HOLIDAY DONATION DRIVE - SUPPORT MSW - DO YOUR PART TO KEEP THIS GREAT FORUM GOING! (Only 24 donations so far out of 49,000 members - C'mon guys!)
×


RichieG
-
Posts
114 -
Joined
-
Last visited
Content Type
Profiles
Forums
Gallery
Events
Everything posted by RichieG
-
Hi David, Any progress on the Mayflower? There's precious few of us building this particular model here, so every one counts!
-
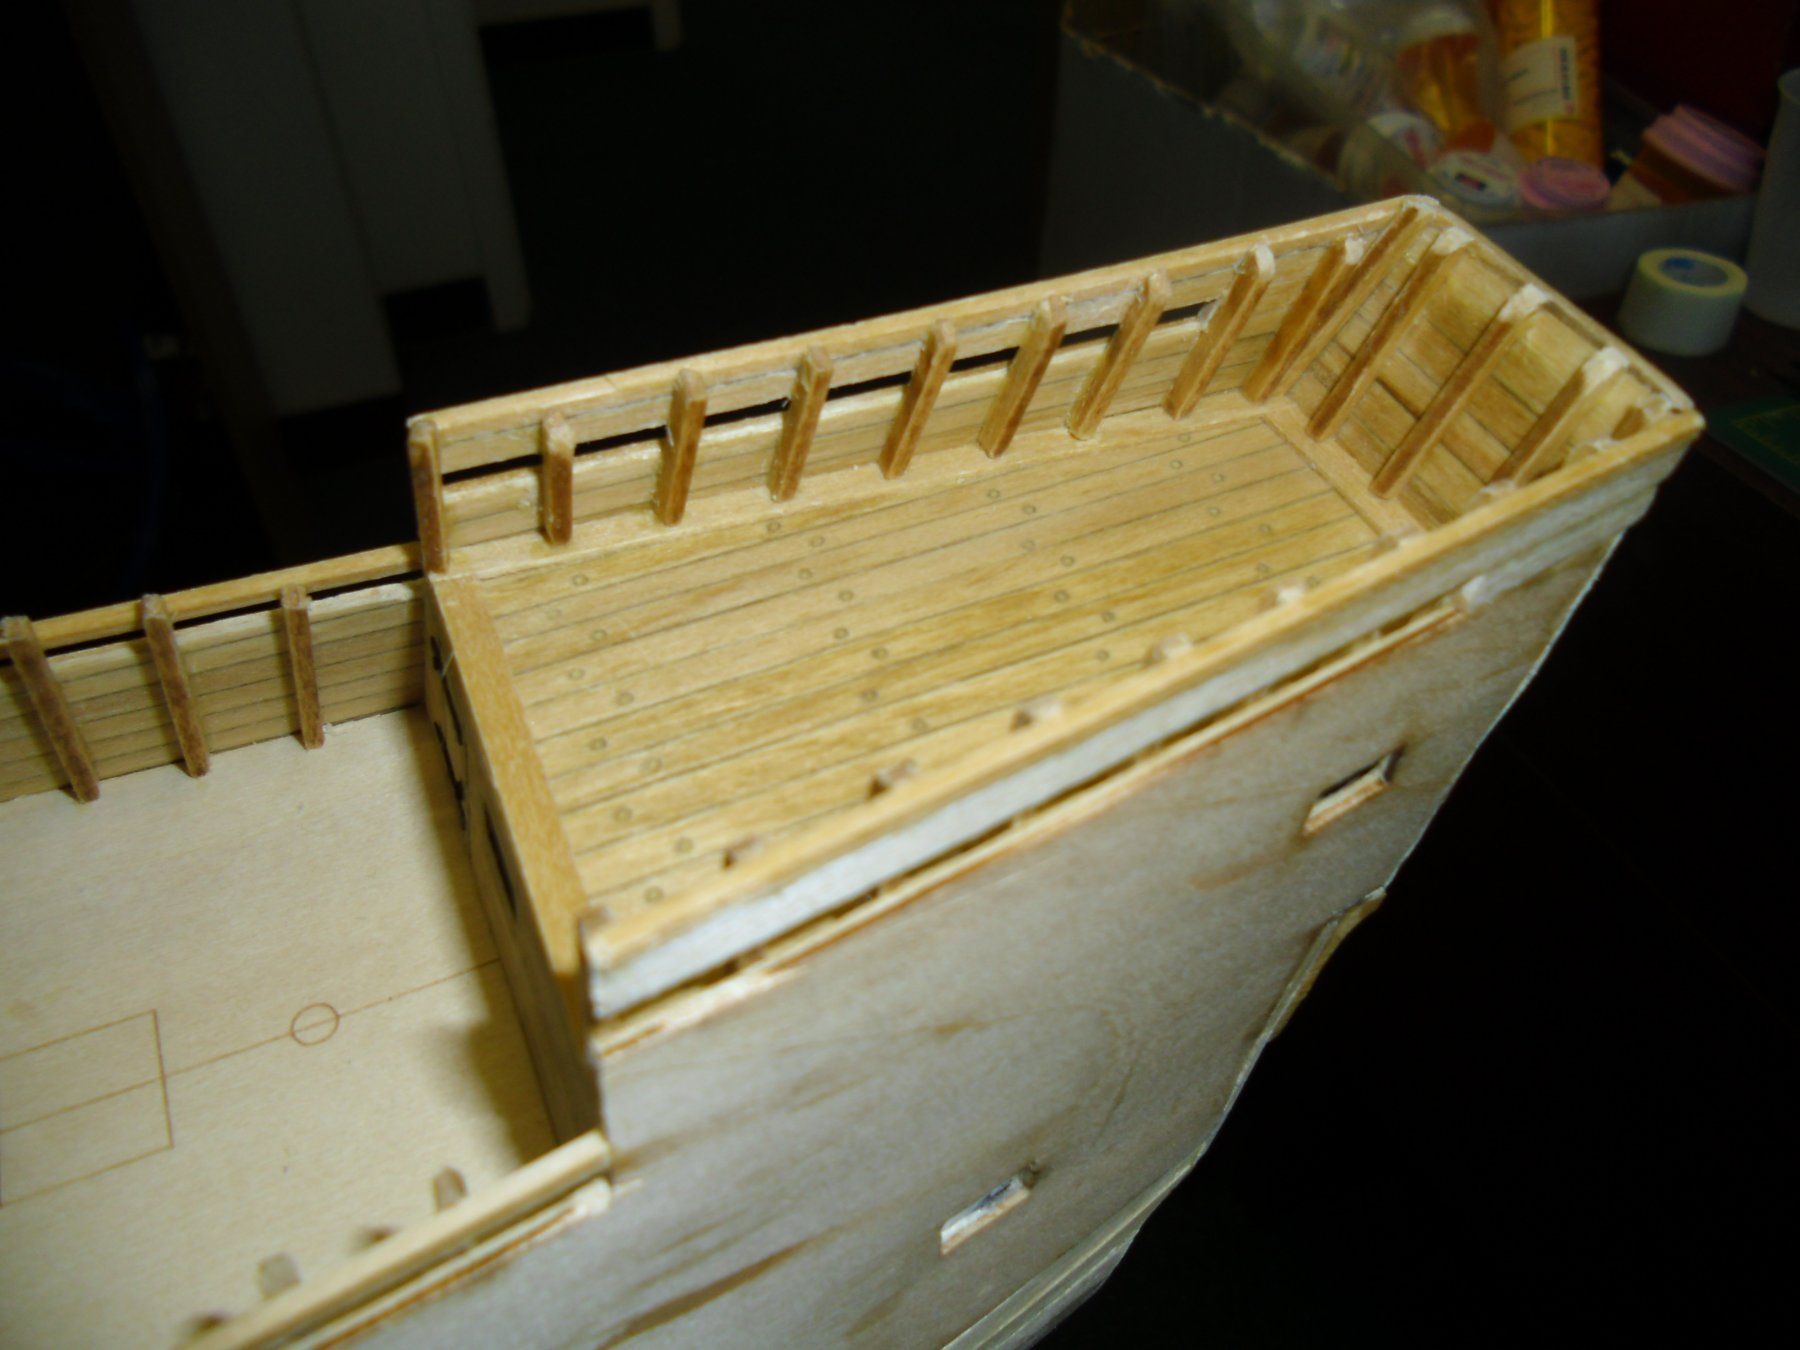
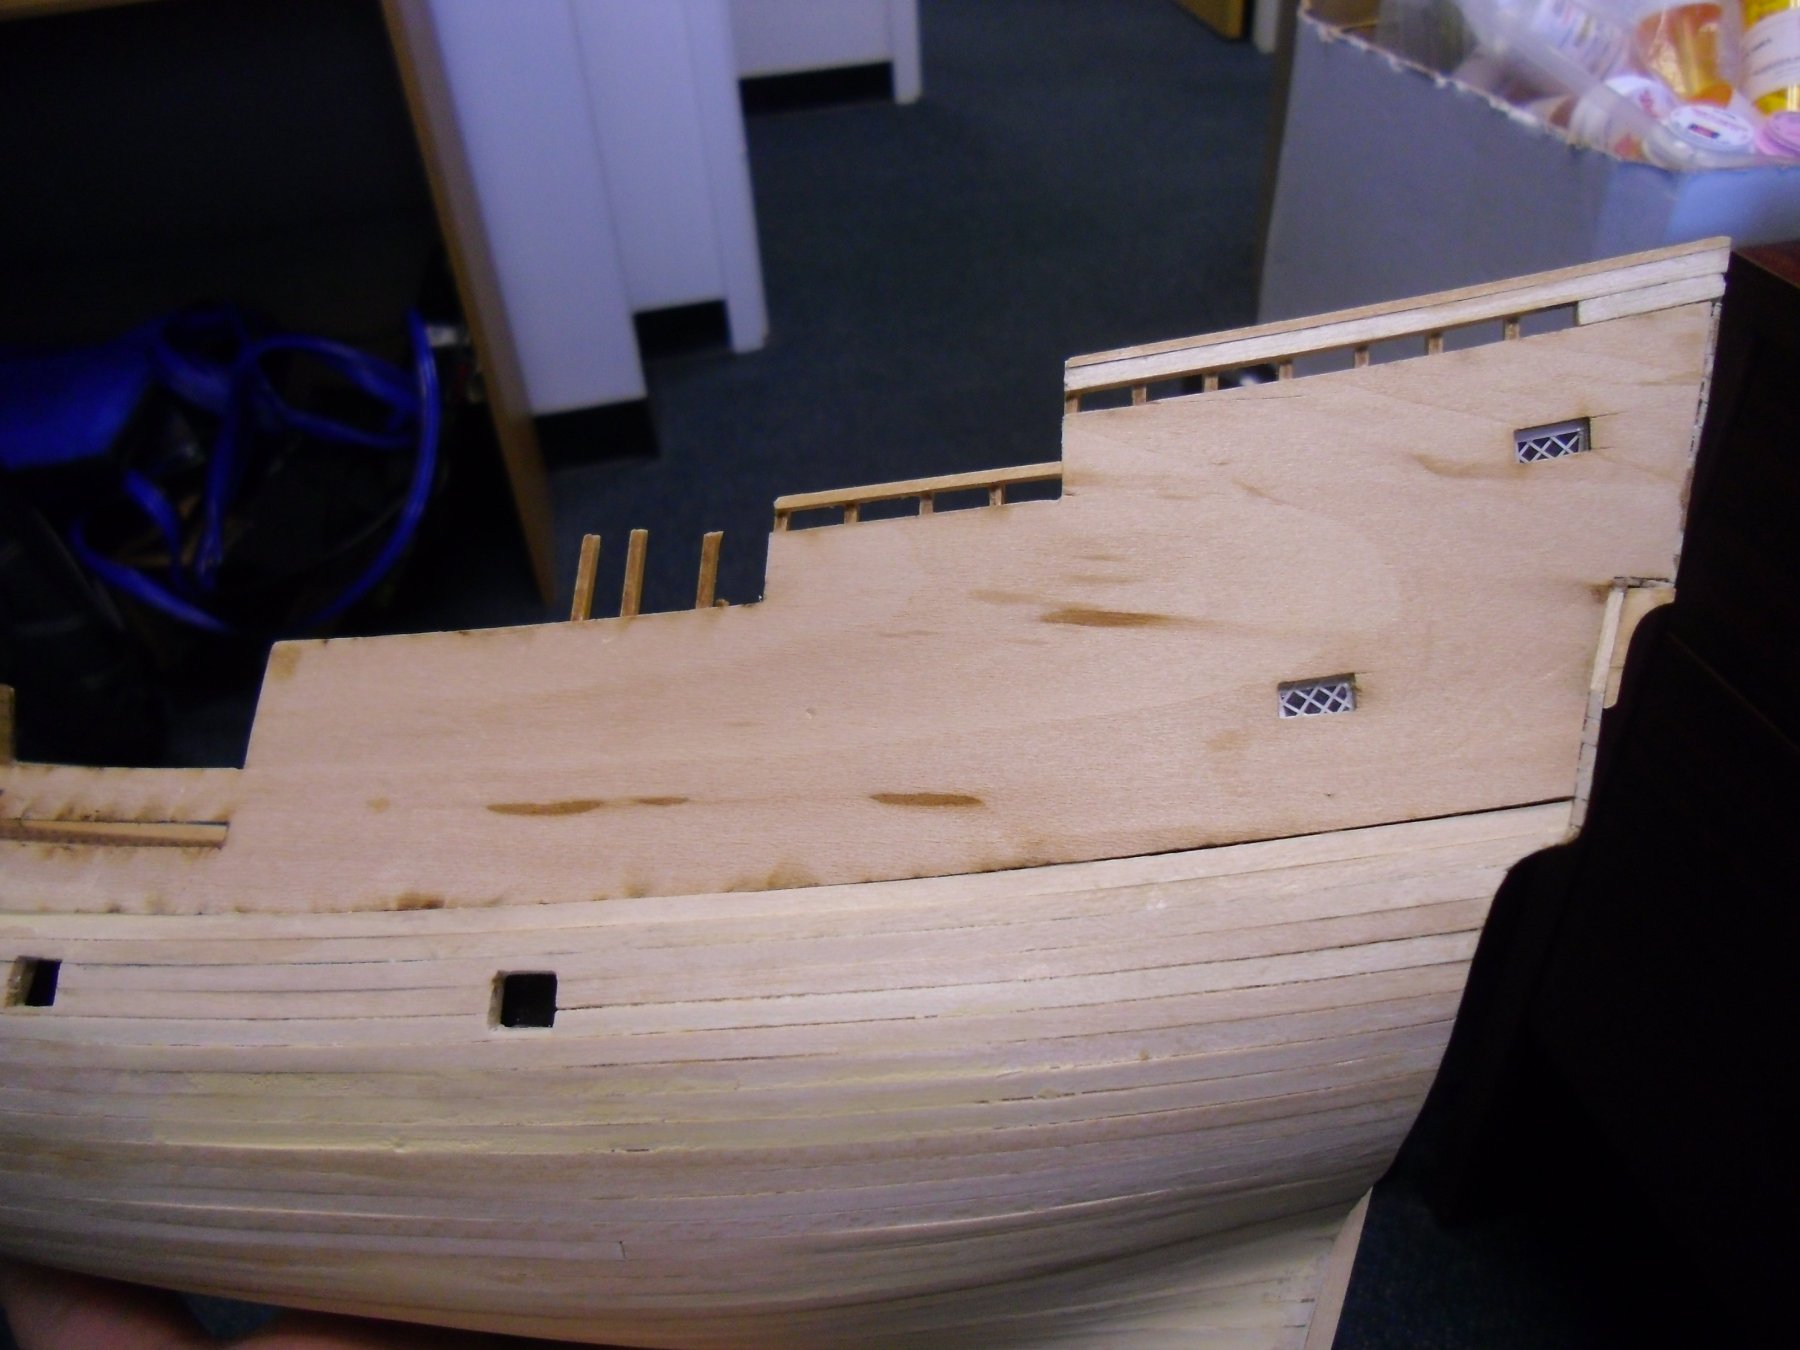
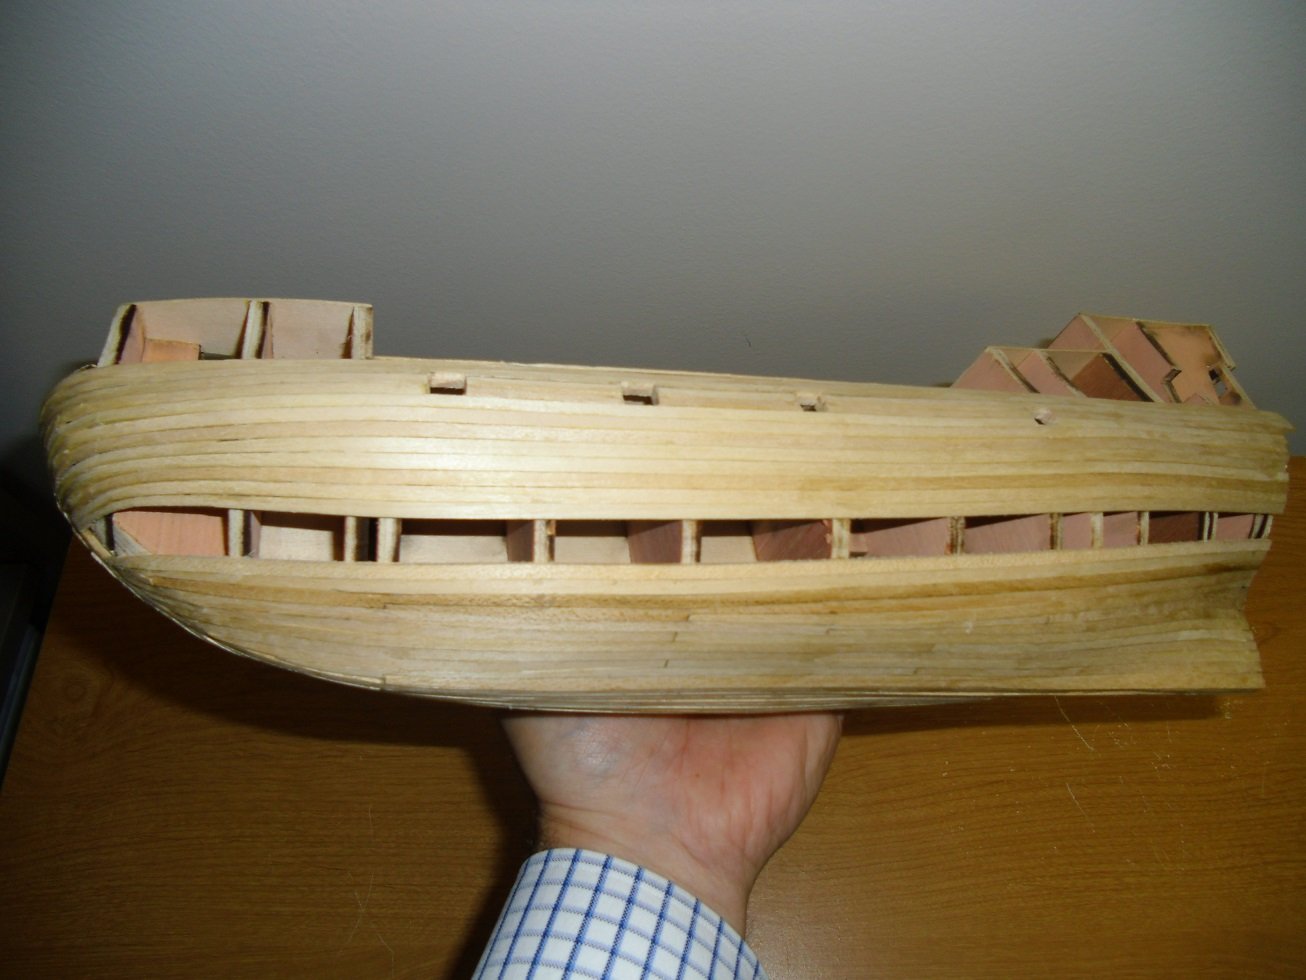
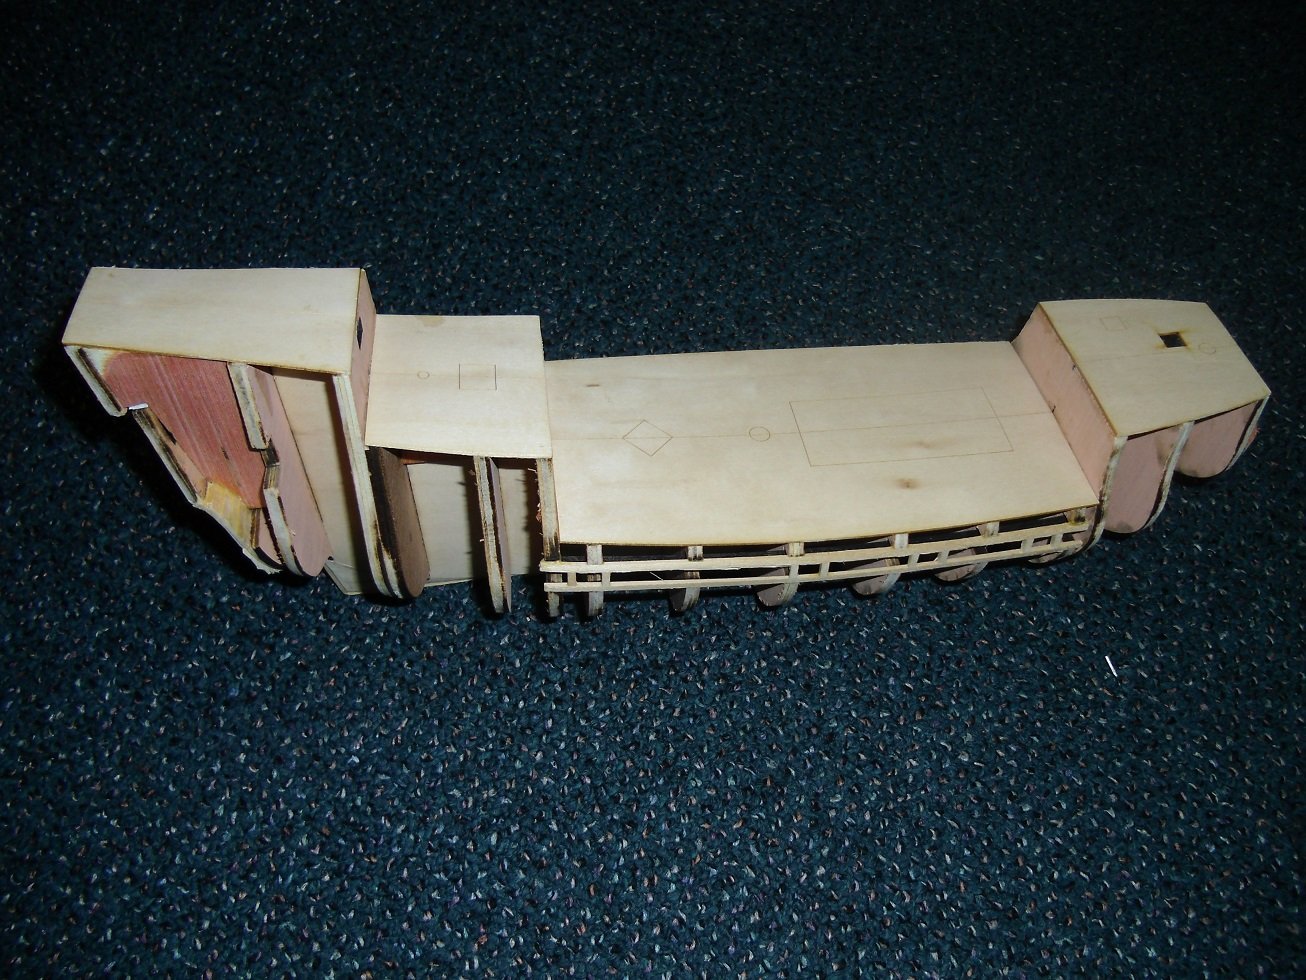
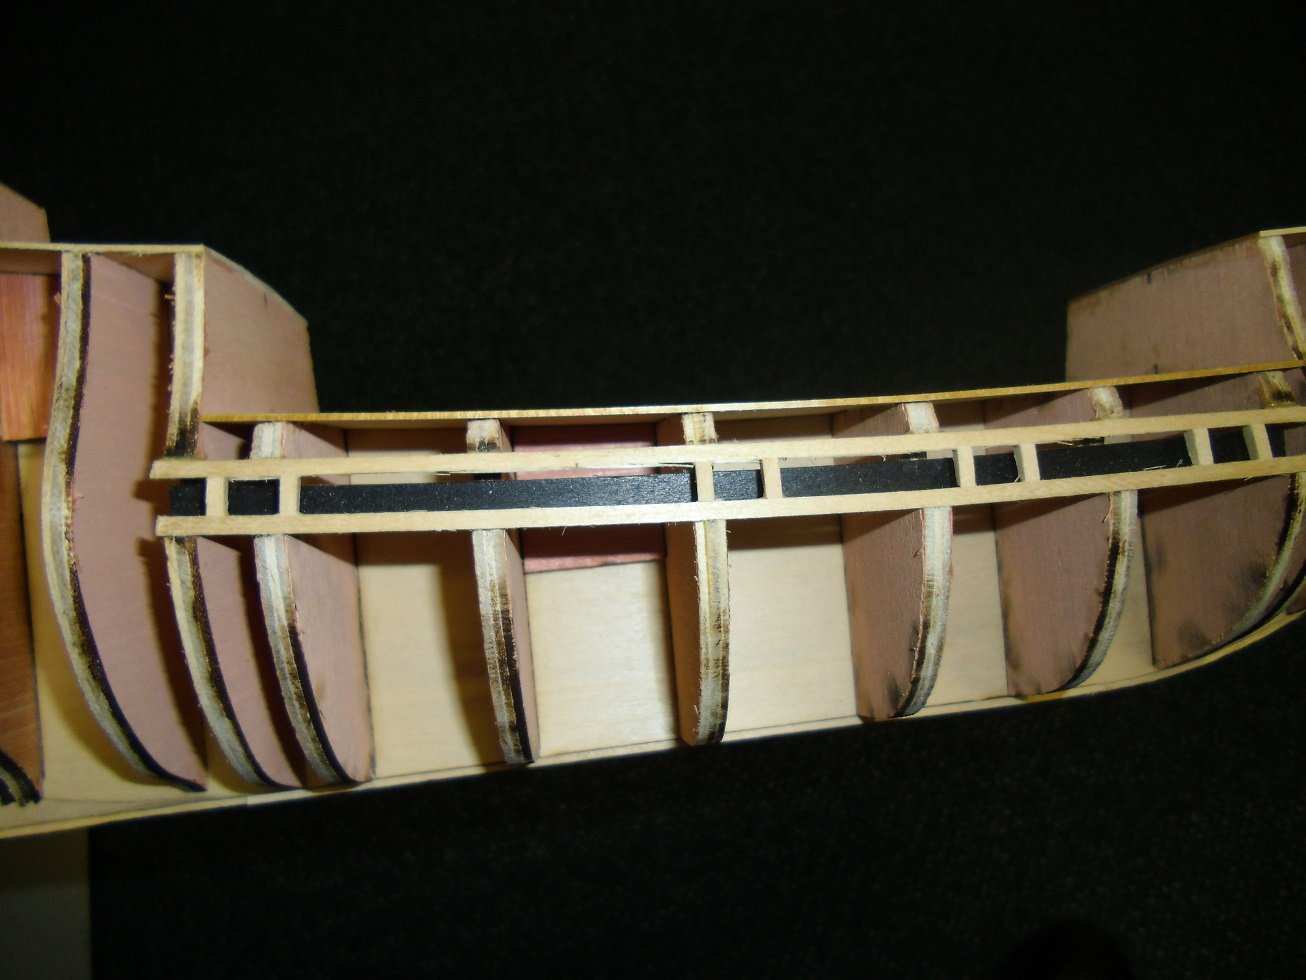
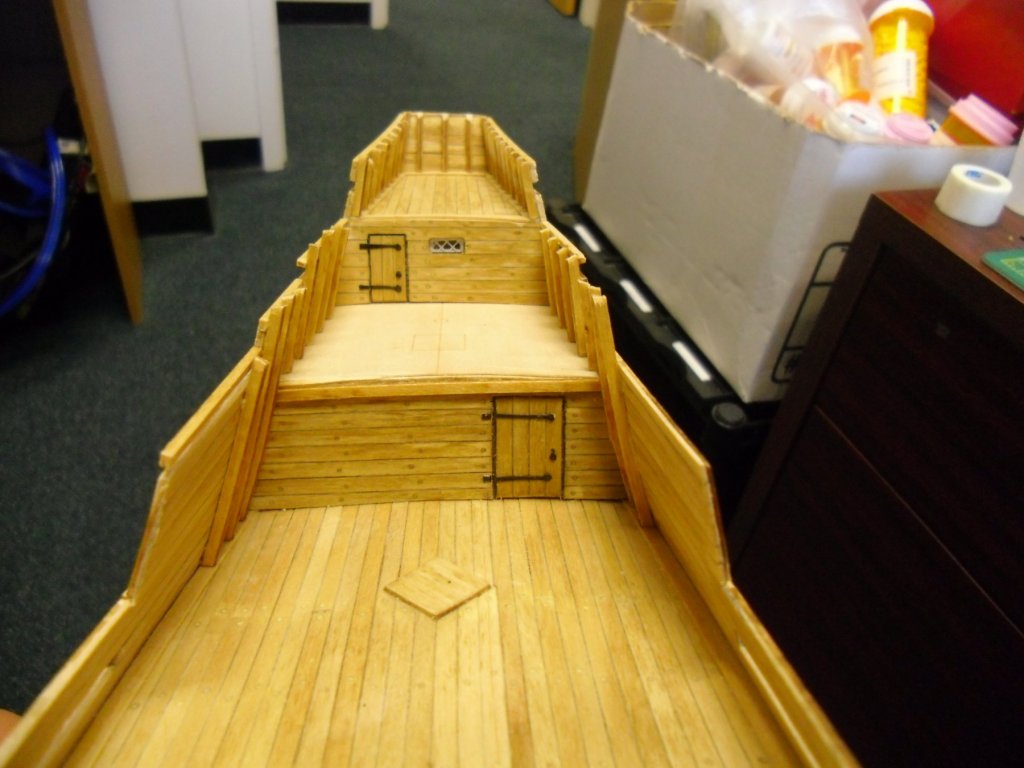
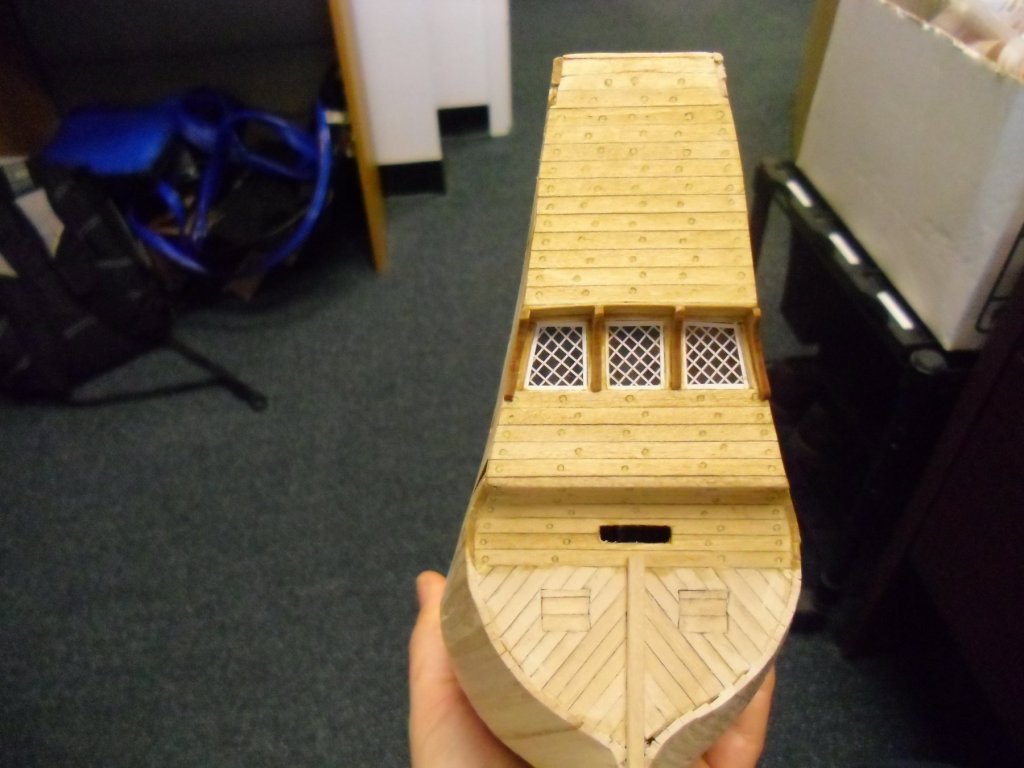
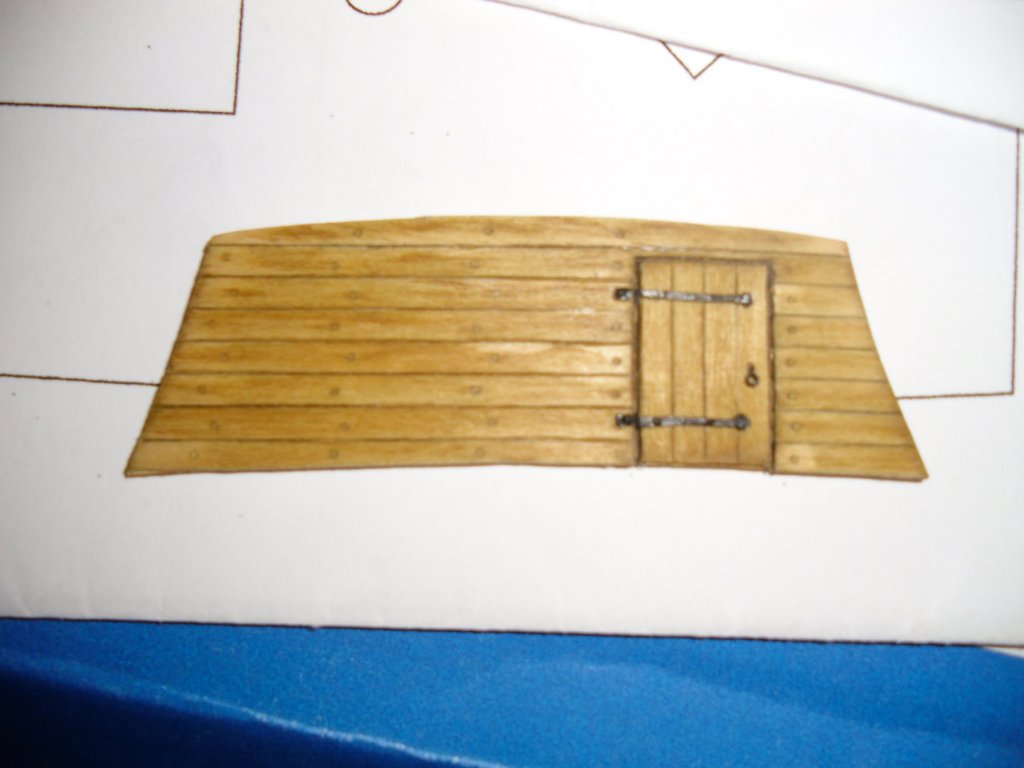
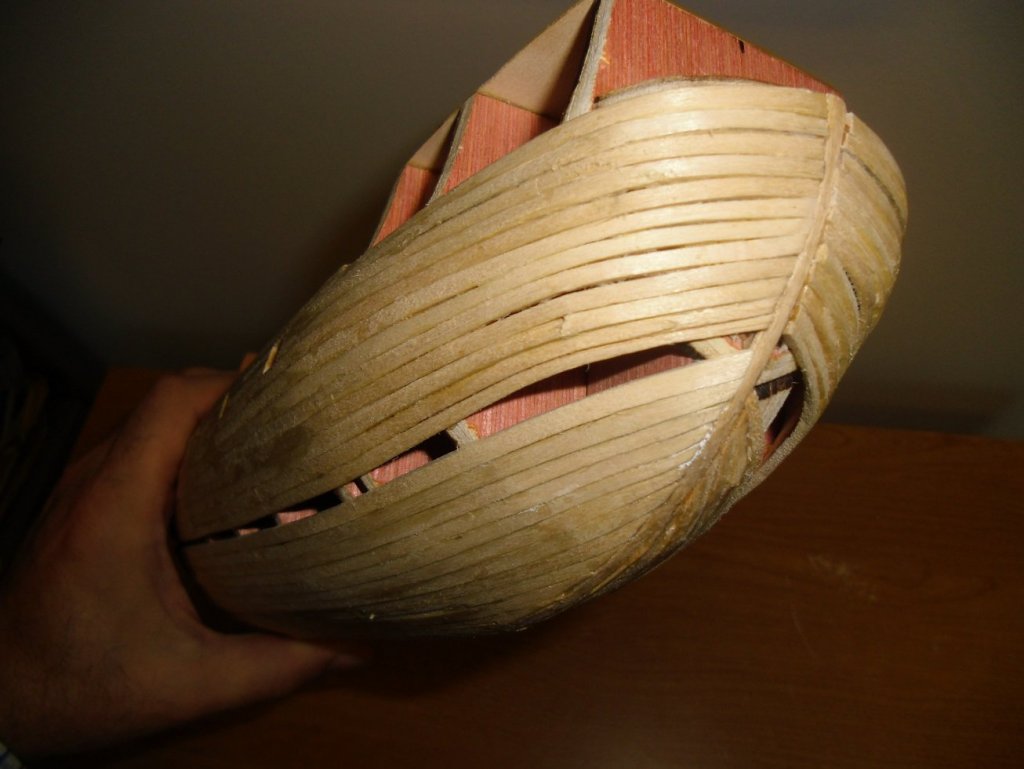
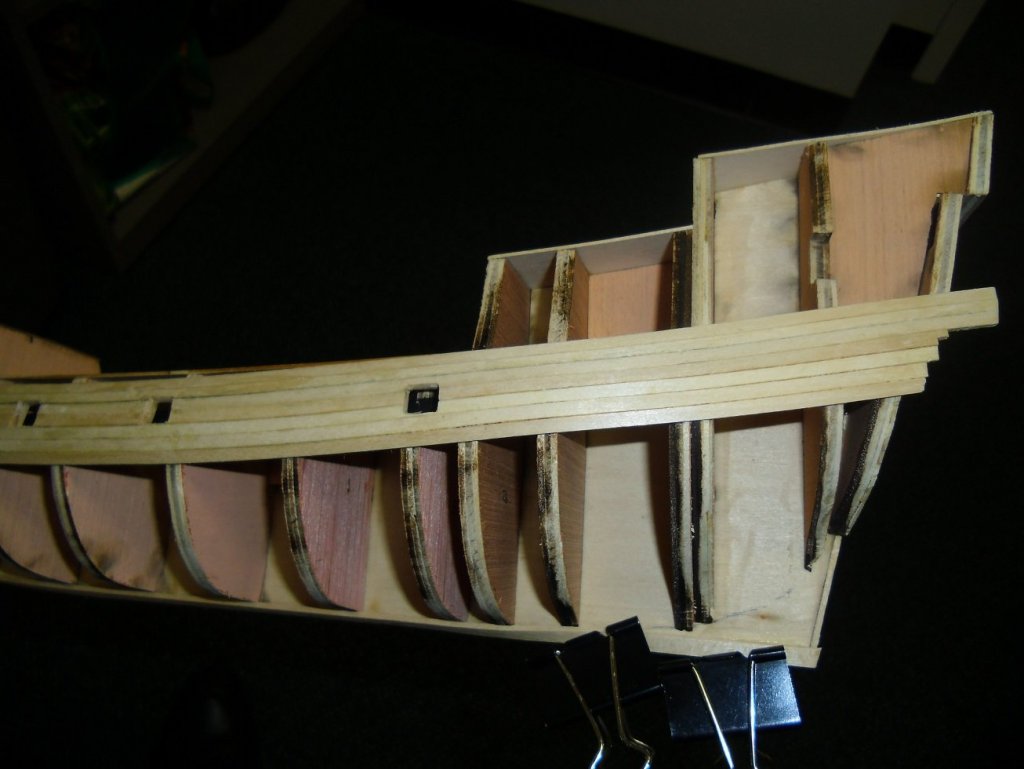
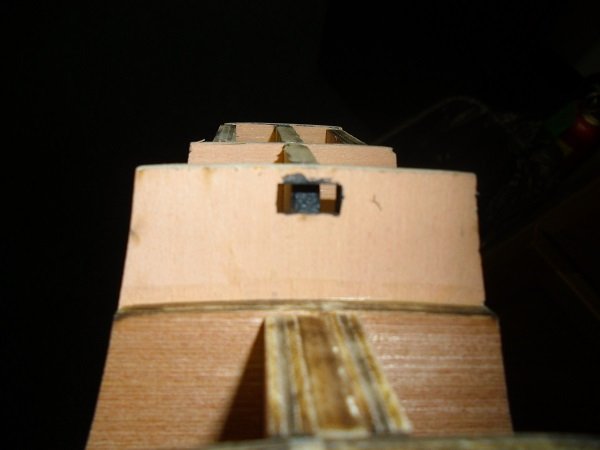
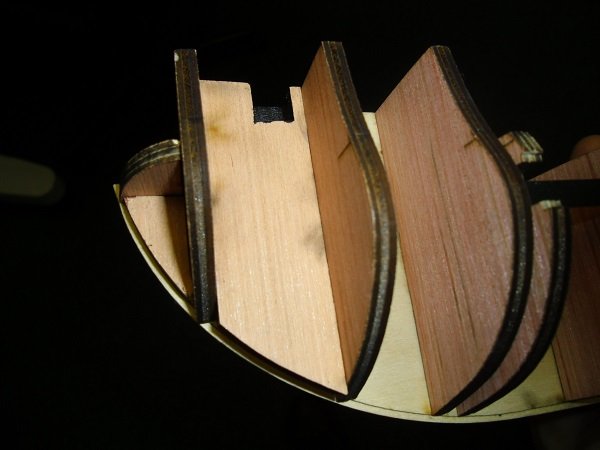
I started putting in the stanchions at the stern of the ship first, and worked my way forward. (I'm a bit less than halfway done with them.) The first picture also shows the great bulkhead and the poop bulkhead in place, with the window and door hardware. I skipped ahead a bit, and put the deck beam in front of the great cabin bulkhead (you can see that in the first picture too). The first two pictures also show the deck with treenails after staining, which I think brings it out nicely. The third picture shows the side windows and the preplanking on one side.


-
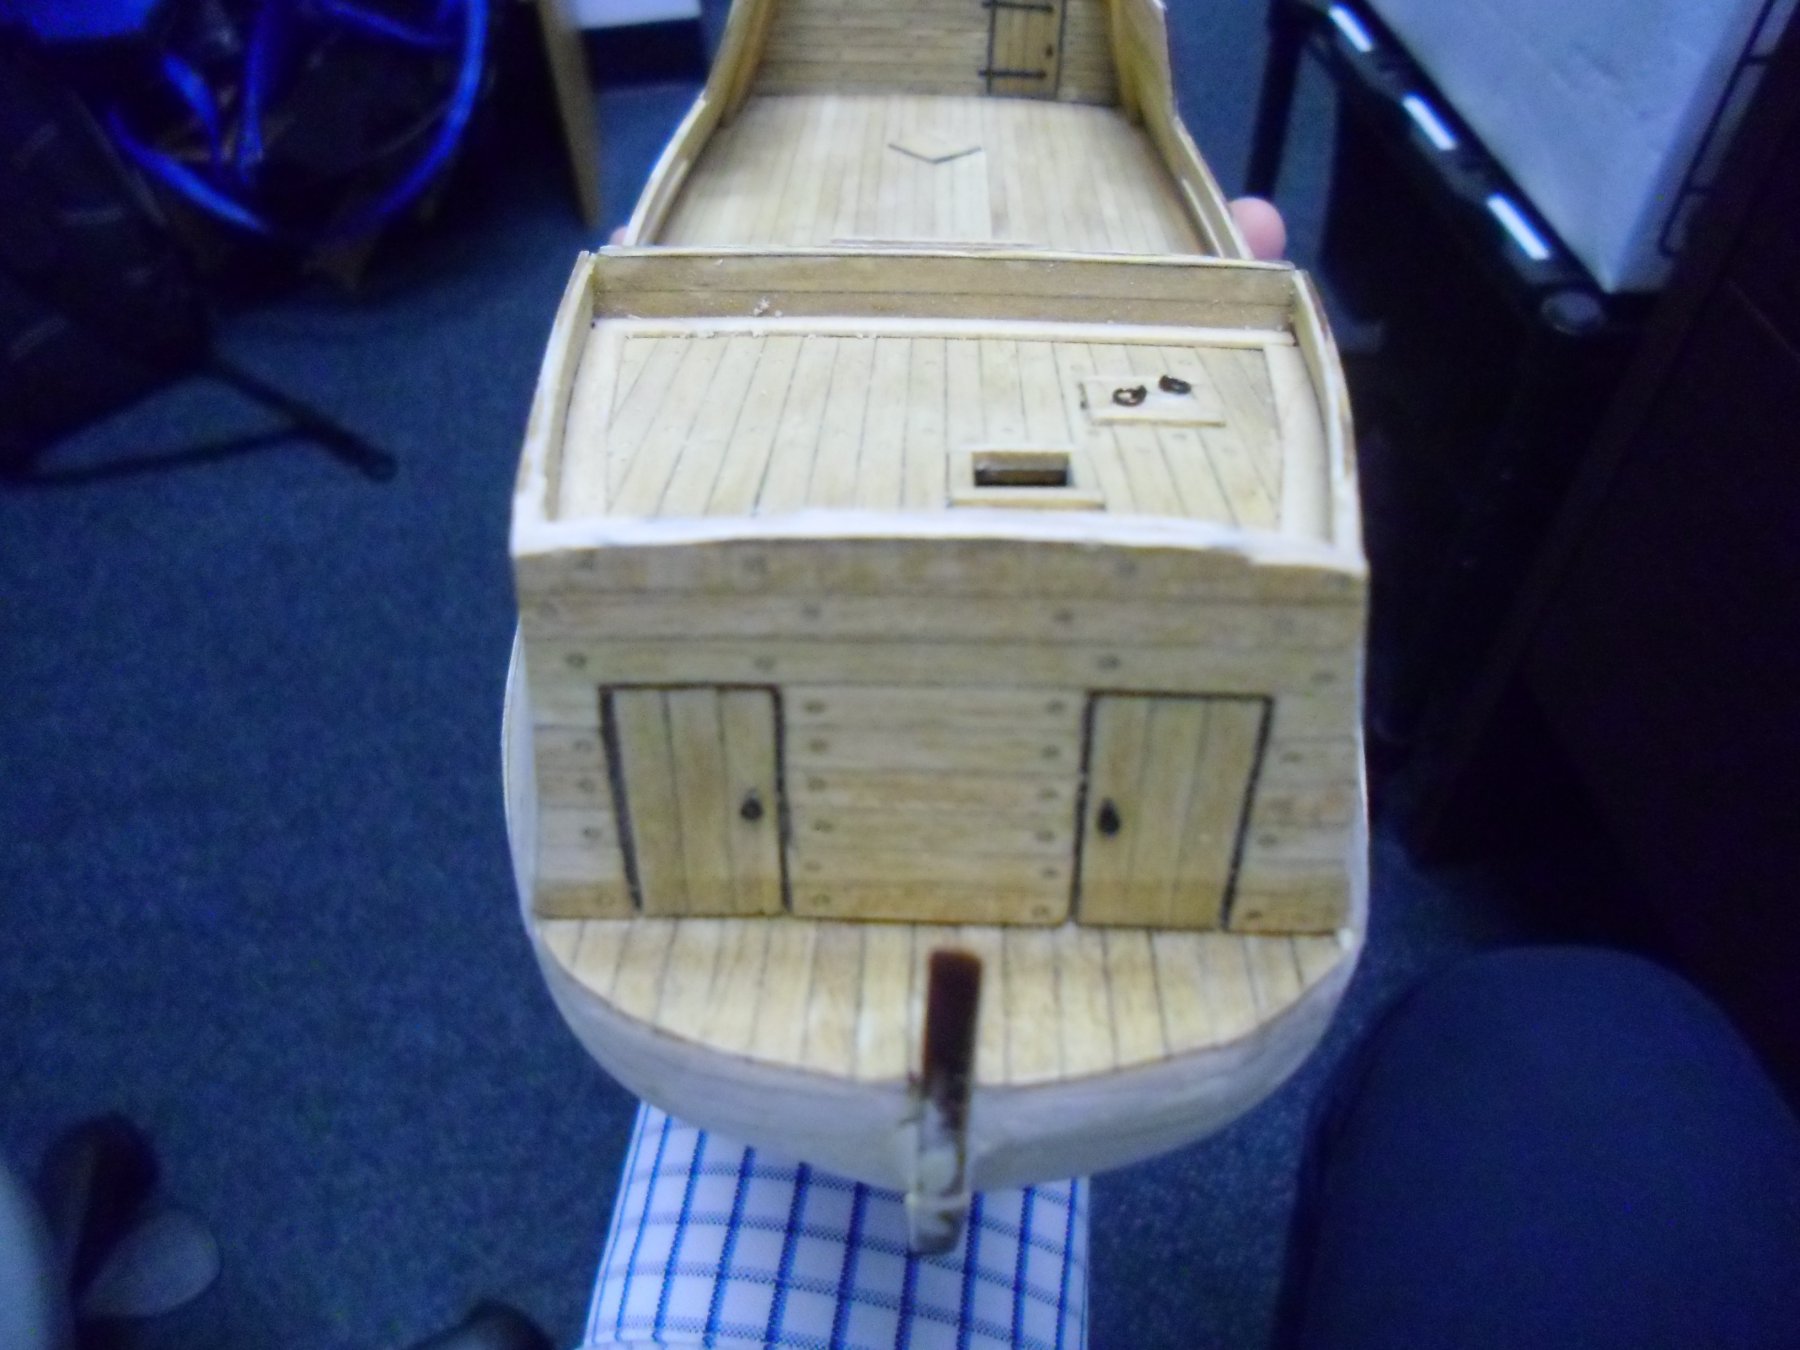
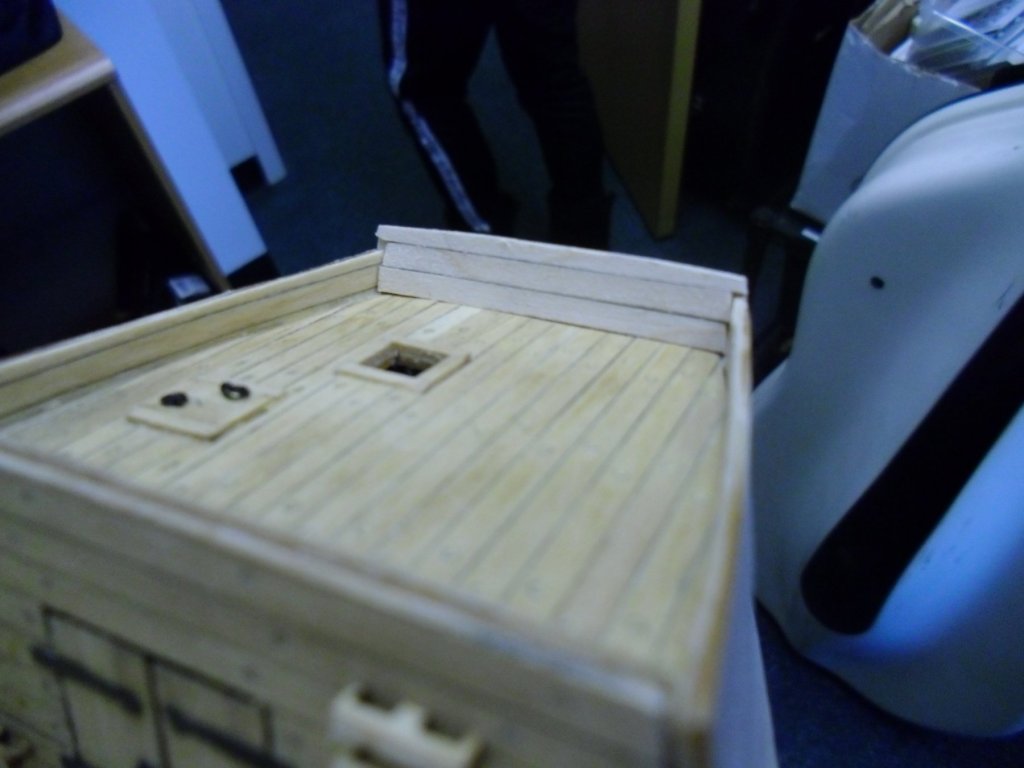
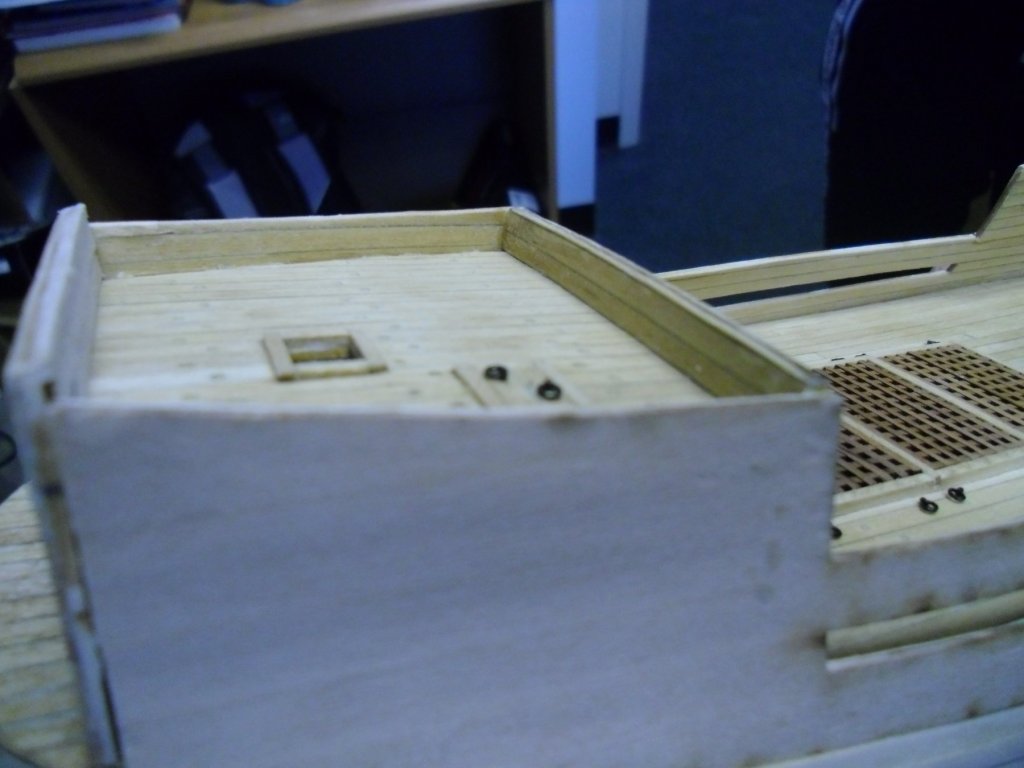
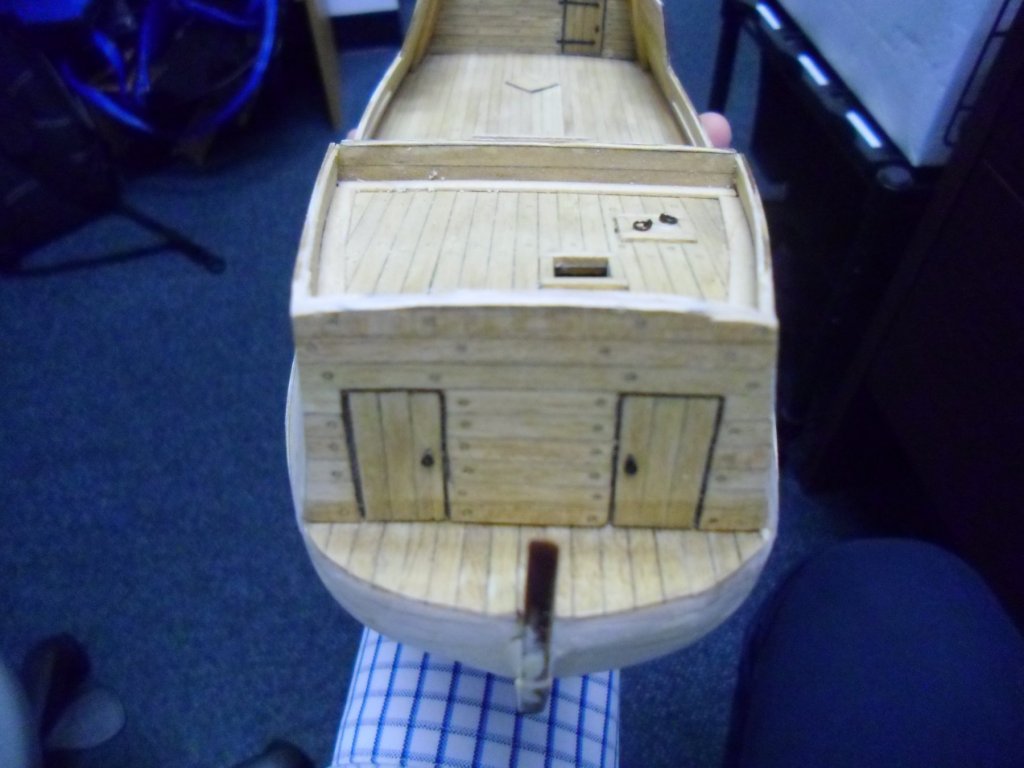
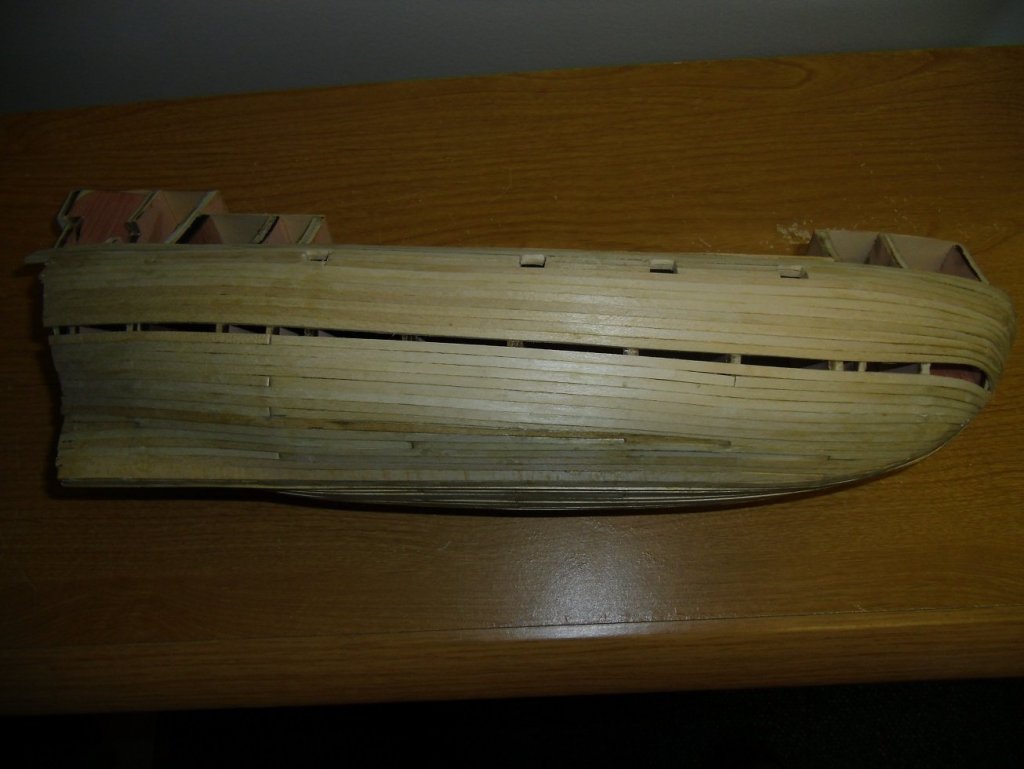
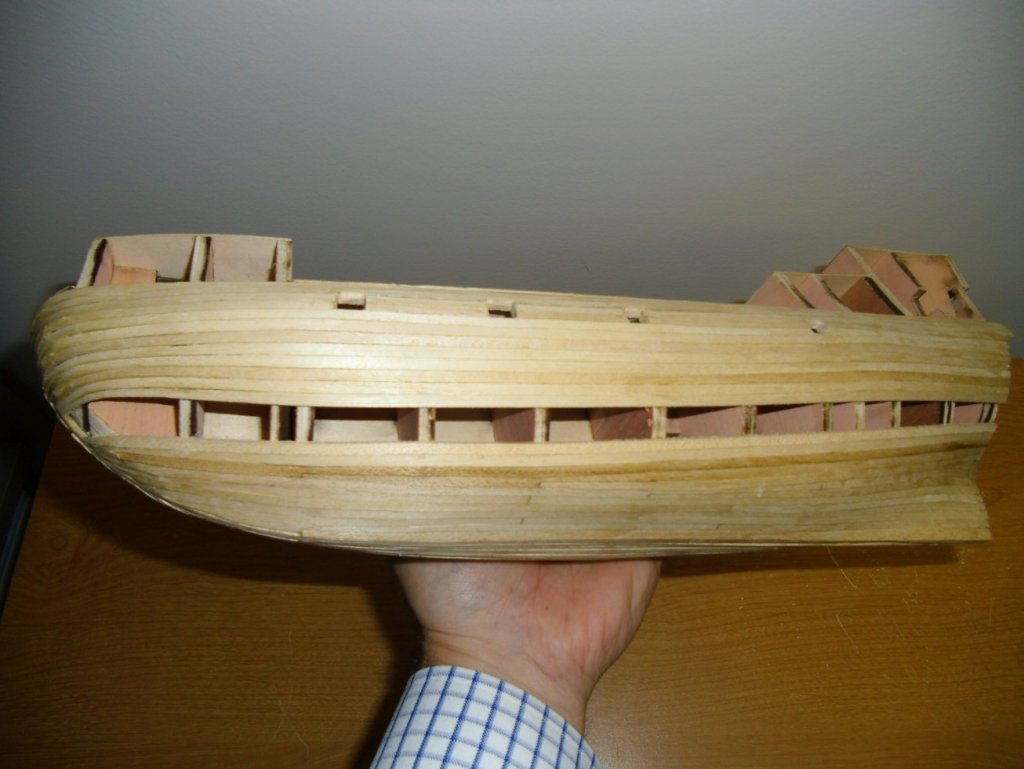
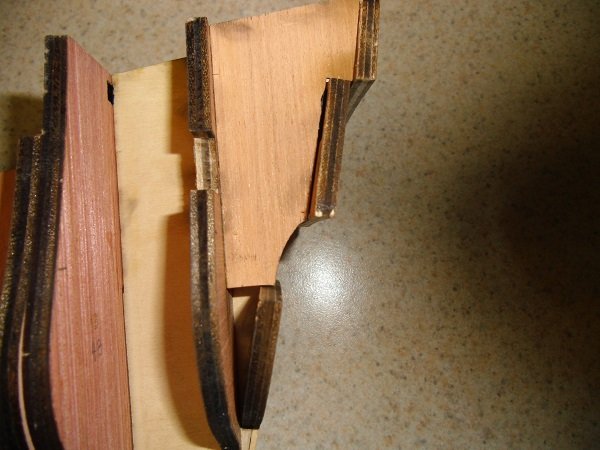
I glued on the bulwarks (or what I'd call the 'side pieces') uneventfully (I thought). I think they were meant to line up with the tops of the forward bulkhead and the transom, but I found that I was over an eighth of an inch low in the front, and over an eighth of an inch high in the back. I was left with the option of raising the side piece in front and lowering it in back, or raising the transom and lowering the forward bulkhead. I opted in both cases to leave the side pieces as they were, and to alter the front and back to match. (the pictures show the forward bulkhead well above the bulwark before alteration, and then the forward bulkhead sanded down to match. In the picture of the back of the boat, you can hopefully see where the transom originally ended, and where it was built up. The new top pieces don't have treenails in them.)
-
I've been working on the mayflower sporadically, but I've been very lazy with updating the log. (I noticed that someone else is planning to start this kit, so I wanted to update the log in case it might be helpful.) As far as teenailing, I went the route of drilling holes (I think it was with a .6 or .8 mm drill bit), rubbing a sharp pencil tip along the edges, and filling with wood filler. Then staining the whole thing with a 50/50 mix of minwaxes natural/golden oak. These pictures show images along the process. The stain brings out the treenails nicely, I think (they are fairly subtle in the pre-stain stage)


-
First of all, I think you've been doing great with this model. I got hung up on drilling those holes through some of the deck pieces; if the hole wasn't perfectly centered, it was too close to one side, and that tended to break through. (At the time, I only had one drill, so I didn't have the option to start small and work gradually up as you did, but that is the best way to go, I'm sure). The brass straps that you have in the picture look nice. I assume that you're talking about having trouble with the brass wire? As I recall, there wasn't any need to 'lathe' it; you just have to cut it to length (I used a regular hand-held wire cutter), and maybe round over the ends so they don't have any sharp edges. I just used some relatively rough sandpaper (I think it was 80 or 100 grit) to round over the edges, just laying the paper on the table and holding the wire by hand. The entire wire will be hidden inside the straps, so I don't see much point in doing anything other than that.
-
would it make a difference if you drill from the outside toward the inside?
-
I'm leaning away from painting the bottom of the hull white at this point. (I'm open to options at this point, but I was thinking of staining it). I do want to paint the upper part the colors that are described in the manual. And thanks for checking in. I'm probably gonna need some help soon enough...
-
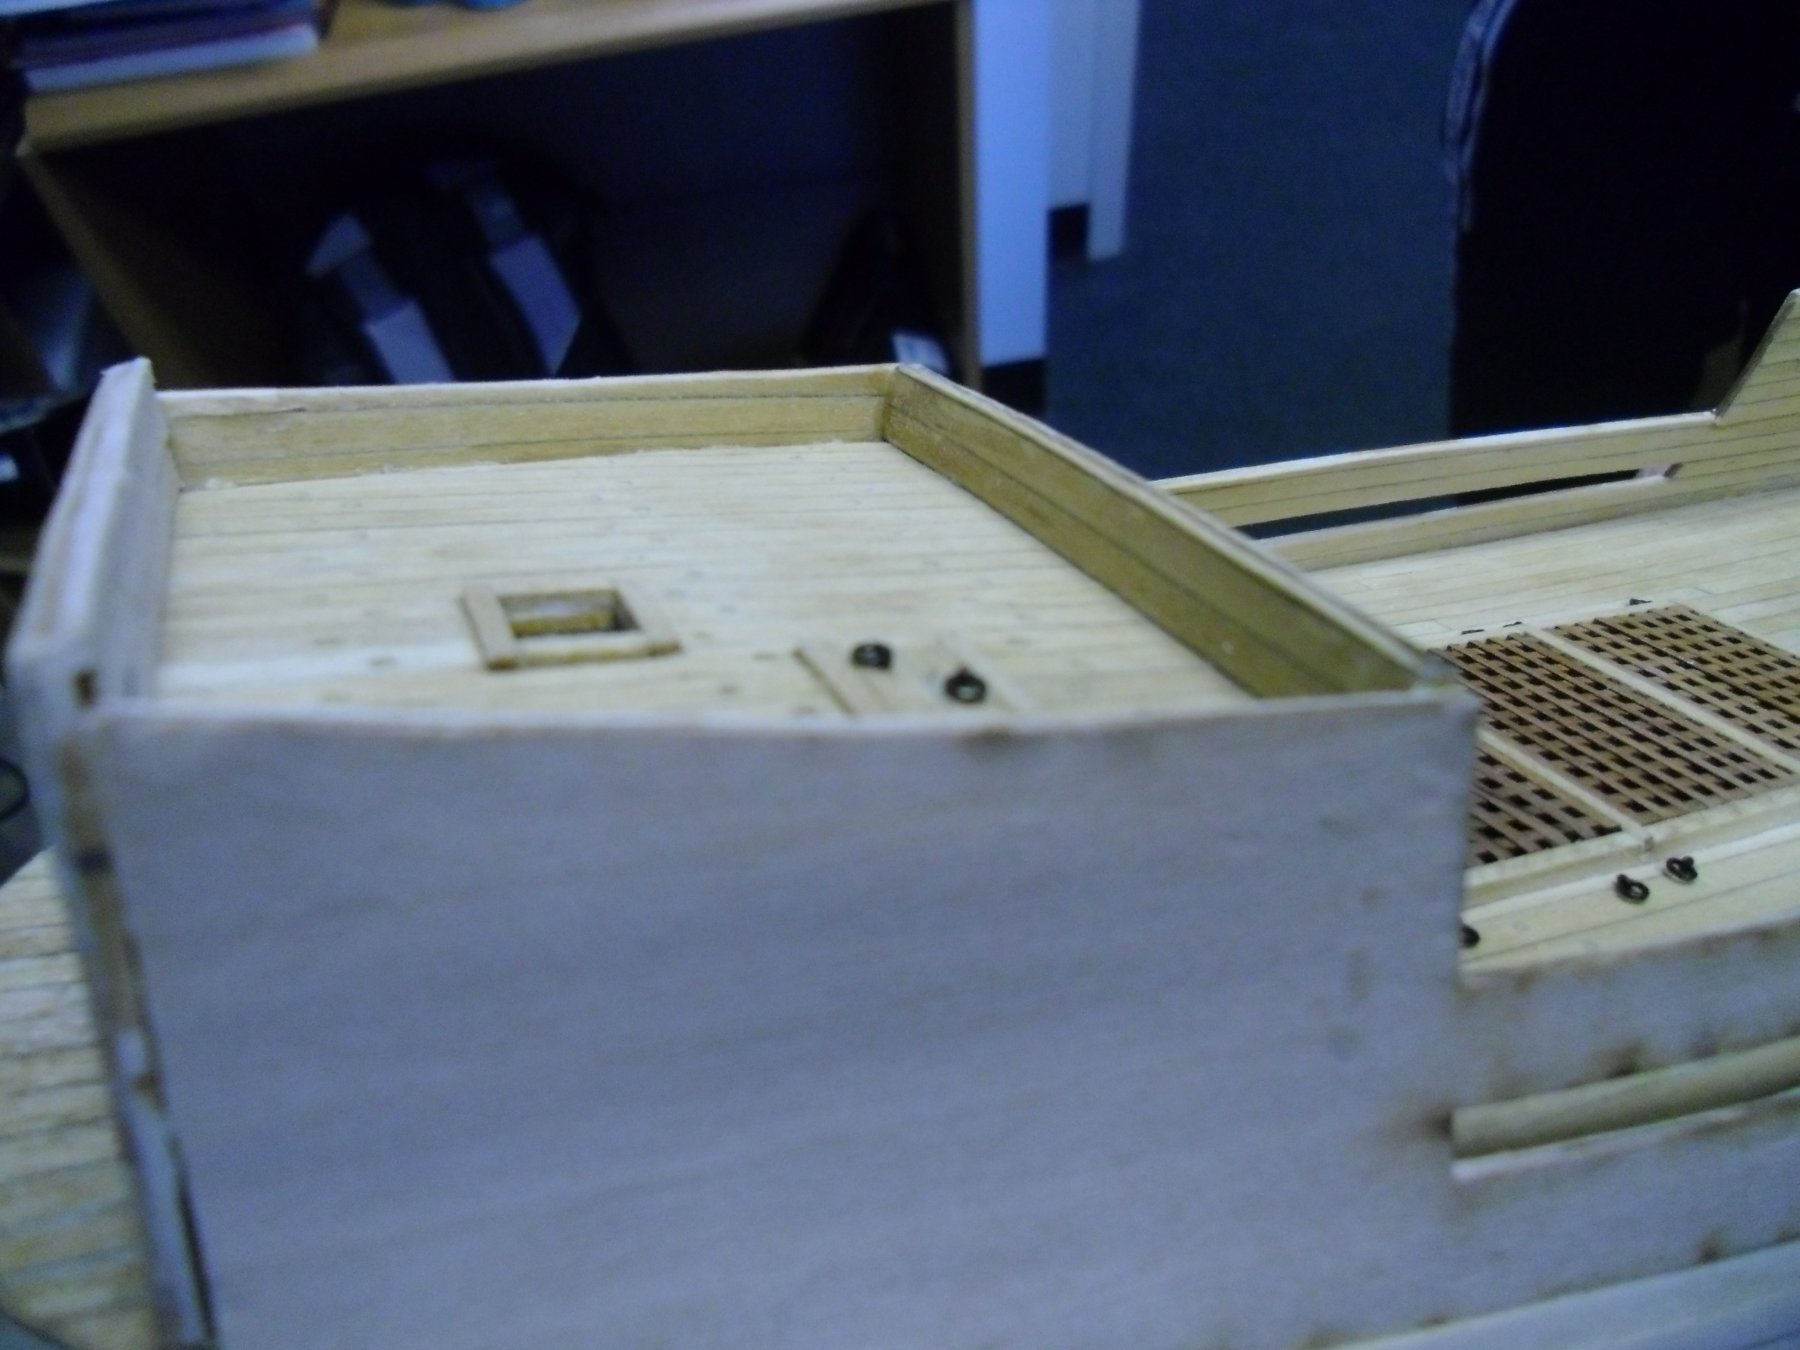
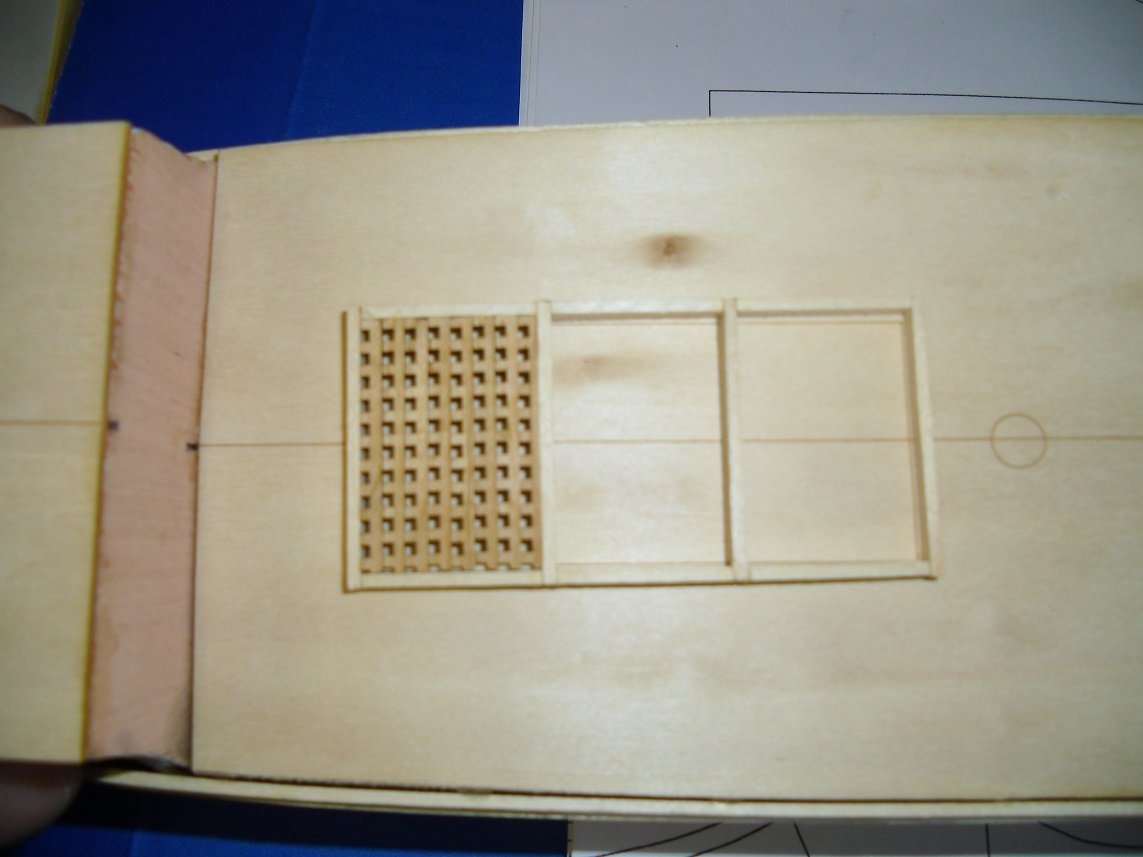
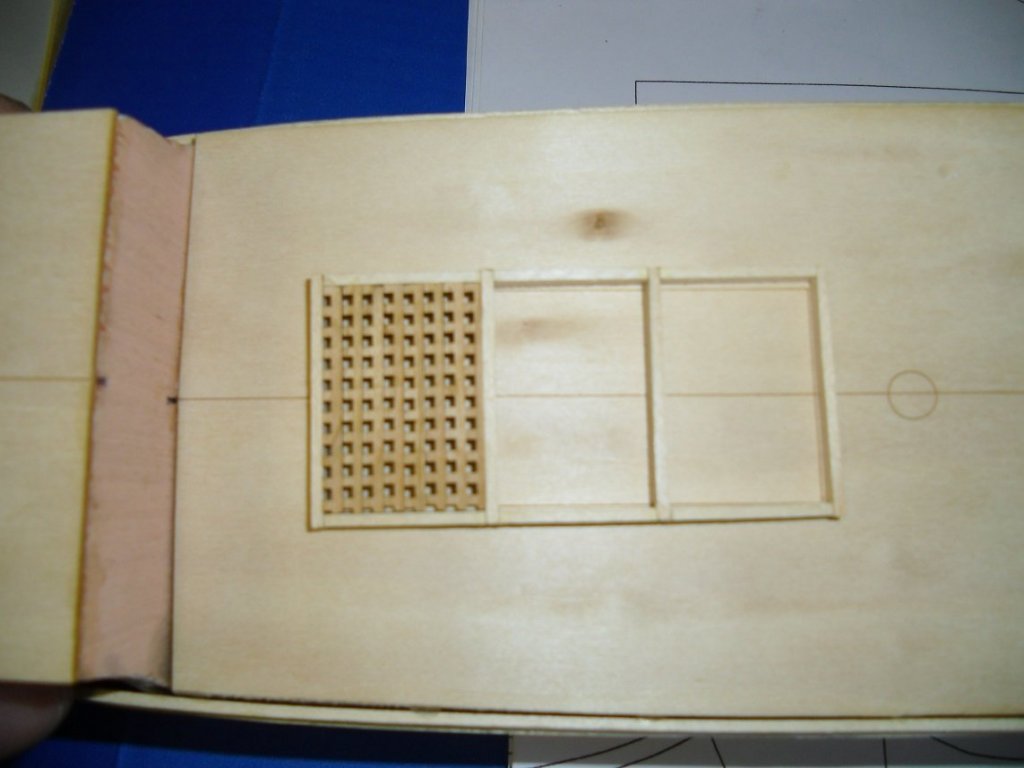
I've been working on both the hull and the deck at the same time (I have a lot of down time while letting the hull planks dry.) I've almost gotten the hull planked, and I did manage to pretty much achieve my goal of getting a complete run from bow to stern. (it won't really matter, as much of it will be covered up by another layer of planking, but I wanted to see if I could plan ahead well enough to make it work.) My main approach was to keep measuring the gap at each bulkhead as I went, and to use stealers where the gap was bigger. There's room for one more hull plank on the starboard side, but it's going to have to be cut to fit that irregular gap. It's actually wider than 1/8" near the bow (due to my overzealous tapering of the planks in that area), so I'm going to use some leftover 3/16" plank in that area (leftover from the garboard plank). I have room for about 3 more rows on the port side, but I think I'll run into the same issue. In the meantime, I've glued on the gratings and planked pretty much the whole deck (there's one piece left to go on one edge, but it's practically impossible to tell from the picture.) I did use a number 1 pencil for the caulking, and I put it one both sides of each plank (the instructions say to put it on one, but I think that was a little subtle). I am going to treenail the deck. The plan is to drill 0.8mm holes, spin a pencil point in them, and fill them with elmers wood putty, and sand it down flat. Then, I'll stain the whole deck with probably a half natural/half golden oak minwax stain. updates to follow, with any luck...

-
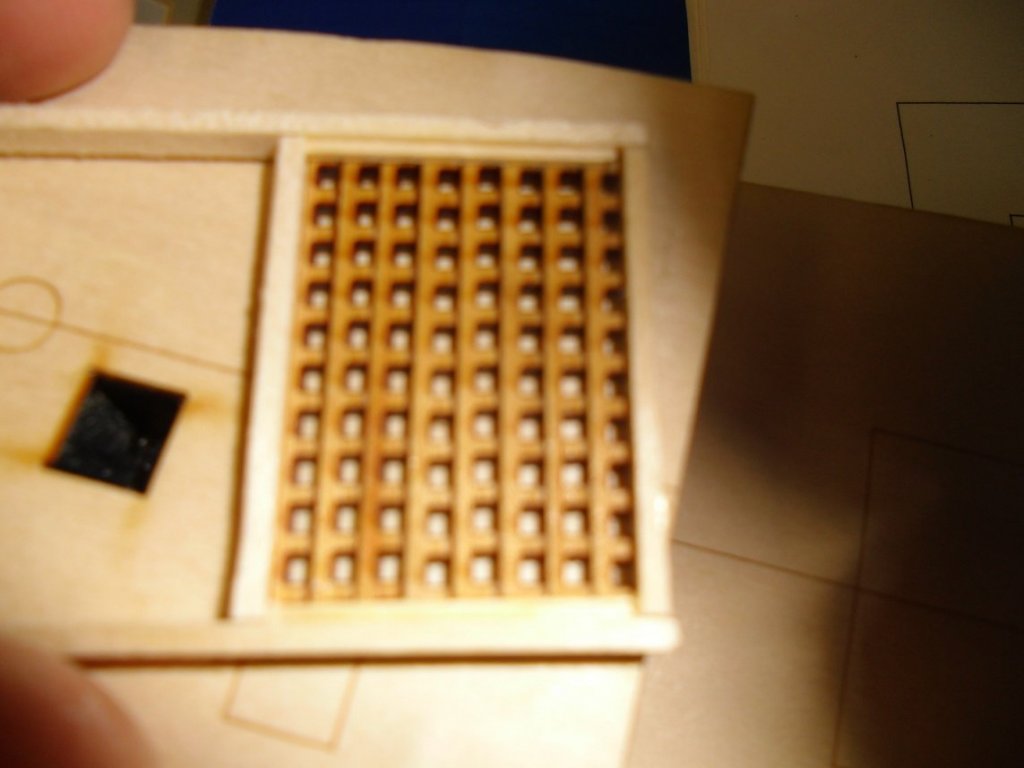
I'm adding a plank on each side more or less once a day, so I'm up to 9 rows now. I admit that the bow is pretty rough, but I think wood filler and sanding will make a solid surface for the second layer. I also am continuing building off of the garboard plank on one side (I'm limiting it to one side for now to see how it goes, before I commit to the other side.) My goal is to try to get continuous rows of planks all the way from stem to stern, so I'm keeping an eye on the remaining gap up at the bow and amidships. (I know I'll need some stealers at the stern, but that's another story). So far, I think that if I keep tapering the bow planks as I have been, it should work out pretty close. While I'm waiting for planks to dry, I've moved ahead to some of the deck fixings. I made the outer casing for the hatch on the upper deck, and laid in the gratings on one third of it. I did go to the trouble of making lap joints for the coamings, which was actually kind of fun (although I think it won't be seen in the finished product.) For some reason, I decided not to cross-hatch the grating, and I just laid strips on their side. That made the grating thinner, so I did put a 1/32" strip underneath the grating to support it (that's what I was trying to show in the kind of blurry picture.) I think it looks ok like that; honestly it's kind of hard to tell the difference between the real interlaced gratings and the 'just laying there' ones, at least for me.

-
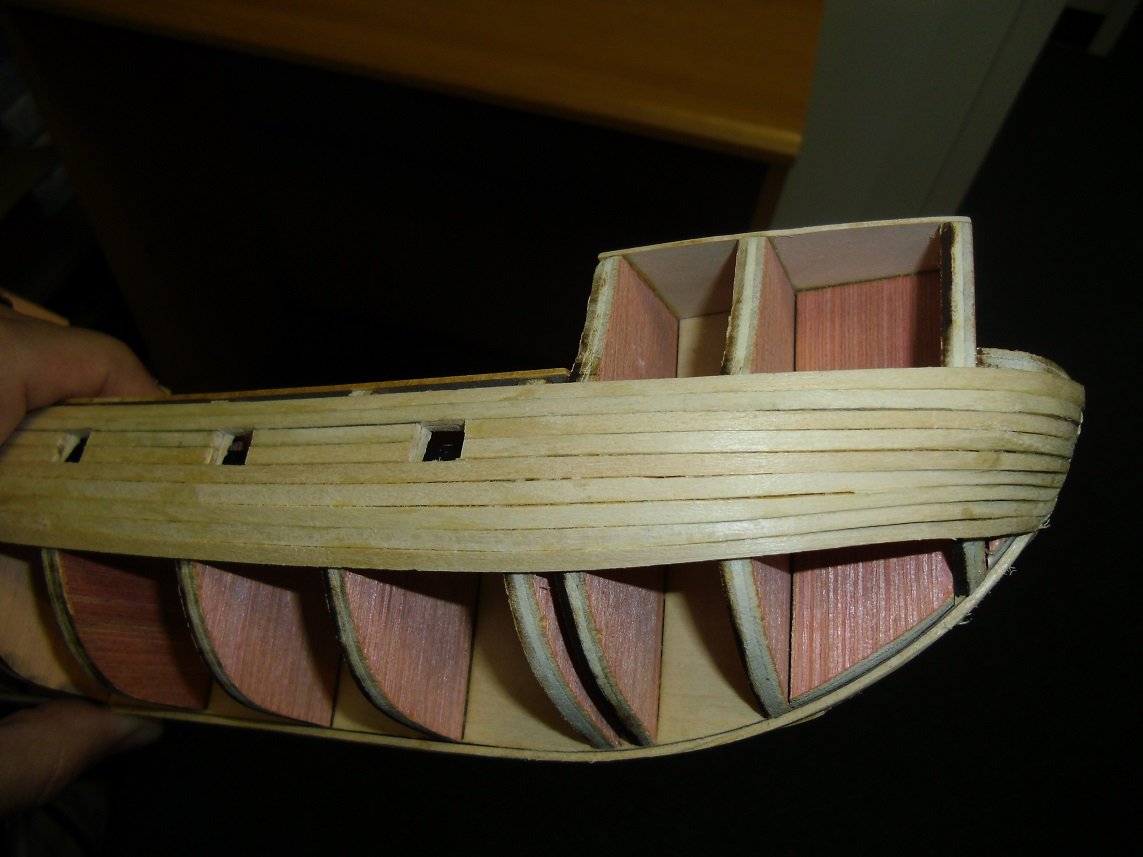
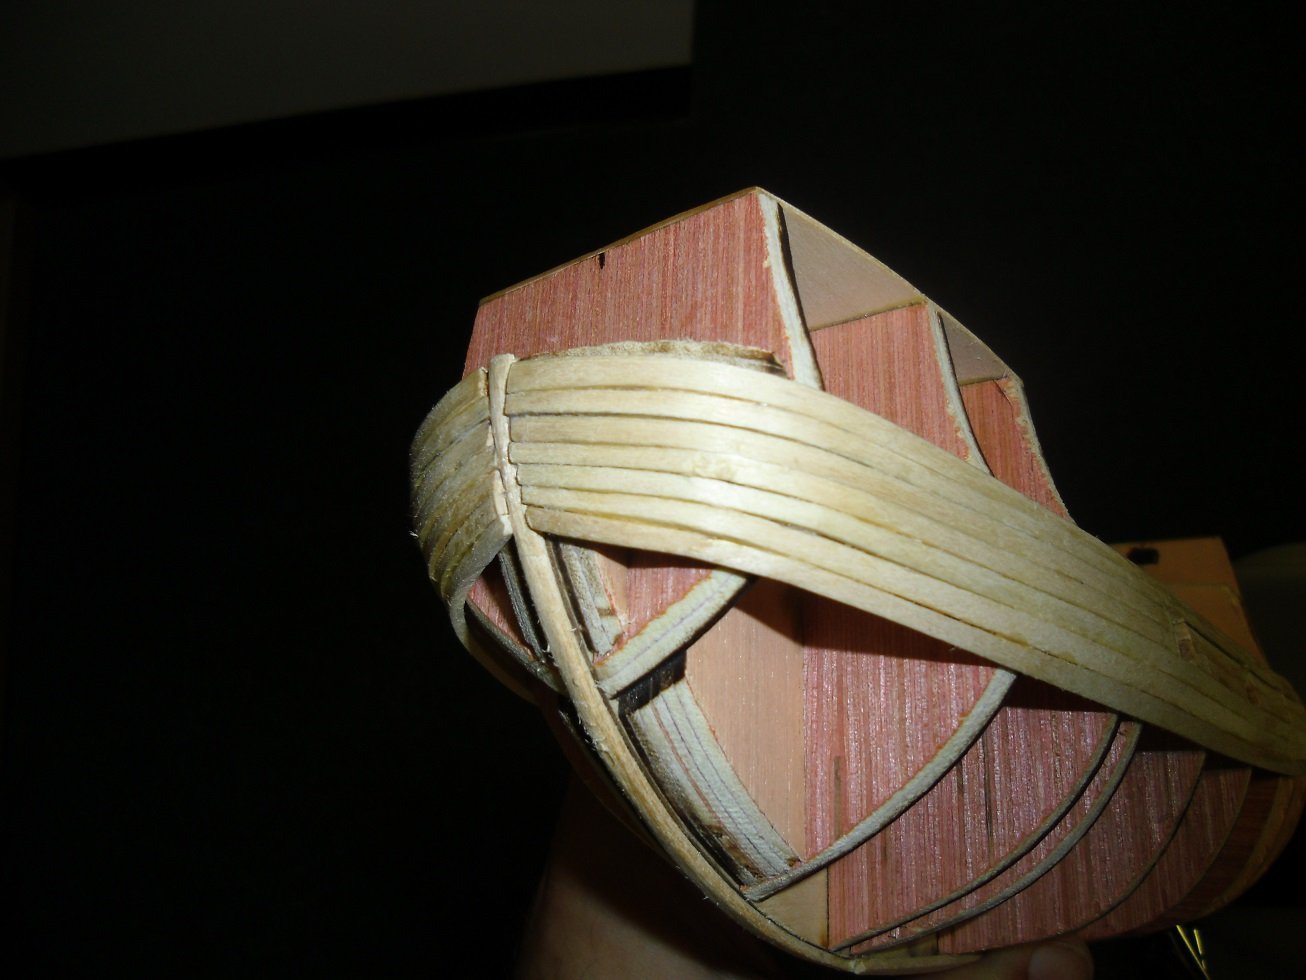
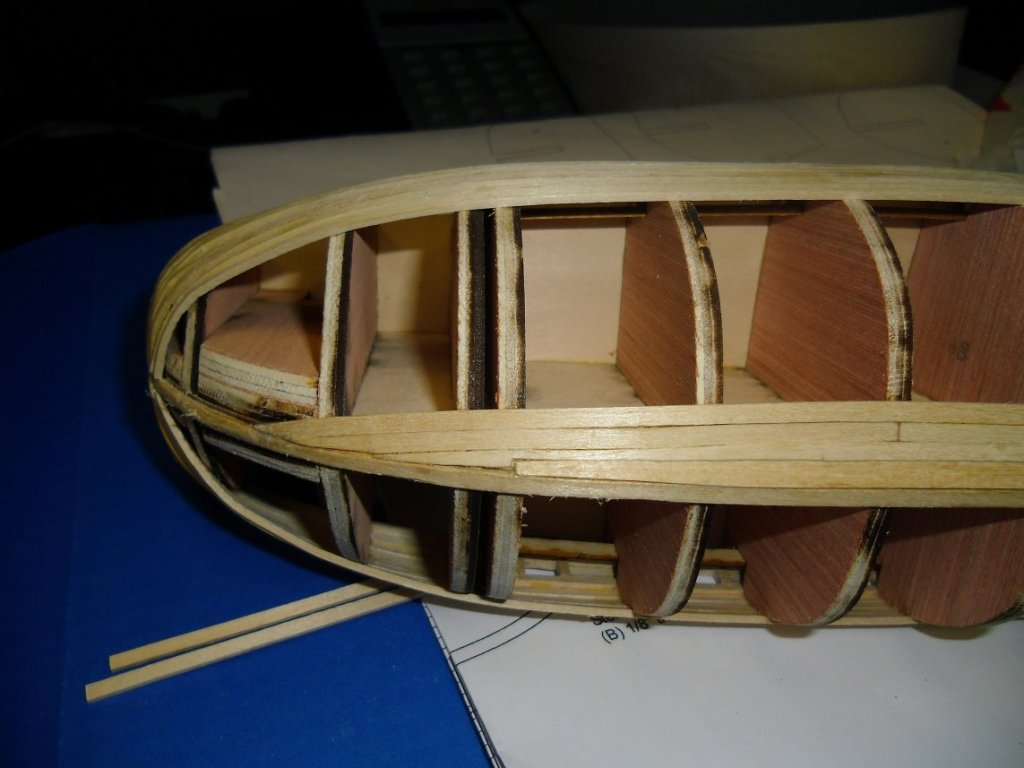
I was kind of afraid to go ahead and start the hull planking, because I'm not sure that the fairing is ever really finished, but I guess I have to start some time. I did as the instructions said, as far as pinning the bulwark template to both sides and marking its bottom in order to define the top of the first row. It lined up pretty closely to the laser marks on the bulkheads, but there were some discrepancies, which, I guess is why this step is necessary. We're told to taper the front 3 inches of each strip to 80% of its initial width, but, the picture in the manual looks like the first strip went in full width, so I started tapering with the second one. (I think I may have tapered more than 80%, but we're talking less than a 32th of an inch here, and it's hard to be precise. I tried to err on the side of tapering more, with the thought that I can use some full width strips down the way if it needs more coverage.) It was strongly suggested by some that I use filler blocks at the bow, but I chose not to, mostly out of inexperience and laziness. I wet the strips and clamped them in place on the model, and let them dry overnight. They held the curve quite well, with almost no spring back. That being said, I think if I ever had to do this again, I would use the filler blocks, as the planking at the bow is anything but smooth. There are step-offs at each row that will need to be filled and sanded down. But, as they say, all this will be covered up soon enough... I cut the planks around the gun ports as best as I could, but it's harder to keep things square than I thought it would be. I took some pictures of the first 7 rows from the front, middle, and back. I decided to try laying in one of the garboard planks at this point, because it seems like a bit of a process. I used the supplied 3/16" wide strip (50% wider than the rest of the planking), and tapered the front as shown in the manual. I figured that if the next row would be notched over the blunt front end of the garboard plank, then I'd need the front end to be not more than half of the width of the 1/8" wide strips, so I tried to get it to around 1/16". It did require some real bending to push the front end up against the rabbet strip, but I didn't wet it. (I just pushed it in place, and held it until the CA glue took purchase.) a picture of the front end of the garboard is also here.


-
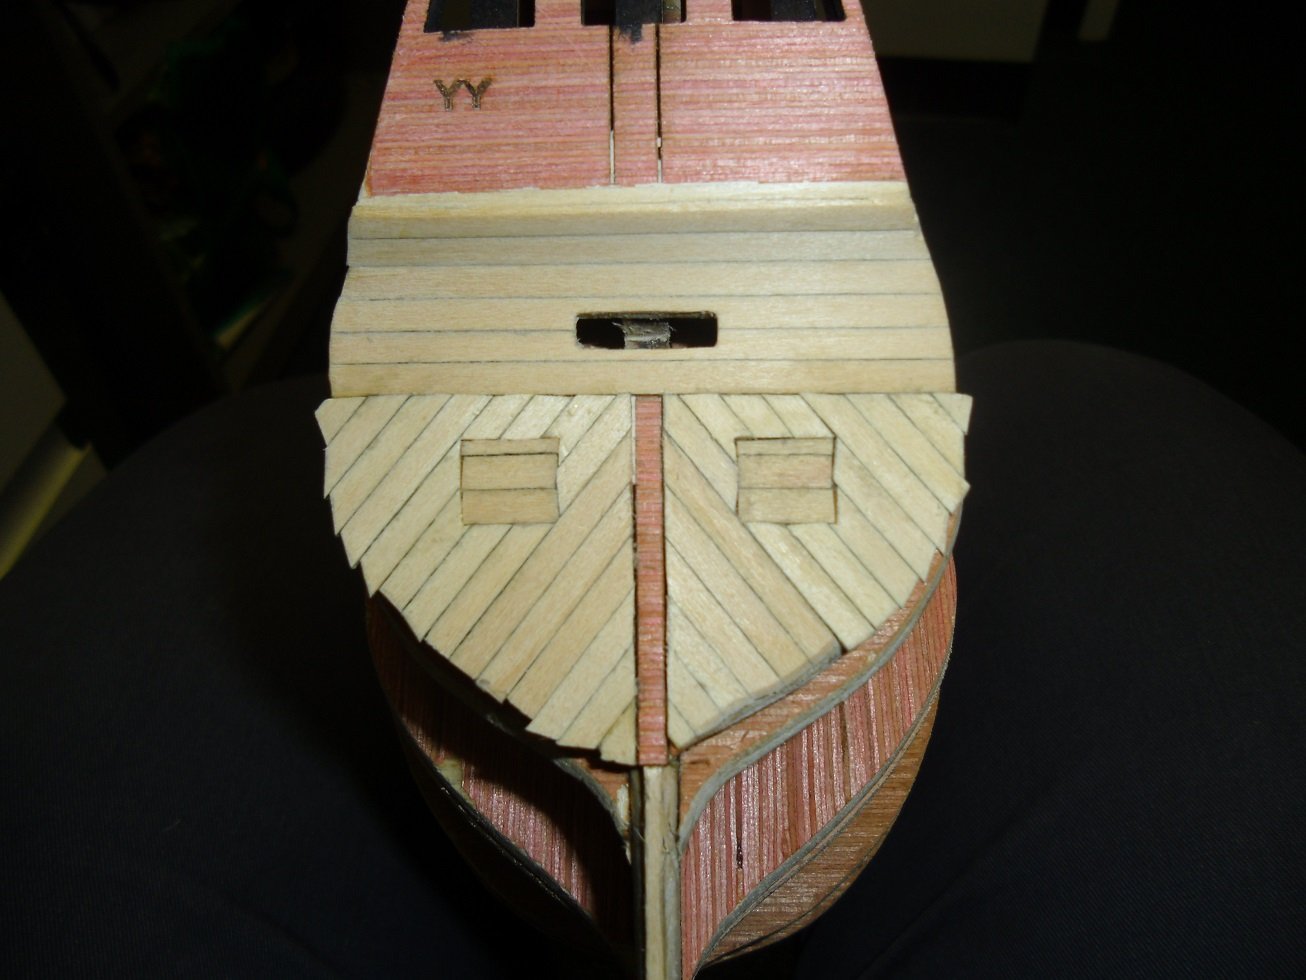
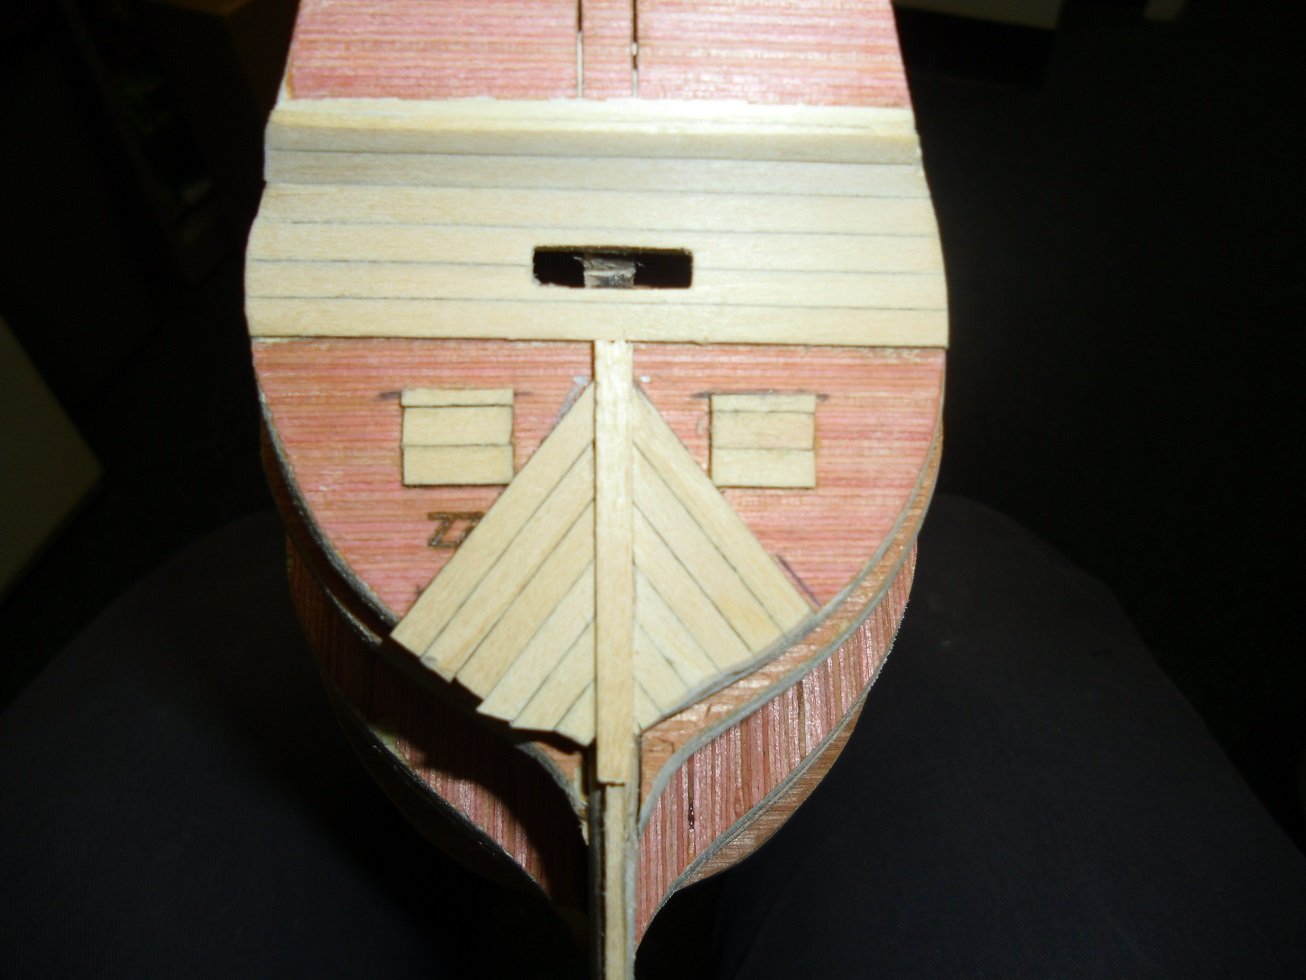
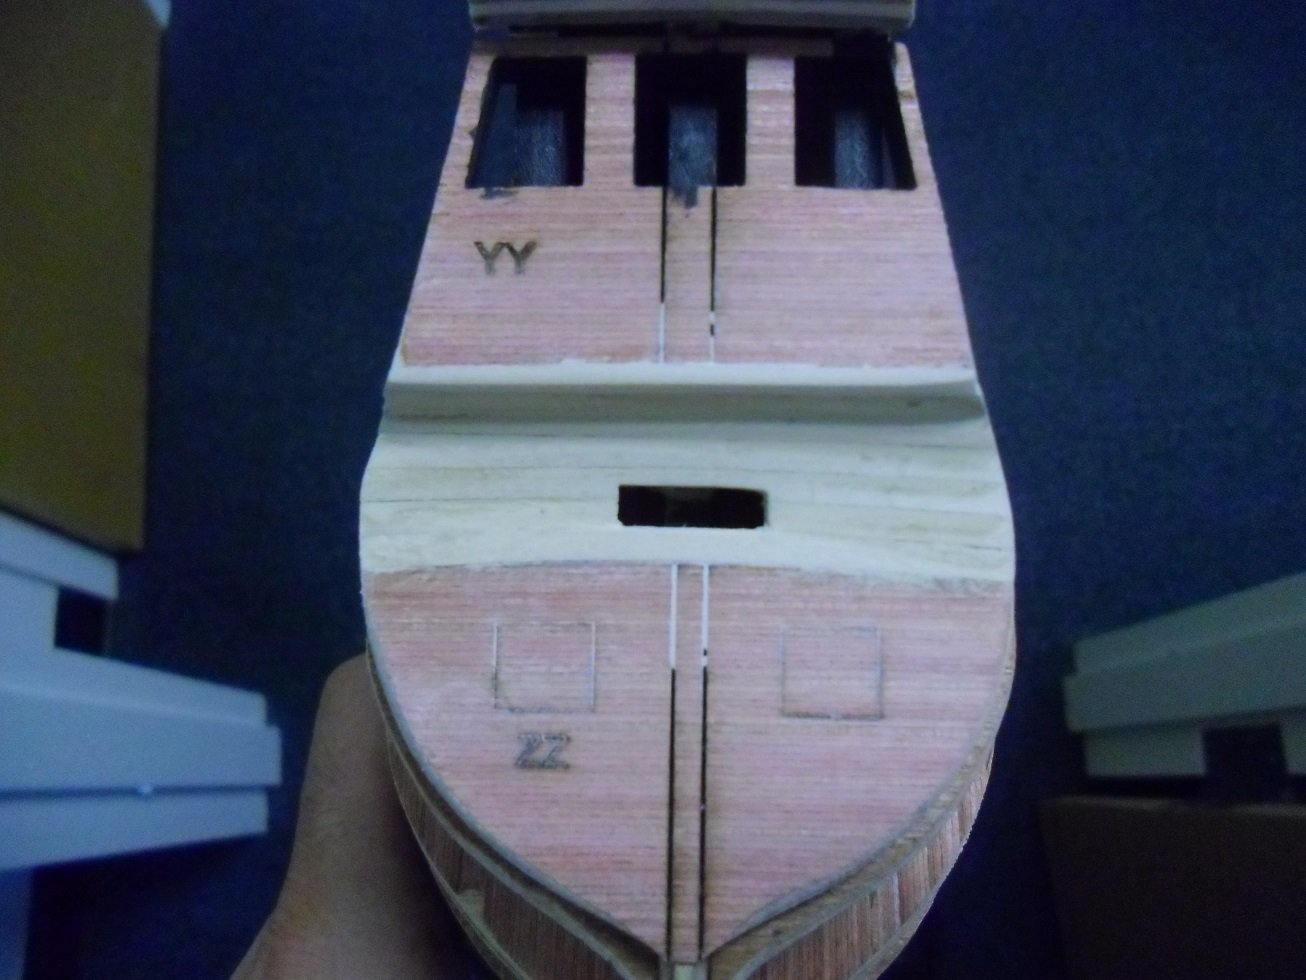
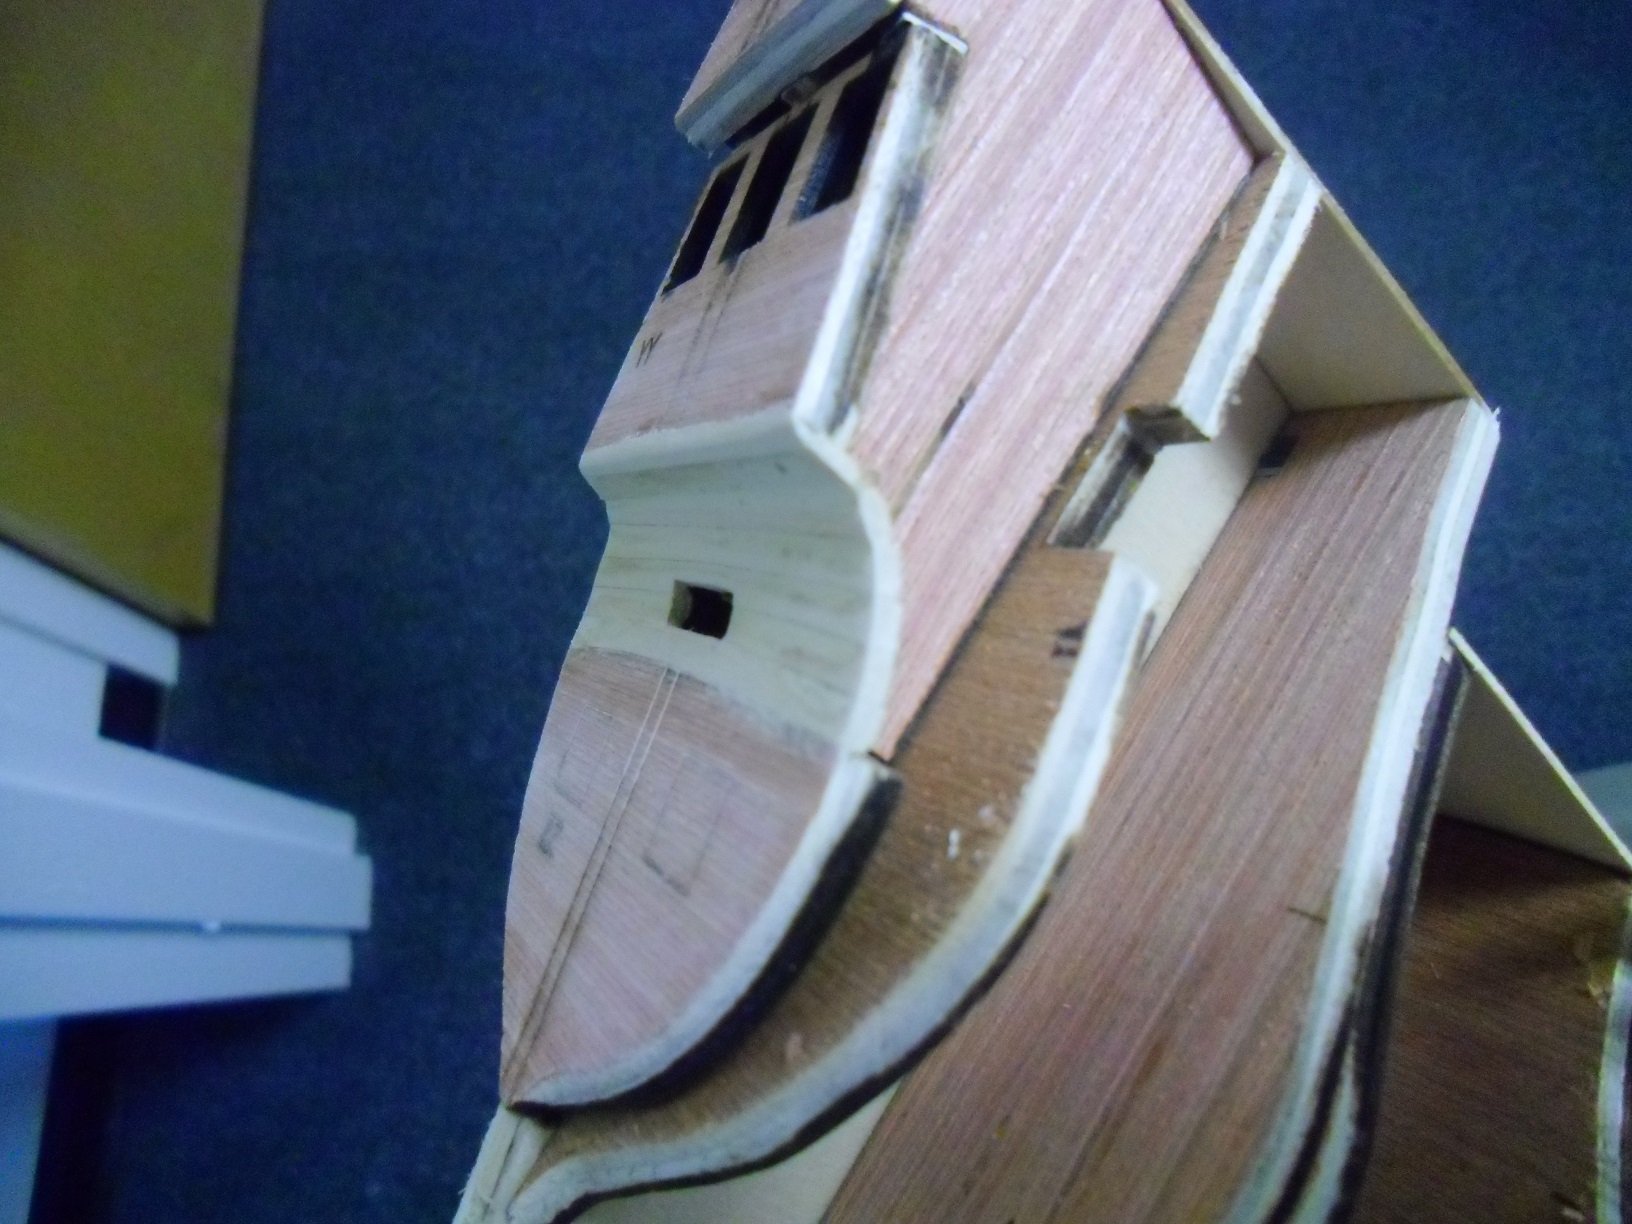
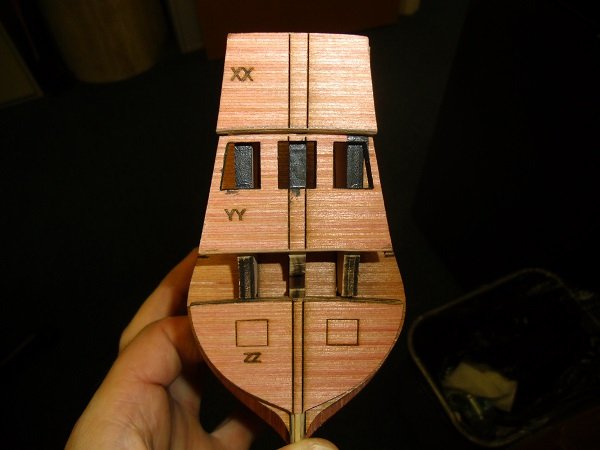
I'm just noticing that it's been 2 1/2 months since I've posted anything on the mayflower, mainly because I've been preoccupied with other things. But I have been picking away at the dreaded faring of the hull, and I think I've finally gotten it done, or close enough that I can proceed with other things. I did put in the gun port framing prior to fairing, as the framing needs to be faired along with the hull (pic 1). After that, I glued on the false decks (pic 2). As Al pointed out on his mayflower build log, I did find that the 4B bulkhead was about 3 mm wider than the false deck at that point, and I followed his lead and sanded the bulkhead to match the false deck. If there was any question about the deck fitting (and there often was), I used the laser-etched center line as a guide, rather than the edges of the deck. The deck edges got sanded down to be flush with the bulkheads wherever necessary. I then put the first planking on the counter (pic 3,4). This was interesting, as I tried to give the 'graceful' curve that is called for in the instructions, but it's a bit clunky to try to make a graceful curve out of a bunch of straight planks placed edge to edge. I did bevel the front edges of some of the upper ones to minimize gaps. I then sanded and used elmers wood filler, and sanded again. (Note: there is a hole in the counter that I think is meant to allow the tiller to pass through eventually, and the instructions imply that you should plank the counter, and then drill a hole in it and file out the rectangular hole. I found it more efficient to leave the gap in the planking to approximate the hole (by using two shorter planks at the sides of the second level) and then increase the hole to full size with a file.) I then put the second layer of planking over the counter and the piece called ZZ. I used a pencil to simulate caulking, and I think it looks ok.
-
Nicely done, Al! Although, in my mind, it makes sense to make the hatch flush with the outer planks, which would have entailed planking around those laser-scribed squares and inlaying the hatch cover into the space. The way you have it, unless you cut out the planks in the area where the hatch cover will go, your cover will lay on top of the planking. I'm not sure which is right or better, but if it were me, I'd have gone with making the cover close flush with the planking. And, nice save with the thinning of a couple of planks to make it come out right in the end. It's amazing how it's easy to miss that unless you're really attuned to looking for it.
-
Achu, looks like you're doing a great job. I have this same kit and have been working on it for about a year on and off. (I'm a bit ahead of you; I'm almost done with the deck fixtures.) I used the minwax wipe-on-poly satin on the hull and deck, and I think it came out nice. For this model, I think it makes sense to put the finish on the hull after you put the bulwarks on and finish up the cannon ports. I actually waited until the point where the instruction said to do it, which was after 'step 14', but you could easily do it earlier. I look forward to seeing your progress here, because I anticipate needing a lot of help with the rigging, and you seem to know what you're doing keep up the good work.
-
Well, I'm glad the ports are above the water line. Otherwise, I'd have felt bad for the poor soul who said 'hey, I wonder what's back behind this door?' while they were coming to the new world...
-
I didn't put spaces behind ZZ, but I did measure the distance from it to bulkhead 5 on both sides before the glue was dry. It needed some adjustment, so I thank you for mentioning it before.
-
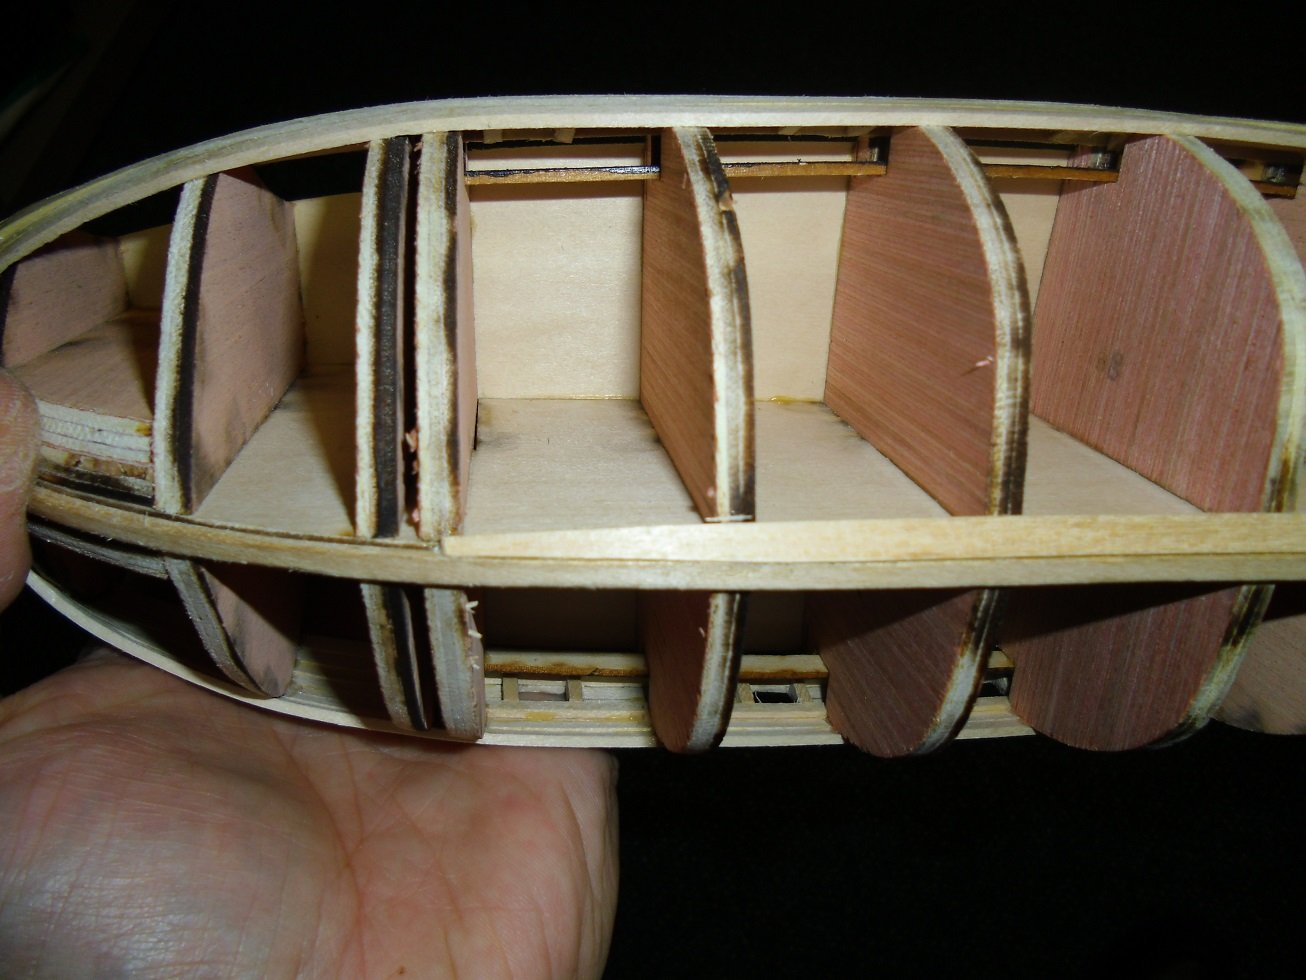
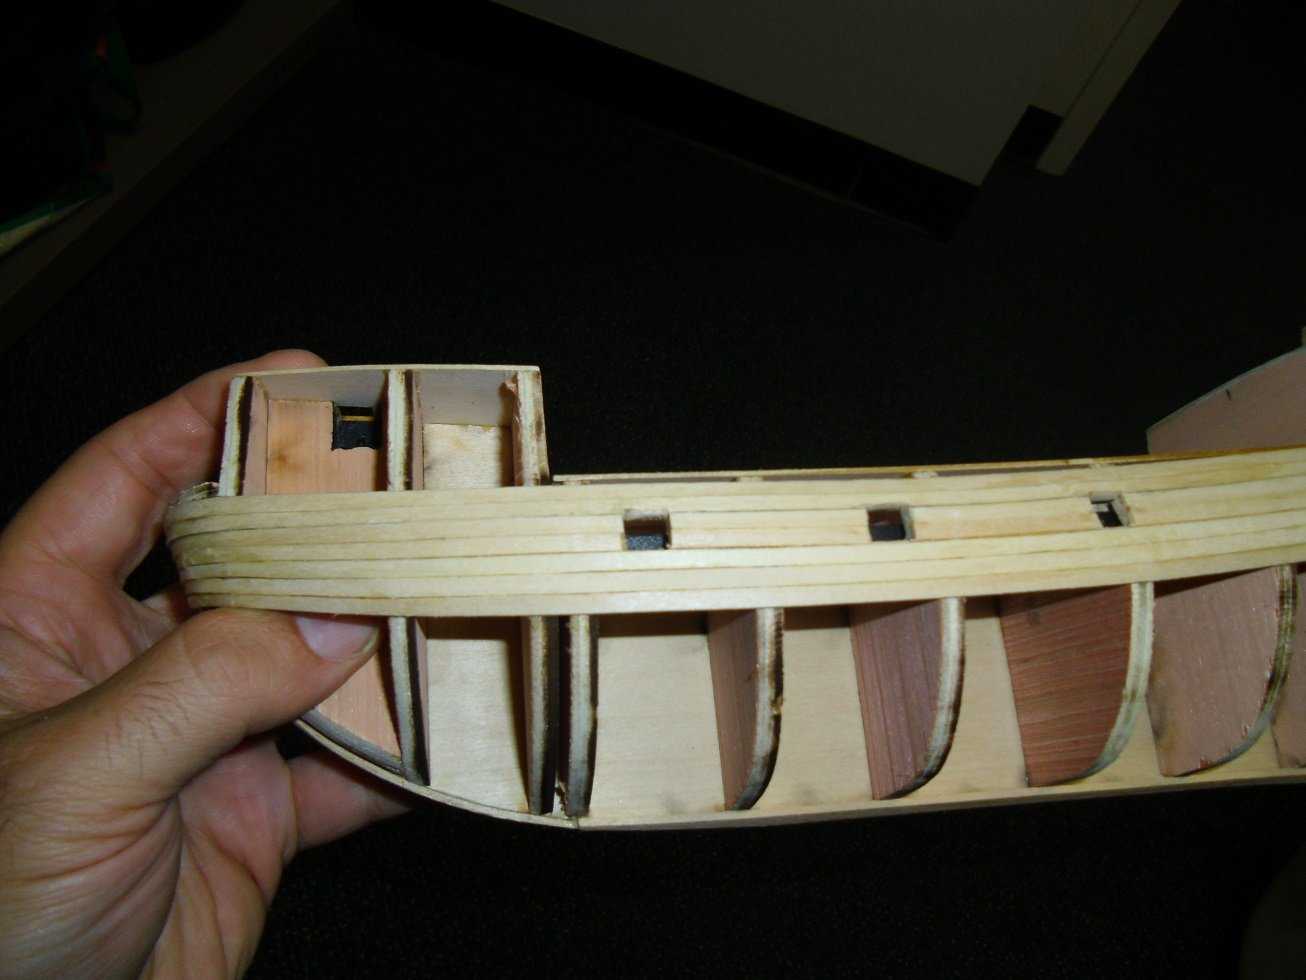
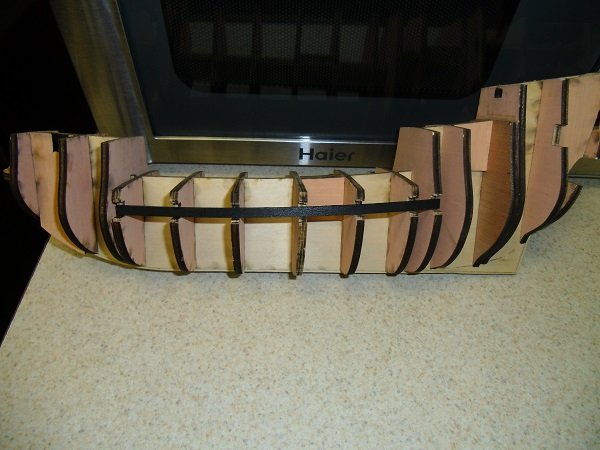
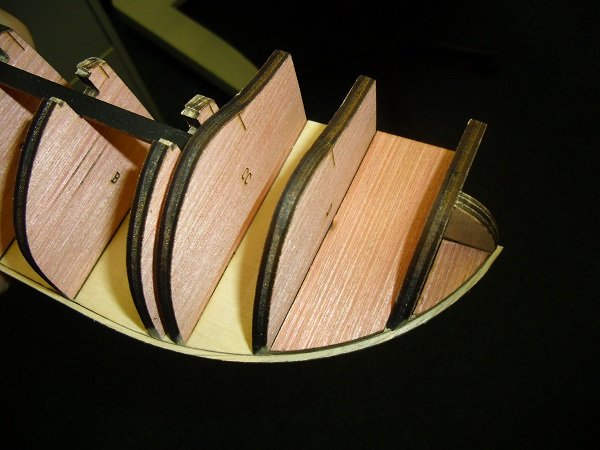
The new basswood bulkhead former is working fine. I've put in all of the bulkheads, all of the filler pieces, and the dummy cannon strip. I've painted the dummy strip black with some acrylic paint from Michael's. I used two coats, and it looks pretty black, which is all I could have hoped for. While I had the paint and brush out, I decided to paint as many black things at once as I could think of (because I hate cleaning the brushes, and I want to do it as few times as possible.) So, the recess in the port foremast fillers, the window in bulkhead 4, and the three windows in the YY stern piece. I wanted to make as 'graceful' a curve over the counter in the stern as possible, and that required significant recontouring of the bottom of piece YY. I'm not completely satisfied with it, but I may leave it as is. I might try to file it down a bit more. I also made a very rudimentary stab at fairing the hull. I filed down the first few bulkheads at the bow down by the rabbet strip. I have a picture of the side I didn't do followed by the side I did. My goal was to get the bottoms of the bulkheads and filler pieces to follow the contour of the bottom of the BF. It's a start, but there's much more to go, obviously.

-
It would hurt me to put all those nice diagonal planks on the stern, and then just paint over it. I think it looks too good with the planking and caulking to over with white paint.
-
Al, I understand. Instead of filler, I'd probably just glue some thin strips onto the edge of the bulkhead. But you are correct, you have plenty of surface area to glue to and to use for contouring. and as far as your question to Joel, I actually have done exactly that on another ship. I used the very sheet that the bulkhead was cut from, and just cut about a half inch wide piece along the original piece's edge and glued it on to the matching bulkhead. It needed a lot of filing and sanding, but it gave me more surface area, and worked fine.
-
I think it looks pretty good, although, as you know, the pictures can be deceiving. In the last picture, it looks like there's a gap above bulkhead E, but other than that, it looks like you did a good job. I wouldn't worry about filling in the small gaps; 'exercise in overkill' seems to describe that endeavor pretty accurately
-
If you imagine a keel and stempiece glued on top of the rabbet strip, and those pieces being wider that the rabbet strip, then there would be a little notch to tuck a plank into. In this model, I think you are right, those pieces are meant to be glued on after the first layer of planking is done, so we won't be able to 'tuck'. And, they are 1/8" wide, which is the same width as the rabbet strip, so it wouldn't quite work even if we glued them on before. And, thanks, Steve, I've seen that log, and I agree it is very good. It's comment number 17 on that log where Chuck suggested thinning at the bearding line to less than the 3/32" that the instruction recommend.
-
Al, I think the rabbet is actually supposed to make the planking easier! And I think your idea is exactly right. You tuck the front of the plank into the rabbet, and that holds it perfectly in place without even needing a clamp there. You can let it overhang in the back until you get the front nice and glued in, and then you can trim the back to length. At least, that's my current understanding. Time will tell...
-
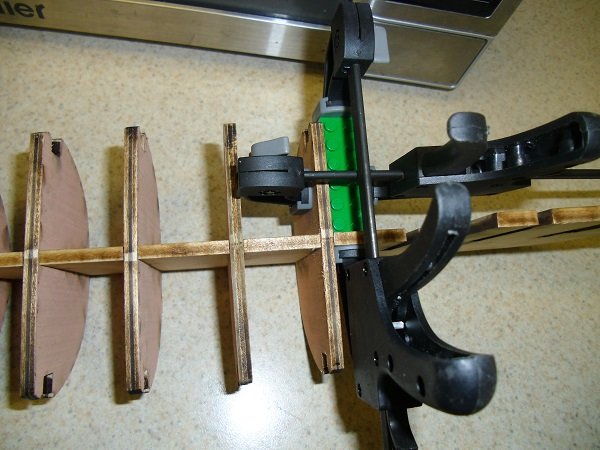
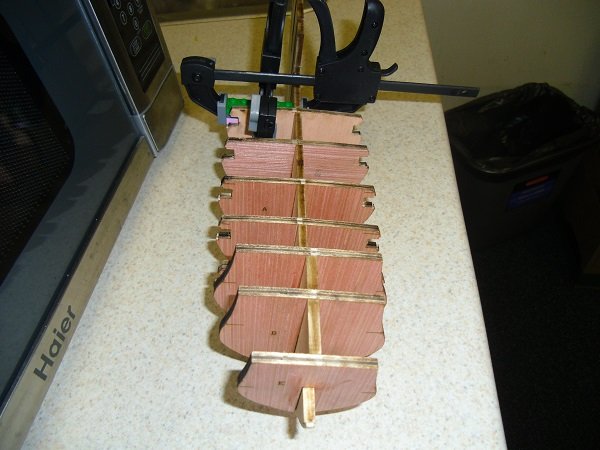
I've gotten started again. I carved the area between the bearding line and the rabbet strip, athough I tried it a bit differently. Firstly, I aimed for 1/16" final thickness rather than 3/32" (I saw a comment on another build where Chuck suggested going a bit thinner than 3/32"). Also, I did the carving (actually, filing in my case) before gluing on the rabbet strip. I just scribed a line on the bottom of the BF 1/16" in from each end, and filed to that level. Then I cut the back end of the rabbet strip to 1/16" from its original 1/8" and glued it on. My reasoning was that this was I wouldn't over-thin the rabbet strip during the filing process, and I'd have a nice square contour to it. I think it was ok, but I'm not sure it was much of an improvement on the original technique. I've glued about half of the bulkheads on. I show these pictures mainly because I remember Al saying he had no idea what a lego was, and doubts that he'd ever seen one. Al, that green block is a lego; they're actually very useful for creating right angles because they are made of hard plastic, and have perfect right angles on each block. They come in different sizes (and colors), and can be stacked to create different sizes and shapes. I used it for the first time on this ship, and I'd do it again. It's at least as good as any other squaring tool that I've seen. I'll finish the bulkheads and then add the filler blocks and eye hook next and we'll see how the fairing process goes...
-
Al, the best I can do is confirm that you are correct: the plans have the poop deck at 50mm wide at its widest, and bulkhead 4B is 53mm wide at that point. I'd hesitate to shave off the difference, although you may be correct that it's the right thing to do. I did look over some of the other plans to see if there was some reason why the bulkhead should be wider, and I couldn't find anything. I'm loathe to bother Chuck with every little thing, but this seems like a legitimate question.
-
Al, it looks like it's working! Agreed, the photos can be misleading, but this latest batch shows a good mating of the bulwark template to most of the frames. Good work!