
HOLIDAY DONATION DRIVE - SUPPORT MSW - DO YOUR PART TO KEEP THIS GREAT FORUM GOING! (Only 24 donations so far out of 49,000 members - C'mon guys!)
×


RichieG
-
Posts
114 -
Joined
-
Last visited
Content Type
Profiles
Forums
Gallery
Events
Everything posted by RichieG
-
Hi Al, I'm looking at your last picture, and it looks to me like you 'faired' bulkheads 4 and 5 (I think that's the numbers) opposite directions, creating the concave shape. If you had left both of them more square, it might have fit the bulwark better. What would it look like if you put the bulwark on the other side, which it looks like you haven't faired yet? Because if it fits better there, I'd shim back up the last two bulkheads and refair them so as to be more like the shape that the bulwark wants to take. (That being said, you definitely can use nails to 'clamp' the bulwark in place; I prefer to put the nails in about halfway, so they're easy to pull out, and any holes that are left will be planked over, so it's not a cosmetic problem. Sometimes it's a good idea to predrill holes in the plank or bulwark, so that it won't have a tendency to split.)
-
sounds good, Al! Although I can't see going through the trouble to put a cannon carriage in there when in won't be seen. It's kind of like your putting a knight into the deck hatch instead of a wire eye hook. It's a lot more work, and no one but you will even know it's there. That being said, you're building this for yourself, so who cares what anyone else sees or thinks. But I'll look forward to seeing pictures of your fairing process. That is a tough thing for us novices to get the hang of, if seems.
-
I got my second set of replacement parts today! They actually sent me two versions of the BF: one in plywood and one in basswood. The plywood is a different brand than the previous parts: it has a whiter color instead of that pinkish shade to the outer sheets. However, it's actually closer to 1/8" than 3/16", and it's still got a pretty nice warp in it. The basswood BF is perfect! Exactly 3/16" thick, and nice and flat. The only thing to be careful about here is that, since it's only one ply, the thin areas will be extra-fragile. I'll just have to be careful. Once the bulkheads are in, it should be stronger. So, I'm going to use the basswood BF, and I think it'll work great (and I'll be the only kid in town with a basswood bulkhead former!) They also sent a that piece of 1/32" plywood where I was missing the bulkwark template. This one has both, so now I'll have an extra one. Now I can go back to page one, and really start the build officially. With any luck, I can catch up to Al before he gets too far ahead!
-
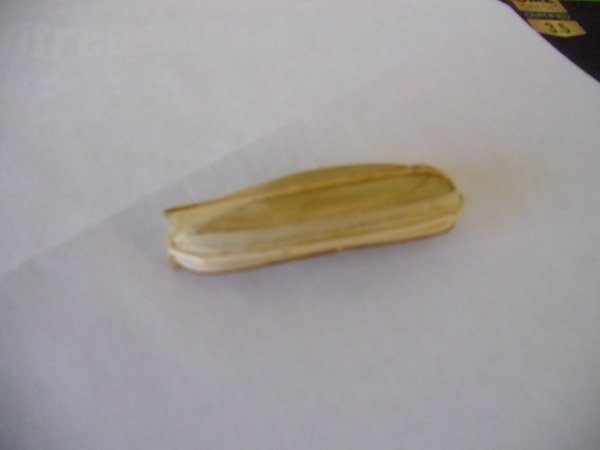
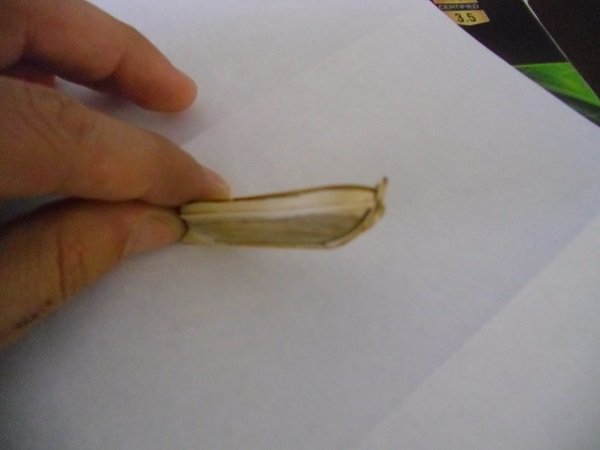
I've done some more work on the ship's boat. I've put the clinker planks on both sides, put on the cap rail, and put on the stem, stern and keel pieces. Here's what I learned: 1) I think the best way to put on the clinker pieces is to use a compass to draw lines on the hull where the pieces will go. So, if you want 1/16" wide planks, set the compass to 1/16" and follow the top of the hull with the point; then reset to 2/16", repeat. Reset to 3/16", repeat, for as many planks as you need. You have to put the bottom plank on first as the upper planks overlap the lower ones. So, in this case, I'm using 1/8" stock, but aiming for 1/16" planks. The easiest way to do this is to forget about using paper or card stock templates (which were a pain in the neck, and worked only passably well), and just glue the 1/8" stock over the area to be covered. Then, redraw the lines that were covered by the extra-wide plank, and cut on those lines with an 11 blade, and pry off the outer pieces. This gives a perfectly straight and even width plank. Then you can place the next extra-wide plank above that one, redraw the lines, and cut off the excess. This worked very well on my second side, except for the fact that I only put 2 planks rather than three for some reason. But if I had to do it over again, I'd use this technique, and I think it would be quick and pretty. 2) When carving the bottom of the hull, be aware that the alignment tab in the stern area blends into the hull itself, and you should be careful not to cut off too much. I ended up with a similar shape in the back as the front, and when I put the keel and stern piece on, it was clear that there was a big triangular gap between the hull and keel and stern piece. I just filled it with wood filler (as you may see in the photos) and I think it worked ok, but it would be better to have been aware of that before shaping the hull. My next steps will be to put the oarlocks on, and to put hinges and door knobs on the great cabin and poop bulkheads.

-
Al, I was thinking more along the lines of put the bottom strip in place, and then put a 1/4" spacer on top in order to get the top strip to be exactly parallel to the bottom one. It might not fit exactly into the upper notch, but it will be the better choice, I think, to sacrifice the notch to gain two parallel strips.
-
Al, I get that the notches are a little different (maybe due to sanding char), but I think the idea is to make the gunport strips exactly the same distance apart all the way across. I think it's more important to keep the gunports consistent than to have them fit exactly into the notches. So a (1/4"?) spacer allows you to keep the gunports nice and square even if the notches are a little off. That's my thinking anyway. (factor in that this is coming from someone who hasn't actually done this part yet...)
-
Al, I don't know where I saw this, but I think someone put a temporary spacer on top of the lower gun port frame so that the upper one was a consistent height above it. That way, all the side pieces can be the same length, and you don't have to custom fit them all. You might try that for the other side.
-
David, glad you got the parts so quickly, and to your satisfaction. (I'm still waiting on some parts myself, but they're in the mail, as they say...) Looking forward to your starting the 'real' building!
-
Al, I think it all looks great, and all the pieces are glued on upside-right for sure. In fact, the only criticism that I can make (and I'm always looking to make some kind of criticism) is that I think that when say 'camphor' (which is a waxy product of the camphor tree which smells a lot like menthol), you probably mean 'camber' (which means to arch slightly; bend or curve upward in the middle). Other than that, I can't think of anything to say other than 'good job!'
-
agreed, the new one is a very good match for the old, and agree that filing out those windows is time consuming (and it's tough to match the crisp sharpness of the laser for the windows). But either way, make sure it's not glued on the wrong way when it's time to glue. (I get confused a lot, especially when the ship is upside down, so I'm kind of attuned to that kind of thing...)
-
Al, I'm just doing a little midnight reading before bed, and I have to point out that: you have the YY piece upside down! the windows have to be near the top when the ship is upright! The narrow part is supposed to be up by the XX piece! (You had it right with the original YY, but the new one you cut was placed on upside down.) !!!
-
Al, that overhang on piece YY looks odd. I haven't built up the bulkheads and stern pieces yet, but I did pop out YY and put it up against the BF, and the bottom edge fits pretty much right on. You're comparing the bottom edge of YY to the bottom of laser cut stern frames, while I'm only comparing it to the BF itself, but is it possible that either 1) you haven't pushed YY up against the upper notch all the way or 2) might you have glued the stern frames on a bit too high? (the stern frames look to be in good alignment with the top of bulkhead 5, so I don't think that's going to be it...)

-
and, those stern parts look good. Another approach might be to glue them on, and then use a sanding block to 'fair' the piece in place to match the slope of the BF. Keep the up the good work.
-
good questions. first of all, remember that this eye bolt is a simulation of how this would really have been hooked up, so there really isn't a 'correct' answer. (the real way was more like you had with the knight, but that would be tough to do on this particular model.) But, if you look at page 37, there is a drawing of a block with a wire hook on it, and it looks like it's oriented in your second picture. So, my best guess (and it is a guess) is that you would go with the hook pointing parallel to the wire around the block. That being said, all of this will be completely hidden in the model (or almost completely, anyway) so no one but you (and anyone you tell) will know...
-
Nick, I think it looks fabulous! (I have this model on the shelf, but I don't see myself getting to it for quite a while) As far as the trenailing goes, are you going to stain the hull? Because then the question isn't so much how different the filler looks as how it differently it takes up stain. Also, had you considered sticking a sharp pencil into each hole and giving it spin? I tried that, and it gave a nice subtle black ring that outlines the trenail, (which matches the caulking between the hull planks in concept) even though the filler itself blends in with the surrounding hull.
-
It's looking like some progress is being made. I'm looking forward to seeing the stern work; I've read up on it, but it not the same as seeing someone actually do it. PS I have another shipment in process from Model Shipways. Hopefully this one gets me to ready to get going, and I can follow in your footsteps...
-
Al, good points, thanks. I don't have and sanding lacquer (same as sanding sealer?), but I could probably acquire some. The planks are pretty soft, and I could try just pushing the pencil point in. I might get more variable sized holes, but we shall see. I think the trick to avoiding the blotchiness is to sand off the extra filler well. It's kind of invisible in this case, so you have to look at it under the light at an angle to see it. The instructions say to use an eyebolt, and just bend the eye down to simulate a handle, so I'm doing that. The hinges are paper painted black with a small wire for the hinge pin. Note: in the photos, the hinges are just rectangular. In the plans, they have a taper with a sort of bulb on the end (which I like) so I'll try to emulate the design on the plans.
-
Al, those bow false decks are clearly meant to be exactly flush with the BF, and laser-etched line looks like it's right at the middle of the thickness of the false decks. I think the confusion is that we have 3-ply plywood, but the material he's using in the prototype looks like it has more plys (although it's still 3/16"). I don't think it'll matter too much, but look at the picture in the book: those bow false decks are perfectly flush with the bulkhead former. I think what you've done looks great. You might want to turn that wood block with holes in it 90 degrees to match the way the eye bolt was supposed to go, but I don't know if it will matter at all.
-
david, I got a different model from the same manufacturer, and I got those same labels on the back of one of my plywood sheets. They peel off easily and completely just with a fingernail. That being said, some of the plywood sheets were pretty severely warped, and I emailed marc mosko. He got back to me within a day, and I had some replacement parts within about a month. The problem is that the replacement parts are no better than the originals. But I emailed him again, and he's going to "make it right" (his words). He emailed Carlos from his company, and told him to check the plywood for damage before cutting the pieces, and also to cut the same pieces from basswood and send me both. So, I think sooner or later I'll be ok. You should try the same. edit: I just saw that in the time it took me to write that, you'd already solved your problem. but try peeling off those stickers. I think you'll find that they come off no problem.
-
My mistake, Al, you are right. There are 2 port foremast fillers (with notches on top), and 1 starboard foremast filler without a notch. They are distinct pieces, though, so make sure both with the notches go on the port side.
-
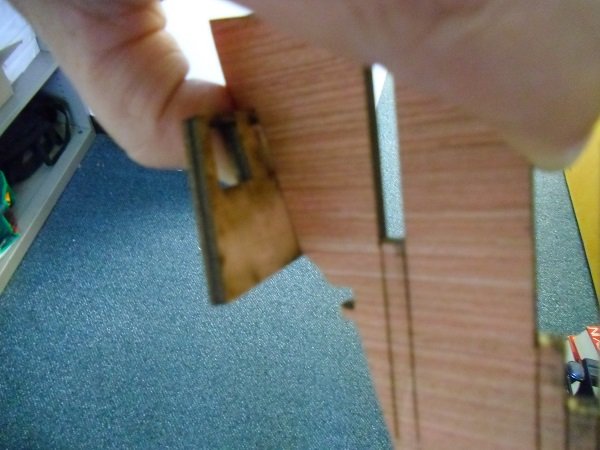
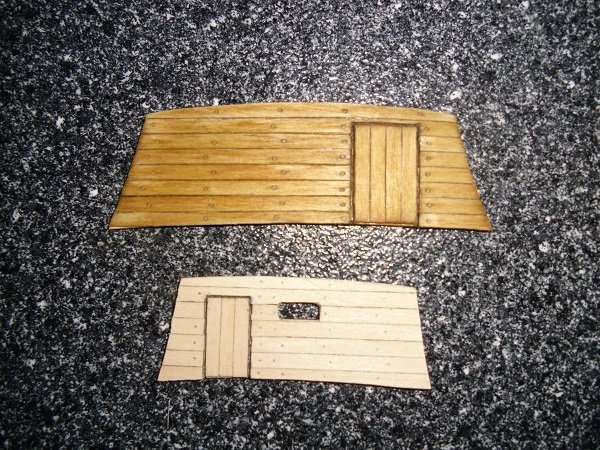
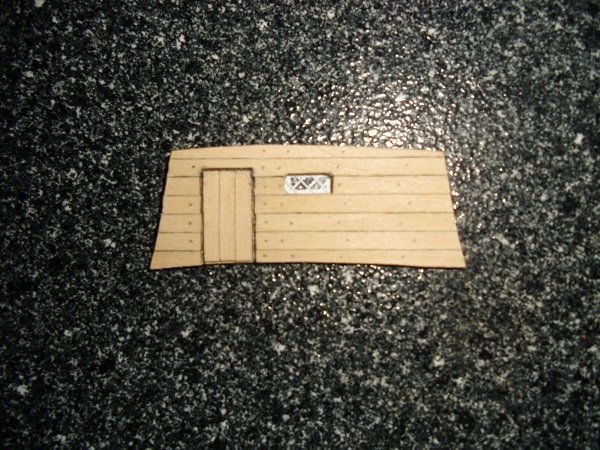
I've continued with parts of the build that I can do while waiting to really start on page 1. I've trimmed the clinker planks a bit on the one side that I actually planked, and I think it looks better. I'll do the other side soon, but I was looking for a change of pace (because my attention span is too short to work on one thing too long.) On page 11 and 12, there is a description of making the great cabin bulkhead, the poop bulkhead, and the forward cubbridge head. These are made 'off the ship', so I can work on them now. The suggestion is to start with the great cabin bulkhead first, because it's well hidden on the finished model, and any 'learning' mistakes can be most easily hidden. As instructed, I planked the door first, then the wall around it. I used a pencil to simulate the caulk, and I like the way that worked. It says to 'be sure to bend each plank so it follows the camber created by the bottom edge.' This not only seemed like a tough thing to do, but it doesn't seem like the way I'd expect it to be on the real ship. I just put a plank straight across the bottom, and them trimmed the edge to match the bottom edge. Then, all the higher planks could go on square. I'm certainly no expert, but if I was tasked with planking a wall on a ship, that's how I'd do it. It says that there's no point in trenailing this bulkhead, as it's hard to see on the model, but I decided to do it anyway, as a learning process. I've seen it done many ways, and I don't think I like the heavy, big, black trenails. I was going for a more subtle effect. I used a 69 drill to make the hole, and then (I read this somewhere, I forget where) I put a sharp pencil point in::to the hole and gave it a few rotations. That had two effects: it made the hole nice and round, and it put a faint black circle around its edge. Then I used Elmers carpenters wood filler to fill the holes and let it dry and sanded it. I think they came out good. The one thing I learned it not to slather the wood filler around the whole thing. I'd try to apply just a tiny dab right over the hole and scrape it flat. Because I think the extra wood filler is what made it take up stain a bit irregularly. I planked the poop bulkhead, and made the little window by putting white pinstripe tape over the acetate sheet (all supplied in the kit) and I think it looks pretty good. I've marked where the trenails will go with a pencil, but I haven't drilled and filled them yet. After staining, I think I'll use card stock (painted black) for the hinges, and put the black-painted bent eyebolt in for a handle, and we should be ok.
-
Yeah, Steve, it's kind of a bummer. They didn't send that one sheet that was missing the bulwark template, so I figure since I'm going to need that anyway, maybe I'll try for one more bulkhead former, if they're willing. I sent an email to Marc, and we'll see what he says. He may be getting sick of hearing from me by now, but that one was a legitimate gripe. The piece literally never got laser cut into the sheet, for some reason that I still really don't understand.
-
Looks good, Al. As far as how much glue to use for the bulkheads, the answer it probably not too much. You can tell that they get pretty stuck even before the glue dries. And it you want to strengthen the joint after the fact, some people seem to brush diluted wood glue over the joint. It's all covered up eventually, so it doesn't have to look pretty. But, I think even that will prove unnecessary, as you have rock steady joints the way you've done it. I will mention that, as I was reading some of the other build logs on here, that there was a comment from Chuck that it was a good idea to taper the stern to a bit less than 3/32", (maybe 1/16") but I don't know how critical that is. It sounds like after it's planked, you'll have to thin out the stern by sanding down the planking, and you'll have to do that more if you've left the PF on the thicker side, and less if you've thinned it more. But I'm sure it will work out in the end. If you're looking for things to do while the glue is drying, (and I know this because I'm looking for things to do while I'm waiting on replacement parts) you might want to paint the inside edges of the little window on bulkhead 4B black (although there's enough laser char in mine to make that almost unnecessary.) That process is described on page 12, right hand column, full paragraph 2. Soon, you'll be putting the filler pieces in place. I look forward to seeing it. Just a reminder: both fore mast fillers go on the port side! (all of the other ones go one on each side)
-
I just got the replacement parts today, and gosh darn it, the new bulkhead former is warped almost exactly the same as before! The bulkheads themselves seem better, but I've made no headway on what Al calls the 'PF'. I've soaked both, and put them under some books with some over correction on the straightening, so we'll see how it goes. In the meantime, I'm working on the great cabin bulkhead, and I'll probably start on the poop bulkhead tonight. I'll put pictures of those up later.
-
boiling water for a half hour?!? I just ran mine under cold water from the sink for a few seconds! Either way apparently works, but I'm tempted to go with the easier way in that case...
