
Paul Jarman
-
Posts
478 -
Joined
-
Last visited
Content Type
Profiles
Forums
Gallery
Events
Everything posted by Paul Jarman
-
 Good tip I will try that. I use a pick up pencil and find the tip a bit to big for really small PE parts. Paul
 -
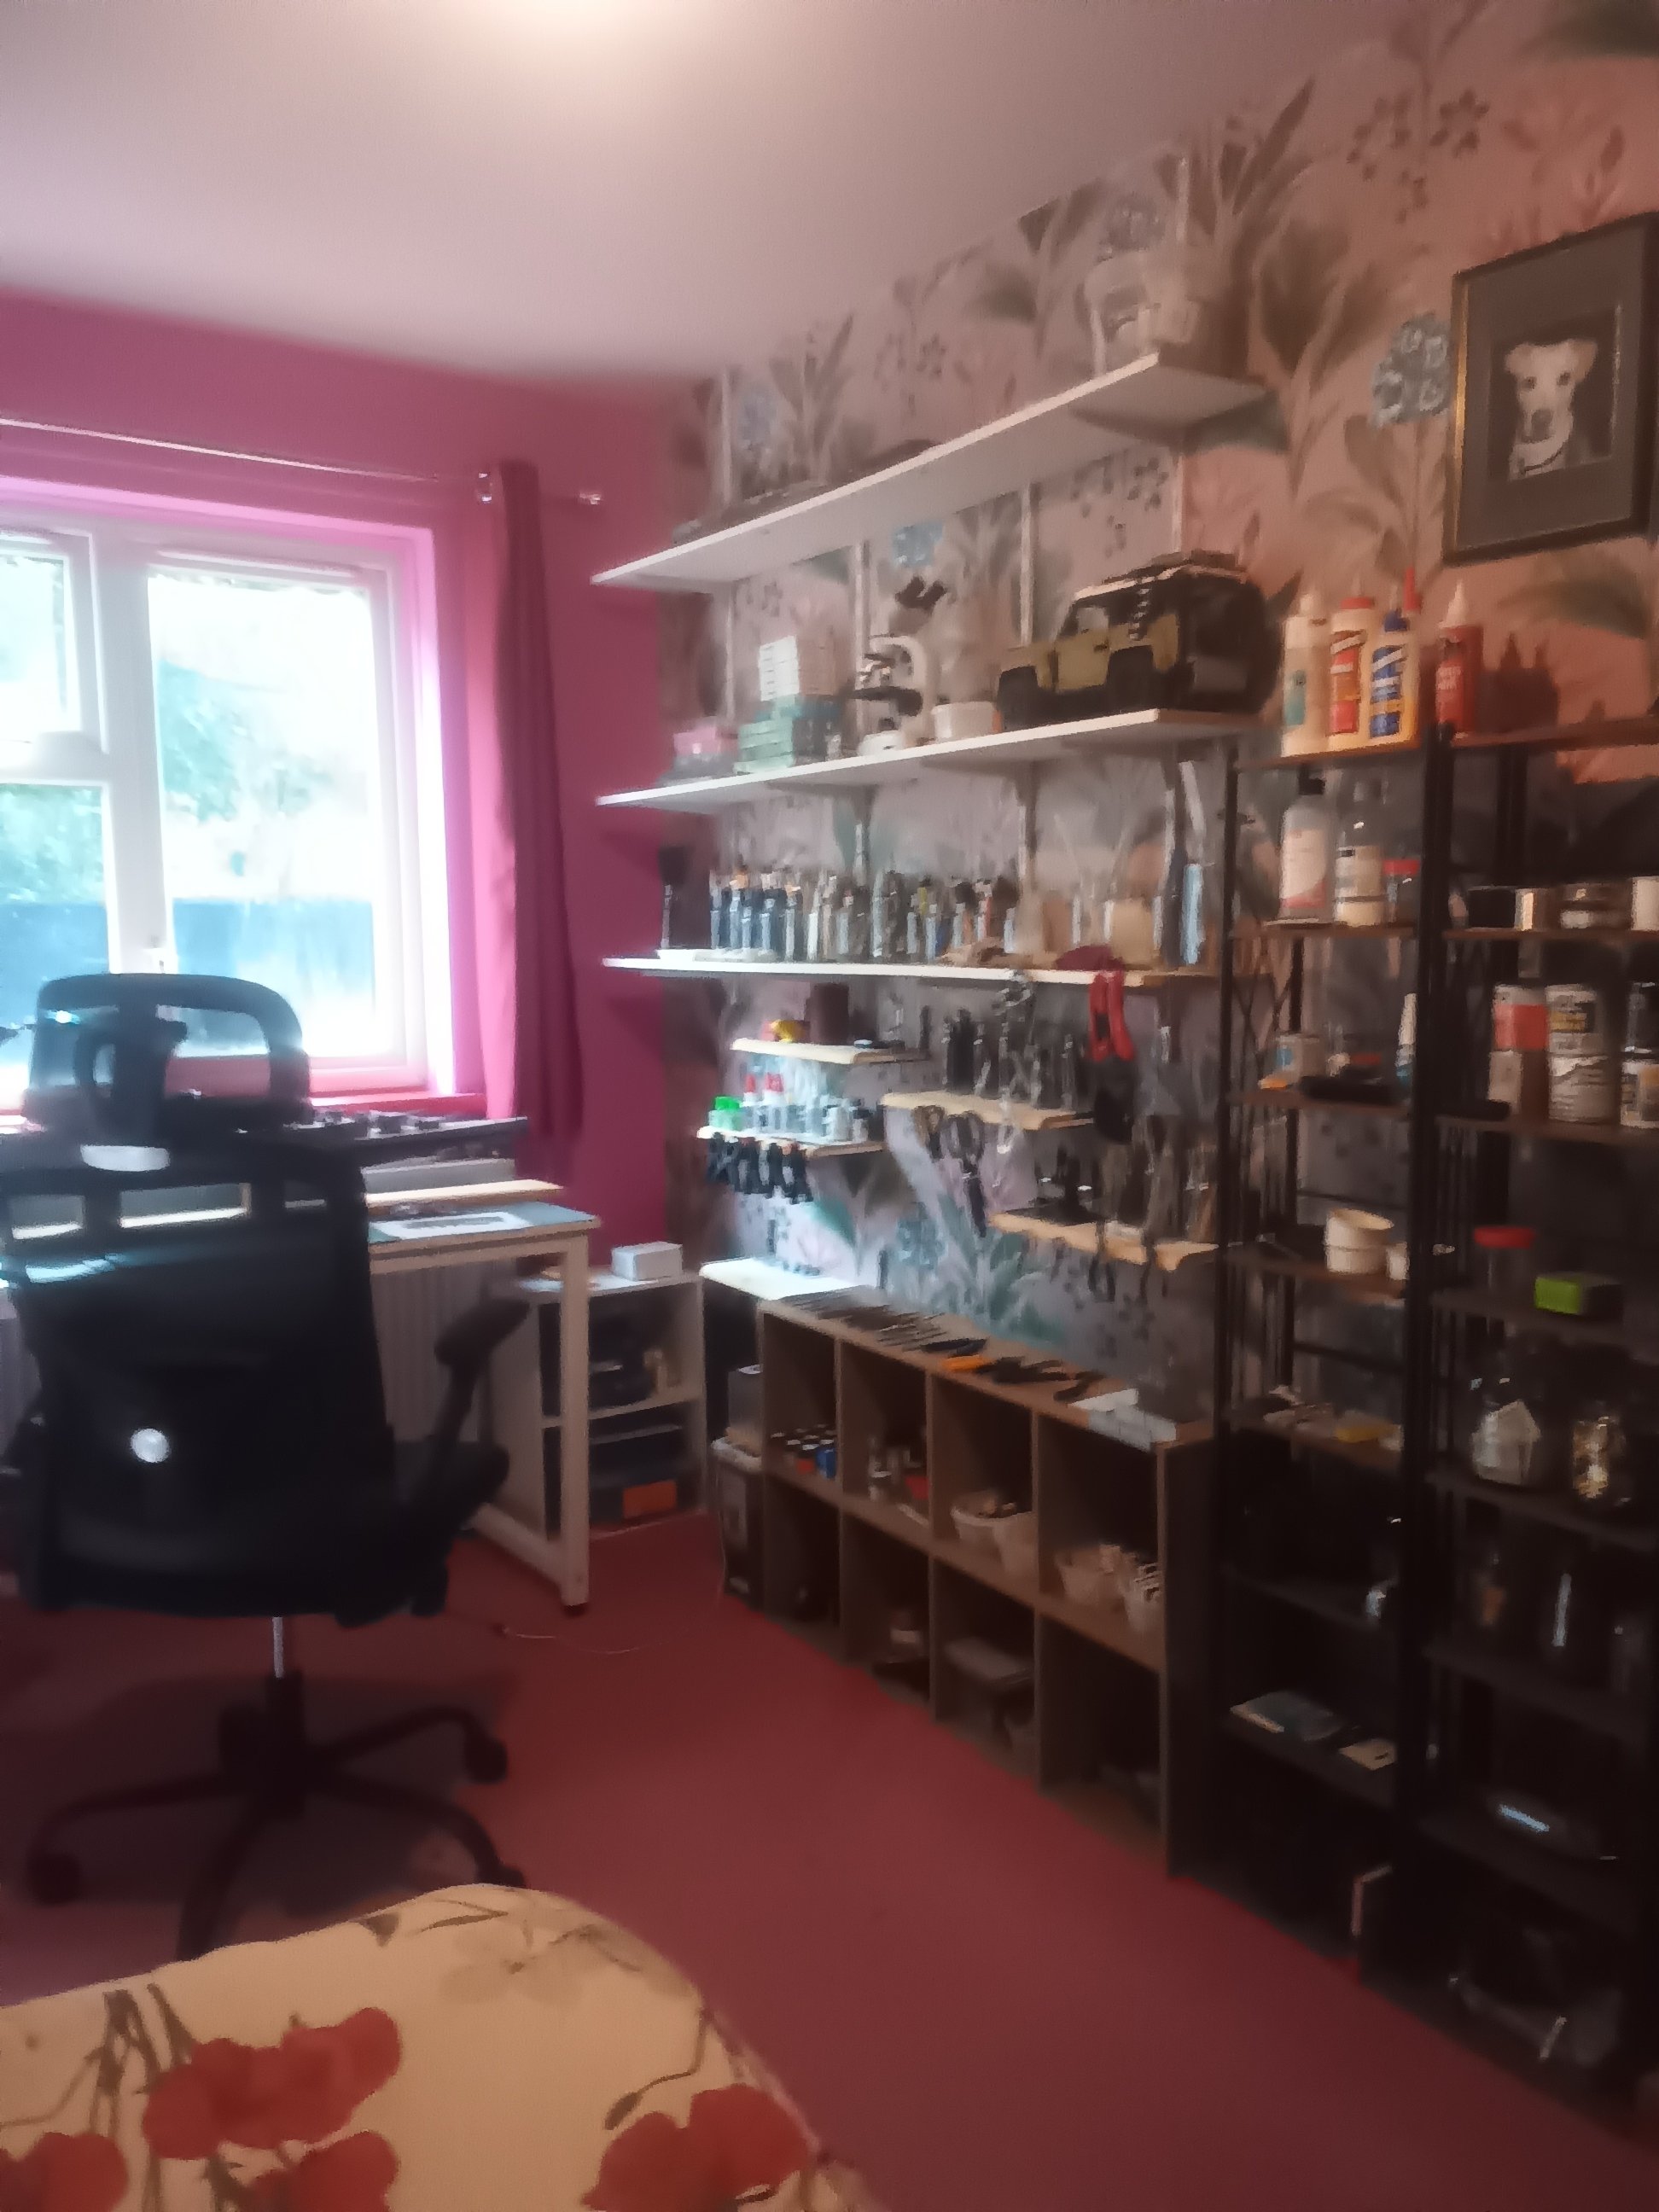
Work area pictures only
Paul Jarman replied to Johnny Mike's topic in Modeling tools and Workshop Equipment
My work area is in my bedroom.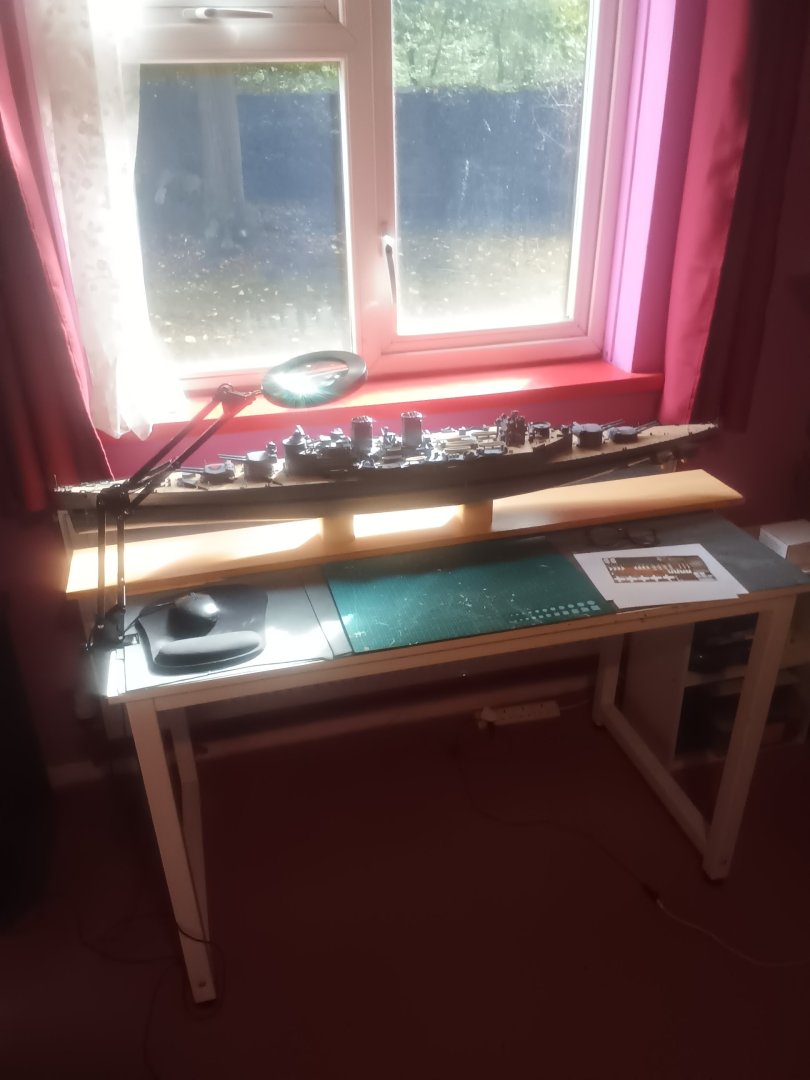

- 52 replies
-
- 15
-

-
Thanks alan,they certainly are. Should look better as I go. If Iadded all the PE there would be around 40 extra parts to add. After these are the 3 pompoms and they look even more challenging. As I've mentioned before, the next few kits will be out of the box builds using the kit PE rather than buying an upgrade kit. Even though it does lmprove the look so much better. Paul
-
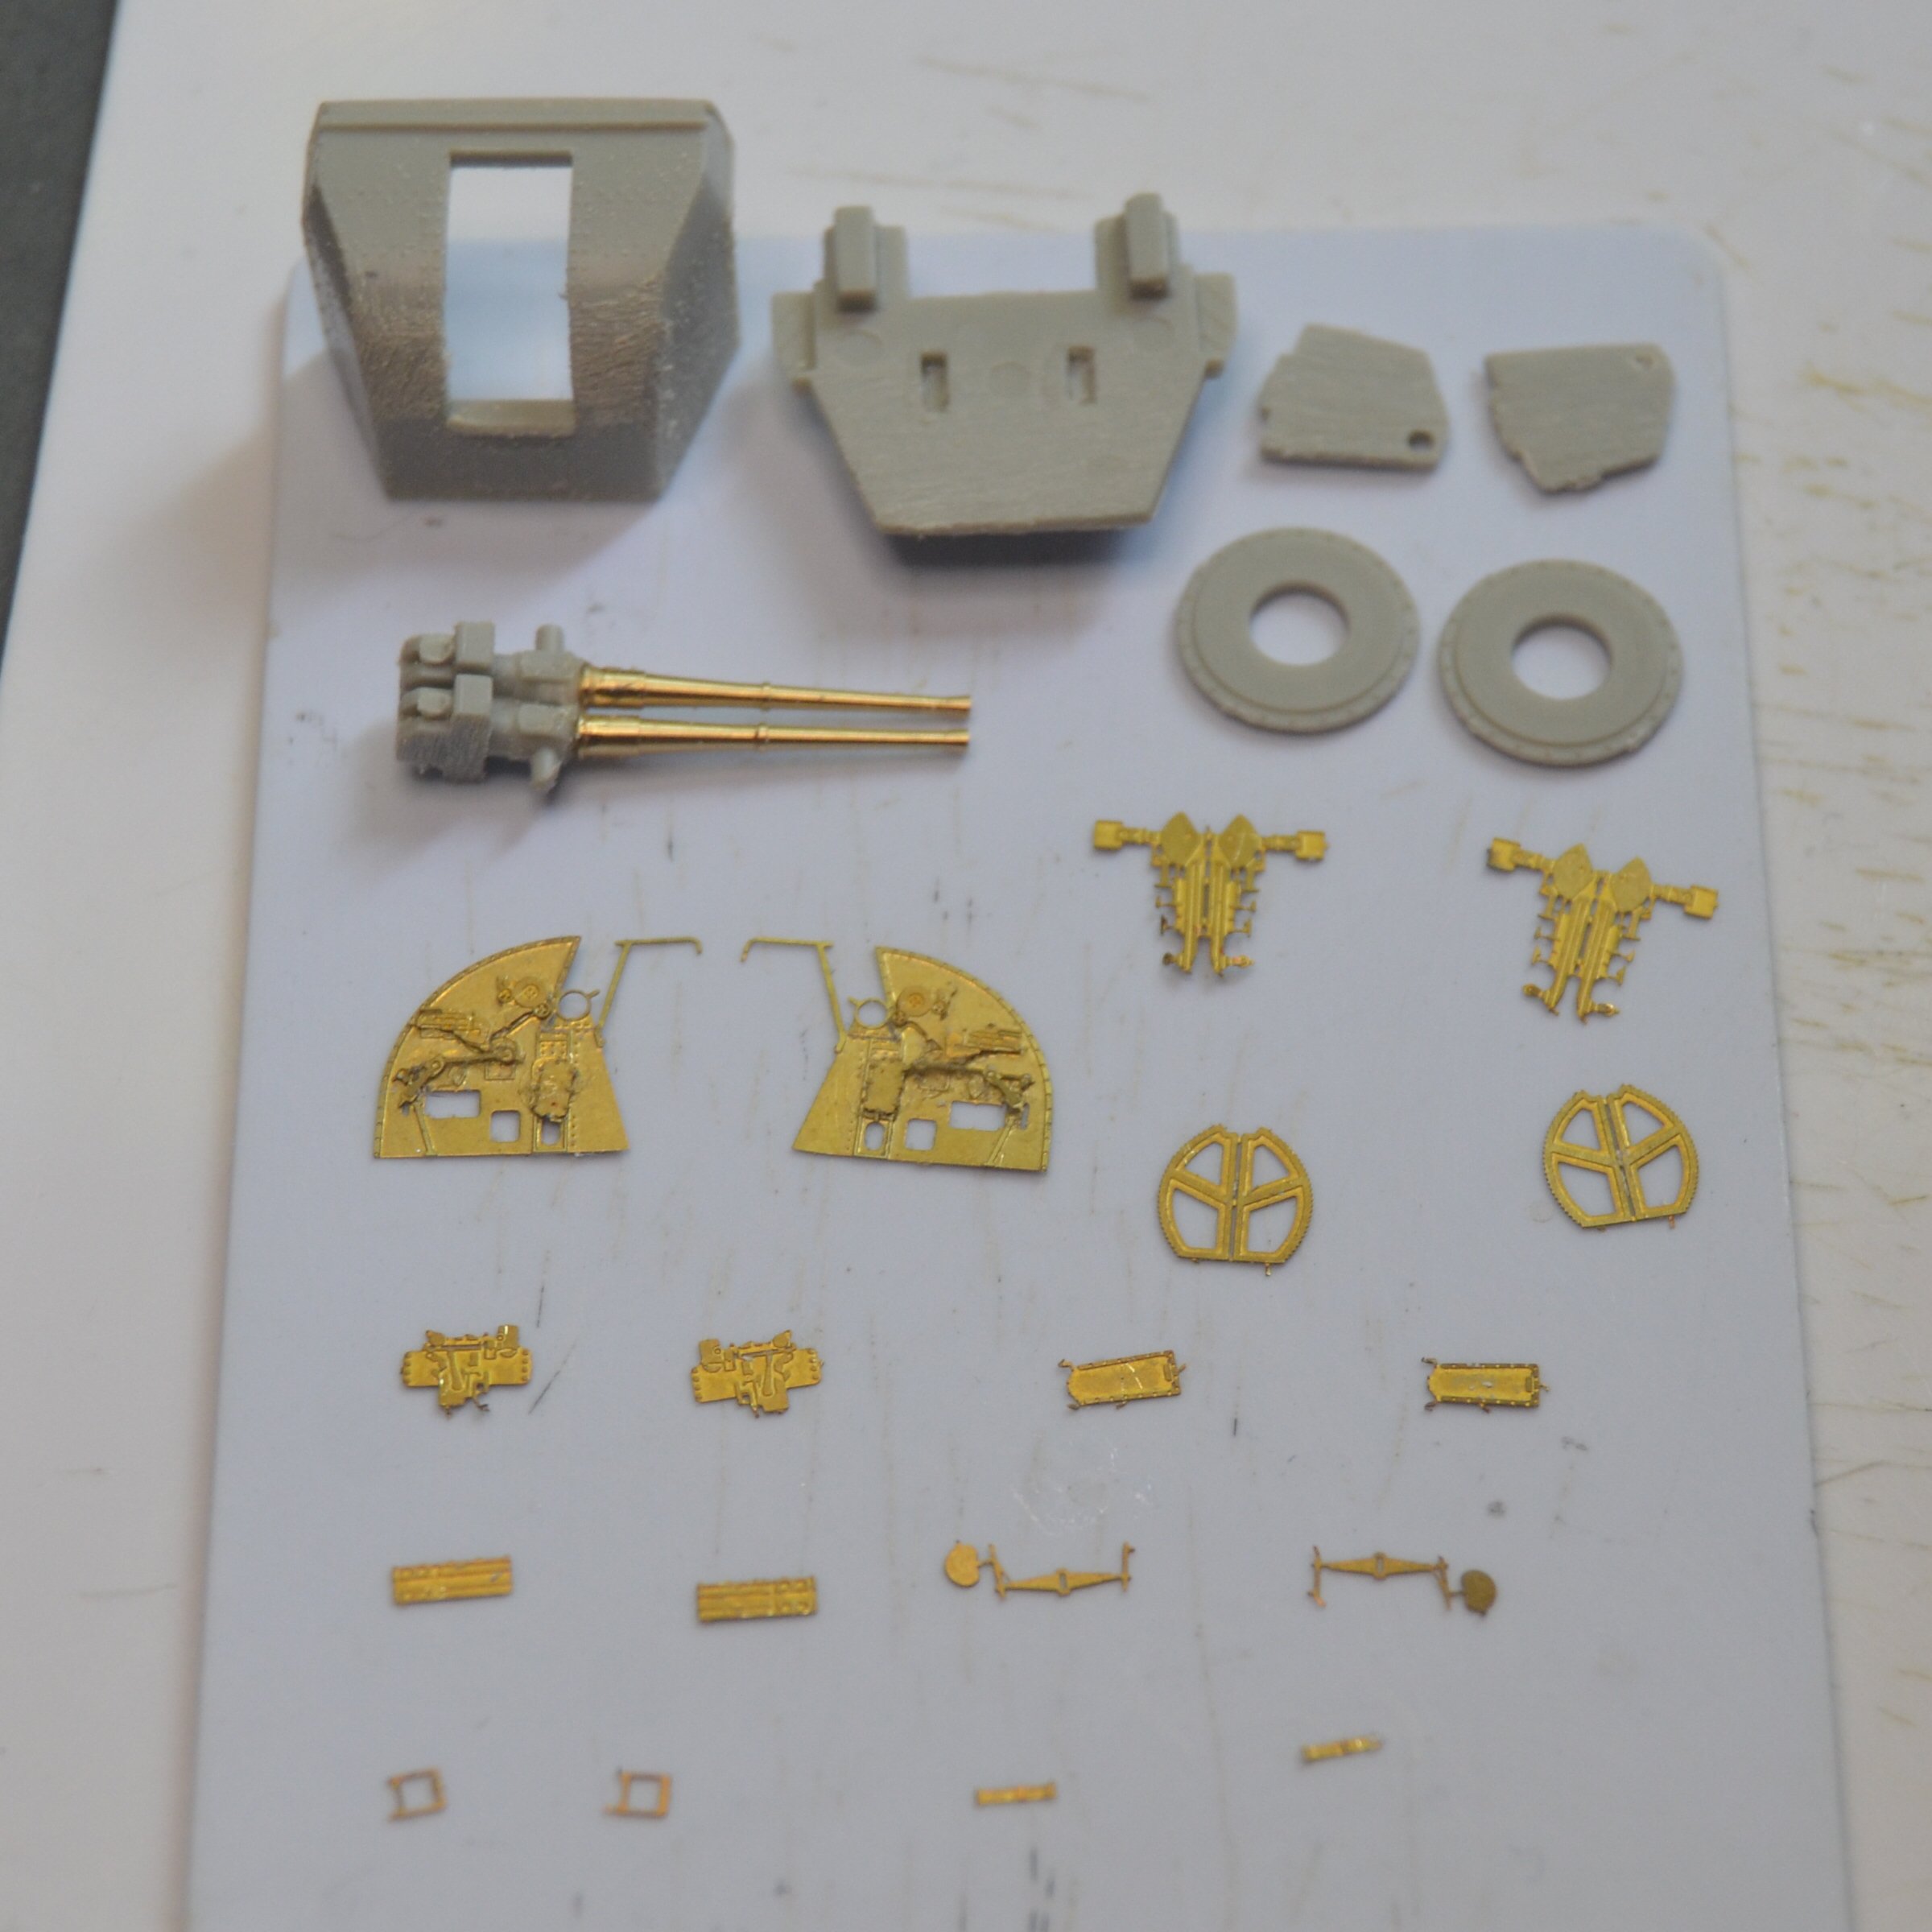
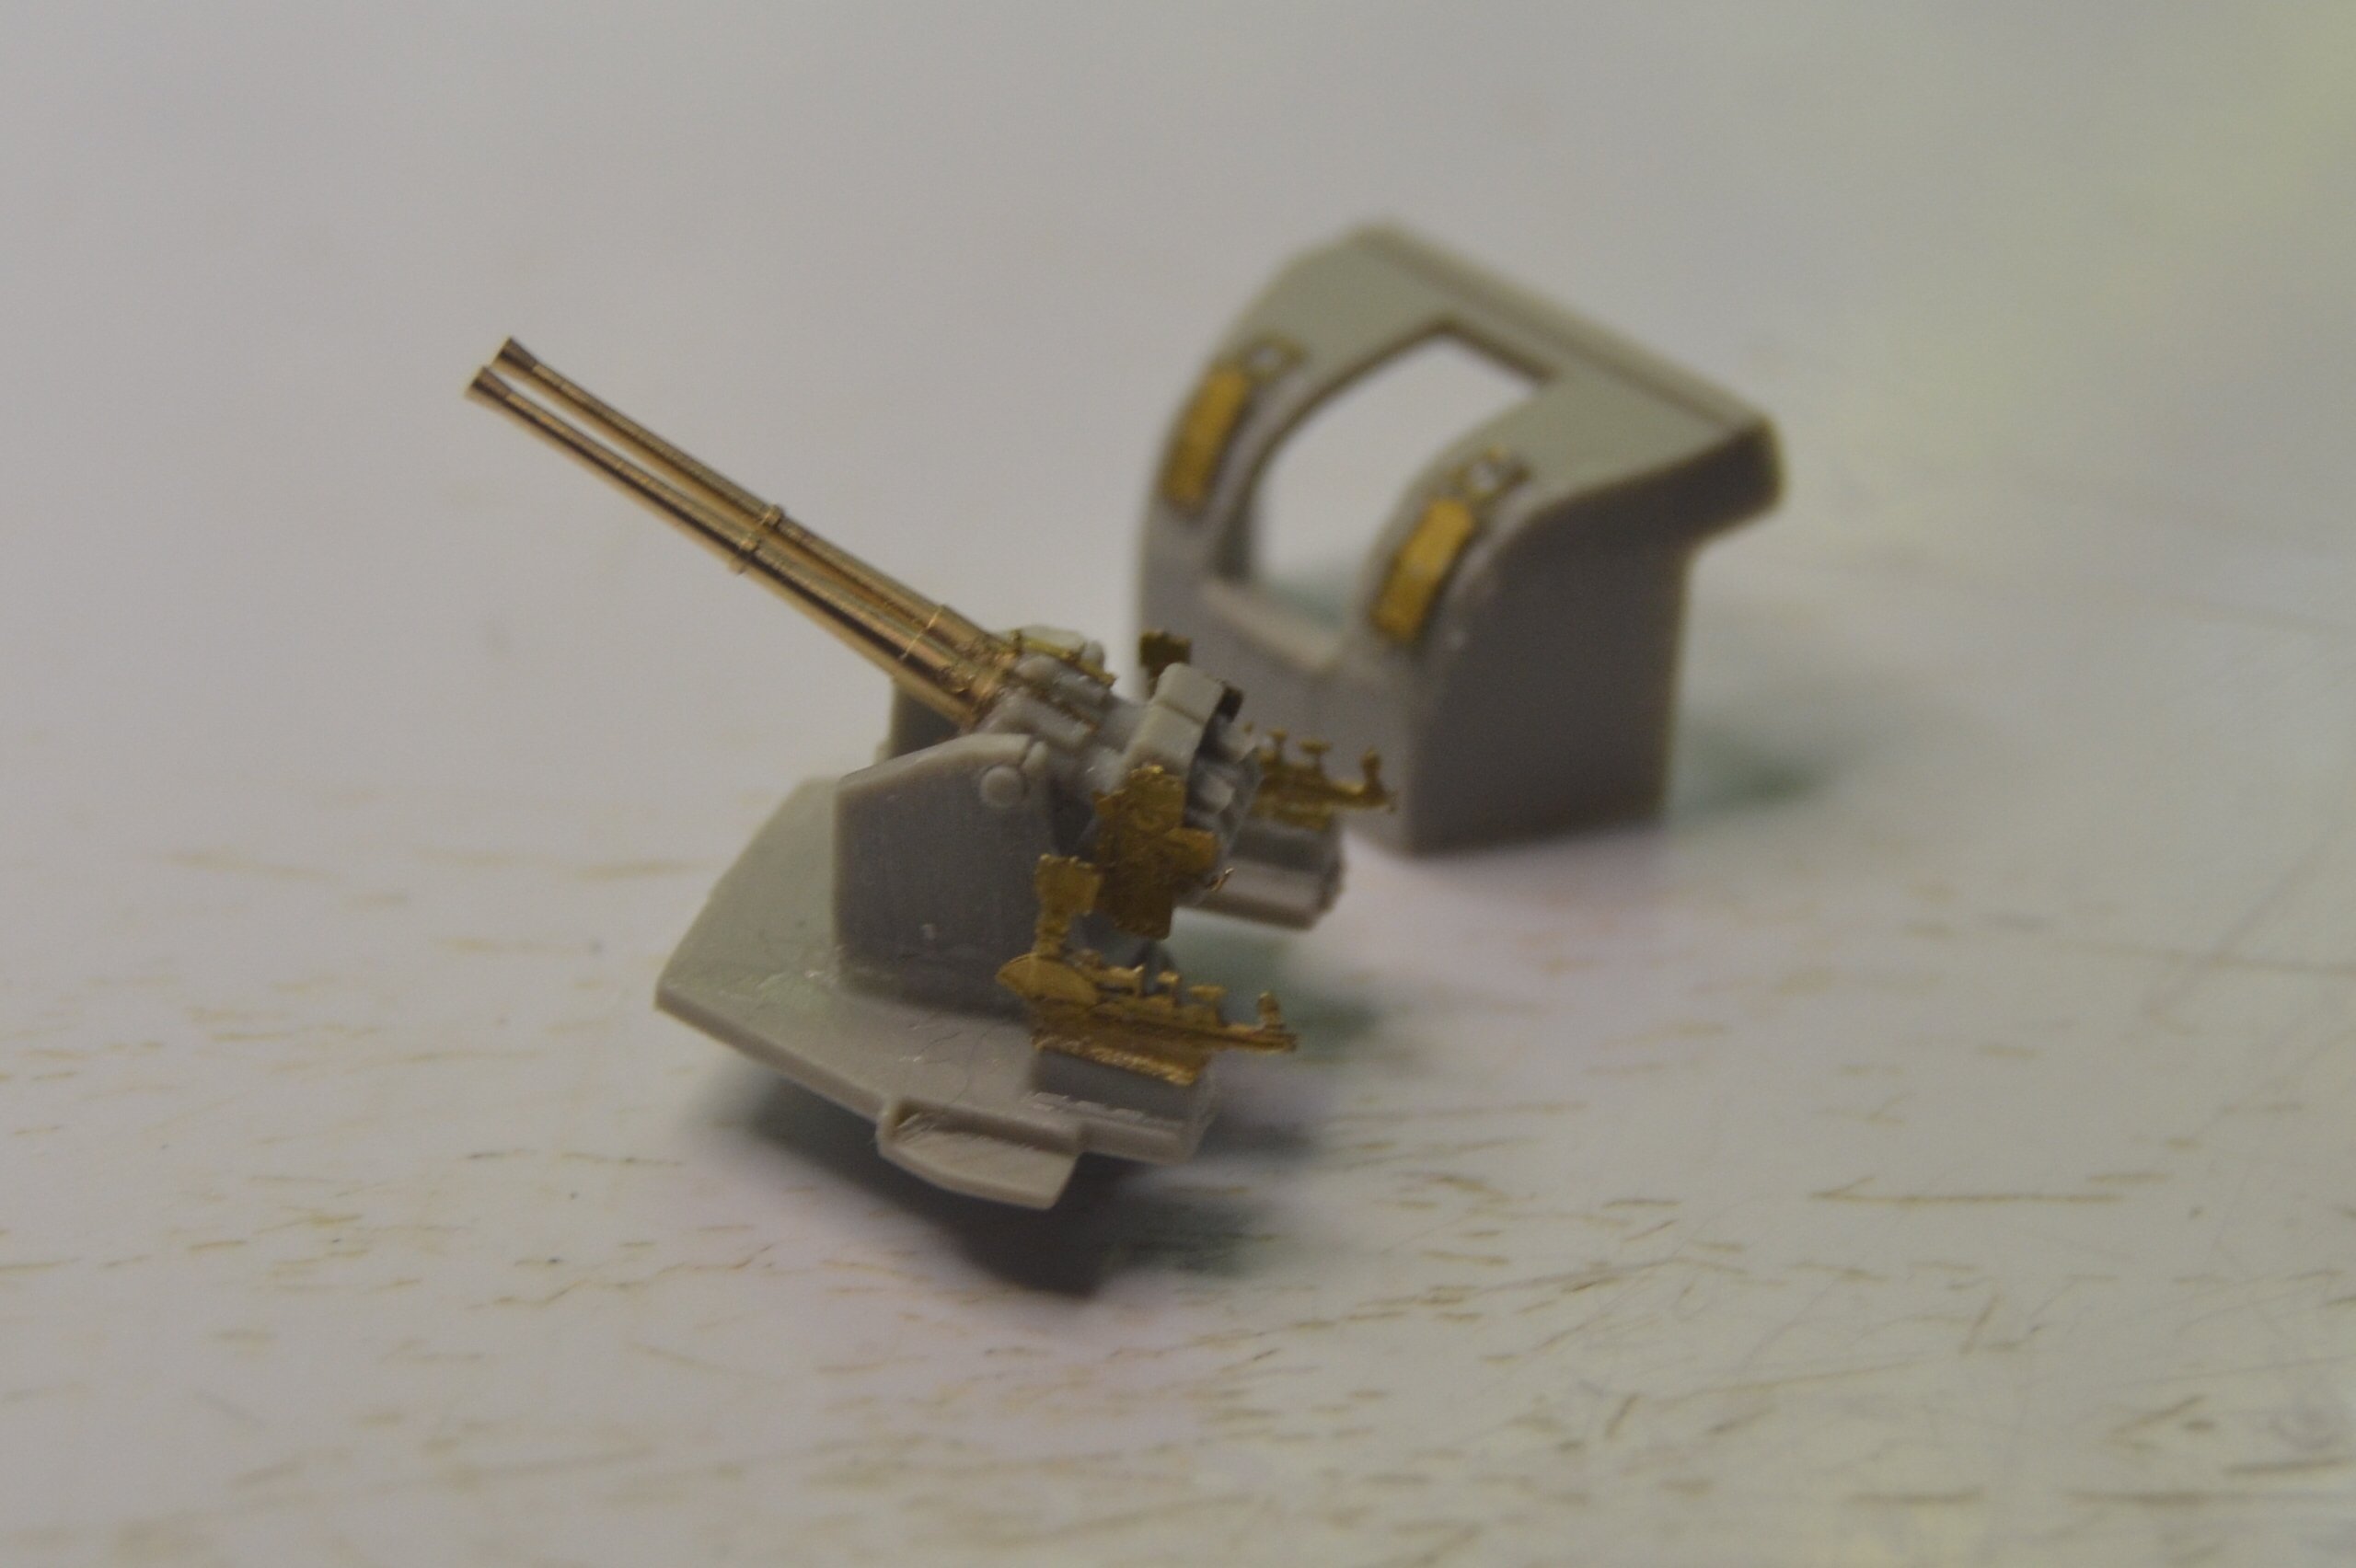
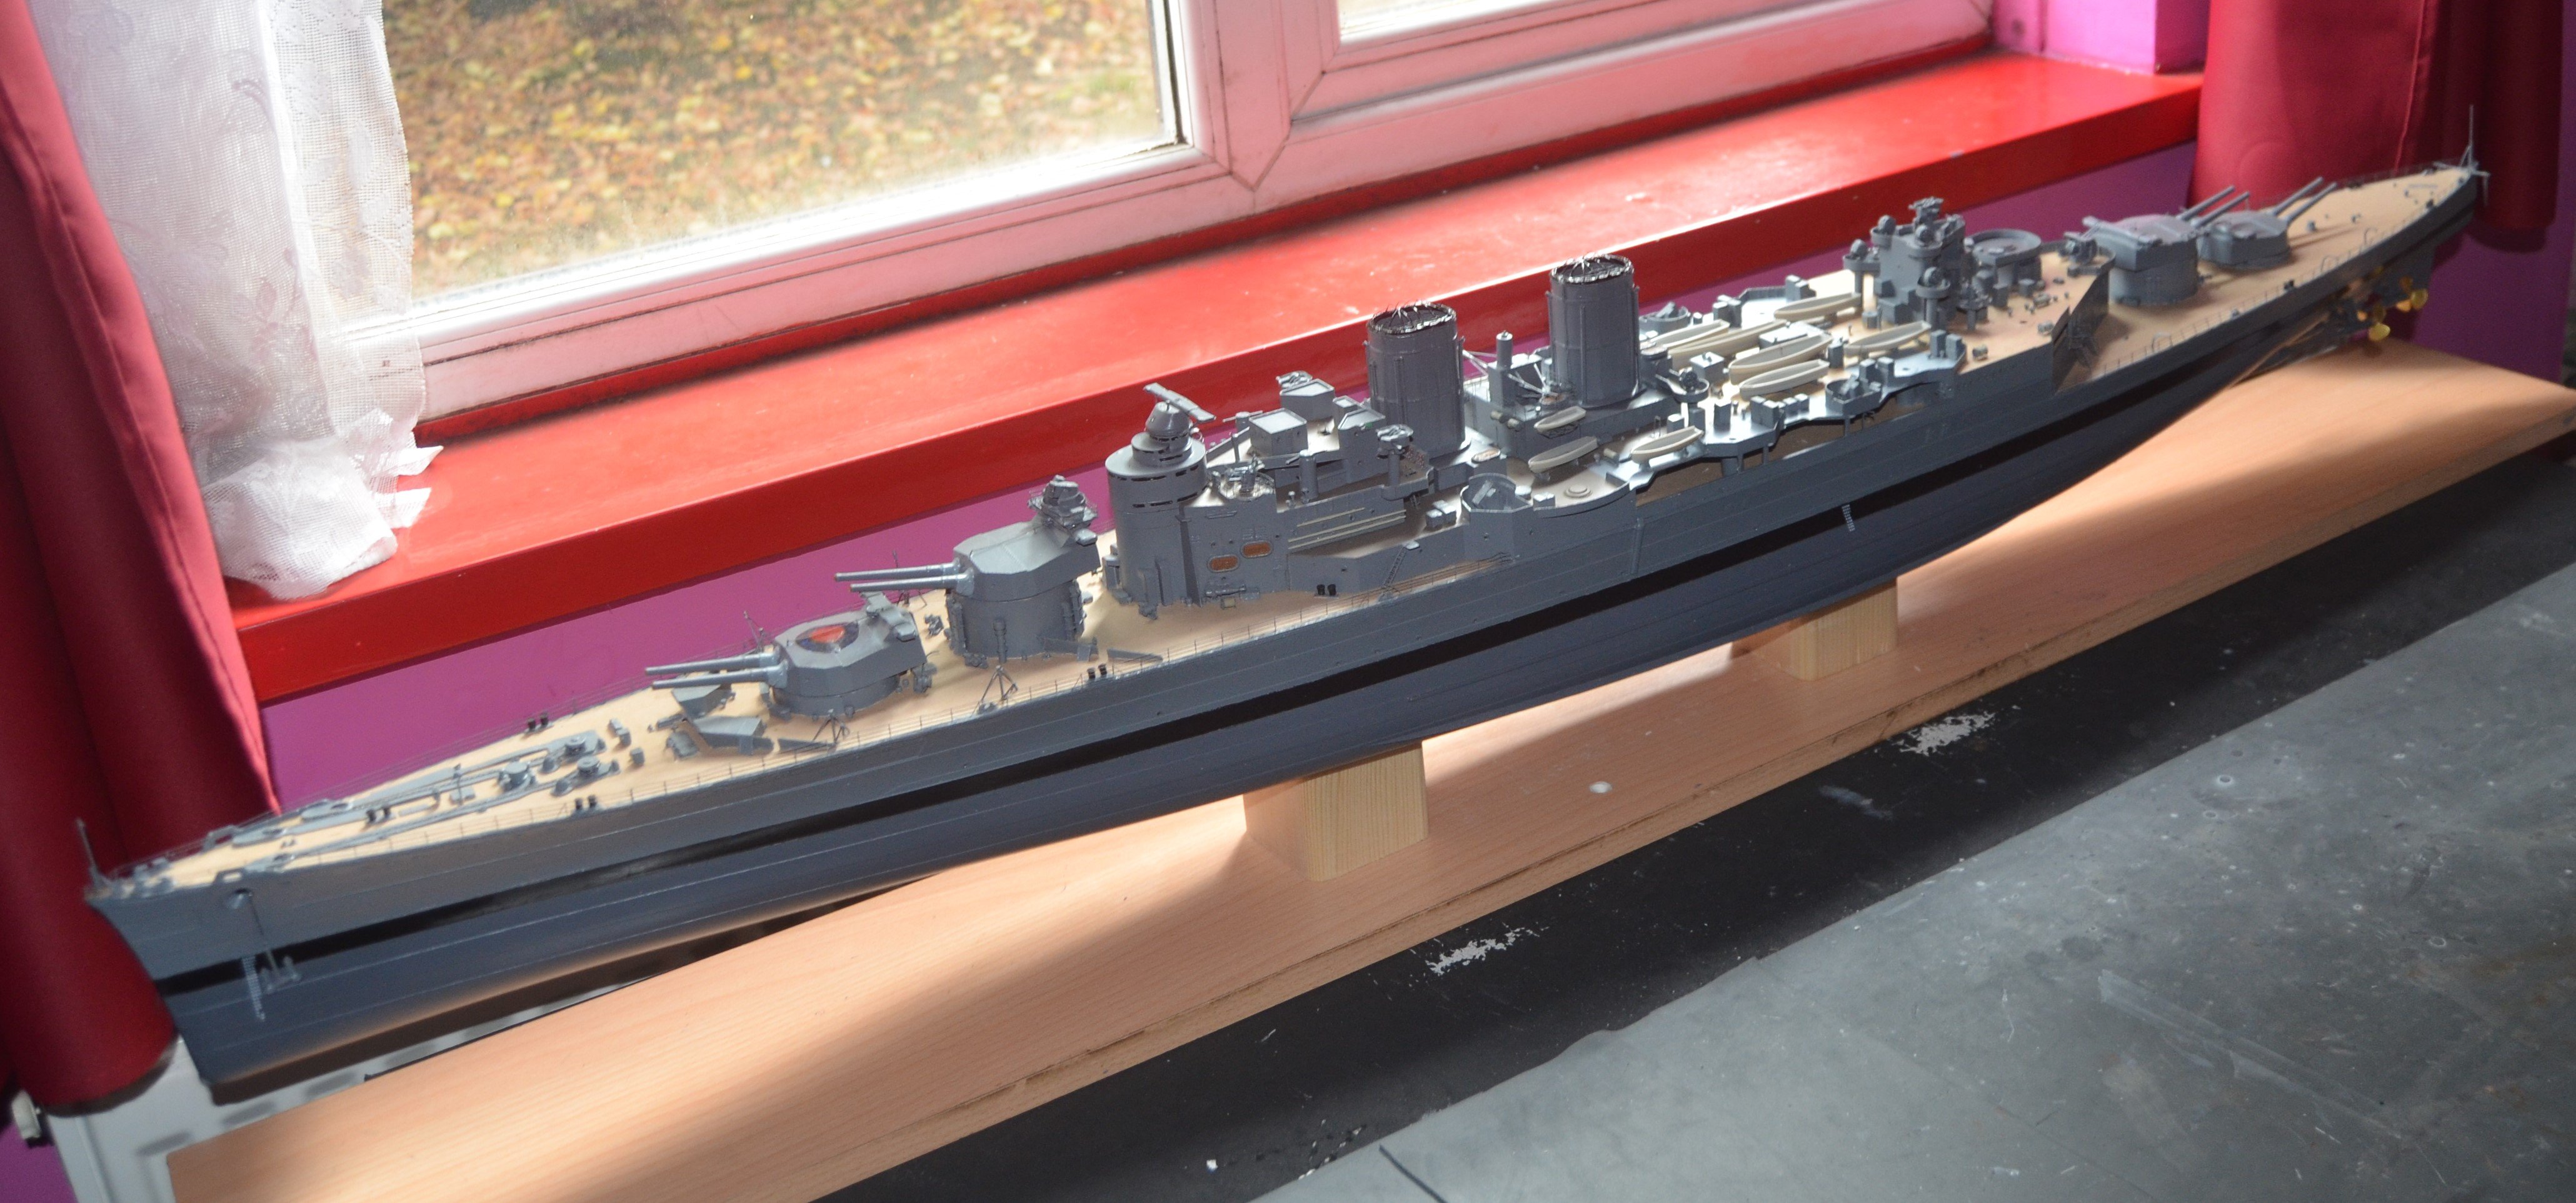
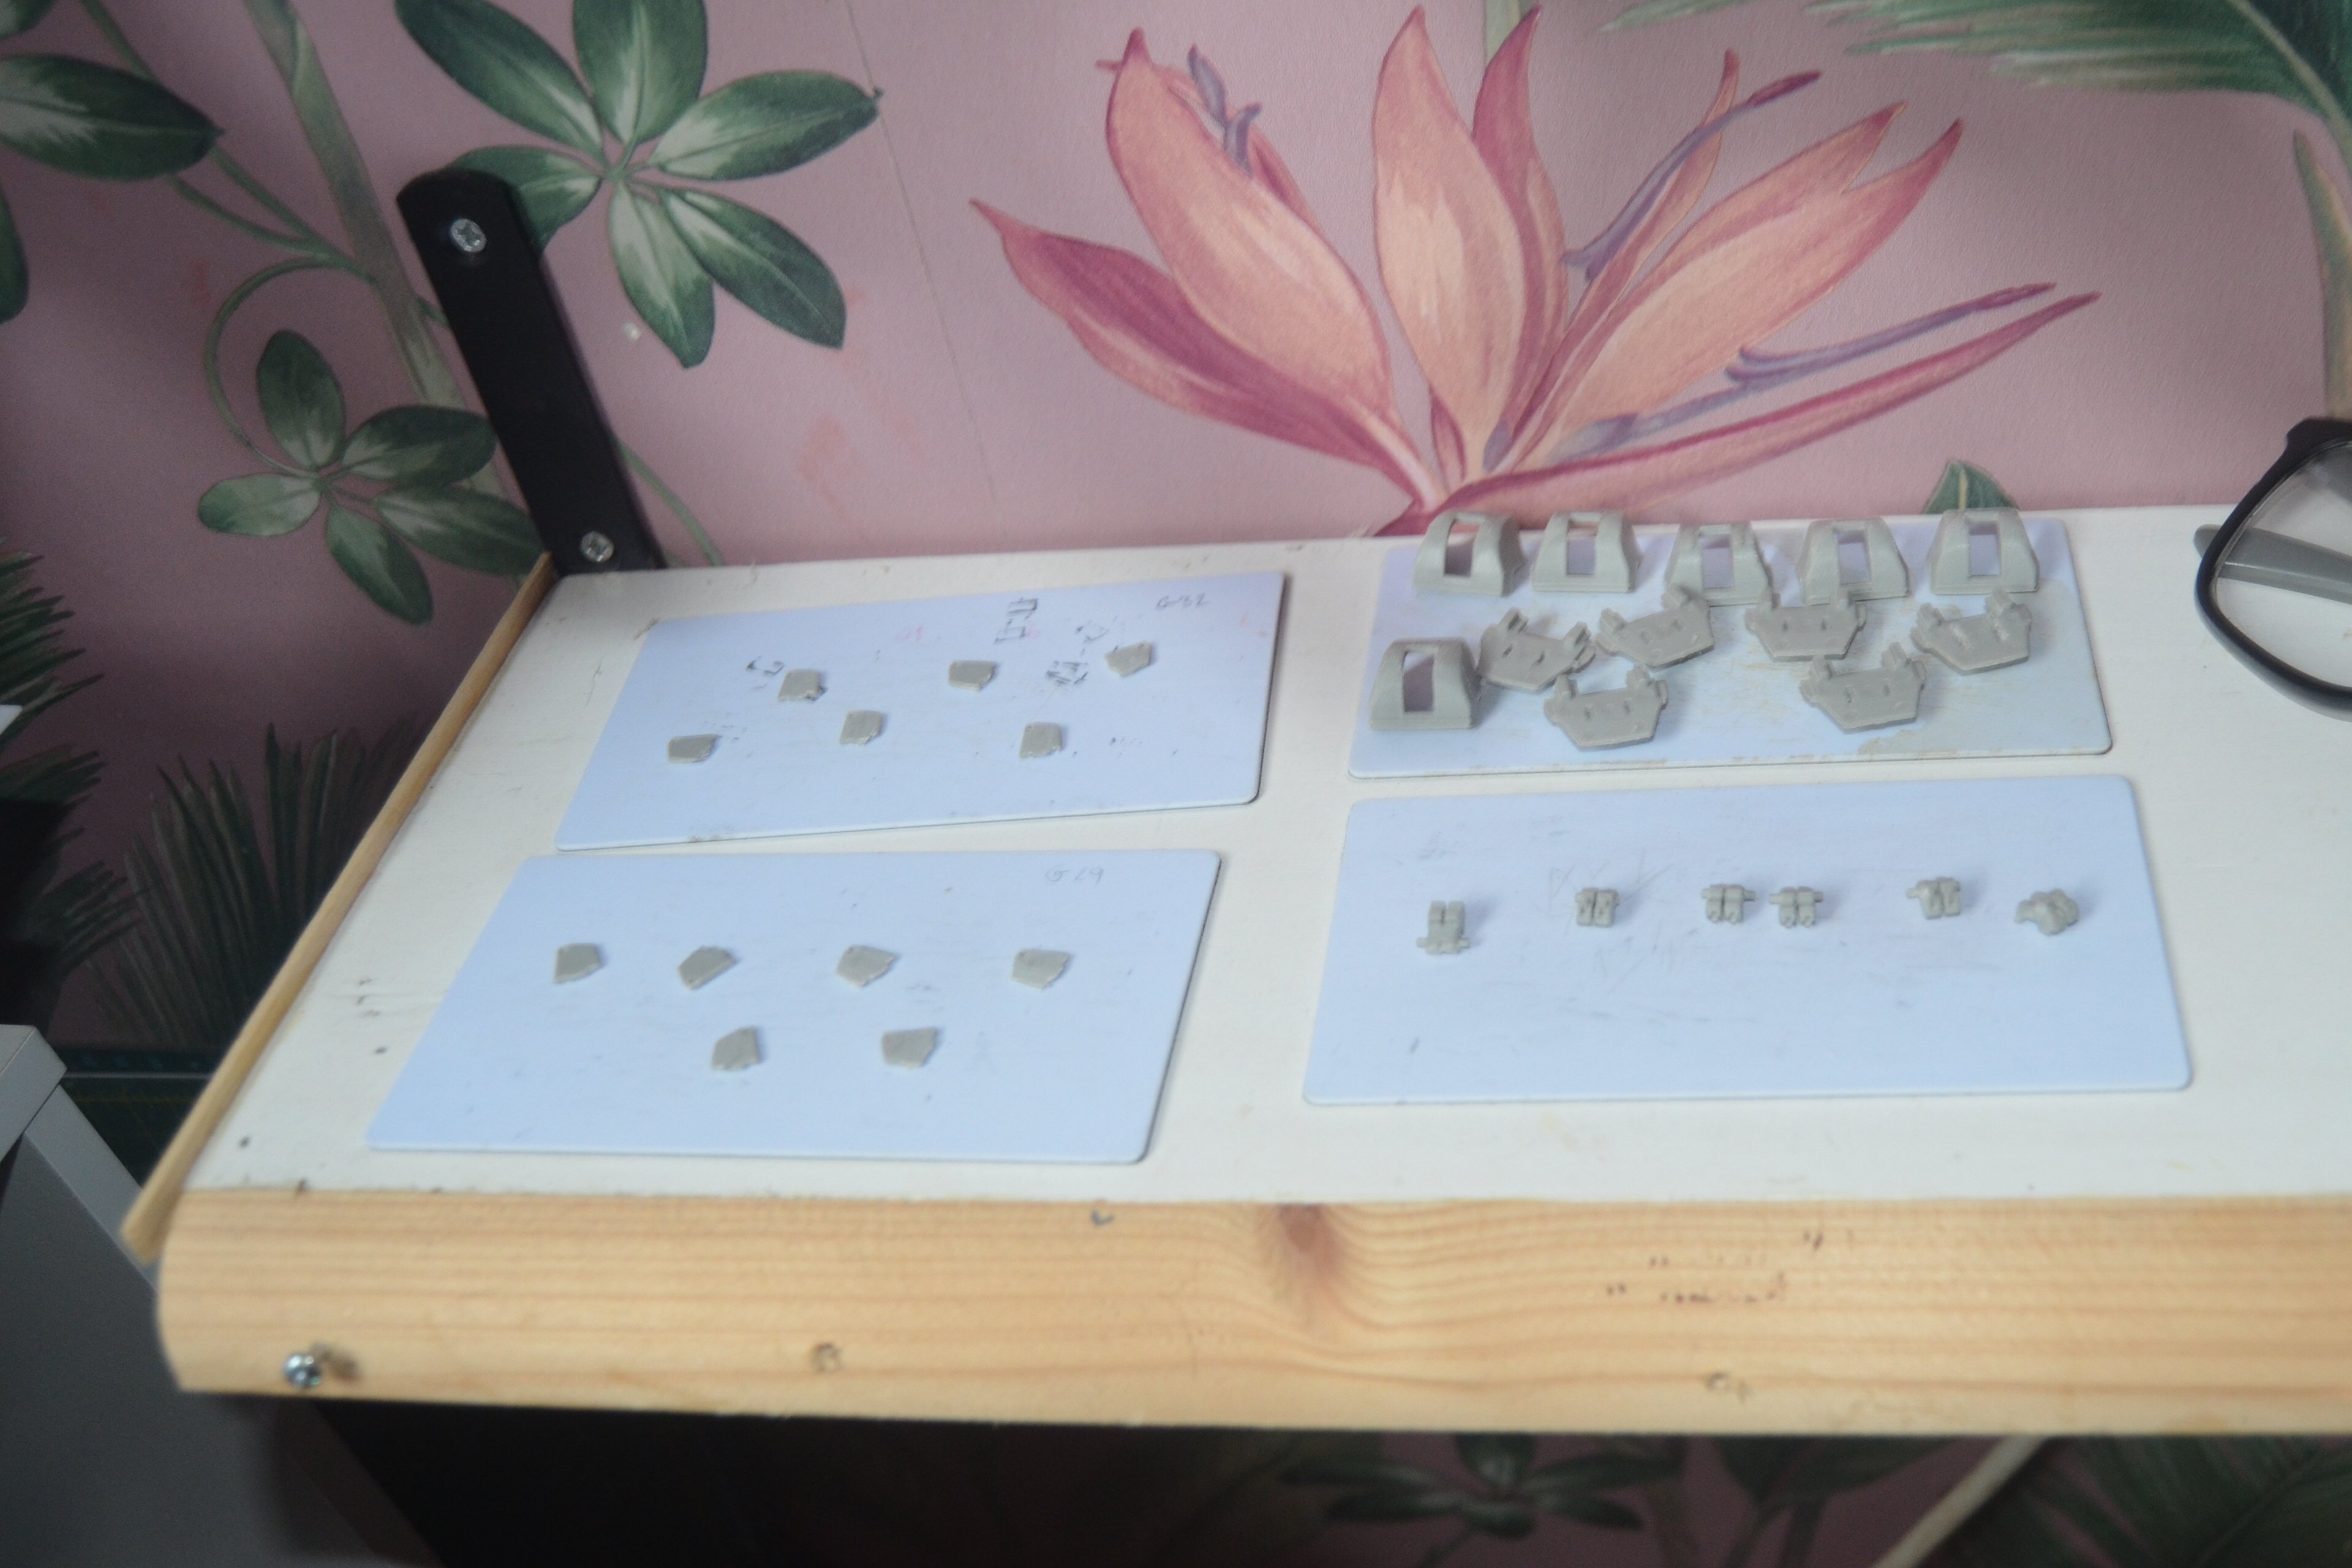
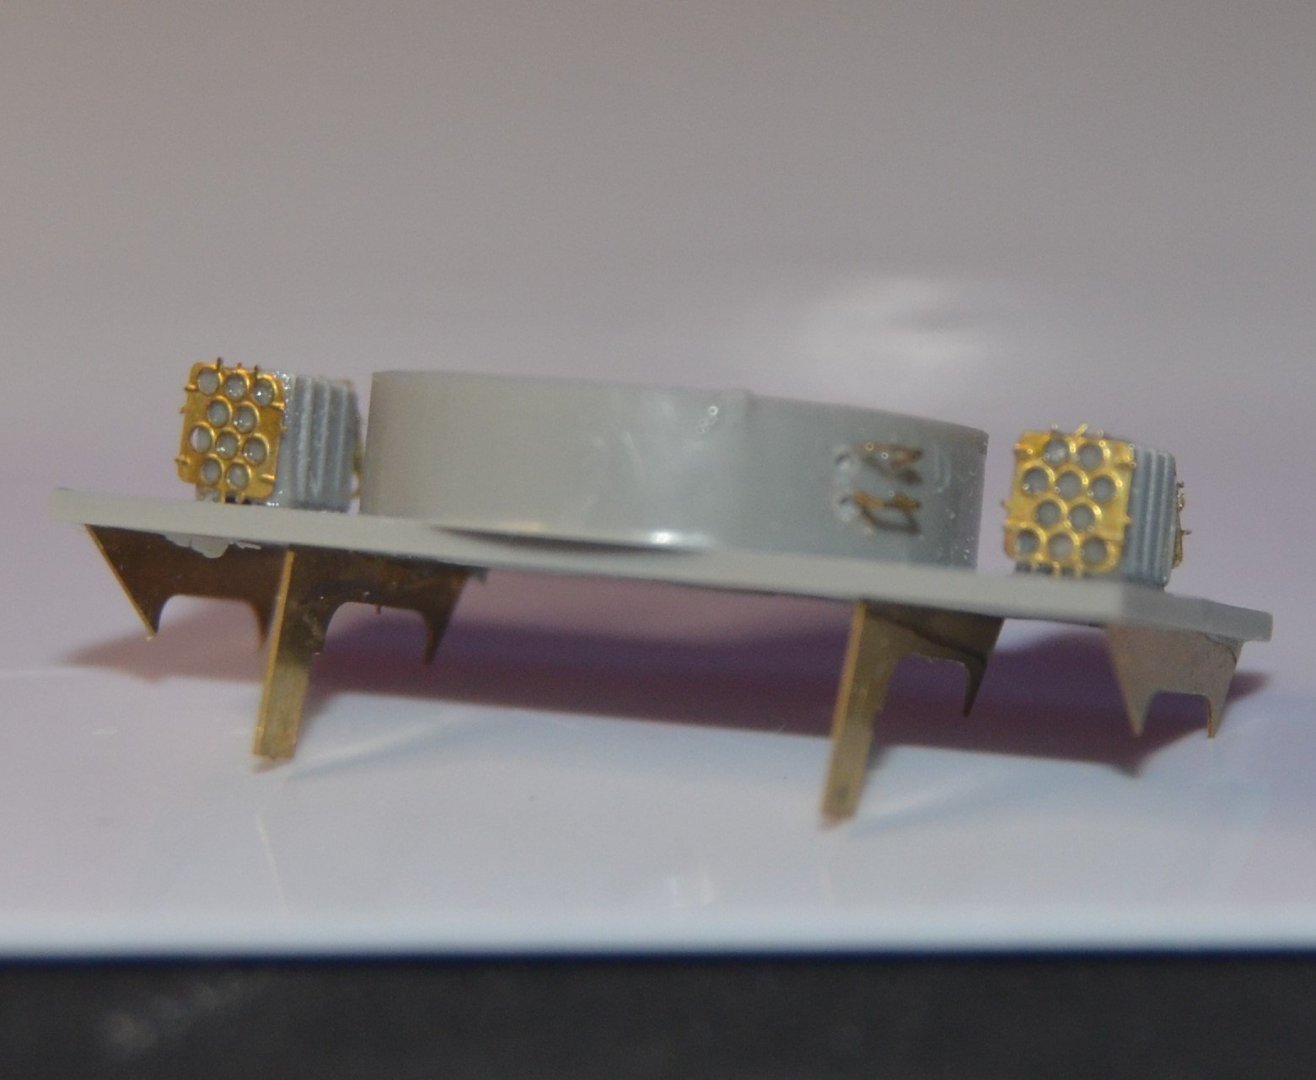
Working on the 4 inch guns. there are seven of these to make up. luckily there is one extra in the kit. Which is good as the first try was not very good. The problem was the PE walls. They touch the roof of the shield if not fitted exactly right. So I found it better to use the plastic walls that I've sanded down. This allows the gun barrels to be held in place correctly and they can be moved up and down. The PE walls are then installed and glued against them. there is quite a bit of PE I have not added simply because it is so tiny that it can not be seen once the gun is put together and painted. Cutting the plastic barrels off and adding the rolled metal ones was the most time consuming part. drilling the holes out in such a small piece requires a bit of patience because of how small and deep the holes need to be to except the rear of the barrels. The pictures show the gun as built out of the box, which does not have any PE to add to it. The others show the PE to be added and how the gun looks with the extra bits added. And the plastic parts cleaned prepared and ready to be made up with the added PE for the final six guns. And how the model is looking at present. I thought there was something on the TV screen and was trying to clean it up before realising the camera had picked up a tiny bit of fluff on the tip of the gun. As always the parts look way better when viewed normally.


-
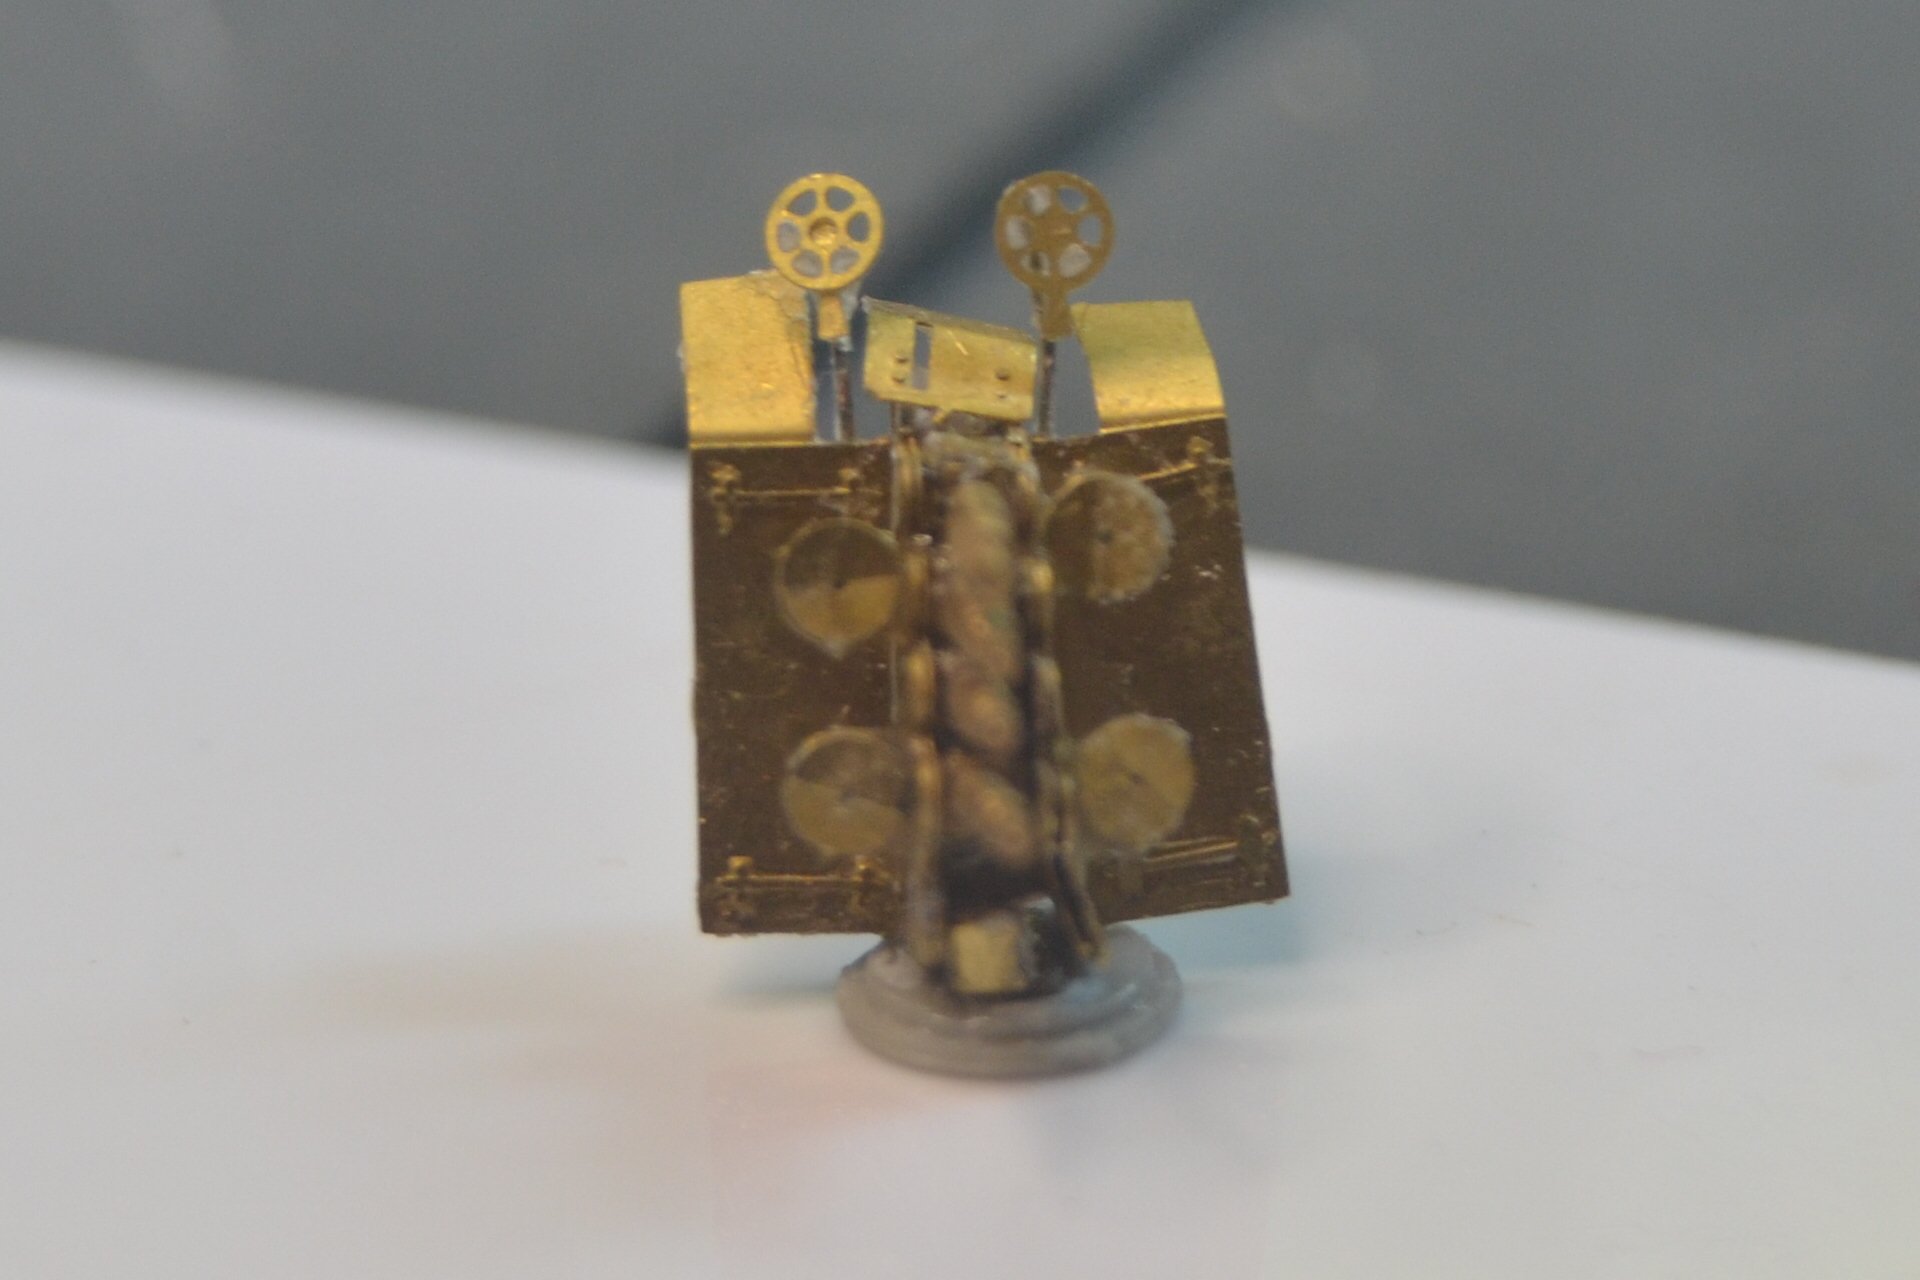
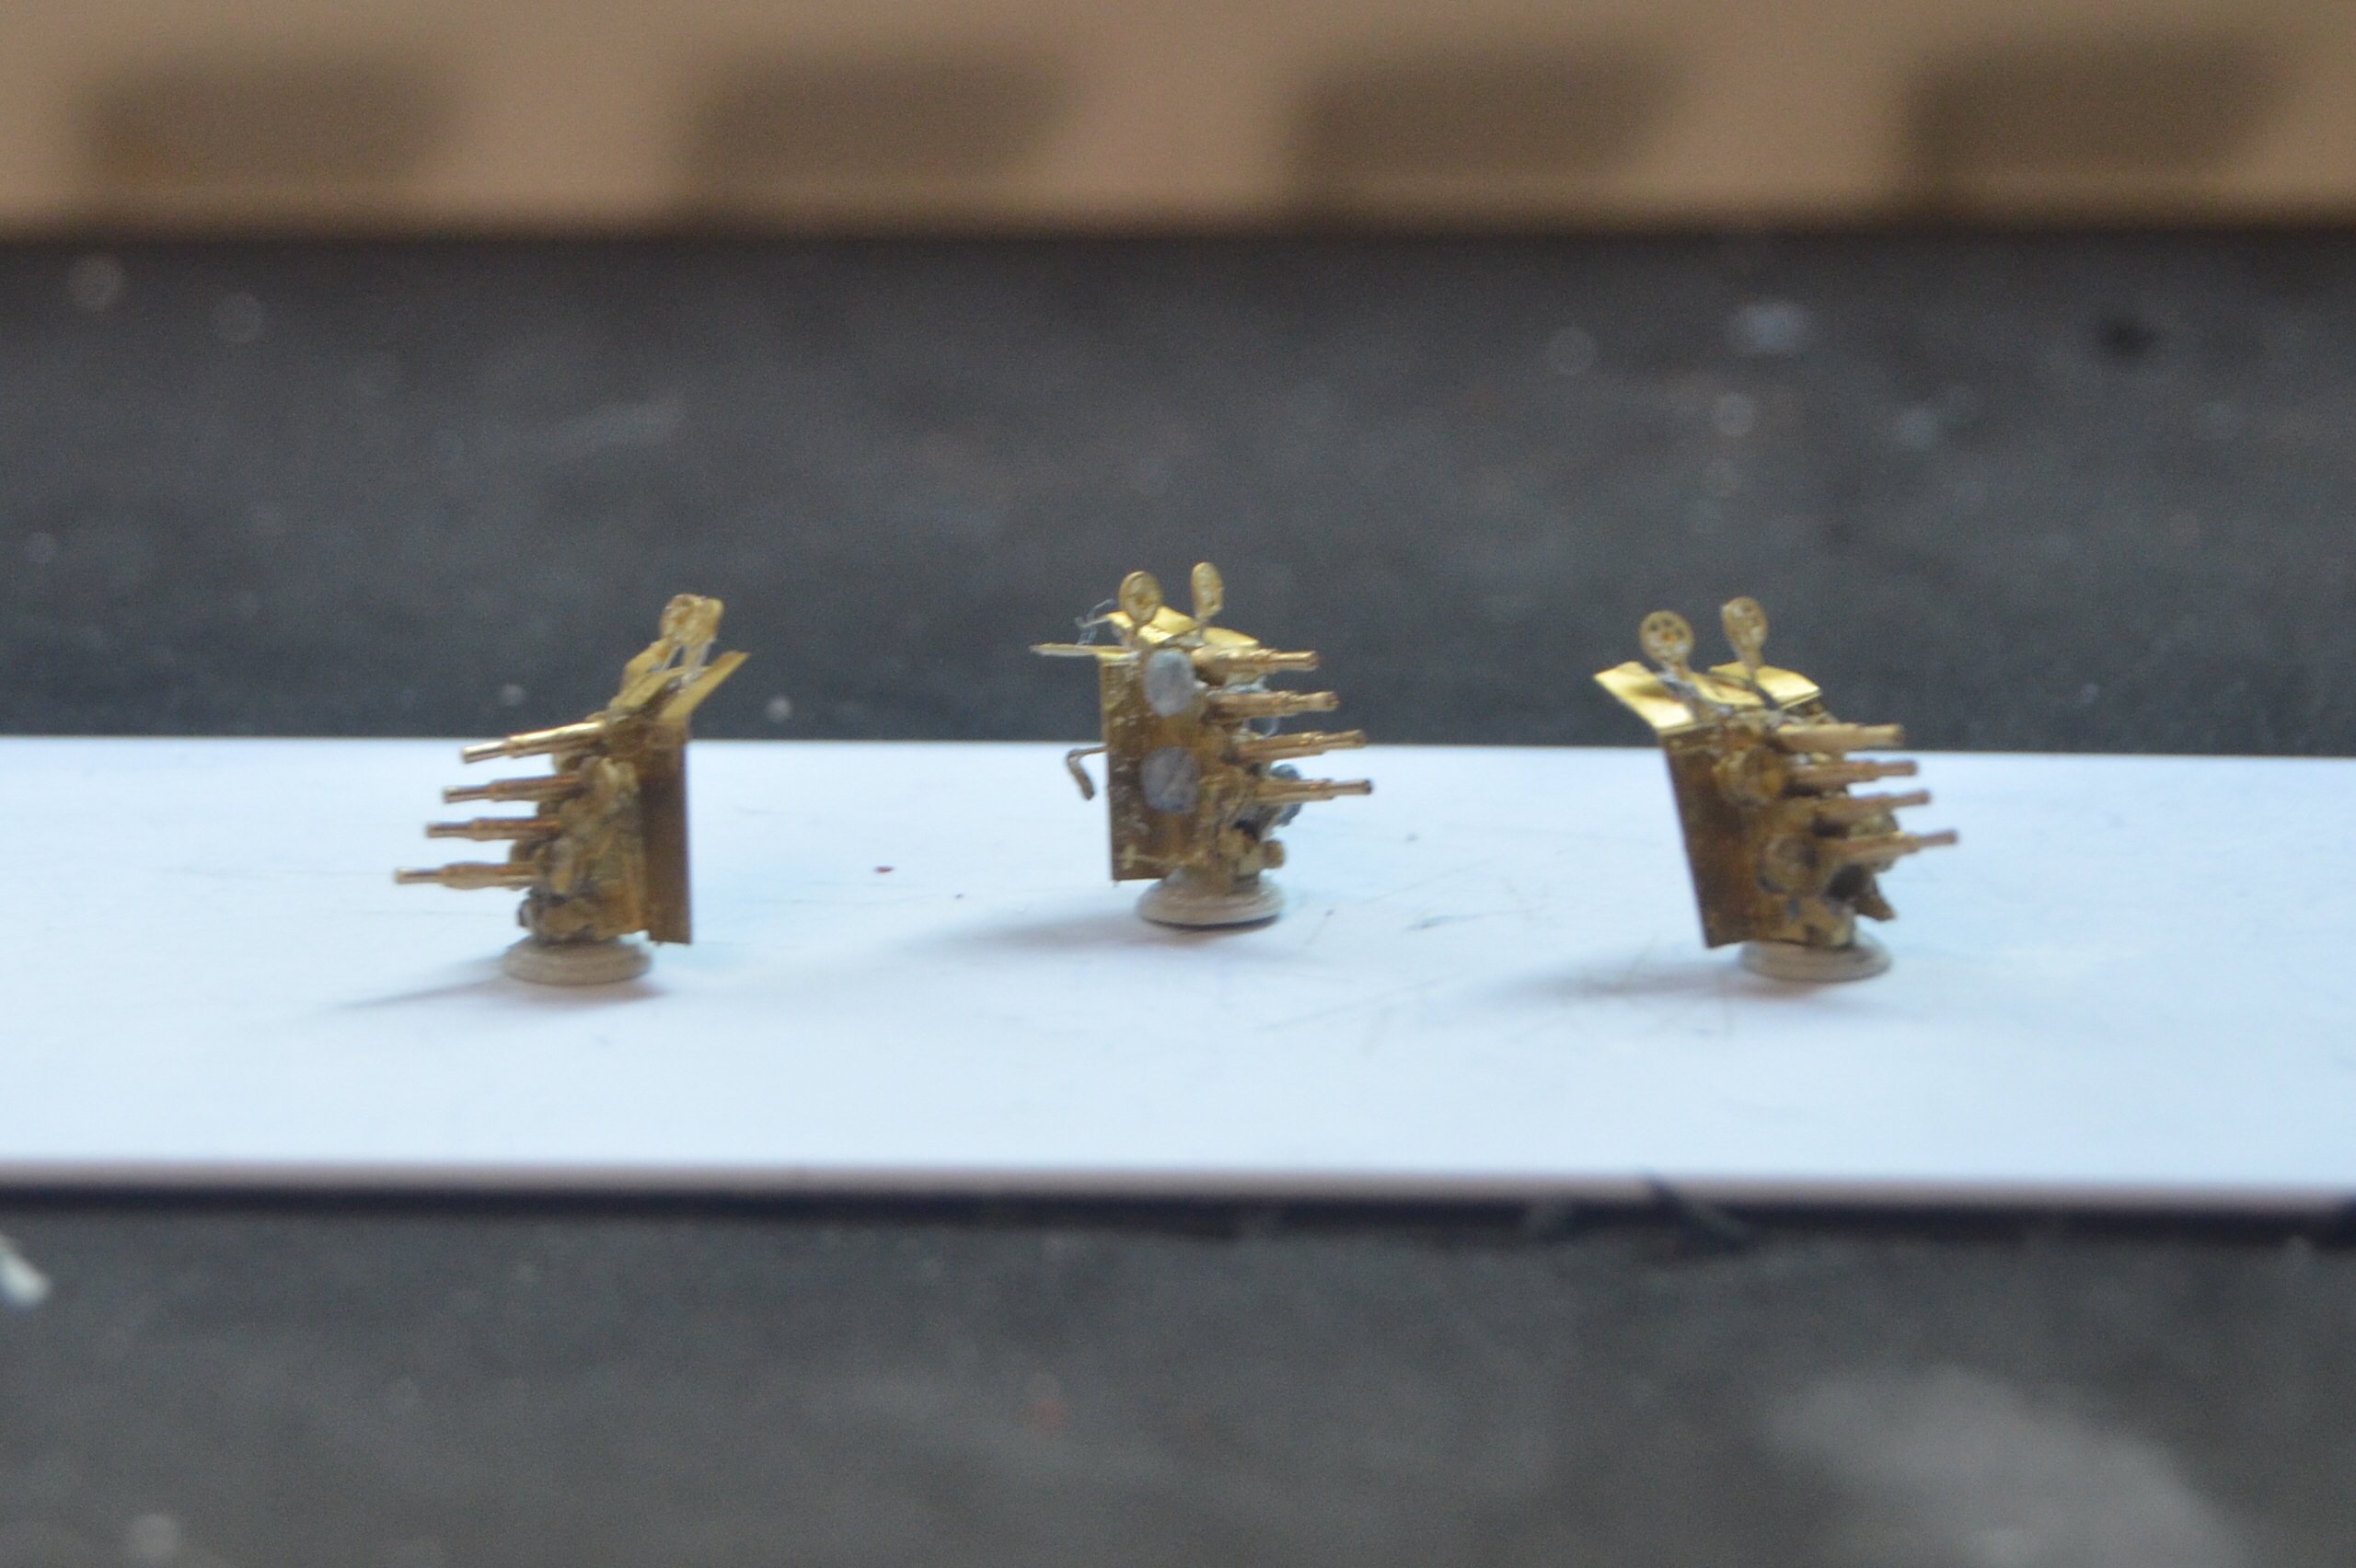
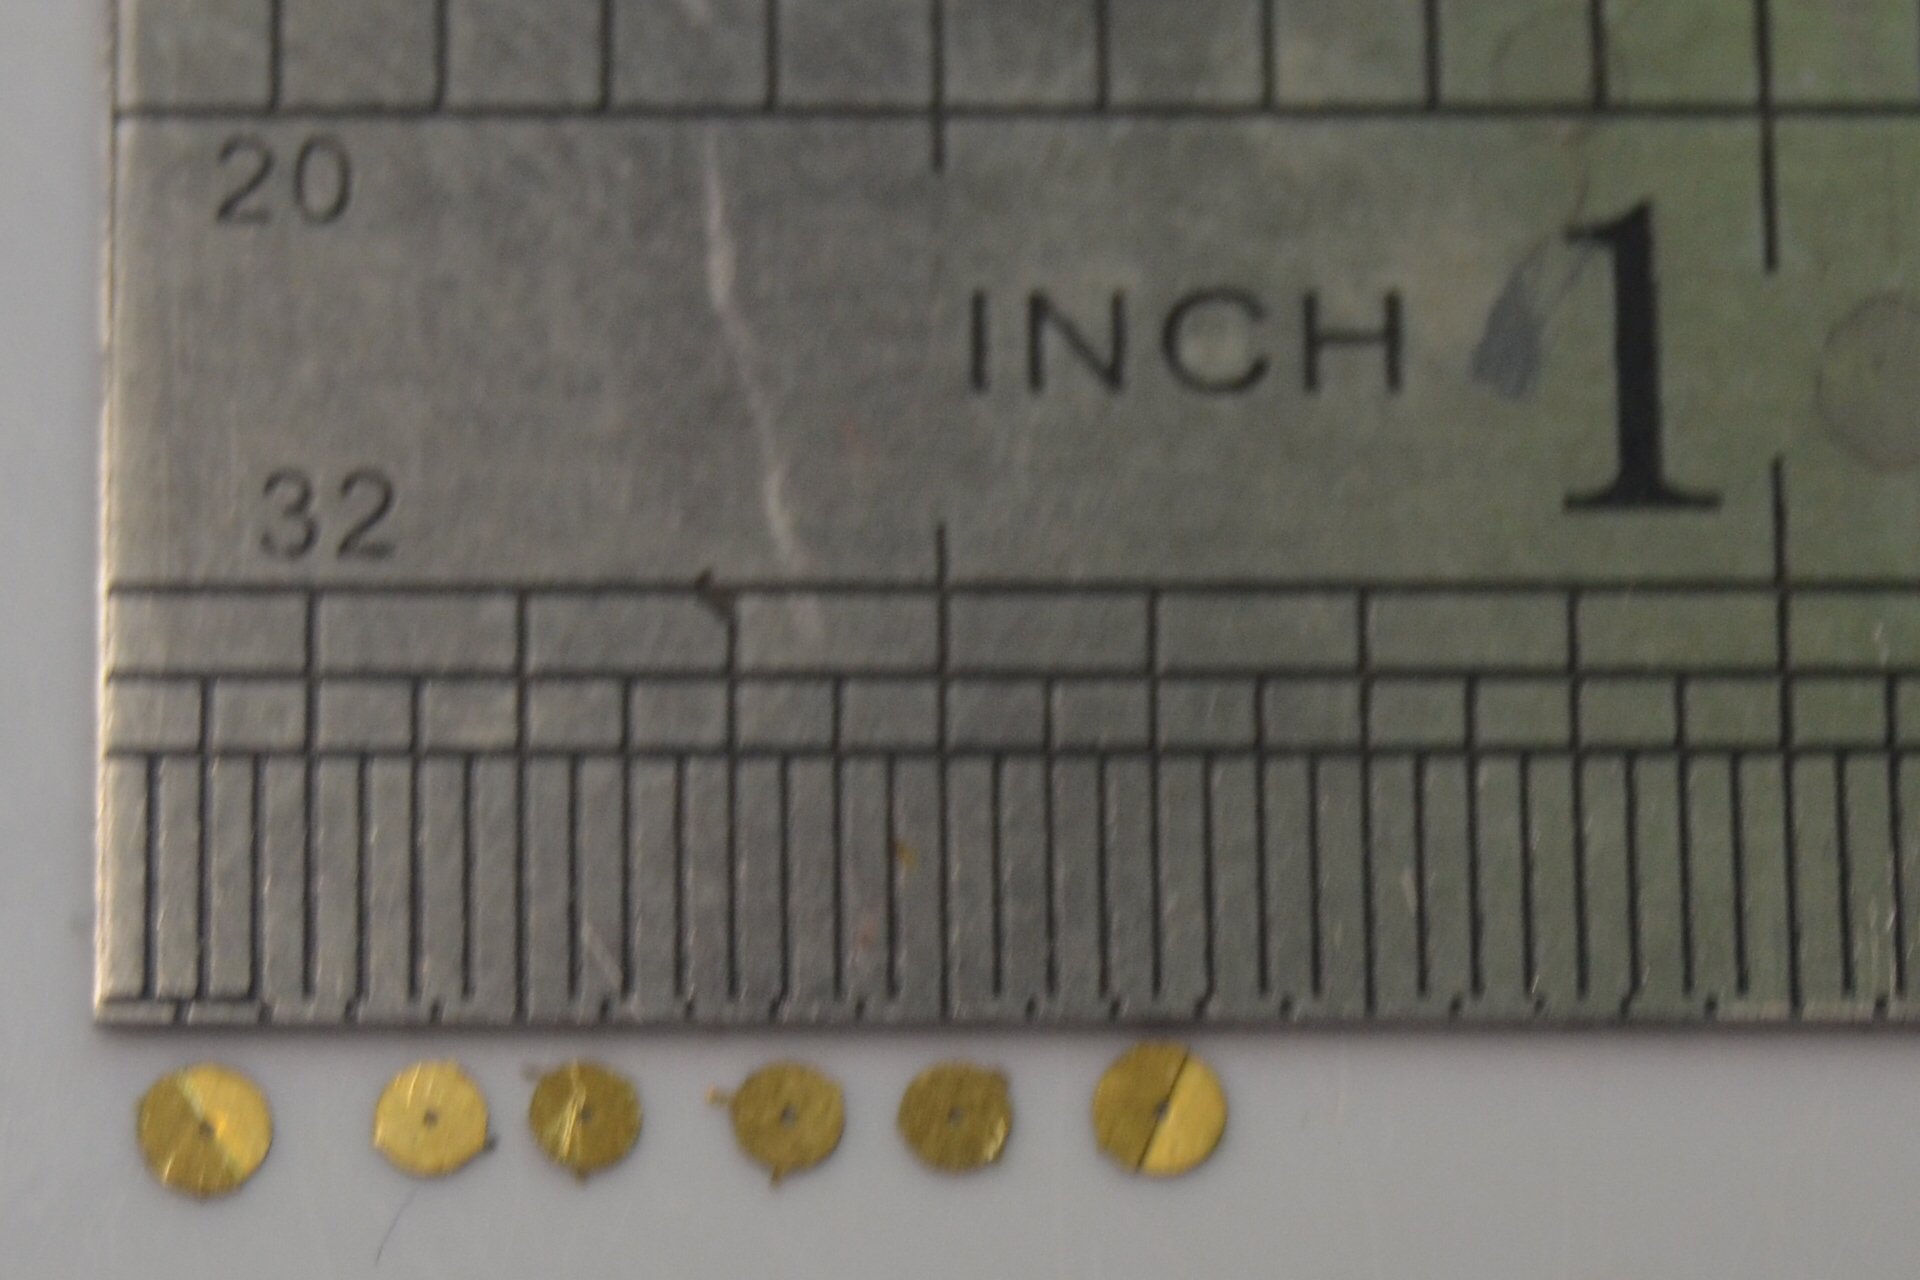
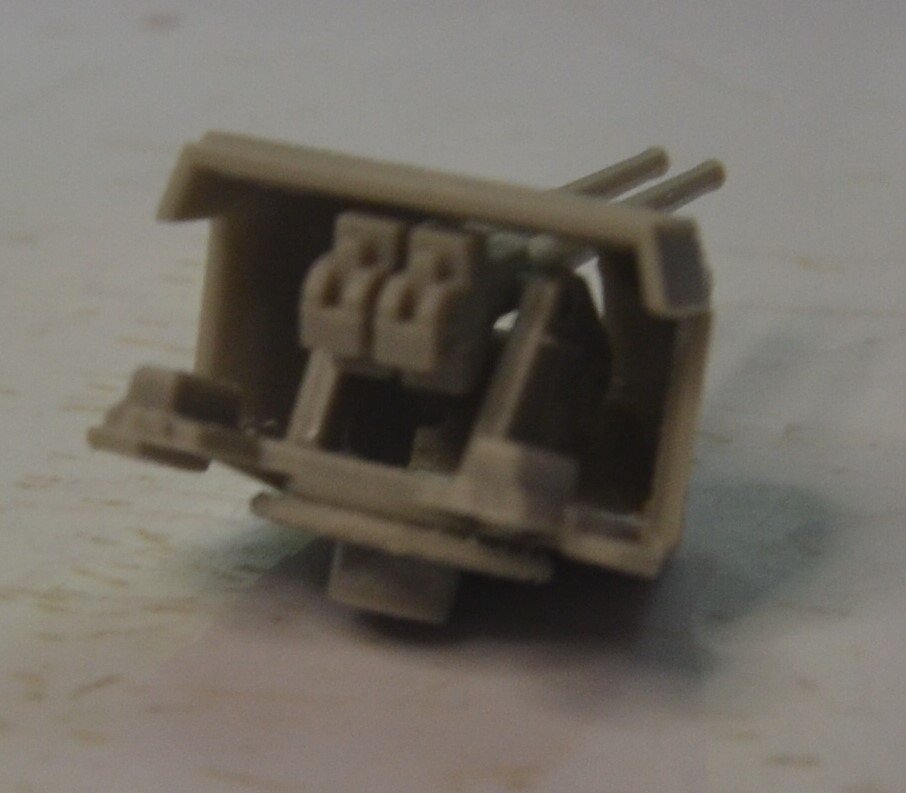
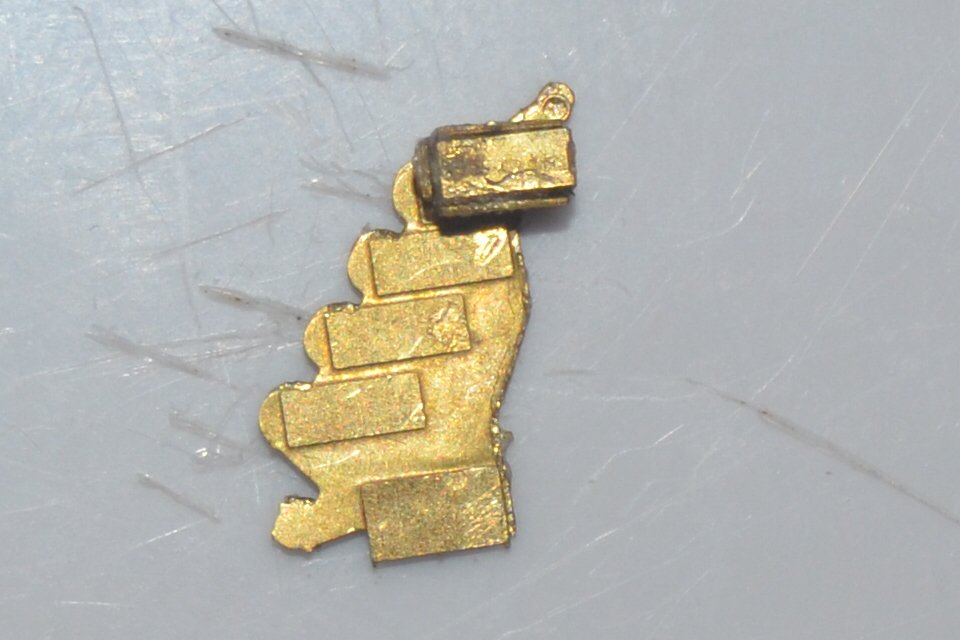
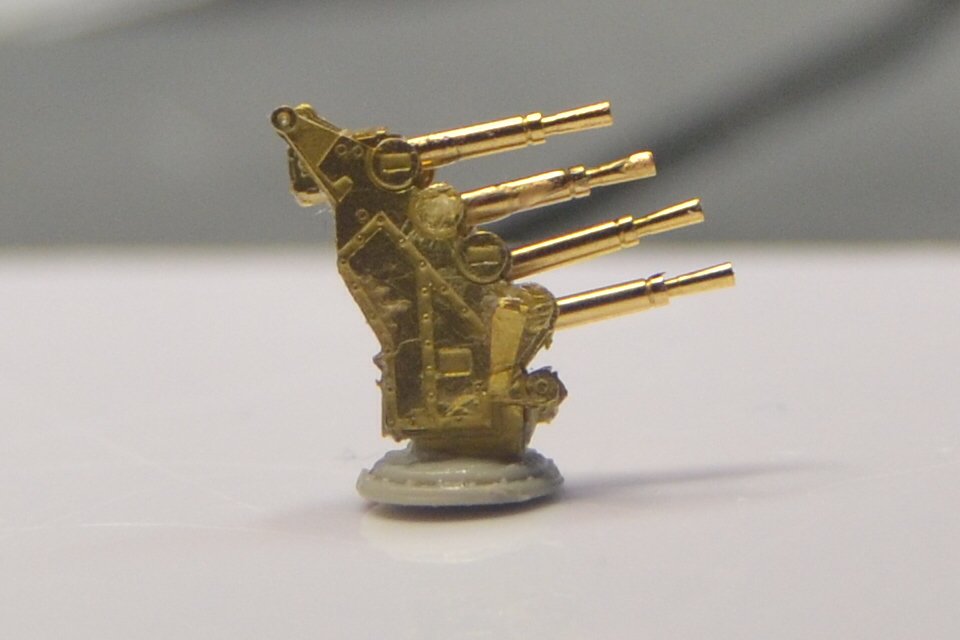
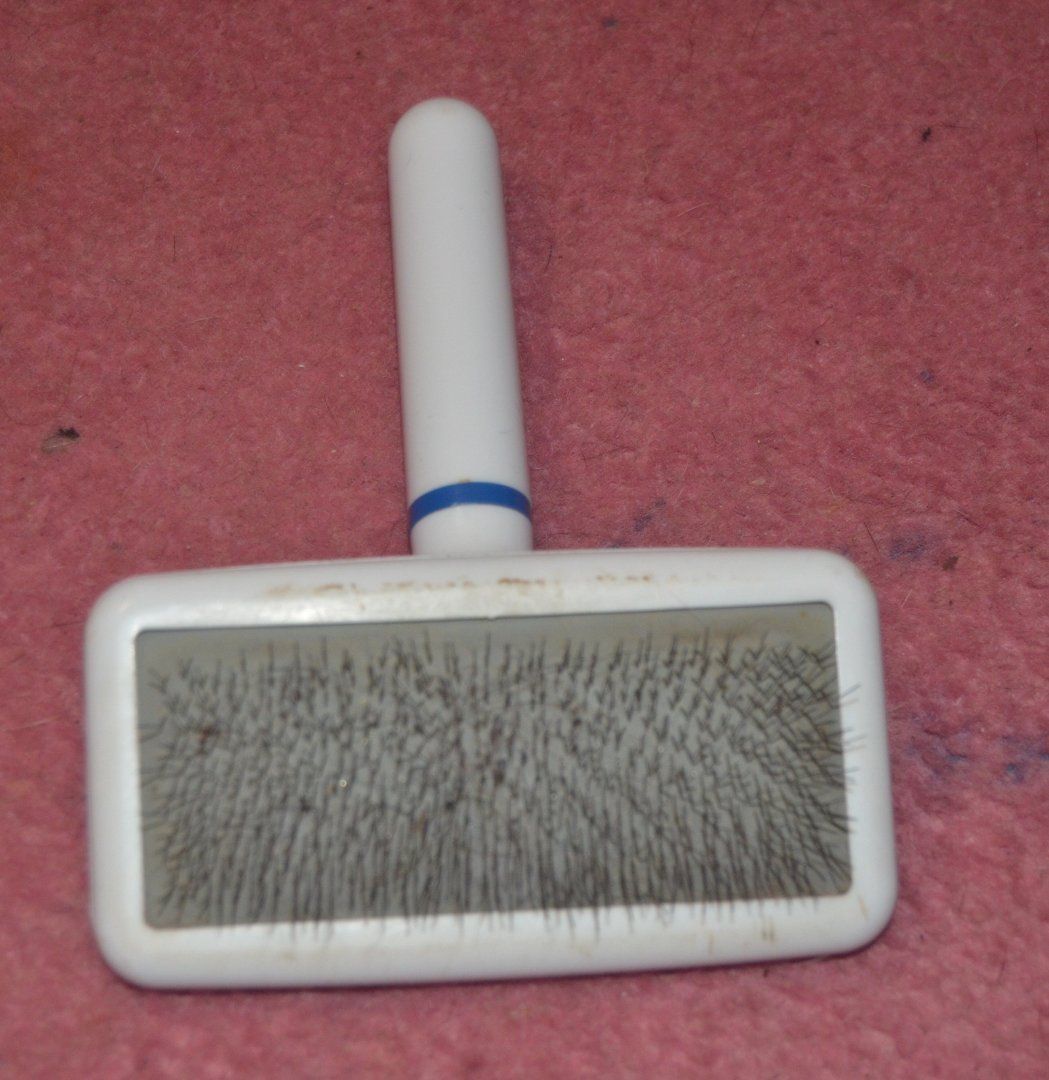
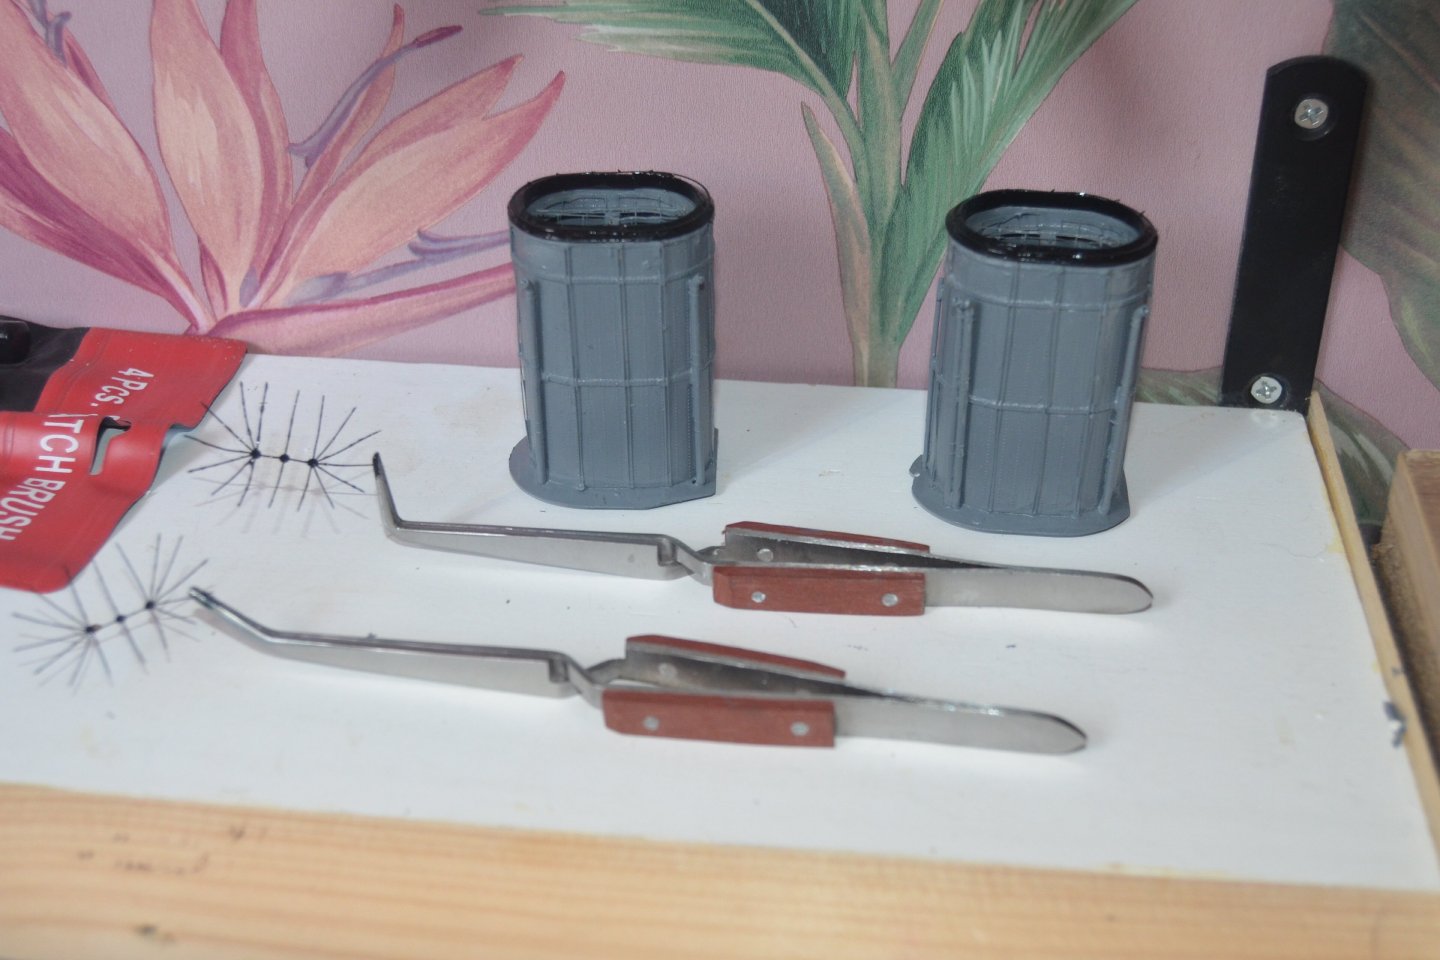
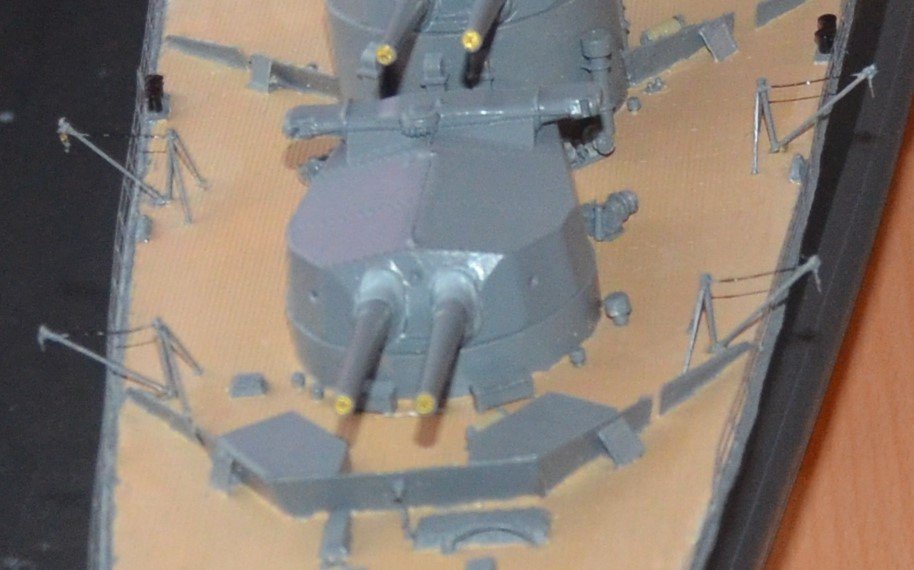
Working on the Quad guns. These are so frustrating to build with all the PE involved. There is some work to do tidying them up but they do look a lot better when viewed normally. the four ammunition drums are made up of six very small discs that have to be glued together. And they are a small as they look. I did one gun with plastic parts but the PE ones do look better. The barrels look a lot better than the plastic moulded ones. And also I have found the perfect tool for the PE the carpet monster gobbles up. This is a dog hair brush. Brushed fairly strongly through the carpet it works a treat. Wish I had thought of this before. One of the discs flew off and not only did it pick that up I also found various small PE parts that I thought where long gone.


-
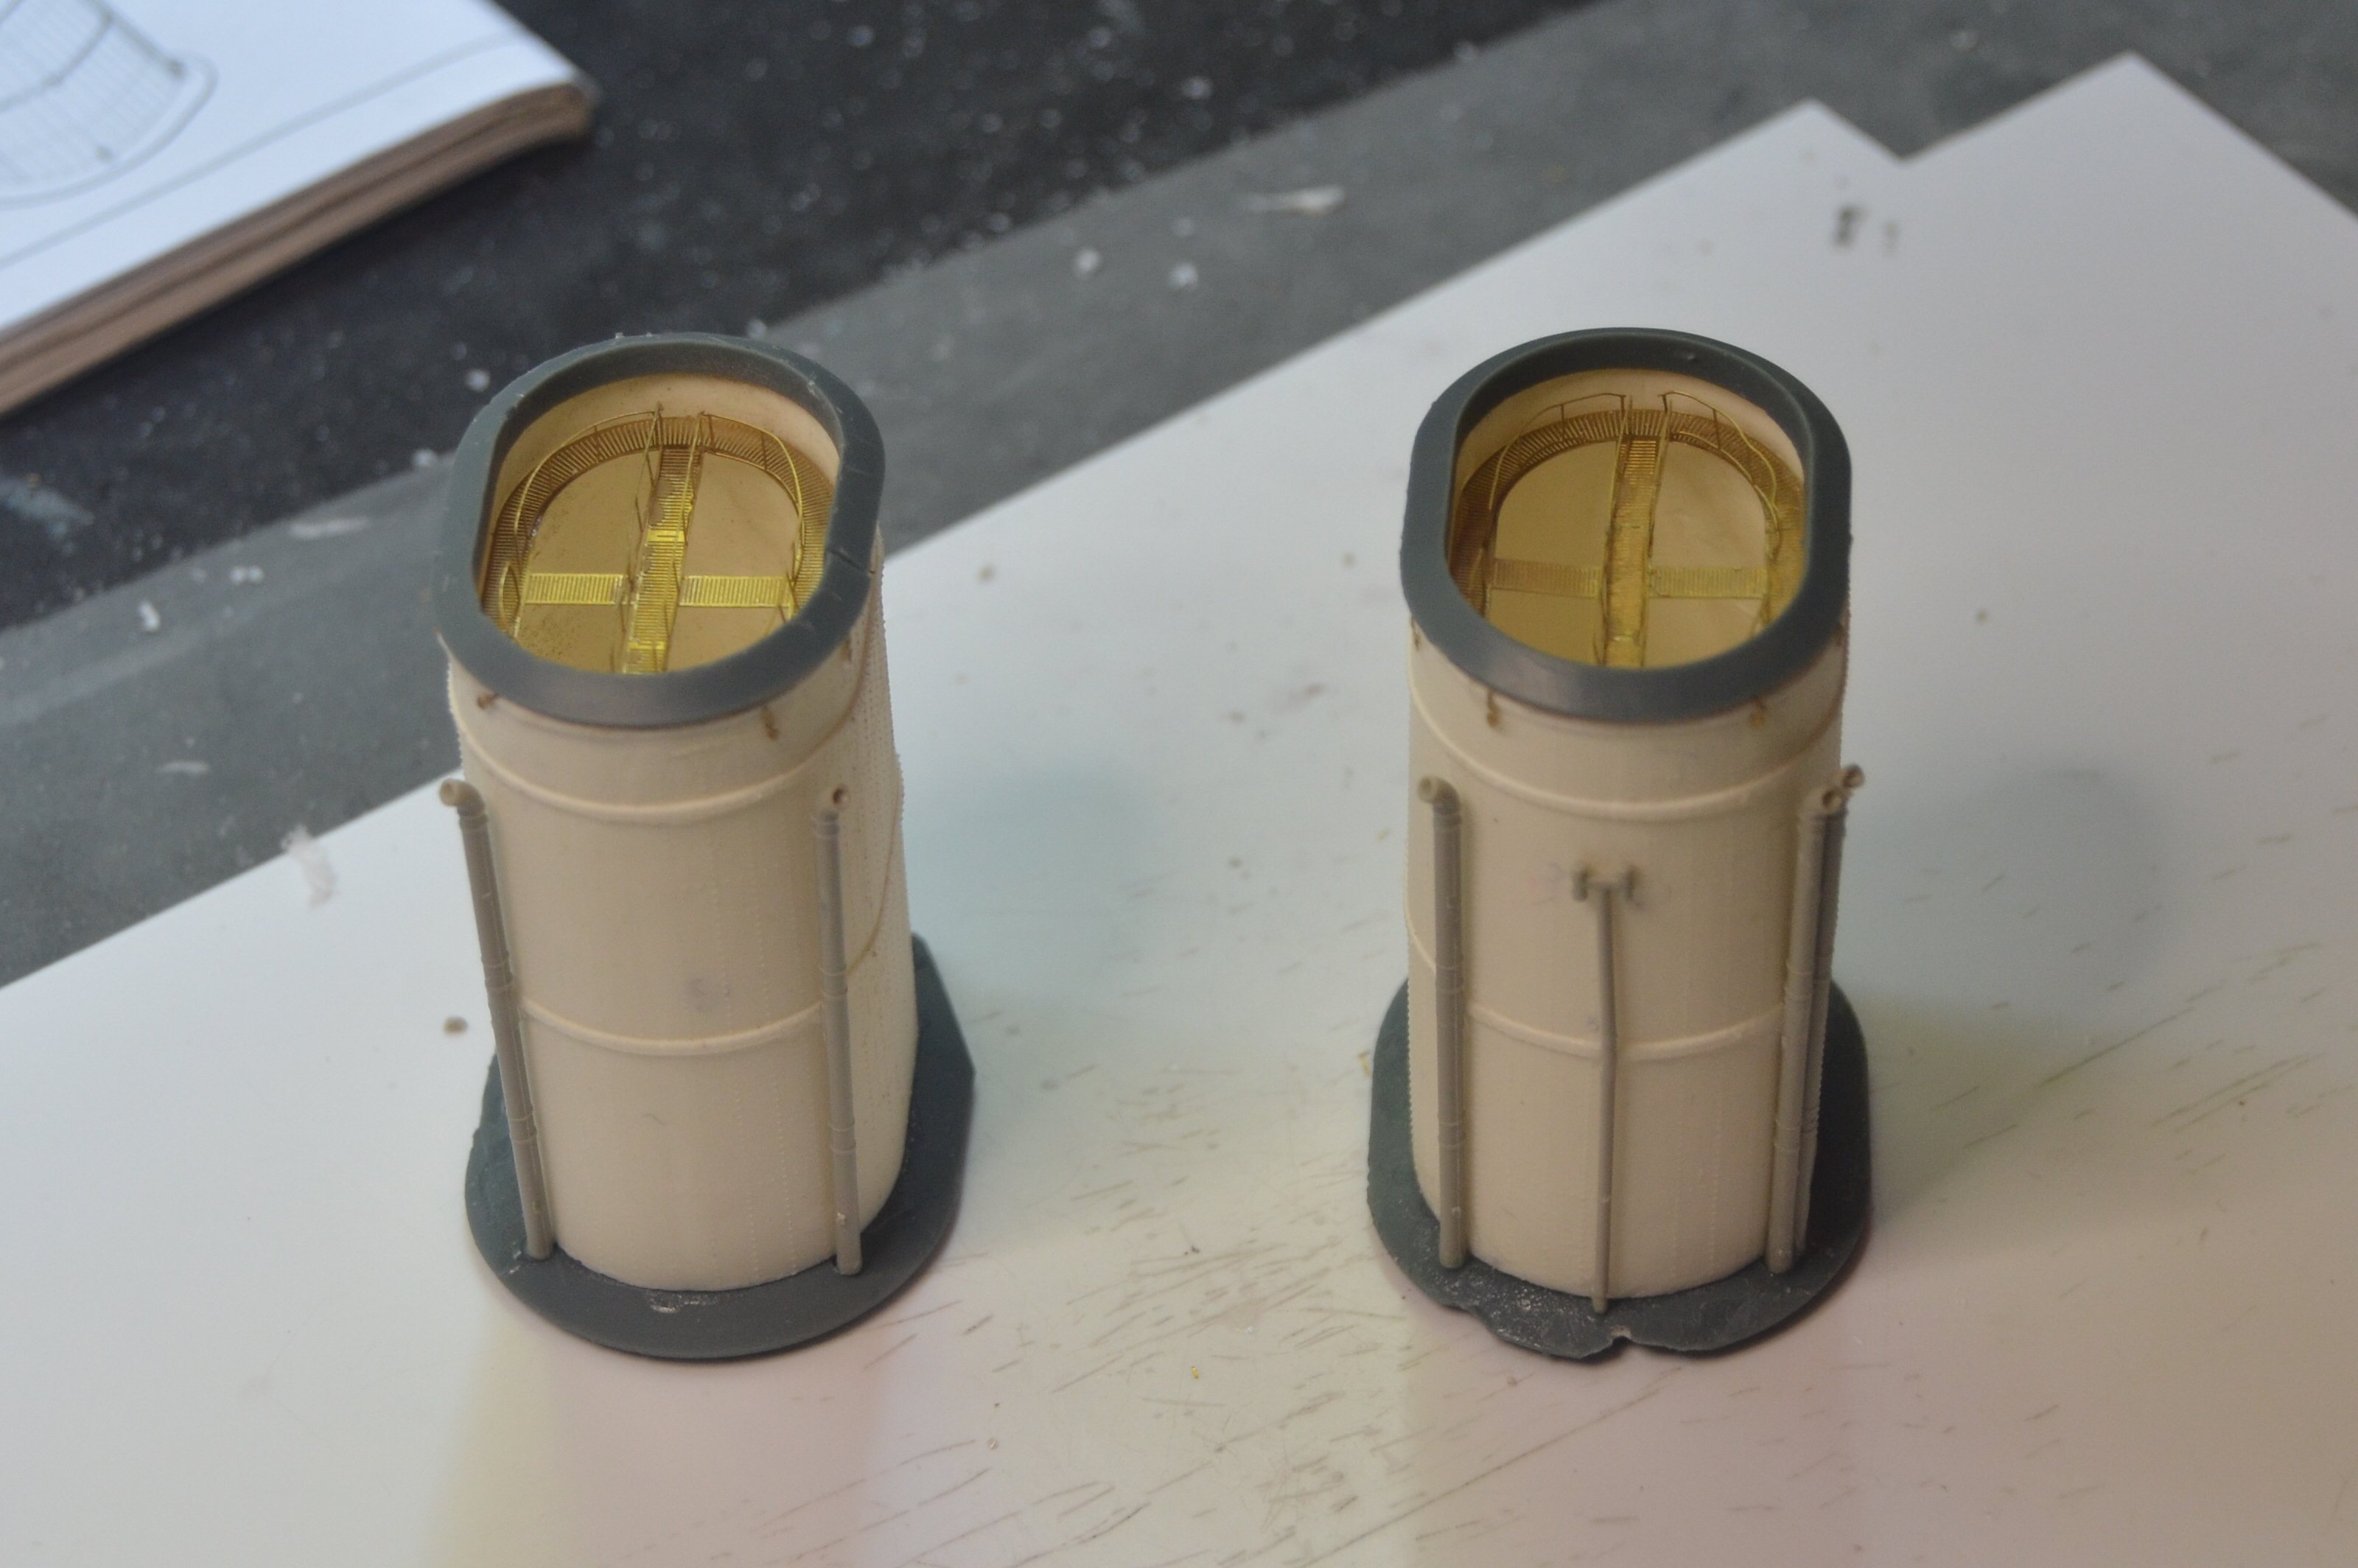
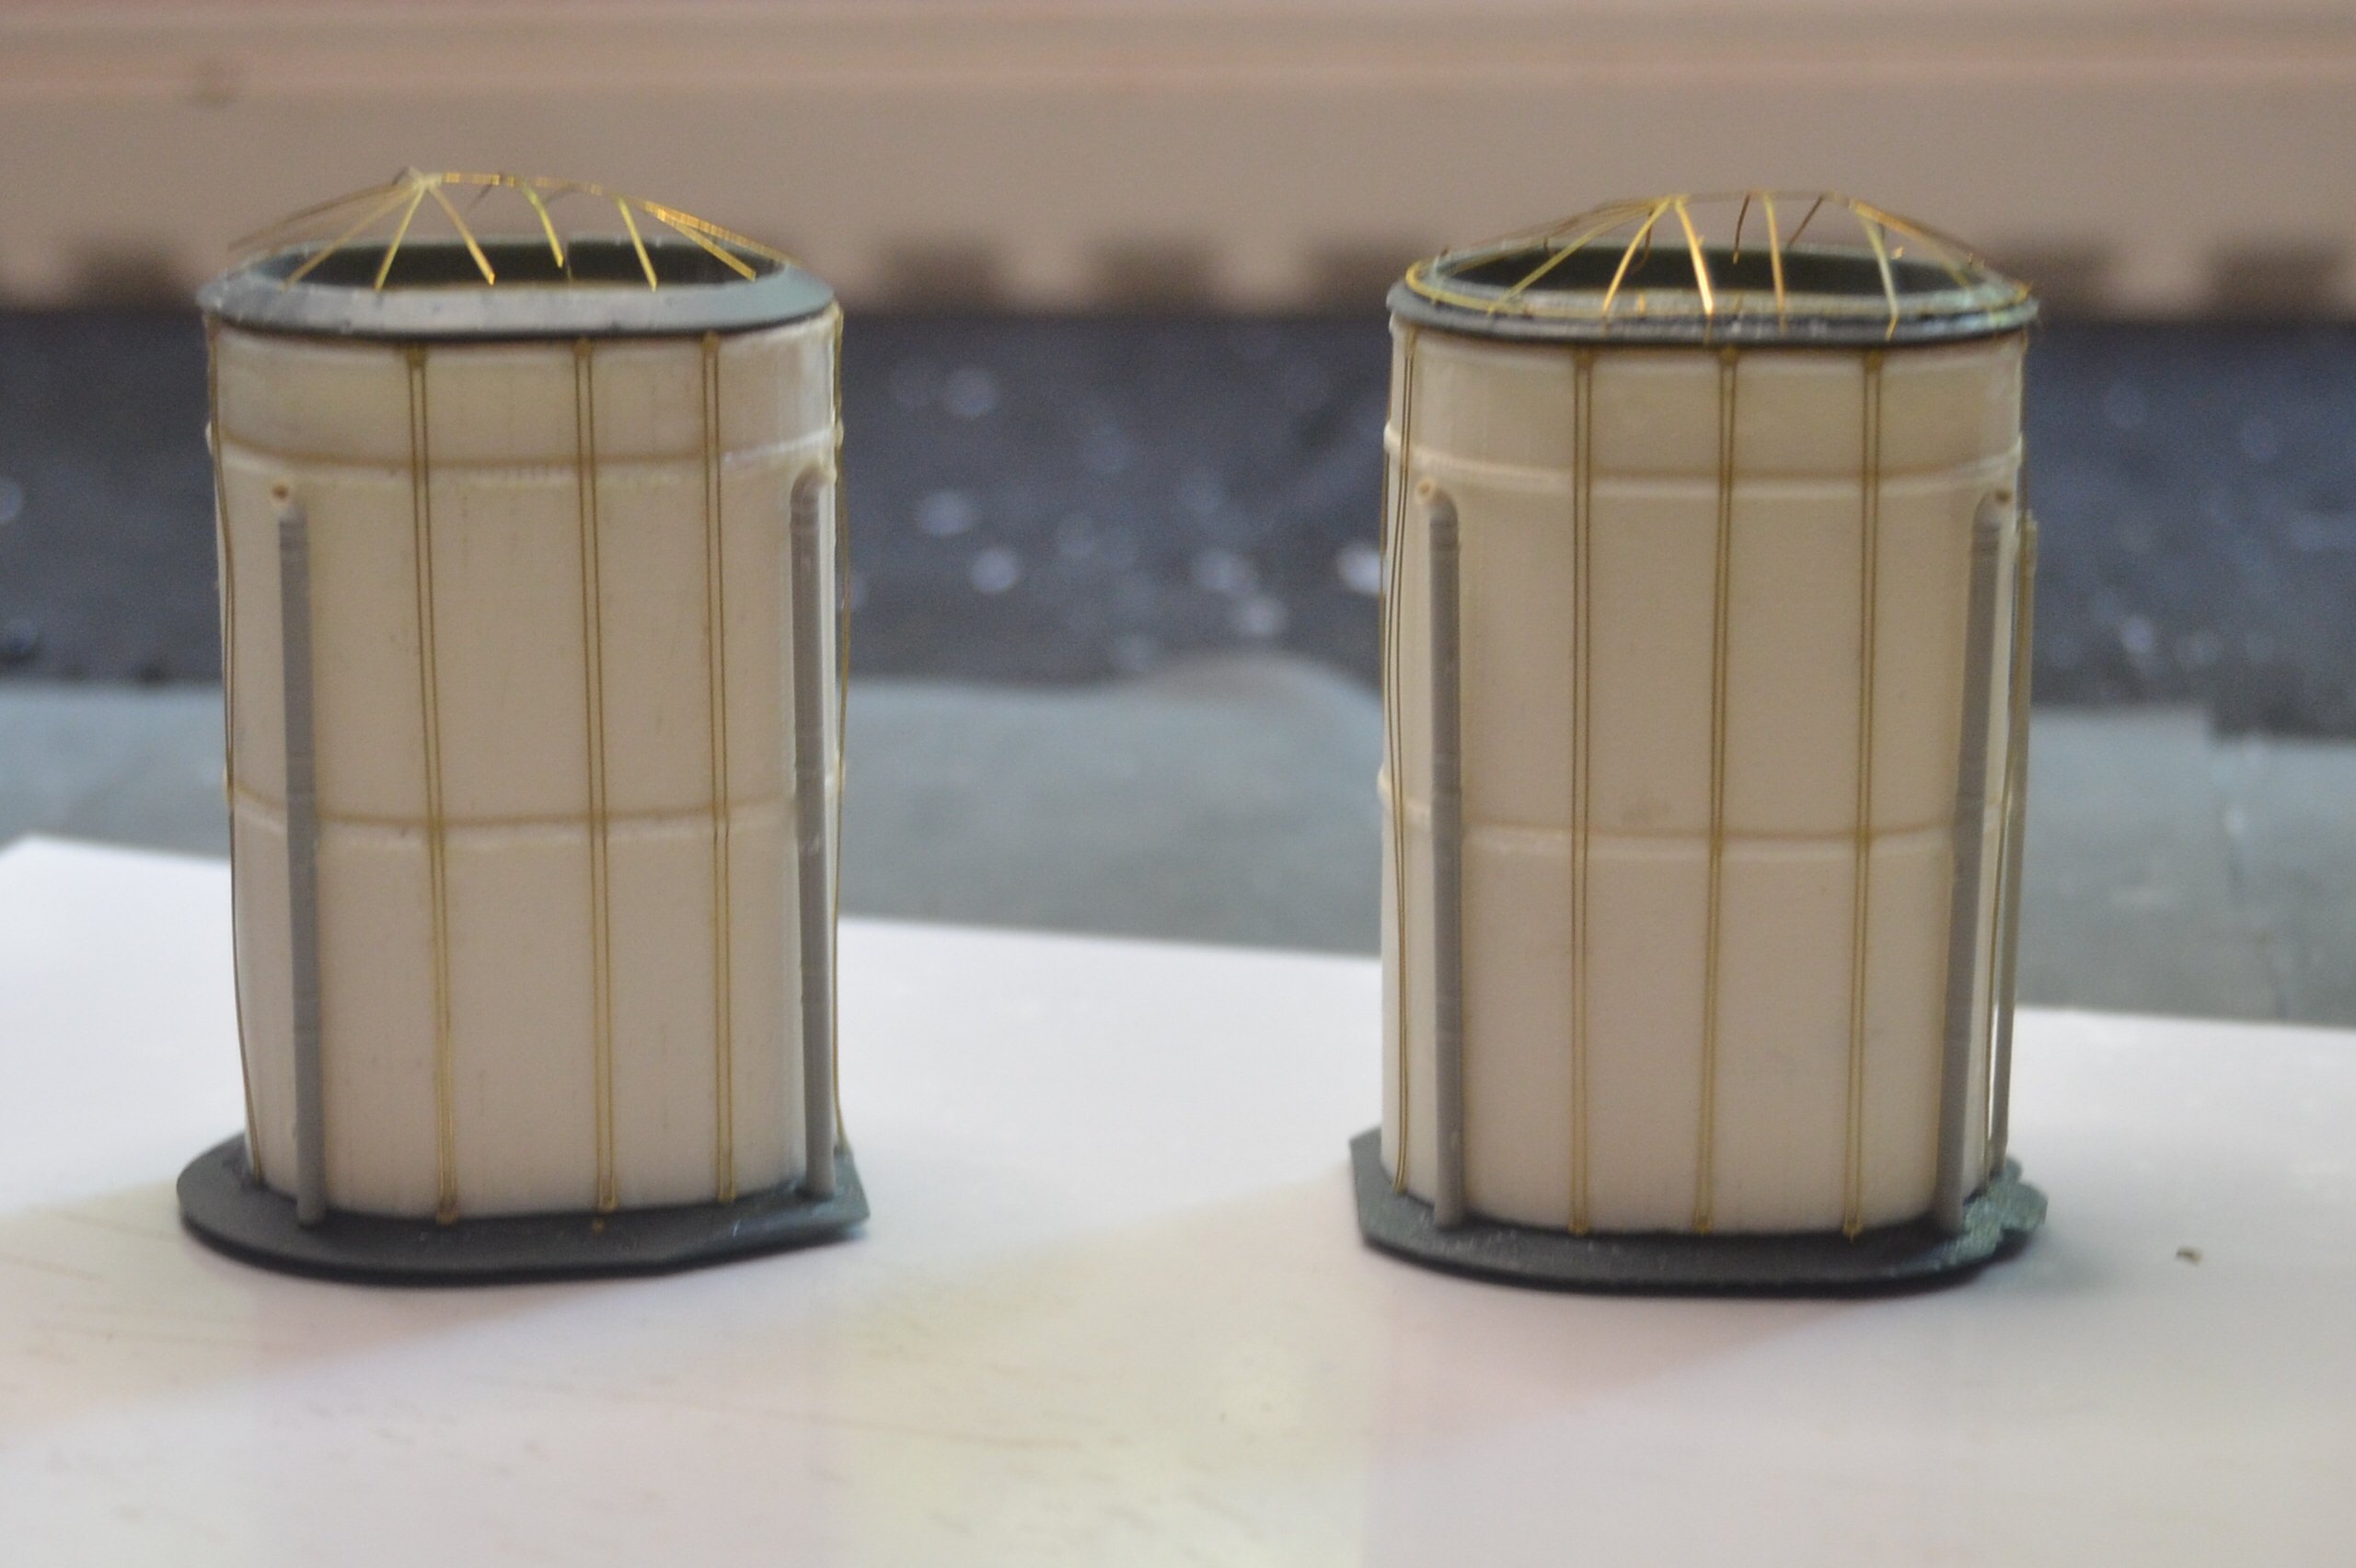
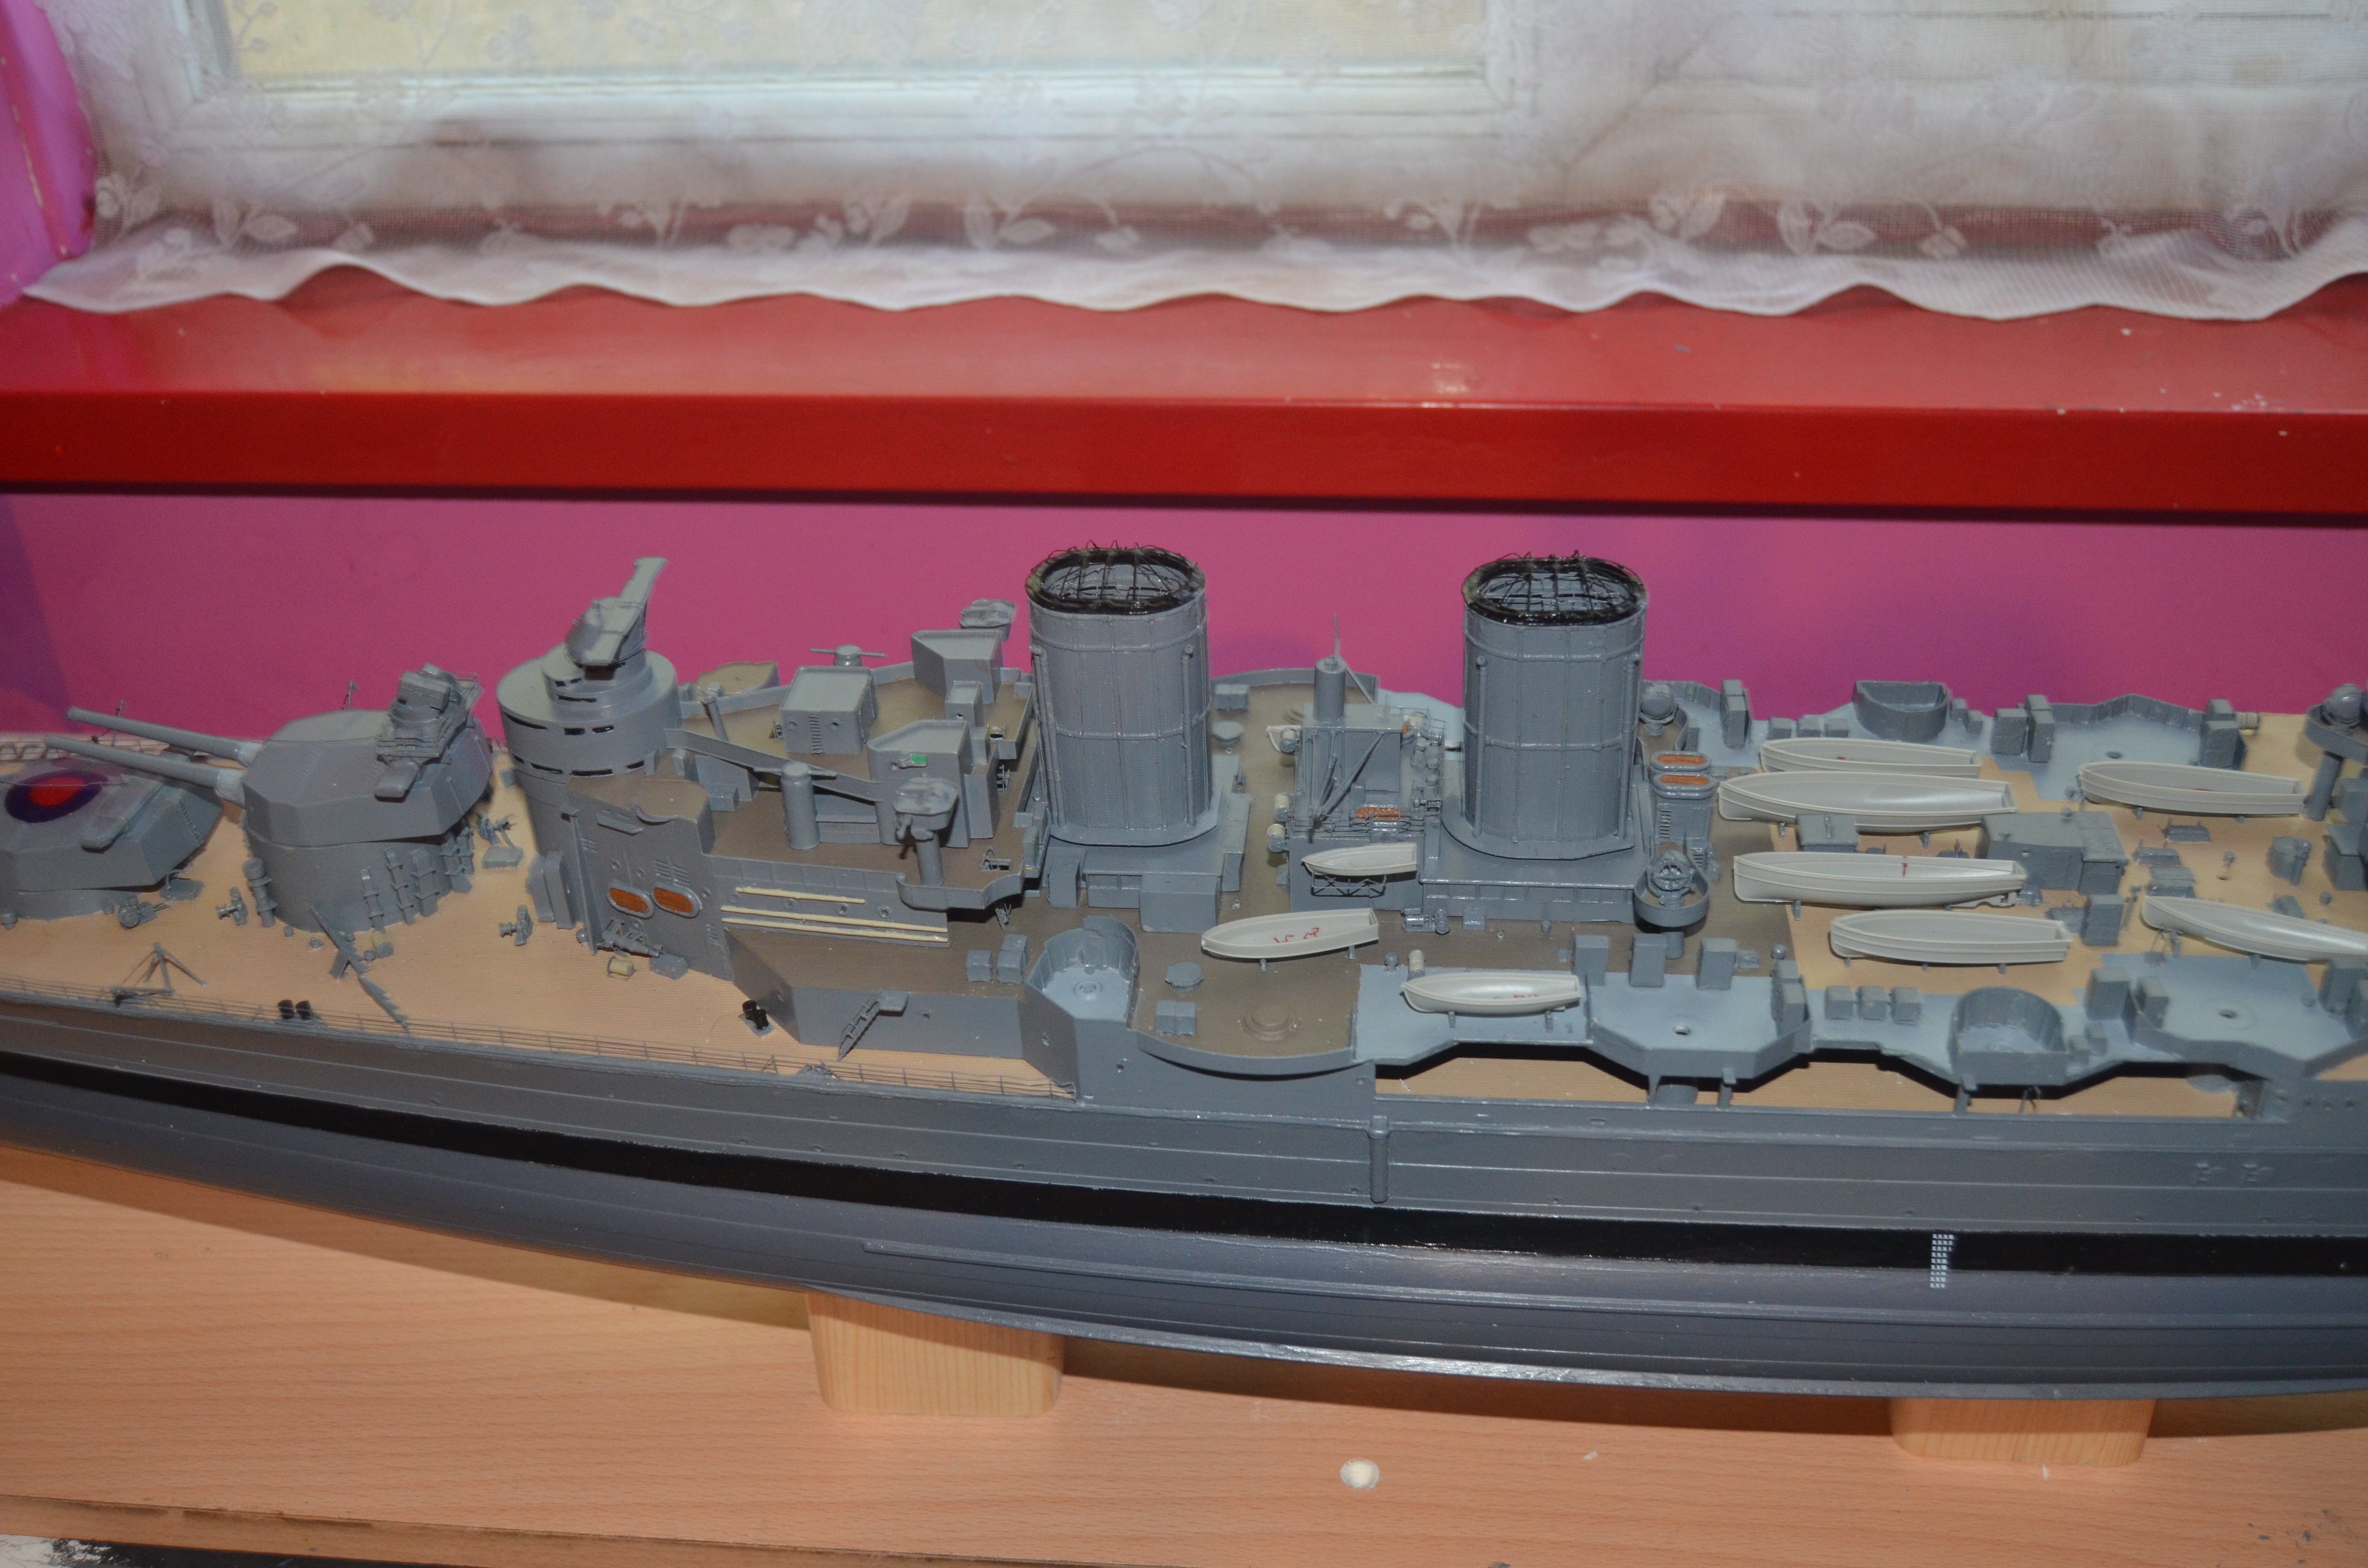
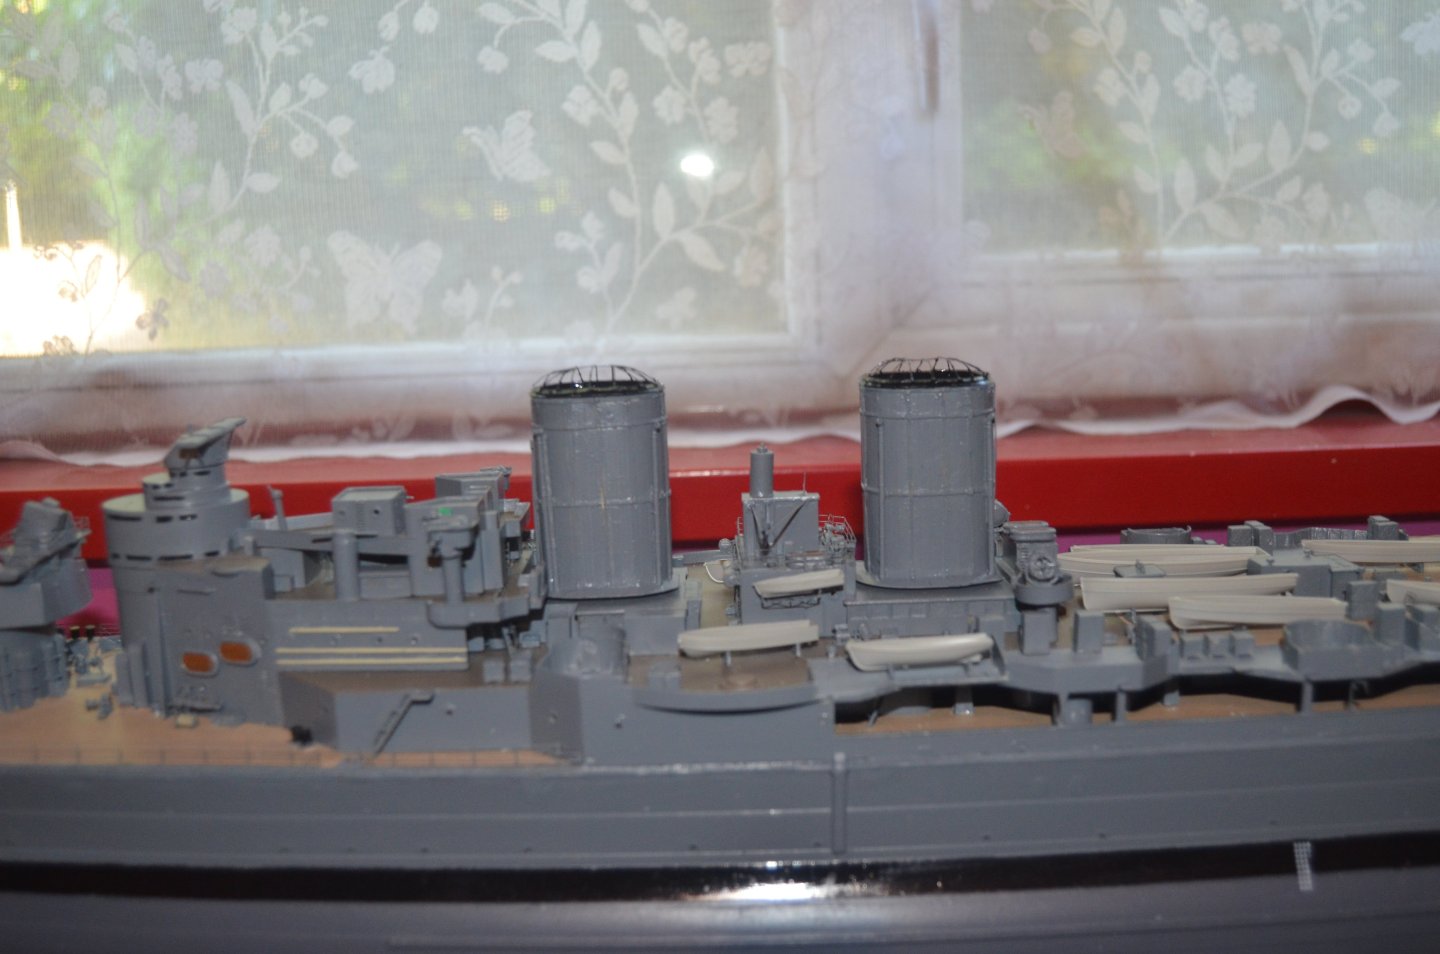
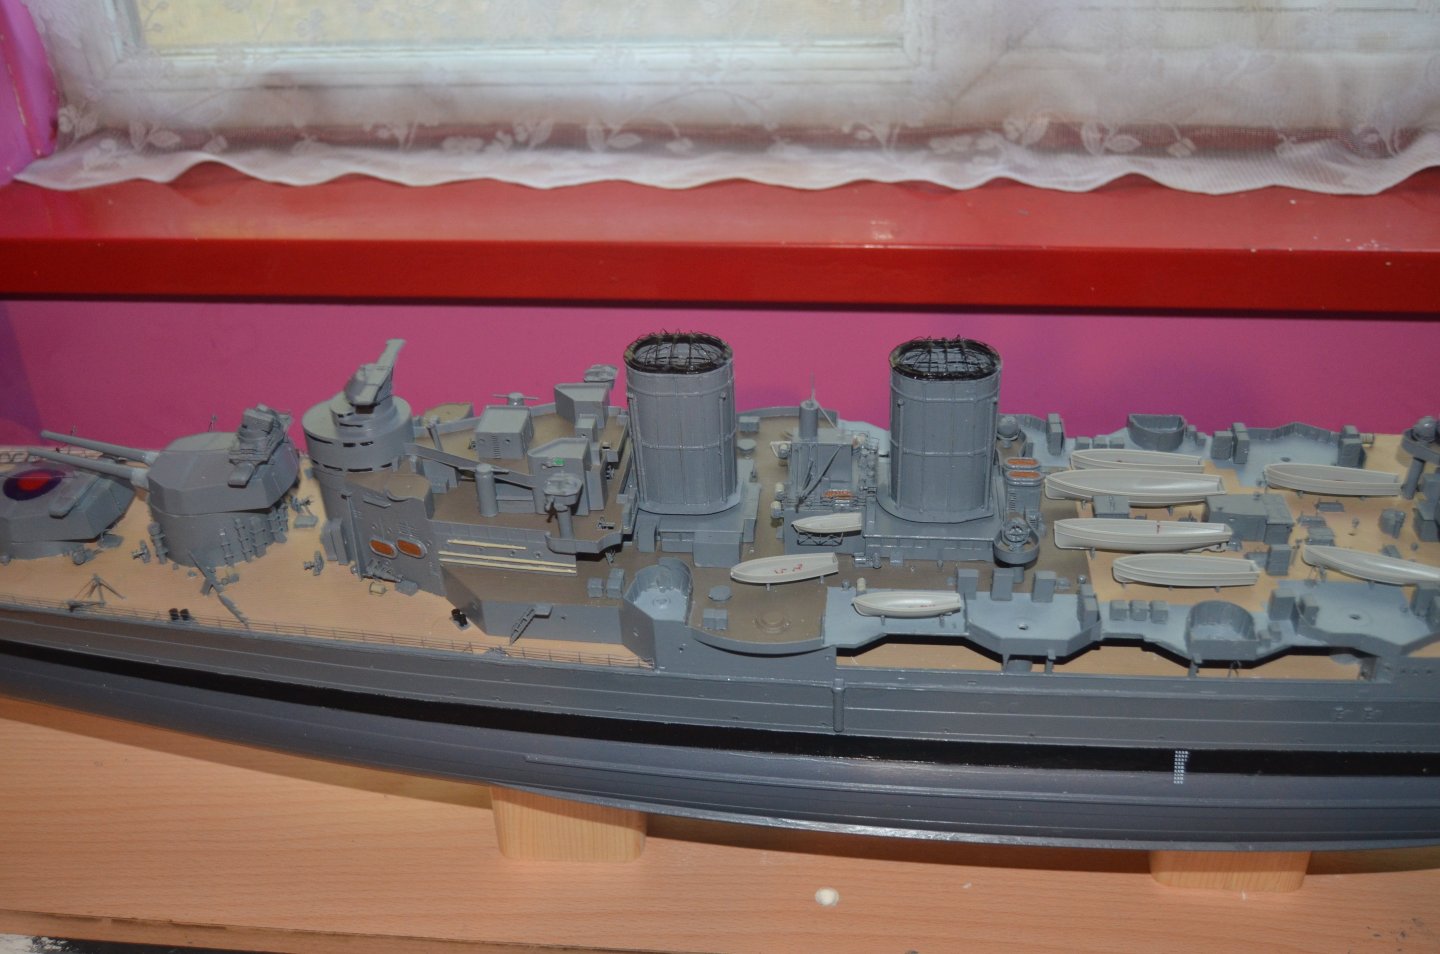
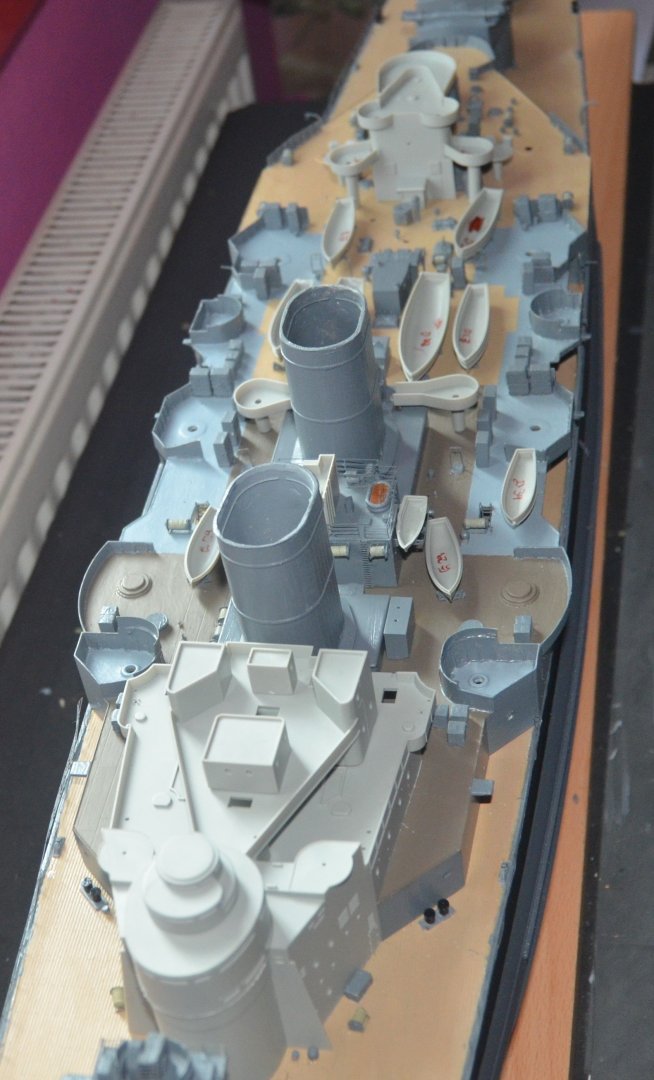
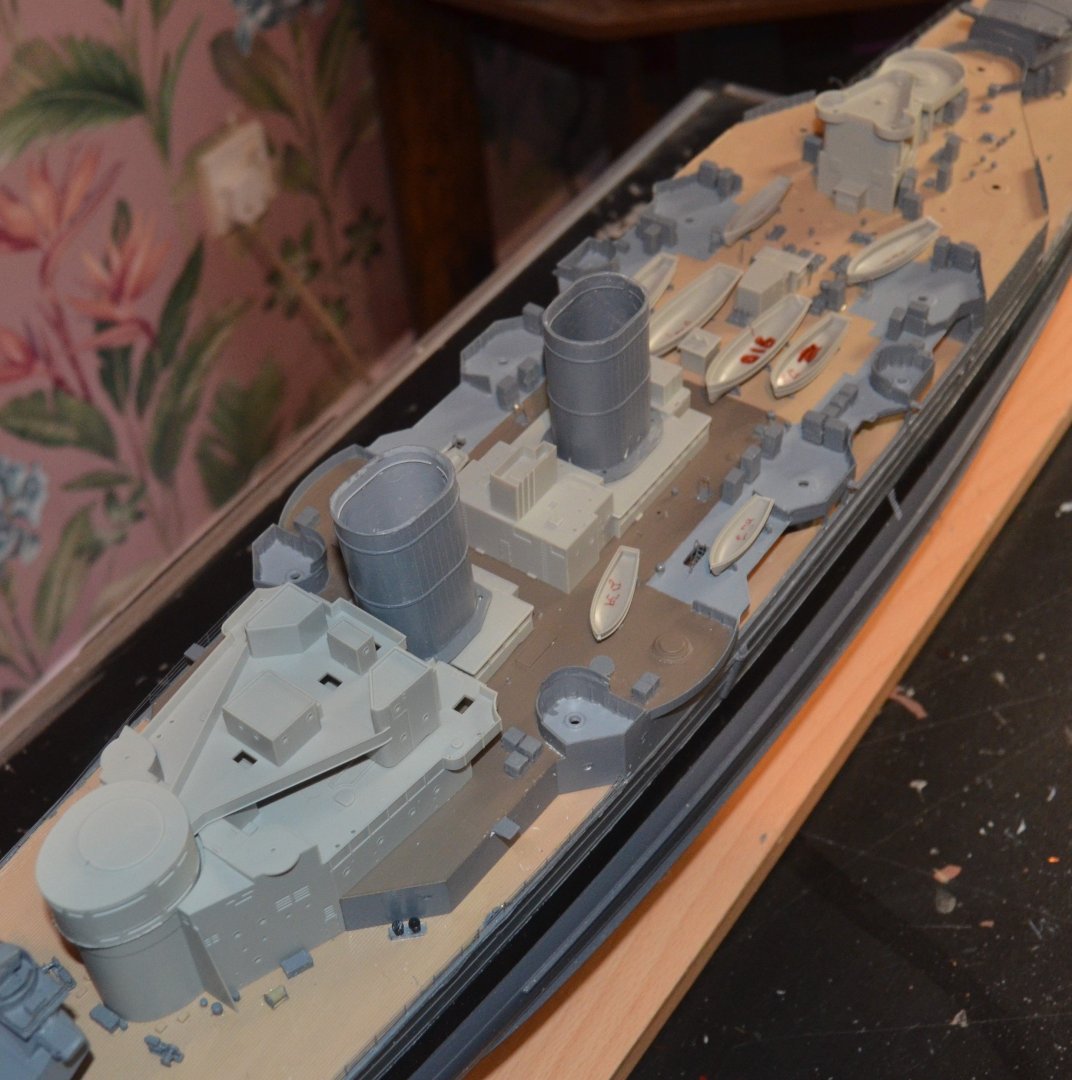
Funnels completed and glued in place. The PE adds a nice bit of detail. The cages on top have come out well considering how fragile they are. I will be adding the binoculars next But not the PE ones, the plastic ones are far better. PE is mostly good but when it is a part that sits on a column it just doesn't work. They would just be flat parts that don't look right.


-
Nice one,excellent prize. The Pontos upgades are far more extensive than the MK1 kit. And I believe the Pontos set includes the updated rear funnel. You will enjoy building this excellent kit. And the HMS Hood website is a brilliant resource for the many alterations if you decide to make them.
-
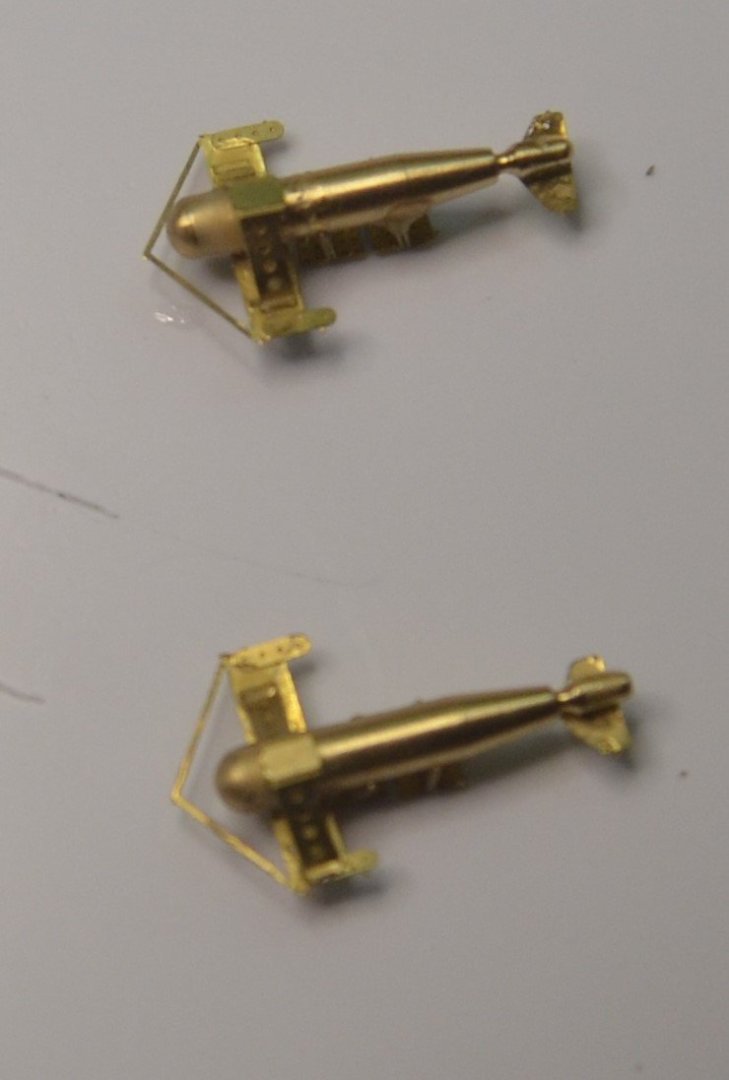
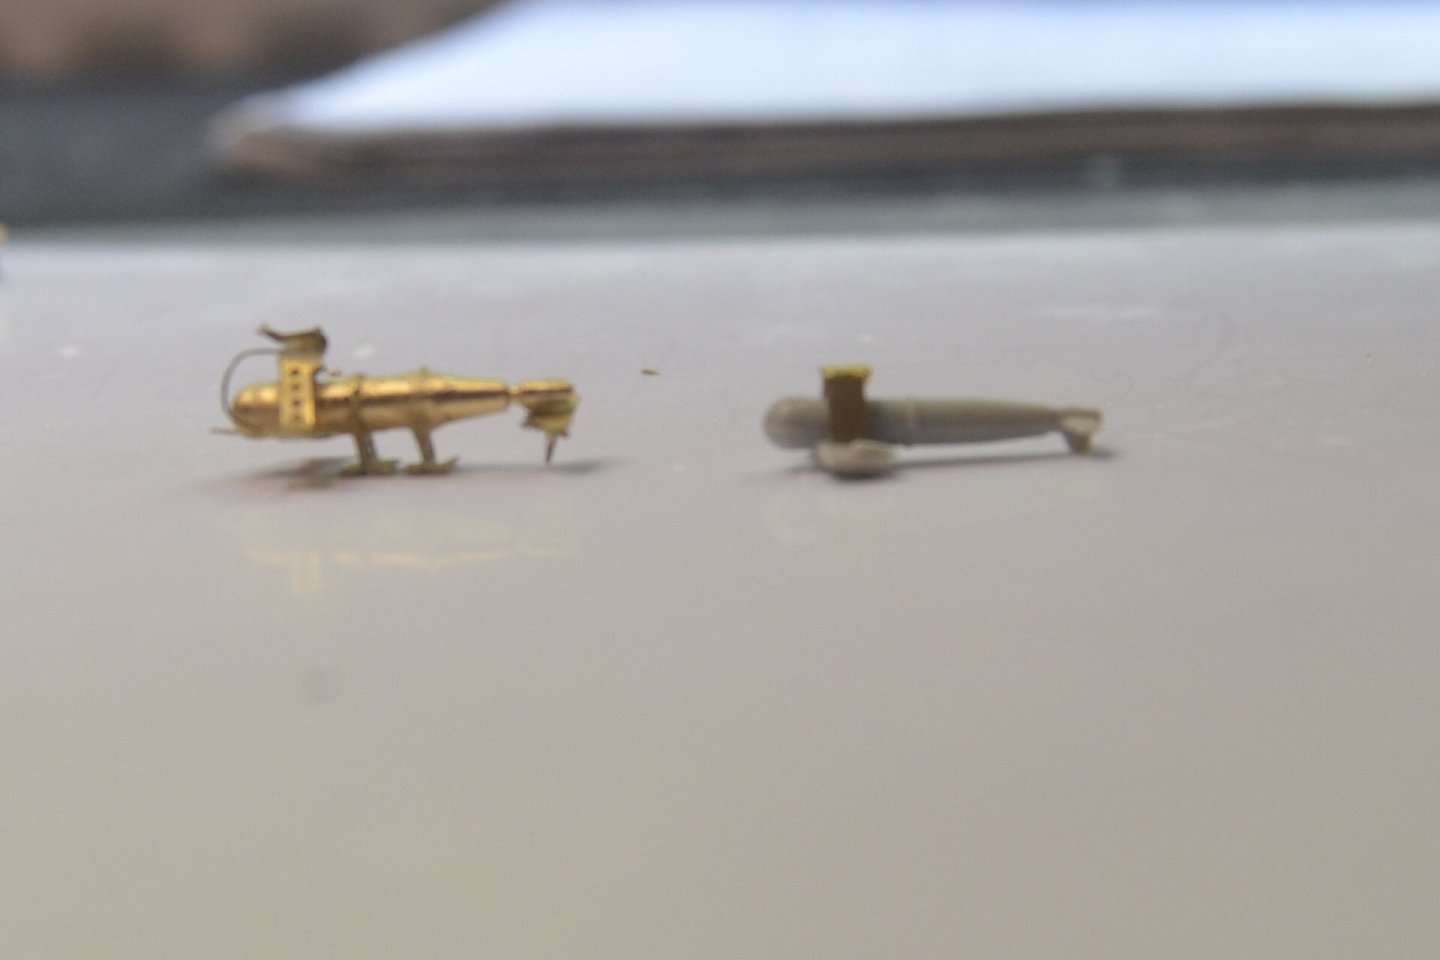
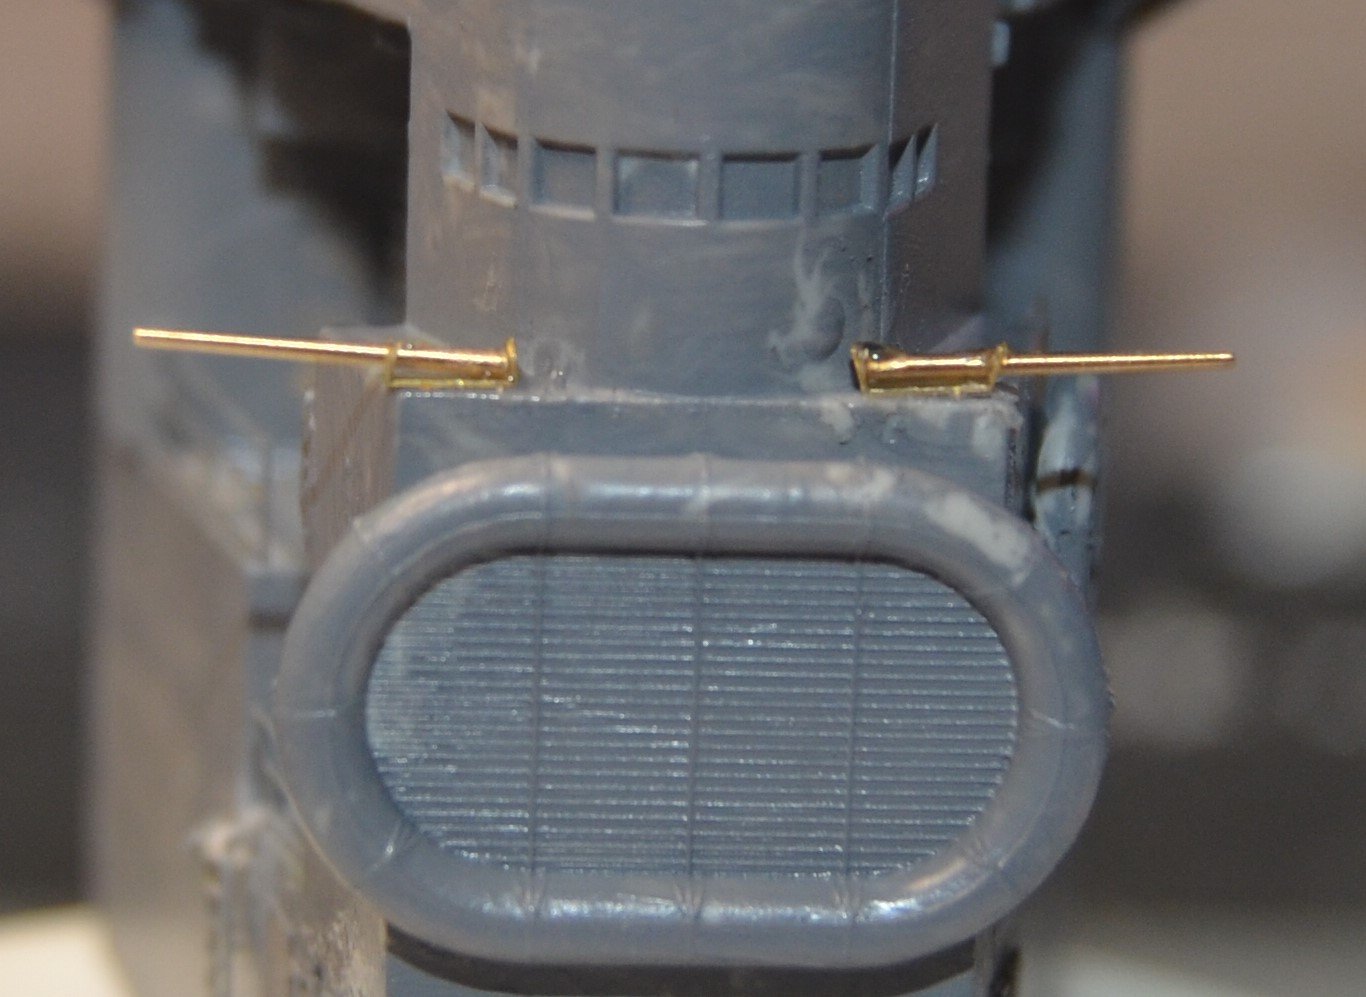
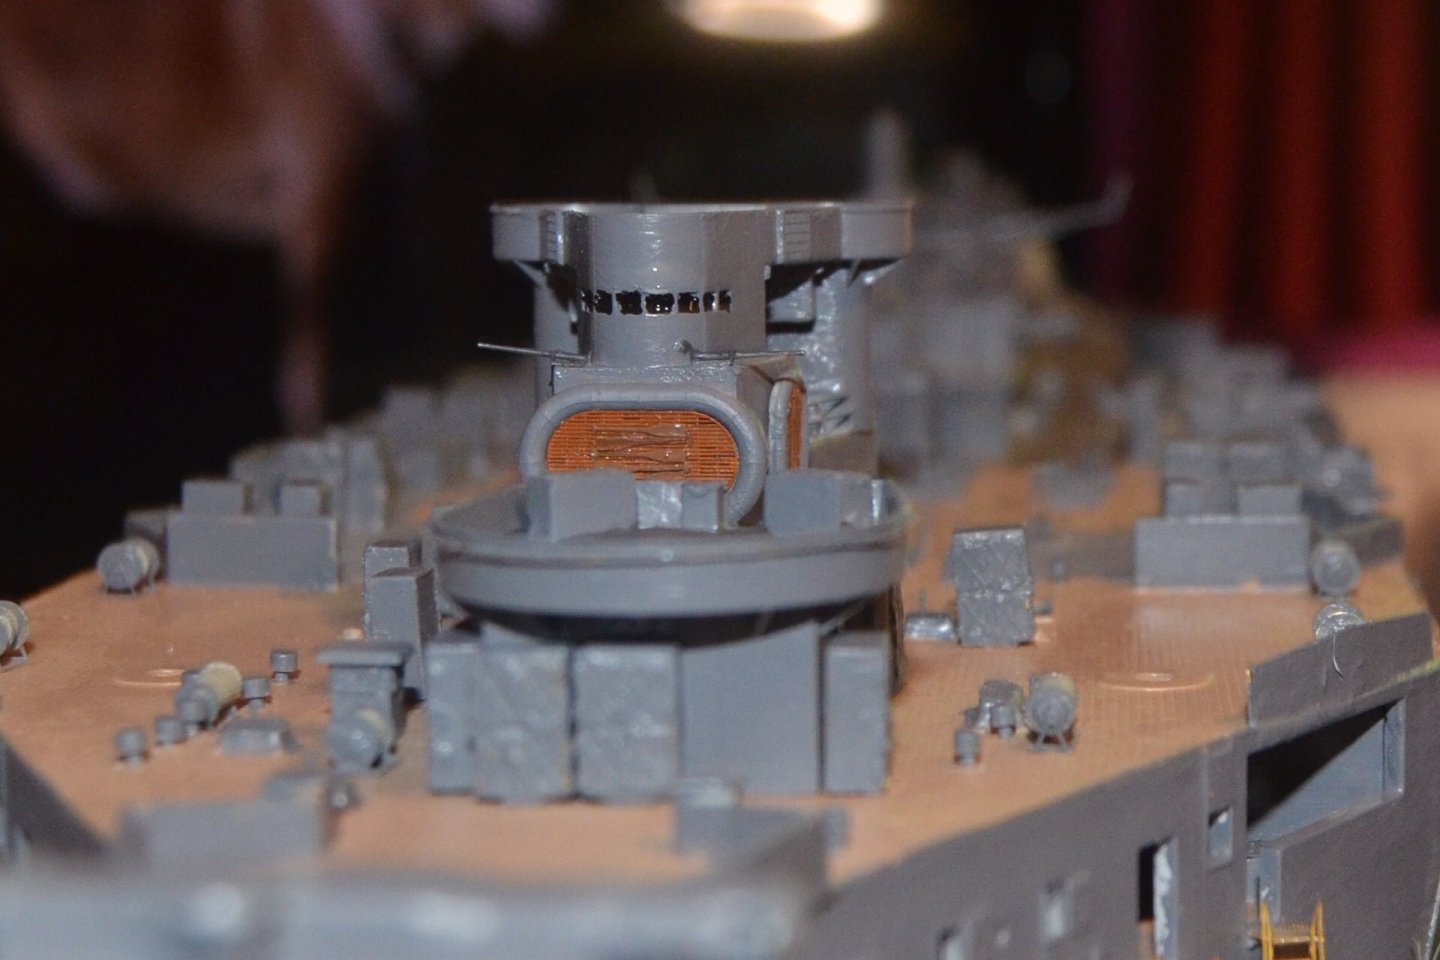
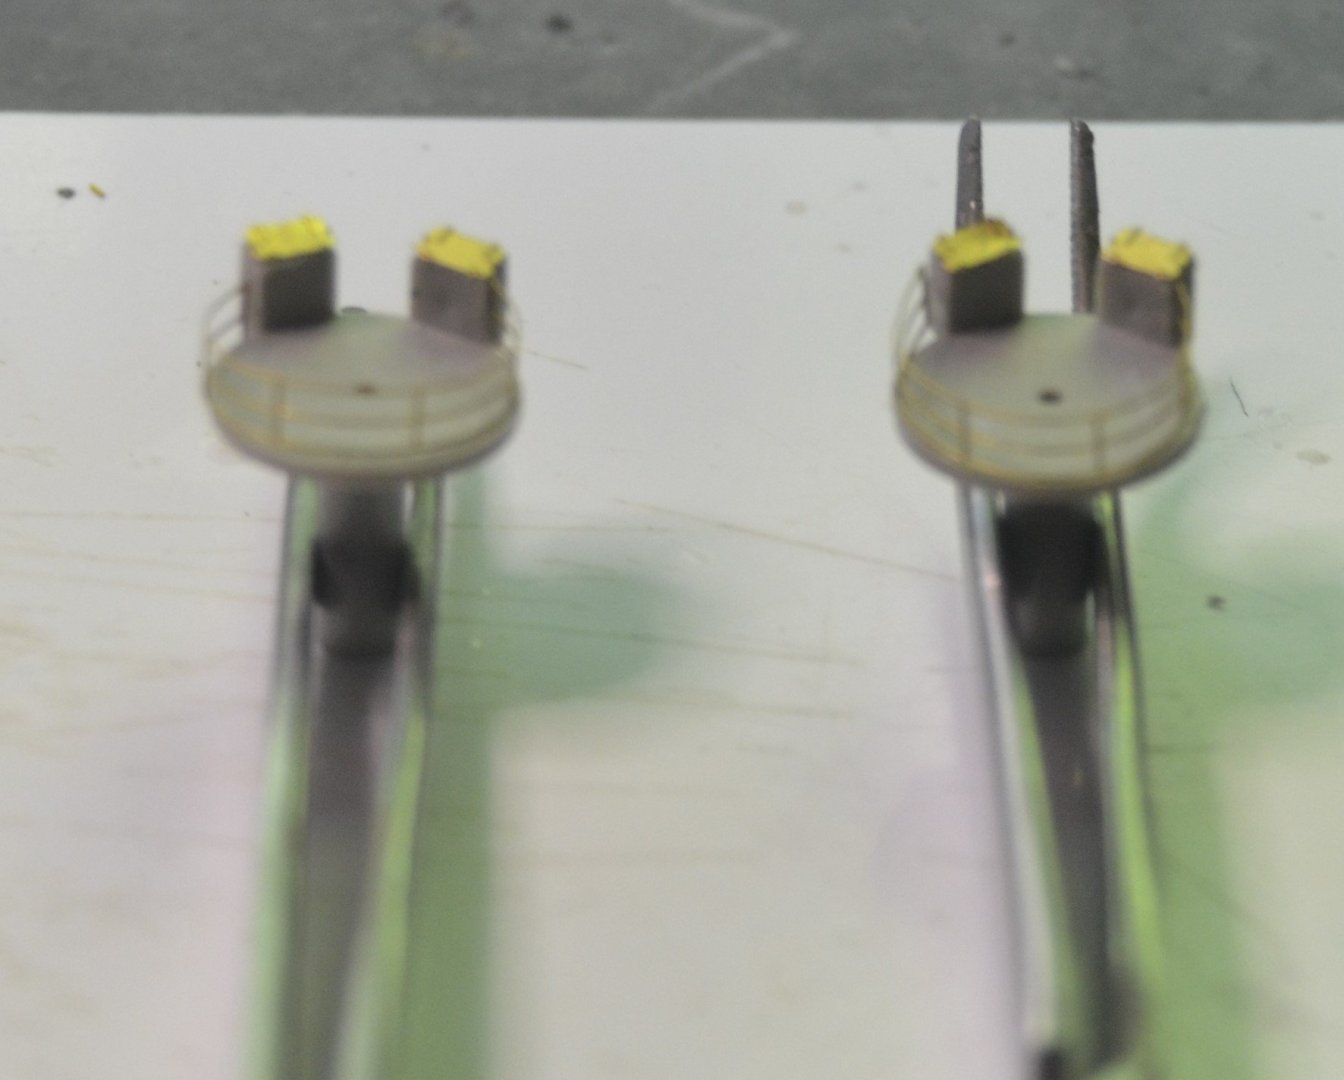
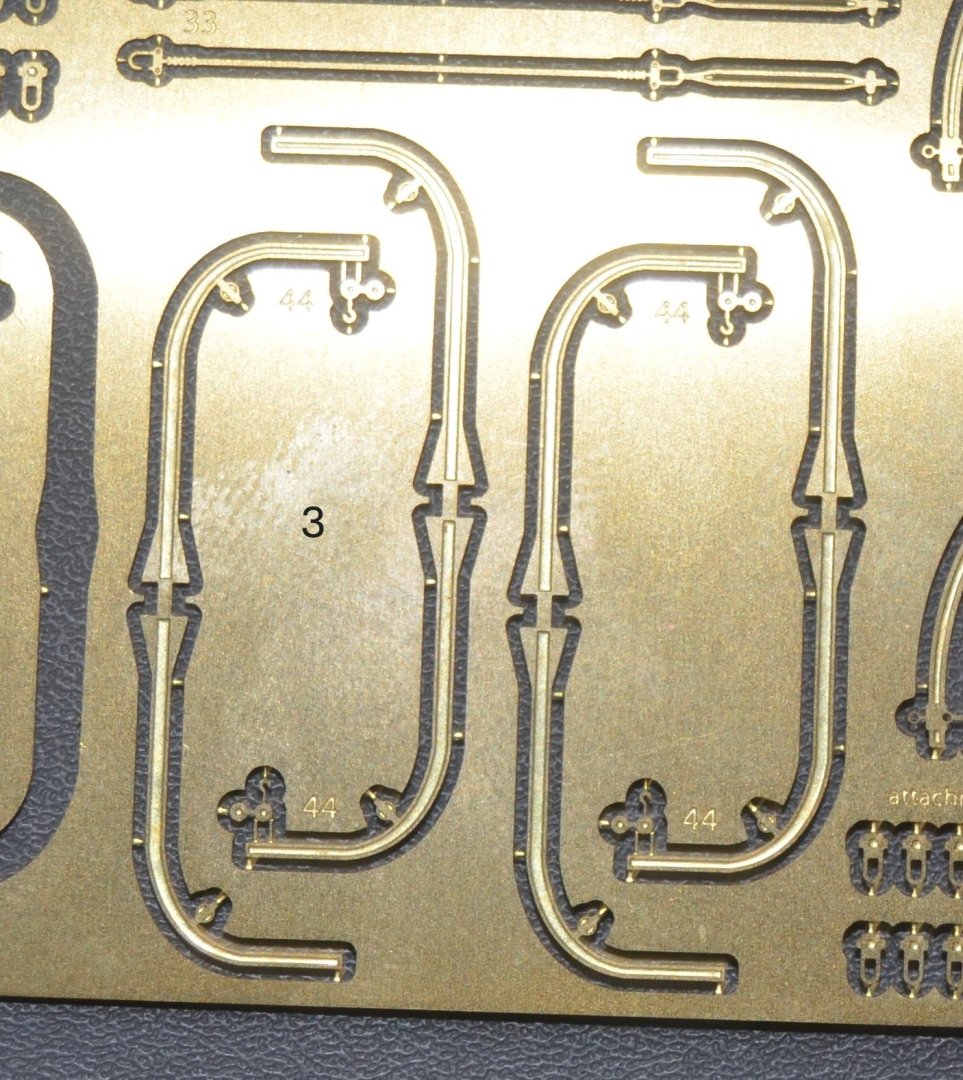
Quite a lot of detail added to the bottom part of the bridge. The paravanes are the upgraded ones. I have included one of them with one as made out of the box to show how much difference there is. The ladders have been added, although most of them are difficult to see below the top section. I think the next few models will be built out of the box. I enjoy adding all the extra detail but it does add a lot of time to the build.

-
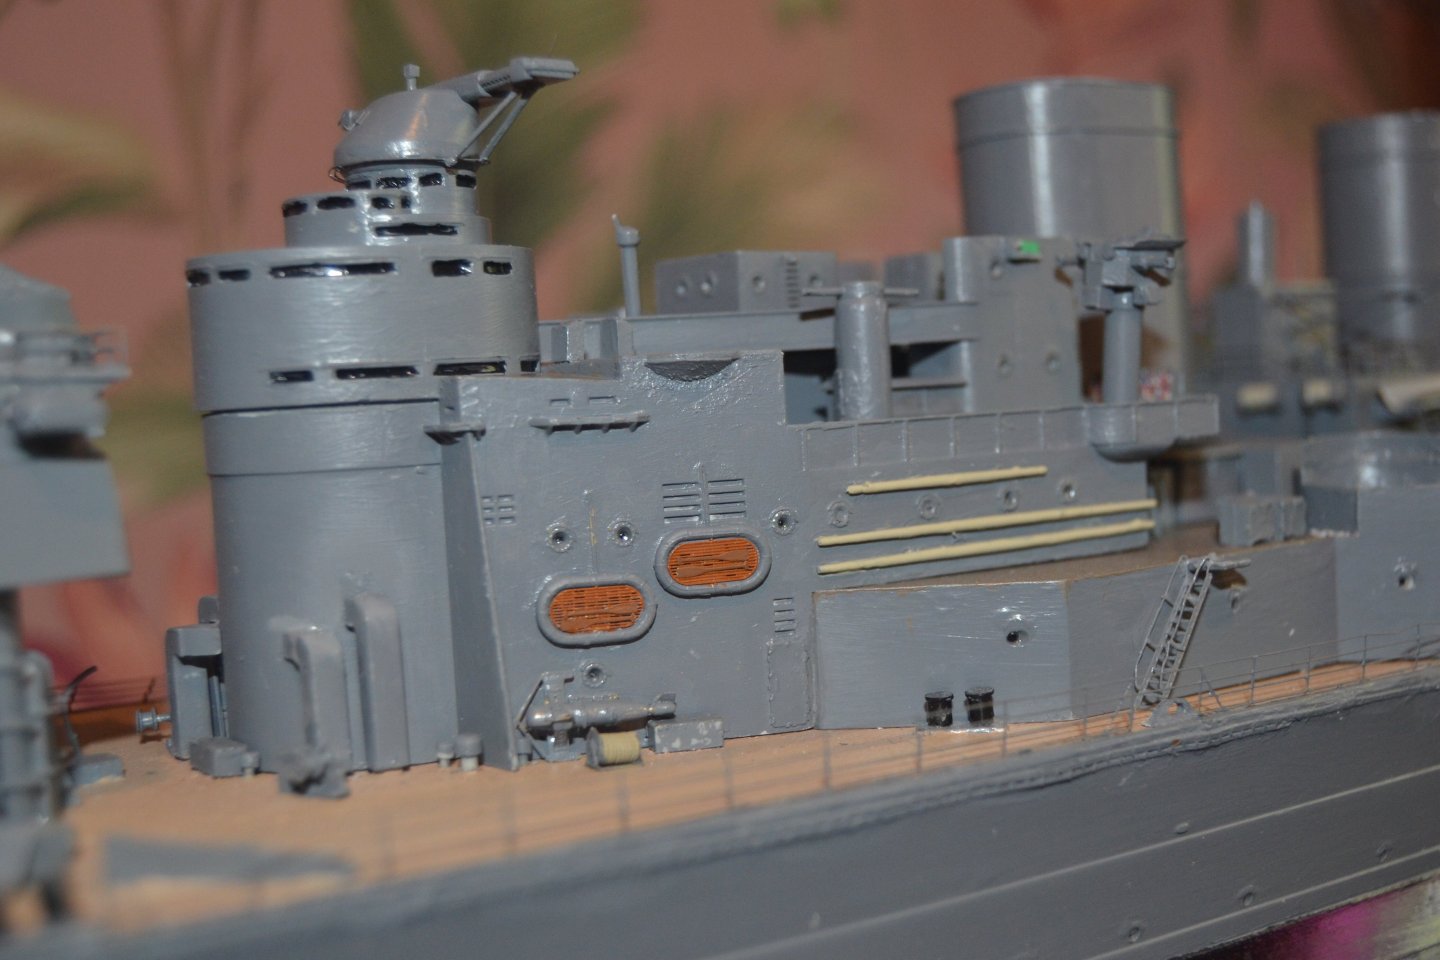
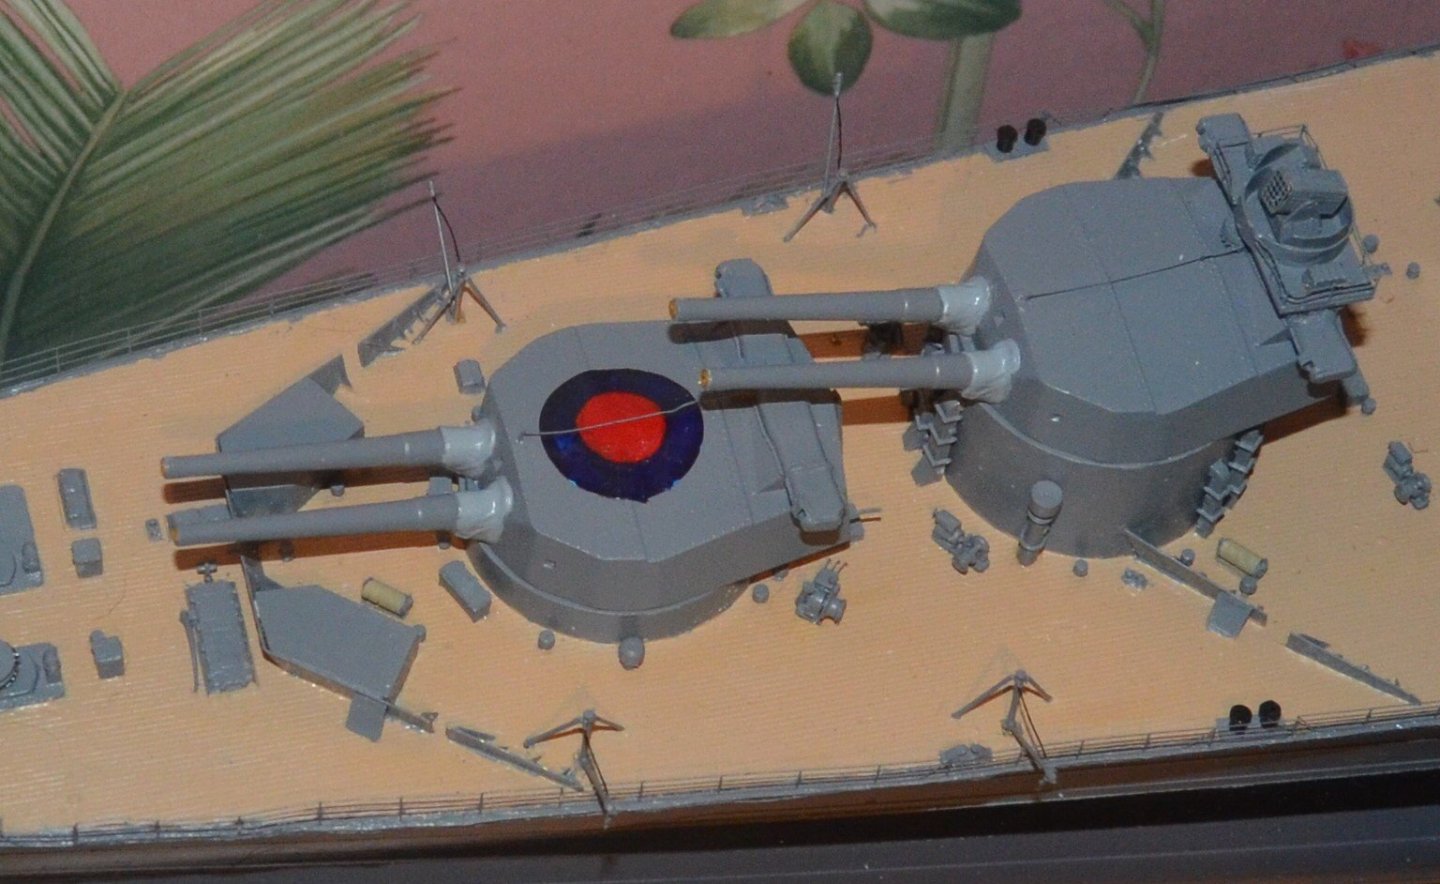
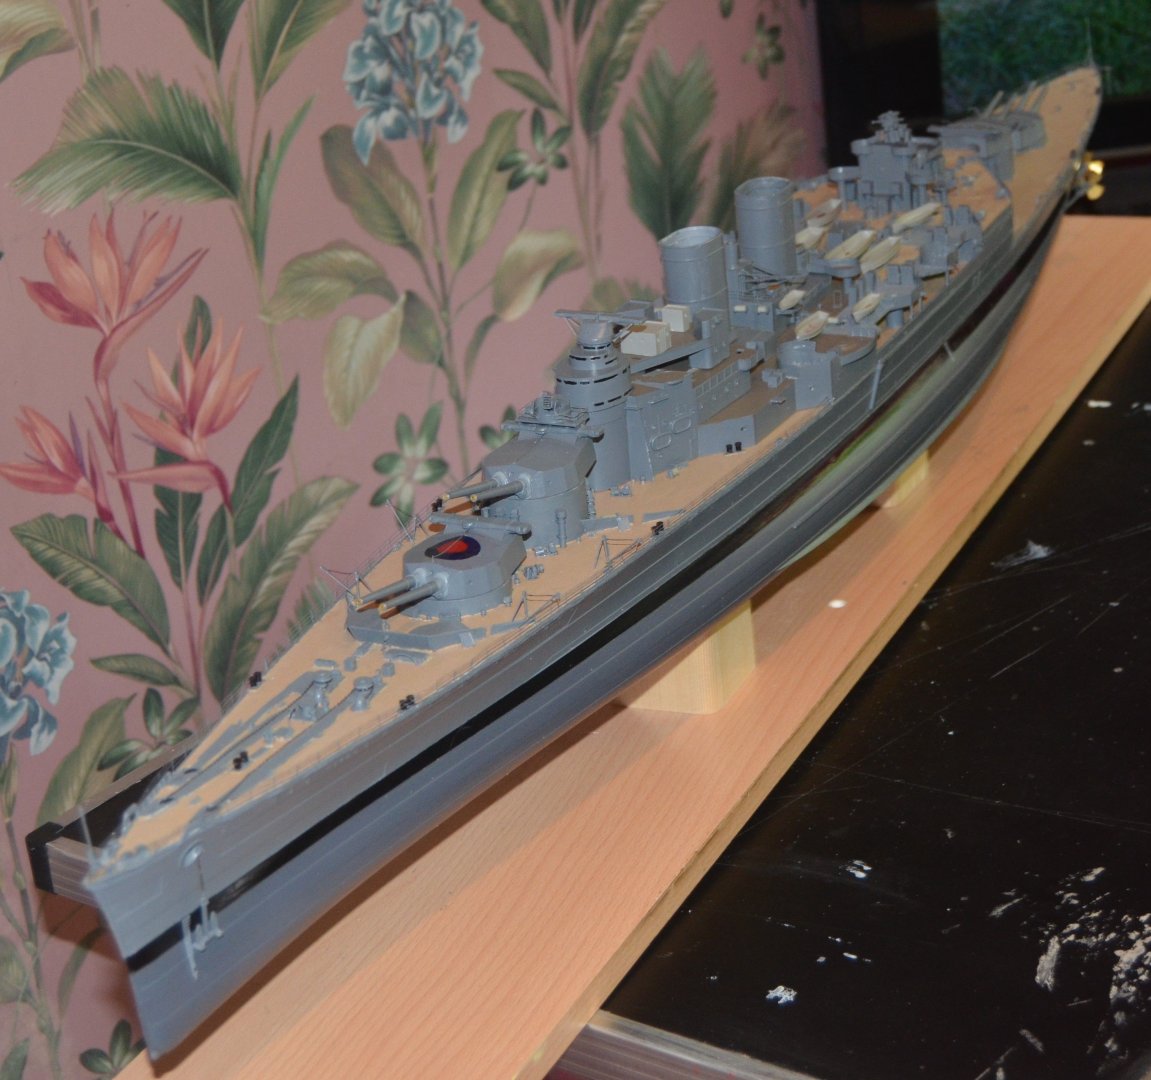
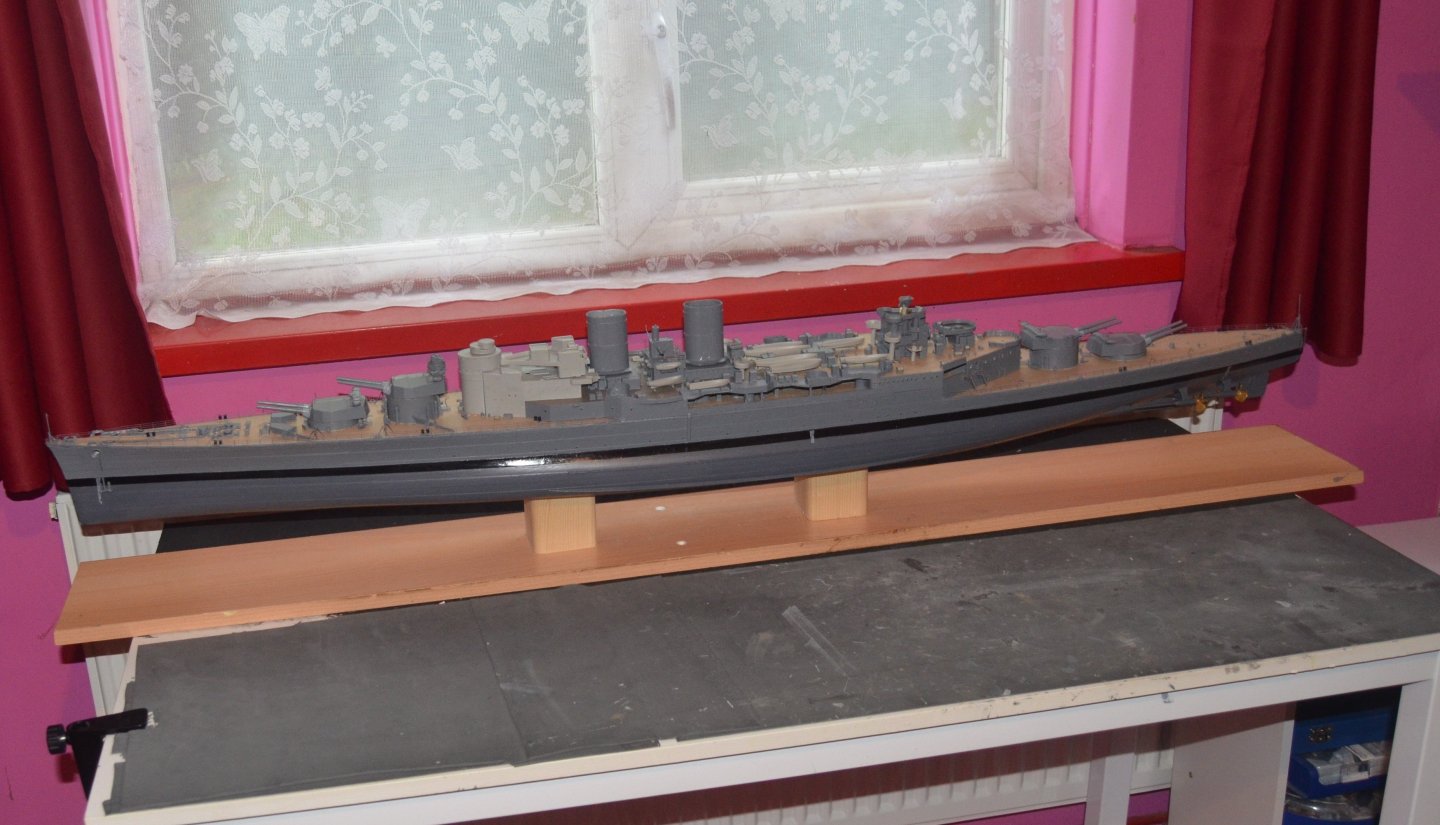
I have decided to do the bottom section of the bridge. Still a lot more to add to this inside and on the outside. I also decided to add the red and blue insignia to the gun turret. I had some self adhesive round labels which where the perfect size. After a bit of trial and error working out how best to paint it I settled on painting the blue on top of the red. This looks a lot better then the bright blue colour. It also looks better on the gun than in the picture I have zoomed in on as I have tidied up the edges and added another coat of blue. I have painted it over with a thin coat of matt varnish to seal it in place. I am adding so much extra detail now using the MK1 upgrade kit. Which is improving the look of the model so well. Still lots to do on the shelter deck alone before getting to the upper part of the bridge and masts.


-
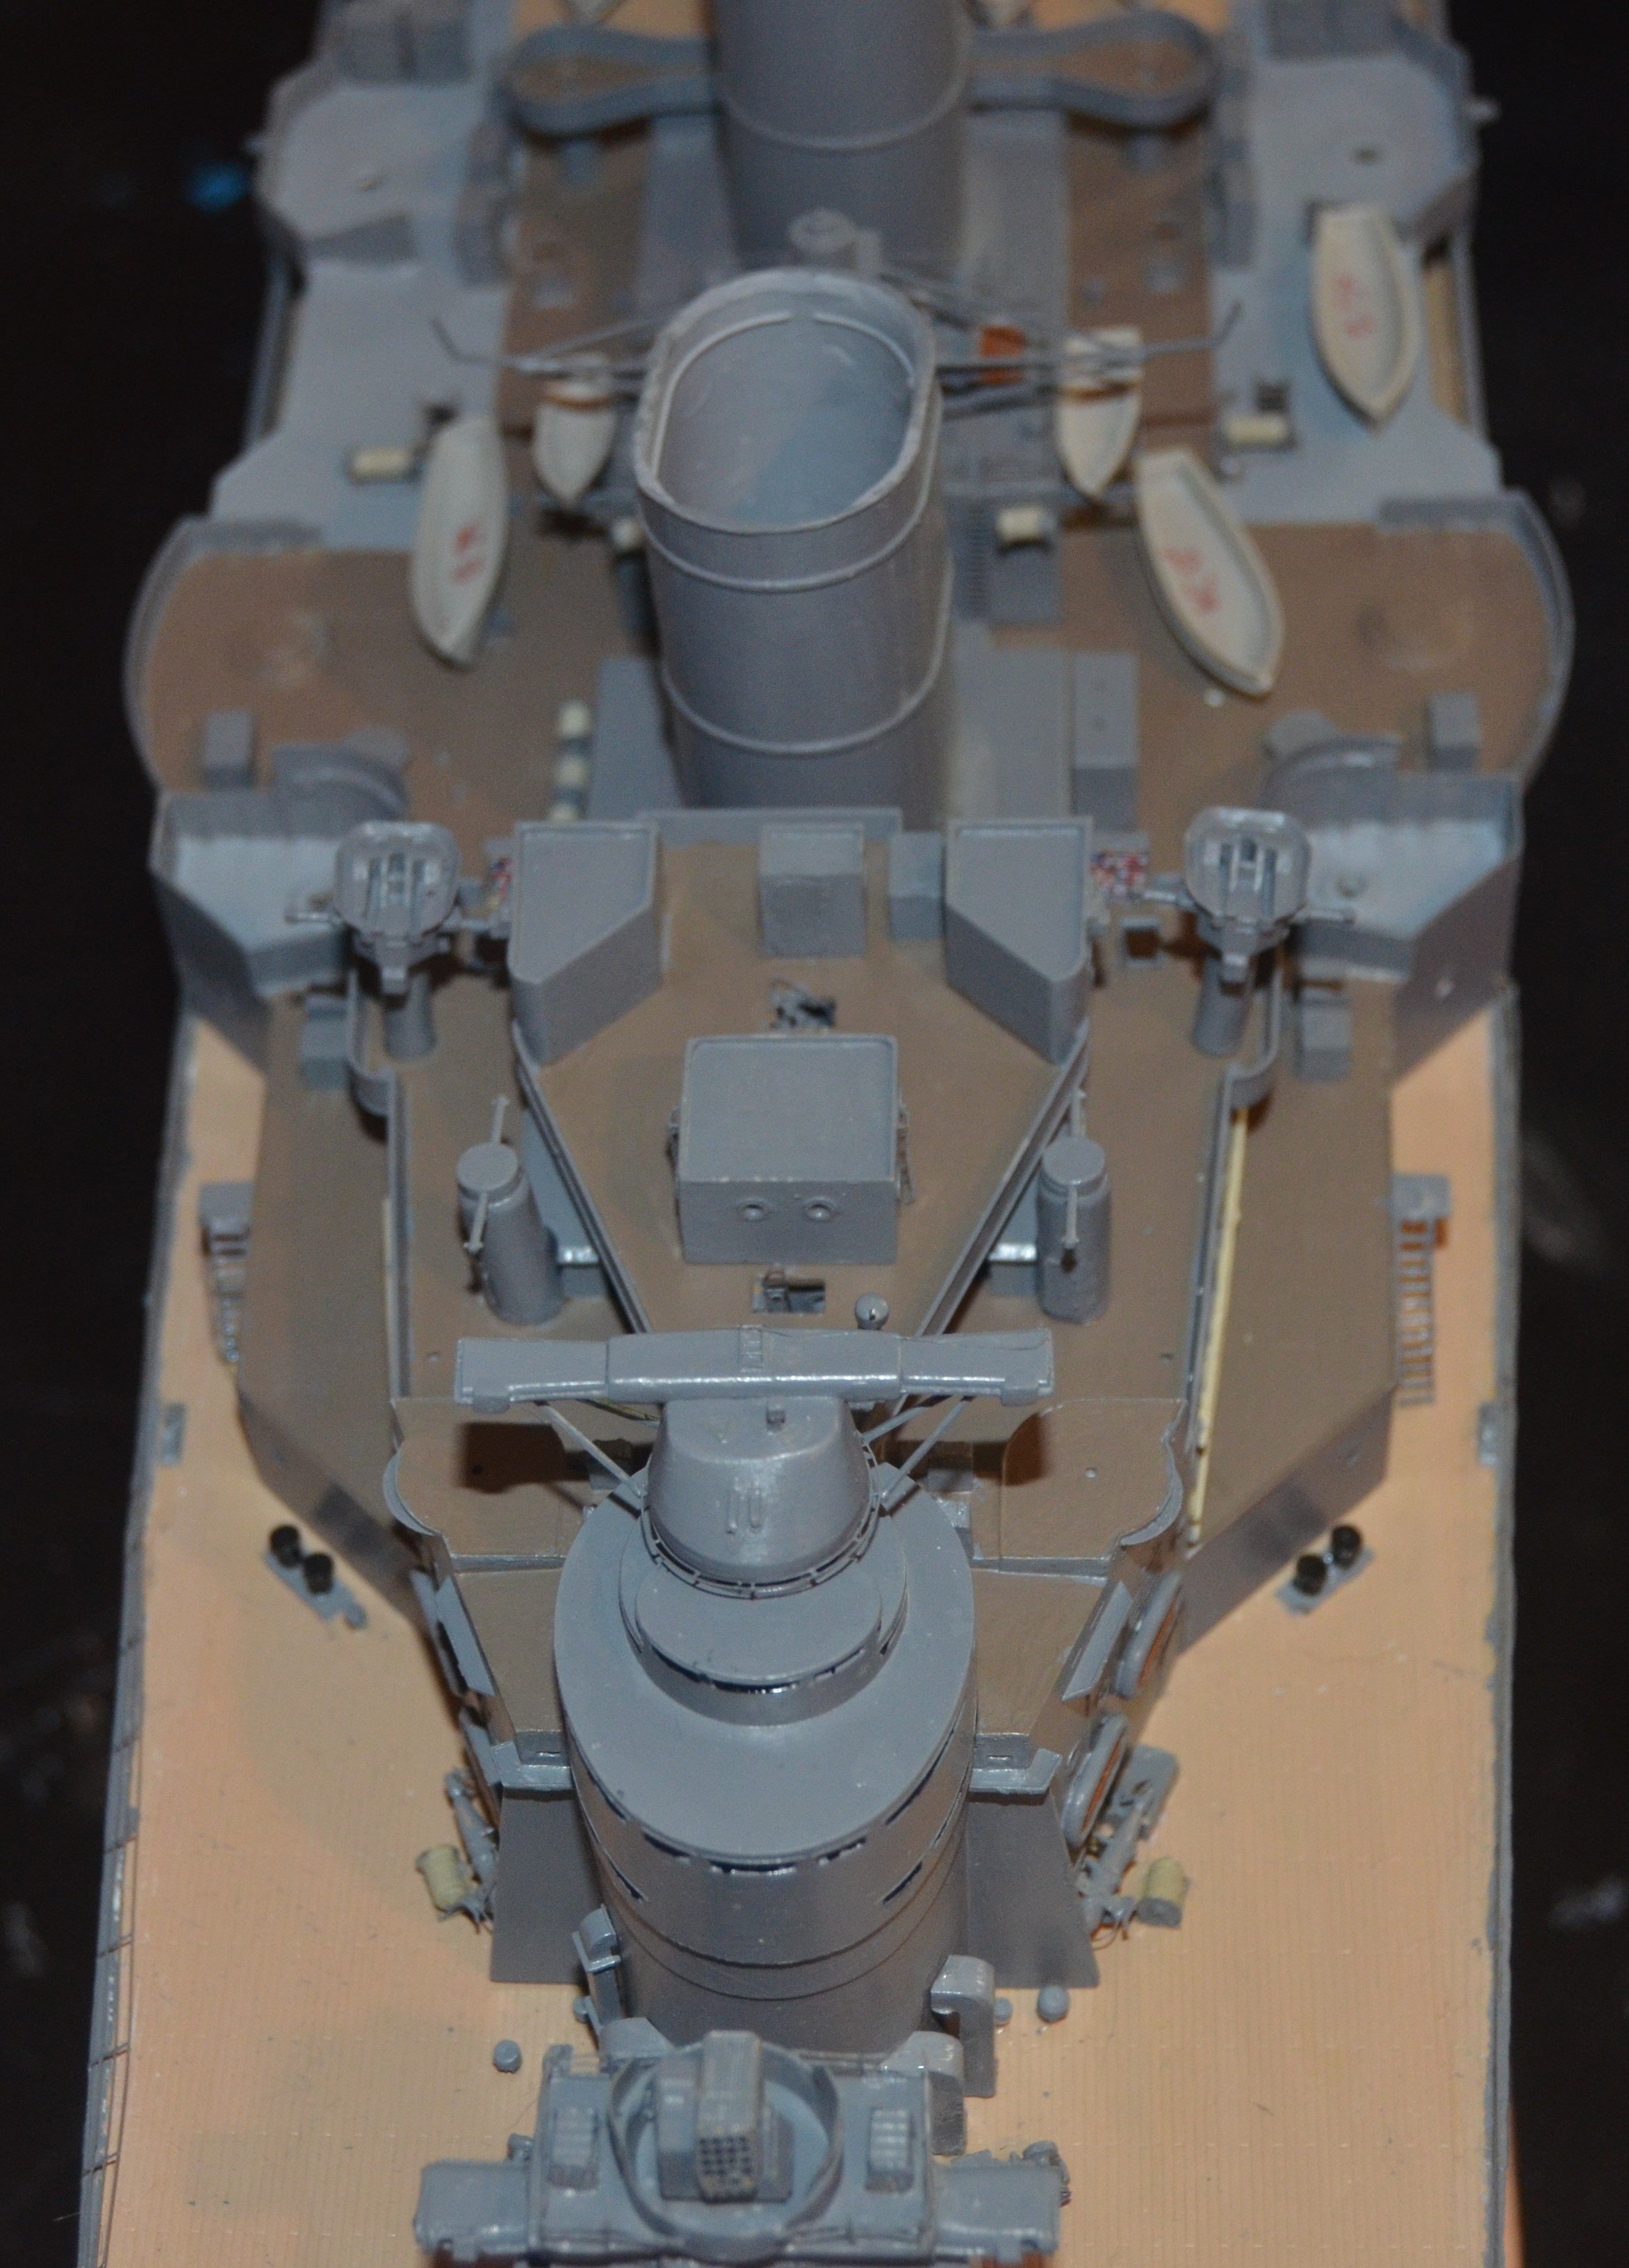
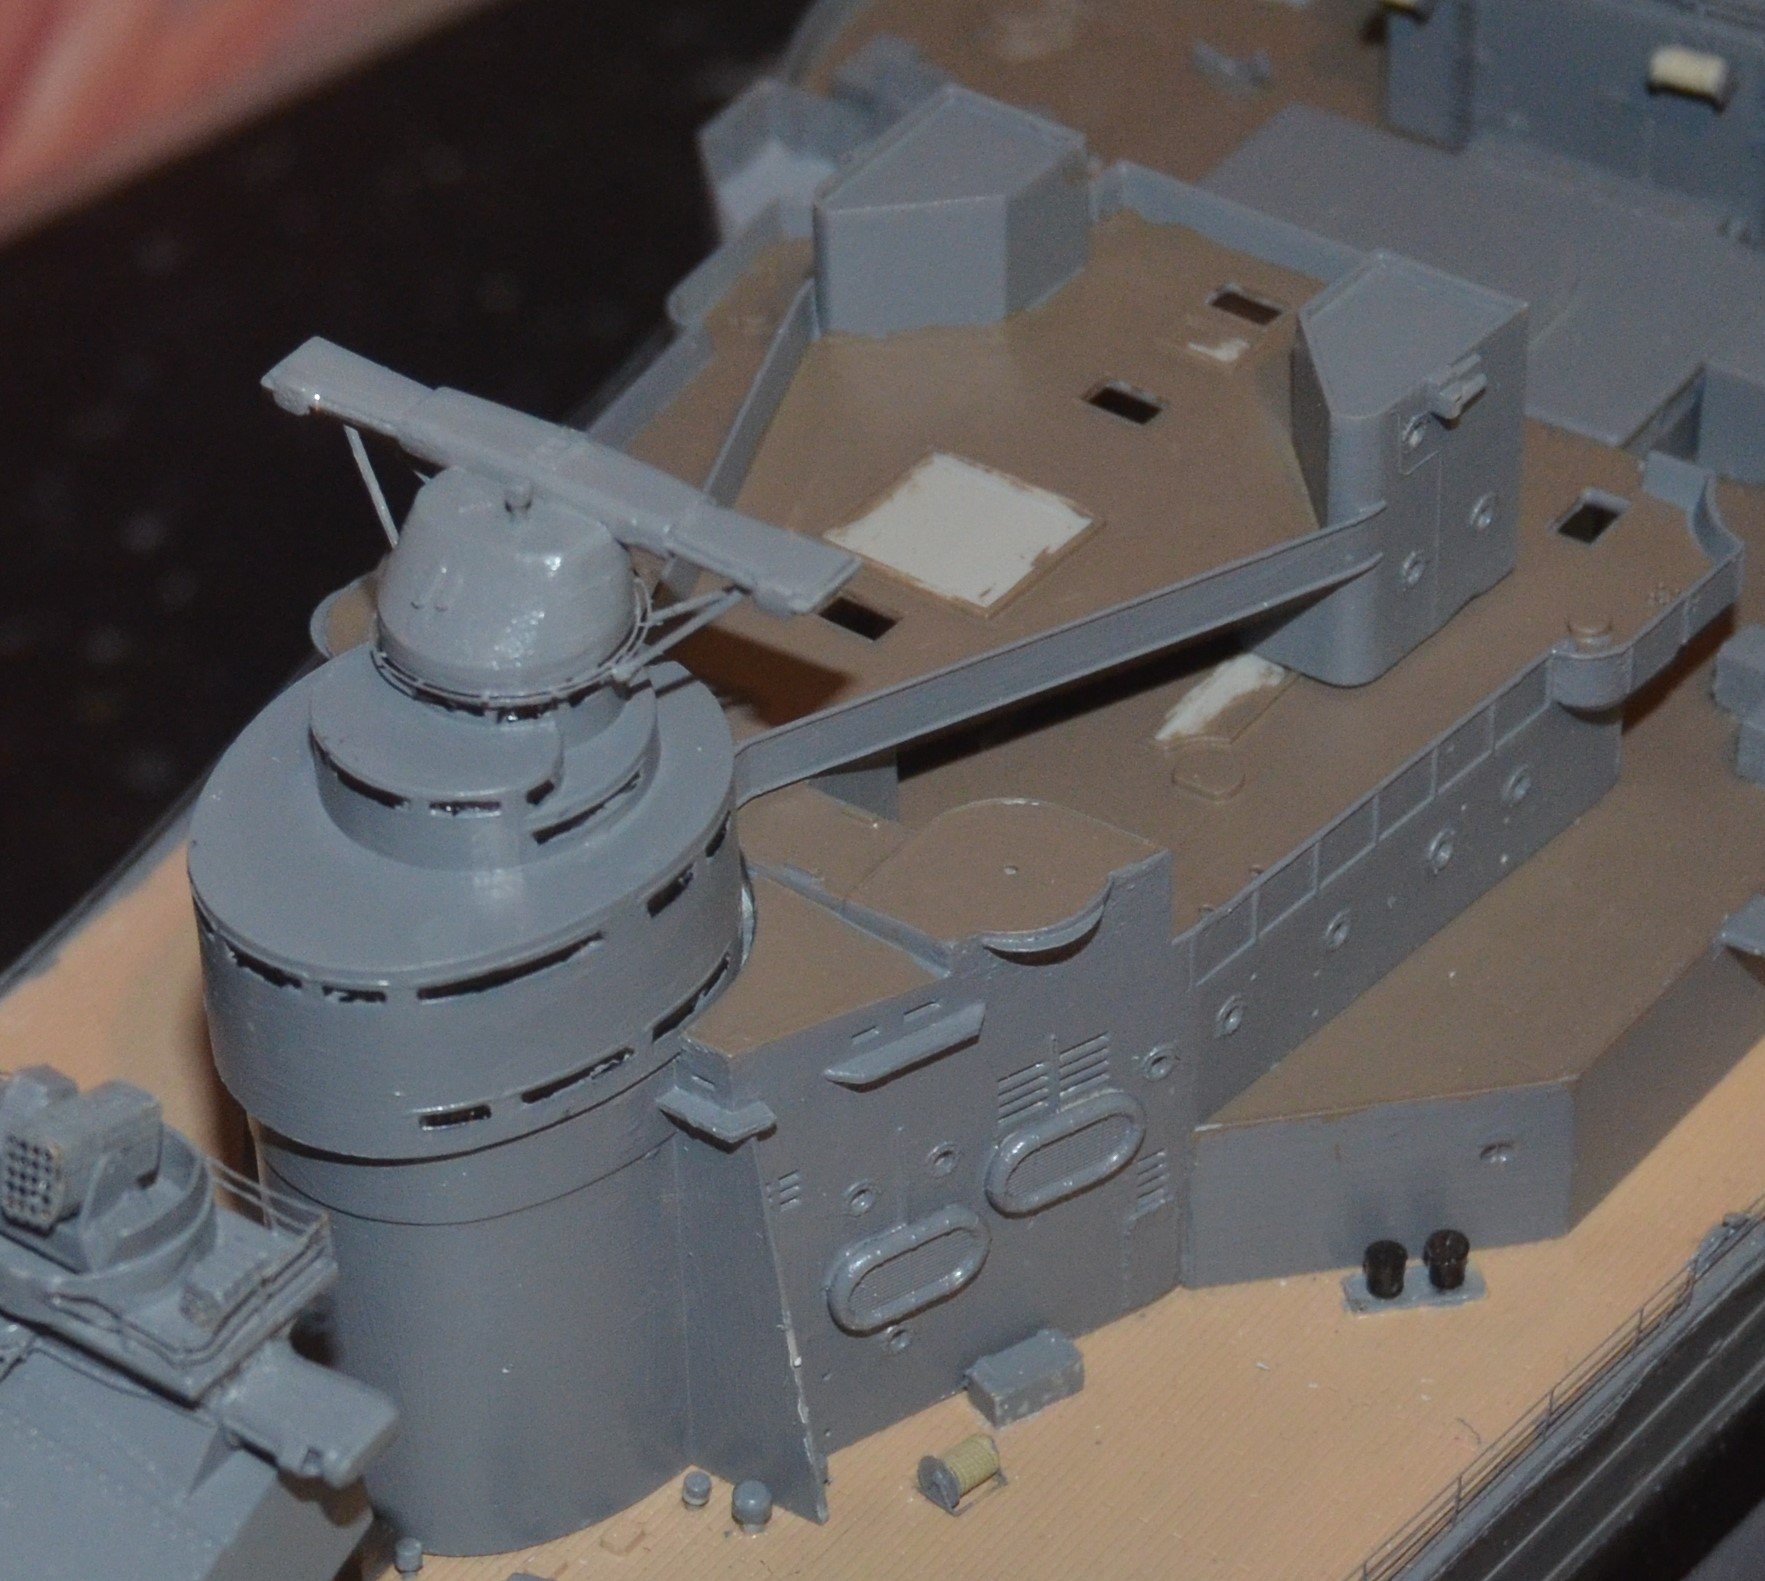
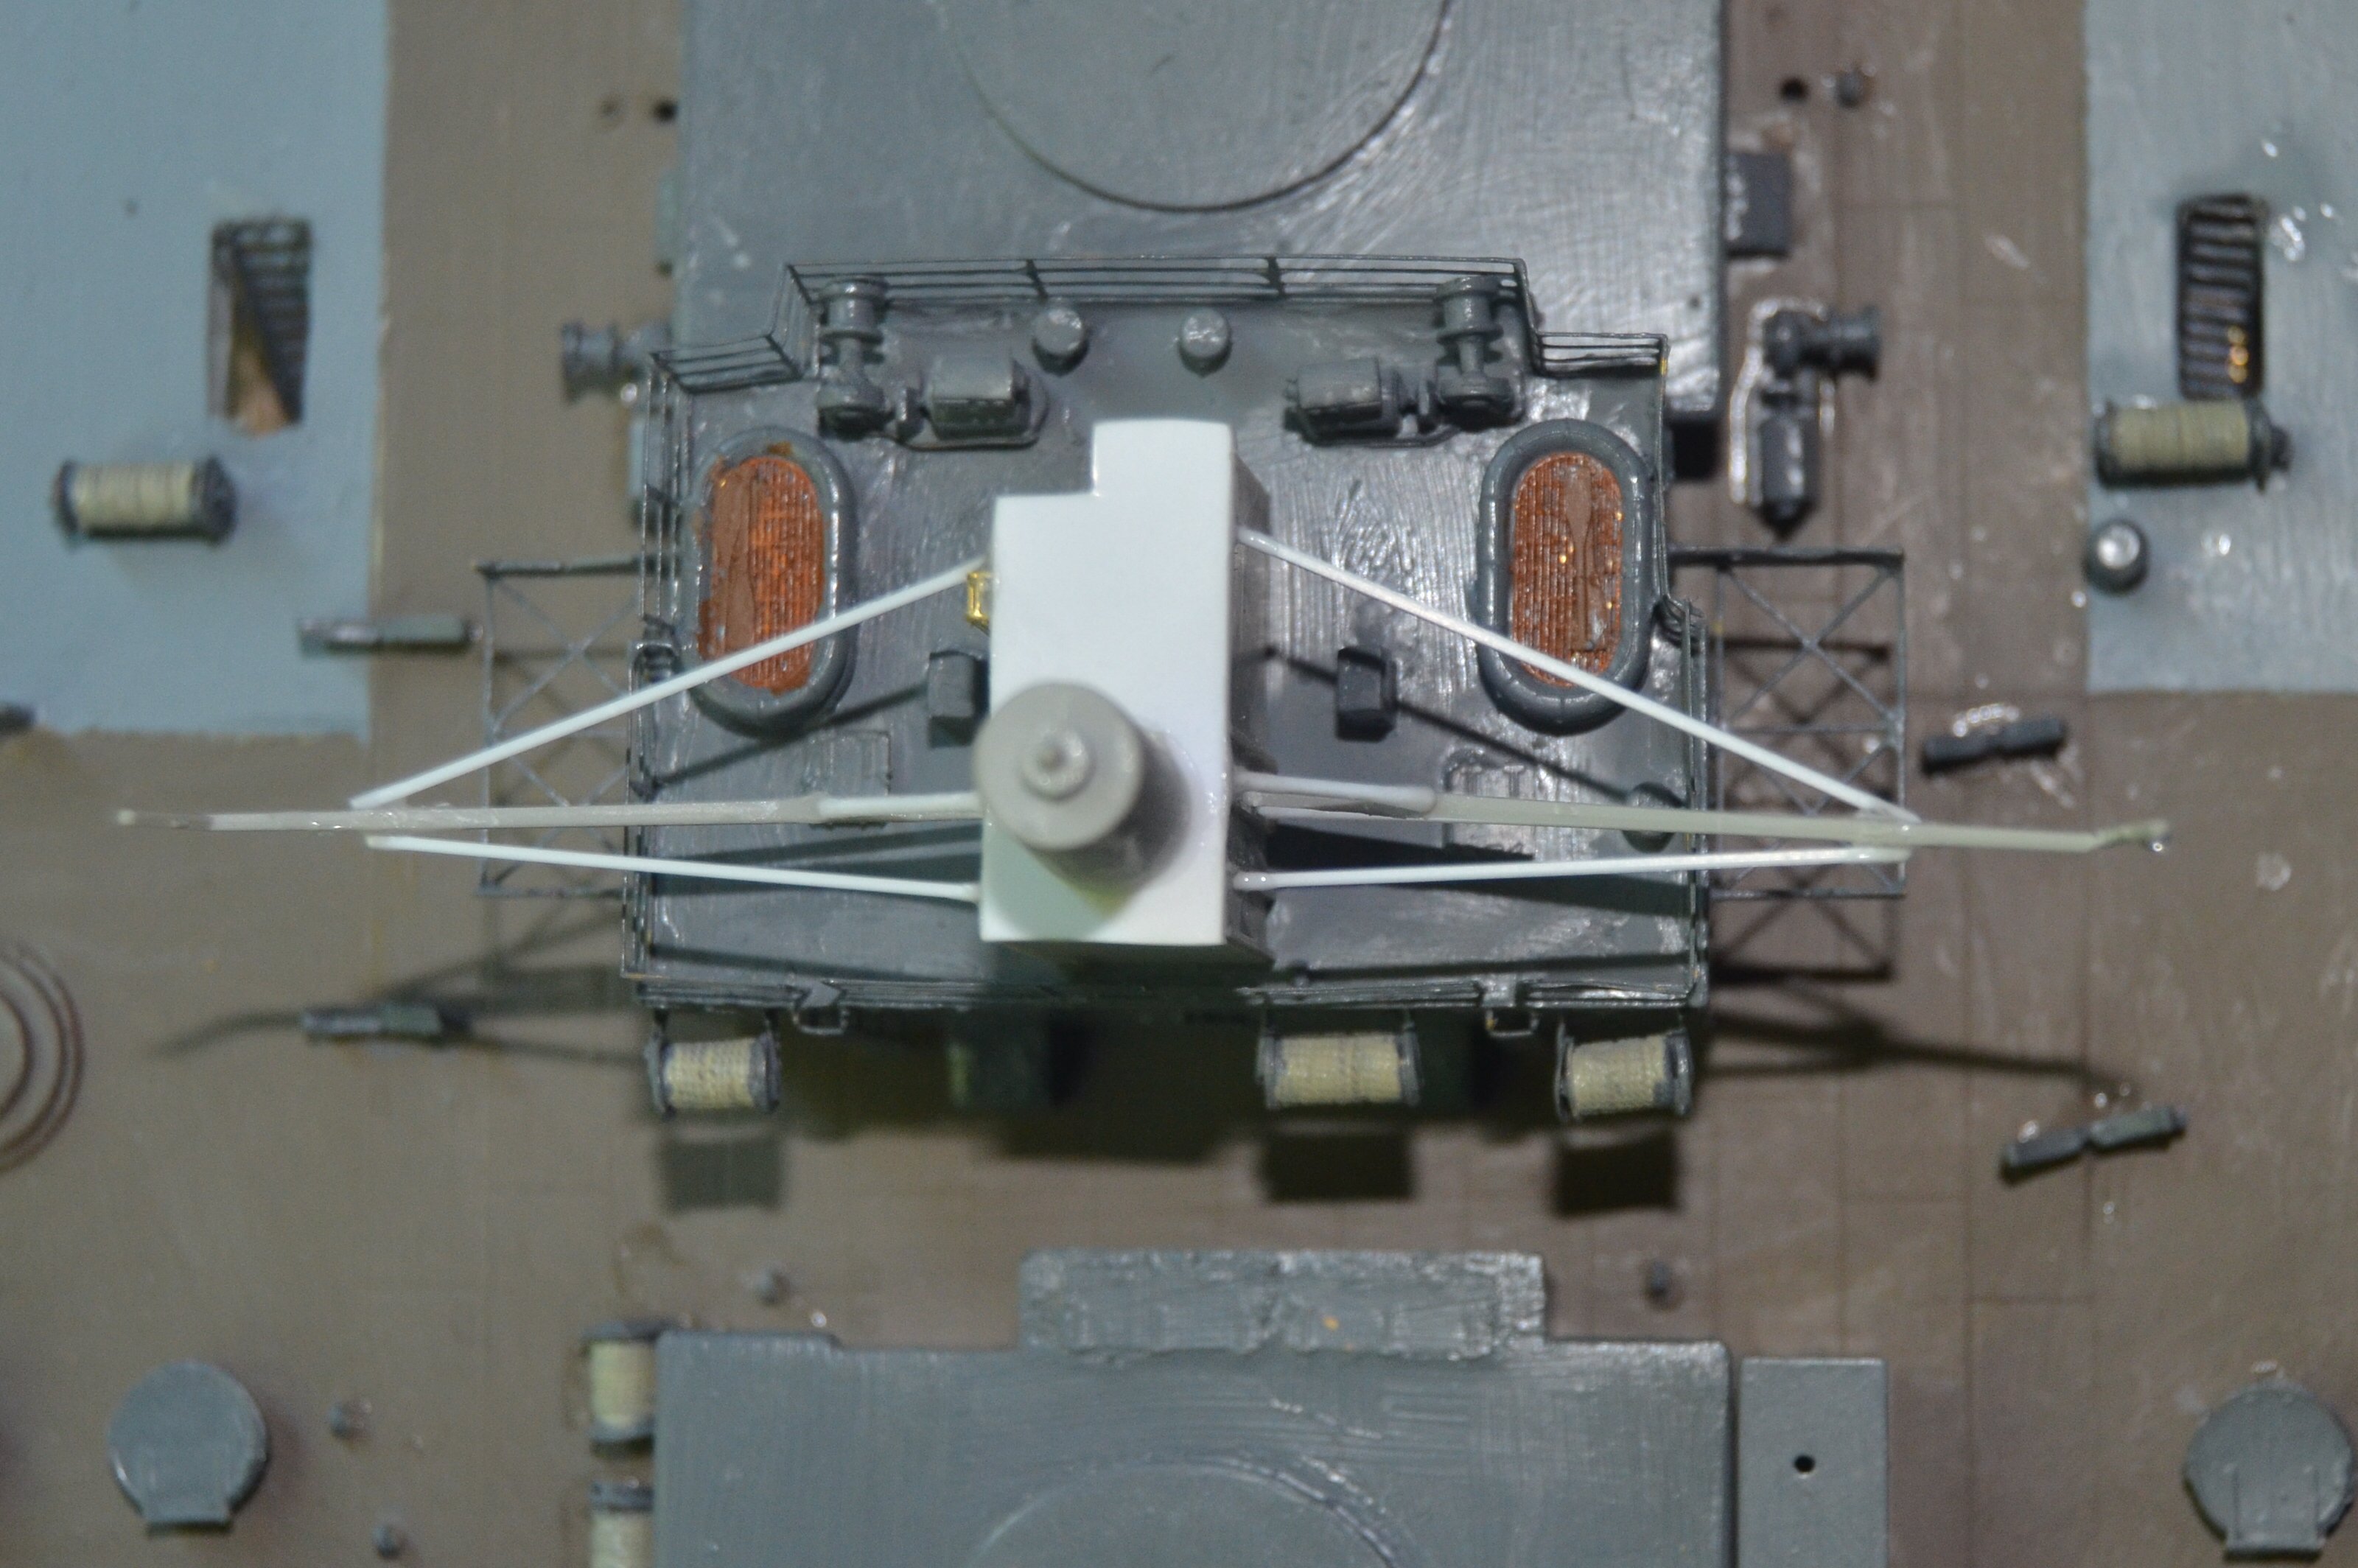
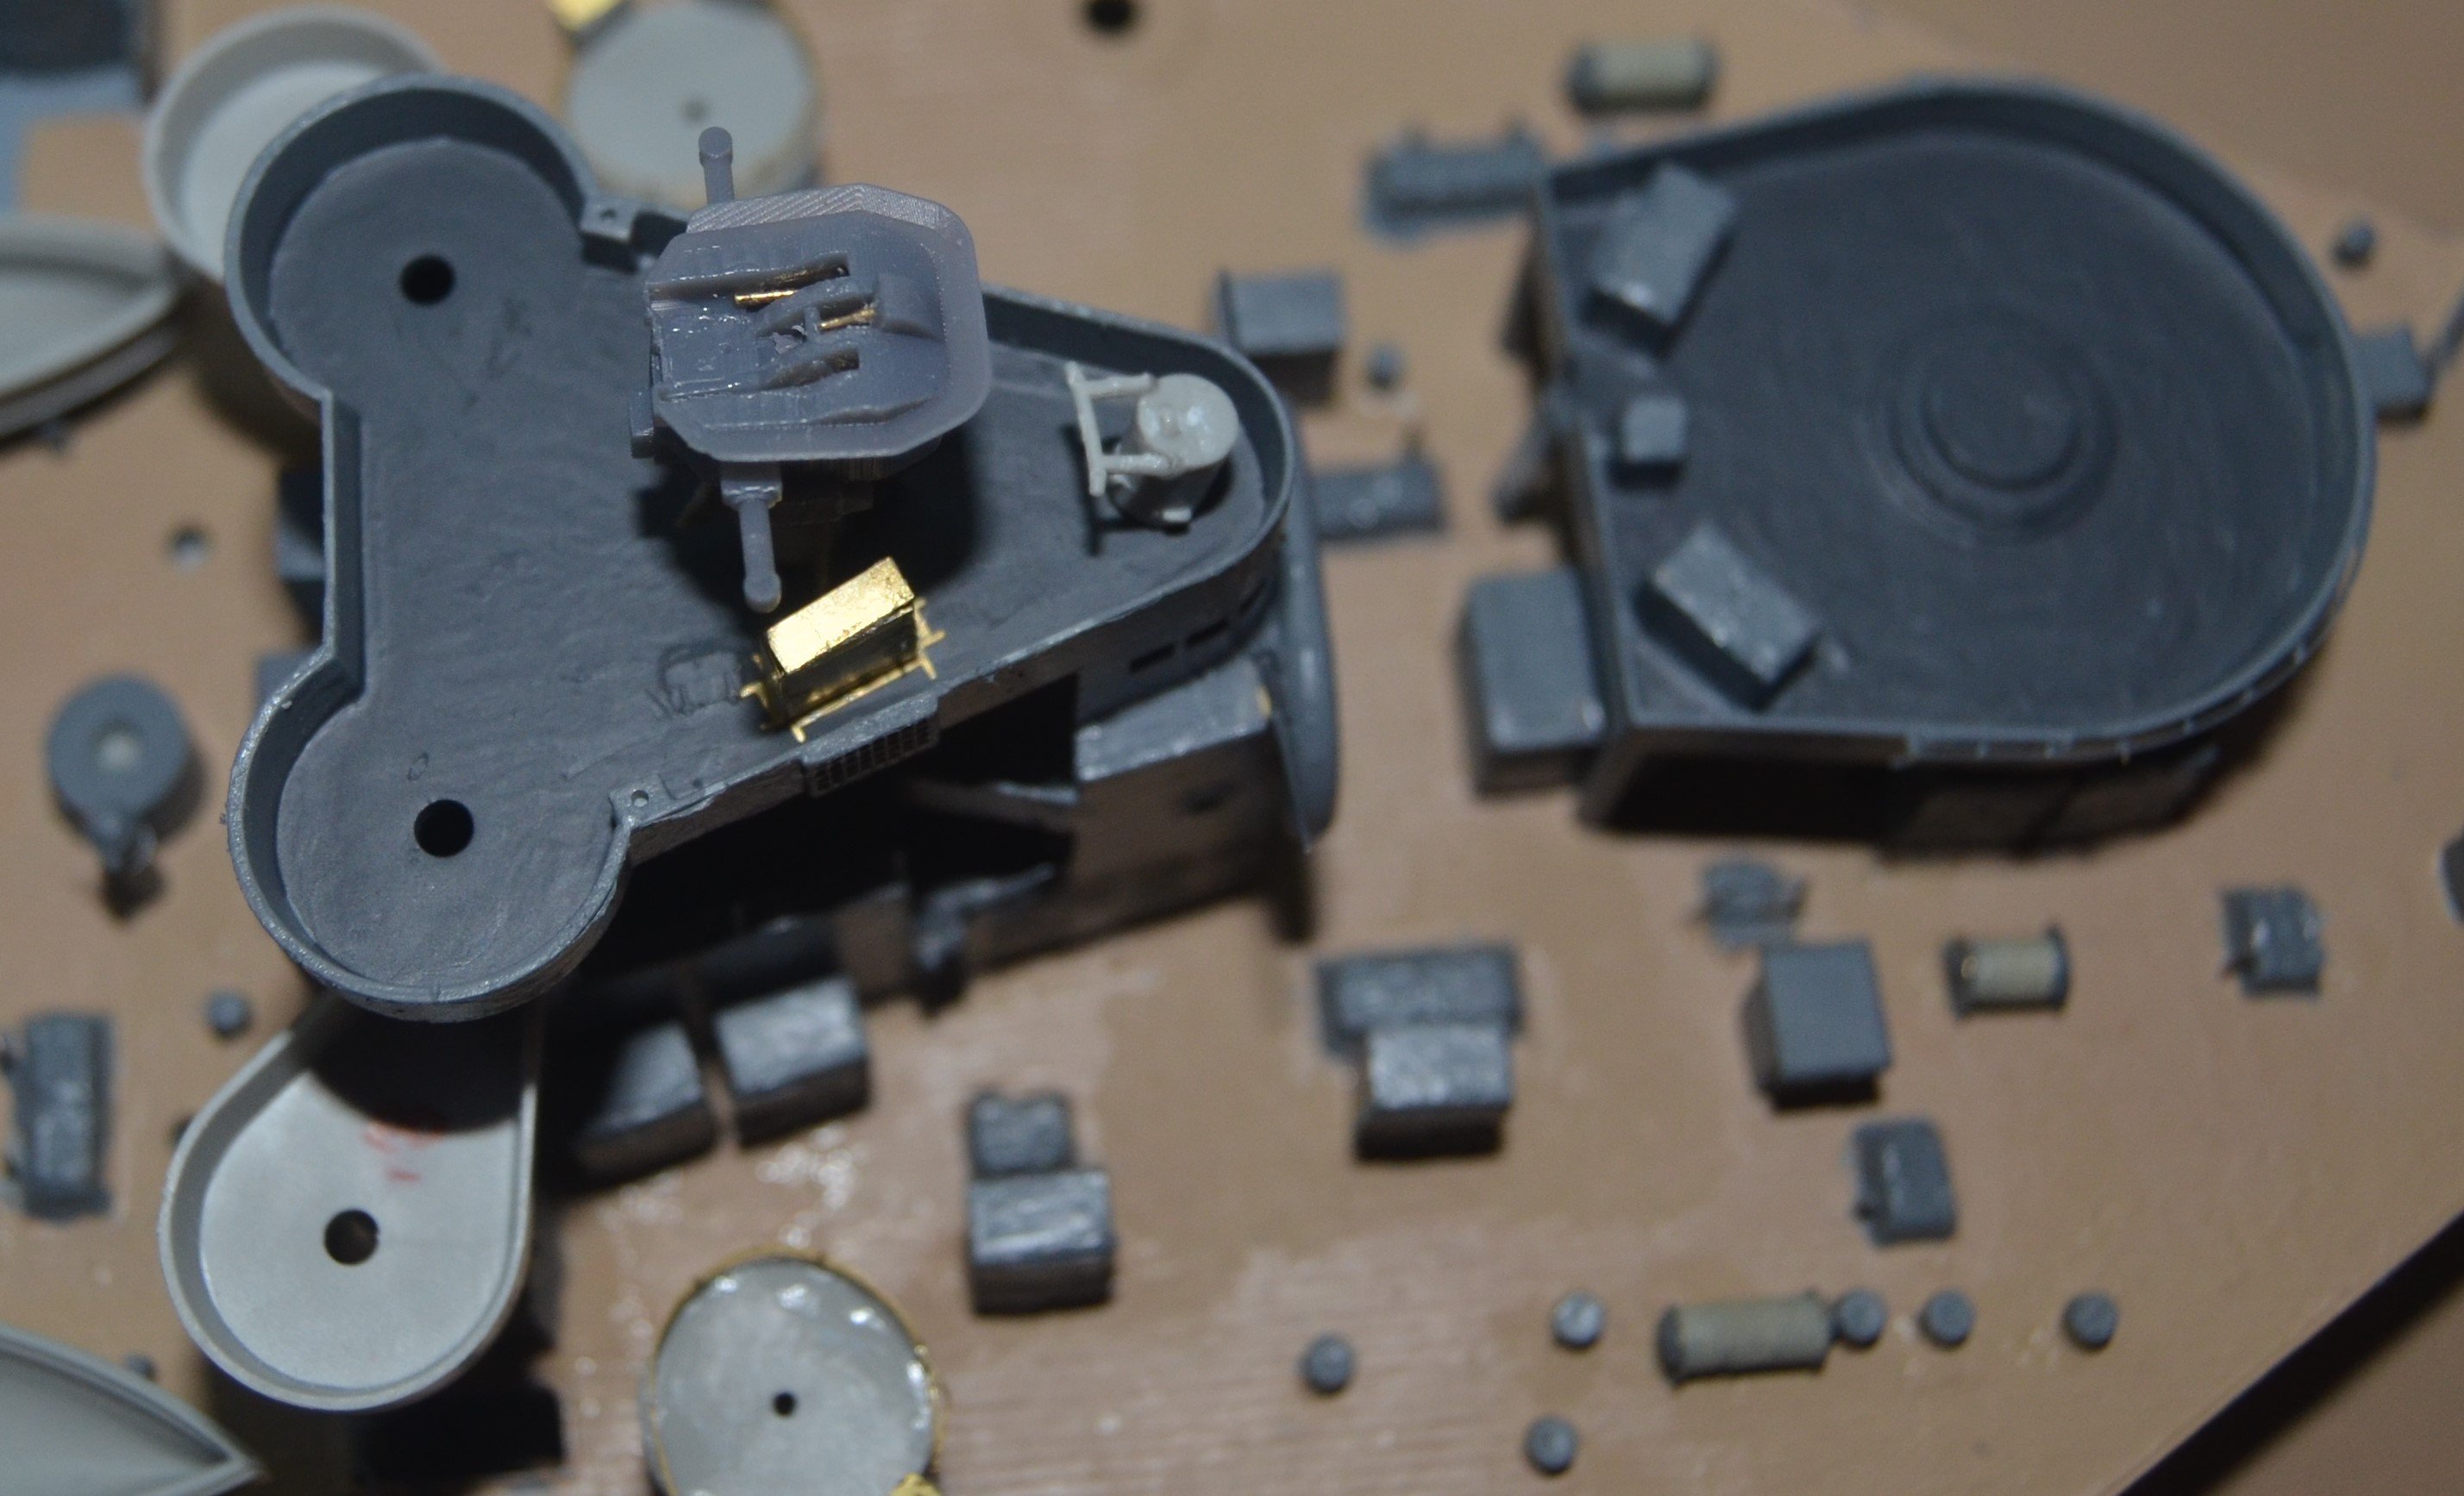
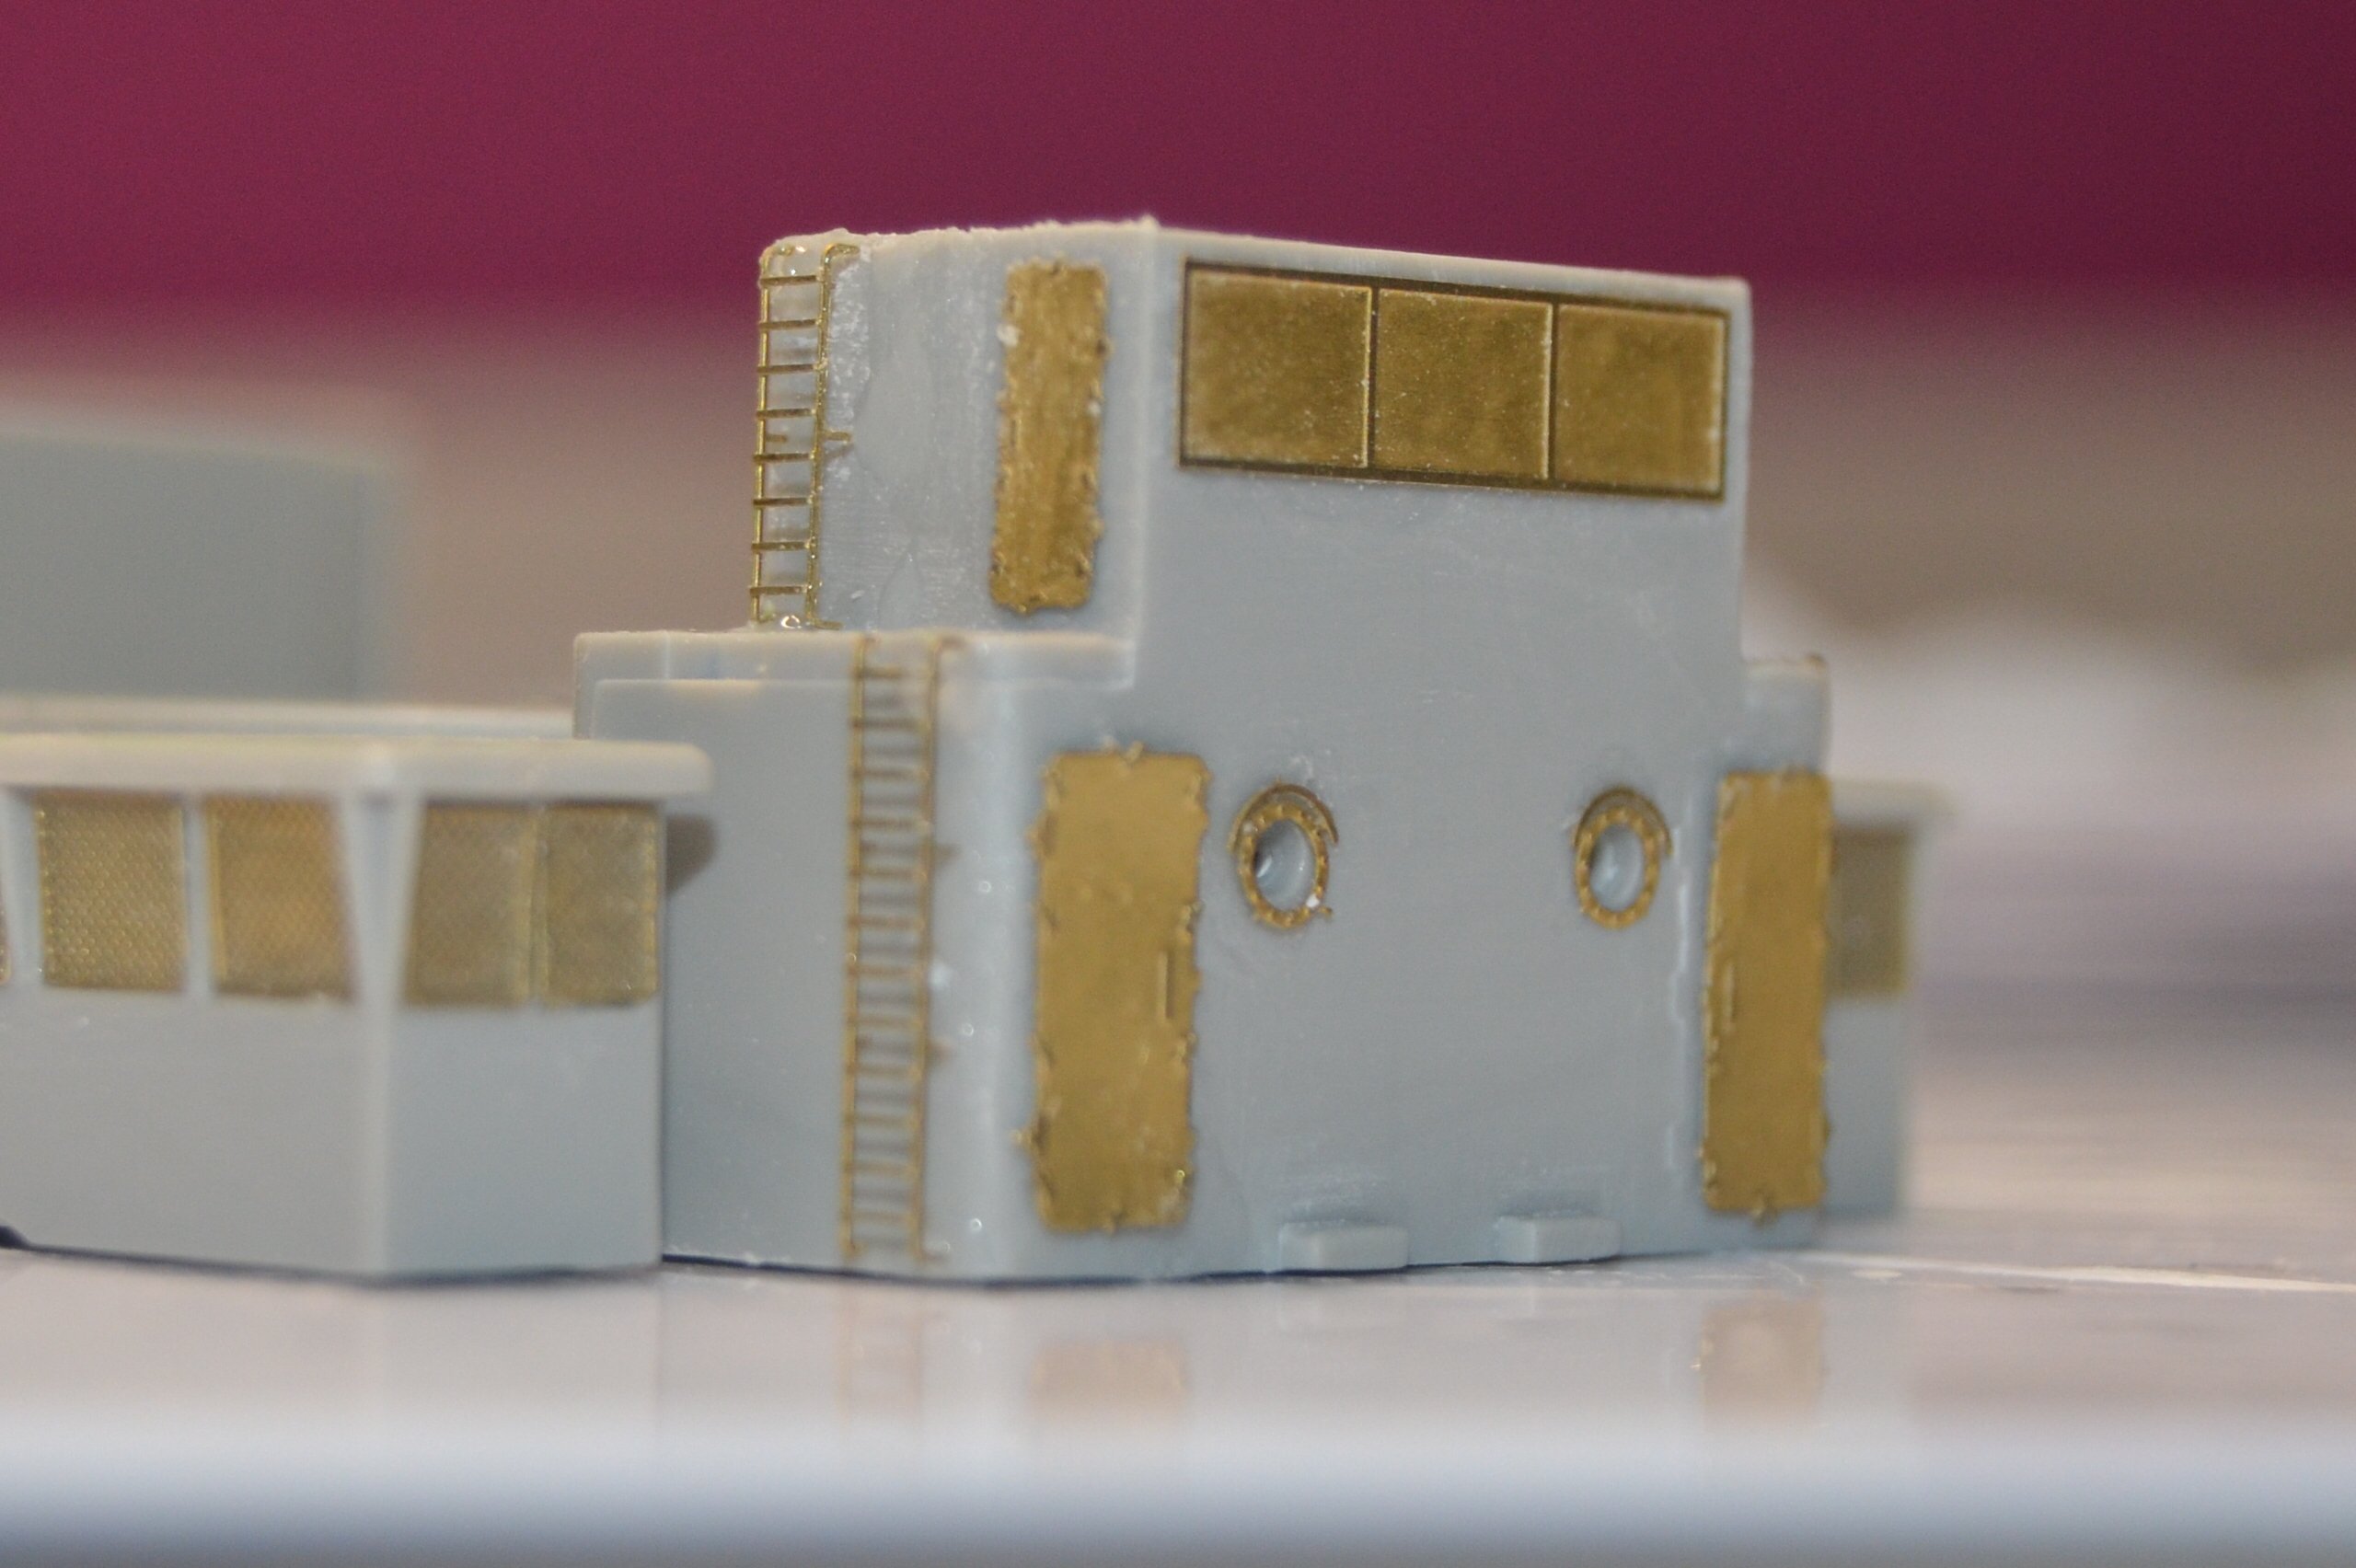
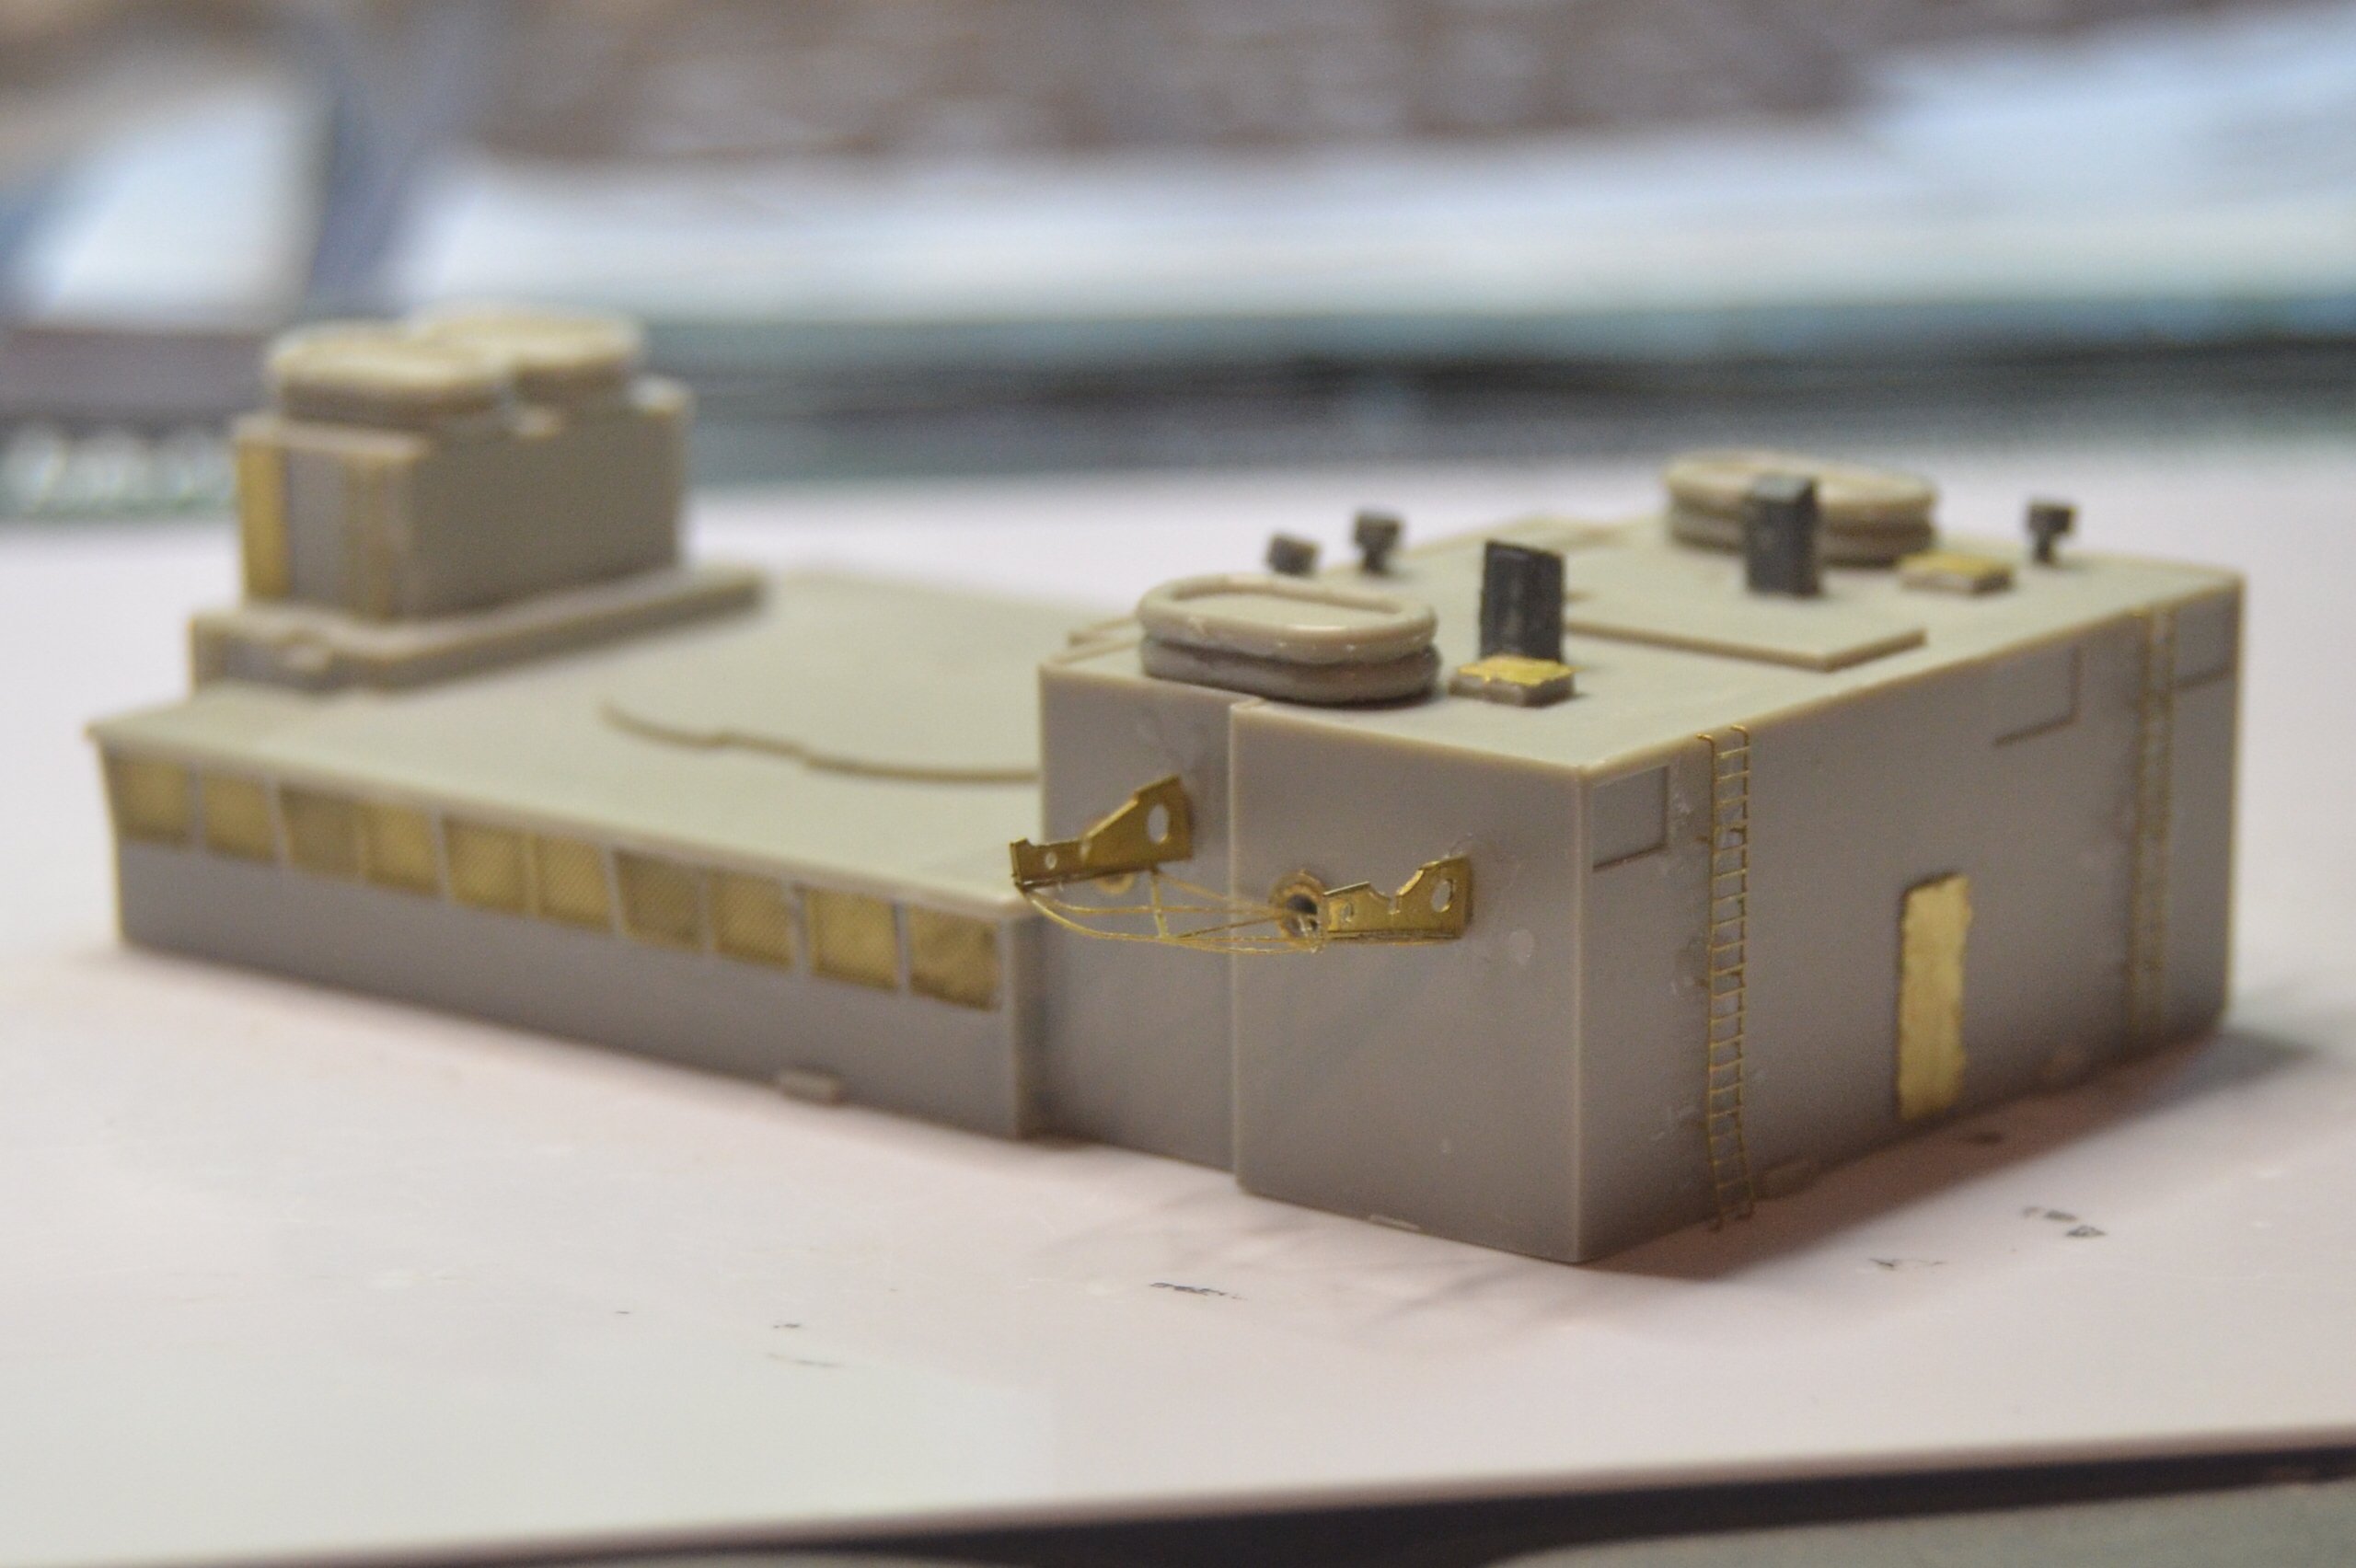
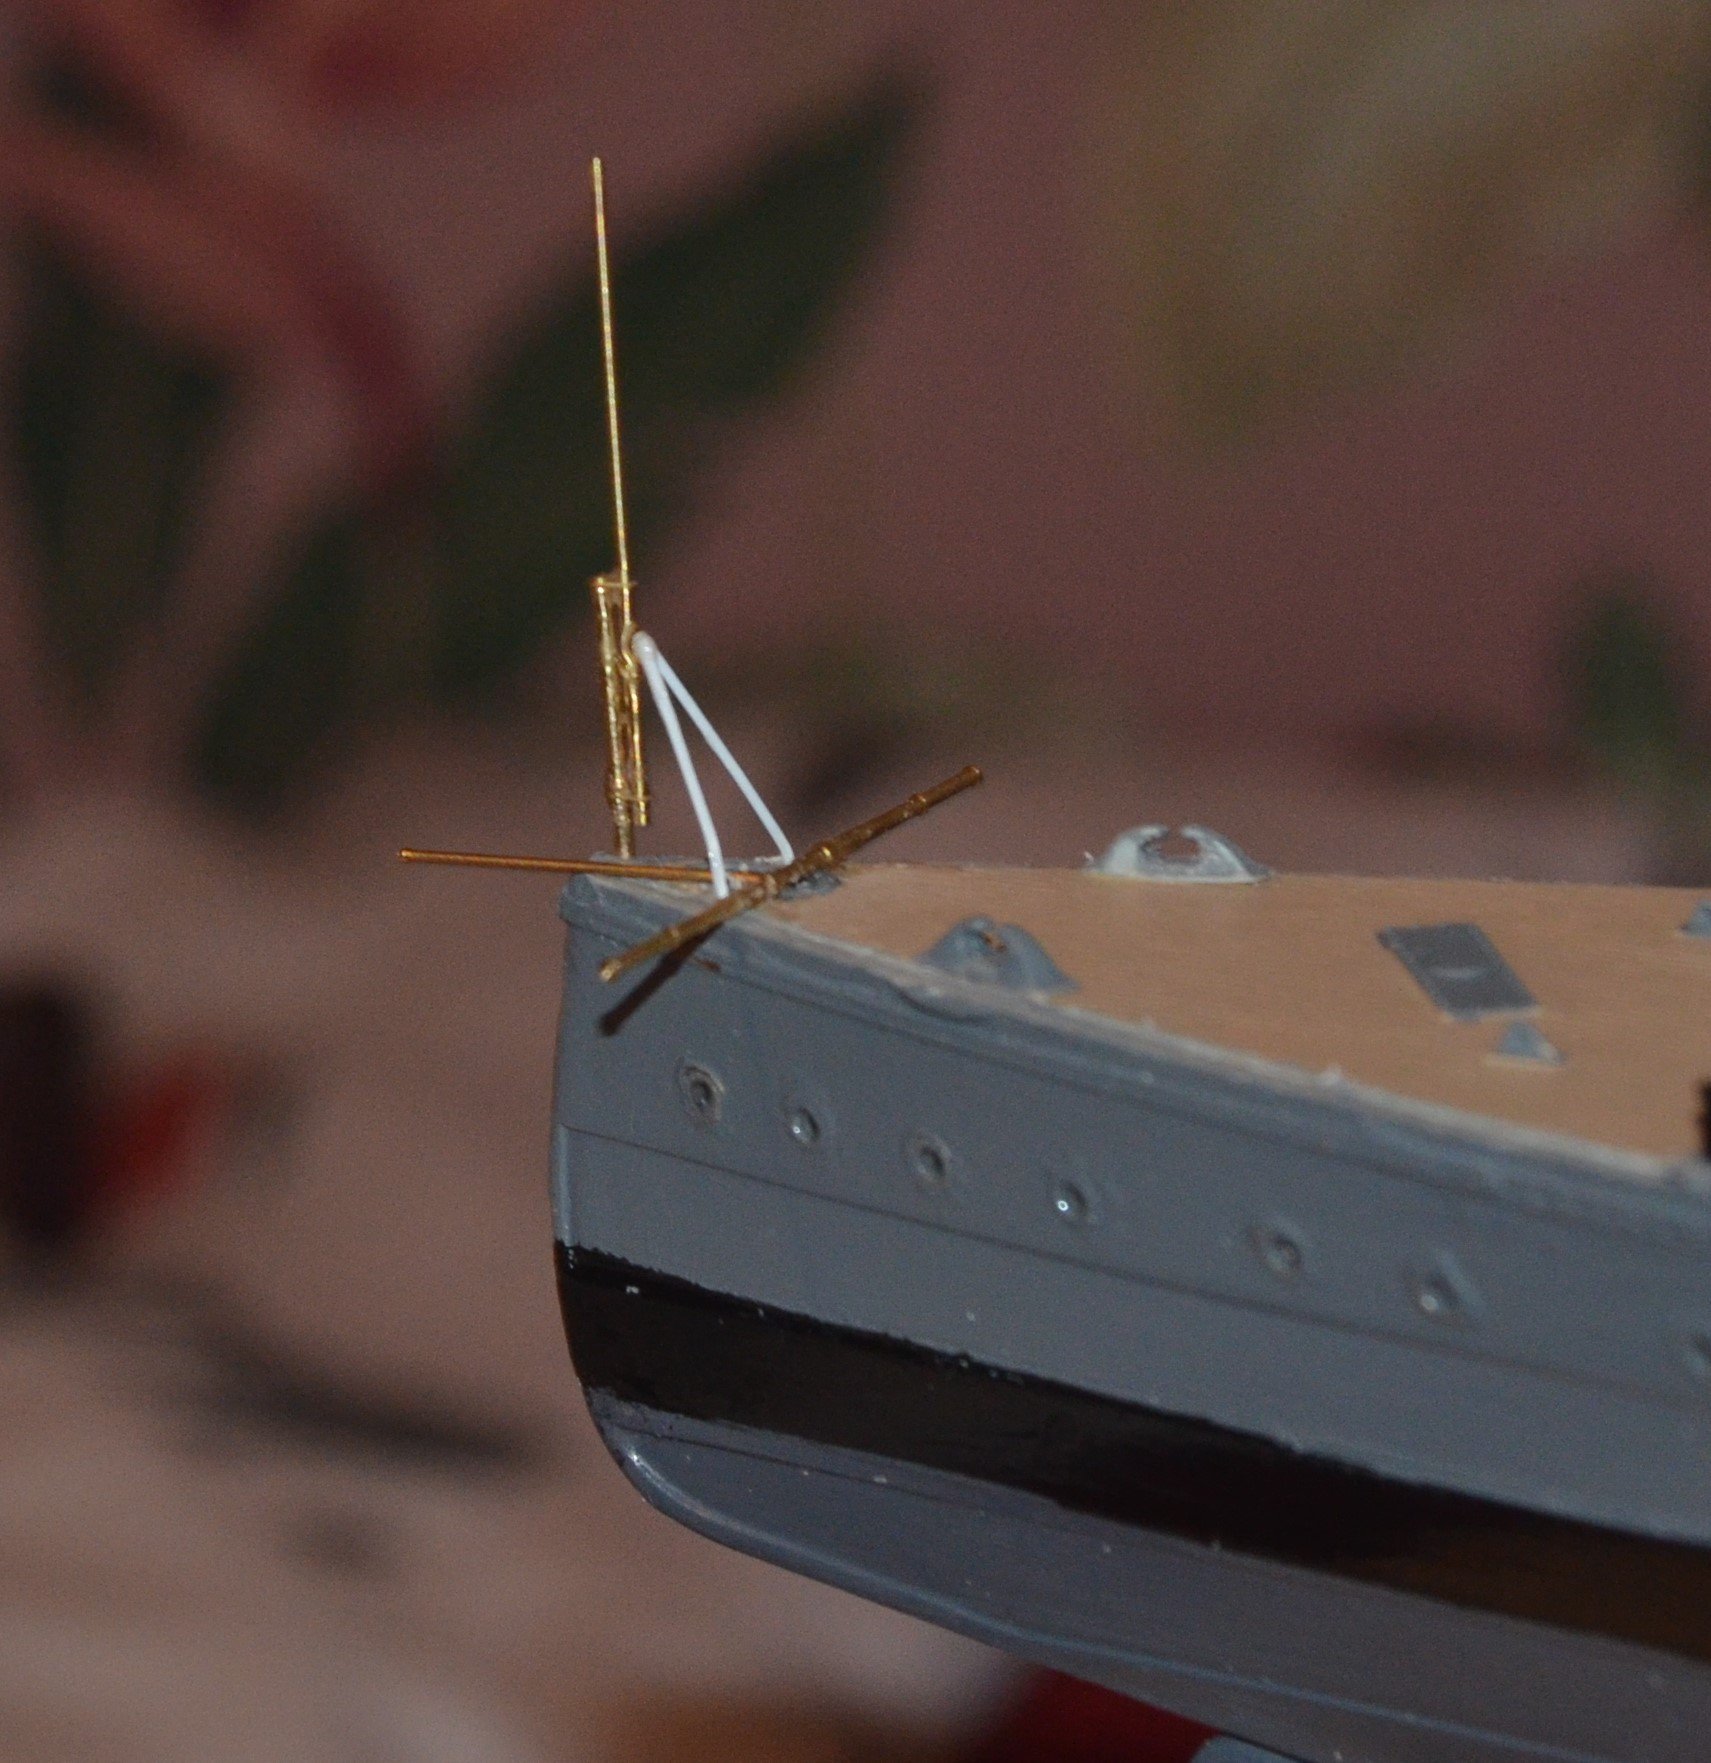
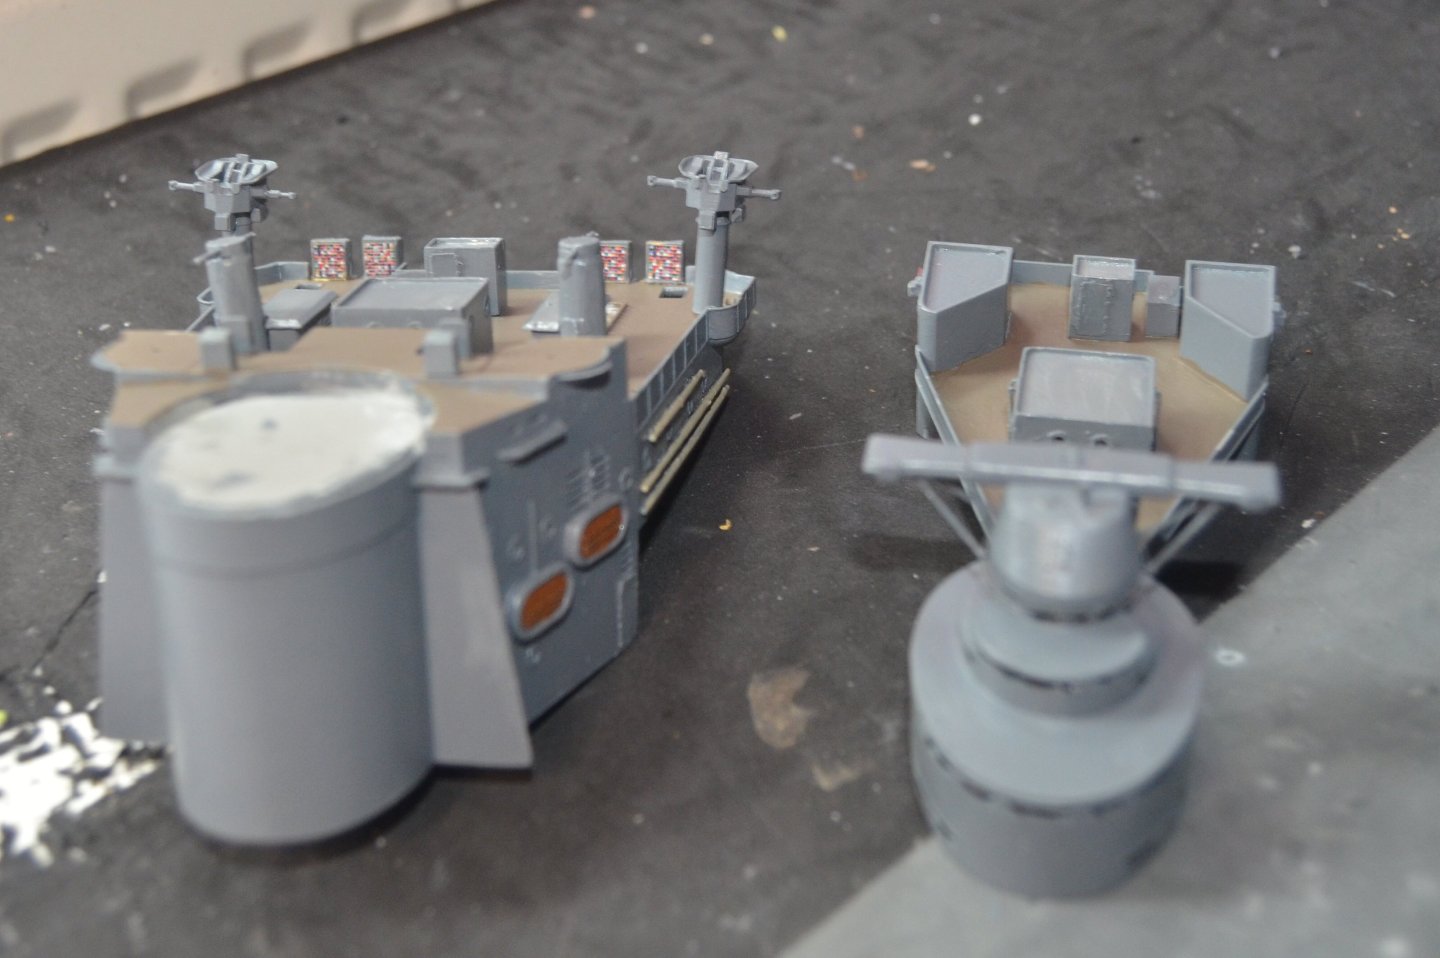
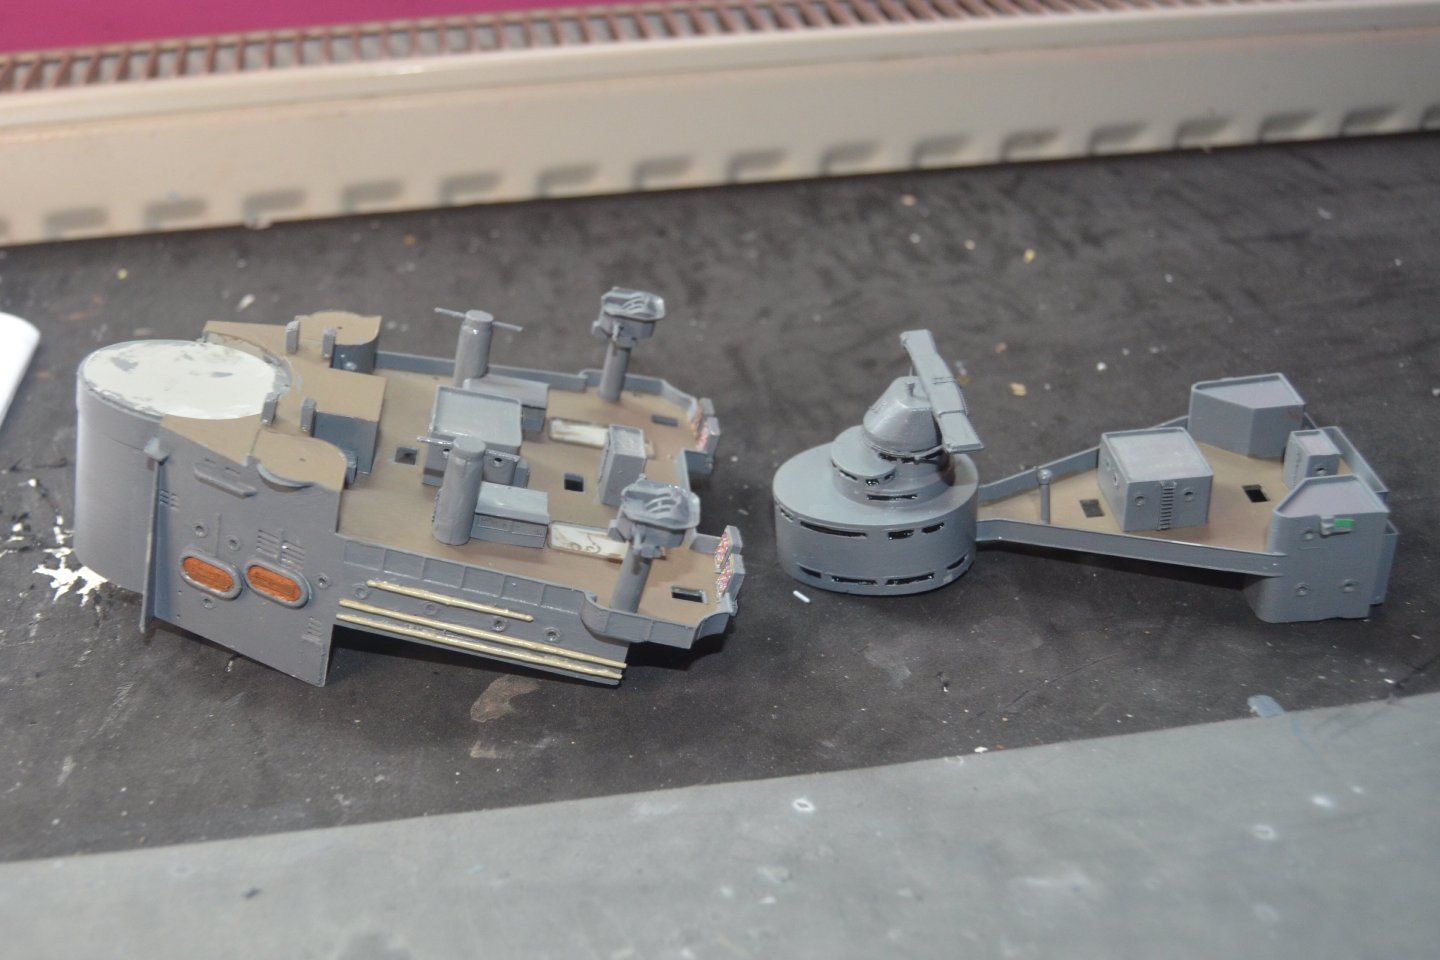
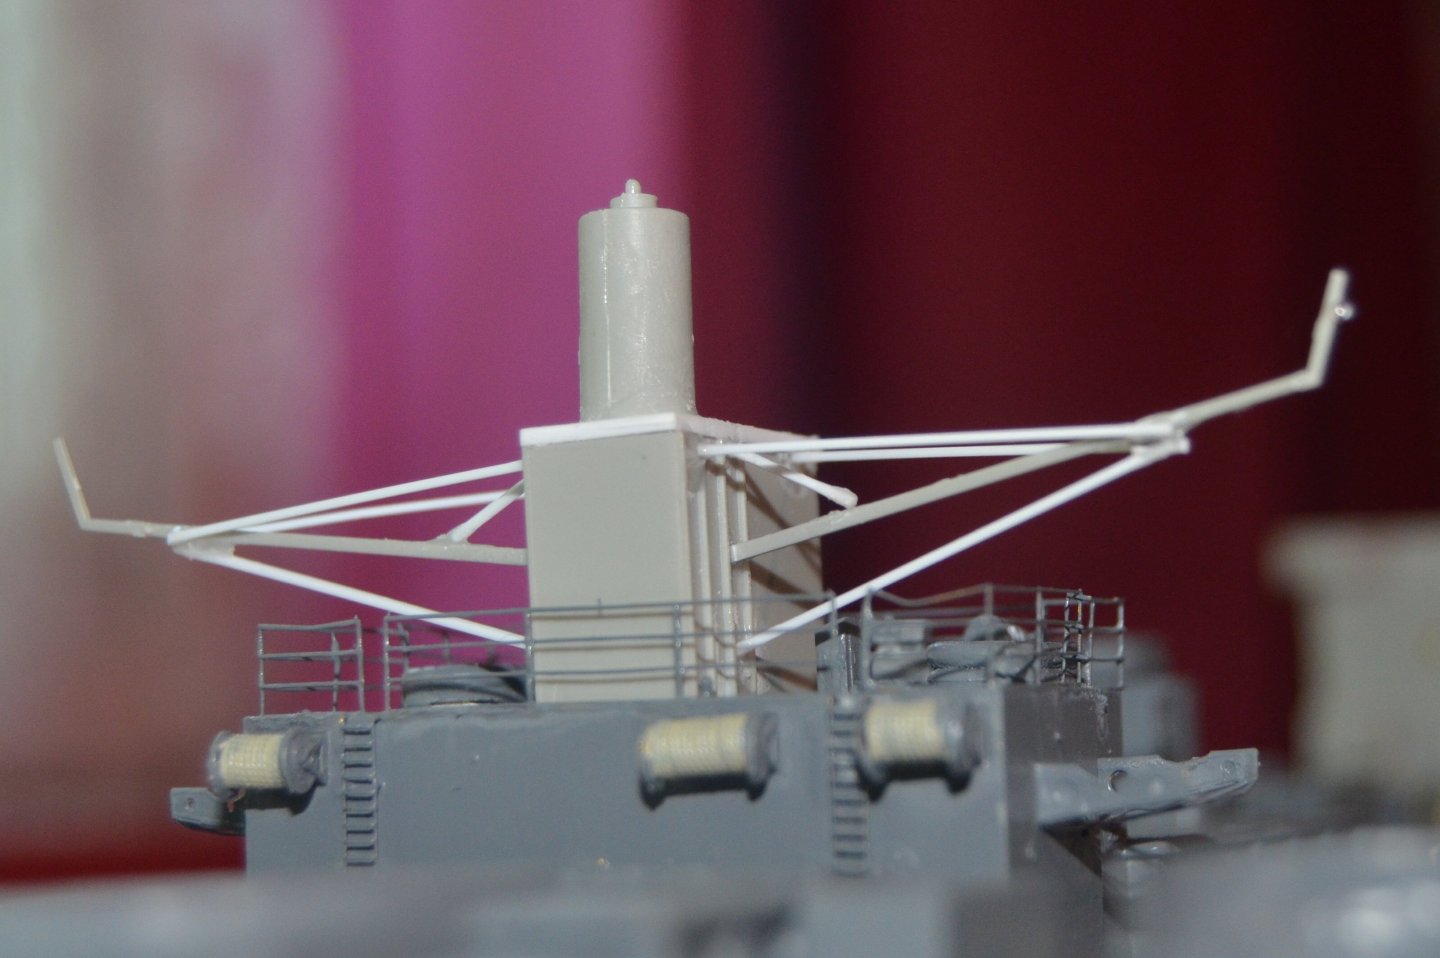
It's getting a bit complex now. I'm adding lots of details to the various structures. Probably around 80% of them are upgrades from the MK1 kit. Trumpeter have made some strange decisions with this kit. It is a quality kit to a very high standard. There are quite a few PE ladders and steps. But where these are molded into the plastic they have not replaced them. But the MK1 kit does have all the replacements for these parts. Pictures 1 and 2 are the wireless rig. Trumpeter have the layout slightly wrong. and the roof was flat not recessed. this has been remedied with some thin plastic sheet. And the aerial spreaders where made with some very thin PE that was also not quite right. I have made the spreaders from very thin plastic rod based on the HMS Hood web site. In picture three the tripod director has had the plastic one replaced with a resin one which is a lot more detailed. The black in the windows is lacquer paint and looks far better than the close up. They catch the light at times and look like glare from the glass windows. Still lots to add to the smaller deck parts before getting round to the bridge. PE has it's good and bad bits . It is excellent for adding a lot of detail that would otherwise not be on the model. On the other hand it does add a lot of extra time to the build.


-
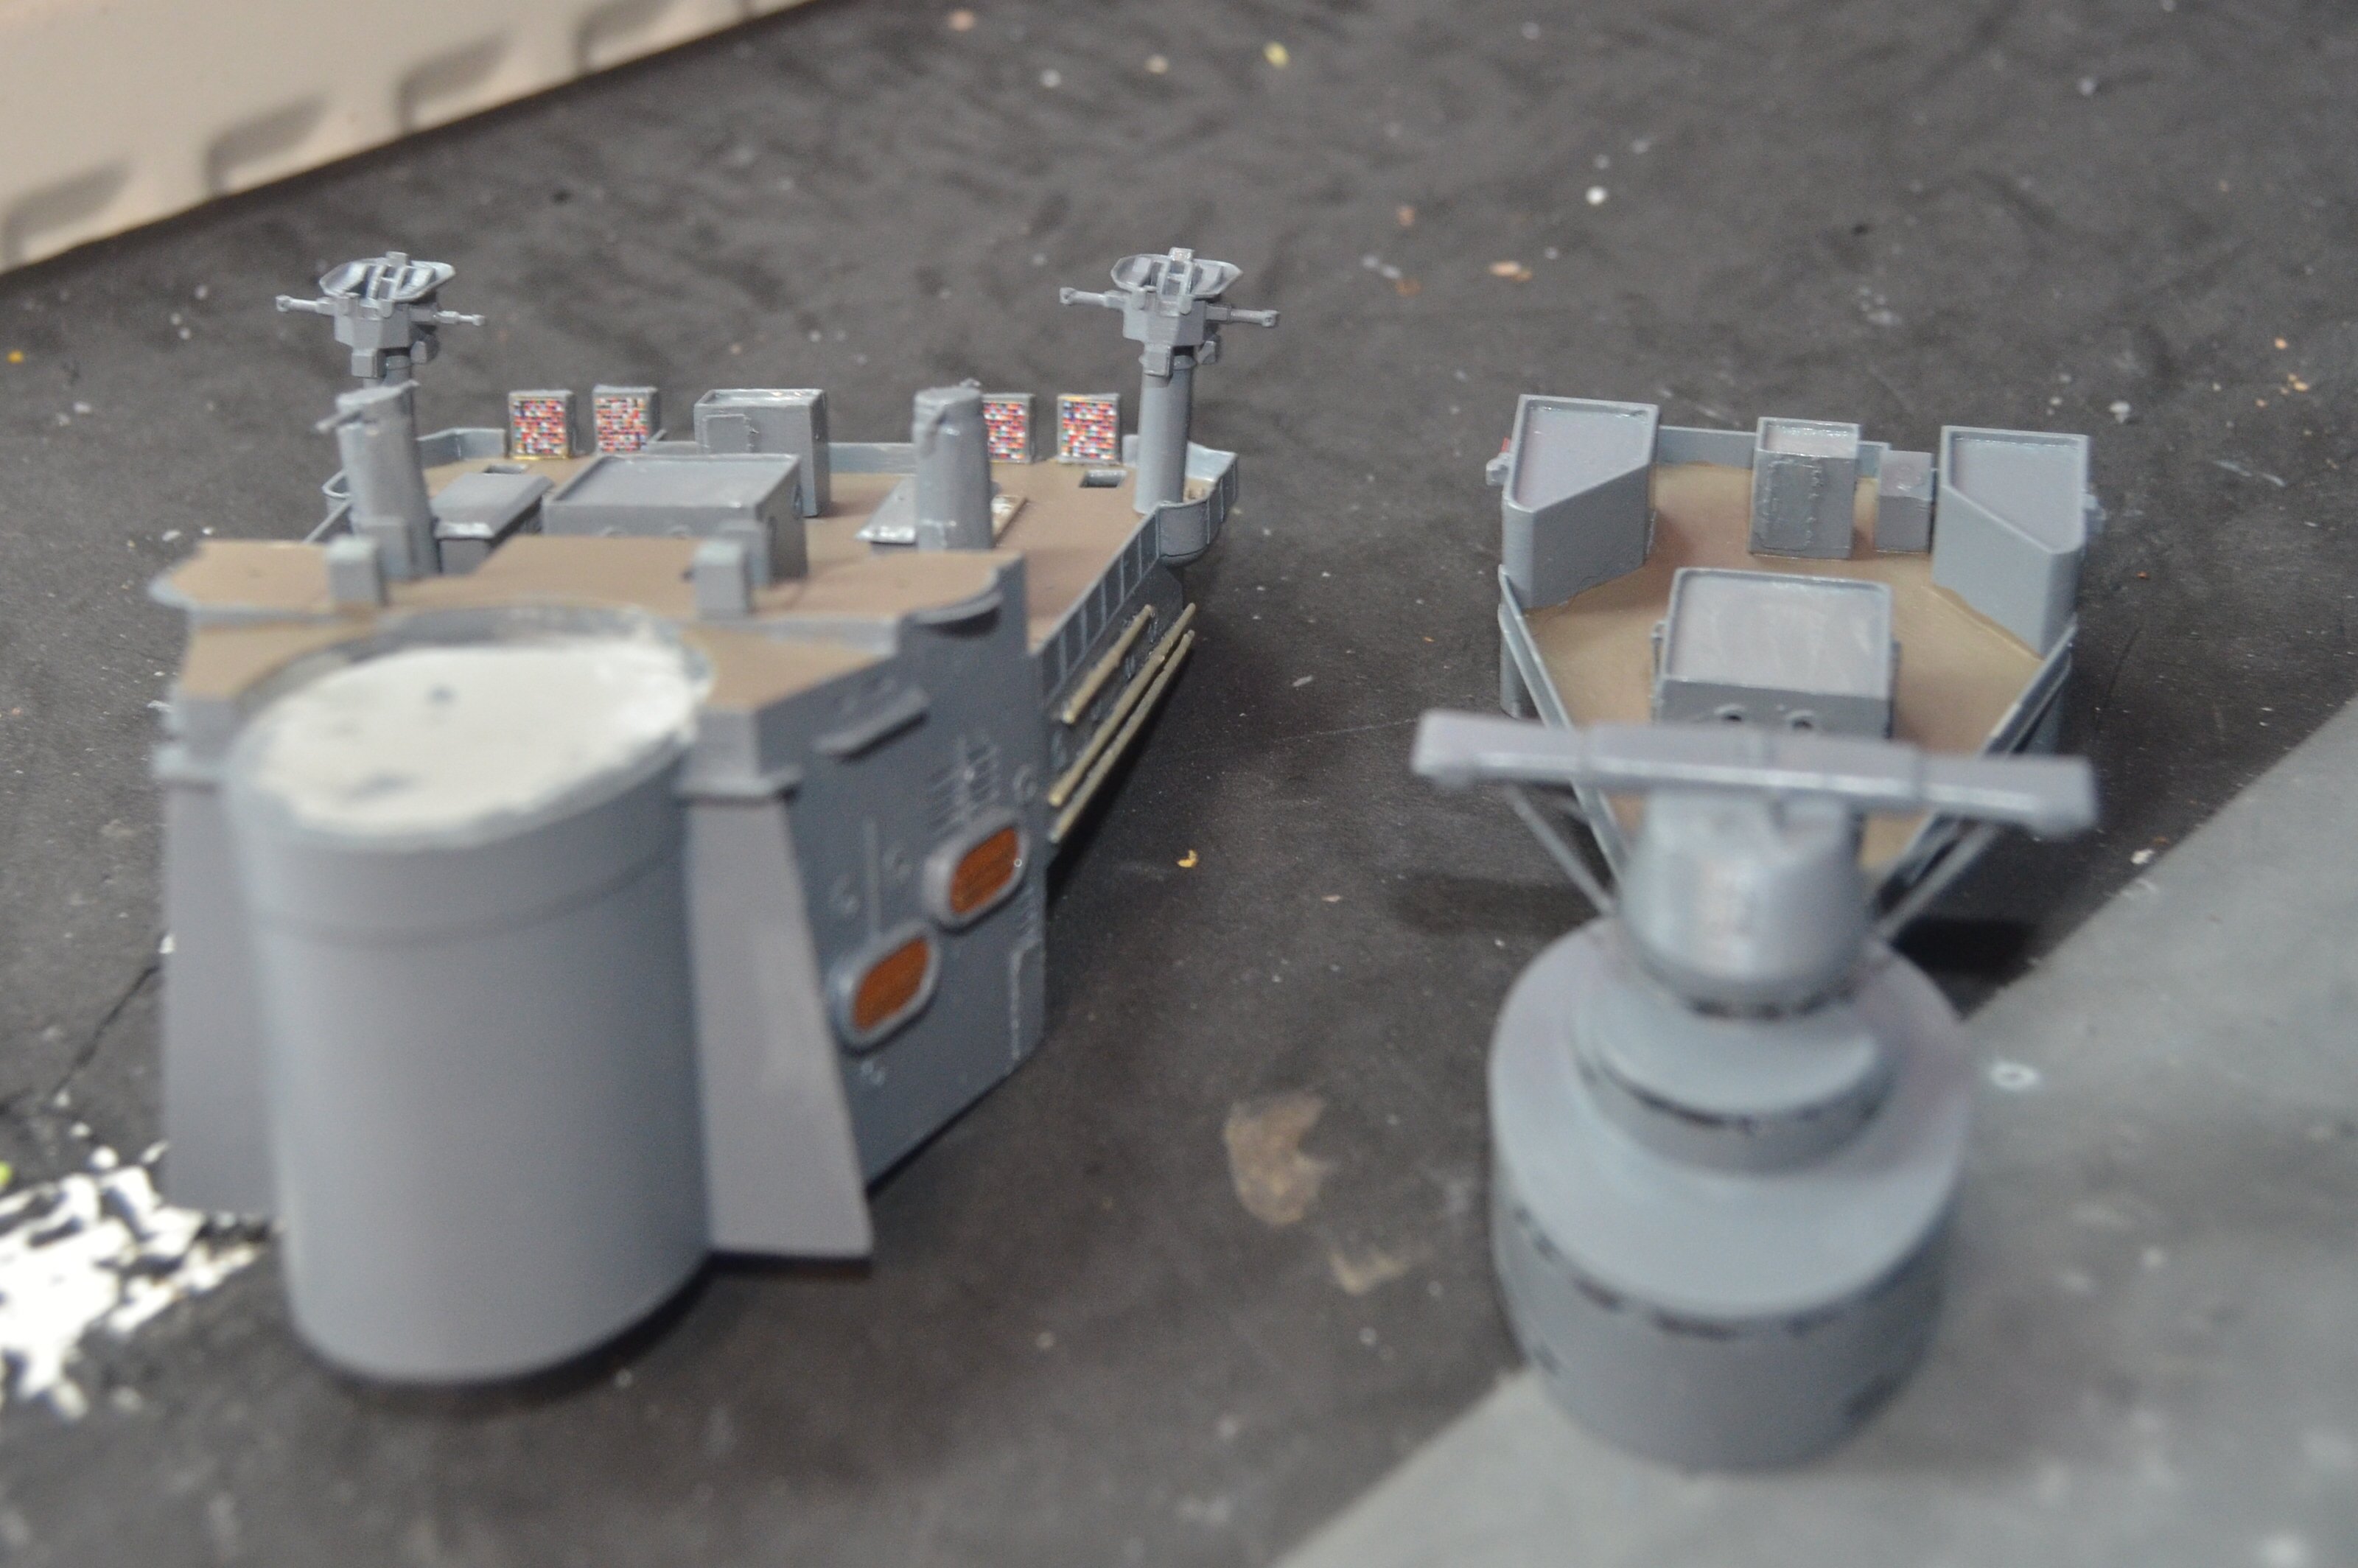
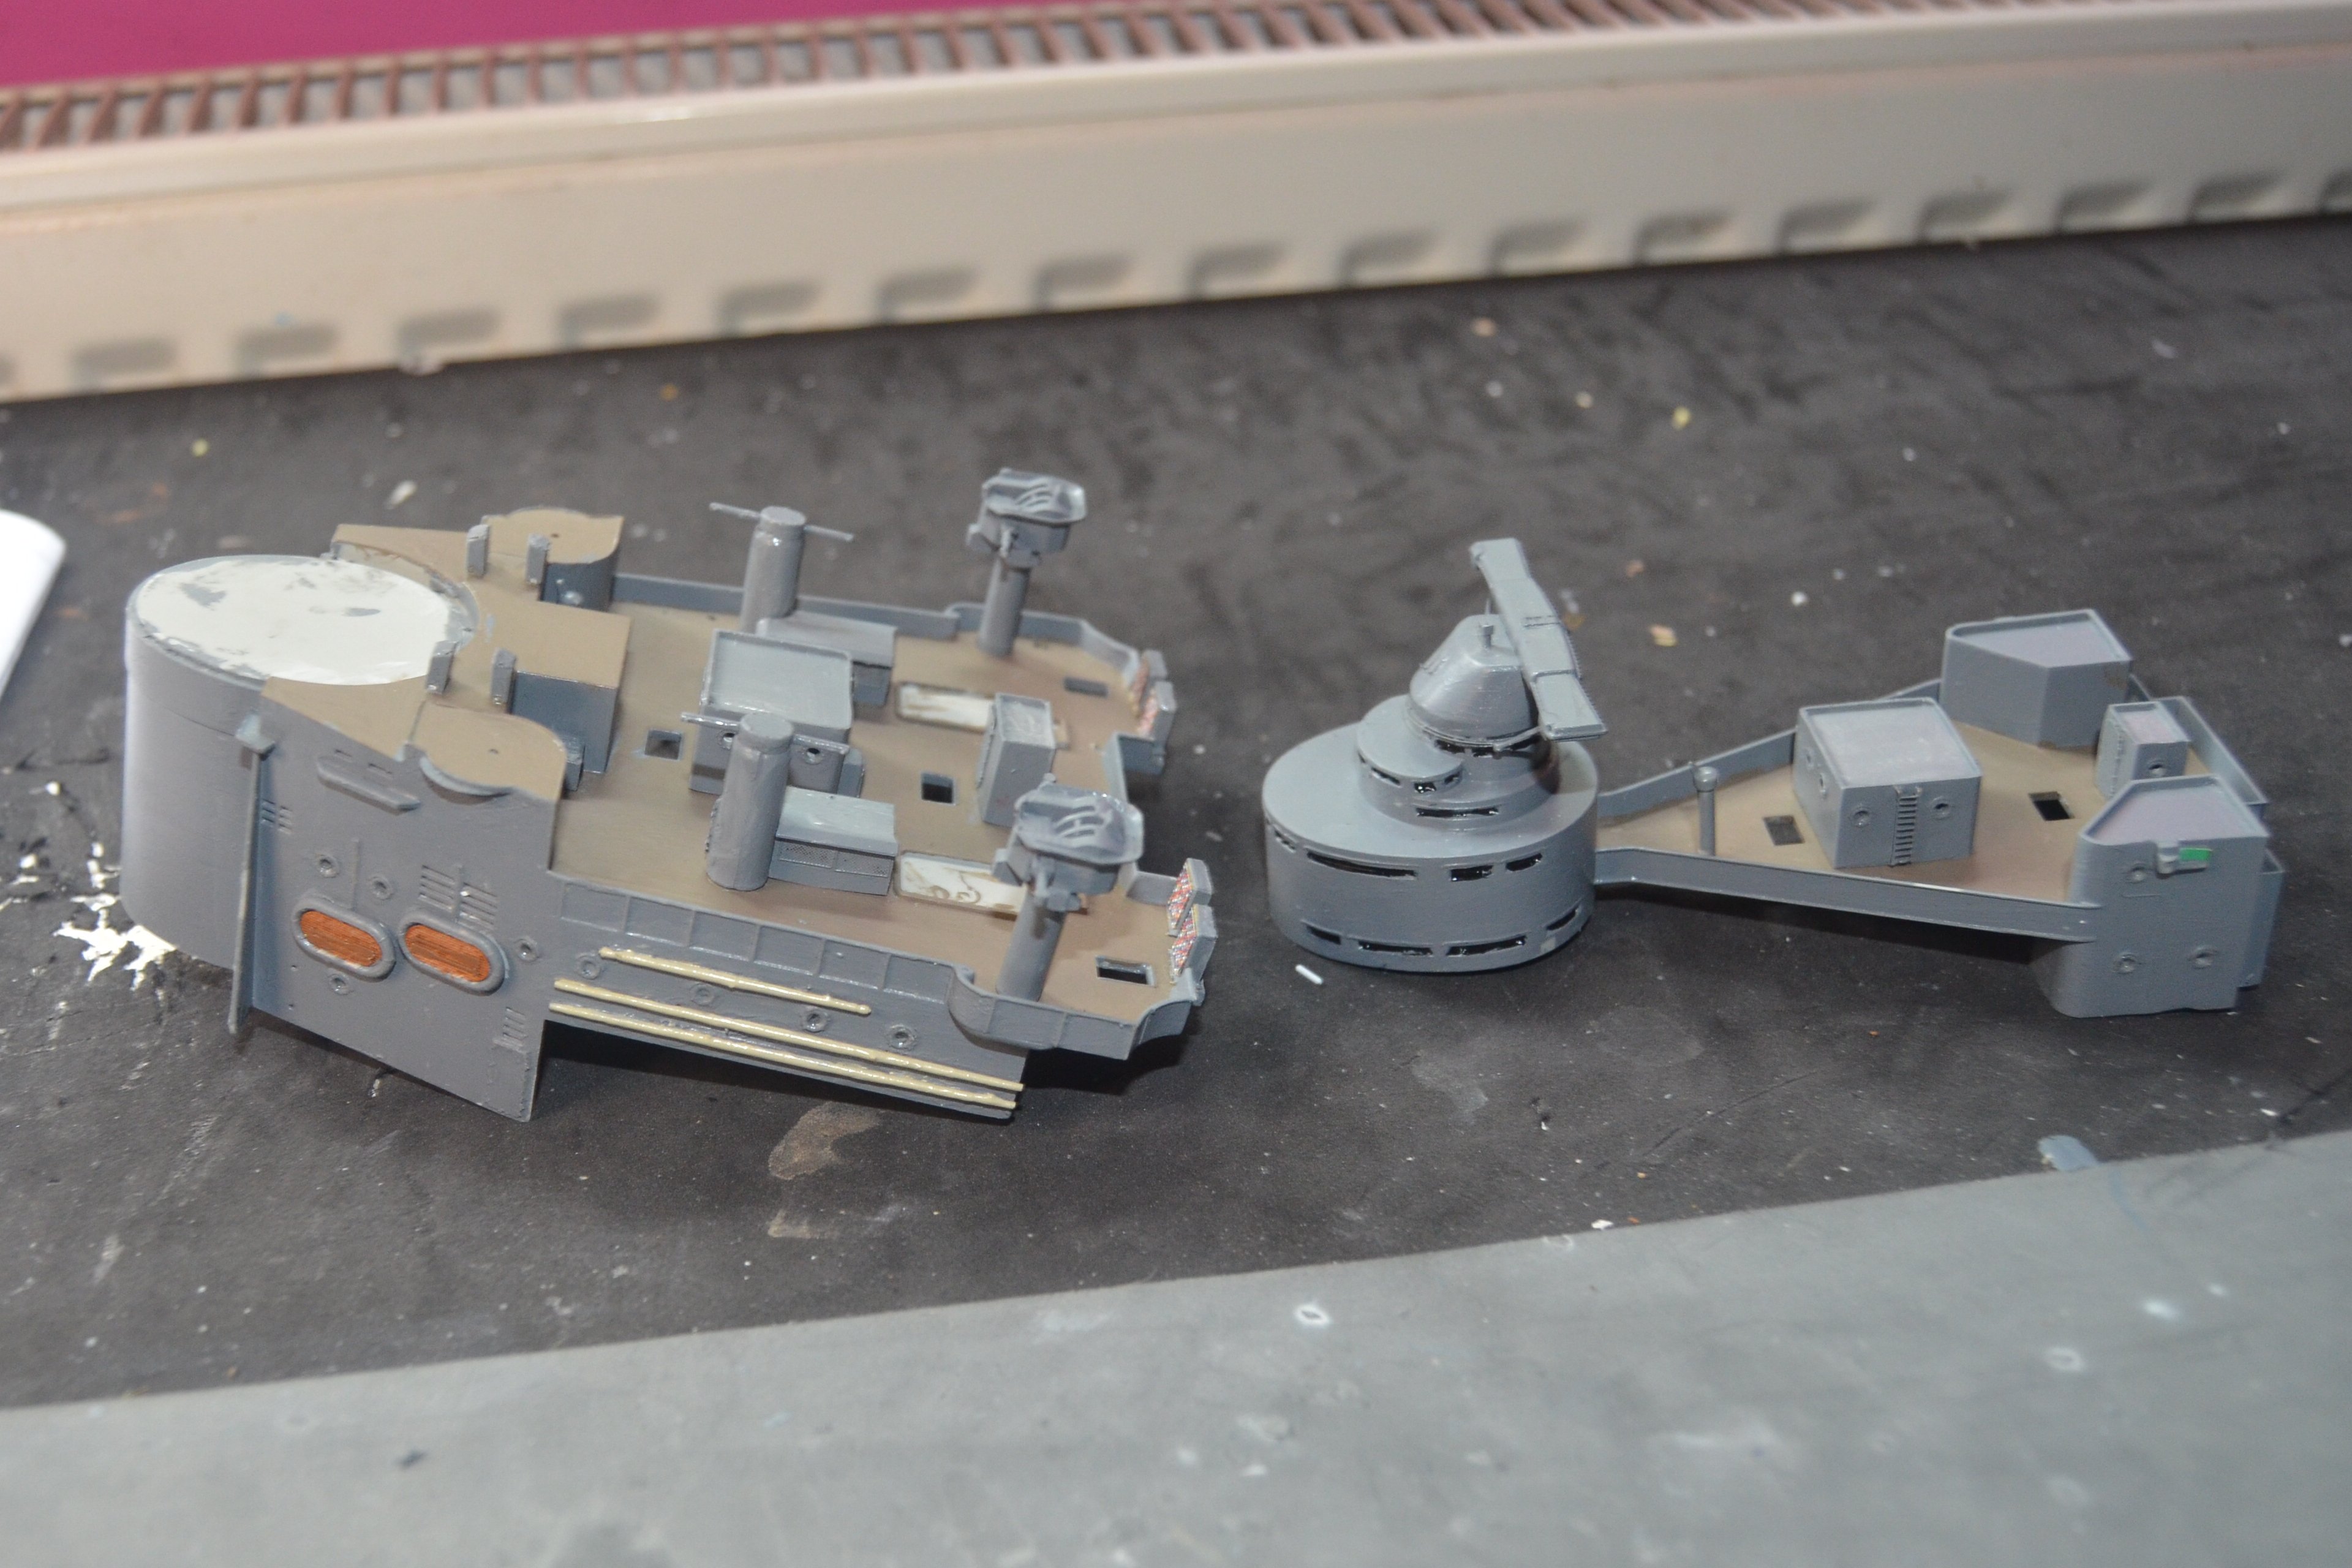
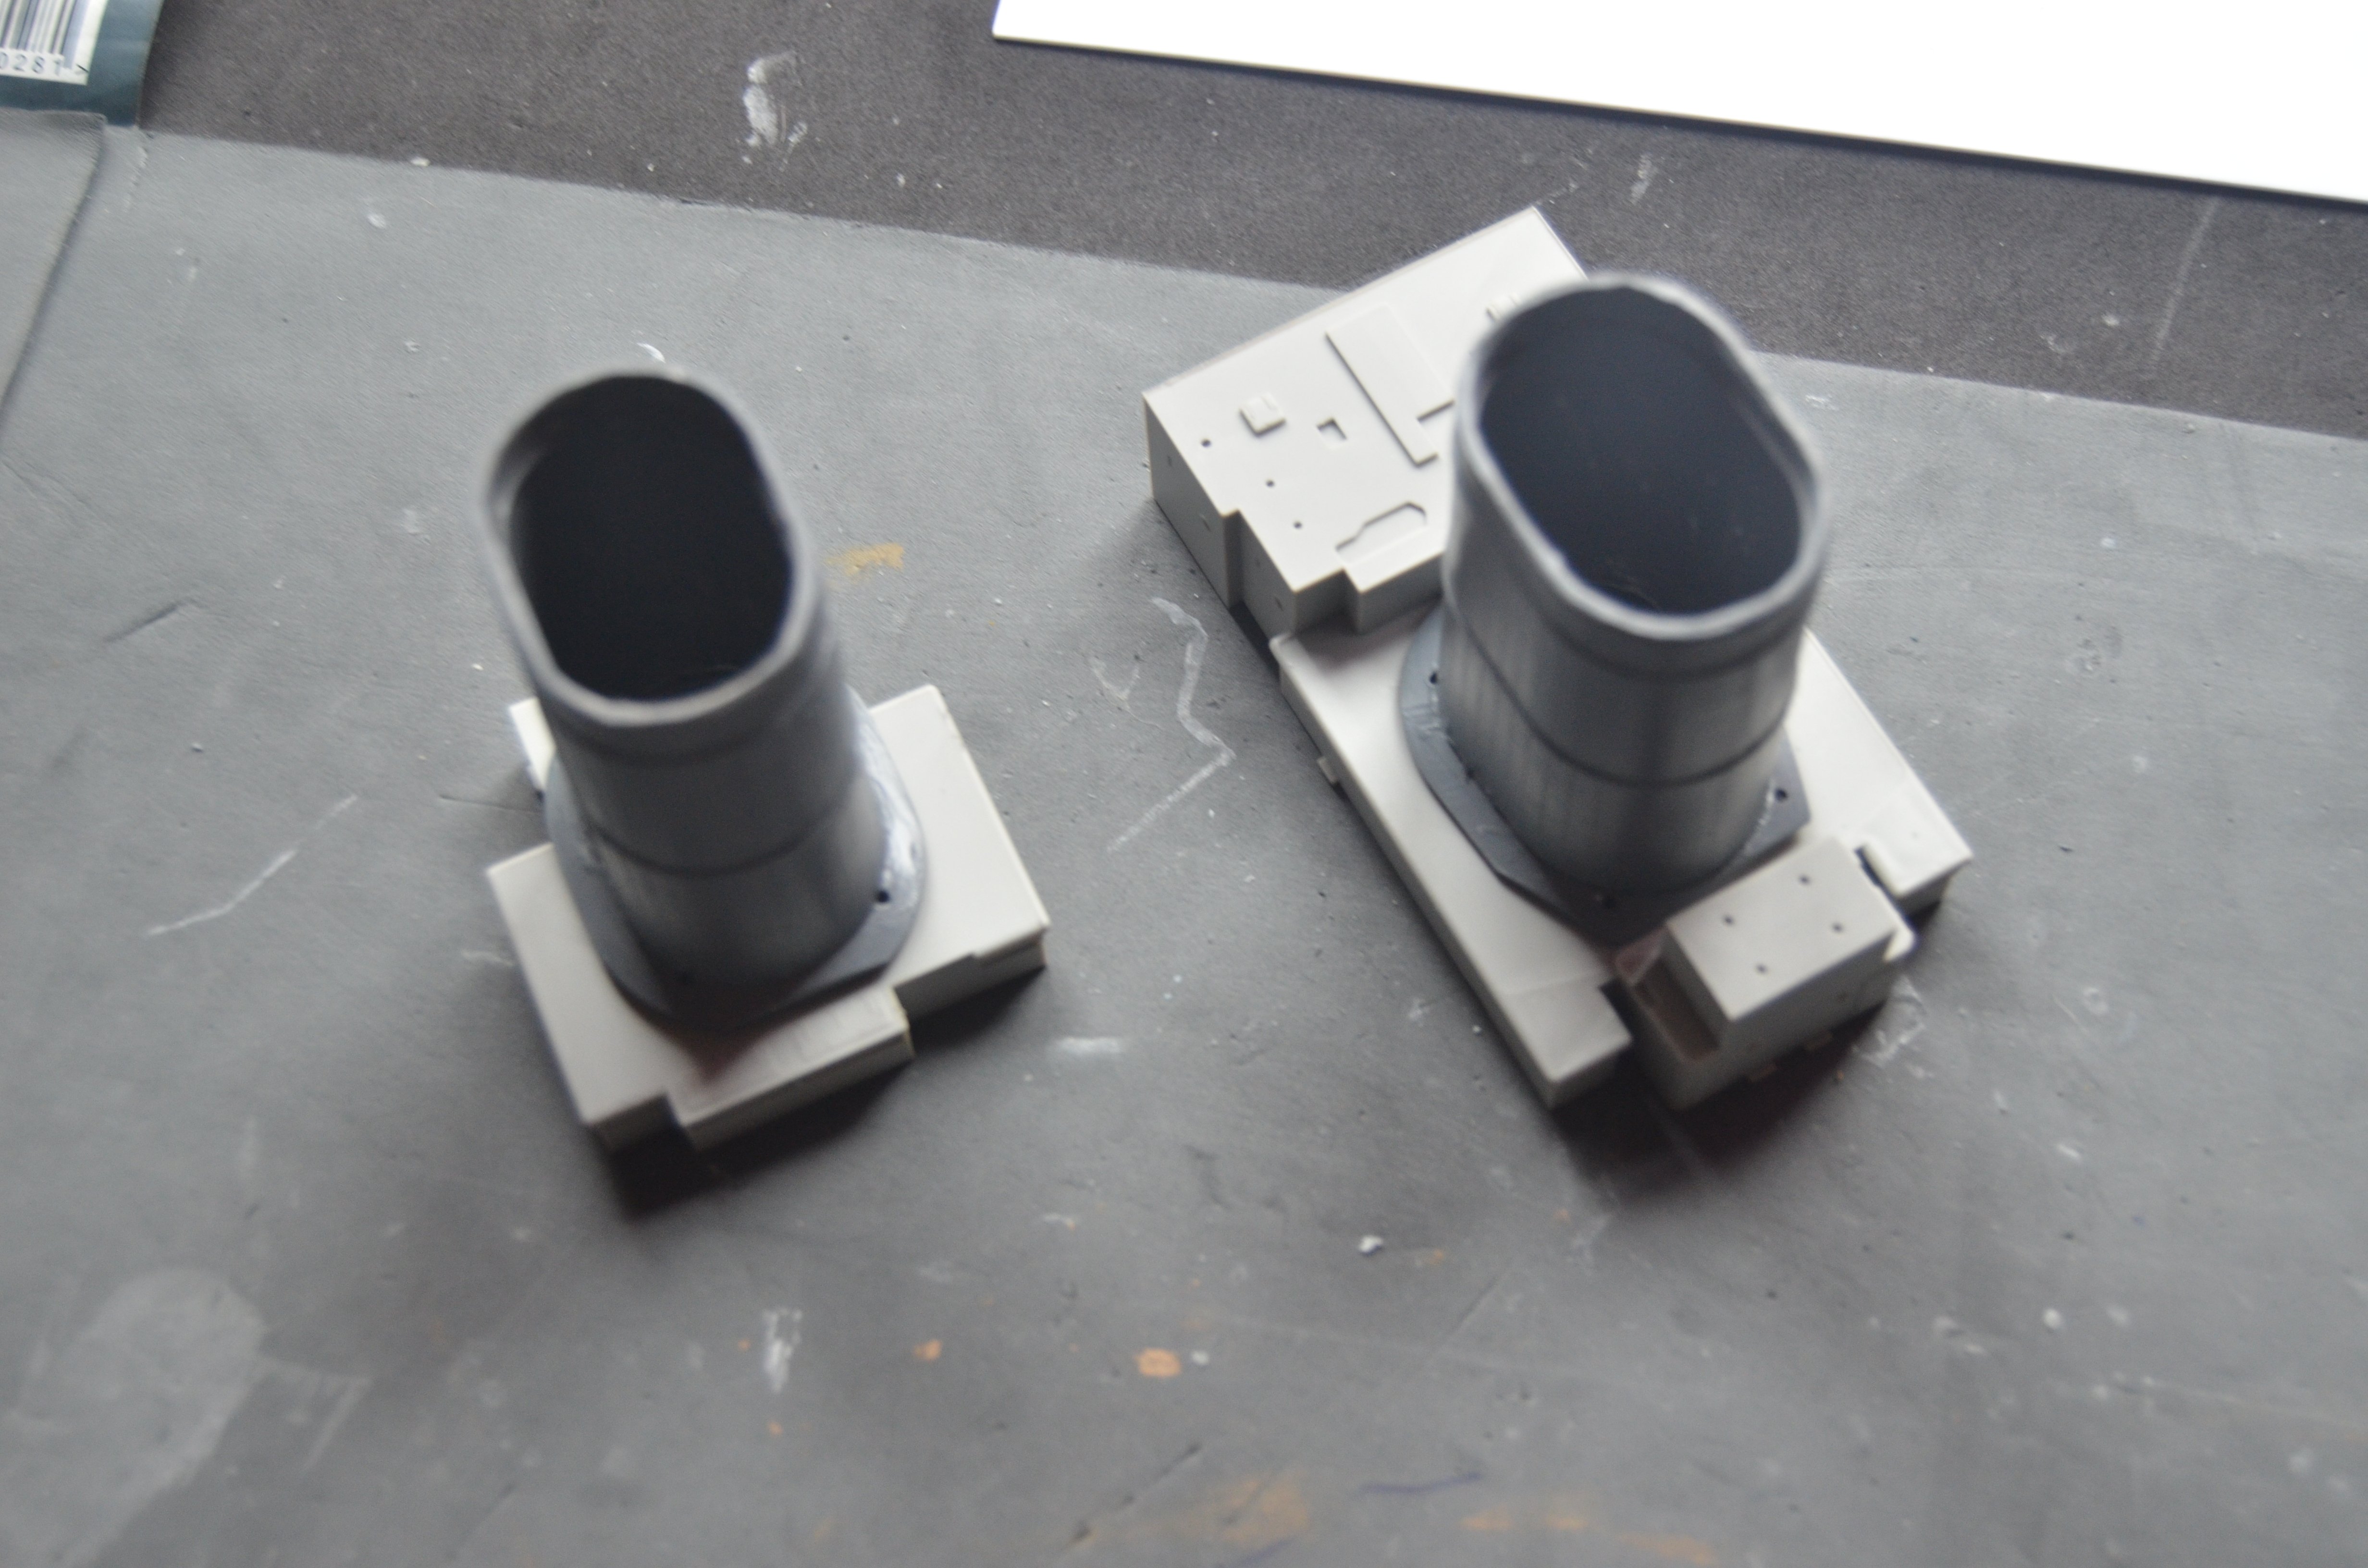
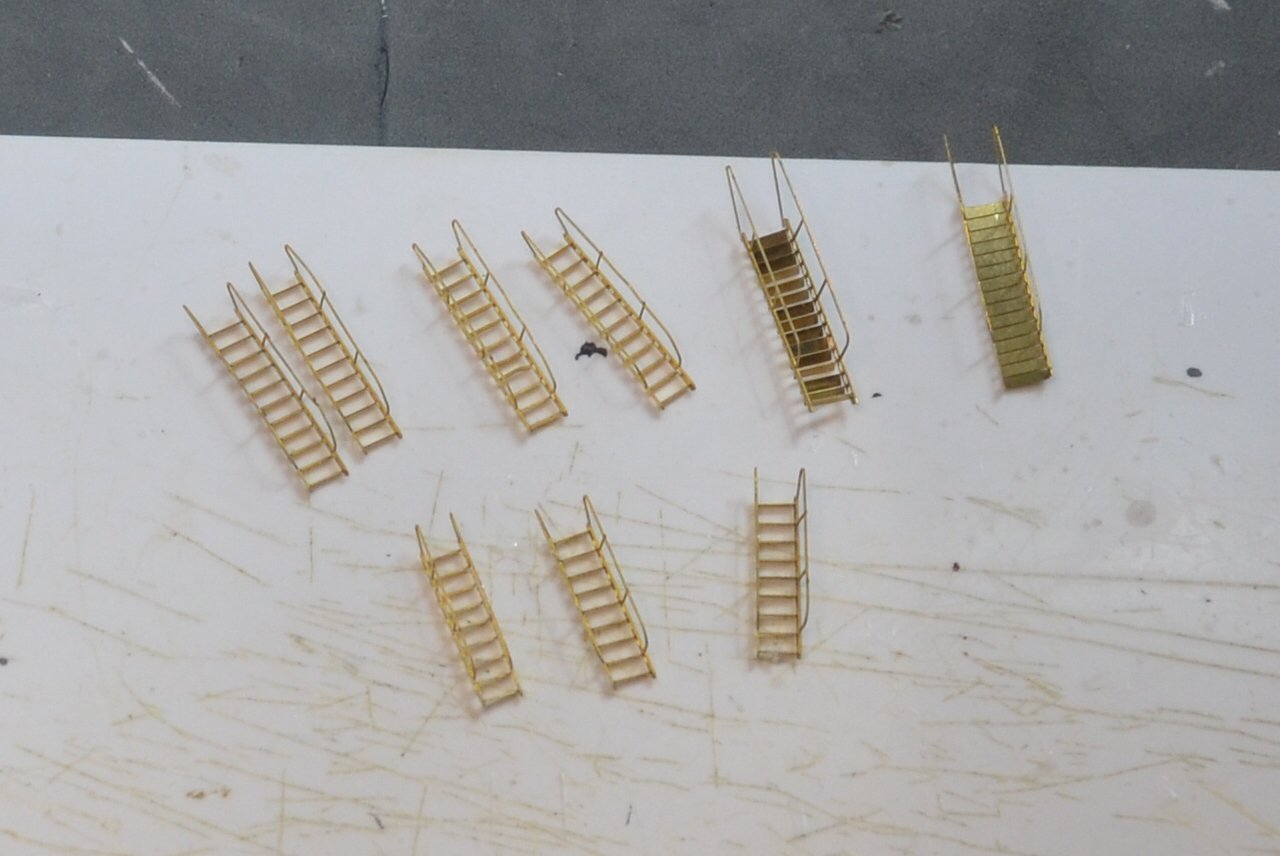
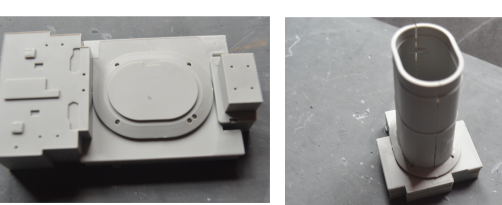
More work on the shelter deck. I decided to build the two funnel bases as there are various hatches that will sit against them. The rear base has a lot of the MK1 upgrades attached to it. I painted the base of the dinghy's in leather matt and the oars in brown. It just adds a bit of detail in amongst all of the grey. The ladders have come out very good. Considering that they are as bad as the PE handrails to construct because of how fragile they are. It all looks a lot better than the photos. the close ups do pick out all the bits of dust and glue spillage that doe not show when viewing it normally. I will carry on with the smaller structures on this deck before moving on to the bridge. I will probably build the ships boats and various guns and searchlights. I've added some before and after photos to give an idea of how much extra work has gone into that rear funnel base.

-
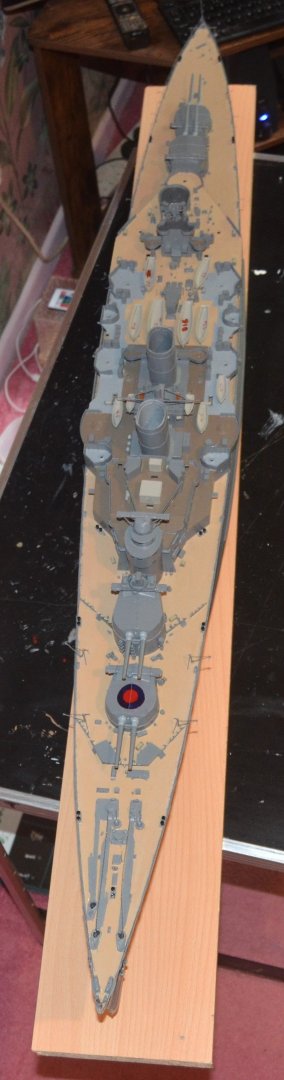
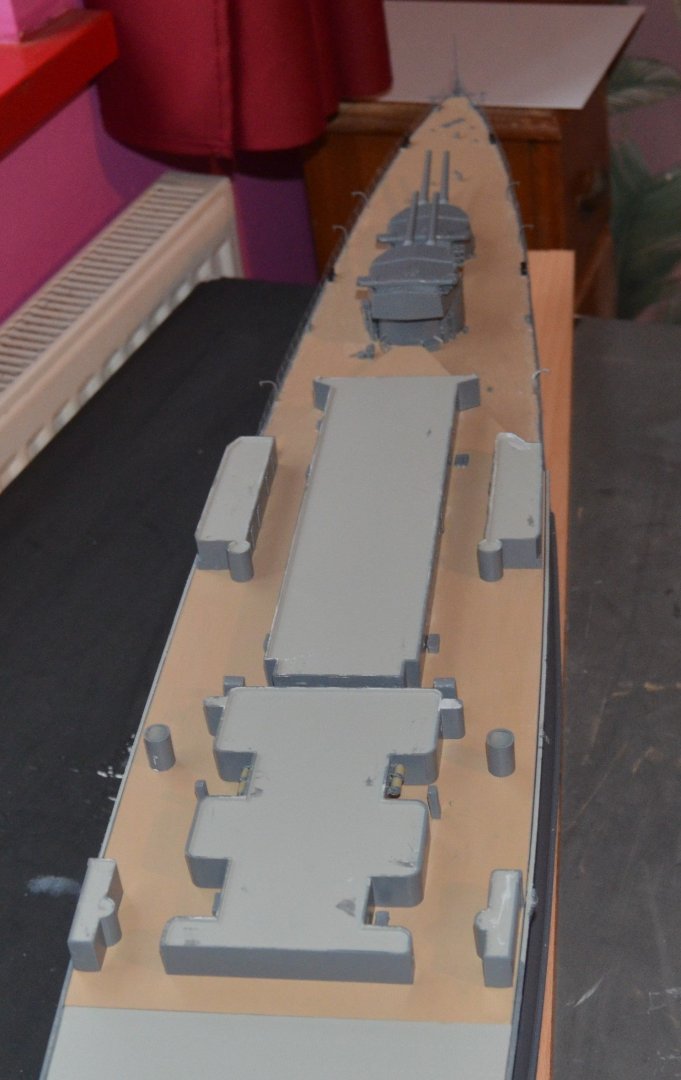
The shelter deck is starting to look a bit busy now. The ships boats are not necessarily in the correct order. I have added them to make sure to boat crutches are all correctly aligned, which they are. I have also added stanchions to the hatches that are shown in the anatomy of the ship book that where used to hold open the water tight covers. There are 35 of the larger lockers on the deck and 16 smaller ones. There are now 17 reels and winches to make up and add. and then various davits and ladders to add. I will then concentrate on the smaller structures before moving on to the main central part of the ship. Building the model the way I am out of sequence and not following the instructions to the letter is proving a much better way of working on the model.

-
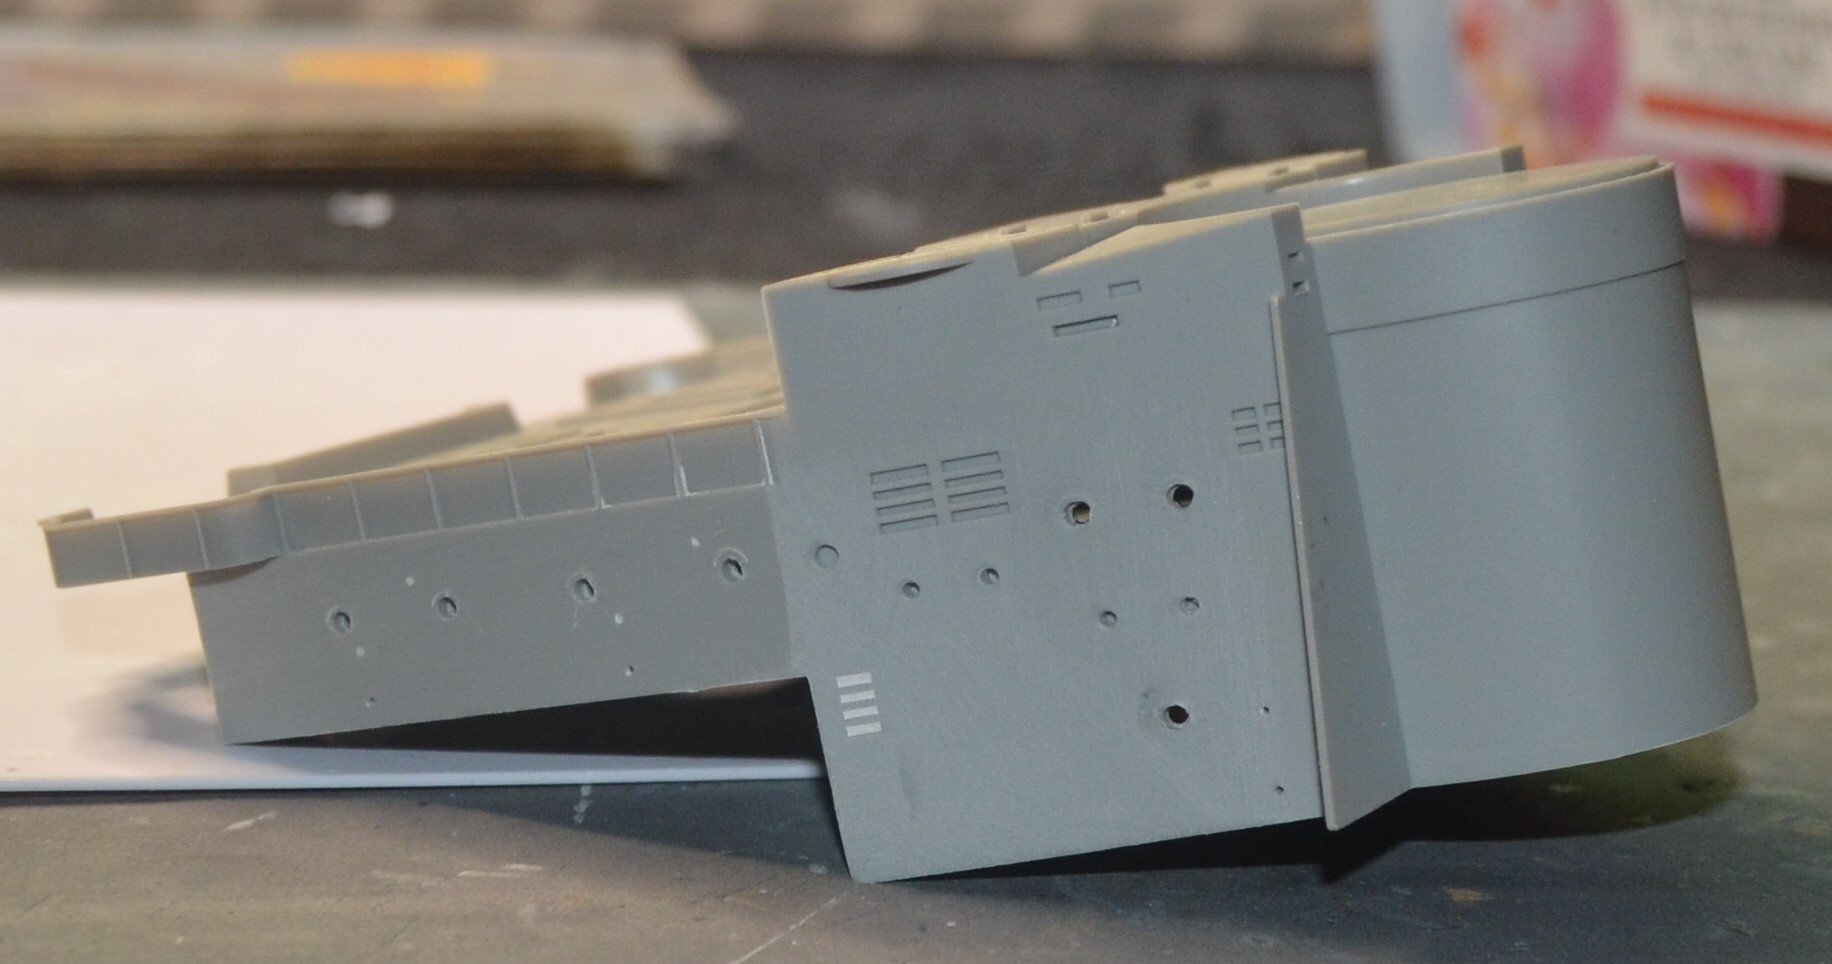
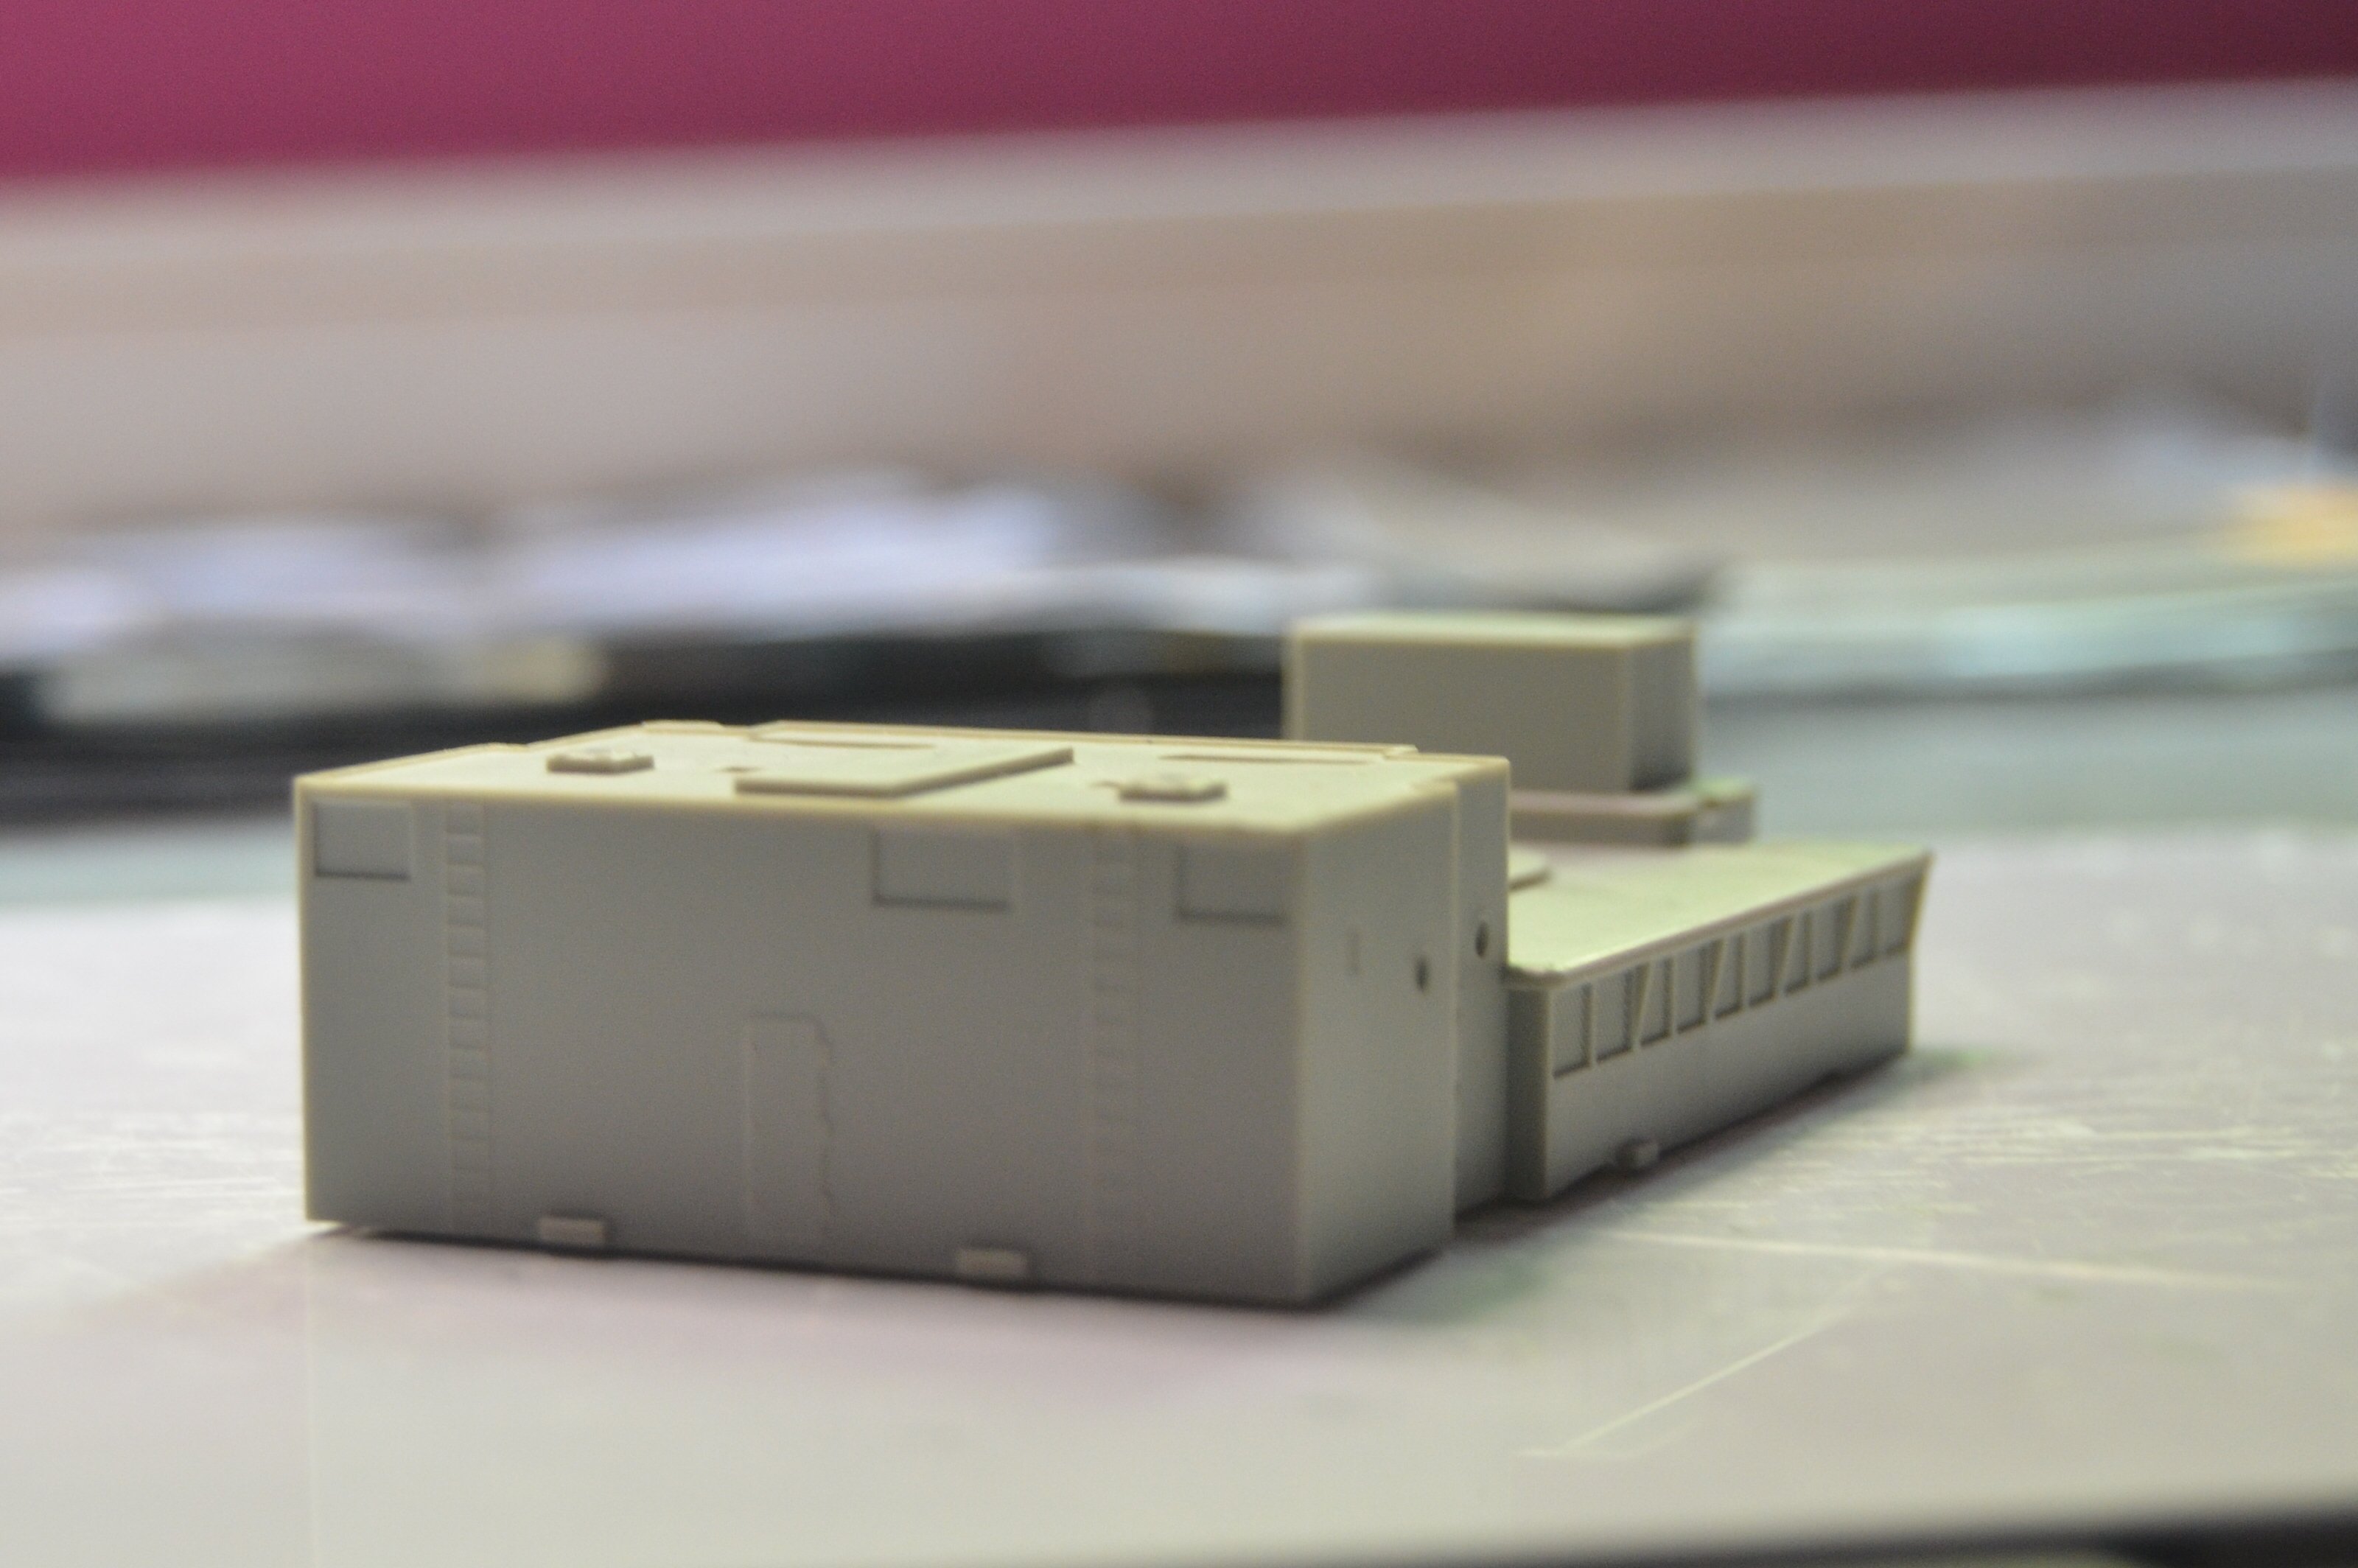
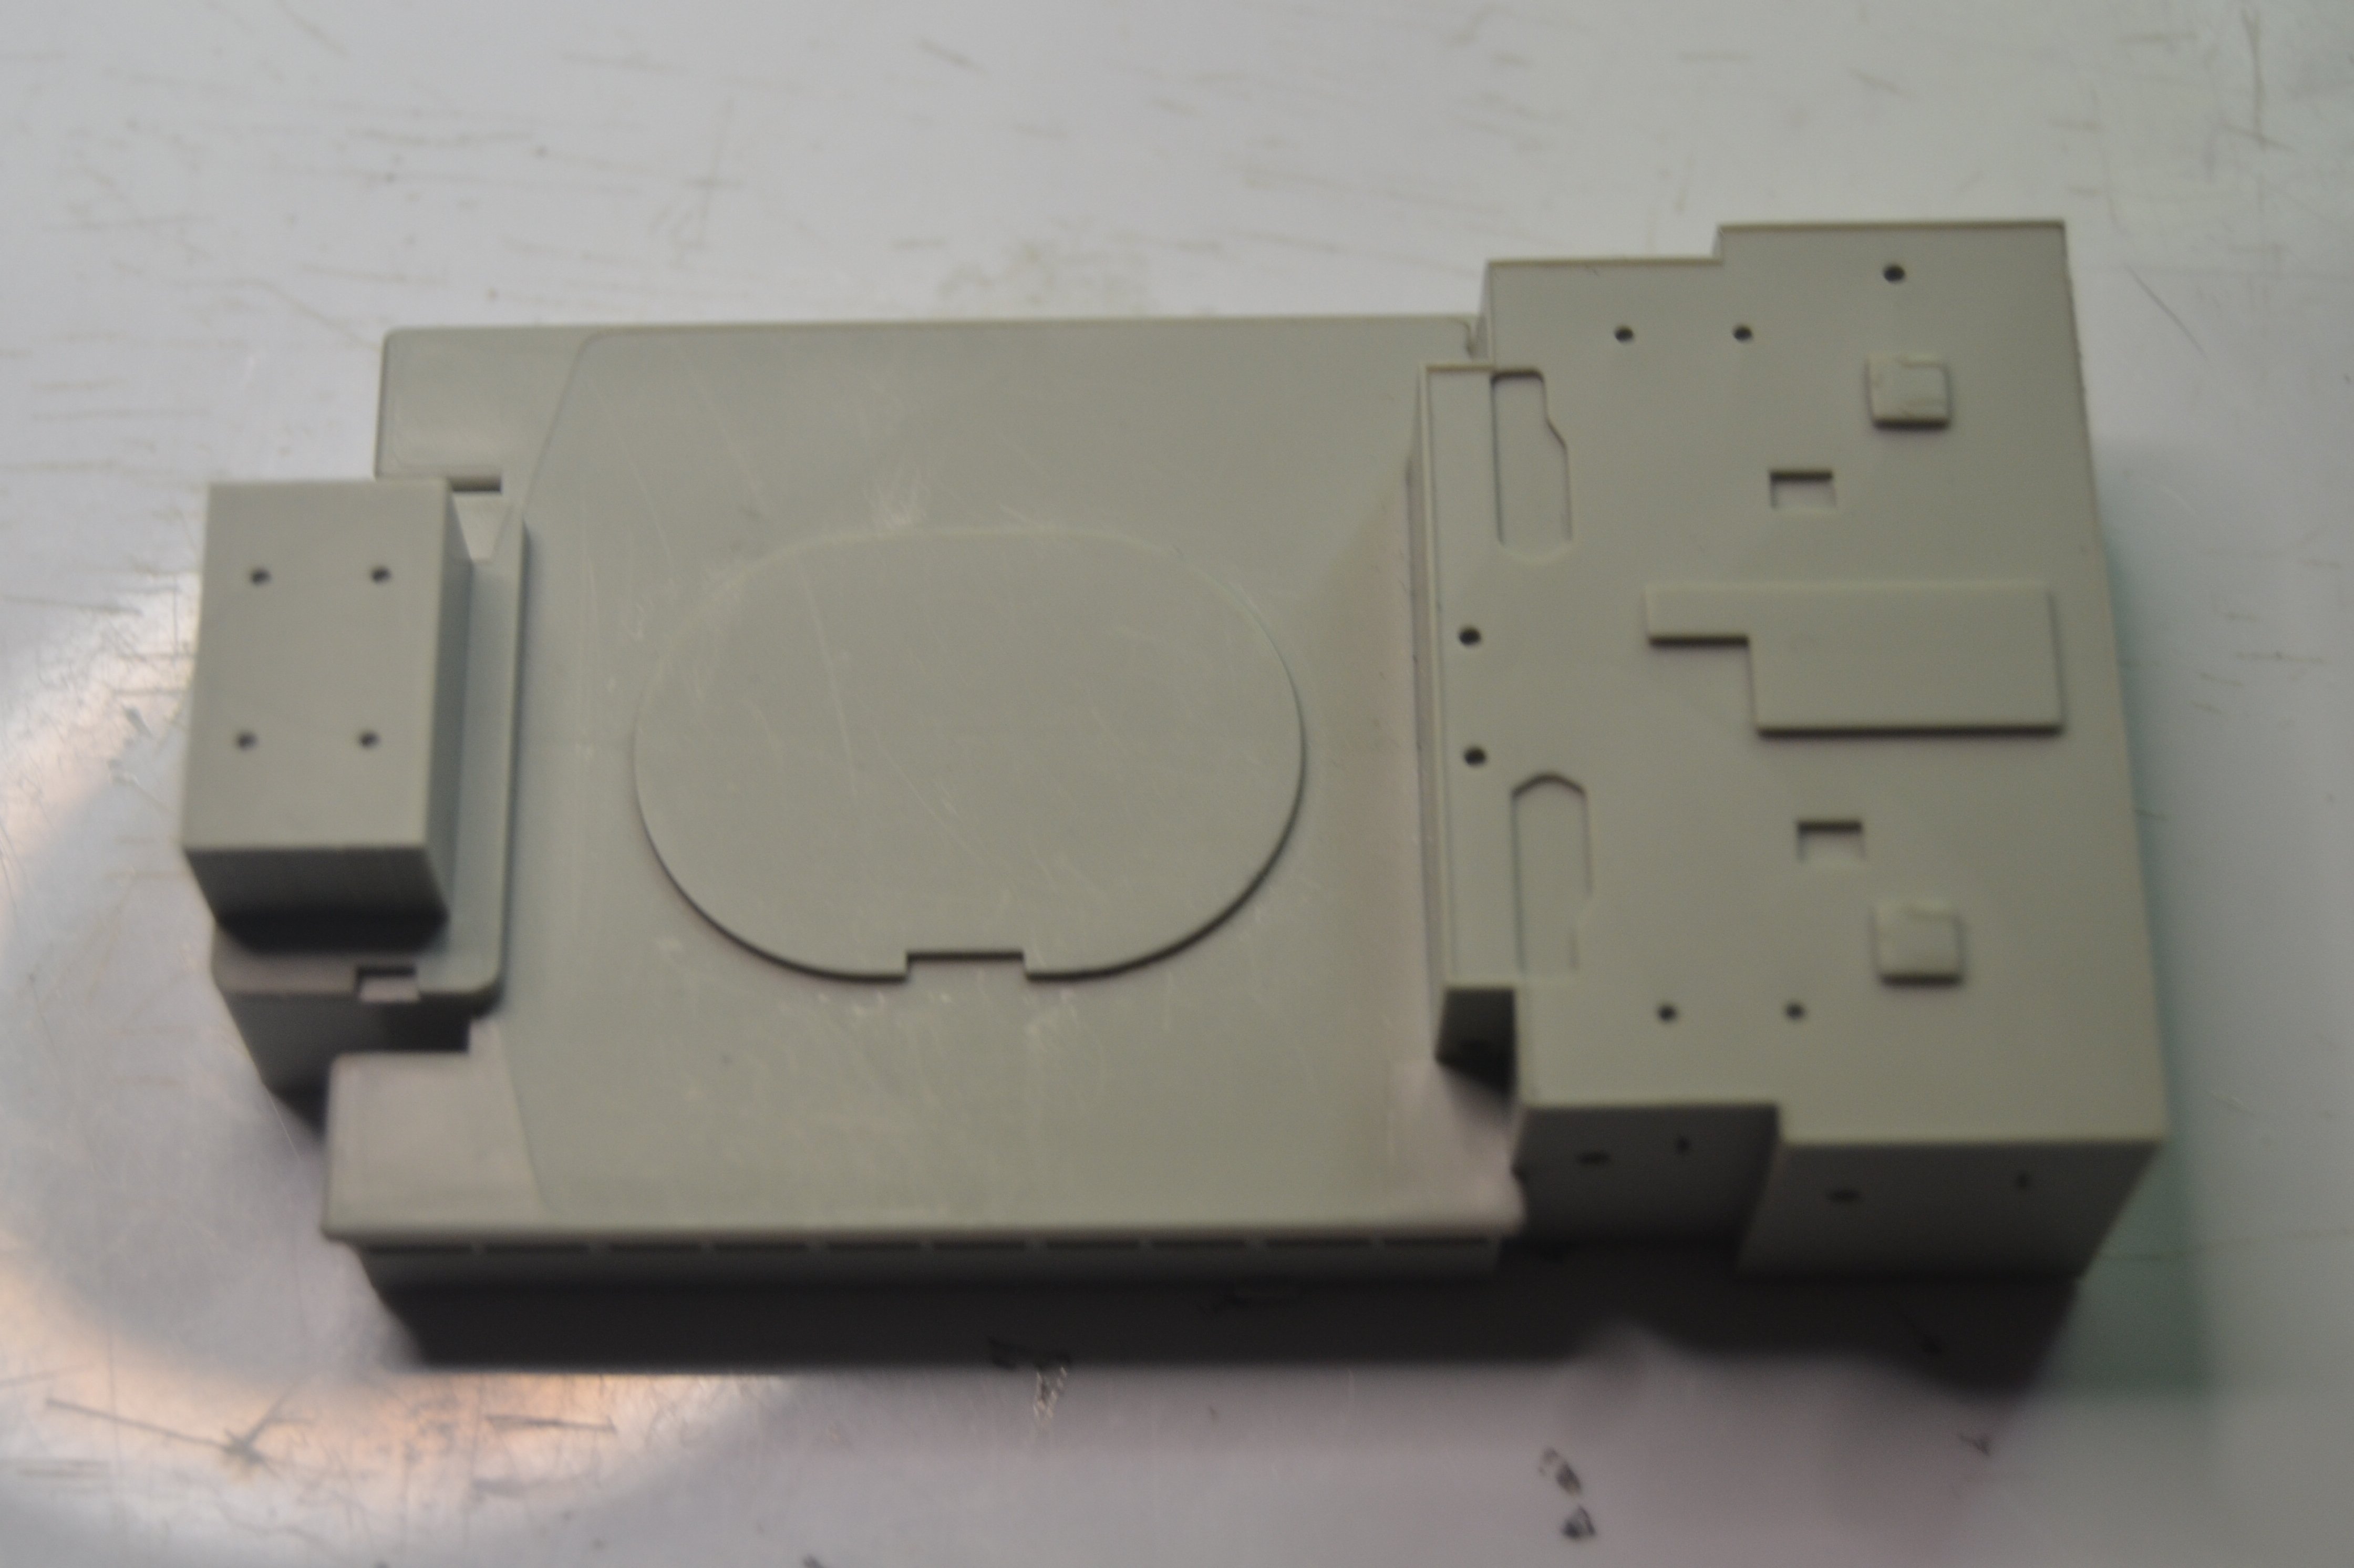
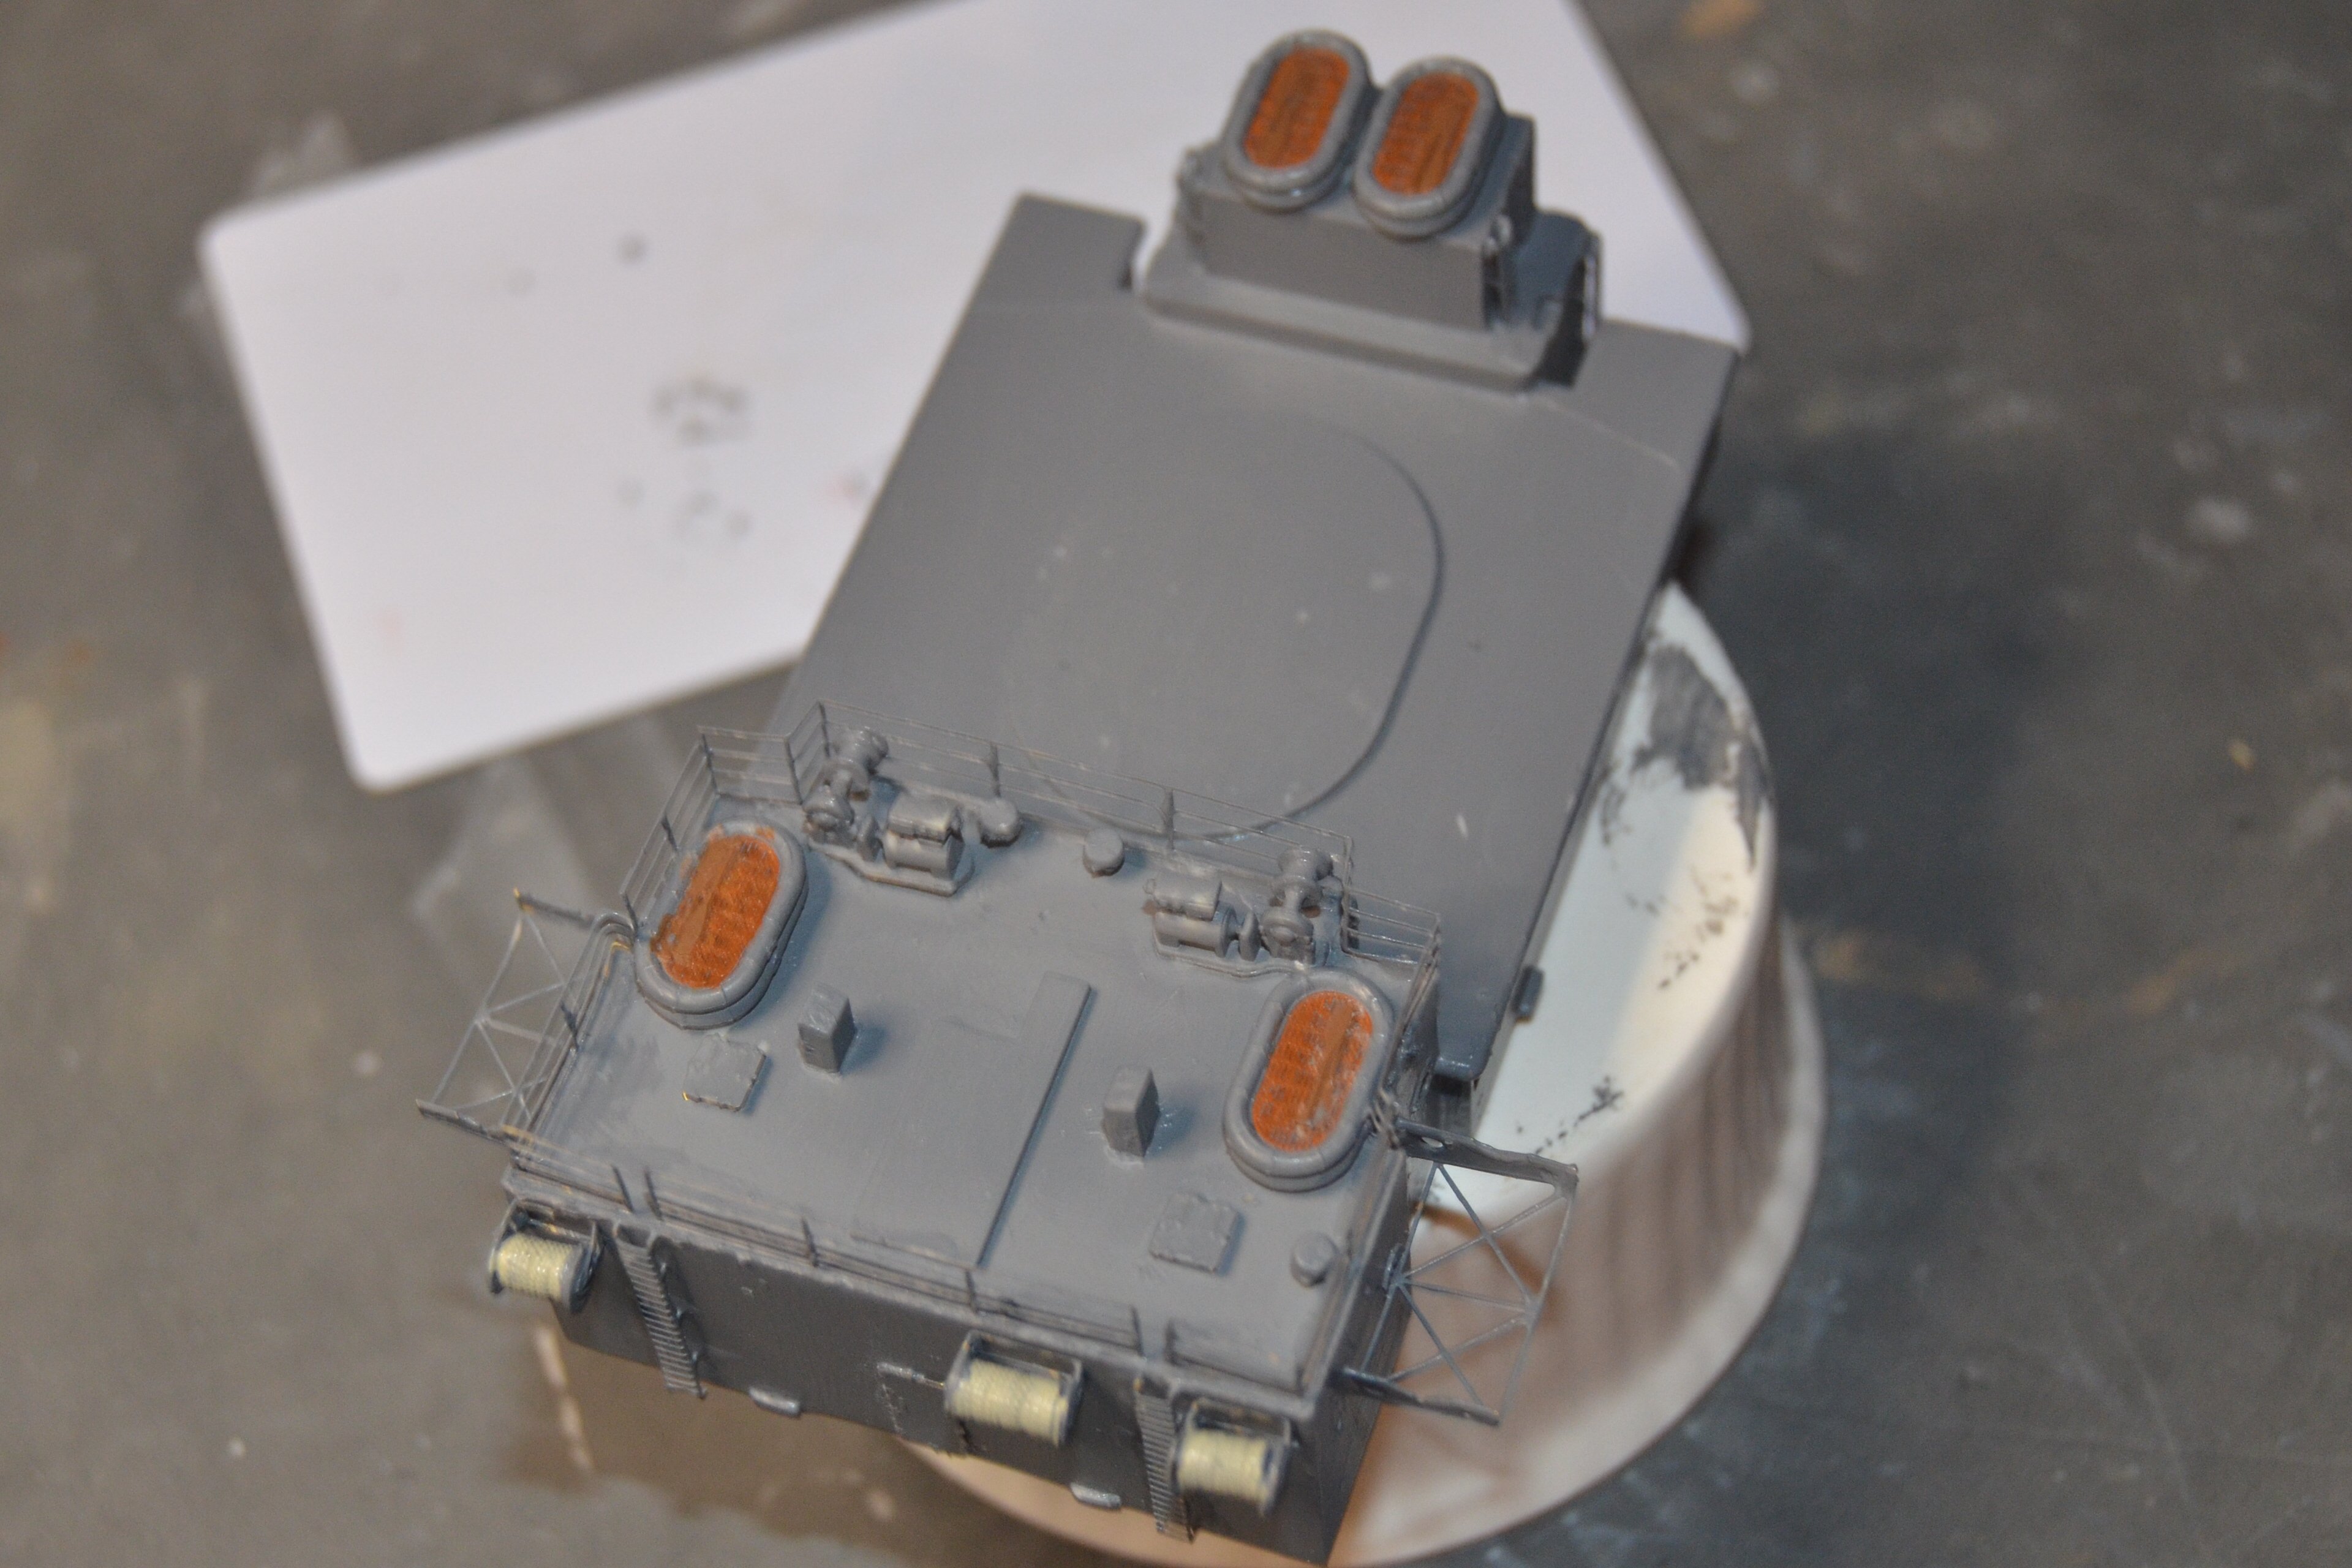
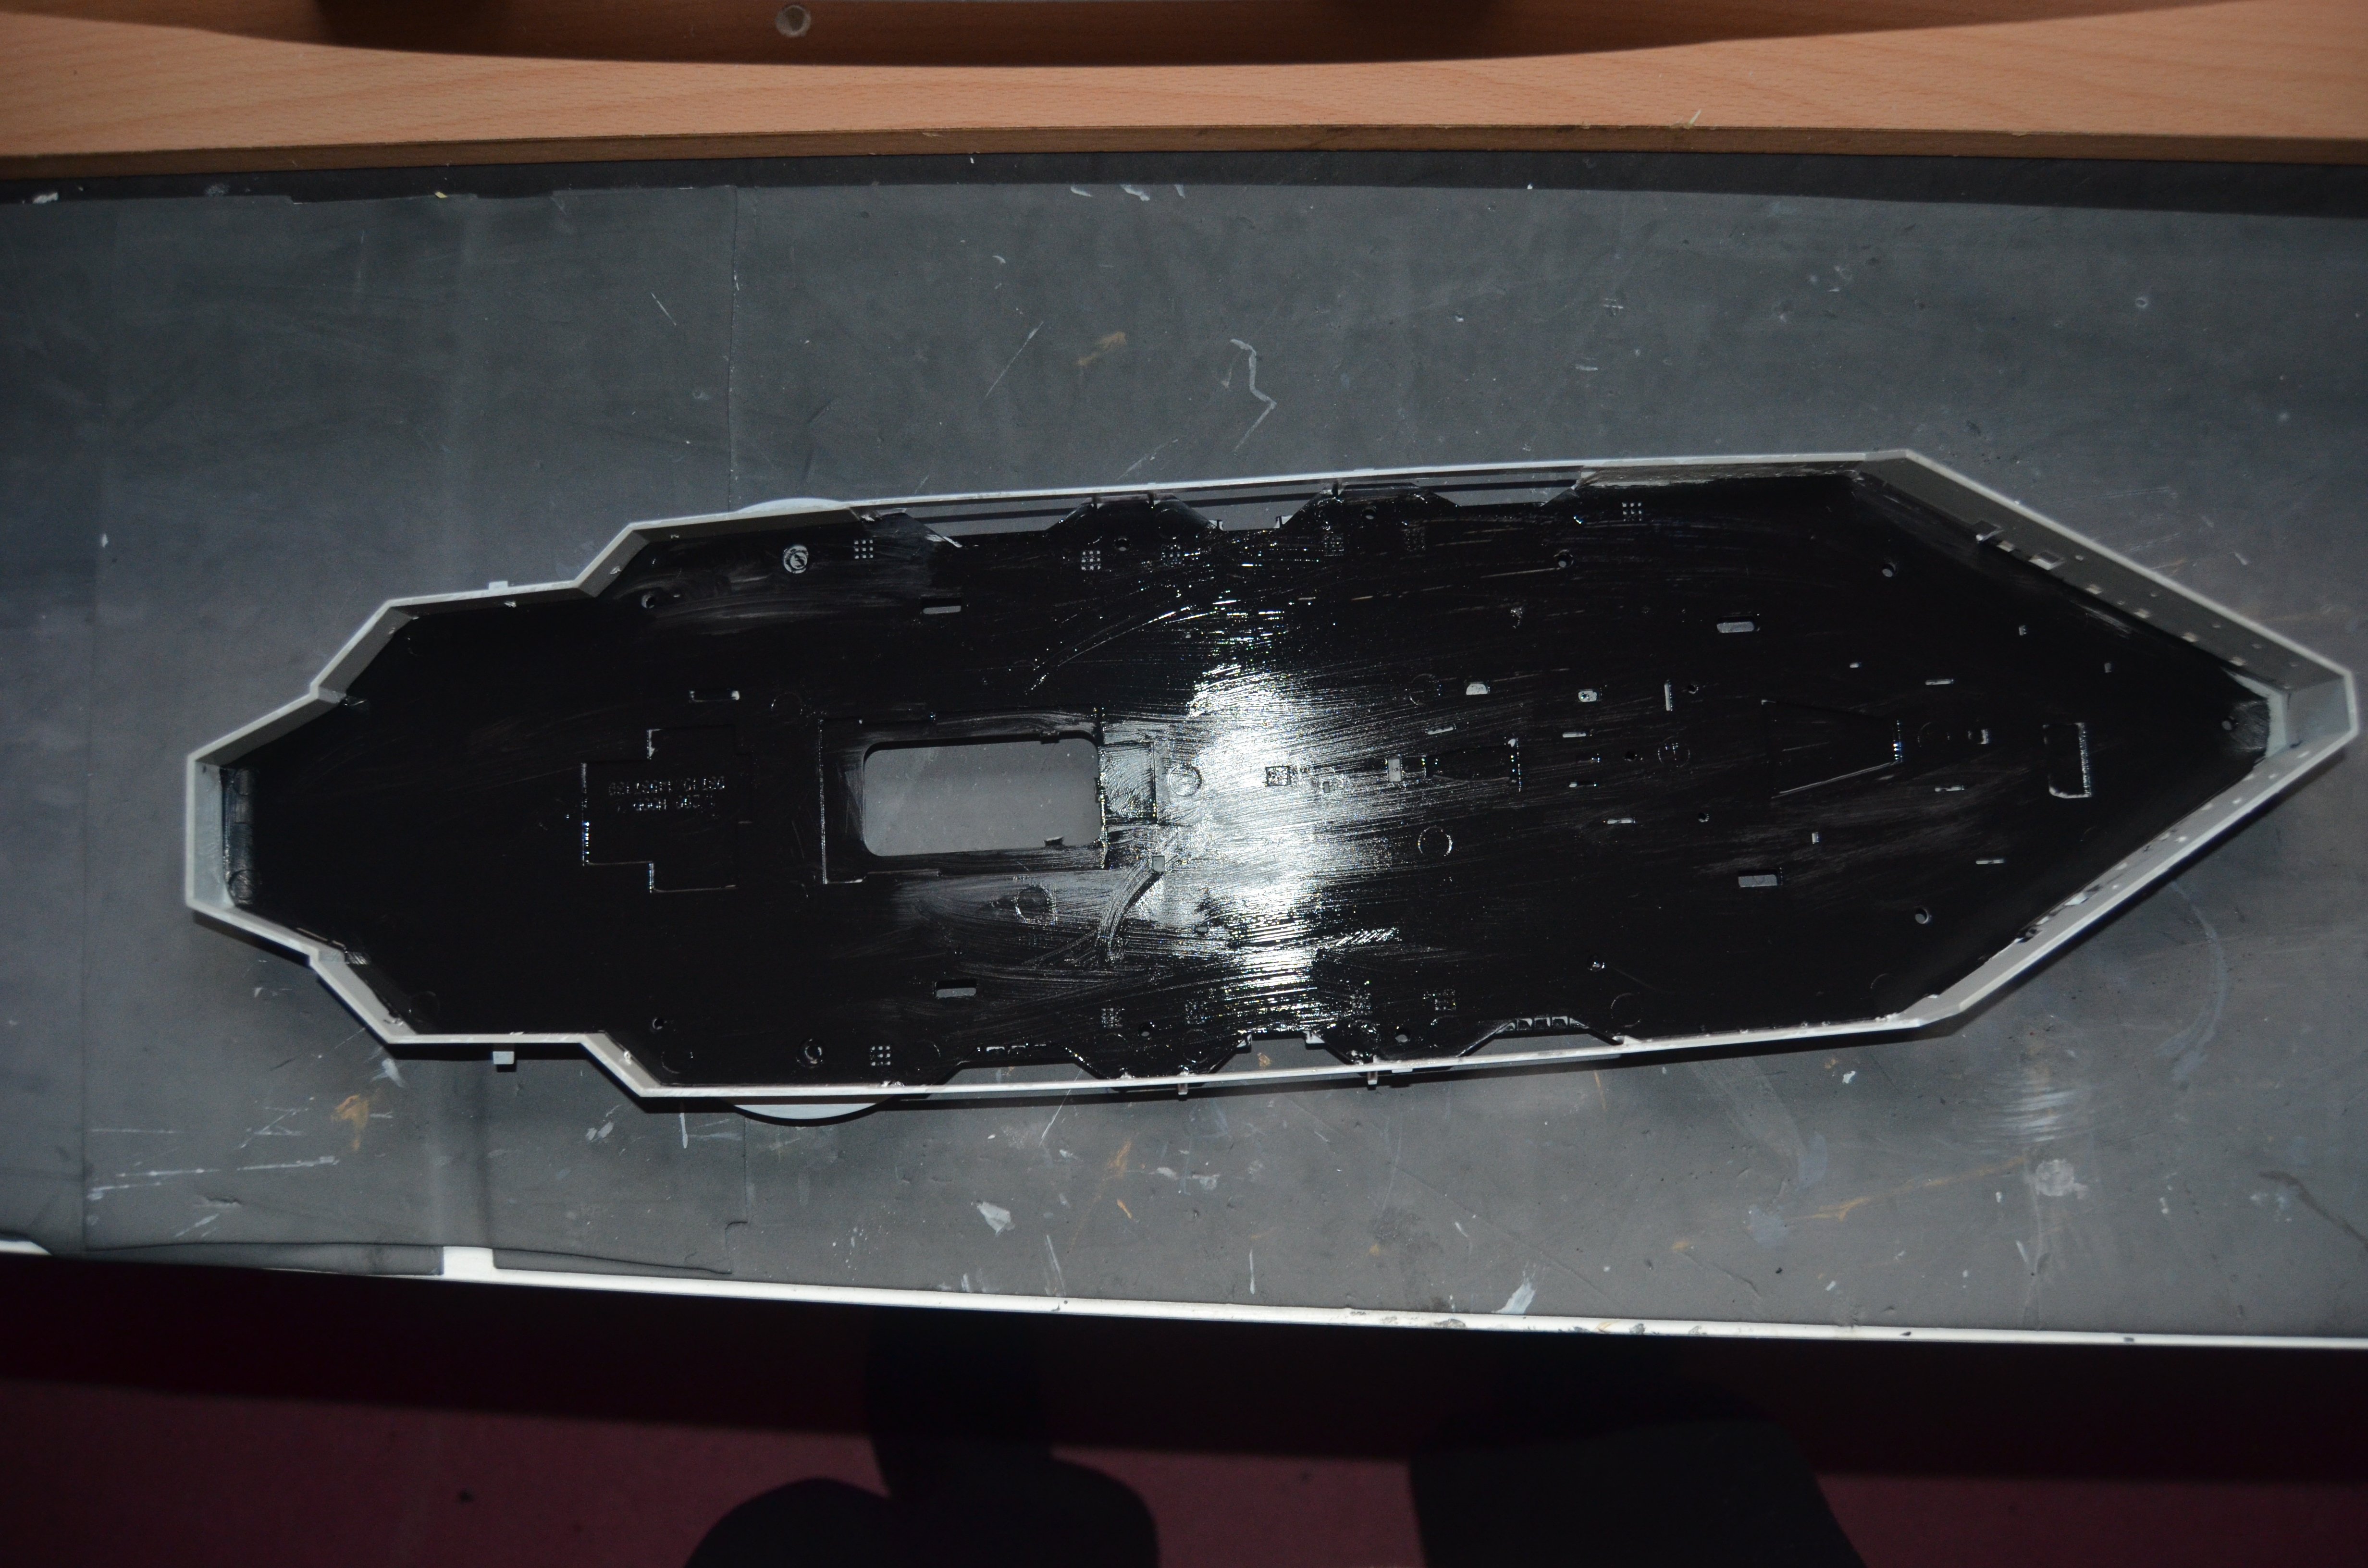
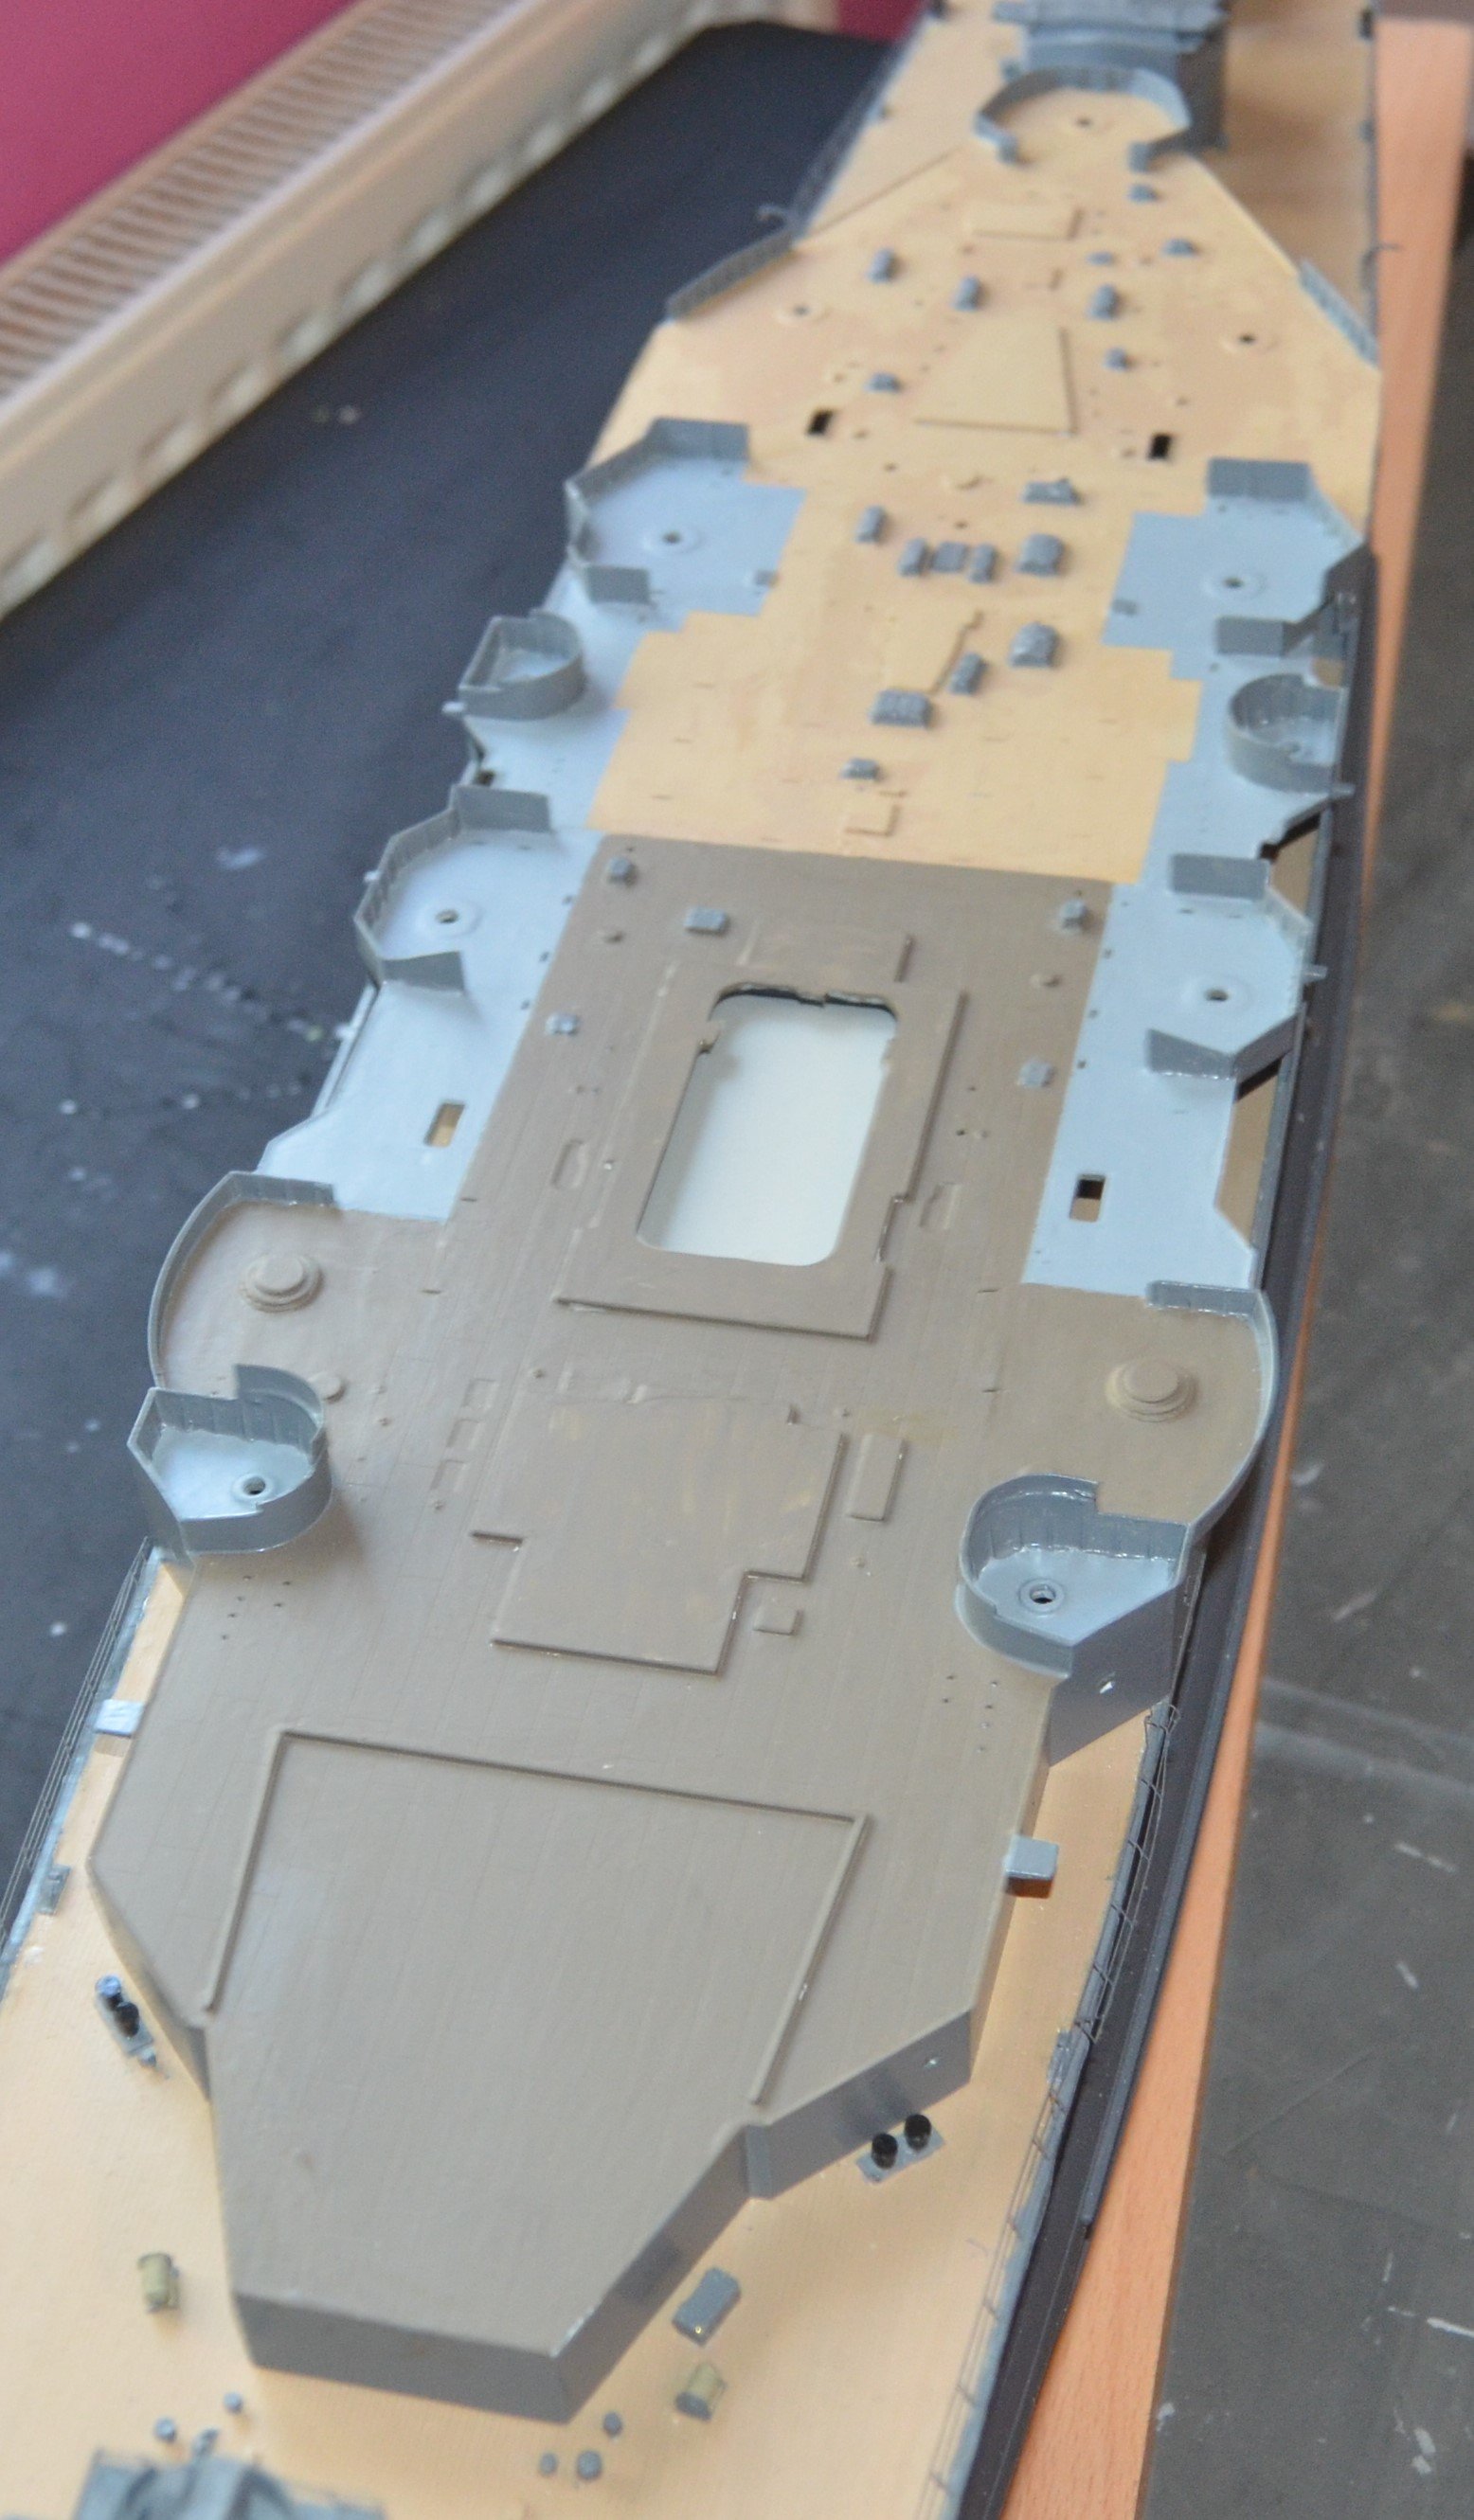
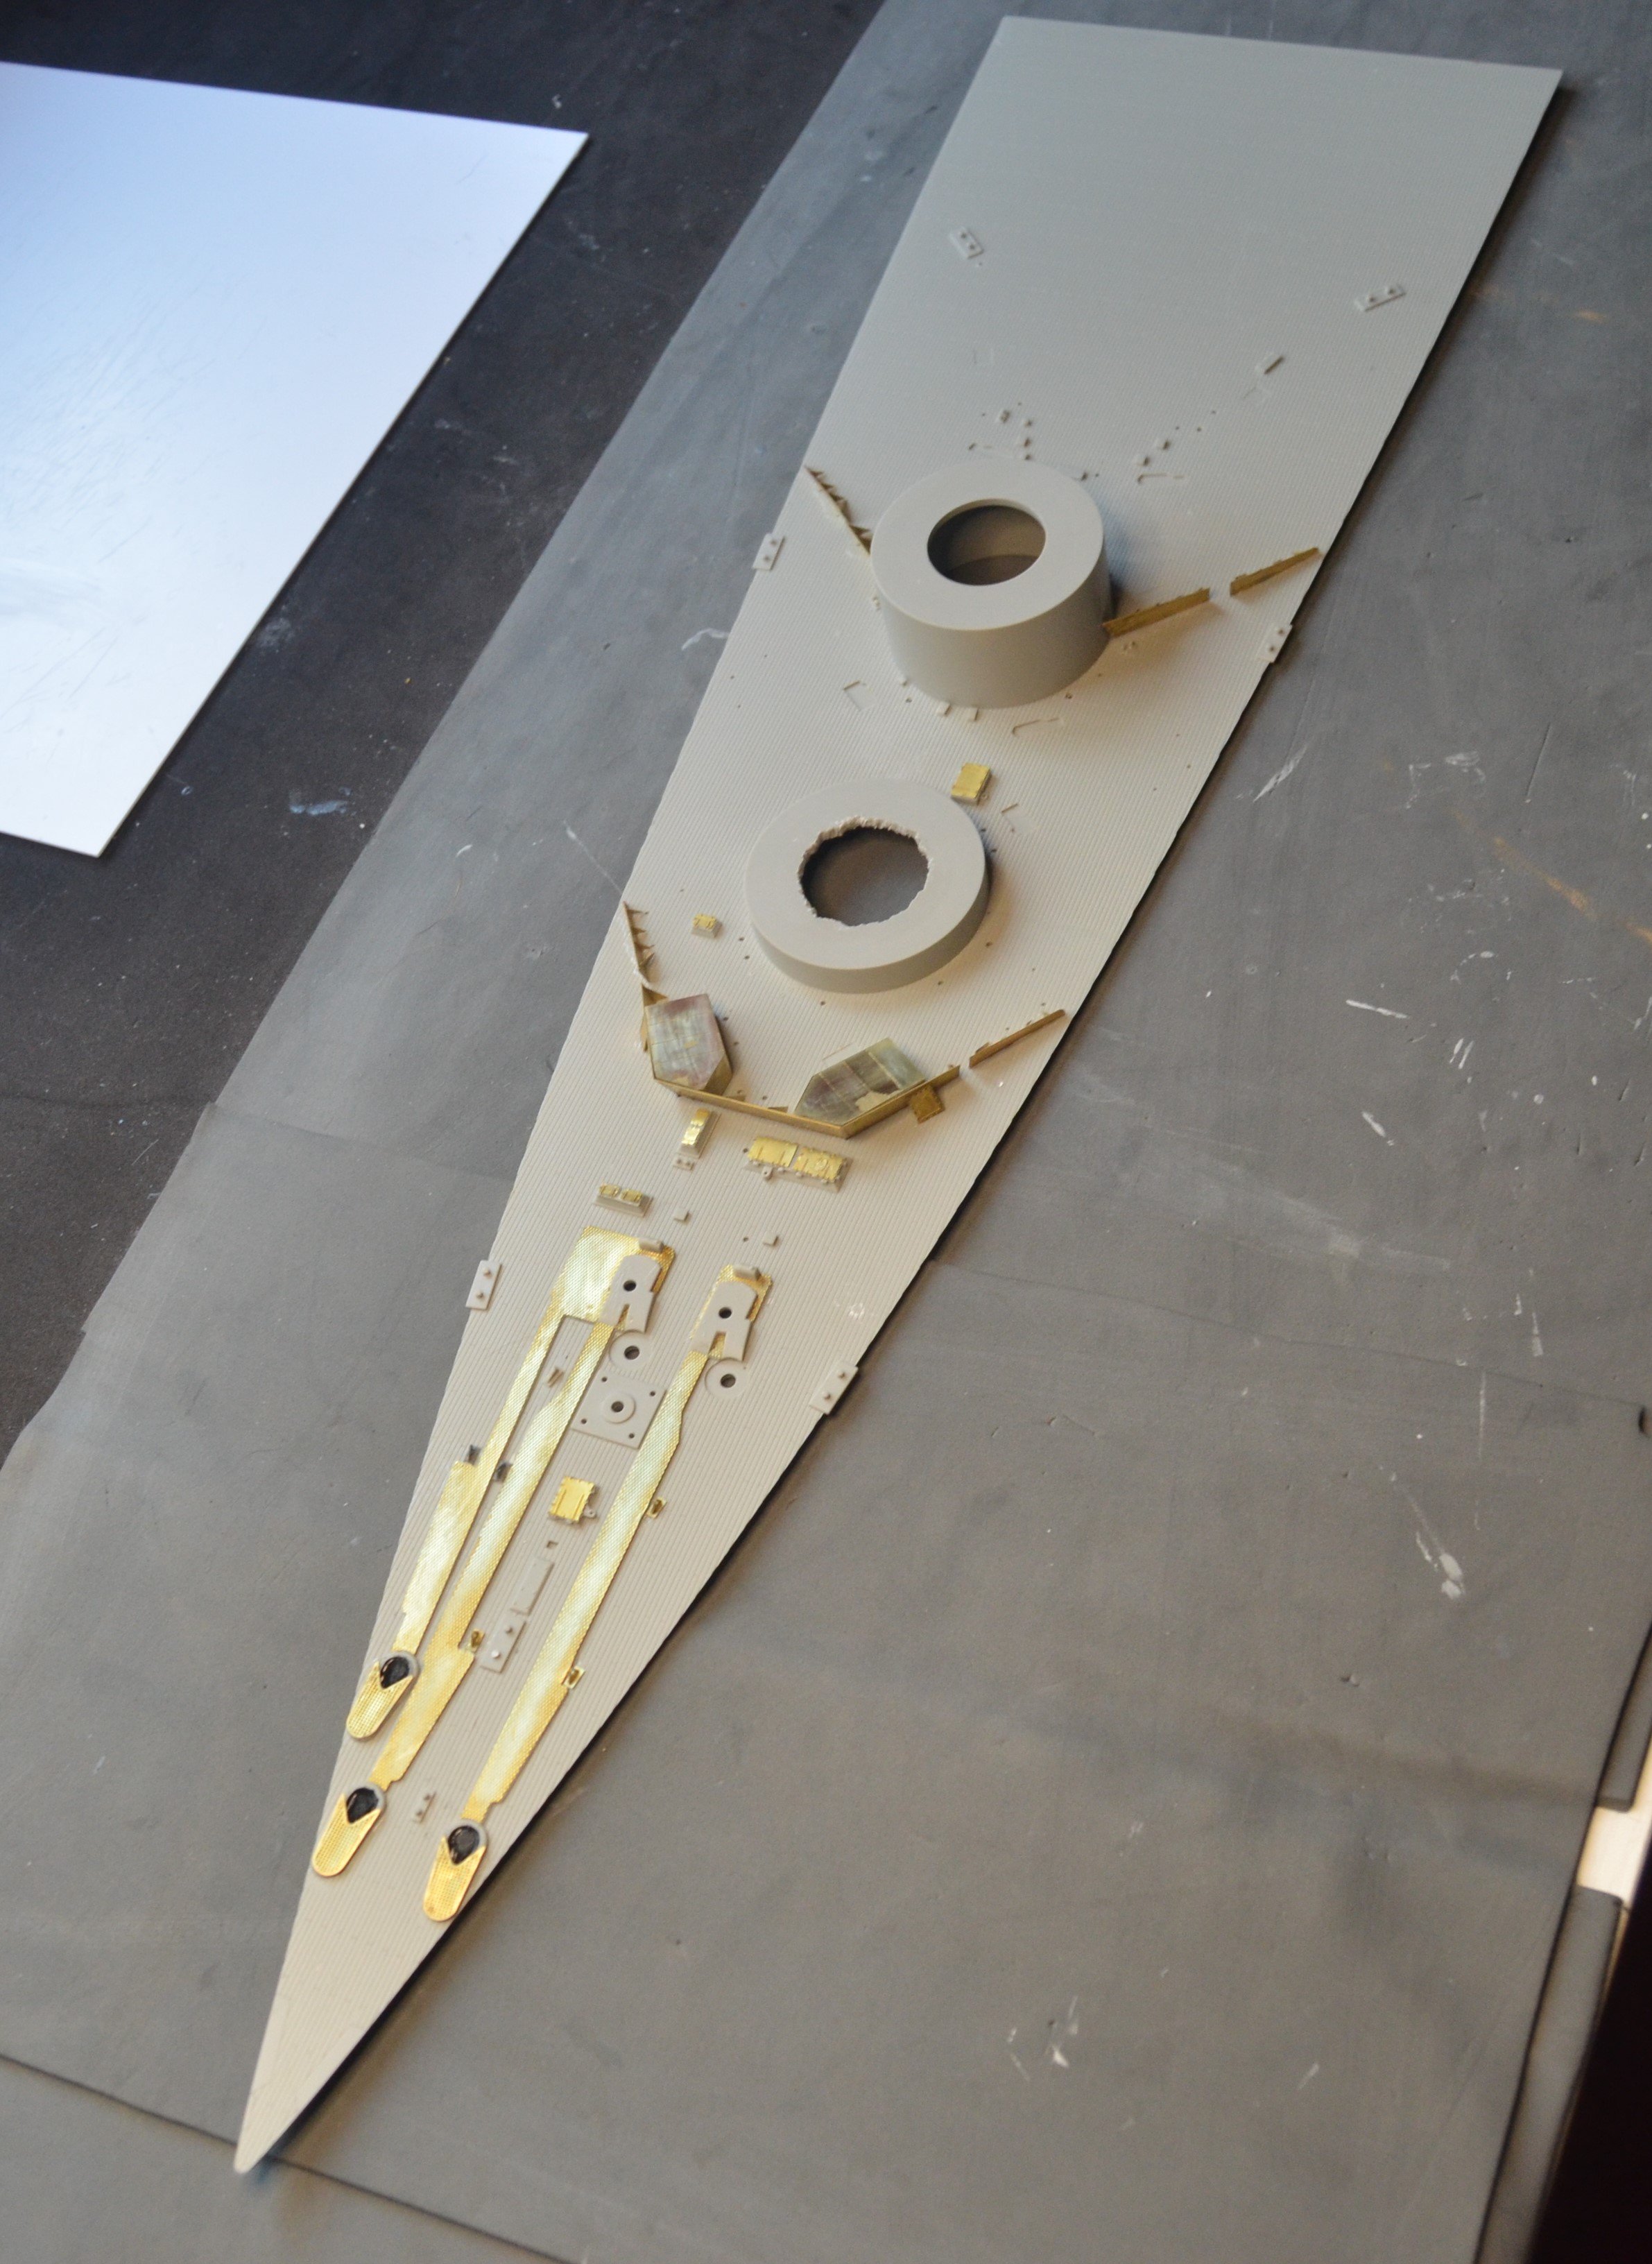
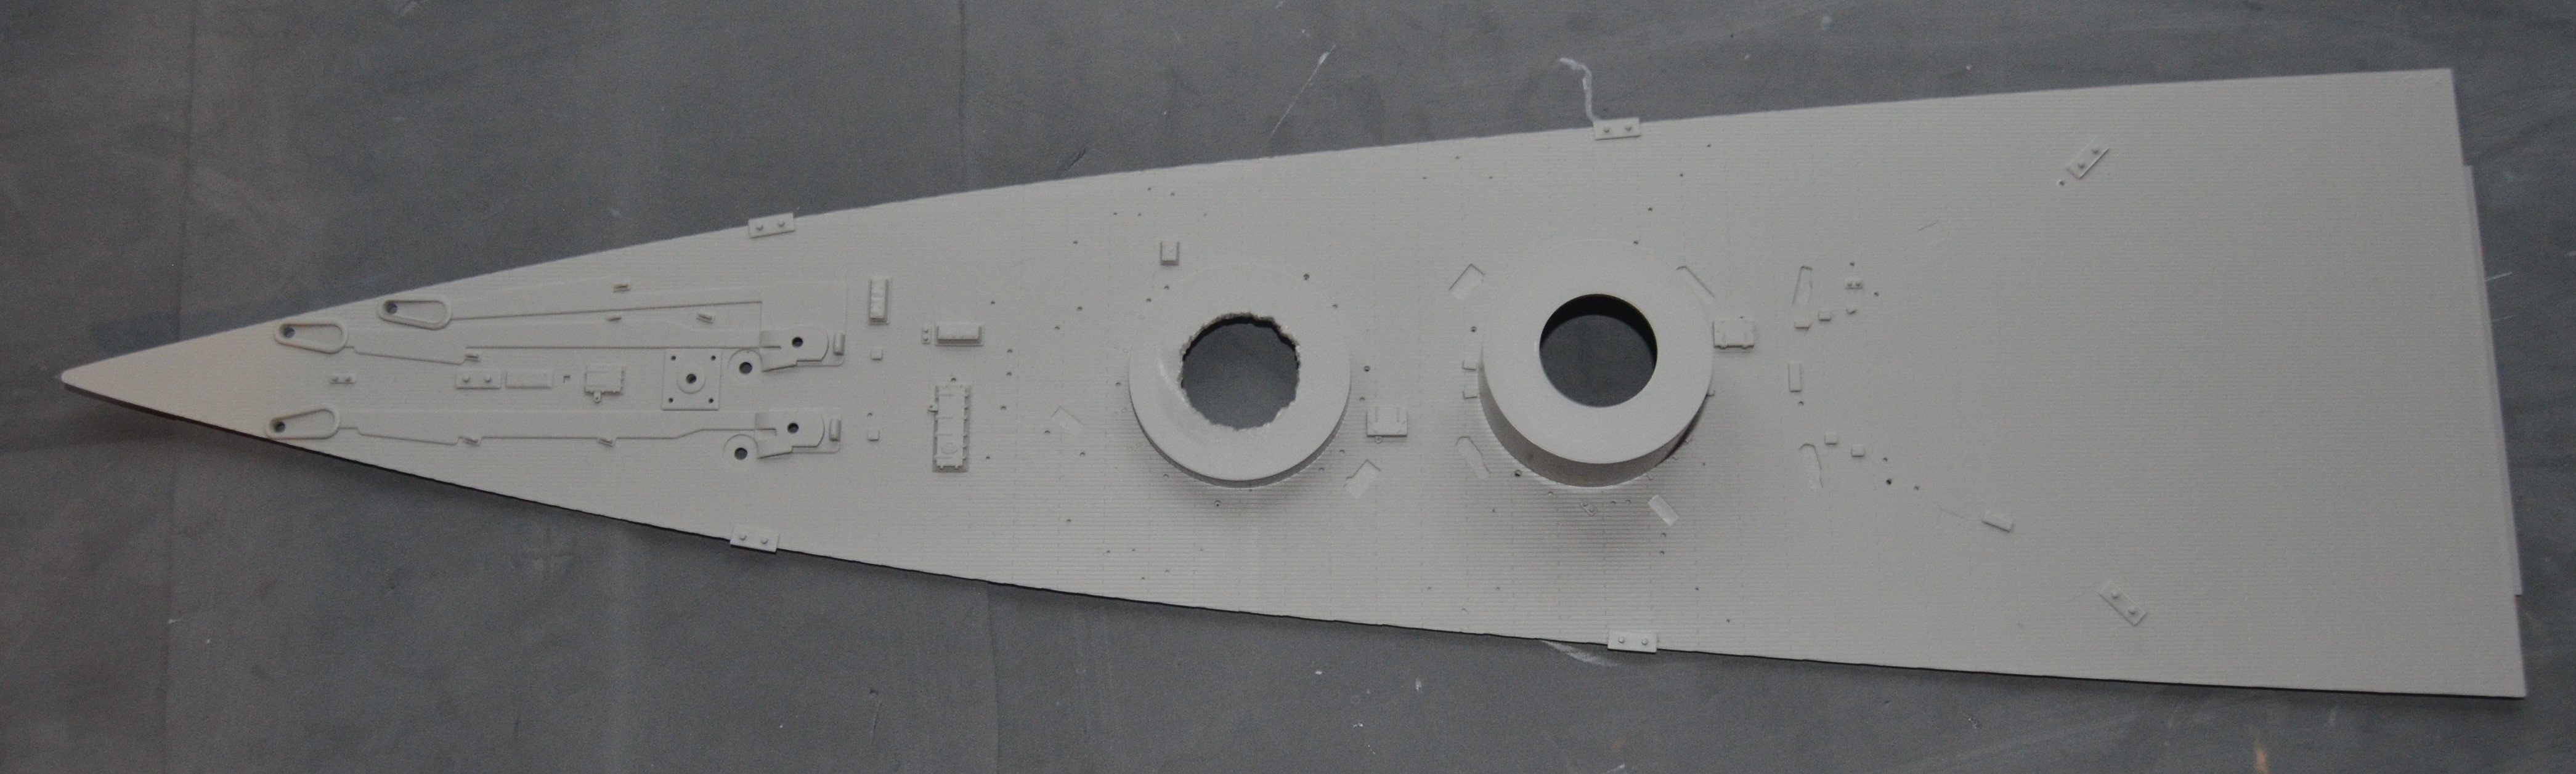
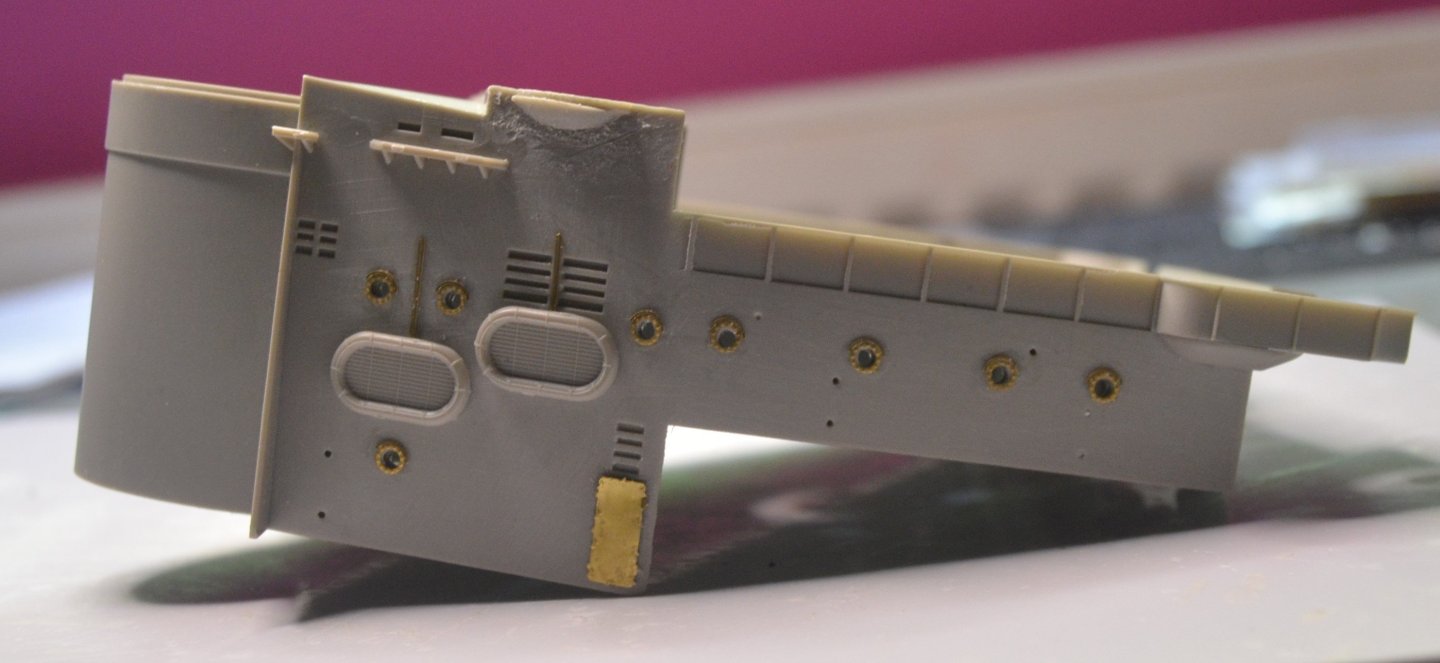
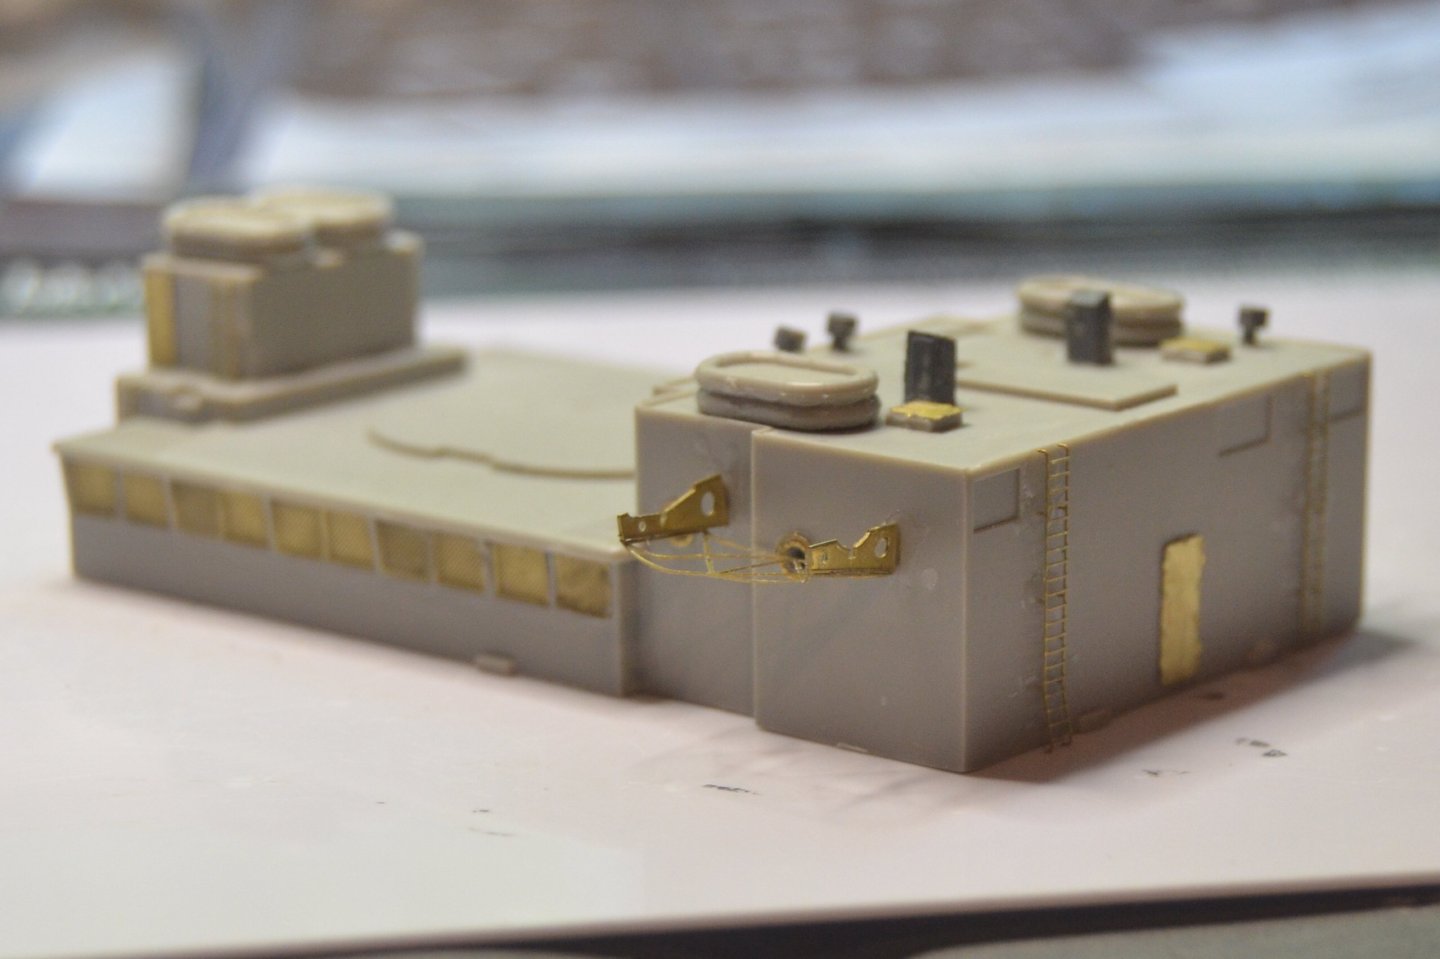
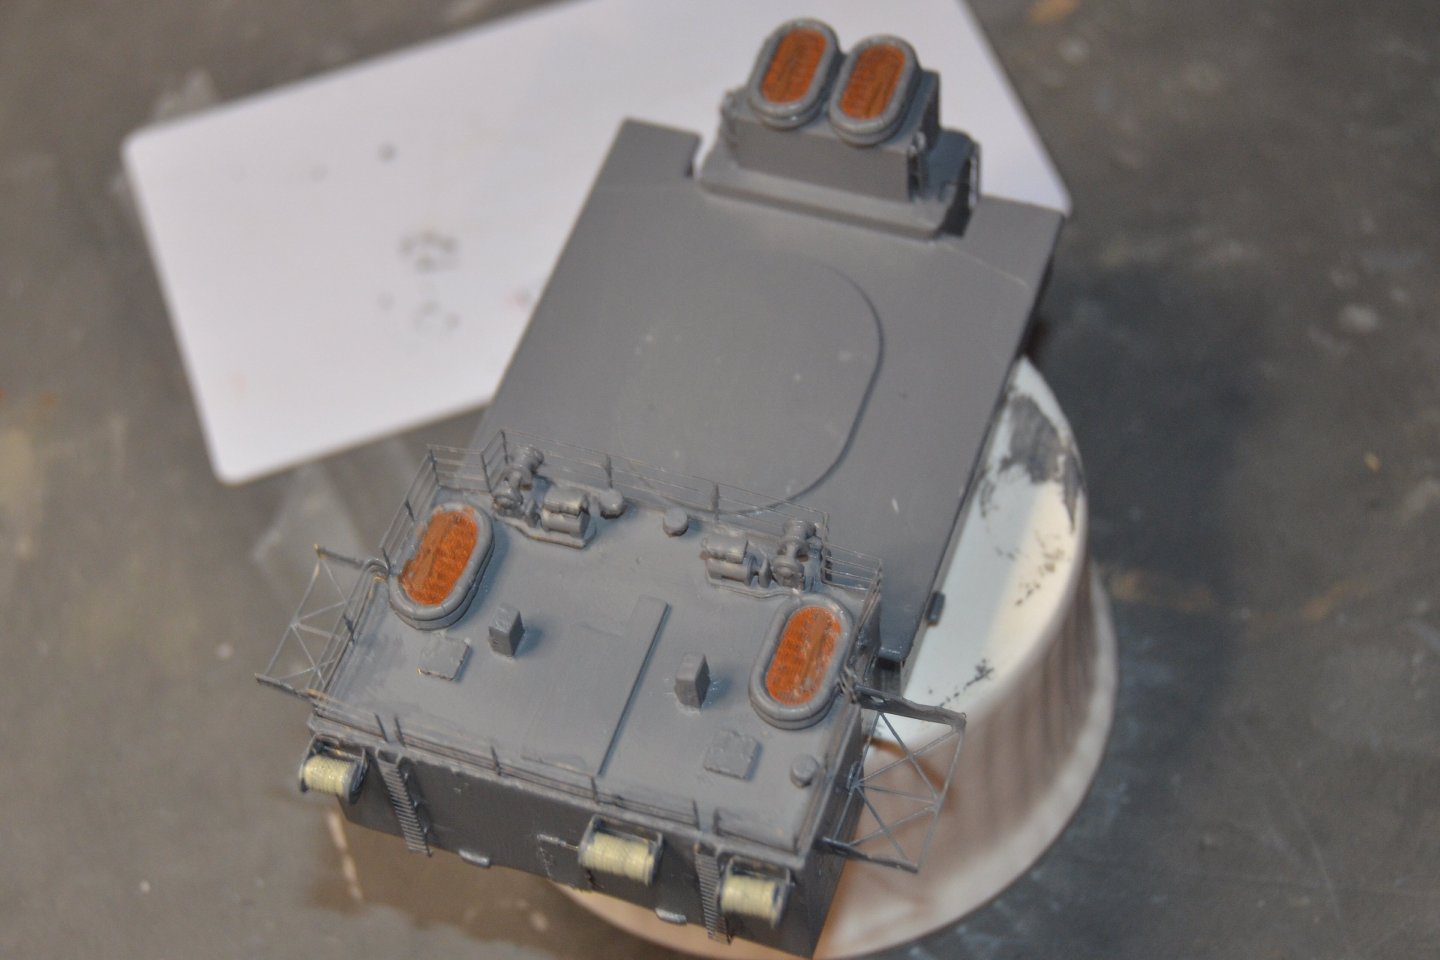
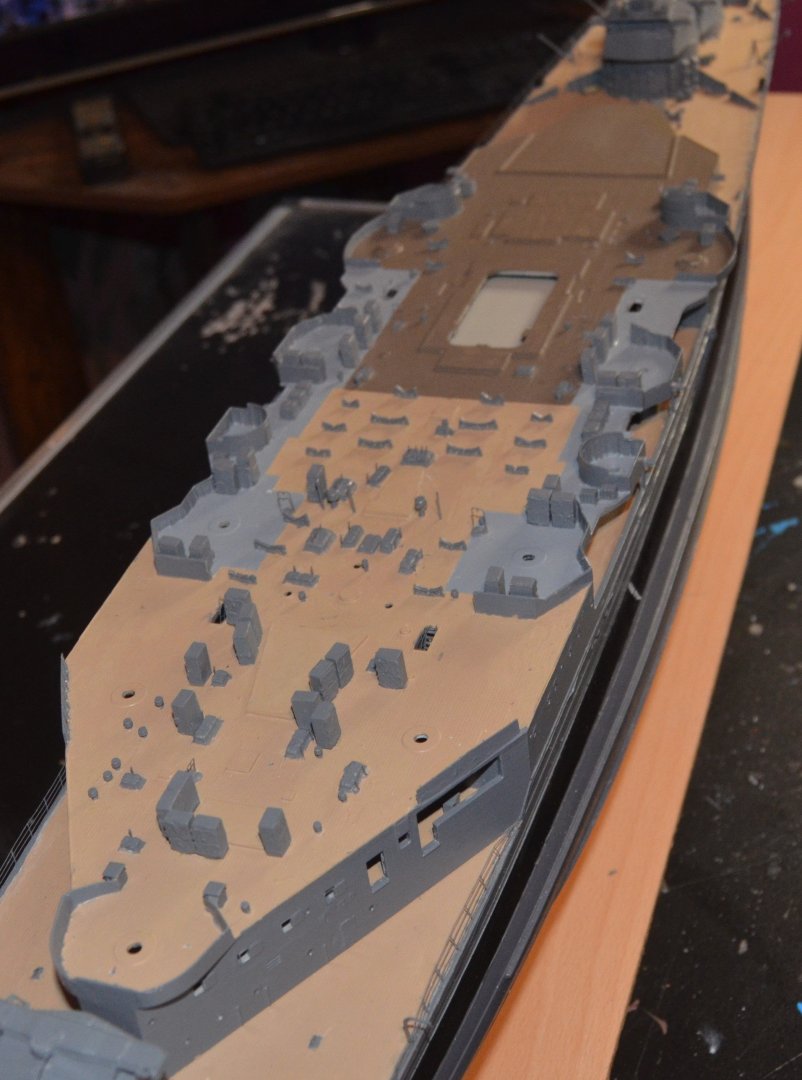
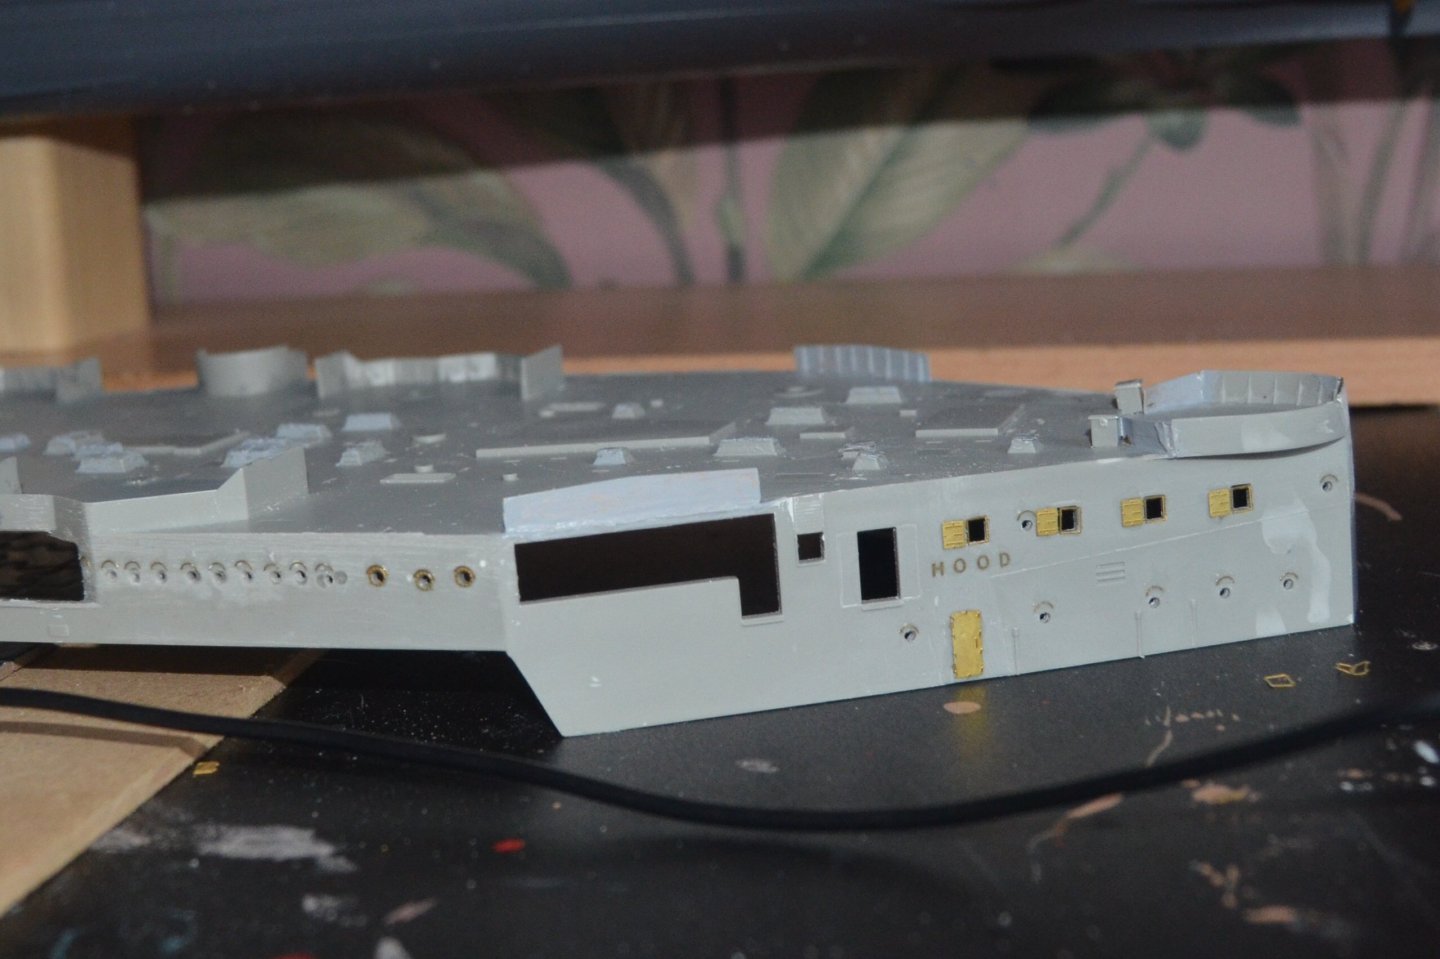
The shelter deck complete. Not glued down yet as there are a few little areas need attending to. I changed the semtex deck colour 4 times. I originally painted it concrete but that was to close to the deck tan colour. I then went with a dark grey. I then tried a light green colour as was mentioned on the HMS Hood web sight. But that didn't look right. I finally settled on the medium grey which HMS Hood Association are fairly confident is the correct colour based on pictures from the wreck showing the colour. I have used the upper hull grey toned down with some white to achieve the colour. In the first picture the deck has been sanded flat inside the taped area. In picture two the yellow areas have been removed and the blue sections are the added PE for the splinter shields. The front section has been changed from rounded to straight. The portholes have also been changed on the port side as recommended on the web site. I have also raised or lowered various areas with PE. I have painted the bottom black. This allows you to see inside the deck better so you can pick out the details under the deck. I will add all the smaller parts like ammo boxes, flag lockers, reels, winches and the chocks for the ships boats, of which there are around 200 parts to fit before starting on the super structures. The name plate may be a bit to high up. But the letters are individual PE ones and to remove and replace would almost certainly ruin them.


-
Sorry to hear that. I'm in the same boat as they say. Failing eyesight,shaking hands and generally a lot slower when working on my models. All age related. I find the small parts hard work. And rigging is just about doable without to many blocks. I find wooden models to much work now, so have turned to plastic kits whitch are a lot more easy to do, And then I make my modelling harder by adding PE to the model. I use a 10x table magnifier lamp and is a huge help. Paired with some 3x glasses it has improved my modelling enormously. Some of the lamps also have a smaller higher powered magnifier at one side. And a headband magnifier is also a good investment.
-
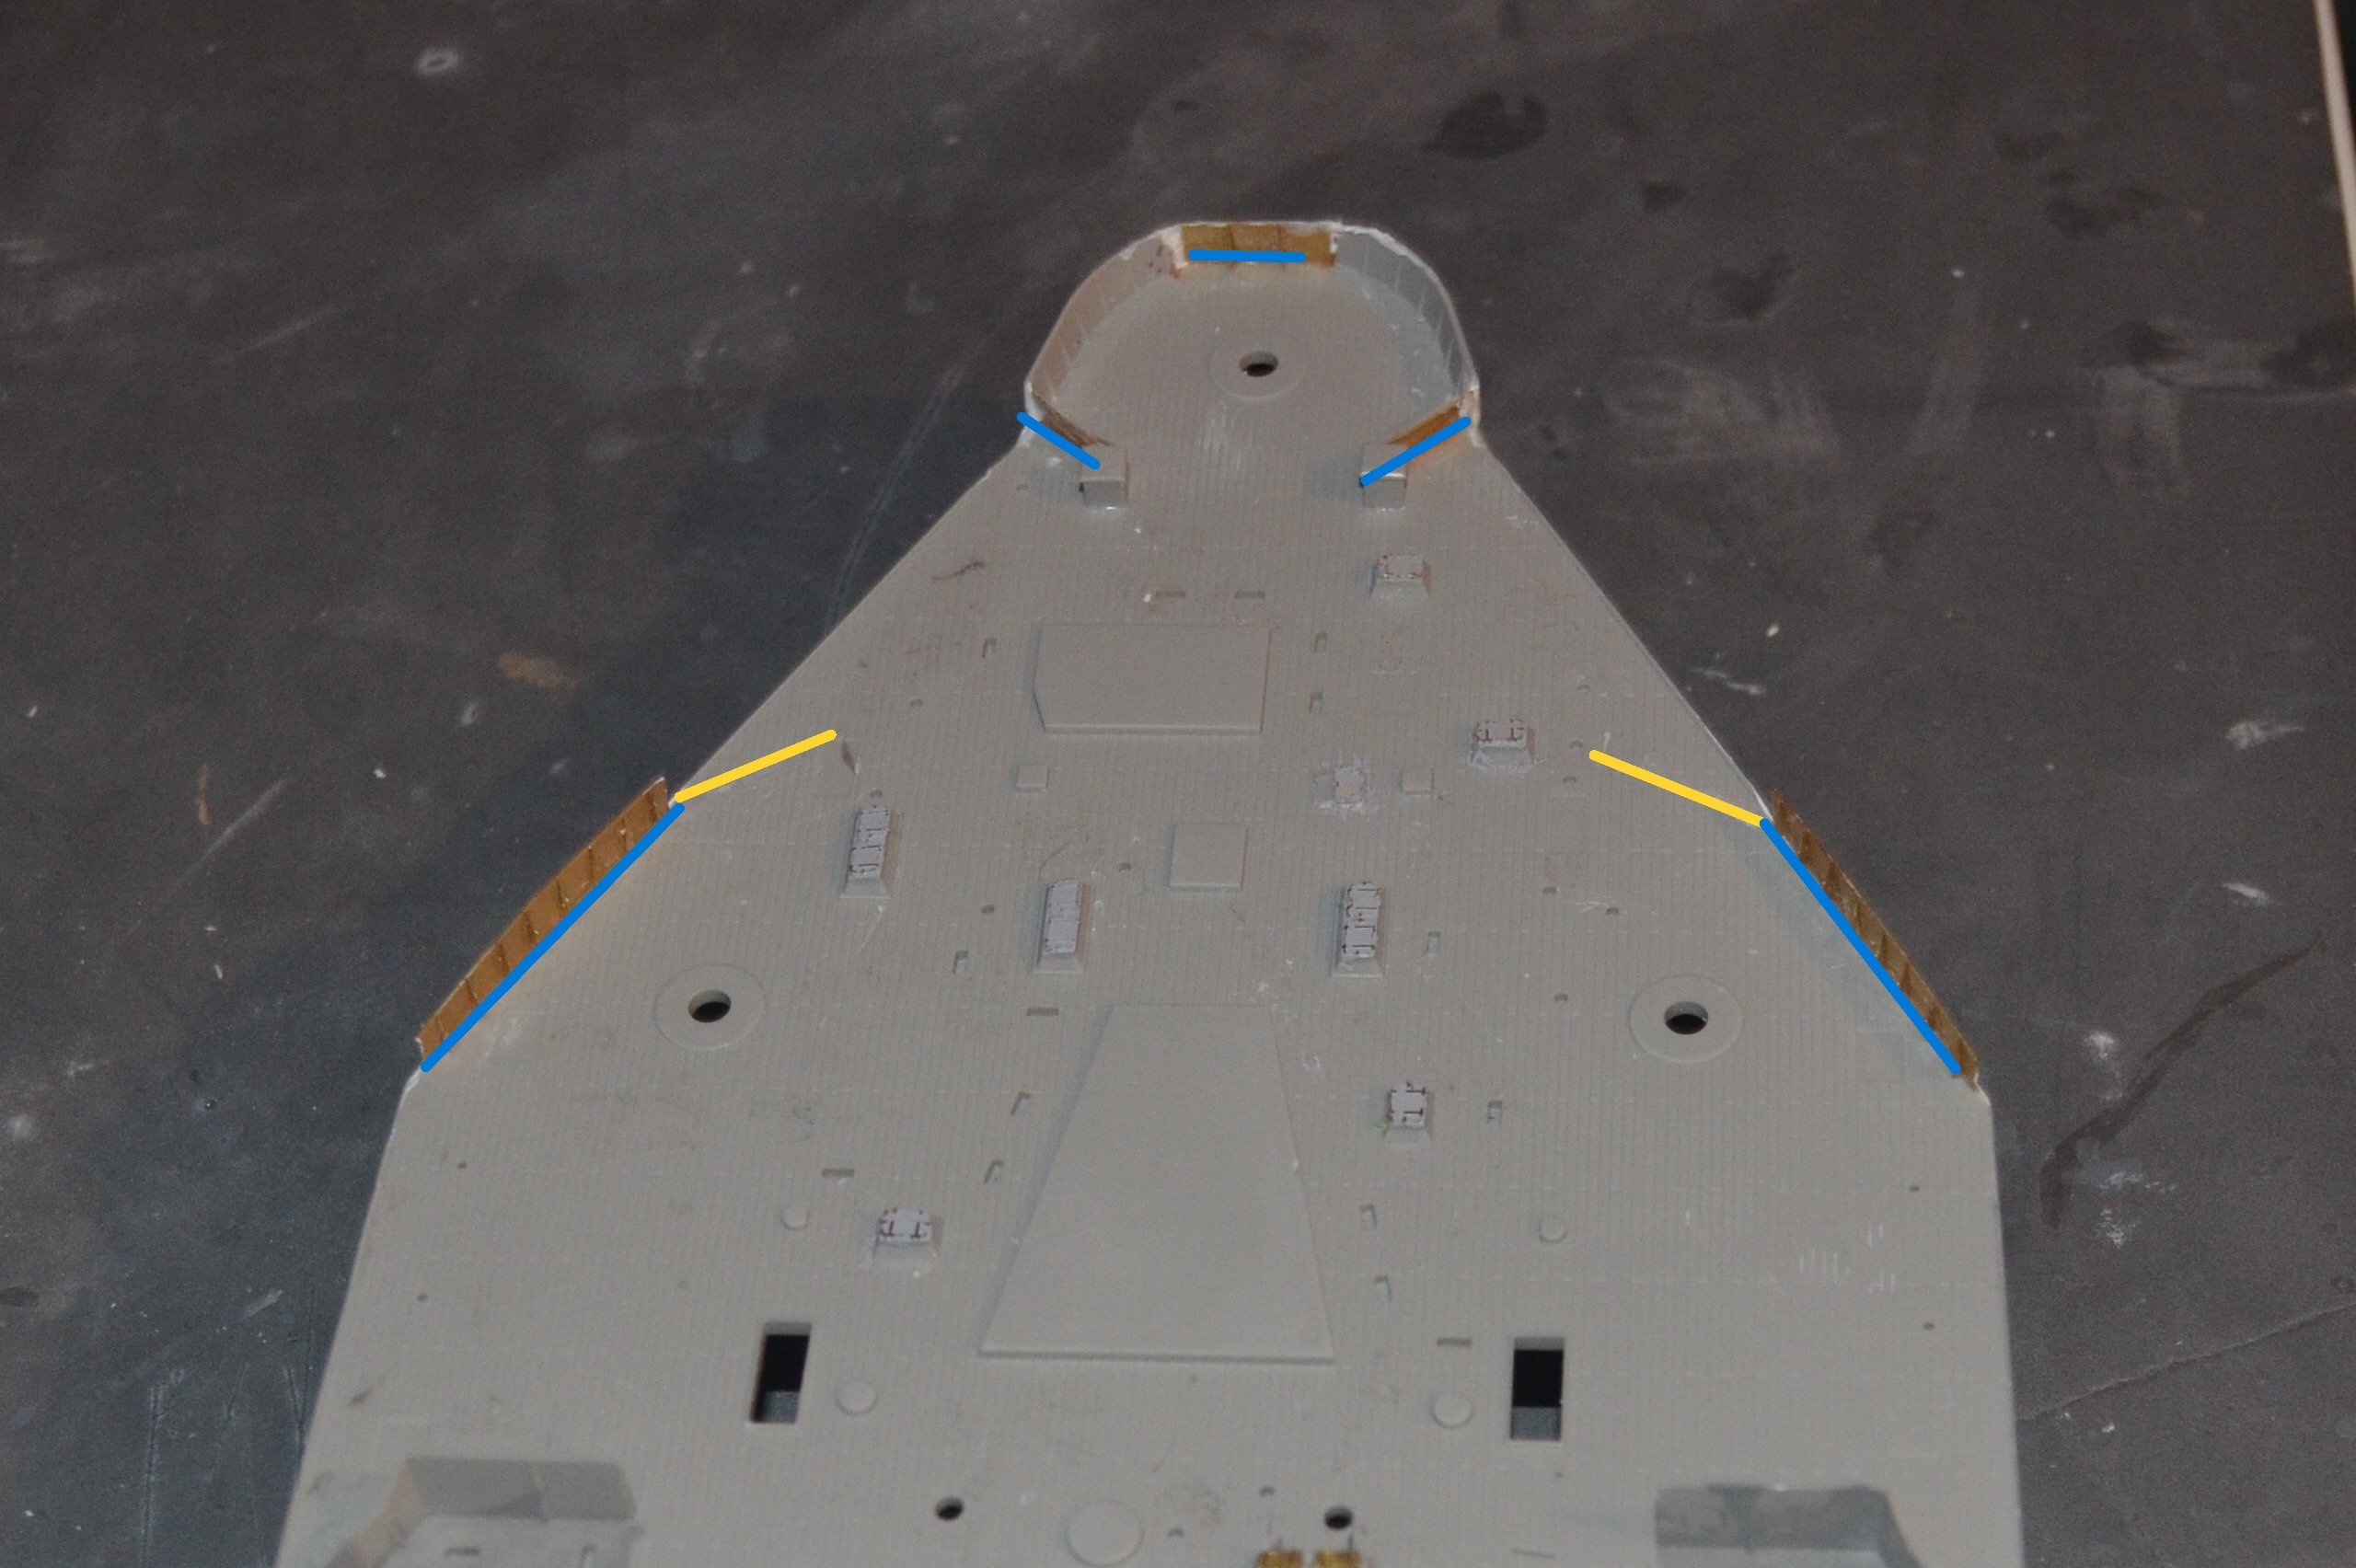
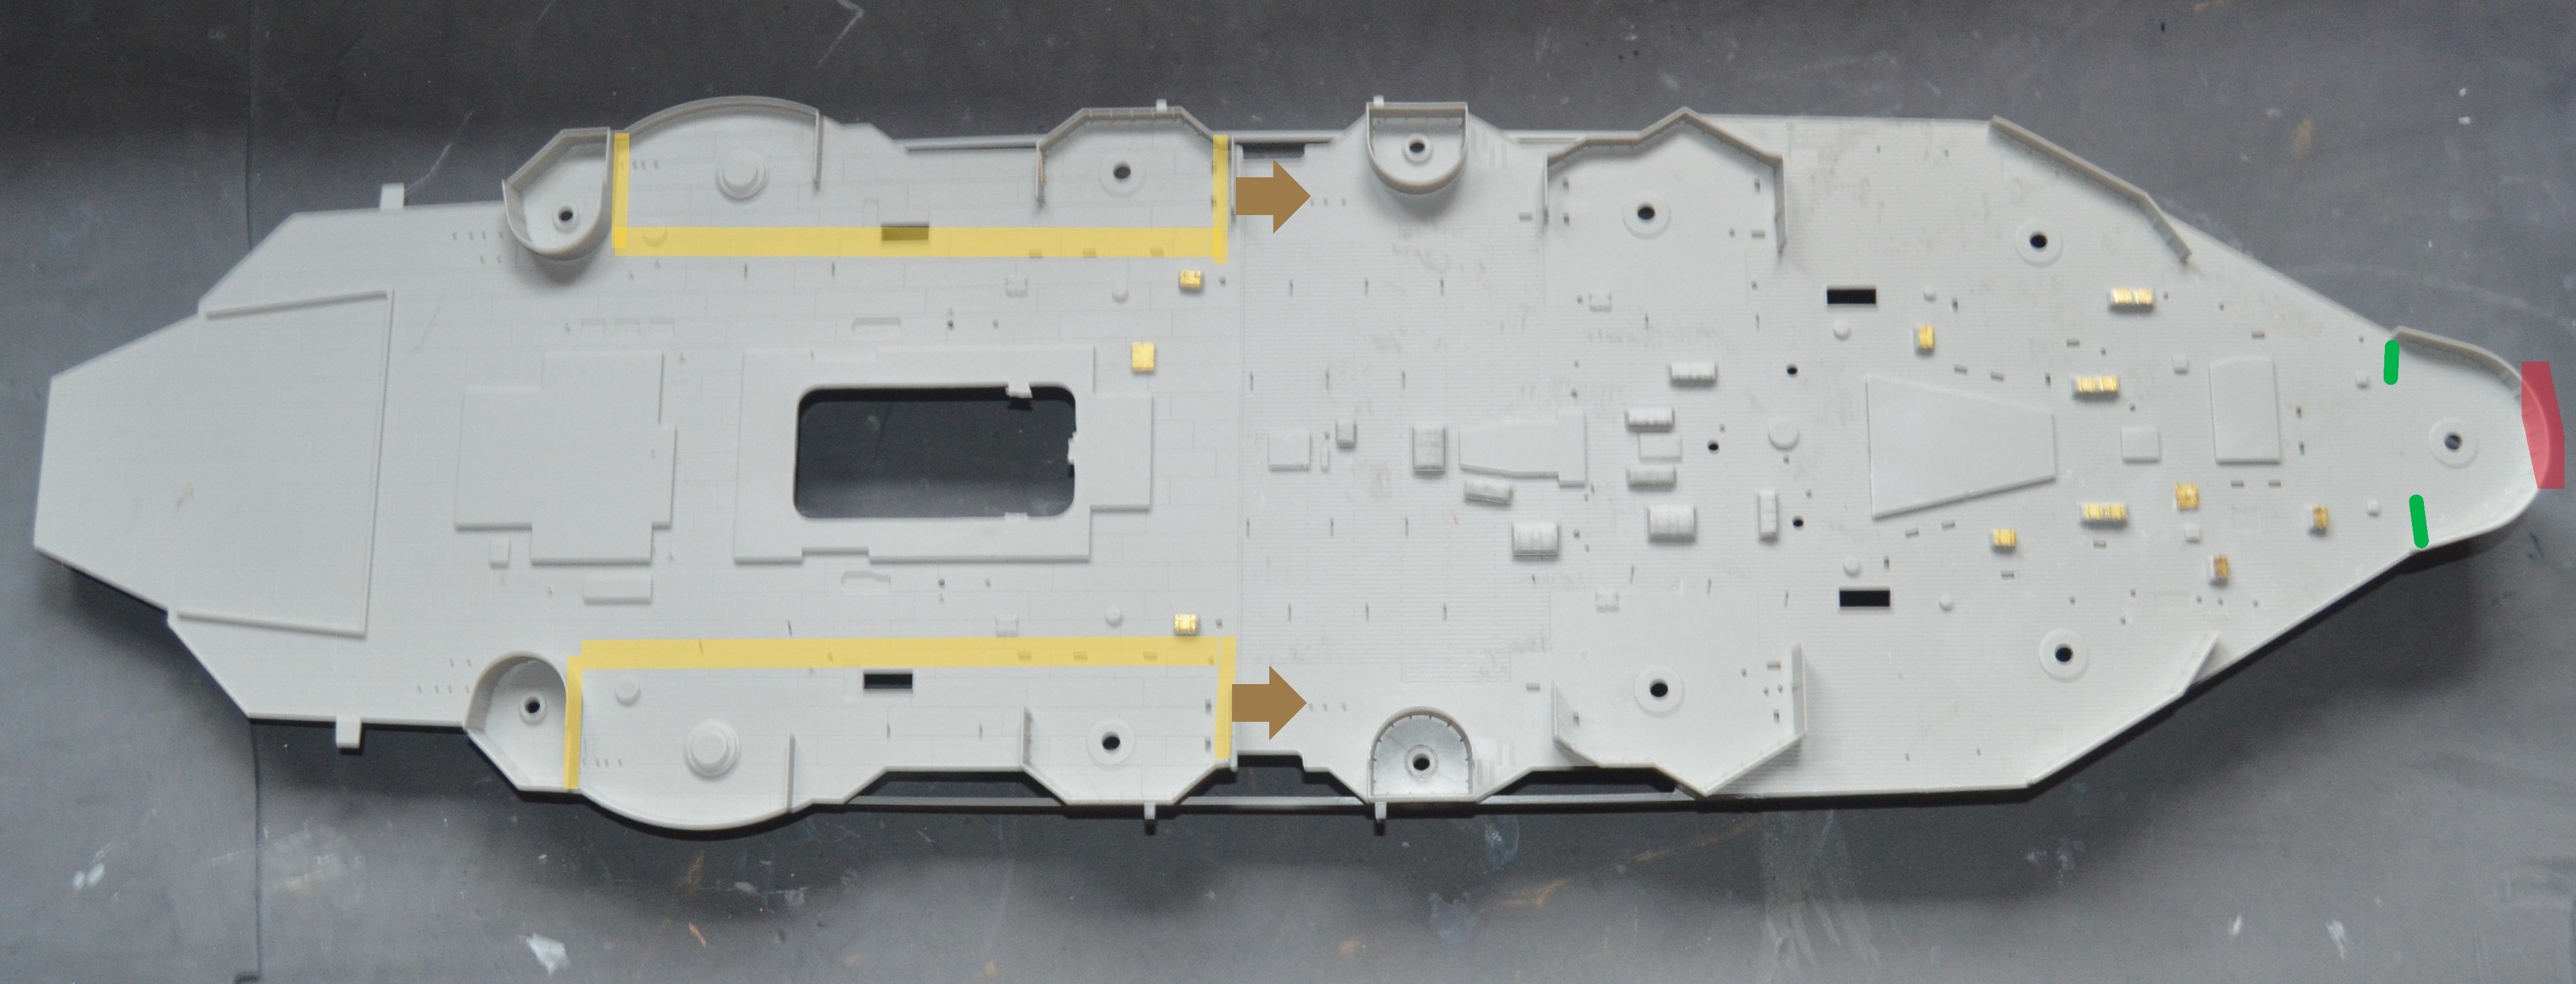
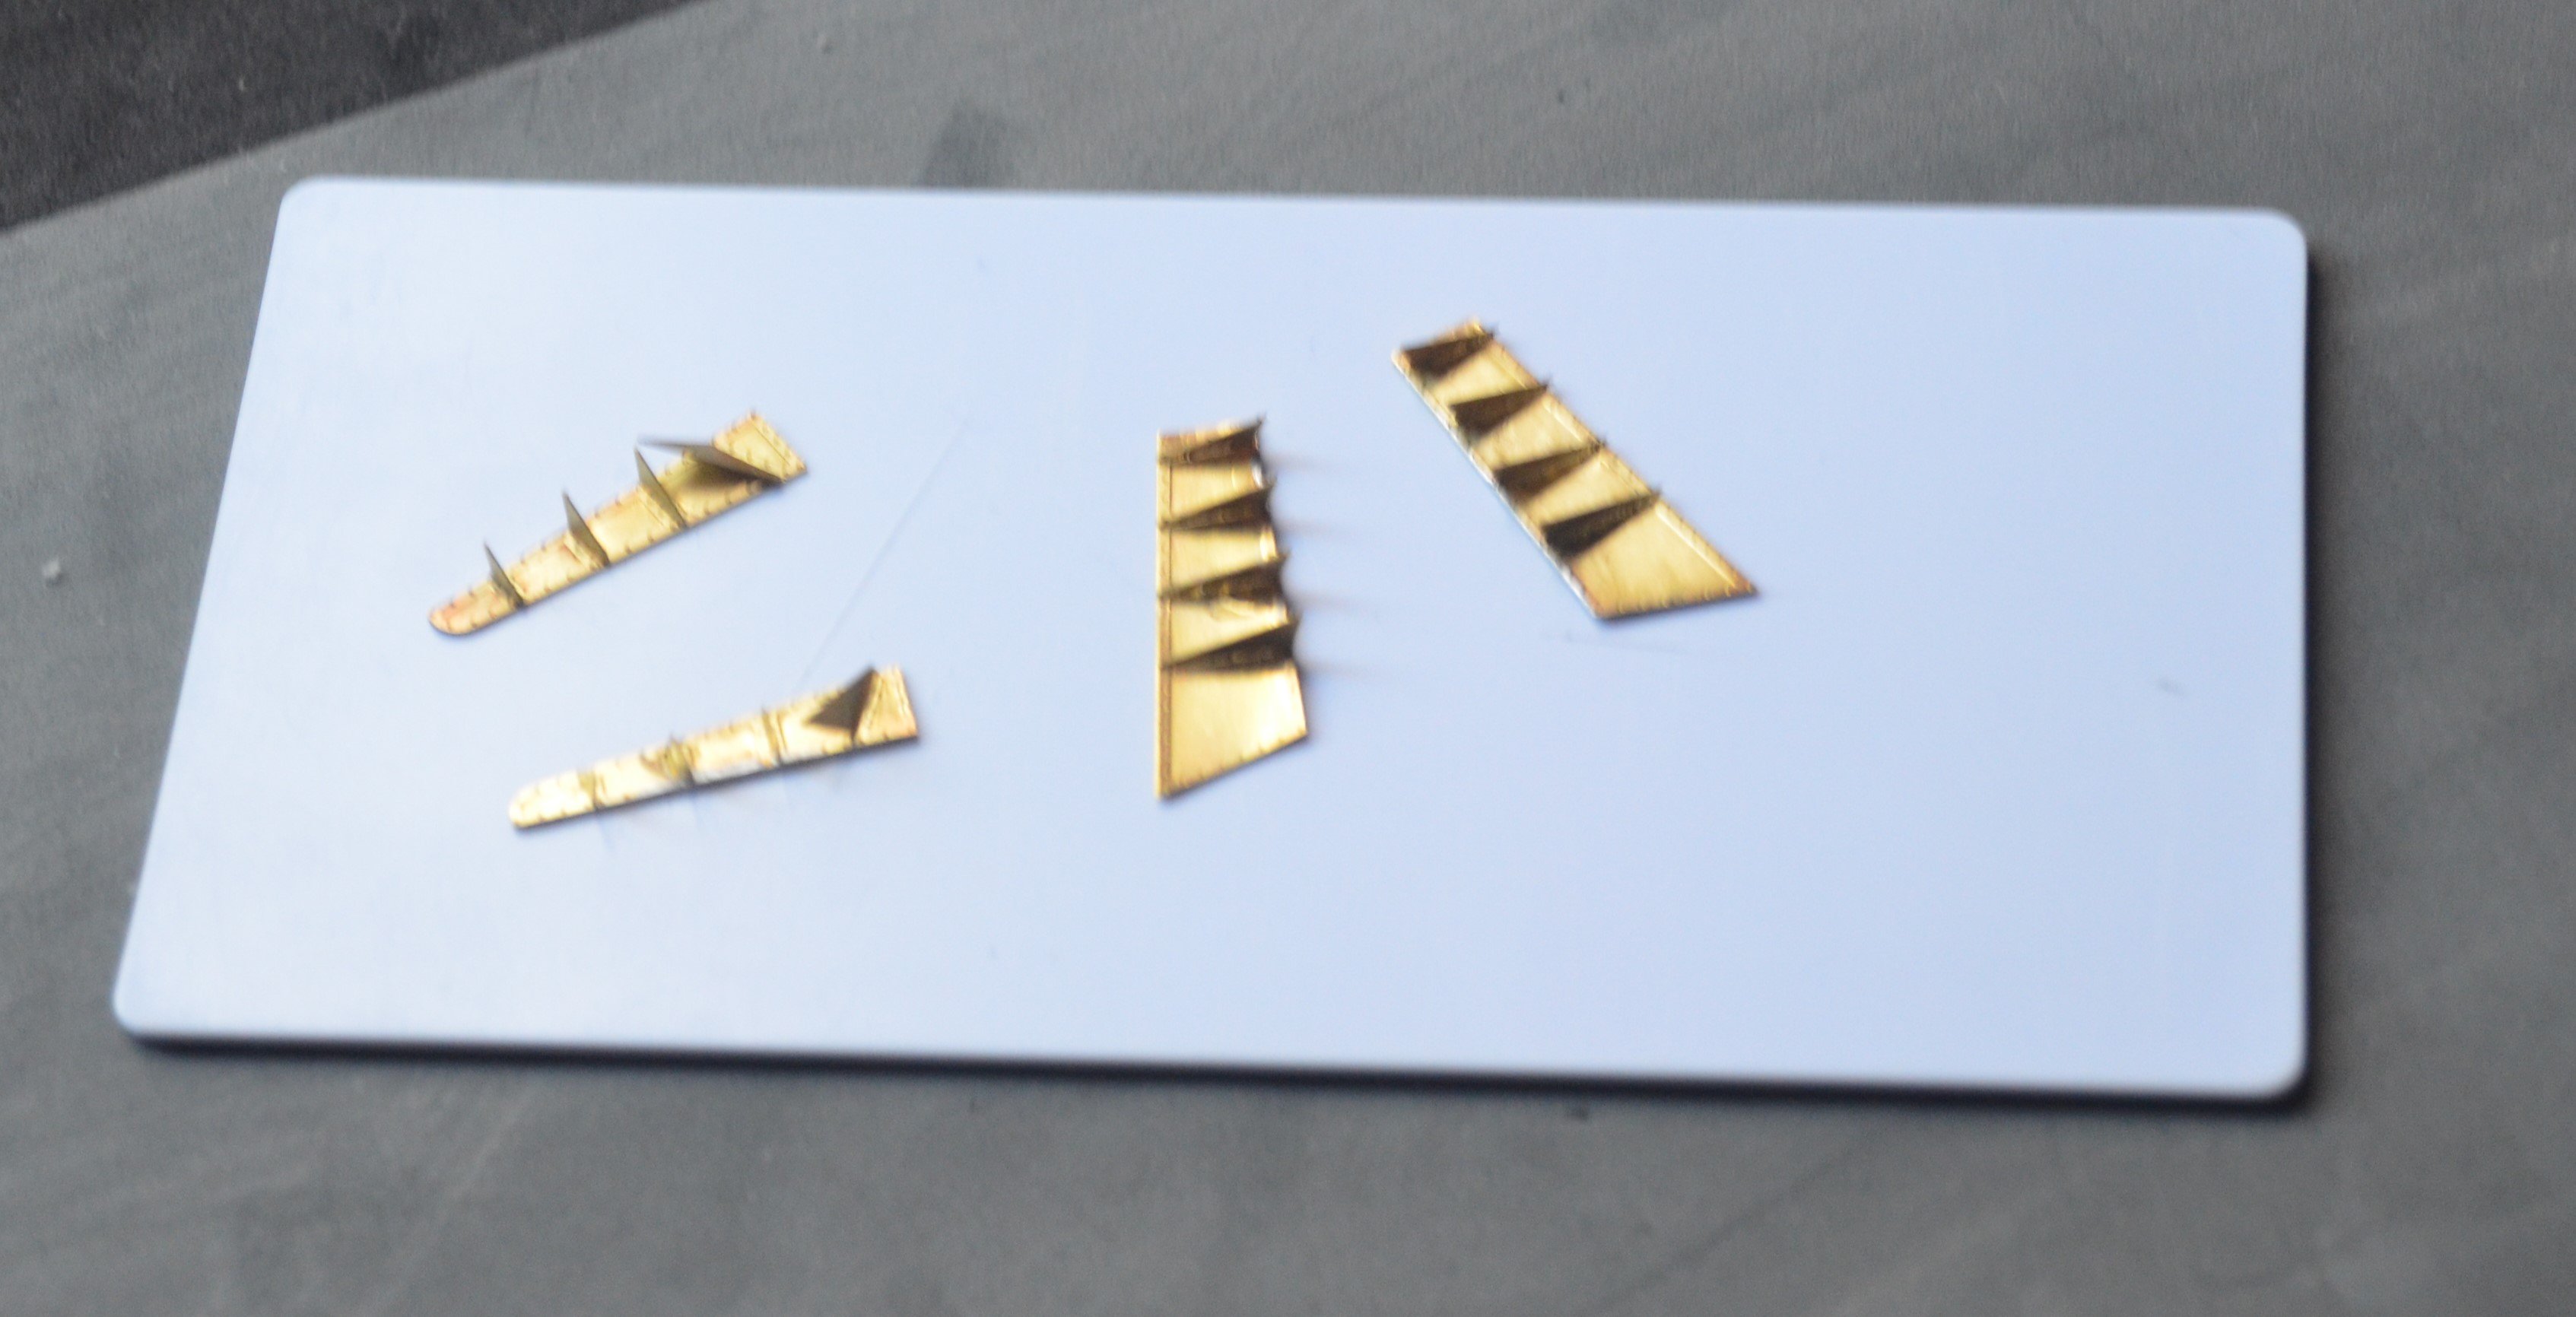
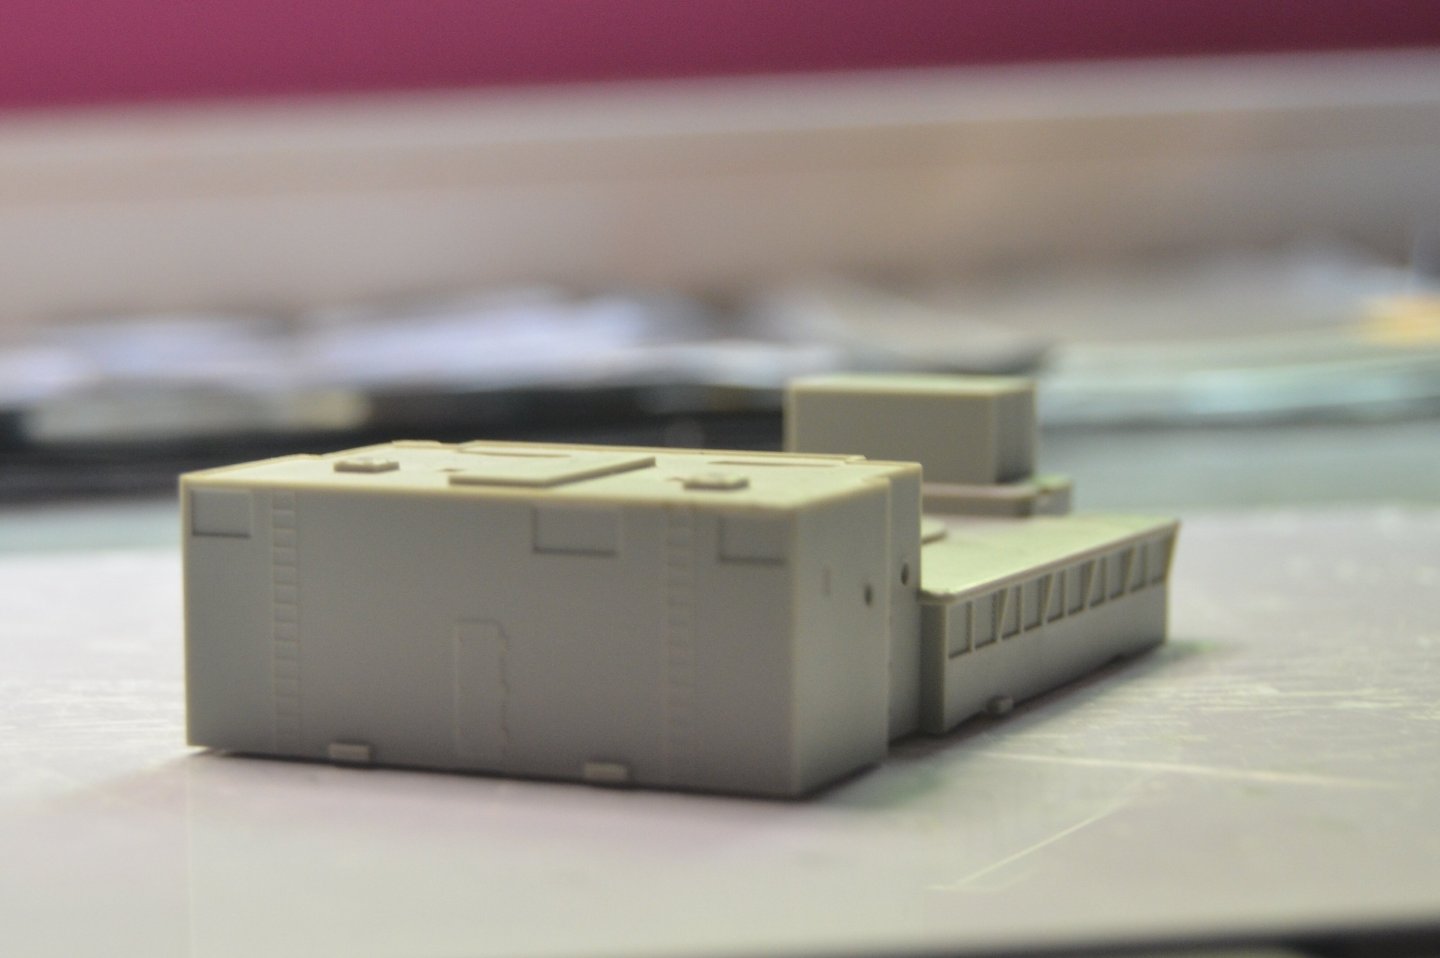
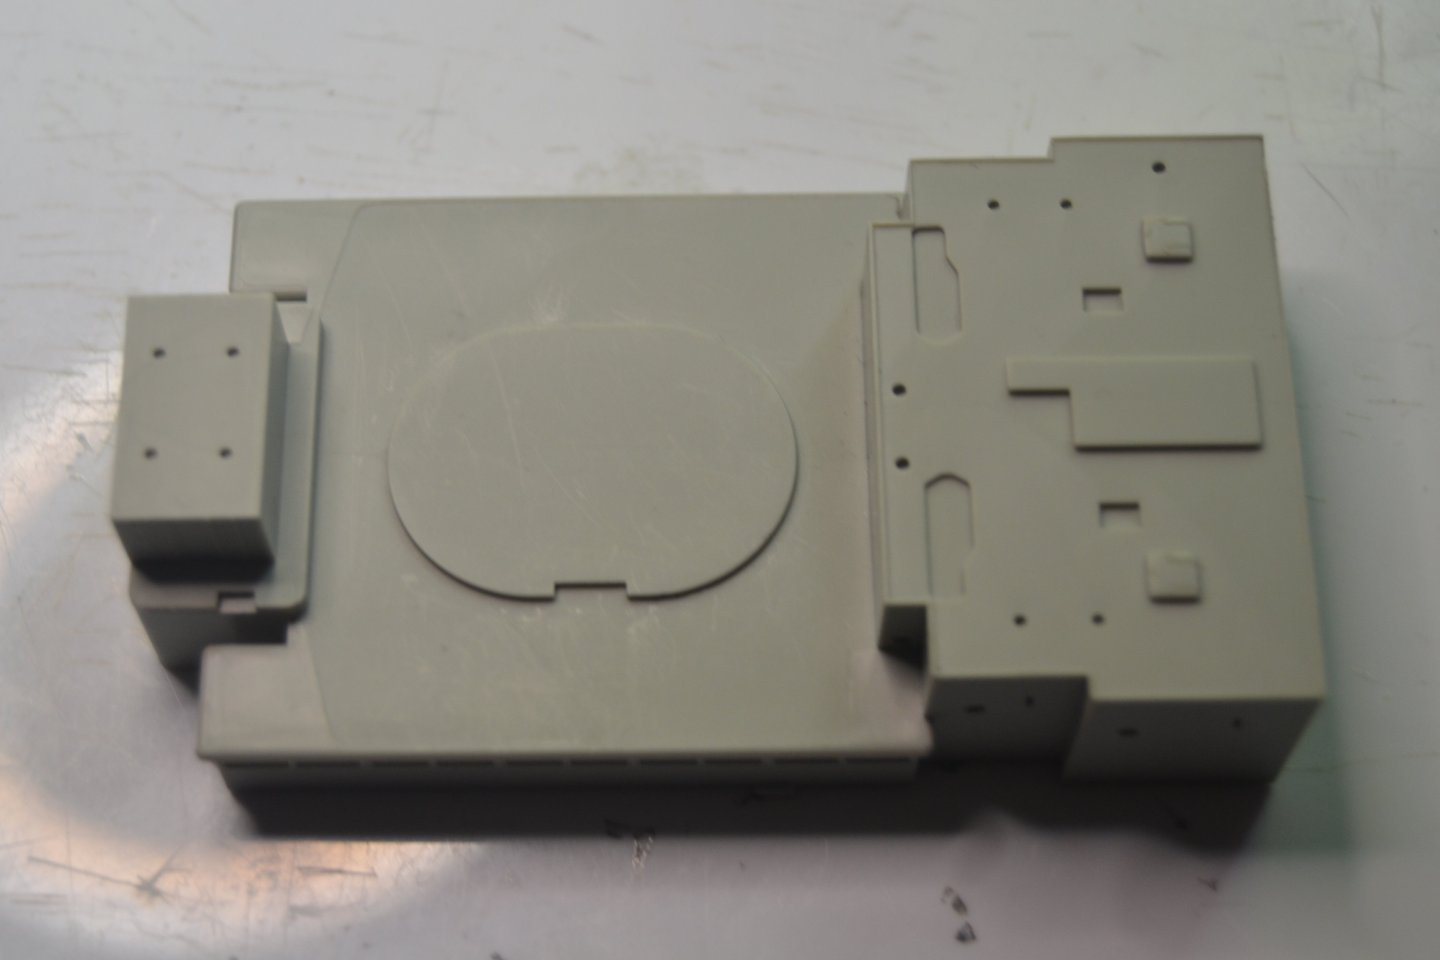
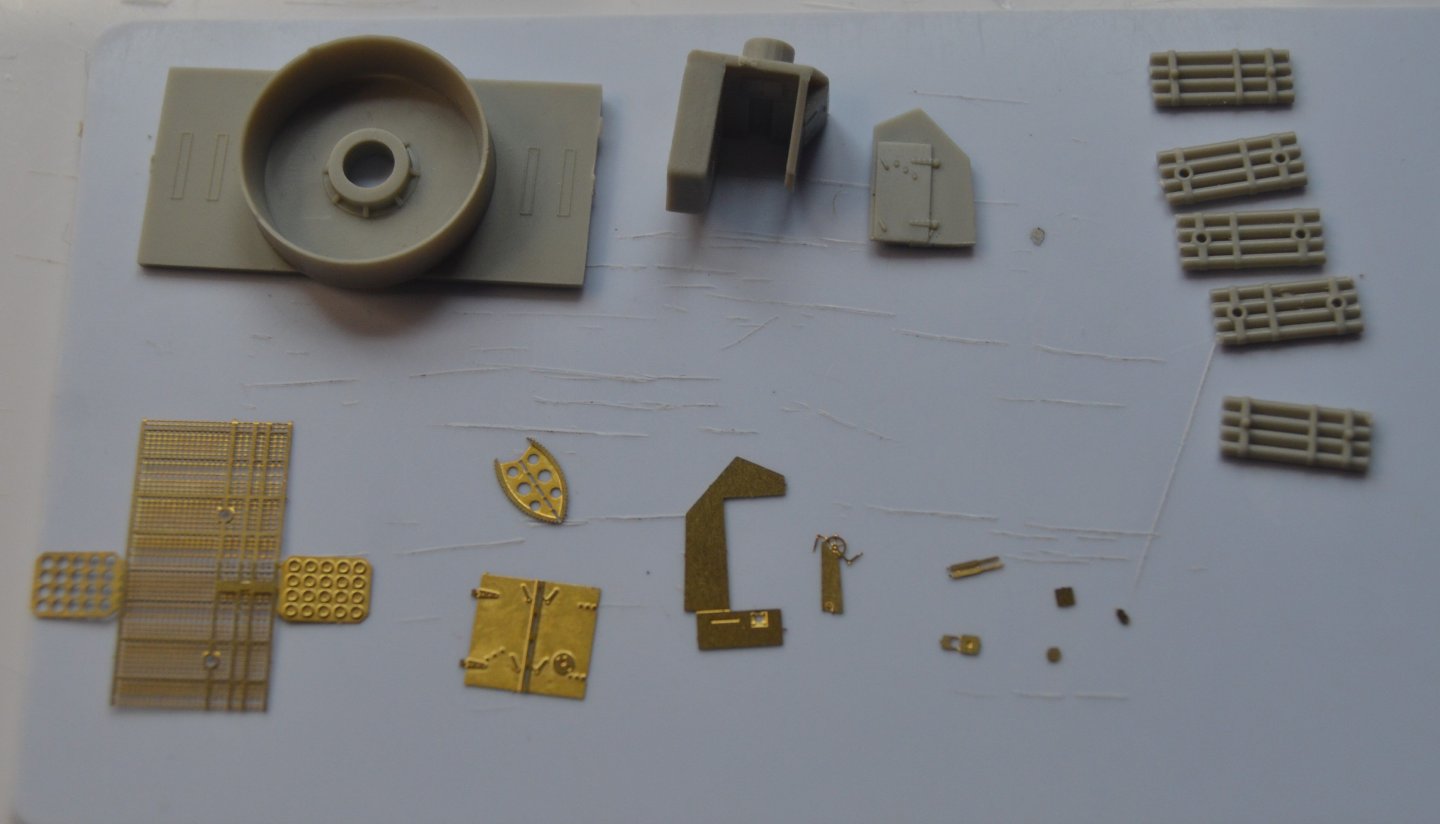
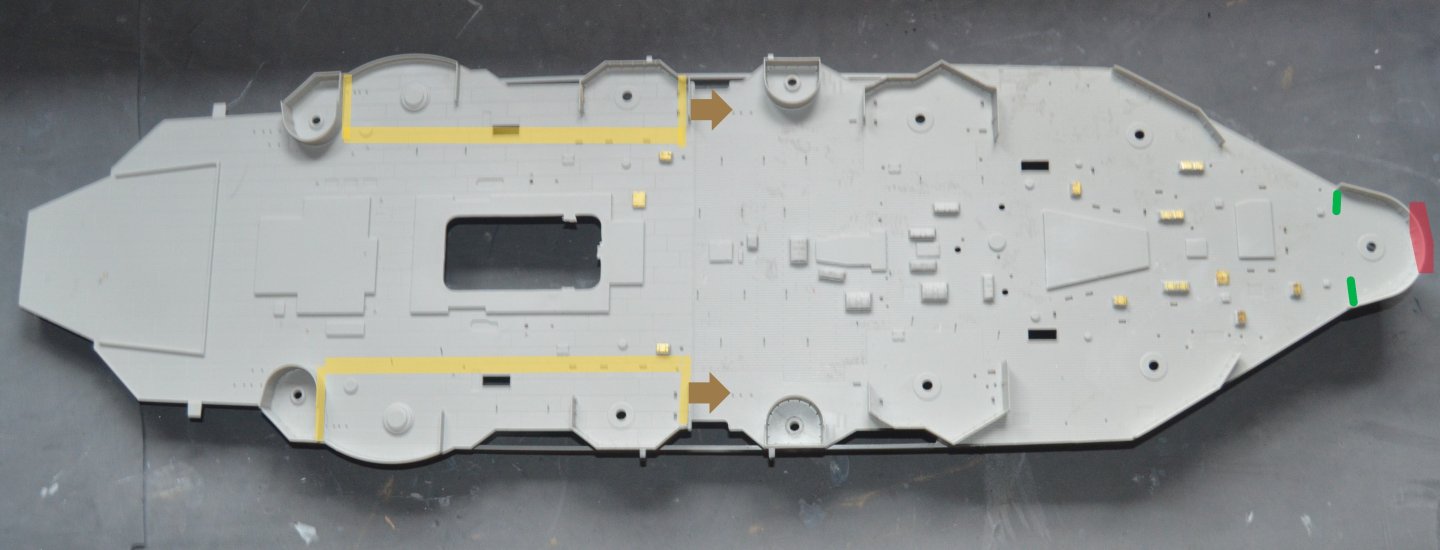
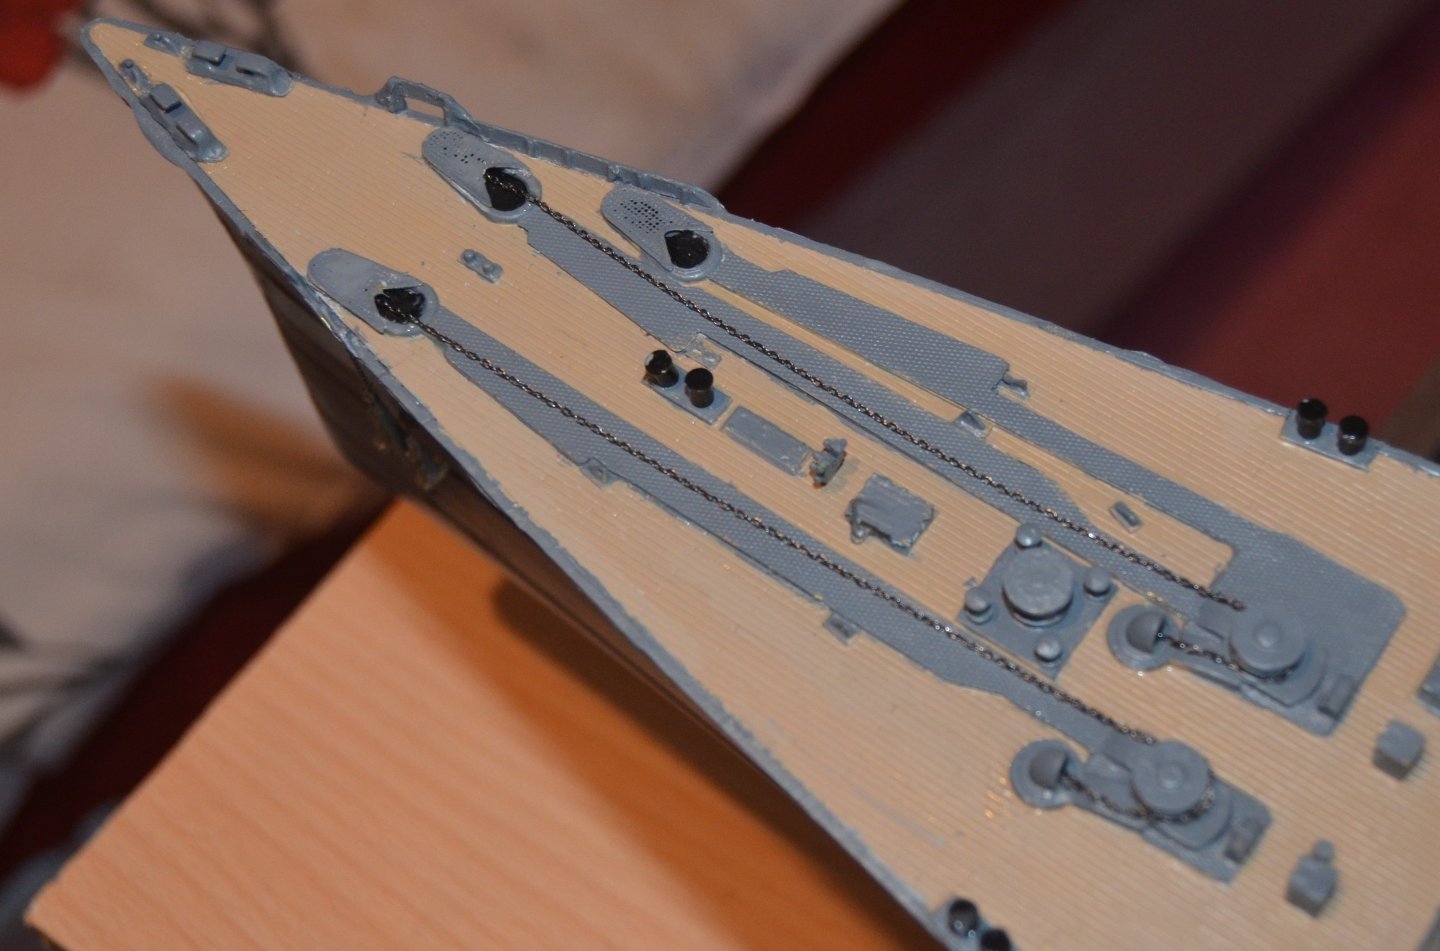
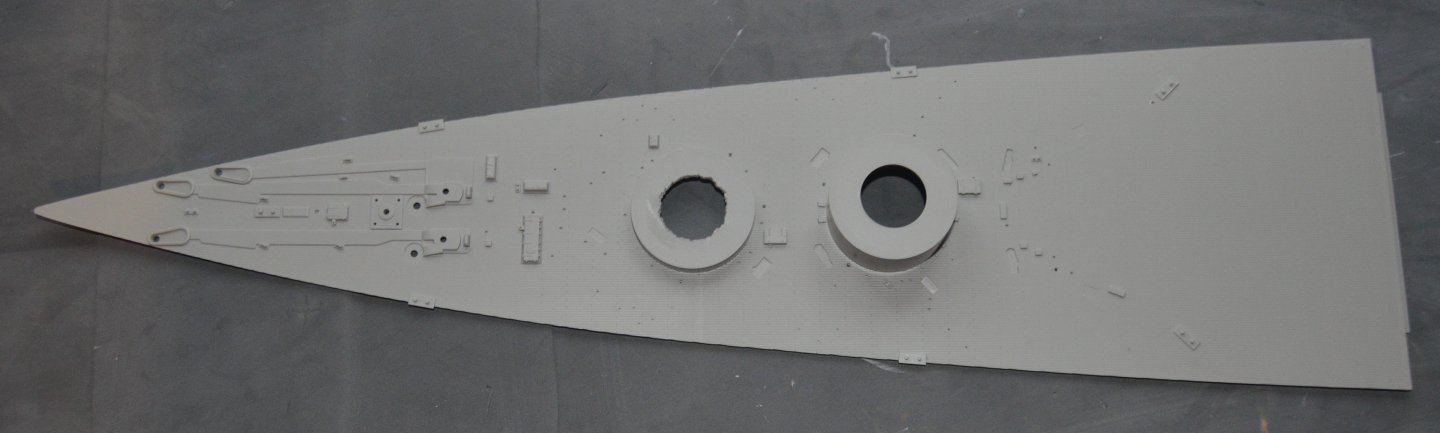
The bow deck completed. Including the rocket launcher on top of number 2 gun. I've added a bit of black paint to the rockets so you can see there is something inside the cage. I have also invested in a second resin funnel. There is nothing wrong with the correct plastic one. But because it is a two part build the join is visible down the sides. The resin funnels are one complete part so look better having two the same. The first picture shows how the funnel bases would look without clipping at one end. One of the bases would cover the two hatches. The second picture shows the clipped bases which sit in place a lot better. Picture 3 is the paravane derrick and boom, used to pull the paravane through the water. I did wonder what the two housings where behind the breakwater. They are the sheds that had paravanes in. I have got two extra ones that come with MK1 upgrade kit. So may see if I can attach one of the plastic ones to one of the derricks and hang it down the side of the hull. picture 4 is the parts for the rocket launcher. The very small parts are only used if I have the door open, which I won't. It's onto the shelter deck know. I have started to add the PE, of which there is a lot both on top and along the sides. The area inside the yellow outline needs to be filled and sanded flat to match the area the arrow is pointing to. This is then painted up as the semtex part of the deck. The red mark is where the front part needs to be flat rather than rounded. And the green marks are where a small piece will be added to make the sections slightly longer.


-
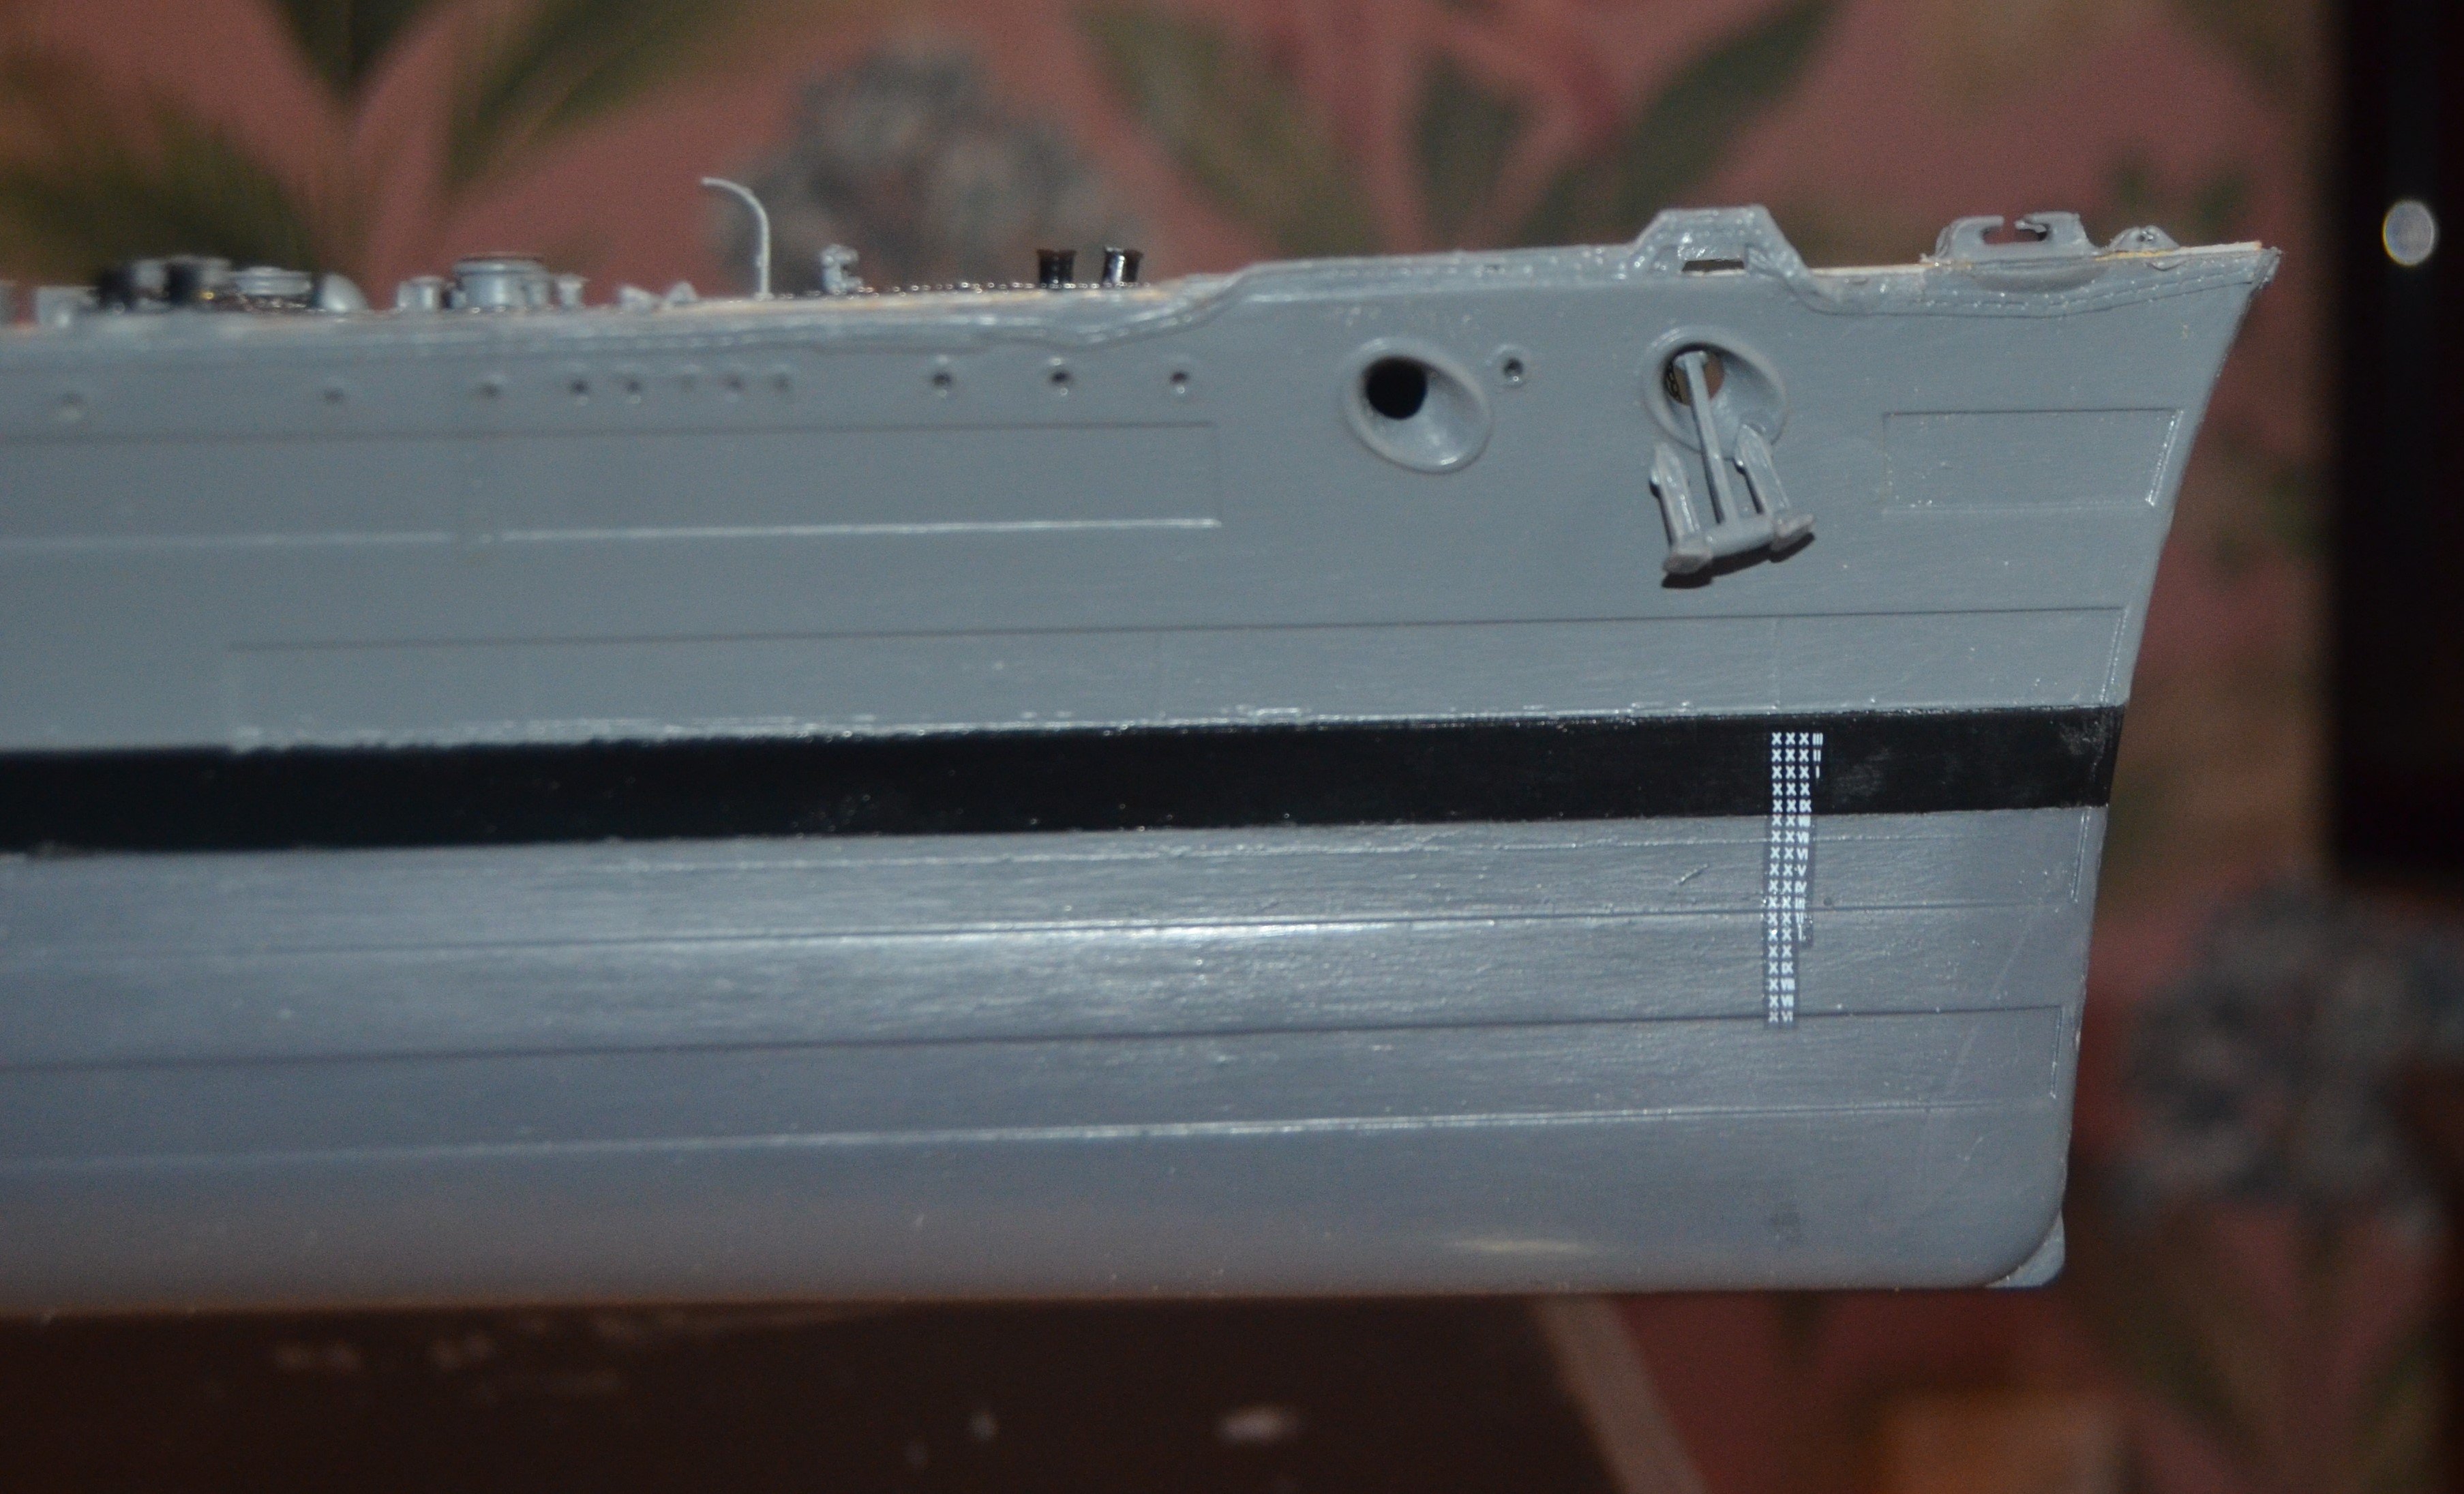
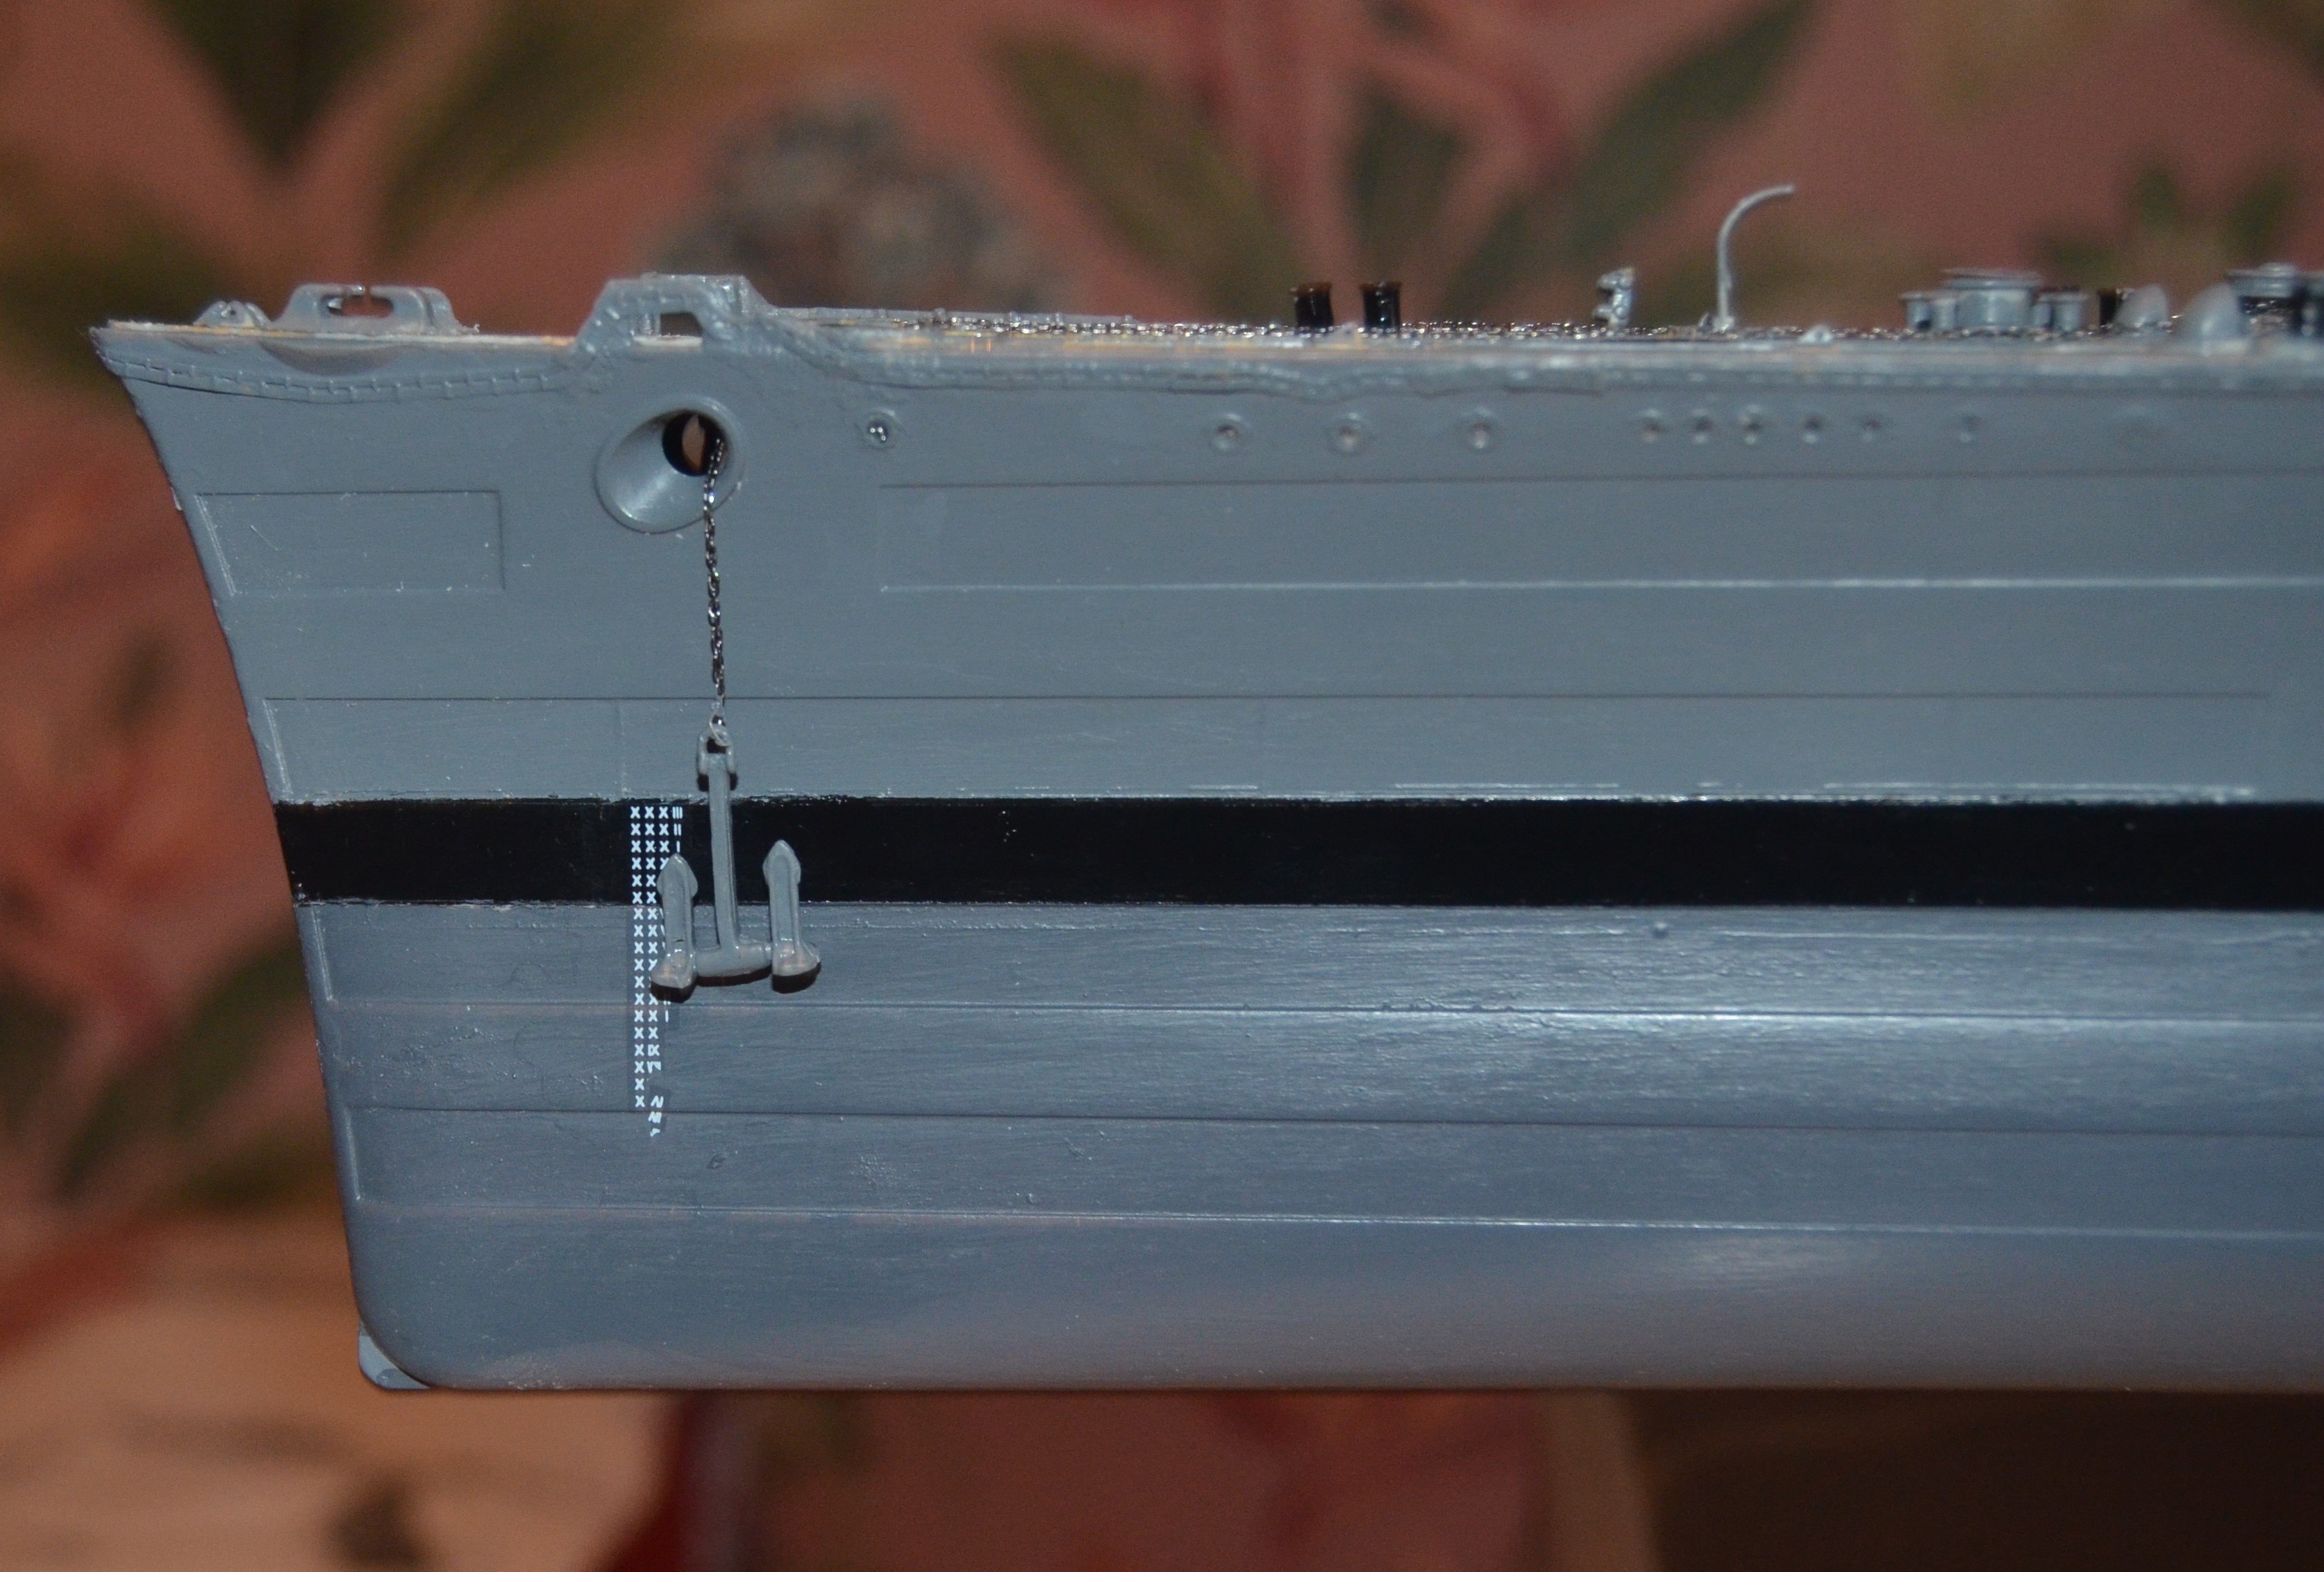
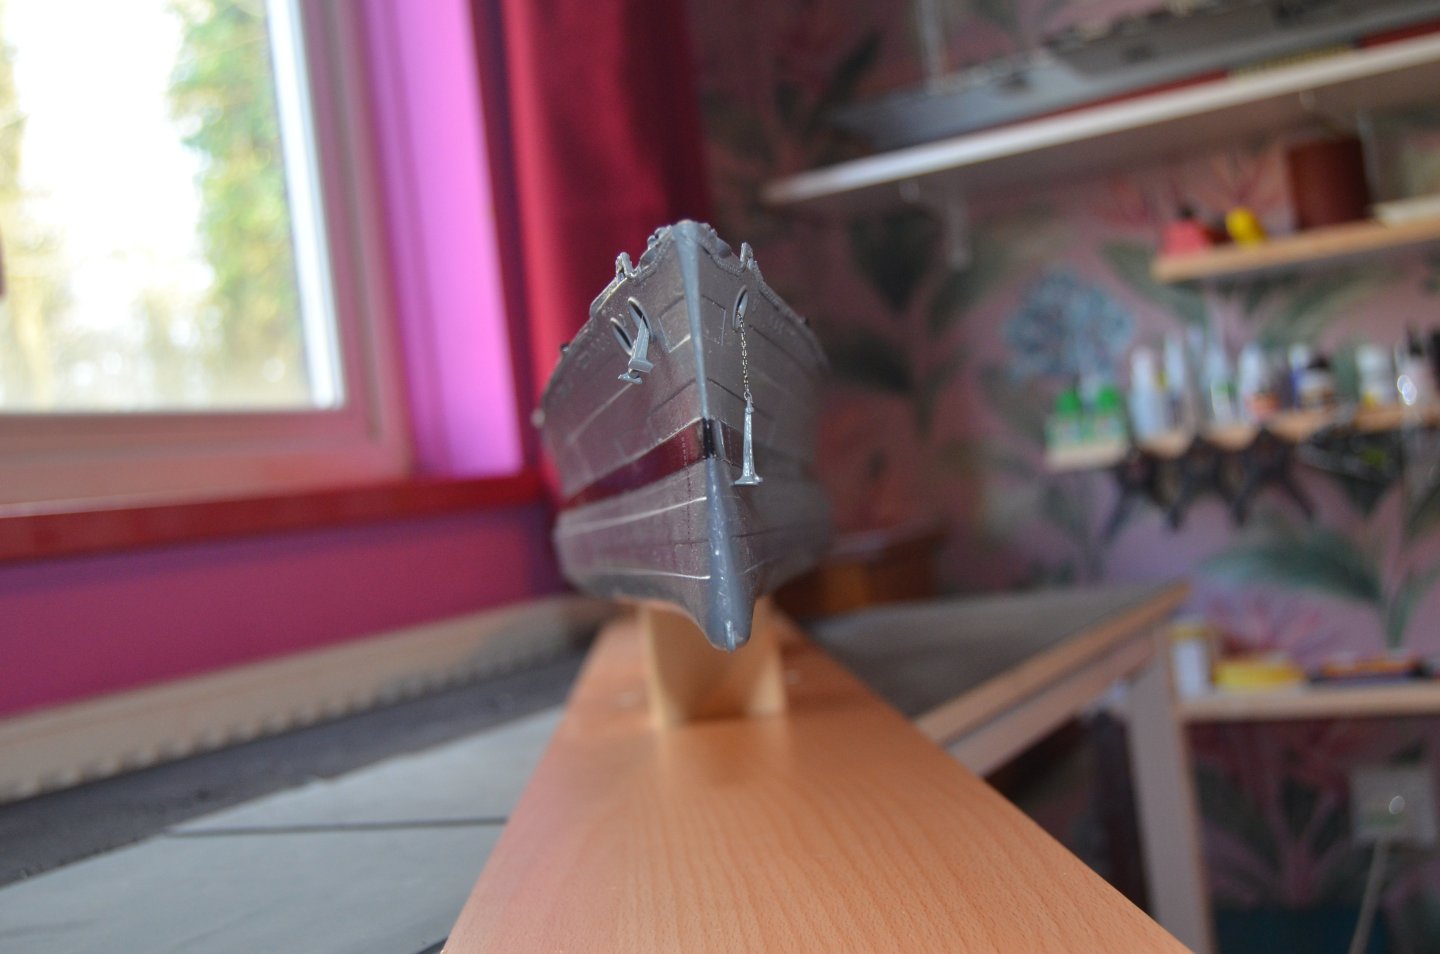
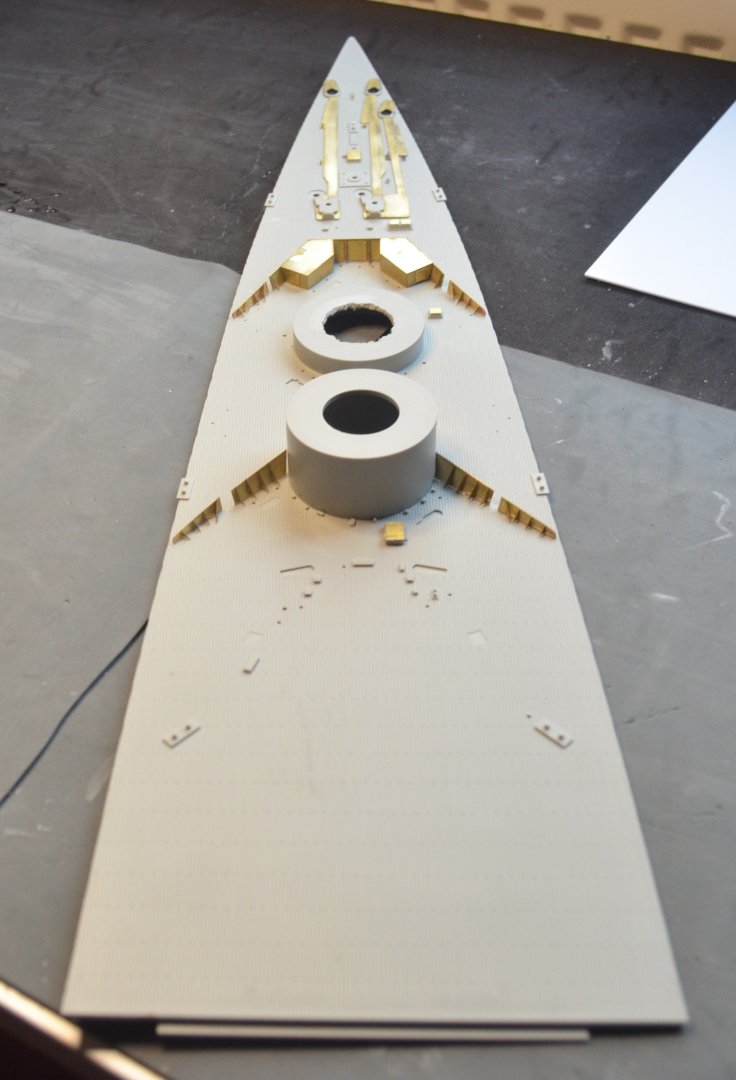
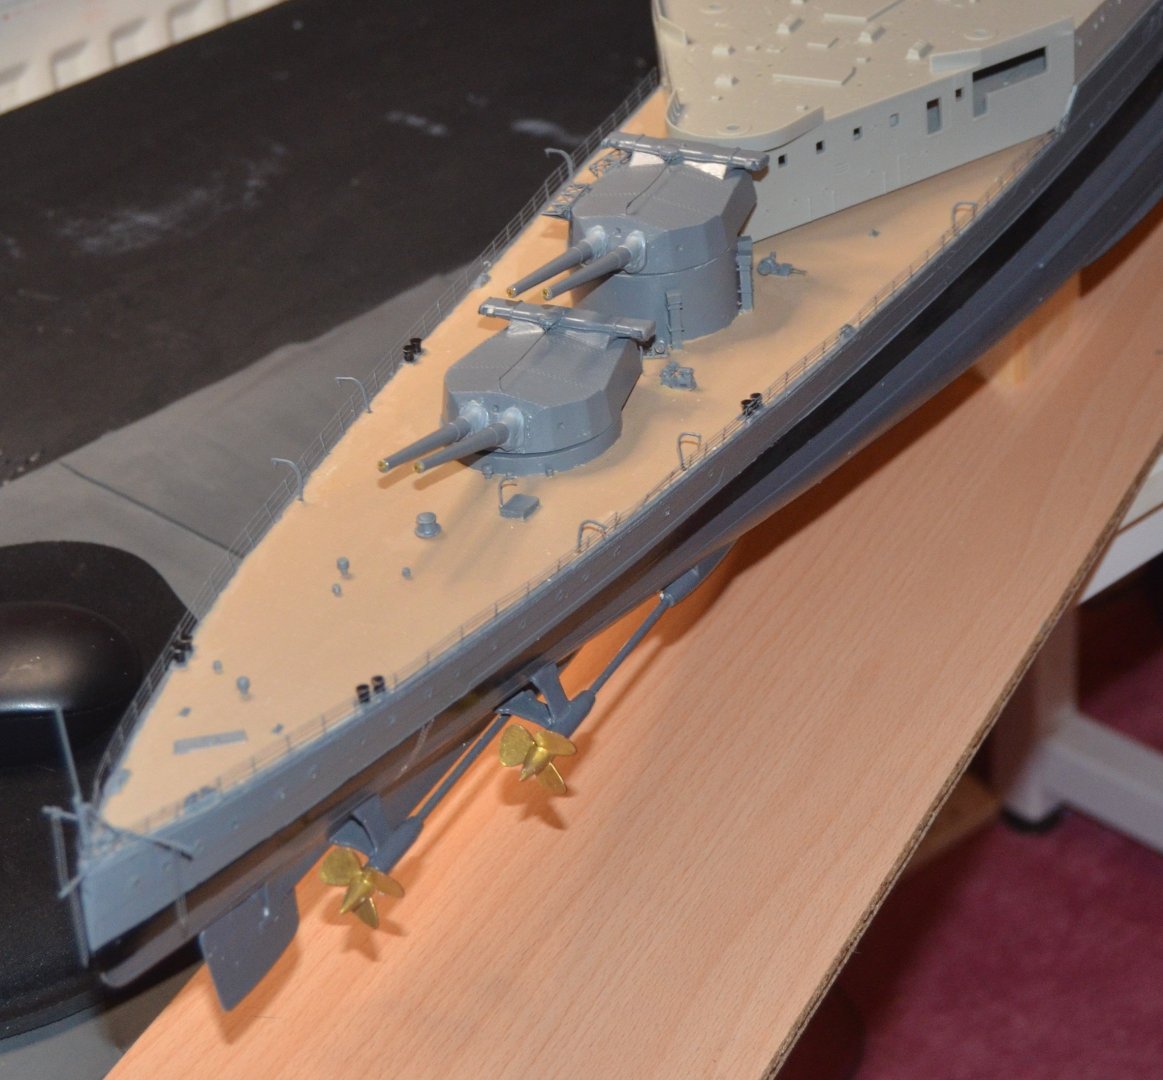
The bow deck nearly complete. You have to be very careful fitting the middle and bow deck. I added the shelter deck to make sure it fitted, which it did. But after carefully removing it when I glued the decks in place I must have added a bit to much weight to hold it down towards the stern and it moved down, probably because of the wet glue acting as a lubricant. A few days later when I fitted it back on there was a fairly large gap where it connects to the hull. After removing both decks and spending a few hours cleaning them up I glued the centre deck on first keeping it lined up with a mark I made for the end. And it now sits perfectly. As shown in the first picture. The anchors are the white metal MK1 upgrade ones. I have set one being let down and the other in place. Just the hand rails and some davits and the bow staff to add then onto the main part of the build in the centre of the ship. This Trumpeter kit is excellent, with just the odd exception everything fits so well. And with all the upgrades I have added it is looking like an excellent model.


-
Some of the PE glued onto the bow deck. I did this because it was better to glue it onto clean plastic rather then painting it first. This will be painted in situ. Then there are all the other parts that can be added once painted. Still a fair bit to do along with plenty more PE.

-
Middle deck completed. Didn't take long to do this section. There are over 90 PE enhancements from the MK1 upgrade kit on this deck. Which will be all but invisible once the shelter deck is in place. the Hawser reels where the worst part of this stage of the build. The parts are so fragile that most of the sides broke away. But managed to make a good job of repairing them. The cable drums are painted beige to allow them to stand out rather then using red paint which would be to overpowering. Onto the bow deck next. just have to decide what to replace and what to enhance.
- 97 replies
-
- 10
-
-
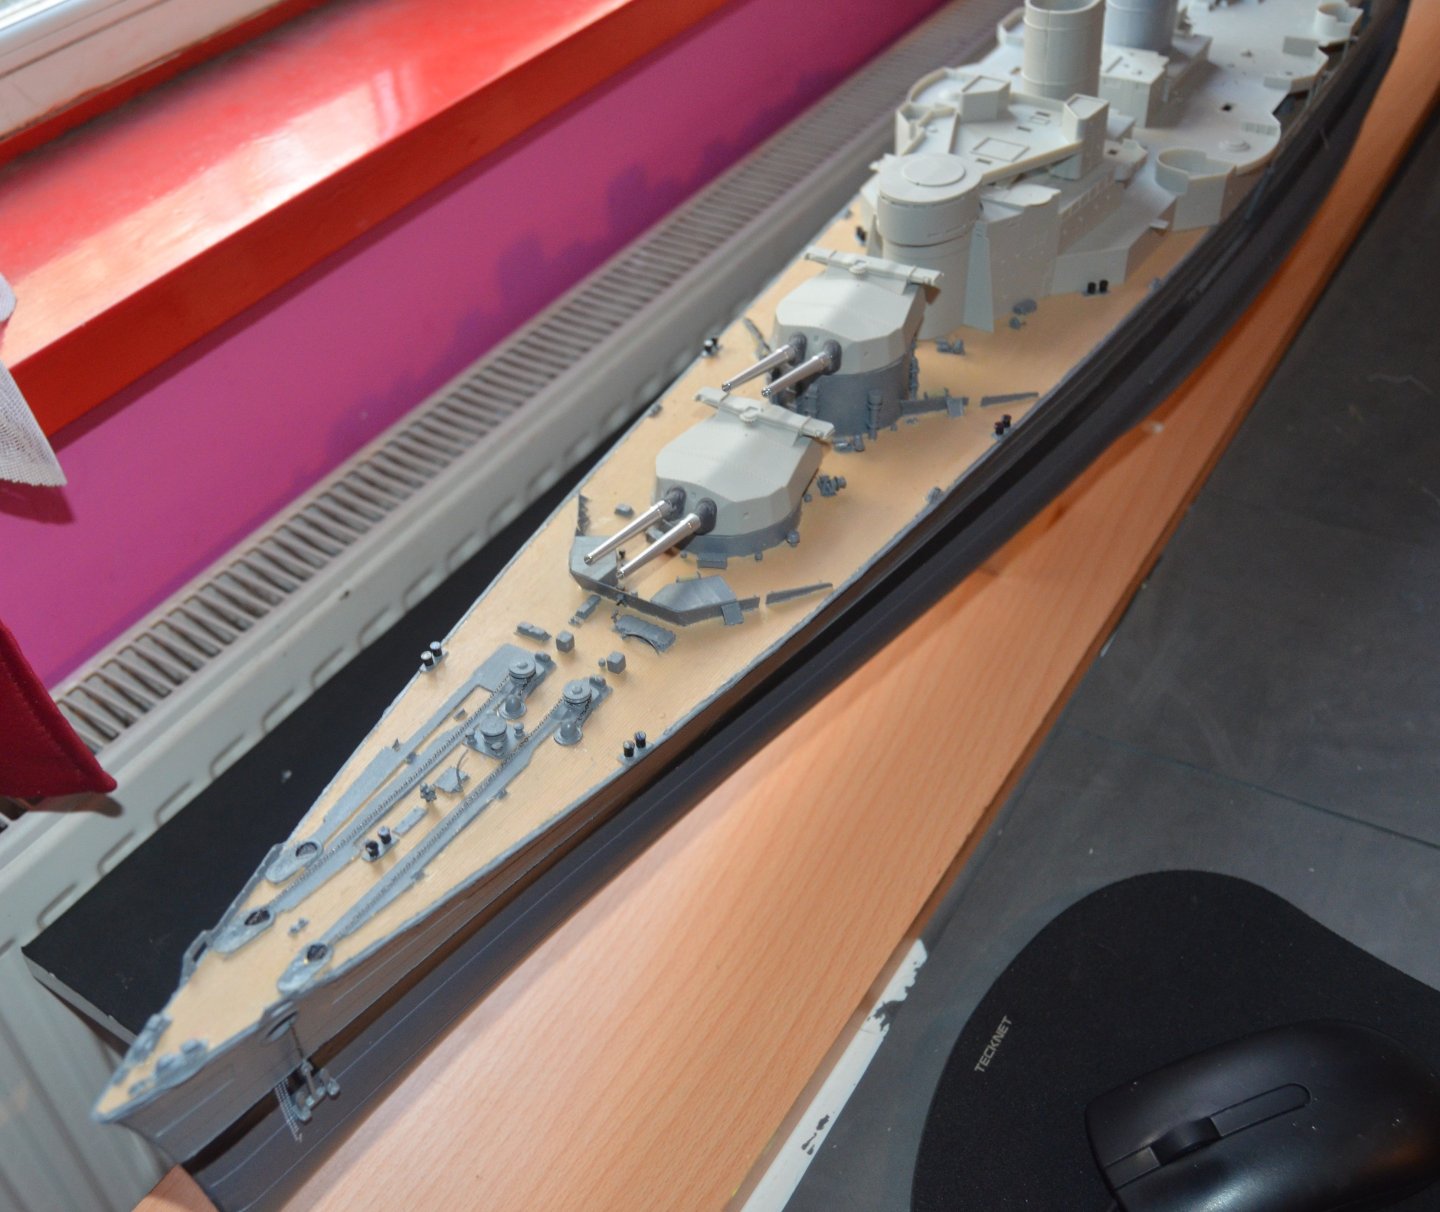
Stern deck complete. The blast bags are painted with ocean grey with a bit of white added to lighten the colour. I have added the brass tompions to the barrels which I think makes them look better than open barrels. Onto the middle deck next. There is quite a bit of work to do on this deck with all the added PE. Most of which will be hard to see once the shelter deck is in place.
-
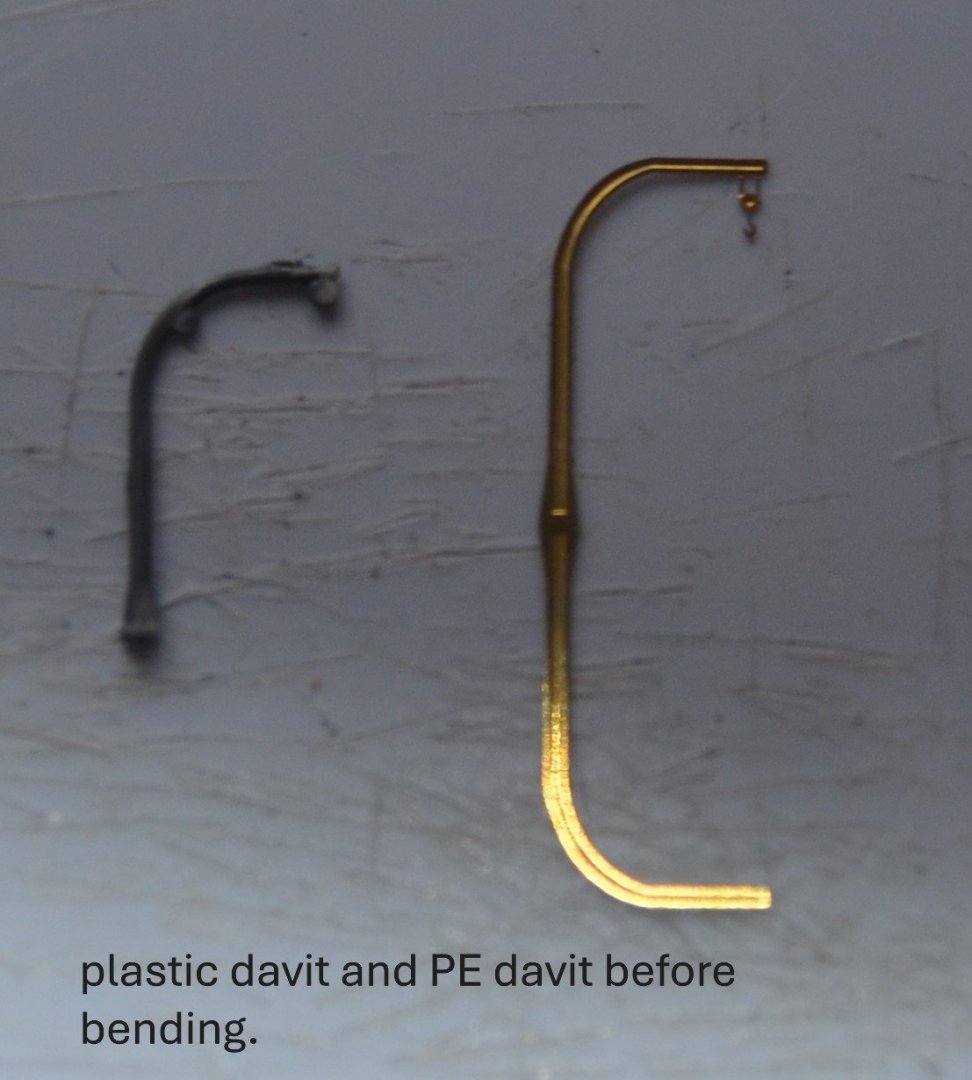
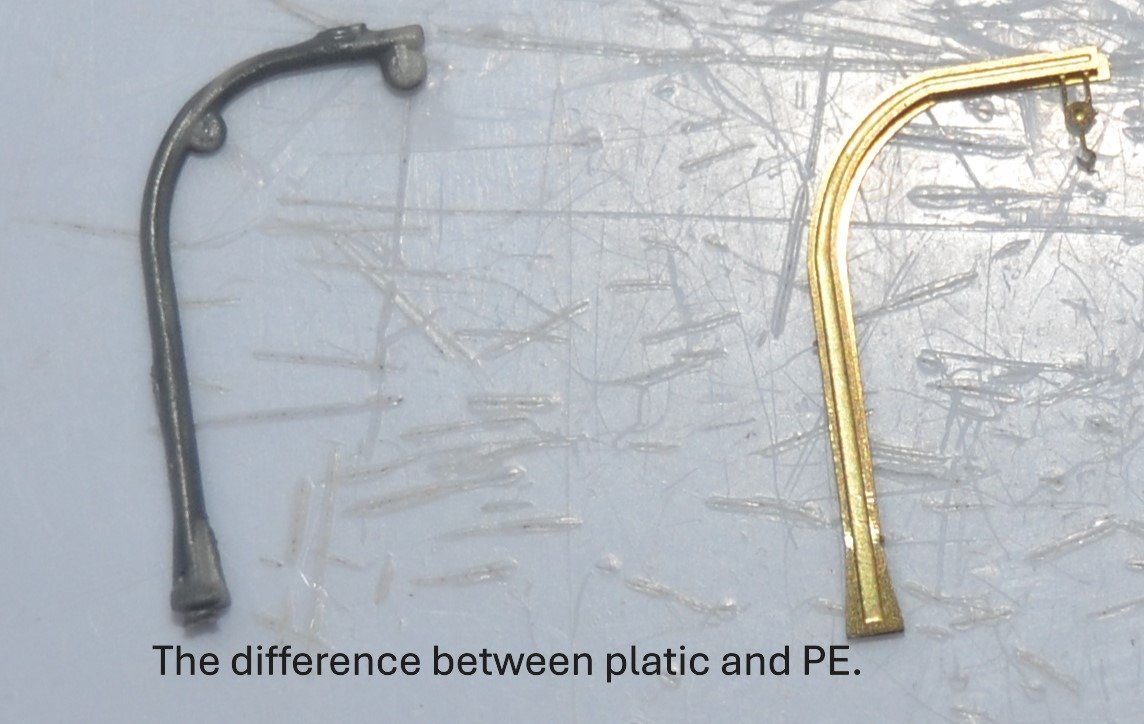
The stern deck is now complete and all the hand rails are in place. They look very good considering how fragile they are. Of all the PE I can put up with some of the very tiny parts, but I really hate PE handrails. These are the MK1 upgrade rails. They have the various areas cut out where there are cleats and bollards. The kit PE does not have this option. There are a few parts that will attached to the side. These will be added on completion. The davits are soldered together rather than gluing them, they look a lot better doing them that way. Number 3 is the davits for elsewhere, they have the advantage that when bent into shape they will have a tab on the bottom to add them to the deck which these ones did not have. The picture of the stern booms has had a part made up from plastic rod. The original supporting part was so fragile it bent out of shape. The part is not as big as it looks. I will concentrate on the stern guns next before moving onto the middle deck.

-
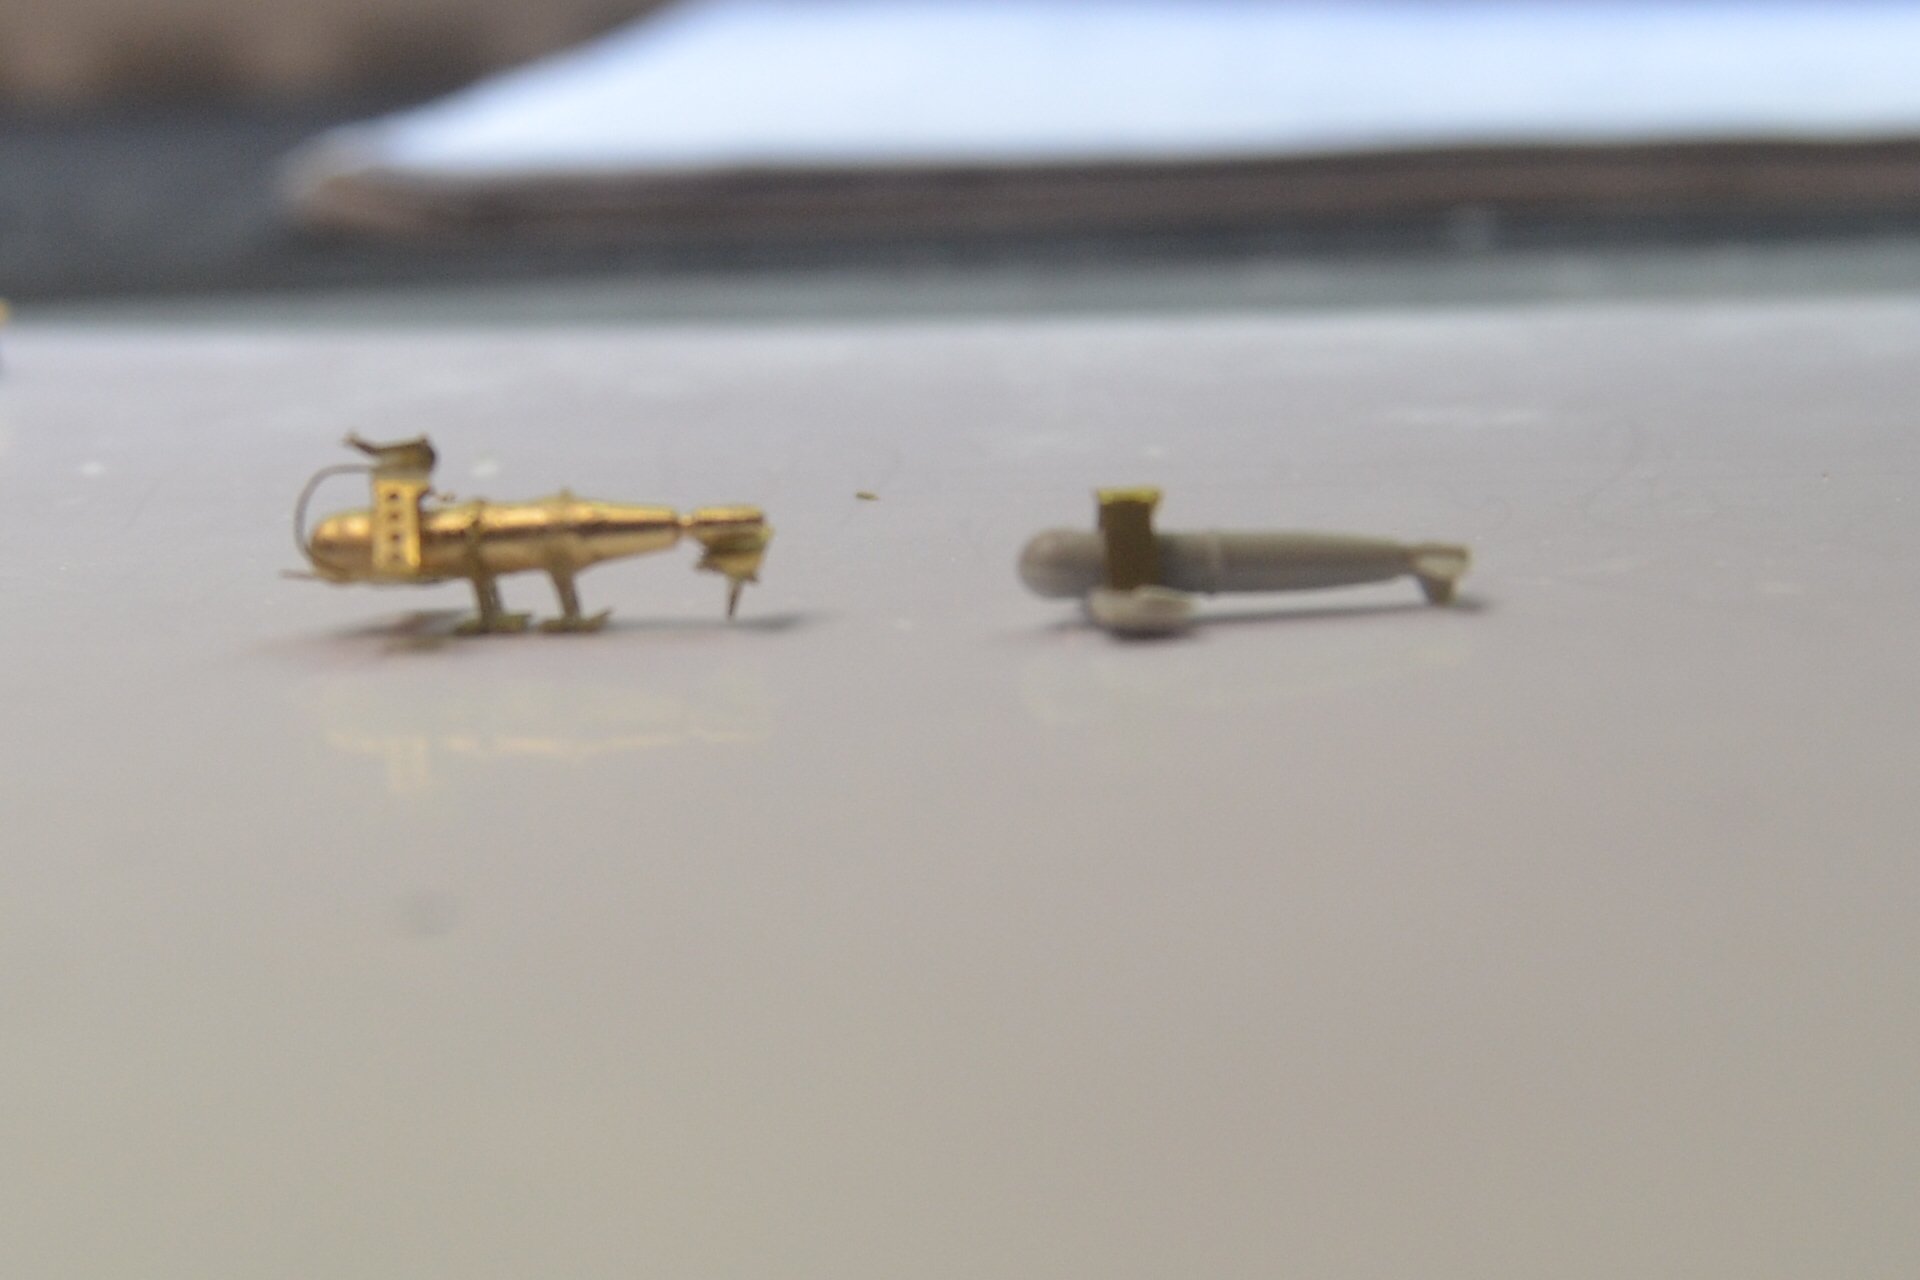
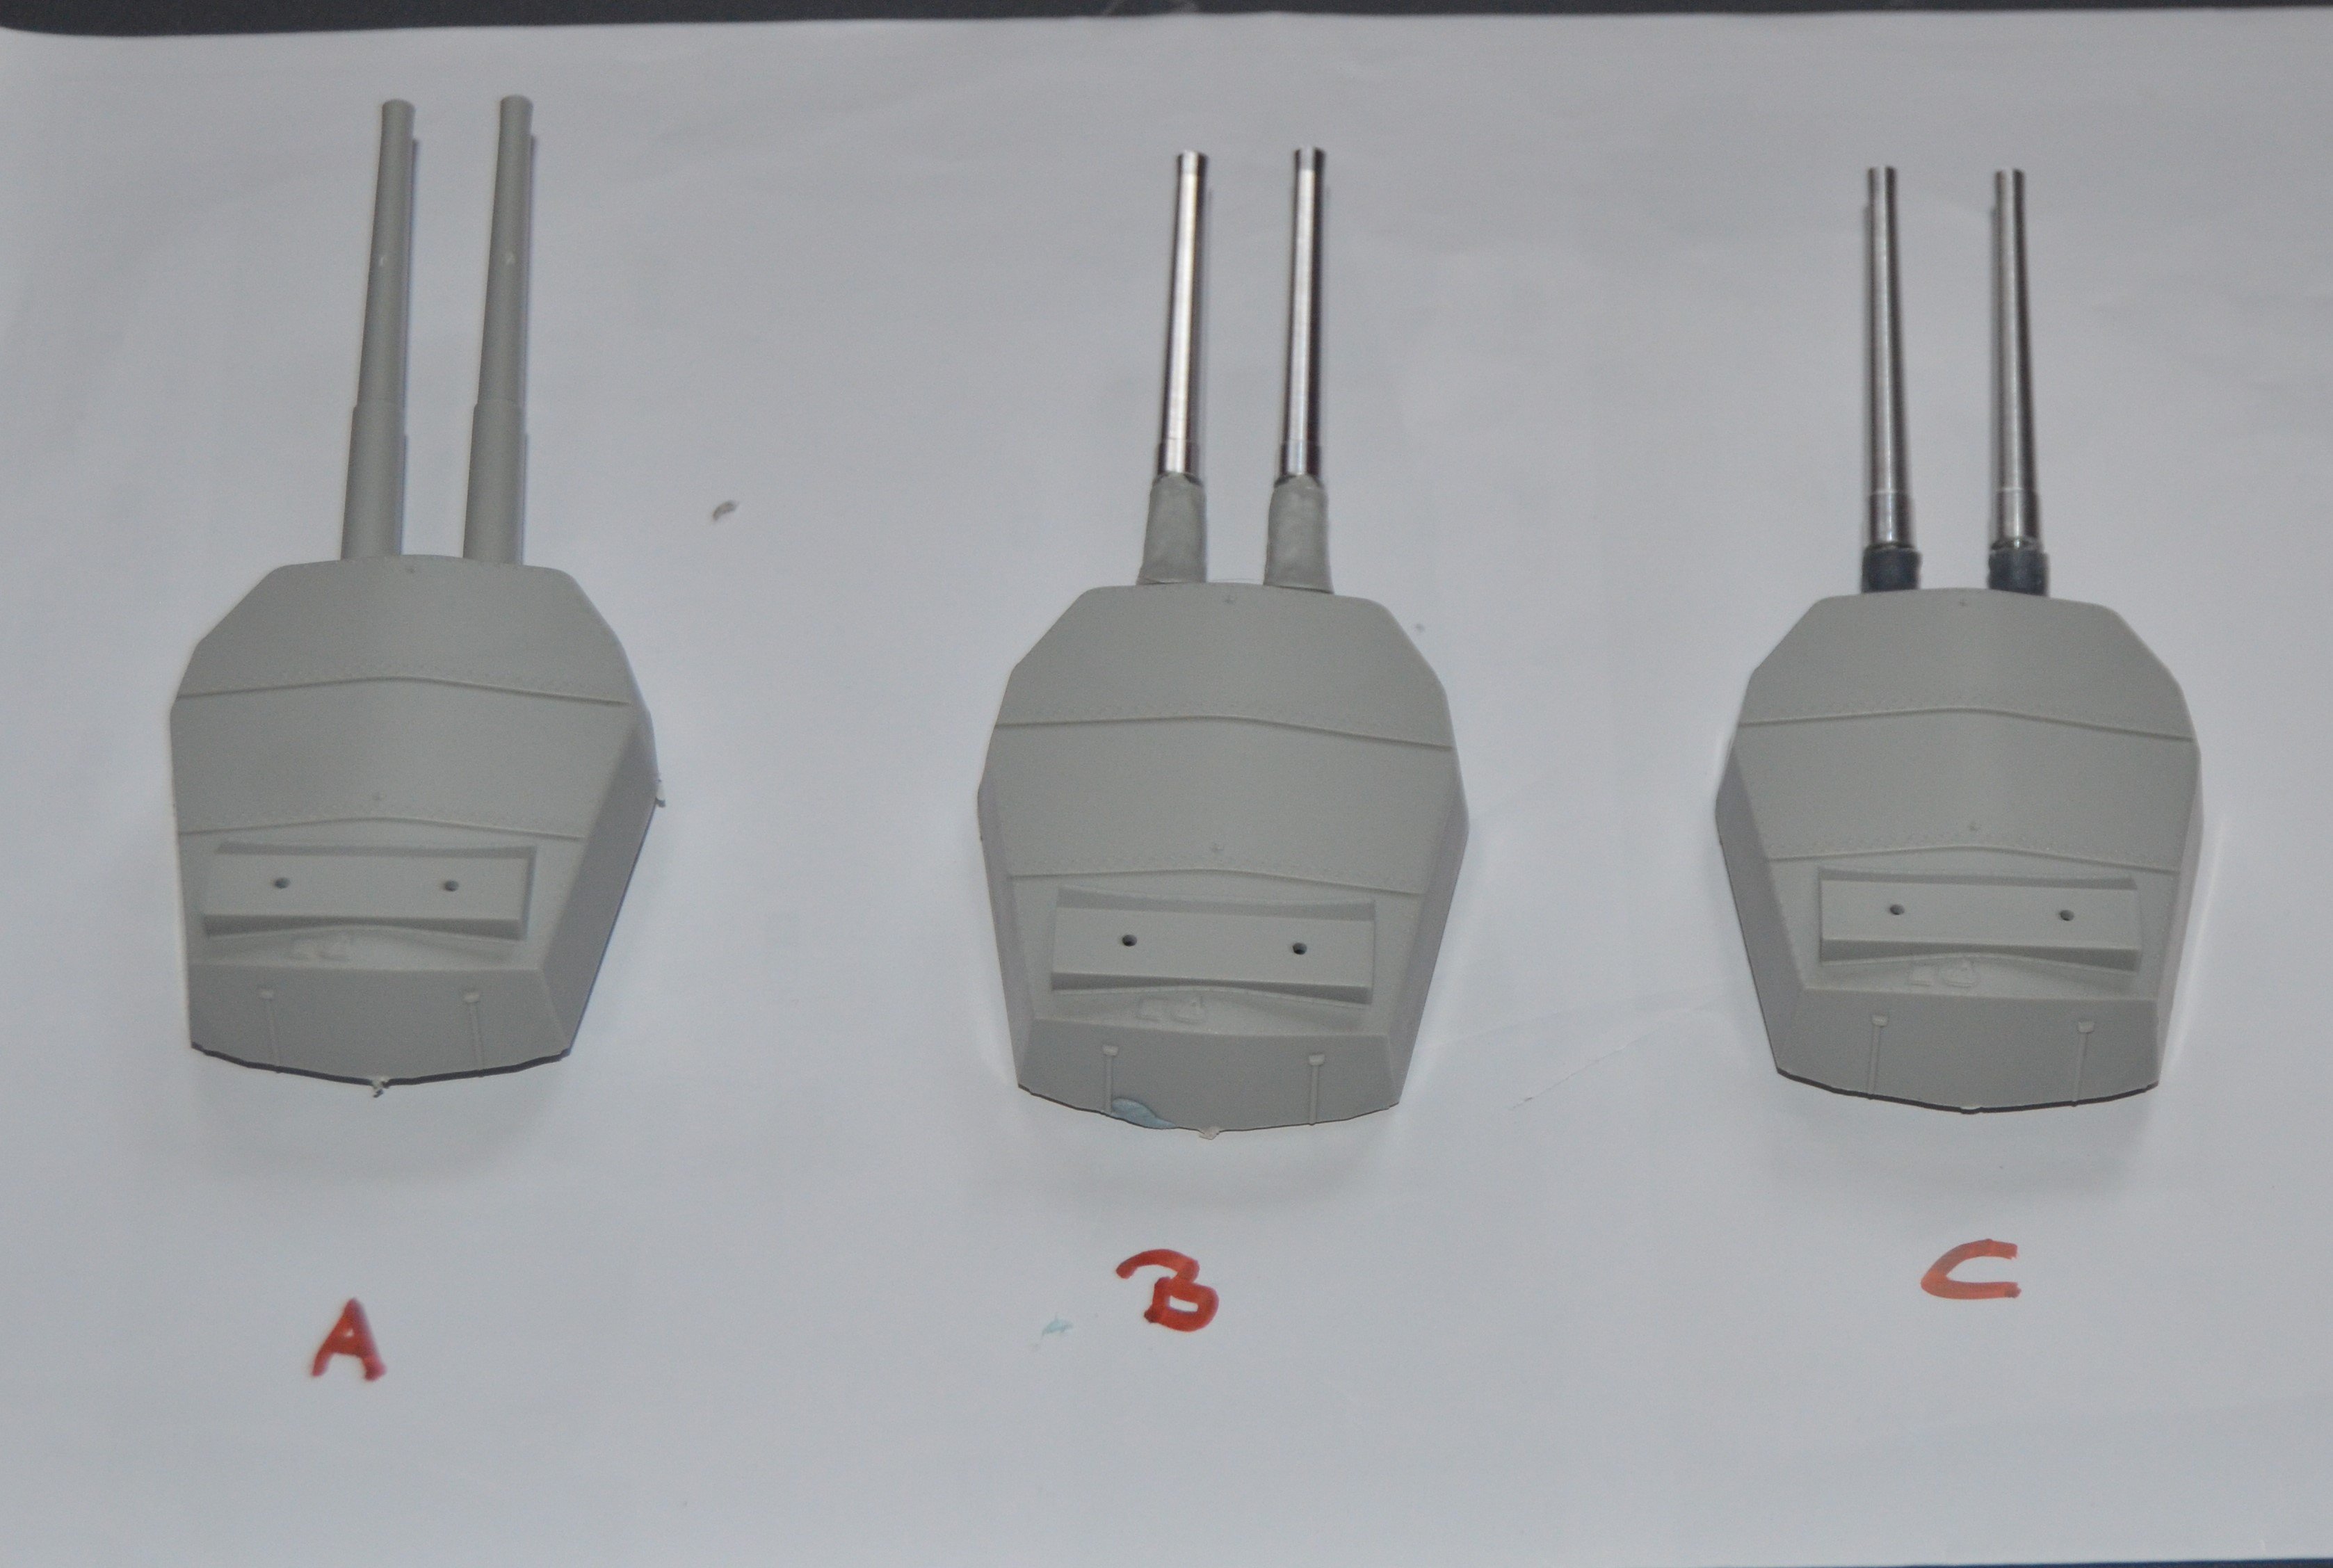
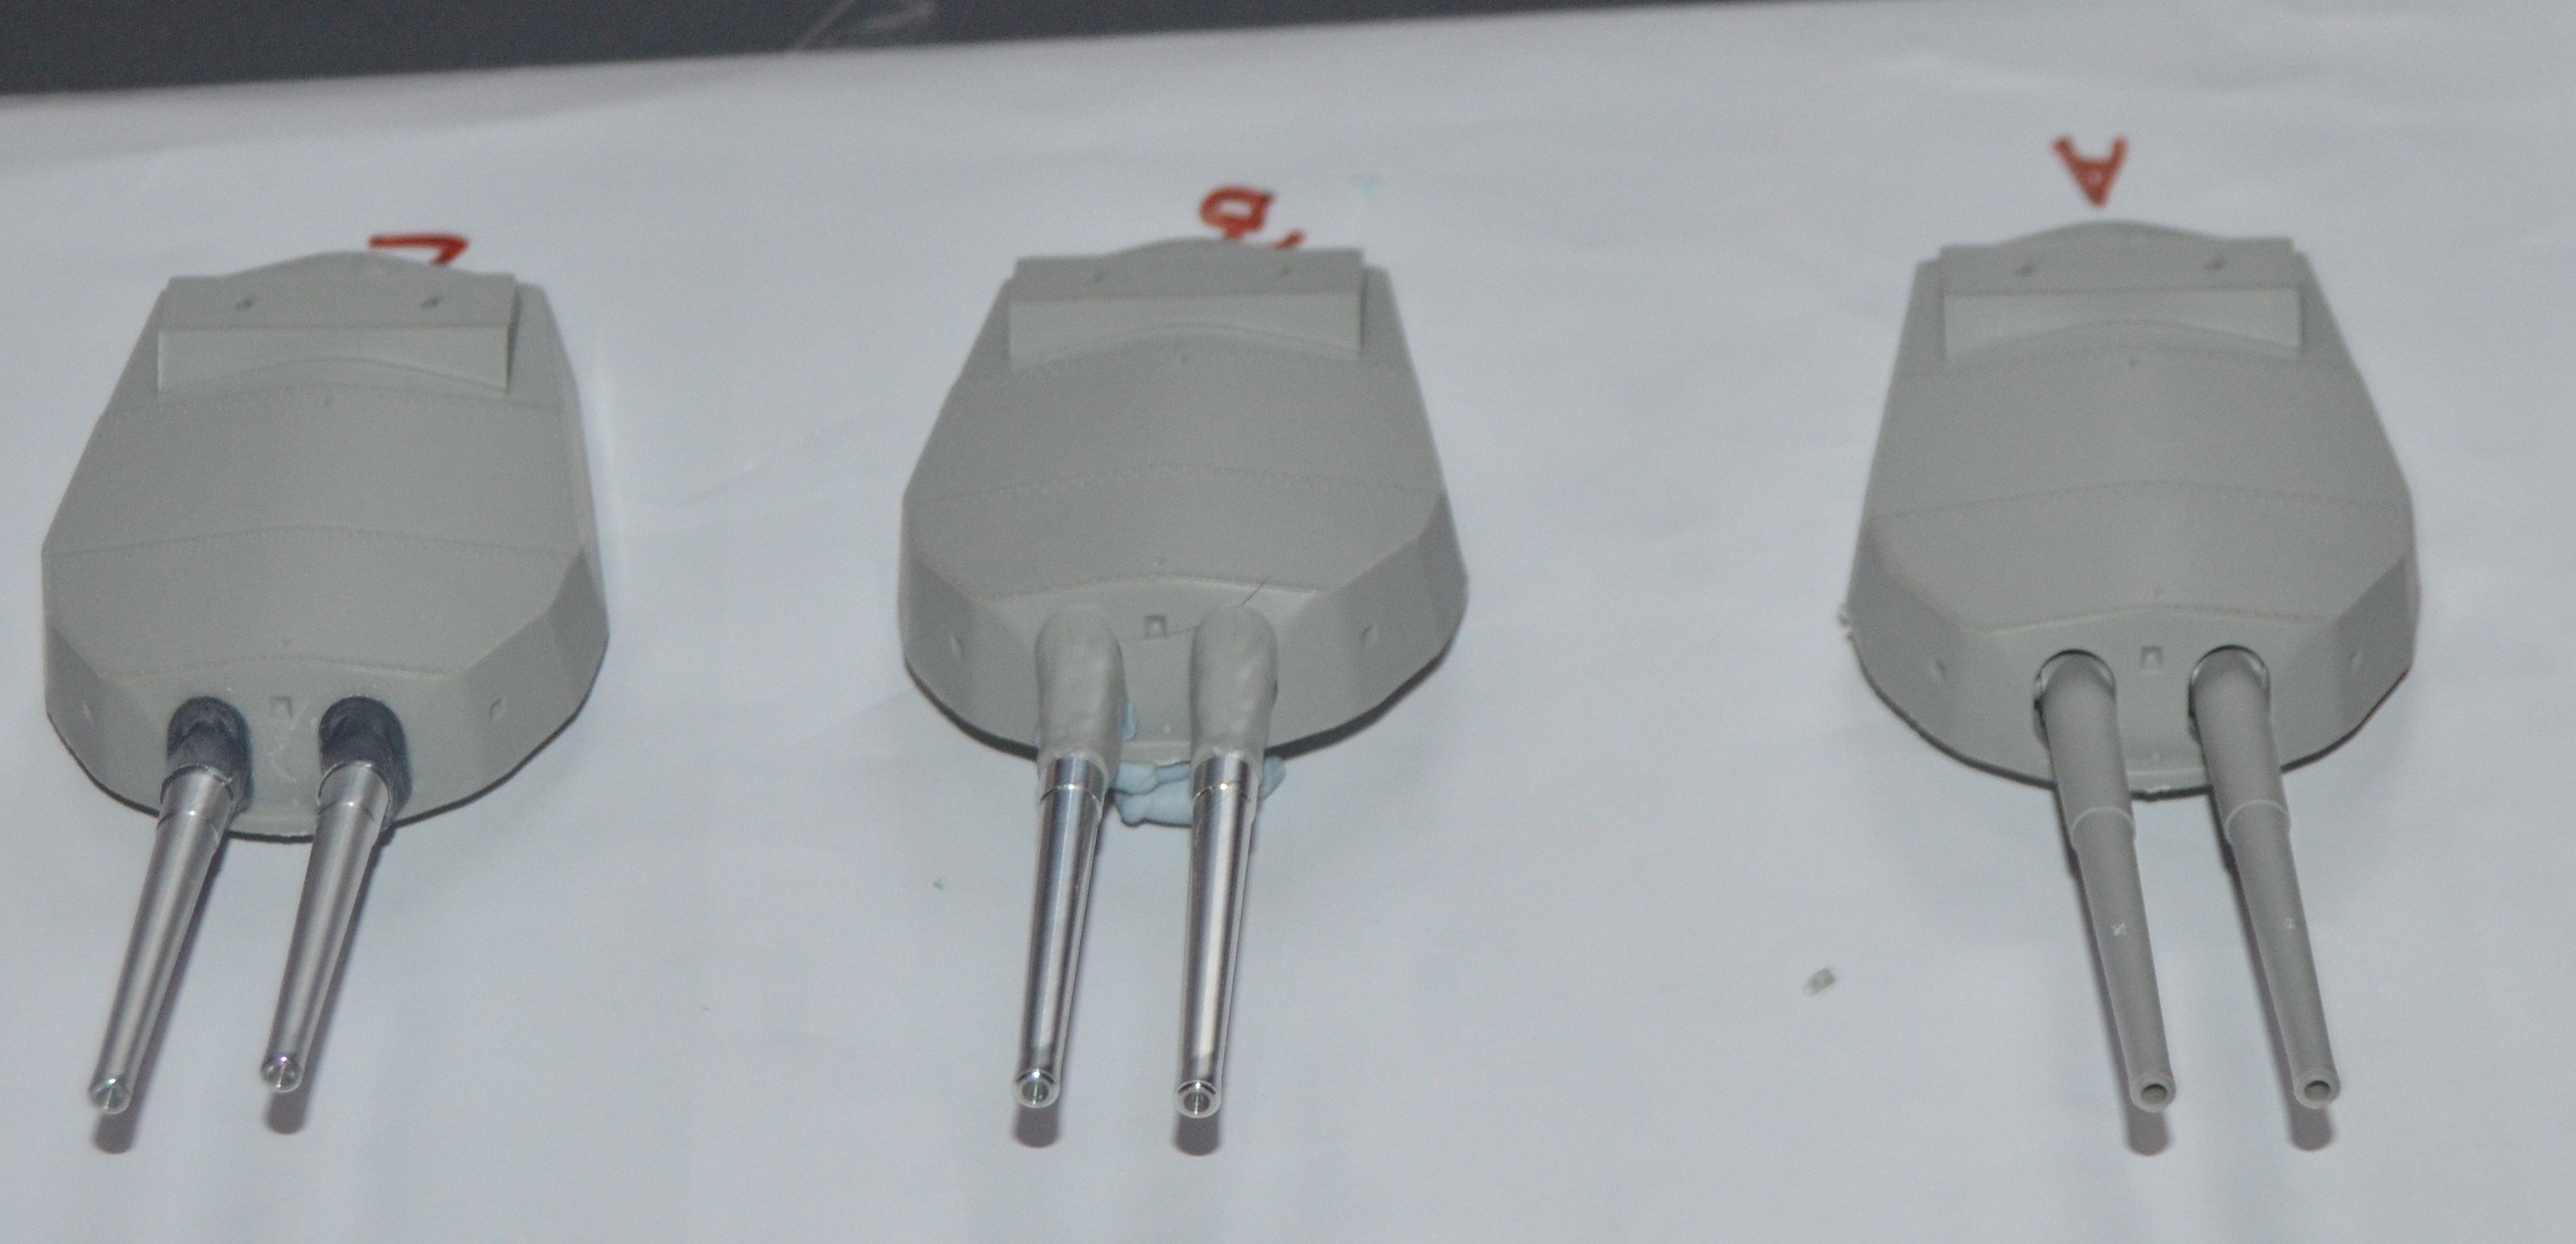
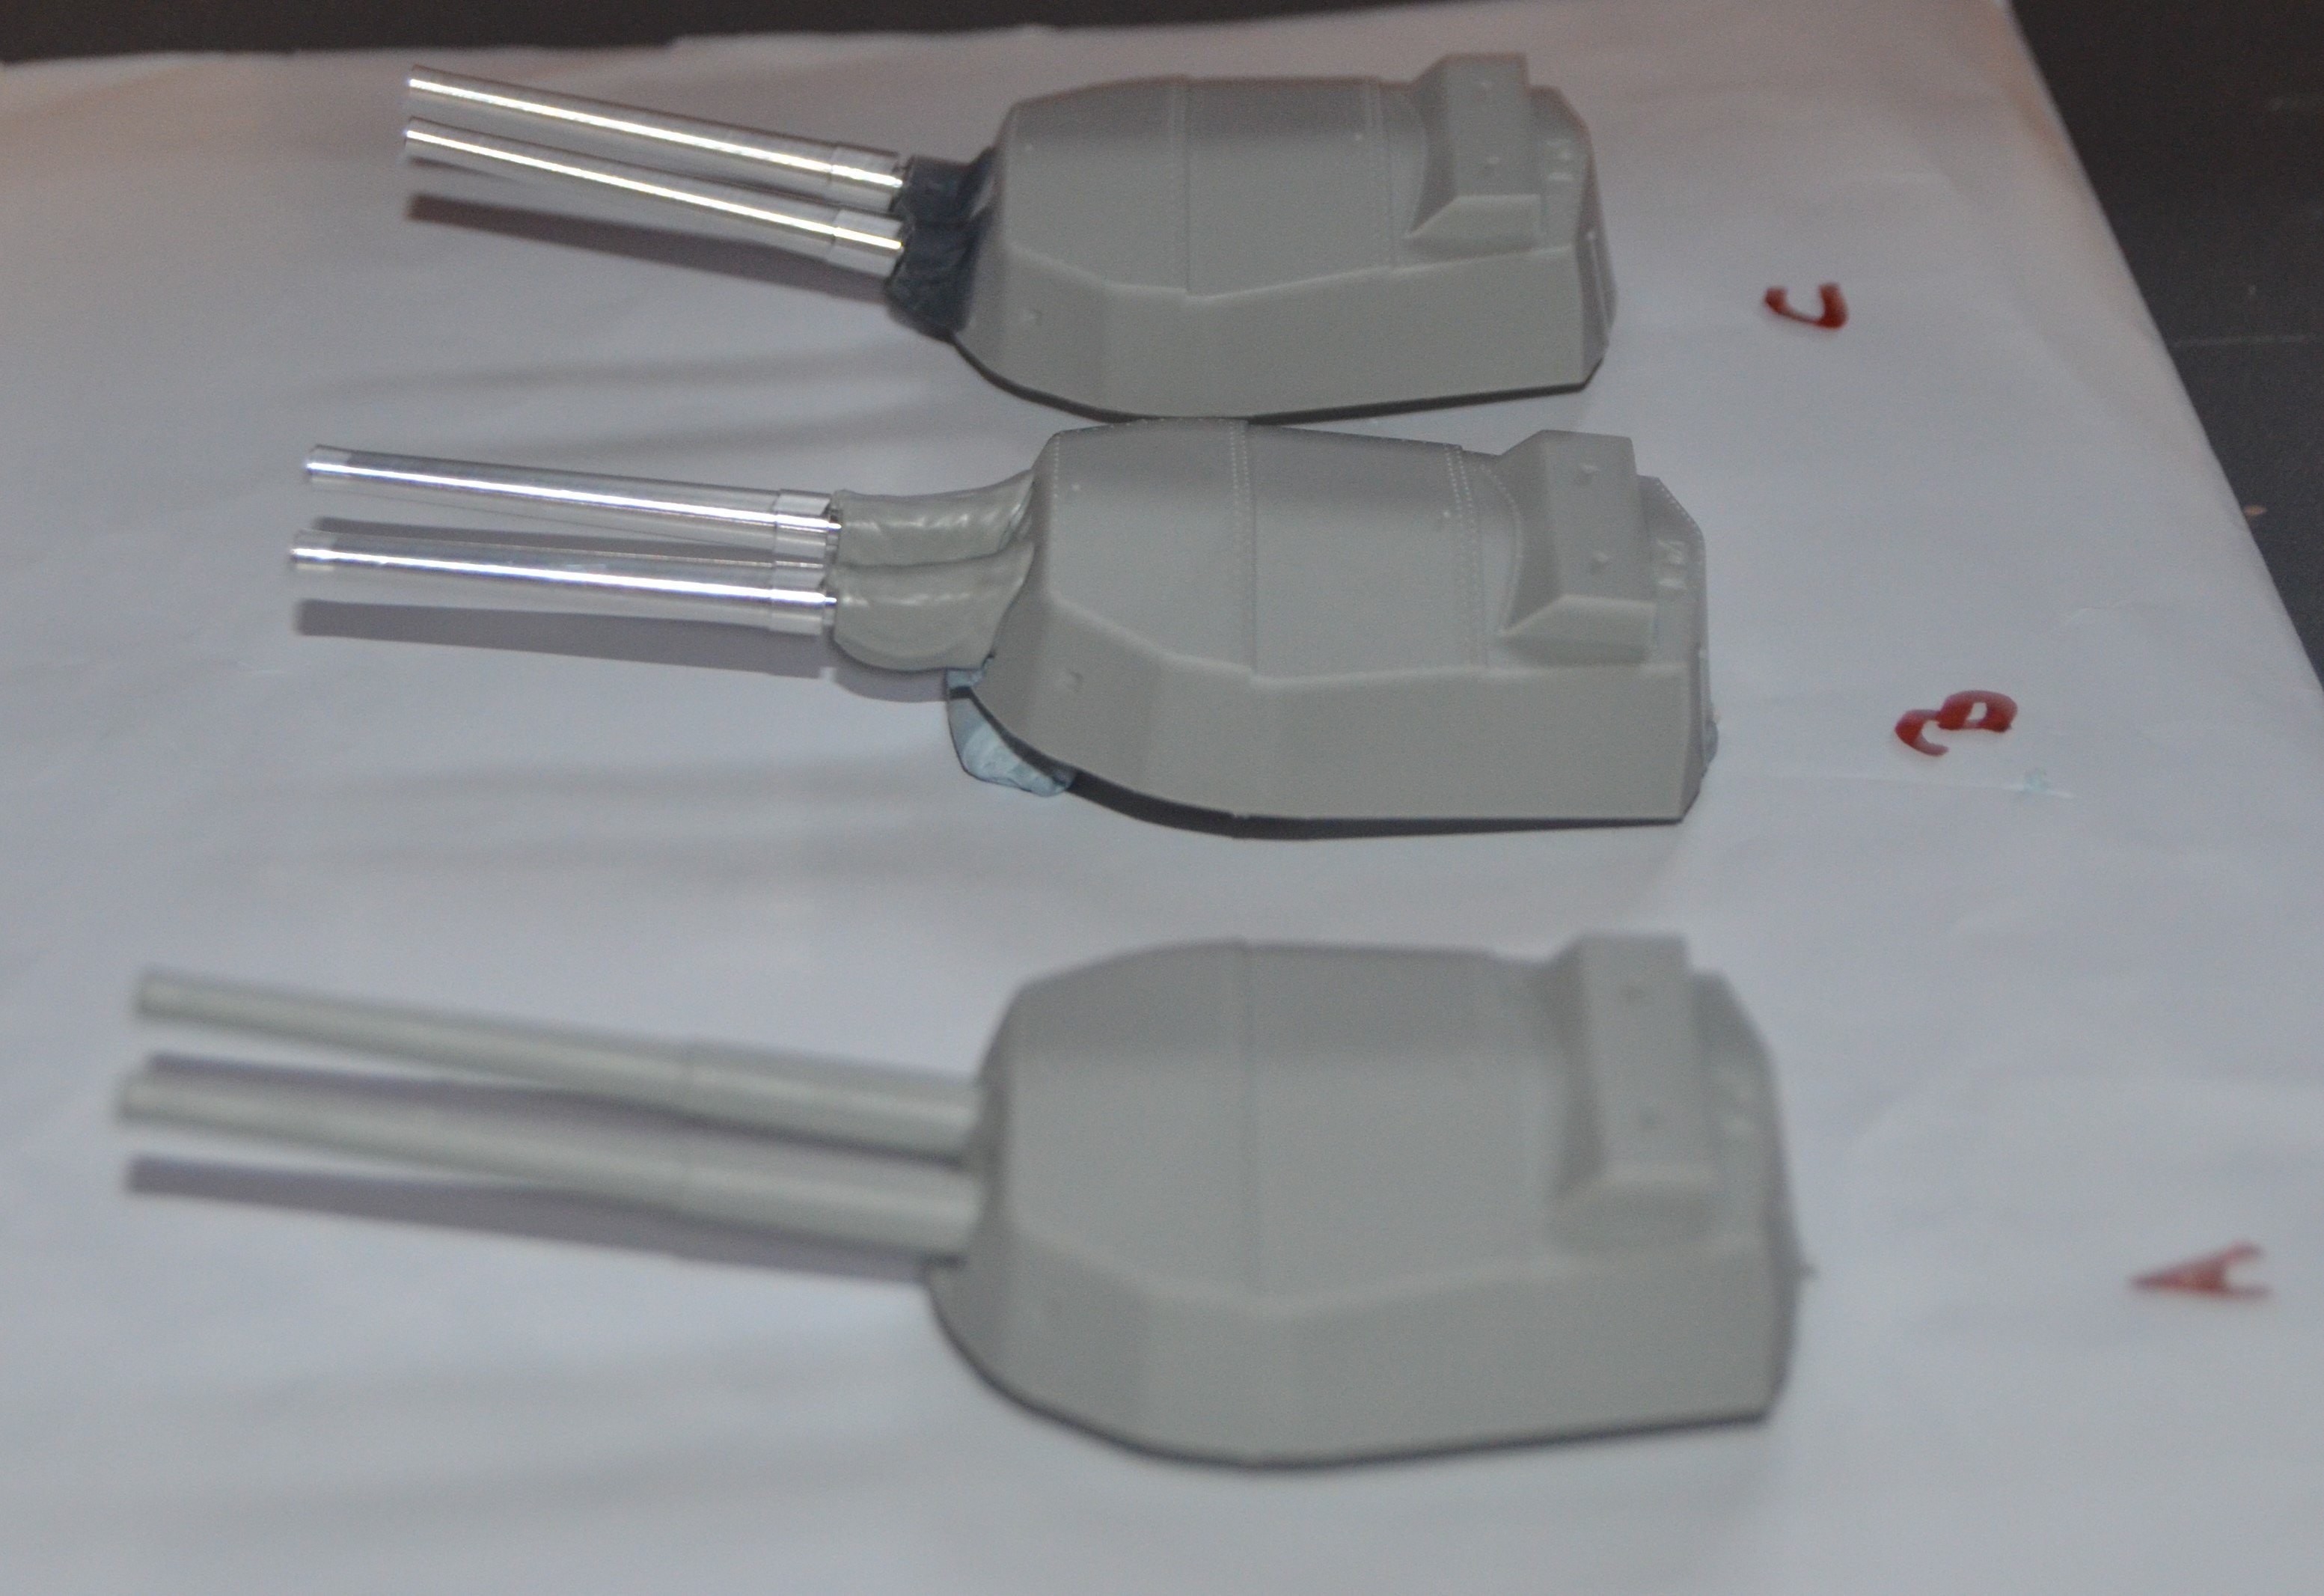
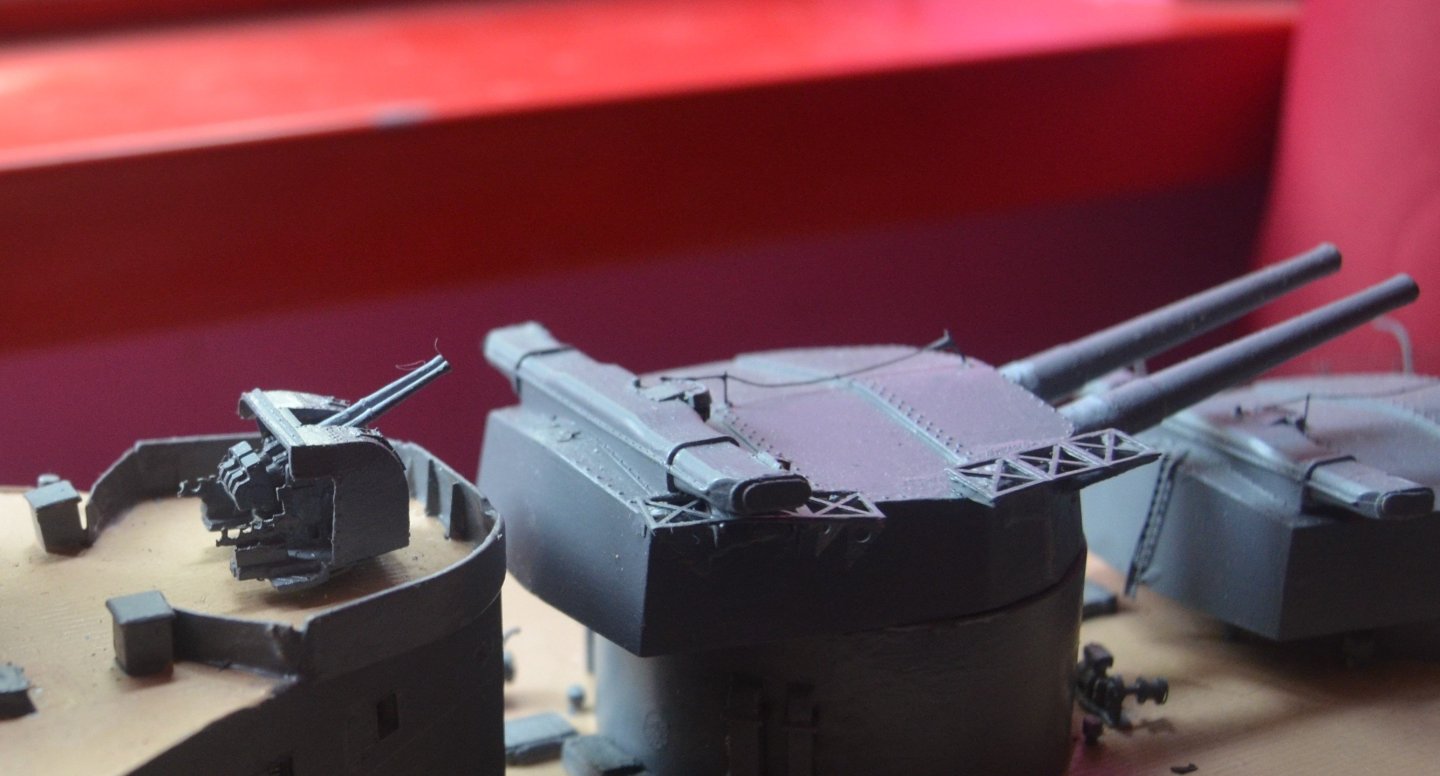
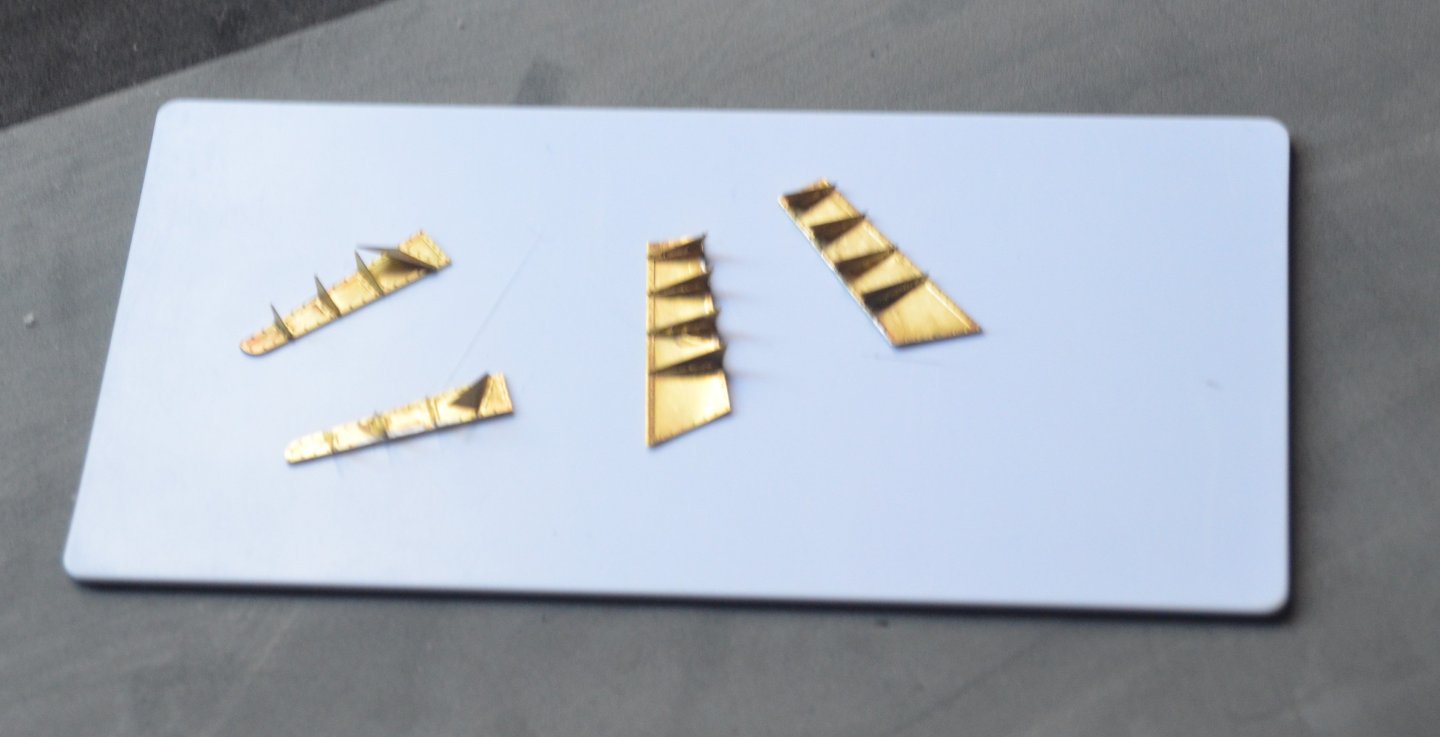
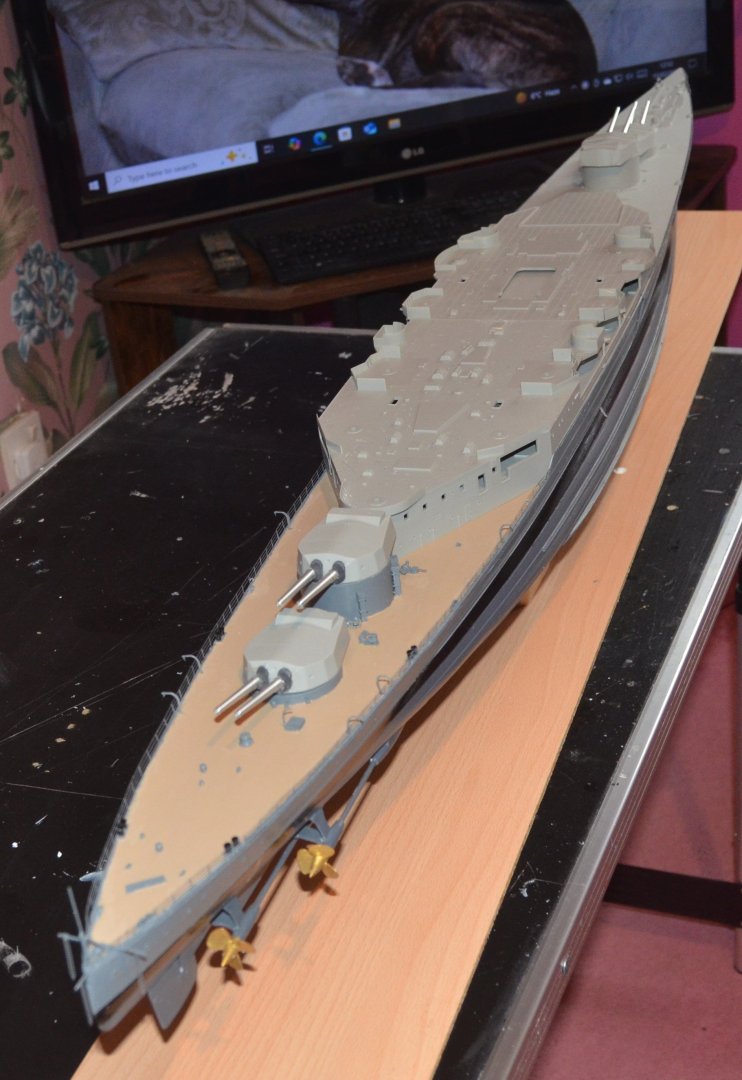
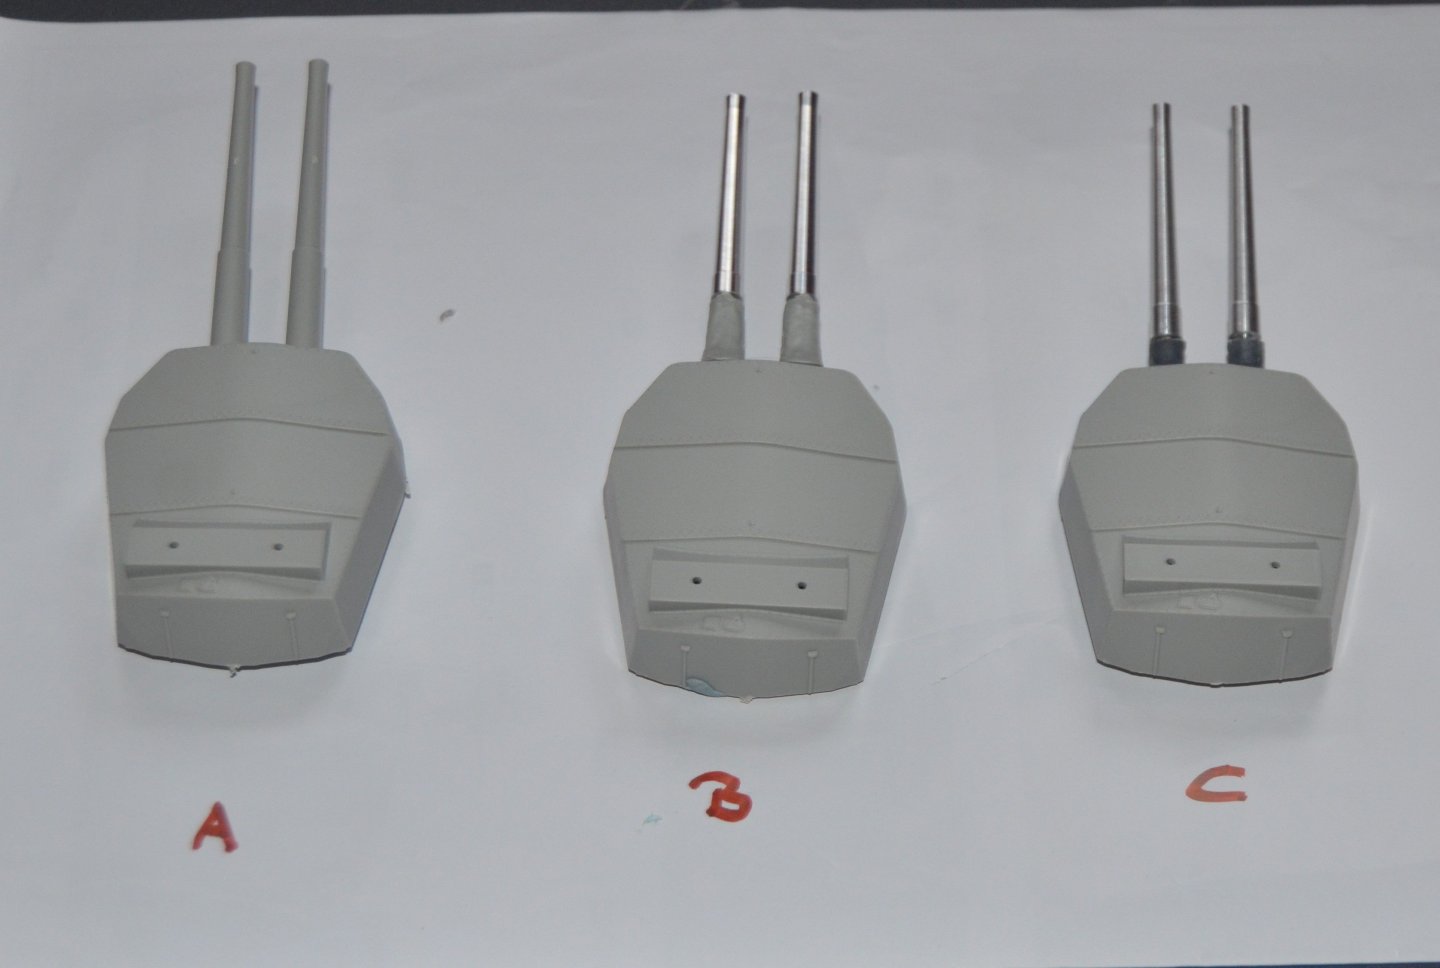
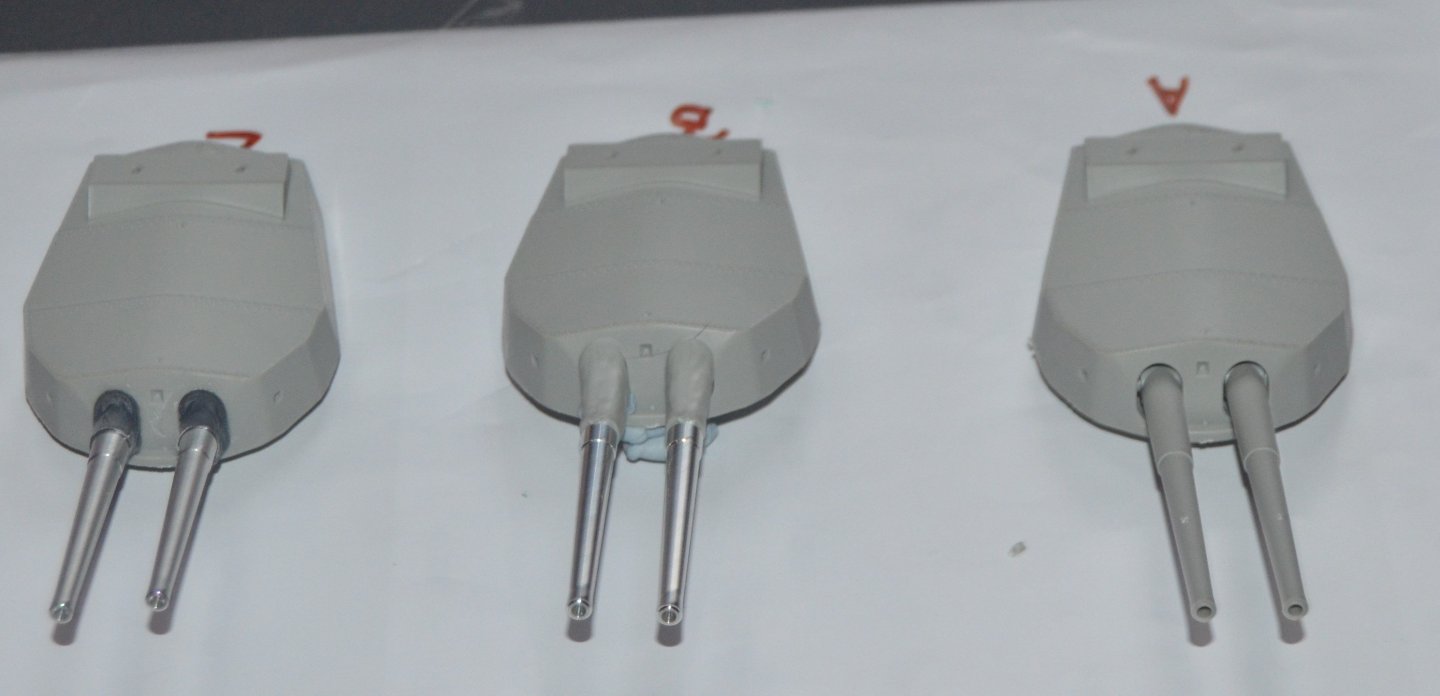
The kit comes supplied with two extra gun turrets. A is as built from the box. There are no blast bags with kit and nothing to hide the gap where the barrels come through the turret. B is the Trumpeter upgrade blast bags and barrels. C is the MK1 upgraded barrels with blast bags. As can be seen there is a marked difference between the three versions. Especially in the length and diameter of the barrels. I am now almost certainly going to go with the MK1 upgrades.

-
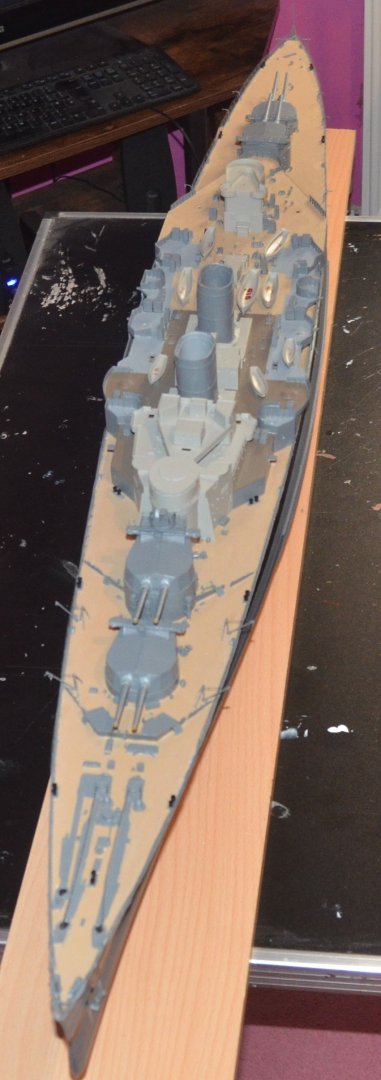
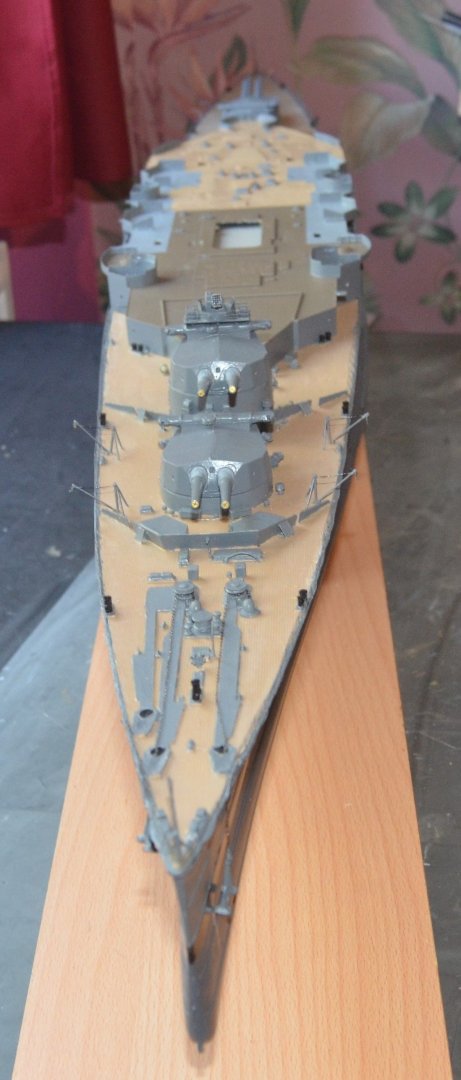
Starting the detailing. I like to work stern to bow on my models. The deck is painted deck tan as I don't like the wooden decks. I like it and it has come up really well. A lot of the fittings have been added. the guns are the replacement metal ones from the MK1 kit. The only thing I don't like very much are the resin blast bags. I did not realise working in resin is so complex. The slightest bit filed down to much could ruin the part. They are not terrible but there is a very slight gap where the guns fit in. There is a PE ring that goes around the base of the guns. They might look better once that is added and they are painted up. If not they can be removed and replaced with the Trumpeter gun upgrades. Although their version of the blast bags are almost twice the length of these ones. They are growing on me as I keep looking at them though.

-
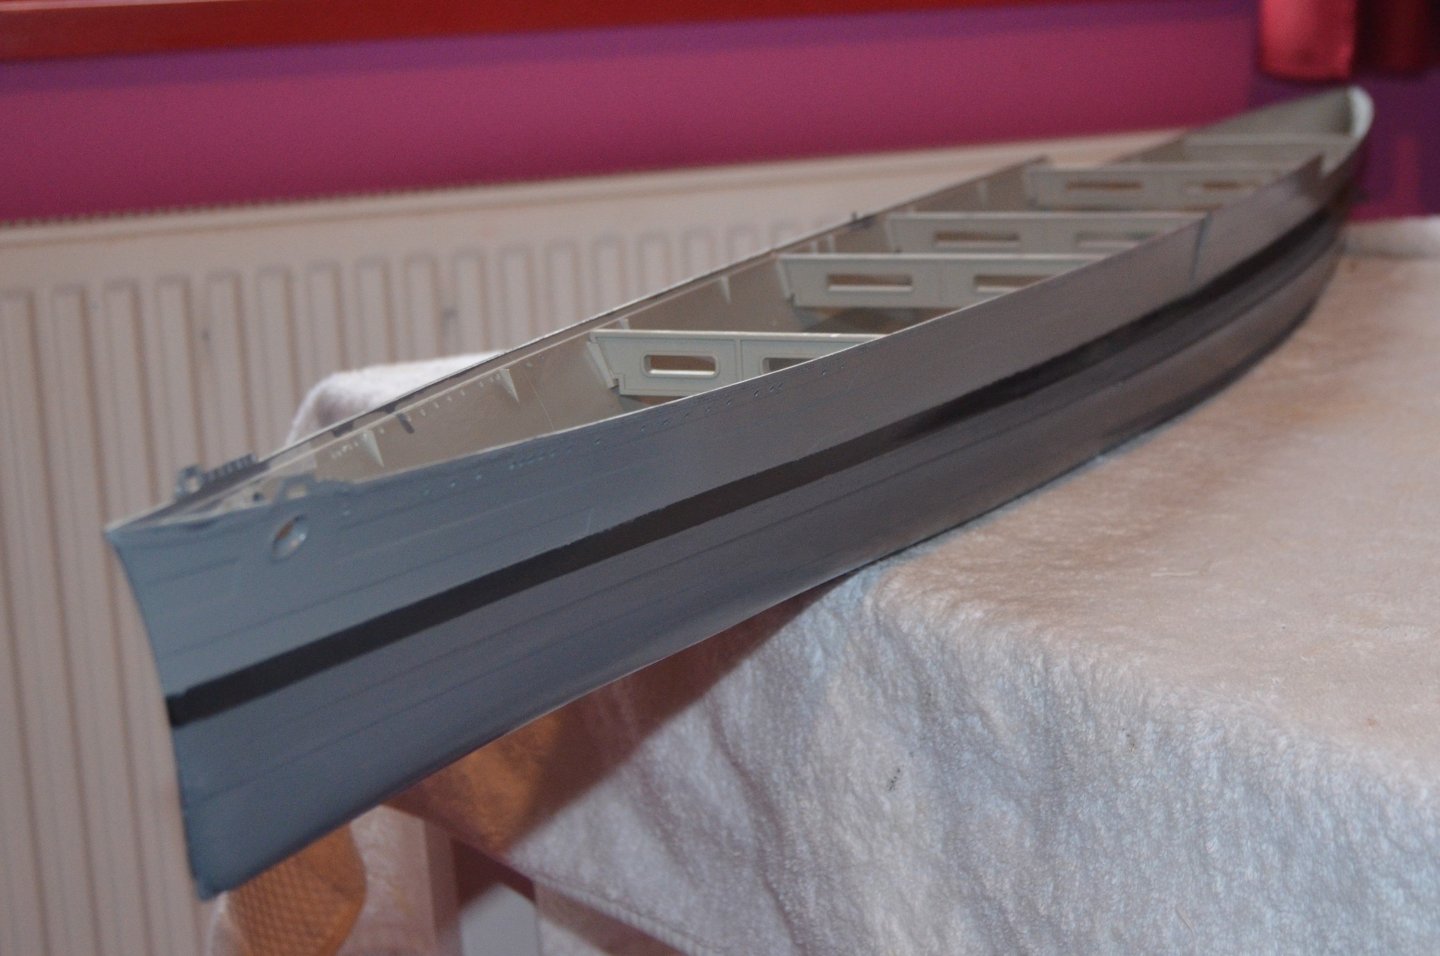
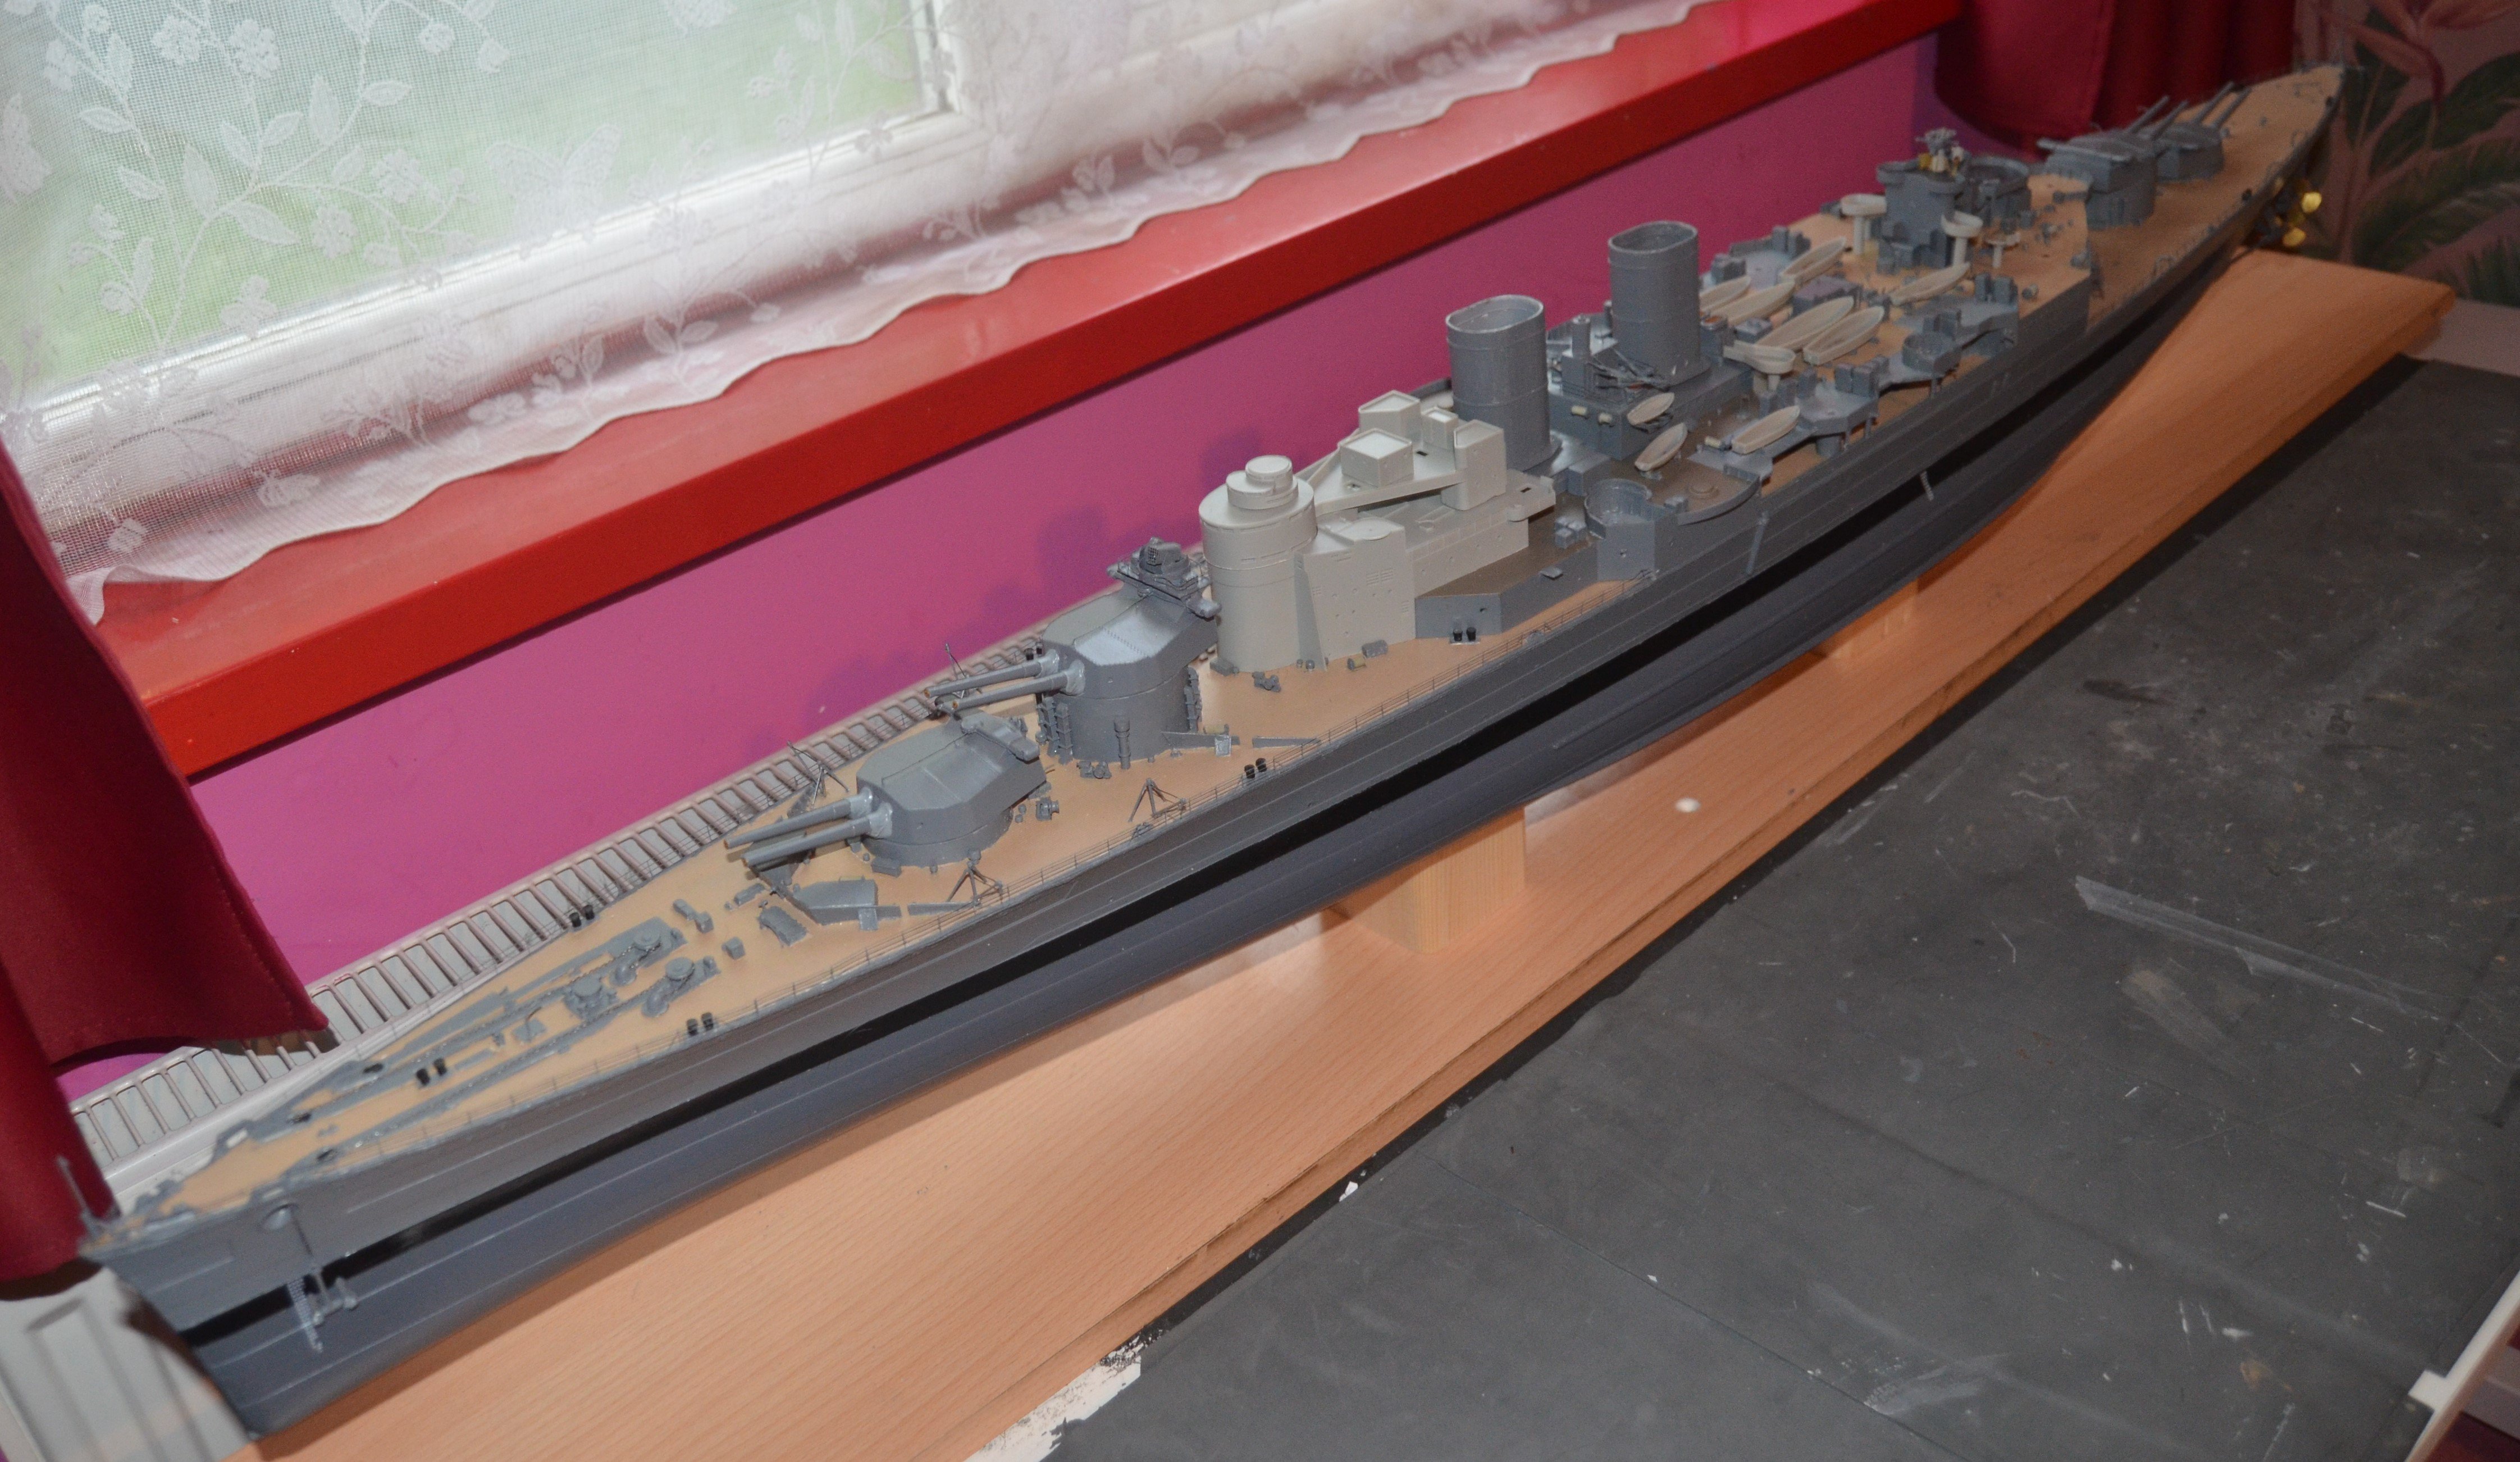
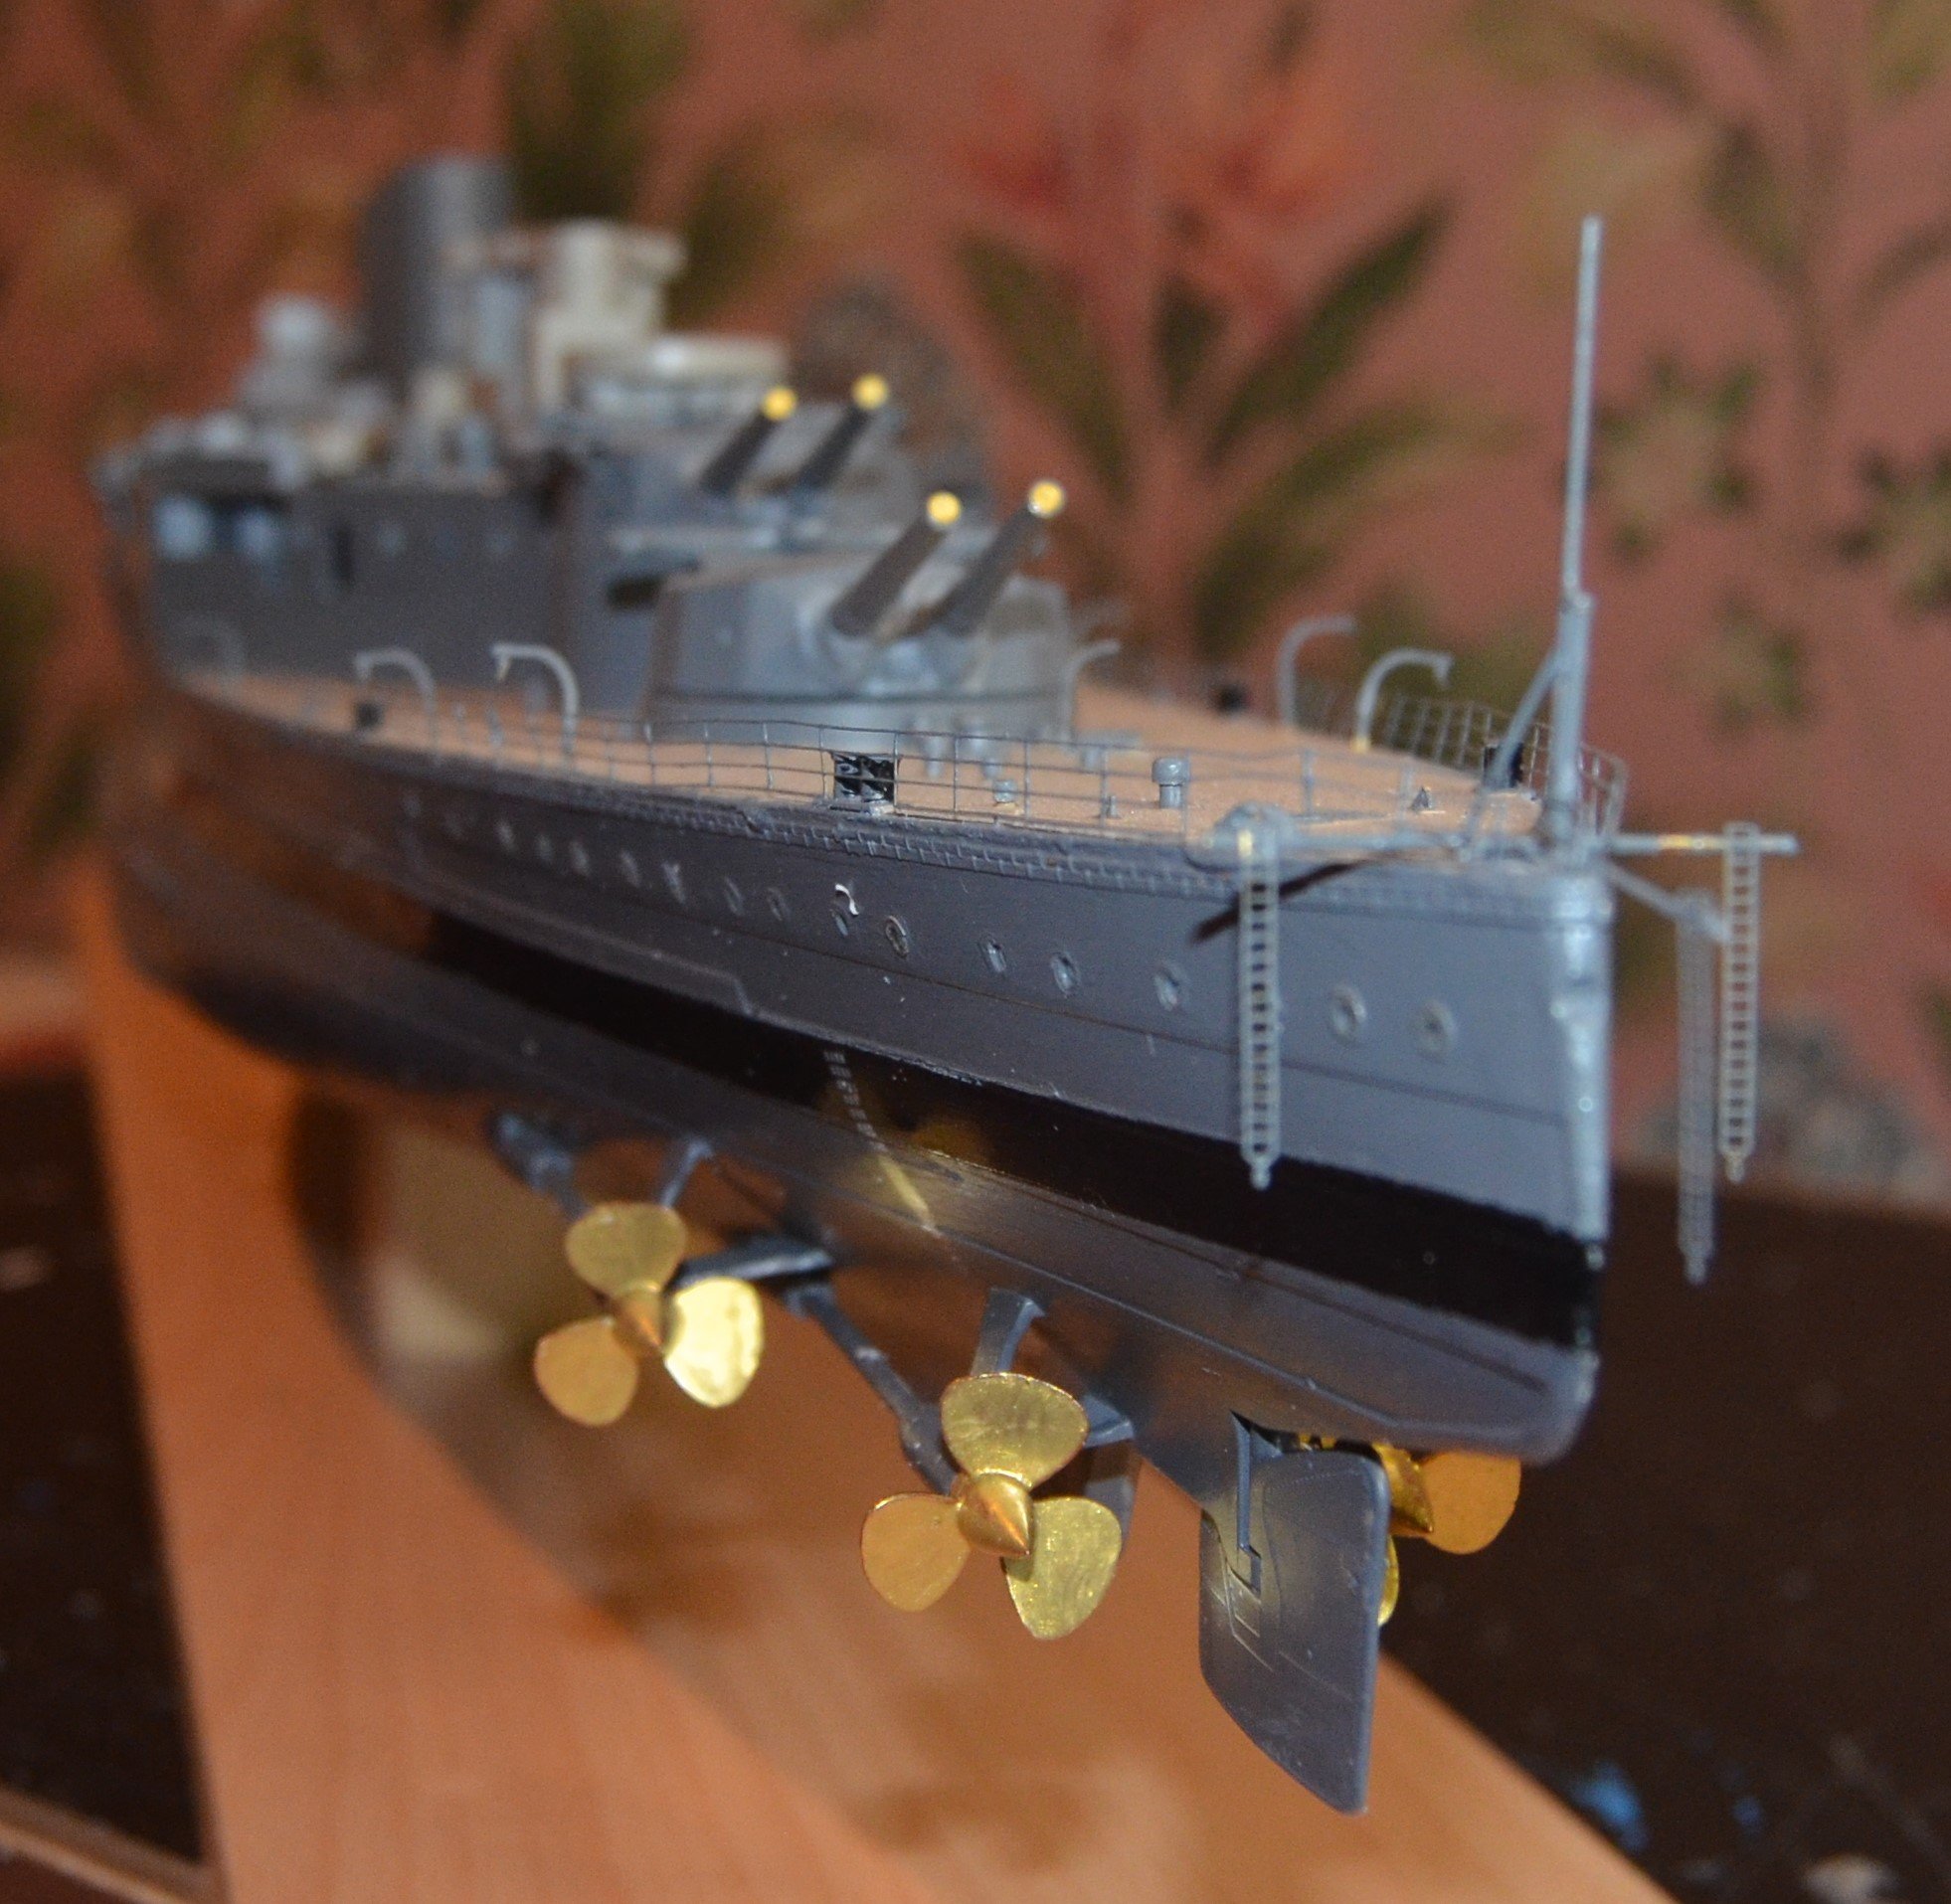
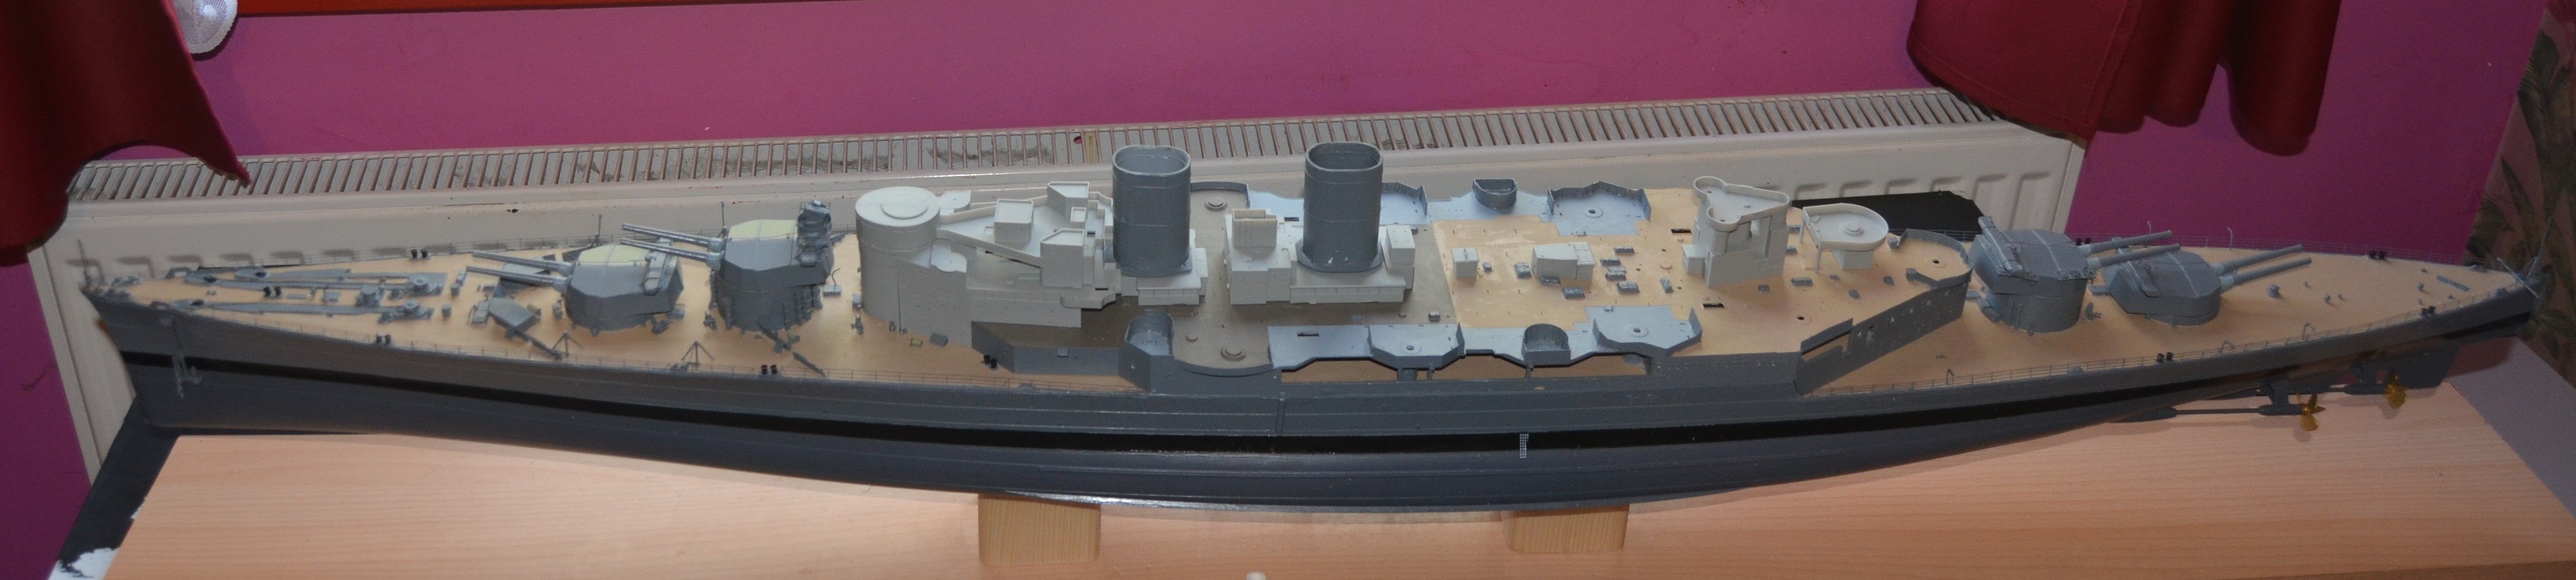
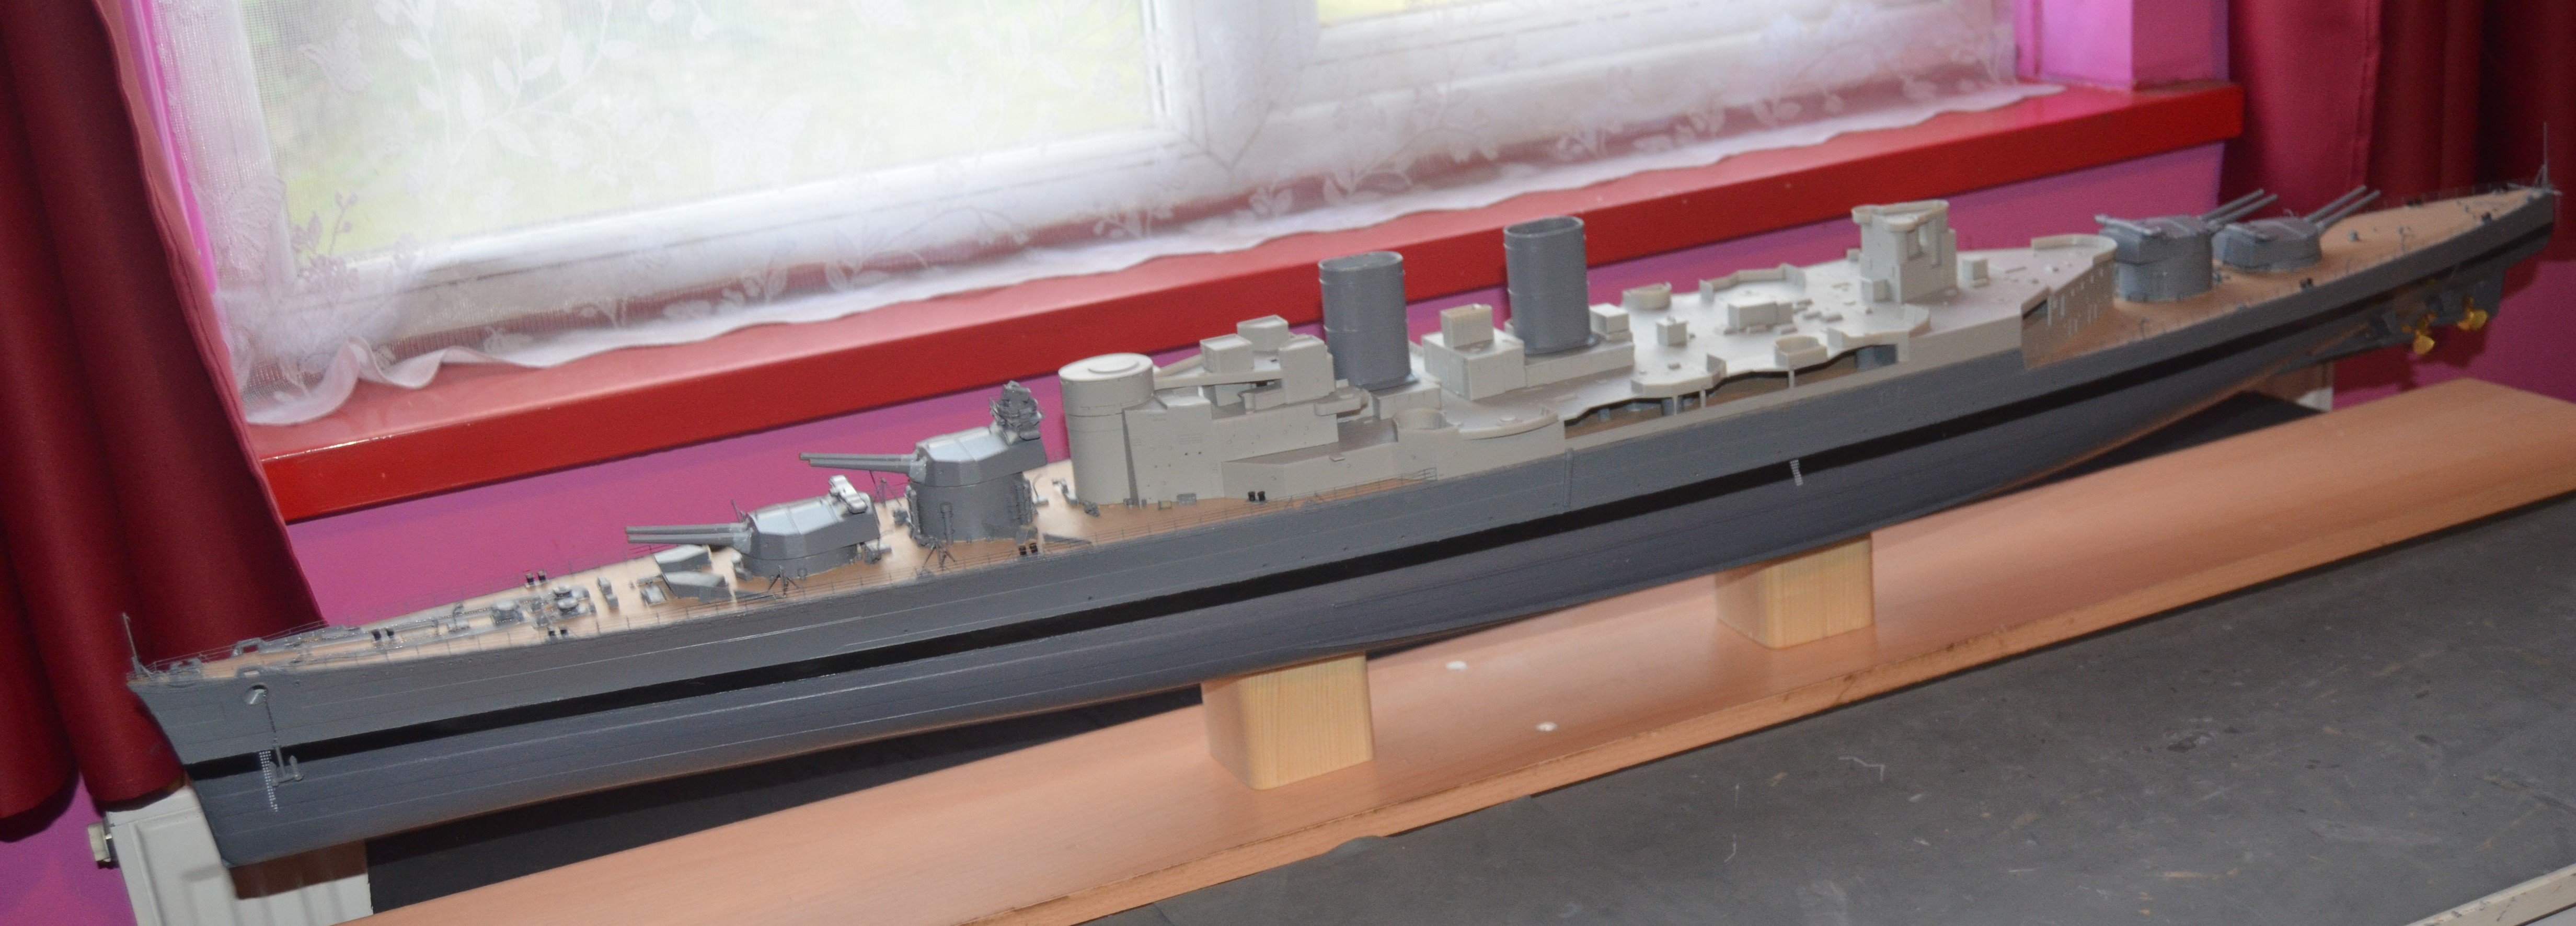
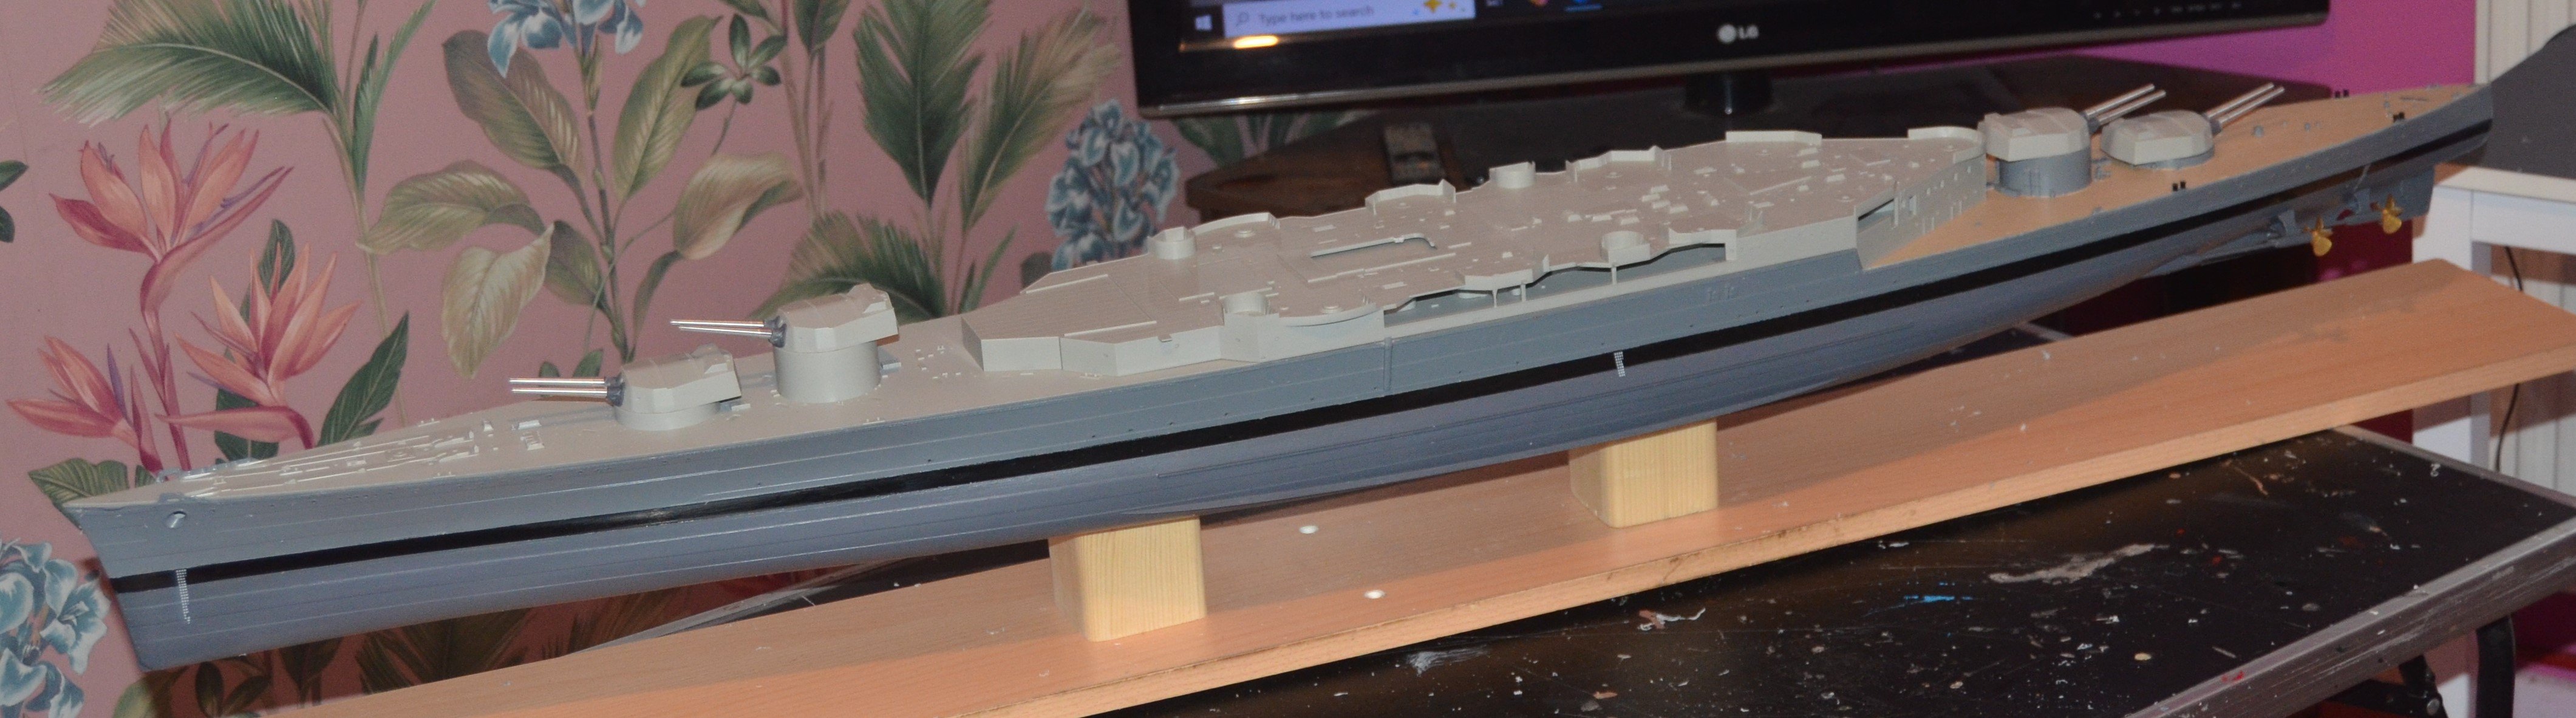
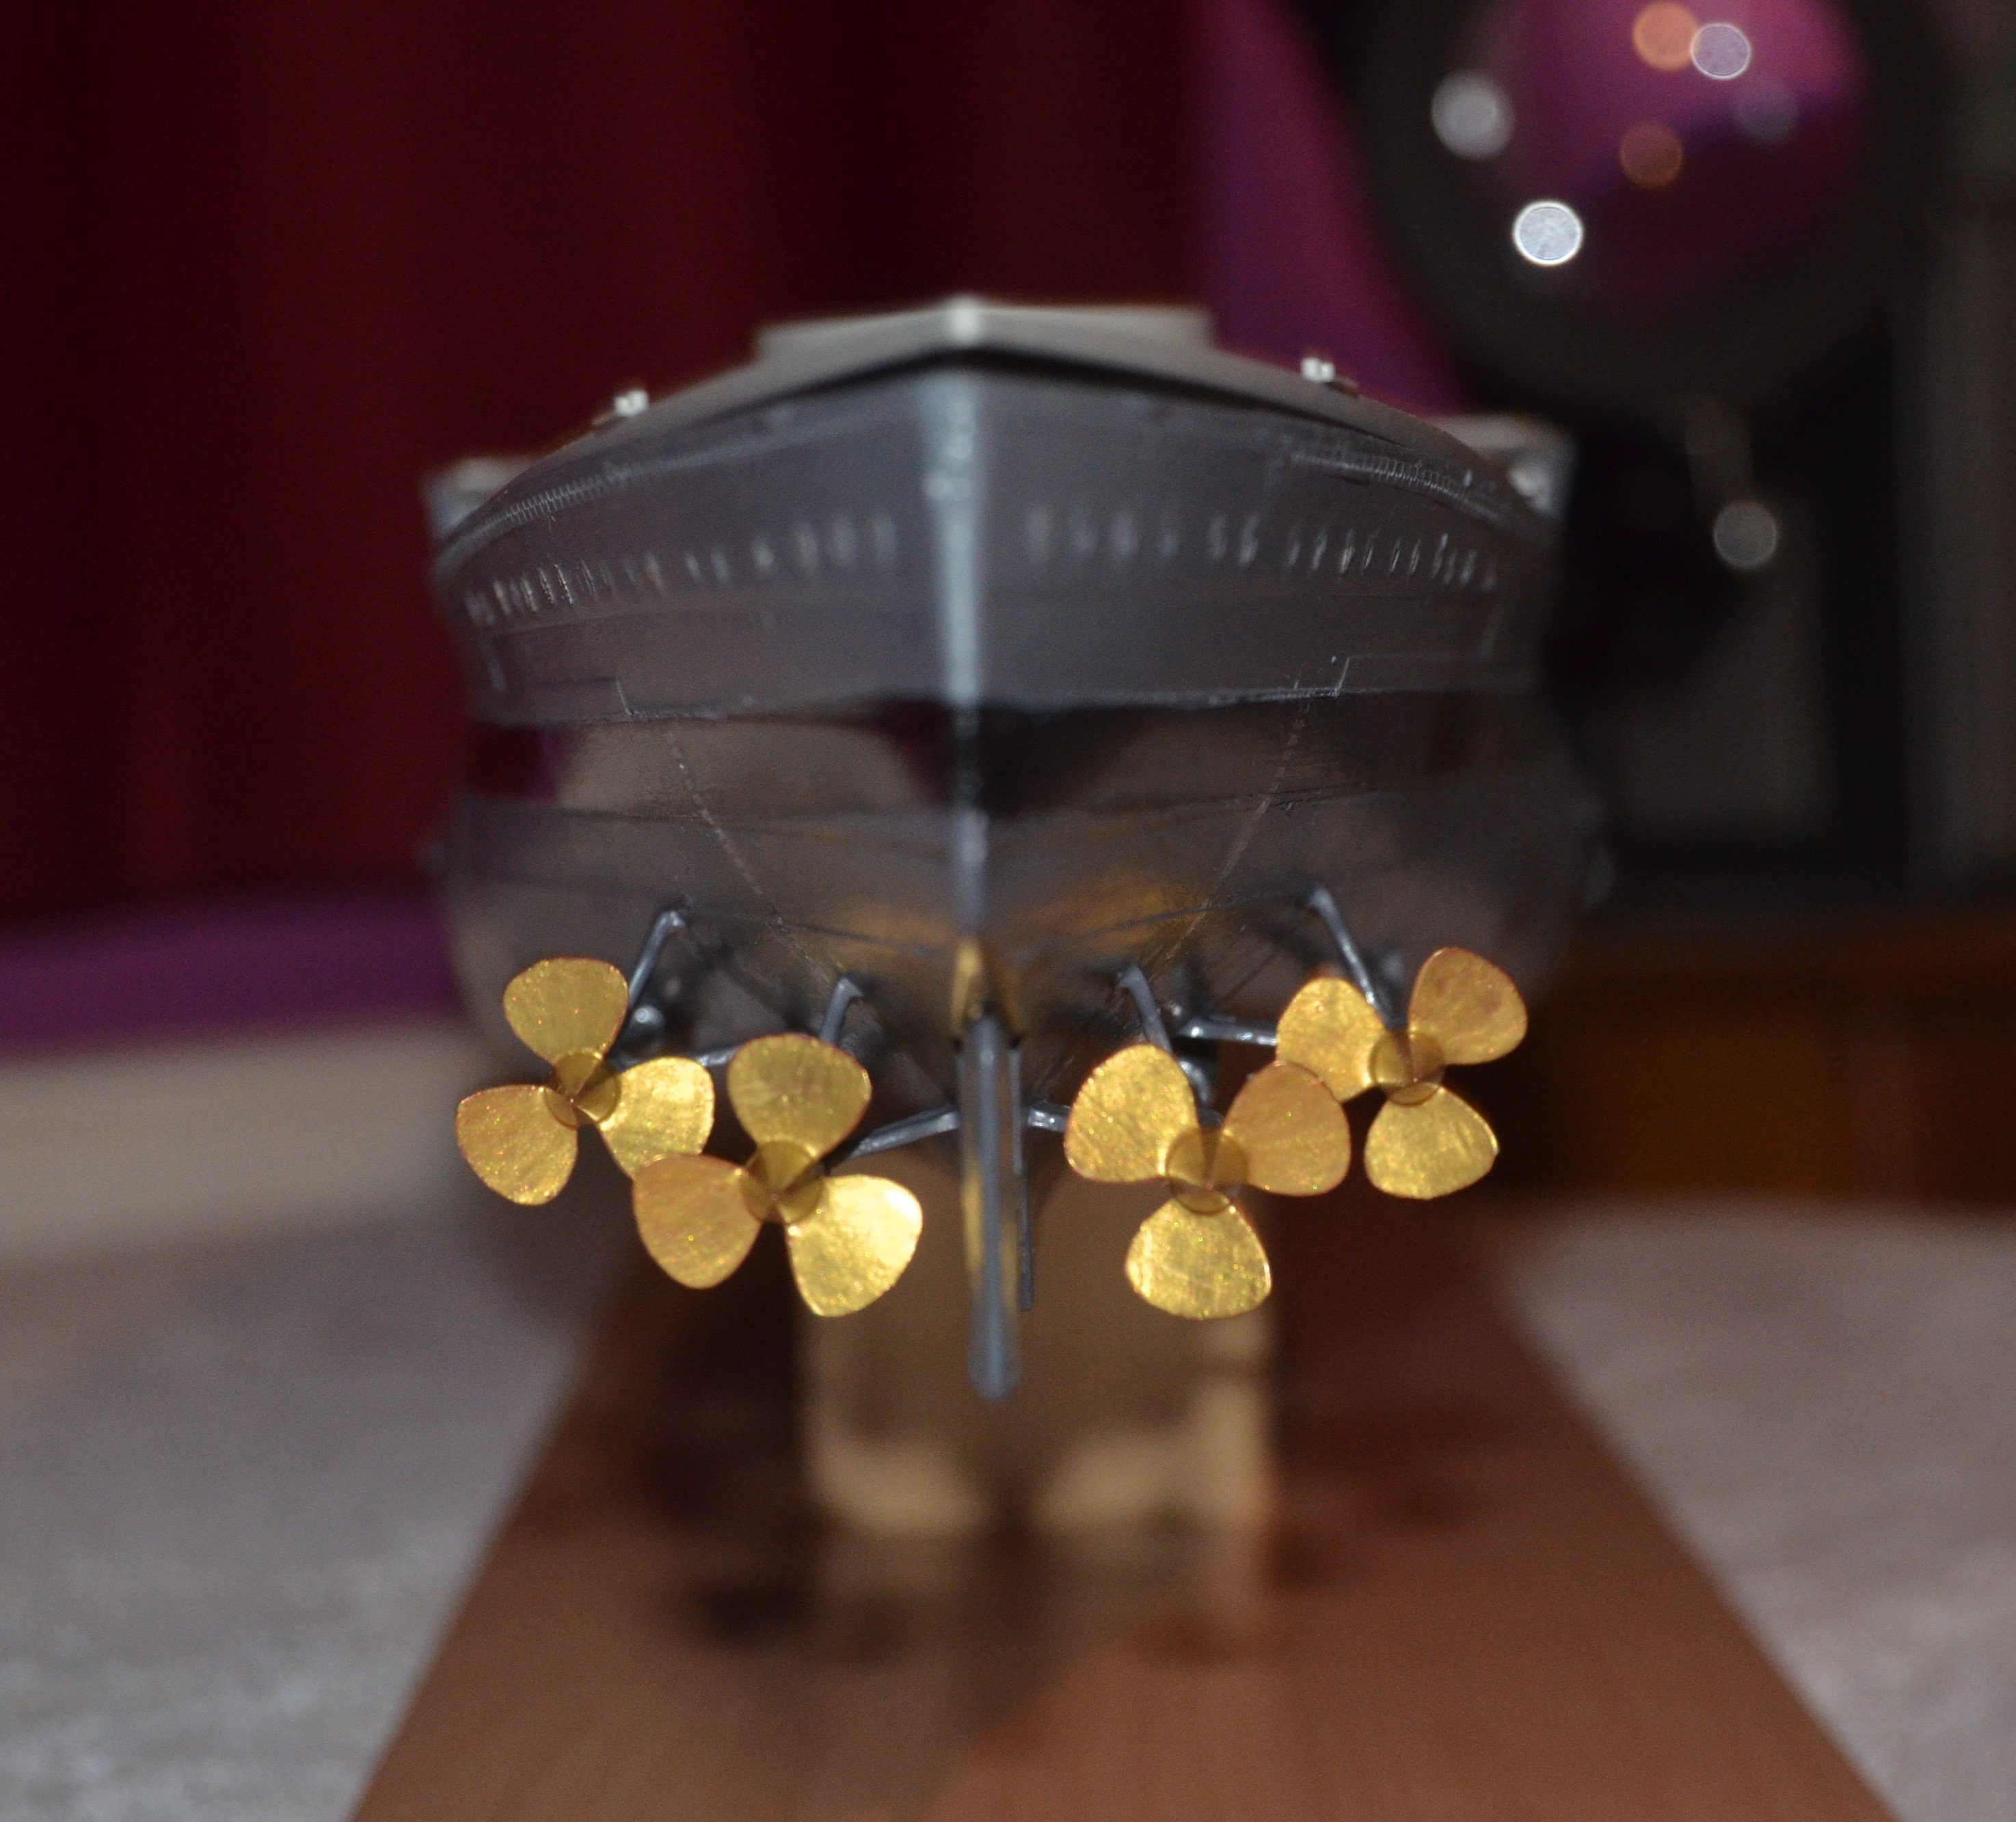
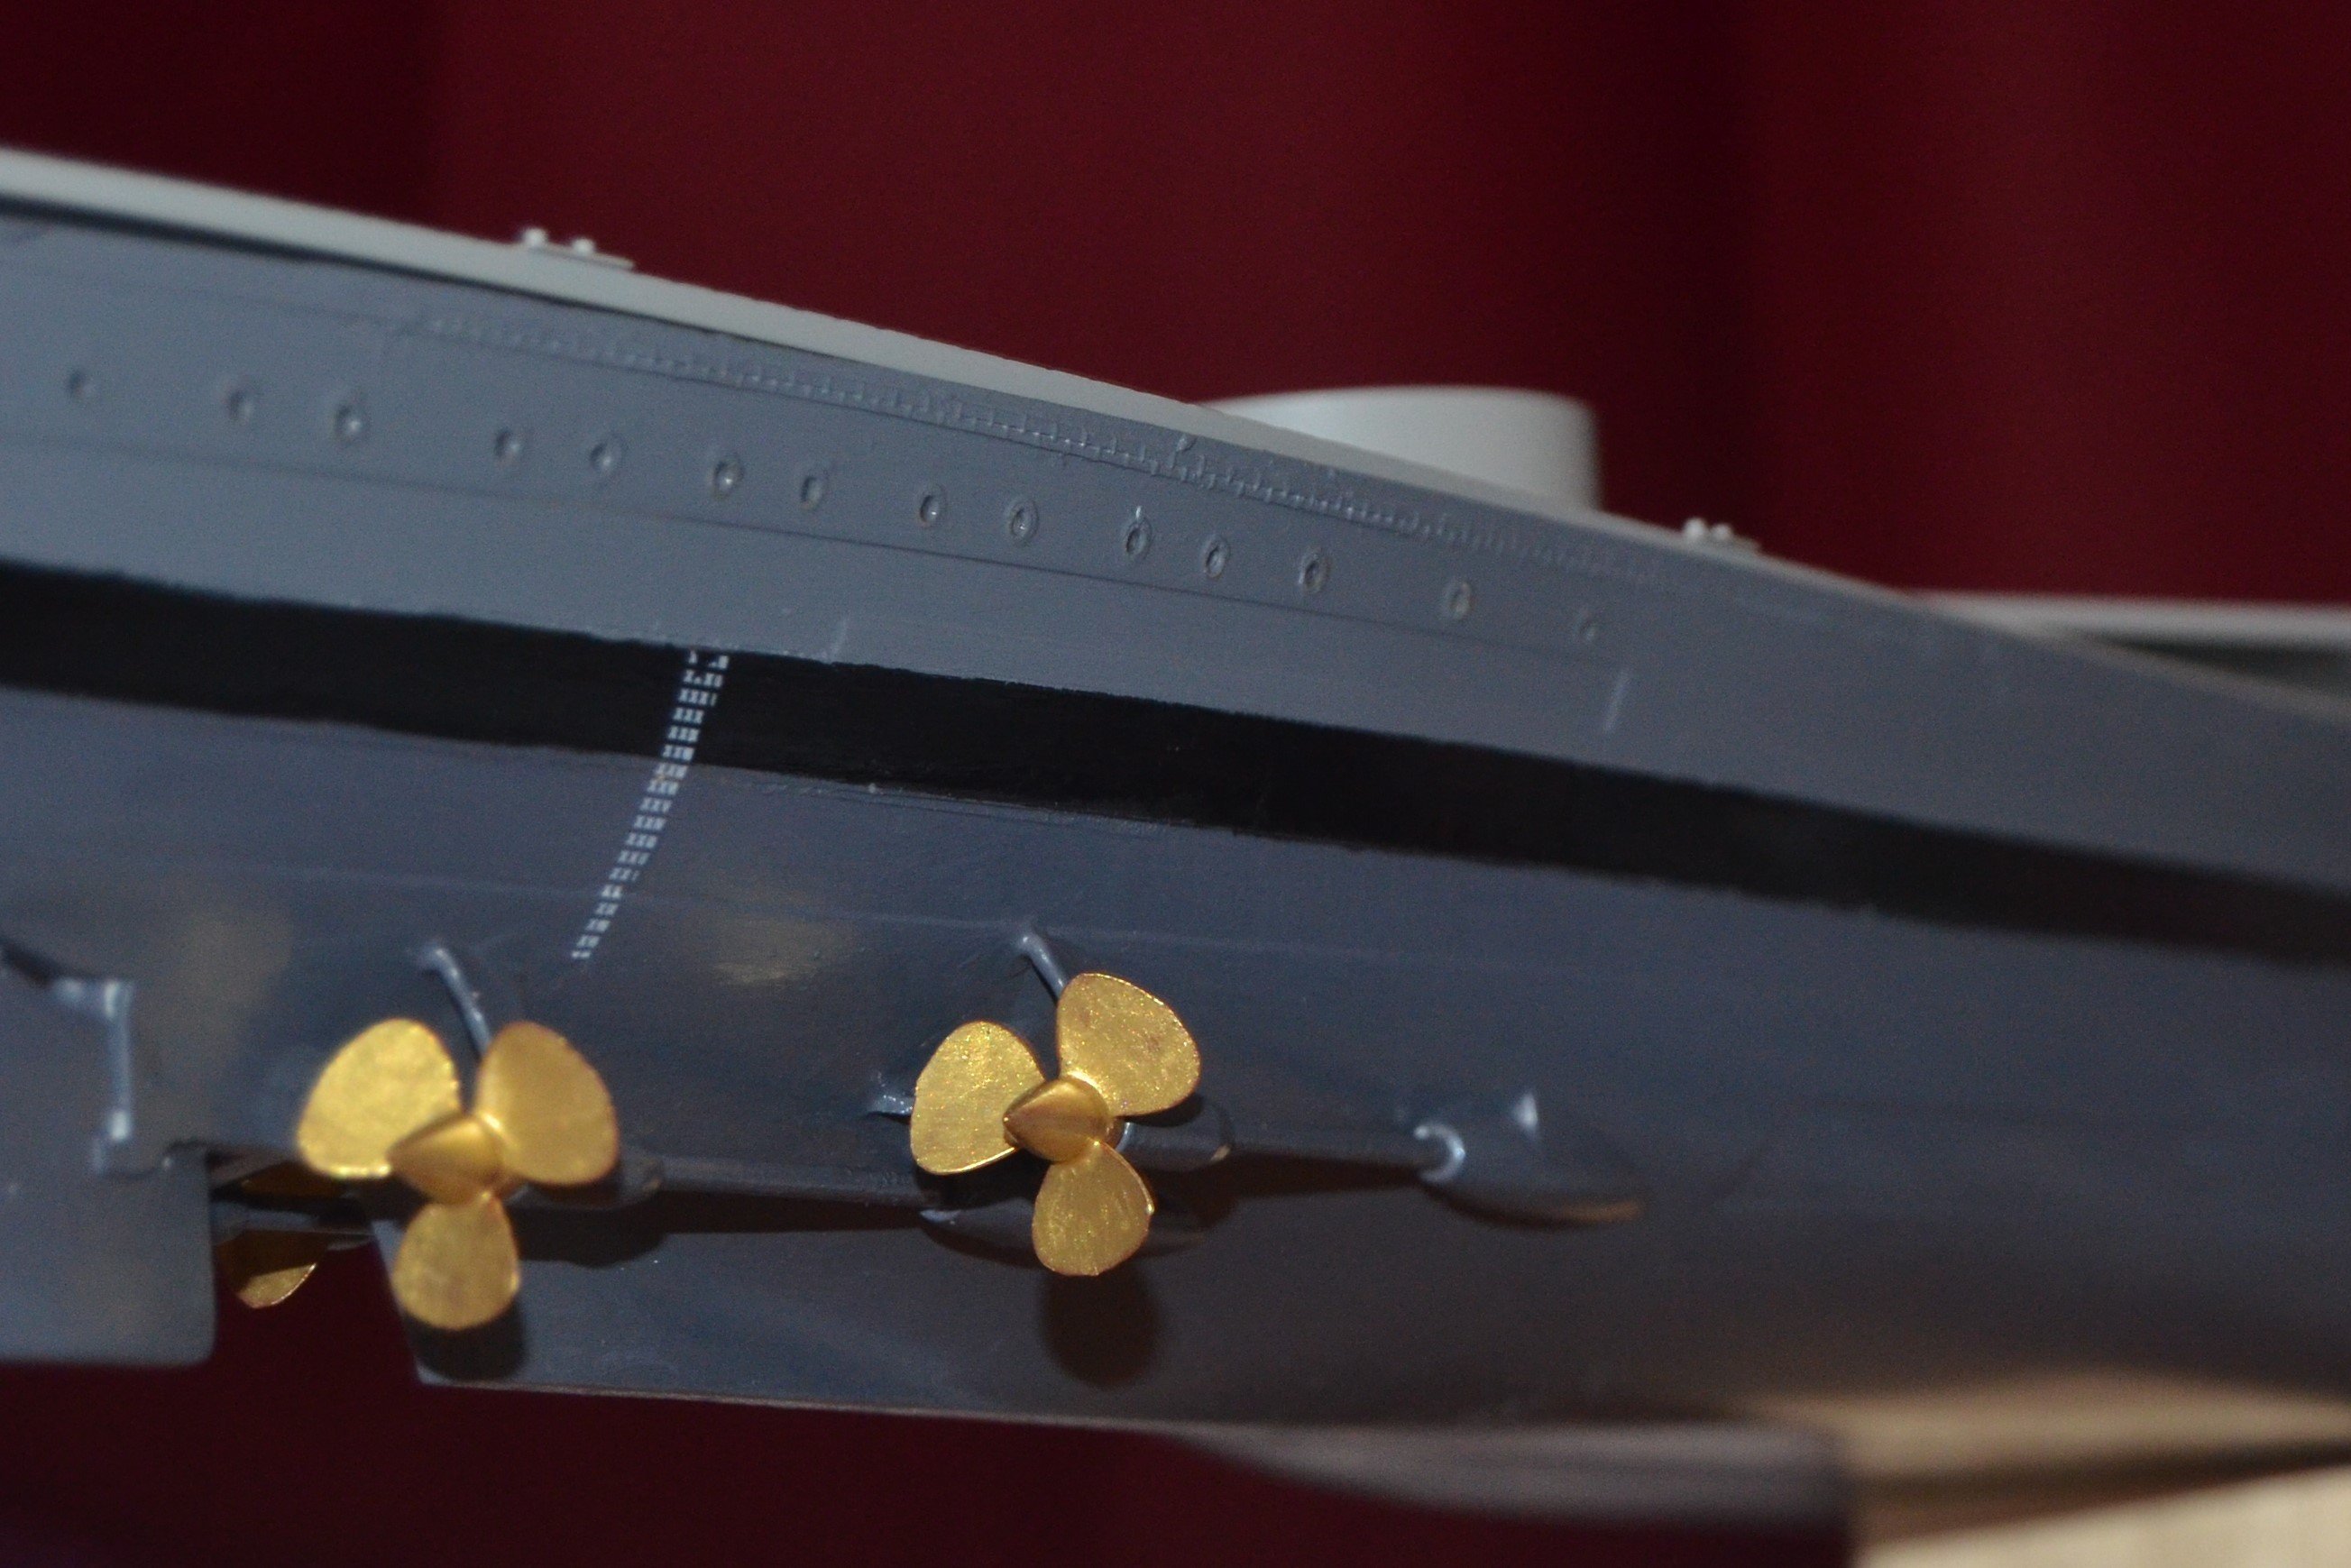
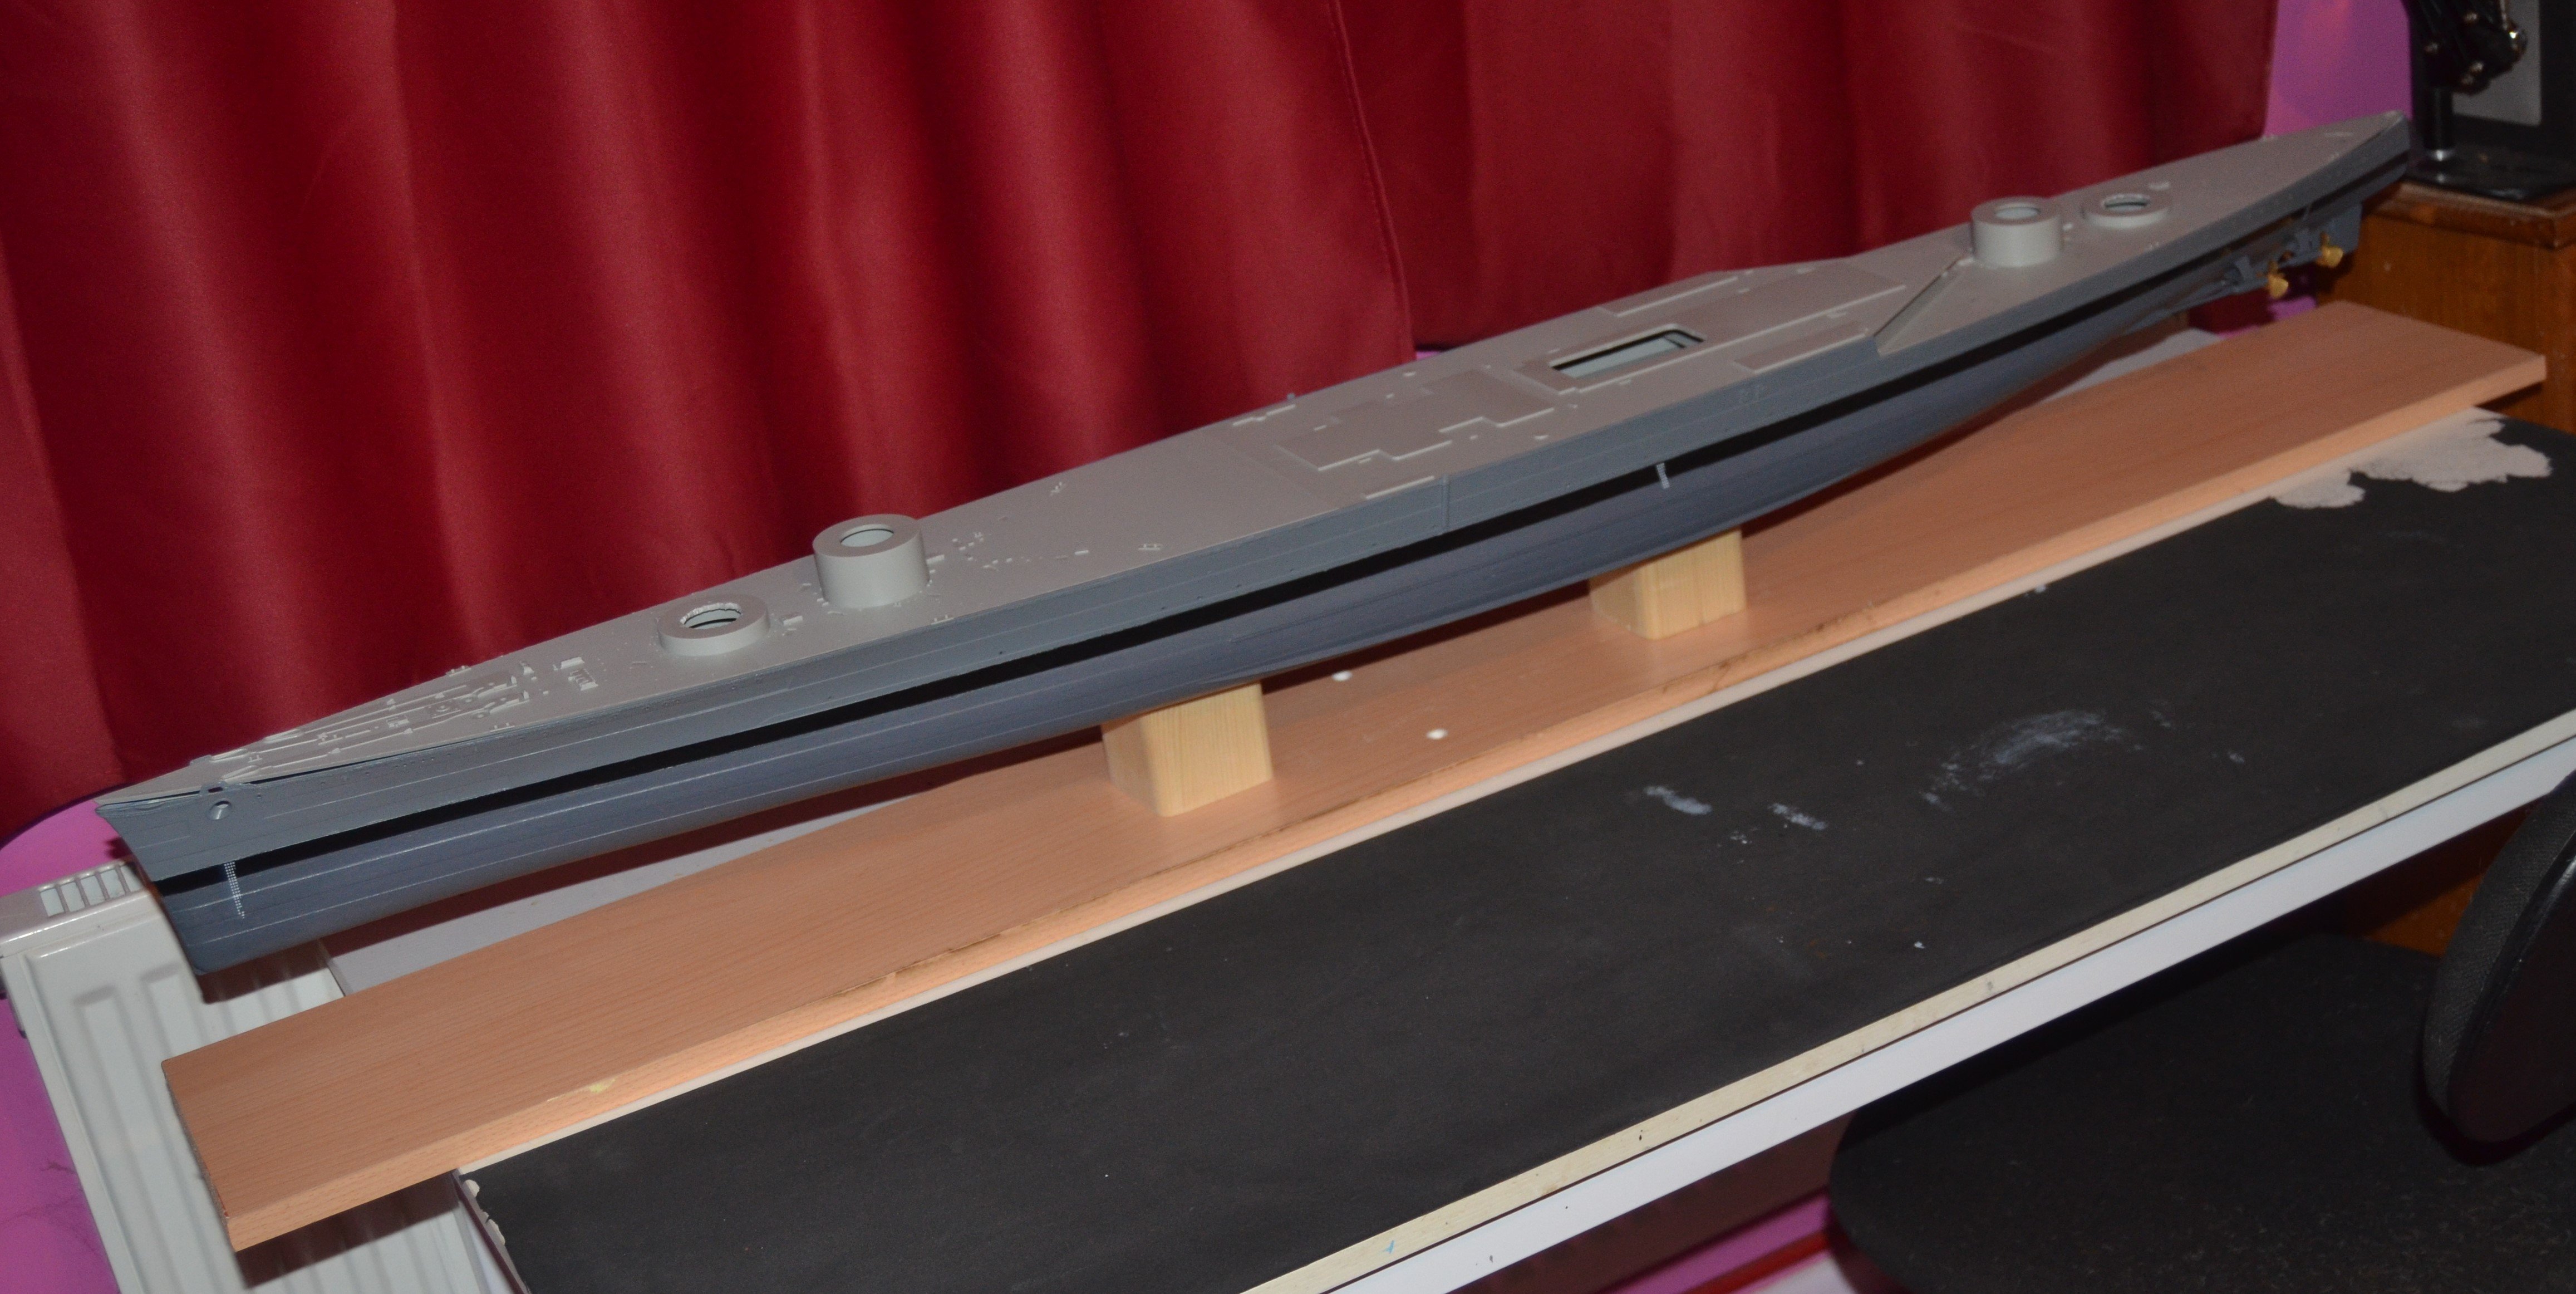
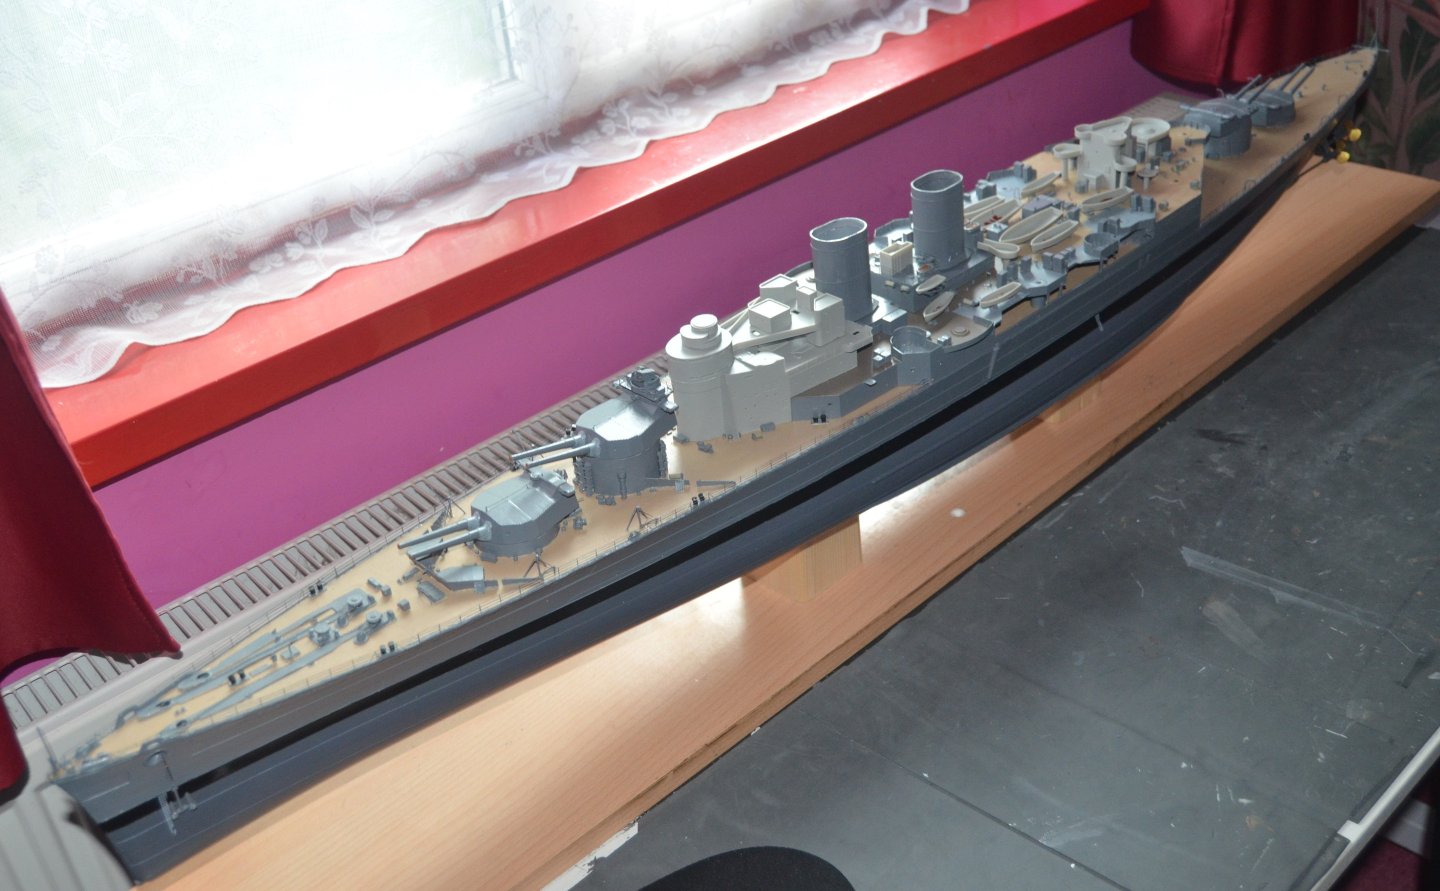
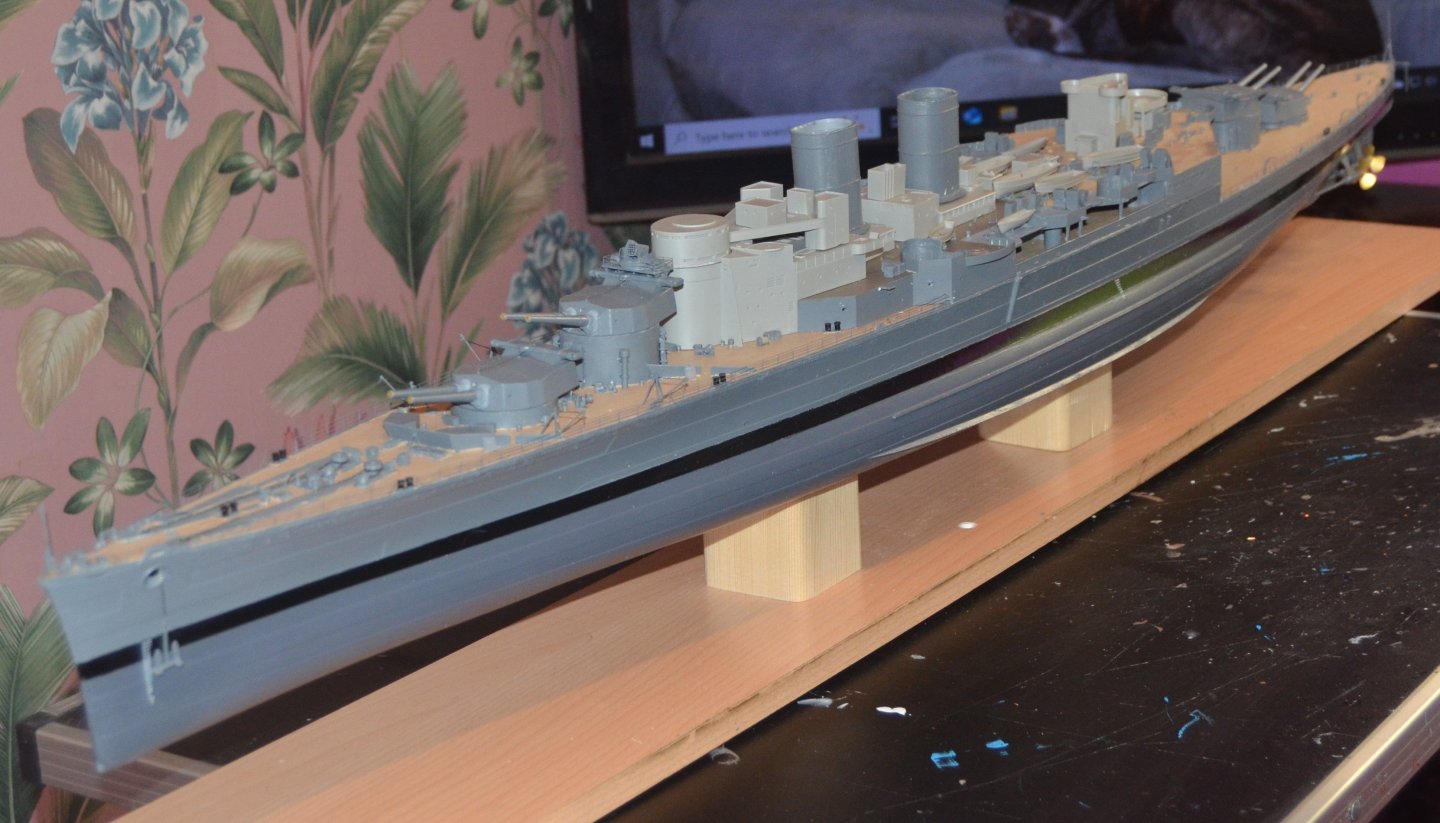
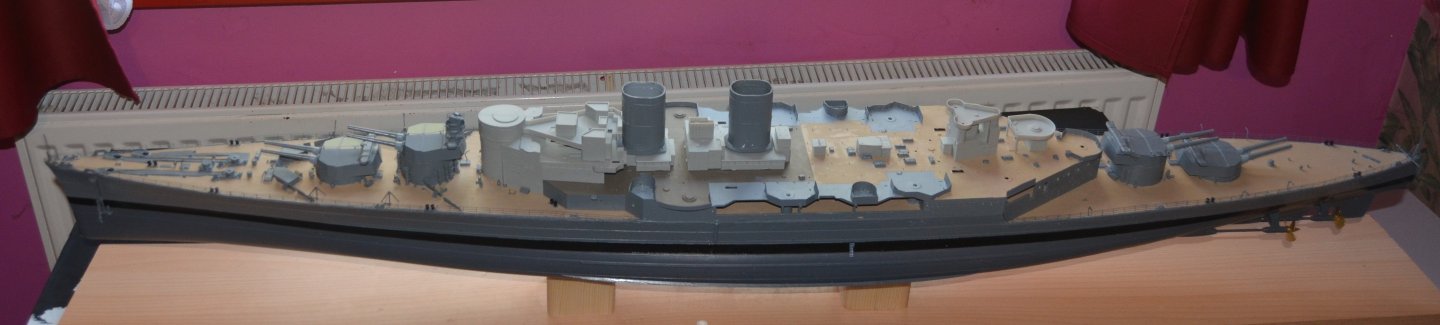
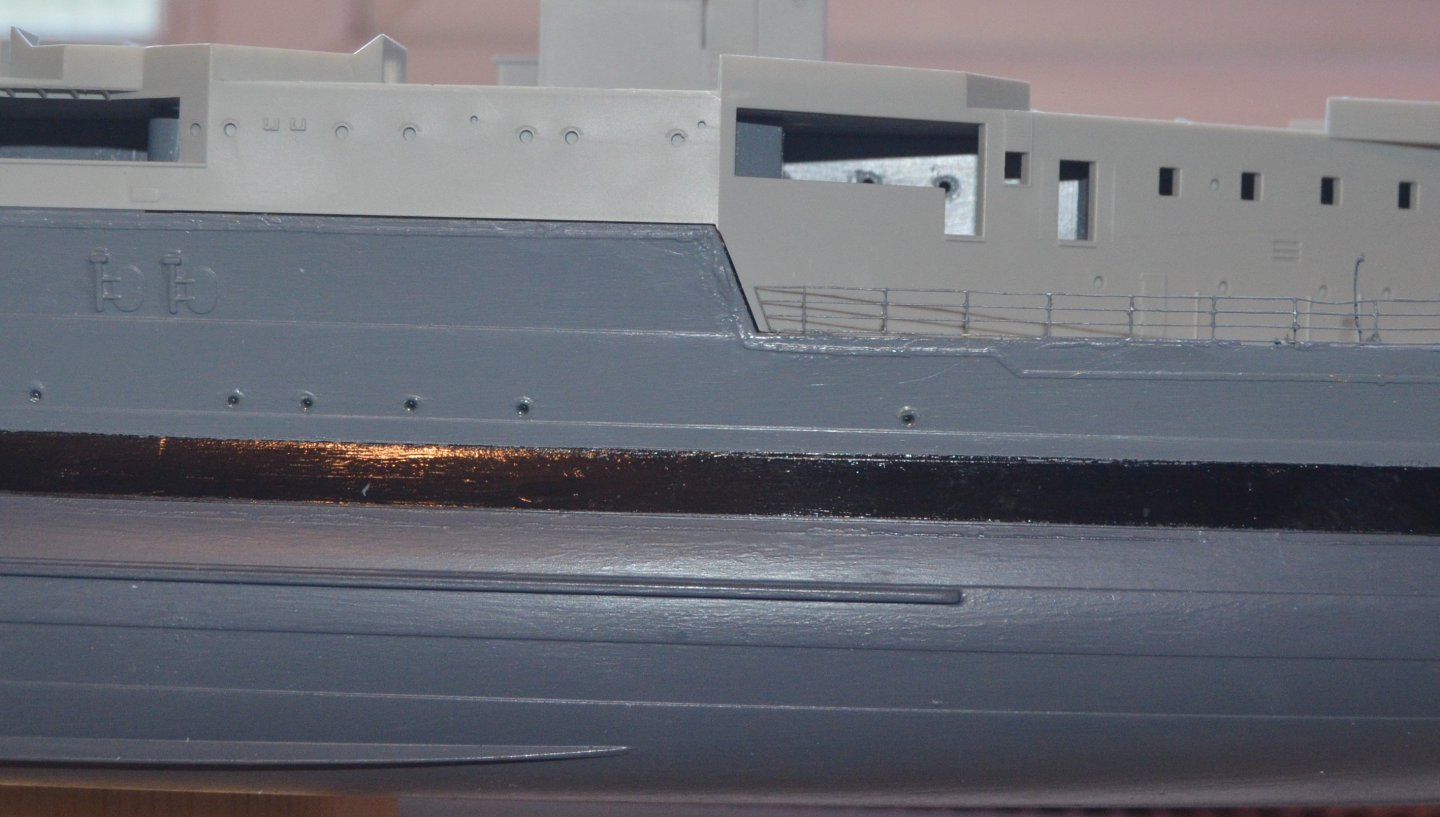
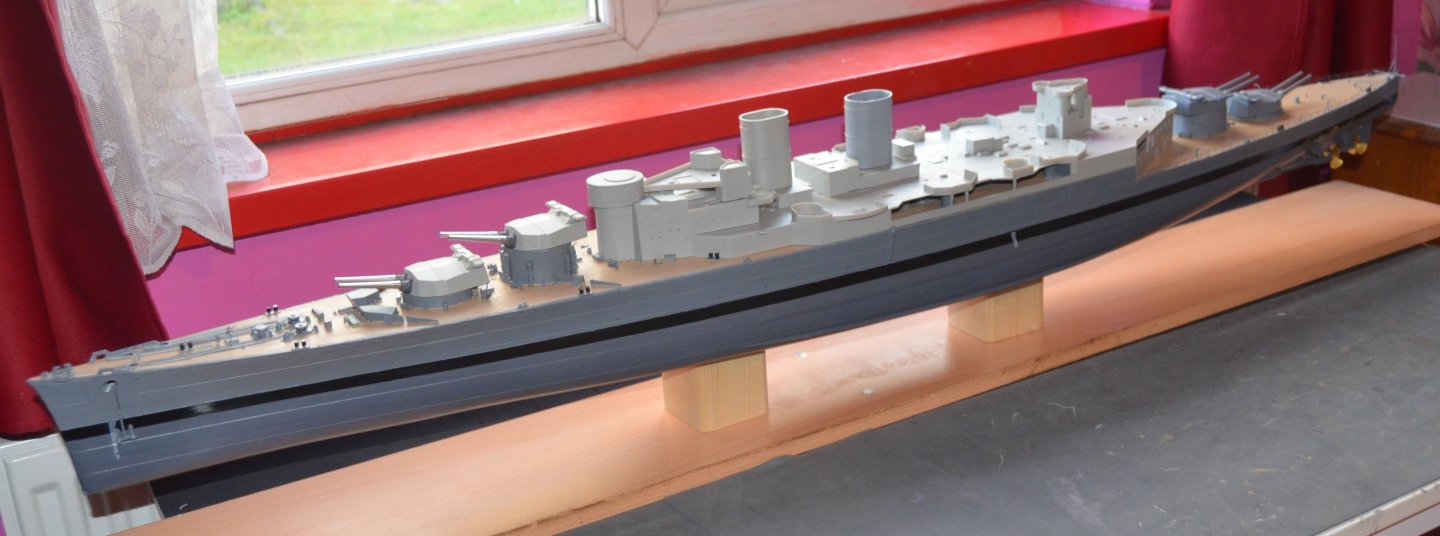
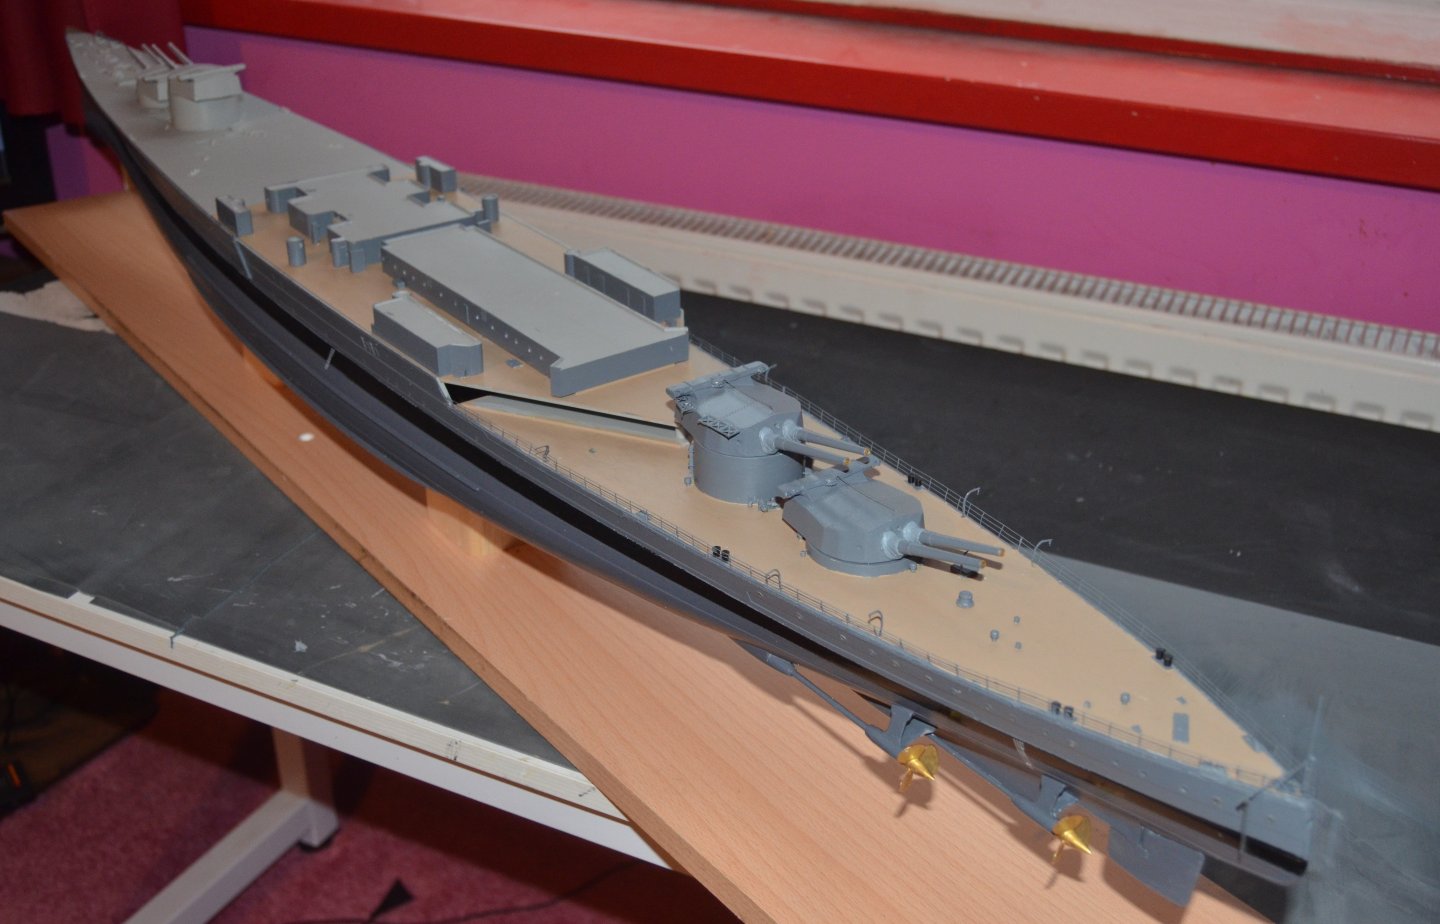
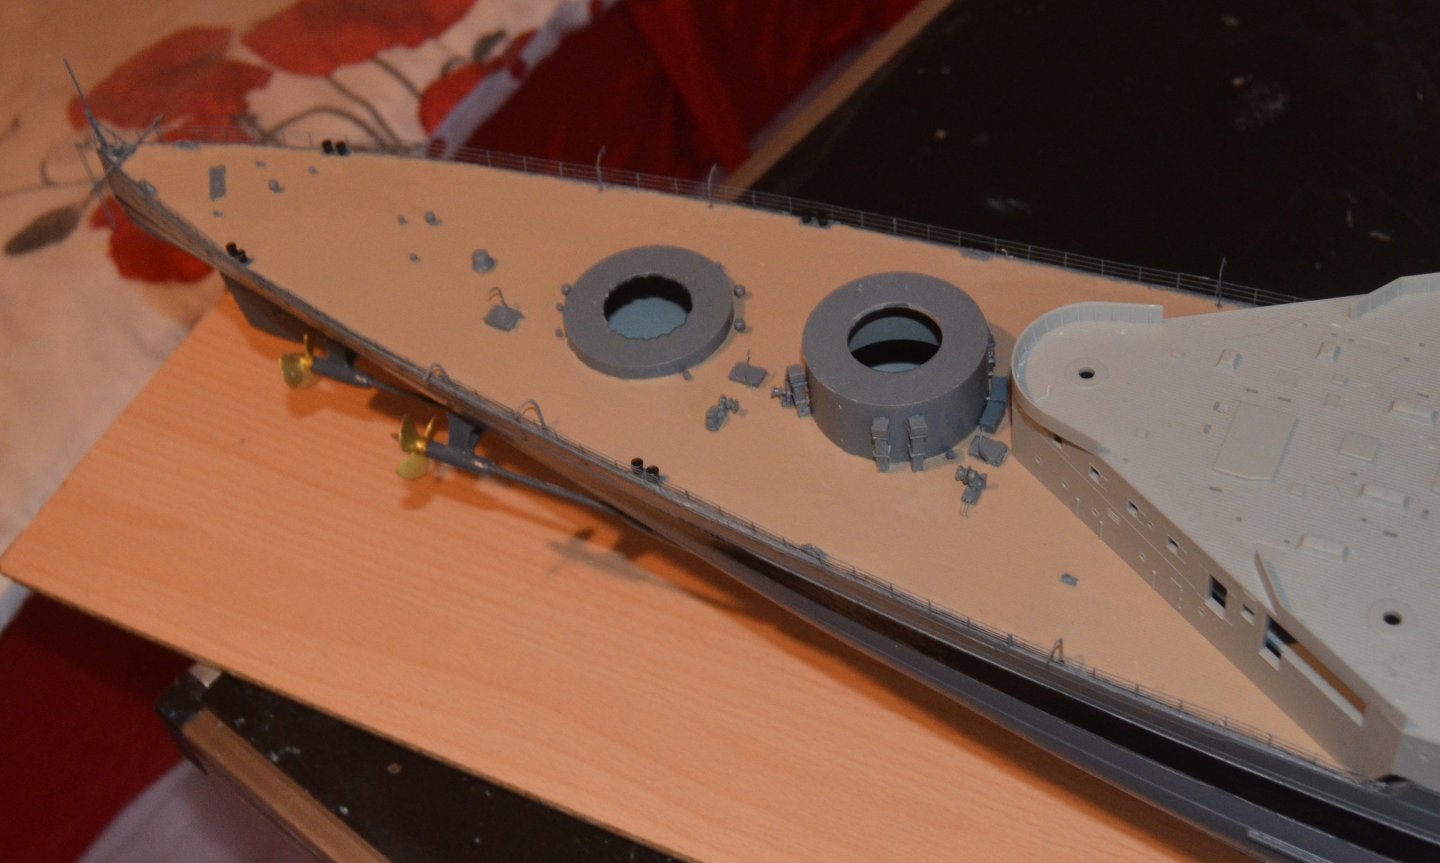
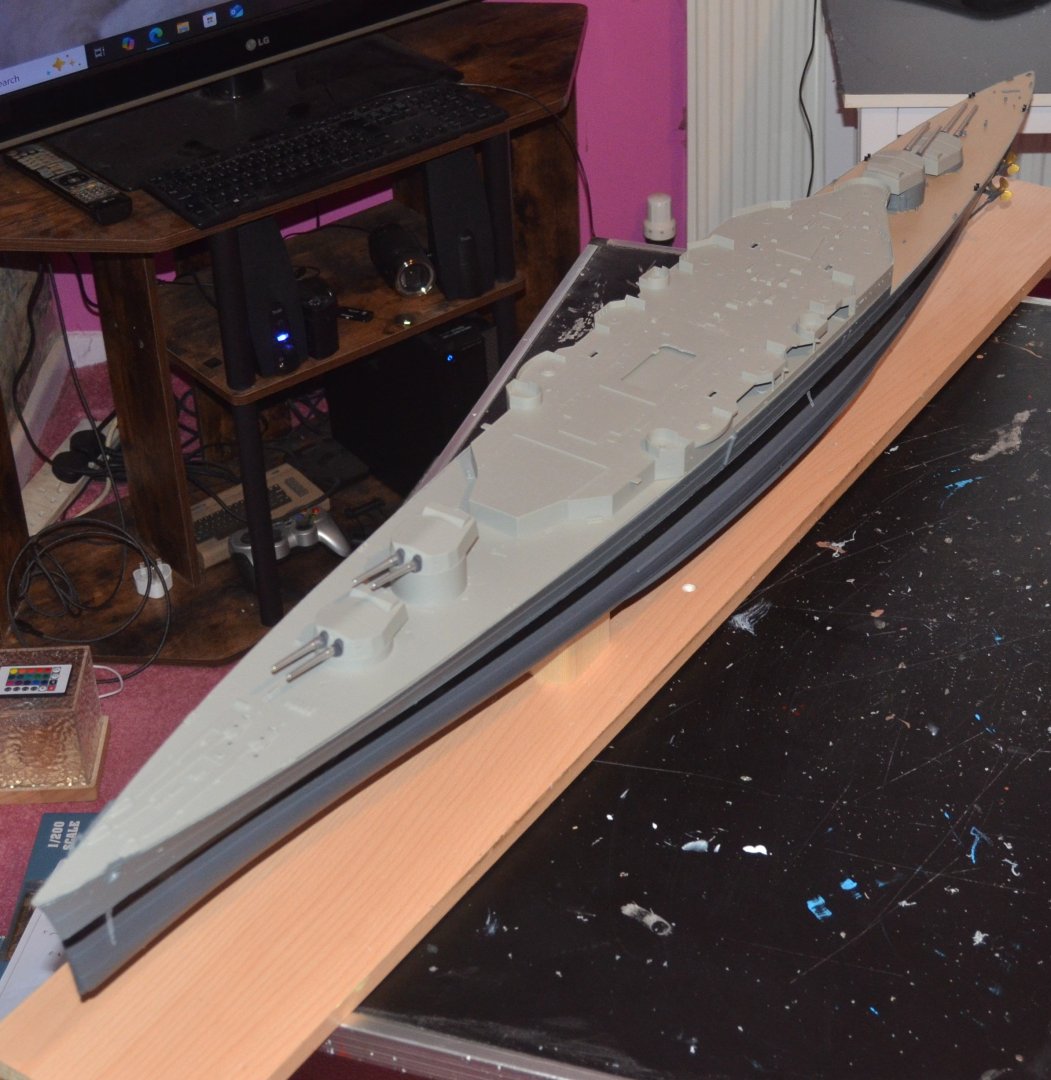
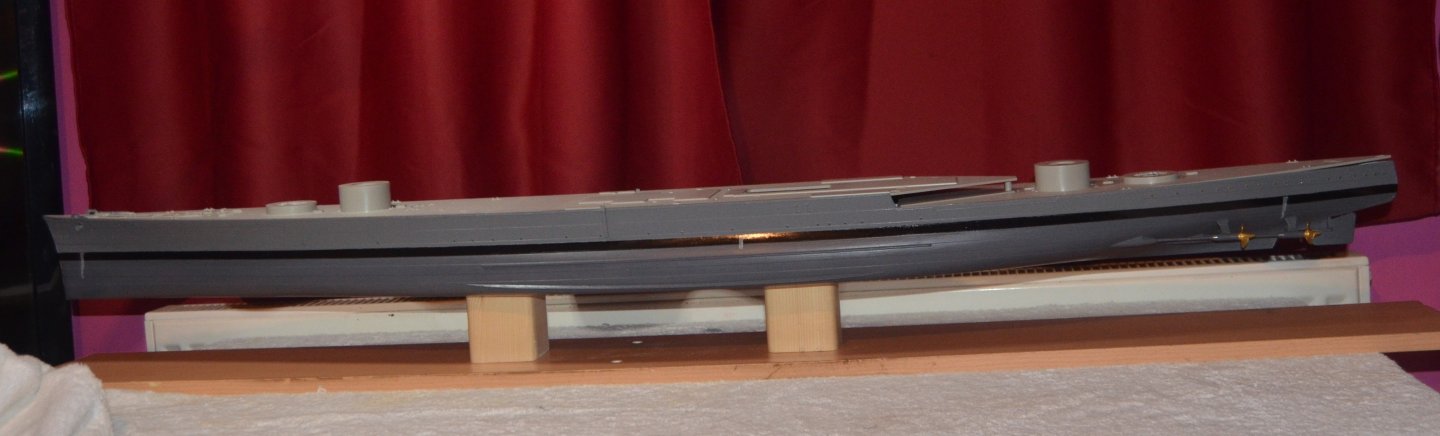
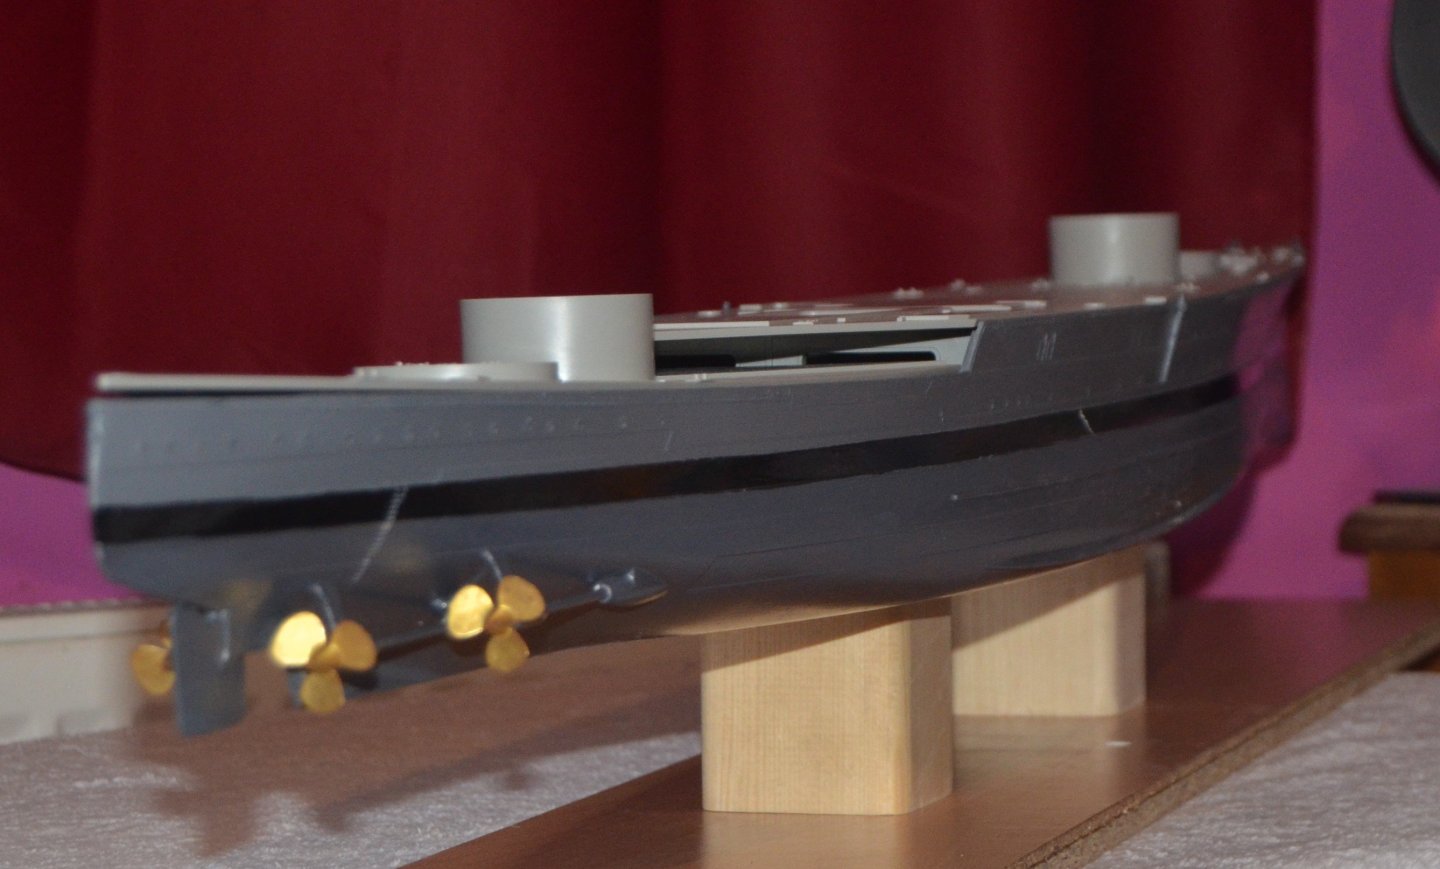
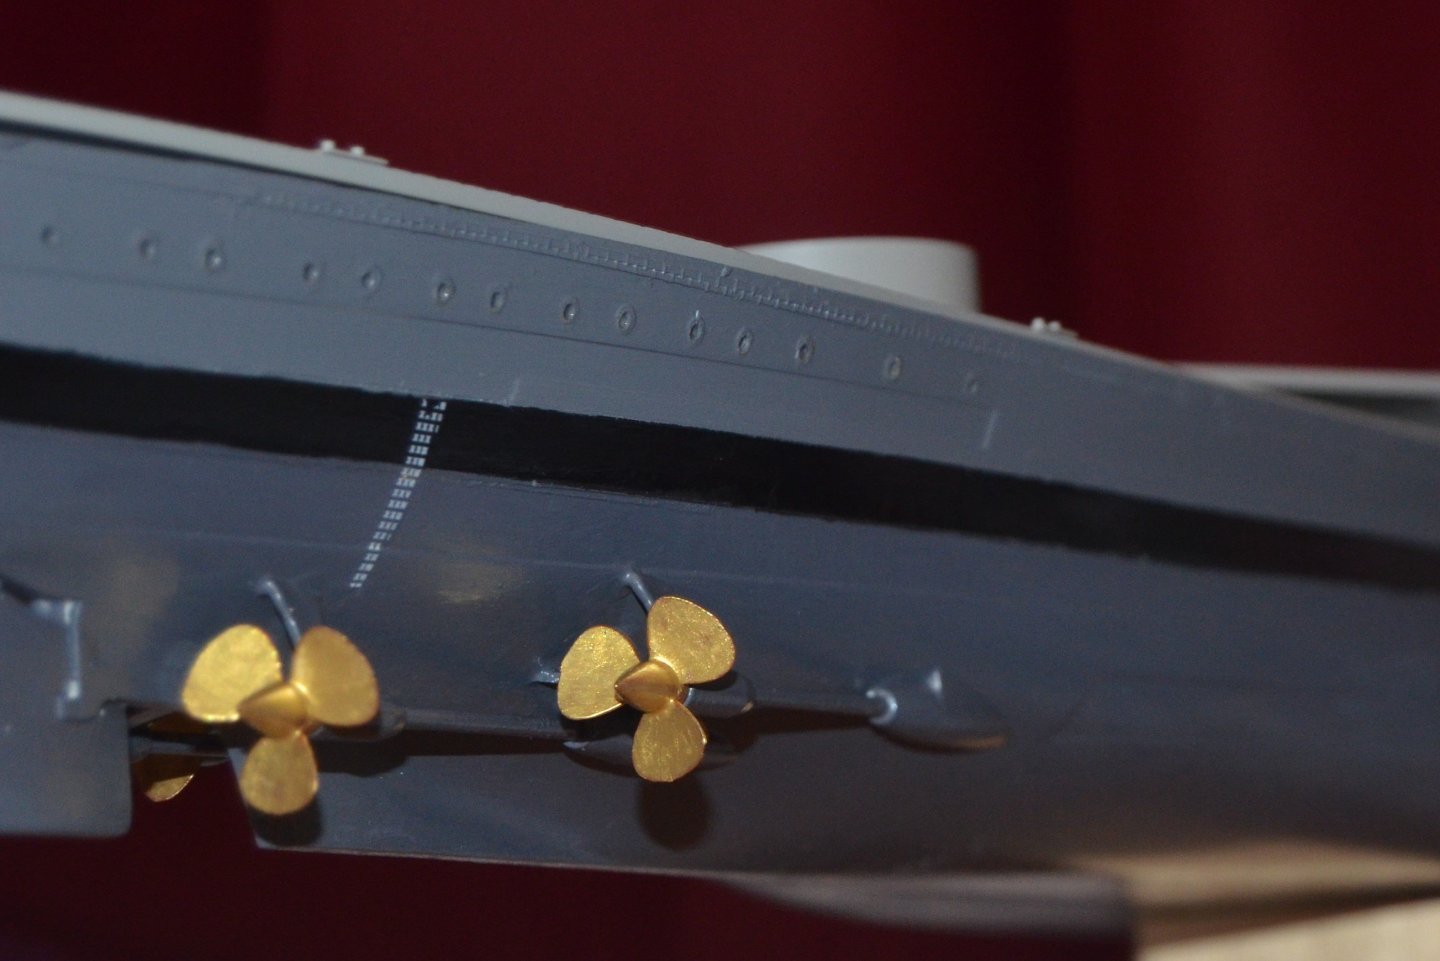
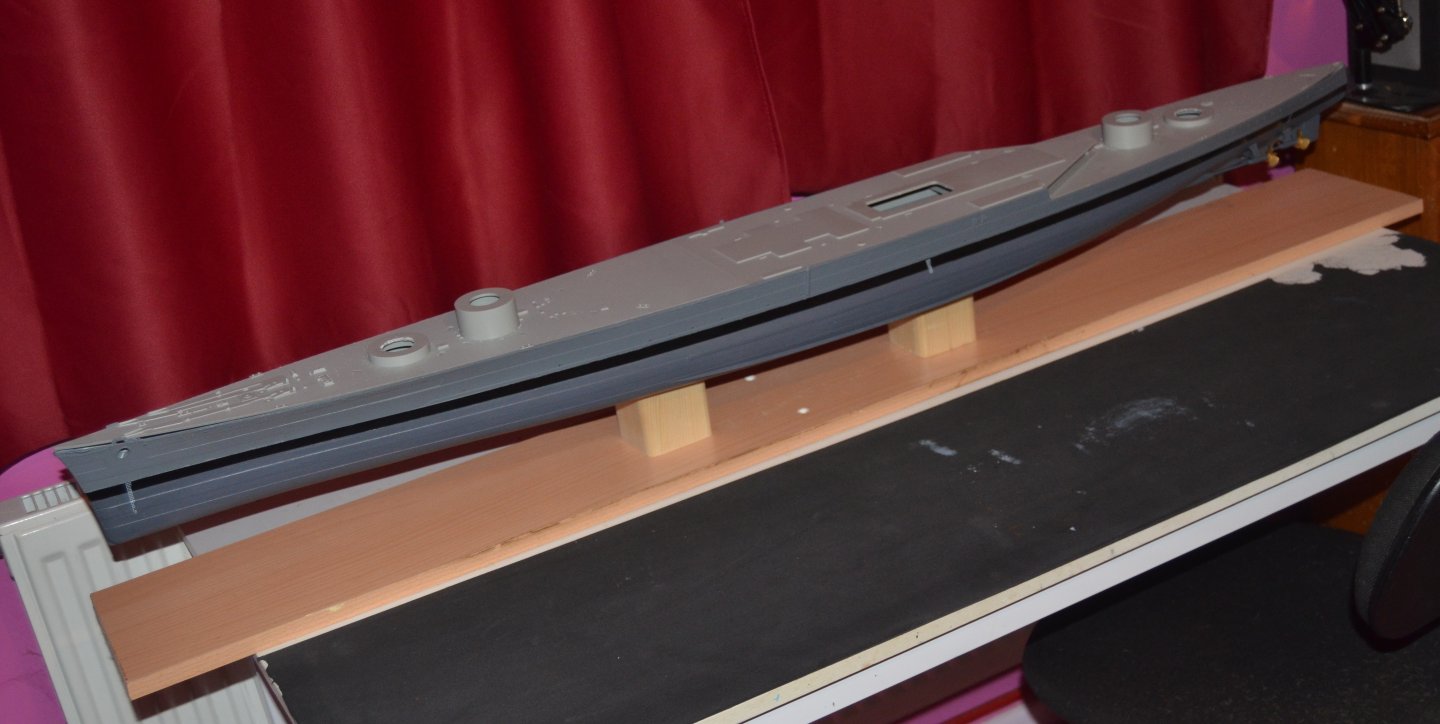
The hull is complete except for a few ladders and bits that will be added once the model is nearing completion. I reckon the mix I have made up for the upper hull is very close to the Home Fleet grey used on the ship. The degaussing cable is visible above the props and has not disappeared as I was worried it would do once painted. The model is now bolted firmly on the baseboard and I can work on the decks and superstructures without the need to touch the hull.

- 97 replies
-
- 12
-
-
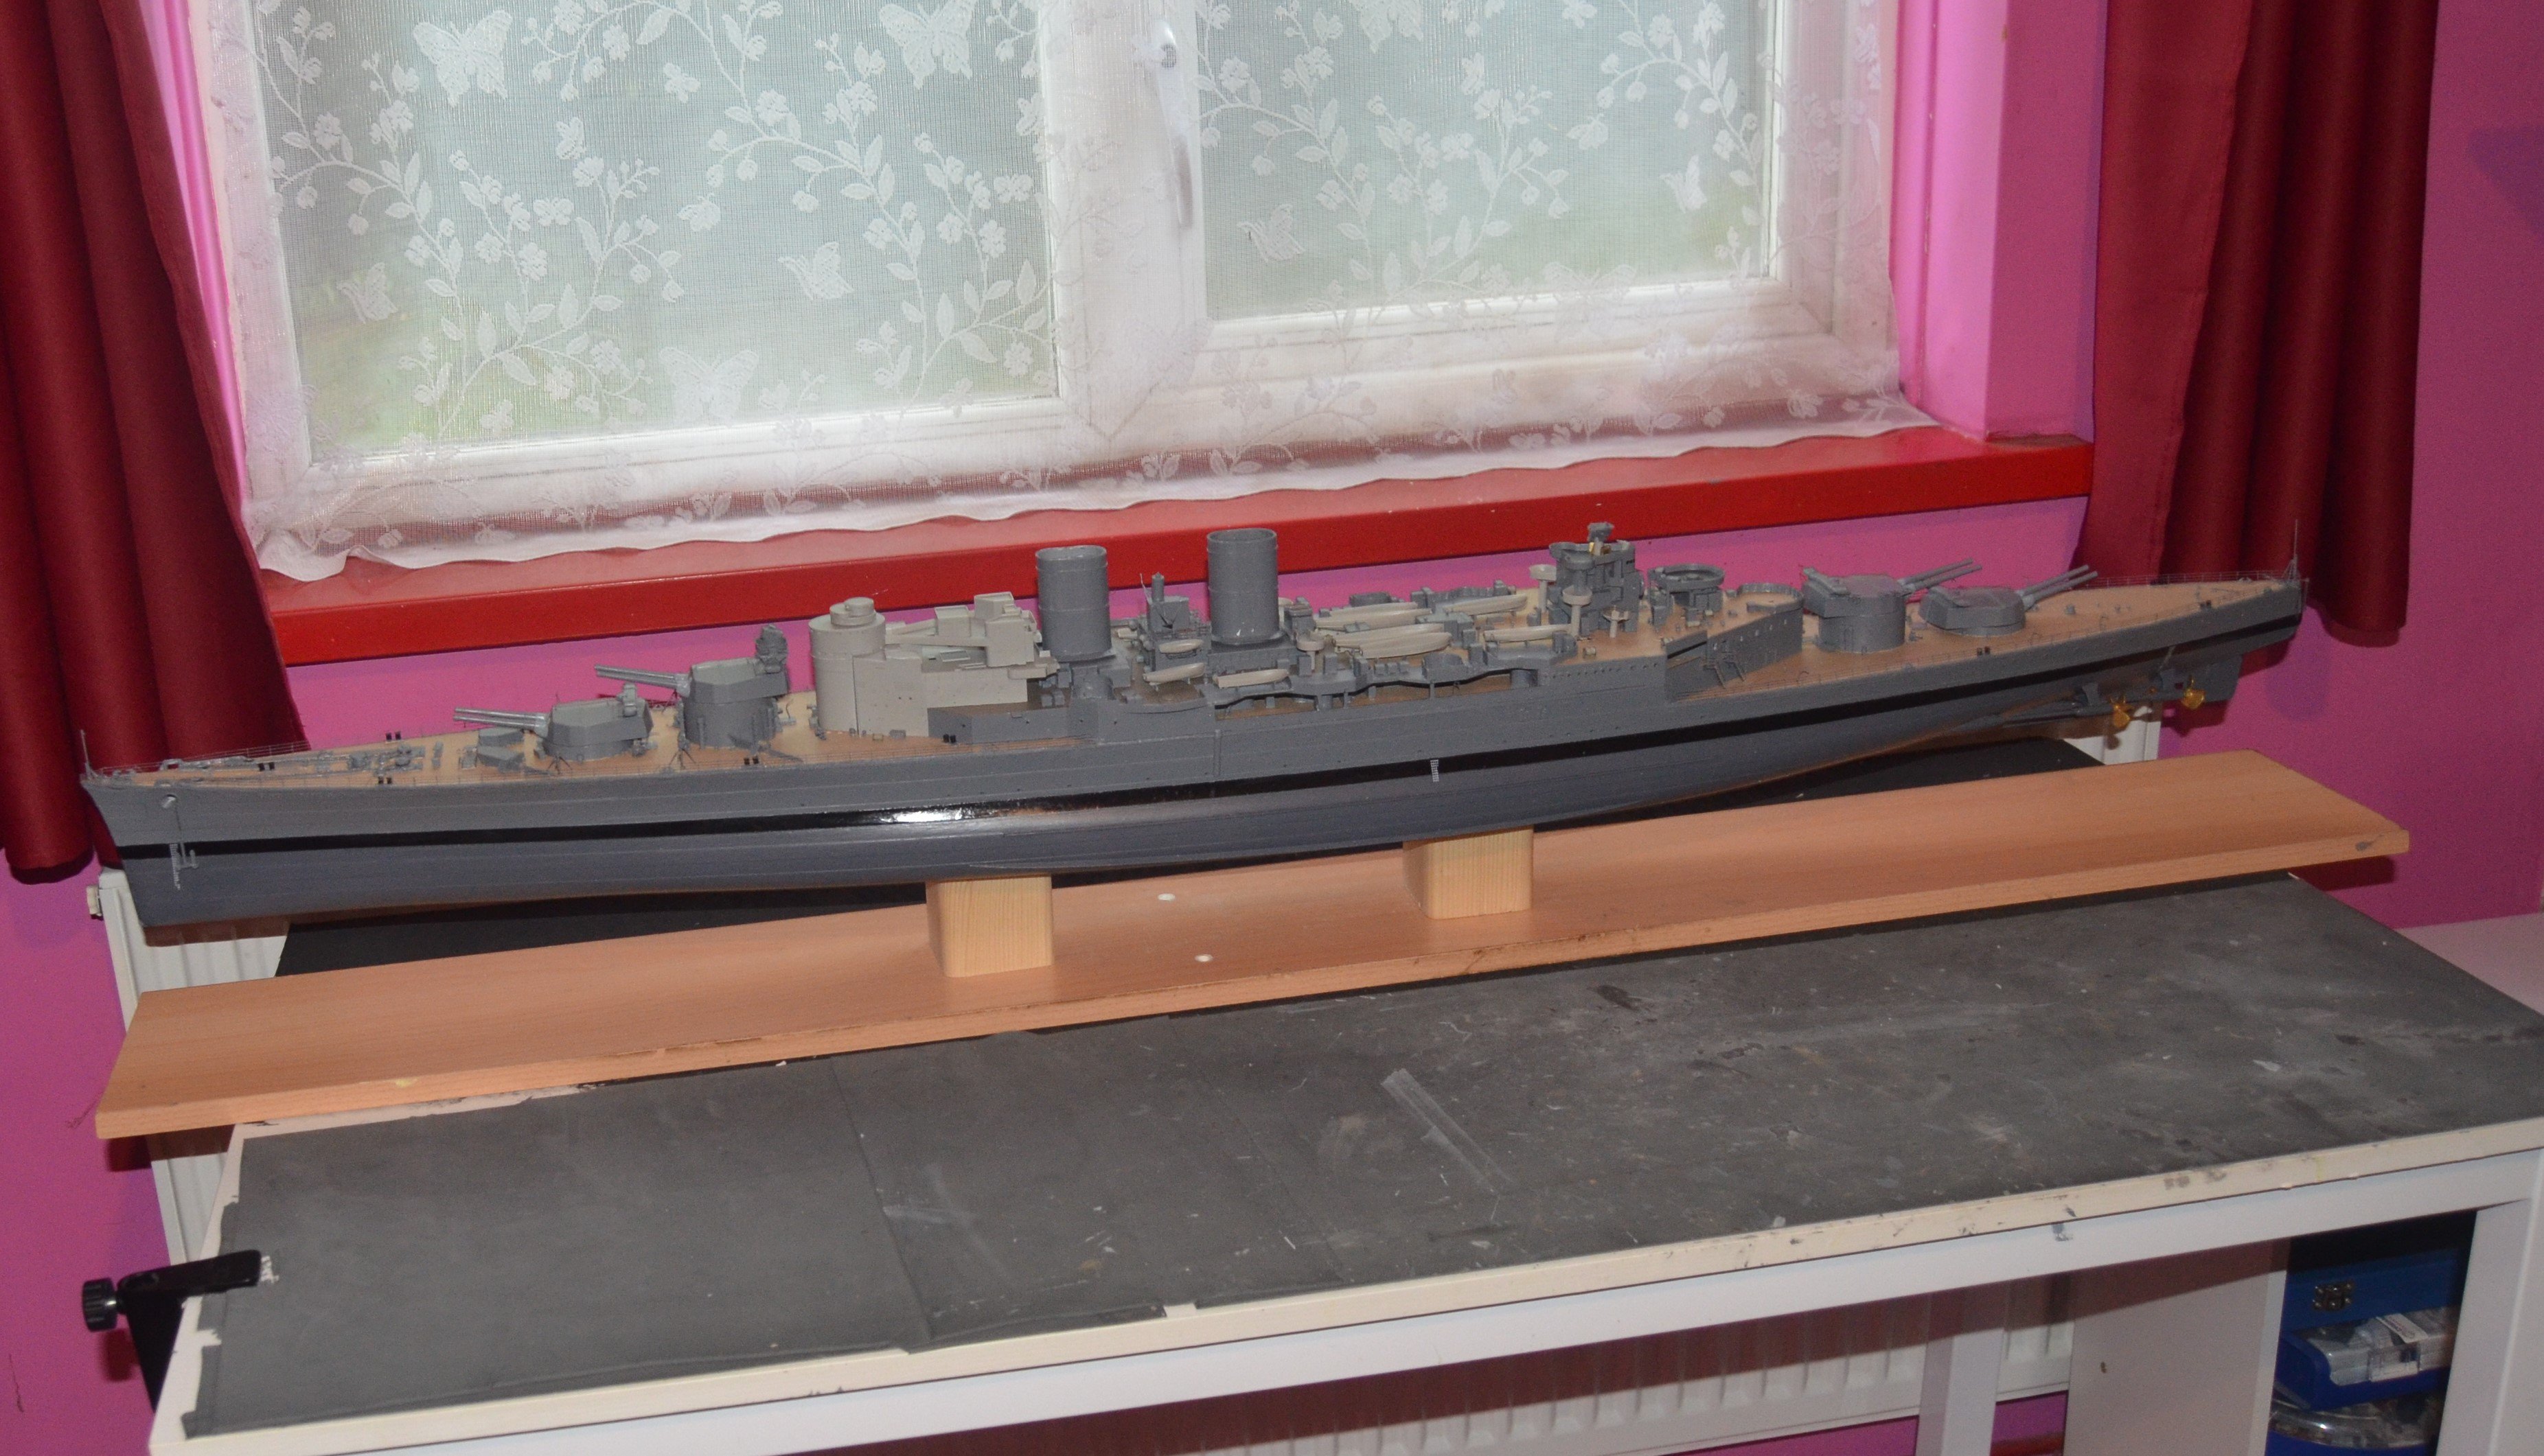
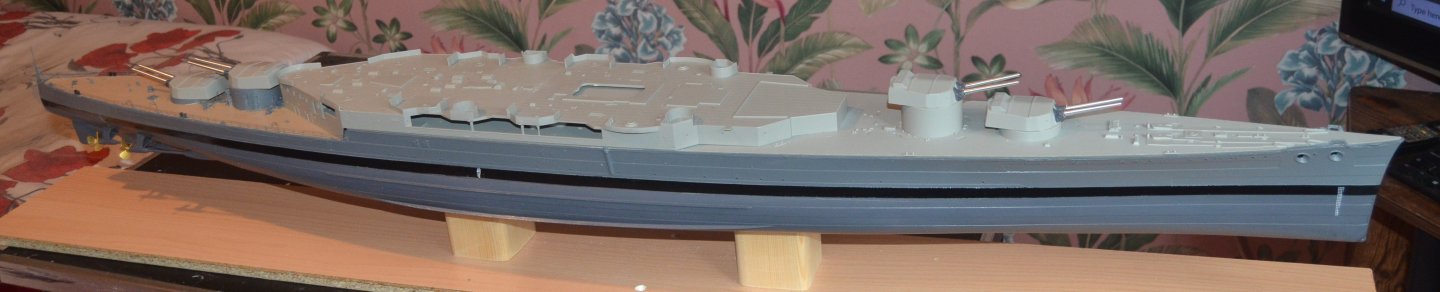
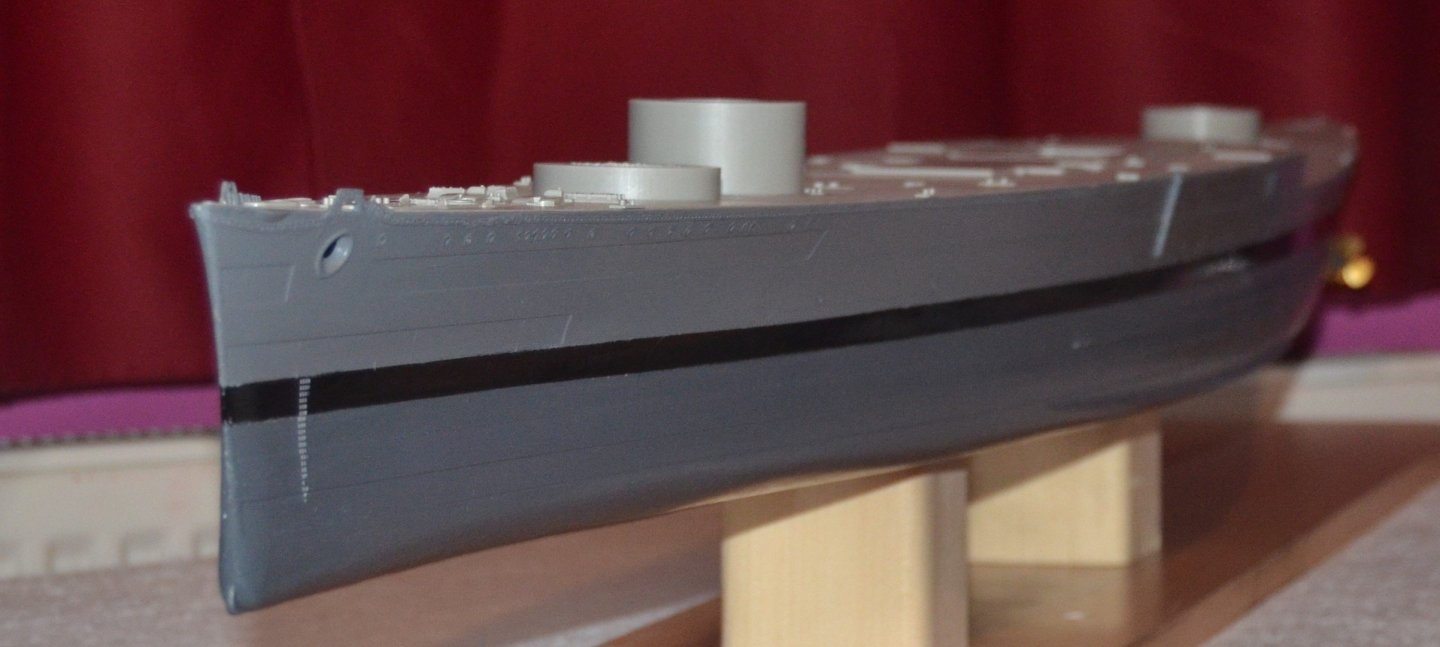
The hull repainted. I did not have enough of the Tamiya neutral grey to make a good mix. But I did have a number of different Vallejo greys from previous models. They where far to light to really look authentic. But I mixed them with some black and a candy racing blue also from Vallejo. I have manage to mix just over 200mls and that has been decanted into 50mls jars. So if I have another accident which I almost certainly will I won't loose most of the paint. I think I have come up with a better colour than the neutral grey I was originally painting the hull. Not quite as dark as I would have liked but looks good with the dark grey bottom. I also remembered why I prefer The Vallejo colours the are so good. Excellent coverage and all round better paints to work with. The black boot line is Tamiya lacquer paint. This is very good paint and covers well. It dries very fast. But looks good. It looks lighter than it is in the photo because of the flash on the camera.