
Paul Jarman
-
Posts
478 -
Joined
-
Last visited
Content Type
Profiles
Forums
Gallery
Events
Everything posted by Paul Jarman
-
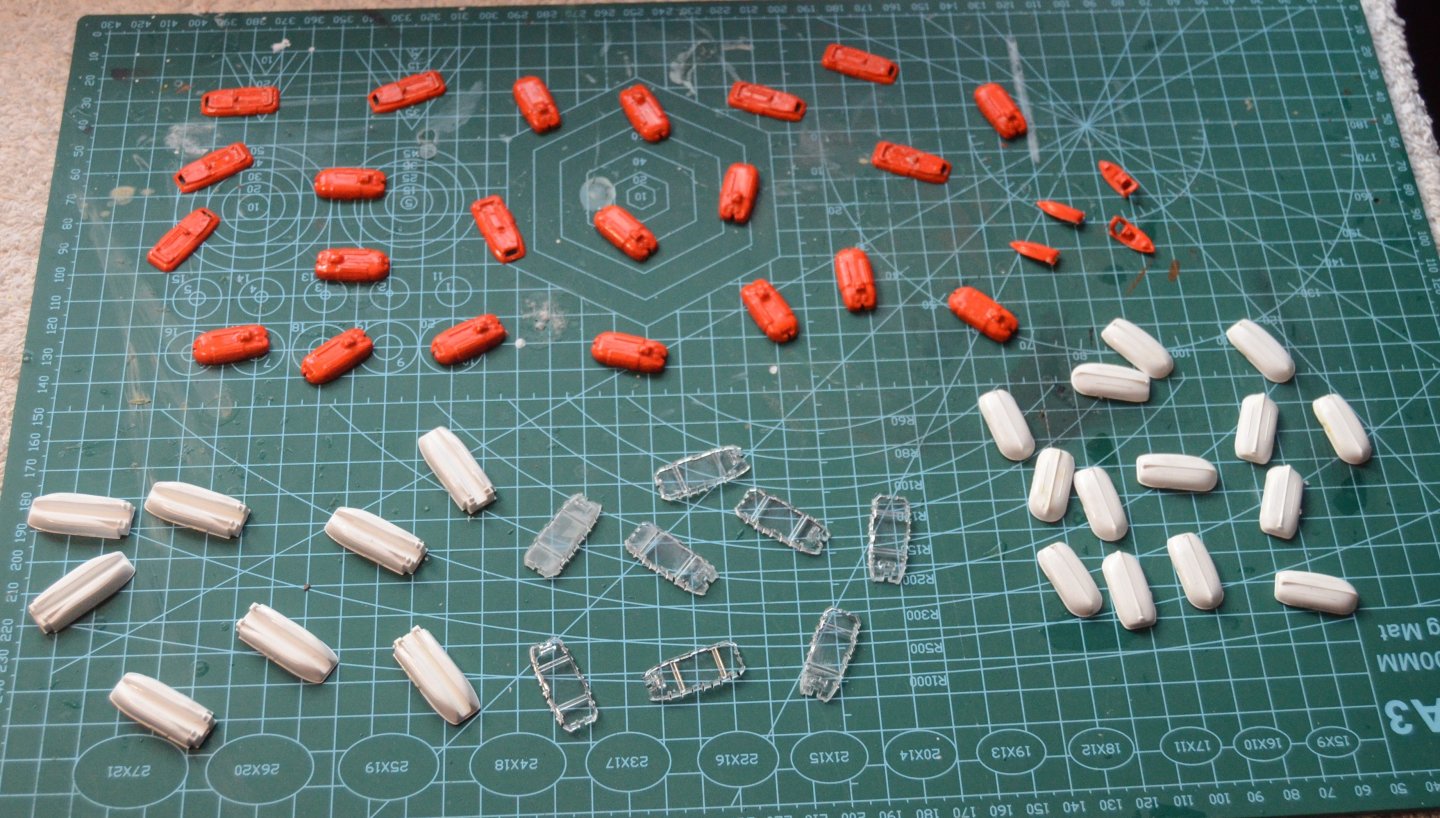
 And the boats ready to be added. Just got to add decals to them all.
- 33 replies
-
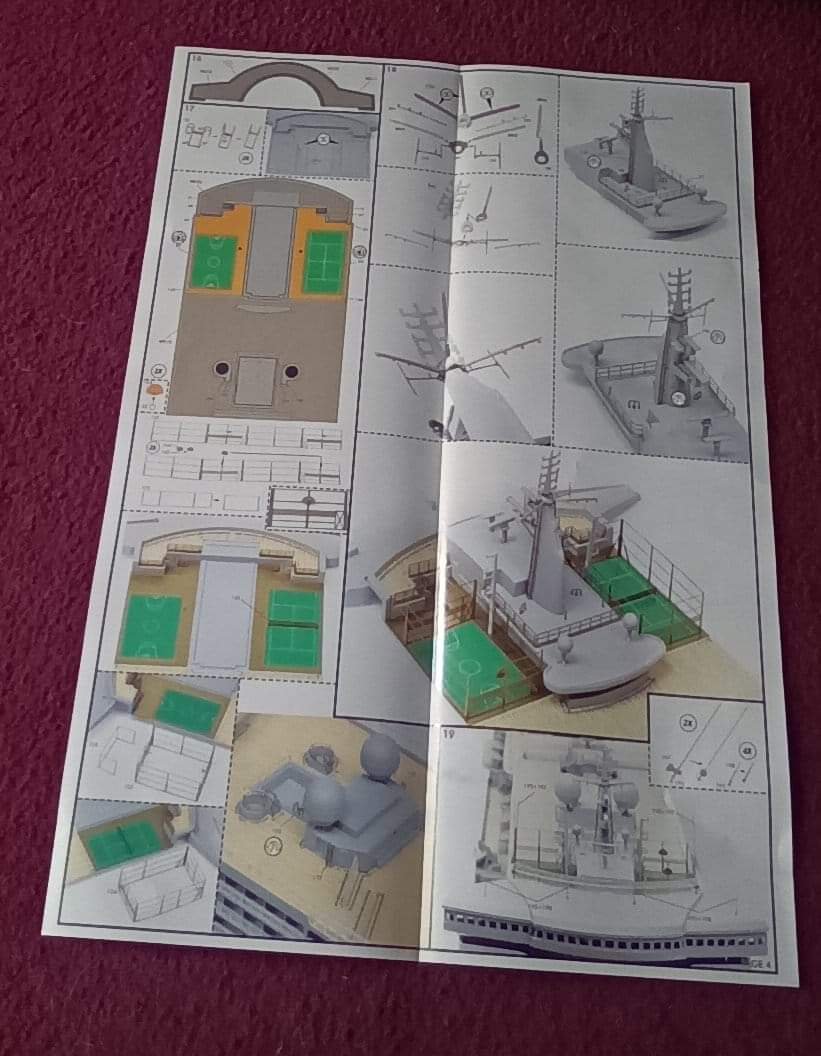
- 3
-

-
- Queen Mary 2
- Revell
- (and 3 more)
-
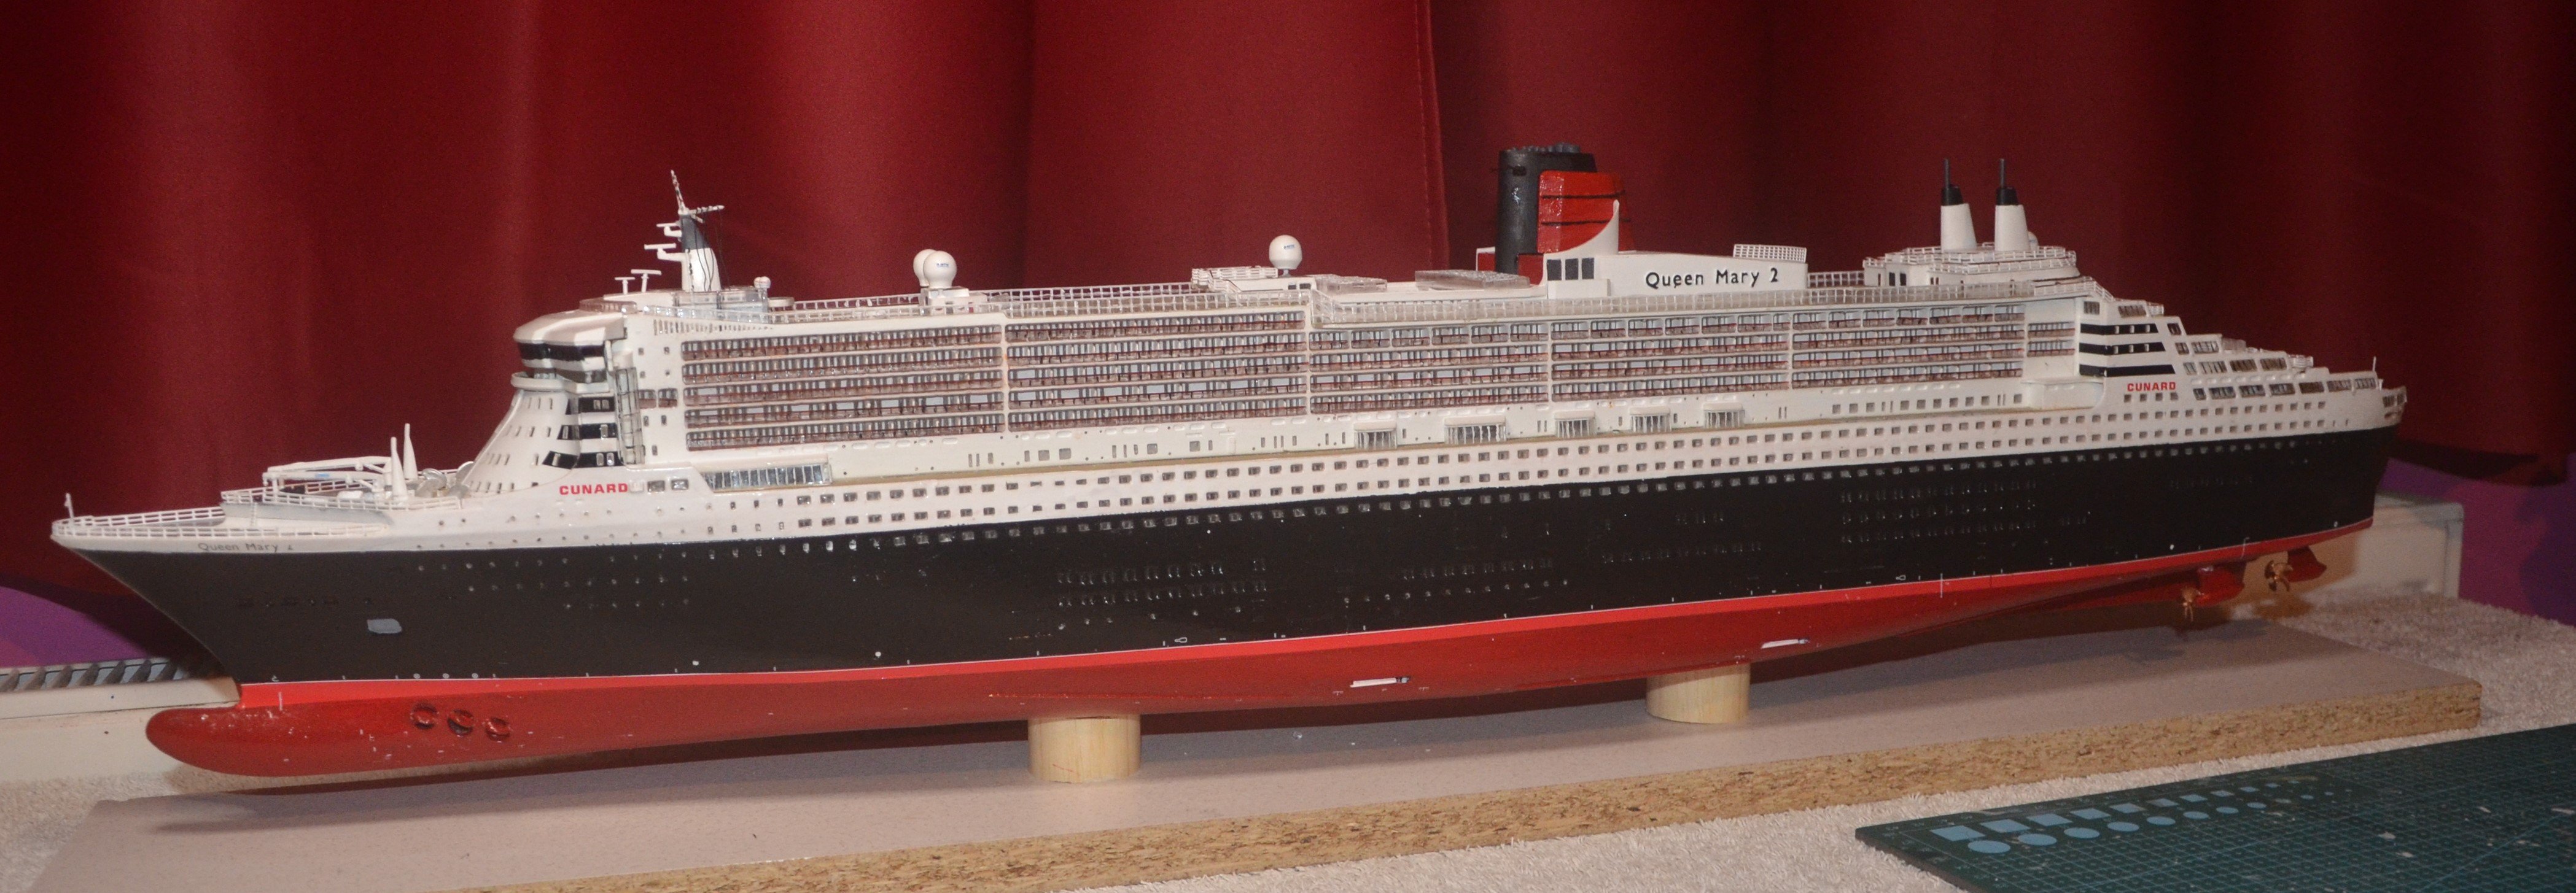
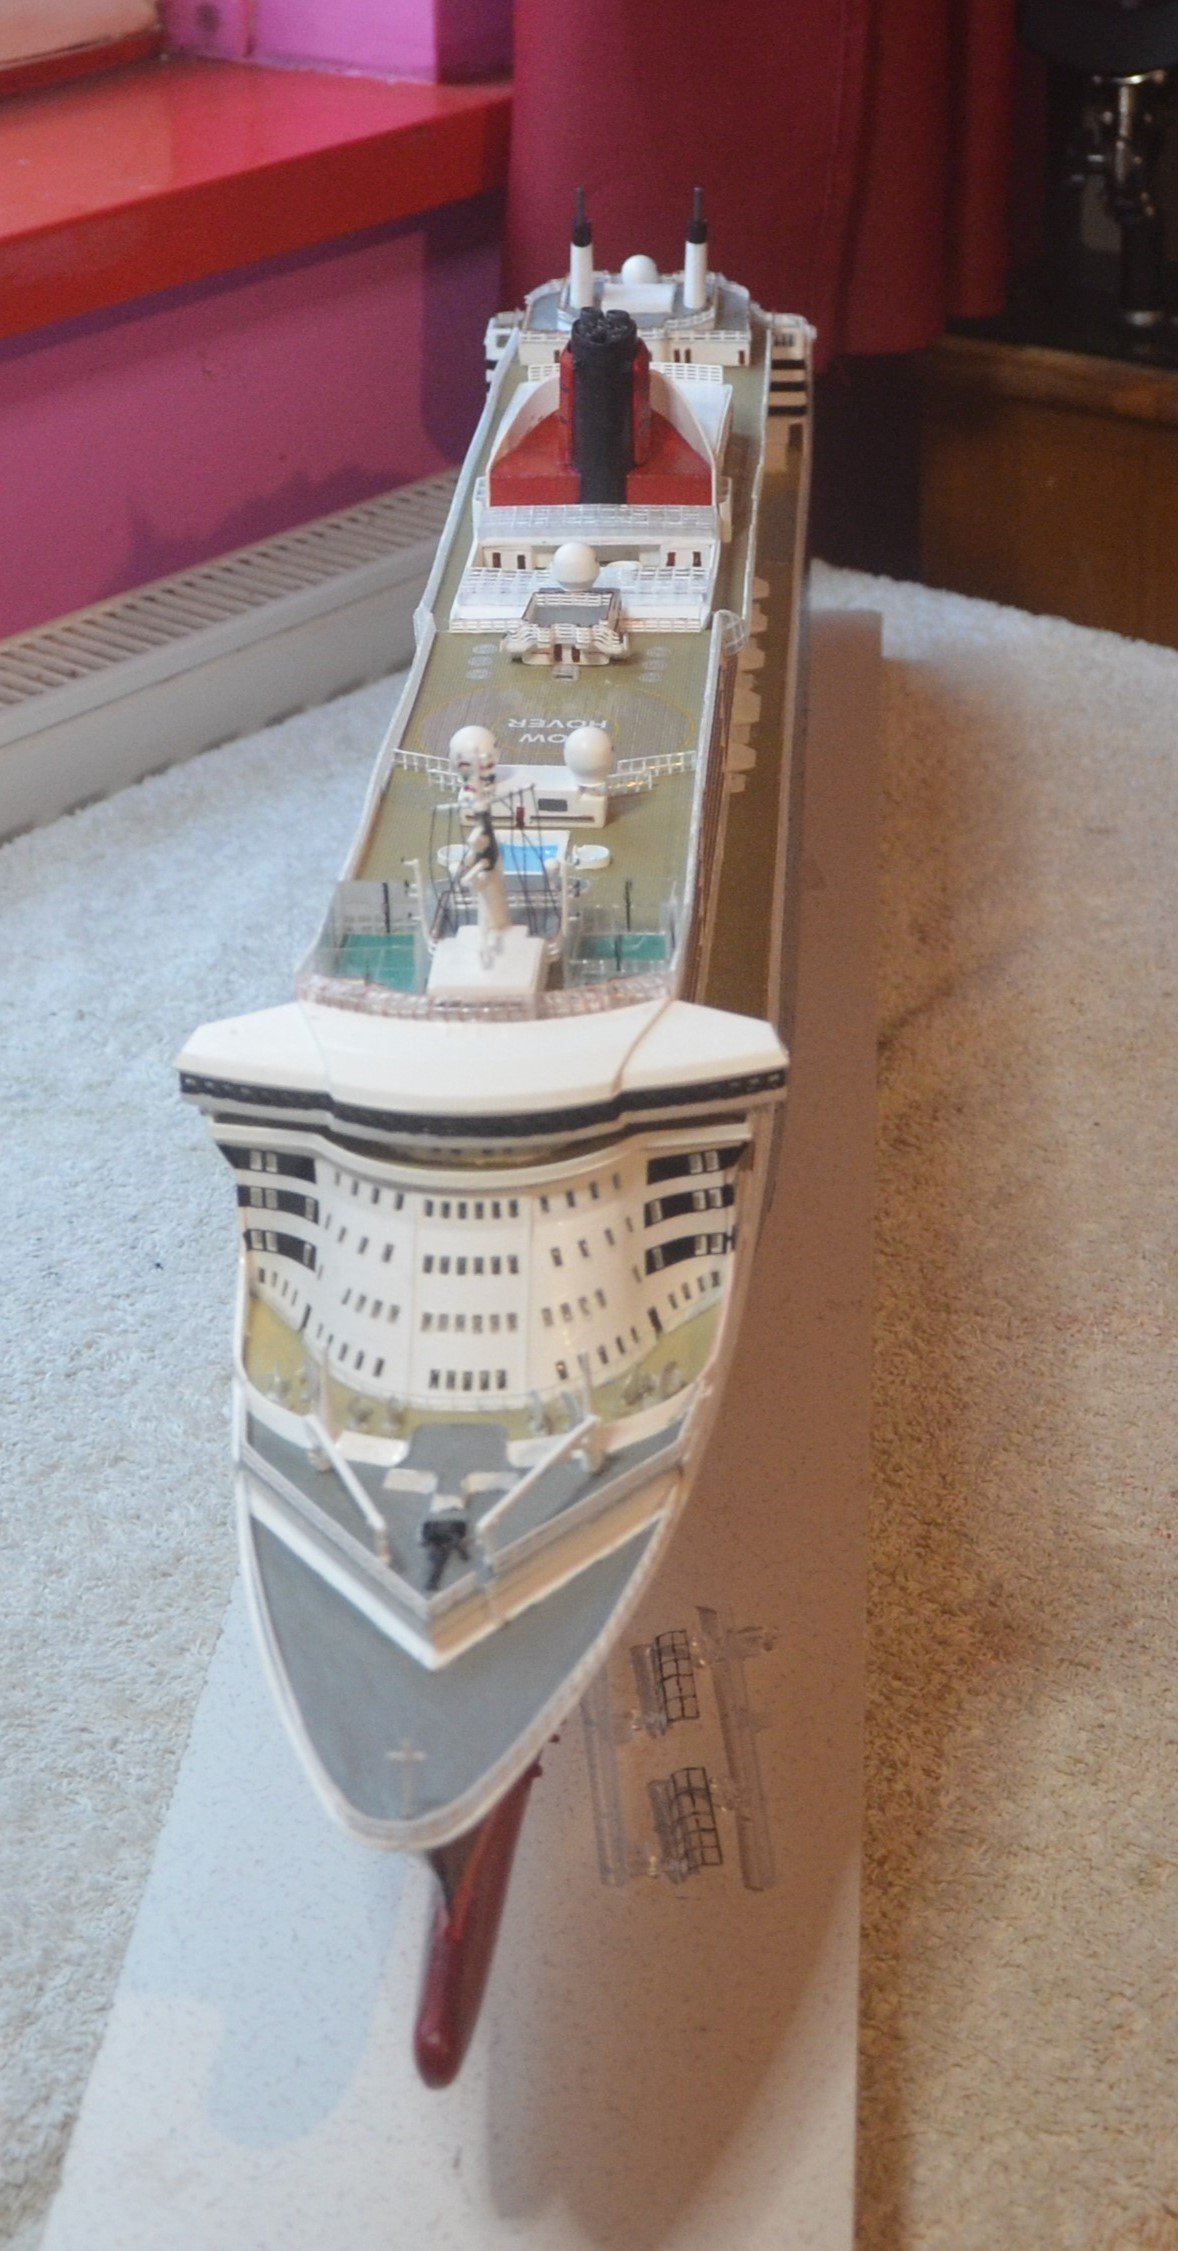
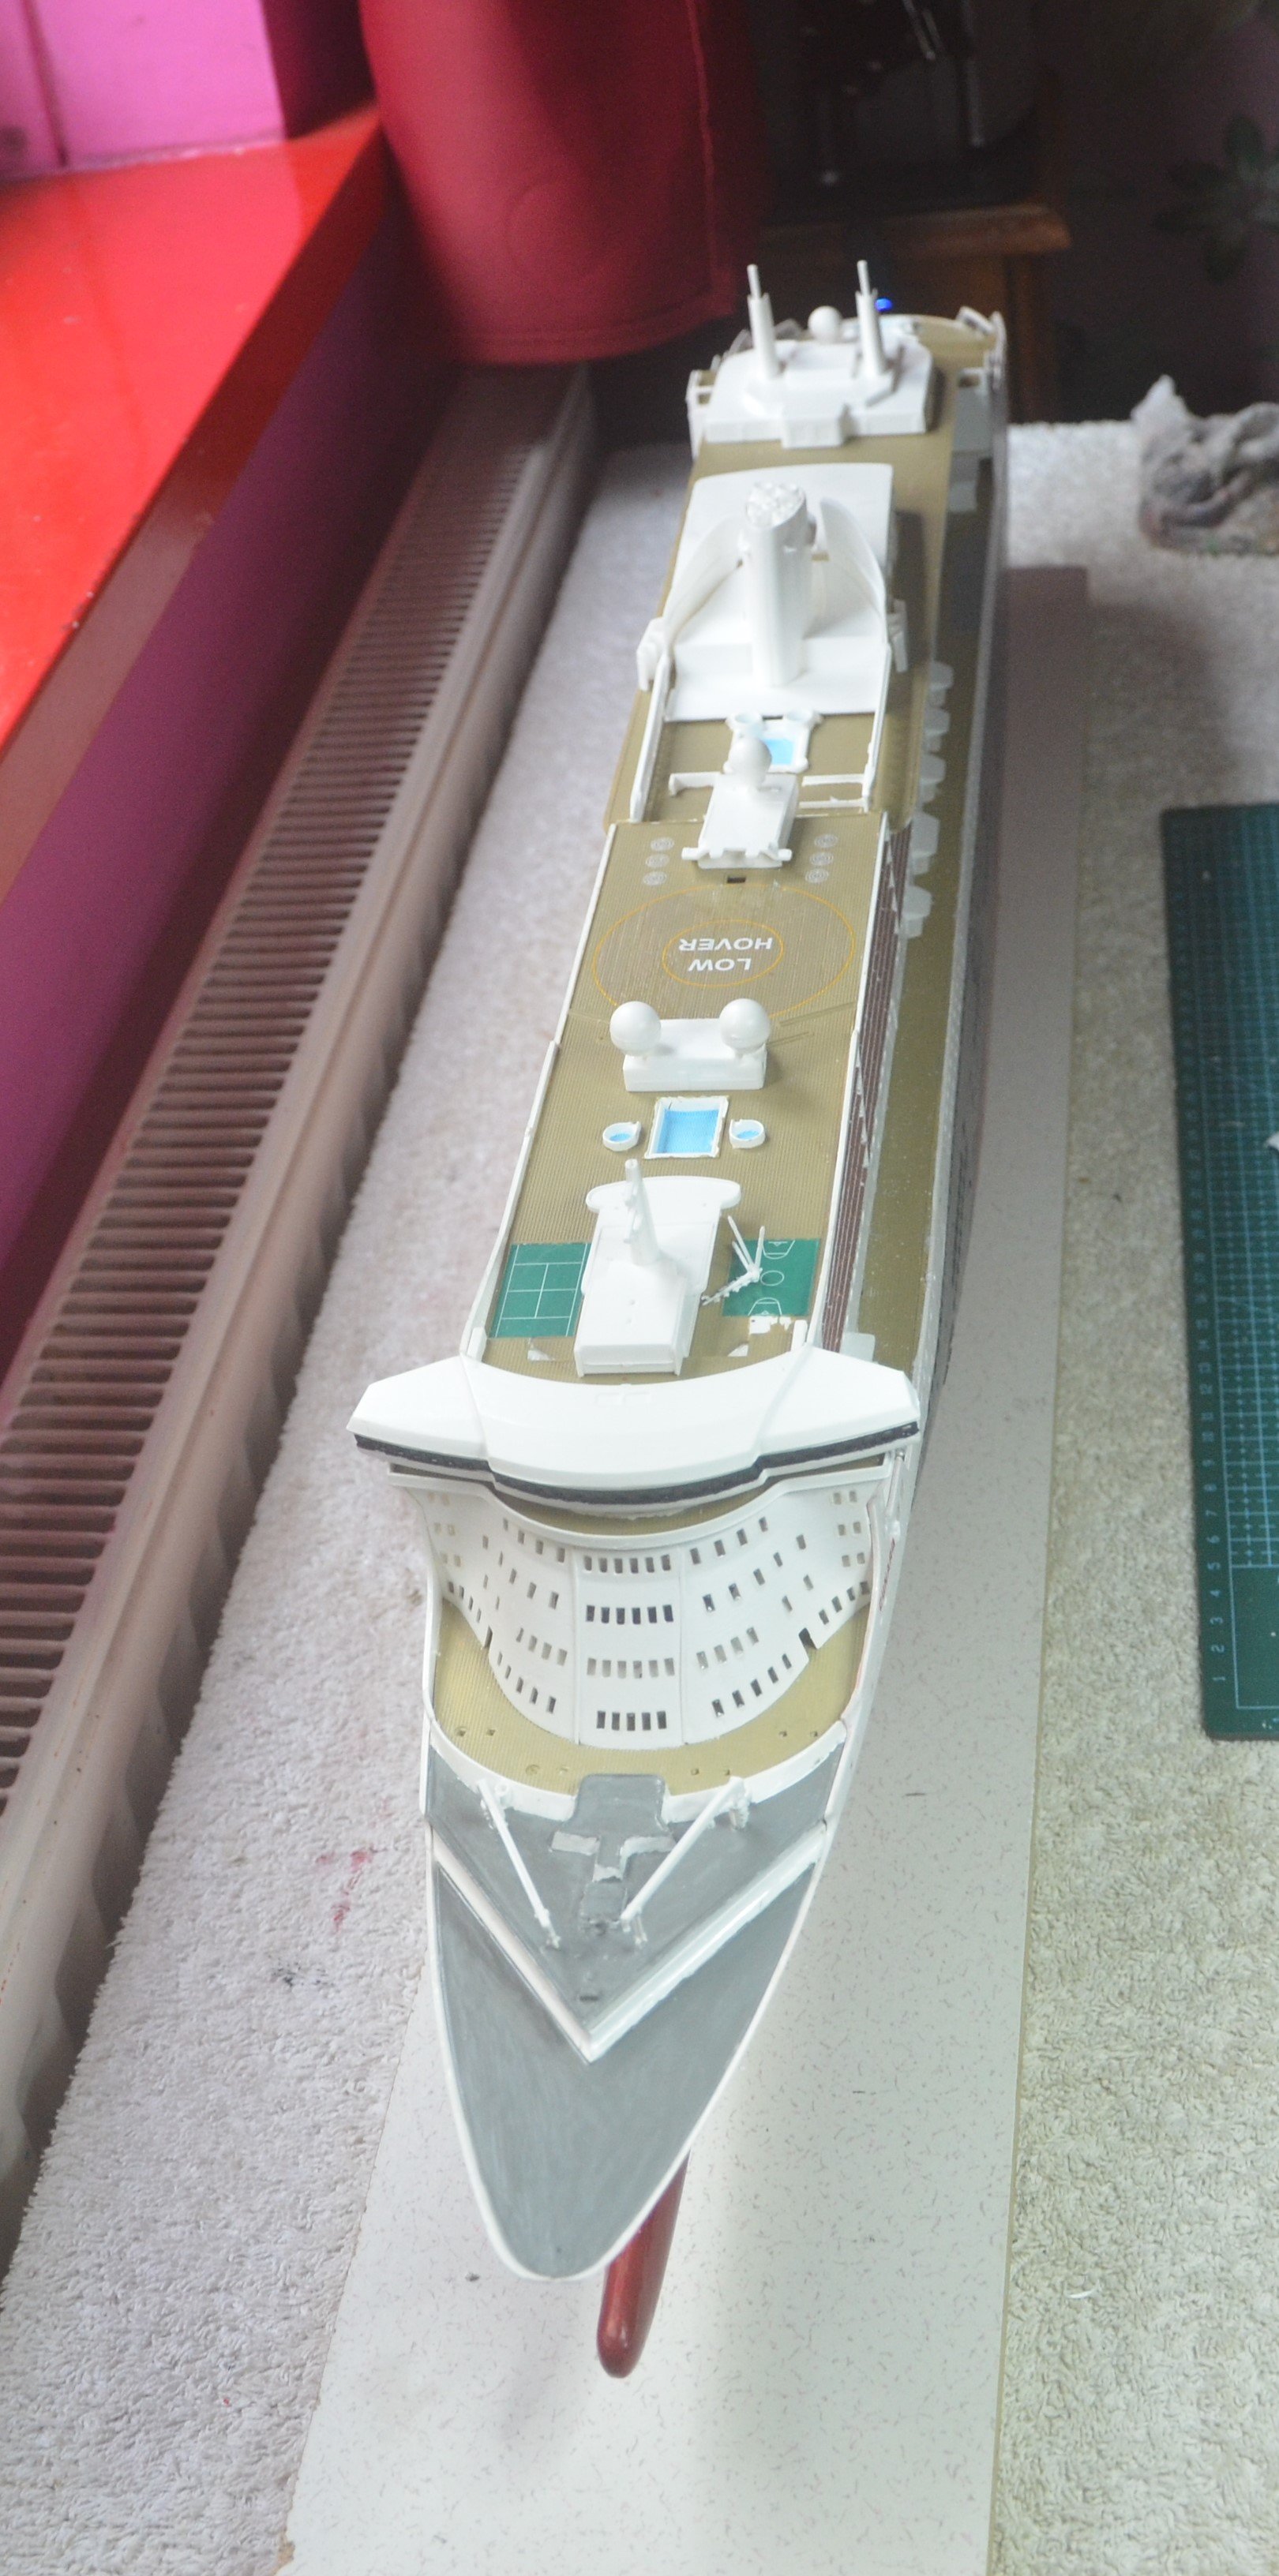
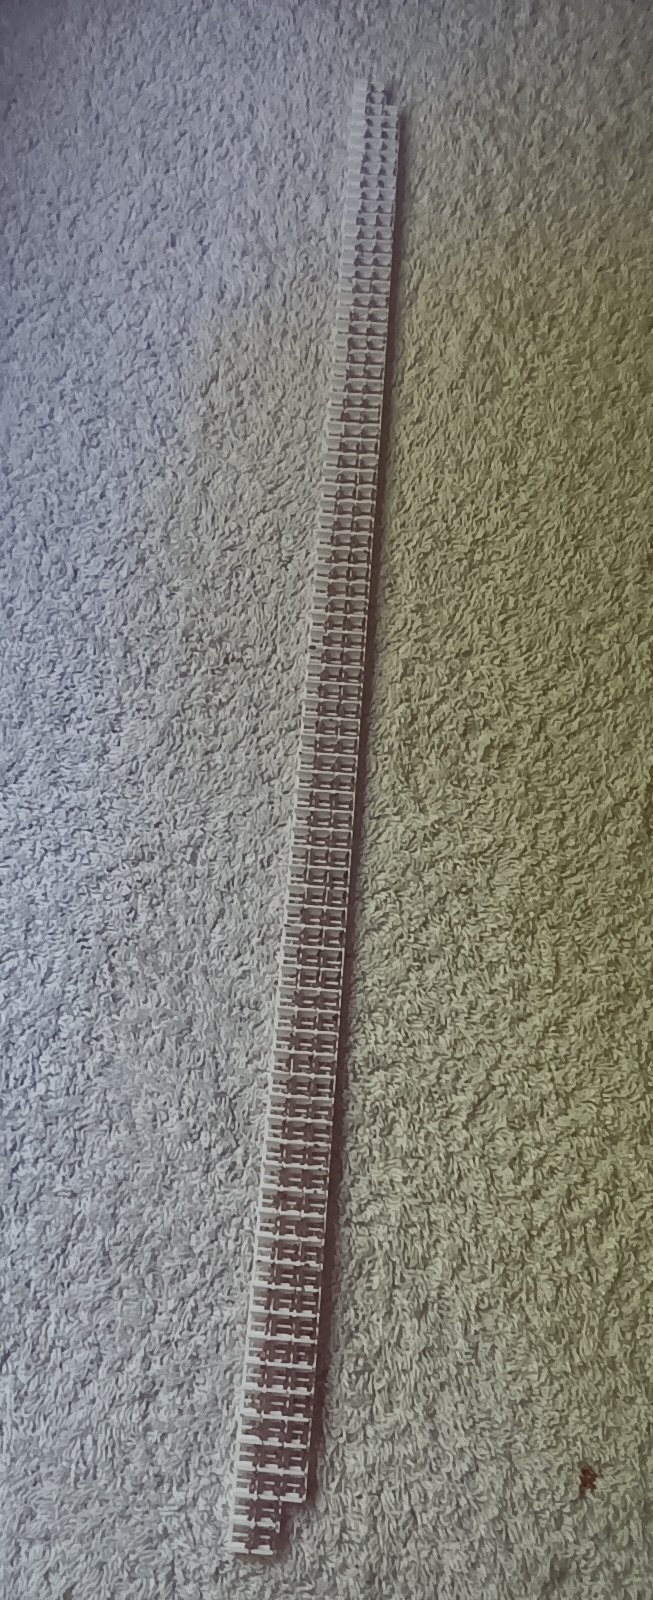
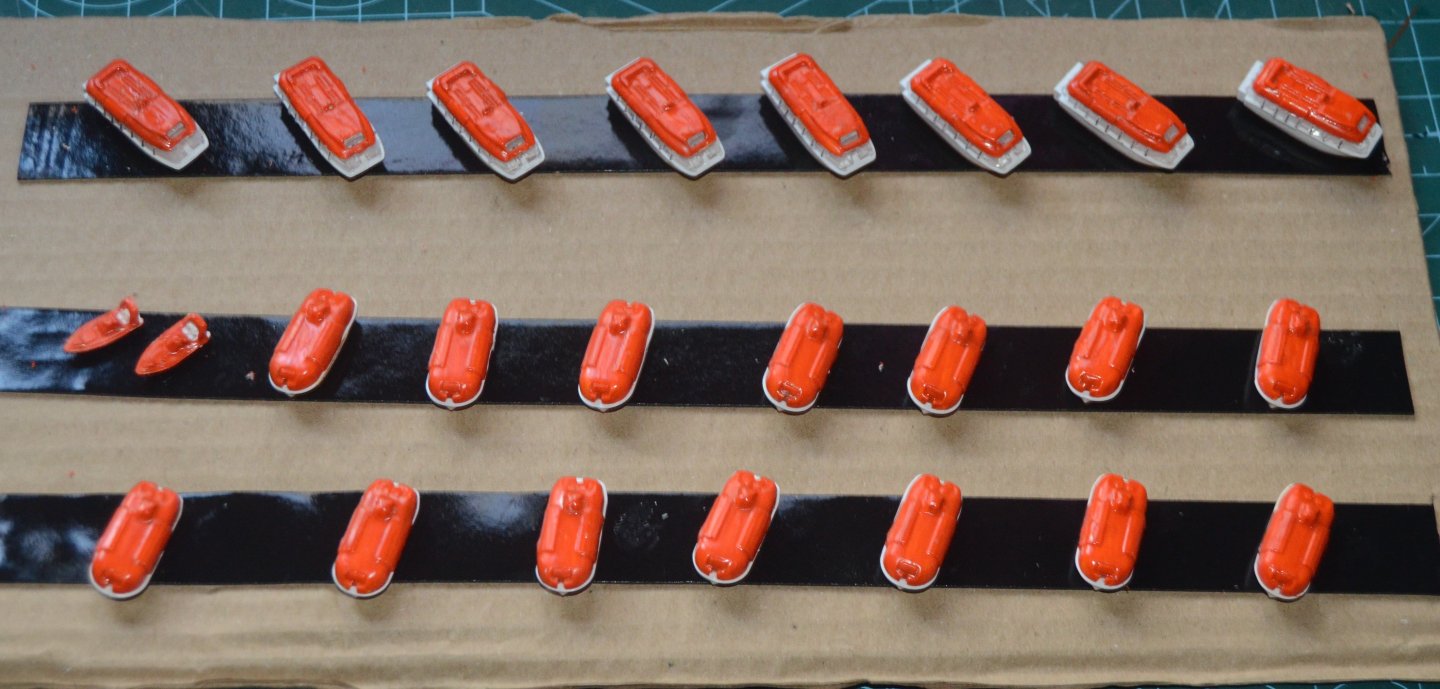
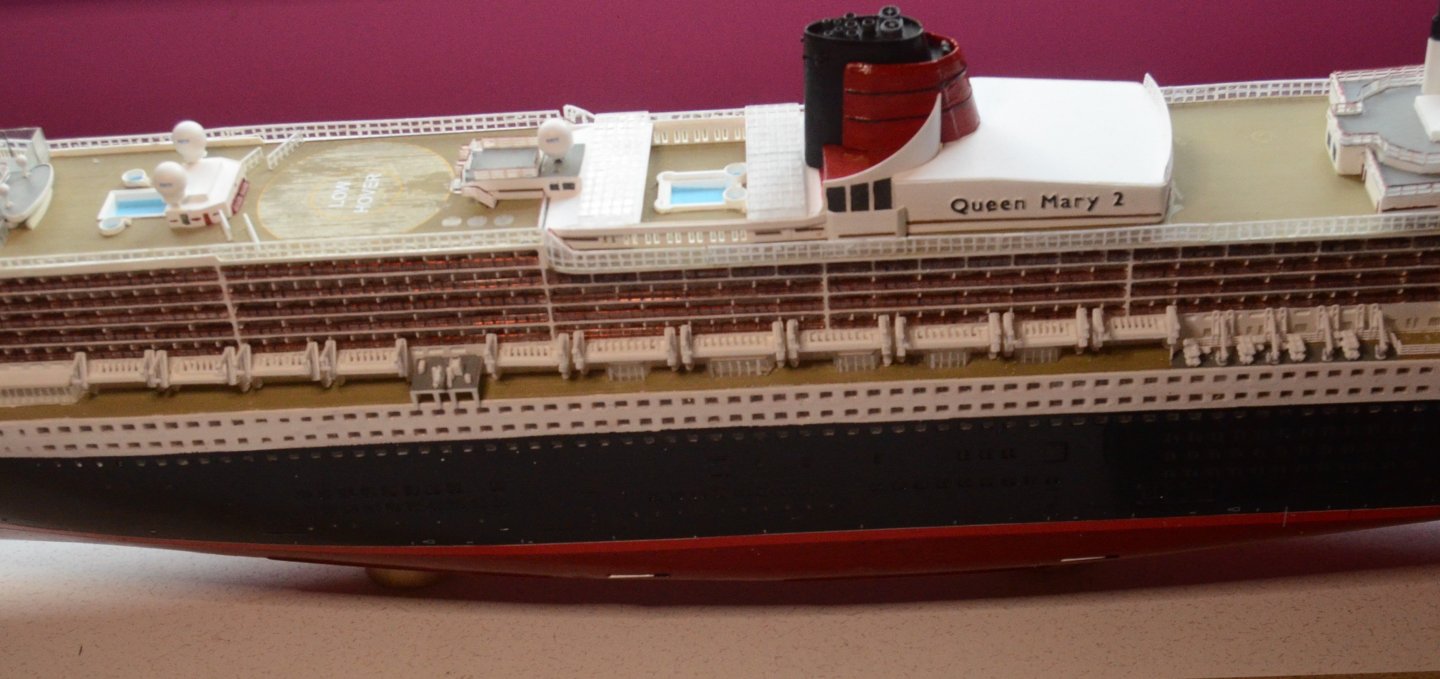
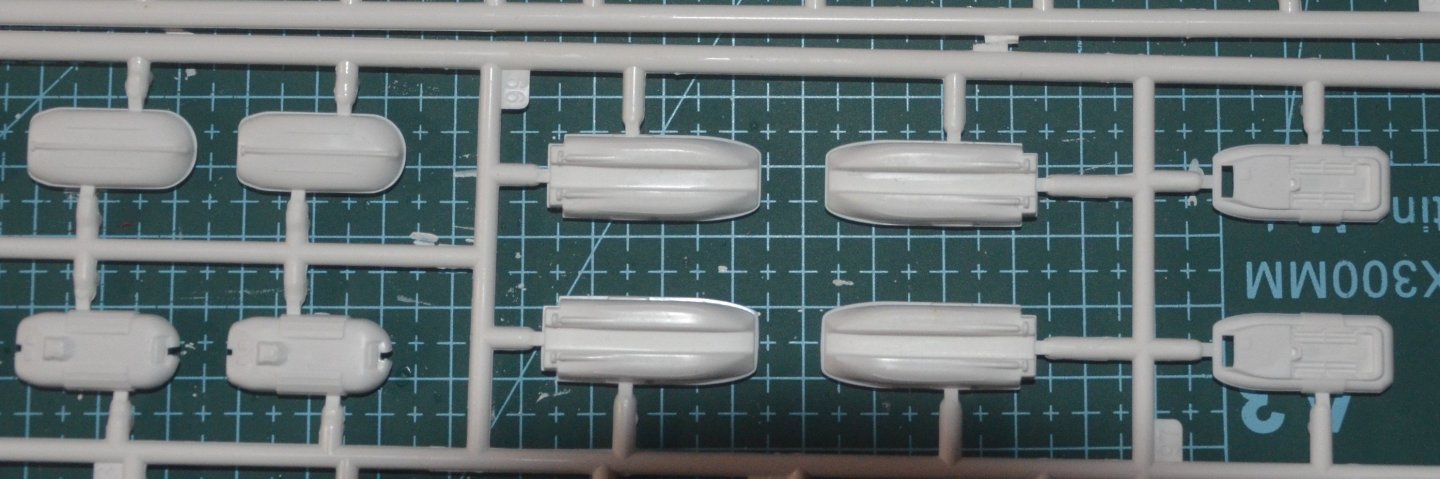
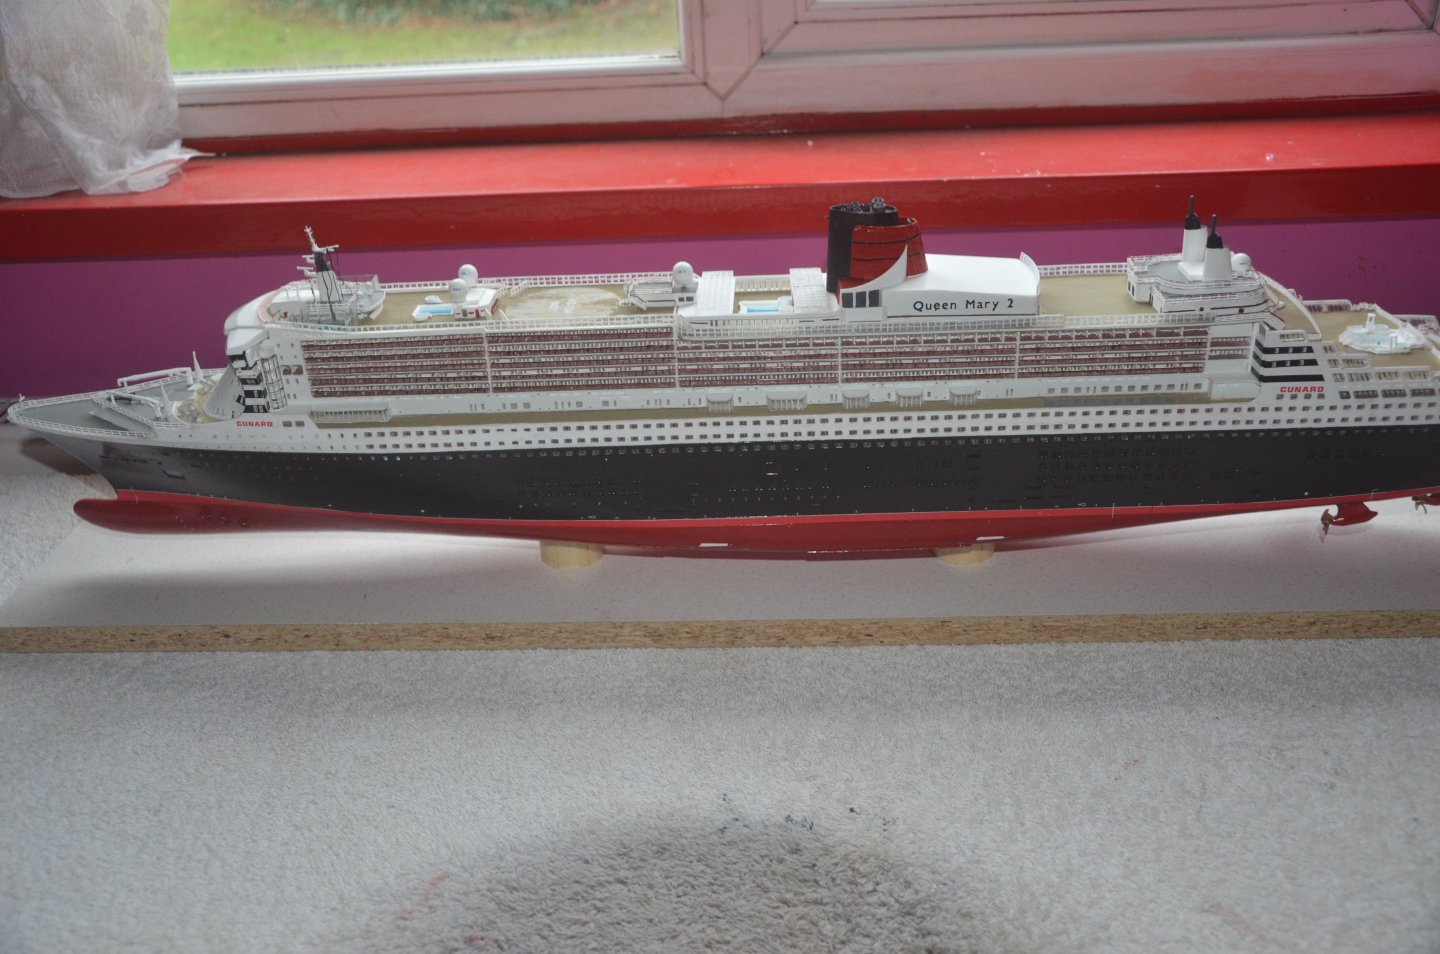
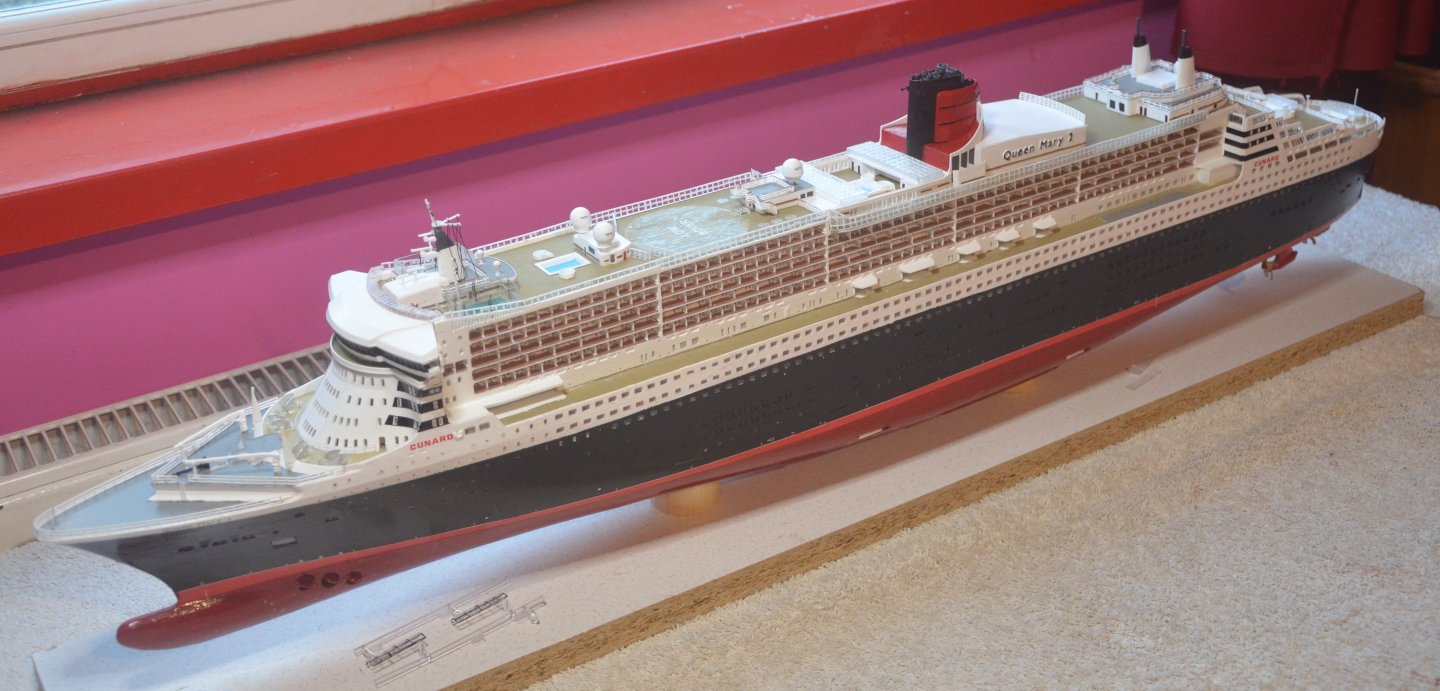
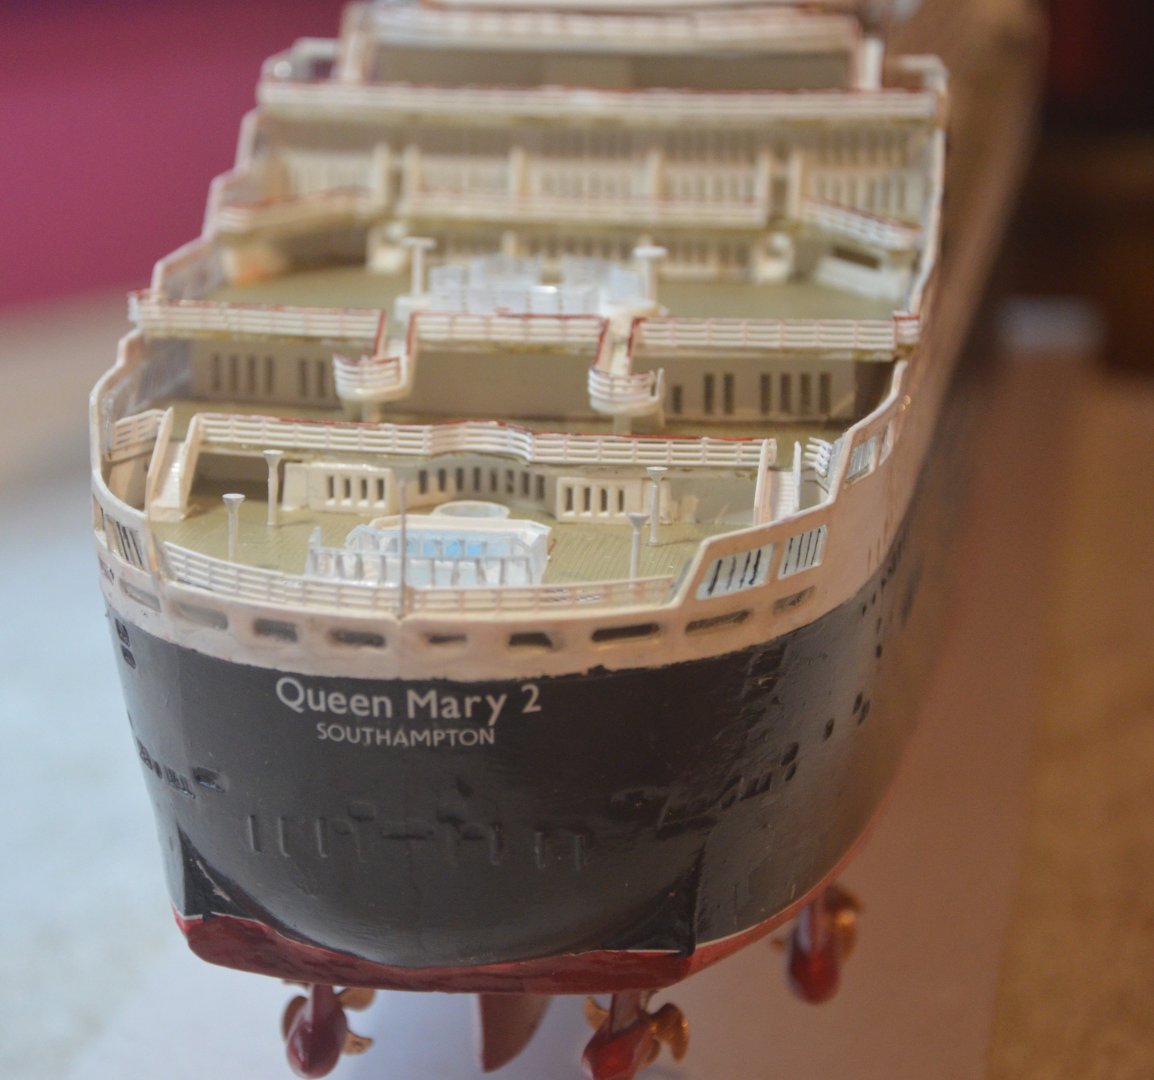
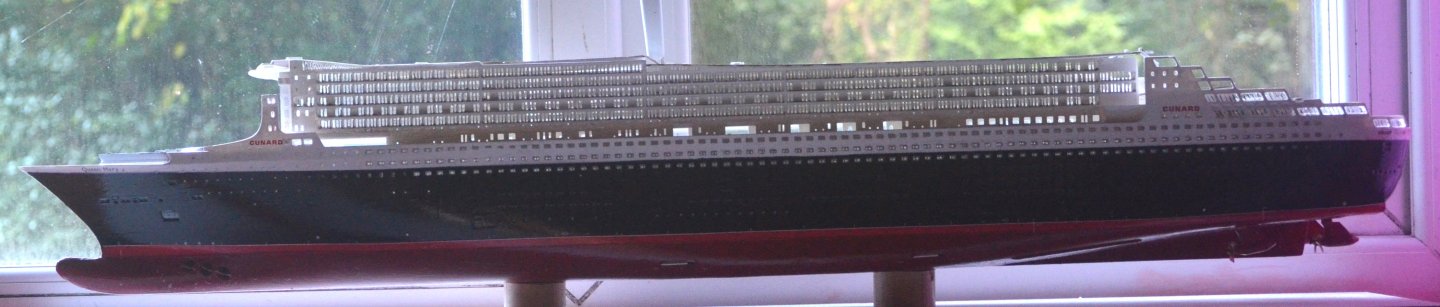
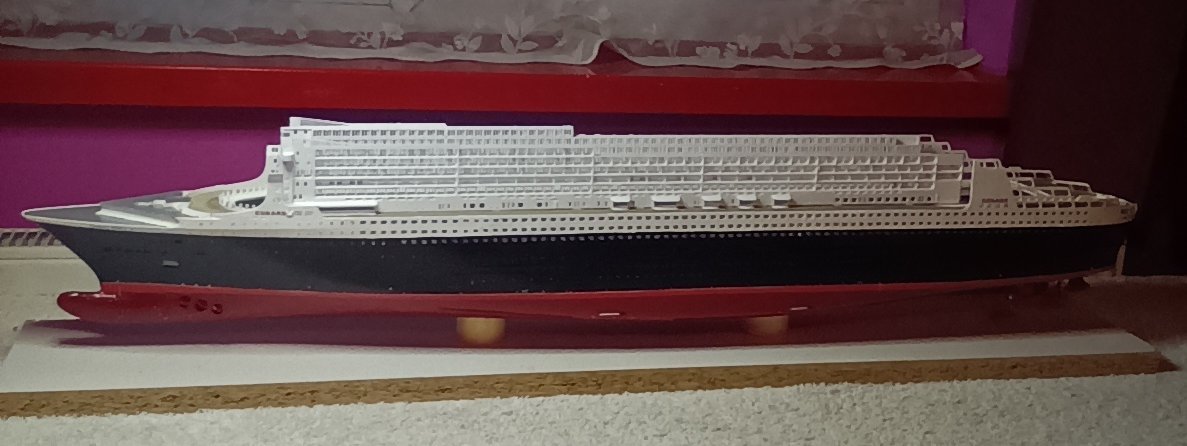
Davits fitted ready for the ships lifeboats. All lifeboats painted ready to be constructed and added. Then a few handrails to add and it is finished. May finish Tomorrow or by Thursday at latest. Took two and a half years to build Titanic from wood. The difference between a wood and plastic build, this has taken just over 4 months. And I have these four models for my next project.

- 33 replies
-
- 4
-
-
- Queen Mary 2
- Revell
- (and 3 more)
-
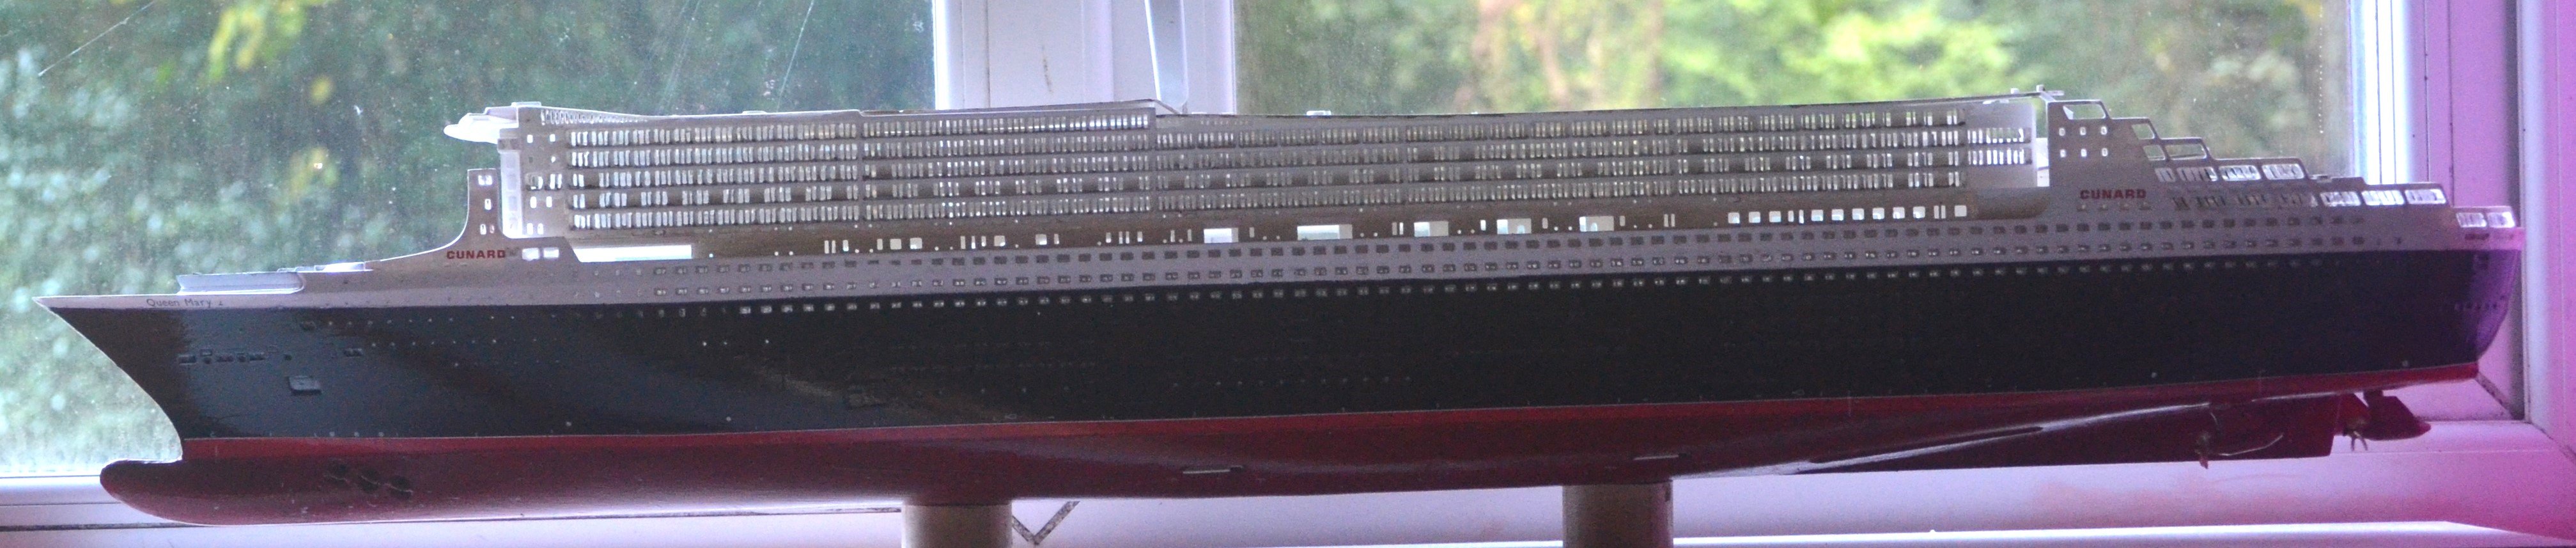
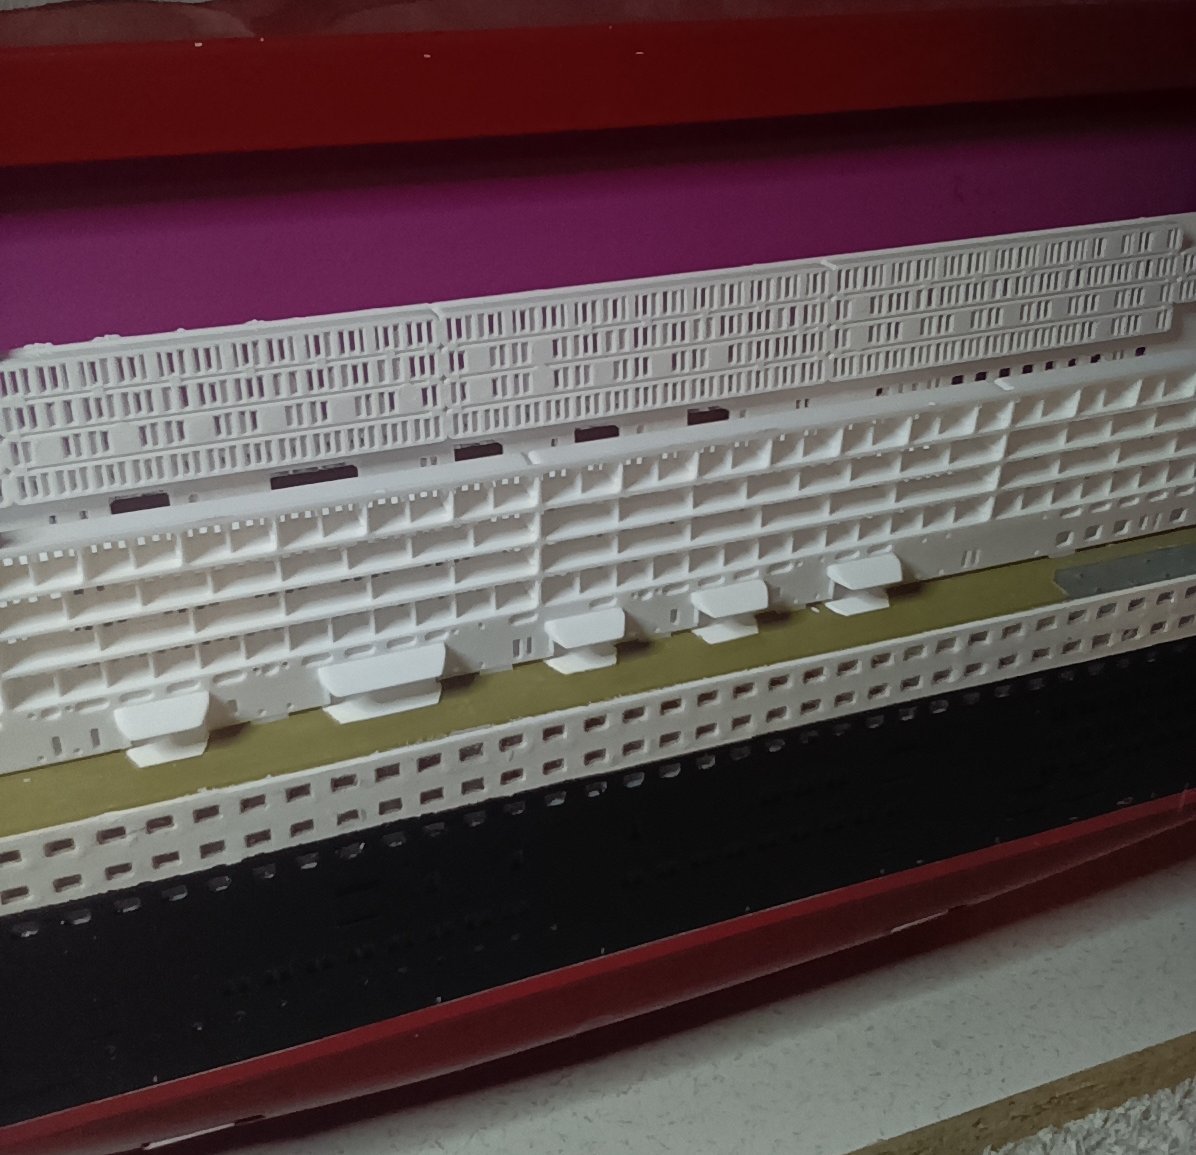
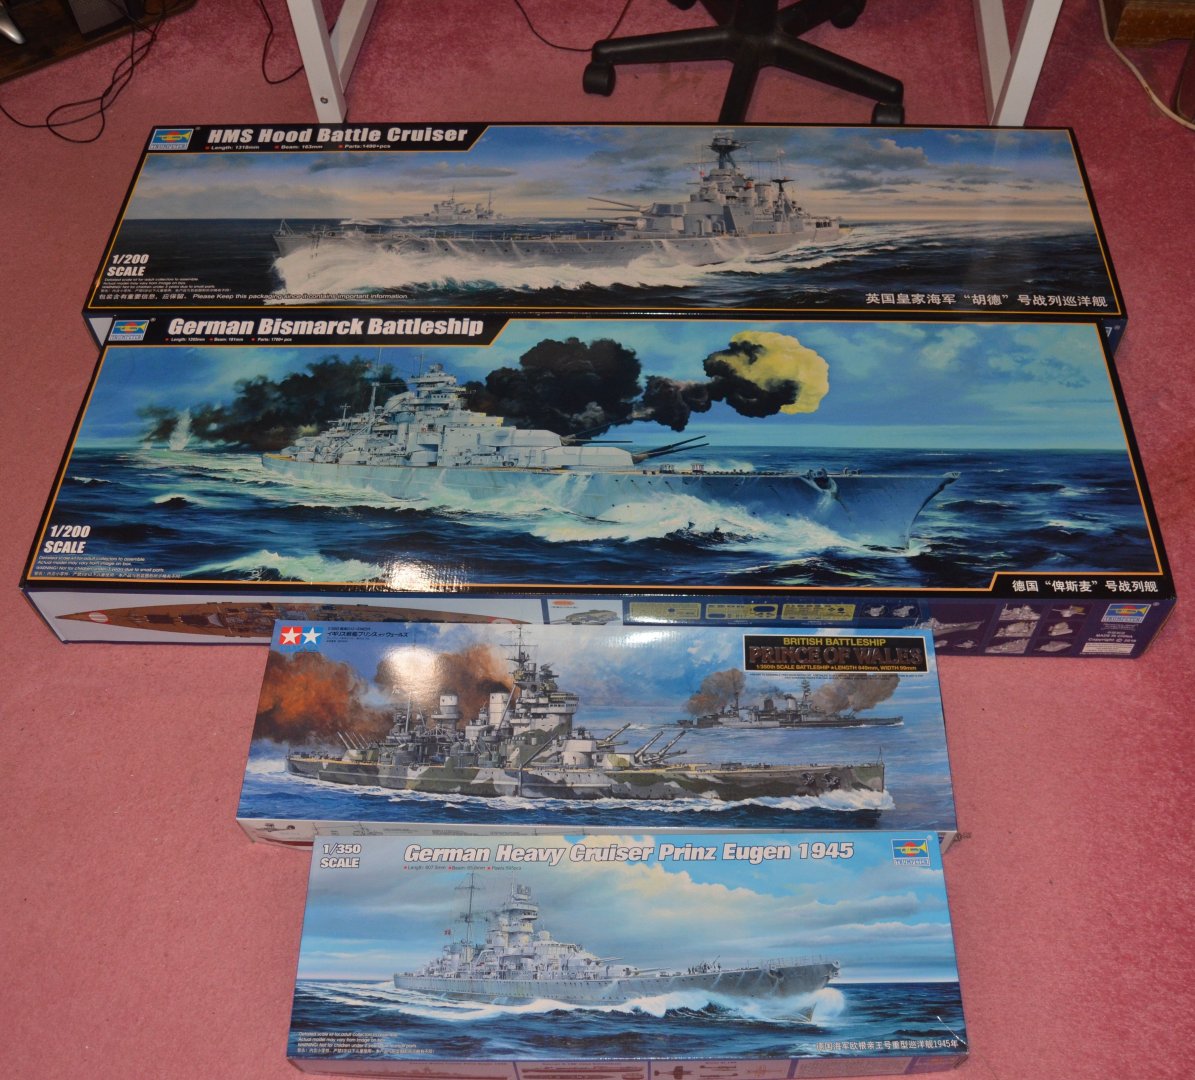
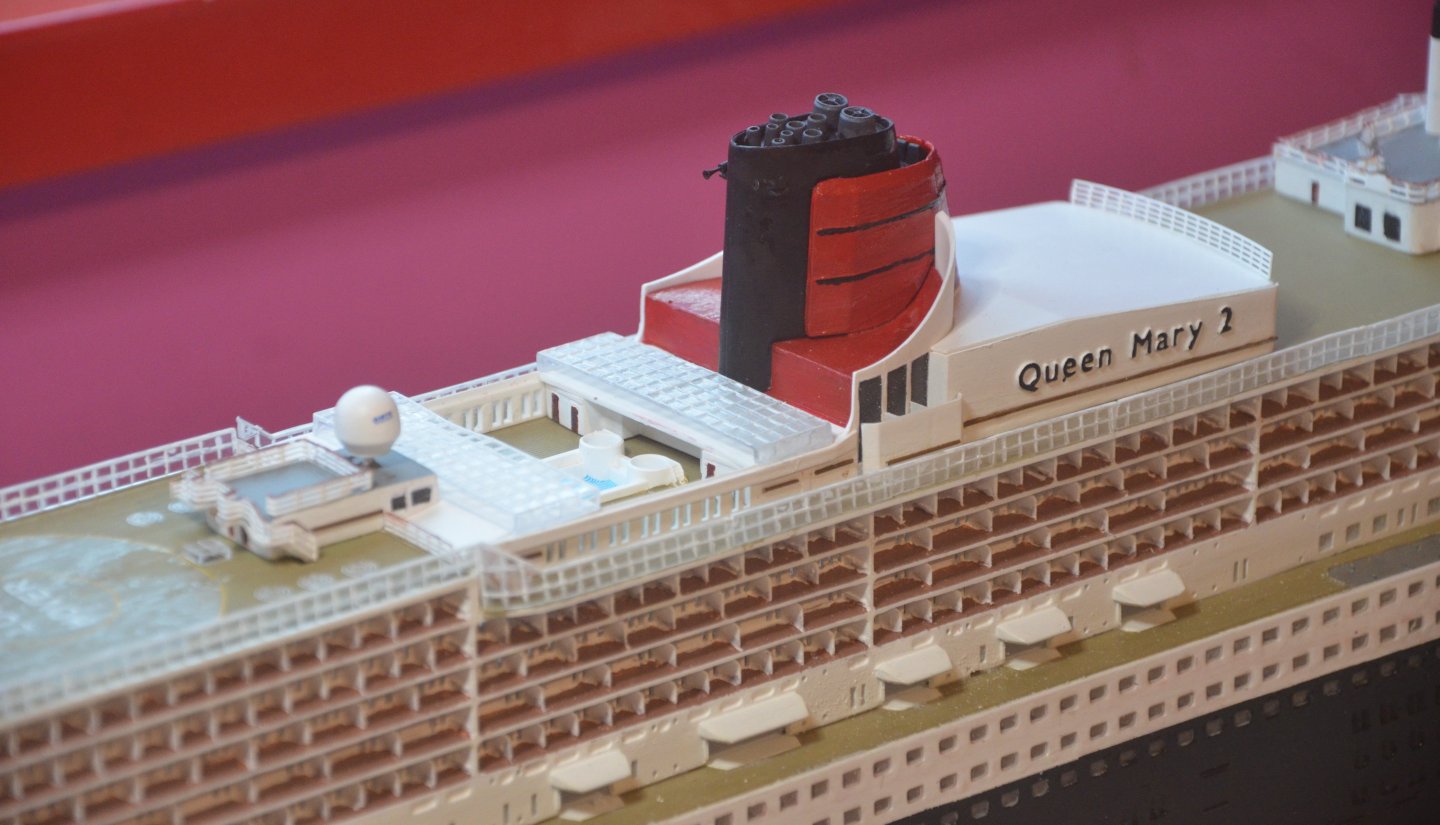
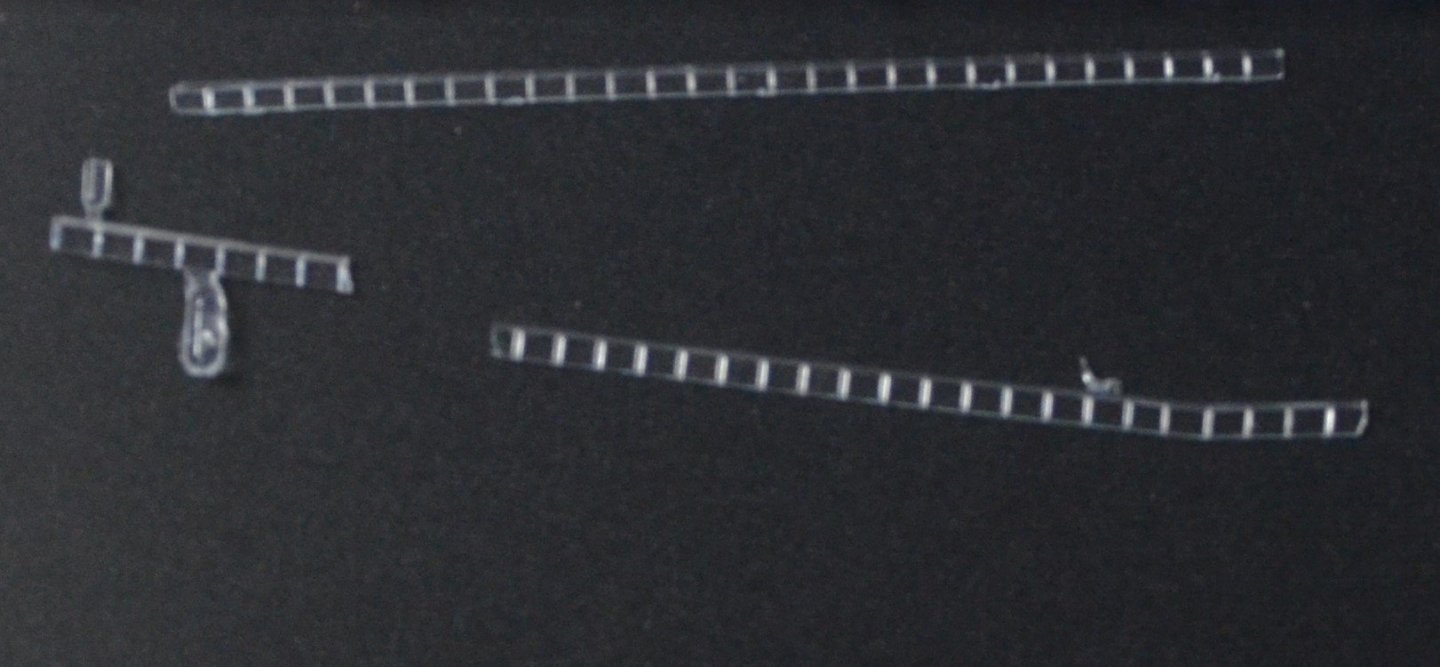
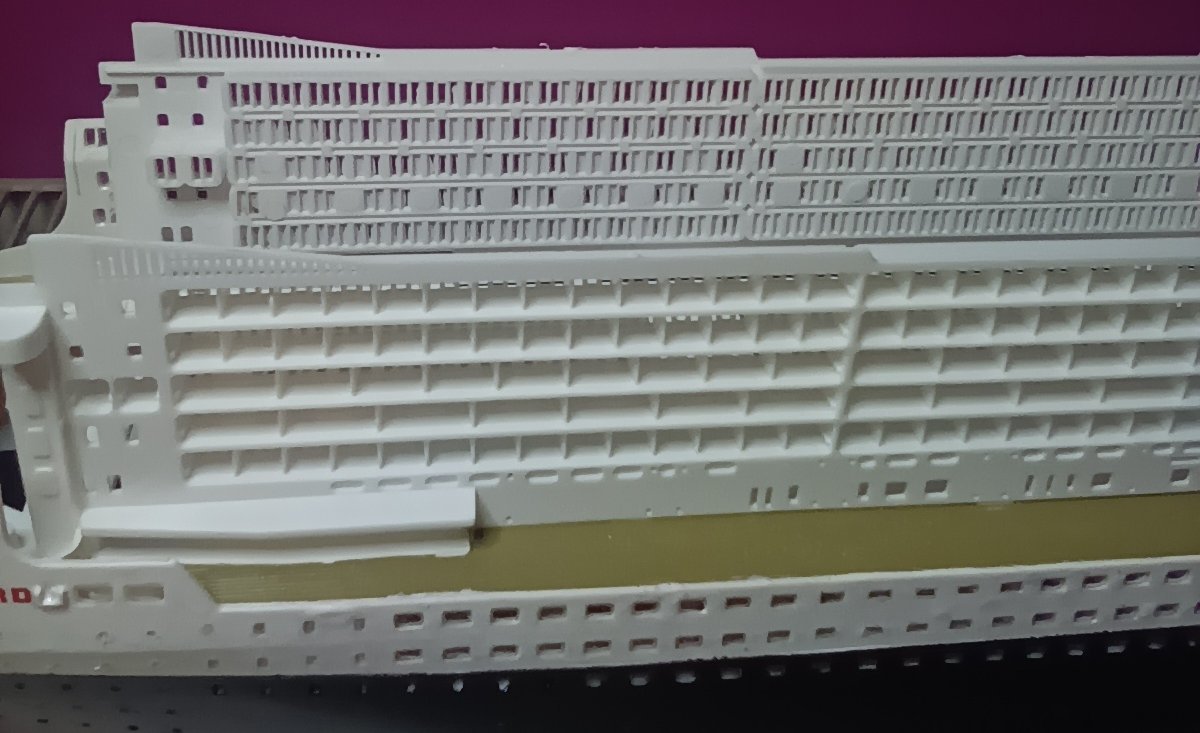
All the clear railings complete. Just the davits and ships boats to be painted and added. then the final sets of railings and she is finished. Adding all those 48 small clear parts was by far the most frustrating part of this build. Most where easy to place as they sat against a column at the back so just needed a small dab of glue on the column. But 14 of them just sit on the floor of the cabin. And the glue would not grab instantly. Apart from that is on the couple of occasions I accidently dropped them onto the baseboard when they stuck instantly. As I will be starting the Hood next, I have treated myself to some Christmas presents. I have the Trumpeter 1/200 scale Bismarck ordered and on the way. And also the Trumpeter 1/350 scale Prinz Eugen and Tamiya 1/350 scale Prince of Wales. This will low me to display the four ships that took part in the Battle of the Denmark Straight. Should keep me going for a few years as I am buying the MK1 upgrade kits and other upgrades for all those models. I did think about buying the 1/200 scale Occre Prinz Eugen but there is a lot of work in that kit and I don't really want to do another wooden model just yet. I may however change my mind in a few years.

- 33 replies
-
- 4
-
-
- Queen Mary 2
- Revell
- (and 3 more)
-
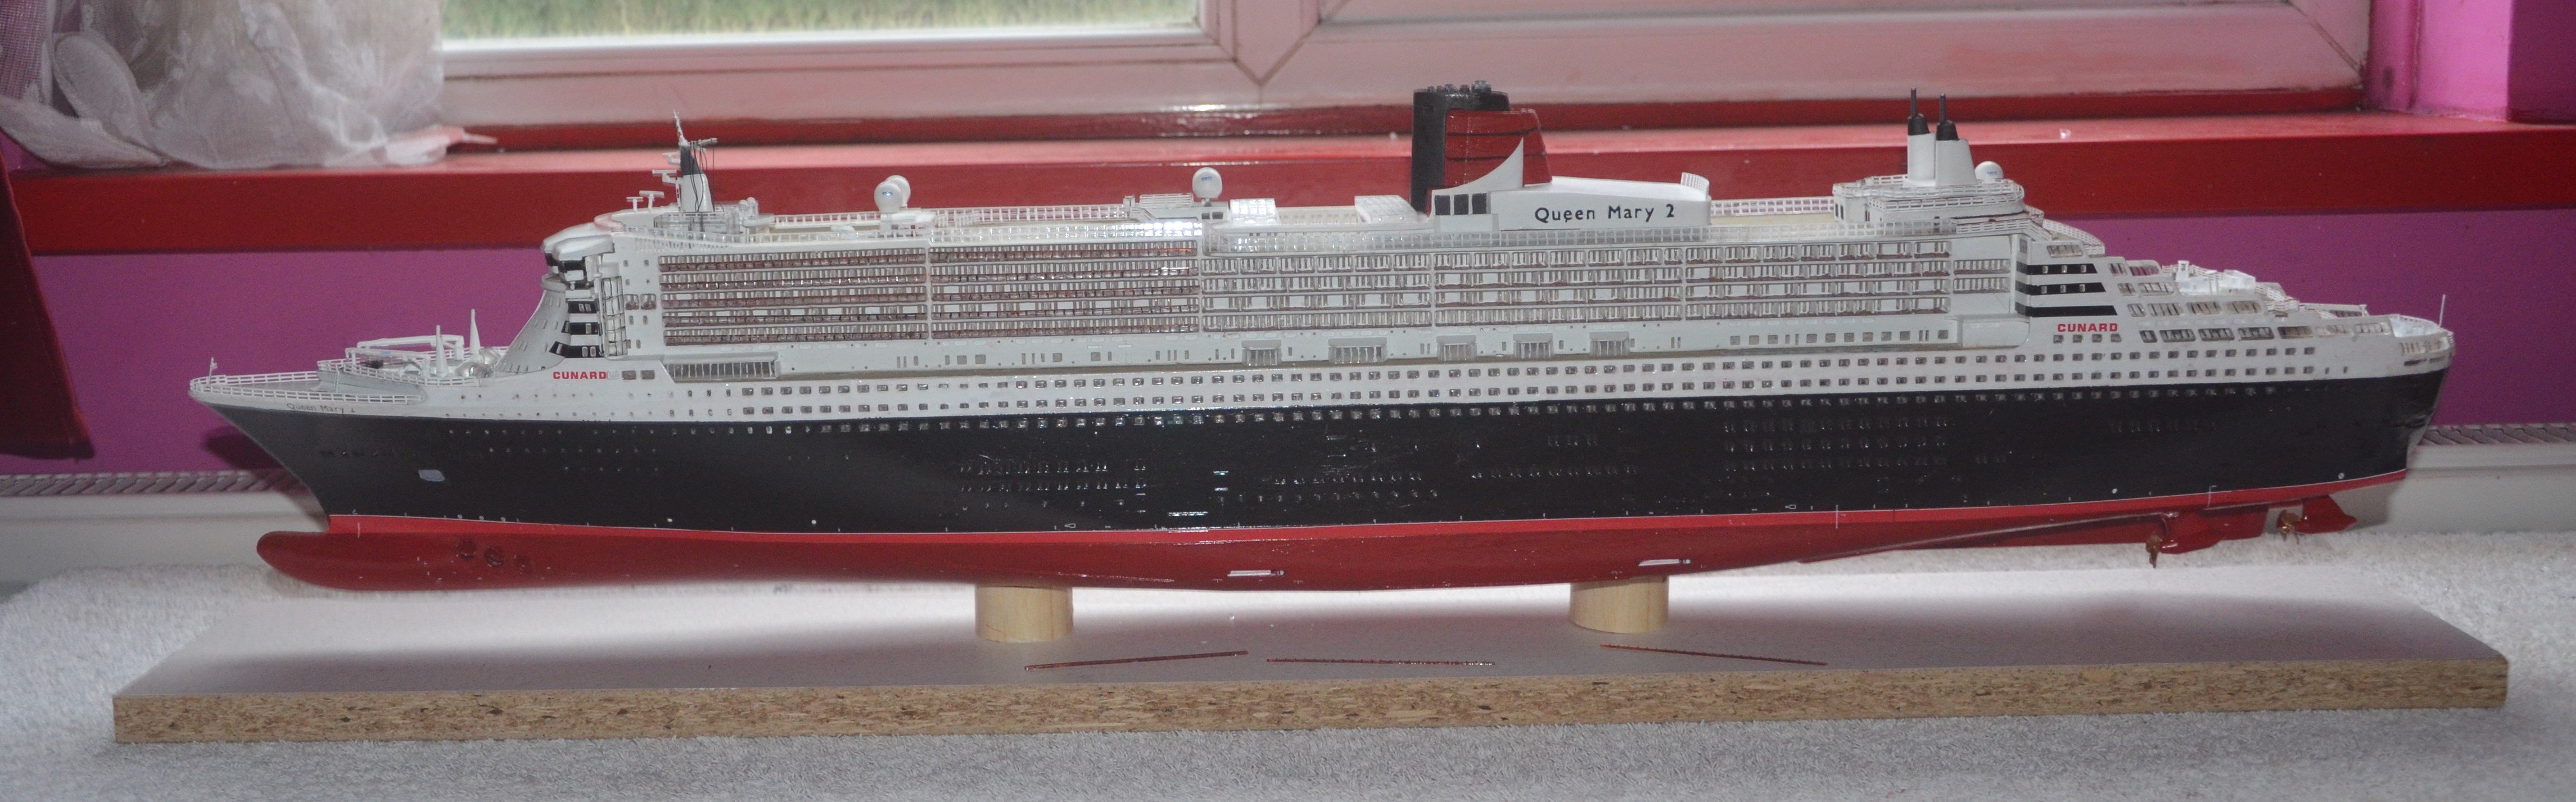
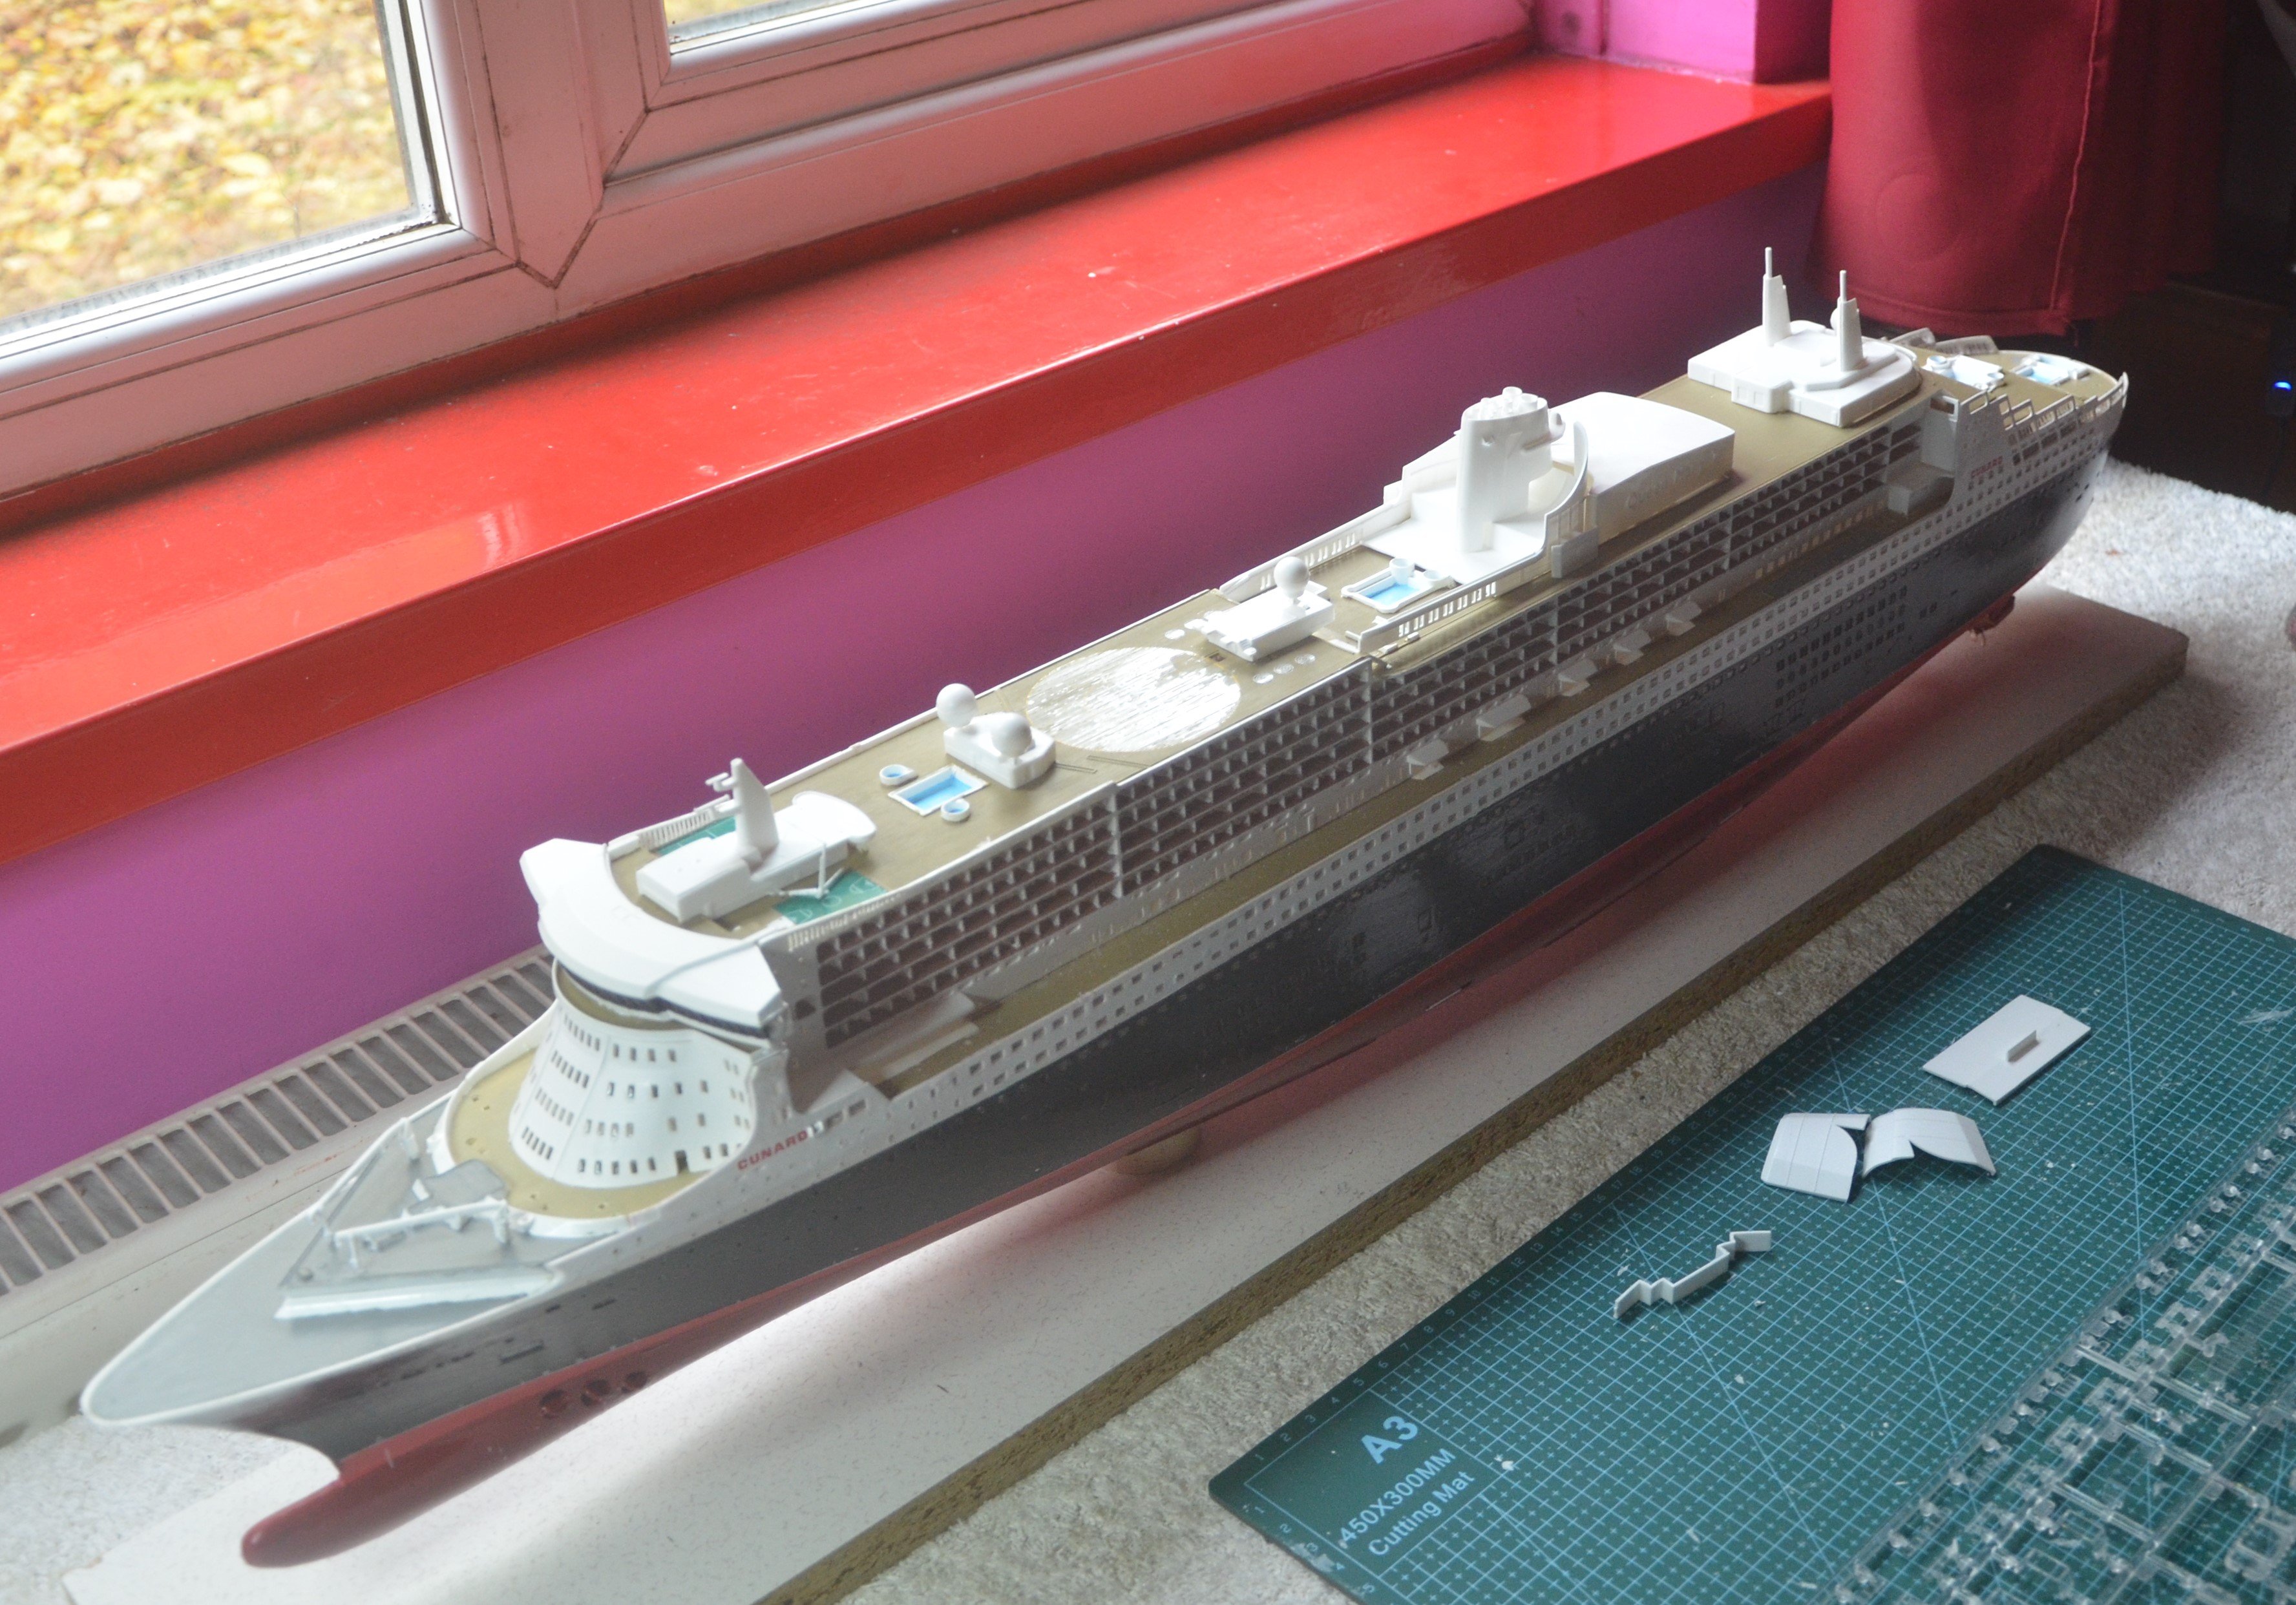
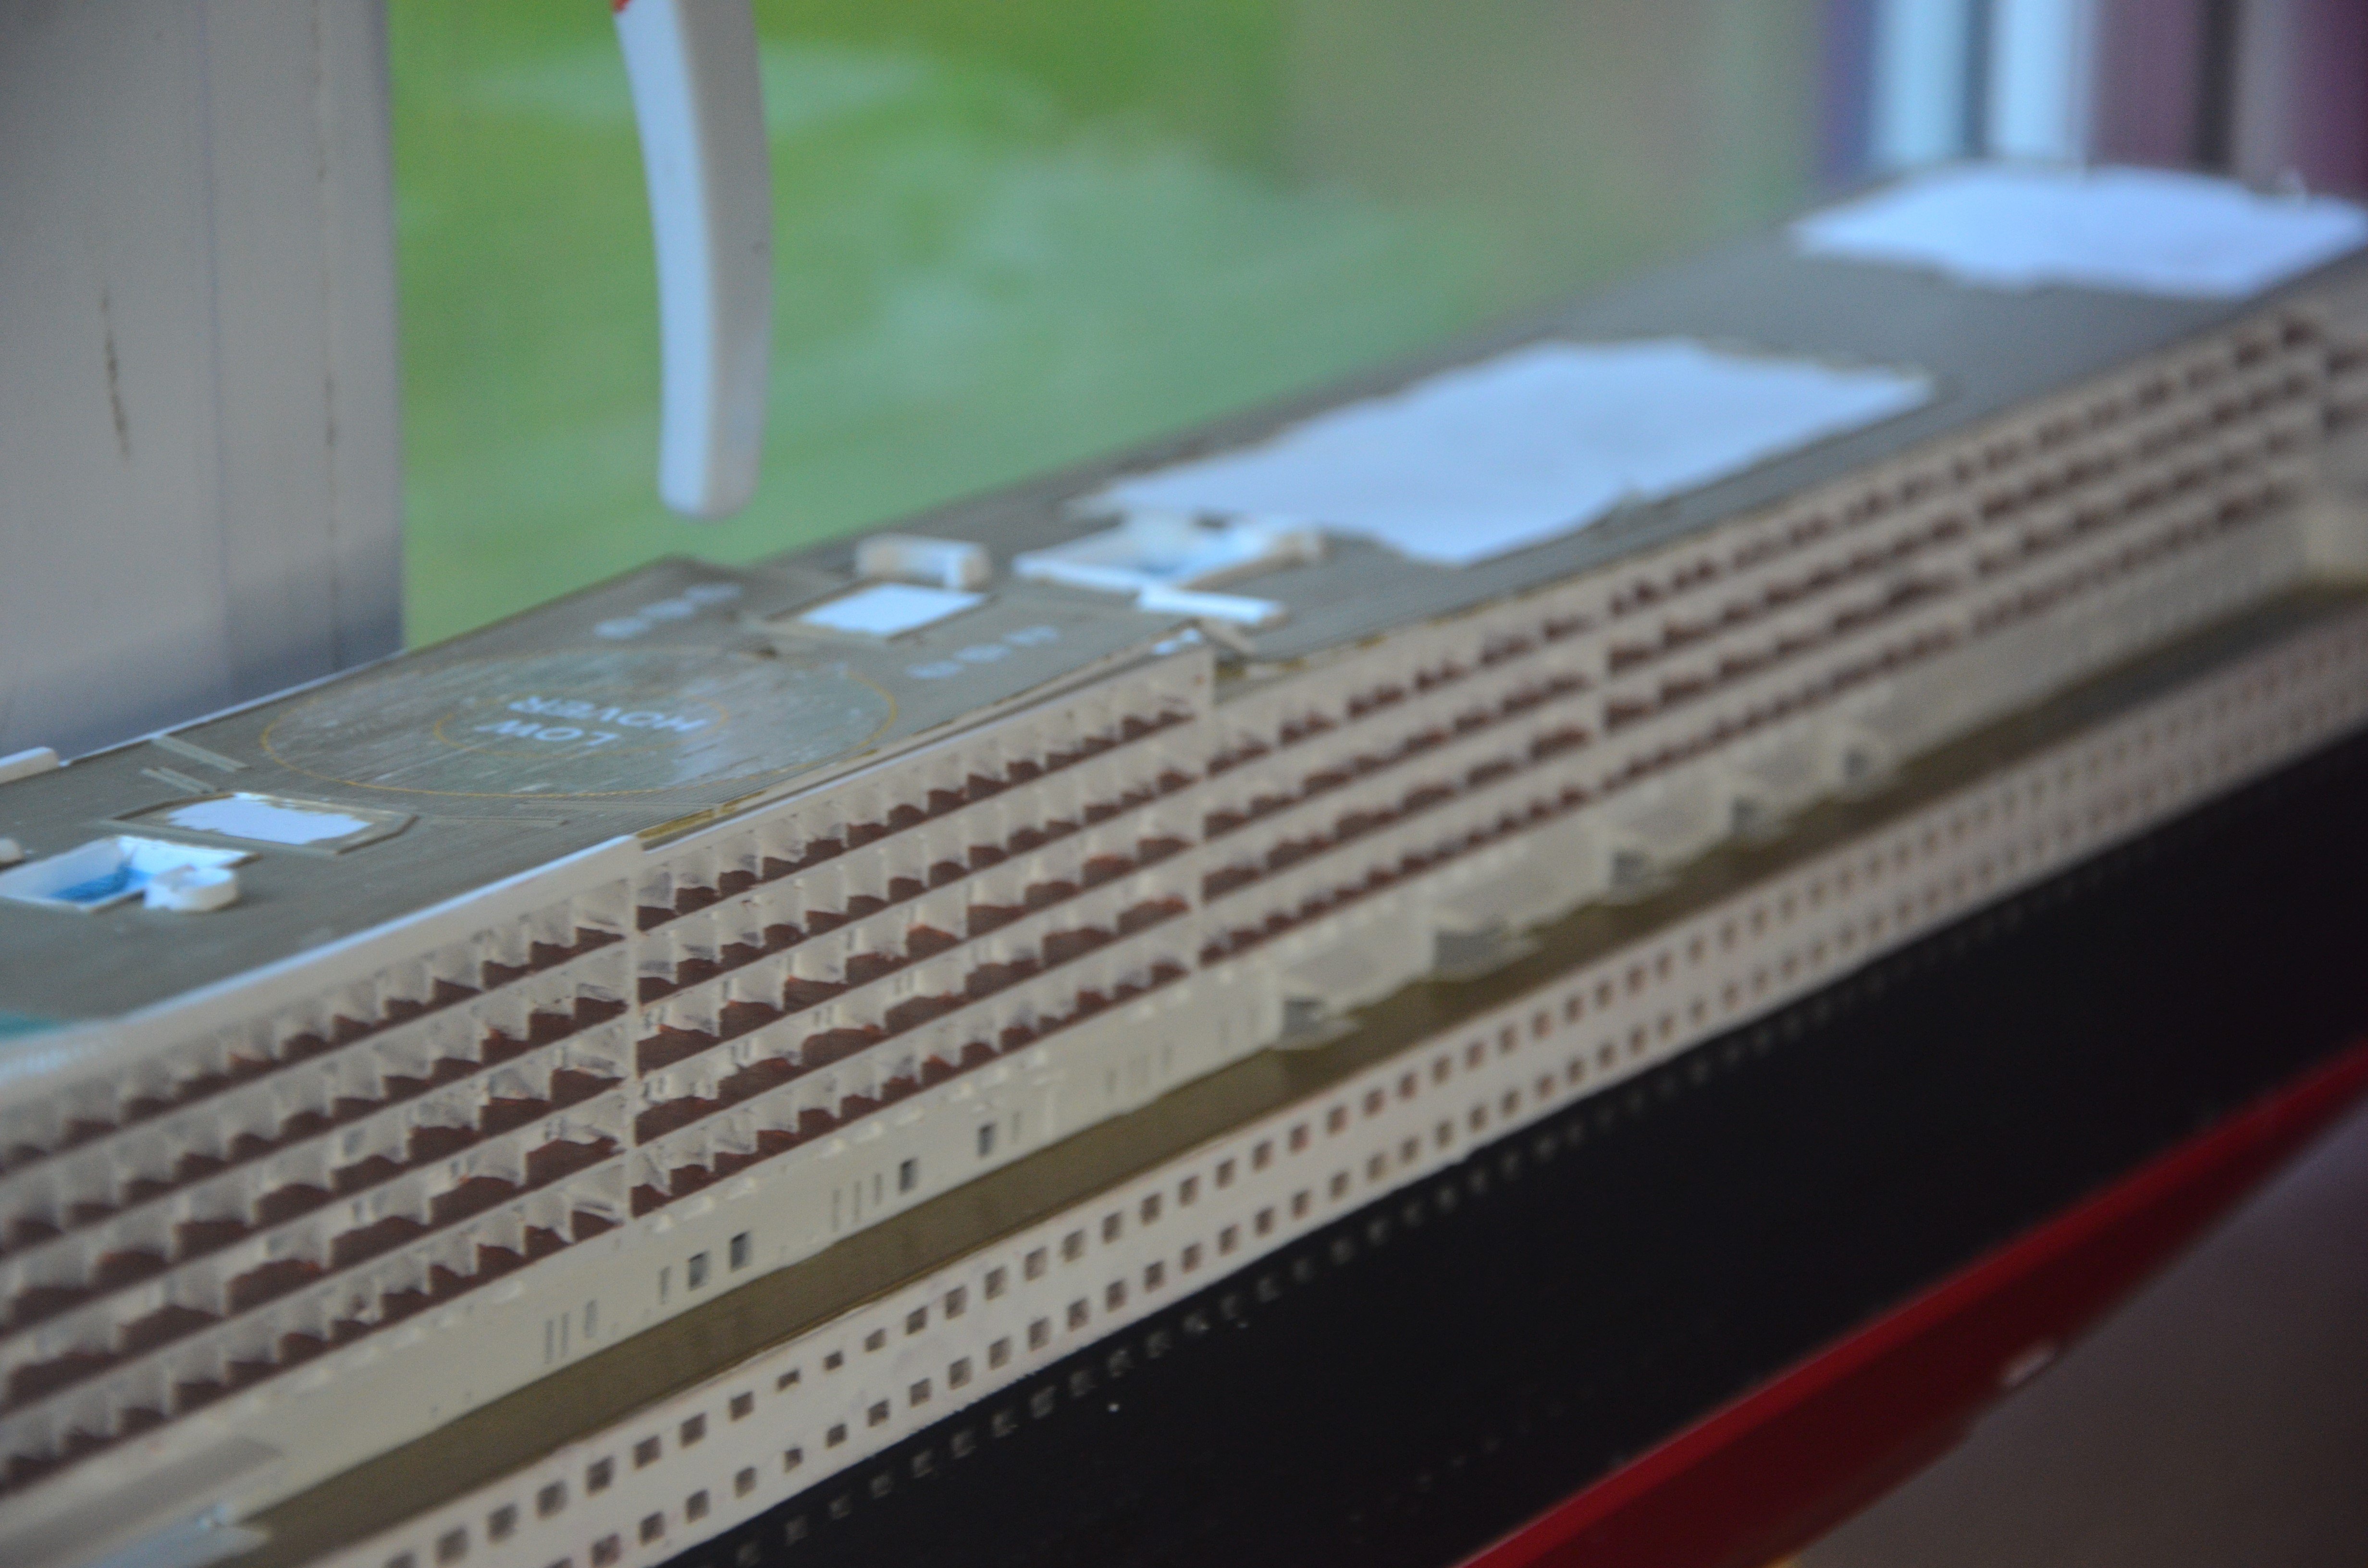
Started adding the hand rails in front of the sea view cabins. These clear rails have the tops painted brown and the columns are black. Once added they improve the look of the model by quite a lot. They tone down all the open cabins and make them look far more realistic. However, for some reason Revell have decided to make the top lines out of very small lengths instead of the single straight lengths the same as all the other ones.


- 33 replies
-
- 3
-
-
- Queen Mary 2
- Revell
- (and 3 more)
-
Thank you. The only ships Ive ever been on are the River Mersy Ferry and the Ferry to France.
- 33 replies
-
- 3
-
-
- Queen Mary 2
- Revell
- (and 3 more)
-
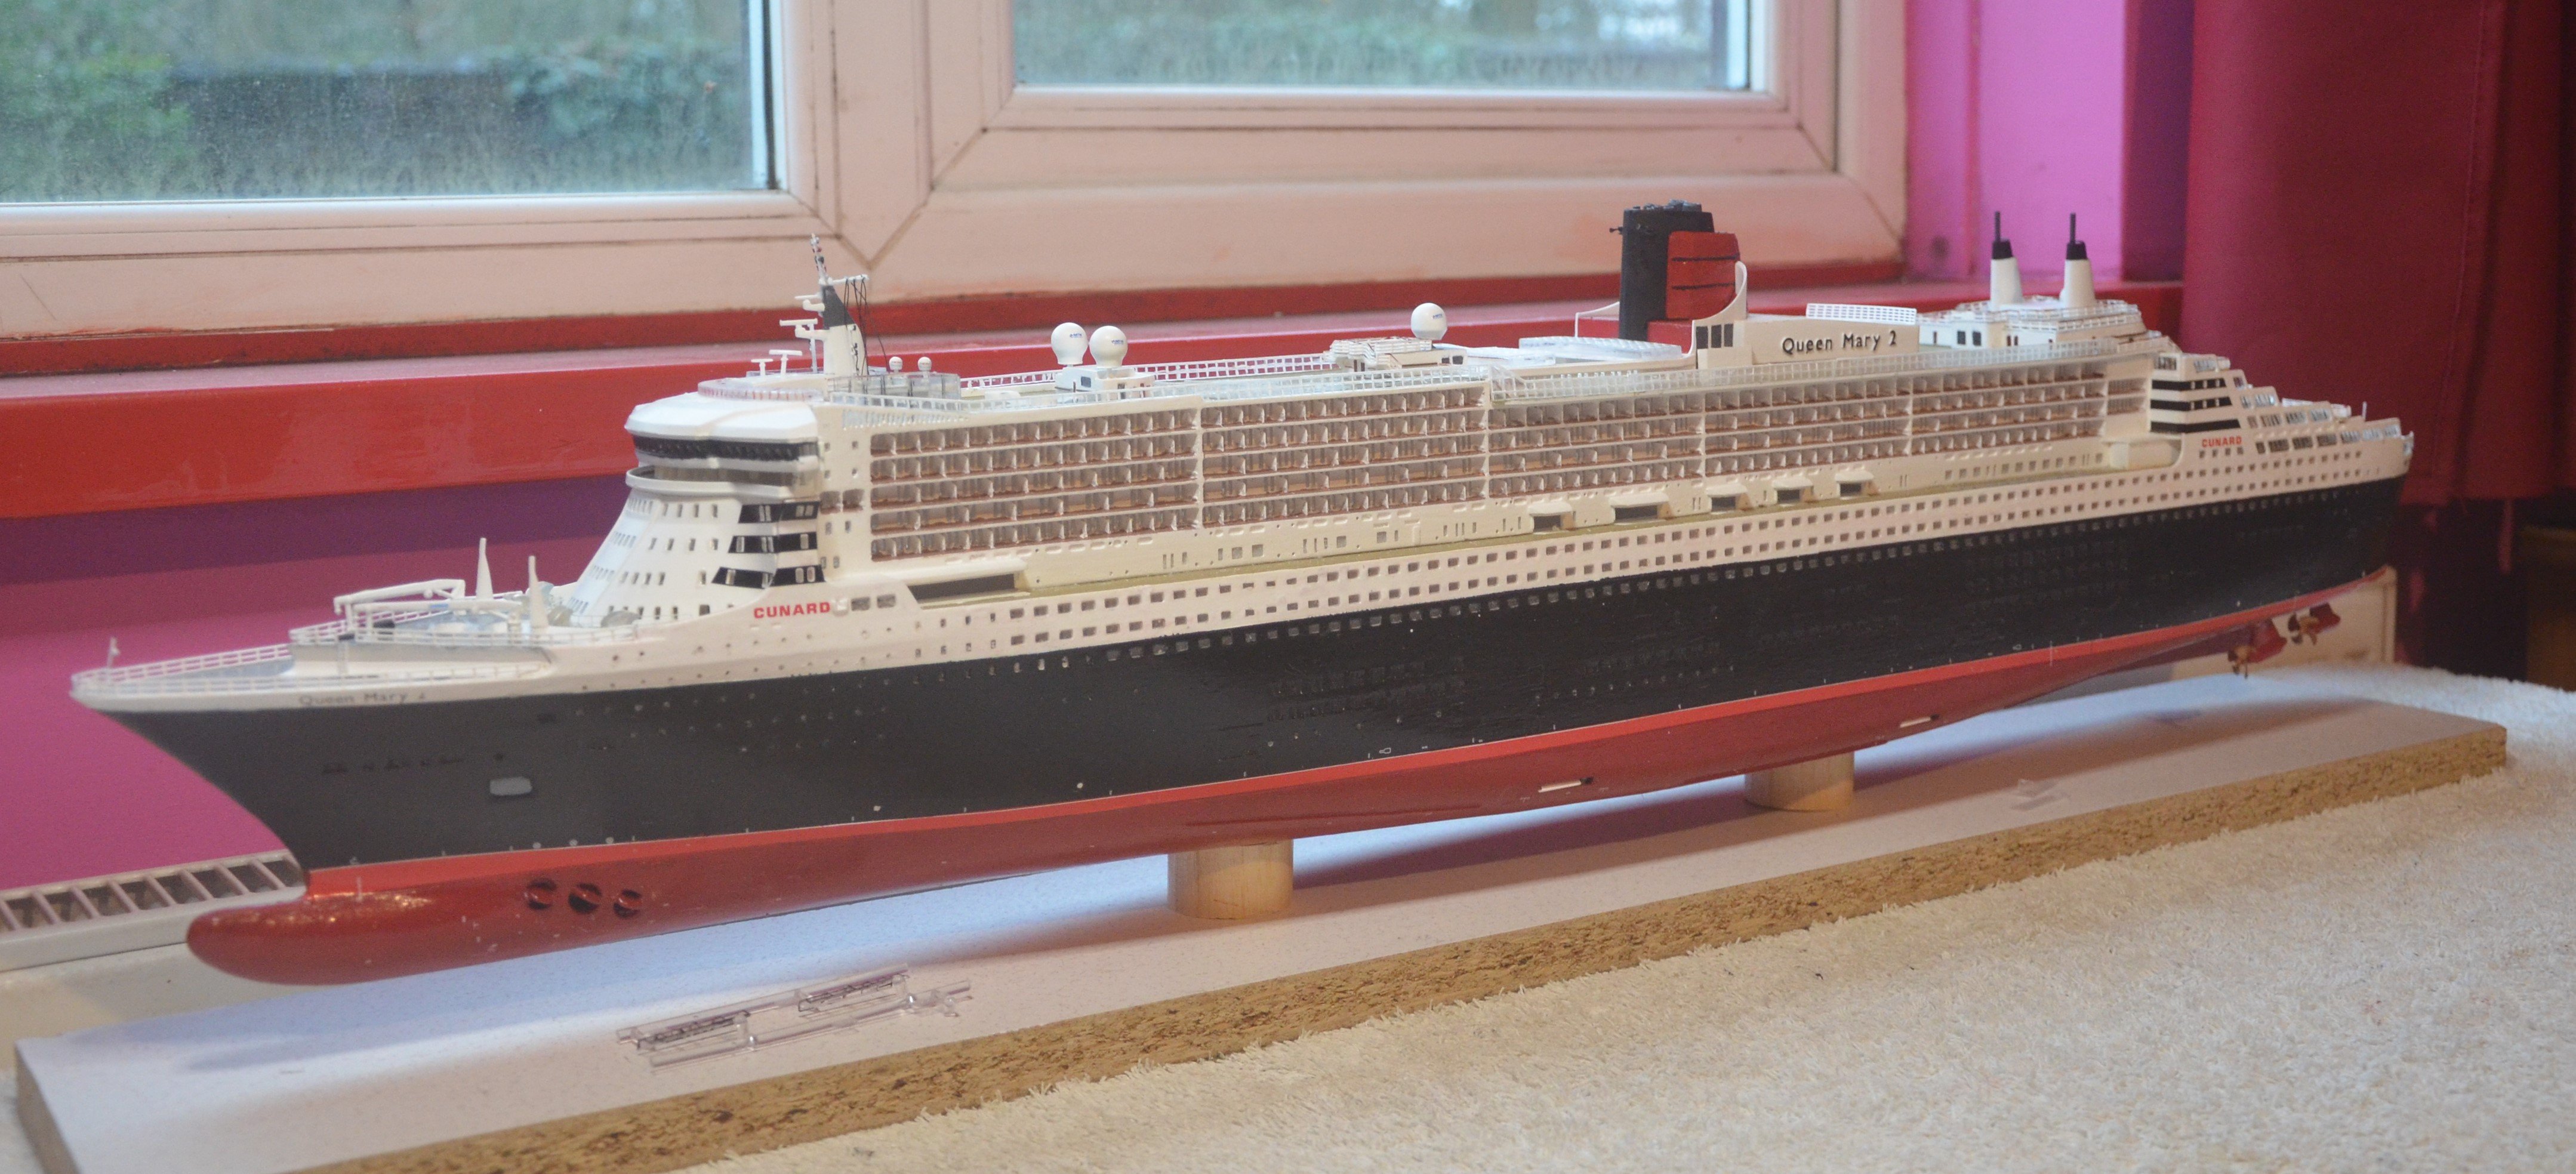
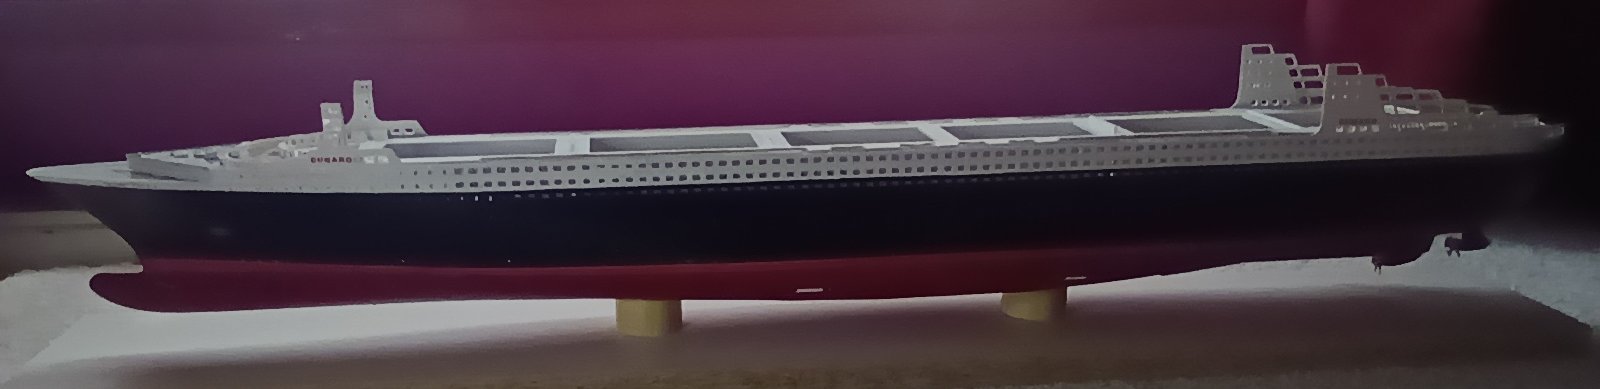
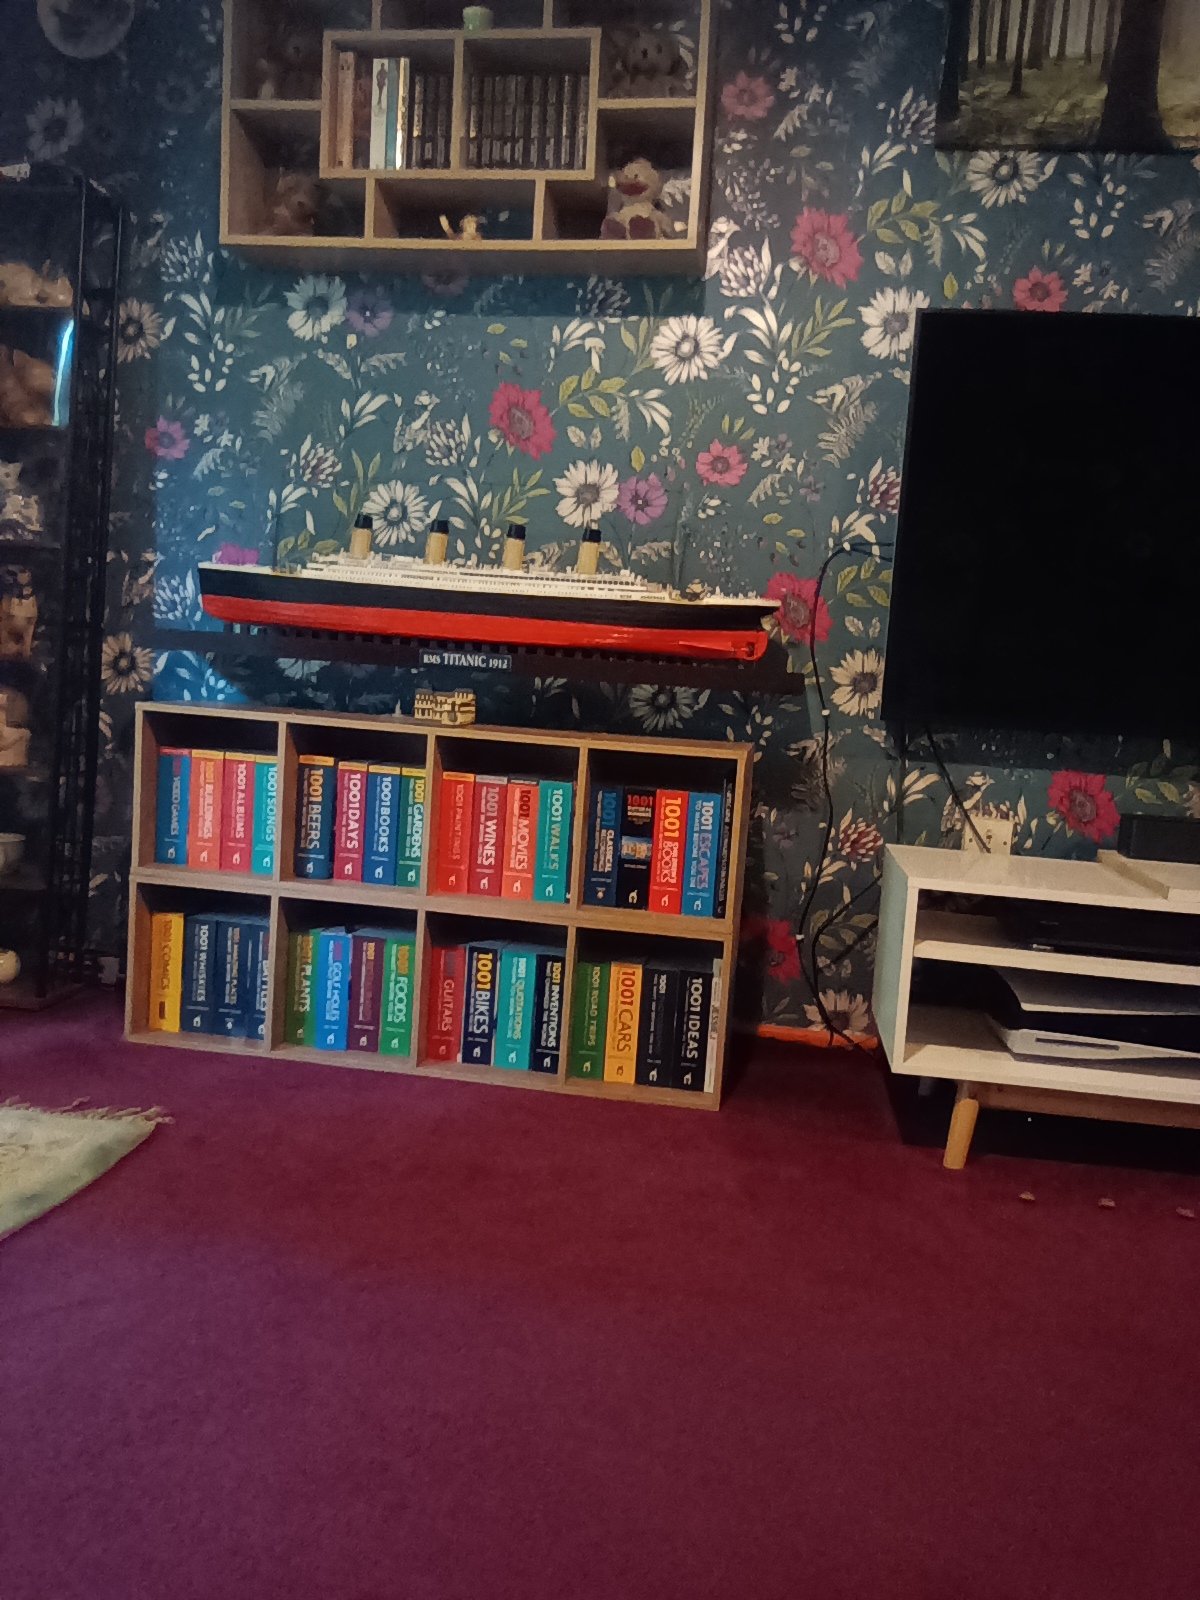
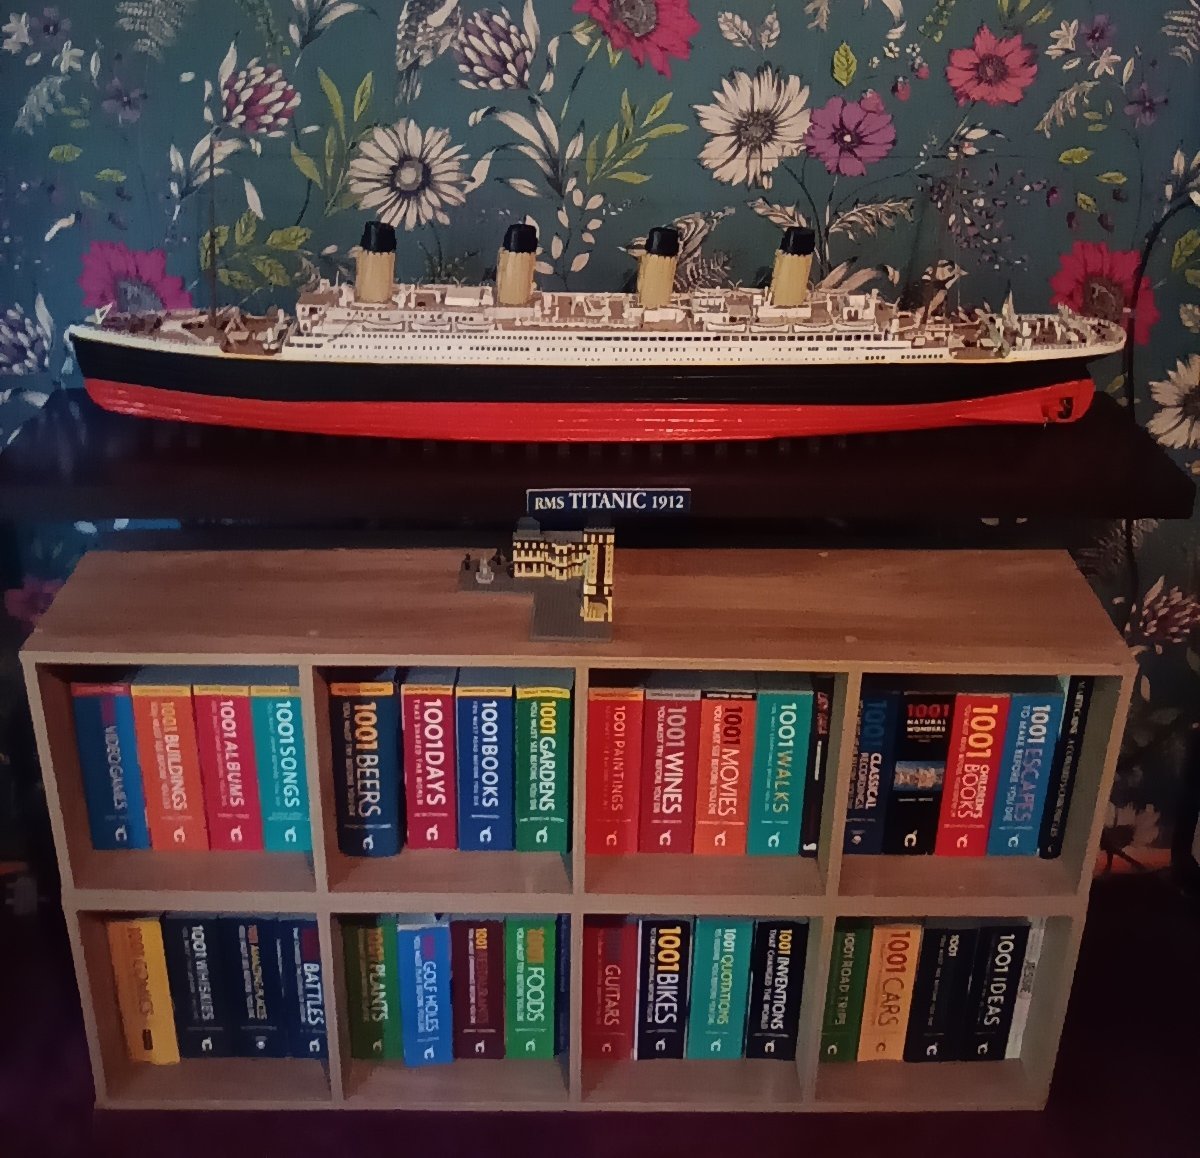
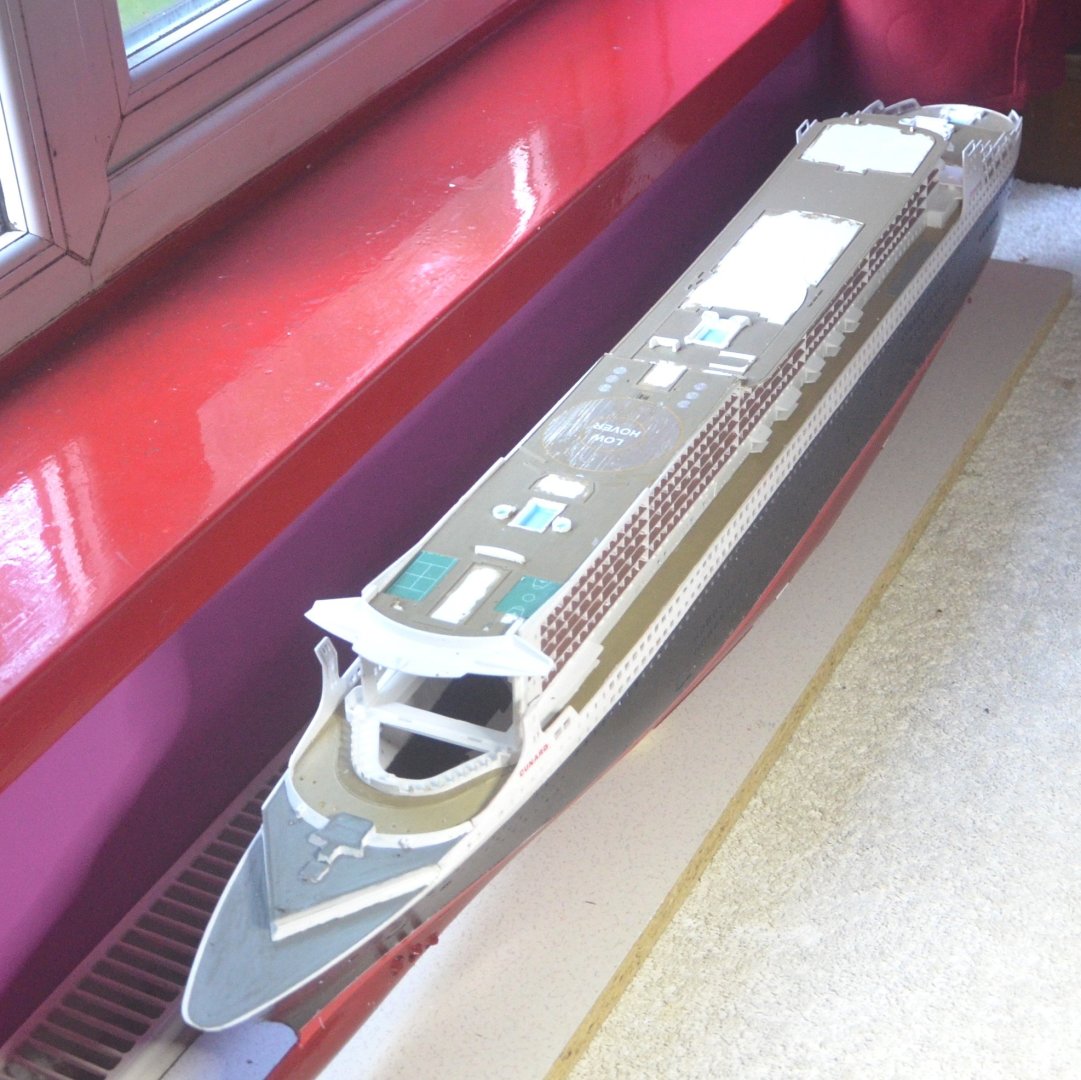
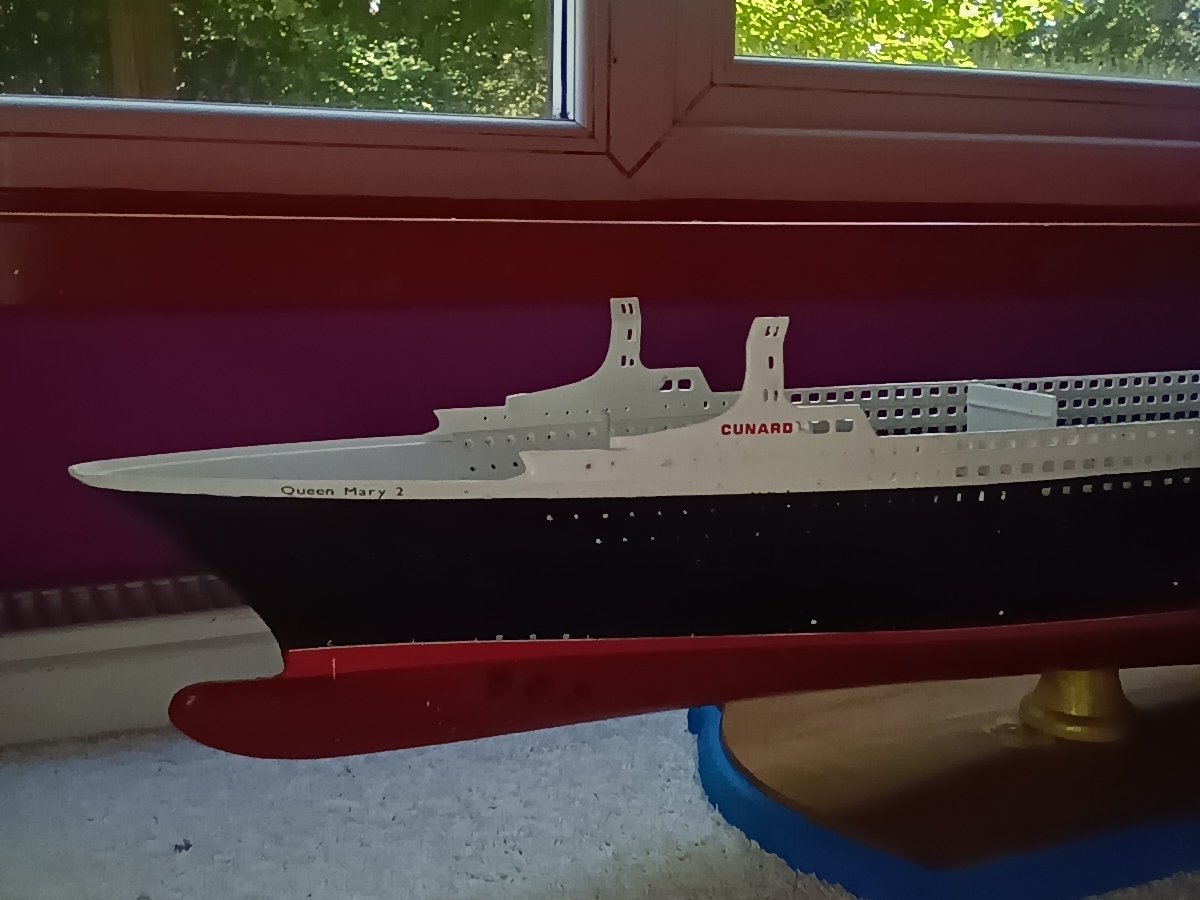
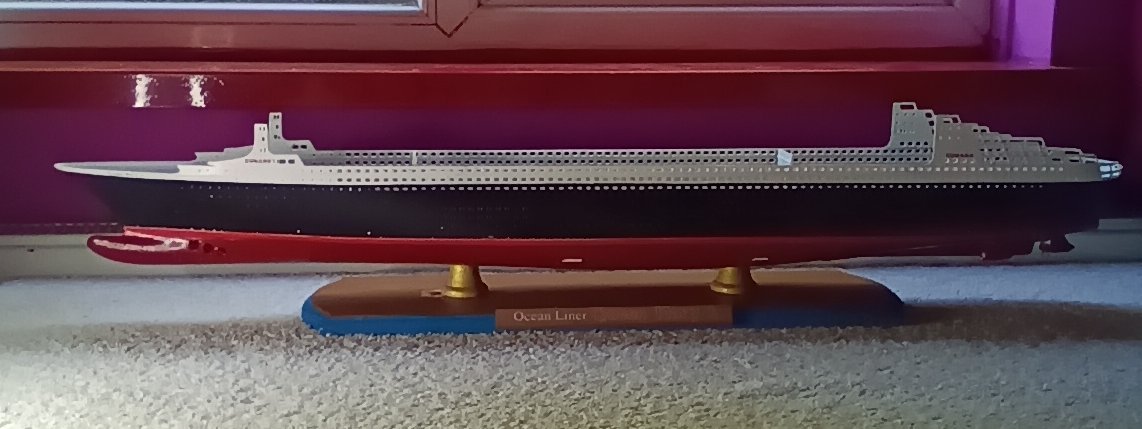
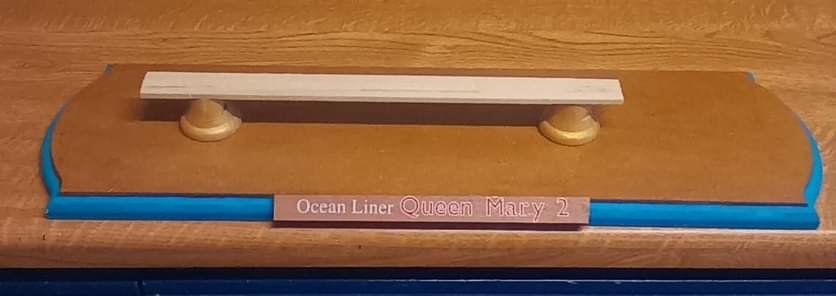
Thank you. Yes I do like the hull lines myself. Once finished I will display it alongside the Titanic.
- 33 replies
-
- 4
-
-
- Queen Mary 2
- Revell
- (and 3 more)
-
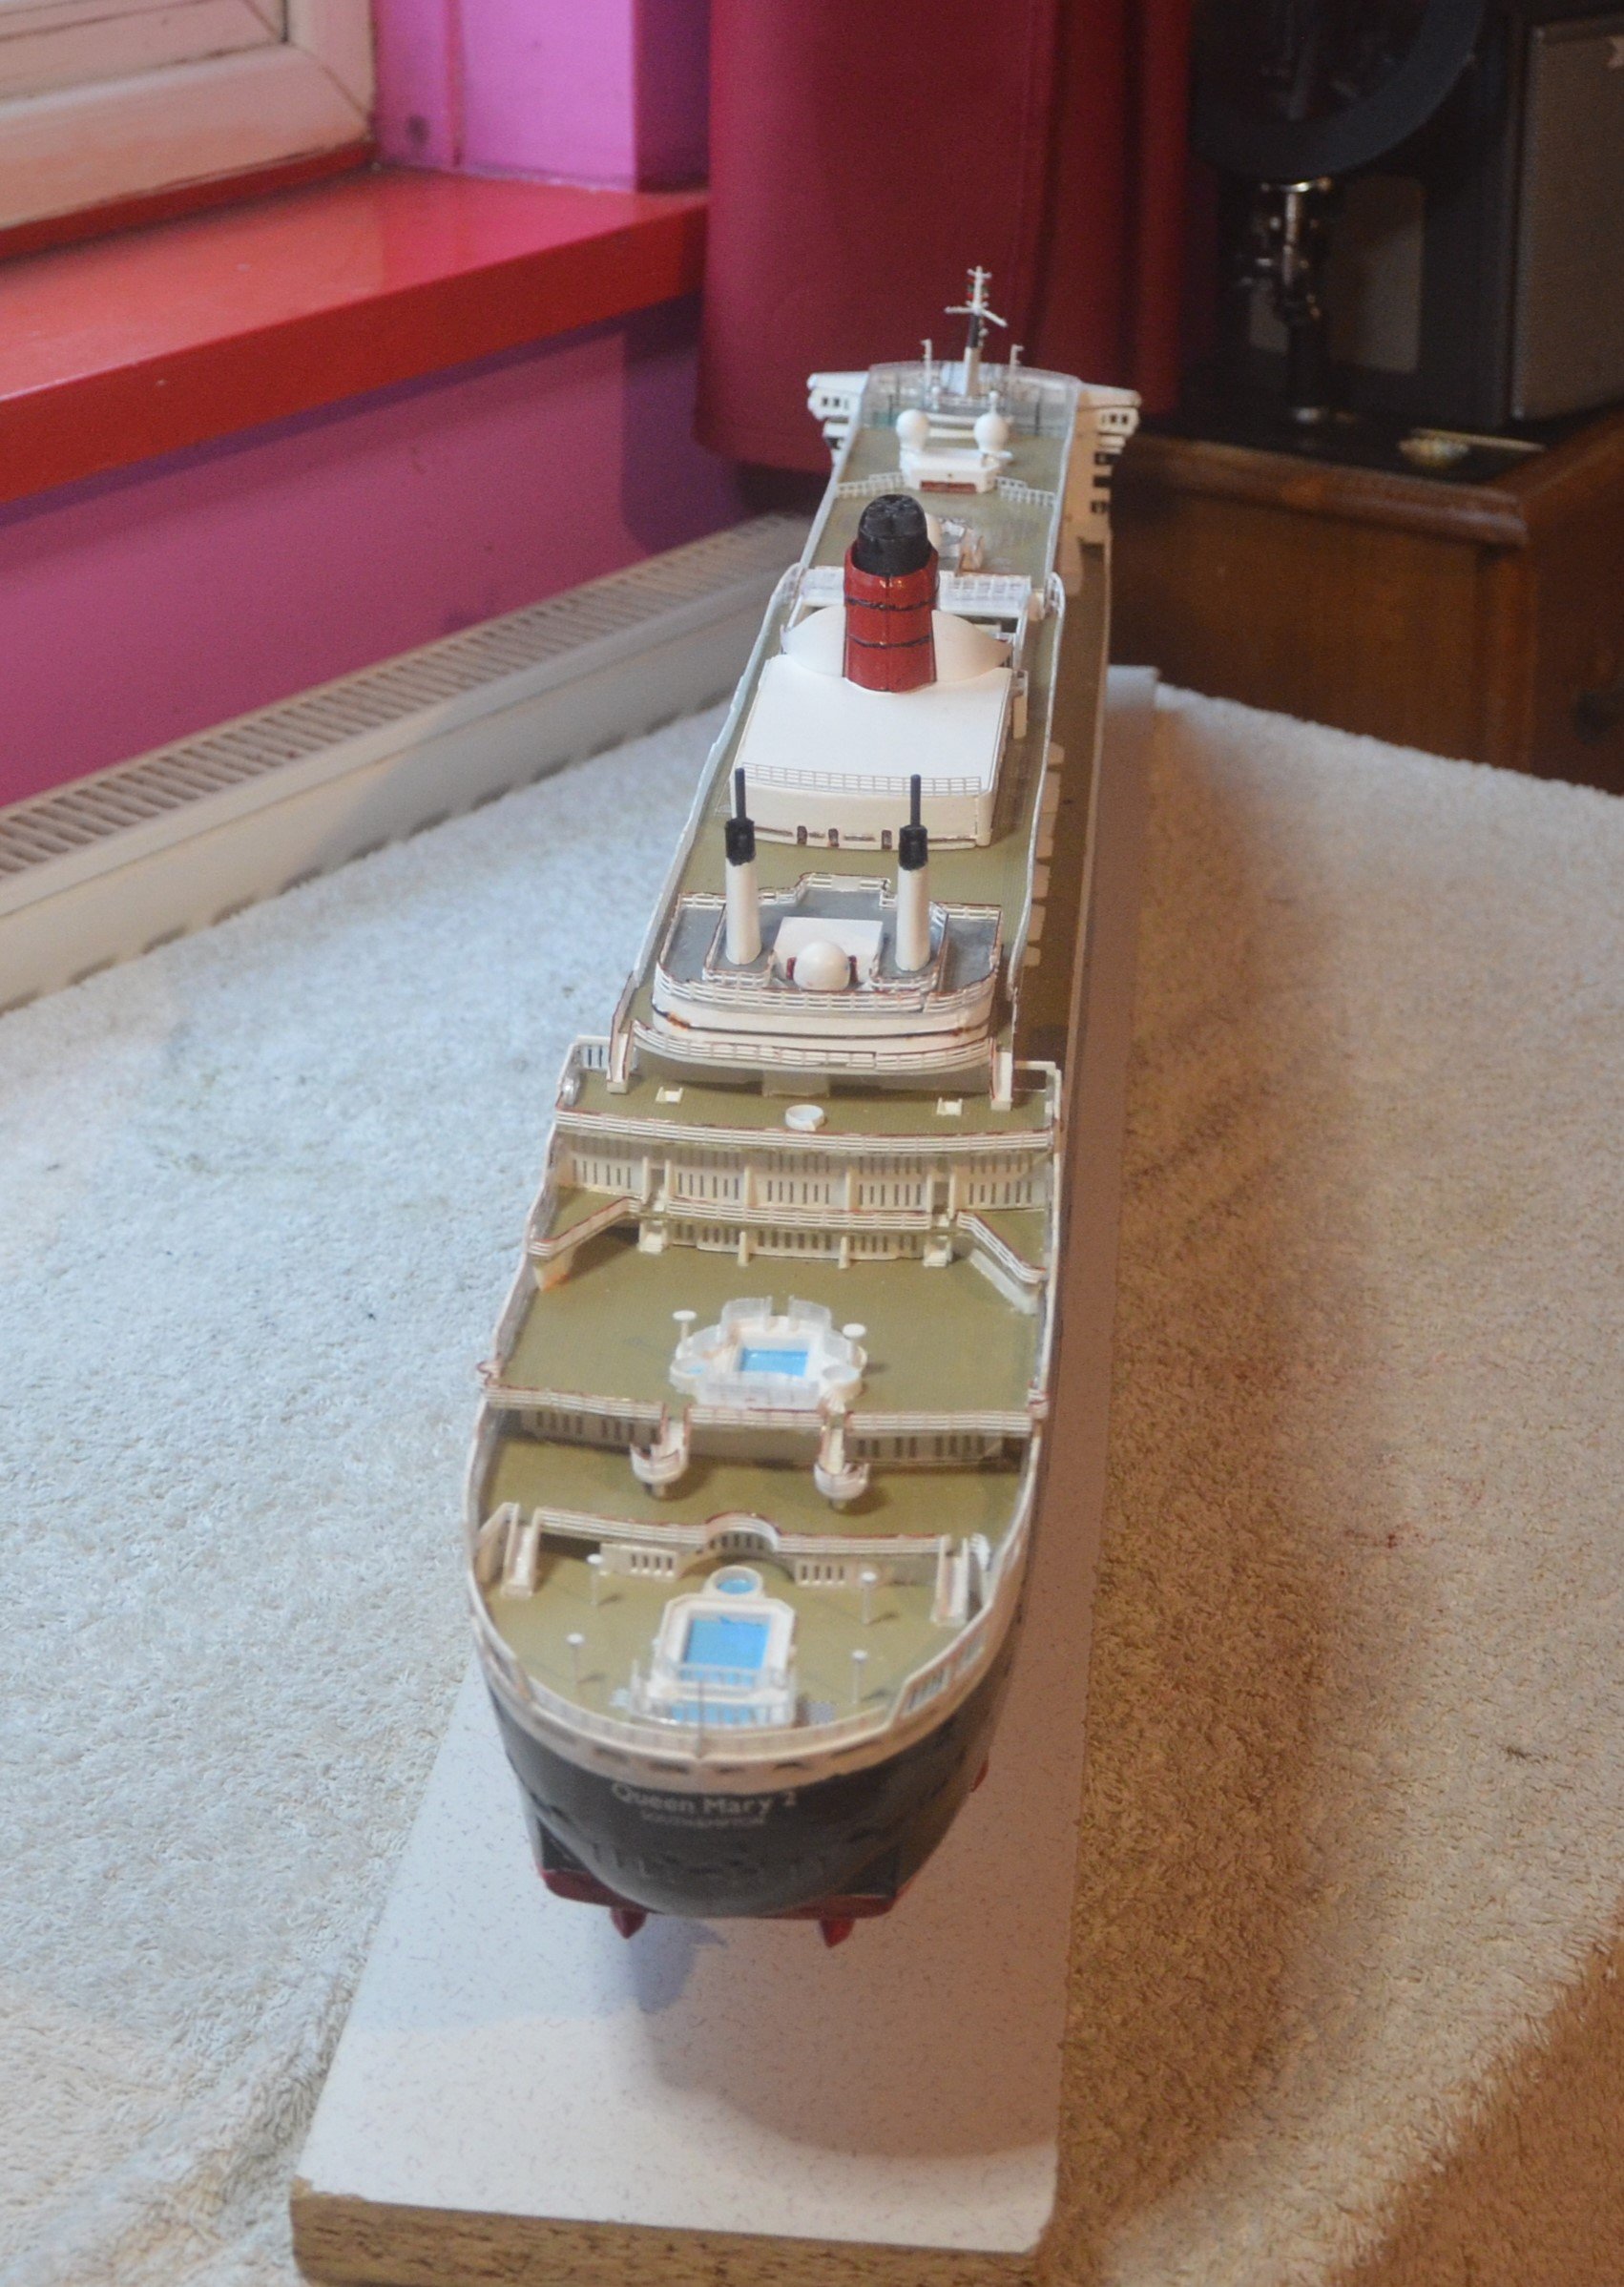
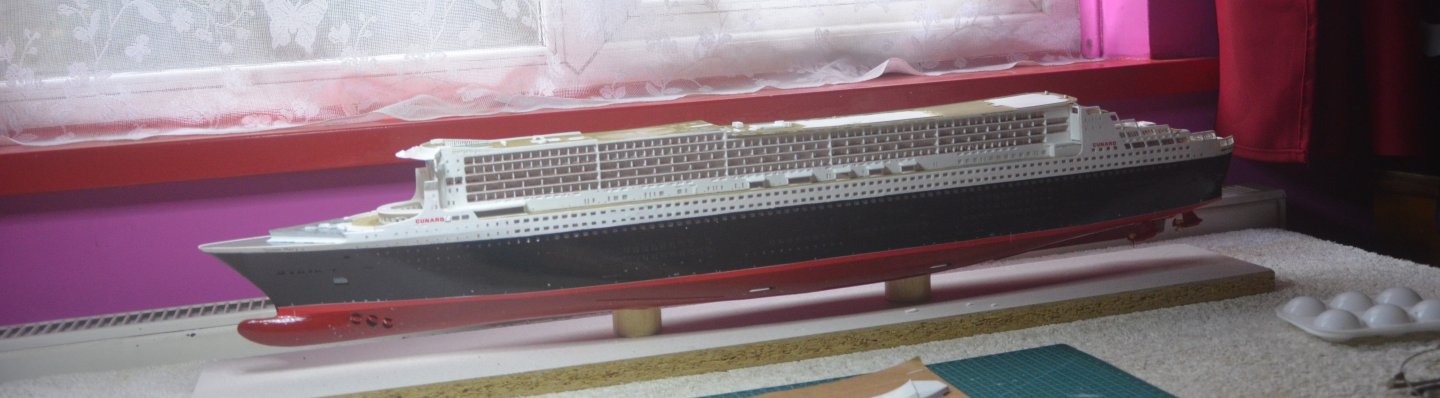
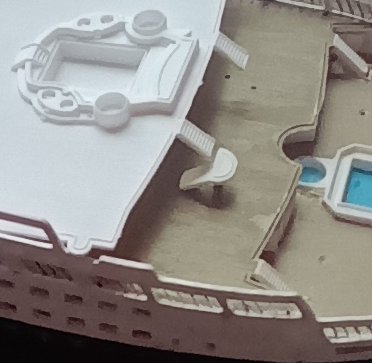
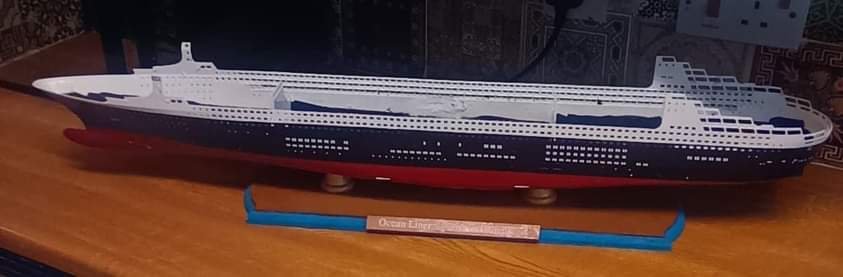
Queen Mary 2 decks completed. I have not used all the photo etch that came with the kit just some of the bits that add a bit of detail. I must have been unlucky and got a kit that was not in perfect condition. There are so many broken and warped hand rails. I decided to use the plastic ones as the are already moulded in shape. I could have improved the look a lot more if I used the photo etch ones but it takes to long to shape them. I decided not to use the flags. I did put one on the jack staff but it just did not look right. They appear far to big. I also filed off all the raised mouldings that went along the various deck structures rather than trying to paint them. I used a 0.001mm square plastic rod instead which looks a lot cleaner and more realistic. I now just have the clear balcony rails to add and the ships boats and a few more railings and it will be complete. I am happy with way it looks without all the added PE. The other reason I stuck with a literally out of the box build is because I want to get it finished so I can start on the Hood, for which I have the MK1 upgrade set. so that will be around a year to eighteen months build perhaps even pushing two years.


- 33 replies
-
- 6
-
-

-
- Queen Mary 2
- Revell
- (and 3 more)
-
Thanks for the tips on cleaning the plastic. I will buy some and give that a go. They are not completely flat as they have raised moldings. Which is why I have not tried sanding them yet.
- 33 replies
-
- 3
-
-
- Queen Mary 2
- Revell
- (and 3 more)
-
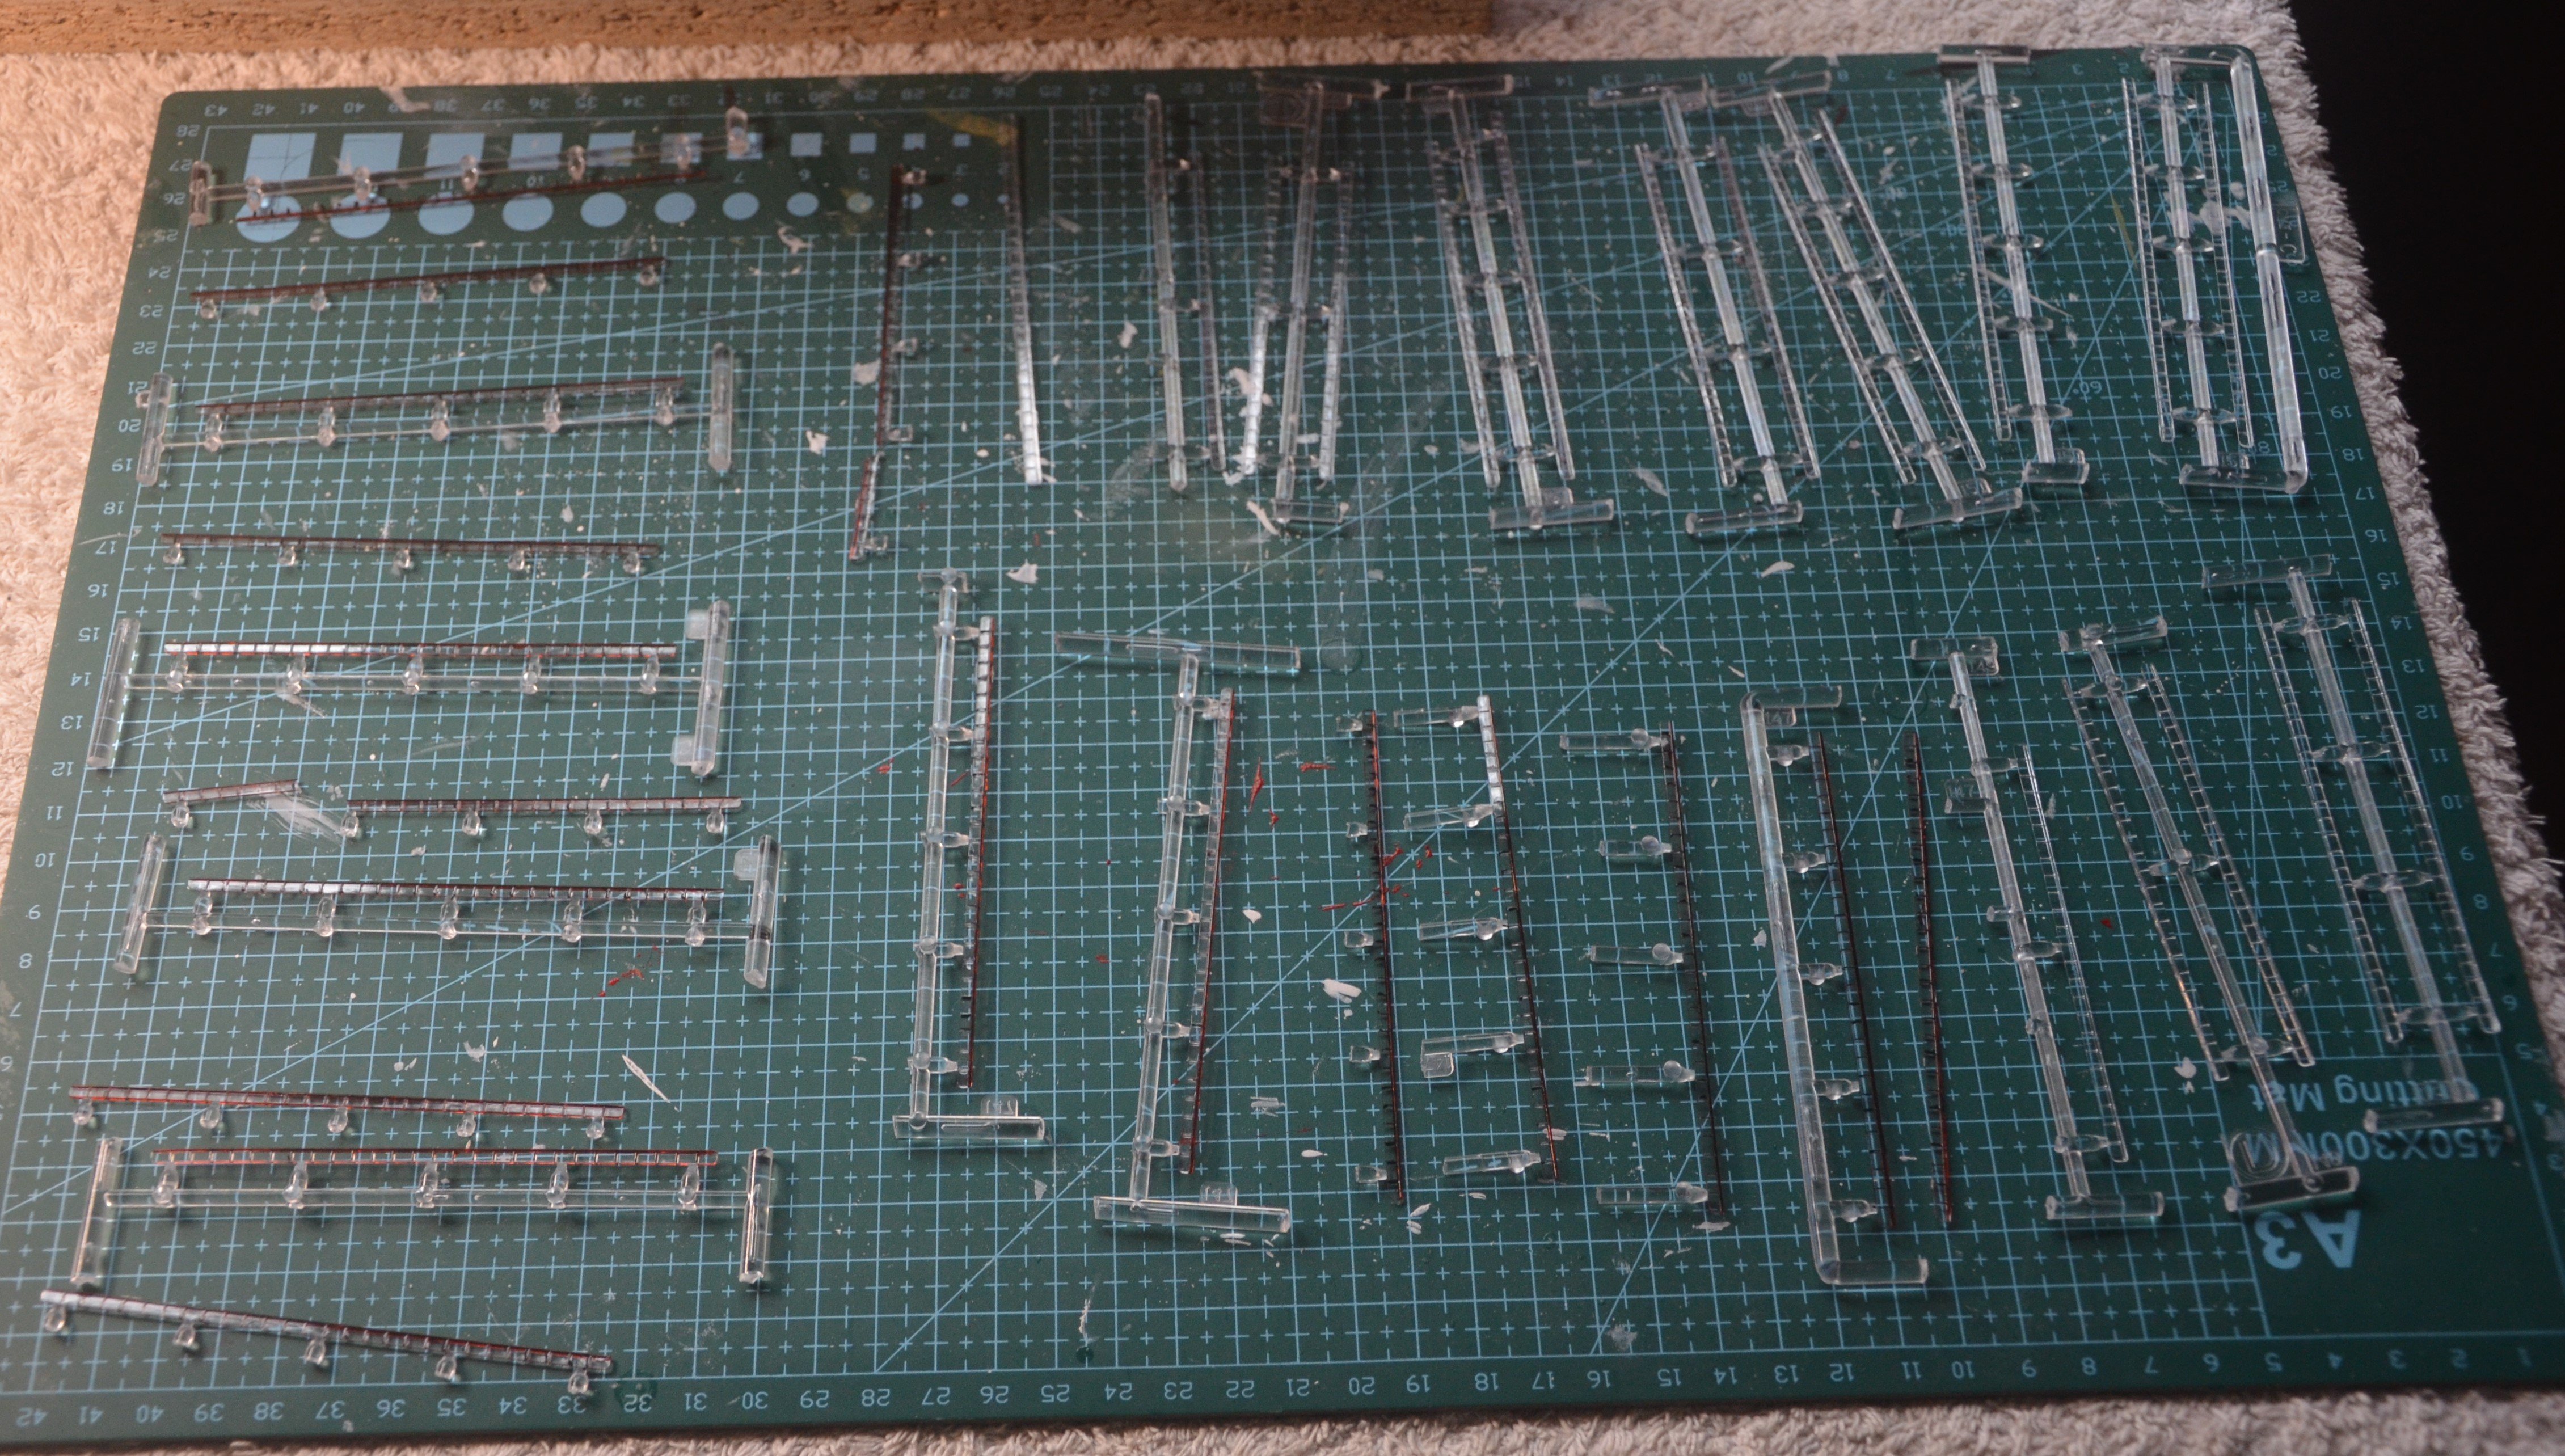
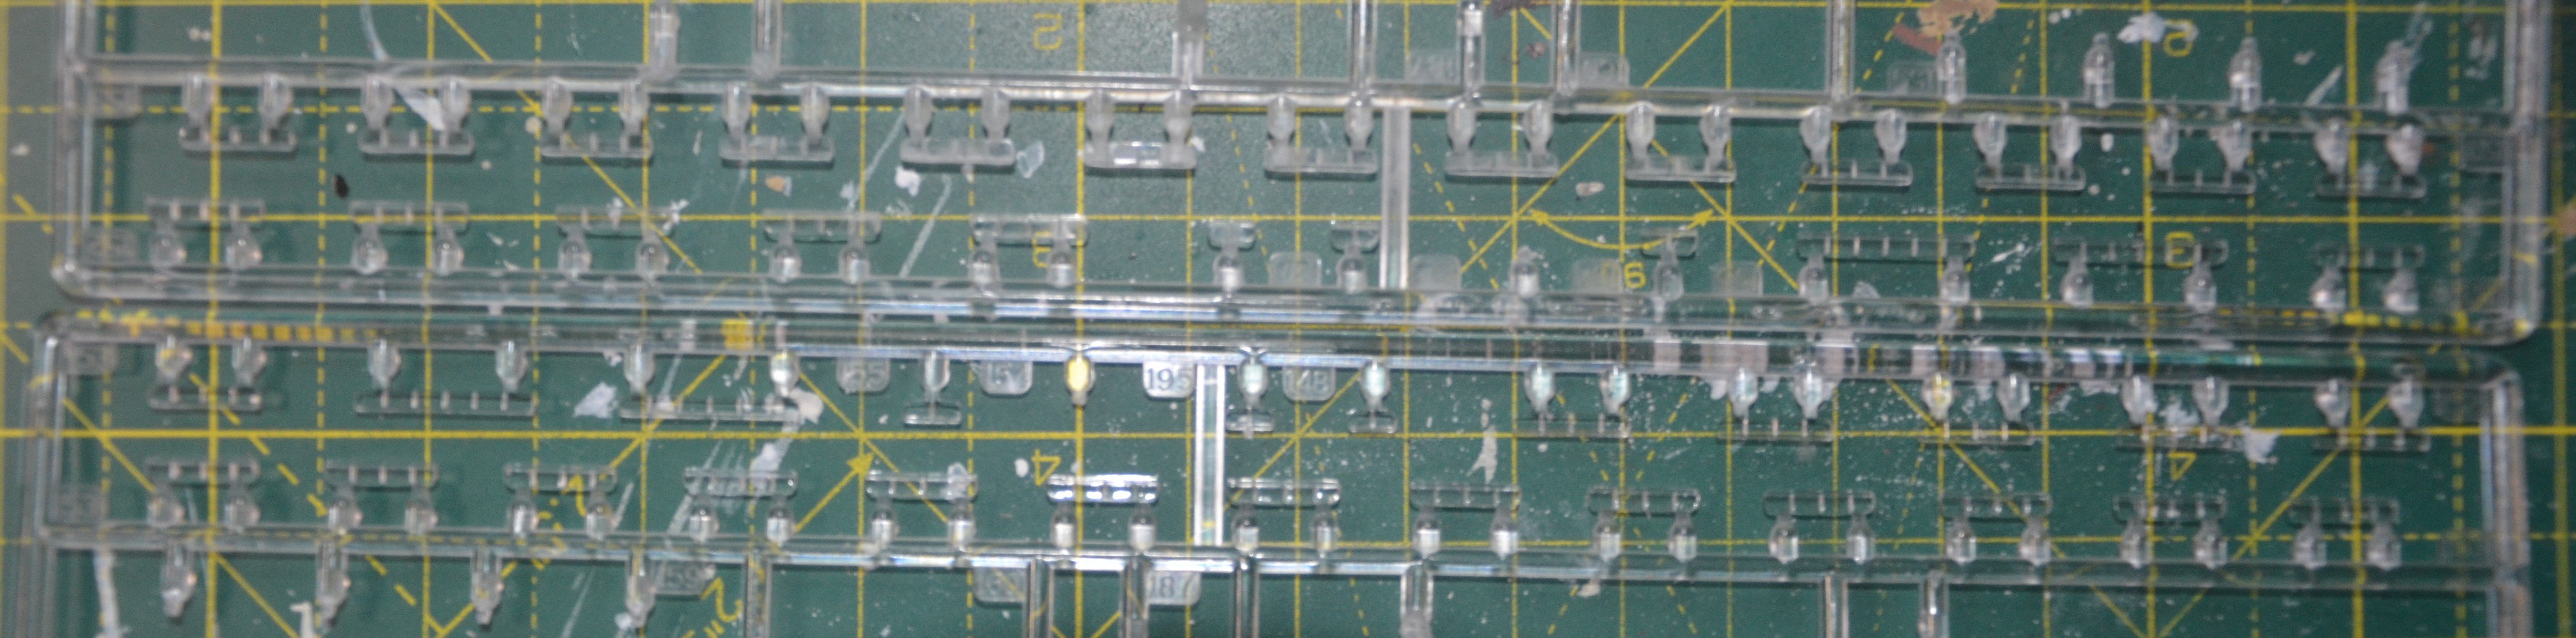
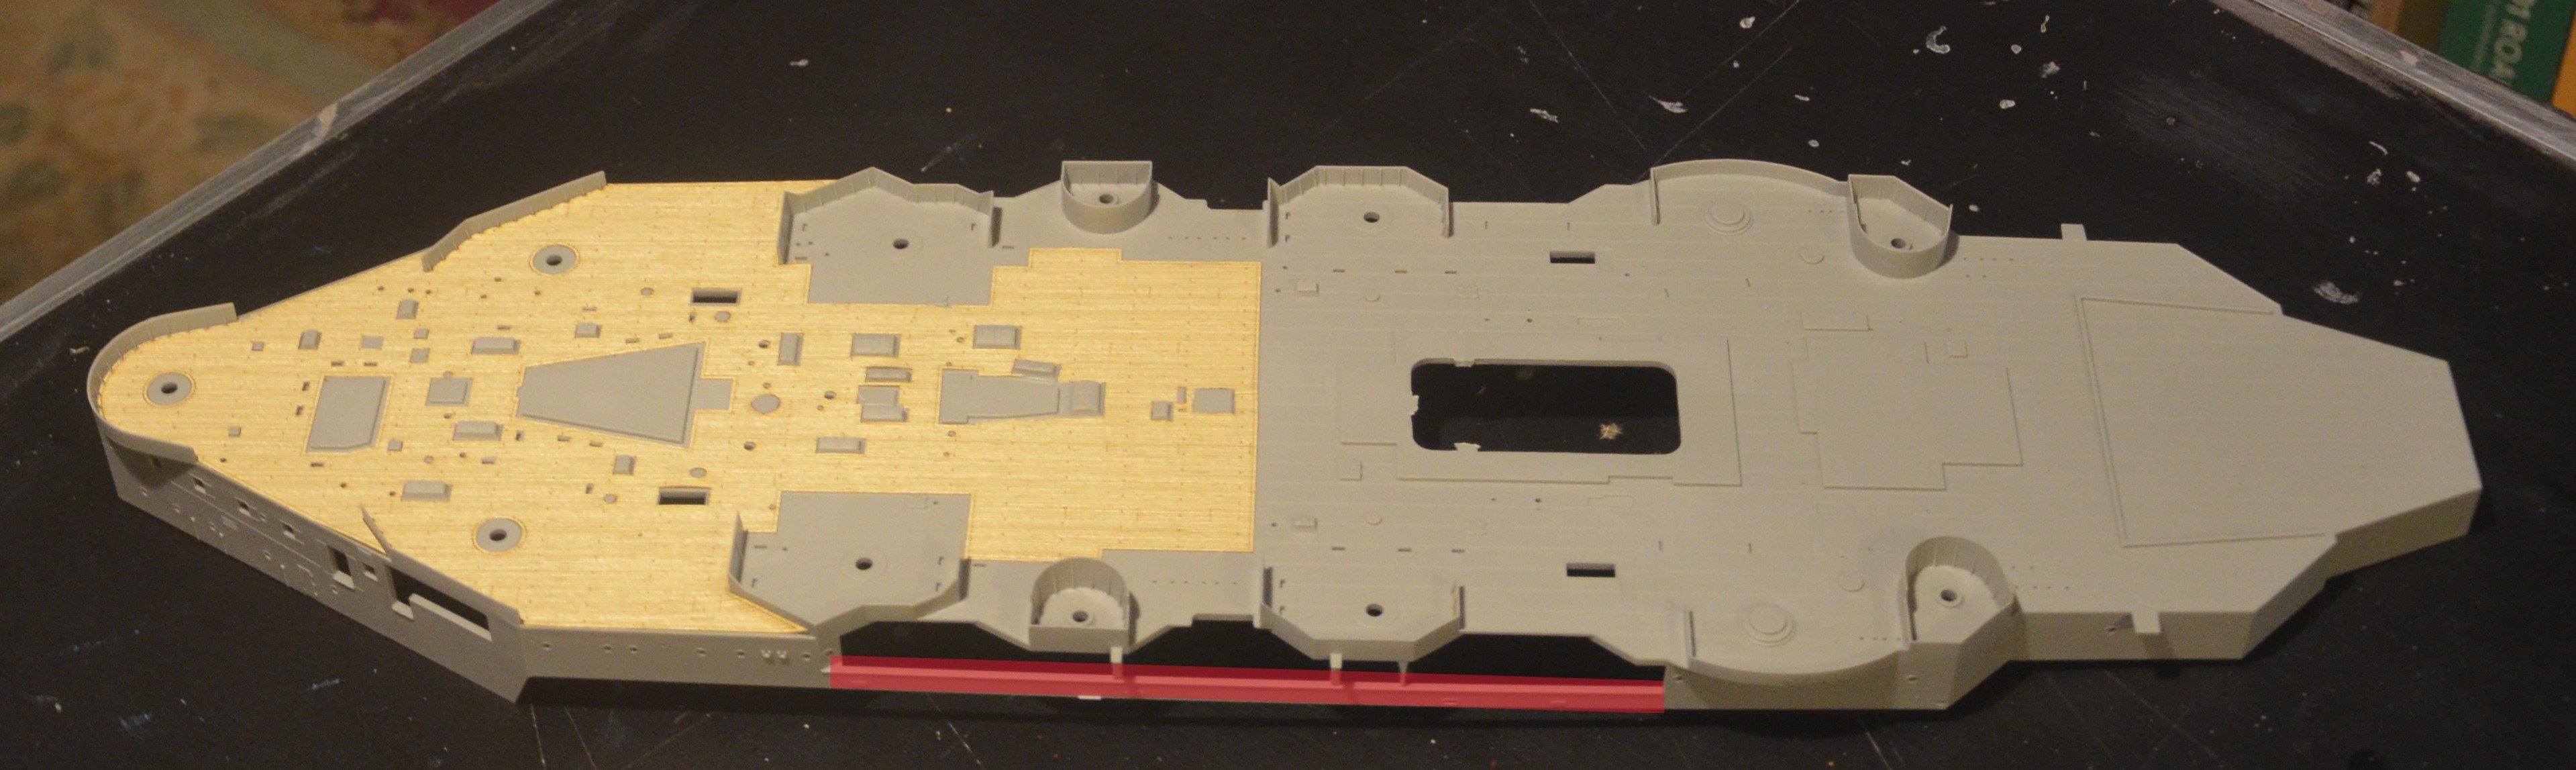
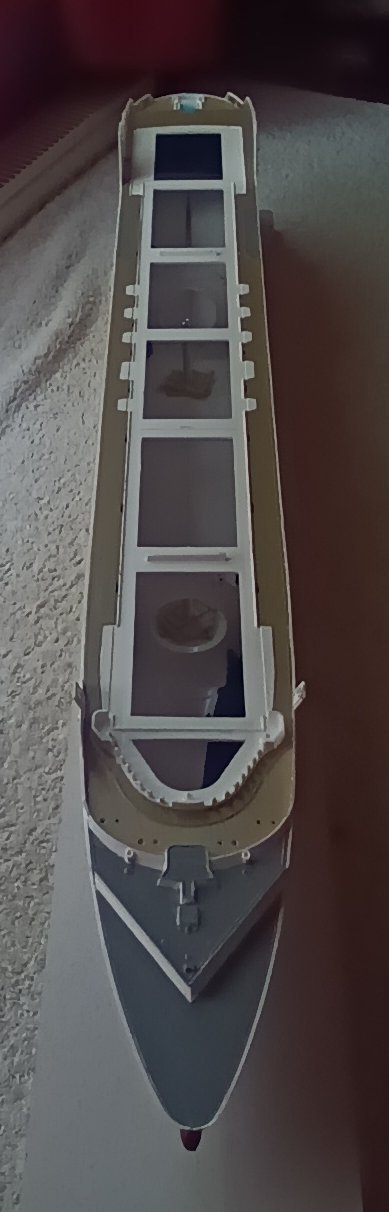
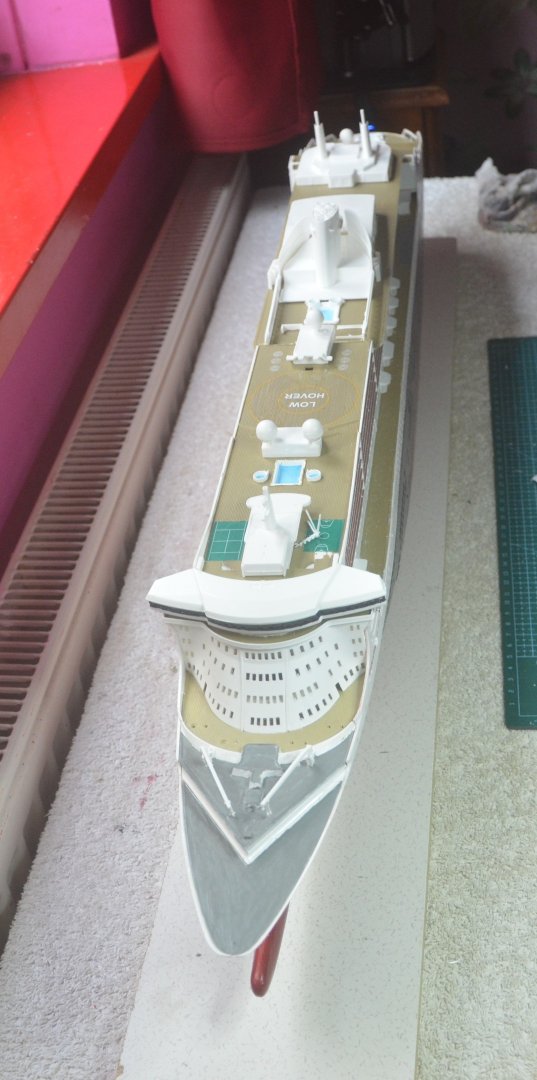
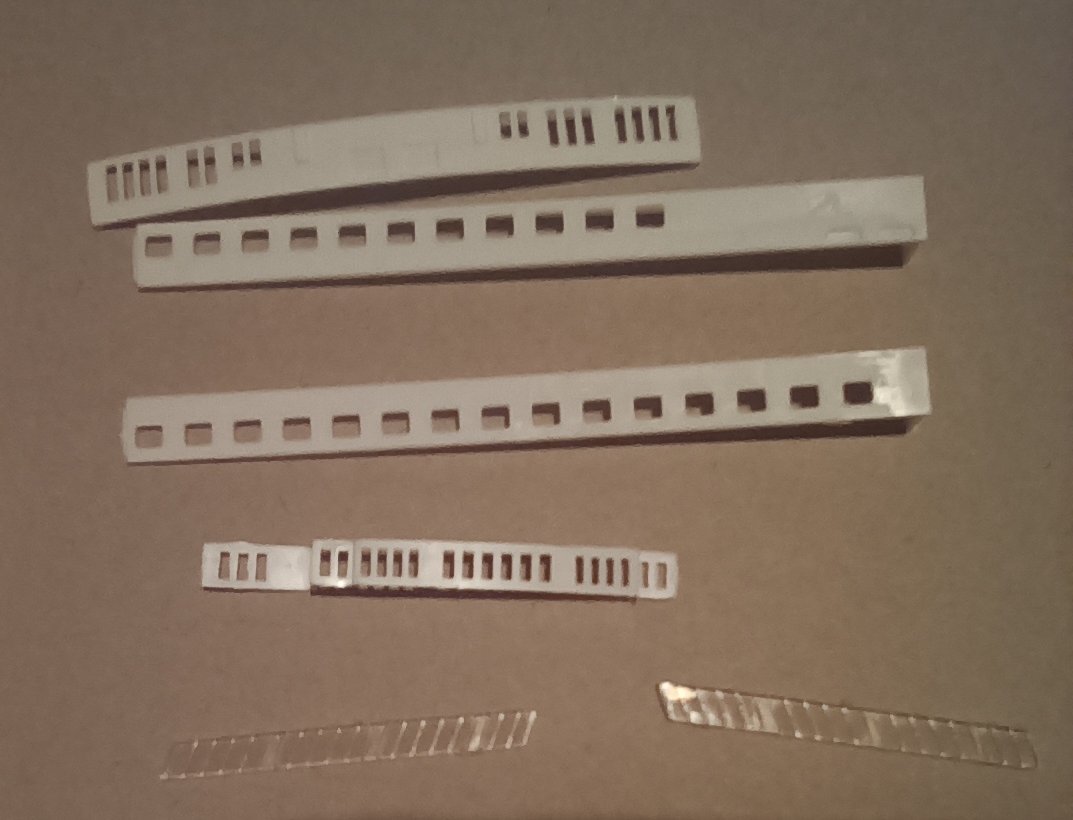
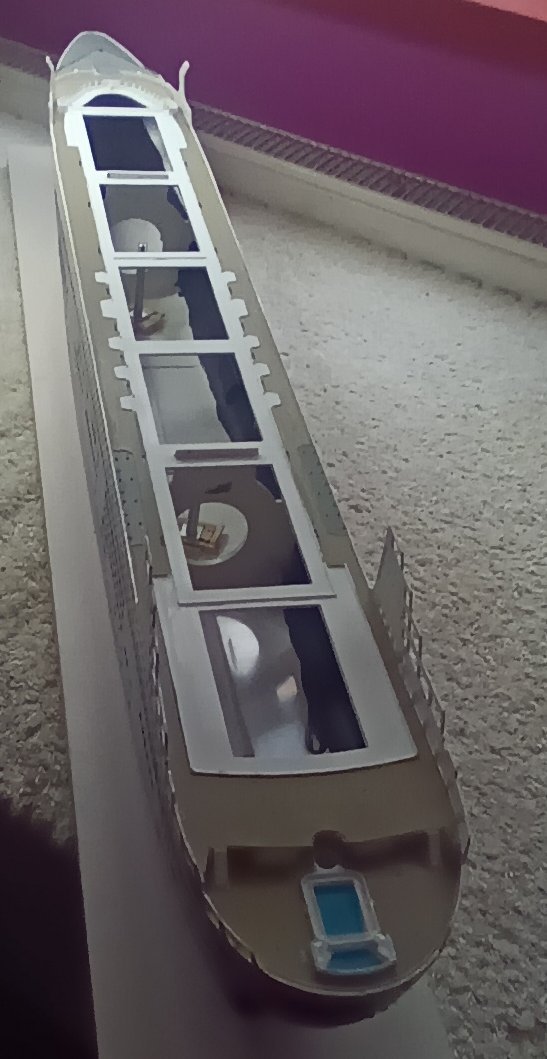
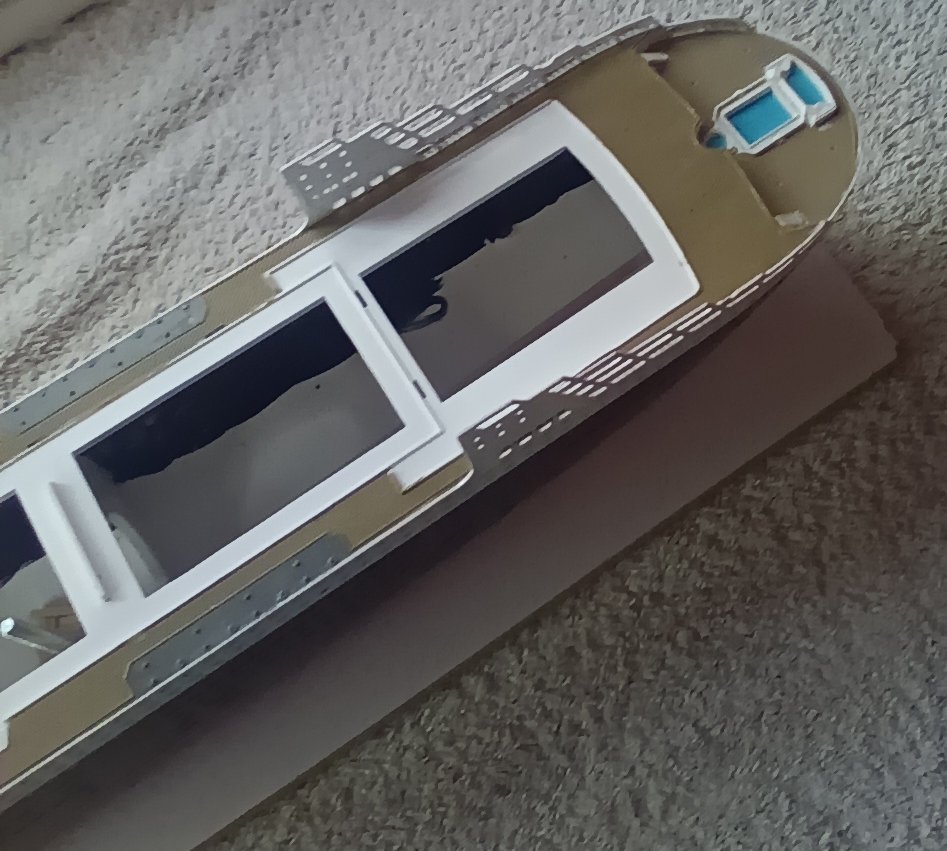
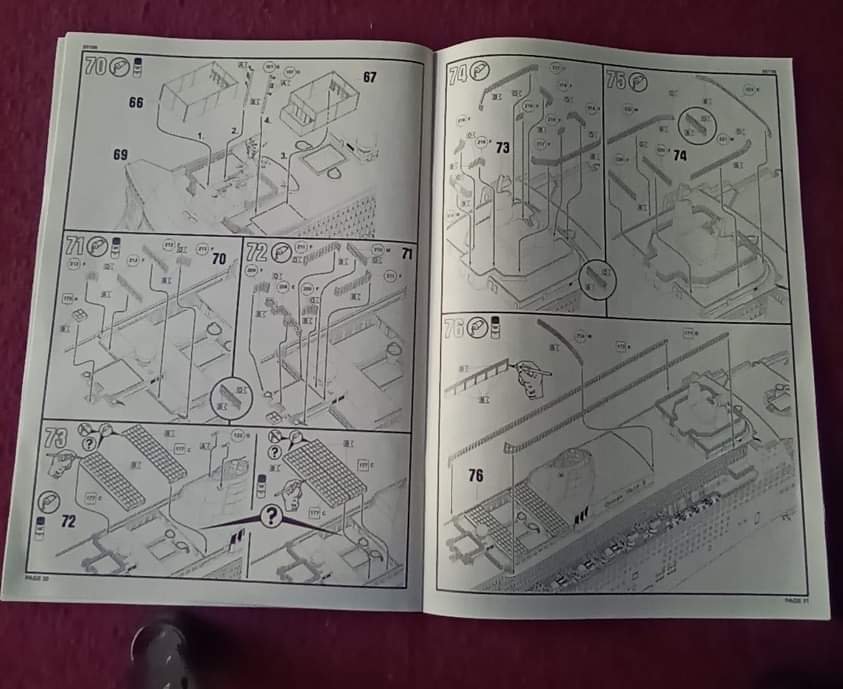
Deck fitted in place and the superstructures dry fitted. Most go together just fine but some will require a bit of work. Just need to prime and paint them and then onto the lifeboats and clear parts. The instructions have you adding the clear parts in front of the balconies before adding all these parts. but I will add the clear parts after completing the deck fittings. Every window at the back of the balcony cabins has been individually glazed. That is around 900. One of the problems is the clear parts that have become fogged somehow. This is how they came out of the box. So far I have tried various techniques to clean them without success. If any one has any tips on how to clean these that would be much appreciated. Also, not Queen Mary associated but I have been sorting through all the MK1 upgrade kit for the Hood ready for when I start to build her. I don't particularly like wooden decks but decided to give it a go on this section. Everyone of those deck structures has to be cut out. But I think it has turned out just fine. Not brilliant but once all the structures are added it should look OK. The highlighted section will be cut out and there will be columns added underneath. Hopefully will be able finish the Queen Mary and start a build log for the Hood in the New Year.


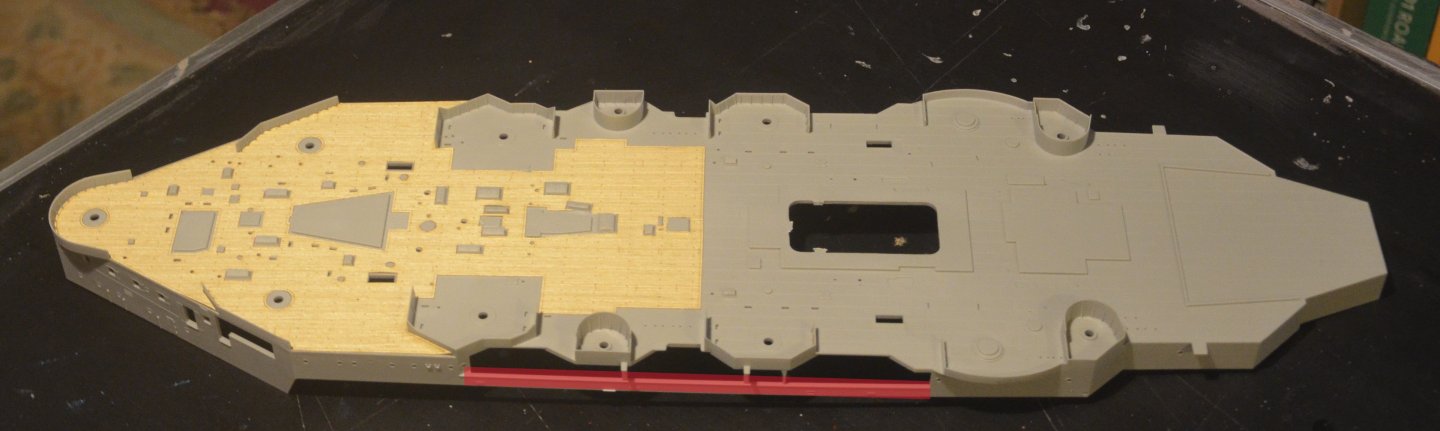
- 33 replies
-
- 6
-
-
- Queen Mary 2
- Revell
- (and 3 more)
-
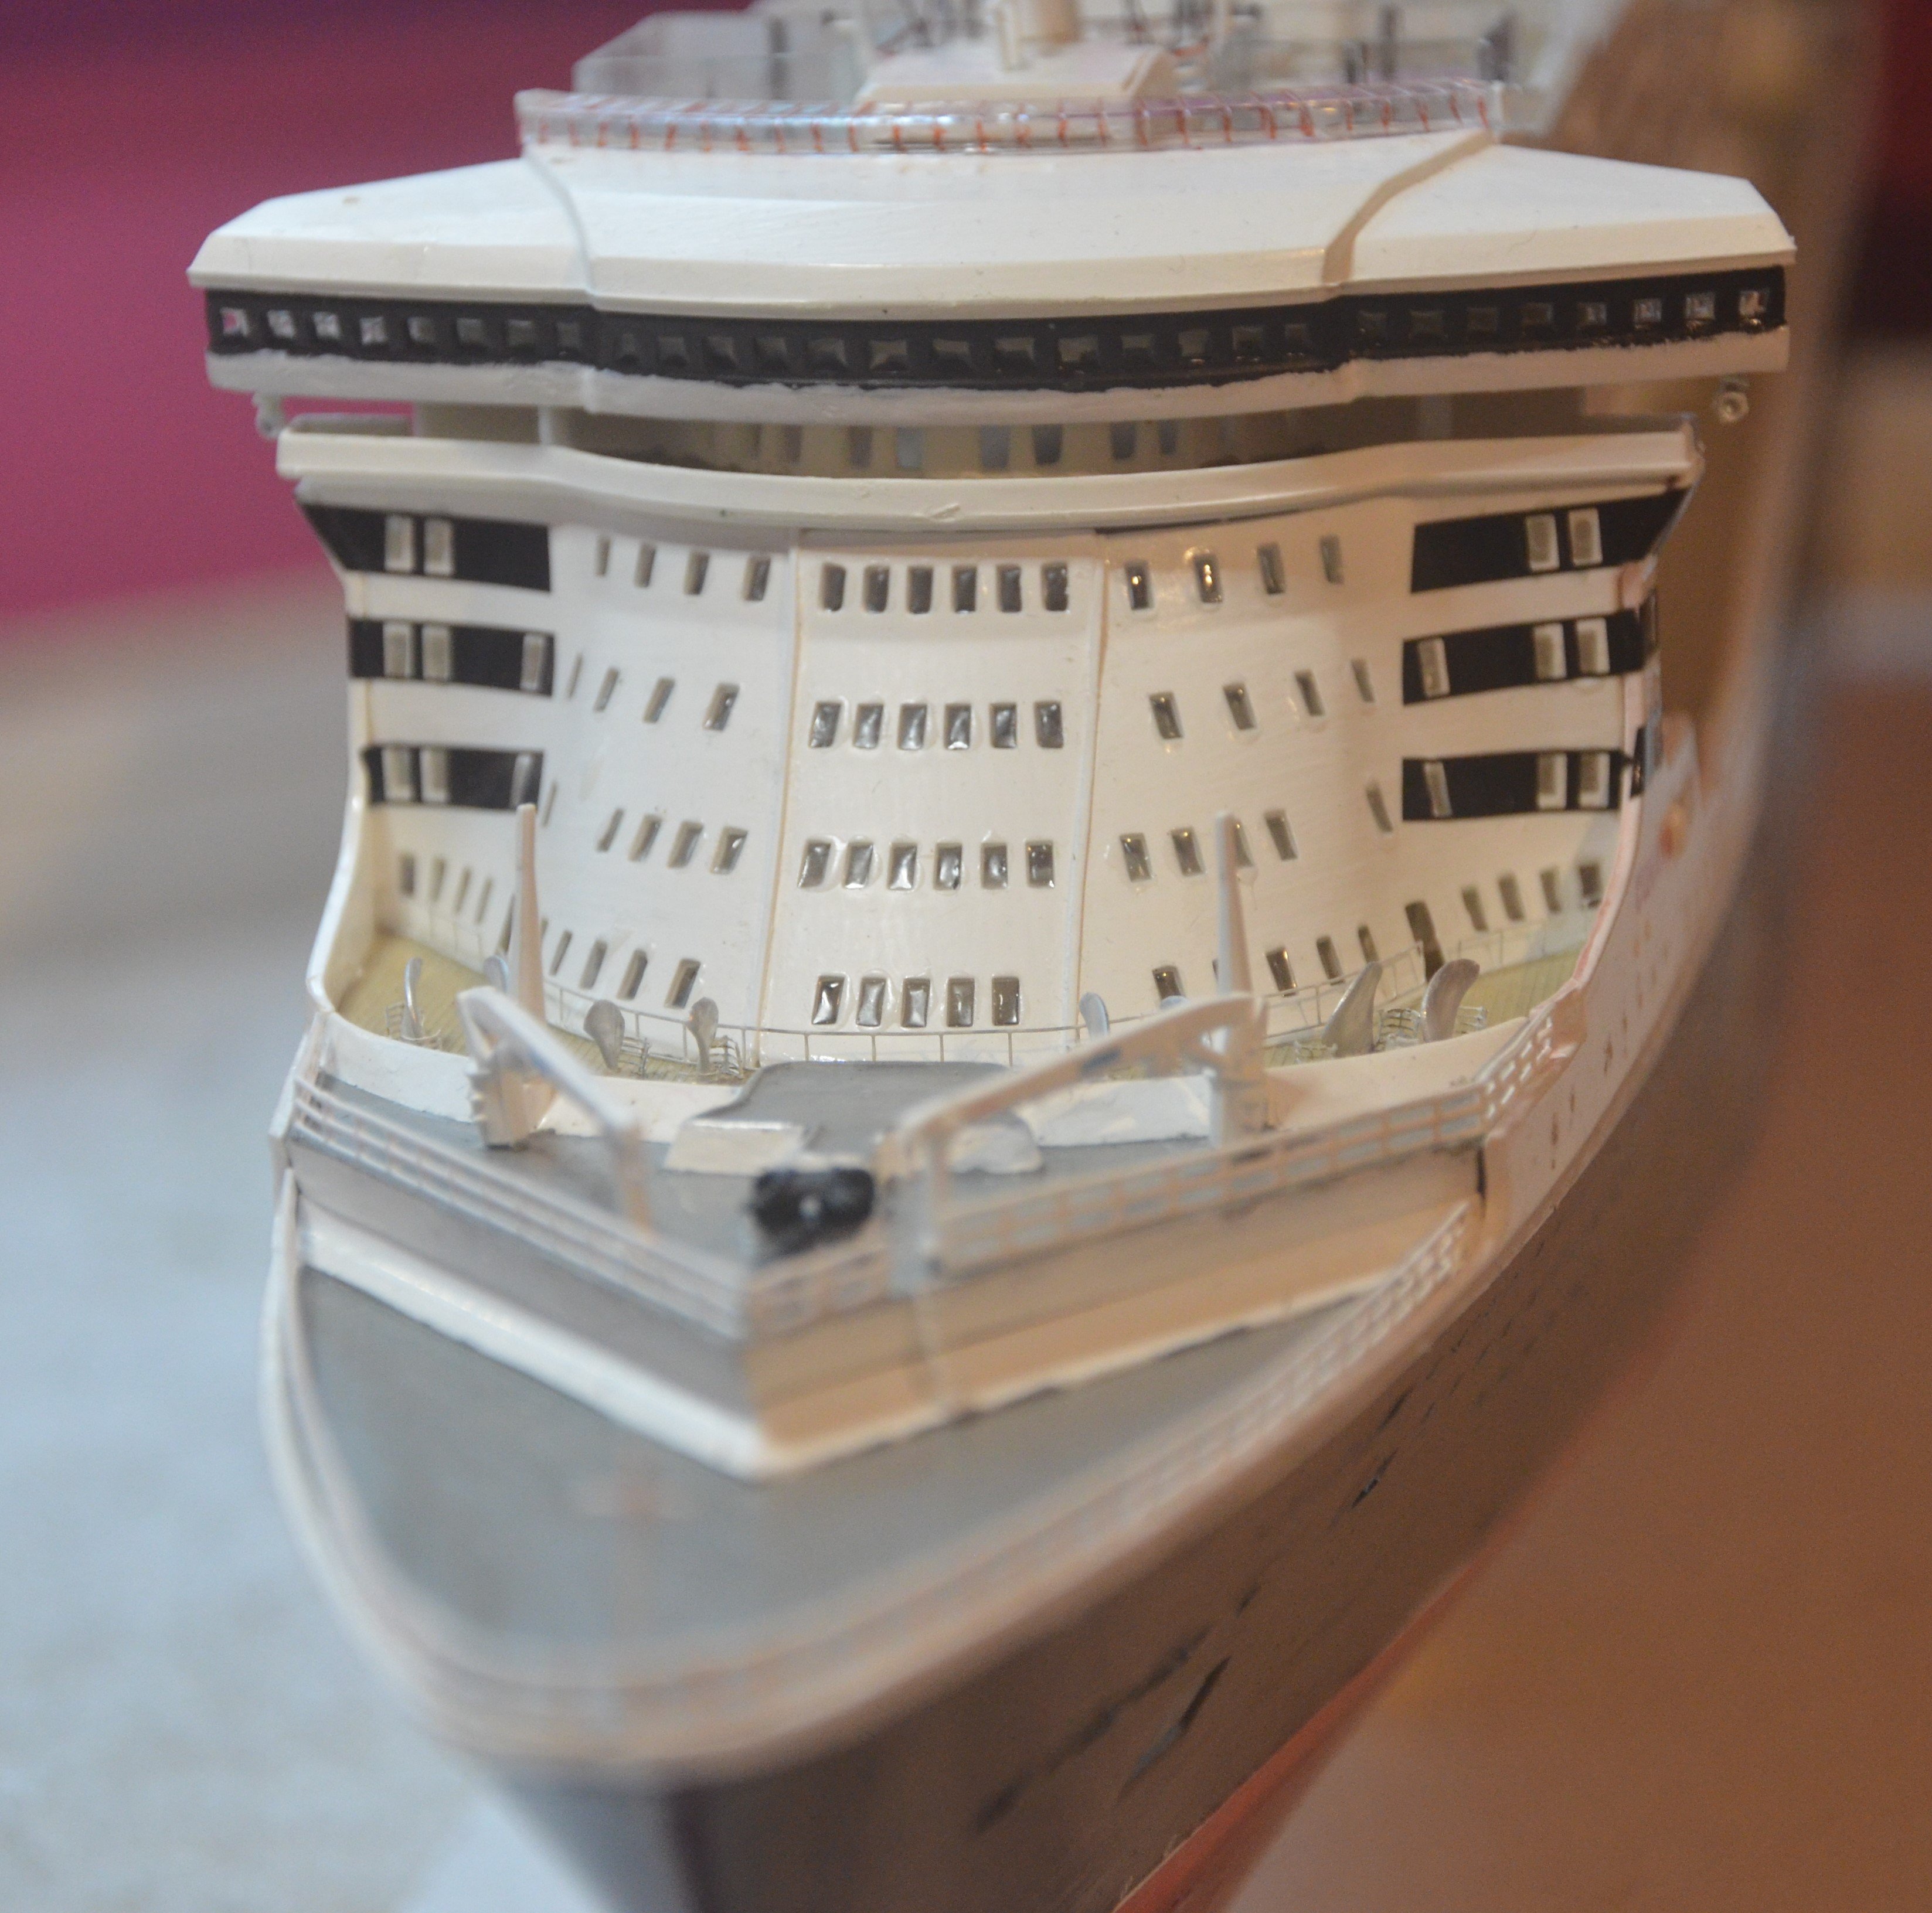
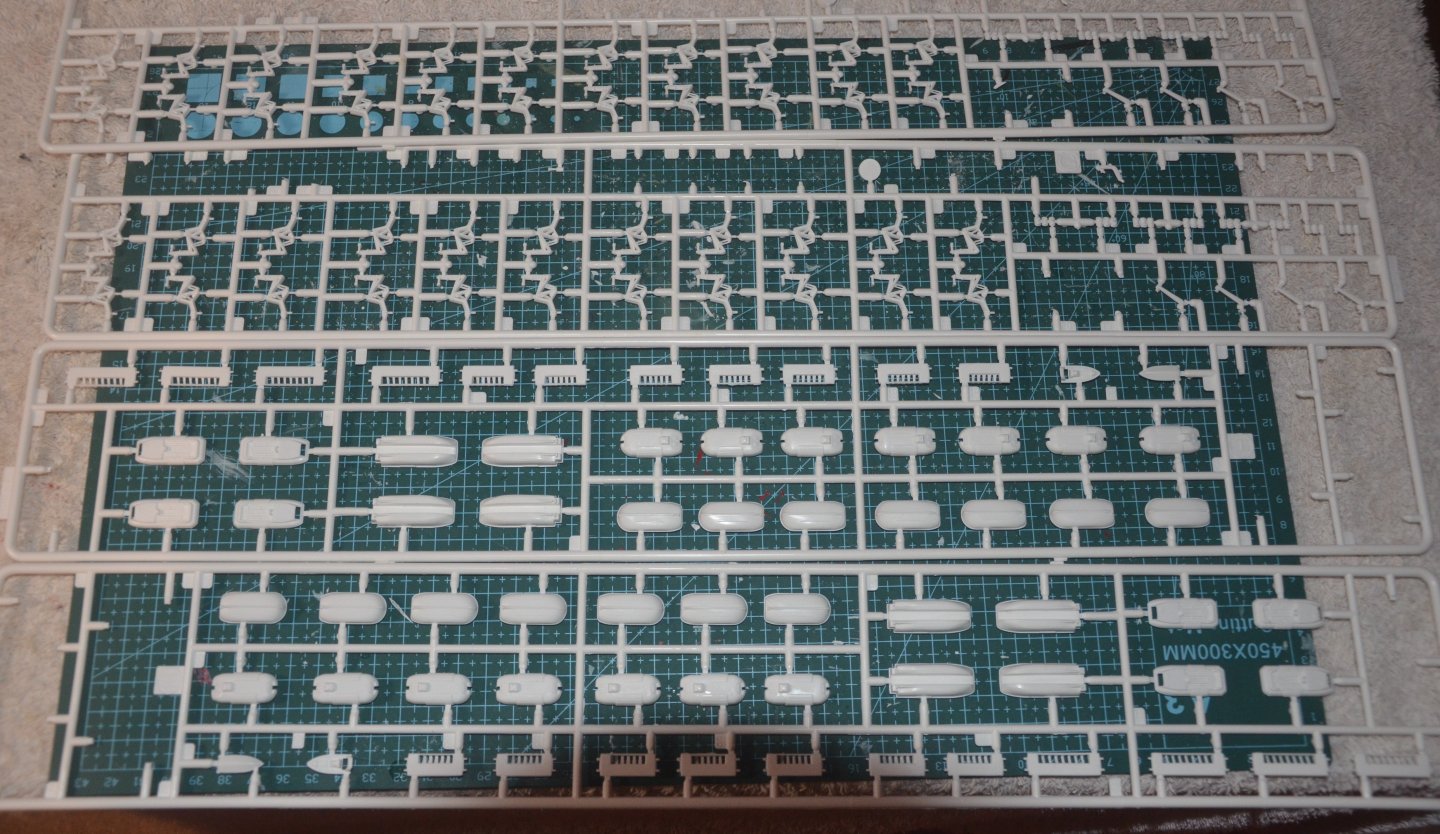
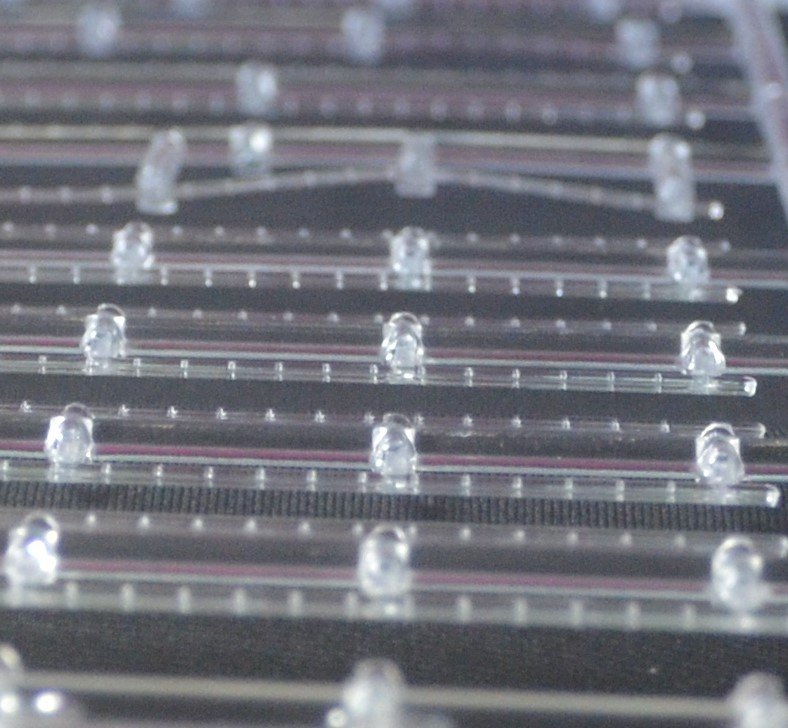
working on the ocean view cabins. A lot of fiddley painting to get the balcony floors looking OK. These cabins will all be visible on the completed model. The back of each compartment represents the doors you would open to get onto the balcony. As such the walls and background need to be painted white. And the floor toned down mahogany. Takes a while. A dentist scraper tool is perfect to scrape away the floor colour that touches the wall and a sewing needle in a pin vice helps to tidy the back up. Once done you can see right threw the walls to the outside. this does not look very good so I am about to start glazing each opening, which would represent the windows in the doors. Hopefully this will help to stop that view. And how the model is coming along. The clear parts are the rails that go across the front of each balcony to stop you falling overboard. these need to be painted brown on top for the hand rail and black for each column. Unfortunately I found one as you see it broken in the bottom of the box. And one on the sprue that is warped out of shape. I should be able to hide these on the side that wont be seen once the model is displayed in its final position. Not ideal for such an expensive kit.

- 33 replies
-
- 5
-
-
- Queen Mary 2
- Revell
- (and 3 more)
-
Finally got a PC. and now have the links working properly. that's all it takes rather then trying to do it with a tablet or a mobile.
- 33 replies
-
- 2
-
-
- Queen Mary 2
- Revell
- (and 3 more)
-
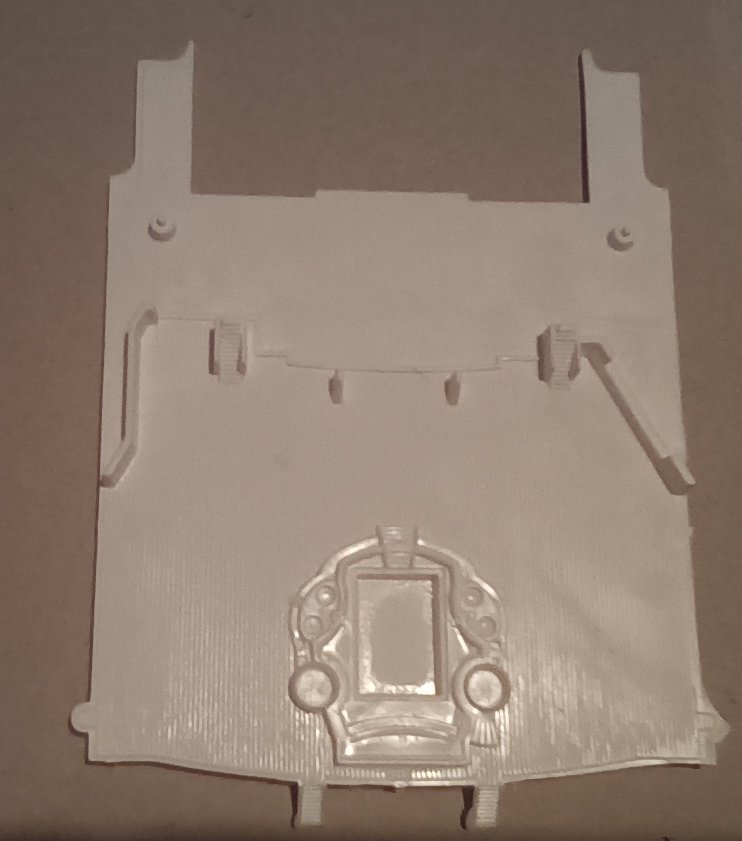
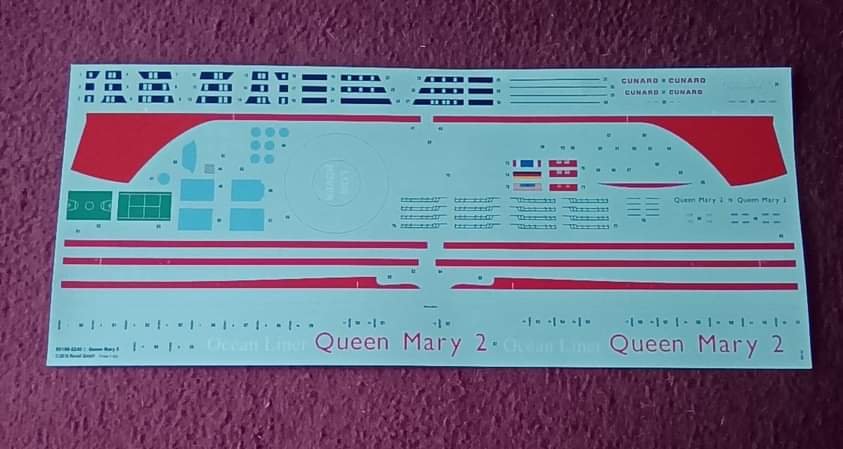
The first set of decks in place. I was going to simulate the water with a resin mix. But decided they where to small to look any good,so used the decals. Which look fine. The line of cabins and stern deck dry fitted. there are 426 to be painted up. There is a lot of flash in this kit. The back of the balconies represent the glass doors leading out to the balcony. They probably won't be seen once the clear glass parts are added. But still need a lot of the openings cleaned out. I may then glaze them. You need to think way ahead sometimes when adding parts. When the stern deck was dry fitted it left the stairs going down to the next deck short. On checking through the instructions it turns out there is a small platform added. The fitting of the deck is stage 16. The two platforms that are added to create a spiral staircase are added at stage 81. So best to fit them now to get the parts lined up correctly,which could have ended up being out of line has I not checked the instructions.


- 33 replies
-
- 6
-
-
- Queen Mary 2
- Revell
- (and 3 more)
-
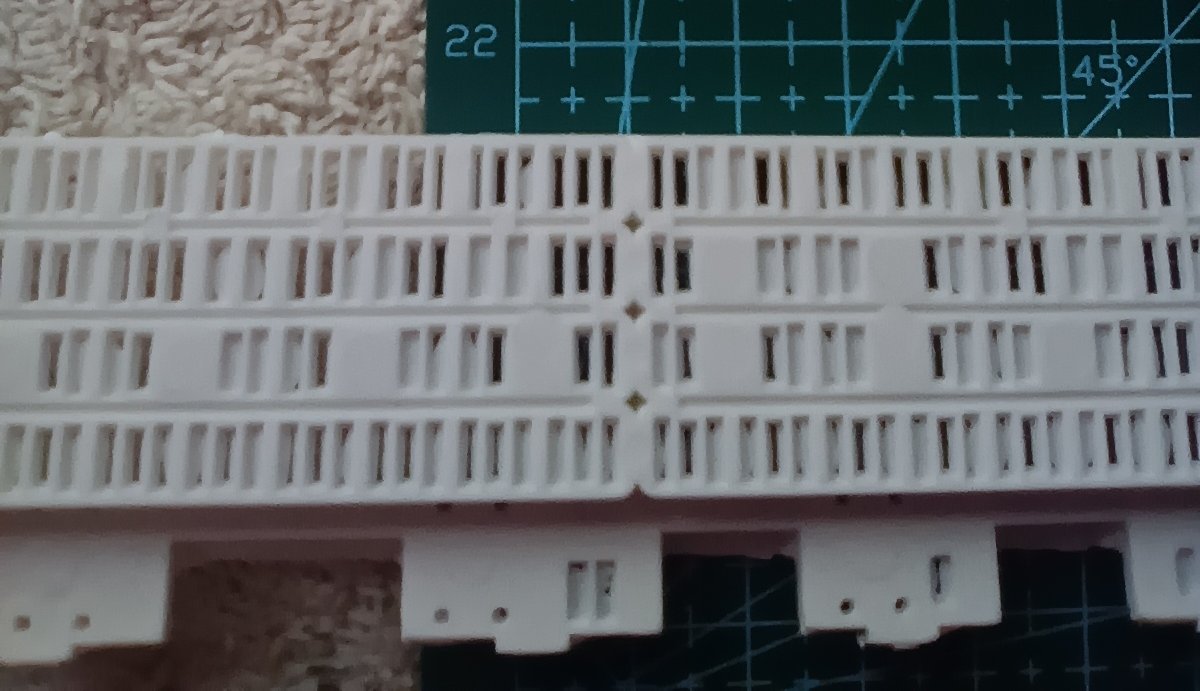
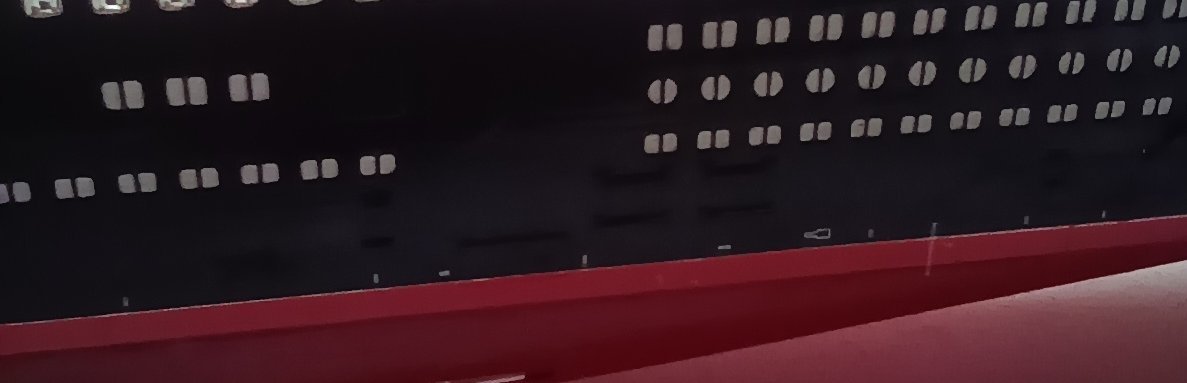
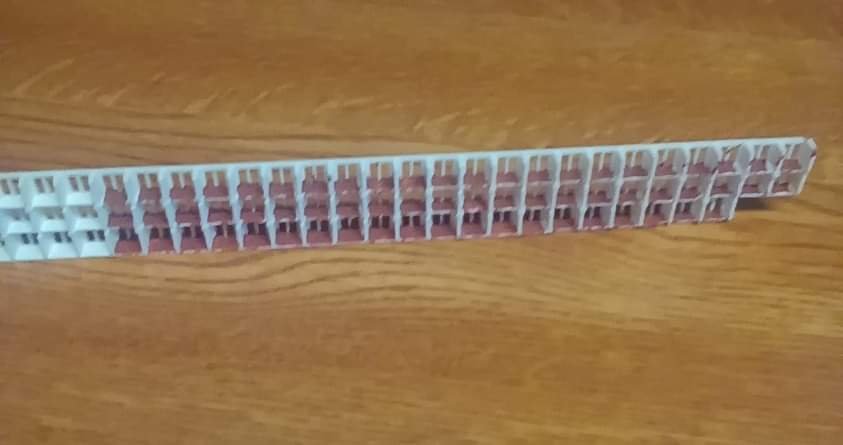
Next line of balconies painted. That's 478 balconies in this part of the hull alone. I've also returned the Windows that where white back to black. The more I kept adding details the more I disliked how they looked. Have kept the port holes glazed as they look OK.

- 33 replies
-
- 5
-
-
- Queen Mary 2
- Revell
- (and 3 more)
-
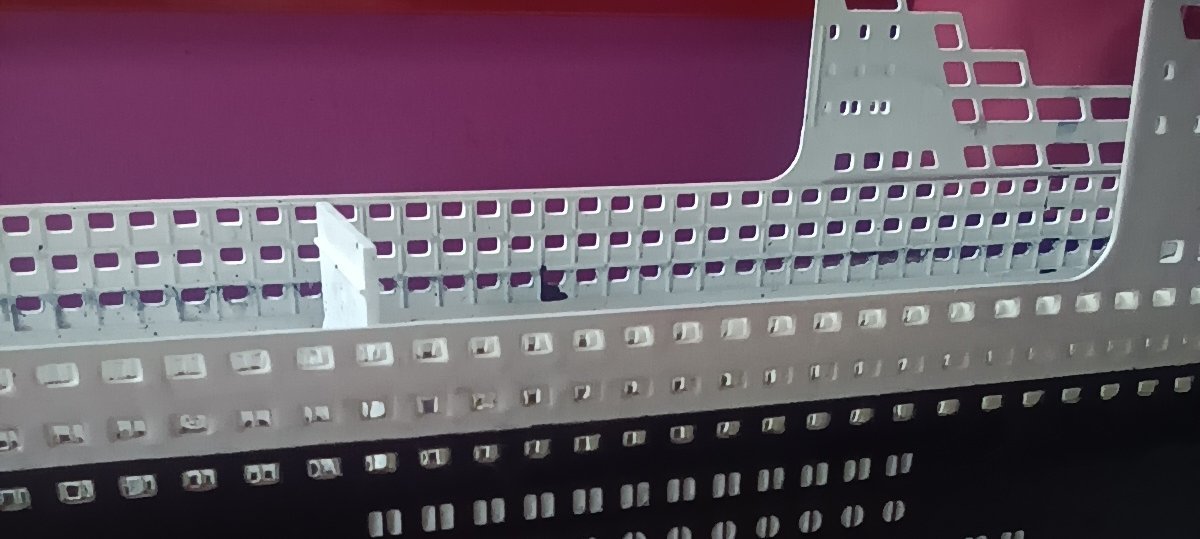
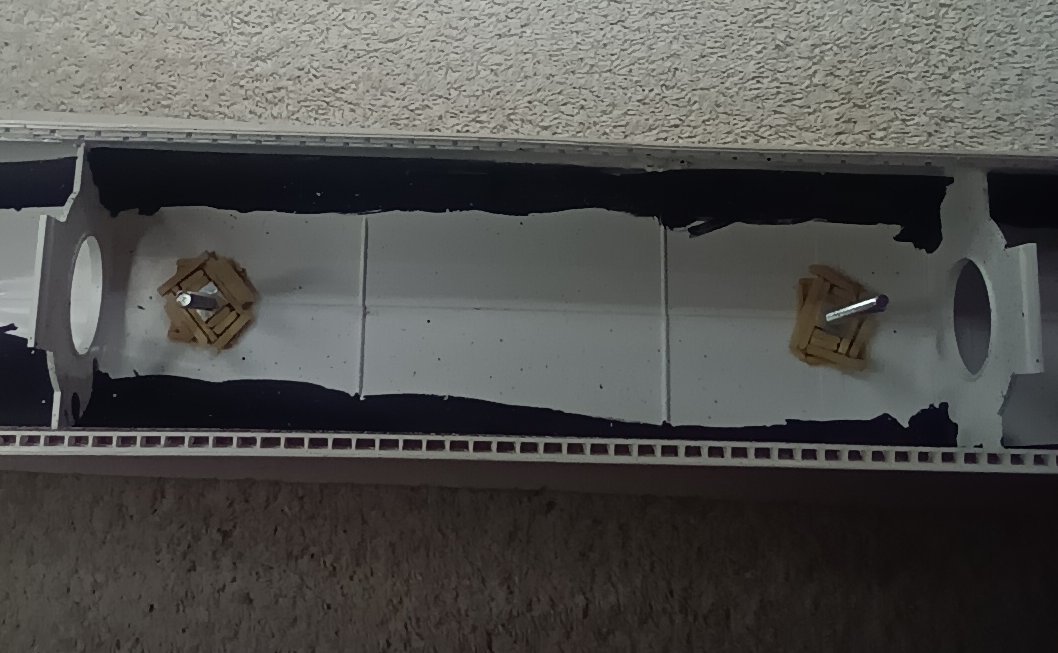
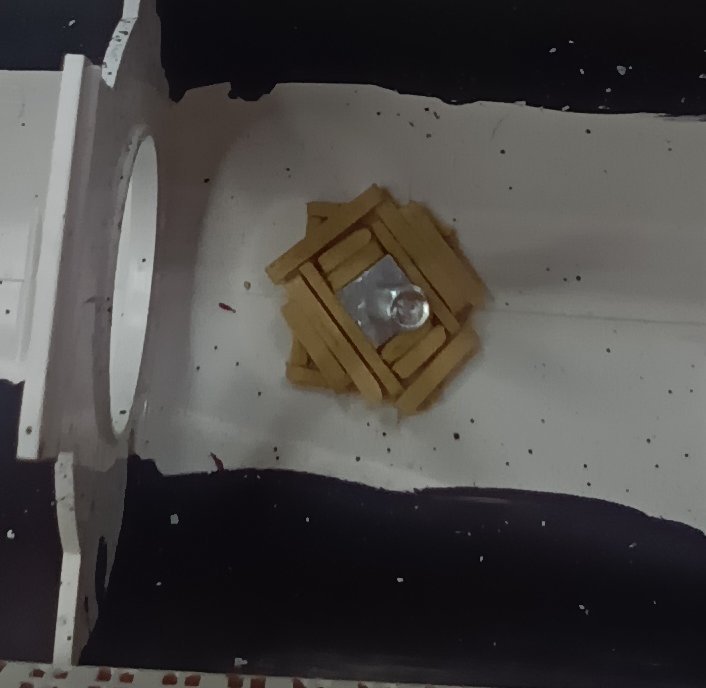
First side of the hull nearly completed. Most of the decals are in place. The top three lines of windows have been glazed with Kristal Klear. Usually with a flat bottomed ship I would put a bath towel on the table to protect the bottom. But that means having to handle the model each time I need to turn it around. So I have made a baseboard from an old kitchen cupboard shelf. And then bolted two decent size columns to hold the model. They where made from a garden fork handle. and give plenty of area to grip the hull. doesn't look pretty inside,but the nuts won't move once tightened up. Plus if I decide to put the model on pedestals they are there to use for them.
- 33 replies
-
- 6
-
-
- Queen Mary 2
- Revell
- (and 3 more)
-
The problem seems to be the fire tablet. I'm writing this on my PS4 and I see a completely different screen than I do with the tablet.
- 33 replies
-
- 2
-
-
- Queen Mary 2
- Revell
- (and 3 more)
-
I can't get this working, can't even delete the signature. I have a message at the bottom saying blocked because of IPS spam. Which comes back as a parcel scam. But a check of the system with sky tells me everything is clean. No spam on the system and no threats.
- 33 replies
-
- 2
-
-
- Queen Mary 2
- Revell
- (and 3 more)
-
This is getting nowhere on this tablet. I'm obviously doing something wrong as you can from how the link looks now.
- 33 replies
-
- 2
-
-
- Queen Mary 2
- Revell
- (and 3 more)
-
Thanks but that did nothing. I seem to have lost all the signatures I had and the link takes me to the Titanic log. I've only ever managed to do it properly on a pc,the tablet seems to be the problem. I don't know if there is a way to undo what I've done and return the signatures back or how to get the Queen Mary link up. I'll try again at some point,if I can't get it working I'll wait a few months and see if I can afford a pc. Paul
- 33 replies
-
- 2
-
-
- Queen Mary 2
- Revell
- (and 3 more)
-
Can someone help me. I was trying to post a link to my build. But I've ended up posting the entire post by accident. Might be to do working a tablet and not a pc. If someone could delete the link I have added and be so kind as to add a proper link for me I would be most grateful. Thanks, Paul
- 33 replies
-
- 2
-
-
- Queen Mary 2
- Revell
- (and 3 more)
-
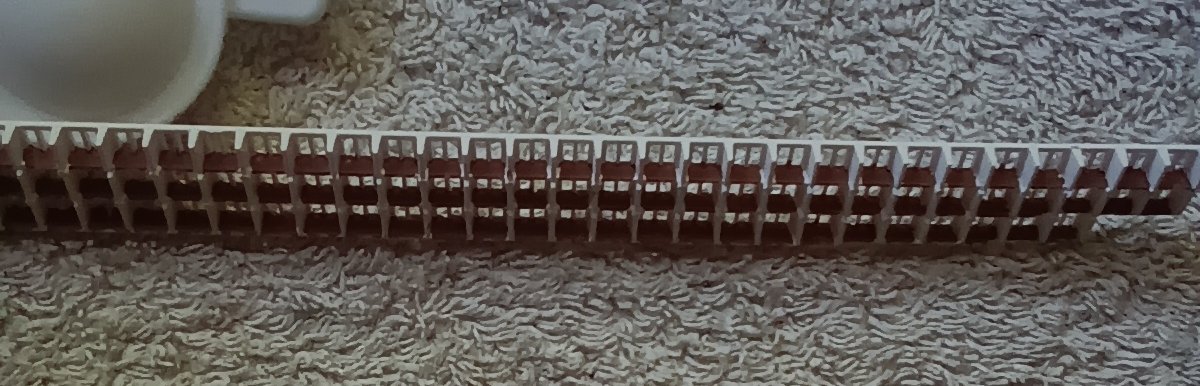
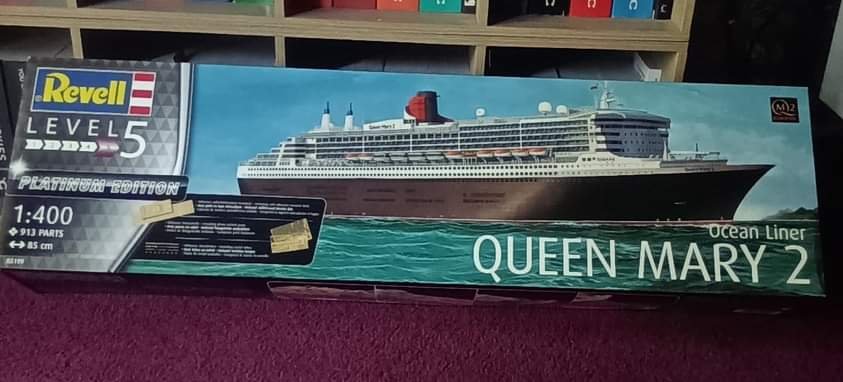
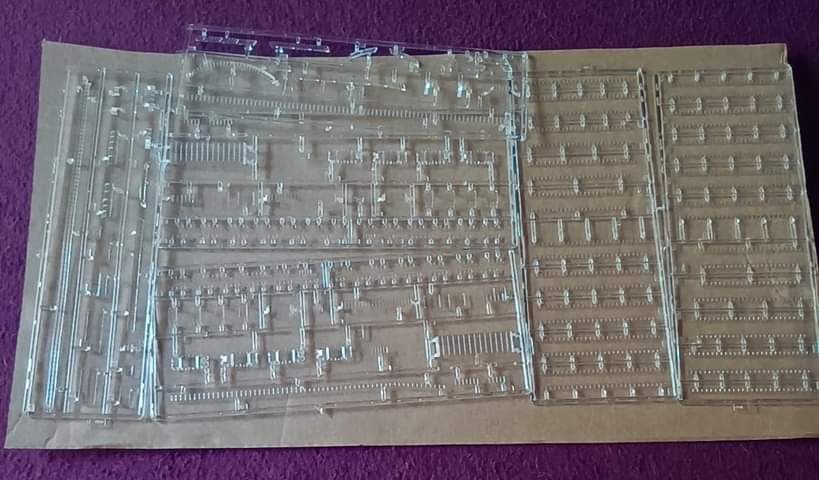
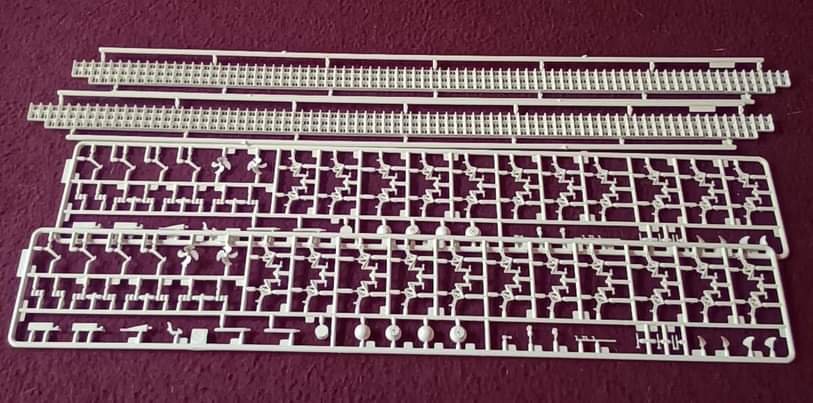
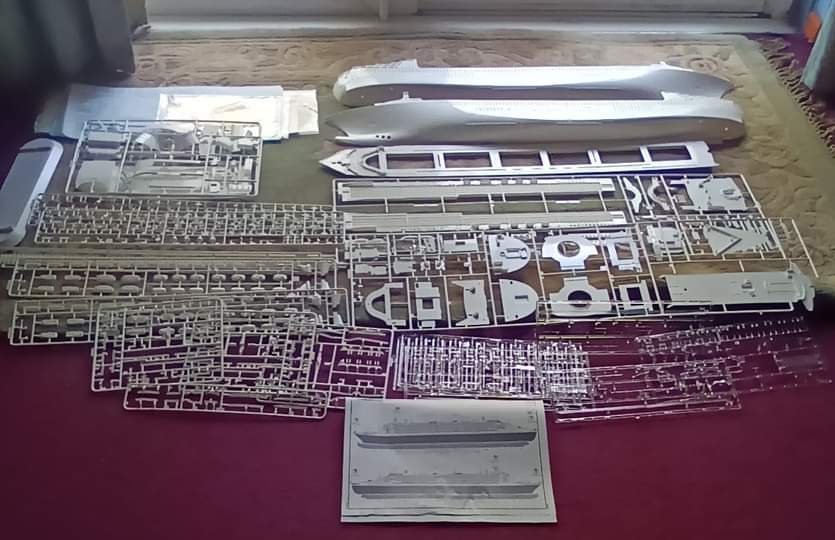
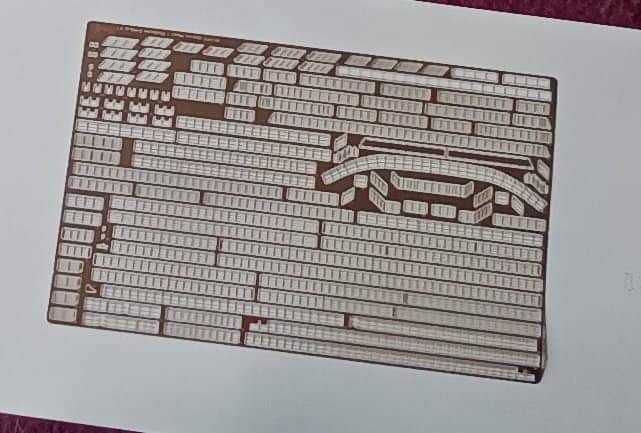
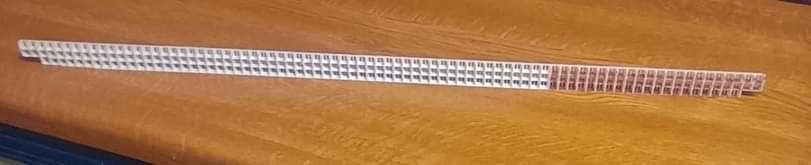
My next build. This is a plastic kit. this will be an out of The box build with The supplied photo etch. The quality is very good for the most part. There is however quite a bit of flash to deal with in a few places. Especially on the hull. This is the platinum edition so has some added photo etch. There are also a lot of clear parts to add to the model. Typical Revell painting instructions. Add such and such % of this and that rather then straight forward colours. Over 900 pieces including the photo etch. So plenty of work. I've been building the hull whilst working on the Titanic. The hull is painted and ready to add the decals. The two long bars represent the balconies that will be glued into the top part of the hull before adding the decks. There are a few hundred of these balconies to be painted. The kit came supplied with wooden decks. But I didn't like these so will paint them. The effect for the Windows was an accident. I always work on the side of the model I am building that will not be seen once displayed. This way any accidents can be rectified on the side that will be on display. So I tried to cut out the Windows for a better effect. I started by sanding away the plastic from the inside,which worked to a point. But it also ended up cutting into the hull. I also drilled out very small holes and cut them out. But it didn't come out very well. So I had to fill the areas in. I didn't have any plastic filler so used some wood filler. This had the effect that you see. It looks quite good so I will keep it.


- 33 replies
-
- 8
-
-
-
- Queen Mary 2
- Revell
- (and 3 more)