


Alex1201
-
Posts
18 -
Joined
-
Last visited
Content Type
Profiles
Forums
Gallery
Events
Posts posted by Alex1201
-
-
22 hours ago, lambsbk said:
I CAREFULLY bored a new hole mid keel to transit my fiberoptics - the right size bit and a careful drill press can do that for you. You will be glad you included the bolts for mounting. I am already using them to hold the ship fast to the cradle while working. The pic link below shows it from the inside.
Dave
The spots in the keel are so thin, seriously, I just opened it up with a drill bit by hand. Made a pilot hole with the small manual drill. Then widened the hole with a larger bit twisting with fingers.
Flip it over on something thick enough to support the flat middle sections. I thought of an advantage to this test. If any port covers or cannons come loose, better to find out now than later that they needed more gluing.
I also have mine secured via the bolts in the bottom, to a simple plastic lid to one of my parts containers. My first stand was scuffing the copper, and my fingerprints were a hot mess. I've done my second coat of copper and should seal it now.
-
8 hours ago, Michael G said:
I've decided I want to try and get in through the hull. It's a bit risky, but since the gun deck is not glued in place, maybe I can make it work. I think I'll try to go up through the space for the screws.
I drilled out the holes for the screws, and it is a very thin layer and easy to get through. You could tell where they were from the outside, there was a dent. A small drill bit went right through, and then I made the hole bigger.
It would be a shame to remove your gun deck after all you had done. Worth a try to fish it with a stiff wire through a hole you drill, or maybe remove and replace one of the grates.
-
19 hours ago, Michael G said:
My options are to have the battery pack hang out one side of the ship, which would ideally be the "back" side when it is eventually displayed, or to run the string through one of the gun ports in the front or back, or to run it through the cabin. If I do any of these the battery pack will just hang out, but I'm hoping not terribly visibly. One other option is to somehow hide it on the deck, perhaps in a canoe. However, doing that it will be smack in the middle of the ship somewhere. I would just have to disguise it the best I could. I don't know that that's a realistic option once I have all the rigging up.
What I saw on one build log was to drill a hole through the keel and to the base. Your gun deck is in place, but it might be possible to drill from the bottom up and fish the wire?
If it's going to show, the least visible place might be along the rudder hinge, and then you could bringing it out that hole in the transom.
Is it thin enough to stick to the bottom of the spar deck without being visible? Then you could get to it through the holes under the boats to change batteries, or maybe even flip the switch?
Where did you find that?
-
And a pause for comic relief. I had a chuckle at a translation of safety warnings found on a set of drill bits...

- popeye the sailor, lambsbk, CDW and 1 other
-
 4
4
-
Thanks, Fright, EJ-L, CDW, and Lambsbk, for your kind words!
Sorry for delayed response. I thought I had notifications set up when people comment. Haven't checked in, been swamped with work, but also made actual progress on the model.
CDW, thanks for the book tip! That one sounds like just what I need.
I did get the painting of the gun deck planking to a potential stopping point, lessons learned for the attack on the spar deck. (My husband says it's fine, and time to move on from something that will not be visible! And he is tired of looking at it. Ha! My work space is on the kitchen table, so I have a critic readily available.)
I will post about that soon.
But new challenge: my tiny chain for the rudder preventers came yesterday. It's TINY!!
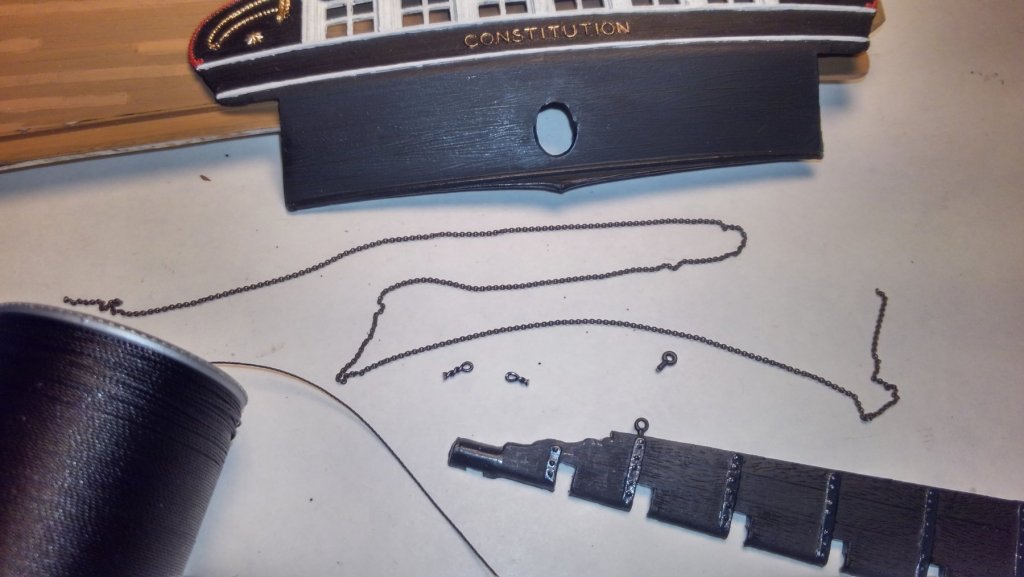
Scratching my head about how to attach it to the transom. This is one modification away from the plans that I have to make. That empty eye bolt on the rudder would drive me crazy!
There is no way I'm getting any wire, or even reasonably strong thread through the links. Shown are prototypes of metal eye bolts I can make as needed (my plan was just to do these for load bearing ones. But they do look less chunky than the part 13's. And were much easier to do than I expected.)
The chain doesn't quite fit through their holes, although I could make some with bigger holes. But I don't think that would look right, and it would still need to be attached/tied/wired/glued to them to keep it from sliding back and forth messing up the drape of each segment.
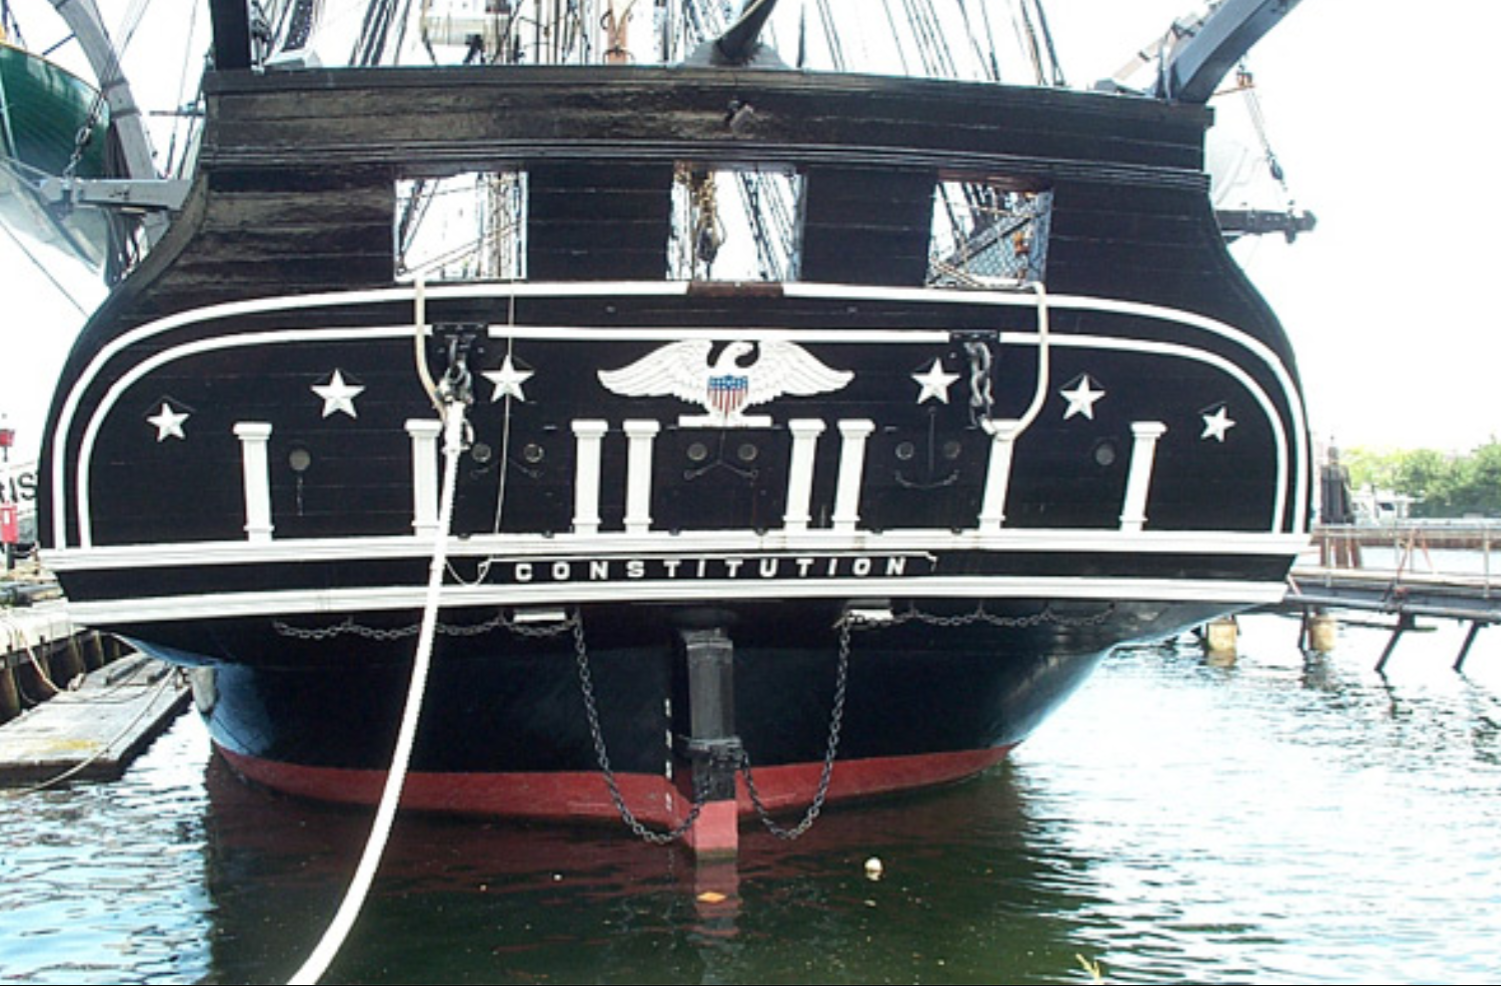
I don't see a way to work it out except by tying the chain to the bolts, or even just looping thread around the chain and through the holes I will drill. (I do have a thicker thread than in the photo.) Then can tie it off inside. I can't see the attachment points on the real ship in the photos I can find. But assuming whatever bolts are not huge, and something low profile will work. And it will be under the edge of the transom, not terribly visible (as in the real life photos) so less is more. ?
Life size example for reference...

- EJ_L, popeye the sailor and lambsbk
-
3
-
Interesting! They must have stepped up their thread game. It makes sense that is an item that will change over the years depending on their suppliers. Mine is terrible.
-
Michael, enjoy your cruise!
Test run looks good. Is that thread that came in your kit?? Mine looks nothing like that.
-
13 hours ago, Michael G said:
The canons are all complete and ready to go onto the ship. I have a question for anybody who's done this build. The cannons have a thread that goes from each one to the side of the ship and back all the way down. I added two pictures here. All these are are little nubs. There's really not any catch on any of them. In hindsight I would have whittled away at them before putting the hull together, but it's too late for that. Any ideas for this? How have others done this? I'm thinking I may have to just one at a time and blue and hold the thread on the nubs.
Looks great!
It looks like there are slight indentations on the top of them?
If not, like you say, creating a notch would be tricky now.
Most people do seem to mention gluing each knot and waiting. If you use CA, doesn't take long. Also note this isn't load bearing. If carriages are glued down, there won't be tension on those lines. Also note, they should be slack in the outboard position. The old directions show them tight. I downloaded the newer ones and they have it right. They don't adjust the length when the cannons move out, so they should hang loose.
Another option might be to glue on a tiny piece of plastic on the top of the pegs to create a hump to catch the knot?
Most of mine have a tiny notch and I plan to knot and CA glue. May try to file a small notch in the smooth ones.
Not expecting it to go well. Ha
-
1 hour ago, Michael G said:
Great! I'm on my phone and can't figure out how to follow yours... what am I missing?
I plan to have an update in the next week or so here. Working the gun carriages still As I mentioned early on I'm trying not to get too absorbed in this that I neglect my family 😄
On my phone, at the very bottom of the page there is a bar to click to follow a thread. Right before the previous/next topics buttons.
Yeah, the real world beckons. 😀
-
On 5/30/2017 at 8:14 AM, popeye the sailor said:
.... you can find rigging thread that is pre-stretched. I've done all the 1:96 Revell kits {that I've done} with the supplied thread. I like the thread......it doesn't fuzz out very quickly...takes a bit of abuse before it will begin to do it. the kit isn't too bad in this respect, since it does supply thread in different sizes, in both the black and the tan. I tried to get some from Revell when I ordered the sails and decal sheet for my Cutty, but it seemed they didn't have it to send or purchase. I believe Revell has stopped the practice of replacing parts......I think only Revell/Germany does it still. ...
Don't want to hijack Michael's post, but maybe Q/A helps others. But, I'm struggling with the thread.
First, it seems so slippery, isn't it hard to work with? Or is that an advantage?
Mainly I'm bothered that their small, med, large are too similar. Attempting to measure using wraps per cm, I get 0.42, 0.43, & 0.53 mm for black and 0.42, 0.5, & 0.52 mm for tan. The large tan is probably the right scale for the cannons. But if my math is right, scale running rigging would range from 0.1 to 0.4 mm (3/8"-1.5" diameter).
Standing rigging would range from 0.2 to 0.8 mm (2"-10" circumference).
And on Revell's site, they say they replace parts for recent kits, but older ones no guarantees they will still have any.
I emailed about what sizes of line they intended to supply in the kit (hoping mine is wrong). Got a "will look into it" reply.
-
-
-
Hi. This is my first build log. A brief introduction: It has been a long time since I did a model, and I jumped in feet first to this challenging one! I had done some model cars in grade school, and then did most of one sailing ship in college (abandoned half way through rigging after the cat chewed off the top of the mast for the second time!!) My crafting since then has varied from needle crafts, to home DIY/remodels, to painting Bob Ross style. All those experiences are going to be useful I think!
Well, this project came to me when we were living in the Boston area for a year. We learned to sail, and spent much time at the Harbor and soaking up all the living history there in the nucleus of our country. I’ve never been a history buff but being on location makes all the difference. After touring the Constitution, I was compelled to do this model. I picked up a 2004 vintage kit from a local hobby shop.
I got started but then had to move, and it has been boxed up for 4 years, halfway through step 1. (I have lost my pictures from that early stage.) I have gotten back to it finally! (this post is long catching up. I promise not to be so wordy in the future.)
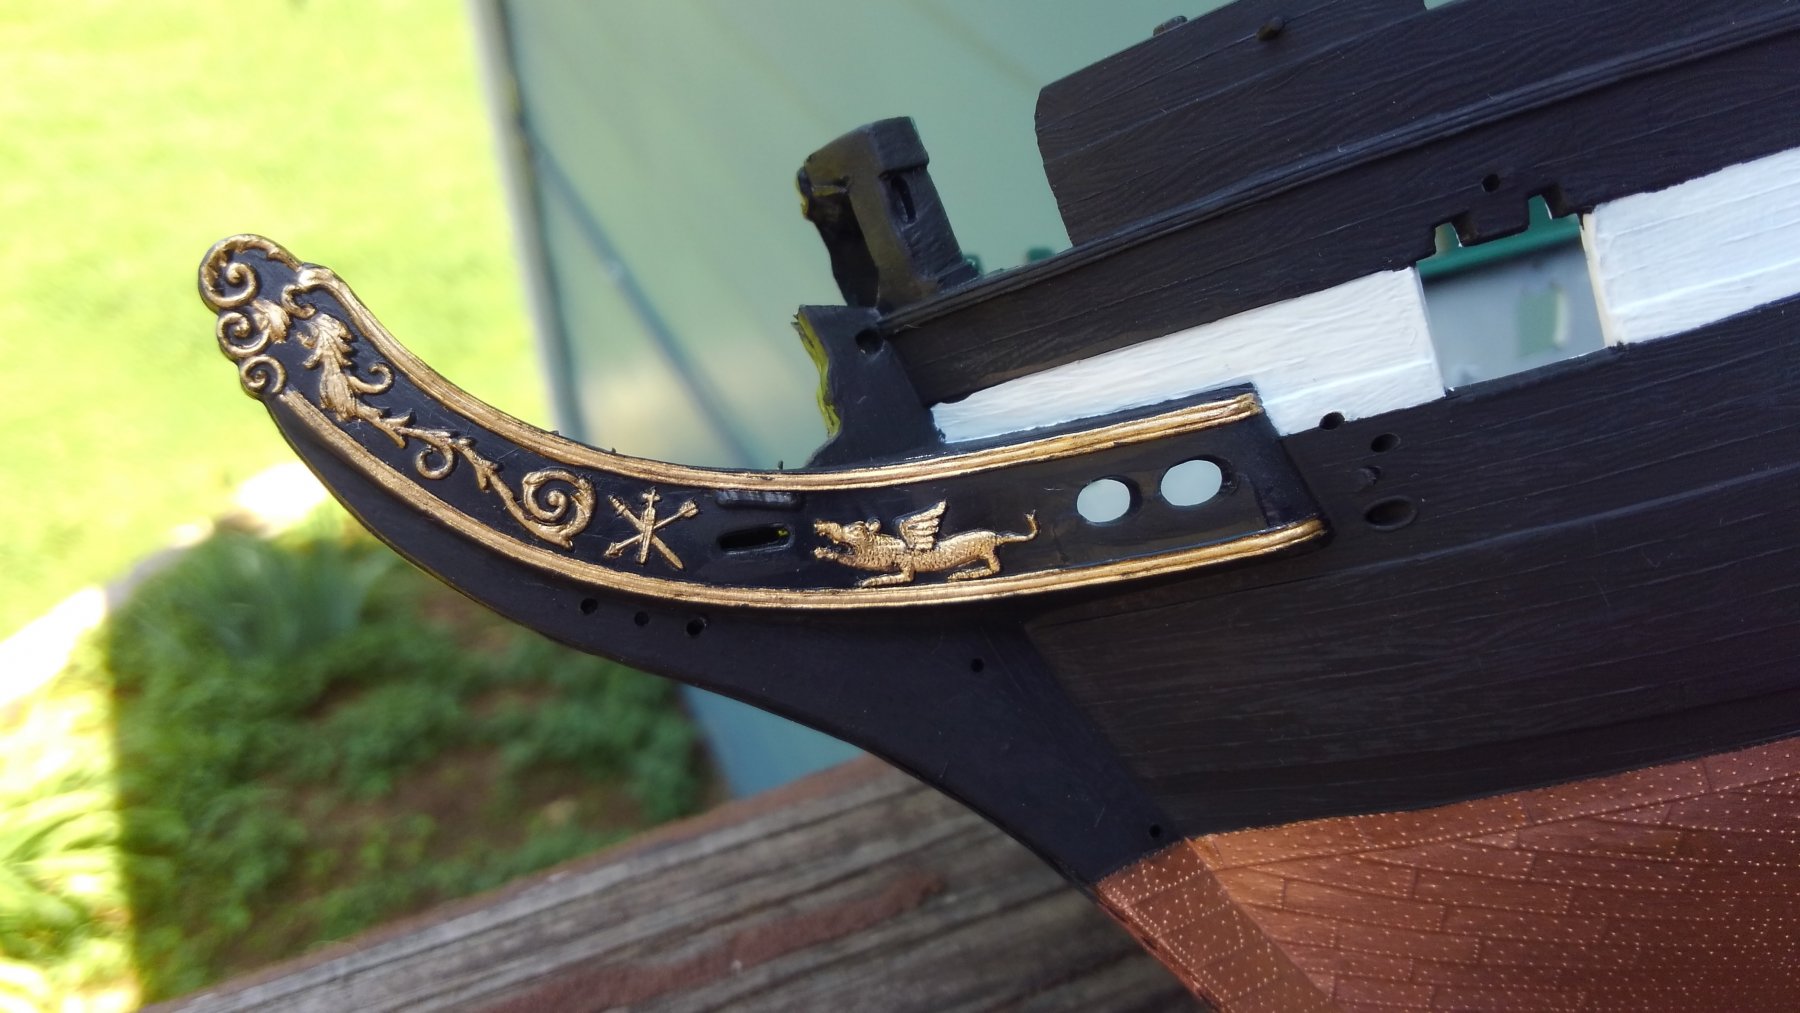
Decisions, decisions!! I had found AndyMech’s log (it must have been right before the great data crash) and used his excellent stern painting as a guide. Starting again, I have read several other inspirational logs, and arguments about historically accurate details, and got pretty overwhelmed with all the choices to make! I find too many creative choices is causing me some stress and paralysis, but getting through it! Some ideas really appeal to me, such as furled fabric sails, lighting in the cabins, cannonballs, etc. Finally to get unstuck, I decided to complete it (mostly) with the supplied parts per the directions, including plastic sails, with minor upgrades/tweaks. If I do another one later I can get more creative and authentic.
Where am I now?

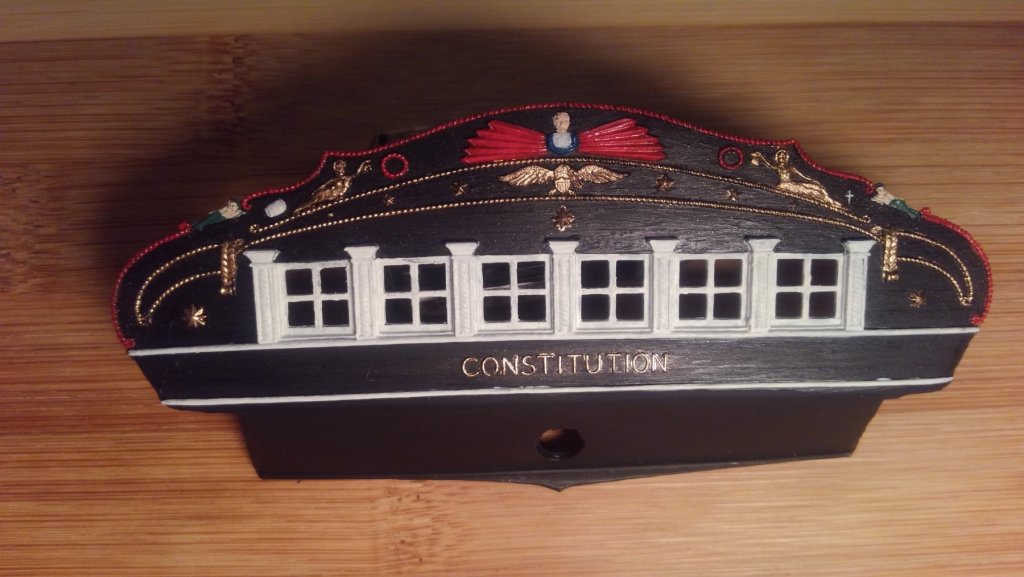
The hull is finally finished (I am sure there will be further touch up of the paint details, but I am calling it done.) I had to correct a mistake: I originally didn’t paint the black part of the hull, because it like the way the raw plastic looked with all the grain details. Gloss or flat didn’t seem right. … But as I got further I realized it needed to be painted and had to rewind. It wasn’t hard to paint the main hull sections. I couldn’t find satin paint (btw, I am using Testors enamel) so used flat. Didn’t like it so flat, so burnished it with super fine sandpaper and it’s ok.
Unfortunately, that meant I also had to paint the black background of the stern, and I was so satisfied with my original work. :-( Forgot to take a before picture this time before I messed it up. My touch up of the black made a mess of the details and then I had to touch them up, and it's not as good now. The one good thing is that I made the mermaid’s torso’s skin tone instead of green. Saw that on one log (sorry can’t remember who to credit!) Overall, I’m not thrilled with the final outcome, but it is ok. I’m sure there will be further touch up.
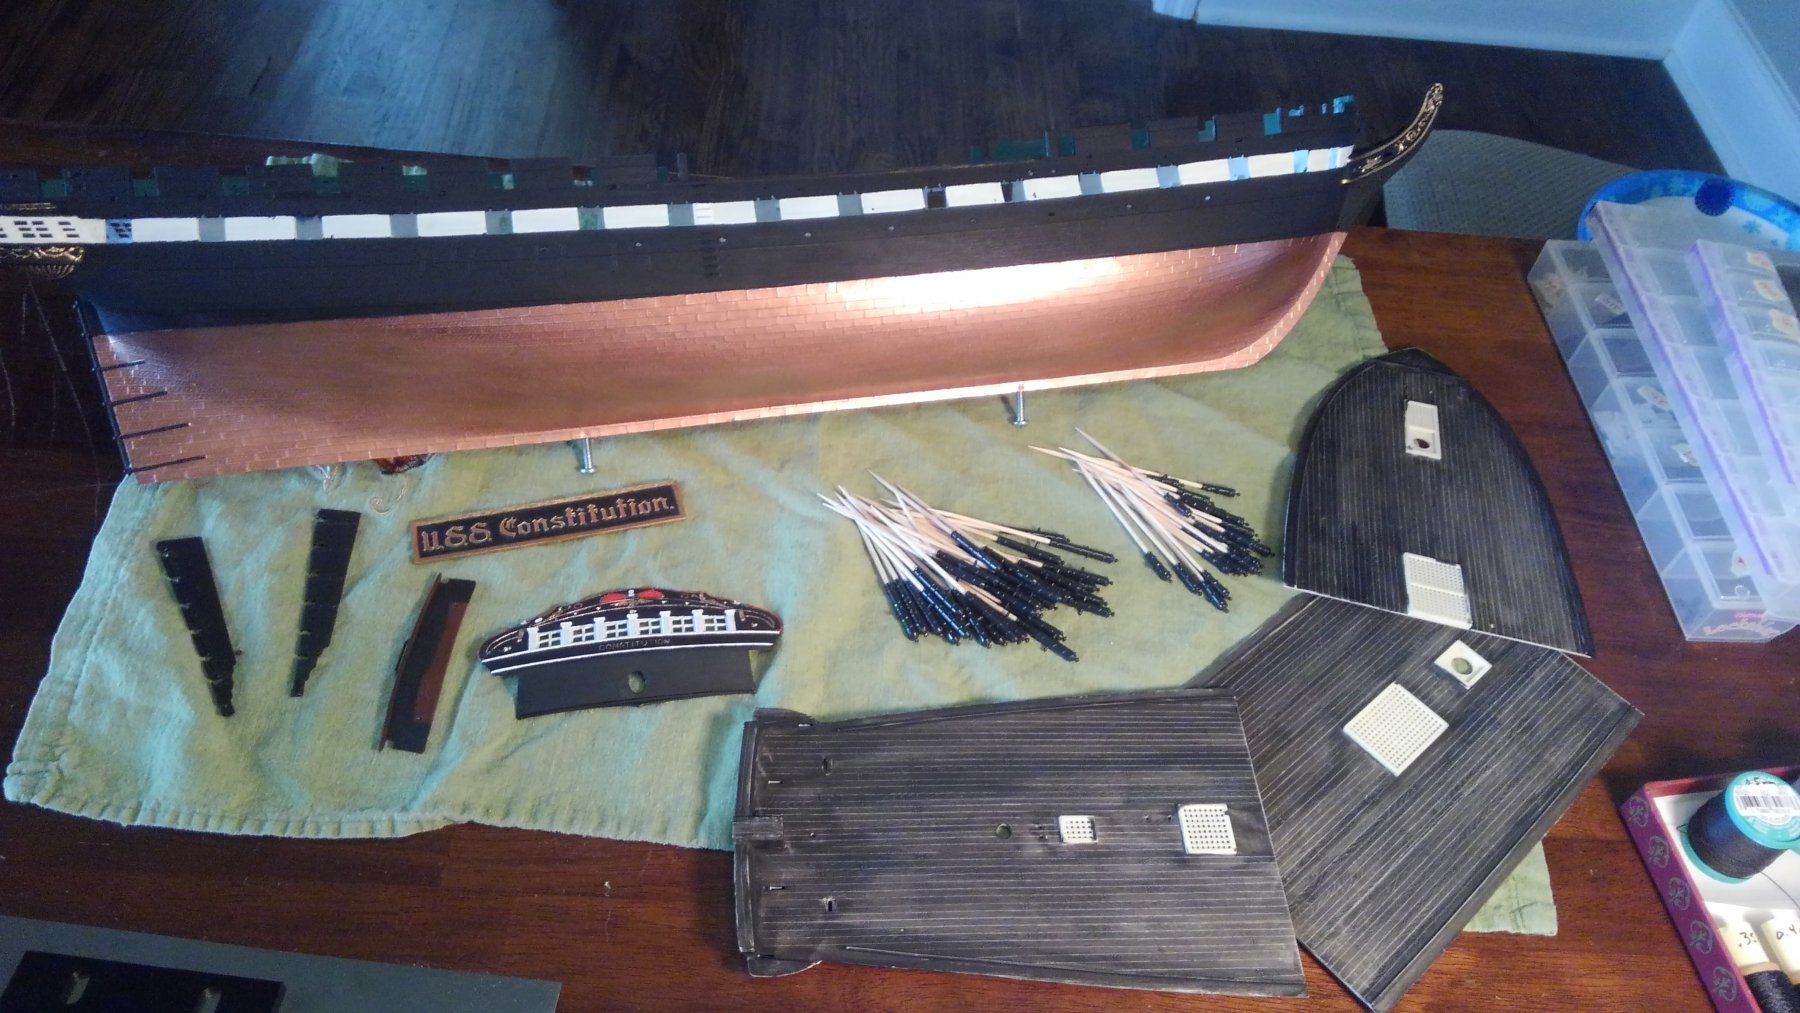
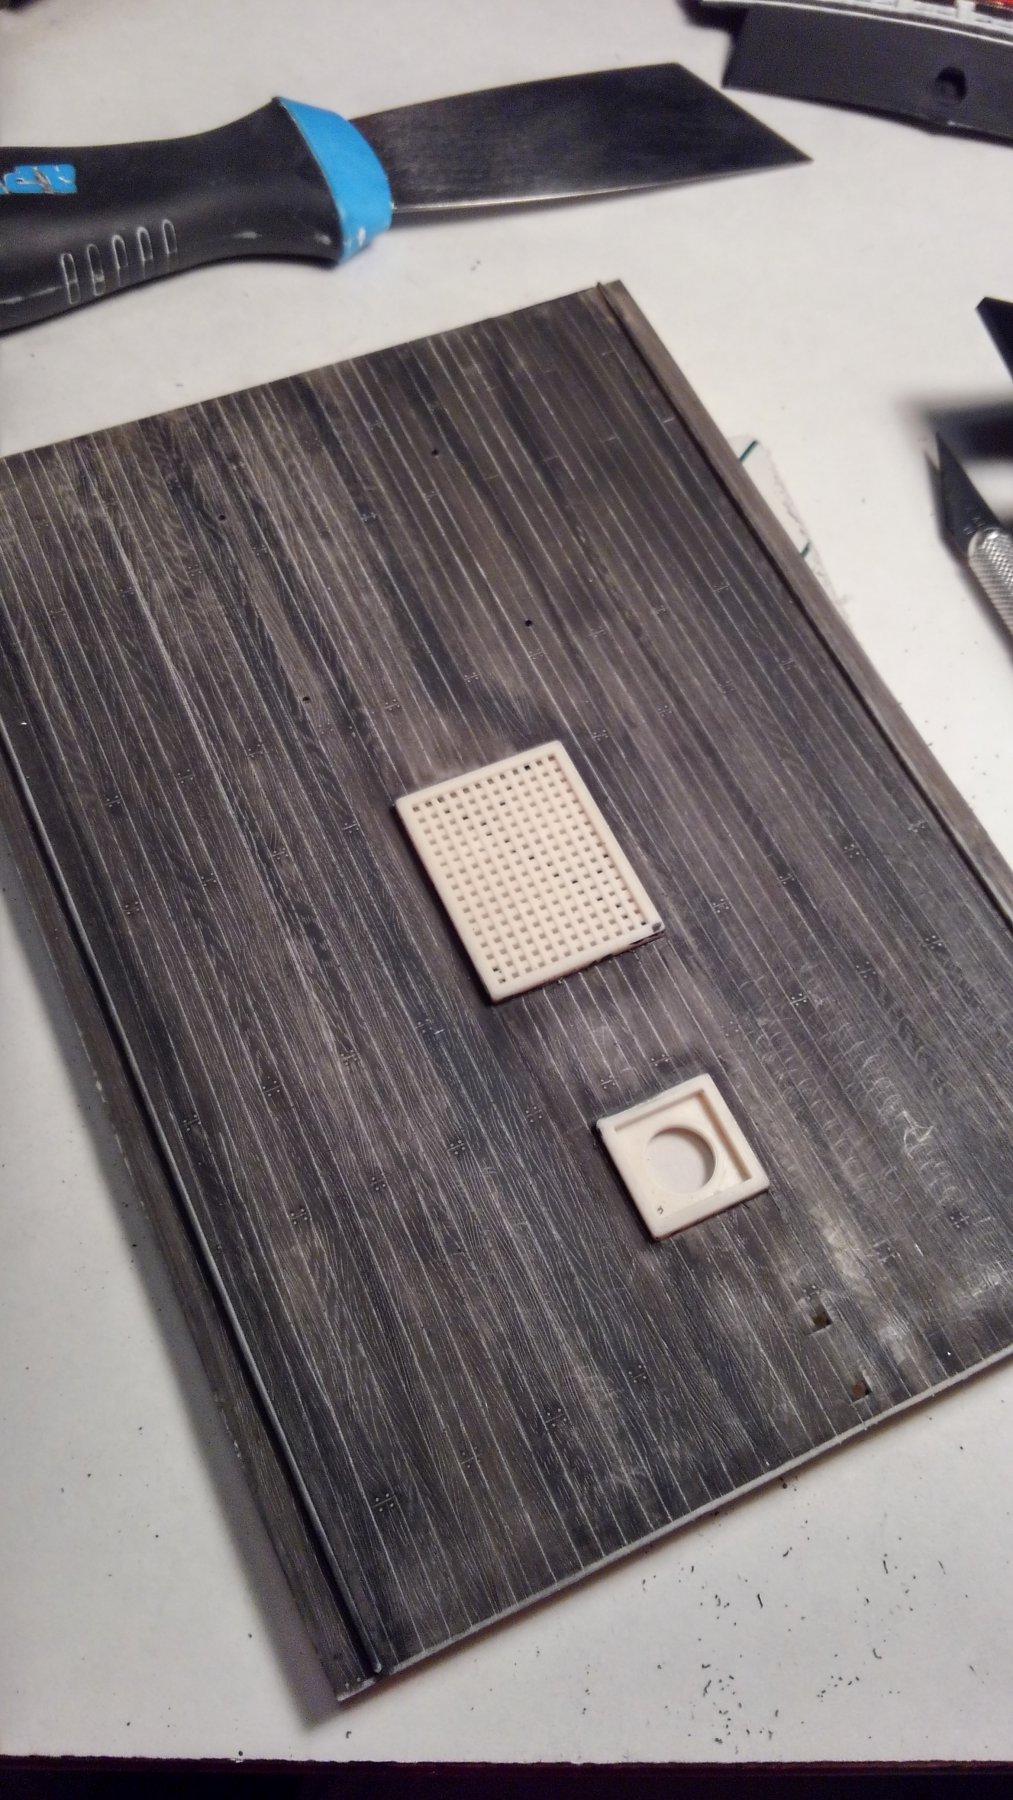
On one log I learned that there are hollows in the keel for nuts to attach mounting supports from below!! Why is this not in any instructions!?! (I have to find this again and credit source.) This would have been GREAT information to have before gluing the hull together. I had been very frustrated about how to mount the model, not liking the dinky kit supports. So I got busy with the Dremel and opened up the spot for the nut, and cleared the hole in the bottom of the keel for the bolt. This leaves a very thin wall, but it seems solid. I put some epoxy putty (from fish tank coral fragging supplies) on top of the nut to hold it in. It’s not pretty, but it will hold, and it is ready for a longer bolt. Still trying to find the right supports. None of the ones I see for sale have the right slot width. I measure 7/32” ? If it is bigger, it won’t provide support. Most are too small, and there isn’t enough material left to shave the keel without exposing the bolt. I guess that is not the end of the world if it will be hidden. But still. What does everyone else do? I haven’t seen this particular issue discussed.
I had to repaint the copper plating. With all the handling, it didn’t hold up well. I need to coat it with something. Someone suggested floor polish. Gloss, satin, …?
The things I have changed so far: (yeah, stick to the kit. I know…)
Of course, had to paint green on the bulwarks instead of white. I mixed green, blue, white and black (=gray) to get a softer green that I think is close to the real thing. Also painted the bottom of the port boat this color. The pot of it I saved is dried up after 4 years, so I hope I don’t need more. You can see the green peeking through here...
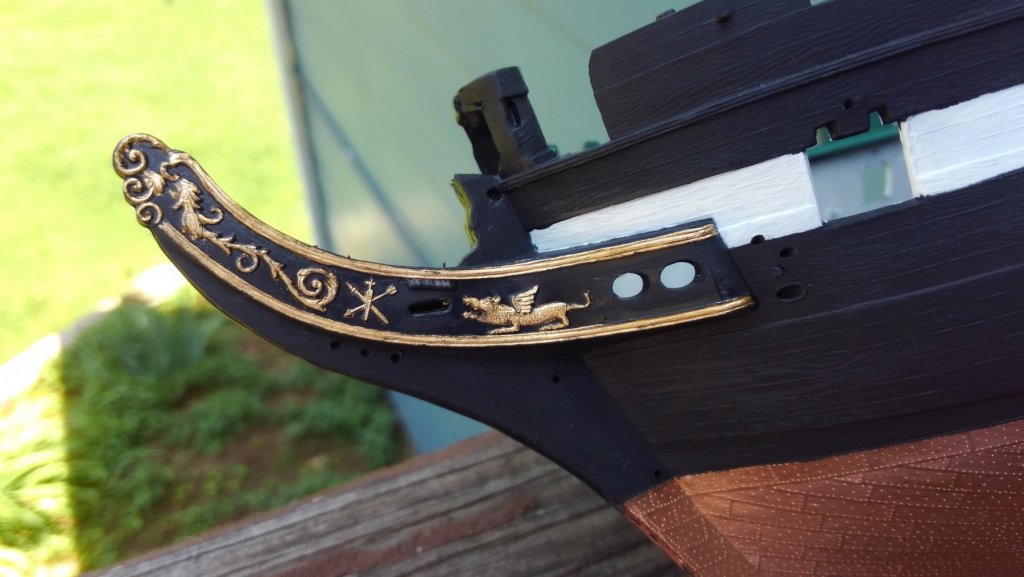
The iron straps of the rudder hinges I wanted to paint black. So I mixed an off black for the cannons and those straps. I really like the effect of the glossy straps on the flat black wood of the rudder. Speaking of the rudder, the little eye bolt perplexed me. Had not seen mention of it in logs or instructions. But clearly it has a purpose. It appears to want a chain. A rudder is not something you want to lose at sea! Research confirmed it is for rudder preventer chains, dual purpose for retention and for steering if the tiller is broken. We can see them on the real ship, the Hull model, and many of the wooden models. I am going to try to add this. Have to find scale black chain.
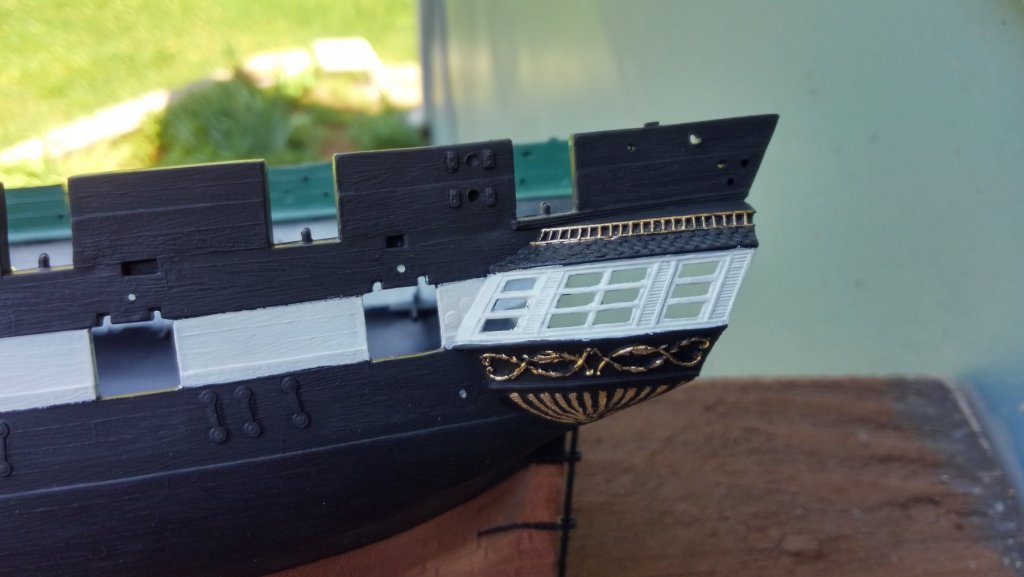
I left out the window “glass.” After a fail of white glue to install the plastic, I took my husband’s suggestion and am not putting it in. Hopefully this will allow more visibility into the cabins, which are too nice to hide.
Other things I plan to change:
Correct the gaps in the spar deck.
Gunport lids – after much deliberation, I decided to put them all on, and leave the front ones closed.
Rigging – need better thread and more variety of sizes than the kit supplies. I have some smaller and larger sewing thread and I may get a size or two from Syren.
Add a bell.
So, the next step is getting the gun deck painted. I am going to try AndyMech’s technique with scoring and painting the boards separately different colors. I am so impressed with the molded details in this kit. Plank ends lining up where beams would be, tiny nail heads! If it weren’t for the dang gaps between the sections! I did a dry fit and the middle section sags. Some reinforcement is in order.
I have painted a thin coat of black, sanded lightly, and have scored the planks. Now on to the painting… yikes.

[Edited. I learned how to insert the photos properly.]
-
On 5/29/2017 at 3:17 PM, Michael G said:
Thanks. I used a 4 different browns, dark to light and did the lightest top coat mixed with water (trying to cut back on the brush strokes - may do that on the top two coats for the spar deck). I had no idea what I was doing, but I am totally pleased with how it turned out. I'm hoping the putty on the seams works out on the top deck...recreating the exact same color is unlikely, but the gun deck is barely visible at that point.
Anyway, cannons are all painted (wife did not understand why I needed to paint the black cannons black
") ). Gonna go see if I can find that burnt sienna paint for the carriages next.
). Gonna go see if I can find that burnt sienna paint for the carriages next.
I'm not going to worry about the seams on the gun deck, but will try to come up with a solution for the spar deck.
I also felt a little silly painting black cannons black. 😊 I did add some white and dark blue to attempt an off-black. In the right light you can tell they aren't quite black. I used the same color for the straps on the rudder. I am now officially finished with Step 1, hull is finished! Lol
My husband is giving some helpful input. After white glue fail trying to stick in the cabin windows... "Just leave them out." Maybe will be able to see in better without them.
-
20 hours ago, Michael G said:
I hadn't noticed the closed one on the picture of the box! I'll go with that then. You just putting that cannon in an inboard position then? You'll have to let me know when you start your log.
I am going to leave out those 2 front cannons as well.
I am working on my deck painting as the next challenge. I like the color of yours!
-
9 hours ago, Michael G said:
For you guys who have built this model, any tips on the color or color mix for the cannon...carriage? Is that what it's called? The base with the wheels? Anyway, I assume revell intended for the plastic to be the right color, but it doesn't look right unpainted in my opinion.
The current color of her carriages is a muted reddish brown. Some people call it salmon, but it's browner than that, imo. But red is the preferred color if you don't want to get fancy. I am going to mix some brown into red, and maybe some gray to tone it down.
-
9 hours ago, Michael G said:
All but the 4 front gun port covers installed! I haven't decided whether or not to open or close the front ones per popeye's comment. Any other input there?
Starting on the cannons. I know it is a negligible difference, but I am painting the cannons a flat black. I think it looks better...
I have decided to leave my front ones closed. One, it makes perfect sense that under sail it would be closed. Two, I note that in the painting on the box mine came with, it is shown closed. (although there are many differences in that image like split covers painted red!) Three, I downloaded the current instructions from Revell, and the front page also shows a rendering with them closed.
Of course this was after much debating about whether to put them on at all!
For cannon color, i am testing today mixing a semi - gloss of off-black. Gloss+flat+gray. Don't know if that will work.
So many decisions! After reading all these wonderful inspiring logs, and fretting for too long about how much detail to add /change/remove, I have decided to stick to the kit instructions with minor tweaks and use all the parts supplied, even the little men and the sails. The next one (?) I would like to go crazy with handmade furled sails, adding crafted parts, etc. This first build (since an abandoned attempt in college long ago) i am going to "keep it simple."
I am going to set up my build log soon. You are ahead of me.


USS Constitution by Michael G - Revell - Scale 1:96 - PLASTIC - Newbie Build!
in - Kit build logs for subjects built from 1751 - 1800
Posted
Of course, mid-keel. I was being dense and only thinking of the bolt holes.
I thought about making a cradle. I don't have tools, but I have a friend with a scroll saw if I can make a pattern. And felt... The simple things we don't think of. Sigh.