

Nek0
-
Posts
140 -
Joined
-
Last visited
Content Type
Profiles
Forums
Gallery
Events
Everything posted by Nek0
-

Le Soleil Royal by Nek0 - 1/72 - Marc Yeu
Nek0 replied to Nek0's topic in - Build logs for subjects built 1501 - 1750
Hello, thank you for your comments ! I'm currently working on the guns so the next update will be in a few weeks I think. I'm not selling/giving my plans yet, I may give them when I have corrected numerous little errors here and there. It has been corrected on the model, and re-drawn partialy but all the corrections on all the plans hasn't been made so currently it's a mess Nonetheless, I just found out that Artesania latina made a Soleil Royal kit, and, in their Youtube add video, they took one of my drawings without asking me if I was ok... Sometimes, people just don't ask...!- 208 replies
-
- 6
-

-
- le soleil royal
- 104 guns
- (and 2 more)
-
SOLEIL ROYAL 1669 by michel saunier
Nek0 replied to michel saunier's topic in - Build logs for subjects built 1501 - 1750
Thank you Marc for posting the pics, his work will be remembered ! -
Le Soleil Royal by Nek0 - 1/72 - Marc Yeu
Nek0 replied to Nek0's topic in - Build logs for subjects built 1501 - 1750
Thank you very much for your messages ! Julia is growing up and will turn 1 year in a few days, it's been a very busy year between the family and the Covid but I could resume the work on the model a few days ago and I ended the third deck panels. I won't give up ! Thank you for your support, I really appreciate it !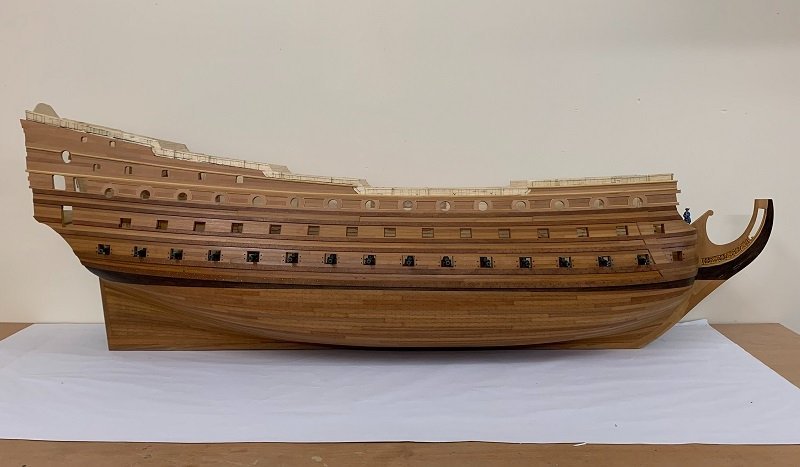

- 208 replies
-
- 25
-
-

-

-
- le soleil royal
- 104 guns
- (and 2 more)
-
Le Soleil Royal by Nek0 - 1/72 - Marc Yeu
Nek0 replied to Nek0's topic in - Build logs for subjects built 1501 - 1750
Thank you very much Marc ! My wife makes miniatures quicker (and better) than me ! My daughter's name is Julia are you Leo too ?- 208 replies
-
- 6
-
-
- le soleil royal
- 104 guns
- (and 2 more)
-
Oh god that's beautiful !! No doubt your work will be an inspiration when I do the quarter galleries... I really admire what you did, congrats !!
- 2,696 replies
-
- 4
-
-
- heller
- soleil royal
- (and 9 more)
-
Le Soleil Royal by Nek0 - 1/72 - Marc Yeu
Nek0 replied to Nek0's topic in - Build logs for subjects built 1501 - 1750
Hello everybody, thank you very much for your messages and all my apologies for not being active the last couple of month... I just discovered the warm PM you sent me and I'm really ashamed... The build has gone very little forward because it's a quite long work to do the carvings, and something I told would never happen again has happened... I'm a father of a little baby girl born 08.22.20 ! Of course it made me busy quite a lot, and I can at last go back to the workshop. As you know the pandemic make my job more tricky but hopefully I'm not working in a hospital so I'm fine. Thank you all for the kind words, I'm really sorry I did'nt see them earlier... I hope everyone is alright, take care, Marc
- 208 replies
-
- 17
-
-
-
- le soleil royal
- 104 guns
- (and 2 more)
-
Hello Marc, I wish you prompt recovery, I hope you're alright now. Take care my friend, for you and your family, Marc
- 2,696 replies
-
- 3
-
-
- heller
- soleil royal
- (and 9 more)
-
Hello EJ, impressive work for a great result ! What a job on the carvings, congrats !!
-
Le Soleil Royal by Nek0 - 1/72 - Marc Yeu
Nek0 replied to Nek0's topic in - Build logs for subjects built 1501 - 1750
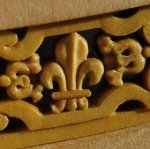
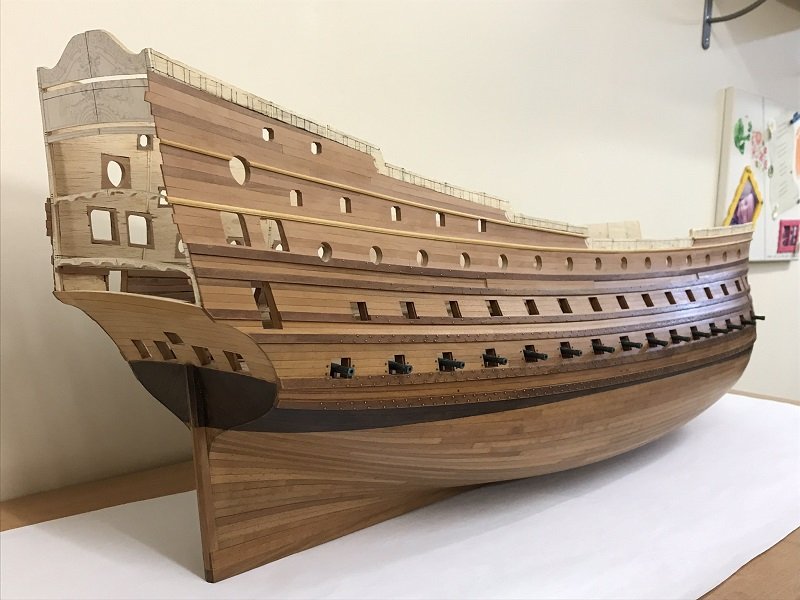
Yes, I will carve every single piece of ornament in boxwood. I had a proposal by a russian modelist to make me every sculpture of the SR in resin, (or wood with cnc I don't remember) in exchange of my plans, and a proposal just like Michel Saunier by a french modelist to offer me some of the decorative parts in resin but I declined both, I want to make as much as I can by myself and I want only wood for the decorative parts. Resin looks good on Michel Saunier's model but who knows how the wood will turn in a few years... Resin will always look the same so maybe in a couple of years the difference between the two materials will be too obvious. For my photos I only use my Iphone... with the light of my workshop. Only the last picture is made by daylight in my living room. I find the Iphone make some really good photos, with much faithful colors than my canon compact camera I previously used. The only inconvenient is when you need to zoom, the precision of the image runs down. And I like to take some distance from the subject and then zoom rather than make closer shots because the closer you are the more deformed is the image. Especially with rounded shapes as a ship's hull. I have not found a solution for that. These last days were my week of "holydays", and I tried to stay offline from the work as much as I could because I needed to. On sunday I return to work and I will make my part of the job of course. Take care everyone, best regards !- 208 replies
-
- 7
-
-
- le soleil royal
- 104 guns
- (and 2 more)
-
Le Soleil Royal by Nek0 - 1/72 - Marc Yeu
Nek0 replied to Nek0's topic in - Build logs for subjects built 1501 - 1750
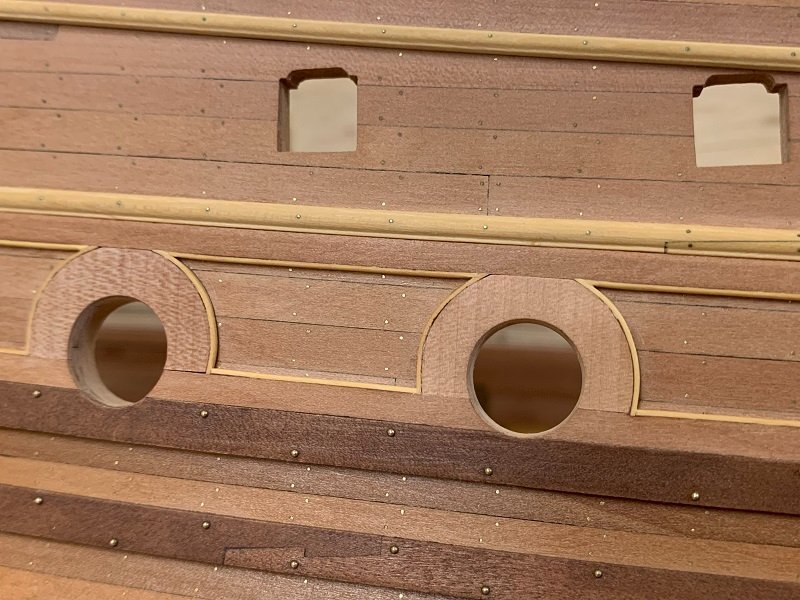
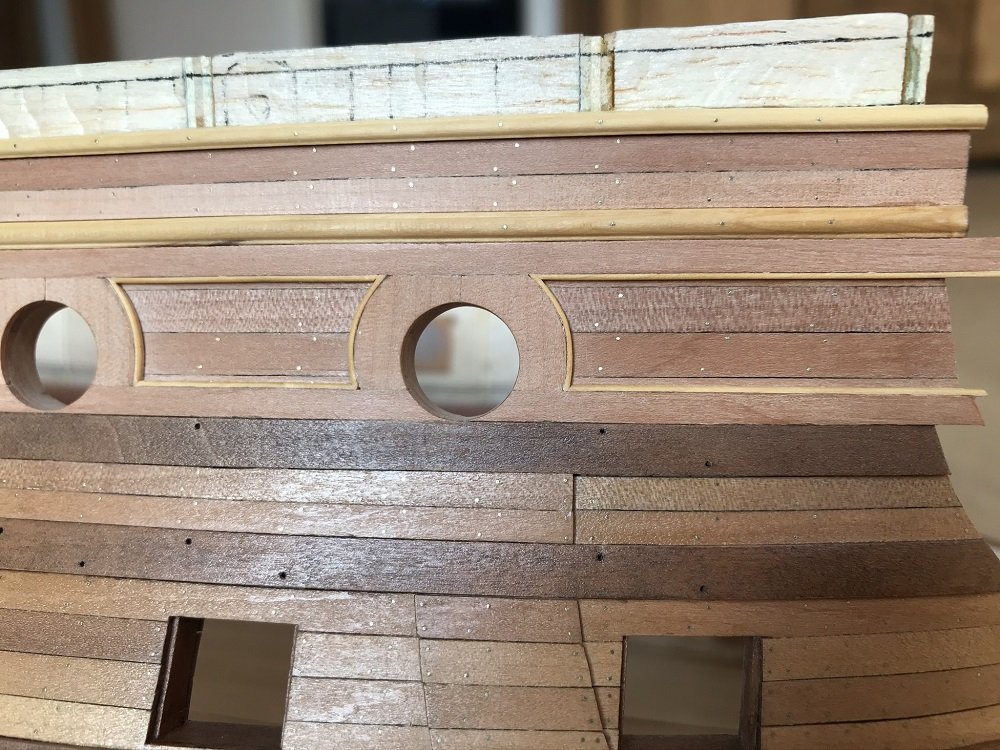
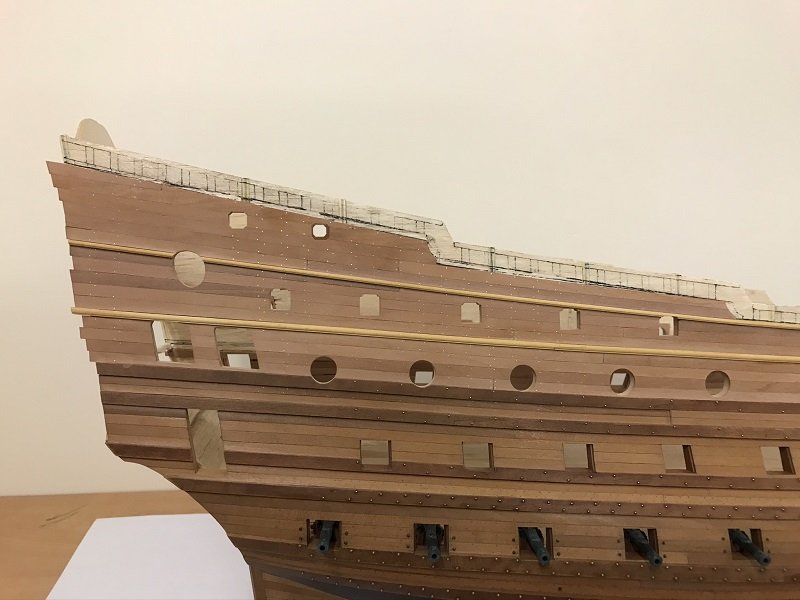
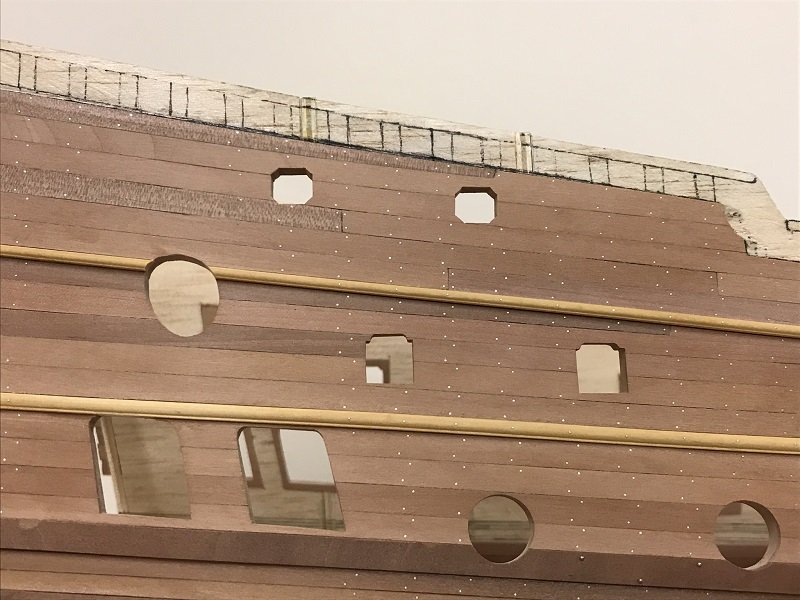
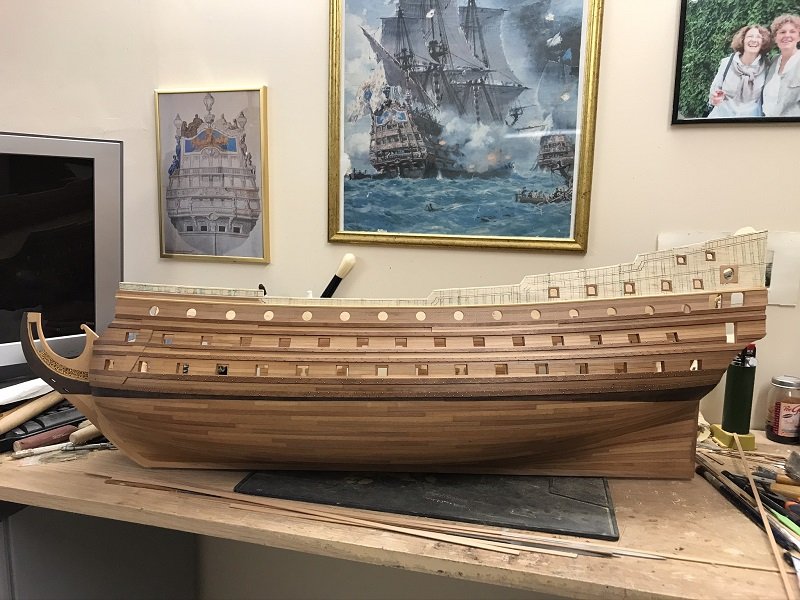
Thank you Victor ! I didn't know about it, I will try ! Work on the Soleil Royal goes on, this time I shoudn't disapear for a few months... well, I hope ! I'm working on the decorative parts of the third deck, much time to adjust these small elements... But the result is there, it's quite good looking. The boxwood parts are 0,5mm, and they are made round on there edges. (sometimes I struggle with english language to exprim simple ideas !! 😅)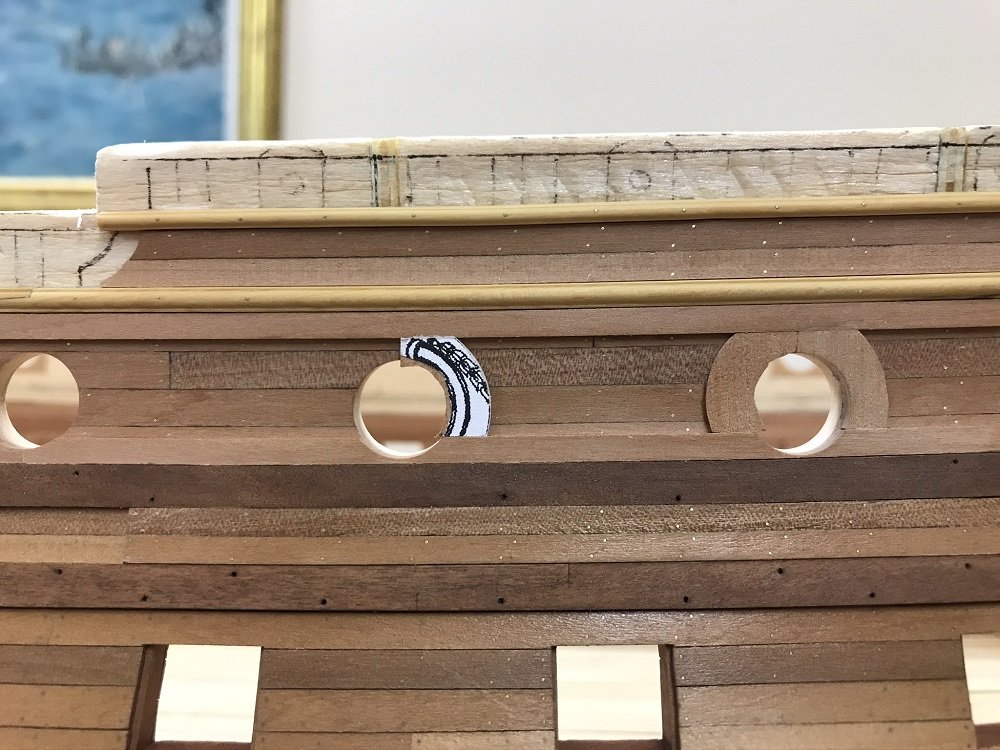
- 208 replies
-
- 21
-
-
- le soleil royal
- 104 guns
- (and 2 more)
-
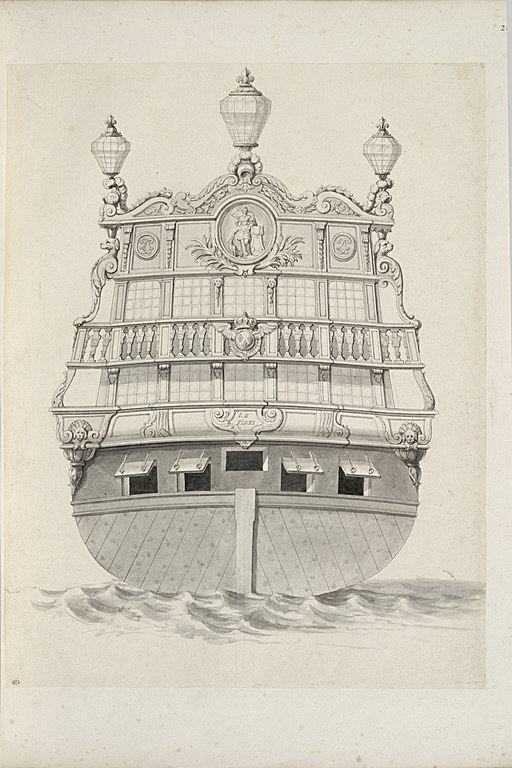
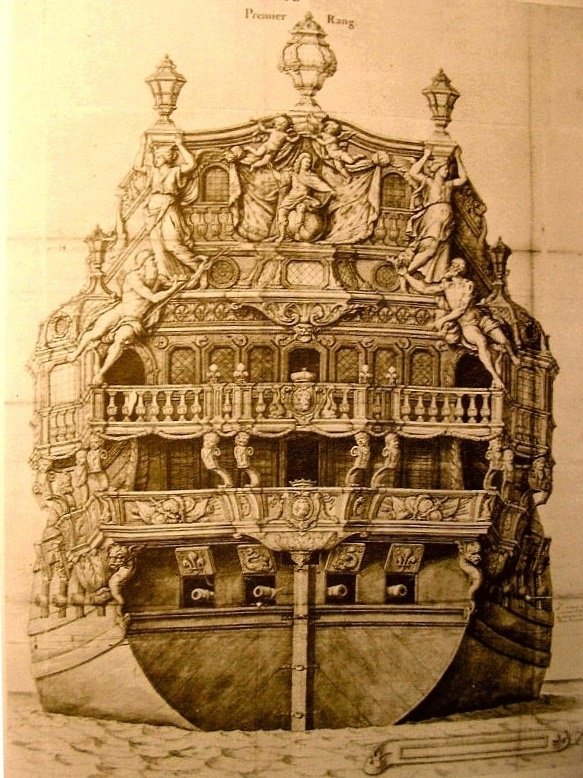
Hello ! I read in every document that the red color was to hide the blood. So red was the color for every planking inside the ship, except for the commander's apartments that were light grey. In fact, red ocher and yellow ocher were quite cheap so they were largely used on the ships. Vermilion red was very expensive and used only for some decorative parts, blue was also very expensive. For the ornaments, gold was of course very expensive but usual at the XVIIe century. At the XVIIIe century one can see much less gold, except for the prestigious ships. As a general rule, you can say that a ship with a royal name had his ornaments covered with gold, and a ship with a qualifier (Ambitieux, Terrible, Temeraire...) or a mythological name had his ornaments painted with napoli yellow.
- 2,696 replies
-
- 5
-
-
- heller
- soleil royal
- (and 9 more)
-
Le Soleil Royal by Nek0 - 1/72 - Marc Yeu
Nek0 replied to Nek0's topic in - Build logs for subjects built 1501 - 1750
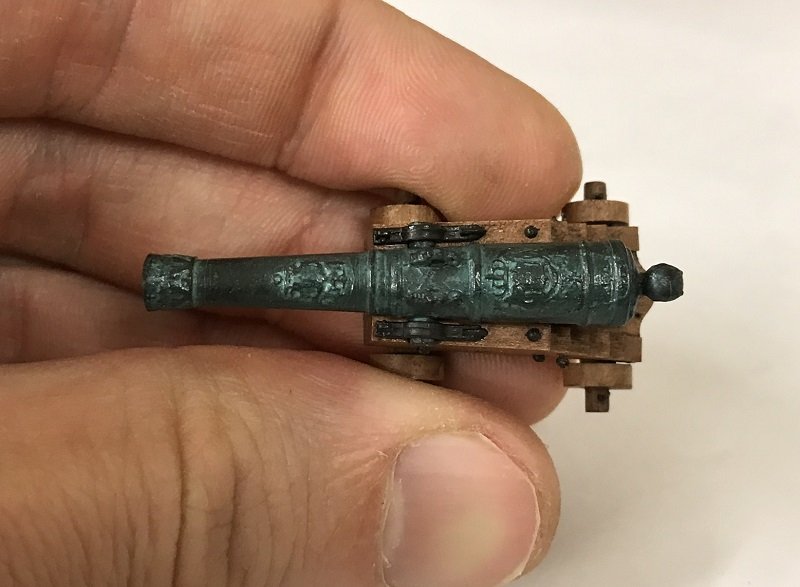
Hello ! Yes, the "susbandes" are the metal parts that secure the gun on it's carriage, I don't know the correct word in English. No problem, I will post as many pictures as needed ! At this time I can work every day in the workshop so the SR progresses quite quickly, I hope I can post new pictures soon ! Yes I'm a GP in the north of France, and we are quite under pressure with this virus... Take care everyone !- 208 replies
-
- 4
-
-
- le soleil royal
- 104 guns
- (and 2 more)
-
Le Soleil Royal by Nek0 - 1/72 - Marc Yeu
Nek0 replied to Nek0's topic in - Build logs for subjects built 1501 - 1750
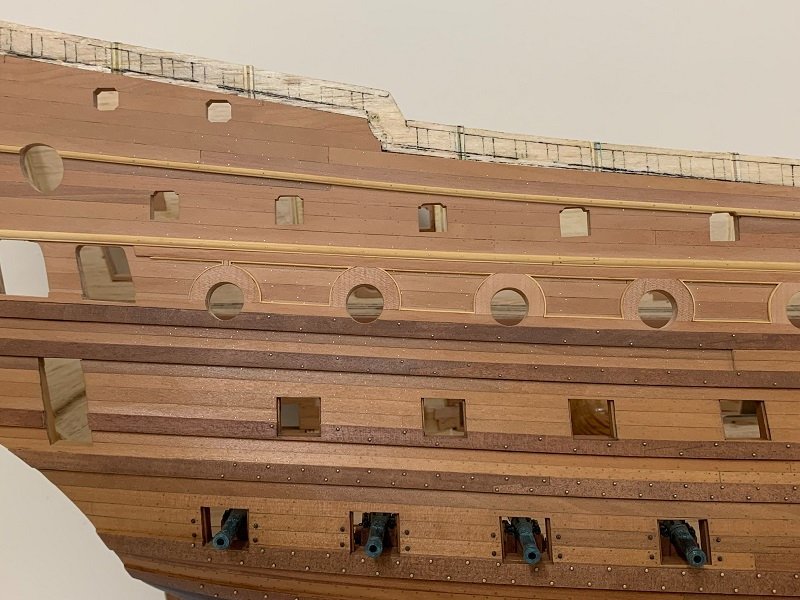
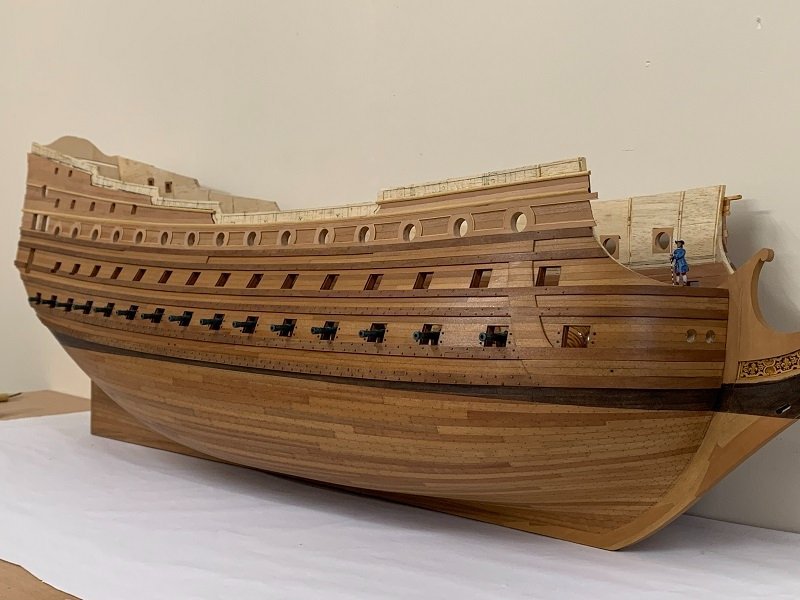
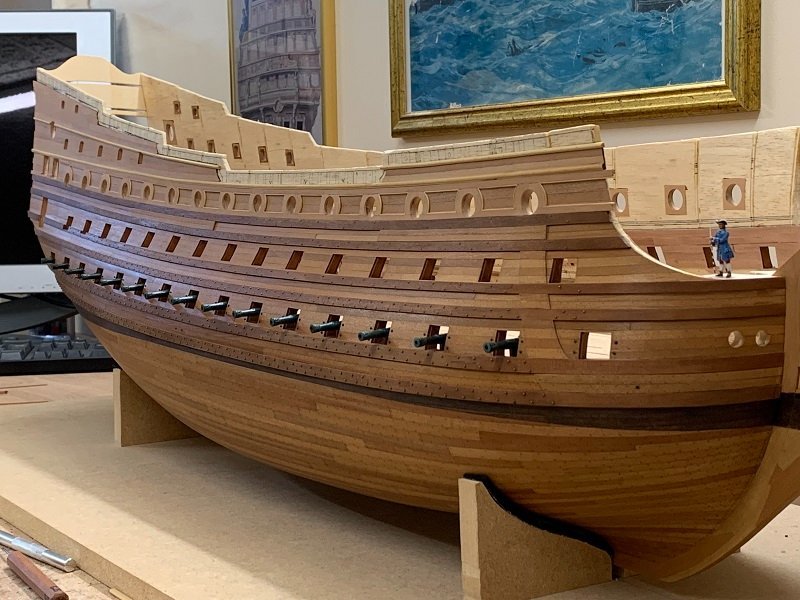
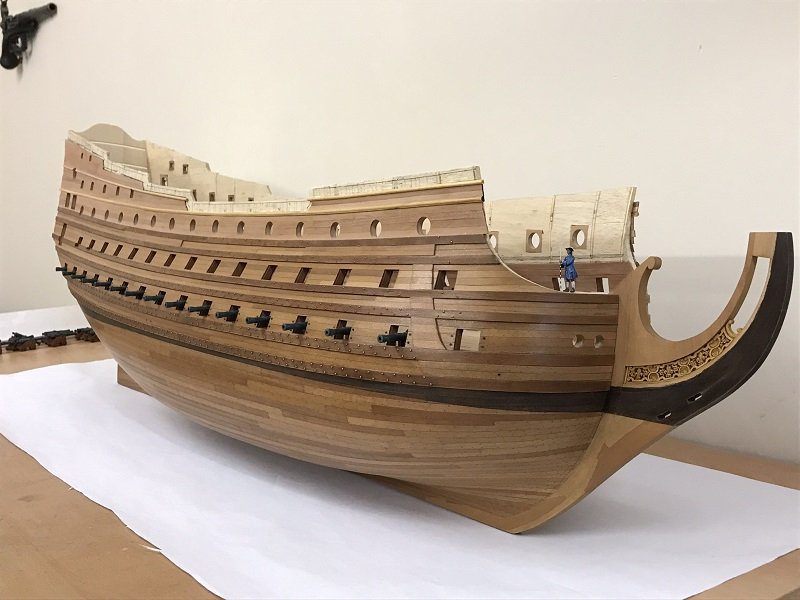
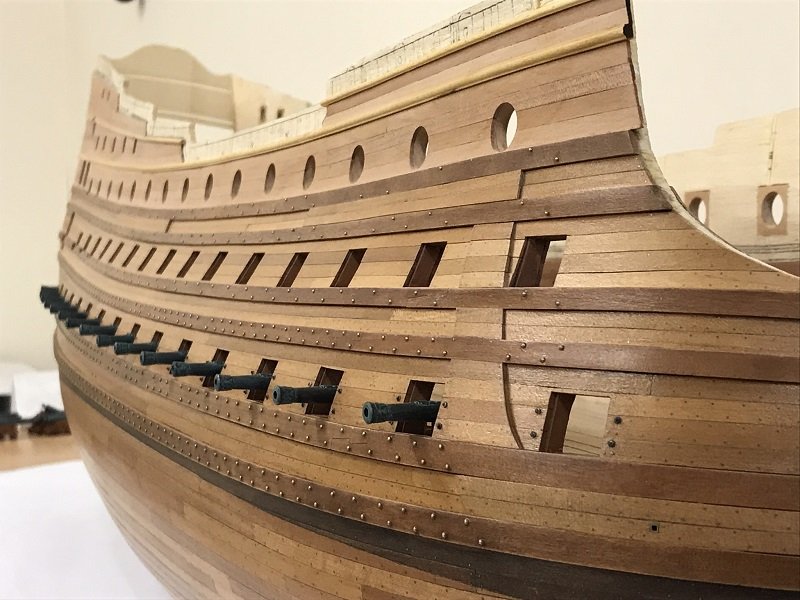
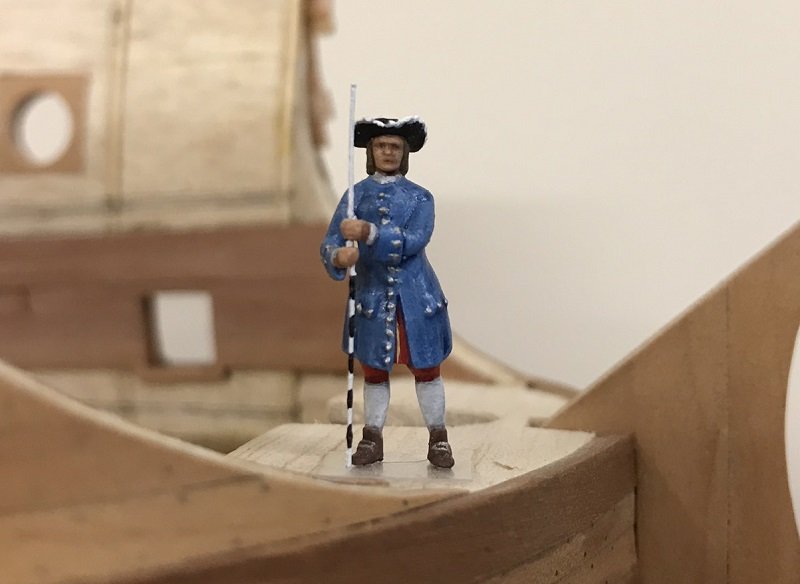
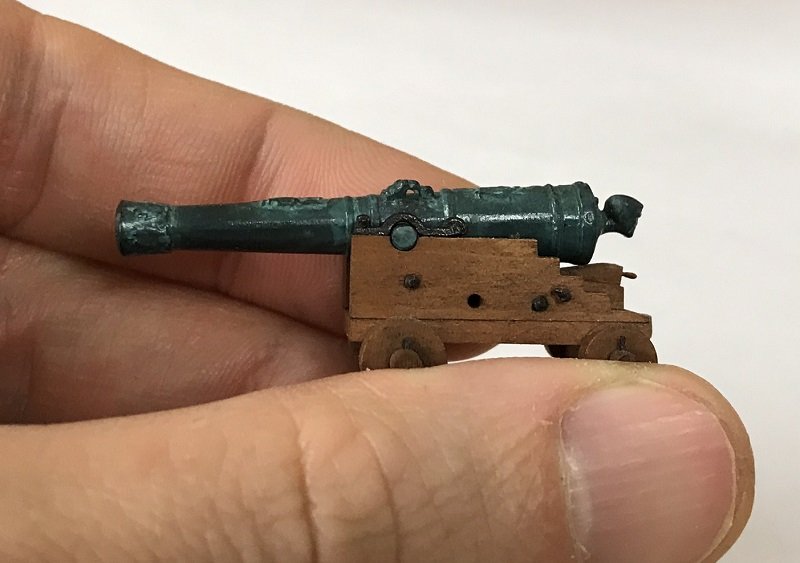
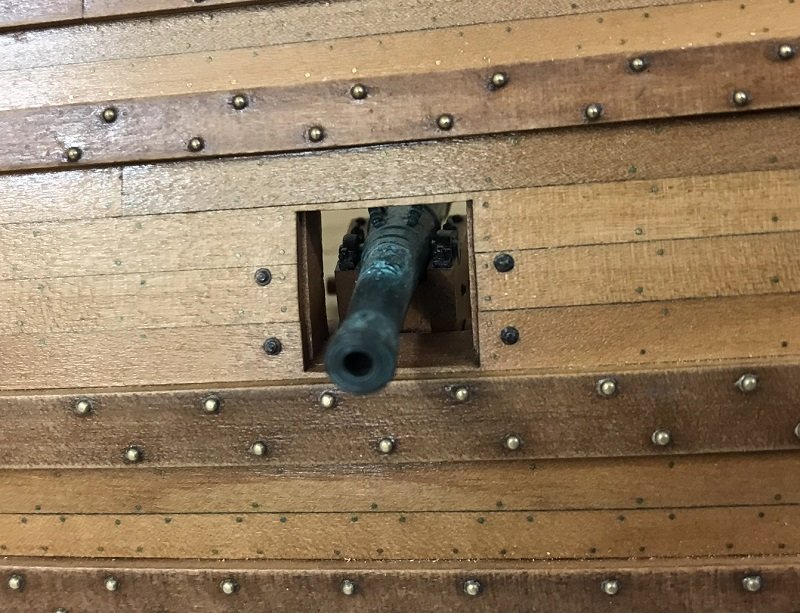
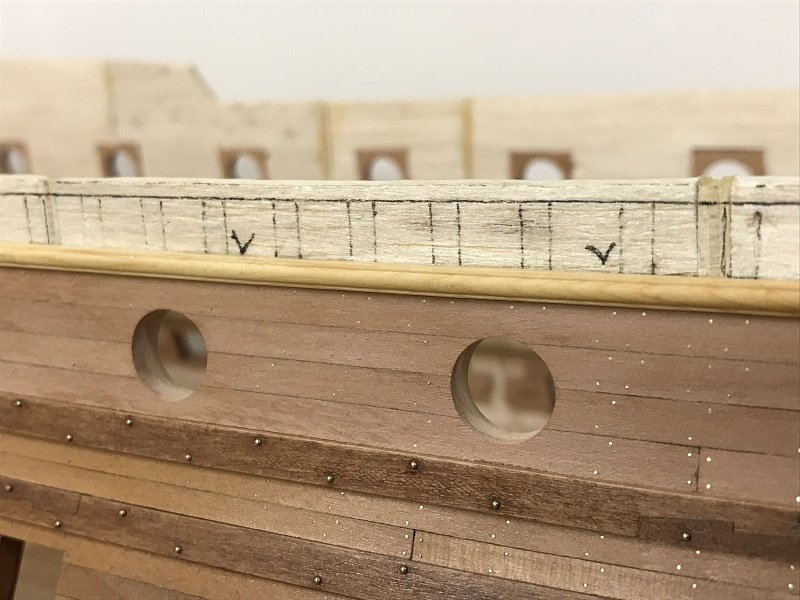
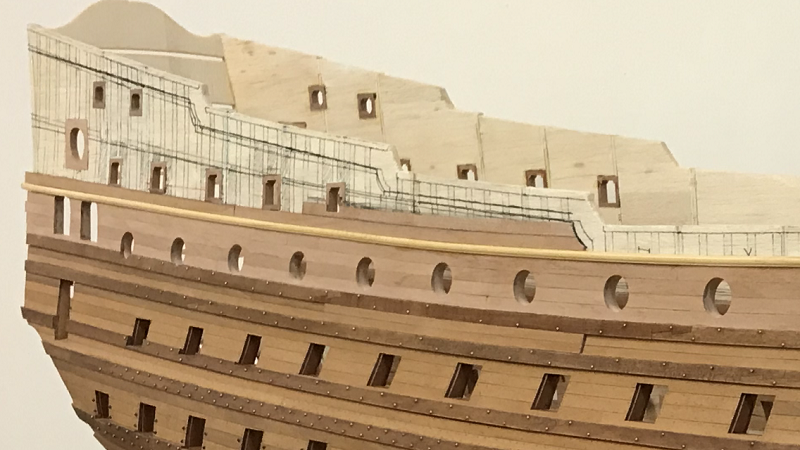
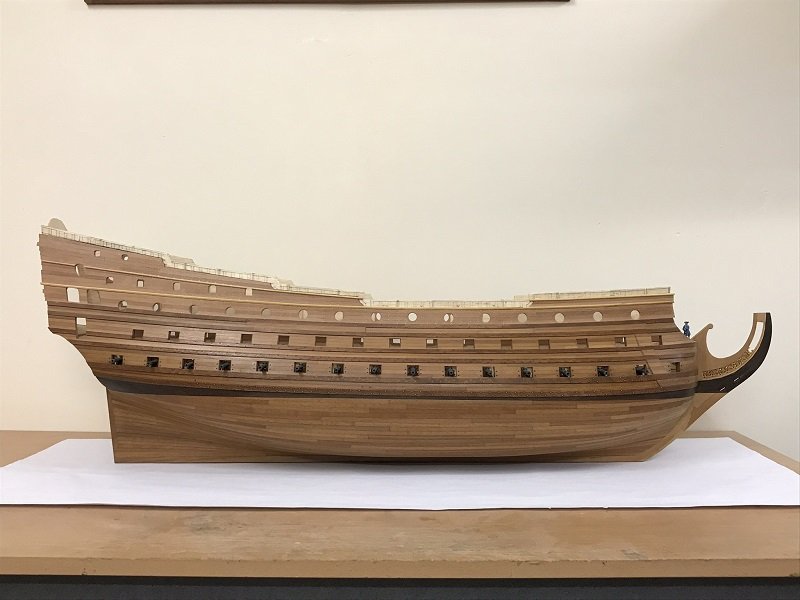
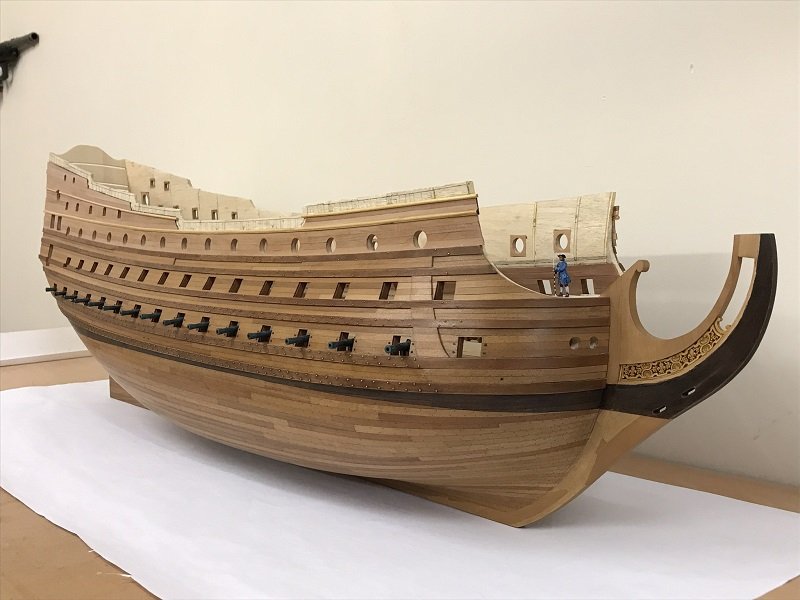
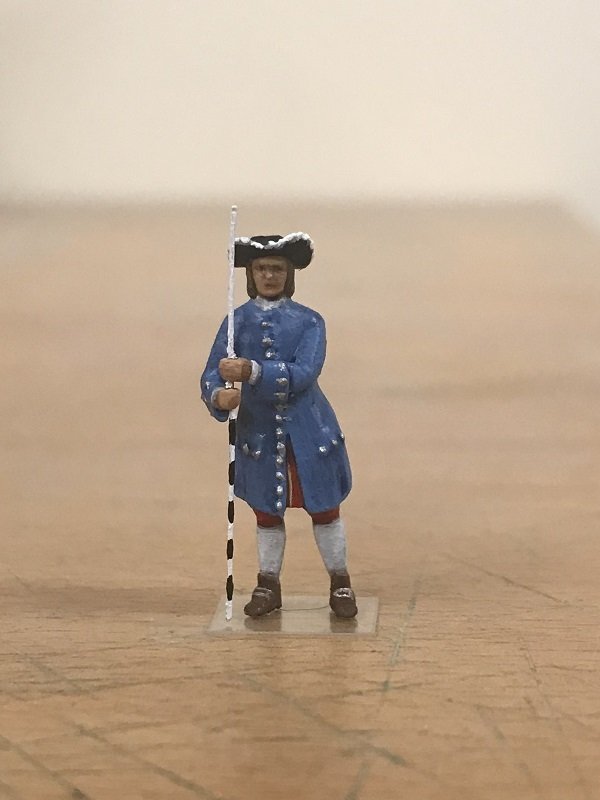
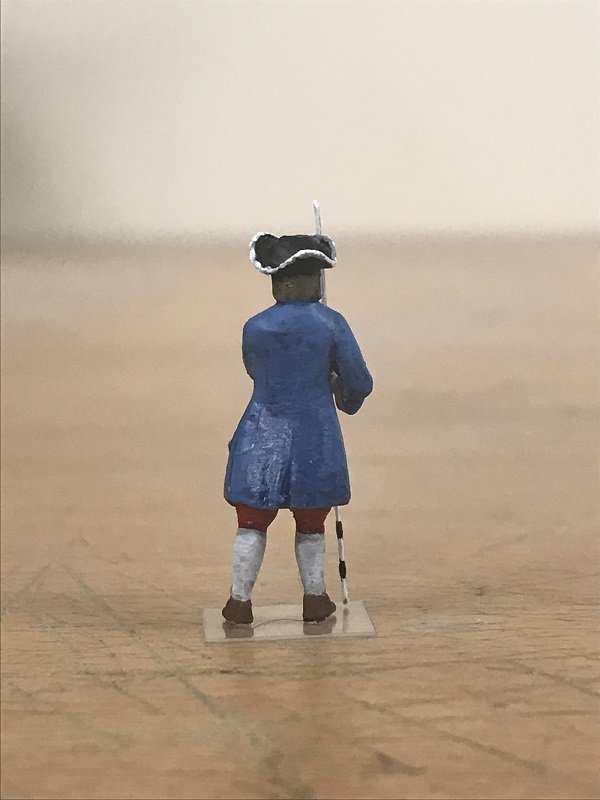
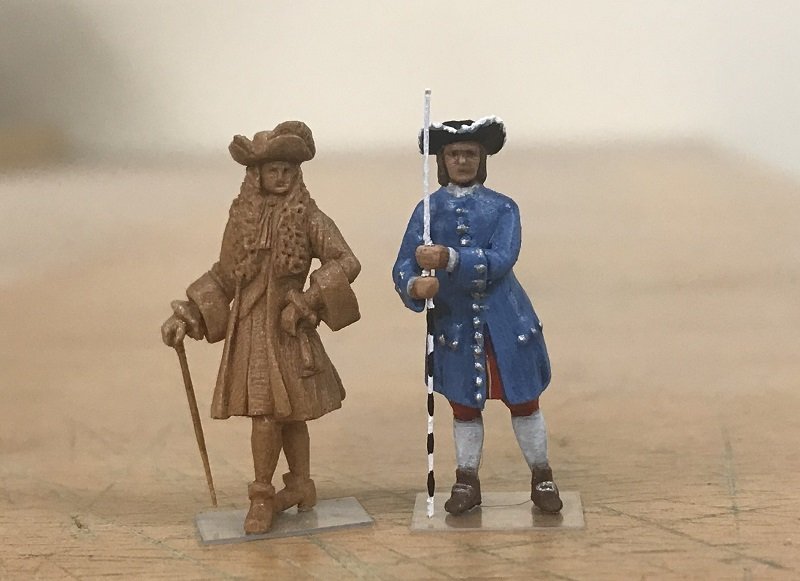
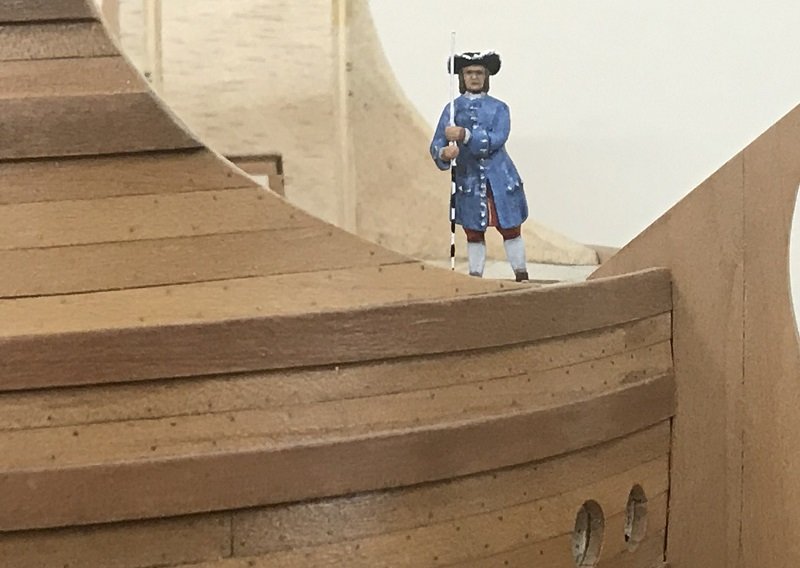
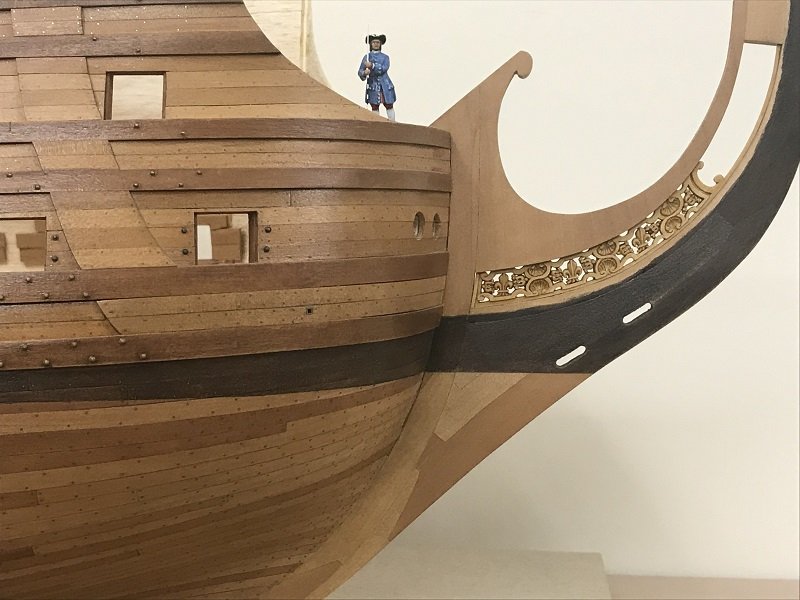
Hi all ! Marc, for the quarter galleries I have no precise plan yet, but I think I will make a quite elaborate form with balsa wood as a draft to study the volumes. Then I will build the stern and the galleries the way it's meant to be, building the frame then planking and then adding the ornaments. I finally made a last correction on the sheer cap railings, wich on reflection I found a bit too stiff and straight. I remade the last level and gave a bit more plunging; it's only 2mm but it makes a difference. So I post the same views as before for a comparison. For the susbandes I resigned myself to use what Alexey Baranov had graciously sent me at the time. It's not bad, and for what will be seen it will do the job. For the guns of the upper decks I will do them by myself but for the first two decks it will save me considerable time. I also post again a pic of the carpenter, I love this little guy. It puts a touch of colour, of life, it pops much more than my little wooden Tourville. It immediatly give a good idea of the size of the ship !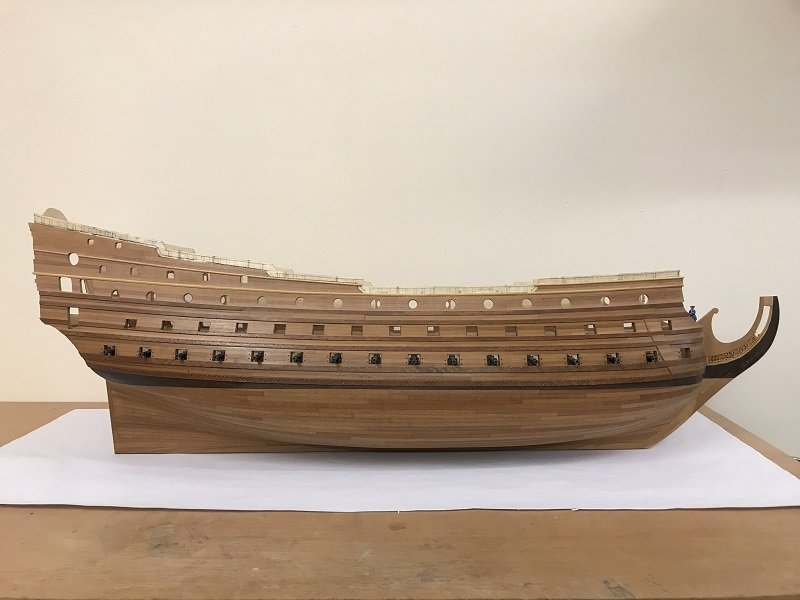
- 208 replies
-
- 24
-
-
- le soleil royal
- 104 guns
- (and 2 more)
-
Le Soleil Royal by Nek0 - 1/72 - Marc Yeu
Nek0 replied to Nek0's topic in - Build logs for subjects built 1501 - 1750
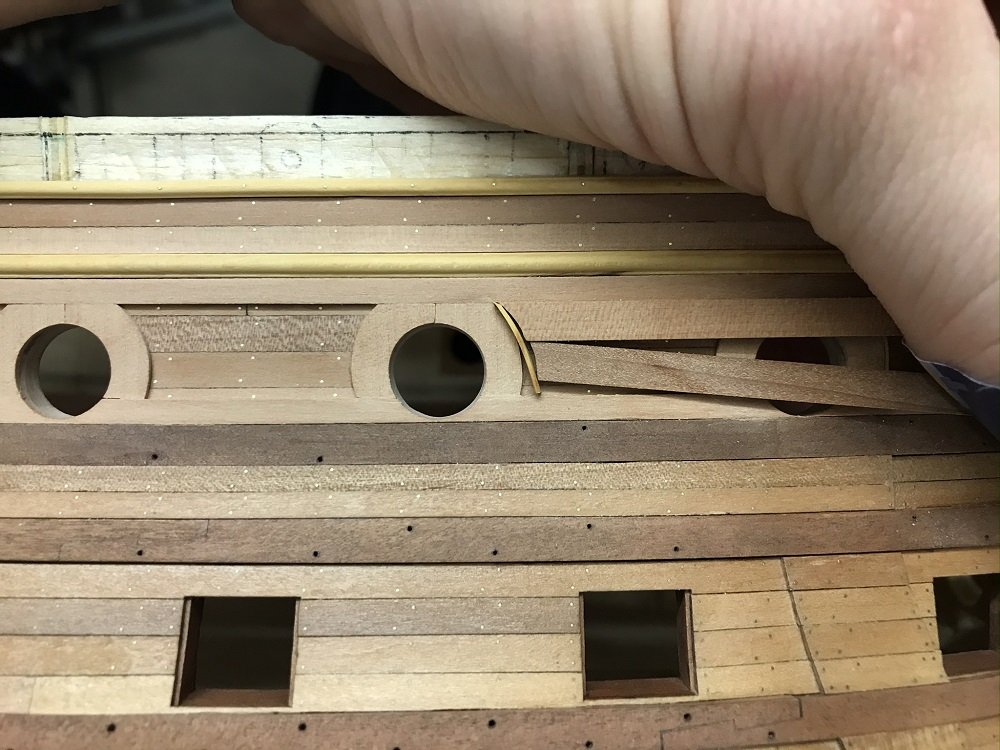
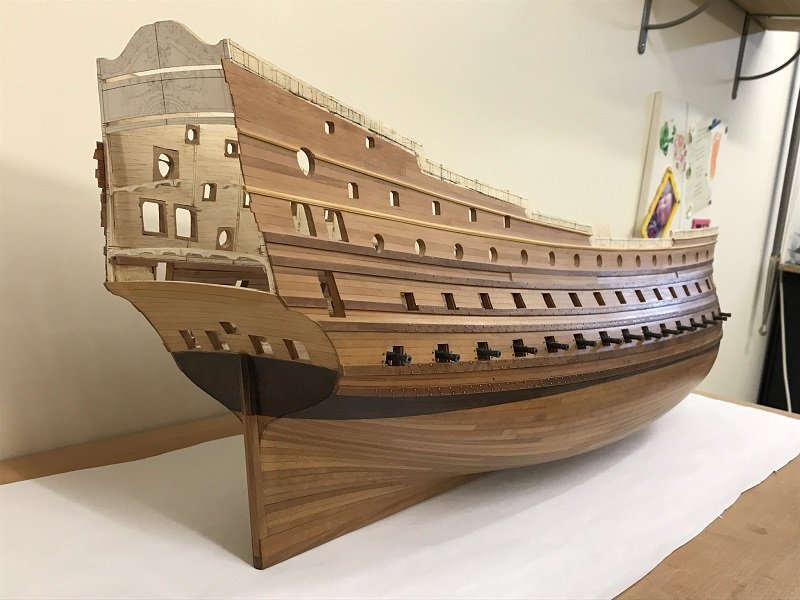
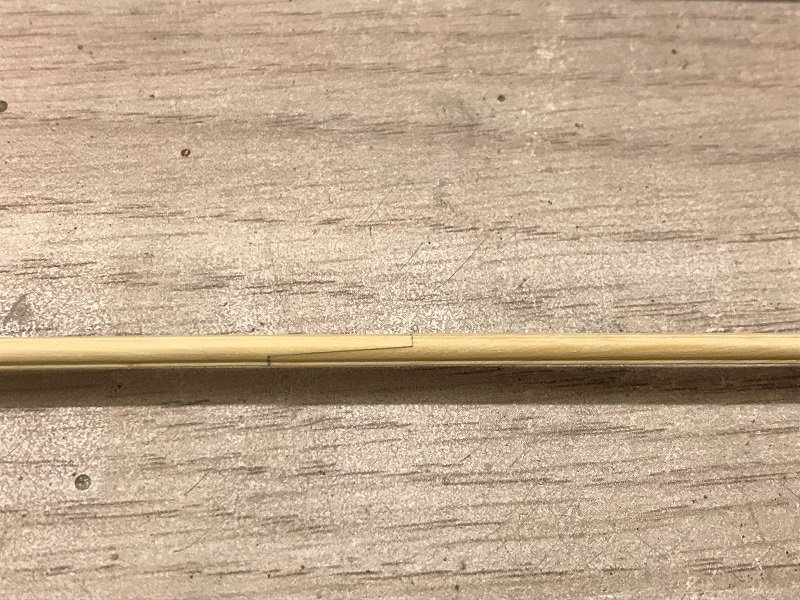
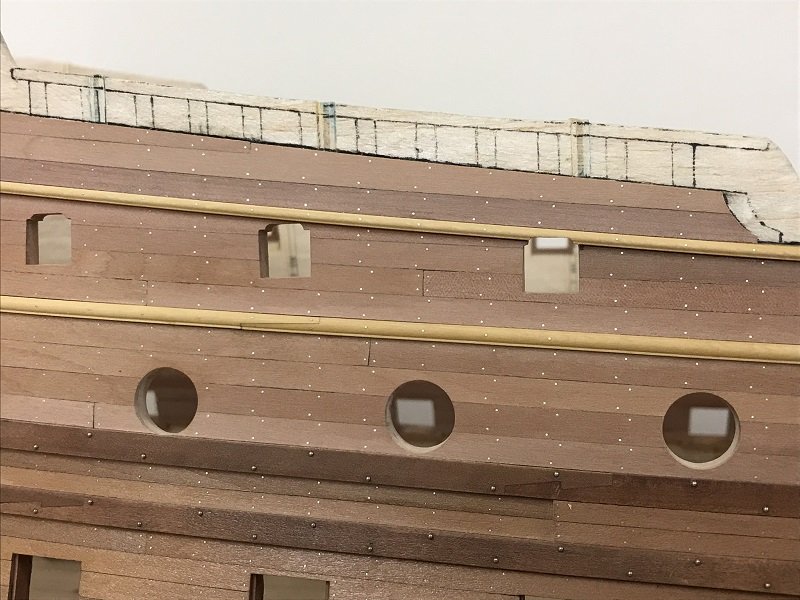
Thank you everybody for your kind words and encouragements. You know, I really hate to be an unreliable man, and I feel unconfortable with saying I will post pics and I can't. But everytime I think I will have some time to go back to the workshop the amount of work (my real work I mean) increases and I'm away from home much more than I would like to... And as you can imagine with the Covid-19, things are not going to be better anyway soon. But that's my job and of course it is the priority. Anyway, I have at last some real improvement to show so here are the pics ! At first I had to make some shaped pieces of wood (lisses de rabattues, don't know the english word, wich are molded) with a tarabiscot. Then I can plank the rest of the ship. I had to correct my drawings concerning the sheer cap railing (rabattues) and make them more parallel to the other "préceintes". (I don't find the english word, but I suppose it makes sense anyway). It came from an advice Marc gave me a few years ago. I did not make them more curve, in fact I even made them more straight, but I gave them less a "fan" shape. So at last it goes forward. The left side is a little late but will be done in a few days. Thank you for your interest, regards, Marc
- 208 replies
-
- 27
-
-
-
- le soleil royal
- 104 guns
- (and 2 more)
-
Hello Marc ! You really did a great work with the windows, and the job on the stern is topnotch, it will look very accurate. Congrats ! Your model is going to be a reference when finished. By the way, a funny thing about languages. In english, one say "stern chase gunports". In French, we call them "retreat gunports". It always made me laugh !
- 2,696 replies
-
- 4
-
-
- heller
- soleil royal
- (and 9 more)
-
It's stunning work, Marc ! I love the way you are building your model.
- 2,696 replies
-
- 4
-
-
- heller
- soleil royal
- (and 9 more)
-
Le Soleil Royal by Nek0 - 1/72 - Marc Yeu
Nek0 replied to Nek0's topic in - Build logs for subjects built 1501 - 1750
Thank you very much ! I can't work as much as I would like on the model and it's real frustration, but it progresses. I don't want to show pictures until I make some real upgrade, but I will come back when there is something interesting to show.- 208 replies
-
- 4
-
-
- le soleil royal
- 104 guns
- (and 2 more)
-
Hello Marc ! As usual it's a real pleasure to look at your work. At this time, the rudder hole was rectangular, not round. So the rudder rudder head did not pass through the hole but only the rod. The purpose of the carvings was only decorative.


- 2,696 replies
-
- 6
-
-
- heller
- soleil royal
- (and 9 more)
-
Le Soleil Royal by Nek0 - 1/72 - Marc Yeu
Nek0 replied to Nek0's topic in - Build logs for subjects built 1501 - 1750
Thanks ! Marc, I'm only planking the other side, exact same thing I did with tribord. Not very interesting but I hope I can show real improvement before christmas.- 208 replies
-
- 4
-
-
- le soleil royal
- 104 guns
- (and 2 more)
-
Le Soleil Royal by Nek0 - 1/72 - Marc Yeu
Nek0 replied to Nek0's topic in - Build logs for subjects built 1501 - 1750
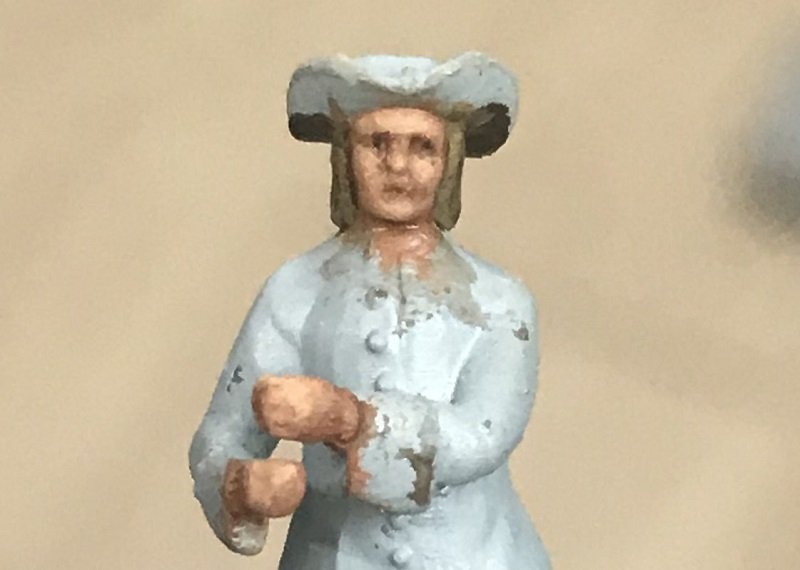
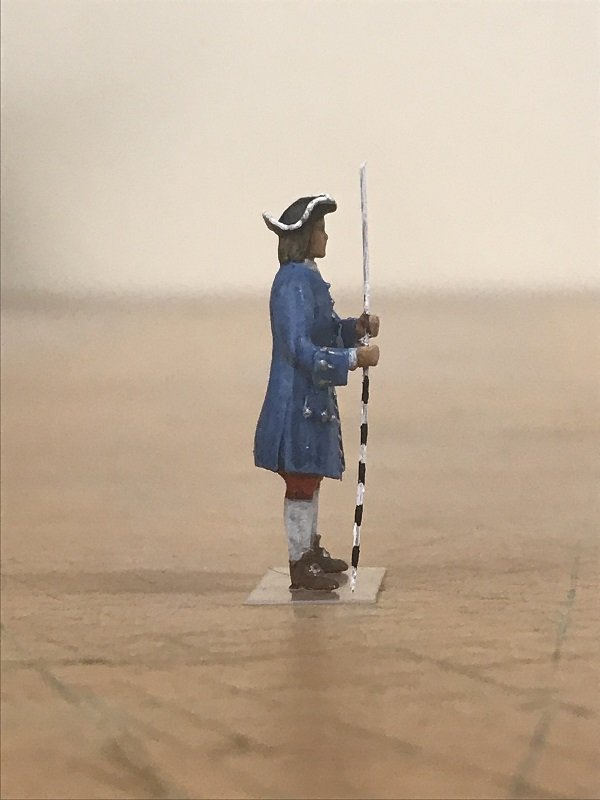
Oh ! I almost forgot ! I can post some pictures of a carpenter I painted a few weeks ago. It's a resin 3D printed work by Bernard Huc, a man on the french forum "marine et modélisme d'arsenal", and he was kind enough to give me a 1/72 carpenter. Here is the thing.

- 208 replies
-
- 16
-
-
- le soleil royal
- 104 guns
- (and 2 more)
-
Le Soleil Royal by Nek0 - 1/72 - Marc Yeu
Nek0 replied to Nek0's topic in - Build logs for subjects built 1501 - 1750
😂😂 I don't want to post pictures for a few pieces of wood glued, but I swear the next photos are coming soon. Thank you Vic !!- 208 replies
-
- 4
-
-
- le soleil royal
- 104 guns
- (and 2 more)
-
Le Soleil Royal by Nek0 - 1/72 - Marc Yeu
Nek0 replied to Nek0's topic in - Build logs for subjects built 1501 - 1750
Thank you guys ! the next instalment is at last being made, the build has resumed ! I'm done with my side project (took me much more time than I thought) and I'm back on the SR. Can't wait to show you some progress.- 208 replies
-
- 7
-
-
- le soleil royal
- 104 guns
- (and 2 more)
-
Le Soleil Royal by Nek0 - 1/72 - Marc Yeu
Nek0 replied to Nek0's topic in - Build logs for subjects built 1501 - 1750
Hello Dan, excuse me for not having answered you... Yes it's a little Vader, I have a 1/72 Skywalker family ! But no stormtrooper to help me, too bad.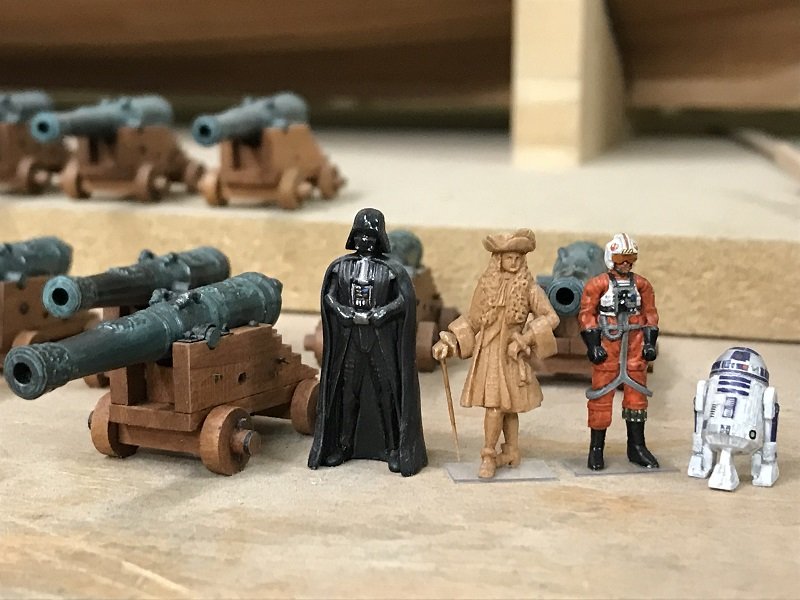
- 208 replies
-
- 11
-
-
- le soleil royal
- 104 guns
- (and 2 more)
-
Le Soleil Royal by Nek0 - 1/72 - Marc Yeu
Nek0 replied to Nek0's topic in - Build logs for subjects built 1501 - 1750
Oh, I did not even saw the last messages, sorry ! Thank you all for your interest. I wish you all the best for this new year. My life reached a balance in the first months of 2018, I have the time to work in my workshop again ! I did not work on the SR because I wanted to finish a sideproject before. It's nearly done so I will be back with the SR in a few days, for my greatest pleasure. And yes it was very frustrating not to work on my model but I had tough times trying to do everything at the same time but it's ok now ! I made the right choices and I'm back. Thanks !!- 208 replies
-
- 3
-
-
- le soleil royal
- 104 guns
- (and 2 more)
