


RiverRat
-
Posts
206 -
Joined
-
Last visited
Content Type
Profiles
Forums
Gallery
Events
Posts posted by RiverRat
-
-
Well! Long time, no sea!

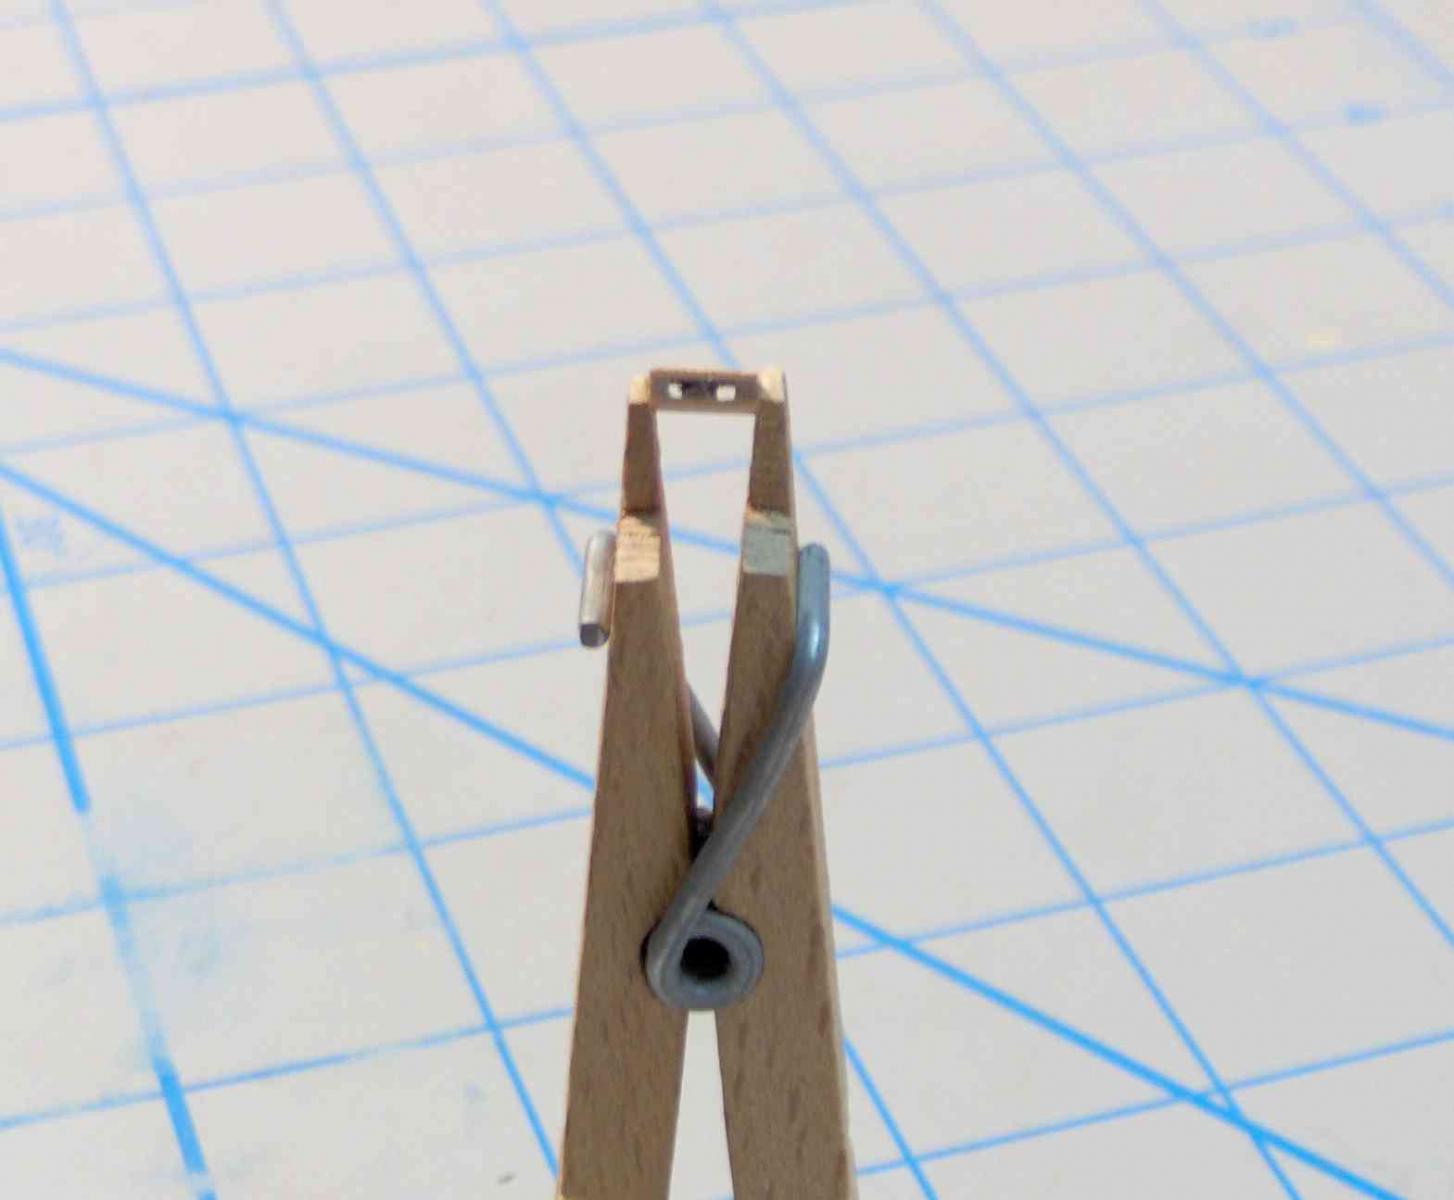
Finally getting back to this. Finished installing the sheave blocks in the bulwarks, except for a little sanding down and touching up/repairing chipped inner planking to do yet. The inner planking is only 0.5mm and I had some delaminating until I settled down and got more careful.
Somewhat of a pain-in-the-@r$e process, 75% happy with how they look, and 100% relieved to get through it!
Here are two typical. A couple better, some not.
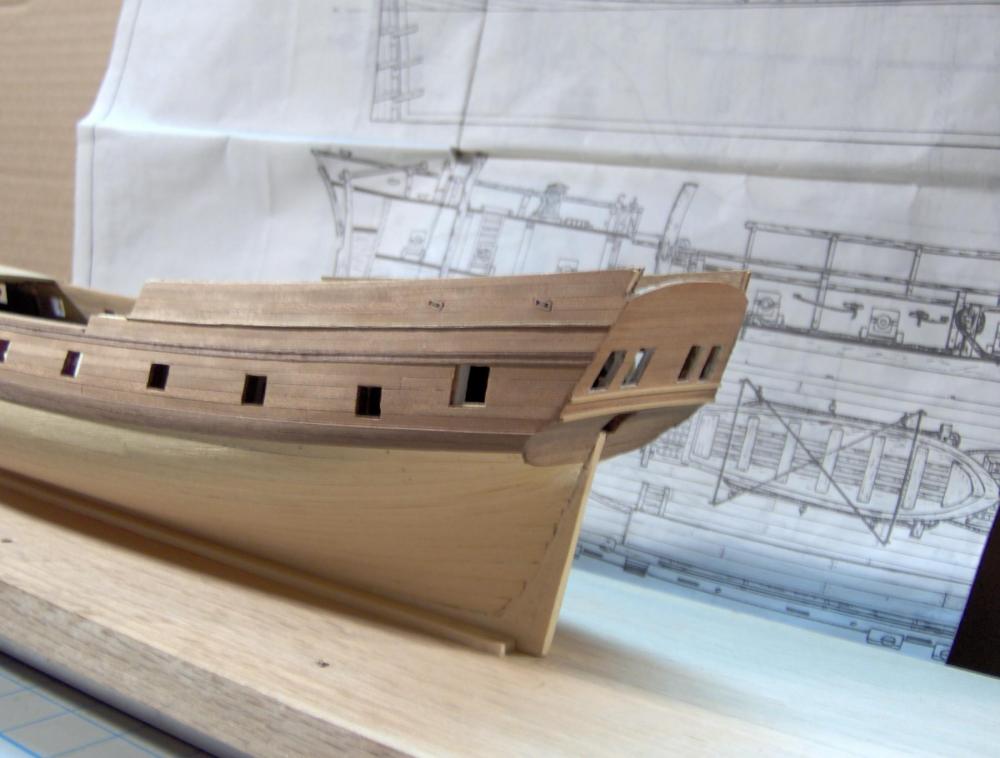
Next, after the touching up: thoroughly review the planking tutorials (it's been too long since last time....) and plank the lower hull.
Cheers!
-
-
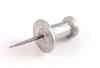
Just found this thread. I noticed a push pin in my wall holding a calendar and thought it might make some sort of capstan.
-
-
My goodness!
 Have I been away this long? Ah, well. I DO have other interests, though. But I've got to missing these model-building trials and tribulations and was wondering if I could rustle up the energy to continue this thing.
Blew the dust off the deck, the Ratt hanging in the basement rafters on the build board. No ill has come to it thankfully. Re-inserted some missing photos in the log on pages 5-7.
No promises, but I might actually continue after taking some time to review where I left off ( and if I can manage to keep that devil cat from getting into the fiddly bits......)
Cheers to the loverly MSW community!
-
I got one too to shape a cradle. It's also good to check for symmetry between the port and starboard shapes.
-
Brian:
In my research, I have seen it done with everything squared up. What you have seen on other models is not necessarily anything to do with how it was actually done. If the builder used the kit plans, that probably does not tell you much of anything about how the ports were actually built.
Russ
Great!!! What sources do you have from your research? Being relatively new at this, pretty much all I have is looking at models and some paintings now and then. It would be great to see some documentation to to clear this up for me. Thanks!
Brian
-
JPett:
Yes, the gunports are square to the bulkheads and you can measure the height from the deck at the side. The sills should be perpendicular to the bulkheads.
Brian:
In fact, all the sills are perpendicular to the bulkheads. To what plan drawing do you refer?
Russ
I'm referring to Post#318, first image, in this topic.
I've seen many models where the sills, top and bottom, were angled to parallel the deck and not square with the vertical sides (horizontal as the waterline), and making a parallelogram shape rather than a square or rectangle. In MSW 1.0, I asked if this was fitting for certain eras or geographical regions, but don't remember that I got a definitive answer. But I've certainly seen ports that didn't have square corners.
-
The gunport sills .........need to be square to the frames and are not angled or anything to follow the line of the deck.
Russ
The plan drawing above seems to show the open (un-lidded) ports as having sills that parallel the line of the deck. The two forward ports, that have lids, look square (or rectangle).
Brian
-
Hello Juan,
Reproductions of the Nina and Pinta toured the U.S. midwest recently and I took a number of photos and posted them here:
http://modelshipworld.com/index.php?/topic/2311-nina-and-pinta-reproductions-at-grafton-illinois/
I can't vouch for the authenticity of their construction, but I thought it might be of interest to you.
Regards,
Brian
-
Hi Tyler,
You'll need something to hold the pieces square as the glue dries. Things like wood blocks, Lego blocks, "L" brackets, judicial use of clamps, with or without things like the preceeding. Whatever you can rig! Sometimes a calibrated eyeball will do.
Is it glued already? With what? Some adhesives can be un-done so the parts can be re-glued.
G'luck!
Brian
-
Thank you all for the condolences. I do appreciate your support and kindness. Should be back to model-mania and frustration shortly

Al
-
Hi ladies and guys,
Perhaps the reason why I couldn’t have been managed any spare time is my habit of laziness. But some sense of diligence in my heart finally won against laziness .......... It would be appreciated that readers allow some inconvenience in my log.
Sounds much like me nowadays! Carry on, if you feel like it................
Brian
-
Thanks Hoss, I'll check it out. I have Steel's "The Art of Rigging..." as a pdf file. I see that "Elements and Practice..." must be a different publication of his.
( I wonder if this should've been posted under "Masting, rigging, and sails")
Brian
-
Changed original post title for clarity.
-
Thanks Sam,
A short delay on continuing much with the build. My brother passed away earlier this year and I'm tasked with selling a couple of his collections of valuables for the estate, so at the moment, I'm trying to get most of that taken care of.
I did get some practice trying to fit one of these fixed blocks into my mock-up bulwarks. Looks like I'd have better luck in the fitting if I have seperate pieces for the inside and outside, rather than fitting the whole thing in one piece. Also made some smaller ones with 0.5 mm openings to try. Details later...........
Regards,
Brian
-
Hi Martin,
I had a topic concerning these earlier. See if it helps your understanding....
http://modelshipworld.com/index.php?/topic/1744-horse-for-boom-sheet/?hl=horse
Brian
-
Probably not worth the money in the end. Will have to make up for it by buying cheap scotch the next couple
daystimes instead of the good stuff.
I was mostly looking for how the version of the rigging plan might differ, Deeply studying Lee's and Peterssen's books might do as well. Which I'll be doing anyway. The MS plans do name what all the lines are. A plus for Mamoli's is that it runs over several pages, developing the rigging in steps, standing to running, in an orderly fashion. I wouldn't know if it's more or less correct than MS. Although I haven't gotten into them much, I have noted some minor differences already.
I was also interested in other details MS might have, especially drawings of the headrails, cheeks, head timbers, etc. We'll see....
Brian
-
Brian, do you have the Admiralty drawings? Did you get them from the National Maritime Museum?
I found 3 images (half-ship profiles at bow and stern, and stern view) somewhere on the internet, maybe msw1. They're snapshots, not scans, of the nmm drawings.
-
-
Yo JP,
The Admiralty drawings show no "quarter badge" on the Rattlesnake. The addition of them in the kits seems to be the model designers' choices, not necessarily reflecting actuality. If you wish, when I get home later, I have a photo of the Mamoli bling provided. I won't be using it myself, and haven't decided if I'll have some kind of decorative trim.
Ben Lankford I think authored the MS Ratt instruction manual??
Brian
-
I'd started the blocks a couple days ago. But yesterday, I recieved the ModelShipways Rattlesnake plans as an additional reference (gee, why am I putting in all this extra time and $$ on this.............I might be rigging by now...)
The MS plans show no rope sizes. The instructions suggest sizes for all the rigging and tells what the kit provides.
Here's that from stern forward:
Main Brace: 0.30mm, kit provides 0.43
Main Sheet: 0.50mm, kit provides 0.76
Fore Sheet: 0.50mm, kit provides 0.76
Main Tack: 0.64mm, kit provides 0.76
The Mamoli kit has 0.40mm for all of these. Why do they suggest 1.5mm slots??
I was hoping to look up other rigging references to see if there might be other information. I suspect the MS instructions are likely OK.
JSG: I'm waiting too! I'd like to make a jig to mark or define the outside and inside cuts, keeping them aligned. I have a couple vague ideas, but haven't worked on that yet. It's a scary thinking how easily this could be botched..........
Brian
-
"Bringing in the sheaves,
Bringing in the sheaves..........."
The Rattlesnake should have 8 single fixed blocks on the bulwarks if I see the drawings correctly. Mamoli's instructions say to make (each side) "...4 slots on the bulwark with a 1.5 mm drill,....". Accchhh!

I was looking into the feasability of my making the blocks and saw in a scratch build someone laminating layers to form the slots, rather than cutting them out. Of course he used actual round sheaves (with pins!), but mine would be simulated.
After some digging around, I decided 2 x 6 mm would be a reasonable size for the blocks. (I have a post asking of size in the "Building, Framing,..." section); no reply yet. Is this size OK??
Bulwarks are 4.5 mm thick. I made these blocks a little wider to finish the profile after installation. Top and bottom are 2 pieces edge-glued 0.5x3mm cherry strips. 1x3 cherry to make the adjoining ends of the blocks, and 1x2 walnut for the fake sheaves. I left a 1 mm gap in-between. Is this too large? This construction makes about 1x1mm holes. I haven't done much looking into rigging size requirements yet.

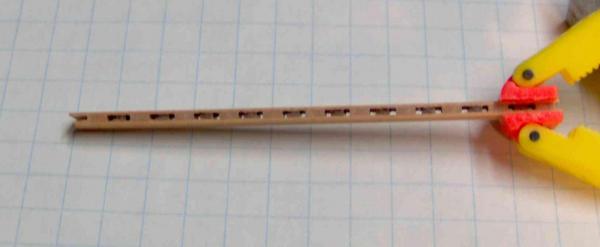
I've cut off one block and cut to near the 6mm width. I made mock-up waist and q-deck bulwarks to practice on. The q-deck bulkhead will need extra filler against the inner 0.5mm planking. Thankfully, I haven't capped the q-deck bulwark on the build and I can add something to fill it for support.
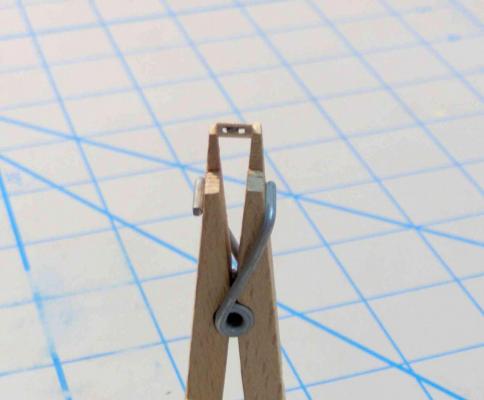
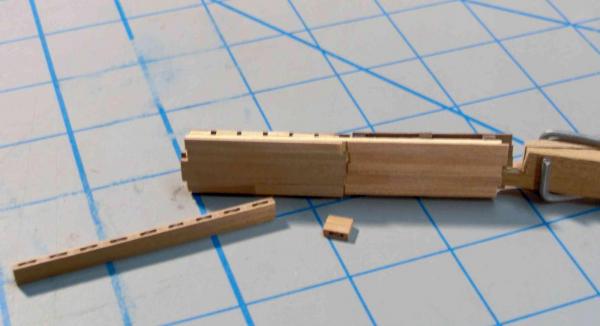
I can easily remake these if my dimensions are off; nothing's installed yet (even the practice stuff). I doubt the holes, if too large, would be noticed much as-is.
Cheers,
Brian
-
This will be slow going since this is my first build and I am taking my time. I really don't want to frustrate myself right out of the gate.
Rich
Perfect attitude!
These builds seem to take longer than first-timers realize (I know ---I'm one). Taking your time and thinking things through pays off big time. Cuts down on the mistakes, re-works, and frustration.
Good luck! Patience!
Brian


La Pinta by JoeNavy - Artesania Latina - Scale 1:65
in - Kit subjects built Up to and including 1500 AD
Posted
I visited replicas of Nina and Pinta a few years ago and posted some pics here.
http://modelshipworld.com/index.php/topic/2311-nina-and-pinta-reproductions-at-grafton-illinois/?hl=nina
I'm sure these "replicas" and current models are just guesses as to what they looked like, but these may be of help or interest to your build.
Cheers