killickthere
-
Posts
43 -
Joined
-
Last visited
Content Type
Profiles
Forums
Gallery
Events
Everything posted by killickthere
-
Beautiful build Mike. I don't care for the industry but the boat is beautiful and yours is art. Following...
-
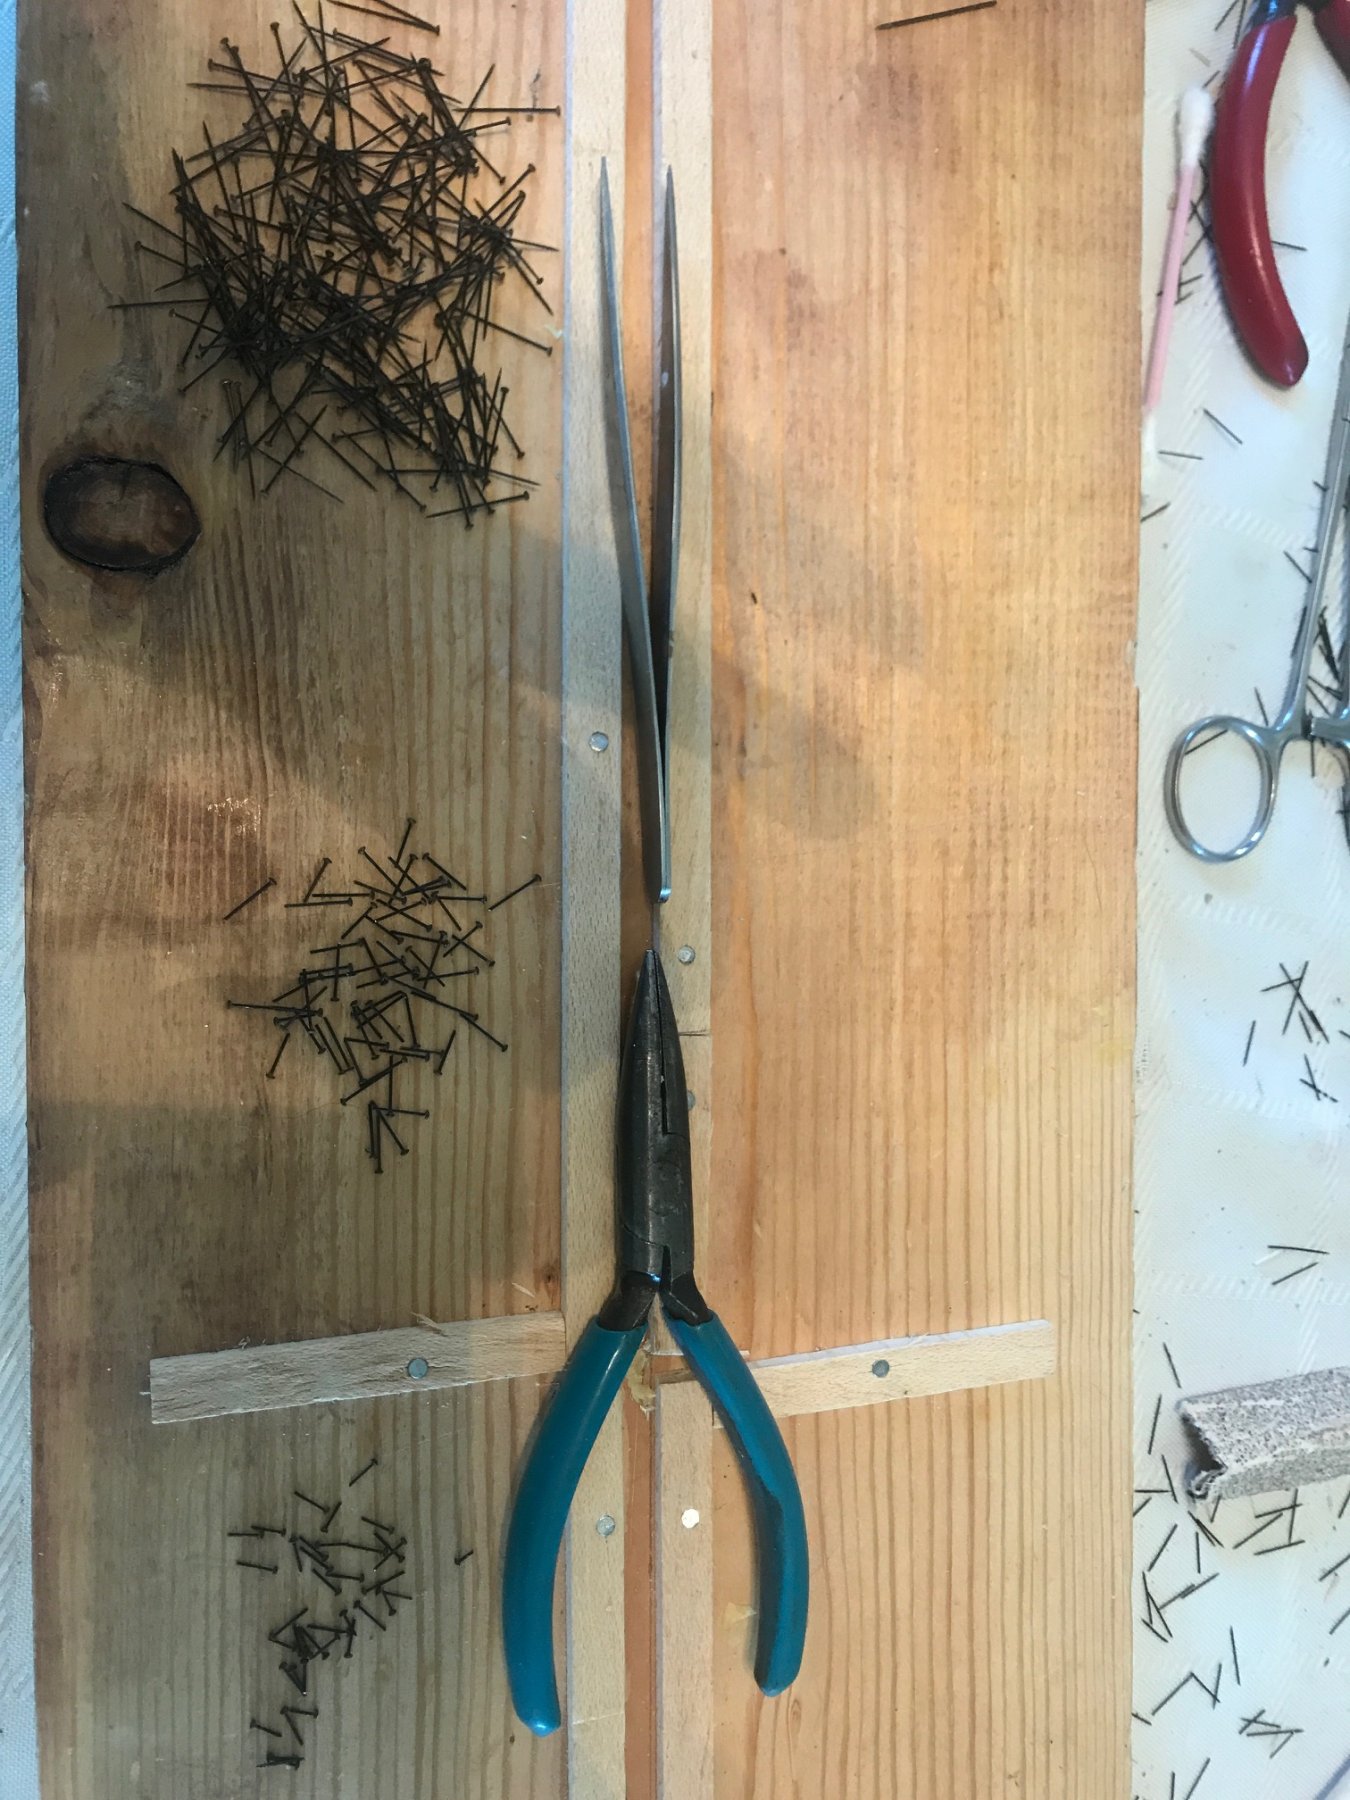
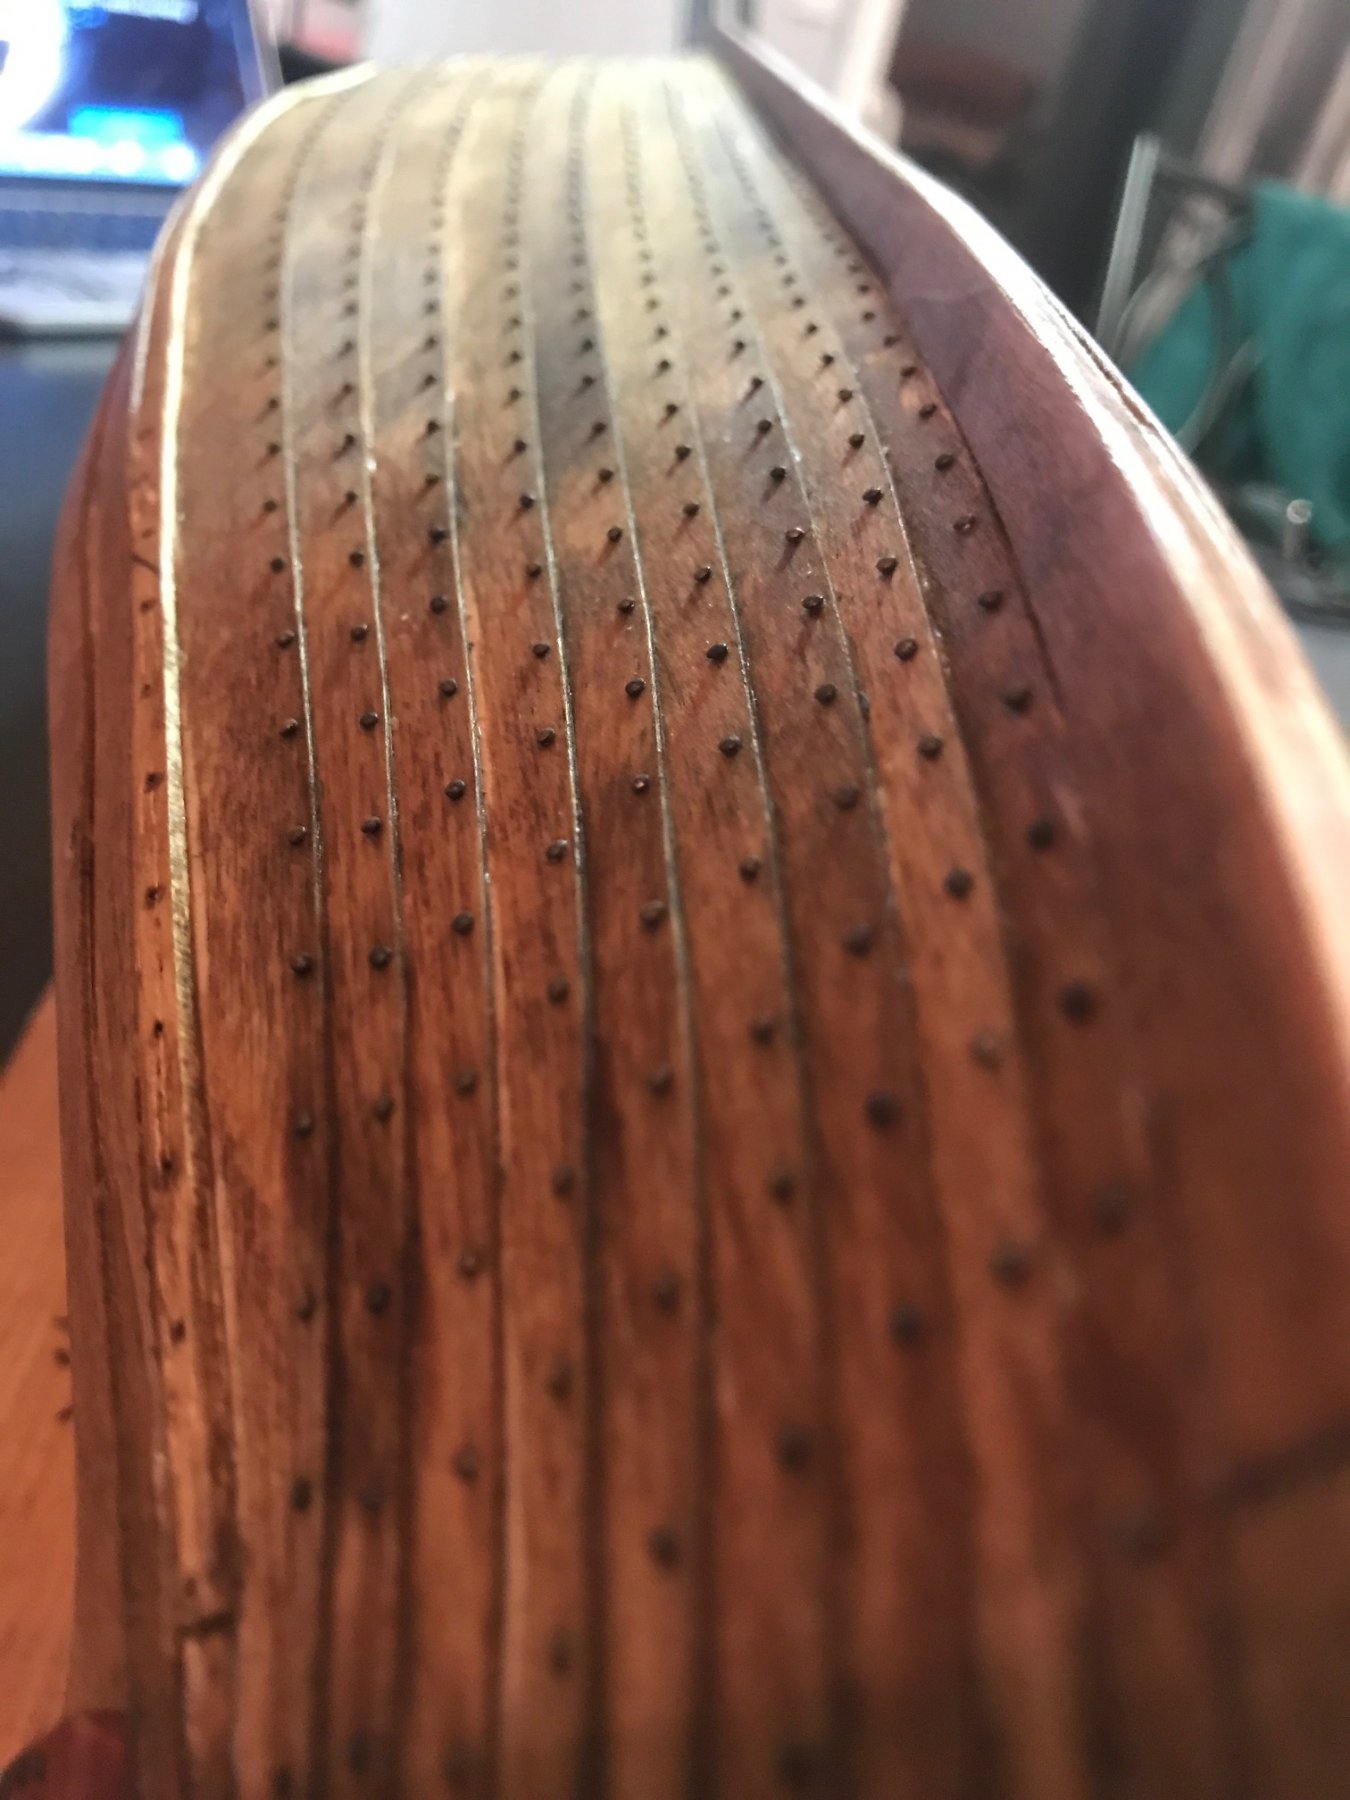
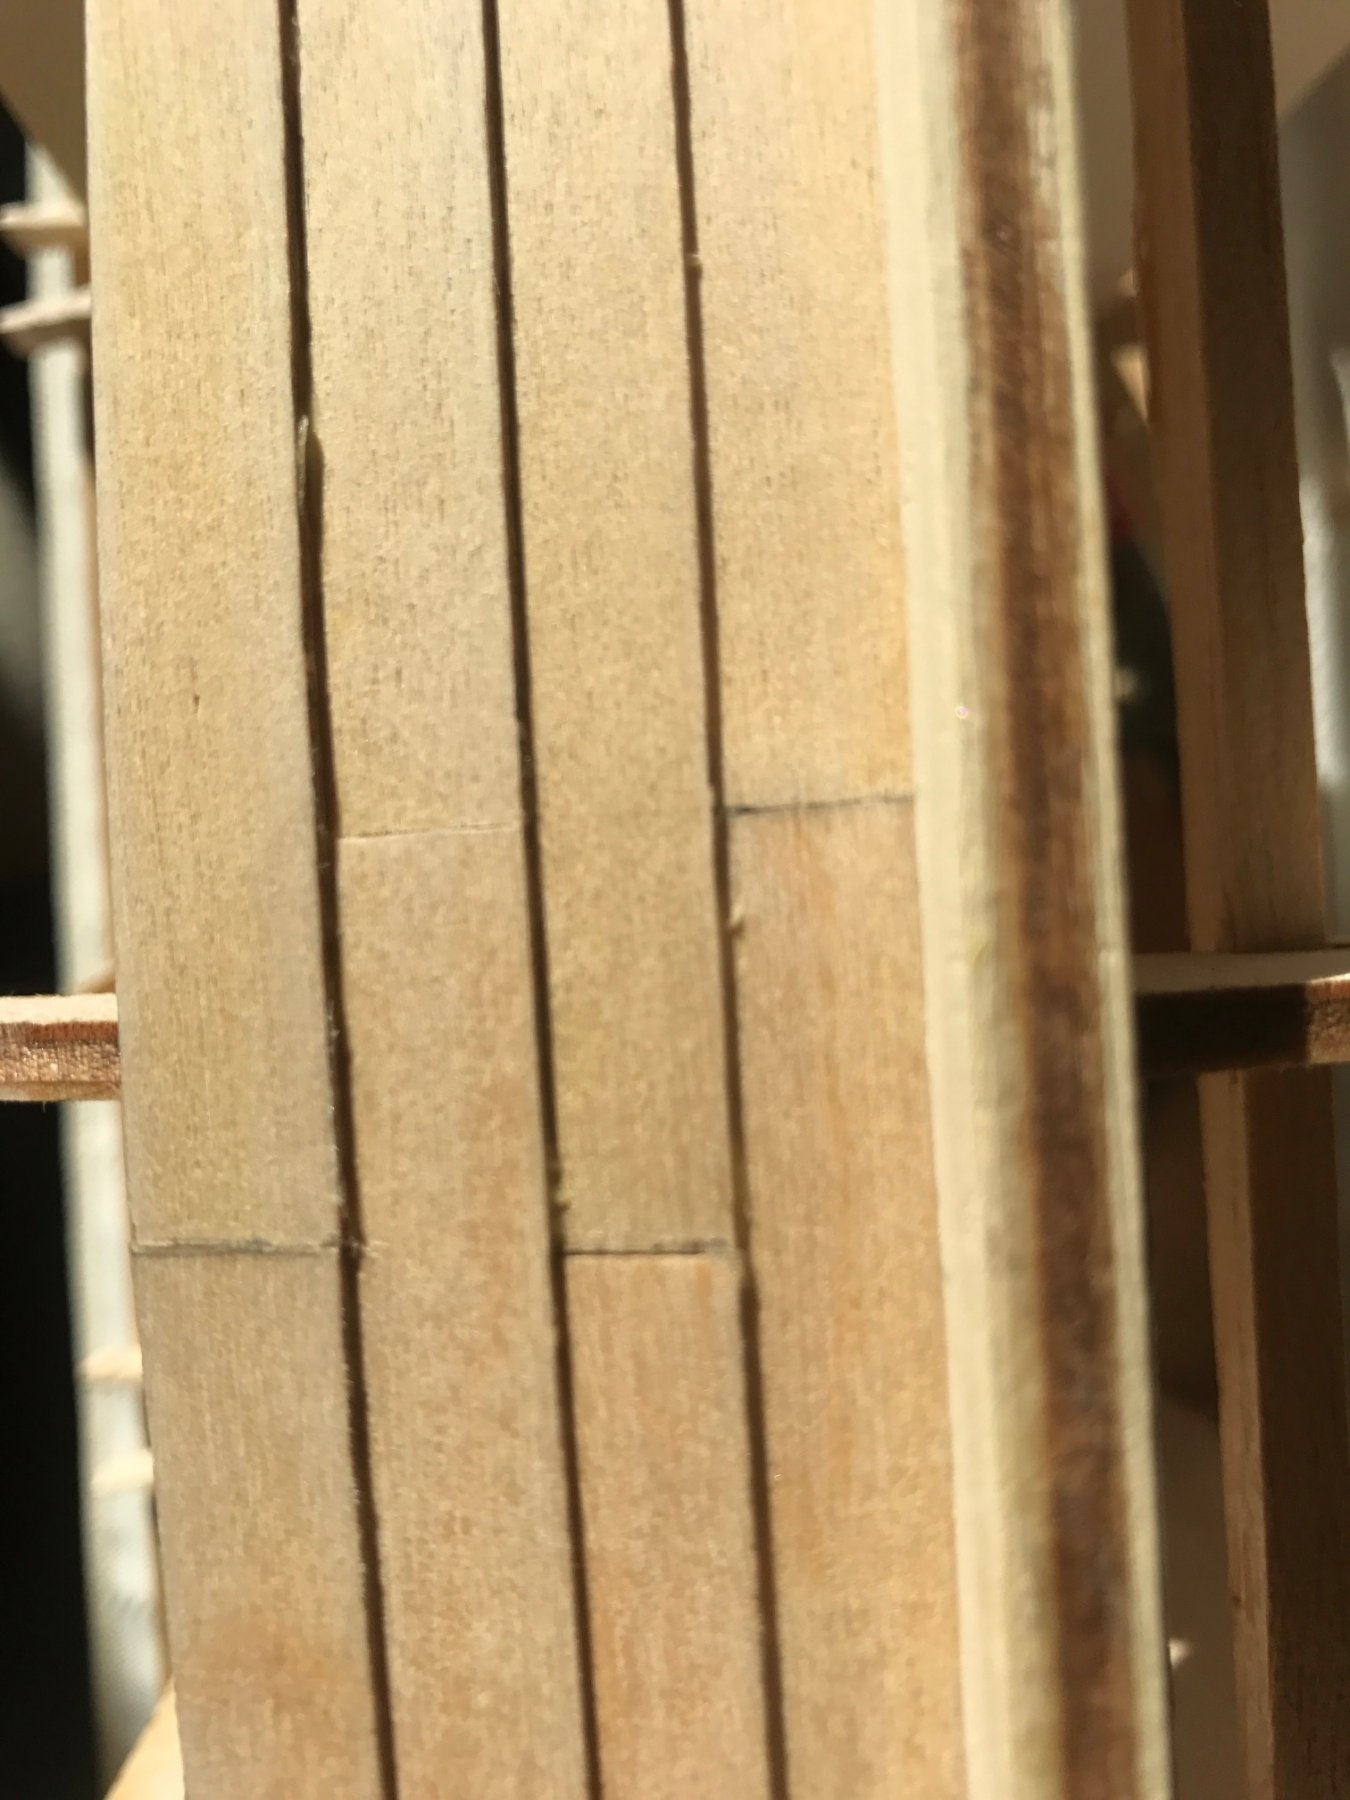
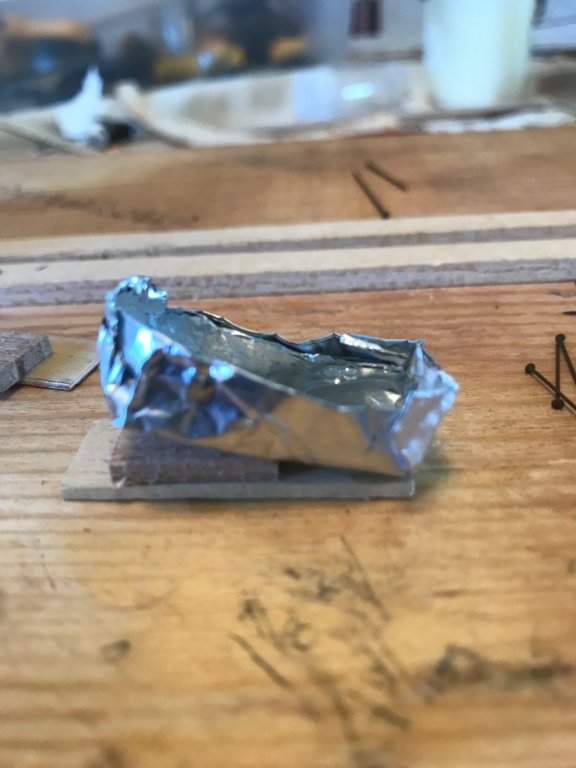
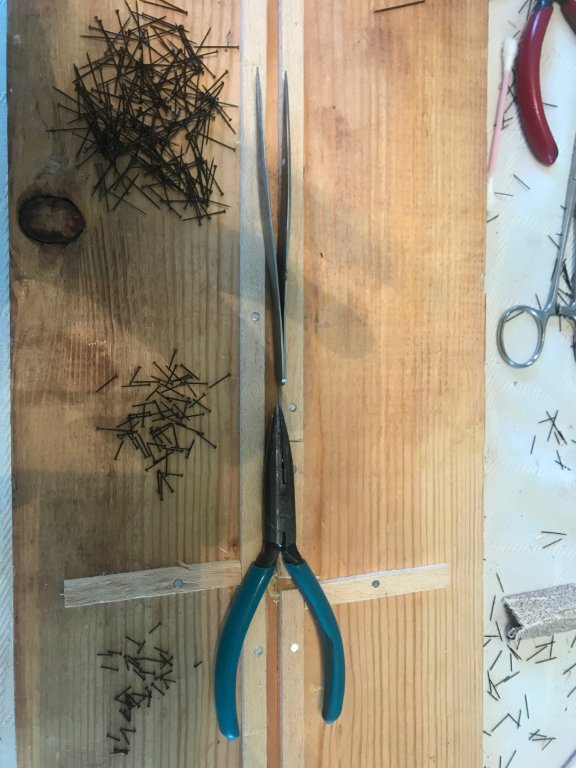
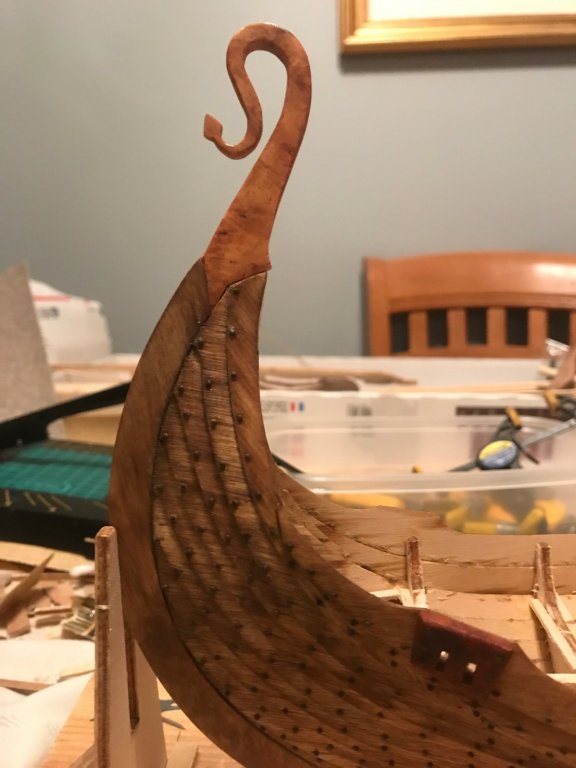
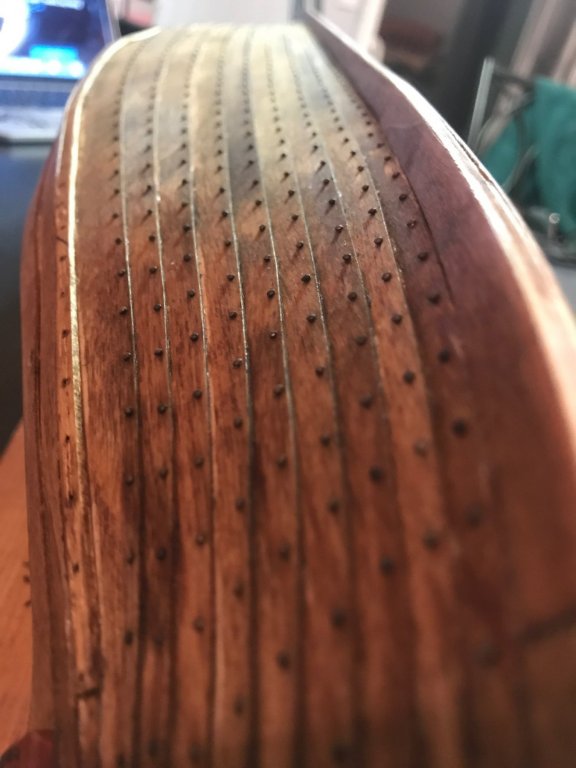
First thank you all for your comments. It's been fun making a model ship again. Second, to those that celebrate Thanksgiving, I hope everyone is having a safe & relaxing holiday. I just finished dinner and of course I'm stuffed! I did the cooking and I do have to say the turkey AND the gravy turned out superb. OK I wanted to make a few comments on the nailing process that I'm using. This is from learning from nailing the first side. What I started doing was cutting two different sizes from the full size pins. So I'm basically using three different sizes. Full size, half size, and quarter size. On the stem & stern a lot of the quarter size are used. As I start nailing towards the center I can use the full size pins. Down along the keel I've needed to use mostly the half size. I also made a little glueboat. I'm using Gorilla super glue. I'll squeeze a fair amount into the boat which in that amount doesn't start curing. The viscosity stays pretty much the same for over an hour. Even over night it is usable. It will start developing 'strings' as you pull the pins end out so I just add more glue. I also adjusted the glueboat making it sit at an angle as to keep the glue at one end. So far this process is working pretty good. Here are some of my lame pictures. Ahh you have to edit to put text after pictures! My glueboat, HMS Sticky And nails with the implements of destruction.
- 35 replies
-
- 1
-

-
- oseberg
- billing boats
- (and 1 more)
-
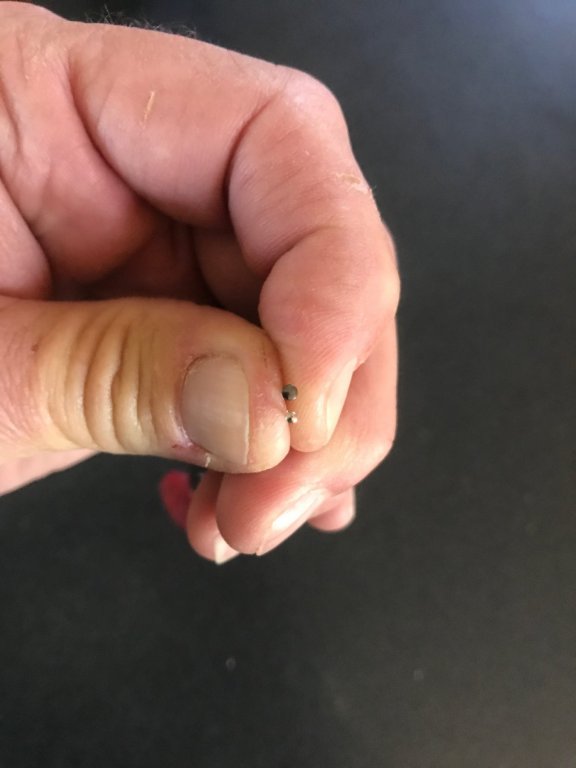
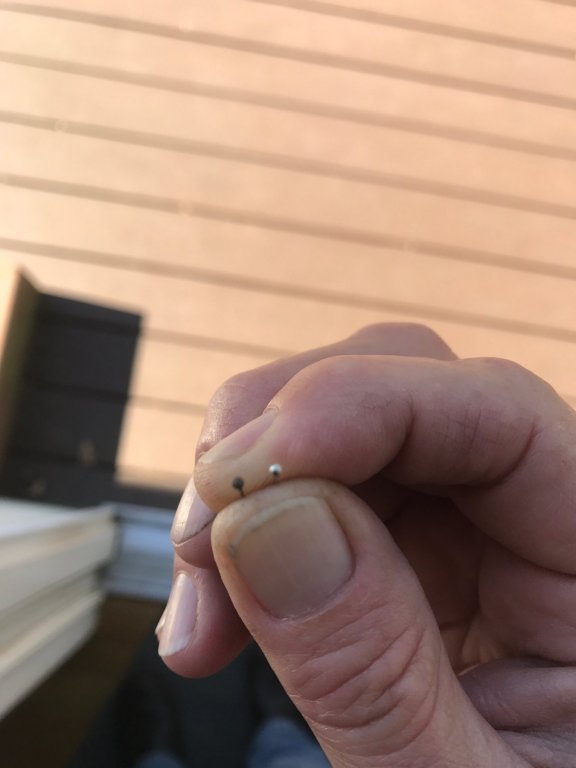
OK I am up to date. The next log will be much better, I hope, as I'll write it as progress is made. Hopefully much more detail. So I am at this point now. I bought some nails from an online model store. They are nice but I wanted to find something a little smaller than the head size of them. I think they were 1.6 mm or so. Well I did. What I found were pins women, (and I'm sure a few menfolk), use for making lace. The head is 1.20 mm. I did the scale conversion and it comes out to 1.13 inches. Das ain't to bad!! So I ordered 2,800 of them. They are a bit long at 17 mm but they are working very well. The pins are steel then nickel plated. I used etching acid to remove, blacken the nickel. Experimenting with time in the acid showed me I could get different colors. From gray to black to an almost rust color. Perfect! I took 400 pin batches, the pins came in 400 piece lots and soaked them various minutes. I used 11mm spacing. I also made a little jig to help with the hole drilling. Worked out nicely. After drilling all the holes, (I counted 968 on one side), I coated the hull before starting the nailing. I wanted the color to be authentic and since the ship will actually go into the water for the funeral I went this route... I purchased a pint of Stockholm pine tar and a pint of boiled linseed oil. Man the stuff smells but in a good way, to me anyway. When I get home and get close to the work area it smells of pine tar. Just like a real shipyard! I mixed it 50/50 and coated the hull. I'll put a 2nd coat on after the nailing is complete. I'm about a 3rd of the way done with the other side. I am also going to nail the frames and mastfish so I'll have plenty. OK, up to date...

- 35 replies
-
- 7
-
-
- oseberg
- billing boats
- (and 1 more)
-
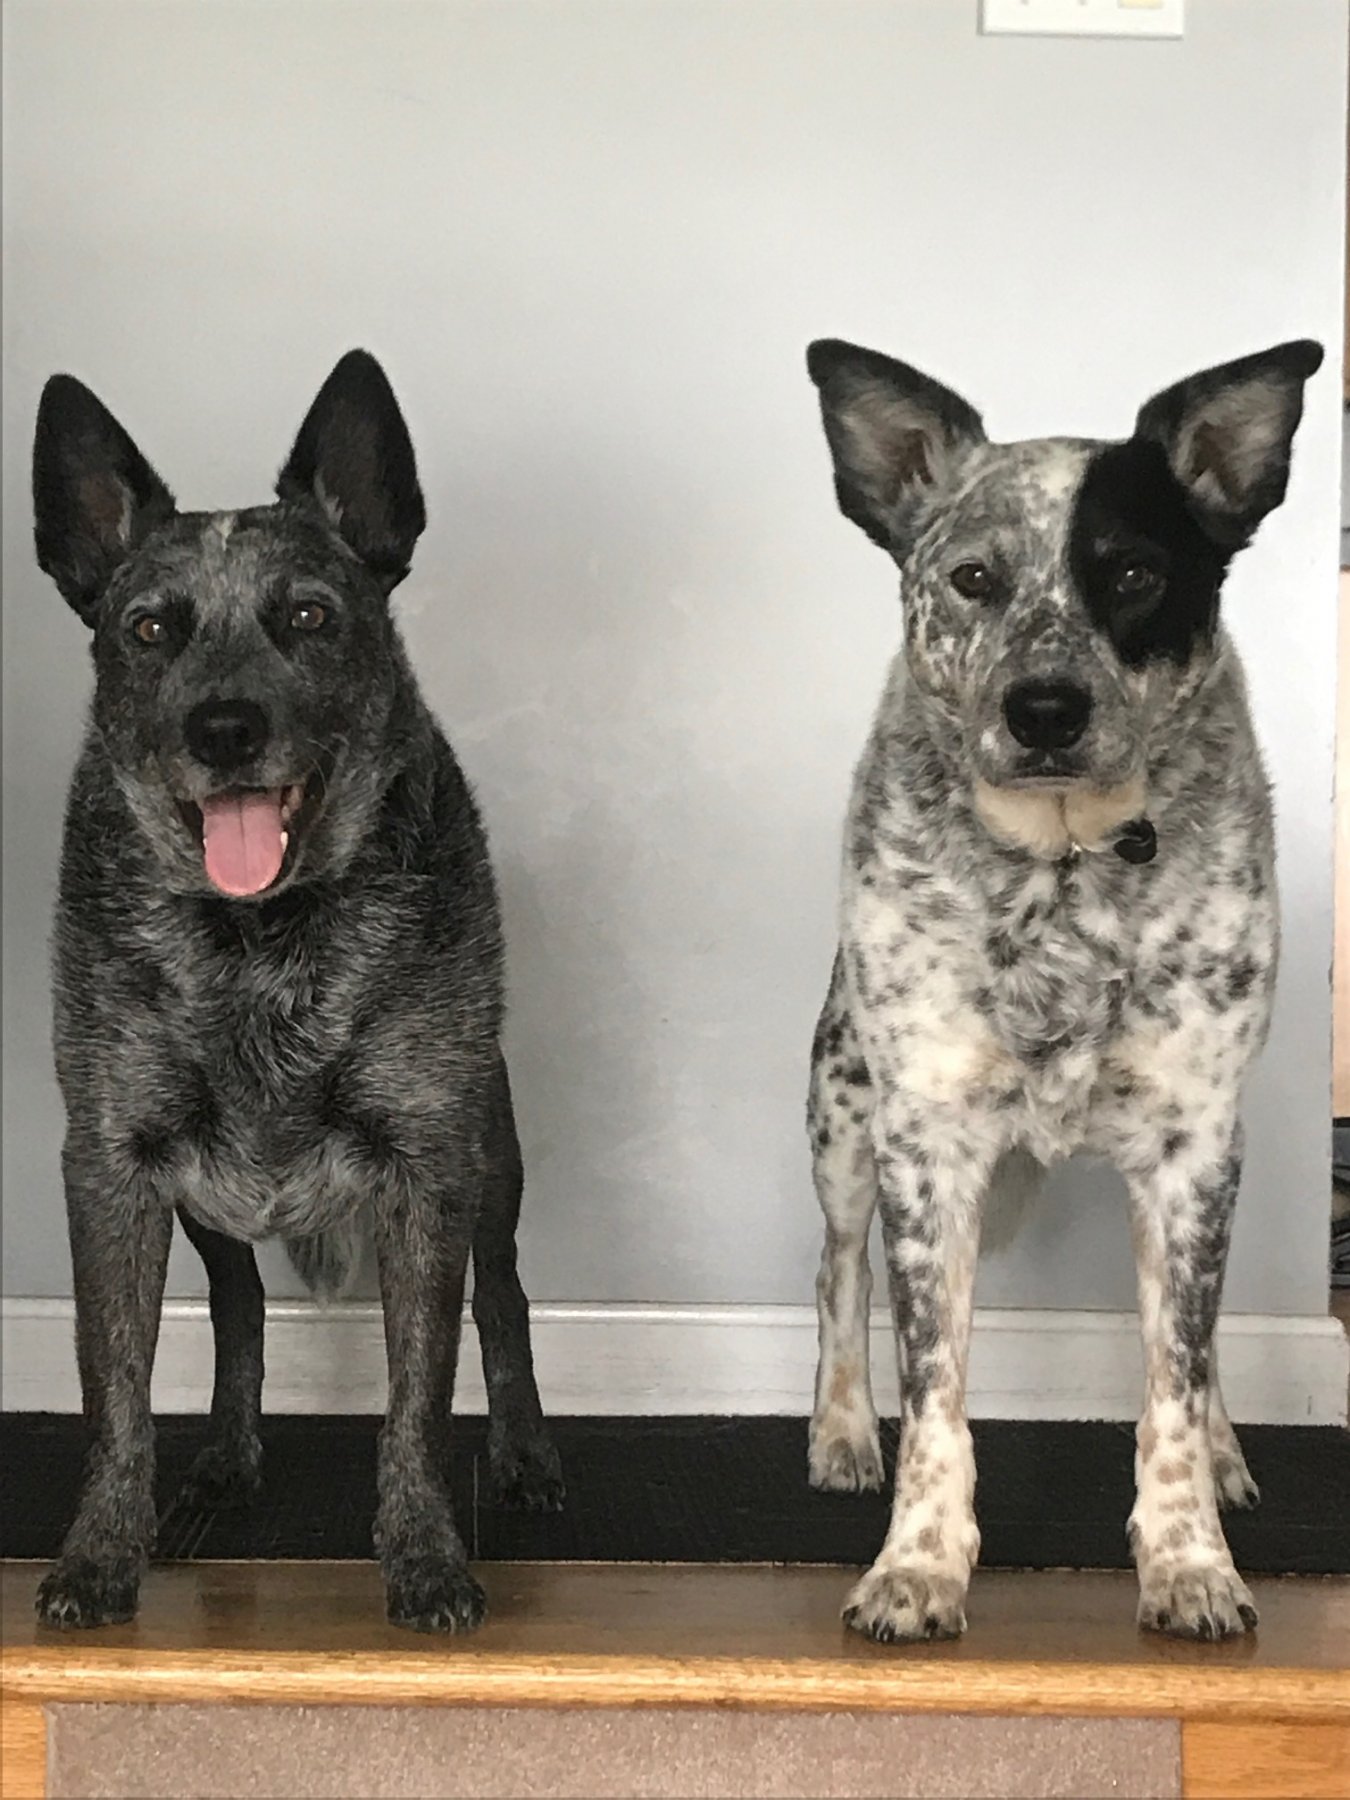
I fiddled making an oar and a shield so I will know how to preside when it's time. I'll only be making 5 shields, one for each of my four dogs & myself. I had two prior and Maxx & Cobi when their time comes. I have Cody & Niki's ashes already. They'll be going to Valhalla with me. on to the nailing of the hull.
-
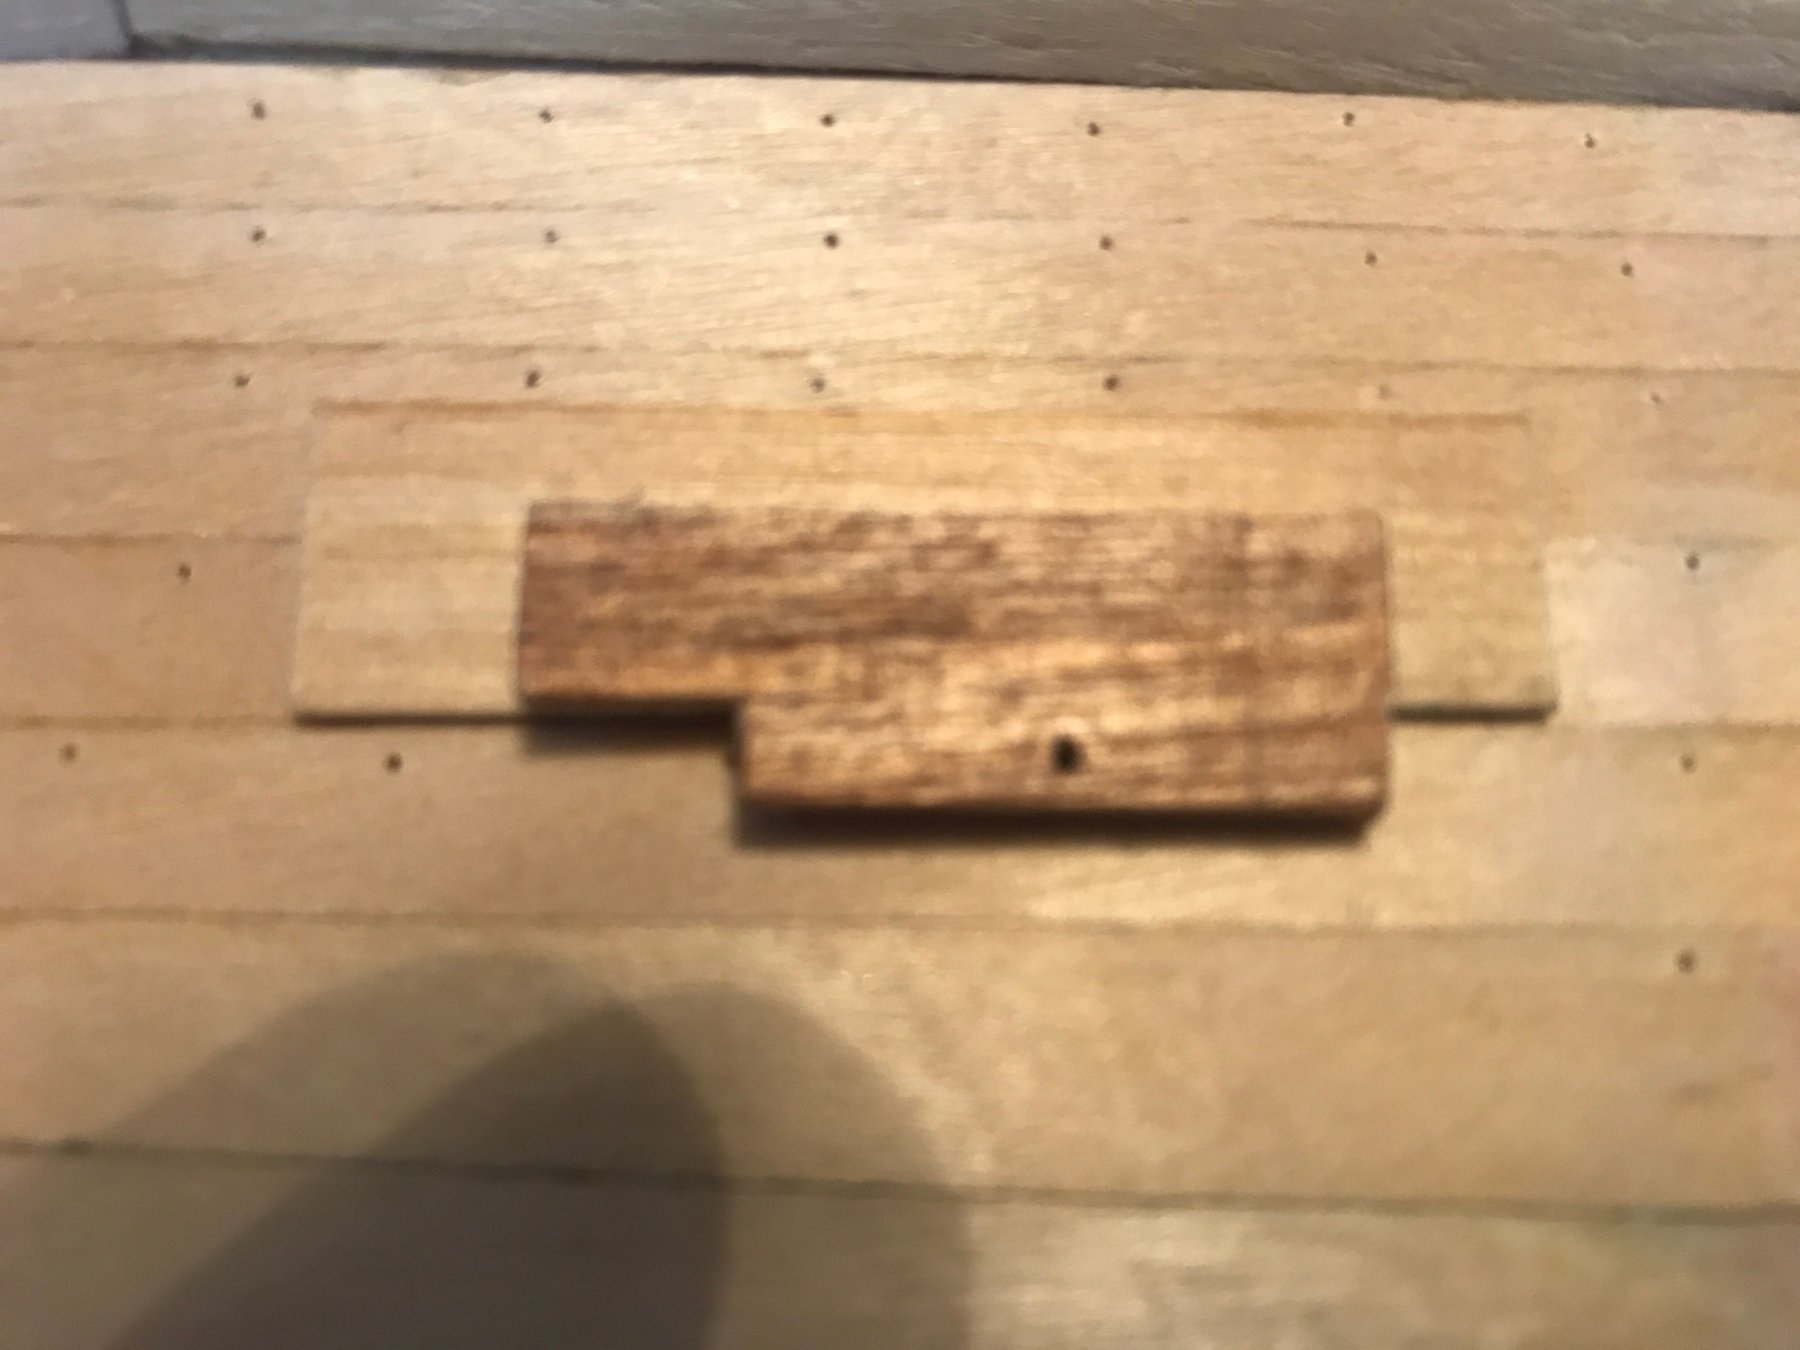
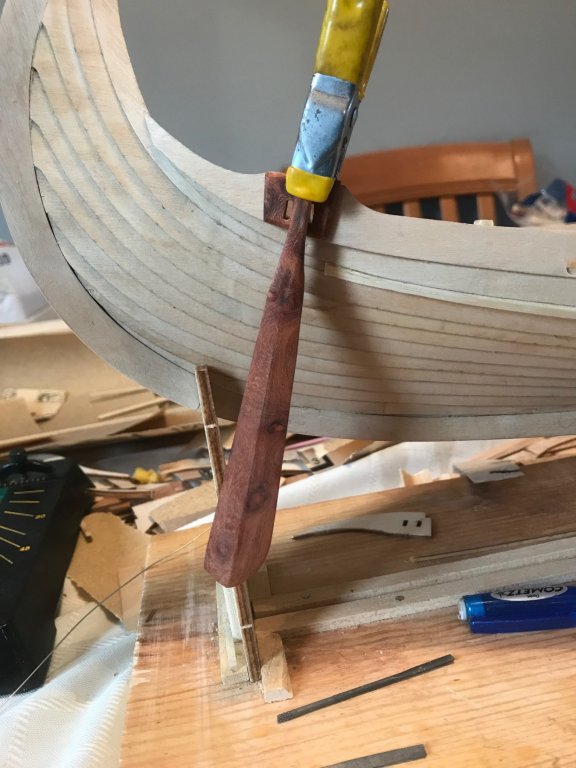
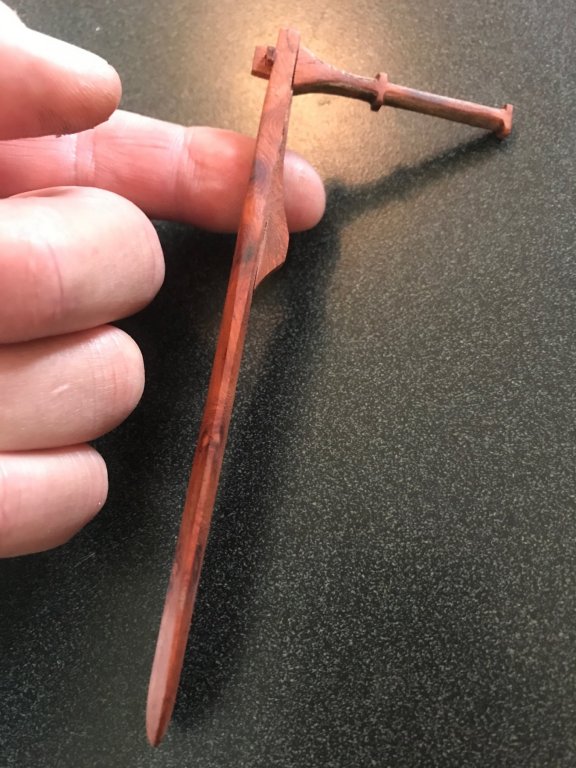
I also made my own rudder & tiller. It's funny what 'wars' we choose to battle and ones we don't. I enjoyed this process and it did come out very nice. I used the same species of wood as the head & tail but apparently there is a redder version! No worries it looks nice I think.

- 35 replies
-
- 4
-
-
- oseberg
- billing boats
- (and 1 more)
-
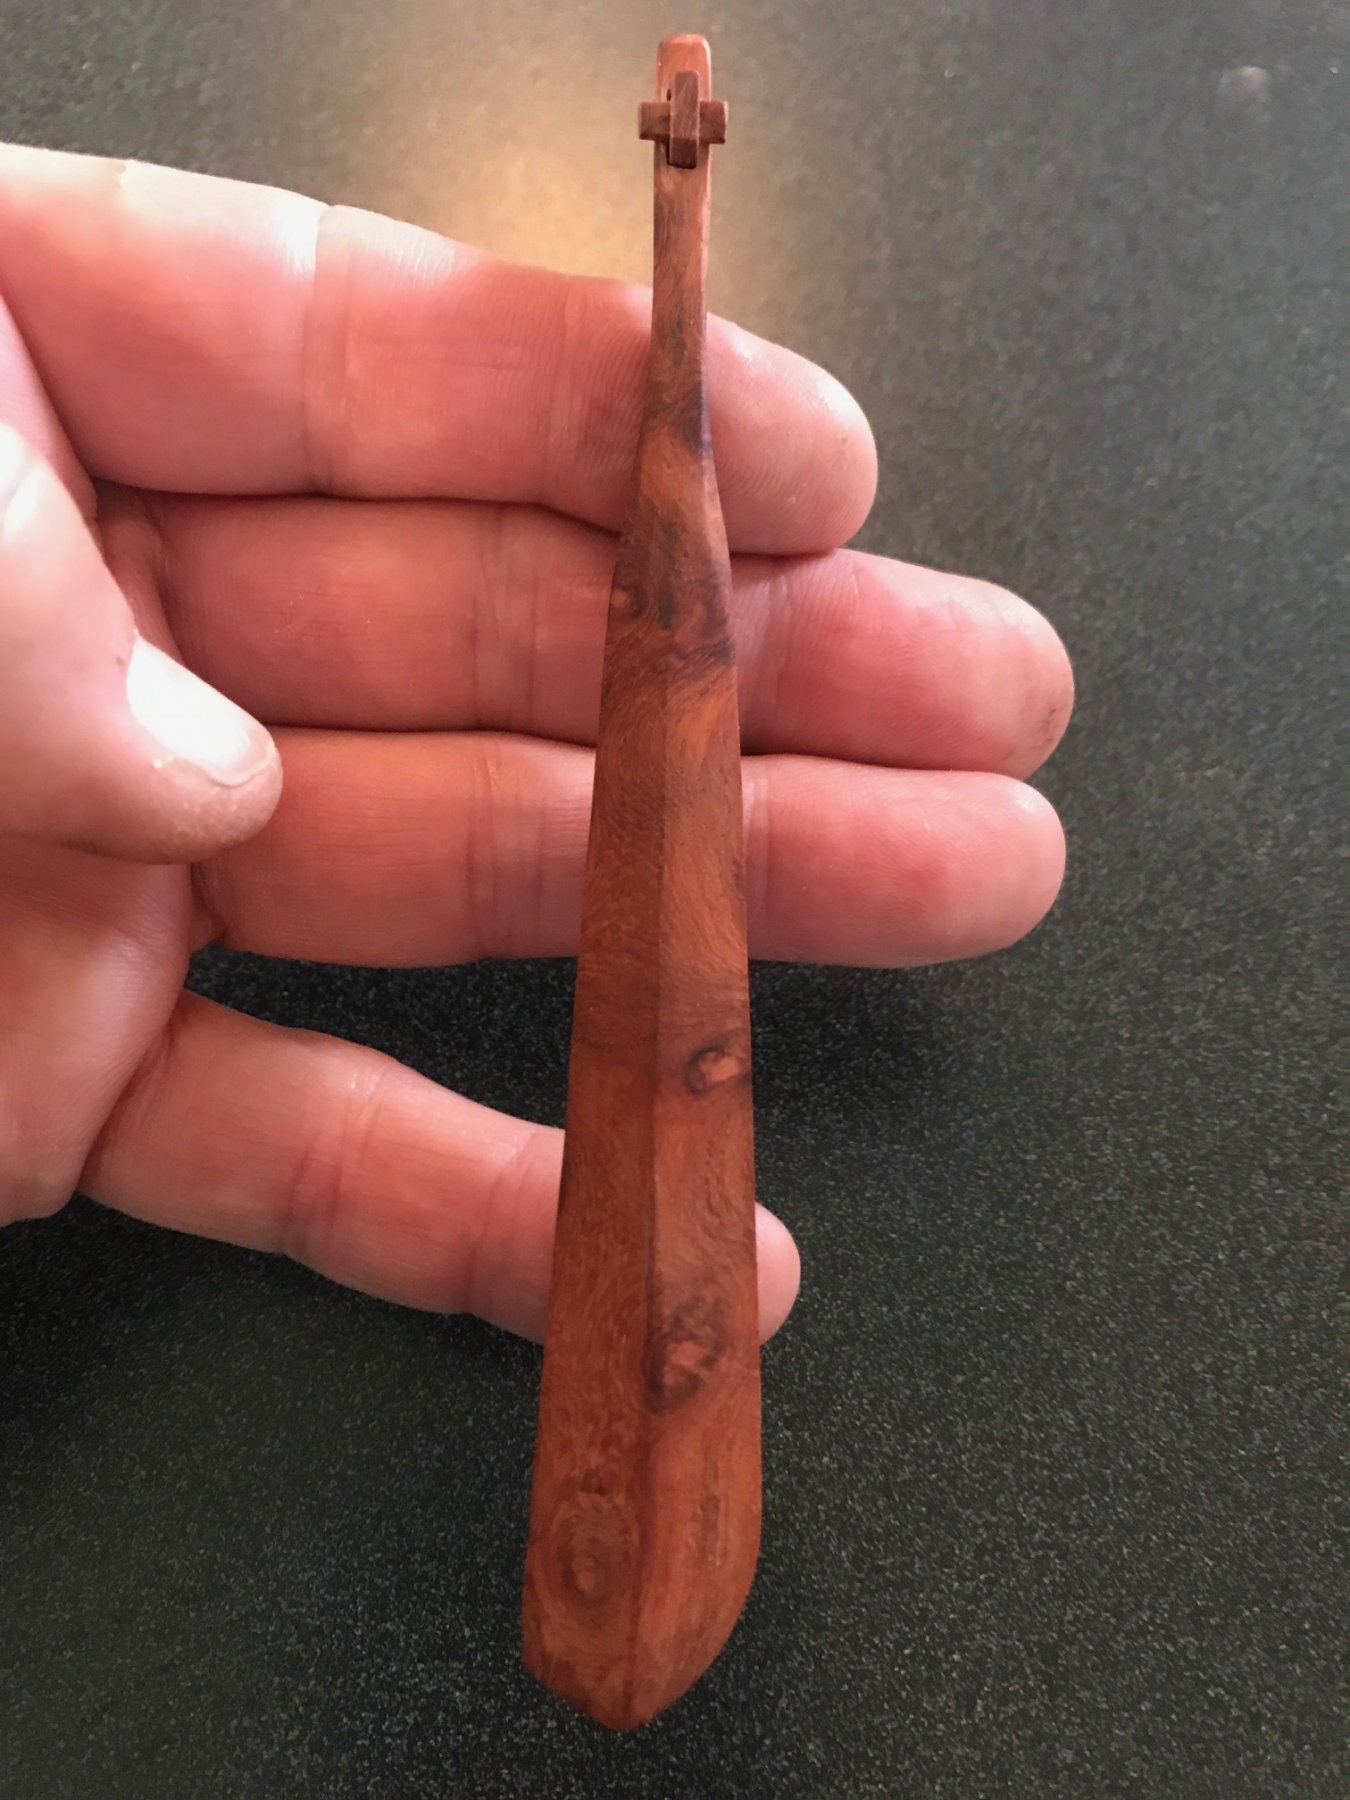
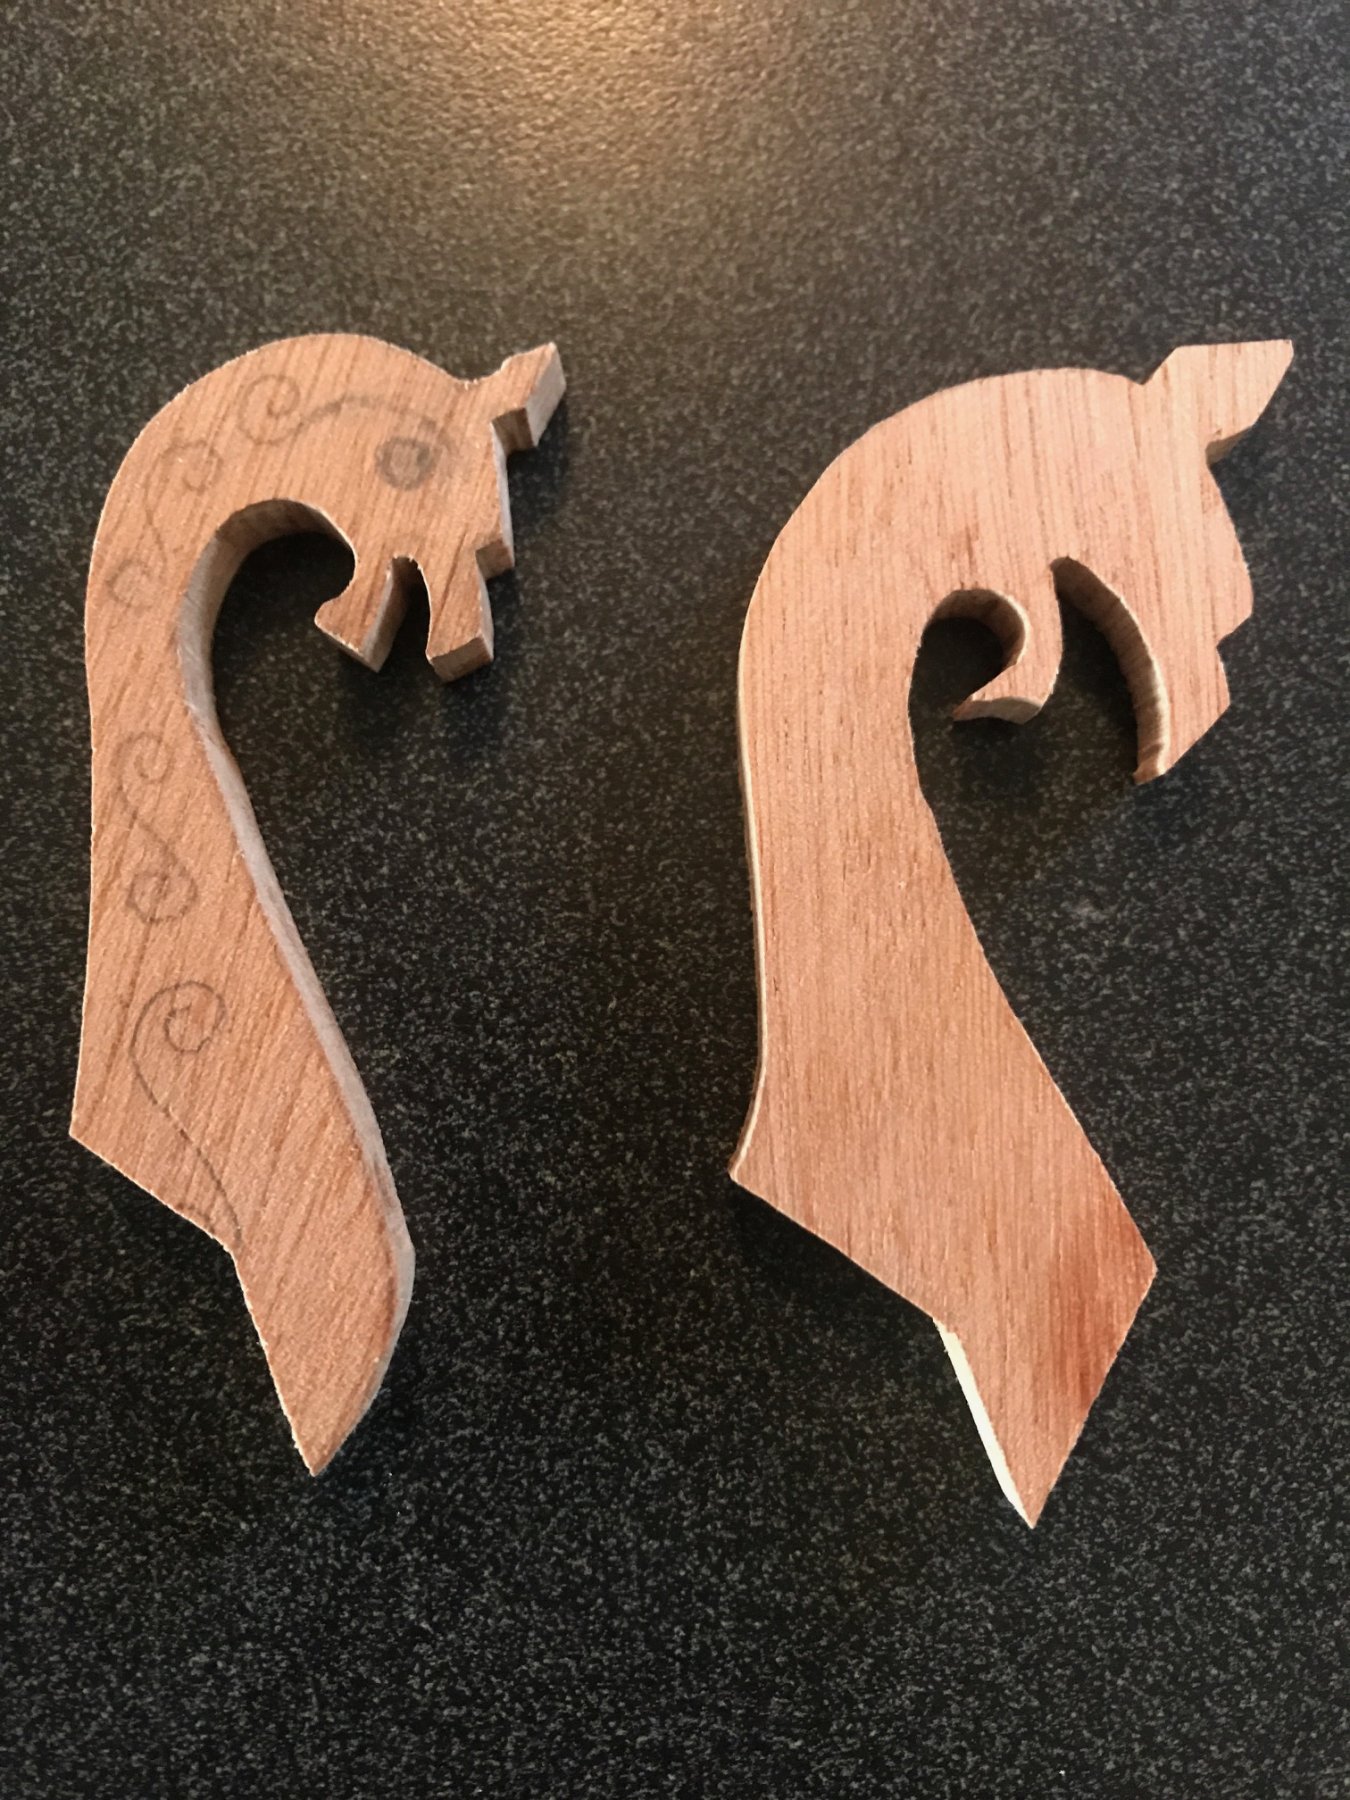
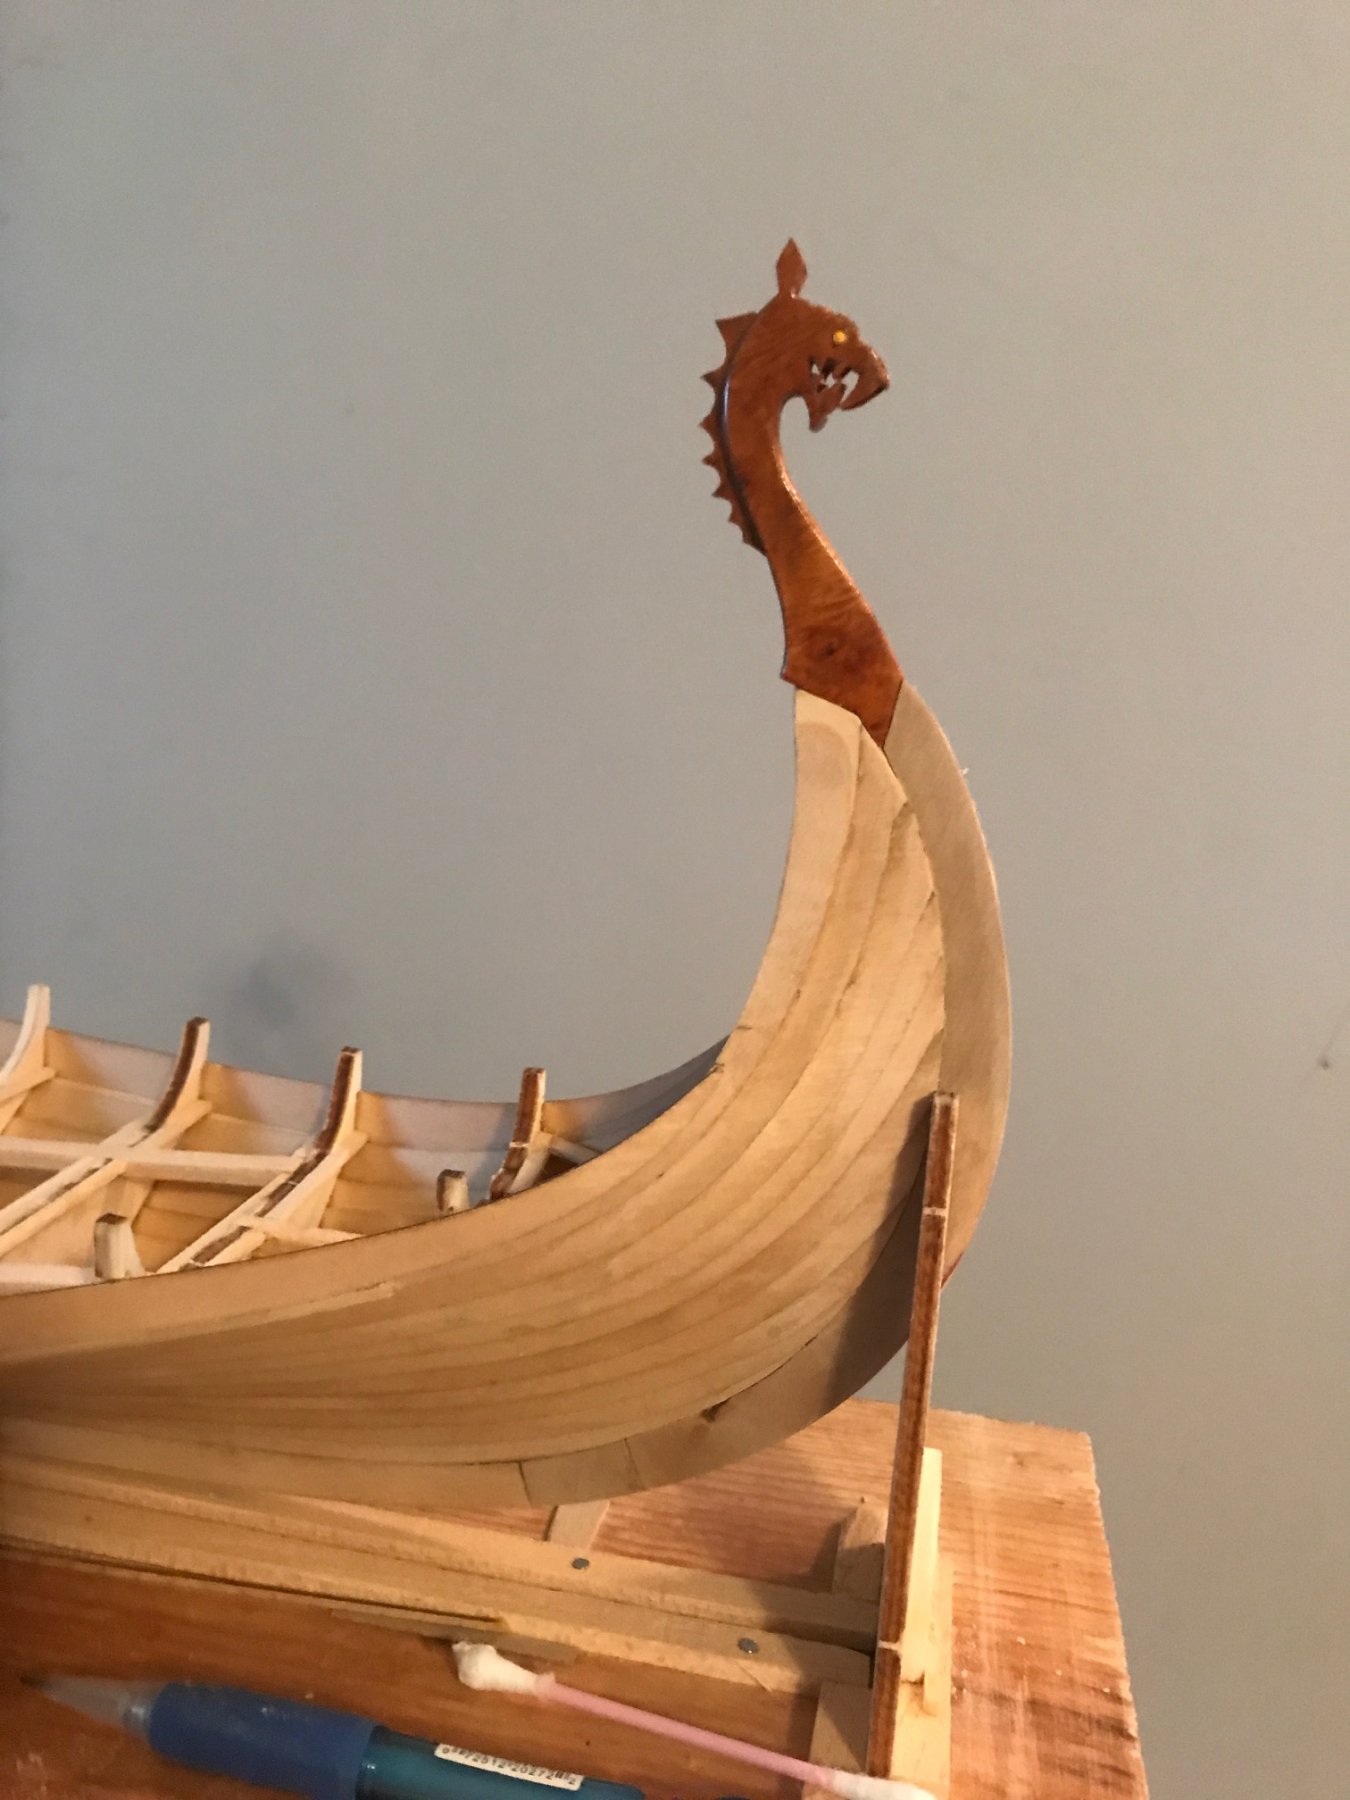
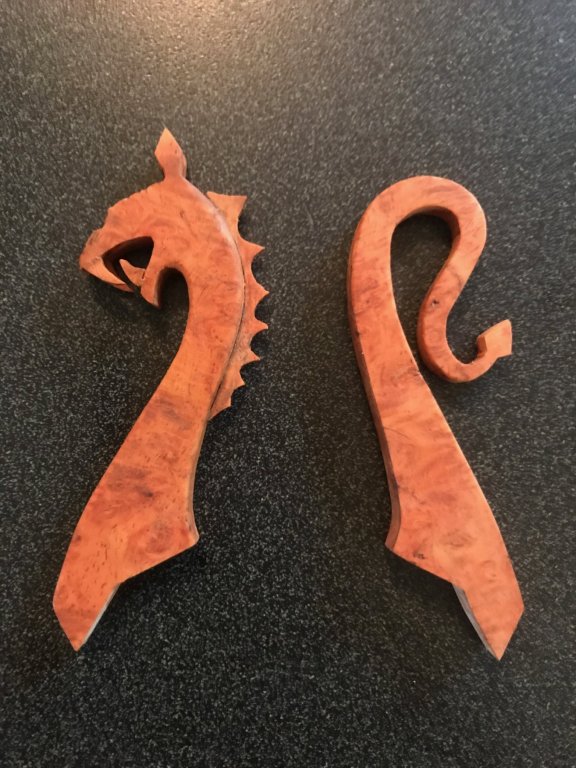
I did try my hand at carving the figures but nothing I did was up to my measly standards. Well I did do a bit of carving on the head itself. I couldn't figure out how to make the eyes. Again I could carve them in. Well one evening I has reloading some shot shells for a skeet match I had and bingo! #9 shot, that's the ticket! I drilled into the head just a wee bit for a socket and whala eyeballs. I initially painted them red but they didn't stand out enough against the color of the wood. I first made a tongue from a piece of brass but it was to thin. I attempted to make it from scrap wood of the burl. It came out to my liking. I added the beard for grins and giggles. Oh a picture of my crew. I apologies for the VERY lame photography. I'm using my phone with the crappiest of backgrounds. I wasn't going to do a lot so I didn't think that far ahead. Hopefully they'll get better.


- 35 replies
-
- 3
-
-
- oseberg
- billing boats
- (and 1 more)
-
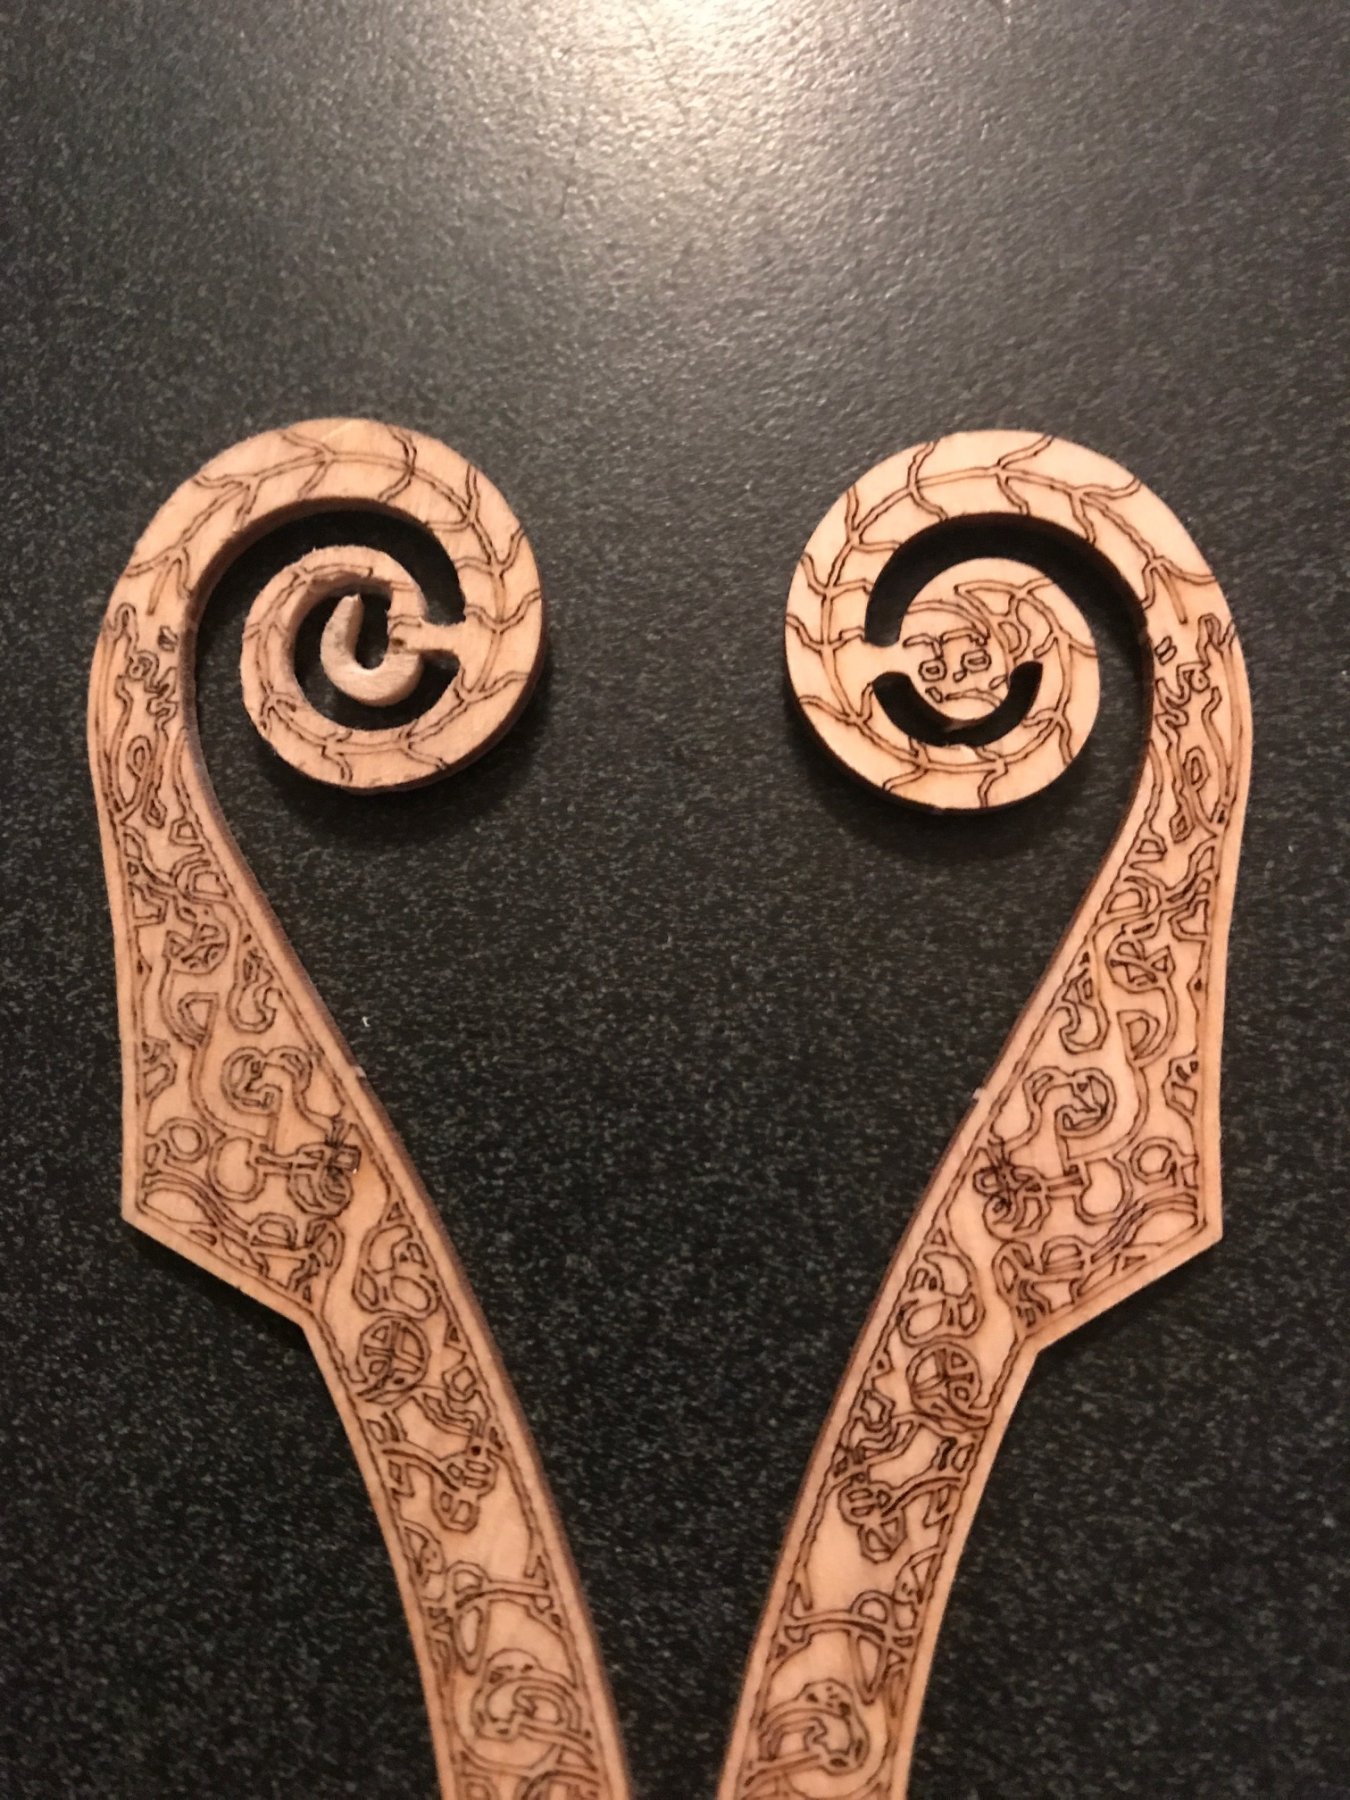
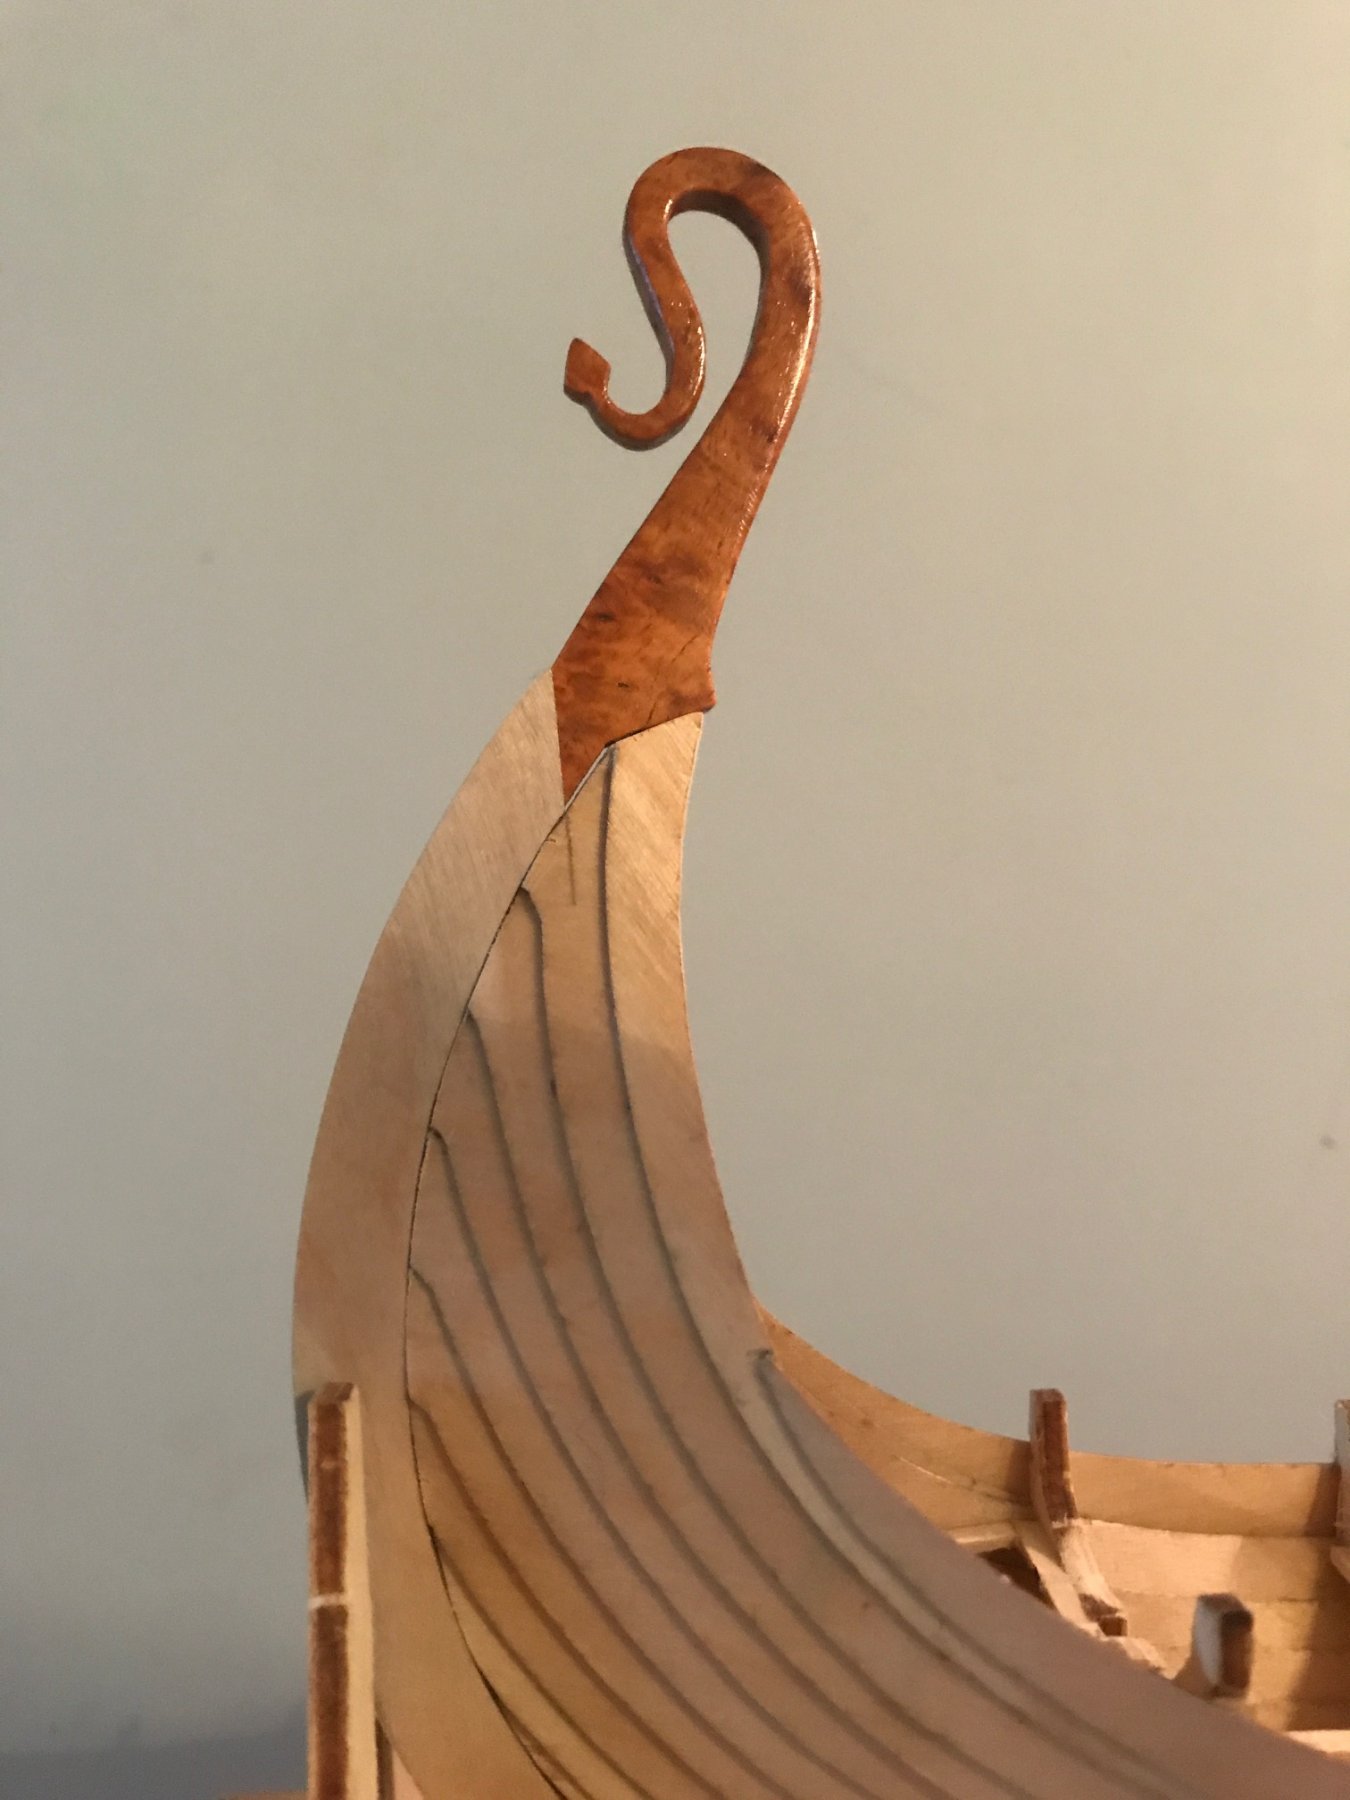
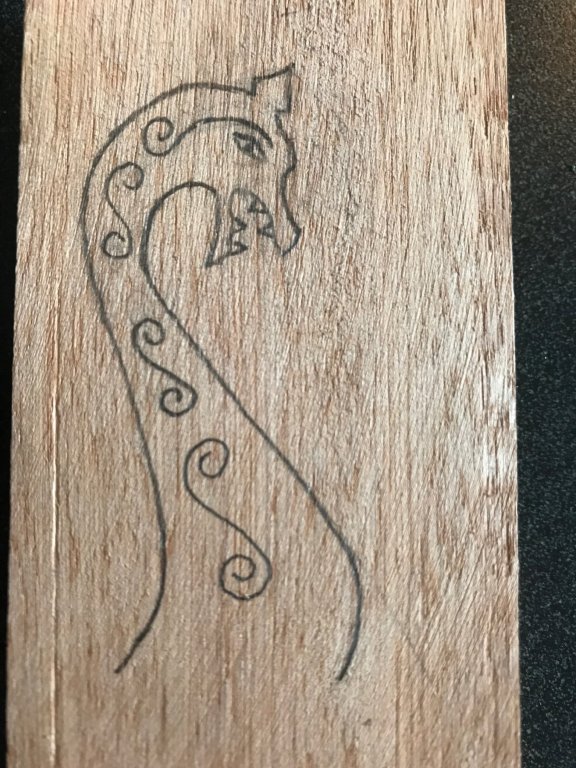
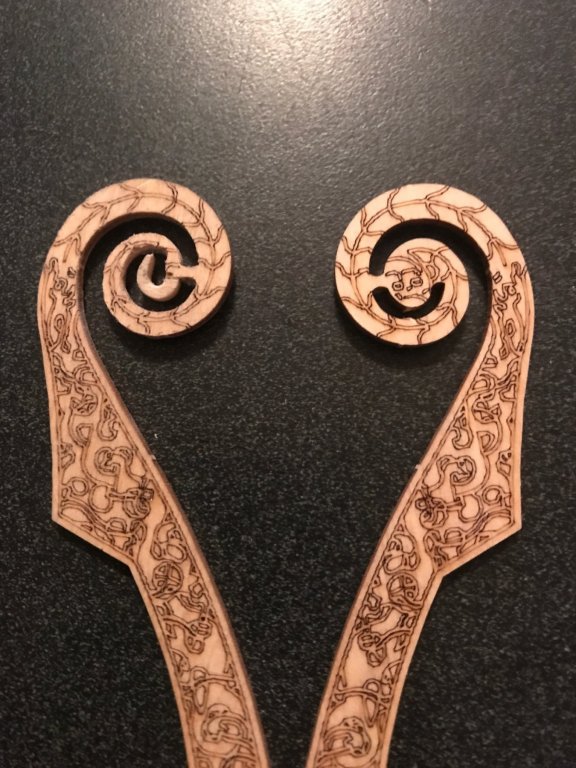
What to do next... Oh, I did make a tail out of the 2nd head, as most know the kit supplies two 'head' pieces for the stem & stern. Around that time I'm thinking what my brother said to me when he saw the project. Did doesn't have a dragon head. That along with the ship being my funeral ship I thought why not. The little artistic side I have kicked into full gear. I made a few liked one pretty much but it was kinda of bland. I remembered in the basement I had some really cool burl for knife scales. So I made a 3rd figurehead. It came out decent. I finally came up with a tail design that was a bit different. Here are a few pictures of that process. The decorated stem & stern pieces just didn't look right with the head & tail so I made my own from birch I had purchased. The fitting took quite awhile and at this point I do not have them permanently attached. I'll wait until I finish the outside of the hull.


- 35 replies
-
- 2
-
-
- oseberg
- billing boats
- (and 1 more)
-
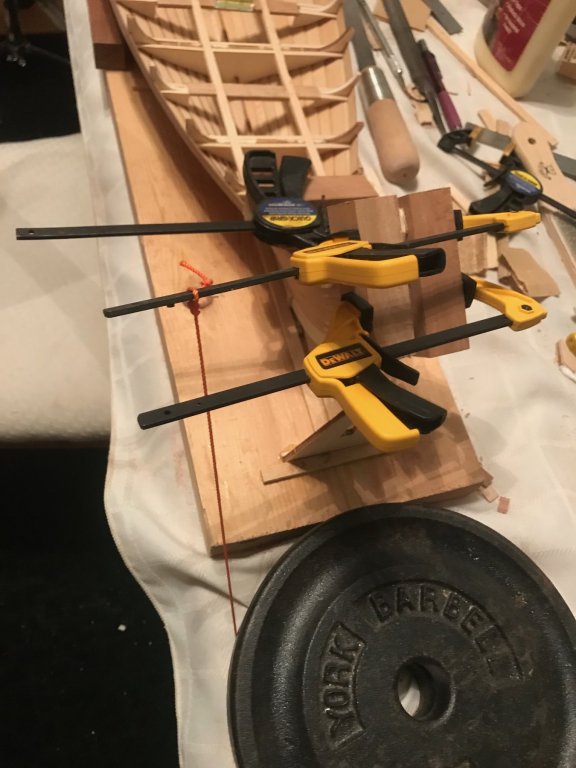
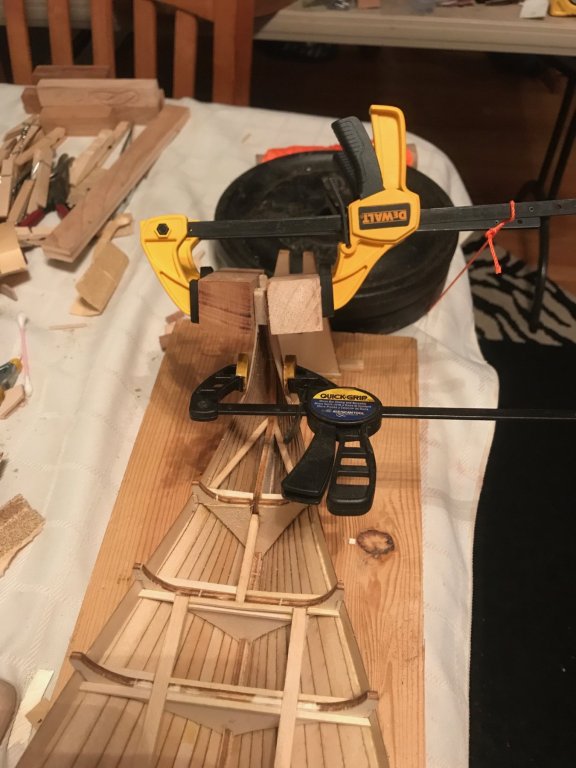
One thing that did happen was I developed a twist at the stem. I'm thinking because I added to many strakes on one side at a time? So I wet the whole forward section, (I won't tell you all the strakes came loose at the stem and became a total mess), with hot water. I made this contraption to twist the stem back in line. Certainly not pretty but it was effective. I let it sit over night and it worked well.
- 35 replies
-
- 1
-
-
- oseberg
- billing boats
- (and 1 more)
-
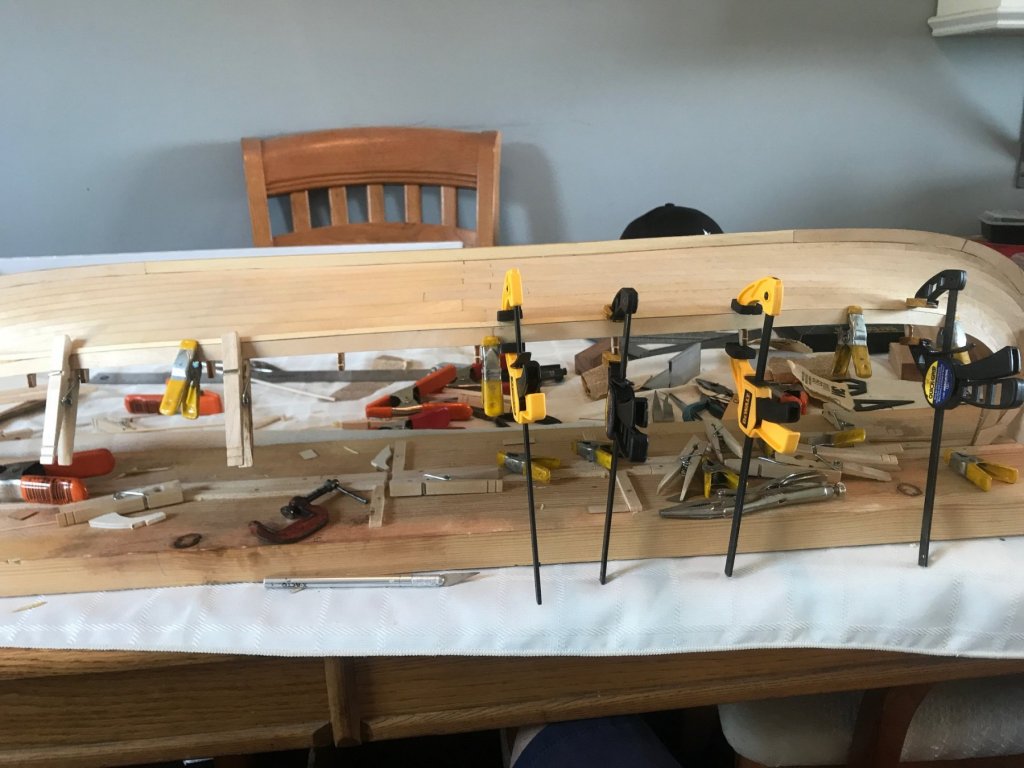
The keel and bulkheads all went on easy. The planking worked out better than it should have. I didn't put tick marks on the stem & stern due to my lack of experience and lack of interaction. Finally when I'm trying to figure out where they should end did it occur to me to look at the plans, measure from those plans and transfer. Live and learn. So kiddies... Do try this at home. Take your plans measure where the planks end on S&S and mark onto them. Like I said worked out better than it should have. I left the last strake until I did a bit of interior work, like adding the extra bulkheads. One thing I will add about the strakes. They all start approx. the same place. It would have been nice if they'd have been more staggered.


- 35 replies
-
- 1
-
-
- oseberg
- billing boats
- (and 1 more)
-
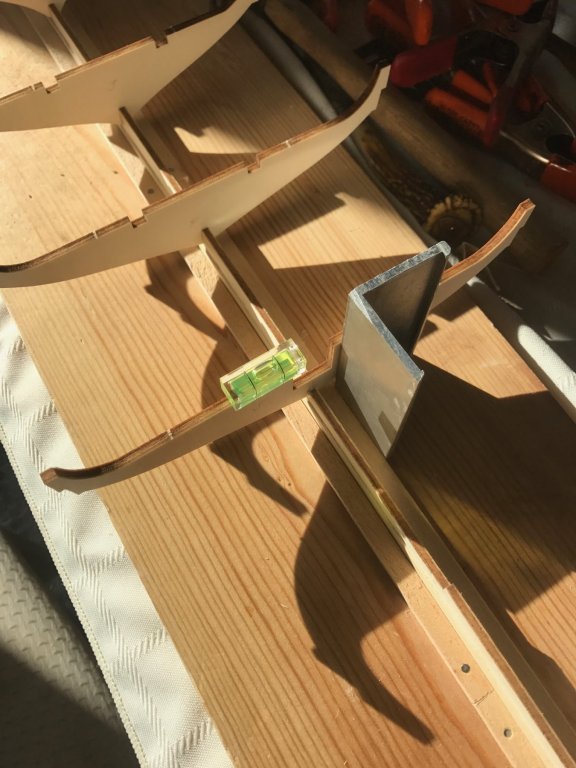
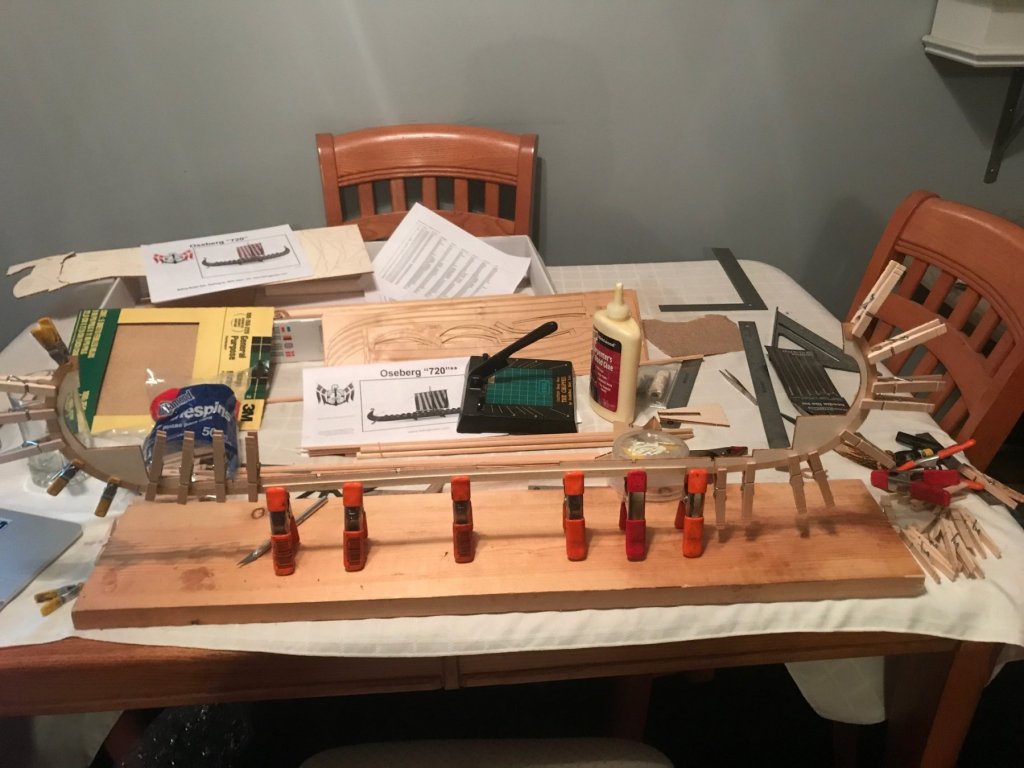
Good evening all, This is my first build log and first model build in close to 30 years. When I bought the Oseberg I bought it with all intentions of building it as the museum ship. Best laid plans right. I'm going to be cremated when it's time. I thought hmmmm... a Viking funeral, (yes I know there really weren't any ship burnings but what the heck). I also bought the Billing since it didn't NOT have the dragon head & tail, again the best laid plans. I actually bought and started the model in August. I read in another post that it isn't bad taste to start a build log as long as there aren't just pictures. And I might just help other newbies pointing out the 5,741 mistakes I've made already. Mistake #1, thinking the kit would actually have instructions, not. I guess Model Shipways & Bluejacket got me spoiled with their superb instruction booklets. I am not able to have the open box ceremony as I didn't realize that was proper manners. Next will. I will say the kit itself isn't to bad. But maybe not the kit for a fella that hasn't modeled in 30 years to get back into the hobby. I shall overcome! (Especially with the build logs here that I've scoured over countless times. Setting the frames was pretty straight forward. Here are a couple pictures to get started.
- 35 replies
-
- 2
-
-
- oseberg
- billing boats
- (and 1 more)
-
Mario beautiful work. I just ordered the MS kit to start after my viking ship. I may follow your lead on a diorama.
- 53 replies
-
- 2
-
-
- bounty launch
- model shipways
- (and 1 more)
-
Thanks for the link. MrBlueJacket.
-
Thank you all for the warm welcomes.
-
Hello Paul, Actually thanks for asking about the name. In the series of books by Patrick O'Brien and what the movie Master & Commander was based on, Jack Aubrey's steward, Preserved Killick. That is what the name's based on. All through the 11 or so books Captain Aubrey would holler... "Killick there!" to get his attention. I can't count the times Jack hollered that. That's the long version. The short version is someone already has Killick hahaha. Thank you for the welcome.
-
Hello Jack, a beautiful rendition of the Oseberg you have created. I am waiting for one, should be here tomorrow. Your build log along with Von_Kossa's will be invaluable. As I would you seemed to struggle with stains. My plan of attack is to use Pine tar and linseed oil as the original builders used. We'll see what it looks like and the drying times. Love all the bits you made. I did the same with the Fair American I made quite a few years ago. Anyway thanks for the build log and fantastic pictures.
-
Good evening all. I joined the forum after doing a search for model building while researching for a build. Through the years I've built two wood ship kits, the Smuggler from Bluejacket & the Fair American from Model Shipways, (I redid the FA into "Pheadrus" a privateer in honor of a deceased brother). Those were after a few plastic model ships when i was a boy. I'm waiting on an Oseberg from Billing Boats. I found Jack P & Von_Kossa's build logs. Both beautiful renditions of the ship. I'm contemplating doing the same. We'll see. Anyway this forum looks to be a fountain of information and fine folks. Killickthere