
MORE HANDBOOKS ARE ON THEIR WAY! We will let you know when they get here.
×

canoe21
-
Posts
4,355 -
Joined
-
Last visited
Reputation Activity
-

 canoe21 reacted to Jerry in BLUENOSE By Jerry - Model Shipways - Scale 1:64
Hello Lawrence..
Thanks for the visit and your usual pleasant words. Hope your vacation has been a good one/
Take care,
Jerry
-
canoe21 reacted to Jerry in BLUENOSE By Jerry - Model Shipways - Scale 1:64
Hello Everyone..
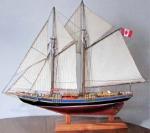
Today I worked on the mainmast with mixed results. As hard as I tried when I attached the top mast tp the mainmast I didn't get it perfectly straight. Unfortunately I didn't notice it until after the glue set. I believe I can straighten it out when I get to the rigging. (I hope so.)
So here are some additional photos of today's work, etc.
Many thanks for looking in at my log and I promise I'm going to do better. LOL
Best,
Jerry
-
canoe21 reacted to popeye the sailor in SHADOW by Omega1234 - FINISHED - Scale 1/300 - Luxury 60m Mega Yacht
your all mapped out.......it's going to be a very interesting build. smelly? after all........it is the 'bowels' of the ship
-
canoe21 reacted to Omega1234 in SHADOW by Omega1234 - FINISHED - Scale 1/300 - Luxury 60m Mega Yacht
HI everyone.
Many thanks for all of your comments and compliments. It means heaps to me!
You know, one of the many mistakes I made with Majellan (see my Build Log below) is that I never had a clear idea of how her various decks fitted together, which was a big no-no, because it meant that making sure that access ways and staircases, etc all were correctly aligned vertically and horizontally, was problematic.
In contrast, I'm going to avoid that mistake with Shadow by being more careful right from the start. For instance, I've cut out all the deck plans in cardboard as templates to ensure that everything is aligned properly. Smart thinking I say (well...that's the theory anyway).
As you can see from the photos below, each deck is labelled to indicate where the various decks are. These templates will be essential when marking and aligning the bulkheads and other major structural elements, thereby making sure that everything fits together properly.
All the best!
Patrick
-
canoe21 reacted to Omega1234 in SHADOW by Omega1234 - FINISHED - Scale 1/300 - Luxury 60m Mega Yacht
HI everyone!
Thanks for all of your comments and Likes. Much appreciated!
Well, I've started on the basic layout of Shadow's Engine Room and other associated areas of her Bilge Deck. In addition, I also bit the bullet and cut out the two large garage doors (situated at the port and starboard side of the ship's hull). These garage doors are where Shadow's two large ship's tenders are berthed when underway.
I know it all looks very rough at this stage, but, it's still very early in Shadow's build. Lots more to go. Oh well, gotta start somewhere, don't we?
Have a great one!
Cheers
Patrick
-
canoe21 reacted to Omega1234 in SHADOW by Omega1234 - FINISHED - Scale 1/300 - Luxury 60m Mega Yacht
Hi everyone!
Ok. I'm worried! Why? Because so far, I haven't had ANY MAJOR stuff-ups with Shadow's construction. I'm not used to this!!!! I'm definitely not in my comfort-zone and I feel uneasy. My normal pattern of building is to lurch convincingly from one major stuff up, to the next...never quite recovering from the last error, before the next one crops up. But, noooo, Shadow has to be the exception.
So far, everything's gone pretty well according to plan. The hull's straight and narrow. She's symmetrical longitudinally and laterally. She's relatively strong and rigid.
Oh, dear God, please let me stuff something up so that I can get back to my normal feelings of discomfort!!!!
Ok, my 'tongue in cheek' rant is over . I guess what I'm saying is that I'm pretty happy with Shadow's progress, so far.
Also, I've been scouring the Net for similar mega-yachts and have been transfixed by a couple of boats that have gold coloured hulls. Weird, I know, but I reckon they look pretty good. So, what the heck, I've applied a gold/coppery colour to the hull as an experiment. Mmmm, not too shabby, I reckon.
I hope you share my enthusiasm for the colour...
Cheers
Patrick
-
canoe21 reacted to Piet in SHADOW by Omega1234 - FINISHED - Scale 1/300 - Luxury 60m Mega Yacht
Very nice progress mate. Yup, I understood what you were up to and it worked out great for you.
I agree, working with wood feels great, natural stuff but plastics and styrene have their place too.
Cheers,
-
canoe21 reacted to cog in SHADOW by Omega1234 - FINISHED - Scale 1/300 - Luxury 60m Mega Yacht
Patrick,
Nice, clever those sections, but how on earth are you going to get thet front piece out ...
-
canoe21 reacted to Omega1234 in SHADOW by Omega1234 - FINISHED - Scale 1/300 - Luxury 60m Mega Yacht
Hi Greg and Mick, and everyone else who commented and hit the Like button! Thanks!
Tonight, Shadow's hull has emerged from her balsa mould. In doing so, I was extra careful to try and remove the balsa core in sections; that way, I could use the sections to create templates for the internal bulkheads later on.
If I'm not making sense, perhaps the pictures will explain it better than my words can.
Have a great week, folks.
Cheers
Patrick
-
canoe21 reacted to Omega1234 in SHADOW by Omega1234 - FINISHED - Scale 1/300 - Luxury 60m Mega Yacht
Hi folks
Thanks to everyone for their Likes and comments! Greatly appreciated.
As you can see for the following photos, I've now been able to make some progress on Shadow's hull. This consisted of adding the longitudinal stringers and vertical frames onto the balsa plug, thus creating the framework of the hull. Once planked, I'll release the hull from the balsa plug, with the result being a nice strong hull...well, hopefully anyway.
Wish me luck!
All the best and enjoy your weekends.
Cheers
Patrick
-
canoe21 reacted to Omega1234 in SHADOW by Omega1234 - FINISHED - Scale 1/300 - Luxury 60m Mega Yacht
Hi everyone
Well, my current project, Majellan, is nearing completion, but, I've been itching to get started on her BIG sister, 'Shadow'.
Shadow is based upon an actual mega-yacht called "Mary Jean II", which can be found at http://www.isayachts.com/ISA_60m_CLASSIC#60m.
My model will, in my customary fashion, be fully detailed inside with all of her five decks reproduced (well...as much as realistically possible, of course). Each deck will be fully removable in order to enable the interior to be viewed; in much the same way as Majellan's are.
Also, as you can see from one of the photos, Shadow looks like a giant compared to Majellan, even though Shadow's hull is only one inch longer, i.e. 8 inches, as opposed to 7 inches for Majellan's hull.
In terms of Shadow's hull's construction, I will use the balsa mould of the hull as the base to bend the frames upon. Once all the frames are bent, I'll the plank over the framework to create the hull...well...that's the plan, anyway.
I hope you can join me on Shadow's journey!!!!
-
canoe21 reacted to popeye the sailor in Syborn by popeye the sailor - FINISHED - 1:33 - trawler
thanks for the kind comments Patrick and Carl.......and thanks for all who hit the like button. I got interrupted yesterday afternoon when my keyboard died. at first I thought it might have gotten choked on the soldering fumes......I found out later that it was due to overfeeding........seasoned cracker crumbs! I have another keyboard, as you can see......this one is so quiet.......no key clatter, like the generic types my soldering is meager at best.......but if I'm a good boy and keep at it, I'm sure I'll get better at it more to come........YEA! thank you
hi Bob........yea....silly me jumping the gun, wanting to see visual progress. now I decide to do something, and I find that I've made it harder for myself. I guess you could say that this is my way of back tracking....I don't rip things apart......I just modify things in place great job on that build of yours.....she's look'in sweet!
I got the pictures from the camera today........the railing and the spot light is drying in the paint booth. so the first thing I did yesterday, was to add the port side single posts.
all the while this was going on, I was bending the wire, to get the shape of the aft border. I got the idea to use a long piece of scrap wood to hold the posts perpendicular, until I can solder the posts in position.
the four singles were soldered and I worked my way to the three hole stanchions........I soldered the top rail. then I got brazen........I tried to go lower. bad idea.......my fear came to fruition.........the center post came apart on the bottom!
it wasn't too tough to move it back into position.....I was a little off in this picture. I made the adjustment and took this one, but it came out a bit blurry. I won't make any more adjustments.....I'll just file it smooth....it's fine
I do have to adjust the end stanchion on the port side, but I finished the soldering here. I took out the center rail and just have the top and bottom on the single stanchions. I like the looks of it.......it's like blending two types of railings together.
there was some clean up and filing to do.......it's slowly taking shape.
I did fix that one over sized pulley, so I got the fifth one squared away. I added feet pads to the gallows and cemented the pulleys in place. I have another block to add to the bottom, and I may dress up the pads a little more before painting them. the pulleys will be painted the same color. there was more sanding and filing to the railings and I also added the spot light....had to solder that together too. I left the post long, since I haven't figured where or how I will position it.
as can be seen in some of the pictures, there is a hole on the side of the funnel/cabin. there's a hole on the other side too. I have two portholes left.........I'm going to install them and use them up. I was thinking of getting nutz with some paint.......but we'll see on that
thanks for look'in in
-
canoe21 reacted to popeye the sailor in Syborn by popeye the sailor - FINISHED - 1:33 - trawler
for those just starting out:
oh my........what have I done to myself. I used to be this happy go lucky guy, playing with my plastic models, in the seclusion of wherever I opened the box. I even had a solid mantra for myself.....only one build at a time. then one day {those who have heard this before, can start yawning now}, a wooden kit fell into my possession......and that opened the floodgates to a new and wonderful hobby {more like a Pandora's box, in my case}. that was in 2009..........
I've come away wishing it was a lot sooner...........a whole lot sooner
I have evolved toward having two tables....the main table, and a side table, in the event I wish to do a second build. I have gone way beyond that! we won't go there at the moment.......I'll leave it as "I'm pre-destined" I will never lament..........I consider them my children, born of hair brained ideas and envisioned thought. there are others..........but I dare not open the lid again, fearing that they'll escape. ..........and they will, you know................they always do.
of late, the main table is a collection of tools and cast off wood, with metal bits scattered for good measure. the trawler sits at one end of it, waiting eagerly for me to add more to her............the second table has become more of a catch-all at this point in time, as I look for suitable parts to feed the aspect being worked on.
the frenzy has also manifested itself on my desk as well, hosting my latest idea and a build in it's own right.........the Flattie.
I sometimes daydream of a room..........a medium sized room {I'm not greedy}, with a work table, that lines three of the walls {in my dream, I don't even allow for a closet }. the fourth wall is dedicated for supplies and of course, the entrance way into the room. I can close that door....and leave the mortal plane behind.......and enter my own imagination. there is a freedom here..........but before I can get too cozy, I get roused to the present by the admiral, asking a question about something or other.........I never stay there for too long
oh well........here I am I've moved to the stern on the trawler. there's more to do with the fore deck, but it's a lot of small stuff.......it can wait till the mast is permanent. I seem to have graduated from ladders to railings lately.....that's what I've begun to play with in this session. I have only seven of the 15 mm three hole stanchions...not enough to go the entire span of the stern border. so, what I've done is run the seven around the center of the span, and fill in the sides with the 15 mm single hole stanchions. I have enough to do the stern span with these, but I think it would look naked with them.......I'd have to try and fill them in somehow, with a second railing. this set up will also make it look a bit more interesting....and if I don't like it, I can add the extra railings. here is the stanchion positions that I have described.
my eyes were play'in tricks..........I mentioned a problem in an earlier post. it seemed like these stanchions were a little taller that the three hole stanchions.
in order to get a better picture of this, they were strung on a length of wire. I was amazed that the difference is greater than I thought it was..........at least 2 - 3 mm {I was too miffed to measure}.
the original though was to simply counter sink the single hole stanchions into the border, correcting the height issue. I can see now that this can't happen. I want this to work........I think it will look cool...........so I entertained the thought of adding length to the three hole stanchions.
anyone who has built billing's kits before, have run into their idea of eye bolts {in some of the kits}. they look like really stubby buttons with a hole in them. I will snip off the locator pins on the stanchions and solder these eye bolts onto them......I have plenty of these eye bolts as well.
setting up the board at my desk, the operation began.........snipping off the locator pin, filing it flat, and solder the additions together.
it wasn't too tough a job.......but it will pose a problem. I won't be able to solder the wire rails in place, the closer I get to the soldered joint. I can do the top rail........but the middle and bottom one will be very dicey indeed. I could do it, but it would take an enormous amount work to retain the shape. I can simply CA the railings as I have done before. the big problem is that I wouldn't have an adequate heat sink....bottom line with them all done and restrung next to the single hole stanchions, they look much better............perhaps just a minuscule of difference.
the railings were re-posted back into their holes {I still need to do the port side}. I did leave enough railing wire on the lower rows, that I can solder them to the single post stanchions if I desire. of course, they won't be strung through a turnbuckle, like the three hole. I've seen Bob's railings......I like the way they look. this will give me the opportunity to try making them......really great idea........functional and realistic.
now....I will get the port side laid out and solder the top rail, to lock in the spacing. then I can decide on the rest of the rails. I kinda wish I didn't cement the funnel/cabin in place.....I had an evil thought {I can still do it........remember,,,it's an evil thought}......icky mae
-
canoe21 reacted to popeye the sailor in Syborn by popeye the sailor - FINISHED - 1:33 - trawler
thanks John..........I can't say that about my other builds.......I got too many oh....well, I'll get 'em cleared up sooner or later I can say though, that I know what I'll be doing for .....let's say..........for the next ten years! I guess, in a way.....that this is a good thing. I'm seeing more......learning more.....and experimenting more. as they say.........the next build always seems to look more enhanced. it's a great thing to tell someone who is just starting out.........they have so much to look forward to never give up the ship!
-
canoe21 reacted to popeye the sailor in BLUENOSE By Jerry - Model Shipways - Scale 1:64
nice job on the dory..............
-
canoe21 reacted to Jerry in BLUENOSE By Jerry - Model Shipways - Scale 1:64
Hello everybody..
I decided to stray from Bob Hunt's practicum when it came to building the dory. The kit provides some laser cut pieces with which to construct a jig to use building the ship's boat. The actual pieces to make the dory with are 1/64" "crapwood" but I decided to give it a try. The practicum found the jig difficult to use and Bob's idea was to make the dory by gluing the bottom of the boat to the side and then glue the transom to what you have already made and keep going that way. I found that ridiculous. Trying to hold a 1/64" piece of veneer in order to glue it to another one of that thickness was impossible...at least for me. So I decided to try the kit's method and I built the jig.
Actually, I found the jig to work well and actually made a dory. It was interesting working with 1/64" x 1/32" strip wood to make the dory's floor grating but by the time one who builds this kit gets this far, one is used to working with such small dimensional strip wood. I used a lot of this stripping even to make the yellow gunwales. All in all, the experience was good because it was a new one and the more new experiences the better model building becomes. So here are some pictures of the dory and also after it was lashed to its skid on the deck.
-
canoe21 reacted to Jerry in BLUENOSE By Jerry - Model Shipways - Scale 1:64
Thank you, Lawrence. I appreciate your visit and happy words.
Best,
Jerry
-
canoe21 reacted to popeye the sailor in BLUENOSE By Jerry - Model Shipways - Scale 1:64
looking sweeter Jerry...........looking sweeter!
-
canoe21 reacted to Jerry in BLUENOSE By Jerry - Model Shipways - Scale 1:64
So is Olive Oil.....
Thanks, Popeye.
Jerry
P.S. here are a few more pictures...
-
canoe21 reacted to Jerry in BLUENOSE By Jerry - Model Shipways - Scale 1:64
Hello everybody...
Another day and some more details. The shipyard closed just in time to have the eye bolts and rings, the catheads and the belaying pins placed in their racks which were also added today. A lot was done but there's still a lot more minutia to finish before the masting can begin. I anticipate that the masts and boom will be part of next week's assignment. So without further BS here are the photos which were taken right before the gates to the shipyard were closed for the night.
Best,
Jerry
-
canoe21 reacted to Jerry in BLUENOSE By Jerry - Model Shipways - Scale 1:64
Good morning Popeye and Dave B...
Thanks for the visit and the happy words. Believe me, I'm trying hard..
LOL
Jerry
-
canoe21 reacted to Jerry in BLUENOSE By Jerry - Model Shipways - Scale 1:64
Hello Everybody..
It's been a few days since I have reported my progress with this interesting kit, Bluenose. When I last reported what was going on I was beginning to build the wheel box which I completely screwed up and build upside down. I thought about making revisions in order to use what I spent a few hours on but eventually decided to make a new one. There were a few other smaller pieces (bits, boom crutch, "unidentified object") which I finished and then it was time to make the monkey rails. This part of the build took a lot of time because painting the rails was difficult. Now there are several other "deck details" which need to be completed such as eye bolts and rings and the ship's boats before the masts and booms are made. In the meantime here are some pictures of the deck as it is at this time.
Best to all,
Jerry
-
canoe21 reacted to marktiedens in Royal William by marktiedens - FINISHED - Euromodel - scale 1:72
A little more progress - all the head rails & support timbers are done . Also,while waiting for paint to dry I figured I might as well make the bow knightheads,& install the front railing of the forecastle. All the timberheads were painted black to offset all of that gold.
Mark
-
canoe21 reacted to John Allen in HMS Victory by John Allen - Mamoli - Scale 1:90 - 5th build
Have completed forward shrouds and ratlines, not happy with futtock shrouds may reattach with a smaller line.
-
canoe21 reacted to John Allen in HMS Victory by John Allen - Mamoli - Scale 1:90 - 5th build
All done ready to start rigging have received missing dead eyes and black line (Mamoli did not include in kit)
Have placed batting in netting some white some dingy. Flip flopping whether to include or remove.
Suggestions?????