sjanicki
-
Posts
227 -
Joined
-
Last visited
Content Type
Profiles
Forums
Gallery
Events
Everything posted by sjanicki
-
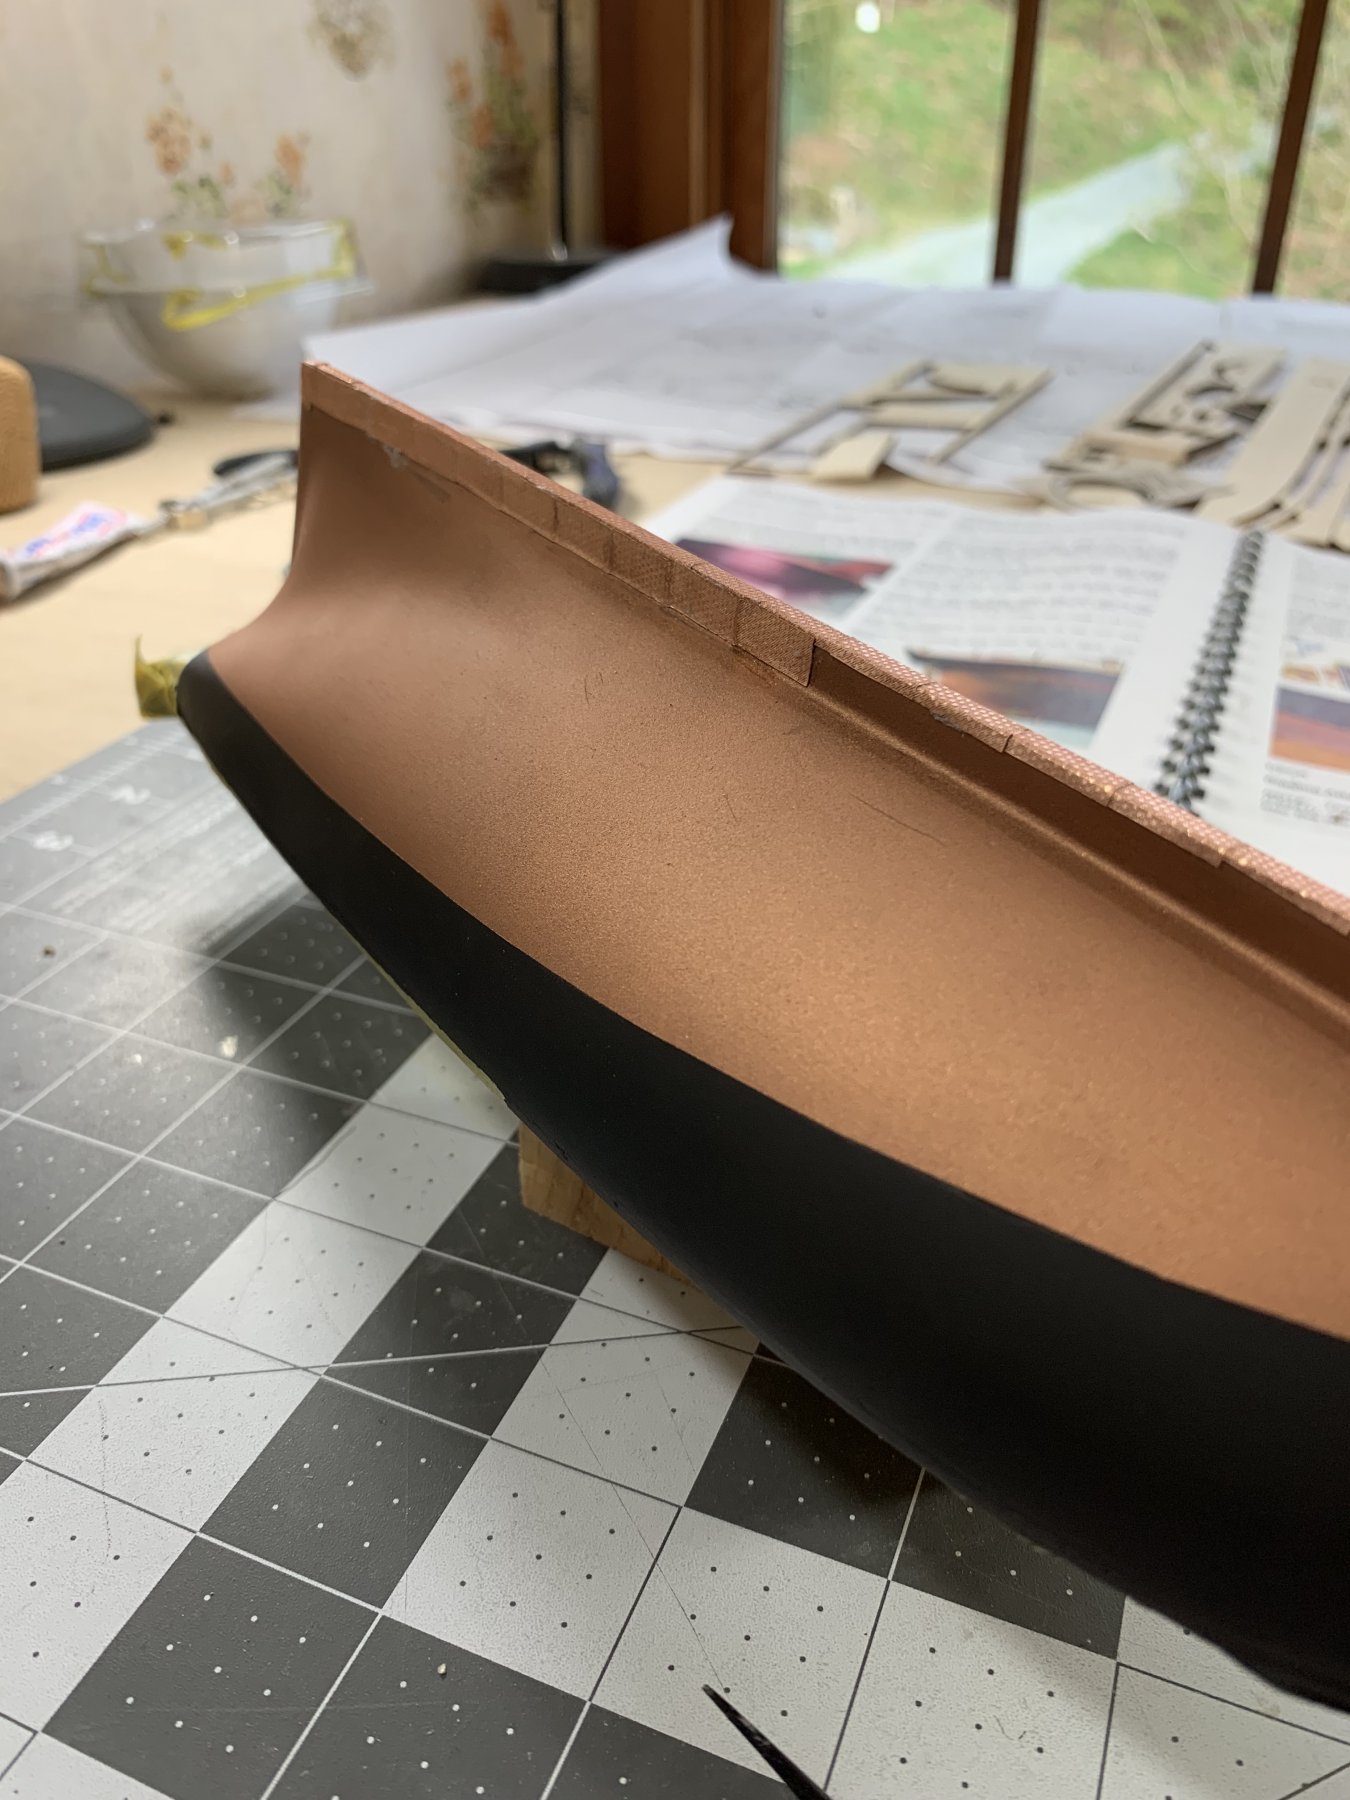
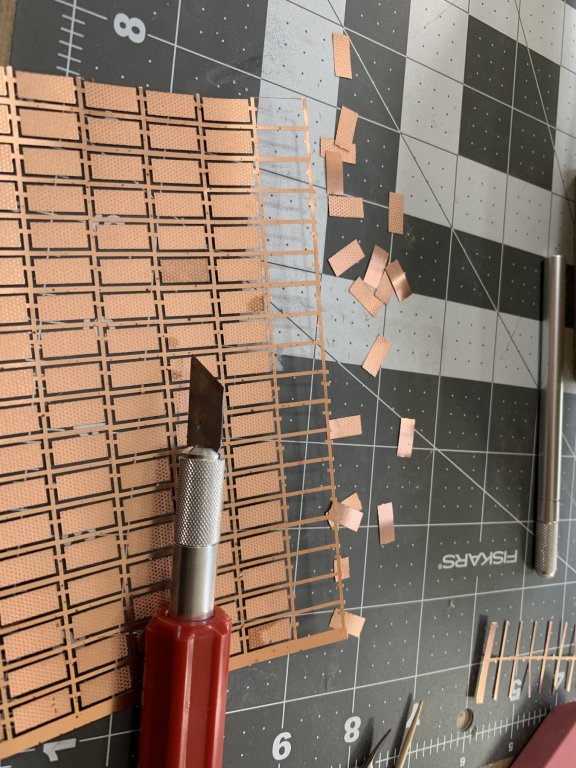
Applied a few more plates tonight along the keel. I have found that getting them to set flat is actually a bit of a pain. What I have been doing to fix this is dry fitting them and bending them more or less into shape before gluing them on. Do people have better thoughts? Thanks in advance!
- 104 replies
-
- 2
-

-
- revenue cutter
- BlueJacket Shipcrafters
- (and 1 more)
-
Have been crazy busy busy this summer but made a bit of progress on the plates tonight. I know they don’t look perfect but I am learning a ton!
- 104 replies
-
- 3
-
-
- revenue cutter
- BlueJacket Shipcrafters
- (and 1 more)
-
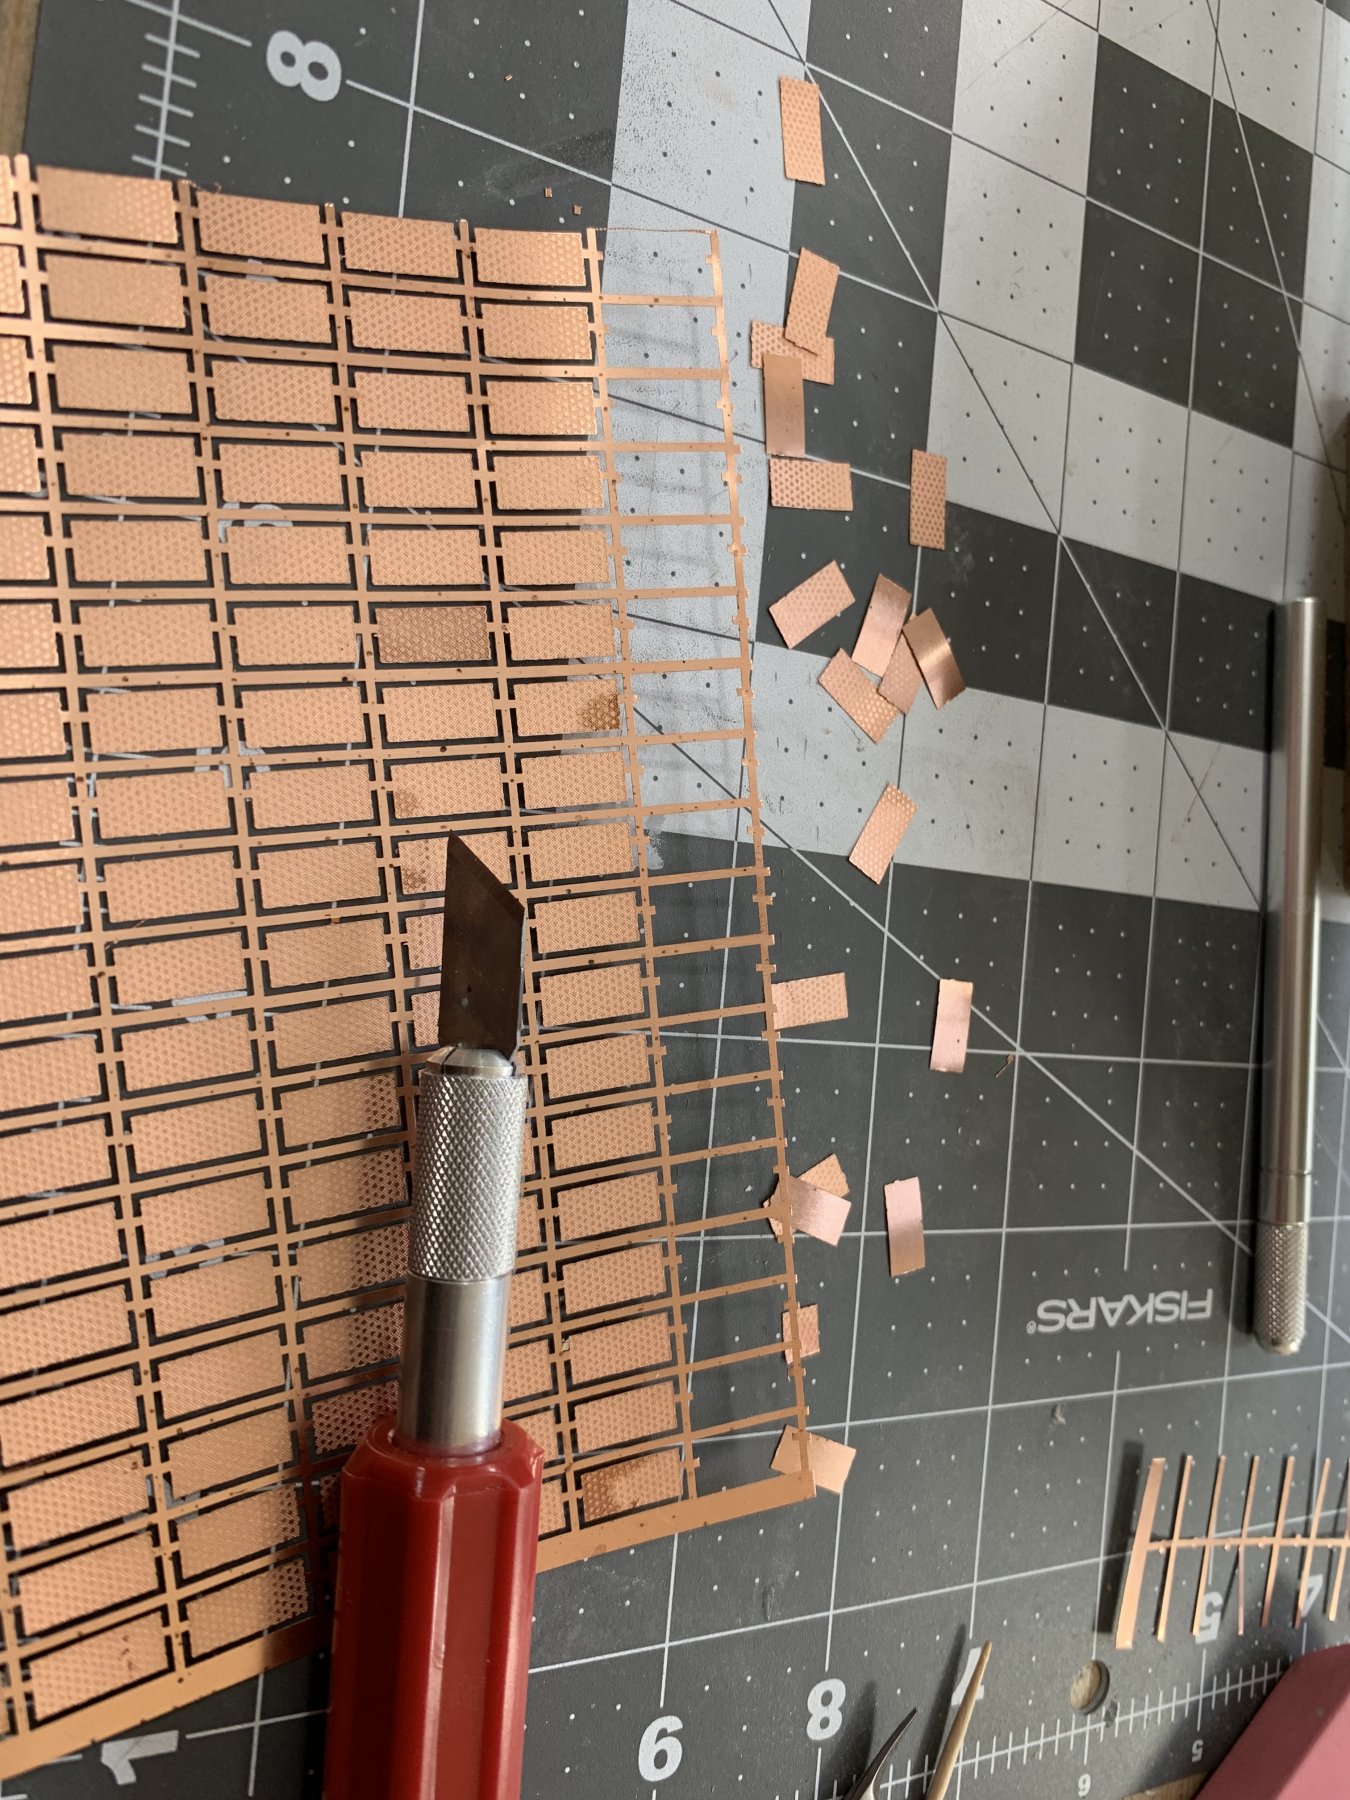
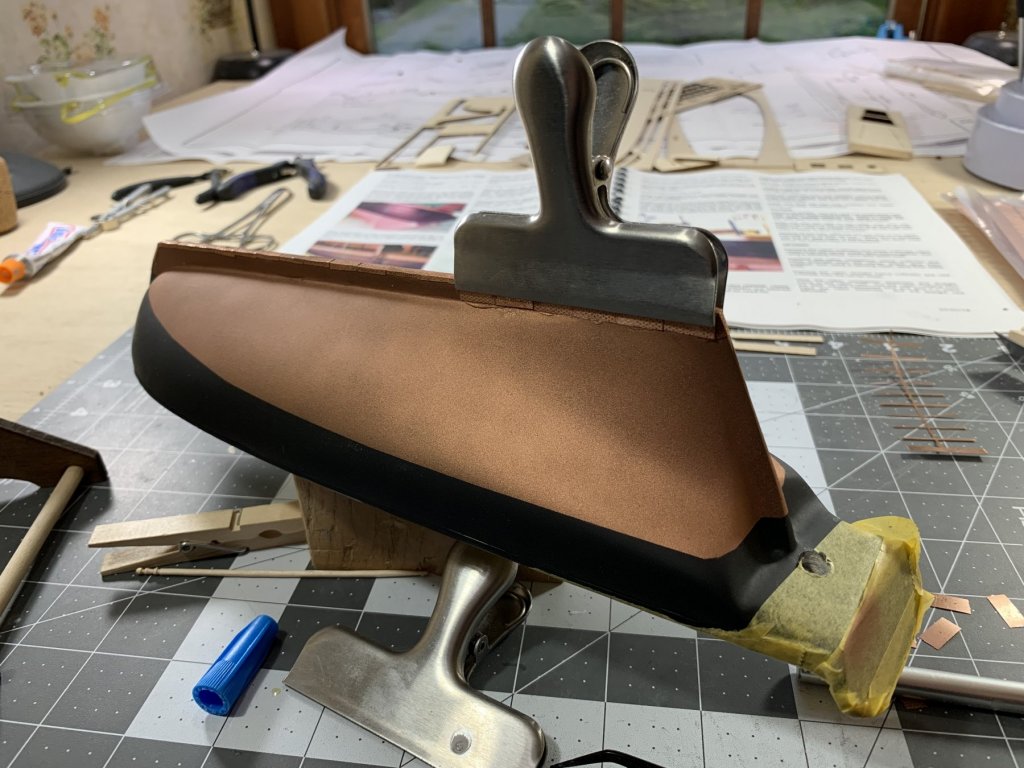
Was traveling for work for a couple weeks so glad to be back at it on the Revenue Cutter. Made some more progress this evening on the plating. Using a clamp to keep things flat as I glue the plates on. Any my recommendations on how to do this on the main part of the hull? Also, cut a ton more plates out

- 104 replies
-
- 2
-
-
- revenue cutter
- BlueJacket Shipcrafters
- (and 1 more)
-
Thank you! This is a great idea
-
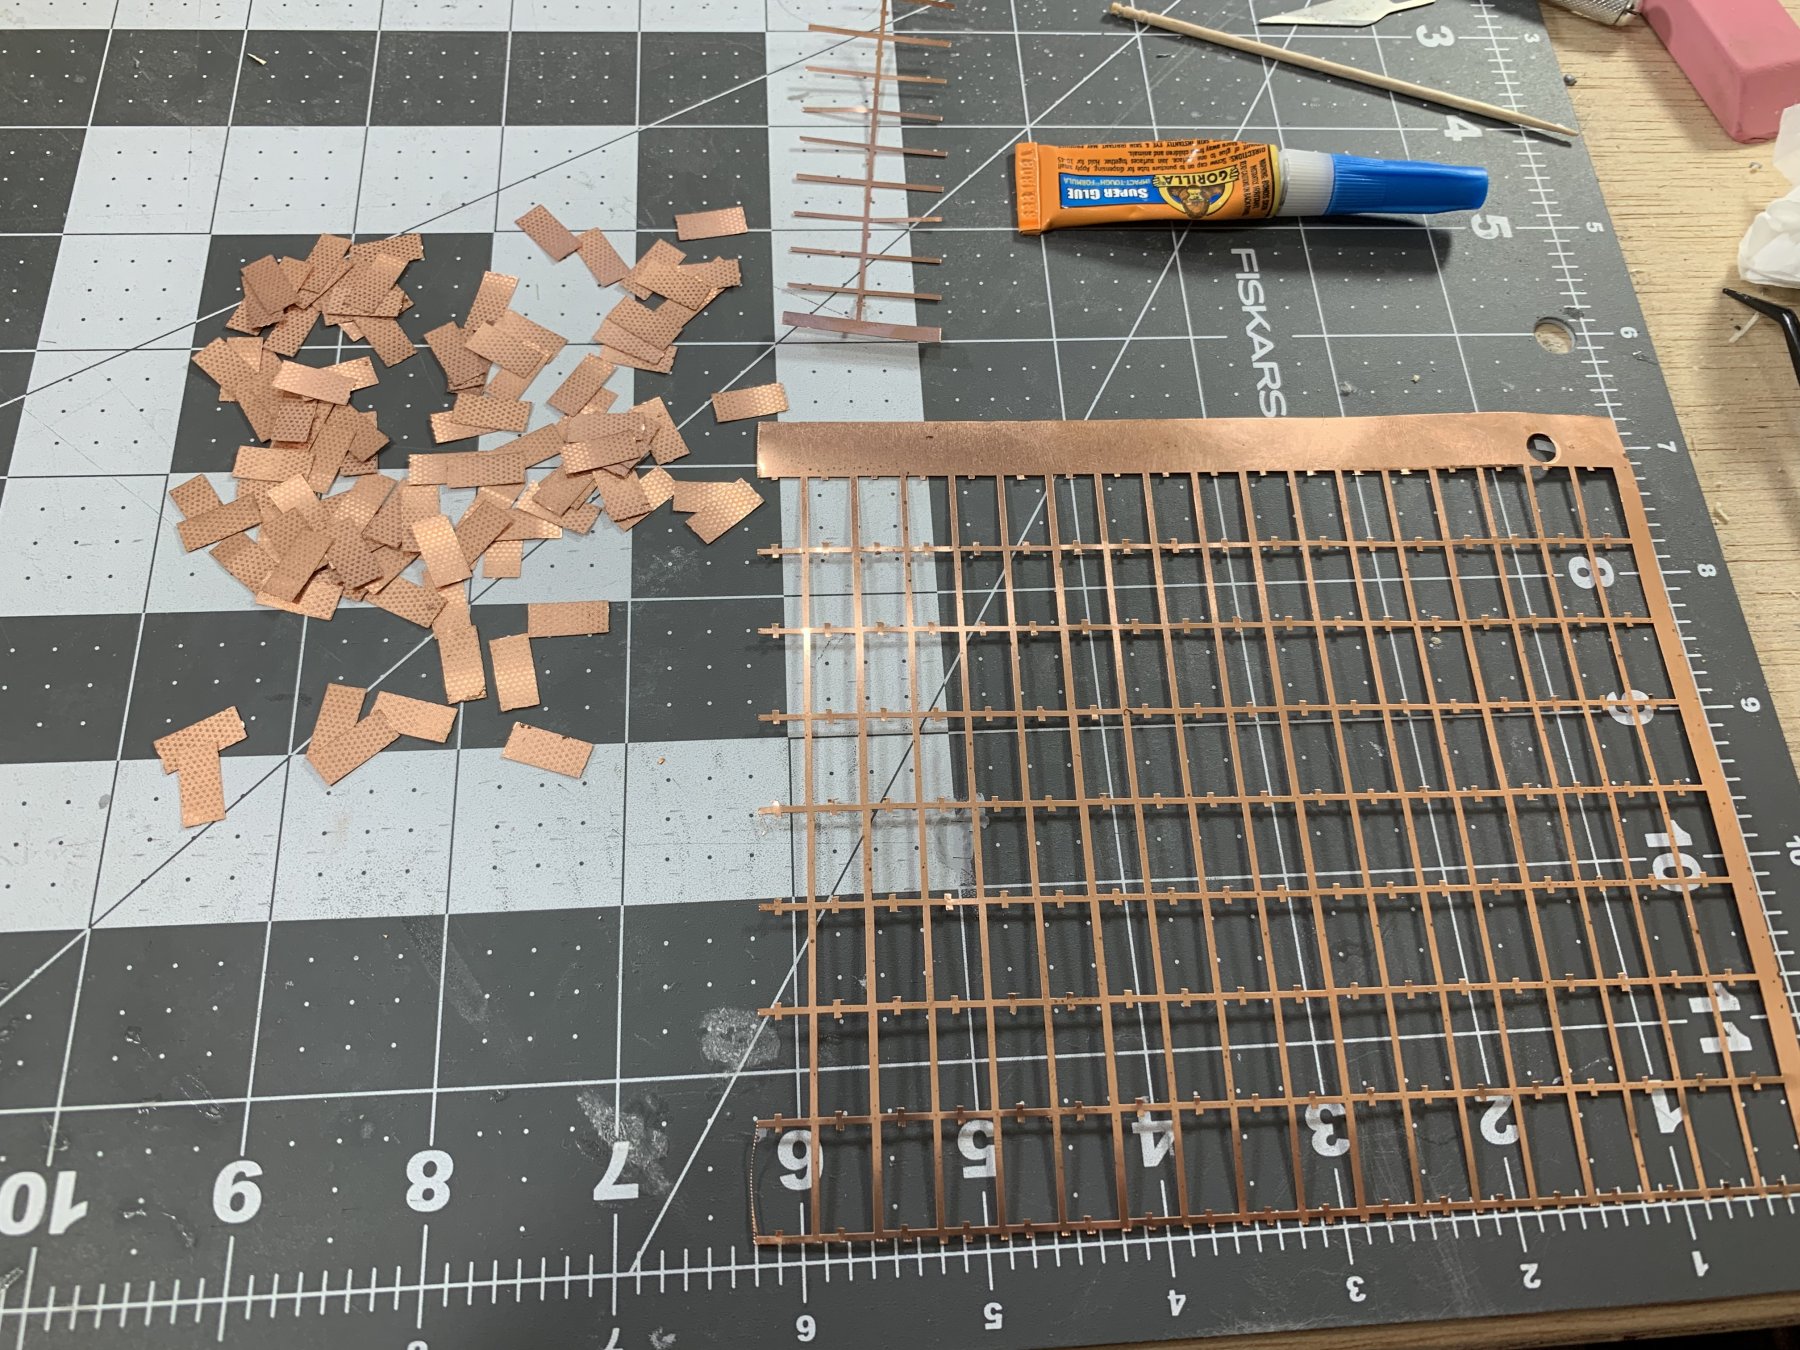
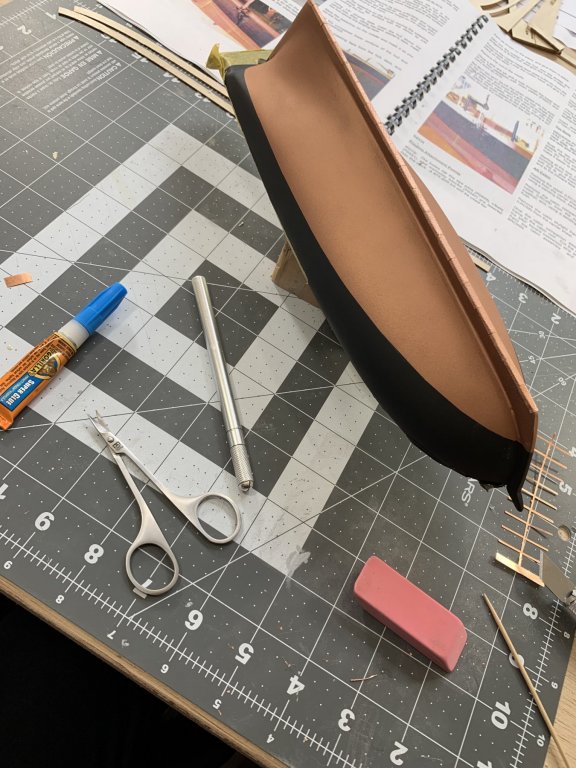
Making slow but steady progress. I began with plating the bottom of the keel. I used a small amount of super glue and then rolled the plates flat with the metal handle of an x-acto knife. I also used an x-acto knife to cut the plates from their sheet. Definitely a learning experience!

- 104 replies
-
- 7
-
-
- revenue cutter
- BlueJacket Shipcrafters
- (and 1 more)
-
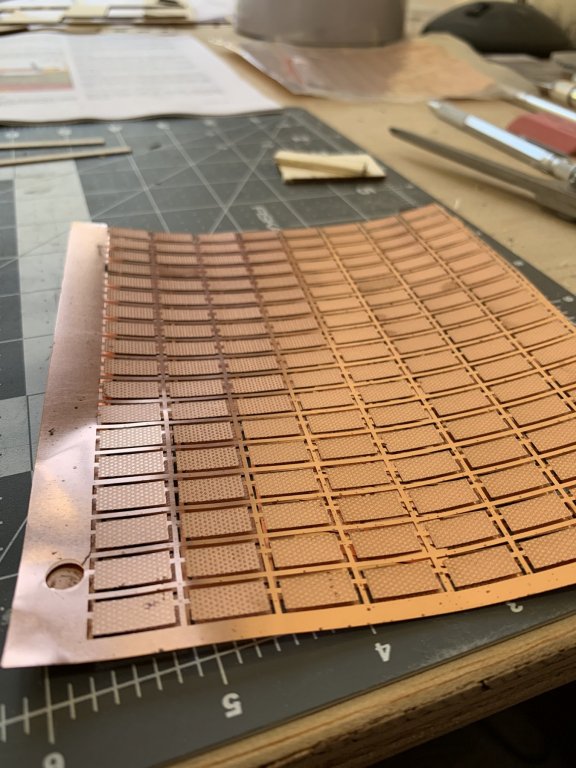
Starting the copper plating today! I did a bunch of reading on the forum and found this nice thread about plating: My current plant is the follow the instructions in the thread and make three rows of plates parallel to the waterline and the rest based on the keel. I should hopefully get some progress photos by the end of the day.
- 104 replies
-
- 3
-
-
- revenue cutter
- BlueJacket Shipcrafters
- (and 1 more)
-
Thank you! The kit is actually super well done - I am definitely learning a ton on it though
-
@MrBlueJacket yes, I had meant True North paints. They were the paints included in the Revenue Cutter paint kit
-
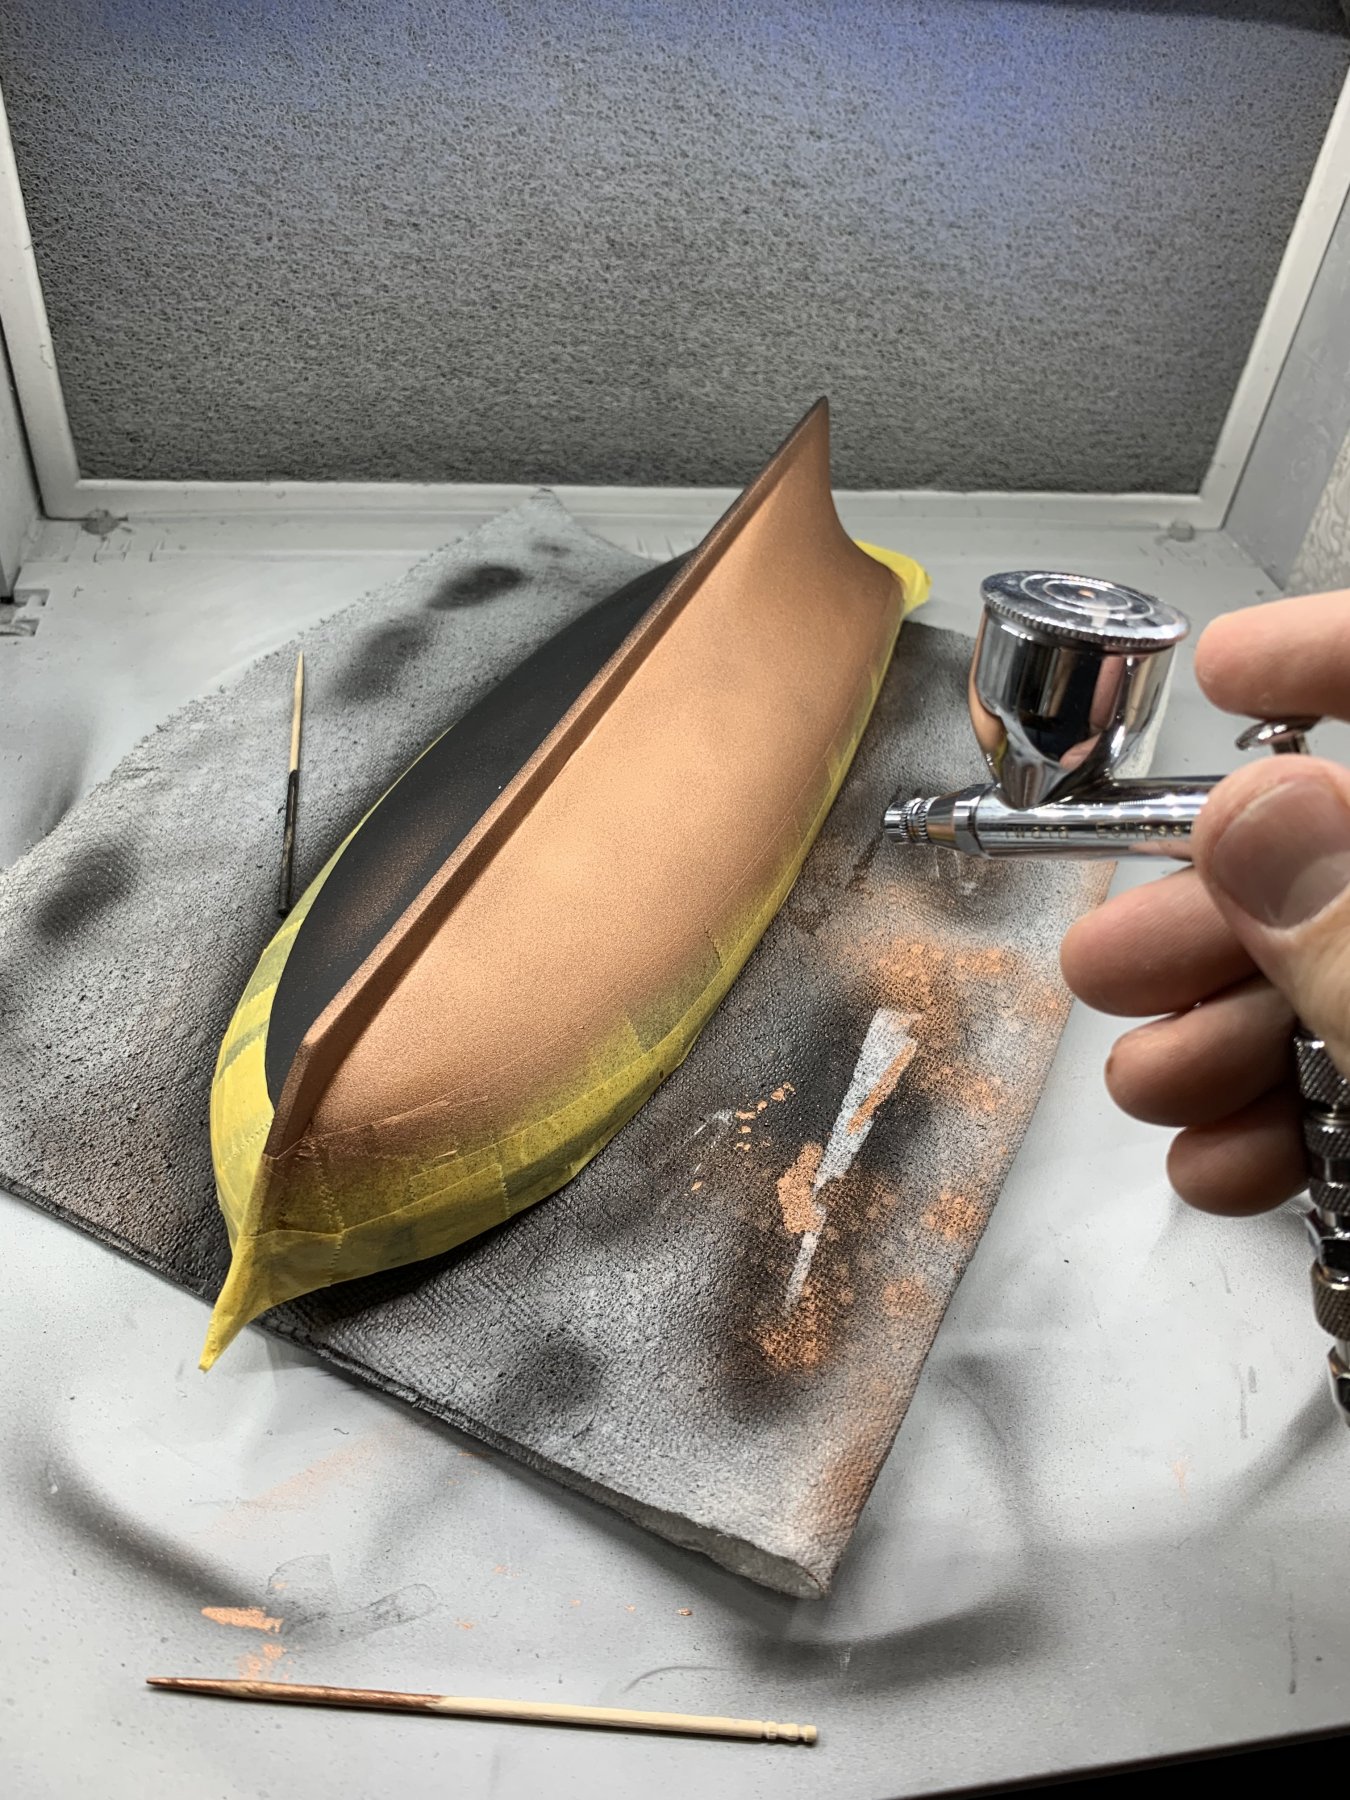
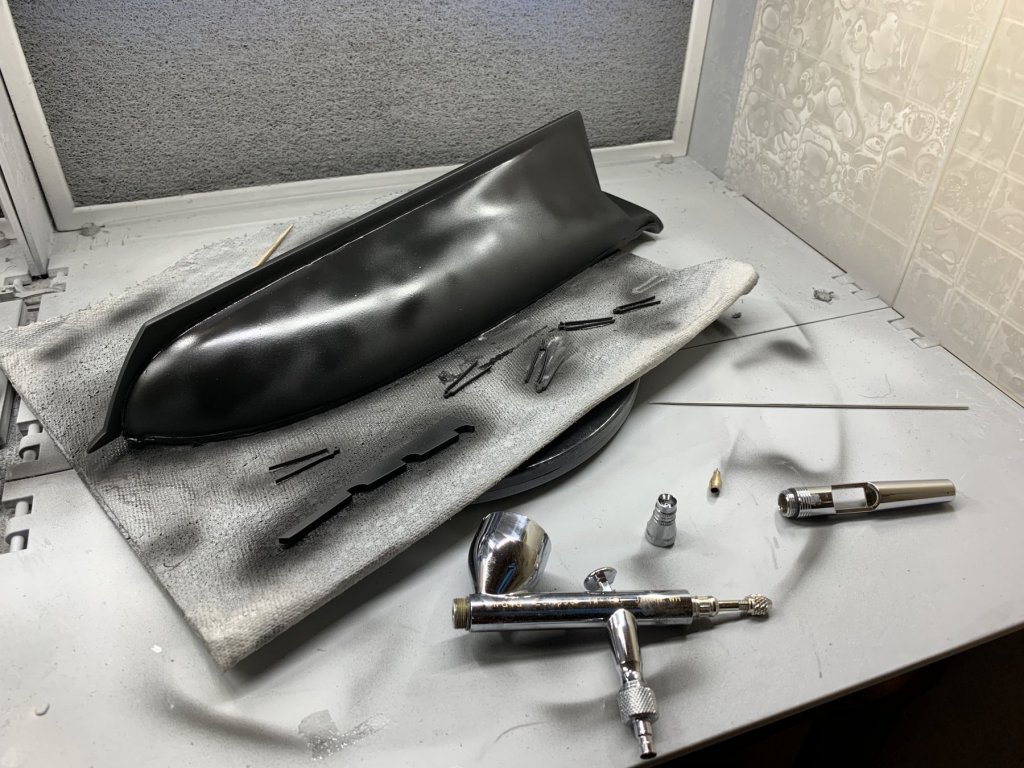
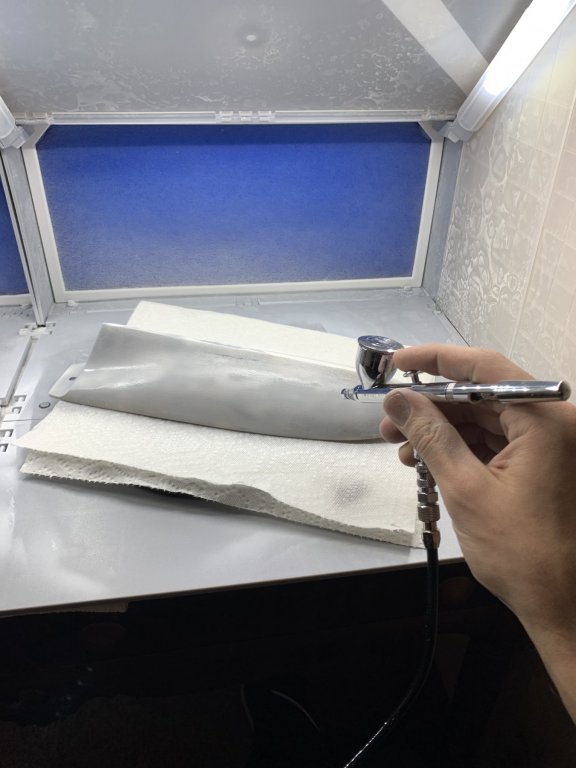
Made some great progress painting the hull tonight. I’ve switched the Great North paints and I find them much easier to airbrush than Testors. Not sure if I have gotten better with the airbrush or just the better paint.

- 104 replies
-
- 4
-
-
- revenue cutter
- BlueJacket Shipcrafters
- (and 1 more)
-
Thanks so much @vossiewulf for the suggestion. I’ve ordered a roll via your link. The masking tape was a pain around those curves so I am sure the 3M tape will be a huge improvement.
- 104 replies
-
- 1
-
-
- revenue cutter
- BlueJacket Shipcrafters
- (and 1 more)
-
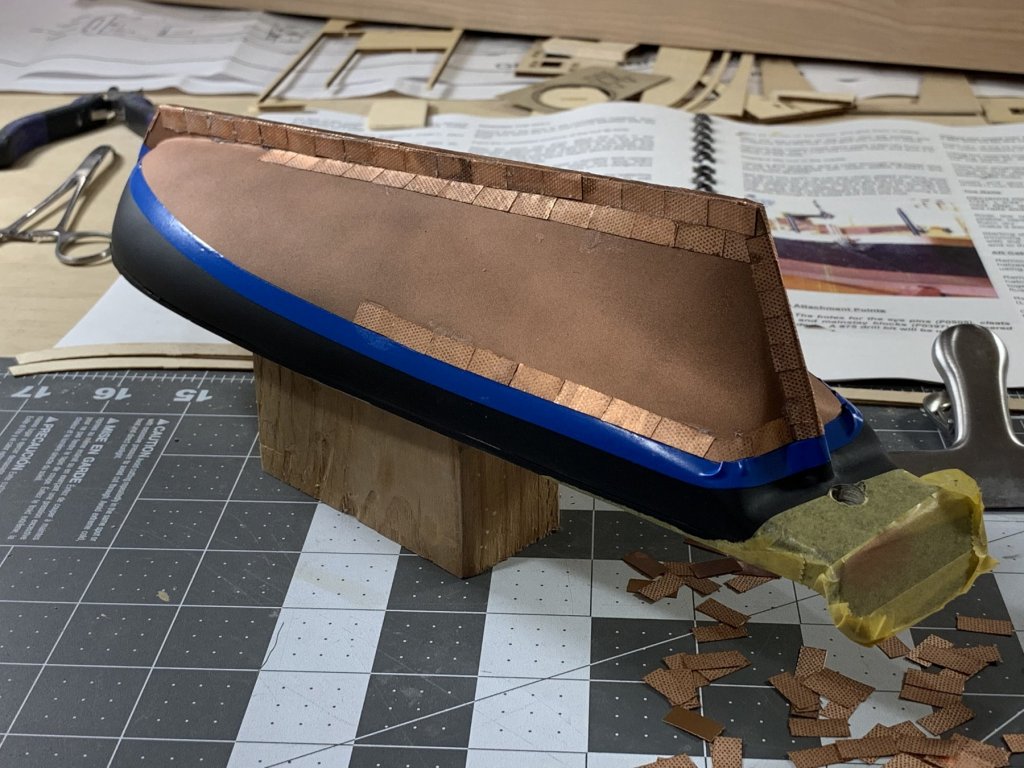
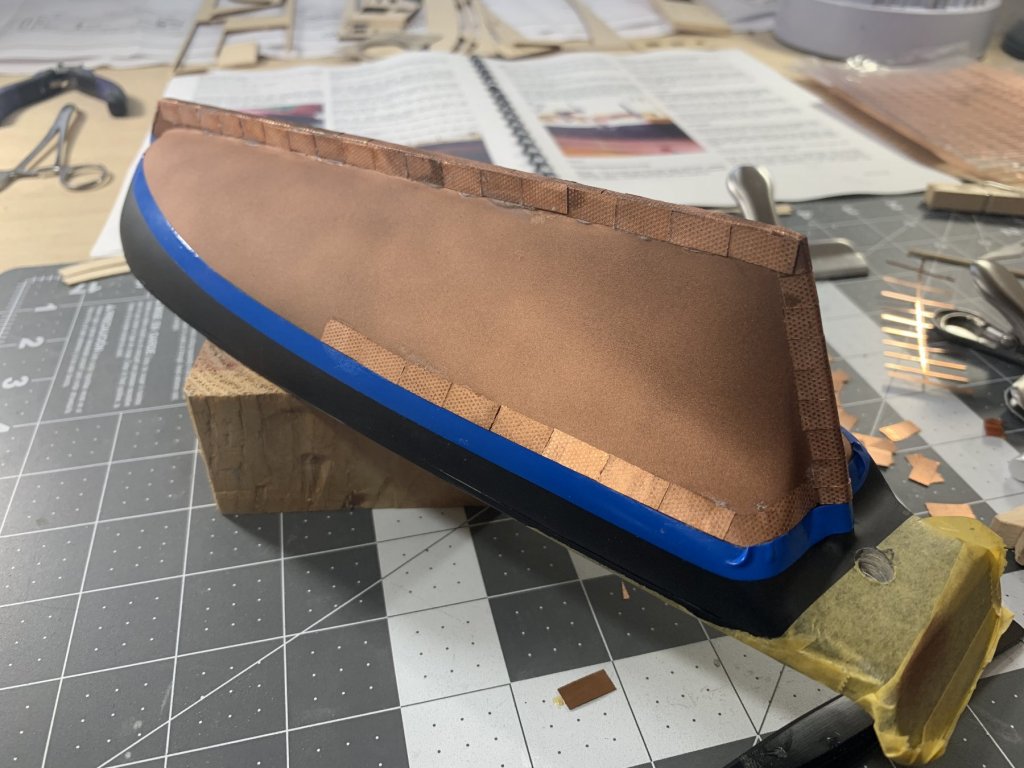
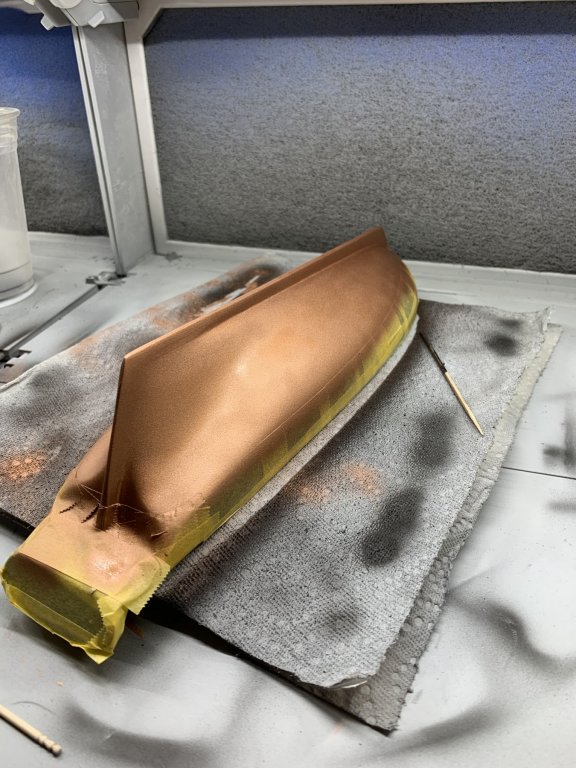
Had a work trip for the last couple weeks so just getting back to this. Built up the waterline jig jig that was included with the kit and marked the waterline. In order to get it level I had to shim the base just a little. In the photo is also a clamp but I used super glue to attach the pencil as the instructions recommend. I then masked along the waterline. I’ll paint it a copper color tomorrow in preparation for copper plating. It took a little while to mask though because of the substantial curves of the hull - or maybe due to my lack of experience. The coper plates showed up too and look super good!


- 104 replies
-
- 6
-
-
- revenue cutter
- BlueJacket Shipcrafters
- (and 1 more)
-
Thank you @RichardG! I actually purchased copper plates from Bluejacket which I believe already have a nailing pattern on them. USPS shows that they should be delivered today so hopefully I can get a start on it this weekend. I forgot to take a picture but I added another coat of black to the hull and its looking great. I'll try and mask the waterline tonight.
-
Thank you @RichardG for the compliment and the advice! I looked at your build log and your coppering and it will be super helpful. Thank you!
-
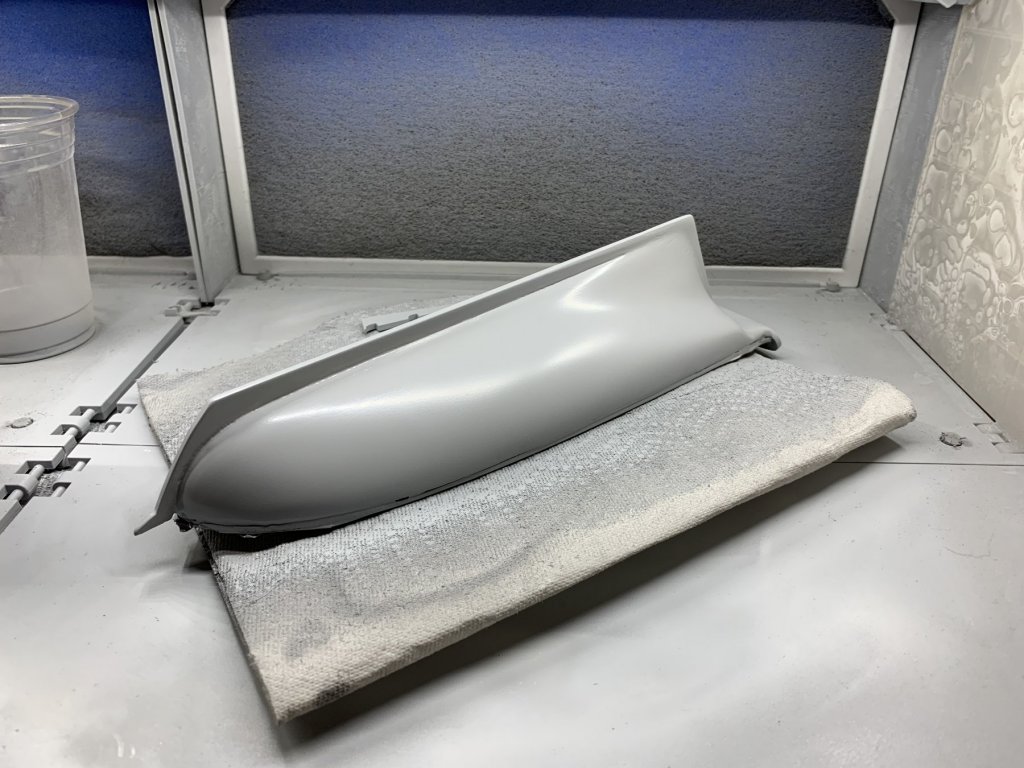
First light coat of black paint on the hull. Next up is a couple more light coats of black and then masking the waterline and painting below the waterline copper. Aside from reading other build logs here, is there a good source people recommend to read on learning the best way to apply and pattern the copper plates?
- 104 replies
-
- 3
-
-
- revenue cutter
- BlueJacket Shipcrafters
- (and 1 more)
-
Thank you Nic! For anyone else looking at this thread I have decided to copper plate the hull of the revenue cutter. I have never copper plated a hull before so I'll definitely be reading other logs and looking for advice. While the copper plates are being shipped I plan on painting the hull as per the plans (black above the waterline and copper below). I saw in another build log how useful it was to paint the hull coper so that any potential gaps aren't obvious.
-
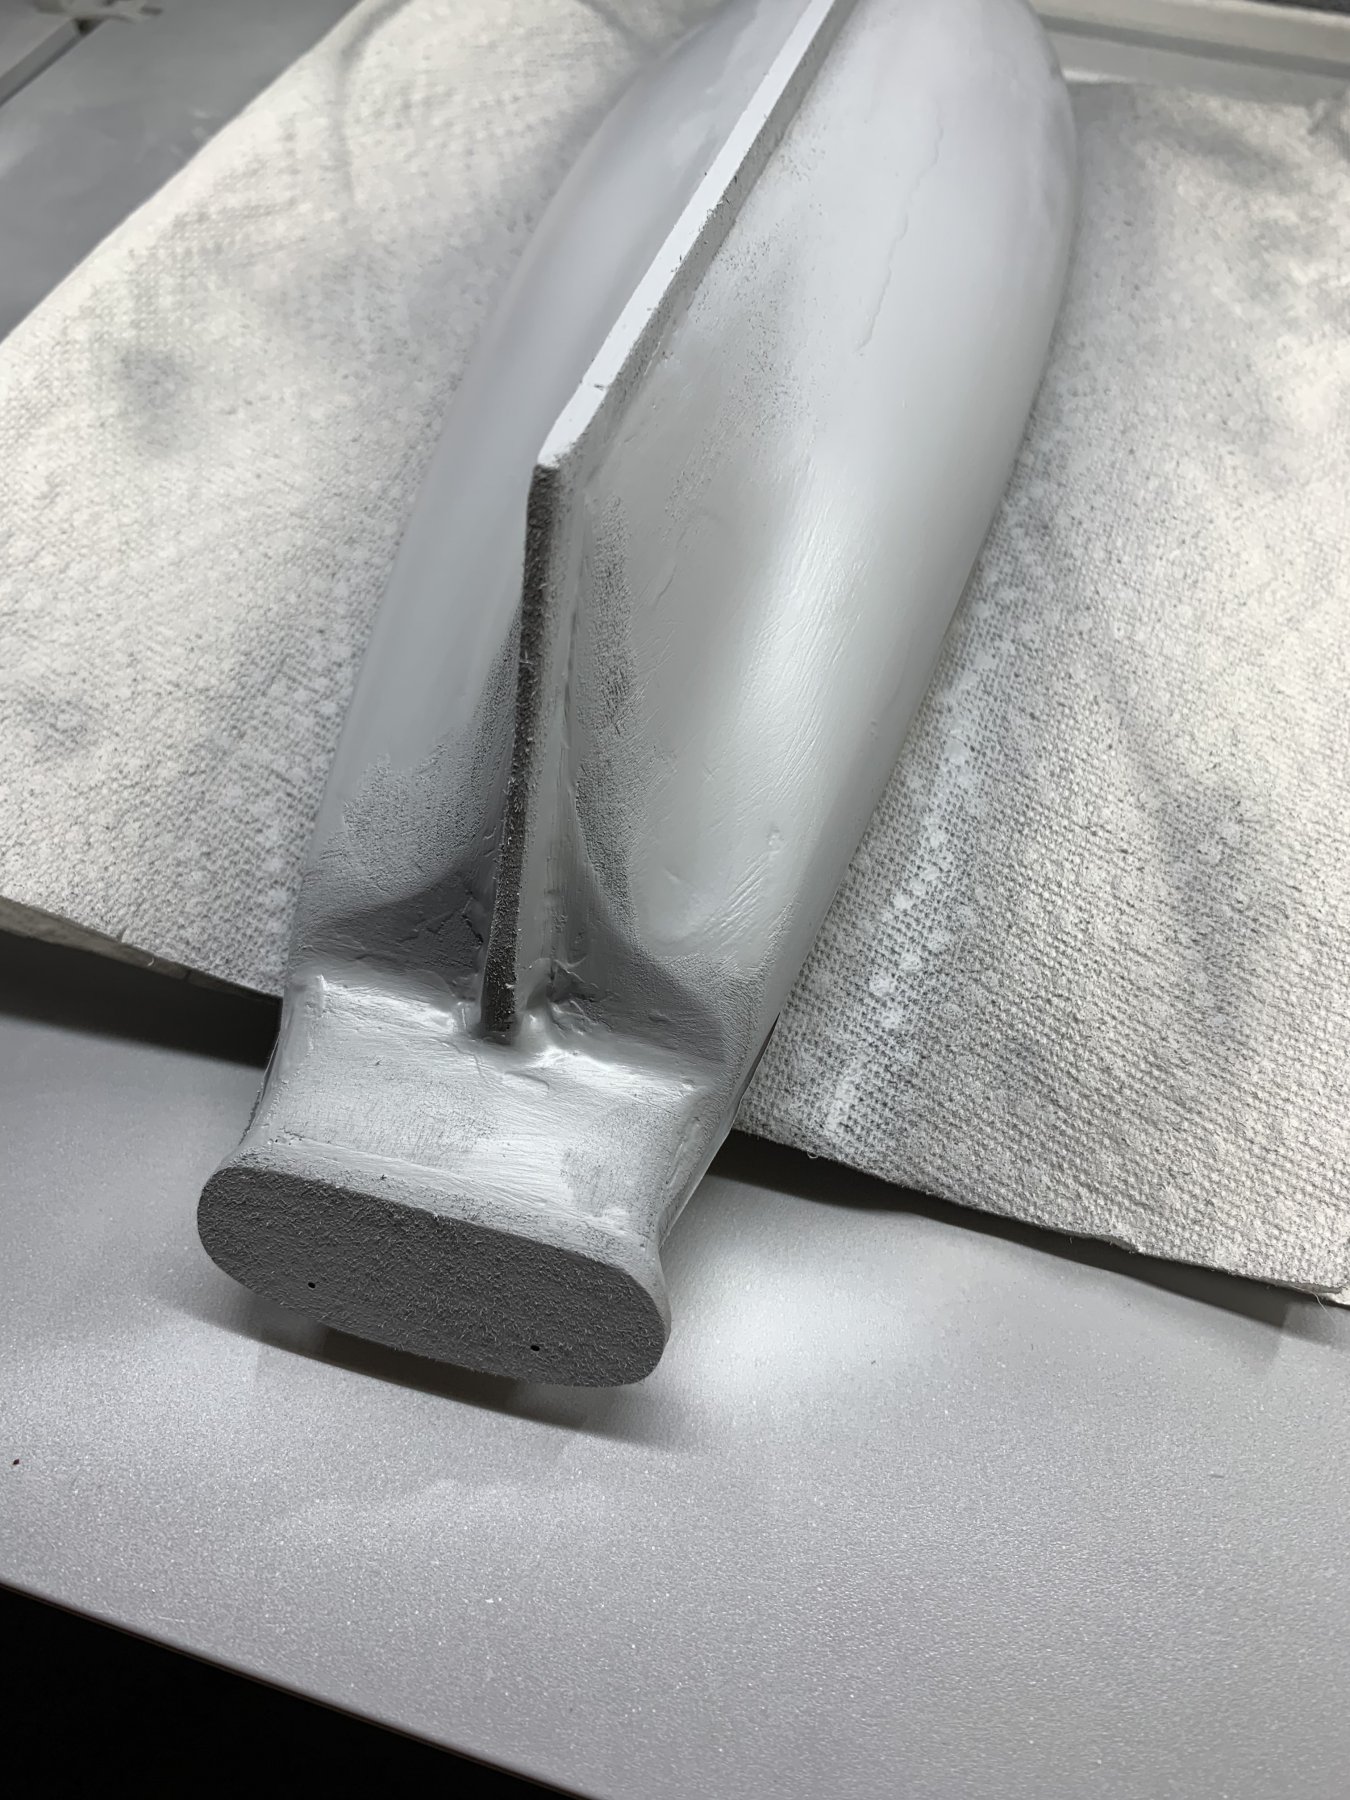
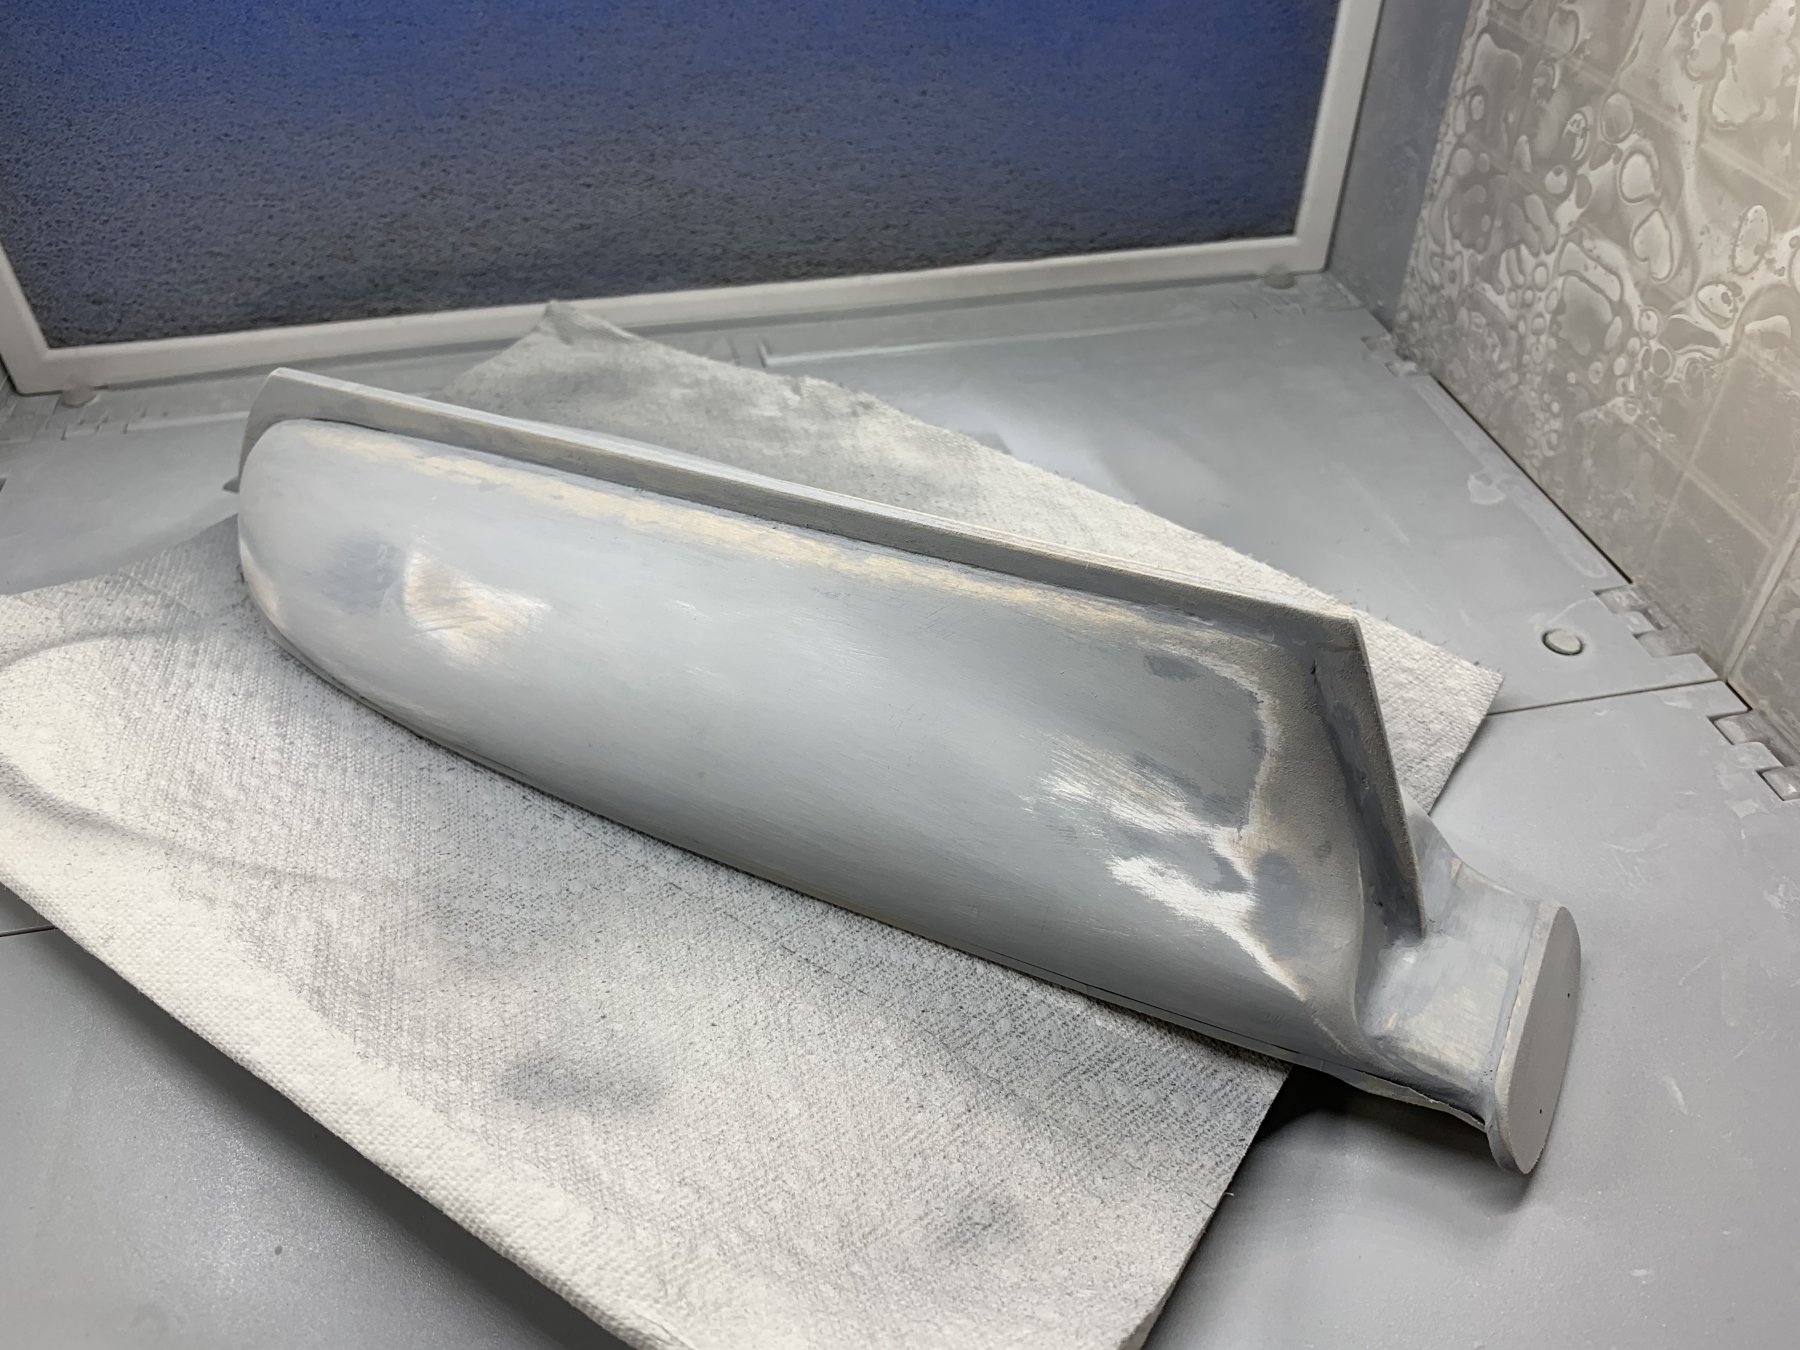
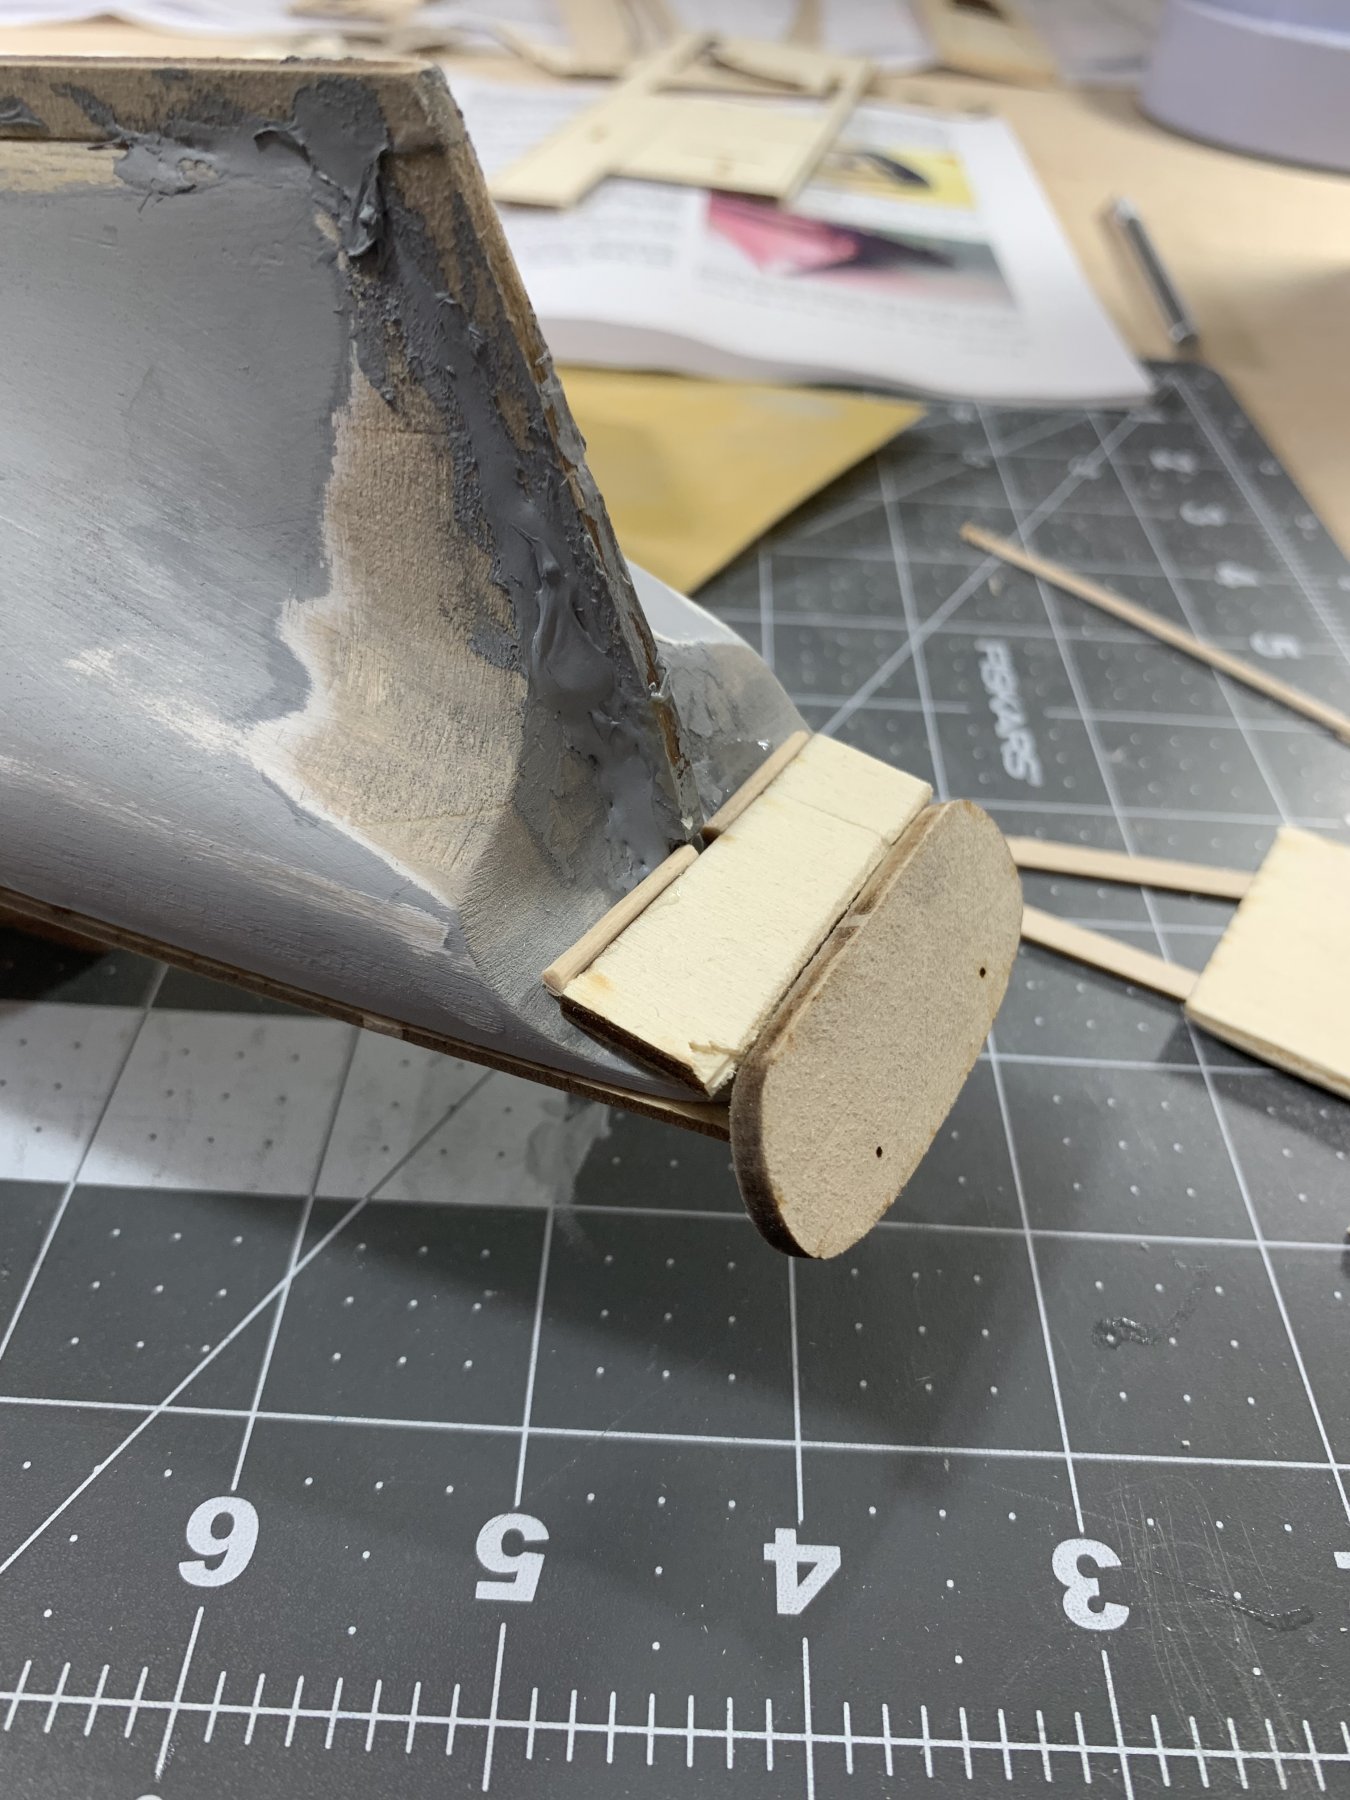
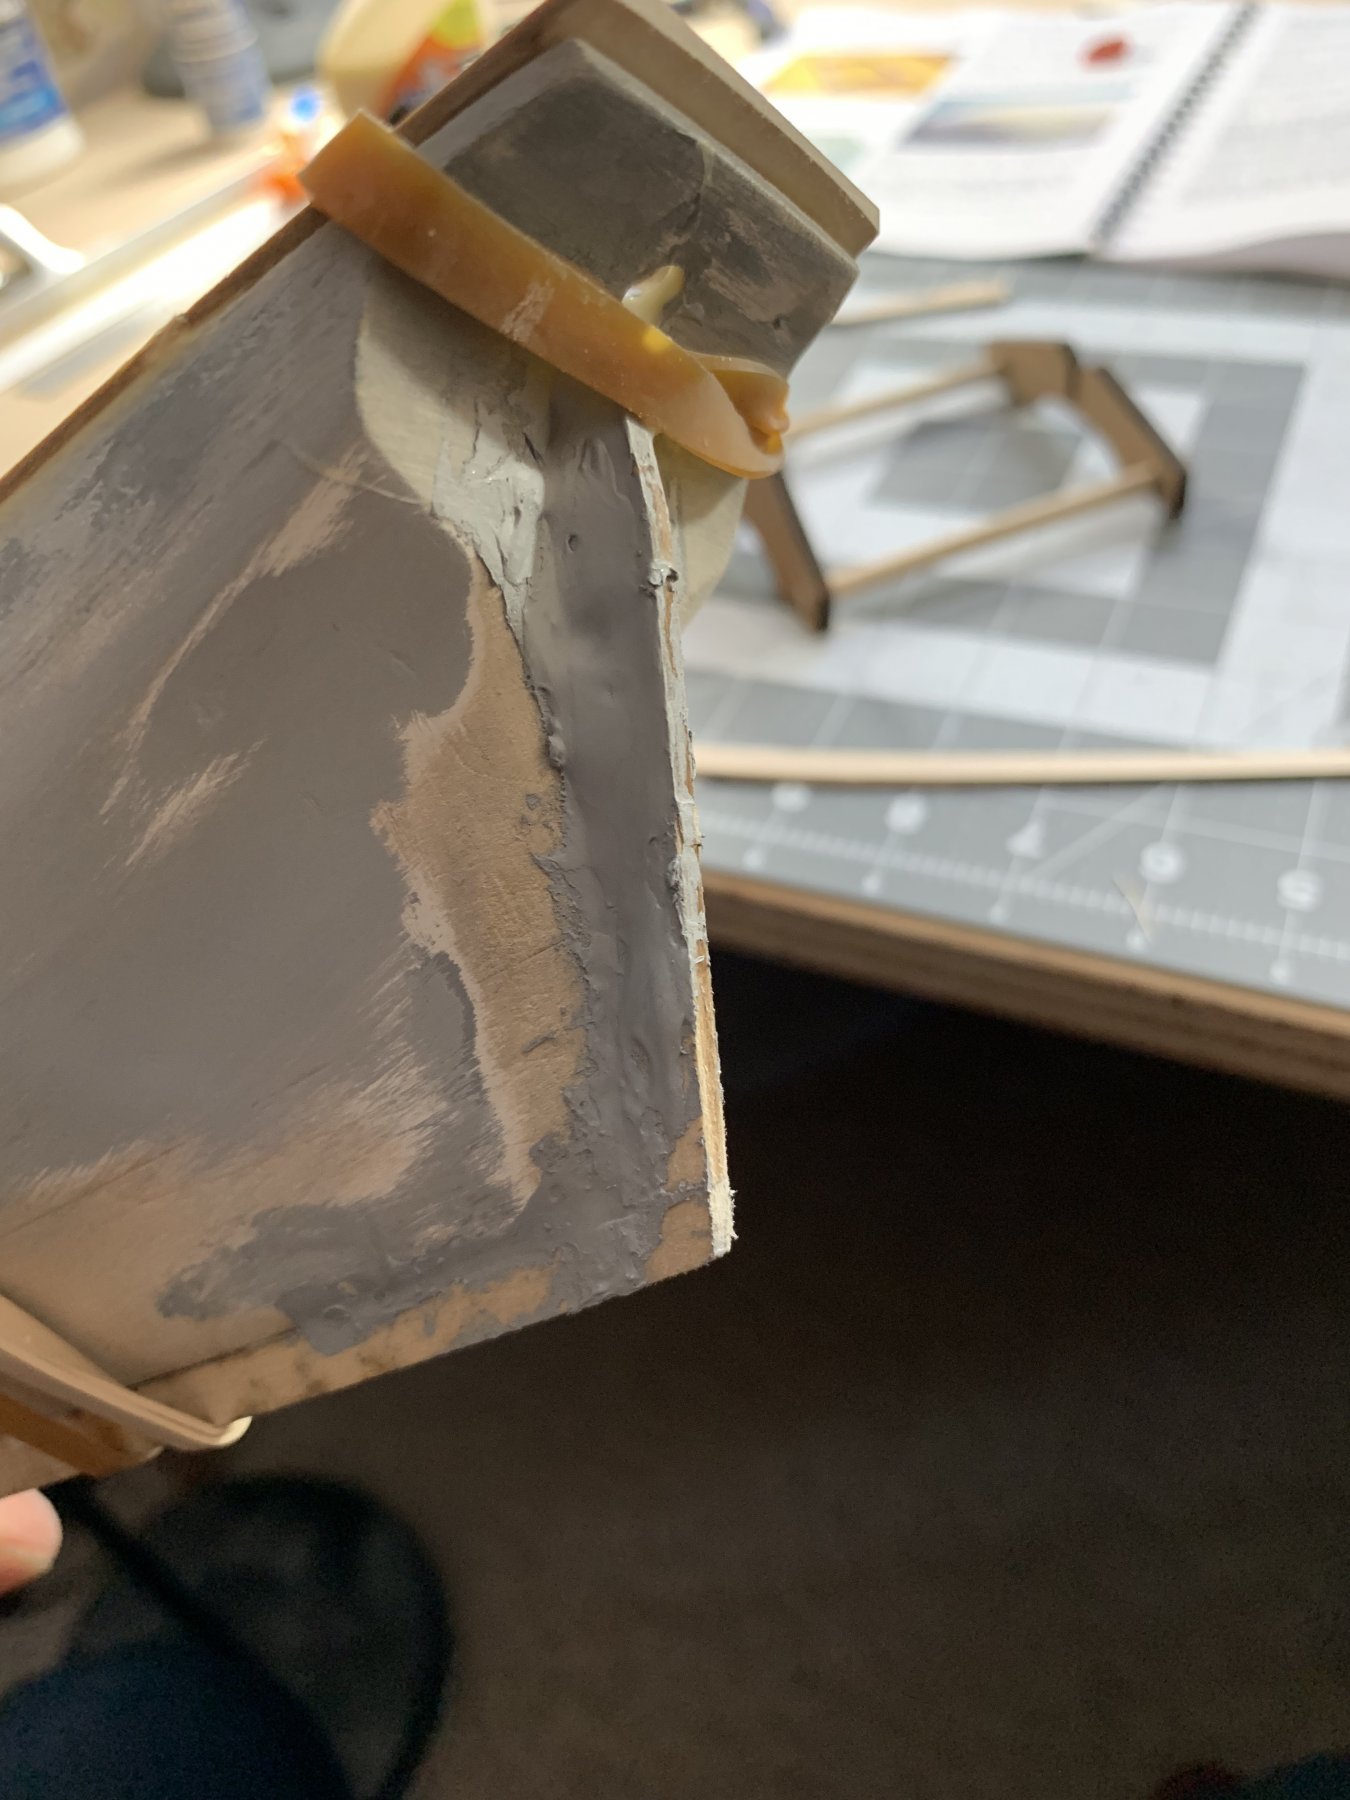
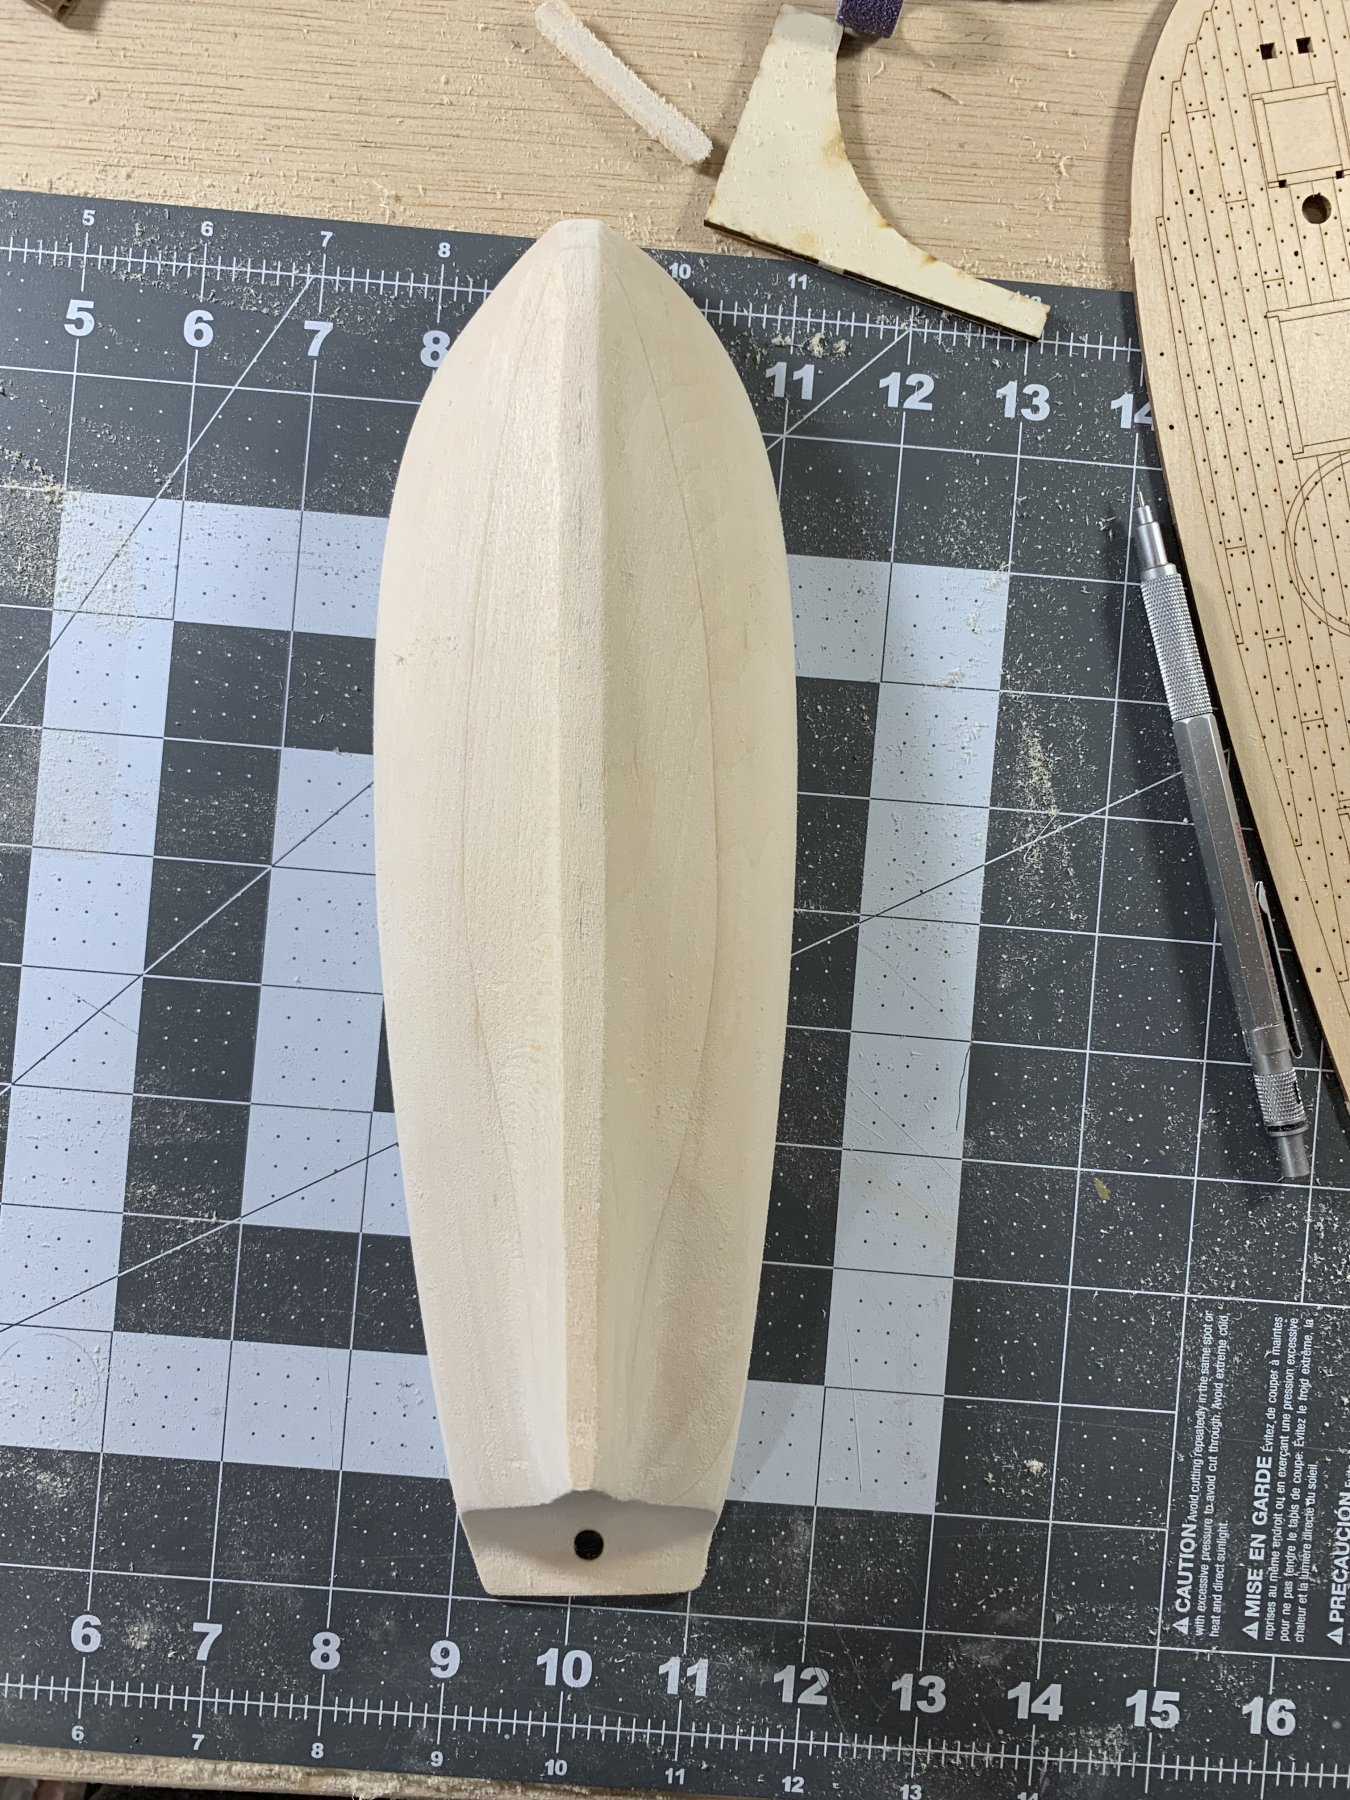
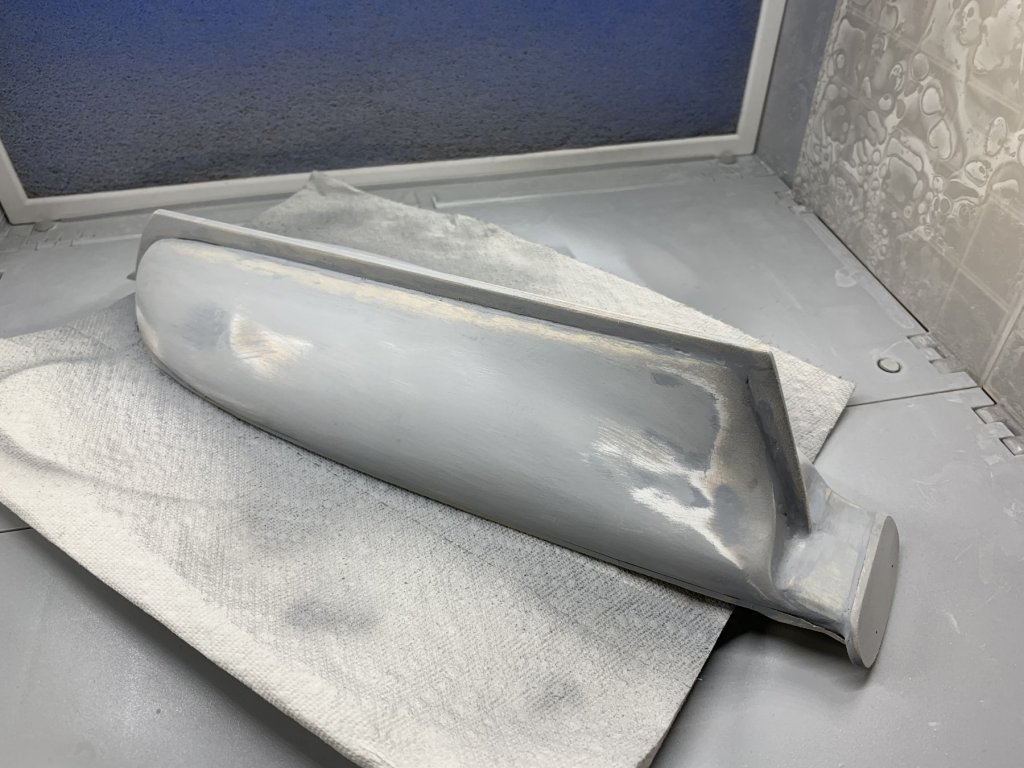
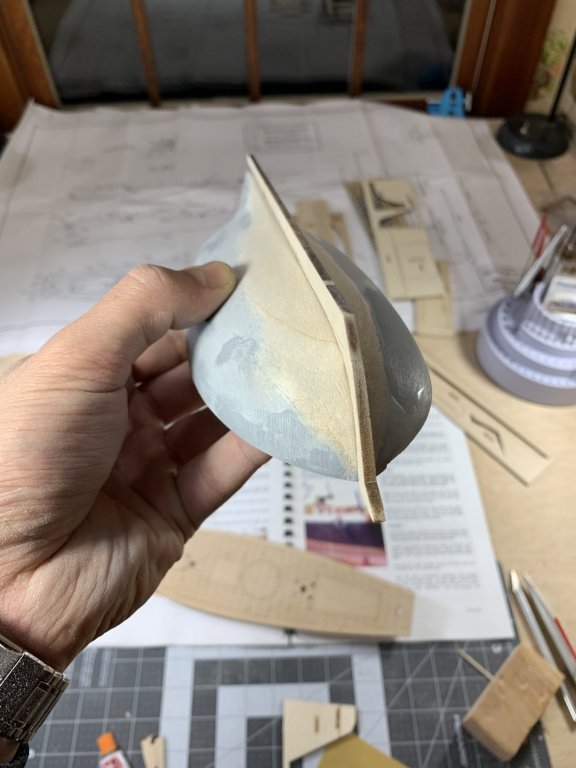
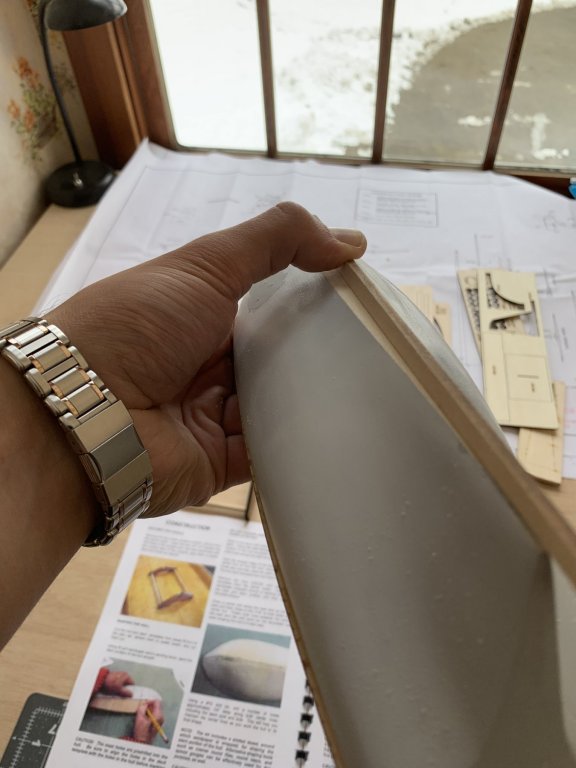
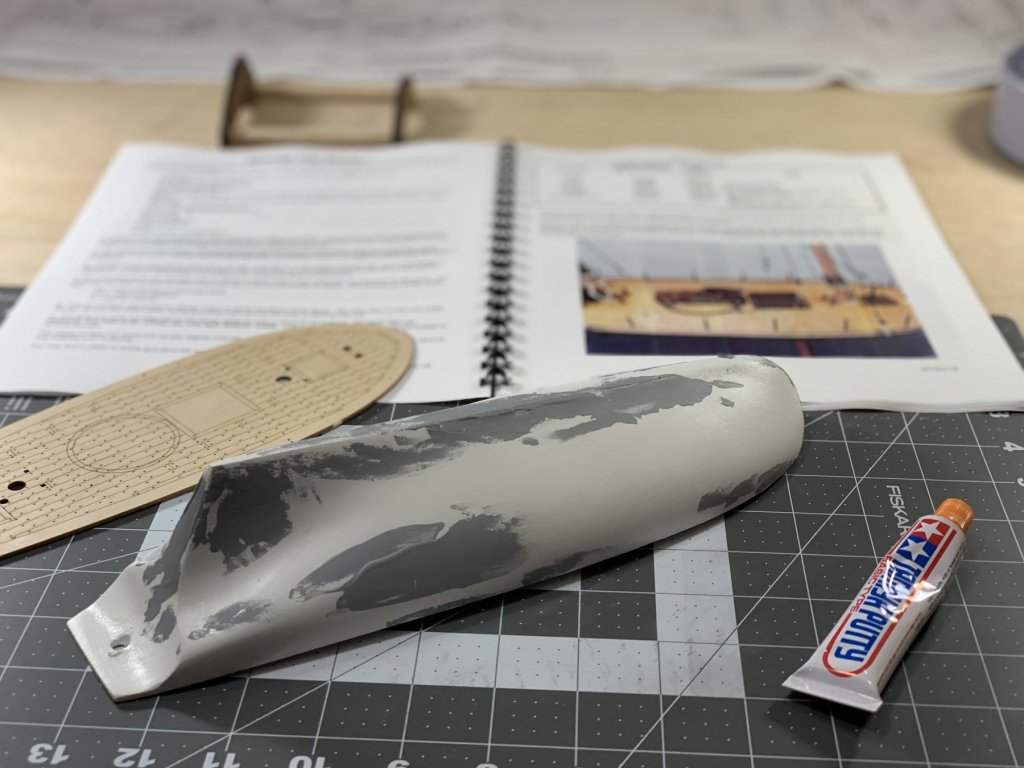
I know it doesn’t look like a lot of progress but it’s four passes of sanding, adding putty, sanding, priming etc. I also used progressively finer sandpaper - going from 120 grit, all the way to 400 grit. I also primed and sanded the rudder. Next up is re-drilling the rudder hole, making one last sanding pass then priming and painting the hull black.

- 104 replies
-
- 4
-
-
- revenue cutter
- BlueJacket Shipcrafters
- (and 1 more)
-
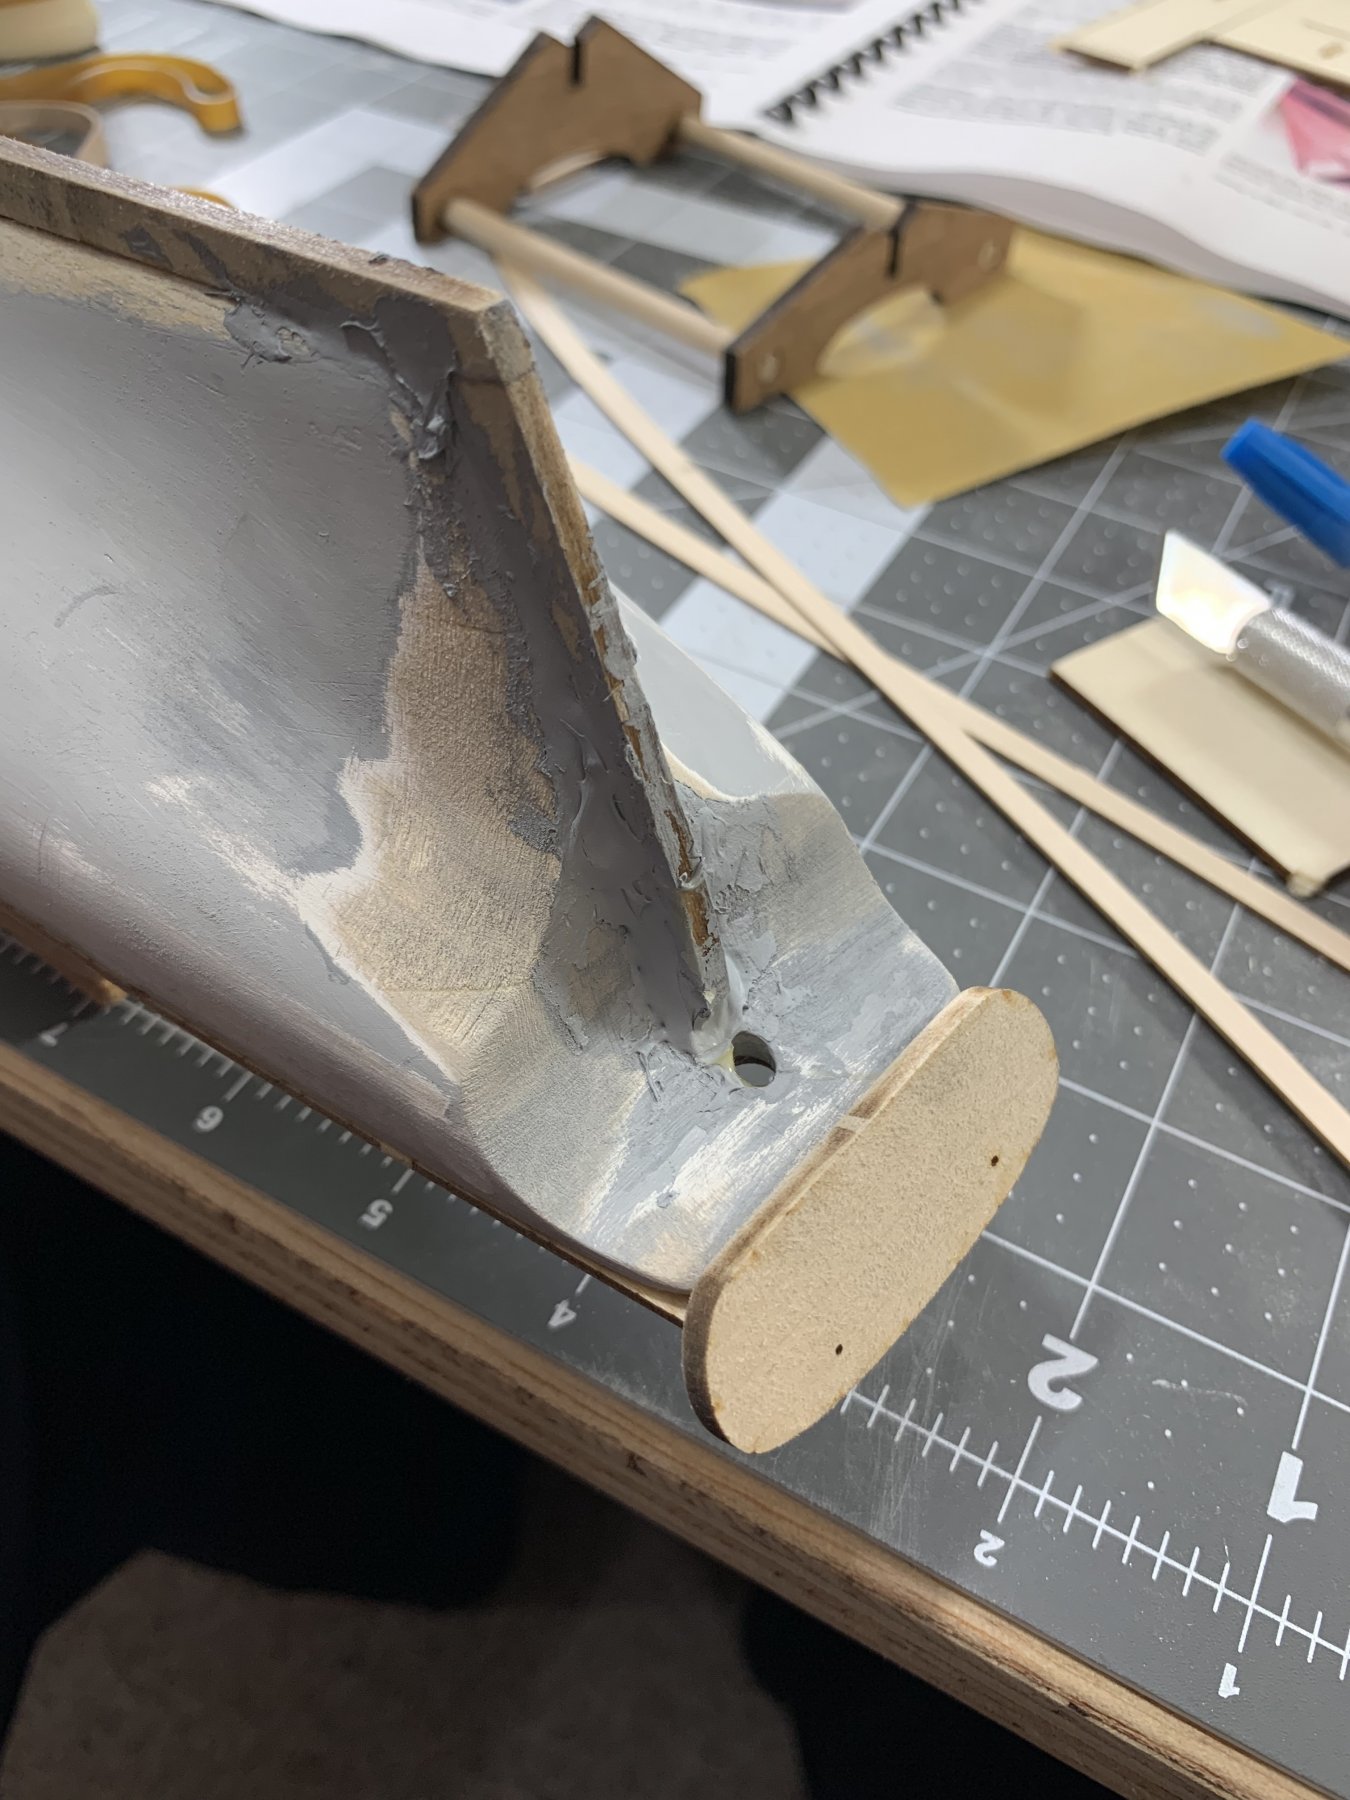
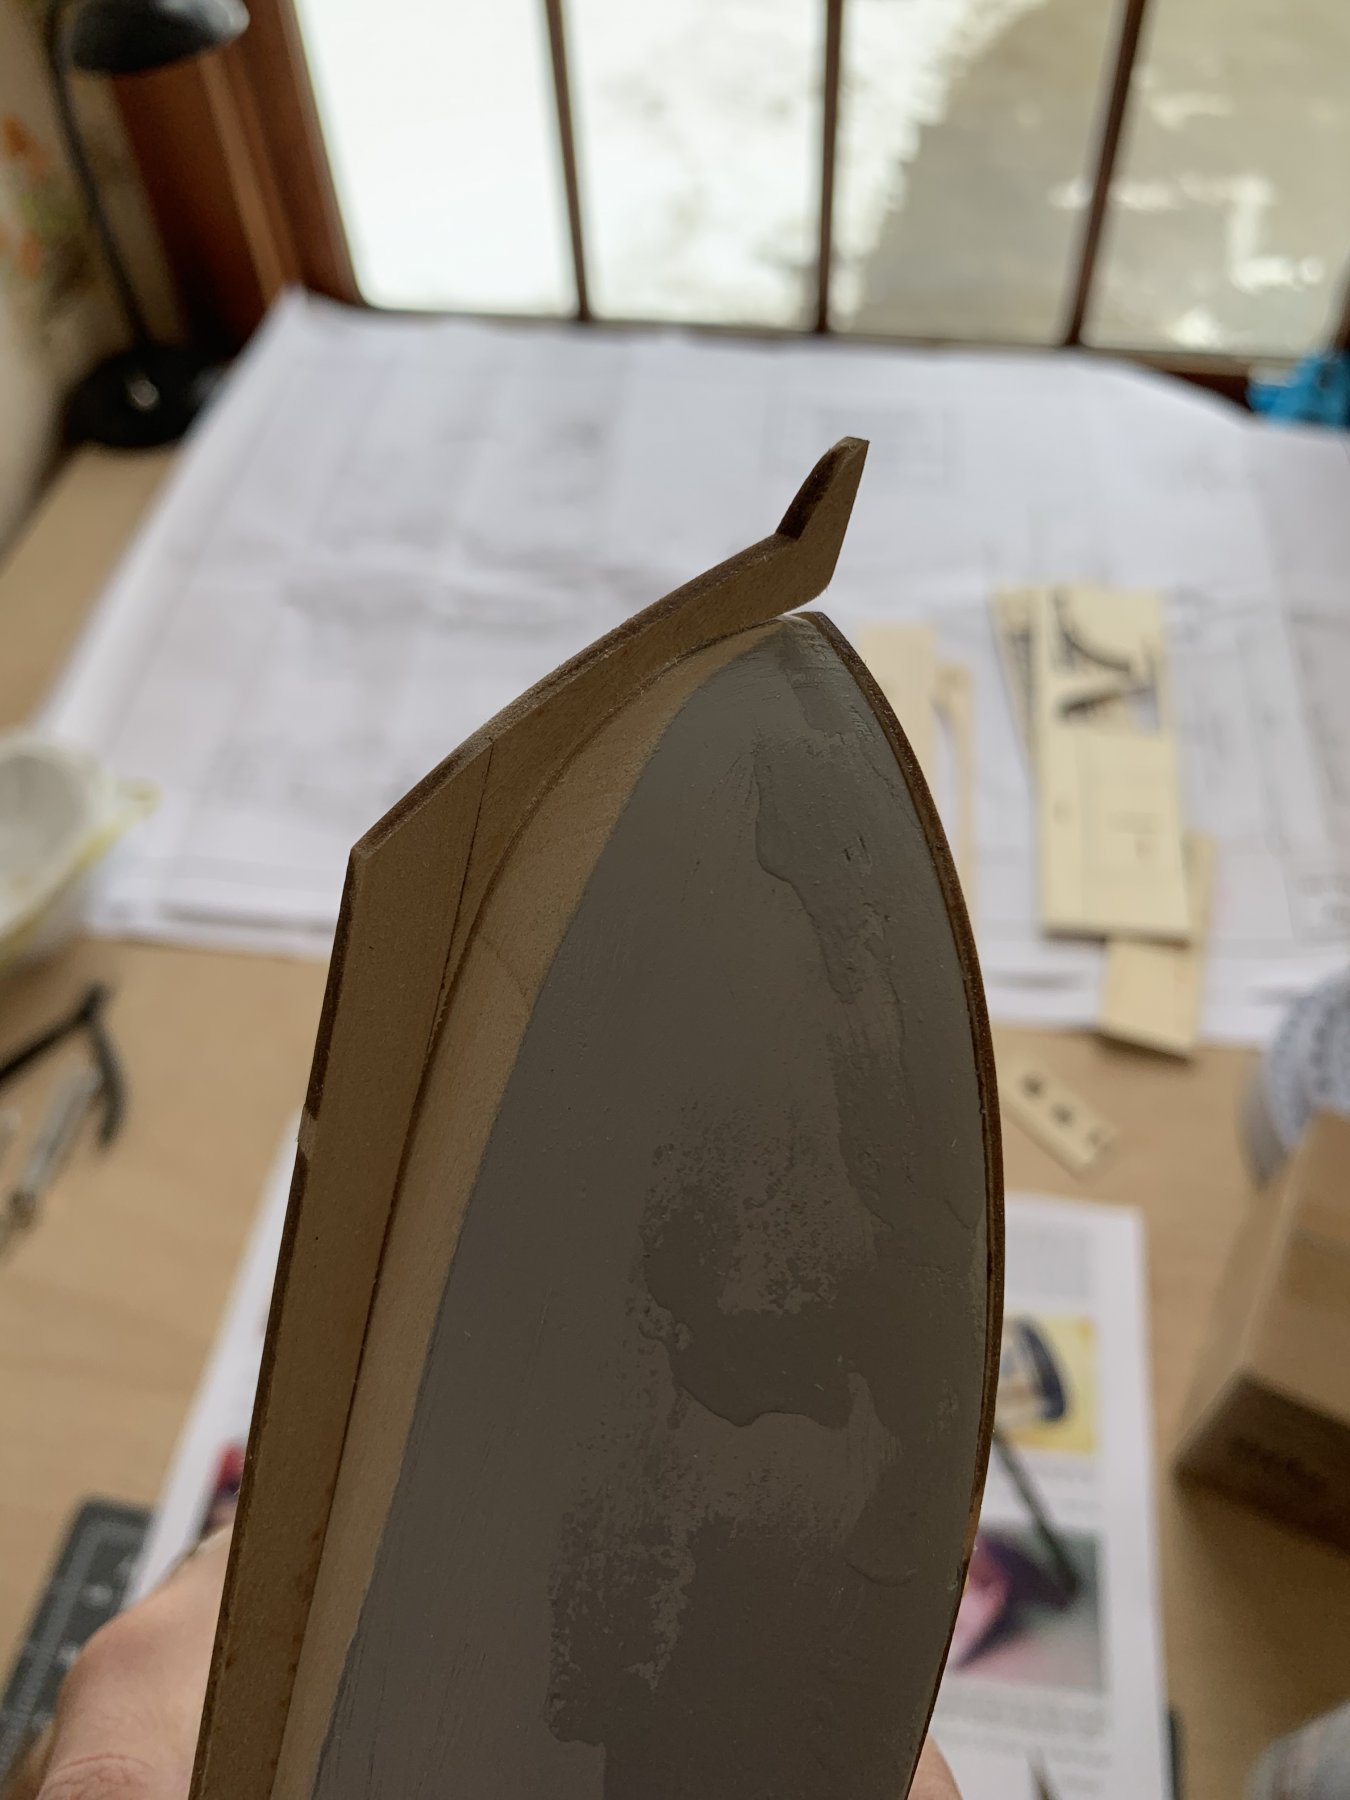
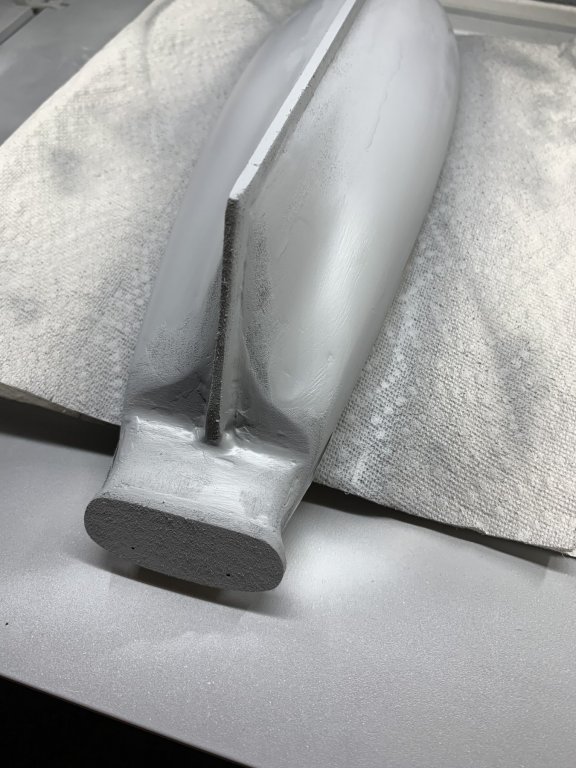
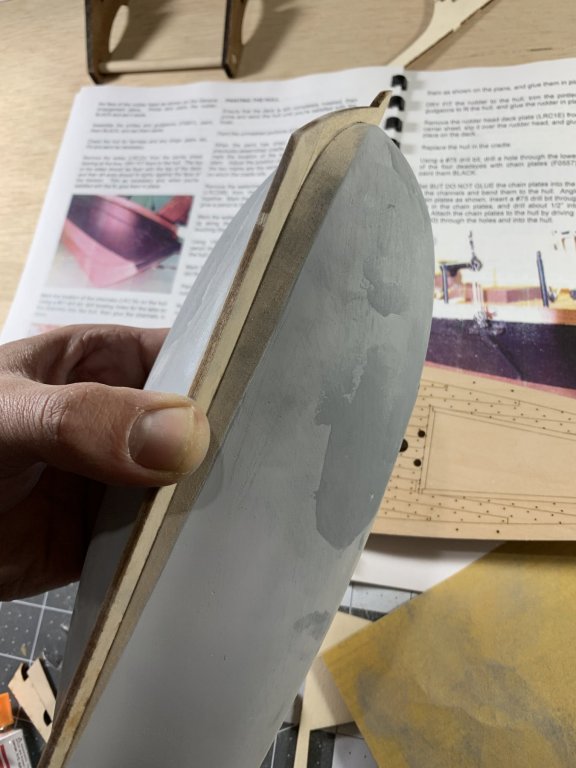
After a couple passes of sanding and priming my transom repair isn’t looking too bad! Obviously needs some more work but it’s a start for sure.
- 104 replies
-
- 3
-
-
- revenue cutter
- BlueJacket Shipcrafters
- (and 1 more)
-
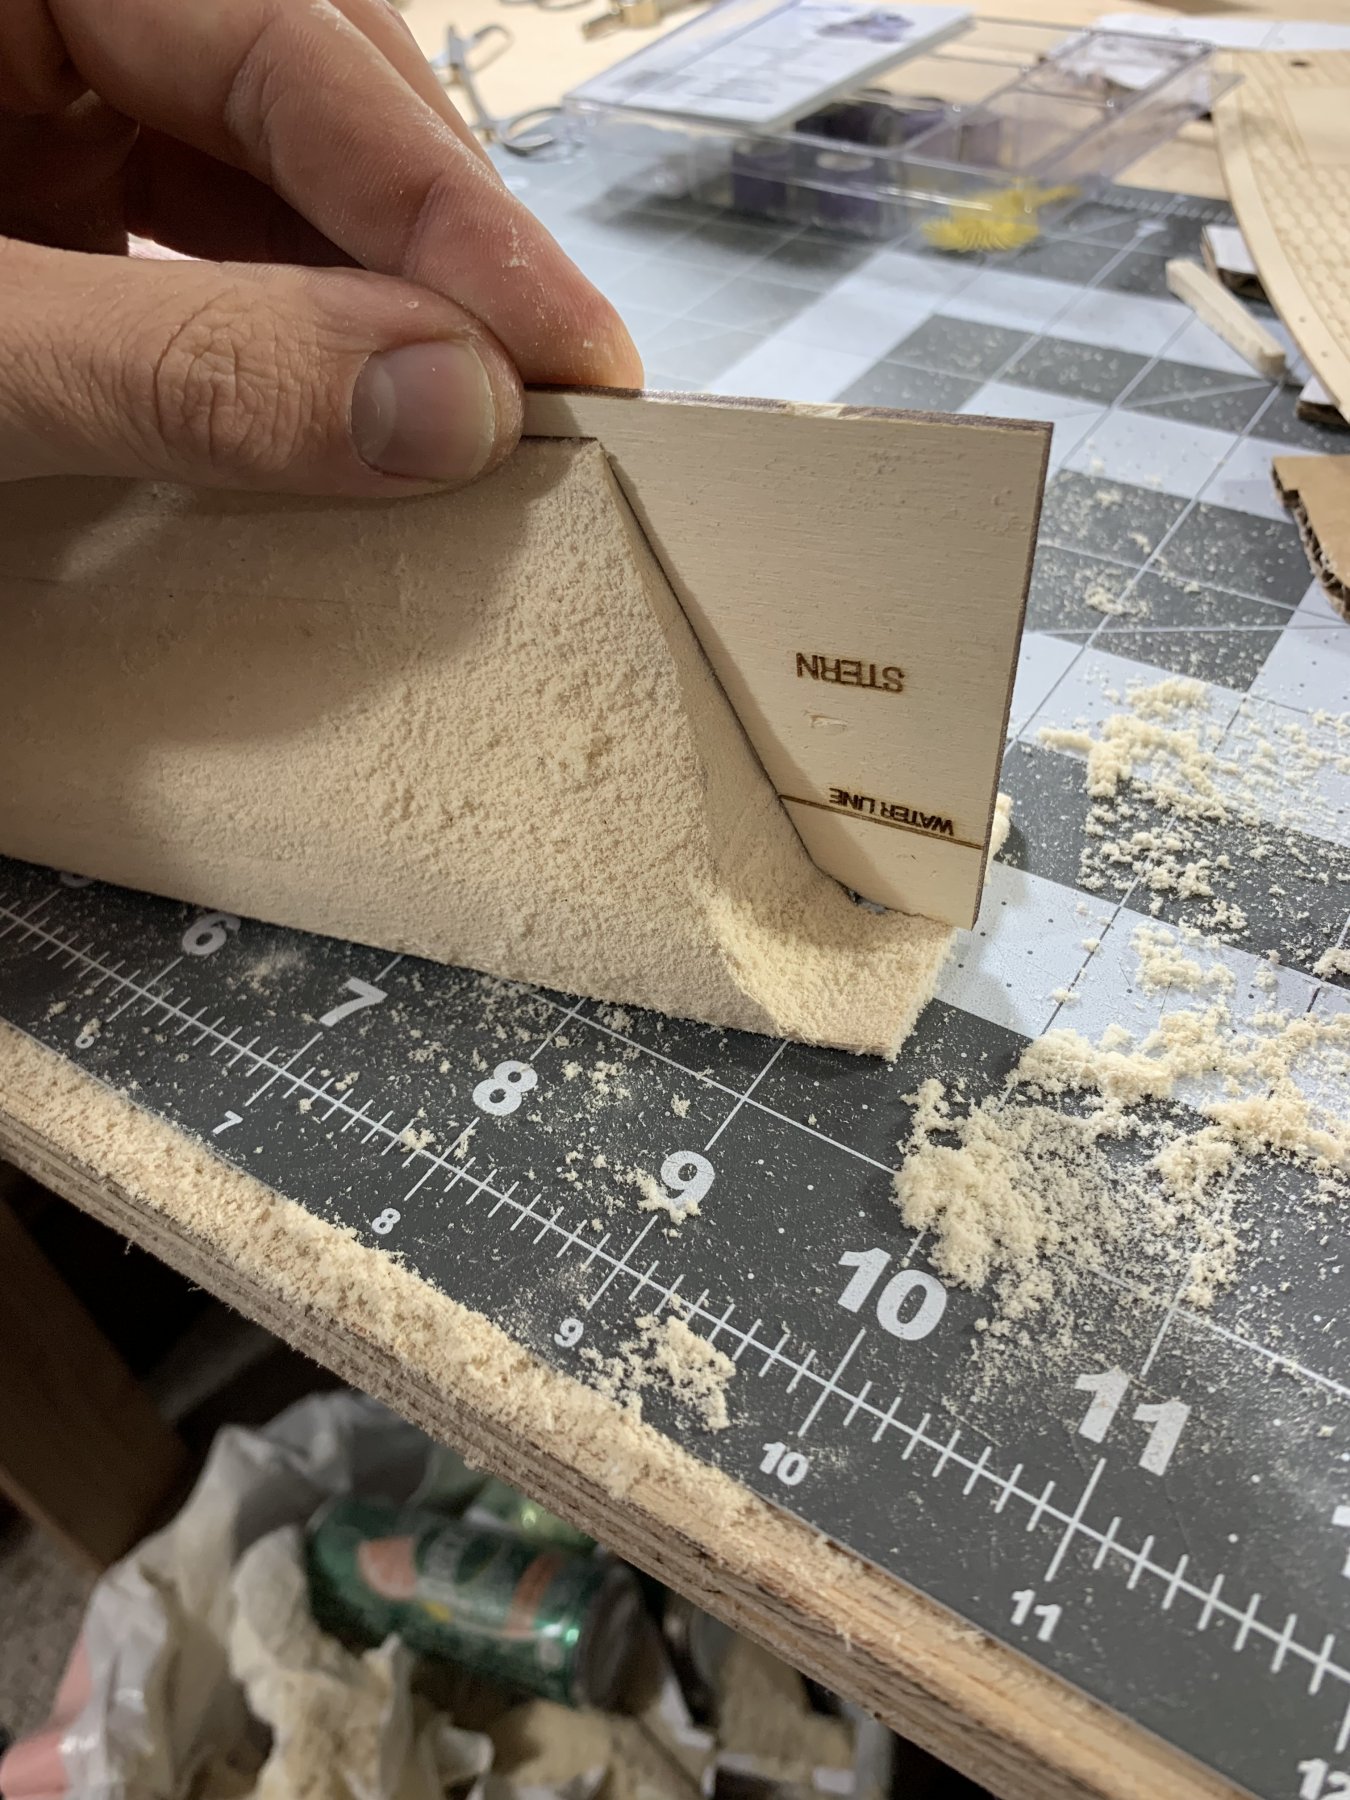
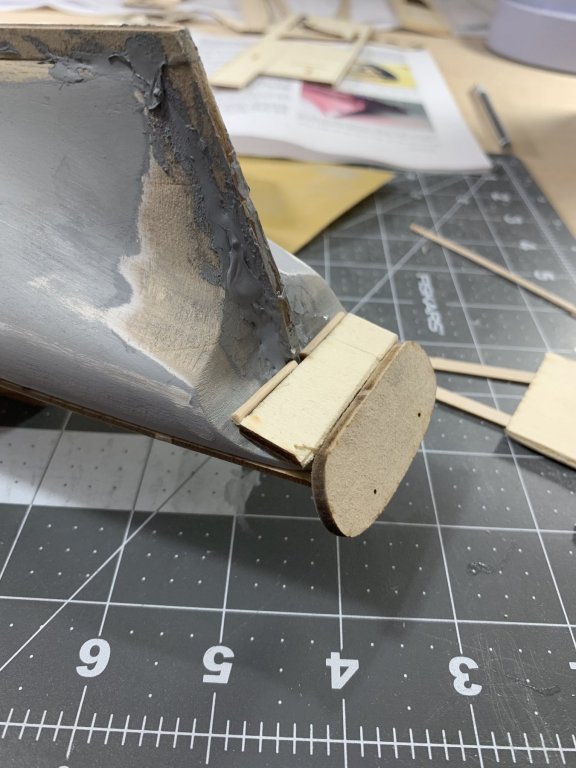
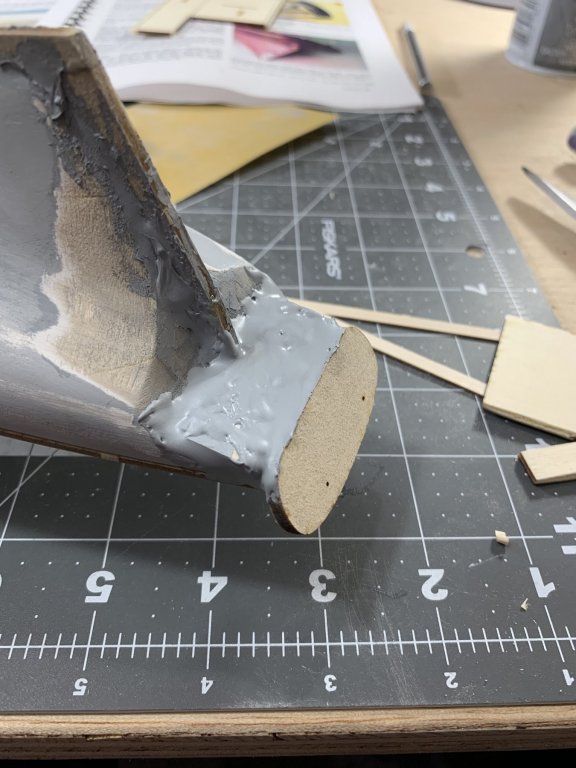
Thanks @Tom E! For sure, the entire kit is well done. And I went with a Minwax Cherry stain (actually left over from when I stained the case for the combined USS Monitor and CSS Virginia). Here are some photos of how the stain actually went. Unfortunately when I glued the deck on some glue was pushed through a hole near the carronade rail resulting in a bit of a blemish on the deck. I'll need to cover it with some rope or something when it comes time to rig. I also discovered another mistake on my part when I went to glue the transom onto the hull. I had over sanded the section of the hull substantially (by about 1/8" inch) which resulting in a huge valley once the transom was glued on. I decided to glue some wood material for the majority of the fill and then utilize some putty to do the rest. Bit of a big screwup on my part but I think I may have figured a way to recover from it. Immediately after gluing the transom on it was clear there wasn't enough material. The wood I used to fill most of the gap. After the putty was applied. I'll likely have to spend quite a bit of time sanding this until it looks proper again.


- 104 replies
-
- 2
-
-
- revenue cutter
- BlueJacket Shipcrafters
- (and 1 more)
-
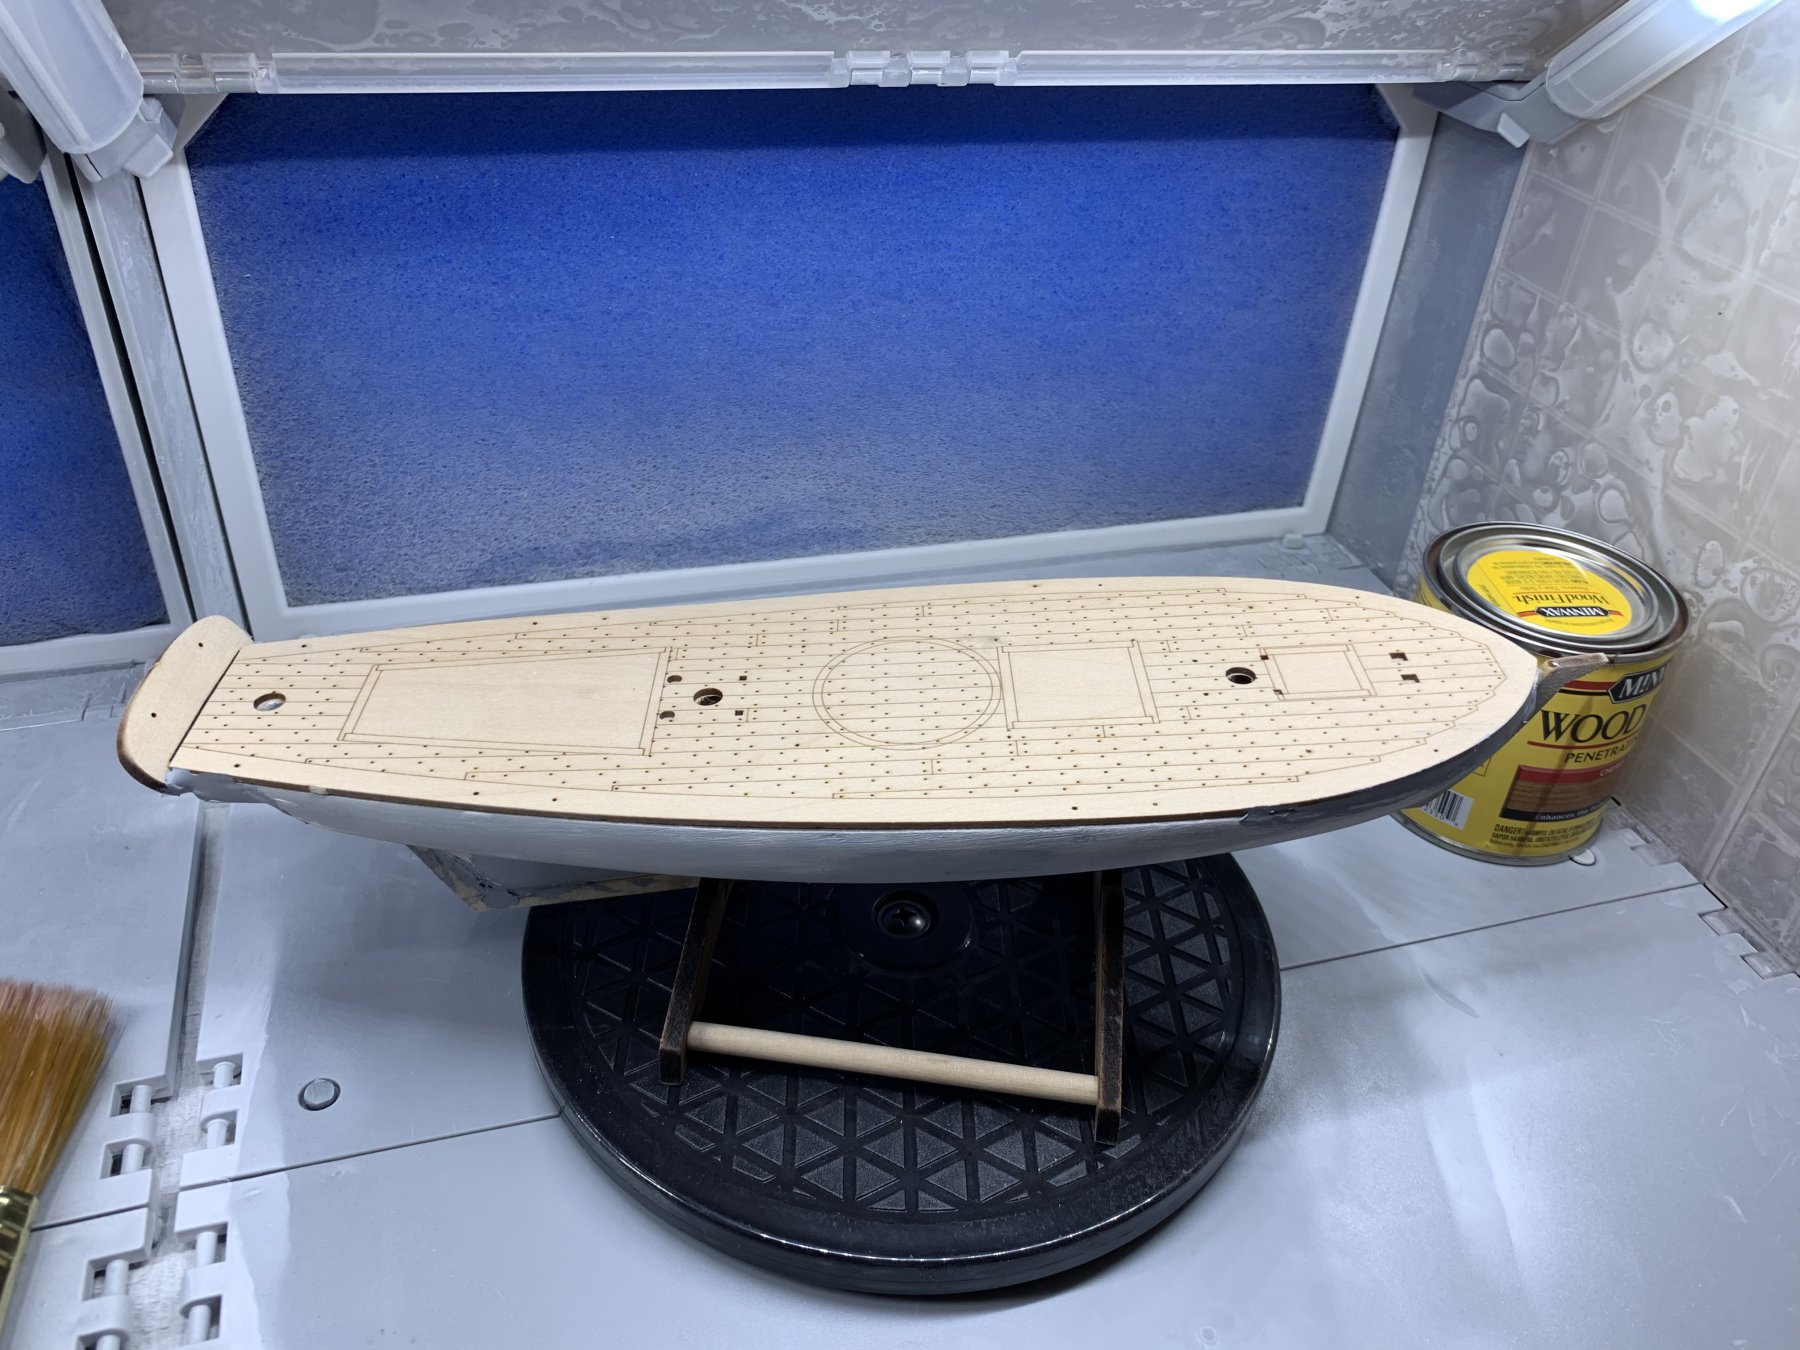
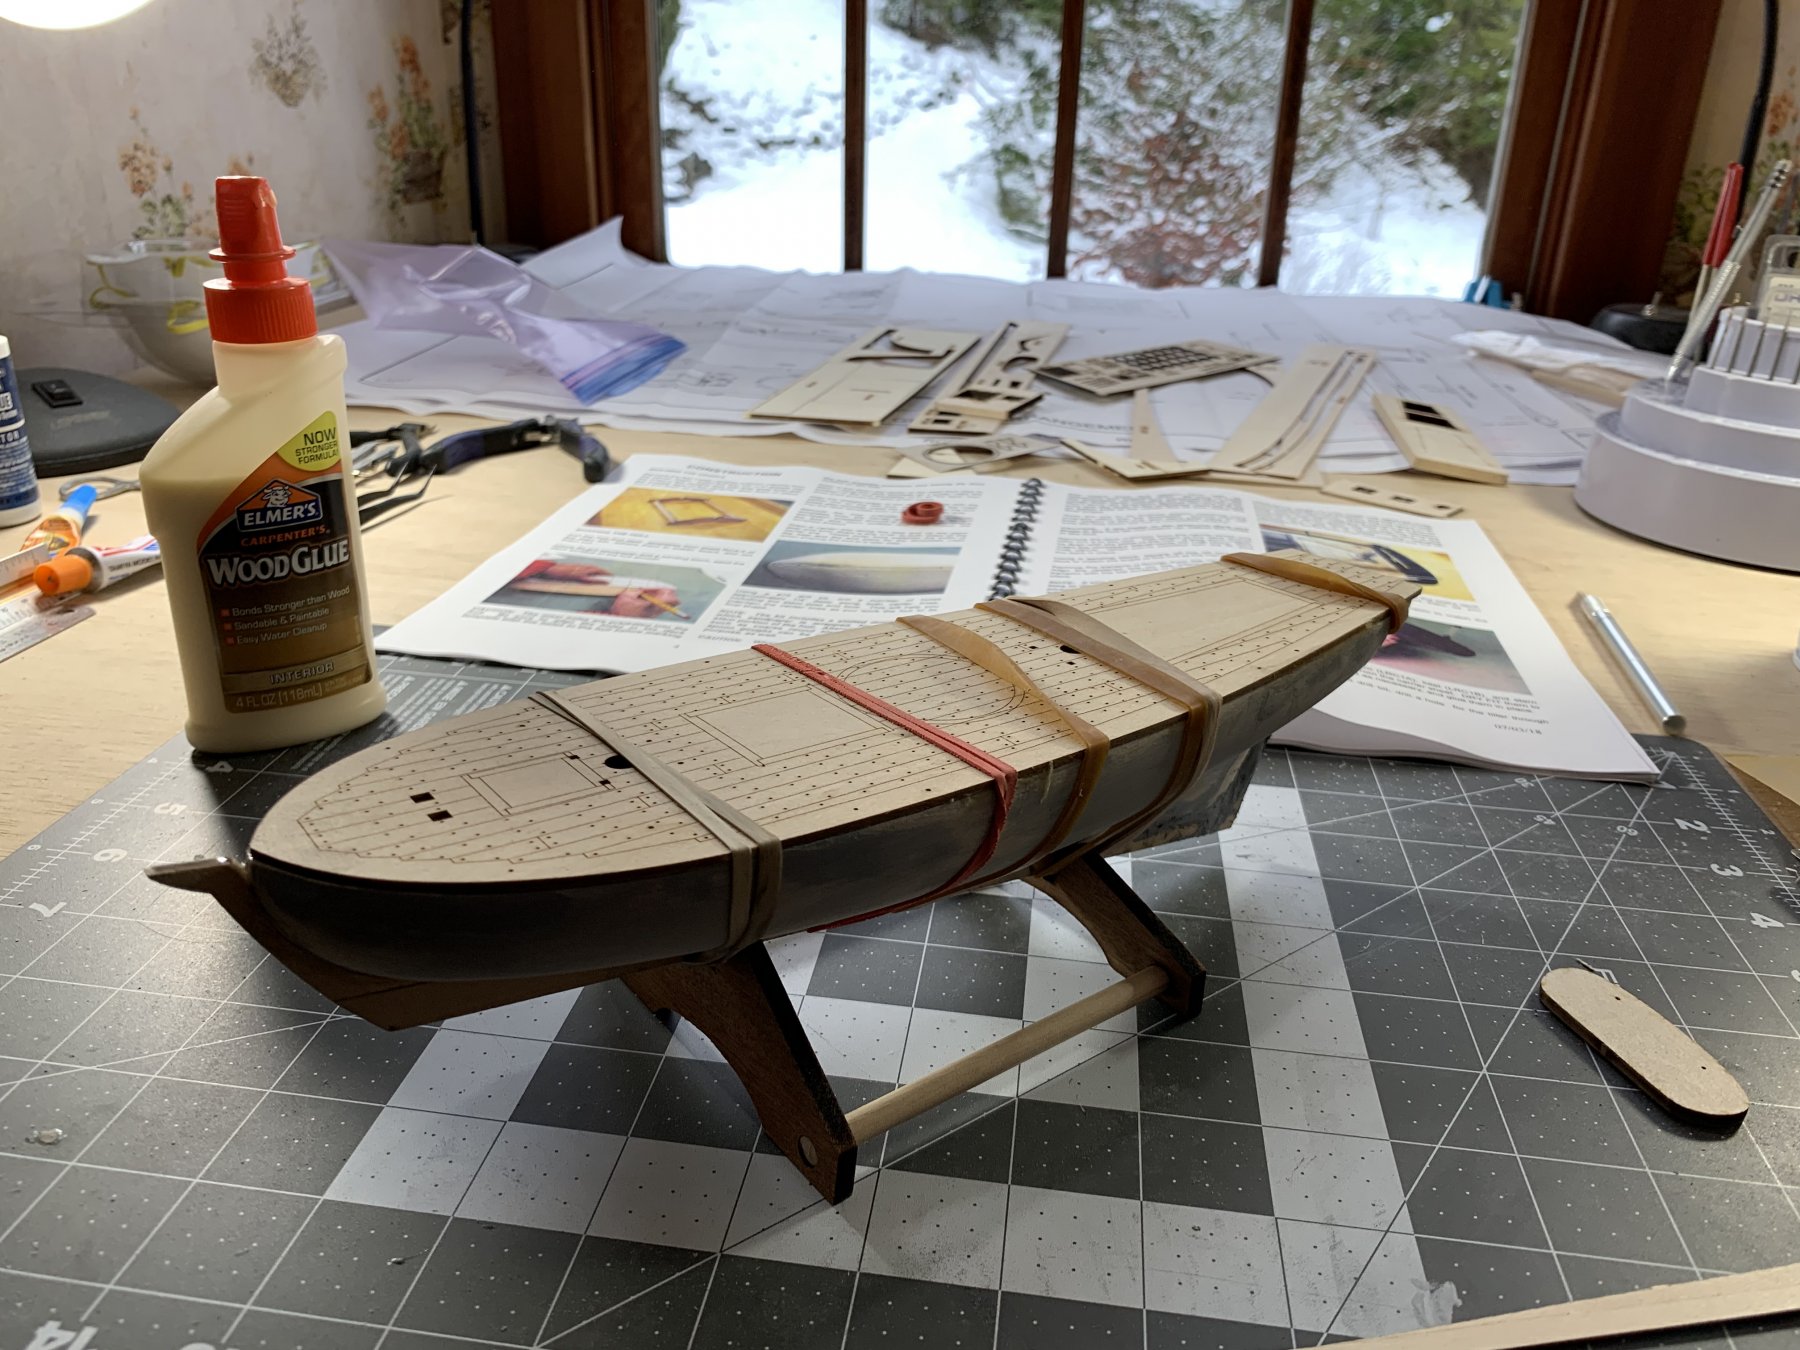
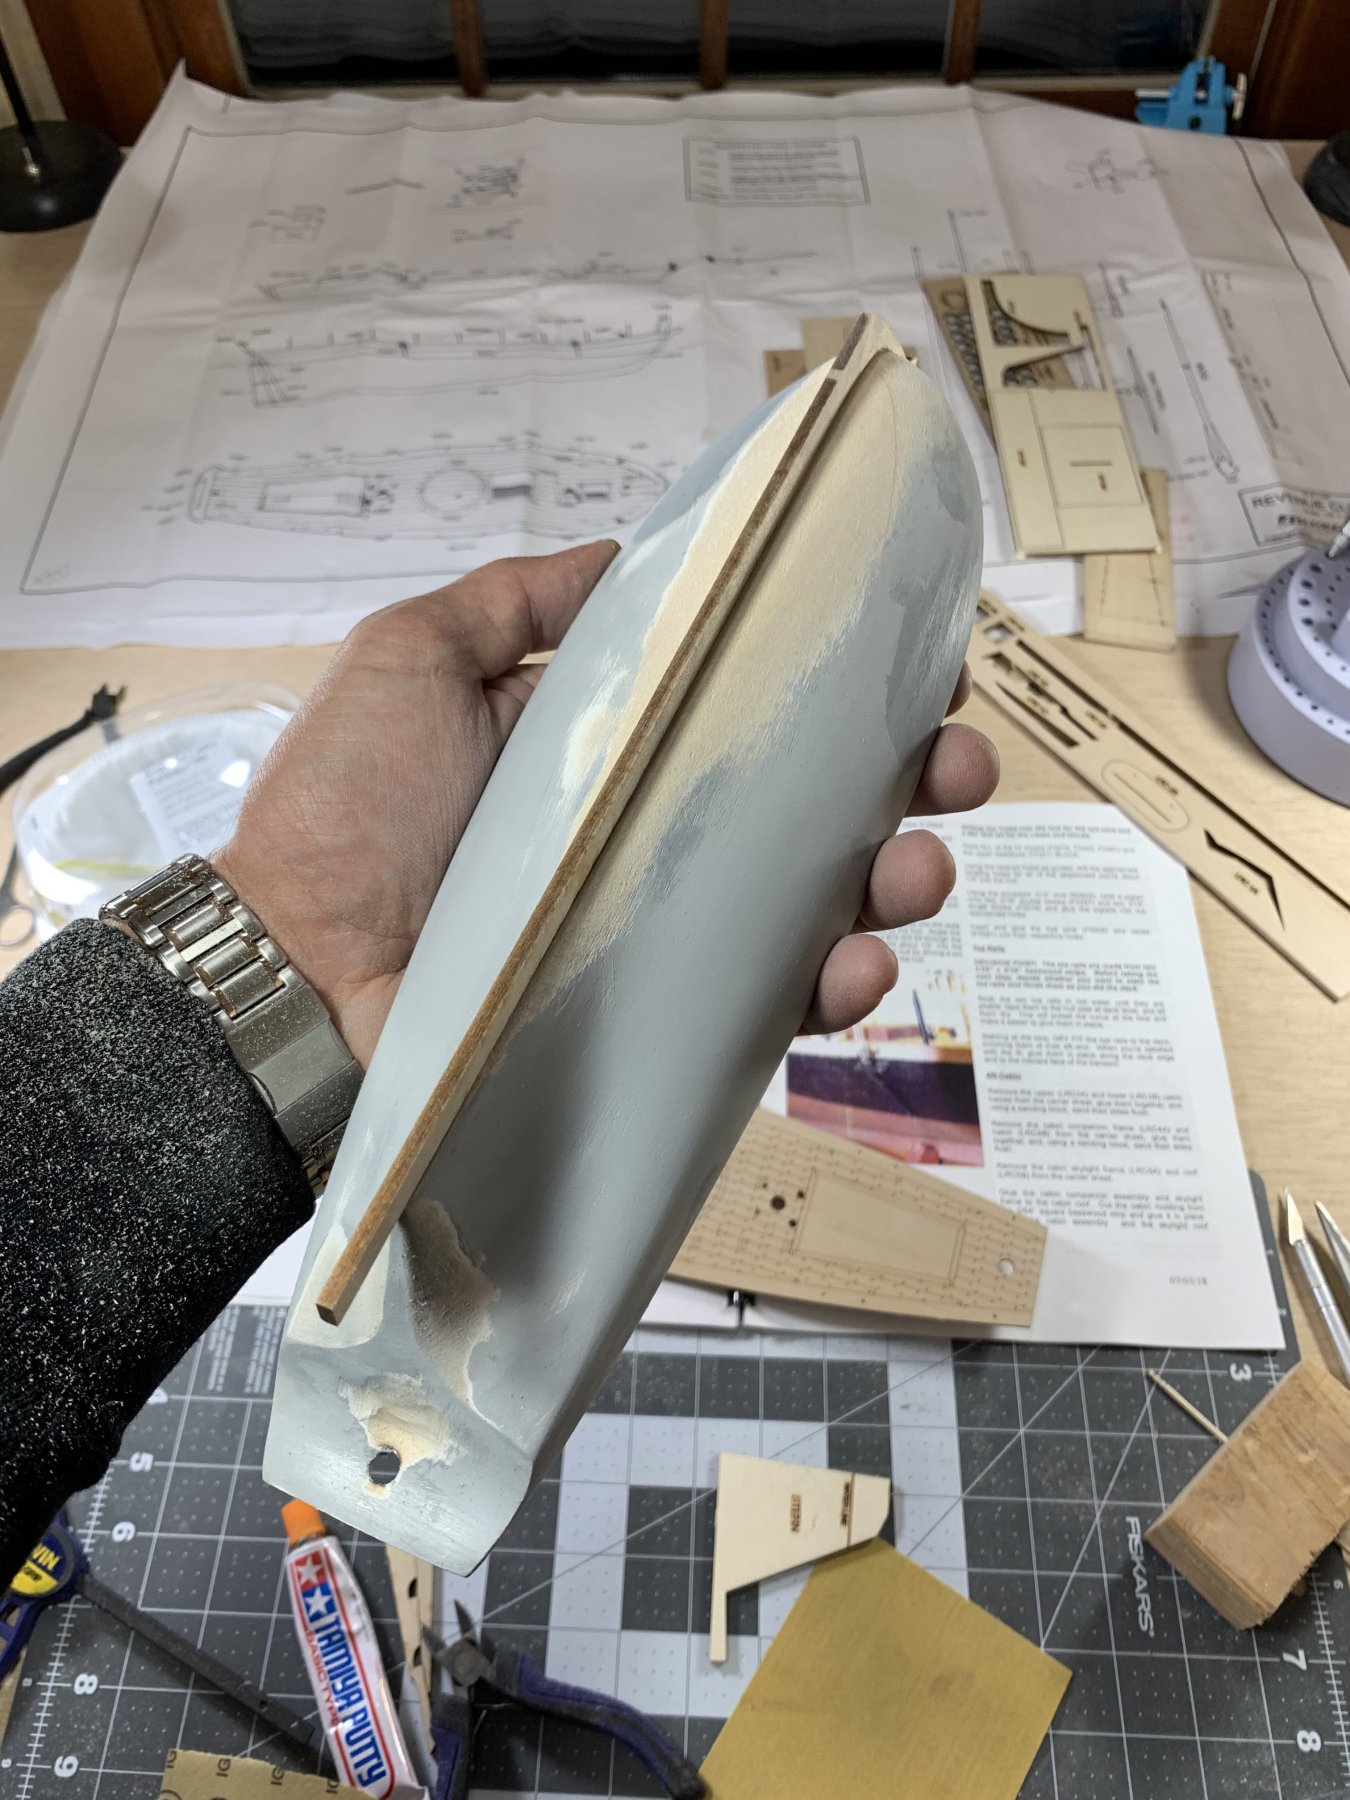
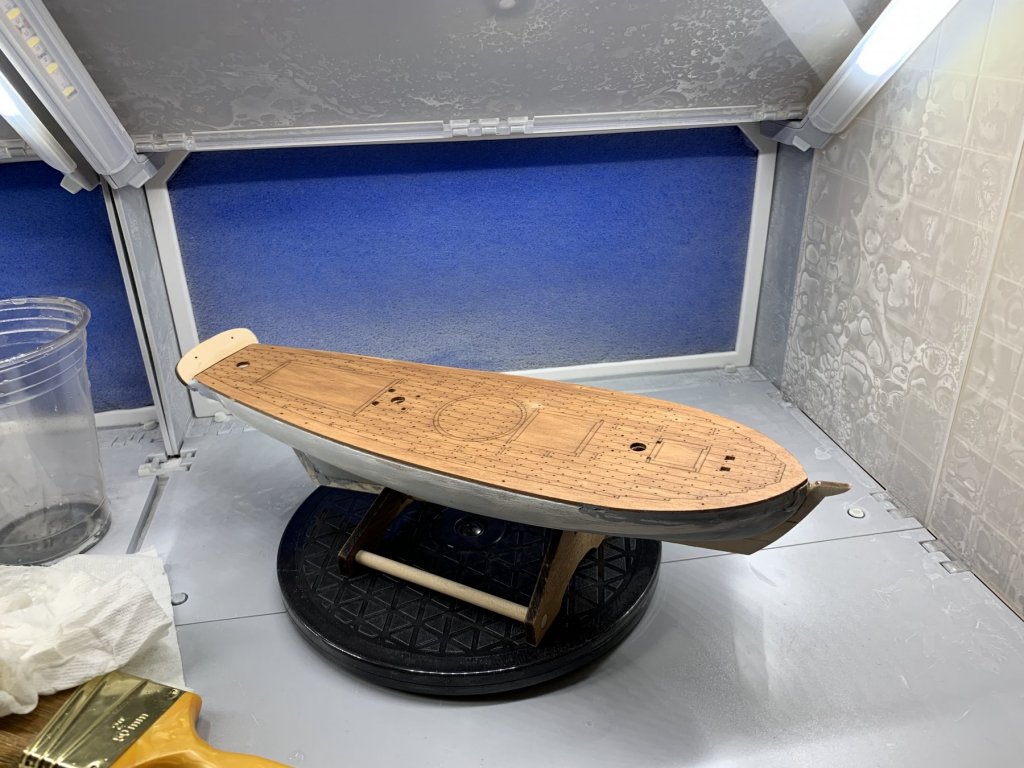
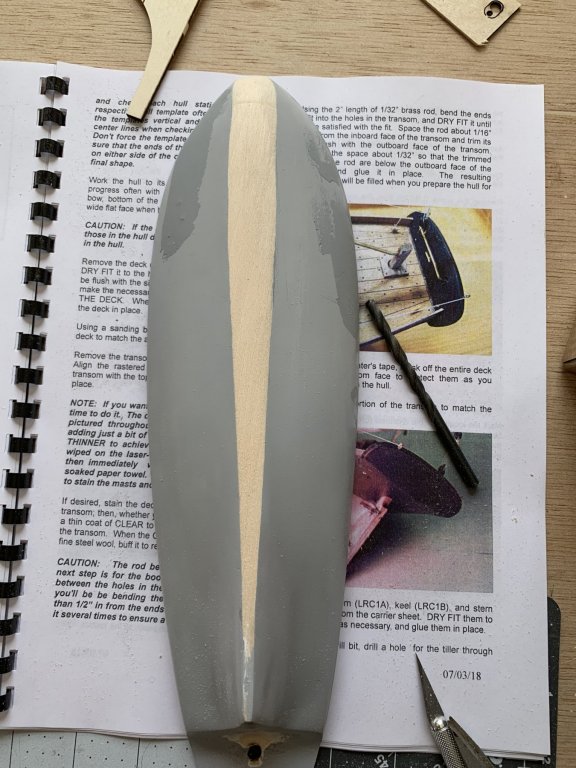
Made some more progress last night mounting the keel and gluing the deck down. I used CA glue to attach the keel without any issues. Unfortunately I did over sand the after section where the rudder post connects resulting in a bit of filler being required. I'll need to sand this and probably fill again until it is smooth and fair. For gluing the deck down I ensured the the drilled mast holes lined up with the laser cut holes in the deck and glued it down with wood glue. I chose wood glue so I could have time to fix things if there were any miss-alignments. I then used a number of rubber bands to hold it in place while the glue dried. The laser cut deck looks extremely gorgeous in person. I'll probably try and stain it this evening.


- 104 replies
-
- 3
-
-
- revenue cutter
- BlueJacket Shipcrafters
- (and 1 more)
-
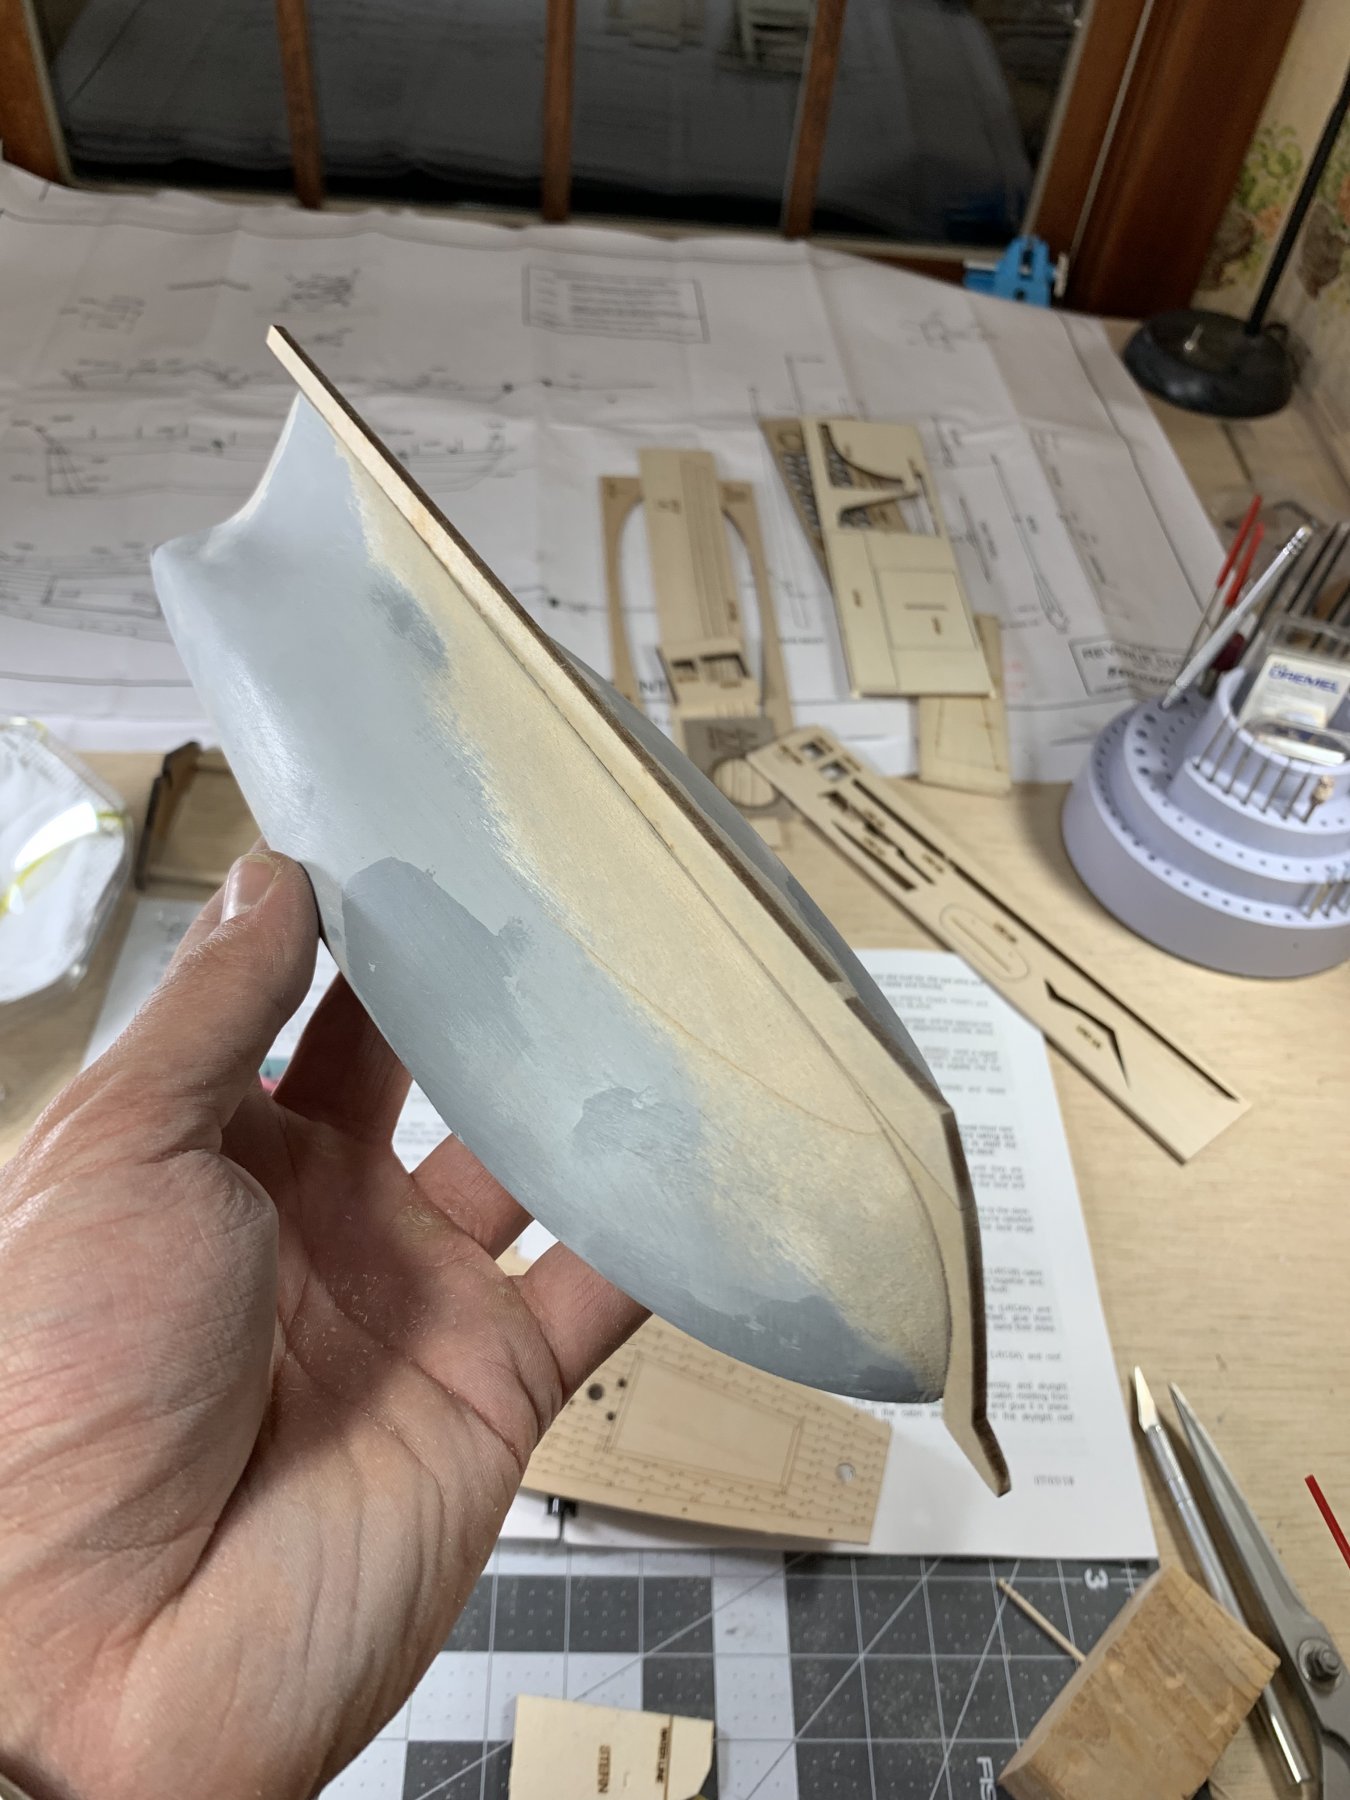
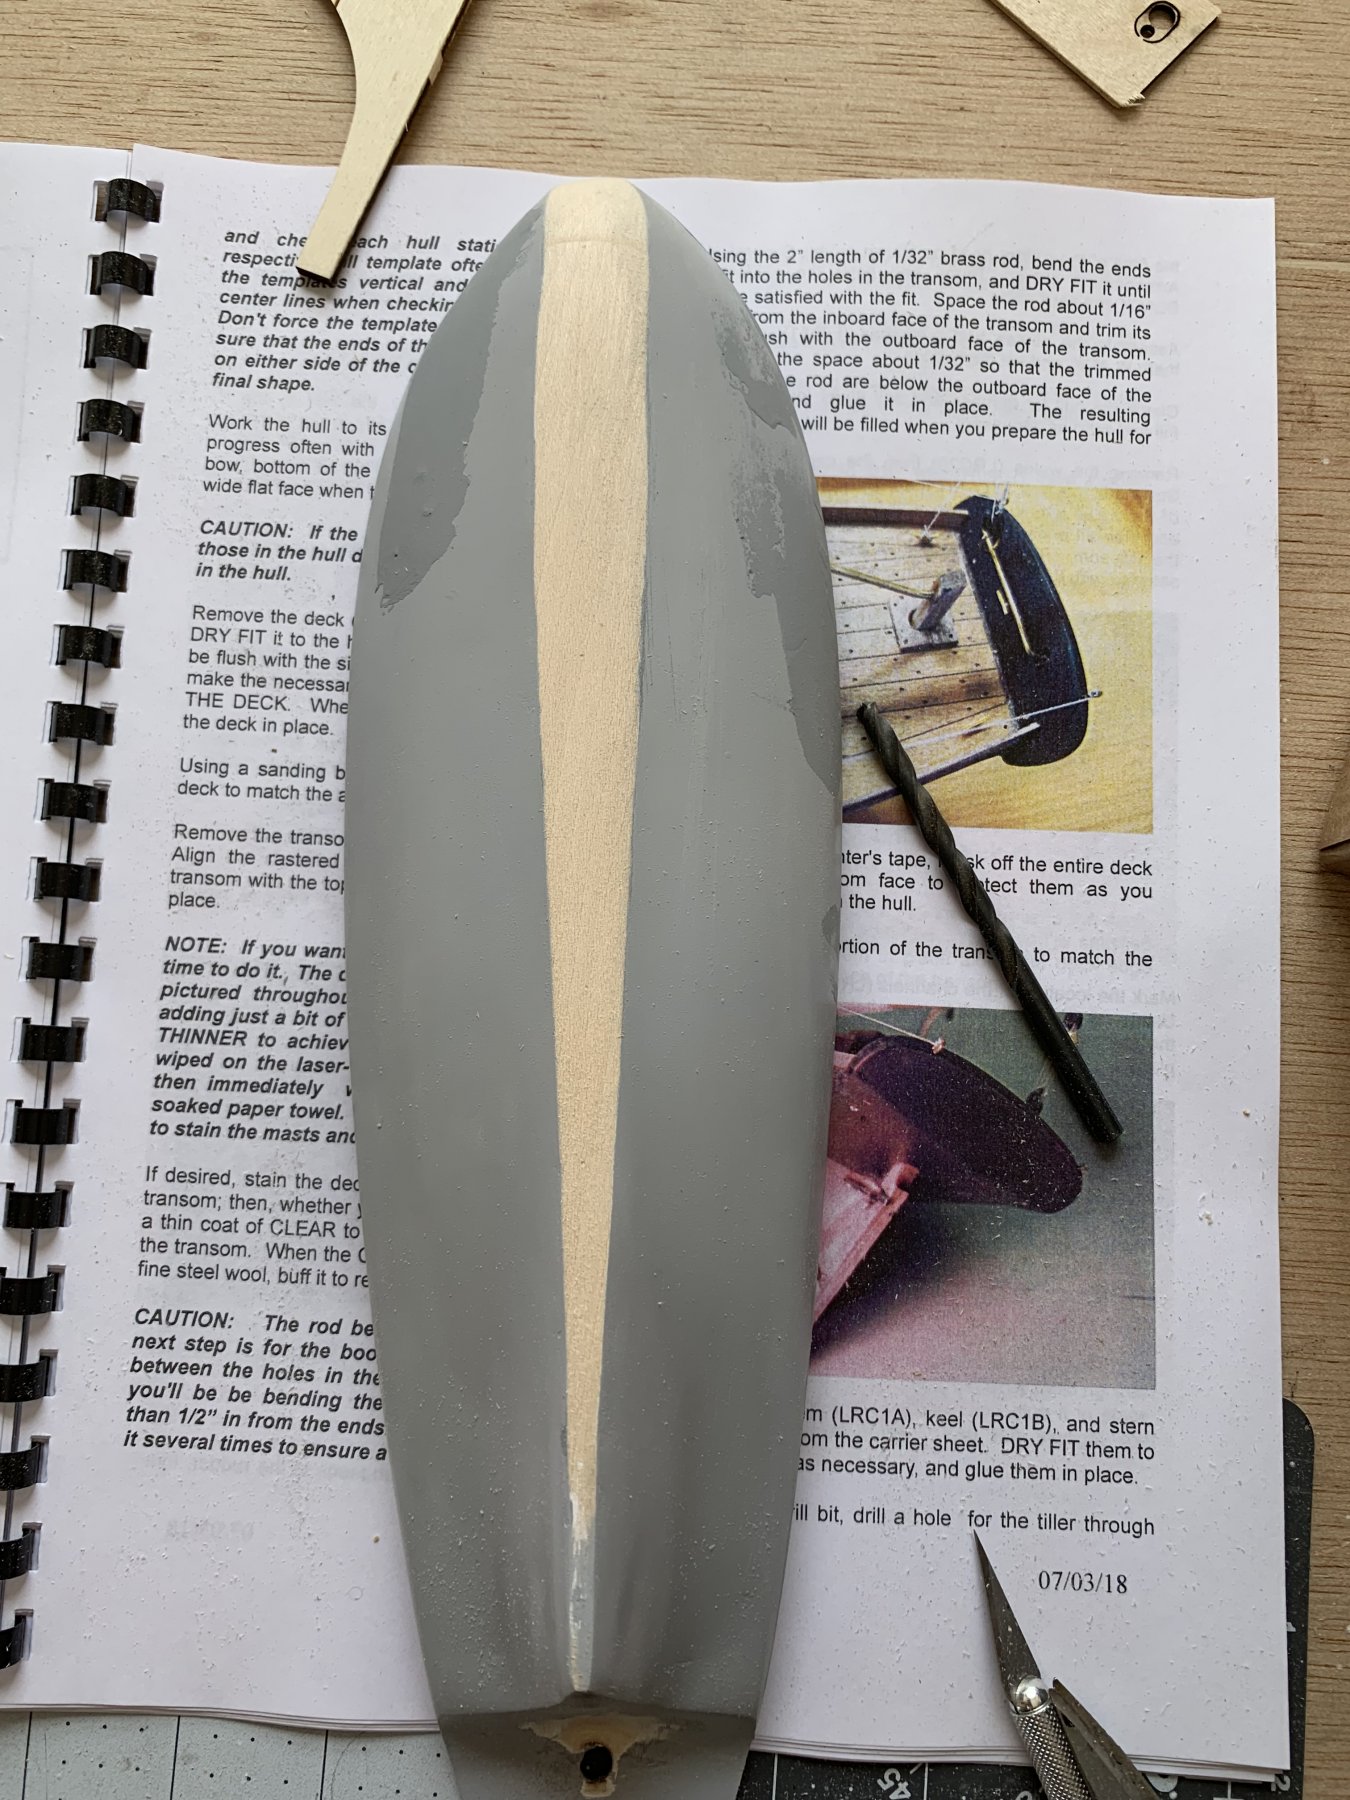
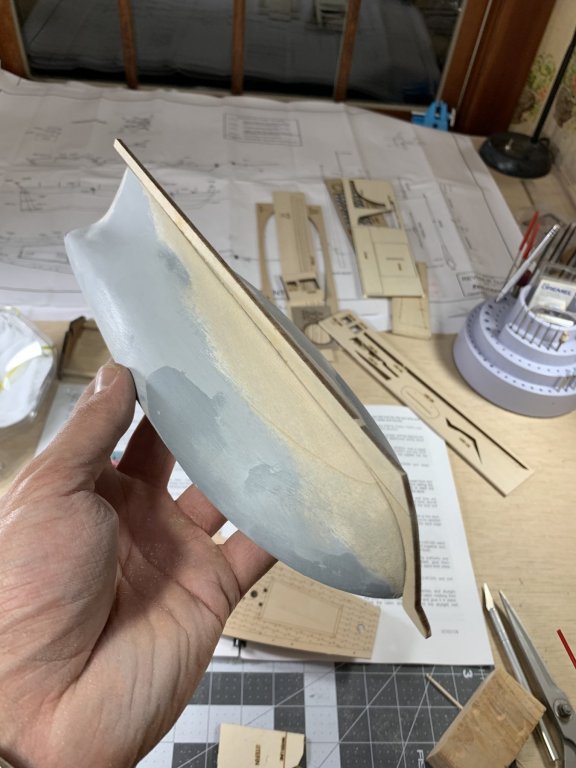
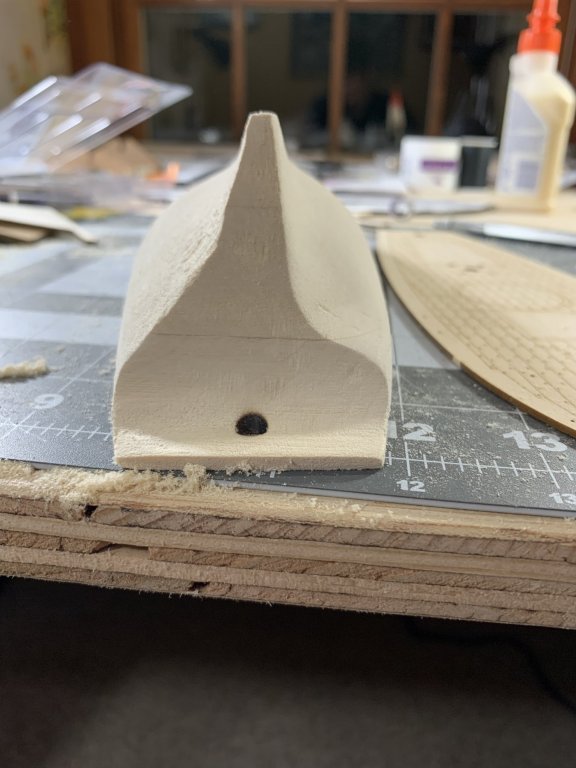
Made some more progress today fairing out the flat spot on the hull where I had previously made a mistake. Considering how forgiving wood is I doubt if I’ll ever make a model from any other medium again. Once this little bit of rework is complete I’ll be back to make progress again at full speed. Marking the proper location of the keel on the flatten bottom of the hull. I dry fit the laser cut deck with the pre-drilled mast holes to insure the proper location. The keel location properly marked. Not sure how I had gotten the hull so acymetric before. After some more shaping and sanding it’s finally starting to look more the way it should.

- 104 replies
-
- 3
-
-
- revenue cutter
- BlueJacket Shipcrafters
- (and 1 more)
-
This “Snowmageddon” in Seattle has allowed me to focus a bit this weekend on the Revenue Cutter. I wen’t to attach the keel to the hull only to realize I somehow misshaped the hull quite a bit. Fortunately I had excess material which allowed me to simply sand away more to get the proper fit between the laser cut keel and the hull. This will require a bit of work to get rid of the large flat spot on the bottom of the hull though.

- 104 replies
-
- 2
-
-
- revenue cutter
- BlueJacket Shipcrafters
- (and 1 more)
-
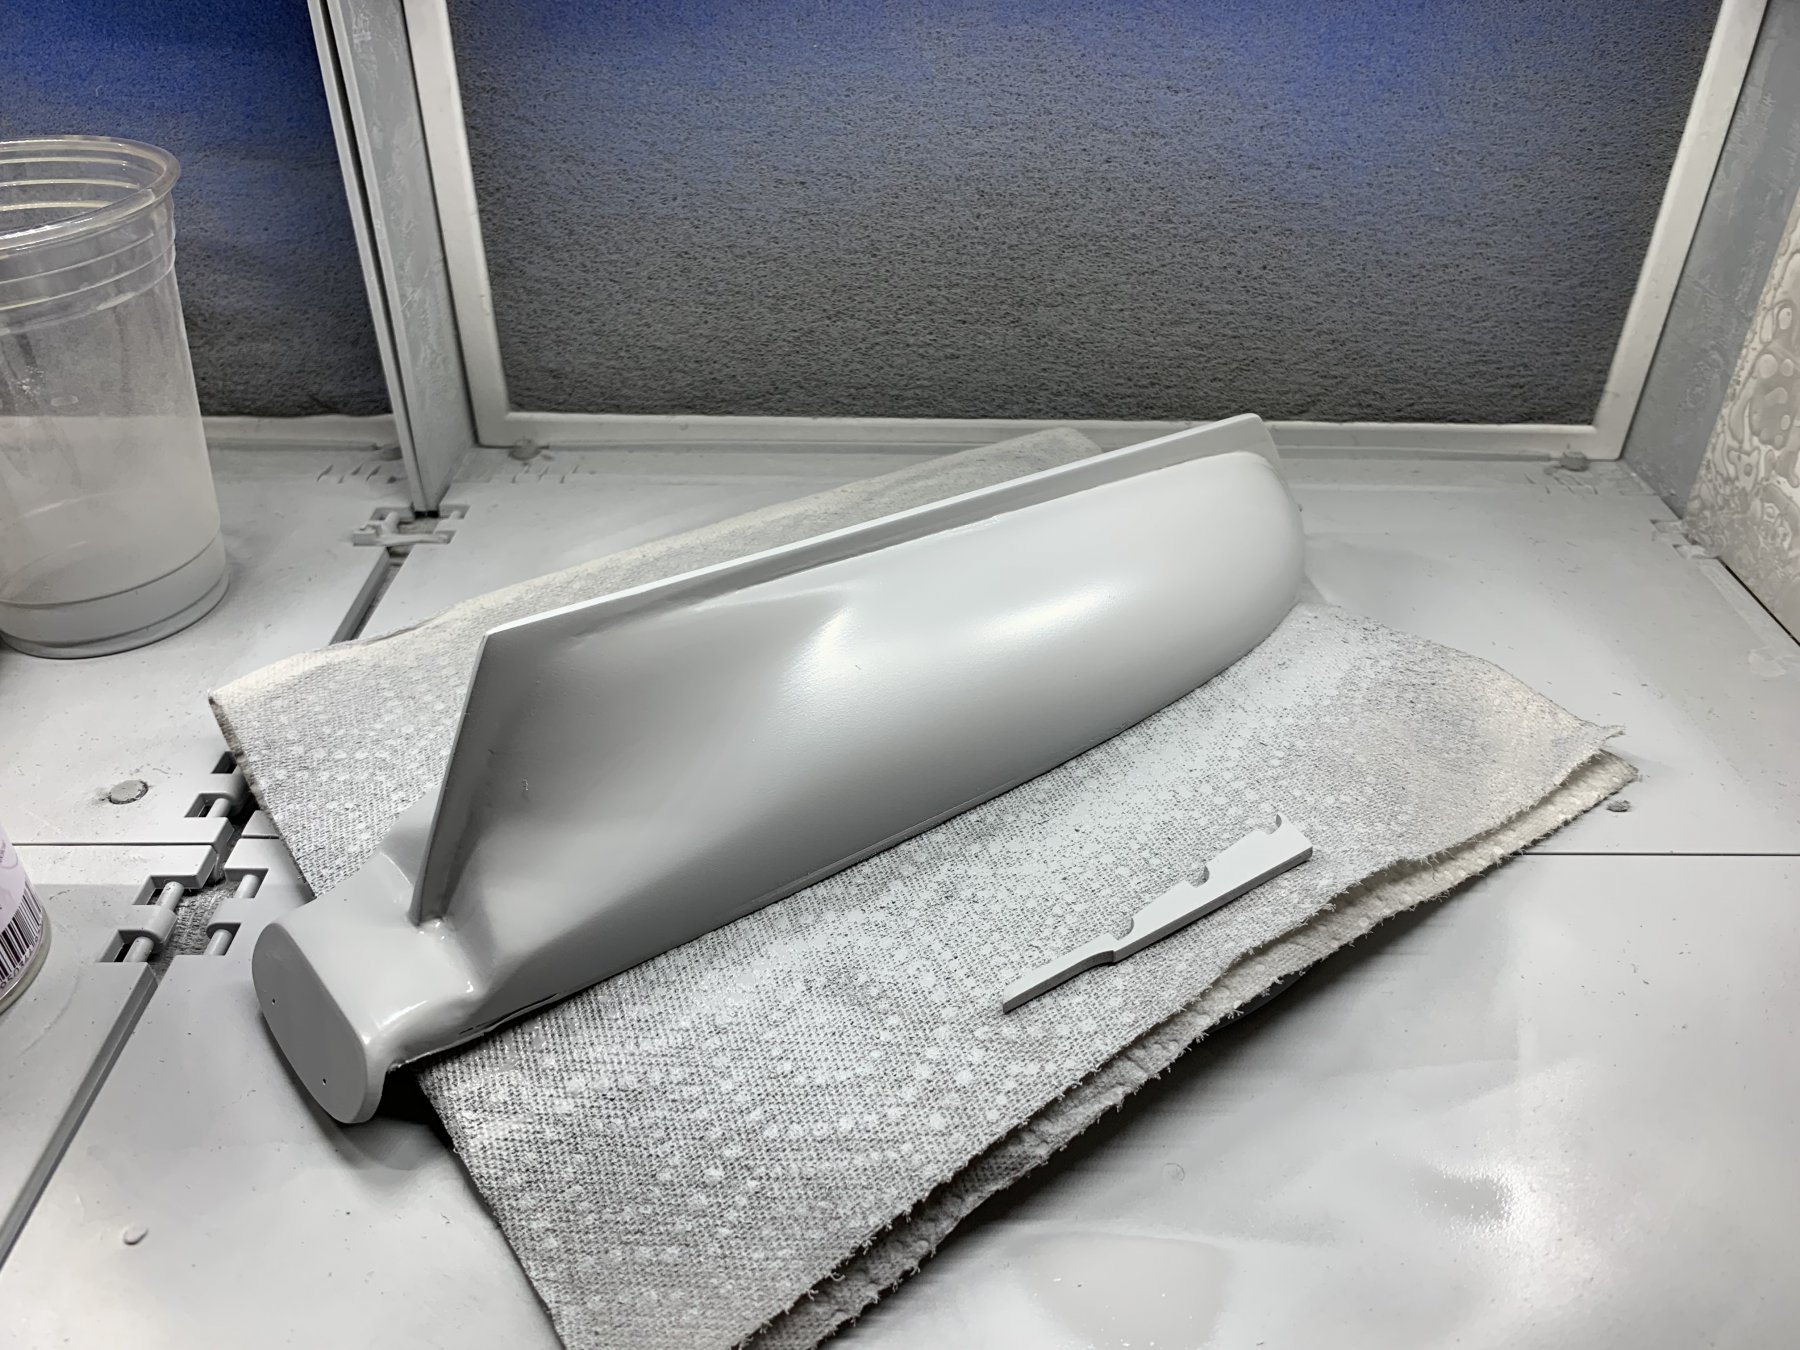
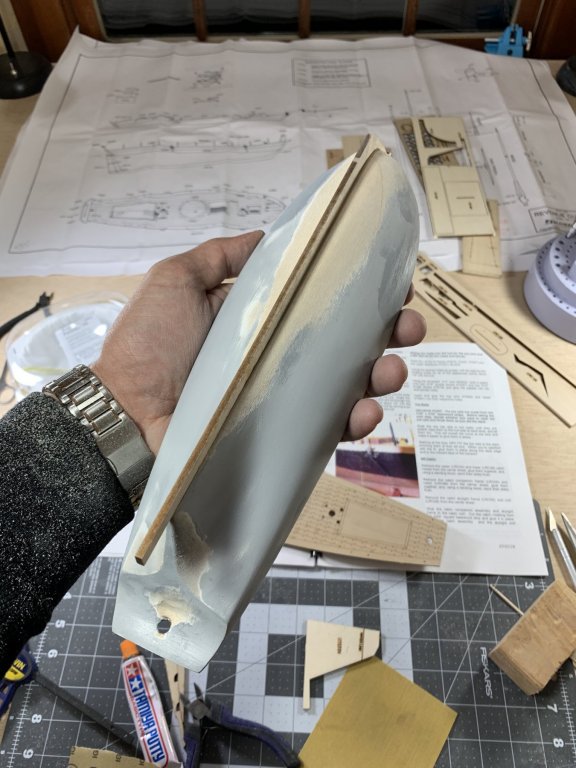
@Sea Hoss thanks! Made some more progress this evening sanding and priming. I generally prefer to use different colors of primer, as well as putty so I know how much I have sanded away. Also, I use Tamiya putty which works well. What do other people use for solid hull models?
- 104 replies
-
- 5
-
-
- revenue cutter
- BlueJacket Shipcrafters
- (and 1 more)
-
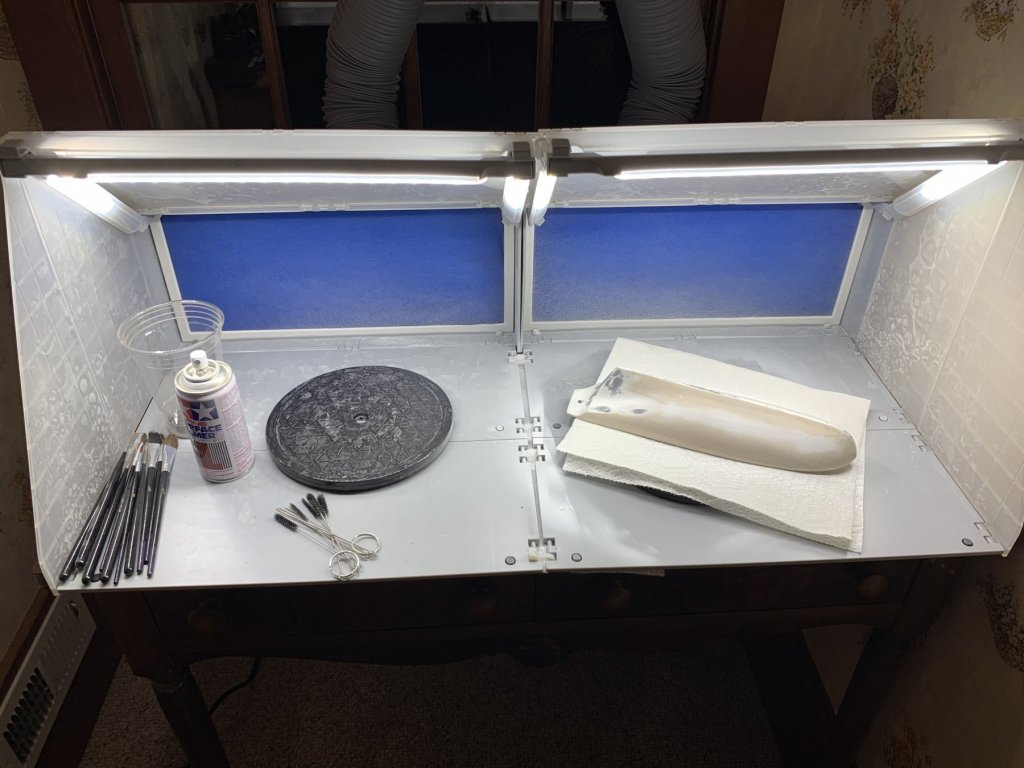
@MrBlueJacket thanks for the complement! And you are right, there was quite a bit of material that needed to be removed at the stern. The template though that came with the kit pre-cut was super helpful there. @austristan thanks! I look forward to seeing your completed photos 👍🏻 @Javlin thank you! @Eric W thank you for the all the tips. What I learned on solid hull kits on the CSS Virginia and USS Monitor was super helpful on this one. Also, I’ll definately take your advice on the skylight. I may also just cut a deeper hole in the deck to make the appearance of a large cabin - though your tip may be better. In general I didn’t actually make too much progress on the kit over the holidays. I did however put together a really nice paint booth and just made general improvements to my work bench. I did manage to make a few more passes sanding the hull as well as priming and applying putty to any pit marks go get the hull as smooth as possible. Making slow progress!

- 104 replies
-
- 2
-
-
- revenue cutter
- BlueJacket Shipcrafters
- (and 1 more)
-
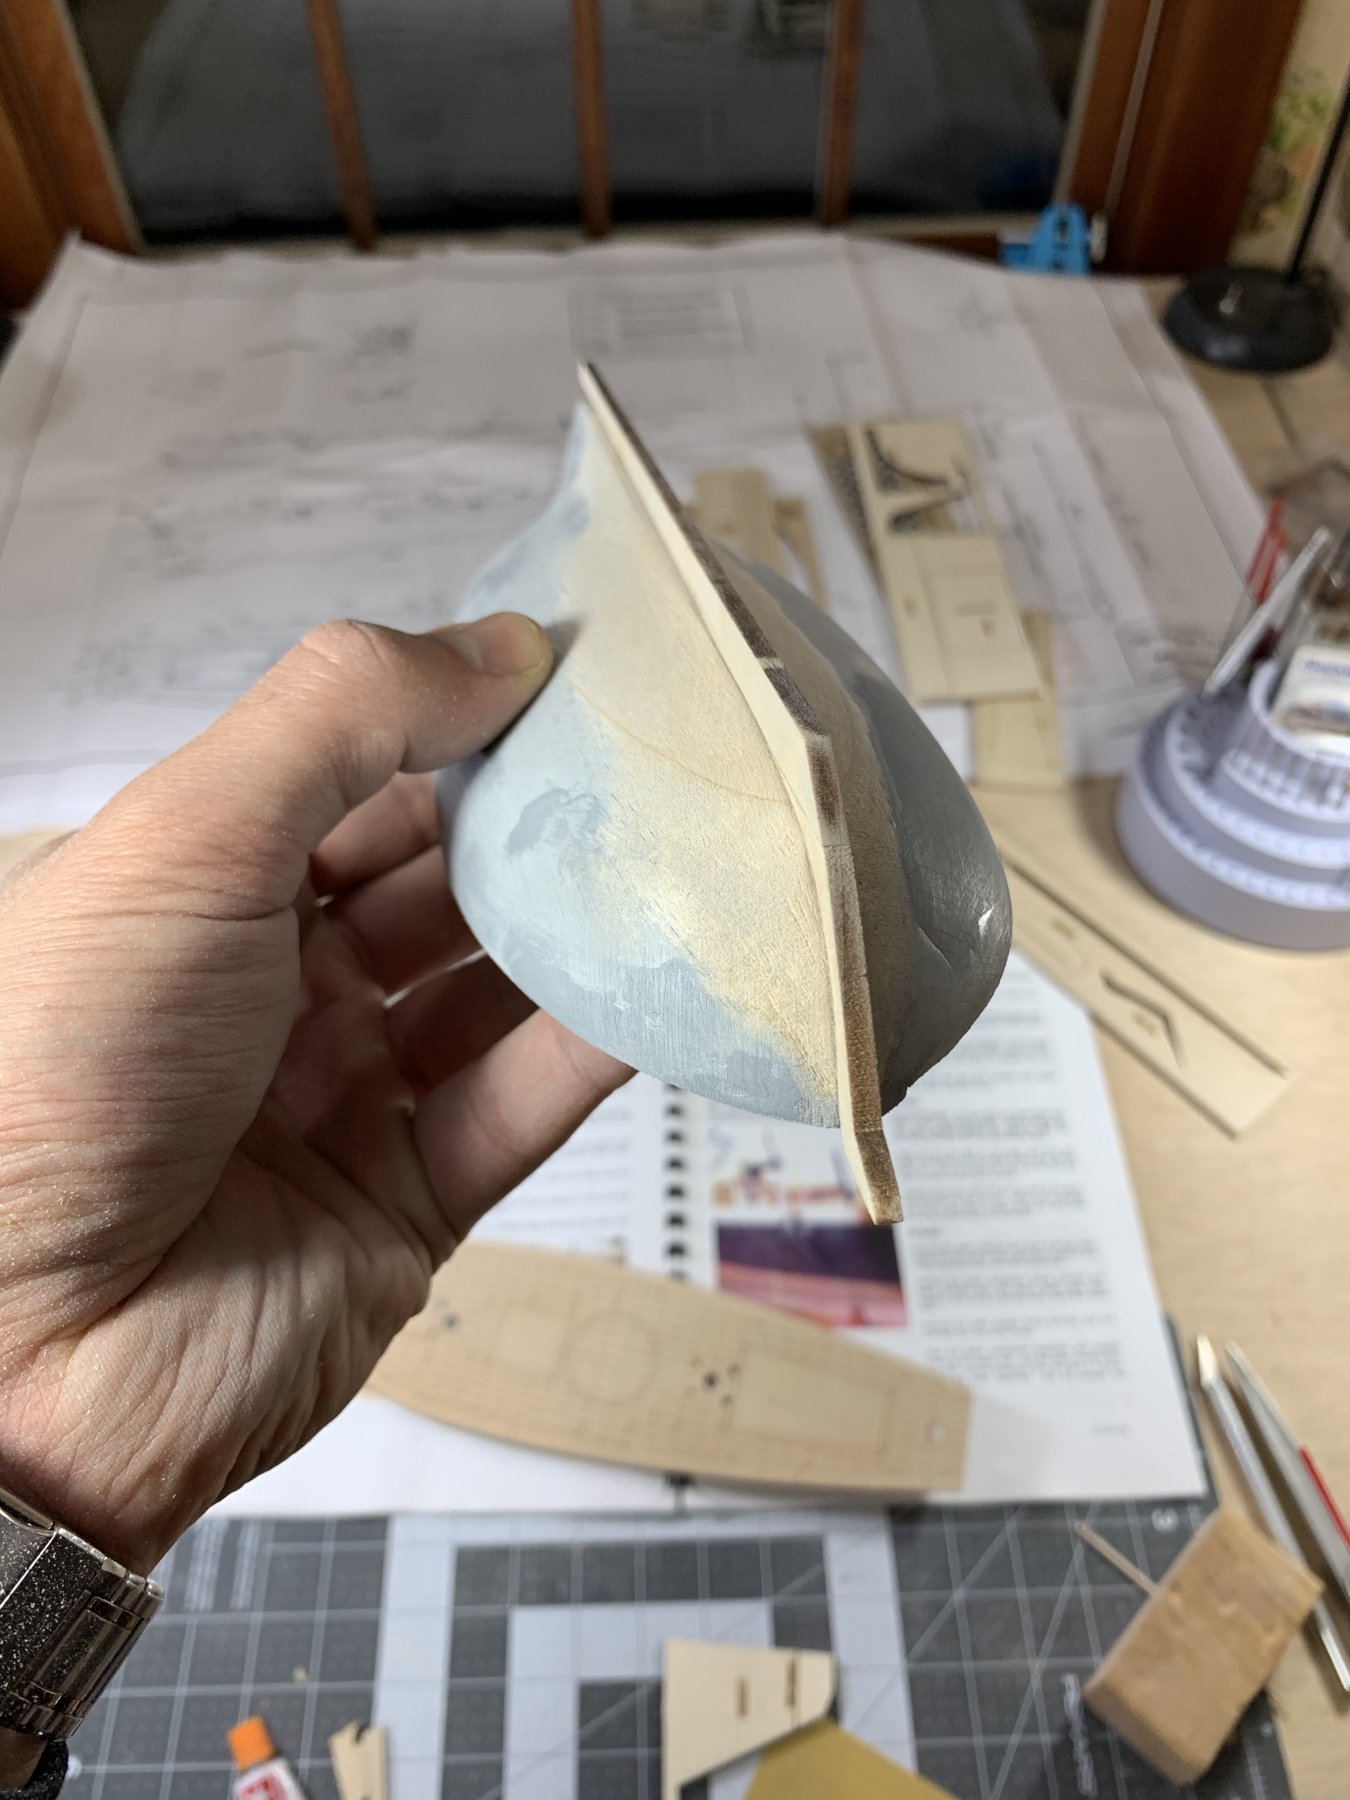
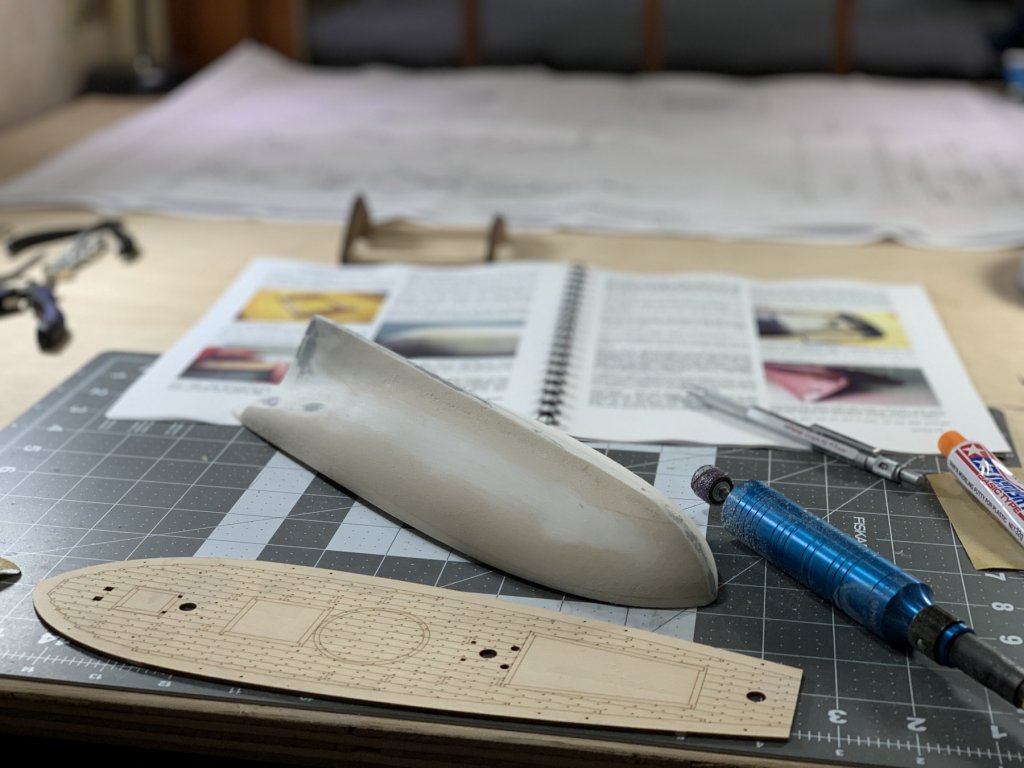
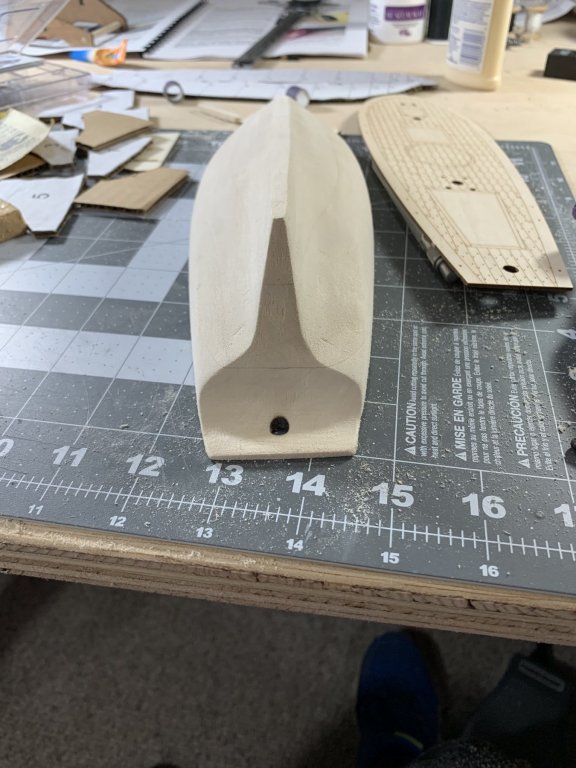
So I spent a little time this evening carving the hull. Using the rotary tool I carved the stern area to match the template. Quite a bit of material had to be removed but it didn’t take too long. I was a little nervous though about taking too much away. Next was continued hull carving. I shaped one side first just for reference. I then carved the other side and sanding by hand for a while. I also used the laser cut deck as a template. I’ll probably paint a layer of primer to help clear up any rough patches.


- 104 replies
-
- 7
-
-
- revenue cutter
- BlueJacket Shipcrafters
- (and 1 more)
-
Also, there are two other build logs of this model by @Eric W and @austristan. I would greatly appreciate any tips or pointers they have on building the Revenue Cutter.
- 104 replies
-
- 1
-
-
- revenue cutter
- BlueJacket Shipcrafters
- (and 1 more)