sjanicki
-
Posts
227 -
Joined
-
Last visited
Content Type
Profiles
Forums
Gallery
Events
Everything posted by sjanicki
-
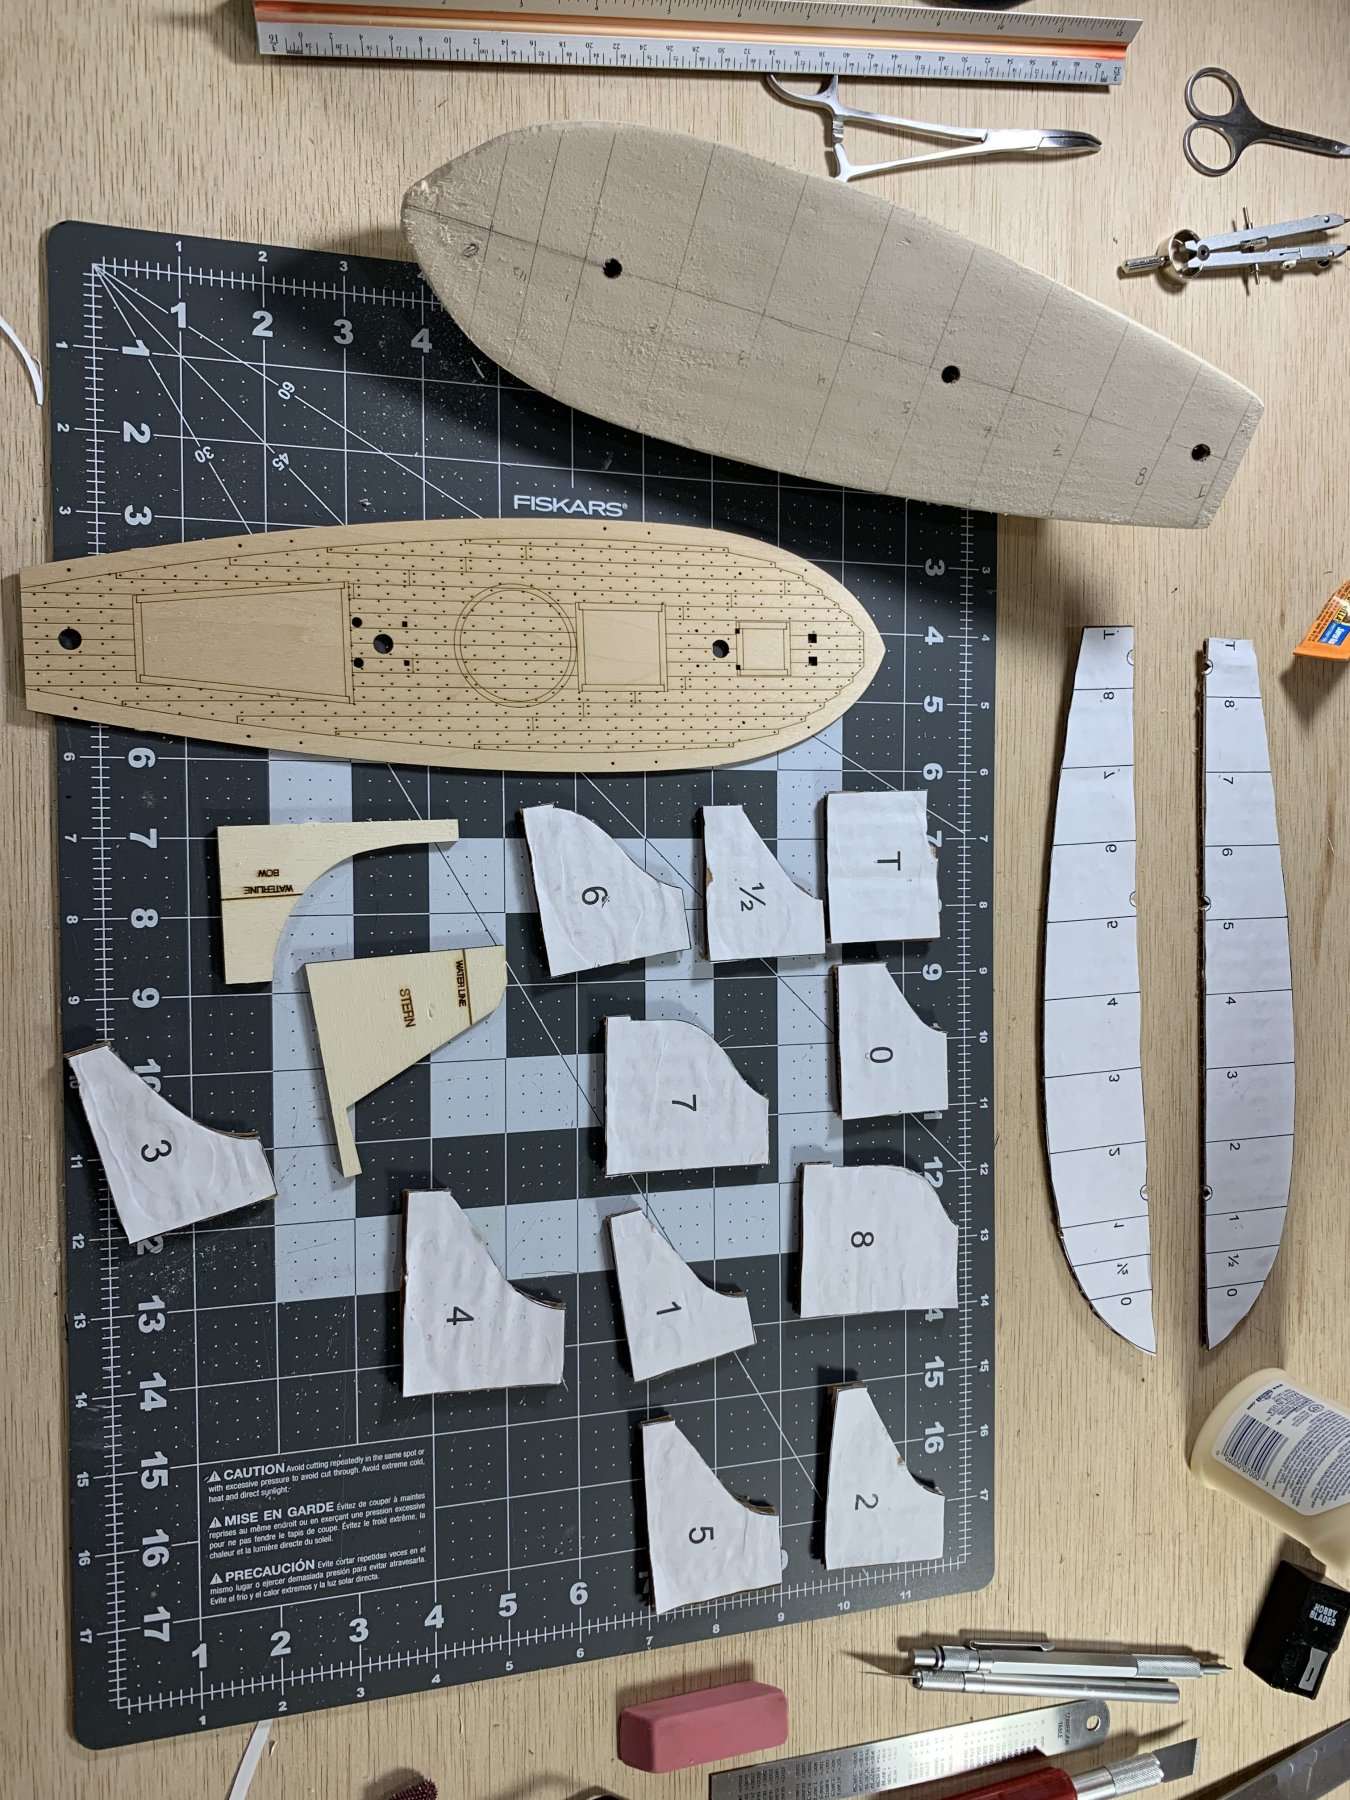
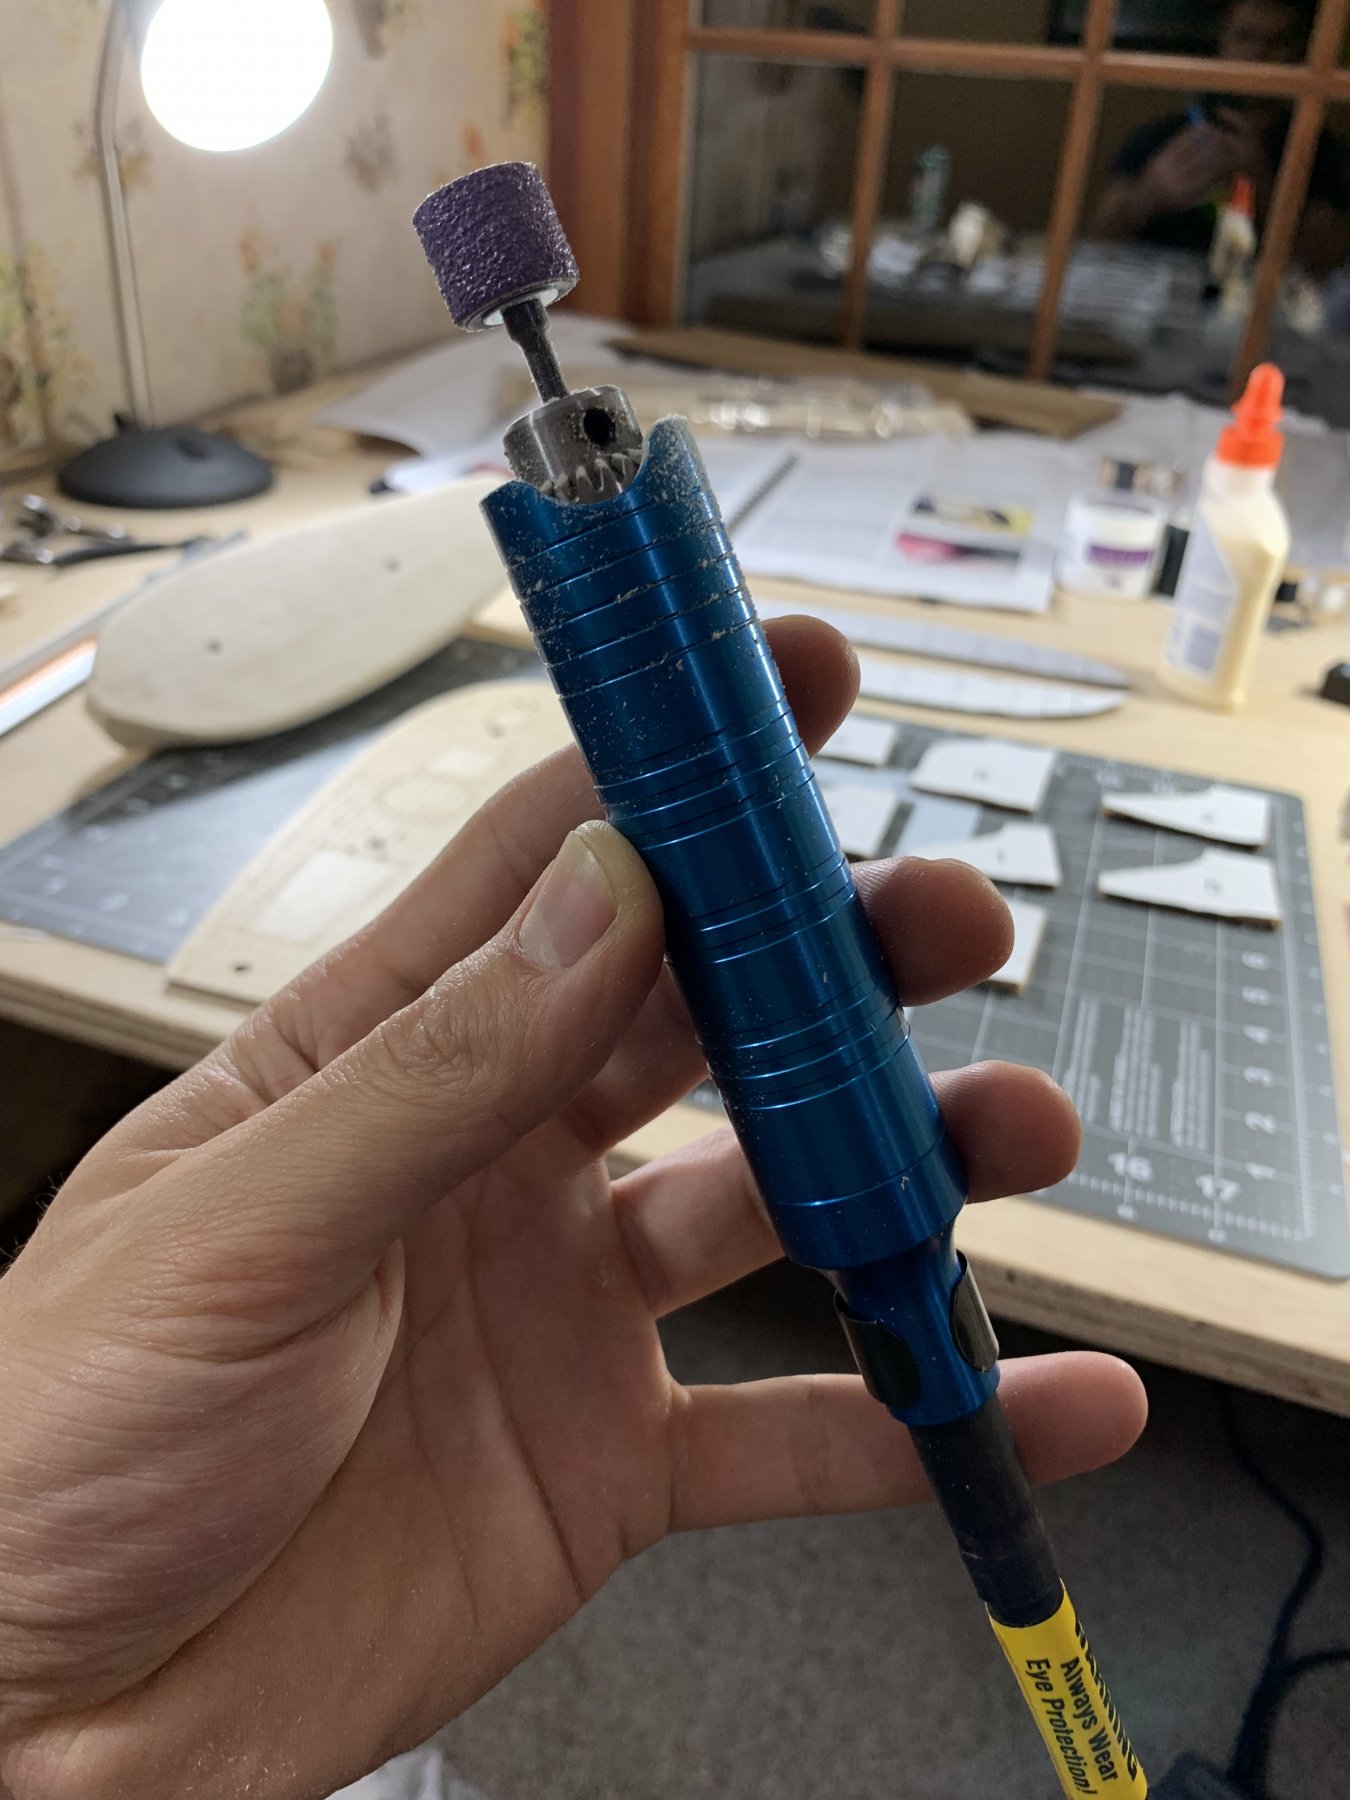
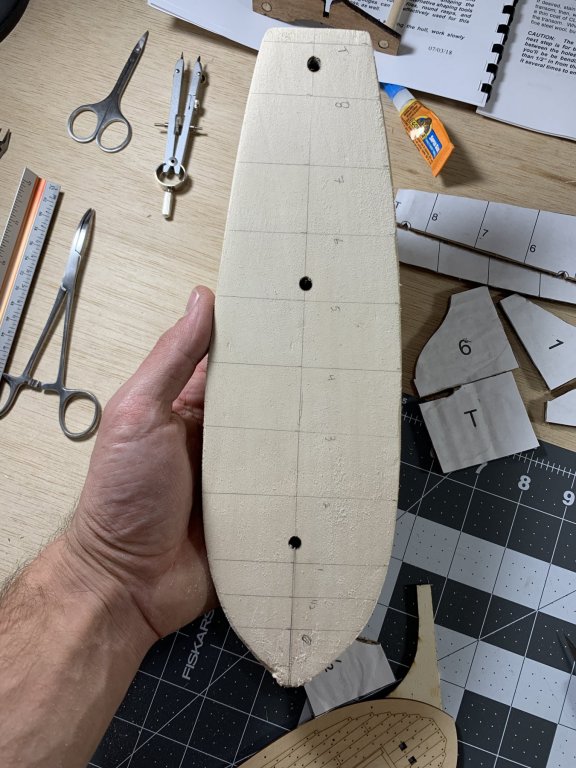
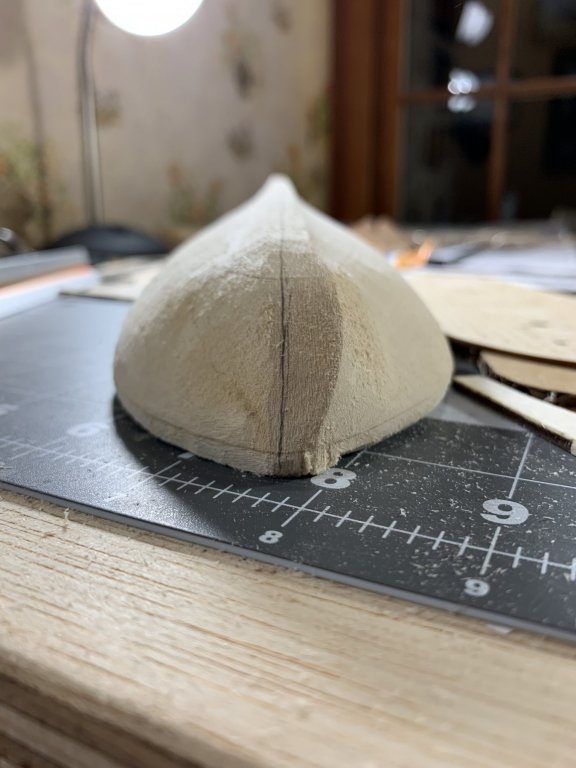
So I made a little progress this evening shaping the hull. I began with photocopying the template sheet and cutting out the hull templates. I also mirrored the sheet so I could have a right and left deck template. I then glued the templates to a piece of cardboard and cut them out with a razor. I then marked the various template locations on the hull as well as the centerline. I used the instructions suggestion to drill a small hole in various locations along the centerline to keep track of it while sanding away. I also recently acquired a fordom flexible shaft tool and it makes shaping the hull much faster. Using this tool and the templates I made a little progress on shaping part of the hull. Up next is is just more hull sanding and shaping.


- 104 replies
-
- 5
-

-
- revenue cutter
- BlueJacket Shipcrafters
- (and 1 more)
-
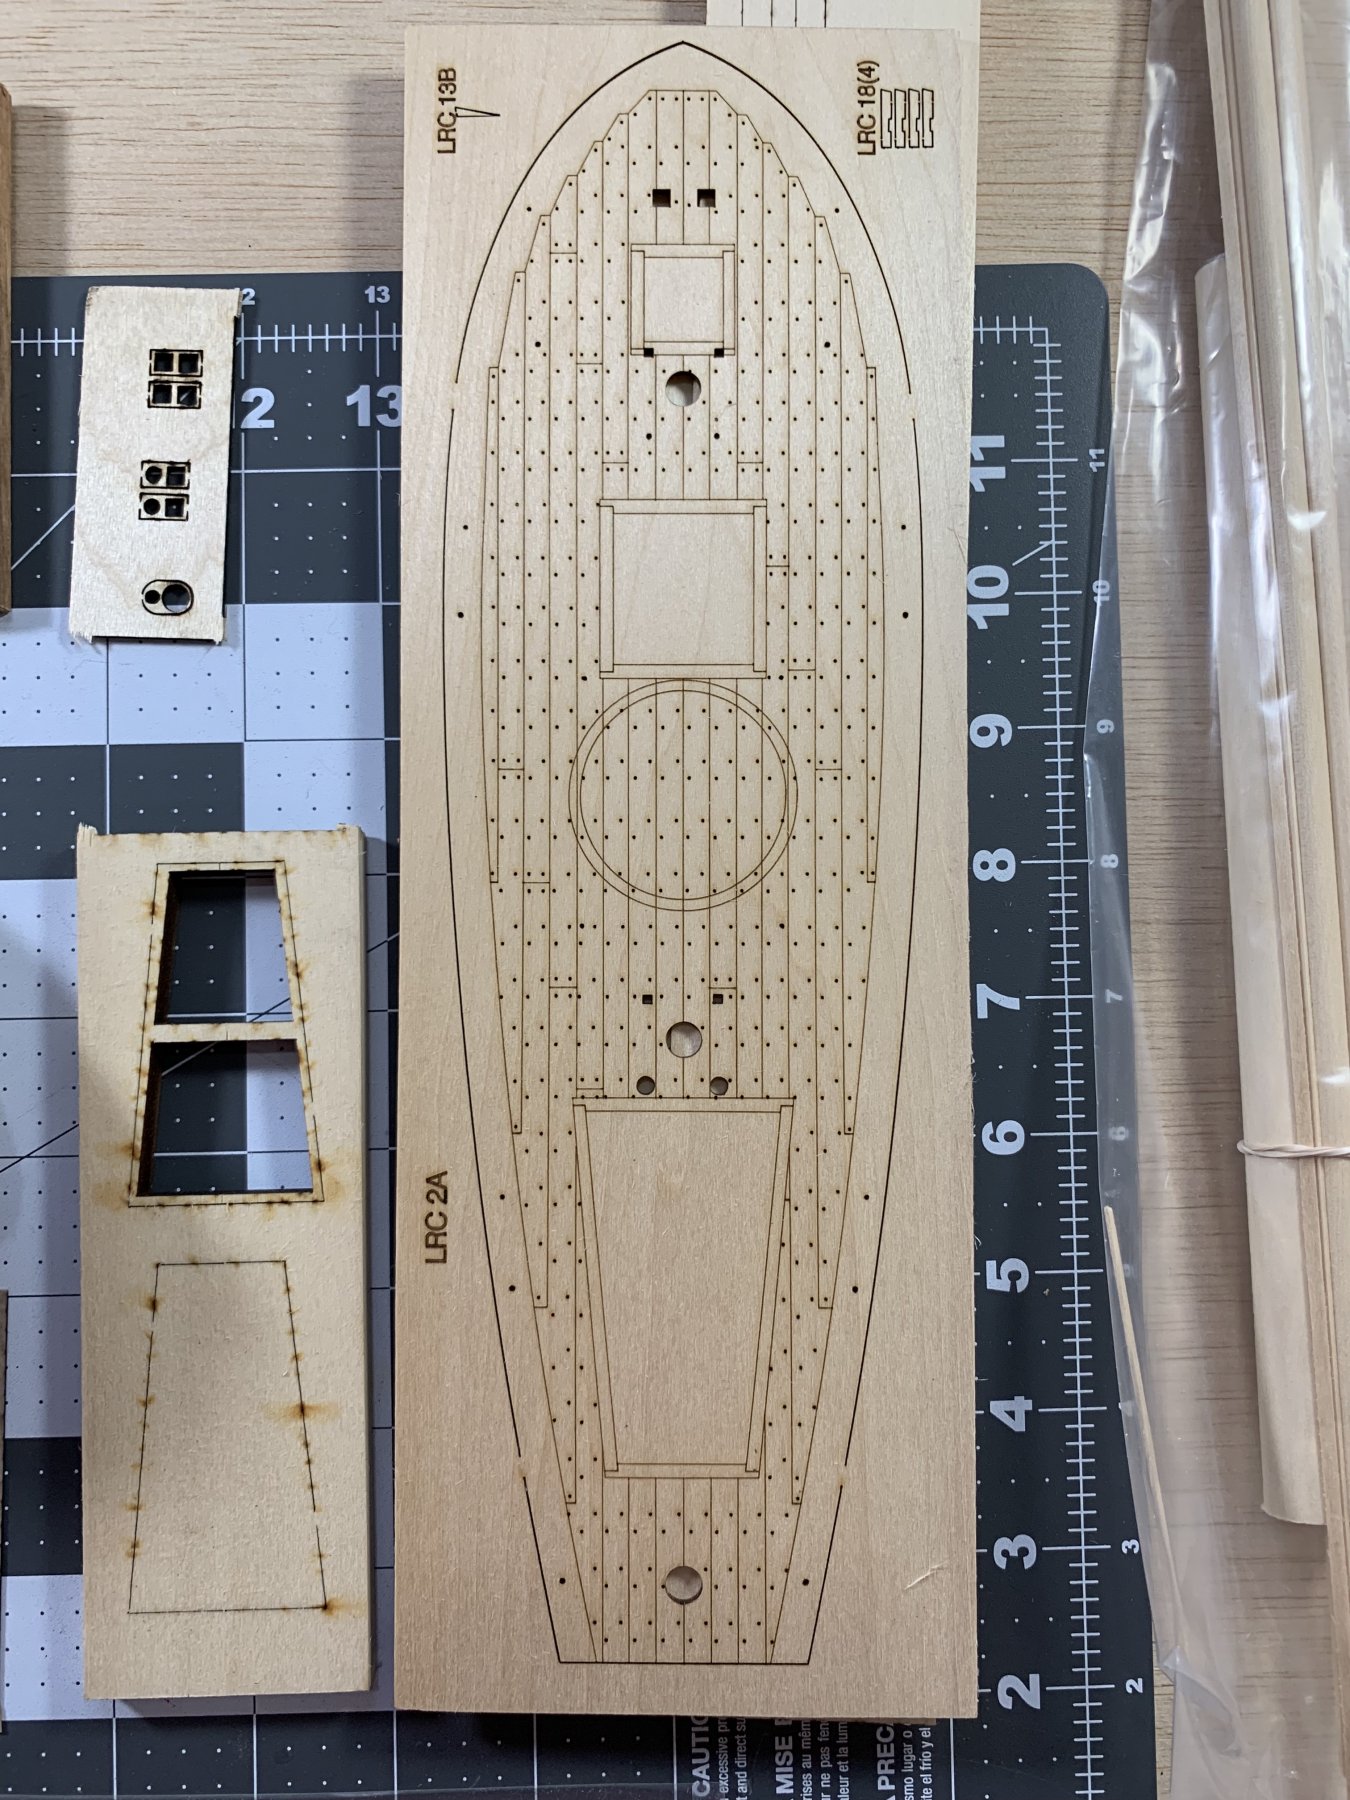
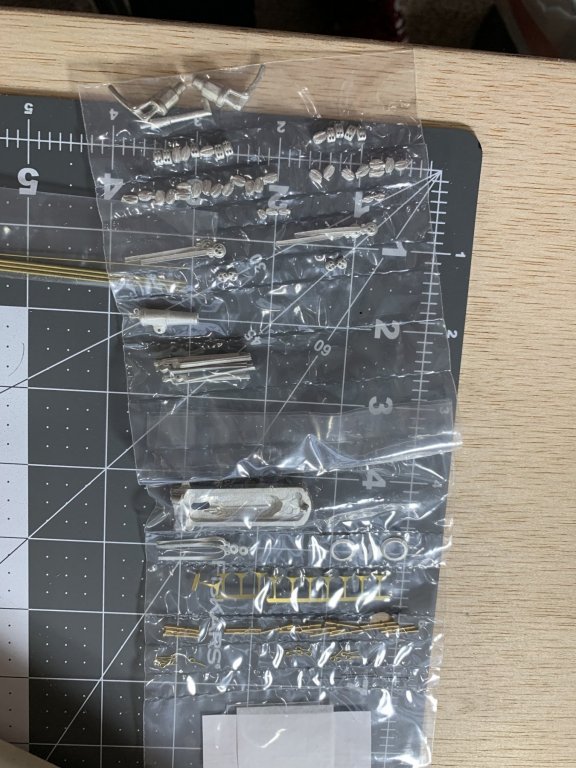
For my third wooded model ship (after the Monitor and Virginia) I decided upon the Revenue Cutter by BlueJacket. I chose it for its entry level status but also because it will introduce me to more rigging. Anyways, on to the build log! The kit comes in a nice cardboard box with a color label showing the completed model. The kit includes a number of brass and cast fittings as well as laser cut wood and a machine carved hull. A nice touch is a display cradle is included as well. The laser cut deck is really well done. Excited to start working on the various cast components!


- 104 replies
-
- 7
-
-
- revenue cutter
- BlueJacket Shipcrafters
- (and 1 more)
-
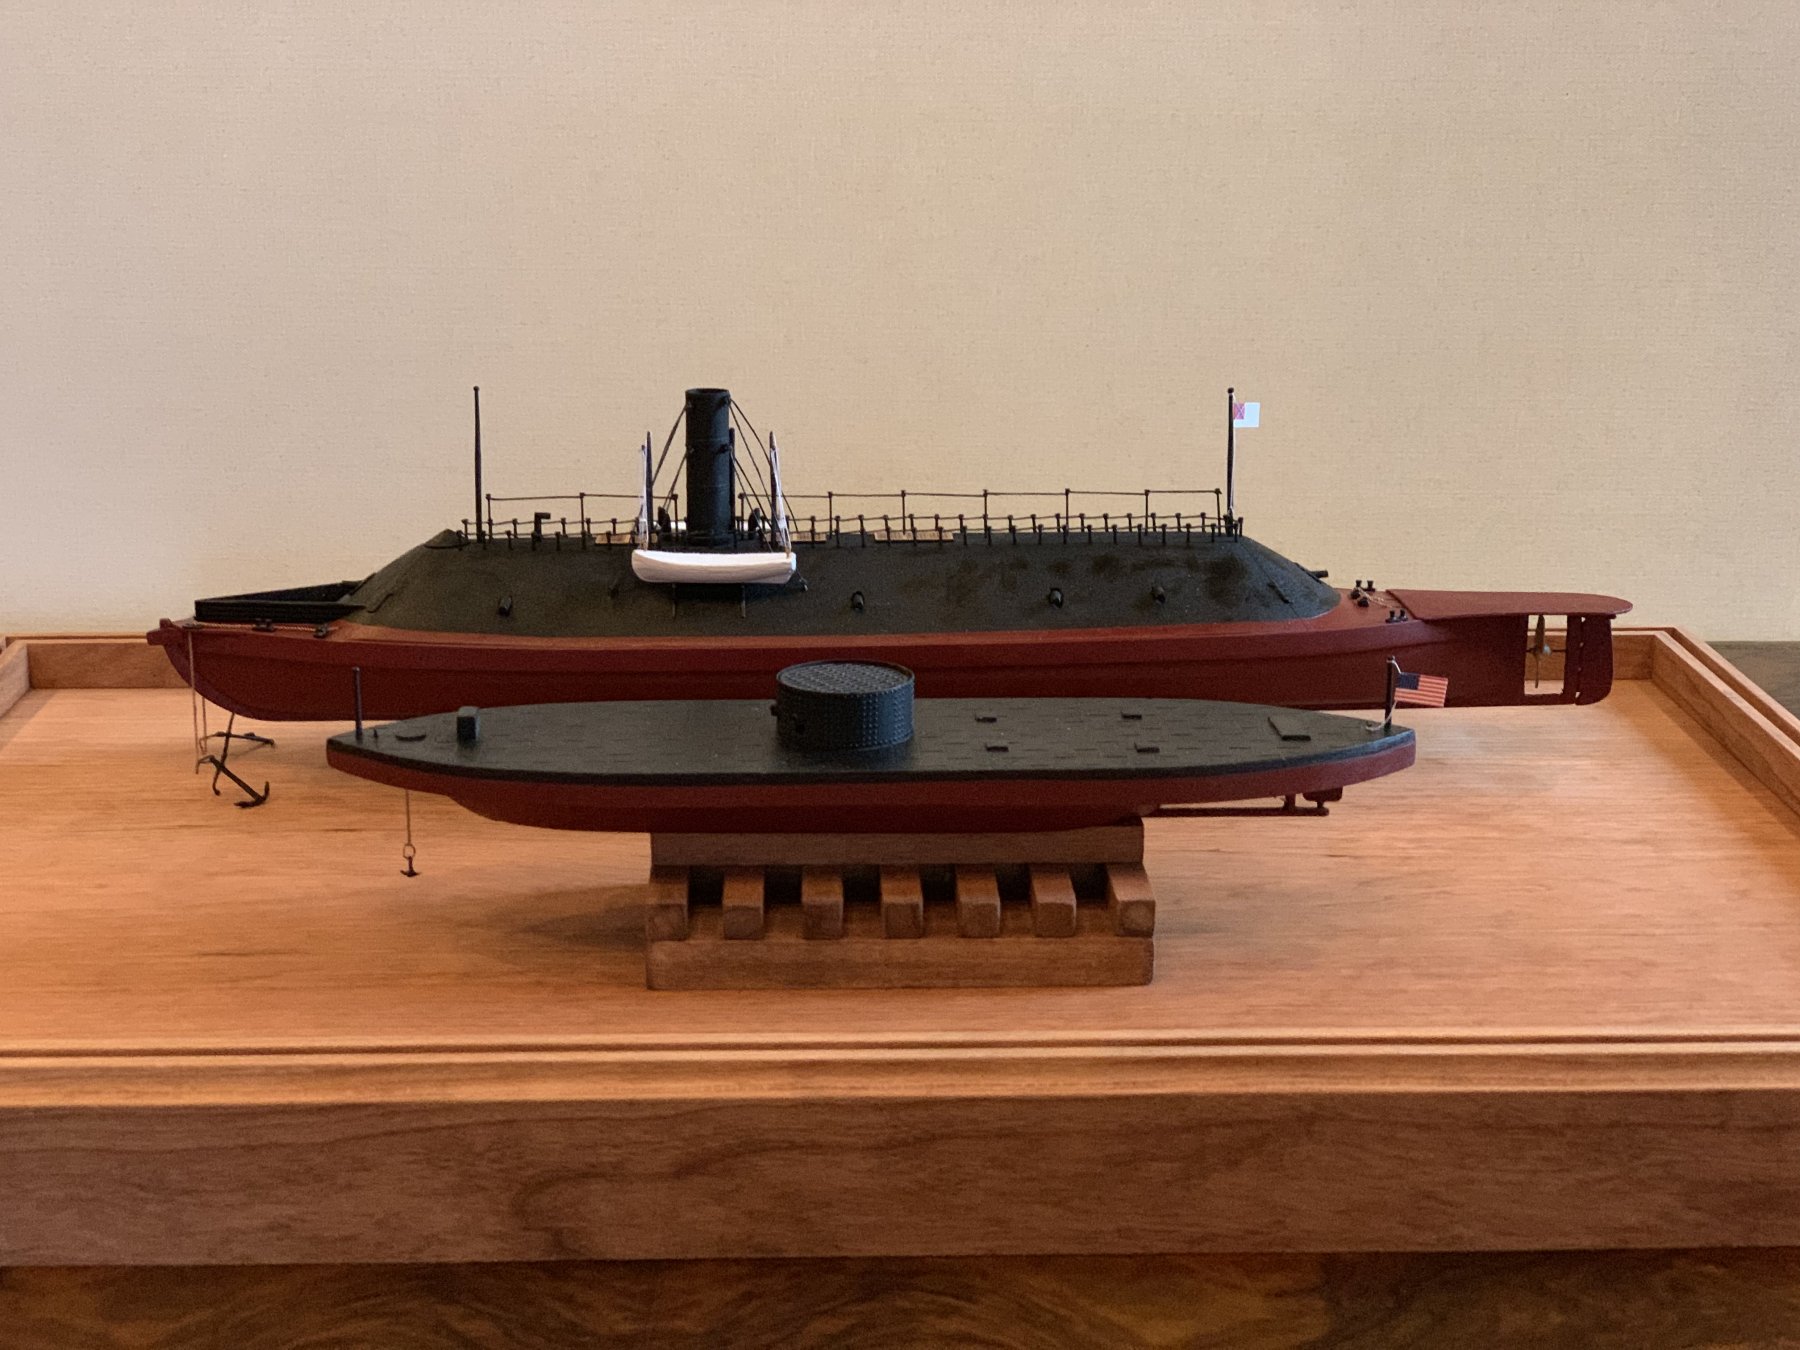
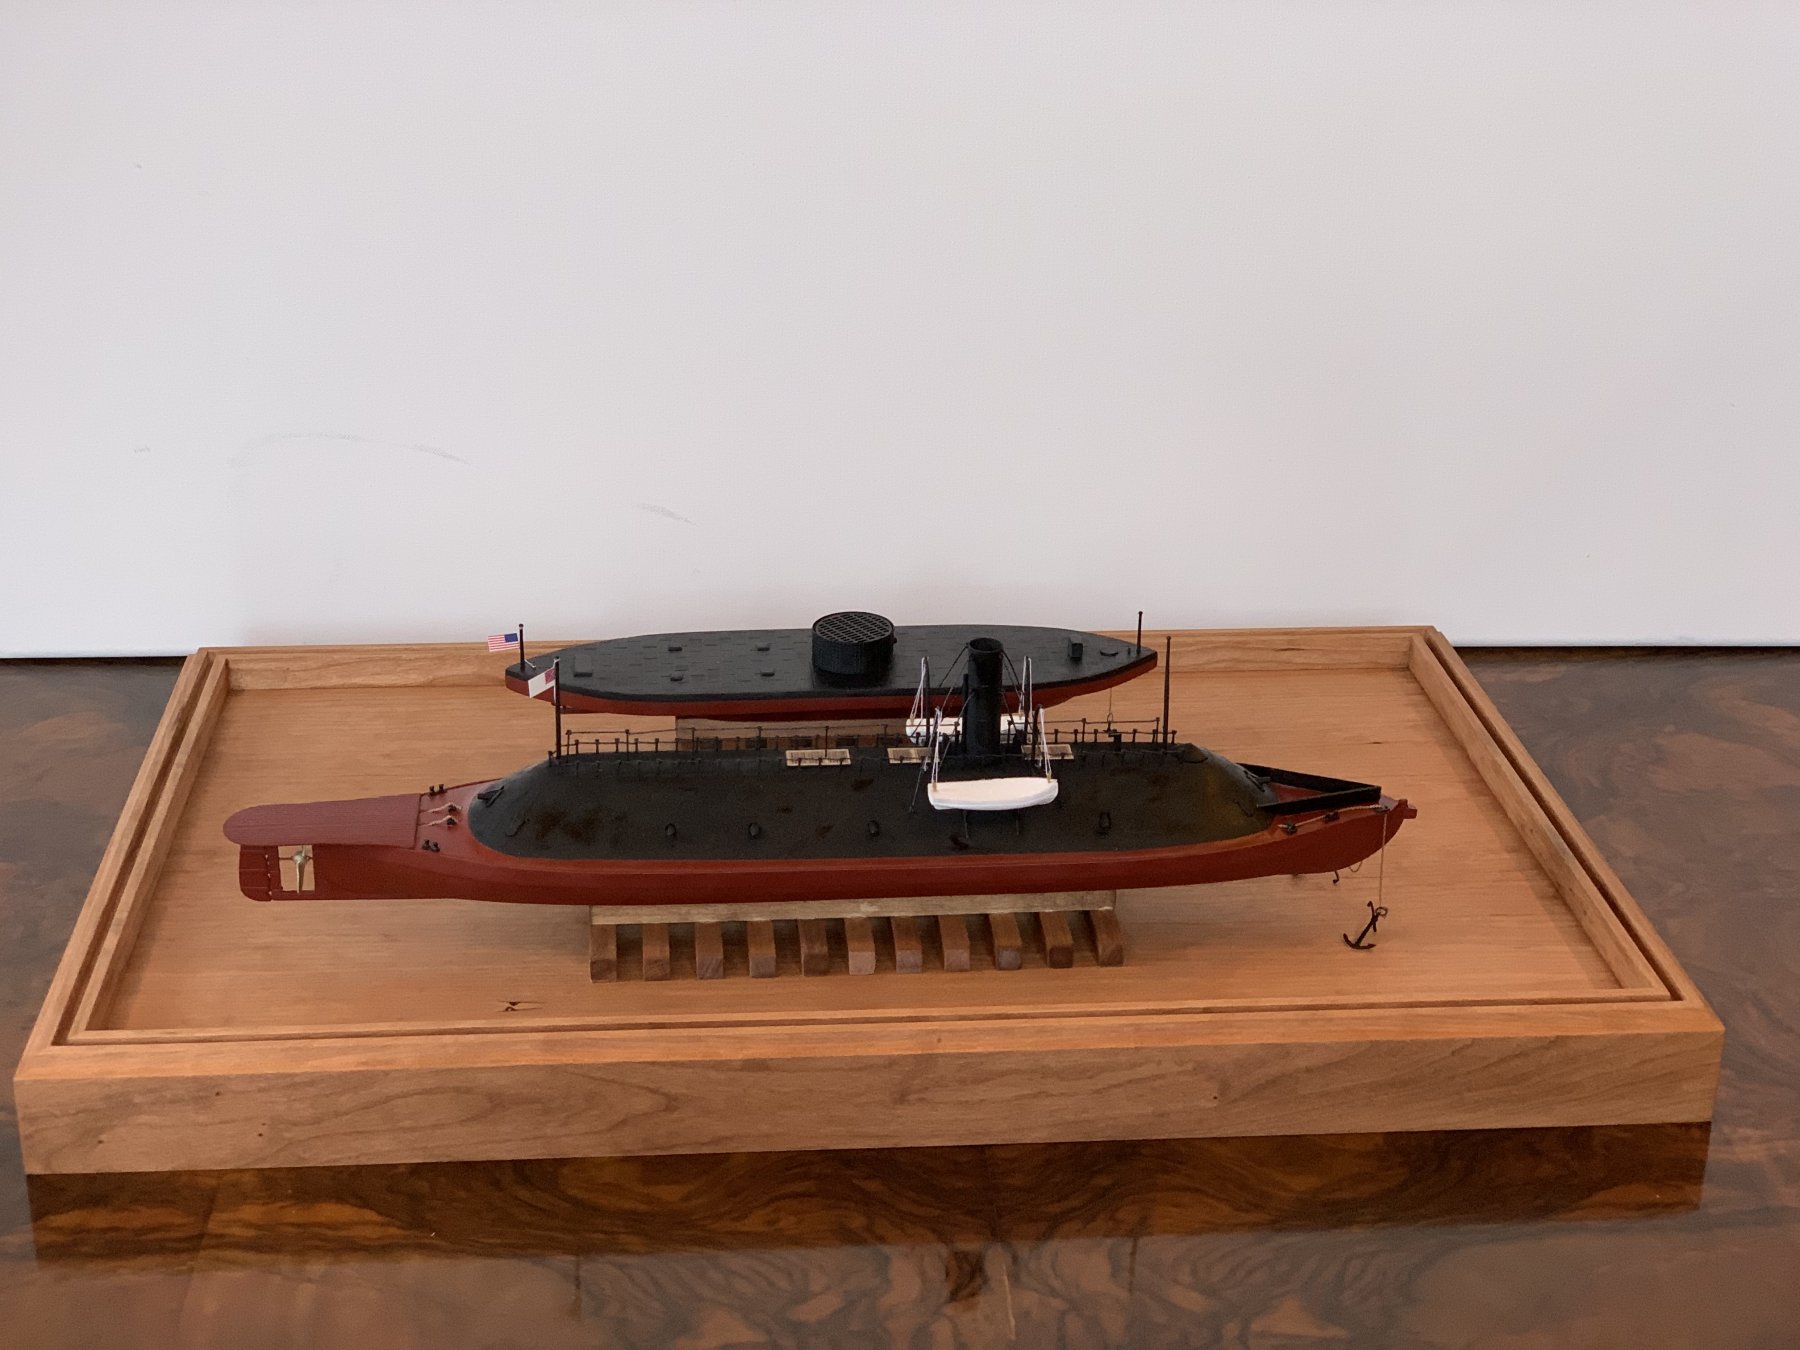
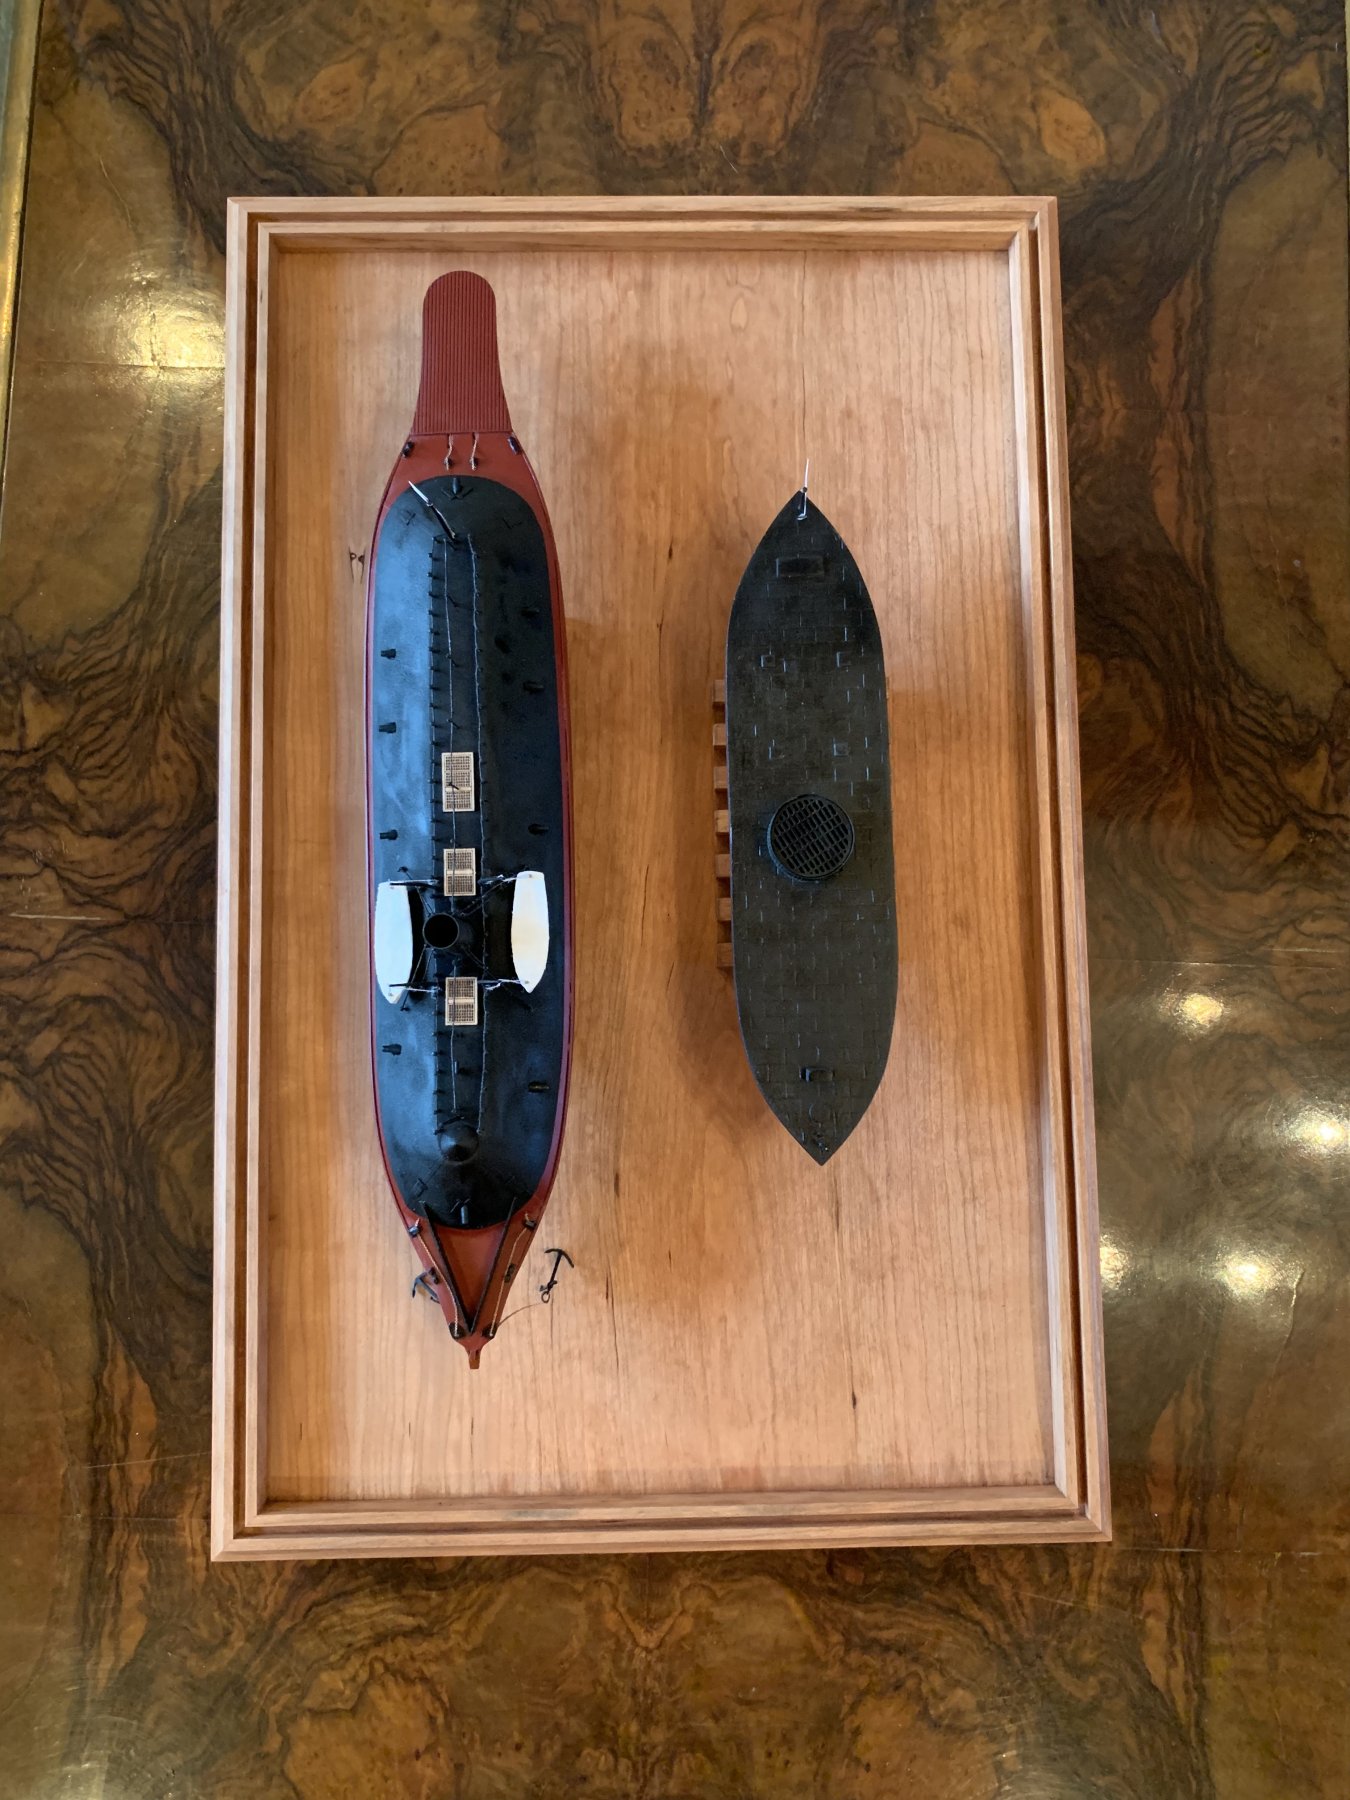
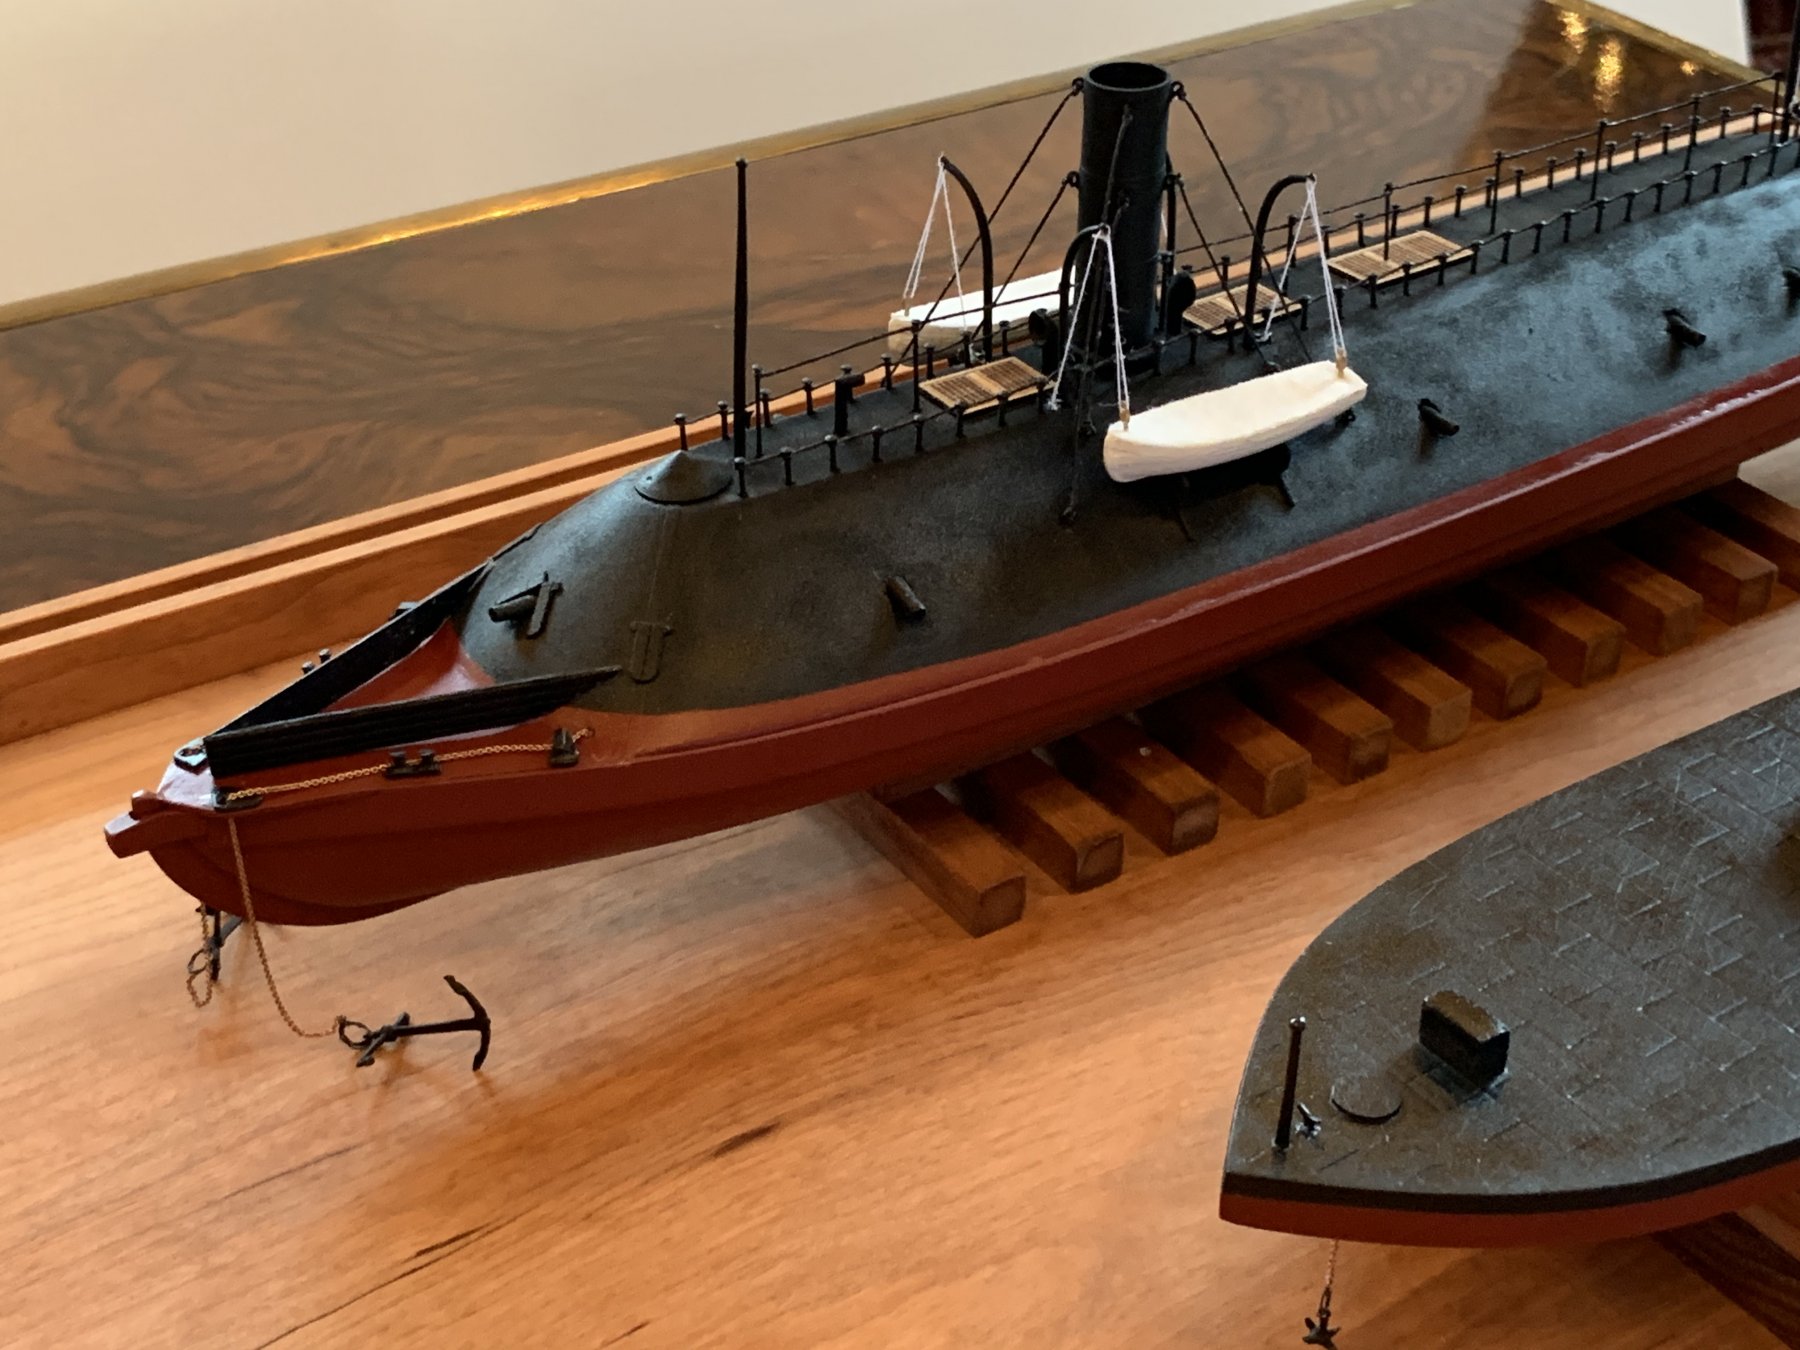
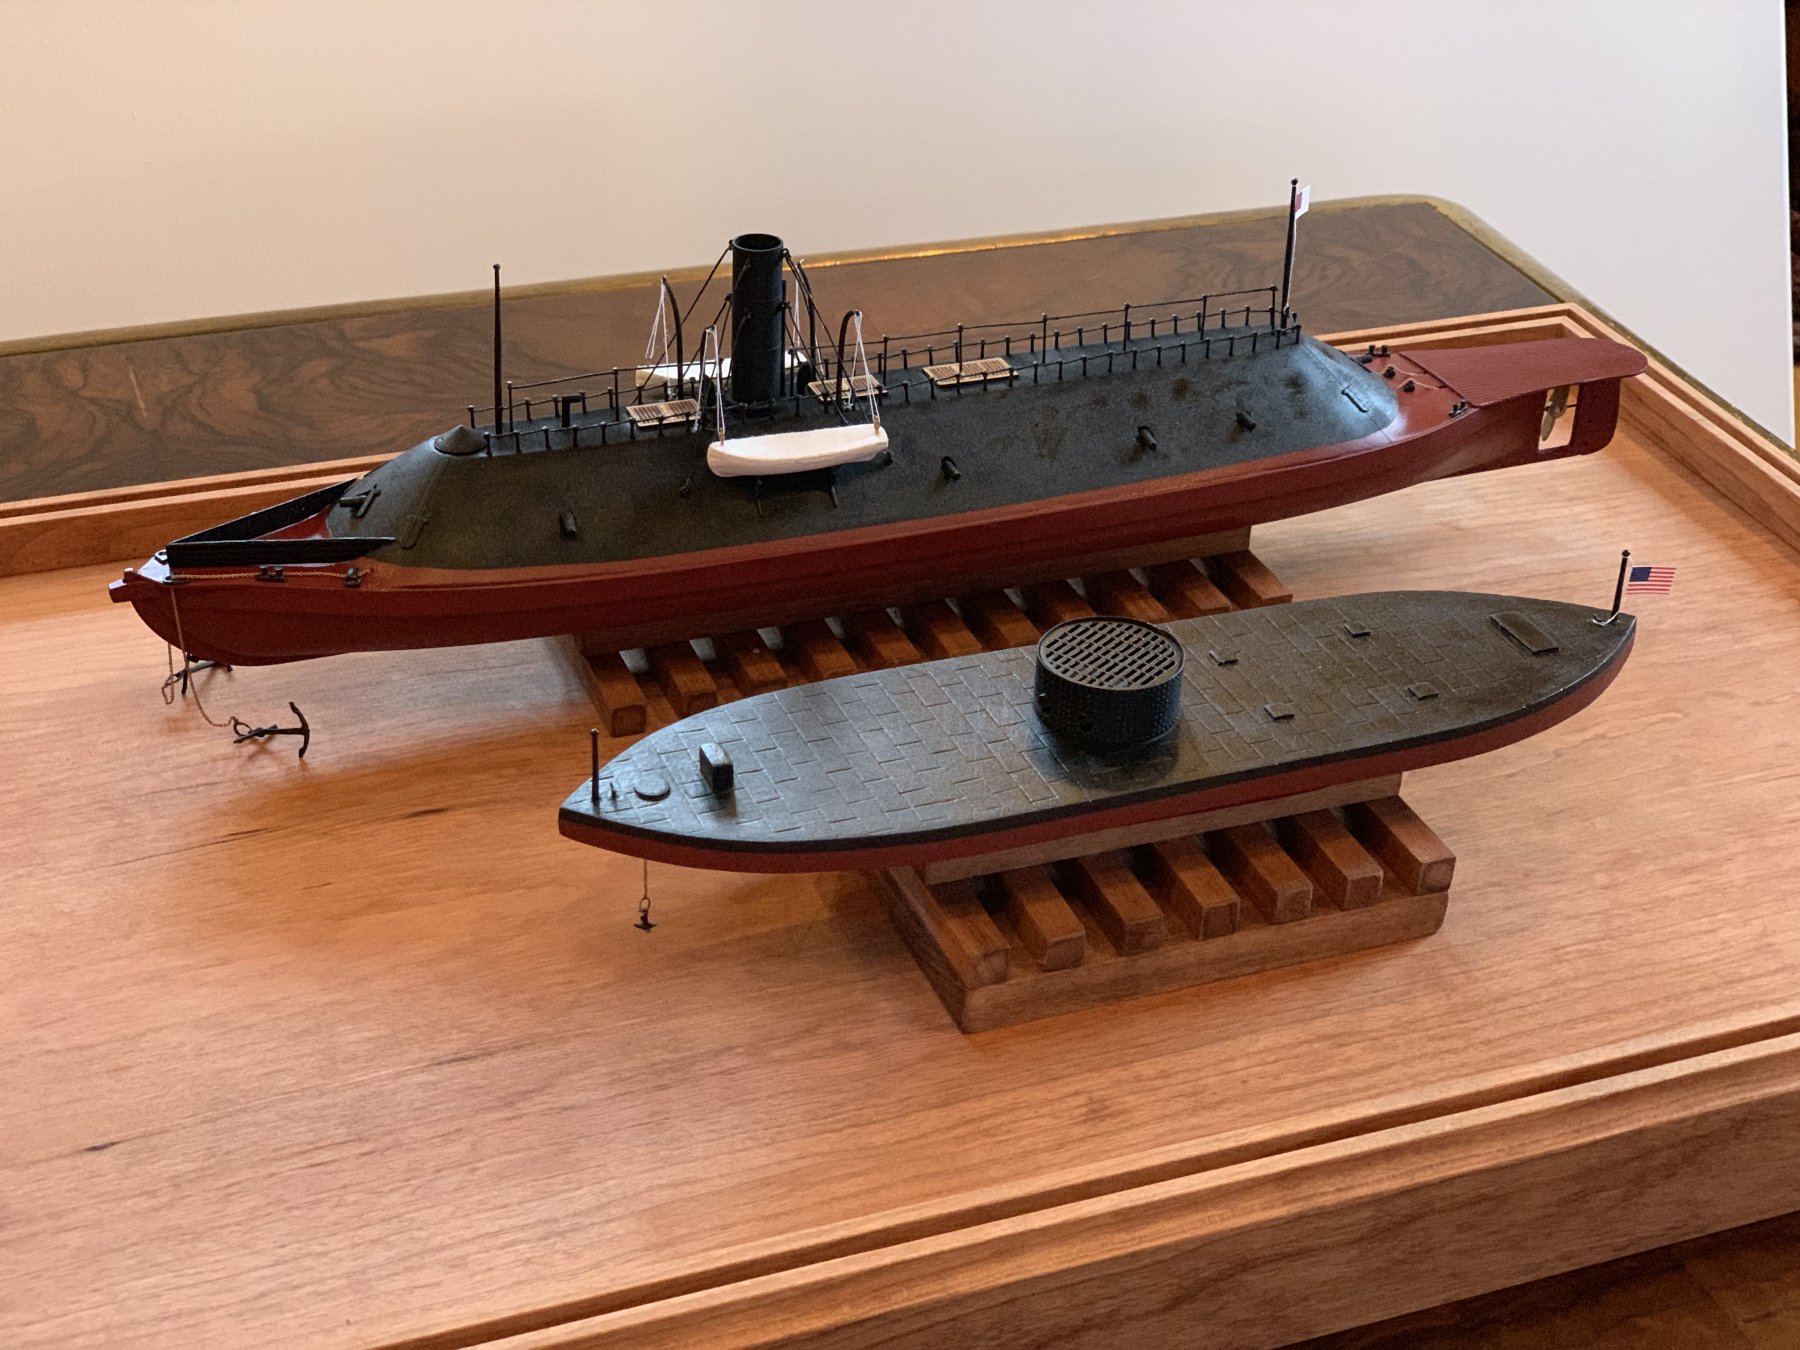
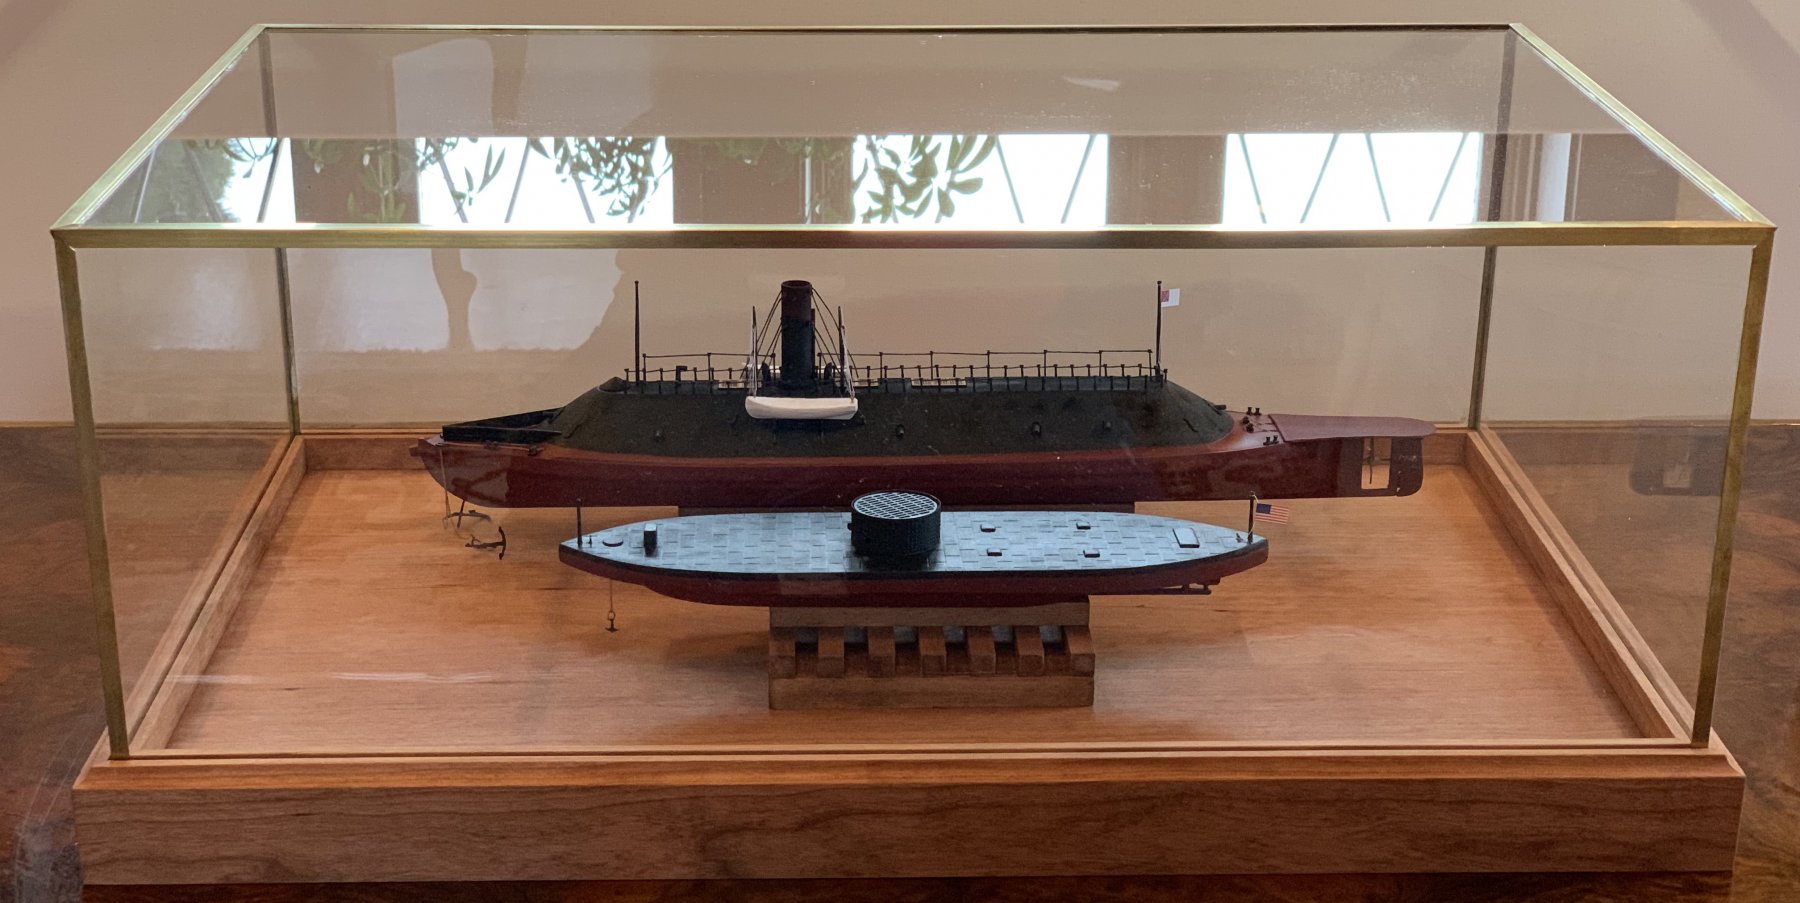
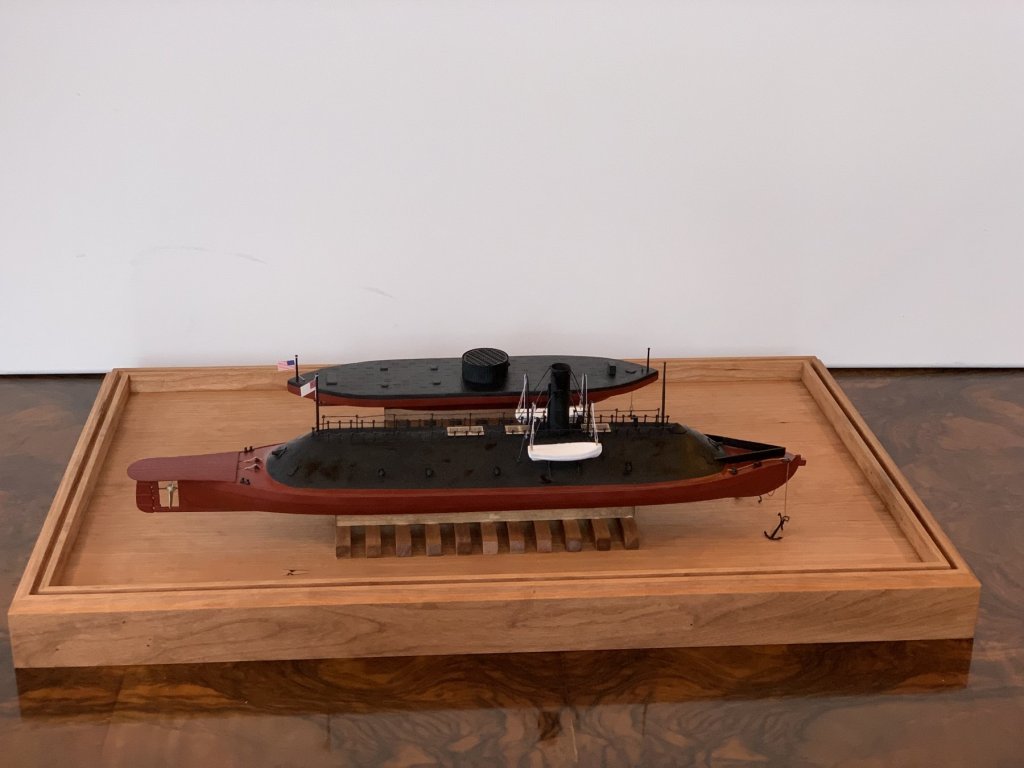
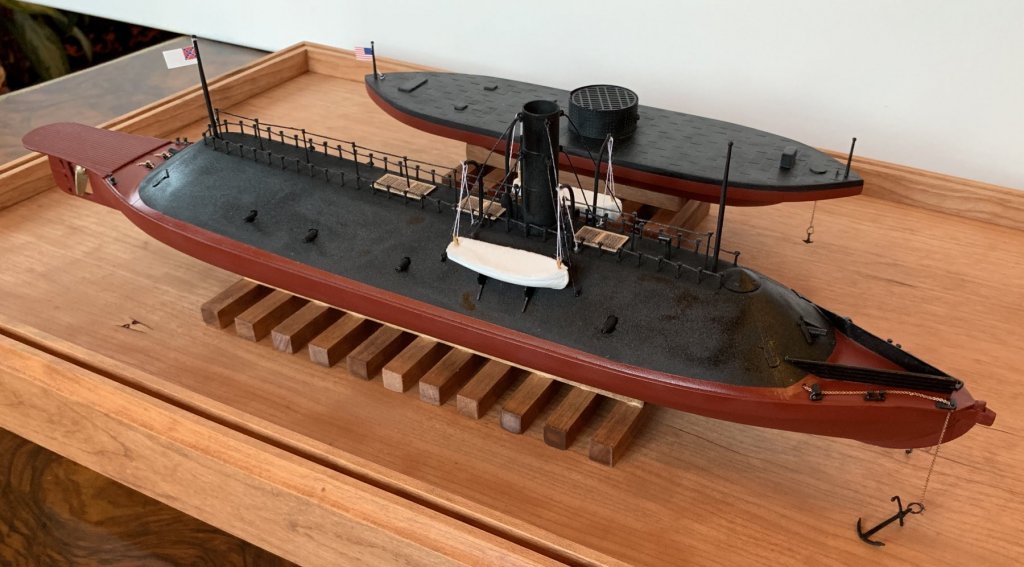
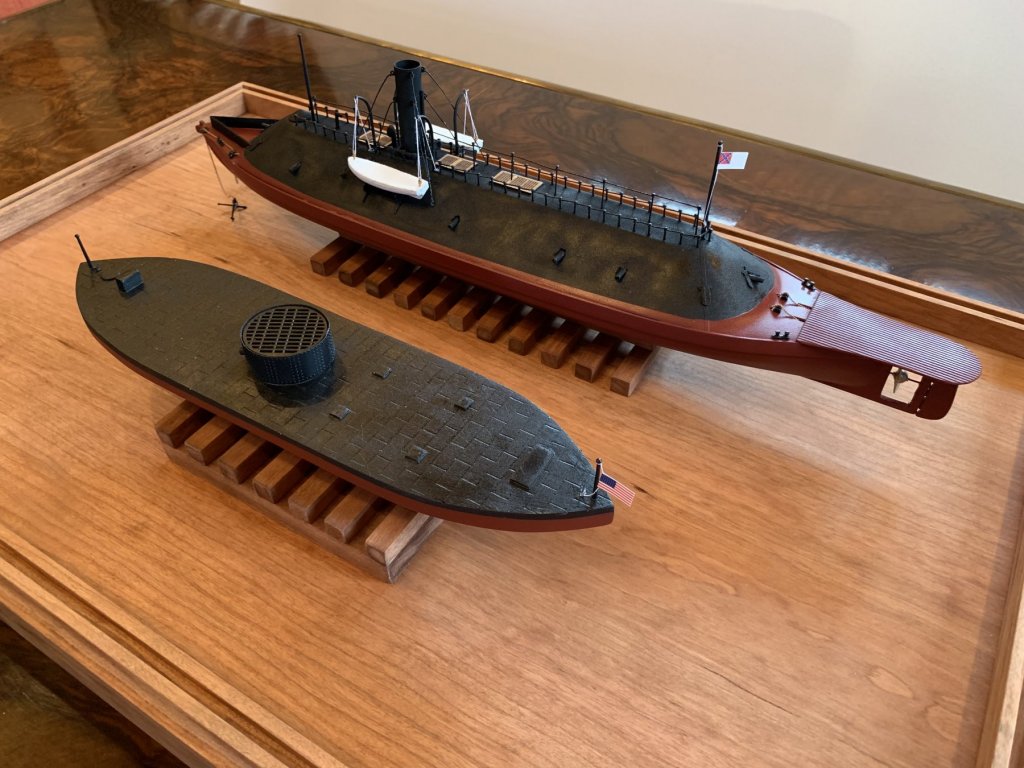
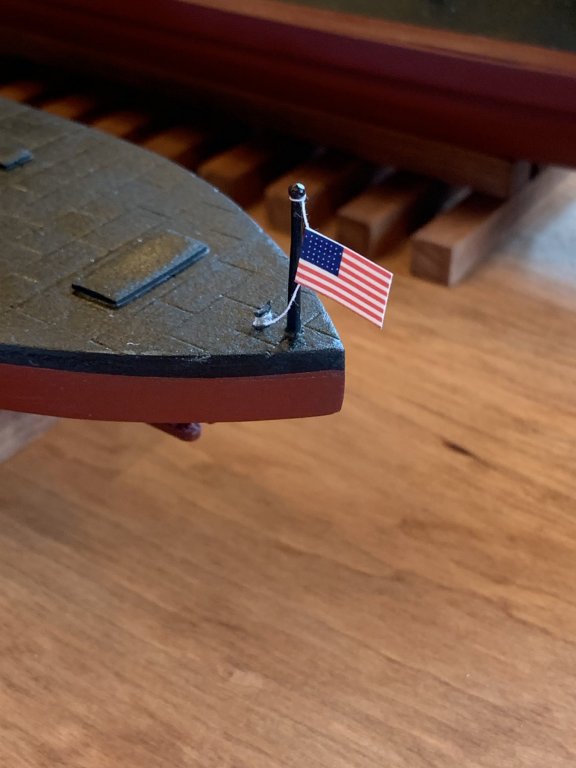
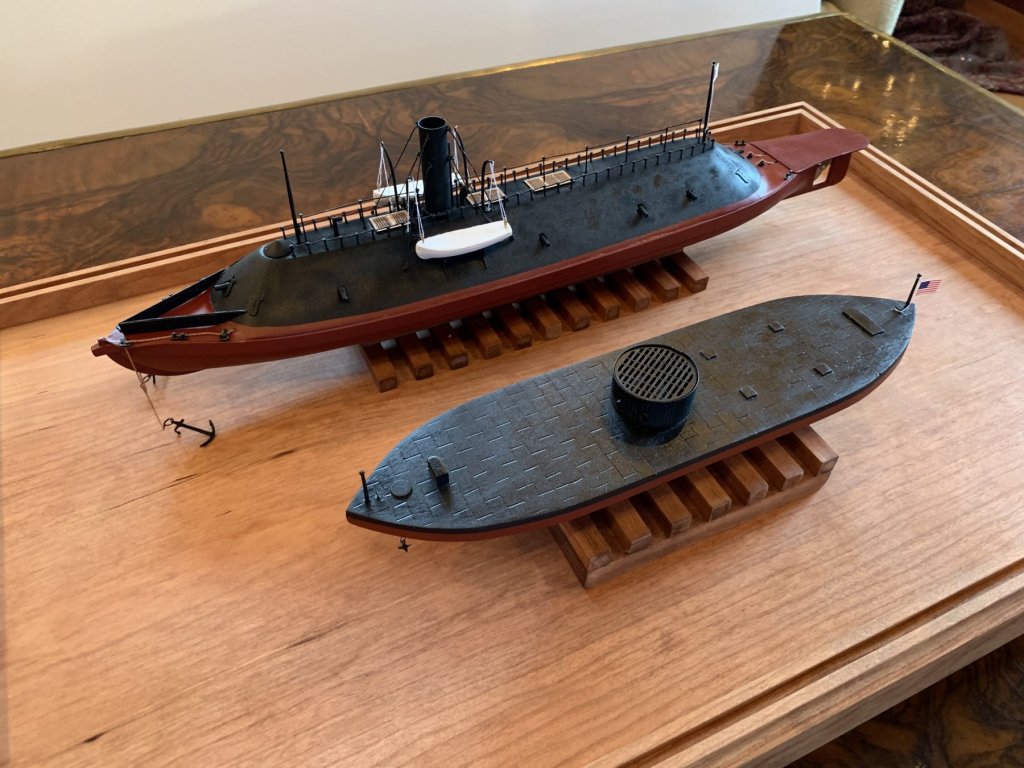
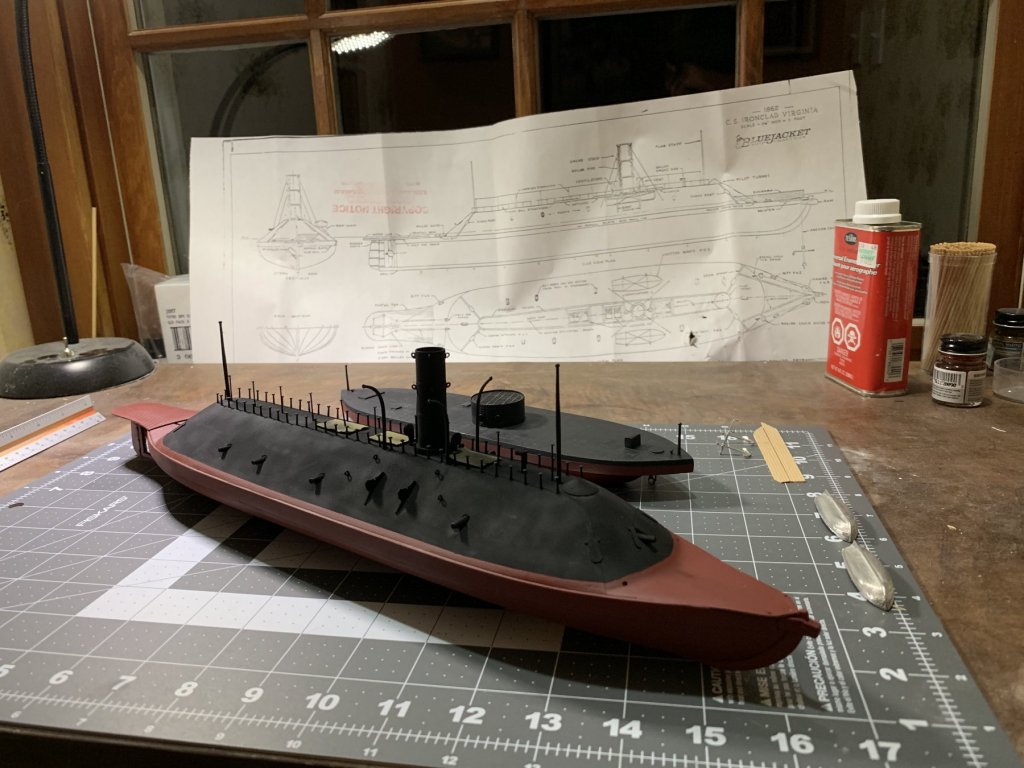
So I am calling both the Virginia and Monitor finished! For being my first model ship builds I am extremely happy with them. For the case I ordered a case kit from BlueJacket and mounted the glass myself. For the ship mounts I used some 3/8” square basswood cut into 3” sections. I had to mount the monitor on a 1/2” inch pedestal though to keep the waterlines at the same height. These models were really a blast to put together.


- 43 replies
-
- 12
-
-

-
- virginia
- BlueJacket Shipcrafters
- (and 1 more)
-
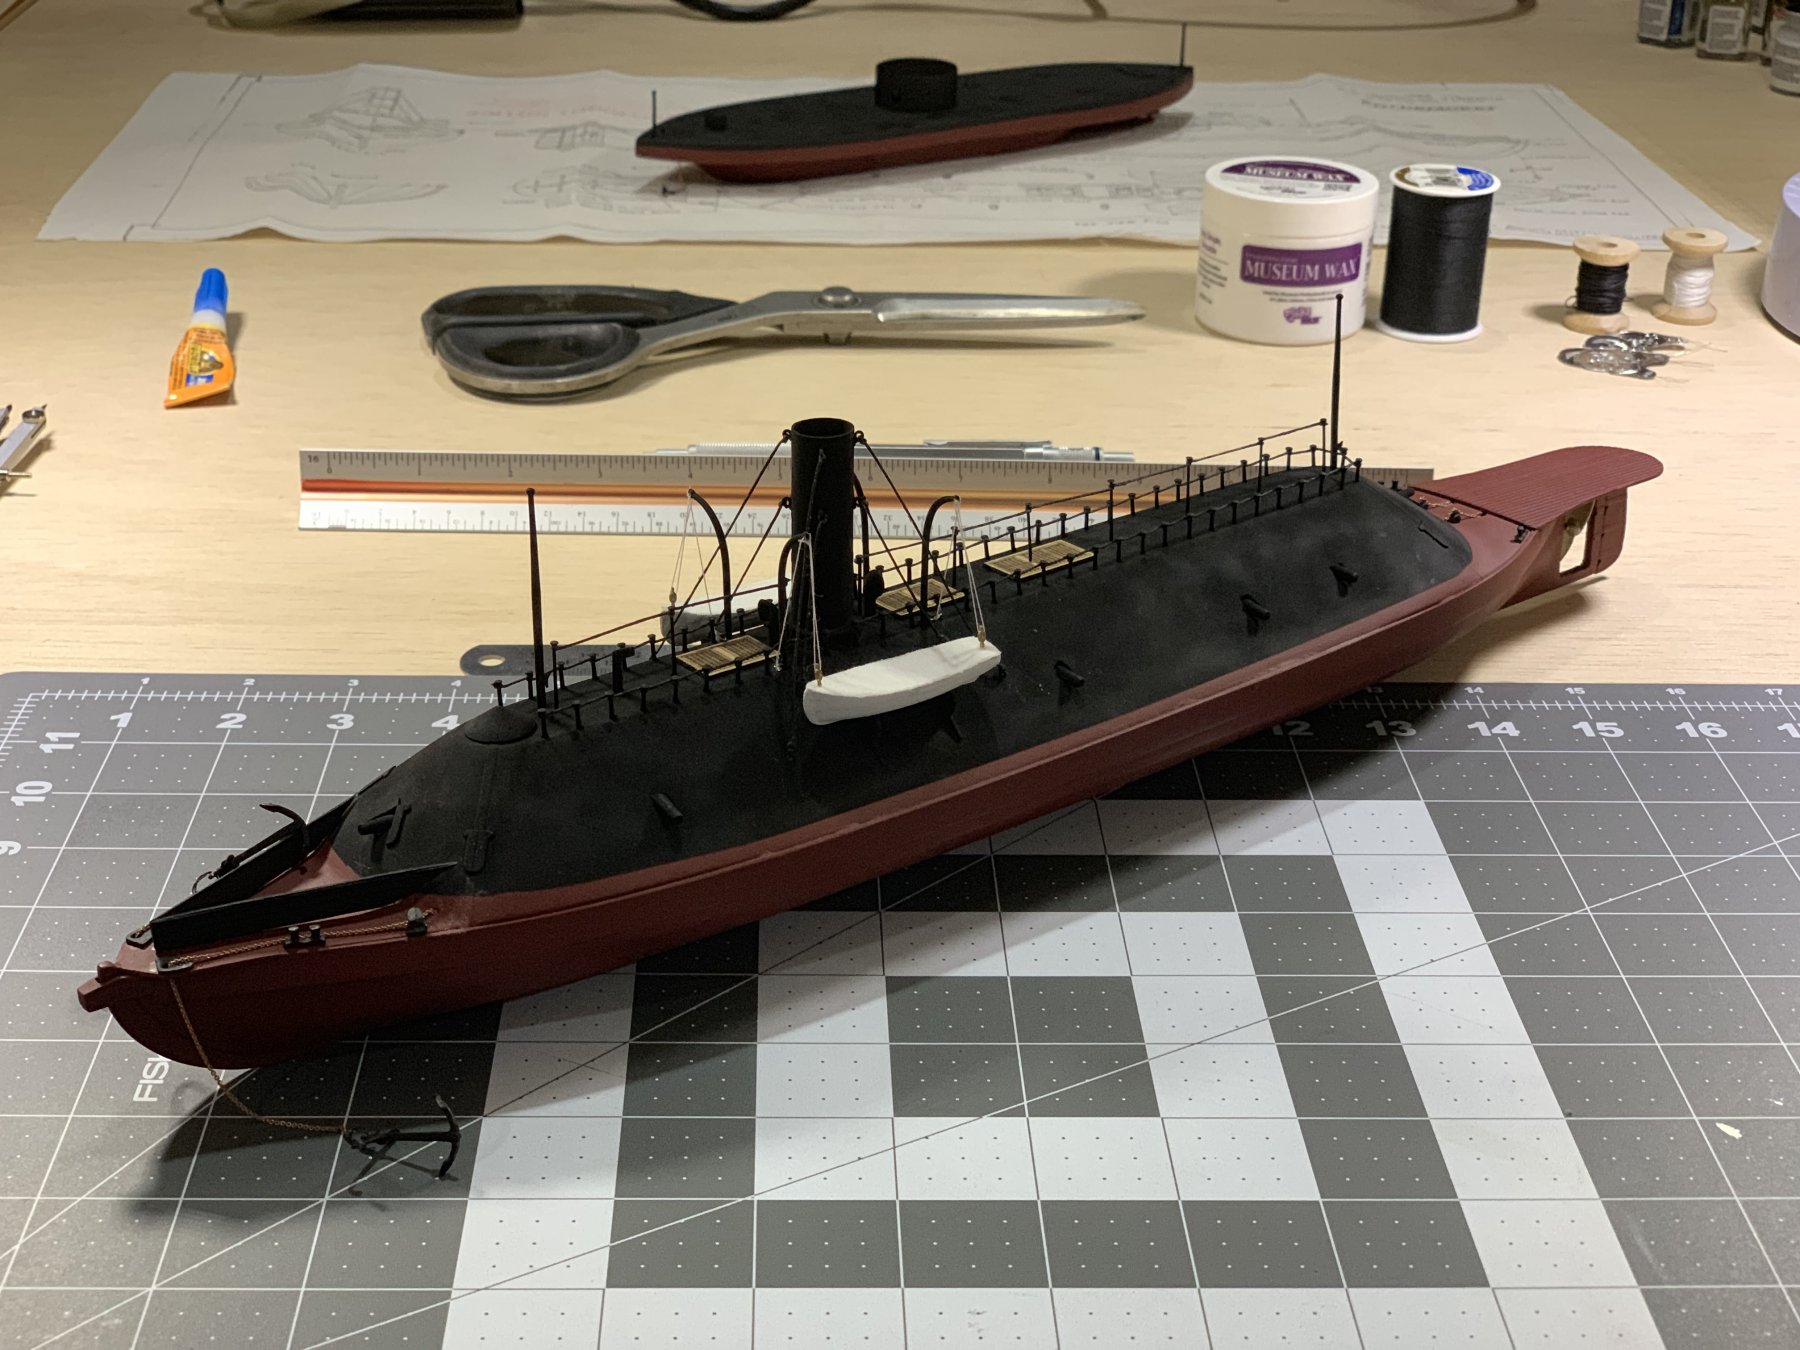
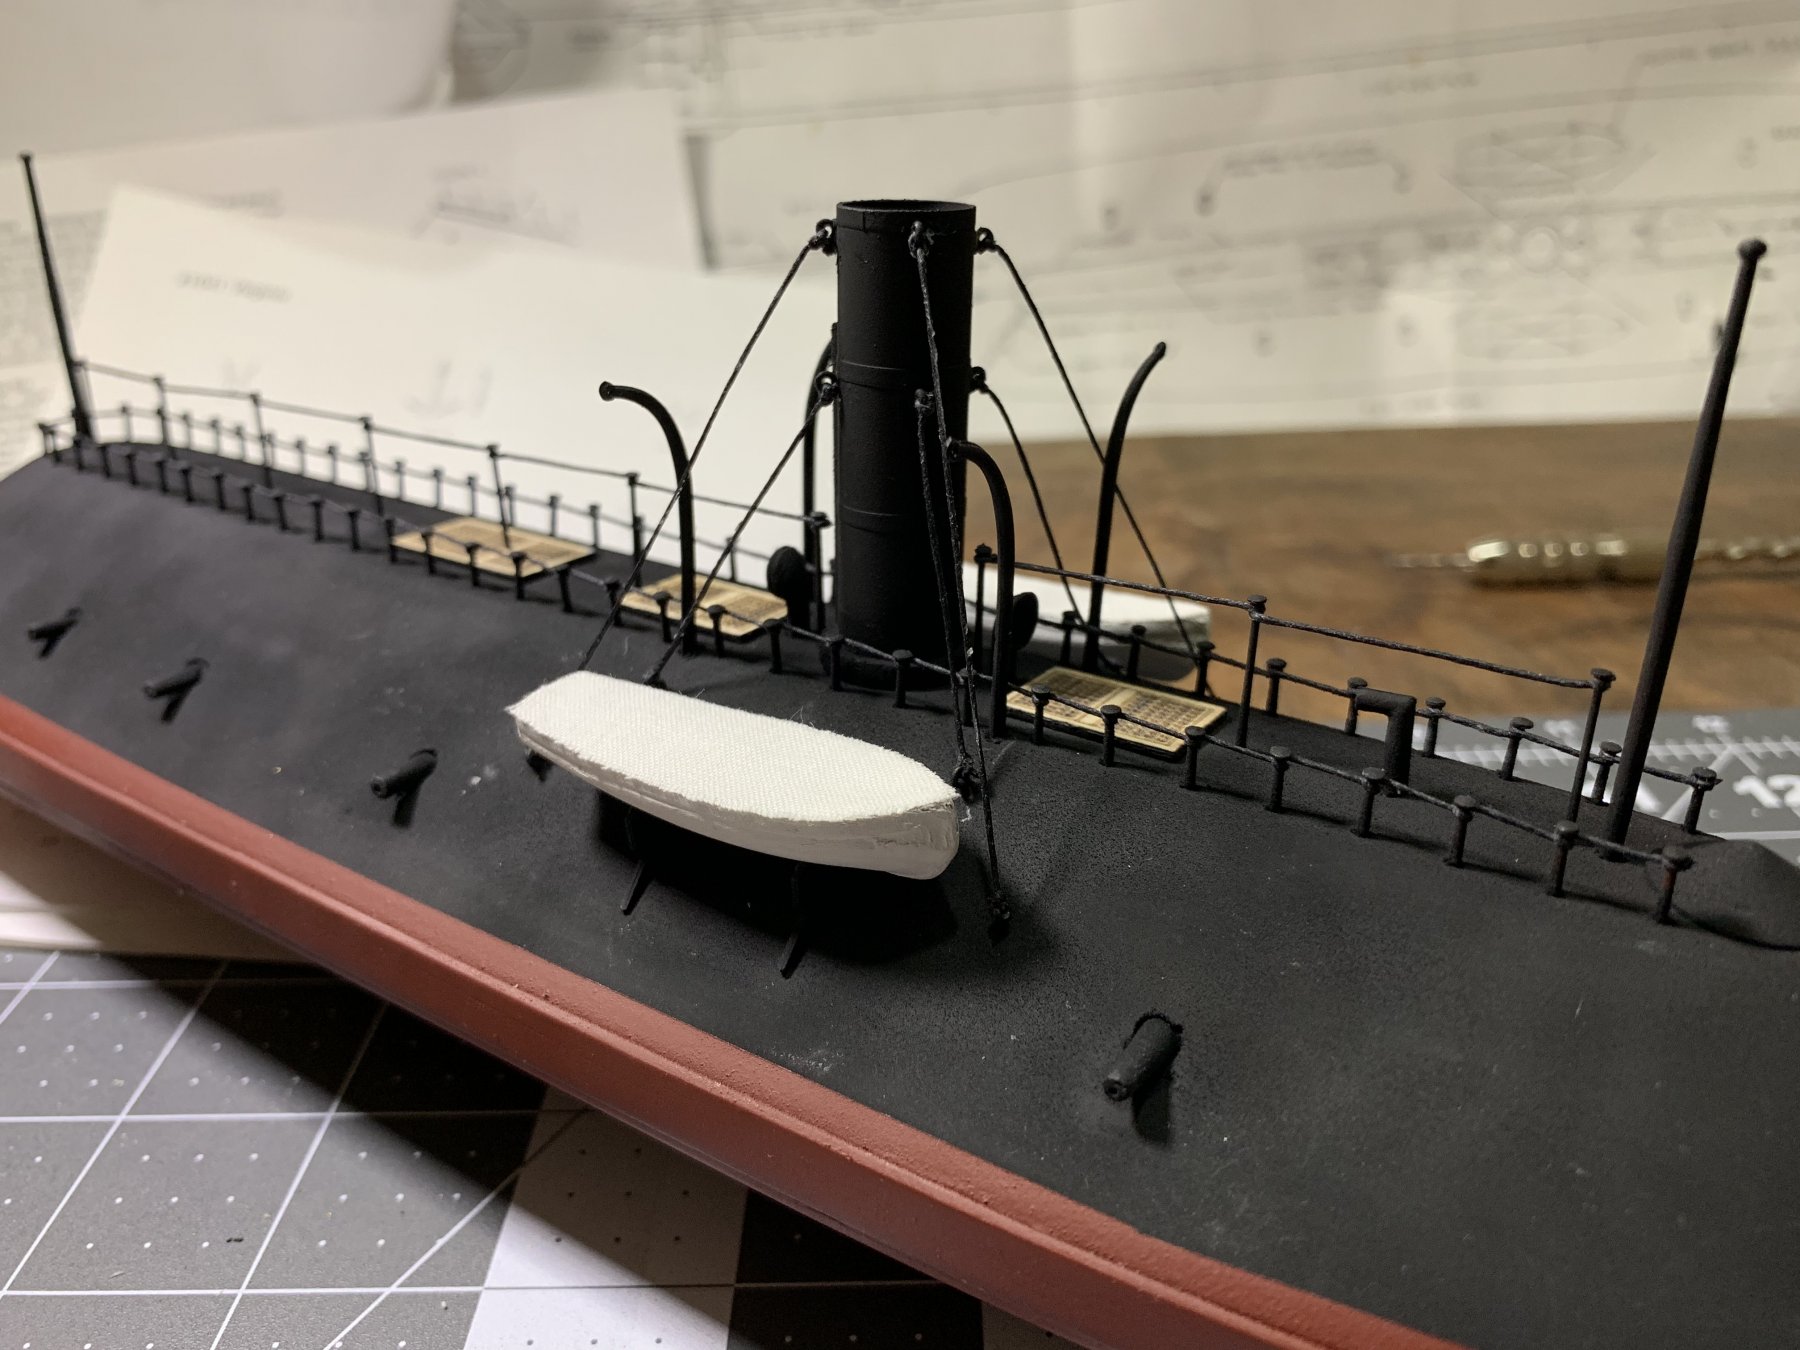
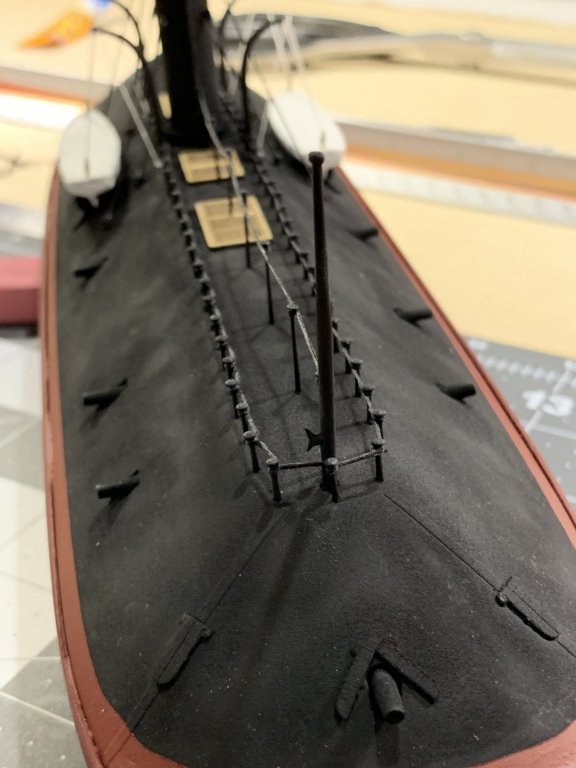
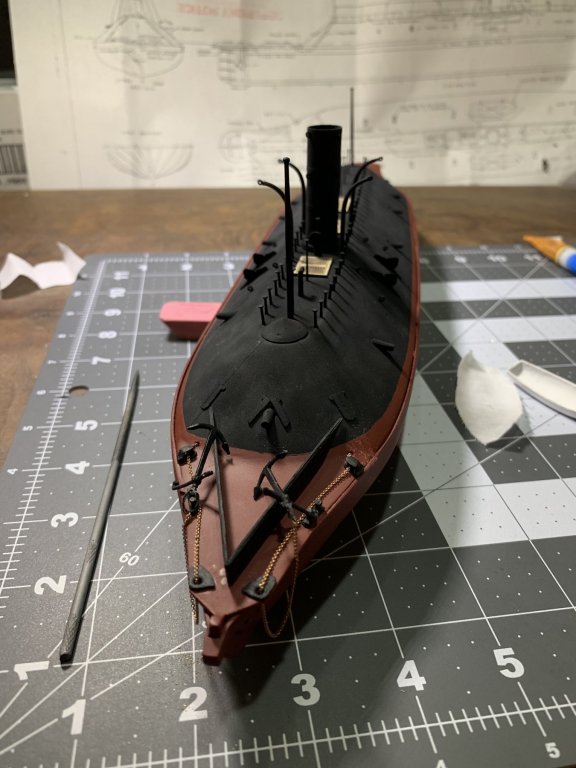
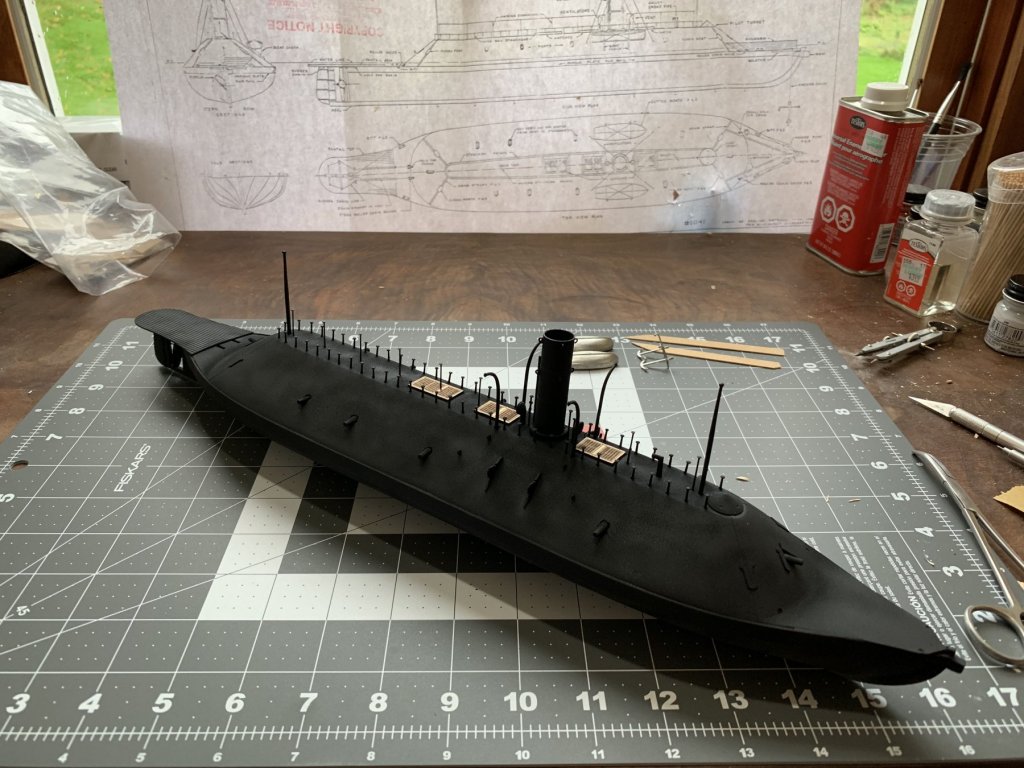
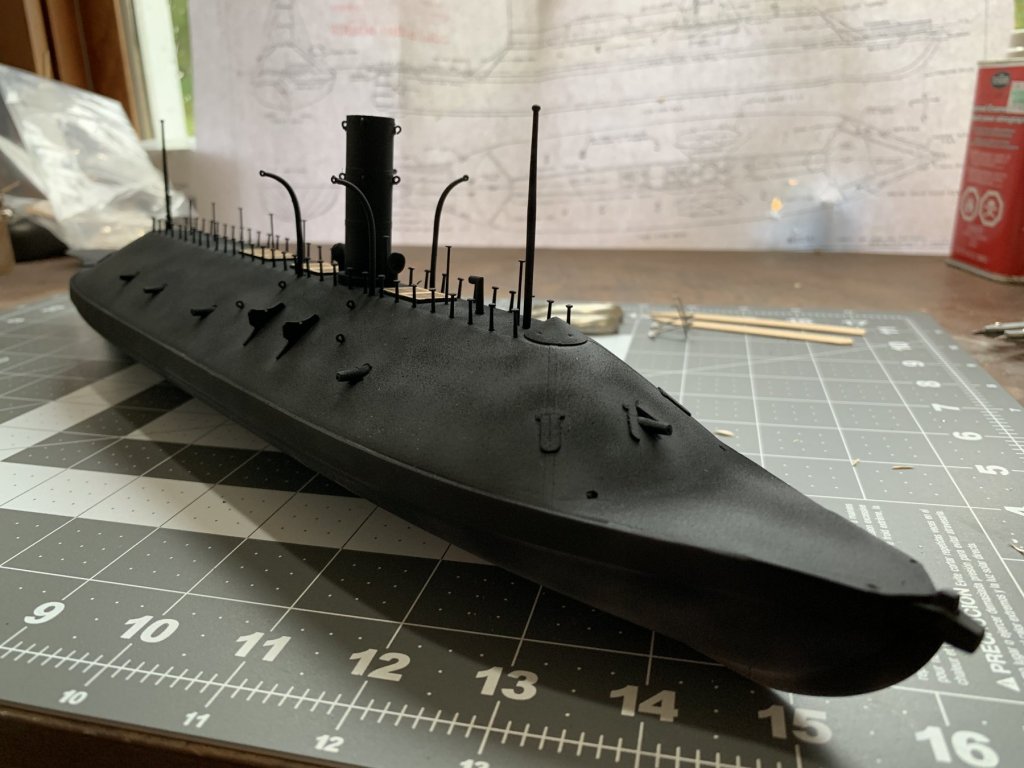
Installed cleats for the flagstaffs as well as for the cutter davits. I used brass cleats, used CA glue to mount them, and then painted the flat black. I aslo rigged the cutters. The blocks I painted brown and glued to the cutters with CA glue and then ran the line and terminating the line at the cleats on the deck. Furthermore, I darkened the color of the deck grates a bit. Overall it’s getting very close! Next up is a clear coat to cover the various little blemishes. I have ave also ordered a display case that will house both the USS Monitor and CSS Virginia together which should make for a nice display.

- 43 replies
-
- 7
-
-
- virginia
- BlueJacket Shipcrafters
- (and 1 more)
-
I took @MrBlueJacket‘s advice about using CA glue to attach the covers for the cutters to great success. Up next is installing some cleats for the flag staffs and cutter davits. Getting close!

- 43 replies
-
- 6
-
-
- virginia
- BlueJacket Shipcrafters
- (and 1 more)
-
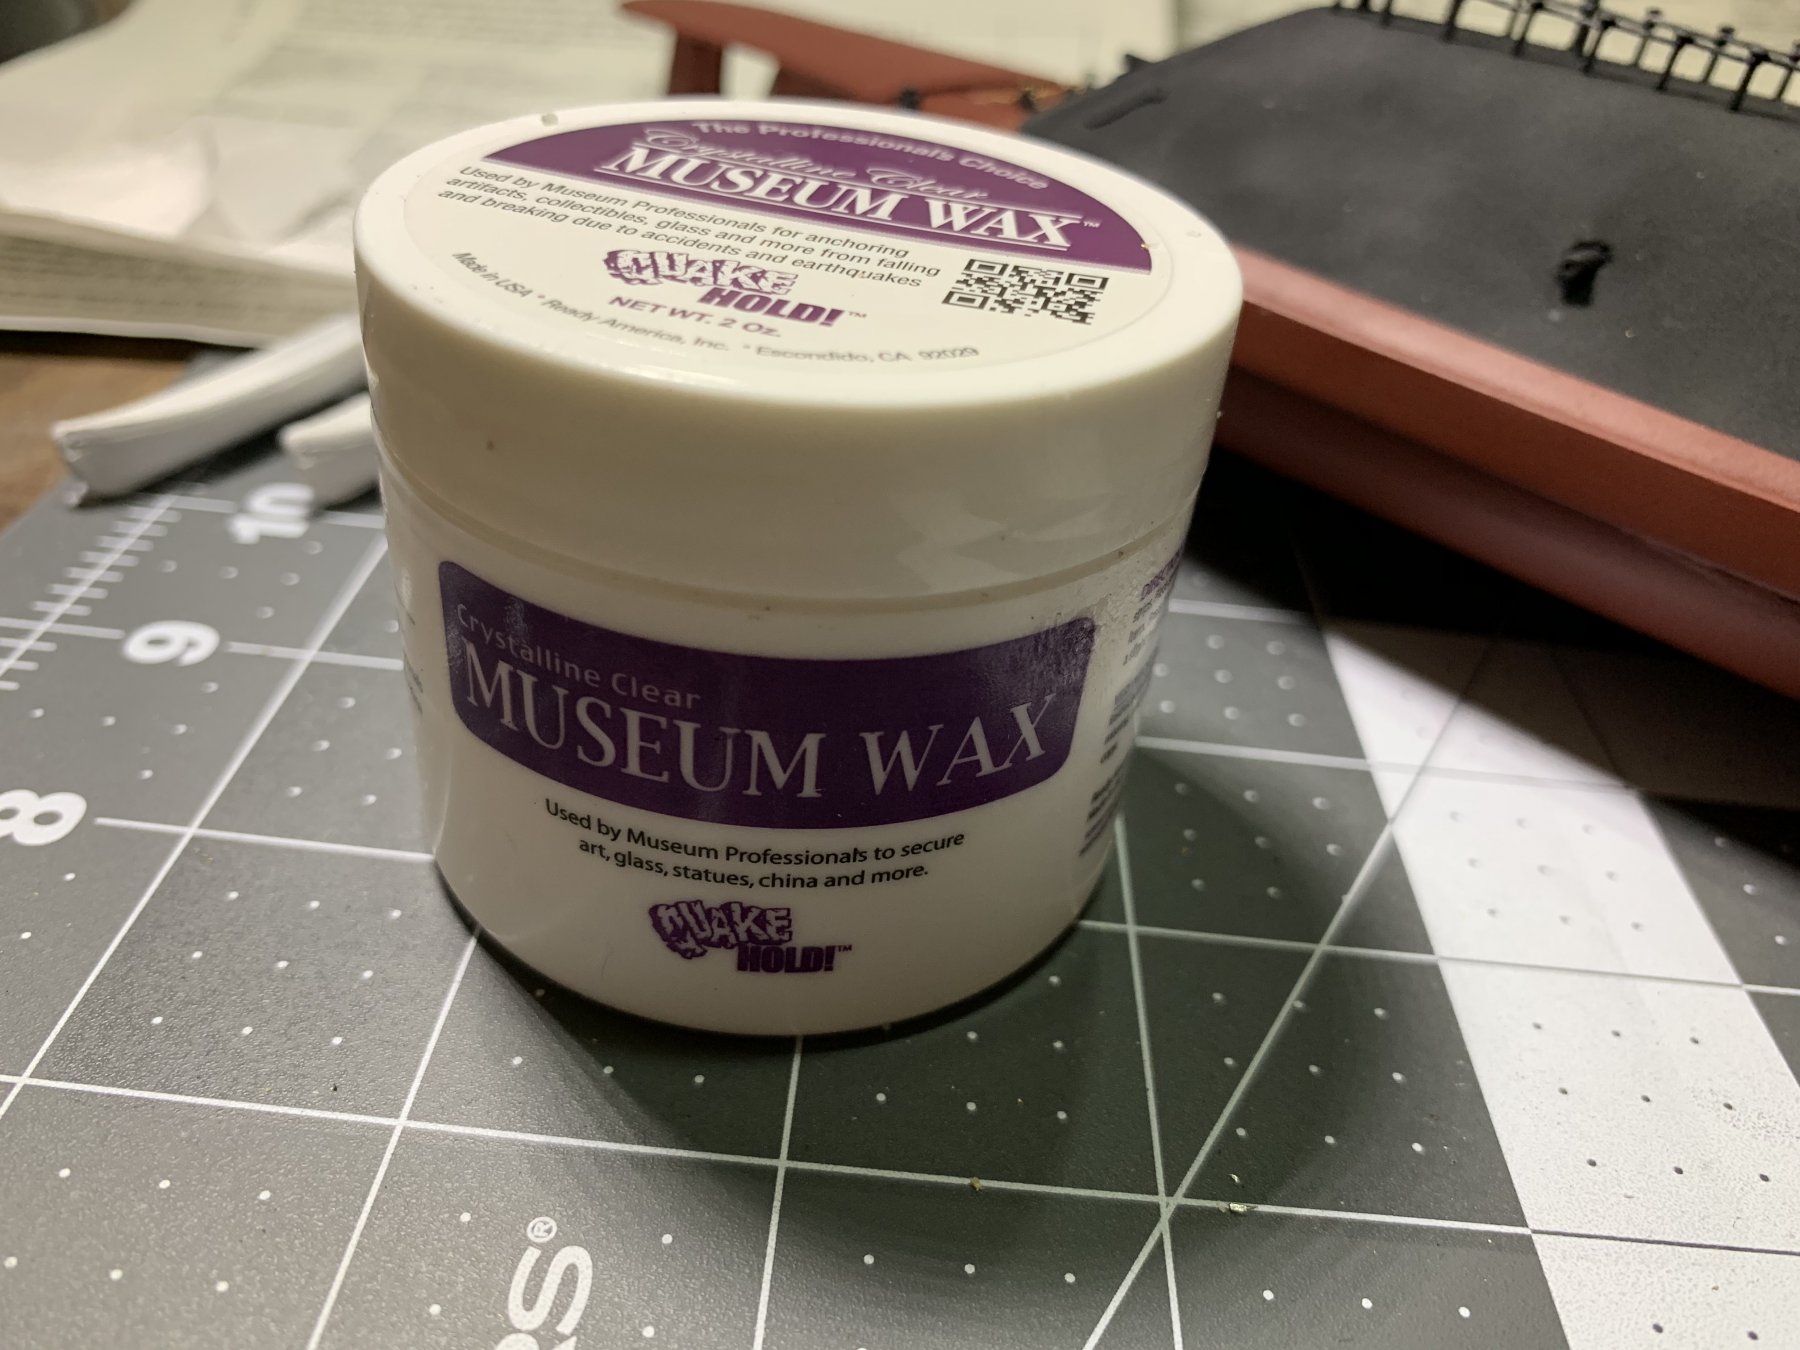
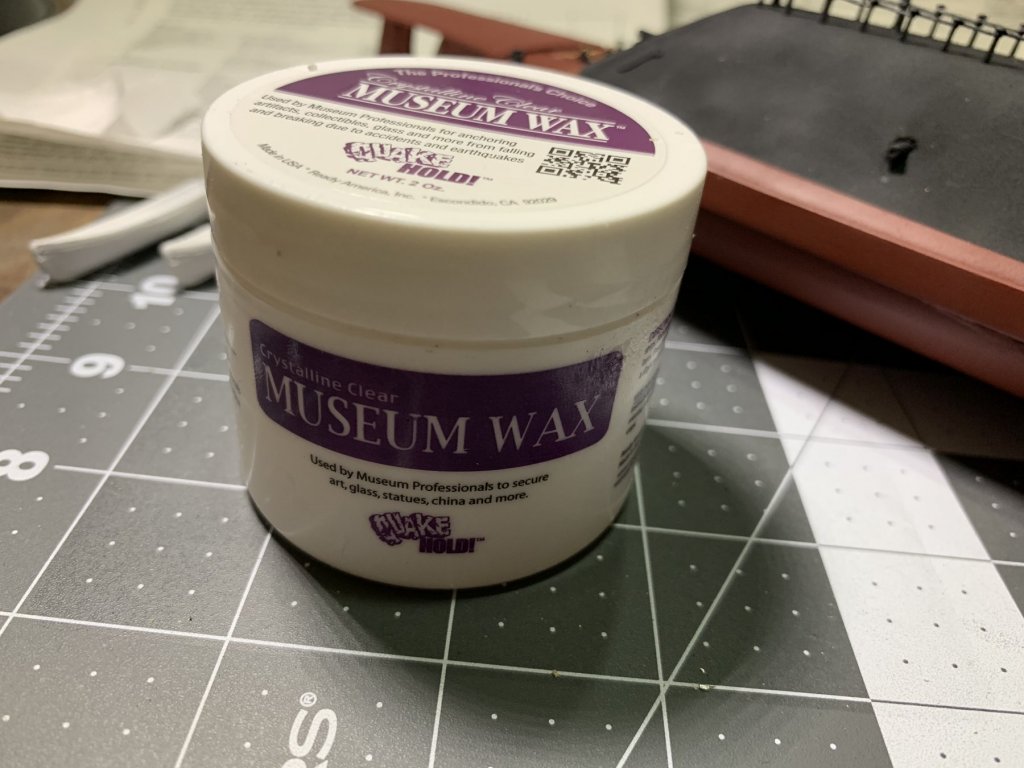
Made a little bit of progress on the Virginia this weekend on the rigging and railings. I used the kit supplied thread and museum wax. I paid special attention to keep the direction of my threads consistent on both sides for the railing and am pretty satisfied with the result.

- 43 replies
-
- 4
-
-
- virginia
- BlueJacket Shipcrafters
- (and 1 more)
-
Hi @MrBlueJacket, Thanks for the sugggestion - I’ll try that this weekend. The model is turning out great btw! Stanley
- 43 replies
-
- 1
-
-
- virginia
- BlueJacket Shipcrafters
- (and 1 more)
-
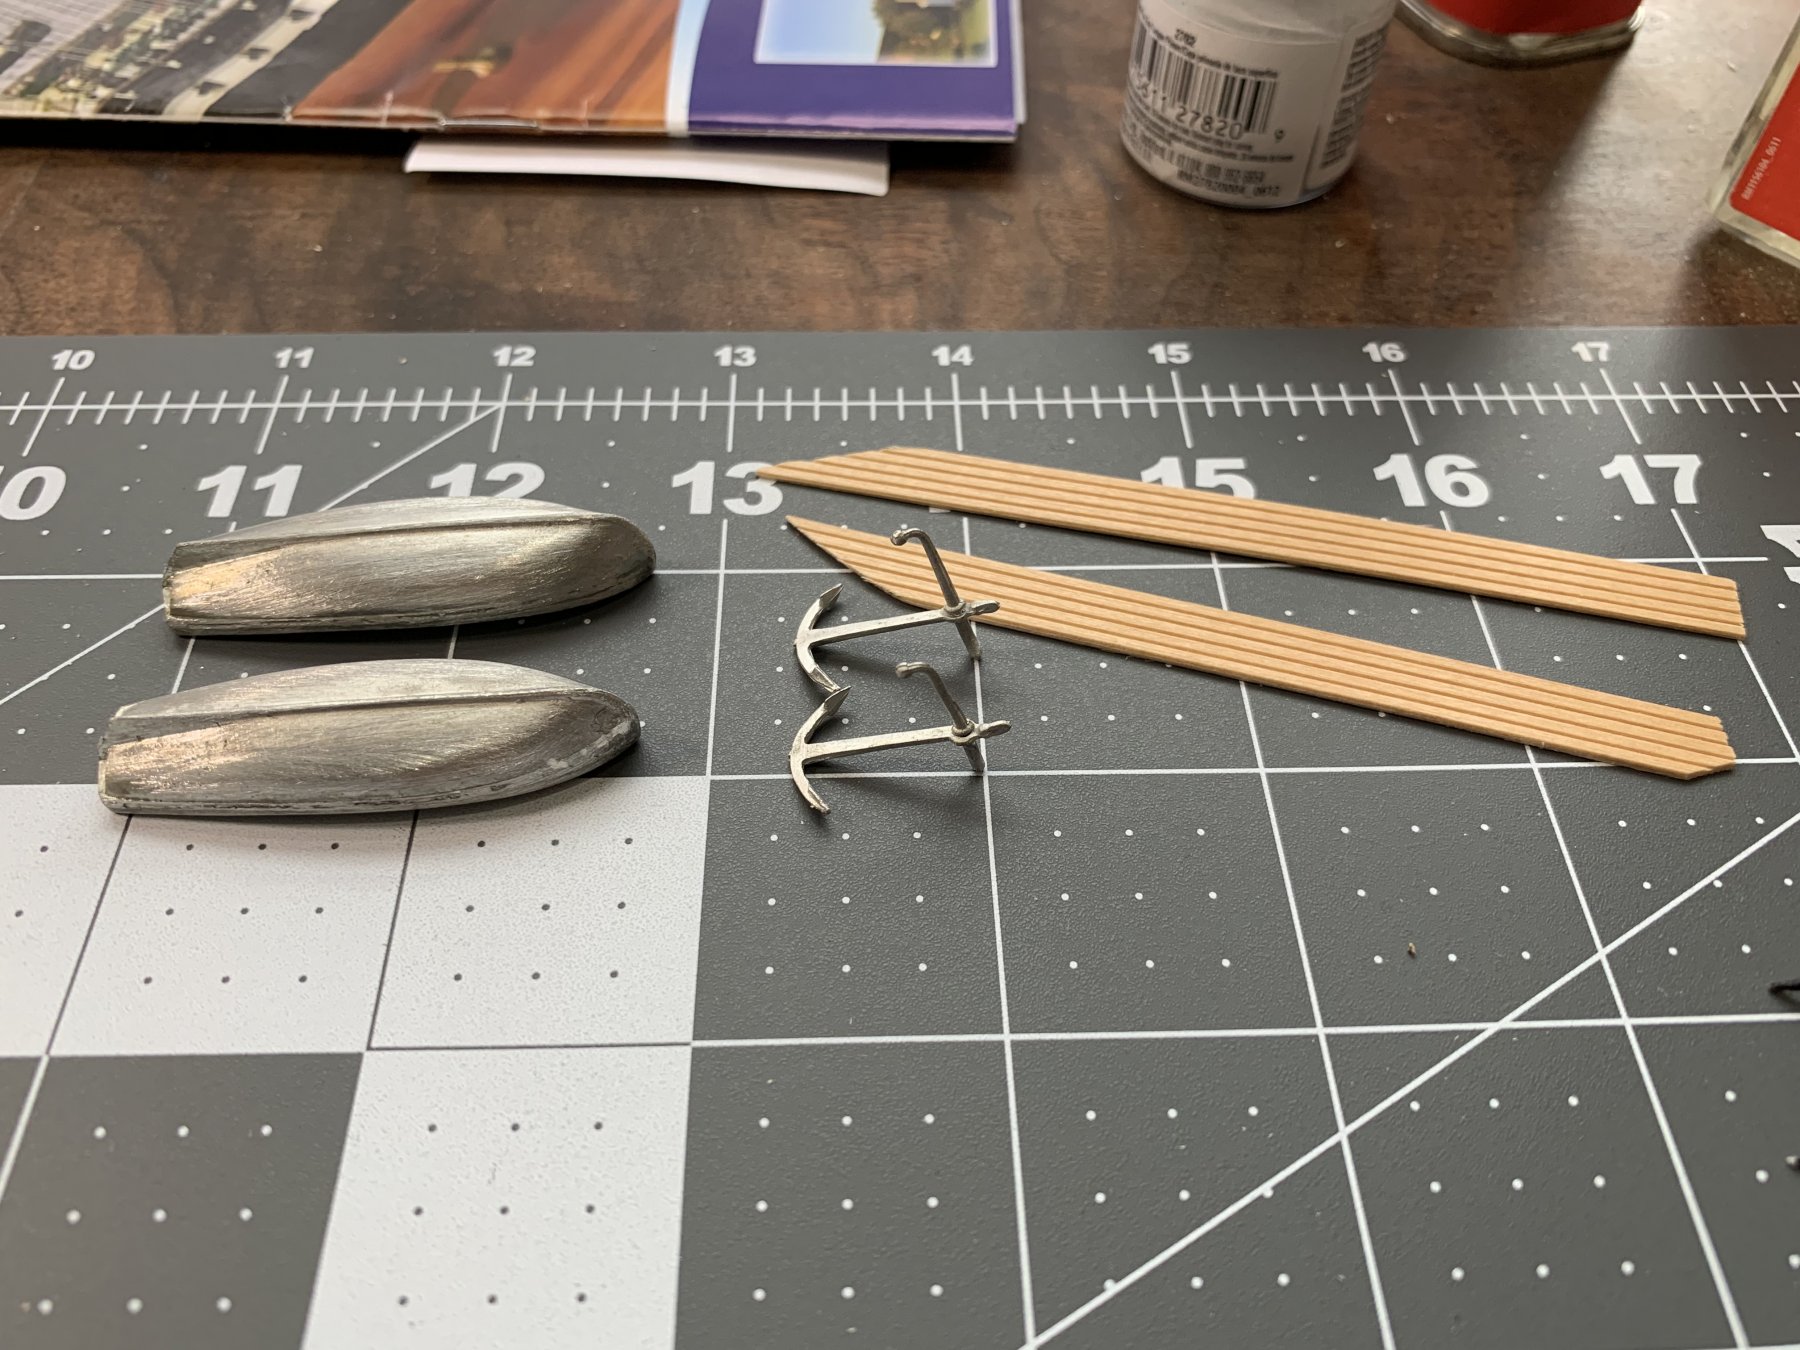
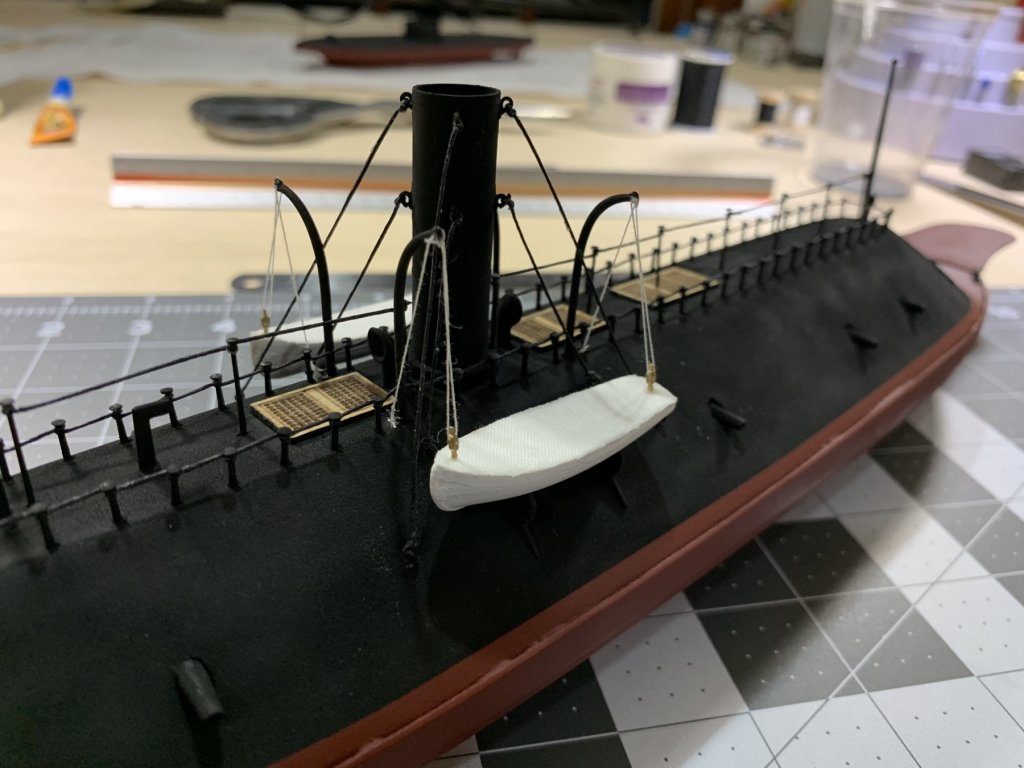
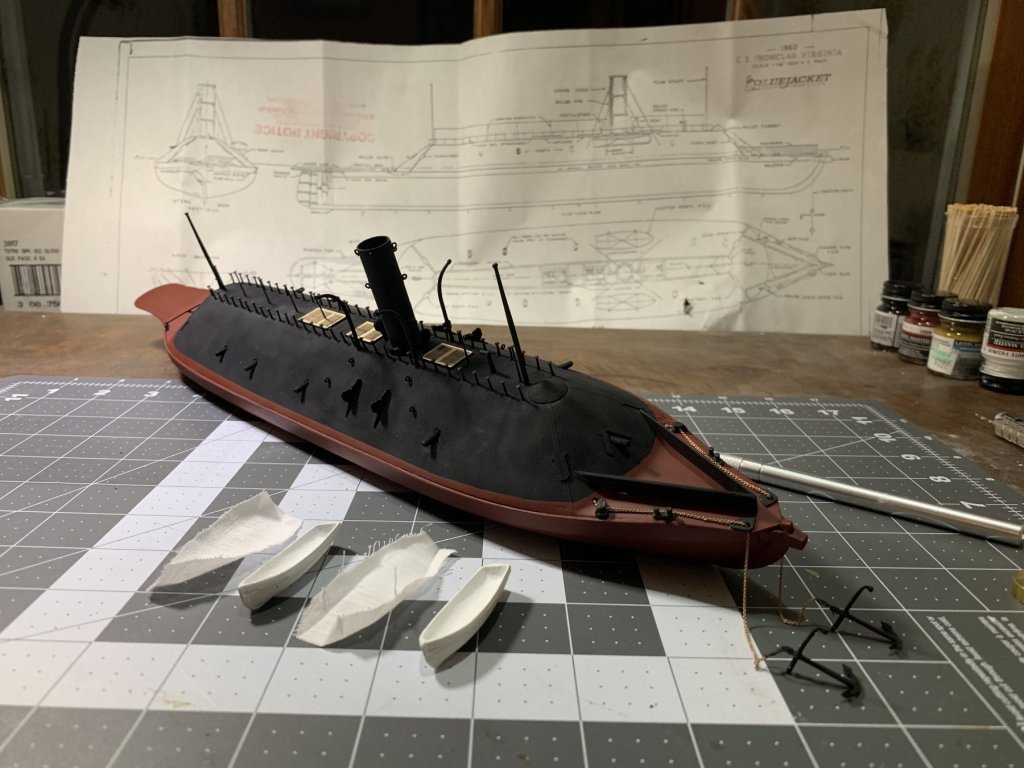
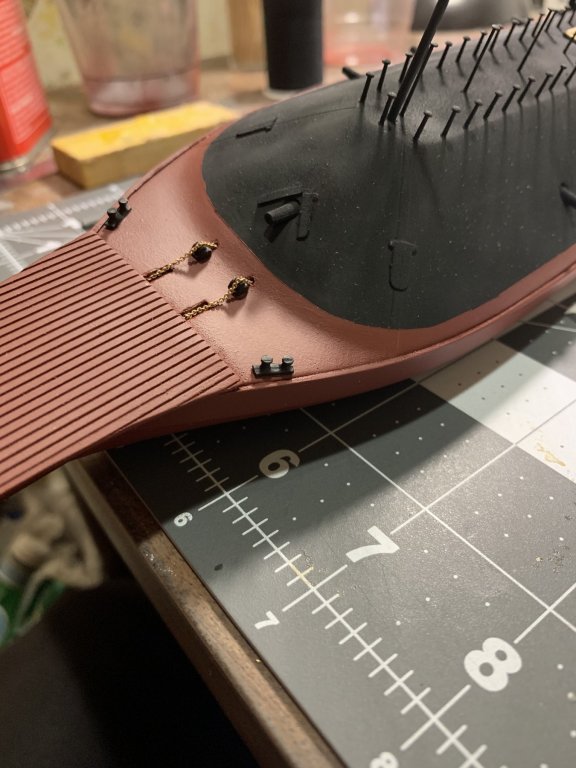
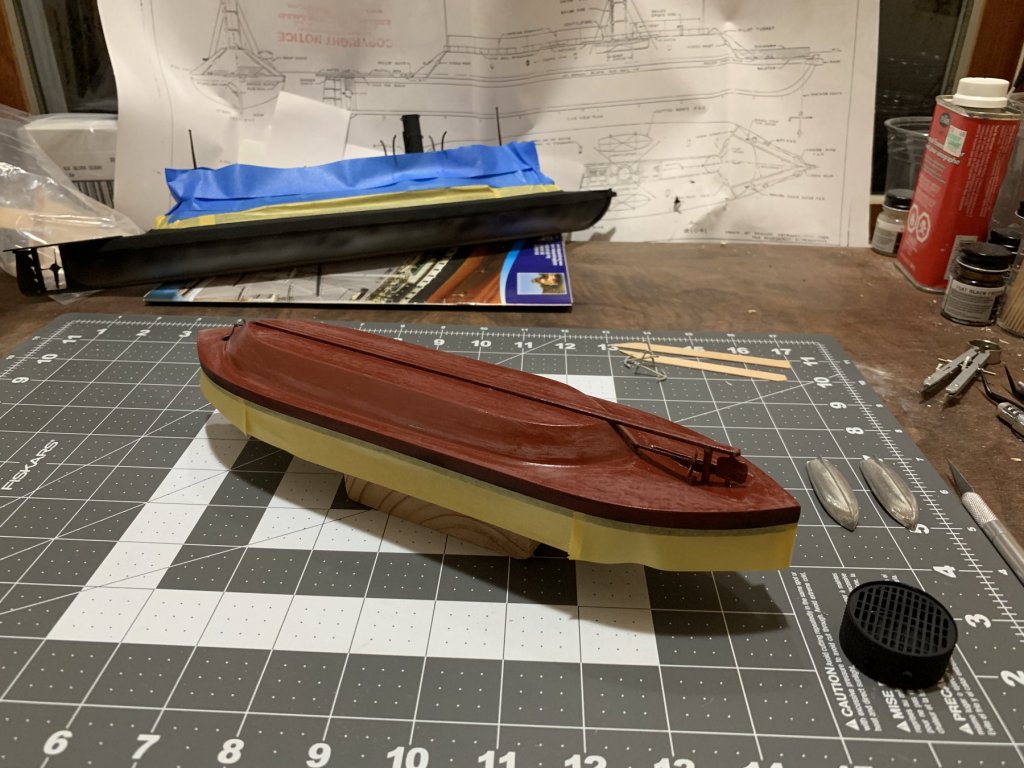
So I mounted the anchors and their chains as well as the chains for the rudder assembly. I used thread covered in conservators wax and made a number of turns with it to tie the chain to the anchor. I also painted the cutters and cut the fabric tops for them. I tried utilizing my initial idea of ironing and sewing the edges but it wasn’t working out well. I would welcome any feedback people have on the best way to attach the fabric tops to the cutters.
- 43 replies
-
- 6
-
-
- virginia
- BlueJacket Shipcrafters
- (and 1 more)
-
Mounted the forward bullwarks as well as touched up a few scuff marks on the paint. I know it’s a small update but I find that making a tiny bit of progress every night keeps me moving forwards.

- 43 replies
-
- 3
-
-
- virginia
- BlueJacket Shipcrafters
- (and 1 more)
-
Mounted the various deck fittings after painting them. I also painted the screw a brass color. Furthermore, I painted and dry fit the bulwarks. It’s really coming together!


- 43 replies
-
- 5
-
-
- virginia
- BlueJacket Shipcrafters
- (and 1 more)
-
Does anyone have a historical engraving or historical mention of cutters on the USS Monitor? If so, how they were installed? I have seen a number of other models that include cutters in various configurations but I don’t want to add them to my model if they aren’t historically accurate.
-
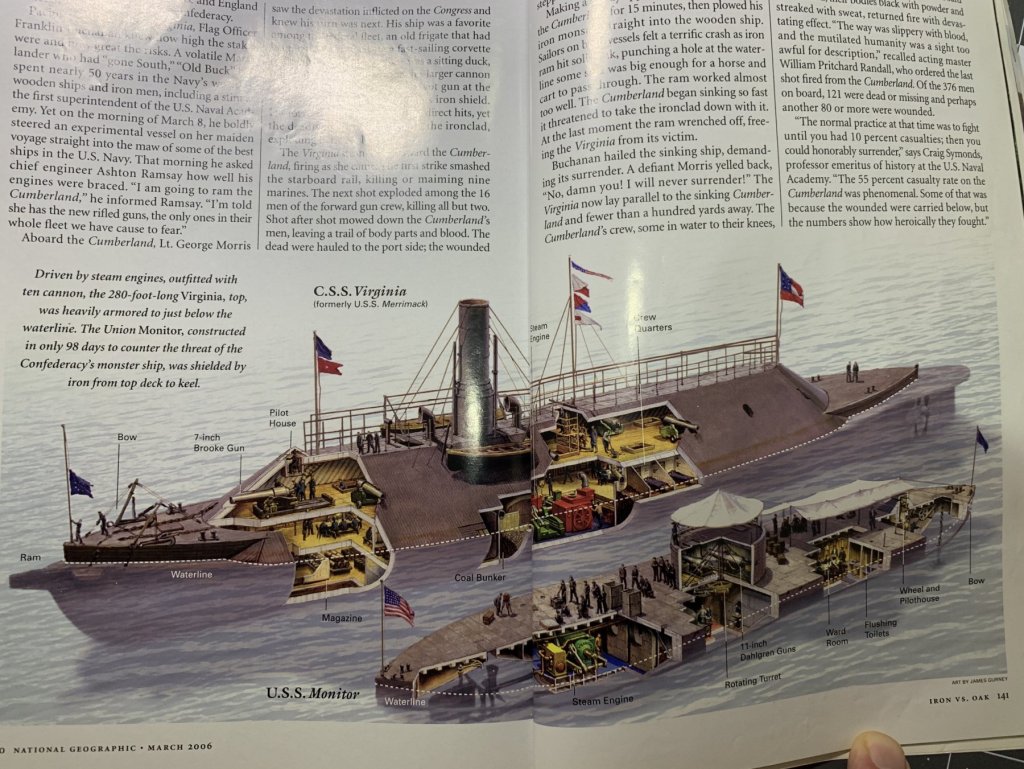
Cleaned up the remaining deck fittings and began priming them. I’ll paint the deck fittings black and the cutters white. On a more technical note: The kit comes with a bit of fabric that is meant as a tonneau cover for the cutters. What is the best method for securing this to the boats while maintaining a tight fit? I have some ideas but I wanted to solicit people’s thoughts. Also, the March 2006 National Geographic has a phenomenal article on the battle of Hampton Roads and is a great read for anyone interested. Of note is the nice cutaway diagram of both the Monitor and Virginia to scale. Though I suspect they may have taken some small artistic license.

- 43 replies
-
- 4
-
-
- virginia
- BlueJacket Shipcrafters
- (and 1 more)
-
Thanks @Wallace! I applied another coat of paint and then took off the tape and no leaks! Now on to the bulwarks, cutters, and deck details. On another note, I repainted the Monitor at the same time and I am super happy with how well they match.

- 43 replies
-
- 3
-
-
- virginia
- BlueJacket Shipcrafters
- (and 1 more)
-
@MrBlueJacket It's actually the one I worked on earlier in the year. Since I hand brushed it I decided to do some re-work and sand off a bit of paint and airbrush it so they two ships would have identical paint jobs. They will go together in a display case so I would like them to match as much as possible.
- 43 replies
-
- 1
-
-
- virginia
- BlueJacket Shipcrafters
- (and 1 more)
-
Got the first coat of crimson paint on and it’s looking great! Will probably do another coat or two and then take the tape off and hope for no leaks!

- 43 replies
-
- 3
-
-
- virginia
- BlueJacket Shipcrafters
- (and 1 more)
-
@MrBlueJacket Thanks for the suggestion! I'll ad another couple passes of tape to be sure I don't accidentally airbrush the casement of the Virginia red. I may pick up some wider blue tape as well.
- 43 replies
-
- 2
-
-
- virginia
- BlueJacket Shipcrafters
- (and 1 more)
-
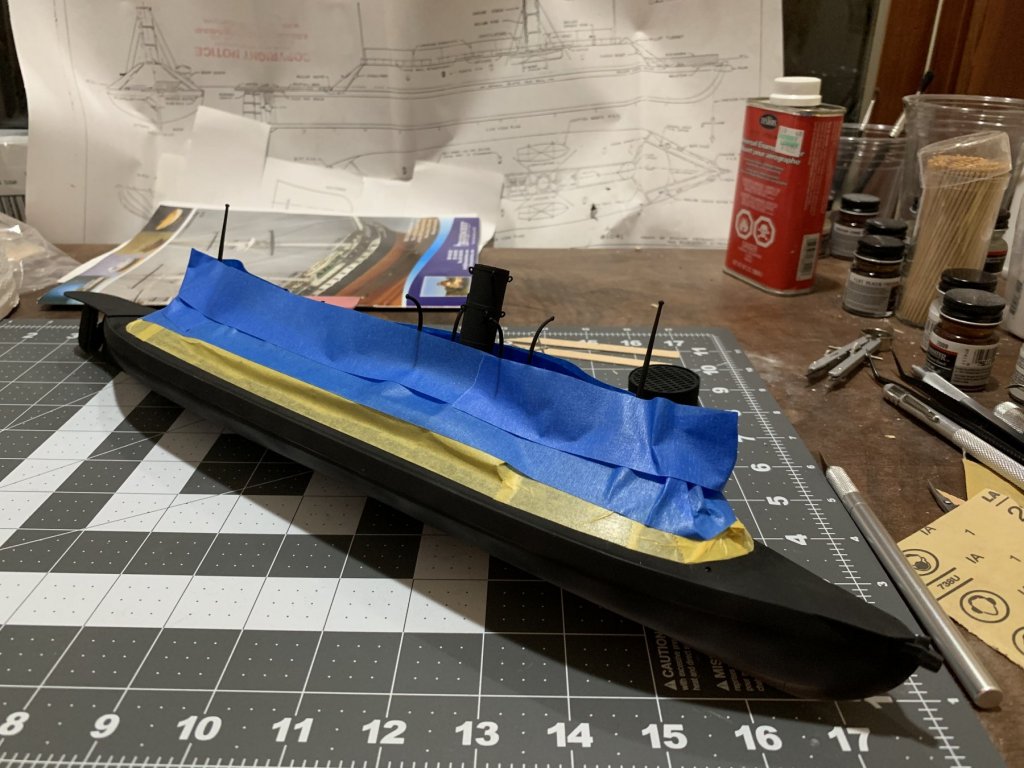
So after continuing work on the CSS Virginia I am much more satisfied with the quality of my paint work when utilizing an airbrush (I hand brushed the Monitor). So I decided to sand off a layer of paint and re-paint with an airbrush. I’ll need to continue airbrushing the Virginia so I don’t think it will take long.
-
Started masking the waterline as well. I decided to mount the bulwarks after painting the waterline because the waterline passes through them. I used Tamyia tape followed by generic blue masking tape. I’ll try and actually airbrush the red later this week. I bought some brass colored paint for the screw as well which should look awesome.
- 43 replies
-
- 5
-
-
- virginia
- BlueJacket Shipcrafters
- (and 1 more)
-
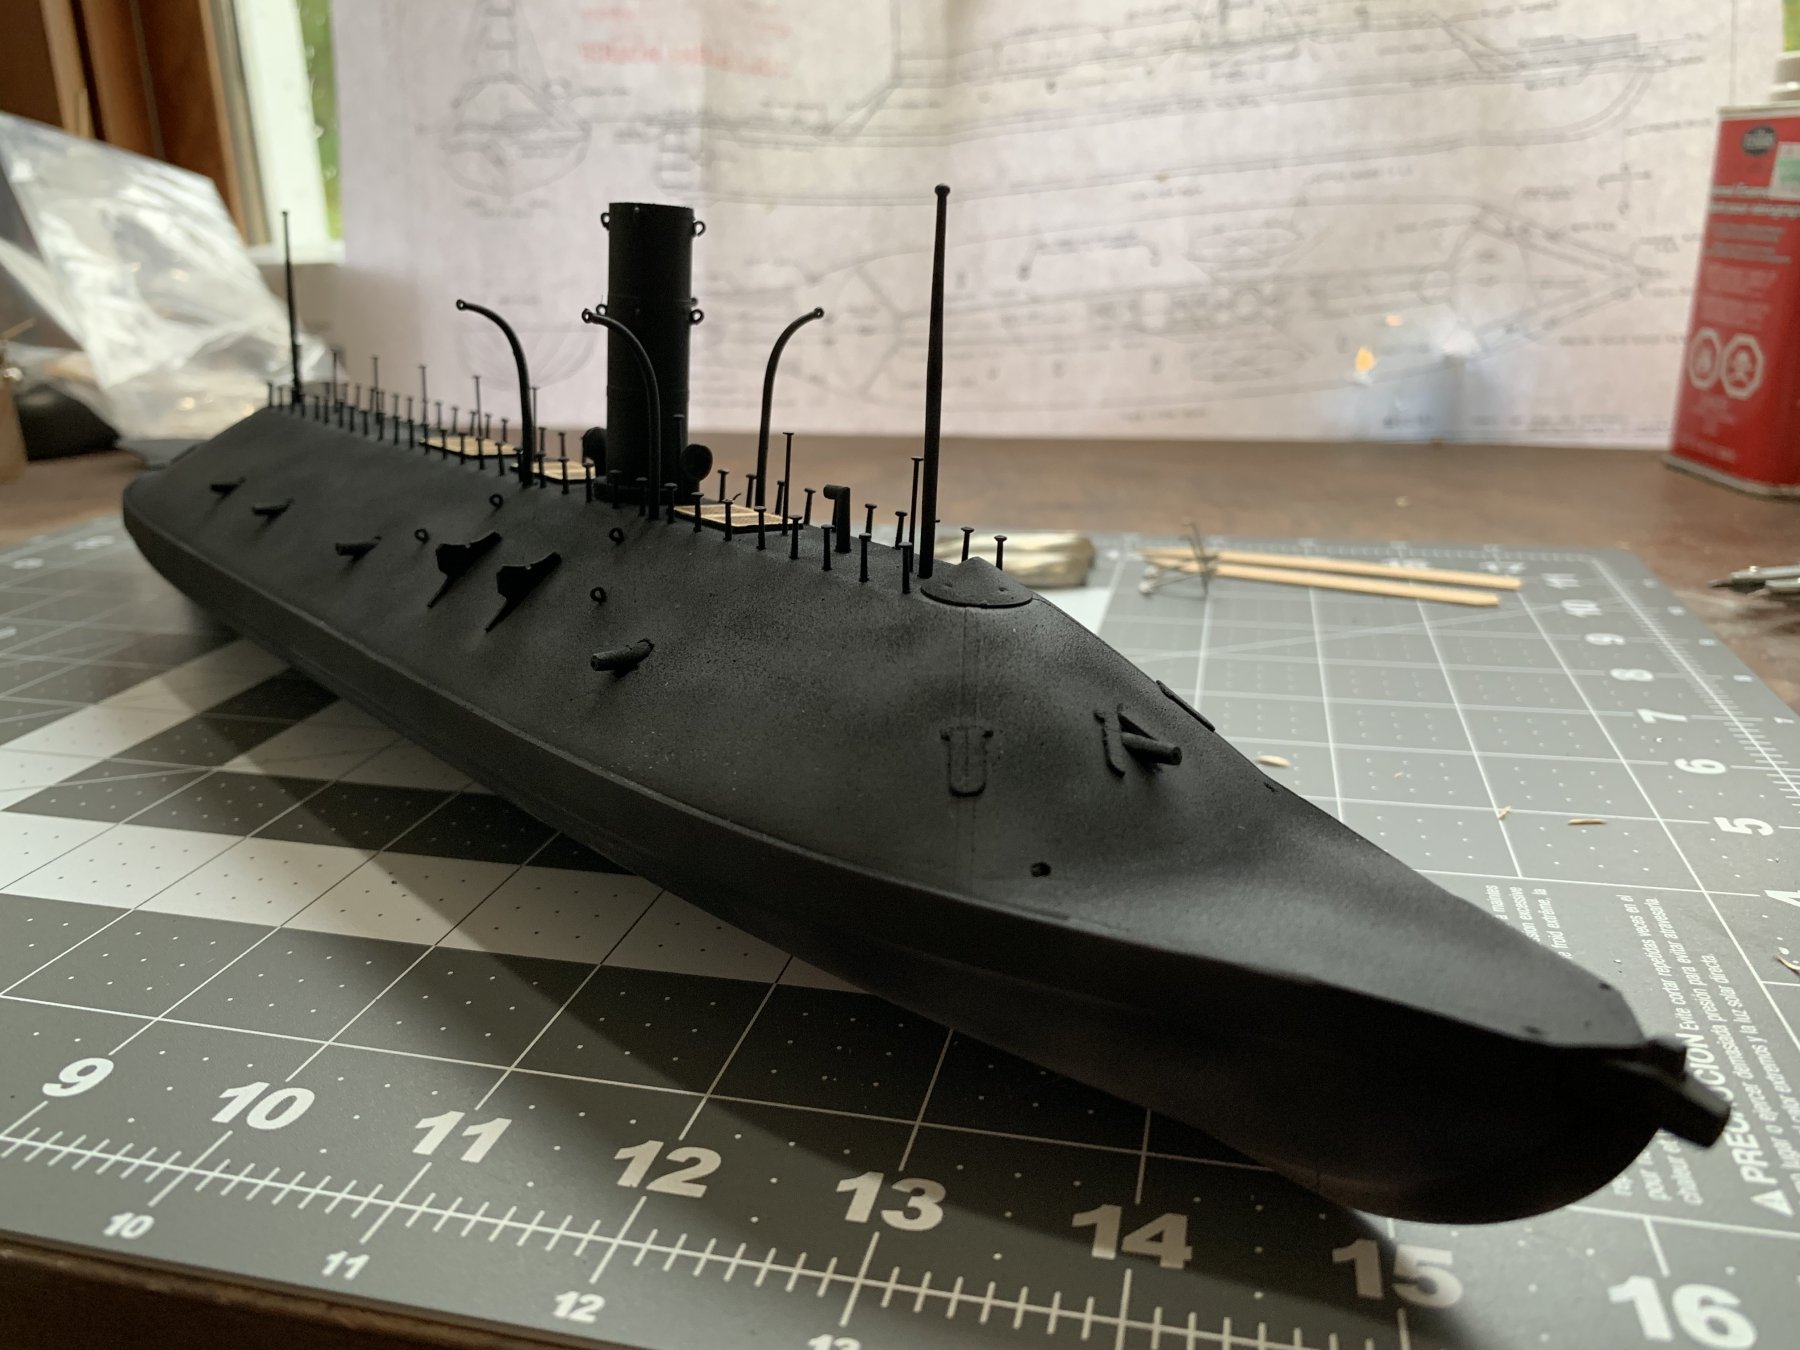
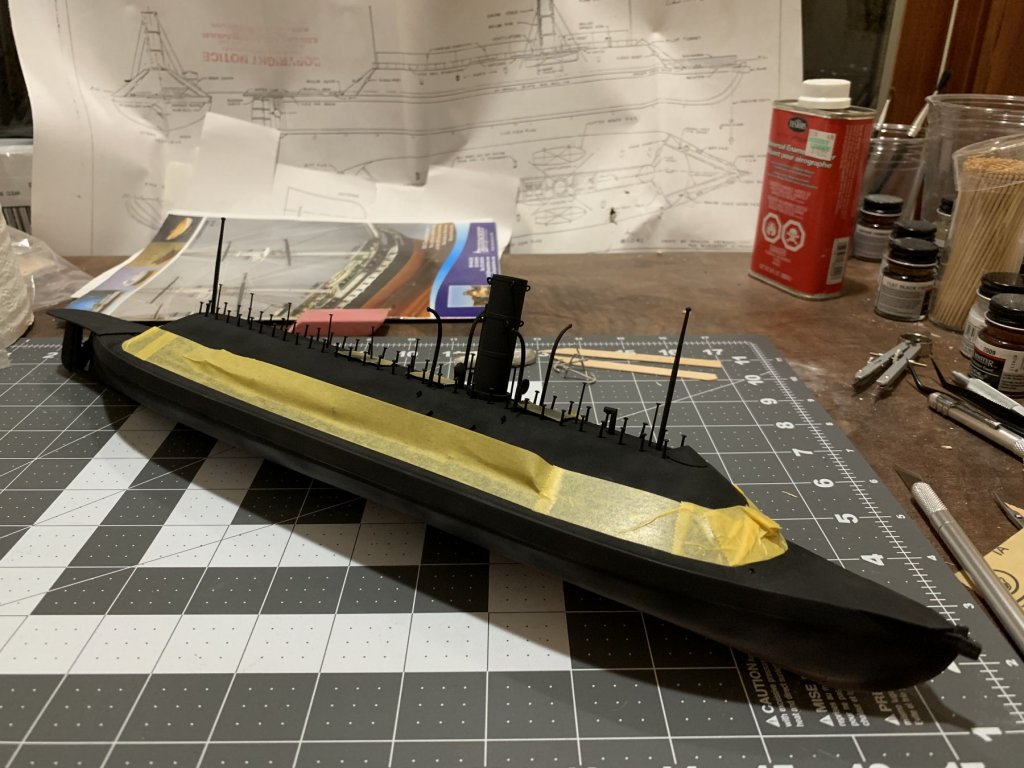
Airbrushed a coat of flat black on the entire model as the instructions suggest. I also did a bit of prep work on the anchors, bulwarks, and cutters in preparation for painting.

- 43 replies
-
- 6
-
-
- virginia
- BlueJacket Shipcrafters
- (and 1 more)
-
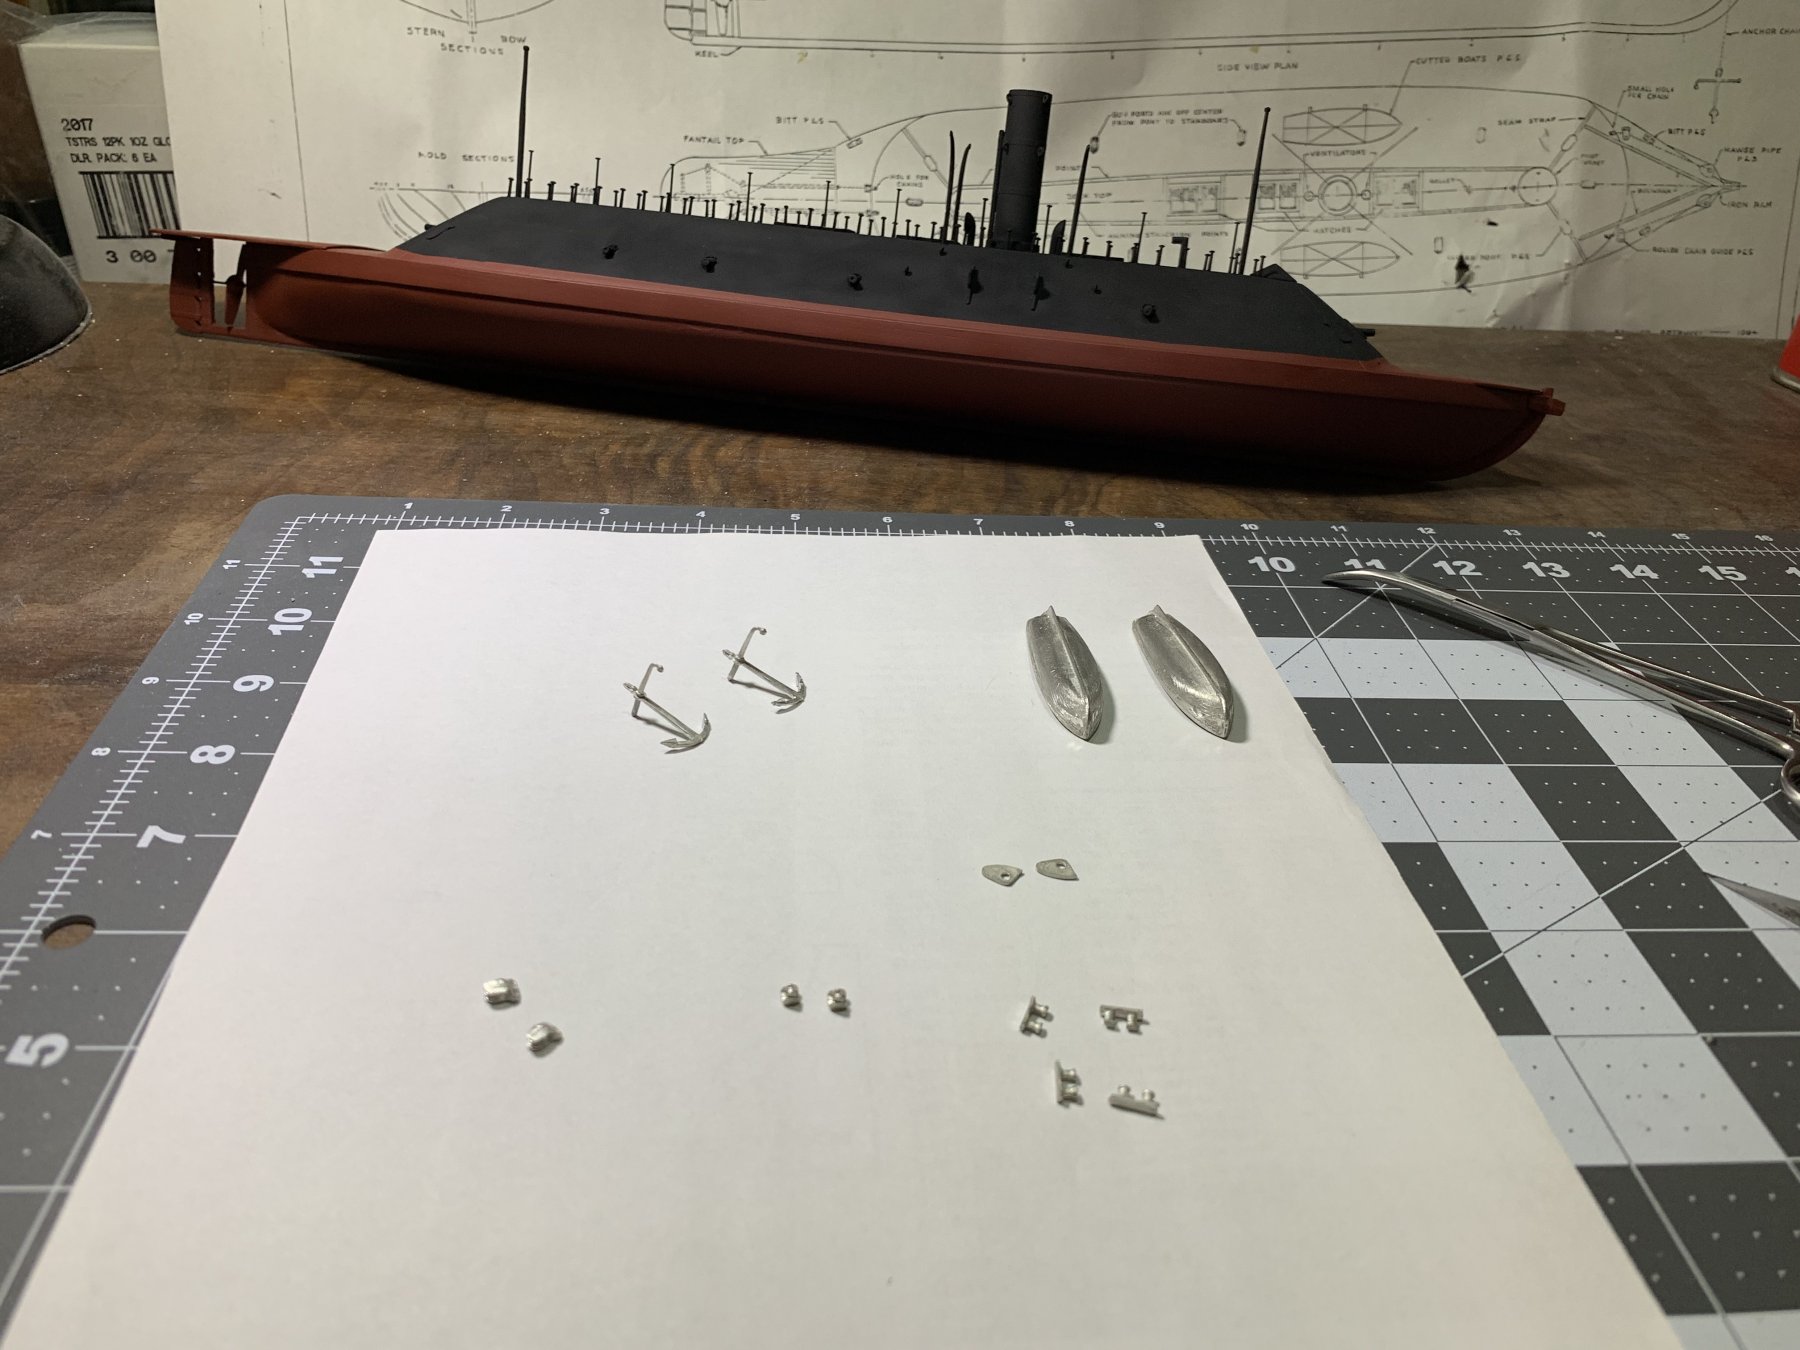
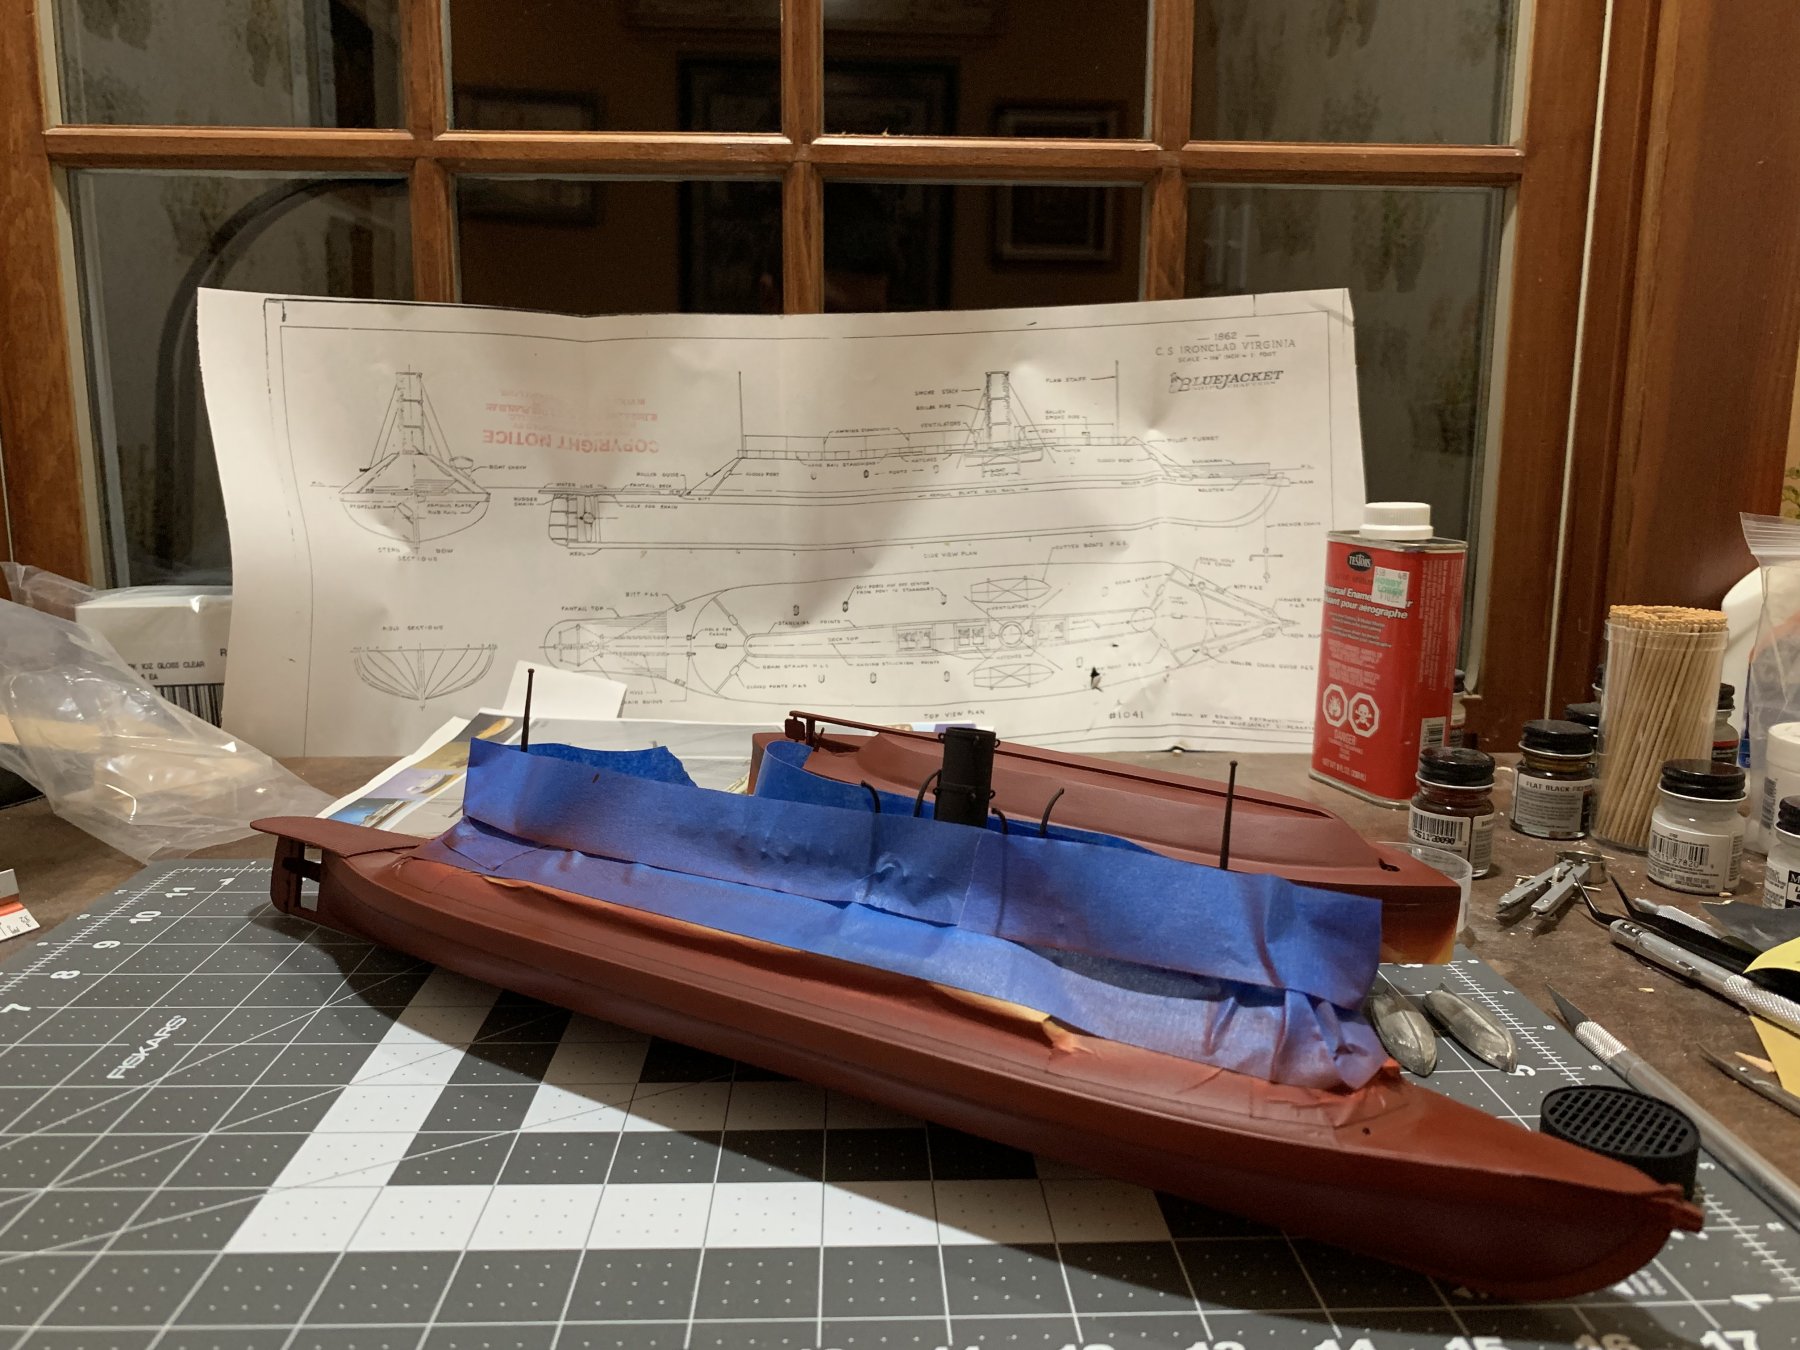
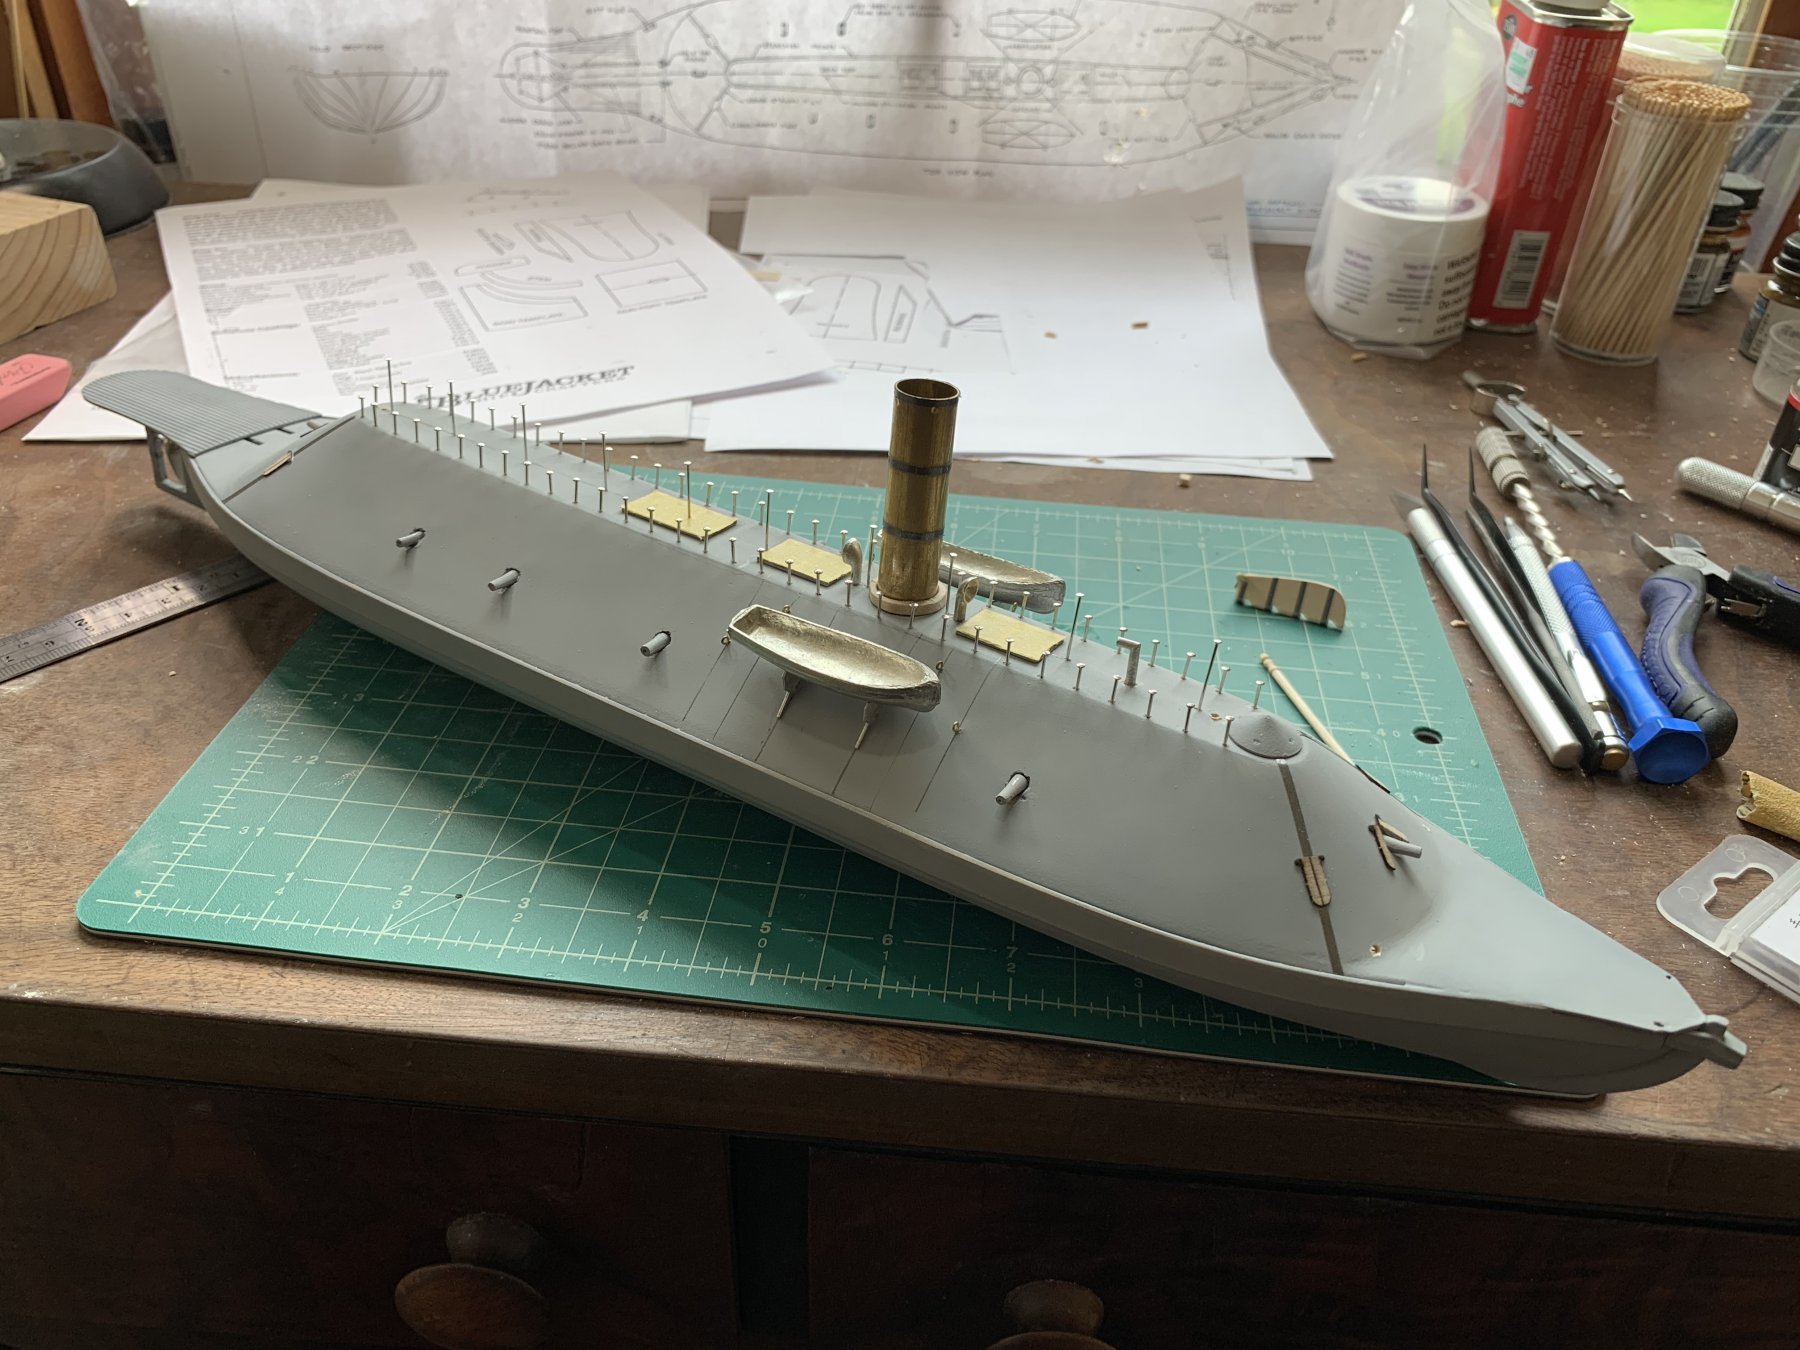
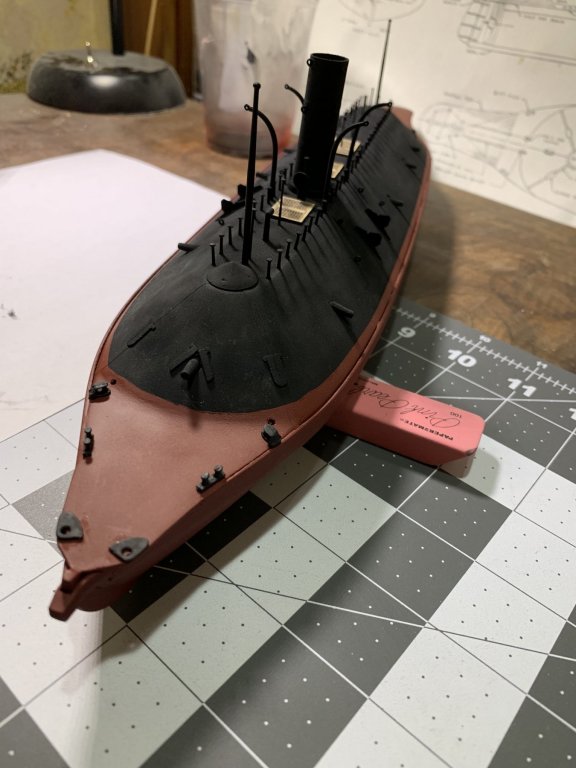
Spent a bit of time on the Virginia this evening. The davits and blocks I order arrived so I wasted no time in installing the davits. They look really good! I also installed the stack support eye hooks as well as glued down the stack. I also installed the propellor and rudder. I used one of the straight sewing needles cut in half to mount the prop. Once the various parts were mounted I took another pass with the airbrush and primer. This is my first model to use an airbrush on and am very happy with how it's turning out. Next up is a coat of black paint and then some work on the remaining fittings as well as cutters. I left off all the fittings that will be black on red in the final model (I plan on placing them after the model is painted).

- 43 replies
-
- 3
-
-
- virginia
- BlueJacket Shipcrafters
- (and 1 more)
-
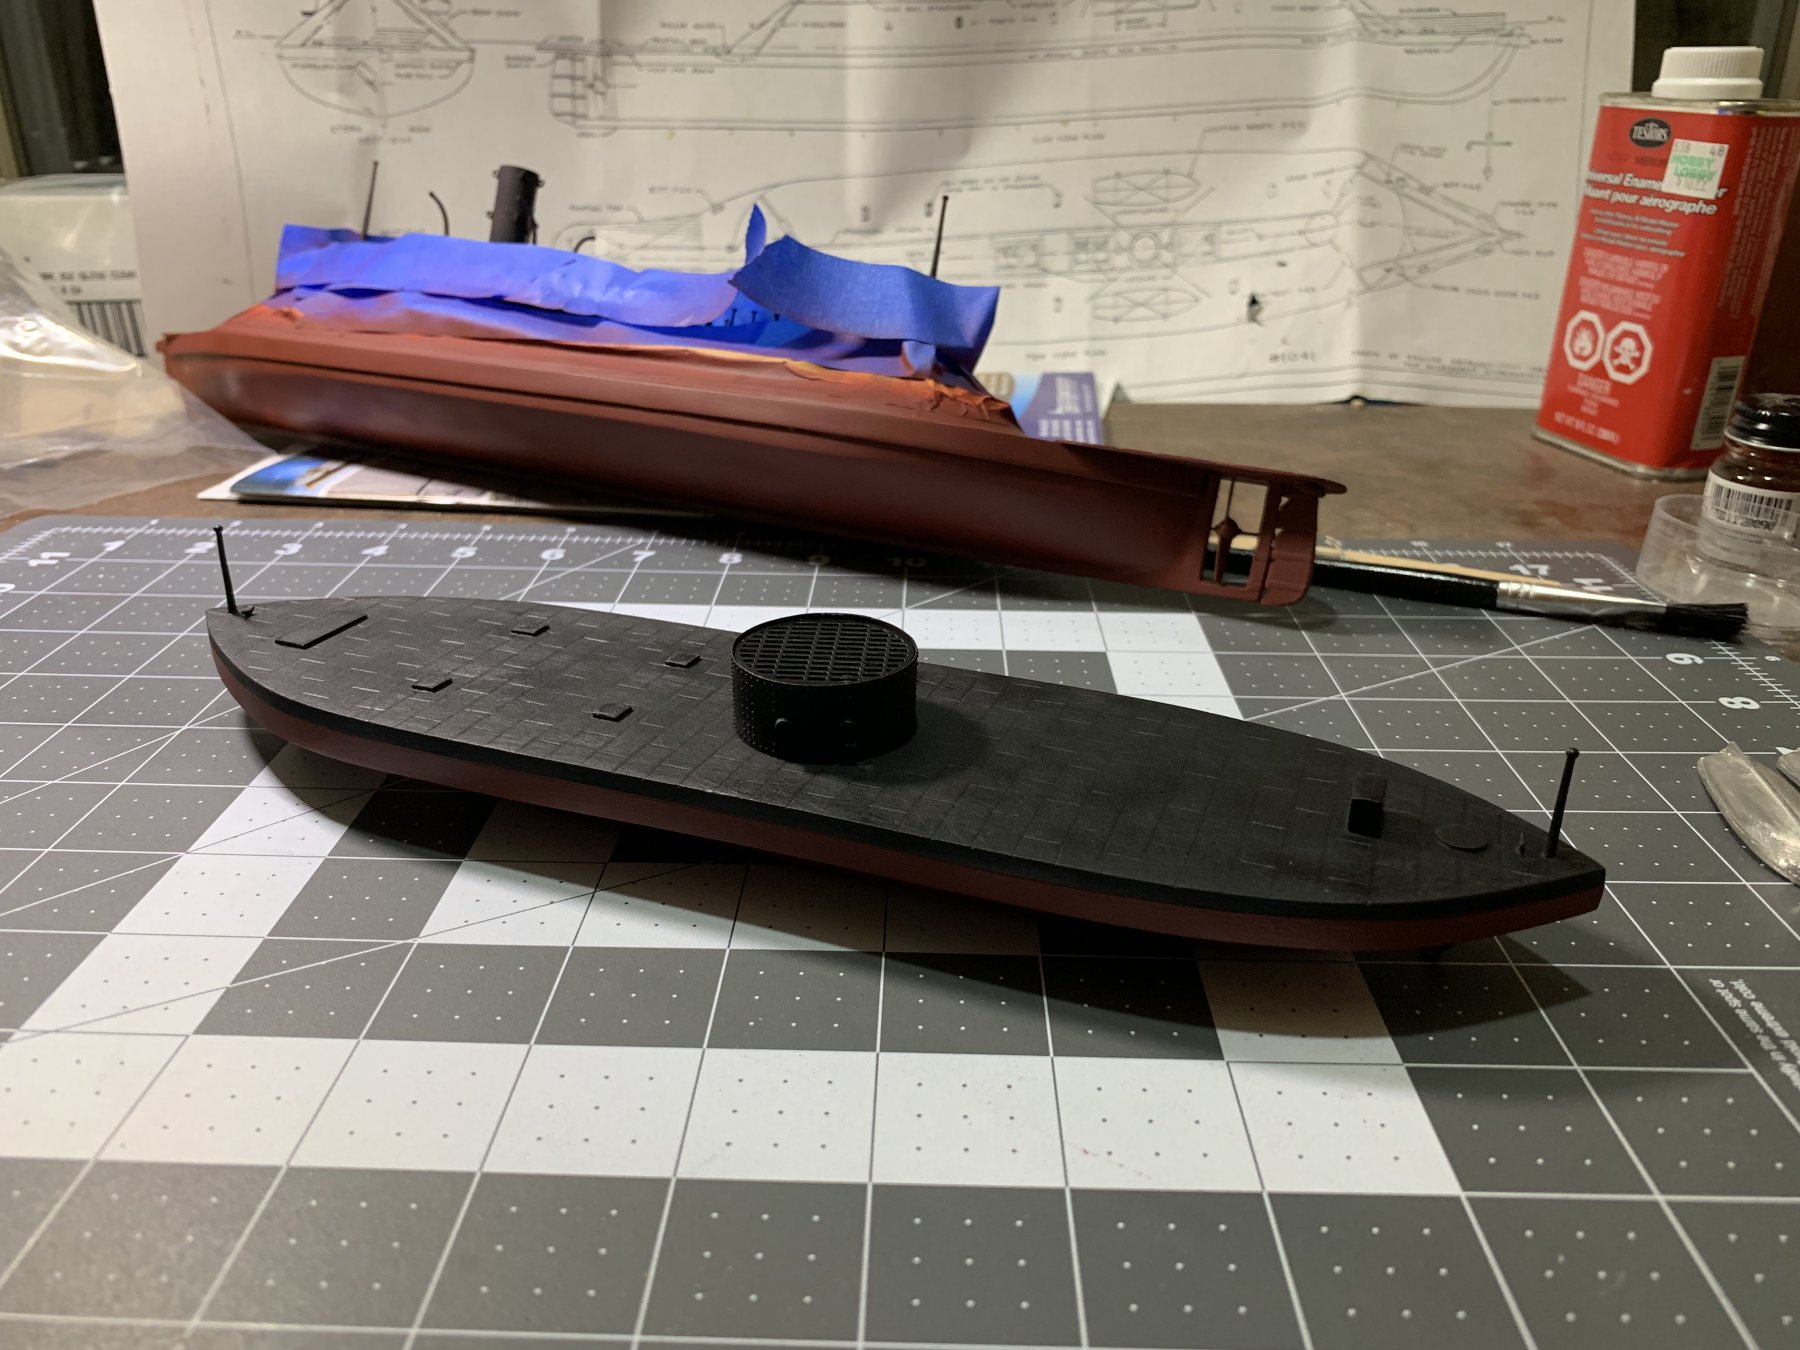
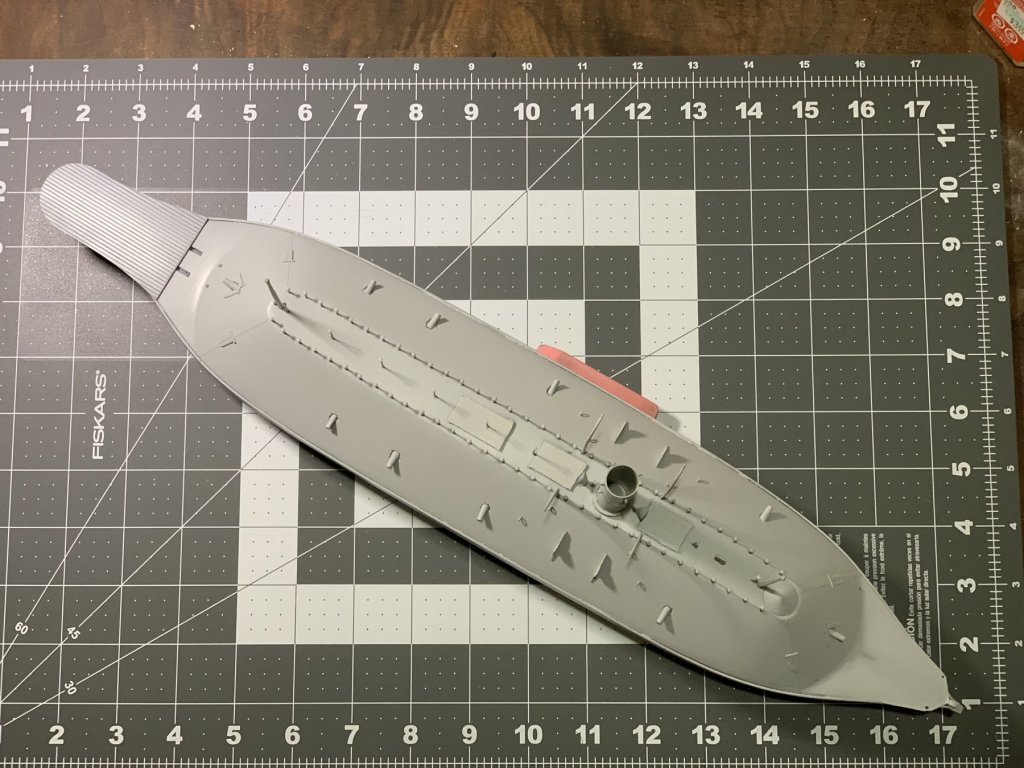
Mounted the cutter chocks as well as finished the wooden base for the stack. Still need to install the eye hooks on the stack for the stack support rigging. I dry fit the cutter for reference. I decided to order some blocks as well as davits to add further details to the cutters. Should look great once they are installed! Up next are cutting the forward bulwarks and installing the various chain roller guides, and mooring cleats. After that I will likely apply another coat of primer and then begin painting. On a historical note, the plans refer to the taller pins on the centerline of the model as "awning stanchions". Does this mean that there was sometimes an awning installed (sort of like a tent)? I remember seeing a graphic of the Virginia (or another casement ironclad) with such an awning but cannot seem to remember where. Would this be a historically accurate addition? I think it would be a unique addition to the kit as I haven't seen that detail on another model of the Virginia. Overall I am extremely happy with the kit as well as my progress on it (especially because I am such a beginner in the hobby).

- 43 replies
-
- 5
-
-
- virginia
- BlueJacket Shipcrafters
- (and 1 more)
-
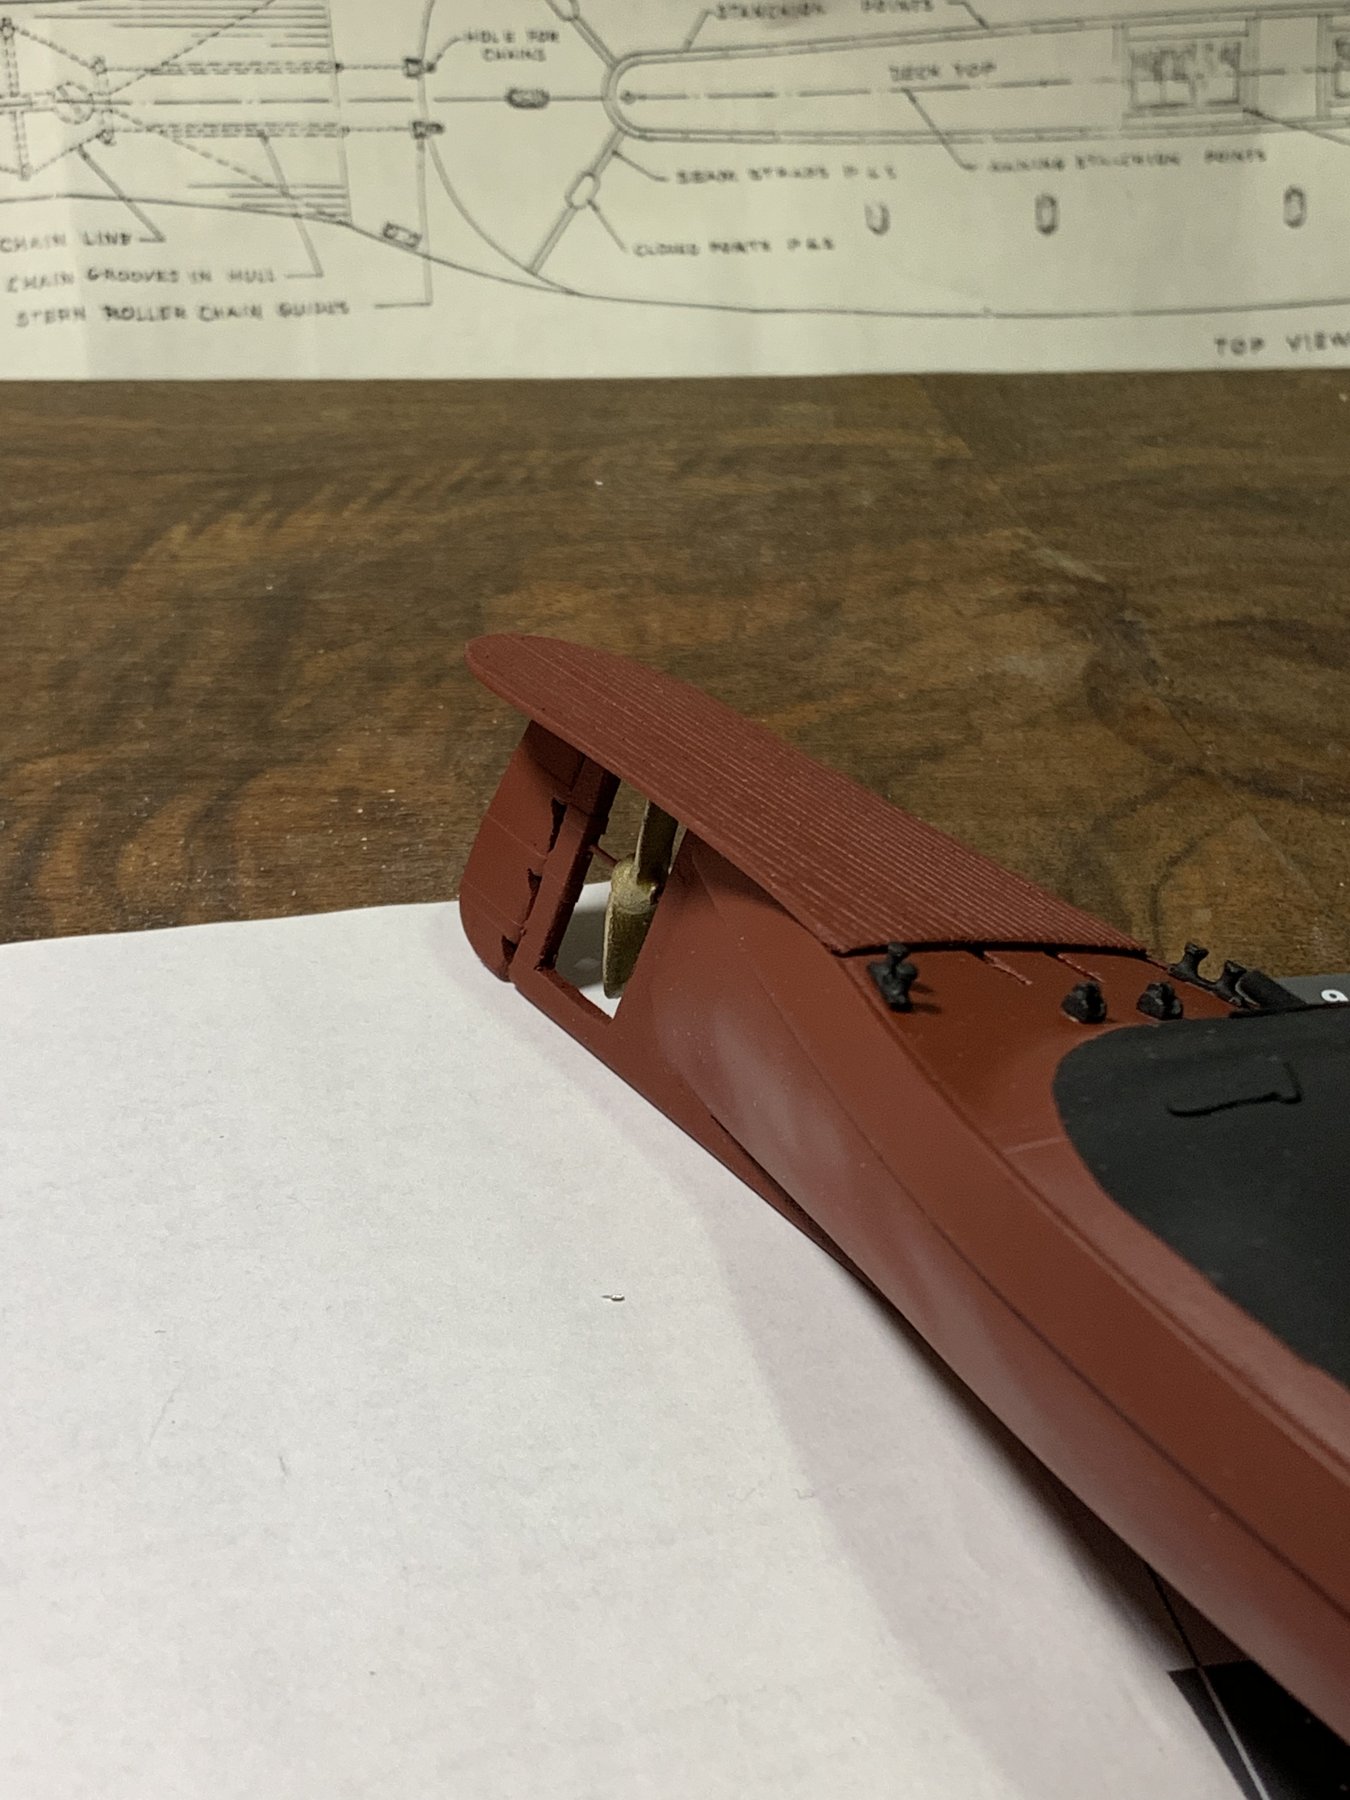
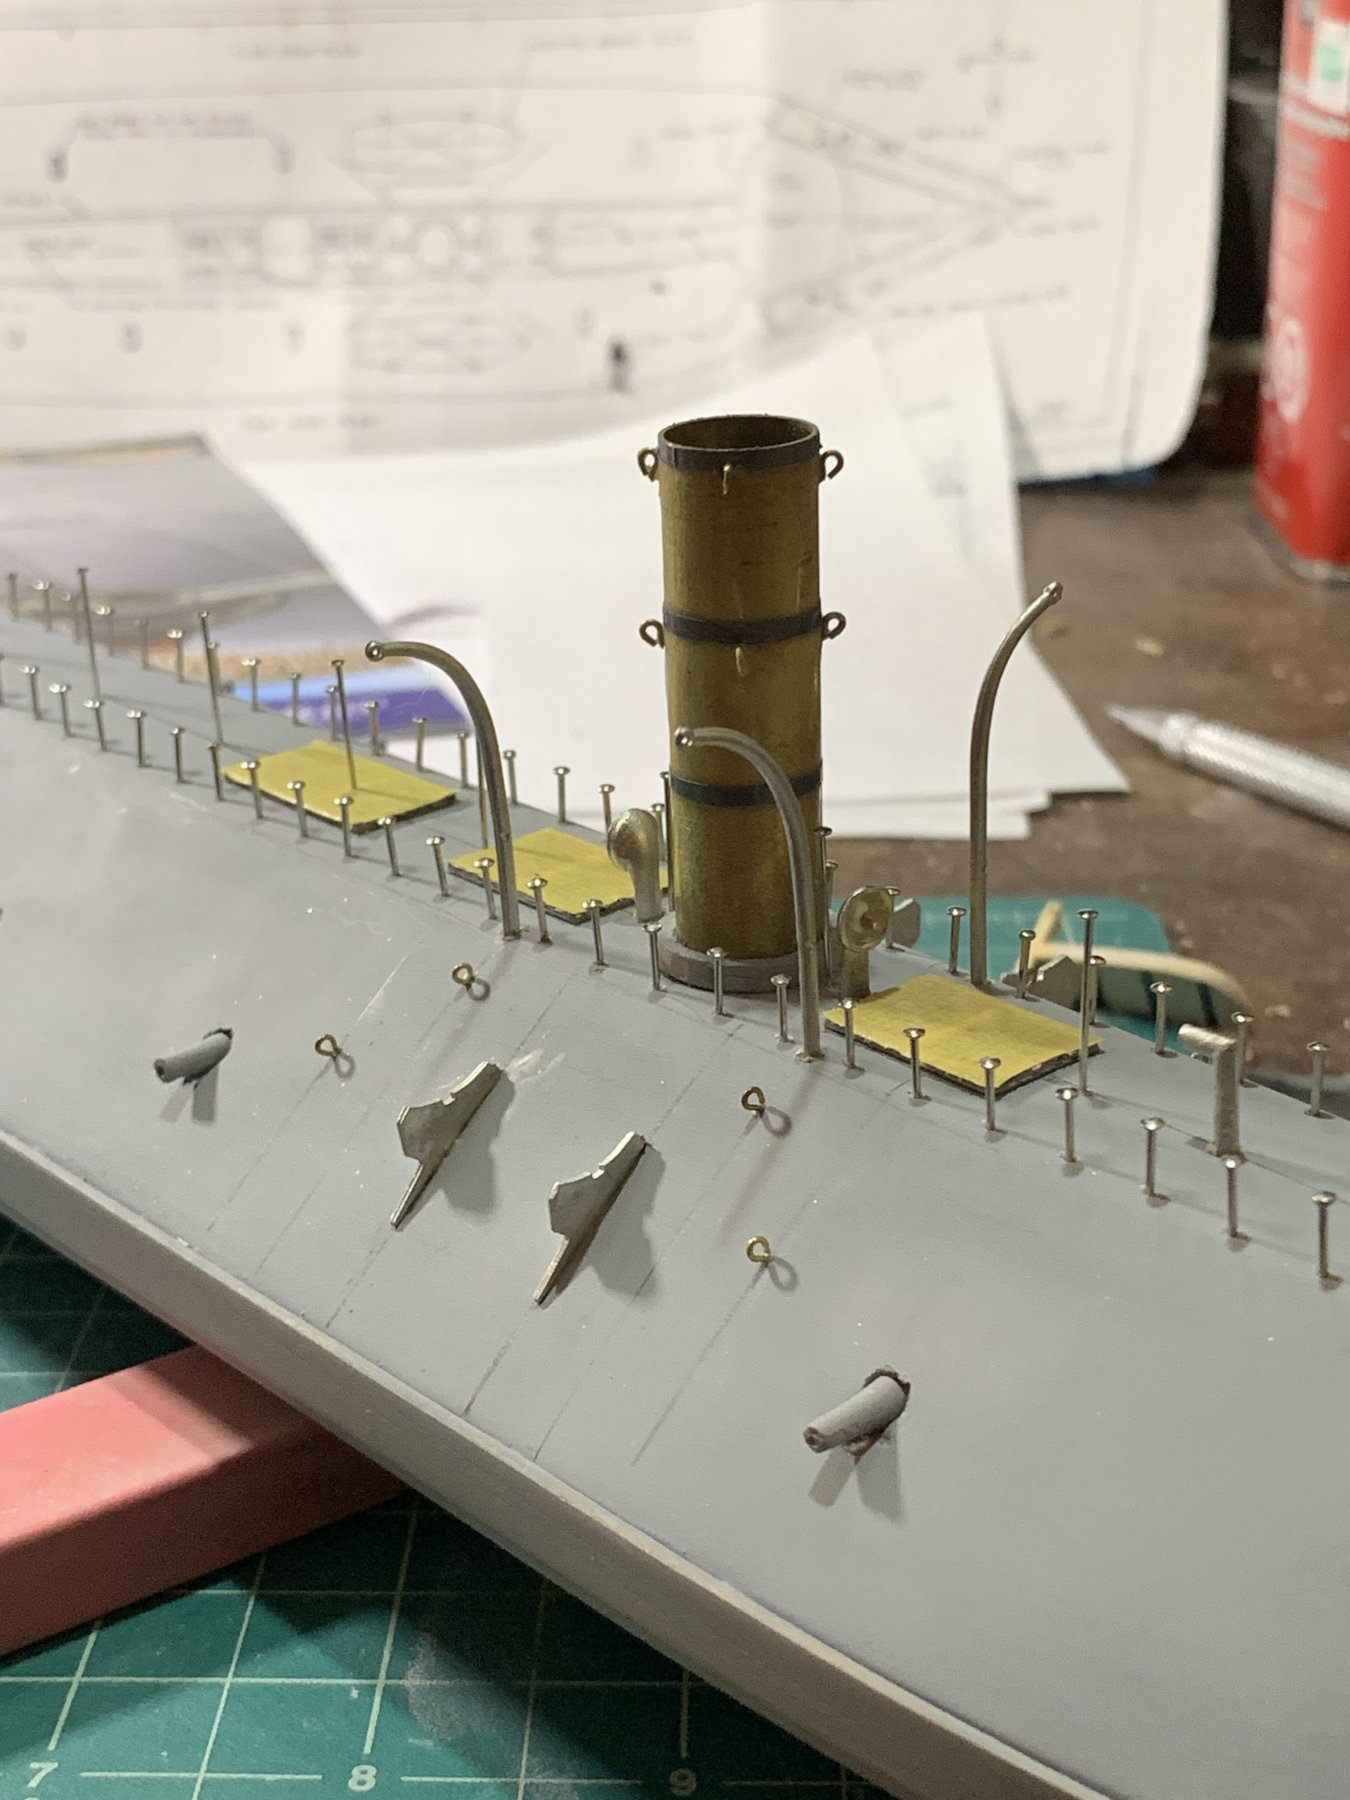
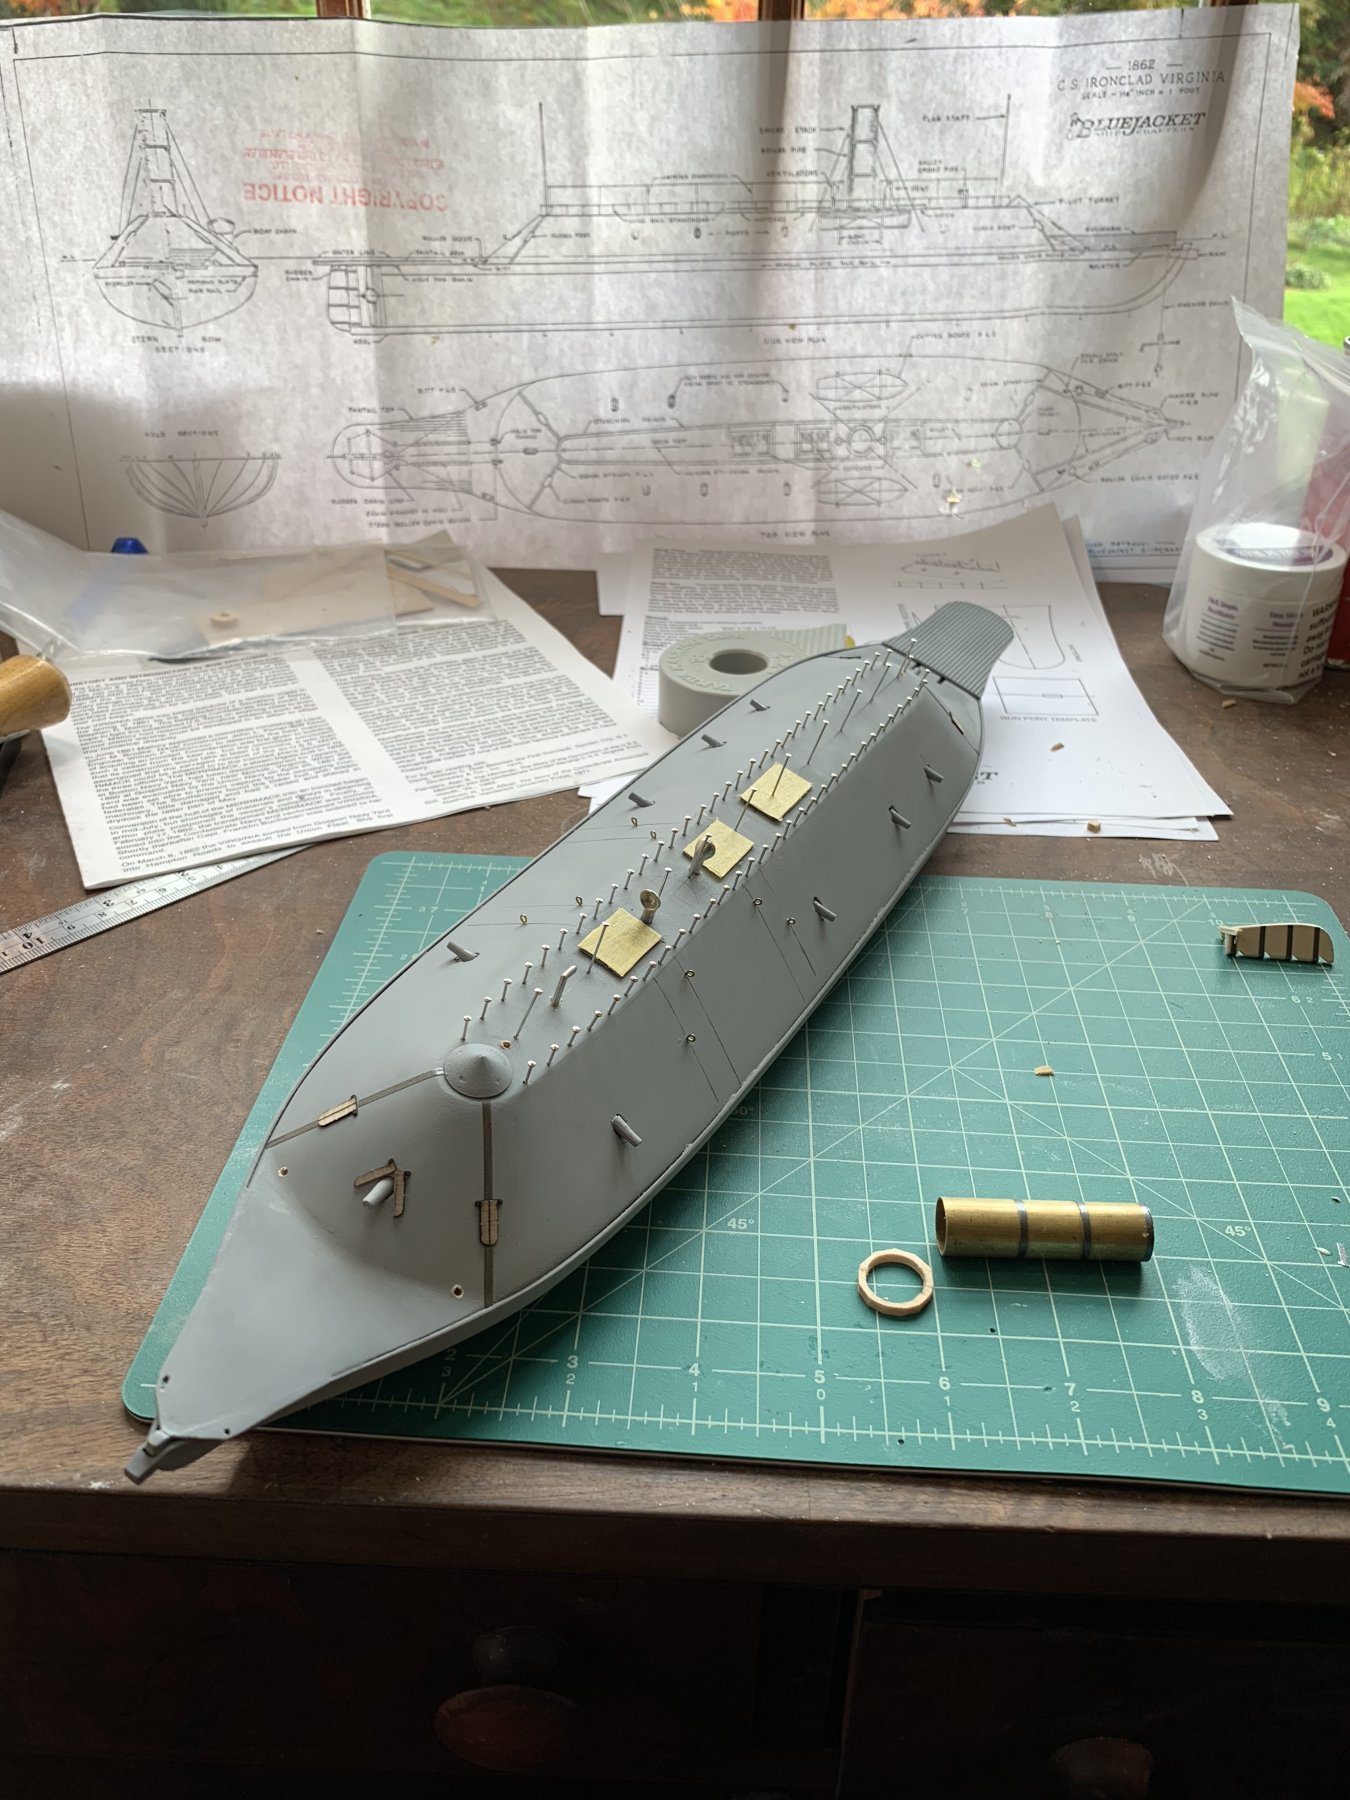
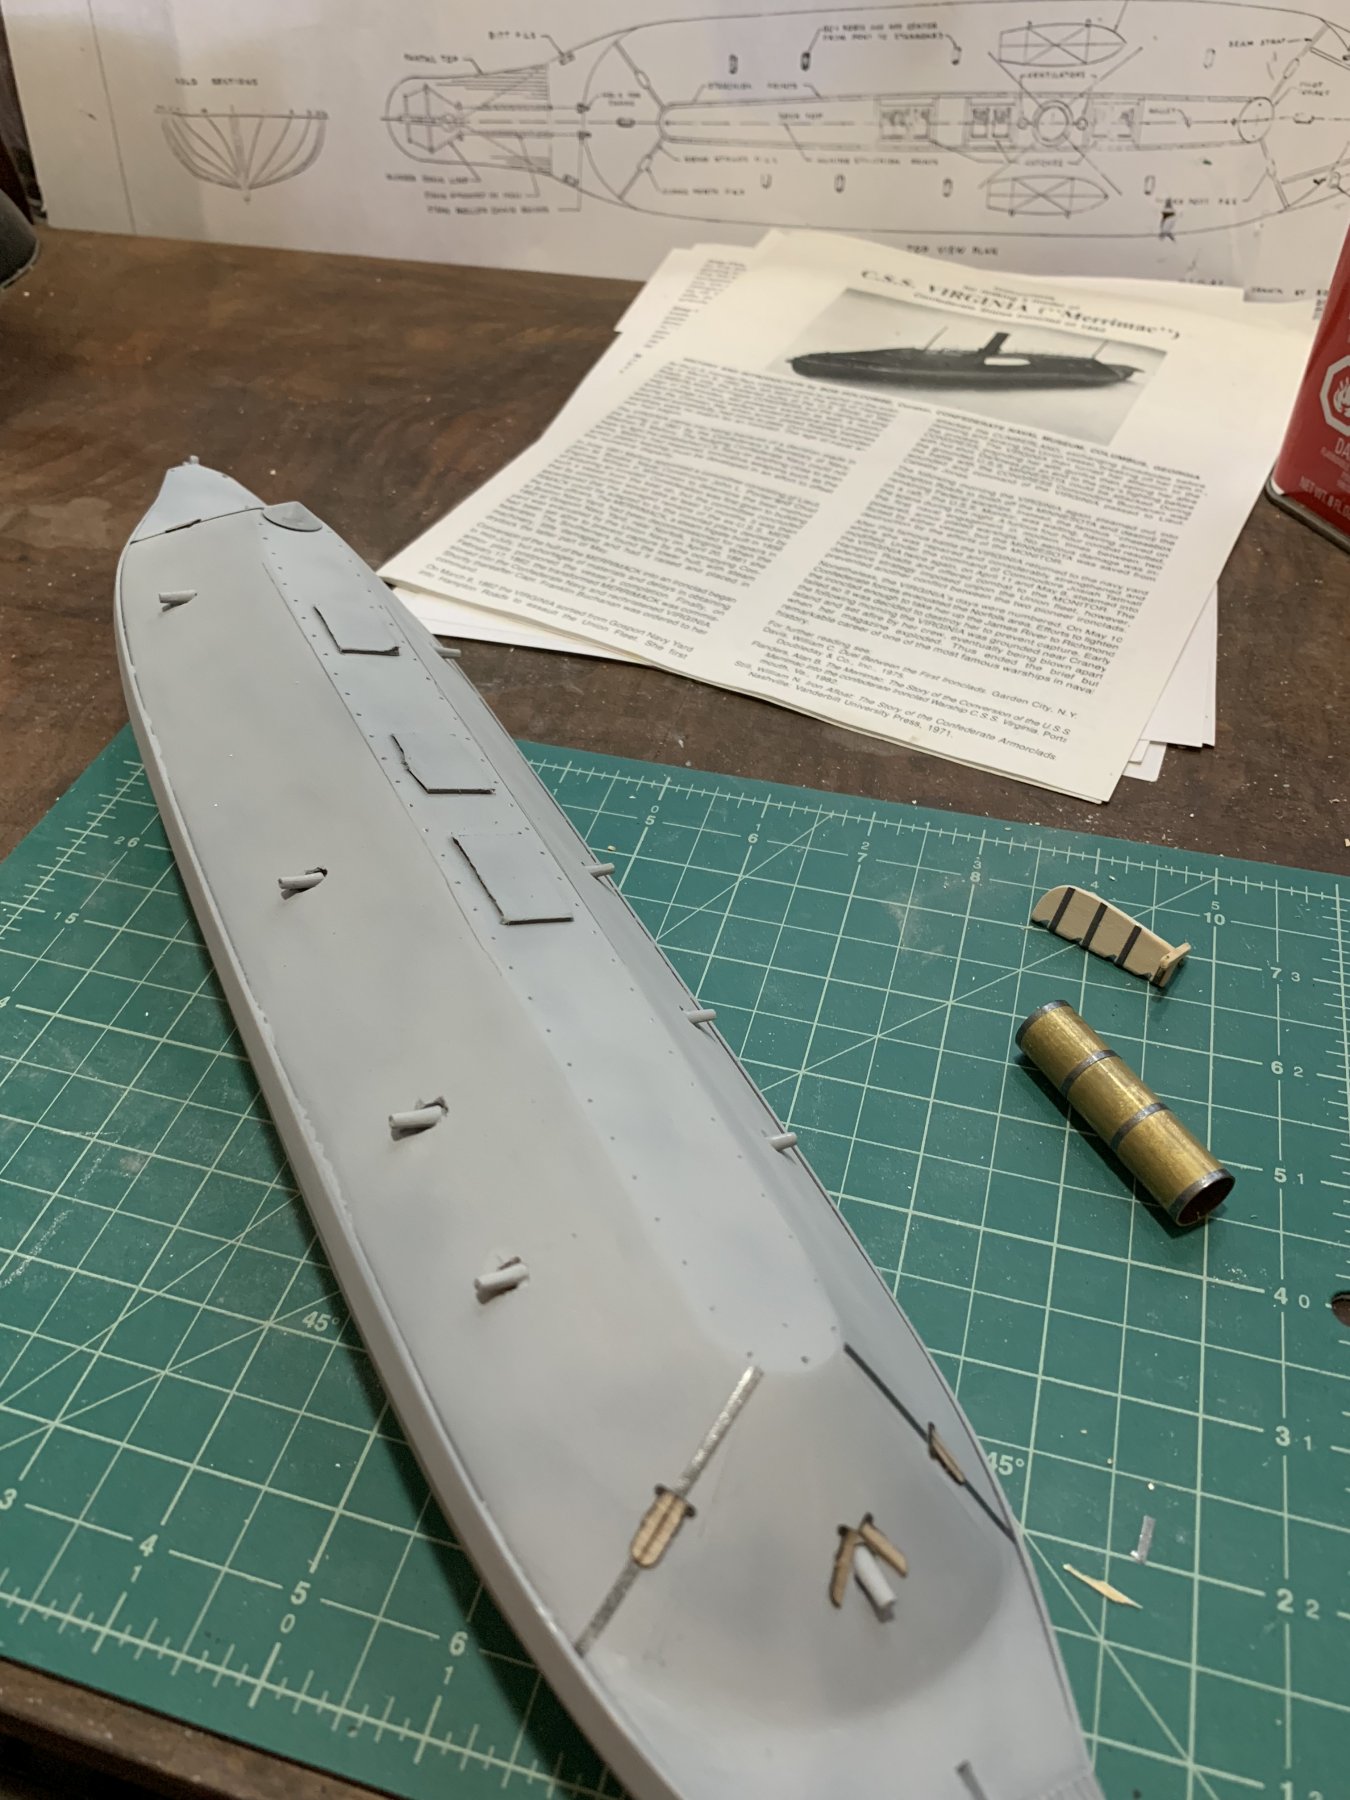
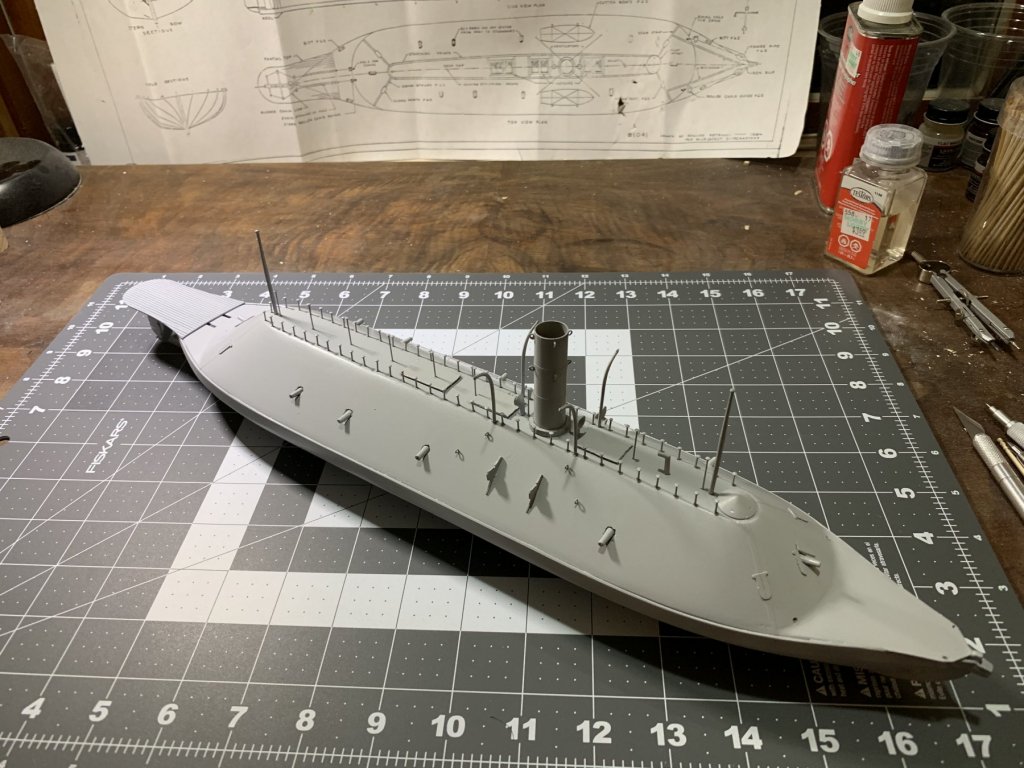
Installed the air vents and galley stack as well as removed the tall stanchions with the eye loops and replaced them with similar but longer nails to the lower stanchions. I used strait sewing needles for the nails as they matched what was included in the kit. I also drilled holes for where the anchor chains and rudder chains go through the casement. I also cut a round plate of wood to help mount the stack.

- 43 replies
-
- 3
-
-
- virginia
- BlueJacket Shipcrafters
- (and 1 more)
-
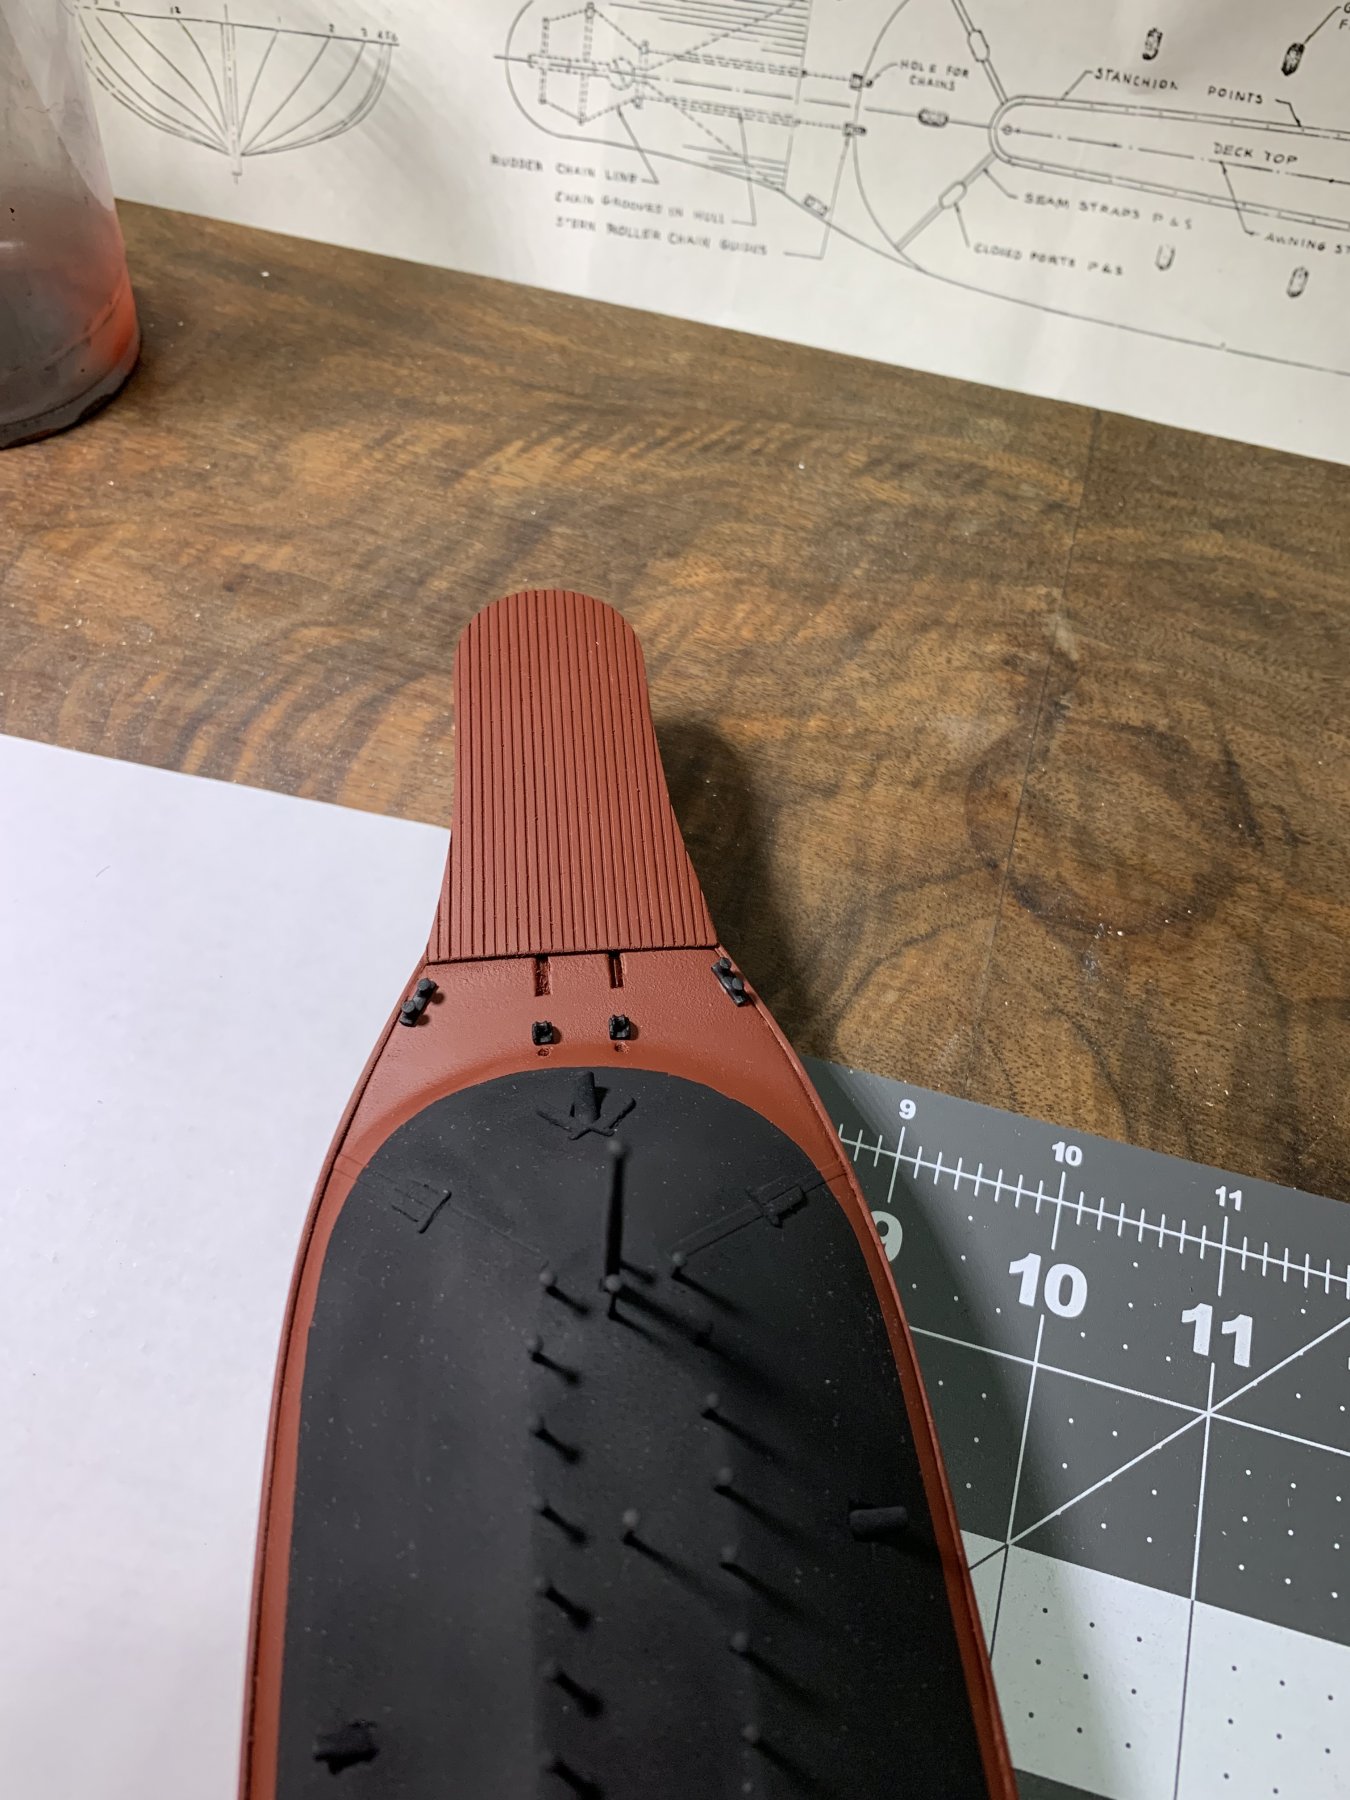
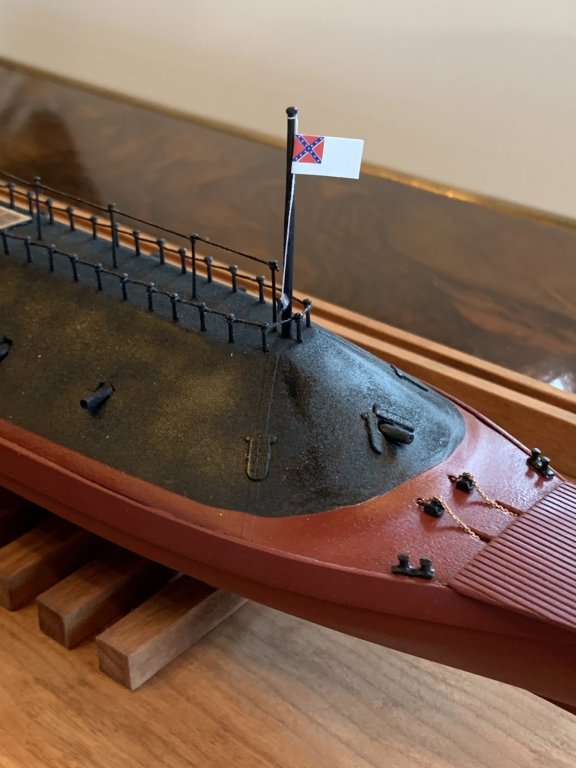
Spent an extra couple minutes after dinner and installed the taller stanchions as well as the stack support eye hooks. Also, added the striping tape where the rudder mounts to match the rudder itself.

- 43 replies
-
- 7
-
-
- virginia
- BlueJacket Shipcrafters
- (and 1 more)
-
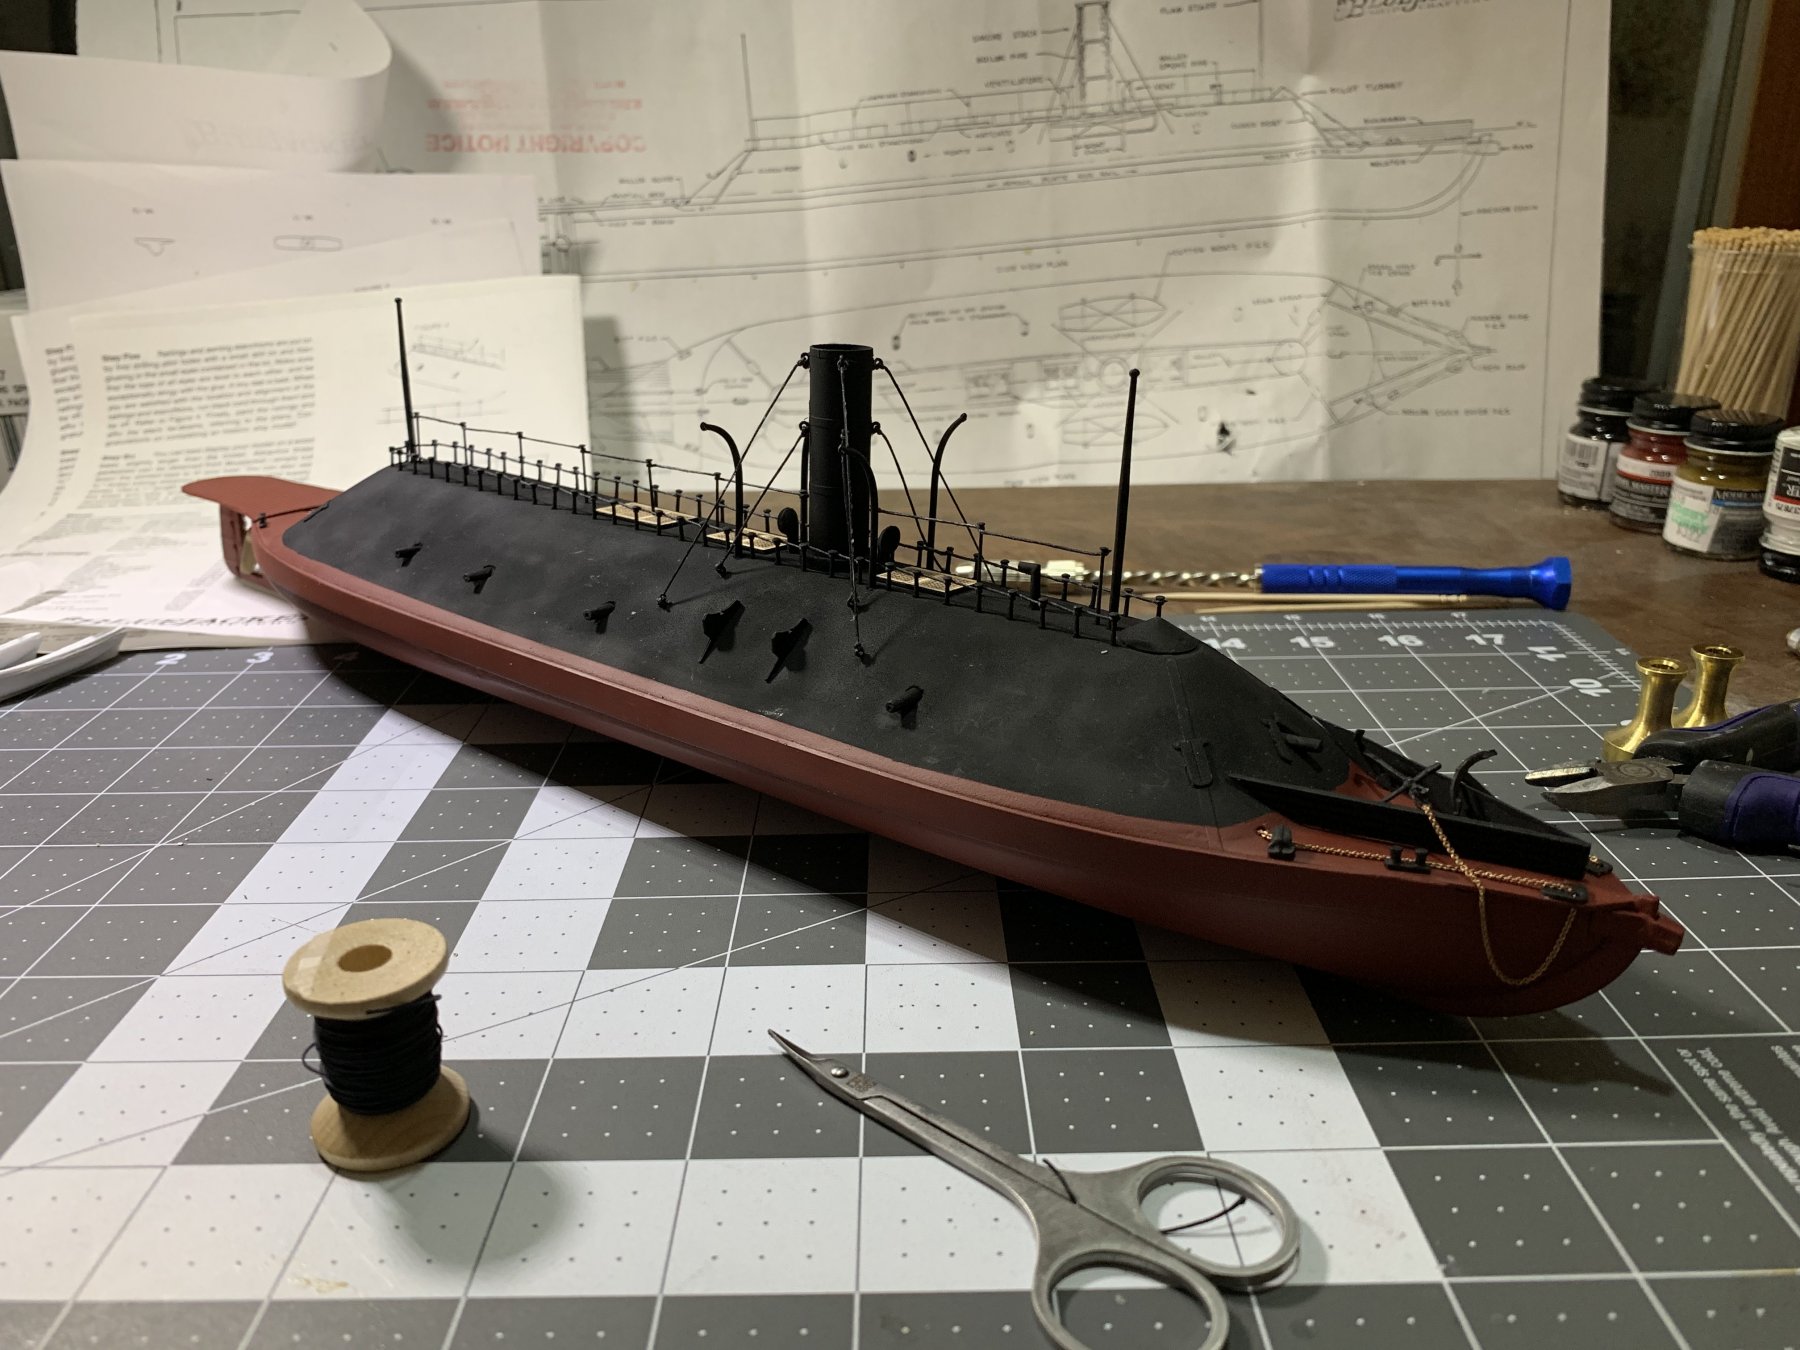
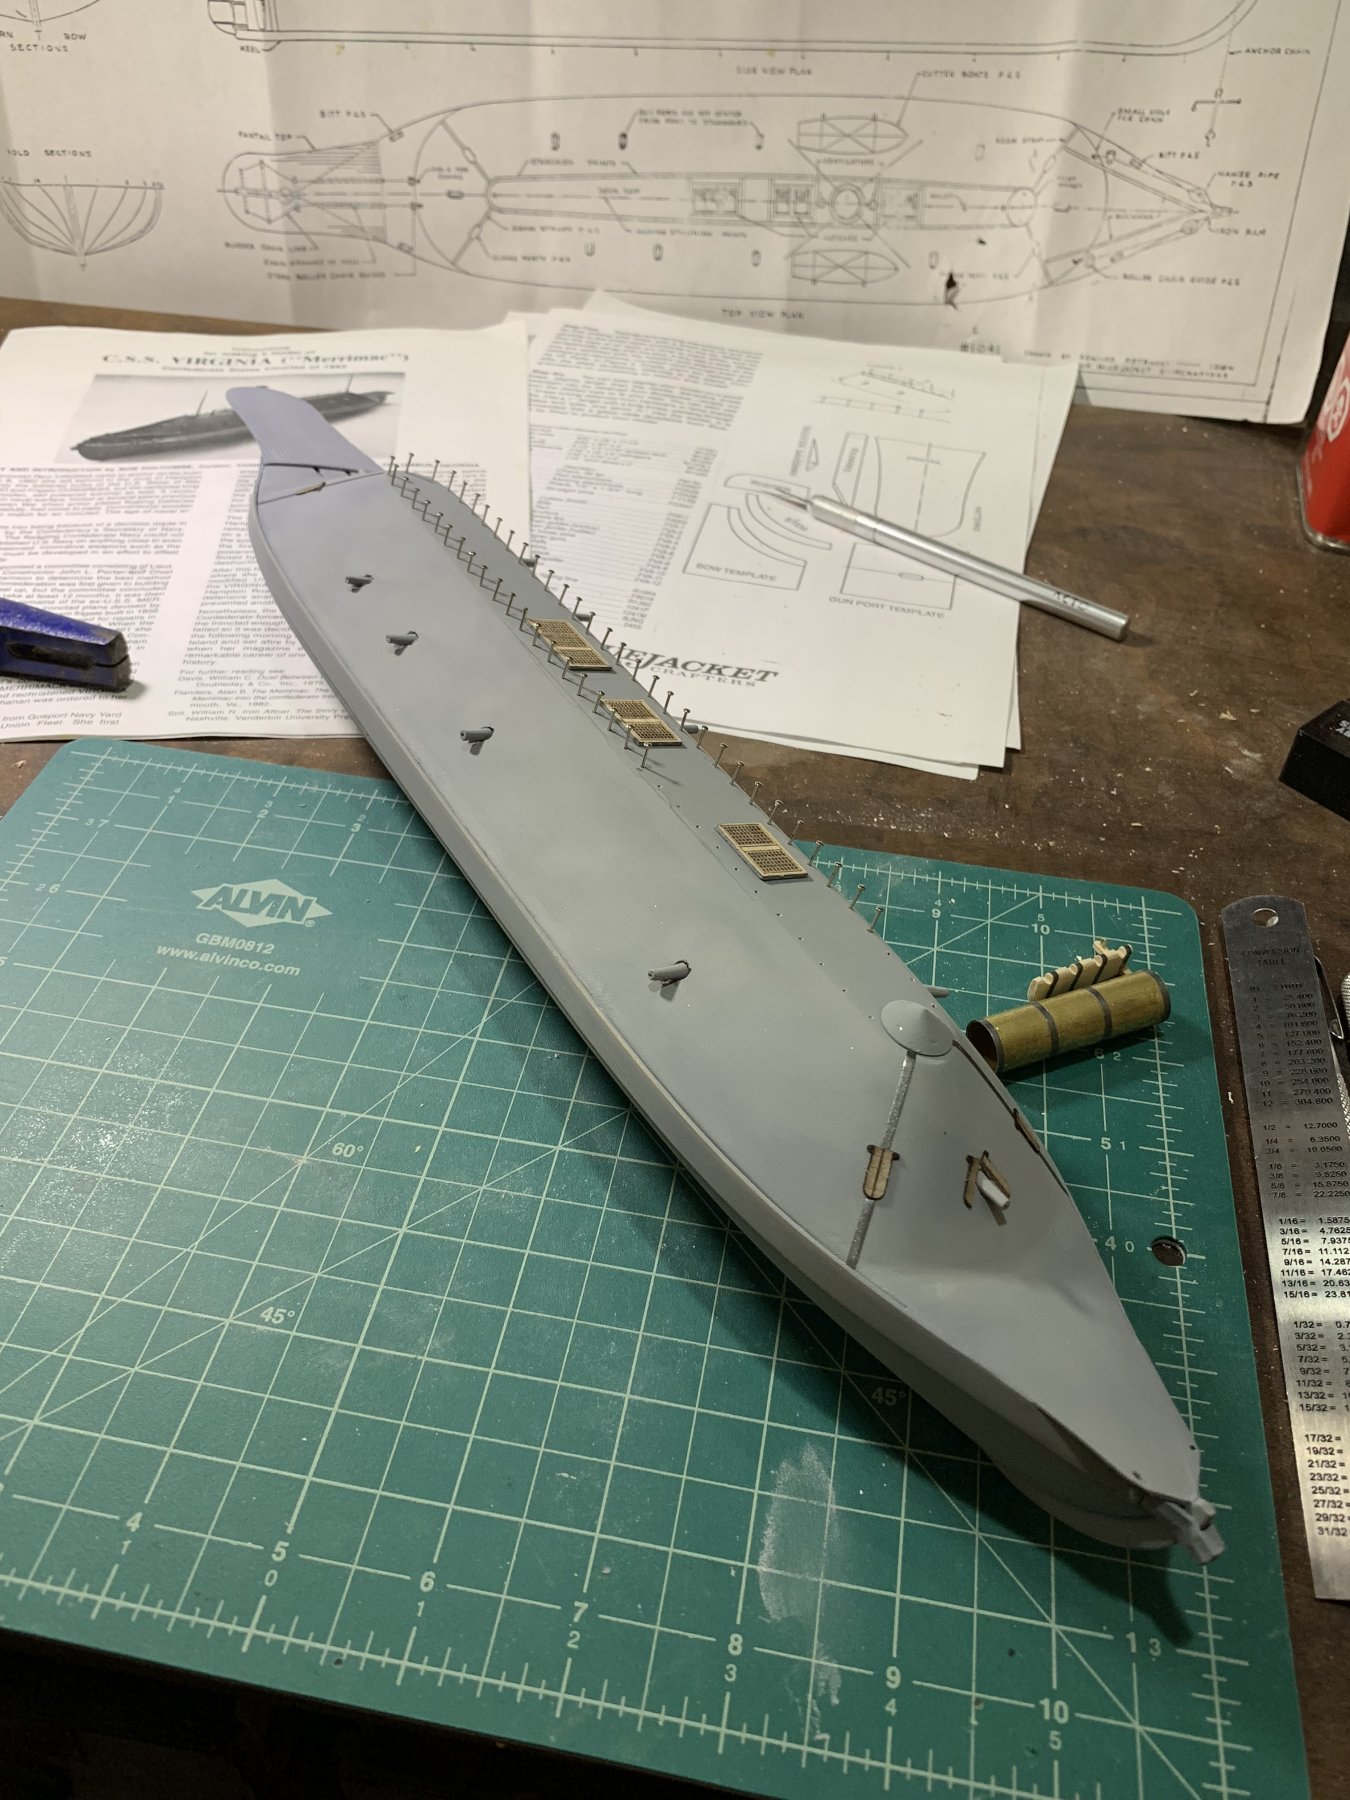
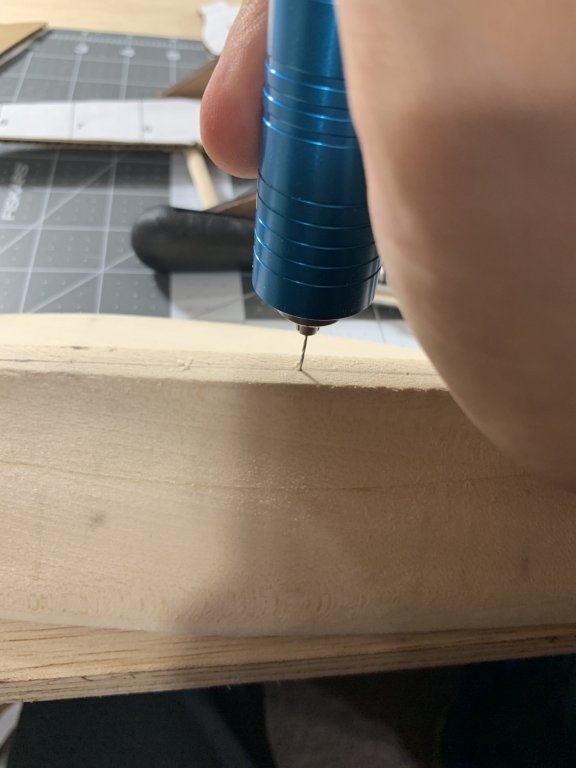
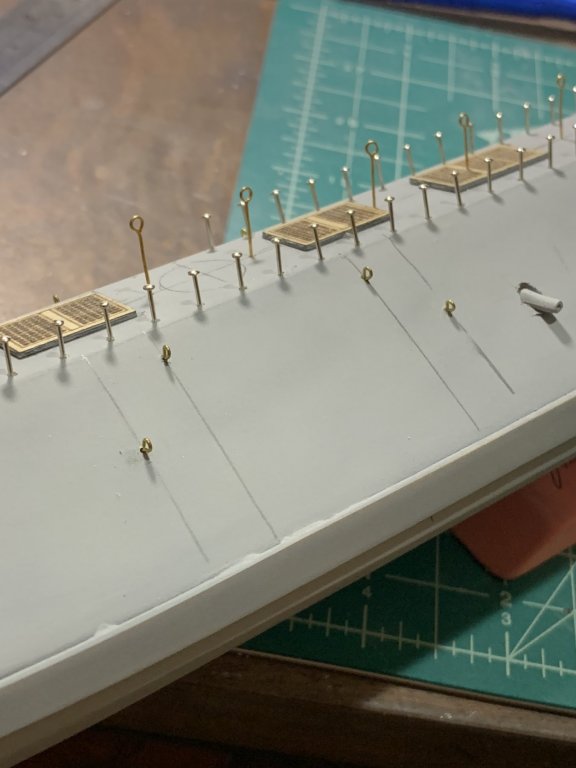
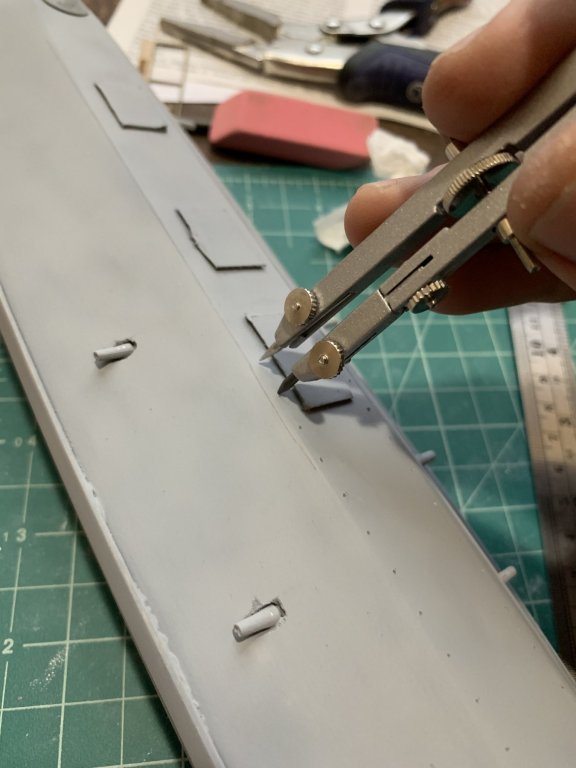
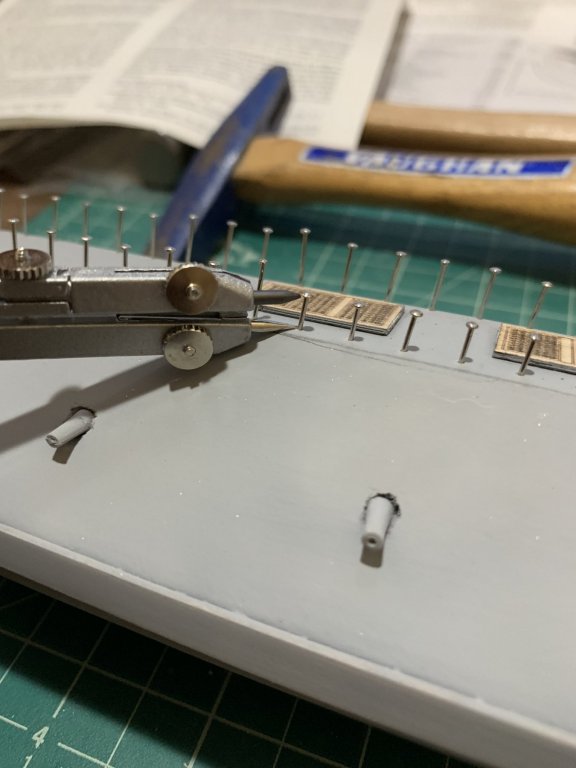
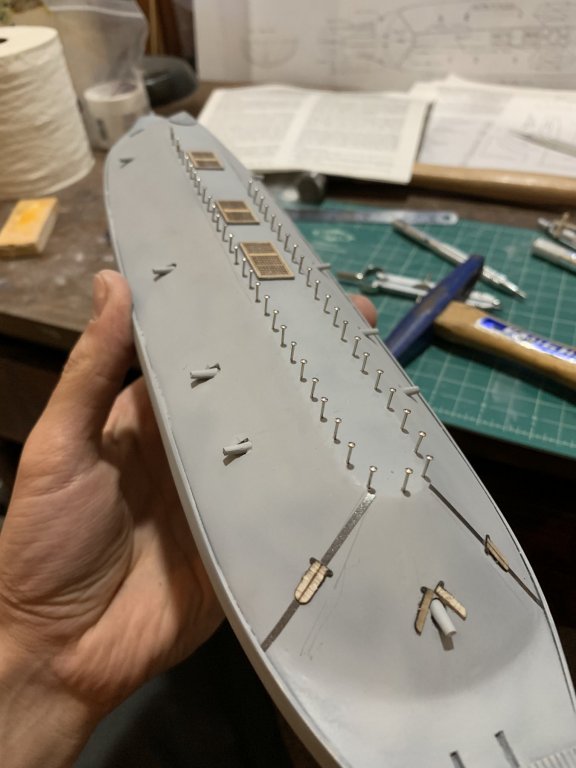
So I finally made some more visible progress after my mistake with the cannon ports. After a quick coat of primer I installed the cannon port covers on the for and aft sections of the casement as well as the striping tape. I then began installing the railing stanchions. First I marked them one at a time with a geometry compass and then drilled a small pilot hole for the nail. I then nailed them all in and gauged the proper depth utilizing the compass as well. Super happy with how its going now that I am back on track!


- 43 replies
-
- 7
-
-
- virginia
- BlueJacket Shipcrafters
- (and 1 more)
-
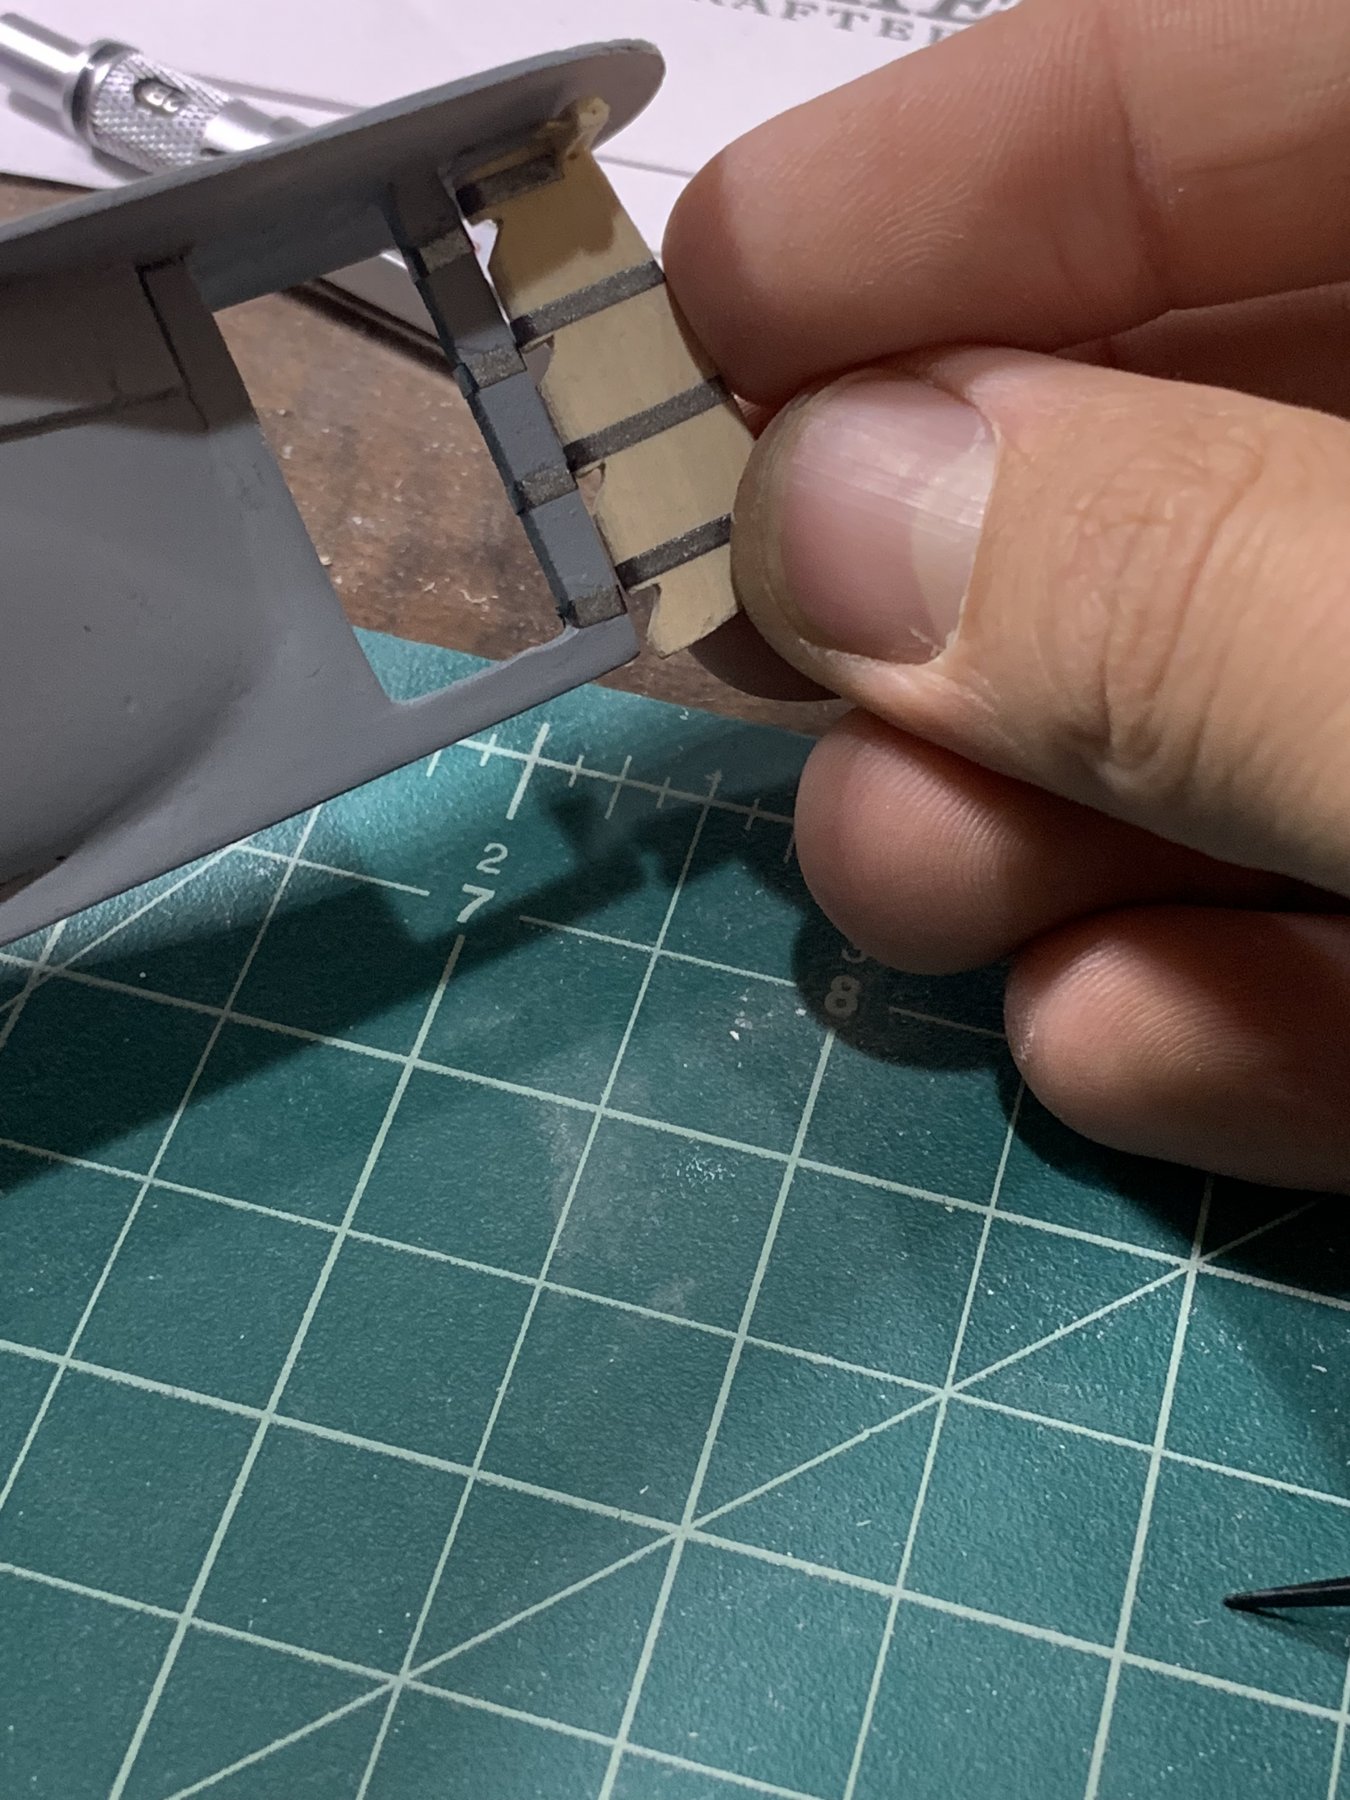
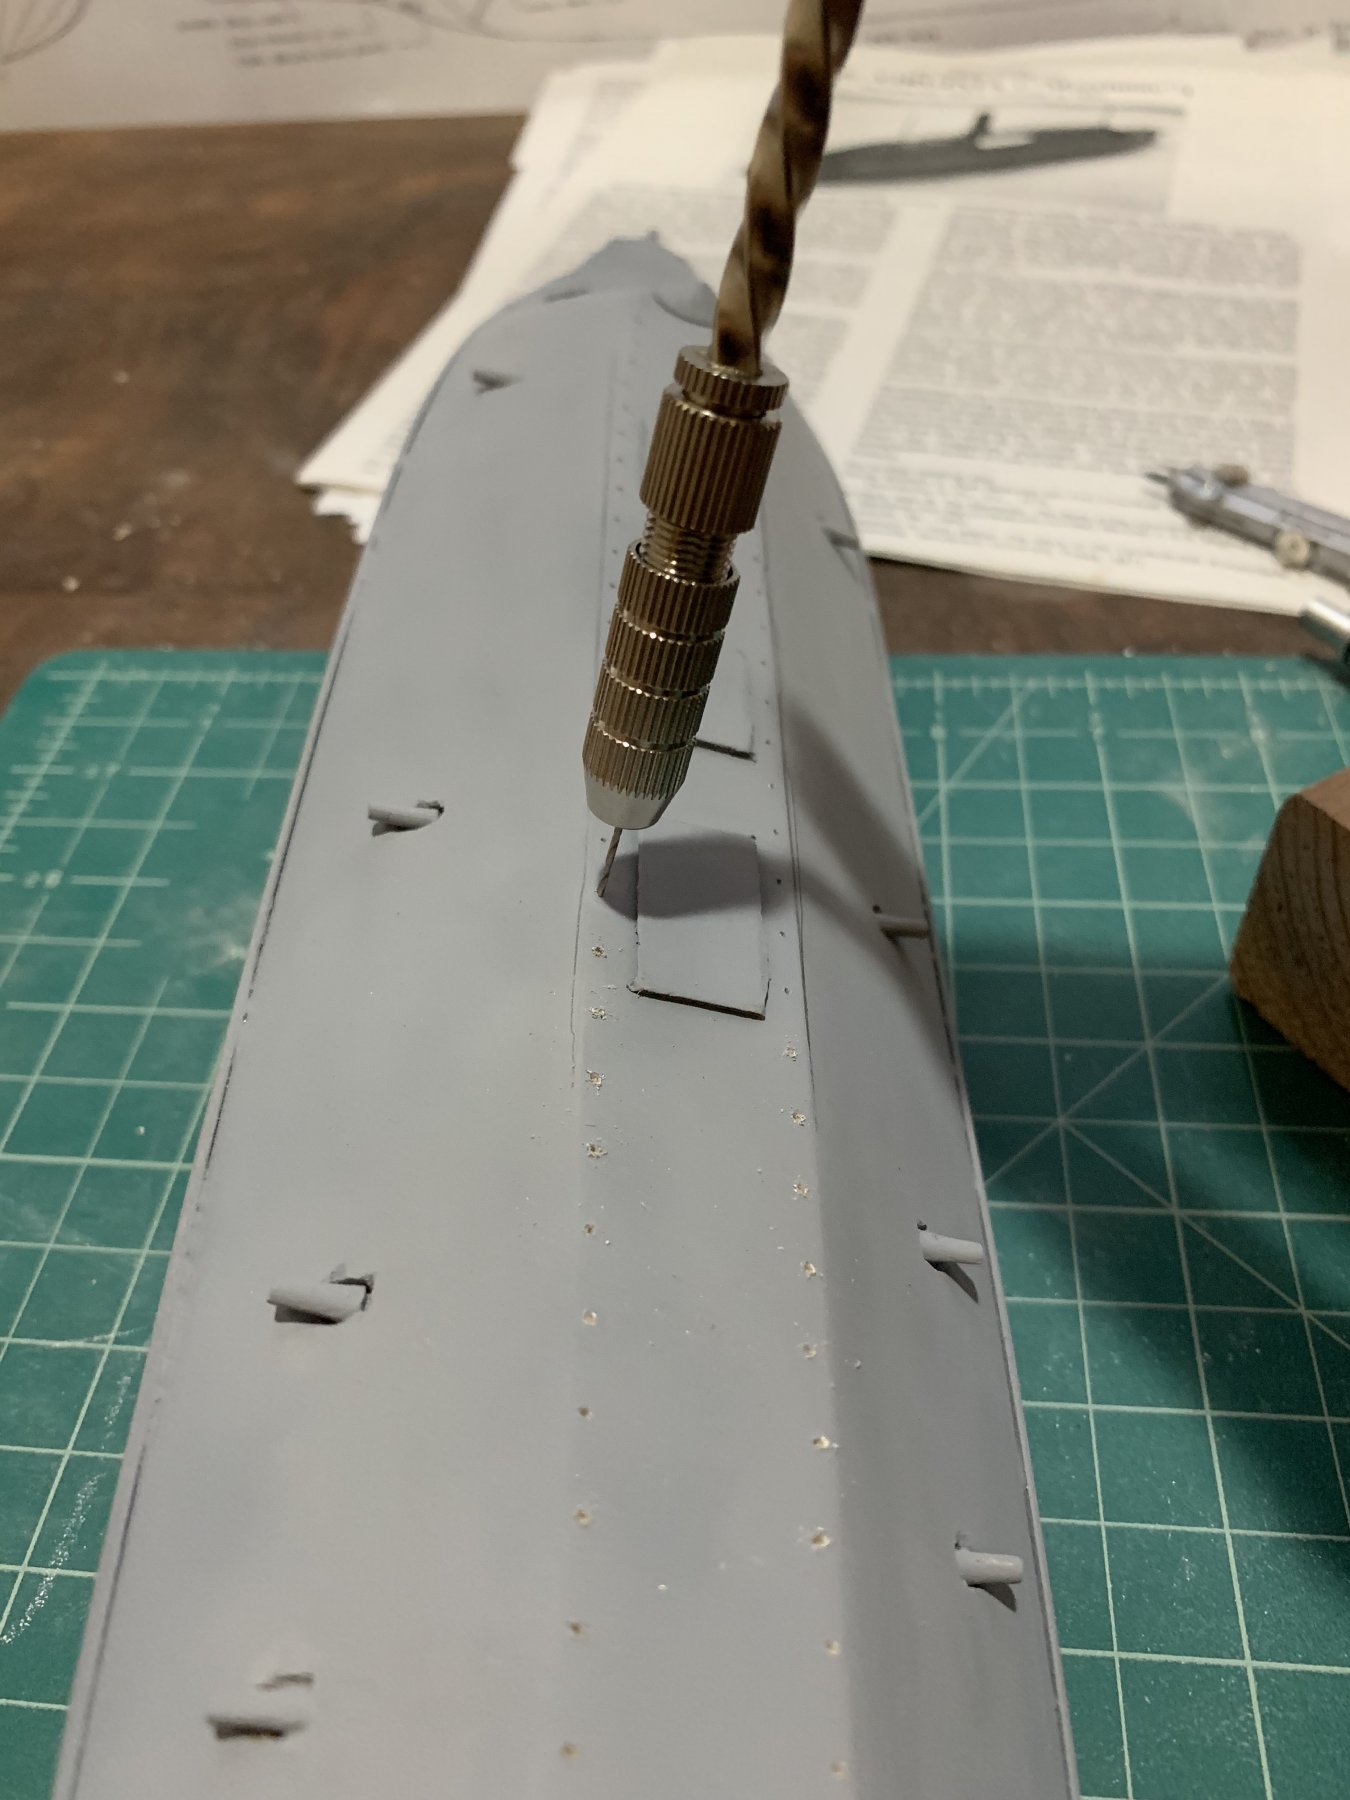
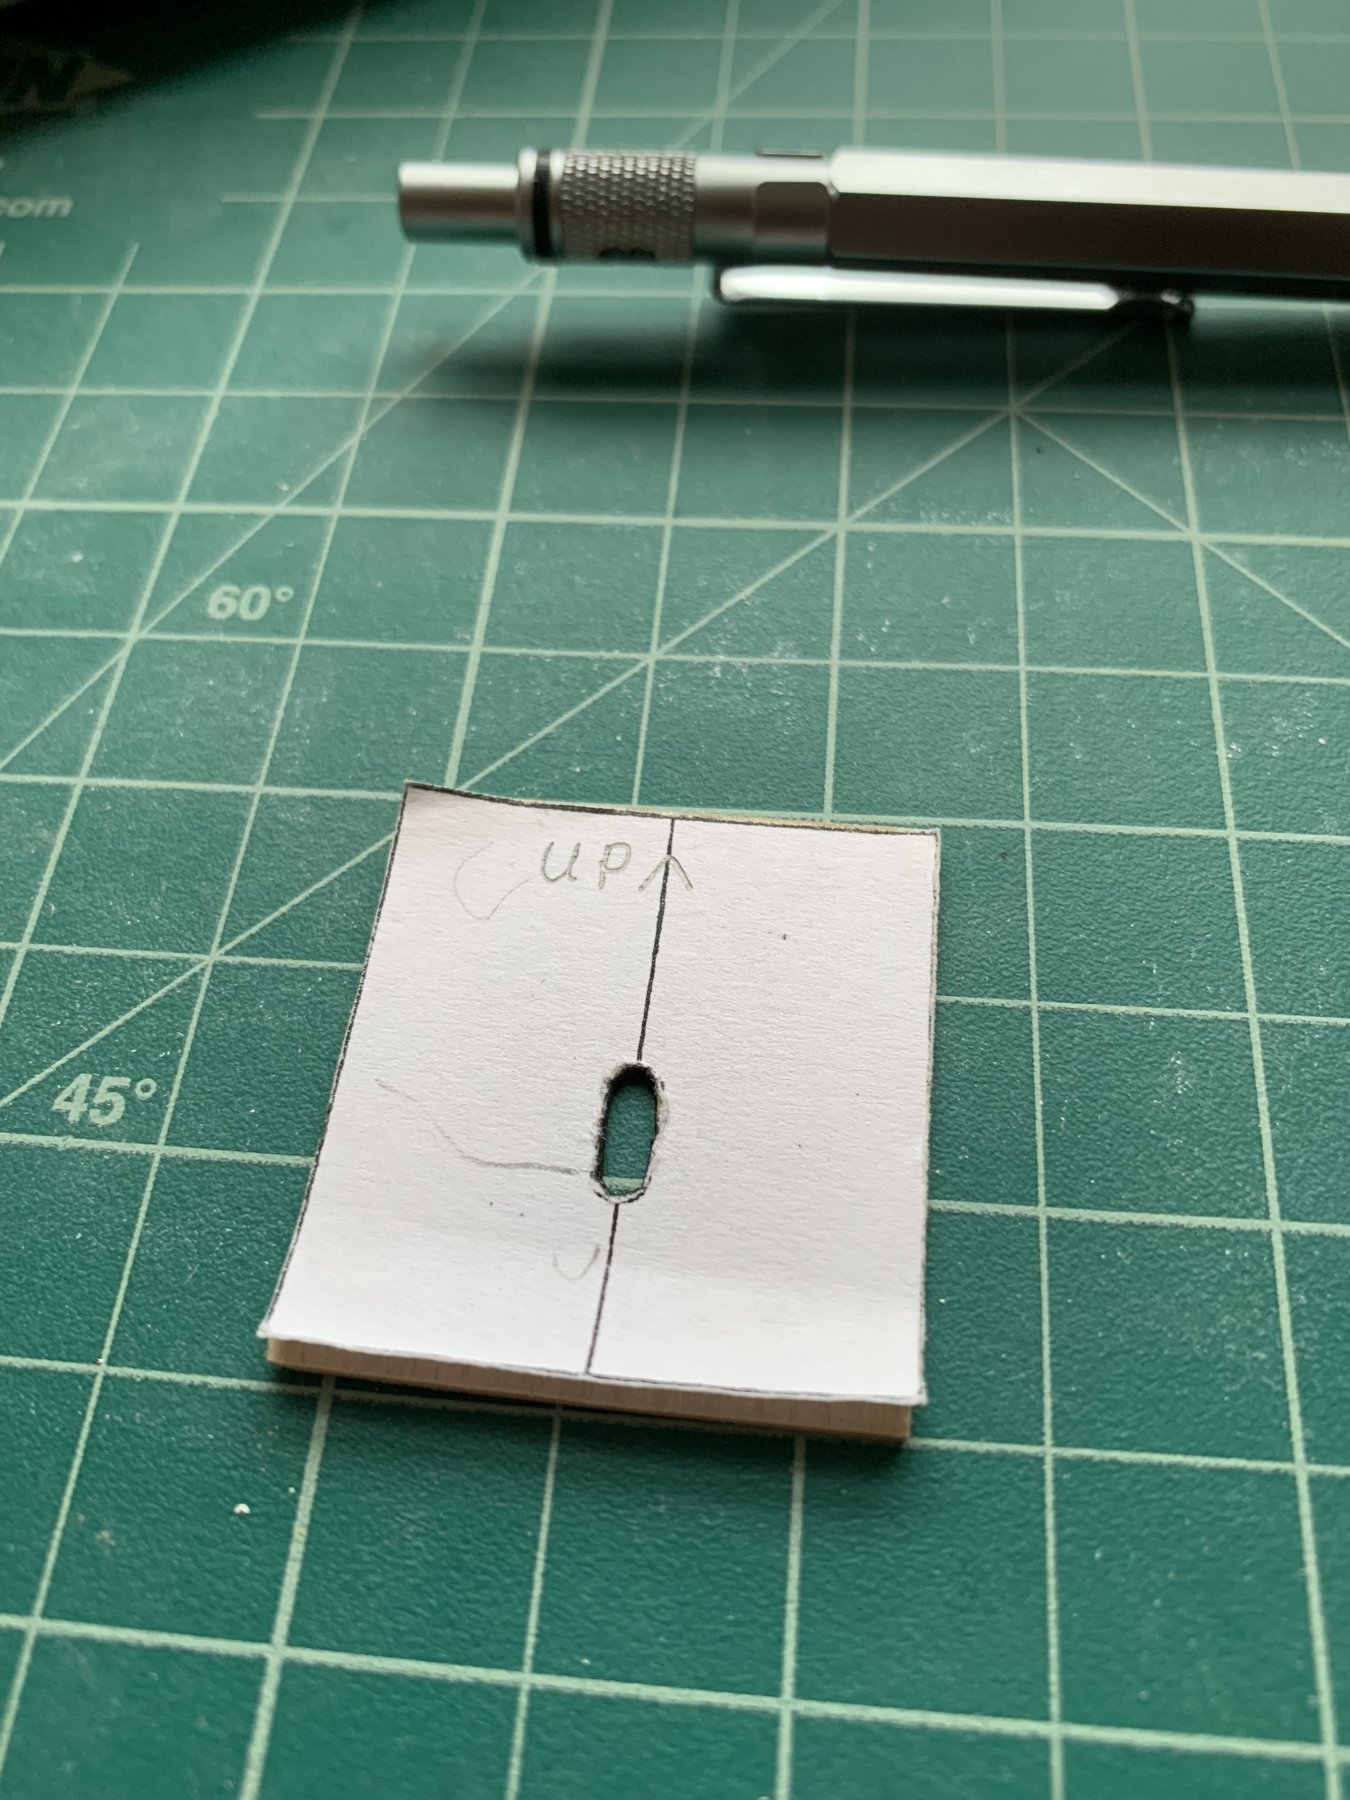
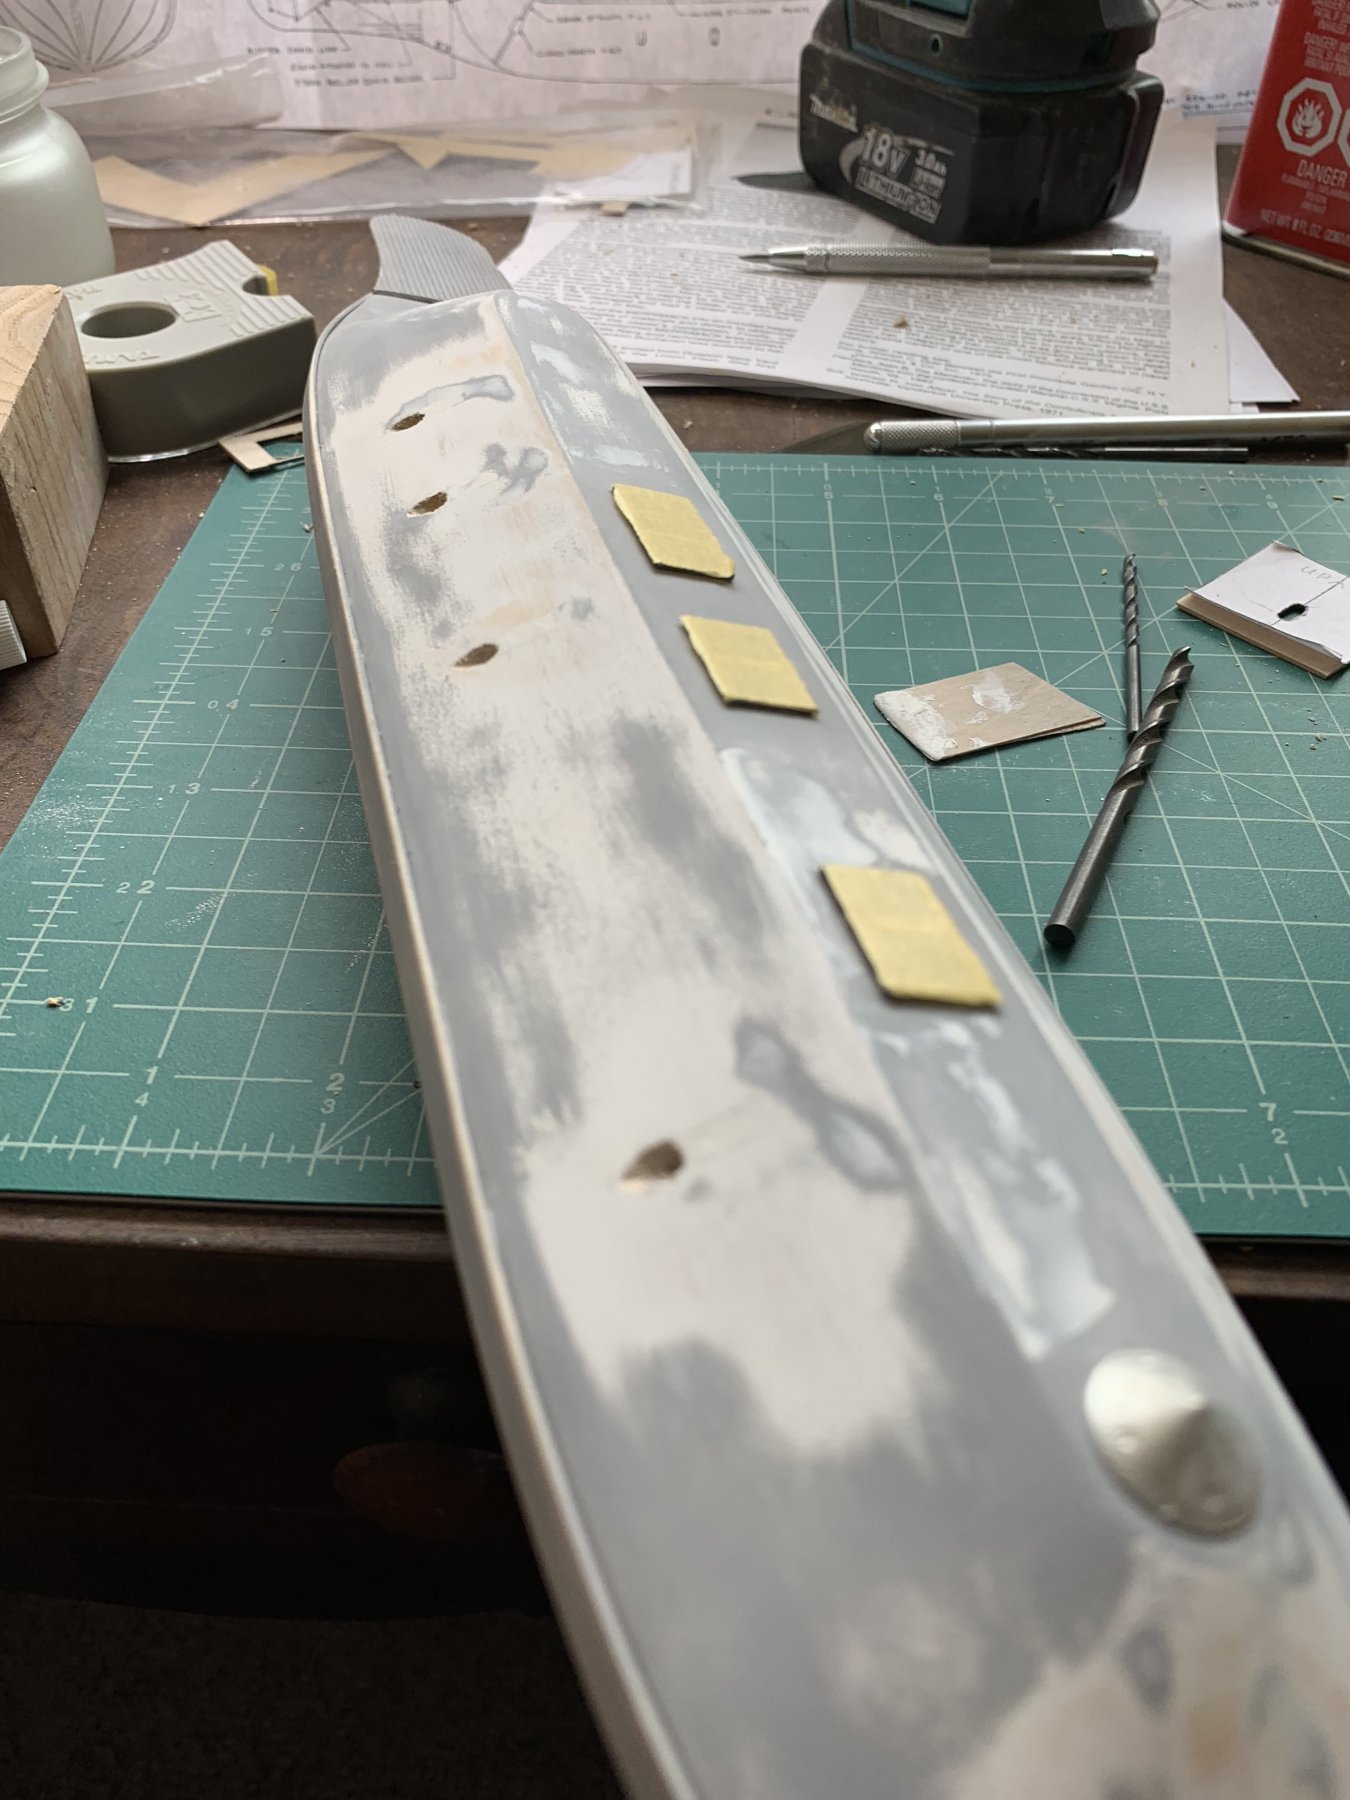
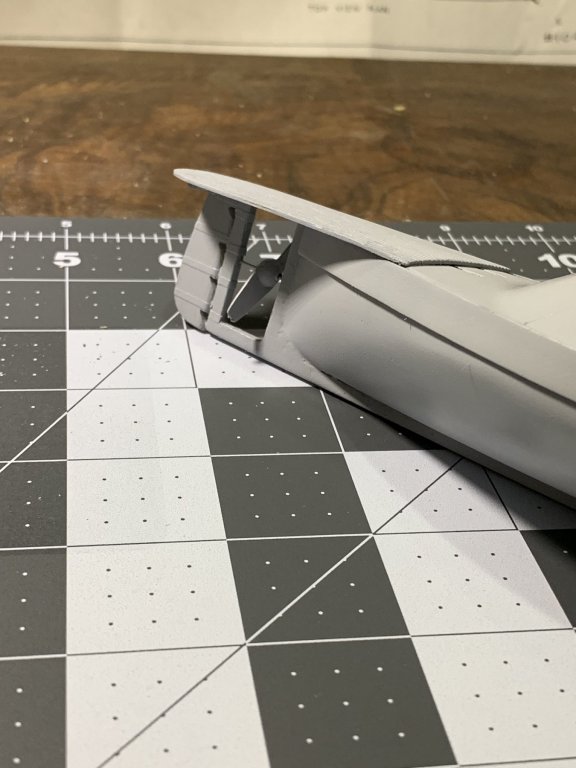
After a number of iterations of puttying and sanding the old cannon ports I finally got them to a state where I could cut new ones. I also labeled the template (so I didn't repeat my mistake 😜). Instead of an exacto knife and chisel this time I used successive passes with different size drill bits. This allowed for the internal step that the plans suggest as well as the oval holes. The drill bit being parallel with the decking made for the oval hole because of the sloped casement. This drilling method was WAY faster than the chisel I used the first time.


- 43 replies
-
- 7
-
-
- virginia
- BlueJacket Shipcrafters
- (and 1 more)