Bitao
-
Posts
407 -
Joined
Content Type
Profiles
Forums
Gallery
Events
Everything posted by Bitao
-

NAIAD 1797 by Bitao - 1:60
Bitao replied to Bitao's topic in - Build logs for subjects built 1751 - 1800
Building ships makes me happy


- 371 replies
-
- 23
-

-

-
NAIAD 1797 by Bitao - 1:60
Bitao replied to Bitao's topic in - Build logs for subjects built 1751 - 1800
- 371 replies
-
- 21
-
-
-
NAIAD 1797 by Bitao - 1:60
Bitao replied to Bitao's topic in - Build logs for subjects built 1751 - 1800
Yes, I did some work on the color. -
NAIAD 1797 by Bitao - 1:60
Bitao replied to Bitao's topic in - Build logs for subjects built 1751 - 1800
- 371 replies
-
- 21
-
-
-
NAIAD 1797 by Bitao - 1:60
Bitao replied to Bitao's topic in - Build logs for subjects built 1751 - 1800
- 371 replies
-
- 22
-
-
-
NAIAD 1797 by Bitao - 1:60
Bitao replied to Bitao's topic in - Build logs for subjects built 1751 - 1800
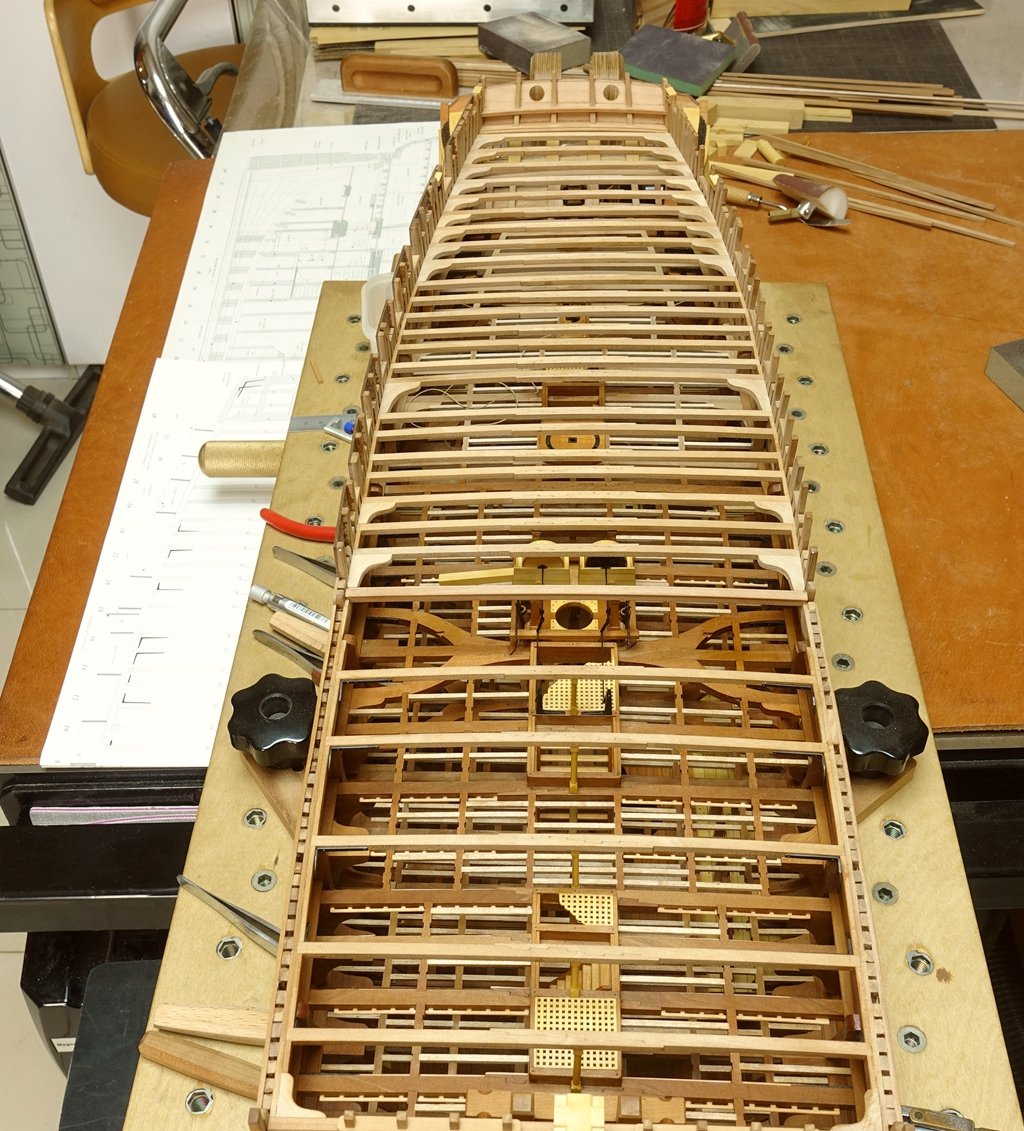
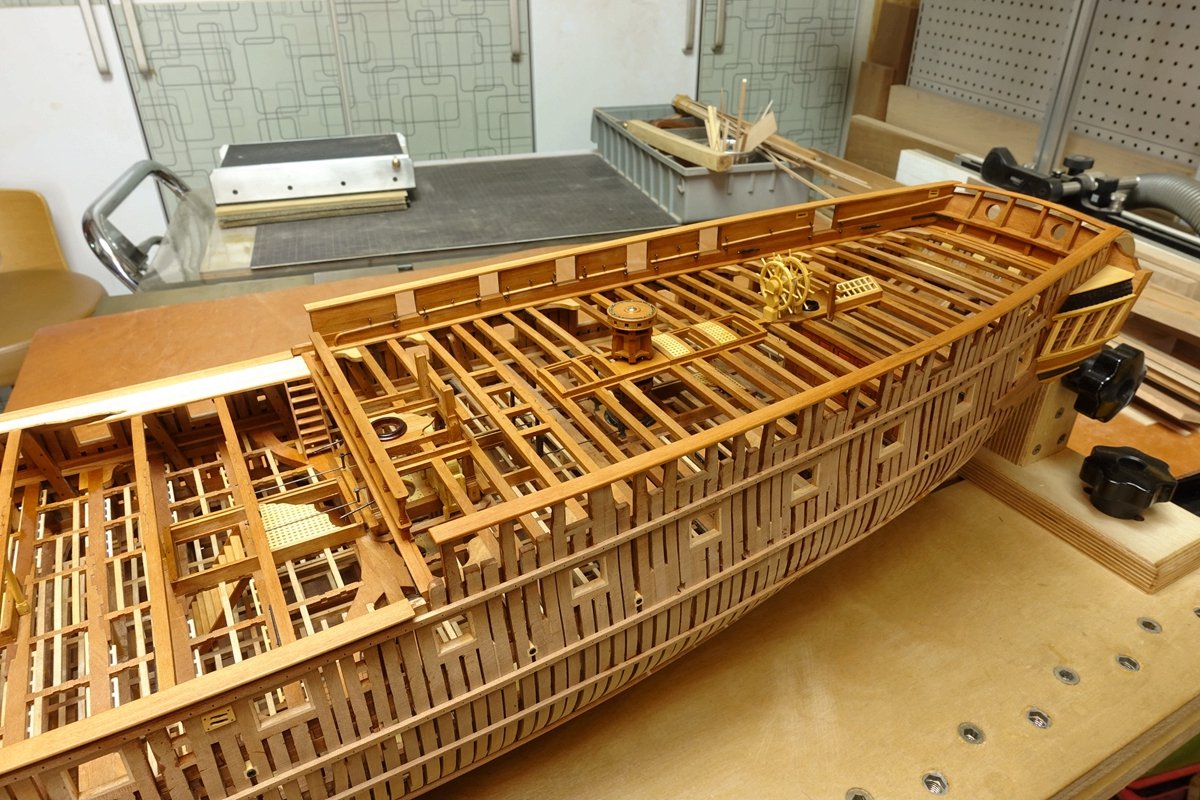
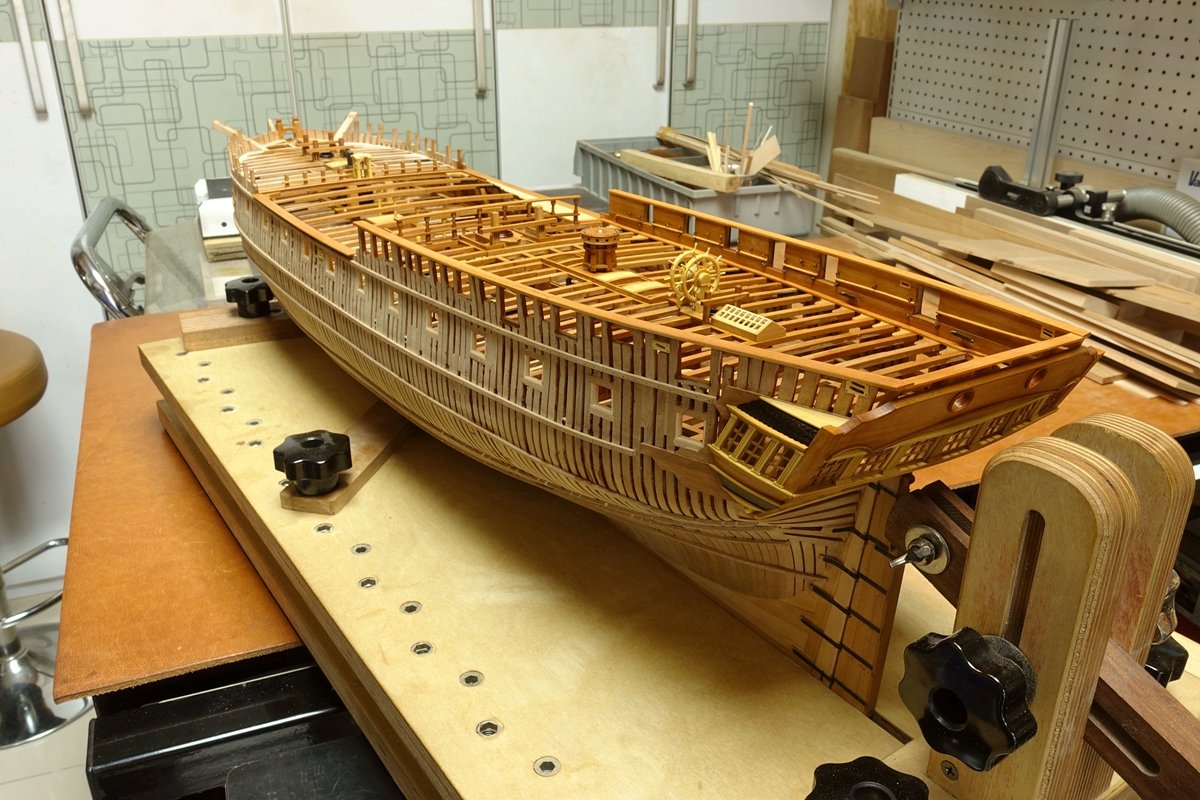
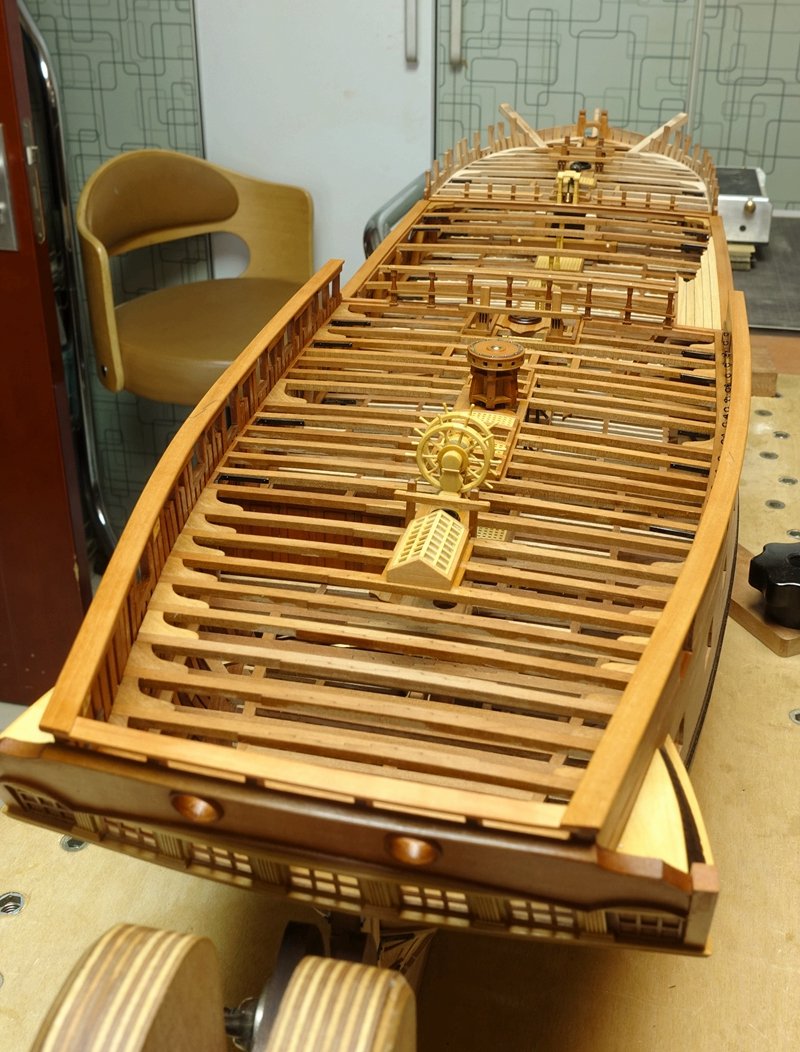
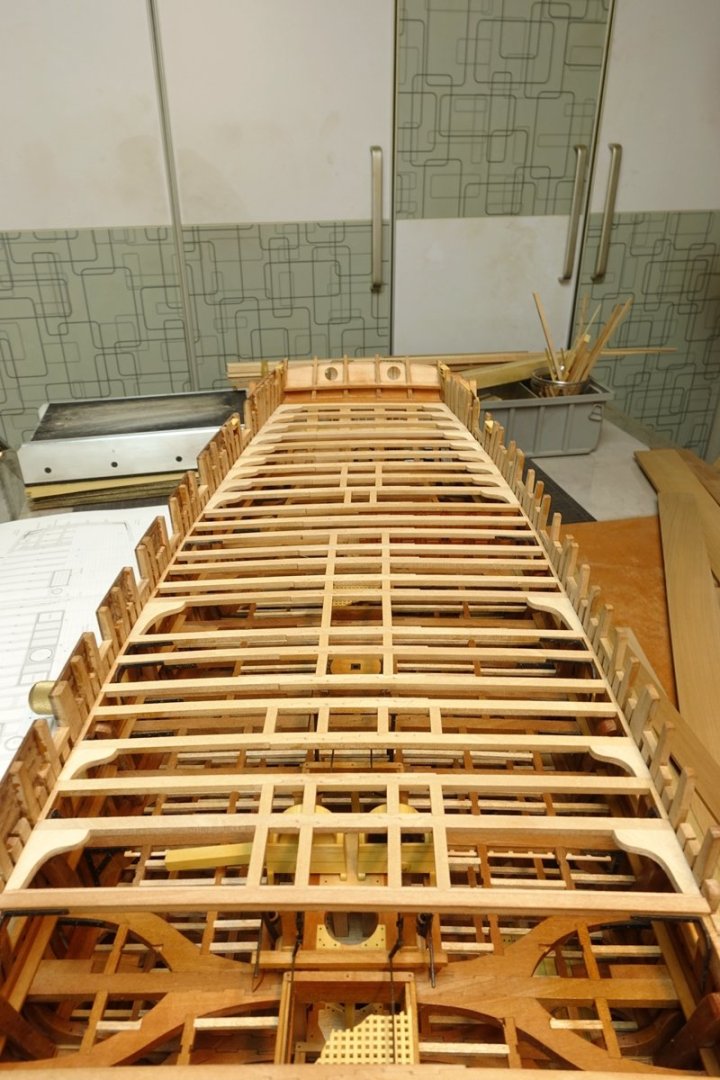
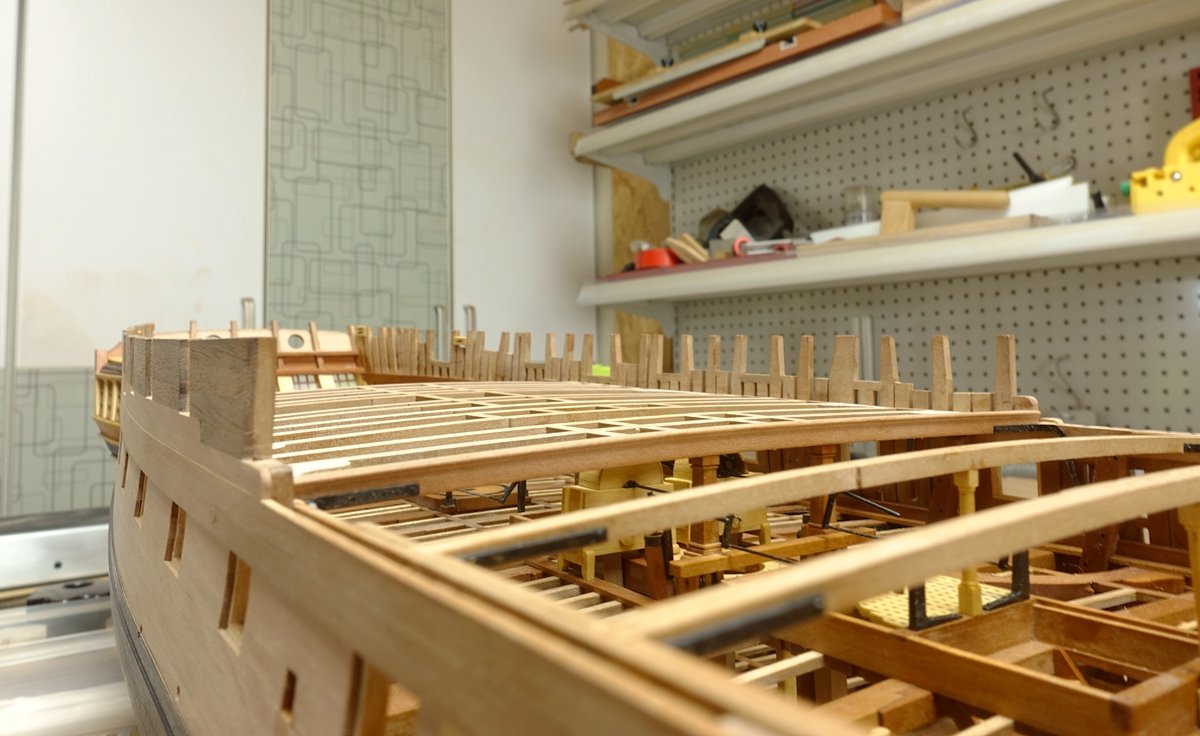
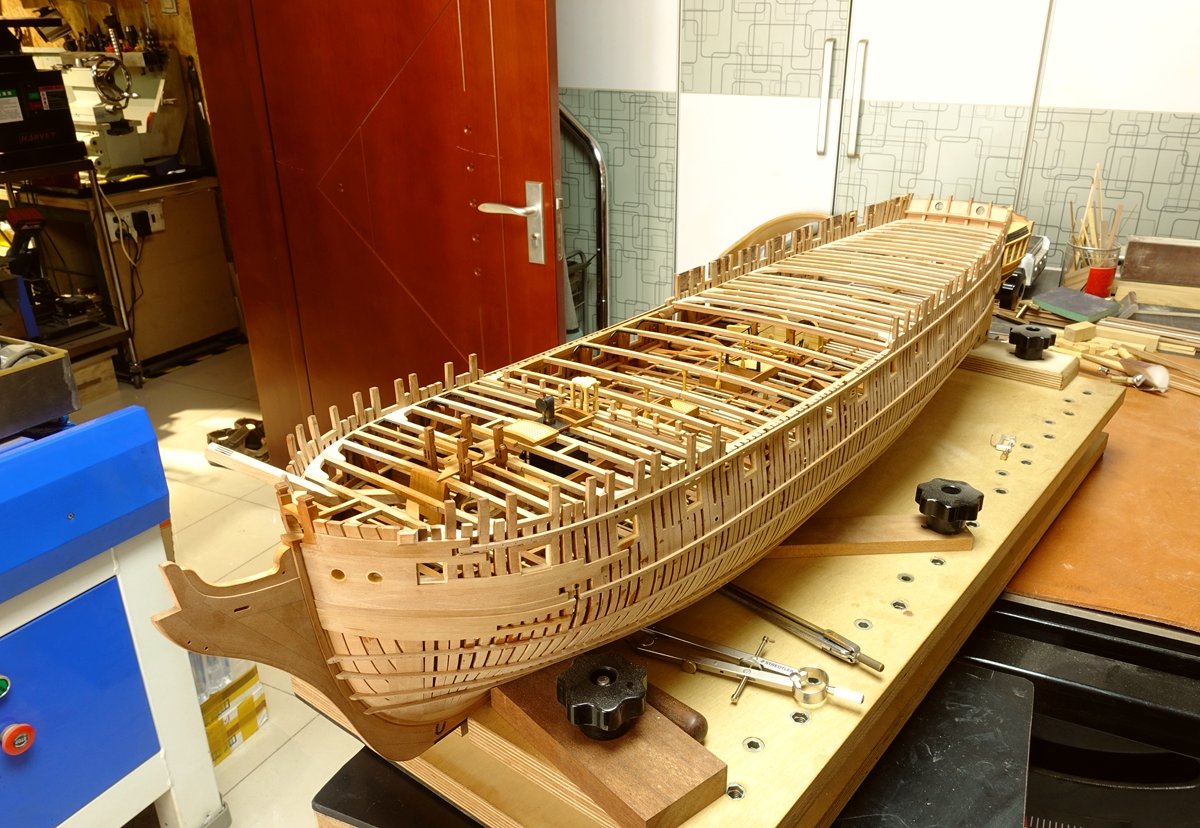
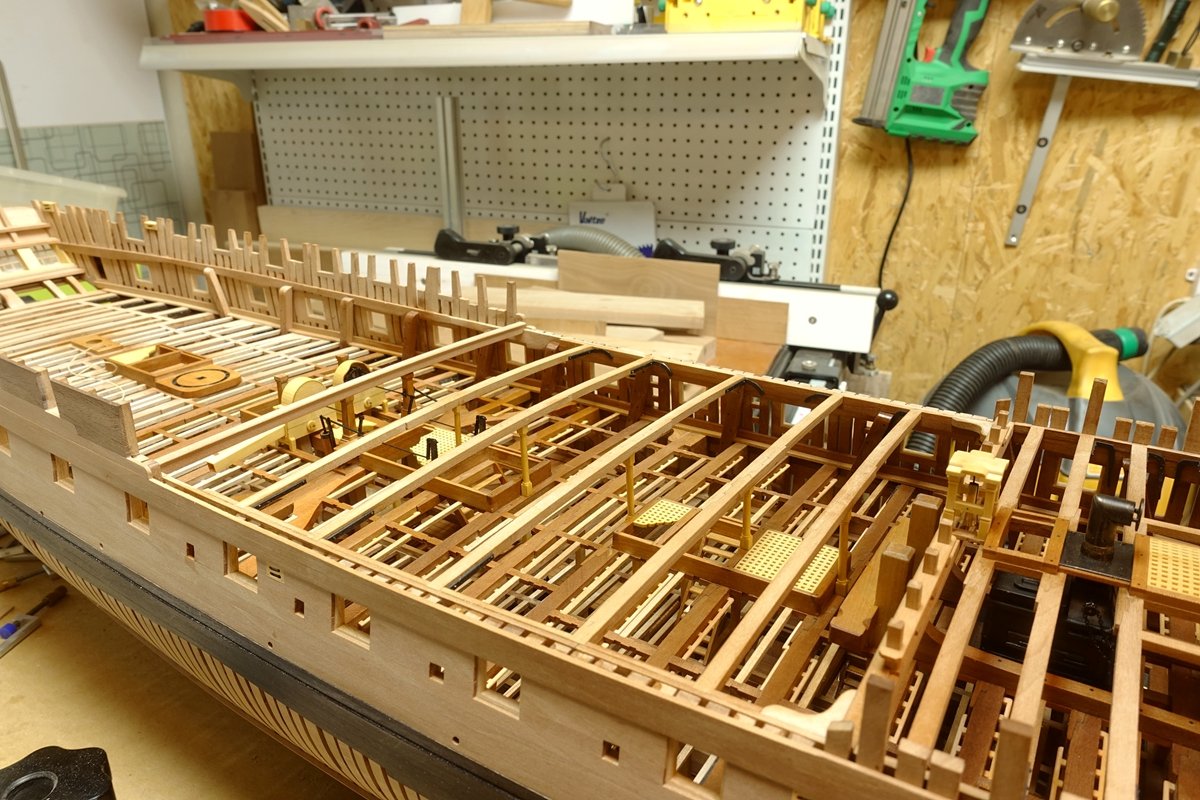
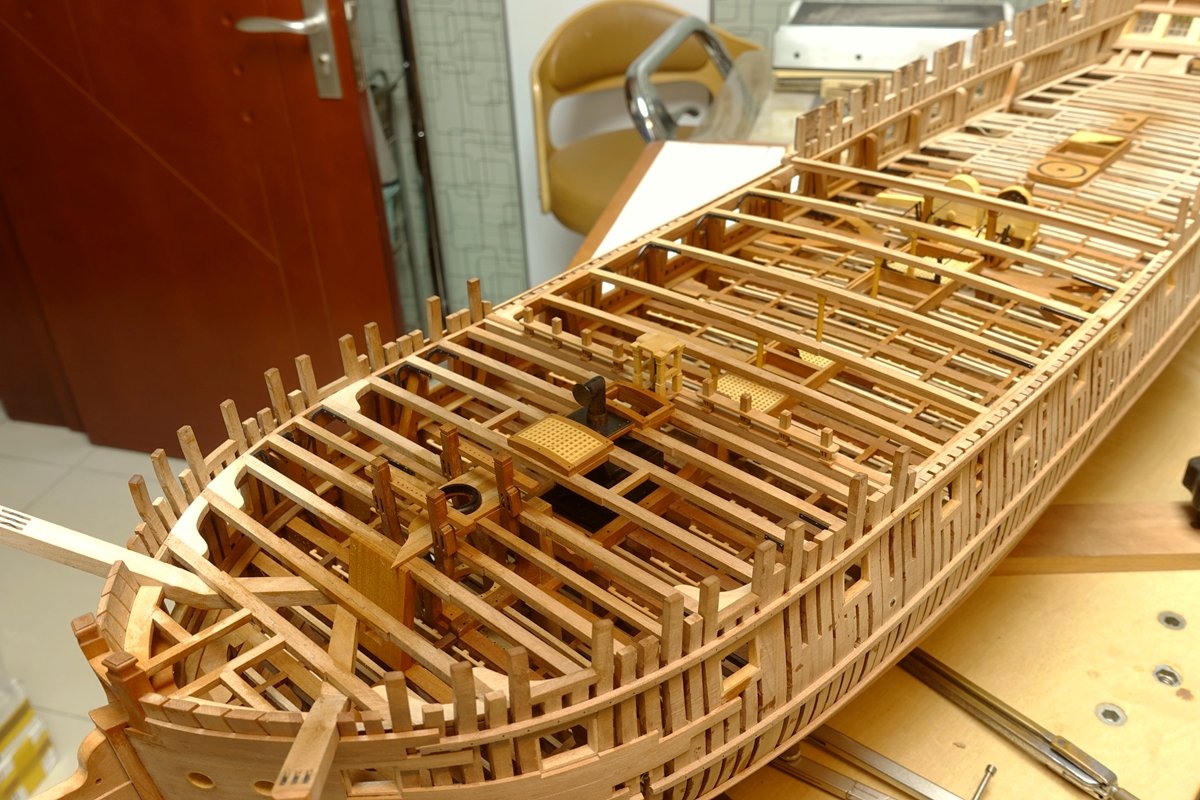
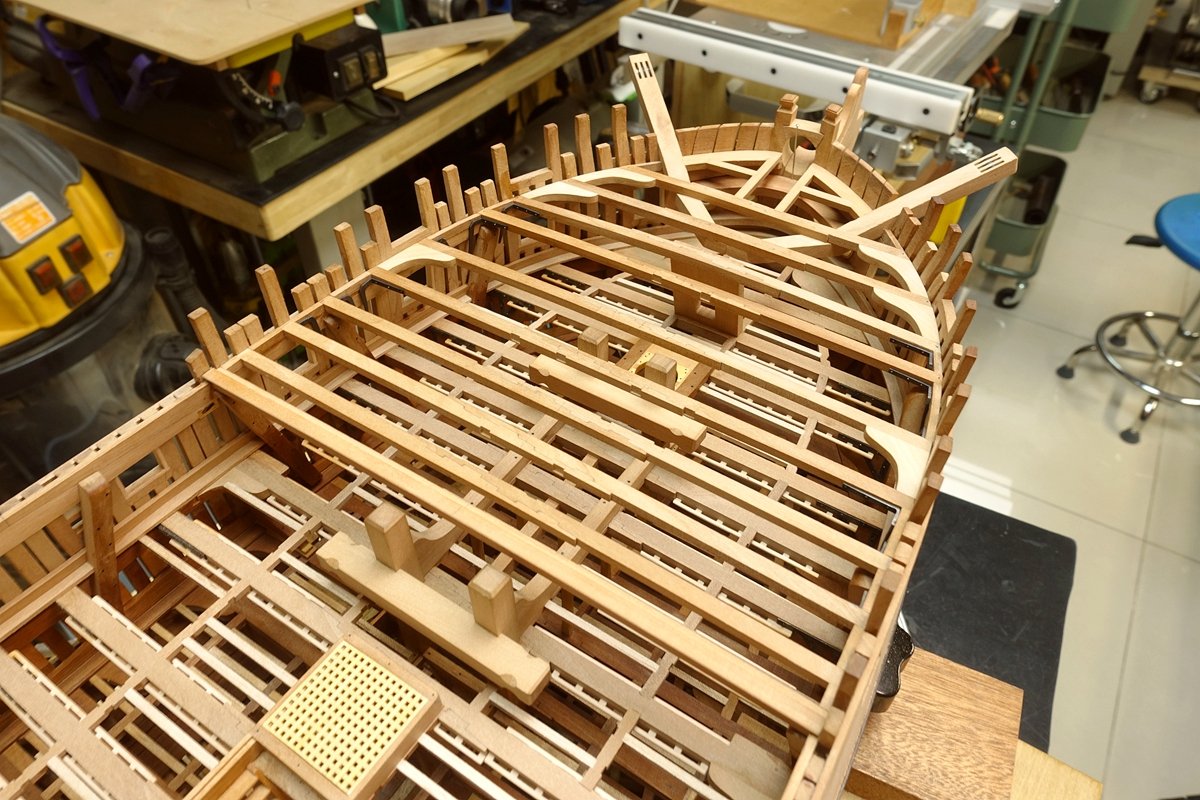
In order to locate accurately, the main beam of the back half of the upper deck is laid (not yet glued) . It provides a reliable guarantee for the smooth completion of all the internals in the later period.
- 371 replies
-
- 19
-
-
-
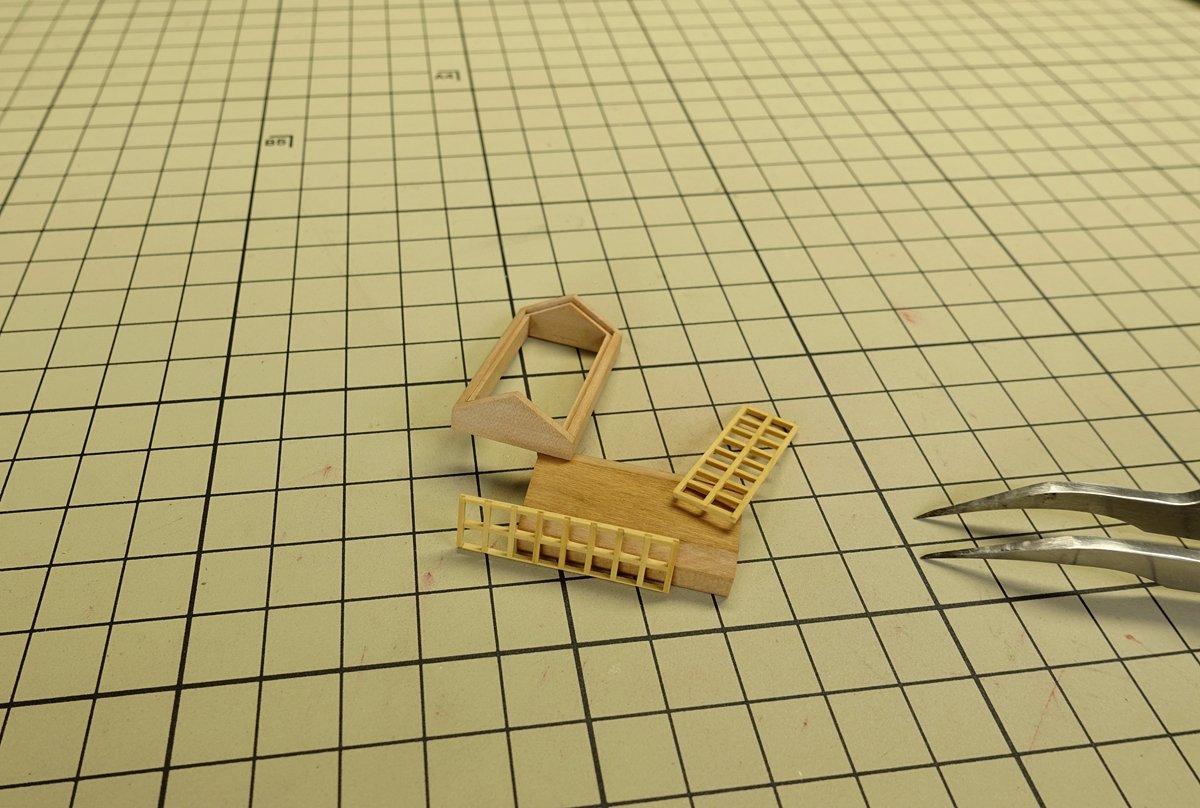
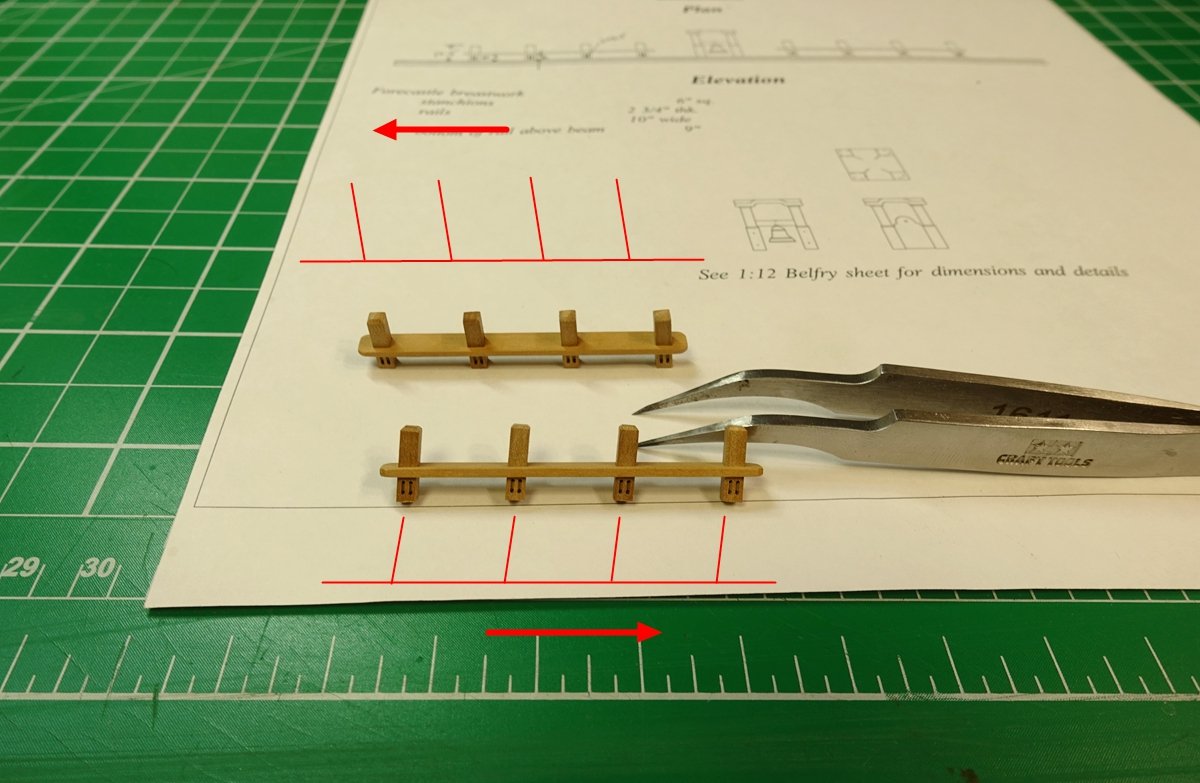
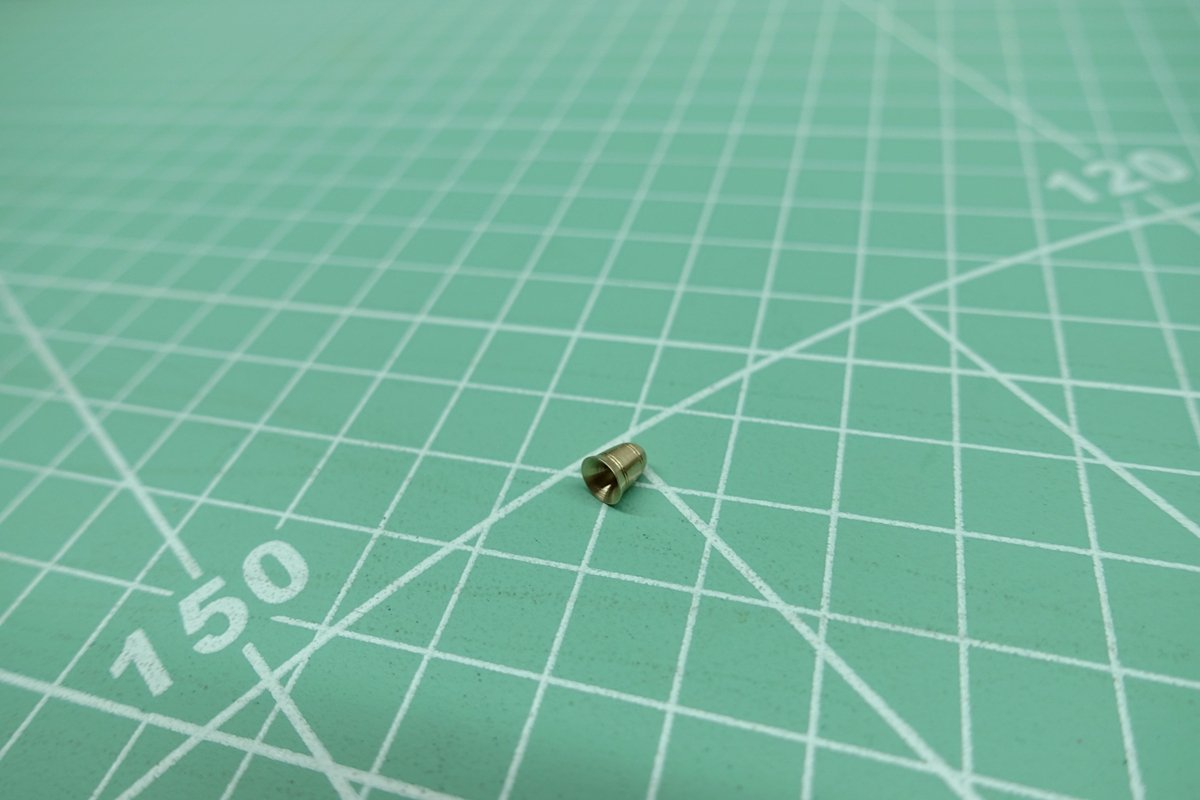
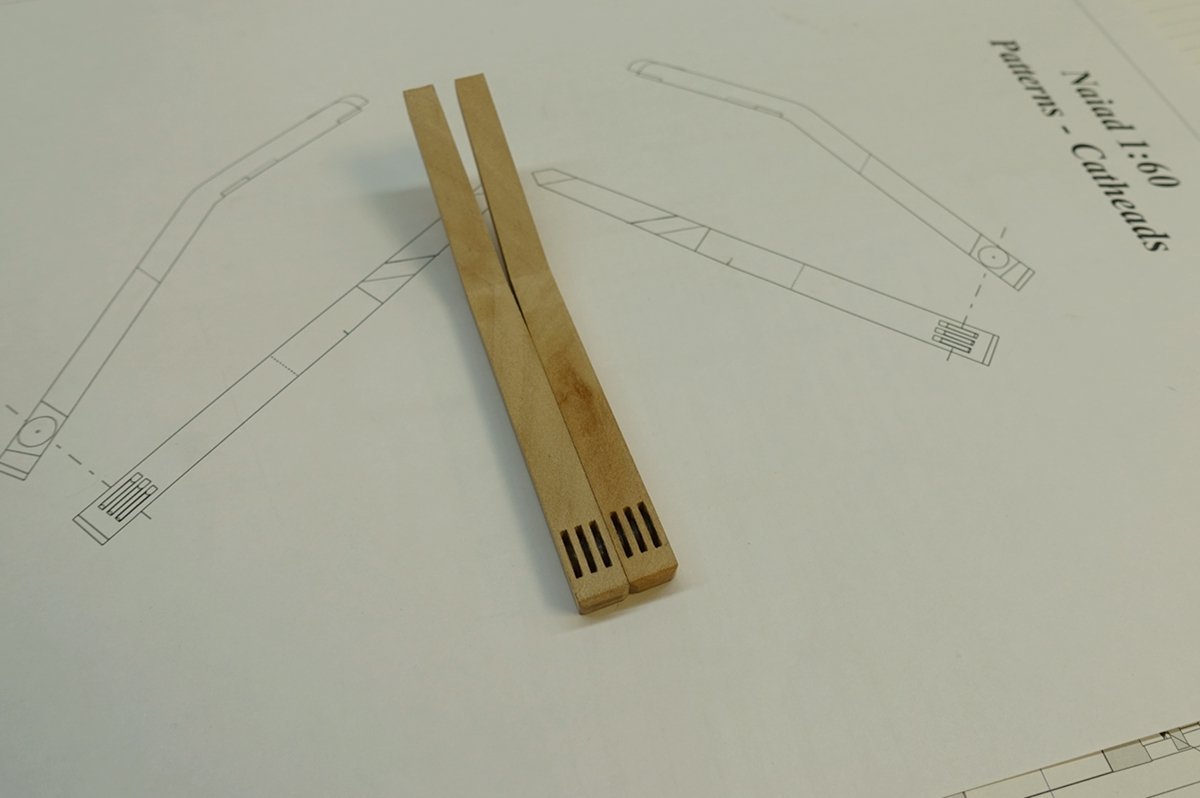
Very nice clean work! To many people, the experience of a production process may seem simple, but it takes more practice to really understand it. Subsection turning small parts, accurate“Last cut” is essential.
-
NAIAD 1797 by Bitao - 1:60
Bitao replied to Bitao's topic in - Build logs for subjects built 1751 - 1800
Good evening, everyone。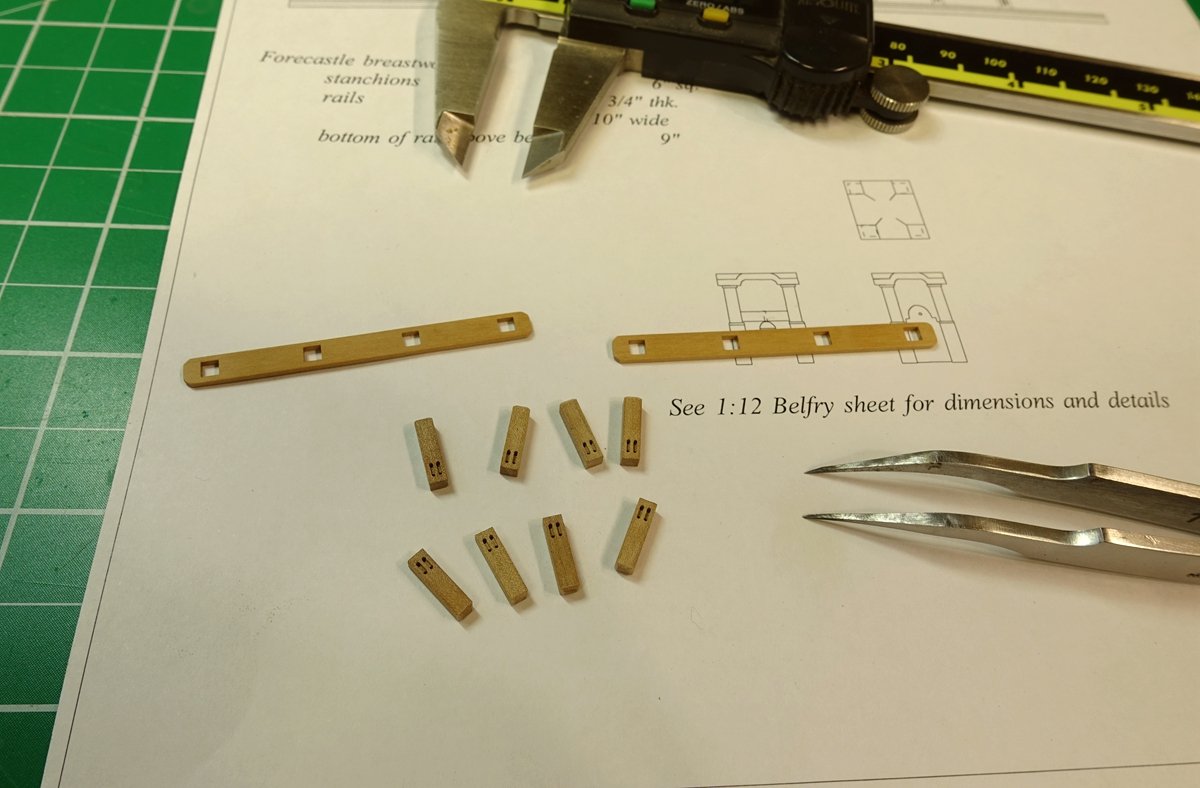
- 371 replies
-
- 22
-
-
-
NAIAD 1797 by Bitao - 1:60
Bitao replied to Bitao's topic in - Build logs for subjects built 1751 - 1800
Continue after a week's rest.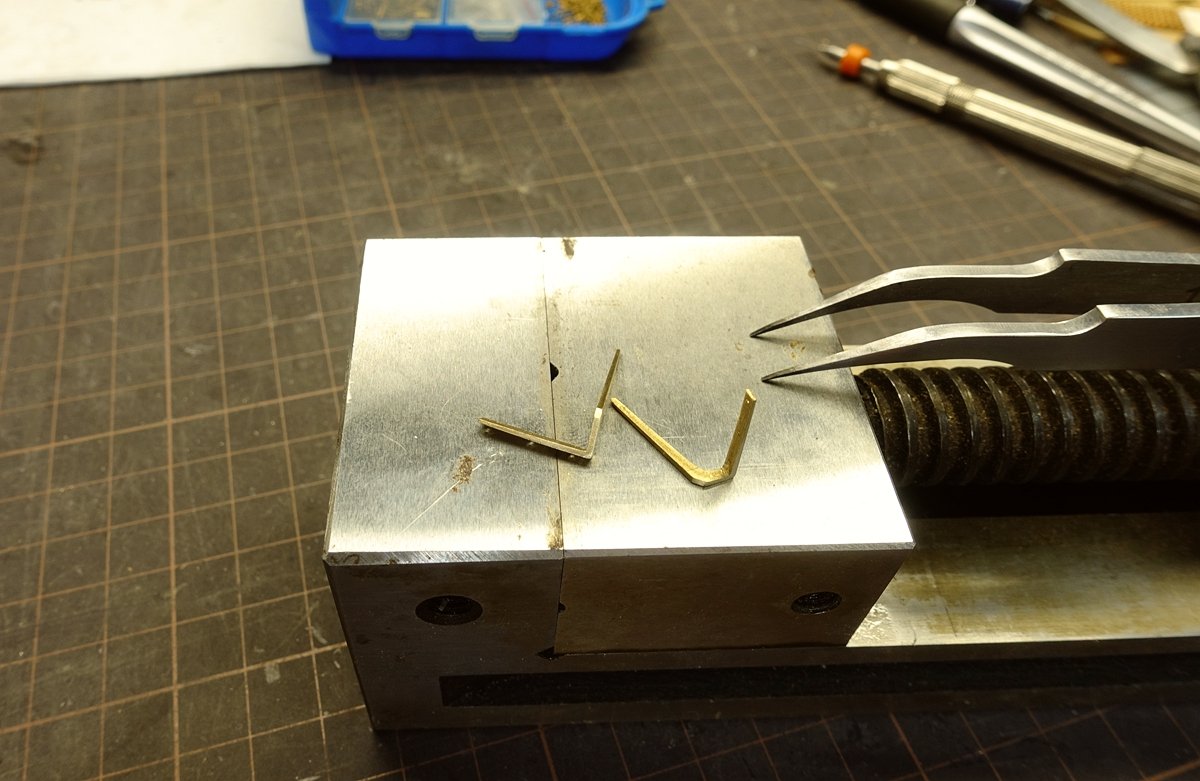
- 371 replies
-
- 22
-
-
-
NAIAD 1797 by Bitao - 1:60
Bitao replied to Bitao's topic in - Build logs for subjects built 1751 - 1800
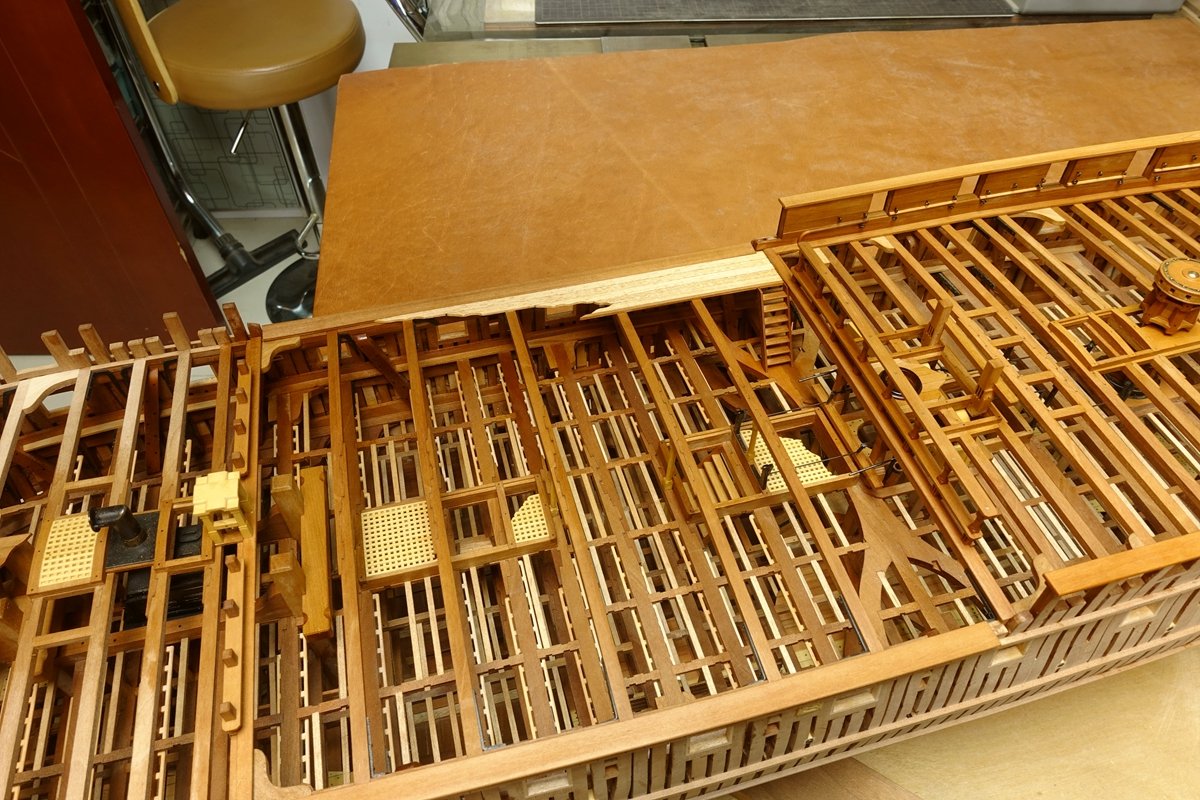
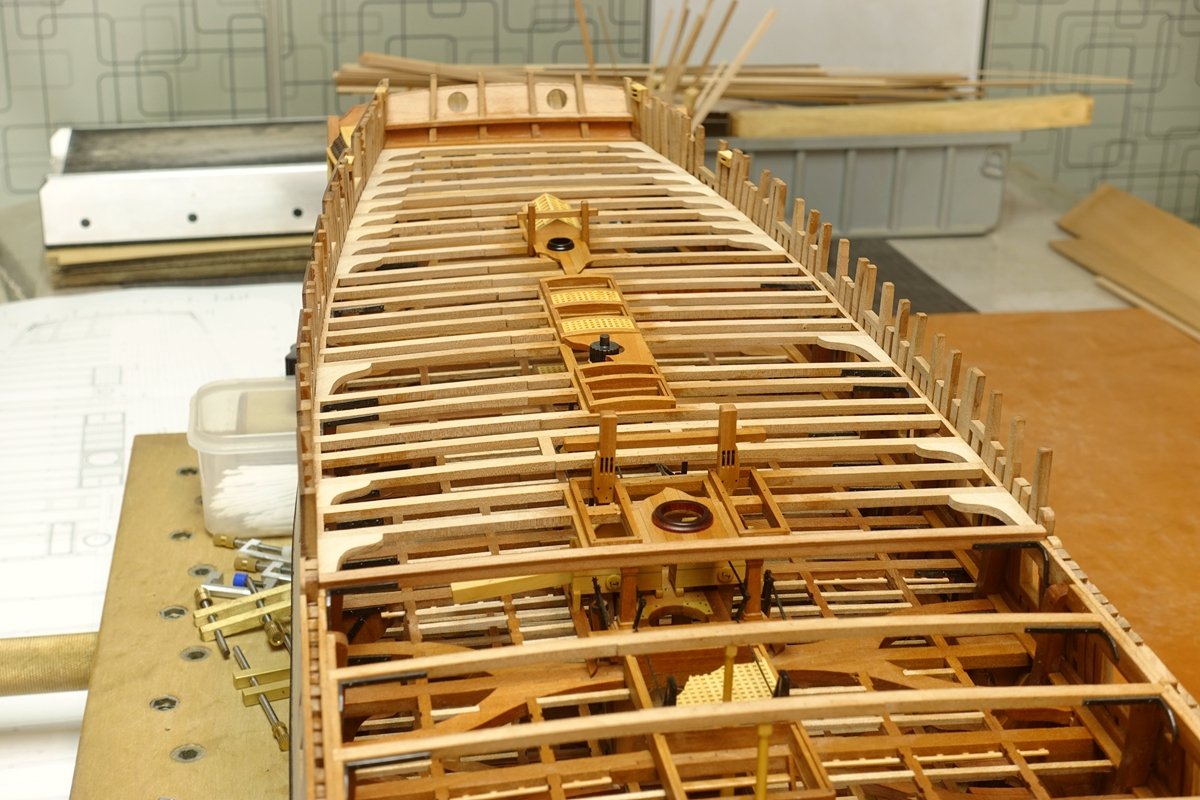
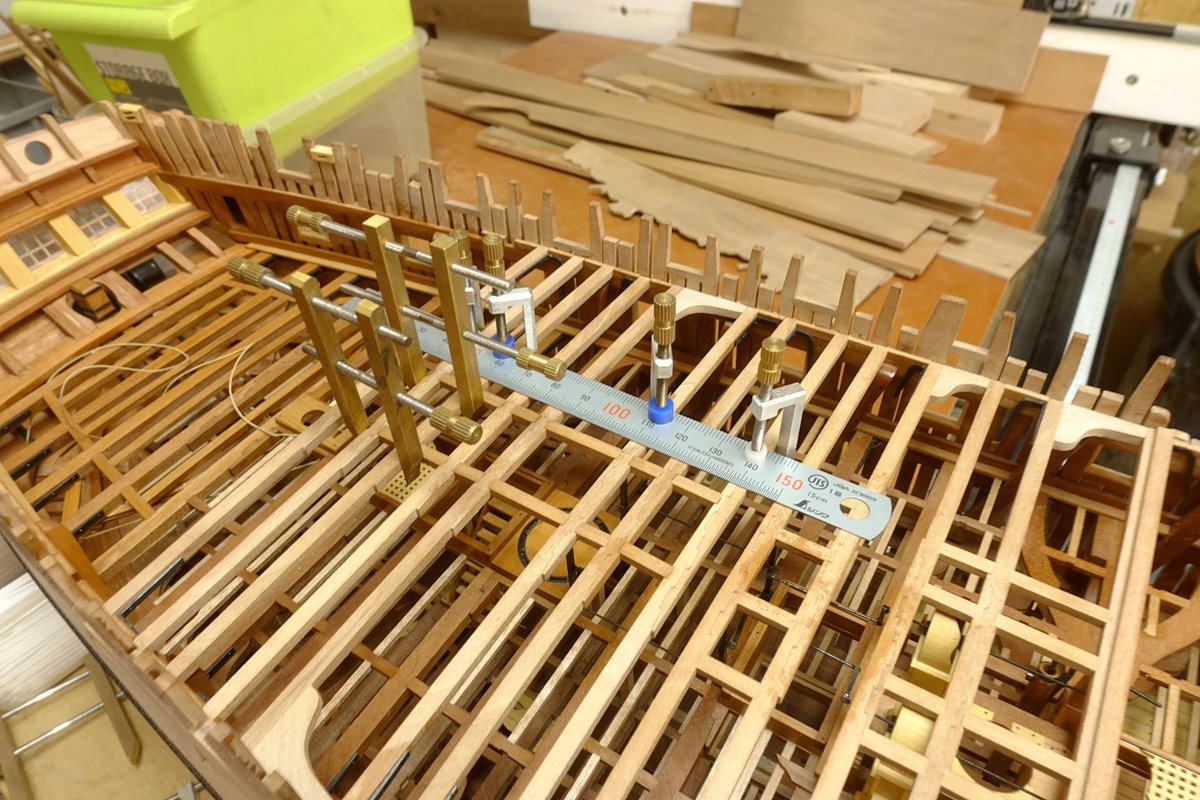
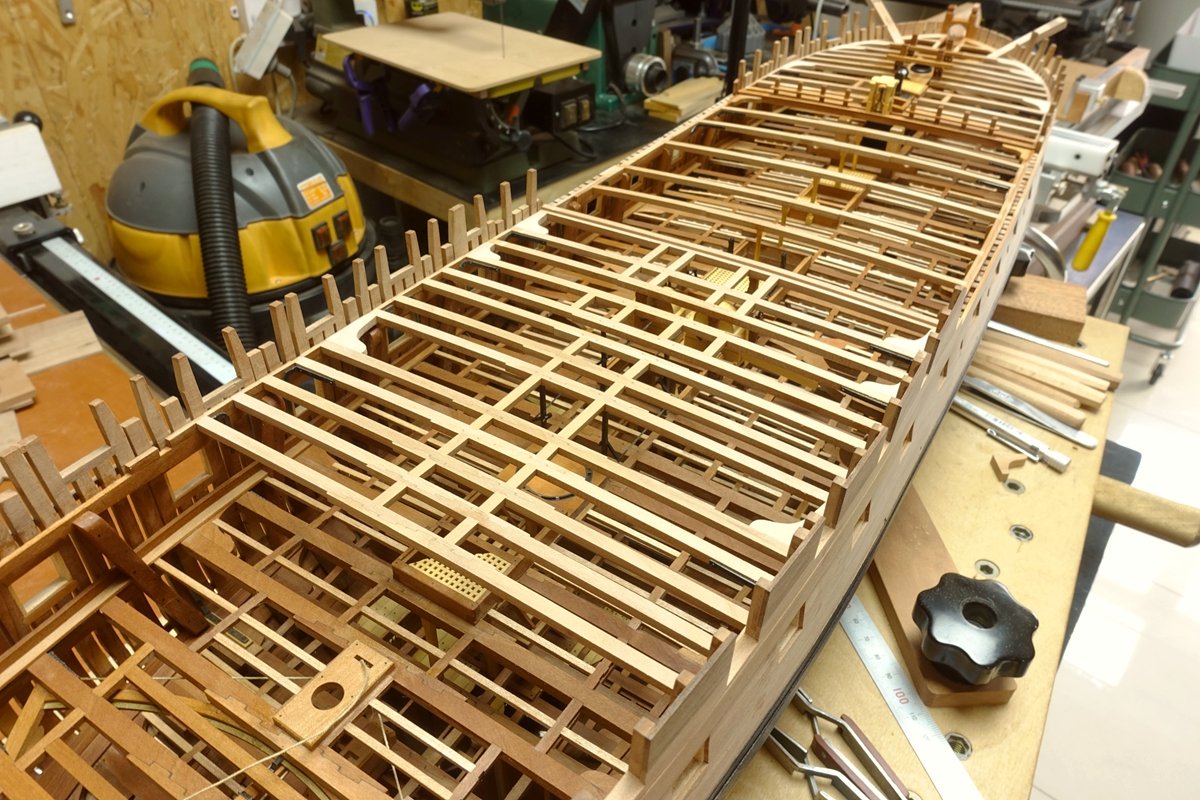
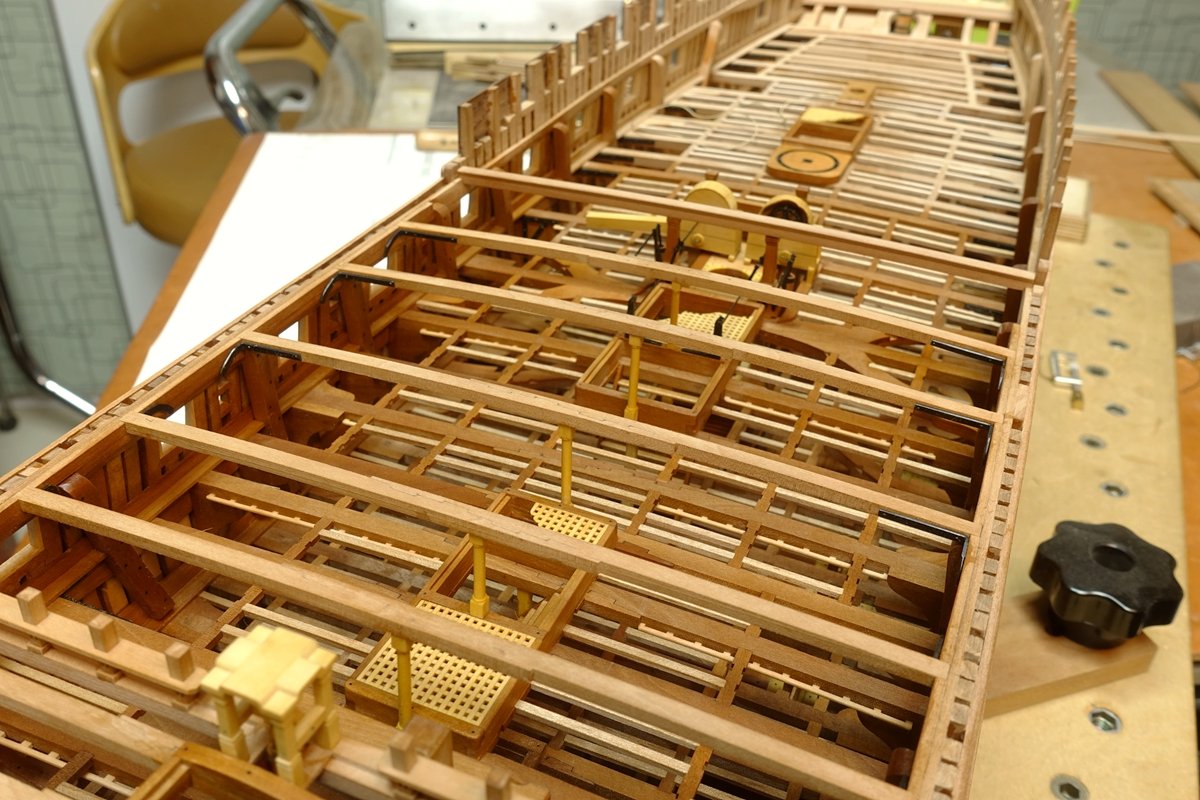
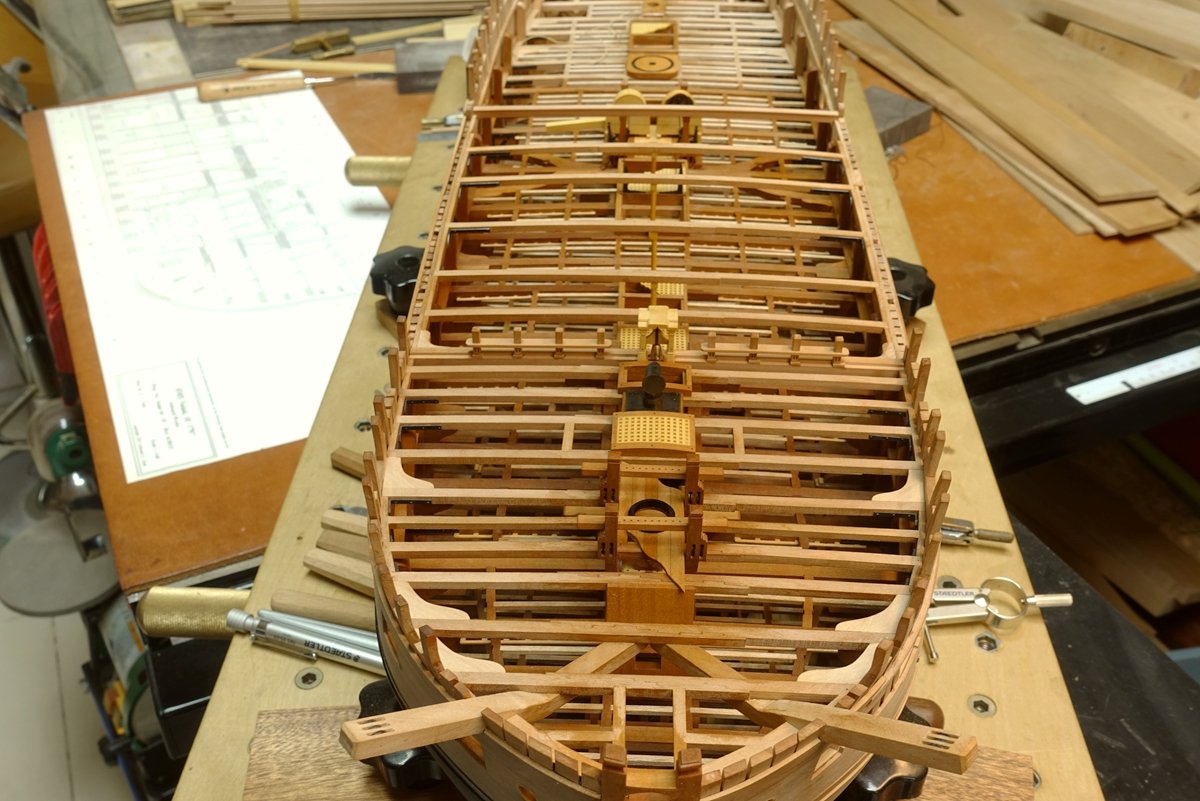
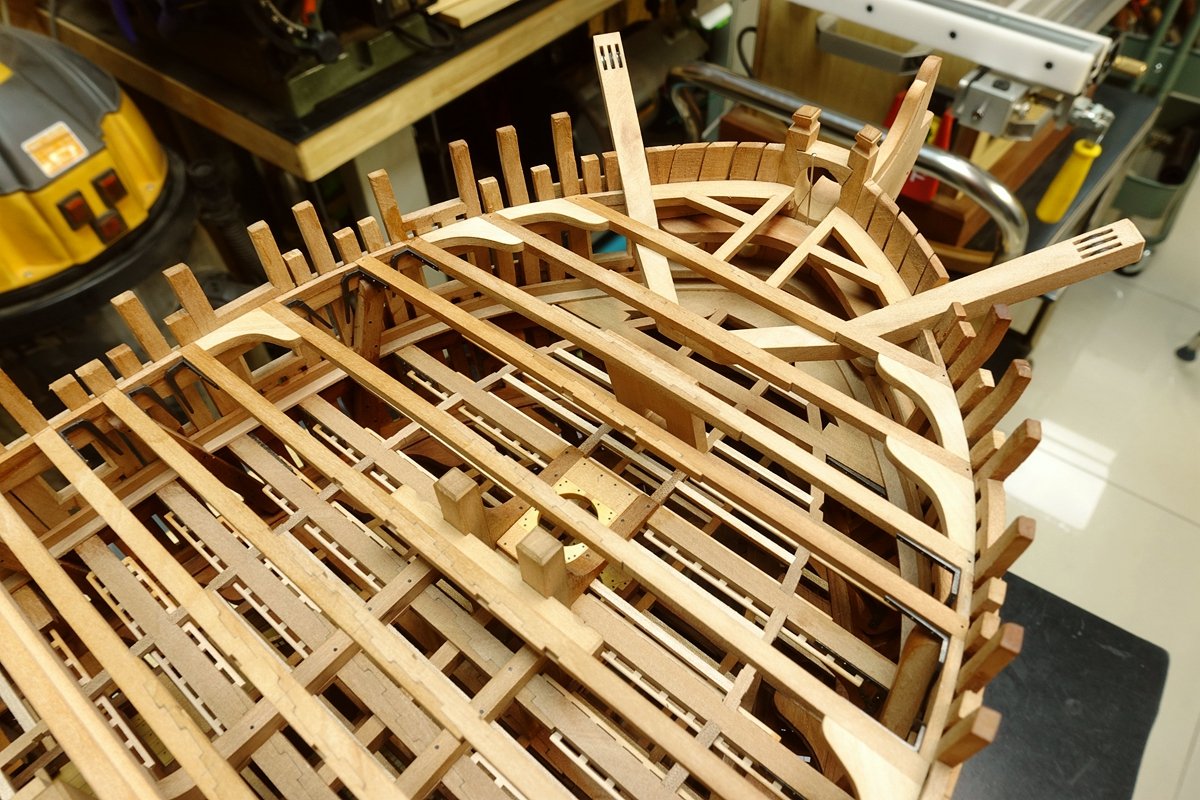
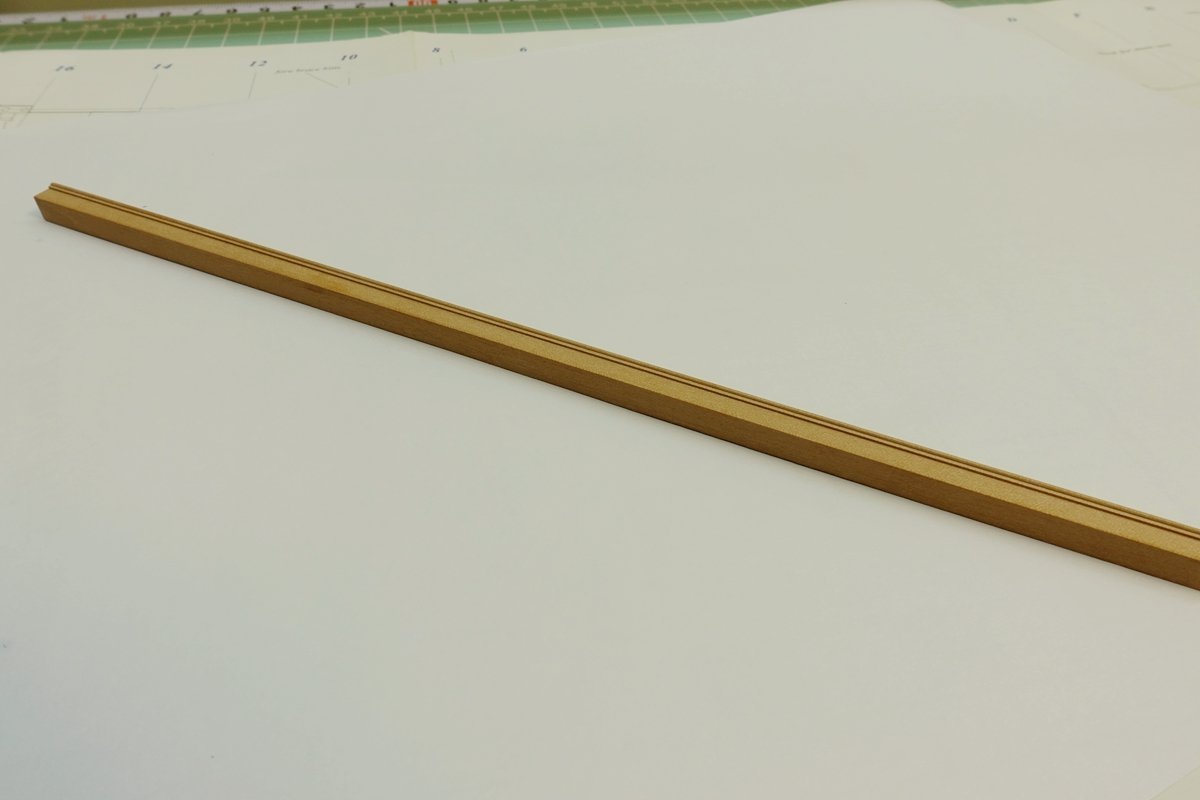
Finish the top deck beam machining. Using waterproof latex bonding, interface to do a black line treatment to increase the effect. Use for at least 48 hours after the hot bending treatment. I can have a rest these days.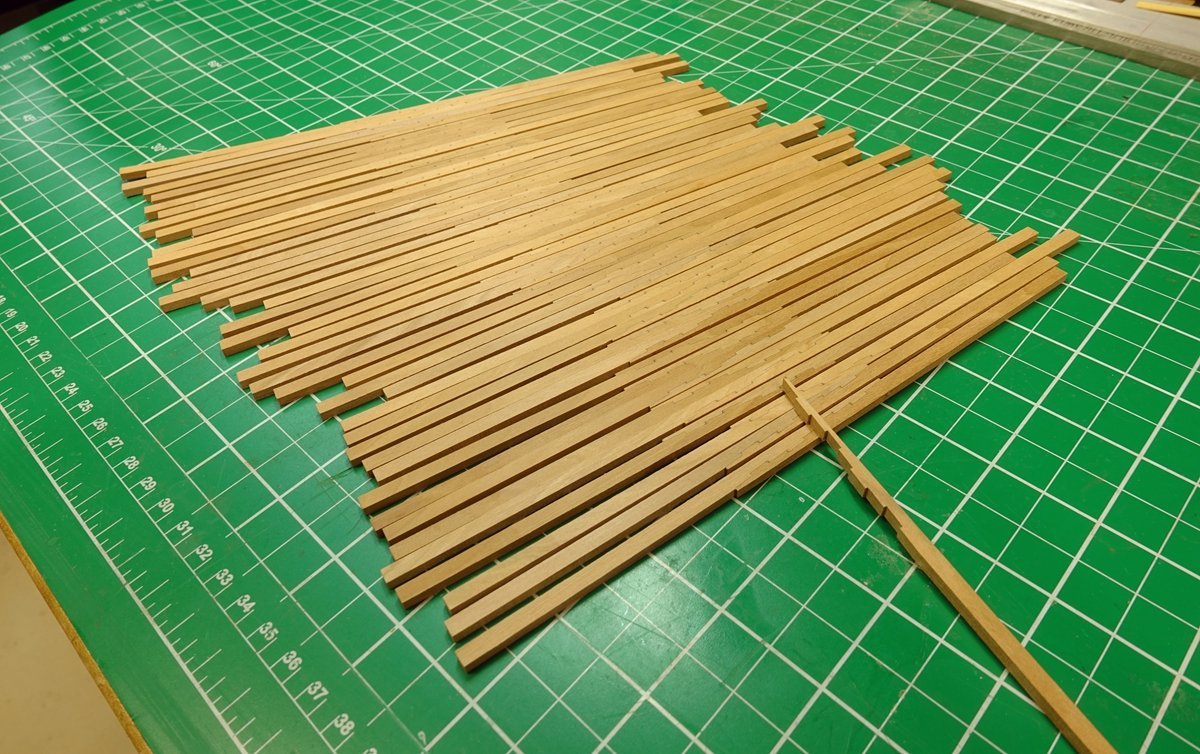
- 371 replies
-
- 23
-
-
NAIAD 1797 by Bitao - 1:60
Bitao replied to Bitao's topic in - Build logs for subjects built 1751 - 1800
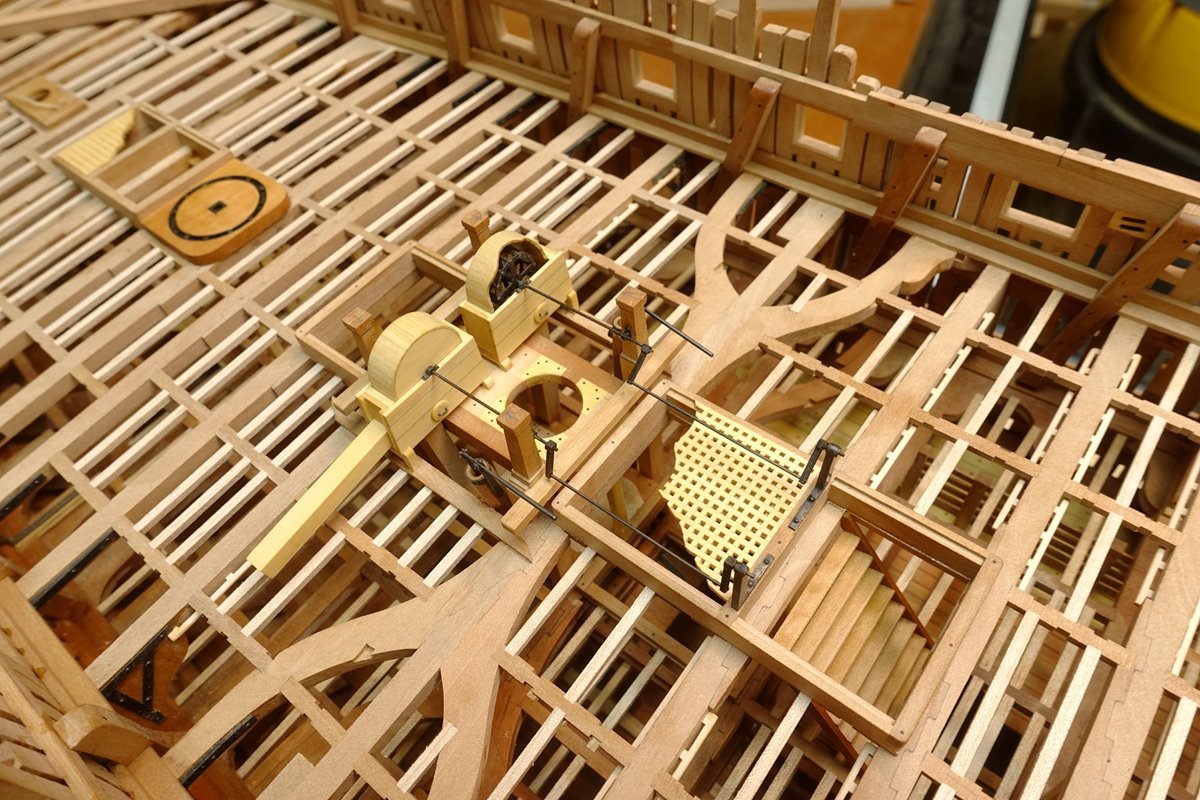
Due to my very limited knowledge, and may not have a good understanding of ED drawings and design concepts and instructions, resulting in the previous completed with the chain pump connected to the“Axis tree” manufacturing error. I may have“Simplified” it for a lot of people. Thanks to Greg for correcting this in time and providing me with detailed drawings that gave me an intuitive understanding of their basic structure. His rigorous attitude and the spirit of unremitting pursuit again let me admire unceasingly! This made me decide that I had to scrap the original result and re-make this part, even though it was considered perfect by many and liked it. Maybe the improvements you see now are still not perfect, but I have done my best. In my opinion, every outstanding person is trying to achieve every detail, it is this forum for everyone the biggest harvest. It's also a reality I have to face in order to make progress. Here, I have to thank each and every one of them for providing me with the information and correcting my mistakes. Thank you!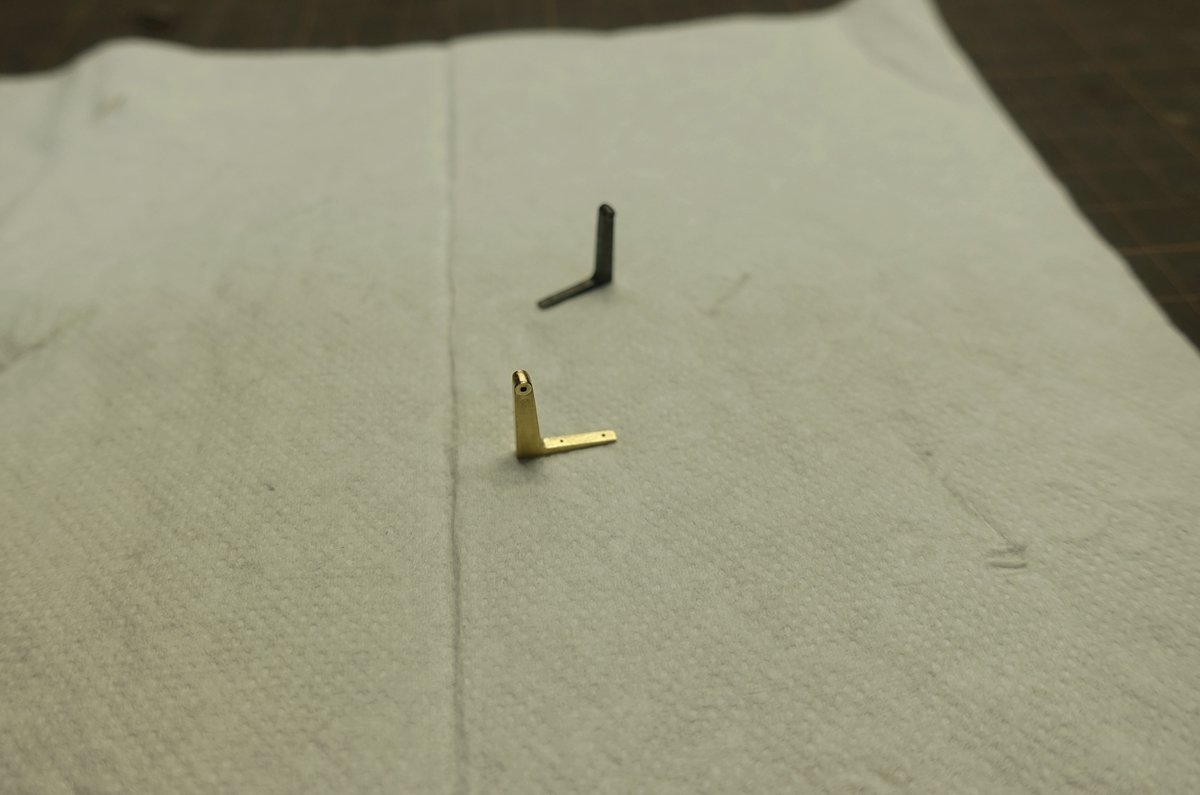
- 371 replies
-
- 32
-
-
-

-
NAIAD 1797 by Bitao - 1:60
Bitao replied to Bitao's topic in - Build logs for subjects built 1751 - 1800
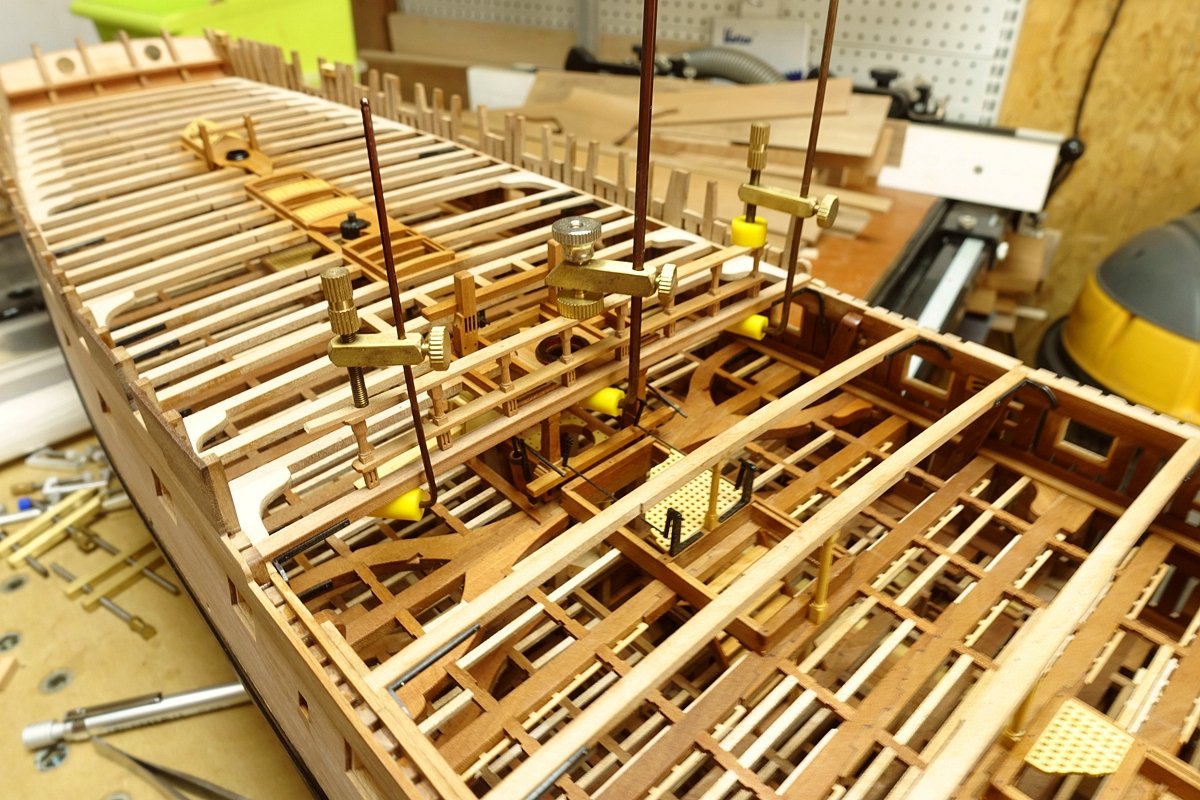
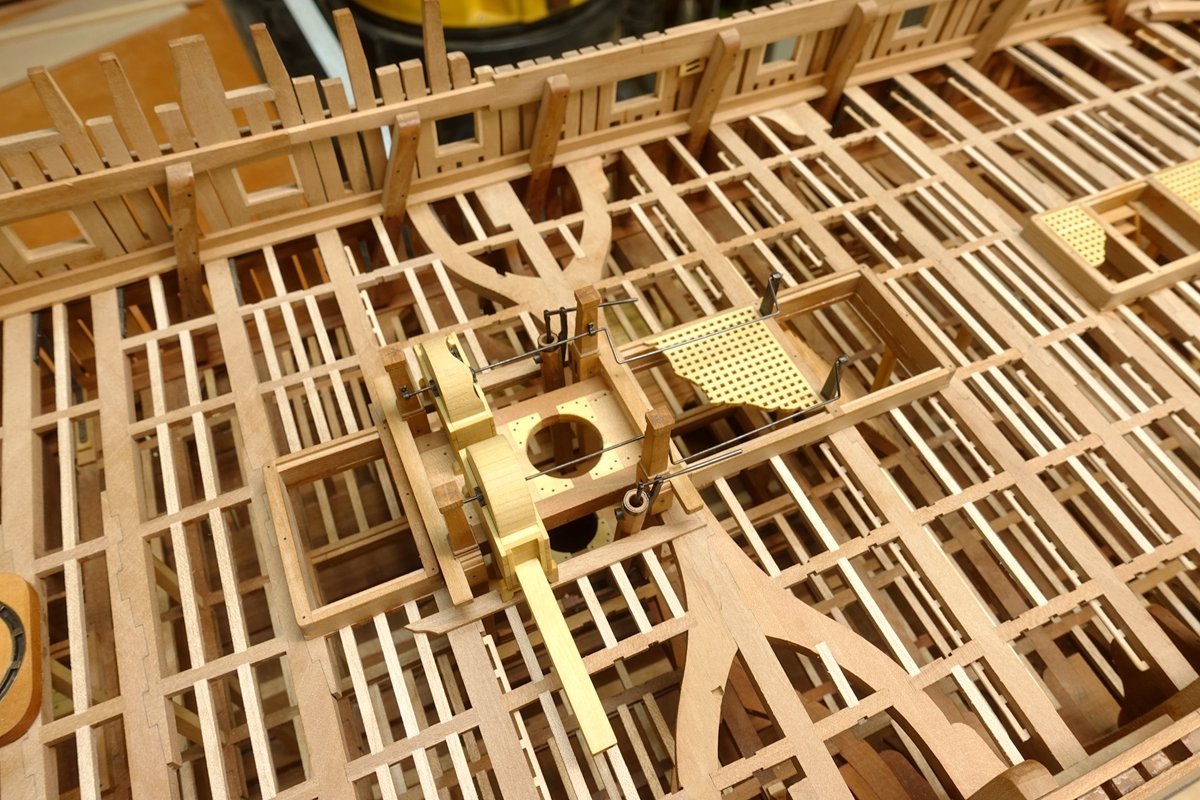
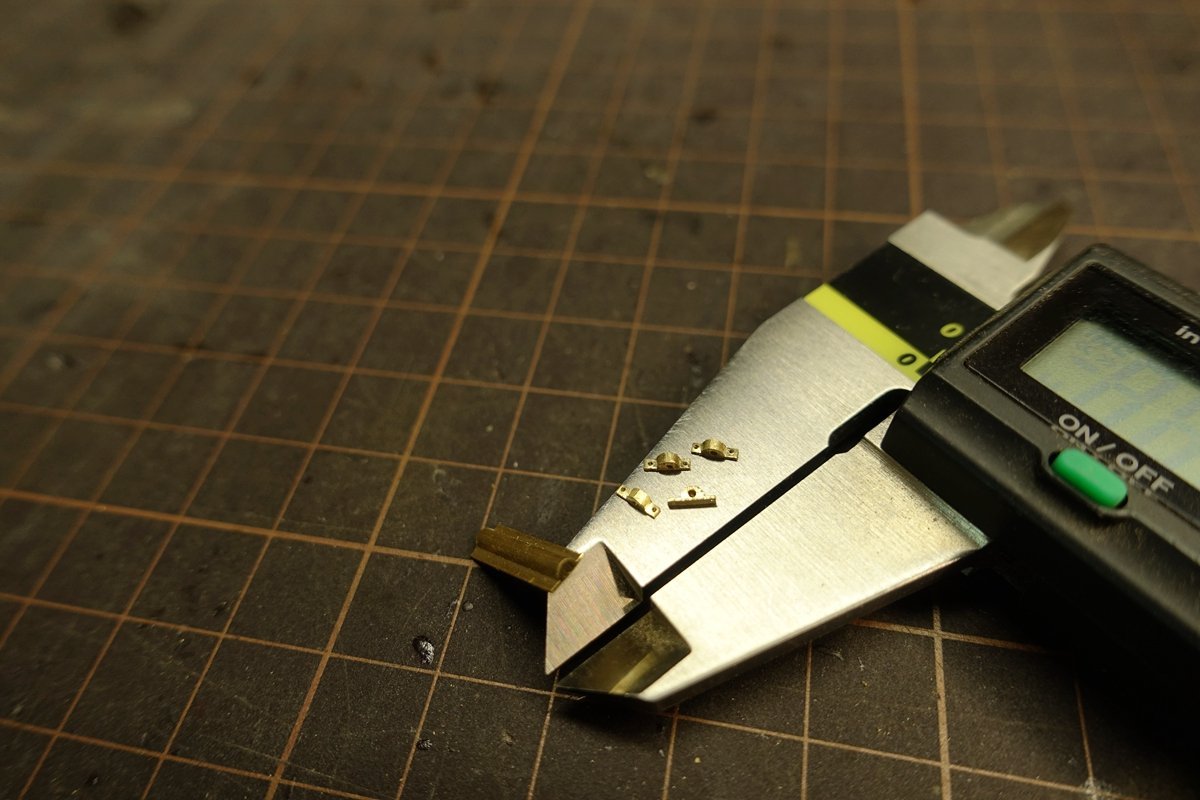
The schedule was suspended due to heavy work for more than a week. I spent a day installing these components today. These may not seem like much, but with fixed pins and rivets, precise positioning can be time-consuming.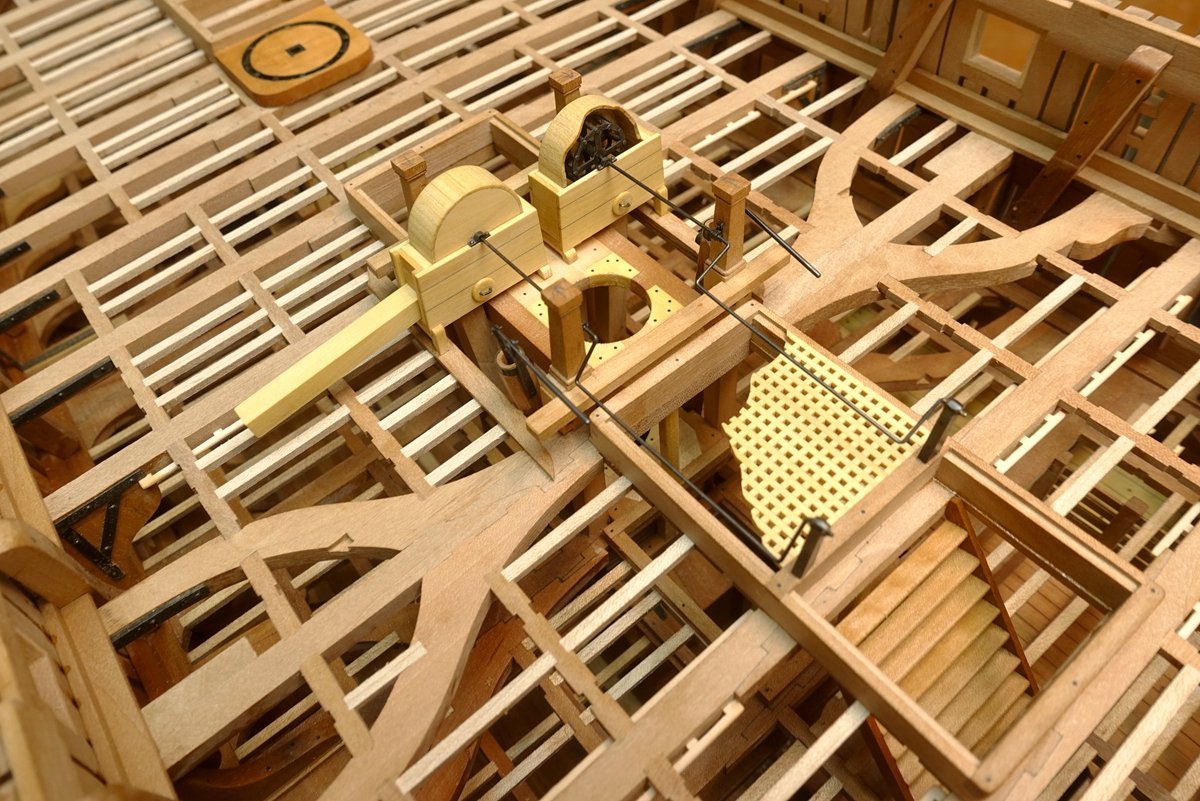
- 371 replies
-
- 35
-
-
-
NAIAD 1797 by Bitao - 1:60
Bitao replied to Bitao's topic in - Build logs for subjects built 1751 - 1800
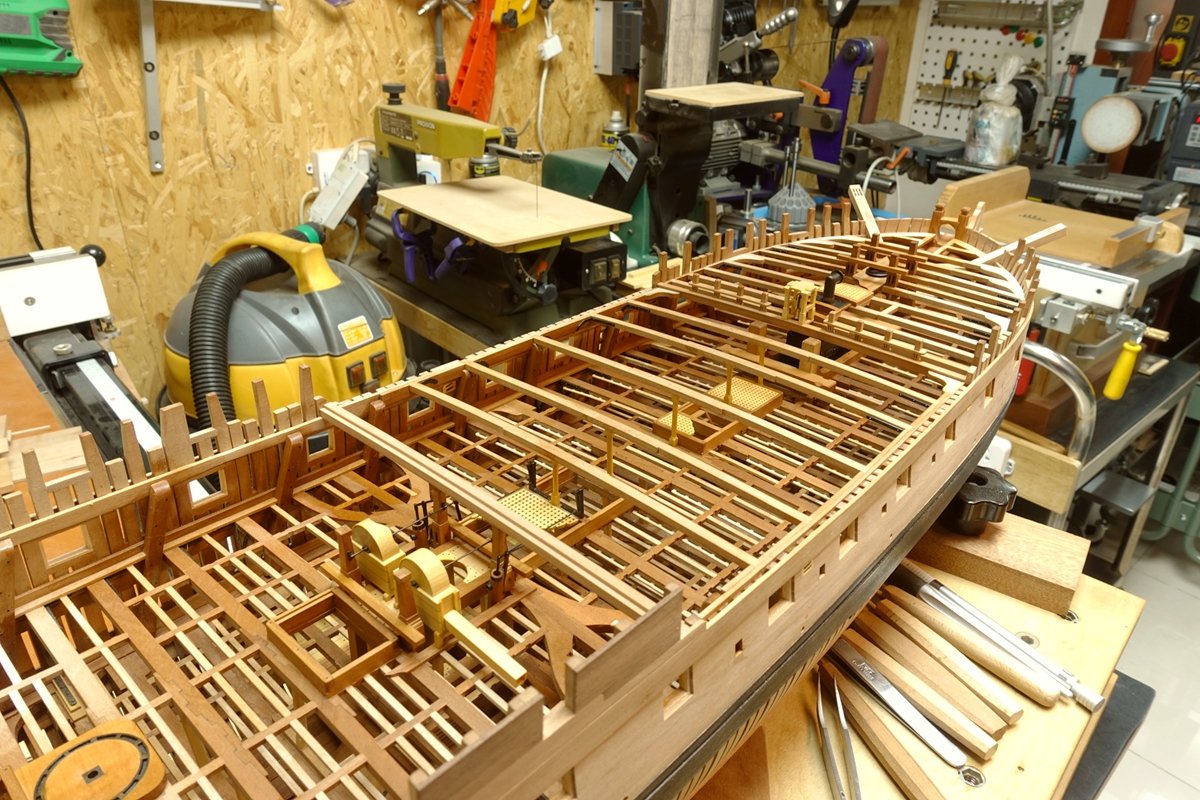
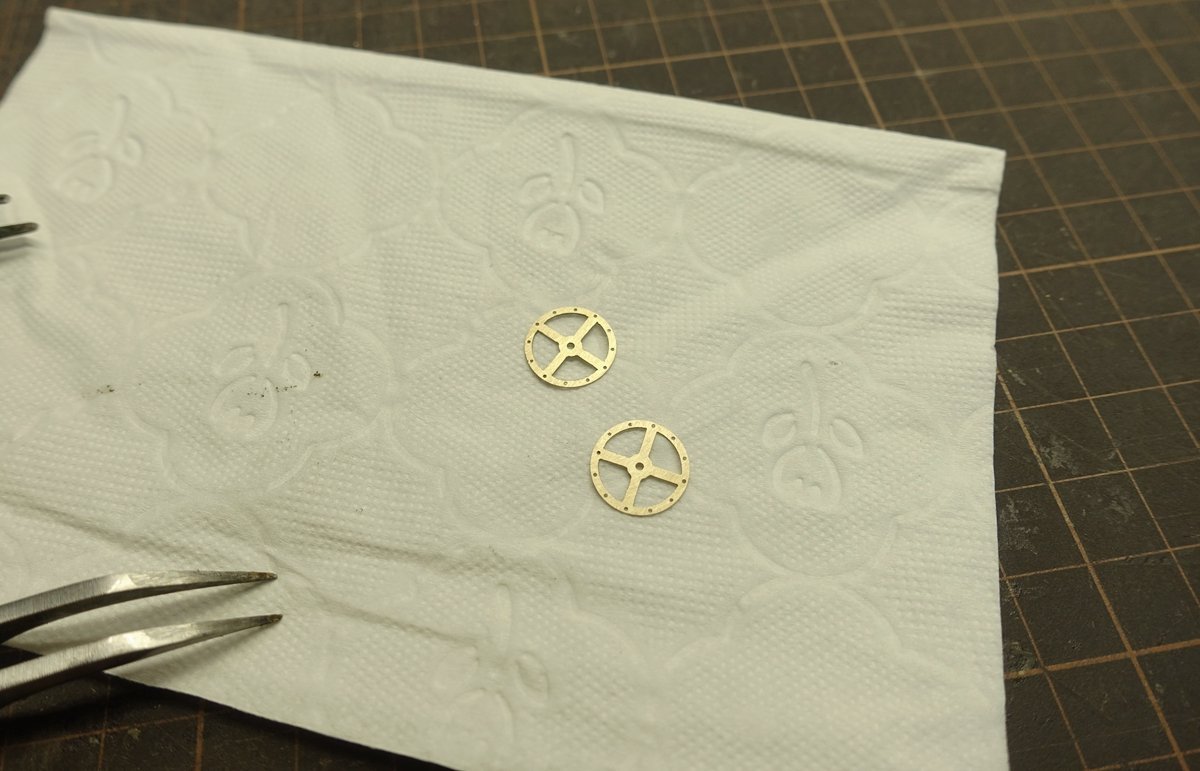
For me, showing others is not only a clear picture, but also an attitude of doing things. Clean Environment is not only comfortable to operate, but also to avoid the processing error caused by dust, especially small parts.- 371 replies
-
- 10
-
-
NAIAD 1797 by Bitao - 1:60
Bitao replied to Bitao's topic in - Build logs for subjects built 1751 - 1800
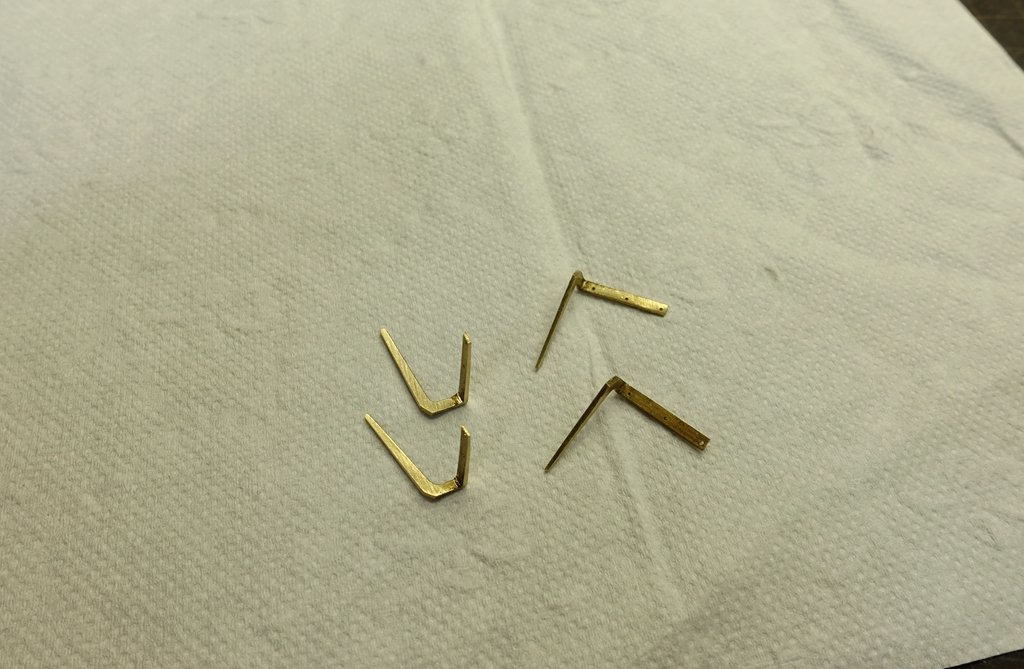
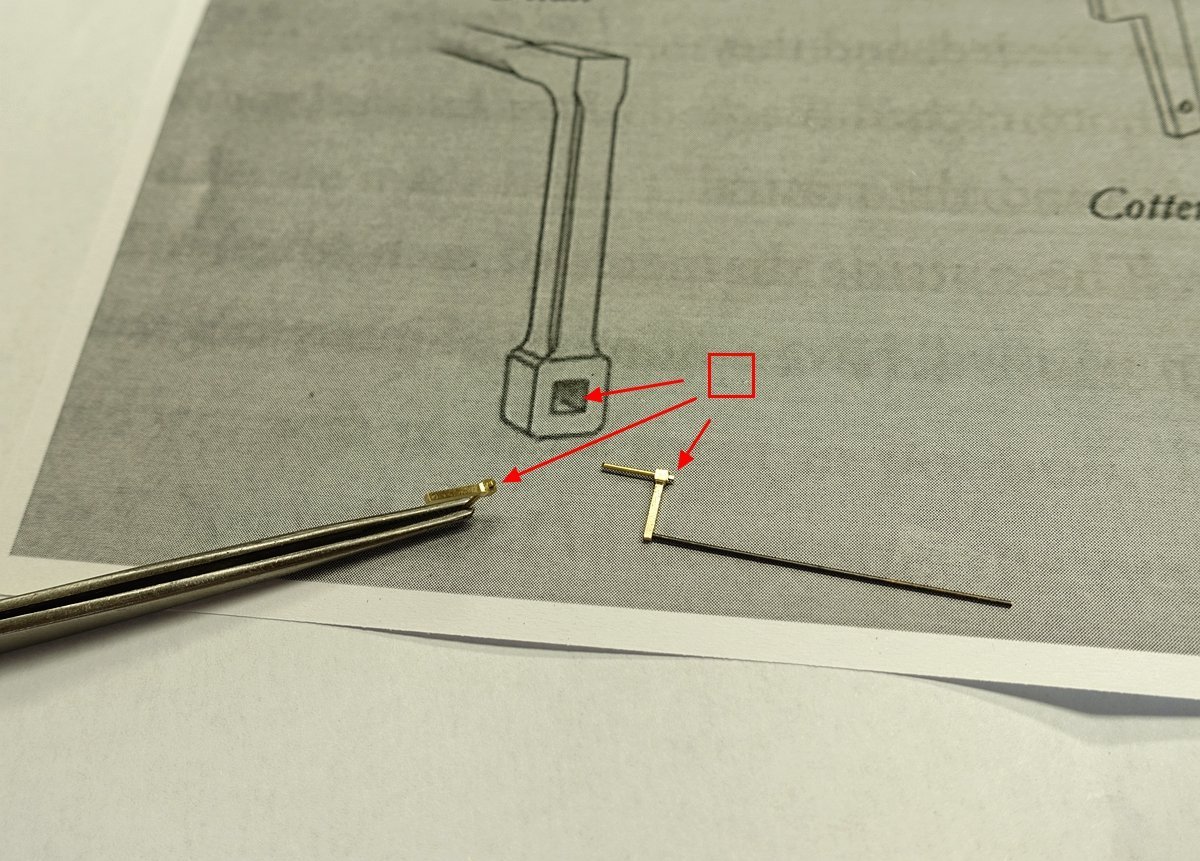
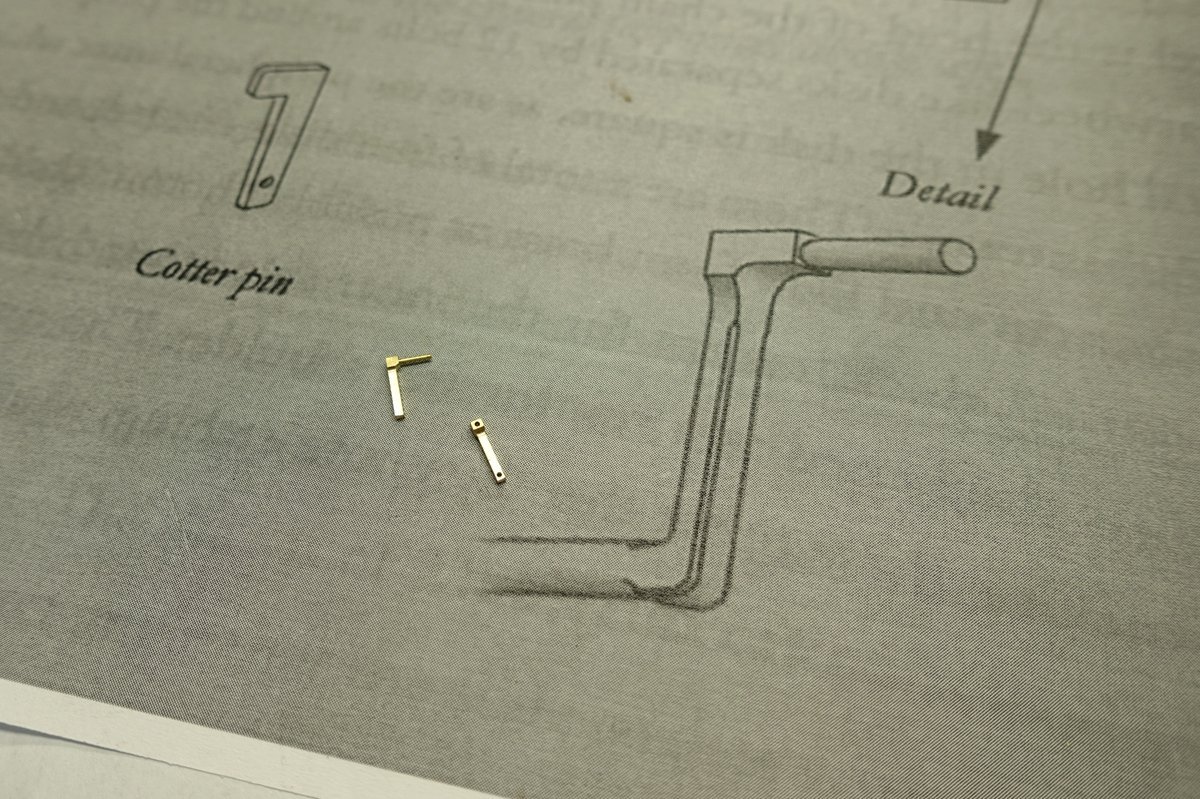
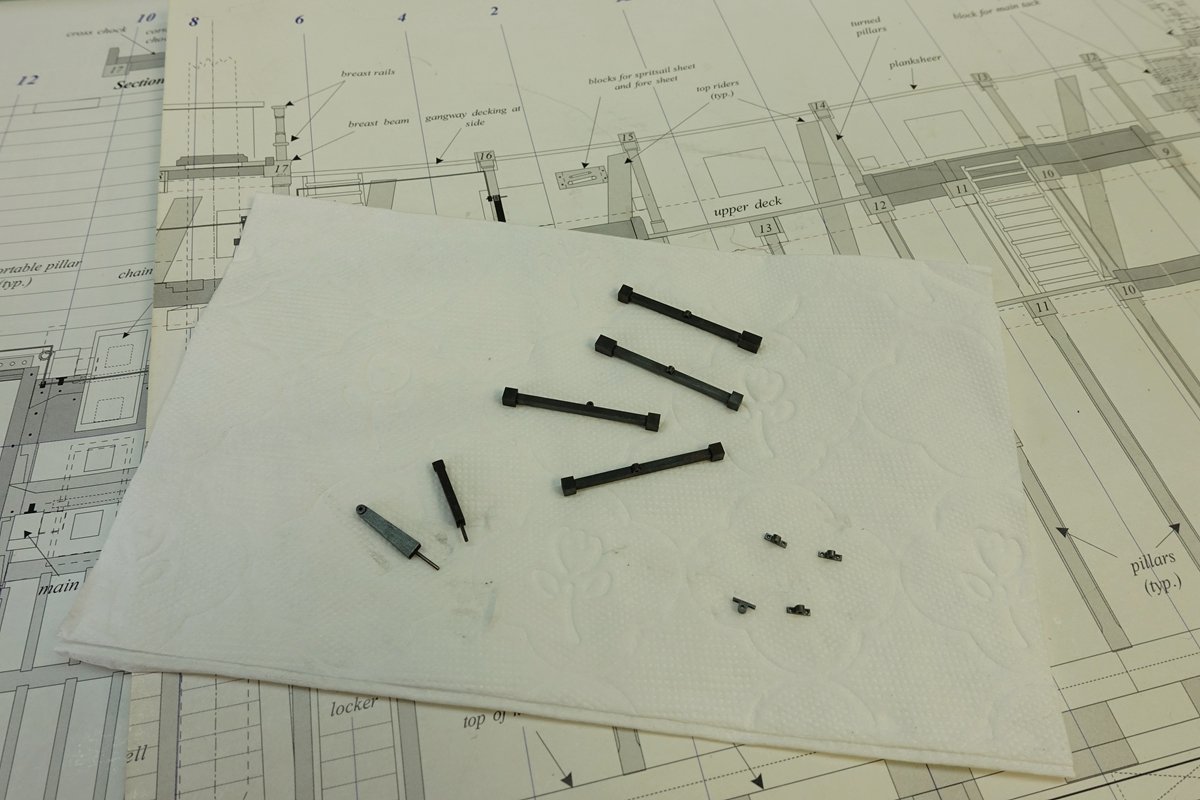
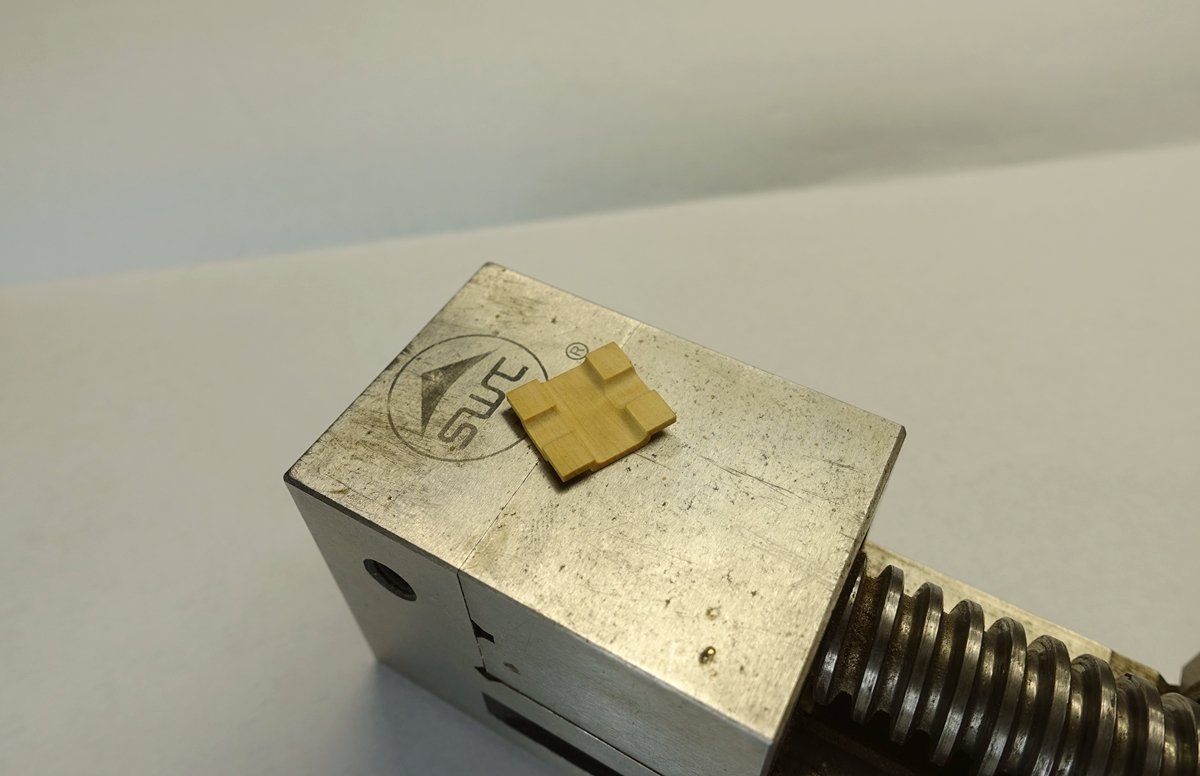
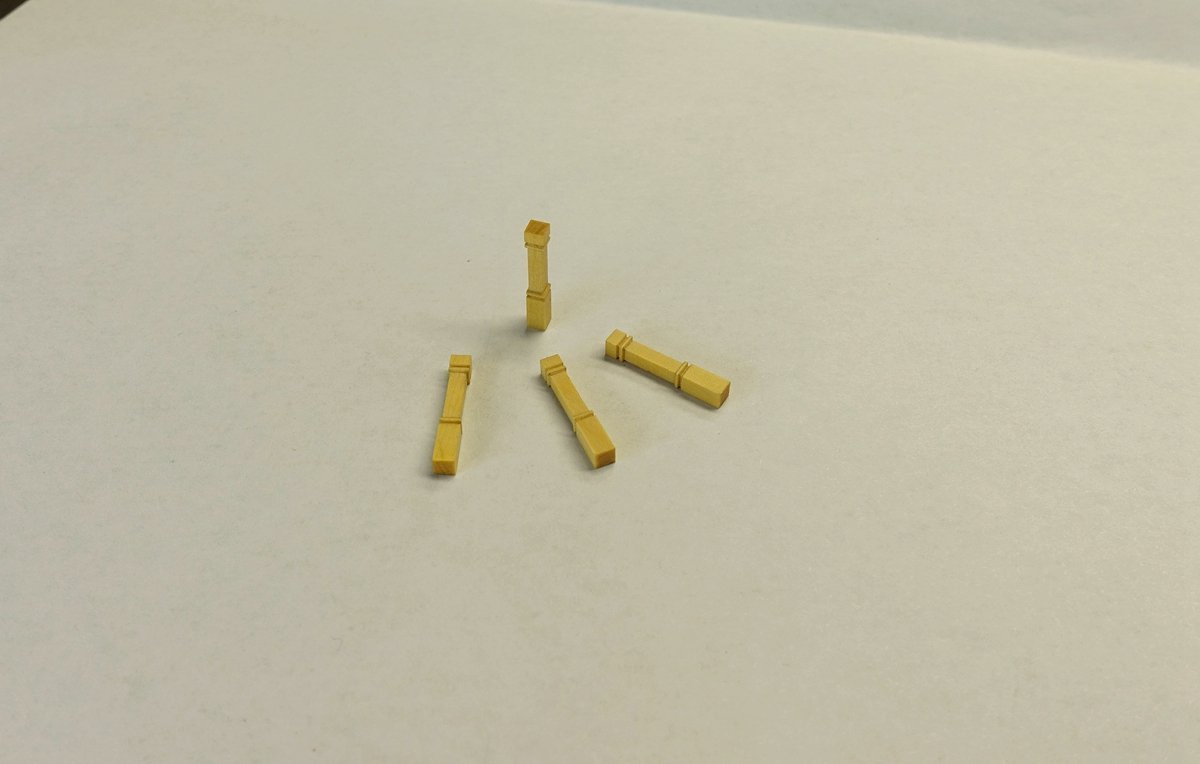
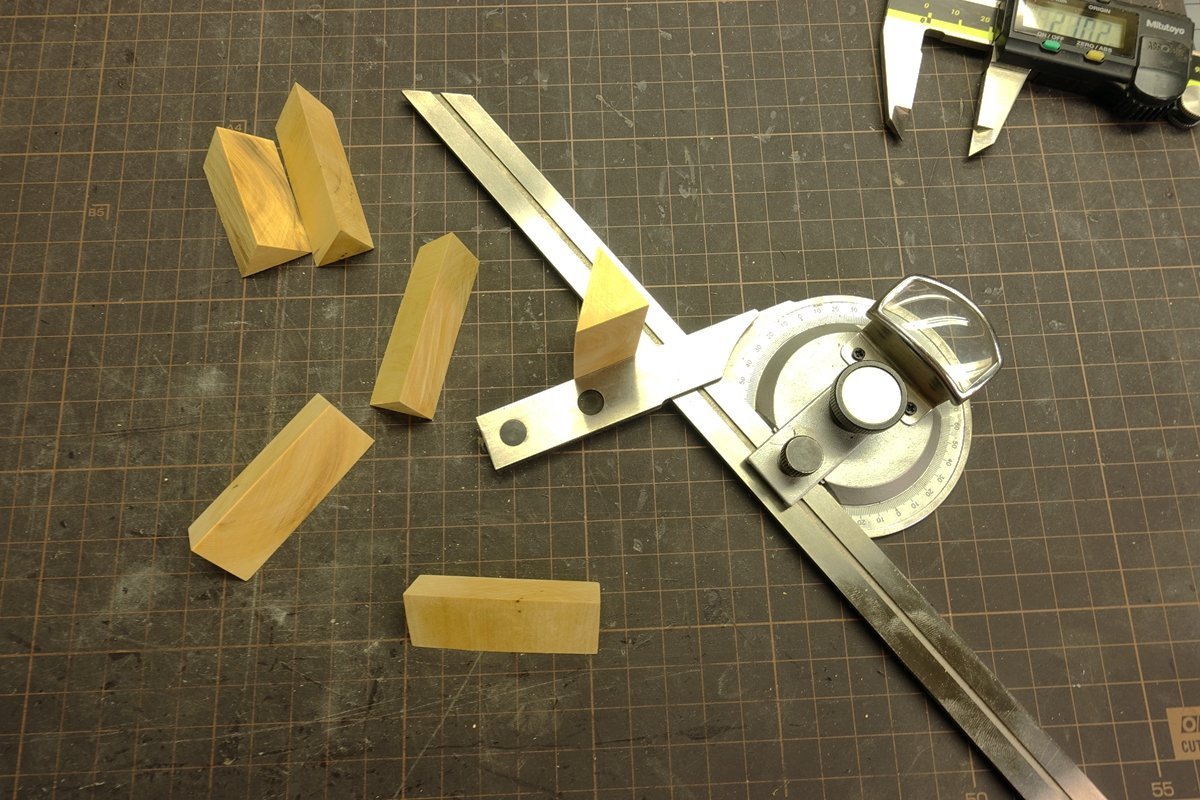
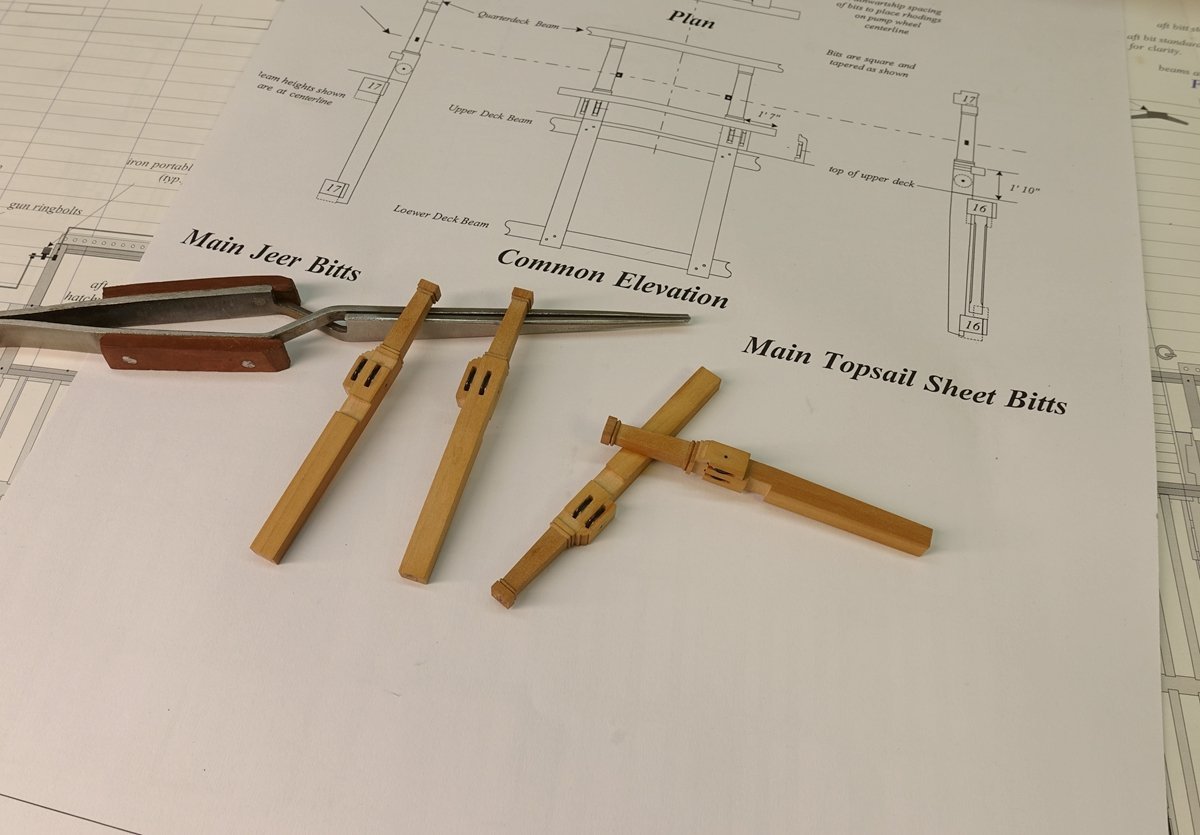
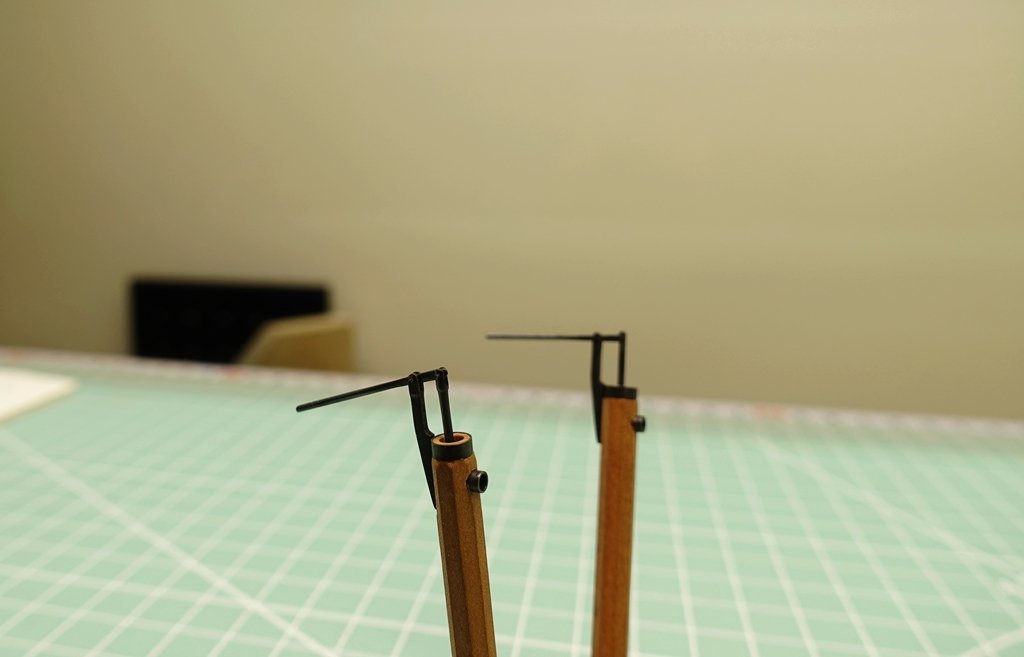
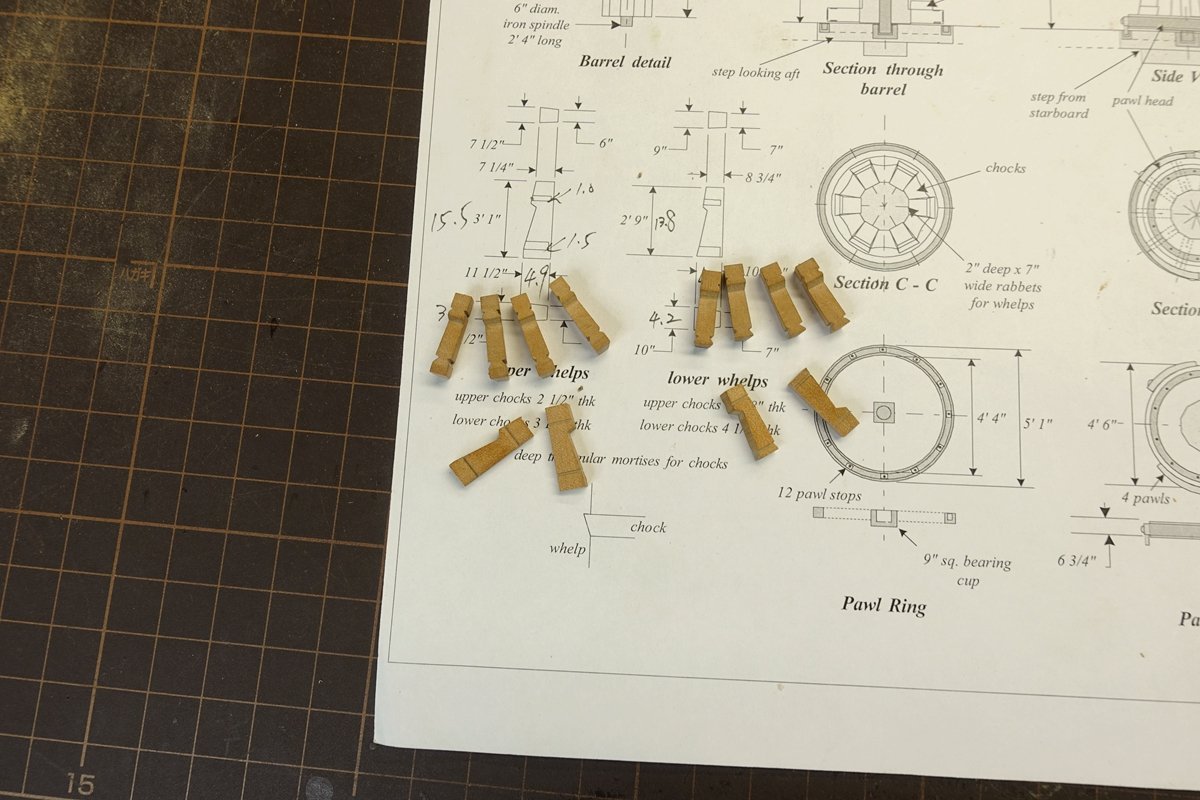
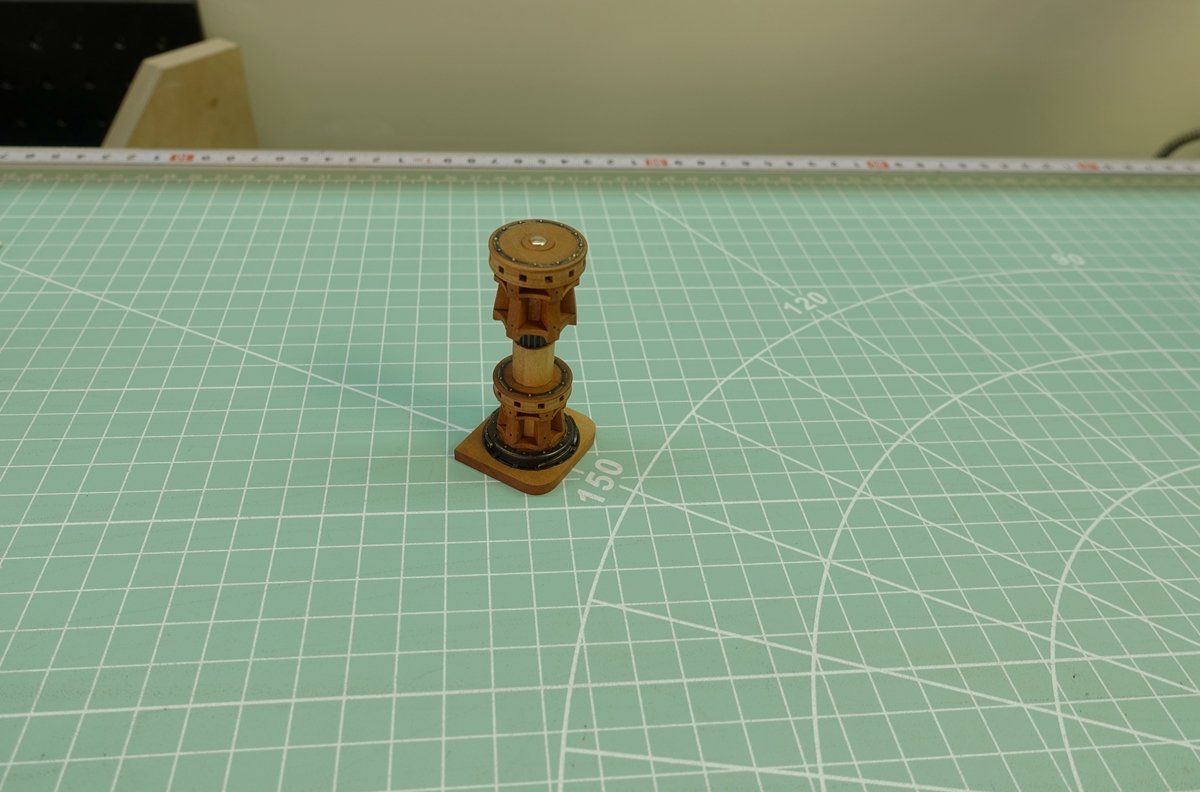
Many thanks to Alan Cabrera for his detailed answers and for providing me with the location of the book. Perhaps I didn't make myself clear in the previous post: The image of the“L” formation was borrowed from Edward Tosti's process rather than my own. Because my knowledge of English is limited, mainly with the help of the Internet translator and we have limited communication, for drawings and books, I usually more directly use data and pictures to distinguish, so a lot of things aren't really understood; for me, reading and understanding is my biggest obstacle, and it takes me a lot more time and it's a lot harder than building parts, and it's a major factor in my progress. The following results were completed in two days according to my personal understanding. In fact, they were also made by the integral milling method after I scrapped two plans and six parts, to first ensure that the installation after the connection is stable and reliable (I rarely use glue to join metal parts of the method) . The finished product will be different from Edward Tosti's, but for me, with limited reading comprehension, it's safer to use the plan in the drawing, so I didn't use an“L” but instead a vertical pillar that looks like a pyramid. I'm sorry to disappoint you.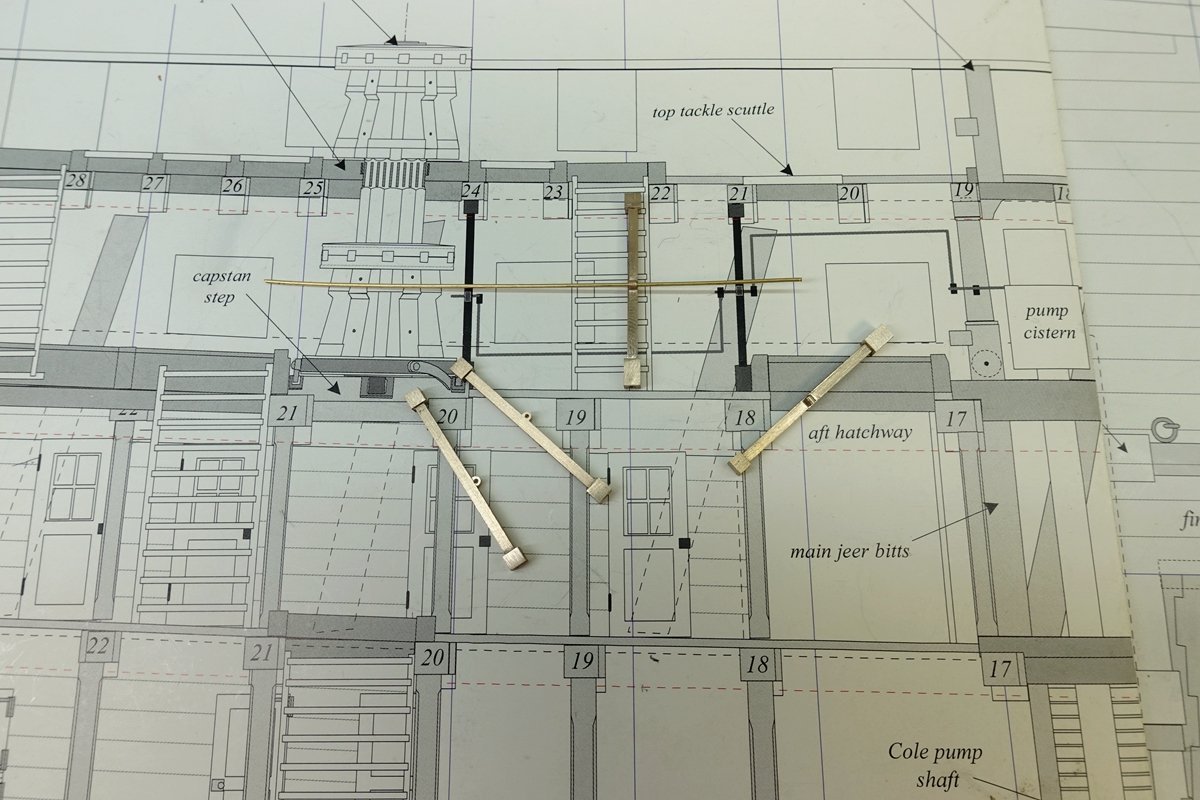
- 371 replies
-
- 21
-
-
NAIAD 1797 by Bitao - 1:60
Bitao replied to Bitao's topic in - Build logs for subjects built 1751 - 1800
Thanks Druxey for the information. After careful consideration, I will use the simplest approach without reliable information or detailed references. Avoid self-defeating. -
NAIAD 1797 by Bitao - 1:60
Bitao replied to Bitao's topic in - Build logs for subjects built 1751 - 1800
This is the fun of our production and the motivation to pursue the goal. . What's not easy is beautiful, isn't it? -
NAIAD 1797 by Bitao - 1:60
Bitao replied to Bitao's topic in - Build logs for subjects built 1751 - 1800
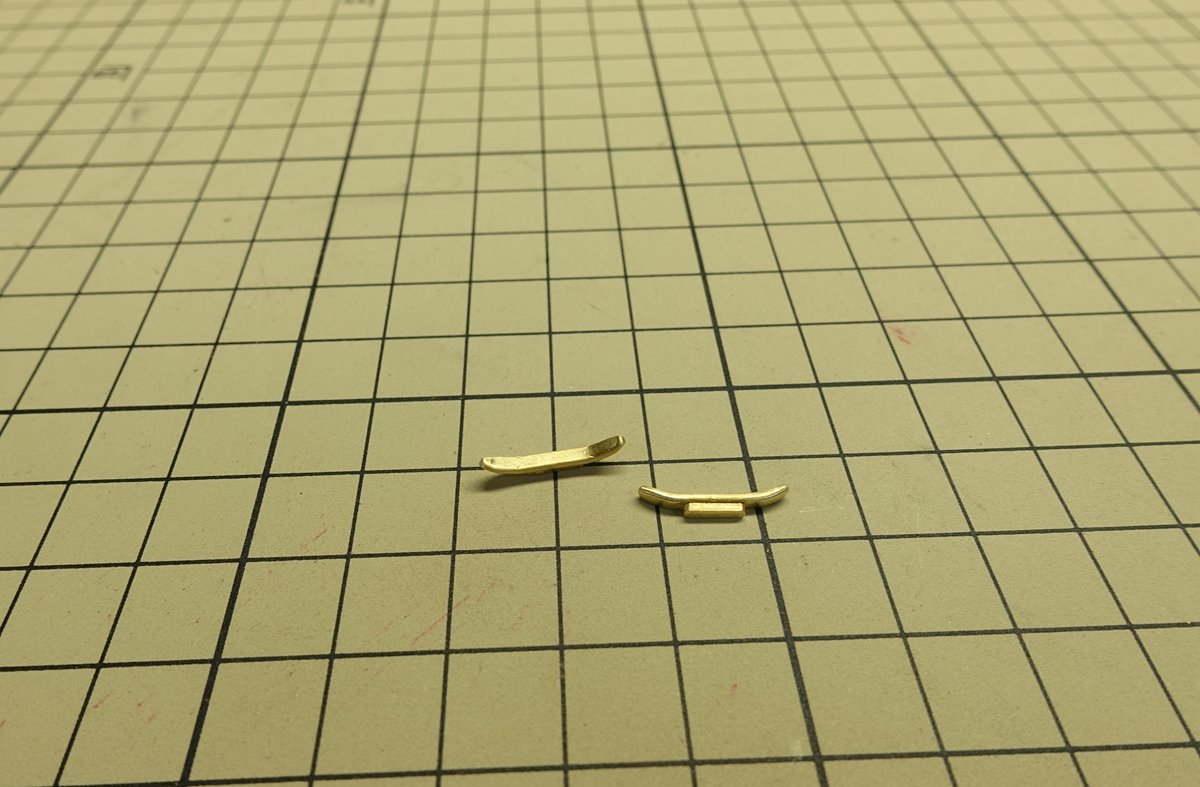
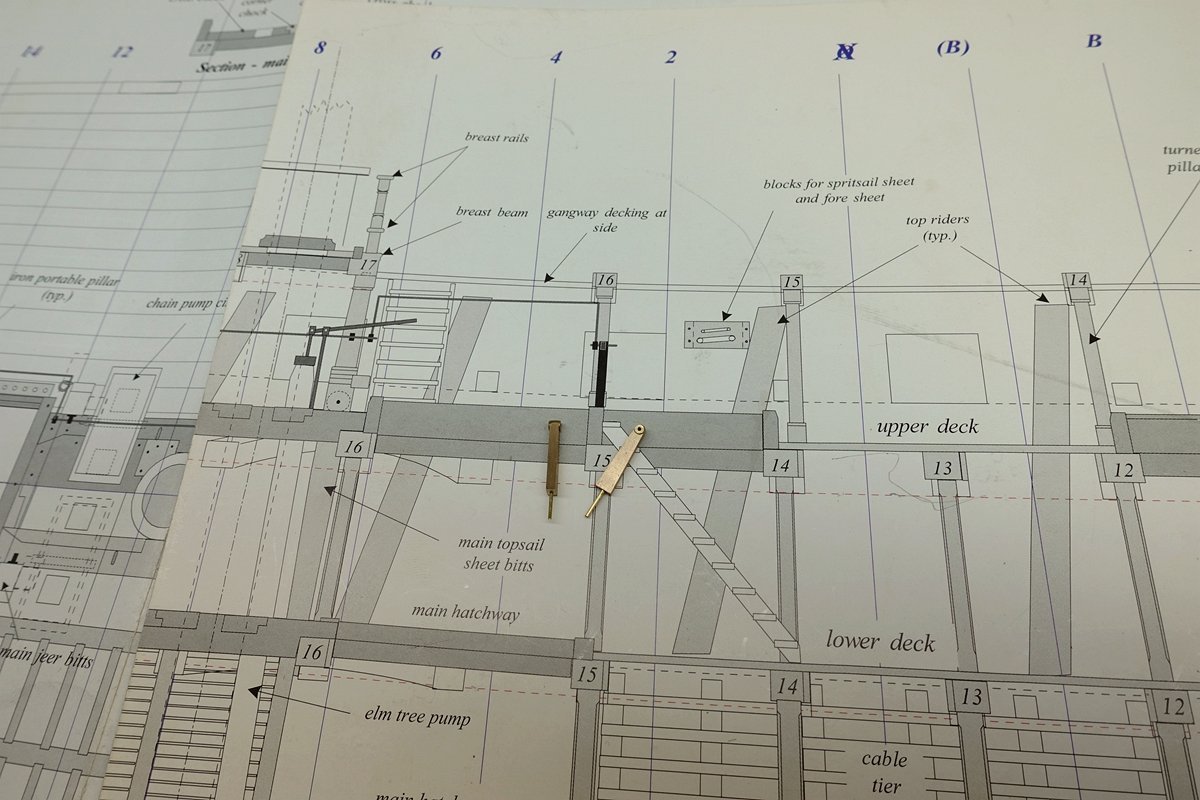
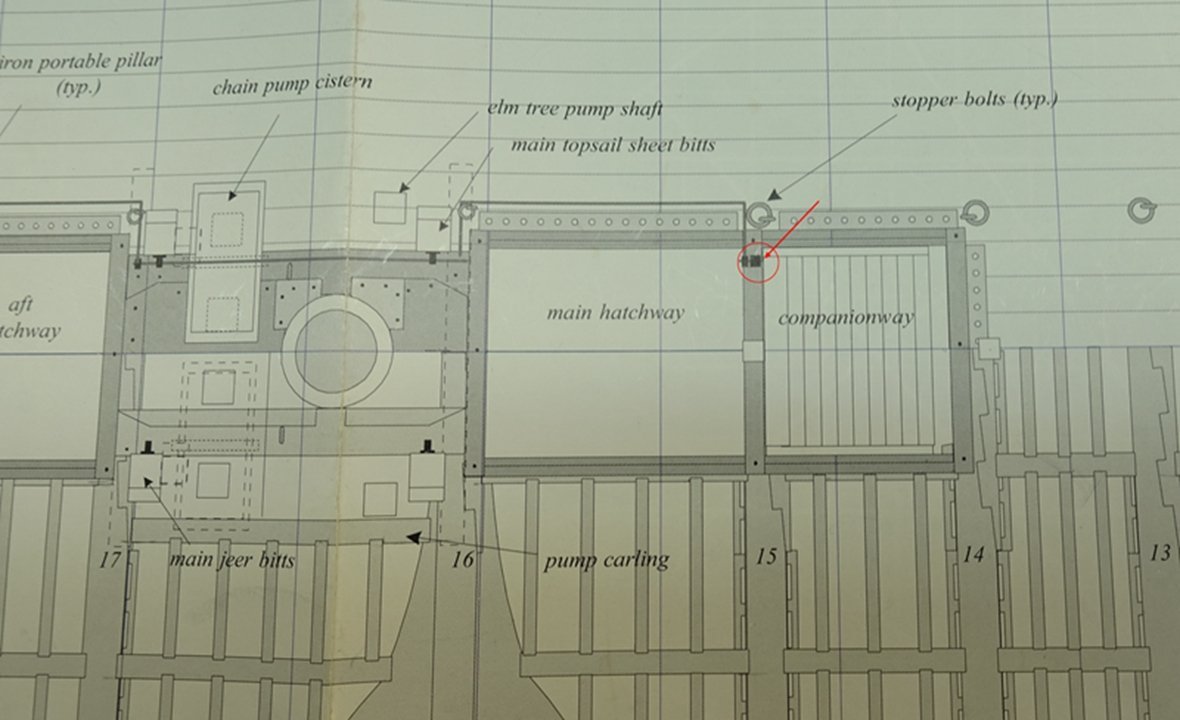
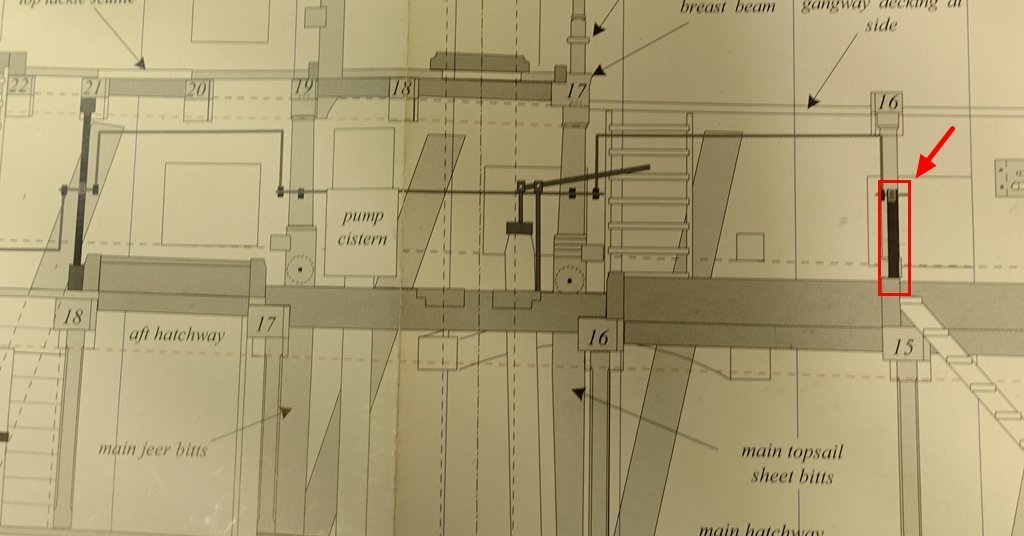
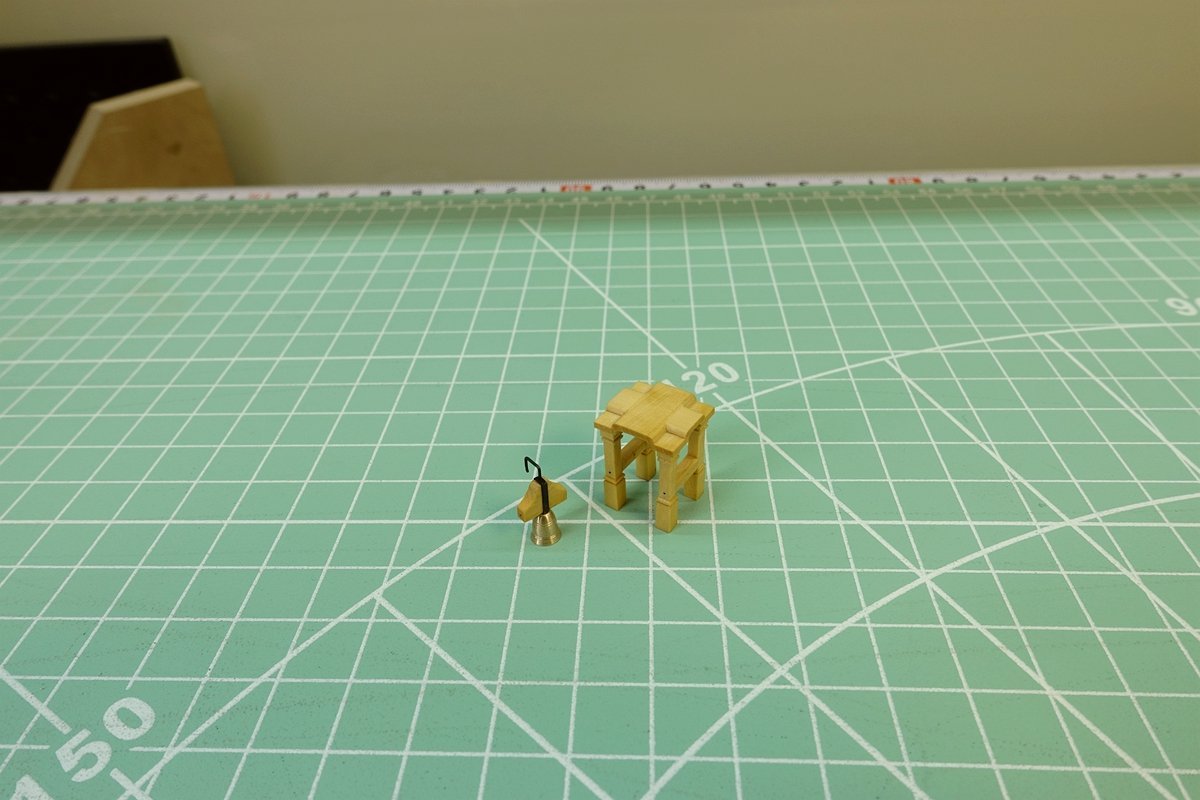
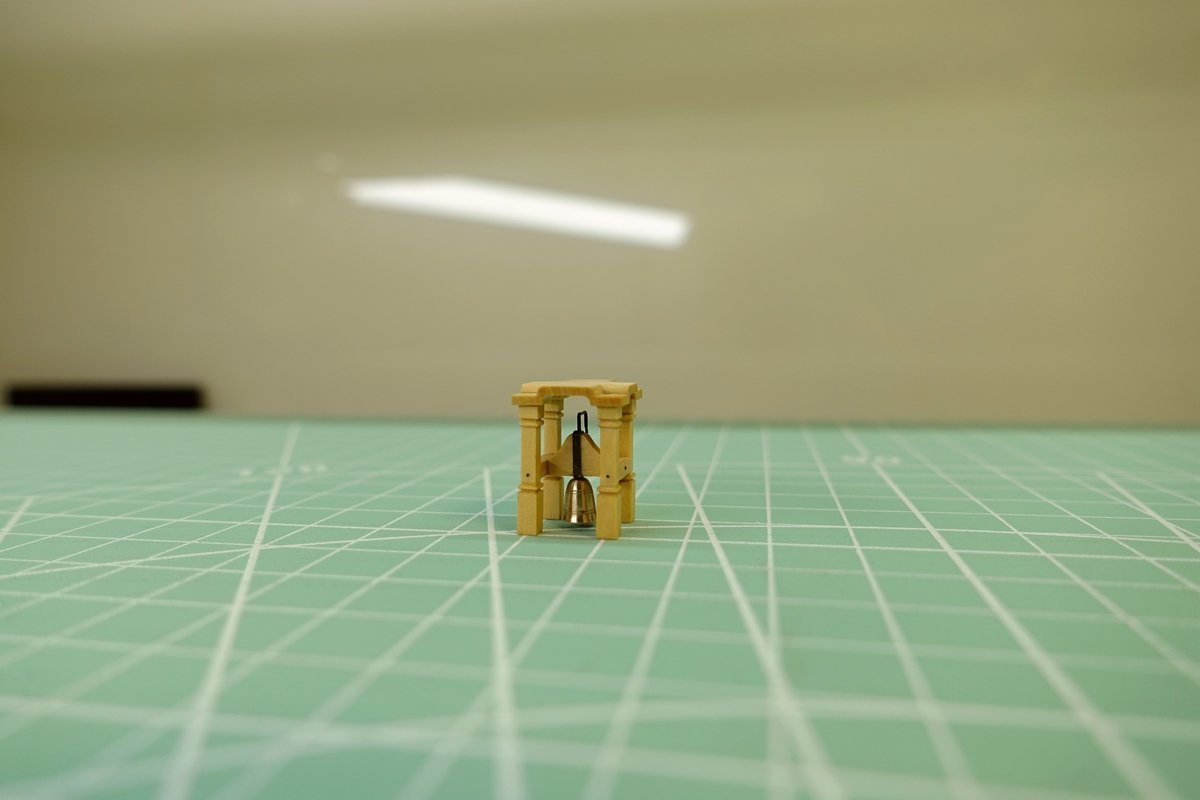
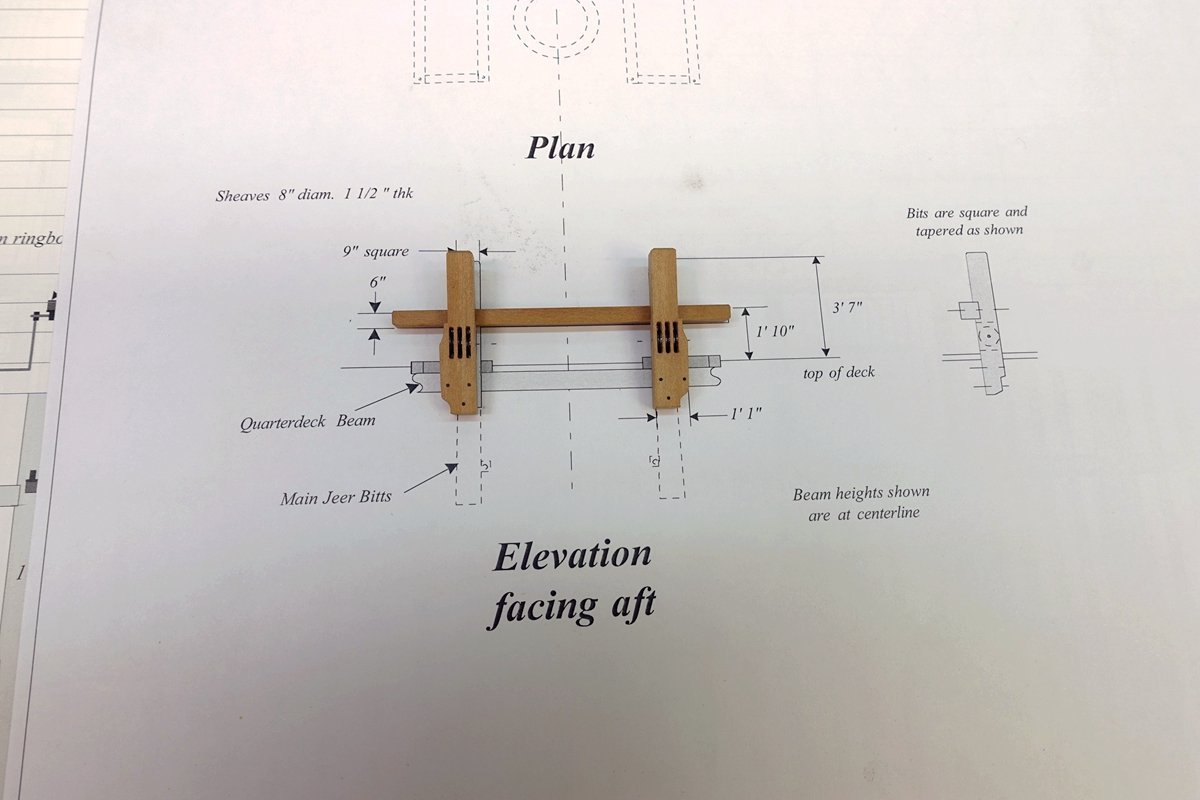
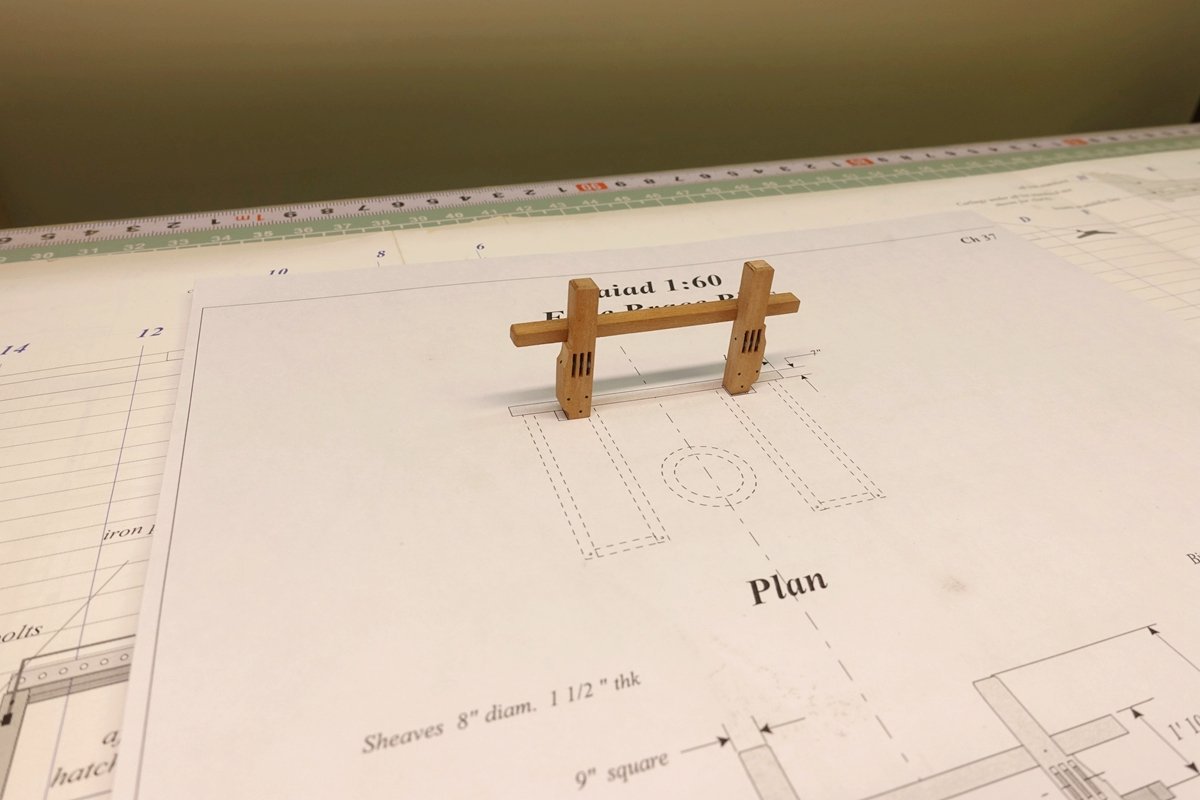
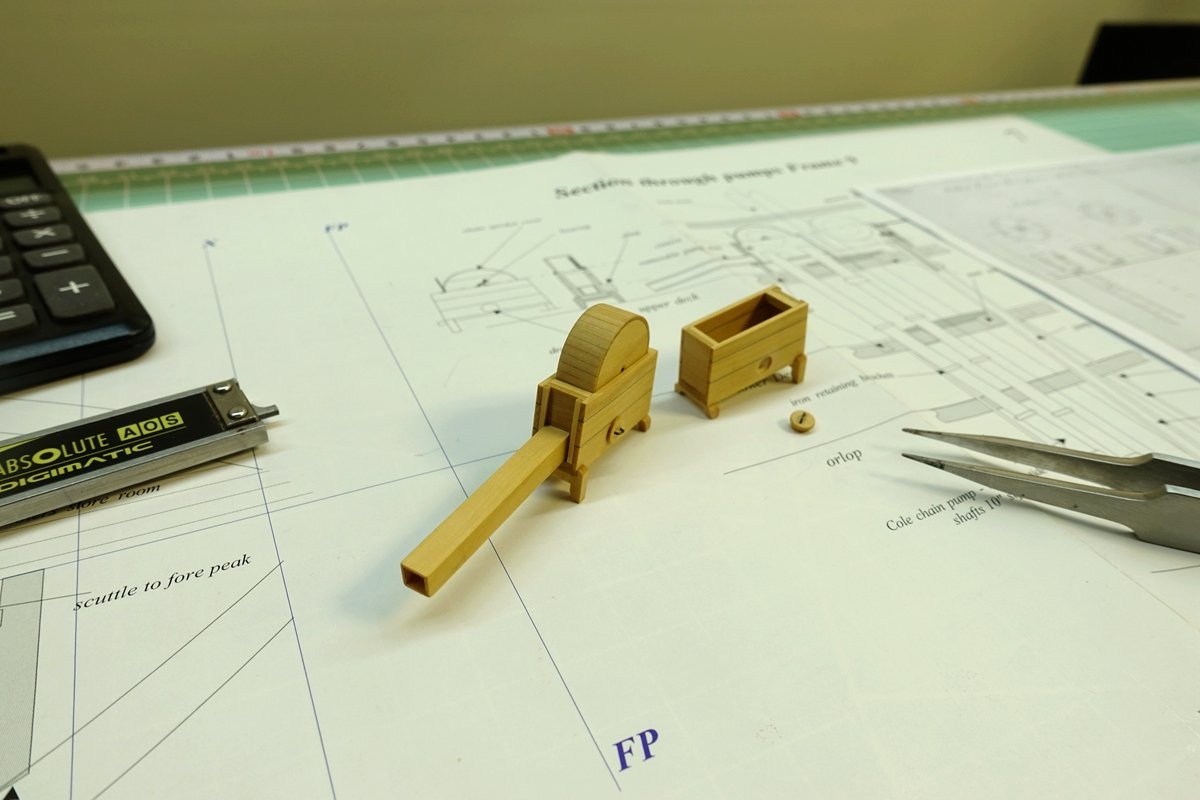
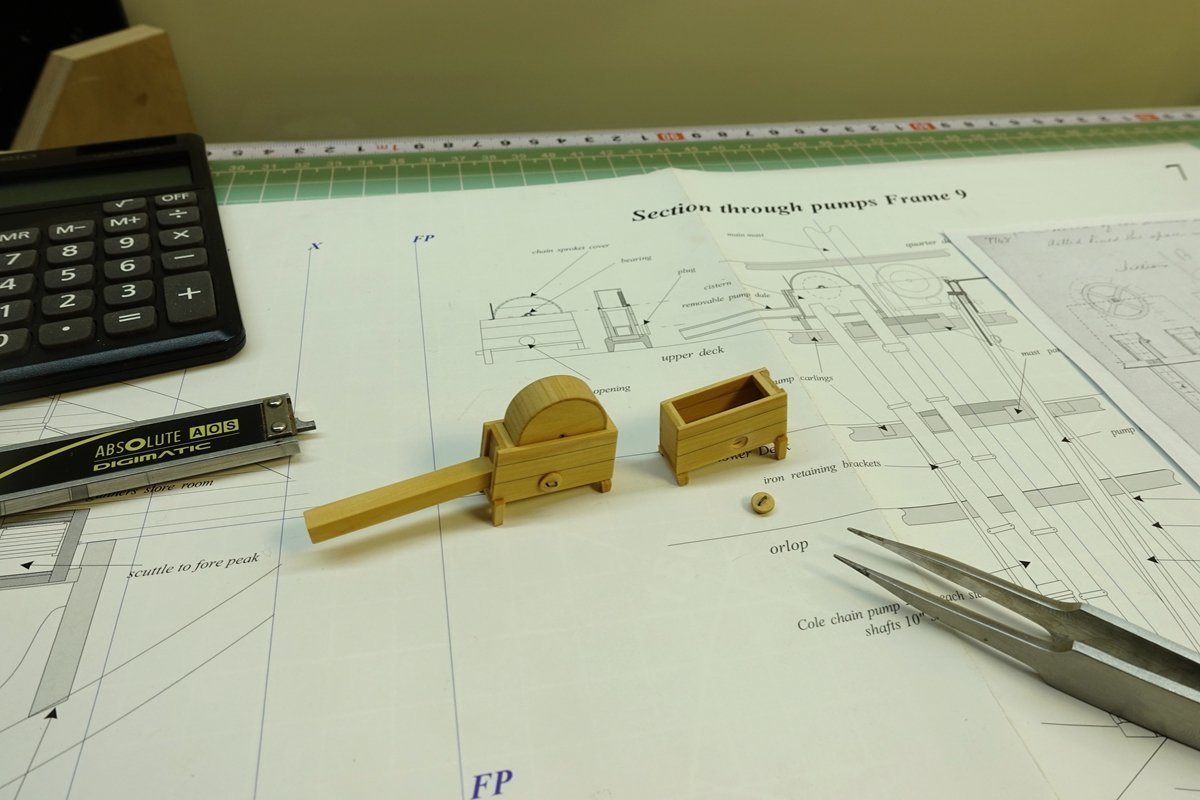
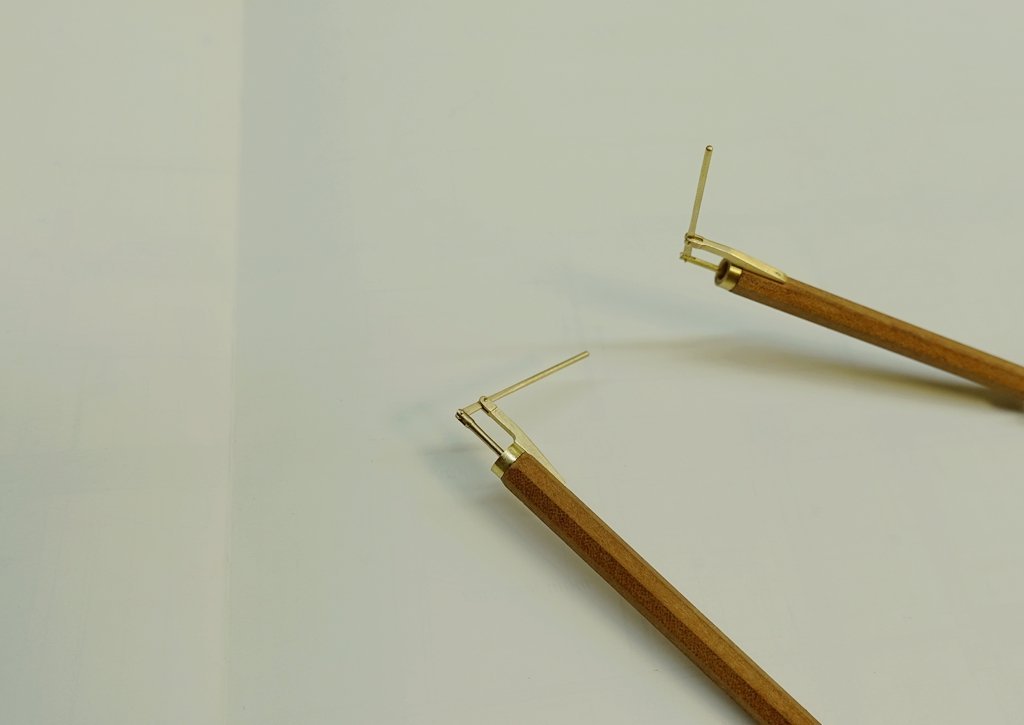
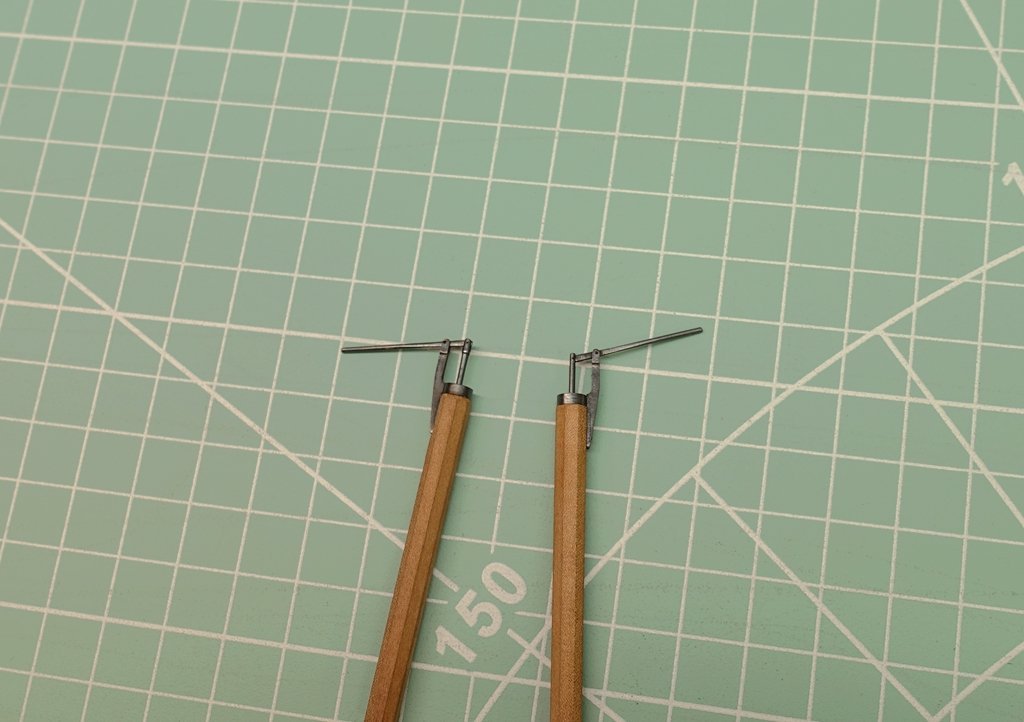
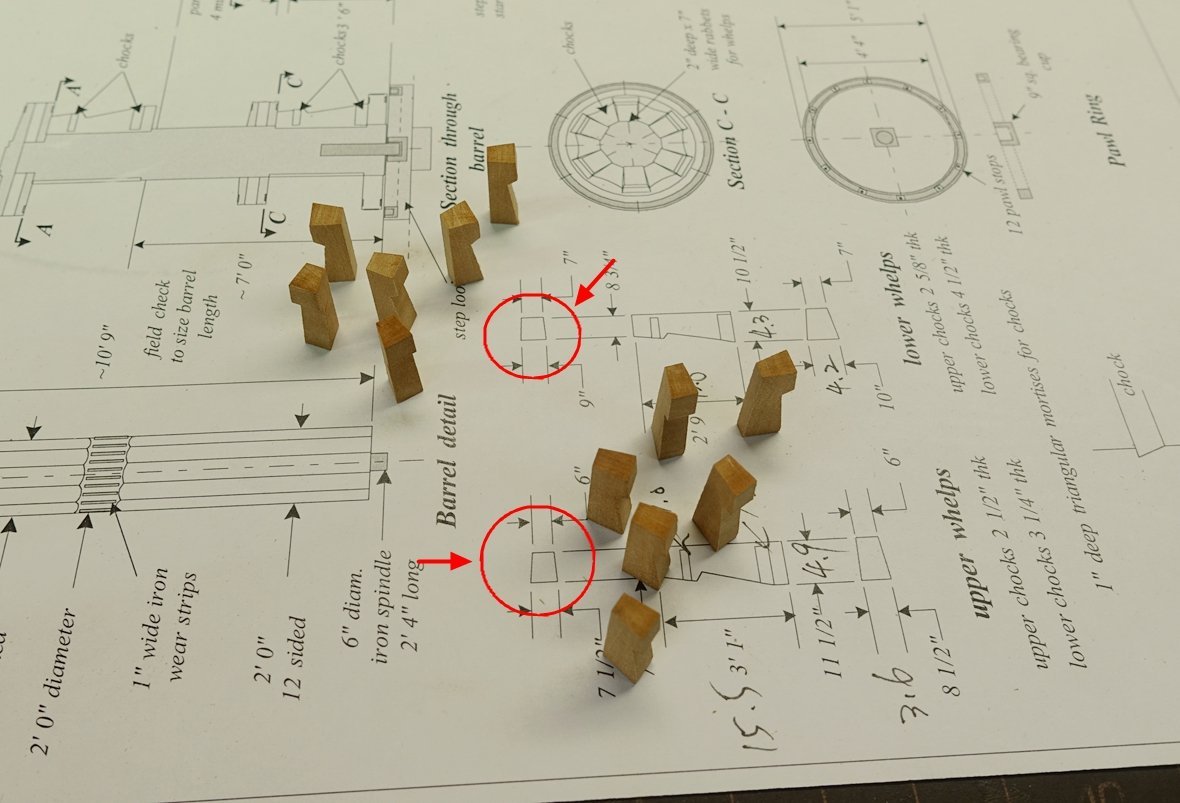
Today, I did nothing but spend a whole day in the studio wondering about the true shape and size of a component! I have been faithful to the original design, but the following picture of the drive rod support in the complete set of books and drawings do not see the detailed description. I've been going over the EdT process again and again, and I still can't find the exact answer except for the following photo, which seems to me to be different from the drawing, as if it's a column instead of an“L” in the process picture. So I can't take the next step. Maybe this part isn't important? But I still hope that who knows friends can provide specific shape for my reference. Also to maximize the restoration of the model's true shape. Thanks for your help!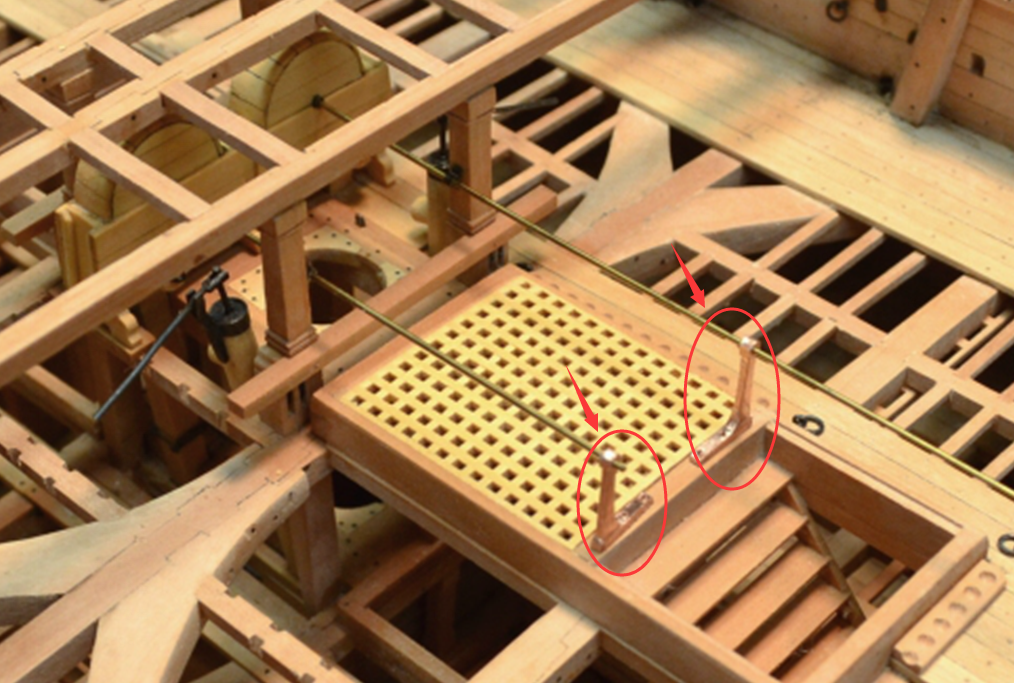
- 371 replies
-
- 12
-
-
NAIAD 1797 by Bitao - 1:60
Bitao replied to Bitao's topic in - Build logs for subjects built 1751 - 1800
Thank you for your love and praise. In order to show more detail, I spent some time taking photos and slowing down the process. Also in order to enjoy the process in their own production rather than make themselves very tired. The goal that was supposed to be accomplished by the end of this month will certainly not be met, so let's just go with the flow. .

- 371 replies
-
- 25
-
-
-
NAIAD 1797 by Bitao - 1:60
Bitao replied to Bitao's topic in - Build logs for subjects built 1751 - 1800
- 371 replies
-
- 30
-
-
-
NAIAD 1797 by Bitao - 1:60
Bitao replied to Bitao's topic in - Build logs for subjects built 1751 - 1800
- 371 replies
-
- 25
-
-
-
-
NAIAD 1797 by Bitao - 1:60
Bitao replied to Bitao's topic in - Build logs for subjects built 1751 - 1800
Thank you for your approval. In my opinion, most people’s works have something to learn and pay attention to. Even mistakes and shortcomings remind me that I need to be extra careful to achieve my goals, so that it doesn’t happen to me, and the work of other masters will inspire me, just like you! The People here are also very modest and friendly, also let me learn a lot of previously unknown knowledge, which is why I especially like this forum, and gave up publishing in China.- 371 replies
-
- 11
-
-
NAIAD 1797 by Bitao - 1:60
Bitao replied to Bitao's topic in - Build logs for subjects built 1751 - 1800
- 371 replies
-
- 25
-
-
-
NAIAD 1797 by Bitao - 1:60
Bitao replied to Bitao's topic in - Build logs for subjects built 1751 - 1800
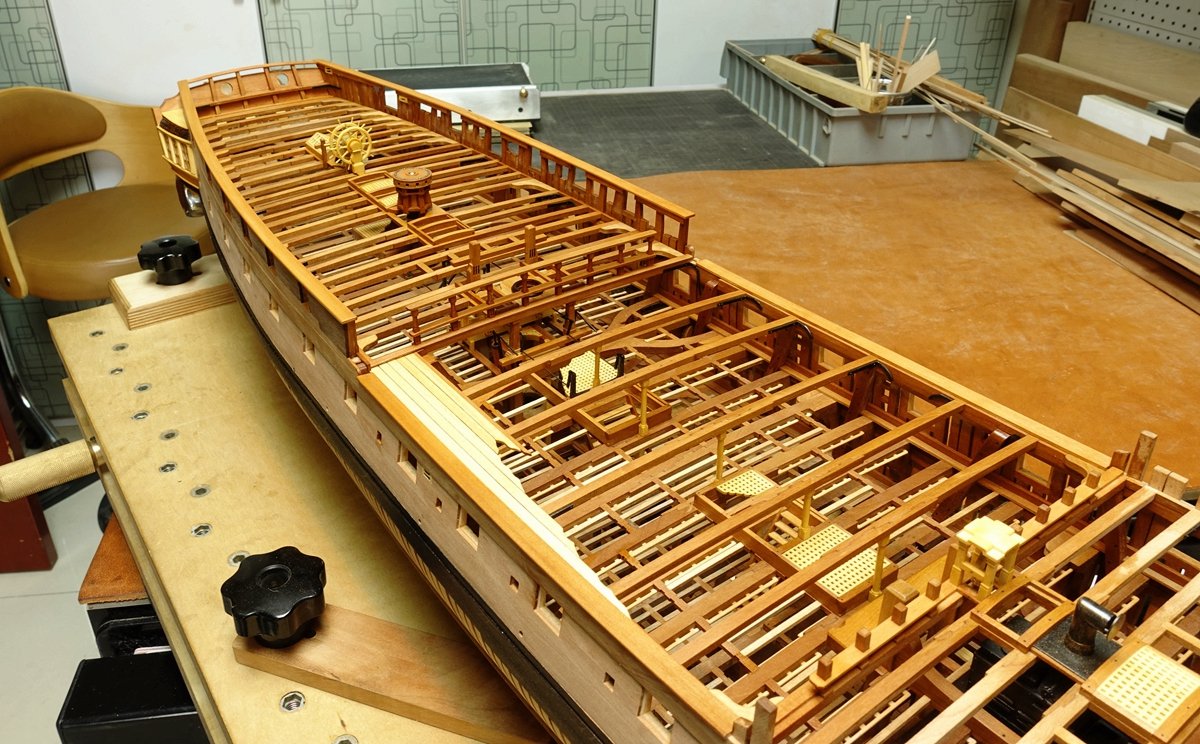
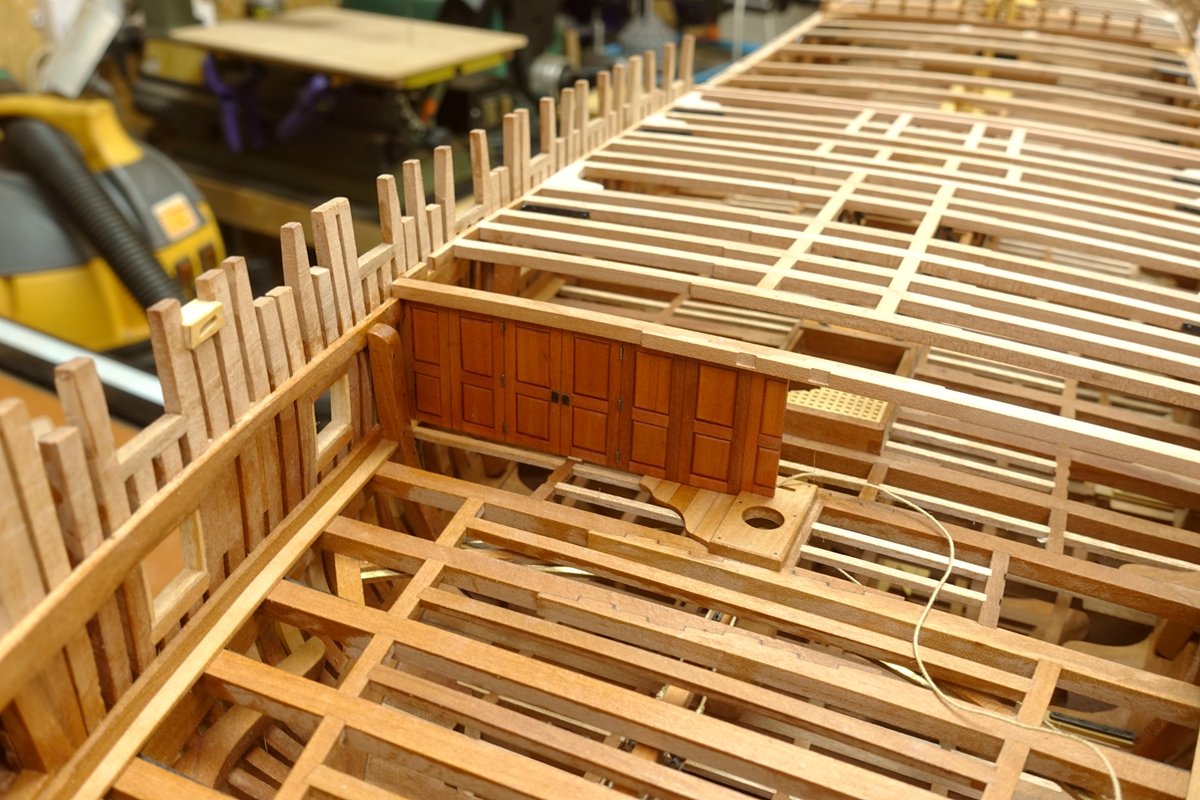
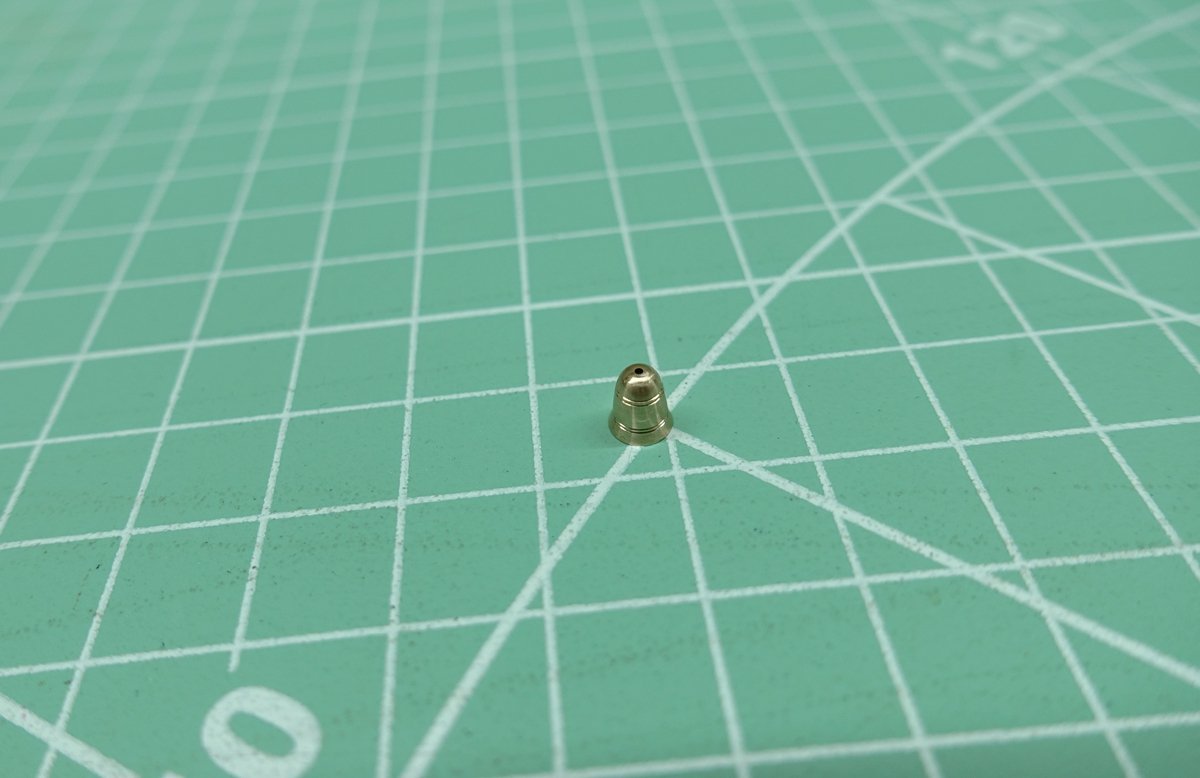
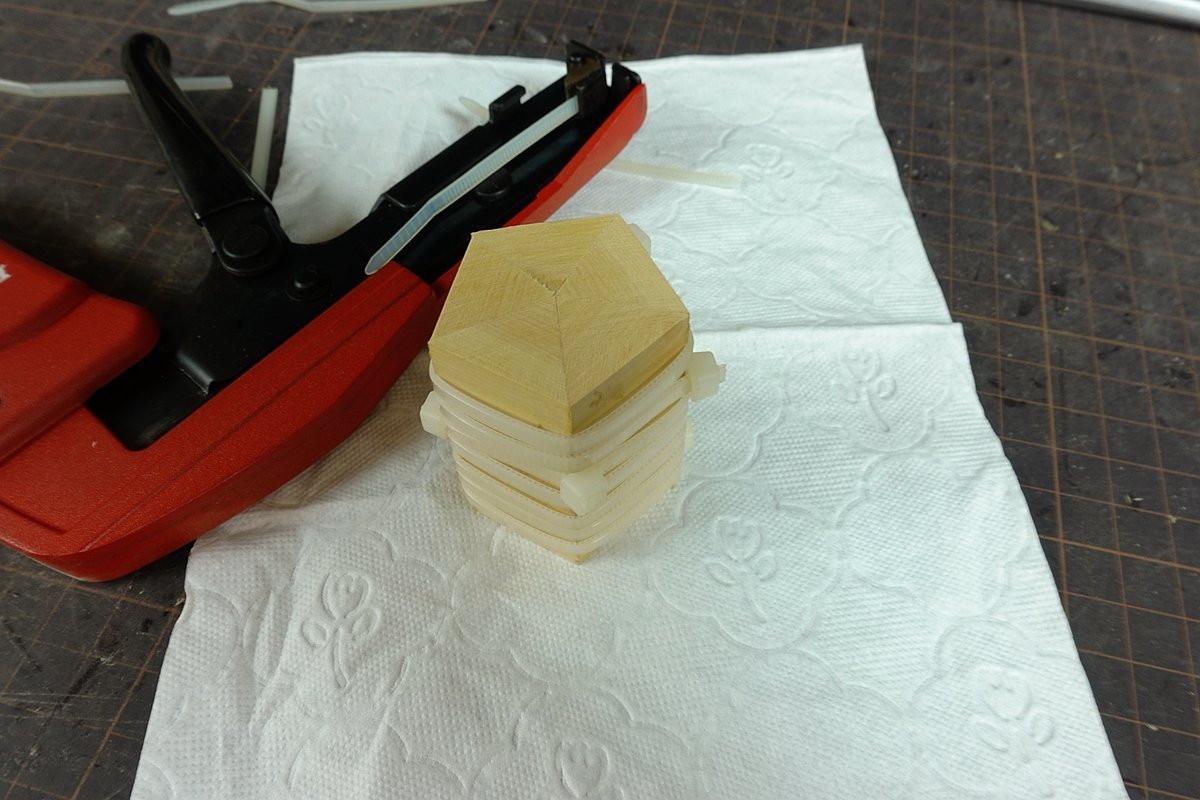
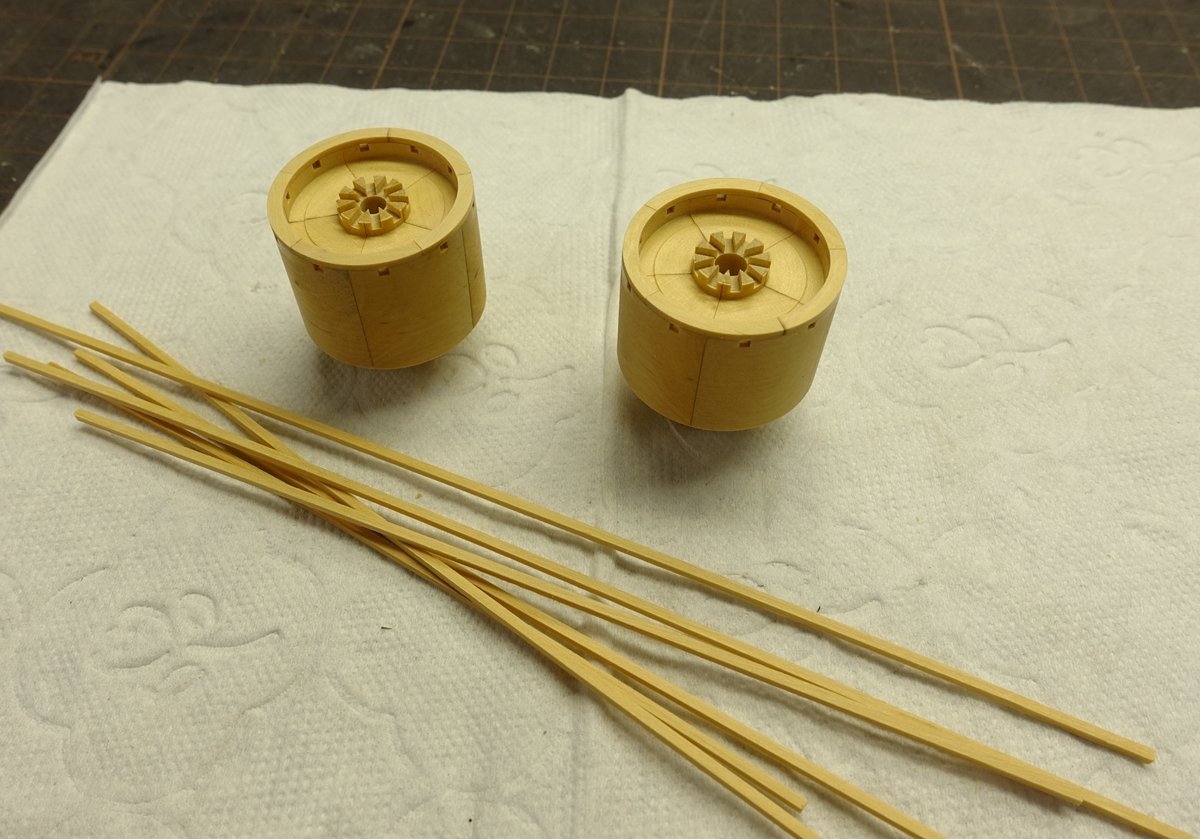
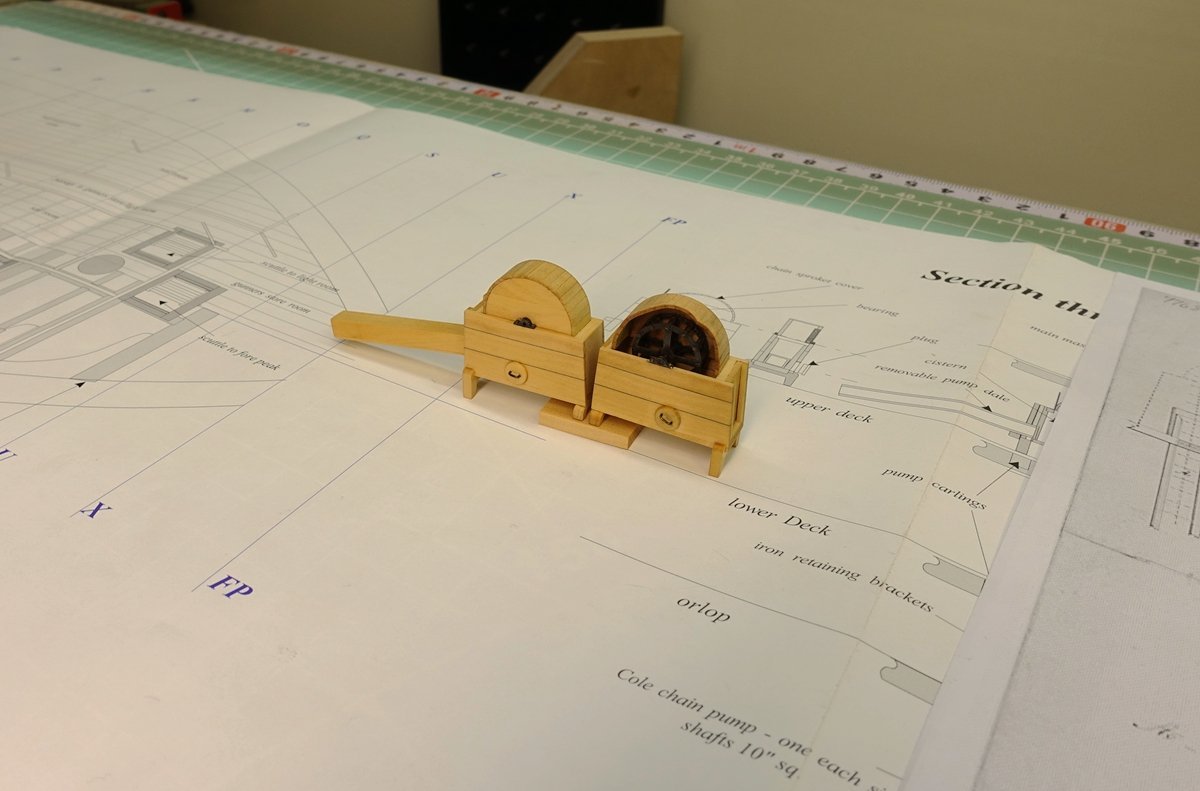
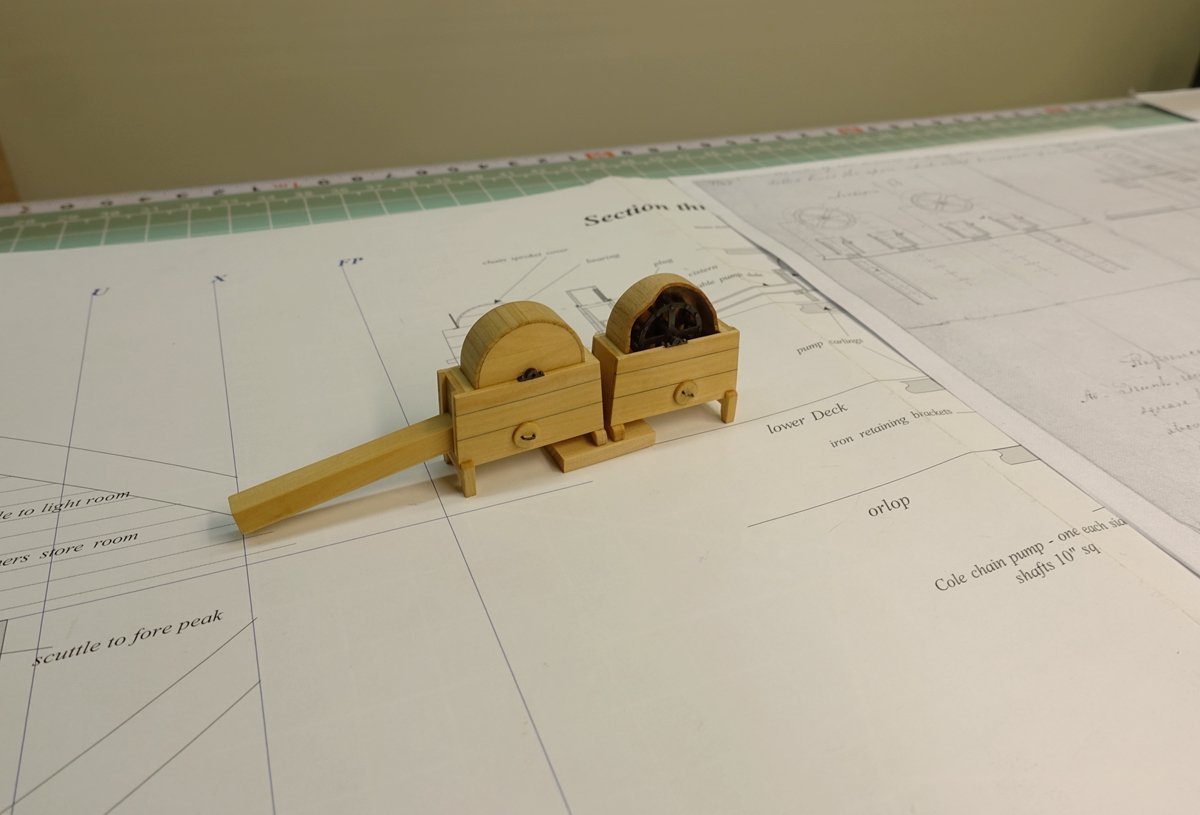
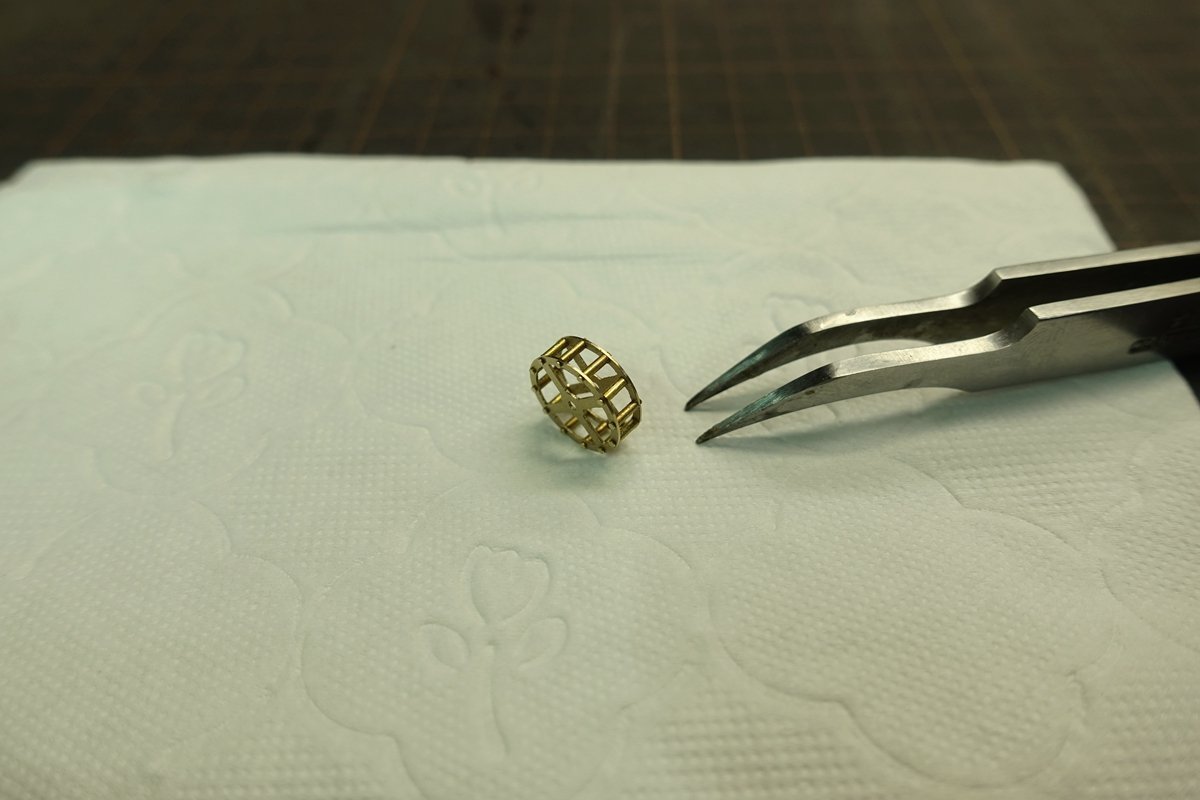
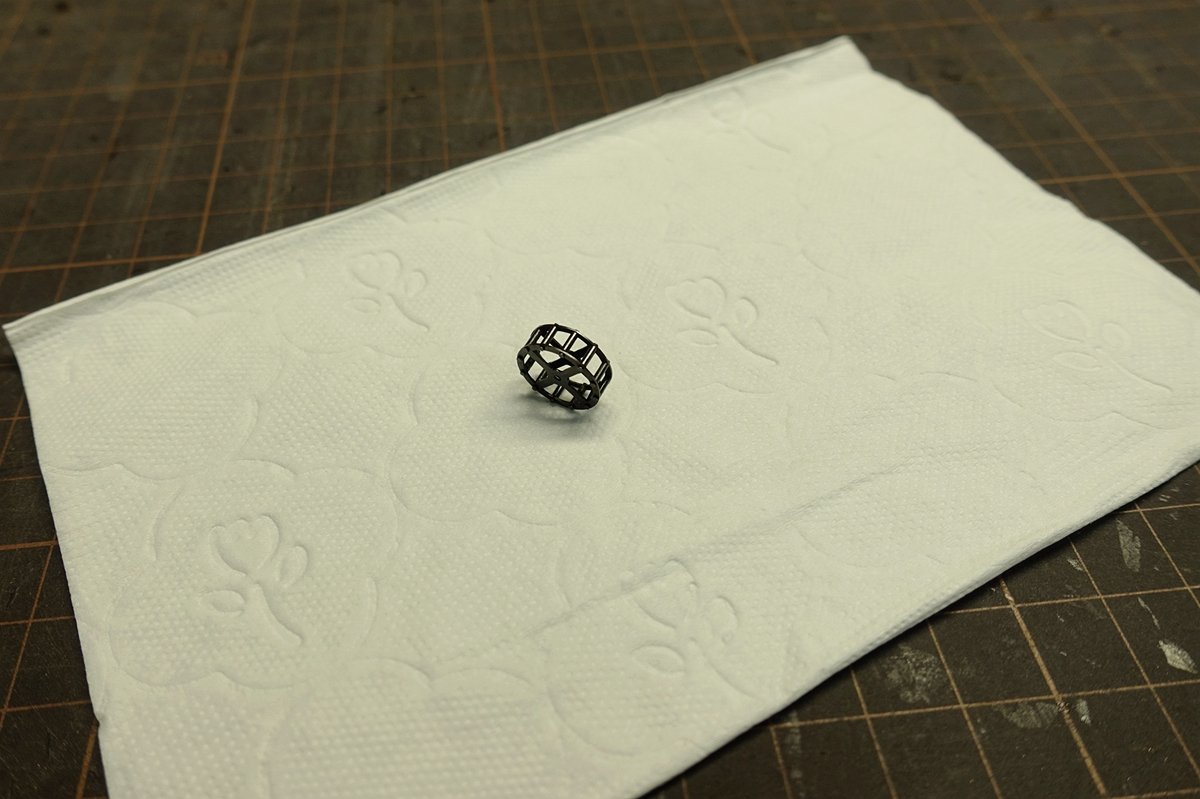
Thank you very much. This pump is not in the original drawings of the gear wheel details, I looked up the relevant information in this site decided to add it. After all, the simple appearance of the wooden box is nothing to see. The scale may have been slightly different, but visually I was satisfied. This part isn’t done yet, so stay tuned.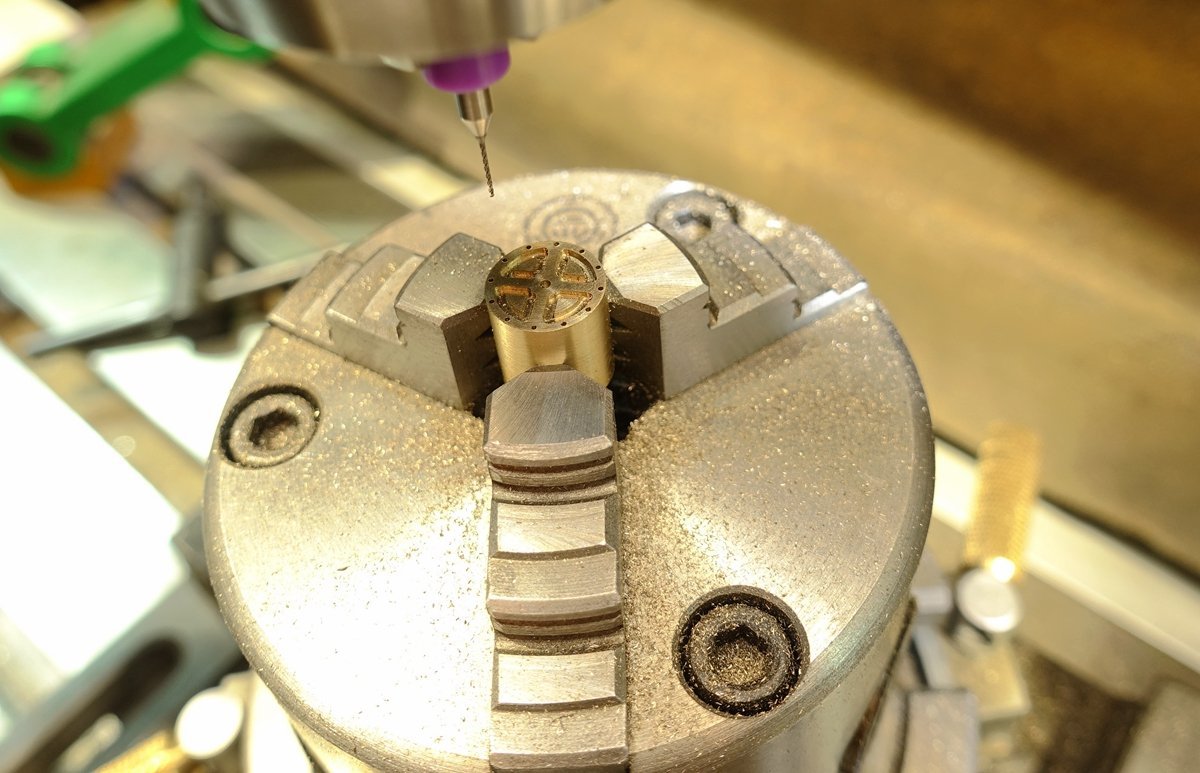
- 371 replies
-
- 23
-
-
-
NAIAD 1797 by Bitao - 1:60
Bitao replied to Bitao's topic in - Build logs for subjects built 1751 - 1800
- 371 replies
-
- 29
-
-
-
NAIAD 1797 by Bitao - 1:60
Bitao replied to Bitao's topic in - Build logs for subjects built 1751 - 1800
- 371 replies
-
- 26
-
-