Bitao
-
Posts
407 -
Joined
Content Type
Profiles
Forums
Gallery
Events
Everything posted by Bitao
-

NAIAD 1797 by Bitao - 1:60
Bitao replied to Bitao's topic in - Build logs for subjects built 1751 - 1800
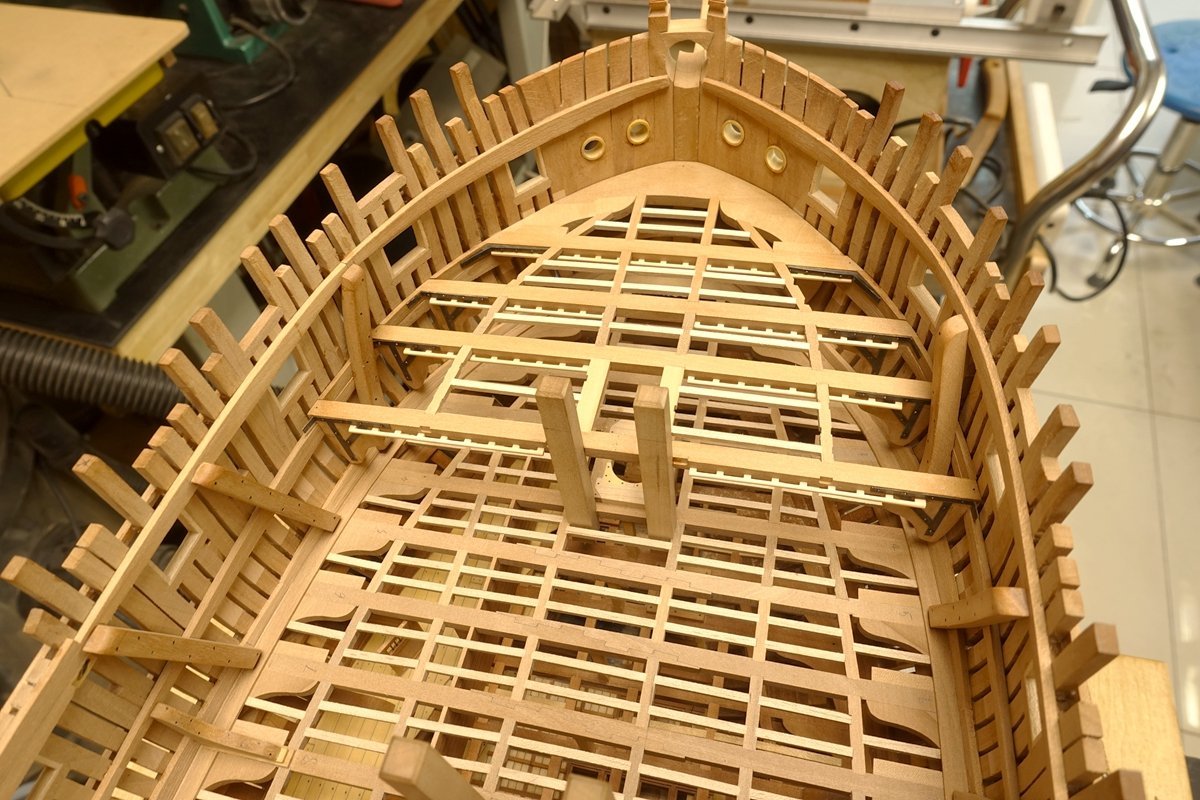
To be continued。。。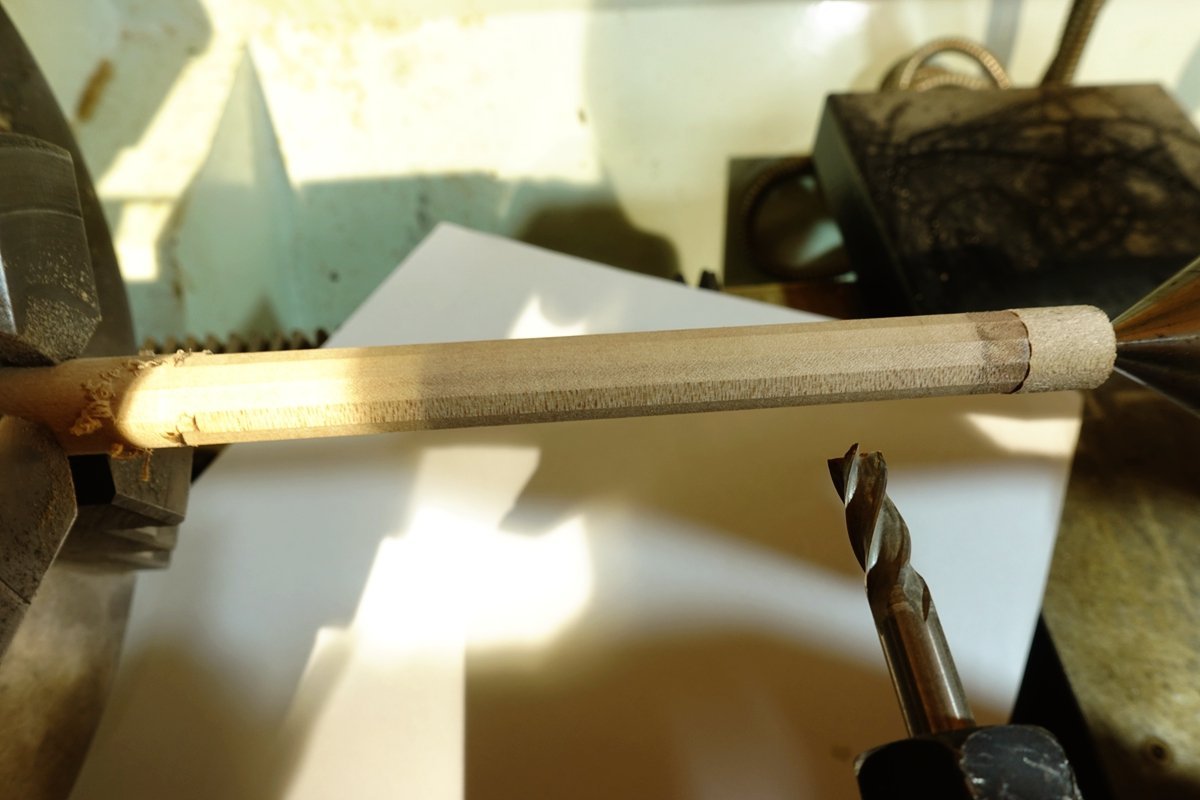

- 371 replies
-
- 34
-

-

-
NAIAD 1797 by Bitao - 1:60
Bitao replied to Bitao's topic in - Build logs for subjects built 1751 - 1800


- 371 replies
-
- 24
-
-
-

-
NAIAD 1797 by Bitao - 1:60
Bitao replied to Bitao's topic in - Build logs for subjects built 1751 - 1800
Continuing the slow progress so far...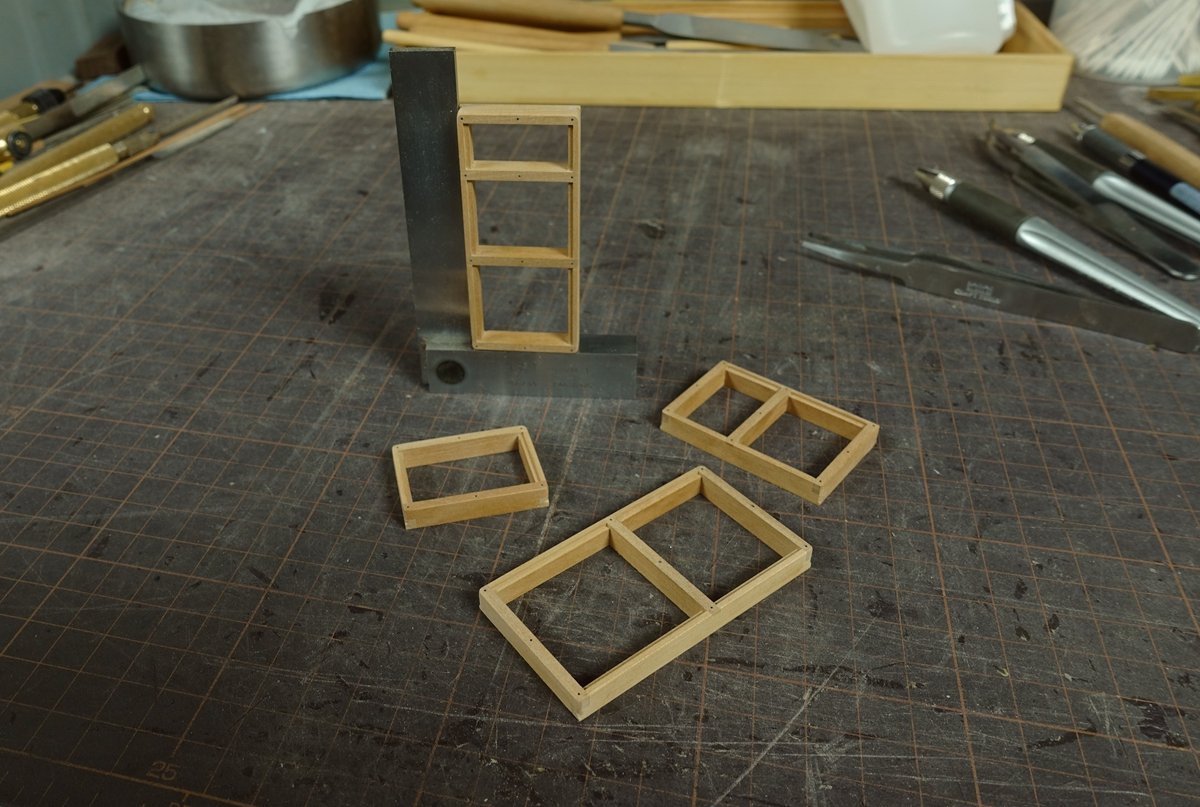
- 371 replies
-
- 25
-
-
-
NAIAD 1797 by Bitao - 1:60
Bitao replied to Bitao's topic in - Build logs for subjects built 1751 - 1800
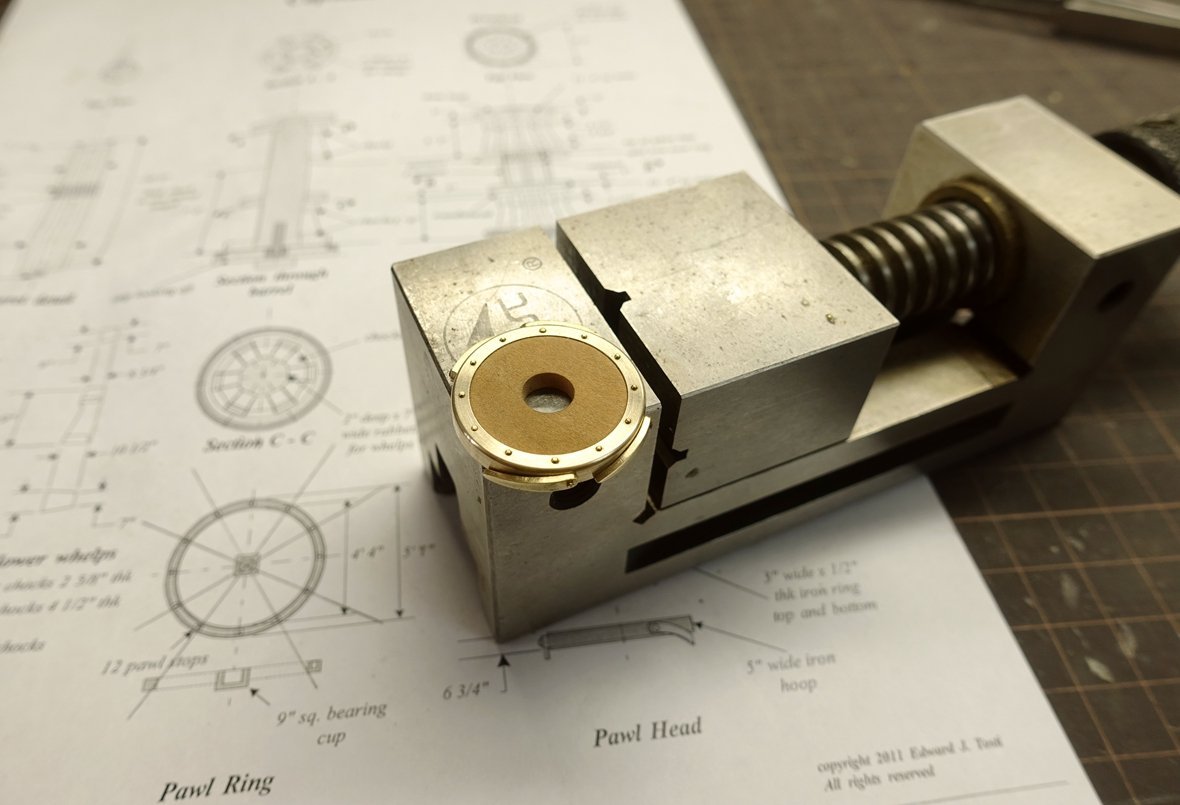
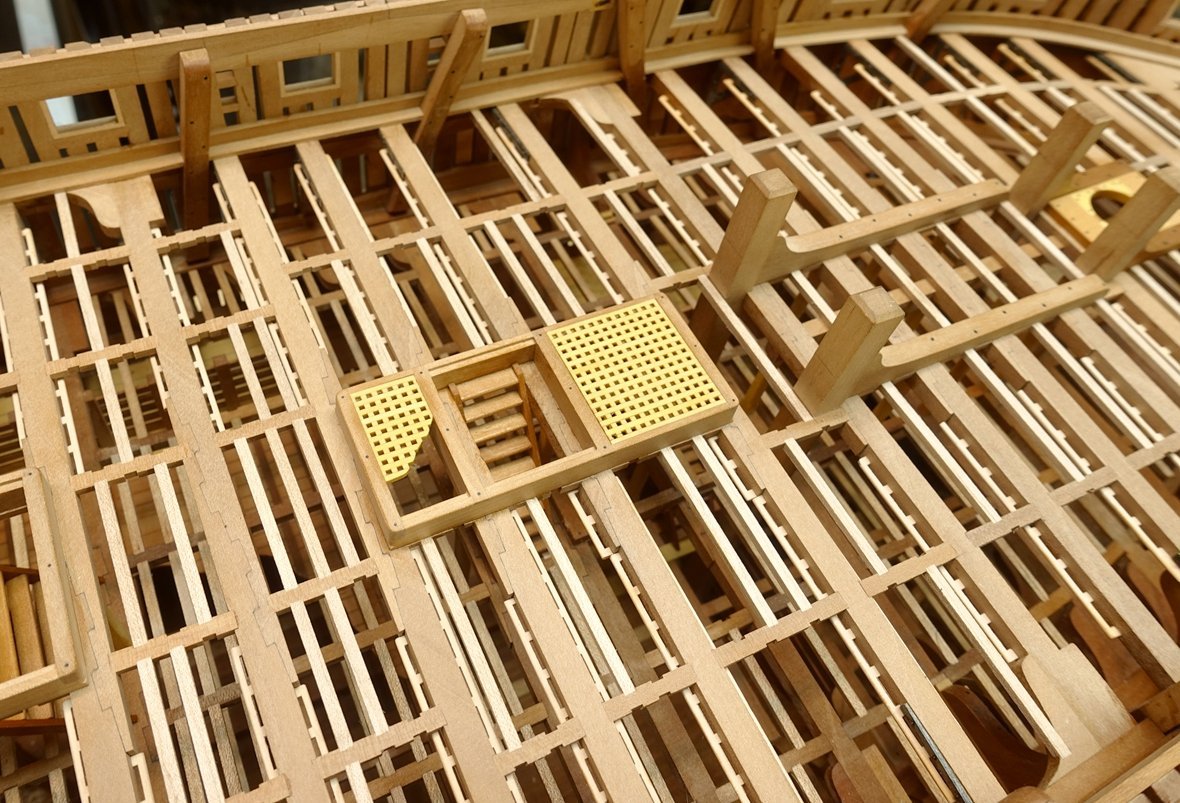
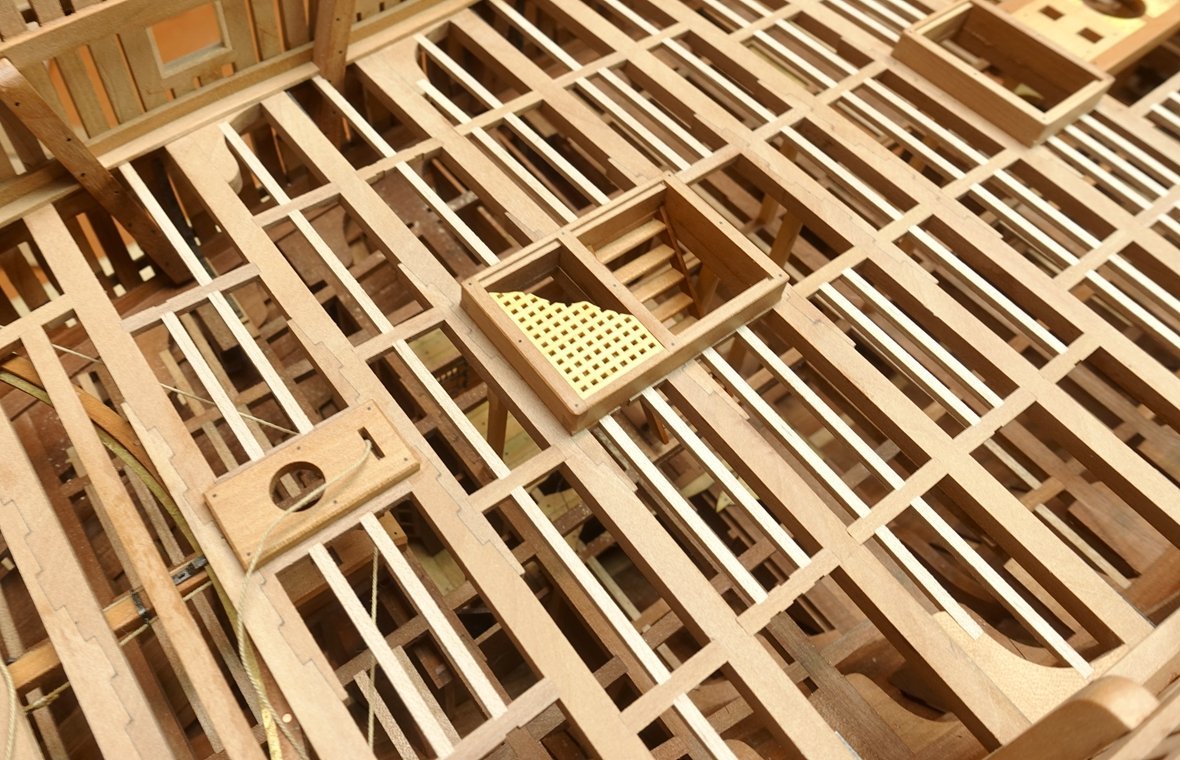
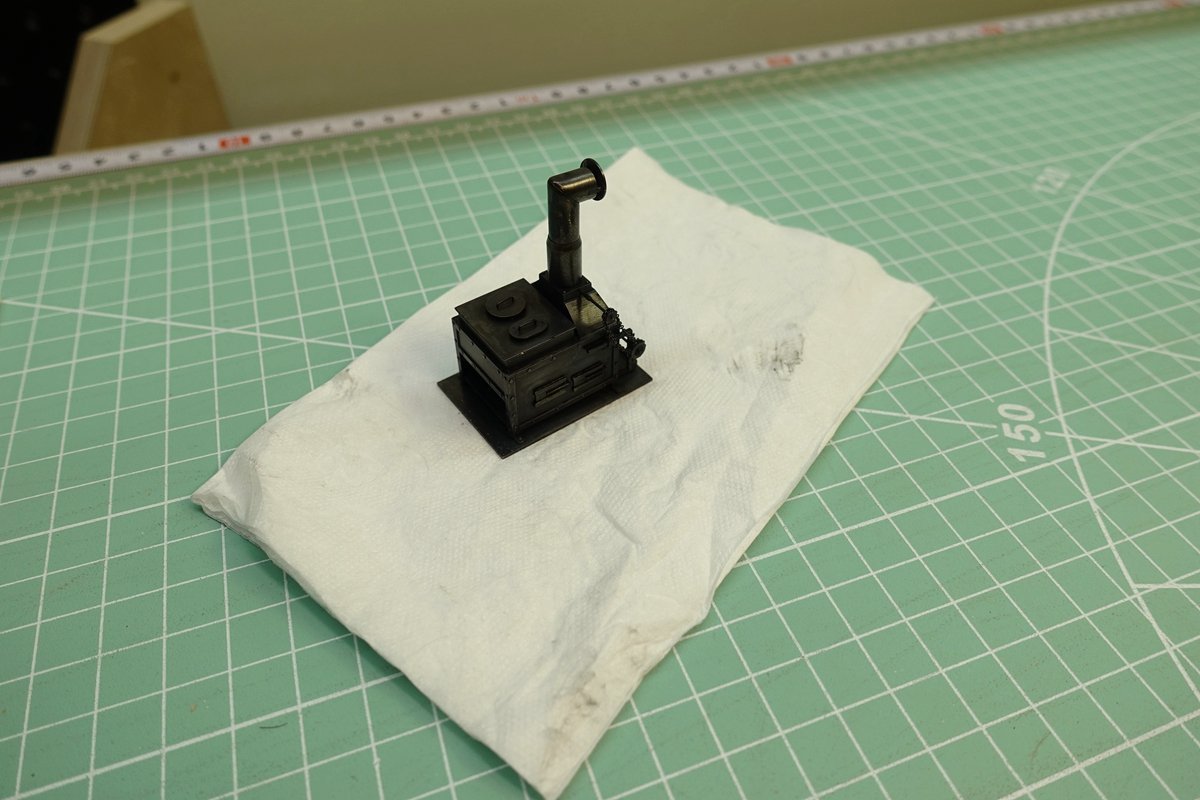
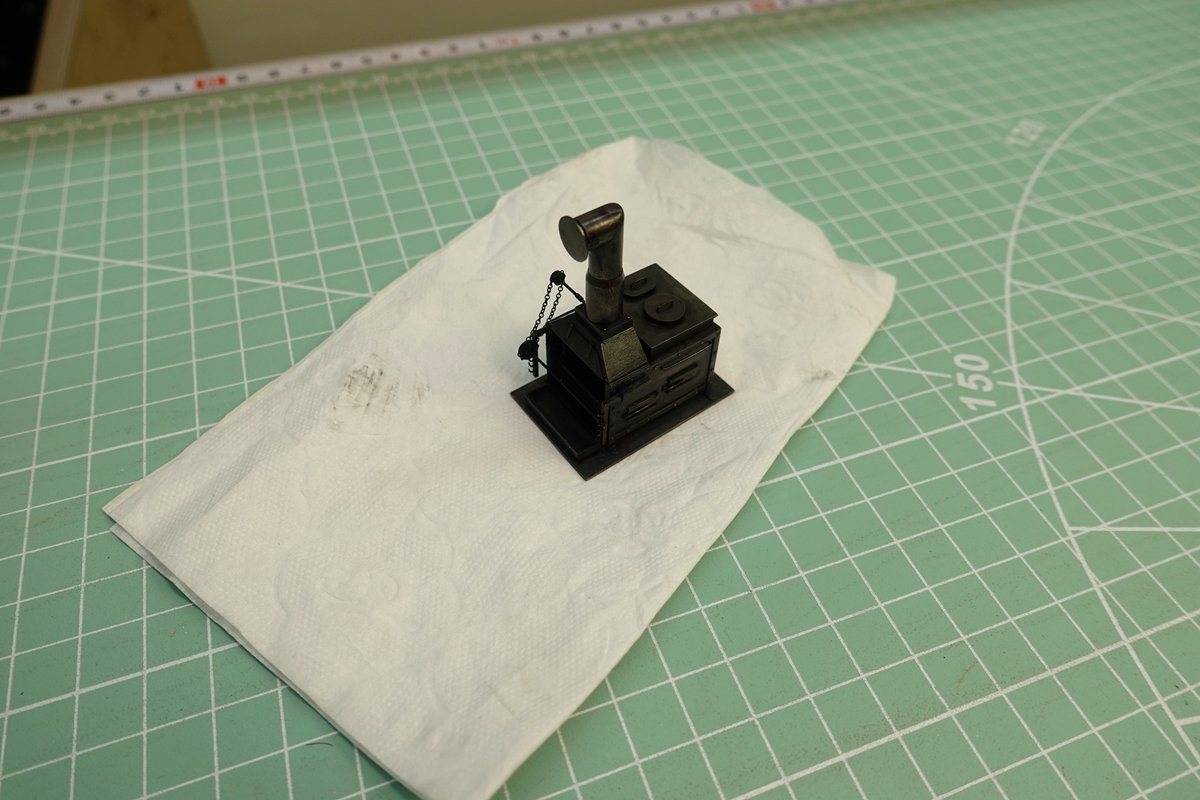
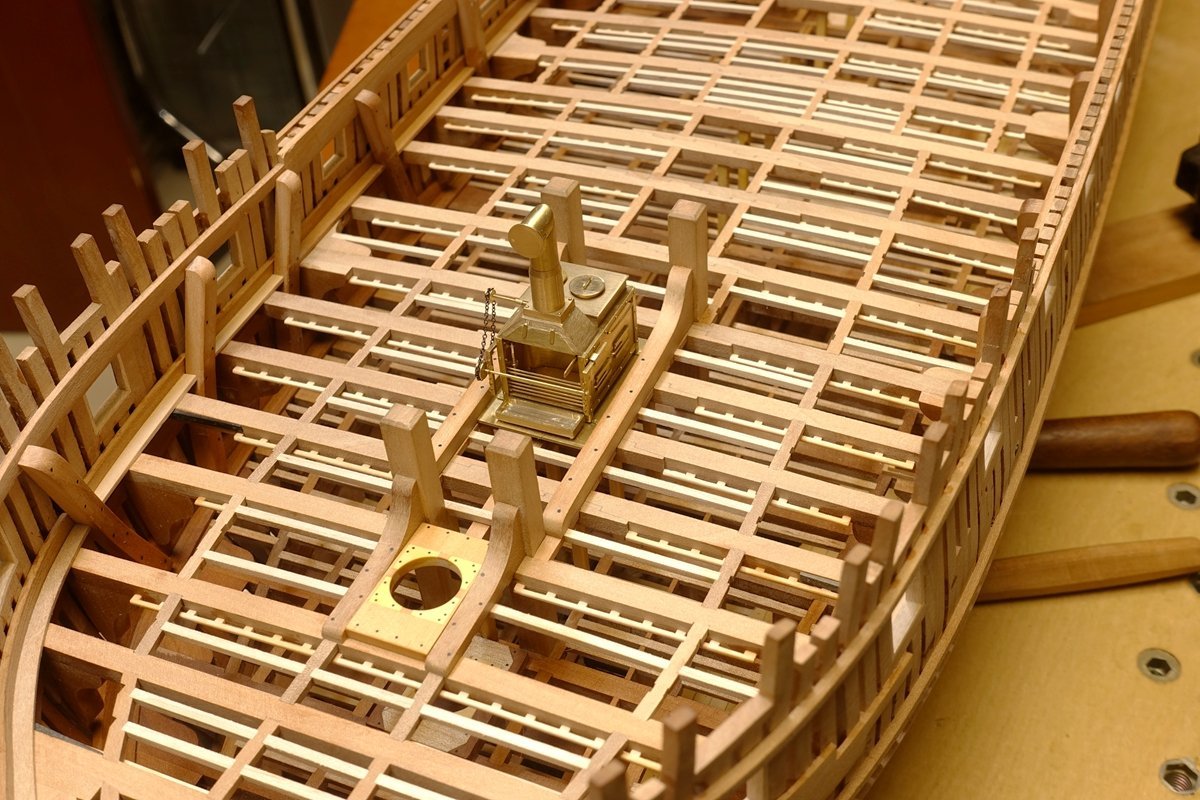
Thank you for enjoying it. The detailed image of the finished stove is on page two. The main body of the furnace is milled by repeatedly clamping the whole brass. To make it more beautiful, the other parts are spliced and joined without glue and welding. Unfortunately, due to my habits and routines, I rarely take photos of the process, especially when it’s complicated by hand. Because it distracts me, it leads to serious mistakes, and it reduces my productivity. I’ve been making changes since everyone mentioned it in the comments, but I’ve had to adapt. After all, it was a tricky business for me to take pictures at the same time (scrap and oil from the metalworking process need to be disposed of) . I have an idea now: The pump in the drawing of the ship is just a wooden box, and from the basic structure I learned on the forum, I want to make it more elaborate, showing the details of the inner chain. However, I am not sure if this structure is correct, after all, the drawings do not have this part of the details, the shape is based on other people’s pictures, the size data needs to be calculated by myself, the small scale, processing will be more difficult. But I am willing to try, after all, we are trying to do every job well, this is also a common aspiration. So I’m going to show you how this process works. And I appreciate your valuable input, so I can make improvements. Thank you! The picture below is what I found in the forum and copied out. As a reference for follow-up production.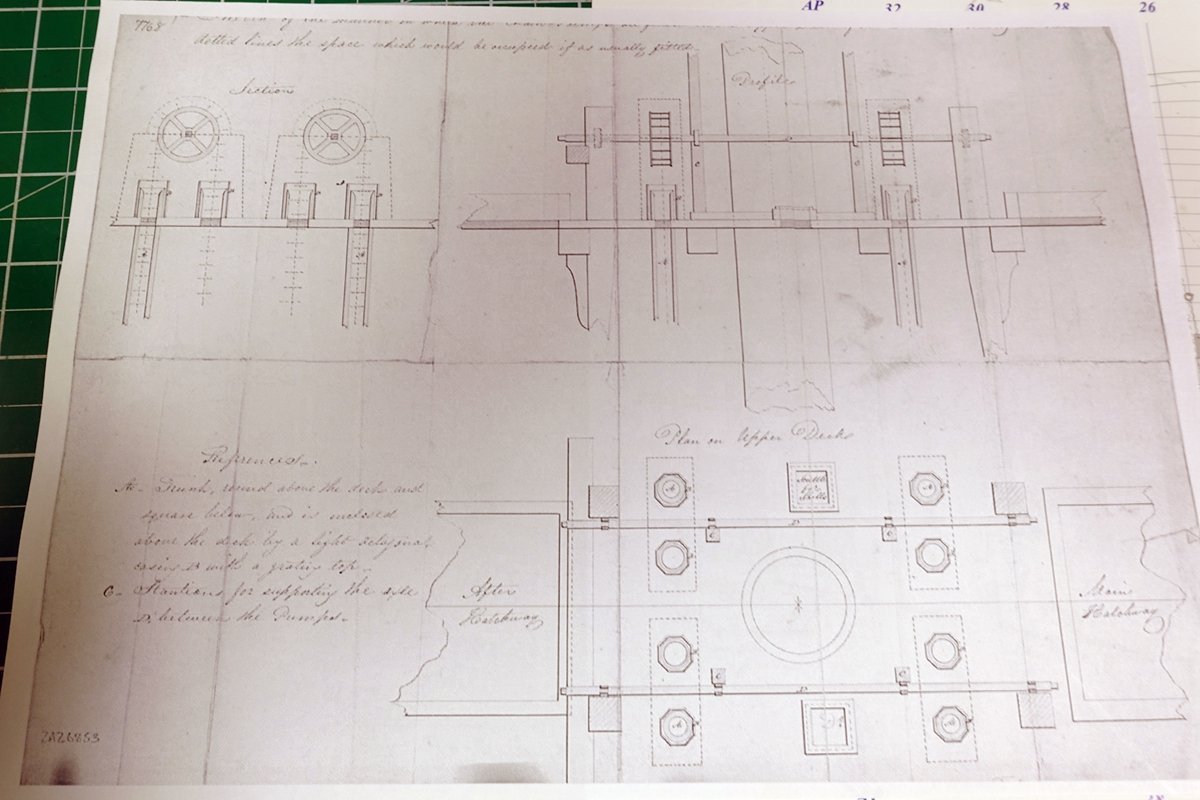
- 371 replies
-
- 10
-
-
-
NAIAD 1797 by Bitao - 1:60
Bitao replied to Bitao's topic in - Build logs for subjects built 1751 - 1800
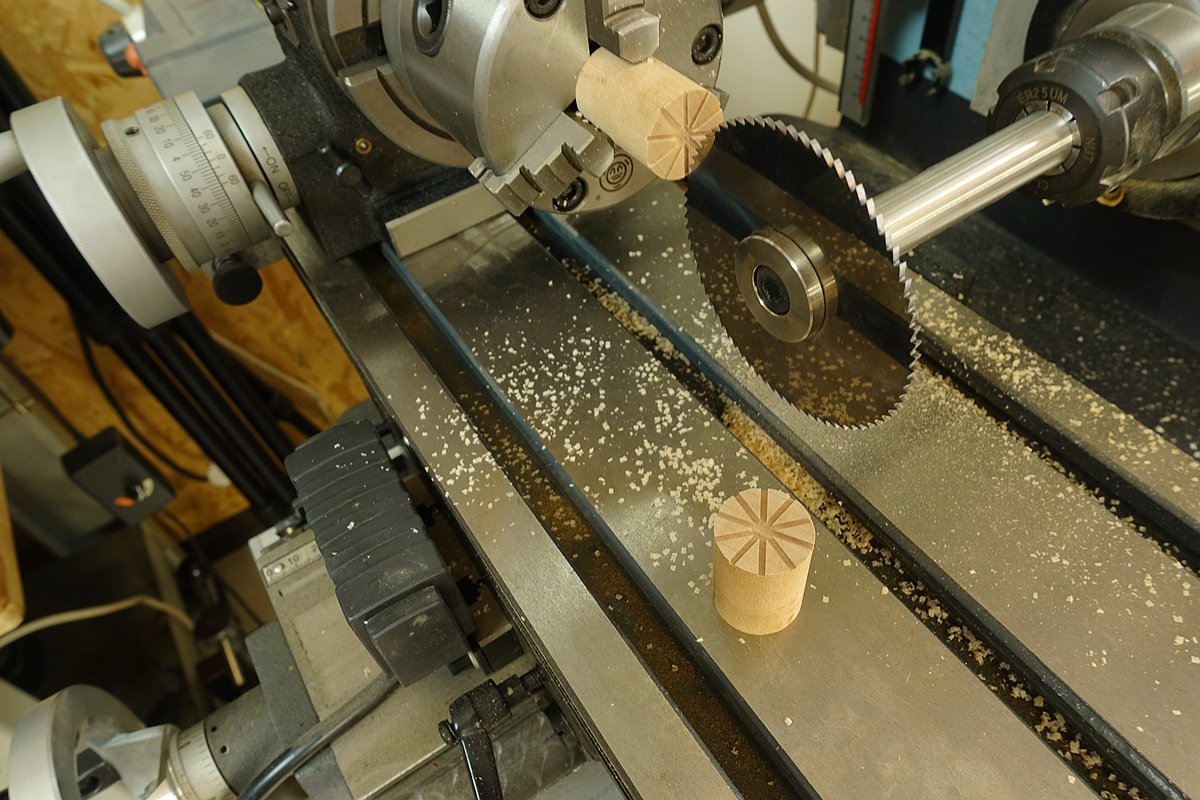
In order to show every detail, try to take pictures of every step. Although also has some flaws or the insufficiency, but overall thought that still quite satisfied. Thank you for your support and likes.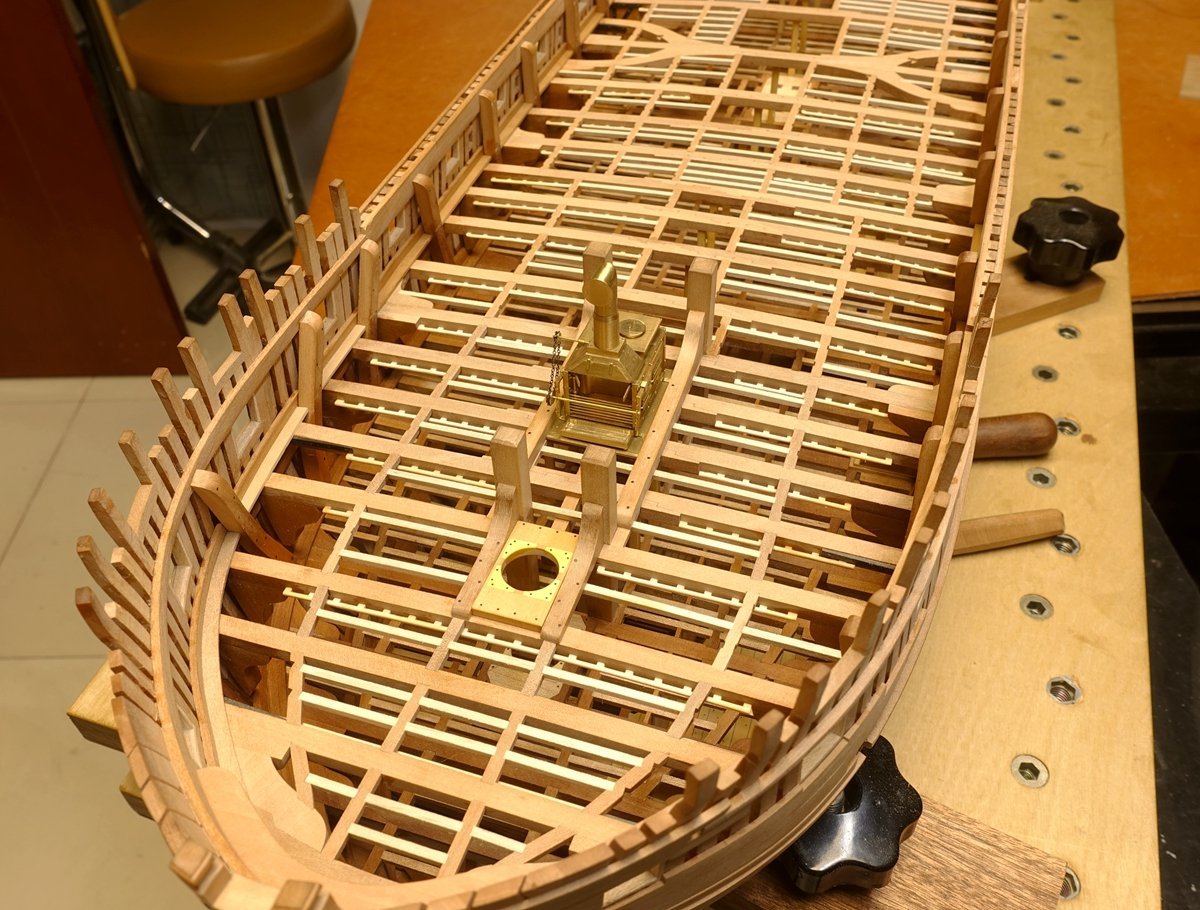
- 371 replies
-
- 23
-
-
-
NAIAD 1797 by Bitao - 1:60
Bitao replied to Bitao's topic in - Build logs for subjects built 1751 - 1800
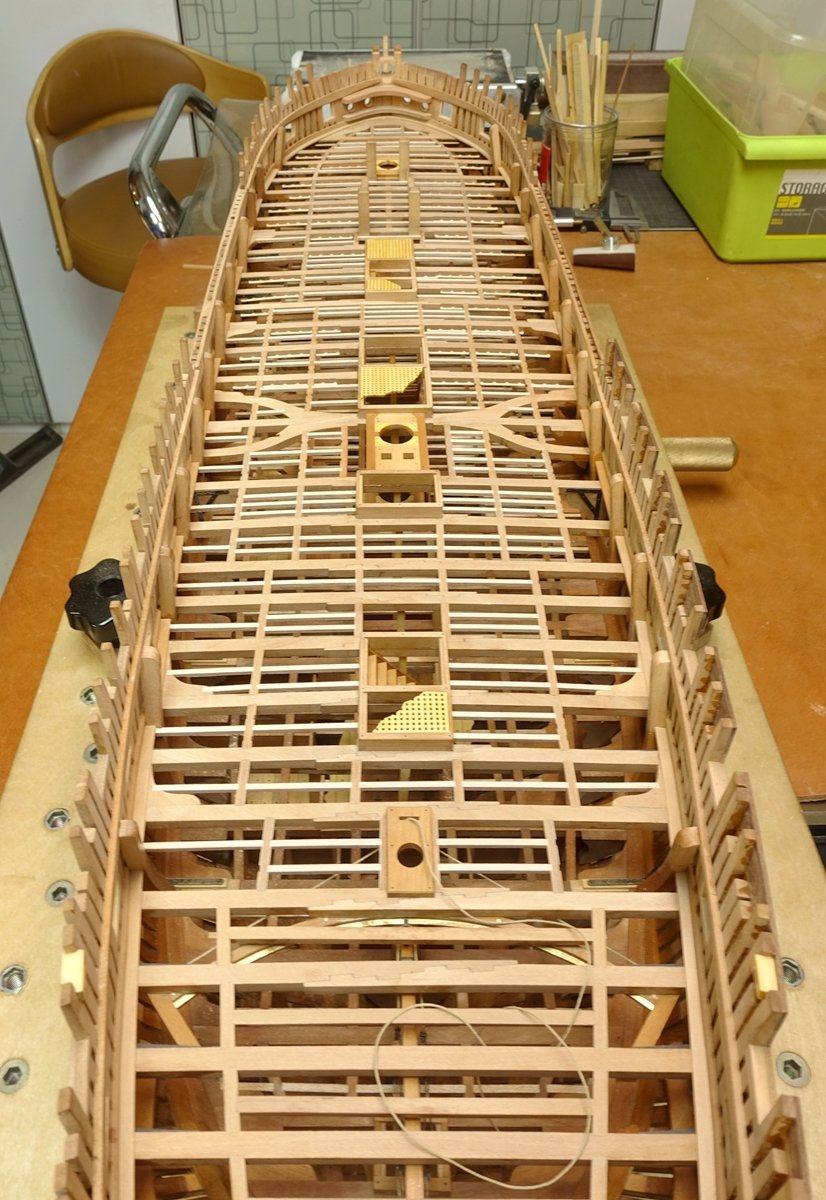
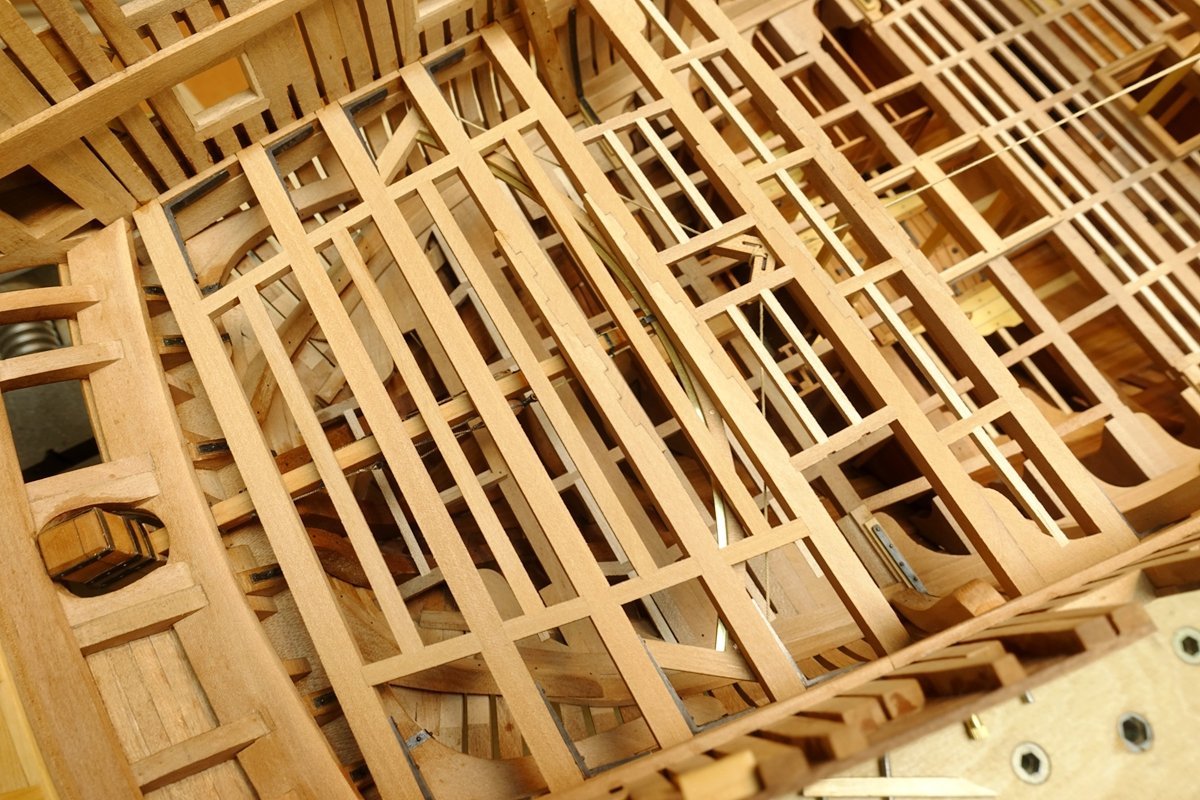
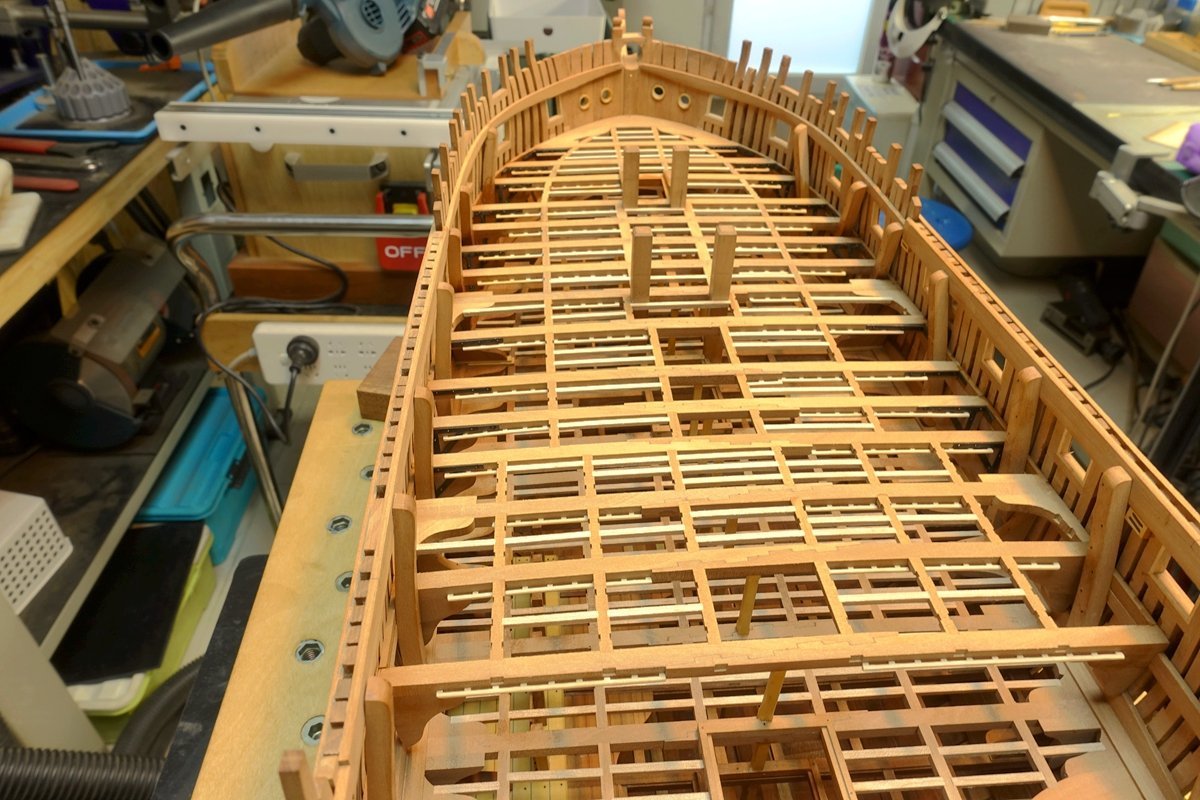
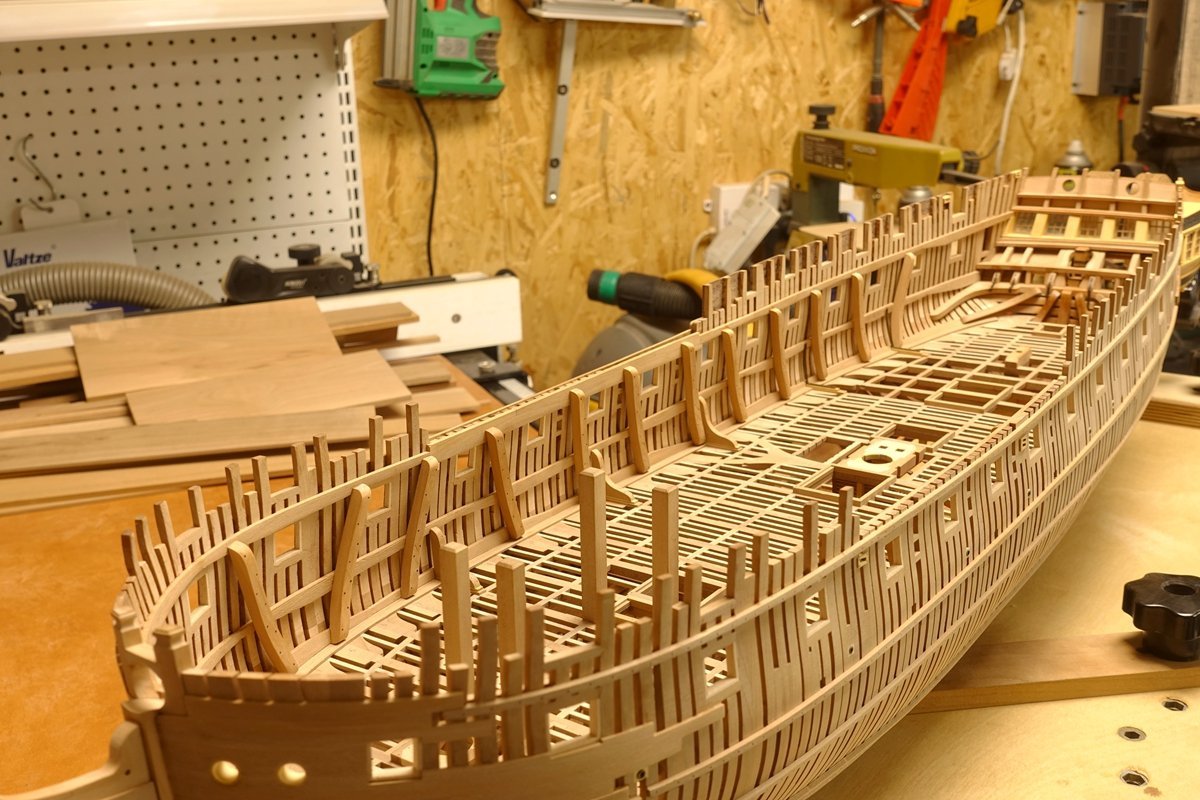
Finish laying this part of the beam and finish painting the lower layer. The next step will be the outfitting construction of this part.

- 371 replies
-
- 31
-
-
-
-
NAIAD 1797 by Bitao - 1:60
Bitao replied to Bitao's topic in - Build logs for subjects built 1751 - 1800
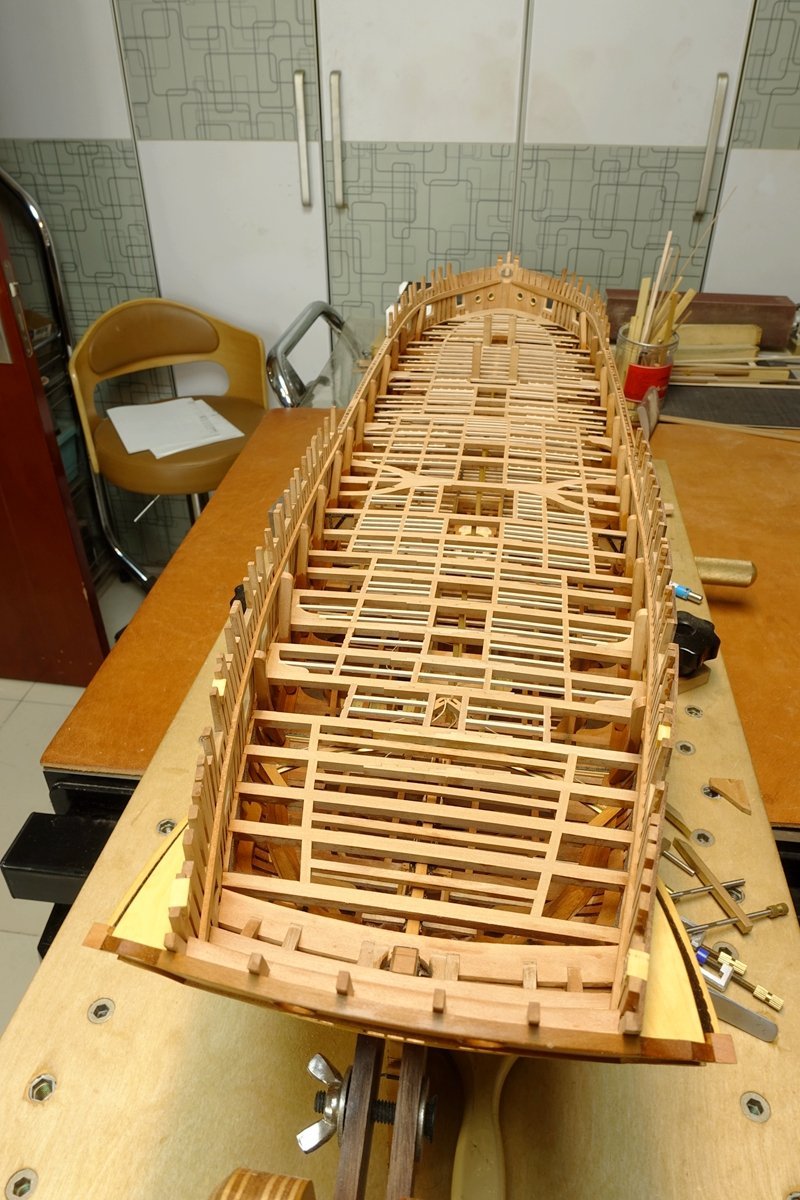
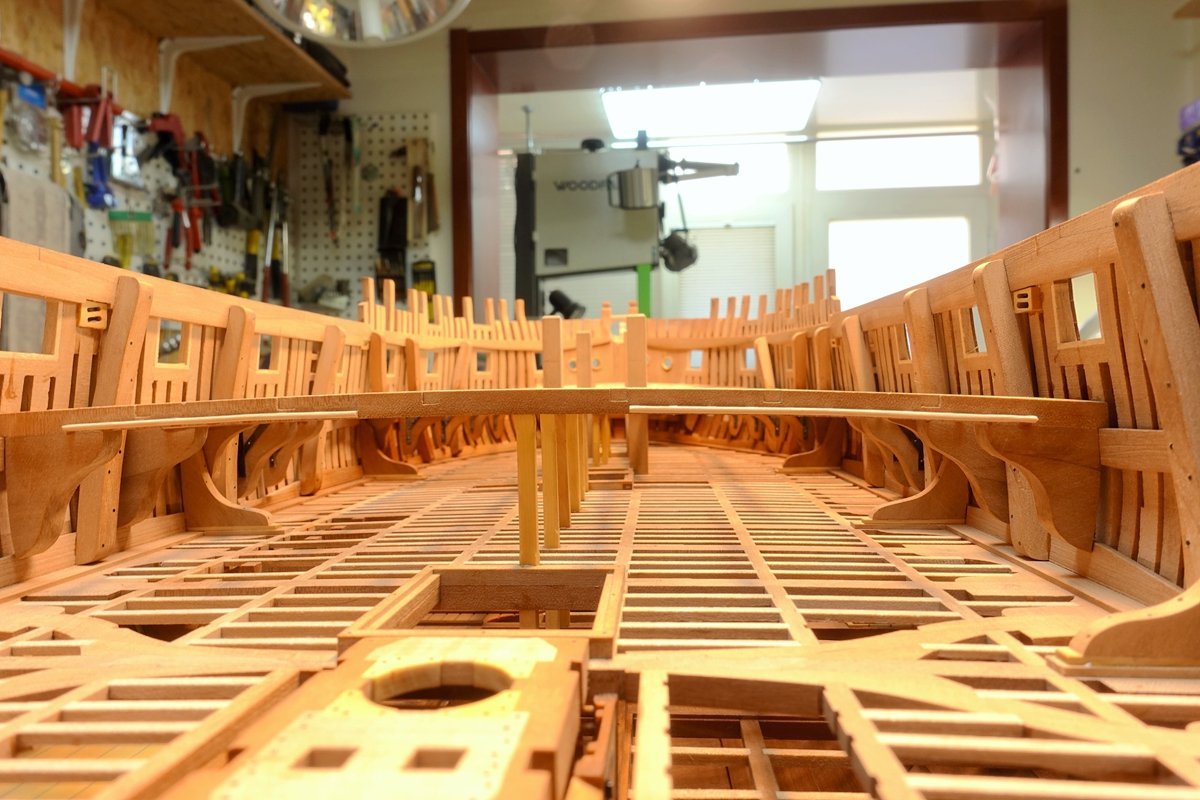
Finish laying the rear cross member.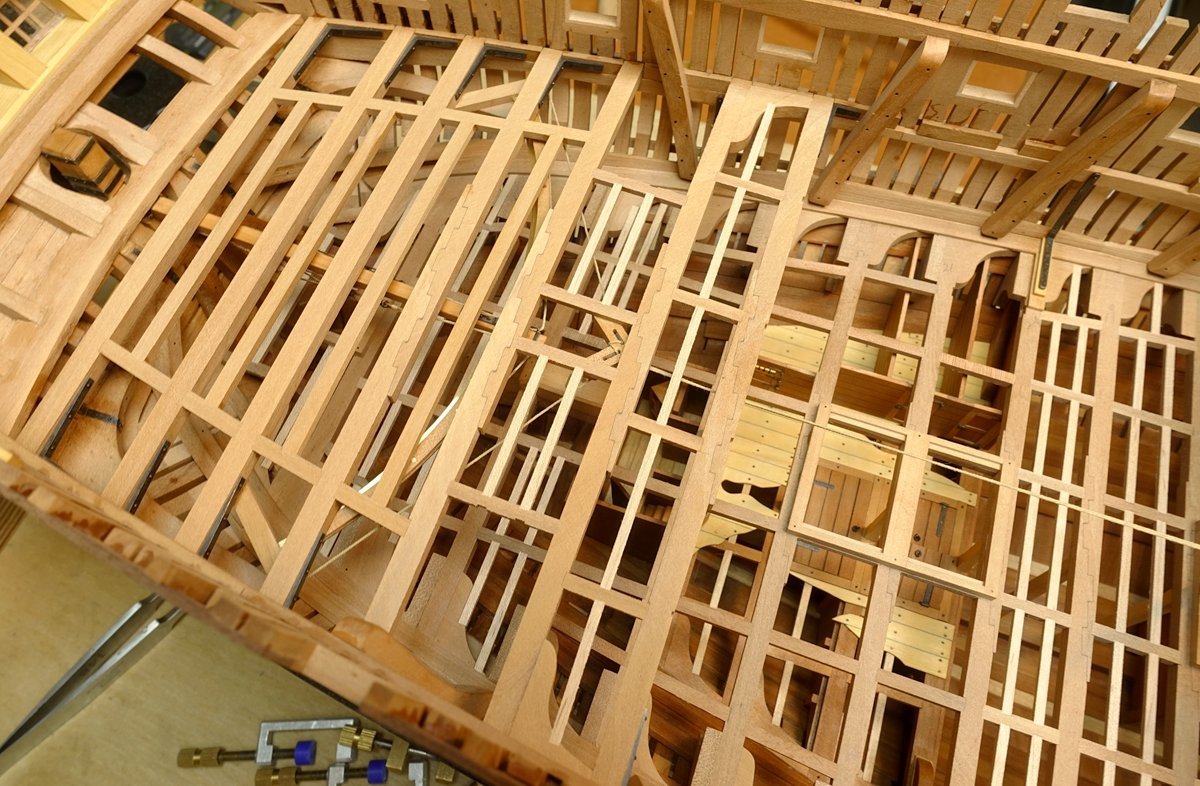
- 371 replies
-
- 17
-
-
-
NAIAD 1797 by Bitao - 1:60
Bitao replied to Bitao's topic in - Build logs for subjects built 1751 - 1800
Knowing what I know about your production, you can do it! Except for metal work and sculpting, which requires a certain amount of skill, the construction of the hull is made up of basic work and is relatively easy. With the right basic approach, I think everyone should be able to do it. In particular, to achieve a variety of interface seamless, in the eyes of many people it is easy to be ignored. -
NAIAD 1797 by Bitao - 1:60
Bitao replied to Bitao's topic in - Build logs for subjects built 1751 - 1800
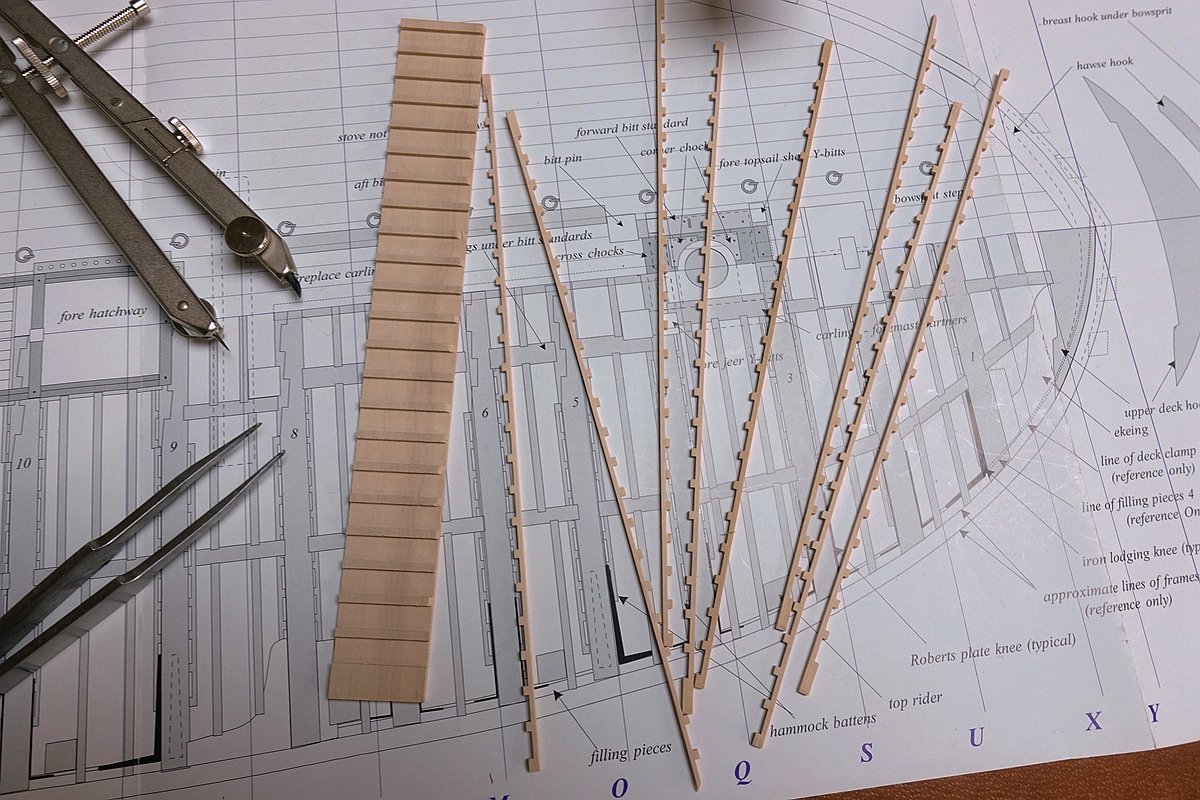
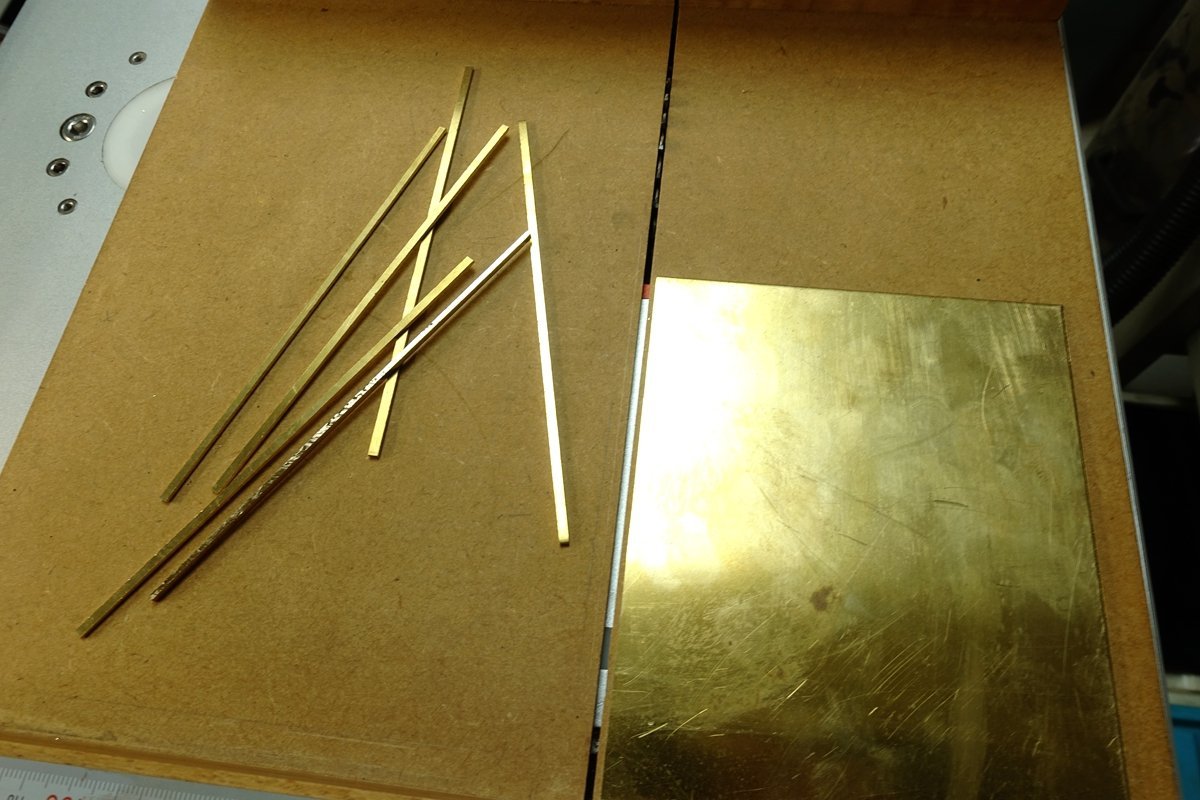
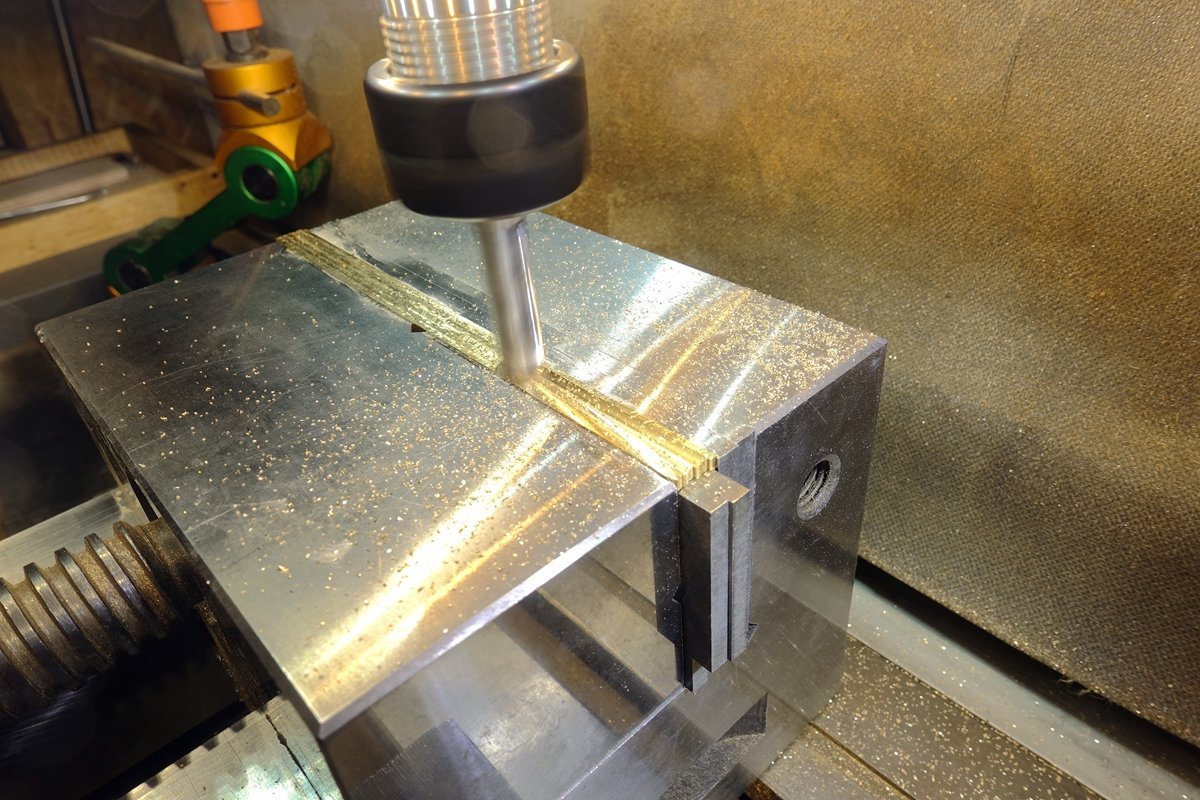
Thank you for your attention, Gary shipwright. In fact, cutting the notches is not difficult, I use milling cutter and hand carving knife to clean. Prior to this step, accurate positioning is very important, usually I use a single side beam as the baseline, spacing in line with the drawing, and marked with a pencil. To ensure seamless joints, the notch width is usually slightly smaller than the plug width, about-0.05--0.08 mm. Joints require only a small amount of force to enter, and can not be deformed, making them stable even without glue. Because my English is very limited, do not know this expression you can understand my meaning? -
NAIAD 1797 by Bitao - 1:60
Bitao replied to Bitao's topic in - Build logs for subjects built 1751 - 1800
Thank you very much for the diagram, which gave me an intuitive understanding of it. I always thought it was some kind of handrail. . . -
NAIAD 1797 by Bitao - 1:60
Bitao replied to Bitao's topic in - Build logs for subjects built 1751 - 1800
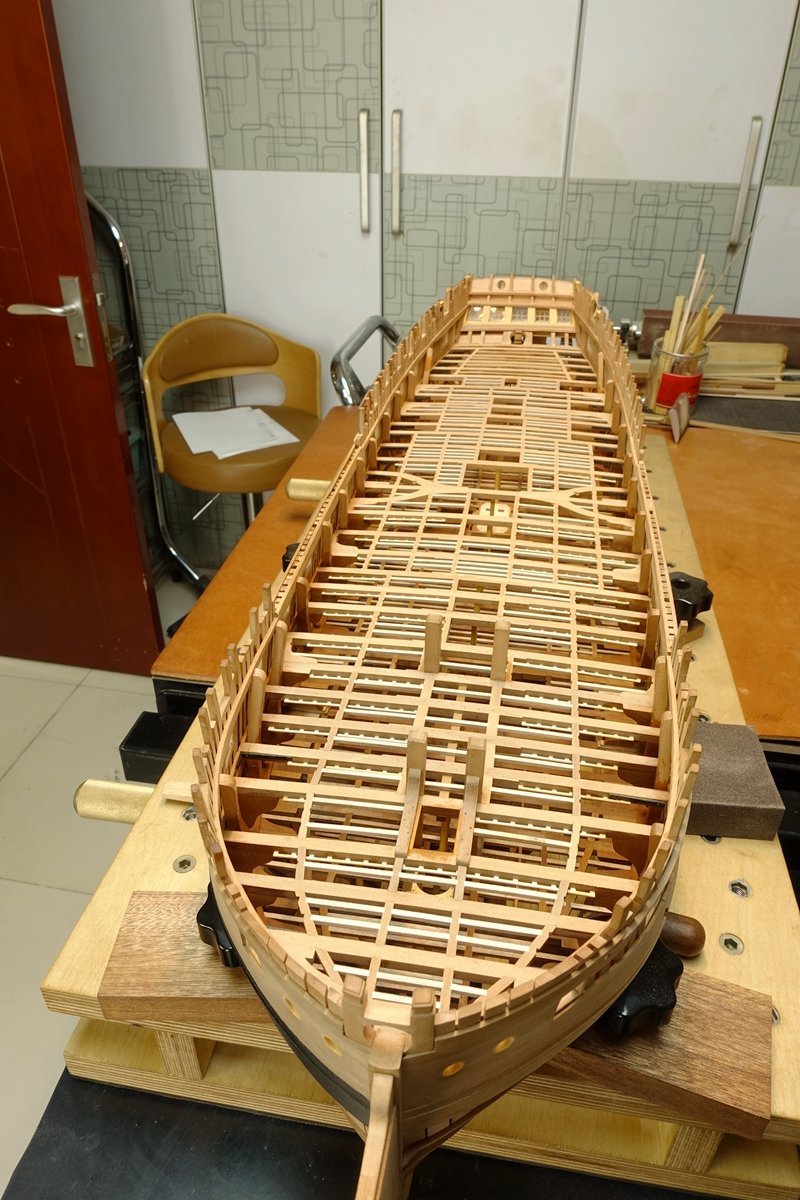
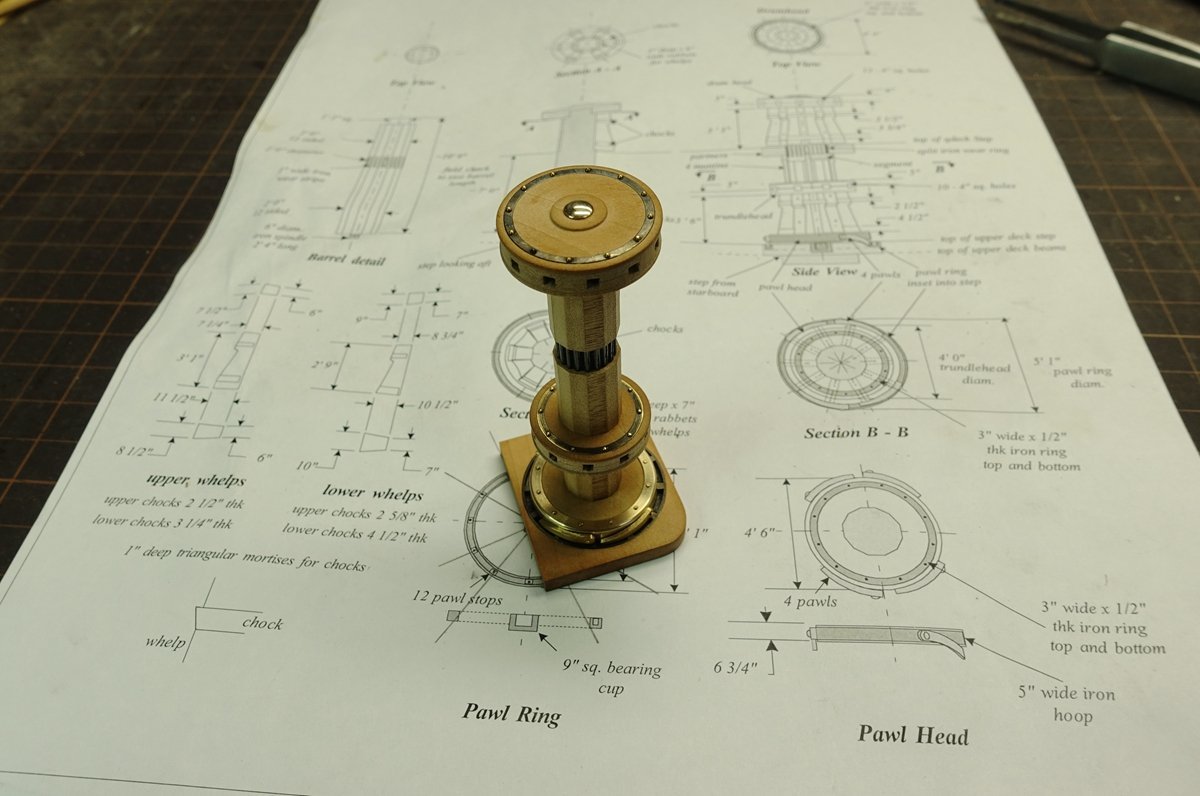
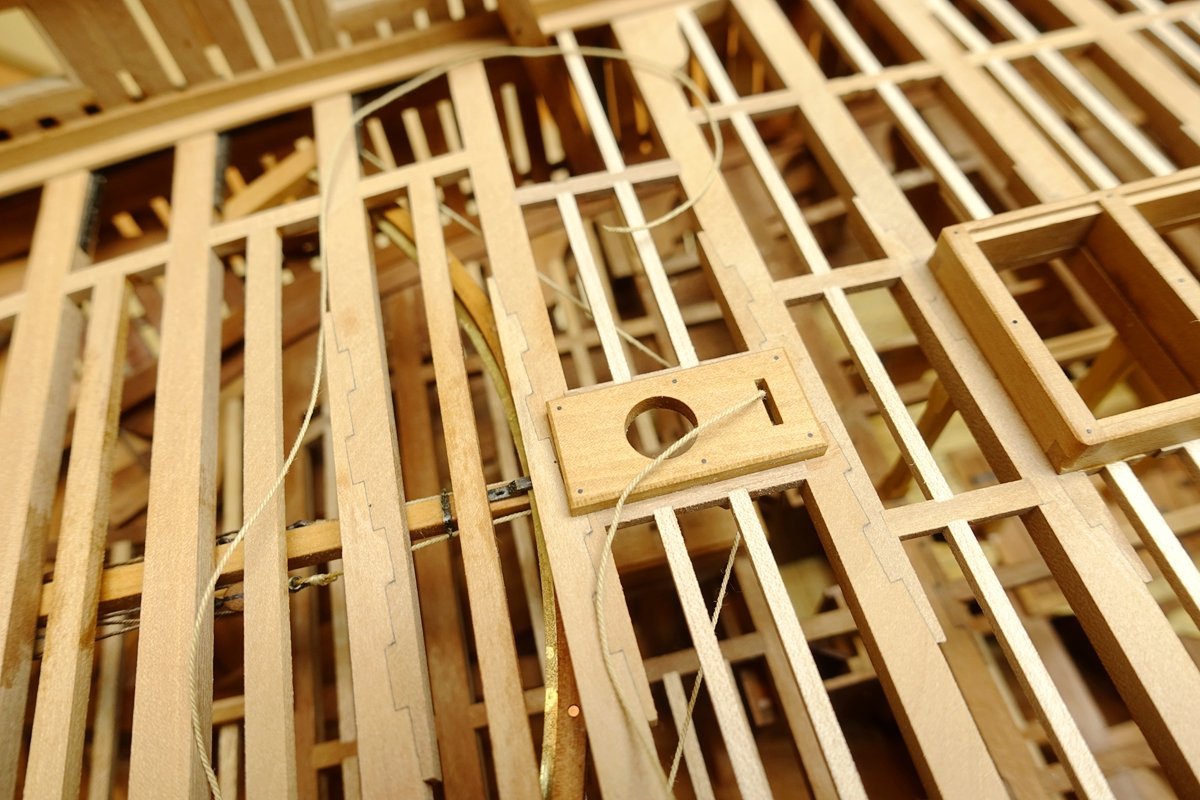
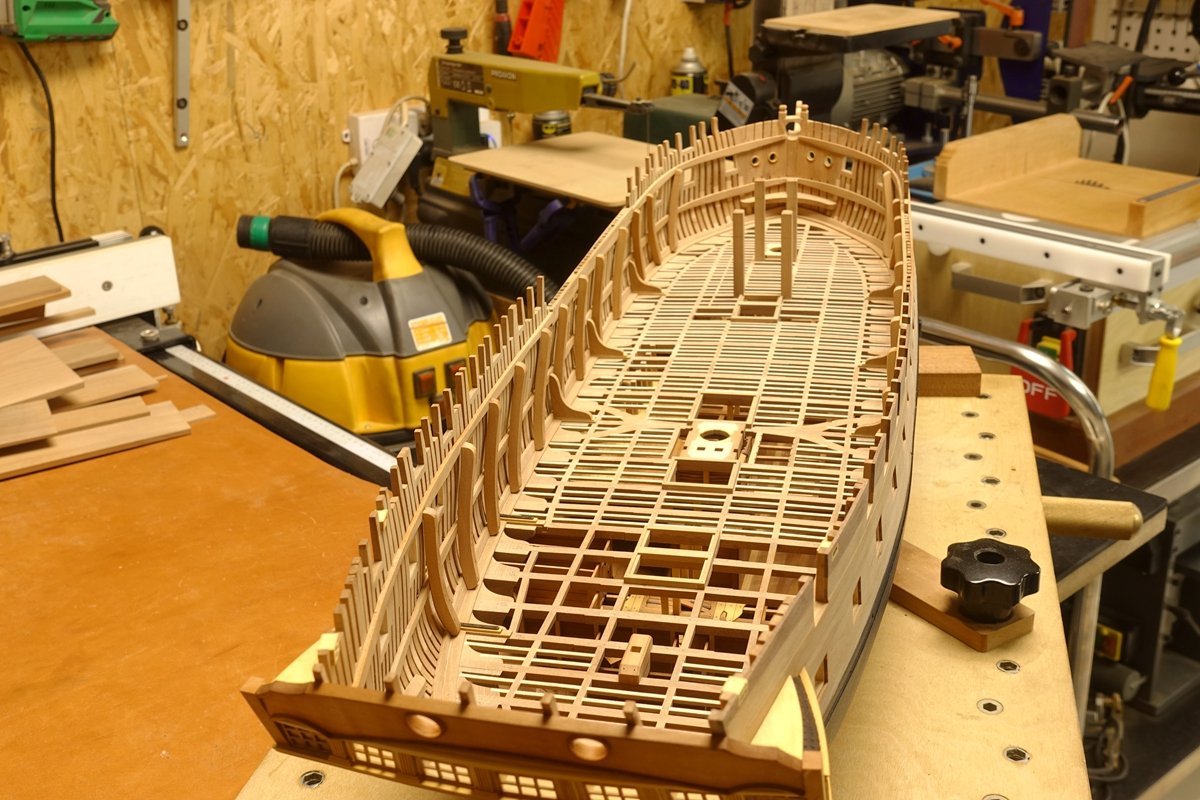
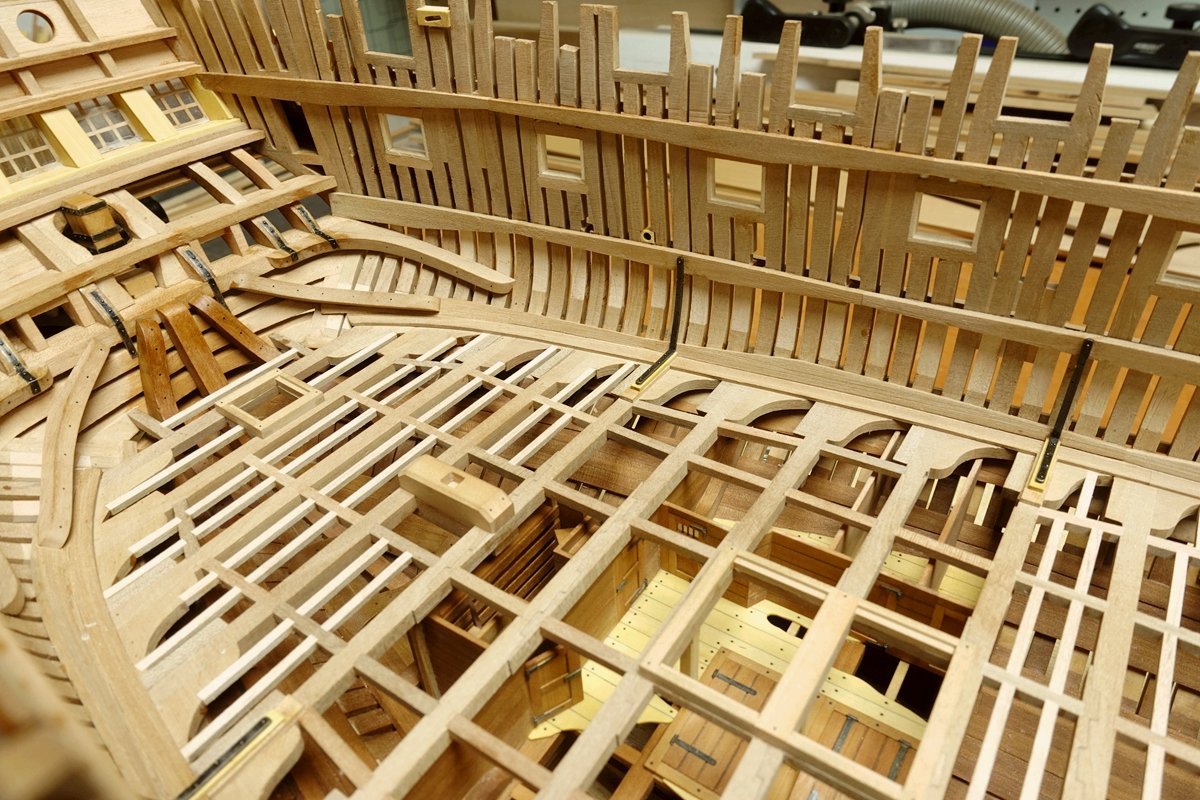
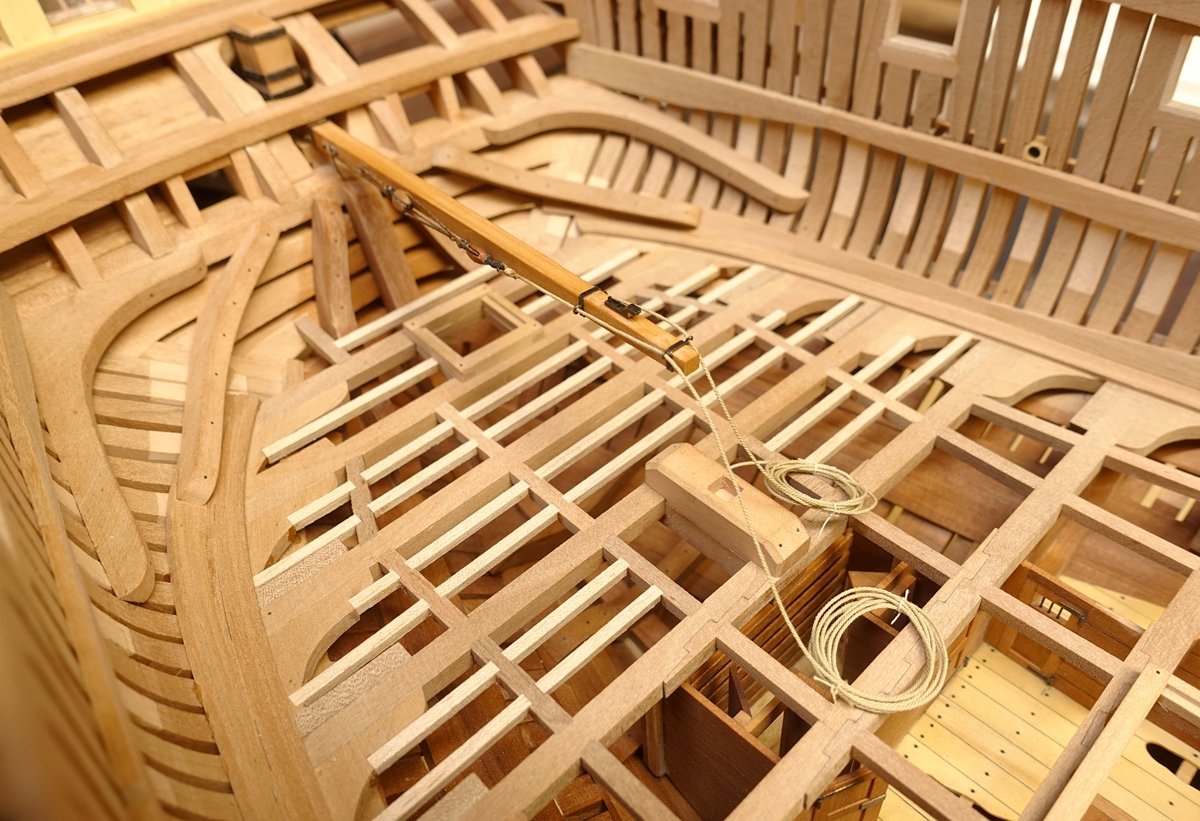
Good afternoon, everyone. Thank you for your like. This part of the outfitting process is slow but I think it is the most obvious part of the internal structure; it also determines the exact positioning of the upper part. So I had to be very careful about what I did. At the moment, the progress is relatively smooth, follow-up will be relatively easy.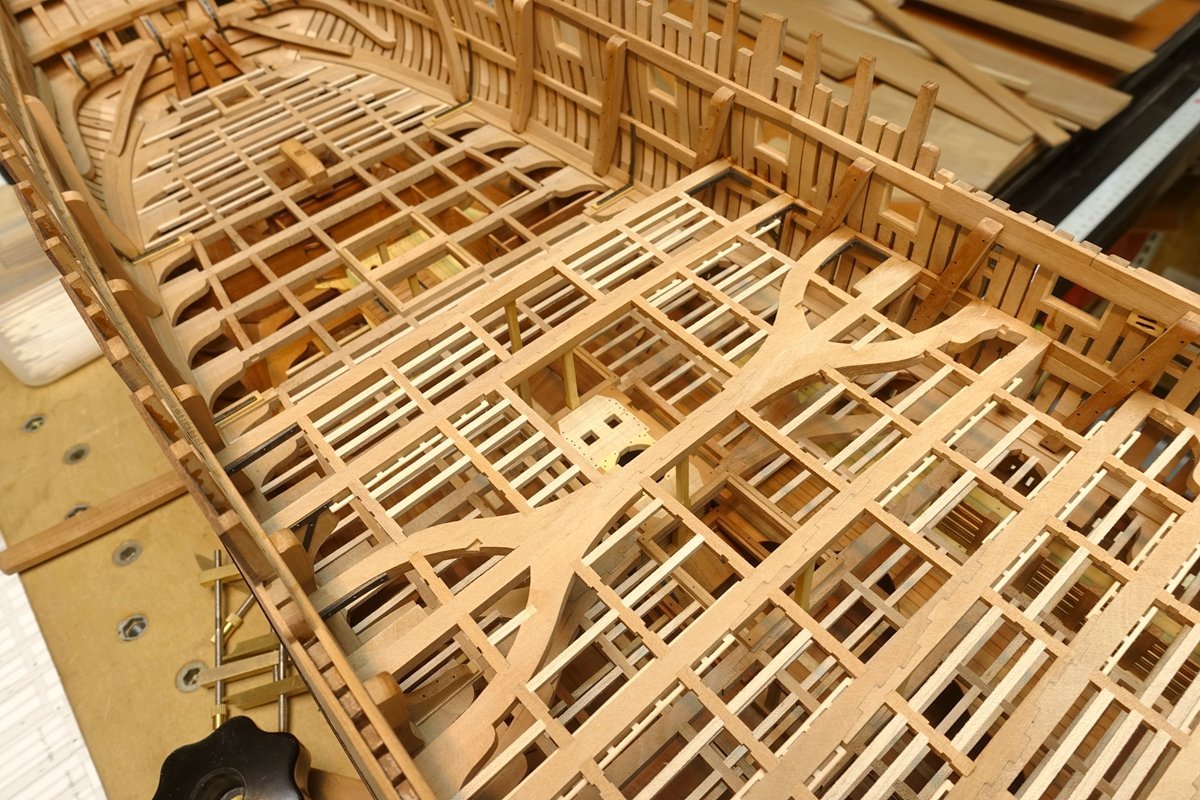
- 371 replies
-
- 18
-
-
-
-
NAIAD 1797 by Bitao - 1:60
Bitao replied to Bitao's topic in - Build logs for subjects built 1751 - 1800
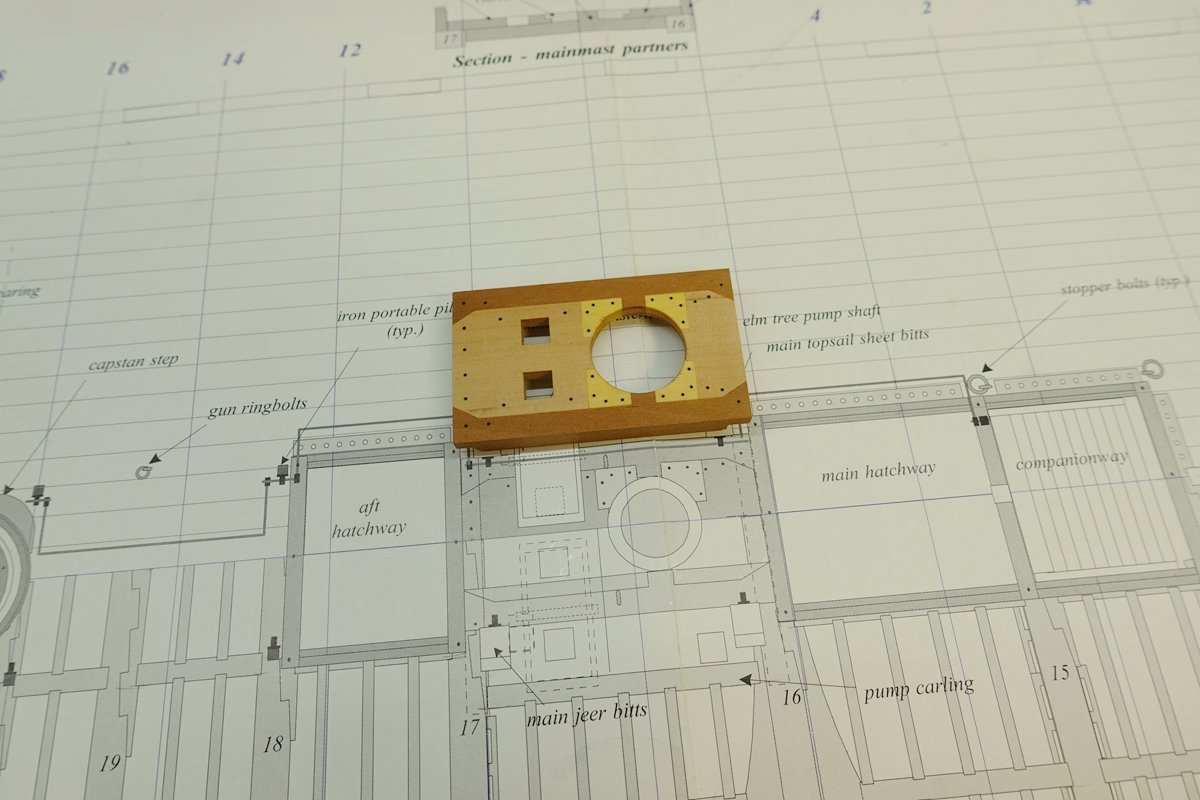
To tell you the truth, there is so little information available on this subject in China that I don’t know what it is used for. Only adhere to the drawings of the graphics and size to be processed out. Whether it is correct or not depends on the drawing and my understanding. -
NAIAD 1797 by Bitao - 1:60
Bitao replied to Bitao's topic in - Build logs for subjects built 1751 - 1800
Thanks, Joe. There’s no doubt that fixing it will take more time and effort than building it. That’s why I have so many scrapped parts and even the whole thing. While many of my works are unblemished in the eyes of others and require a slightly lower price, it seems to me that I would rather be completely destroyed in my own hands than let a defective piece of work get out. In my own production career, adhere to a standard has not changed, perhaps I am more demanding place. I’ve been trying to live up to that standard. . . -
NAIAD 1797 by Bitao - 1:60
Bitao replied to Bitao's topic in - Build logs for subjects built 1751 - 1800
Thank you, Joe. Of the more than 200 models (made of metal and plastic) made over the past 20 years, only 24 of the most satisfying pieces have been sold to collectors, and I have destroyed the rest. After all, my studio has too many tools to store and too little space. Due to the complexity and time-consuming nature of the equipment and process, there are only two possibilities for future sailboat models: 1) if a suitable price is available for sale, and 2) if the price is below the psychological level, all the pieces will be destroyed in the future. -
NAIAD 1797 by Bitao - 1:60
Bitao replied to Bitao's topic in - Build logs for subjects built 1751 - 1800
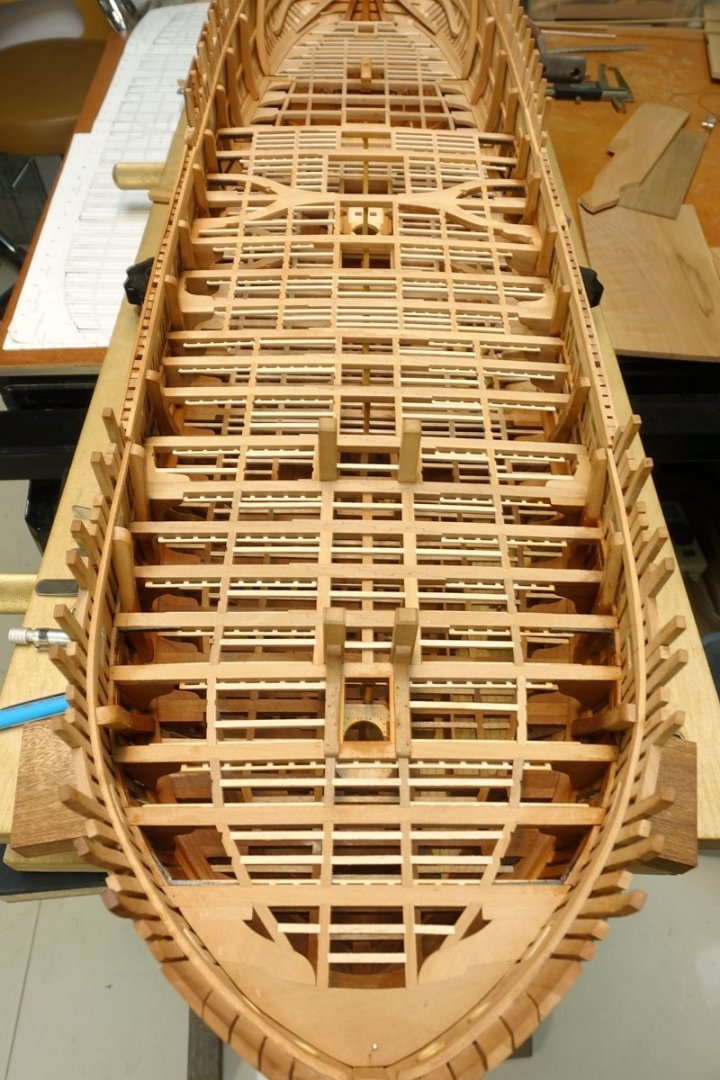
Mid-deck is half-done.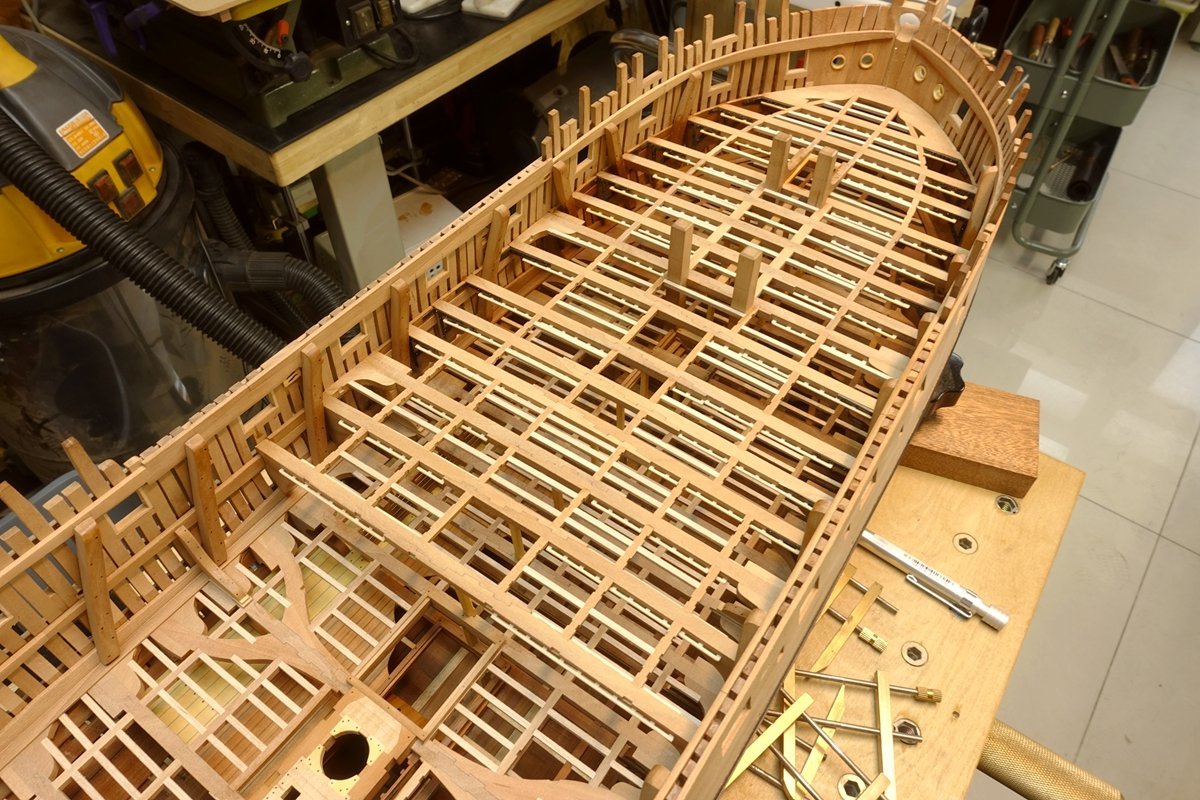
- 371 replies
-
- 27
-
-
-
NAIAD 1797 by Bitao - 1:60
Bitao replied to Bitao's topic in - Build logs for subjects built 1751 - 1800
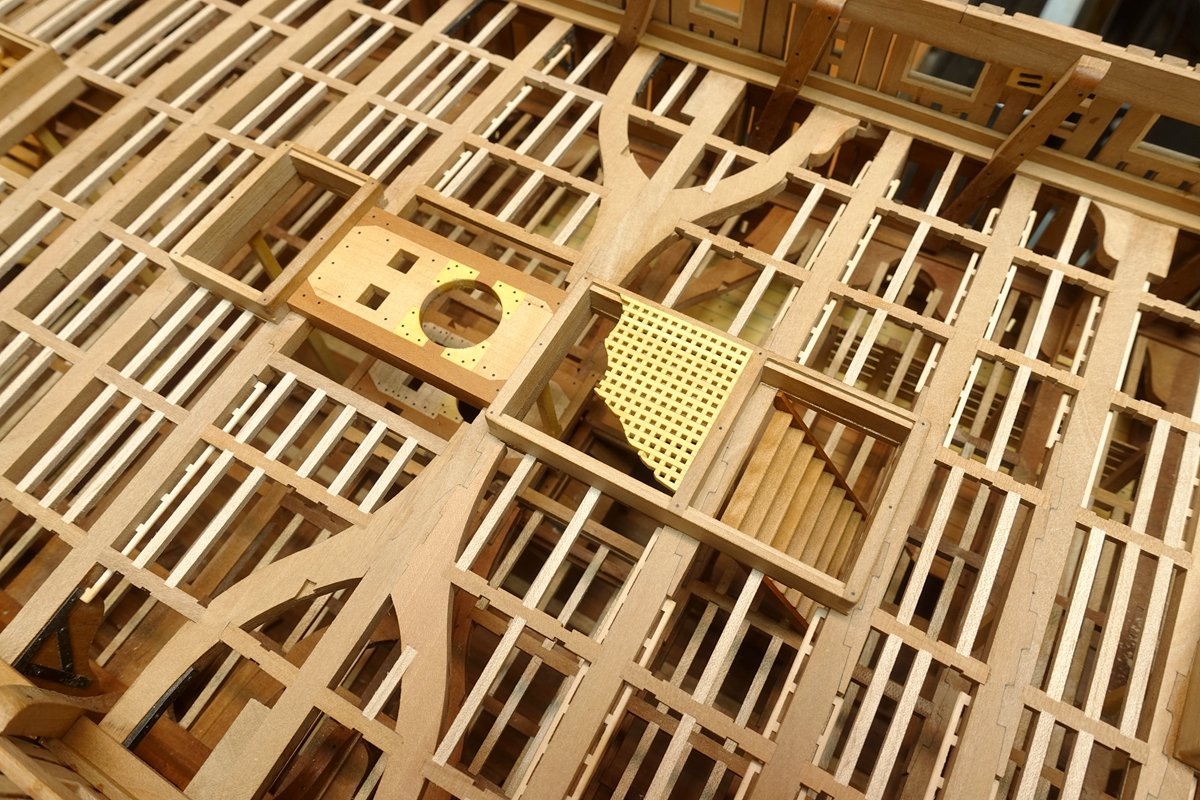
Thank you for your like. Because of the domestic express delivery restrictions during the epidemic period, it was difficult to preorder processing etchings, so the use of copper skin splicing method to produce reinforced corner codes, which delayed a lot of time, but also increased the difficulty; and a large number of hand-to-hand production is required, progress is slow.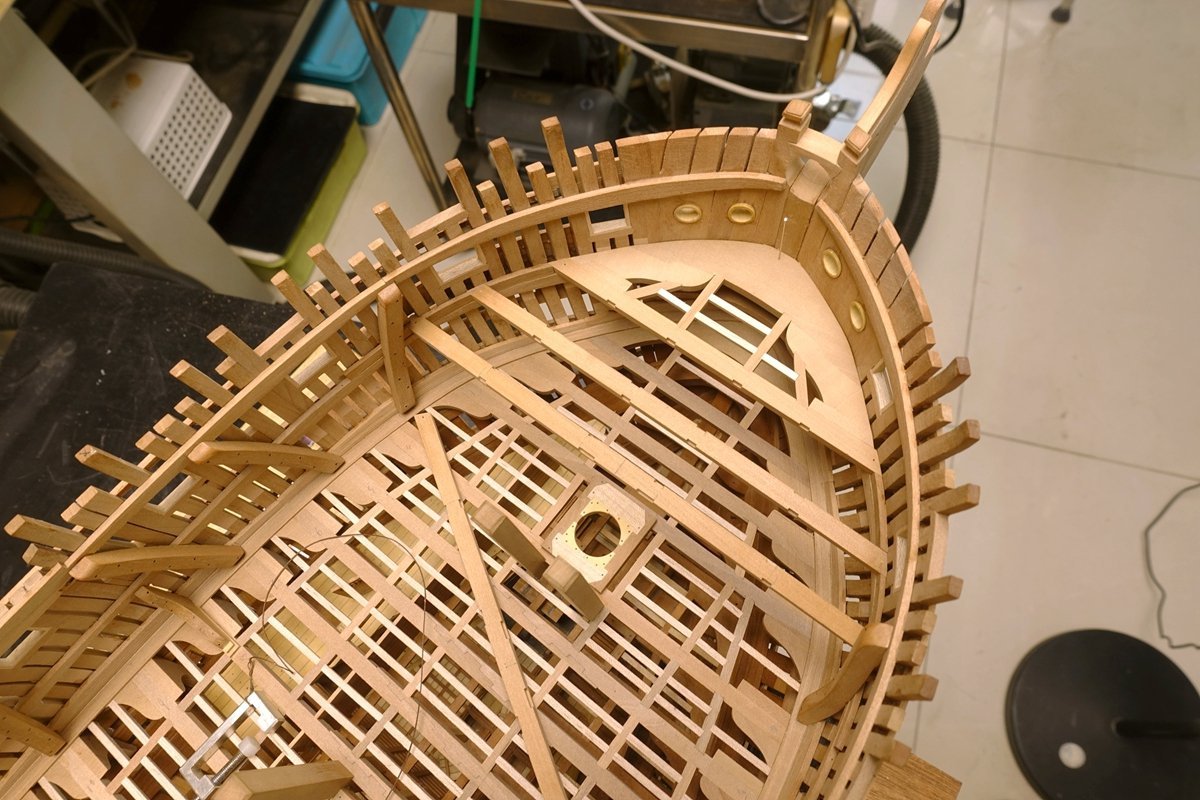
- 371 replies
-
- 24
-
-
-
NAIAD 1797 by Bitao - 1:60
Bitao replied to Bitao's topic in - Build logs for subjects built 1751 - 1800
Moving forward, though much slower...
- 371 replies
-
- 30
-
-
-
-
NAIAD 1797 by Bitao - 1:60
Bitao replied to Bitao's topic in - Build logs for subjects built 1751 - 1800
Finally, it’s back on the inside.....
- 371 replies
-
- 28
-
-
-
-
Since it’s your first POF build, it looks pretty good to me! Unless you’re a genius, no one can be perfect in the beginning. Mistakes are the most valuable asset at this stage, and they often leave a deeper impression. Also accumulated improved experience for the follow-up works. Don’t worry about it. Just keep going.
-
NAIAD 1797 by Bitao - 1:60
Bitao replied to Bitao's topic in - Build logs for subjects built 1751 - 1800
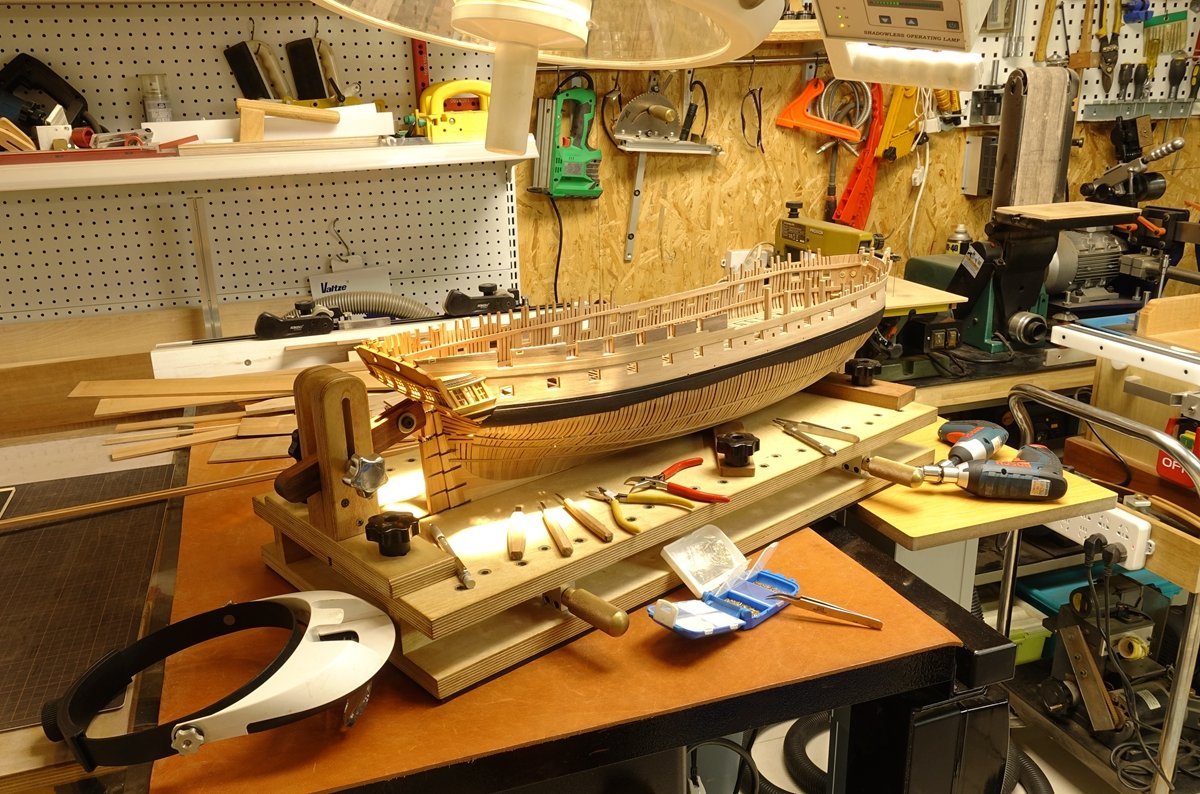
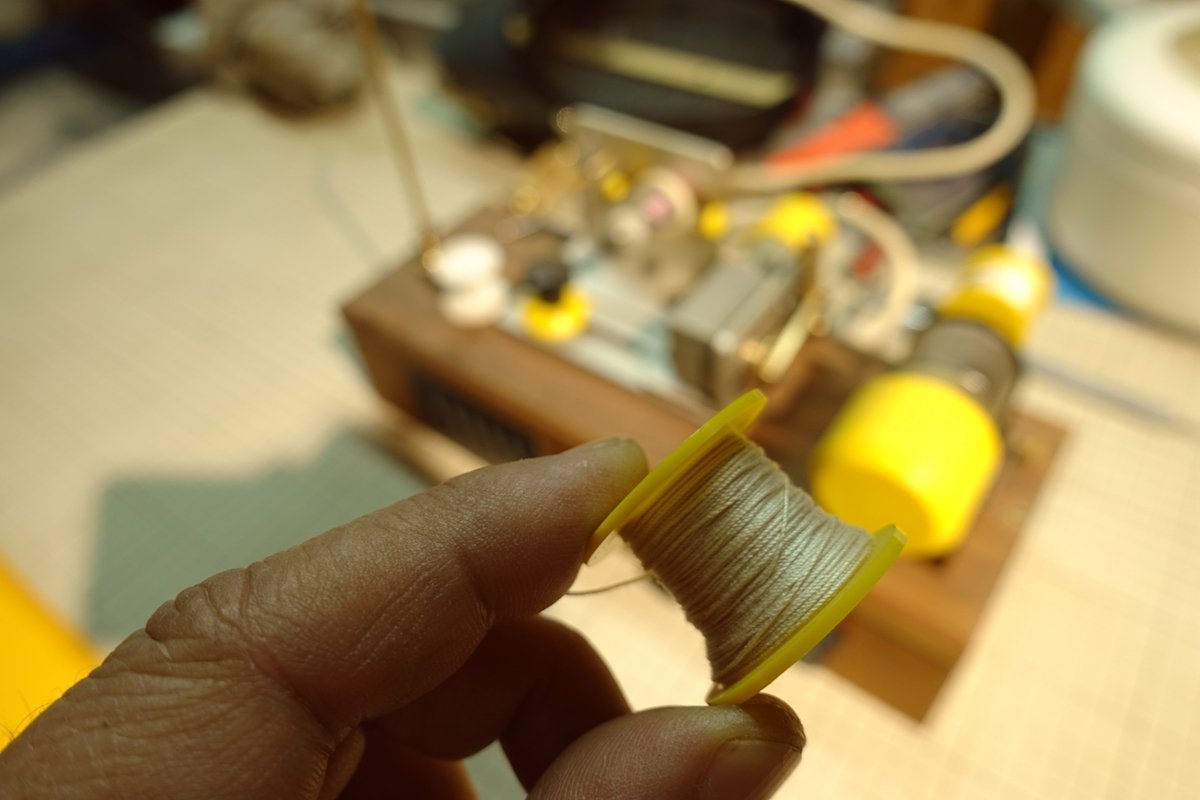
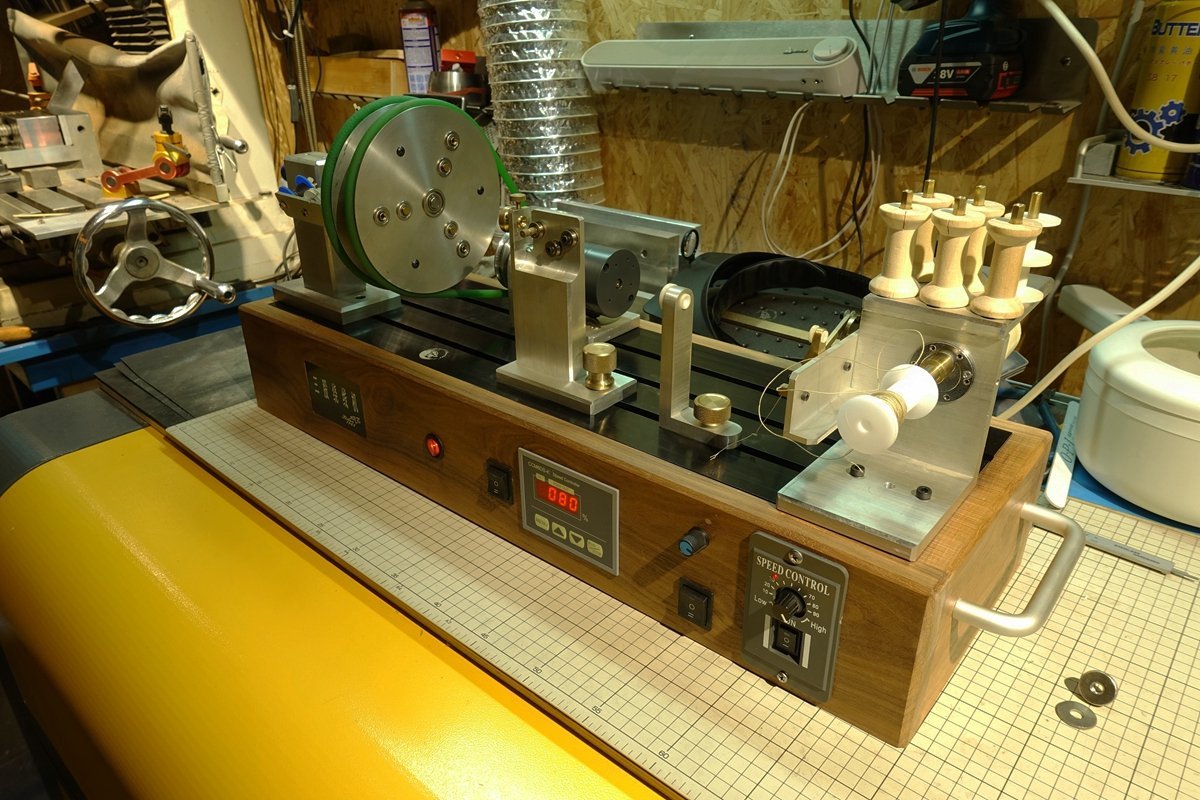
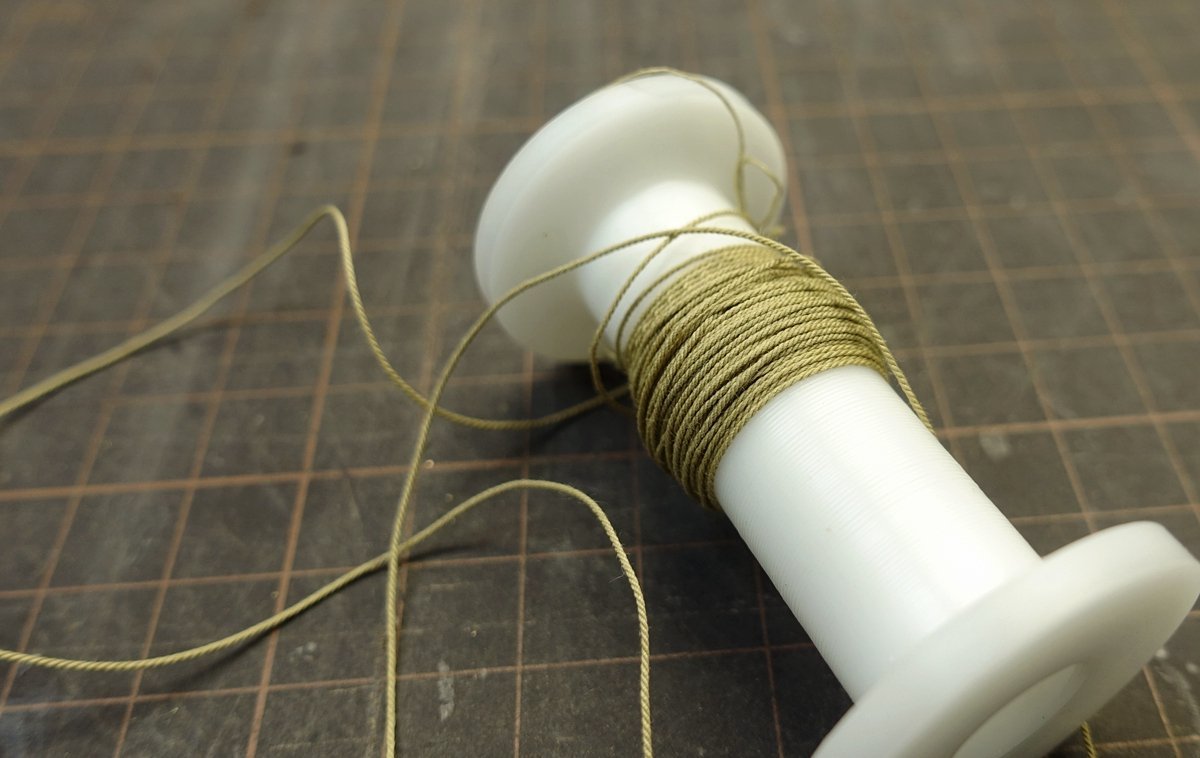
@BANYAN@allanyed: Thank you for the compliment and lIke. This ropeway is the final version of my most stable three-ply winding machine, complete with a wrap and reel (the fourth blurred image in the background) . Because my main goal right now is to build the hull, and once I get to a certain level, I’ll focus on the ropes. -
NAIAD 1797 by Bitao - 1:60
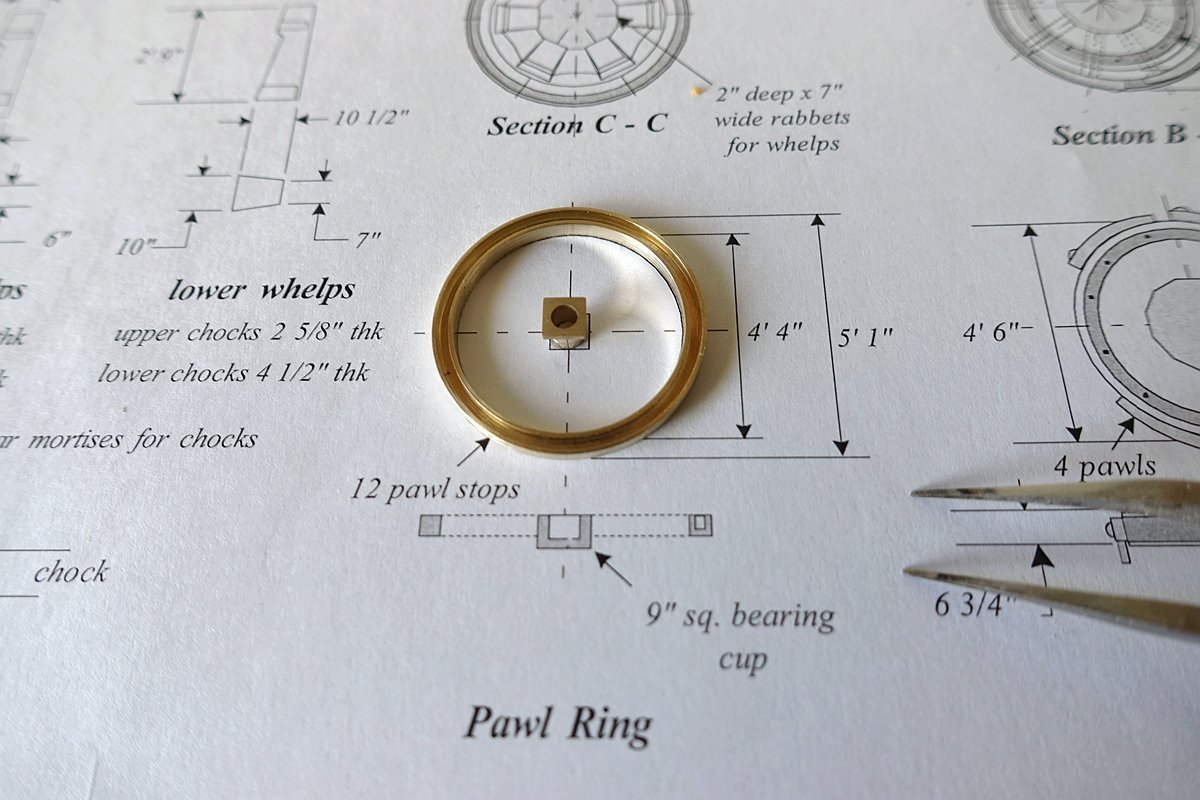
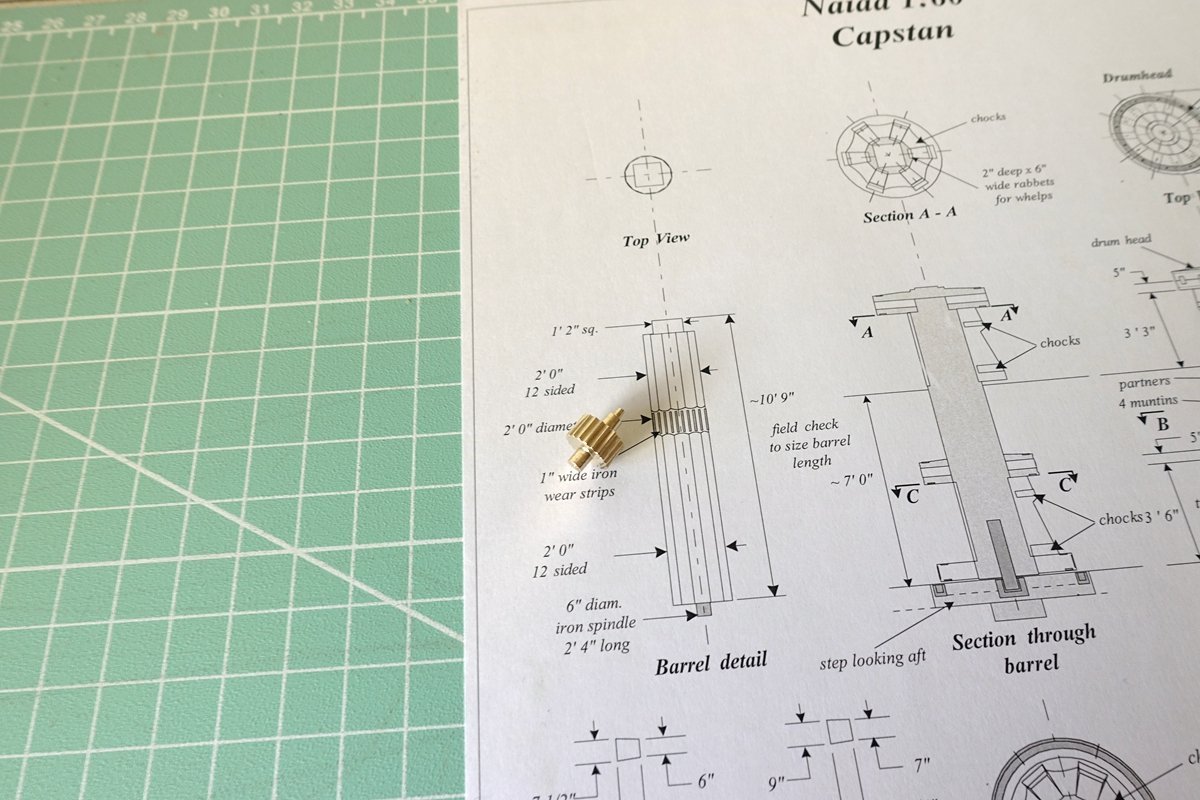
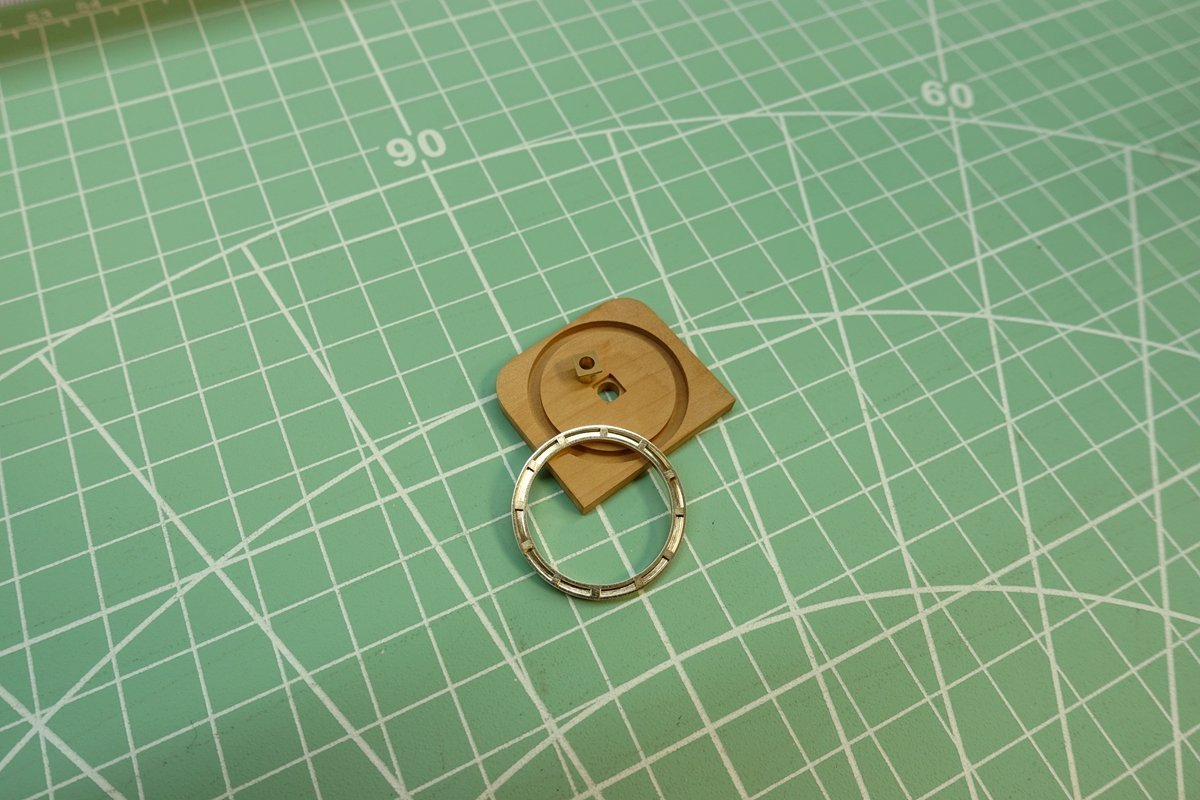
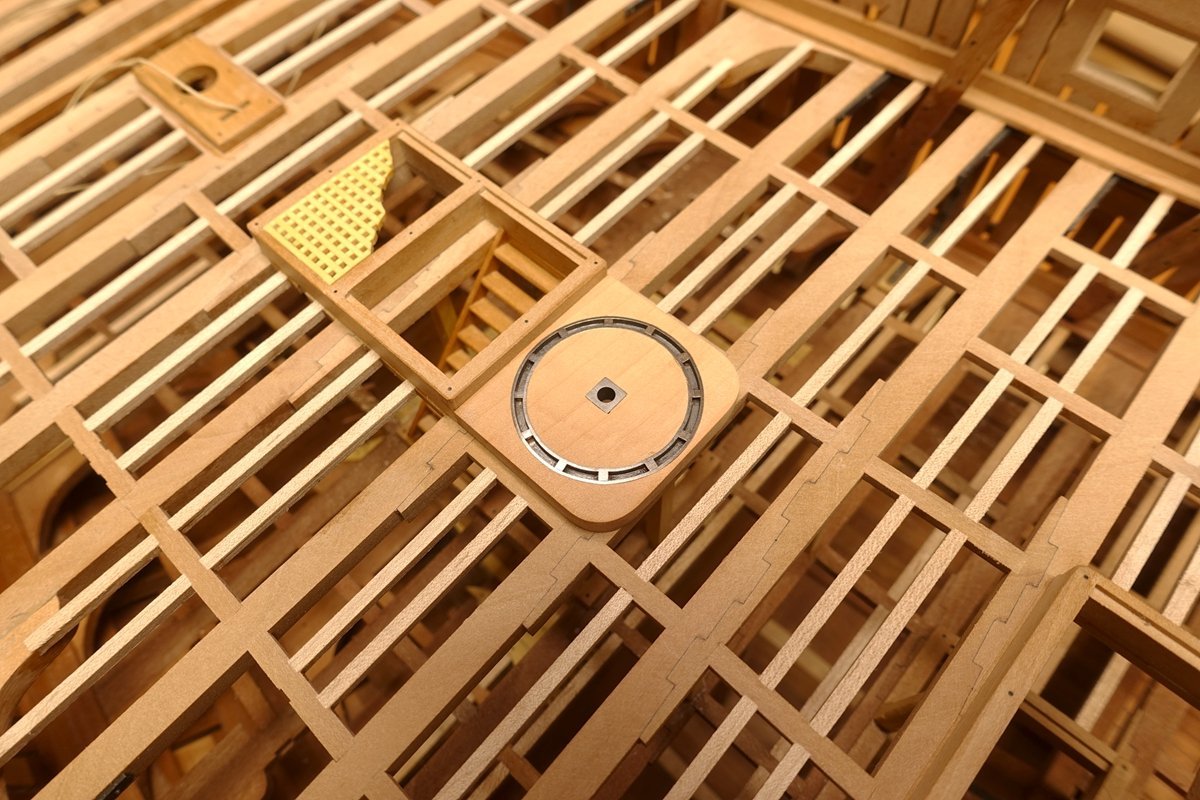
Bitao replied to Bitao's topic in - Build logs for subjects built 1751 - 1800
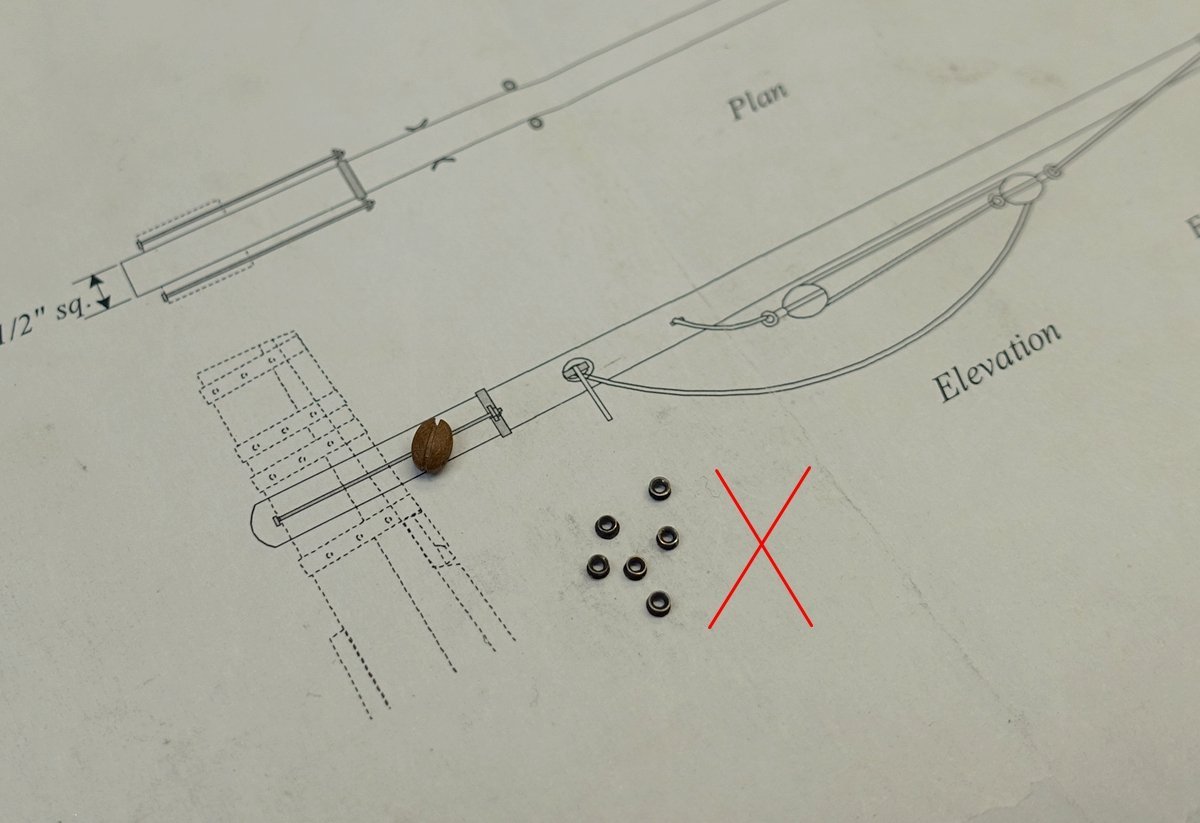
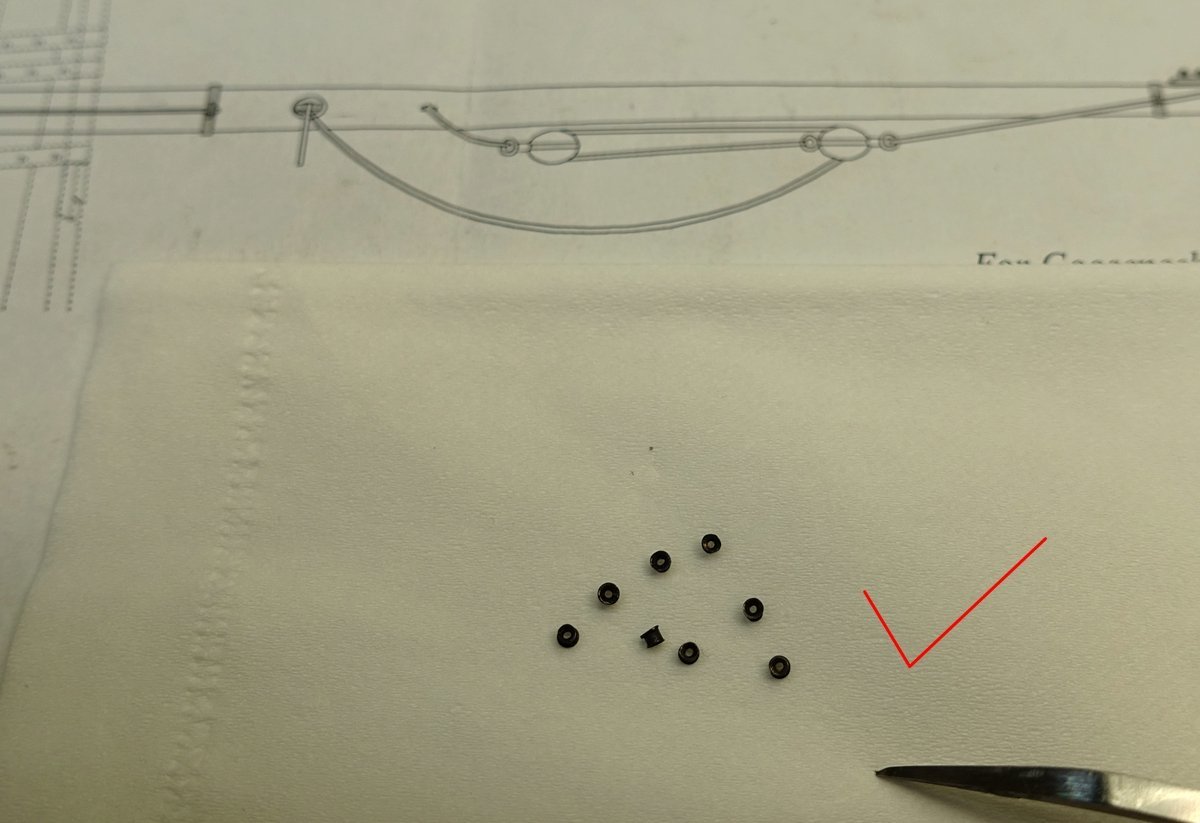
Hello, everyone. Once this section is complete, the internal build will continue. The pulley rings are made of thin-walled copper tubes: 1.5 mm outside and 0.9 mm inside. However, it was found to be too large to be disposed of (part x of the figure) after being machined into a concave outer circle. It was finished with a diameter of 1.2 mm and an inner diameter of 0.7 mm copper tube.
- 371 replies
-
- 29
-
-
-
NAIAD 1797 by Bitao - 1:60
Bitao replied to Bitao's topic in - Build logs for subjects built 1751 - 1800
Thanks, Johann. Your excellent work and relentless attention to detail are my role models and goals. -
NAIAD 1797 by Bitao - 1:60
Bitao replied to Bitao's topic in - Build logs for subjects built 1751 - 1800
Thank you, Gary. I hope every great person in this room inspires us to do better. -
I thought I was on the wrong set and I was in the furniture room. . . amazing!