HOLIDAY DONATION DRIVE - SUPPORT MSW - DO YOUR PART TO KEEP THIS GREAT FORUM GOING! (Only 44 donations so far out of 49,000 members - C'mon guys!)
×


MikeU48
-
Posts
111 -
Joined
-
Last visited
Content Type
Profiles
Forums
Gallery
Events
Everything posted by MikeU48
-
 Well Jim, YOUR brain is engaged....Mine...not so much... When I was looking at these tiny parts I just happened to have an emery board laying right by my mat. Luckily I just had one to do for the long gun on the spar deck. Good to know for the future. Thanks for the tip.
- 209 replies
-
- 2
-

-
- constitution
- revell
- (and 1 more)
-
Hey Lou, Just heard back from Radek at HiSModel. He said the larger wheels go up front. The six wheels included where for possible breakage. I used his brass cannons on the gun deck and they came in two pieces: cannon and center pin. Some were movable so I glued them in place....I think...lol
- 209 replies
-
- 2
-
-
- constitution
- revell
- (and 1 more)
-
Hey Lou, The other oddity is that there are 3 wheels larger than the other 3. I used the 2 small wheels and 2 from another sheet. These long gun carriages would really not be seen once the spar deck is in place. Seeing there are 6 wheels per carriage I imagine the intent was to use 2 large and 2 small with a spare of each. I have an email off to Radek at HiSModel for his explanation.
- 209 replies
-
- 1
-
-
- constitution
- revell
- (and 1 more)
-
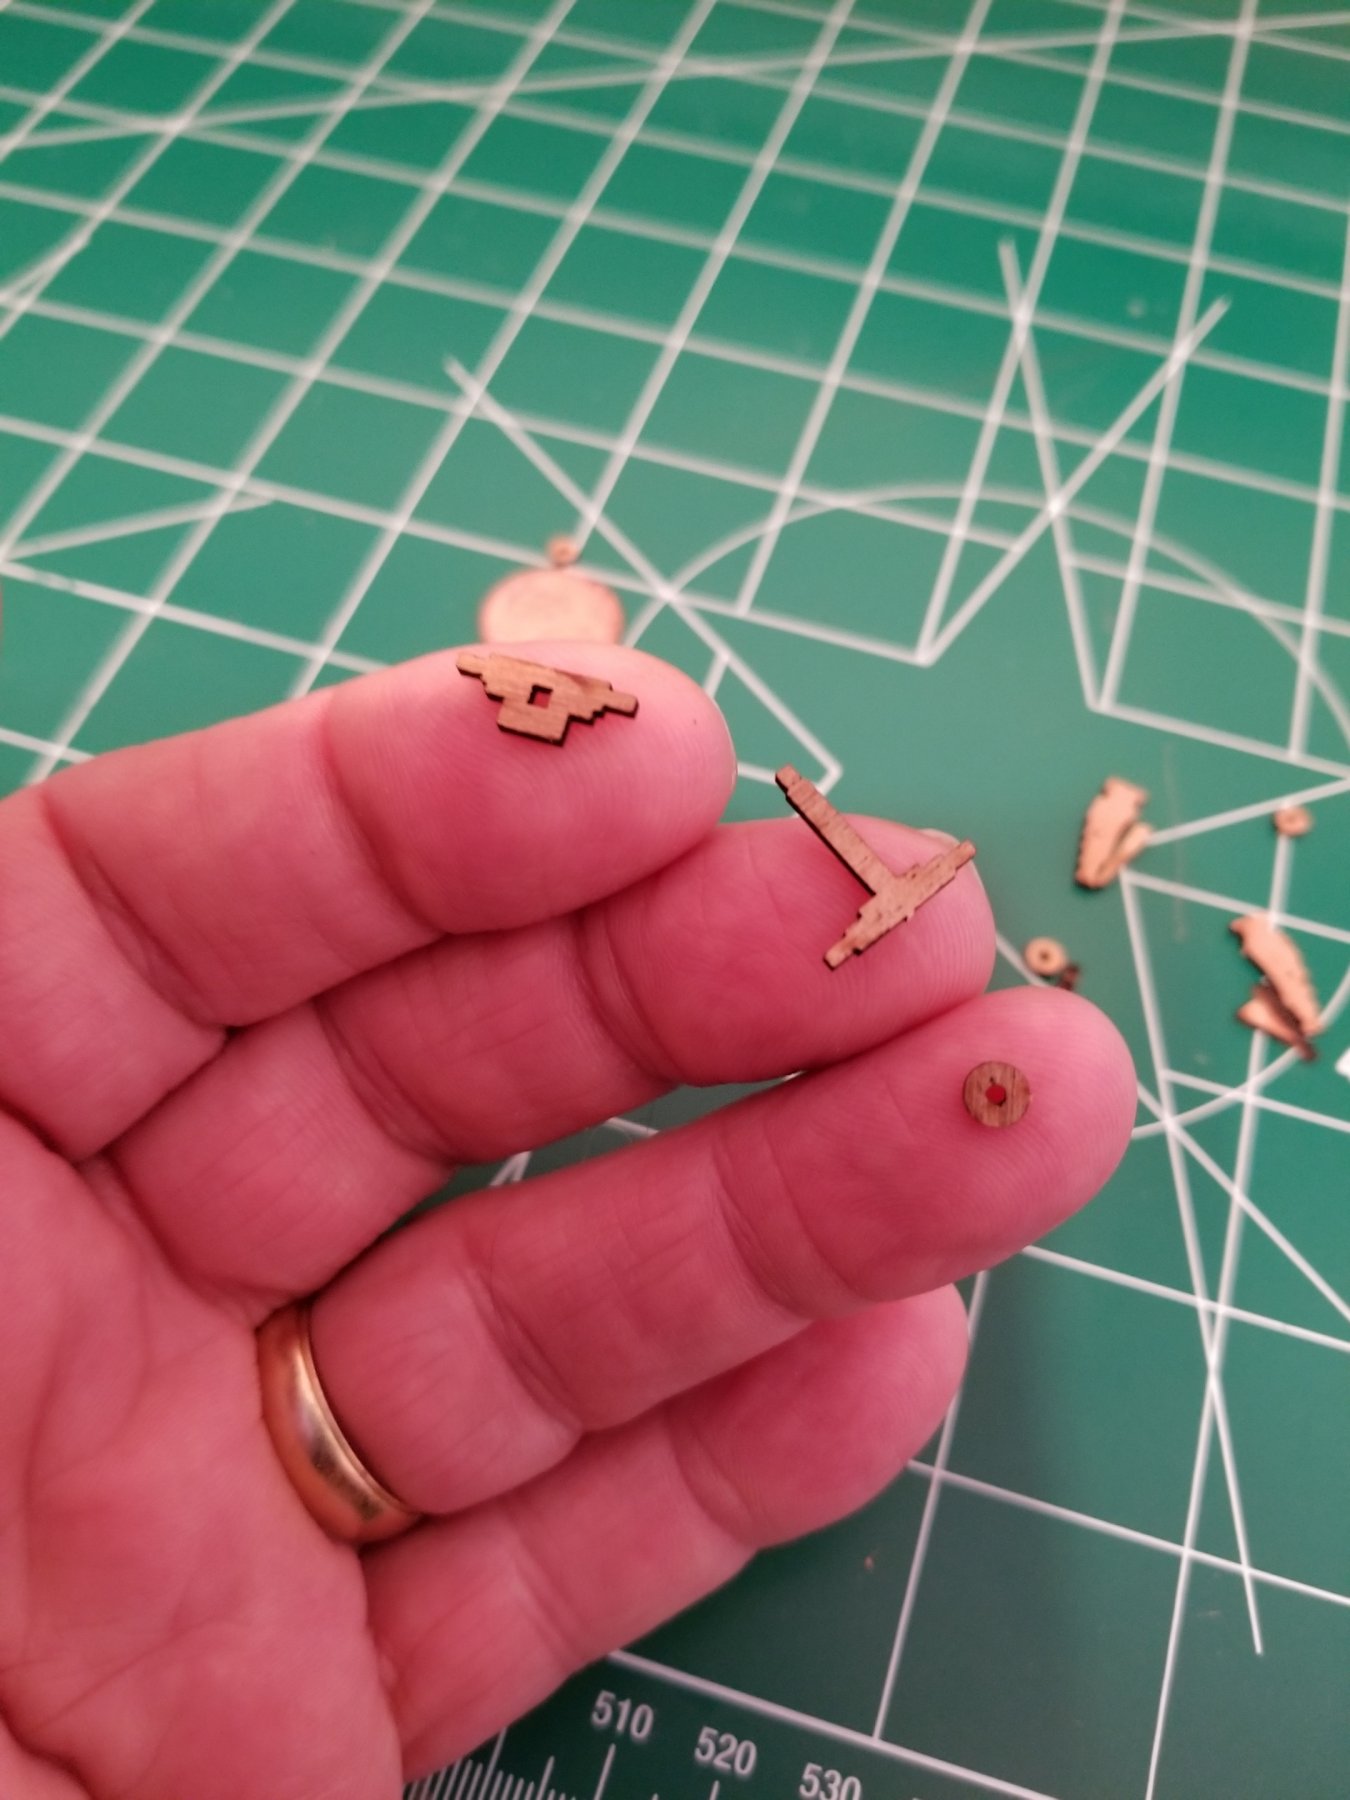
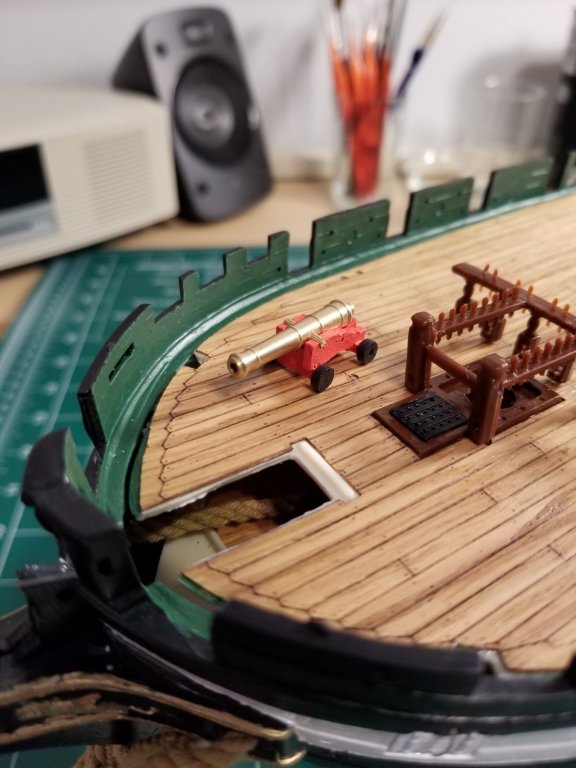
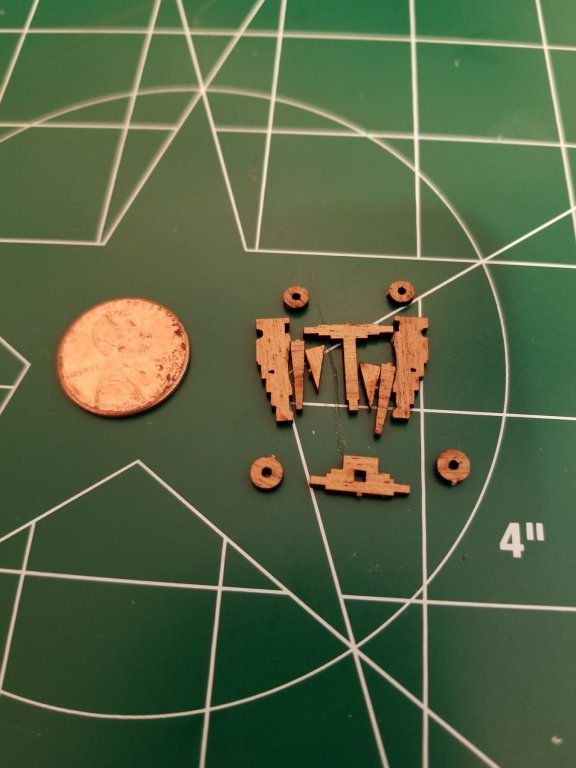
Well, the assembly of the spar deck long gun carriage was a little bit of a challenge even with tweezers. You can see on the pics above that the "axel" for the wheels is square and the wheels have a round hole. Something in the back of my mind says you can't fit a square peg in a round hole. The instruction stated one side of a wheel has a larger hole than the other and to rotate that on the square axle. After many failed attempts I used an emery board to round out the square axle as best as I could because this is a tiny part. Contrary to the instructions I found it easier to hold onto the front piece and axle than when the sides were glued on. At least the carronades will be easier as there are fewer pairs and different wheel mountings. All in all, I am satisfied with the results. I just have to figure out how to attach the two long wedges to the bottom of the long gun carriage. No rush. Now I await the carronades from the Czech Republic.

- 209 replies
-
- 1
-
-
- constitution
- revell
- (and 1 more)
-
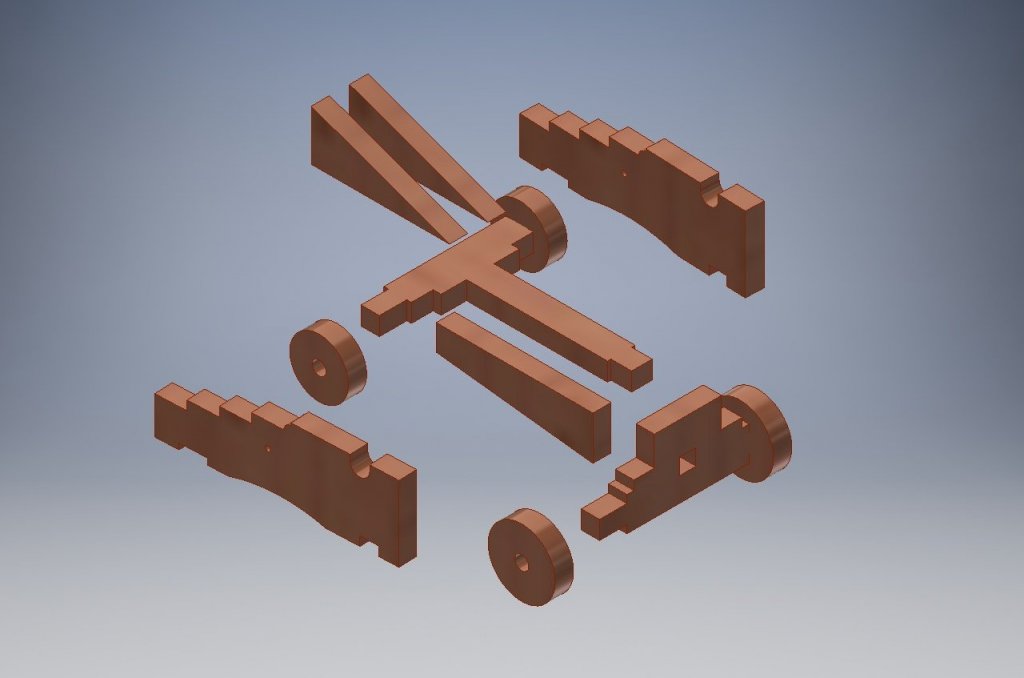
Here is the instruction as provided, to assemble the carriages. Maybe I'm missing something in the translation.

-
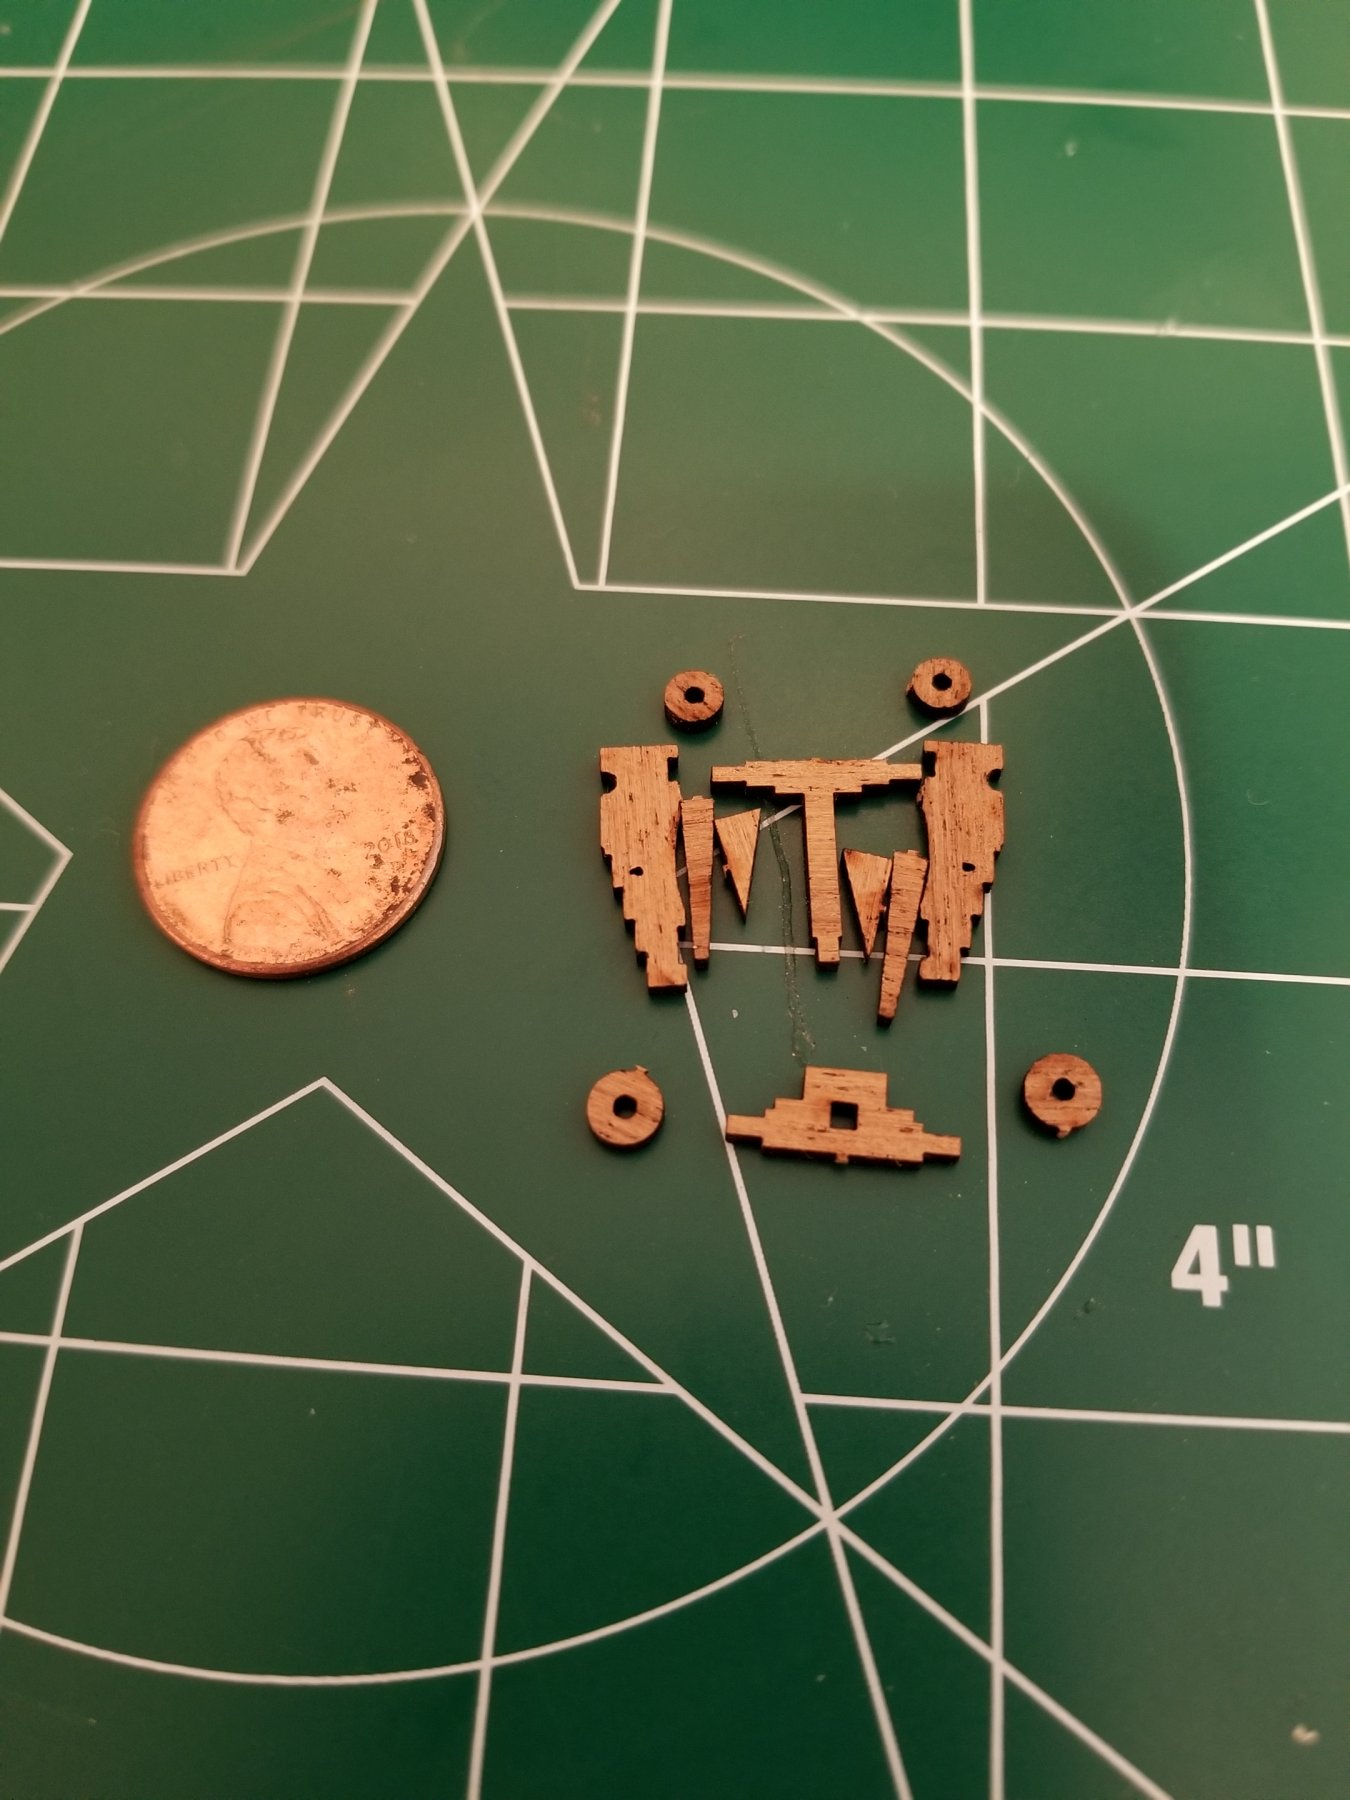
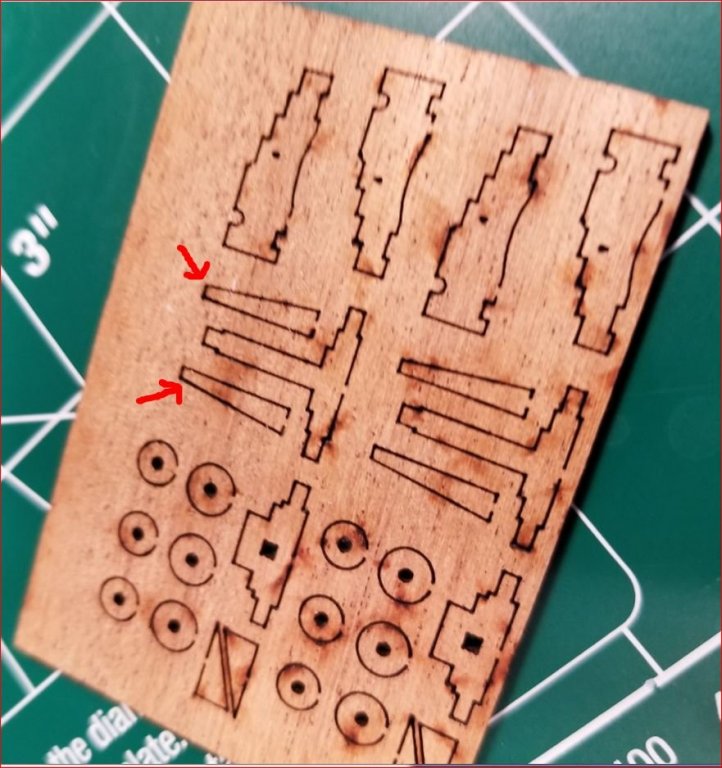
I did that, Lou, JUST FOR YOU...lol I figured it out 3 seconds after I posted the comment. I LOVE THIS SITE....No dry humor here.... he he he You get smacked right between your eyes for stupidity....just kidding... of course. Here's the pic of the pieces. The red arrows are the mystery parts. Note: there are six wheels. Humm This is the assembly pic. The mystery pieces may be glued together under the main frame but never want to guess as none of the other parts are assembled. Better safe than sorry.
-
Thanks for the tip CDW, I luckily bought the original Titebond that's water clean up. NOW I just have to find some tiny fingers... Thank God I'm in no rush....
- 209 replies
-
- 2
-
-
- constitution
- revell
- (and 1 more)
-
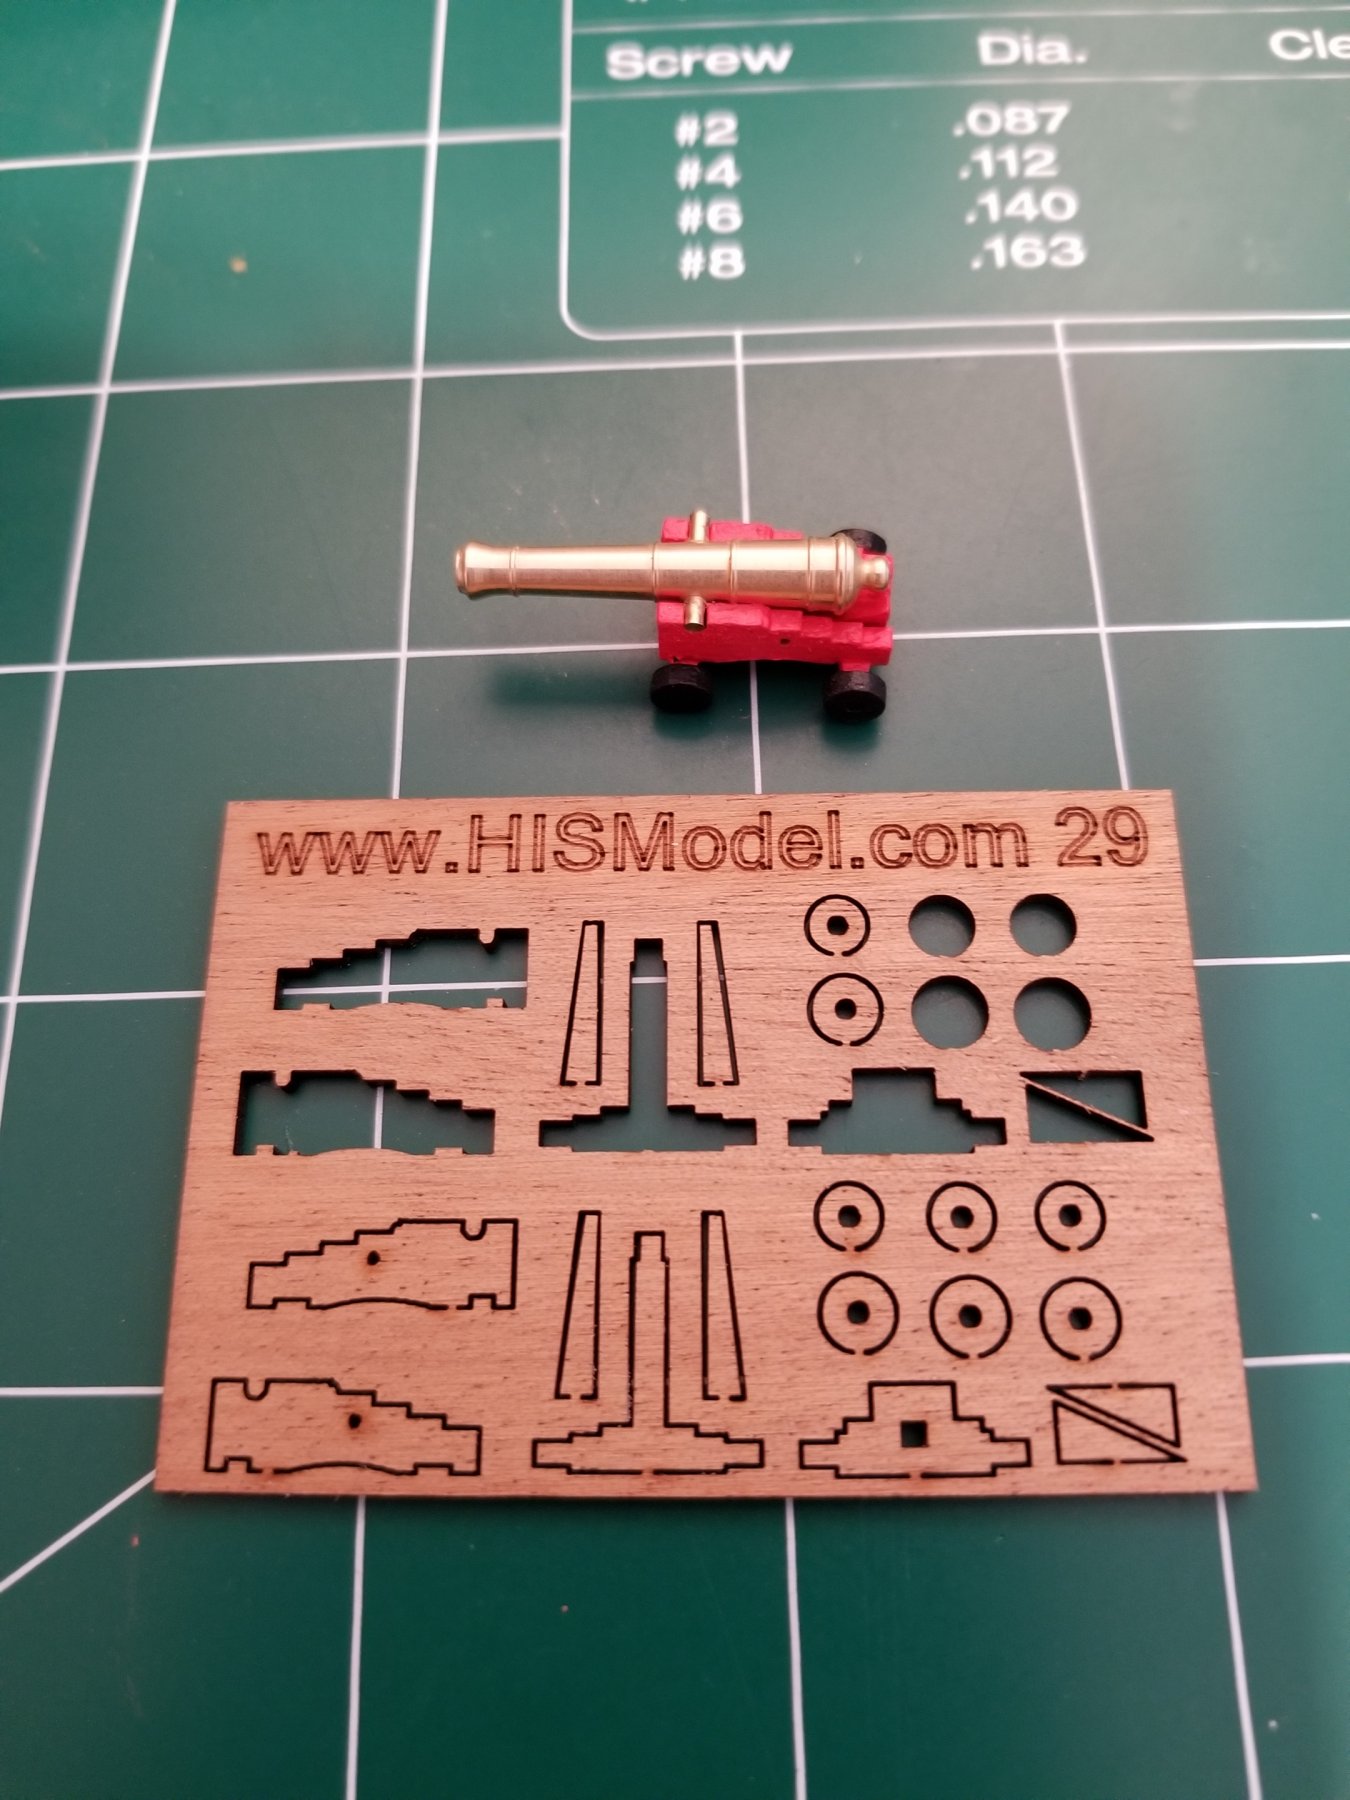
I think I will try to assemble a few long gun wooden carriages from HiSModel. I originally ordered them for the gun deck. Seeing that they would not be seen, I decided to just hold on to them for the spar deck. Then I realized only one long gun is illustrated for the spar deck and the carriages needed for the main deck guns where different. Ordered those from HiSModel as well. Radek and I are on a first name basis now Lou...lol He sent me assembly instructions but his English is a challenge at times. He mentions using a dispersive glue on the wood which I take to mean like Elmers Glue. I'm awaiting an answer on 2 wood pieces that I don't find in his assembly picture. This will be challenging as these pieces are tiny and my fingers aren't...lol

- 209 replies
-
- 4
-
-
- constitution
- revell
- (and 1 more)
-
Hey CDW, Jim and Lou, Thanks for the comments. Funny that you should mention Syren Ship Company as I just ordered one roll of light brown rigging thread for the cannons on the Spar deck. If I like it compared to what came in the box I may order more but not sure on the lengths per spool. Don't want to "short" order but also don't want to buy more than I need. Taking a little break while I wait for the wooden gun carriages to come from HiSModel in the Czech Republic. Had a real pain on the Helm Wheel in wrapping the thread around it as it is supposed to be a functional wheel. Figuring I would NEVER play with the wheel to watch the rudder move, I just glued the thread, tied a know and glued everything to the wheel hub. Replacing the Helm wheel at this point would be impossible as the thread was glued to the hub. I have used HiSmodel for the accessories as he had them categorized for the USS Constitution 1/96 scale. I would have absolutelly no way of knowing the different size blocks or rigging threads needed nor would I know the number of different blocks. well...I guess I could count them...lol
- 209 replies
-
- 3
-
-
- constitution
- revell
- (and 1 more)
-
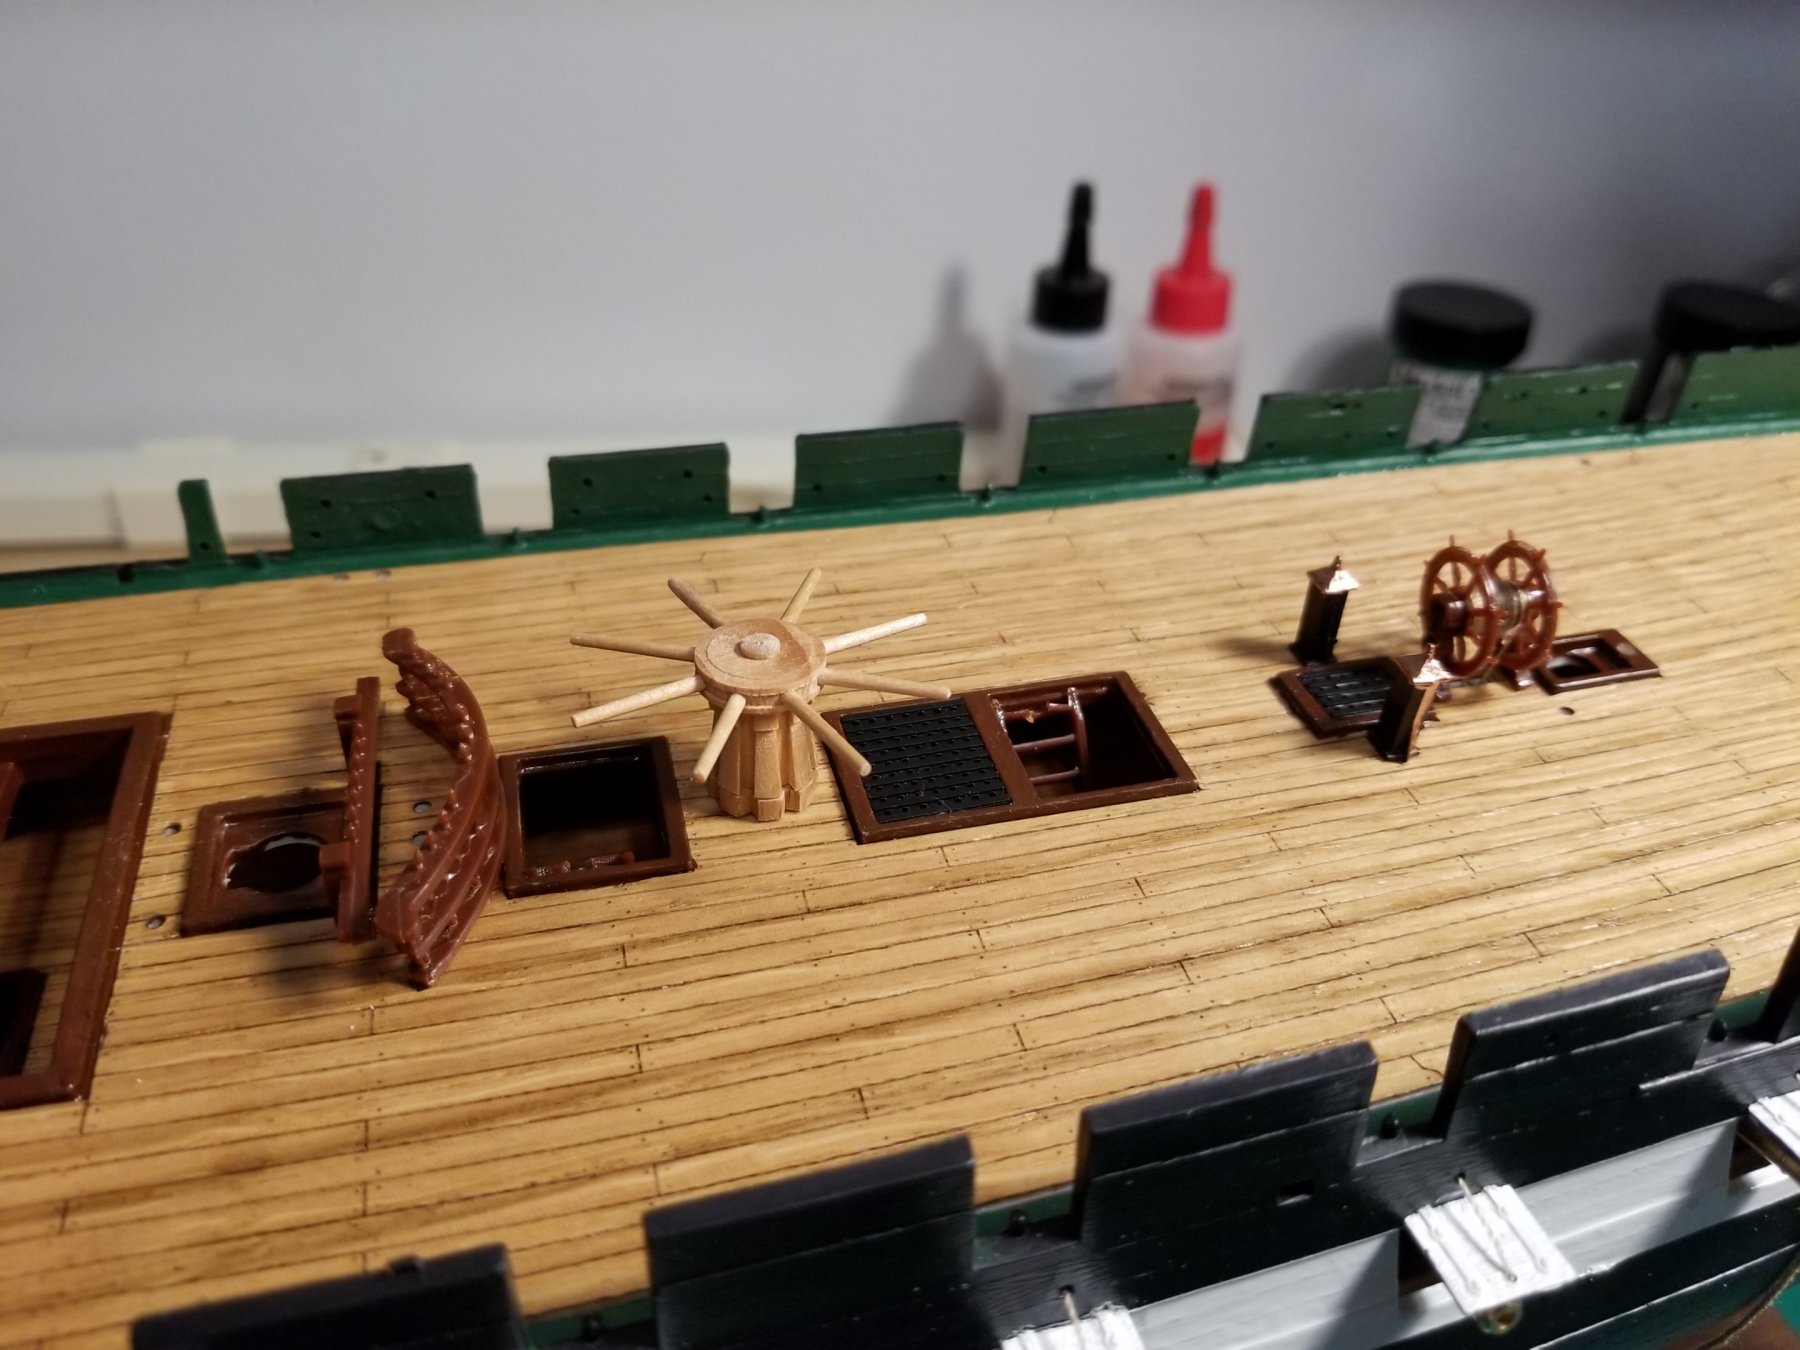
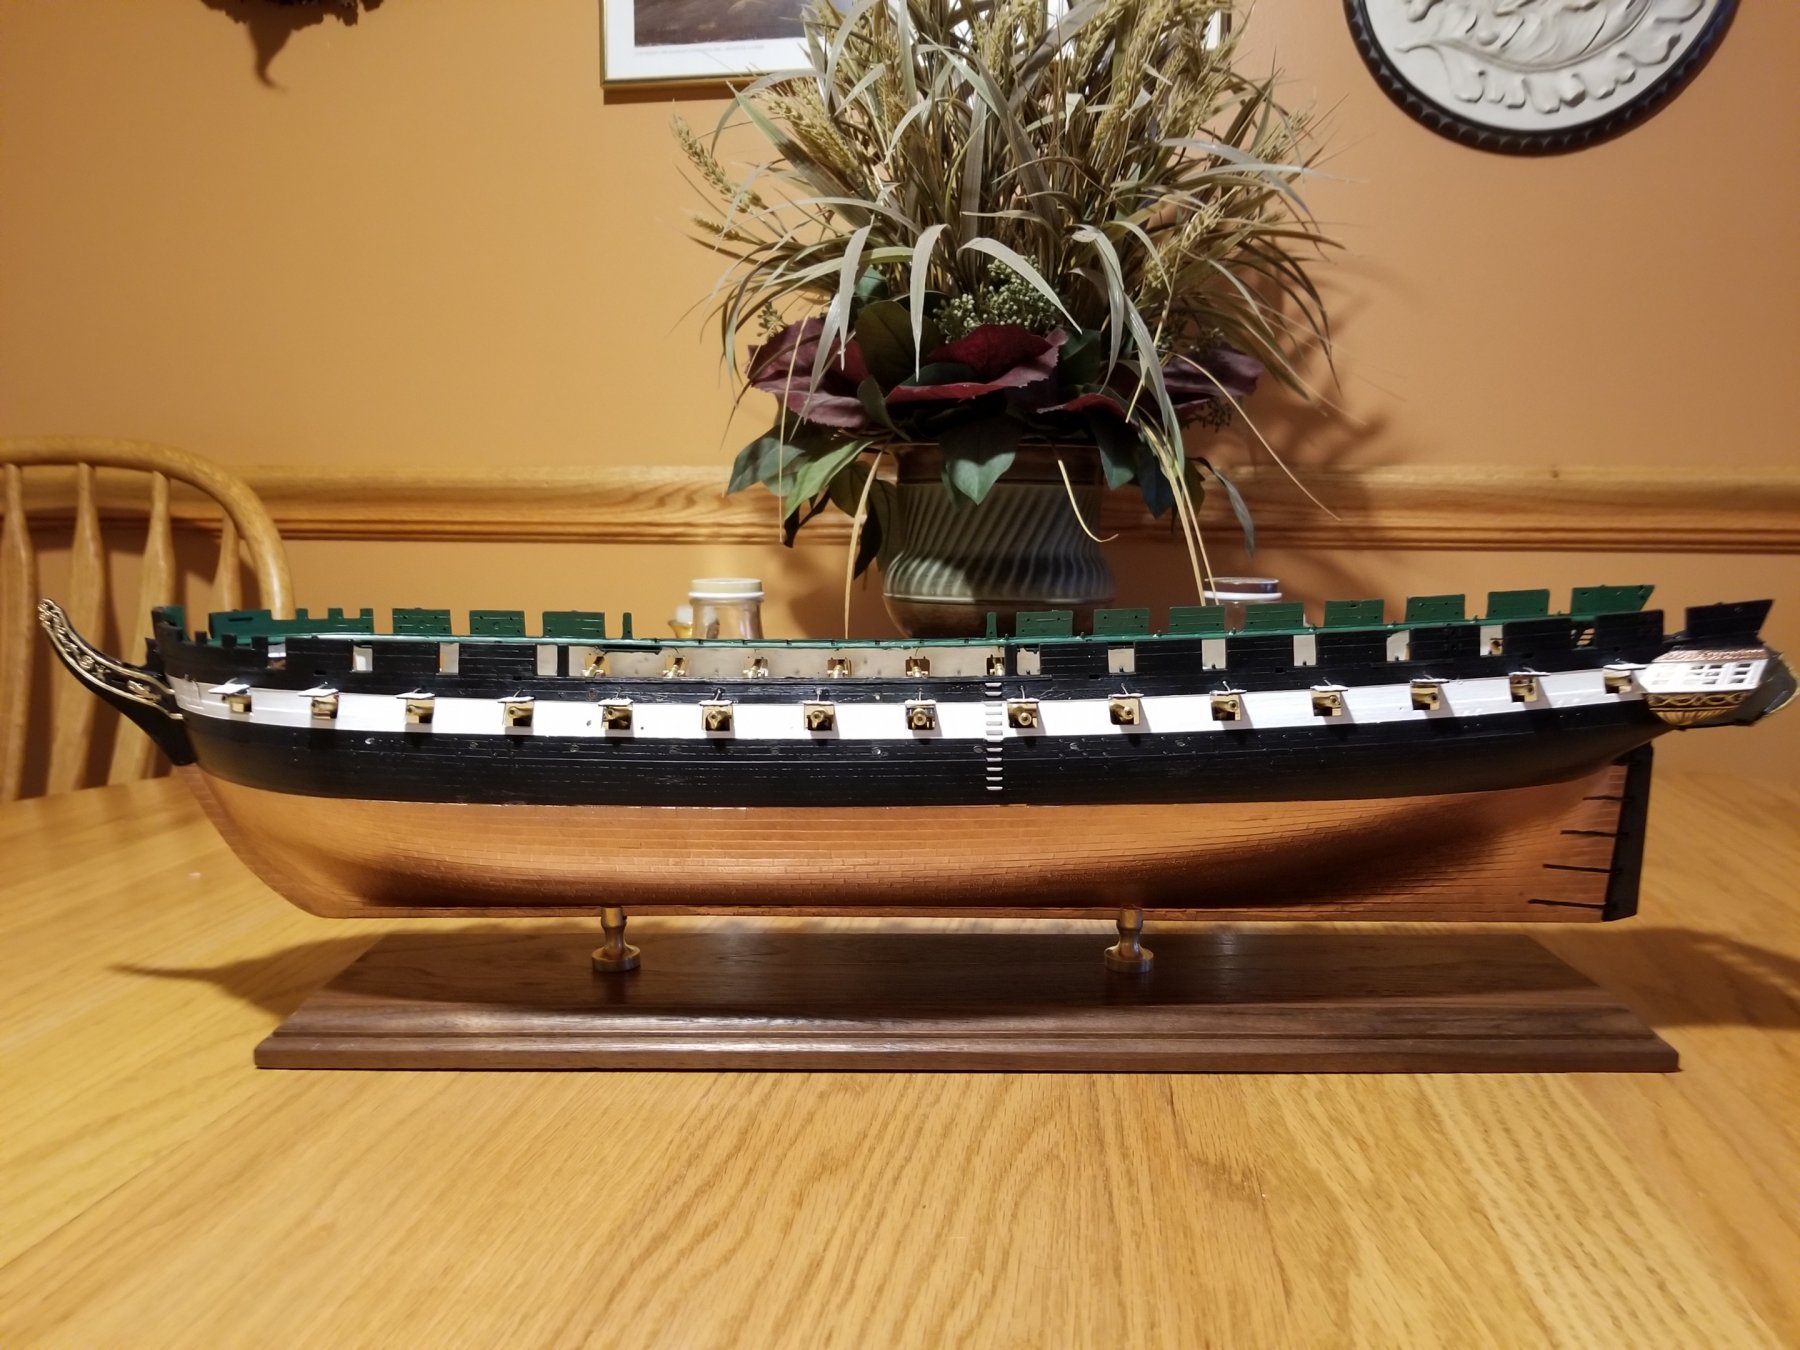
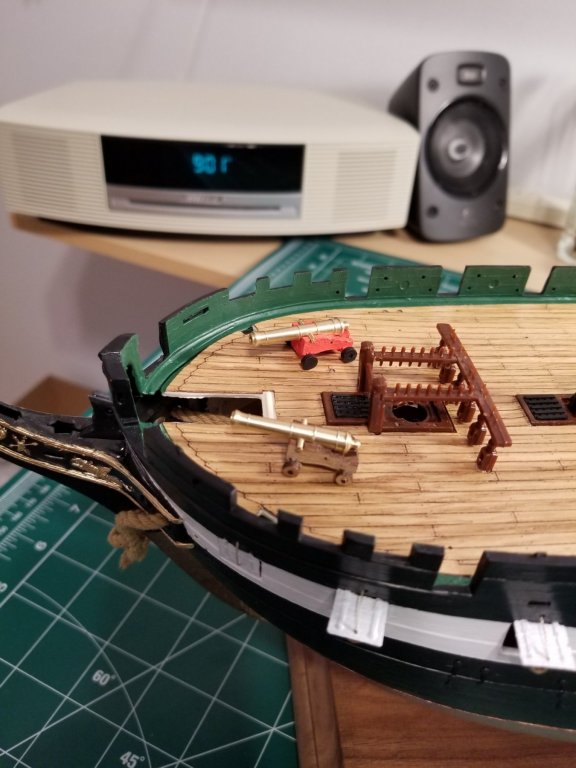
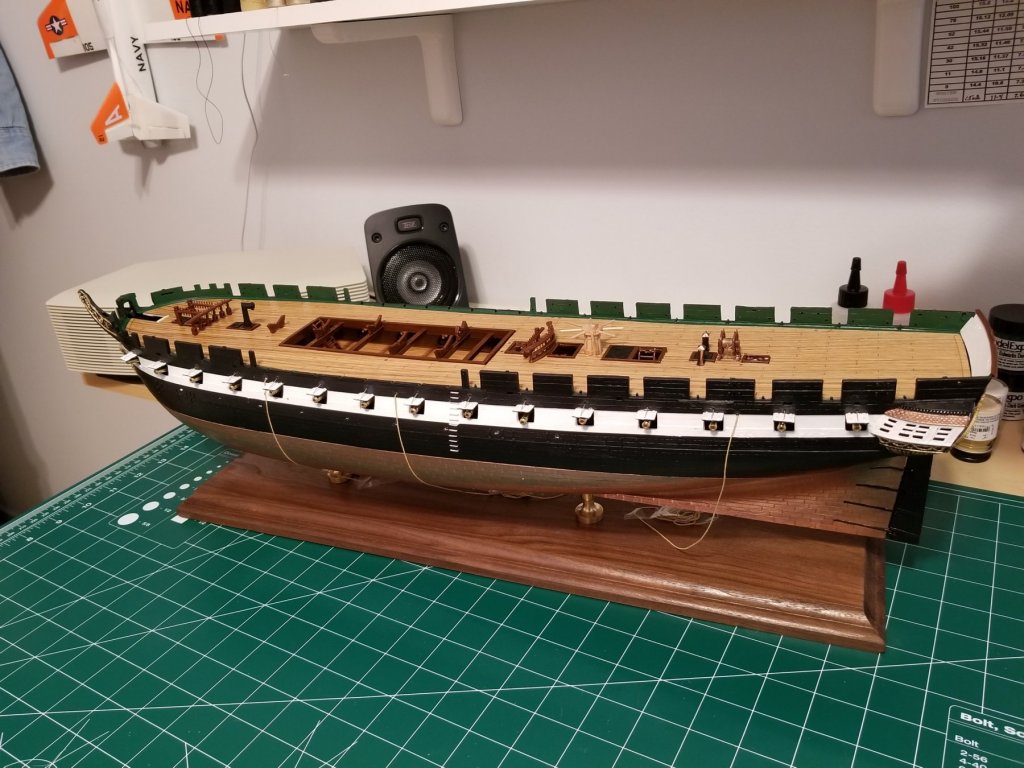
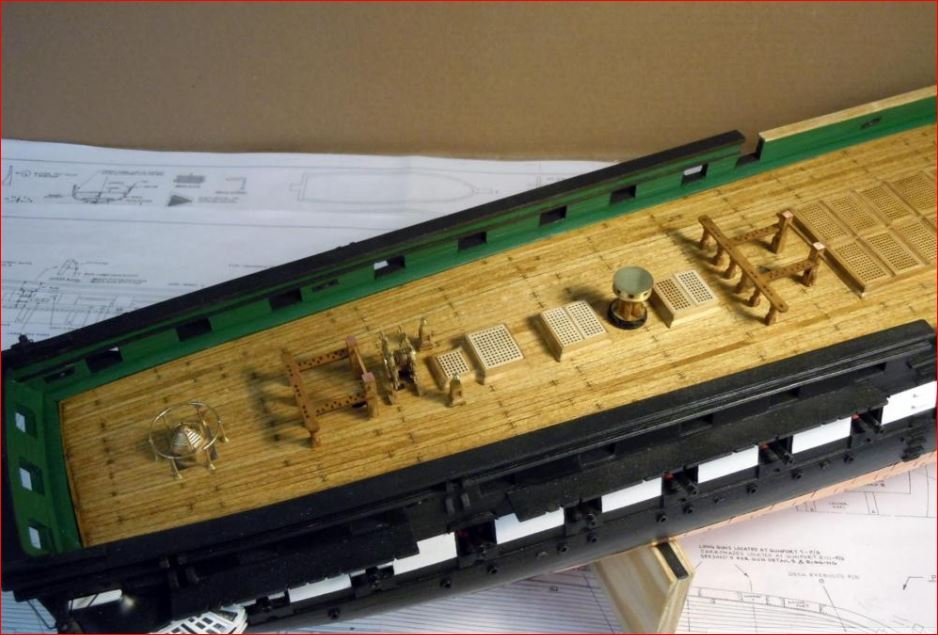
Spar deck glued and some miscellaneous parts. Hated to cover all the long guns but so it is.


- 209 replies
-
- 8
-
-
- constitution
- revell
- (and 1 more)
-
Thanks, Ozark, Read through your log and you're doing outstanding work!!! Keep it up.
- 209 replies
-
- 1
-
-
- constitution
- revell
- (and 1 more)
-
Hey OC and Javlin, Thanks... I truly appreciate the comments. Trying hard not to rush...lol Have to order some more goodies from HiSModel in the Czech Republic so I have some time for the little details I want to do...
- 209 replies
-
- 2
-
-
- constitution
- revell
- (and 1 more)
-
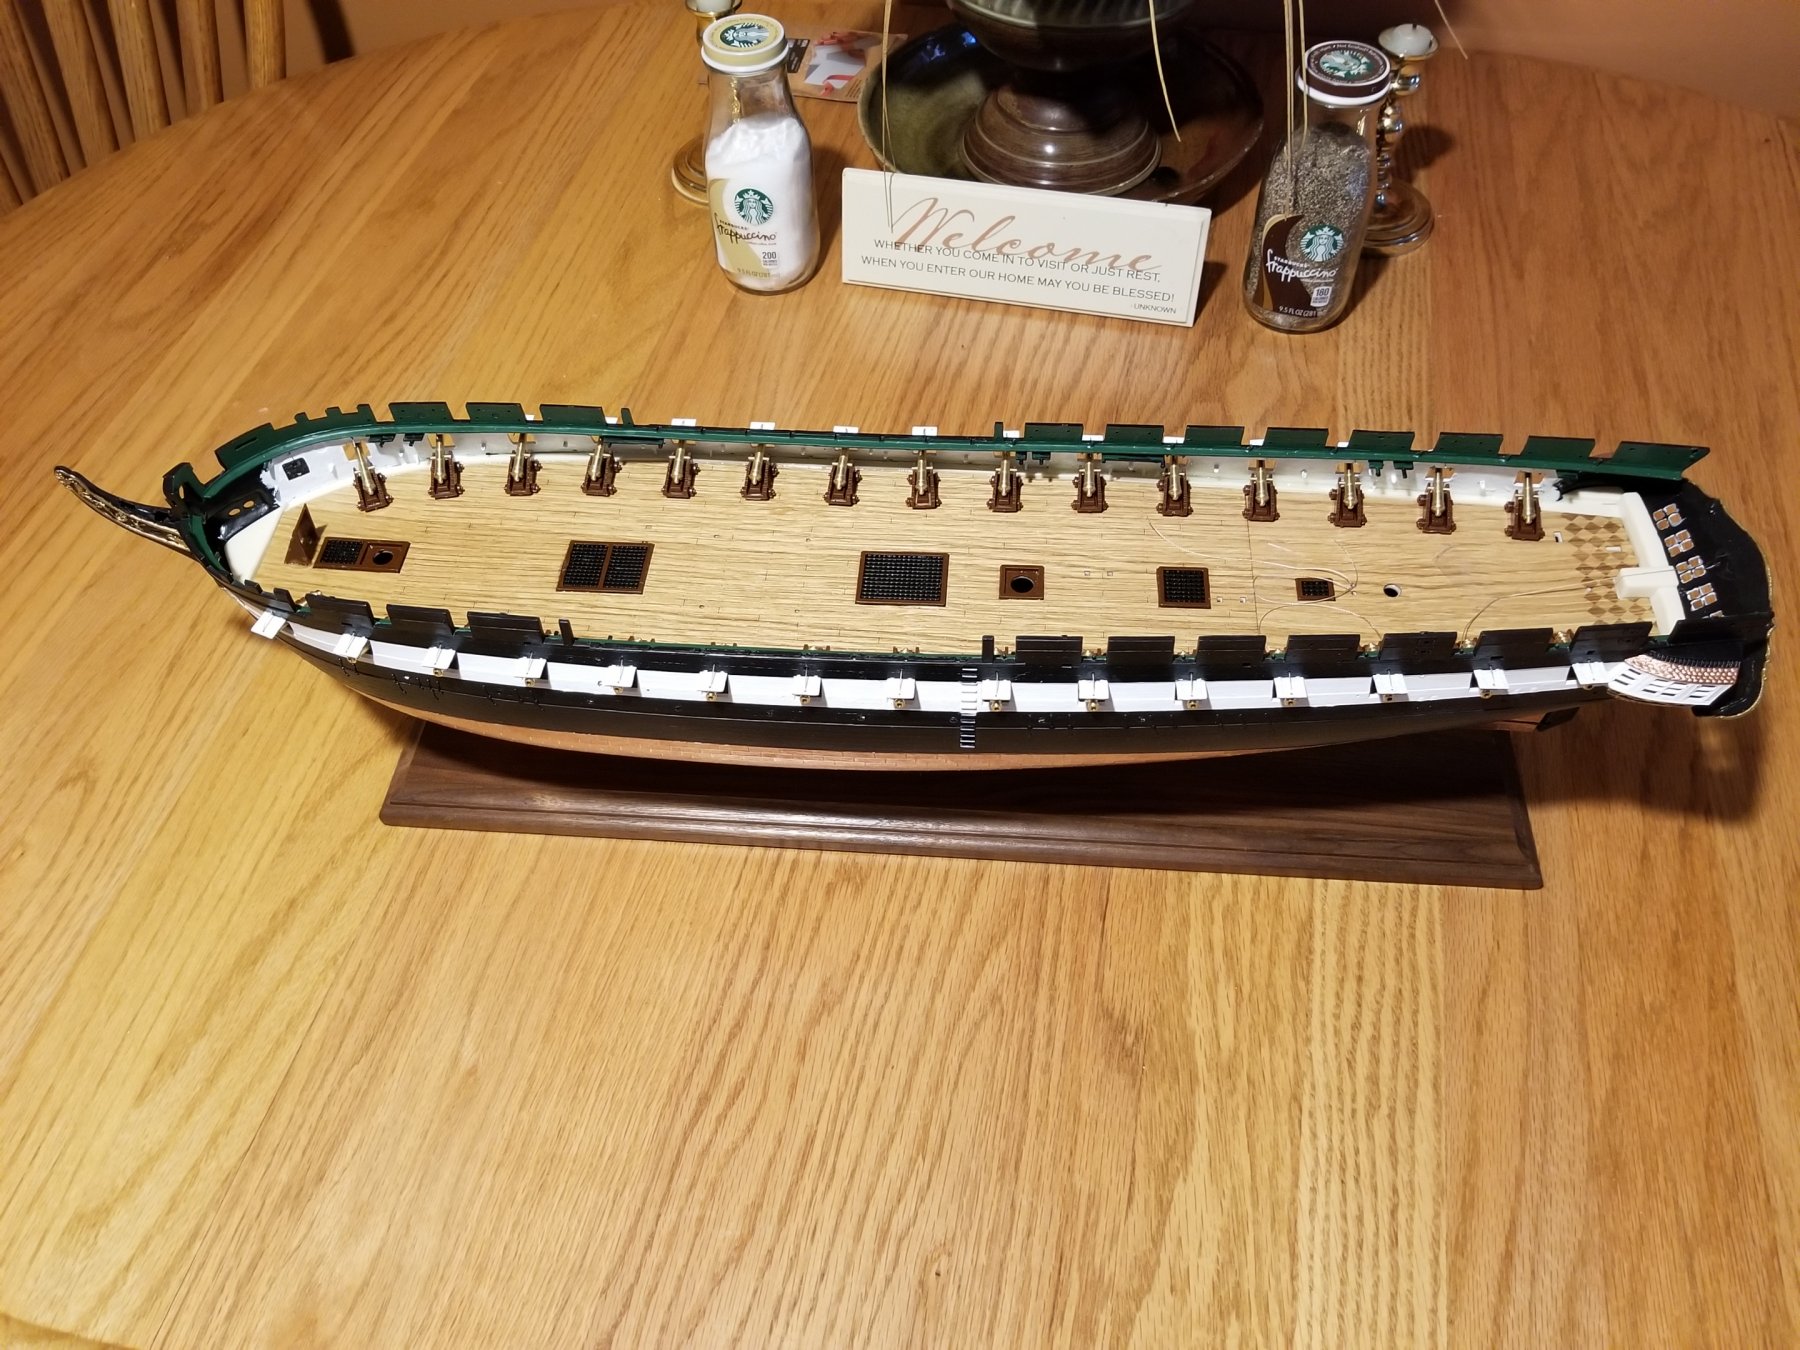
Moving along slowly but surely. Got the long guns glued to the carriages and 2 of the 4 wheels glued to the deck (60 more wheels to go...lol) Gun hatches glued with ropes attached and started painting the interior walls of the Captain's quarters. At least it's starting to look like a ship.

- 209 replies
-
- 6
-
-
- constitution
- revell
- (and 1 more)
-
Hey Jim, Thanks but it was your suggestion and I'm glad you made it. I had never seen that part painted green before. Now I can't wait to install the main deck. I figure in a couple of dazes. Got the long guns to glue down tomorrow and some touch-up painting on the sides of the gun hatches.
- 209 replies
-
- 3
-
-
- constitution
- revell
- (and 1 more)
-
I used to be in the Federal Witness Protection Program (before facial reconstruction as mandated by my attorney) and they had left quite a few laying around.."Just in Case"
- 209 replies
-
- 2
-
-
- constitution
- revell
- (and 1 more)
-
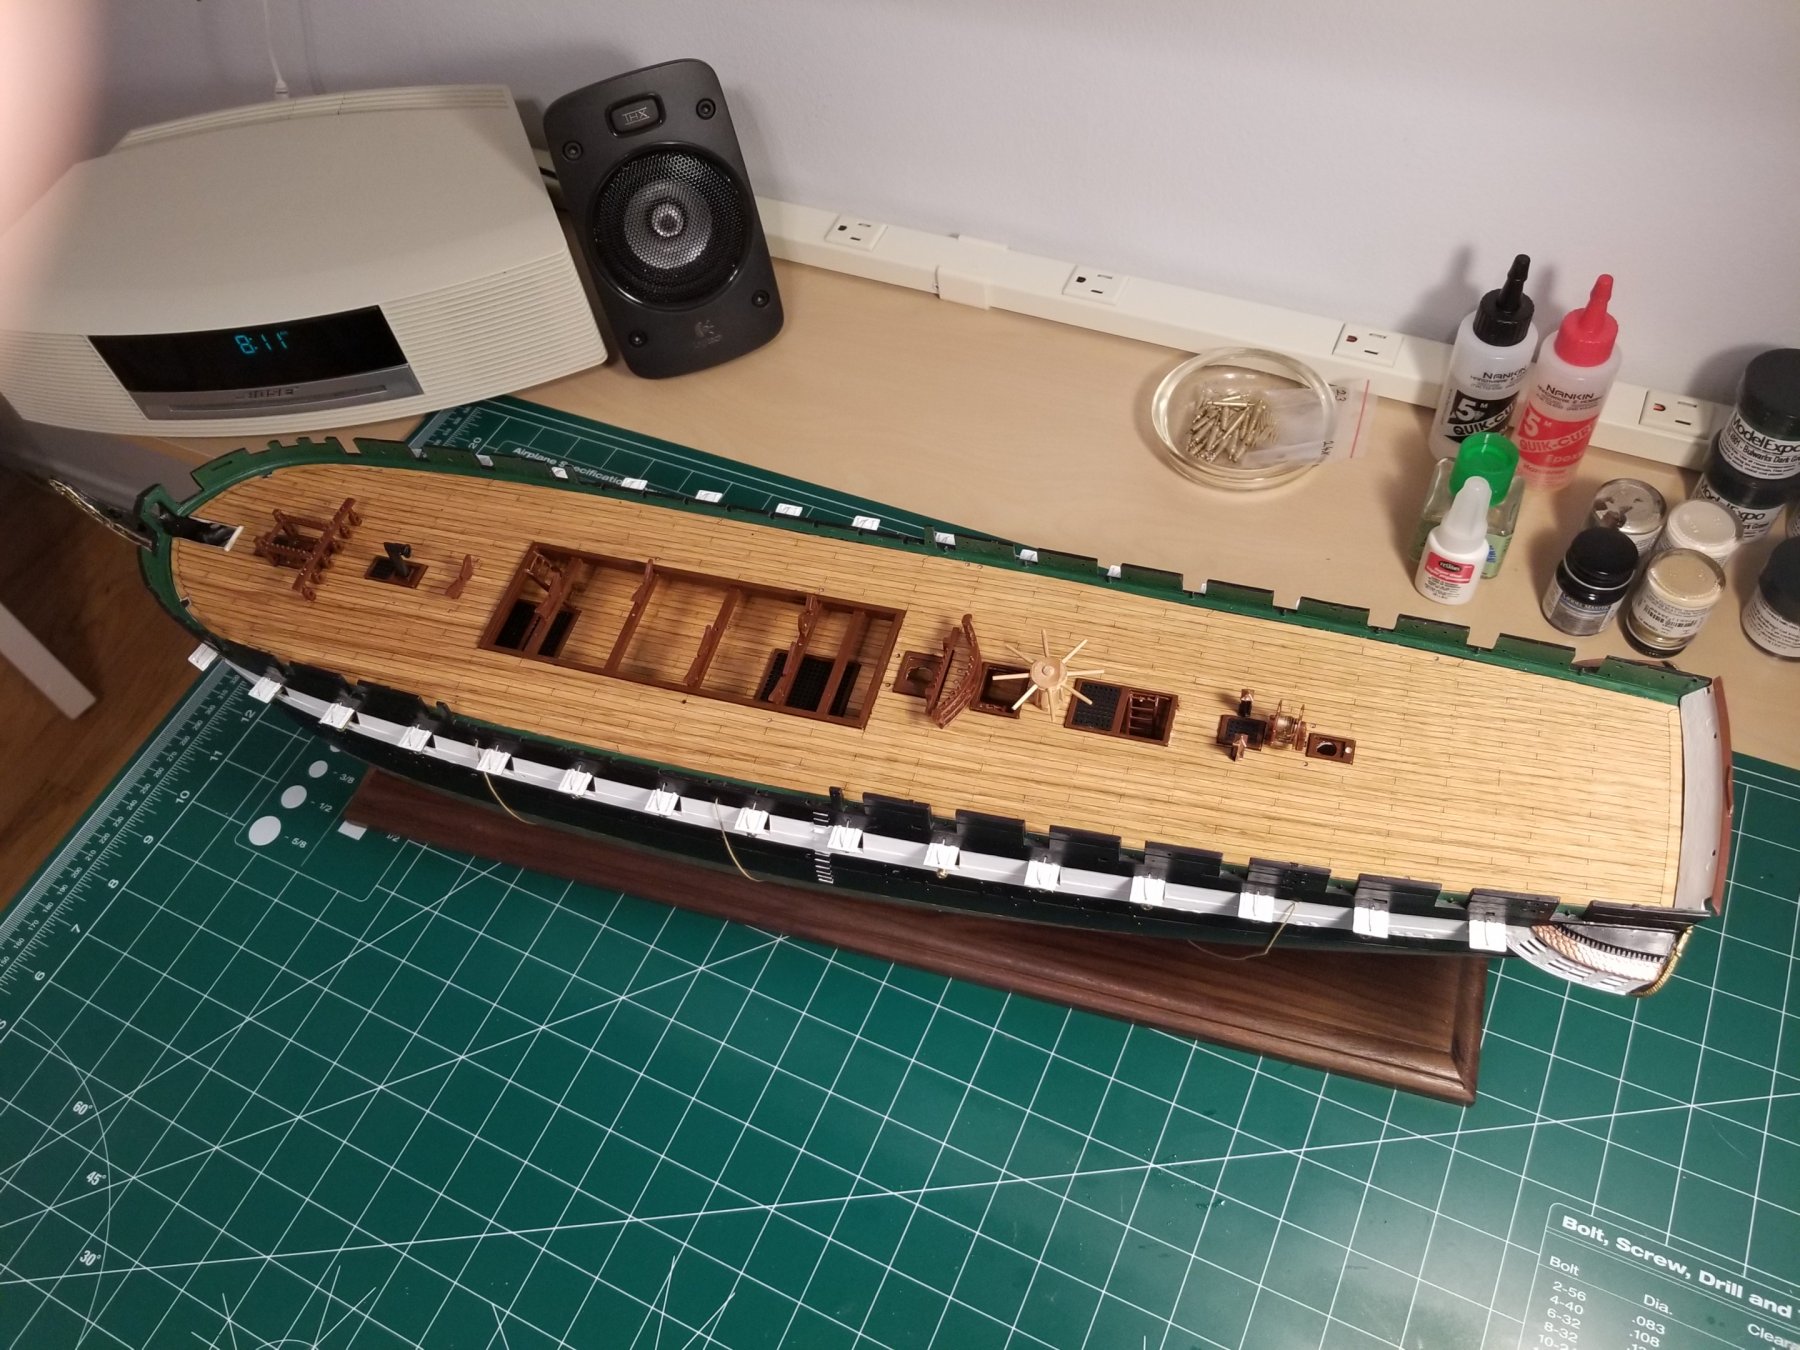
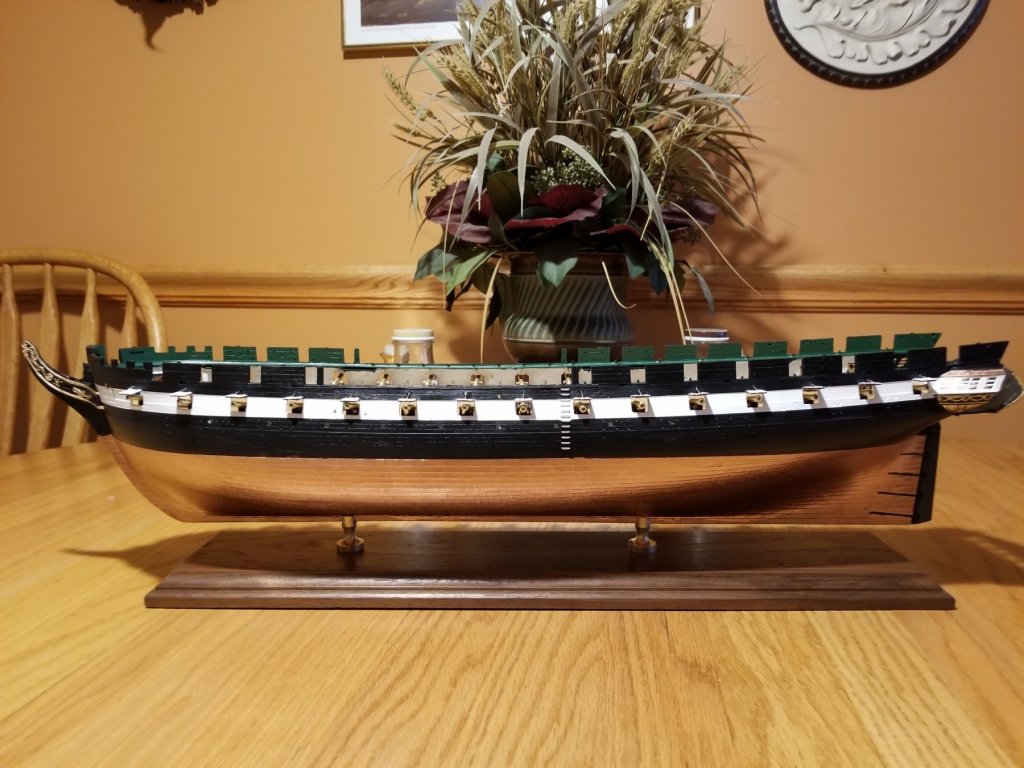
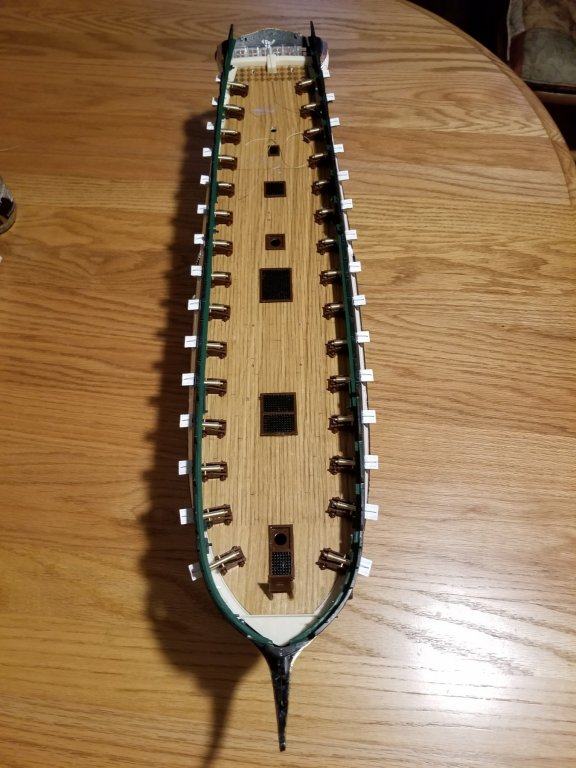
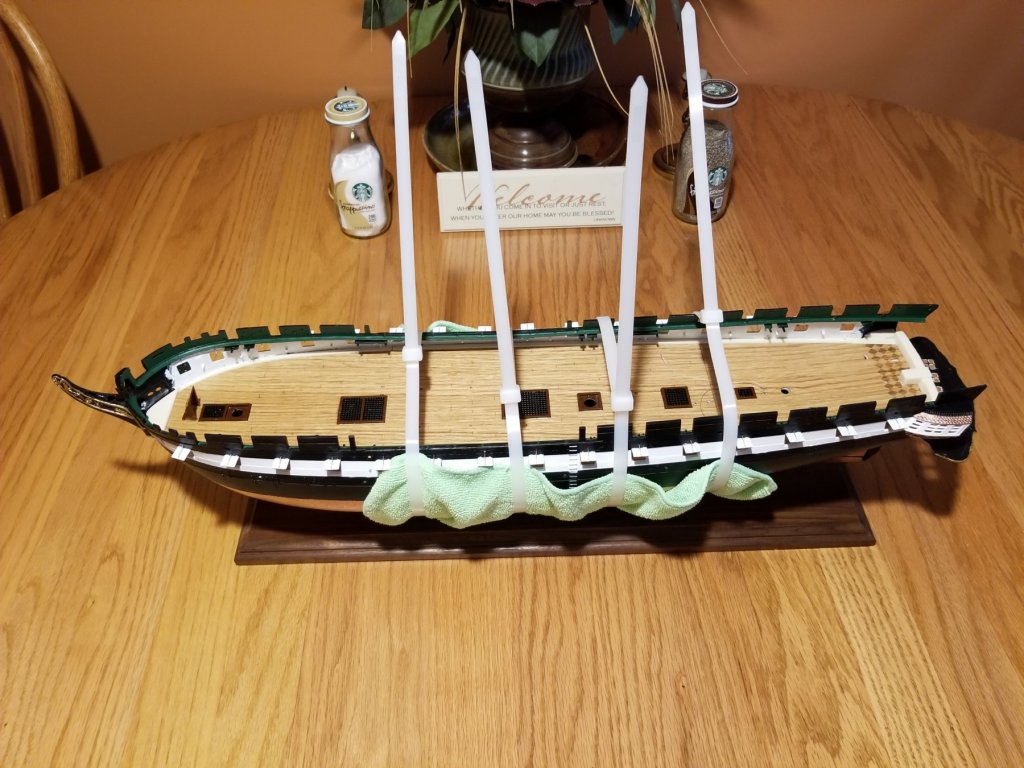
Finally did the above painting. Thanks to Jim and Lou for the suggestions. Remember, I usually paint according to the instructions and have not looked at other build logs here so the suggestions were much appreciated. Installed gun hatches and ropes to hold them open (my fingers are too bigs to try and do the tying.) I instead glued them at the entry hole in the hull and cut the excess off on the inside. Put several coats of glue where the hatch meets the hull to firm up the joints as I understand these can fall off quite easily. The original instructions say not to glue the gun deck to the hull but seeing I had to join all the deck pieces together for the Wooden veneer I decided to glue the gun deck to the hulls. Another factor to influence the gluing was there is a separation on the starboard center side of the gun deck to the hull. Used 5-minute epoxy of the 3-inch section that had the gap and Testors liquid glue on the rest. I will give it a third coat later today and let it sit overnight before I start gluing the long guns to the deck. I couldn't hold the hull to the gun deck while gluing so I used 24" cable ties as my son suggested. We'll see what happens when I cut the ties...lol
- 209 replies
-
- 7
-
-
- constitution
- revell
- (and 1 more)
-
Afternoon Lou, I use to paint for a living (after I retired from my real job) and when people wanted me to paint a room a dark color I would always advise them that darker colors made a room looks smaller and of course DARK. Soooooo.....White it is...... Concerning knowing the technical terms or names, I agree that I'm building this model for pleasure not an education. I just wanted people to know that I wasn't being disrespectful of the model craft and all that goes into it for those who have done it as a SERIOUS hobby. I am just blown away by the expertise and drive for perfection that I've seen on several of the Build Logs here. I have, in fact, order a book through Amazon (I'm an admitted Amazon shopping Whore...) called The 44-Gun Frigate USS Constitution 'Old Ironsides' (Anatomy of The Ship) I an interested in the the Connie history and will get to know some of the terms. NOW ....whether I remember them or not is another thing...he he he
- 209 replies
-
- 1
-
-
- constitution
- revell
- (and 1 more)
-
Hey Jim.... Ok Ok.......I will bow to your expertise and knowledge on how things look...lol See Lou..you have a supporter!!! I KNOW I have white.
- 209 replies
-
- 2
-
-
- constitution
- revell
- (and 1 more)
-
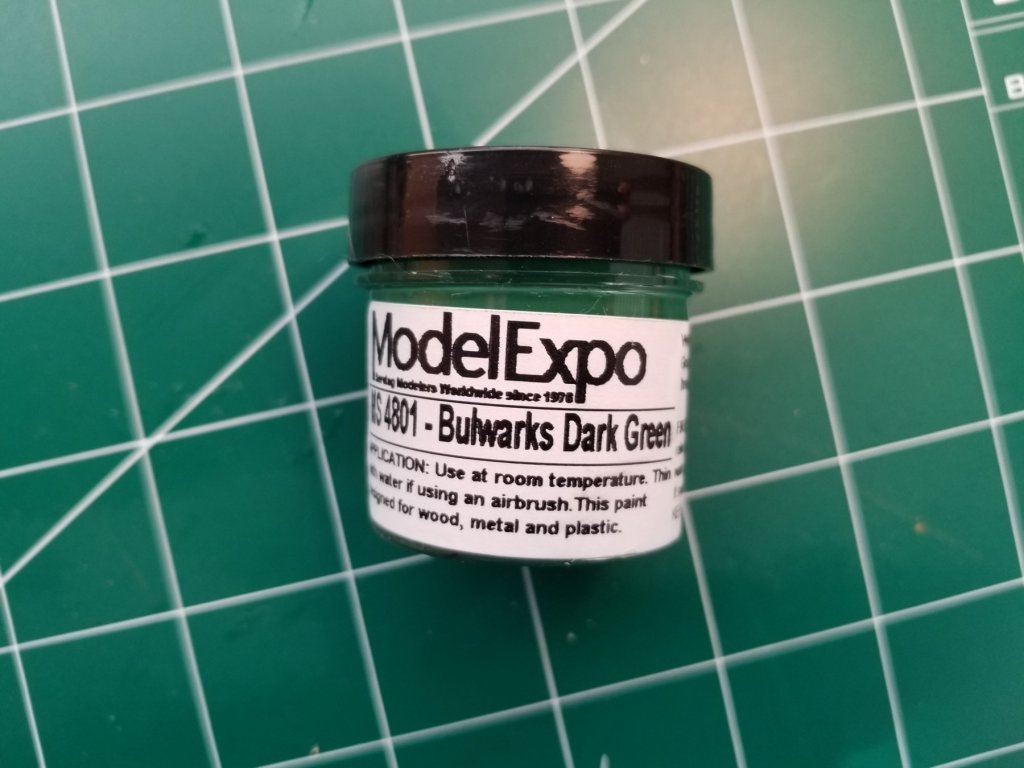
Well, Jim....I think you sold me on the green. It really grew on me overnight and I was pretty sure I had a green color in the acrylic paints I got from Model Expo (at OC's suggestion). They were supposedly geared to the Connie. Funny when I checked my acrylic paints..there was no copper for the hull but look what I found (2 bottles)!!!! As my Dear departed wife would say..."Meant to be" By the way she had that engraved inside my wedding band... And here I thought I was done with the major painting...lol...right!!!Gun Deck removed...Let the painting begin And Lou... gotta cogitate and ruminate on the white for a while...who knows as most of it will be covered by the spar/gun deck. I'll probably get these terms correct someday but don't hold your breath...just bare with me if I lapse back to laymen's terms...
- 209 replies
-
- 2
-
-
- constitution
- revell
- (and 1 more)
-
I found this on another build log (wish I would have remembered who it was but the guy is an awesome scratch builder) This is growing on me and what needs to be painted is so simple on the Revell model. Hummmmm Thanks, Jim...I see a sleepless night cogitating and ruminating about it...lol Thanks Mark for your kind words!!!
- 209 replies
-
- 5
-
-
- constitution
- revell
- (and 1 more)
-
Thanks, Jim. I'll check it out. I always like looking at other peoples work to give me ideas for my project.
- 209 replies
-
- 3
-
-
- constitution
- revell
- (and 1 more)
-
Hey Jim, The gun deck is not secured yet. Just snap-in. Not sure what you mean by inner bulkheads. There is no ceilings....just open air above the gun deck. Remember I'm not up on nautical terms and the instructions provide very few...lol
- 209 replies
-
- 3
-
-
- constitution
- revell
- (and 1 more)