


CPDDET
-
Posts
1,193 -
Joined
-
Last visited
Content Type
Profiles
Forums
Gallery
Events
Everything posted by CPDDET
-

Metallic paint questions....
CPDDET replied to CPDDET's topic in Painting, finishing and weathering products and techniques
Beautiful work there! -
Metallic paint questions....
CPDDET replied to CPDDET's topic in Painting, finishing and weathering products and techniques
Brand? -
Have several smaller parts for my current build that were made by 3D printing. Would like to paint these to look like metal (brass, bronze, chrome, aluminum etc.) I've heard that Velliajo makes a good product but is difficult to work with. Also have seen paint pens for this purpose. Asking for advice on a good product and process.
-
Welcome to the group! I had a 30 foot sloop when I was a younger. Had a great time sailing her.
-
Welcome aboard. I hope your problem finds a solution.
-
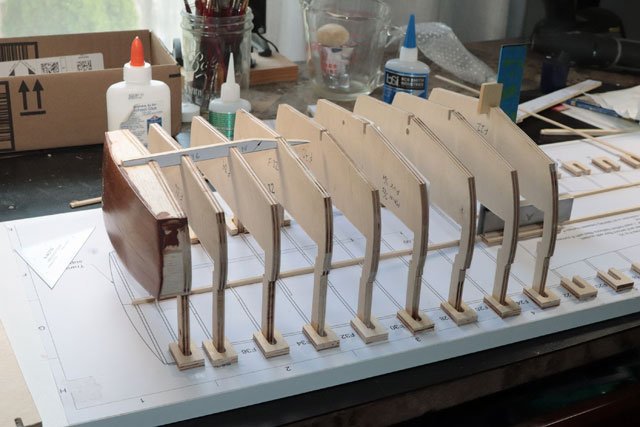
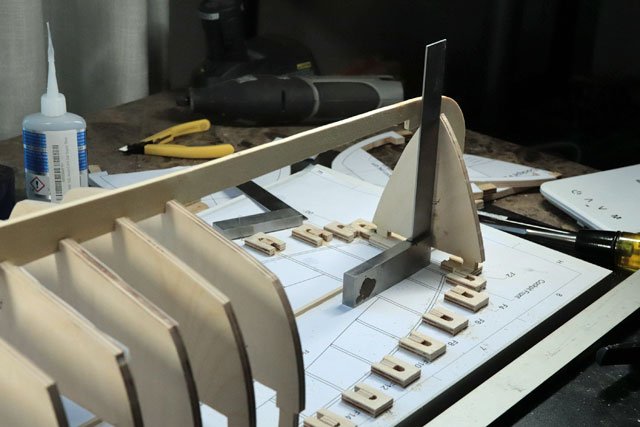
In the process of gluing in supports between each bulkhead to stiffen the entire build before fitting the keel and fairing the hull. First step is to make sure the bulkhead is as vertically straight as possible. To do this I used a large rubber band to “clamp” the square to the bulkhead. I used a large rubber band so it would gently hold the bulkhead in place but still allow adjustment. Next was to draw a line on both the port and starboard side on the bulkhead to assure the support was level across the bulkhead. I used a compass, sliding the pointed end over the top edge of the bulkhead and making a line about 1.5 inched down from the top. Then, after making sure the bulkhead was vertical, used a caliper to measure the distance between the bulkheads and locked in the measurement. Used the locked caliper to transfer the measurement to the saw (between the fence and saw blade). Cut the support, then glued and clamped it in place. The process will take a few days as I’m using Titebond Original wood glue and have to leave the clamps in place for an hour before moving to the next bulkhead. So only getting 4-5 per day completed.


-
All bulkheads are now in place. Next will be gluing in stiffener block between the bulkheads before I can start fairing the hull.

-
Looks great!
-
Looking very nice. Don't over fret on the hull planking. It's going to be painted over anyway. A thin layer of wood filler and sanding will give you a great looking hull.
-
It's always slower going than I would wish. Being retired, one would think I'd have nothing else to do. But life constantly gets in the way. In any case, I'll keep at it. Always trying to be methodical and not rushing anything. Correcting mistakes takes up time as well, and I'm dealing with some of that now.
-
Good point!
-
I purchased a basic Badger brush and compressor kit. Don't use it too often but I love the results when I do. Yes, it takes some maintenance but what dosent. Badger also makes paint that can be used straight from the bottle, no thinning required. While air brushing provides a beautiful finish it's not what you want if your seeking realistic results. Ships were painted with brushes. So depends on the look you want.
-
Welcome aboard!
-
Finally started placing the bulkheads on the build board. After placing a few at the aft end I decided to place the most forward bulkhead to make sure the keel is straight. The keel (s) as seen in these photos is not glued in place yet, its dry fit to assure proper bulkhead enlightenment and its straightness. The keel is split in order to accommodate the prop shaft.
-
Hull planking
CPDDET replied to The Bitter End's topic in Building, Framing, Planking and plating a ships hull and deck
This is a hull plank layout, as best as I know. But I'm no authority on the subject of deck planking either. Best of luck on your journey! -
Hull planking
CPDDET replied to The Bitter End's topic in Building, Framing, Planking and plating a ships hull and deck
This is an example of 4 butt shift system. There is also a 3 butt shift system.
-
Welcome aboard!
-
Welcome aboard!
-
Welcome aboard!
-
Welcome aboard!
-
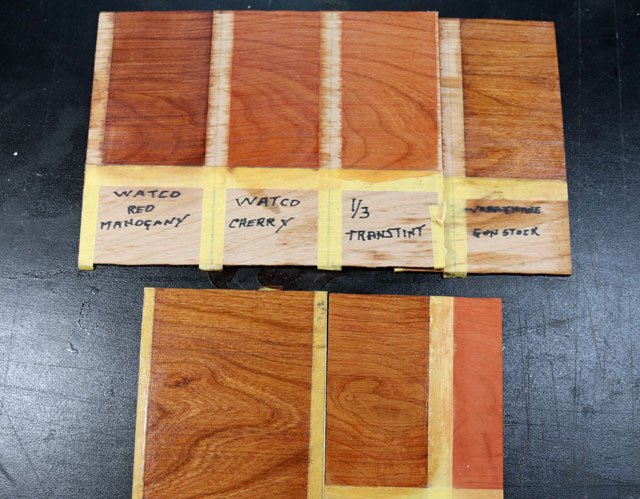
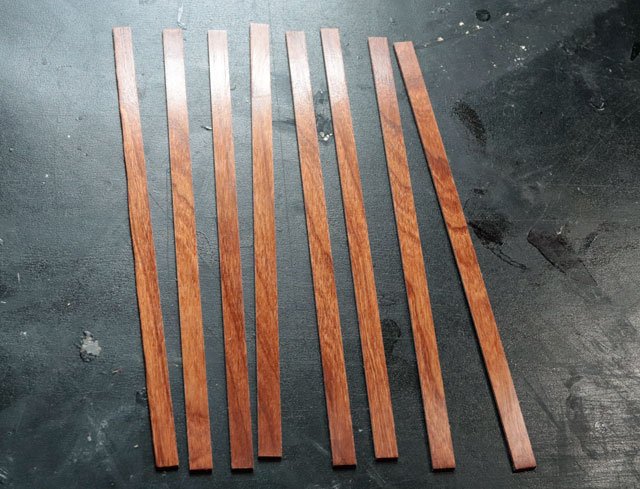
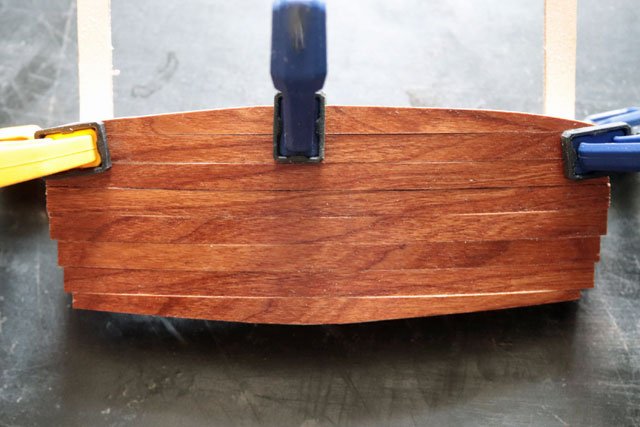
I spent a lot of time coming up with a stain color that looked something like mahogany but not too red and pleasing to my eye. Using gunstock oil stain, brown / red wood dye, mahogany Danish oil and cherry Danish oil I mixed several different combinations, testing them on the cherry wood I will be using for the model. I settled on 2 parts Varathane Gunstock oil stain to 1 part Watco cherry Danish oil. Since these are both oil based there was no issue combining them. My choice is on the lower left. Next was choosing a top coat. After some testing I decided on shellac. This was a bit of a learning curve as I’ve never used it before. But I found it easy to apply (padding) and easy to repair / fix any mistakes. I learned that Zinsser Bulls Eye shellac in the yellow can is waxed vs Zinsser Seal Coat, also shellac, which is de-waxed. Also the yellow can is a 3# cut and the seal coat is a 2# cut. In the future I’ll be using the thinner, de-waxed cut which dries a bit clearer and goes on a bit easier than waxed 3# cut Shellac. Since canned shellac can go off in 6 months or so, I may start mixing my own in small batches. It’s easy enough to do with de-waxed shellac flakes and denatured alcohol. Anyway, I applied 4 coats of shellac and finished with a coat of Minwax Paste Finishing Wax. Then I cut the finished stock into strips (which proved to be a mistake). And glued them onto the transom. My mistake was finishing the stock before cutting and gluing. While the results were OK, the individual planks weren’t as level as I liked. Some were just a hair higher than the others and I couldn’t let that slide. Luckily it was very easy to remove the paste wax with a bit of mineral spirits and 0000 steel wool and the shellac was easy to remove with denatured alcohol and the same grade steel wool. Neither of these bothered the Titebond Original glue which is solvent resistant. I sanded the entire transom and re-stained. This process took less than an hour, not counting drying time after removing the shellac. Now just to re-apply the finish. Next up I hope to get the bulkheads on the build board. But that will have to wait a bit as I’m headed up to Minnesota for a week of walleye fishing.
-
The zen of shipbuilding
-
Planking disaster
CPDDET replied to sgrez's topic in Building, Framing, Planking and plating a ships hull and deck
Mine too! -
Planking disaster
CPDDET replied to sgrez's topic in Building, Framing, Planking and plating a ships hull and deck
On my first build I had to rip out about a 3rd of the hull planks and redo them. Tough lesson for me, but it wasn't all that difficult to recover. Have faith, carry on.
