CPDDET
-
Posts
1,195 -
Joined
-
Last visited
Content Type
Profiles
Forums
Gallery
Events
Everything posted by CPDDET
-
 OK. My iron, on a medium setting, heats to about 330 degrees. Water turns to steam at 212 so the iron is plenty hot to do that. I can apply the iron to a dry piece of basswood for more than 30 seconds, keeping it in one place, and see no signs of scorching.
 -
Remember, it's the heat thats used to bend wood, not the water. Steam is used because it can heat wood without burning it. When you touch a hot iron to moist wood it creates steam which heats the wood and allows it to bend. Some people soak planks but I find that causes the wood to swell too much, at least for me. Try a few different methods and see what works best for you. I'll take a temp reading of my iron and let you know what that is. I know it dosent burn the wood and I can hear the hiss of steam when I use it.
-
Iron Stropped Blocks - Kate Cory Whaling Brig
CPDDET replied to Capt. Kelso's topic in Masting, rigging and sails
For me, it's a struggle to keep a balance on how far to go with authenticity. I can tend to overdo. -
You can either use spiling, as real ships were done, or plank bending. I tend to use a combination of both. The NRG Half Hull kit does a decent job of teaching spiling. When I do bend, I just "paint" the plank with a thin layer of water and then apply heat. Many times I do this on the model. For example, I will use spiling instead of edge bending to shape the plank. Then glue one end of the plank in place, brush on a bit of water and apply heat while bending the other end of the plank in place. This process is used almost exclusively at the bow and stern. Just use spiling for the planks in-between. Be advised, spiling has a definite learning curve.
-
Welcome aboard! Seems you're a skilled modeler and should have few problems building wooden ship models.
-
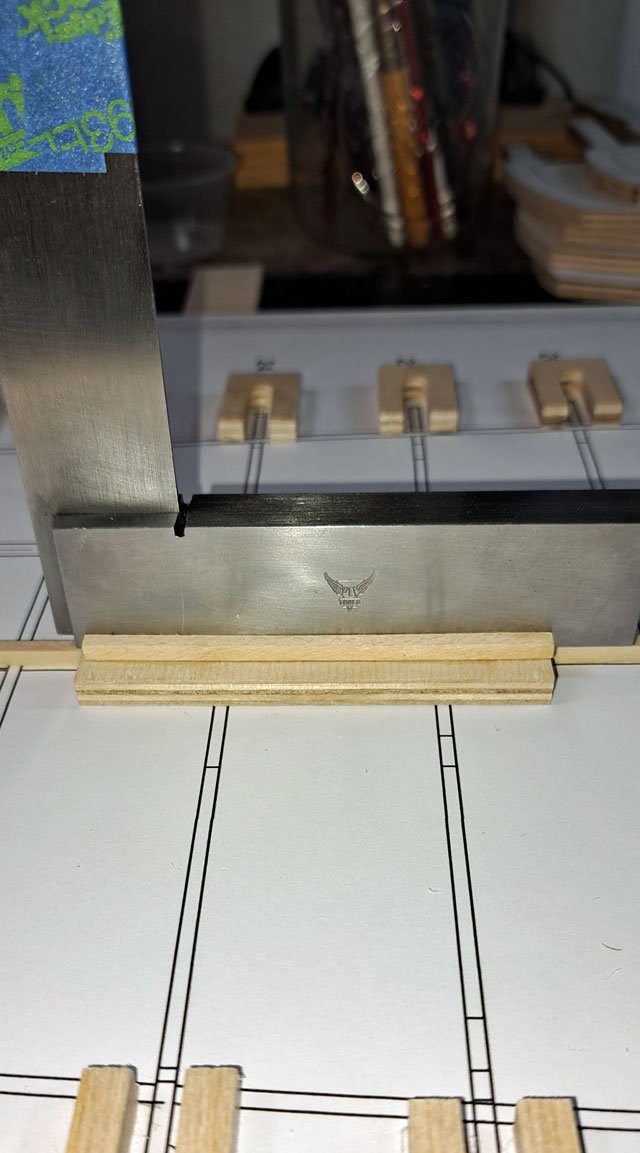
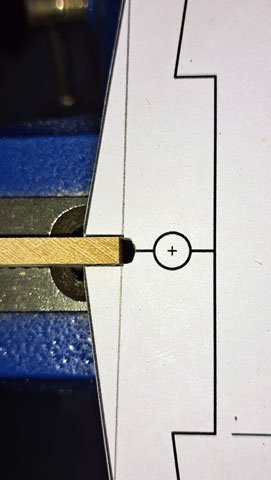
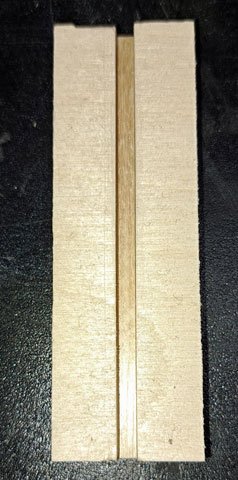
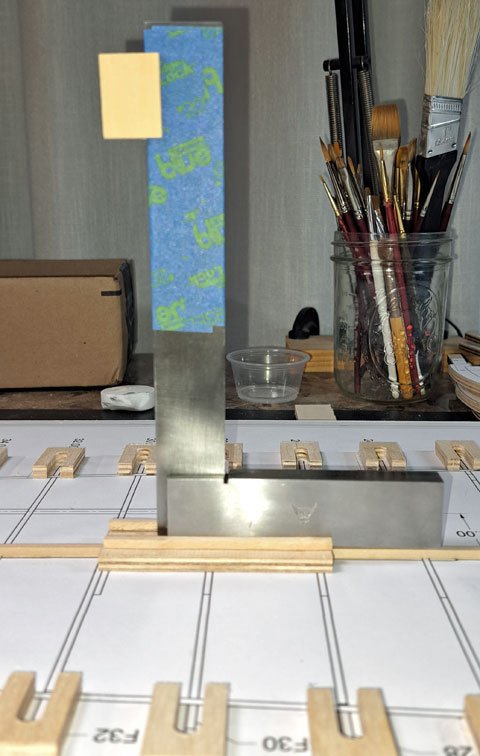
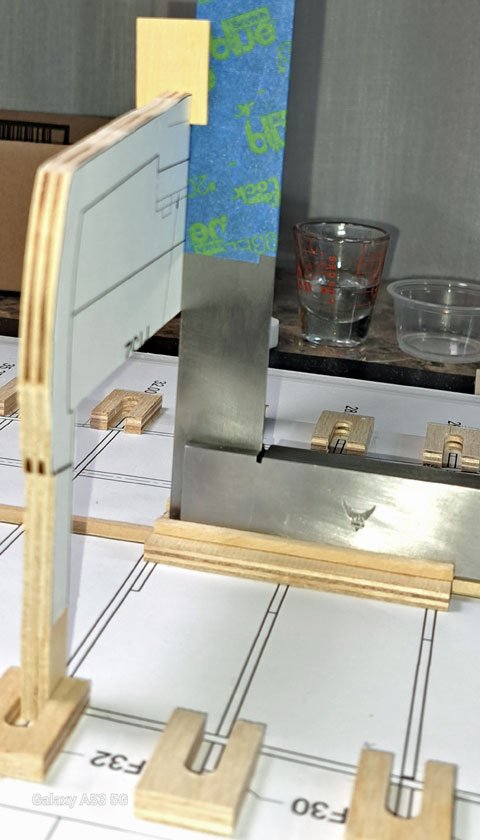
All of the bulkhead supports are now in place. Next up was prepping the bulkheads. I want to tack the bulkheads in place once they are correctly aligned. So I needed to remove some of the paper plans that I glued to them to get wood to wood contact. My thought is to place a small drop of CA to tack them in place and when the time comes I can use acetone to break down the glue or just cut them off, which will have to be done eventually anyway. I had used Elmer’s spray adhesive to stick the plans to the bulkheads and found acetone easily removed the paper and glue. Then I locked a piece of the keel material in a vice and checked to make sure the notch in each bulkhead would accept it. They all needed a slight sanding to widen the slot. After some thought I came up with an idea that would make it easy to properly align the bulkhead notch over the centerline as well to make sure the bulkheads were perfectly vertical fore to aft. I took a piece of scrap wood and cut a 1/8th grove down the center. This will allow the piece of wood to ride on the 1/8th strip of wood that I glued on the centerline to align the bulkhead supports. Kind of like a sled. On the top side I glued 2 pieces of wood to hold the square centered. Lastly I took a small piece of the wood that I will be using for the keel and cut a grove that would ride on the upright portion of the square. The thickness of the upright was just under 1/16th (the size of the groove I cut) so I wrapped one layer of painters tape around the upright to make the fit just snug enough. Now the wood piece can be slid down into the bulkhead notch. Now I can easily get the bulkheads aligned correctly. I’m now contemplating if I should fair the bulkheads before mounting them on the build board. Matthews, the creator of the plans, has dotted lines on the plans showing the amount of fairing needed. I'm not sure of the angle of the fairing so it might mean some trial and error. Of course I could mount the bulkheads first and then fair them as is usually done. Ill have to think about it. Probably won’t get any more done till next weekend as the coming week is going to be busy for me.

-
Welcome aboard! What type of boats have you worked on at the shipyard? Your knowledge and experience may be of big help to us all.
-
Welcome aboard. I really doubt there is any problem posting in 2 groups. I do a build log here and also on a Facebook group.
-
https://michiganmaritimemuseum.org/explore/our-fleet/uscg-36460/
-
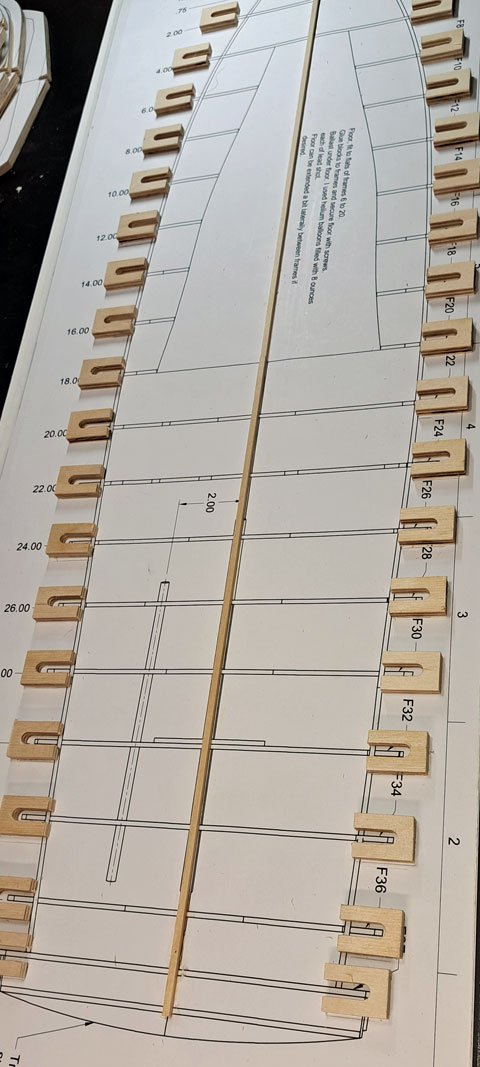
Things are moving along. Picked up a melamine coated shelf (12"X36") and cut what I needed from the build plans. I used 4 rows of double stick tape to mount the build plan to the board. Not the best way to do this as the areas between the tape still lift a bit. It isn't much but spraying the board with an adhesive would have been better. But going forward with what I have. I decided to glue a 1/8 strip of wood to the centerline to assist in getting the bulkhead supports square to the keel. All the bulkheads are cut and all the bulkhead supports have been made so I began gluing the supports to the plan board. This is a large model, about 30 inches long, and with my small work space I decided to dry fit and align the supports one bulkhead at a time. When all looks right I mark the location of both the port and starboard supports but only glue in the port side. Then I can turn the board around and glue in the starboard supports without trying to reach over and do the side furthest away from me. About halfway done with the port side. The slotting in the supports allows me to "slide" the bulkhead back and forth across the beam and will allow me, in the next step, to properly align the bulkhead keel notch to the centerline on the plan.

-
Welcome! Nice build!
-
Welcome! Great choice!
-
It was my first build. Mistakes were made so tred lightly. LOL
-
Wishing you the best on your build journey. I'll be following.
-
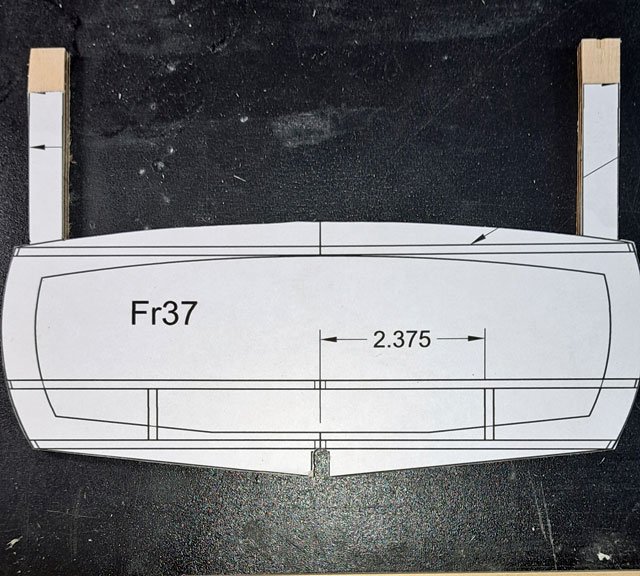
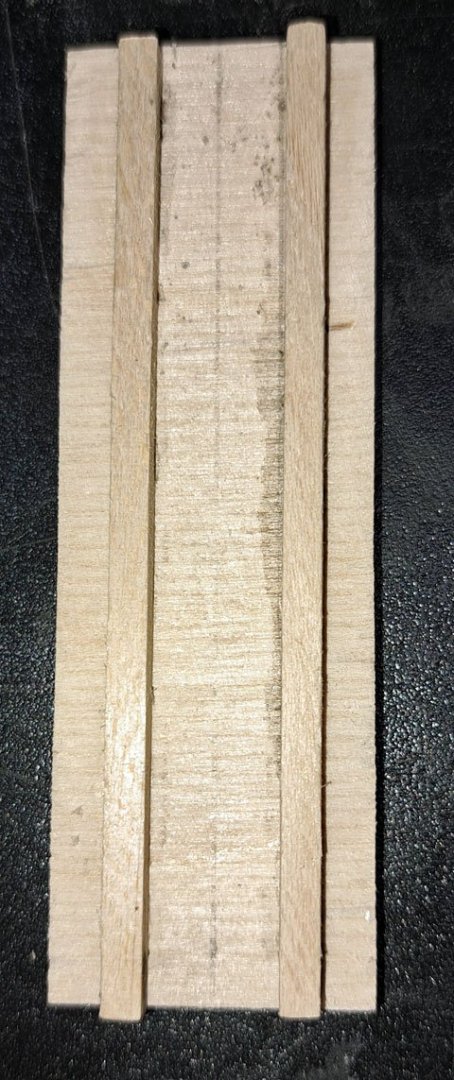
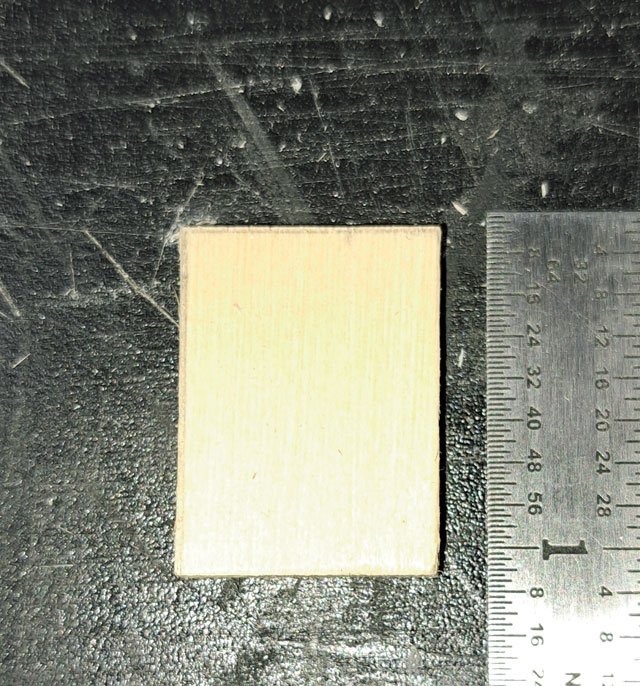
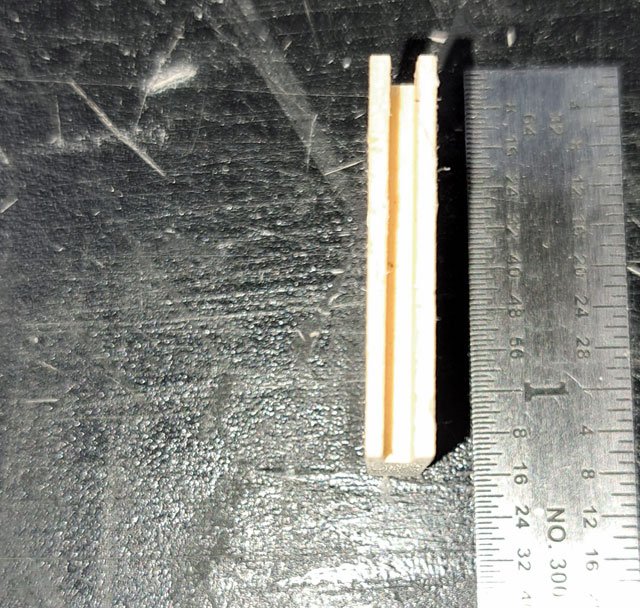
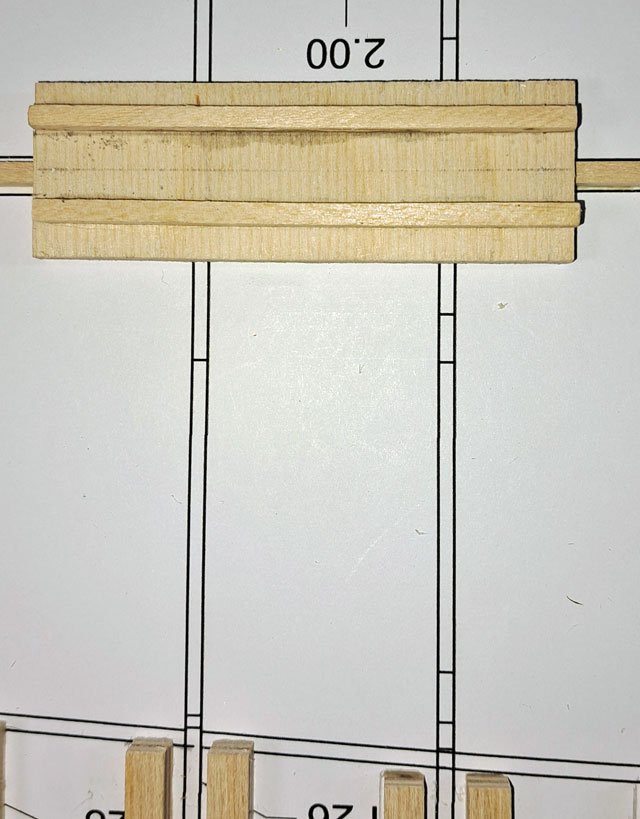
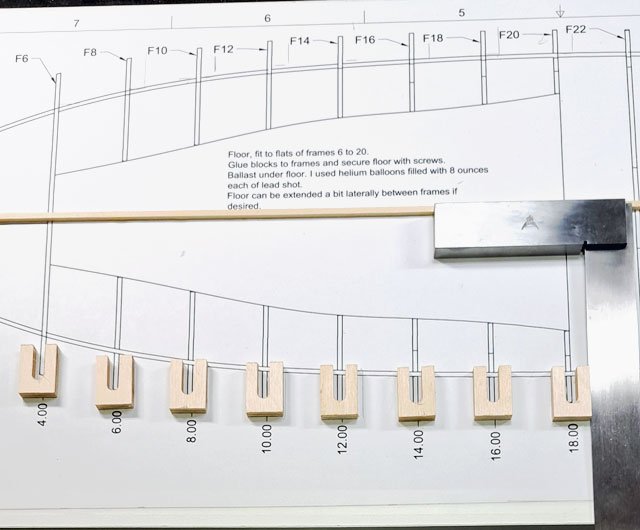
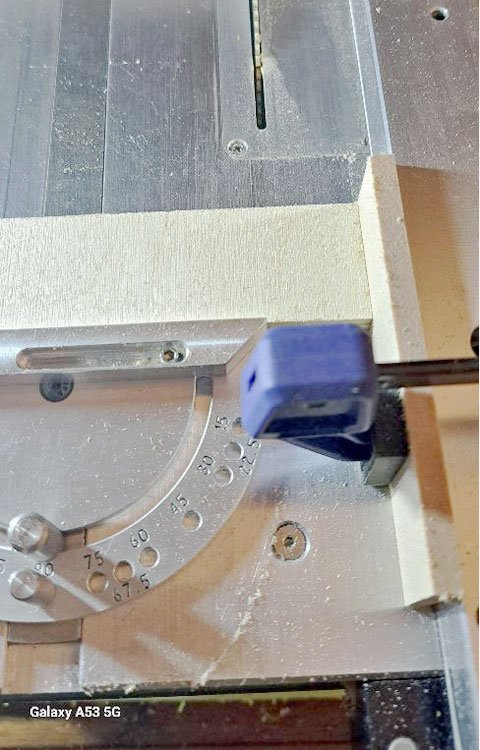
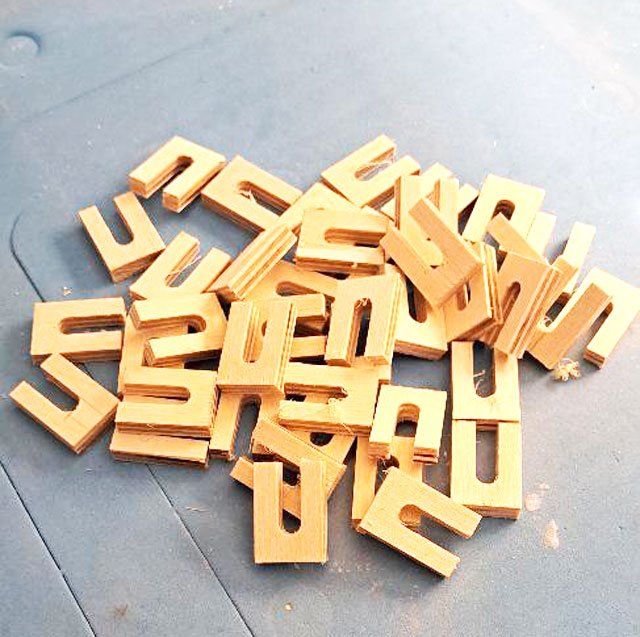
So I decided to cut the pieces and mill the 1/4 inch groove into each piece. Please excuse the color cast in the photos, incandescent light source and I forgot to use my flash. I first set up my saw, clamping a piece of wood to the fence and using the miter gauge to guide the piece through the blade. This way I could quickly cut one piece after another without any further measuring or adjusting. Instead of making some kind of jig I just used the vice on the mill to hold the piece of wood I cut on the saw. Once the vice was aligned properly with the mill bit and I put a stop to keep the length of the cut the same for each piece, it went fairly quickly. While I needed 38 pieces, I decide to make a few extras. So 42 in all. Here is a pic showing how the pieces will be used to hold the bulkheads. It will be a few days before I can get back to this. Next will be the build board. Dave


-
Welcome aboard! You will find many build logs for Bluenose on this site which will be a big help for you.
-
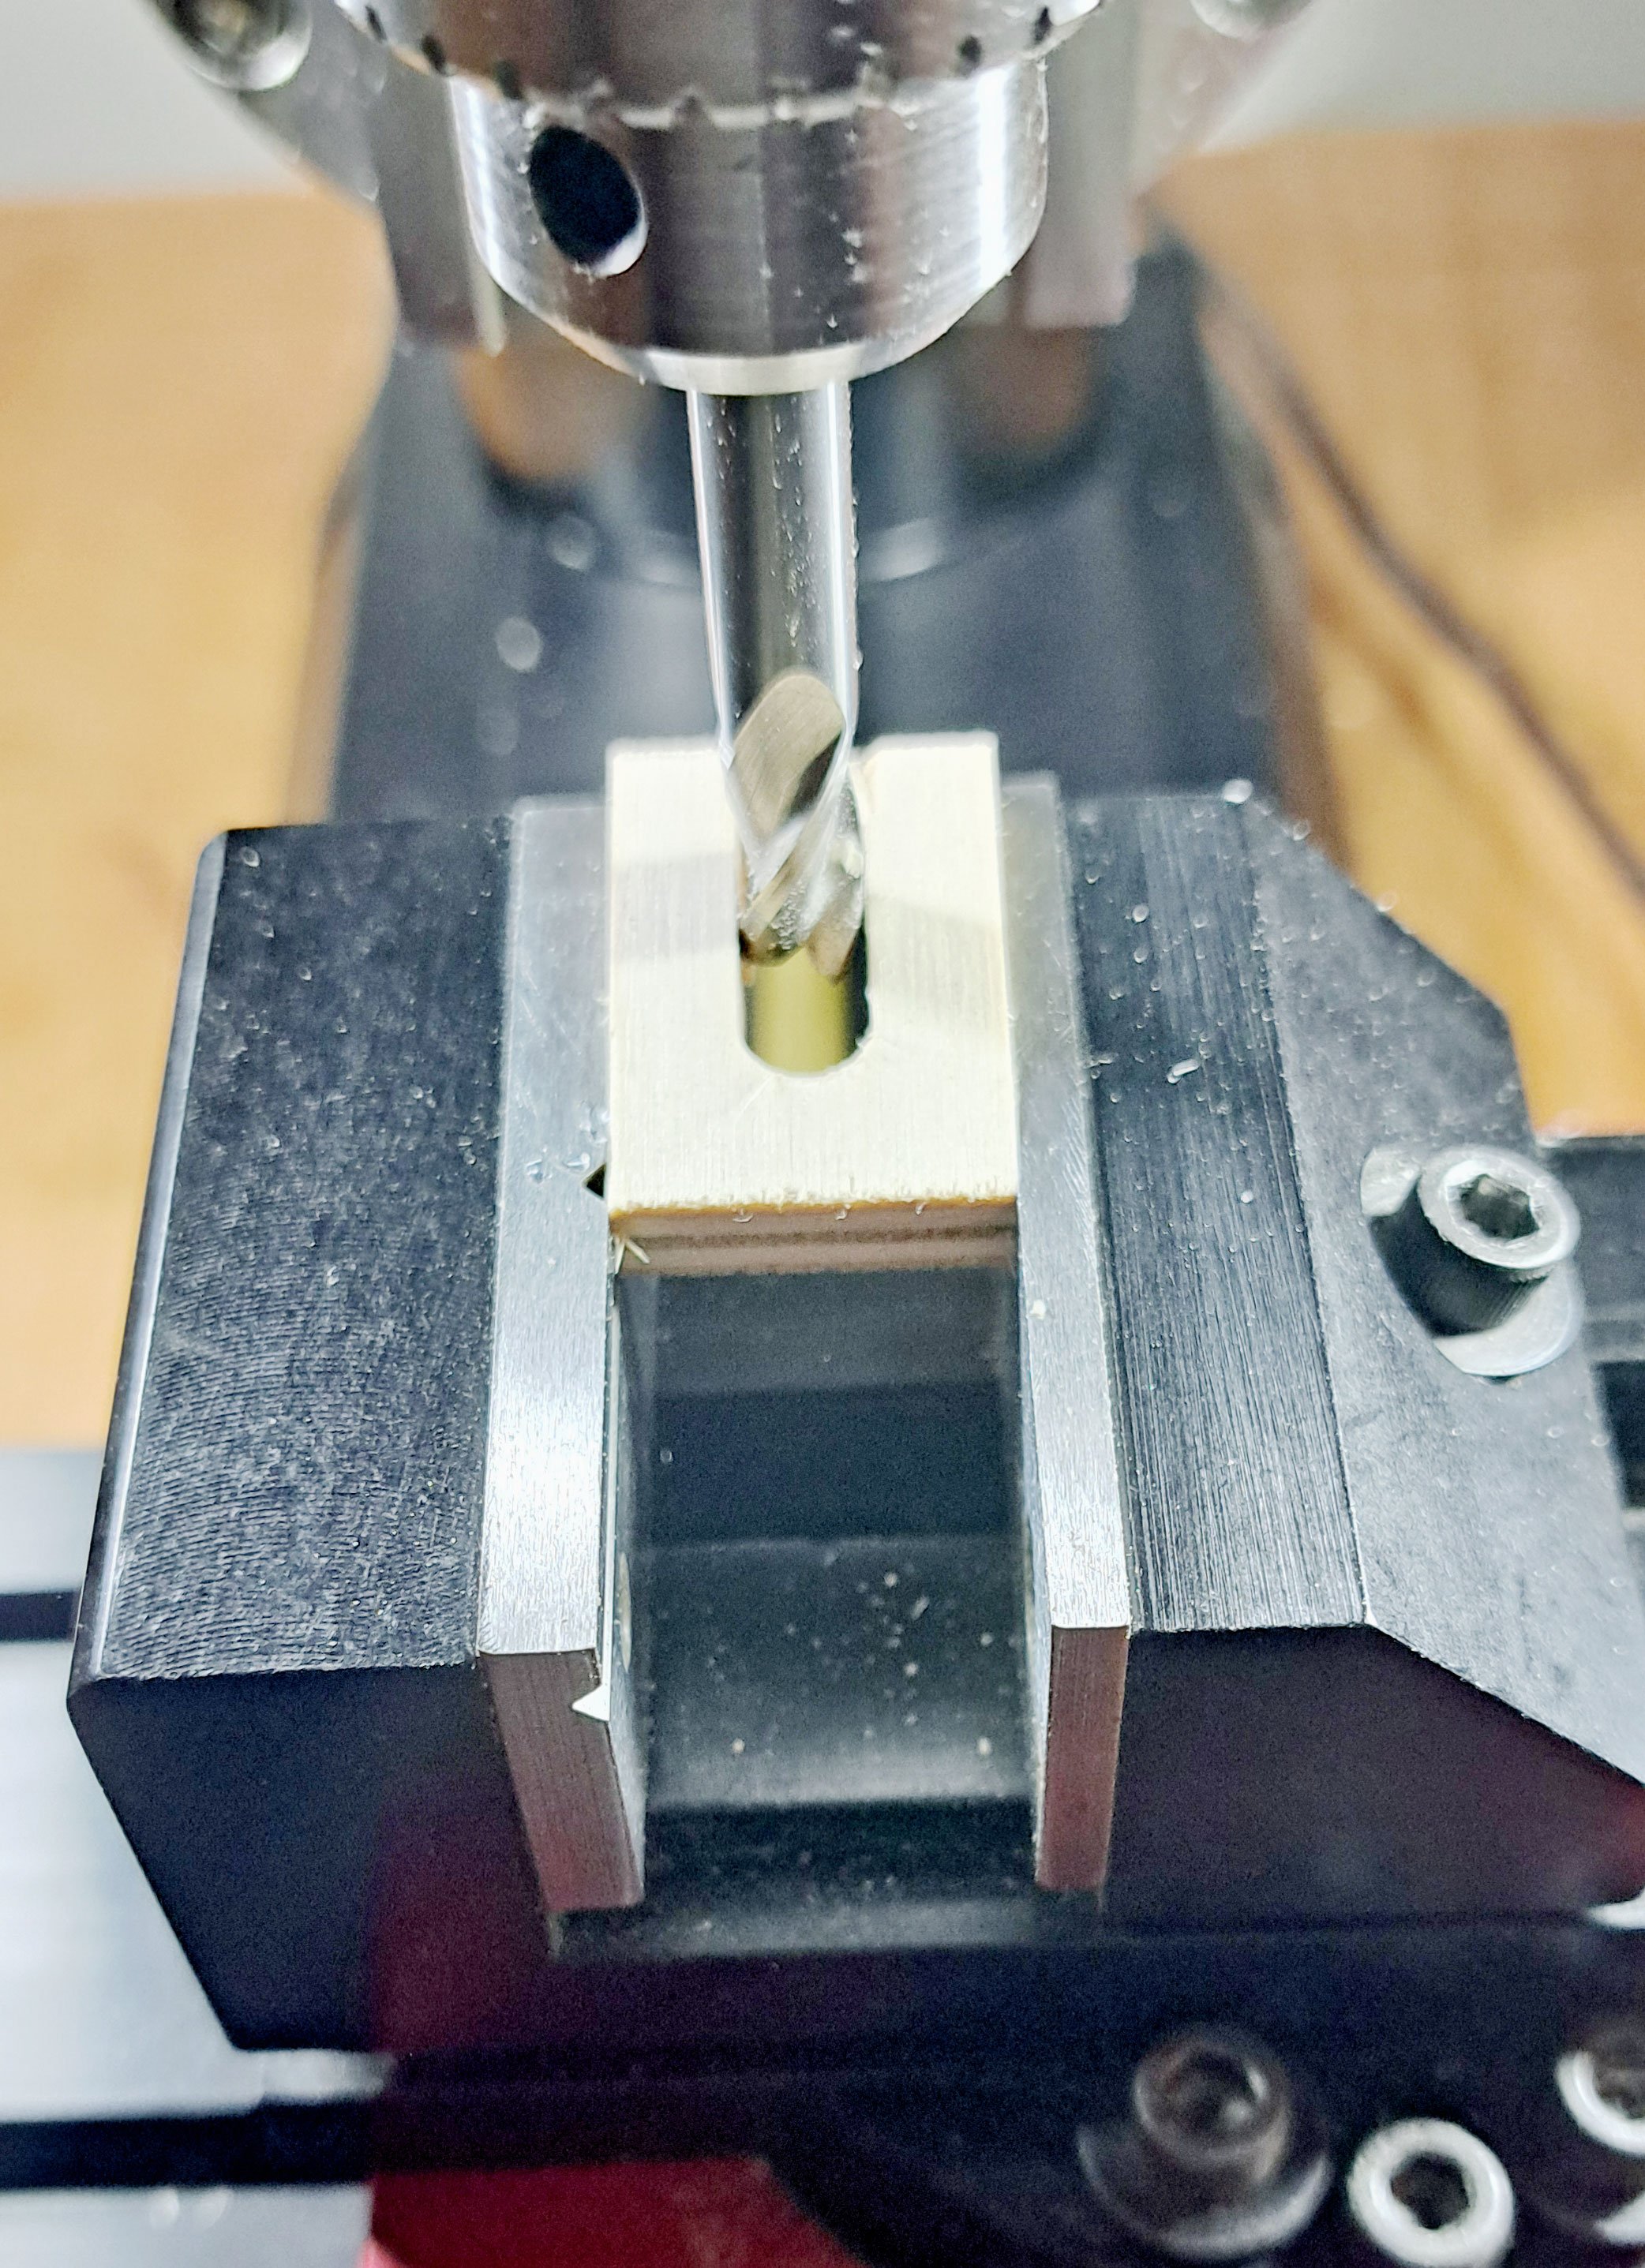
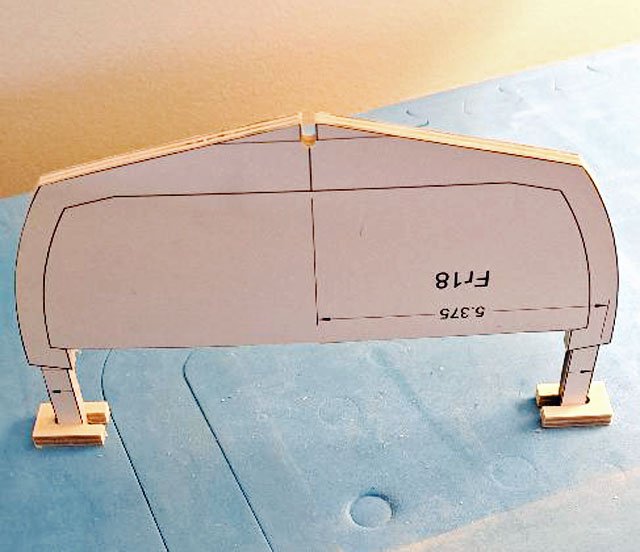
All 19 bulkheads are now complete, next will be making a build board. The process used by Pat M is a bit different than my previous builds in that the bulkheads are attached to the keel with the ship upside down. I'm used to having the keel laid first and the bulkheads set onto it. Pat's method is the reverse of that. As you can see from the picture I posted previously, the bulkheads have legs which they are set on. Pat used small pieces of wood, notched to hold into which the bulkhead legs would fit and hold them upright and then the keel was placed onto the notches on the bulkheads. The hull is then planked, the model turned upright and the bulkhead legs cut off. I suppose I could do this the more traditional way by cutting the bulkheads legs off, lay the keel, attach the bulkheads and plank the hull but I'm worried that if I don't follow Pat's build log I might run into problems later in the build. Right now I'm tryin to decide how the make the bulkhead supports that hold the bulkheads upright. They will be 1/4 inch thick for sure. The question is should a cut a bunch of 3/4 inch by 1 inch pieces and use the mill to cut a 1/4 inch center slot for the legs of the bulkheads to fit into or cult a bunch of 1/4 inch by 1 inch pieces and place one on each side of the bulkhead, making sure its a tight fit. I think I will run a test on a scrap piece of wood and mill out a 1/4 inch slot just to see how tight of a fit I get with the bulkheads inserted into it. If that works, I could make a jig to hold the 3/4 by 1 inch piece and lock that into the mill vice. I could then mill the slot, pop out the piece, drop in another, mill the slot, pop it out, load another and so on. I need 38 of these pieces. Three choice here: 1. Cut and mill the pieces 2. cut thinner pieces and sandwich the bulkheads between them 3. Lay the keel and set the bulkhead onto it as normally done. Decisions, decisions..........
-
It's going to be a slow slog as I'm not sure exactly what I'm doing. 🤔
-
I'm building this from 1:12 RC plans created by Pat Matthews. His design called for plank on frame as he needed below deck space for things like motors and batteries. I have decided to build it plank on bulkhead. His plan also called for 1/8 inch frames but I decided to go to 1/4 inch bulkheads to aid in butting hull planks. Using Baltic plywood I have about 95% of the bulkheads completed (just 6 more to go). My aim is to build the model as close to the 1934 version as possible (even while on the hard in Cuba some changes were made during refurbishing).

-
New to the Wooden Ship Assembly/Build Community
CPDDET replied to rturcic72's topic in New member Introductions
Welcome! Lots of experience and help here. Take your time, work only when you feel like it, know when to put things and walk away for a spell. -
Email sent. Thanks to all!
-
Anyone know if Joe at Modelers Sawmill is still around? Sent him an email several weeks back but never got an answer. Maybe his email has changed? I'm in need of some yellow cedar. Dave
-
Martindale blades for Byrnes saw...
CPDDET replied to CPDDET's topic in Modeling tools and Workshop Equipment
I did order thru Malco, but Malco filled the order thru Martindale. Greg at Malco supplied the 2 names at Martindale for future orders. -
Martindale blades for Byrnes saw...
CPDDET replied to CPDDET's topic in Modeling tools and Workshop Equipment
I ordered thru Malco but it seems Malco filled the order thru Martindale. Greg, at Malco, supplied the two contact names at Martindale to be used for future orders. Malco had a 3 or 4 blade minimum. Not sure if that will hold true at Martindale. -
Can you give us a size ?