GeorgeKapas
-
Posts
297 -
Joined
-
Last visited
Content Type
Profiles
Forums
Gallery
Events
Everything posted by GeorgeKapas
-
 Thank you for you kind words! Everyone's work here is magnificent and different, this is what makes it interesting!
 -
I also discovered that the footropes of the yards were a constant obstruction, but there was no way they could have been added after the fact. Being made out of melted plastic, they were constantly breaking. If the scale permits next time, I will make them out of 0.25mm thread instead..

-
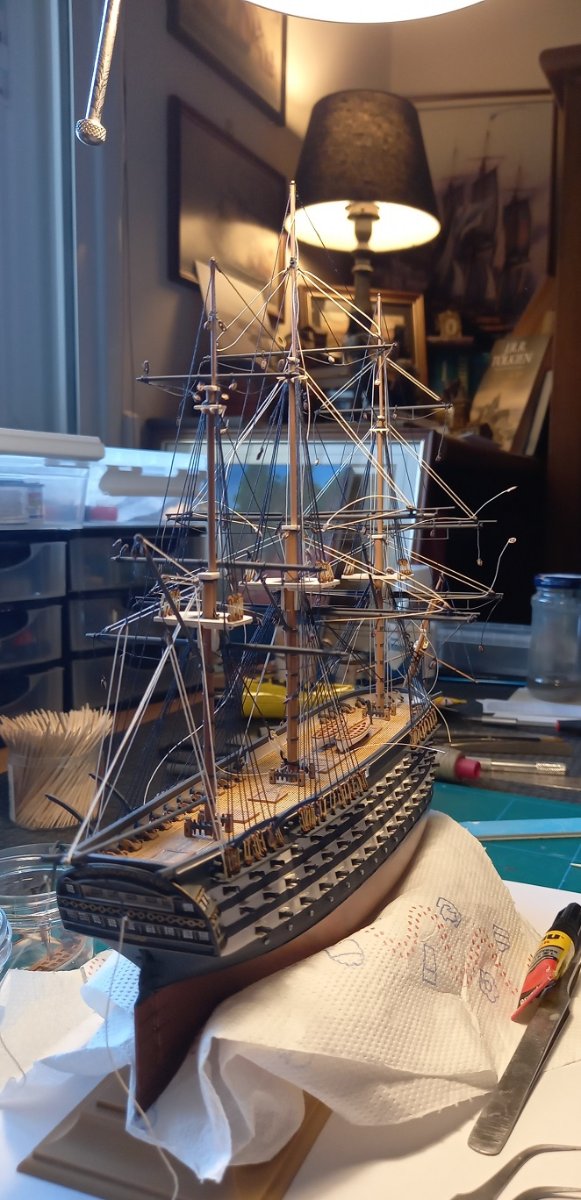
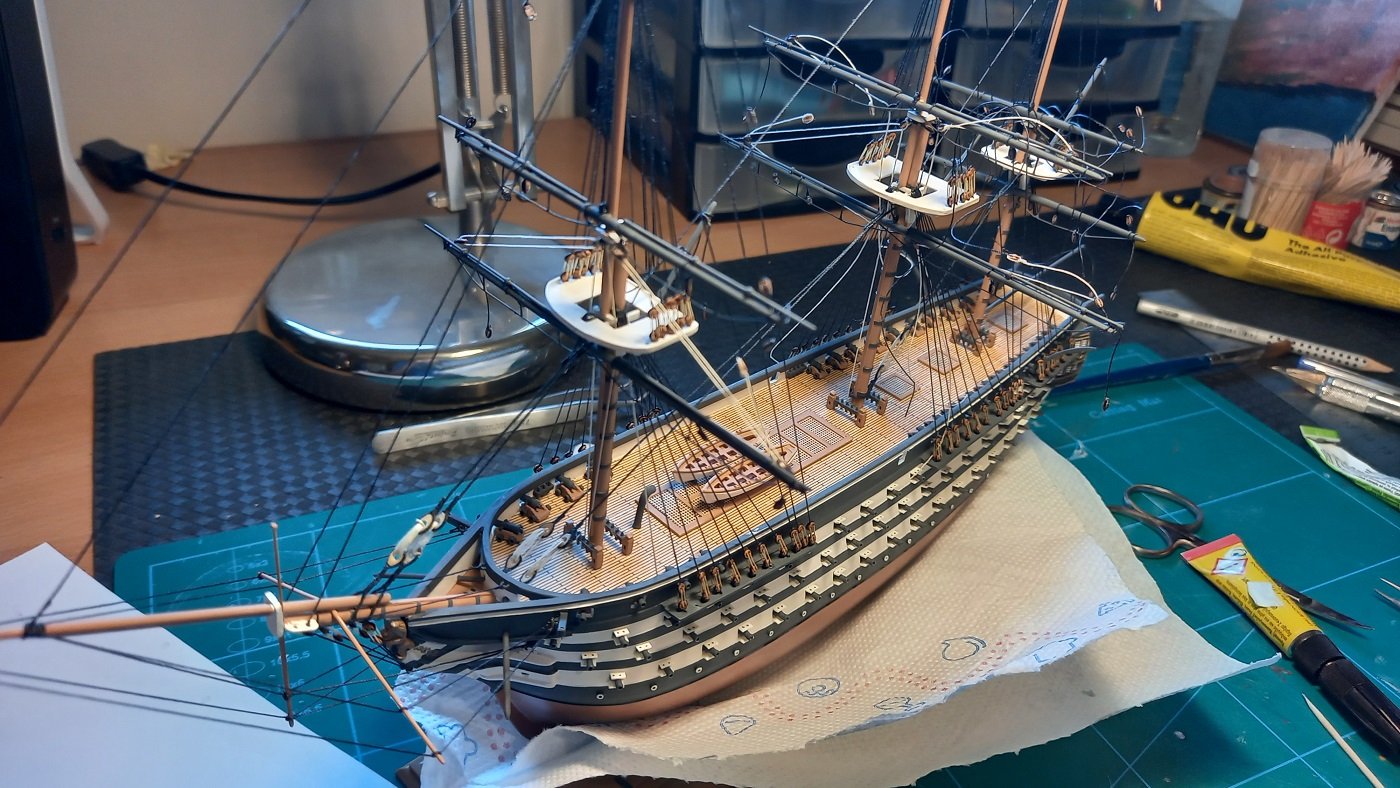
A small parenthesis. I tried to rig most of the blocks before actually putting up the masts so it would make my job easier. I realized that I should also have threaded the running rigging on them as well, because it became very difficult after a while
-
So there is a bit of a time gap here. Rigging was progressing faster in the beginning, but slowed down when more and more lines were begining to obstruct each other
-
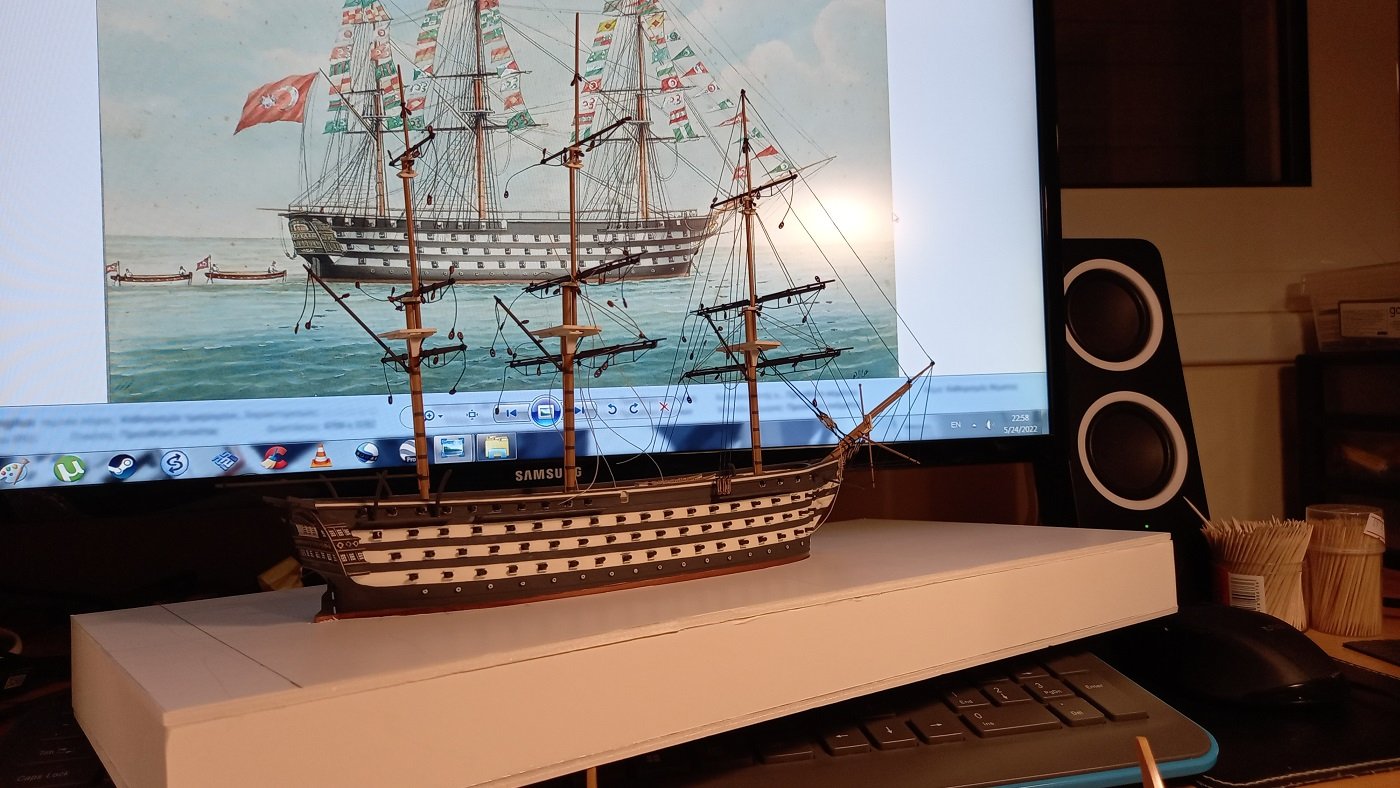
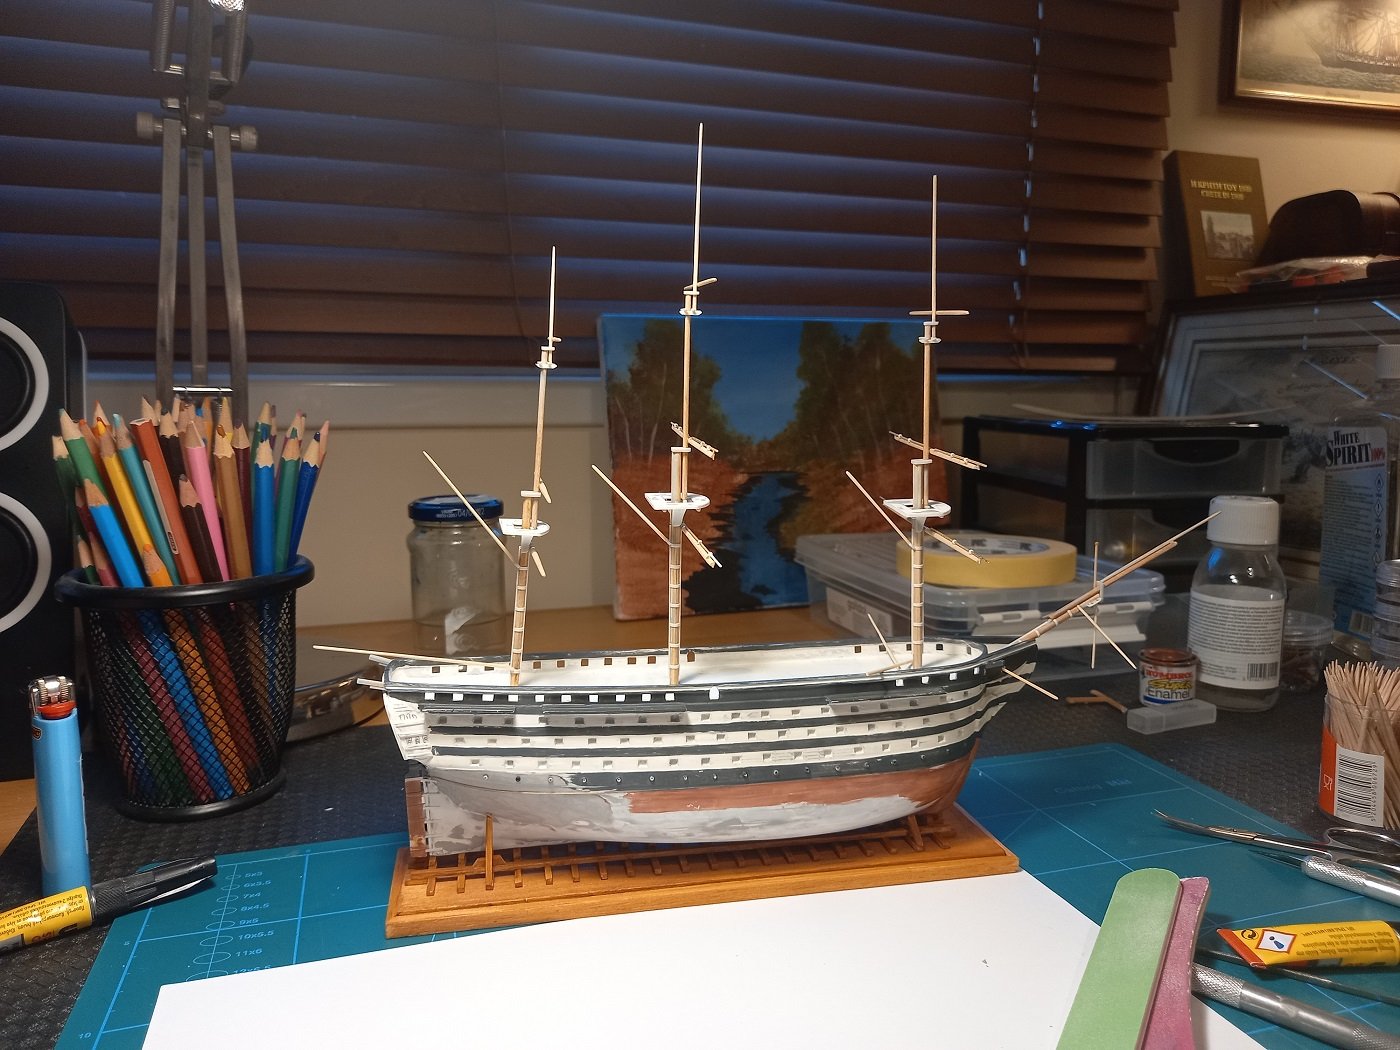
At this point I decided to make a sea base for the model, by making a box that would accomodate the full hull ship inside and making the sea on top of it. BTW I was also given very nice drawings of the real ship as well, as a guide for painting.

-
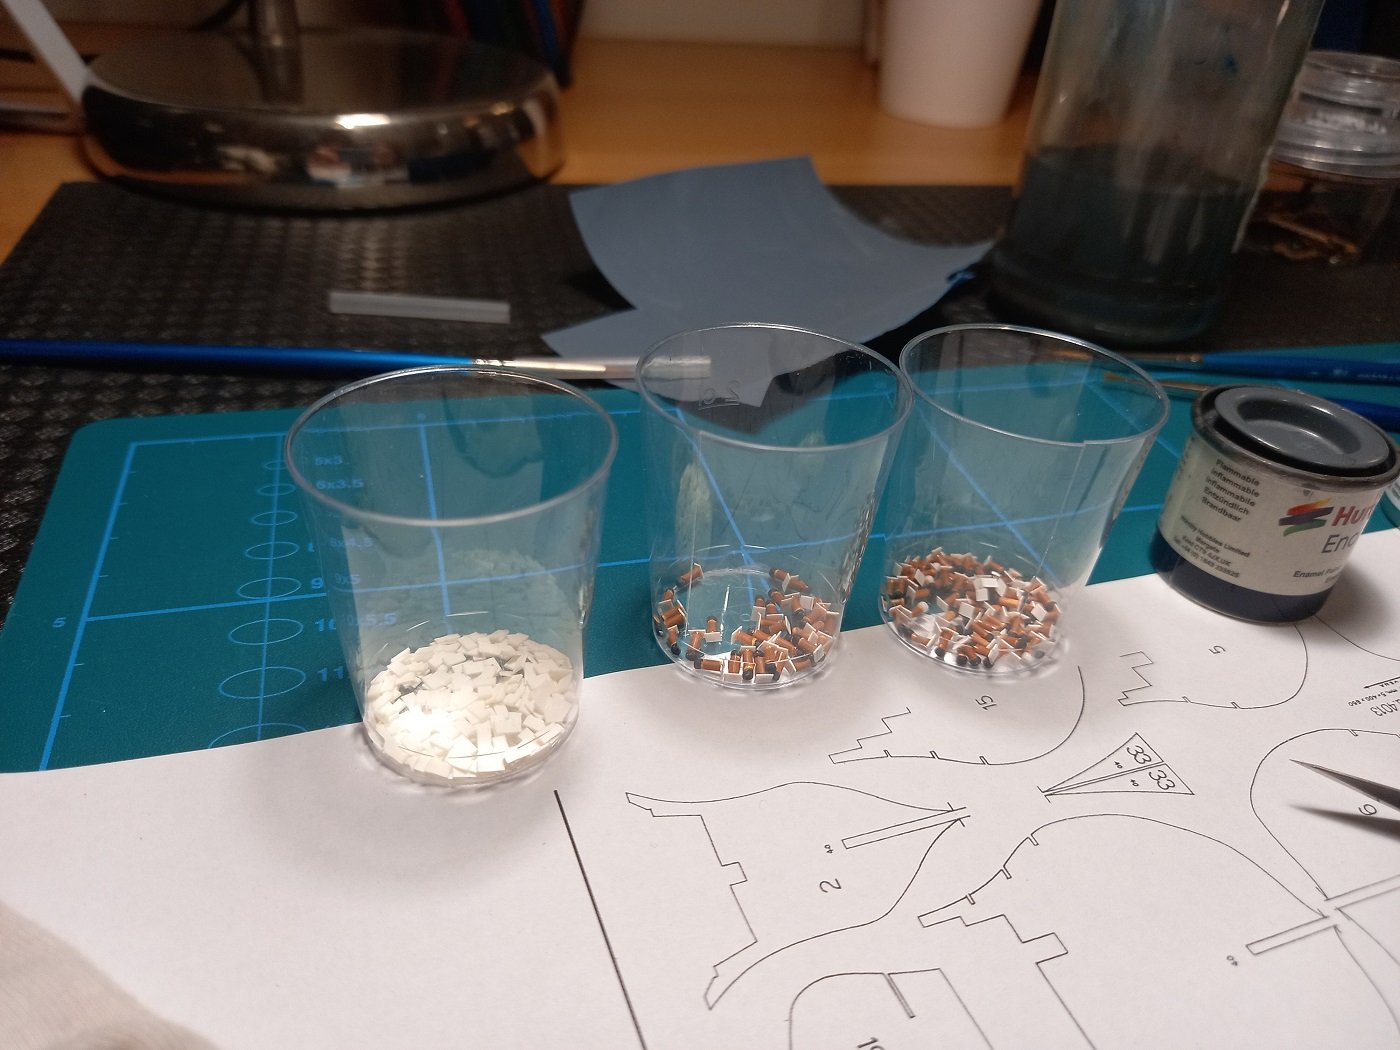
For the rigging, I ordered the smallest blocks I could find, 2,5mm and then cut them horizontally in half to reduce them further more and actually get 2 of them out of one. As for the deadeyes for the shrouds, this was a world of problems for me. In the end, after many tests, I found a design that was good enough and simple enough, so I could make hundreads of them quickly, and actually still looked recognizable to an observer a reasonable distance away. Once again made by melted sprue
-
Some more photos during that phase. Afterwards I started the rigging process, and the diorama base
- 70 replies
-
- 10
-

-

-
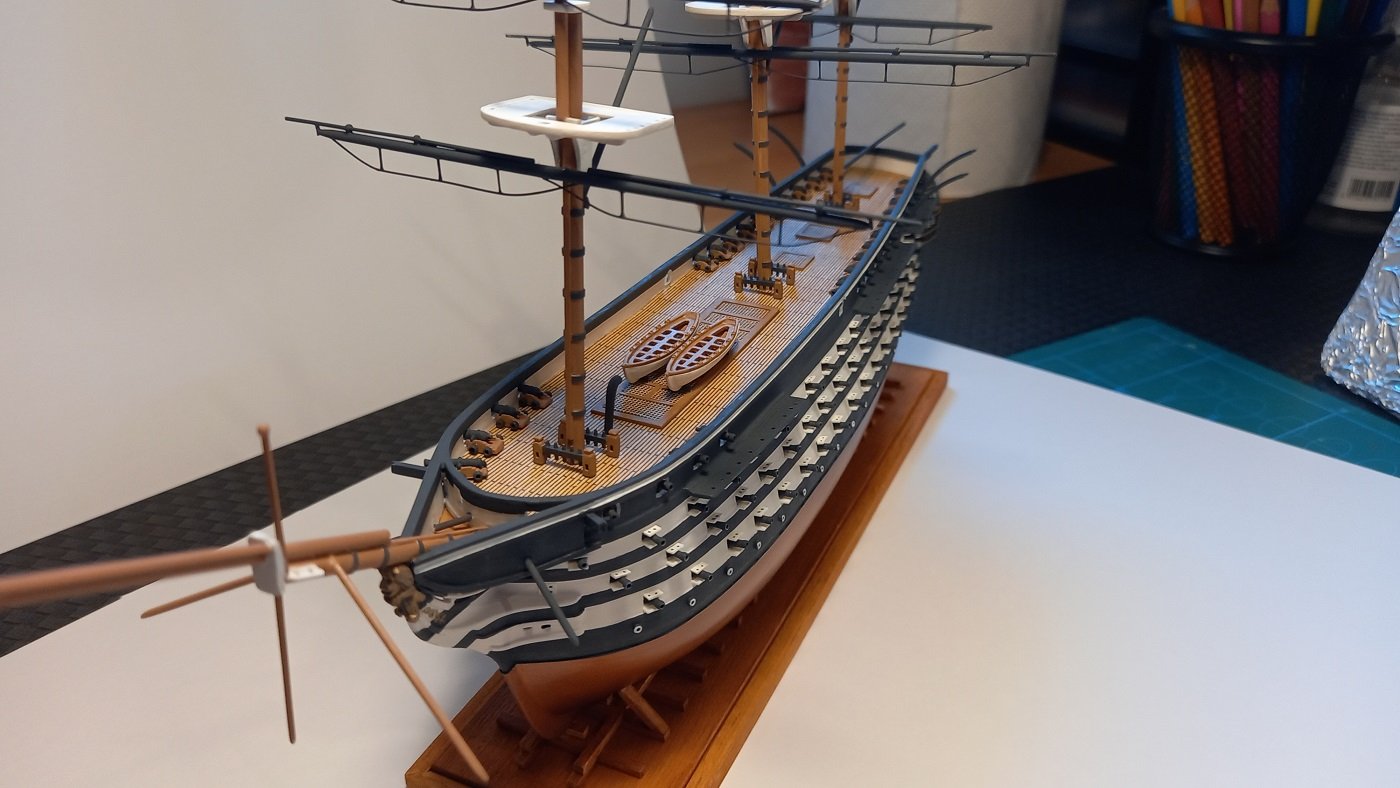
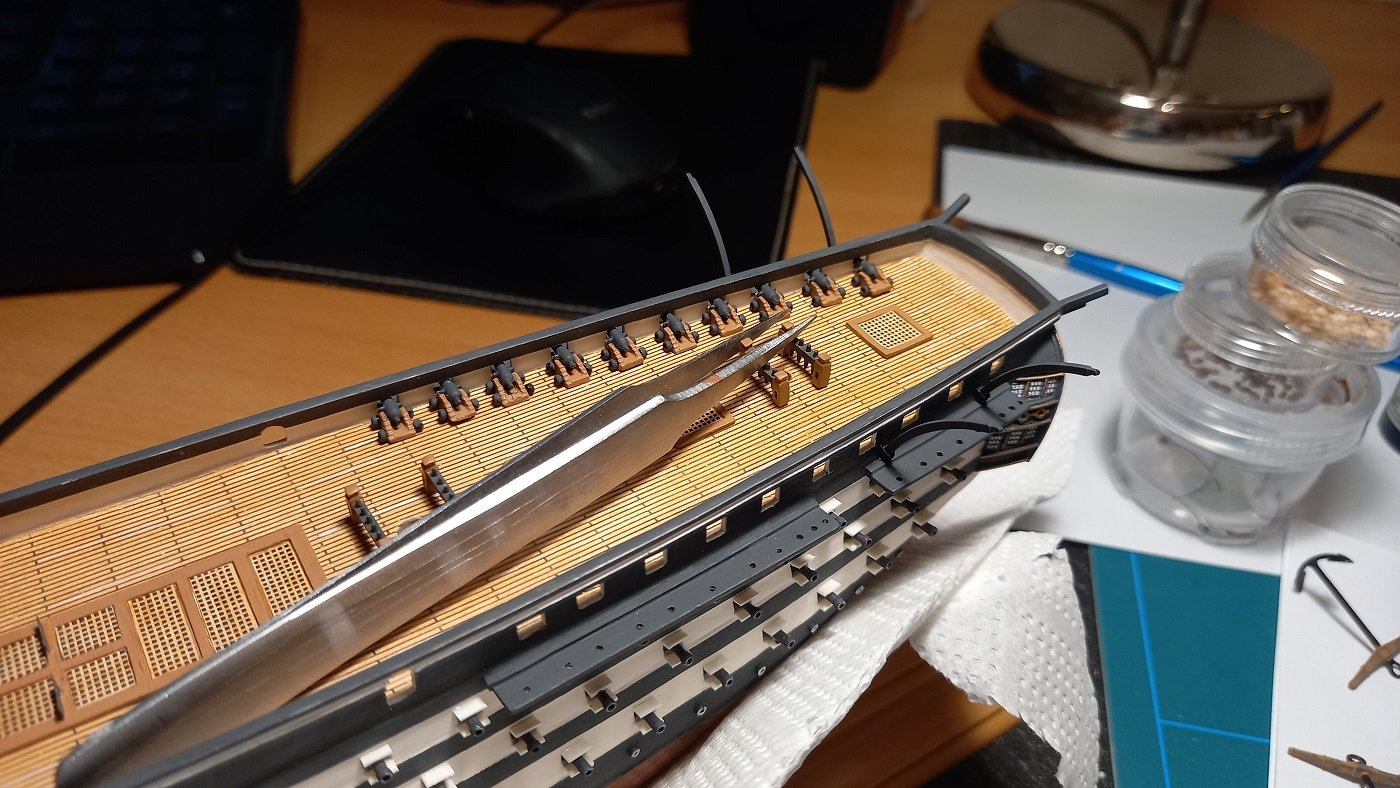
So here the painting is almost complete. I was constantly correcting the color edges, the stern galleries are now painted and a token arabic script and some flower patern added according to the plans.
-
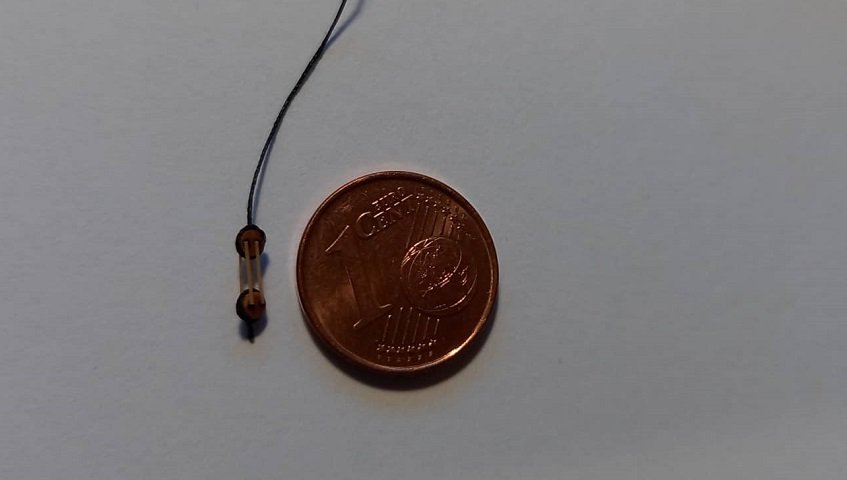
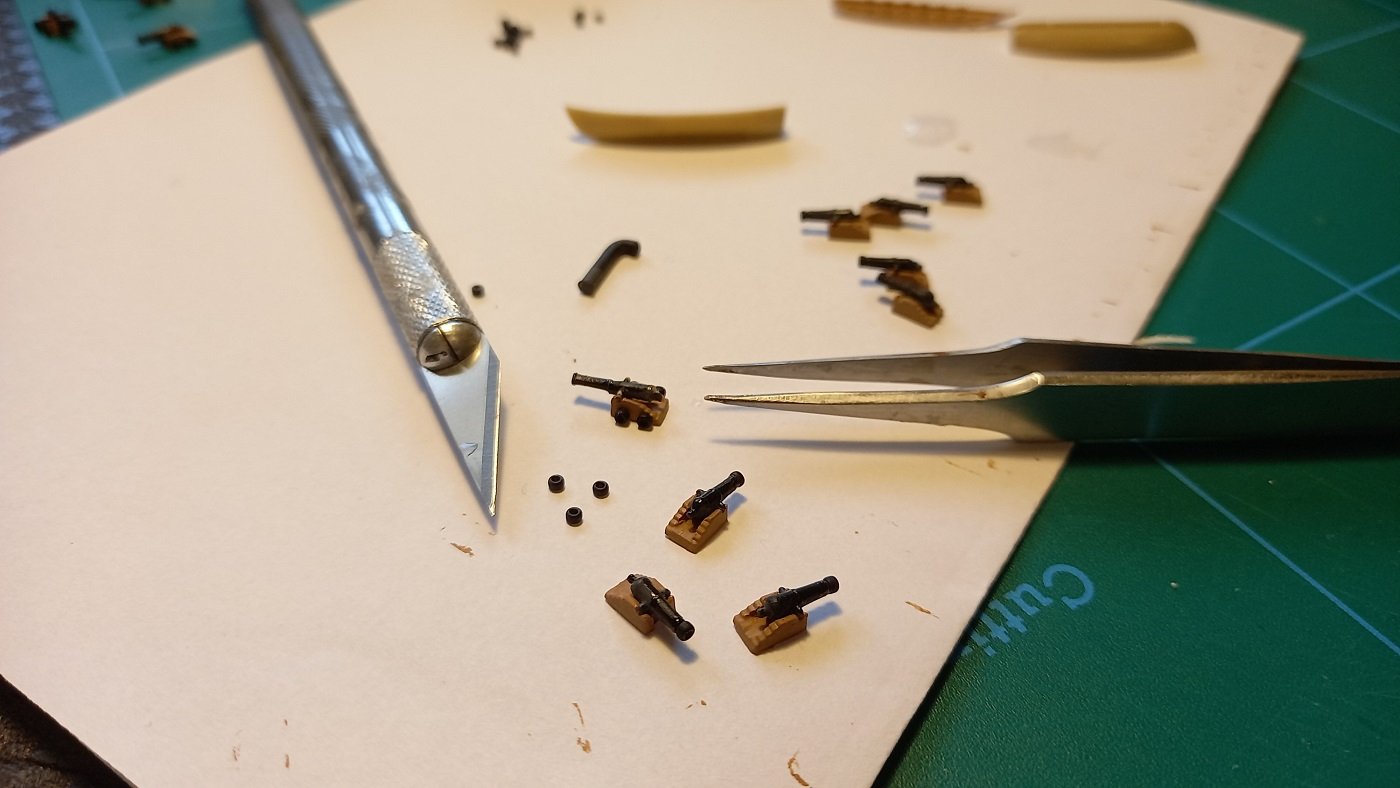
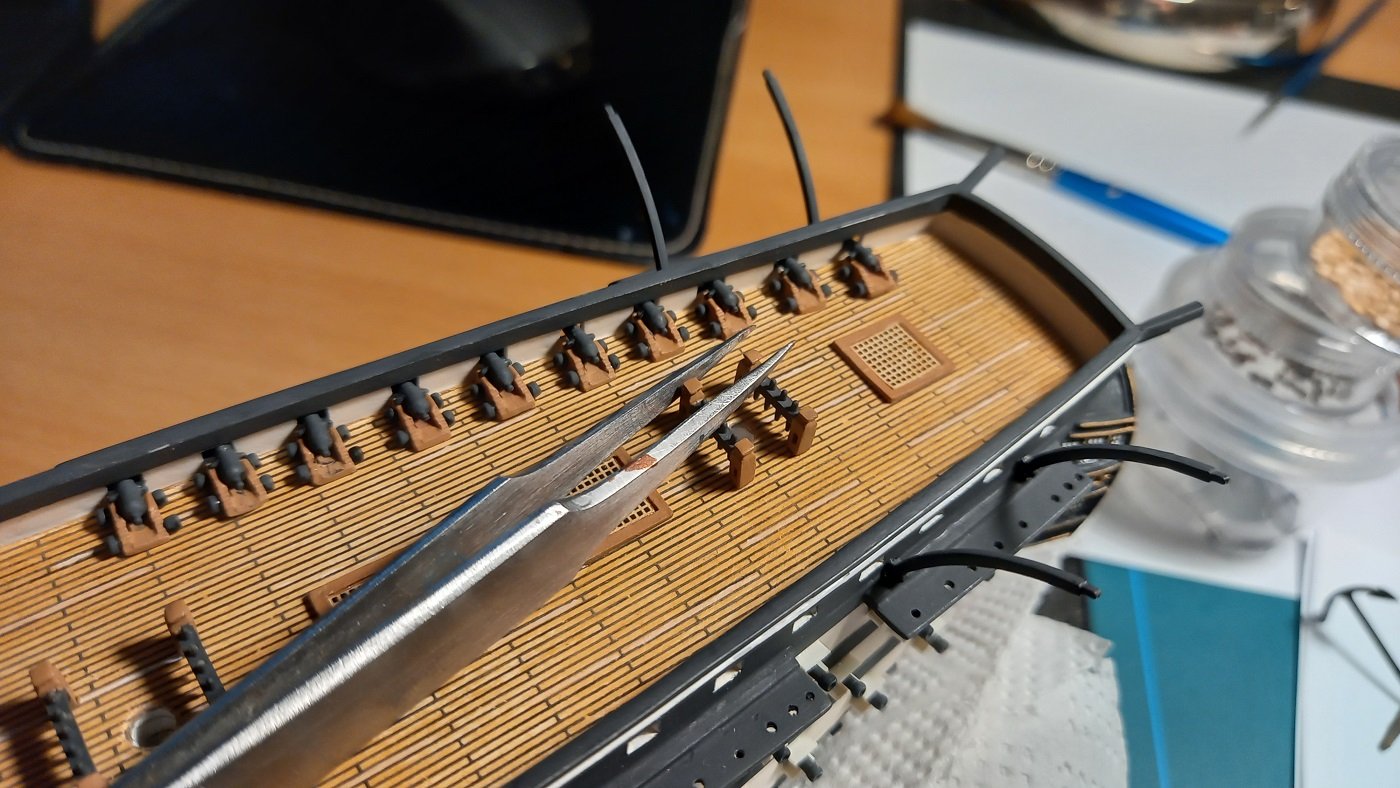
So I made a few long guns and short guns for the top deck. Again, the carriage was scratch, the wheels and gun muzzles were beads, I actually sources some old guns and cut them down to scale. Some close ups of the quarter deck, with my painted deck clearly visible now. Notice I also printed and painted some windows for the galleries. Once again, the model is tiny and later on I took some photos with me near it for scale.
-
Thanks!! Indeed I forgot once again to properly document the process because of the time pressure this year... Actually sorry I misspelled sprue. So I meant the classic method of melting pieces of sprue of kits to produce lines of varous thickness etc. I also have a large supply of vacuum formed sails from kits, that I use as thin sheets of plastic for virtually anything. For the deck and some fittings, I printed black and white designs on the lazer printer, glued them on cardboard, coated their edges with ACC or superglue, and painted them. The guns as you can see are a combination of such materials, the muzzles are actually tiny beads etc
-
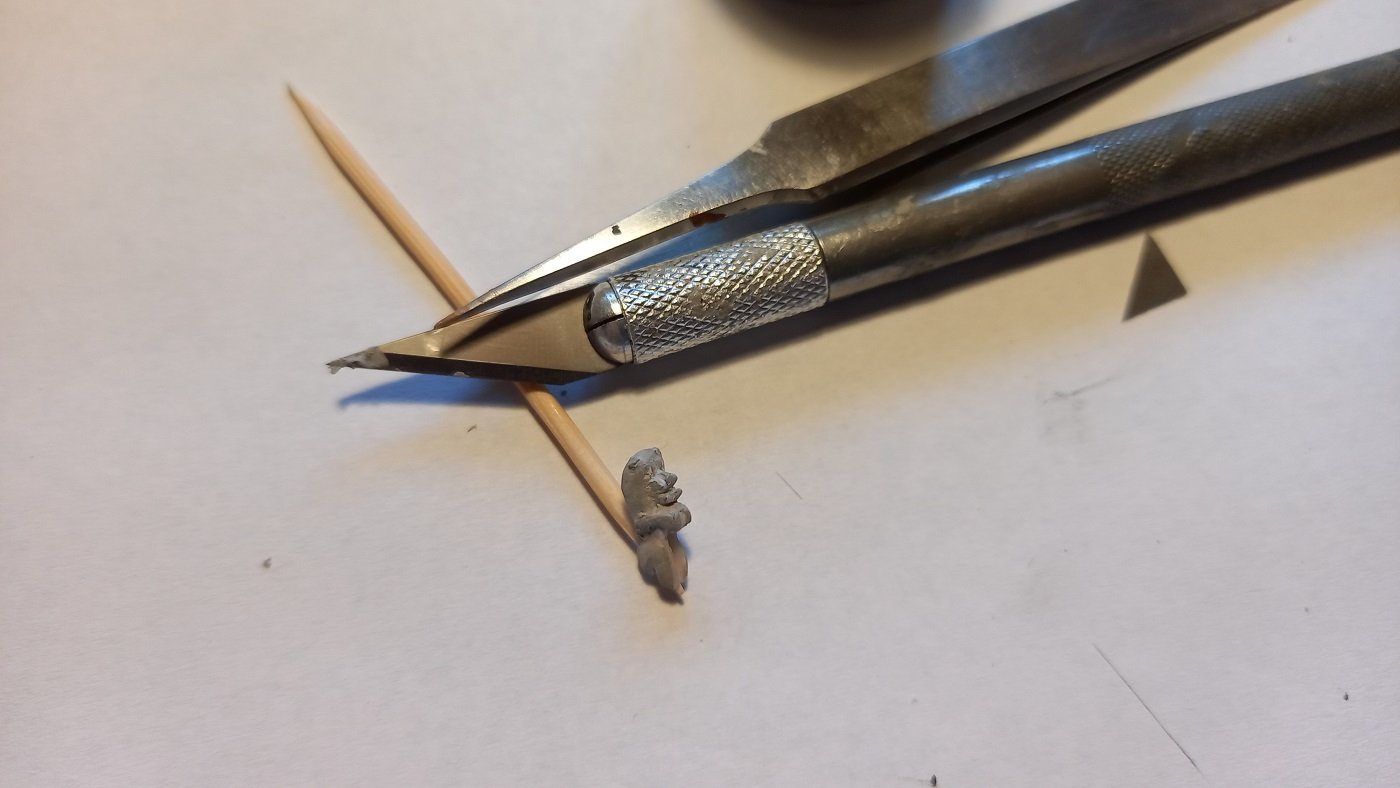
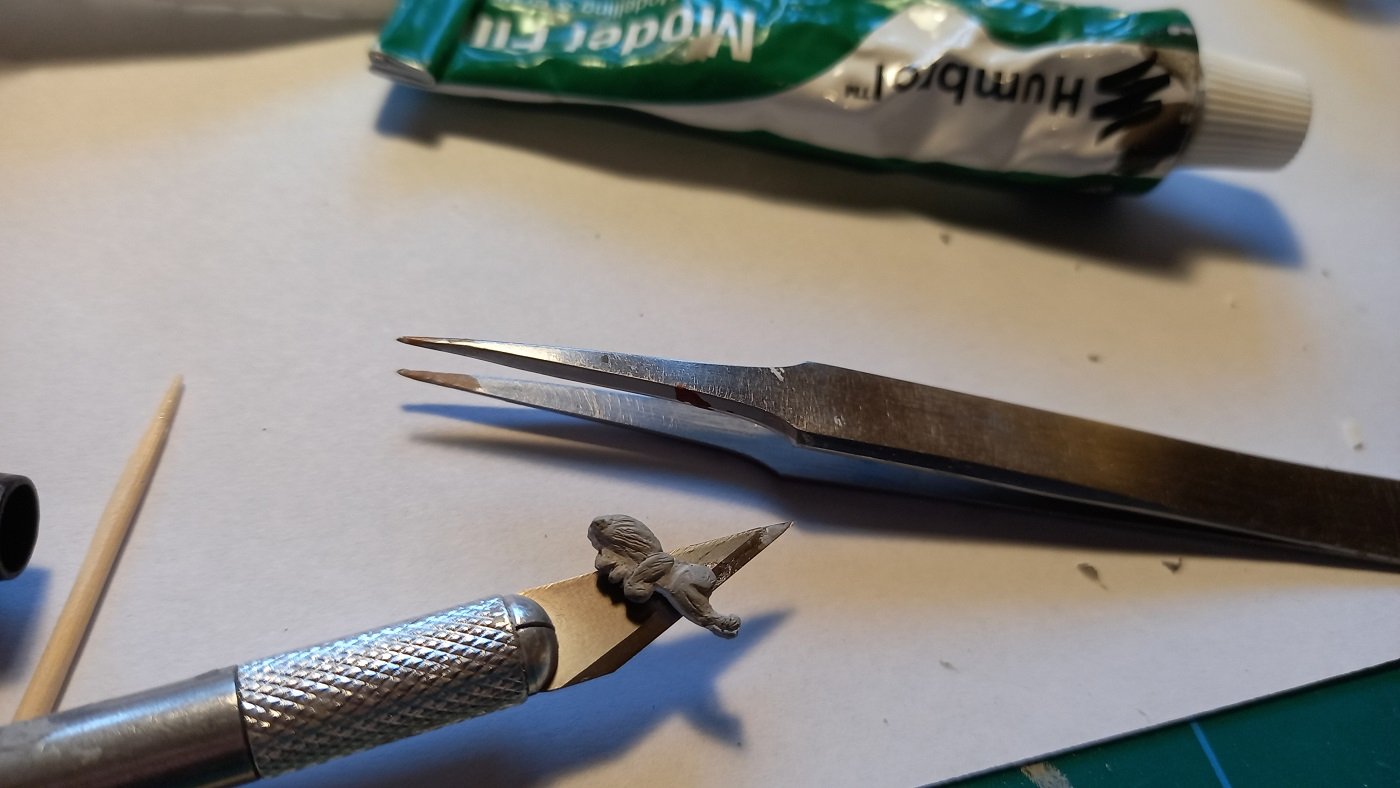
The scale of the ship was really a challenge, but anything bigger and I would not have the time to experiment on till completion. Here are my attempts to make a tiny lion figurehead, the carving being a few millimeters tall
- 70 replies
-
- 13
-
-

-
-
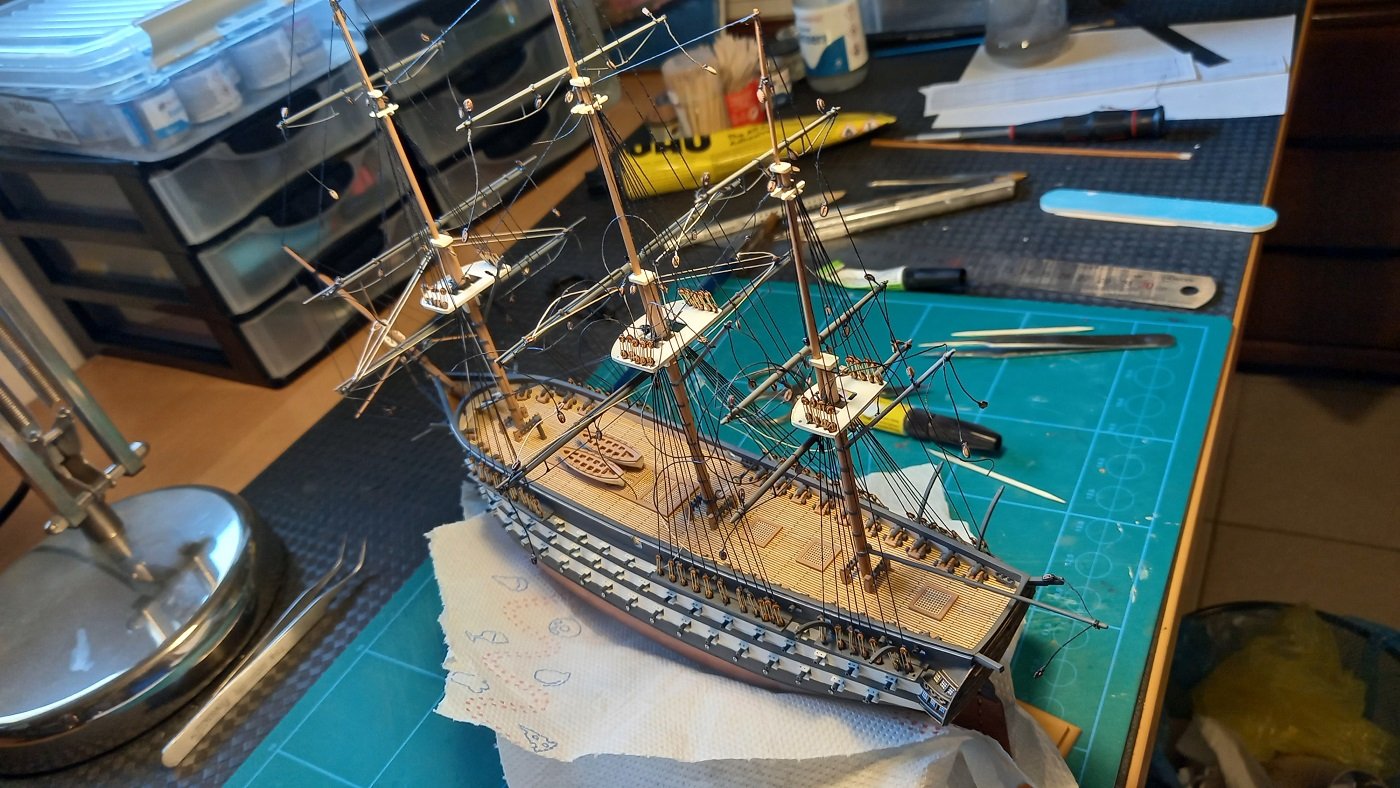
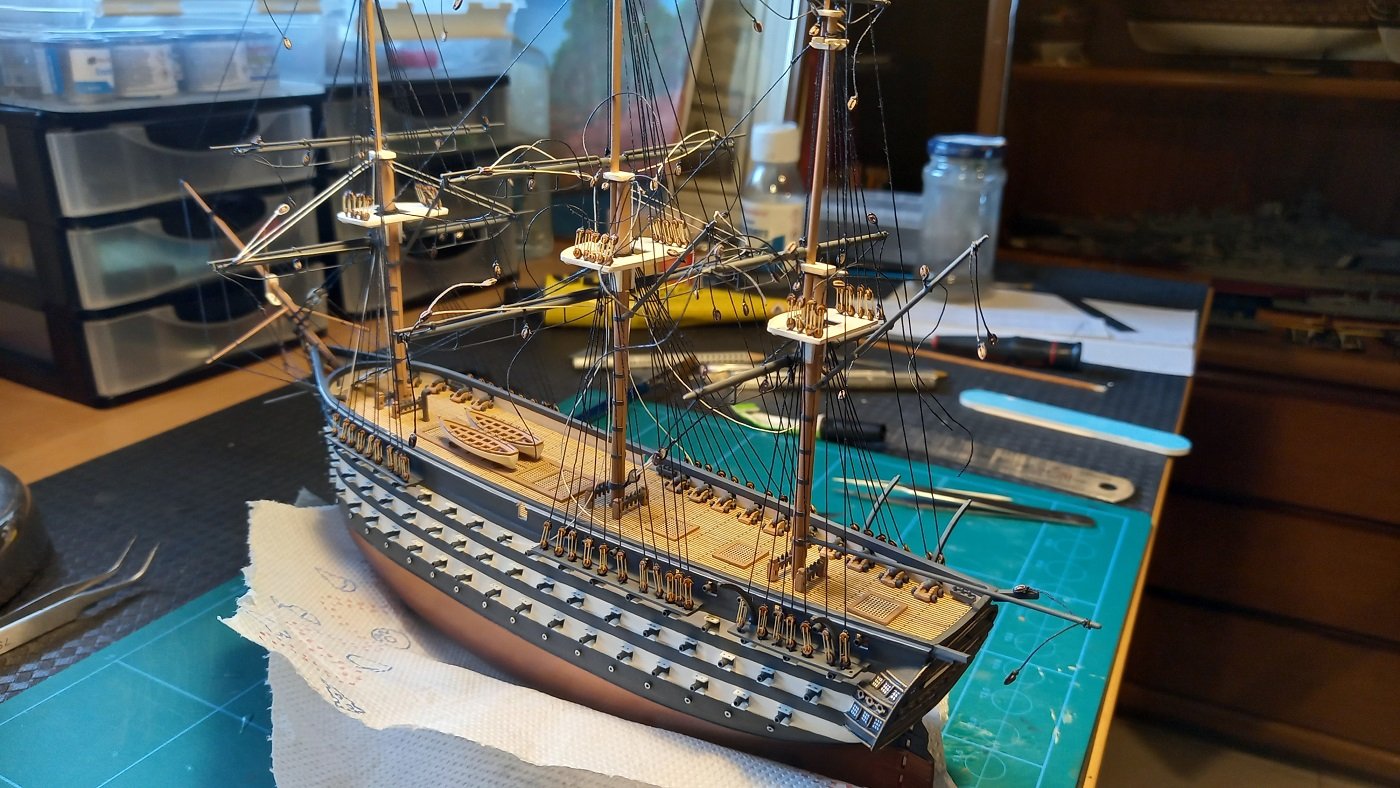
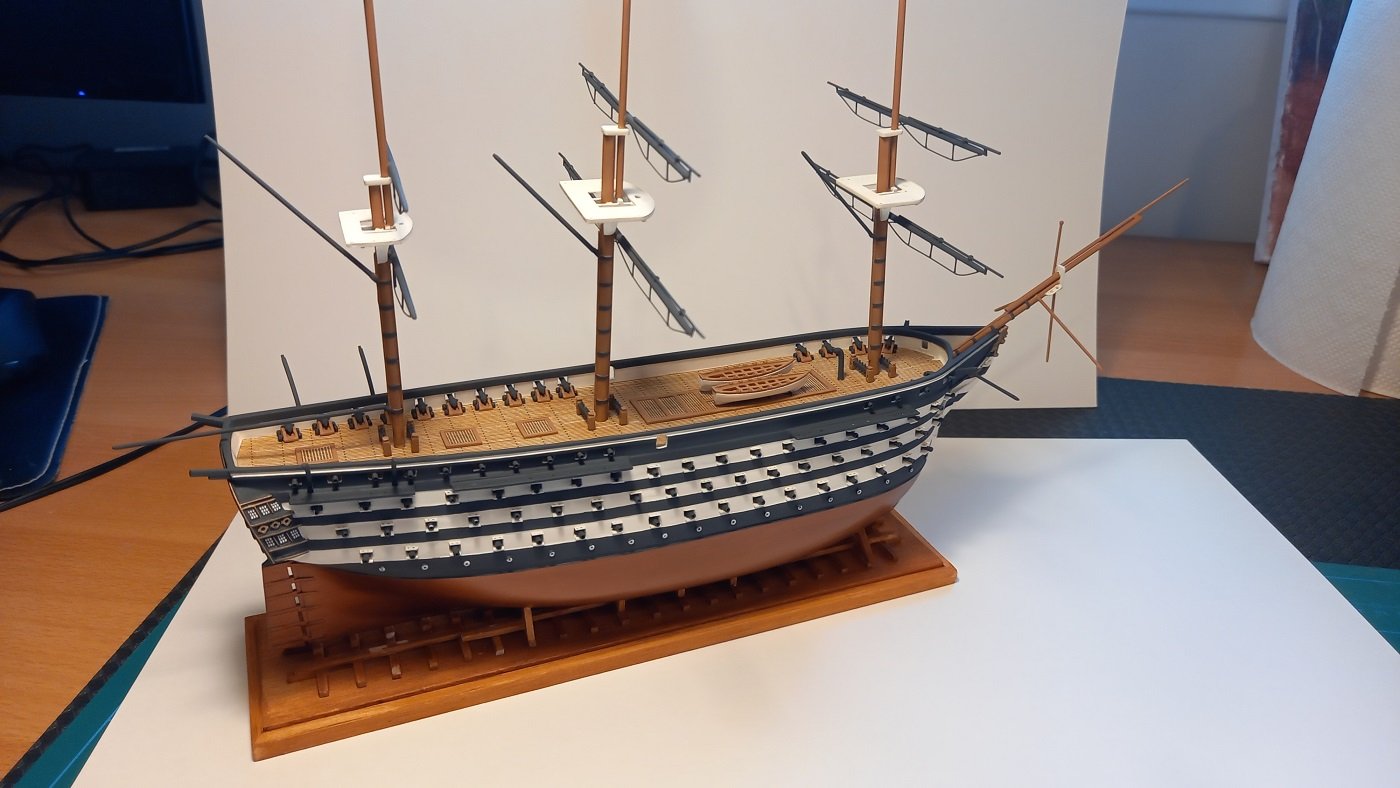
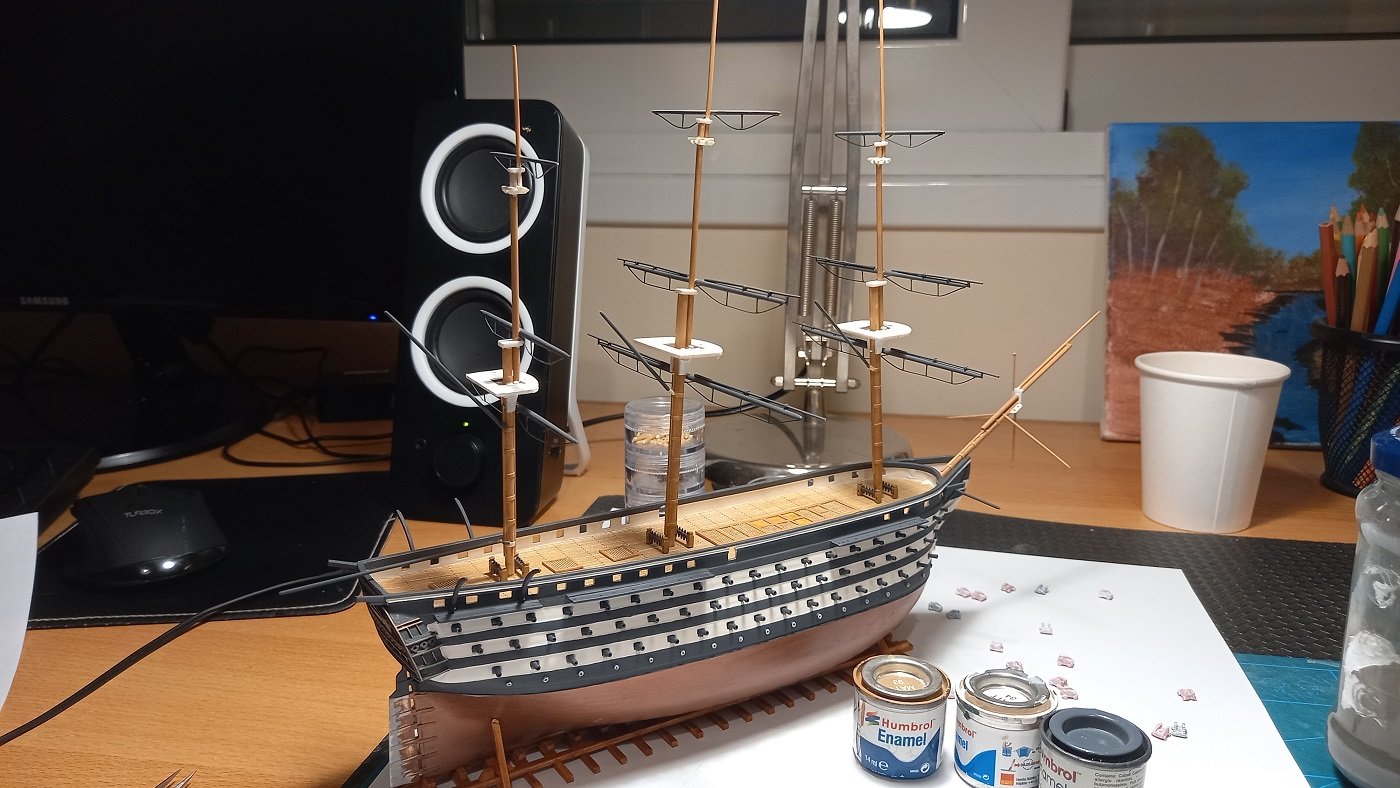
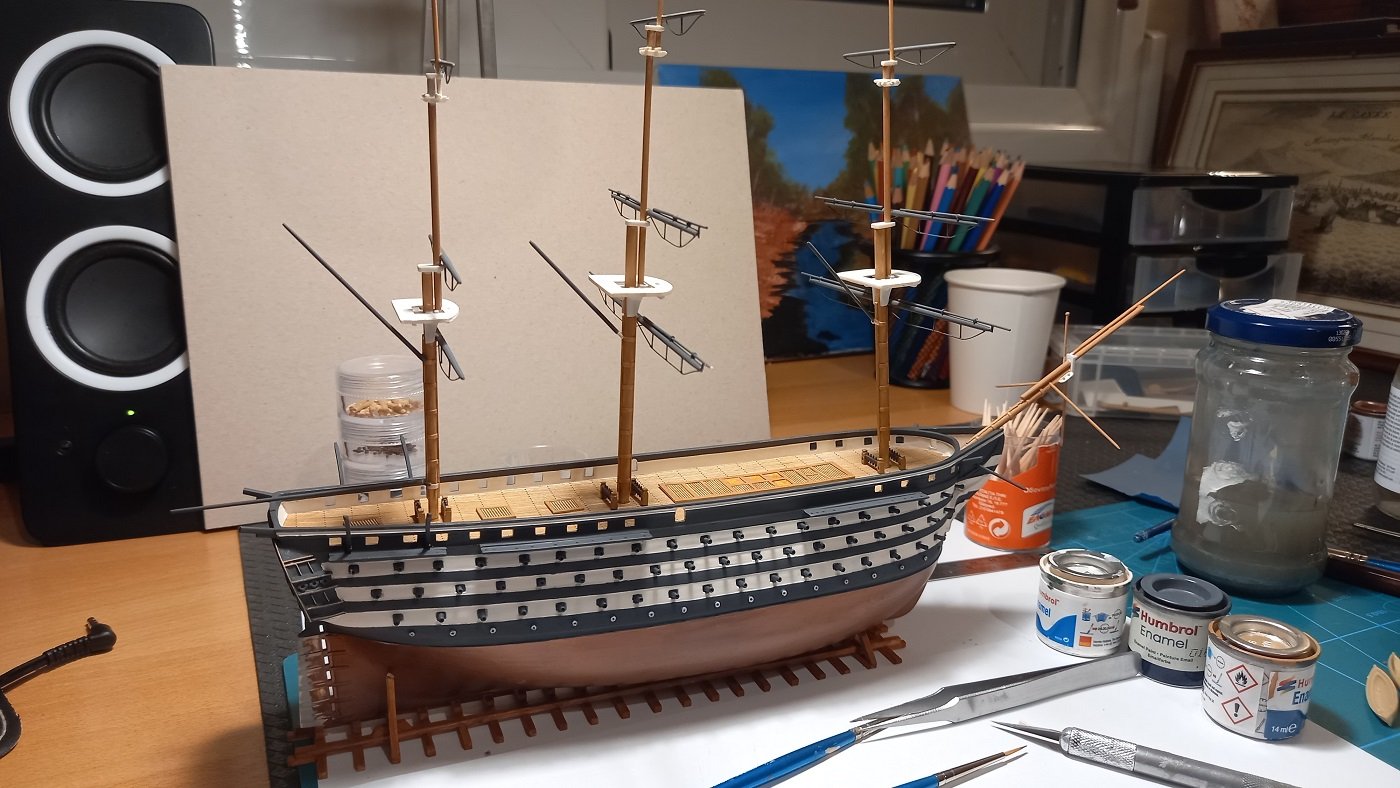
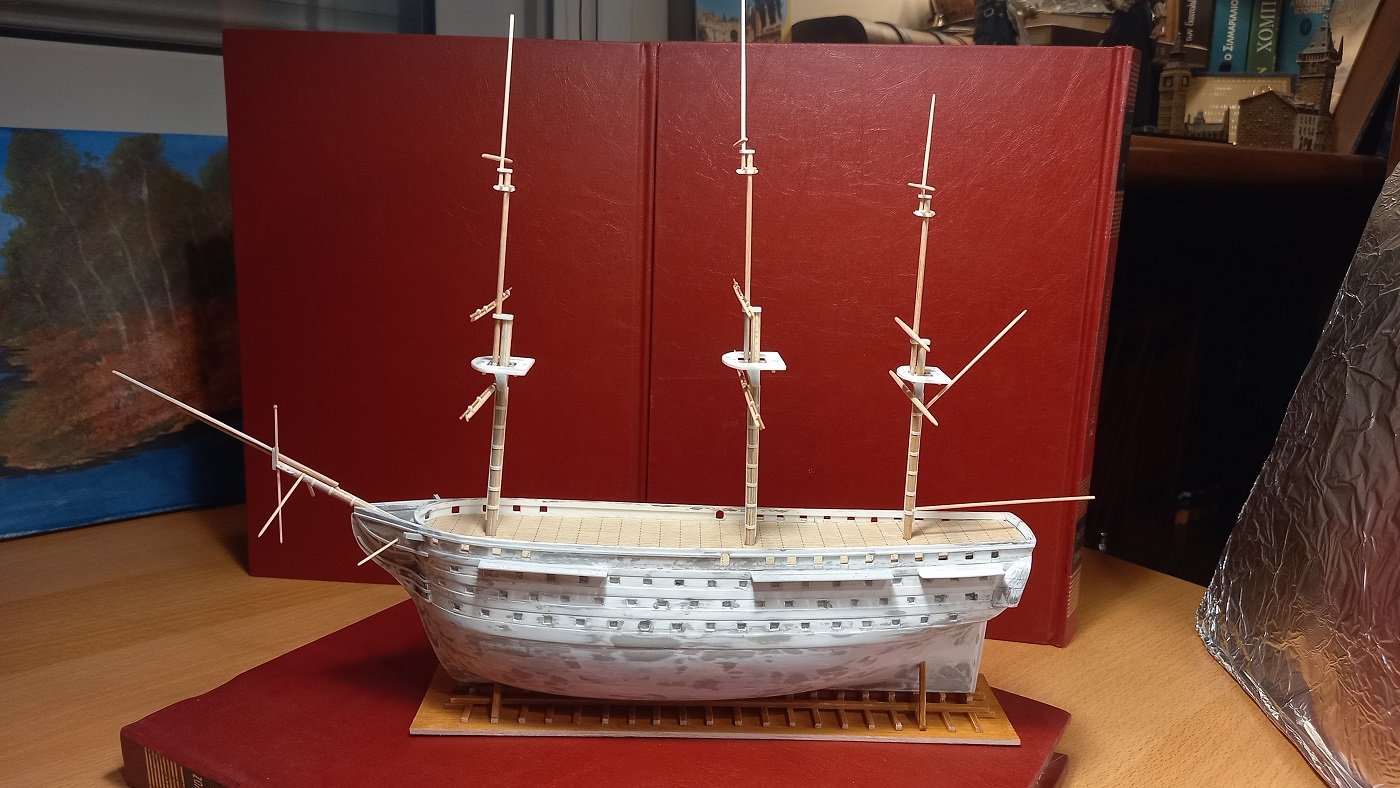
Painting continues, I remade the rudder, worked on the masts a bit more, added footrops with melted spruce, added all the guns and gunports etc.
-
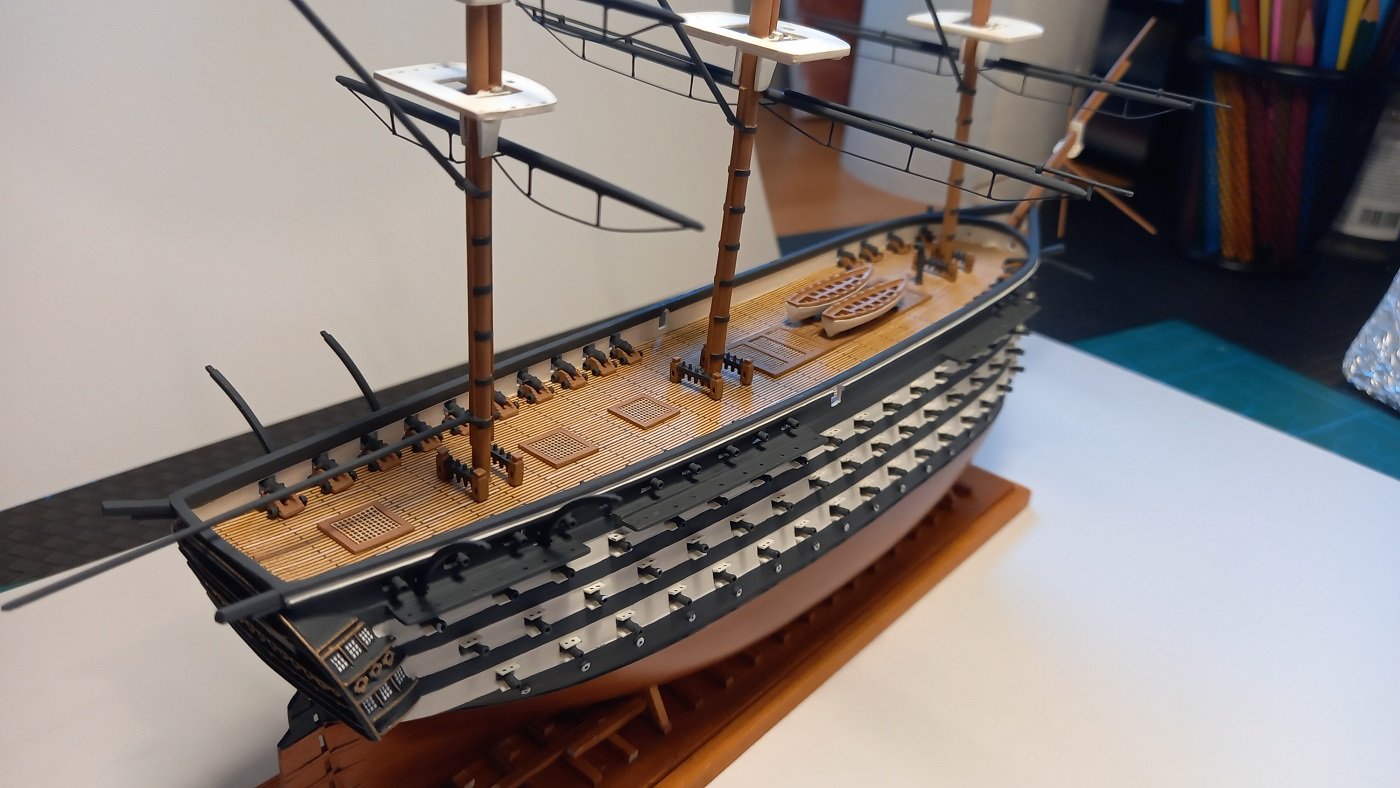
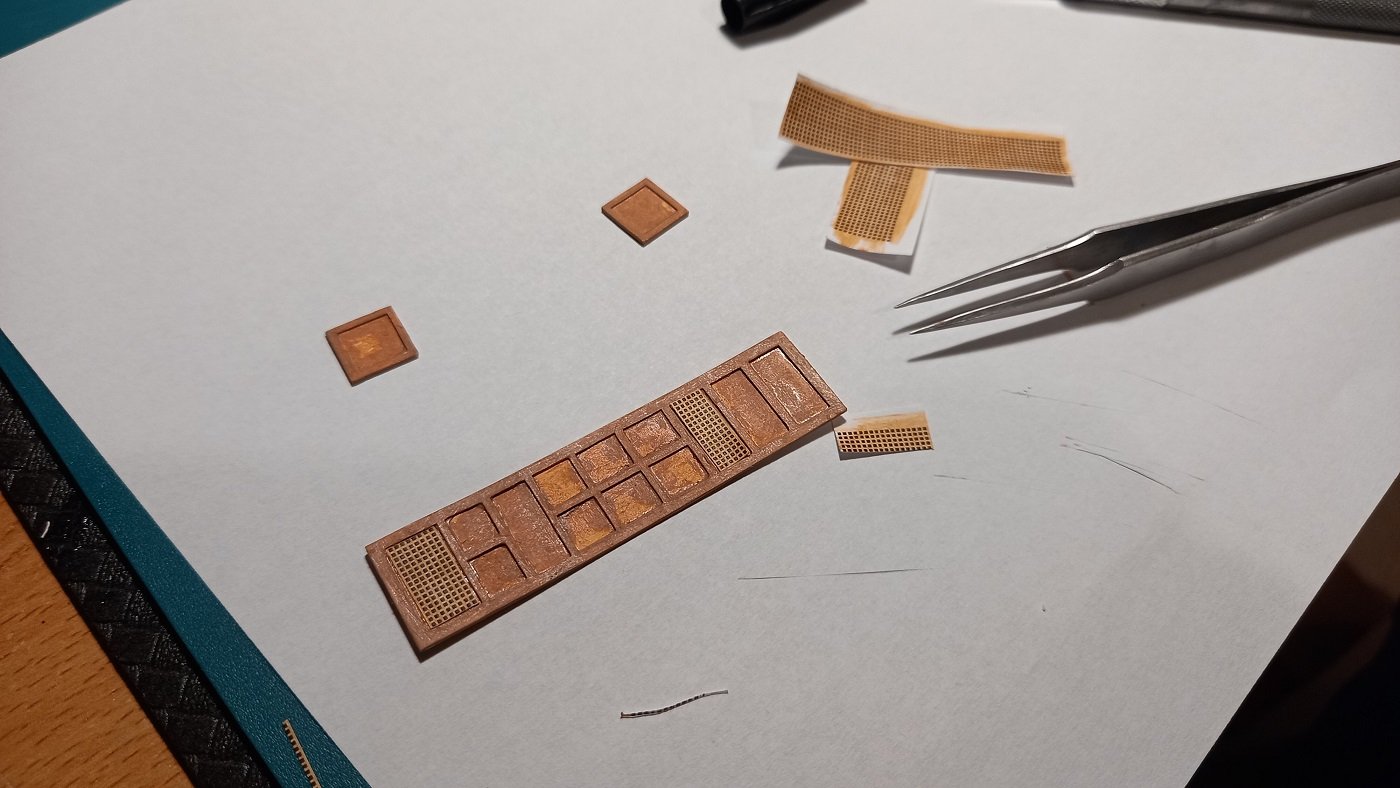
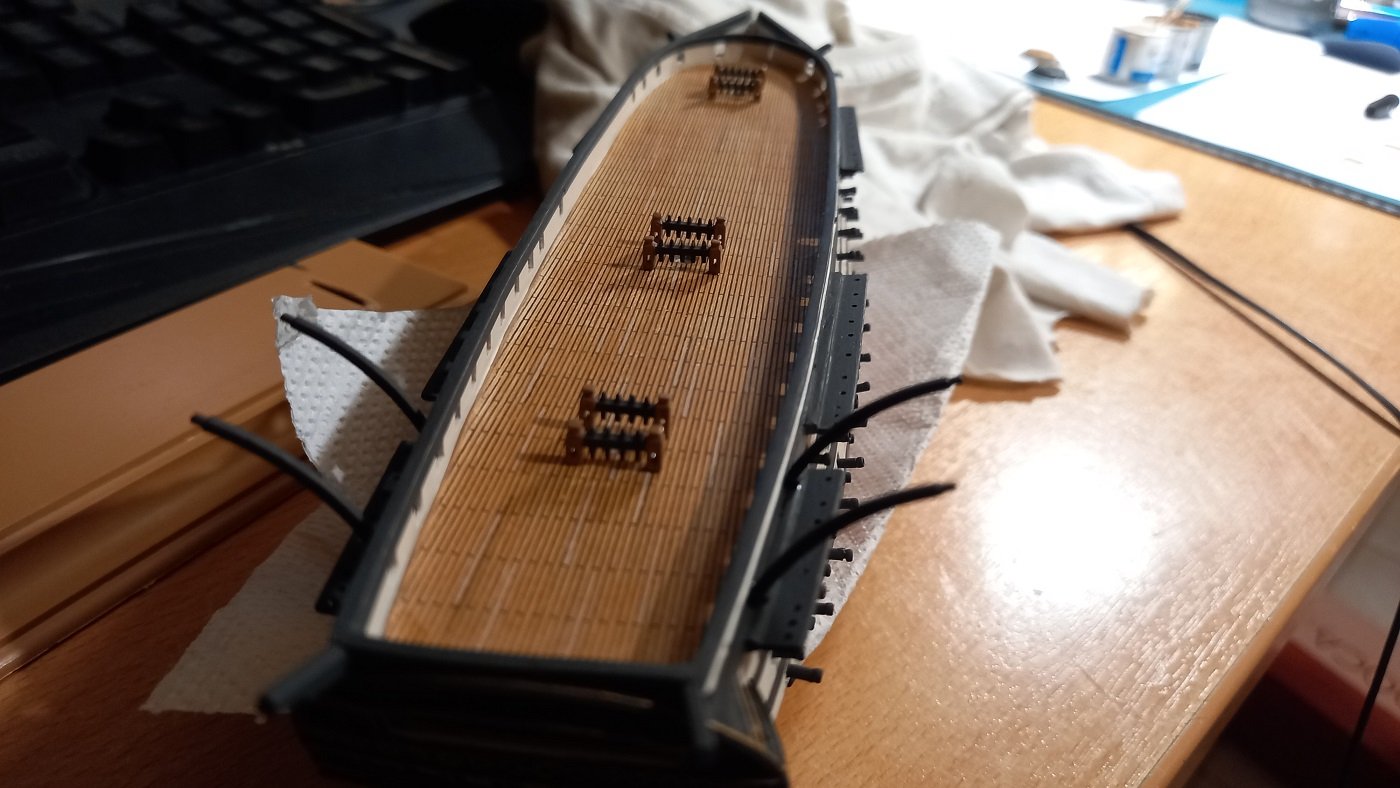
Working on the deck. I had it printed black and white and then hand painted it. Some small pieces were used from my scrap stash to produce fittings
-
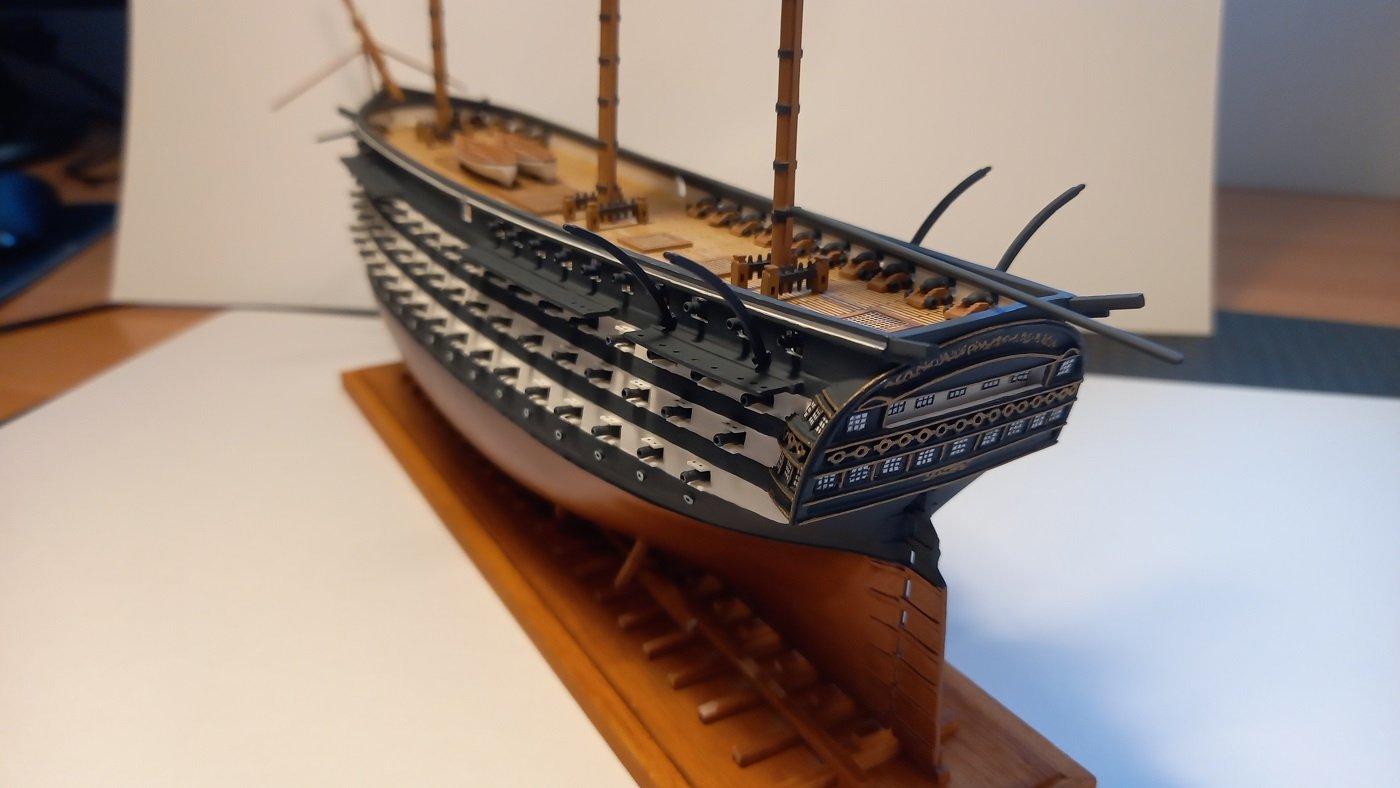
The hundreds of guns were made with scrap plastic melted spurce and beads. I used a base for the gun stubs so I dont have to paint the interior of the box behind the gupports, everything in this model is tiny. The gunports are of the American two piece style. Needless to say these were many many small pieces
-
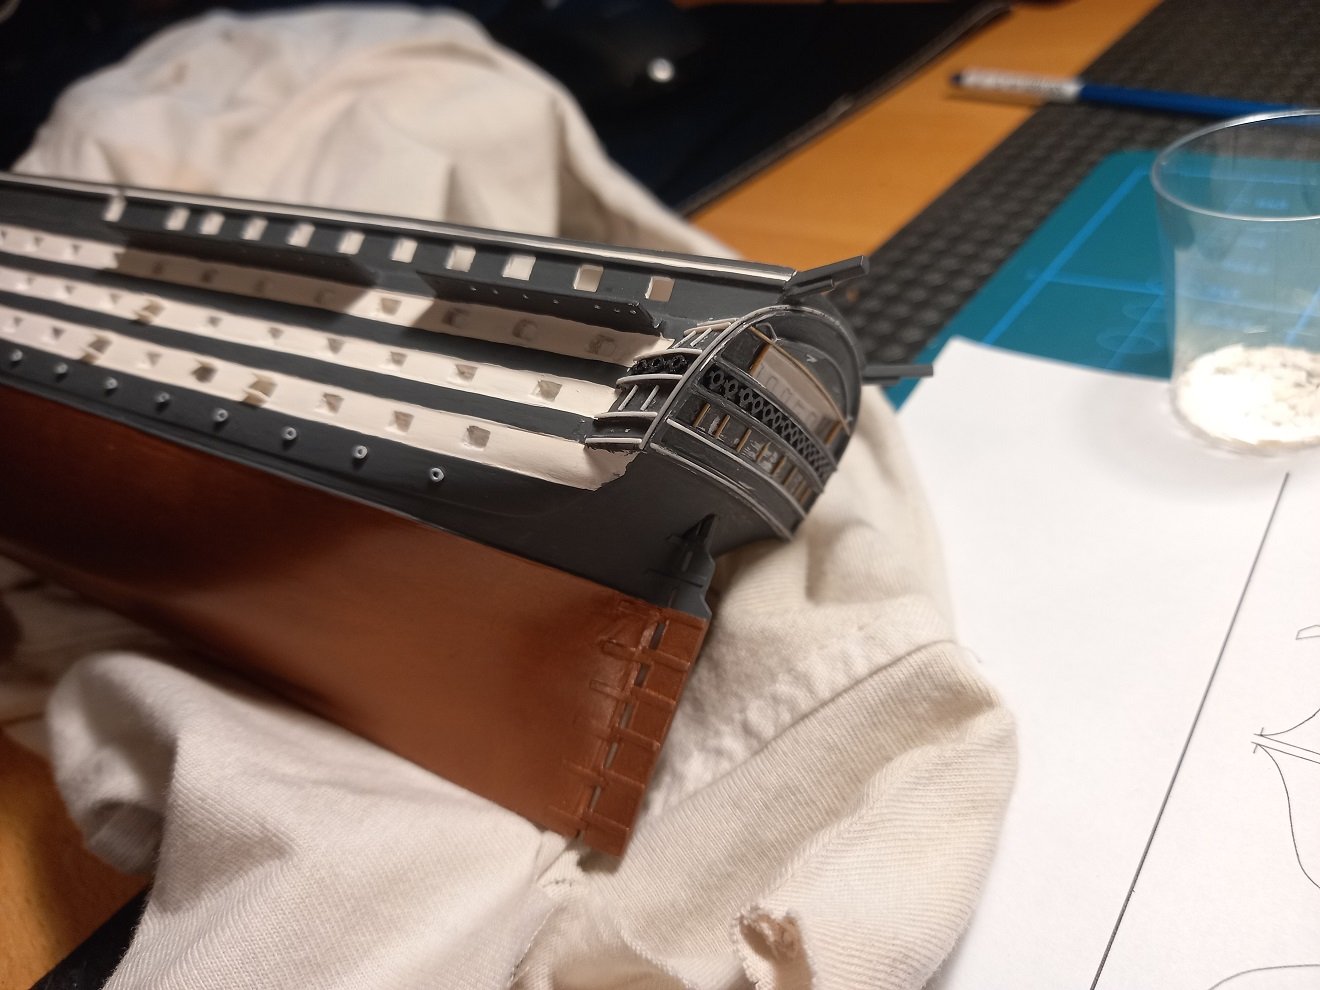
The stern galleries were a field of problem solving for me, melted spurce and scrap pieces were the order of the day there as well. Work on the coloring, surfaces etc continues with back and forths
-
The next photos show quite a few weeks later, back and forth on test painting, correcting the surfaces in many places and working with the stern galleries
- 70 replies
-
- 10
-
-
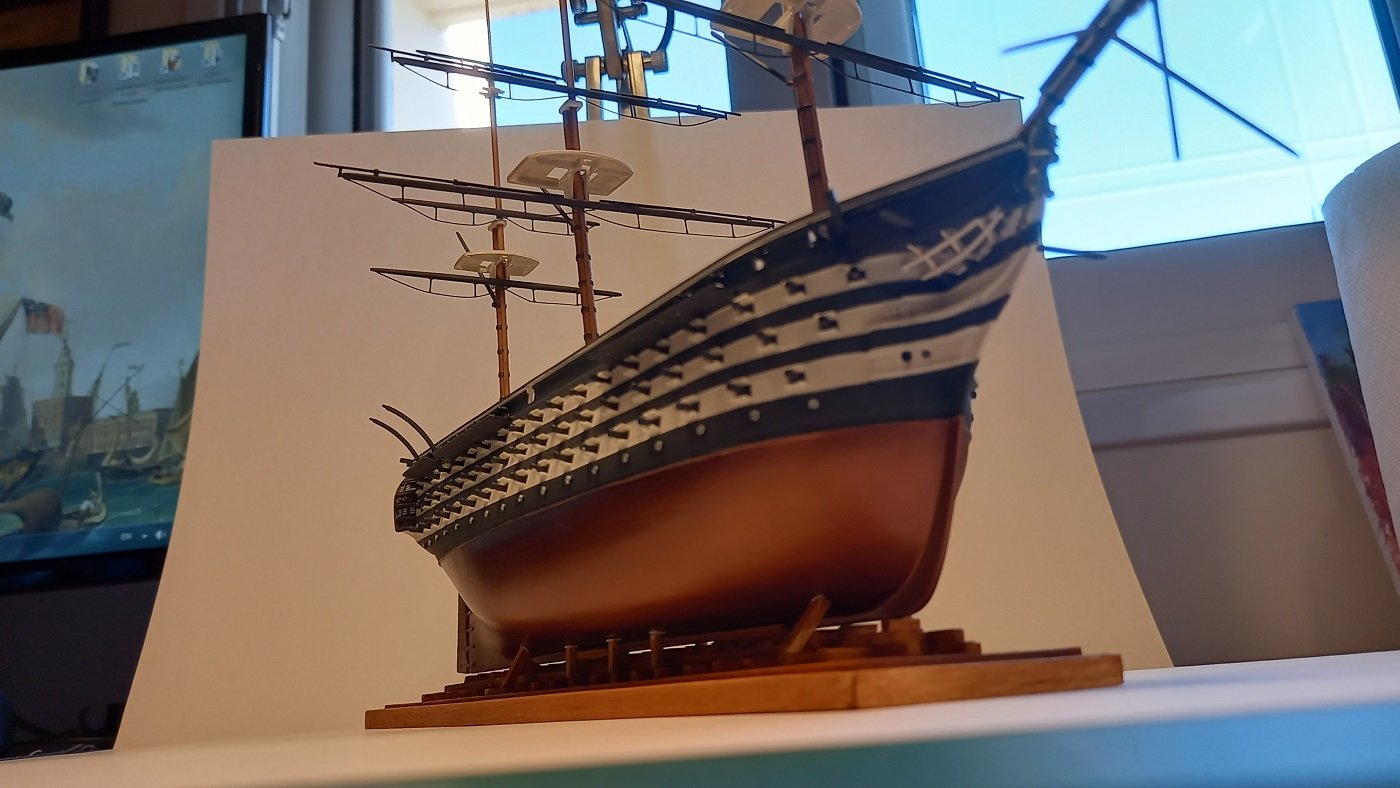
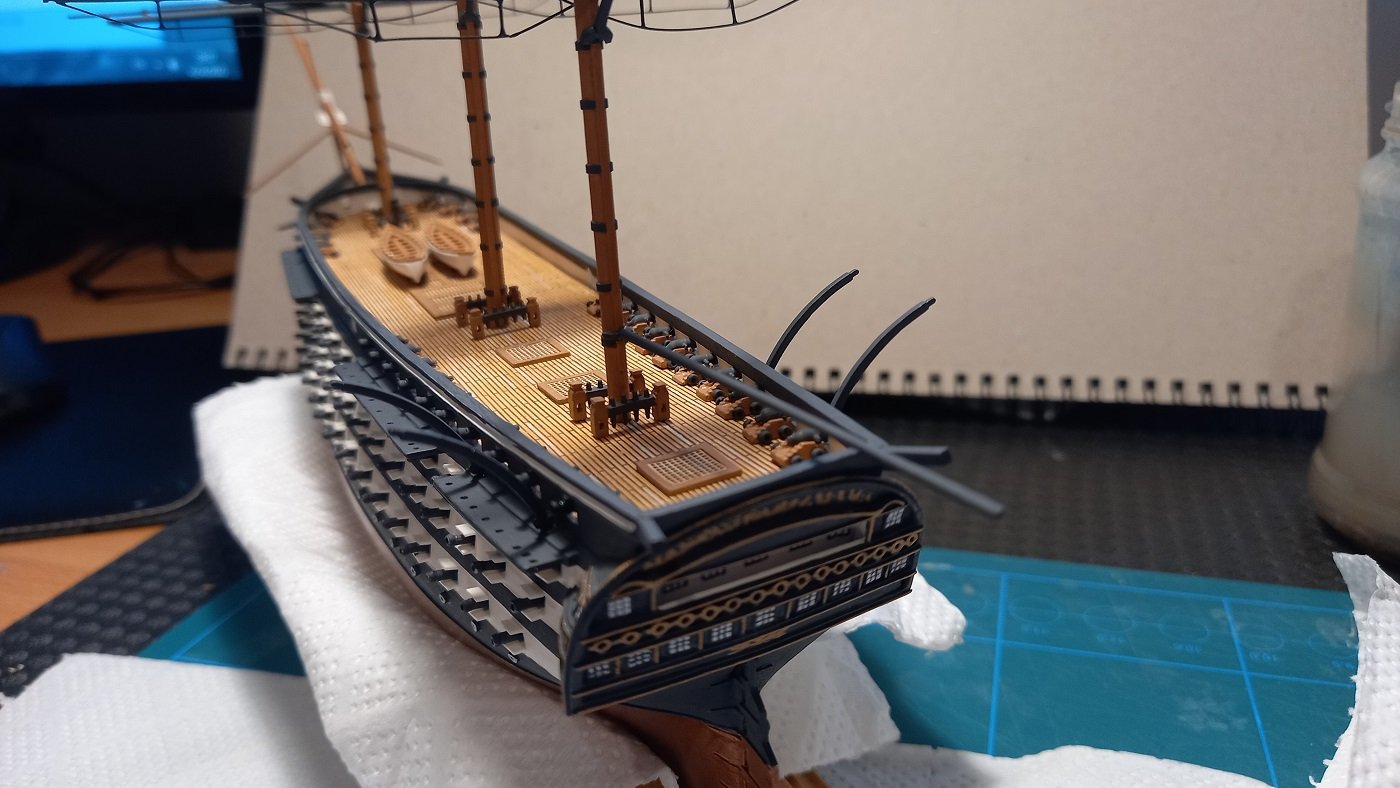
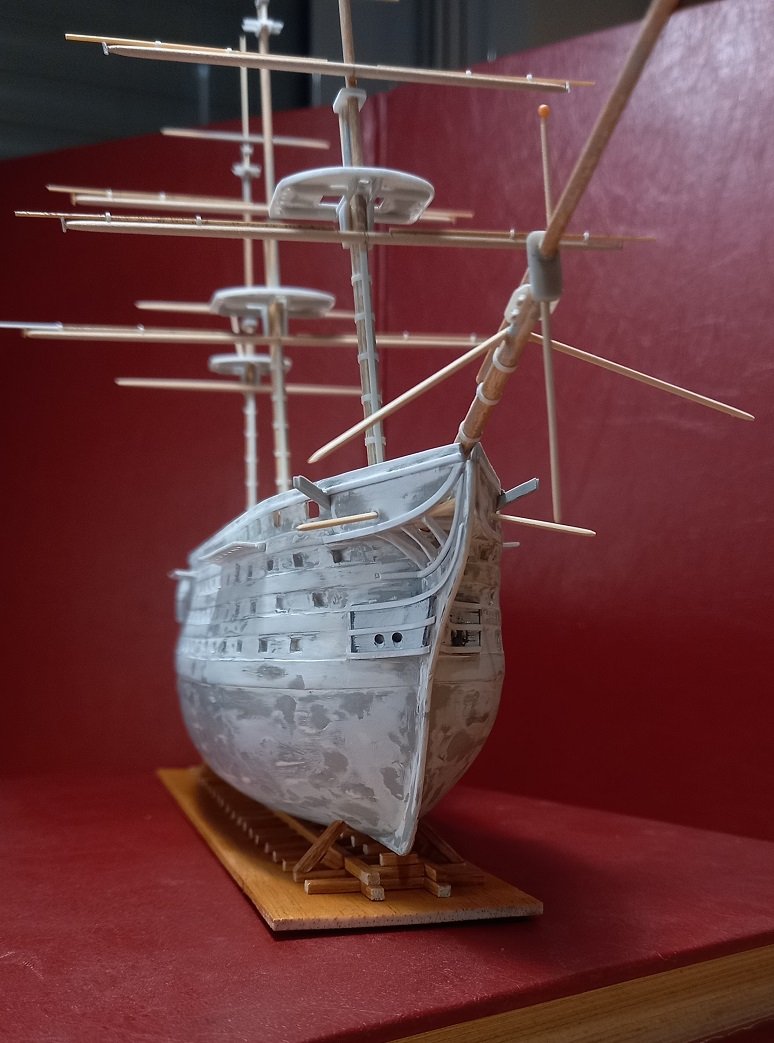
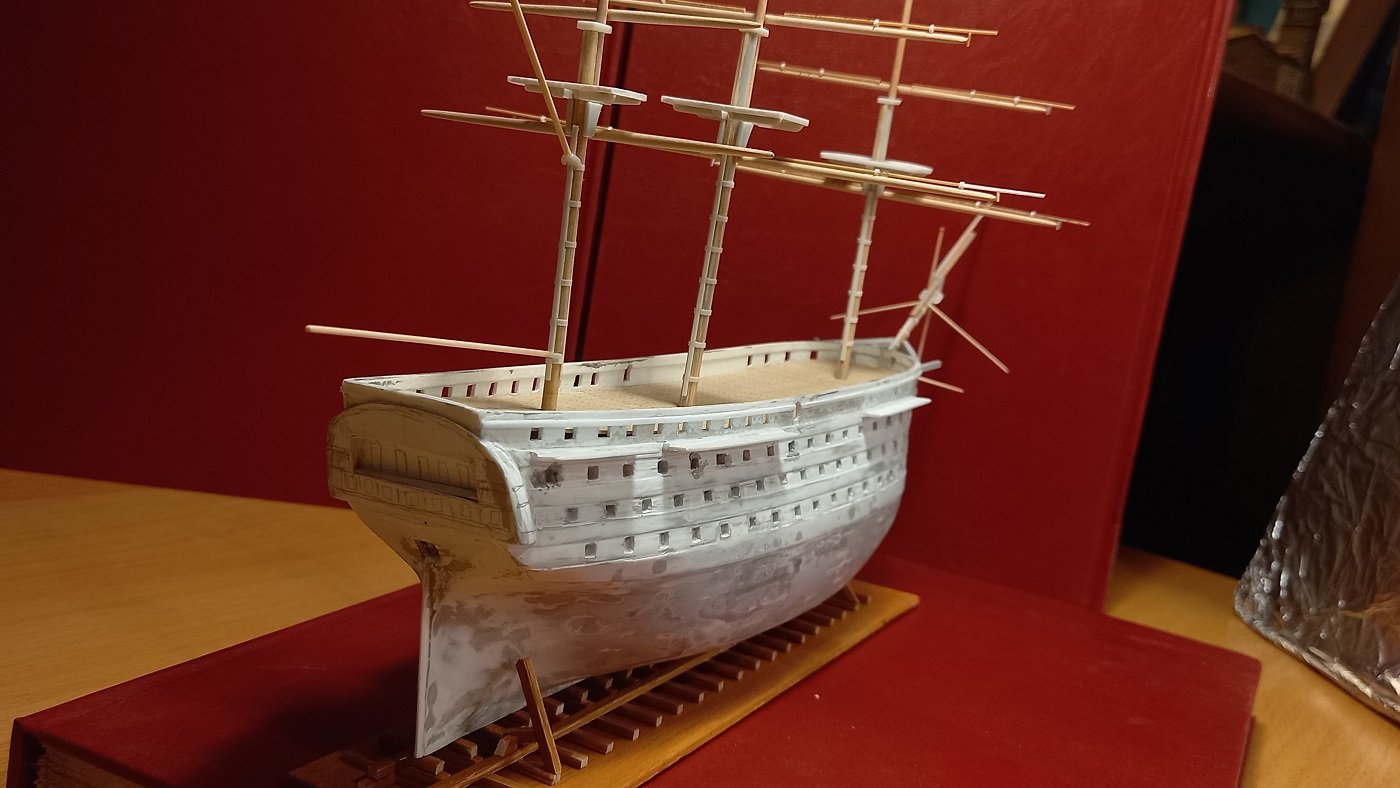
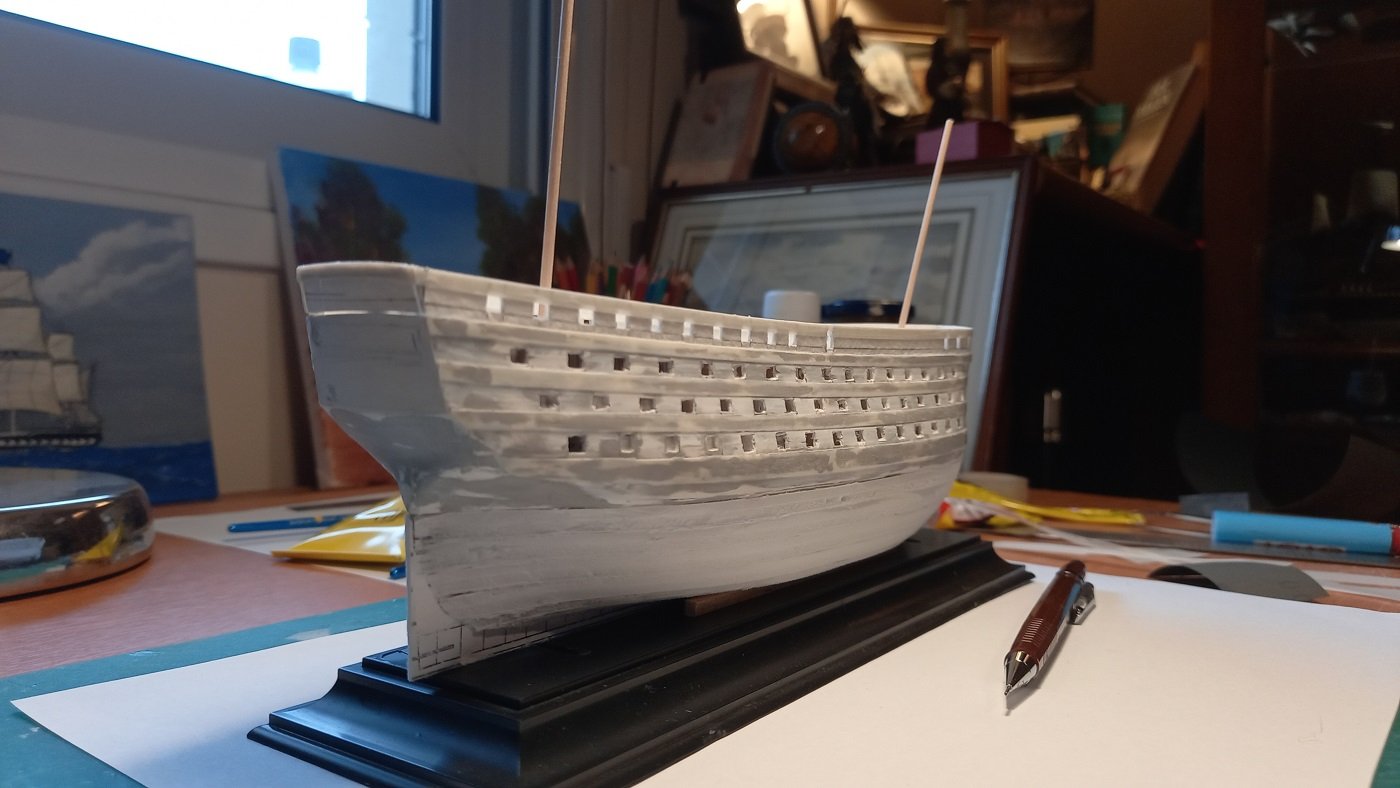
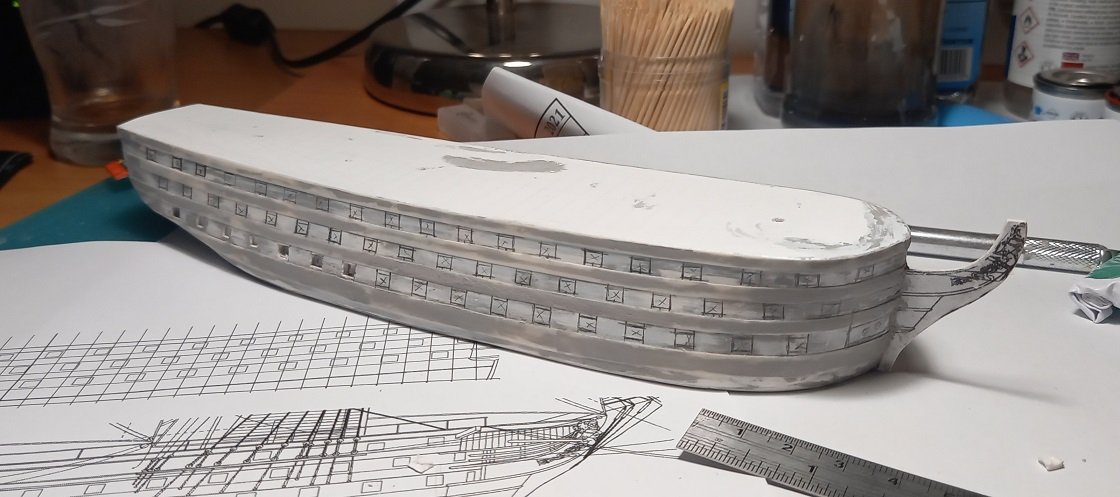
The bow details were made mostly with plastic strips and pieces. After this point I started going back and forth trying to correct the generally the surfaces and the stern in particularly. It was the most frustrating but useful part of the built
-
So here is the stern being worked on. All surfaces were still quite rough at this point The plans called for a balcony as well. The masts are simply inserted and not properly fitted. As for the deck, I did it by hand as a seperate piece, which is still not fitted properly down. I also made a nice base for a full hull display, a plan I later revised. Notice the boxes inserted to create the gunports, quite a lot of them and about 2,5mm cubed
-
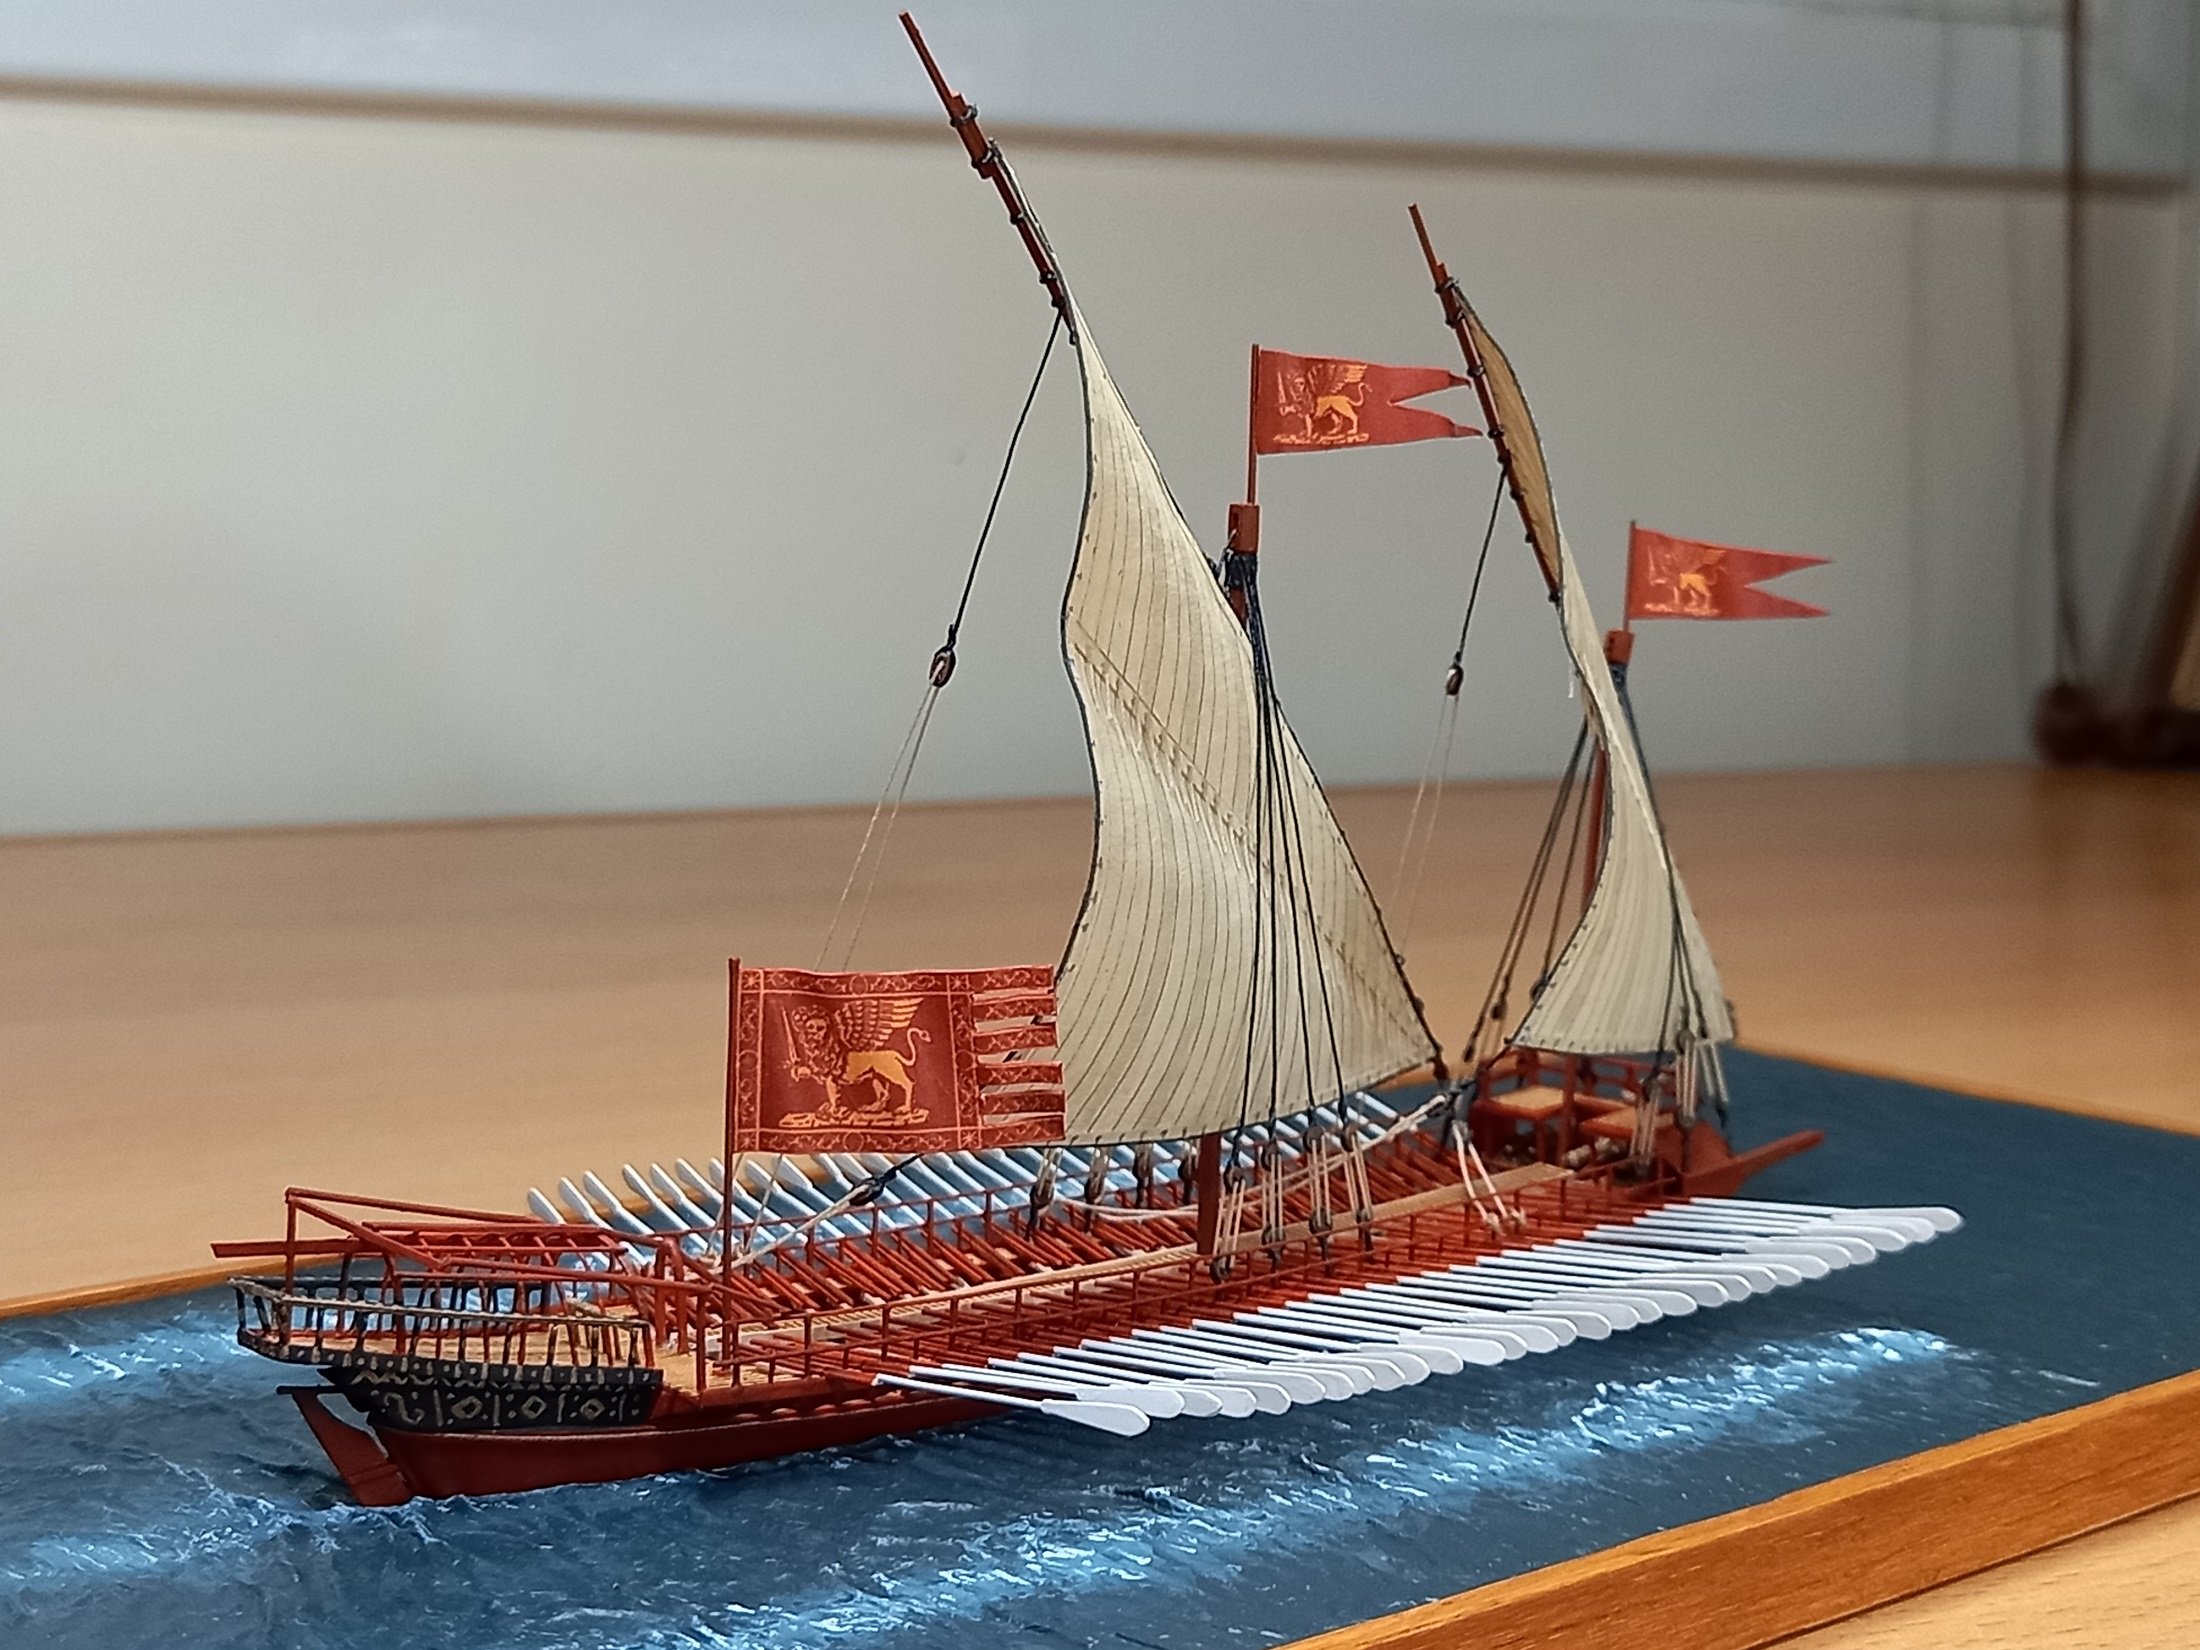
Thank you! The museum is right next to the Dolmabahce Palace. It has royal barges and a galley, but not much in the way of models unfortunately.
-
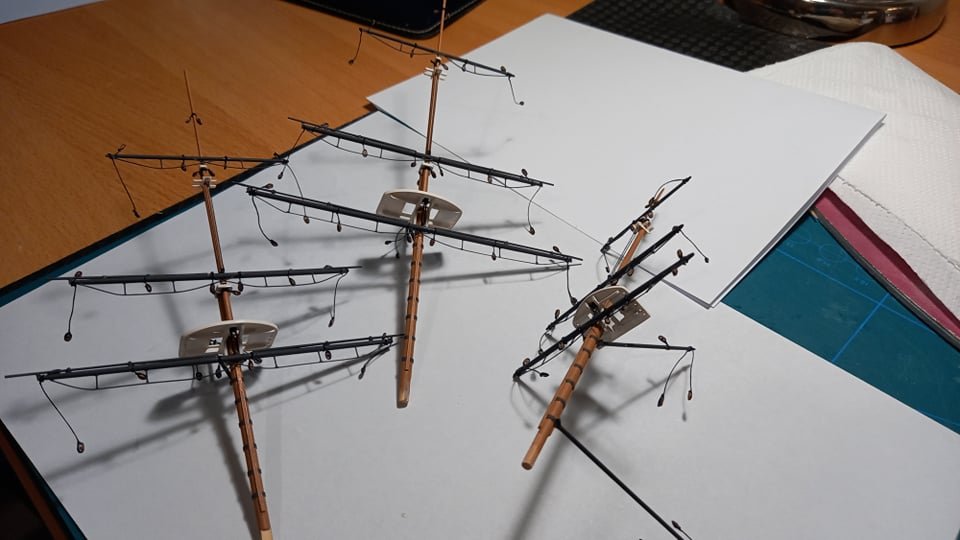
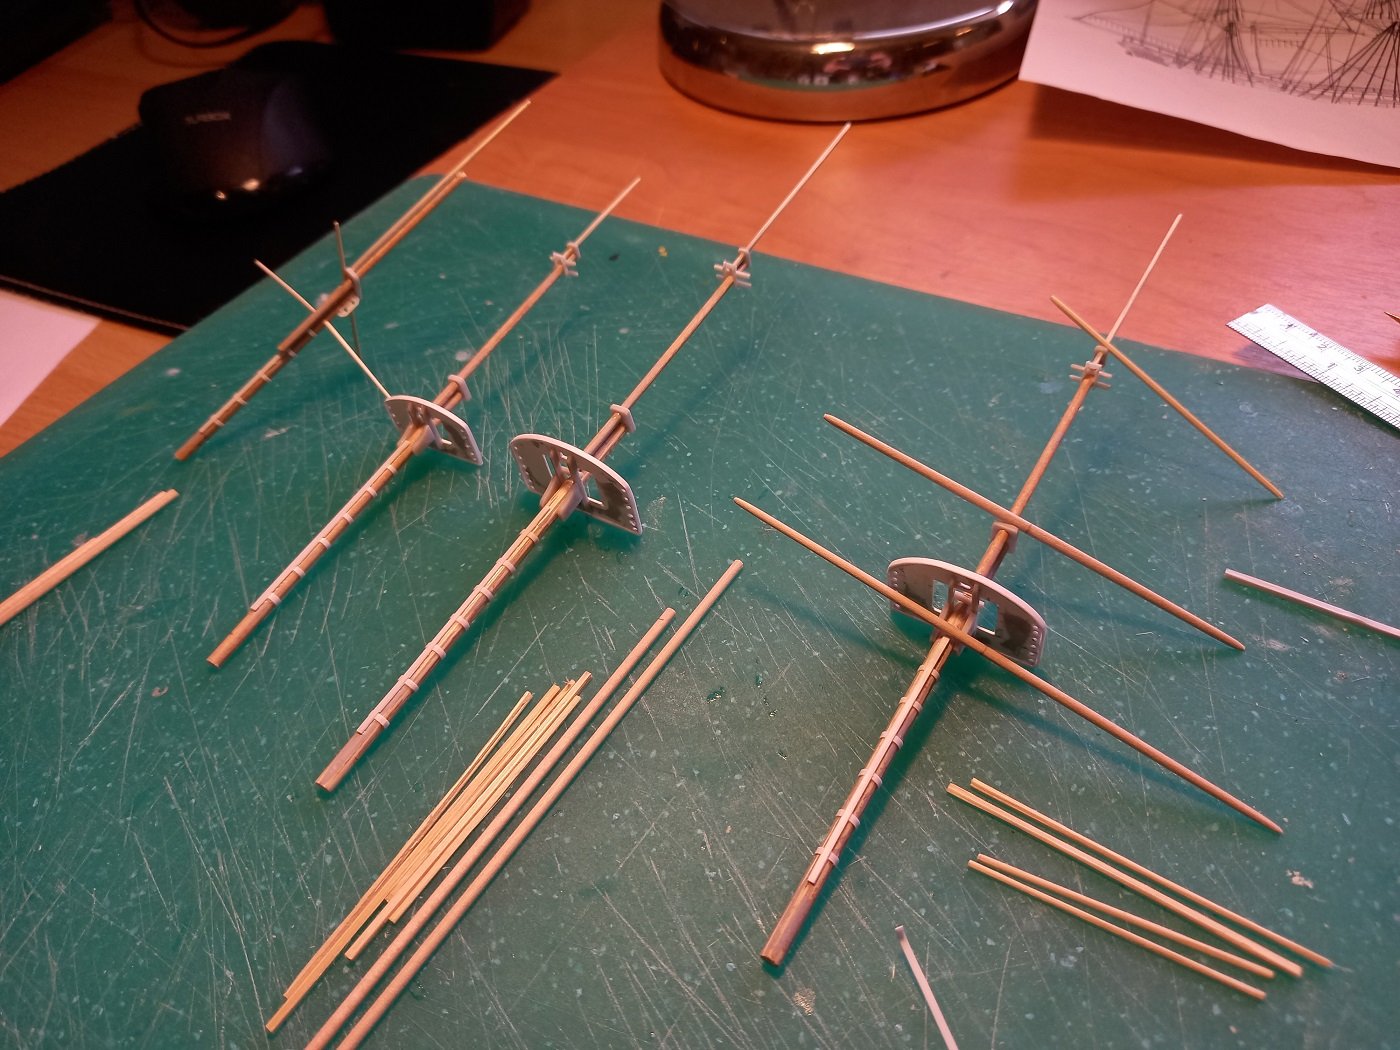
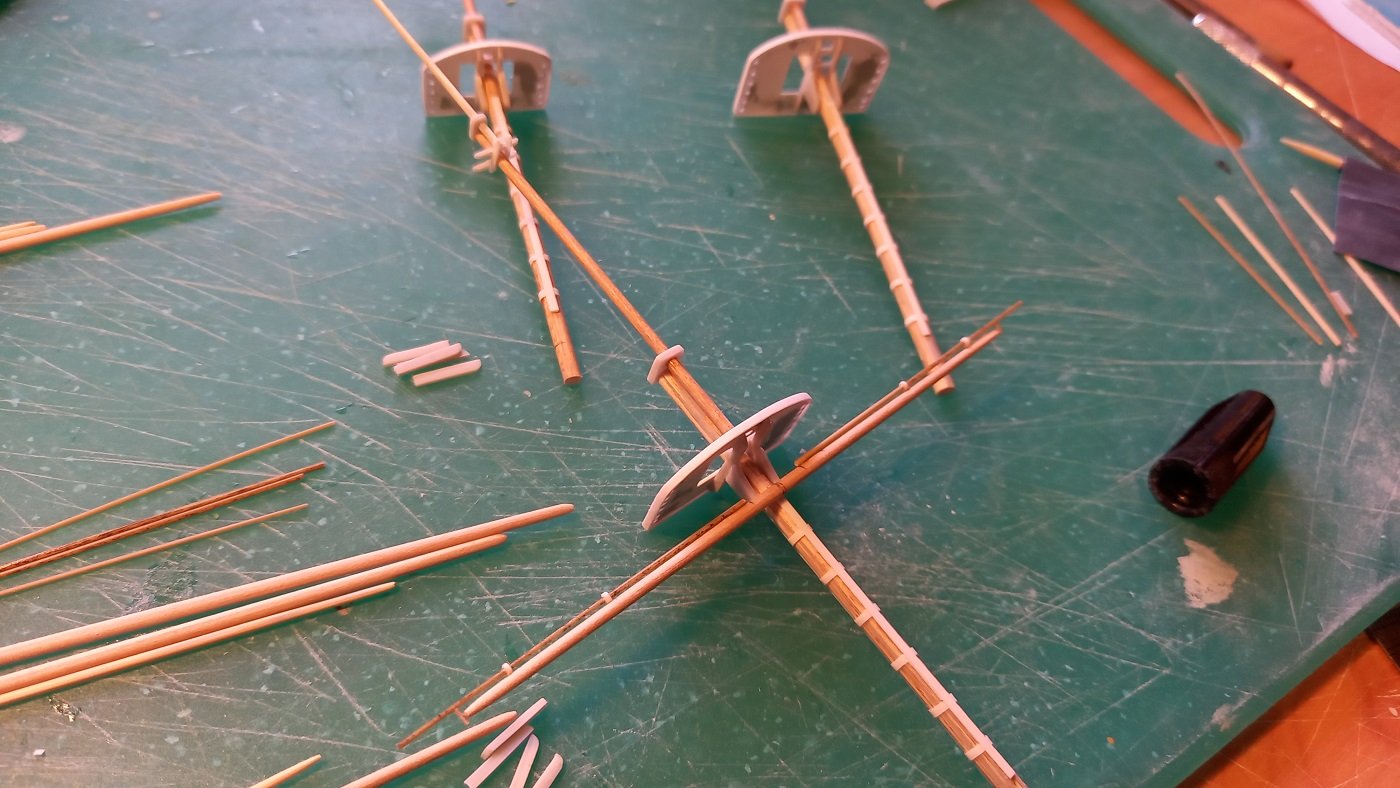
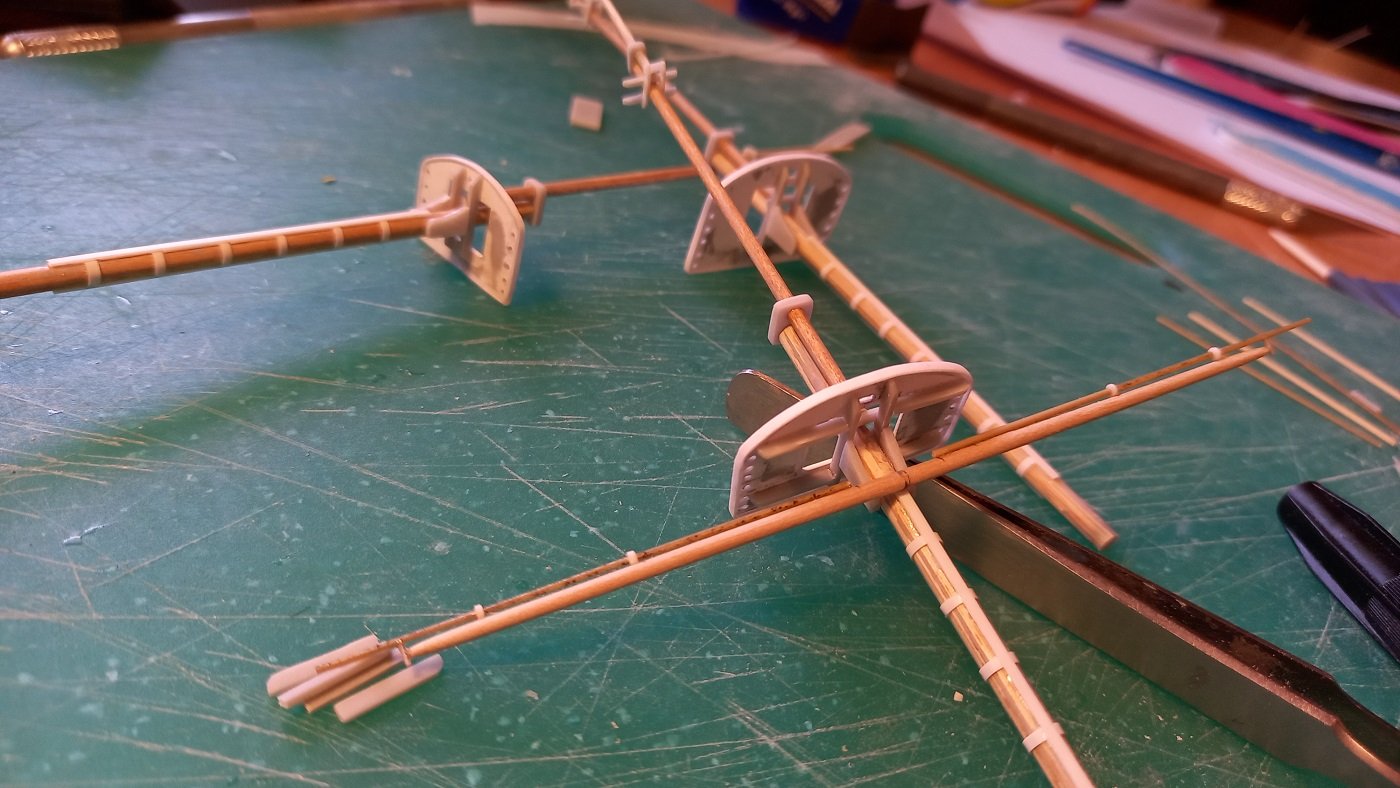
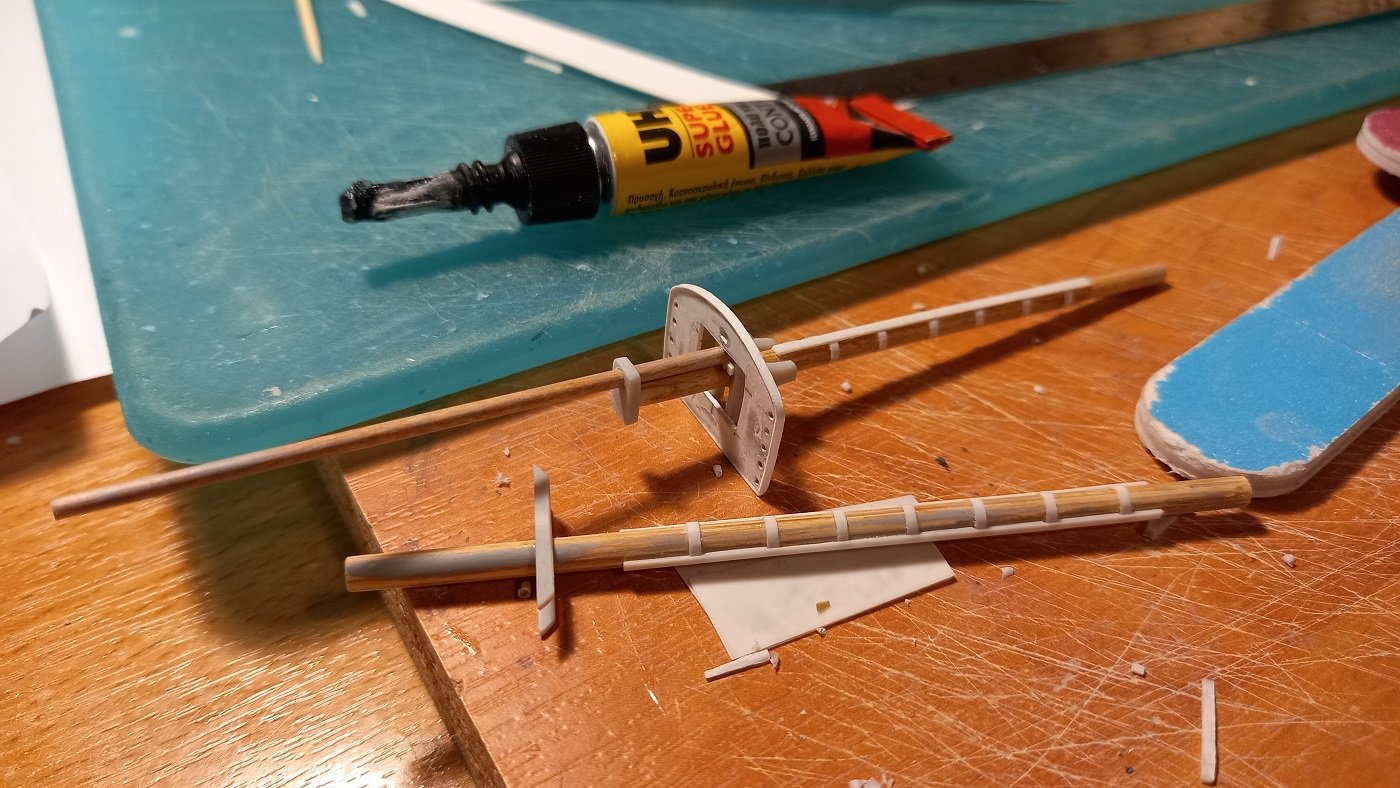
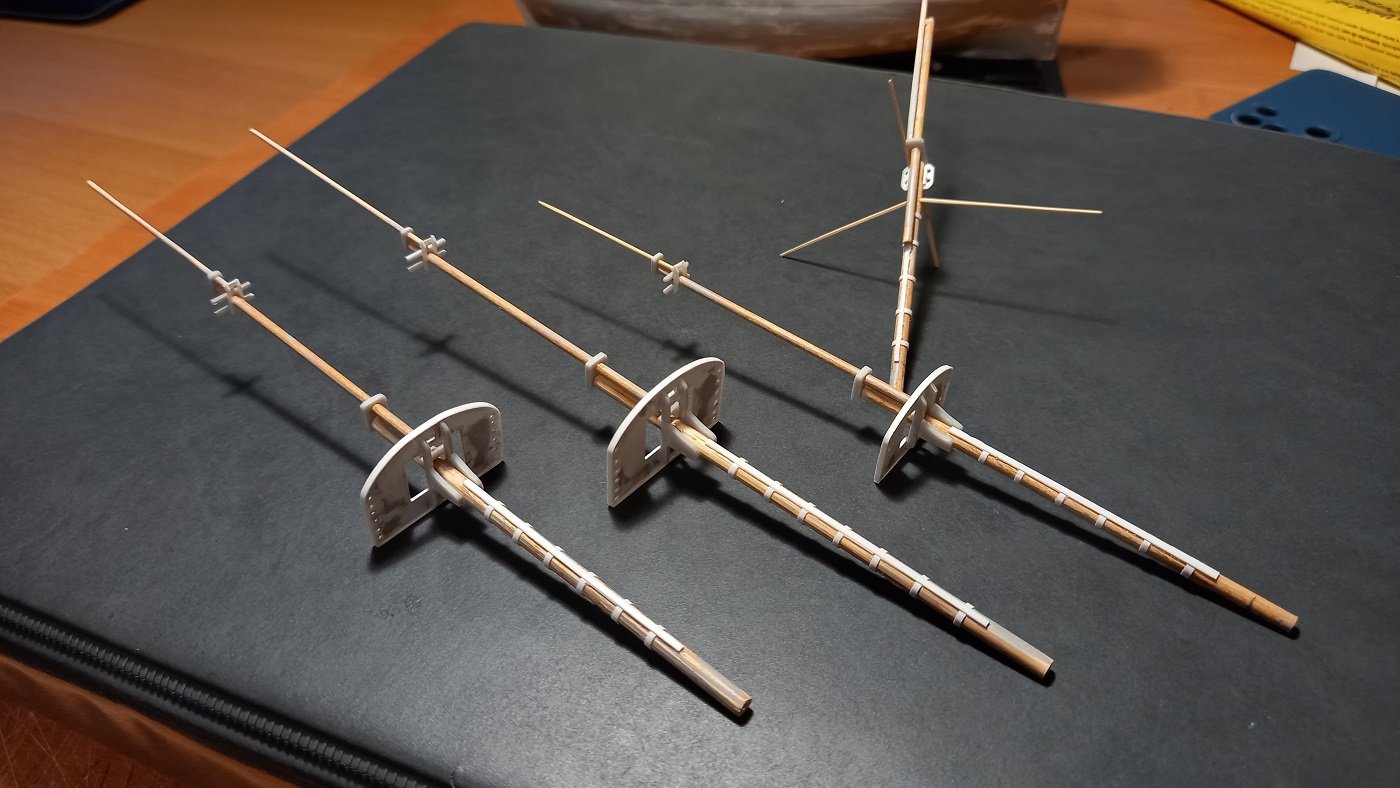
The yards were made with the same method, I also heavily used melted spruce, both here and throught the ship
- 70 replies
-
- 12
-
-
-
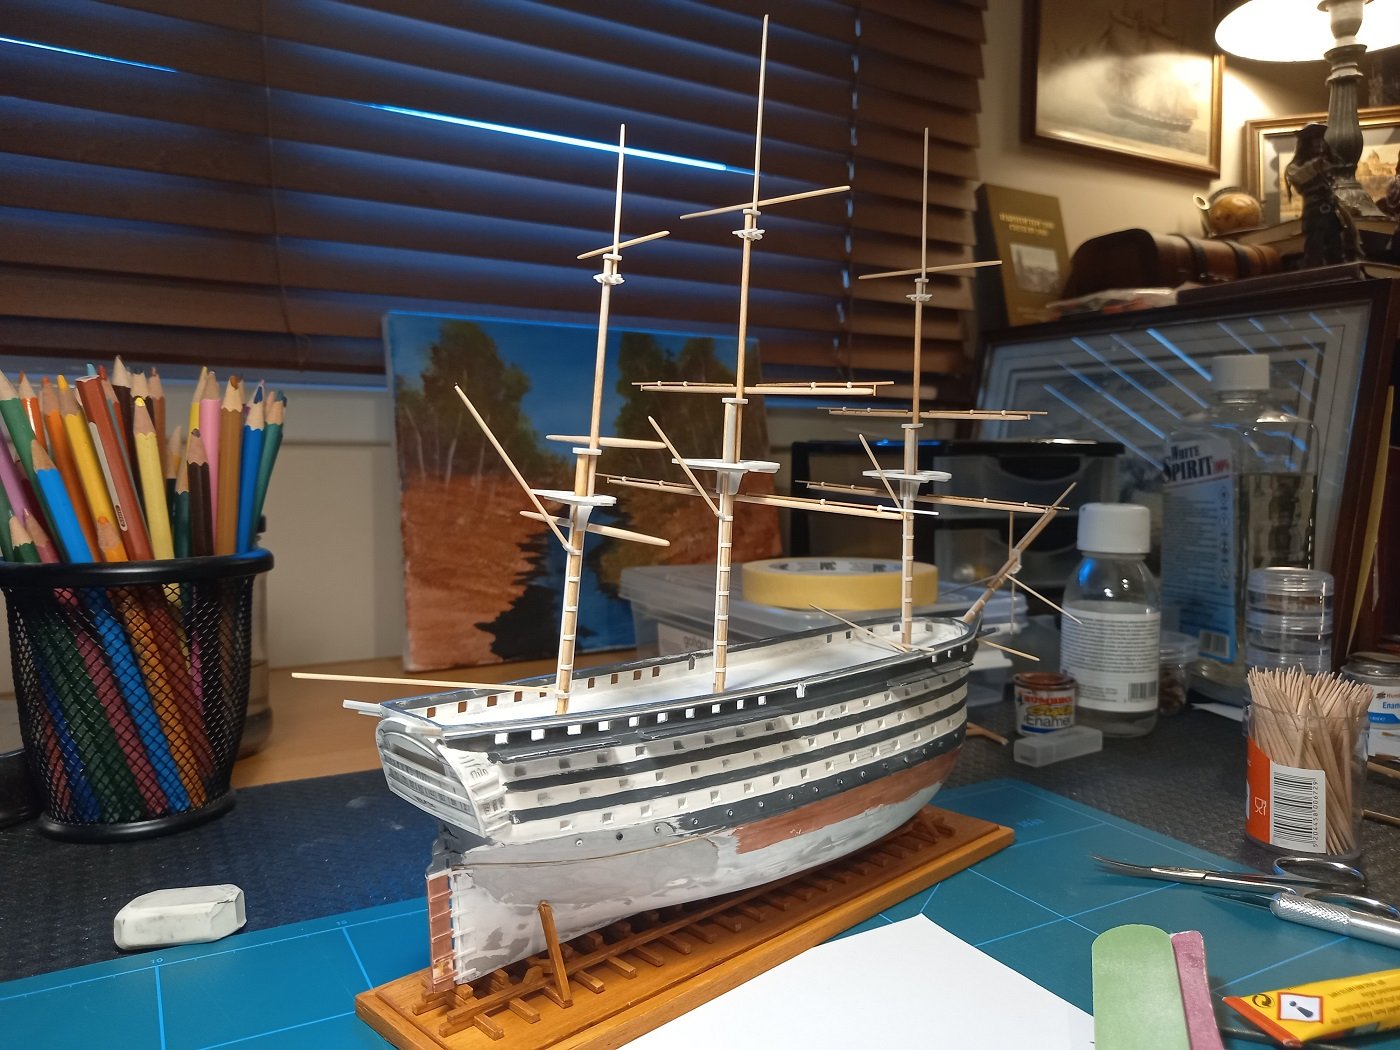
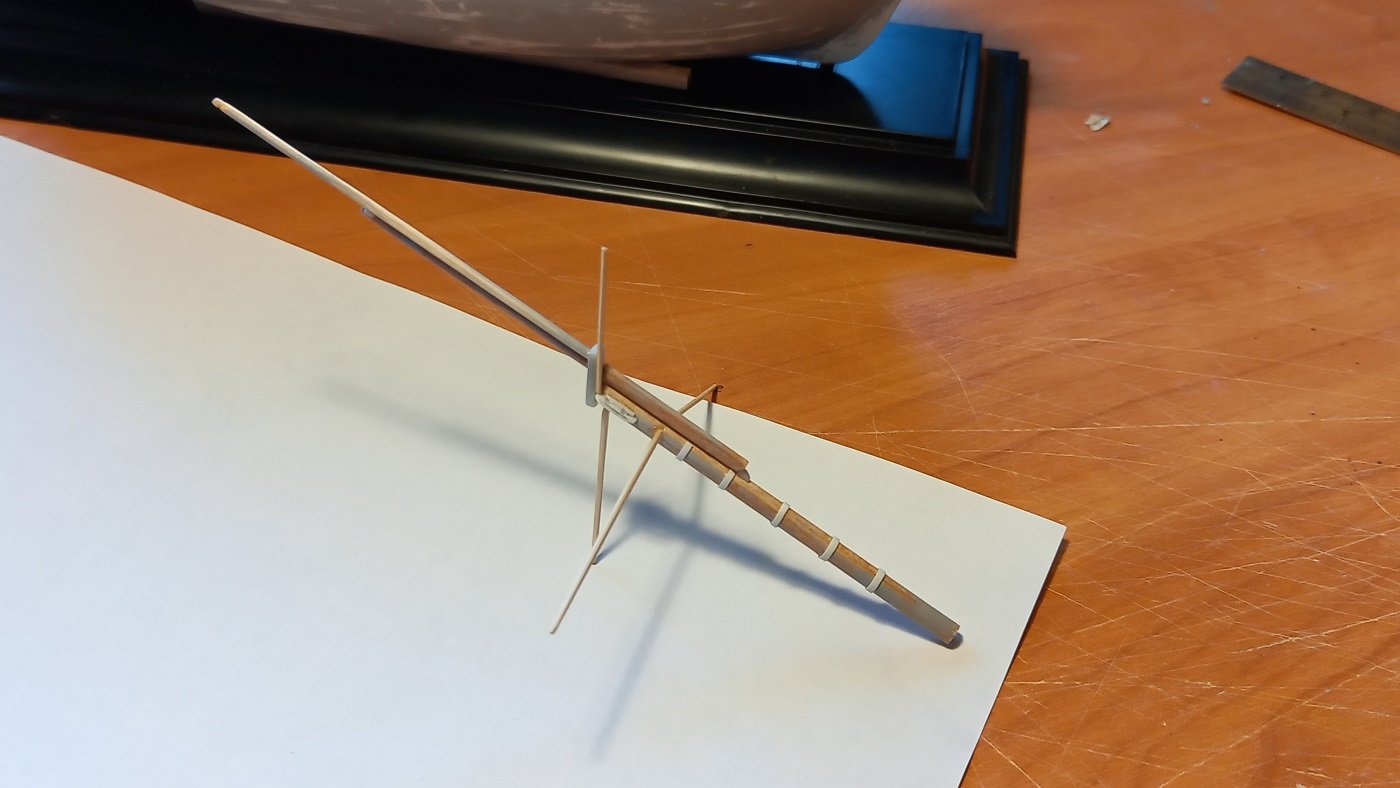
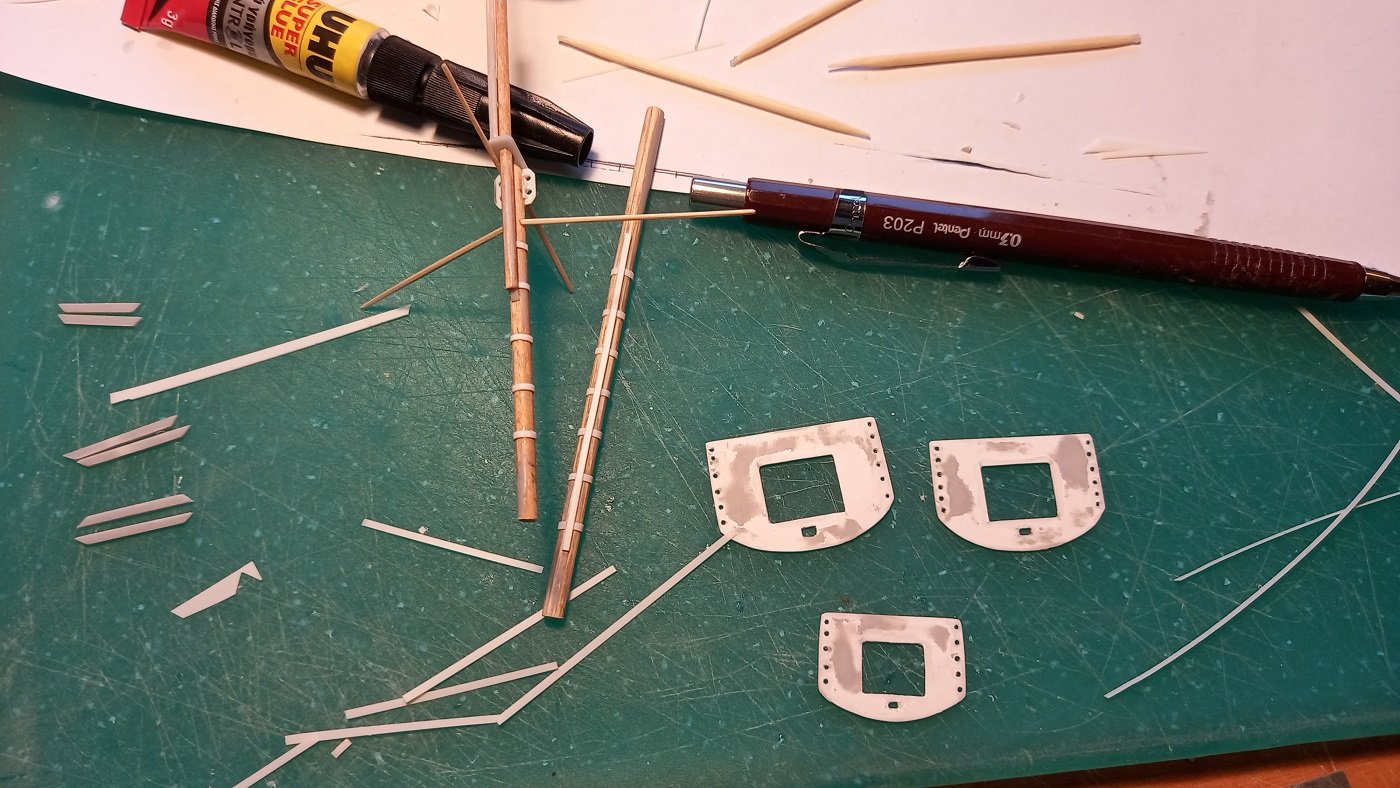
I used balsa wood, bamboo pieces sanded down and plastic strips to make the masts. Some yards I later remade

-
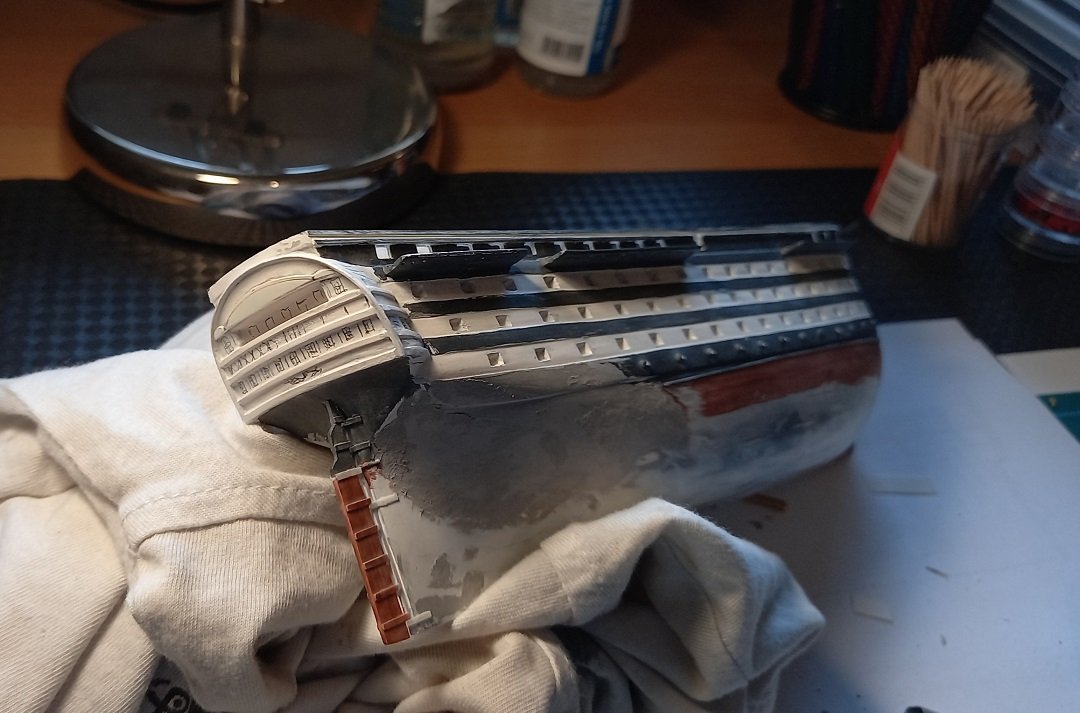
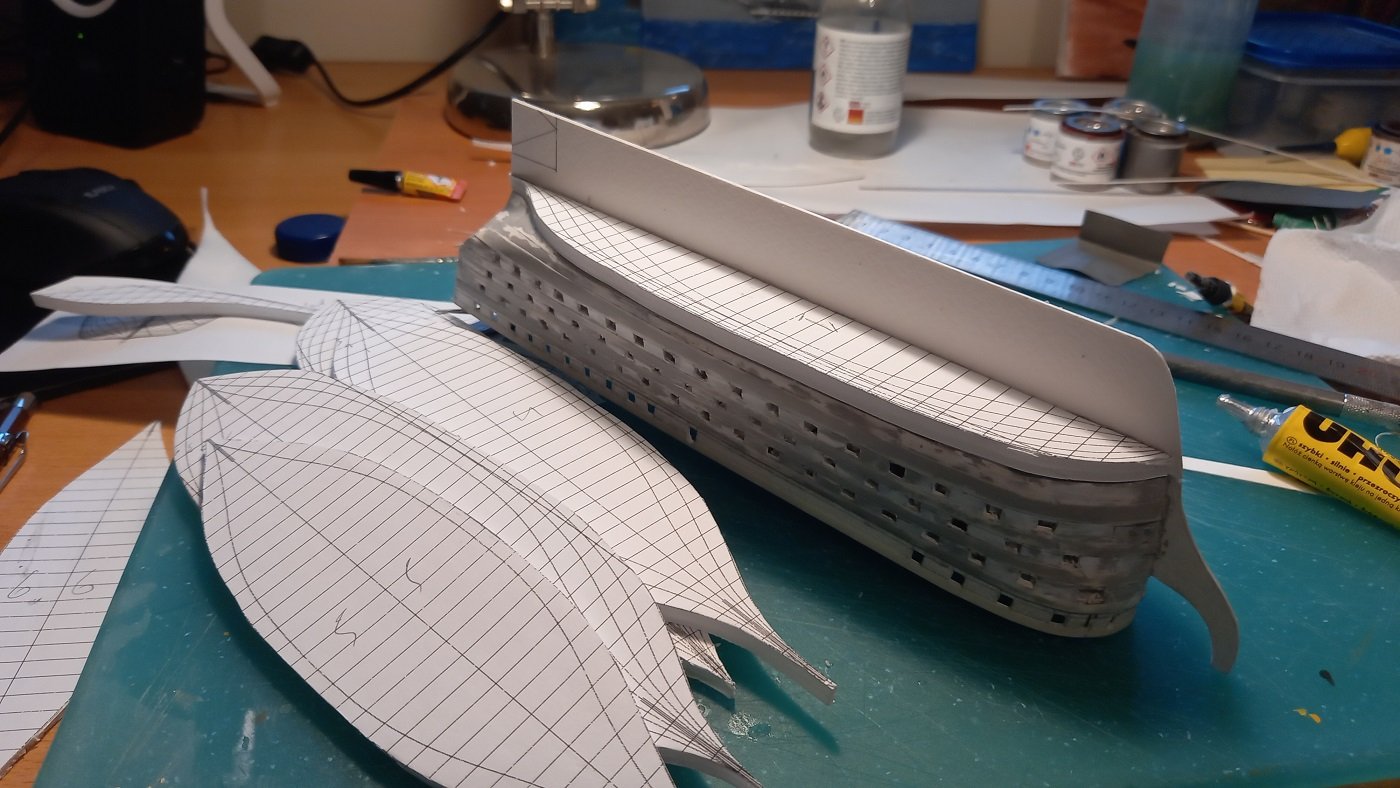
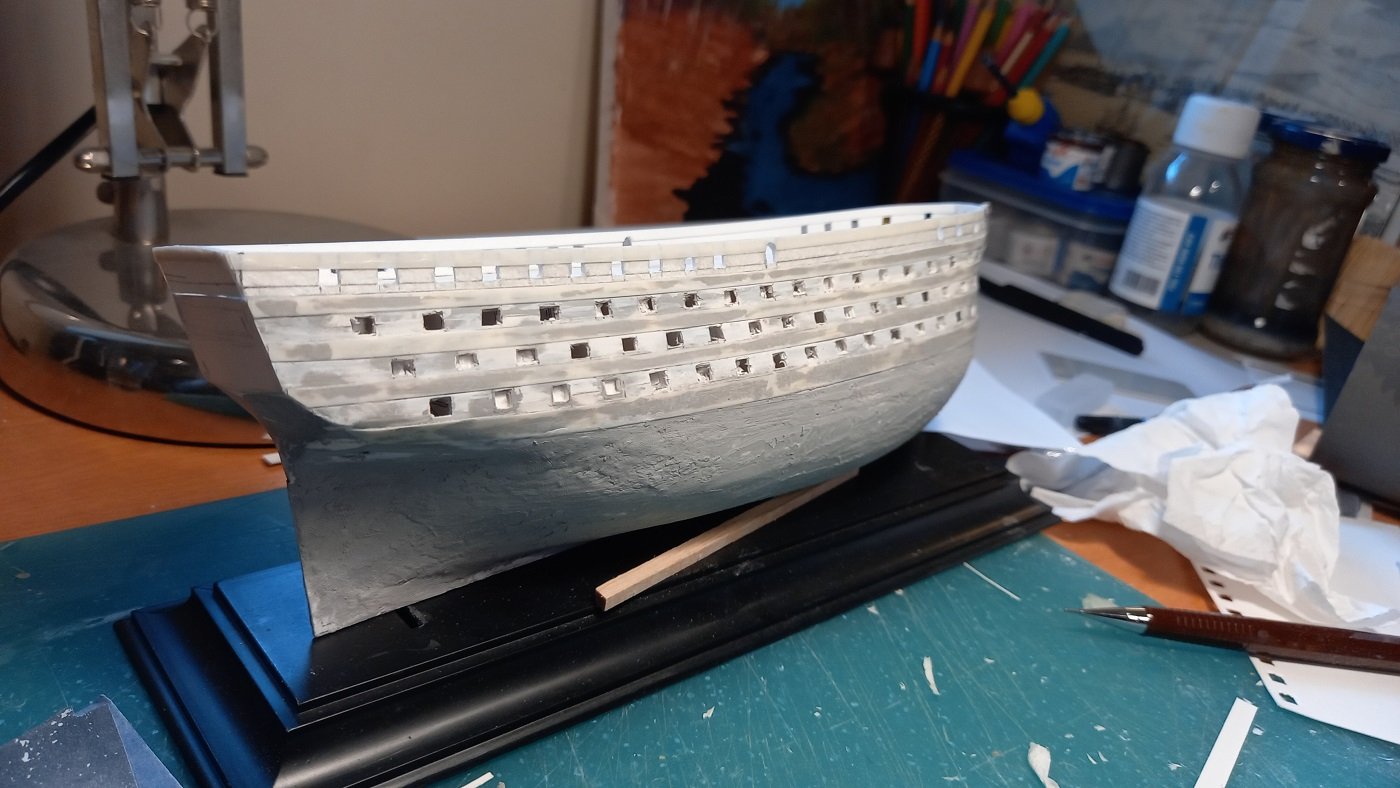
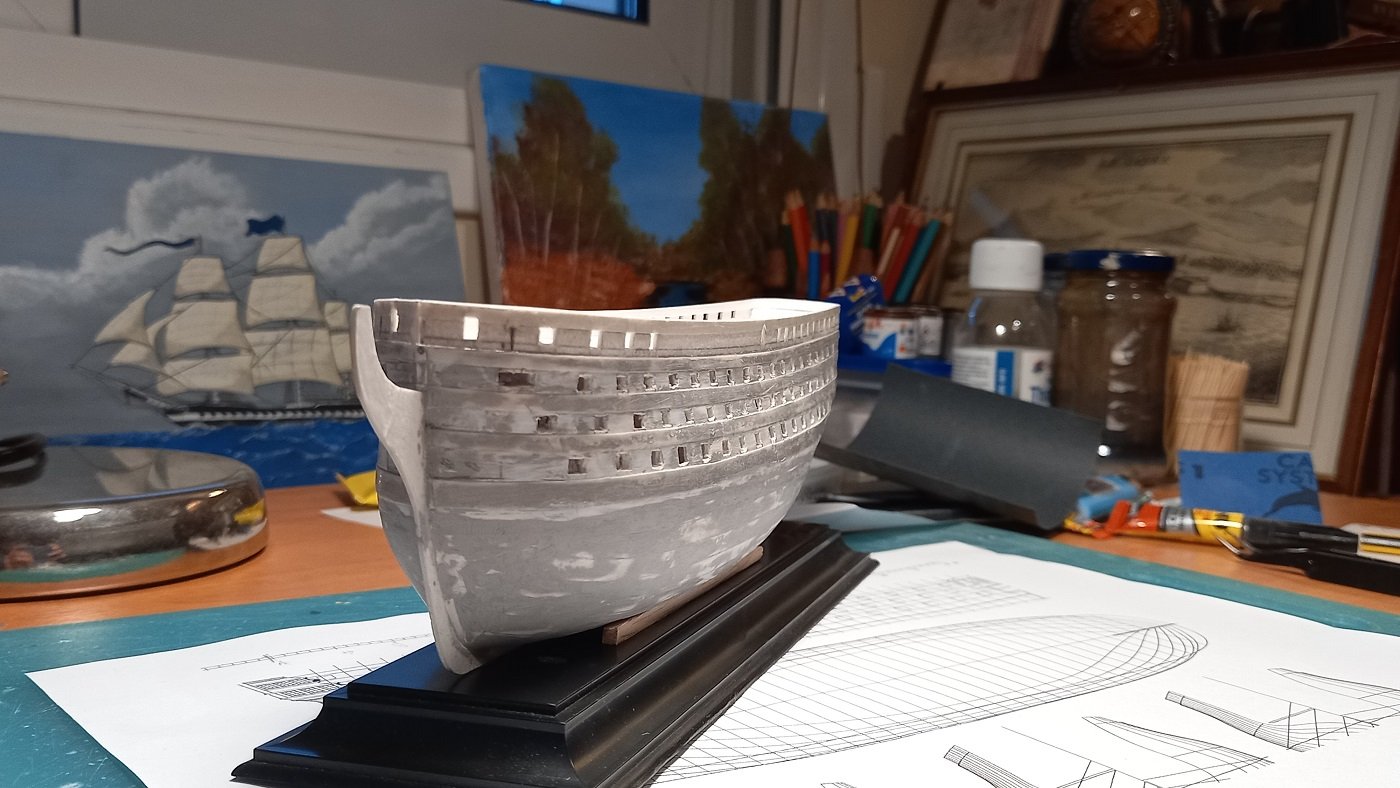
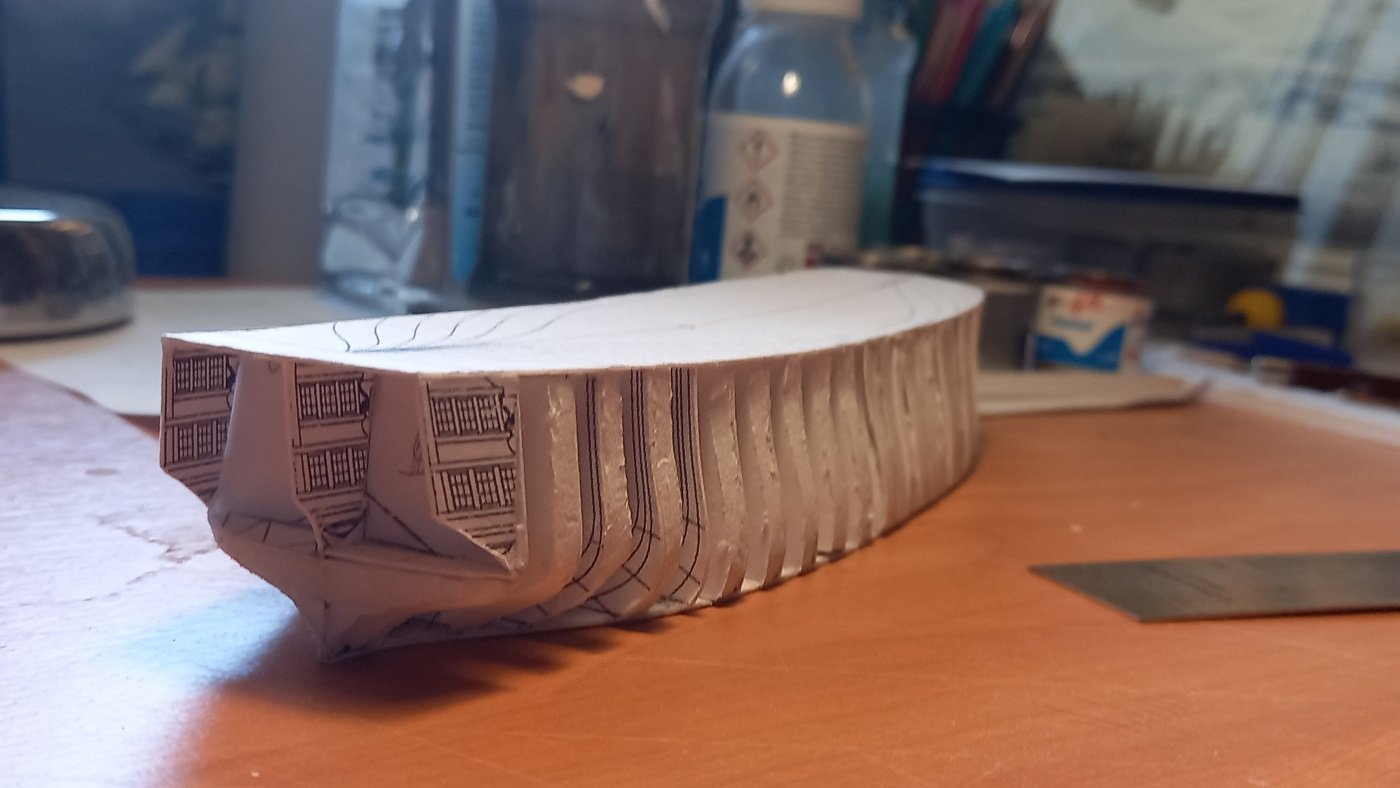
So then I decided to make the lower hull, as this was still an experimental model for me. This time I went for the bread and butter method, so I printed horizontal lines. After applying a simple planking I coated it with modelling filler.
- 70 replies
-
- 10
-
-
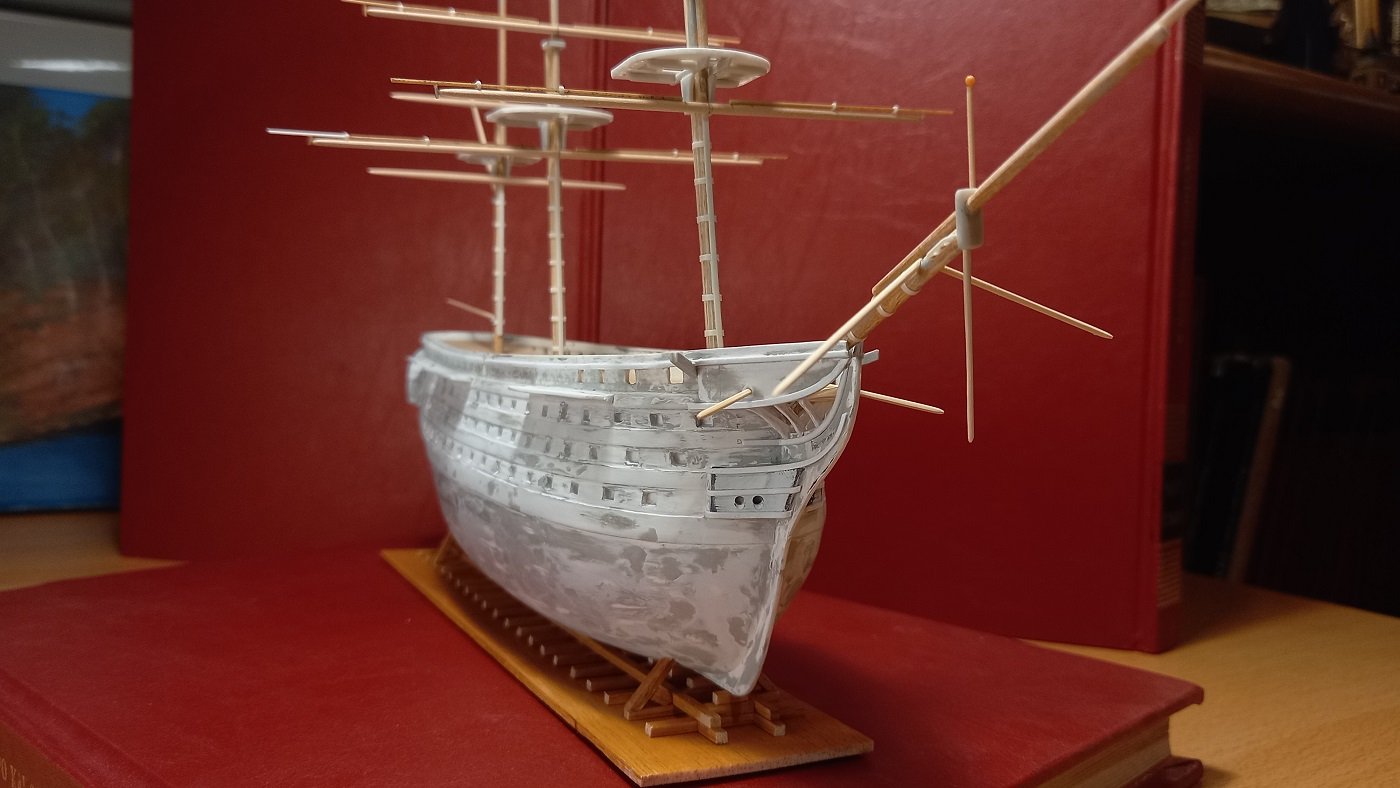
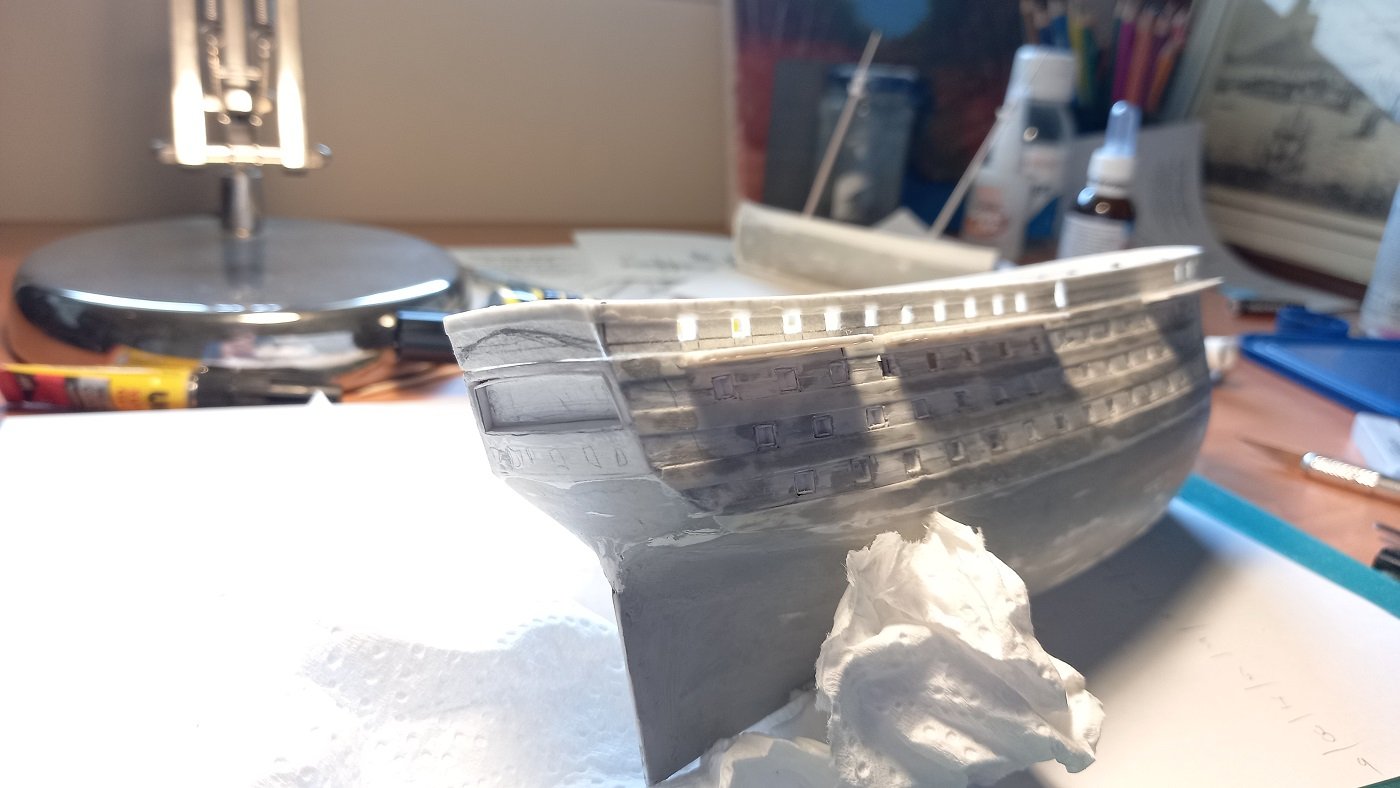
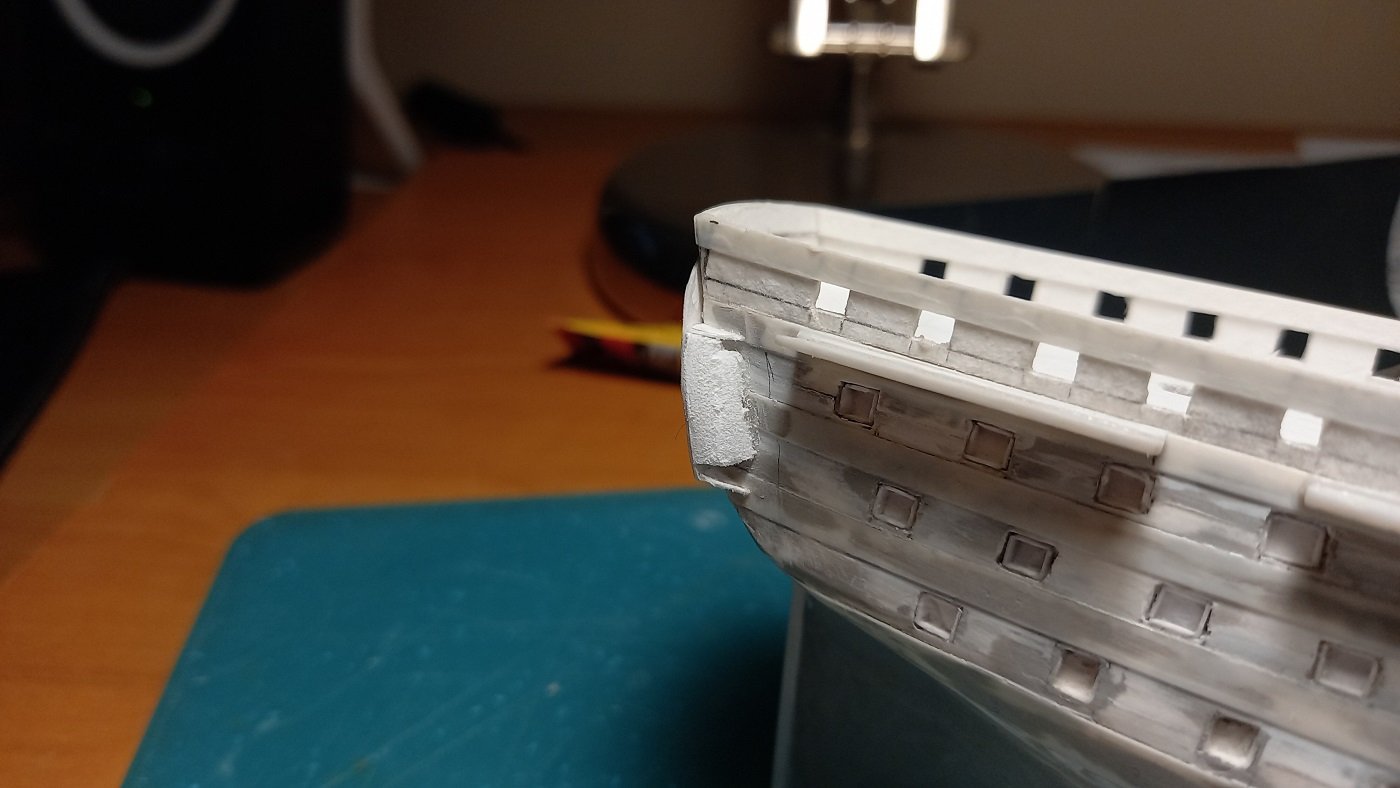
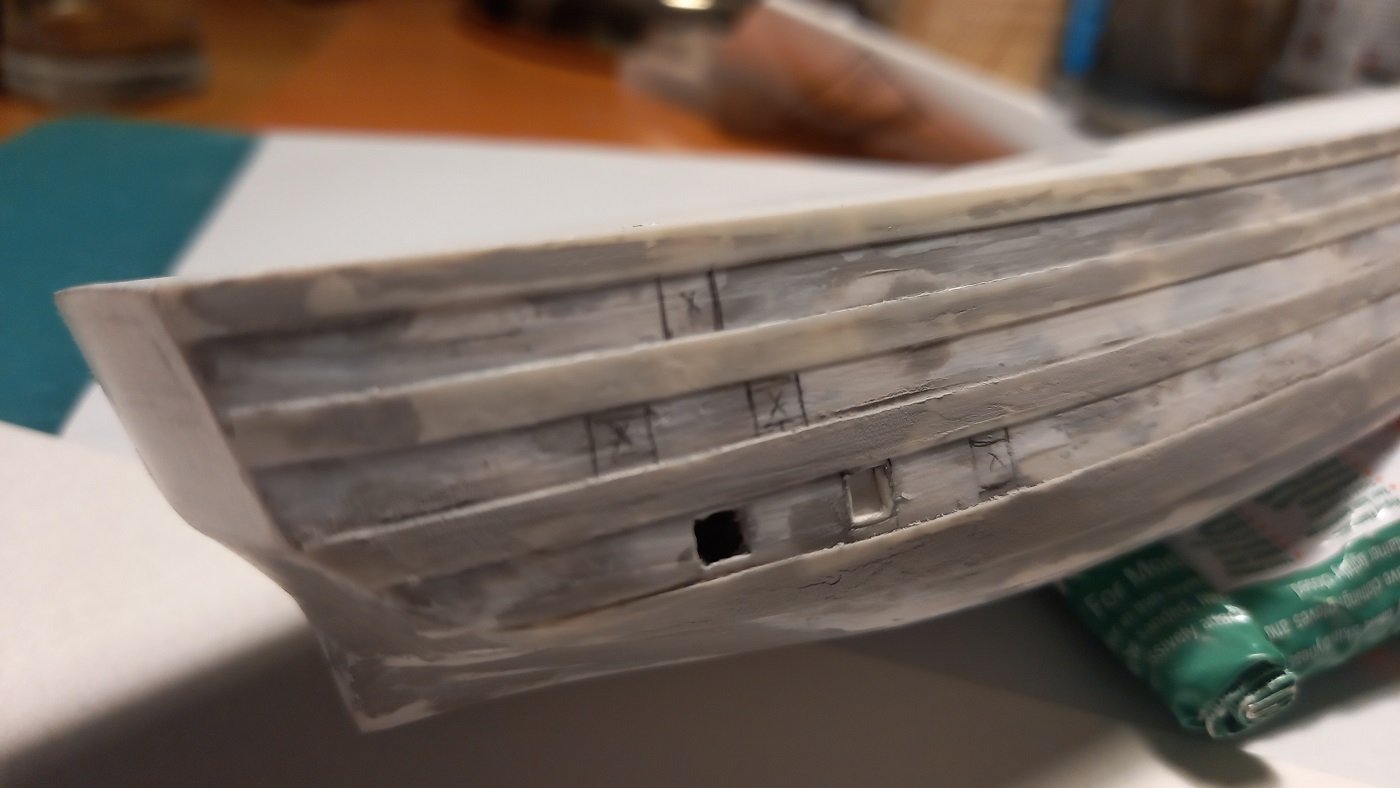
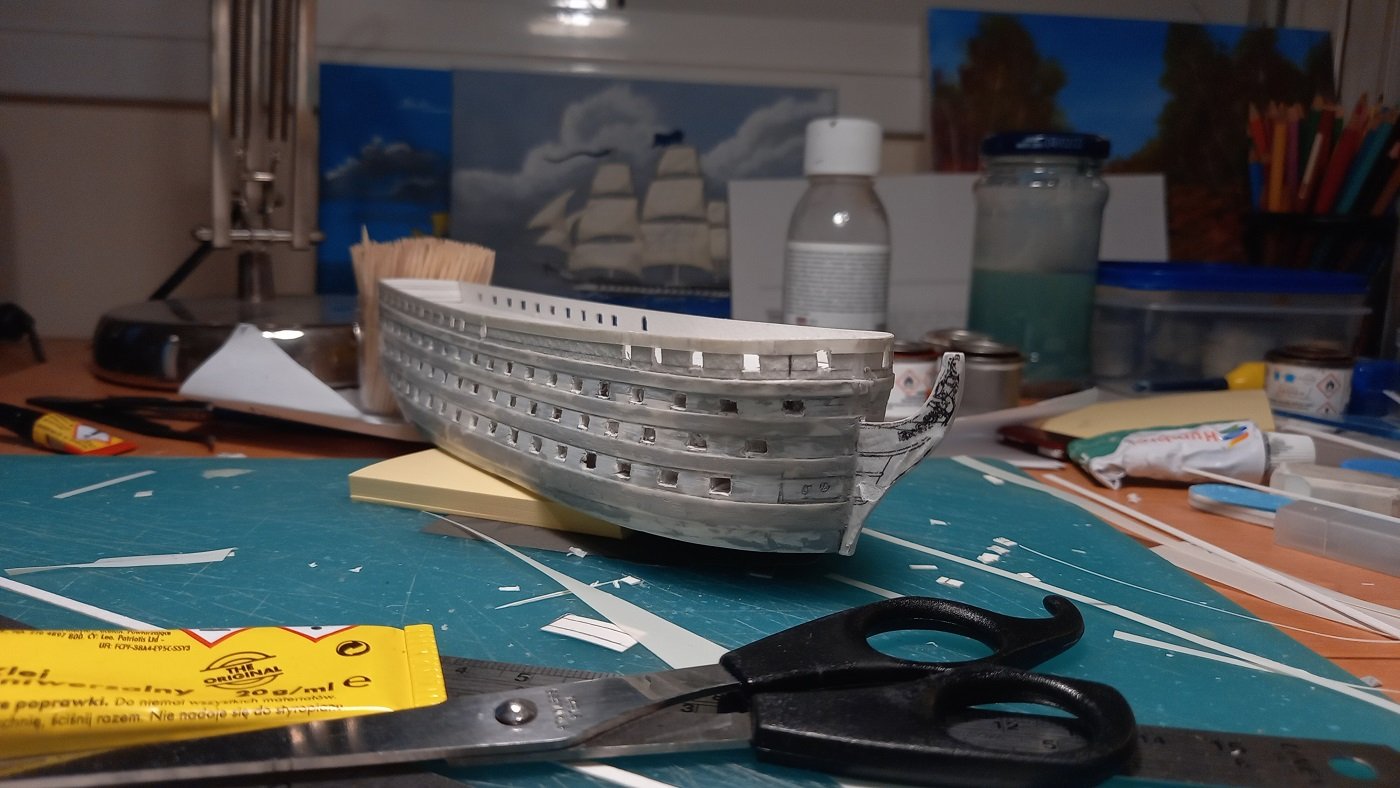
I heavily use superglue, even as far as completely coating the paper to turn it into some short of fiberglass. I also used thin stripes of plastic sourced from the sails of plastic kits. I added the wales using this plastic and traced and cut the gunports. Boxes will be inserted and then all surfaces will be coated with filler to be sanded down.
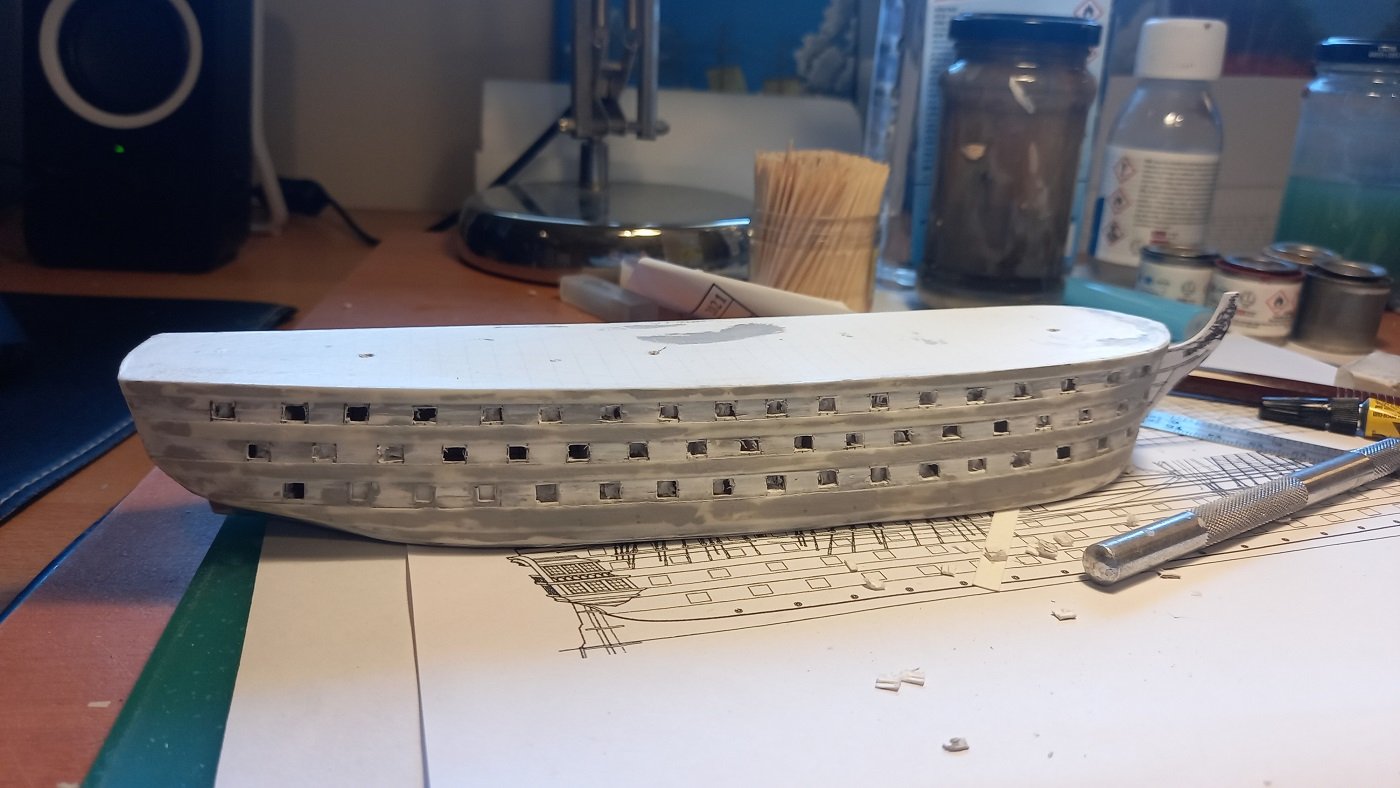
-
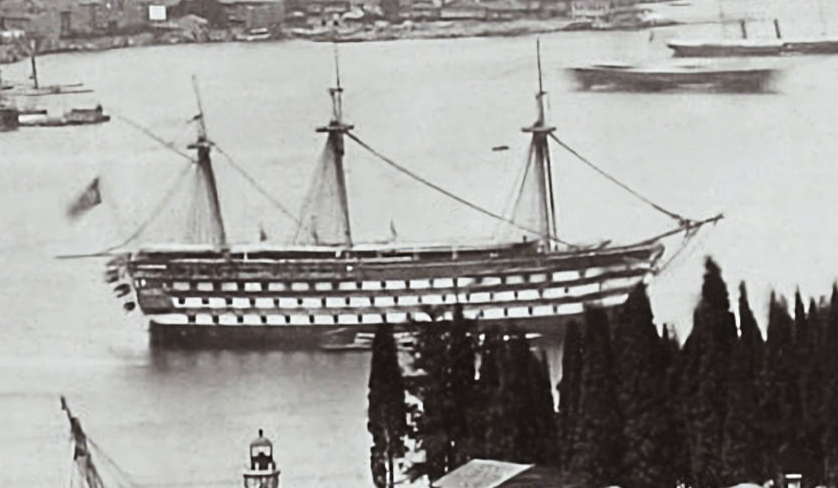
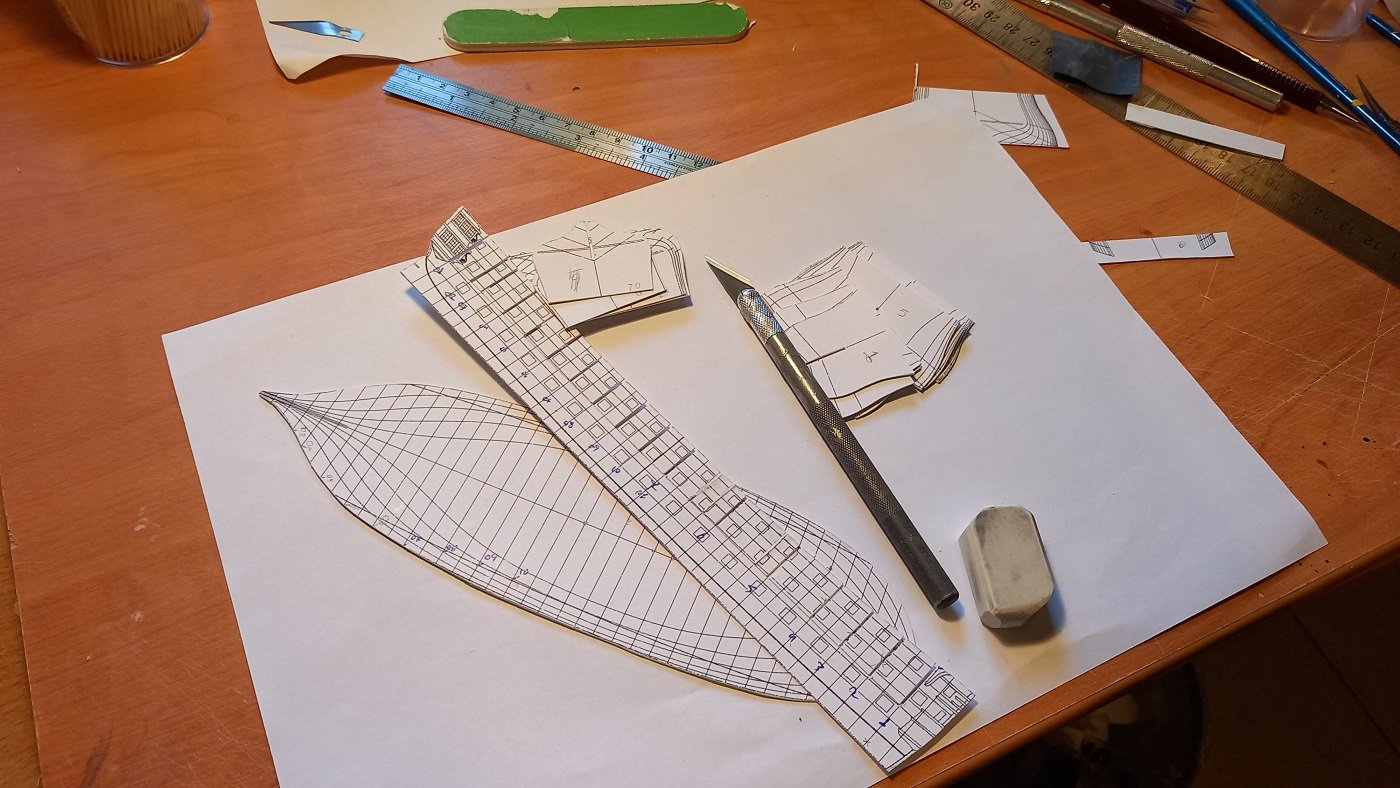
So originally I printed the lines for a waterline hull. Used thick paper and architectural foamcore to fill in the gaps. Her lines are unconventional, quite wide, limited tumblehome, bow heavy volume and rather thin lines aft, with only two levels of galleries and a flush continuous deck like a frigate.


-
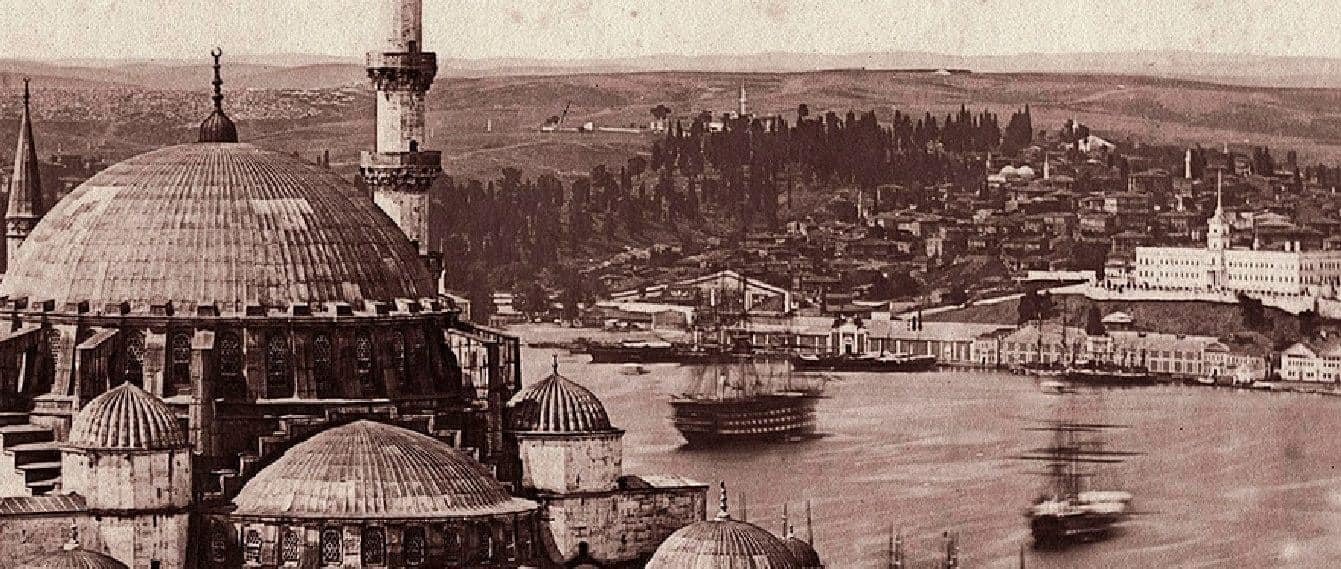
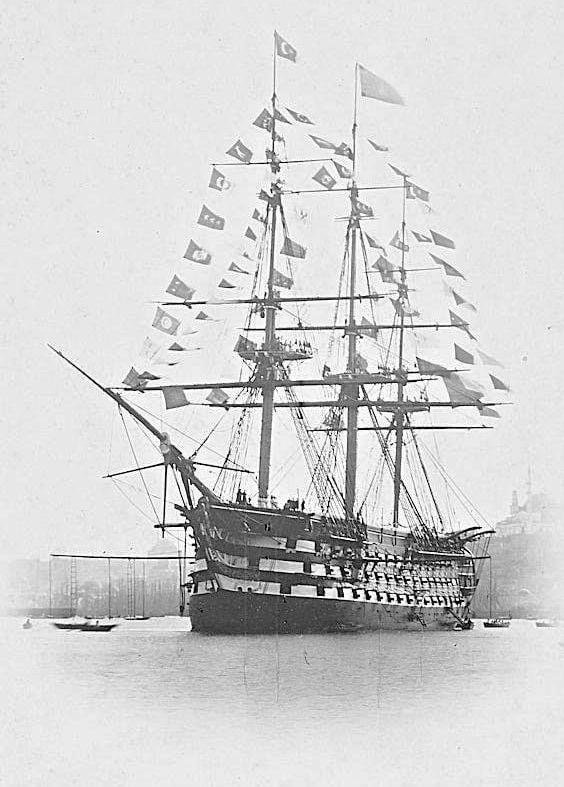
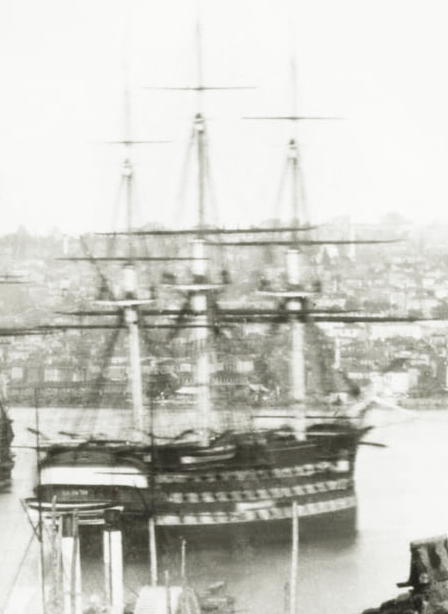
Lets start with some info and photos of the ship. 128 guns, dimensions 76.15 m × 21.22, one of the largests ships of the line ever built. Later, it came to my attention that some schoolars debate the length of the Turkish foot (kadem), but for me that was rather irrelevant, as it would only slightly change the stated scale. The plans had no scale and I printed them manually anyway. Launched in 1829, she participated in the Siege of Sevastopol (1854–55) and was considered to be upgraded to steam propulsion but that plan was never materialized.