Valeriy V
-
Posts
1,116 -
Joined
-
Last visited
Content Type
Profiles
Forums
Gallery
Events
Everything posted by Valeriy V
-
 Hi, Phil! I continue to admire your work. 👍👌 I'd like to say a few words about painting brass. The problem isn't that paint doesn't adhere well to brass, but that brass needs to be degreased before applying primer. Solvents like acetone don't degrease. They only dissolve the grease, but they don't completely remove it from the surface. Even if you dip the part in acetone, the grease dissolves, and when you remove the part and let the acetone dry, the grease reappears. It doesn't change its chemical composition. Completely degreasing brass is done in a caustic soda solution (NaOH). As a result of the chemical reaction, all the grease on the brass surface turns into soap flakes and precipitates. After this, I rinse the part with running water, dry it with a hair dryer, and apply primer.
- 490 replies
-
- 8
-

-

-
- minesweeper
- Cape
- (and 1 more)
-
Thank you, Nils! I'm flattered by your feedback. I hope your words come true and my photos help someone master brass soldering techniques and perhaps something else altogether. Happy New Year!
-
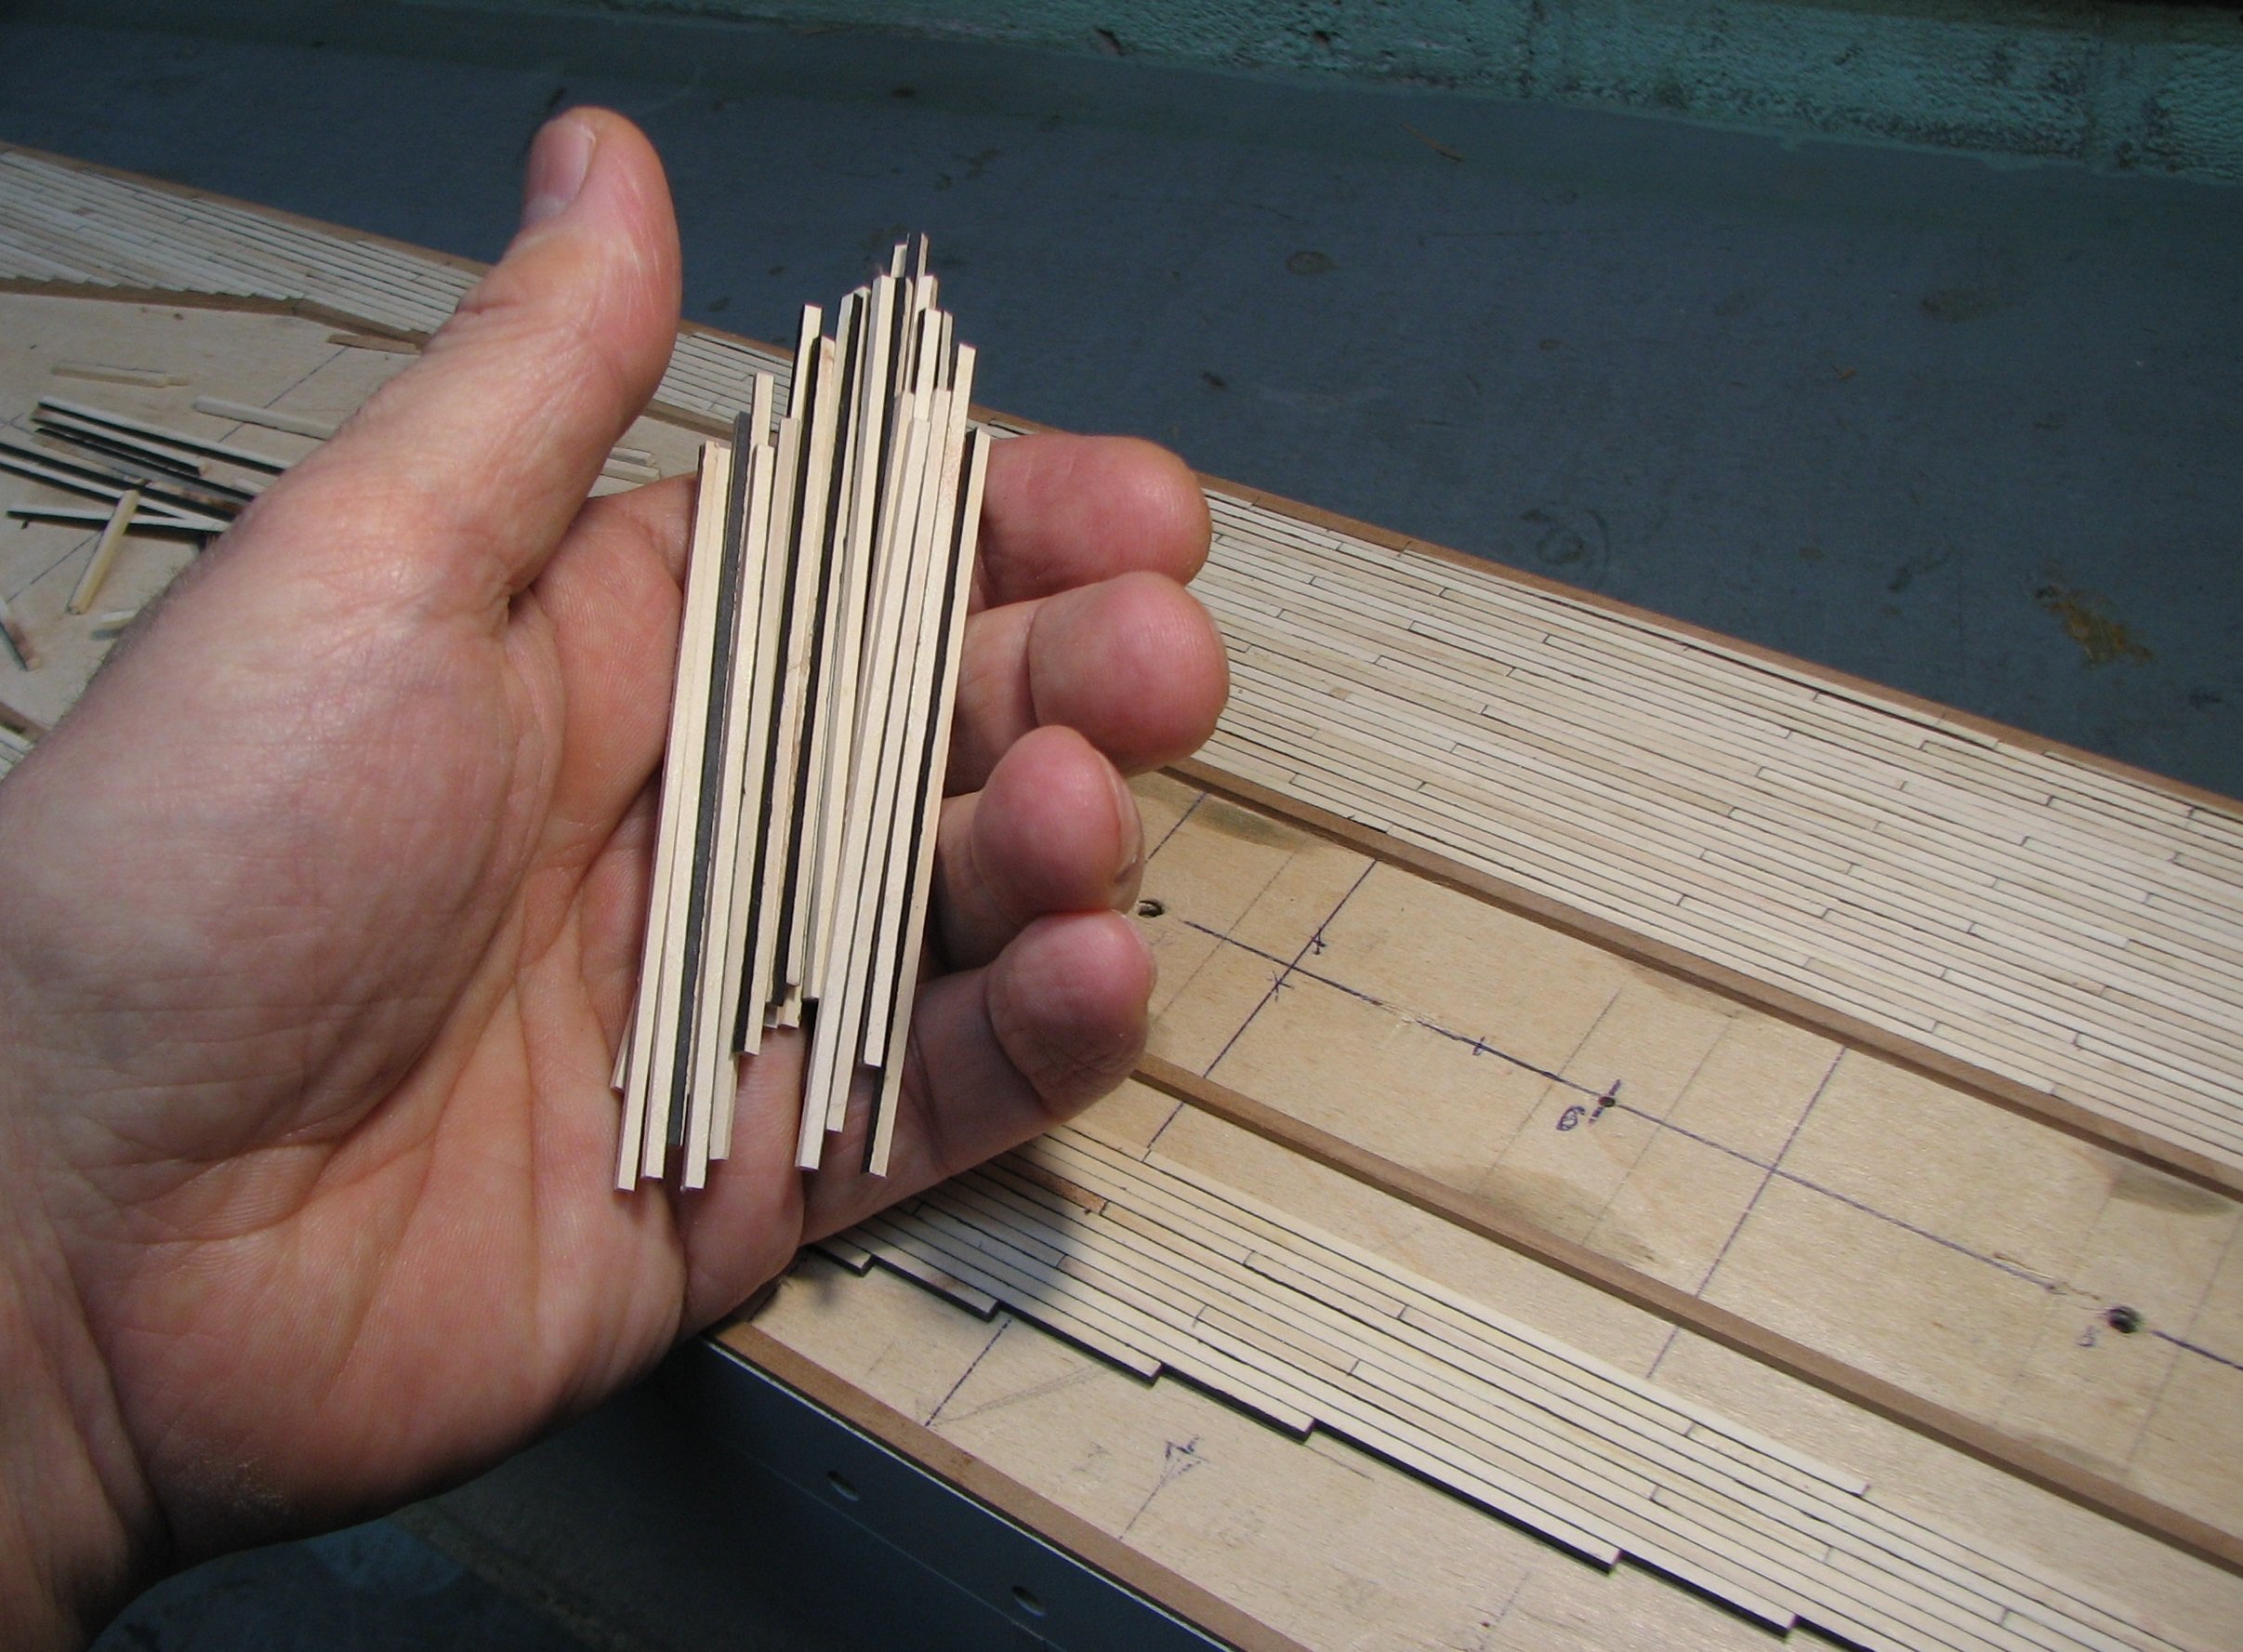
Thank you all for your feedback, likes and congratulations! I made the decking boards from rowan, and the side boards (watersides) from pear. Besides rowan, I also typically use maple and birch for decking. In my opinion, these woods best reflect the color of the decking after exposure to sun and saltwater. I use pear for the watersides because I like the contrast, which visually highlights the fine details. To simulate the seams between the boards, I use black paper.
-
I welcome all forum members to the new year, and I hope it brings only good news. And I'm continuing construction of the cruiser model. Wooden deck planking.


-
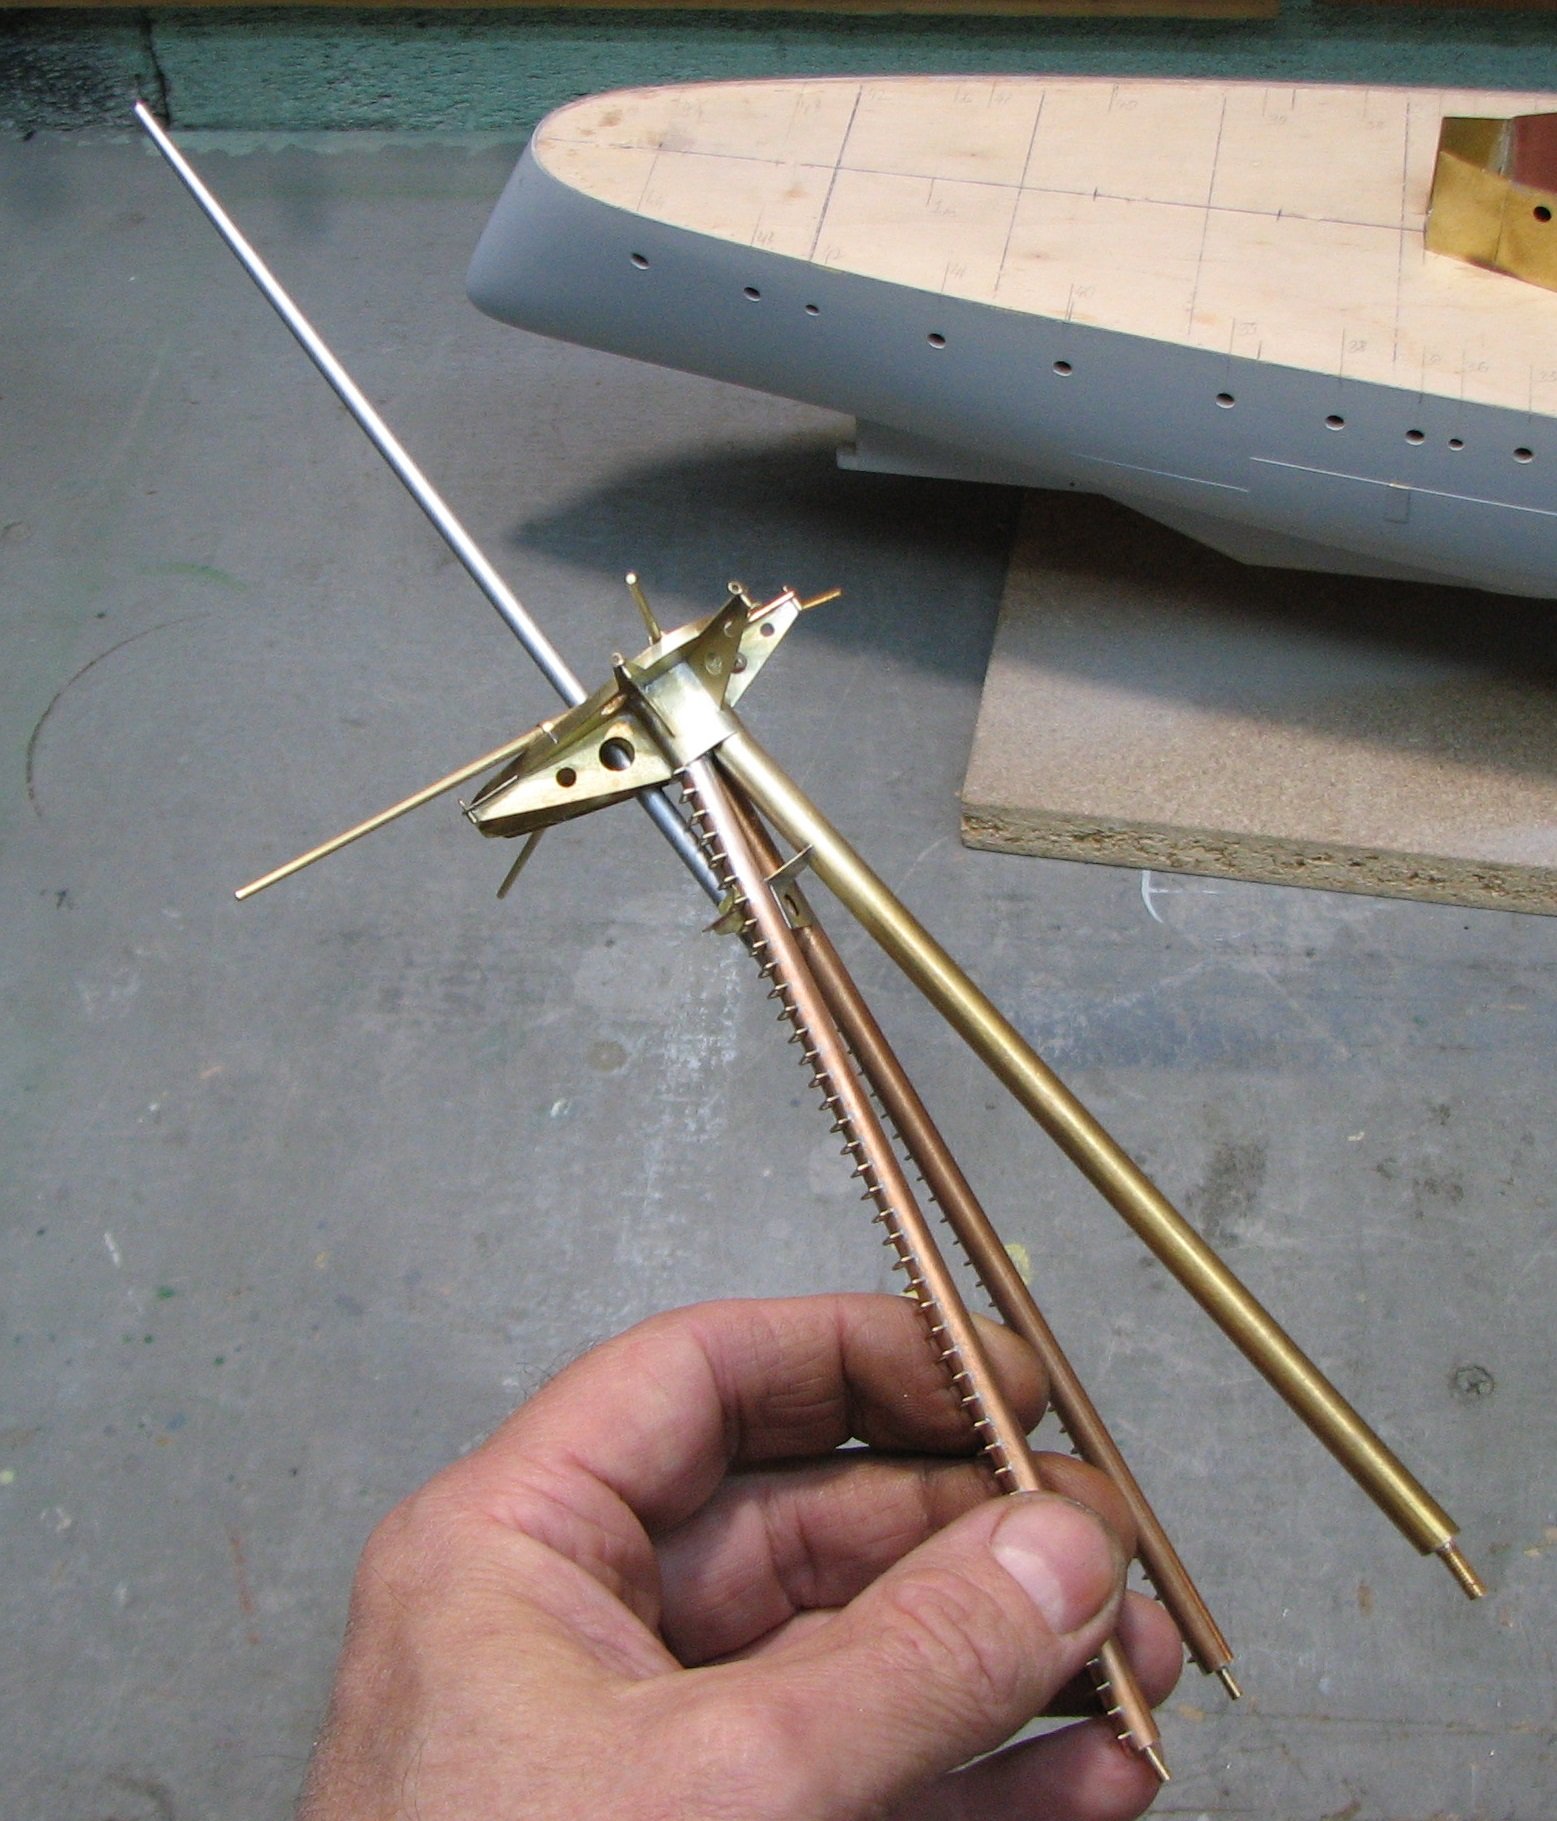
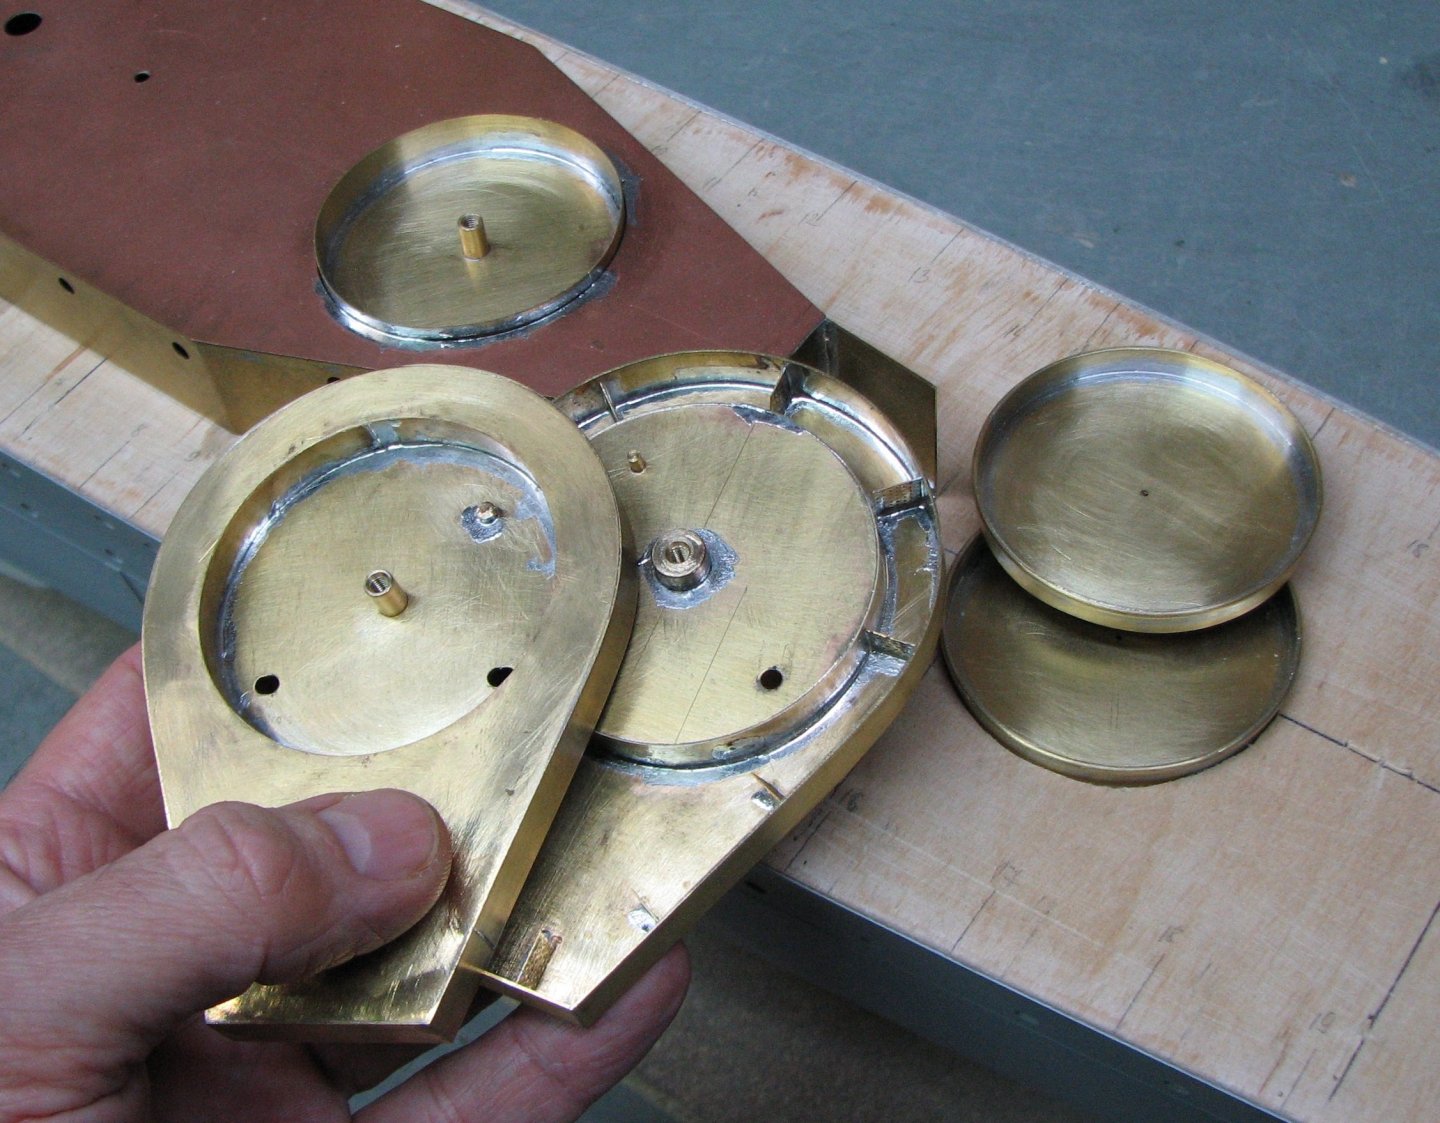
Precision is essential when drilling the holes; this is the most difficult step. This is achieved using a coordinate table on a drilling machine. The brackets themselves are soldered sequentially, using the pre-drilled holes. And there's nothing complicated about that.
-
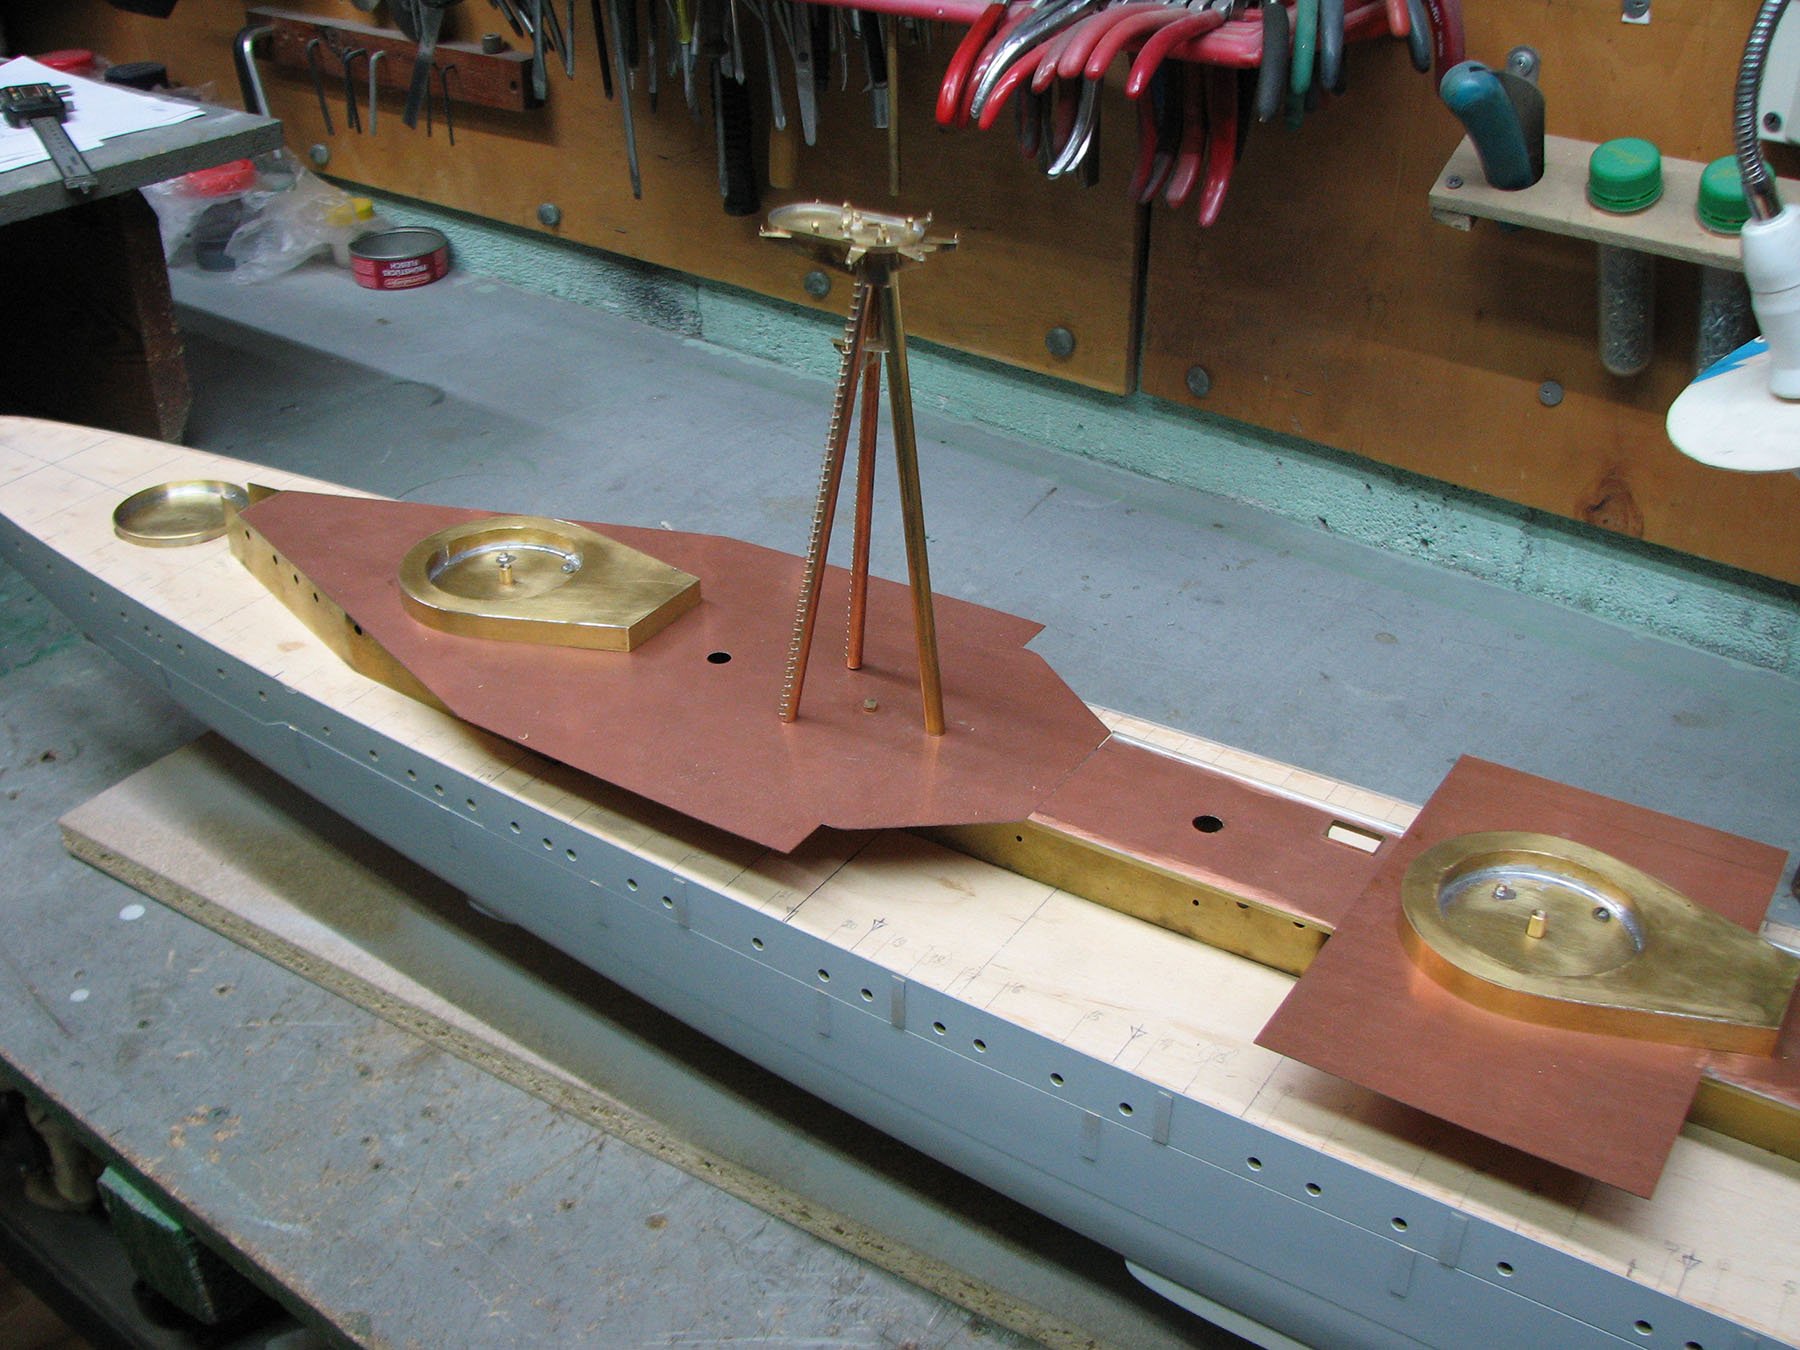
Mounting platforms for main caliber guns.

-
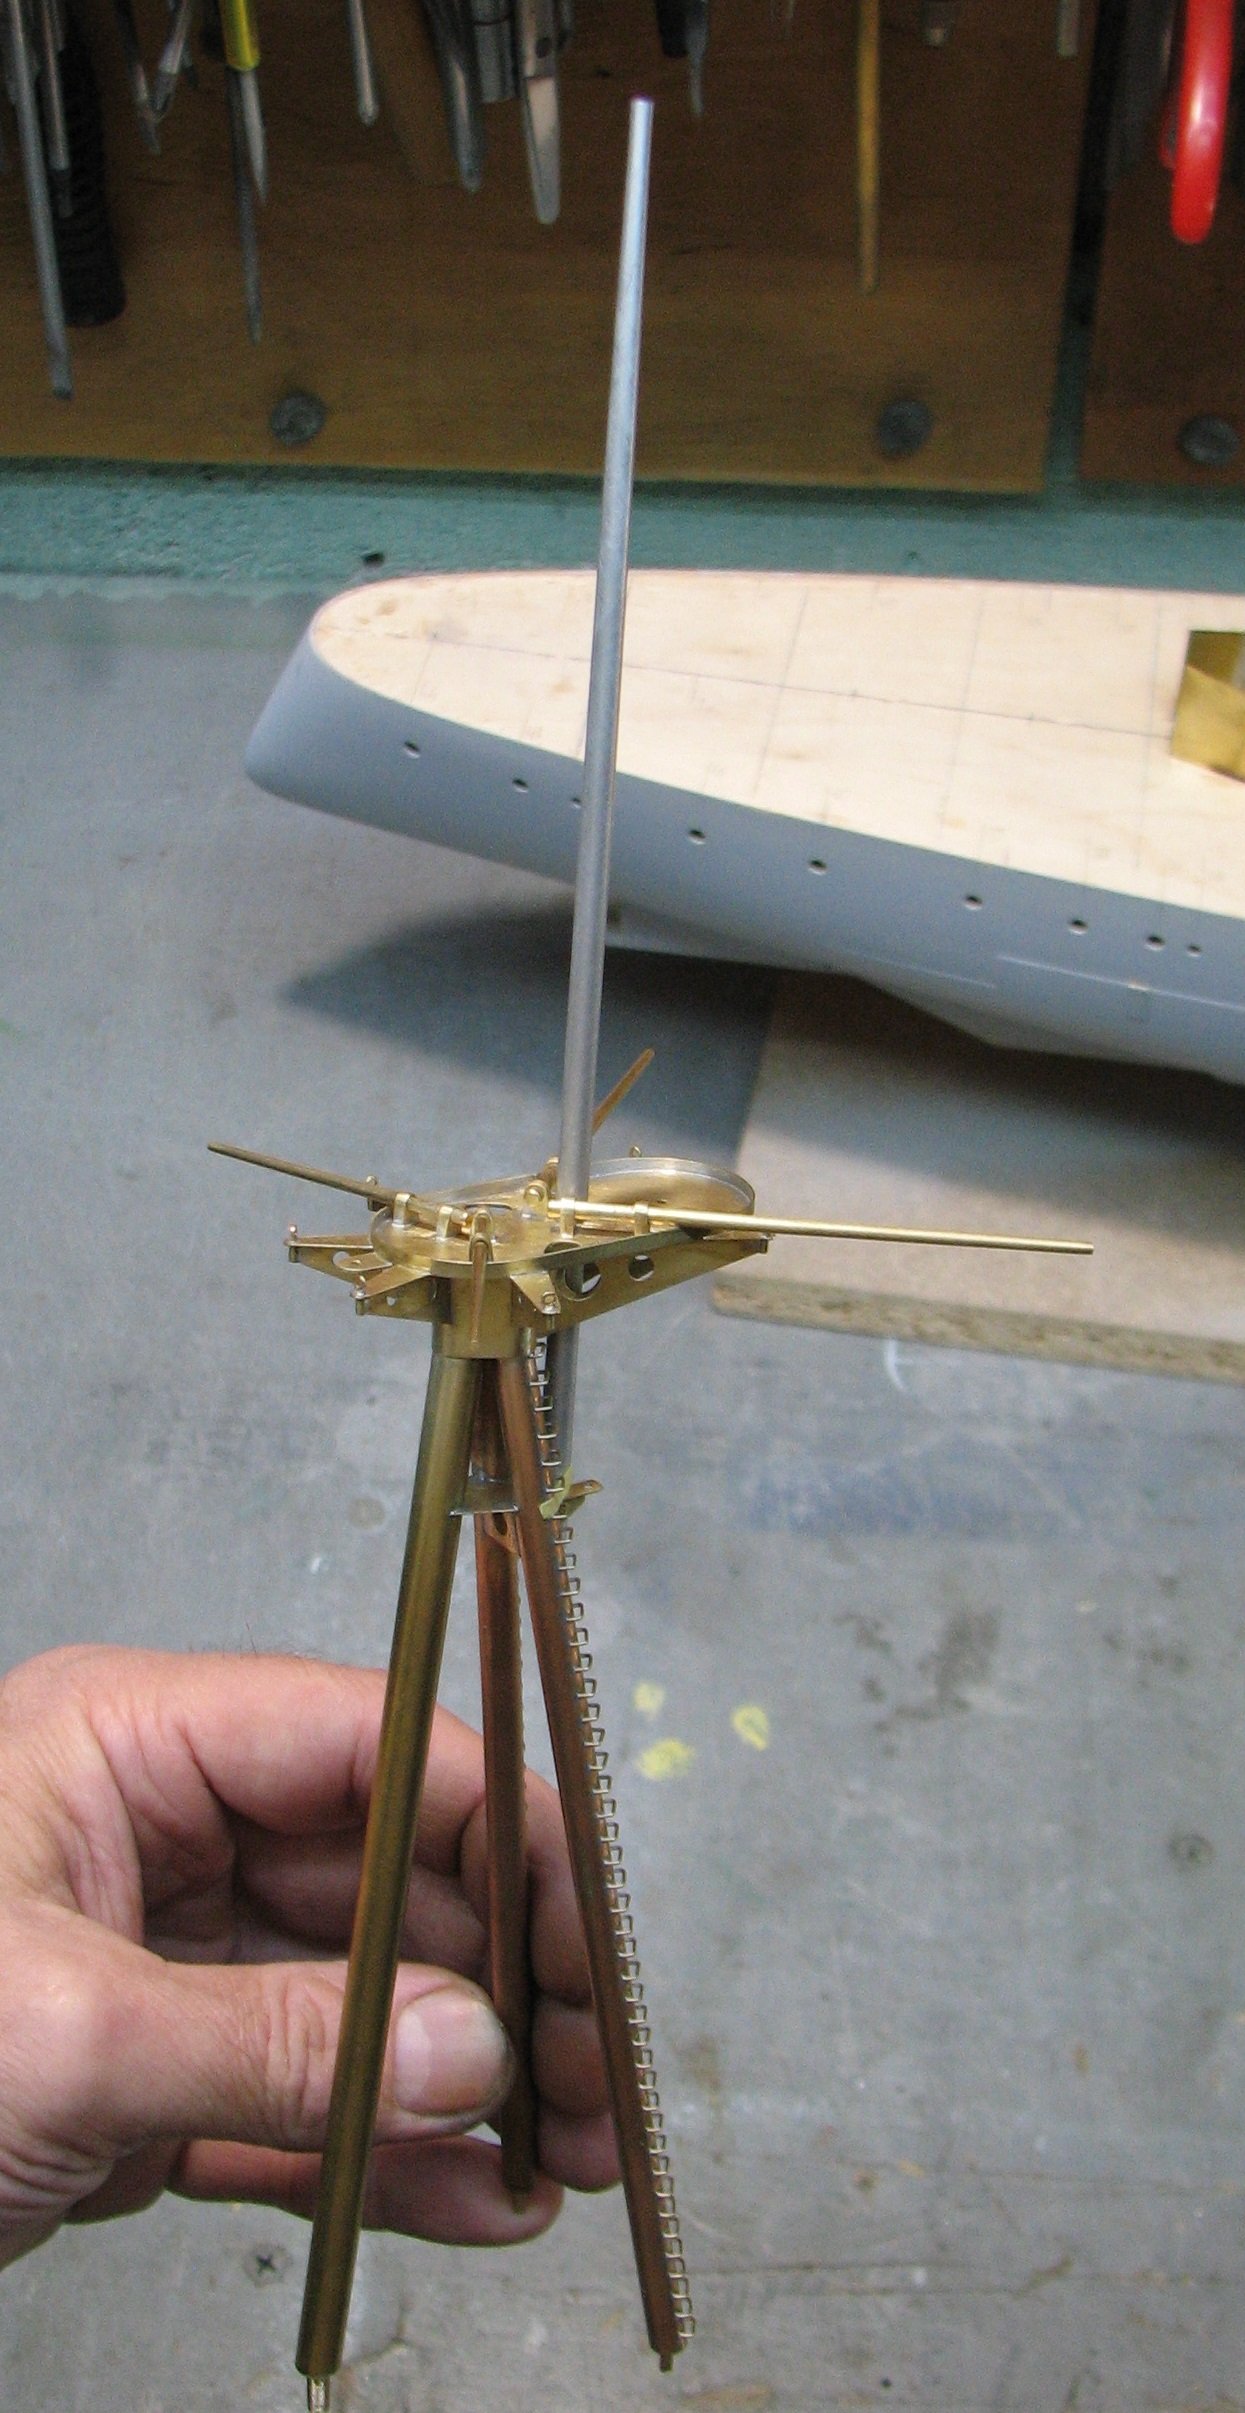
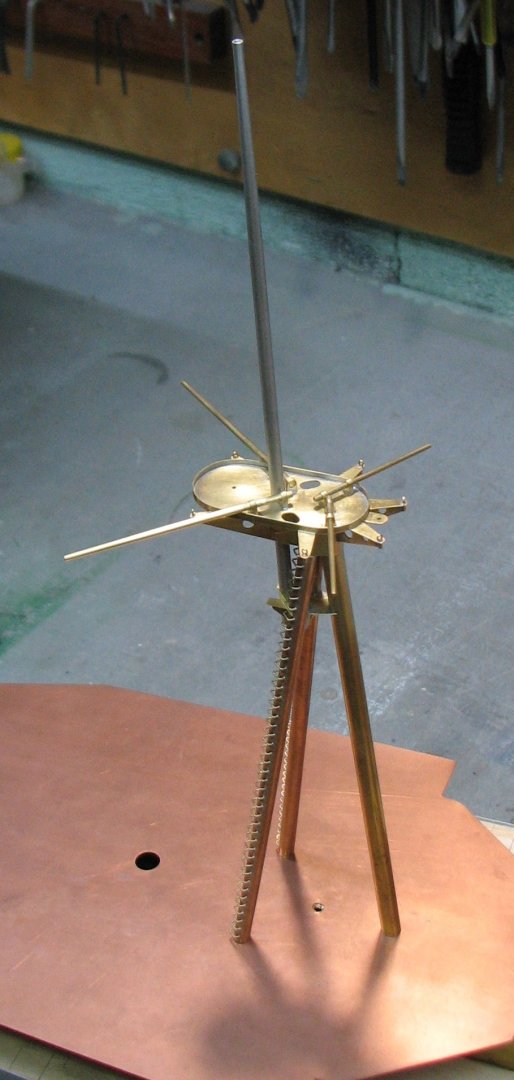
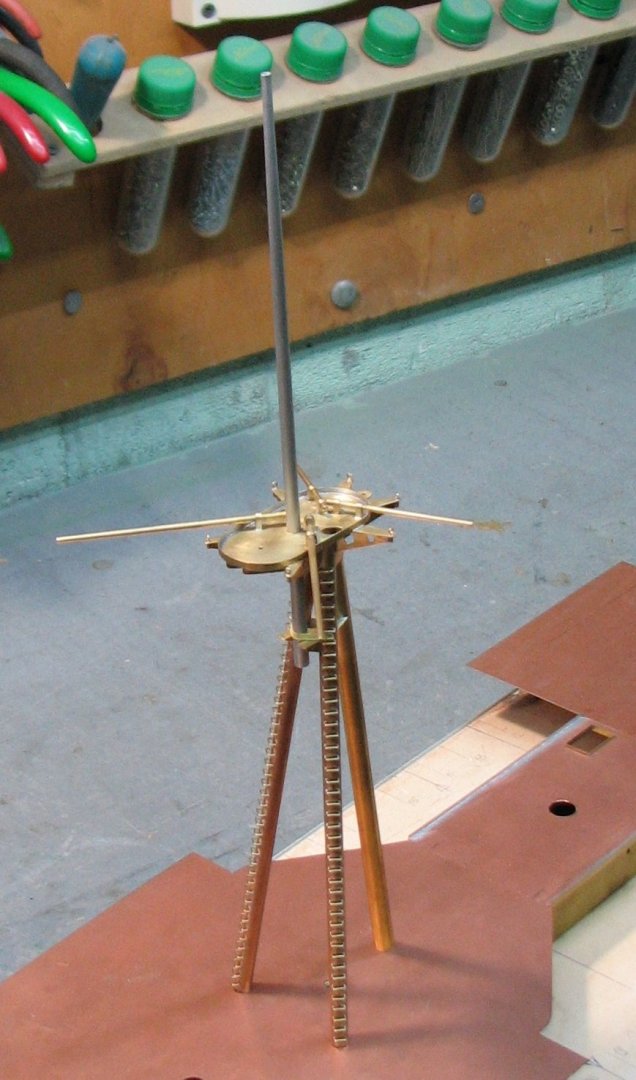
The mainmast is almost completely assembled.


-
Assembling the upper platform.


-
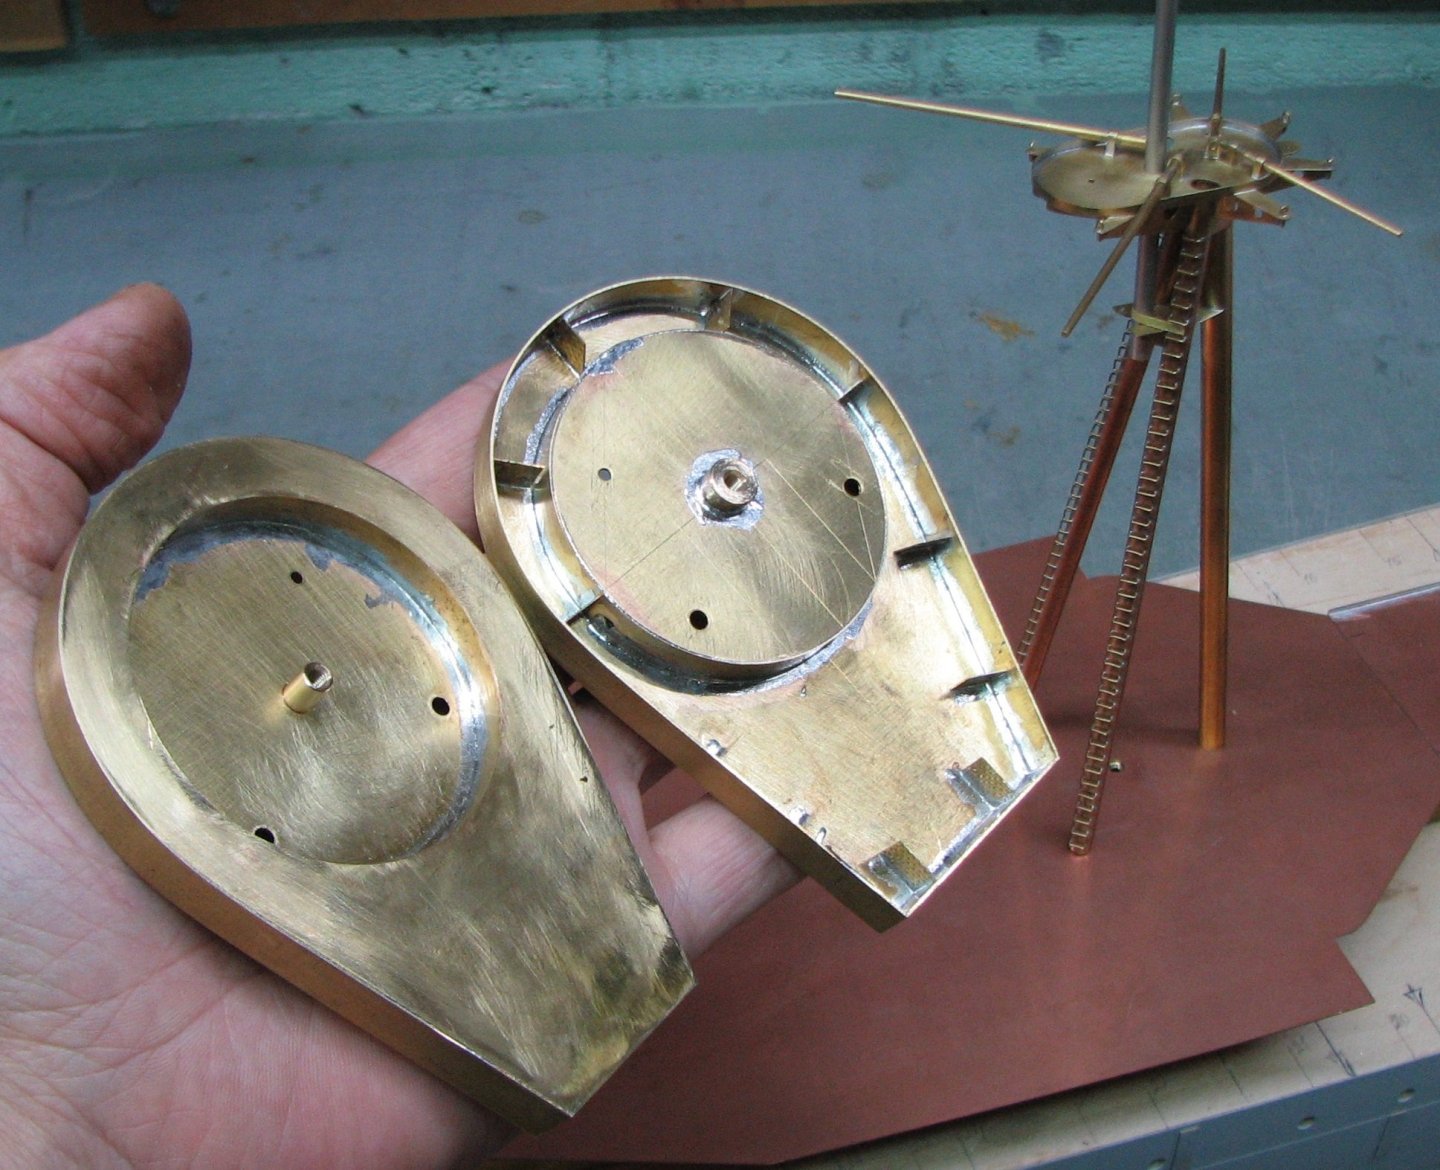
Thank you all for your feedback and likes, and I continue... Mainmast. Soldering the ladder brackets and assembling the tripod.

-
Yes, I understand you. Apparently, it's something like this machine. On these rollers, the square that is produced is indeed far from ideal.

-
This is an interesting machine. I would like to see it. Can you show it?
-
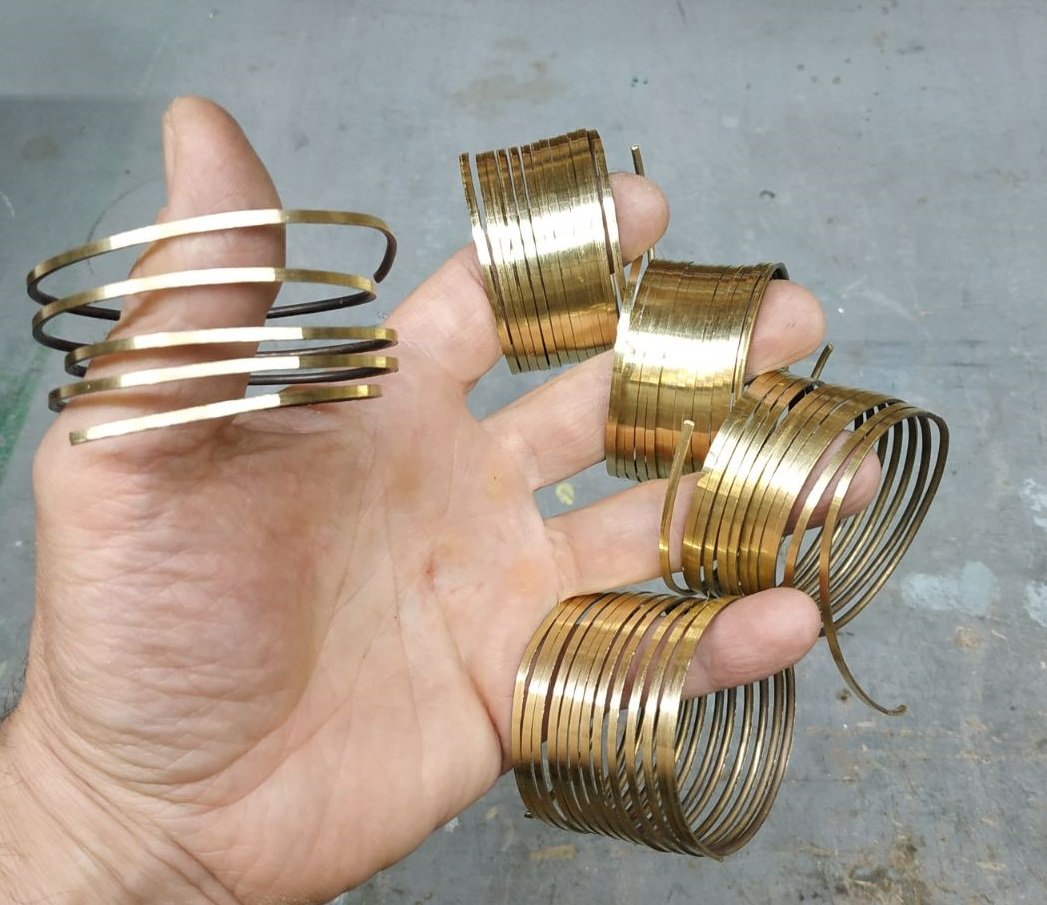
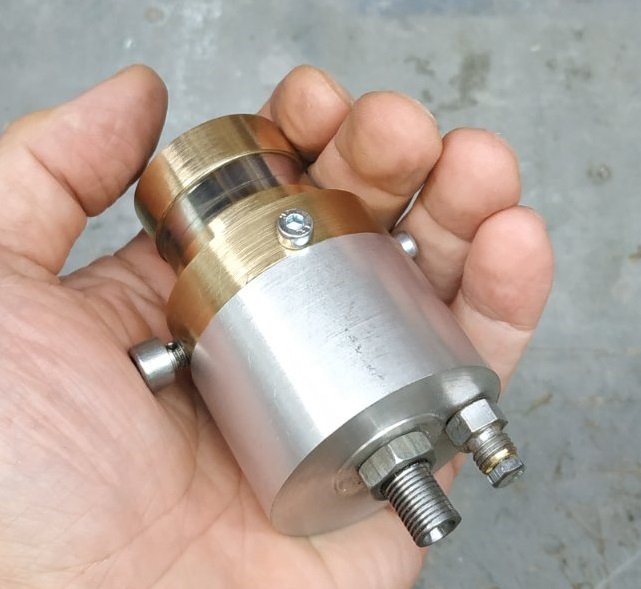
After removing the wire from the drum and removing the manufacturing allowances, I obtained 2.1 m of the semicircular profile I needed. I think that with a little modification to the drum, it could also be used to produce a square profile.
-
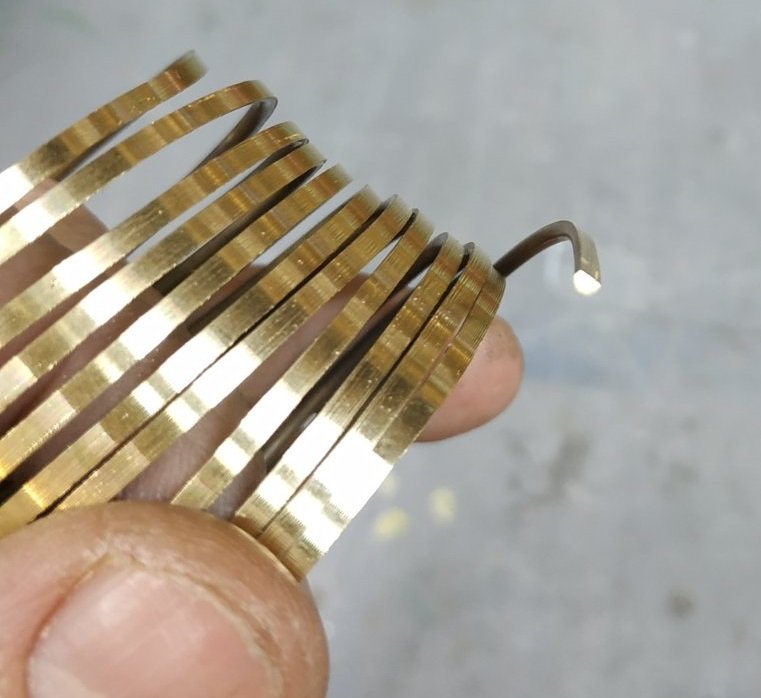
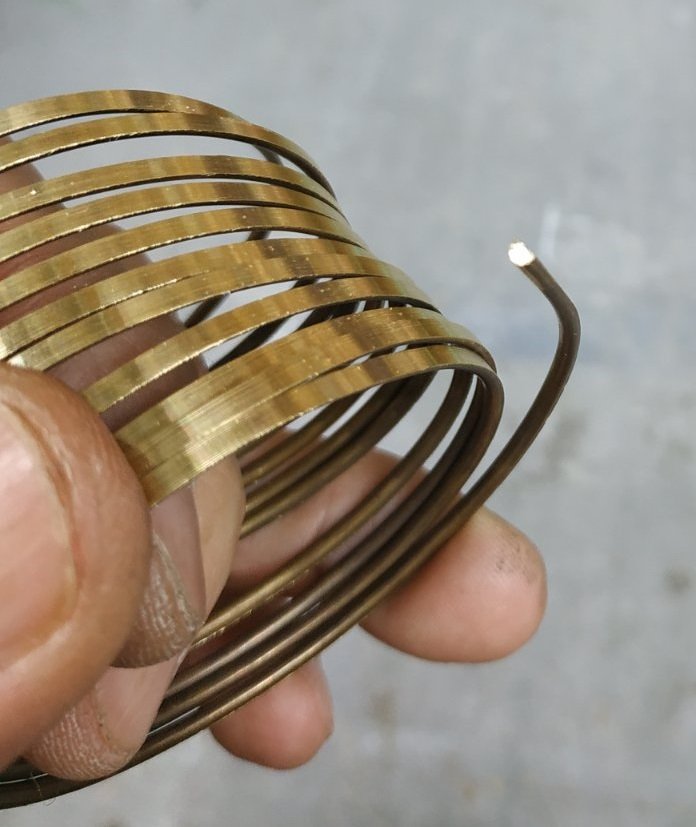
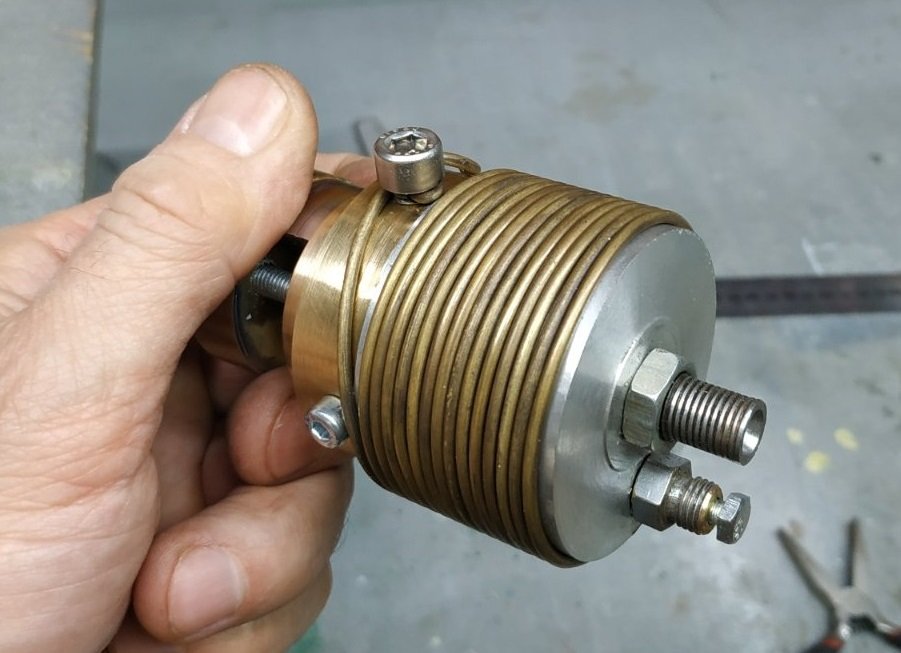
After being sharpened with a cutter, the wire on the drum took on this appearance.
-
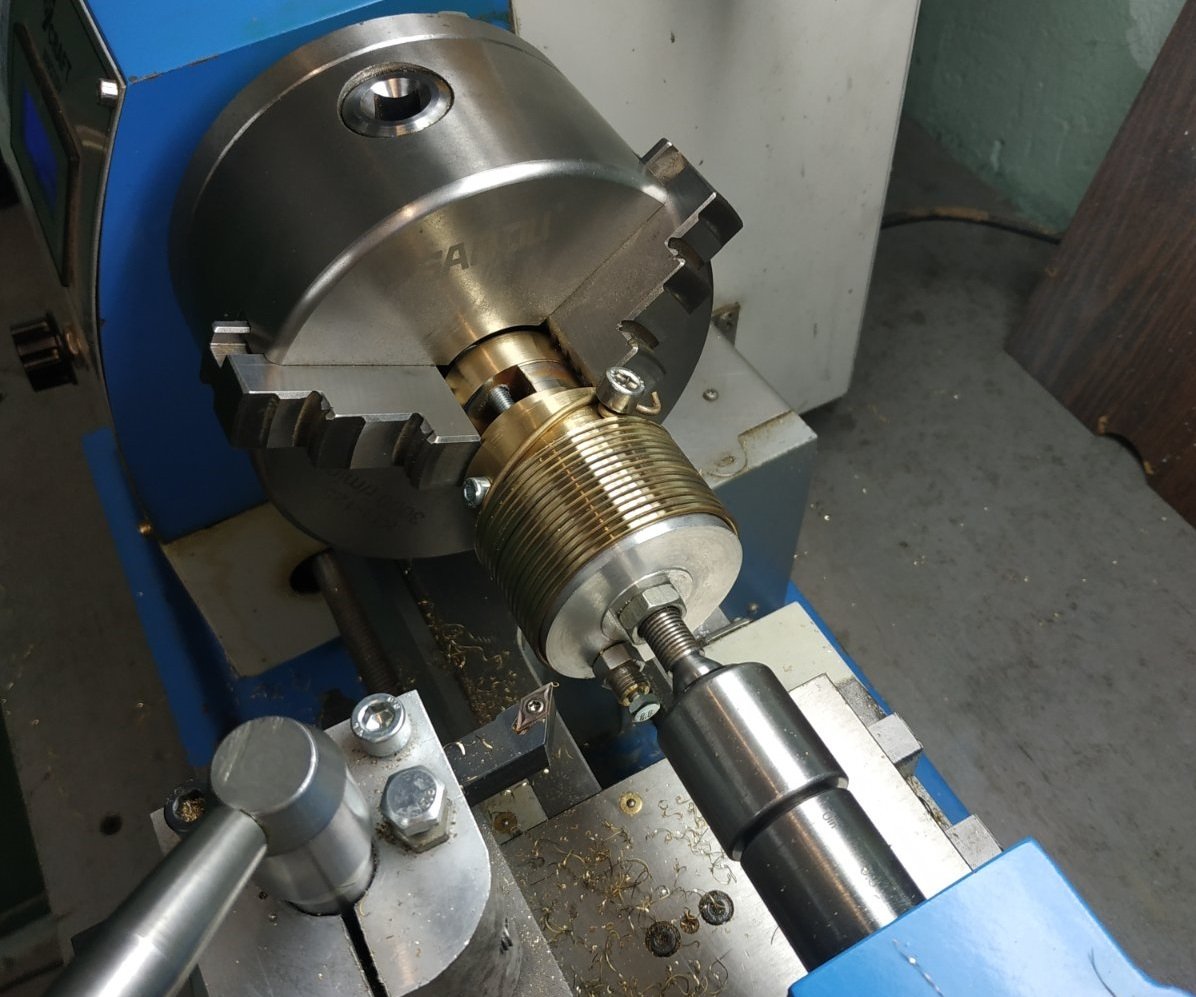
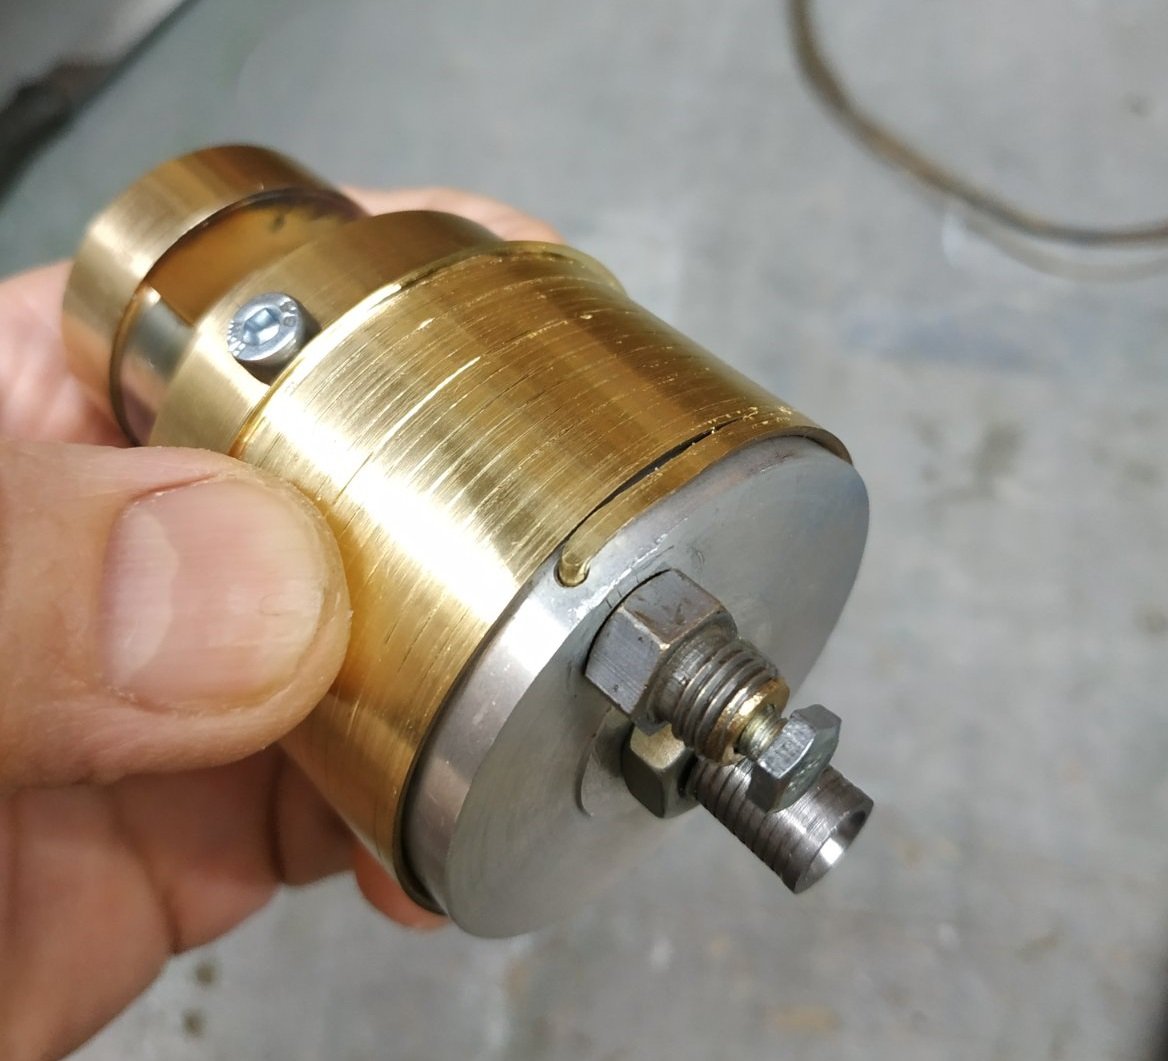
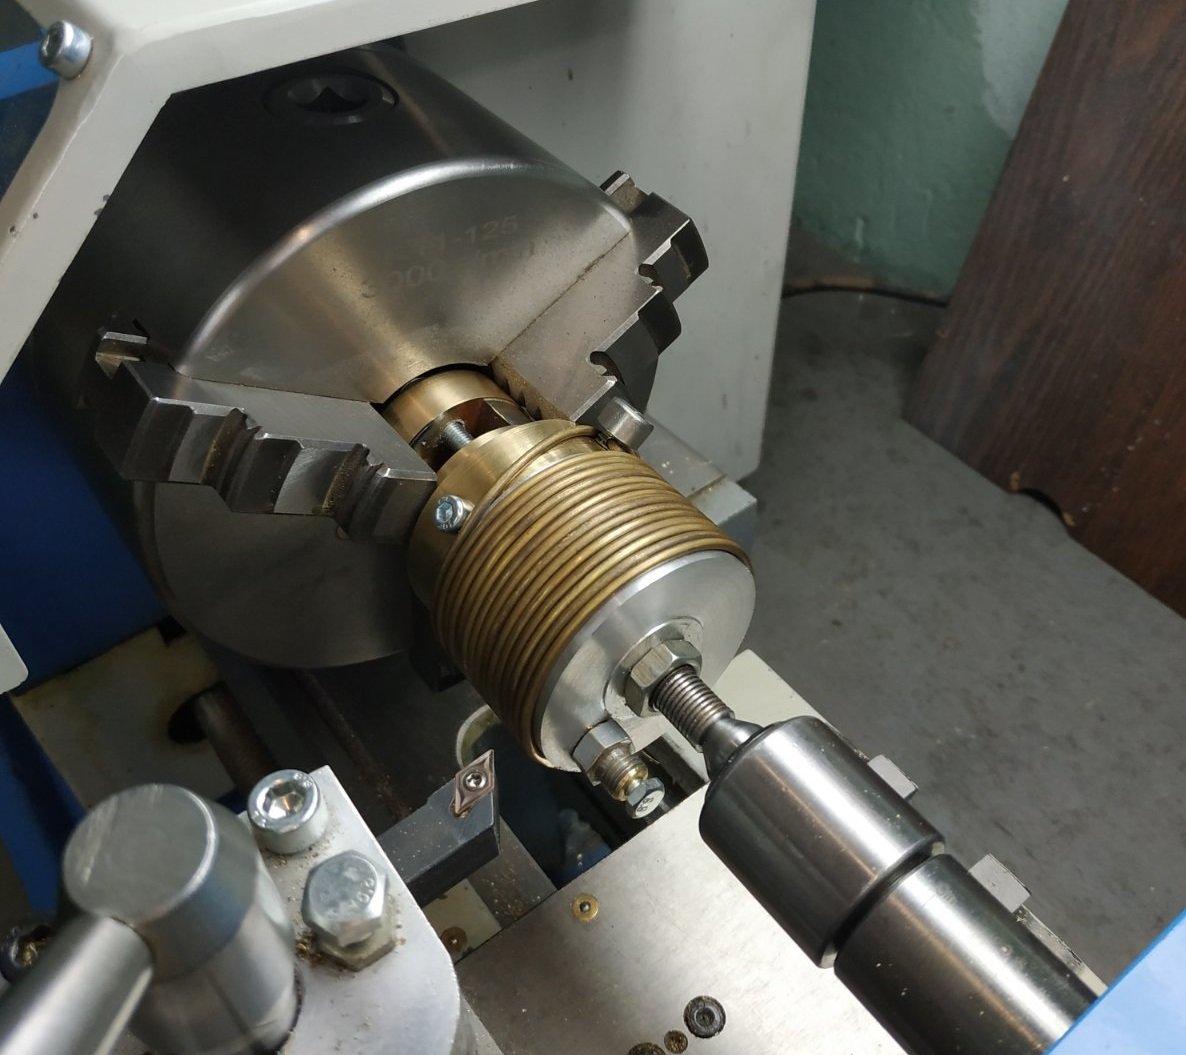
Then I wound it with 2 mm diameter wire and inserted the drum into the lathe. The length of wire that fit onto this drum was 2.3 m.
-
Hello everyone! Today I'll share a method for making a semicircular brass profile. Perhaps this will be useful for someone building models. The simplest way to create a semicircle is with a jewelry die. However, when the wire diameter increases beyond 1.5 mm, significant physical force or a special drawing mechanism is required. I decided to make my life a little easier and made this drum.
-
Yes, I had that choice, but instead of wood, I was going to use plexiglass. However, after thinking it over, I realized that making such a plexiglass dummy would take me much more time than soldering a brass frame.
-
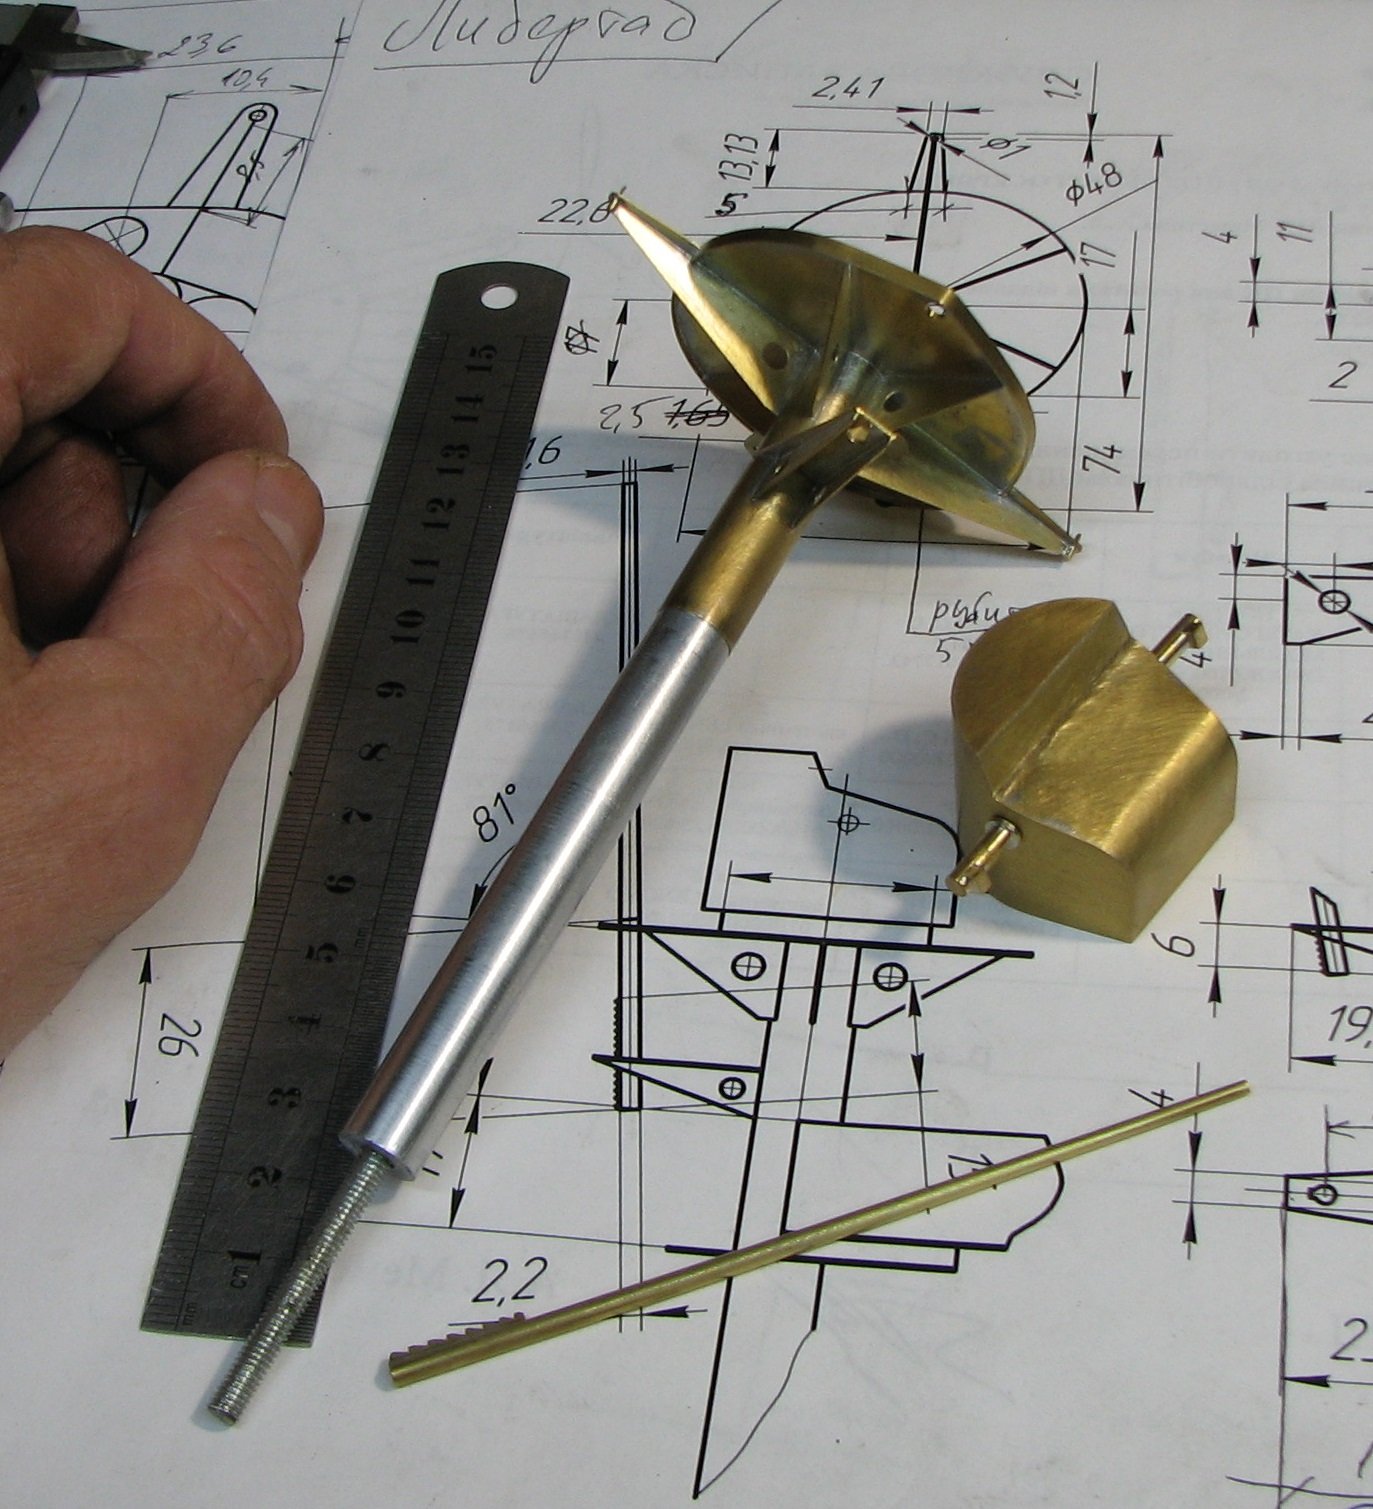
Details of the foremast before and after installation on the forward superstructure.


-
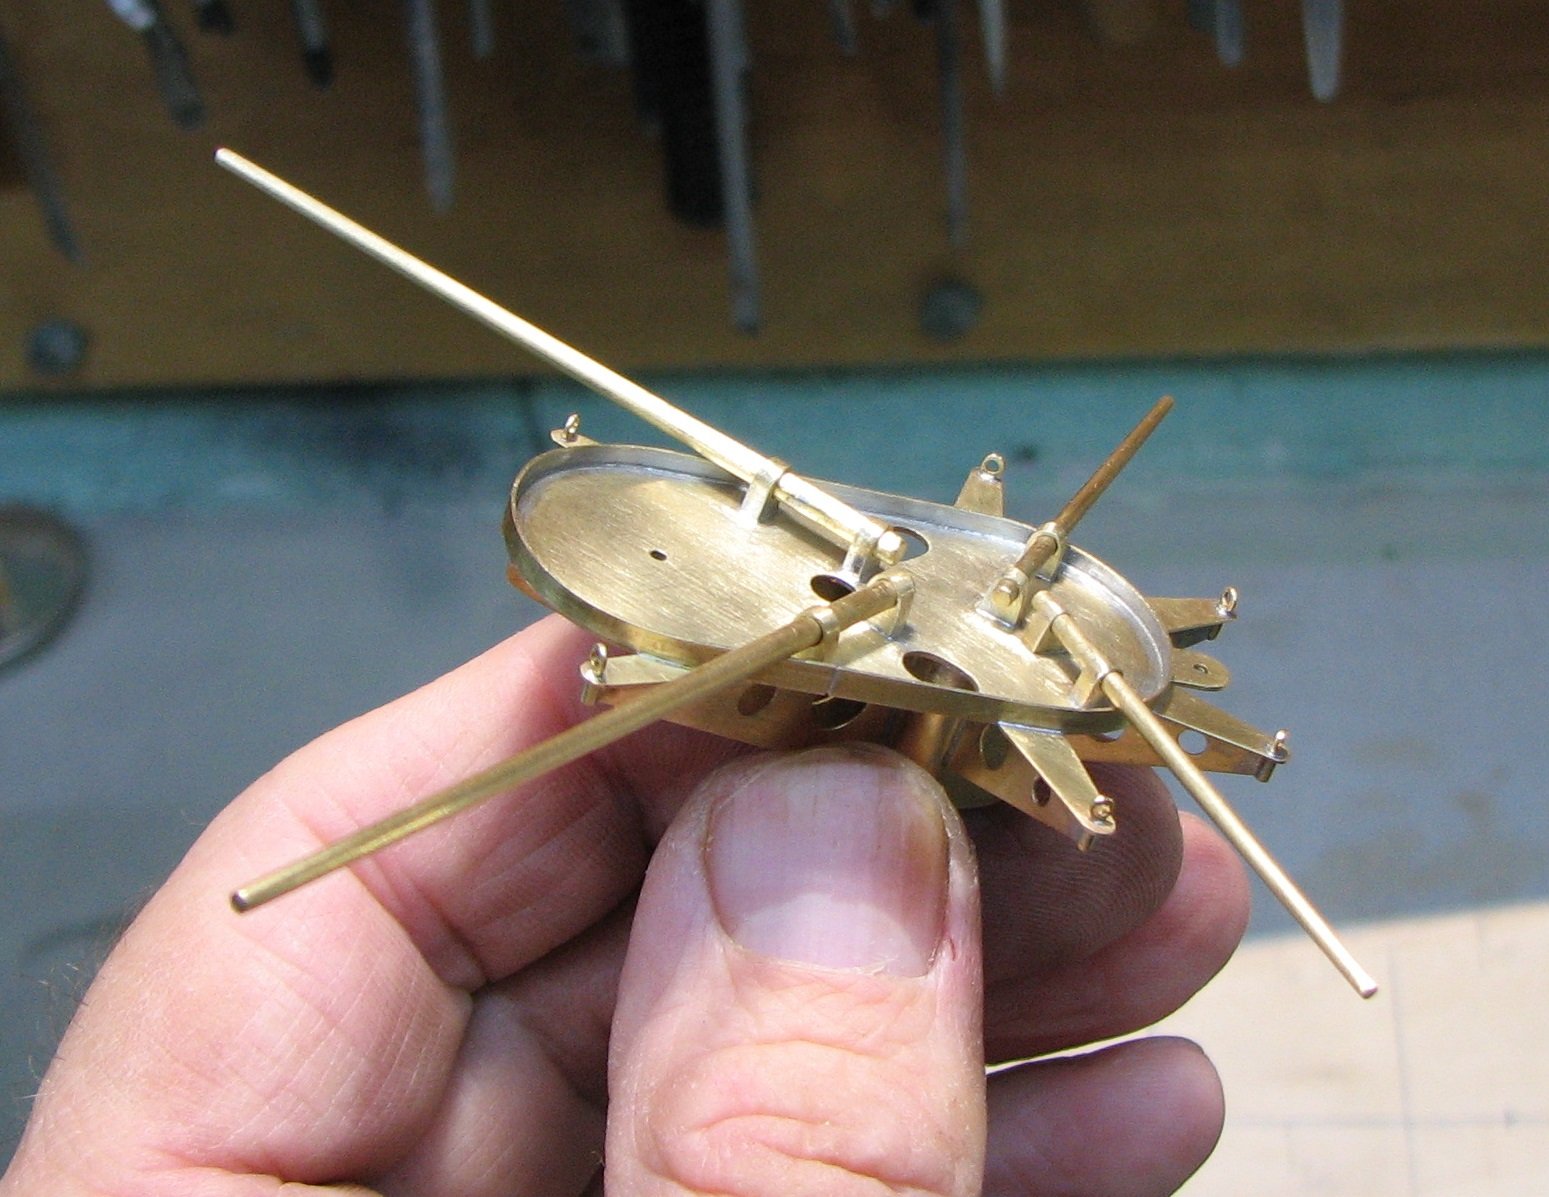
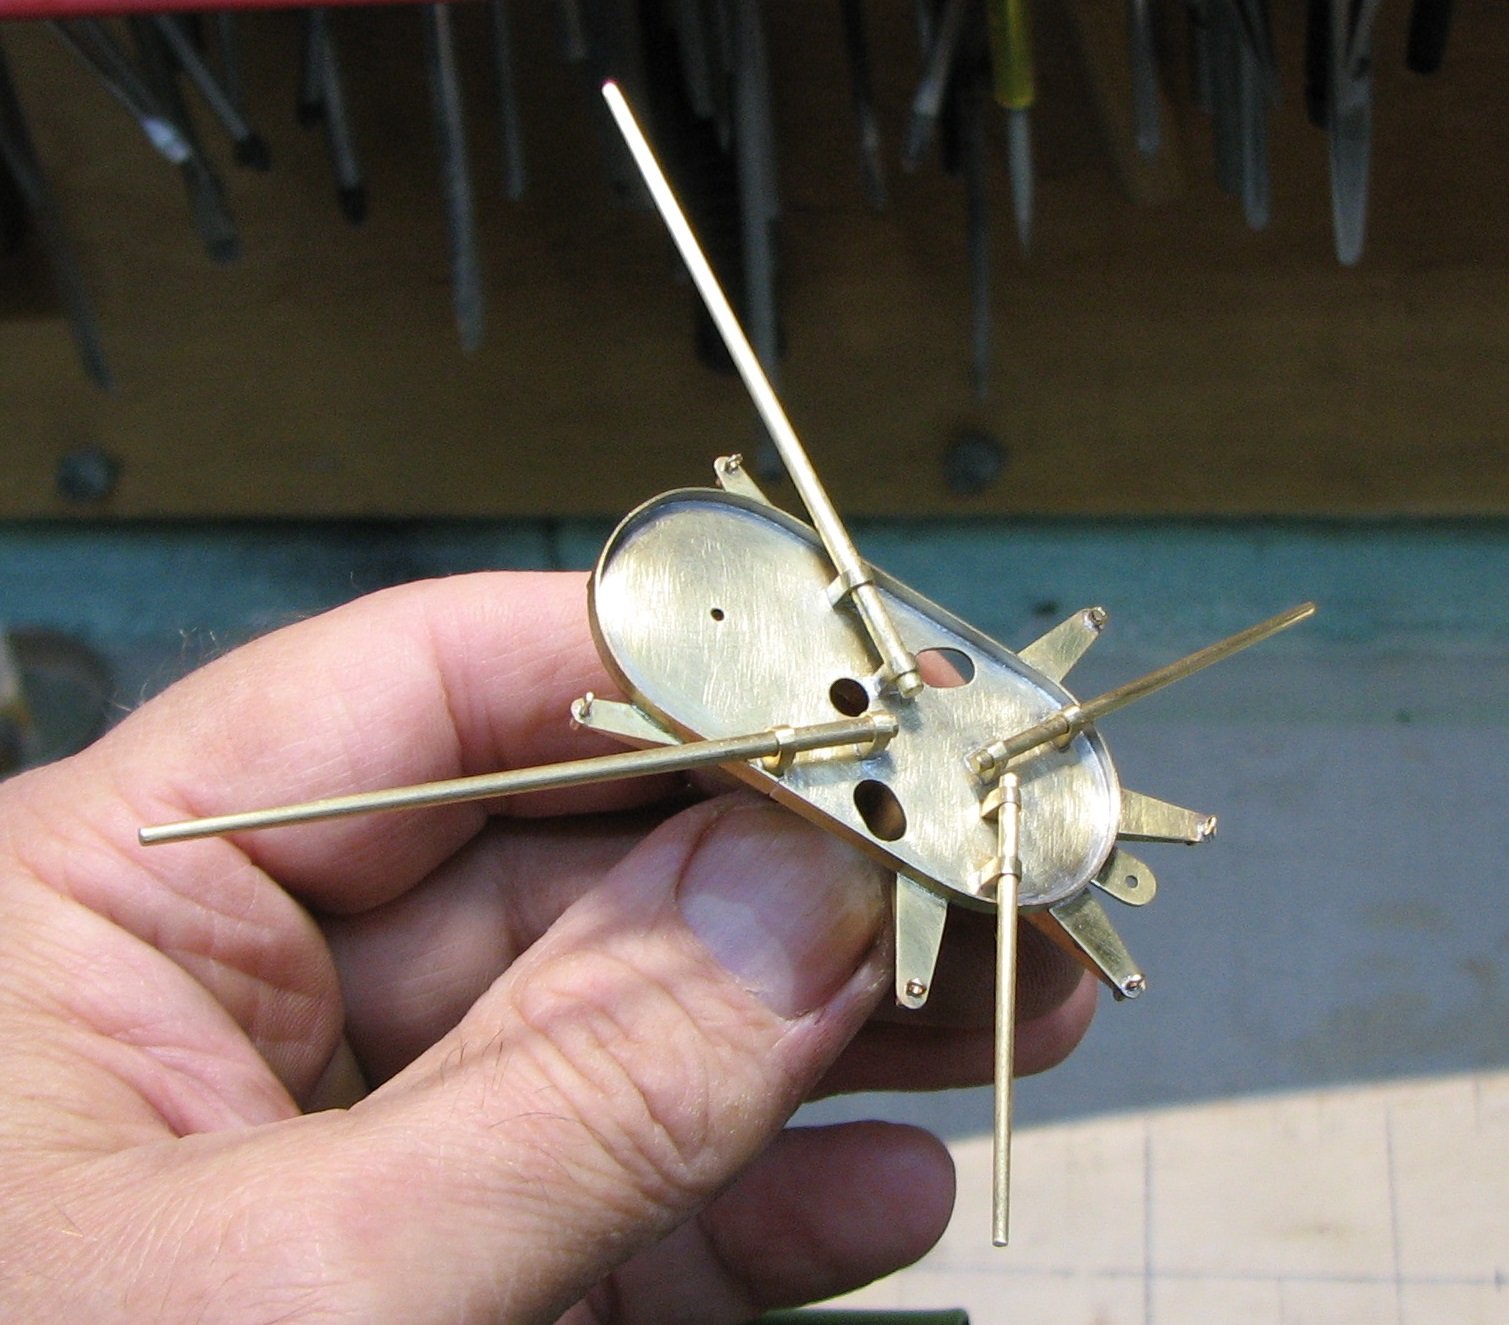
The control post platform is located on the foremast.


-
The control post is assembled, but for now it is without small parts.


-
Frame sheathing.


-
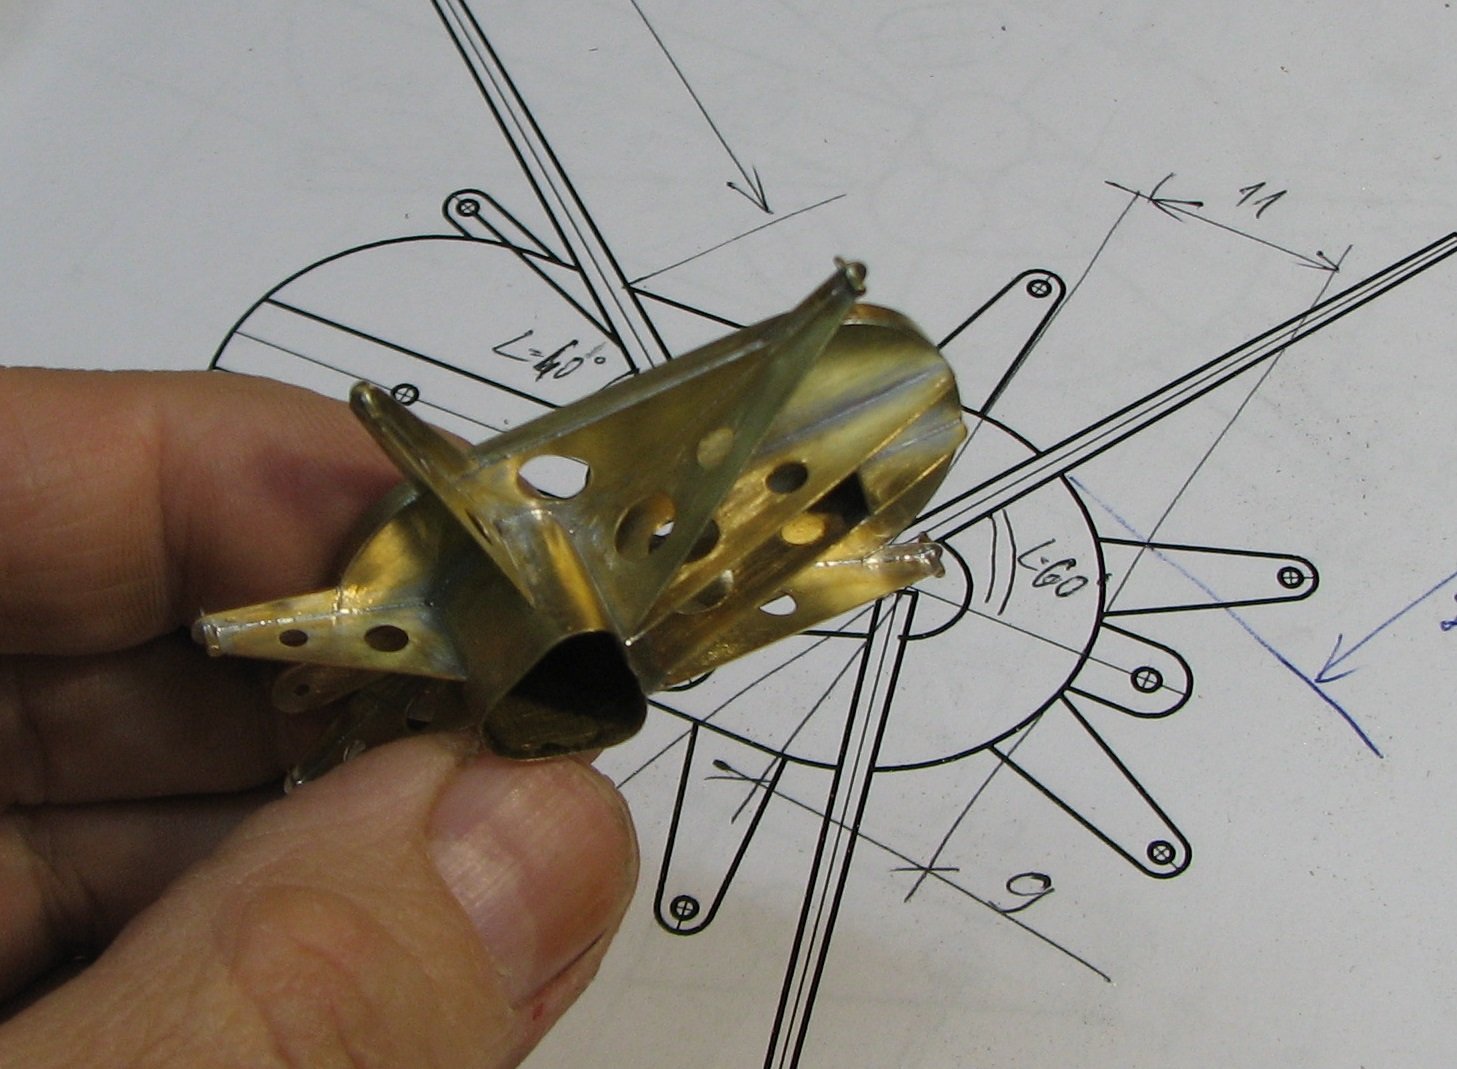
Greetings everyone, I'm continuing my work after a short break. The photo shows the soldering process of the artillery fire control station. It is located on the cruiser's foremast. Frame assembly:


-
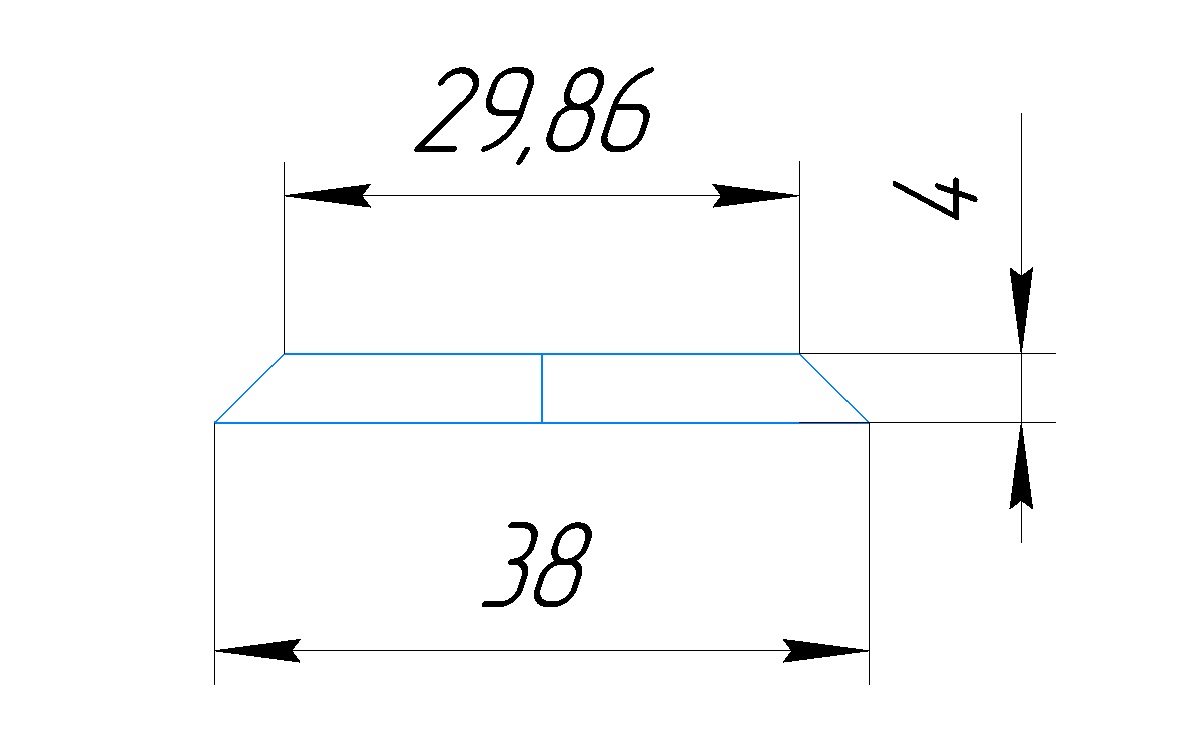
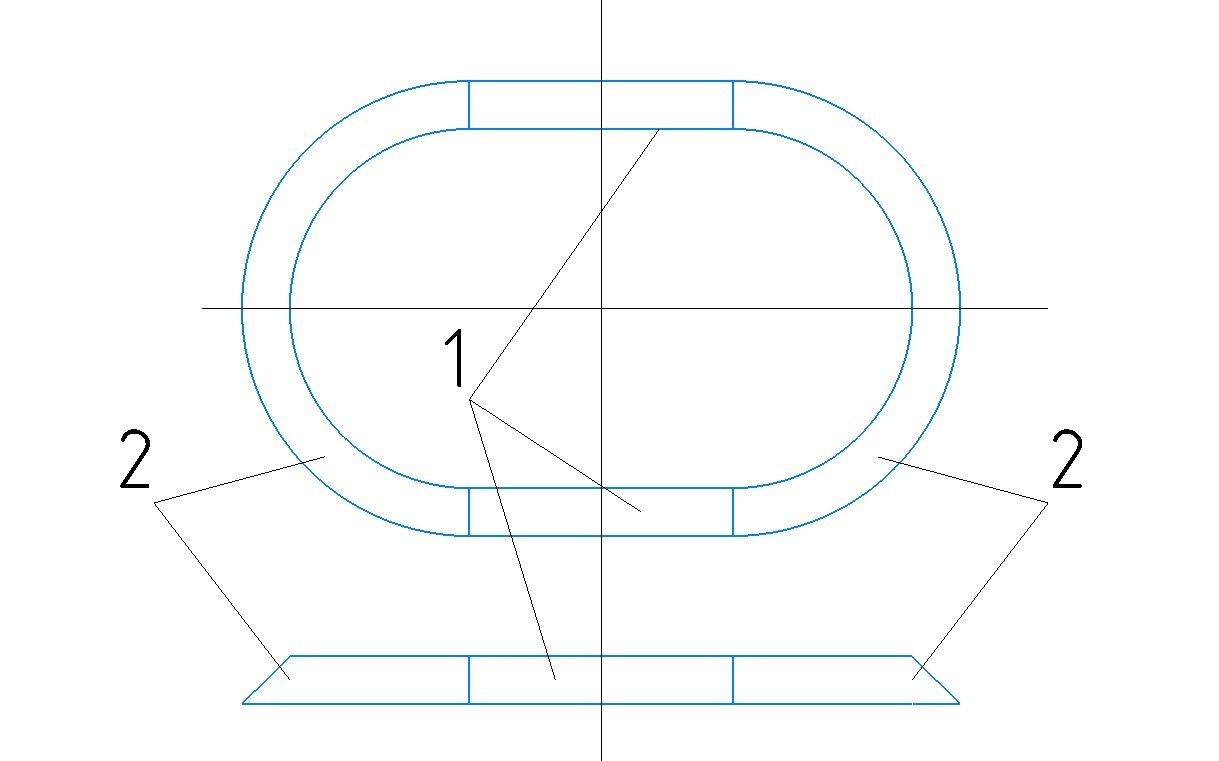
And now all that remains for me is to make the parts of the required sizes and solder them together.
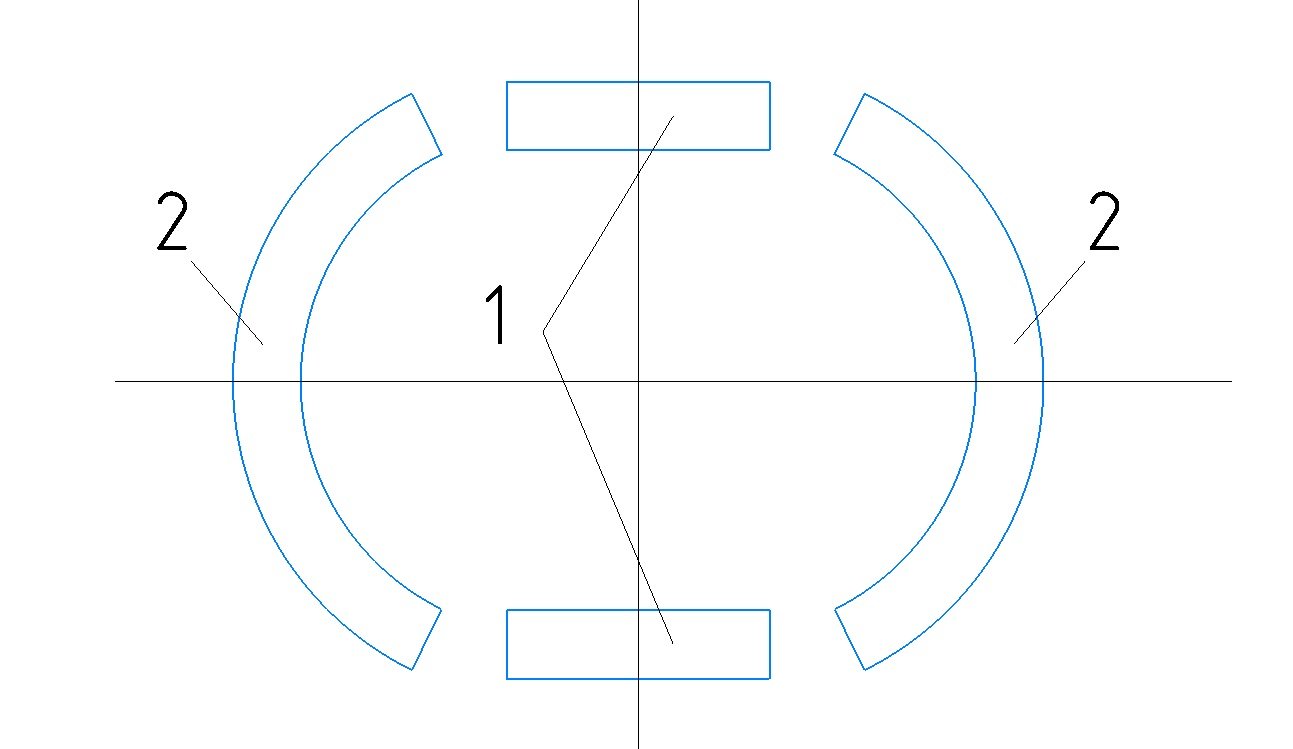
-
Two parts #2 are a truncated cone with previously known parameters. Using a calculator (online) to calculate the dimensions of the truncated cone scan, I get the dimensions I need. https://stanok74.ru/klientam/poleznye-formuly-i-dannye/kalkuljator-rascheta-razvertki-konusa-iz
-
Phil, thank you for your kind words, I am flattered! In this situation with the manufacture of a sloping visor, everything is also quite simple. If the part is of a rather complex configuration, then I try to apply the following principle: - divide the complex part into several very simple ones in configuration - concentrate your efforts not on the manufacture of one very complex part, but on the assembly of several simple ones into one single and complex part.
-
Jan, thank you for your feedback! And I will allow myself to comment on it a little. What you called "gifted" I still put in third place in importance. Experience and skills definitely claim second place. But in first place should be the necessary high-quality machines and tools, because without them the necessary experience cannot appear and no gifted can help with this.