Valeriy V
-
Posts
1,116 -
Joined
-
Last visited
Content Type
Profiles
Forums
Gallery
Events
Everything posted by Valeriy V
-
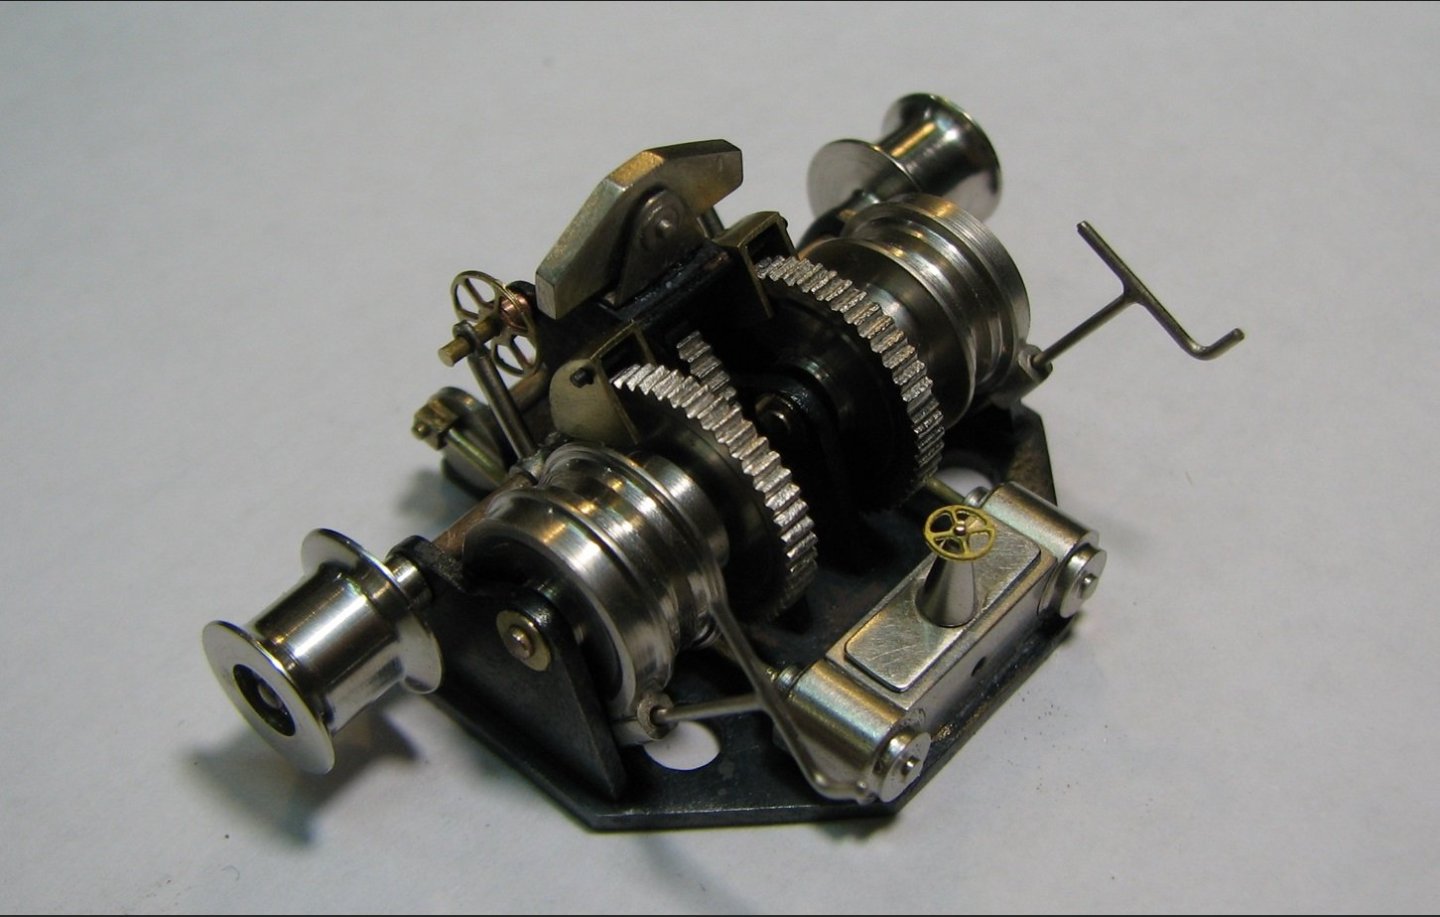
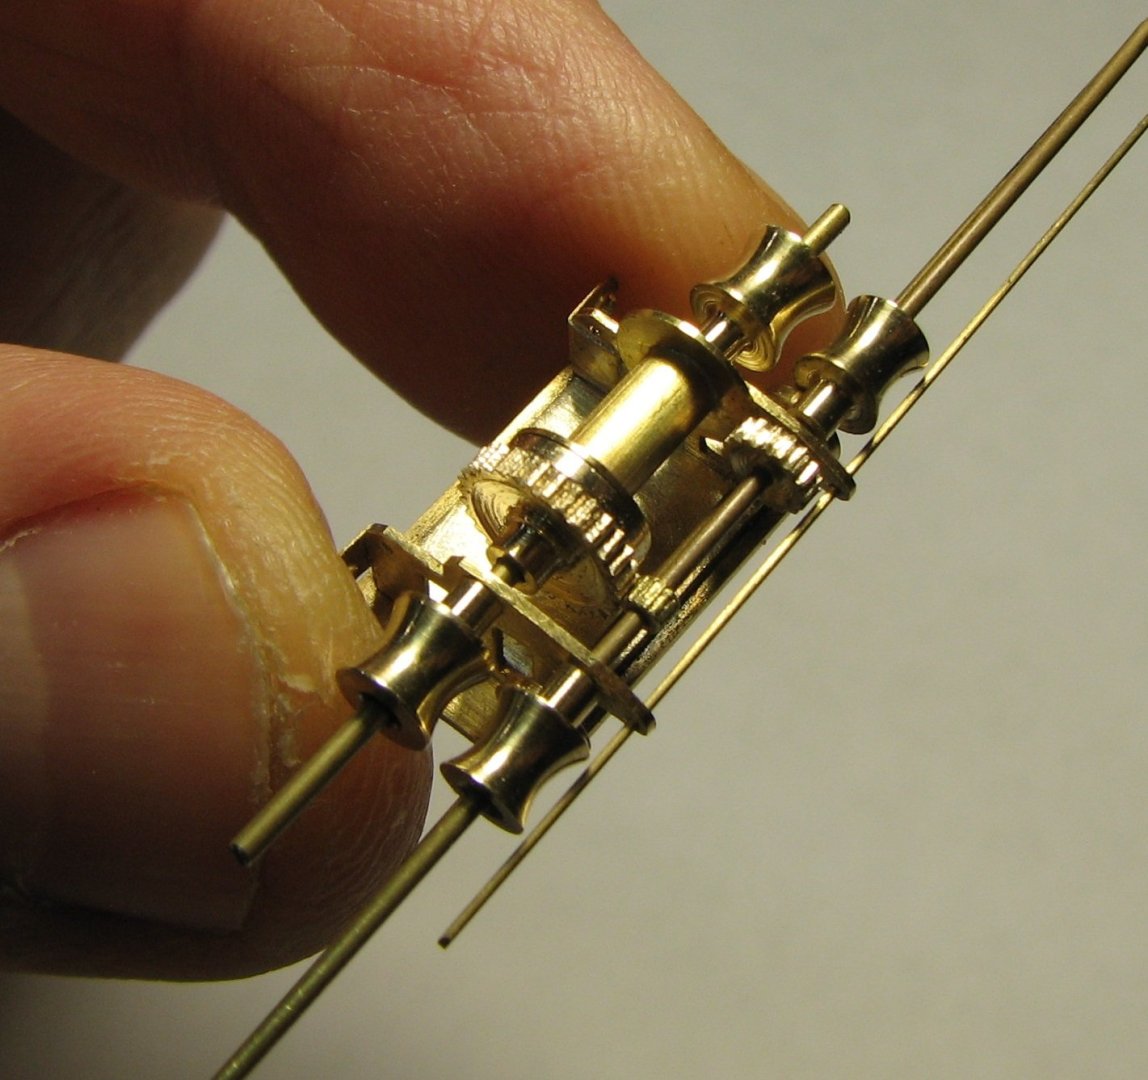
 All parts of the steam winch are assembled together.
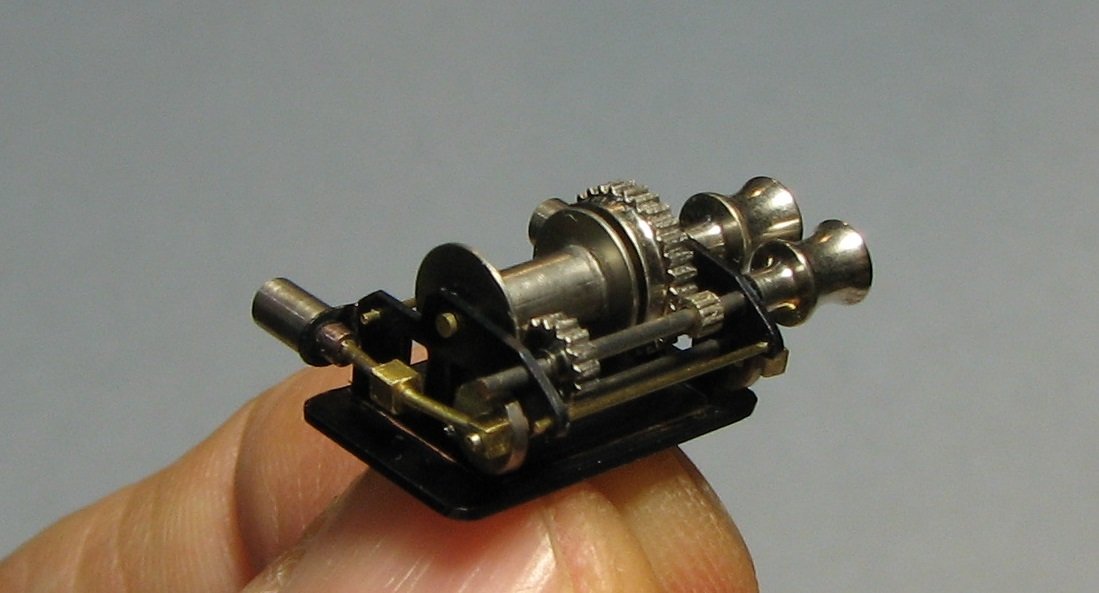


-
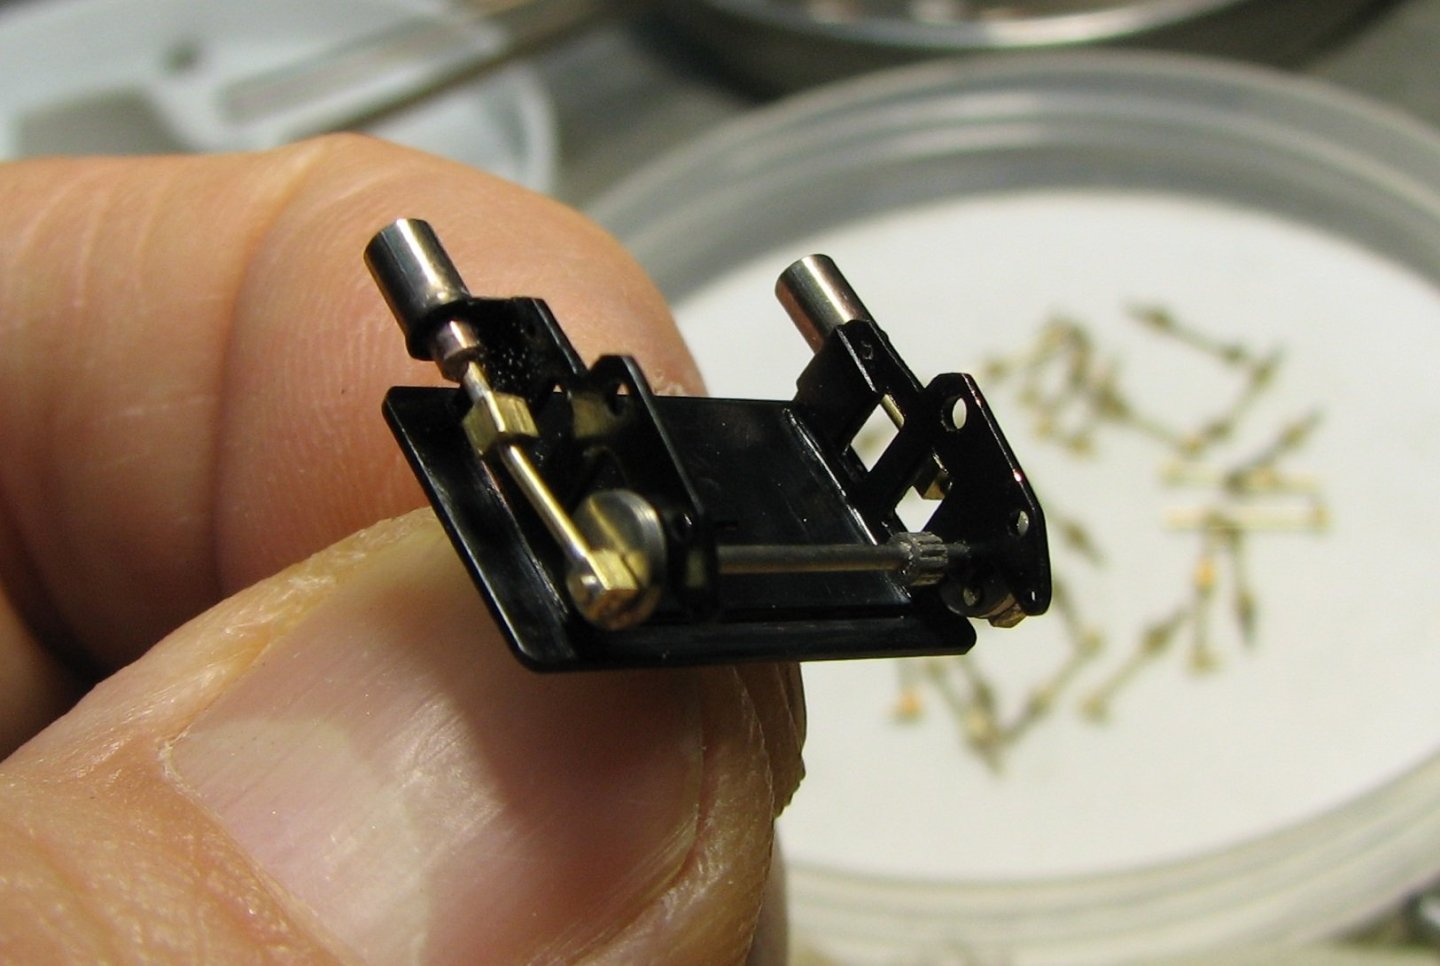
Assembly of steam drive parts.
-
Thank you all for your feedback and likes. I am pleased that my viewers' interest does not fade. I continue working on the cargo winches. Before I start their final assembly, I need to check all the parts for compatibility.
-
BRAVO! Ras, this steamship turned out much better than the previous models. And it's just great that you didn't paint some parts, this maneuver allowed you to revive your model.
- 128 replies
-
- 3
-

-
- zulu
- sternwheeler
- (and 1 more)
-
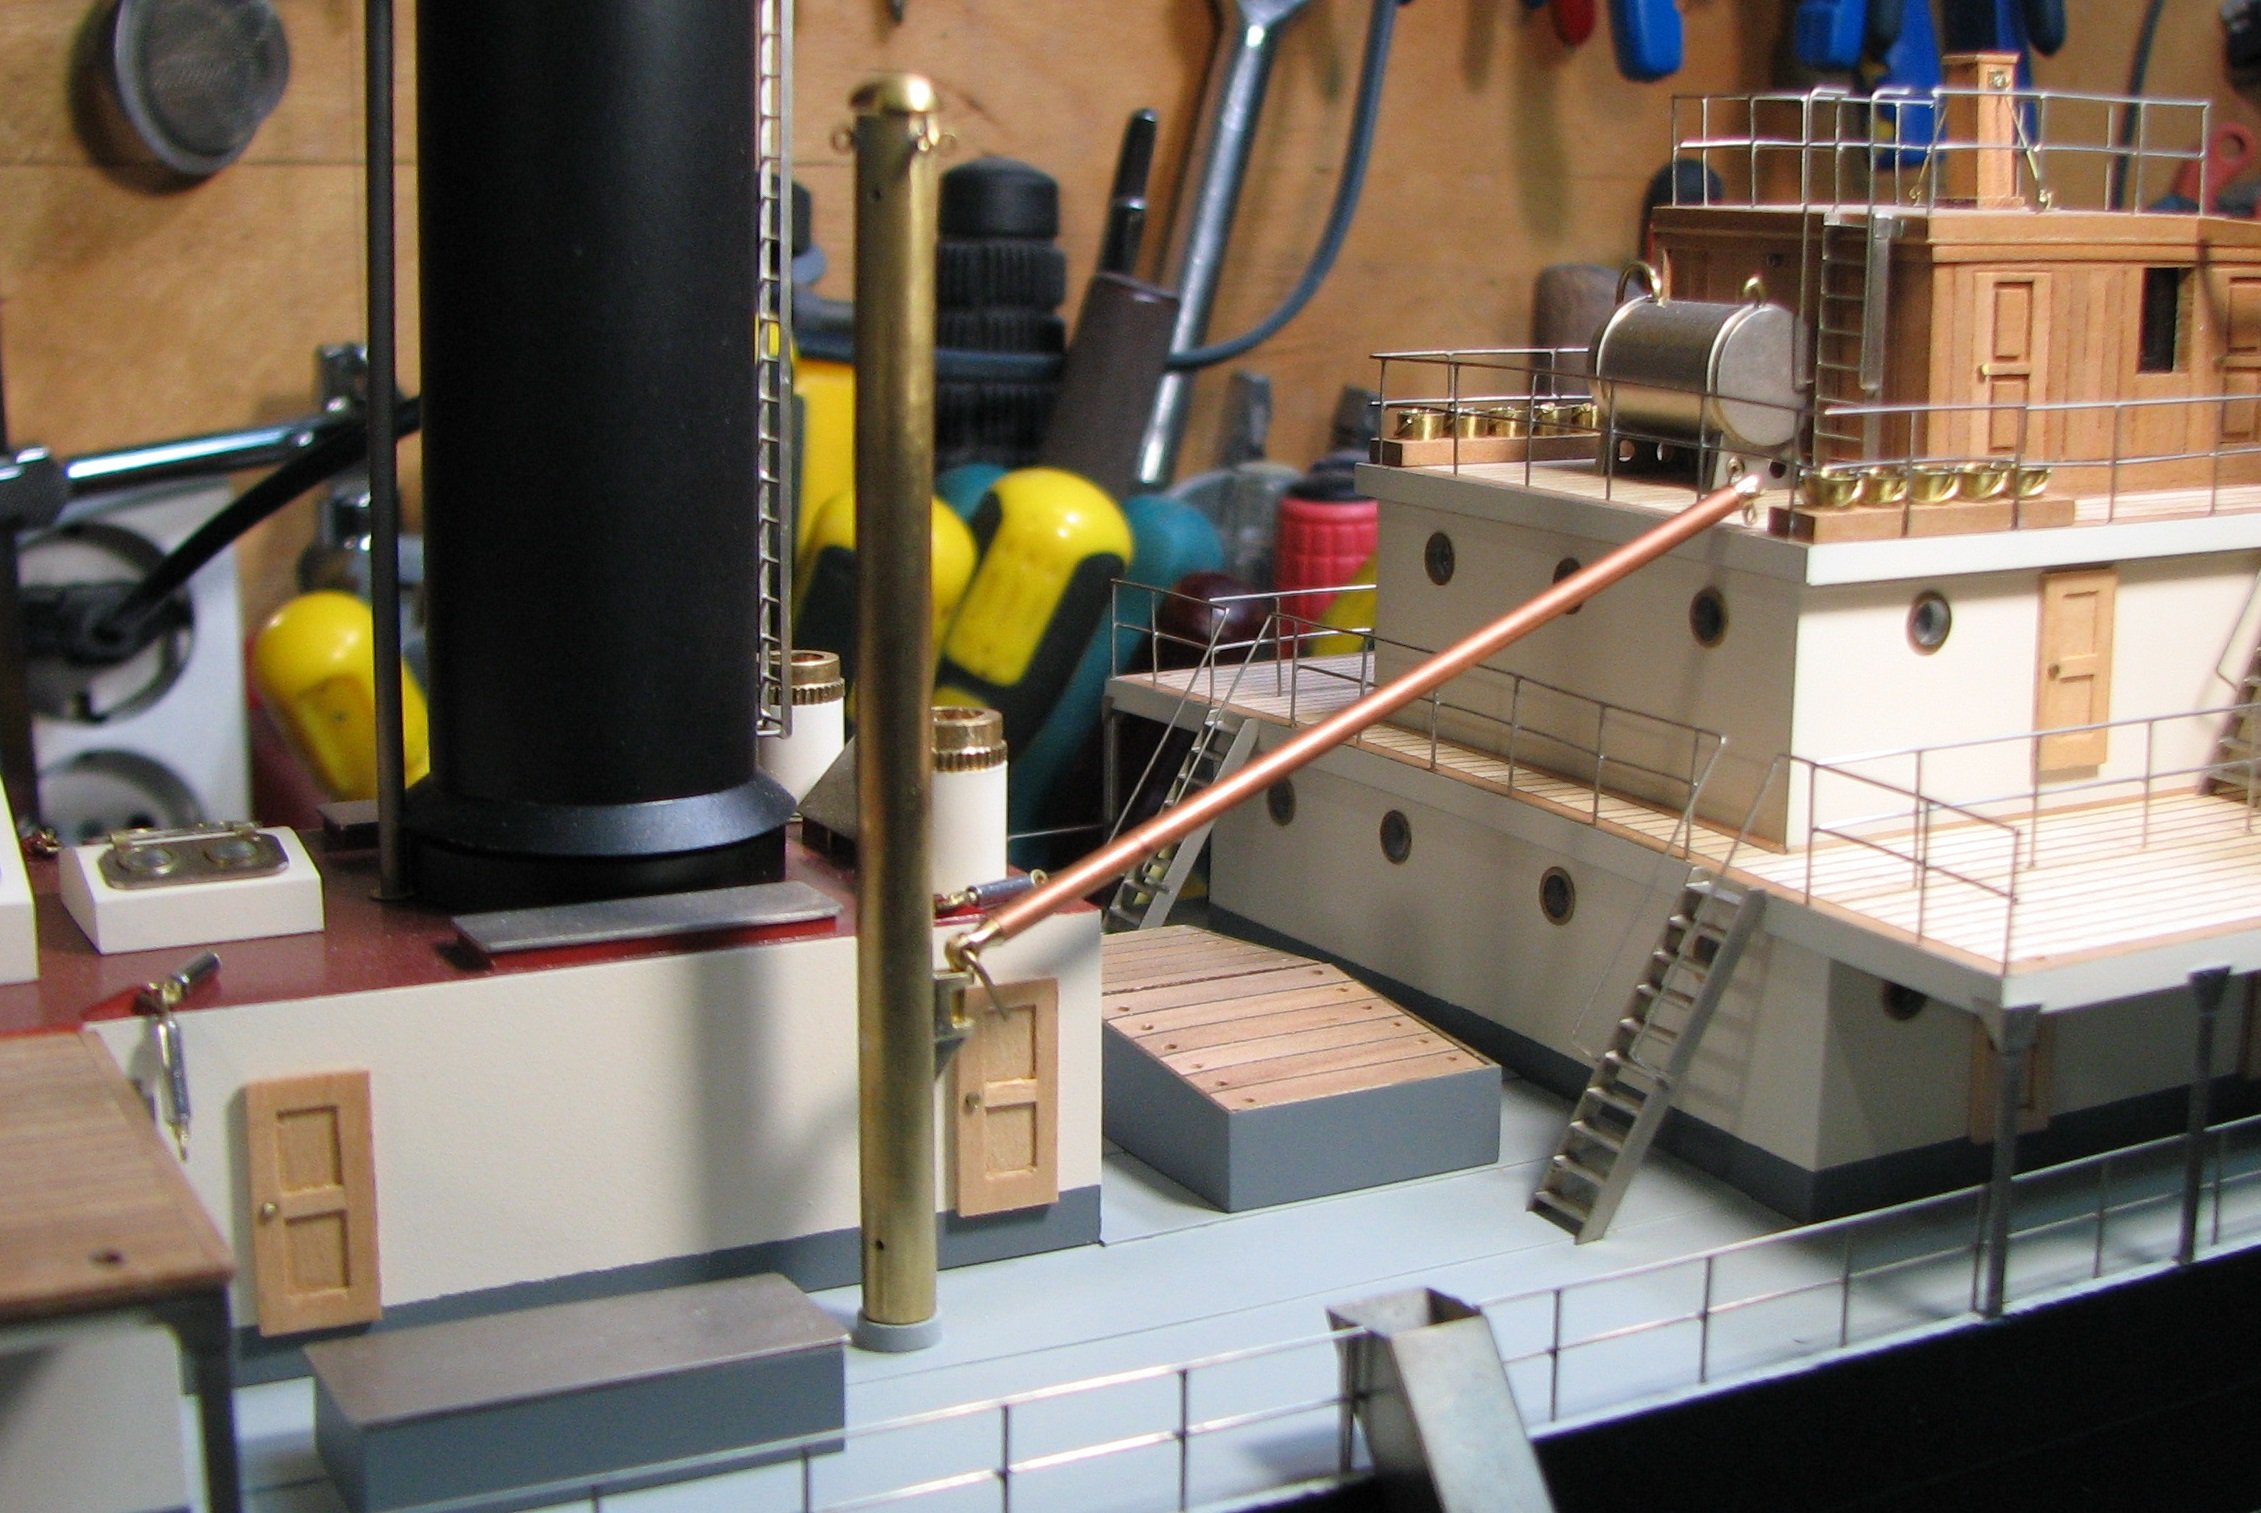
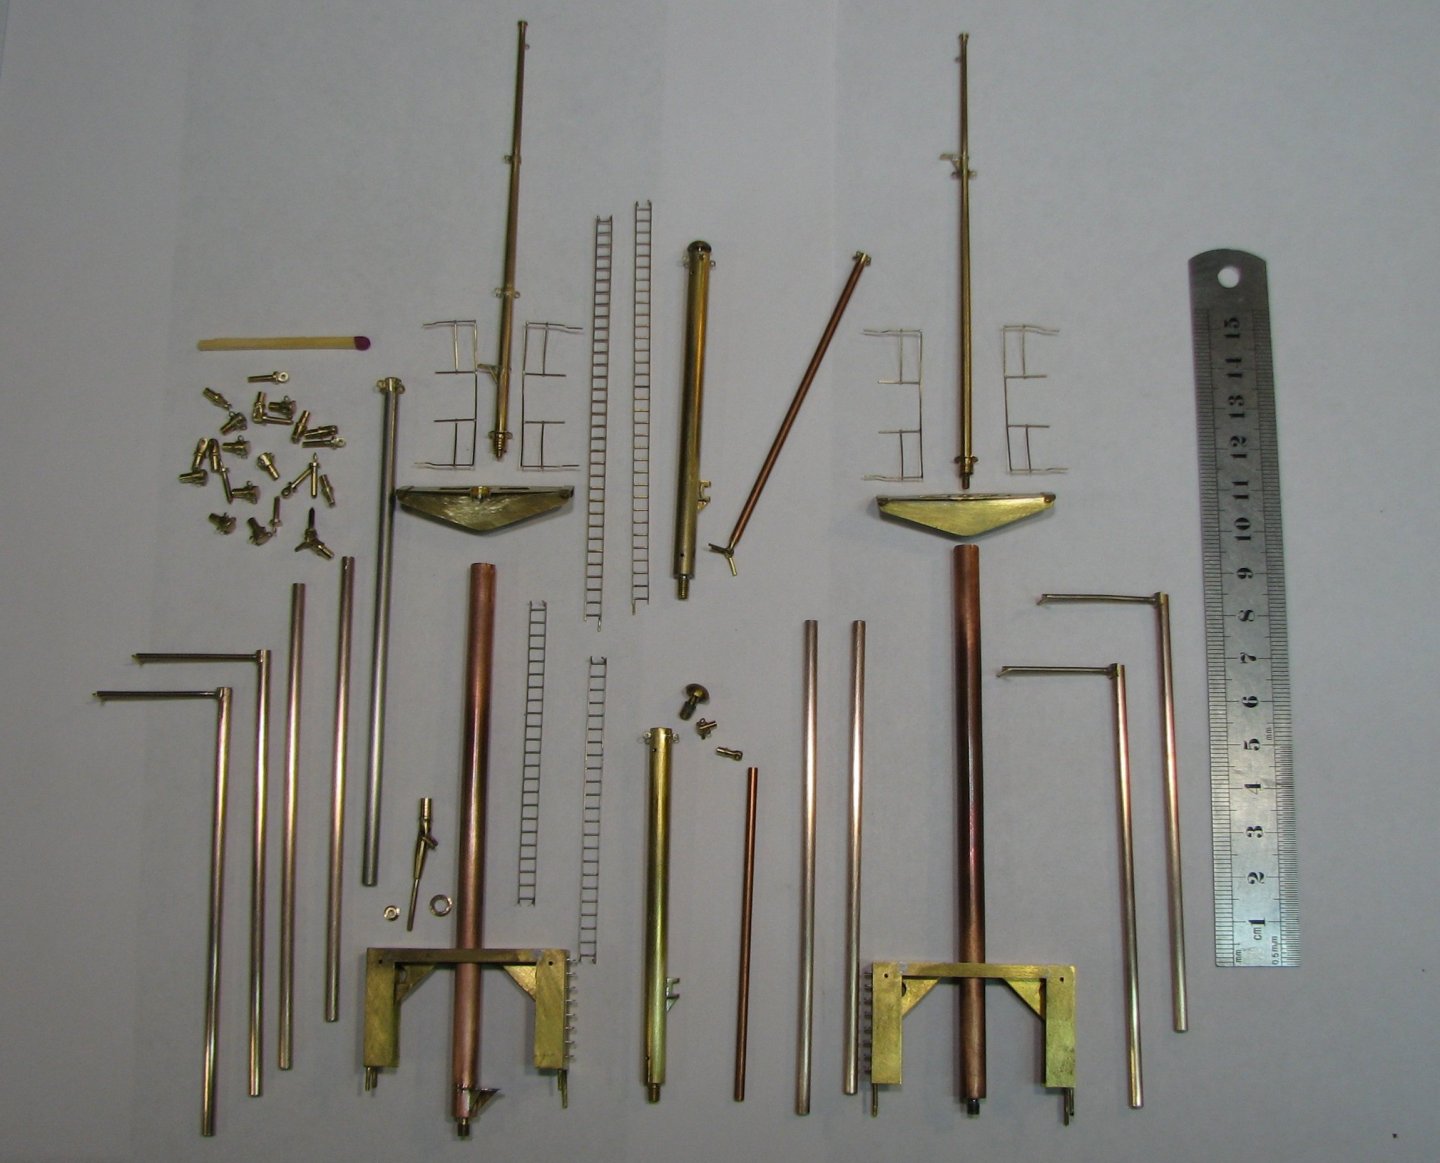
The cargo device of the steamship in disassembly. Without steam cargo winches, rigging equipment and the rigging itself.
-
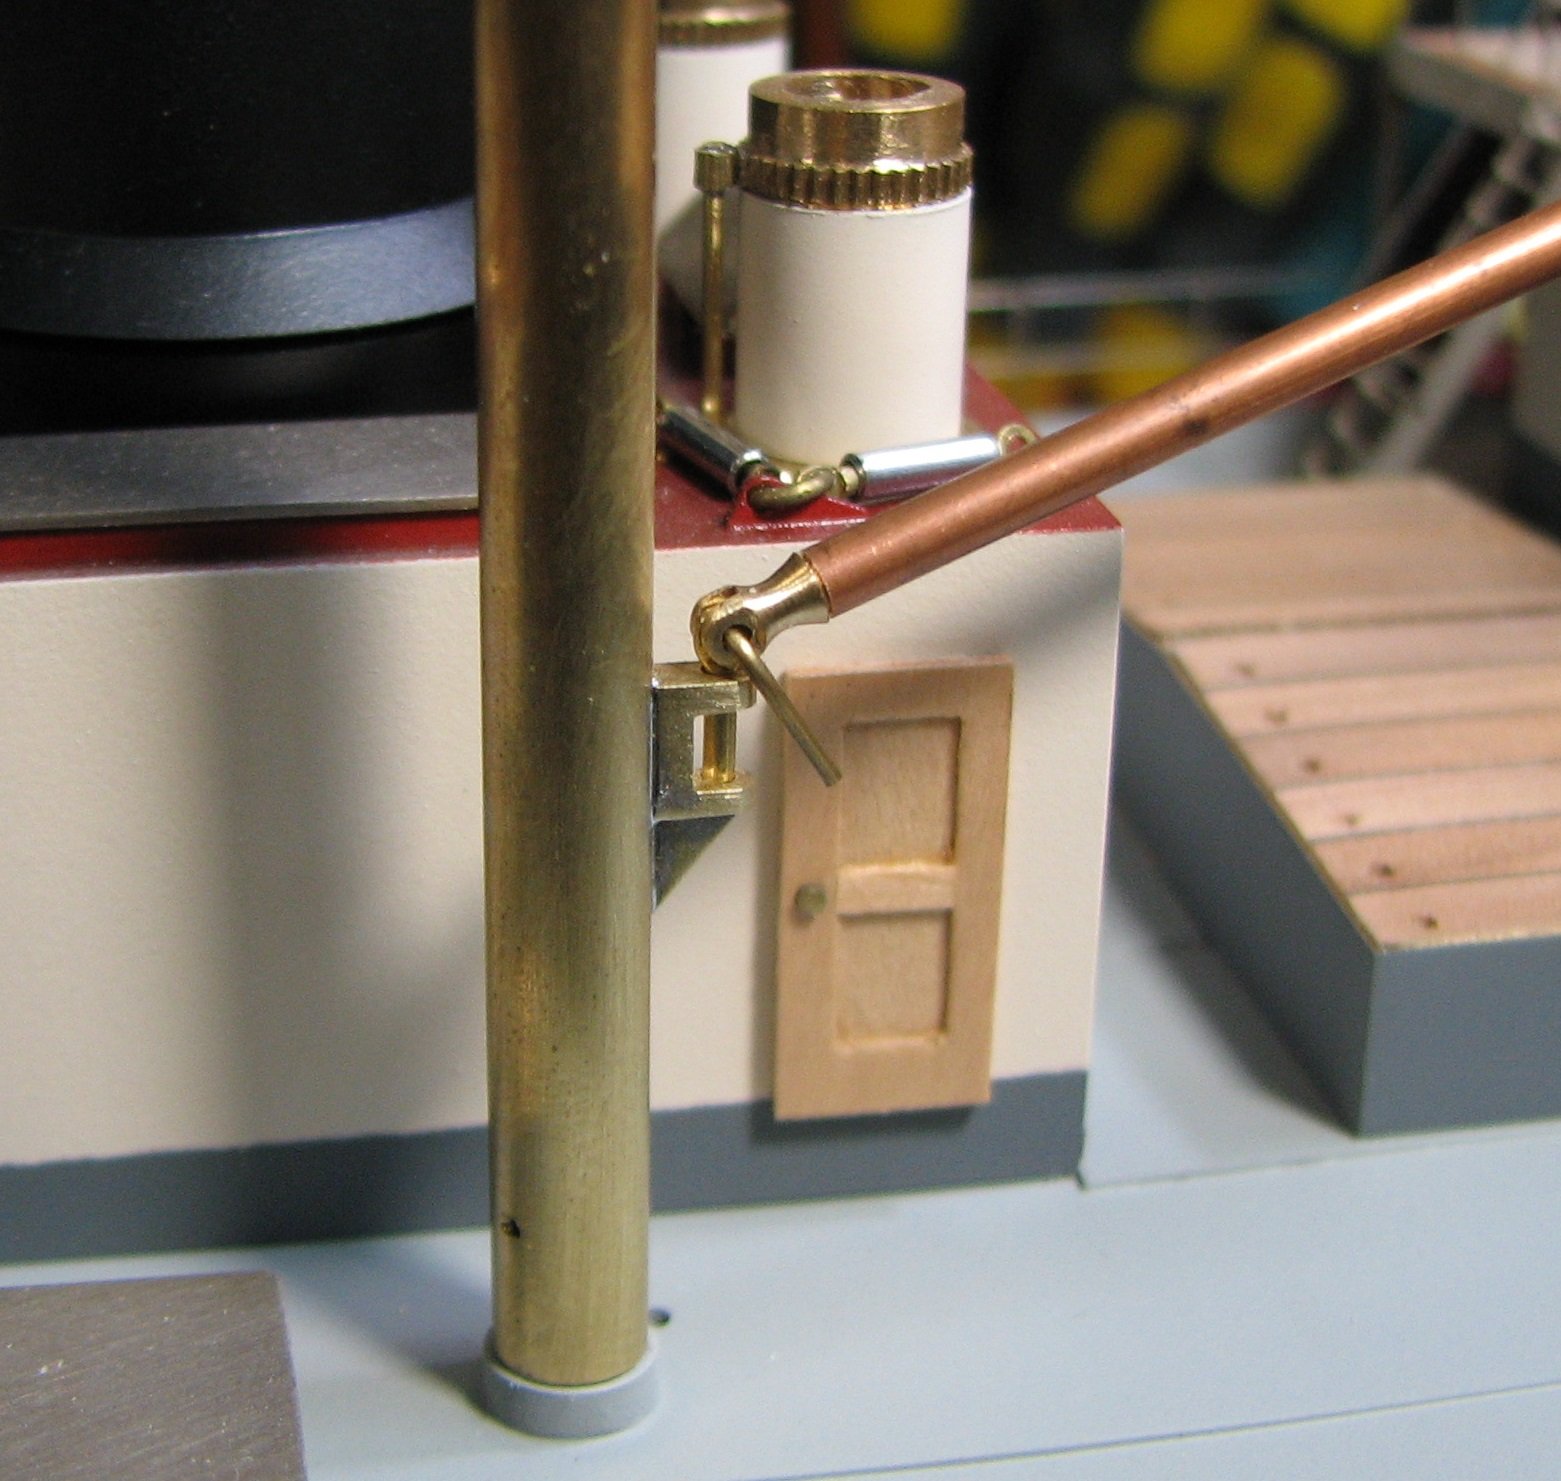
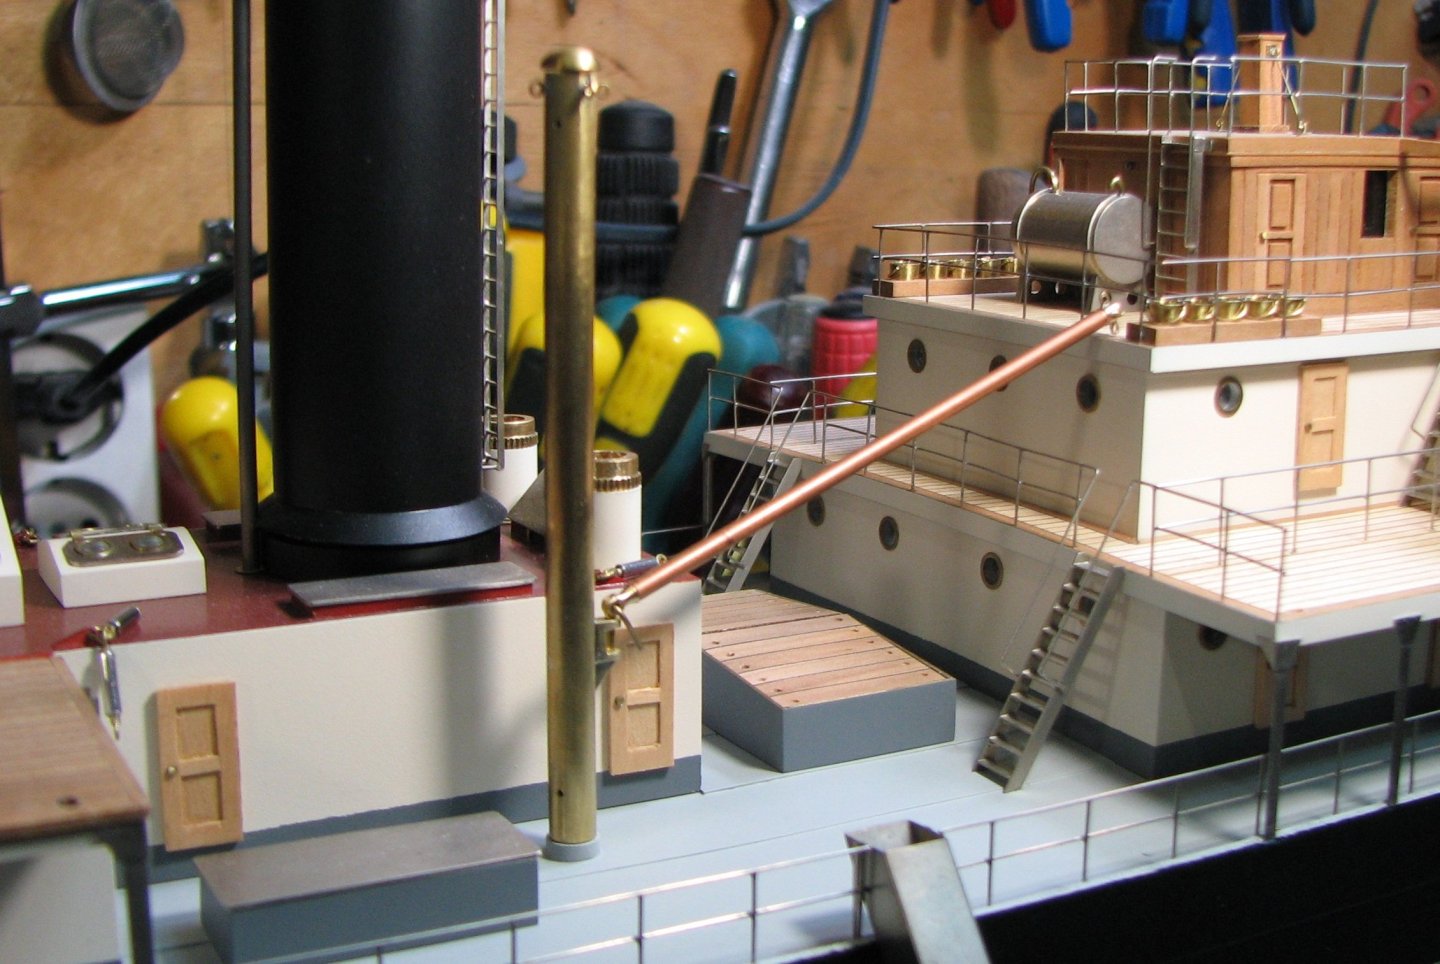
Approximate installation of parts in their places.

-
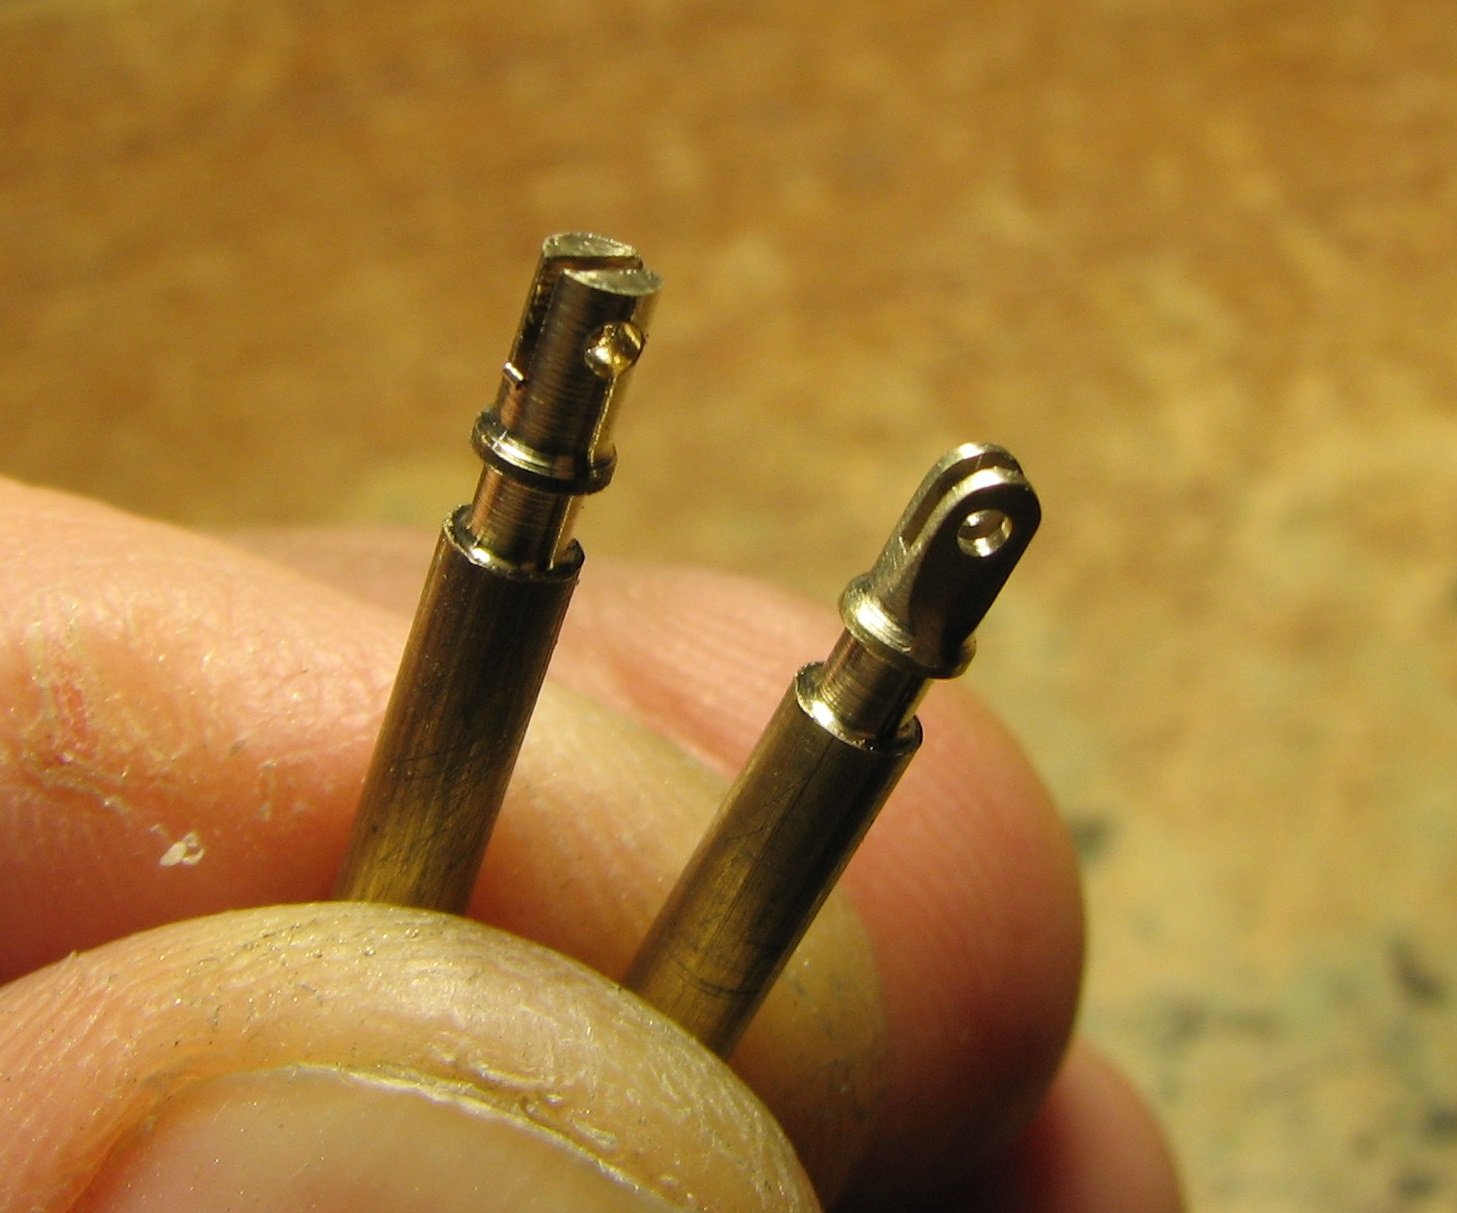
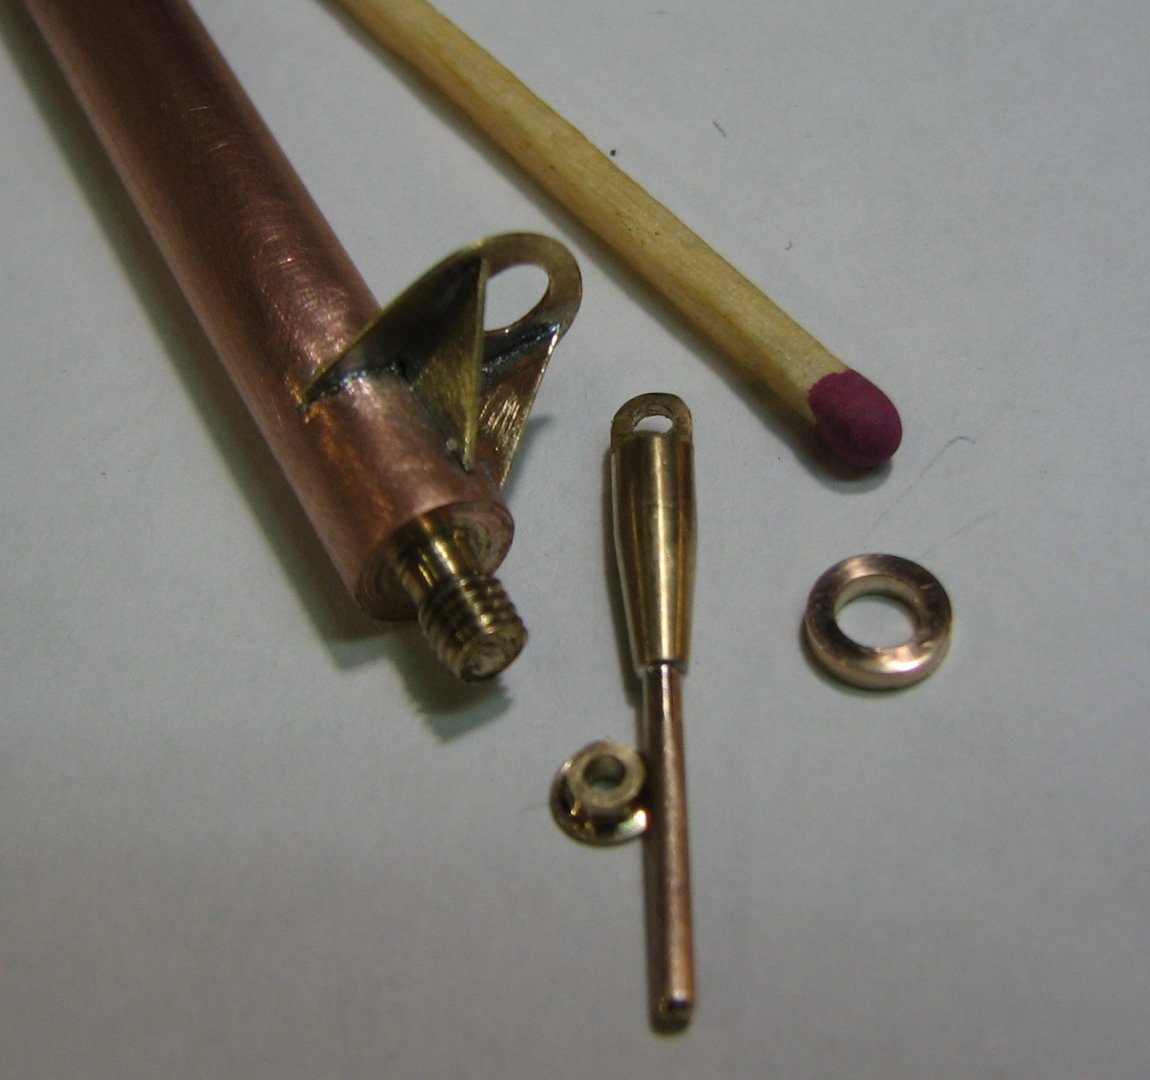
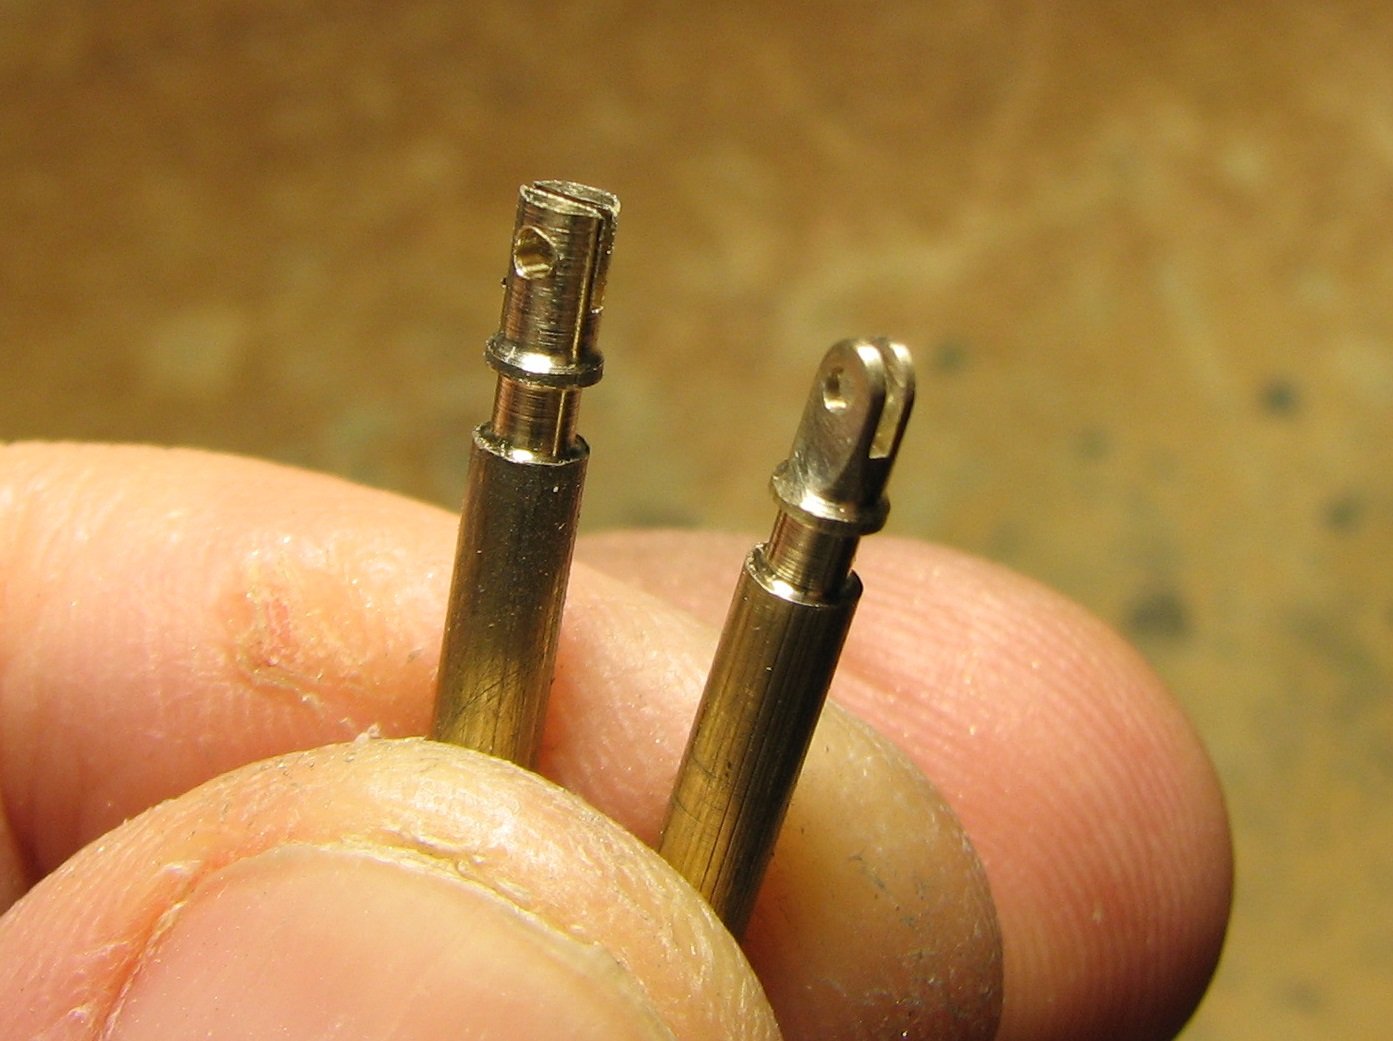
Boom parts with increased lifting capacity.
-
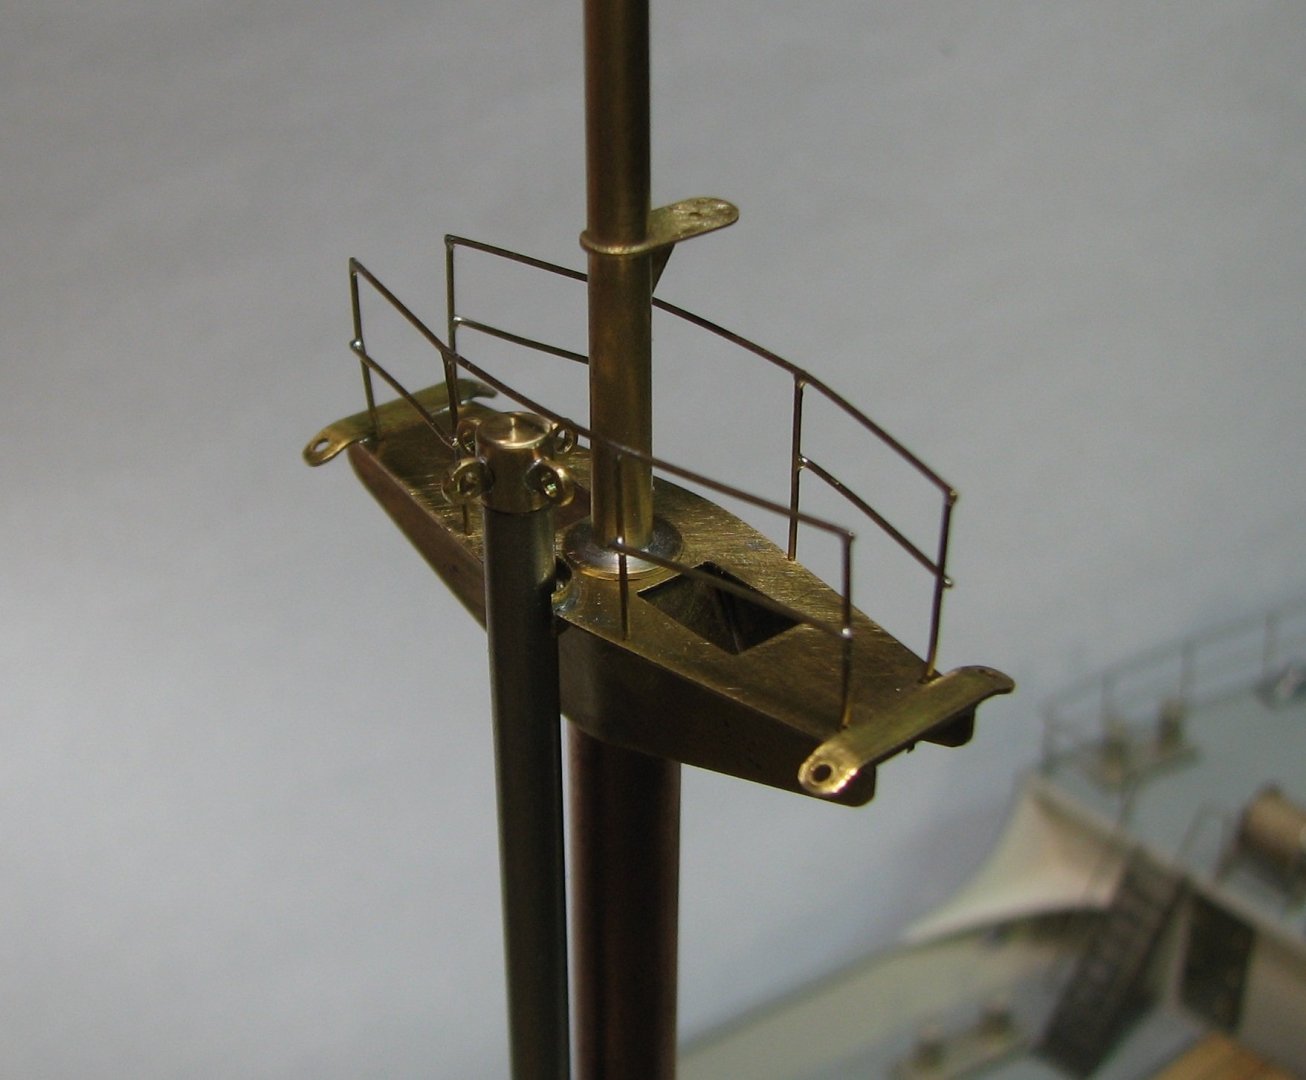
Light cargo boom on spar deck.

-
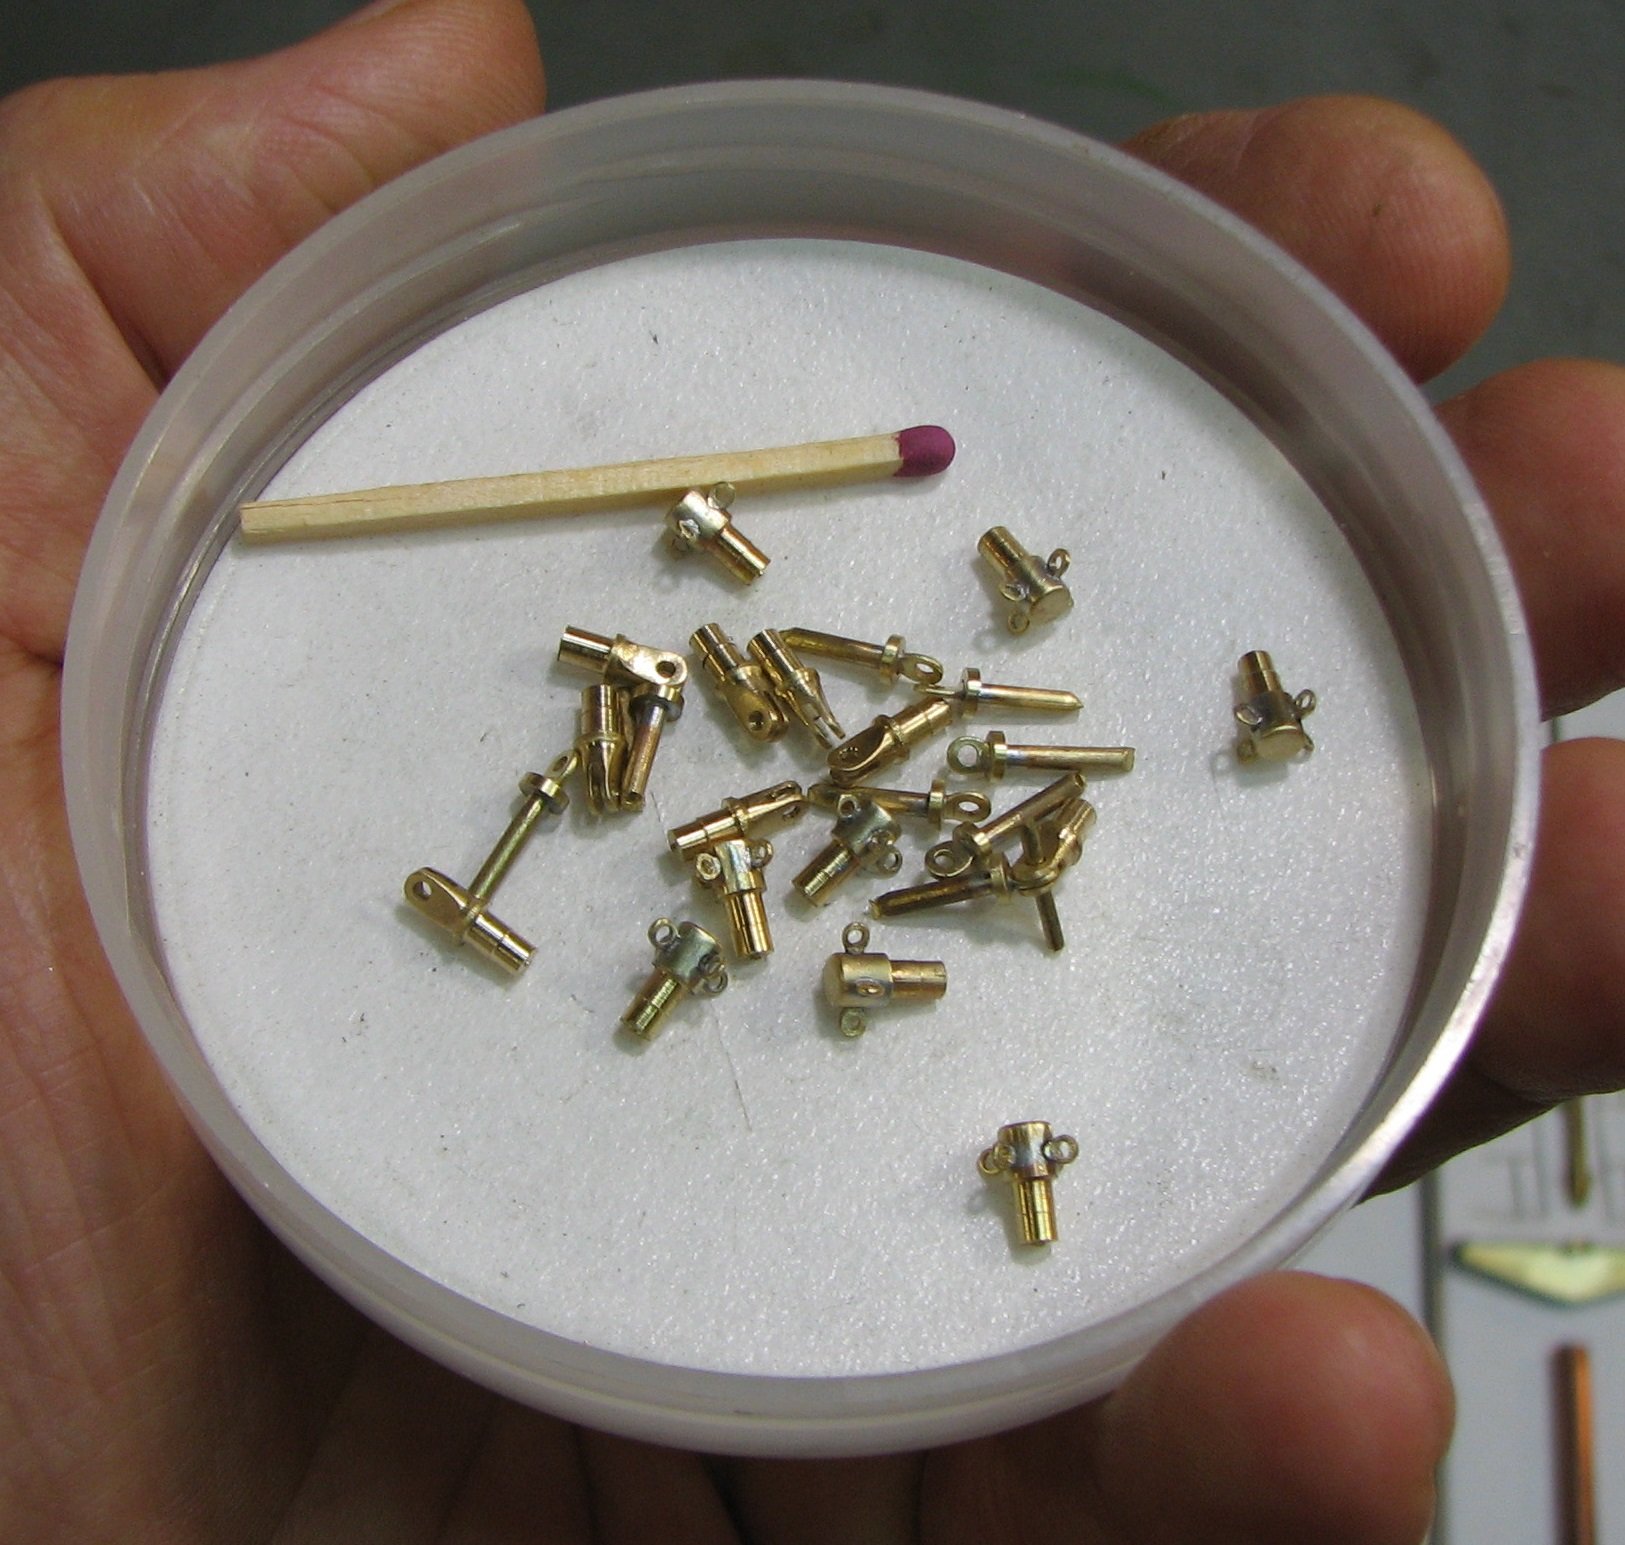
I continue to make details for the model of the steamship. Parts for light cargo booms.

-
Hi, Dart! It should be explained to the rest of the forum participants that on its first voyage to Spain, the ss Blagoev carried light tanks (T-26) for the Republic on its deck. Therefore, the customer of this model plans to install these tanks on the deck of the model in the future. But it is unlikely that these tanks will be made of metal.
-
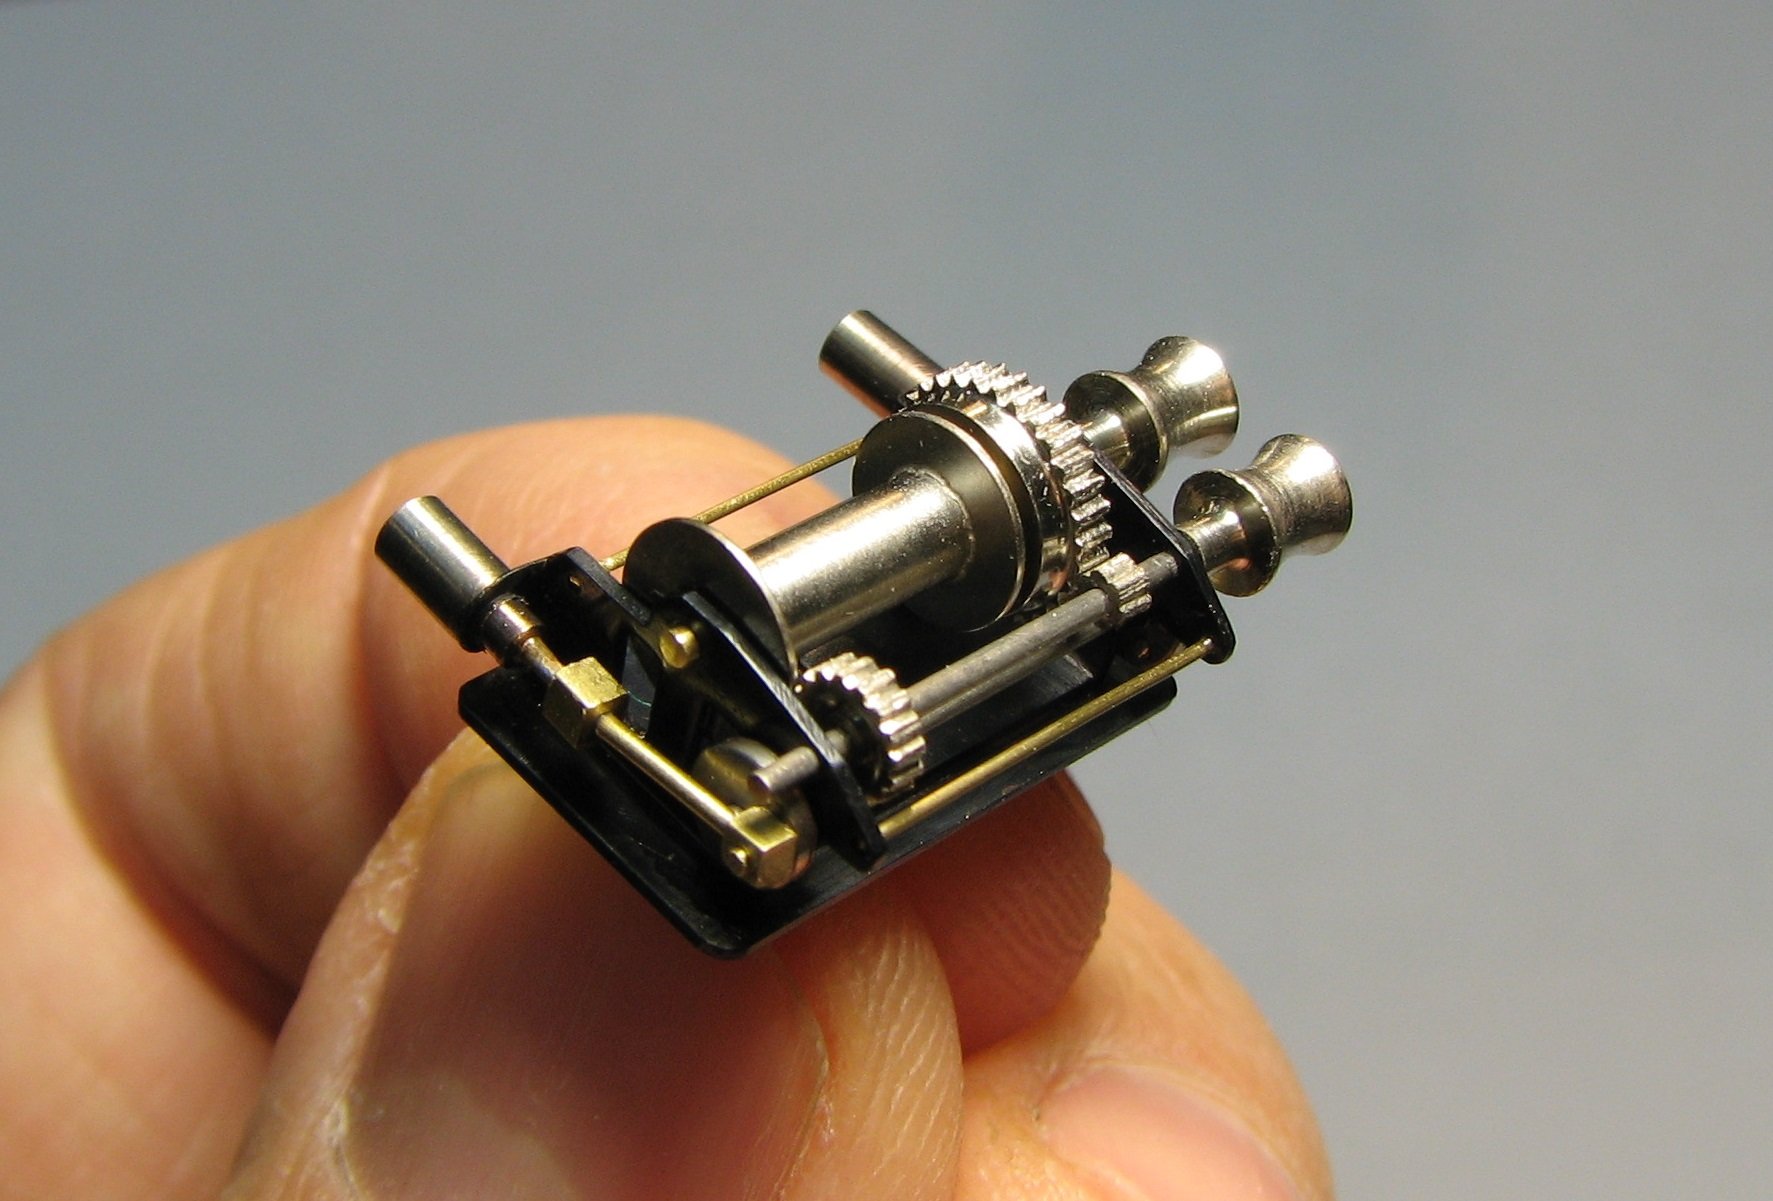
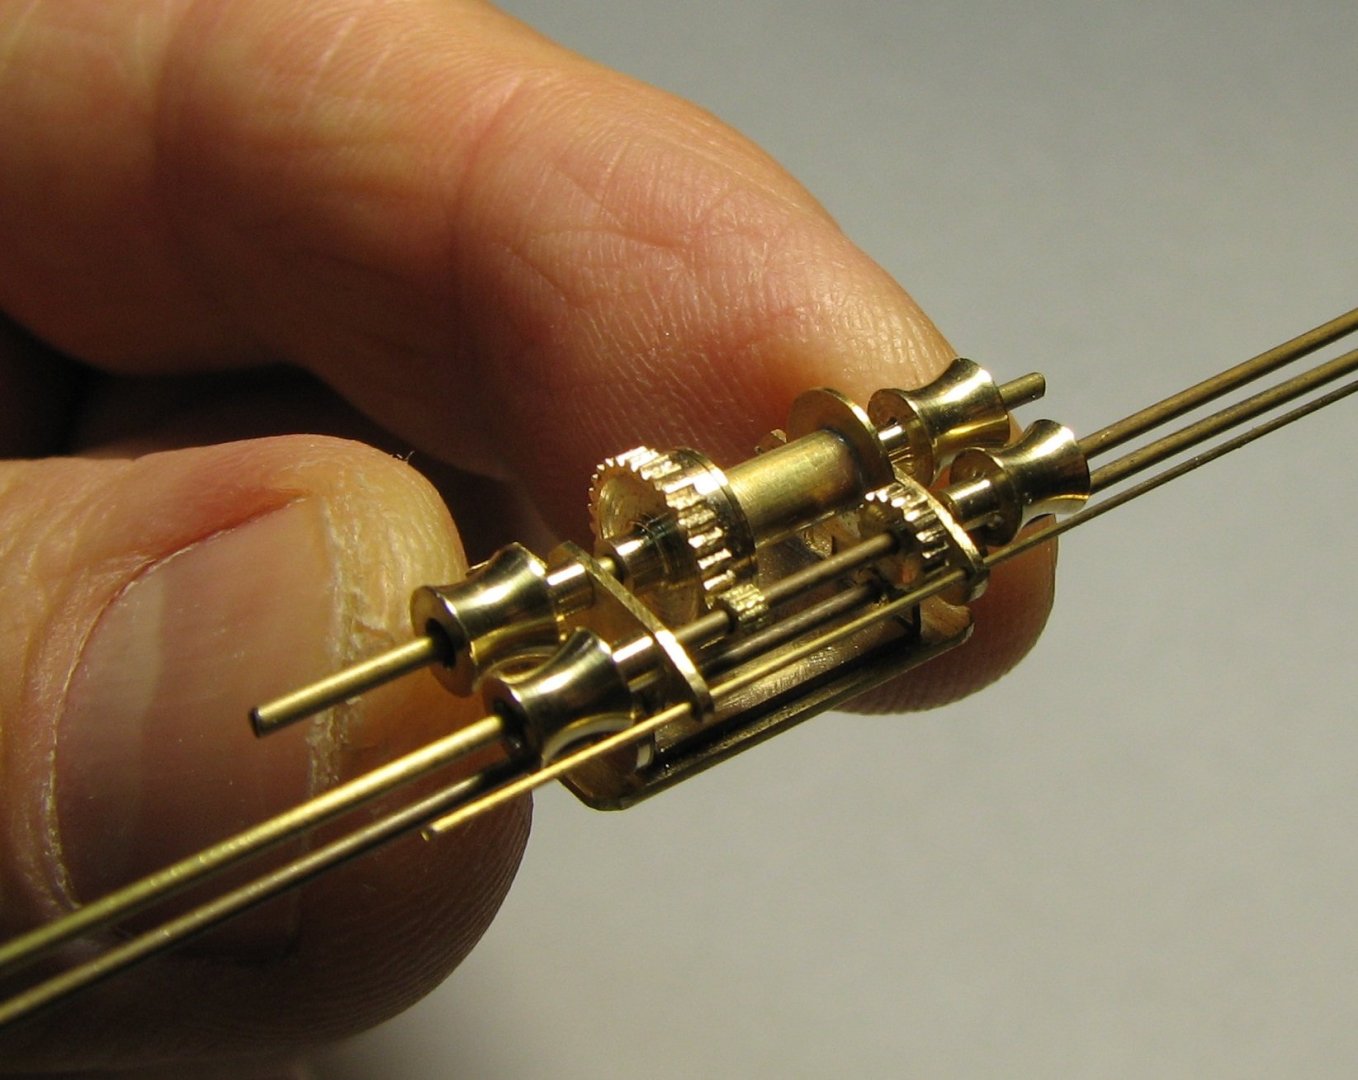
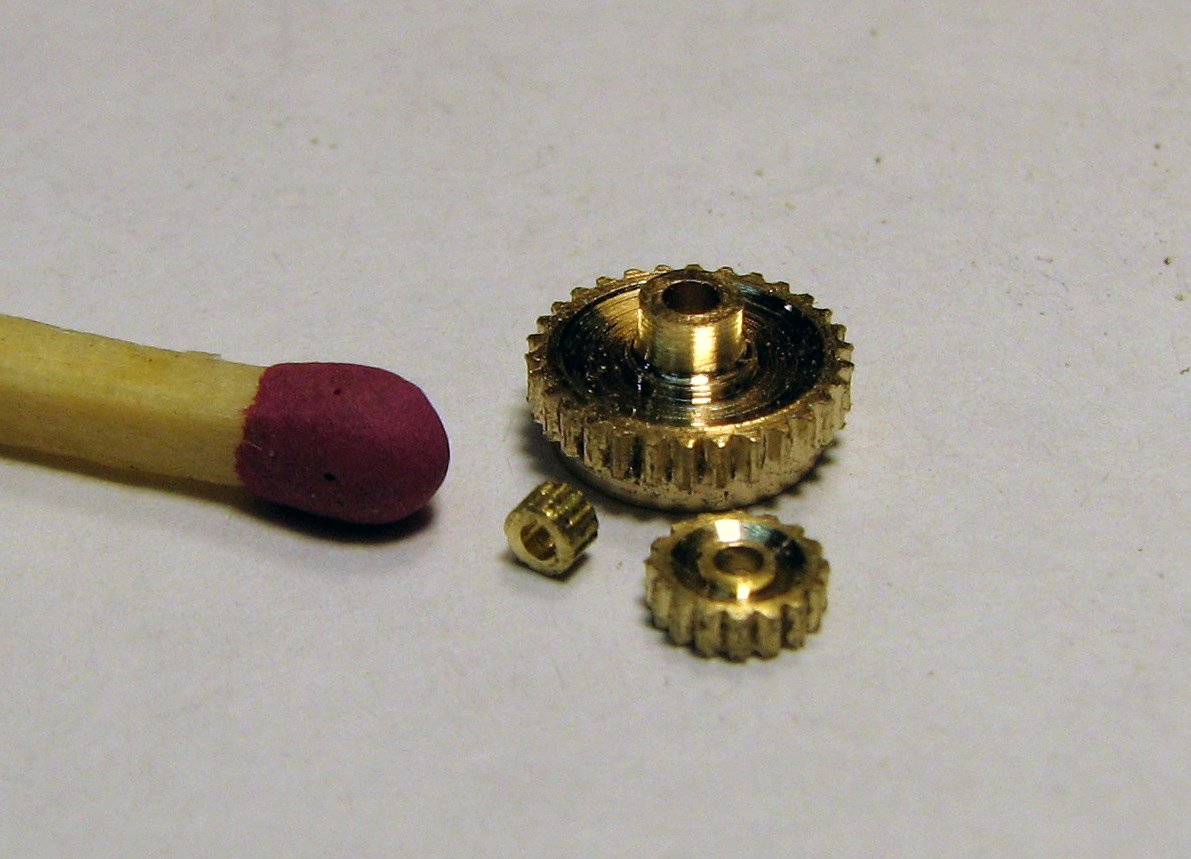
No, no! Watchmakers do very precise work and I only imitate it.
-
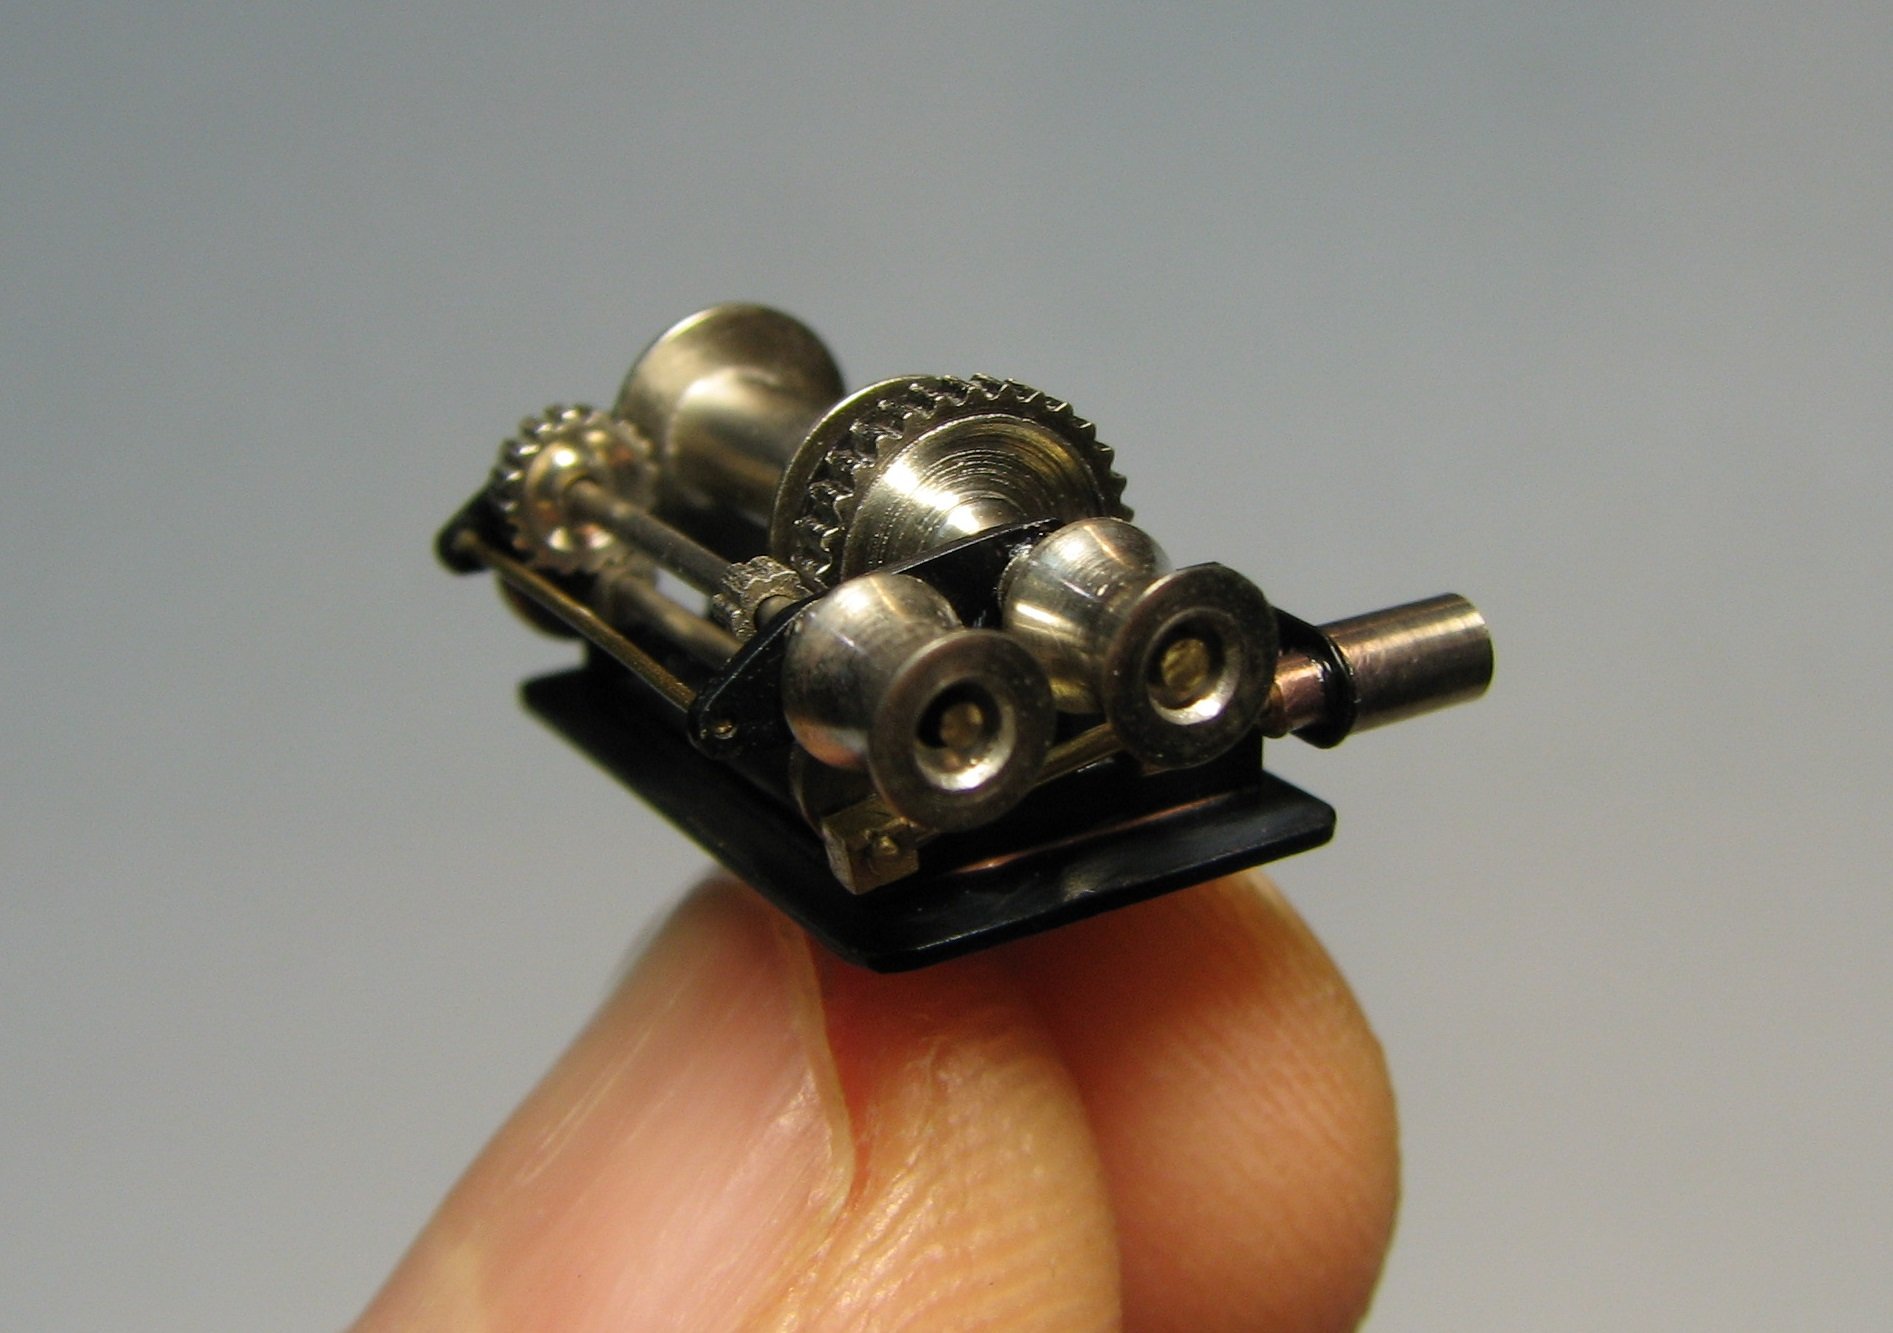
Now I have to put it all together.
-
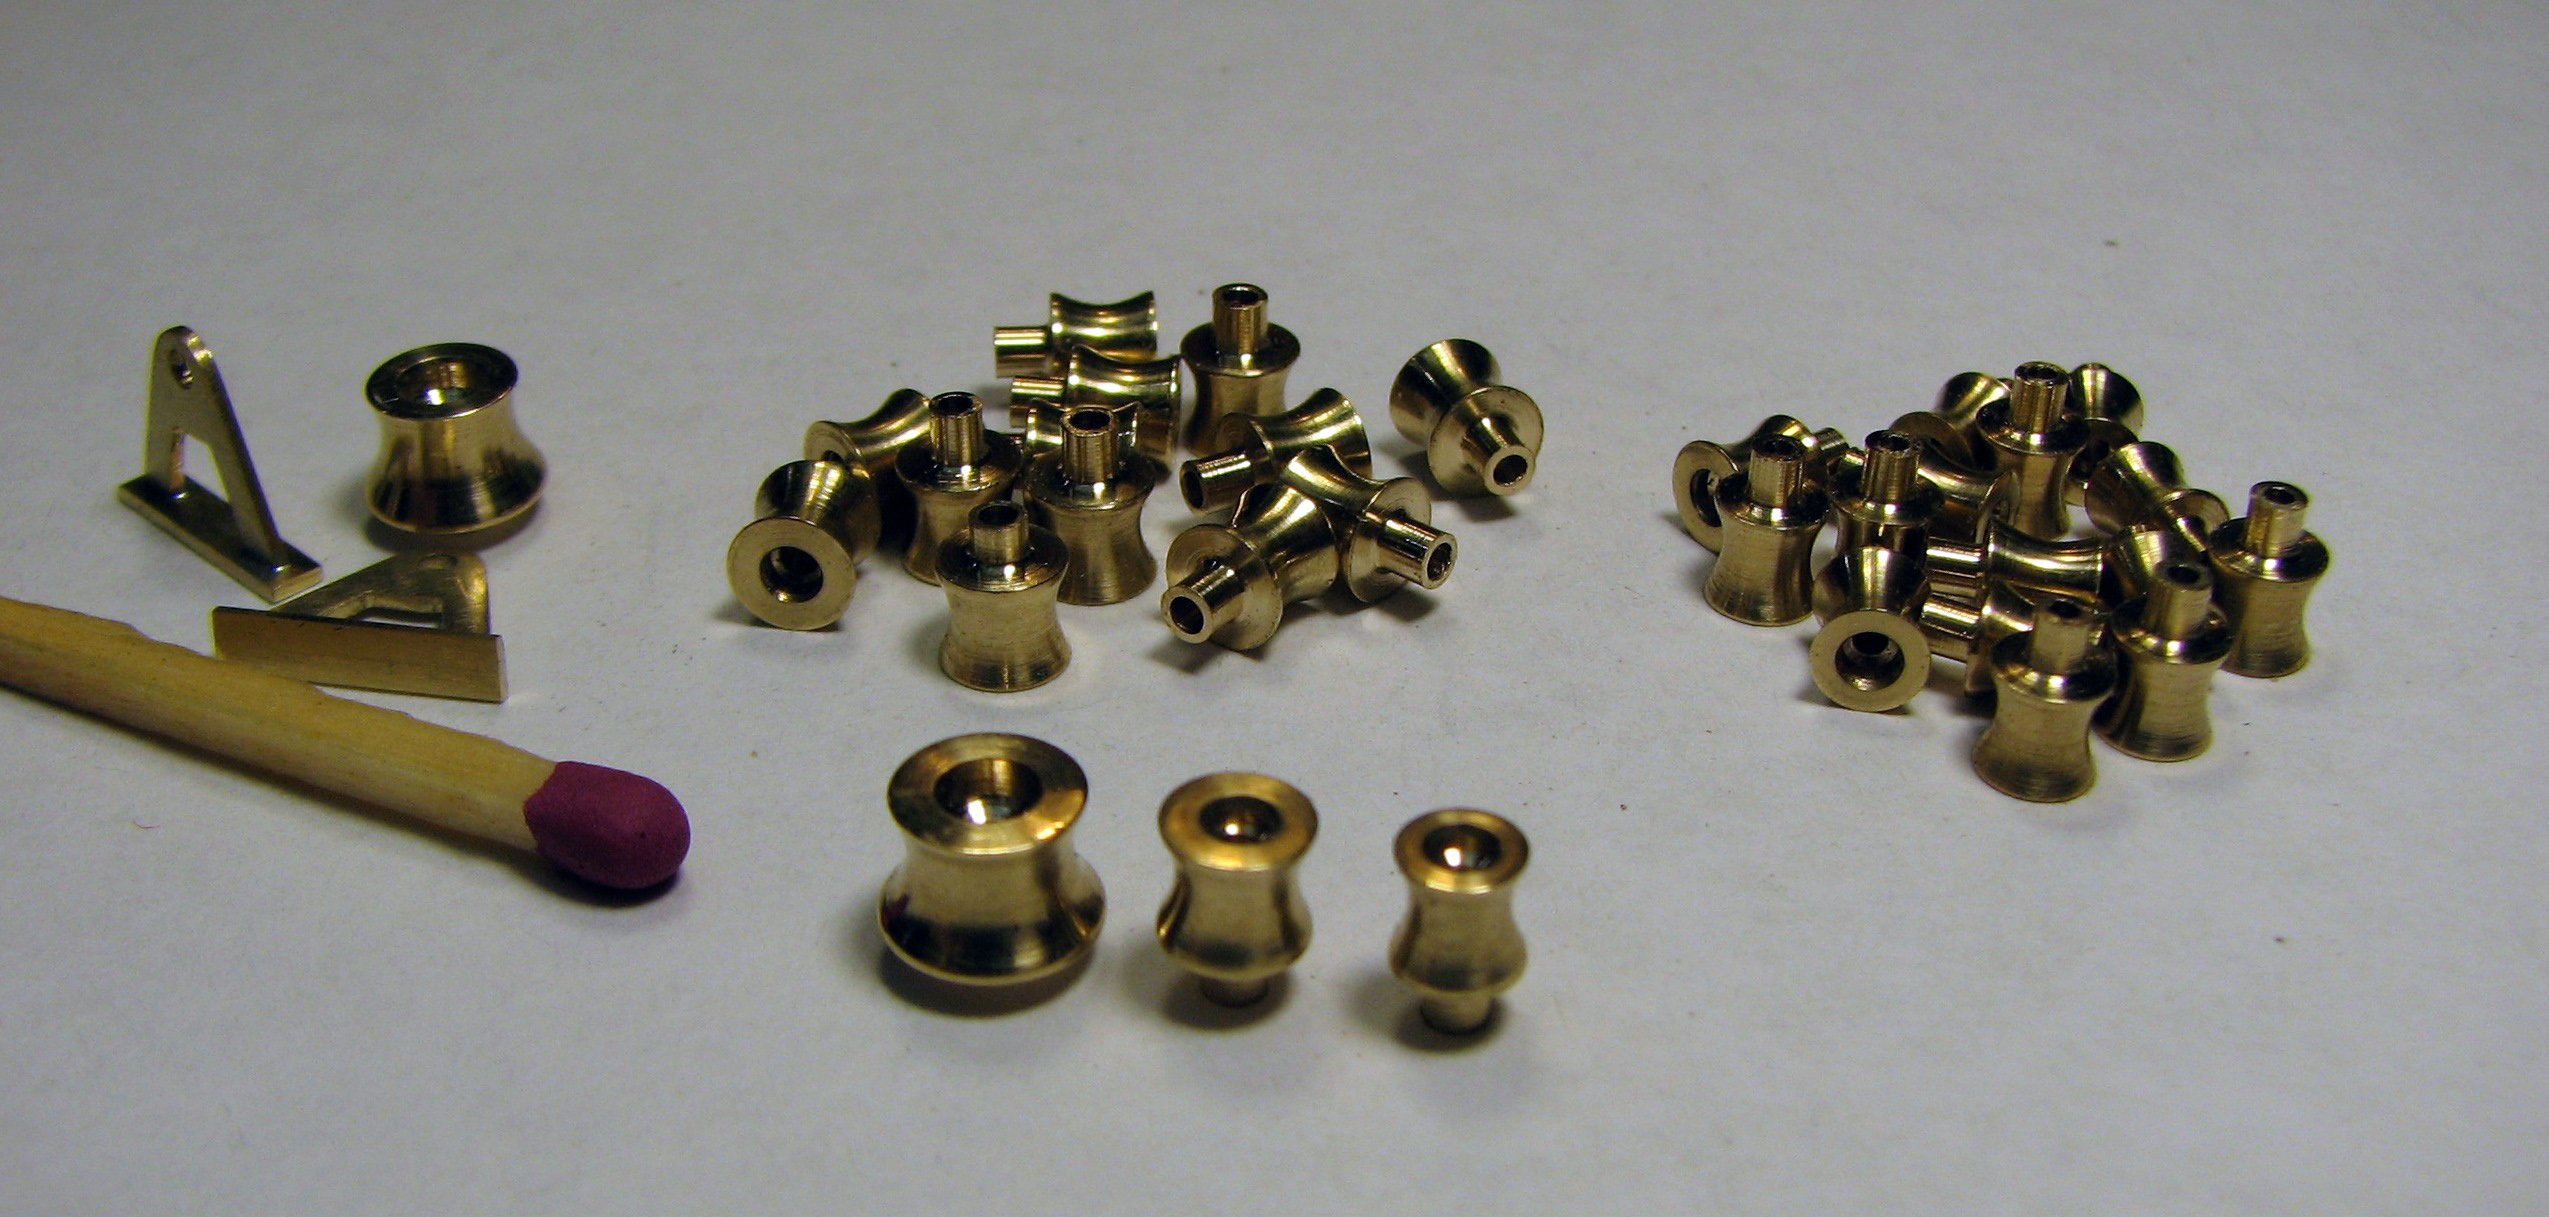
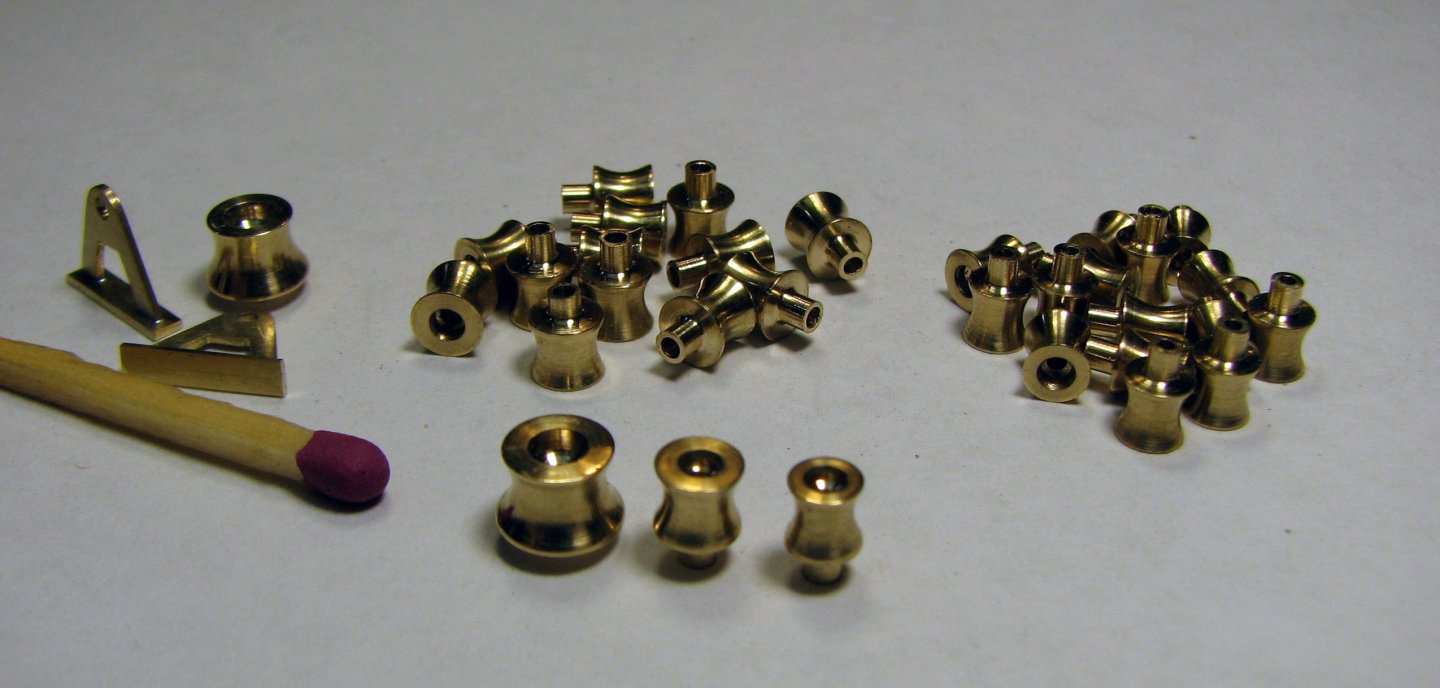
Warping drum. Three sizes.
-
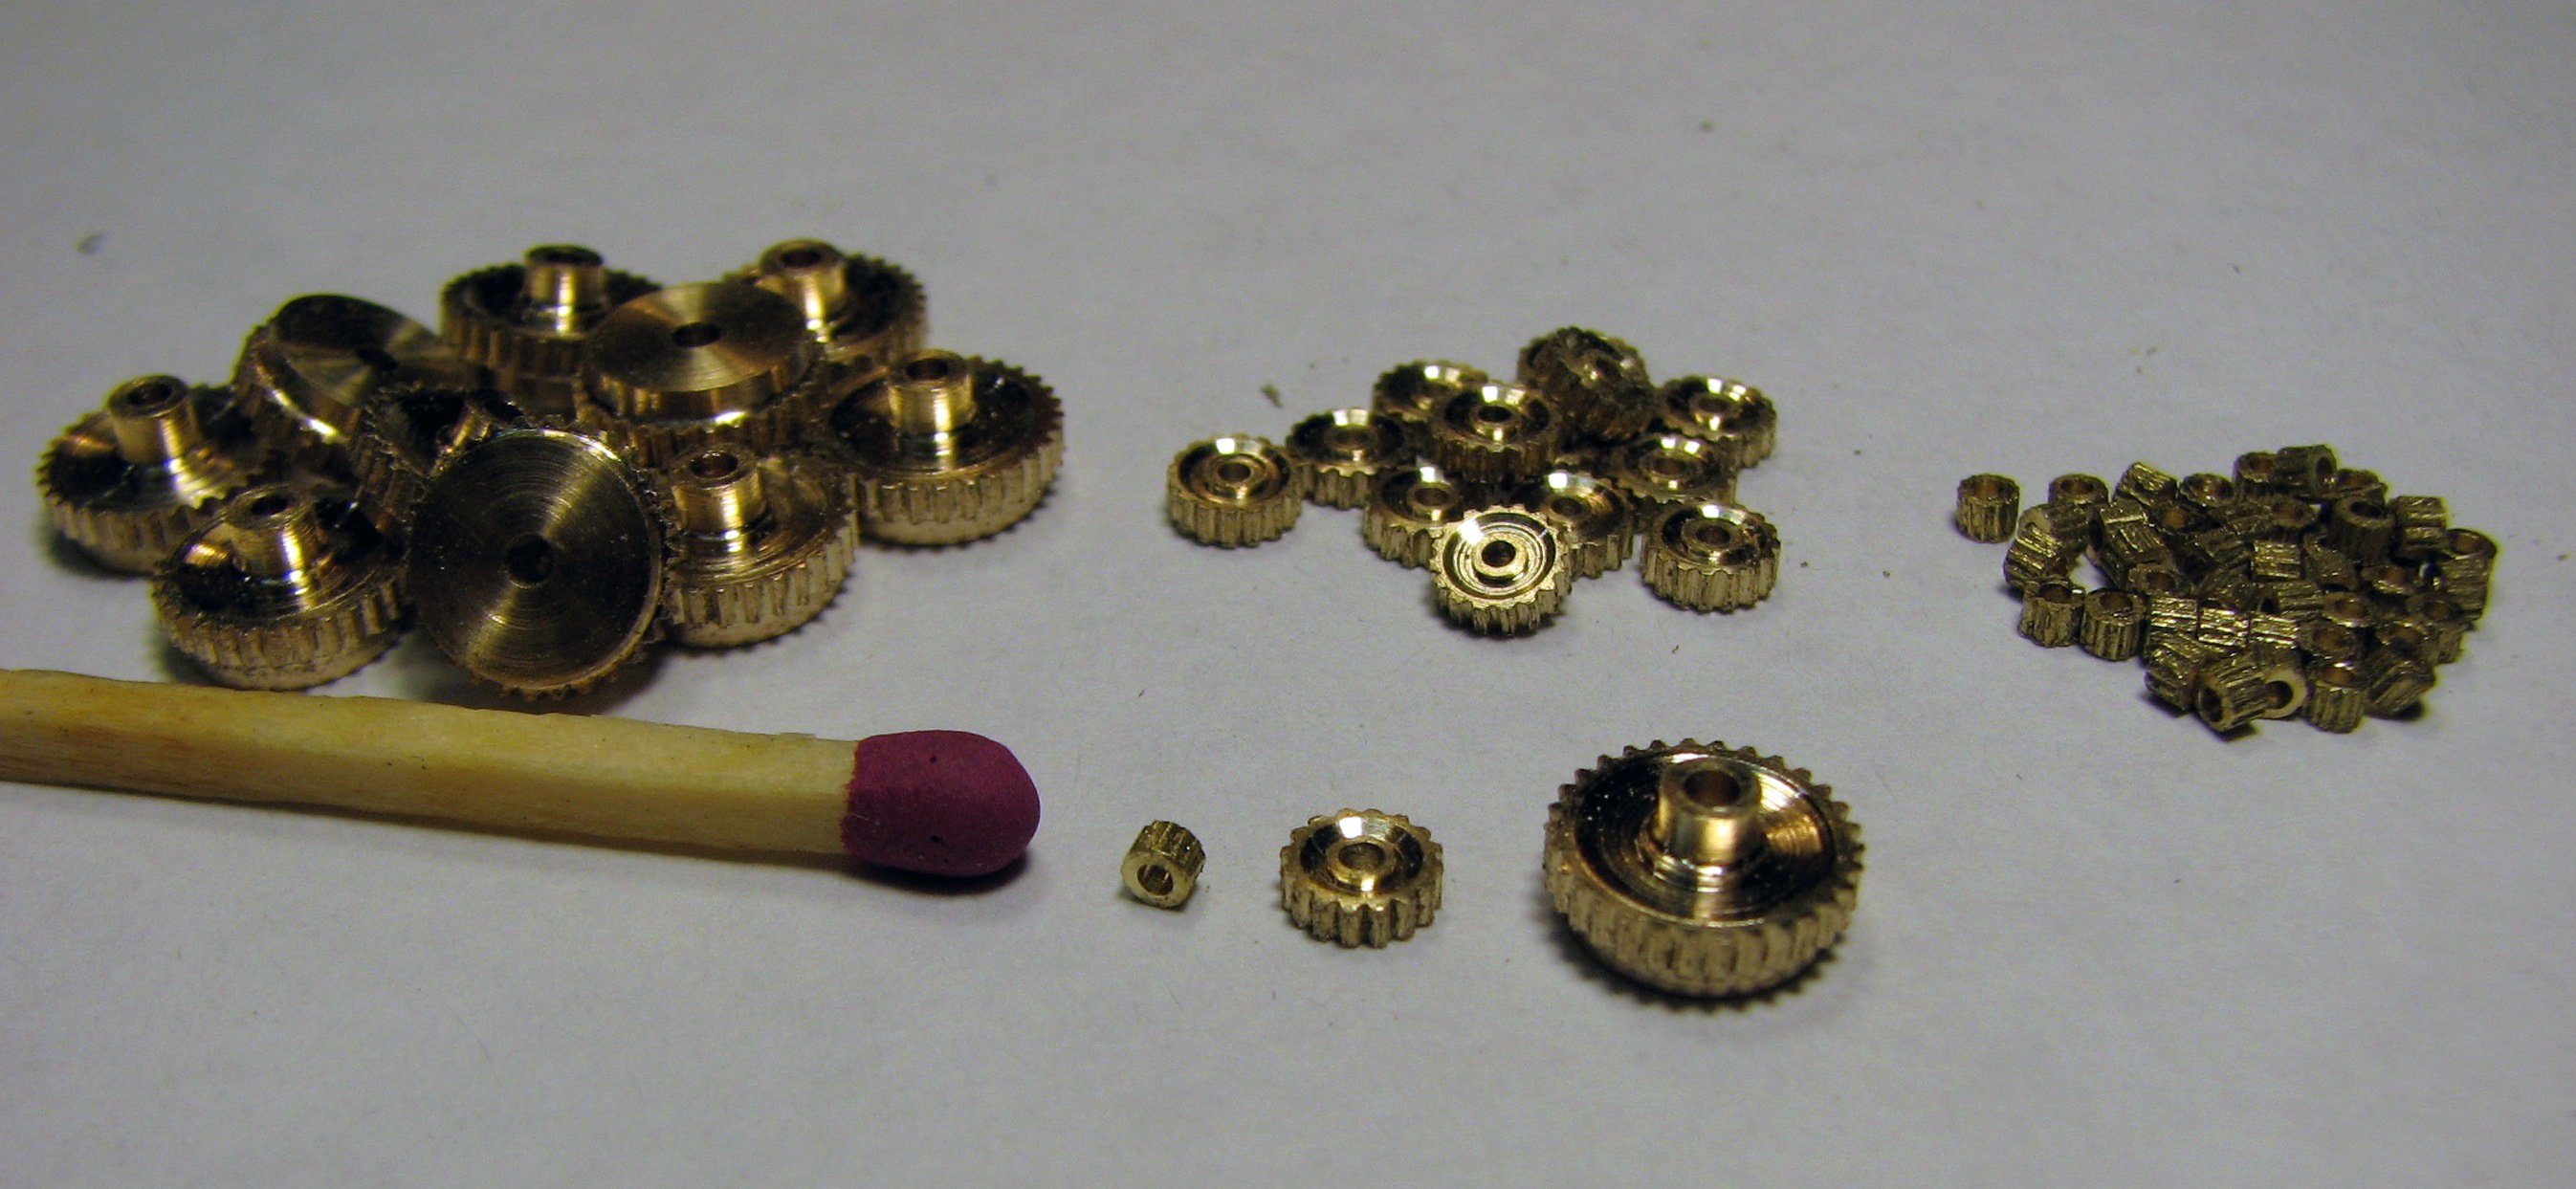
Gears of three types.

-
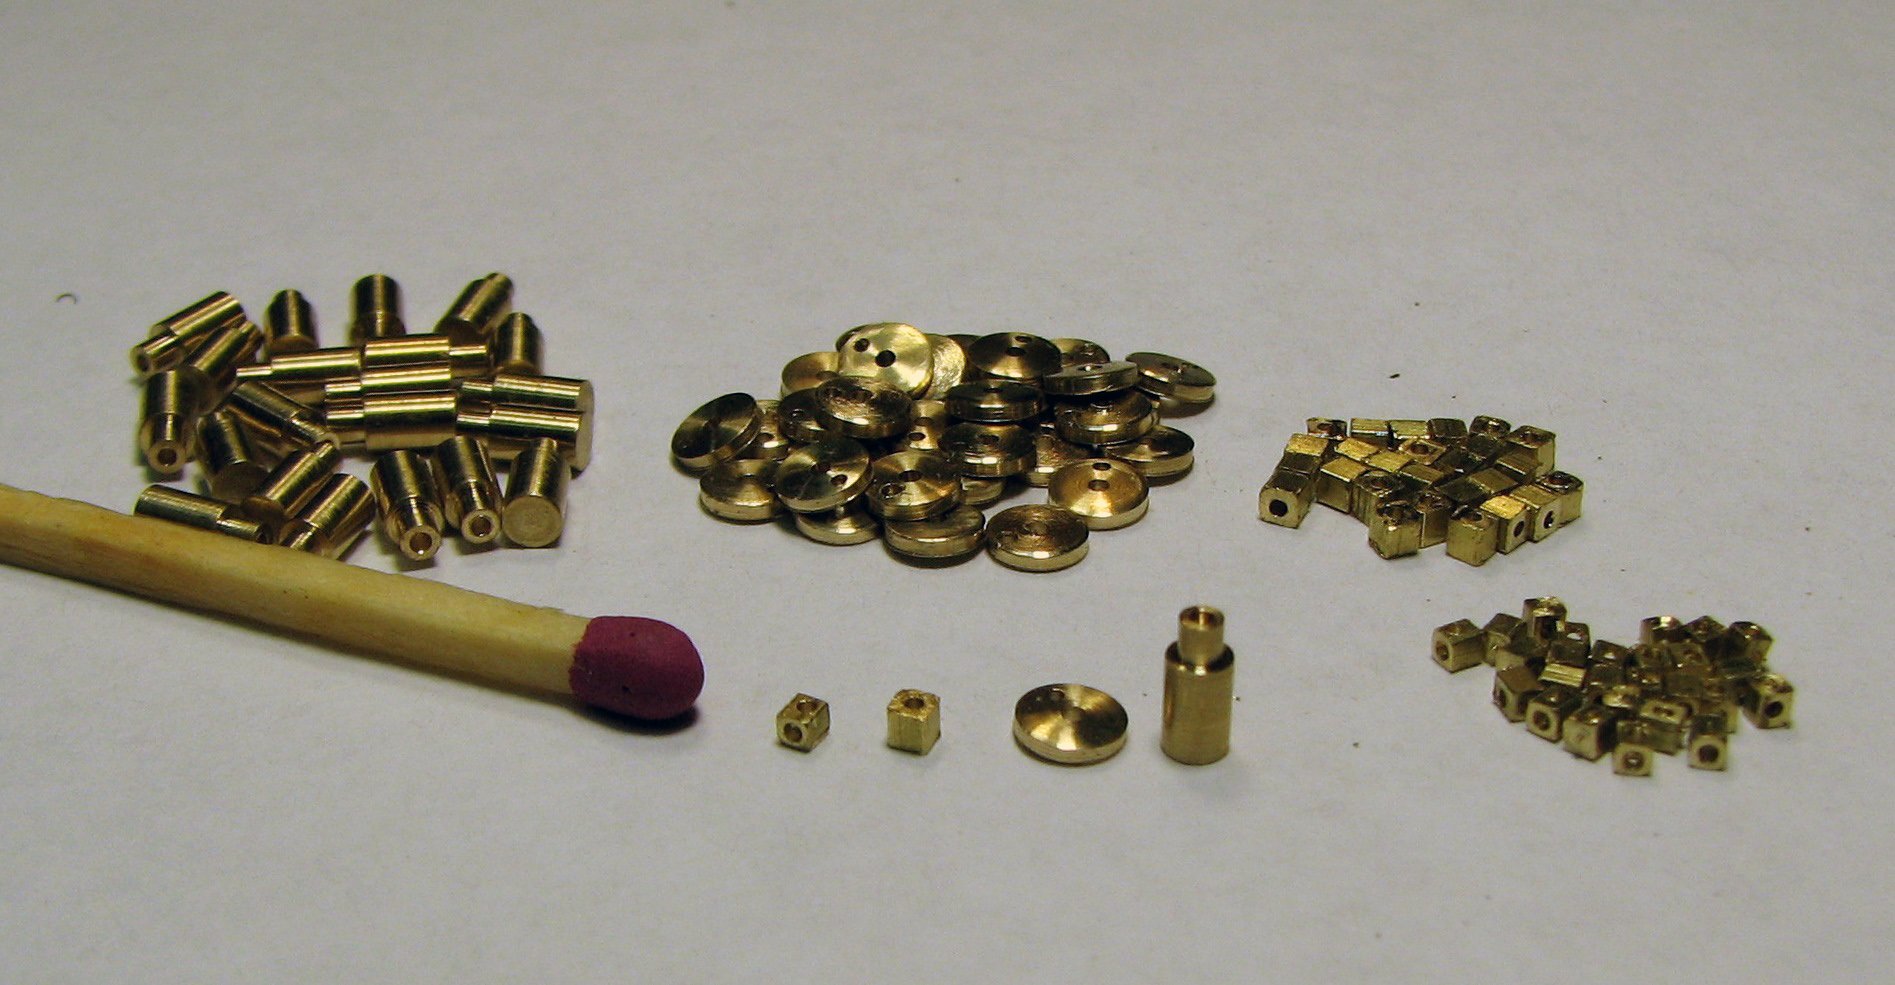
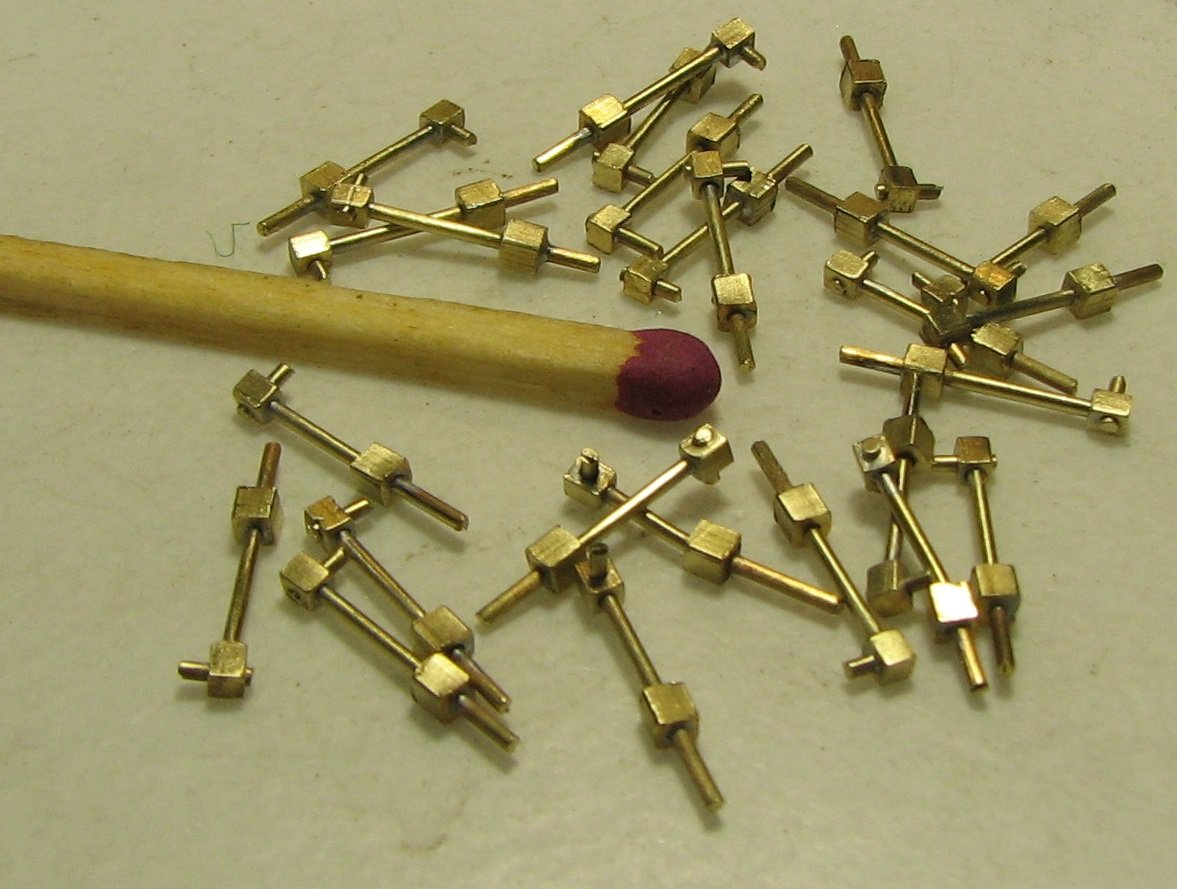
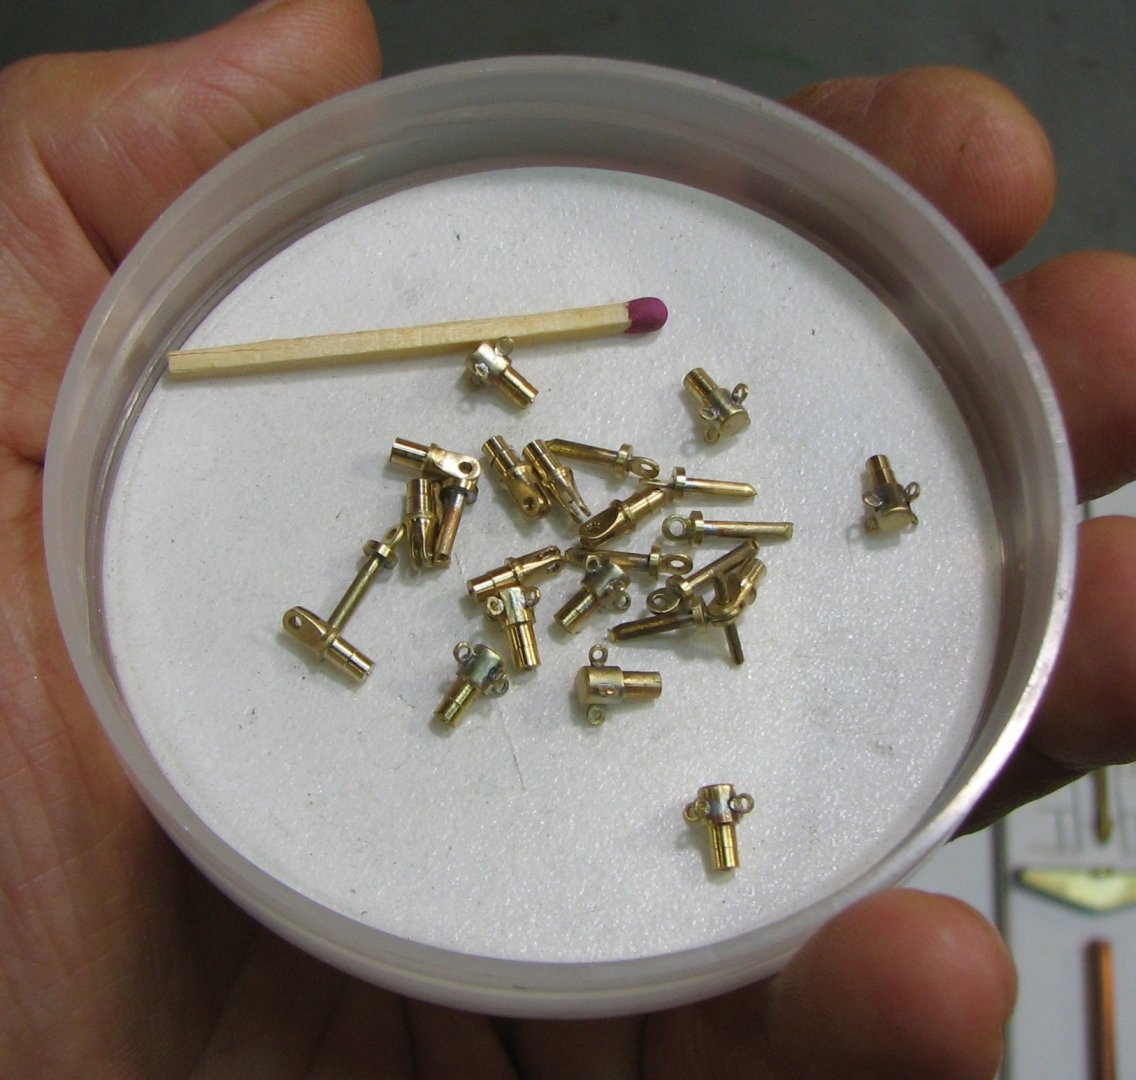
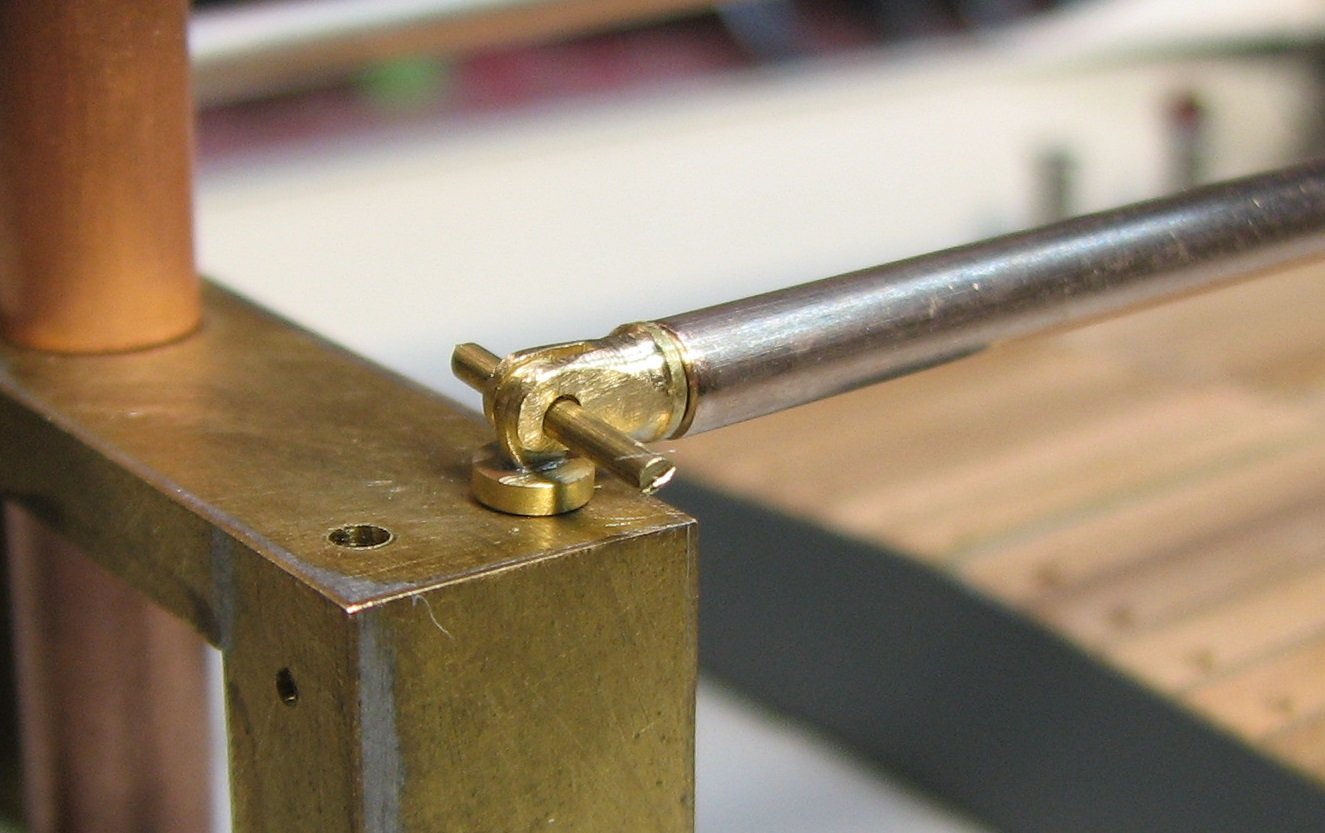
Details of the mechanism for the steam drive of the winch.

-
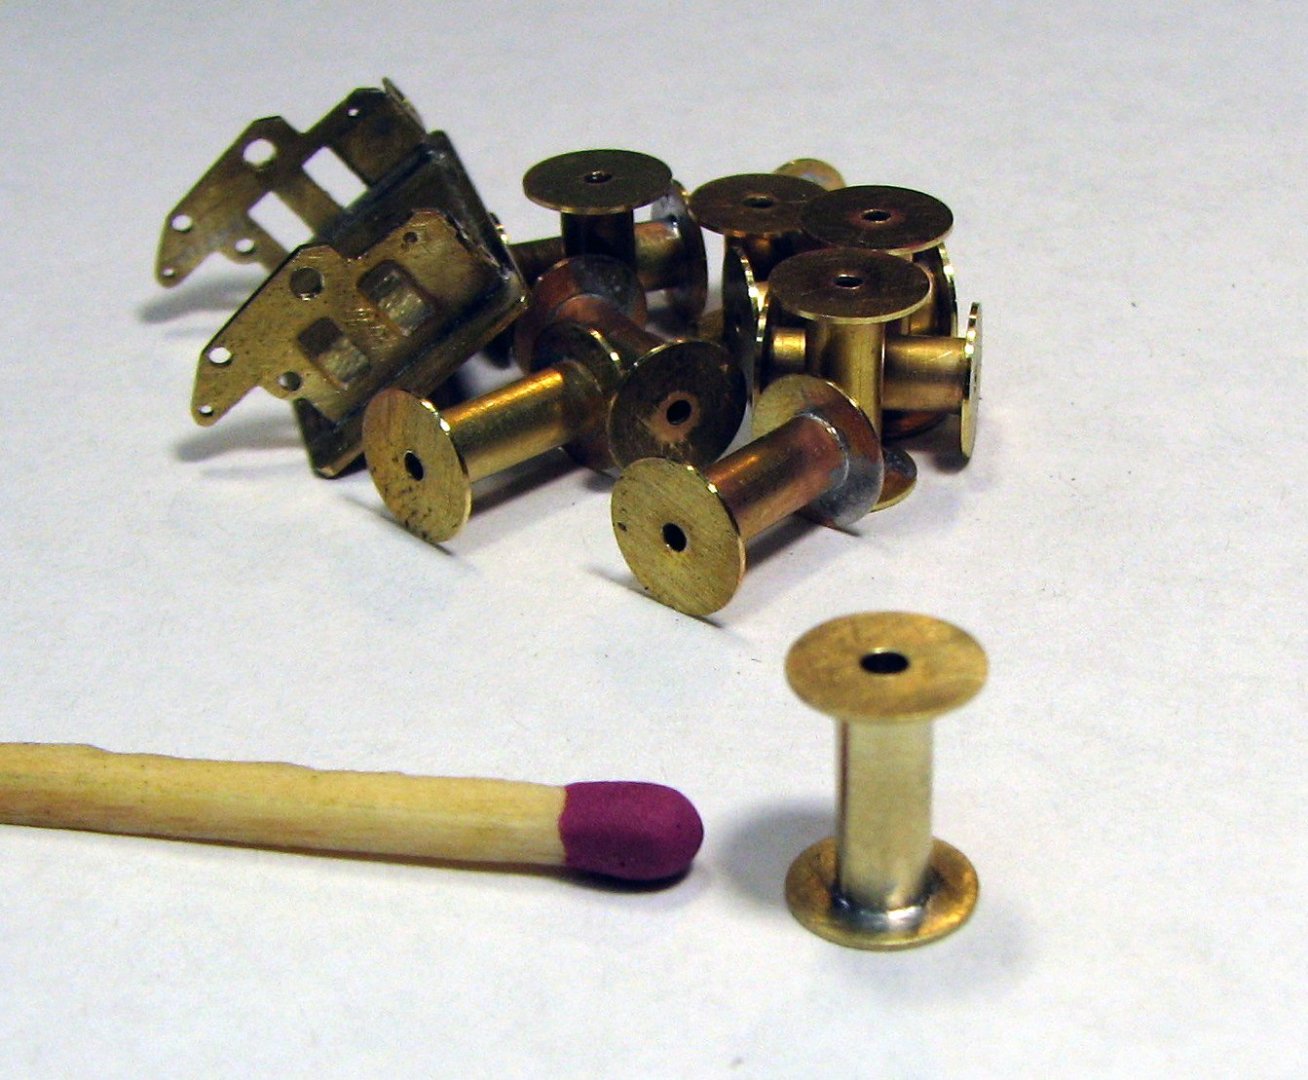
Rope drums.
-
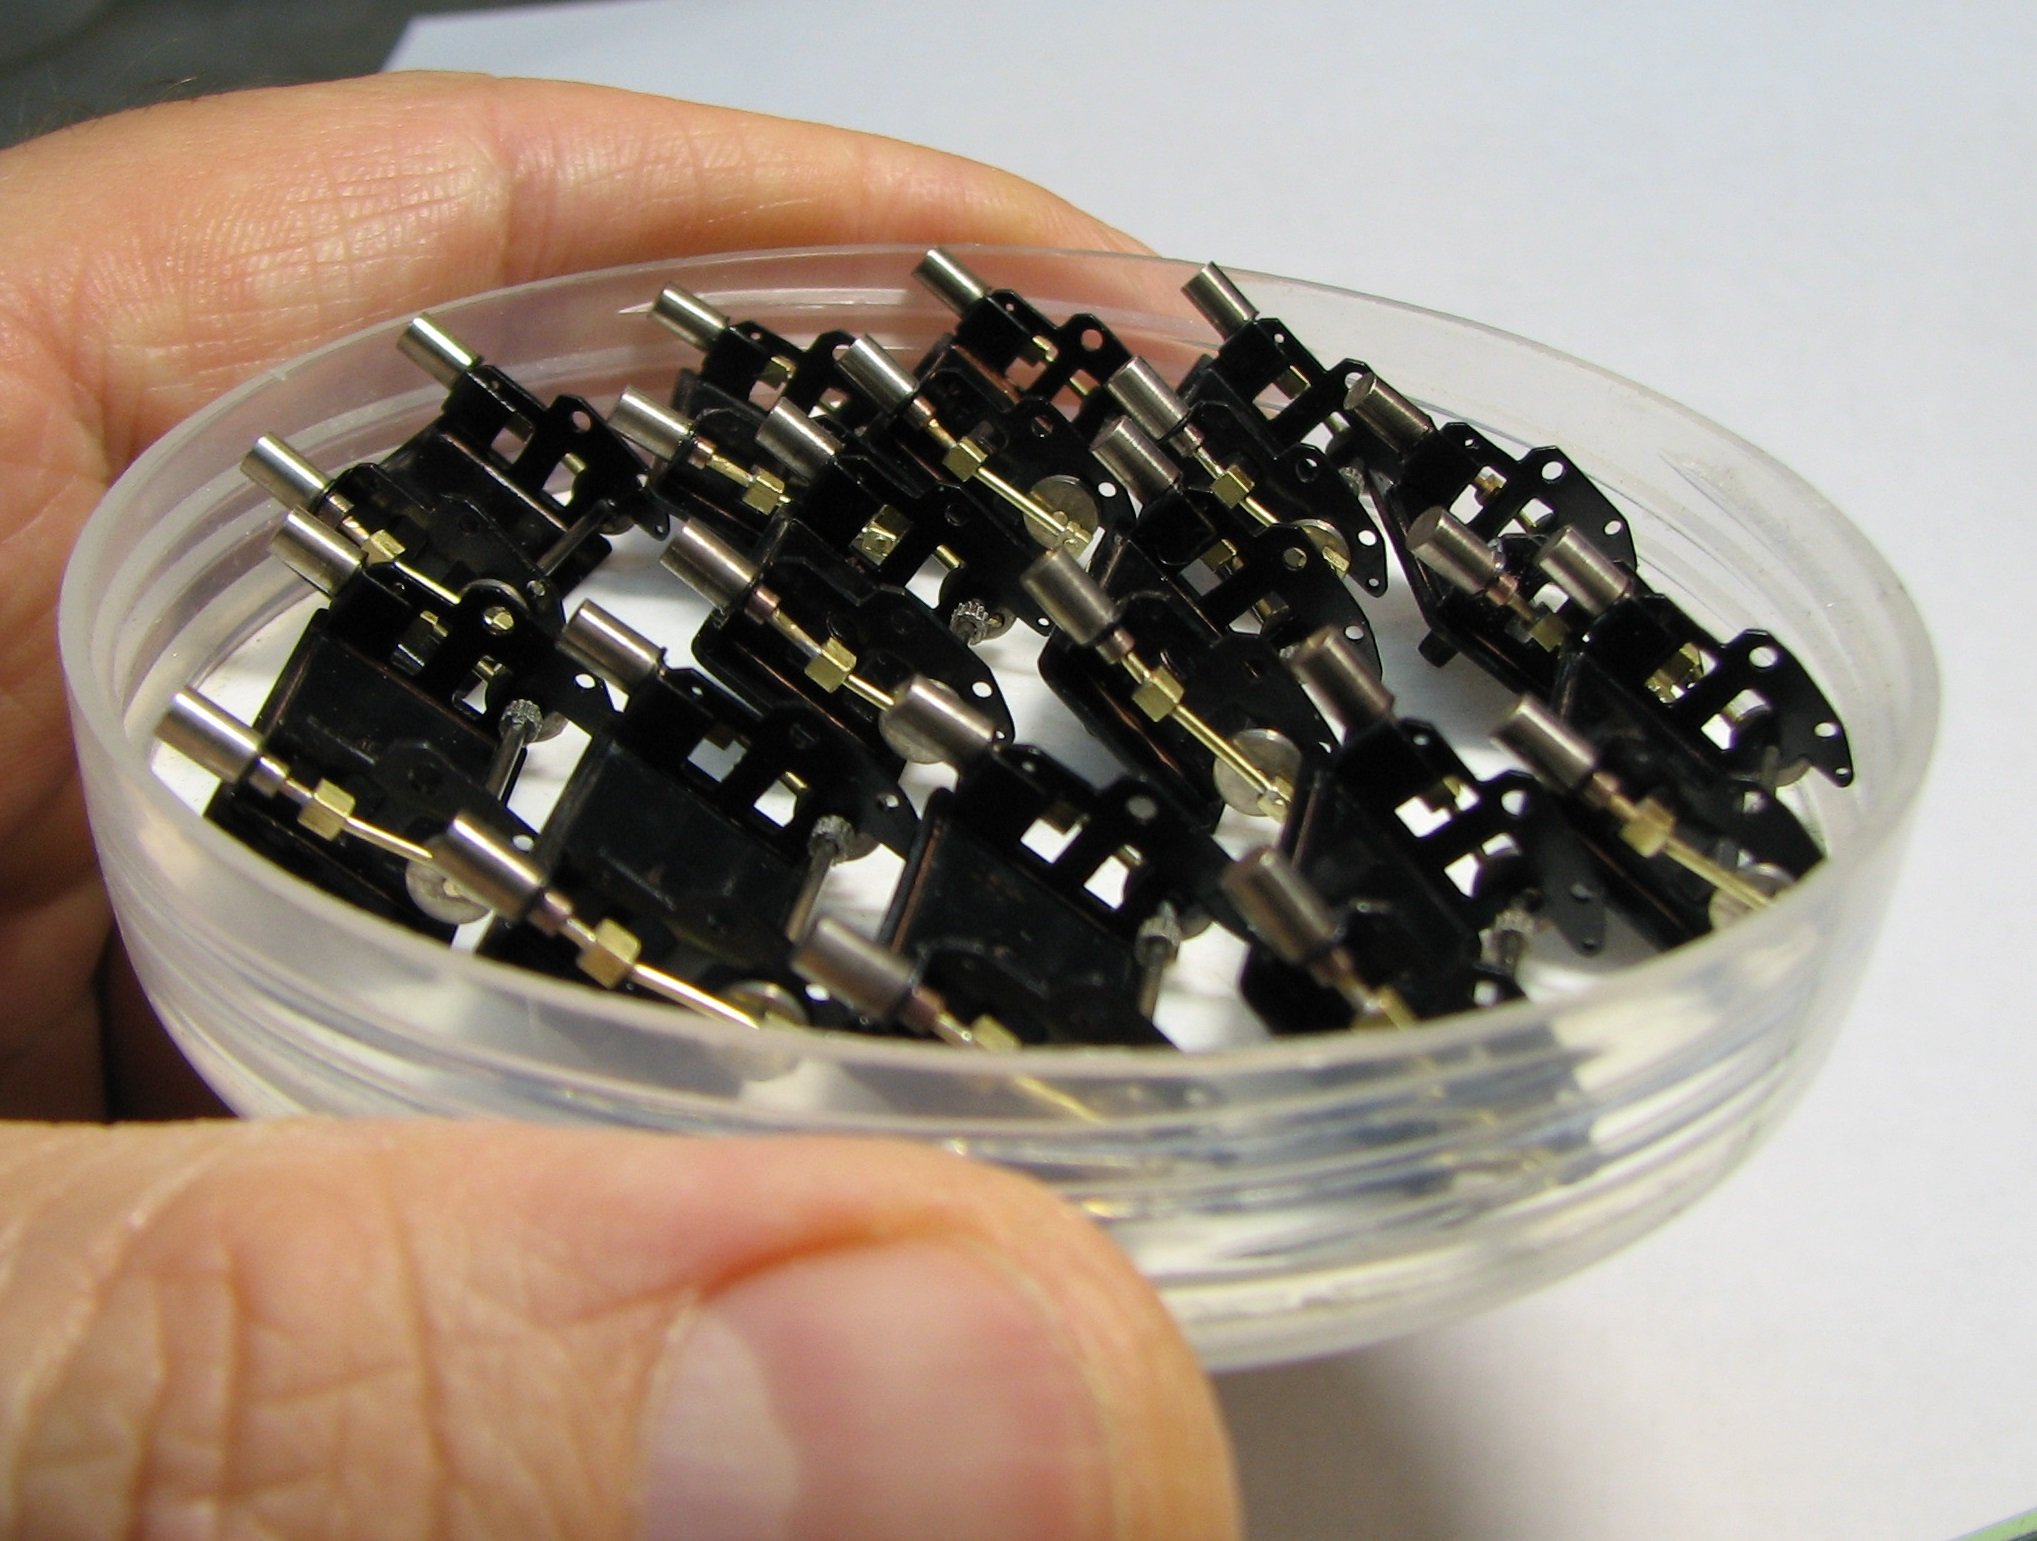
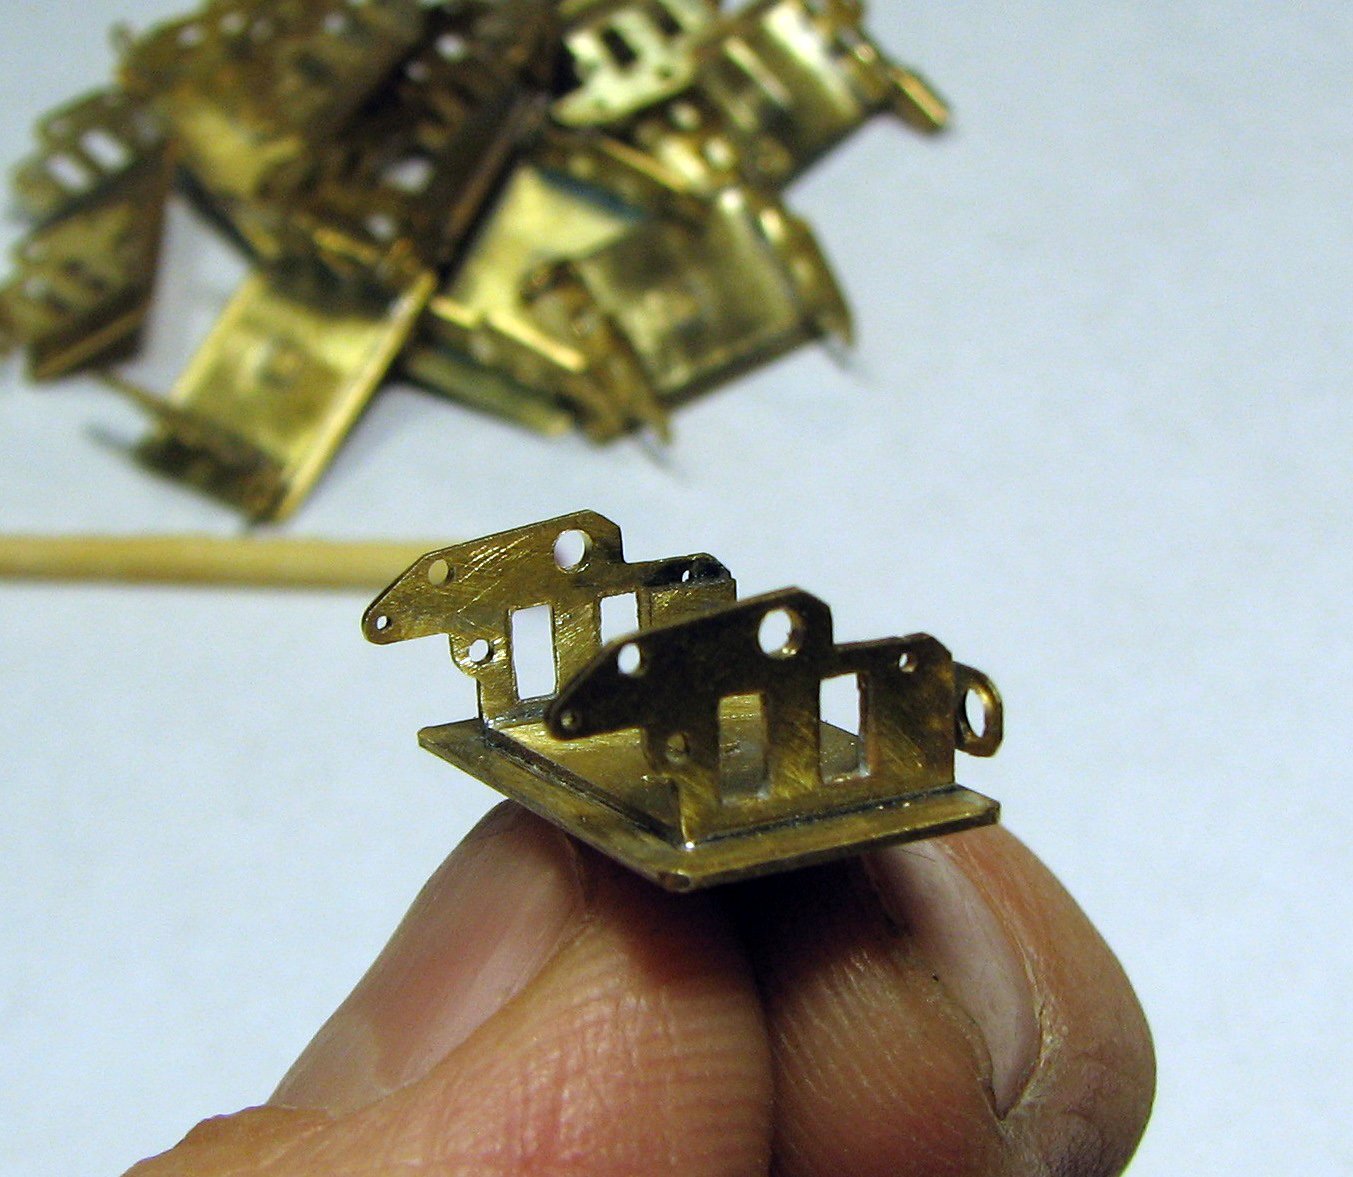
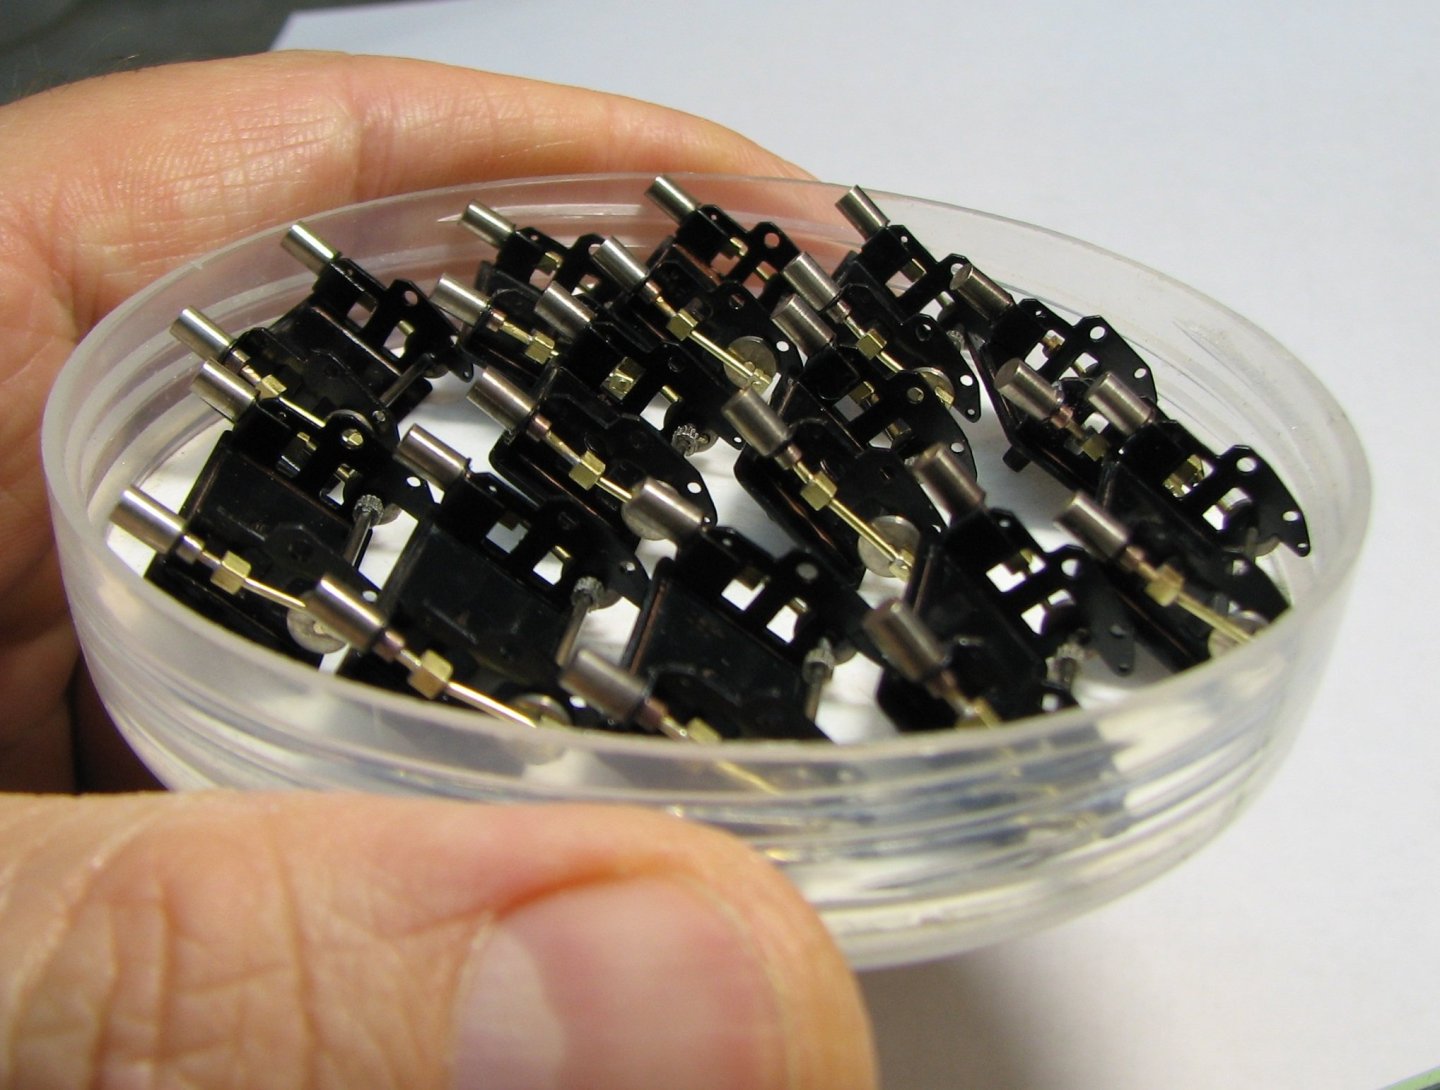
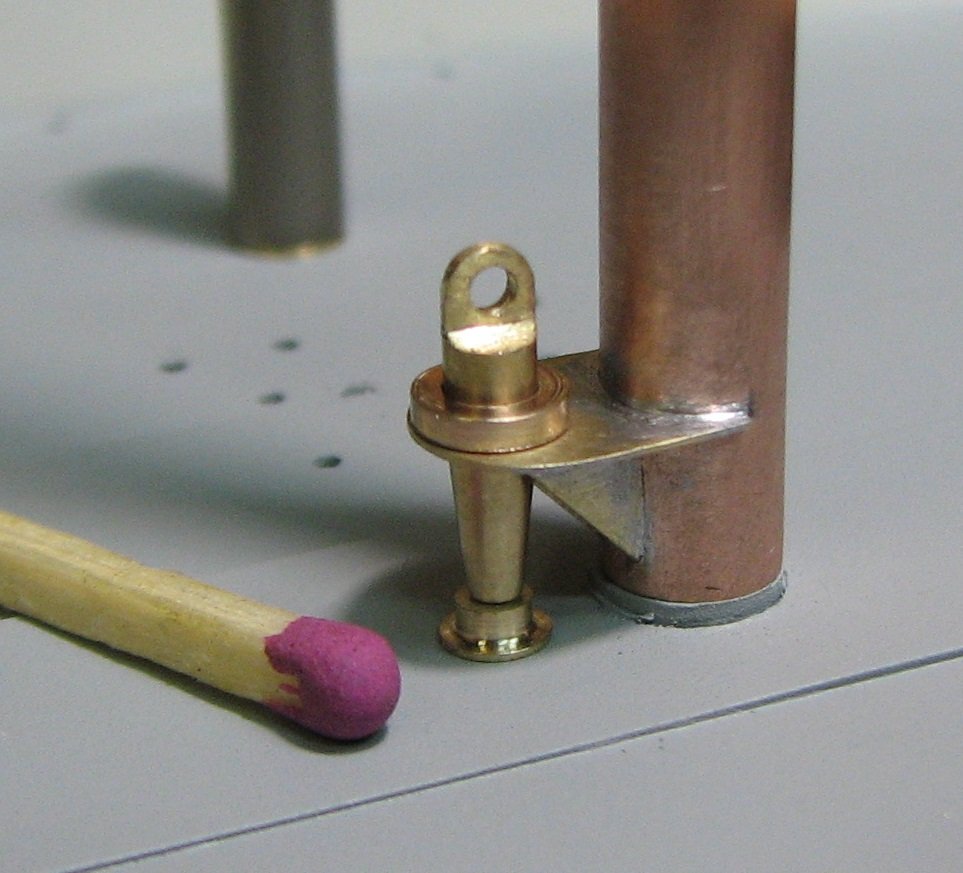
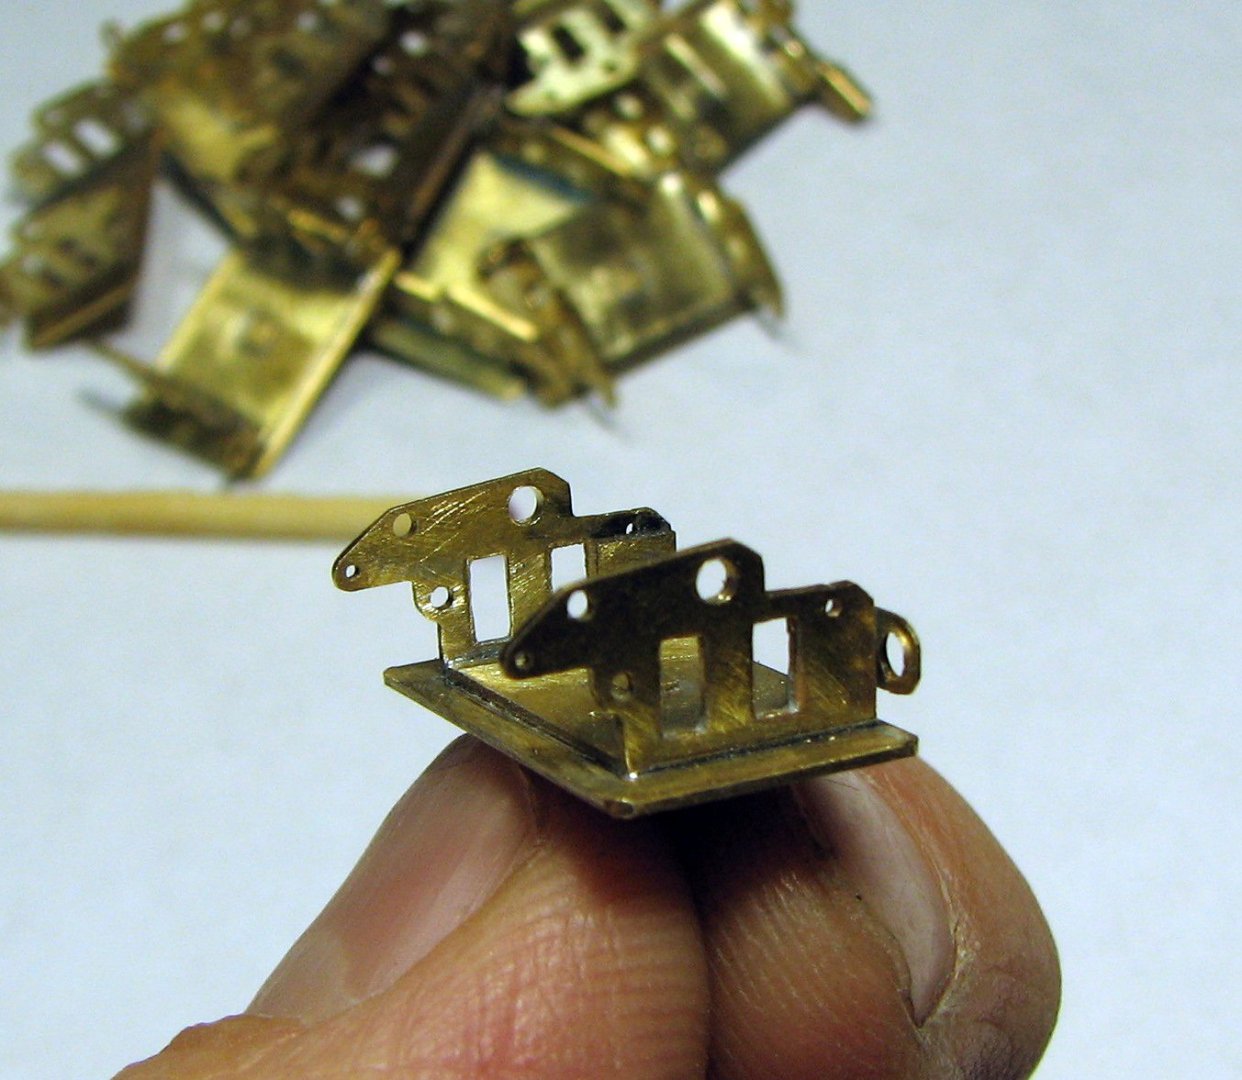
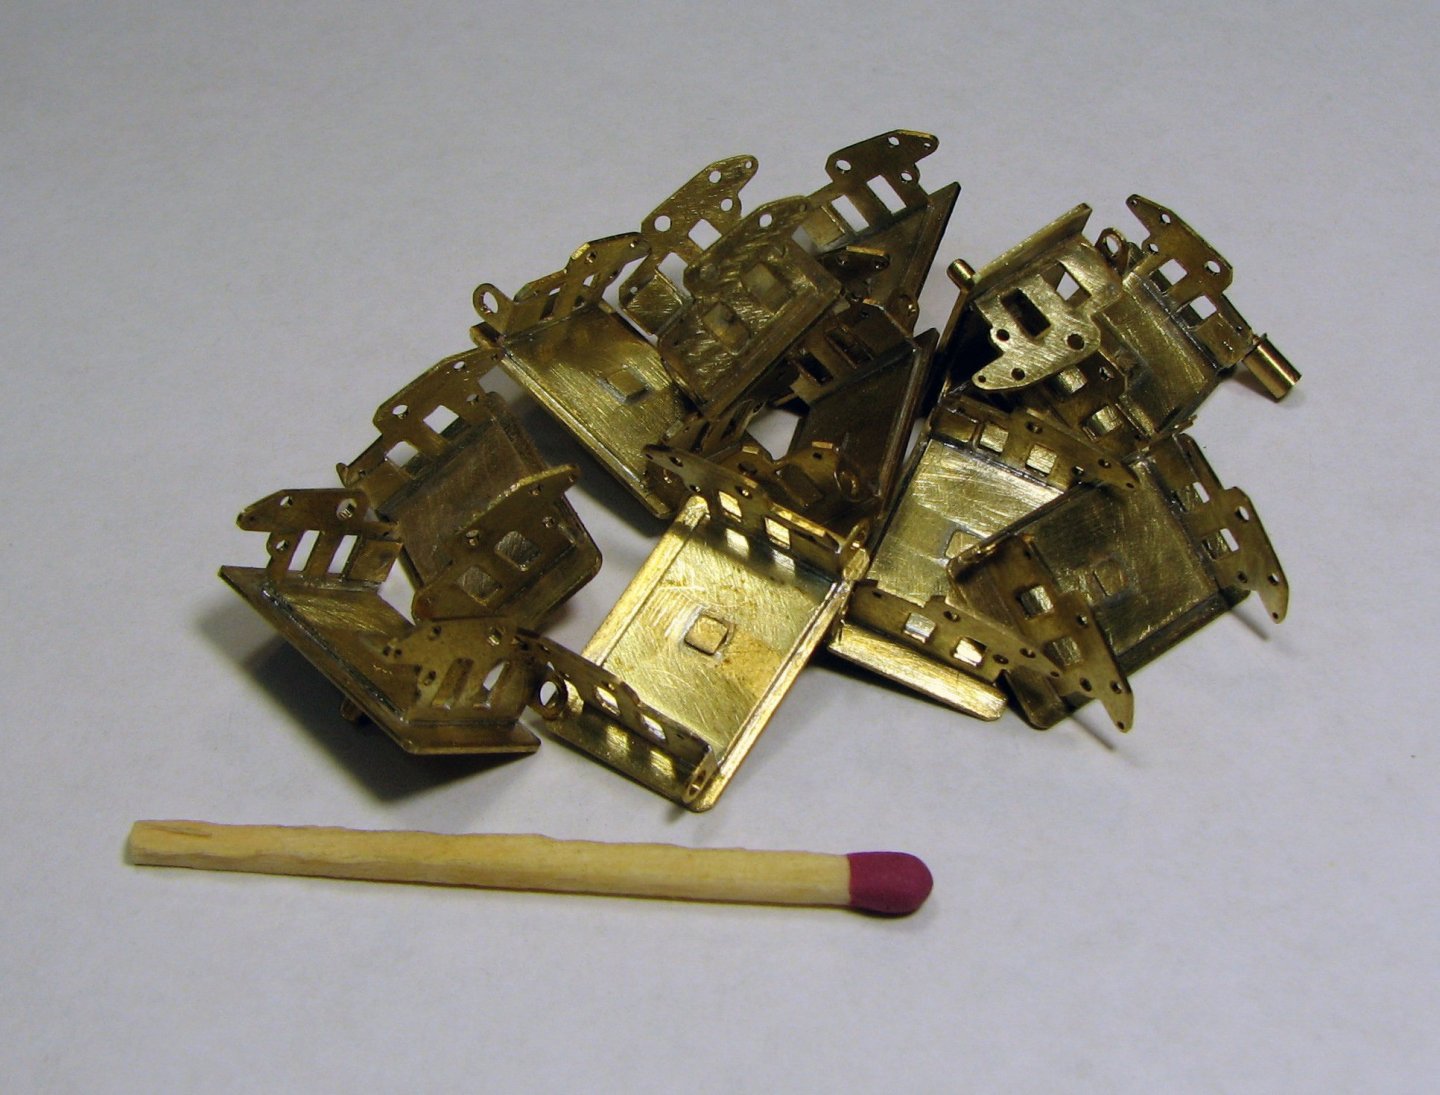
Hello everyone! I am preparing to assemble the steam cargo winches. Taking into account the mooring winch, there should be 11 of them in total. Assembled winch foundations.
-
Phil, thank you for your amazingly artistic story! 👌👍 Once upon a time I had to get into a severe pitching for the first time on a six-meter plywood sail shell. And it turned out that the Lord had gifted me with the ability to endure pitching without any problems. But what was happening to my crewmates was not a funny sight.
- 482 replies
-
- 5
-
-
- minesweeper
- Cape
- (and 1 more)
-
Phil, very interesting! I'm waiting for the continuation. 👍👌
- 482 replies
-
- 2
-
-
- minesweeper
- Cape
- (and 1 more)
-
Thank you, Gary! I have stopped working with silver for now because I don't like the subsequent patination of parts after silvering. In the photo, all the parts are nickel-plated.
-
Thank you, Tony! I'm really glad to hear that your book project is going well! 👌👍
-
Keith, if such people are interested in my work, I am always open to discussing details . But, I repeat, I am completely unfamiliar with this type of book and even more so I do not know how they are published and what is needed for this. I can only photograph the work process and even then not always.
-
All parts of the anchor and mooring device are installed in their places.


-
Andy and Keith , thanks for your trust, but I can't write books at all. I can only build models.
-
Now it needs to be installed on the forecastle.