MORE HANDBOOKS ARE ON THEIR WAY! We will let you know when they get here.
×


mfrazier
-
Posts
253 -
Joined
-
Last visited
Content Type
Profiles
Forums
Gallery
Events
Everything posted by mfrazier
-
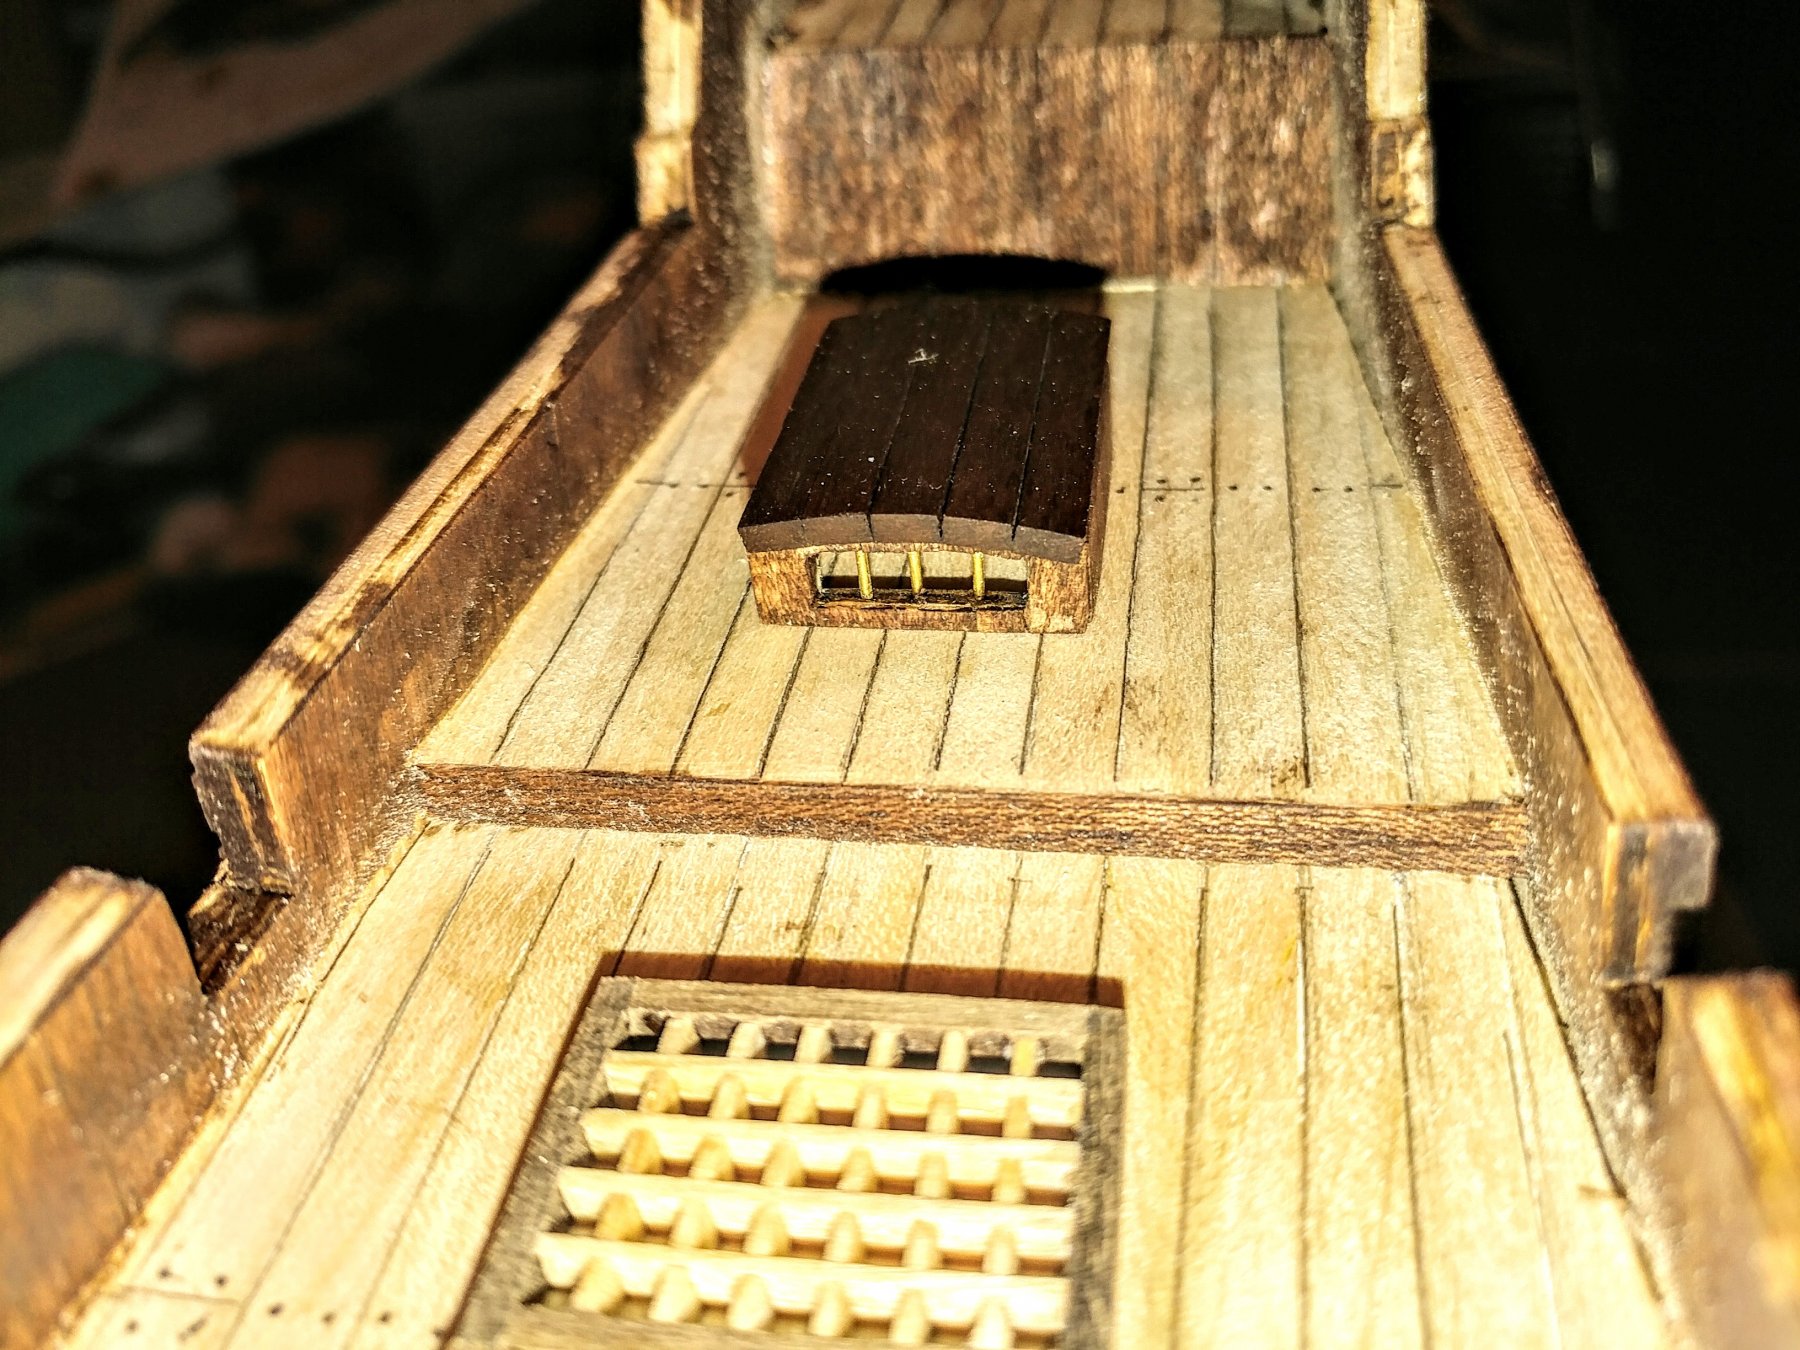
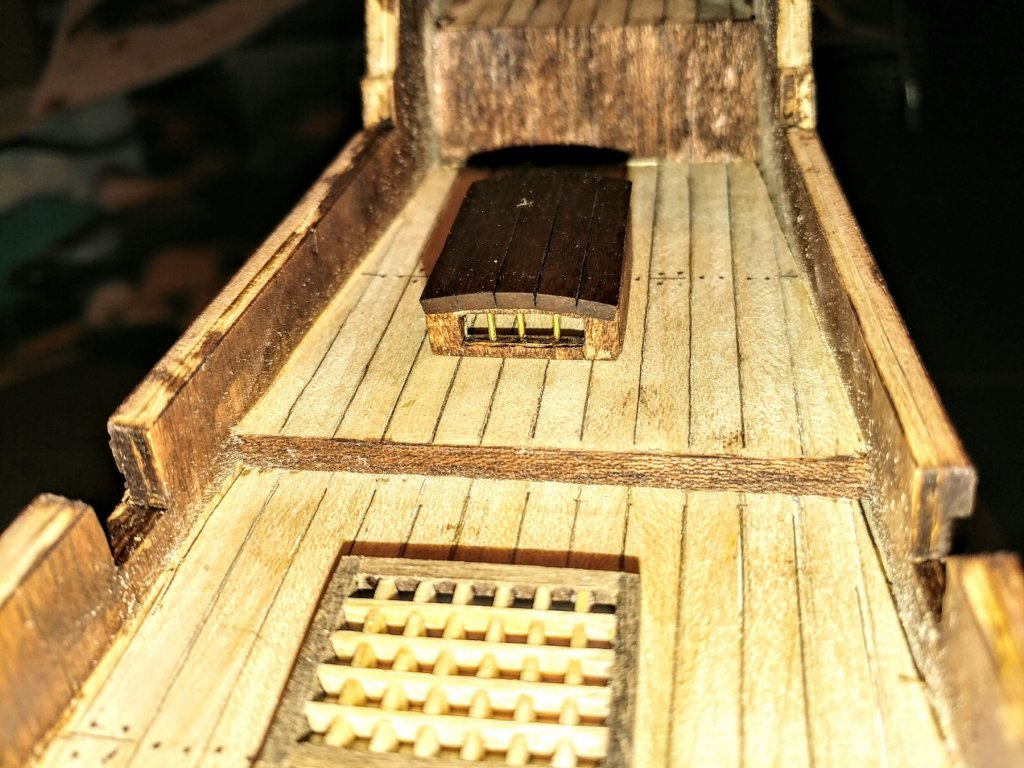
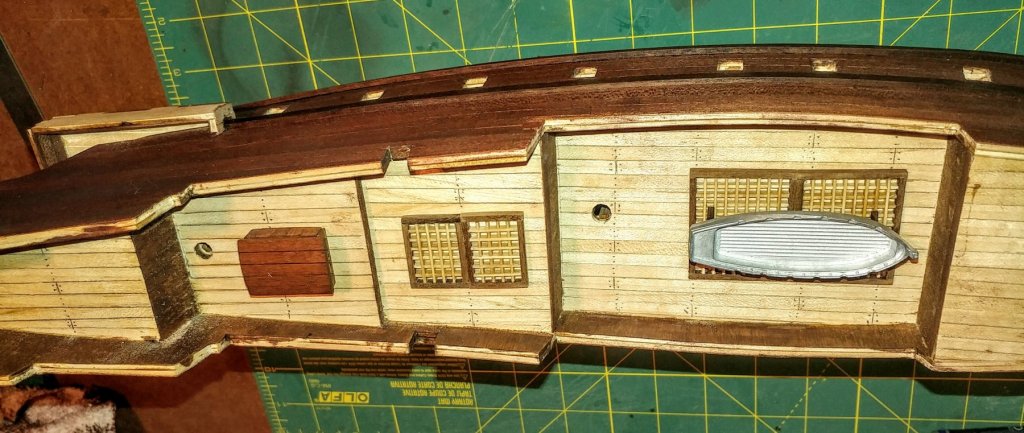
 In the photo above, the grate on the middle deck was made the size the plans called for. But when I set it in place, I then set the two cannons that go on that deck in place and found they were a tight fit and there was no space between the grate and the cannons. If this was real, there would be no space to walk from the lower deck to the upper deck. So I cut that grate in half and staged everything again and it looks much better. I have learned I have to be thinking way ahead when building to avoid big problems later. ( Photos would not upload for some reason)
 -
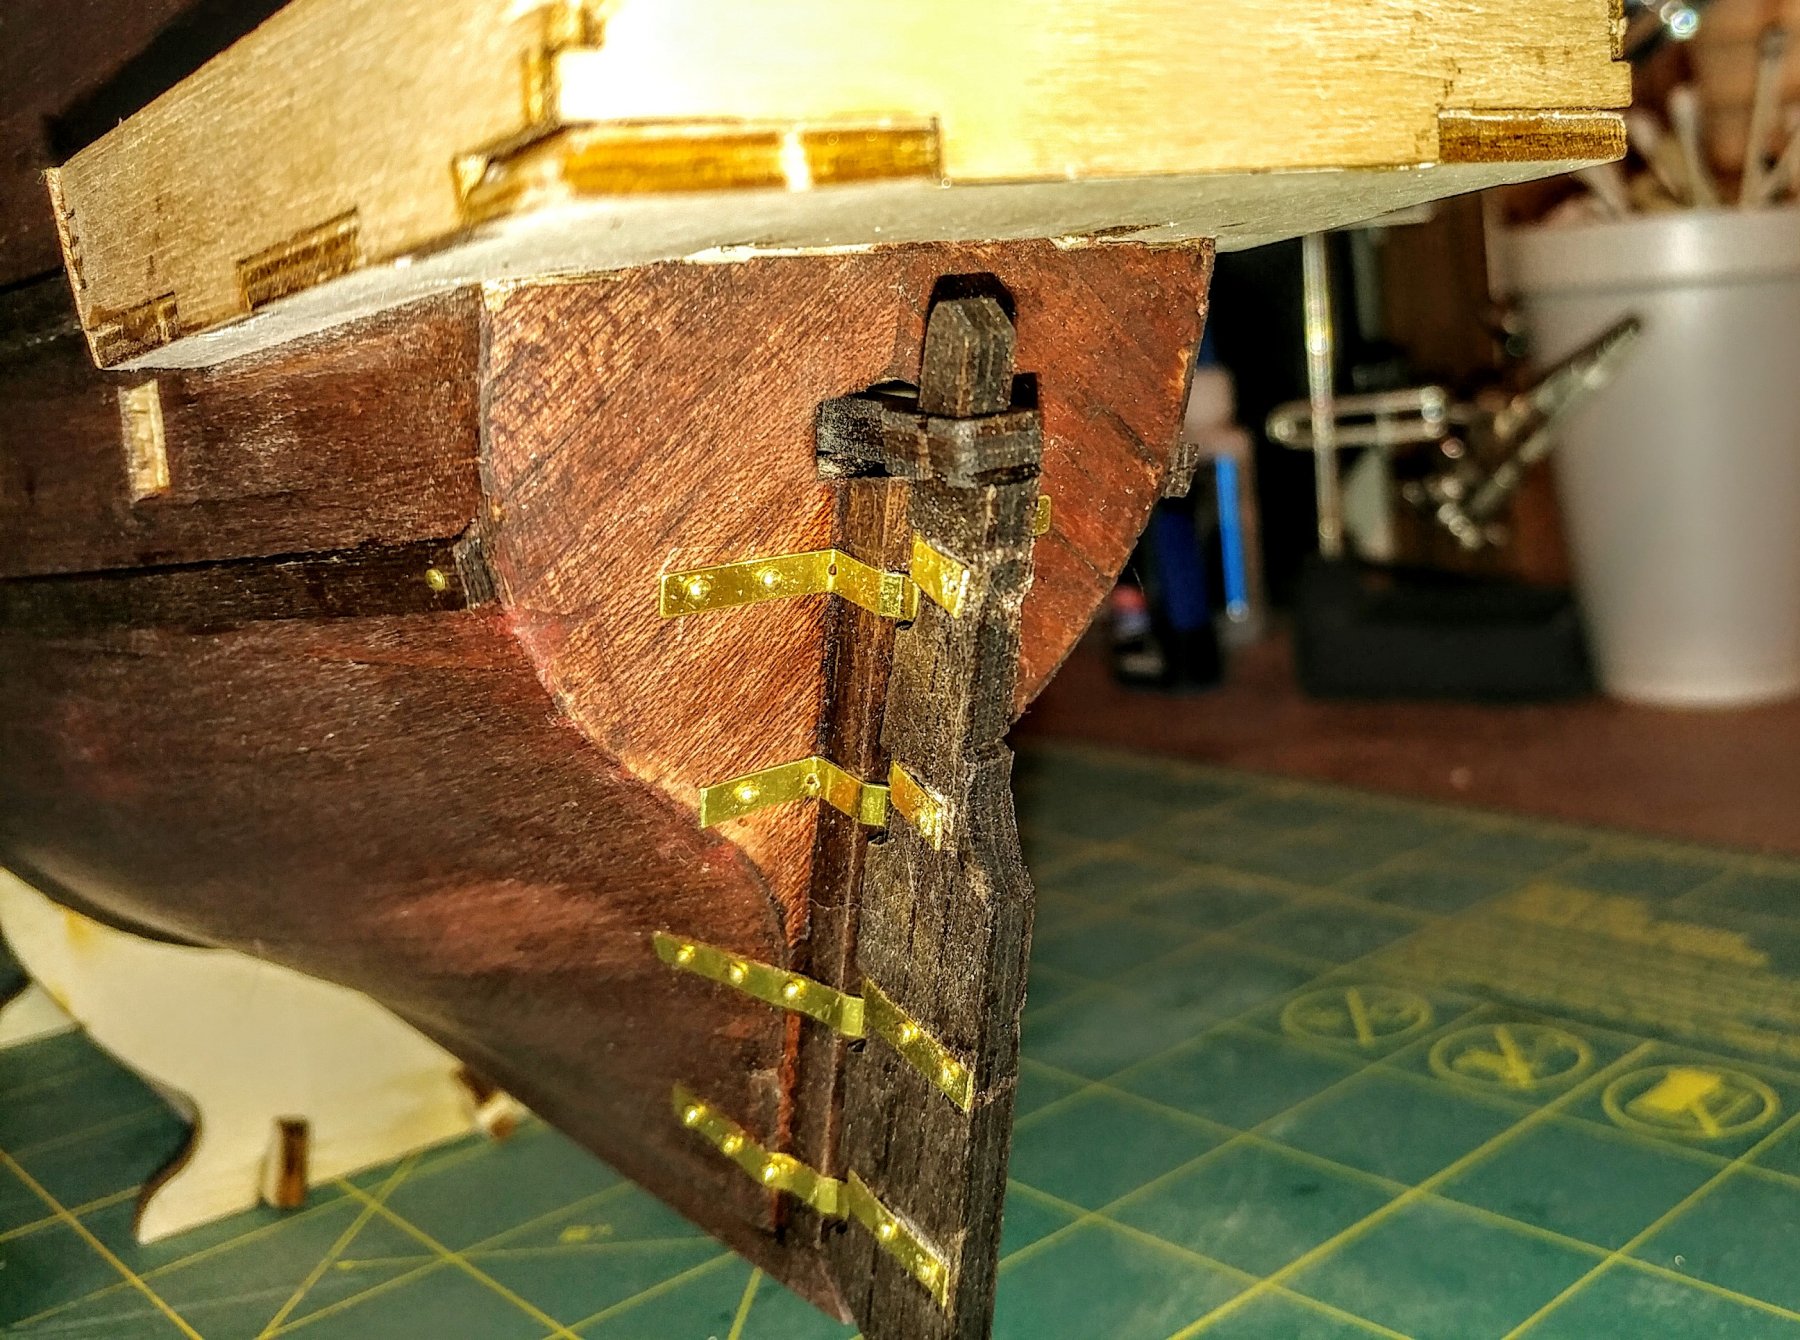
Today I installed the rudder. I also made the little "hickey with a window". I'm sure someone can tell me what it is actually called. I set the items on the deck temporarily to see how it looks. I am fiddling with these detail parts while waiting for the wood I ordered to finish the hull. It is supposed to arrive March 5th. I have to go to the store and get paint to start the small "life" boat. It is cast metal and I want to finish it to look like wood.

-
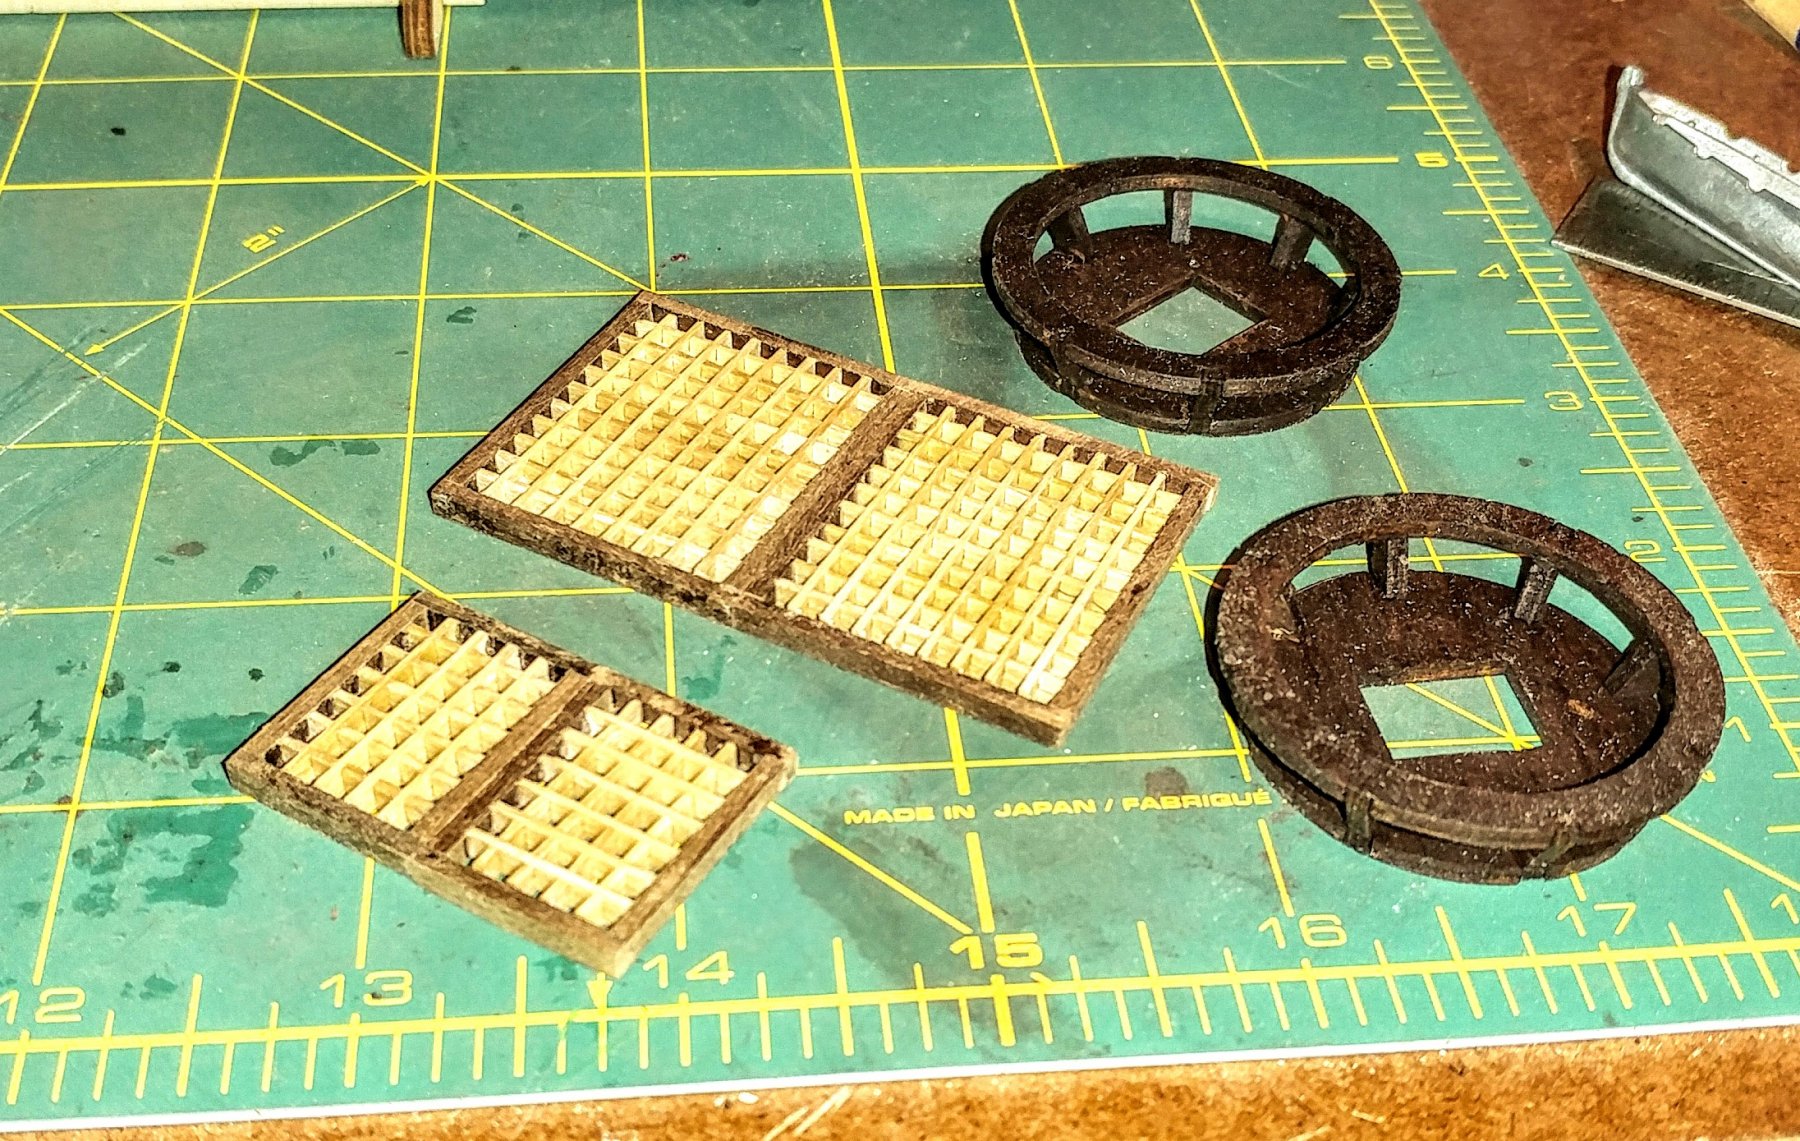
While waiting for the wood I ordered, I started making some of the other components. I made the grating for the decks and the Crow's nests. The plans show the grating on the deck but you can see the deck underneath them. I am thinking to either paint the area under them flat black or put a black film on the underside of the grating to simulate the dark opening. I think it would look better. I ruled out cutting actual openings because the bulkheads in the frame work would be visible and the decks are glued to them also.

-
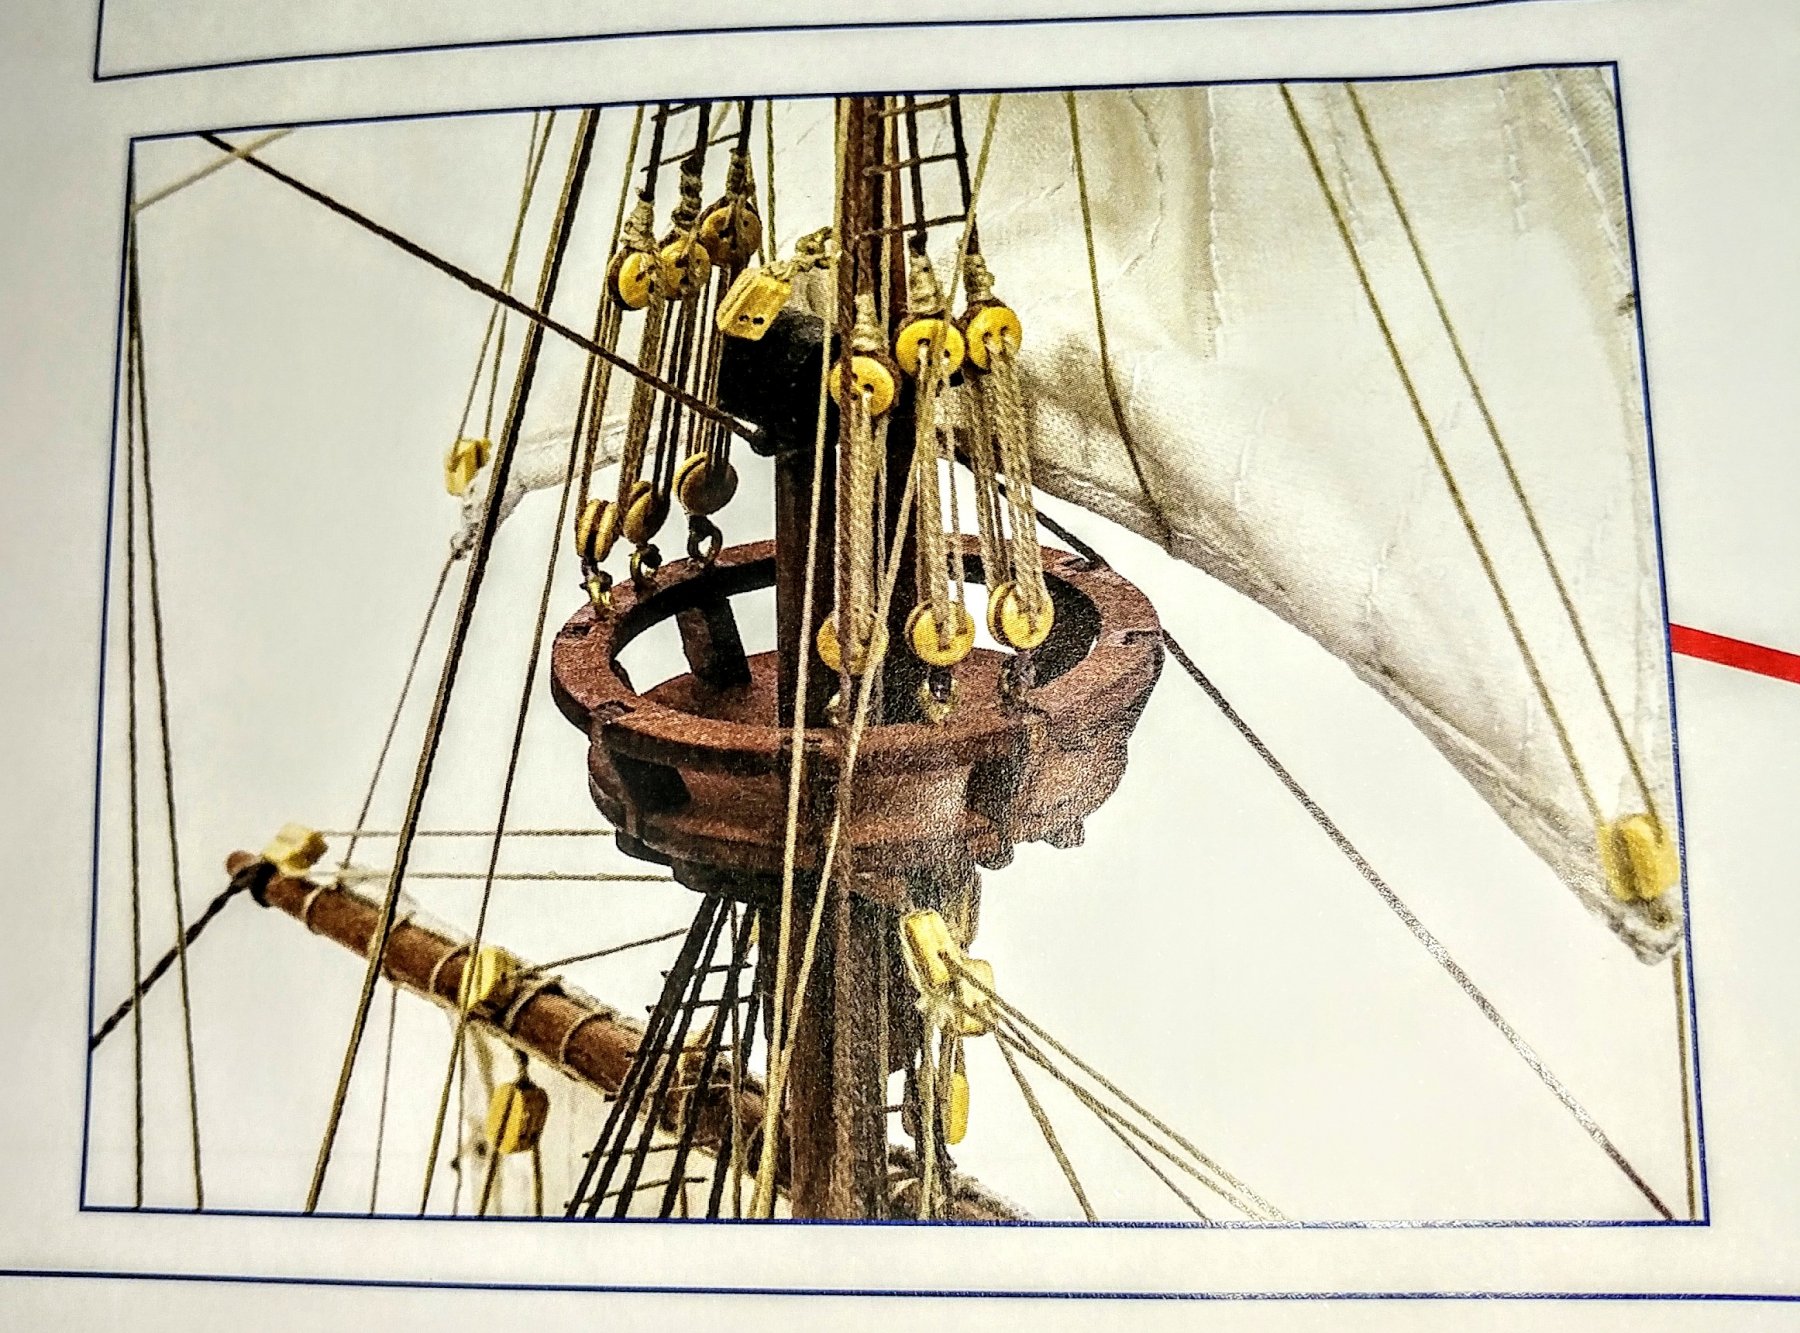
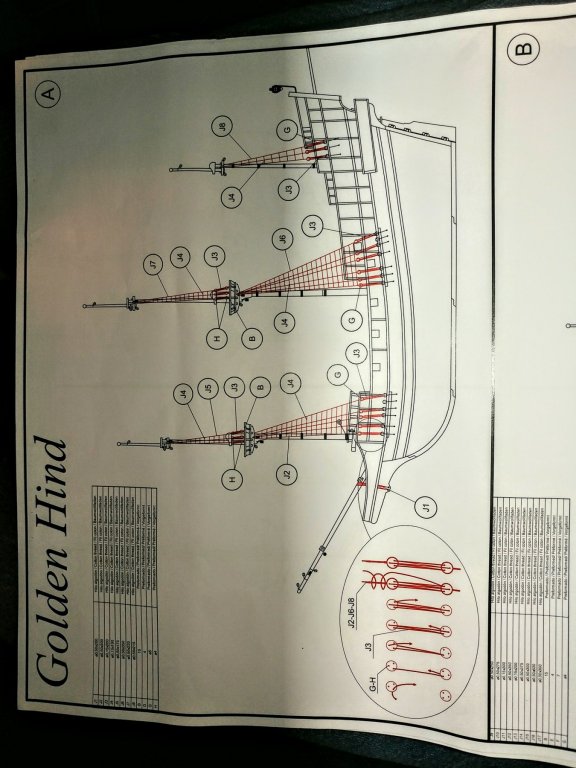
Thank you for that information. I see in the plans the shrouds have the dead eye at the bottom end. The plans have no details about the top of the shrouds. These plans also show to only serve the end that wraps around the dead eye. I can see that from the close up photo of the dead eye end. The more I study these drawings, I am convinced they merely tie the top end of the shrouds to a brass eye screwed into the mast. They show another set of these shrouds from the nest to the top of the top mast section and the bottom of these shrouds tie in small brass eyes in the nest railing. I am assuming they did this to make construction easier for most builders of the kit. I, at present, do not have a way to serve the entire length of the shrouds ( without building one of those server machines I have seen others on here have made. ) This is going to require some thought. I was considering making a serving machine, but not this soon. Showing my ignorance here, I would like to ask why the shroud line is served the entire length? The following are the only reference to these shroud lines in the plans. Kind of vague .... huh? You can see in the second photo, how the lines attach to dead eyes eyes which then attach to brass eyes in the railing of the nest . I think I will get the book you suggested to gain more knowledge.

-
I been studying the so called "plans" supplied with the kit and found they DON'T match the kit! (big surprise). The "picture" directions match the kit but the rigging plans do NOT. This left me with a few questions that hopefully some of you guys may be able to answer. I will be asking some questions as I get closer to that part of the build, but one question I am really stumped on is , I think they are called, ratlines? ( The "rope" ladders). The photos are too small to see and do not show how the lines attach at the top underneath the "crow's nest" or lookout, what ever it is called. They all seem to go to one point, I think on the mast but there is absolutely no detail in any of the drawings what they attach to. After a lot of studying and frying a few brain cells thinking, I am thinking there must be one of those little screw eyes installed right at the bottom of the nest and they tie to it. The photos are not clear and the rigging plan jus shows the lines going to a point on the mast but nothing about how they are attached there. All the other rigging lines are fairly clear as how to do them. The cannons are another issue. I have pretty much figured what I will do with them and how, but the photo plans show all the dummy cannons below deck and 4 cannons on the top decks. The rigging plans show all the cannons on the top decks which does not match the kit. This also throws off the rigging lines a little as I have to work around all those cannon doors that are in the kit but not on the rigging plan. It is all good though, but it just ups the challenge a little. I am finding I need to look WAY ahead to avoid problems later do to mistakes in the kit or plans. I am really starting to enjoy building this ship as I get closer to the details of dressing up the empty hull and finding ways to increase details or make some things better than the kit supplied.😁
-
I found a bottle of CA glue by LocTite. It is a gel super glue. It is thicker and does not run. The bottle has a small lever on each side that you squeeze to make the glue come out. How far you squeeze the levers controls the glue flow. You can lay a tiny bead, a heavy bead or a tiny dot. The control is fantastic. I wish I had Found it before starting my build. I found it at Lowe's building center.
-
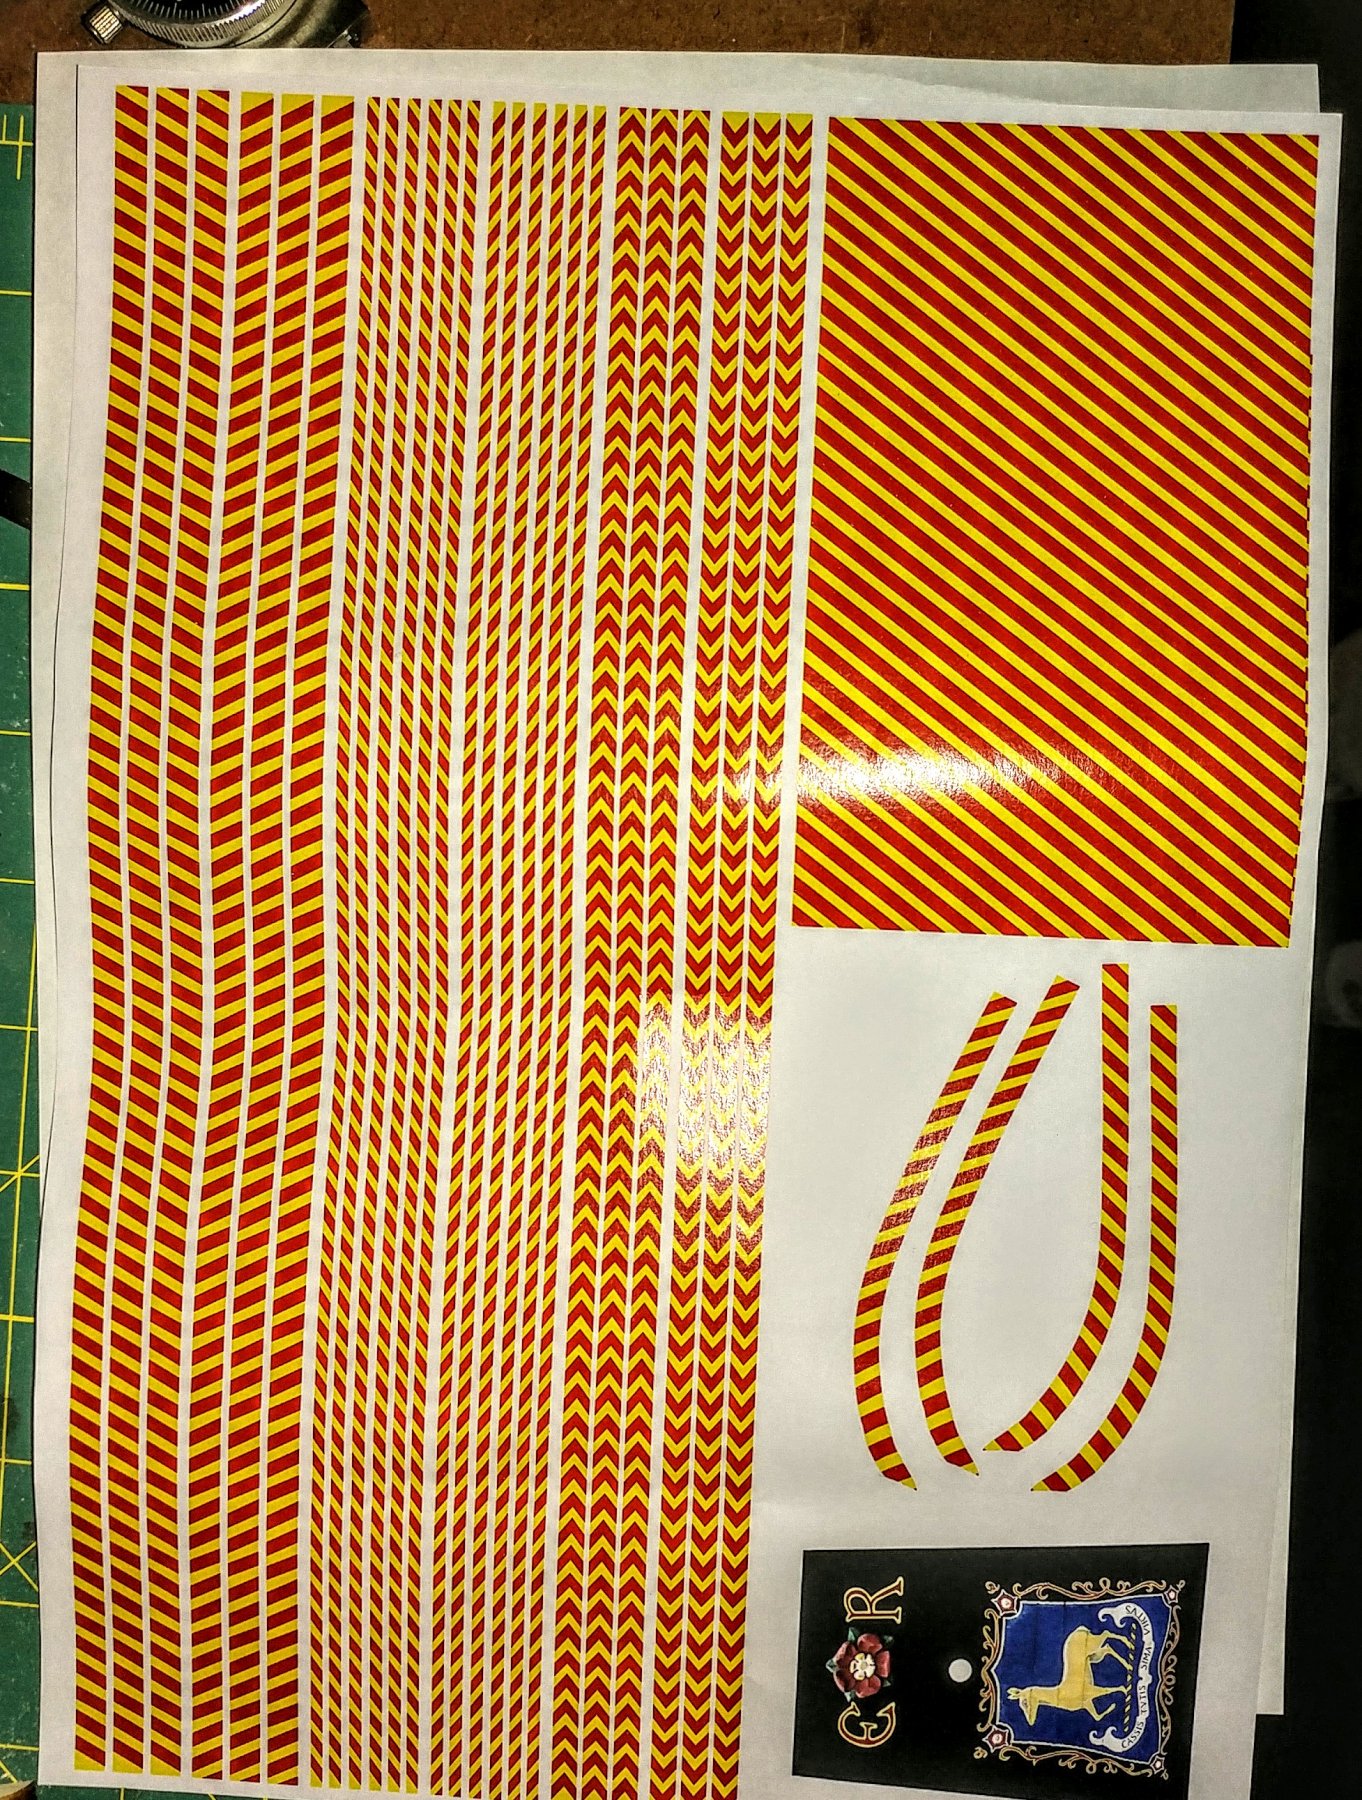
This is the paper graphics that came with the kit. I doubt I will use much if any of them. Yellow is my favorite color, but I think this is too much red and yellow. I want to incorporate some other colors in also. I will make some yellow trim, then add other colors like blue and green and red.

-
Yes I did steam. The thicker first planks ( white wood) we're easy to bend, twist , and work with , but the .5mm x 5mm second planking was a wood called sapelli. It was just miserable to work with. Kept breaking and splitting. As I progressed, things got easier though. I guess I will reconsider a finish, I never thought about that. I would like a tung oil finish, but I would probably have to do the white paint first. On the other hand if I put a poly or varnish on and I do the complete hull, the white paint below the water line may work better. I just don't want a gloss finish.
-
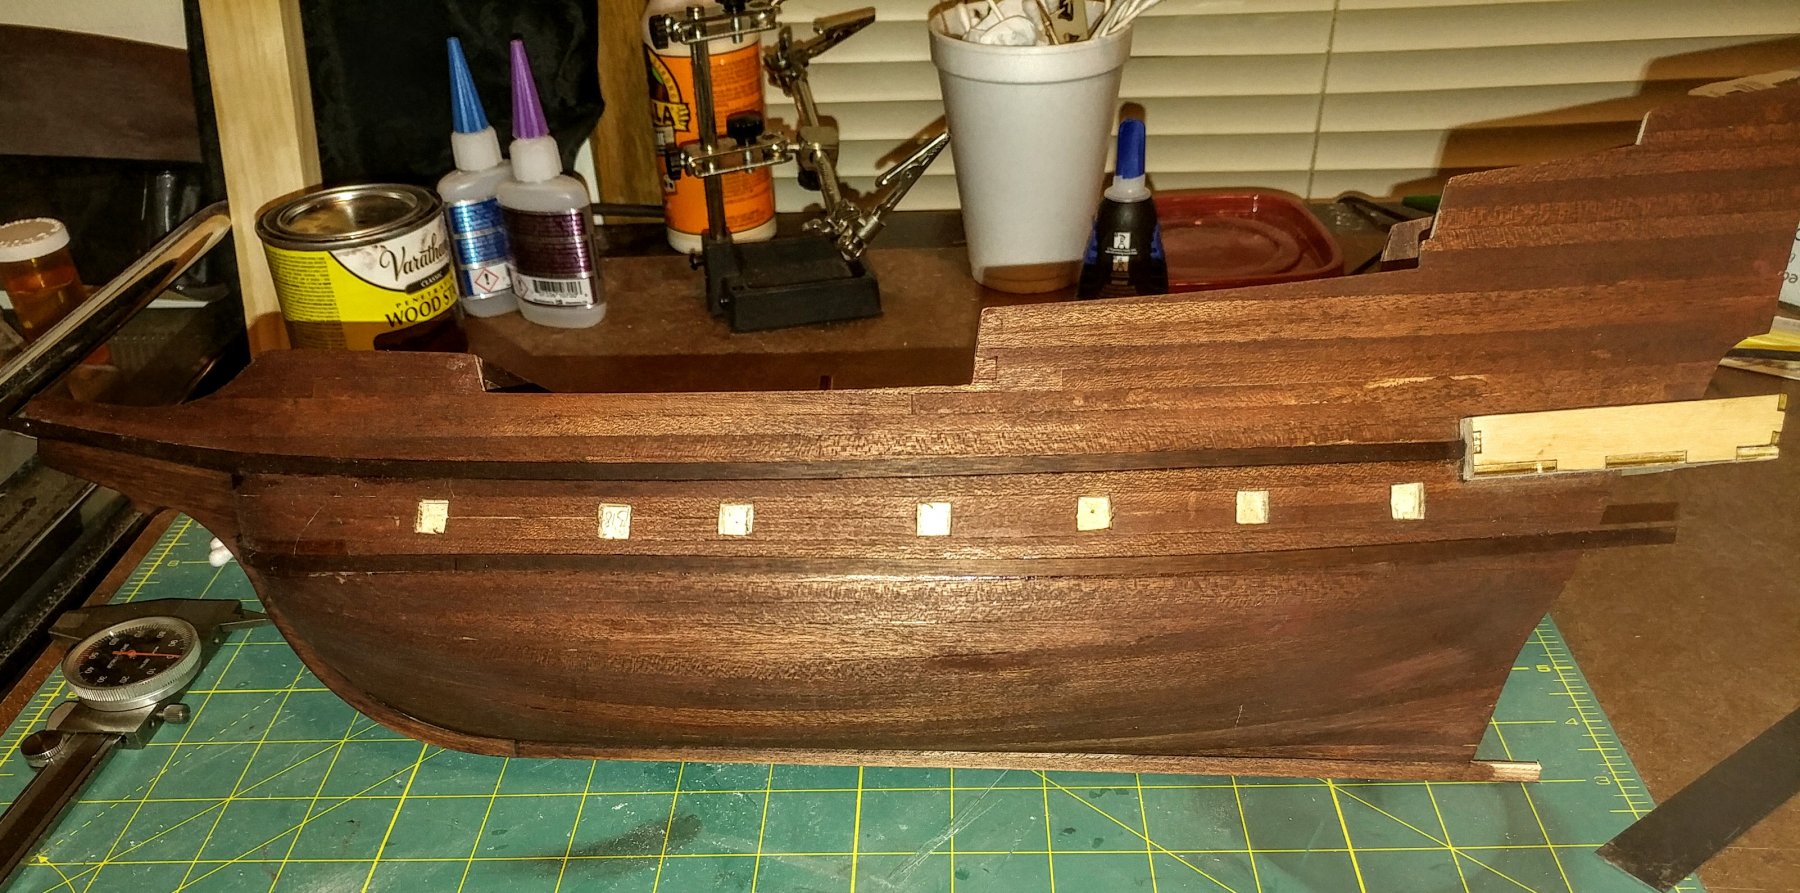
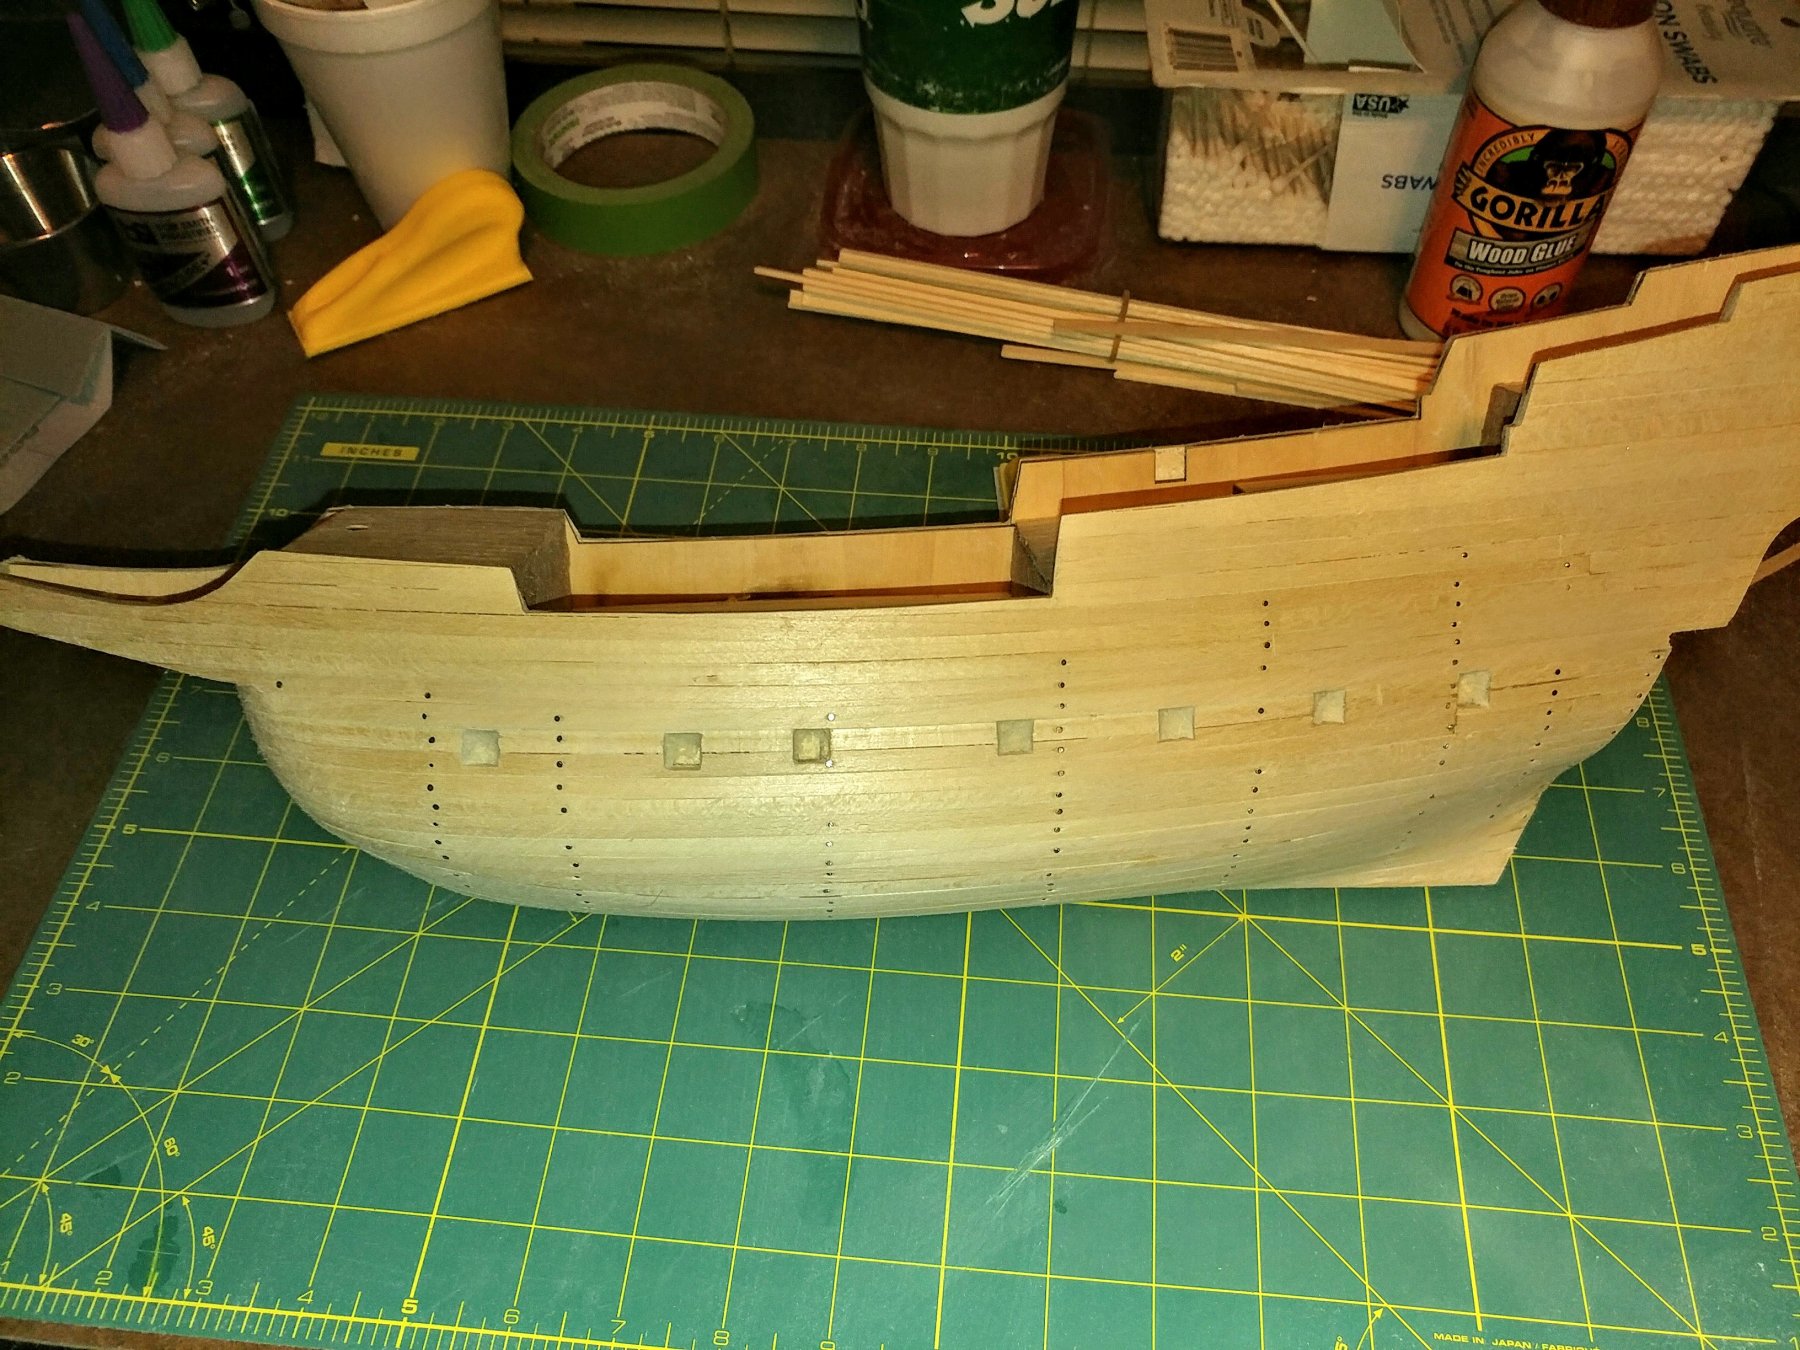
I got the hull planked and it was a disaster! I had a very hard time with the second planking, as the wood strips (.5mmx 5mm) we're very dry and brittle. Several kept breaking and splintering. I also used CA glue and got that crap everywhere. It was on my fingertips, on the wood ..... I made a mess. About half way through the second planking, I got the hang of it. I spent hours straightening out the mess I made. Because of this, I ran short of the planks so I am waiting for more to come to finish some areas ( seen in the photos). Finally, I am pleased with what is done so far. Trying to follow these lousy directions supplied ( I'm not going to dignify calling them plans) has been difficult, so now I just use them for reference. I have read through the other build logs on here of this ship and have figured out that no two are alike. The kits, or the builds, while all beautiful, are very different. Right or wrong, this has led me to feel better about making changes. I have made a list of changes and ( I'm my opinion) improvements. One thing I really liked in others was the bow had grating instead of the deck floor like my kit has. I am not changing this now as that part is done. I am however going to make new cannons for the deck as the ones in the kit are not that great. I have sanded the decks and am going to redo the seams and the nail marks to coincide with the beams underneath instead of the random pattern shown in the kit. I have decided on many other improvements and will show them as I get to that point. In particular I am going to make doors from scratch because the brass etched doors supplied just look fake. I am going to make new gun port doors as the ones supplied leave a lot to be desired. I stained the hull with mahogany stain. I am going to leave it this way and not planning any other finish on it. I do want to paint the hull white below the water line. I'm not sure yet how that will go over the stain so I will experiment on some scrap wood with stain and paint before putting anything on the model. This build is really getting exciting for me now, especially after seeing what others have done and what is possible.


-
Vossiewulf, I thank you and everyone else here for your help and guidance so far. It is very much appreciated. I really can't explain why I chose the Golden Hind to build. I looked at kits for a couple weeks, maybe it chose me. This model is a little smaller than I thought ( I thought the scale was different than it actually was). When thinking that it was the one I wanted to build, I looked the ship up on line and did find not a lot of information and what I did find seemed to be inconsistent. I read about and looked at photos of the two full size replicas that were made and they aren't even consistent and some seem to think not entirely authentic in detail. Maybe this is a good one for me, as building it is medical therapy for me. It is to keep my mind busy ( doctor told me I needed a new hobby) and everything I do must be a challenge to keep me interested. I was not so interested in historical detail as much as doing a good job on how the build turned out. Now my thinking is changing some in that respect, so my next build will require more thought and research. Since ships are a new subject to me, I am sure I will make a lot of errors in being historically correct and most likely will do some things because they are pleasing to my taste. I do things for fun and enjoyment, as that is what retirement is to me. I will be pleased if it looks nice when completed whether correct or not. The next one ....... that may be a different story 😁.
-
I would very much like to use the geometric designs, but I have reservations about gluing these paper to the wood and it looking good. I have never had success gluing light weight paper to anything. The paper they are printed on is not very heavy so I may take a scrap of the paper and experiment gluing it to a piece of scrap wood. I could scan the designs and print them on card stock if the paper is too thin. I am disappointed some in the plans for this kit as there is not much information. Thanks plans consist of 6 pages of photos of the kit in various stages of construction and that is it besides an inventory of the parts list which I can't read because there is no English on it. So I am studying photos trying to establish details. I don't mind this except it is difficult to determine the order some things need done in. I do plan to do as much detail work as I can.
-
Thank you for that information. I was considering a tung oil finish. As near as I can tell, the Golden Hind had a lot of colorful painted striping. I am not sure yet if I like that. I been looking at online photos of the two reproduction ships. The kit came with printed paper stripes to cut out and glue on, but I have my doubts that will work well. I still have plenty of time to think about that though.
-
Oh, something else. I did not pull the nails out of the first planking. The plans didn't say anything about that so I assumed they get left in. When I nailed, I took the time to countersink the nails to make sanding the first layer easier. It would be too difficult to remove them after countersinking them. It doesn't seem to be a problem.
-
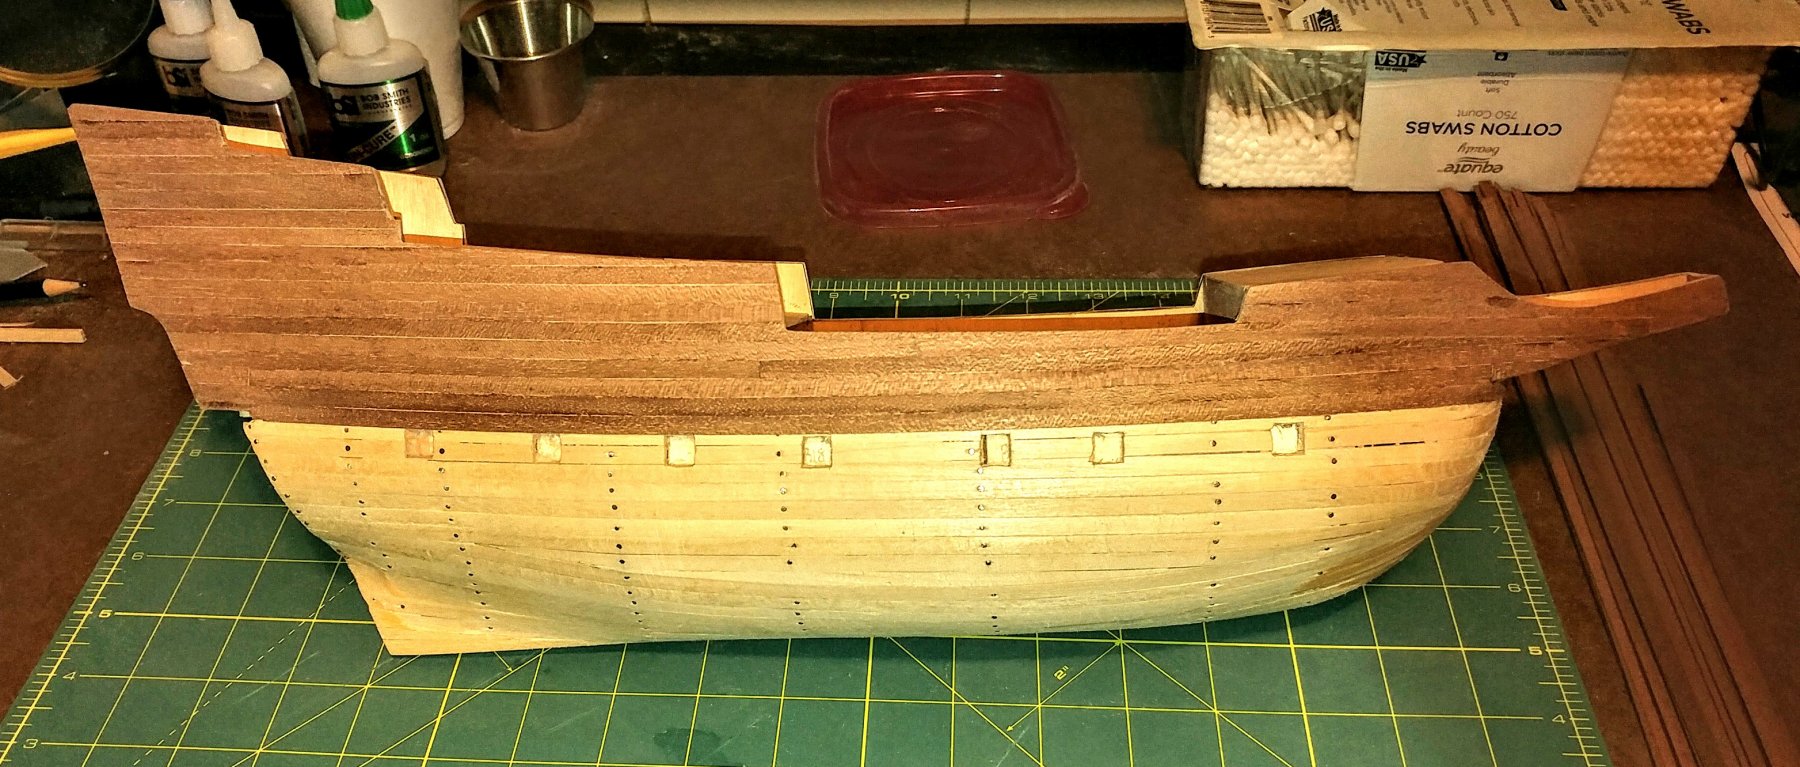
Well, I began the second planking. It started out a diaster. I was having a hard time gluing these thin, flimsy strips. I am using CA and I got it everywhere. There is so much super glue on my fingertips I can't work the touch screen on my phone. I think I finally got a routine worked out. I took great care to make this layer as perfect as possible, and then IT happened. I dropped the hull on the bench and damaged two small areas. It took me several hours to cut and fit patches in this spots and glue them in. I got them fixed to where they can barely be found but it wasn't easy. I have tremors on my left side and sometimes I can't hold things well and to top it off, I am Left handed. I sanded the area in the photo where the second planking is installed to see how it will look and I am very pleased with it so far. I think when done and finish sanded it will be good. One of my personal flaws is I am a perfectionist and if something isn't darn close to perfect, I can't accept it and thus I sometimes do things over that others can't figure out why. I have been trying to get over that for quite a while but not a lot of success. Another question. What do you guys use for a finish on the hull, on the decks? I was thinking polyurethane. Gloss or matte finish. The hull and decks get a different finish? Spray or brush on?

-
Thanks. I found the planking process not very difficult. Everything is common sense for me ( no matter what I do). Nothing overwhelms me because I break everything down to simple tasks and only concentrate on the one task at a time. This makes all things much simpler and easier. I made a few mistakes probably or could have laid a few planks better. I experimented with the planking to try to find the best way to lay them tightly with the least amount of cutting and fitting. Being the under layer I figured it the best place to experiment. I used the CA glue and it worked well, and you are correct, less is more. Too much and it does not set. I thought of using it on the second planking but those boards are so thin and flexible, I kind of thought they may need the entire back side glued to keep them tight on the hull surface, but that doesn't seem to practical with super glue. Guess I will think on it some more. I don't have a plank bender so to bend the planks, I put a pan of water on the stove and brought it to a boil. Then turned the stove burner to low to keep the water hot. I dipped the part of the plank to bend in the hot water for between 30 seconds to a minute.( If you look closely tiny air bubbles come out of the wood in the hot water), when they pretty much stop, (30 to 60 seconds) remove the wood from the water. I then use the BACK edge of the blade on my utility knife to make light indents every 1/16 to 1/8 inch on the back side of the plank while lying on the bench. This let the softened, damp wood bend easily and smoothly. ( The tighter the bend, the closer and deeper the indents need to be)on. Since the wood did not soak long it will dry quickly. I found this to work excellent without buying expensive tools or gadgets. I thought about posting some photos of the process if it would help anyone else.
-
I got the first layer of planking on. I followed the instructions and pictures in the plans and I think it came out pretty good. It is rough sanded and came out very smooth. There are a couple of really small areas that may need a little filler, but that is all. Which brings me to my two questions. 1. What kind of filler do you guys recommend for a small thin low spot? 2. The second layer of planking is very thin , almost like a veneer. They are also 5mm wide but thin. What glue do you use for these? I used BSI instant glue for the first layer, but it doesn't seem like that would be good for this thin finish layer. Any recommendations on installing the second layer would be appreciated.

-
That makes a lot of sense. I hadn't thought of that. I did what the plans showed, but it makes sense the deck planks would be nailed at each beam.
-
Thanks, guys. Yeah, I figured there would be some fitting of parts, but I didn't know it would be this much. It is all good though, I now know more what to expect and will plan a little more ahead. Everything I do now affects something else down the road that I don't know about yet. The other problem is the language. I'm guessing it is Italian? (Not sure where the kit is made). The plans have both languages, a lot of English for the basic stuff but most of it is another language. The parts inventory is entirely in a foreign language to me and that makes it a little difficult to figure out, but that just ups the challenge a little. I love a good challenge. I read a few other build logs before I started and as I go, I am remembering things others have done and this has been a big help in avoiding a possible problem.
-
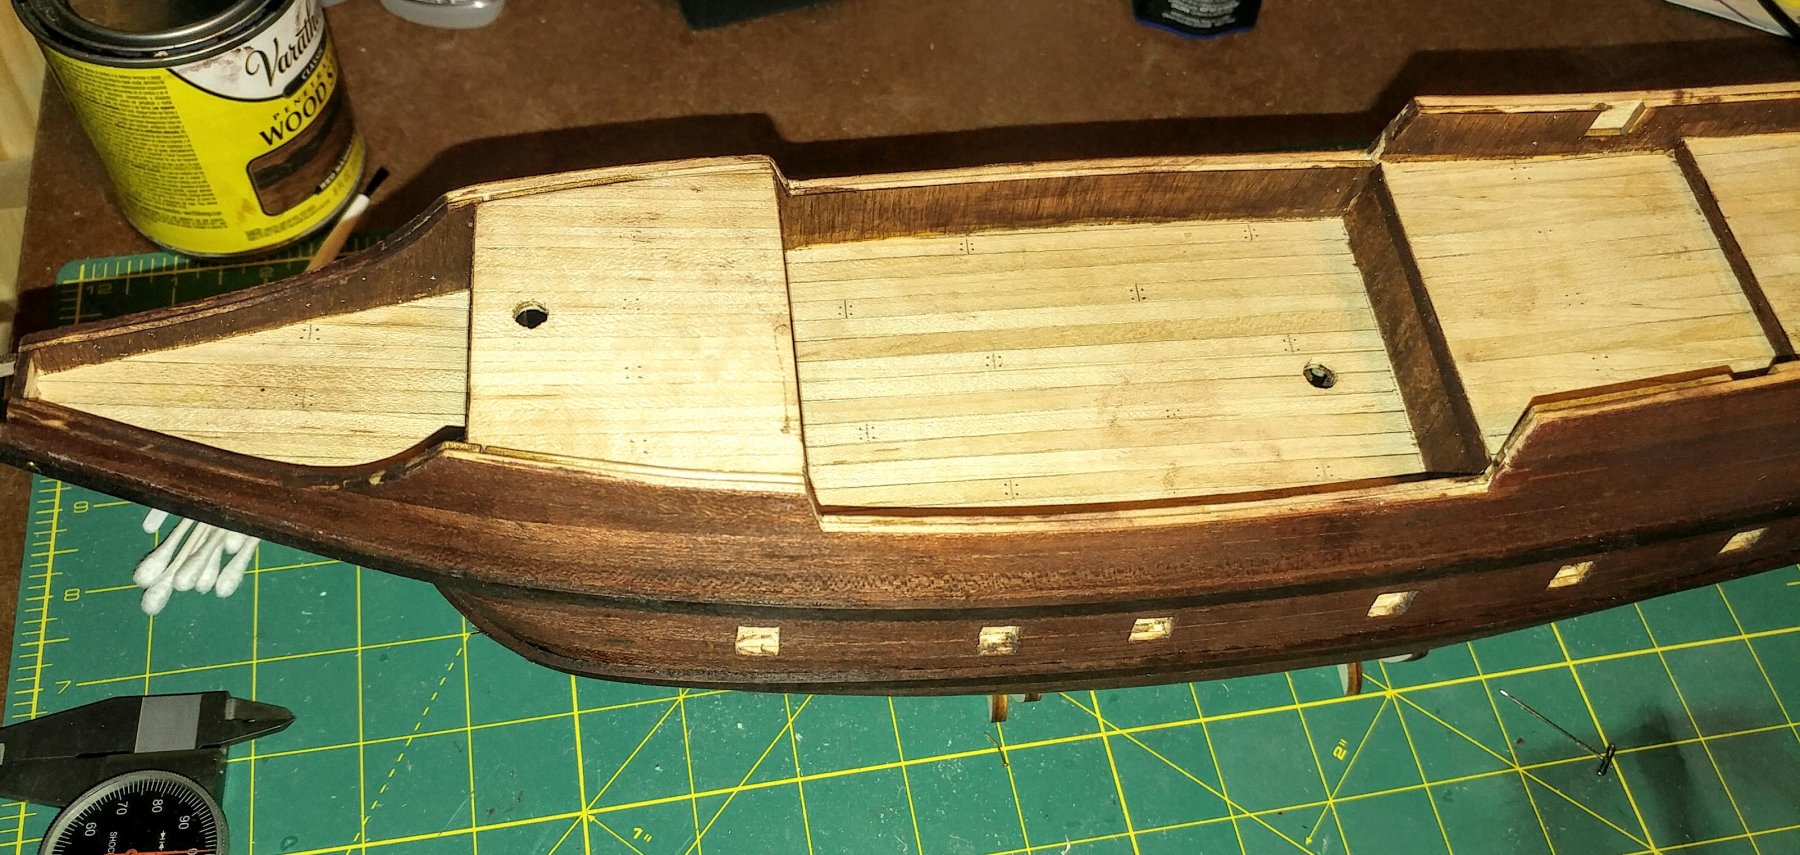
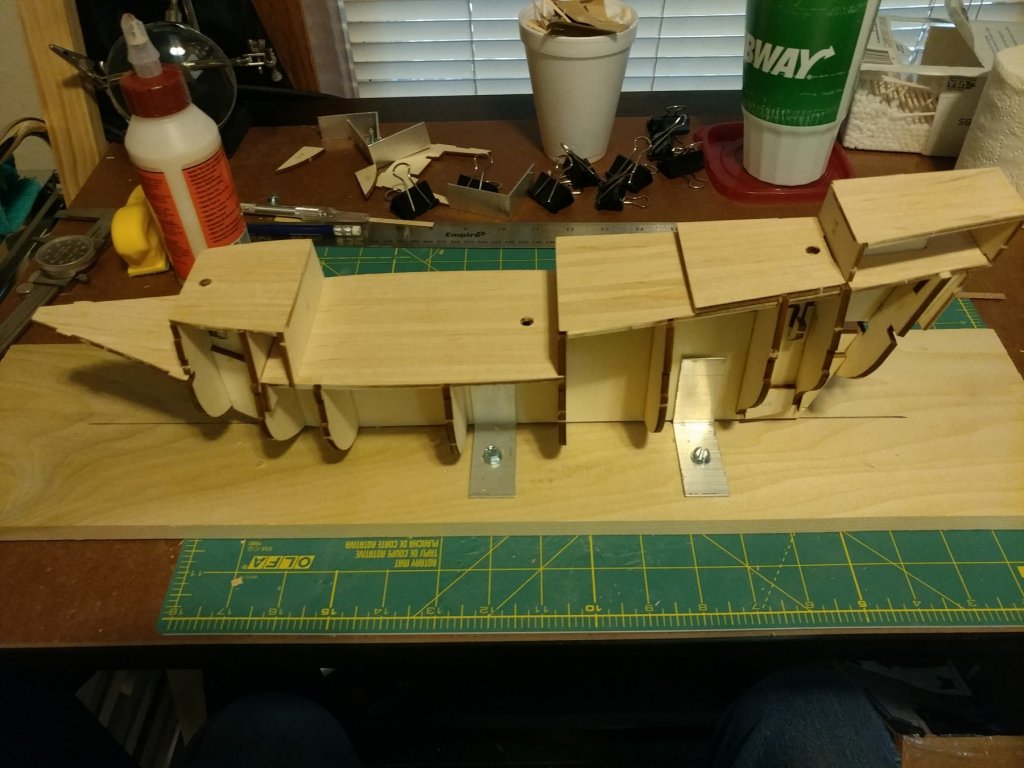
I got the decks on and the top panels. The panels are sanded smooth with all the high spots smoothed out. After I profile the edges of the bulk heads and install the filler blocks, it will be ready for the first layer of planking. I was a little disappointed in the quality of fit of the deck pieces and the panels that are installed. There was a LOT of fitting to get these to line up well, but I am fairly satisfied with the end result. I thought the kit would be more accurately cut than it was, but it just makes a good challenge I think once the first layer of planking is installed and sanded, things will be much better. I have read that better job done on the first layer, the easier and better the end result will be. I look forward to the planking and finishing of the hull.

-
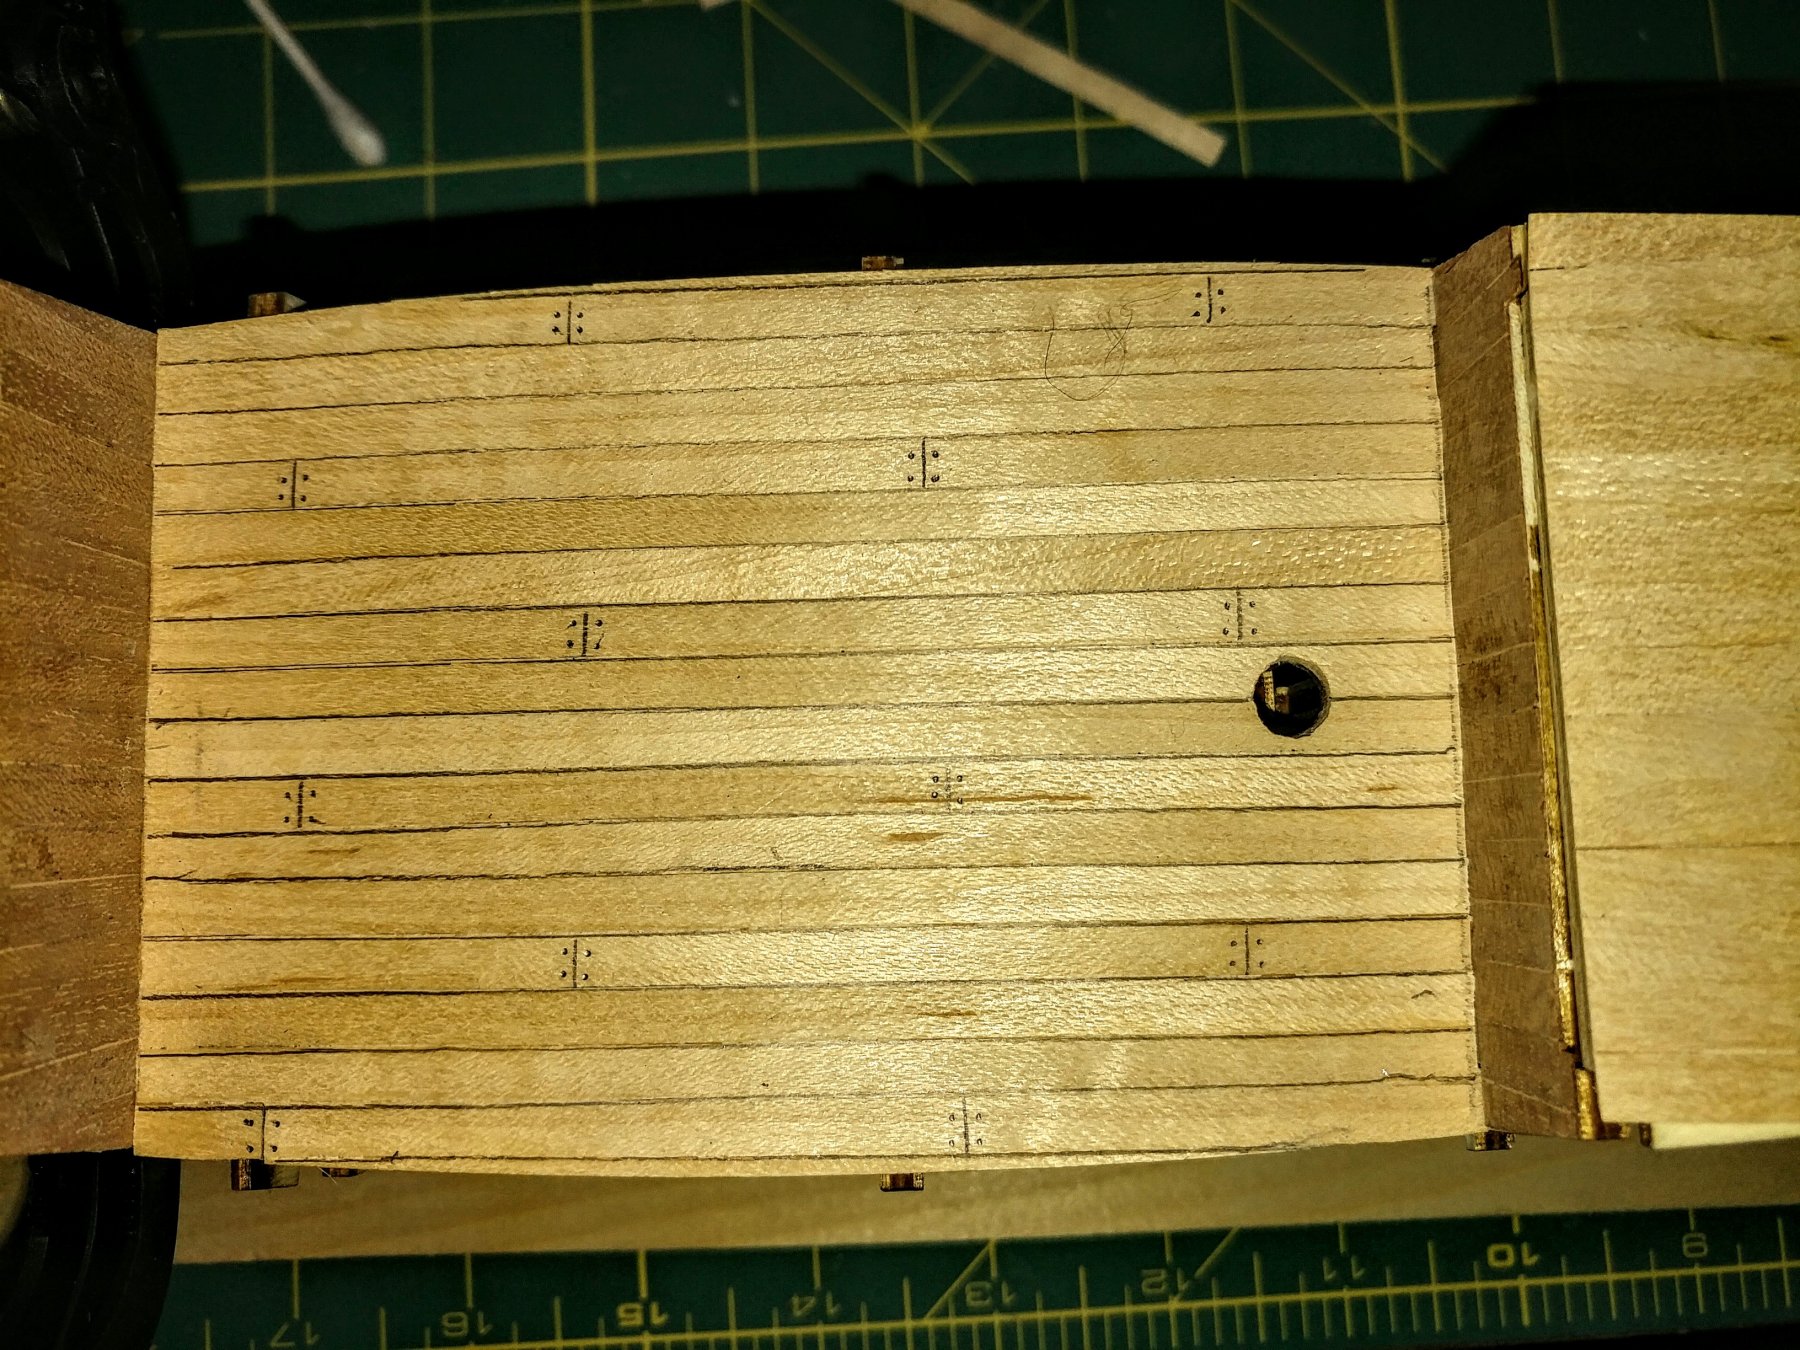
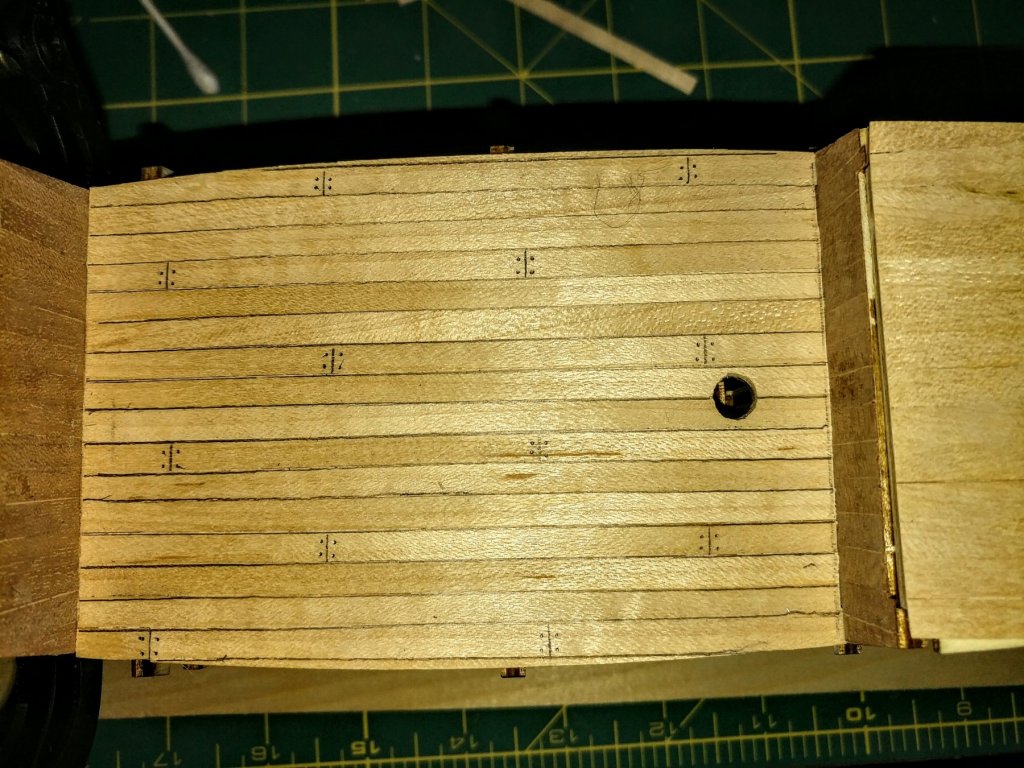
Ok, after trying several things, I found a way to get the look I wanted. I used a .5mm mechanical drafting pencil. It makes a very fine line and did the nail marks really well. I will do this on all the decks.
-
I planked the decks while the hull framework was curing and dry fit them on the hull. The decks are sanded smooth. The plans show using a sharp pencil to mark the plank seams and make nail marks. I tried this and I didn't think it looked good, so I sanded them clean.( It looks better in the picture). Is there a trick to this look? My only other choice is not to mark them. I shall think on this for a while, I guess.
-
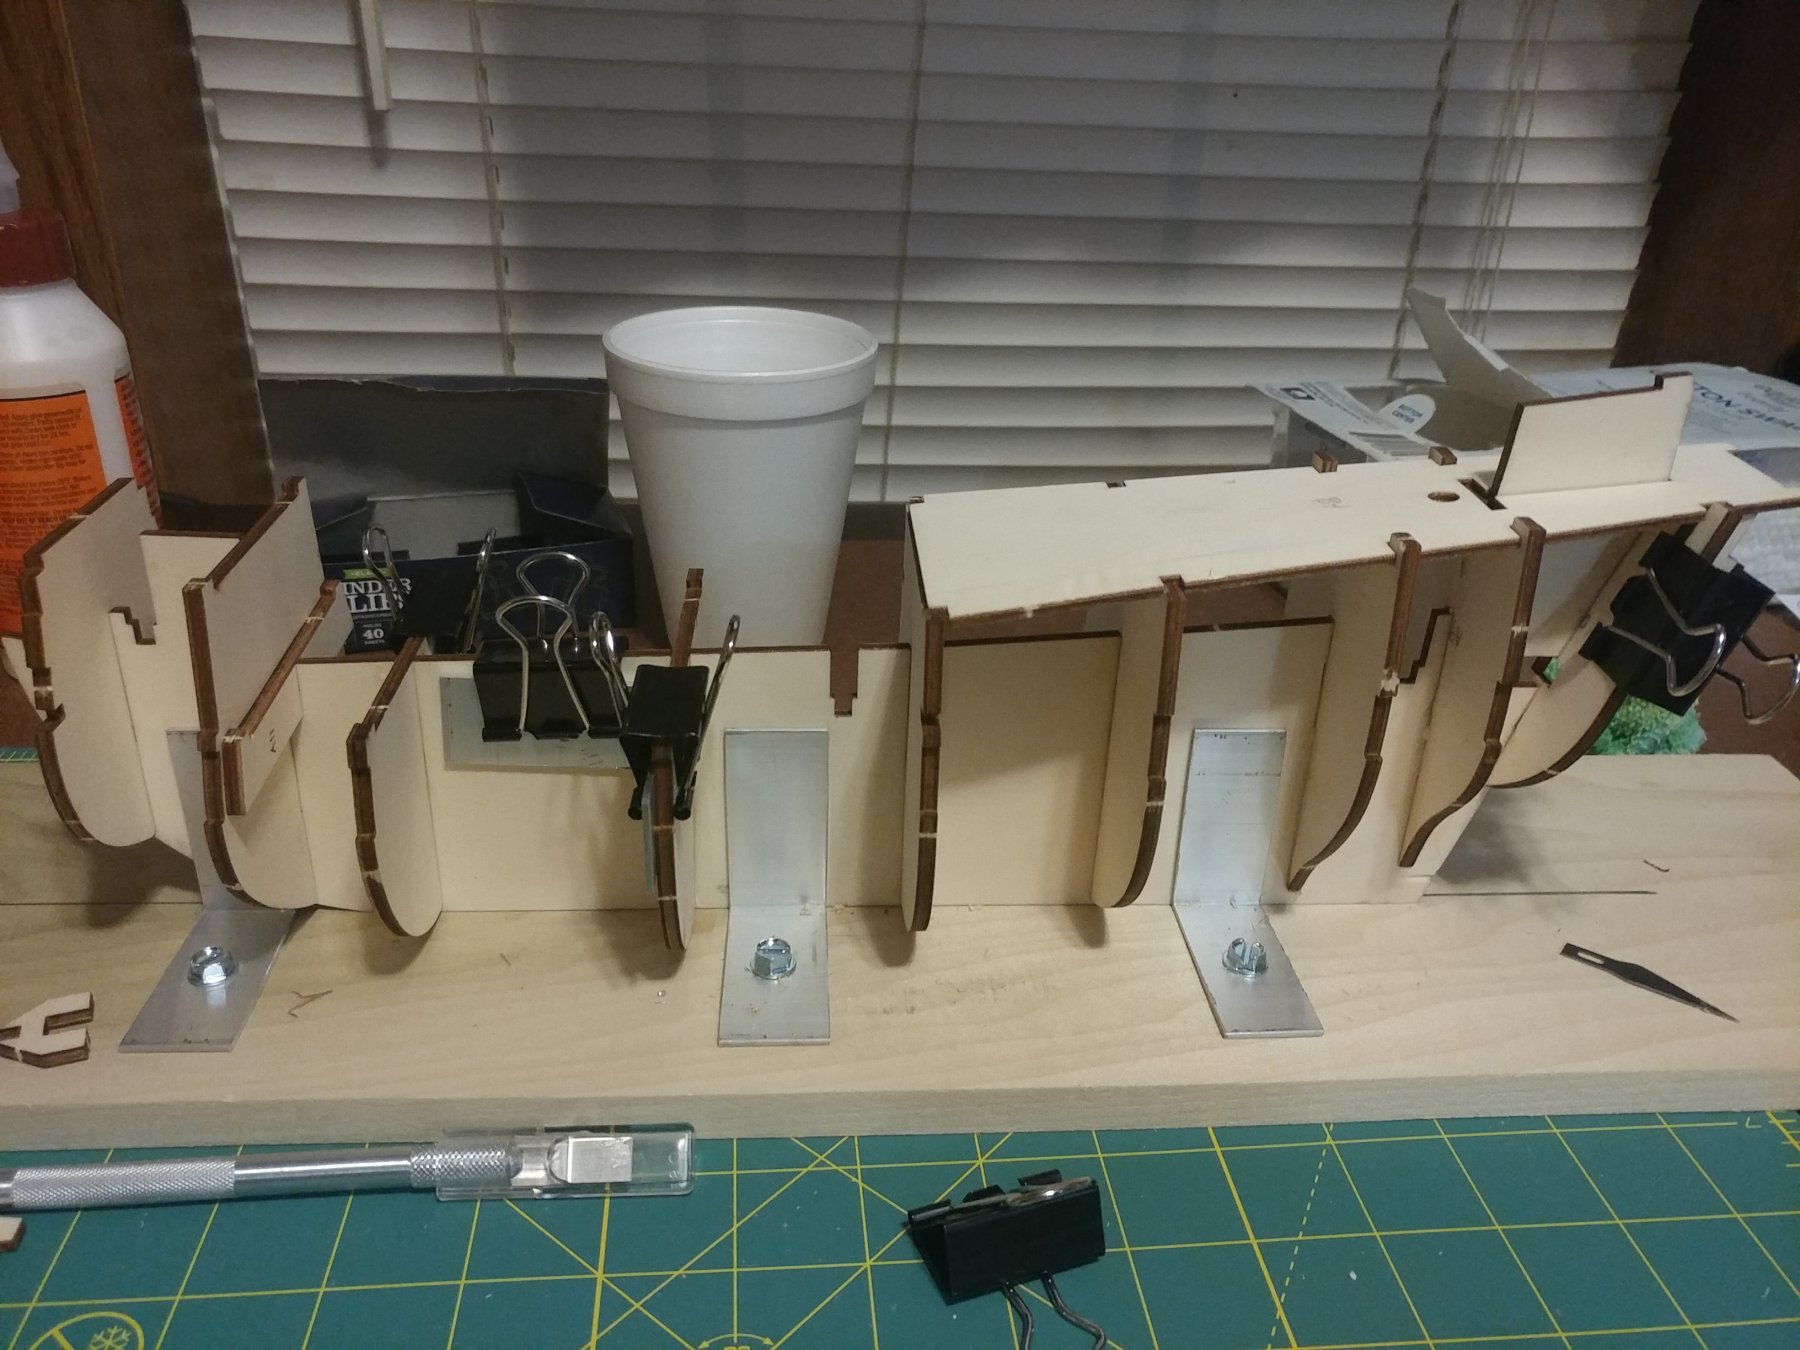
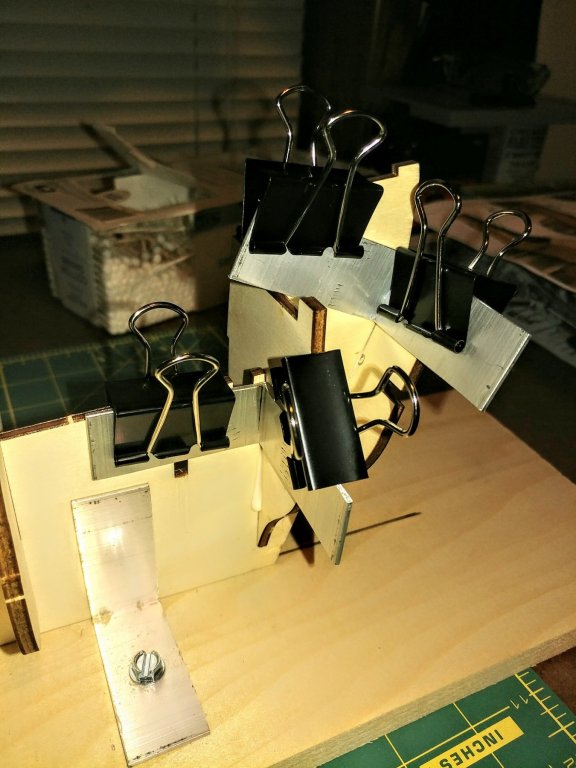
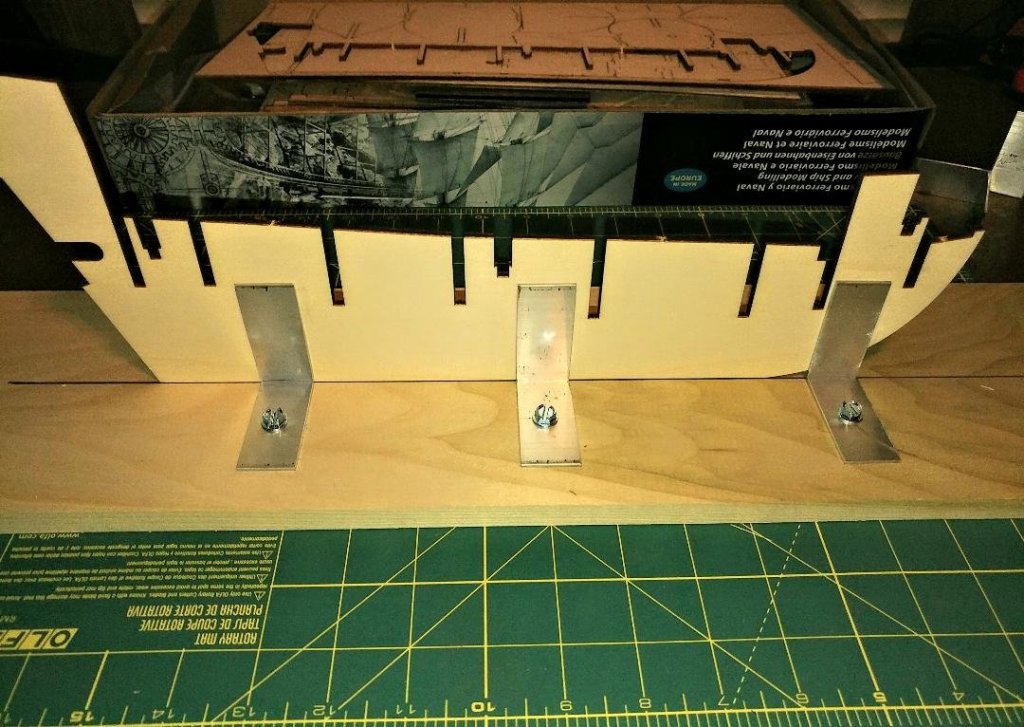
I spent some time studying the plans and while they are well made, they have some vague areas and it takes a lot of studying to figure some things out. They are in another language but have some sections in English also. I dry fit all the bulk heads and checked their fit. They were all tight , so after studying and rechecking everything, I decided to glue them in place one at a time, clamping them square until the glue set and then moving to the next. I used paper clips for clamps and the angles for squares to hold till the glue set. I glued the last three bulk heads in place and after looking at it, I decided to dry fit the deck on the bulk heads and found the deck would not set all the way down on the front end. I am glad I did because one of the bulk heads was not lining up with the deck at the correct height. I had to work the glue joints loose and drop the one bulk head another 3/32" to make everything fit. Now the deck sets correctly. The tolerances on these wood parts are going to take some getting used to. I am used to working with everything being within .001" or less working with machined metal parts. The wood is a little more forgiving and not quite as critical. I will spend the weekend assembling the hull framework. I think it might be best to make filler blocks for the front of the hull to have more area to attach the planks to. The plans don't call for them, but it seems like a good idea. I have a question. The plans call for nailing the first layer of planks on ( the hull is double planked). Is this considered the best way to do it? If so, should they be glued also and if so are the nails temporary? I am wondering, because the second layer of planning is very thin and unless the nail heads are sunk, I worry they may make bumps in the thin outer planks. I hope this makes sense. Thanks, Mark F

-
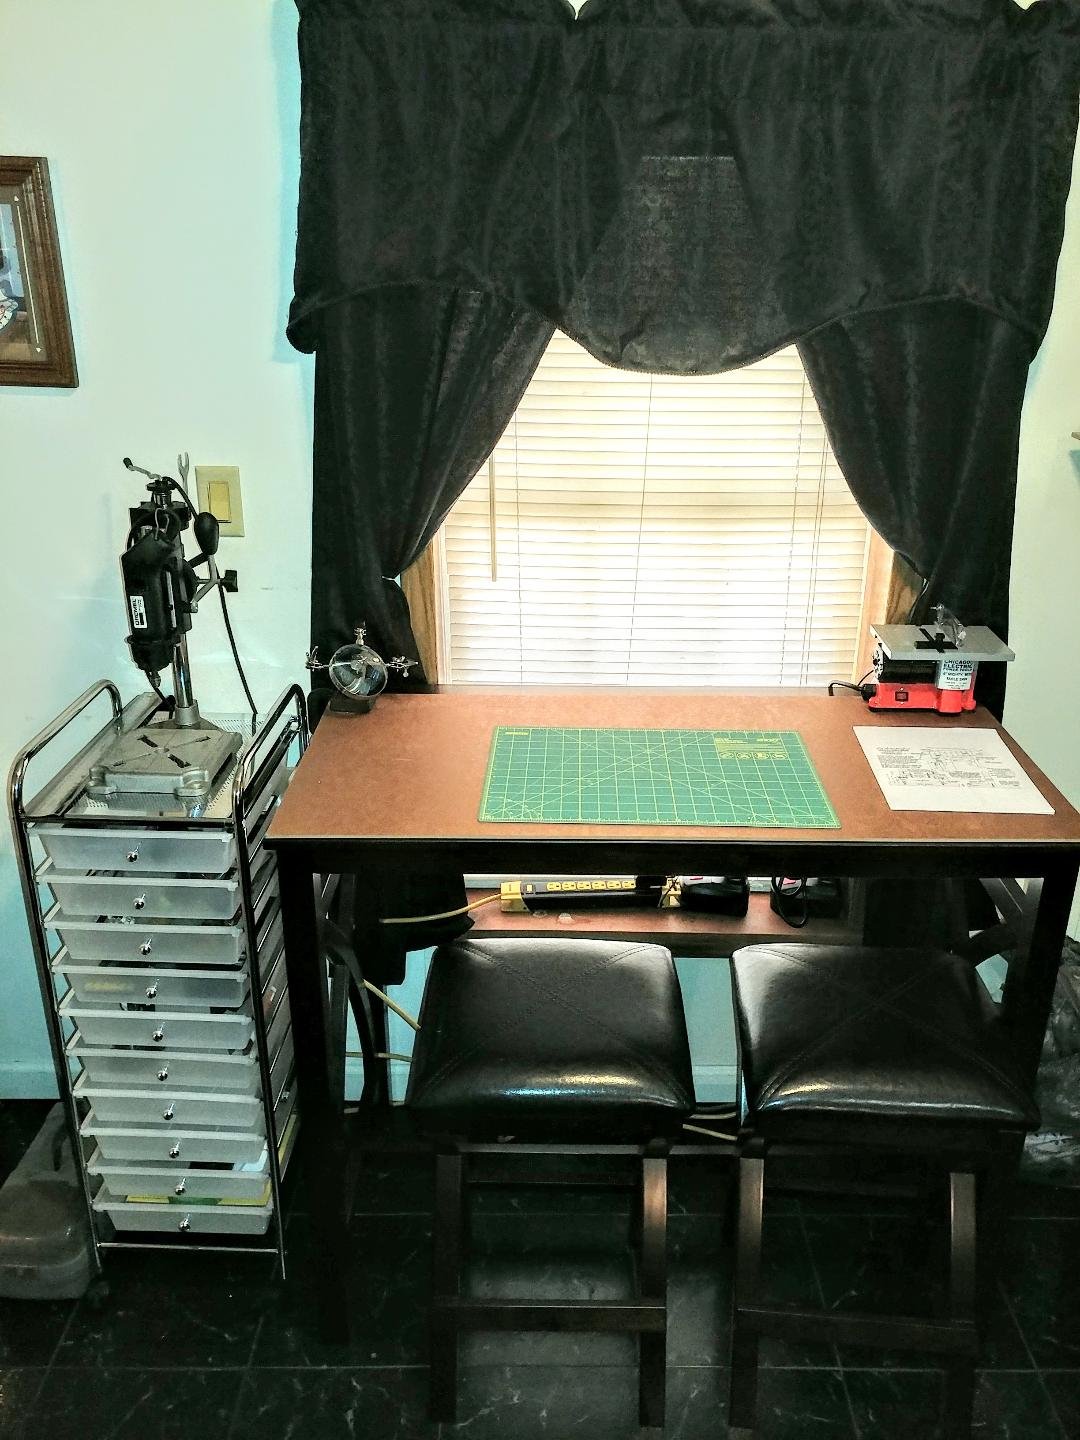
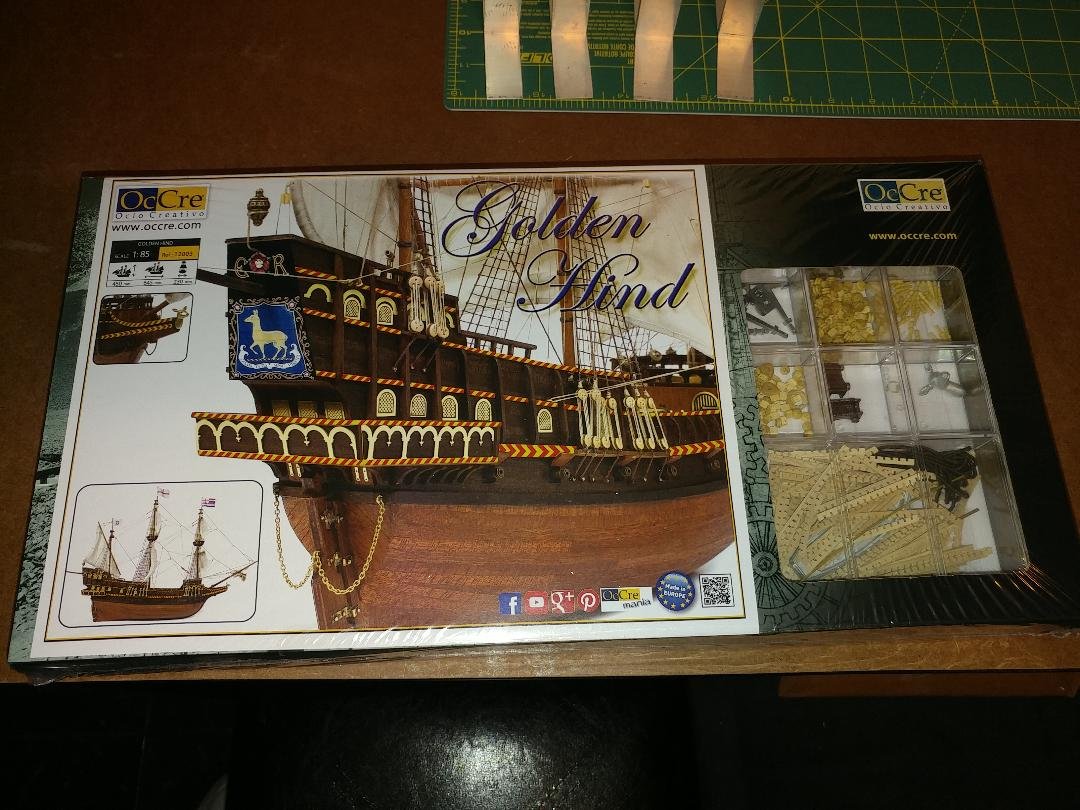
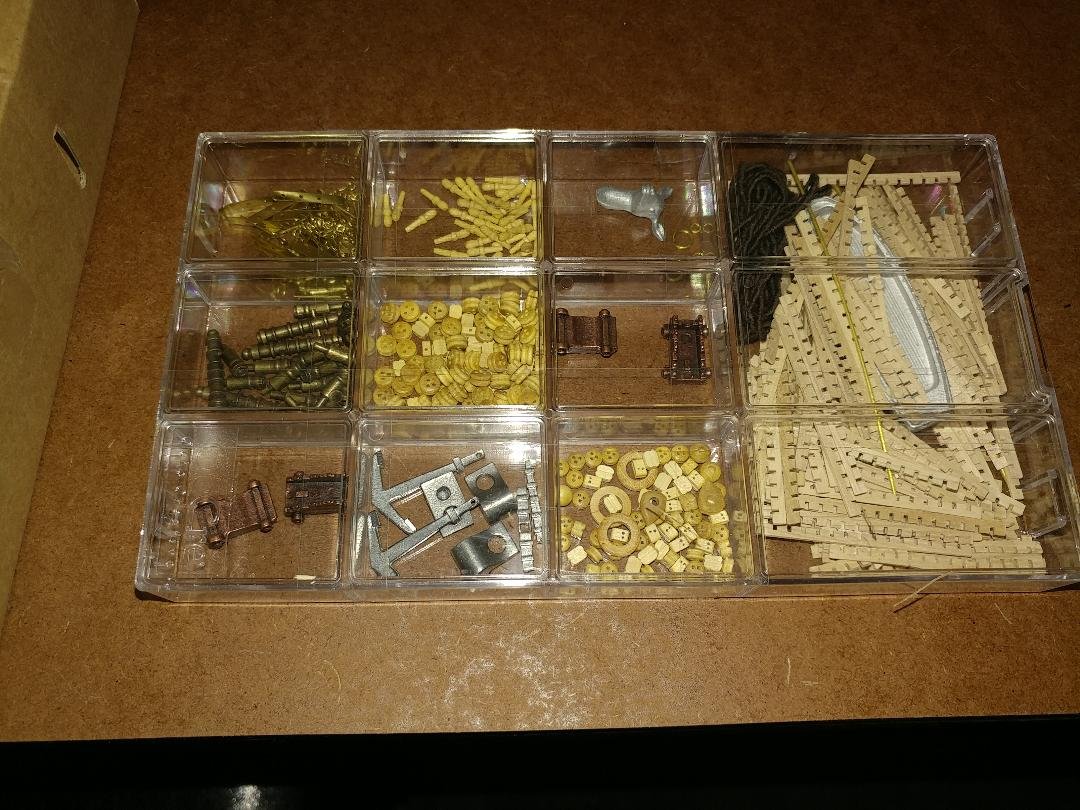
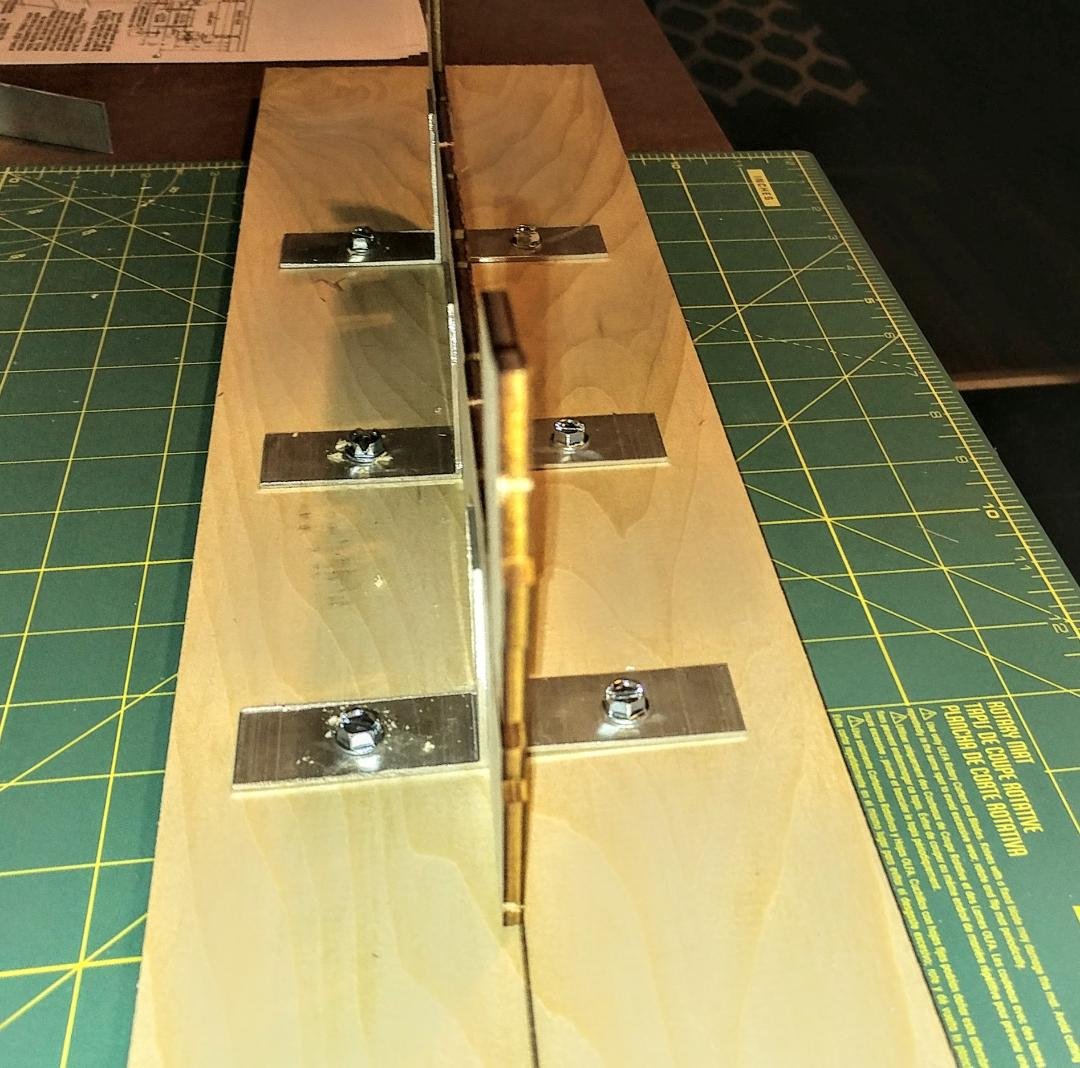
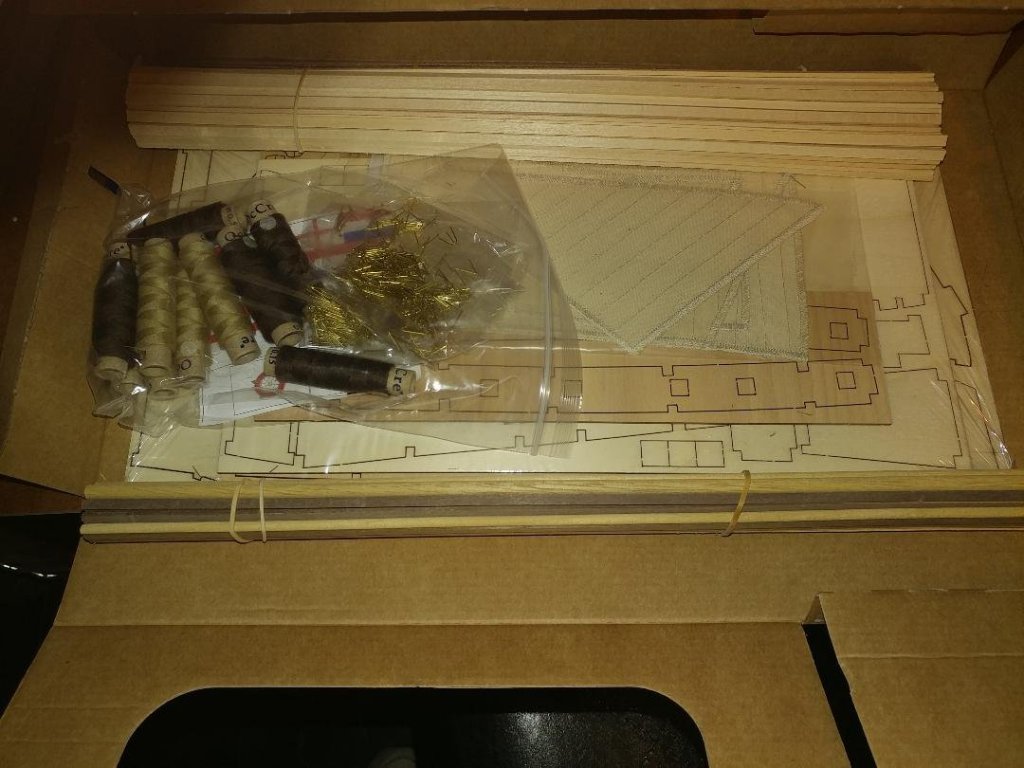
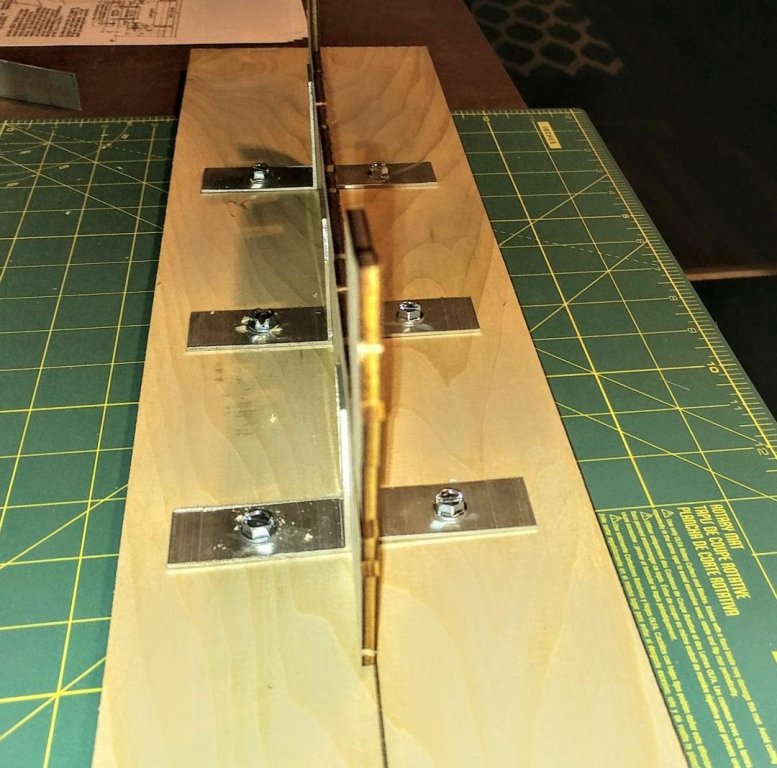
I finally chose a kit by OcCre to start building. I chose the Golden Hind. The kit is a little smaller than I actually wanted, but I think it will be fun to build. I ordered the kit last week and it came today. While waiting for it to arrive, I moved some equipment from the machine shop "clean room" into the house as I am not able to get the wheelchair into the shop outside. This is the area I set up to build in. I am impressed with most of the quality of the kit, especially for the price. The first thing on my agenda is to build a needed way to hold the ship as it is built. I set up a board to hold things square while the bulkheads are fitted and then glued. I cut some pieces of 2 inch aluminum angle and mounted them on each side of the part to hold it tight and vertical. It is a snug slide into and out of the angle brackets. I cut a few extra pieces of angle to use as squares to clamp the bulkheads in place square when glued. having the machine shop and a wood shop is a big advantage, because I can literally make anything I need. I will be building a simple keel clamp to hold the ship for planking the hull and the rest of the build. I will do that between fitting and gluing the bulkheads on this board. I am not to concerned about the build itself as much as I am not being familiar with all the terminology of the ship parts as you guys are and am a little intimidated trying to discuss the build not knowing all the correct terms. Some of the pieces are still "do hickeys" or "thingies" to me until I memorize their correct name. This part is a learning process for me, so please be patient If I don't call something by its correct name. I will do my best to learn all the correct terms, hopefully with some help from you folks.


-
Can anyone recommend a miniature hand plane?
mfrazier replied to Bettina's topic in Modeling tools and Workshop Equipment
Thank you all for your replies. I have ordered two planes. A Lee (and a cheaper one from eBay to experiment with). Mark F. -
Can anyone recommend a miniature hand plane?
mfrazier replied to Bettina's topic in Modeling tools and Workshop Equipment
I am glad I didn't order yet. I think I will go with the one from Lee. I see they also have a mini spoke shave.