MORE HANDBOOKS ARE ON THEIR WAY! We will let you know when they get here.
×


mfrazier
-
Posts
253 -
Joined
-
Last visited
Content Type
Profiles
Forums
Gallery
Events
Everything posted by mfrazier
-
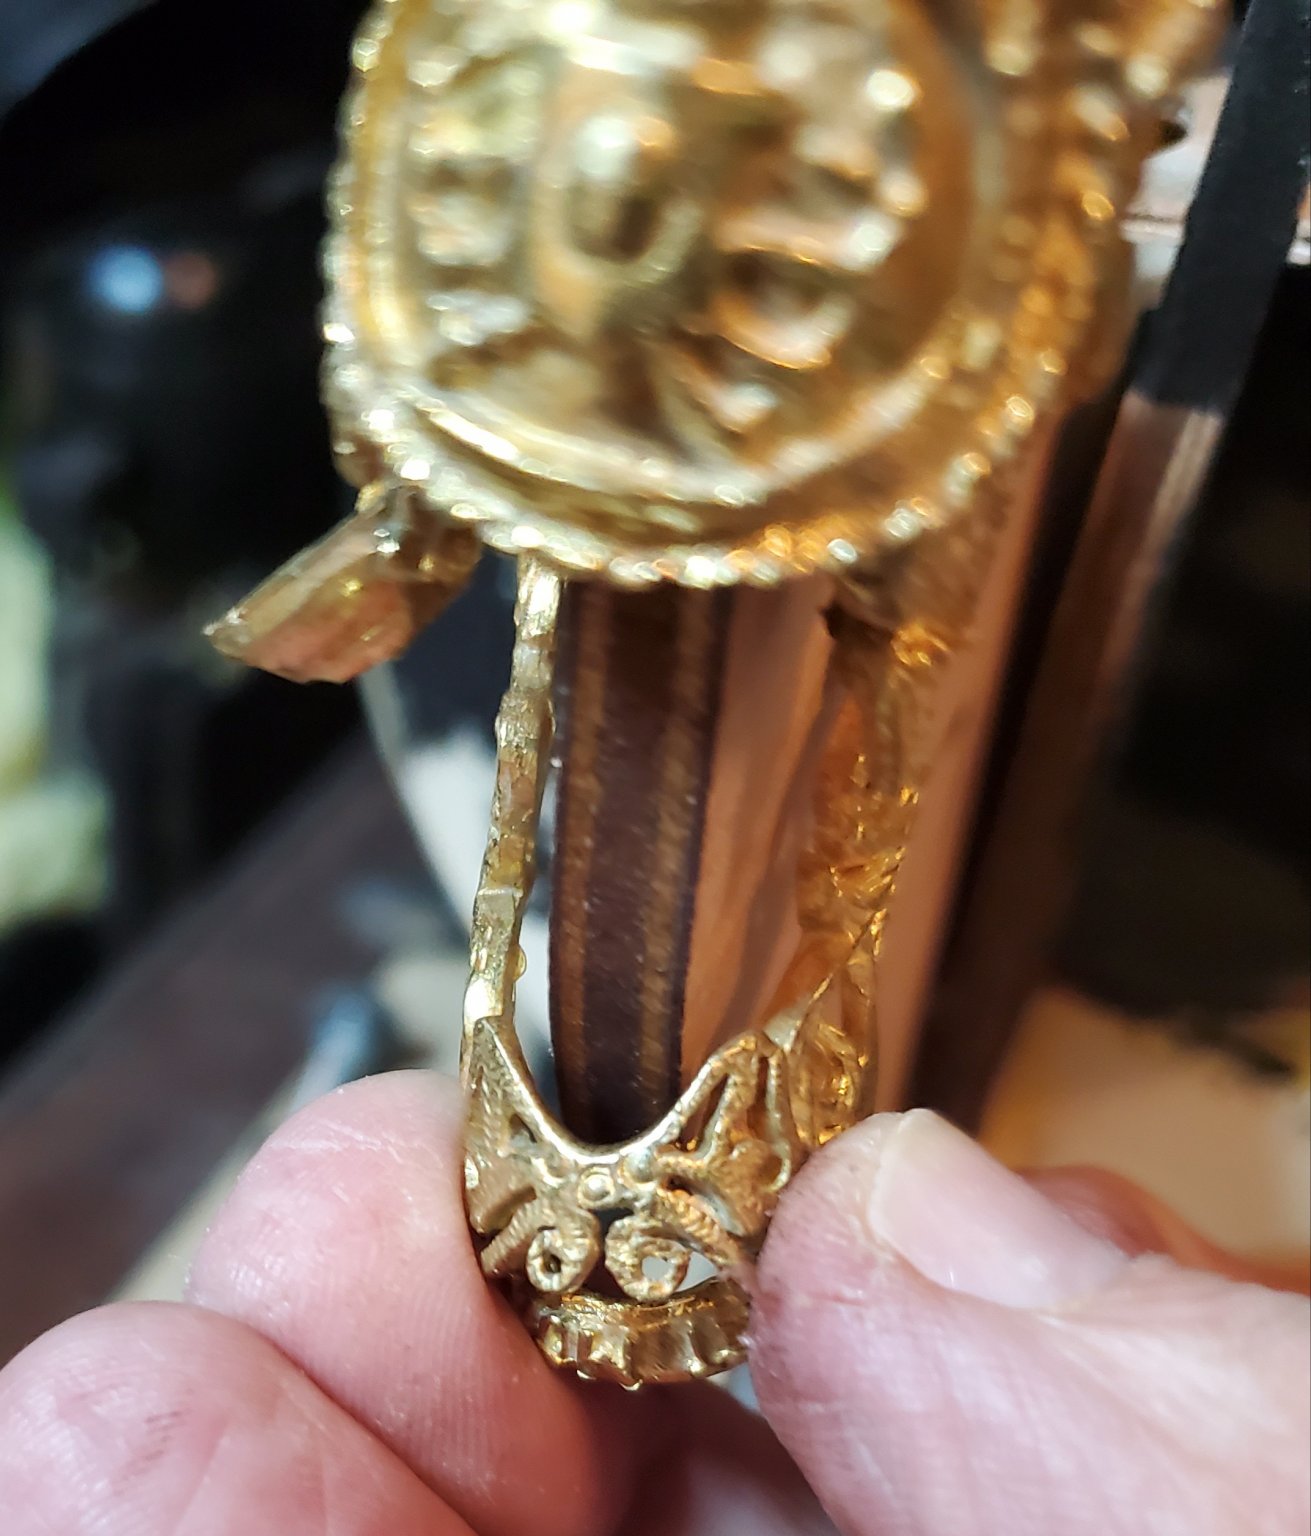
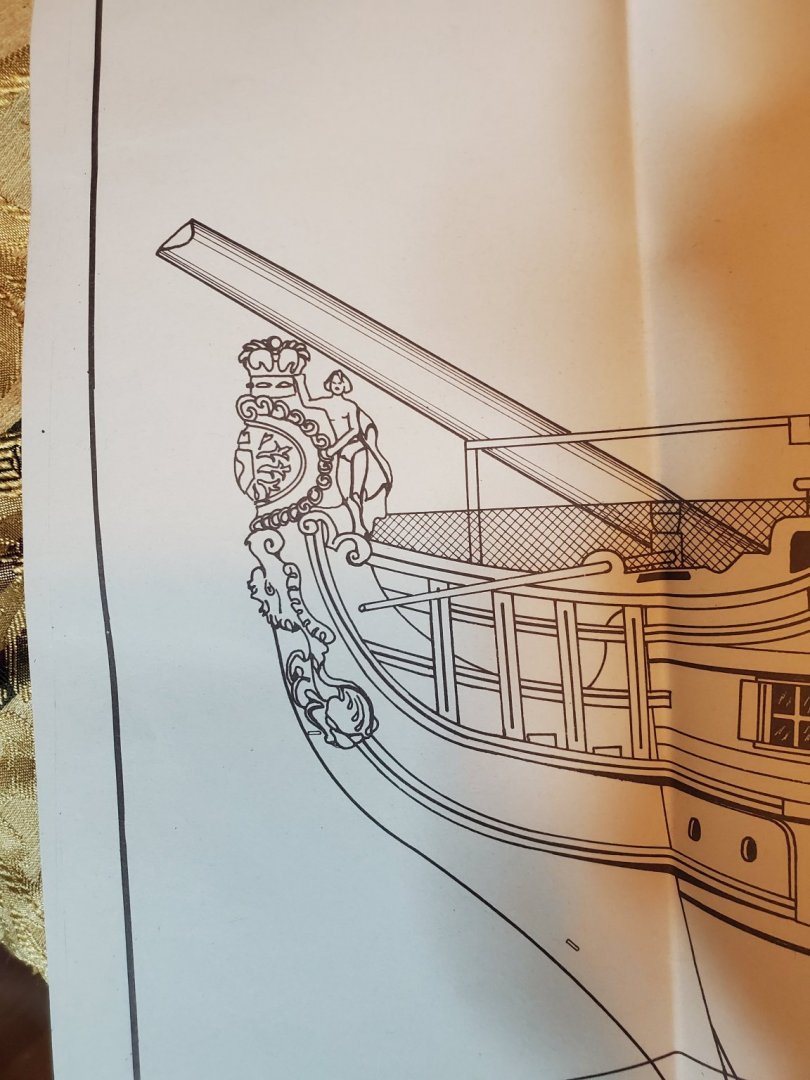
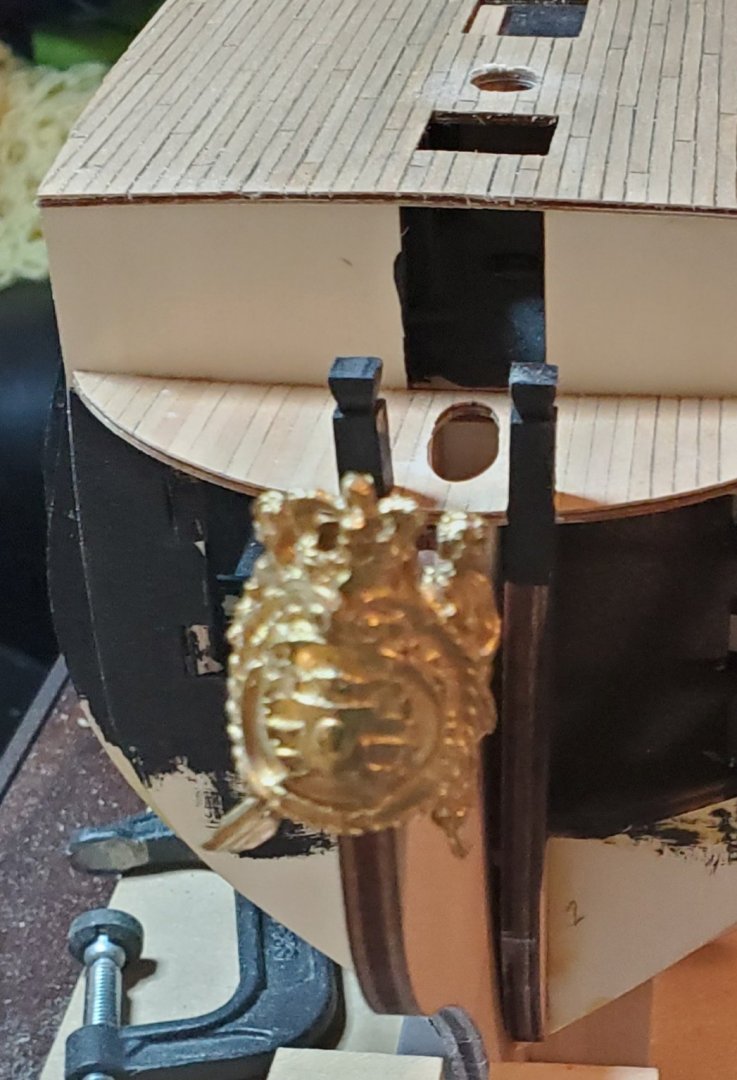
 Thanks. That photo helps a lot. I could actually use the top piece by adding the spacers. It still leaves some questions about the bottom piece. It seems they may have left it wide to go over the trim pieces on the knee but from the photos I can find, it doesn't cover or cross them. I am kind of thinking I will order the Caldercraft figure head or the Shapeways one and then fit to which one is available. WHO WOULD HAVE THOUGHT!! I got more info from the box cover than all the plan sheets and instructions. The photos show the casting on the bottom. The top photo shows the piece crossing the trim. The plans show it on top the trim. Either way spacers would be needed on the bottom also. I am going to grind all the flash off and polish up the details on this thing with my die grinder. I got nothing to lose and maybe it will look passable. Worst case scenario is I mess it up and buy one of the others. It is a challenge, and I like challenges. Mark Frazier
-
OC., The plans and instructions don't say anything about planking the knee but I intended to as the real ship is planked, I noticed in photos. I planned to plank it with thin strips. To fill this figure head, I would have to at least use 2 mm thick planks on each side. Isn't that awfully thick? Although that probably would make this monstrosity fit much better. I don't remember reading about the planking on the knee in other build logs. I nee to go back and check. I also plan to put a strip over the edge of the keel and knee to cover the plywood edge. I figured from McKay's book , the head of the knee tapers and the dimension for 1:78 scale is 3.5 mm at the front. I suppose I could taper this knee and planking would cover the plywood, but that would defeat trying to use this figure head. I never dreamed this detail would be this difficult to sort out.
-
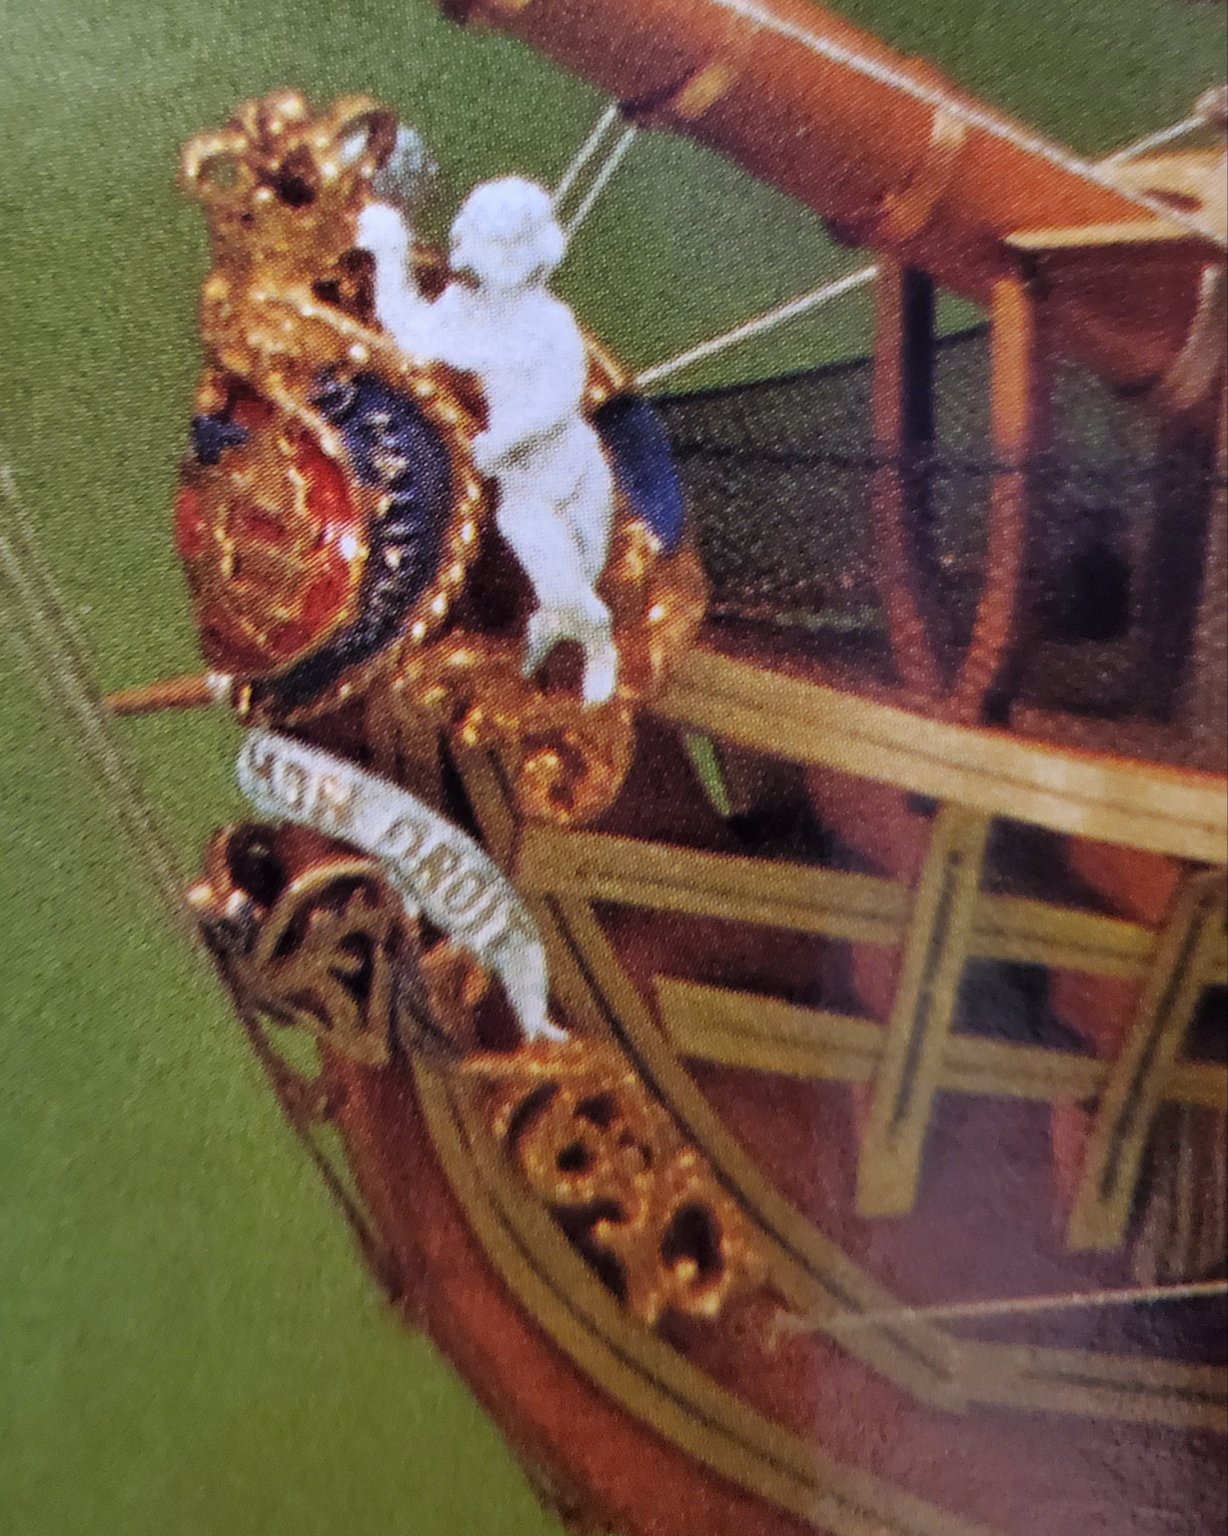
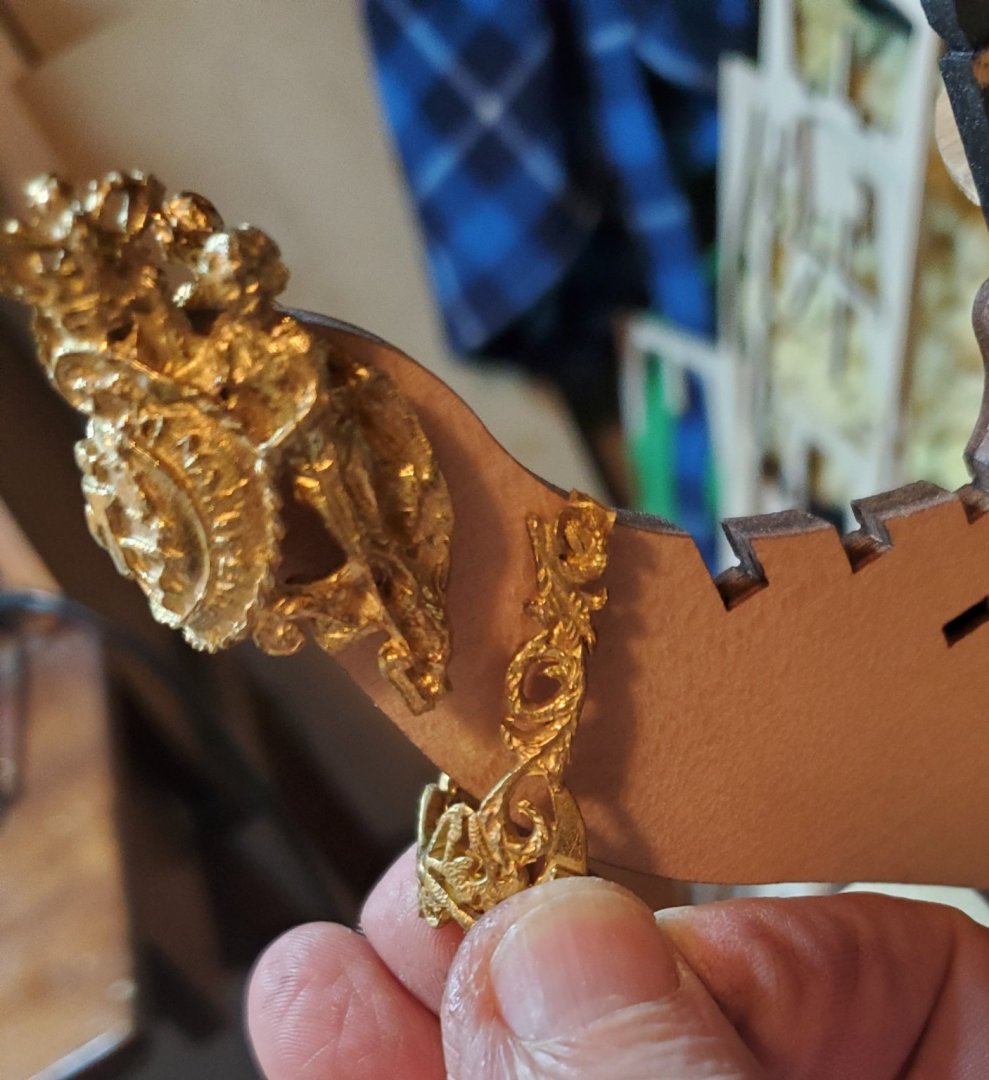
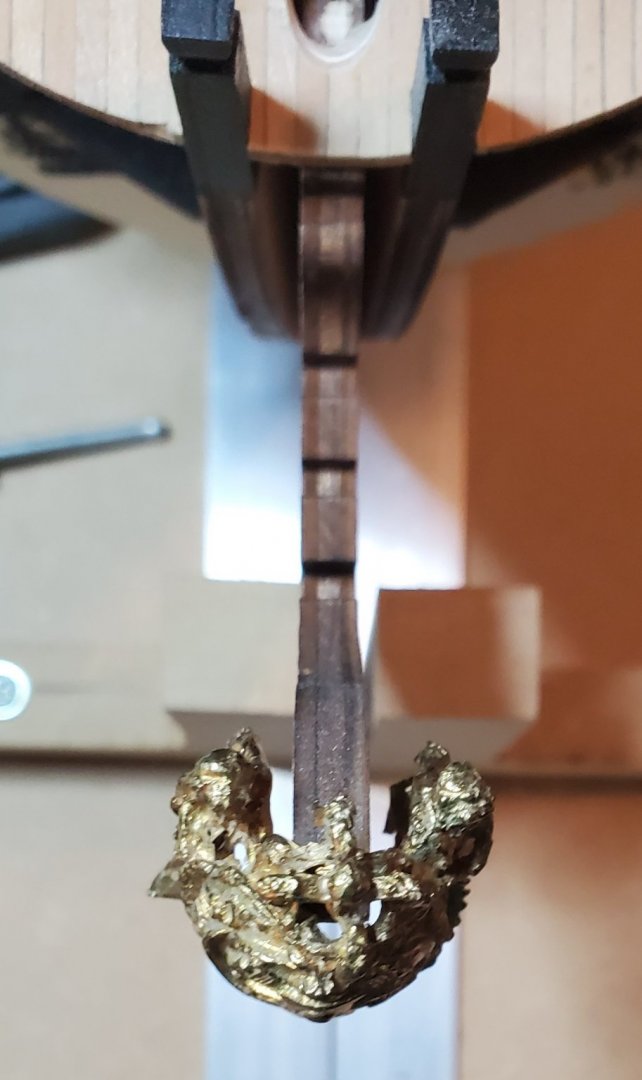
This is the ONLY photo or mention of the figure head Anywhere in the plans or instructions, and the one supplied ain't that nice.

-
I have been looking at that. It is made to actual scale of the real ship, so it fits a 3.5 mm head of the knee. You are supposed to taper the knee down to fit. (The real ship does have the taper). I don't want to do it and basically can't or shouldn't because the knee is plywood. Tapering plywood does not work well. My knee is 7 mm thick ( Mantua has no sense of scale). I am considering the Caldercraft figure head. It is 1:72 scale but there is very little difference ( about 3 or 4 mm, and it is smaller than what I have. I think the Caldercraft is the best way to go here. Mark Frazier PS ..... I may contact Shapeways and ask if he can change the width. They did it on the 1:84 scale. They make a wide version because the kits are not to scale.
-
It doesn't appear so. There is no dividing line to cut. I had heard their castings were useless. I see why now. This thing is way out of scale also. Too big. Maybe I should look into ordering the Caldercraft figurehead even at 1:72 scale it would be smaller than this one. Mark Frazier
-
I can usually figure anything out, but I don't have a clue about this thing. There is no way I am going to build the bow beak that thick. I just don't know. Mark Frazier


-
Yes and it is just as wide. I am stumped as how to use this.
-
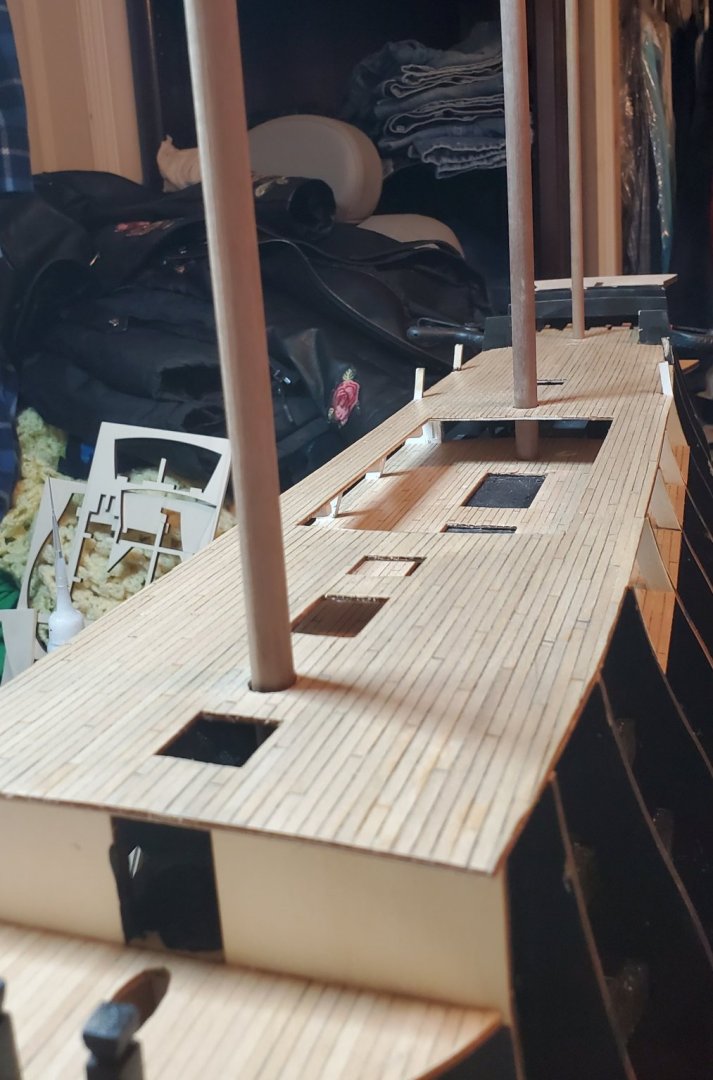
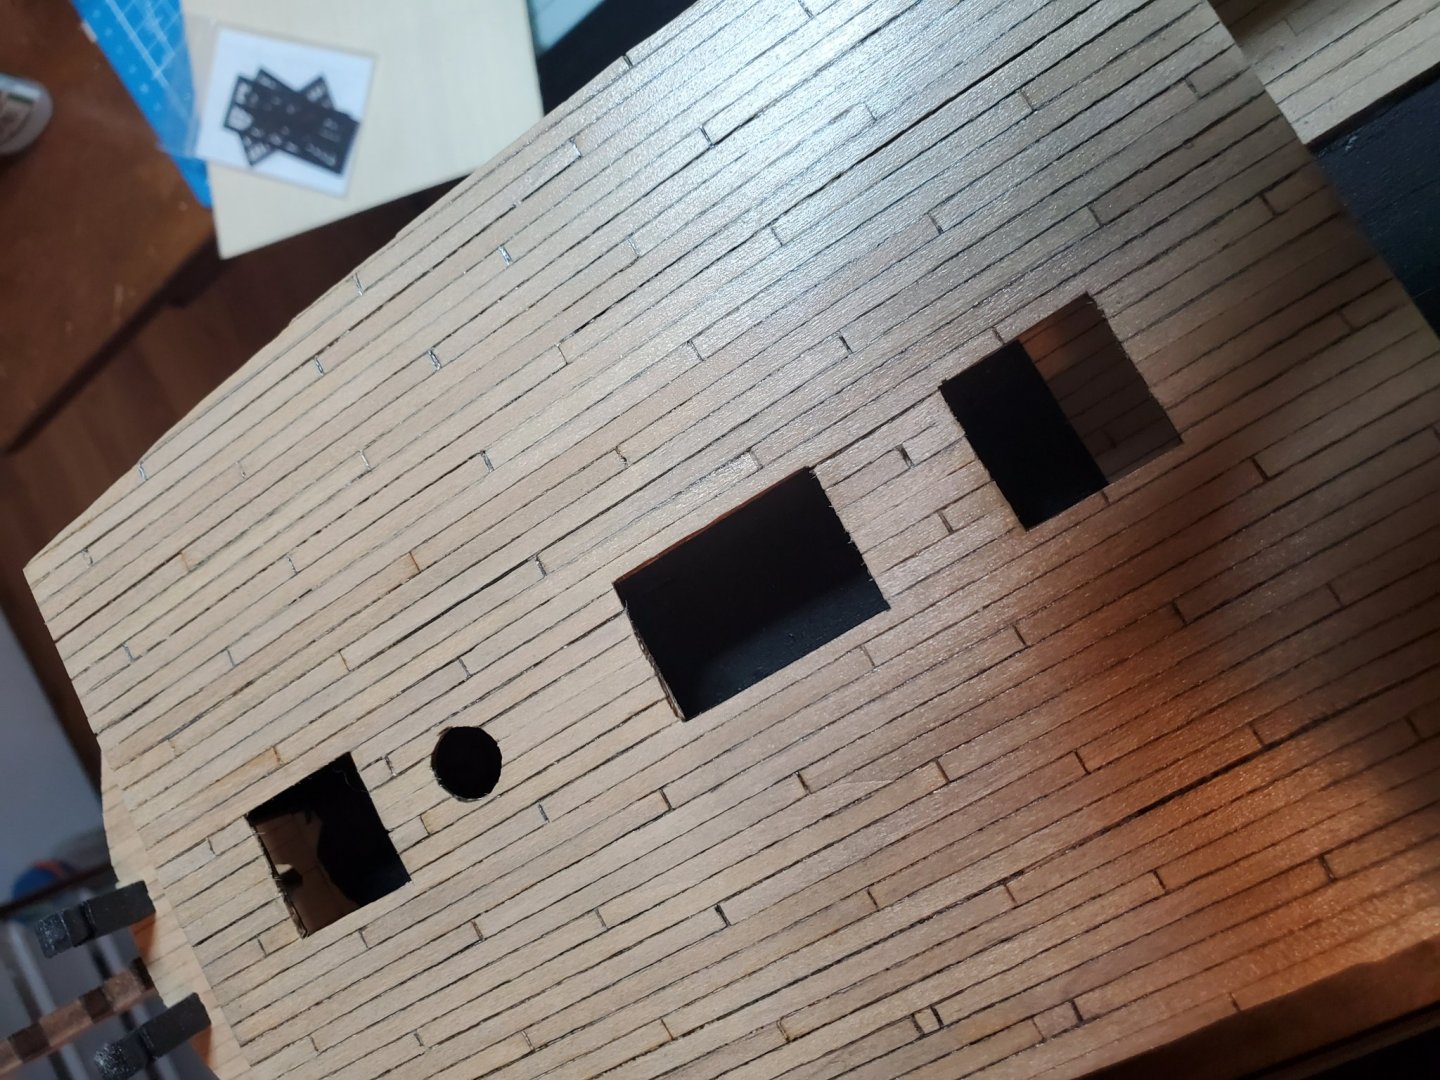
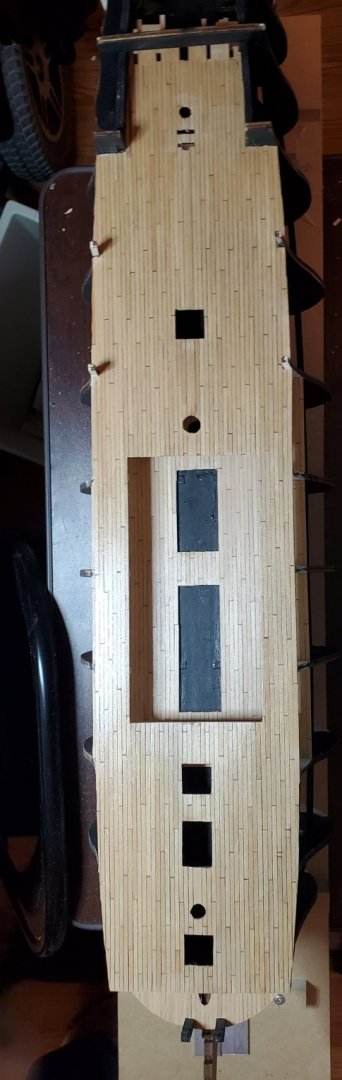
I though I better check the holes in the decks for the masts. I checked all the framework for the masts fit but forgot to check the decks for alignment before planking and finishing. Sure enough, they are off about 1/16 ". I filed the holes a little to get the masts to fit in. It should be fine as the mast sleeves will cover the gap in the holes in the quarter deck. I thought I would check a few other things while at it and I remember. I don't want to use the figure head supplied. ( I see an order to Shipways for this). The gap on the back is 1/2" wide. There is not one word in the prints or instructions about this item. I am smart enough to know that this can't be bent without breaking as it is cast. What were they thinking? I am wondering what others who bought a Mantua kit did about this. I am not going to need it for a while but I thought I would check it. I have no idea what to do with it yet. I was going to use a die grinder and dress the details to improve it and maybe even use it, but now I not so sure it worth trying. Any suggestions? Mark Frazier
-
Thanks, I tend to do that with everything I do. I pour everything I have into all my projects. Trouble is, I need 40 hour days to keep up with myself and all the projects. I downloaded your build log as I look at it often for reference and inspiration and ideas. I have book marked a half dozen build logs on here to refer to for ideas and solutions to different things. There is a lot of amazing work on here and I can only hope to work in that league of skill. Mark Frazier
-
Thanks OC. I think it will grow on me ( the last thing I want to do is to plank over it and cause more problems as with the deck height to everything else.) Besides, after all the deck furniture and cannons are in, the deck may not be that noticable. Lol. Mark Frazier
-
Thanks OC, I thought about that aged look, and it probably would hide the wood quality problems better. I sanded the decks to mostly level and applied a clear coat of poly. I will buff them lightly with 600 grit and another coat of poly to see how they look. They actually look okay from 2 feet away. The decks on the real ship are not perfect. The quarter deck you see in the videos, I do not believe is original as it is too perfect. The gun deck is a better representation of a 250 year old deck on the real ship. I did not have a wider plank for a king plank so I laid two planks tight against each other in the center to simulate the king plank. I don't know how noticable it is but it was the best I could do with what I have available. I used a pencil to simulate the caulking and left a tiny gap at the ends of the planks and ran a .5 mm pencil in them. I am not crazy about this method for simulating caulking, but it is the best method I know right now. These planks are too thin to use black paper. I would have done that had I had 1 mm planks. I will give this a day or two to grow on me. I have ordered Casey brass black for the cannons and some smaller wire to try to make smaller hooks to match the scale better. It should be here next week. Mark Frazier Y.T. , I do agree with you about sanding. You can sand to too much perfection and the details and character gets lost. Mark Frazier

-
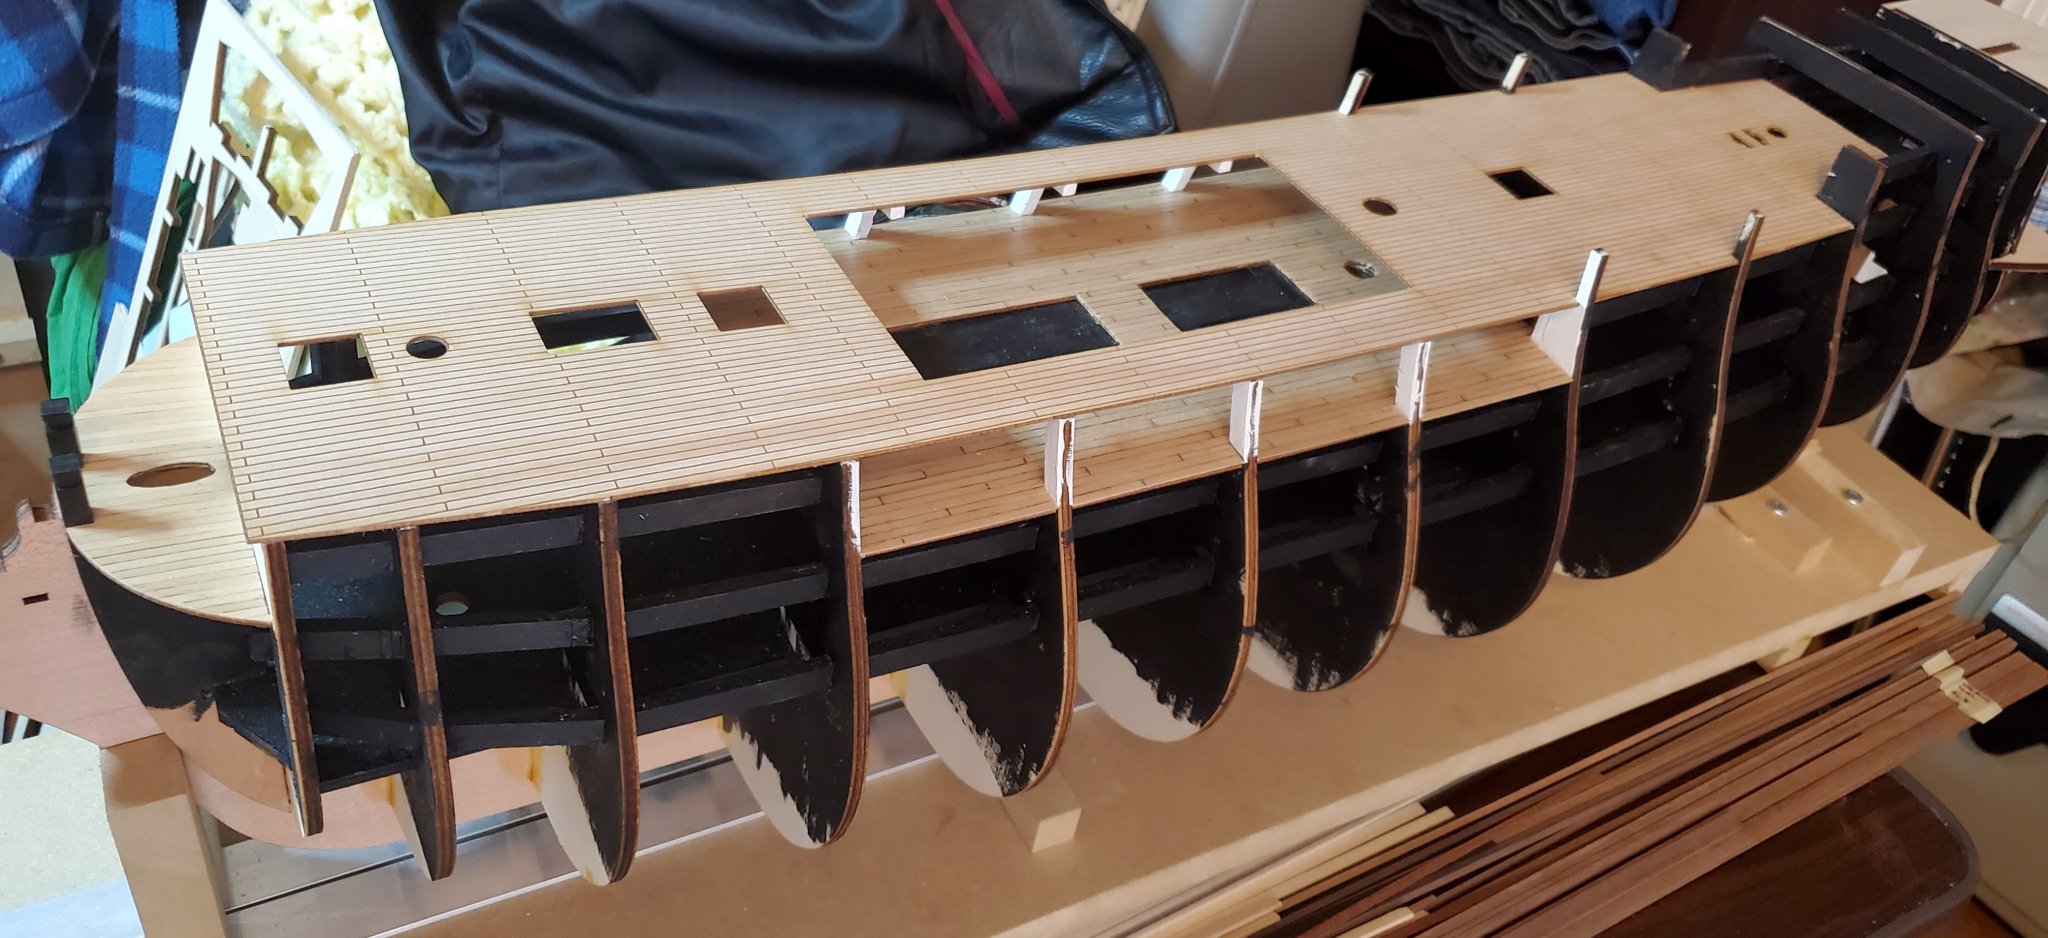
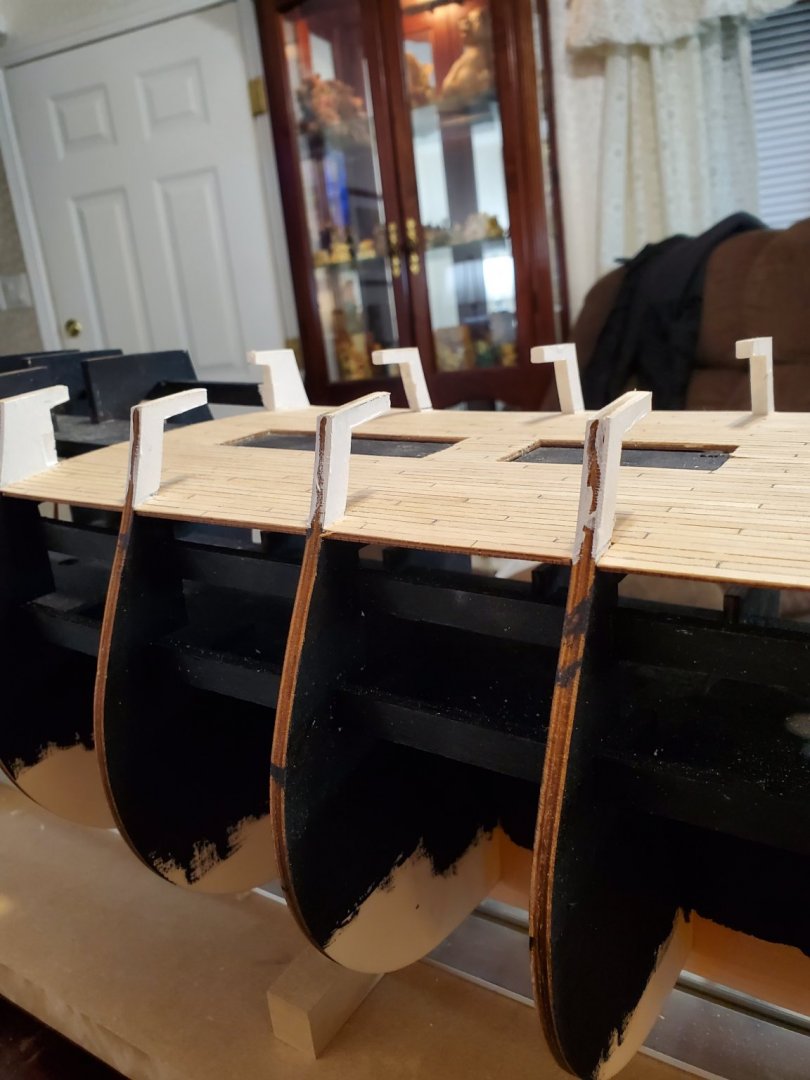
I got the quarter deck on and planked. I am very disappointed in the quality of the deck wood supplied with the kit. It is not consistent in thickness and the edges are too rough. It is very thin also. It was a lot of work dealing with this poor quality wood. The results are almost acceptable. I was thinking of planking over this mess with some good quality 1 mm thick wood (which I wood have to order) but that will throw every height off 1 mm. I will think on this a bit. What do you guys think? I got a package from Syren today. I ordered a sheet of 3/64" thick Alaskan cedar and the emblems for on the cannons. The wood is to start building my stern gallery and the deck cabins behind the ships wheel. The kit supplied items for these are just not acceptable to me. Mark Frazier

-
Mark Frazier
-
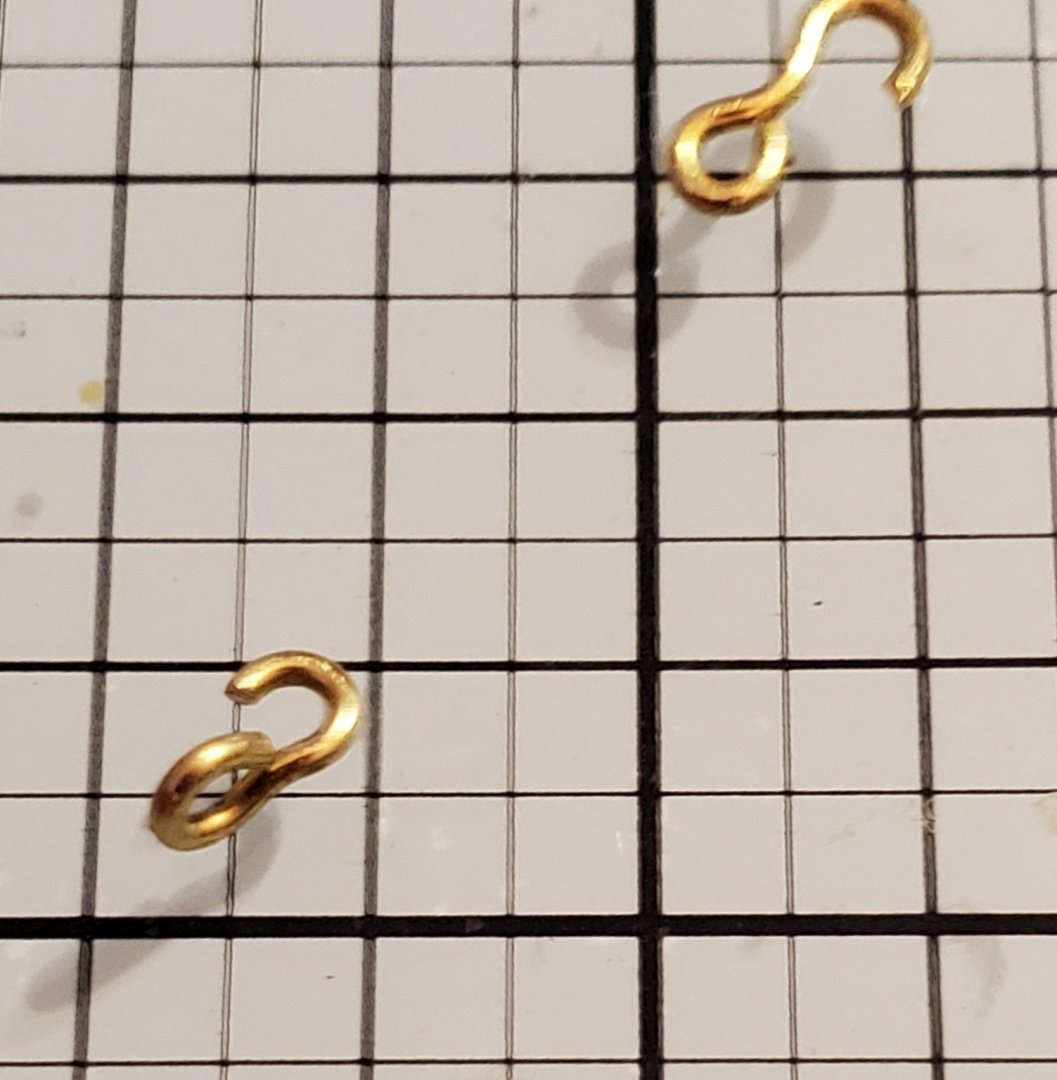
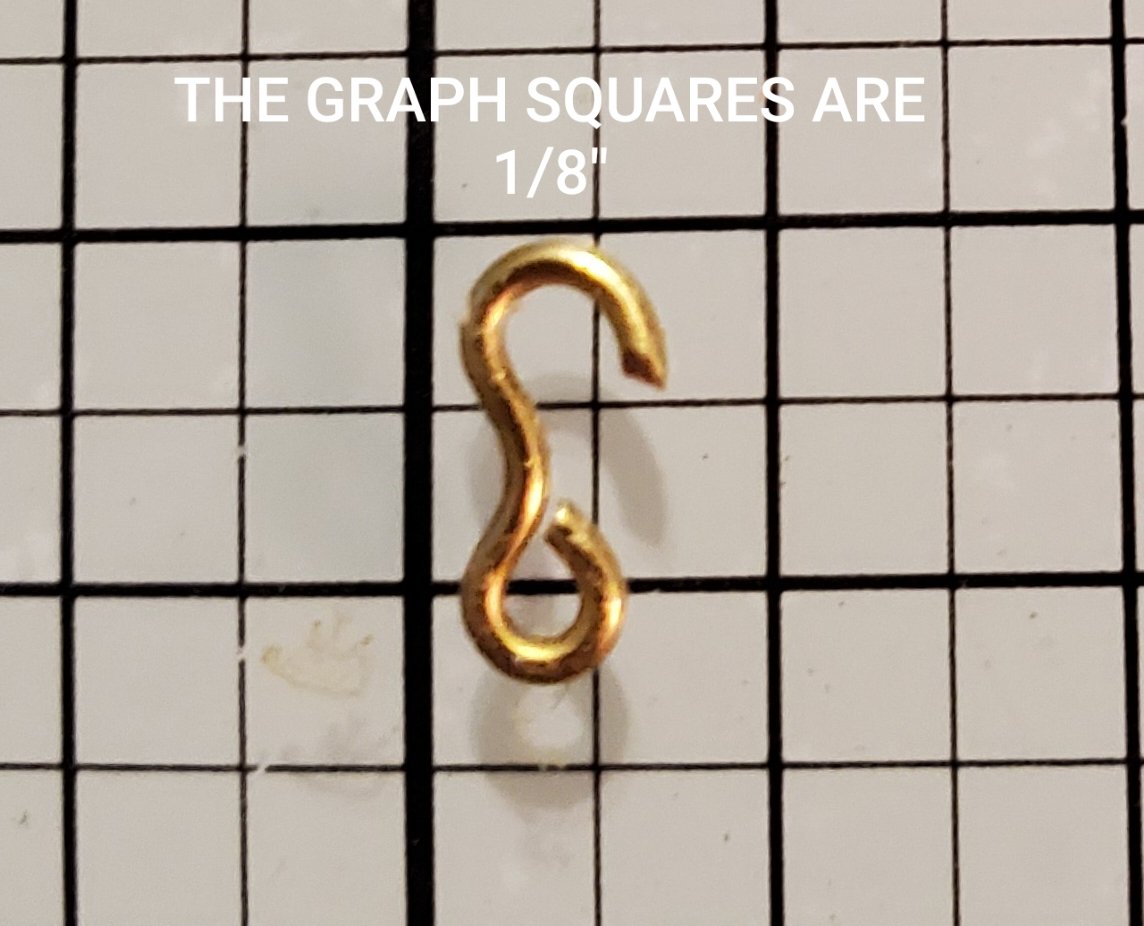
I thought I would try making some rigging hooks. This was my first attempt. I think the wire might be a little heavy, but it will fit in the small eyes on my cannons. I'm not sure yet but I think the hooks will need to be perpendicular to the eye. I probably need to use some slightly lighter wire also. If I experiment enough, I should come up with a nice hook.
-
Thanks Bill, I'm retired and there ain't a lot to do at moment so I spend several hours a day working on my ship. Mark Frazier
-
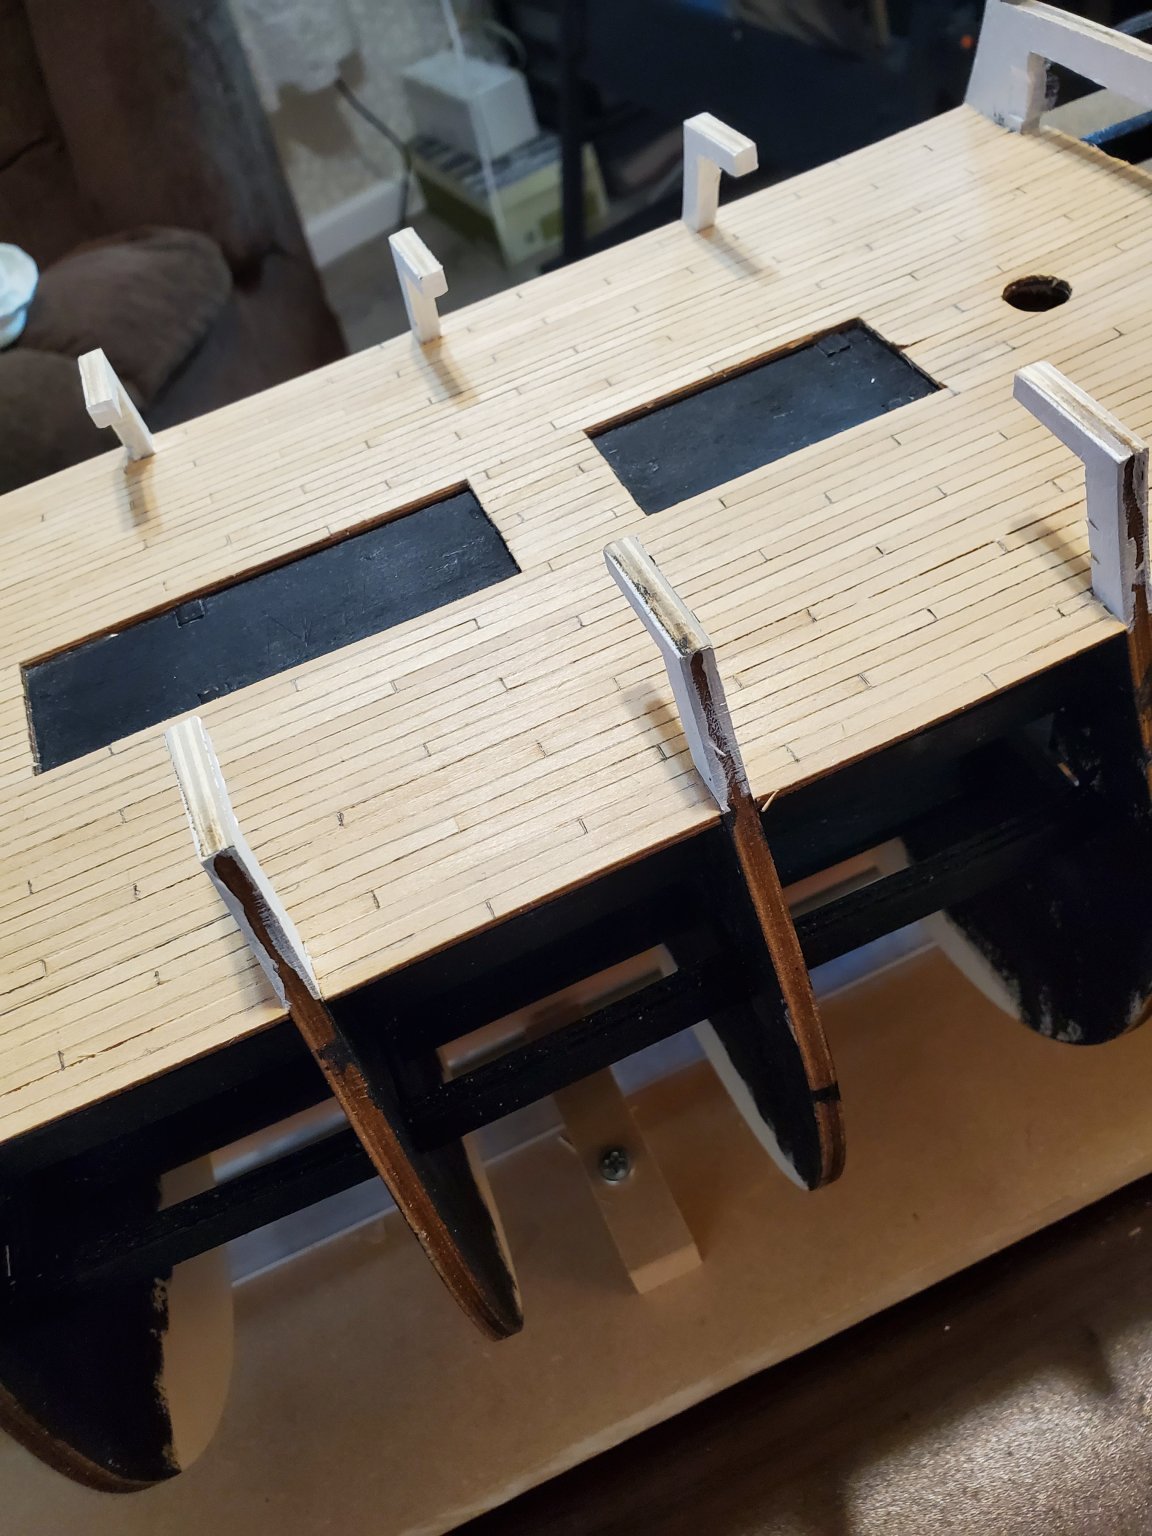
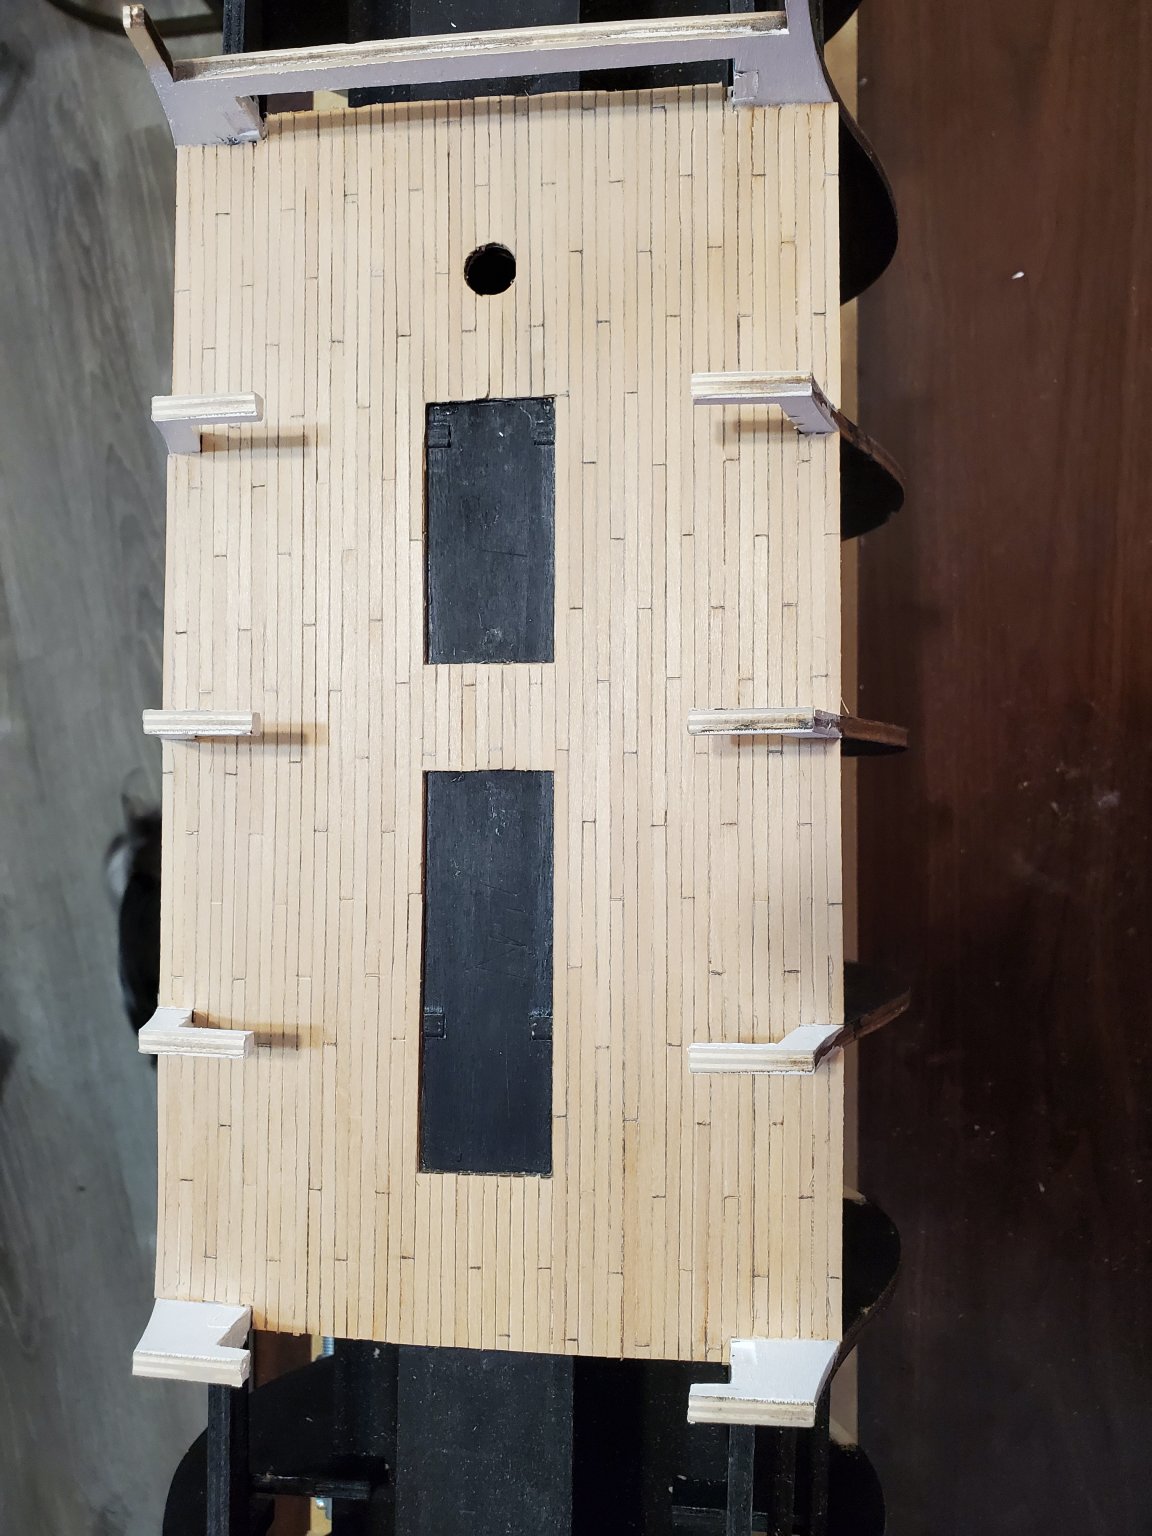
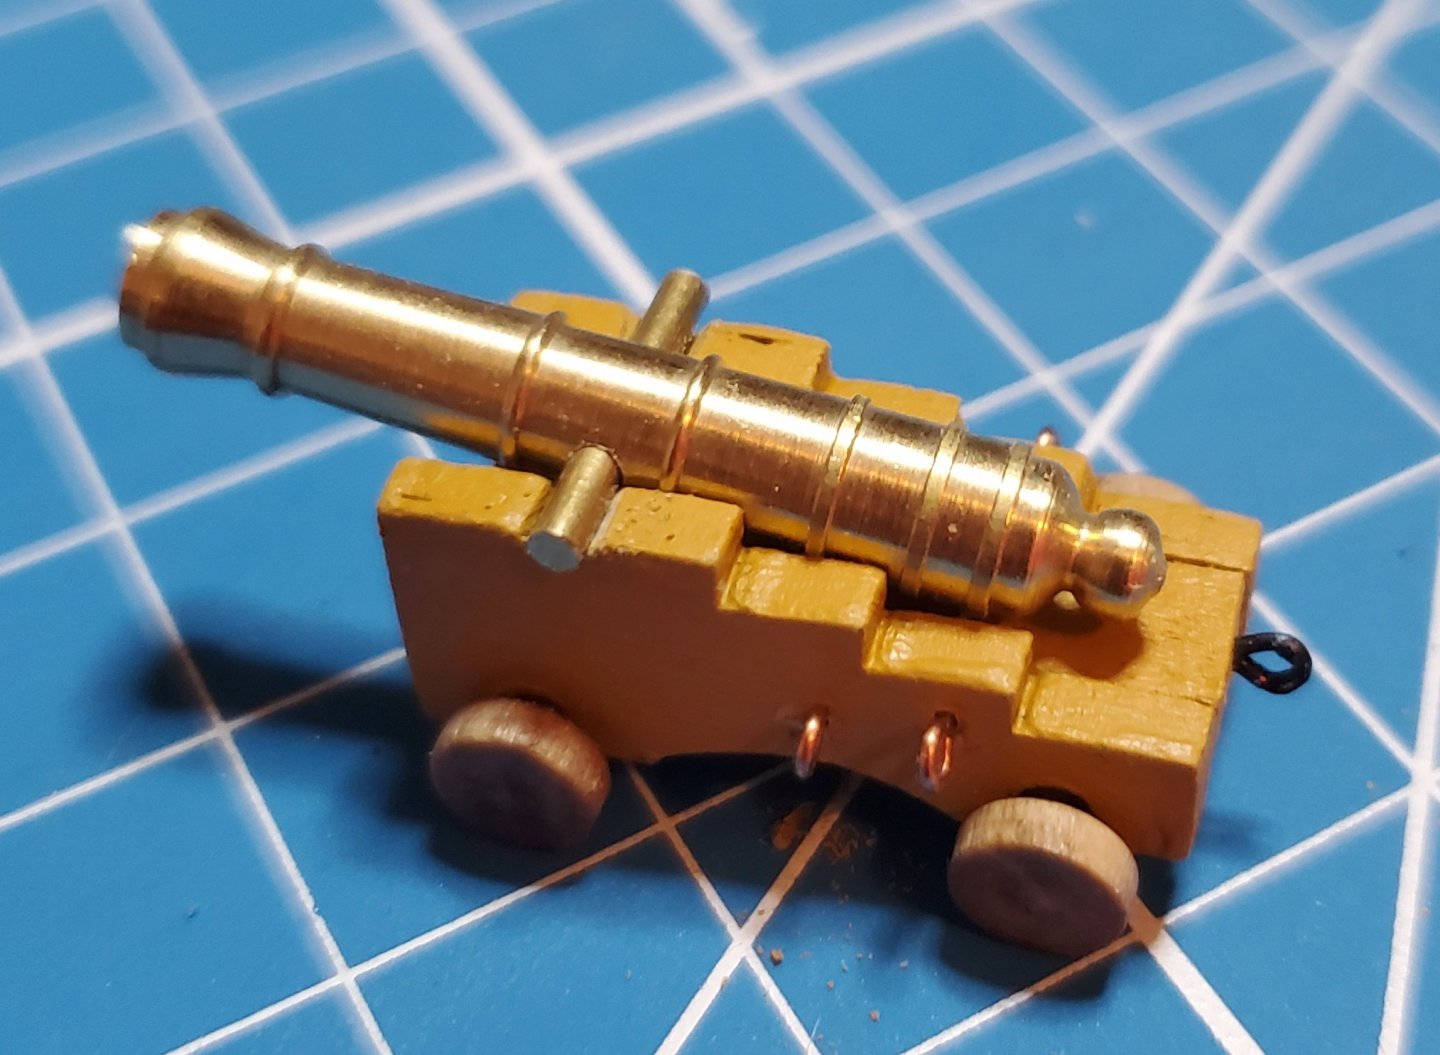
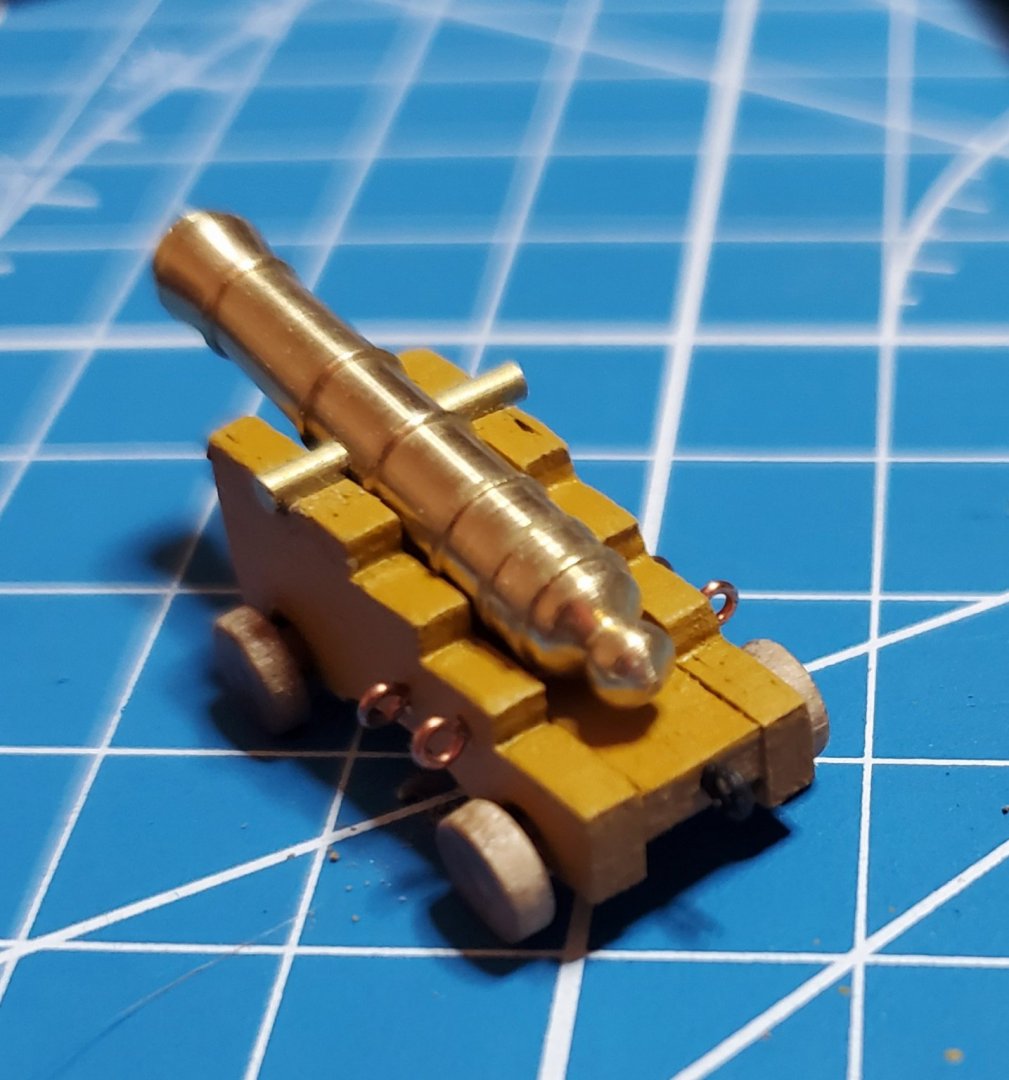
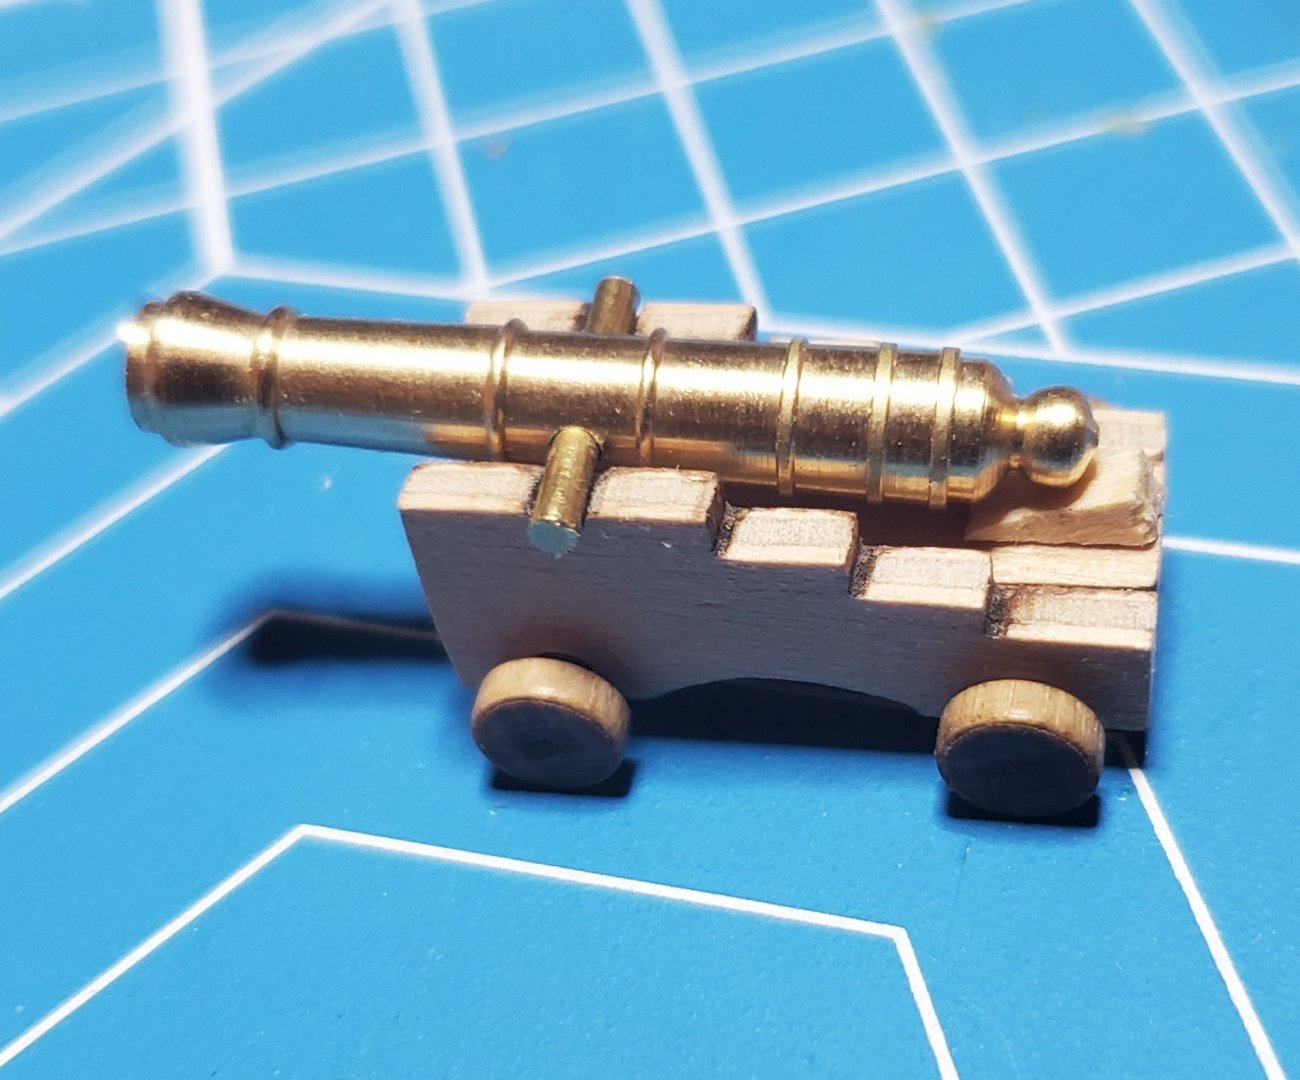
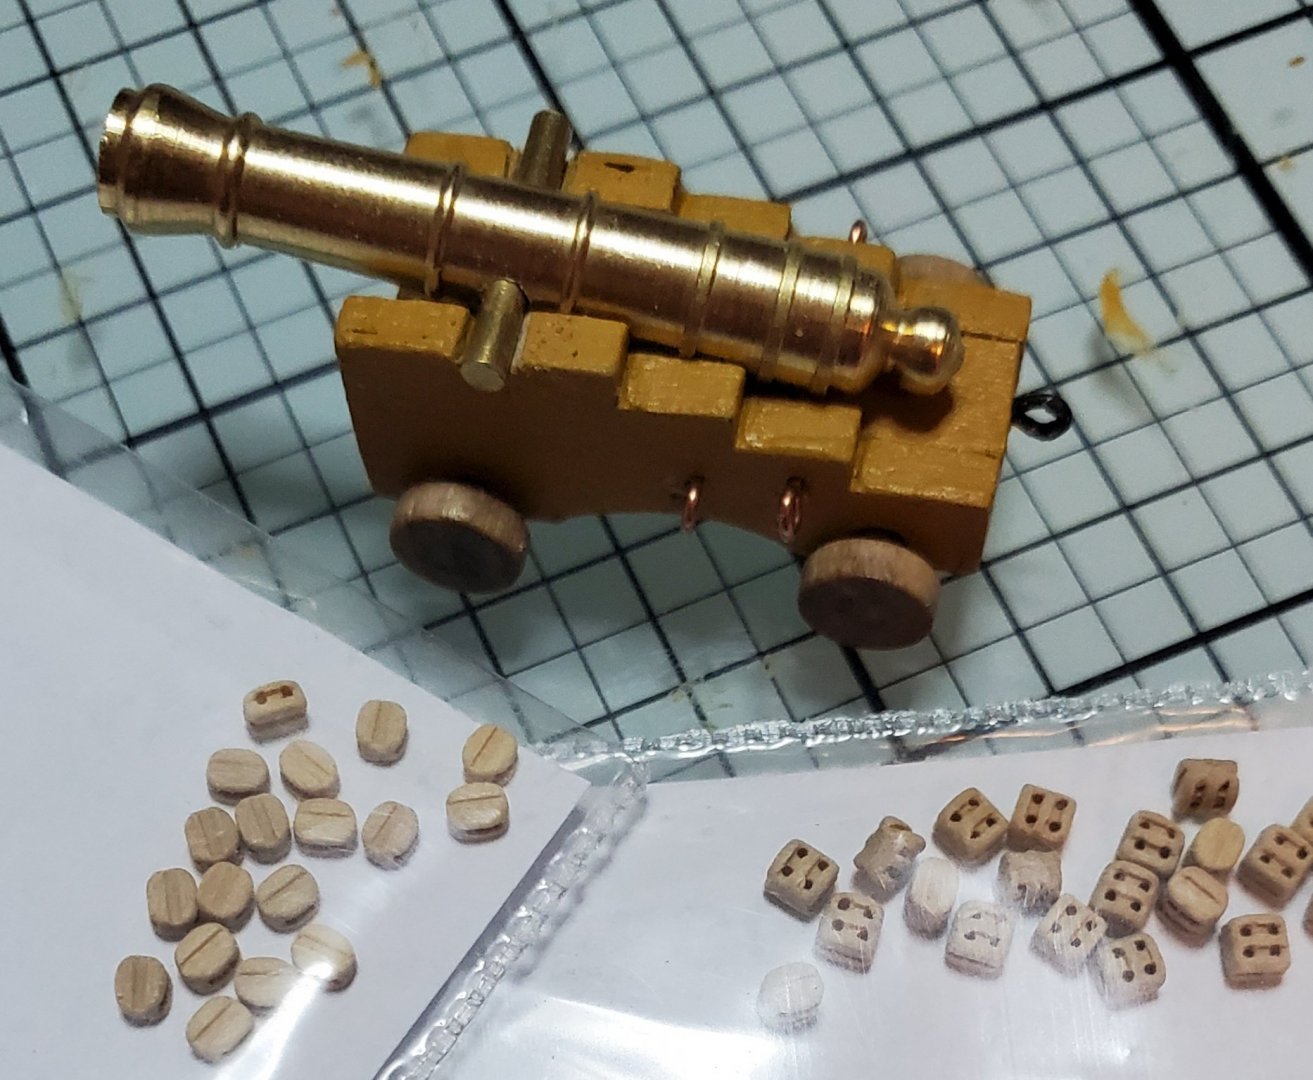
I put the quarter deck on. It is ready to plank. I put gloss polyurethane on the gun deck, but I brushed it out so it was not overly shiny. I like the way it came out. I been working on the cannons. I decided to paint the carriages yellow ochre. I assembled one cannon, but nothing is glued yet. I have small copper eyes for the carriages but I need to blacken them before installing. Still working on how I will do that. I tried painting one but it doesn't work well. I will be adding axle details to the outside of the wheels. It is a slow process as these are very small to work with. One of the problems I see with some other builds are the use of the rigging blocks from the kit to rig the cannons. These blocks look huge and out of proportion to the cannon. I ordered the smallest single and double blocks from Syren for my cannons. They are just the right size for the cannons and terrific detail and quality. I also have little straps to go over the pivot pin for the cannon to the carriage, but they too must be blackened. Mark Frazier


-
Welcome Bill, glad to have you along.
-
Thank you all for the replies. I figure on painting the bulwarks yellow ochre and at present am leaning towards painting the carriages the same., I think. I have that paint and it is hard to go get anything cause almost everything is shut down. This is my opinion, but I don't think those scientists know what they are doing. I find it hard to believe Lord Nelson went into battle with a pink ship. I don't care what name they give that color, it is PINK and I am not painting my version pink, just saying, but obviously, someone likes it. This virus situation is making ship building difficult. The normal places I would get supplies are shut down and mail orders take so long. Mail ordering has become so overloaded, it is getting backed up and delayed. It is going to get worse. If more states follow Vermont's lead, which is stores are now only allowed to sell neccessary items. This will cause more panic buying. I am trying to anticipate things I need for this ship so I can order them and not be sitting here waiting until God knows when. As I mentioned, I will paint the bulwarks yellow ocher, but I am still deciding whether the outside will be painted or stained. Mark Frazier
-
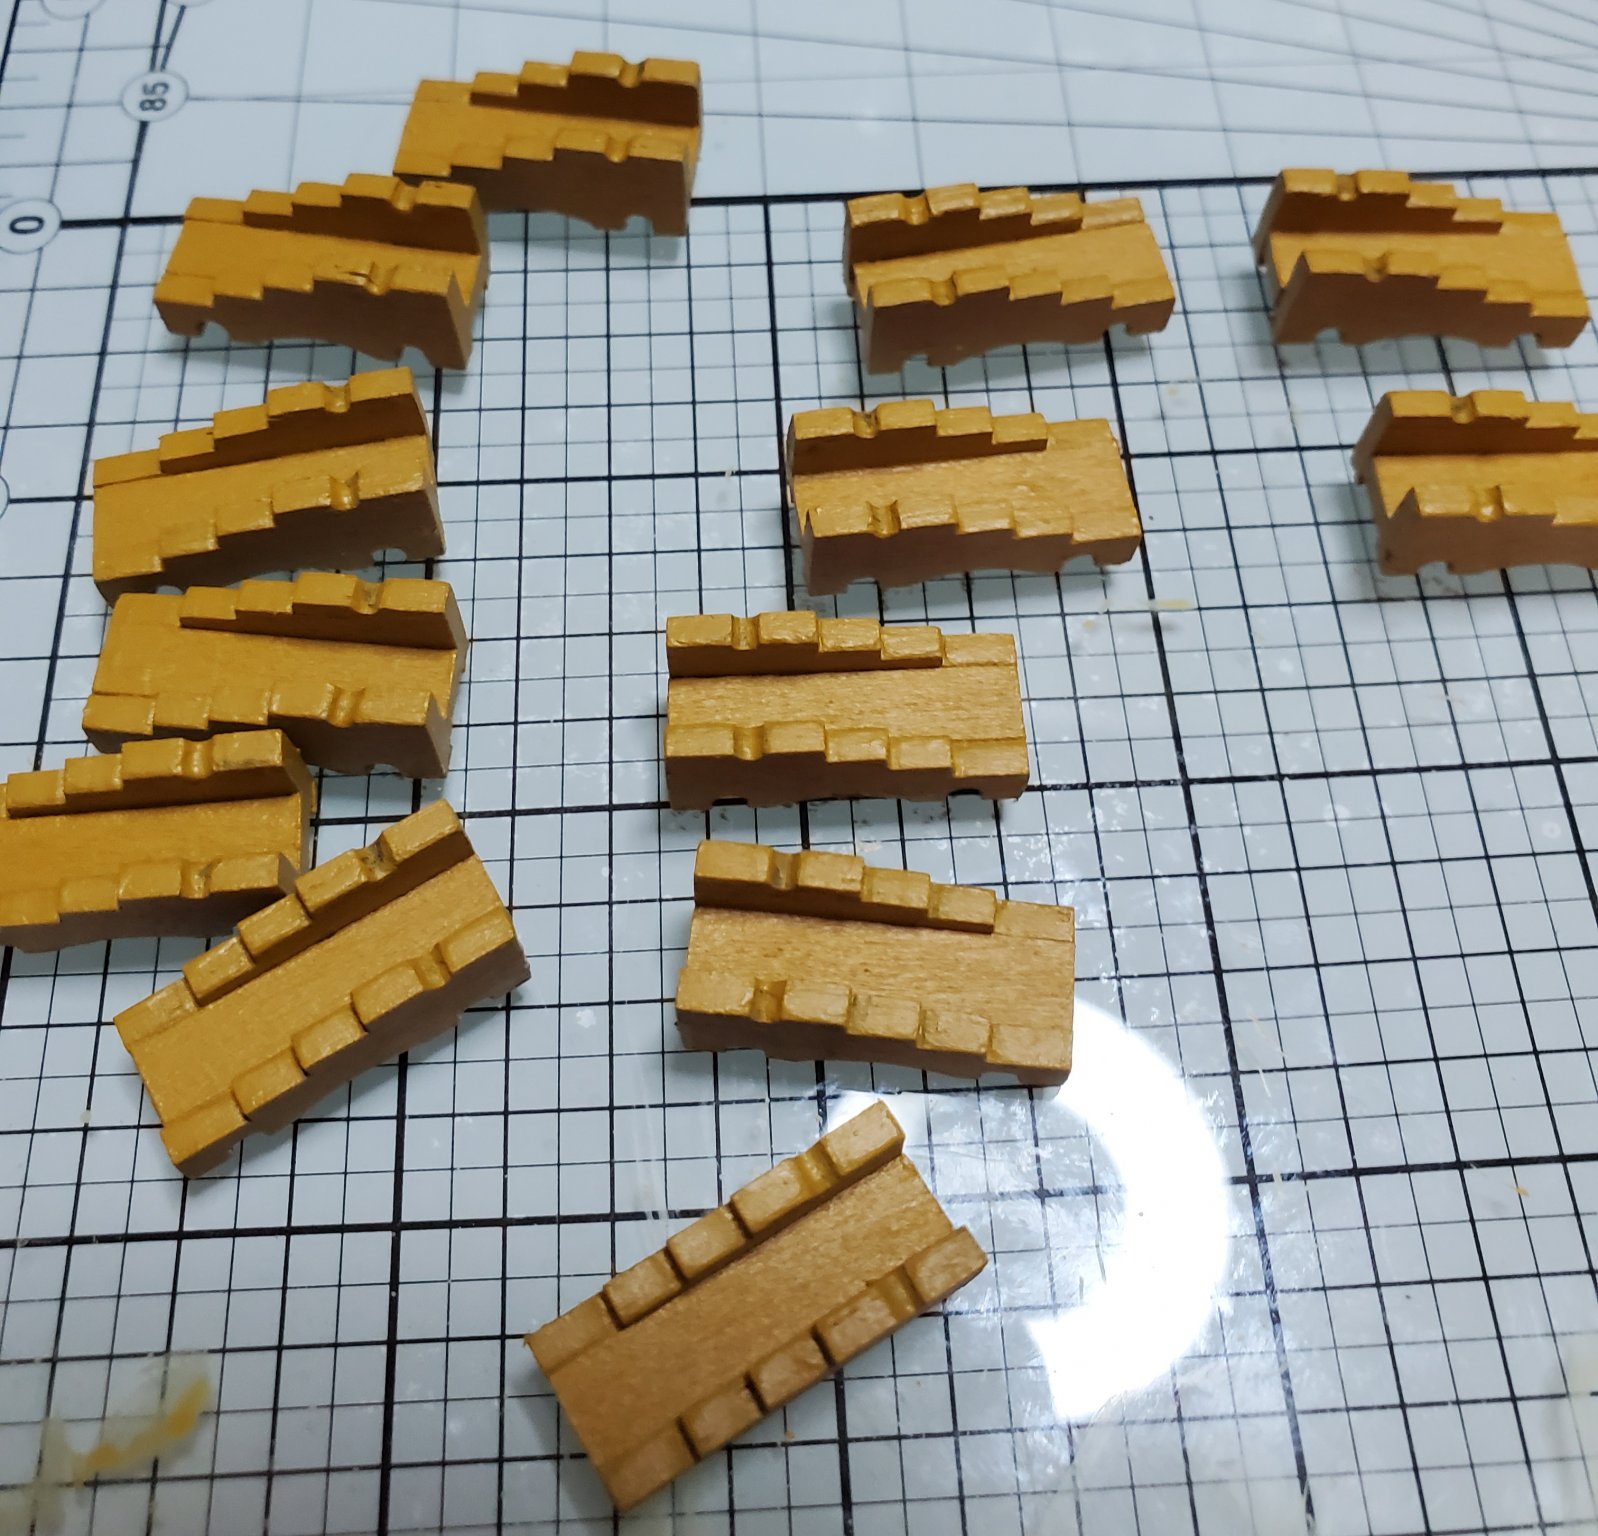
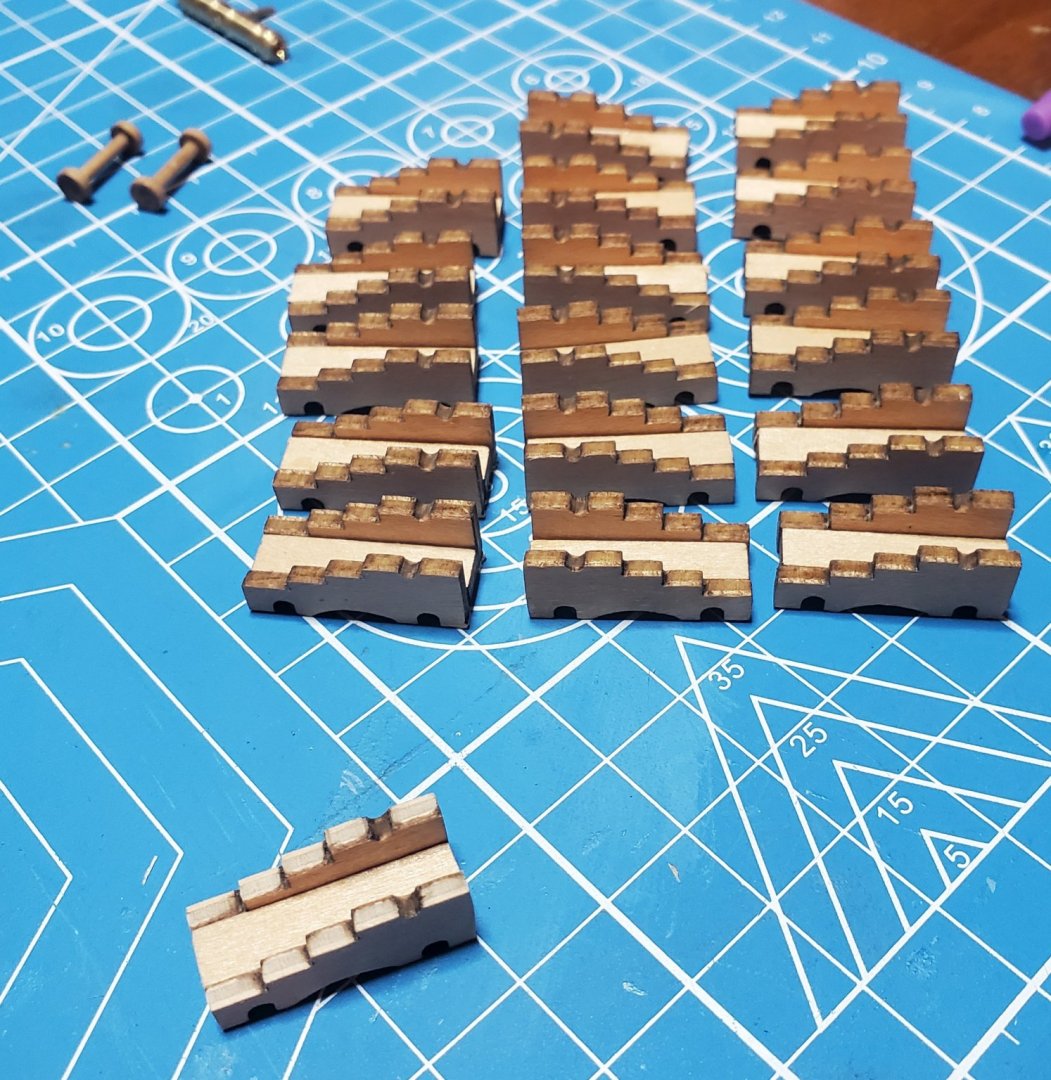
I thought I would take a break from the hull while I try to find some finish for my decks. I need to finish the deck that is planked before I install the deck that goes above it. Problem is finding a store that has it that is open. So while that is on hold for a moment, I thought I would build some cannons. keep in mind these carriages are only about an inch long. They are nice and will finish up good. There are three pieces. The sides and the bottom. Now trying to put these 3 tiny pieces together is an adventure all it's self. With my big hands that shake, I just about get the together and try to clamp them, the clamp misses or slips and everything flies all over the place. After several attempts, I got to find a better way. So I make some little blocks to fill the space in the middle and bottom and the clamp all together. Then spot glue 4 corners wit CA , remove the blocks, and glue the seams. Worked great. Built 18 carriages in 30 minutes. Before this I fiddled for two hours with one carriage. The above carriage with the barrel on is just sitting together to see how it looks. Next I will paint them, add all the hardware, then the wheels and rigging. About the color. Does anyone know what the actual color of the carriages should be. The video tours of the ship I see online show them bright yellow, ( which I don't care for) I have seen them on builds painted different colors. I was wondering what color the were in 1765. White, yellow, yellow ochre, and brown are the most common colors I've seen. Mark Frazier

-
Gary, Thanks for the information. I think the image you posted closely matches the kit. I was thinking about this configuration if I stain and don't paint. This info does tend to make me feel better if I go that route. Thank you. Mark Frazier
-
Yeah, I finally figured a shortcut to eliminate all the counting.
-
When I set up and tried to start the 4 butt shift pattern, I spent three hours trying to figure it out. I laid a few planks and it would be wrong and I had to remove them and start over. Finally, once I got it started, it went okay. I am sure most of my problem was the fact that I have major problems with numbers since my stroke a couple years ago. I'm an engineer and I used to be able to do trigonometry problems in my head and now I can't add 2 and two without a calculator and still get the answer wrong. It gets frustrating. This planking method requires some counting, a lot of counting.
-
Thank you OC. Mark...
-
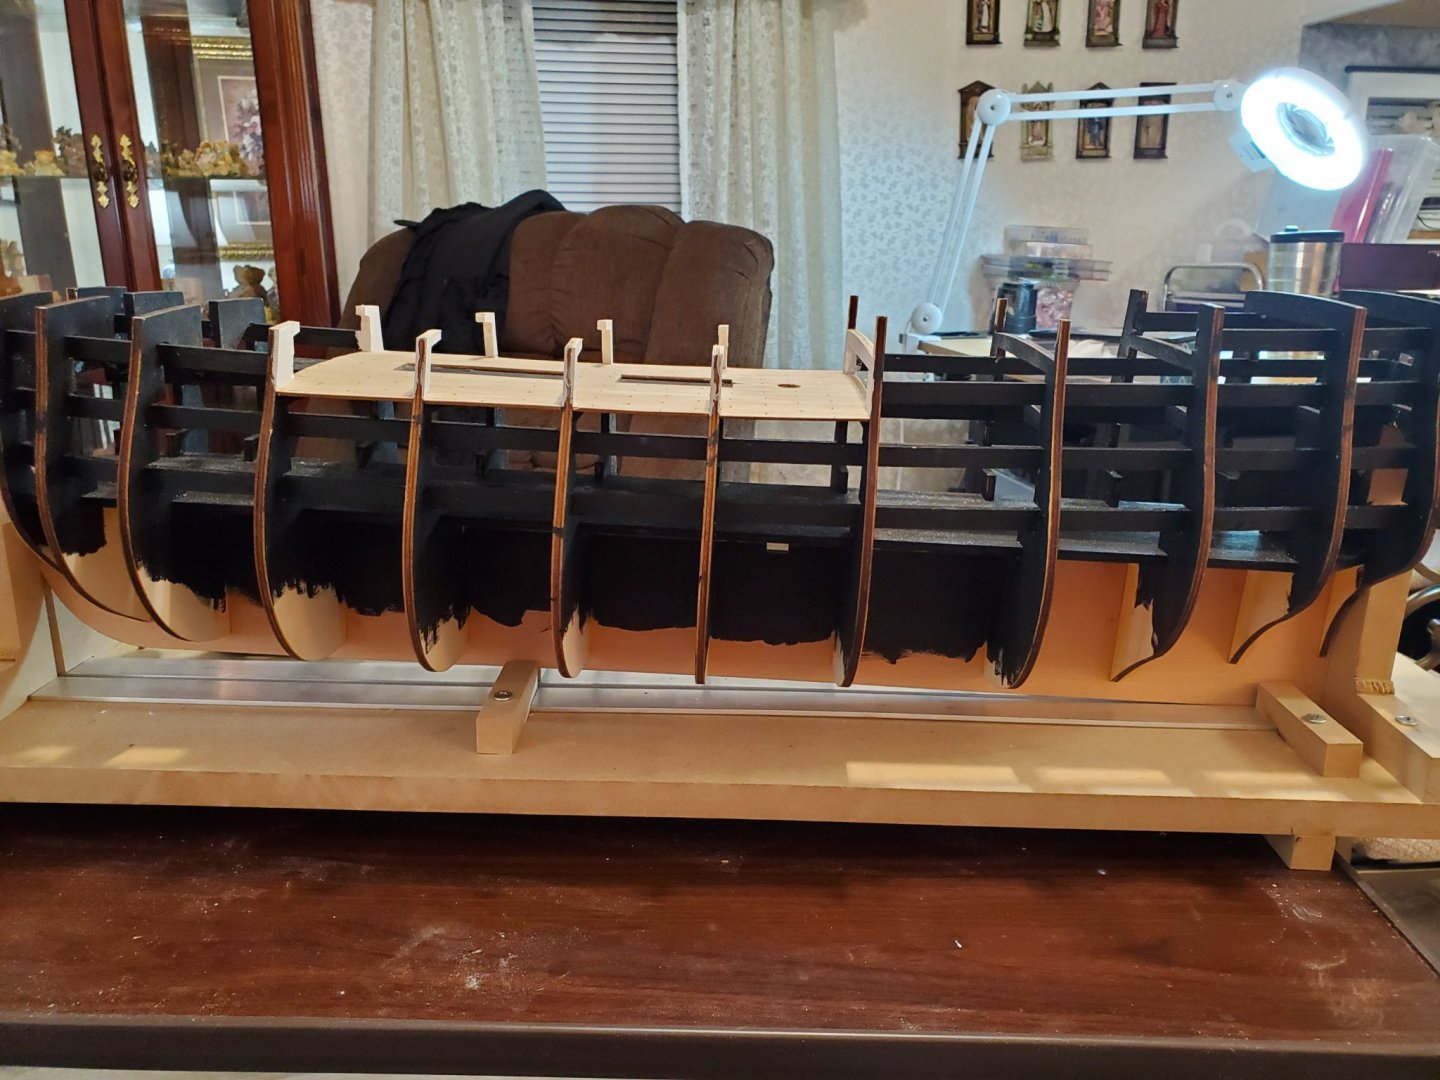
I got the lower deck installed and planked. I used the 4 butt shift pattern. I used a pencil to simulate the caulking but I am not really pleased with it. I tried it on this deck because it will be mostly covered and difficult to see much. It is satisfactory, but I want something better for the upper deck. I am still working on ideas. I still need to put a finish on the deck. My last model, I used matte poly, but I don't care for that. I painted the upper deck supports white. The videos I watched on you tube show the supports white. I imagine that the gun deck was white to brighten it up. It would get pretty dark painted any other color. I noticed many builds I have read painted these supports yellow ochre. I painted all the dummy cannon area flat black. I am going to have to scratch build some of my stern gallery. I don't know where these model companies get their ideas for things. This isn't a bad looking stern in the kit but it is off on the scale sizing and not much like the real ship. Also I want better details. Because of the differences in the design, the Shapeways decoration will not fit, so that will save a chunk of change but now I may have to try and find a way to use the crappy Mantua castings. That will be a last resort and I still have time to think about this. Maybe if l can scratch build the stern and get it closer to correct, I could use the Shapeways decoration. We shall see later. I keep looking ahead in the very sparce instructions to see if there are any other problems. And there are. The bow area up front is all wrong in the kit so it will require some scratch building. I don't really mind this as this was the plan anyway. Basically I will use the hull and some other things . You could build a decent ship from this kit but it would be a poor excuse for the victory. Oh, well , on towards planking the hull. It is starting to look like a boat. Mark Frazier


-
Y.T., I did read your log sometime ago when I was researching. I remembered when I saw it again. I think the newer Sergal kit is much better but still carries a lot of problems with it they have never changed. I was interested in how you did the Wales on the side. Whether or not you followed the instructions which are not like the real ship. I actually tend to like the plans in this area even though it is wrong. Mark Frazier