HOLIDAY DONATION DRIVE - SUPPORT MSW - DO YOUR PART TO KEEP THIS GREAT FORUM GOING! (Only 20 donations so far - C'mon guys!)
×


mfrazier
-
Posts
253 -
Joined
-
Last visited
Content Type
Profiles
Forums
Gallery
Events
Everything posted by mfrazier
-
I had to hunt for a place to plan on displaying it. I talked my mate into moving some of her pictures to open enough wall space for a shelf. Good thing she is impressed by these models. Mark
-
 I spend a lot of time on the model kit sites looking for a better quality part or a good embellishment to make any improvements or better detail. I am learning a lot with this build and my next one is much larger so I can work on details better.
 -
What is even better, the kit is on sale for $397
-
ASAT, I hope one day to build the Sovereign of the seas model when hopefully it is improved some. I just couldn't see spending $1200 dollars for a kit with the amount of negative reviews. I did read some of the great builds on here and I think the model can be built satisfactorily. I read several reviews that said the biggest problems were with the castings fitting with the laser cut parts. I just had too much doubt for the price.
-
After thought and the reviews, I decided not to build the S O S ship. I chose the HMS Victory from Billings Boats. I was able to download the instructions manual(more than 40 pages) and was impressed so I ordered the kit it is 1:74 scale. Total length is 54 inches x 35 inches high. This was the size I wanted.
-
Well, after my research on the Sovereign of the seas ship model and that I found more bad reviews than good. I decided that I would build the HMS Victory. I ordered the kit today from Billings Boats in England. I downloaded the more than 40 pages of illustrated instructions and was very impressed. I also liked the scale better than others. It is 1:74. The total length of the model is 54 inches and total height 35 inches. At this size I believe I can embellish the build with a lot of detail. I will start it when it arrives and do the rigging on my Golden Hind between steps on the Victory.
-
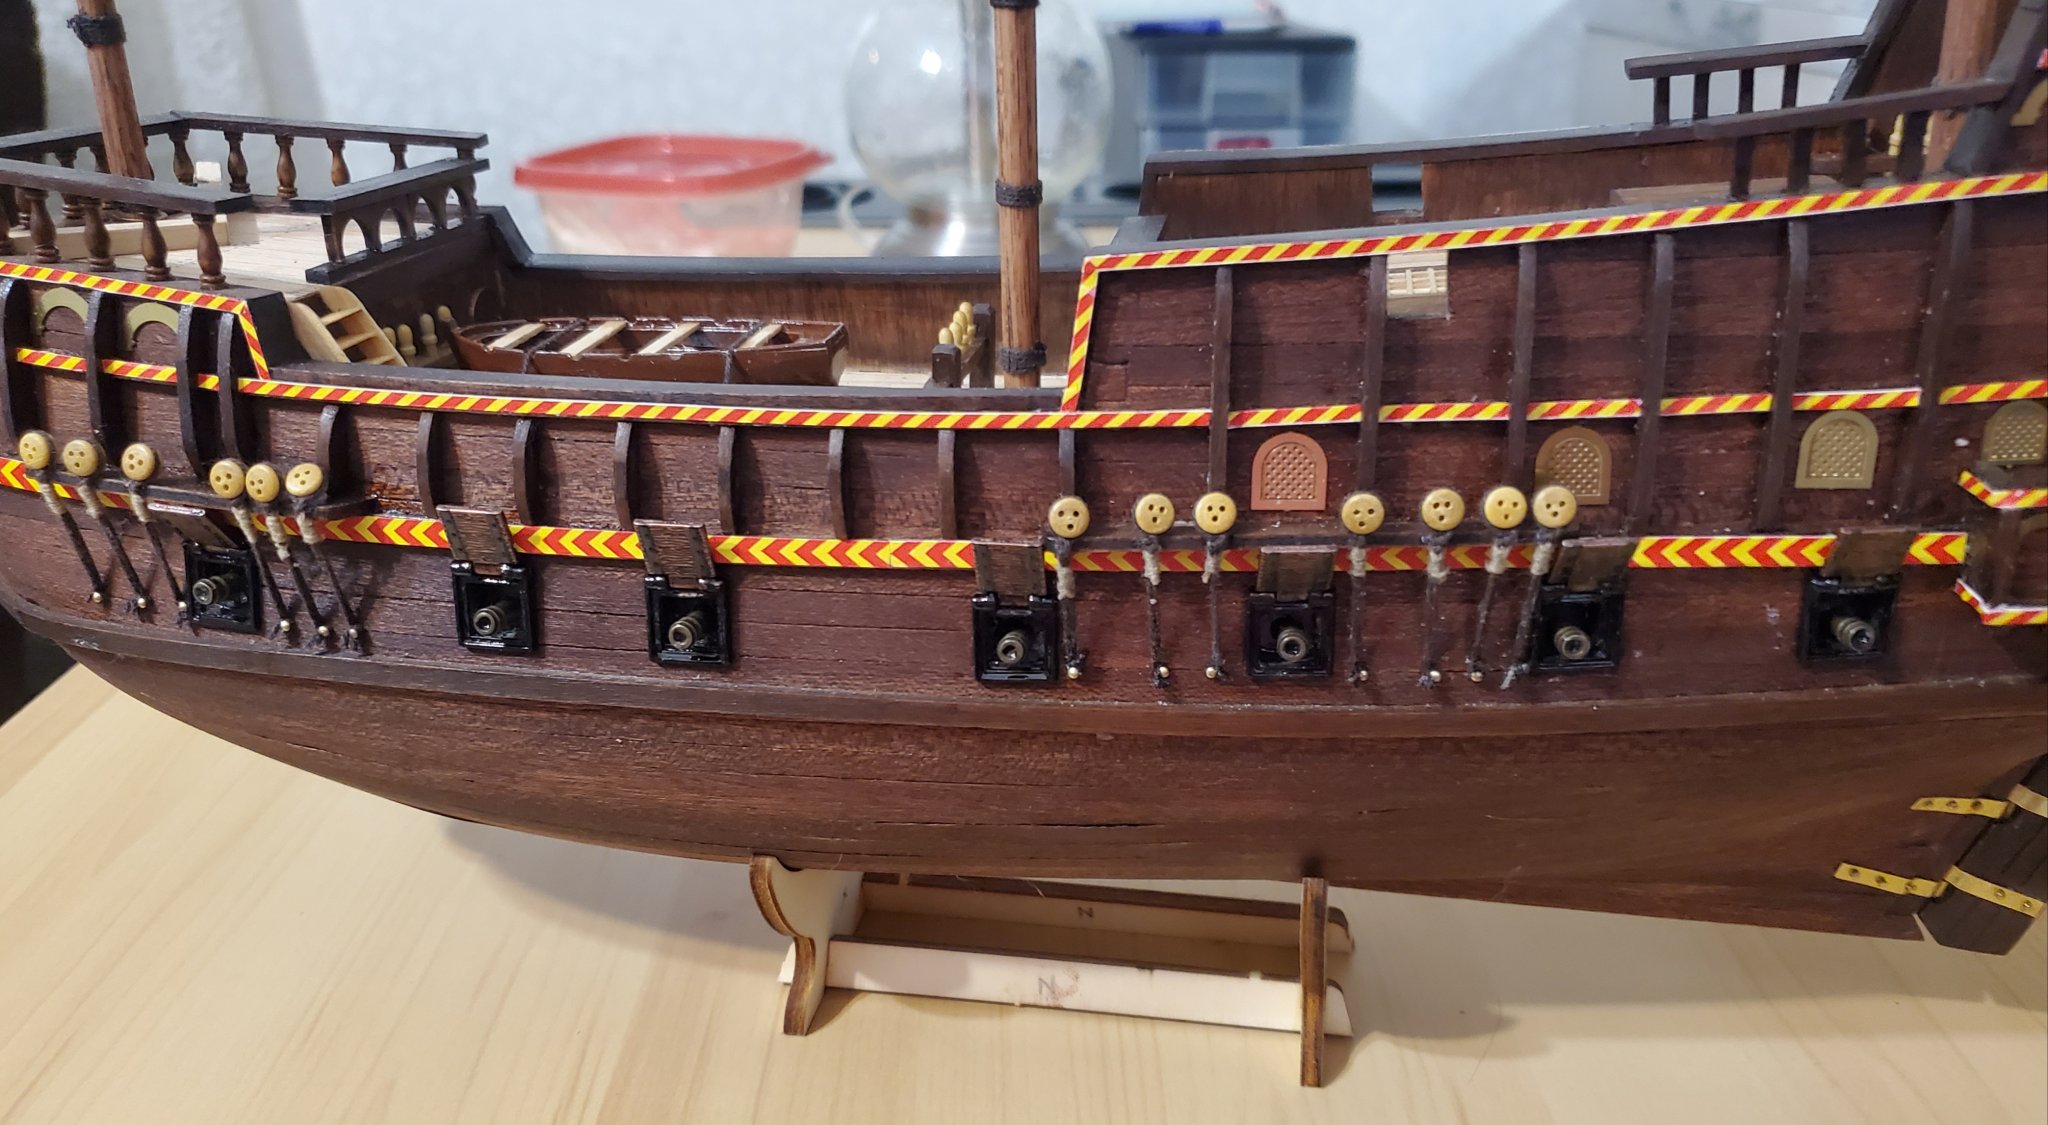
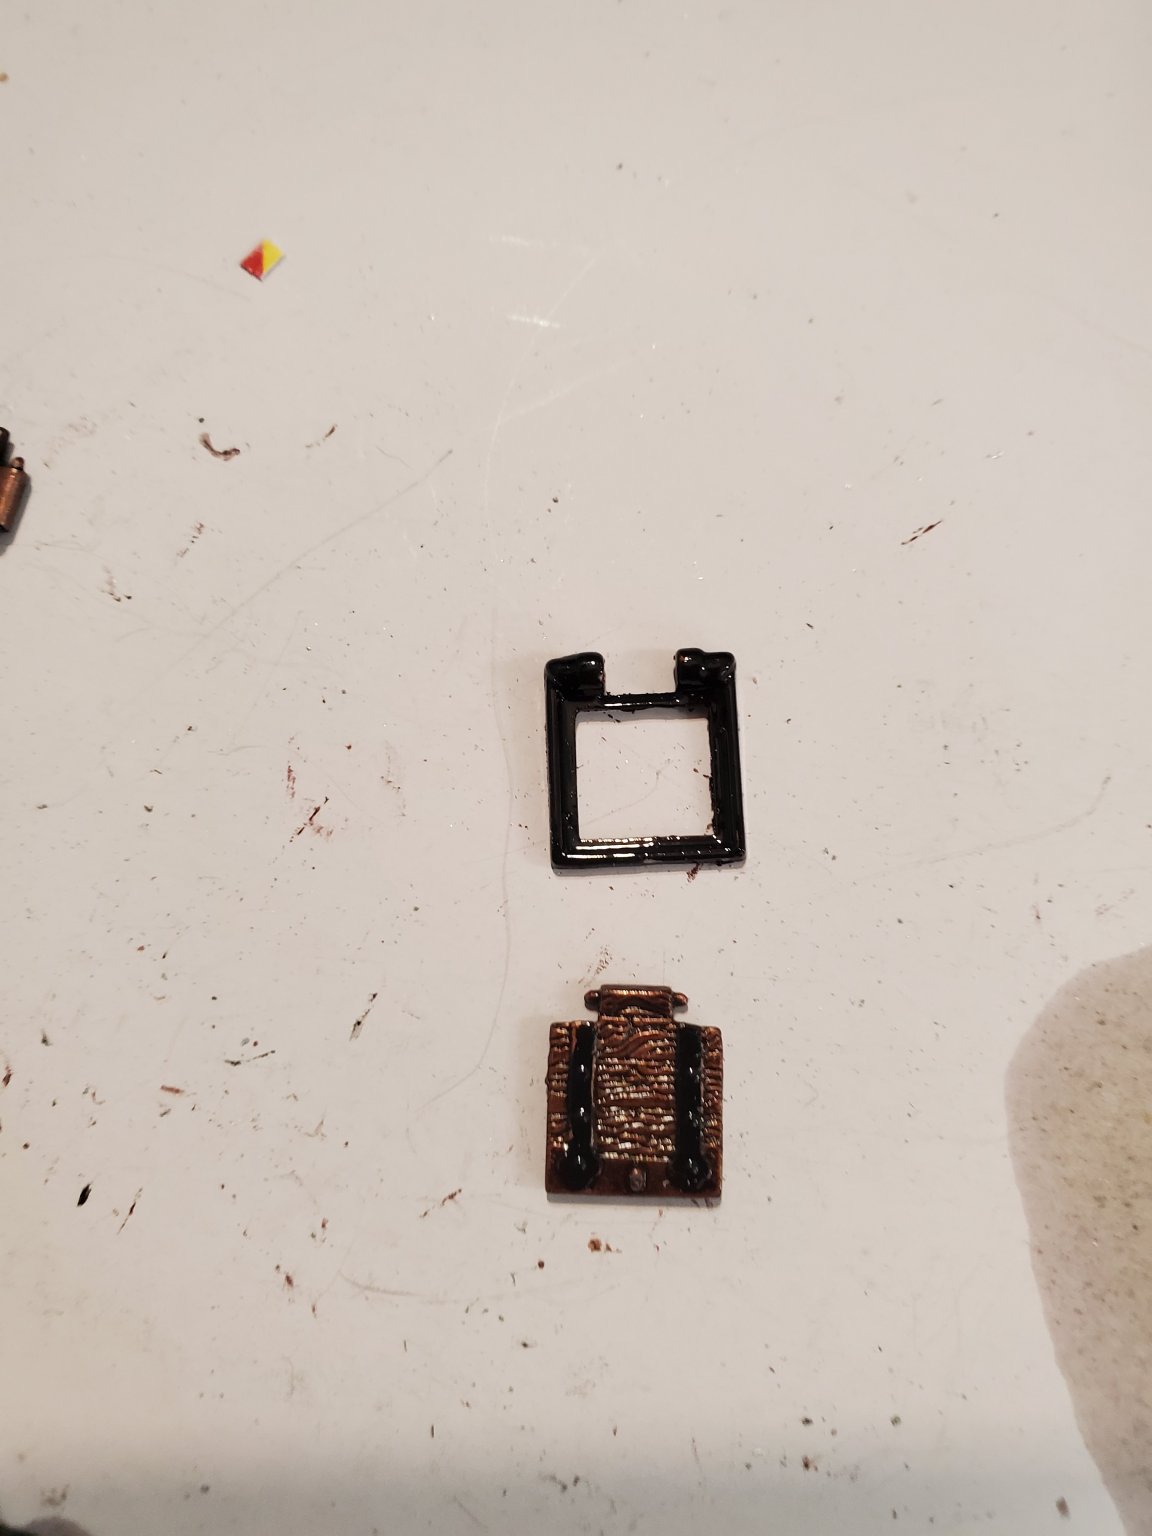
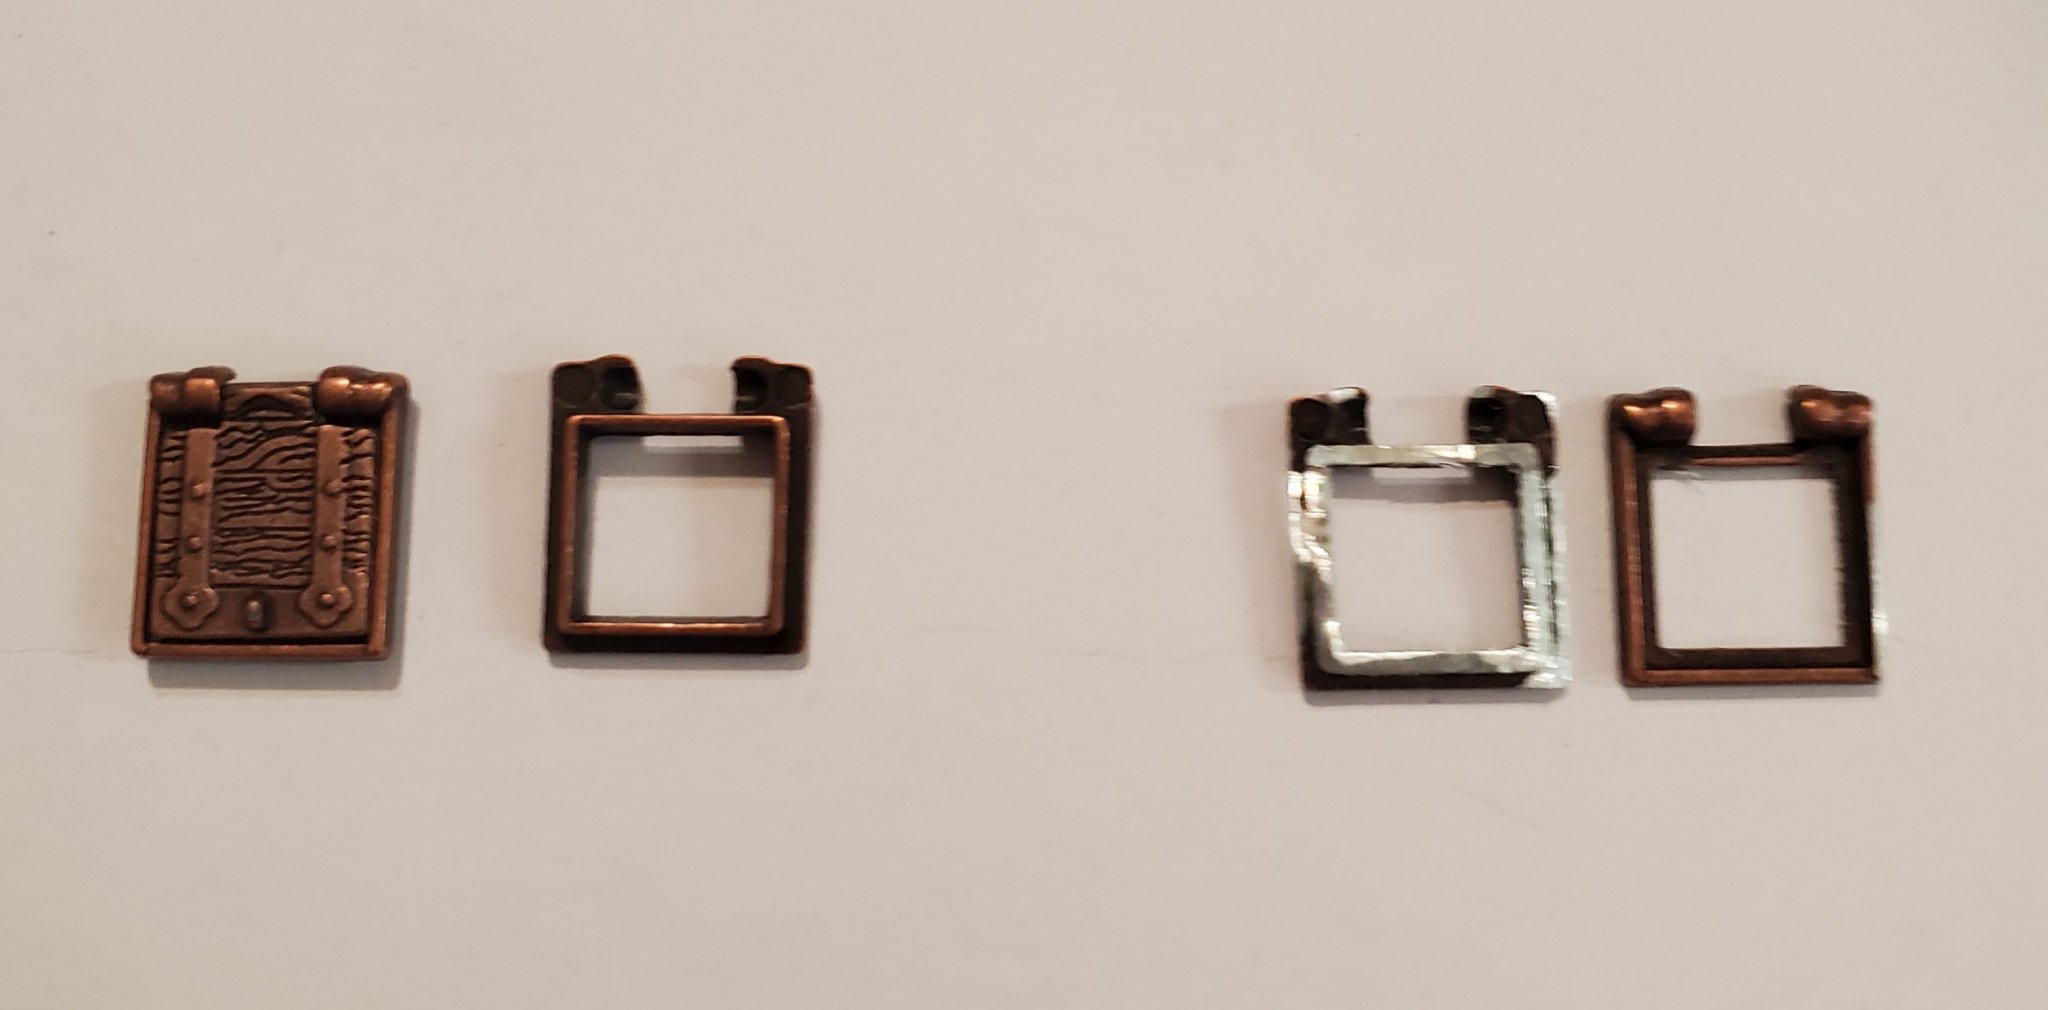
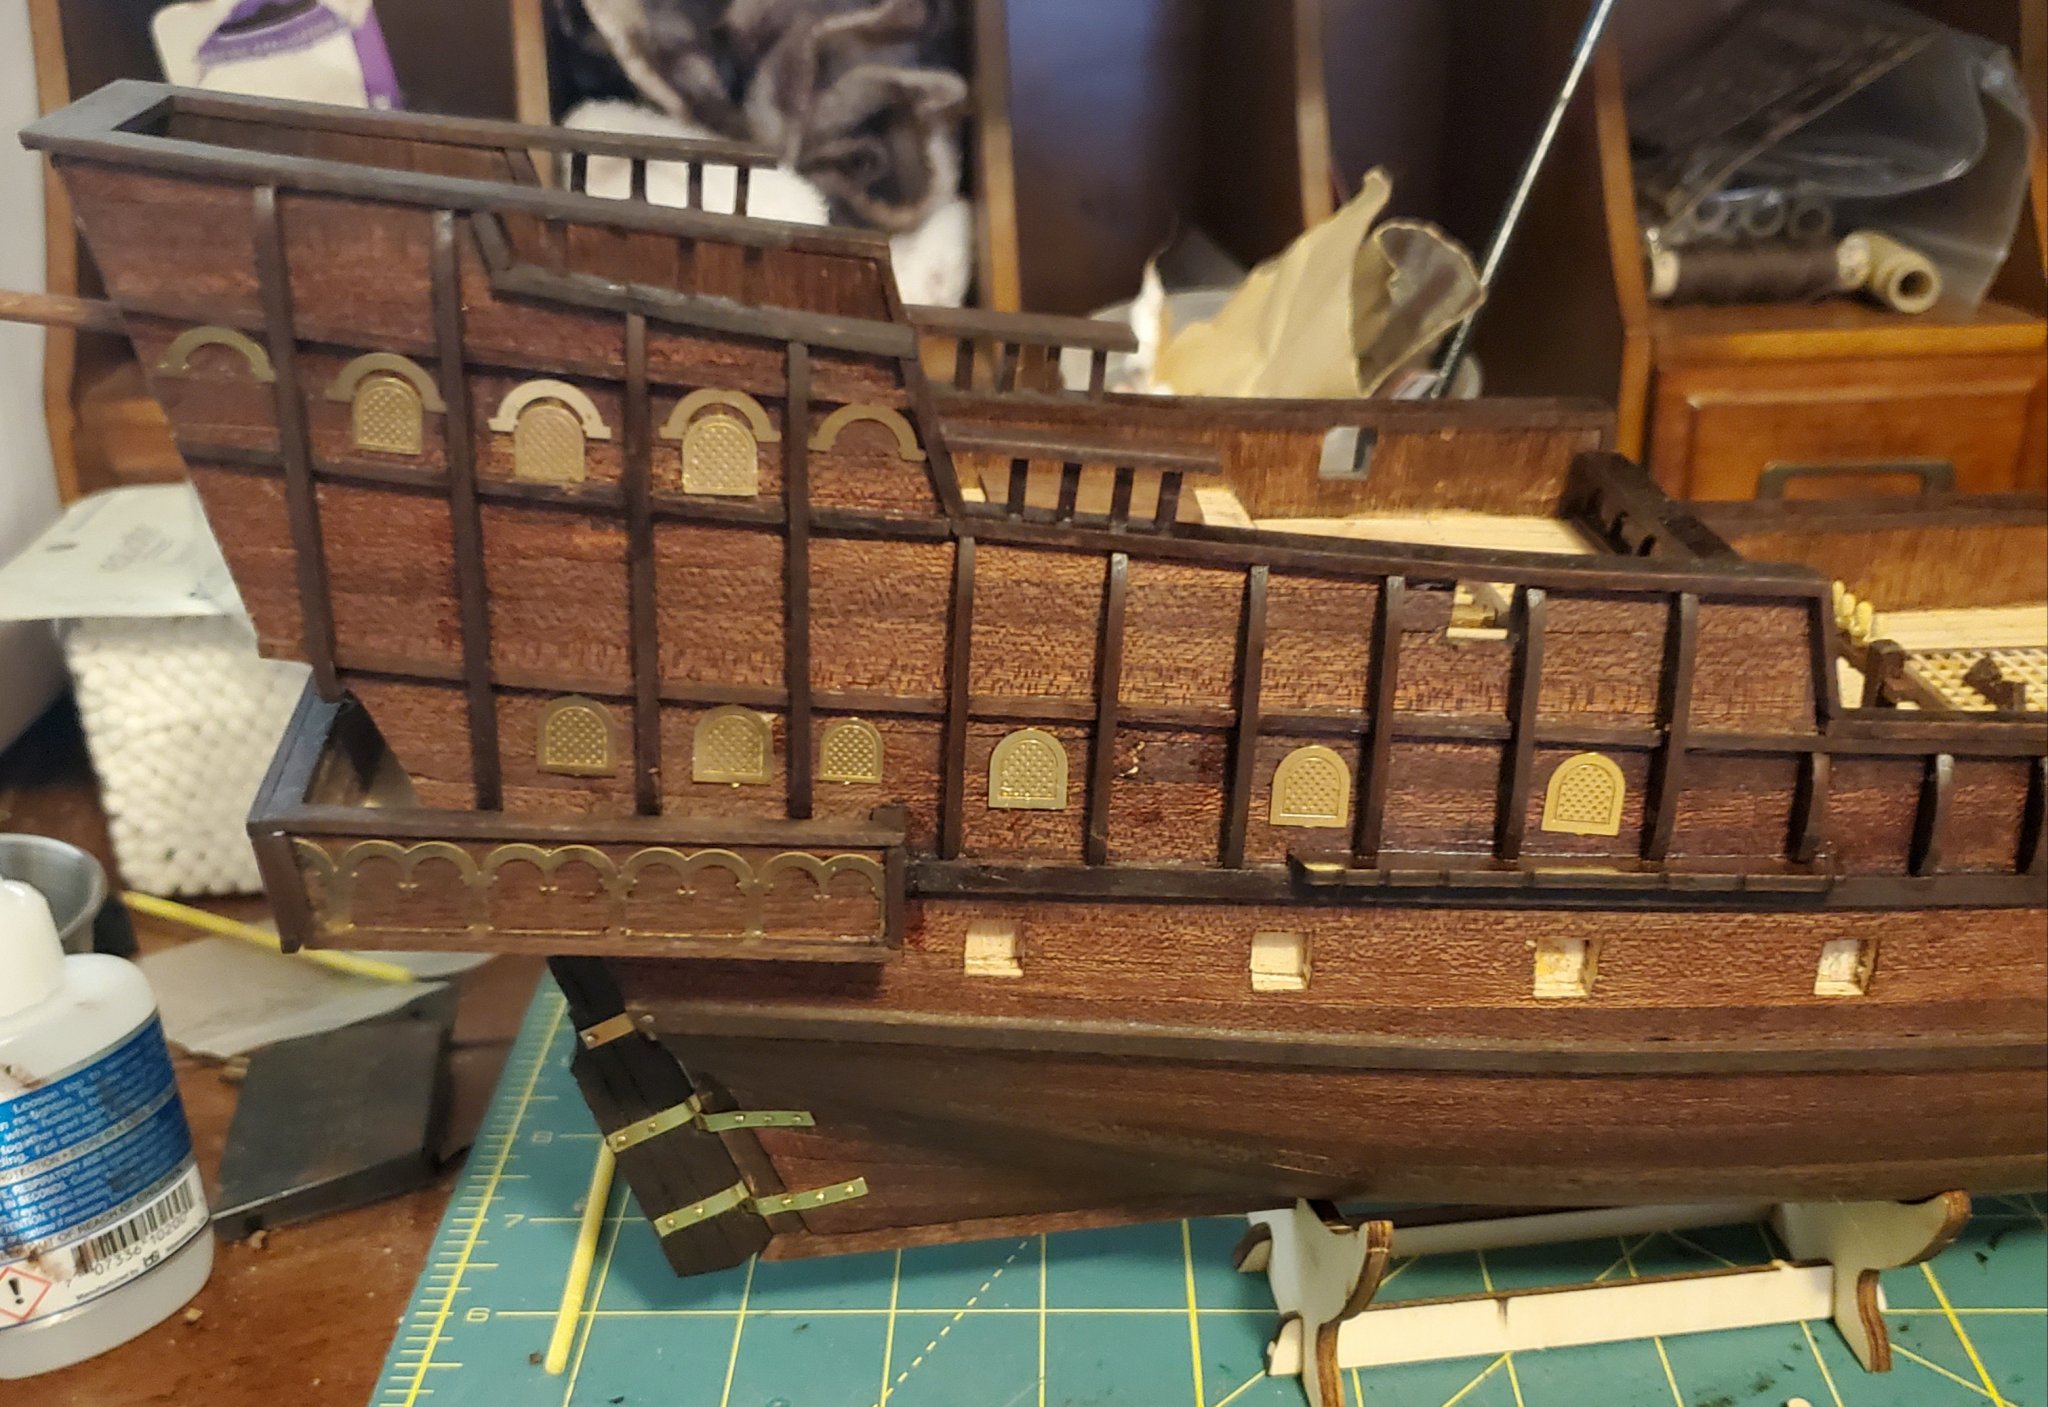
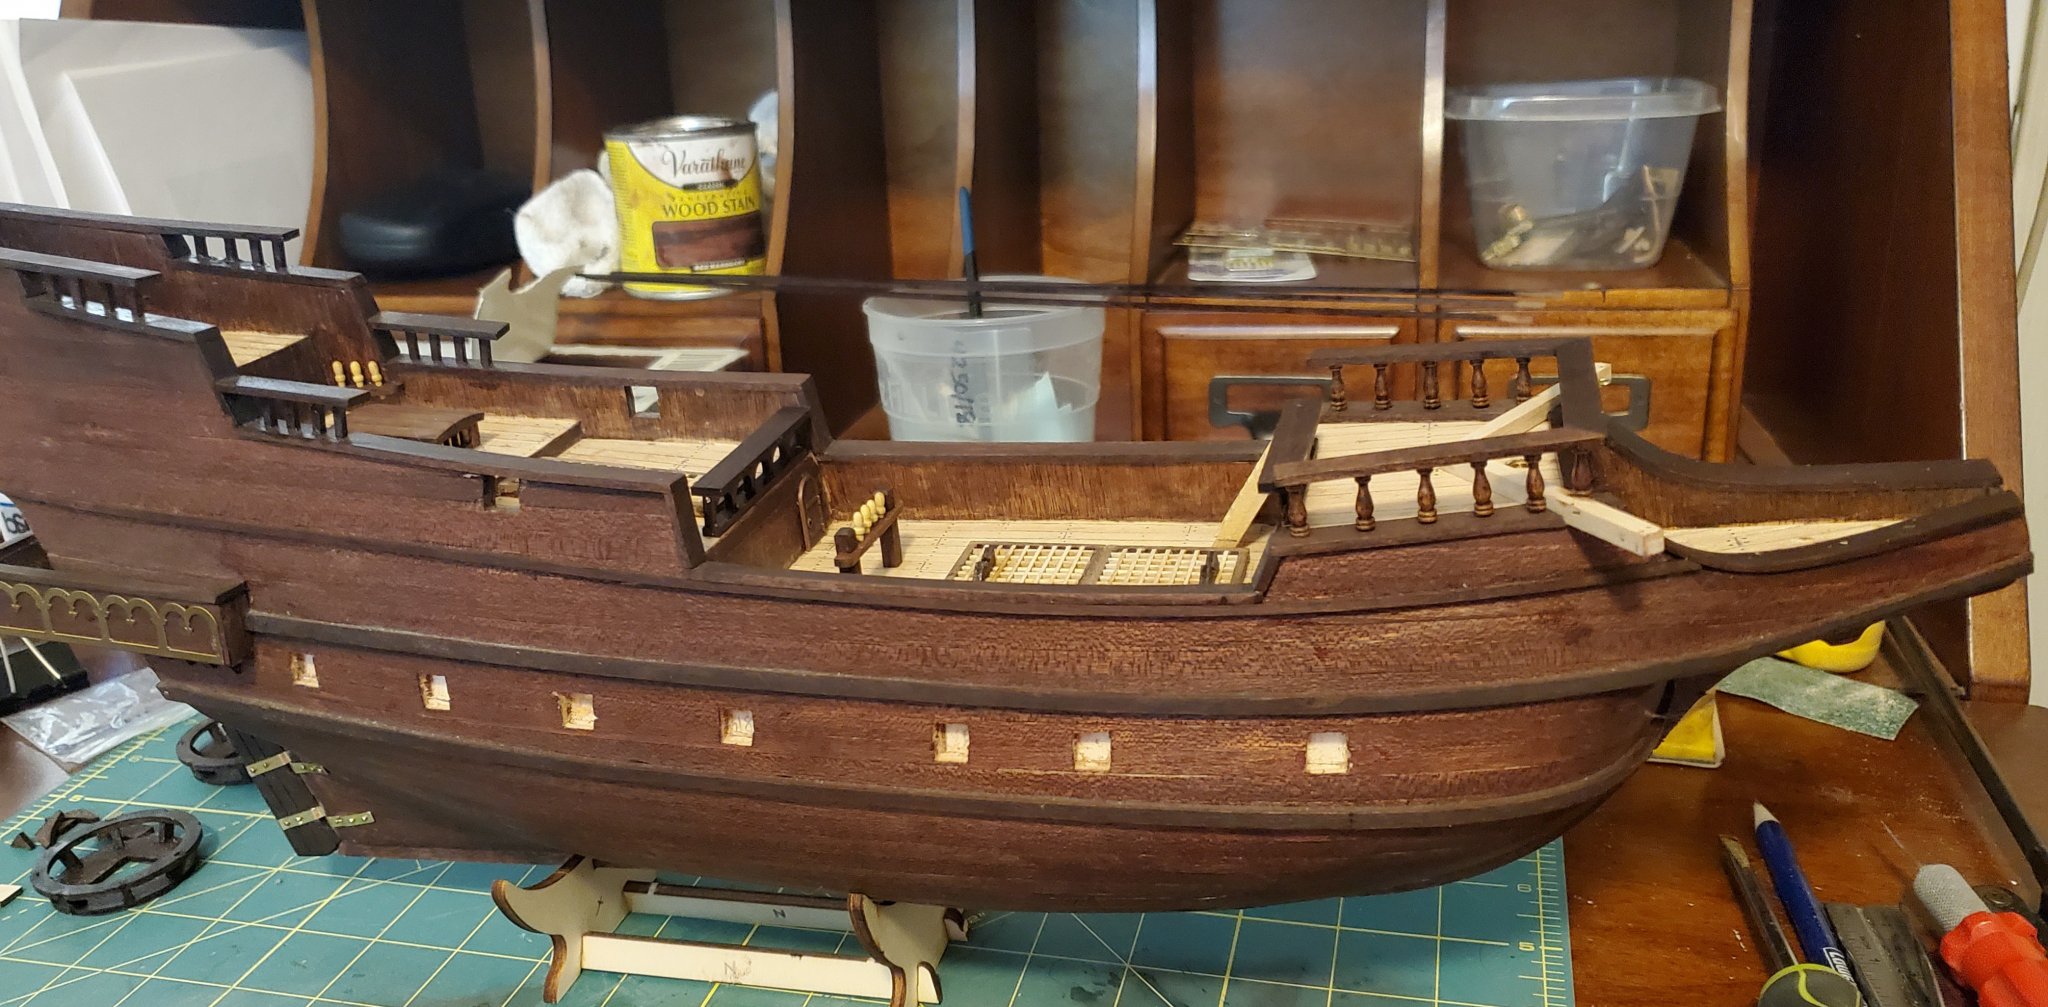
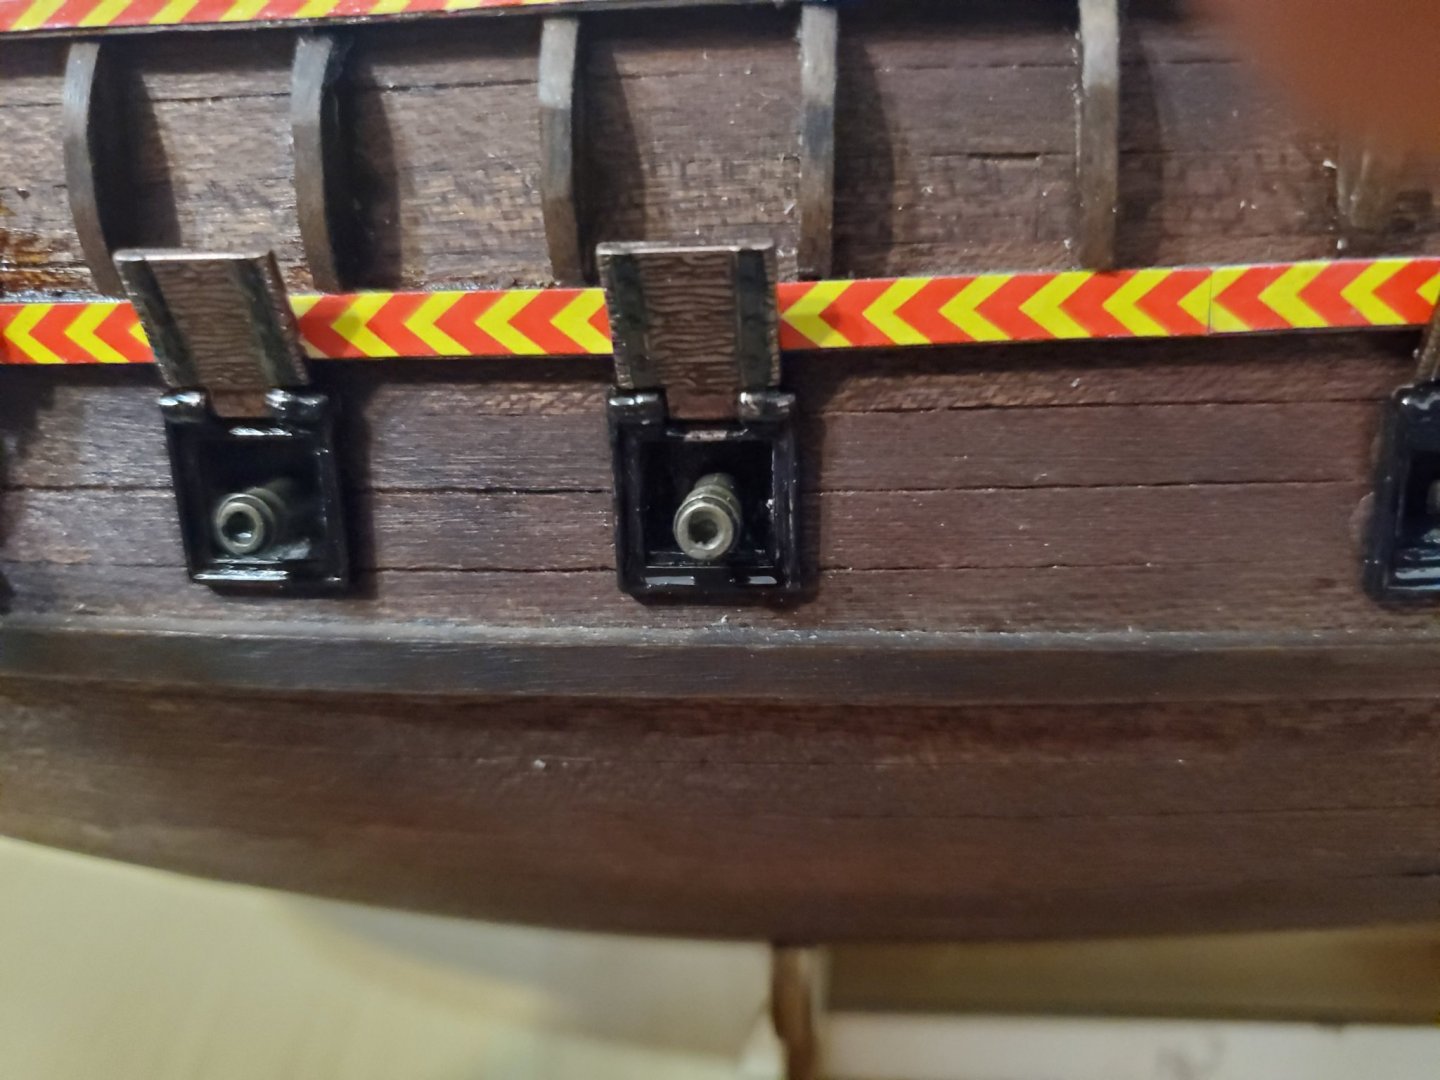
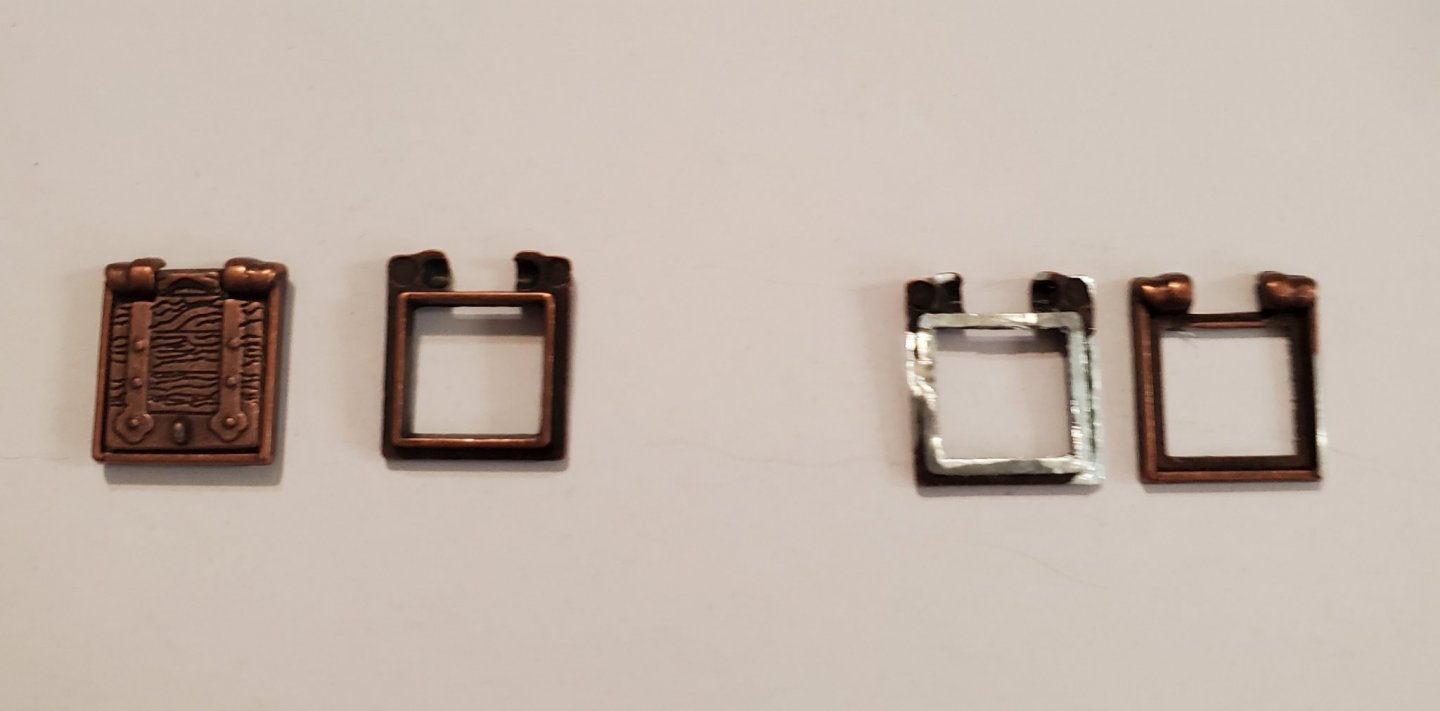
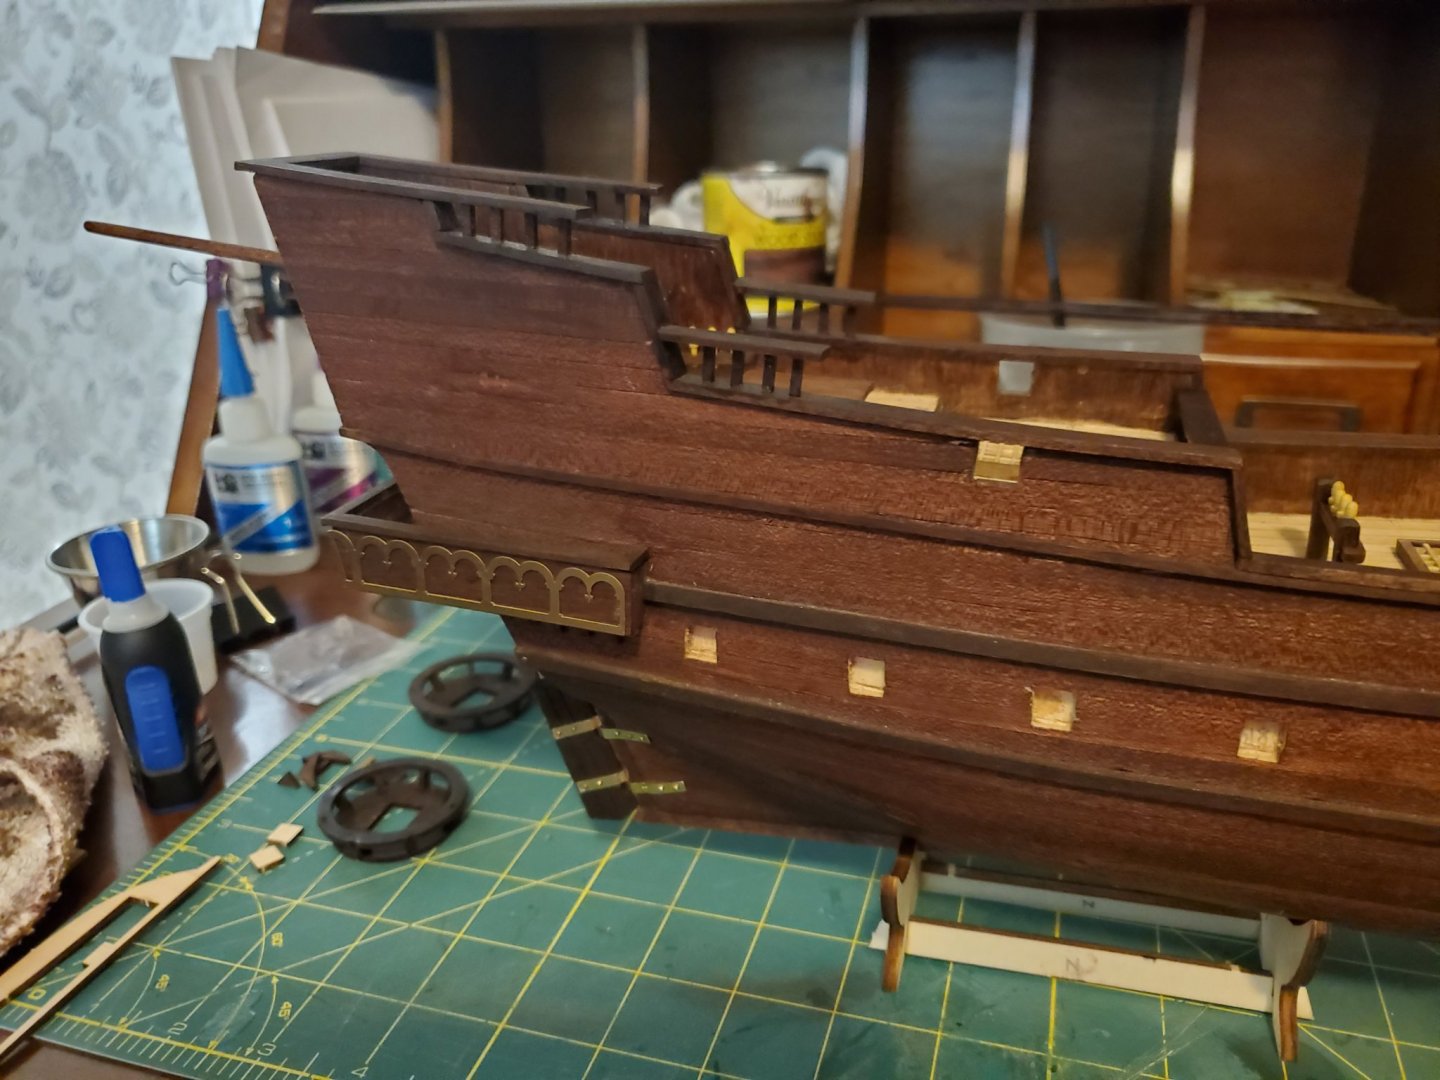
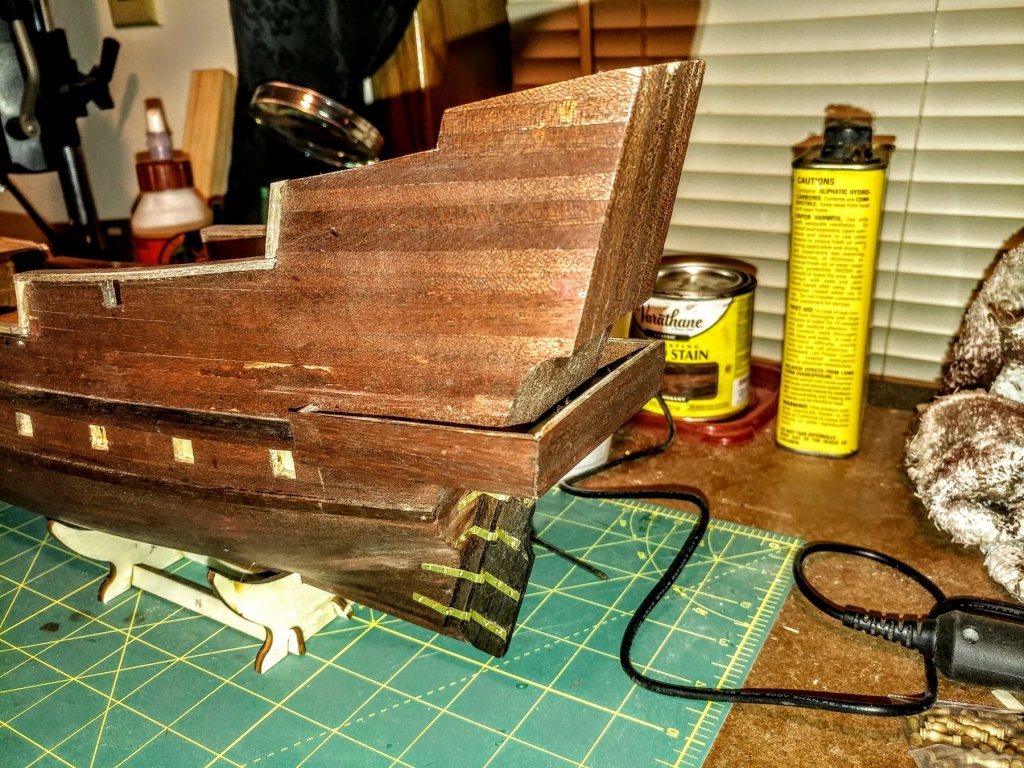
These cannon ports are much better than the little piece of ply wood from the kit.

-
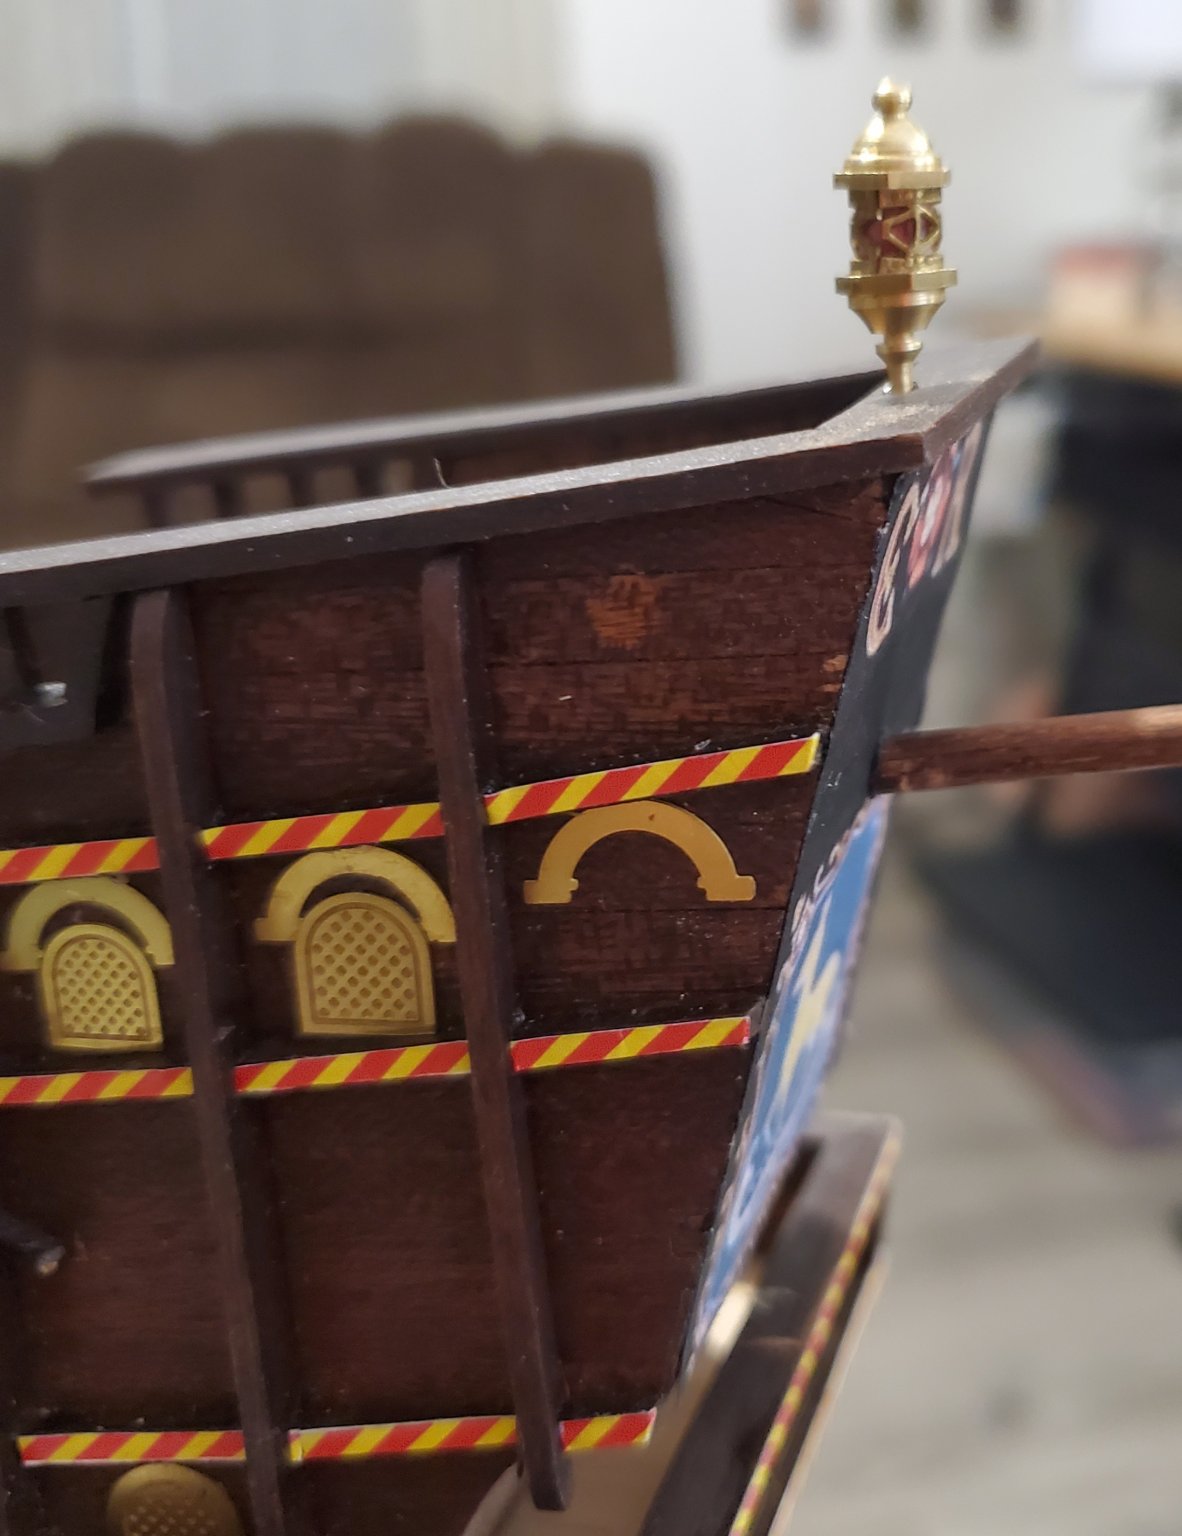
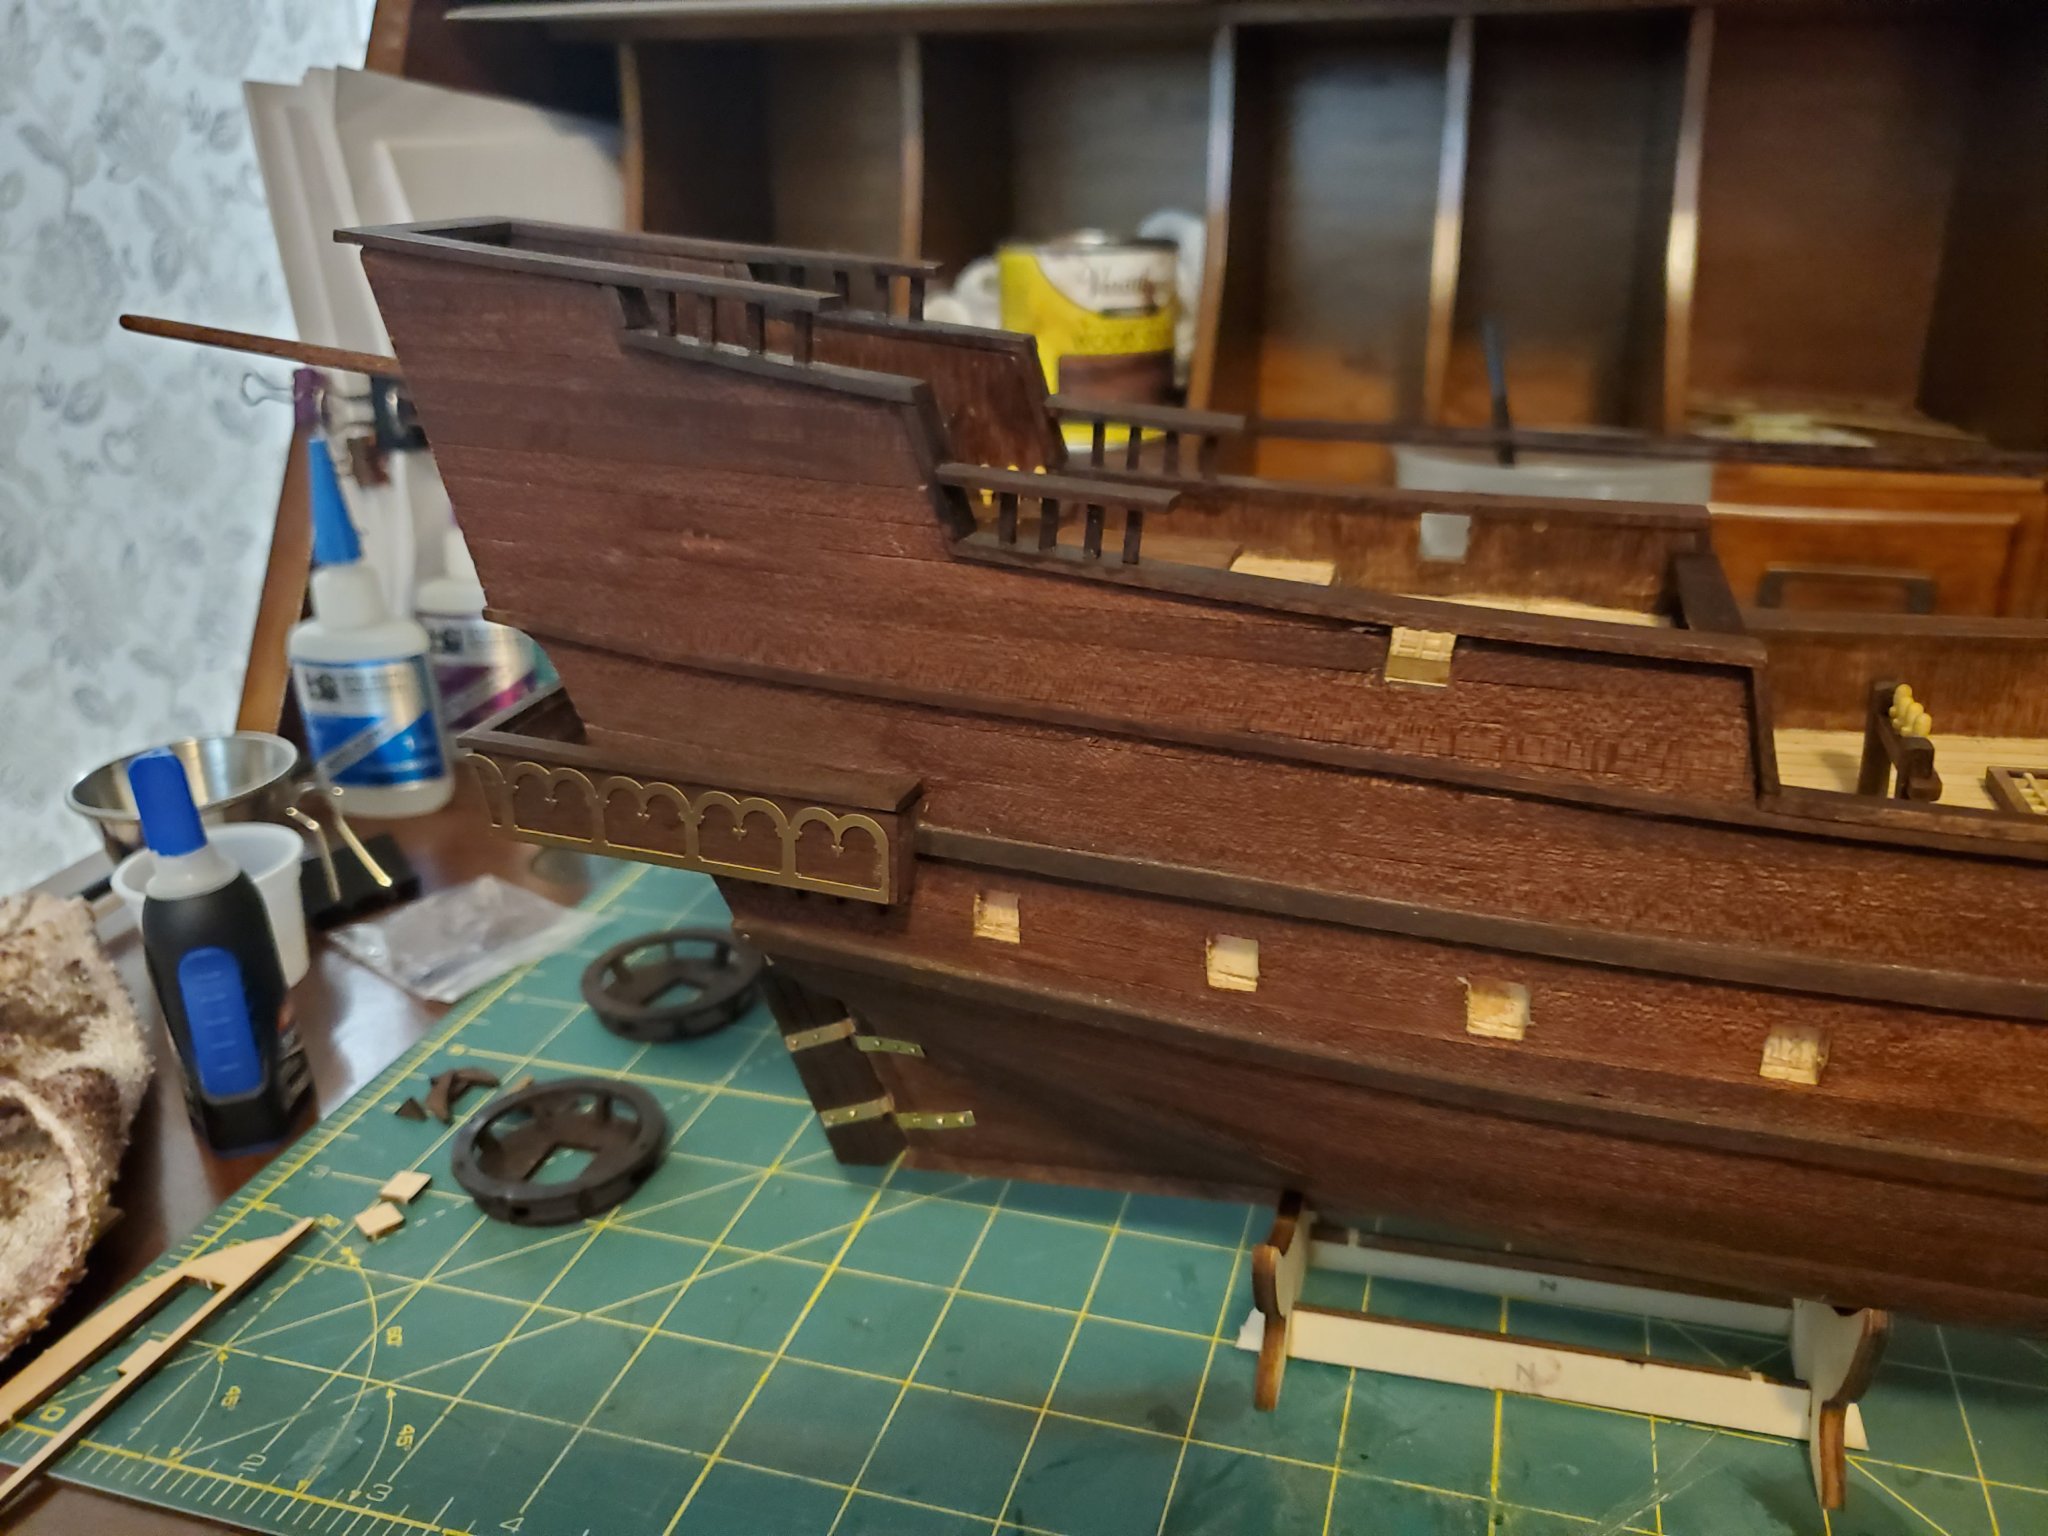
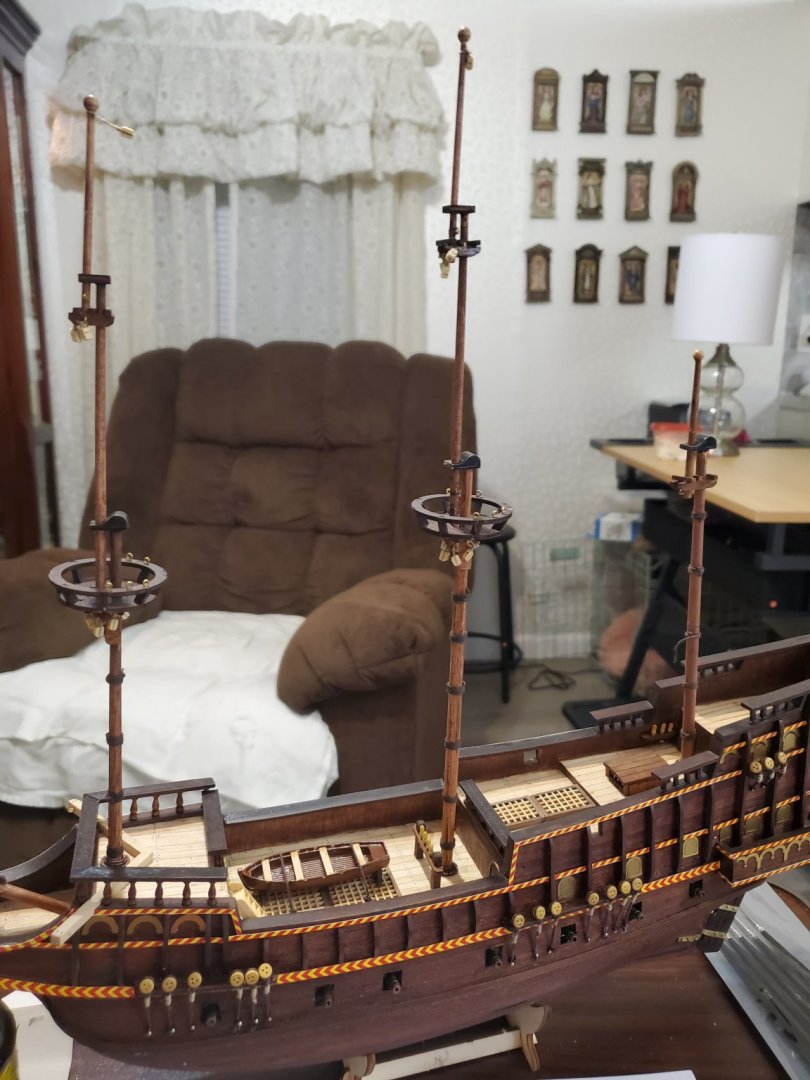
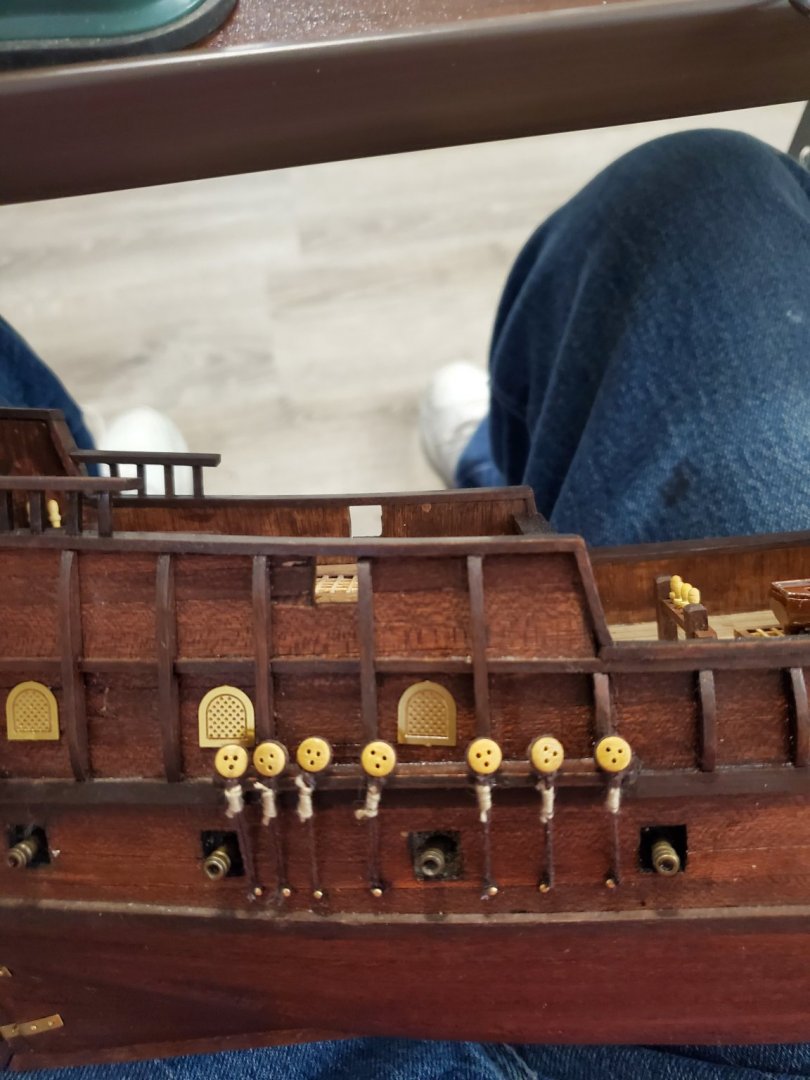
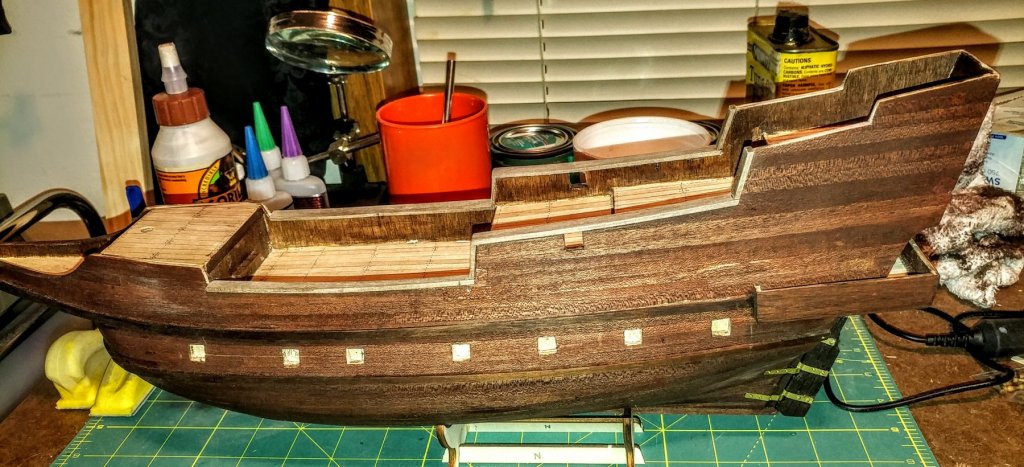
I got the masts mounted today. I am going to start installing the shroud lines. I got my improvement parts from Ages of Sail today. The most important part I was waiting on was the gunport frames and doors. The little plywood squares that were in the kit were poor at best. These frames and doors really make a difference. The following photos show them. I ground the extensions off the back so I can glue them to the hull. I painted the hinges and frames flat black and used the stain for the hull to color them to match as close as possible. I also ordered a better lantern for the stern. This one in the photo is a big improvement.


-
That was what I was afraid of from what info I could find. I understand that model may not be exactly historically correct, but for $1200, I also don't intend to replace half of poor quality or fit of cast metal components. As much as I desire to build this model, I don't think I want to gamble that amount of money, especially since I find more negative reviews than positive. My next choice of ship, I was thinking the HMS Victory. I think I will research it as well as the Royal William. Thank you. Mark
-
Has anyone had experience with this kit? I have tried to research it on the internet before pulling the trigger on $1200. I have found some reviews saying lousy instructions and many poor fitting parts, particularly the castings. I have found an equal number of reviews saying it is fantastic. I just wonder what the real story is. For that price , I expect a pretty good kit. Mark
-
Okay, I'll let the cat out of the bag. This build was to learn more about ships and learn practices and techniques. I have built many things in my life, but a large detailed model ship is on my bucket list. I am planning to build the Sovereign of the Seas if I can find the kit. It is always out of stock (or maybe it just has to be special ordered). If I can't get the S o S, I may have to do the HMS Victory, but that is not my first choice. Mark
-
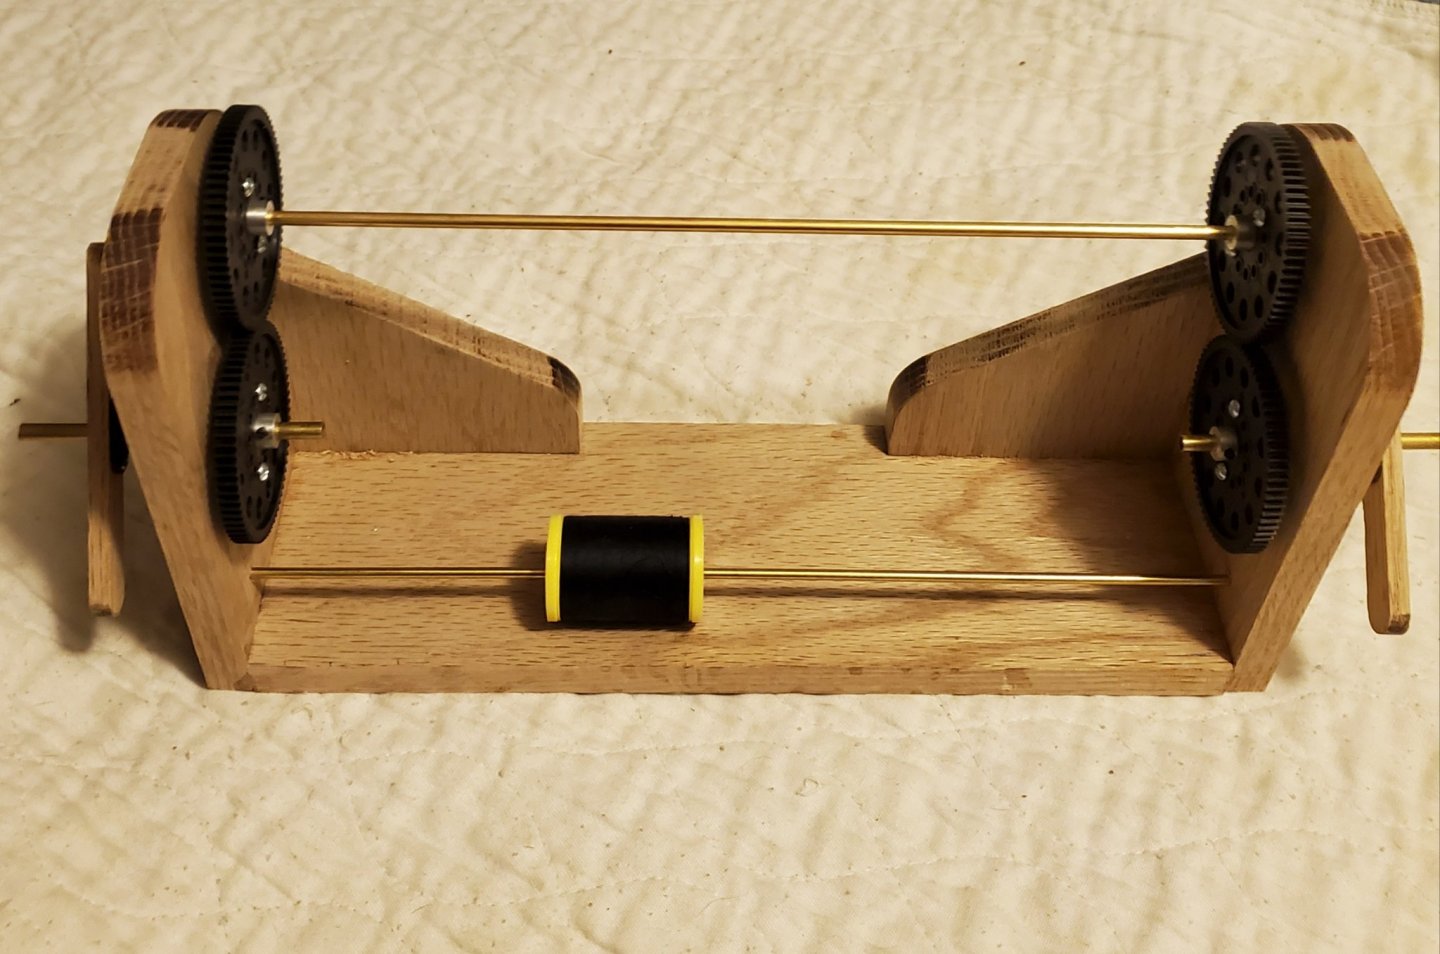
Soooooo..... I tried out my little serving machine and it works excellent. In the photo, you can see the difference in the string before and after serving. Yes it is some work, but I think well worth the effort. I do want to motorize it though.

-
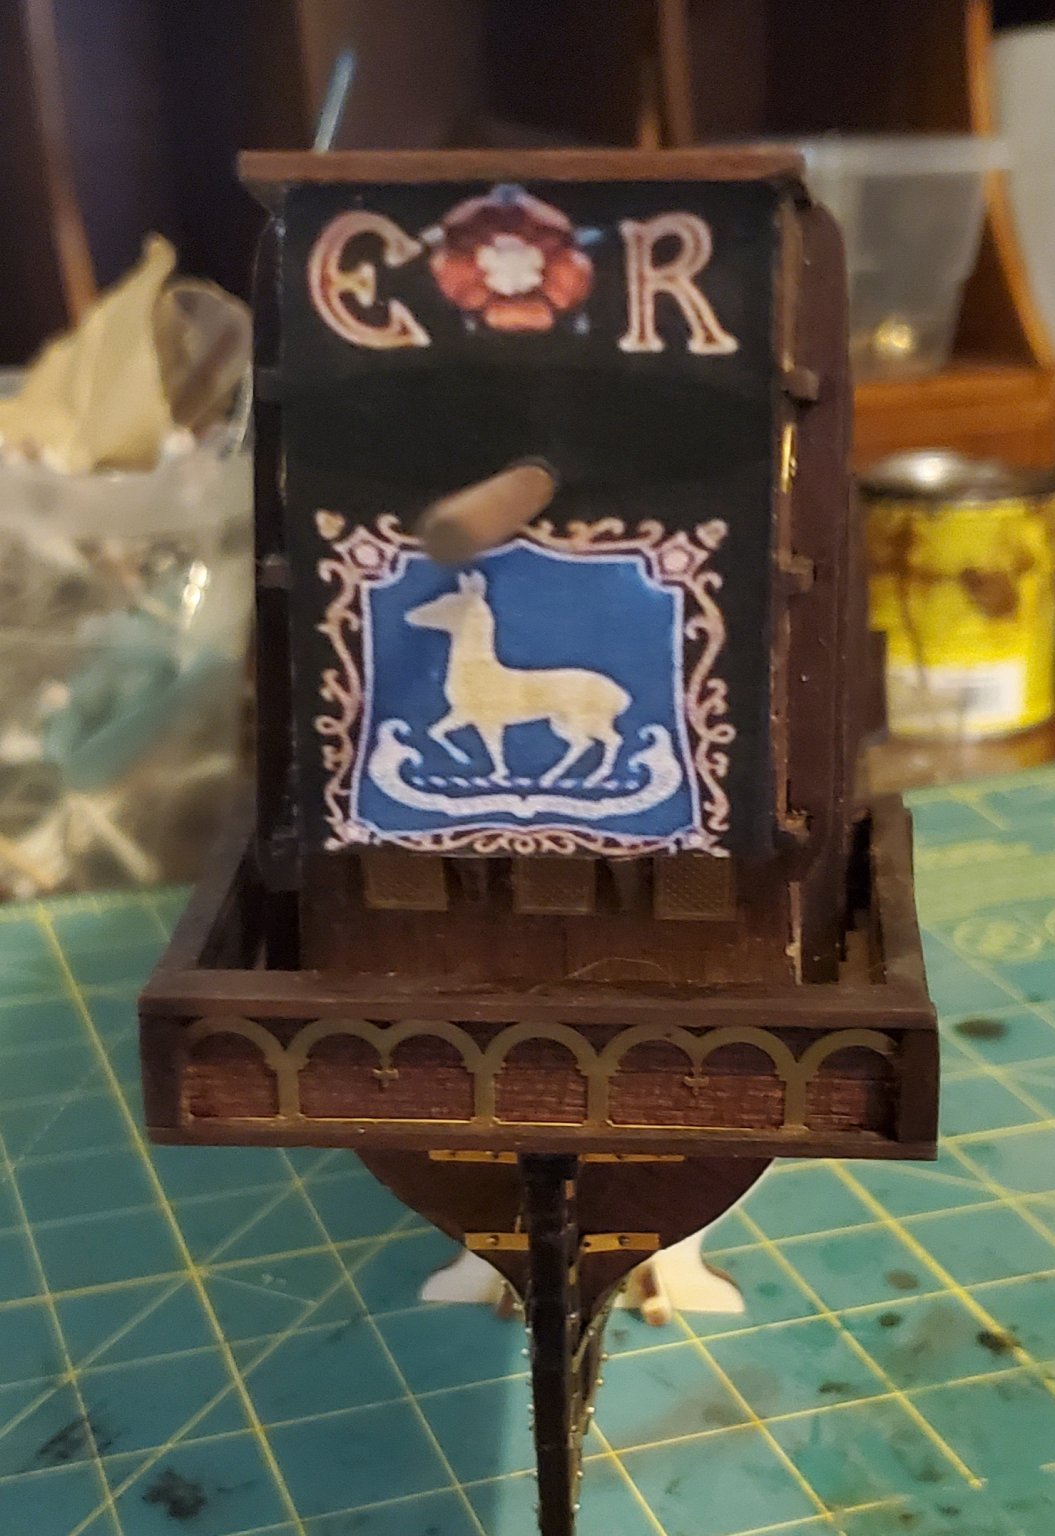
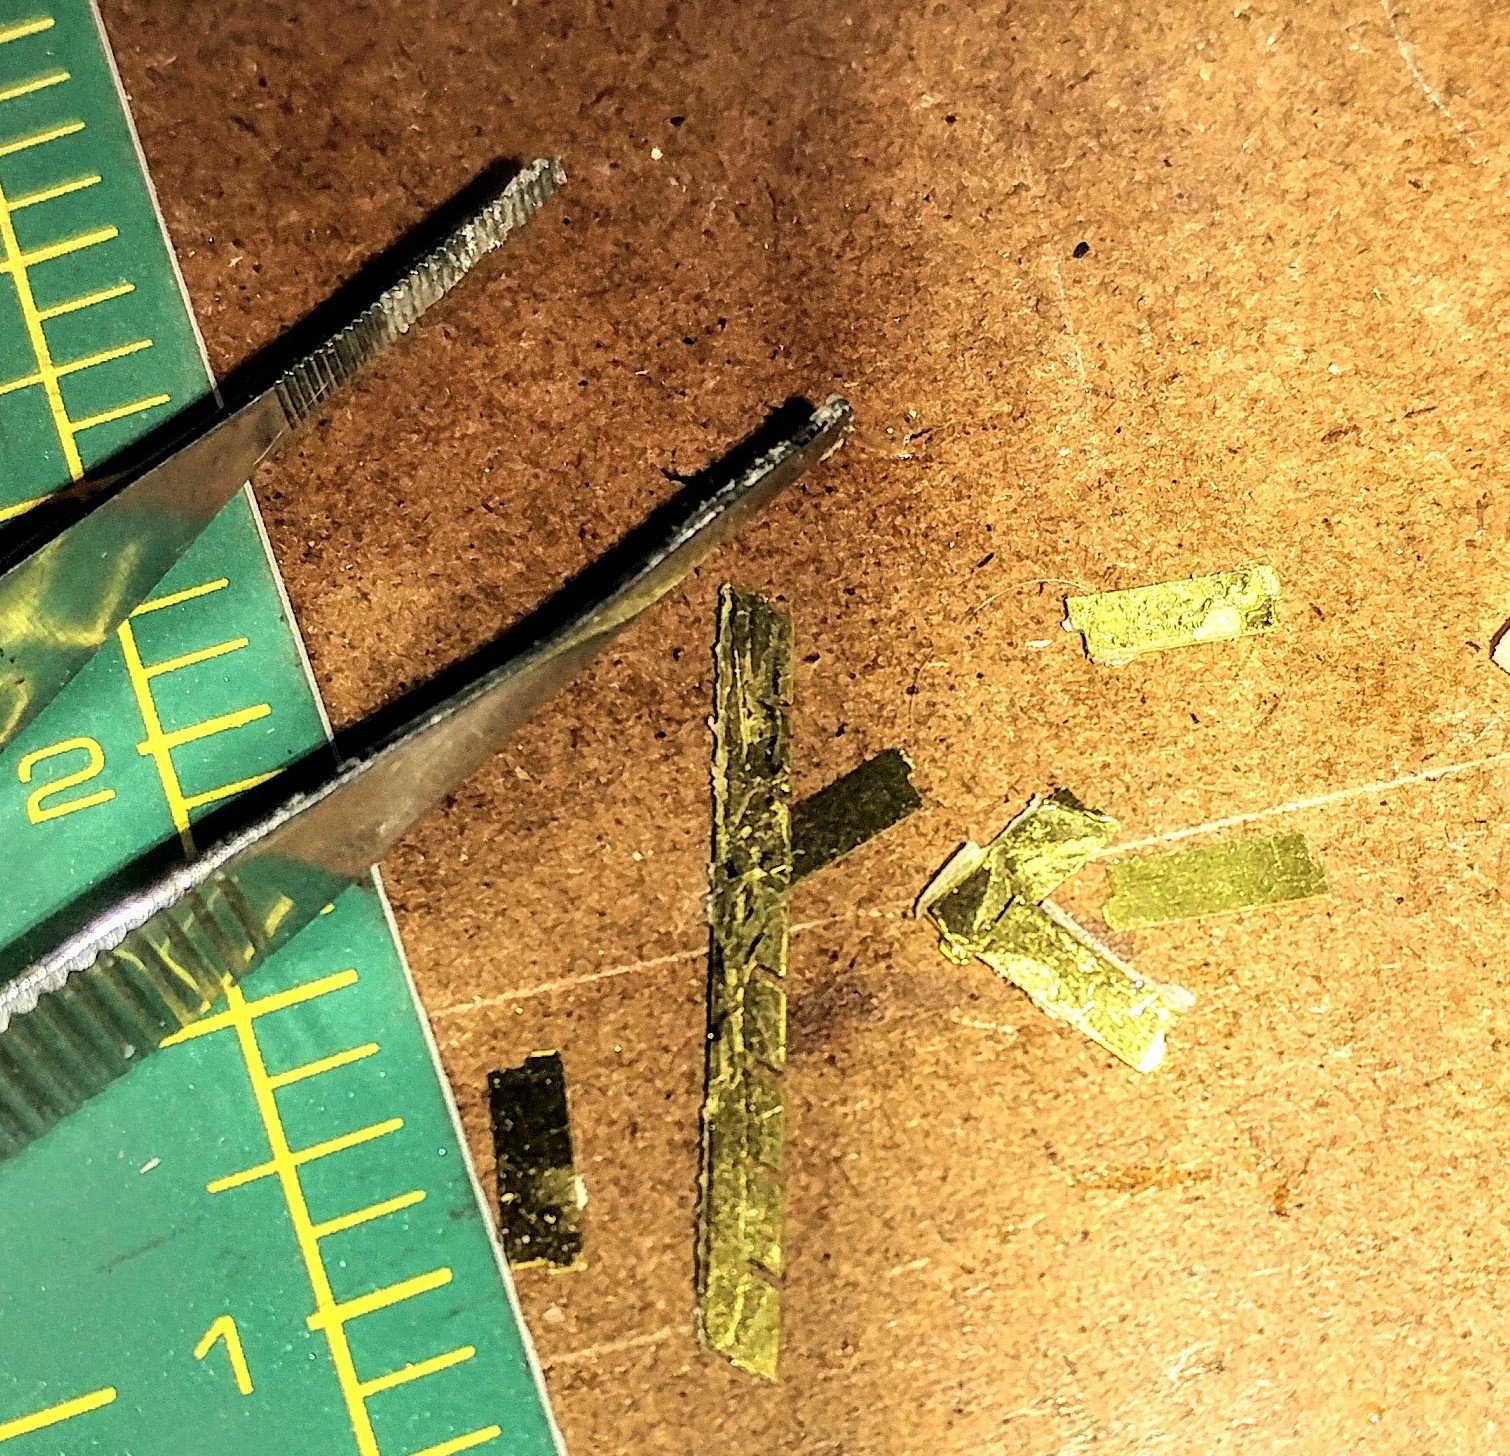
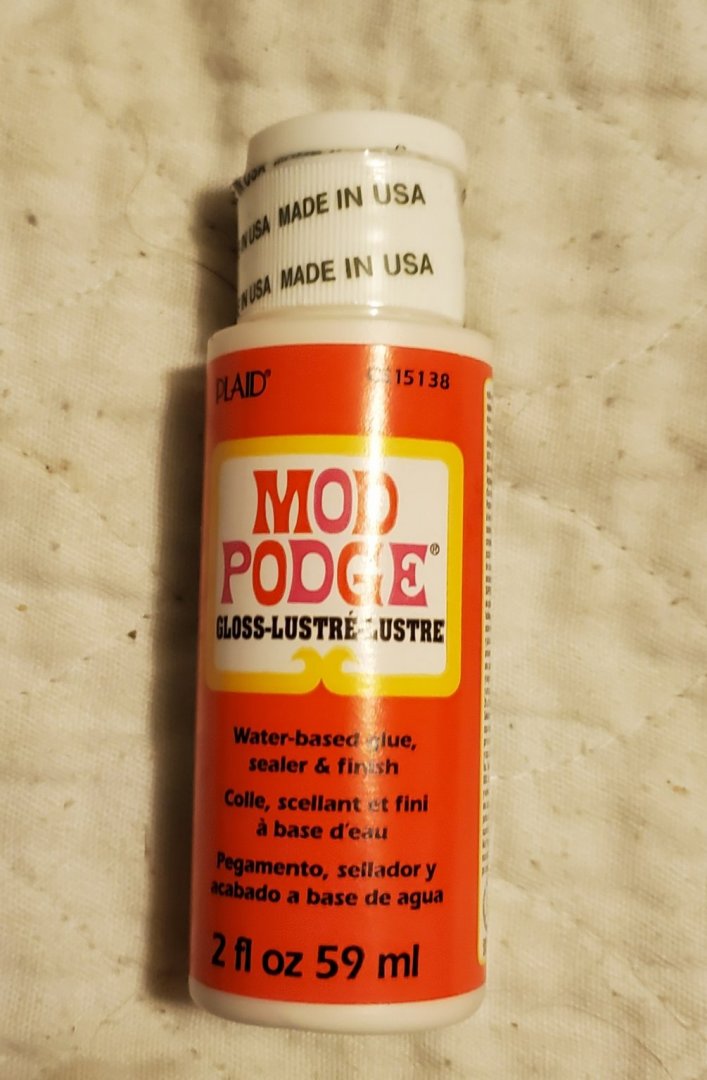
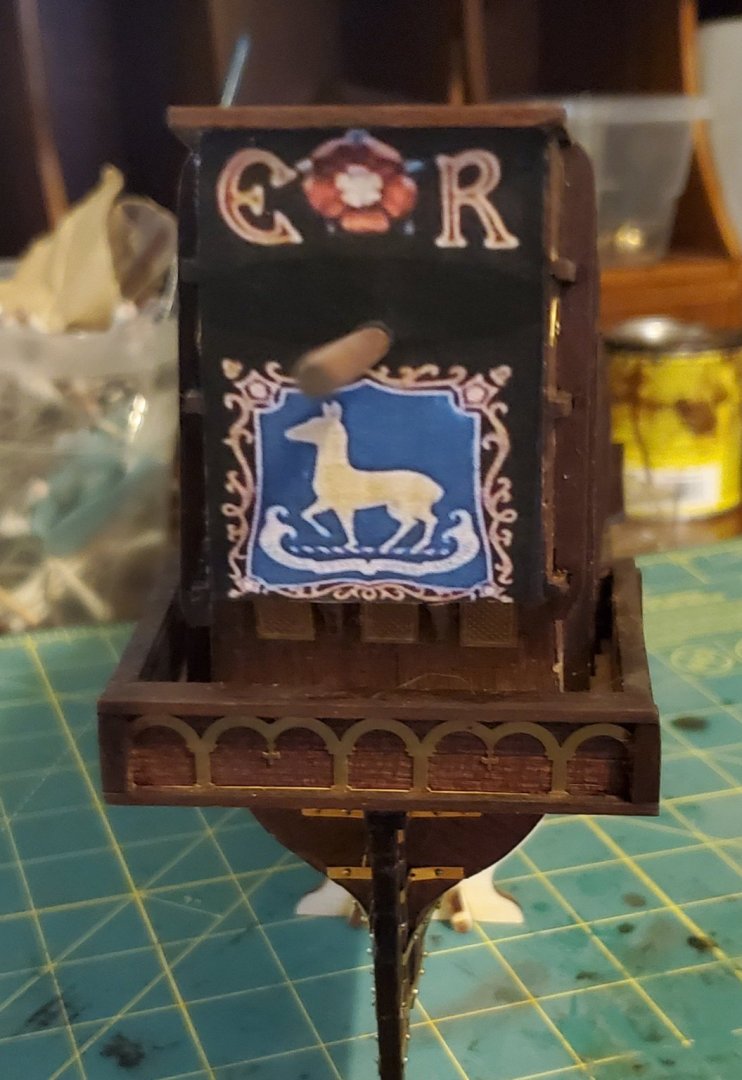
I bought paint to paint the graphics on my ship but after attempting to paint the graphic on a scrap piece of wood, I found I couldn't do it because my tremors are too bad for that precise of painting. Soooooo......what to do? I decided to try to use the printed graphics supplied in the kit, but the last time I put glue to this paper it fell apart. I raided my mate's craft room and found the perfect adhesive. It is the sealer for her Mod Podge. This is a thin water based adhesive. It goes on white but dries clear so it doesn't show. It worked well to glue the graphics on the wood. They aren't quite as nice as paint would have been, but they are acceptable.


-
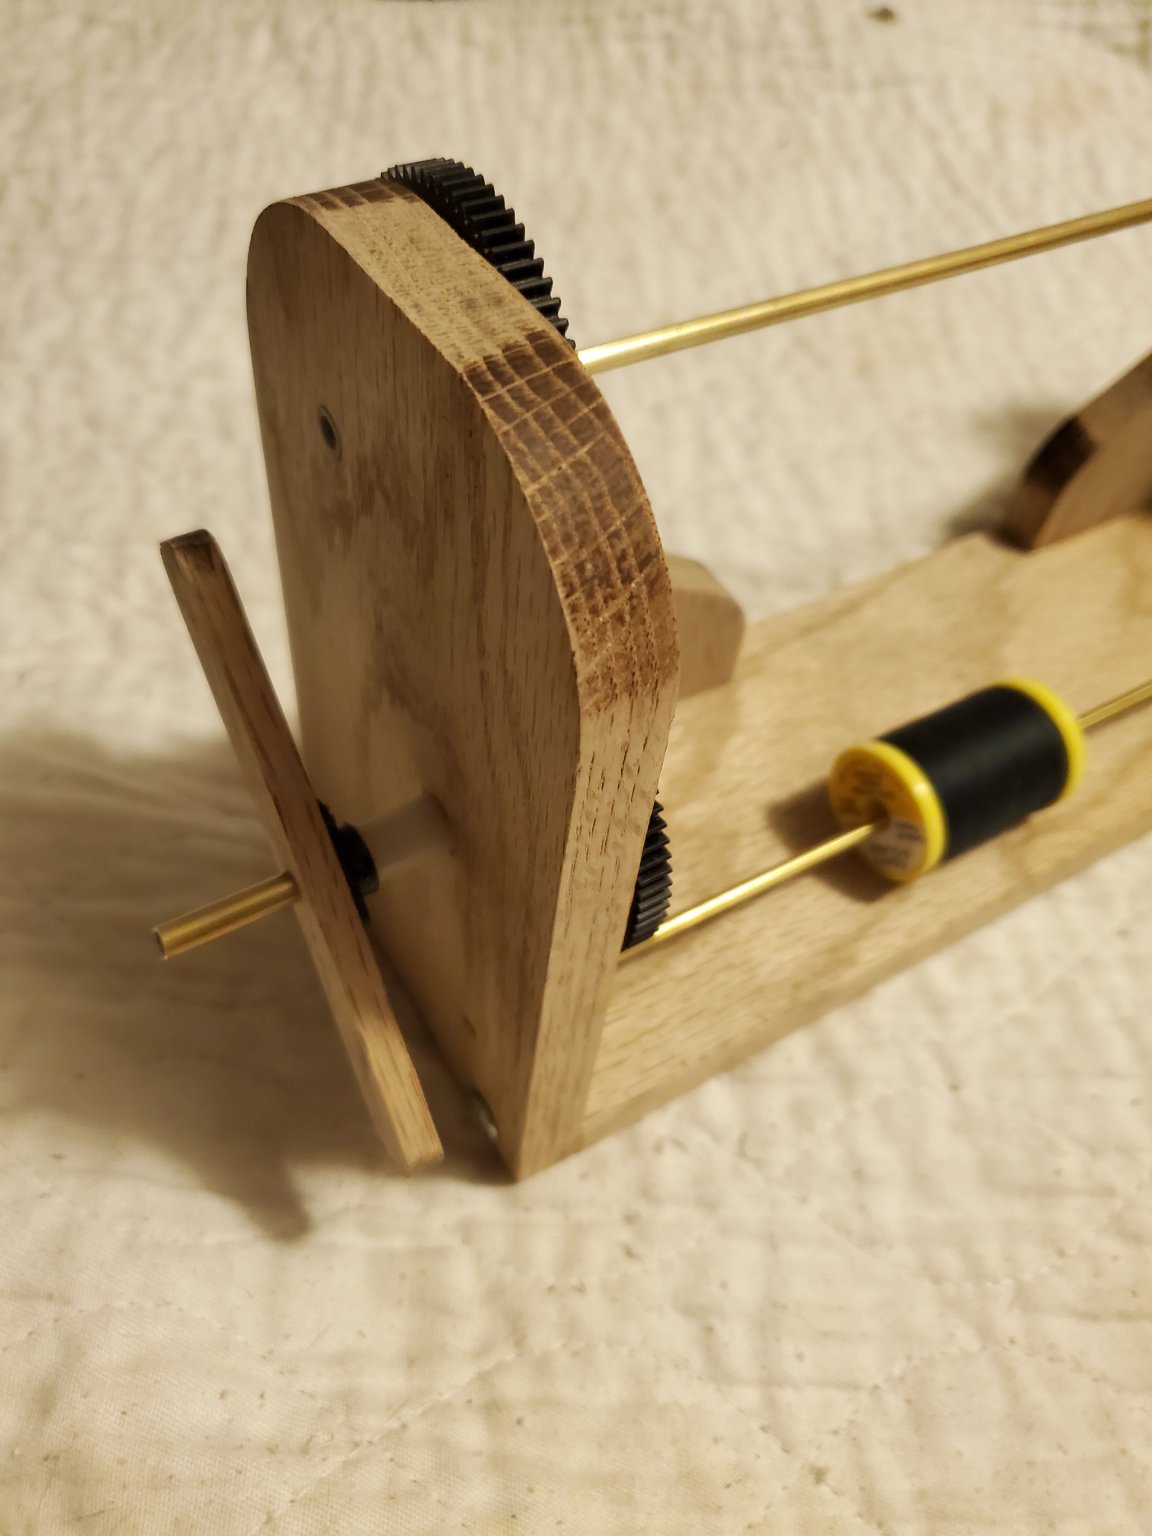
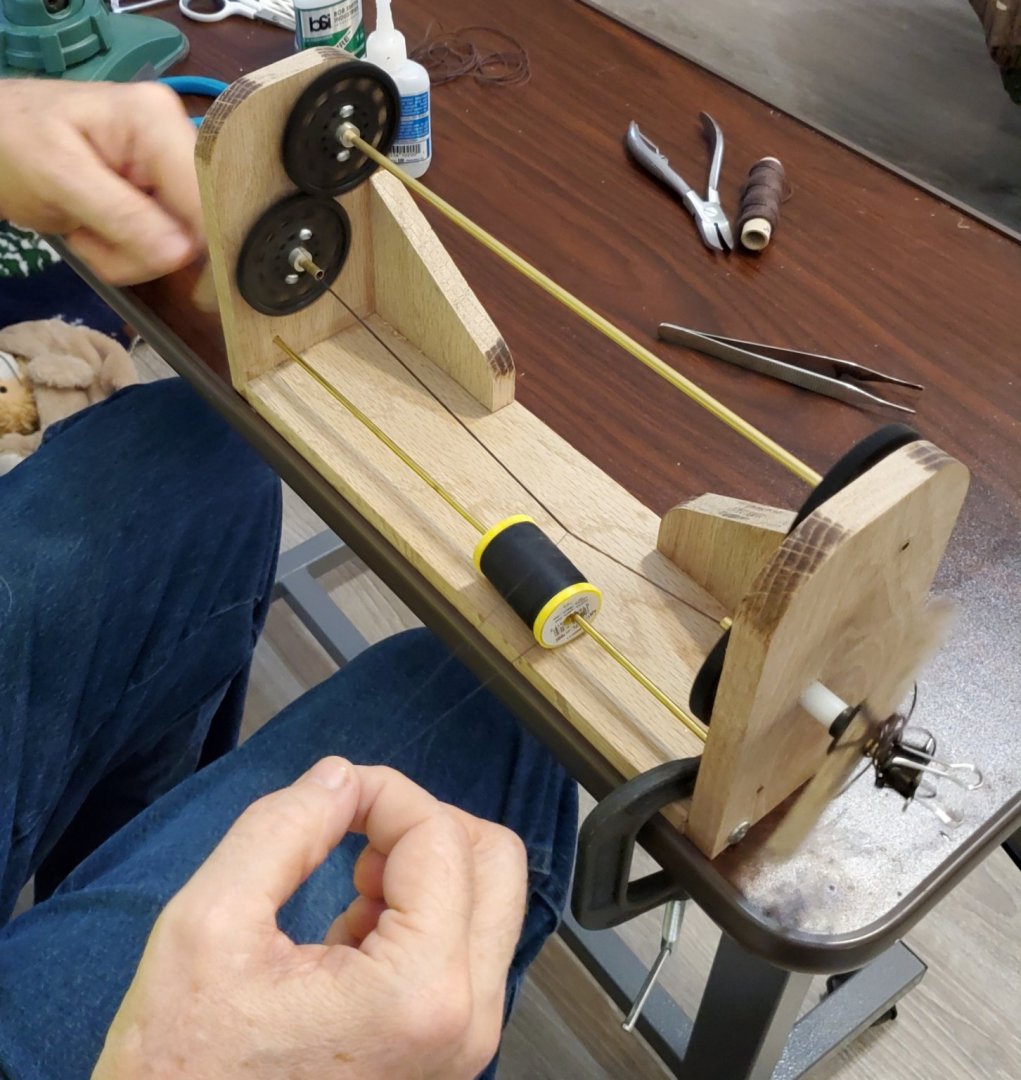
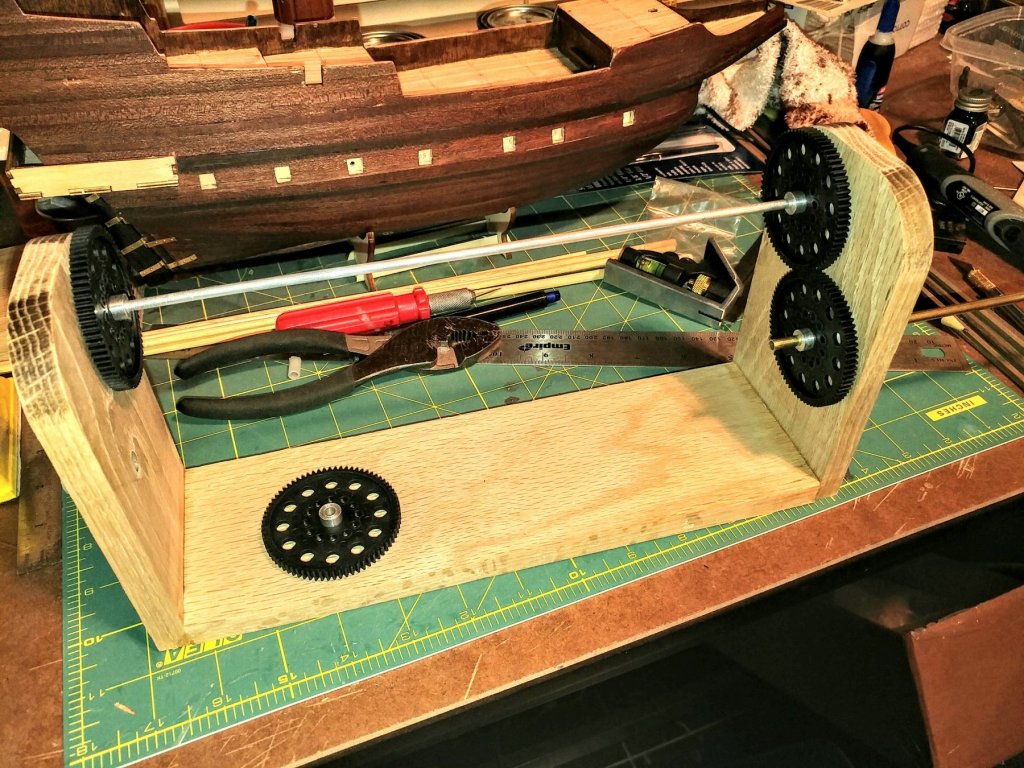
I finished my little serving machine today. I made it from scrap material in my shop. I have a total of about $10 in it for screws and the brass tubing. I works really smooth and easy.


-
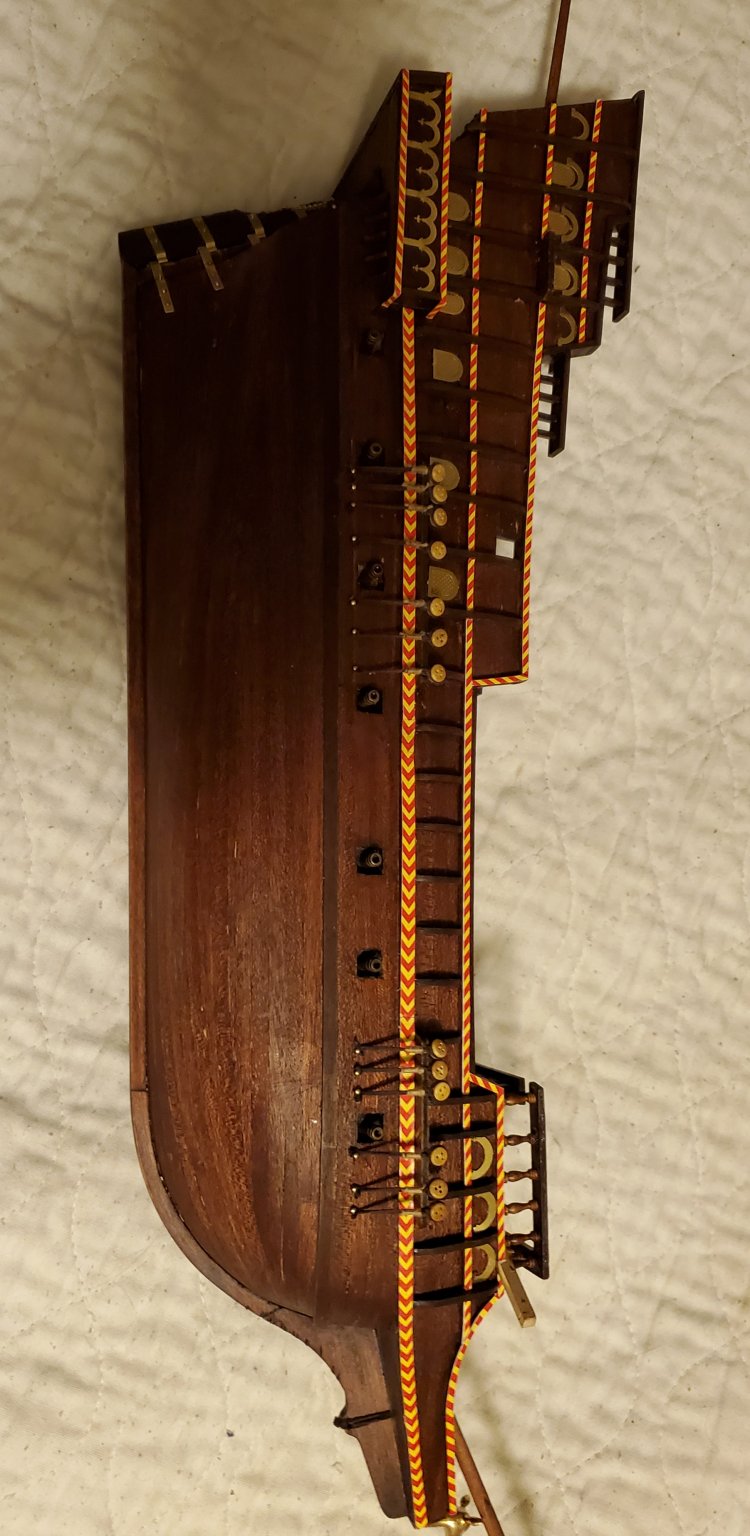
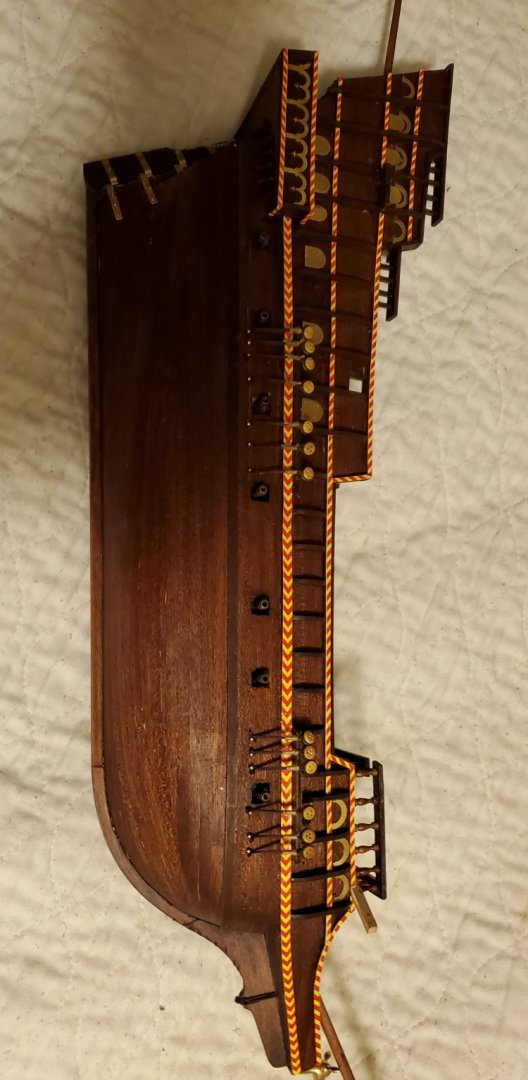
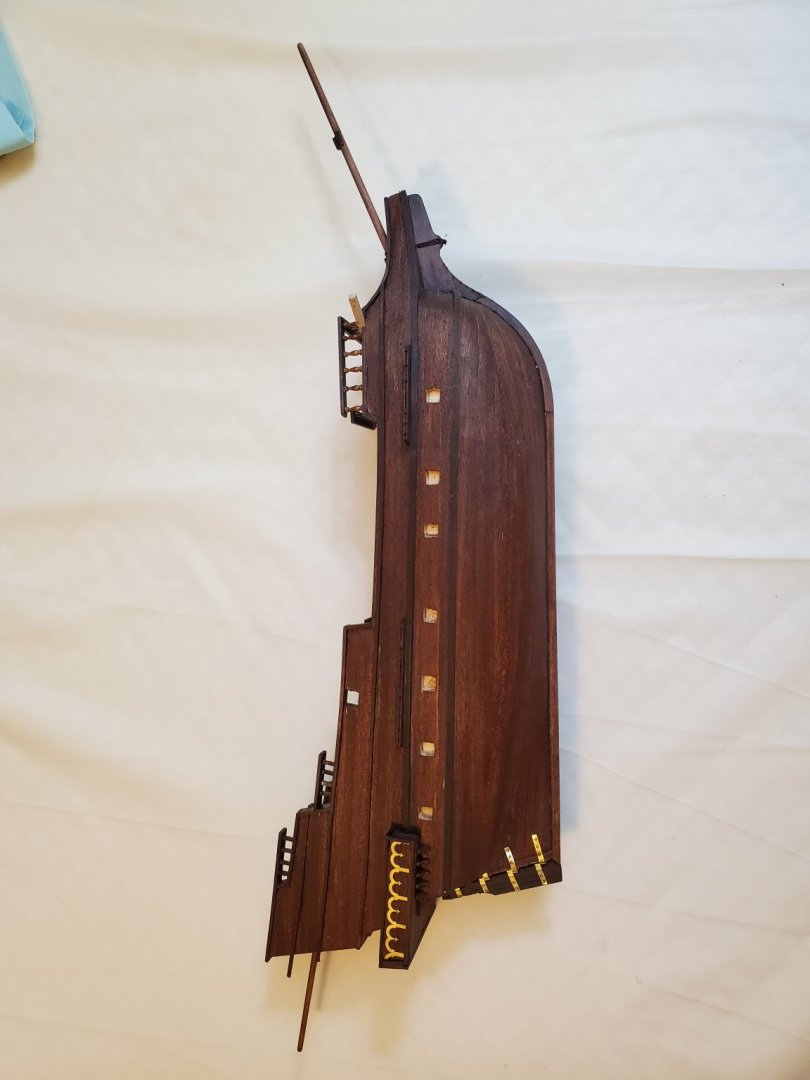
I have made an incorrectable mistake, but in my own defense it was from following the instructions ( term used very loosely) . I placed the "boards" ? That hold the deadeyes for the shroud lines on the hull according to the instructions, which also show the chain plates? Fastening straight up and down. Now, realizing they would be better angled to match the shroud lines, it is too late to move them, so I will do it like the instructions. But I will know better on my next build. But that is the purpose for this build, to learn as I don't want to learn on my next project as it is priced very high.
-
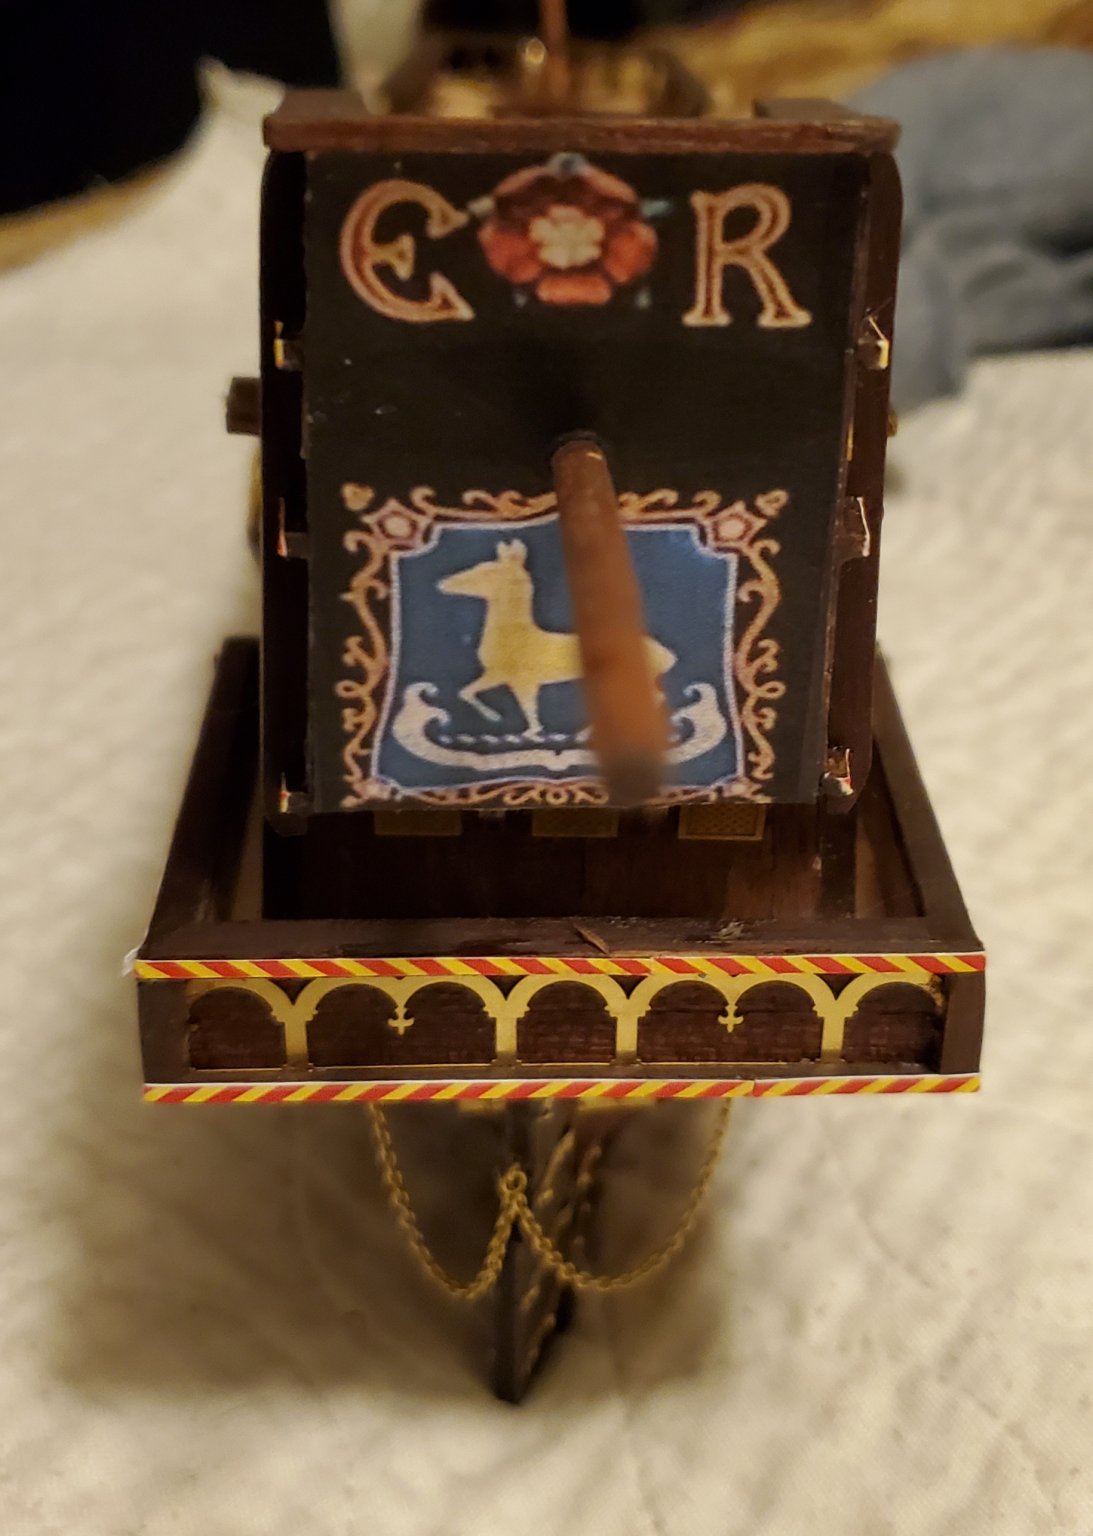
After three hours of working with photo editing software, I was able to satisfactorily fix a horrible mistake. I tried to glue the paper graphic onto the stern of the ship with paper glue. It did not work. The glue softened the paper and the graphic fell apart trying to place it. I spent days trying to think of a solution. The only photo of this graphic I had was on the instructions but it was at an angle so the view was skewed. I took a photo and spent hours tweaking, cutting and pasting until I finally straightened the view. I printed out the new graphic and use double sided scotch tape to apply it. It is not perfect but will do the job. I also applied the etched brass windows. That was another educational experience. I used a drop of CA glue and only had about 5 seconds to place them, which sometimes wasn't enough. In retrospect, I probably should have gotten some glue with a little more work time.

-
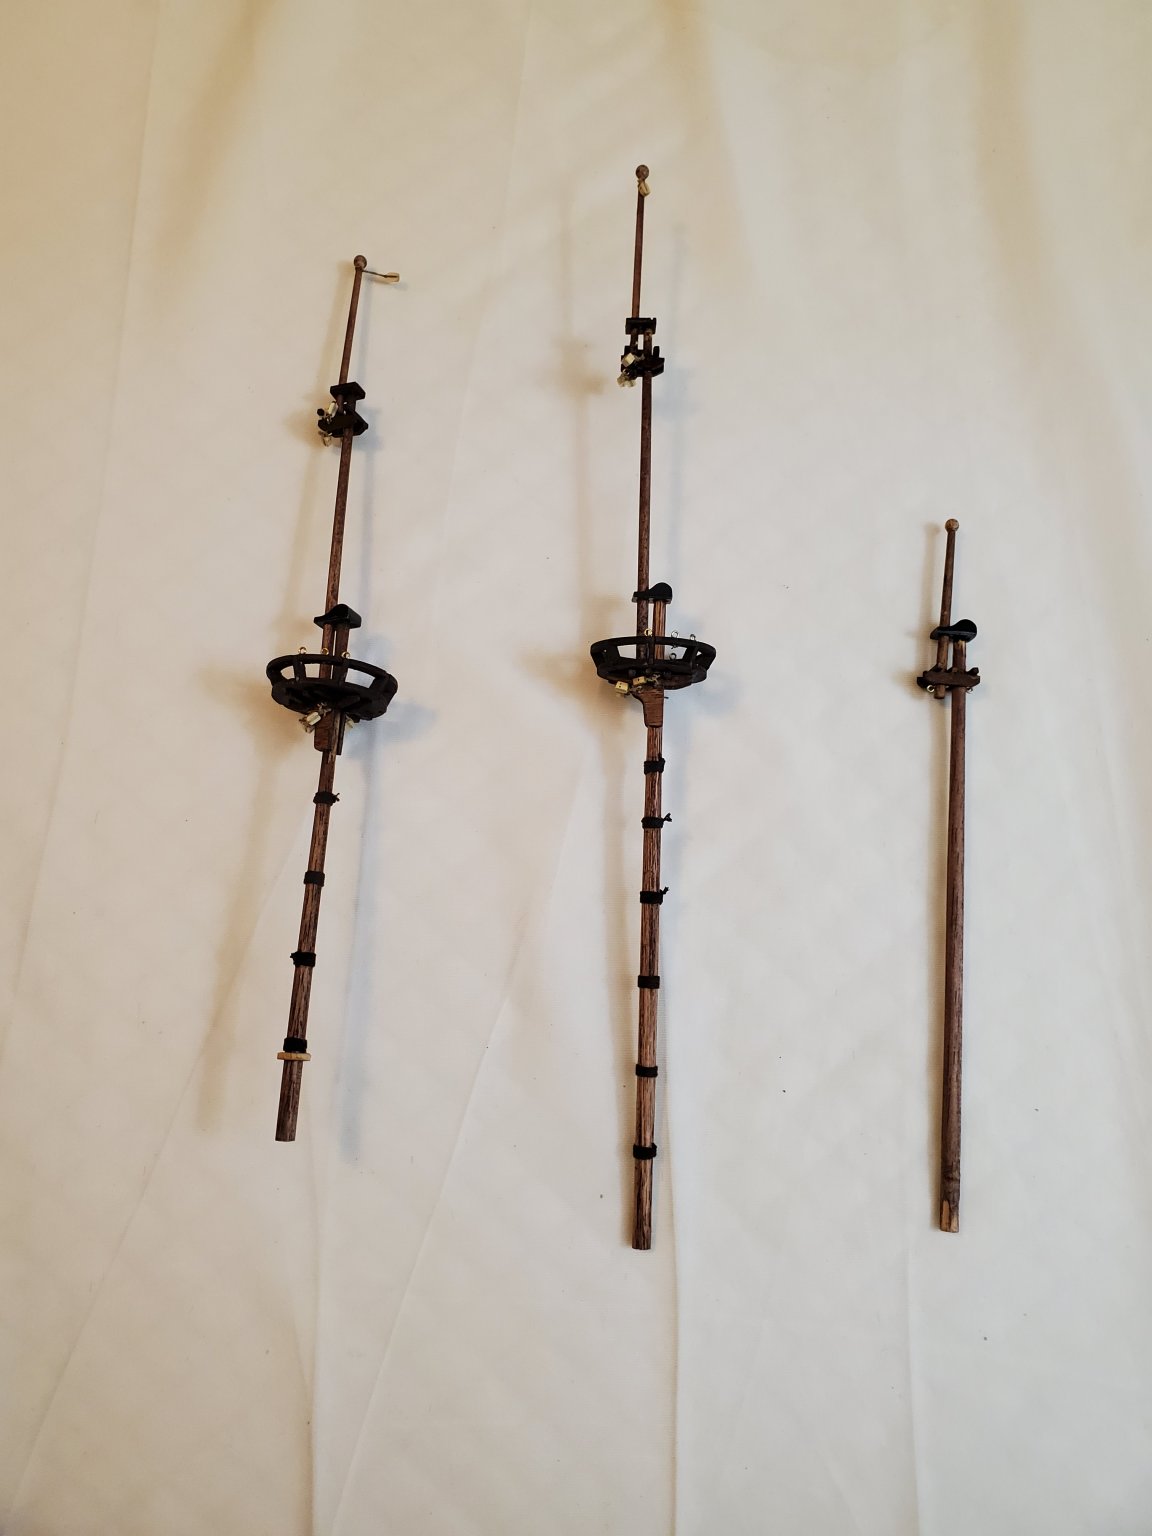
I took a break from the hull while I make some decisions and built the mast assemblies. I will install them later. These were the most difficult thing on this model so far. Trying to hold and glue these tiny pieces, several at a time was a very difficult task. But I got it done.

-
I am finally getting back to my ship model after most of a year of health problems and "life". I have been working on the hull some and working on details.


-
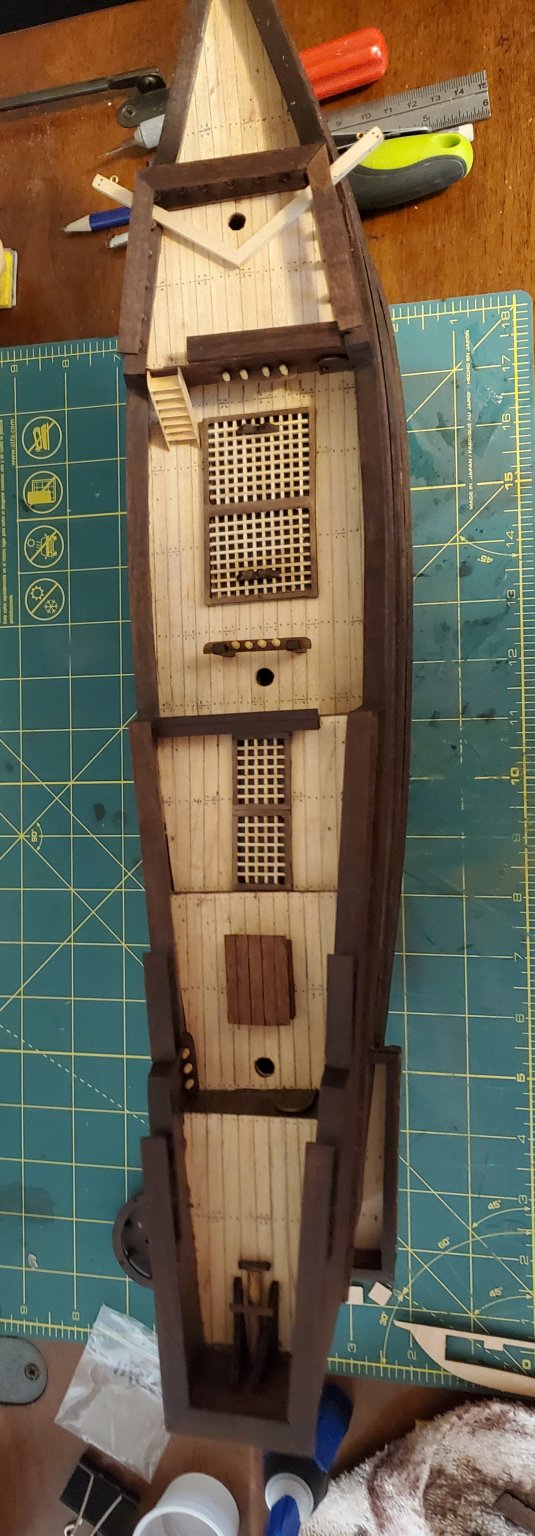
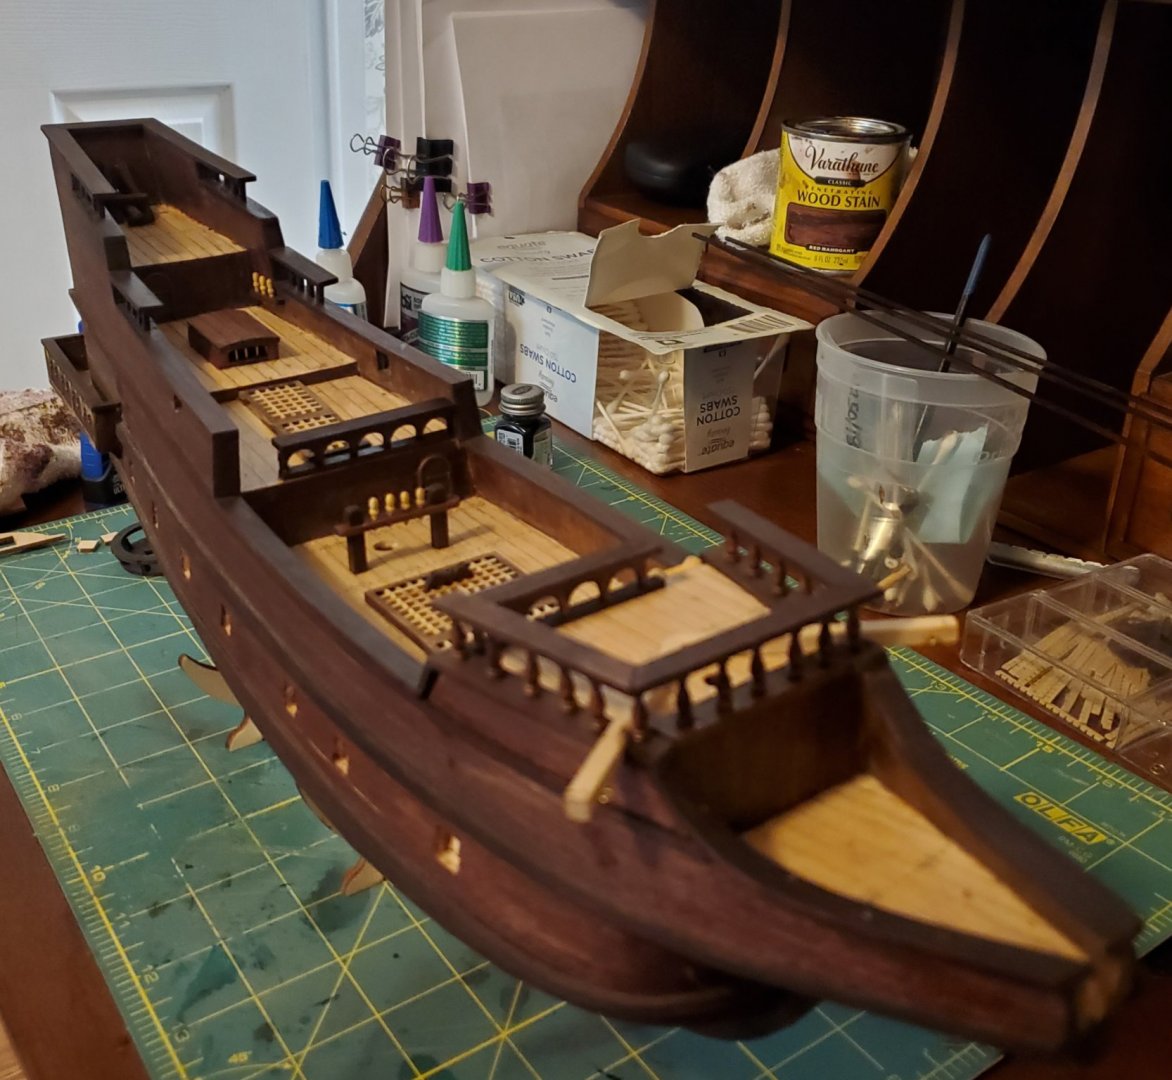
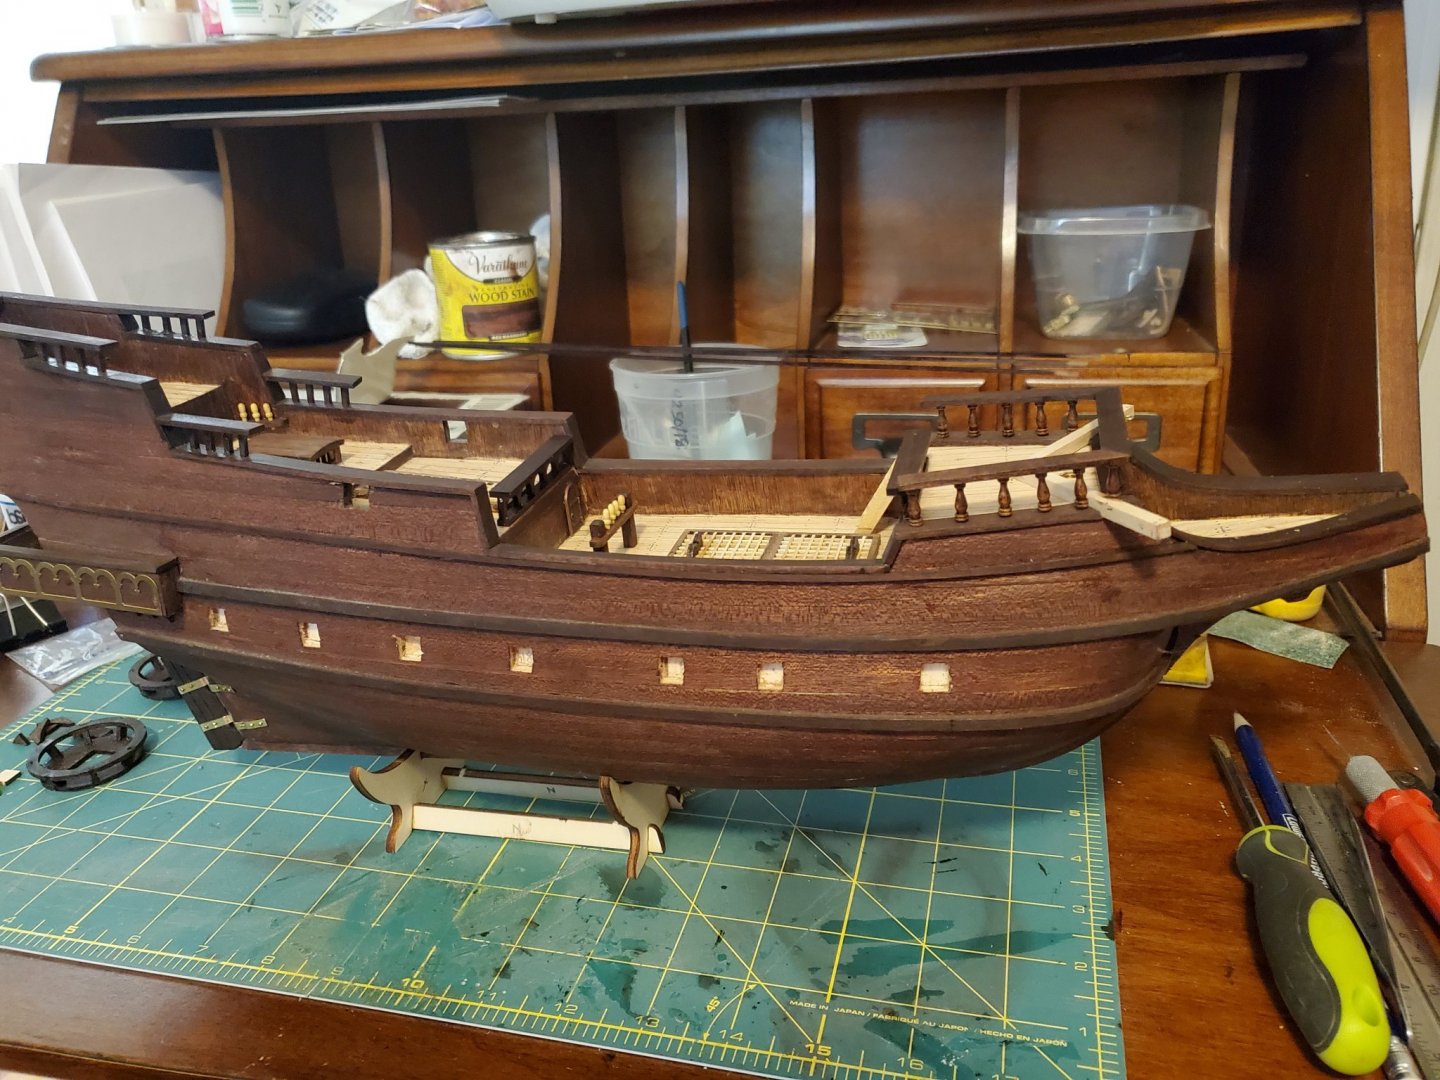
I got the wood I needed and finished the mezzanine on the rear and started adding the railings. I put a matte finish on the decks. I won't have a lot of time for the next few weeks, but try to spend a couple of hours each evening working on it to unwind.
-
While waiting for the wood I ordered to arrive, I raided the junk ( I mean inventory) box in my shop and started to put together a serving machine. The gears are 2" diameter RC car gears I machined aluminum hubs for to mount on the shafts. After trial fitting everything, it turns smoothly. I put nylon bushings for bearings in the oak wood frame so I can motorize it later. I still have to make a crank for each end. This little machine will cost me "zero" dollars since I had everything lying around already. I'll post a finished photo as soon as it is done.
-
Thanks guys. I think I will serve lines on this model (especially for practice). You are correct that the building is not a problem for me, it is learning the terminology and what standard practices should be. I have a degree in engineering and have been a master machinist and tool and die maker most of my life and wood working has also been a hobby for about 30 years. I got this kit as a sort of test run because my next project will be a larger model built from scratch. ( I am used to building things from scratch and drawing and reading blue prints). I always liked ships and this is on my bucket list. I am hoping my health and mobility lasts as many more years as it will take to build the ship of my dreams. I am a little slower than I used to be. I have had a couple heart attacks, open heart surgery, a couple of strokes (after which I now have trouble with numbers), tremors on my left side, and severe spinal stenosis which messes up my balance and ability to walk. I downloaded and printed several articles found about planking hulls and decking. I also found and downloaded a very large list of terminology and their explanations to refer to. The next ship I build , I want at a scale where the hull will be in the range of about 2 feet long. This will allow a much higher detail level. I don't know how long it will take to build, but I hope my health and life lasts as long as I need. I am ordering a few of the books you have recommended. I spent my life learning everything I can about anything I can and this is a new adventure and world of knowledge.
-
I have a question. I am wondering if the scale of the ship I am building (1:85) would it be noticeable to take the time to serve the various rigging lines. Some of these lines are very small. I would like some feedback on this from you more experienced fellows. I have never served any lines before and would like to know when or if the line is too small to make it practical. I never heard of serving before I got this model to build and this kit doesn't even mention these details. This rigging is new to me and I am trying to study up on it some while waiting for my parts to arrive. Any tips would be appreciated. Mark F.
-
Thank you for the suggestion. I had thought about that. I will do it just before I mount the grating permanently and use flat black paint. Suggestions are always welcome.
-
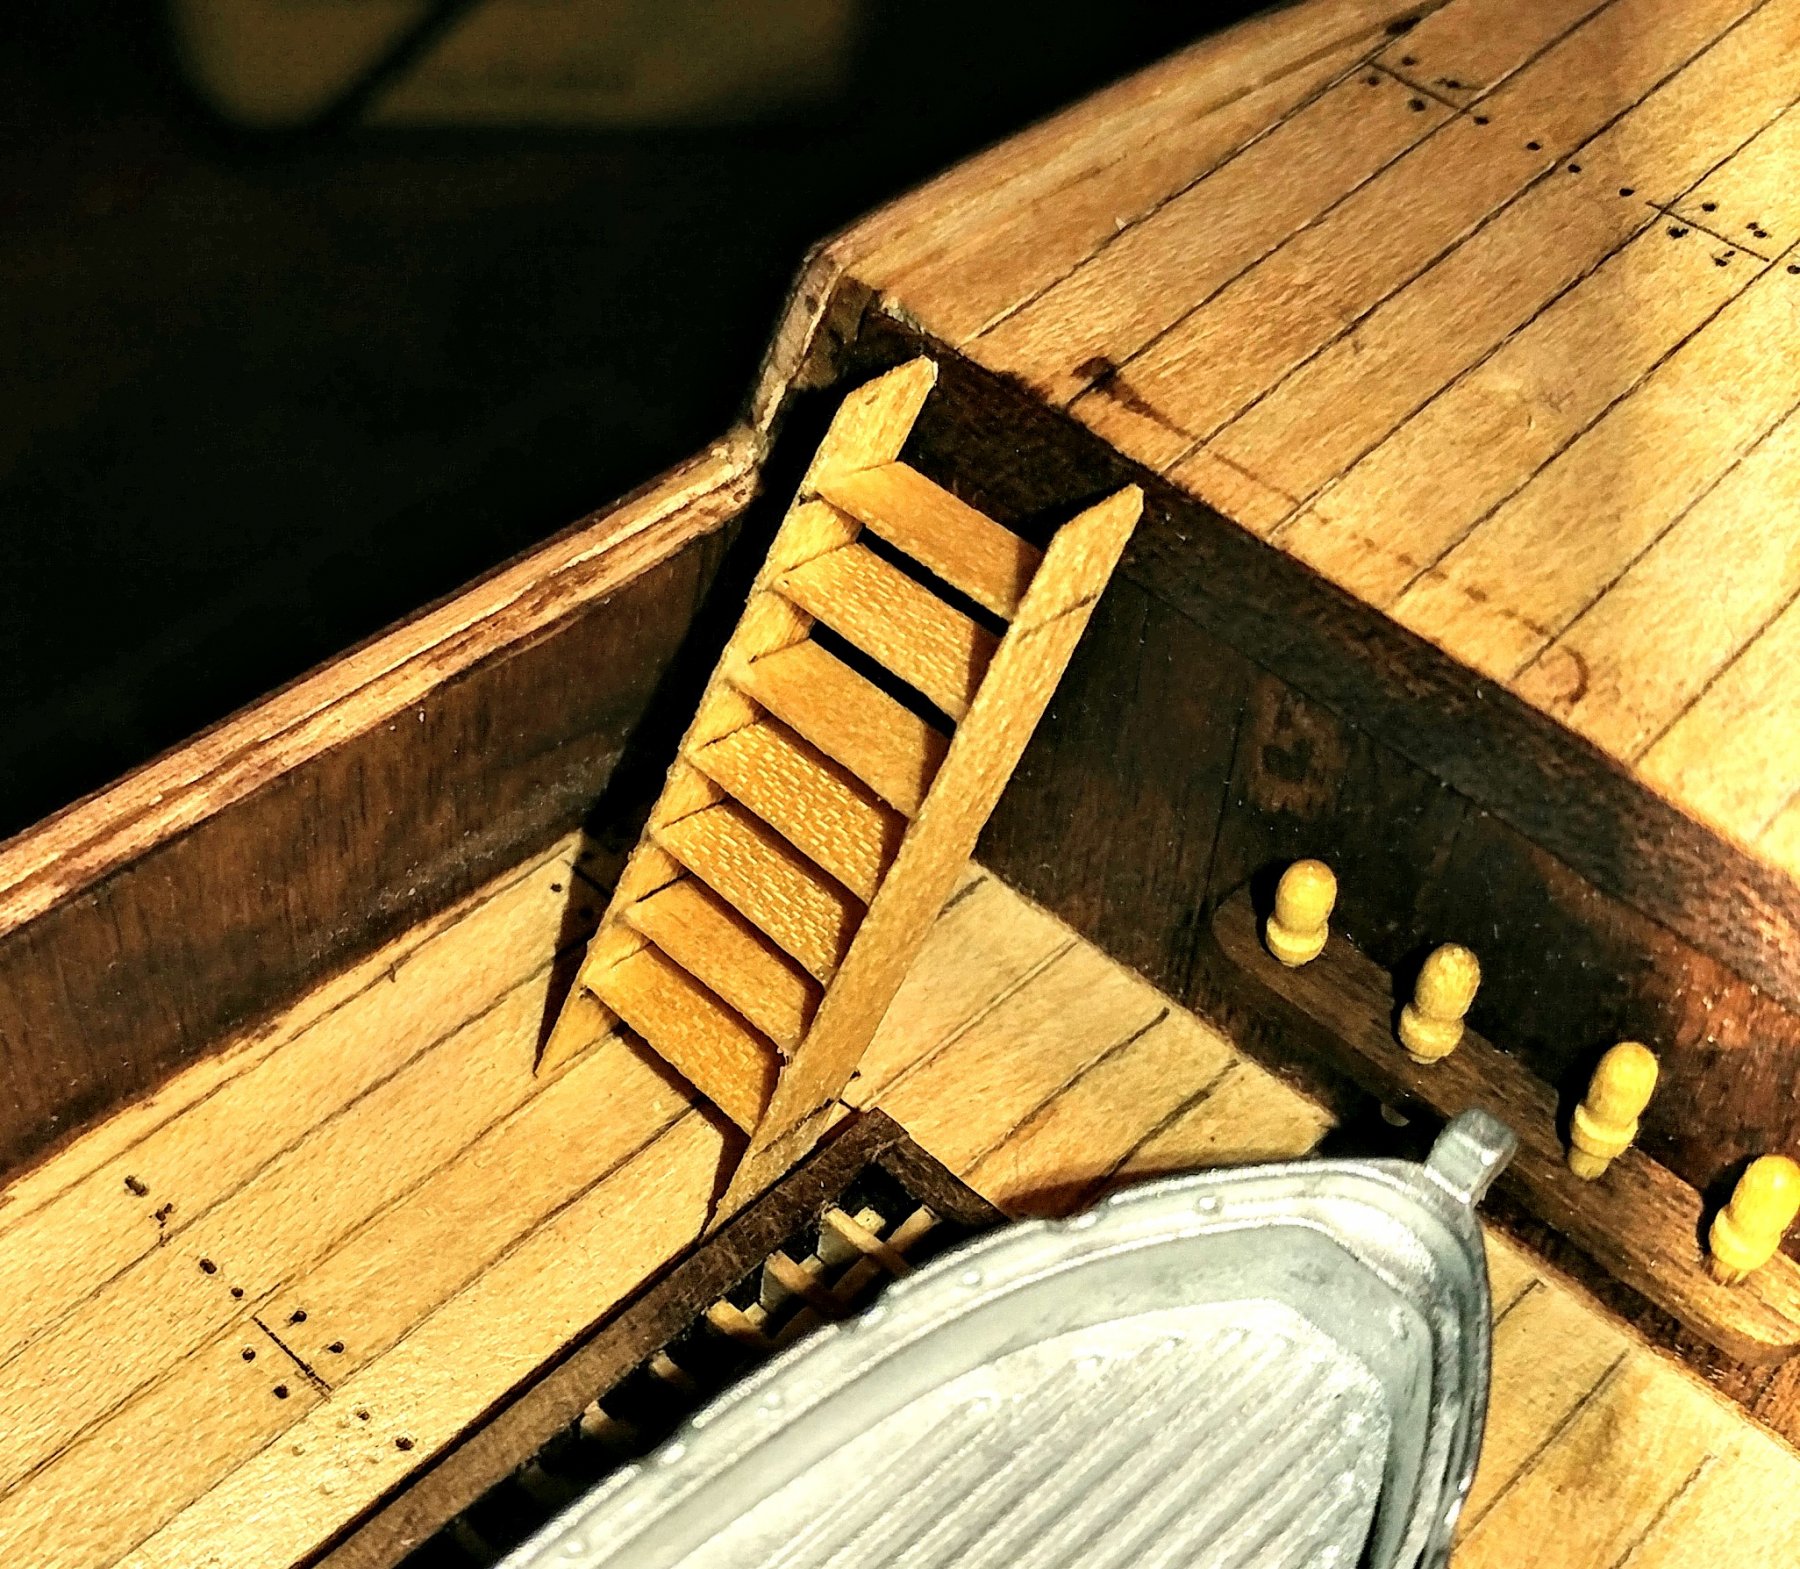
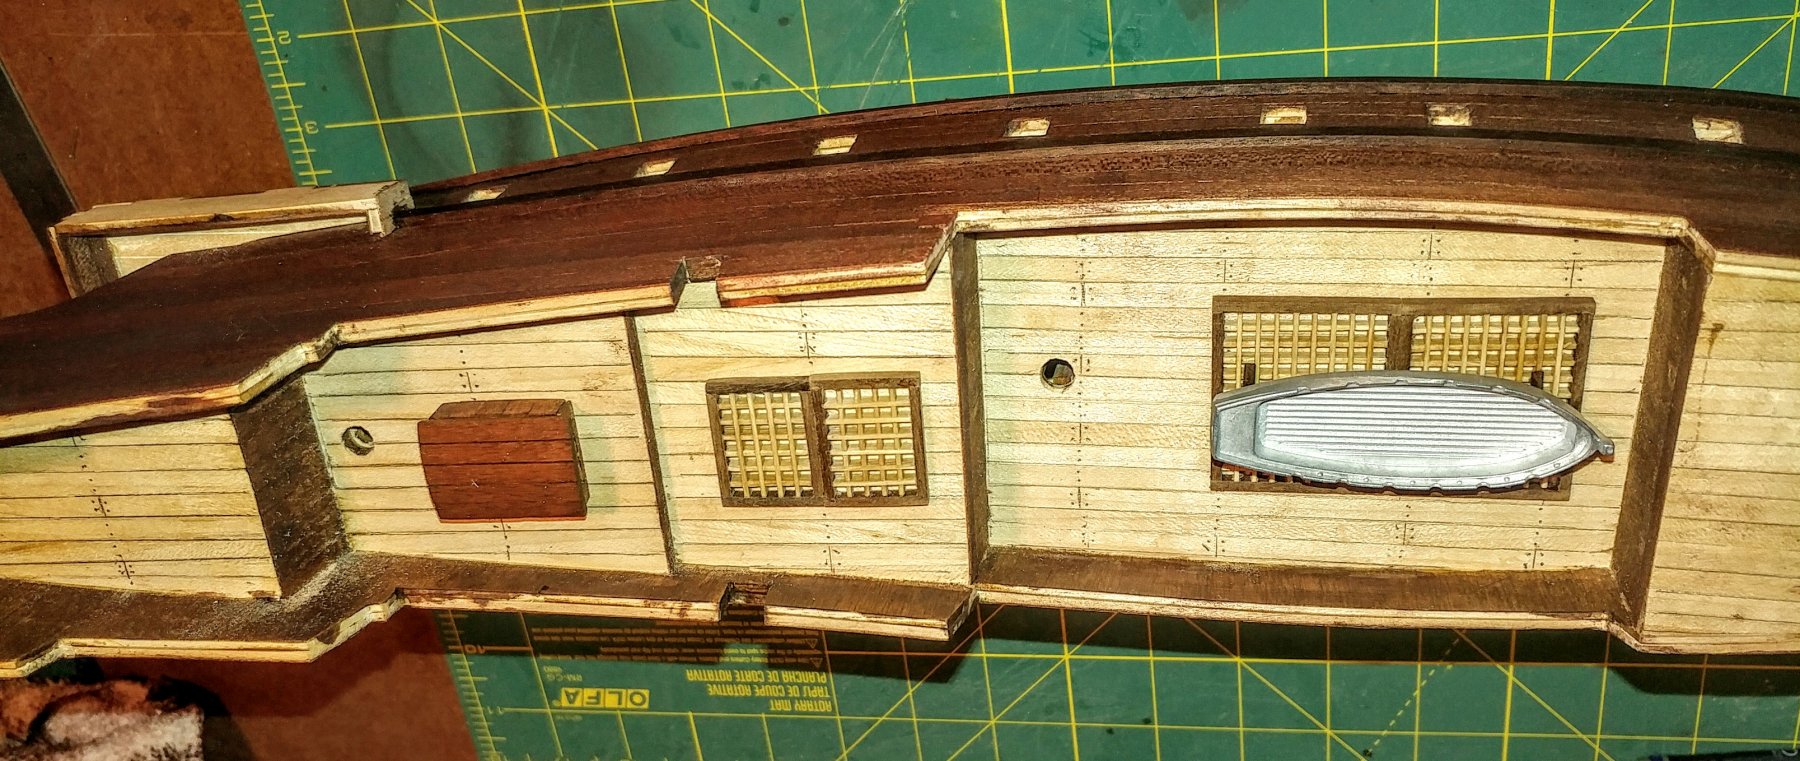
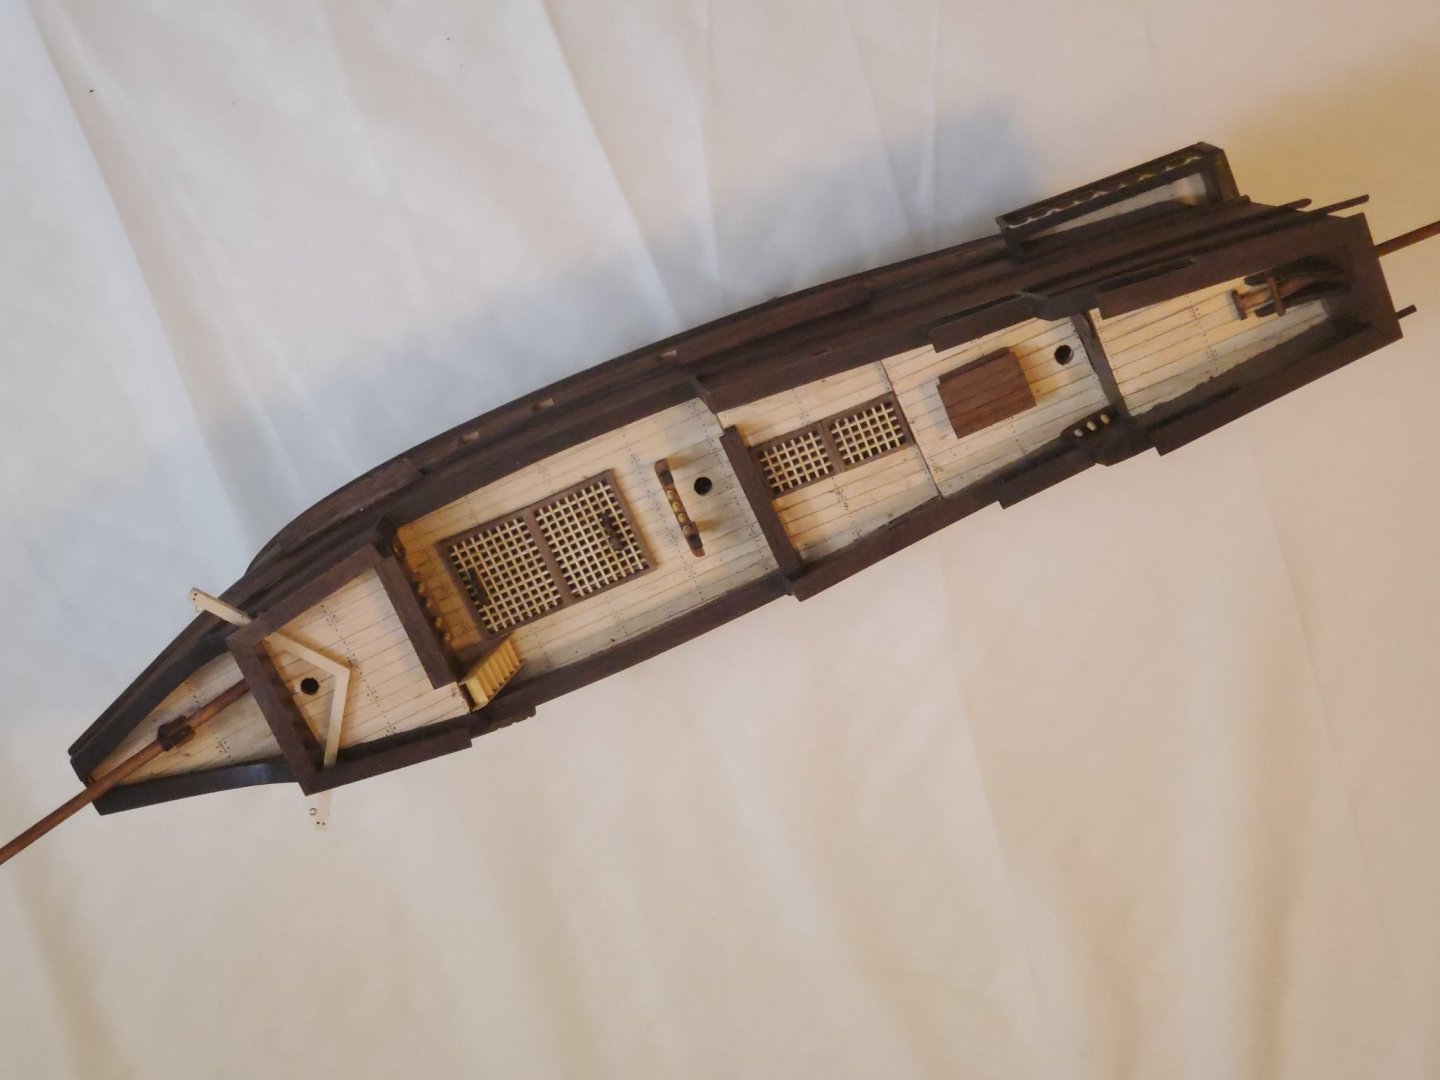
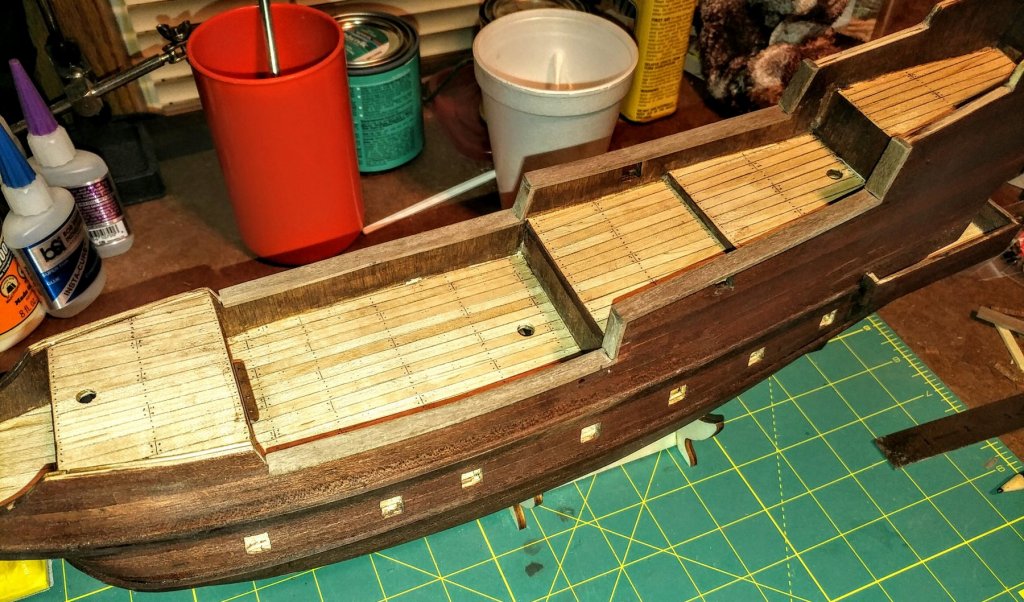
These were the kit supplied little brass ladder pieces I have destroyed. They are so tiny and thin it is impossible for my big hands to work with them. It worked out much better because I am happier with the scratch built wood ladder I made. This one is nice after 4 hours and the third attempt, I finally found a way to do it. The above photo shows the grating for the middle deck as the plan called for. There is not enough room for the cannons as they are tight fit and no walk around space. I cut the grate in half and will turn it 90 degrees and there is plenty of room for the cannons and it looks much better. Today I will varnish the decks and continue to make detail pieces as it will be next Friday before the wood to finish the hull arrives.


-
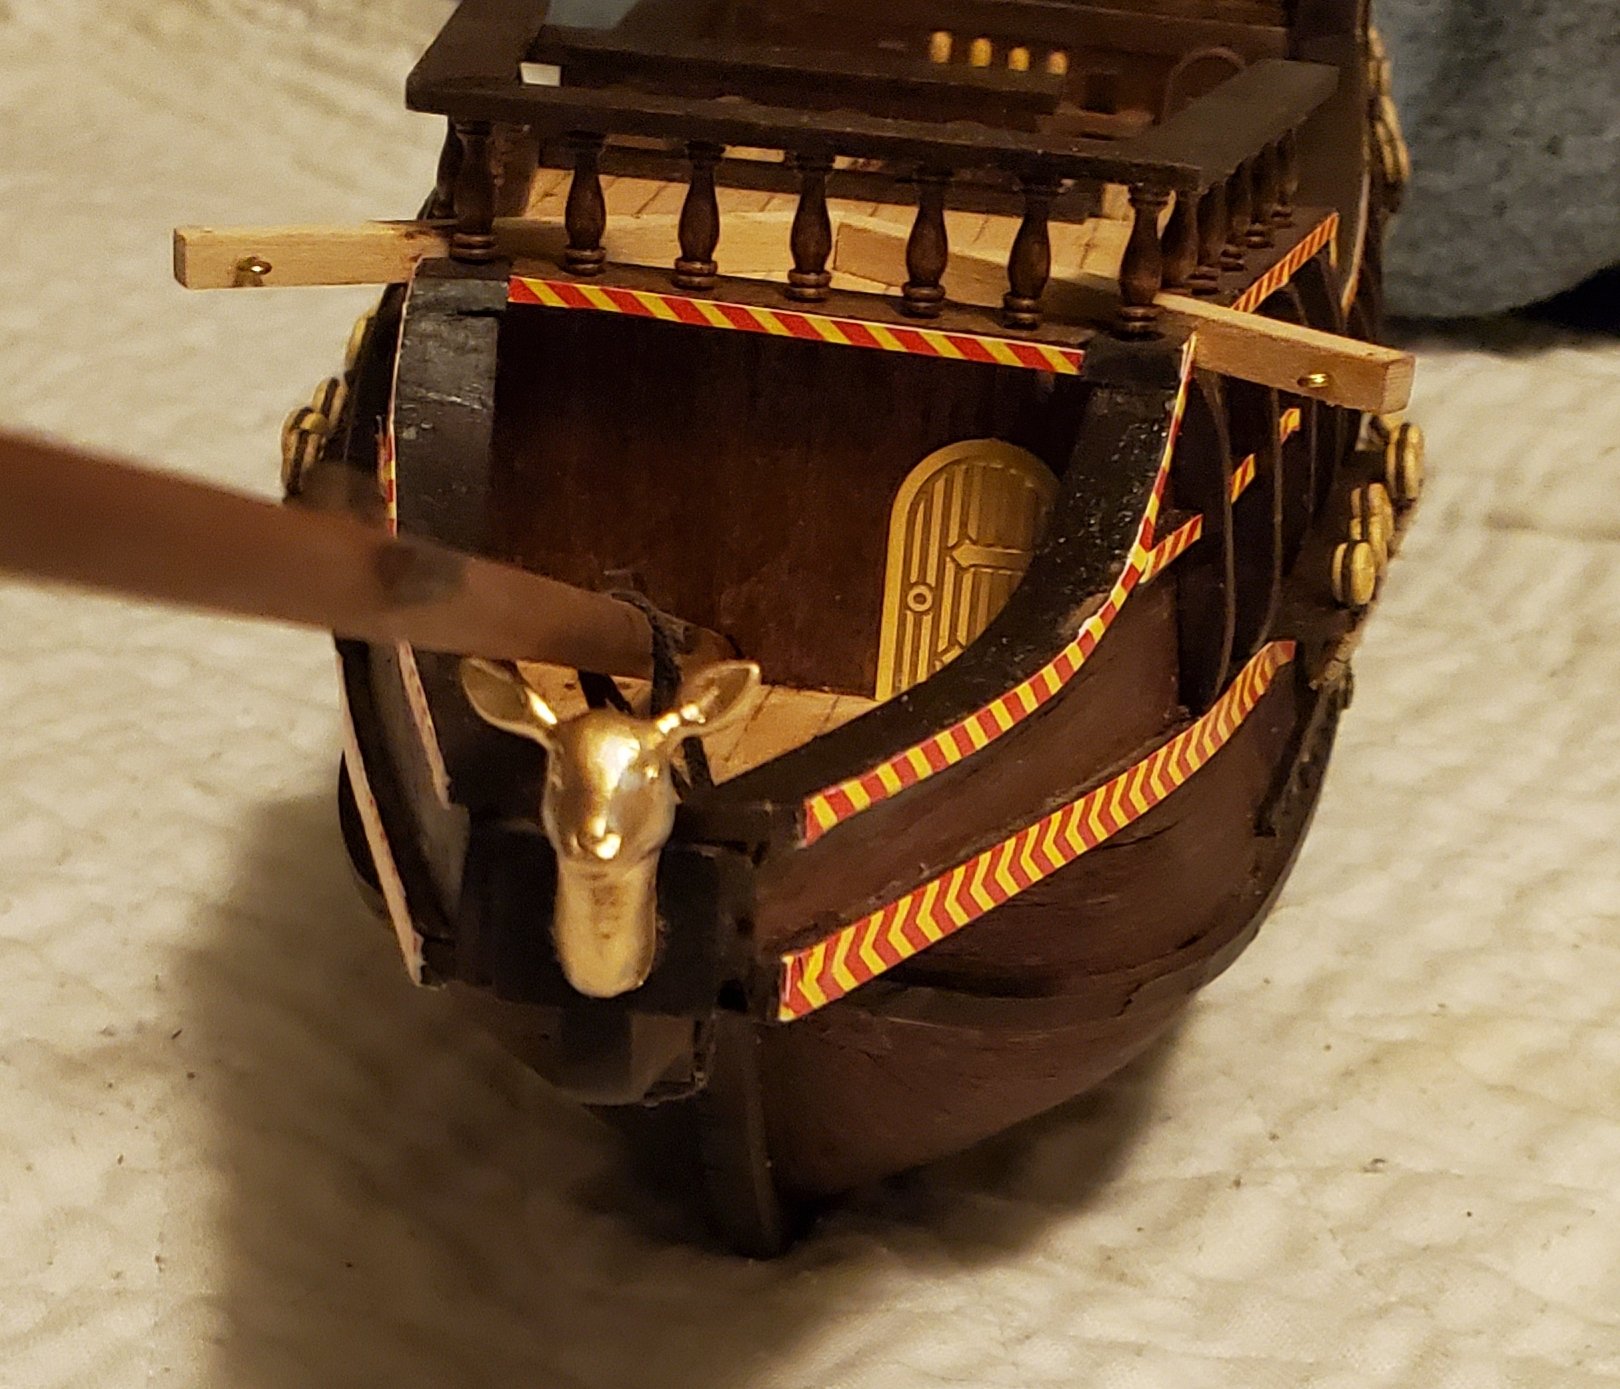
Ahhhh ..... Thanks for the picture. Now I understand. I was wondering, since there was no ship's wheel, who and how the boat was steered. ( A picture is worth a thousand words). It is a bit of disappointment as I would have loved to had a ships wheel. I just like them.