HOLIDAY DONATION DRIVE - SUPPORT MSW - DO YOUR PART TO KEEP THIS GREAT FORUM GOING! (89 donations so far out of 49,000 members - C'mon guys!)
×


Alexisgm97
-
Posts
43 -
Joined
-
Last visited
Content Type
Profiles
Forums
Gallery
Events
Everything posted by Alexisgm97
-
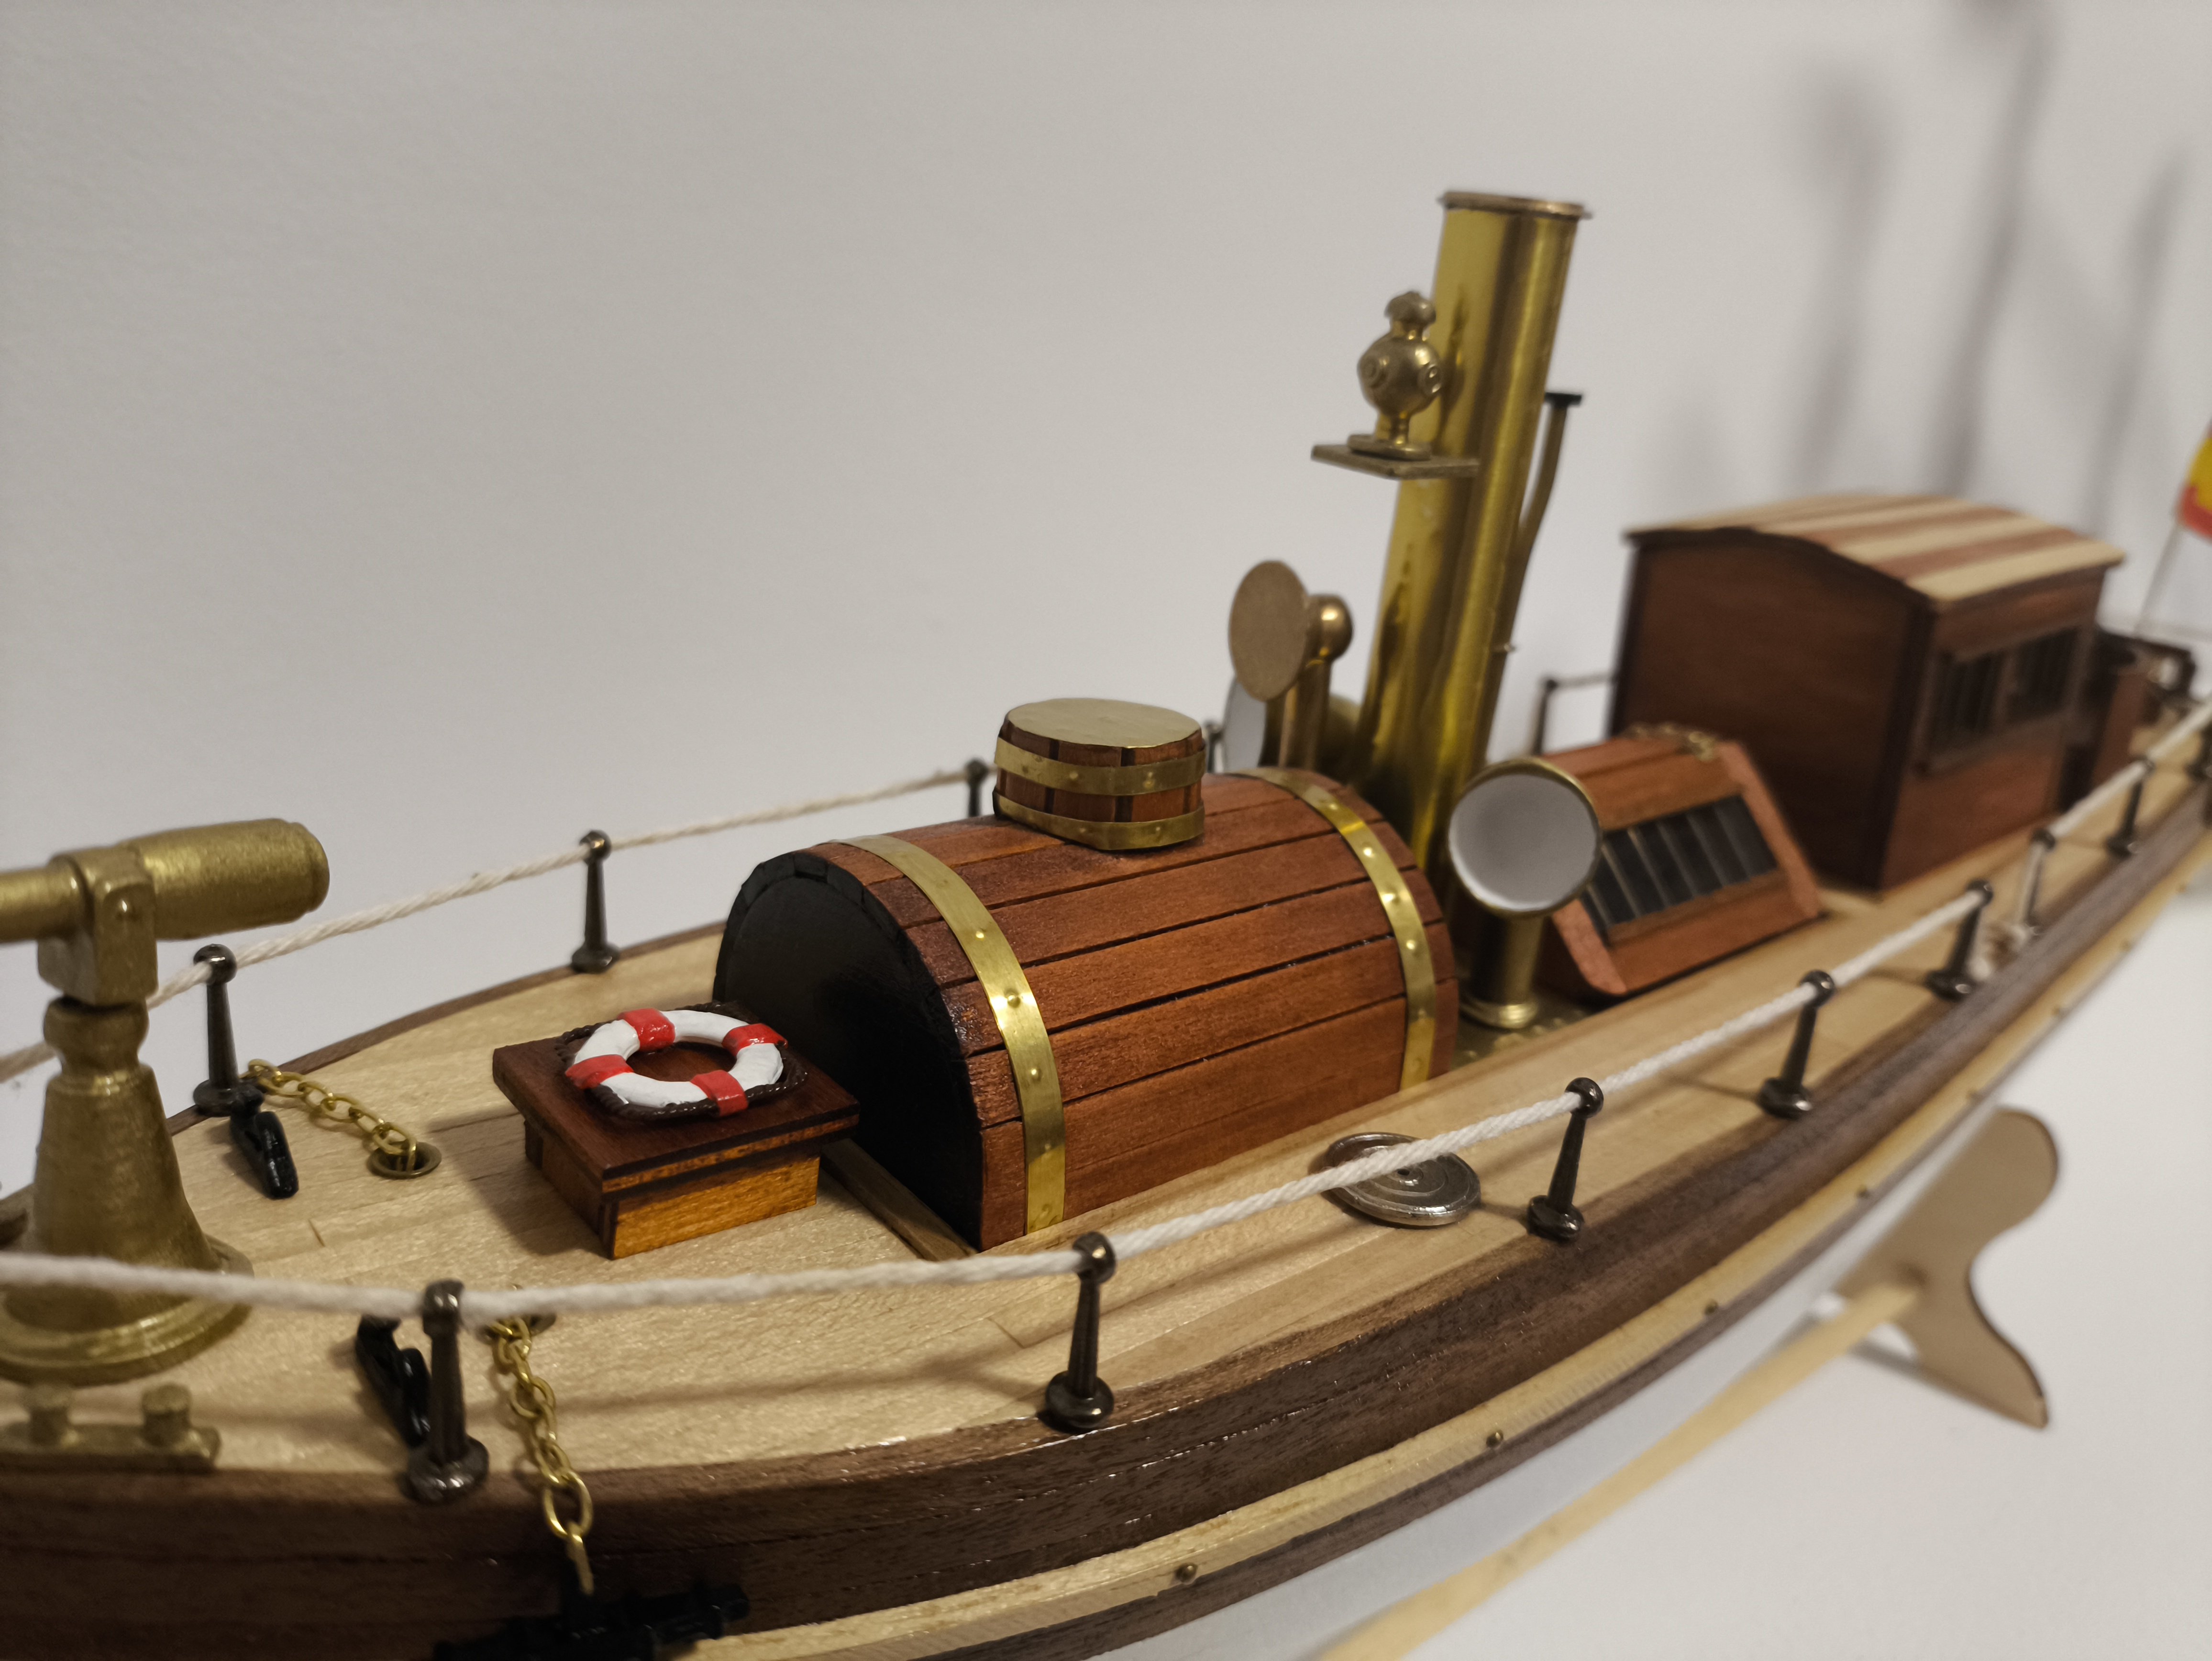
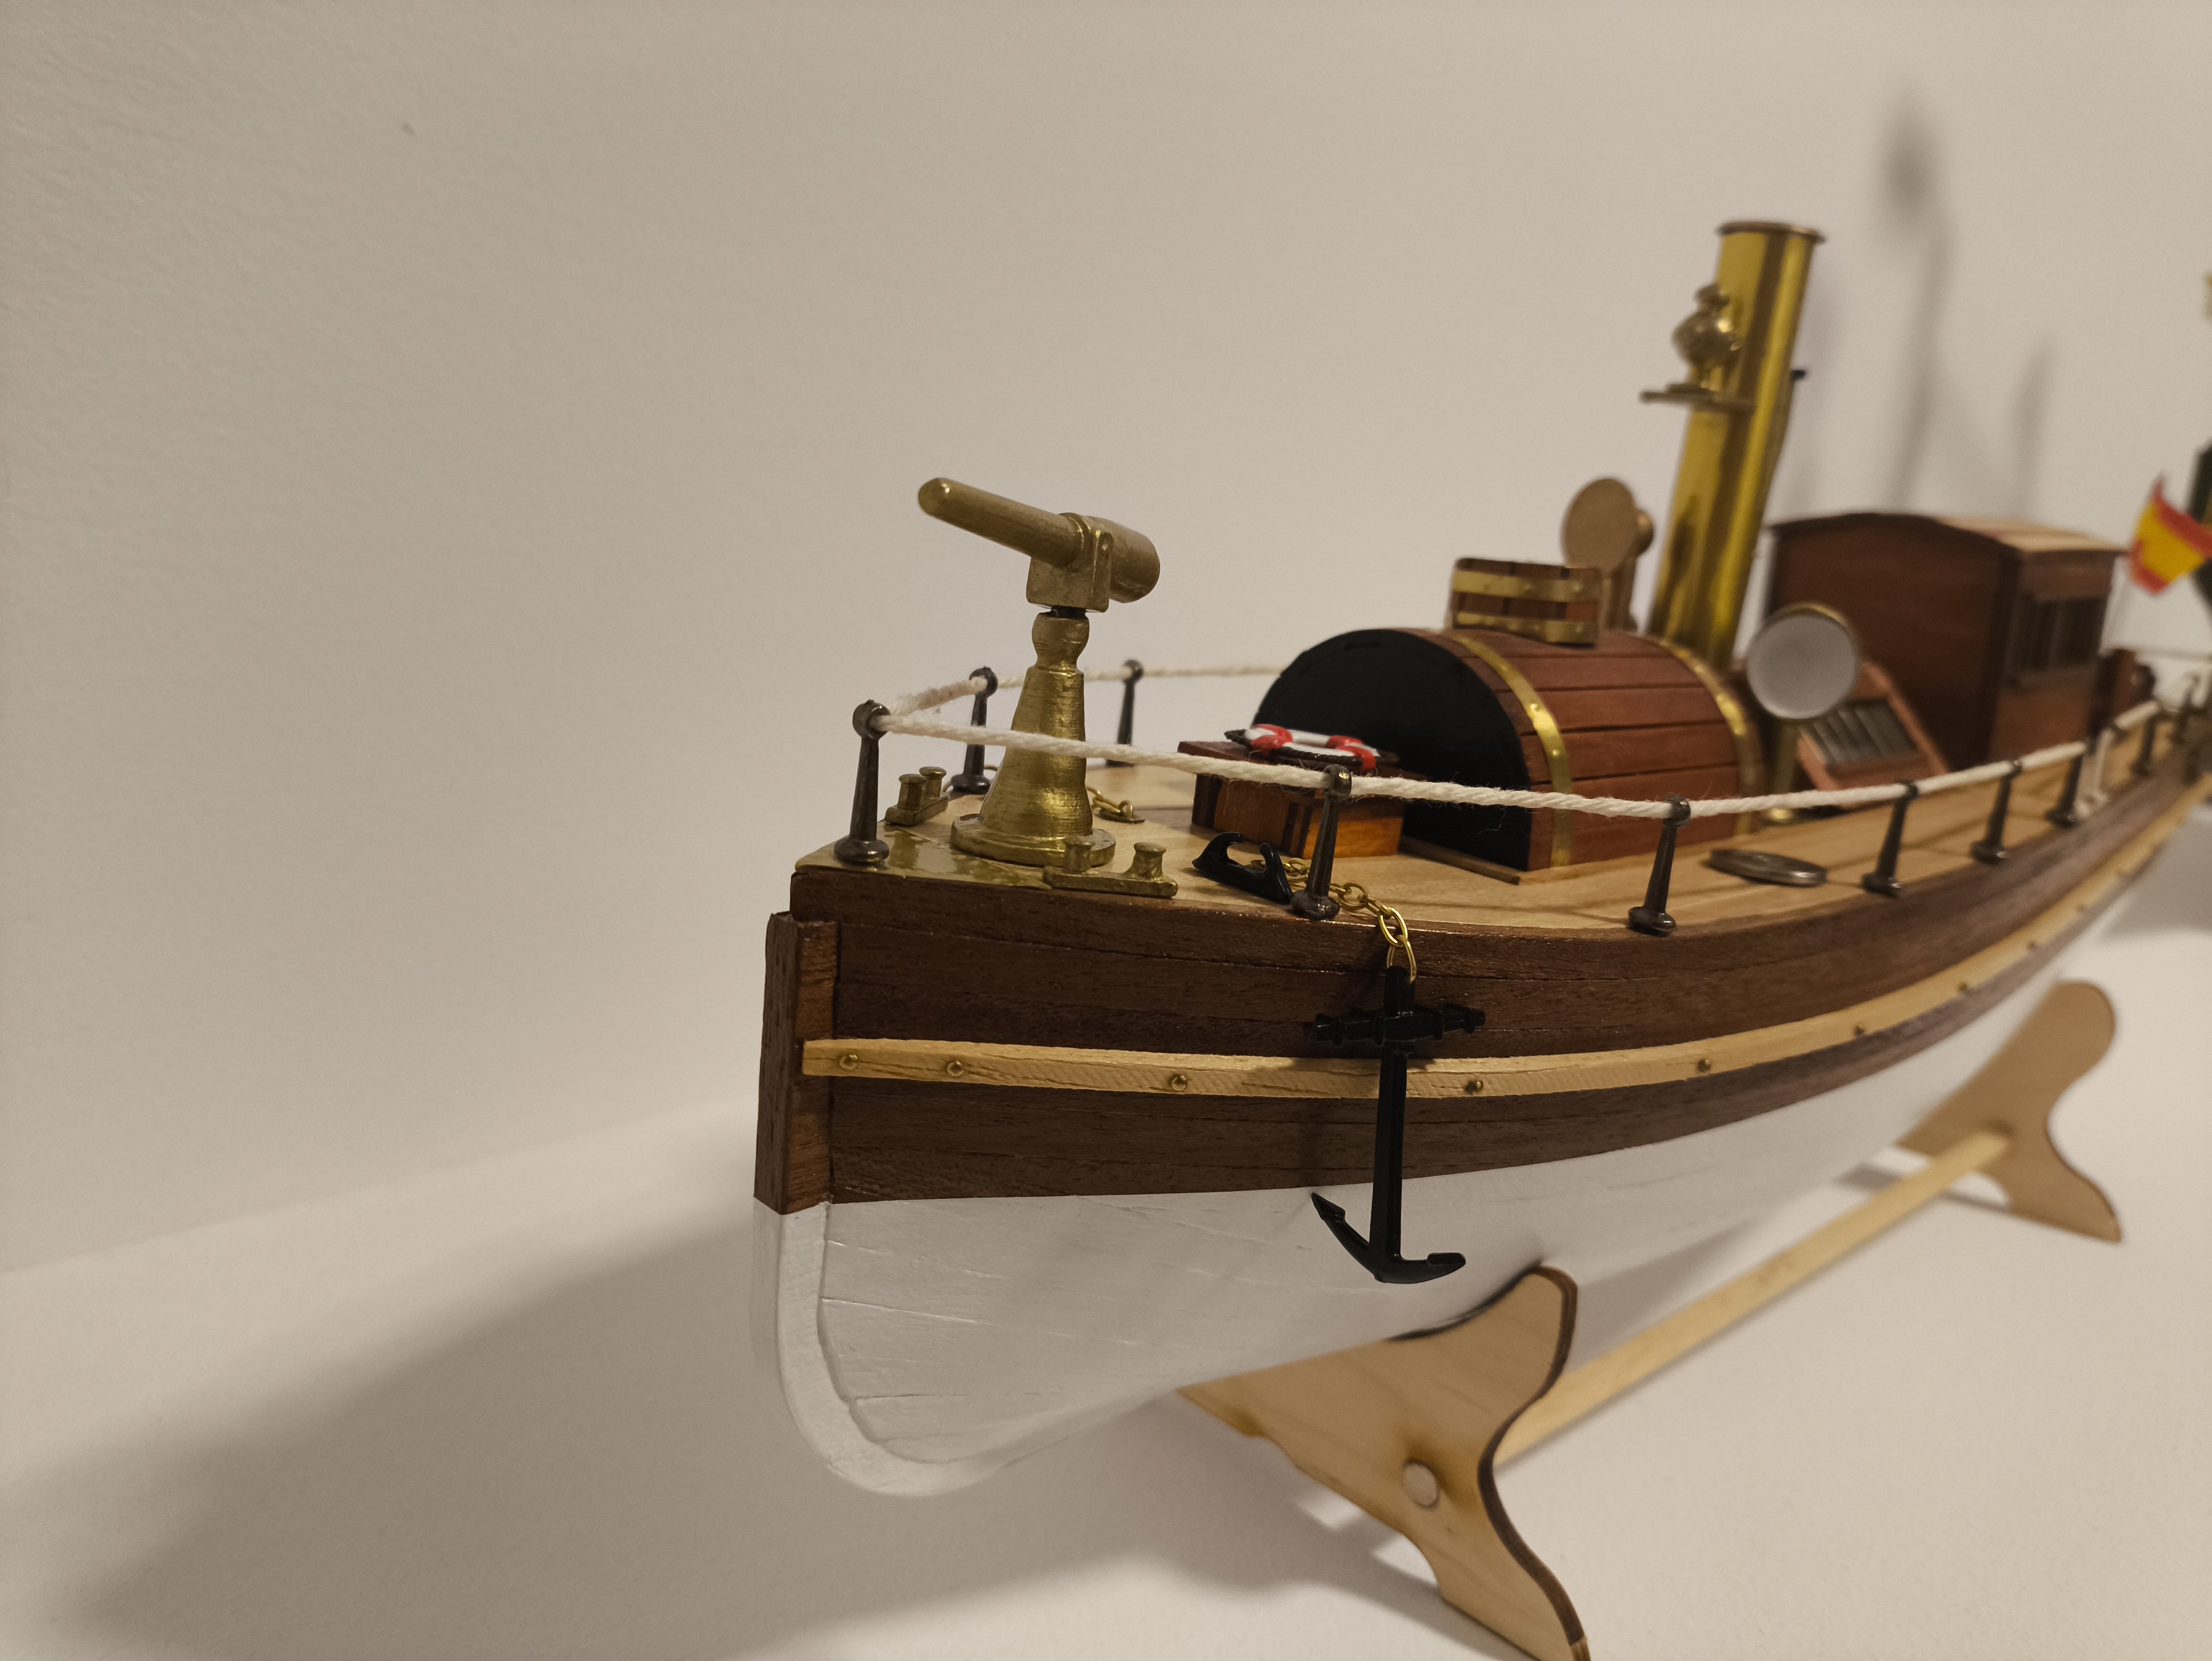
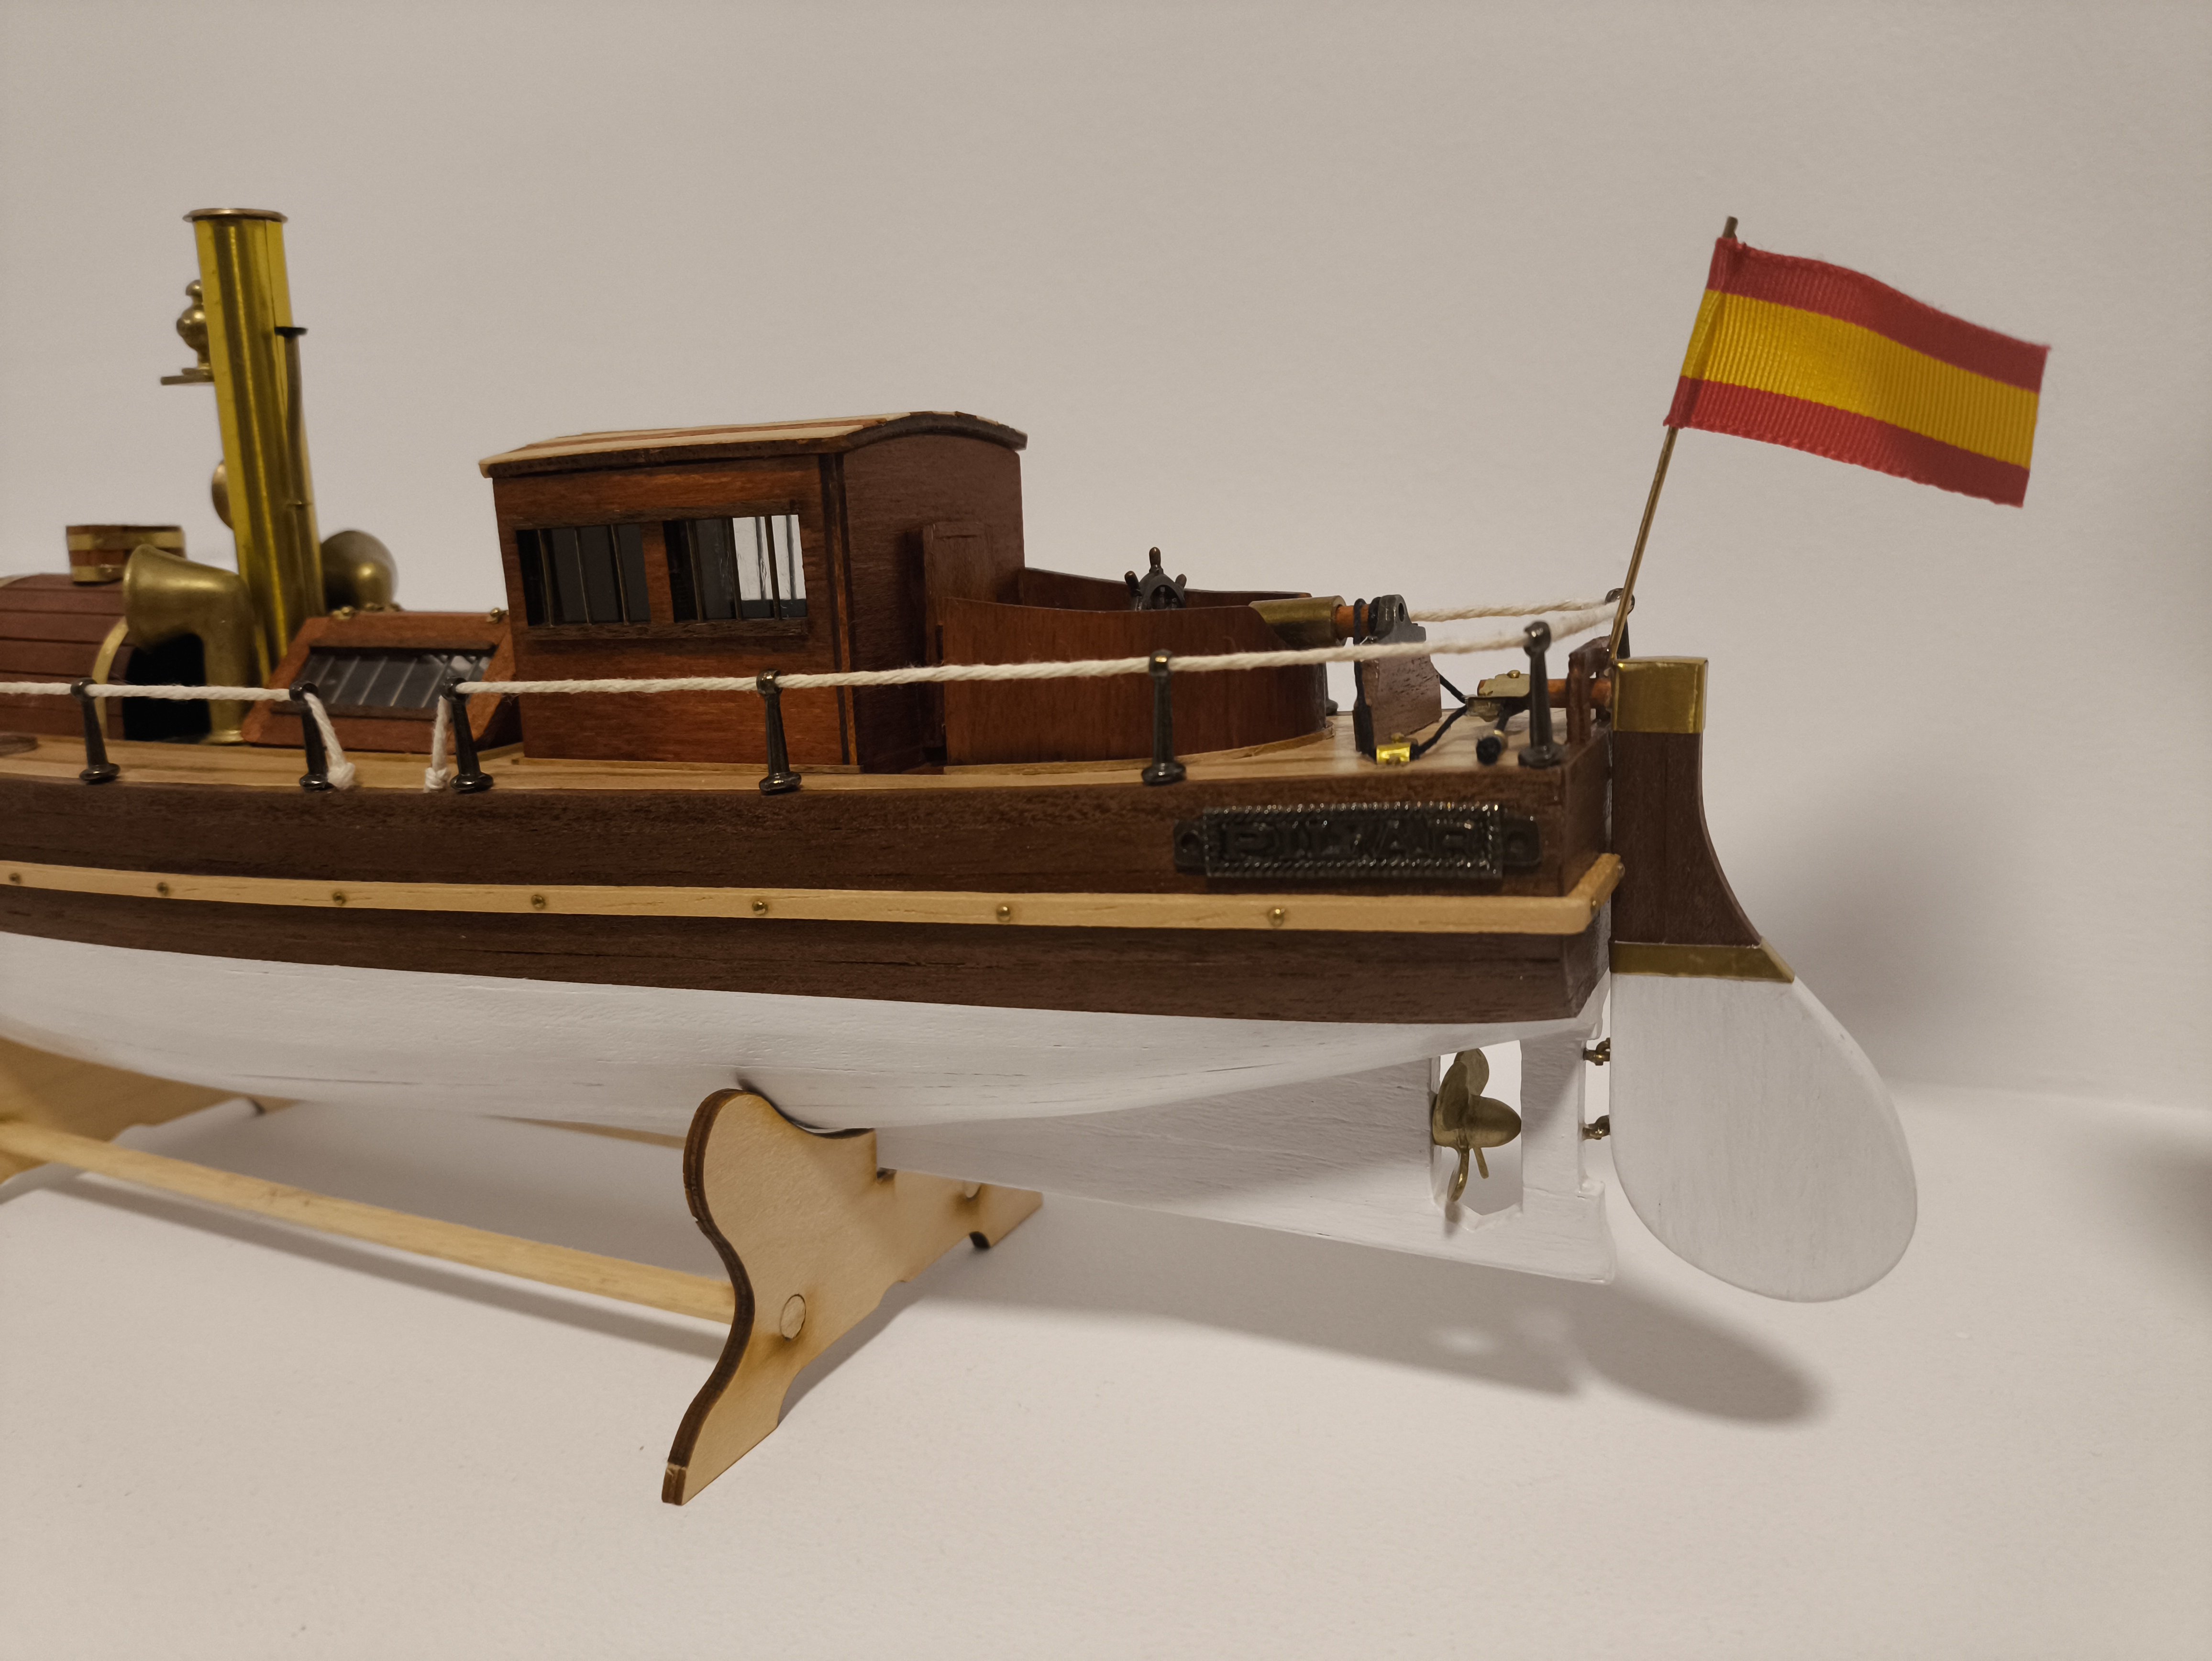
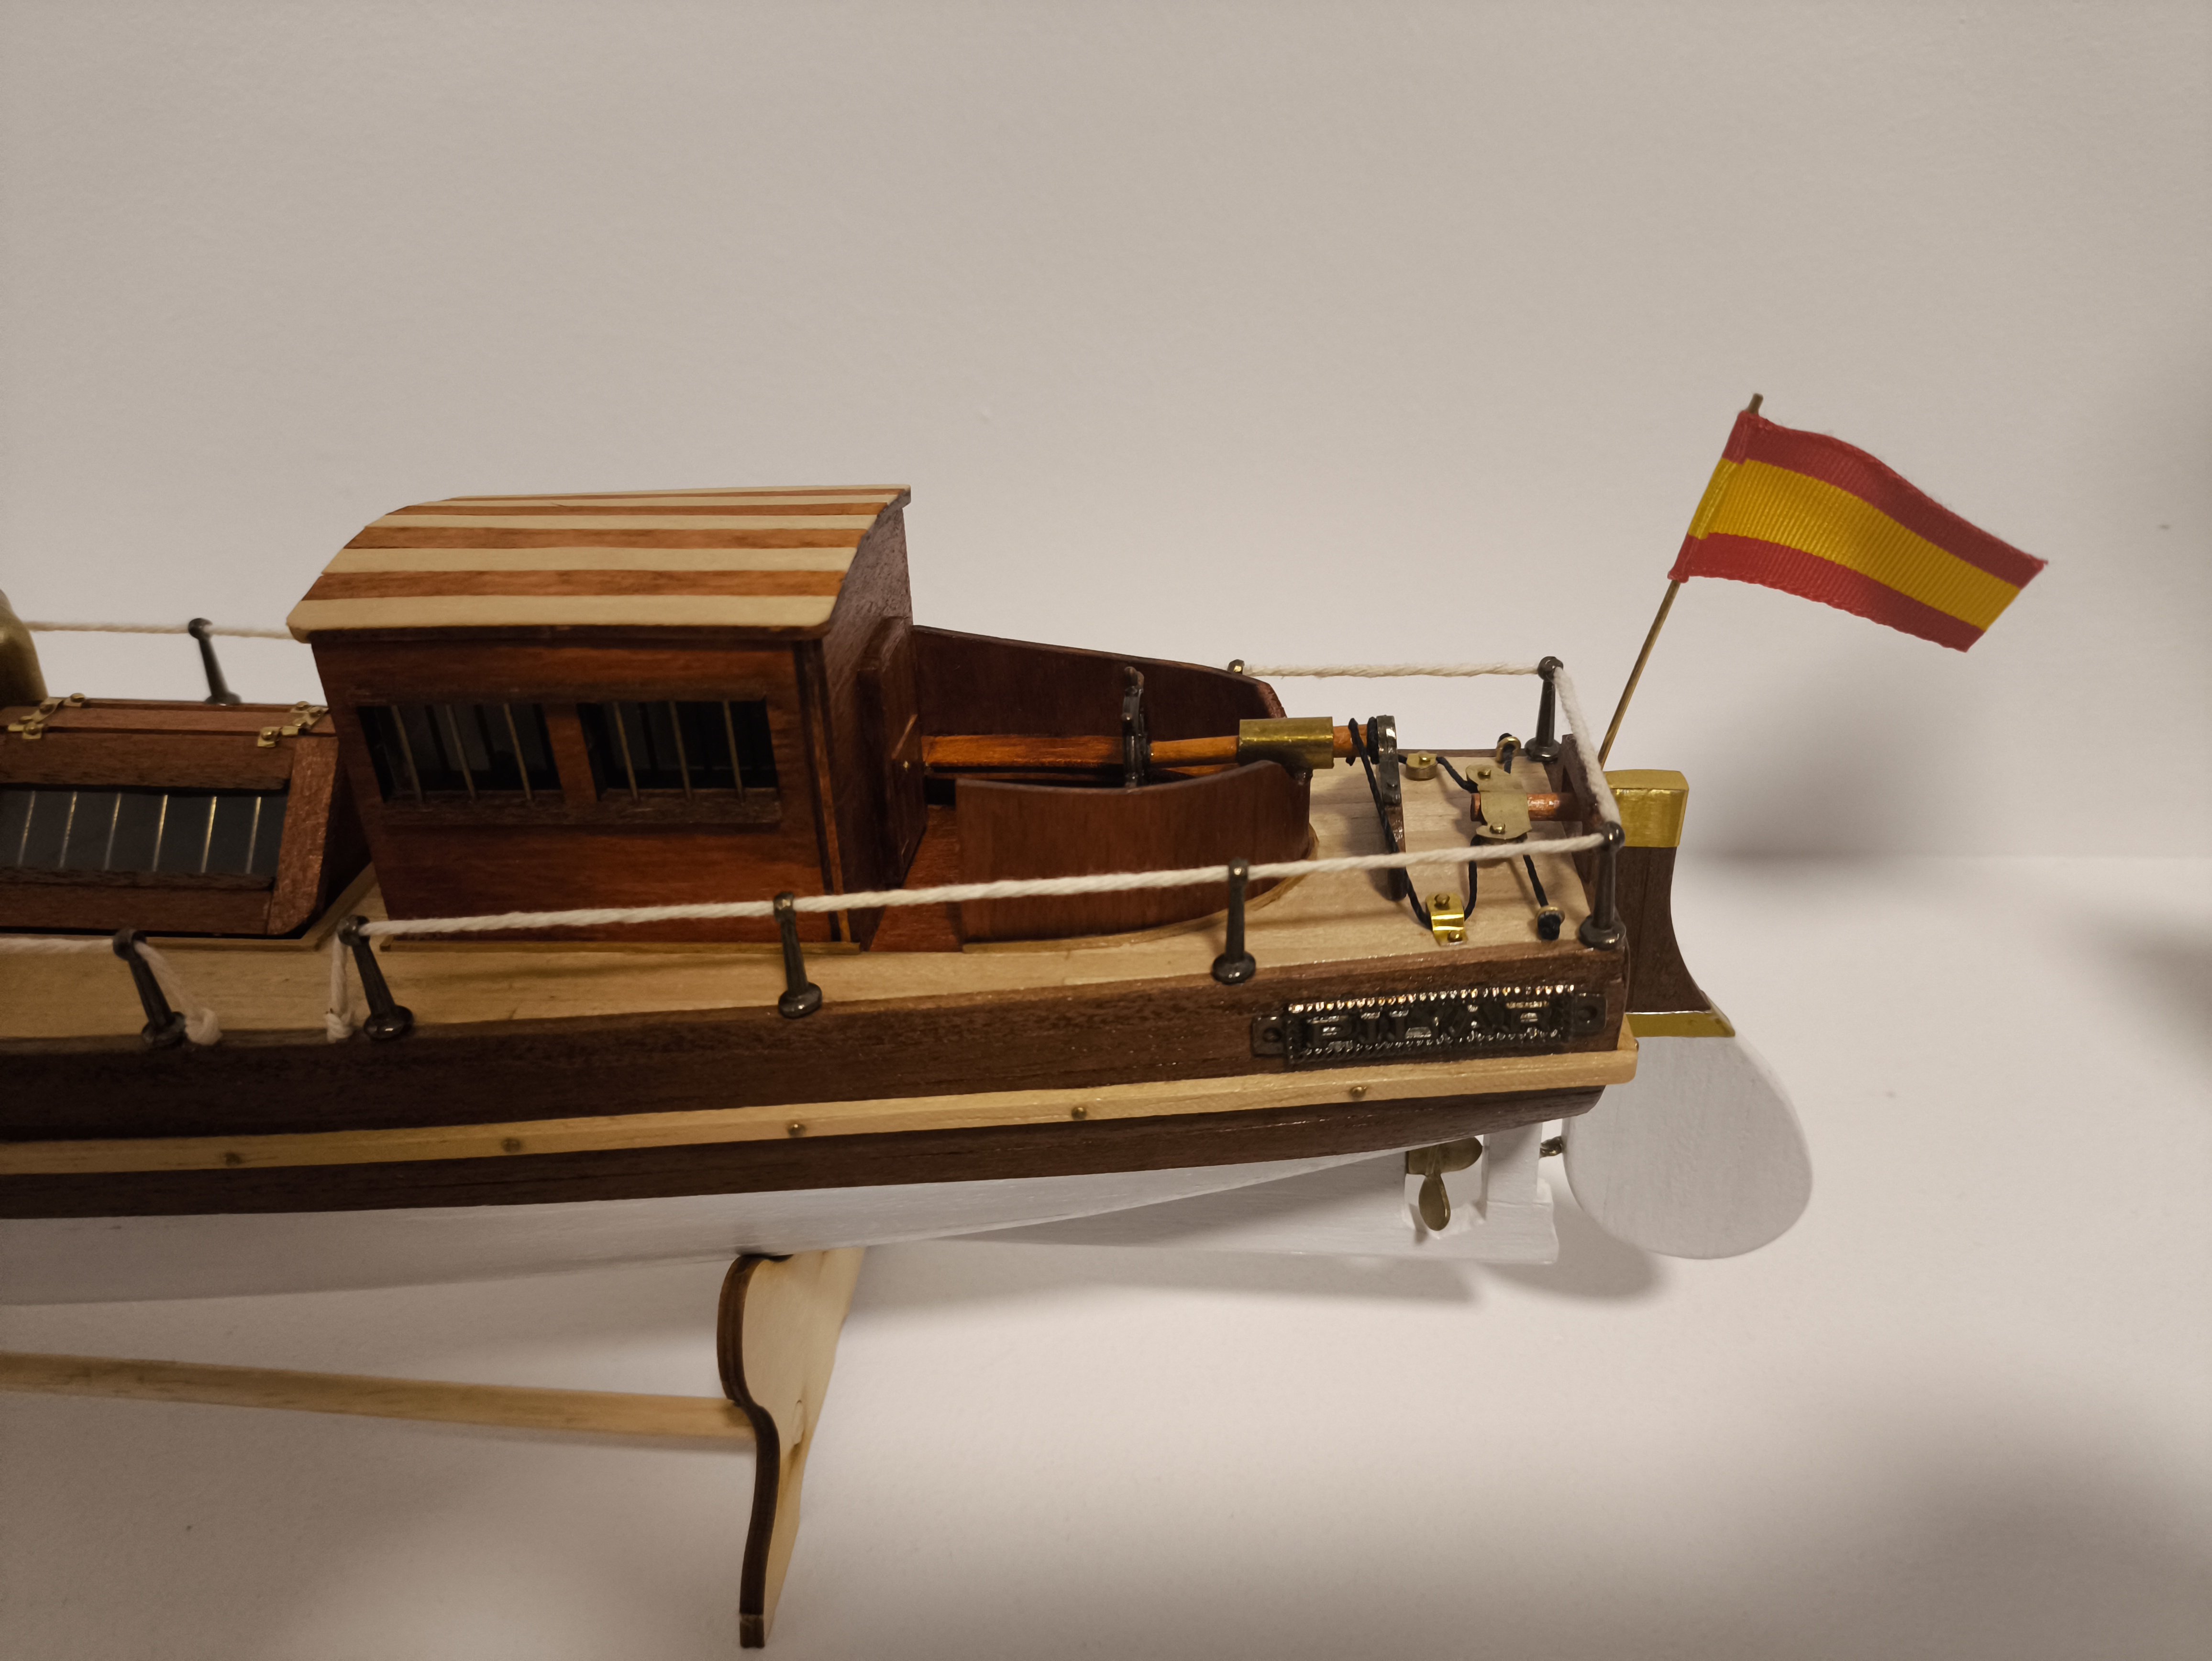
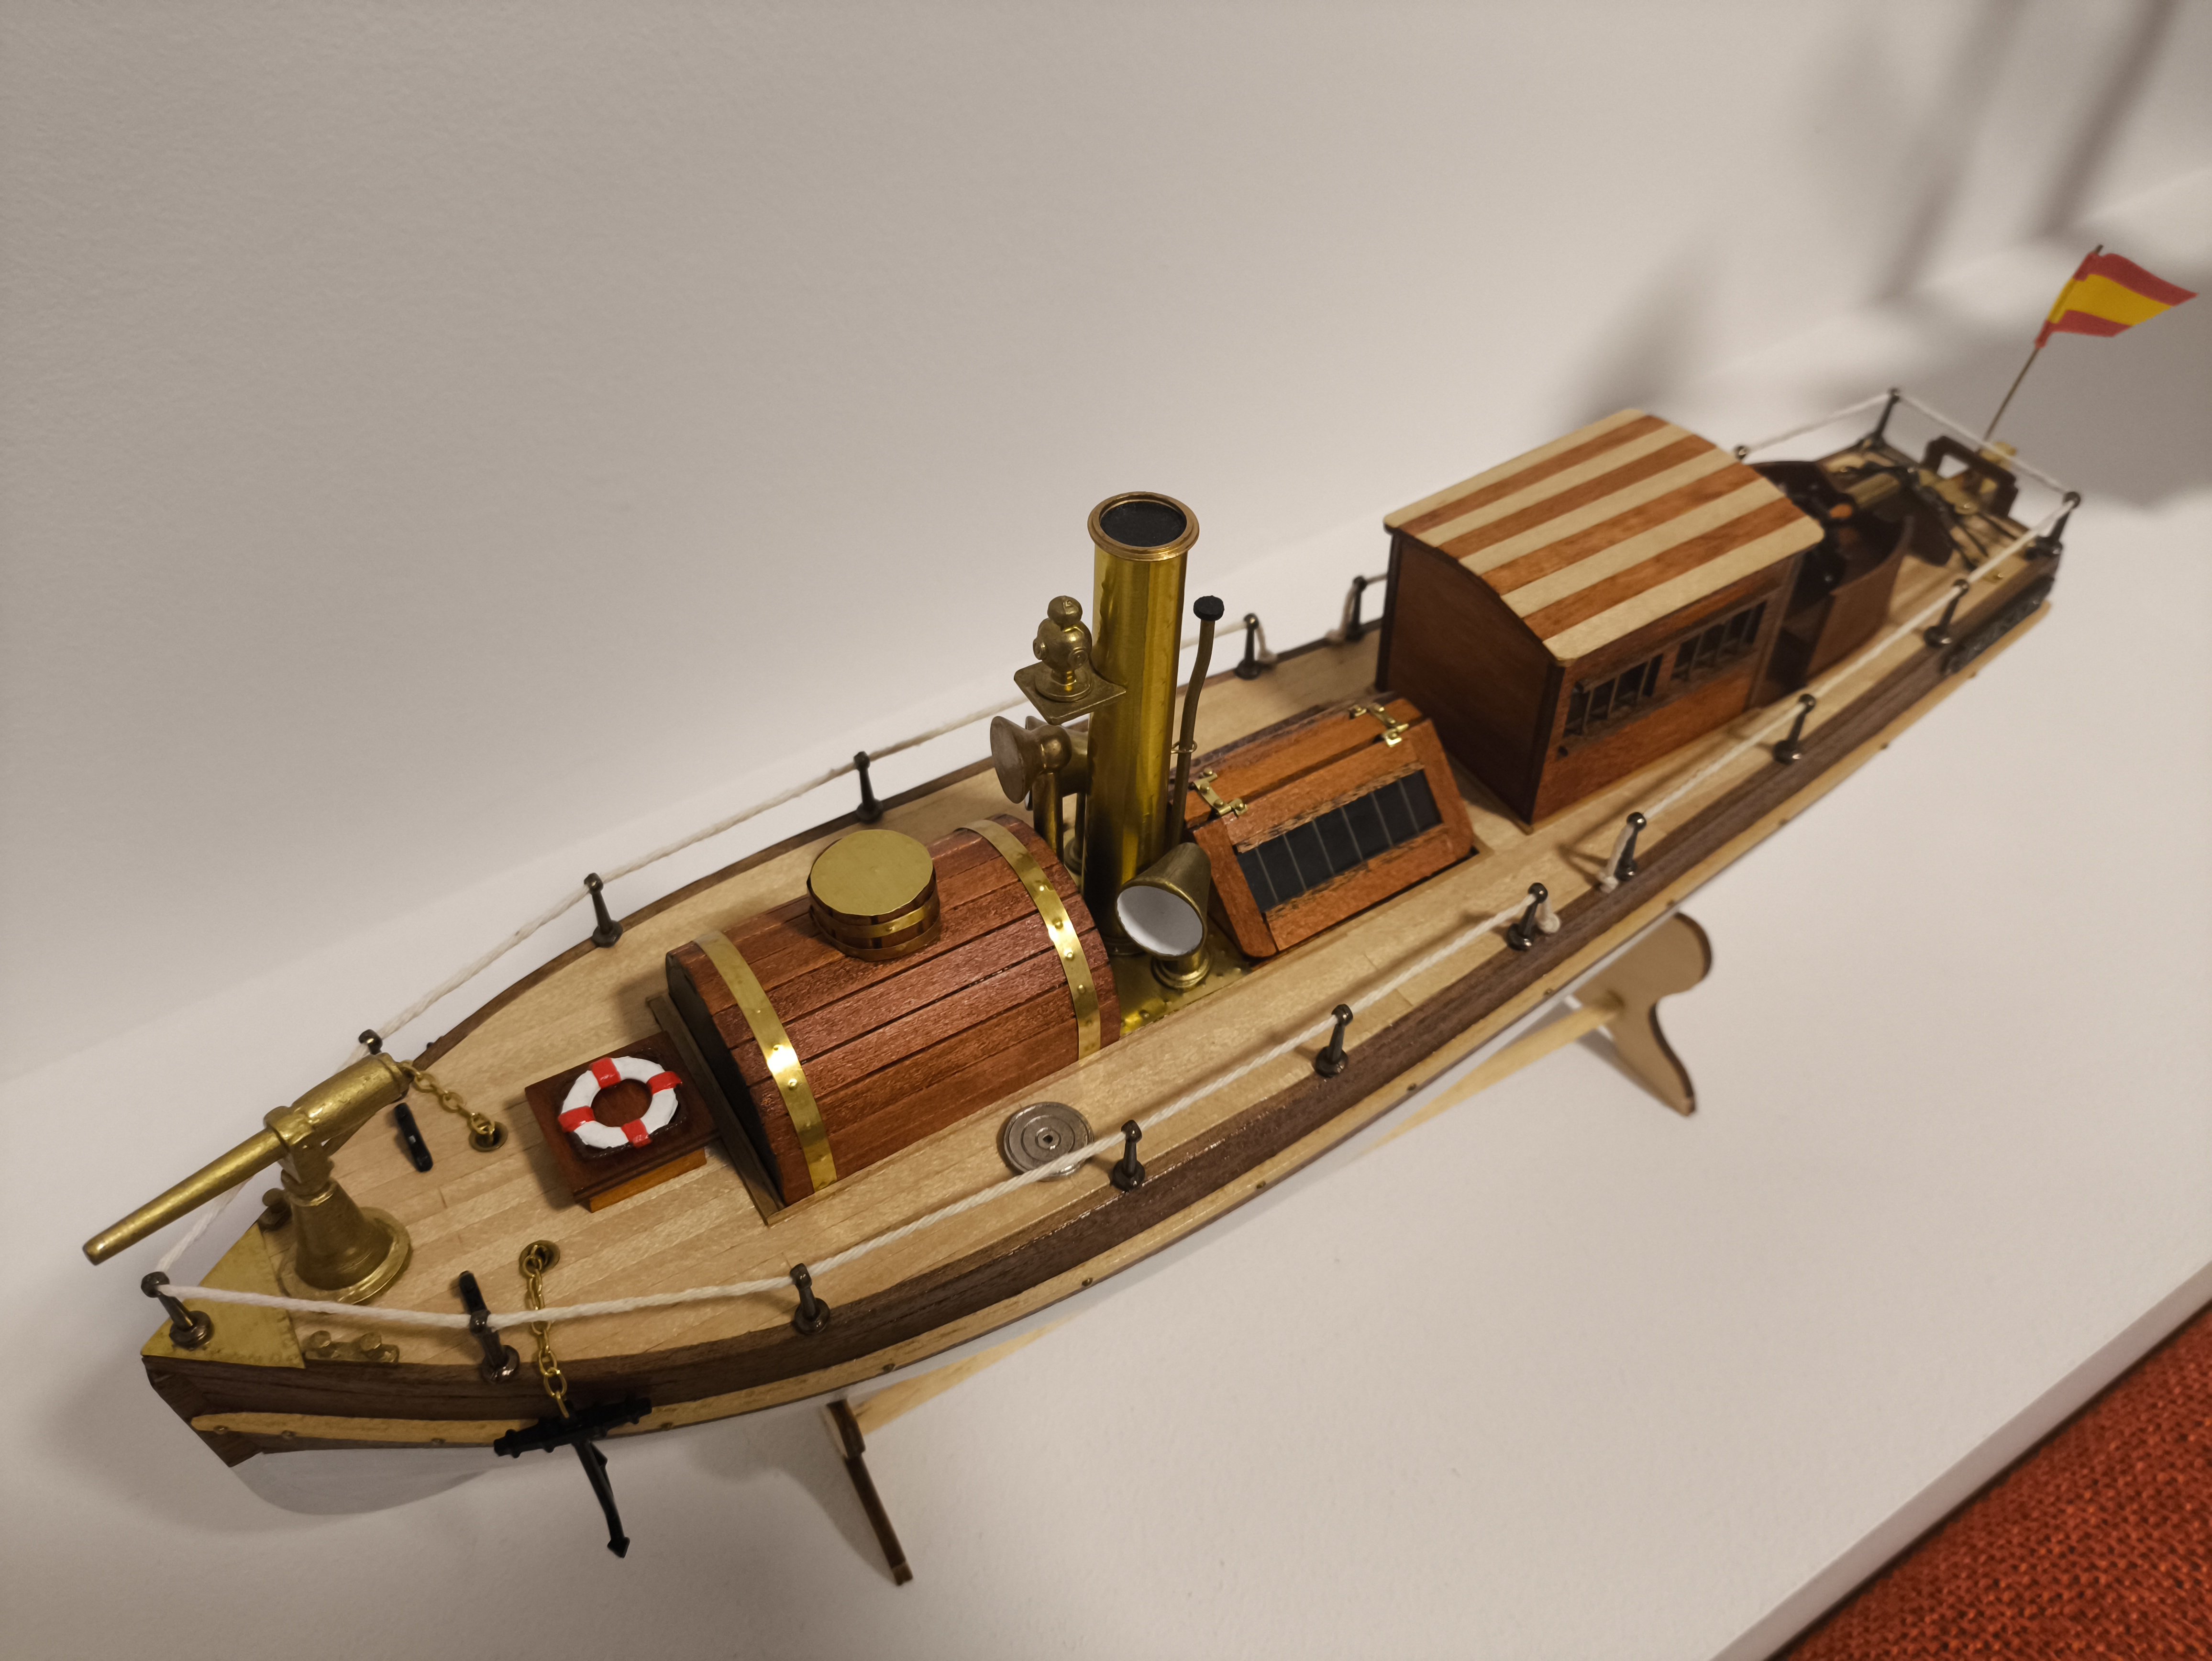
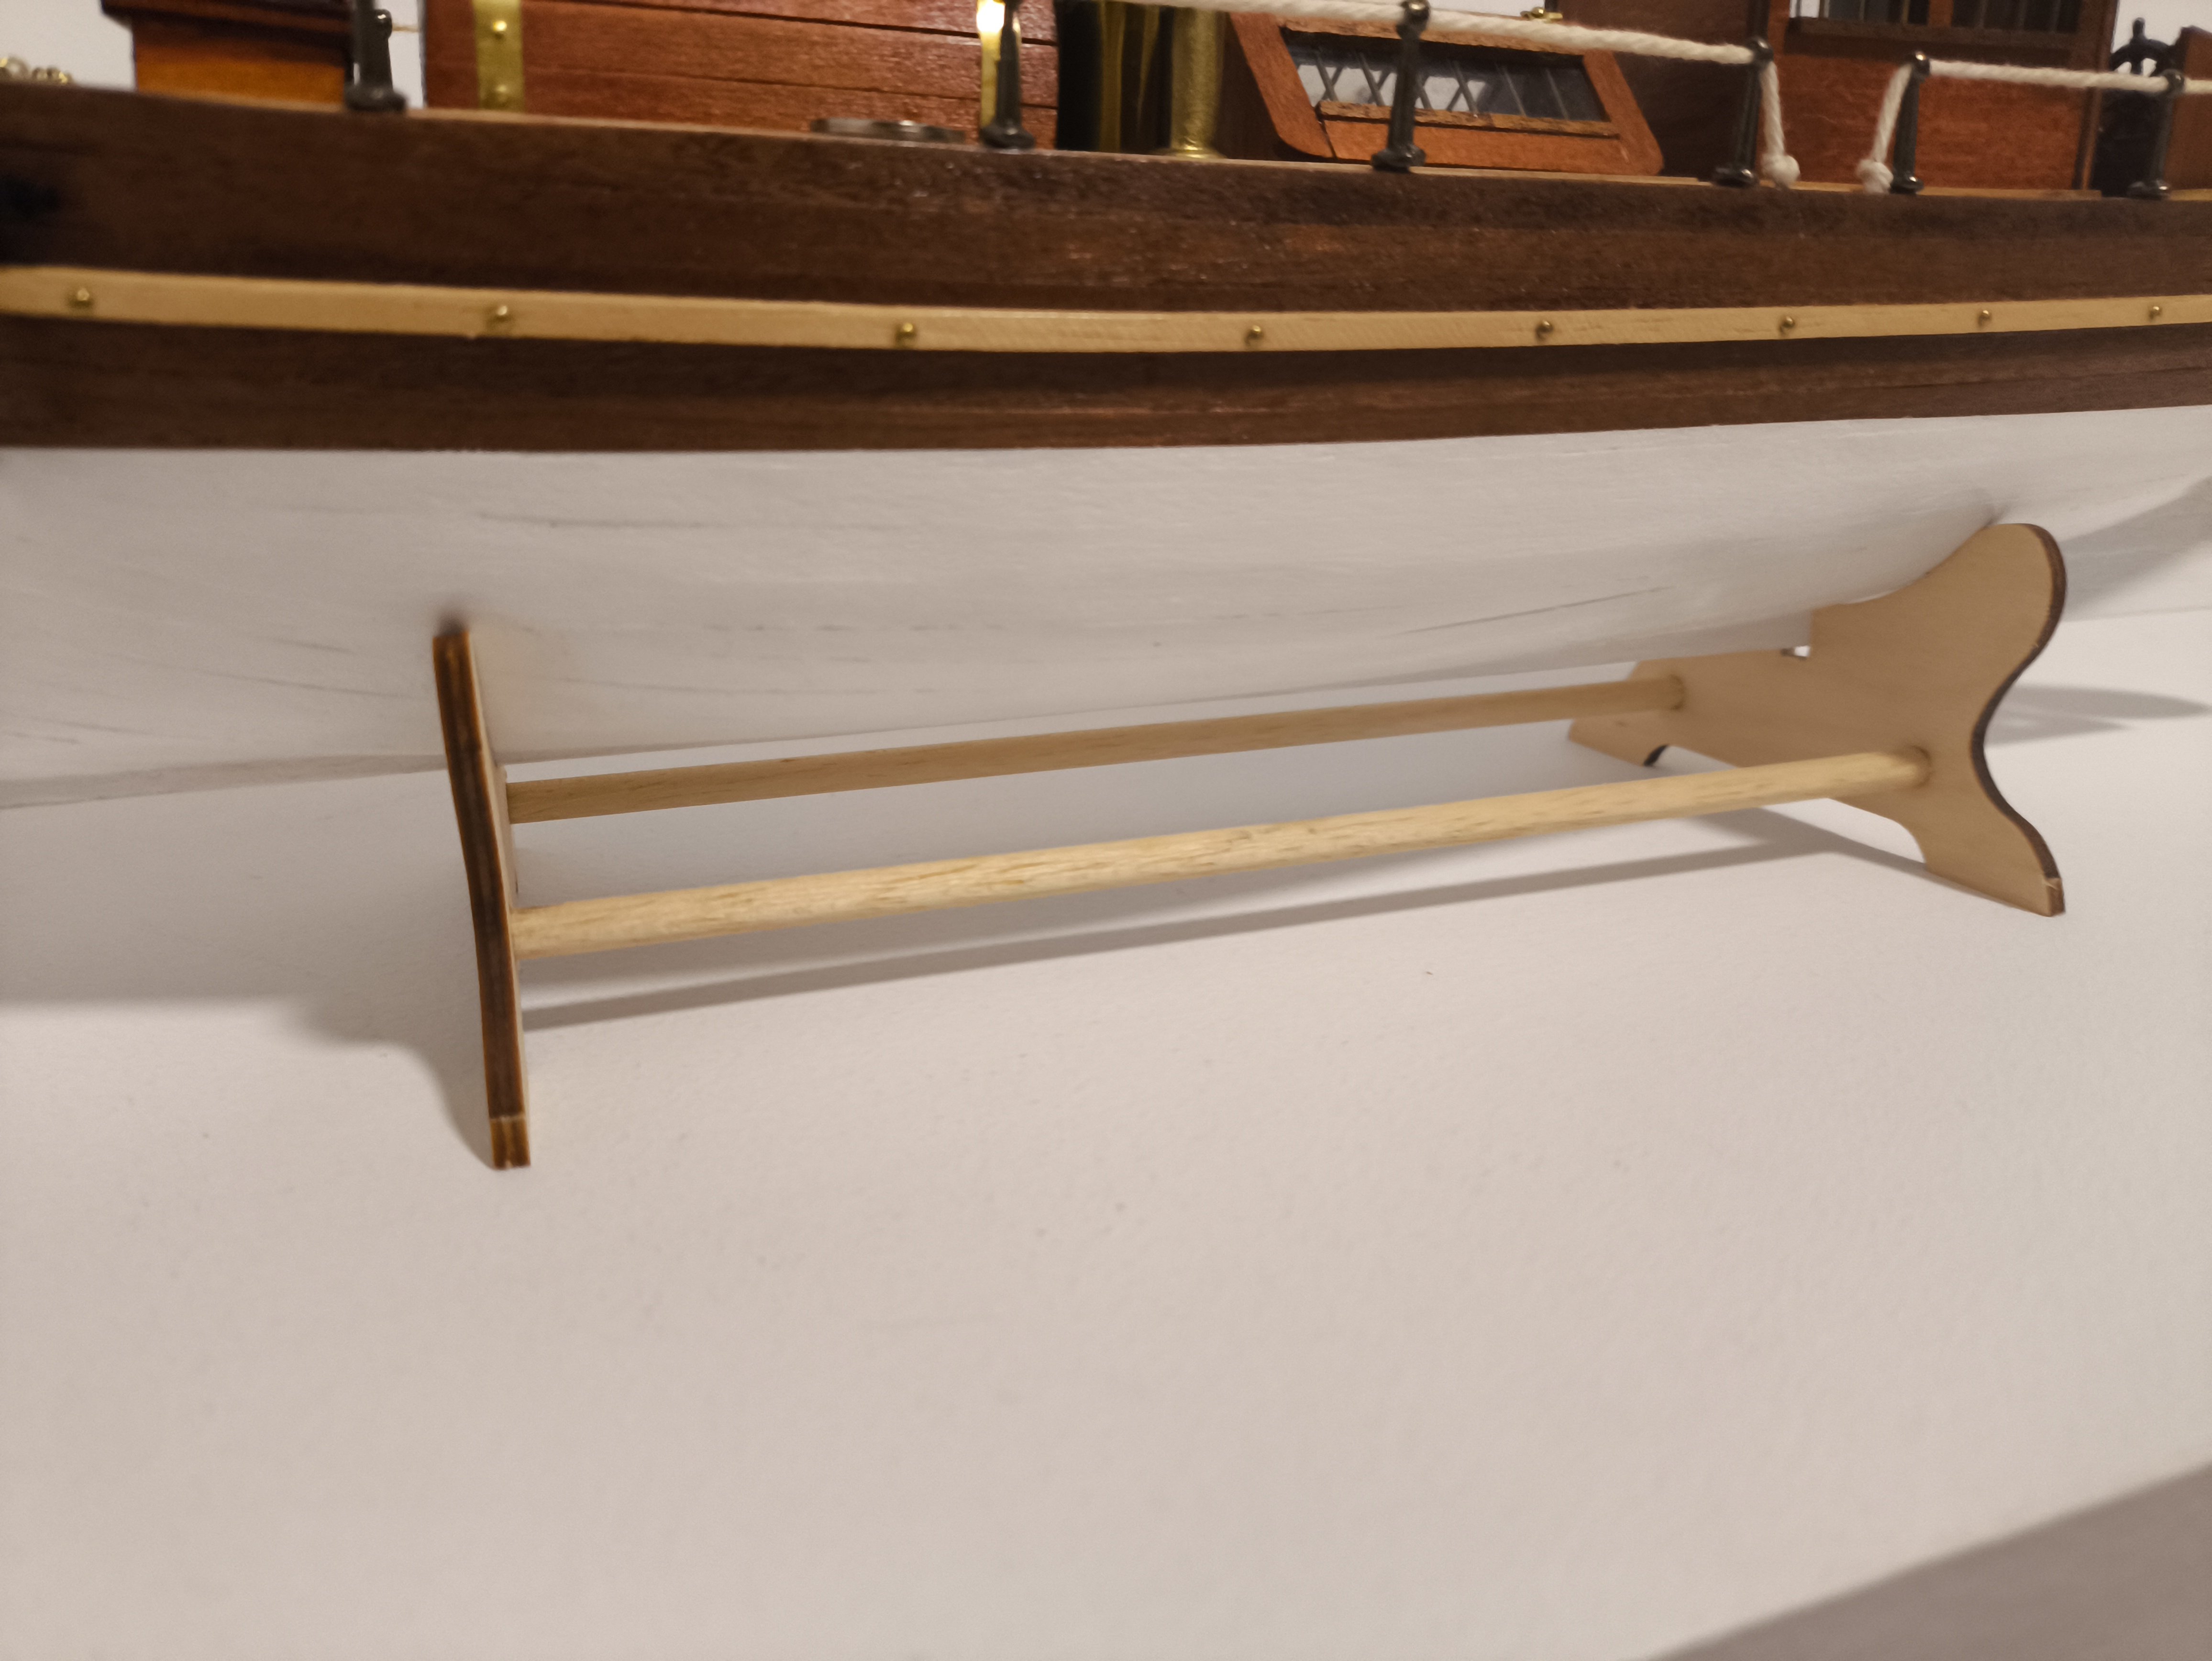
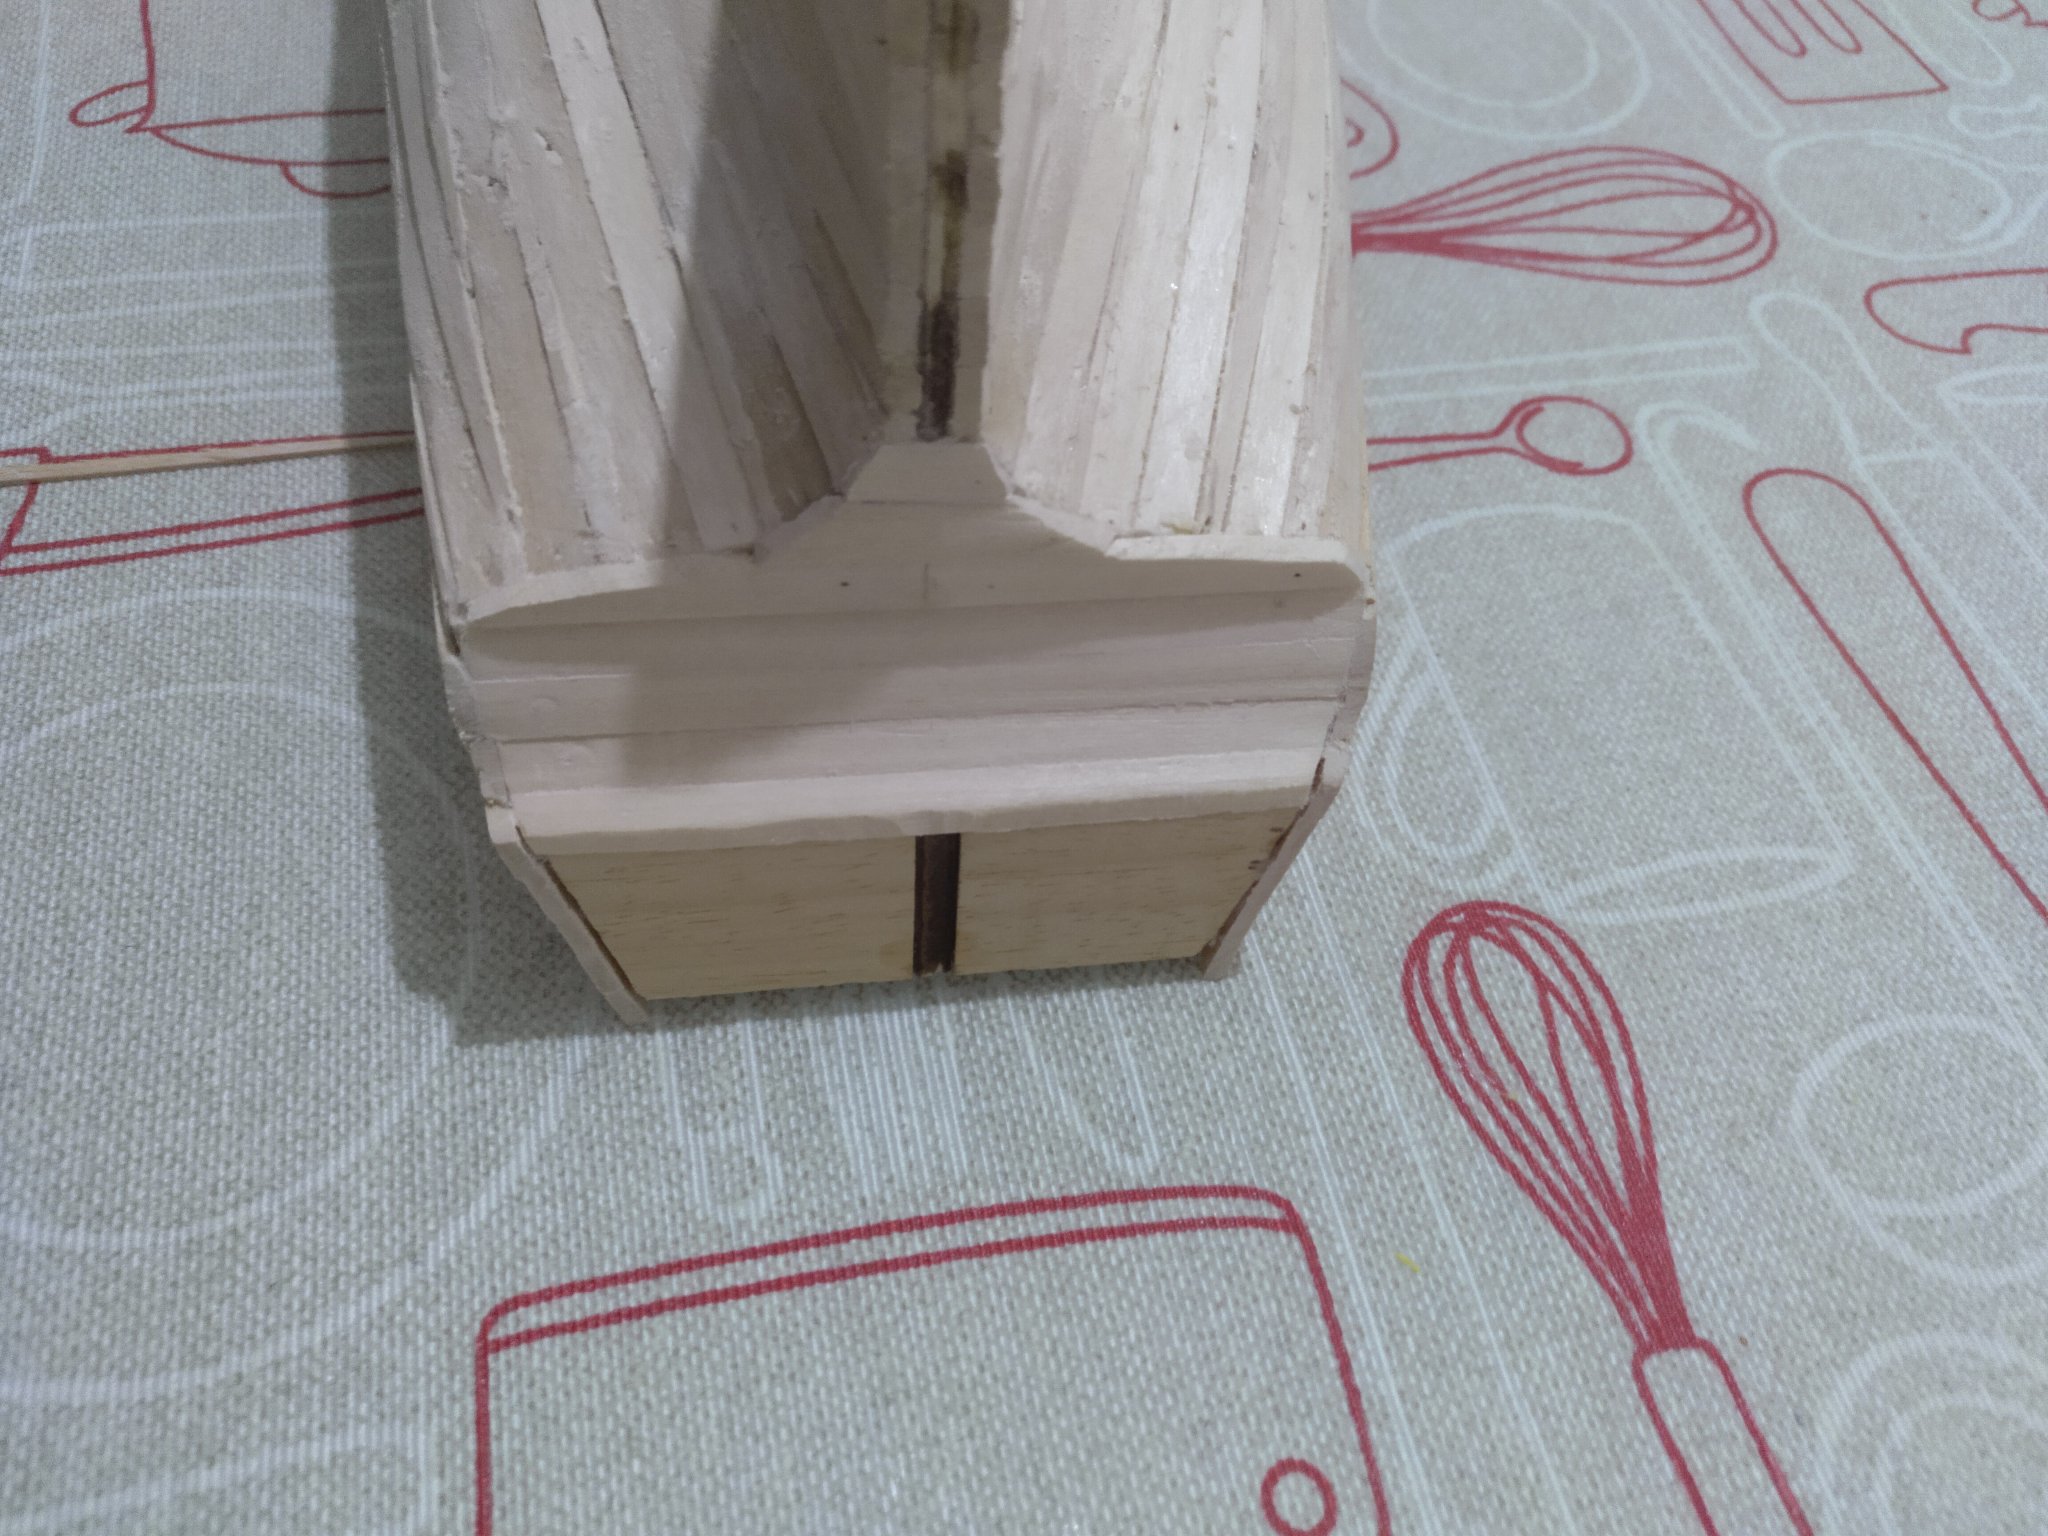
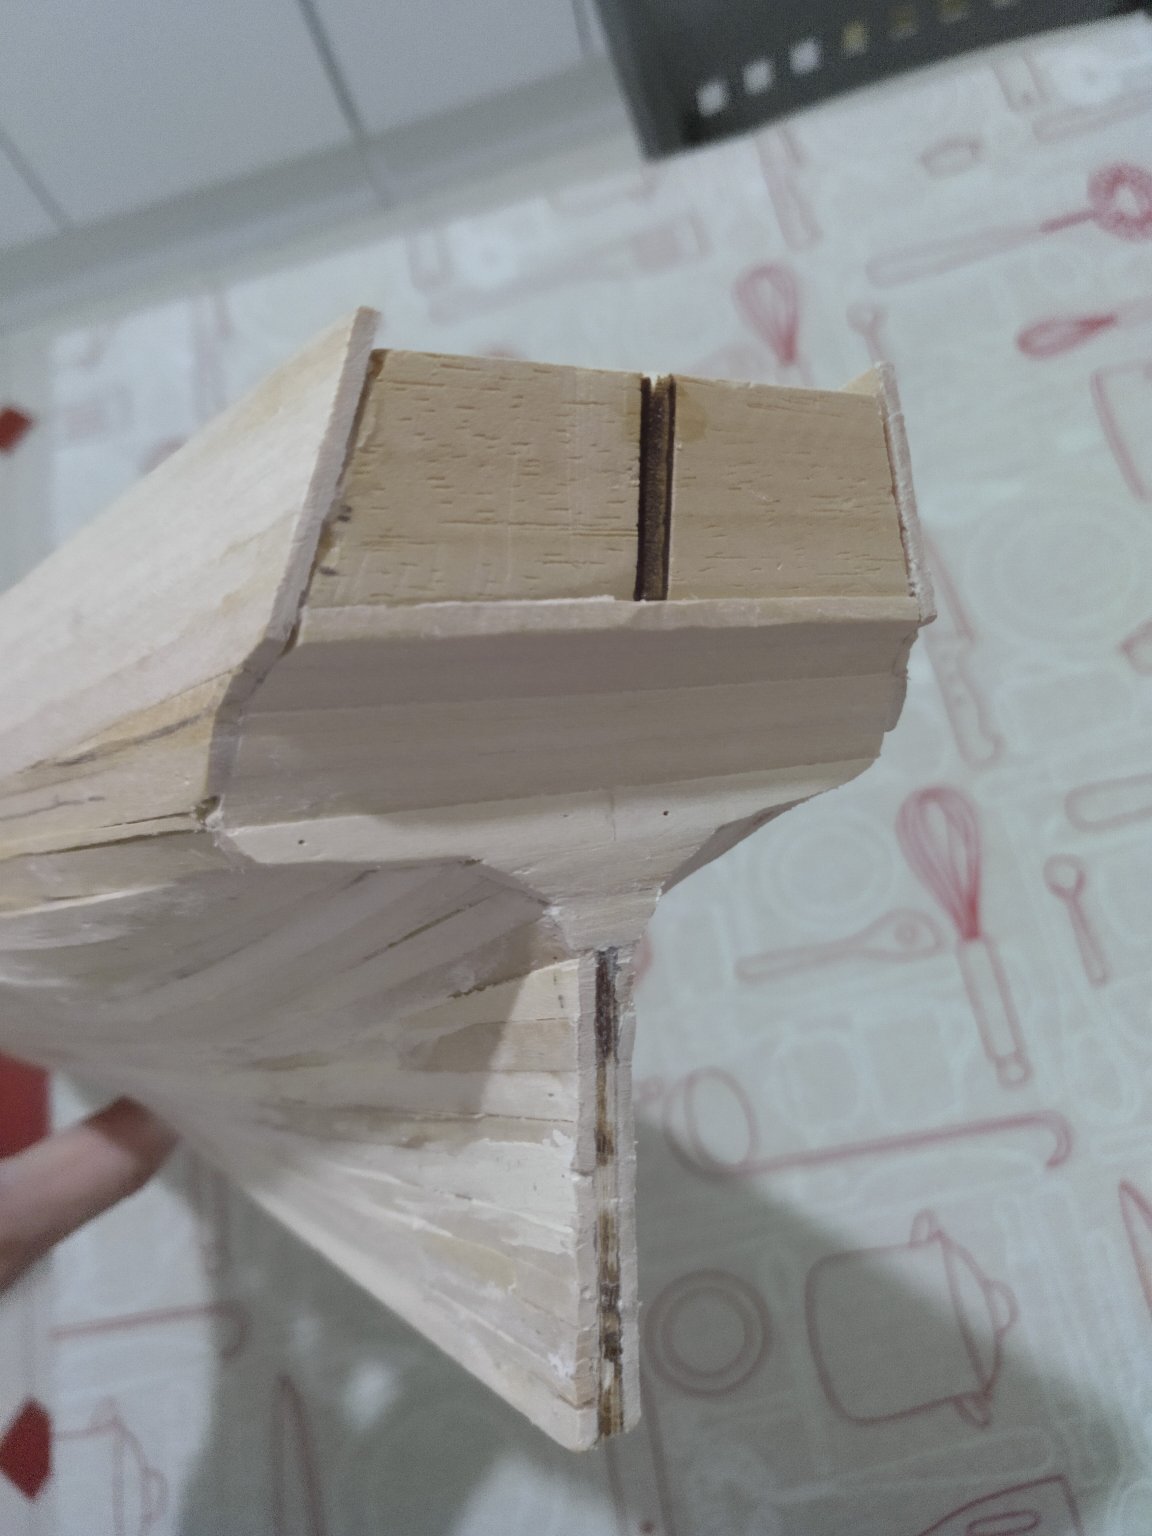
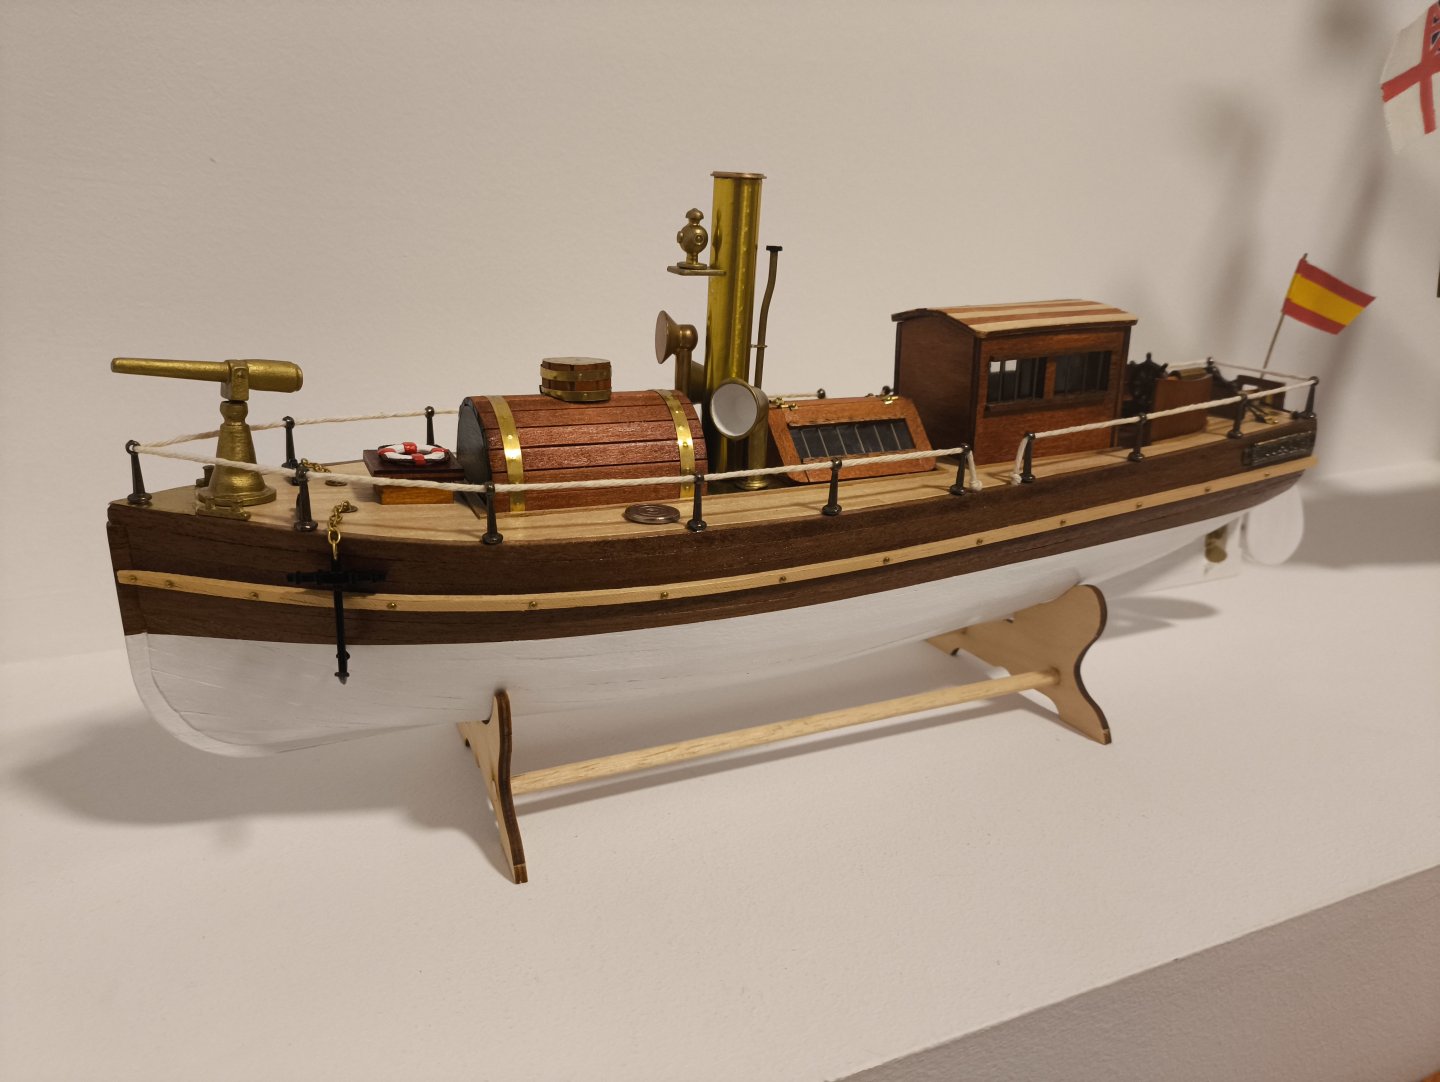
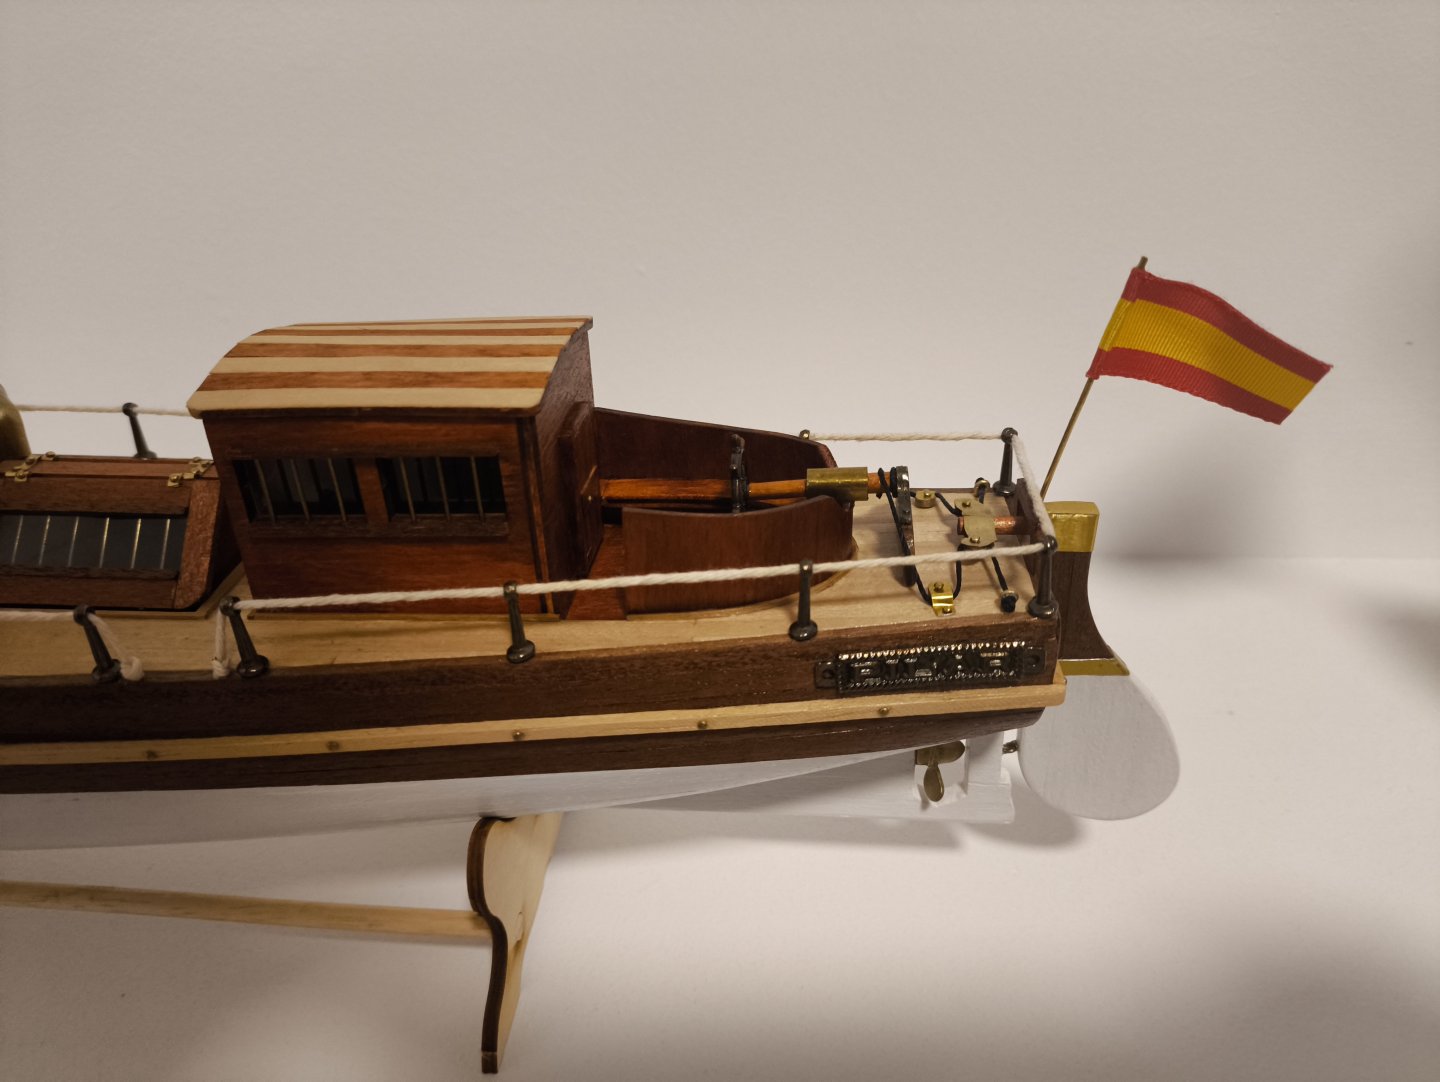
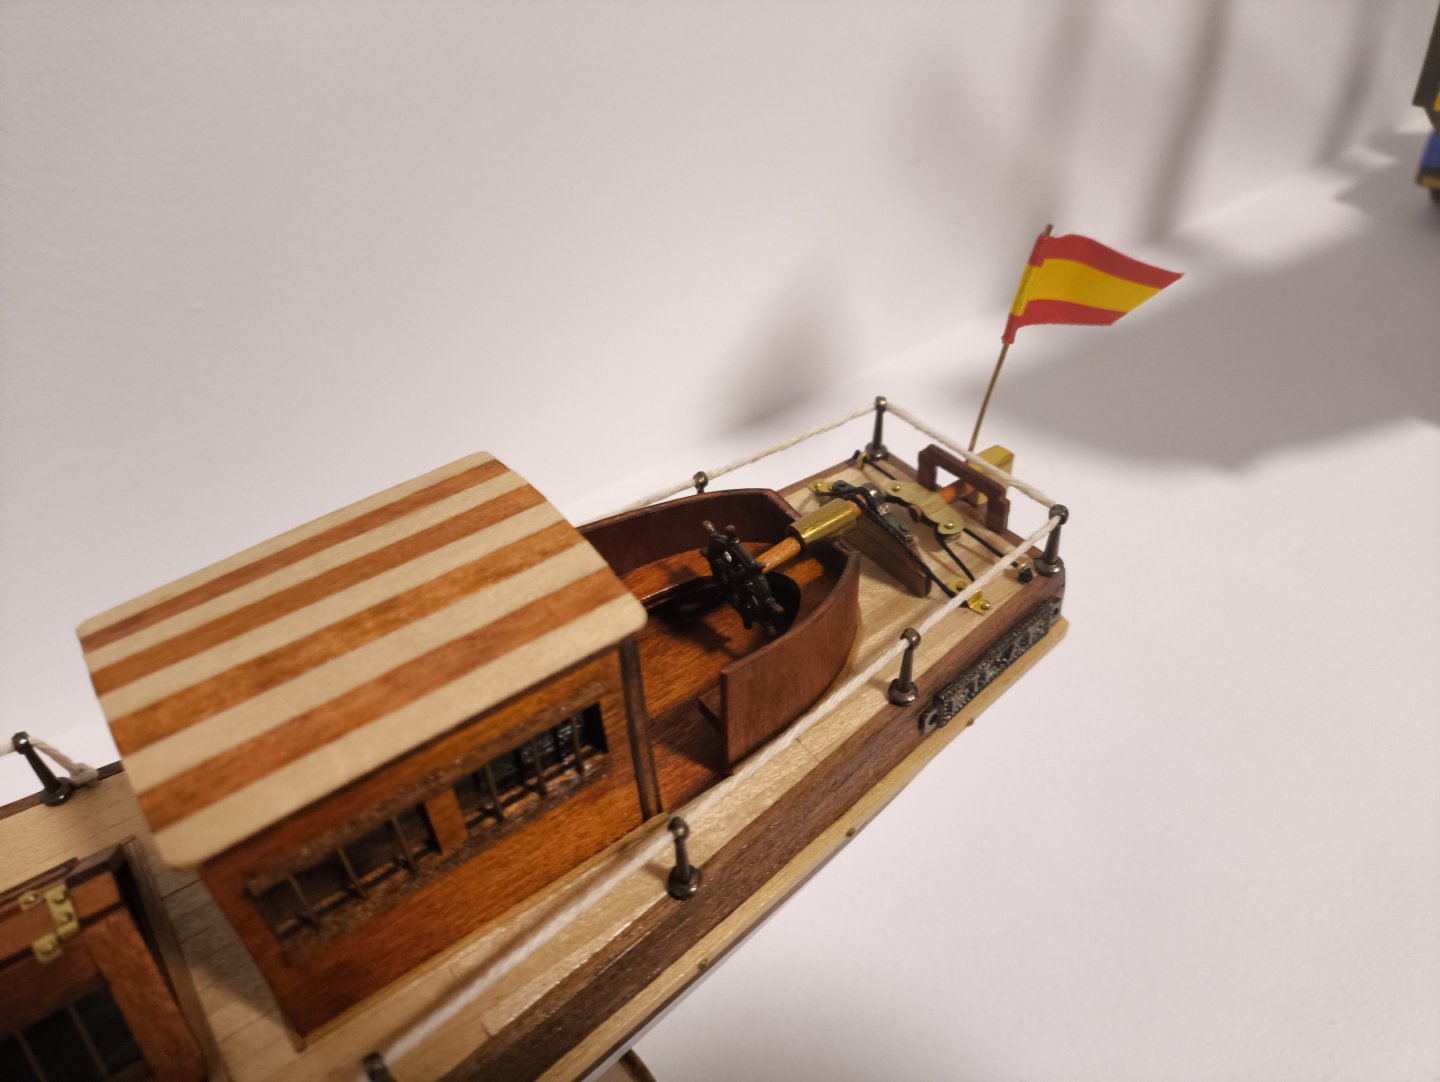
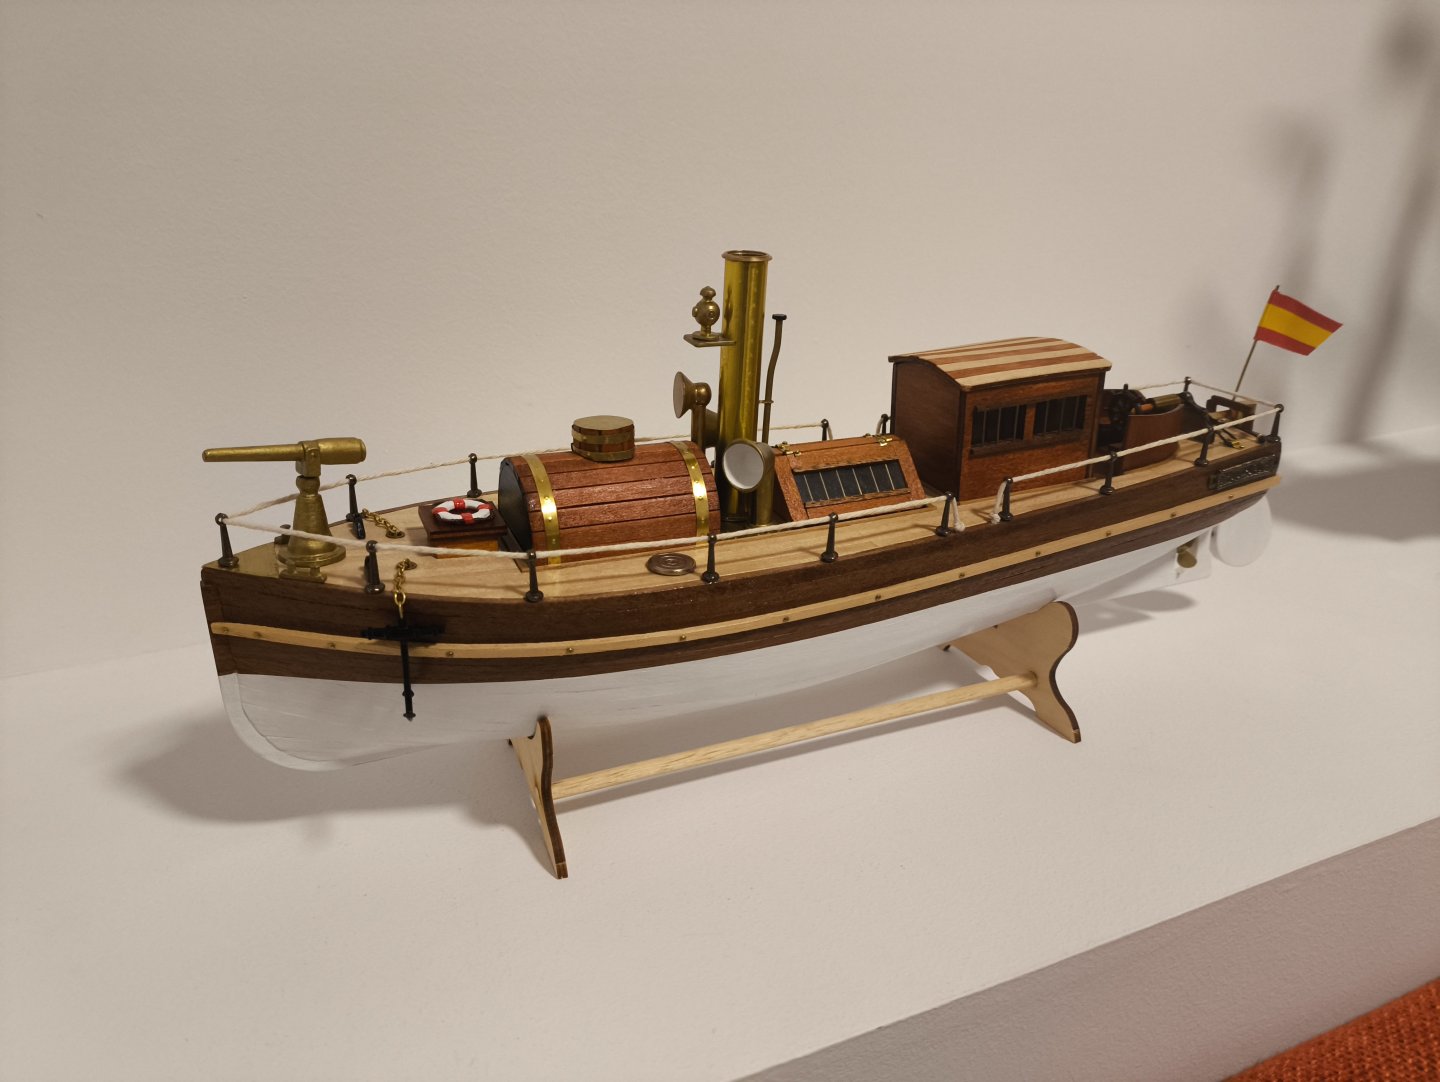
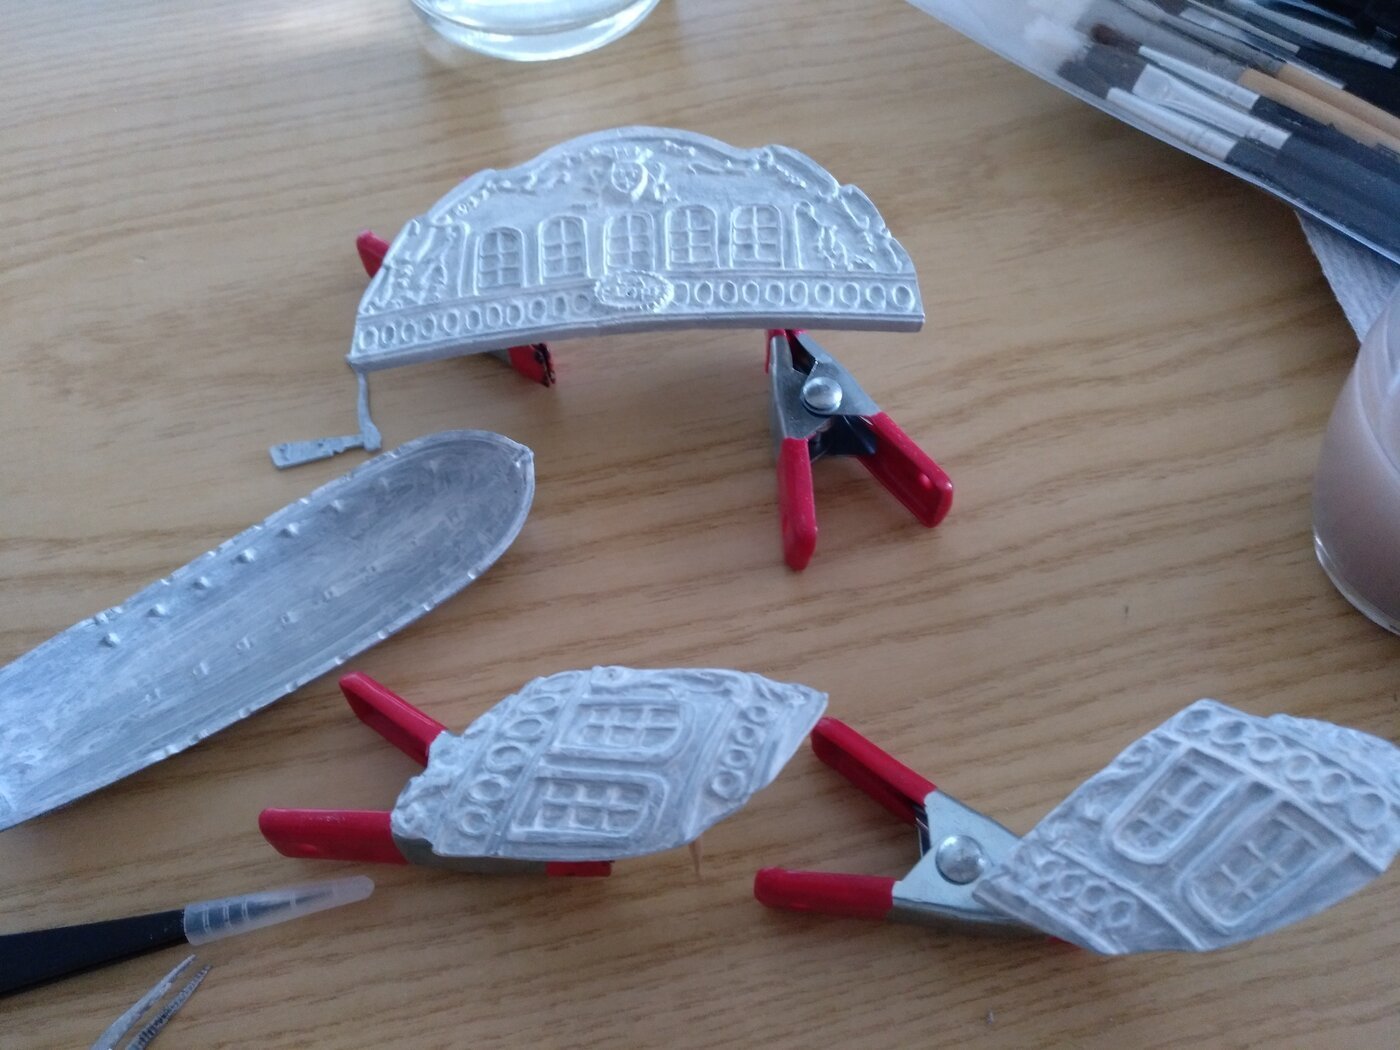
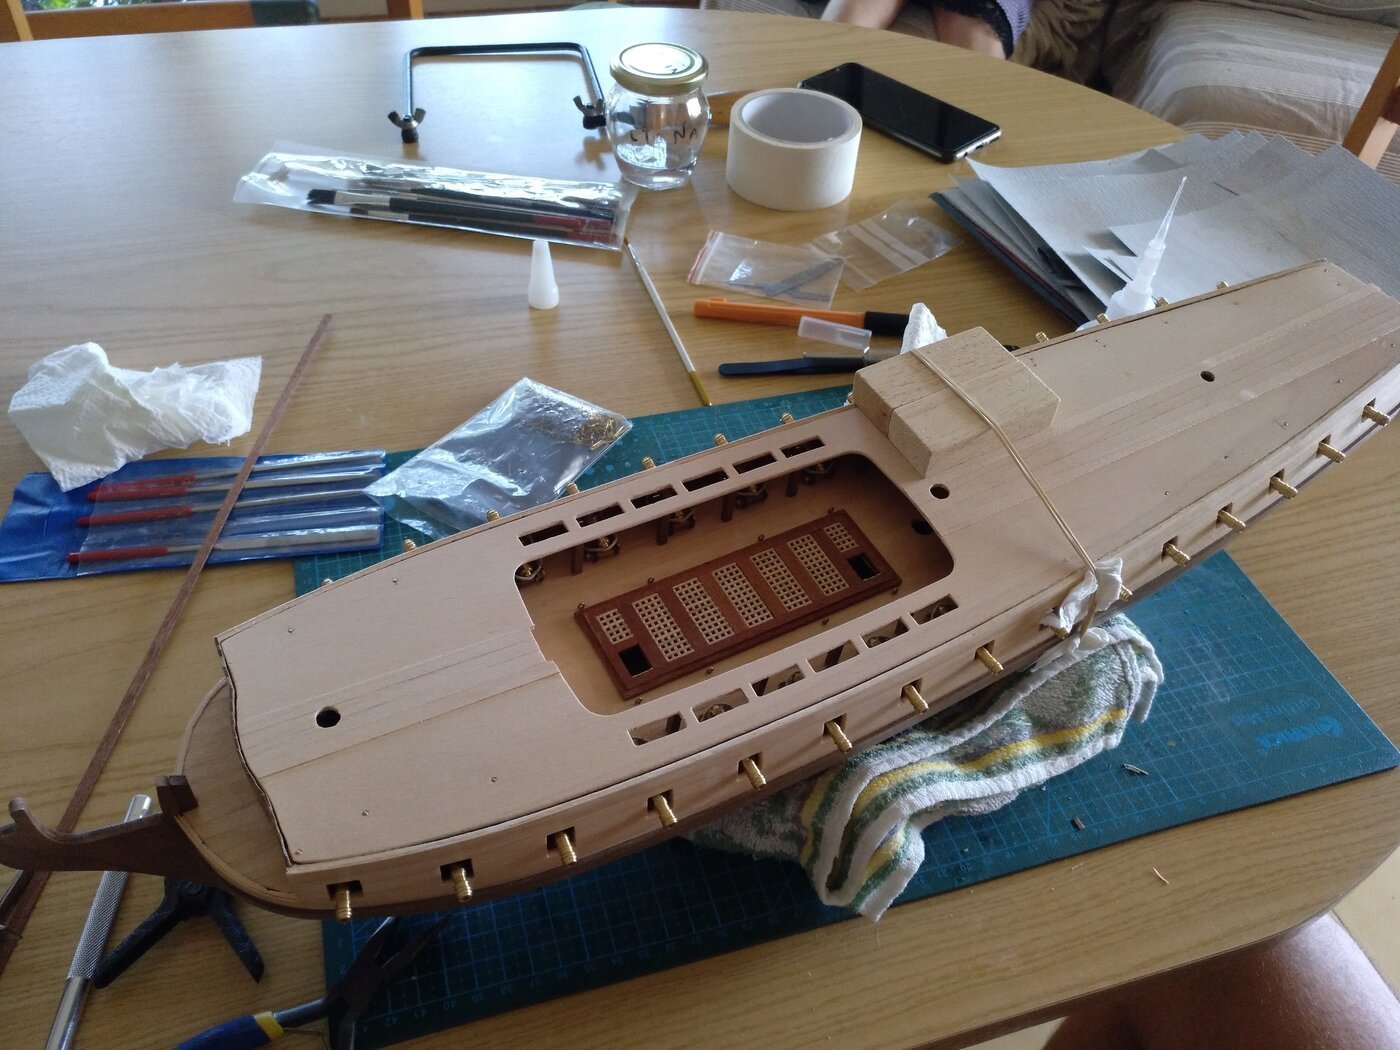
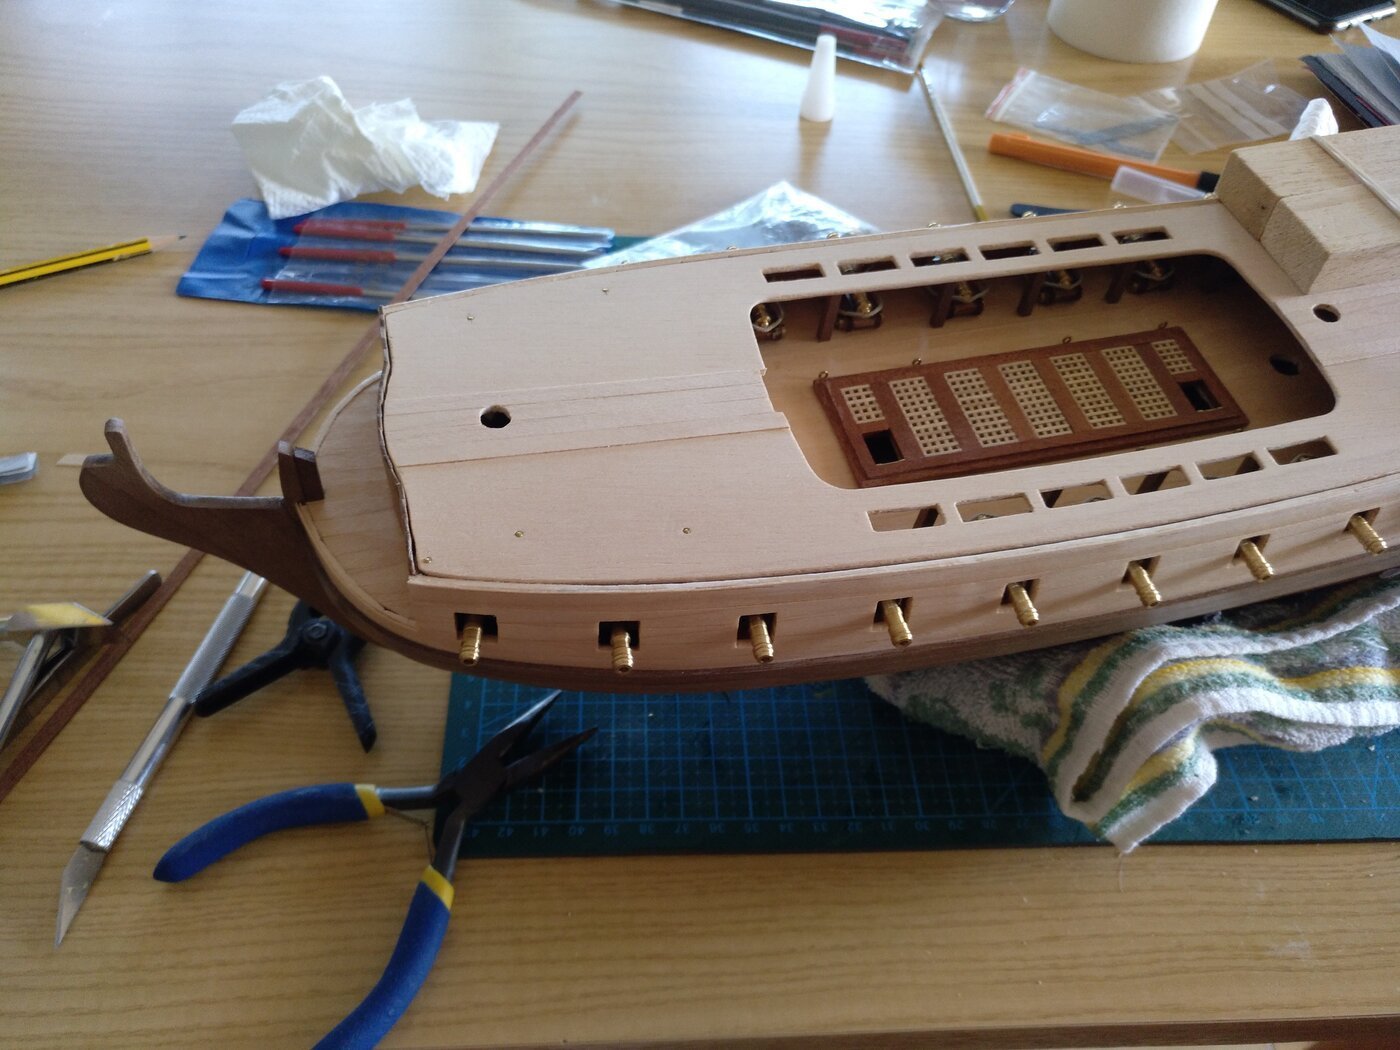
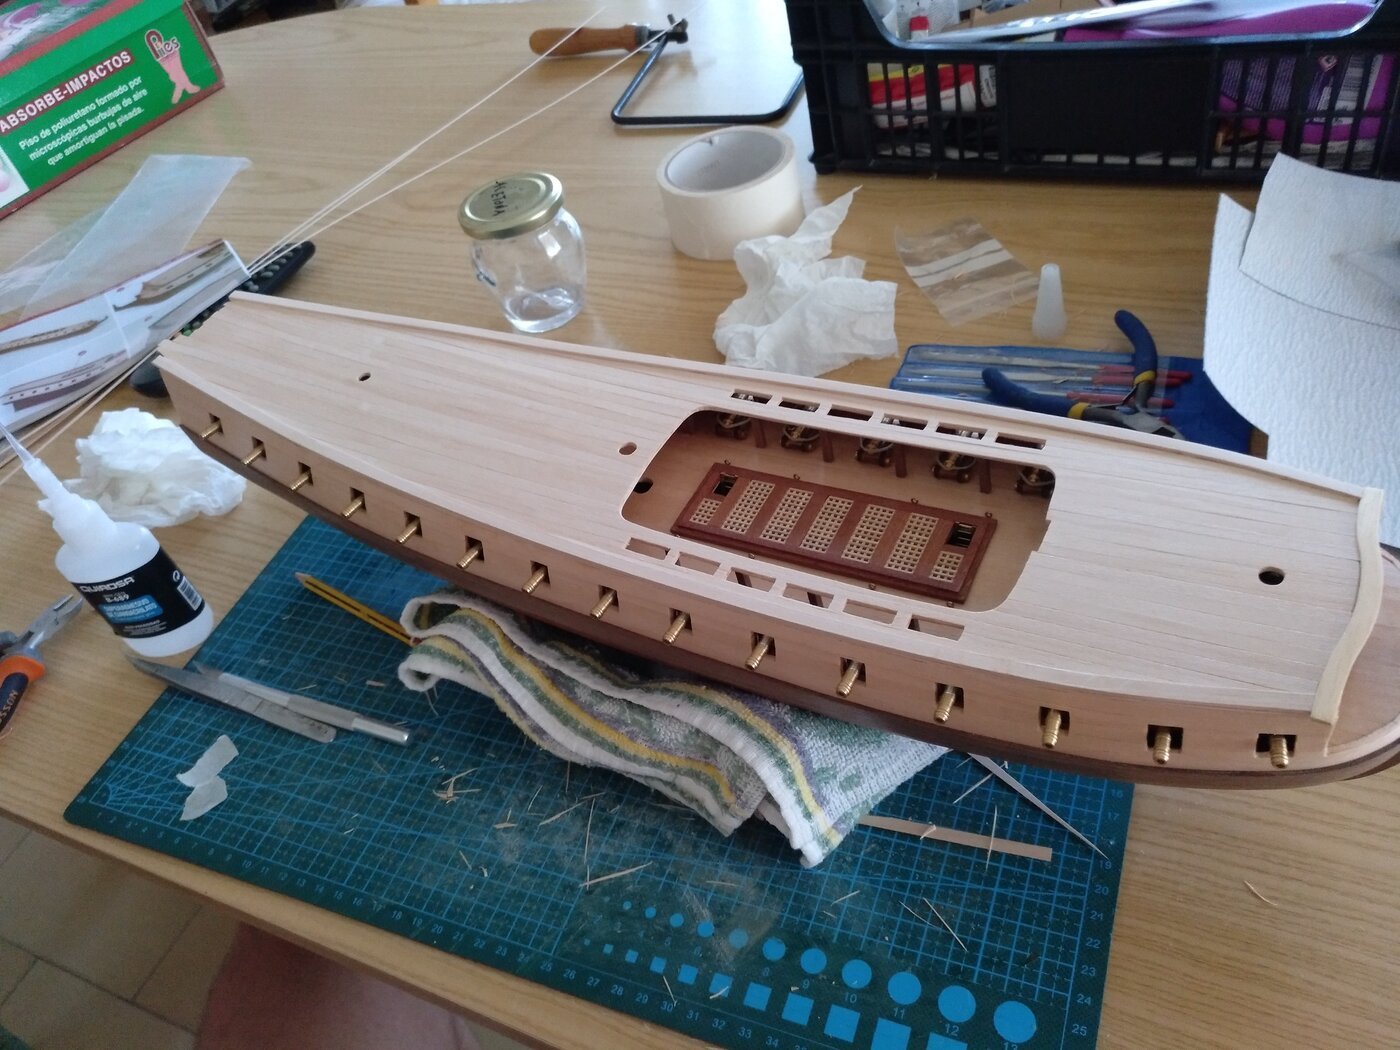
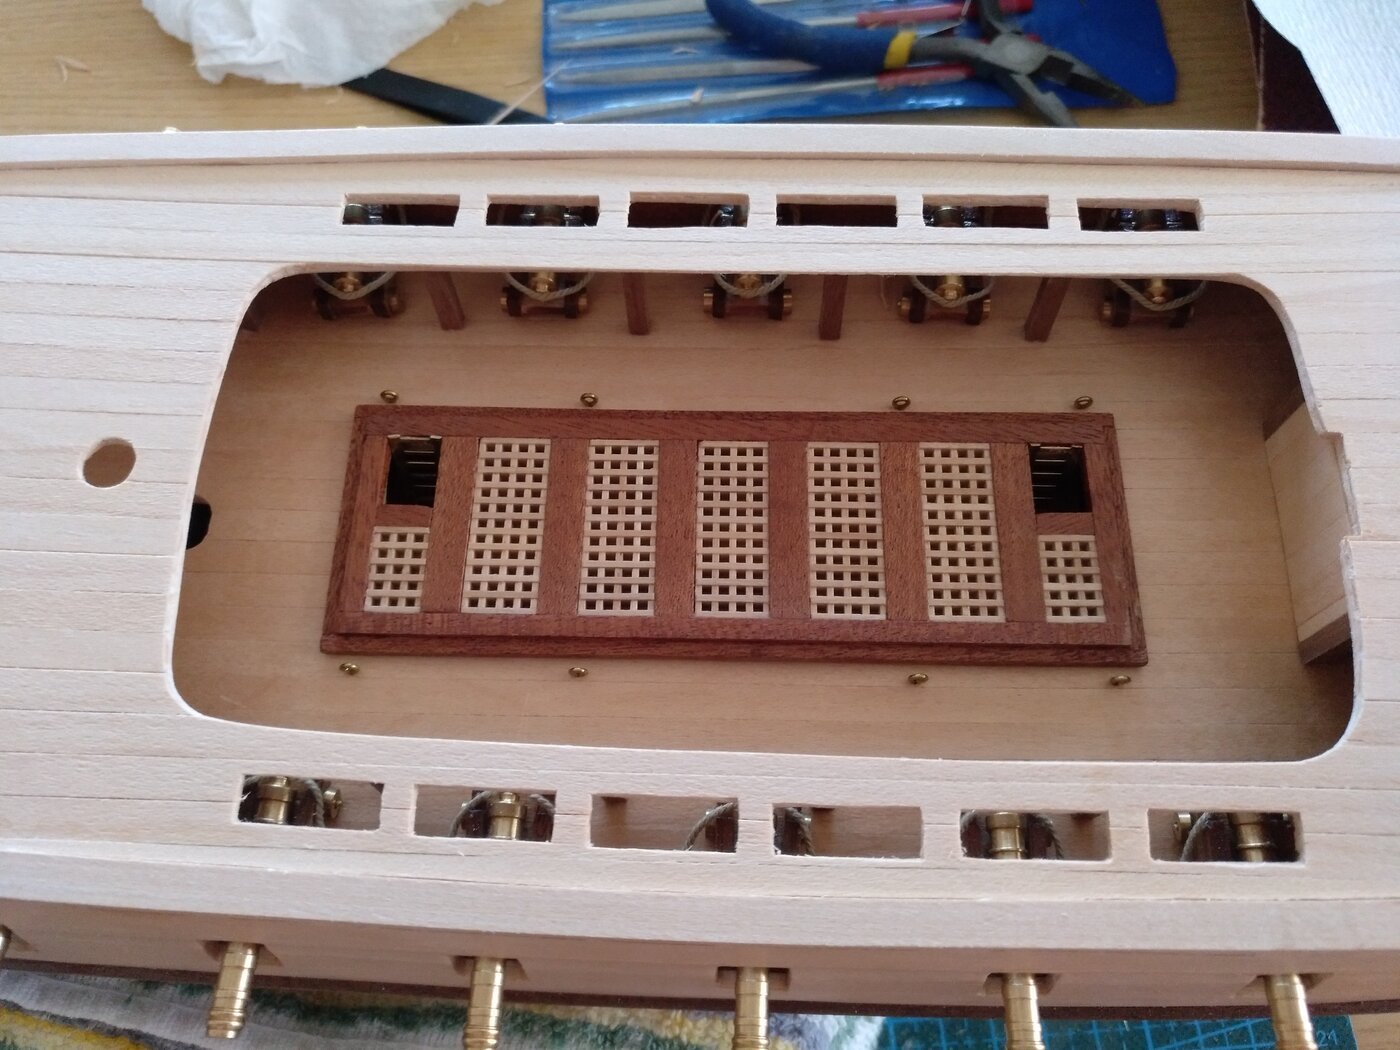
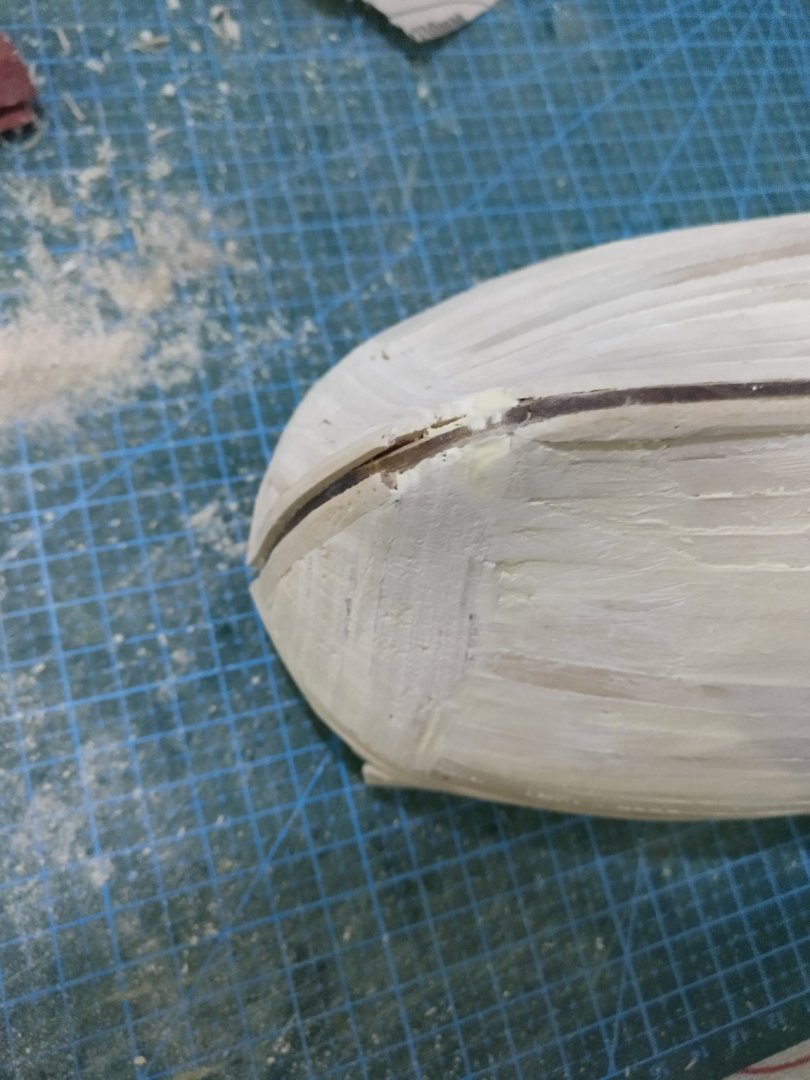
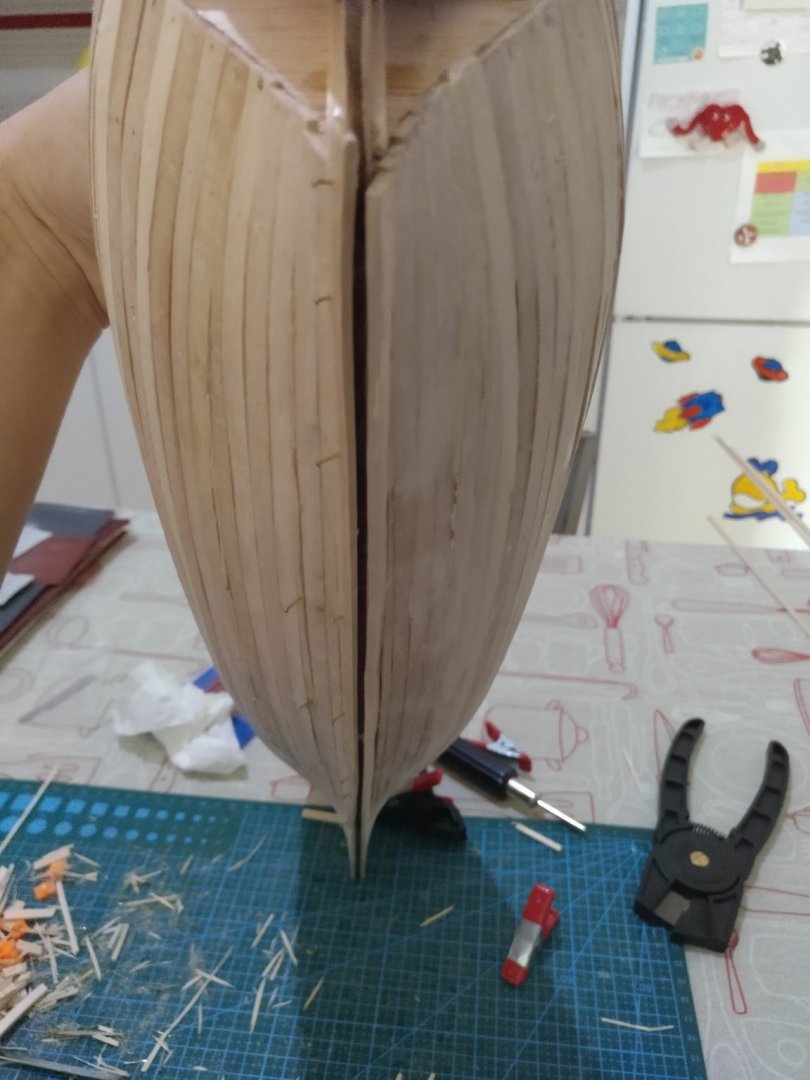
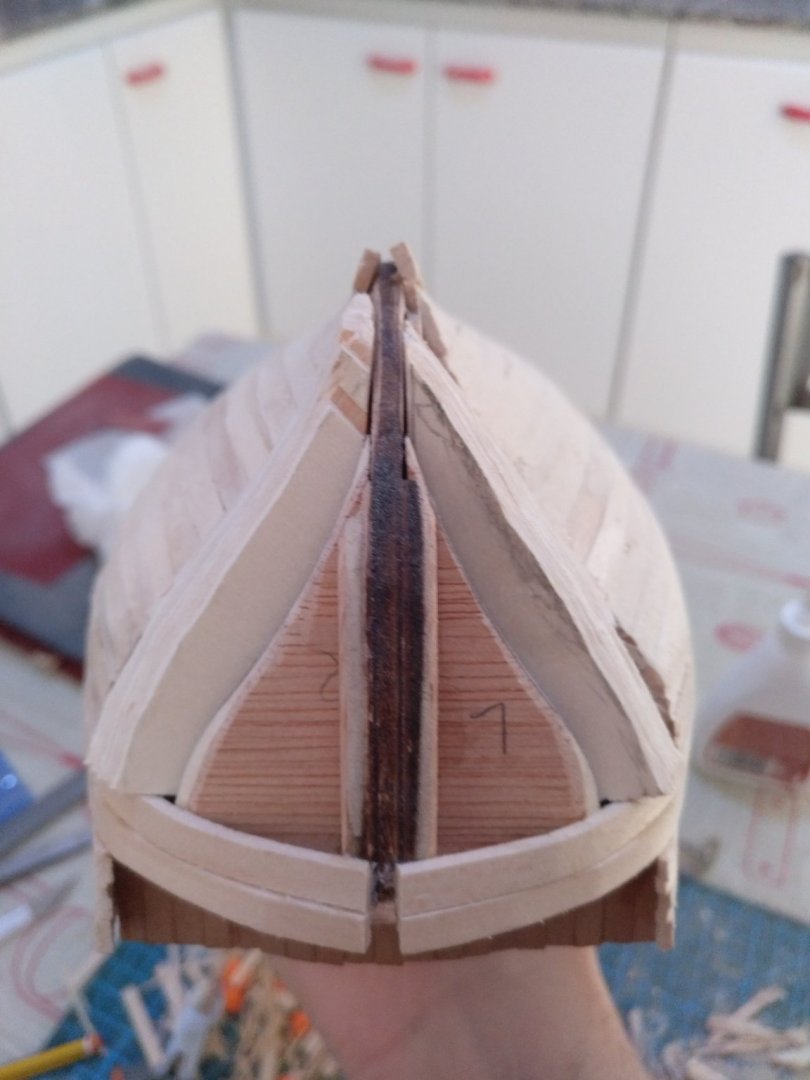
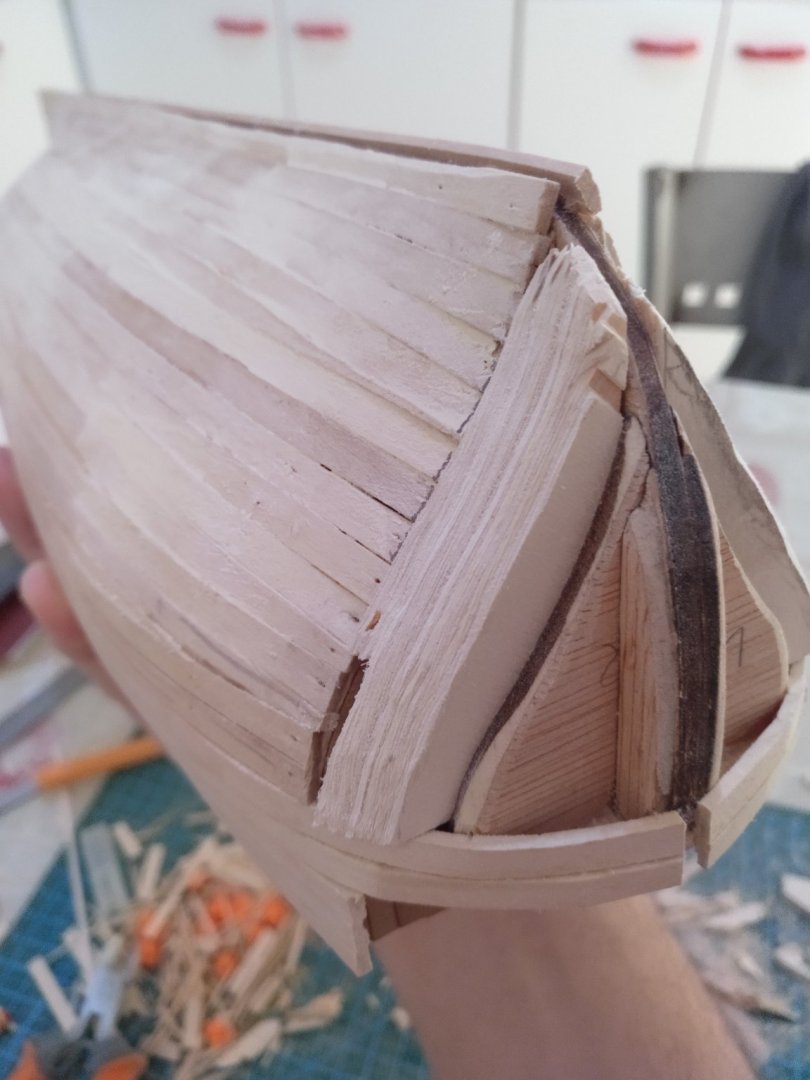
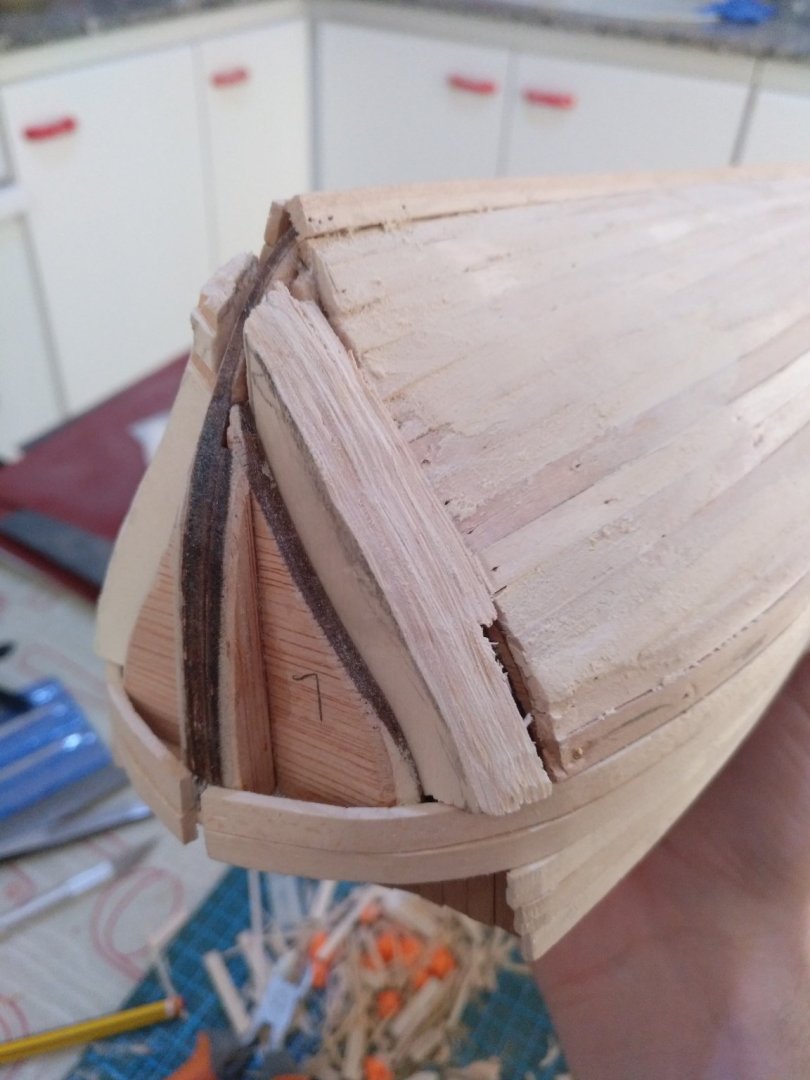
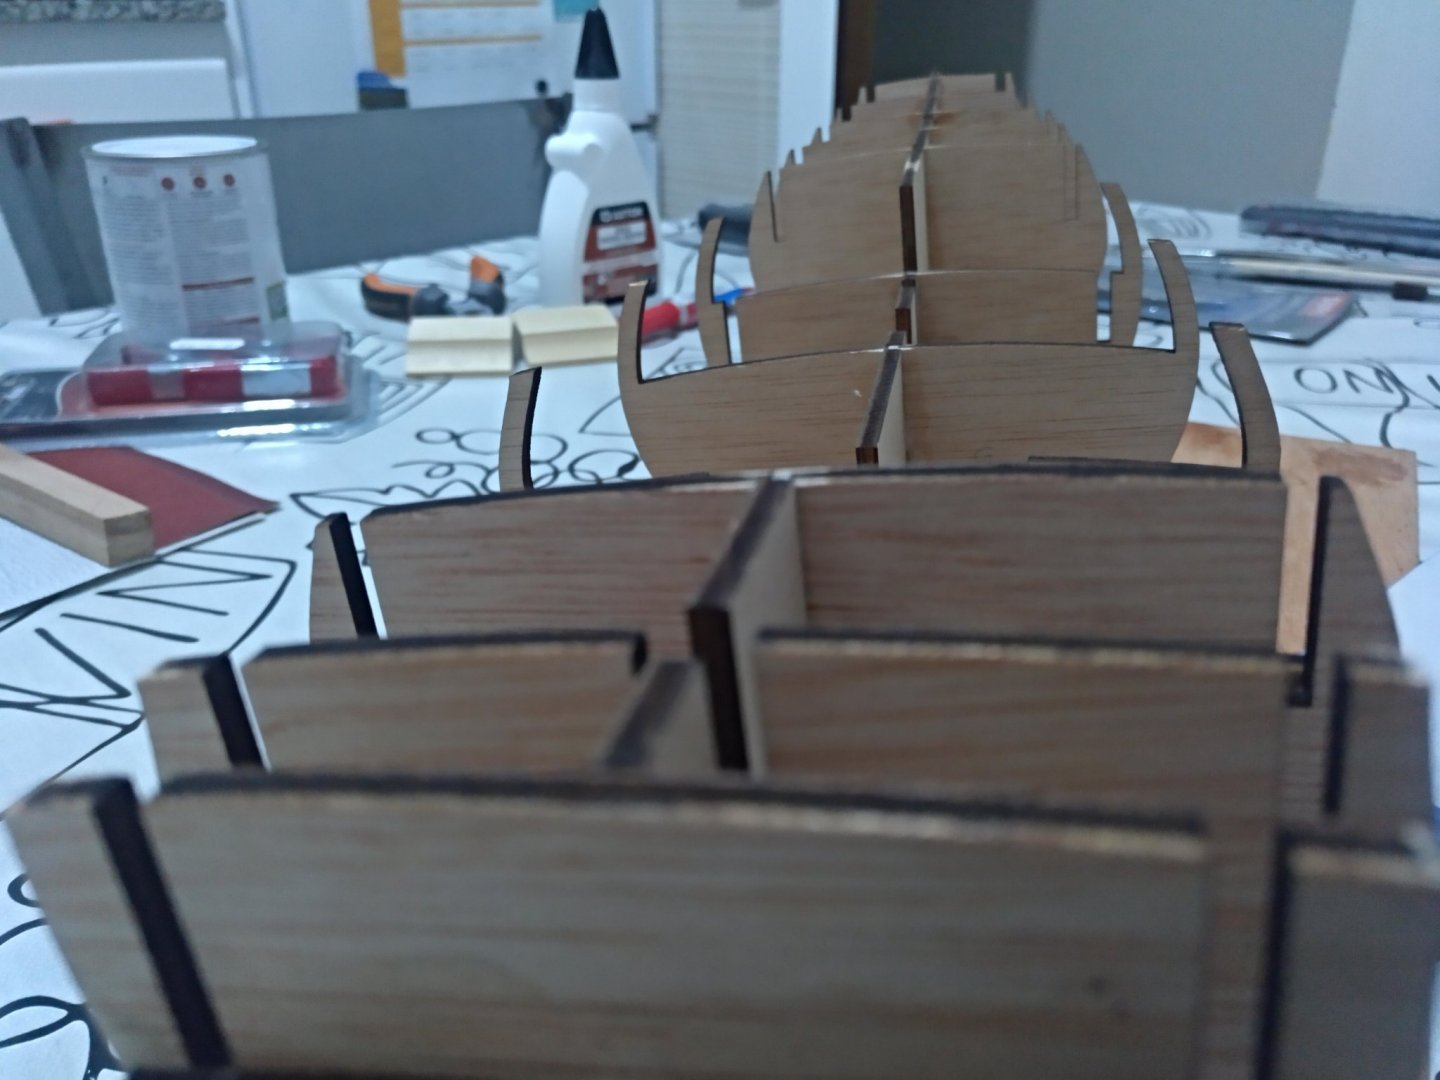
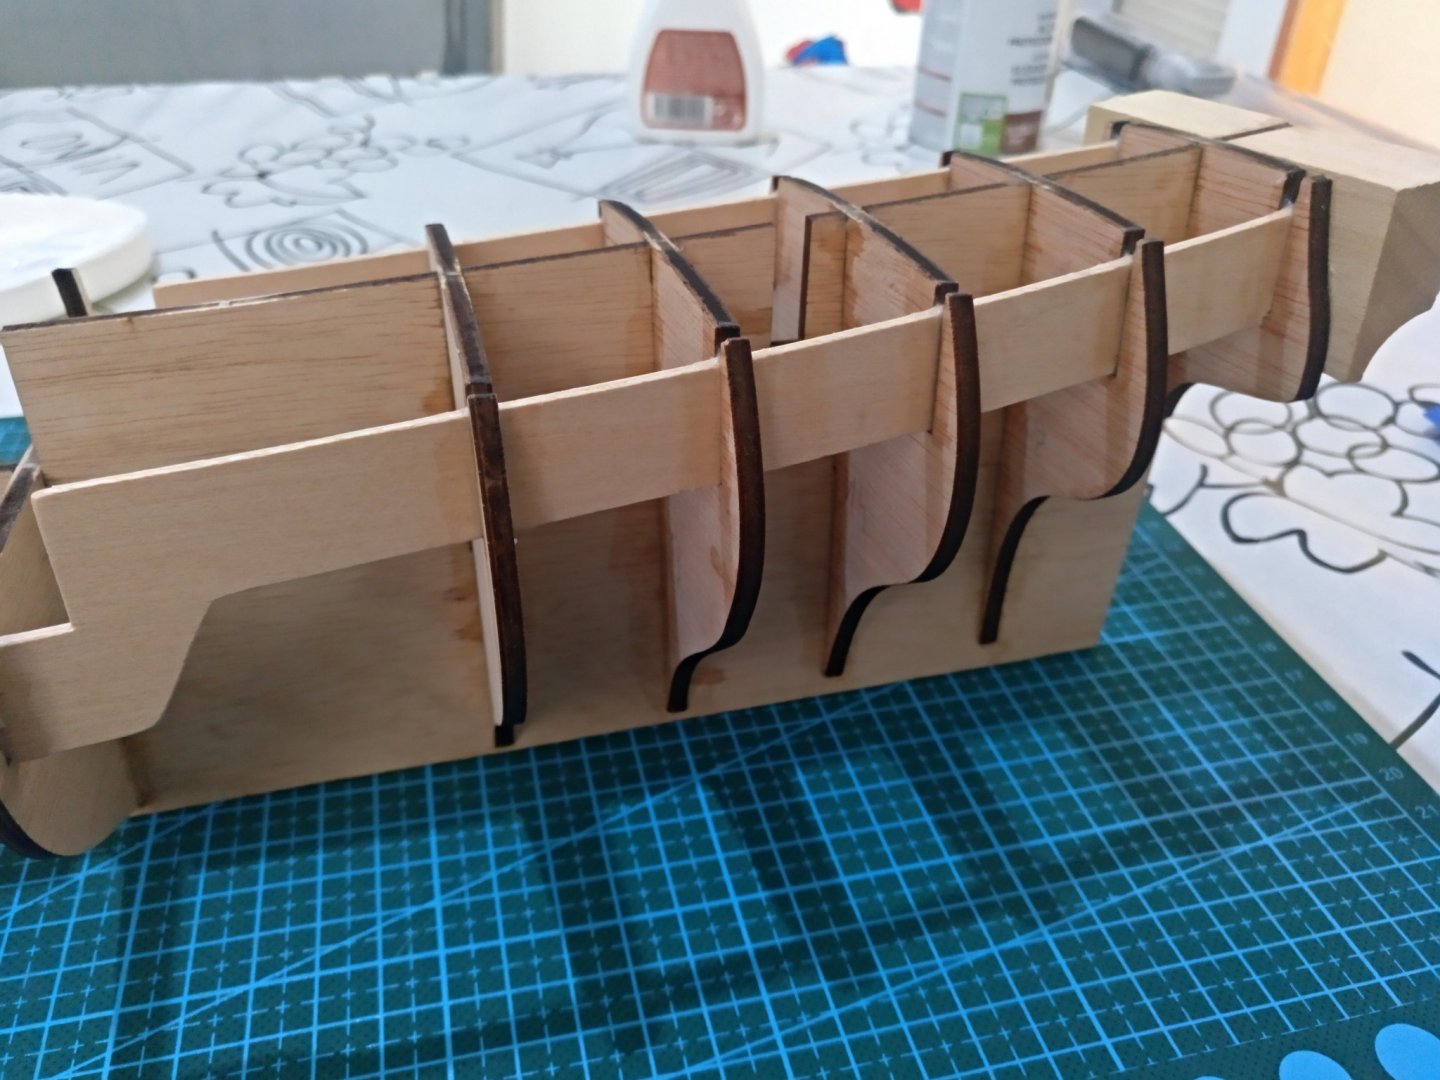
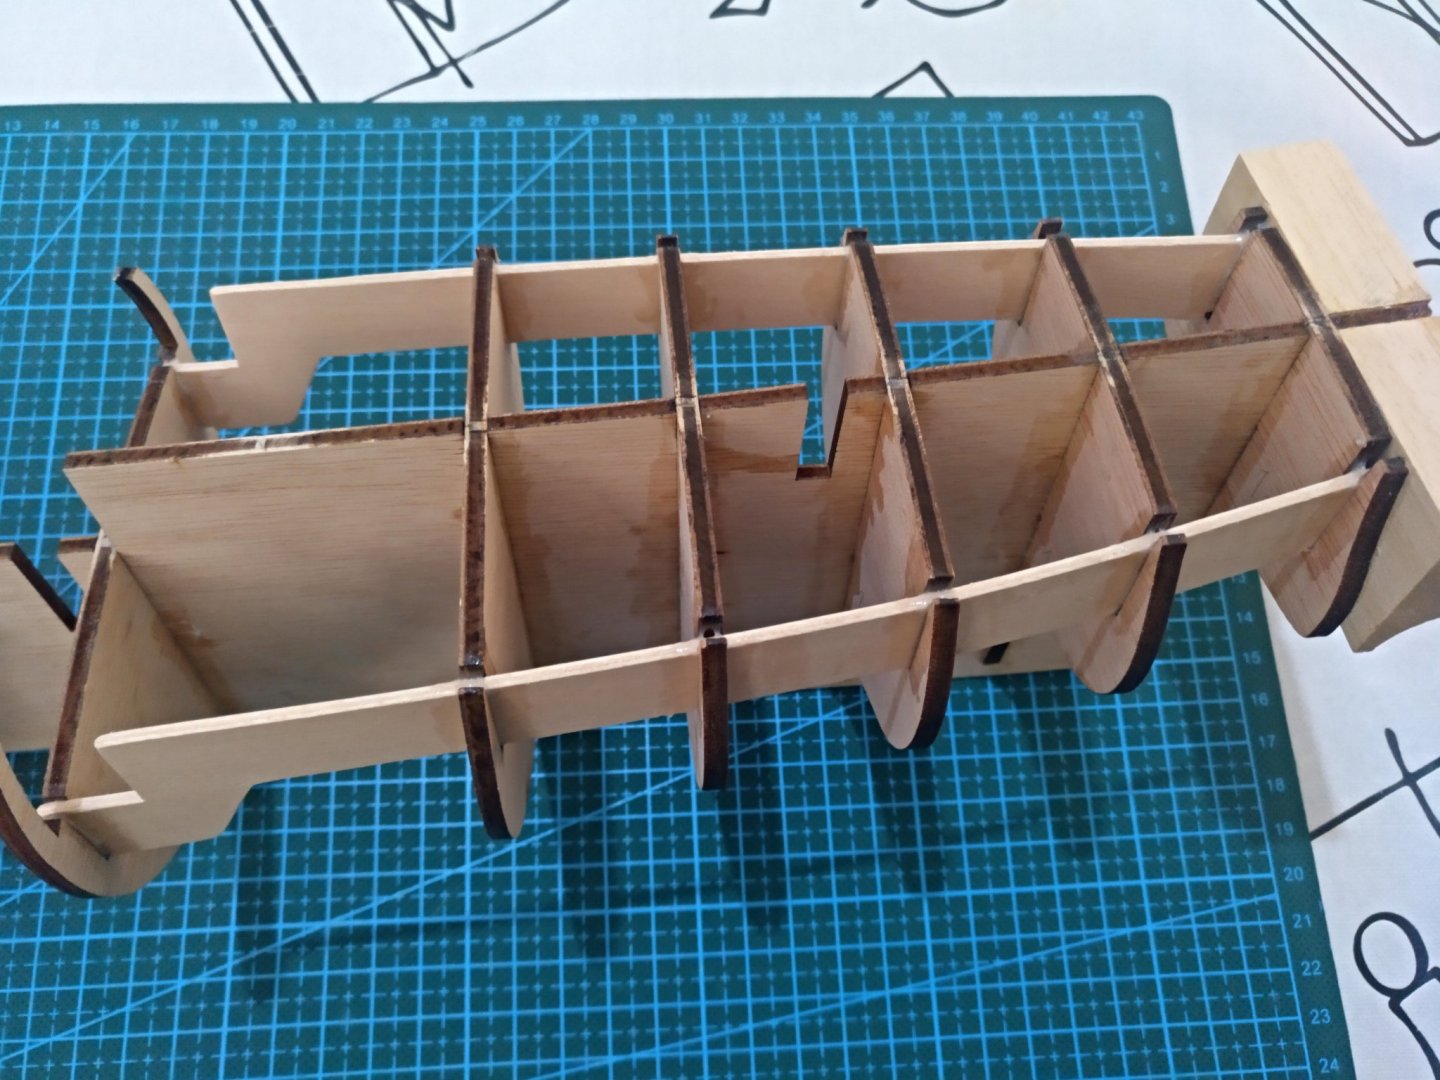
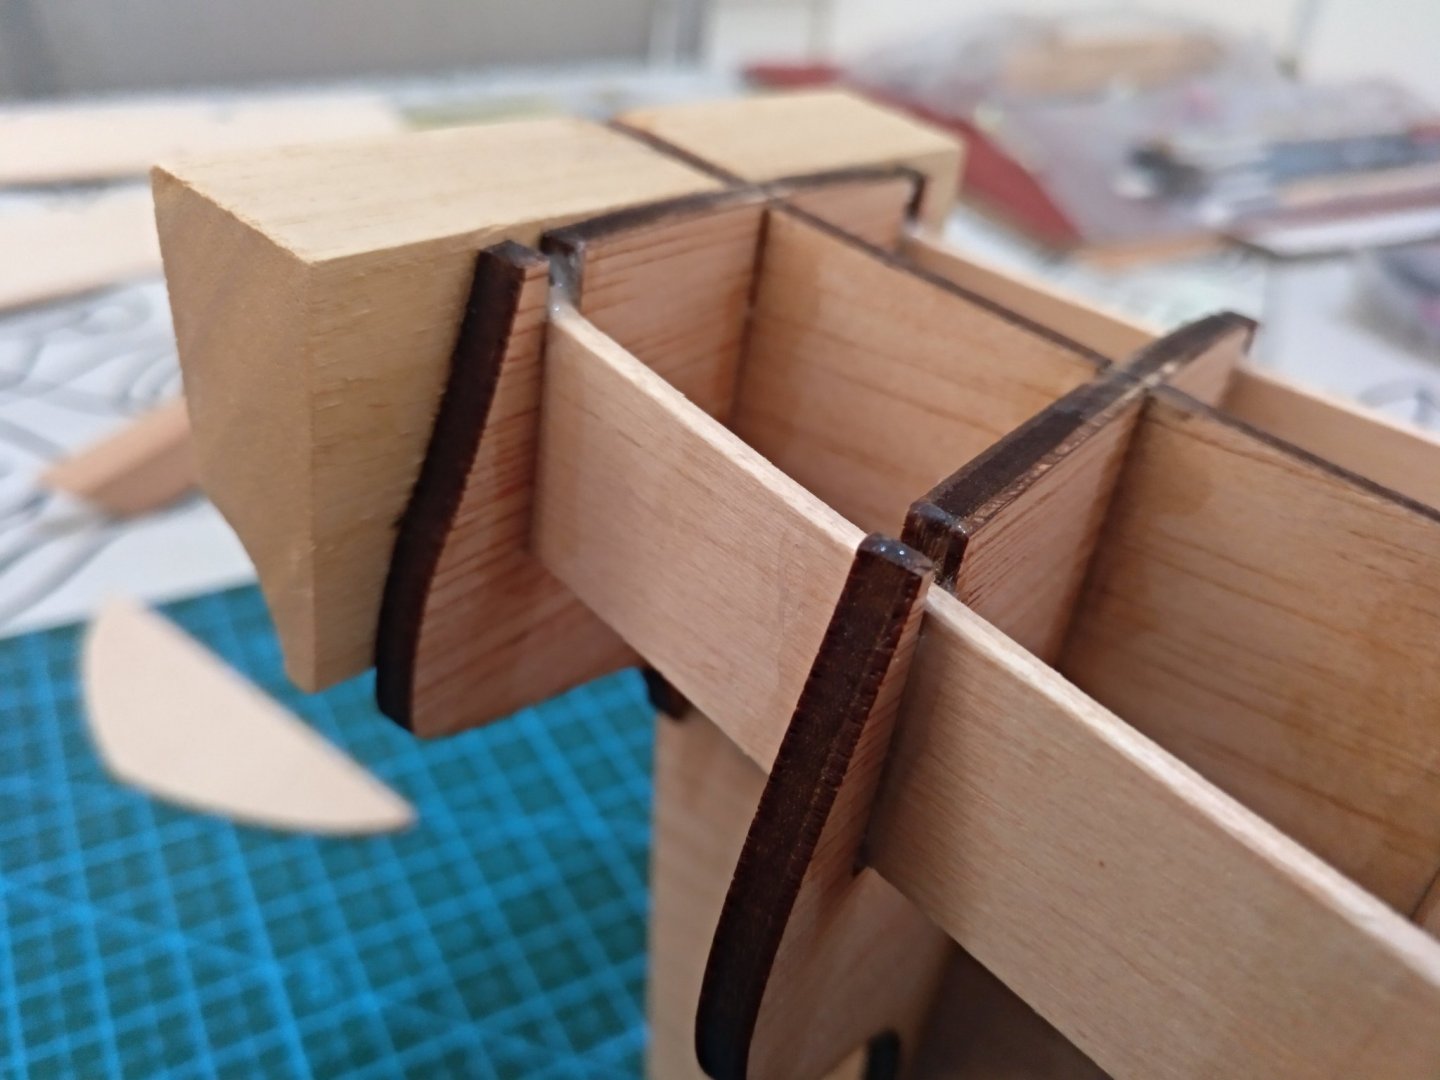
Hello everyone! I have just finished my Escampavia Pilar 1865 from the lesser-known Carthagonova company. It has taken me about a year of intermittent work. Still, I must say that the instructions and how the kit is prepared require the modeller to plan in advance. Sometimes, more than one might like, to look for alternatives out of the box, both rhetorically and physically, as the bits and wood supplied and those listed differ quite a bit. I want to think that it was just my case, but let it be a heads up. Anyway, apart from showing it to all of you, I need a bit of help to build a suitable and adequate base for this model, as the one supplied by the kit is way too simple, even if painted or dyed. After some time reading threads and watching models, I have seen many bases made from scratch, so I would love to get some ideas to try to build the best one for this kit. I hope you like it. And here you can see the basic supplied base.


-
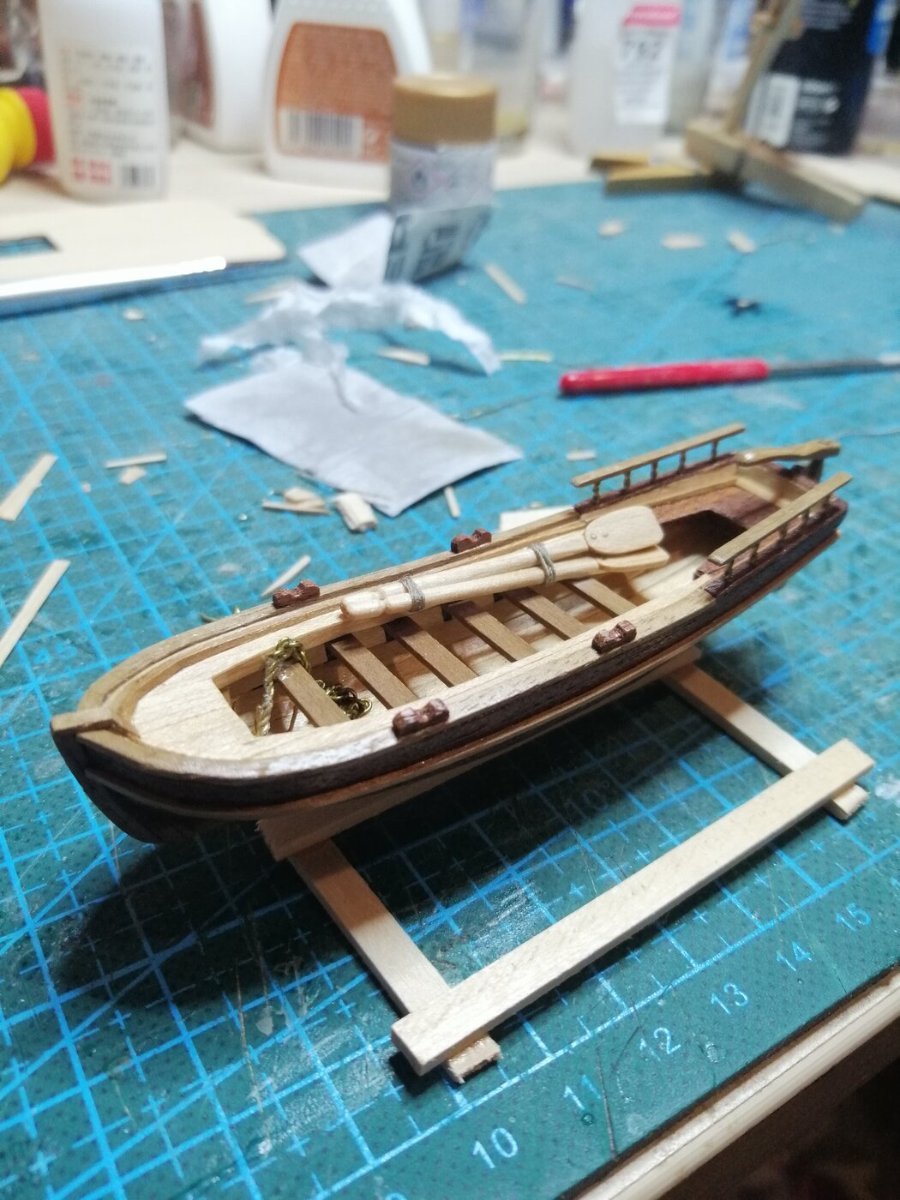
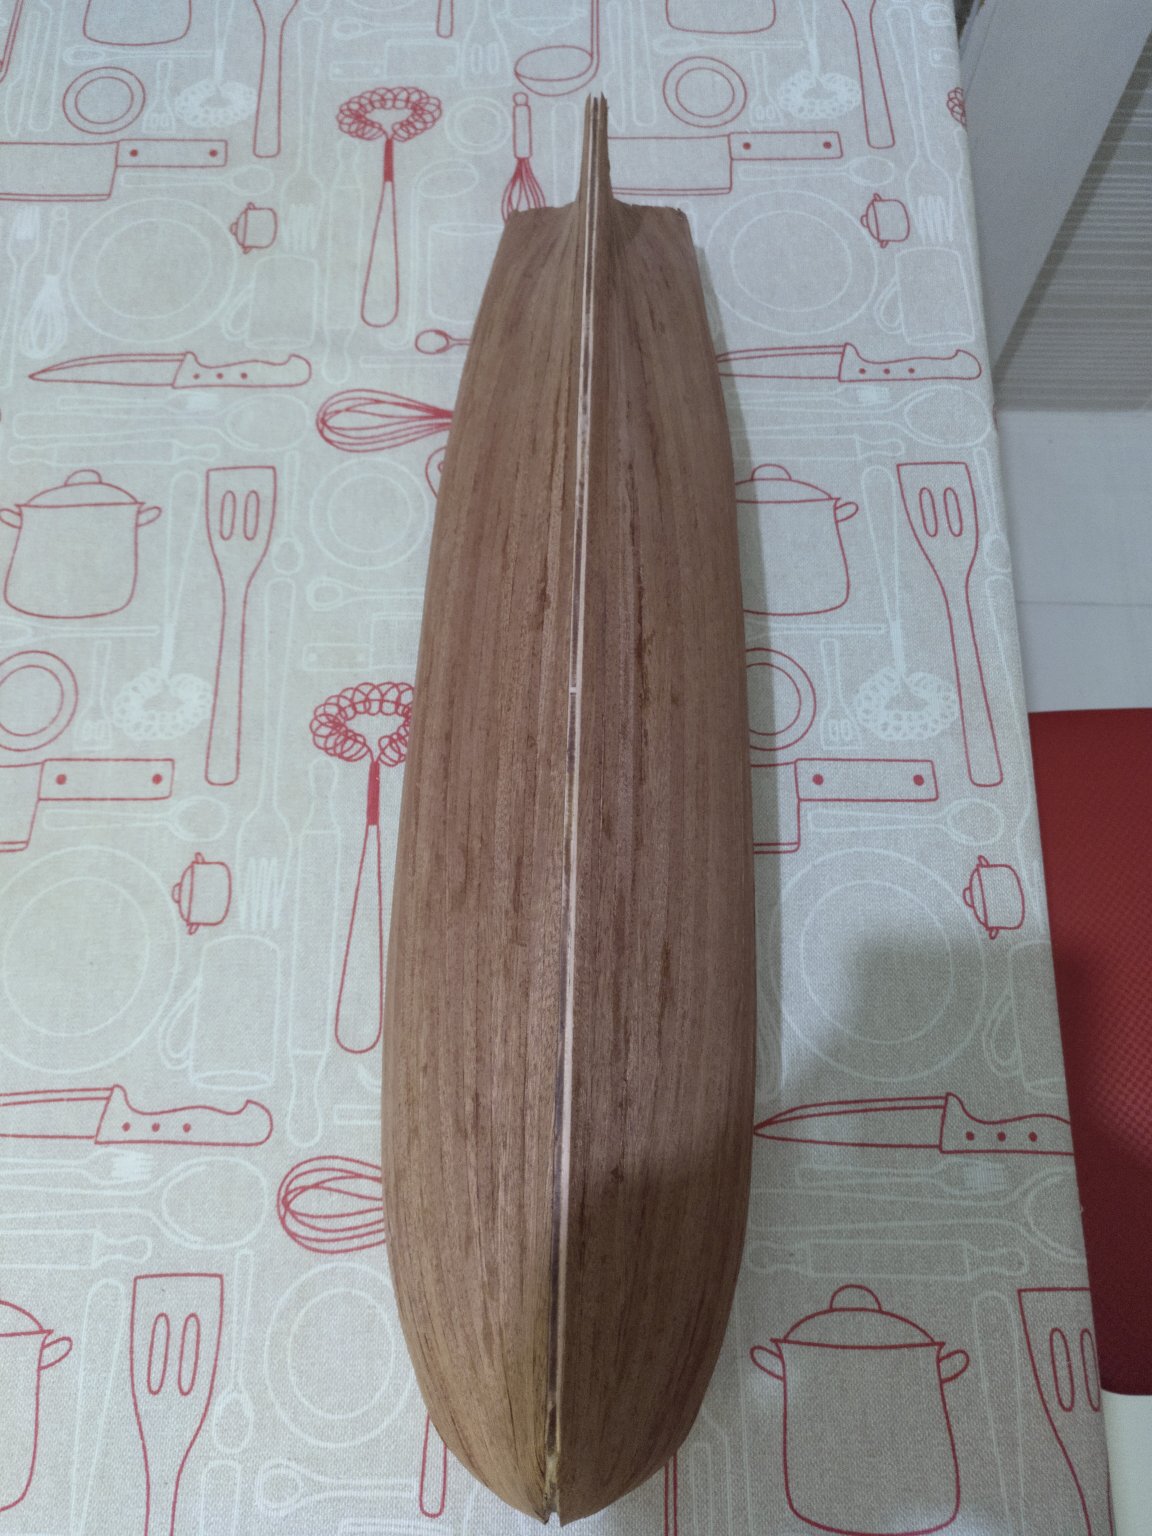
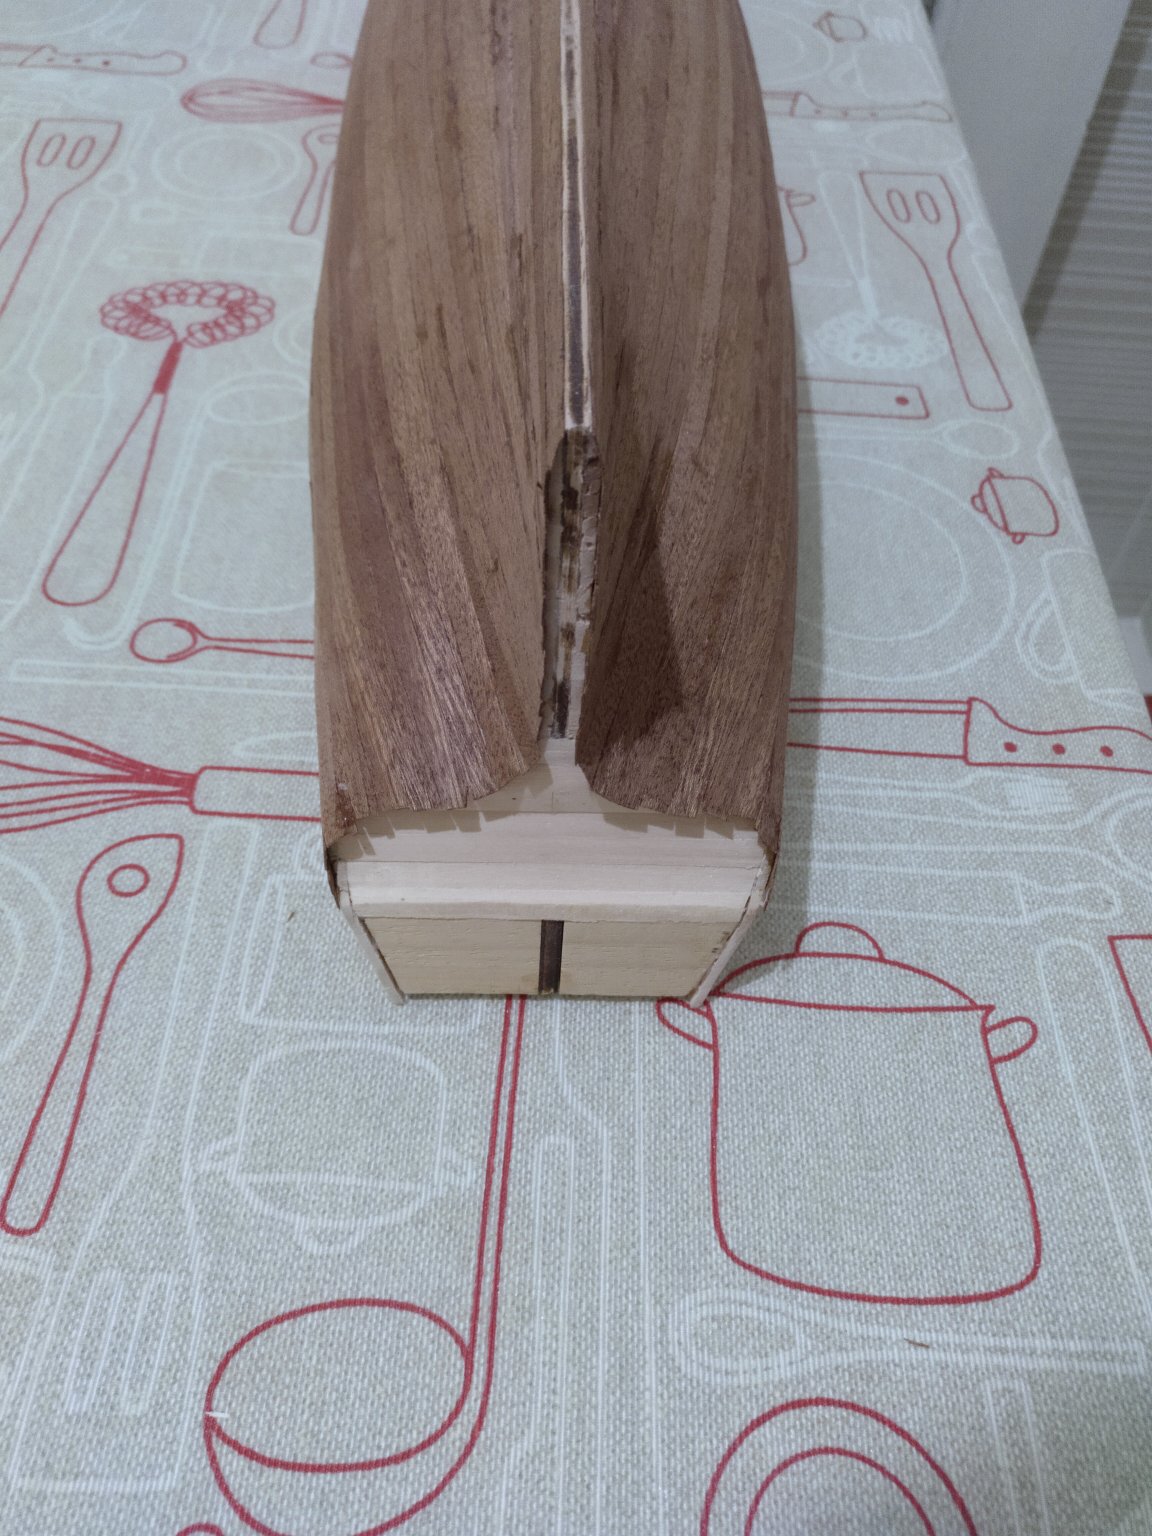
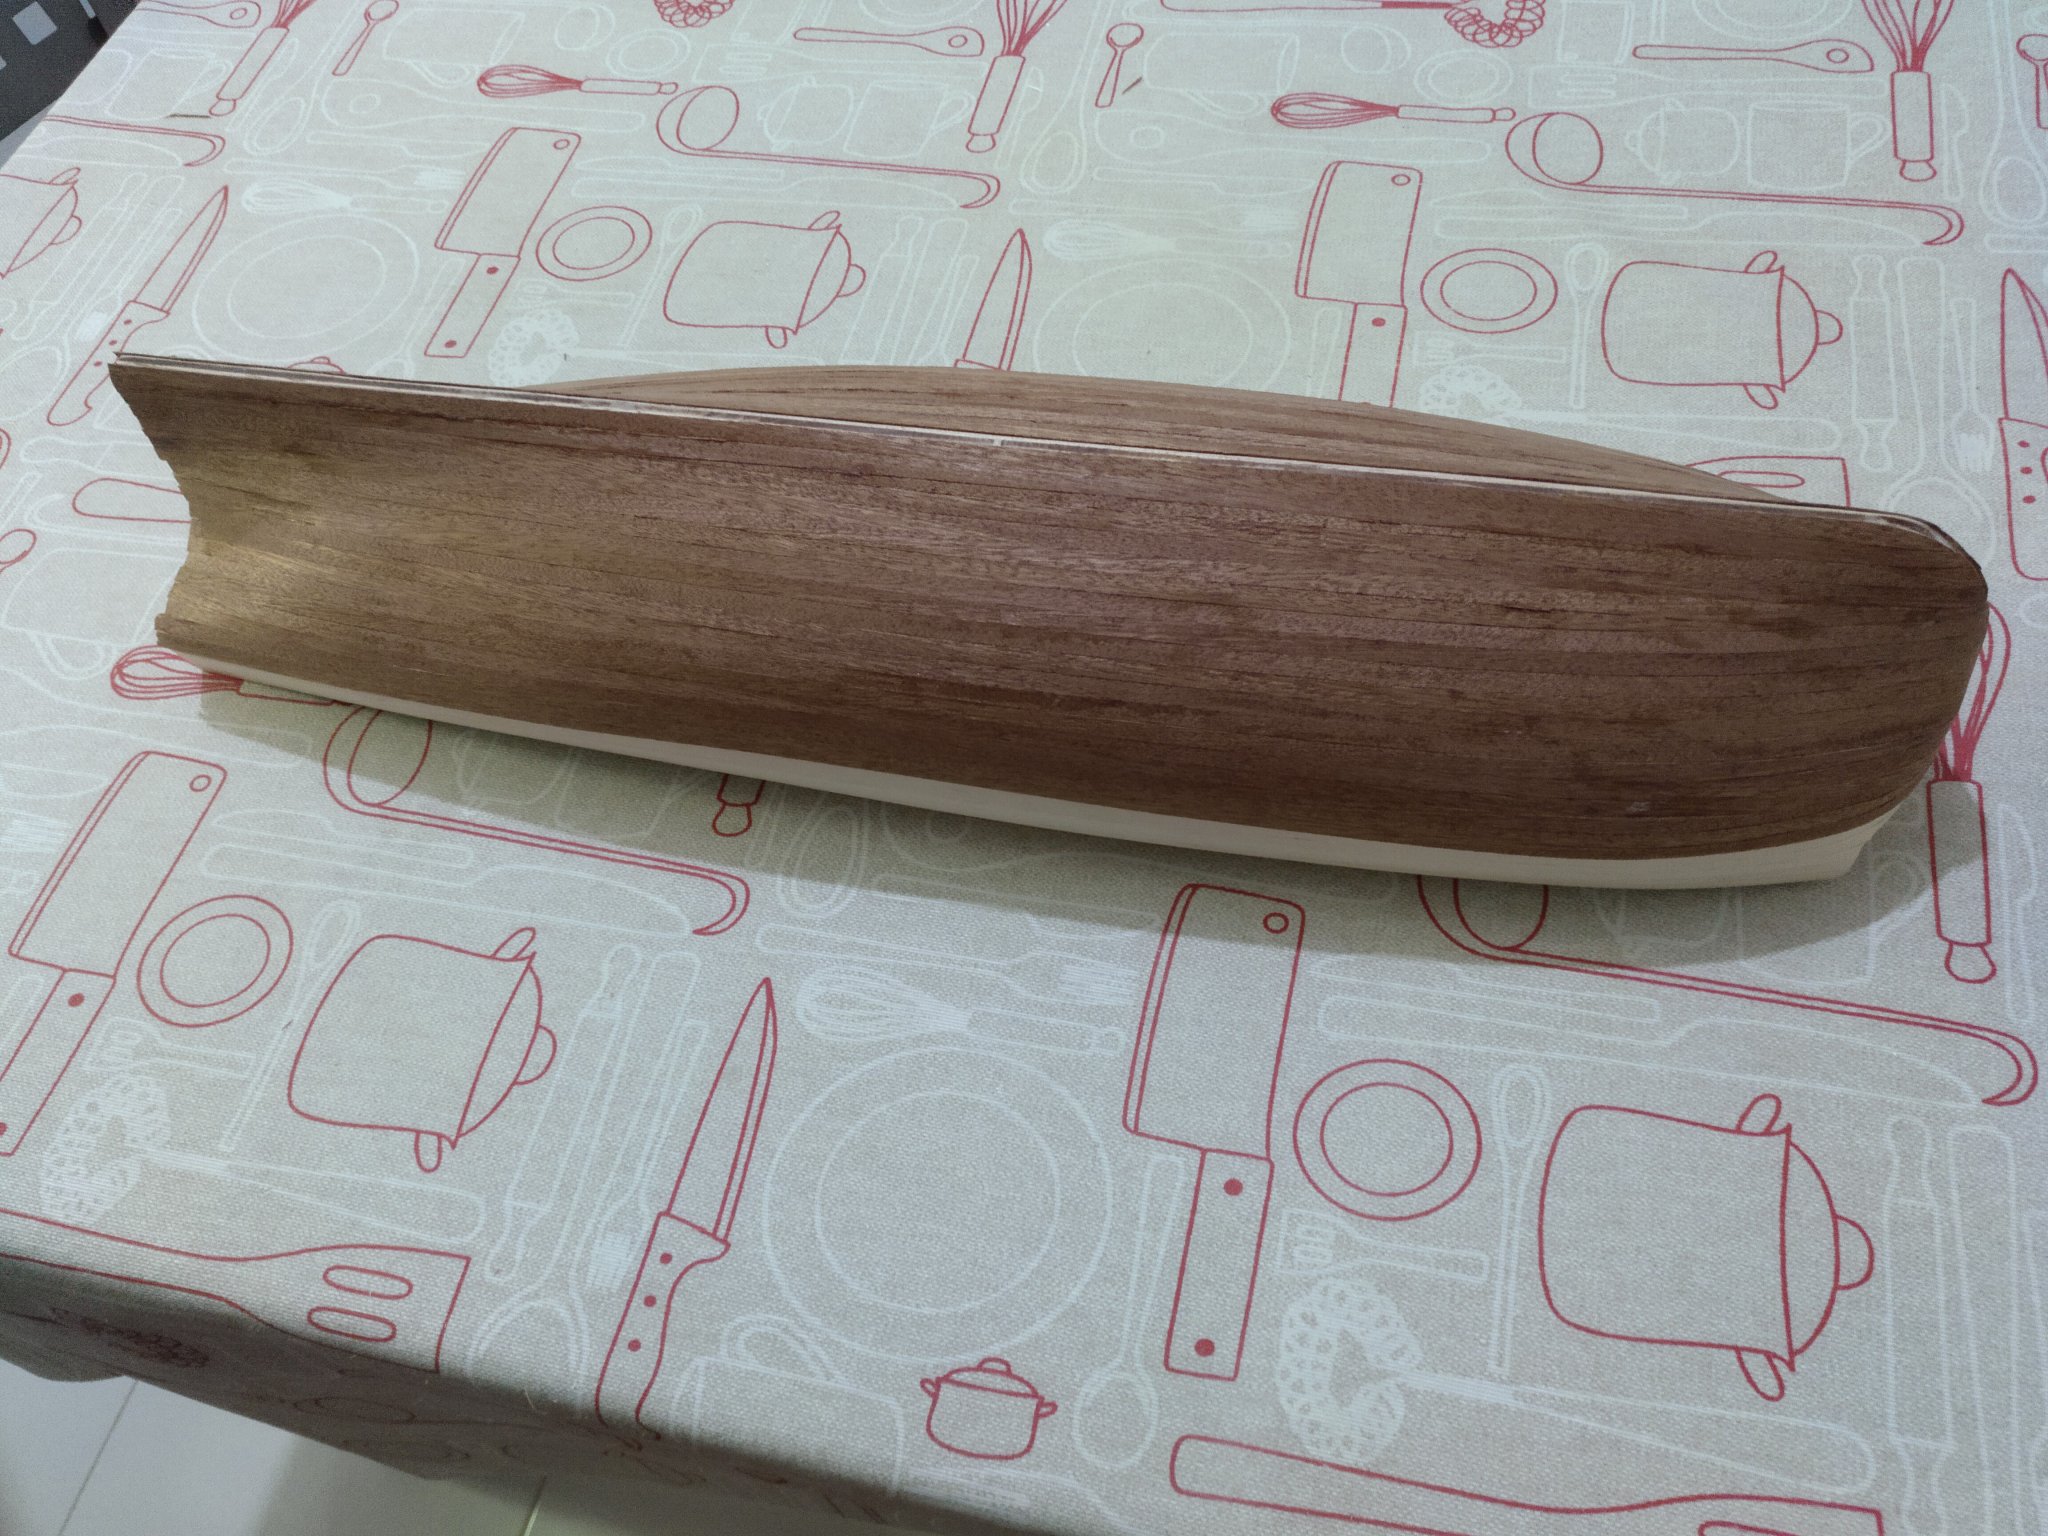
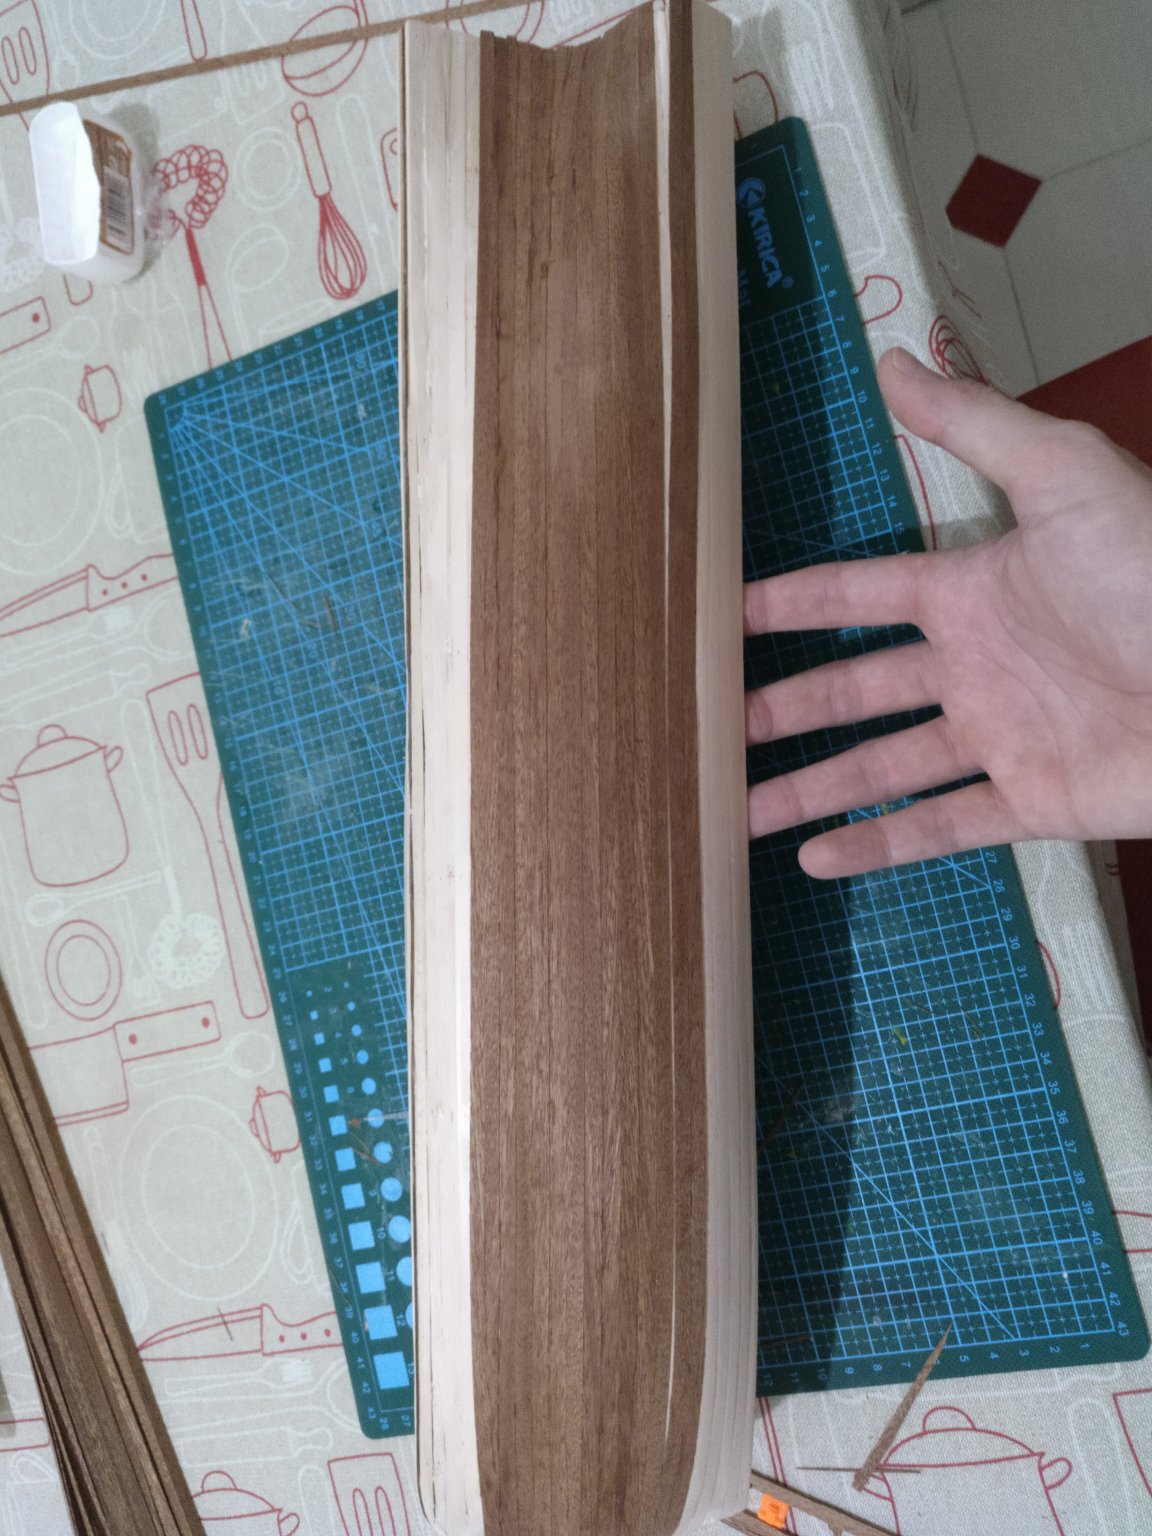
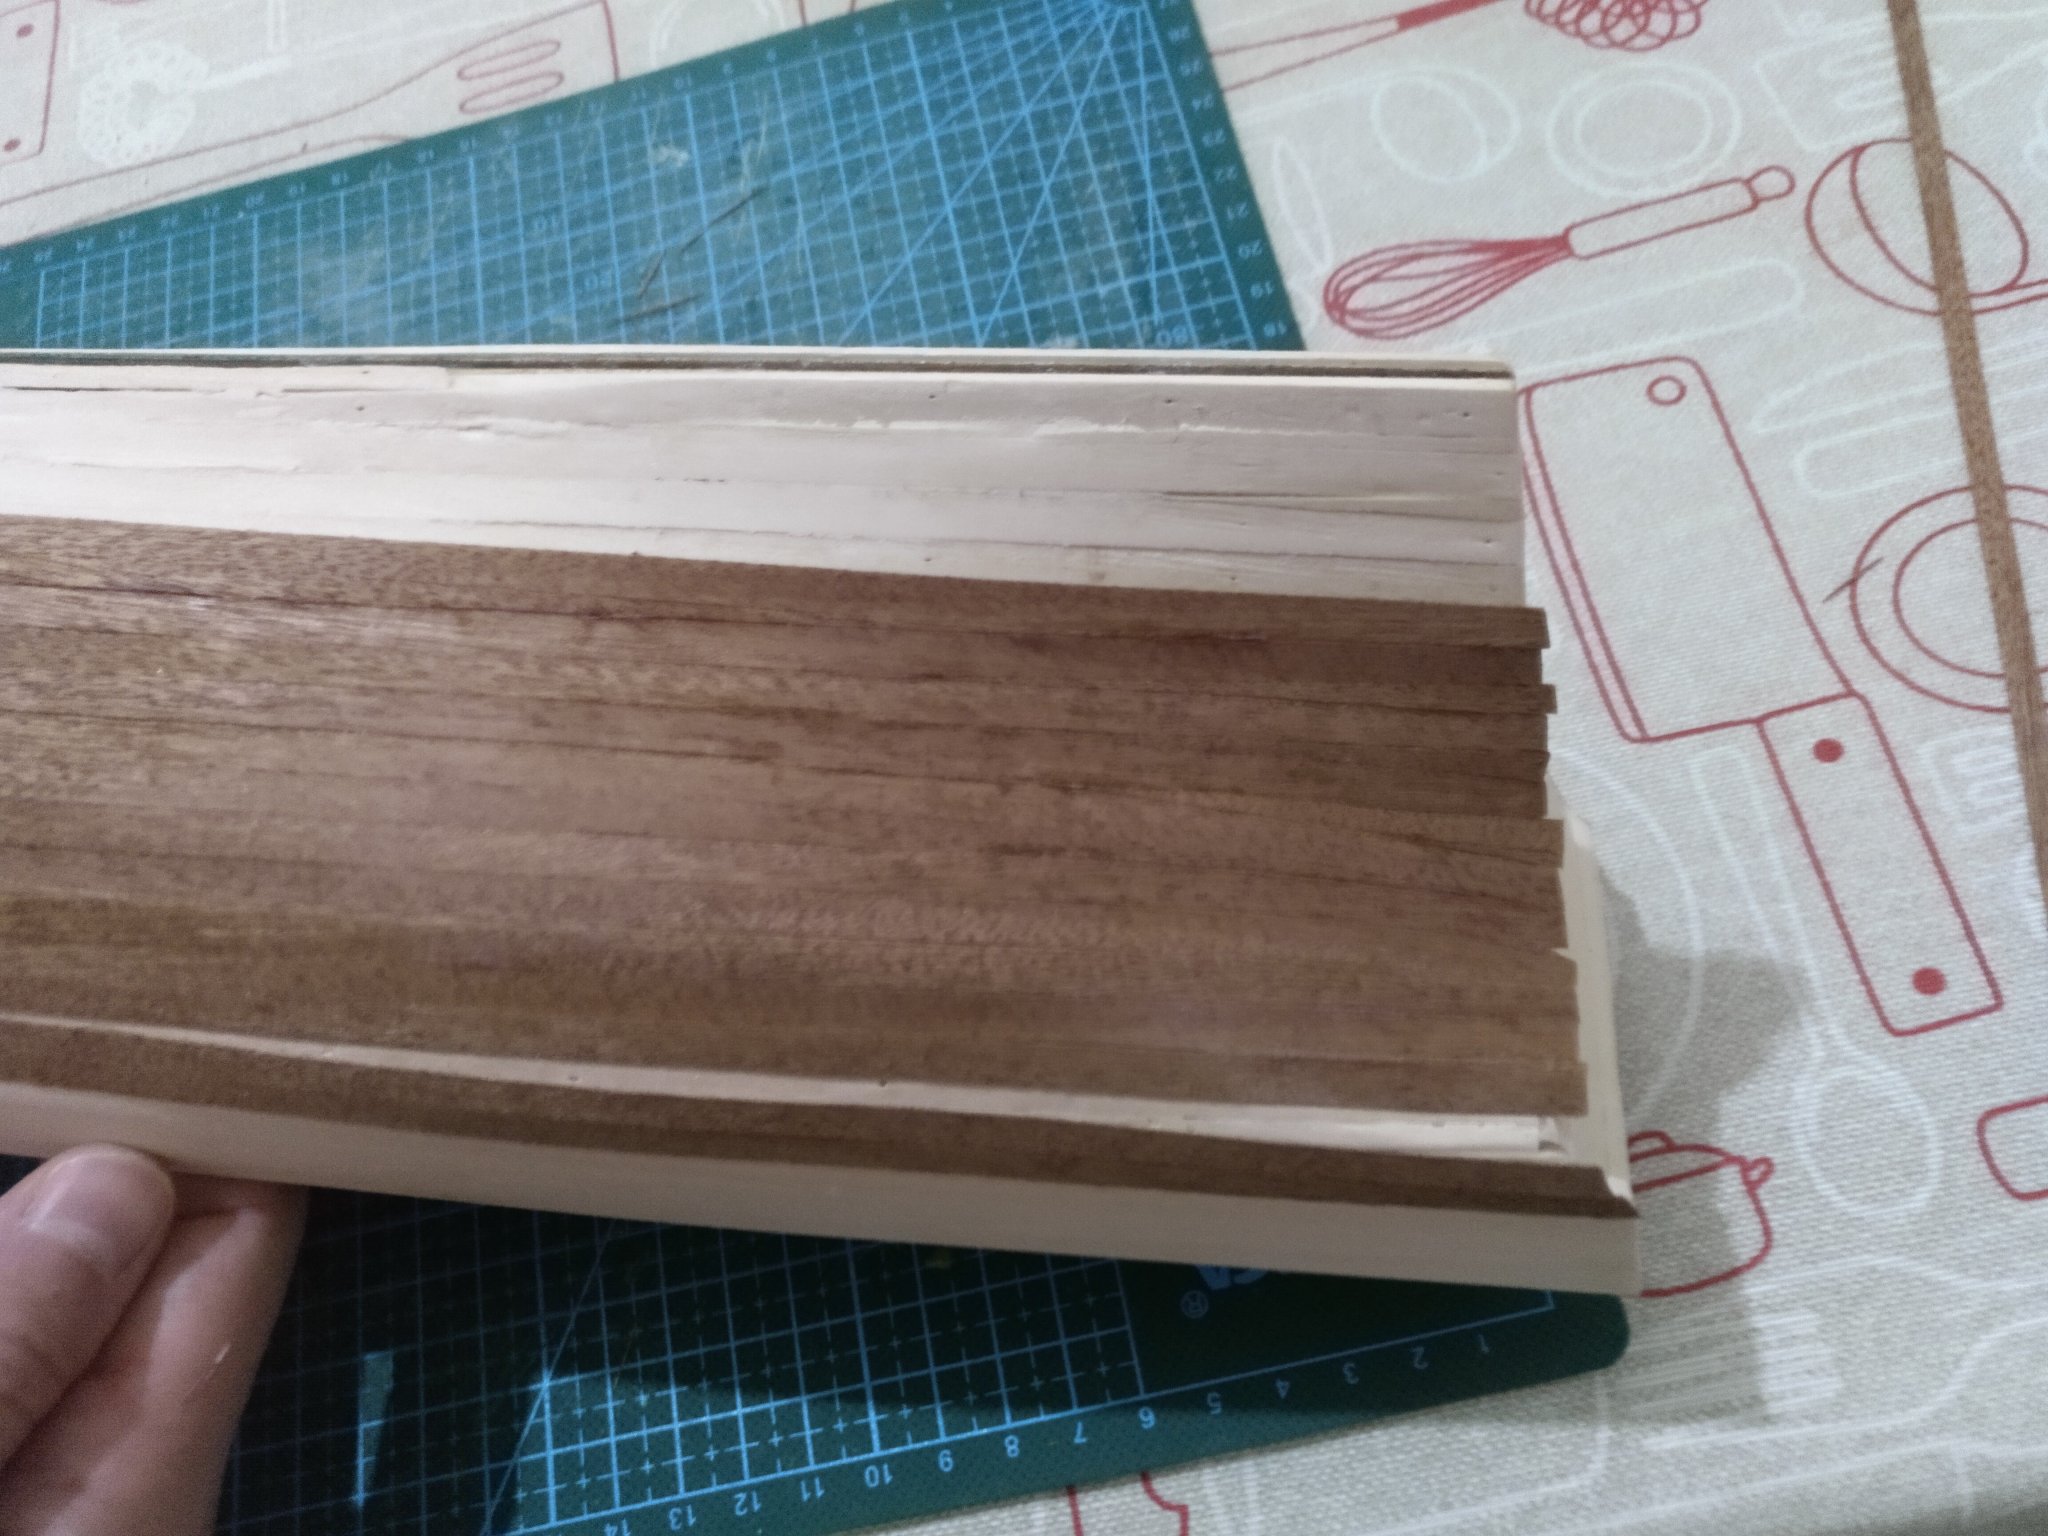
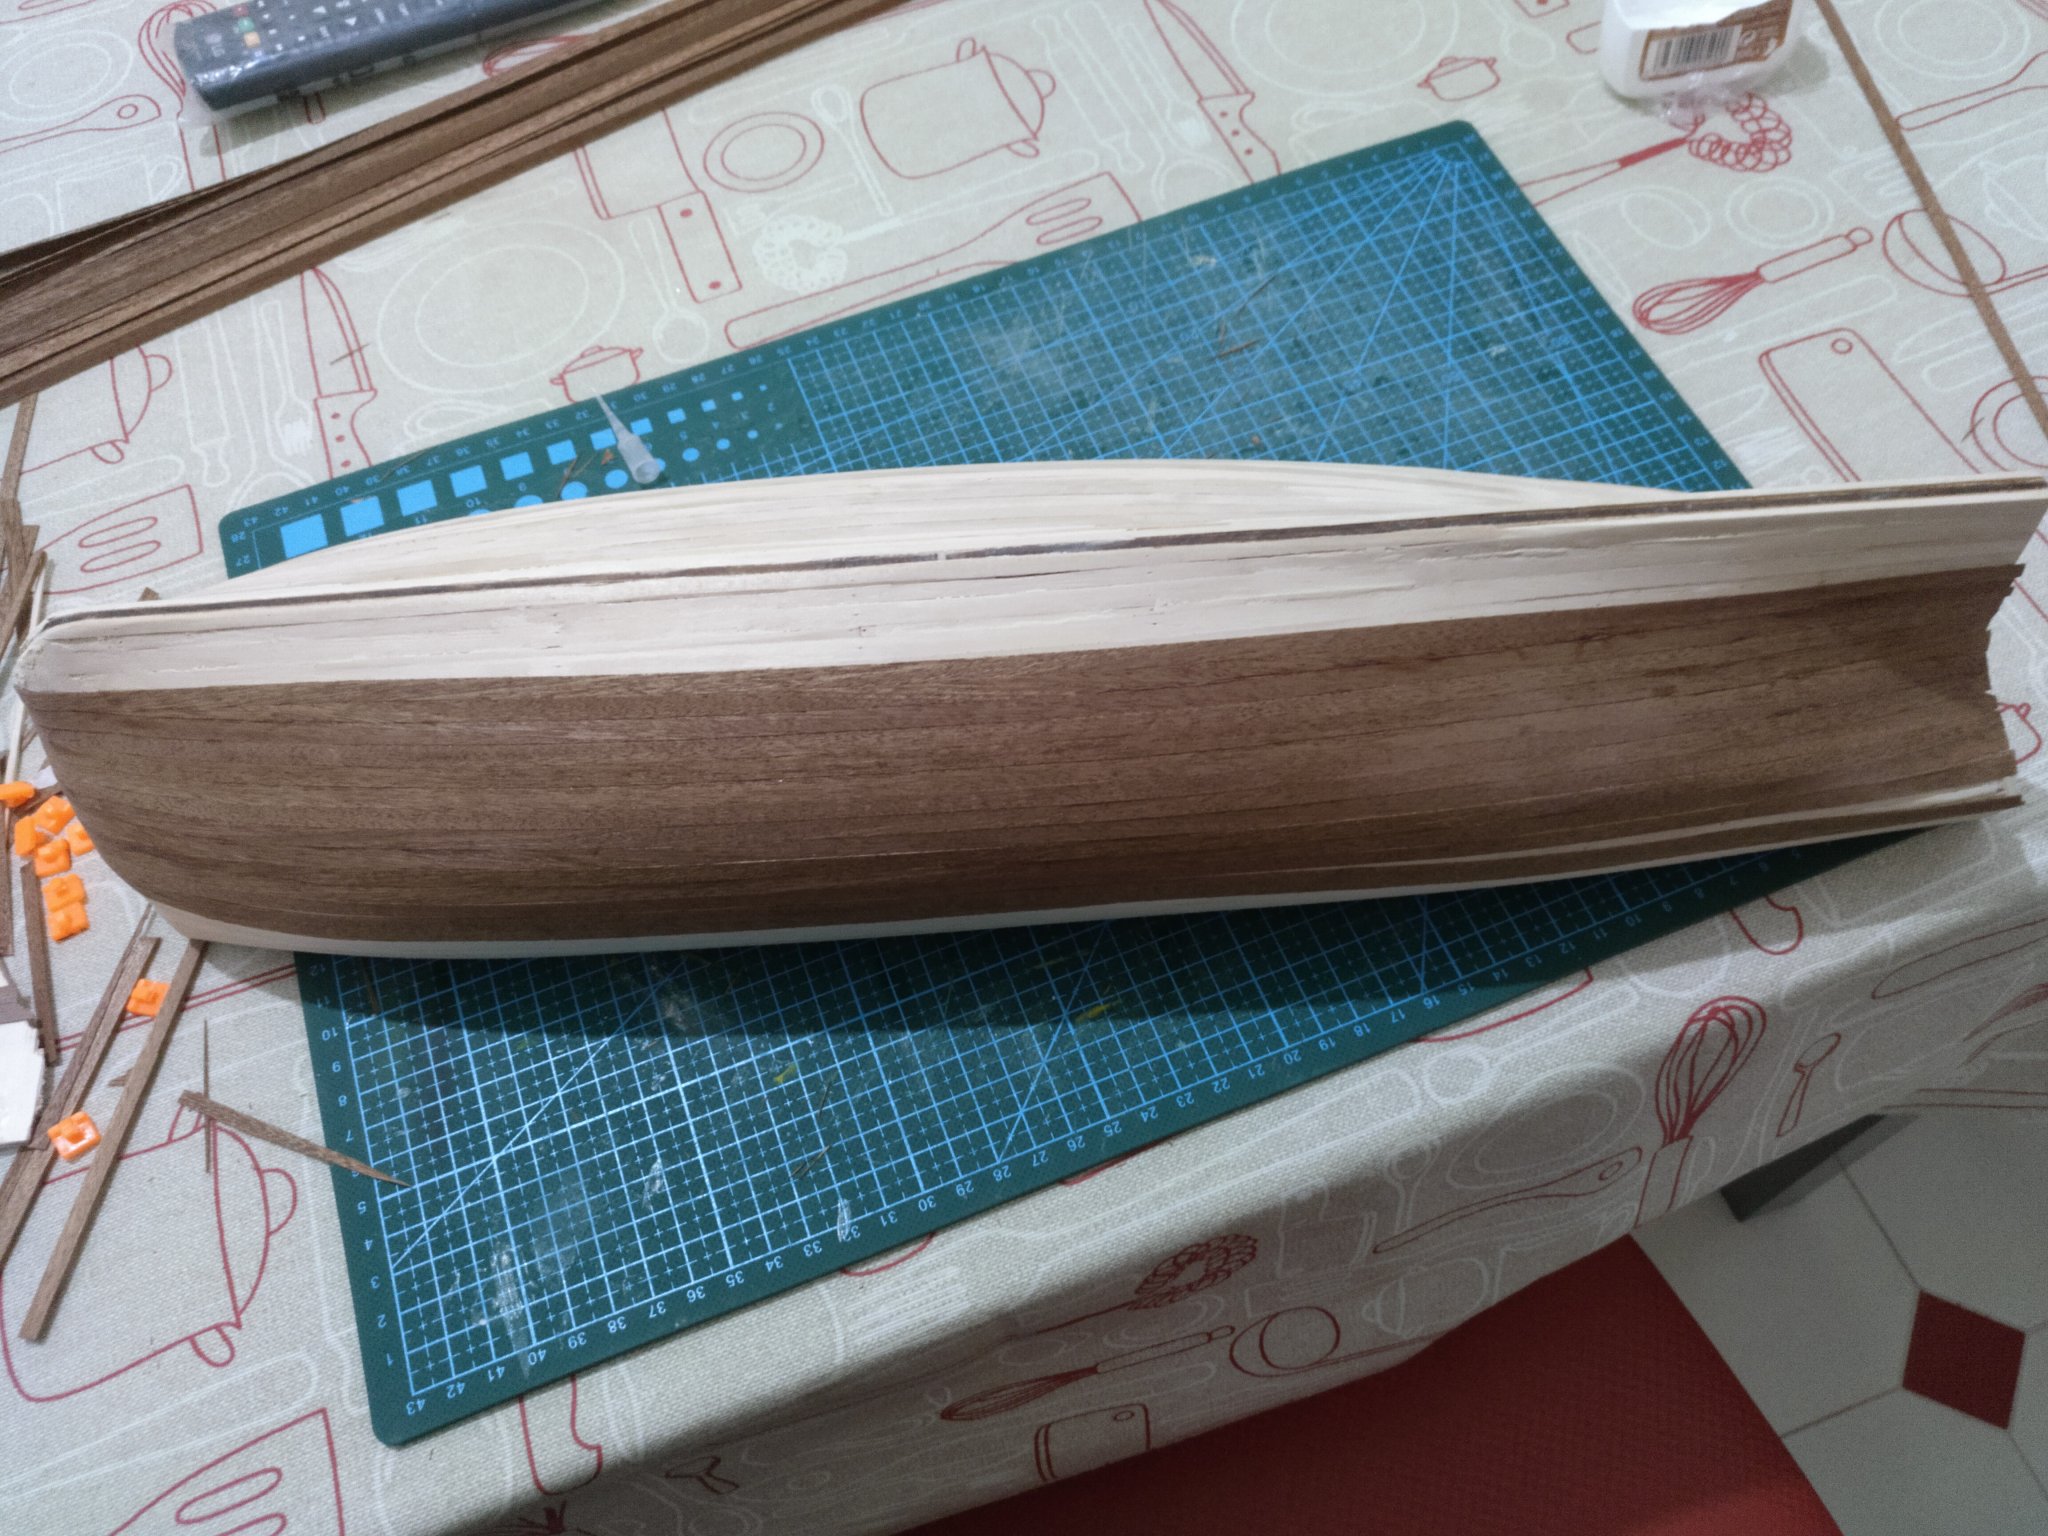
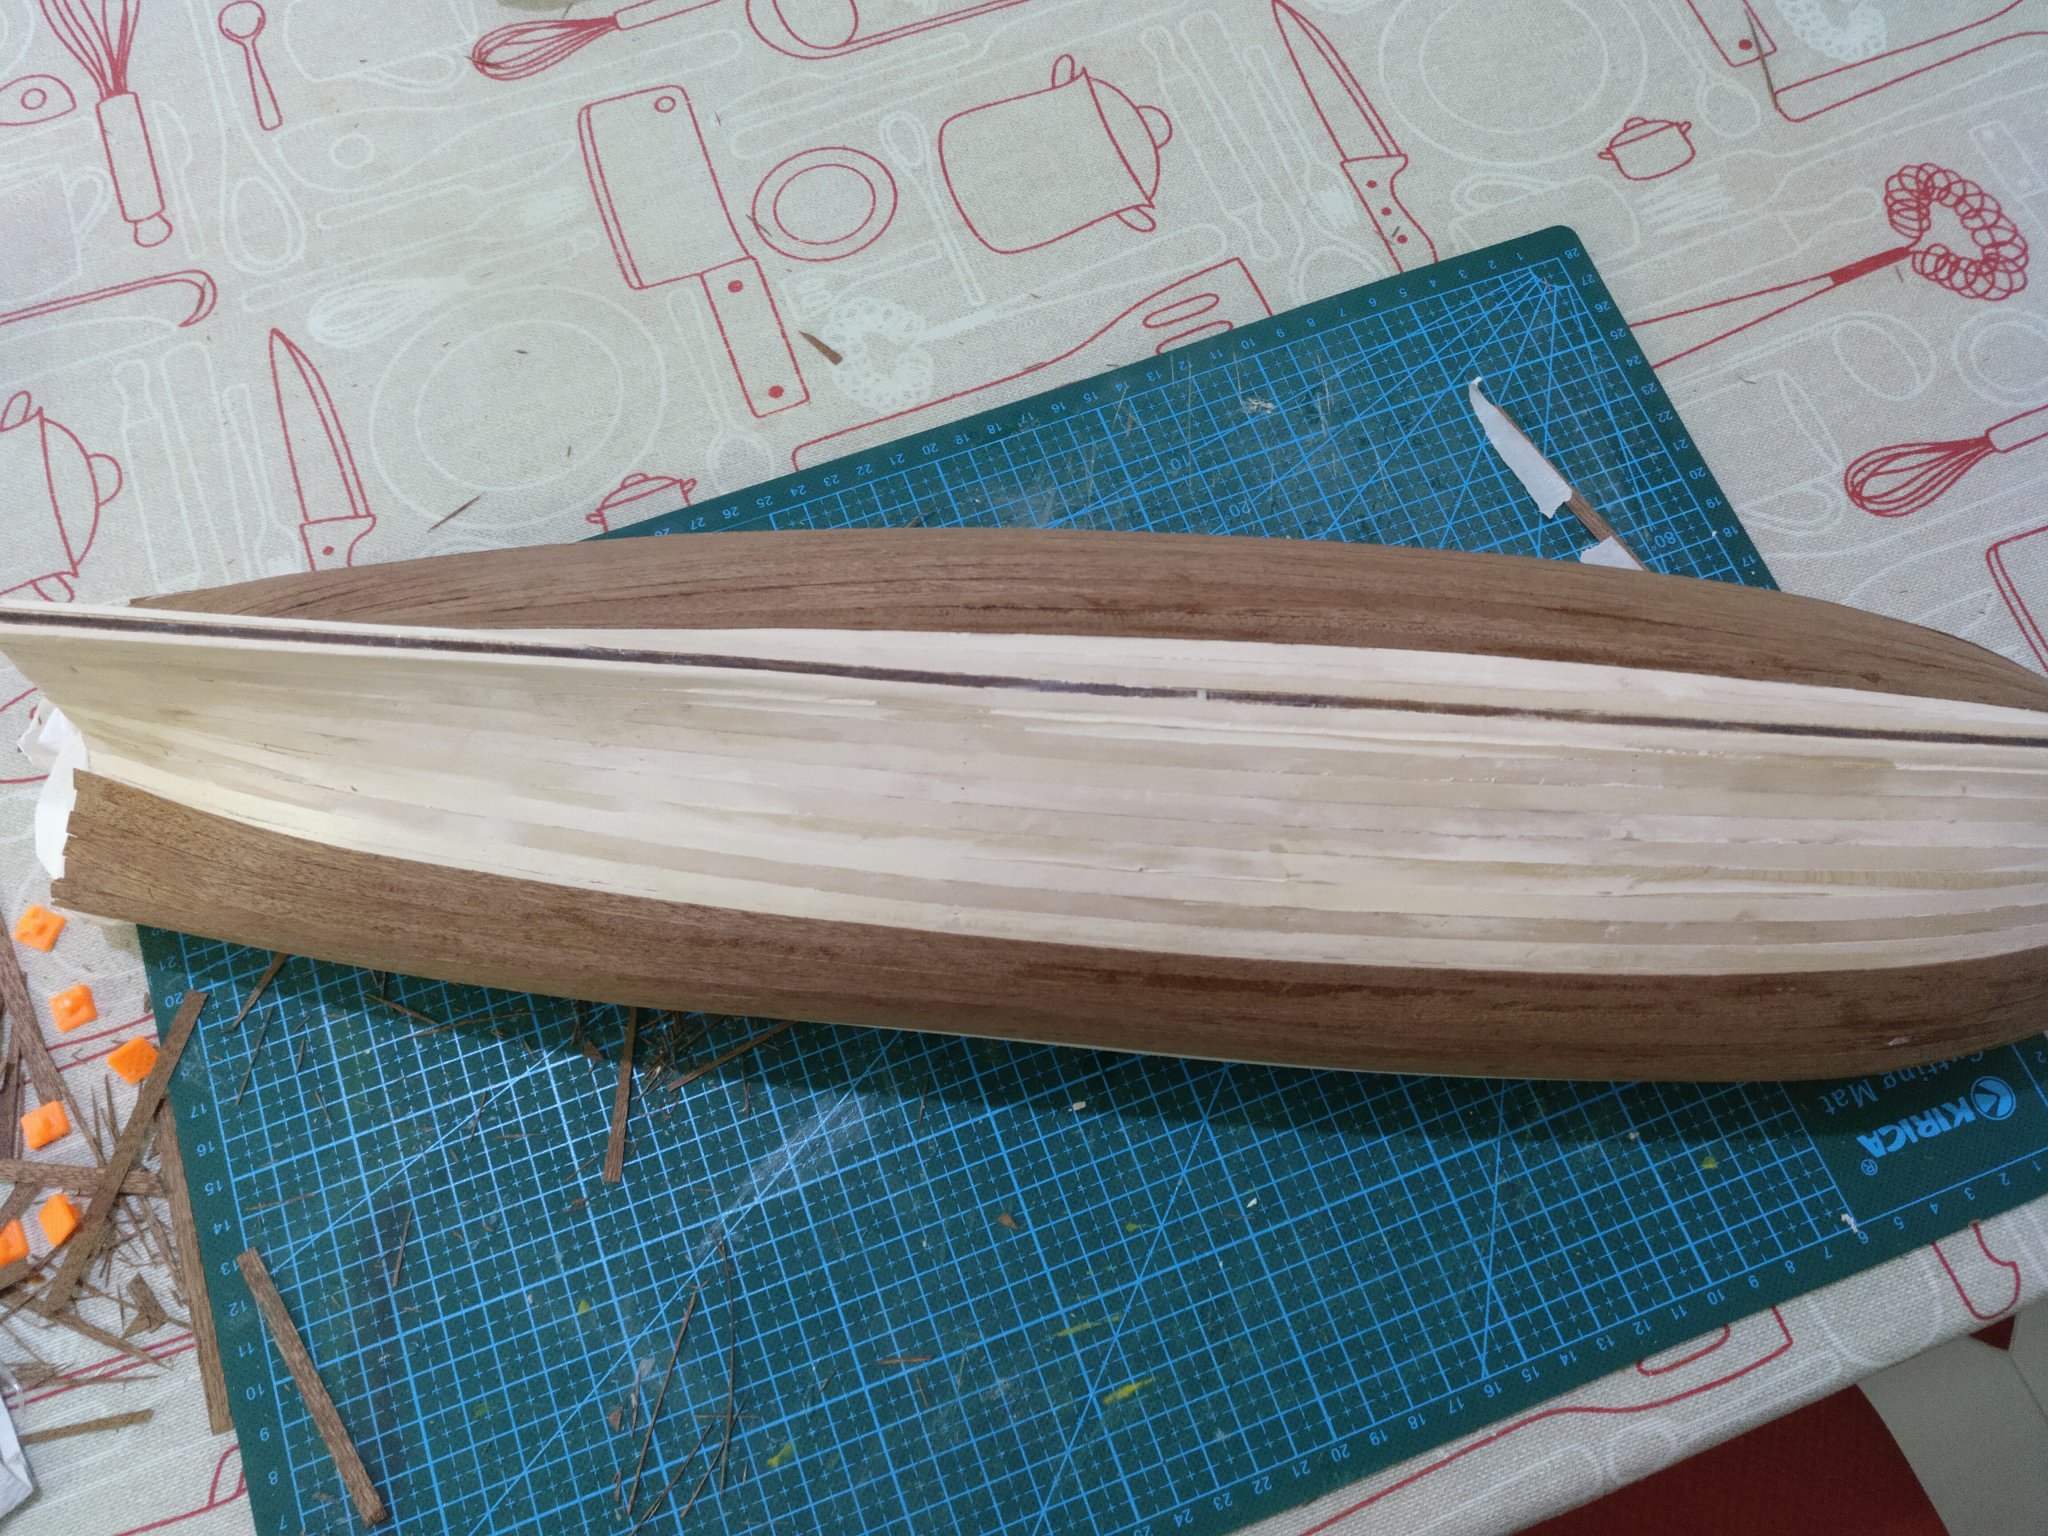
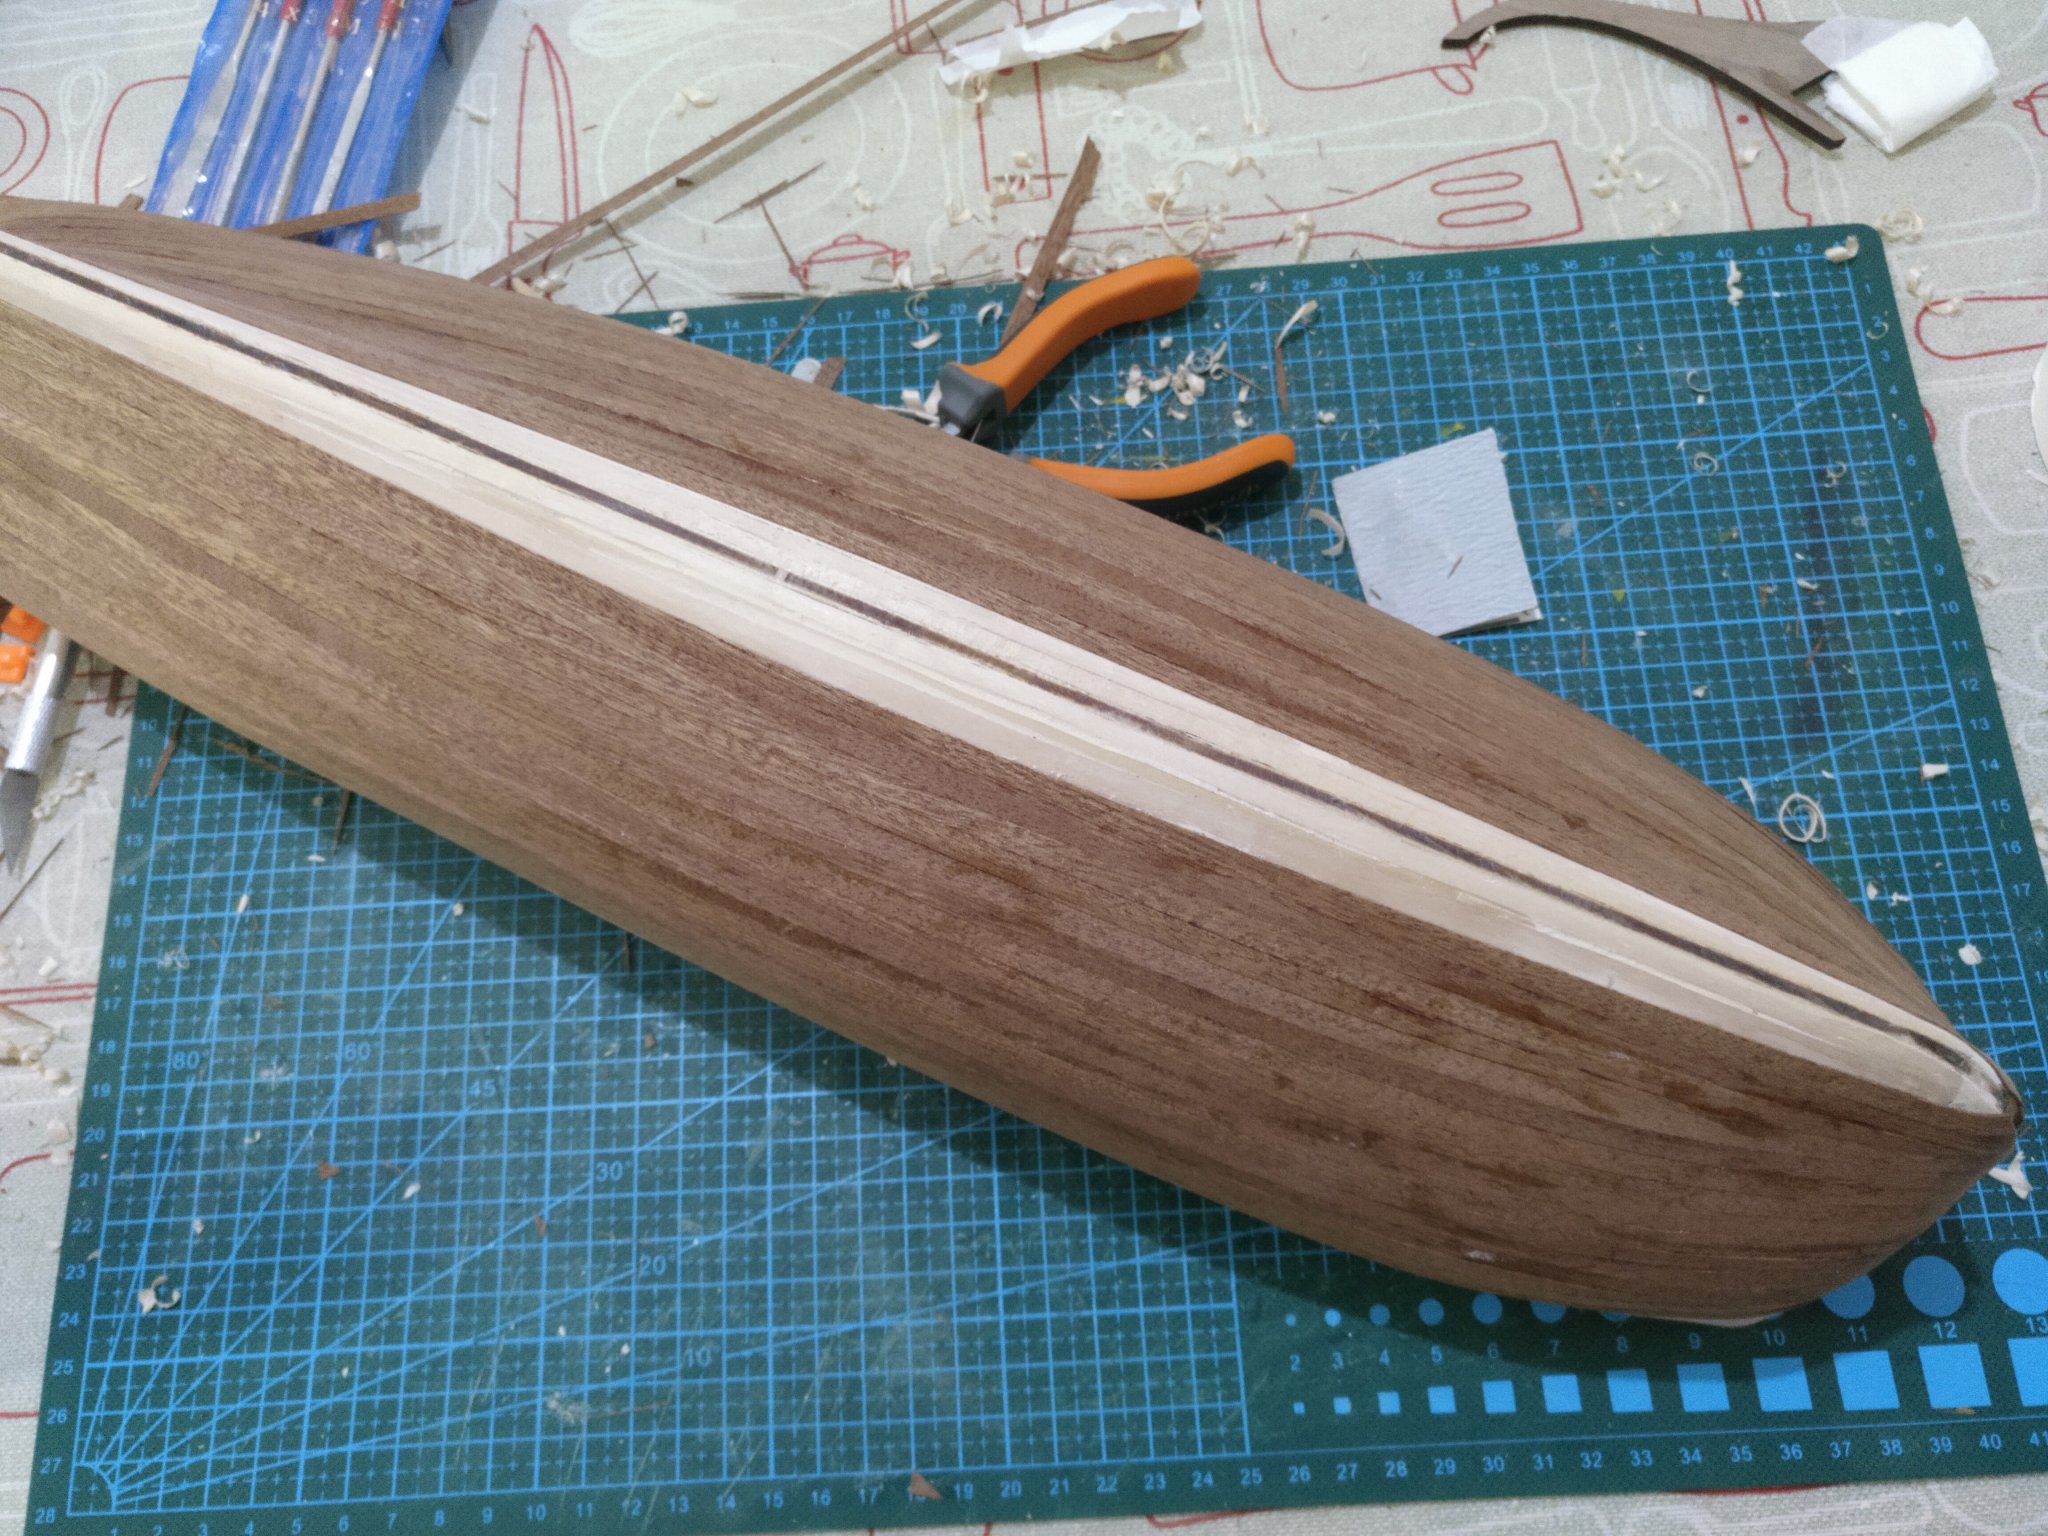
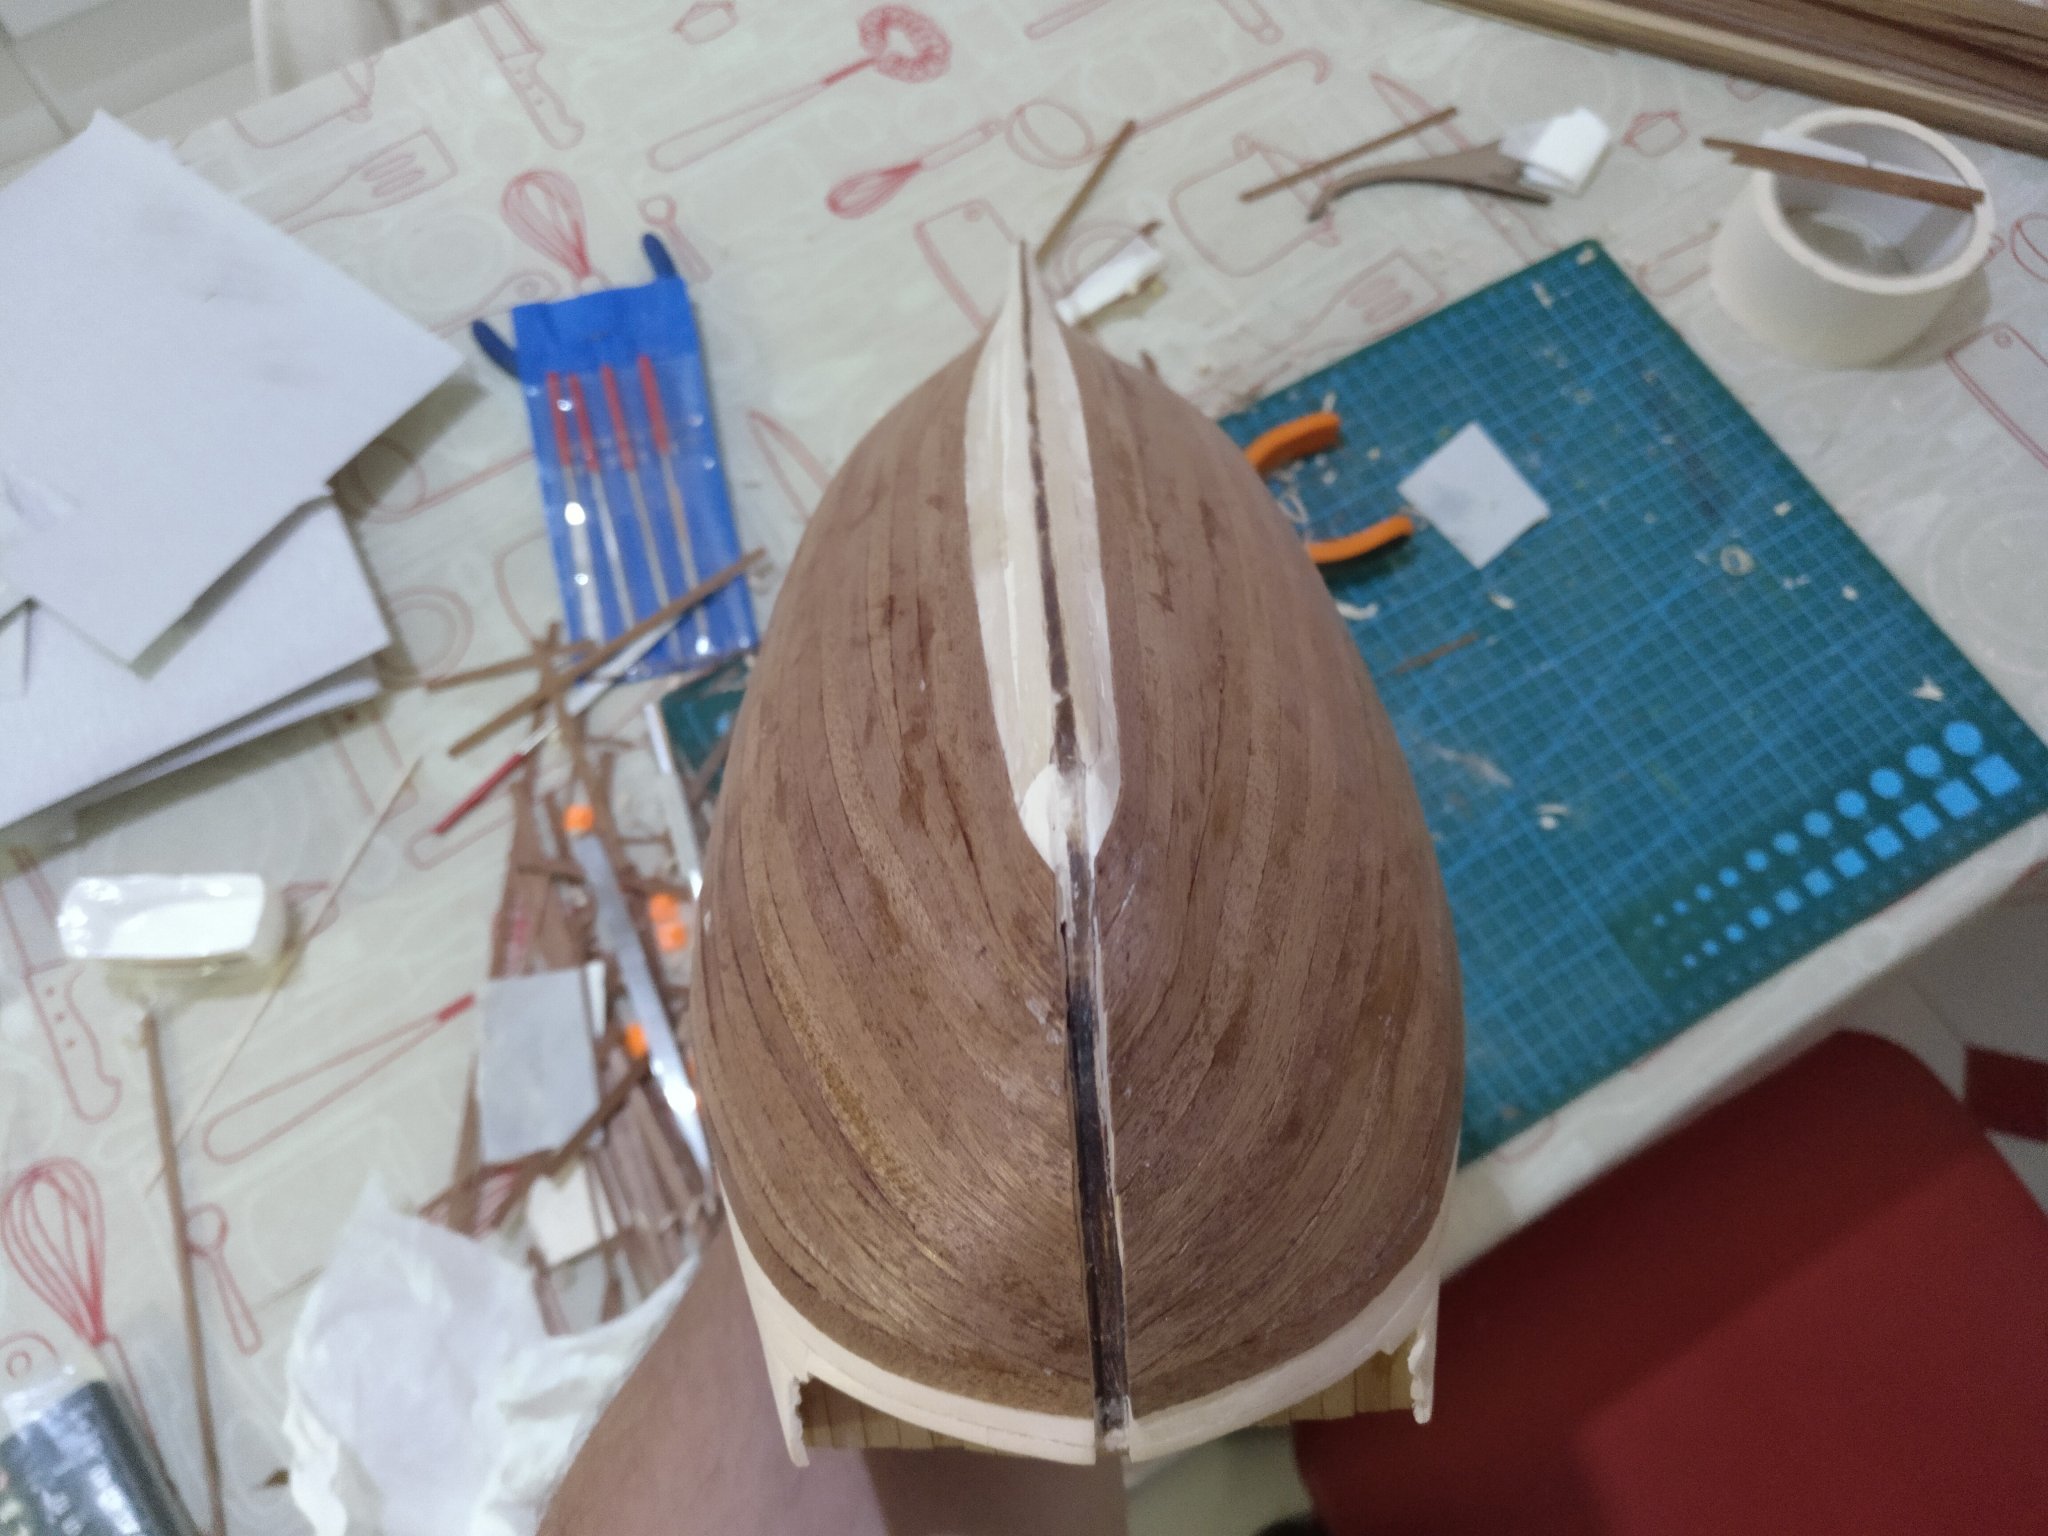
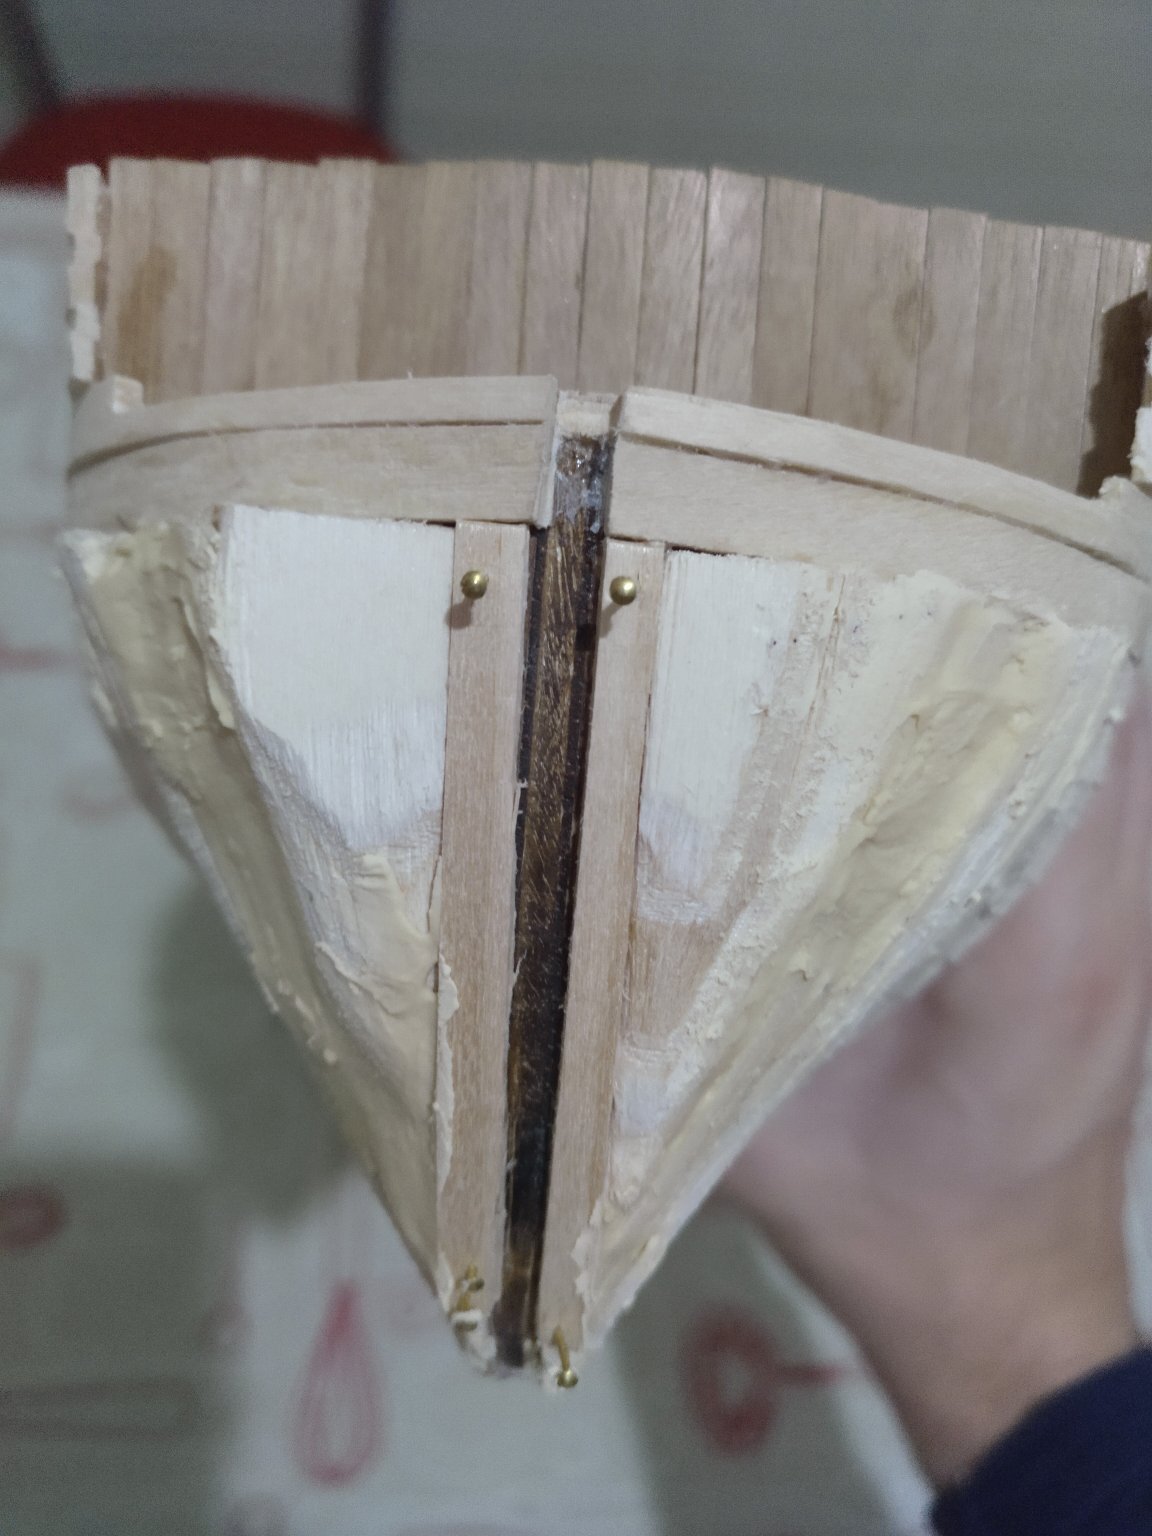
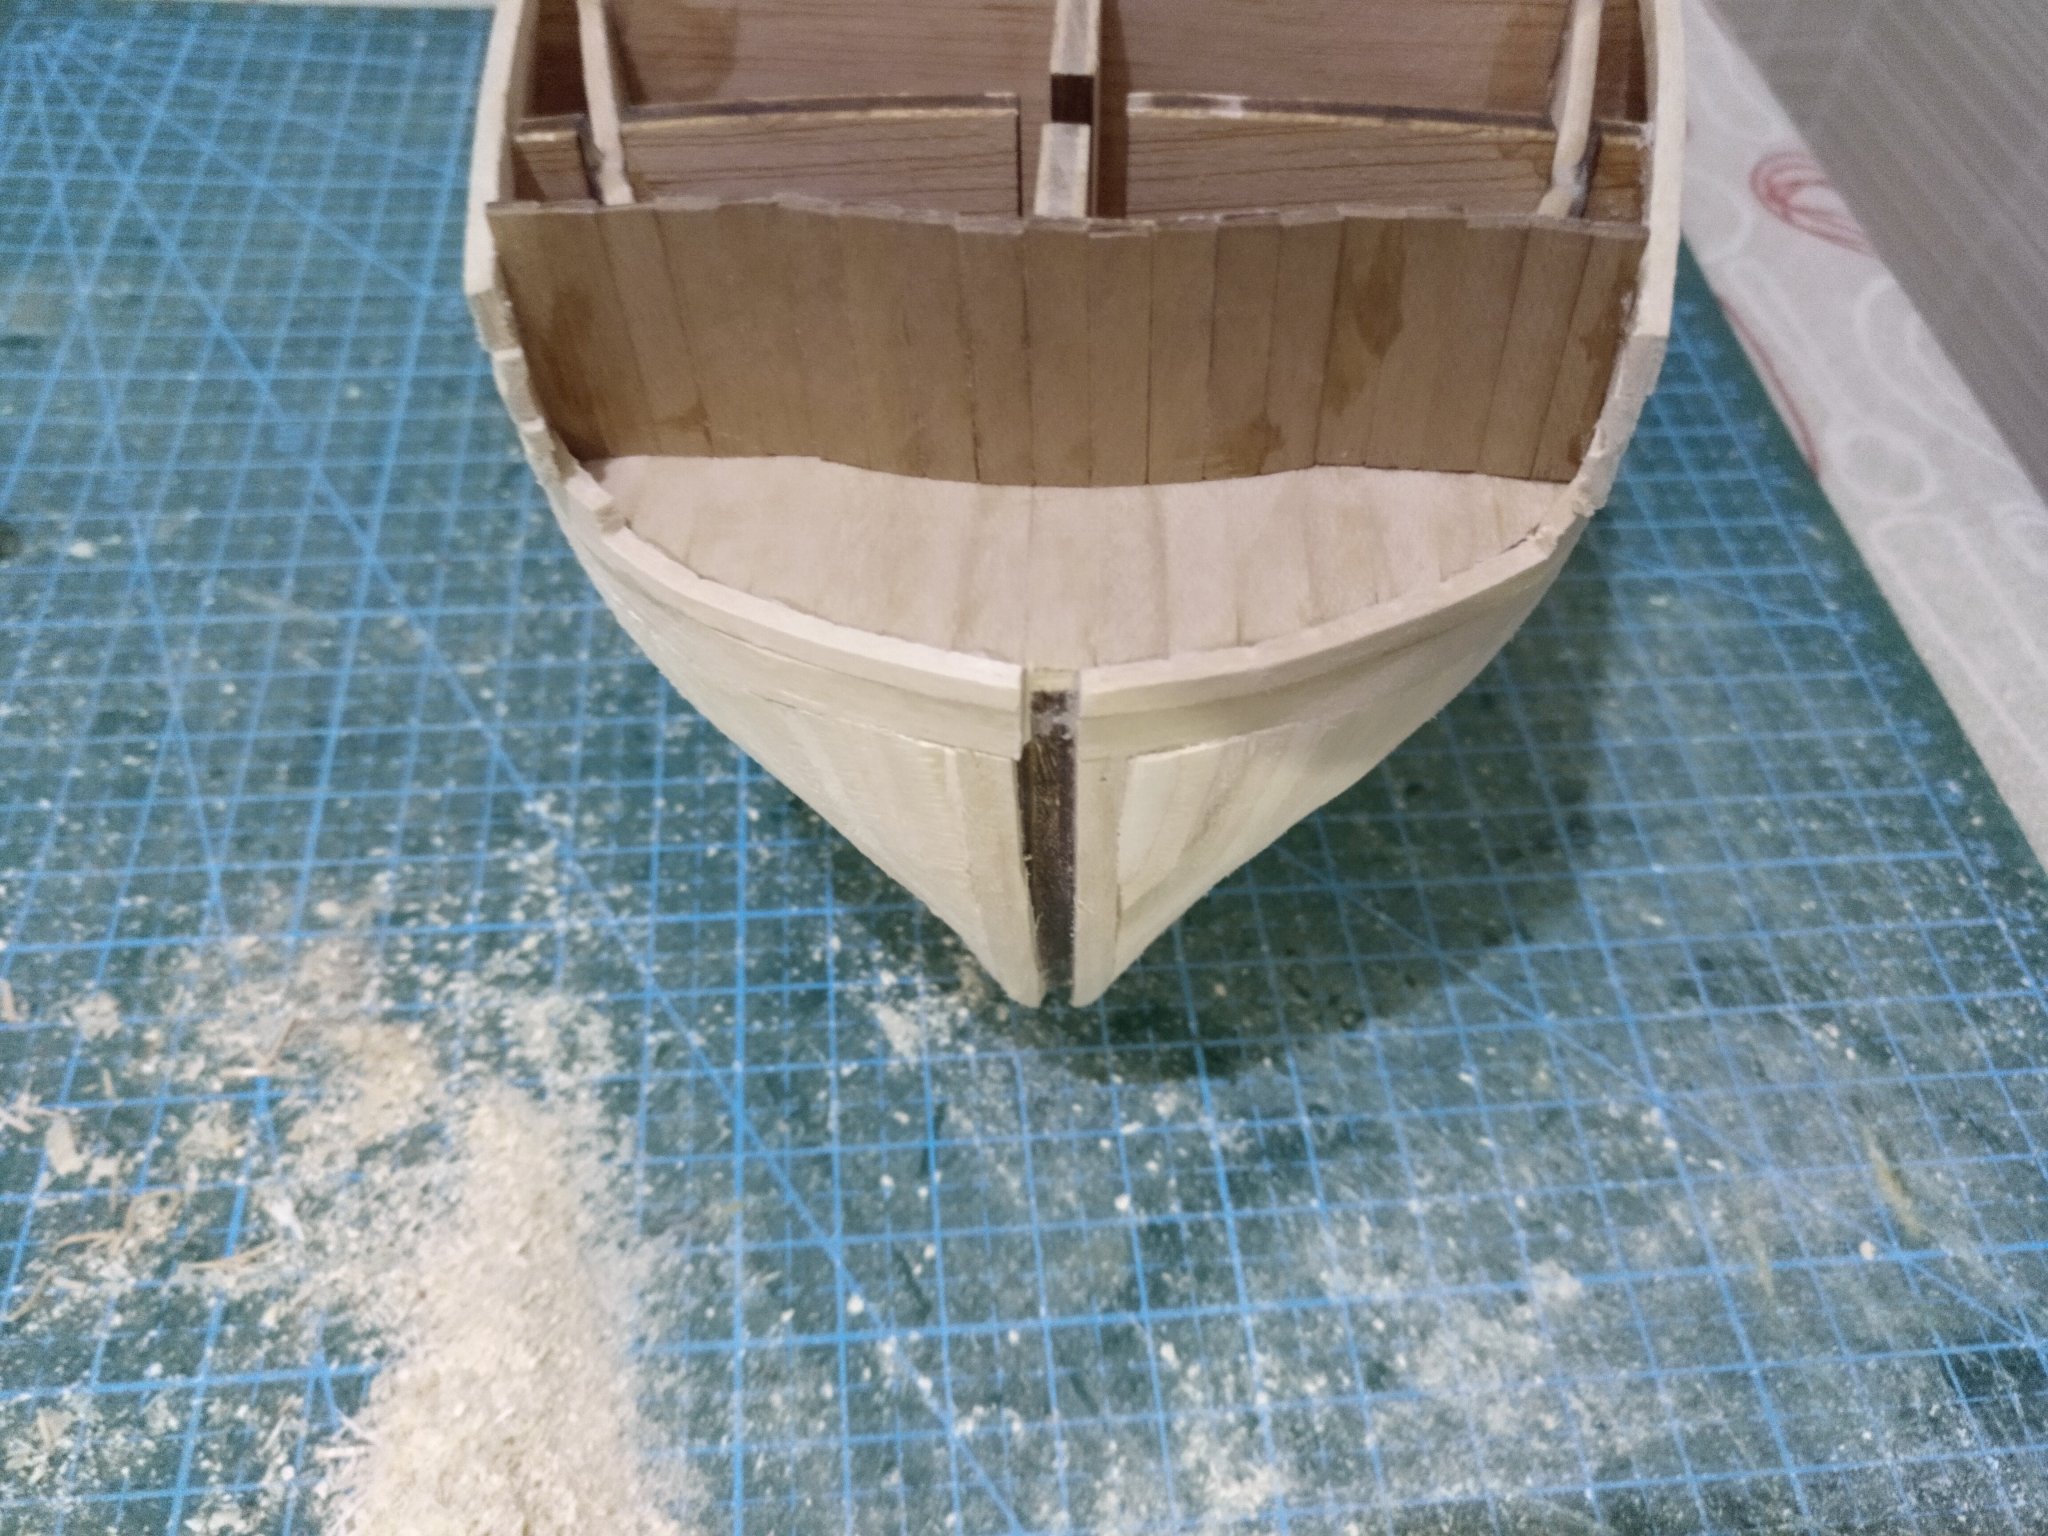
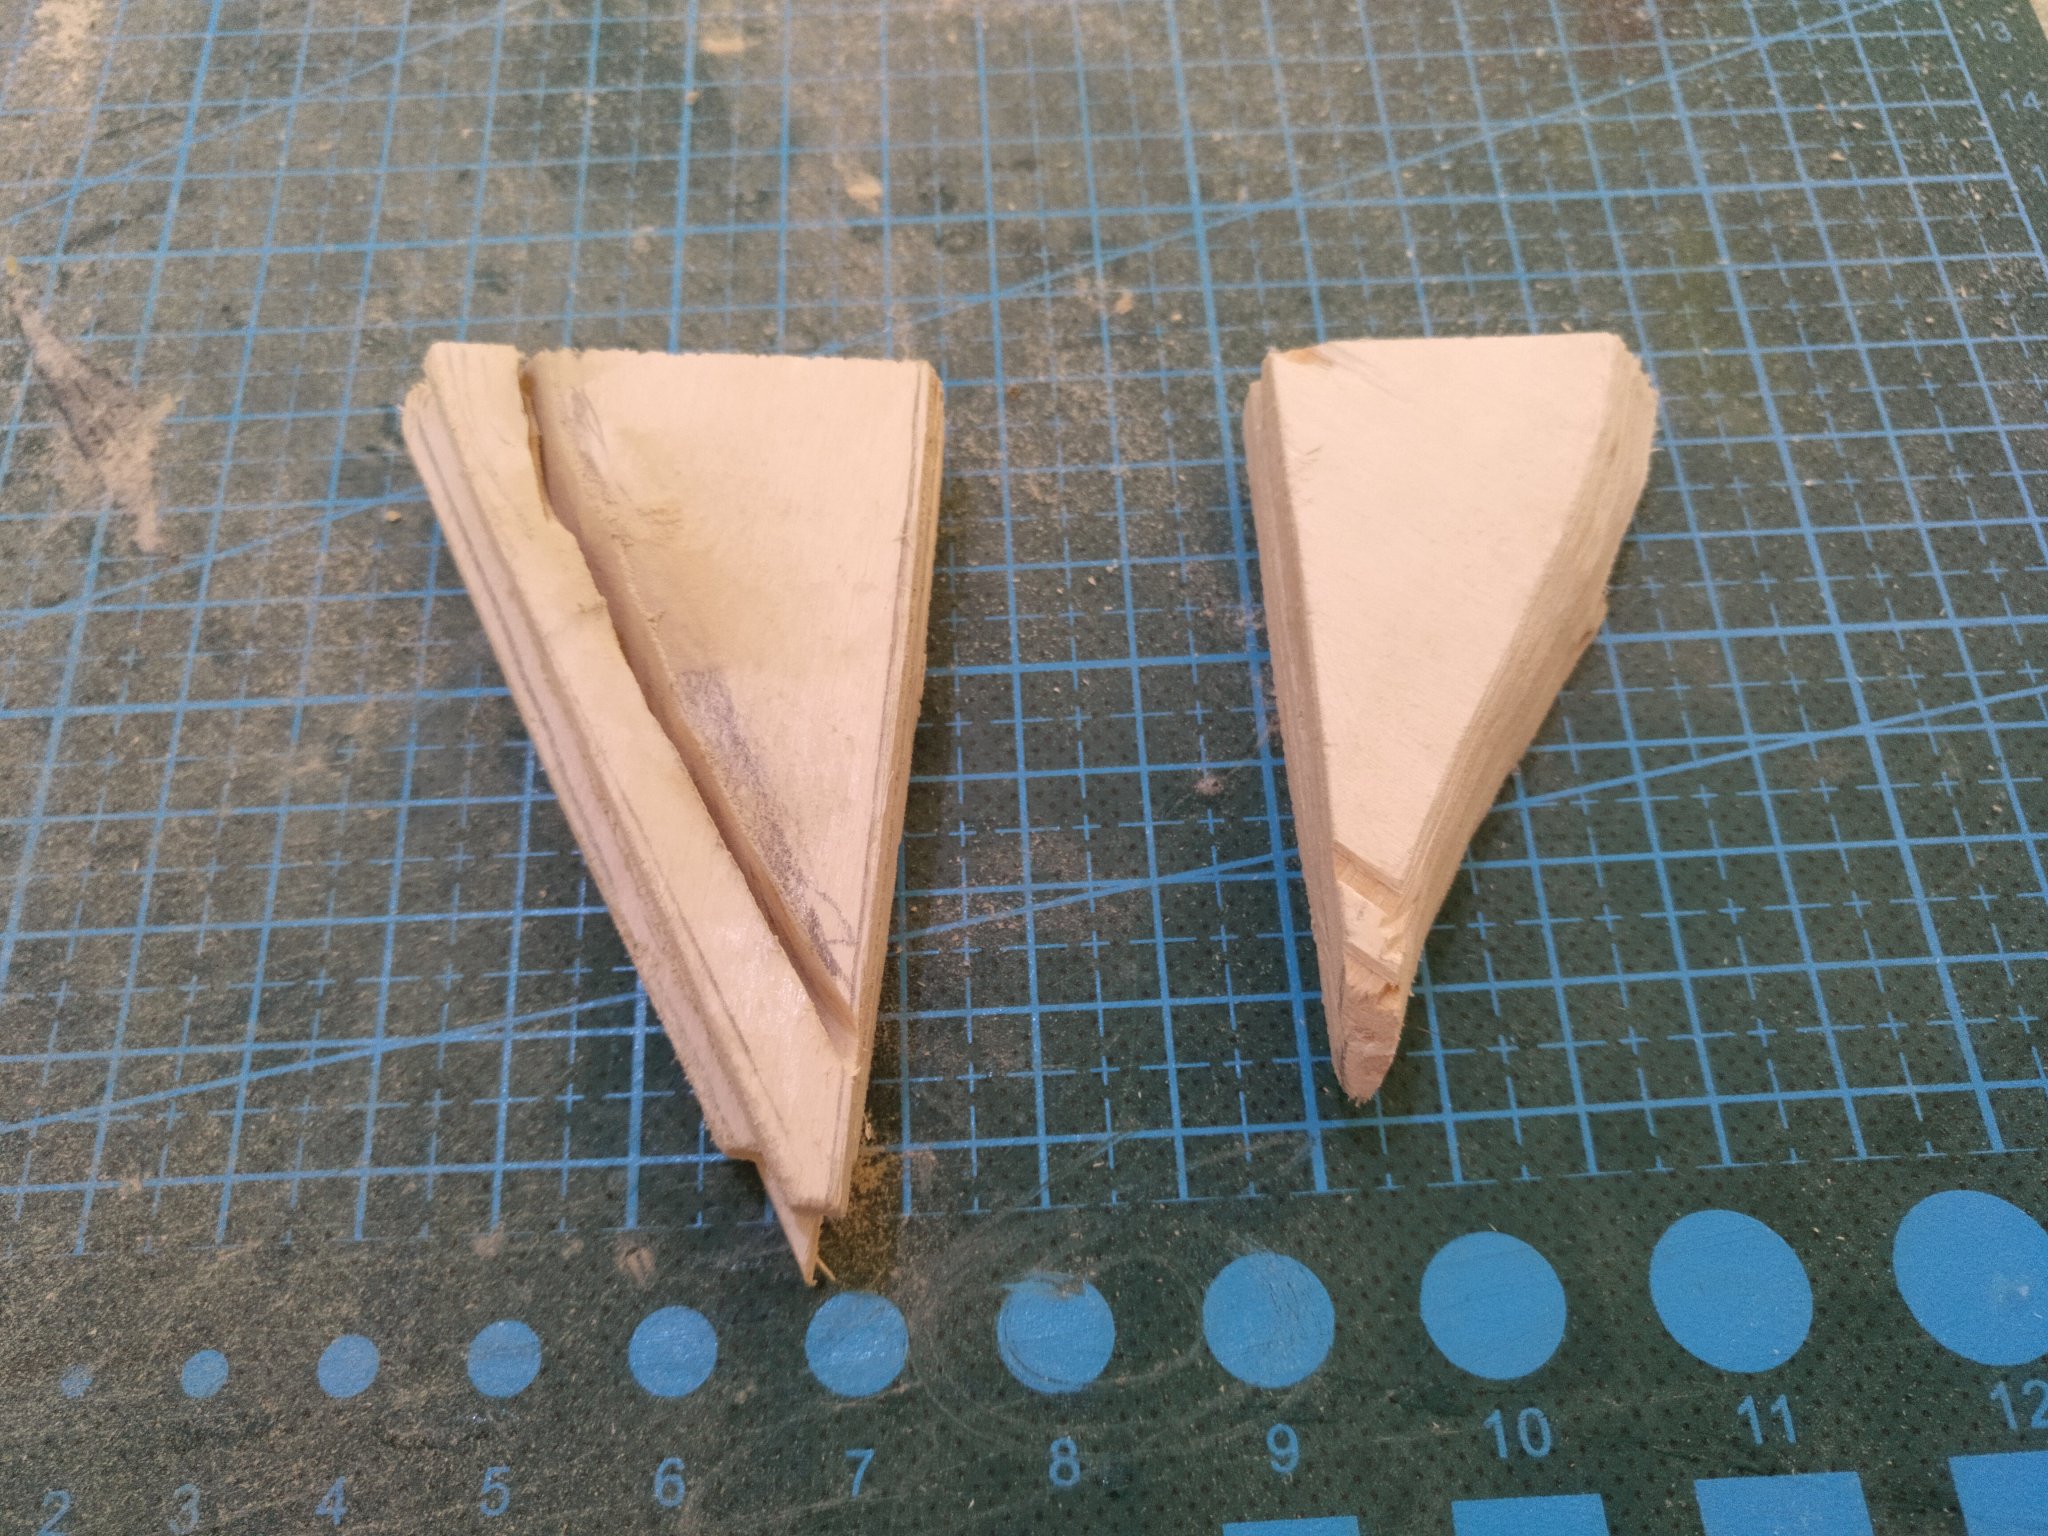
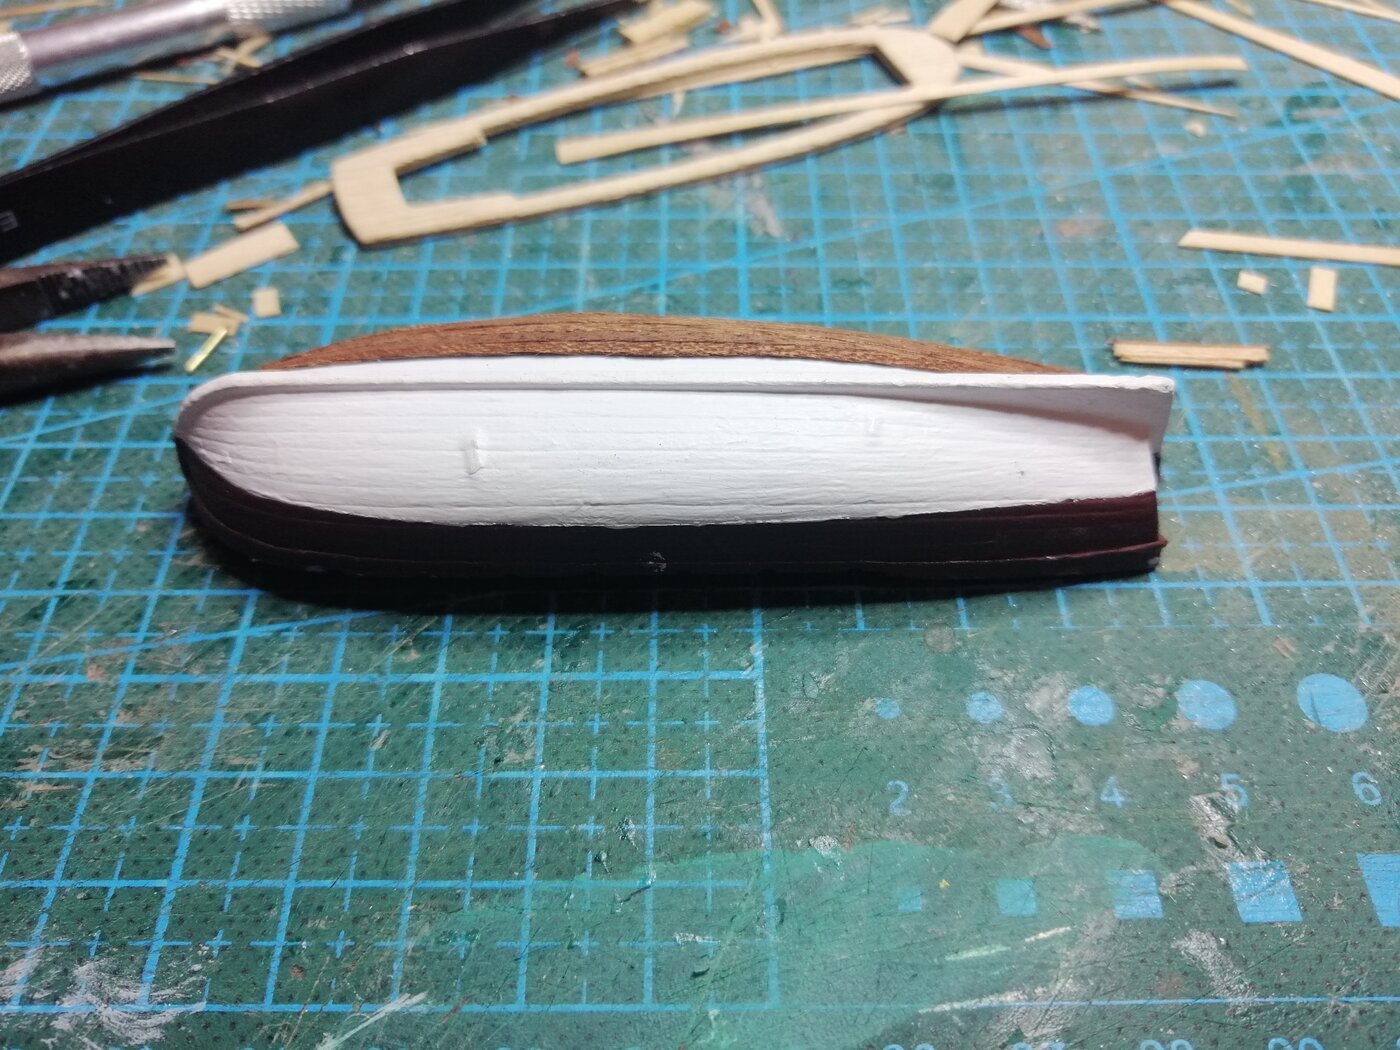
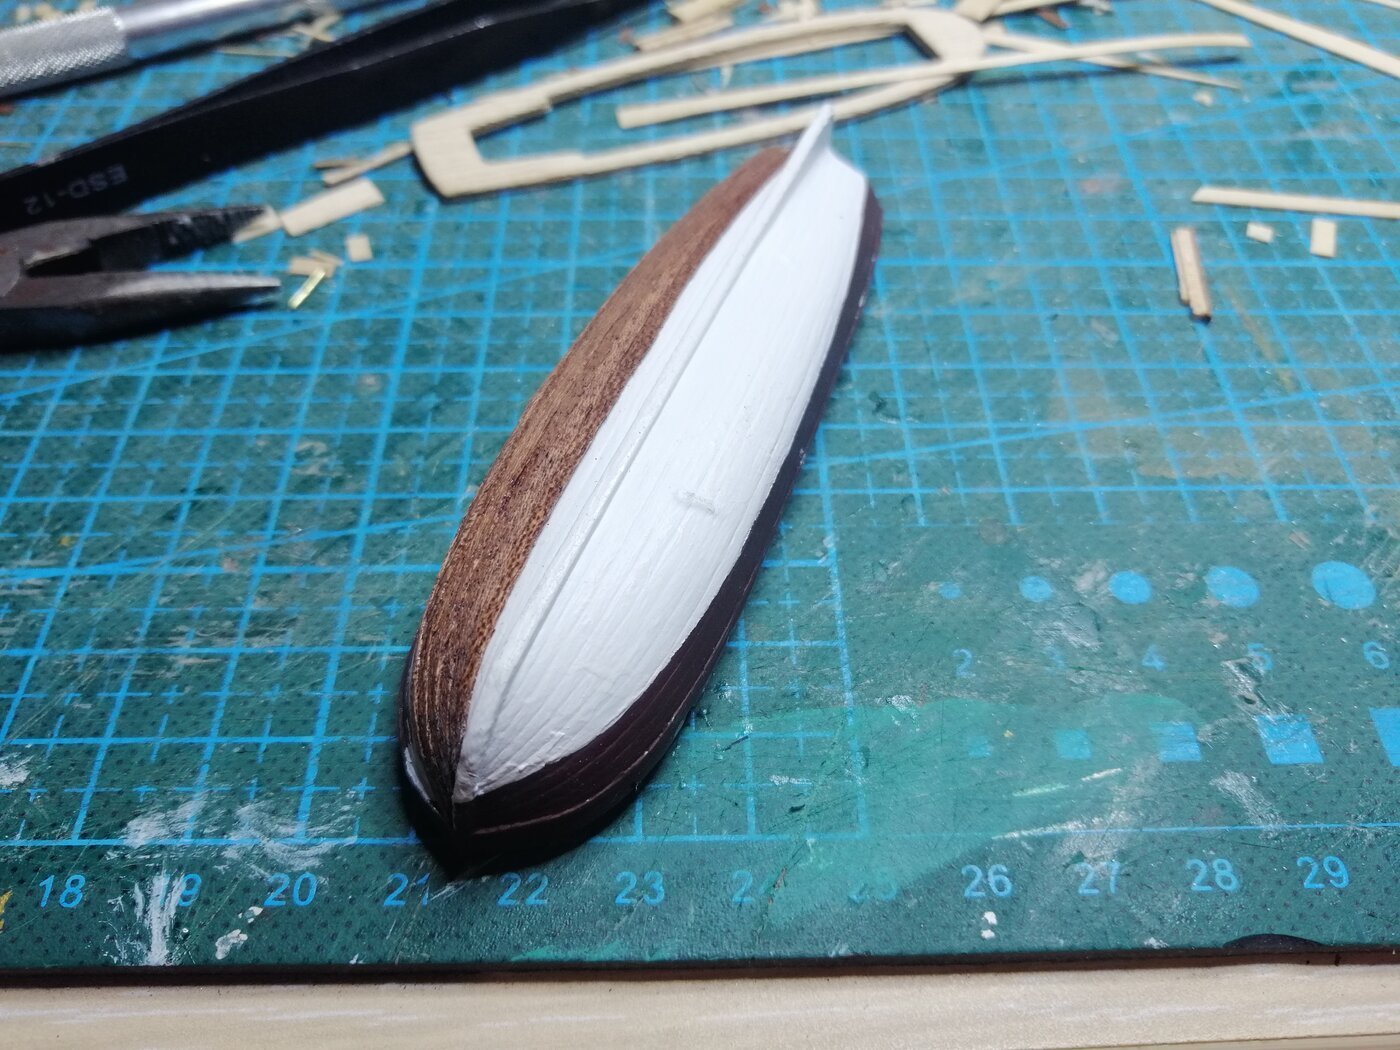
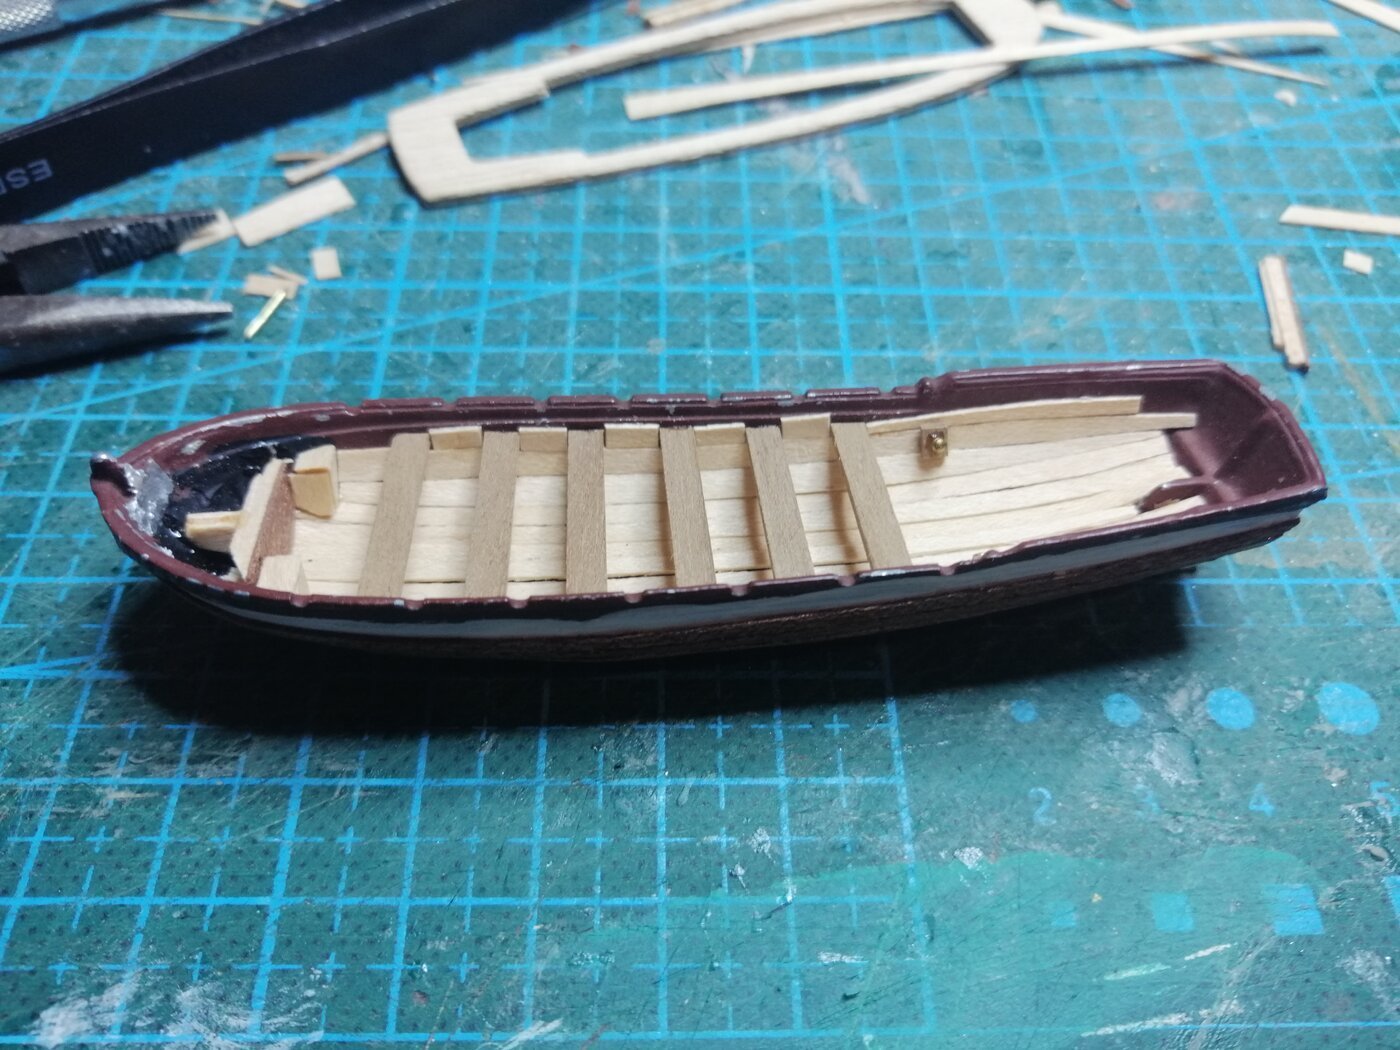
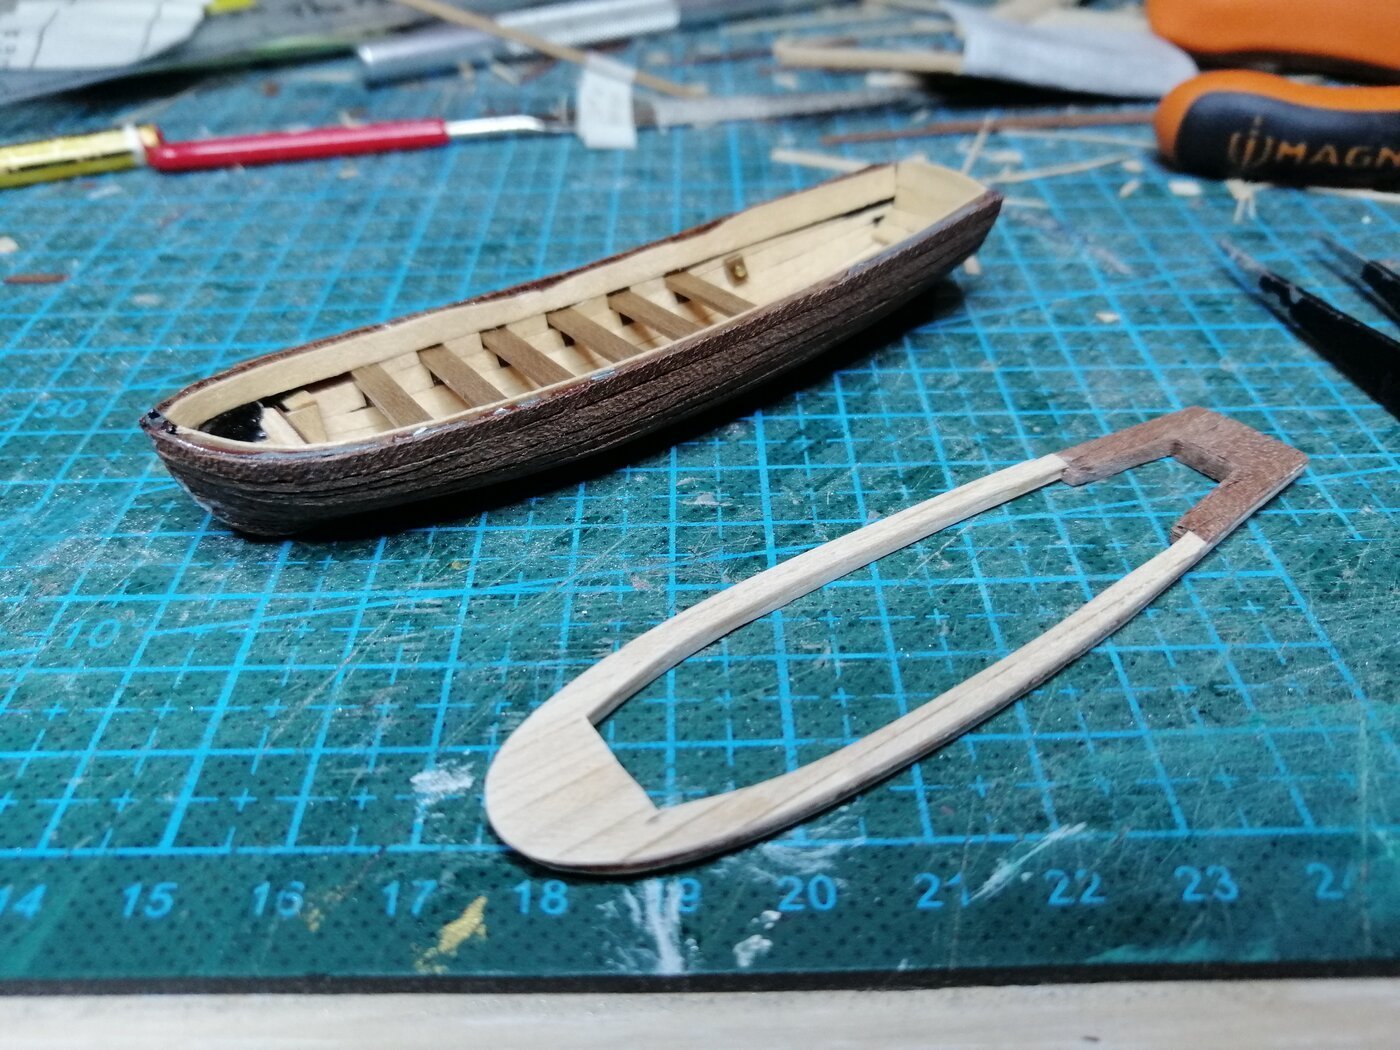
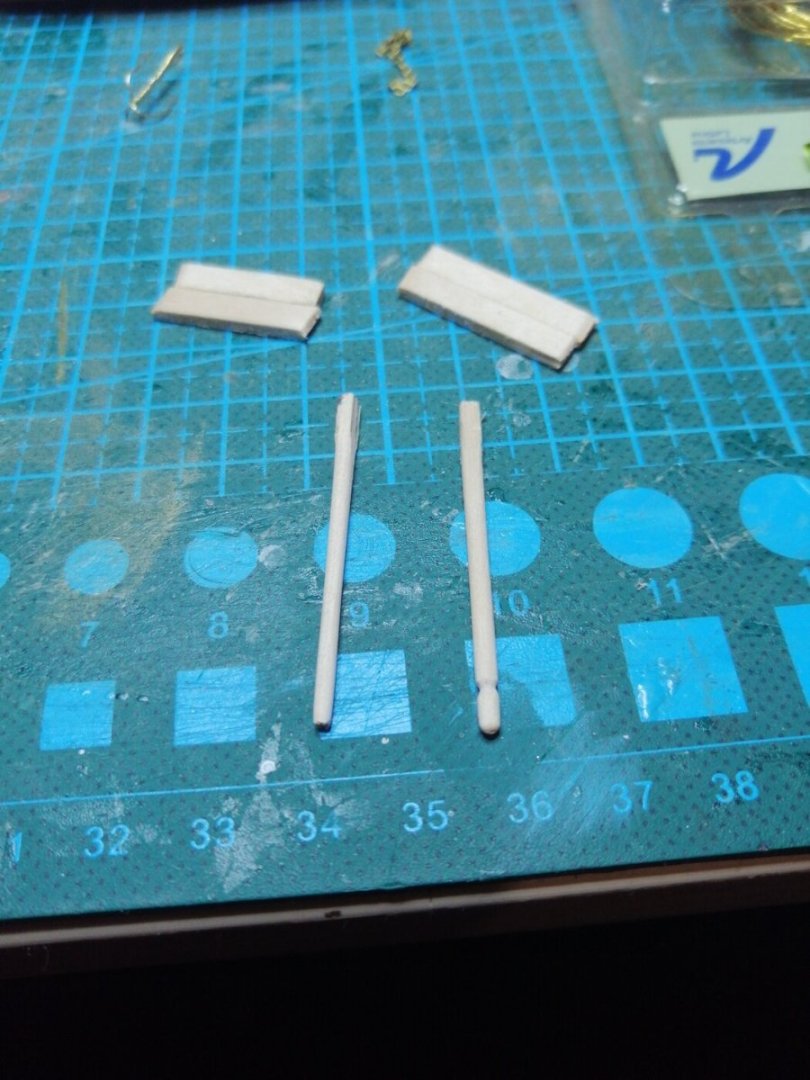
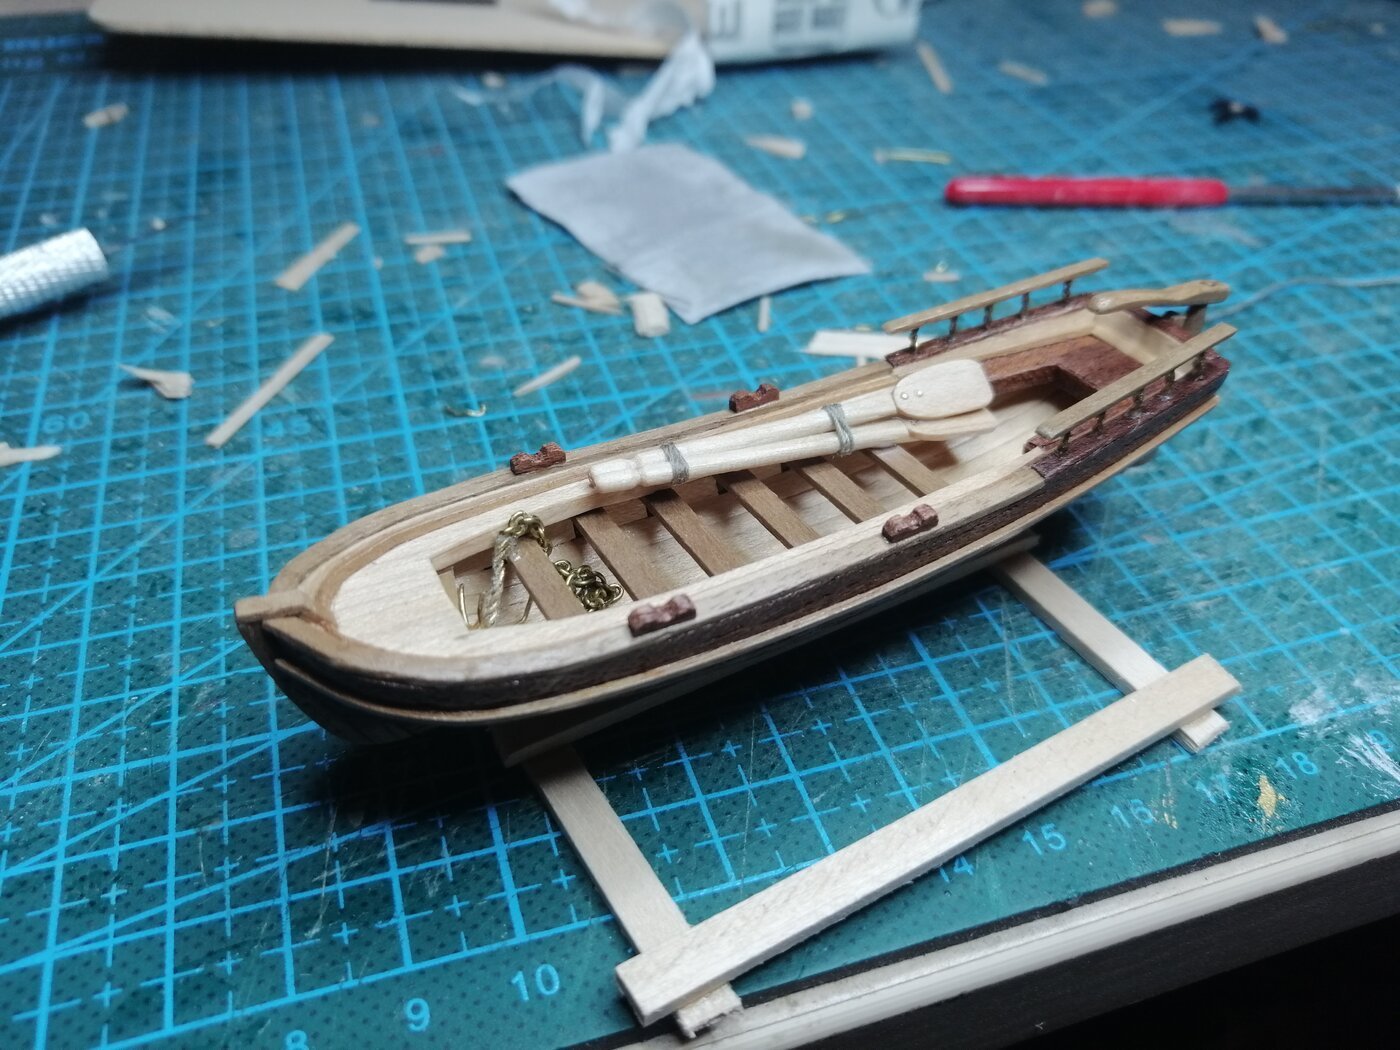
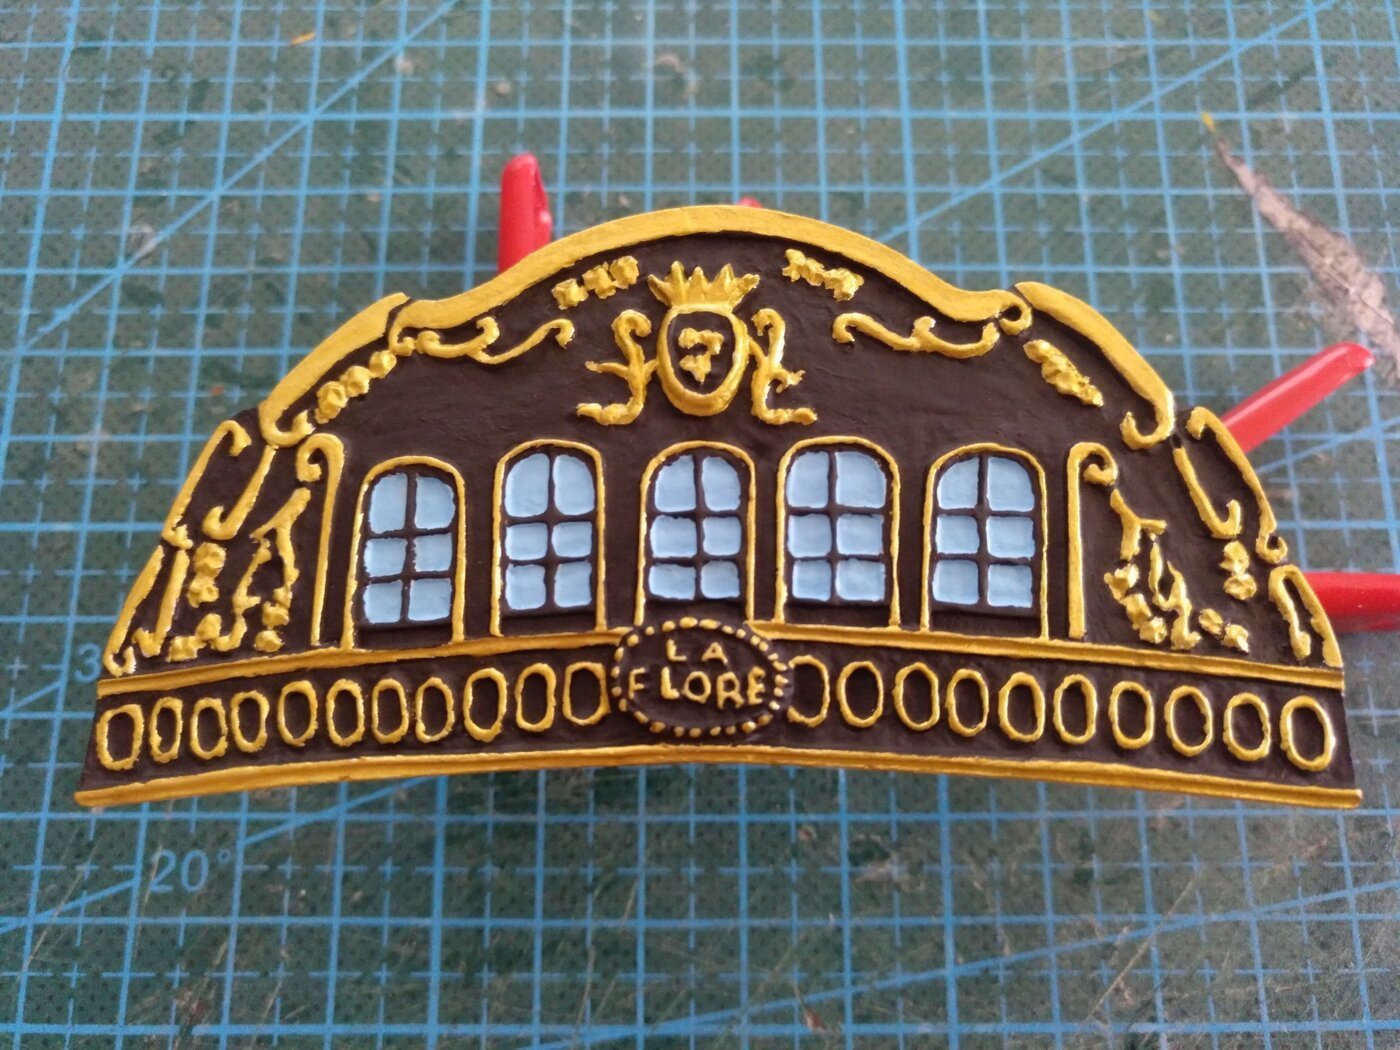
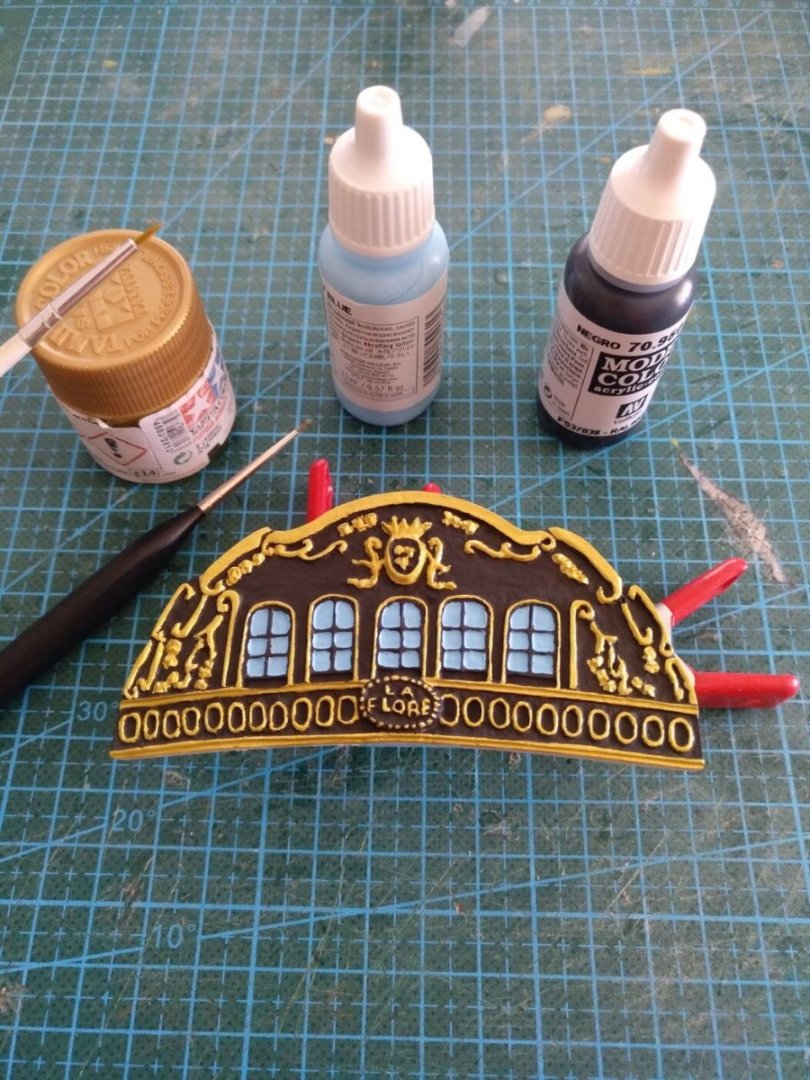
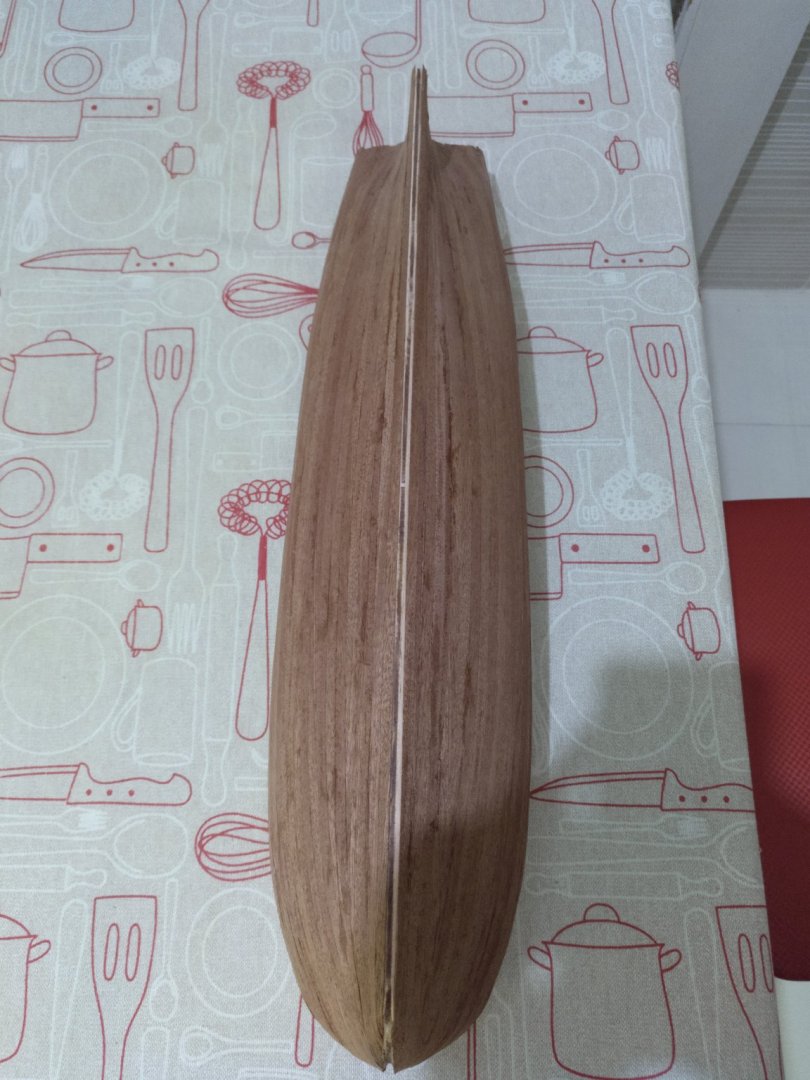
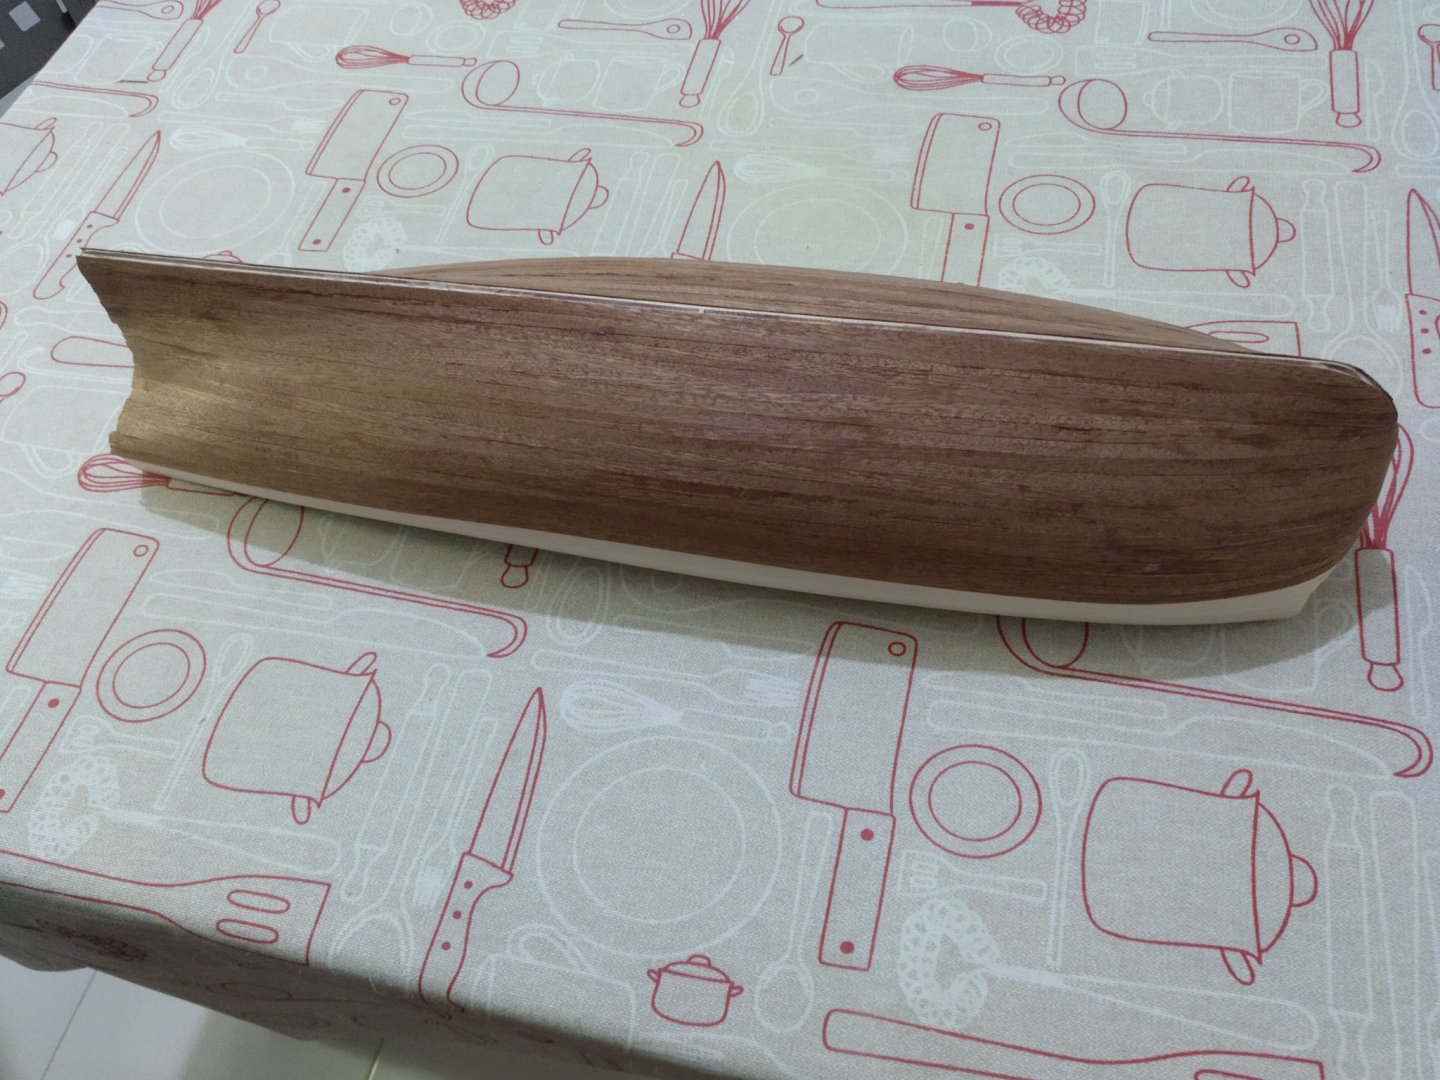
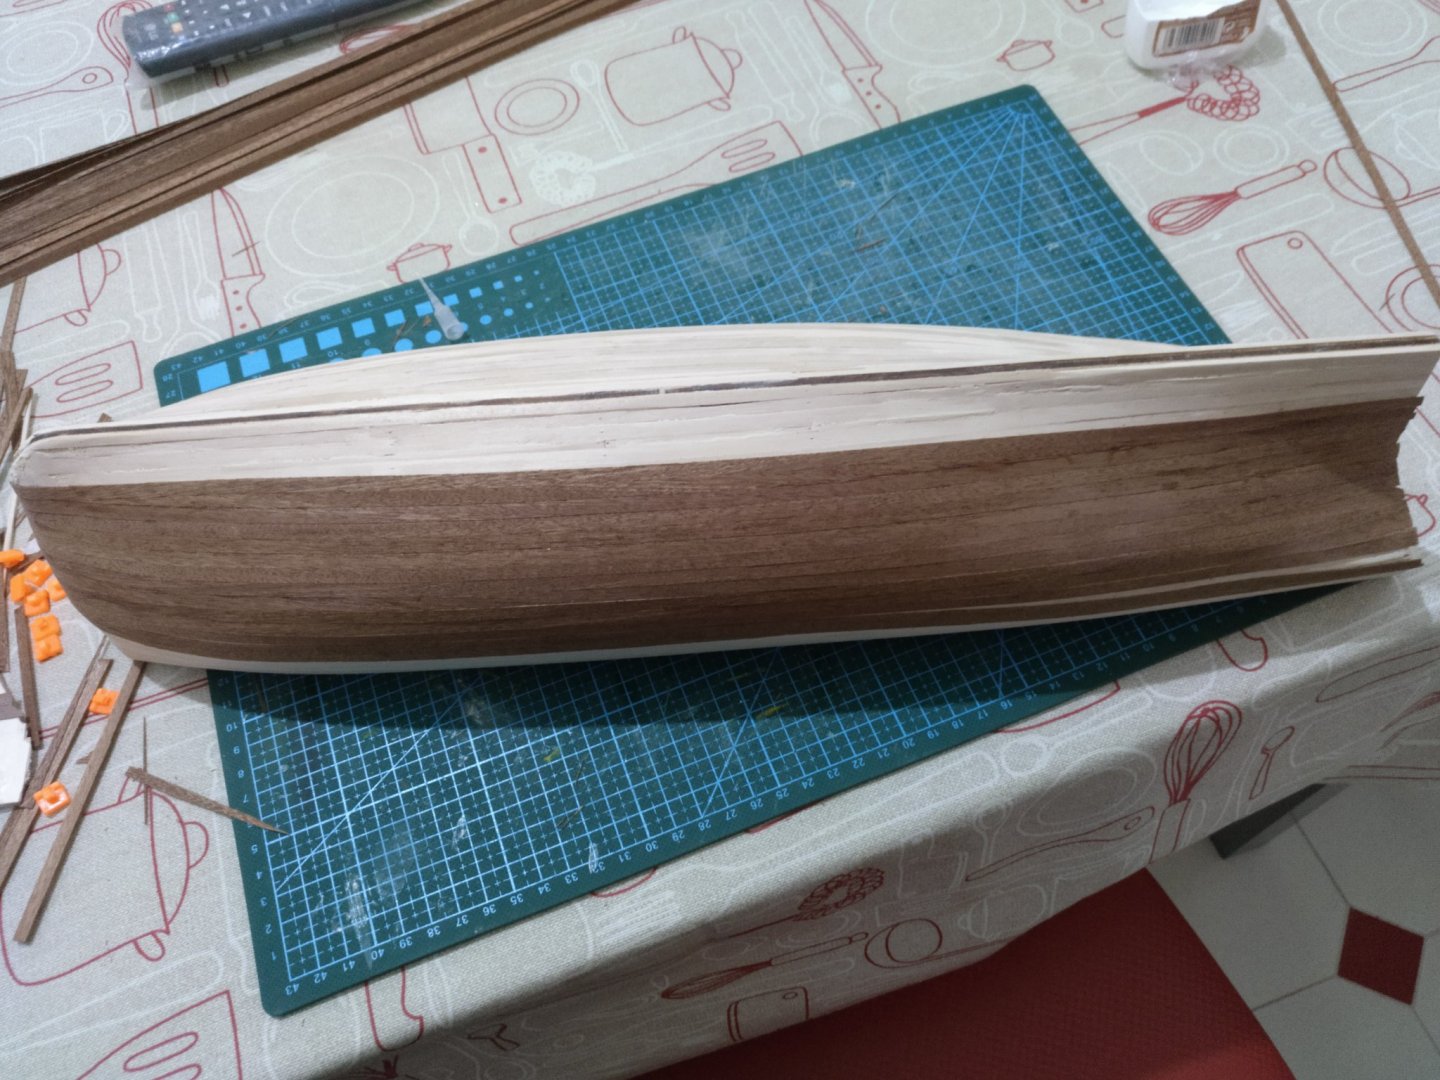
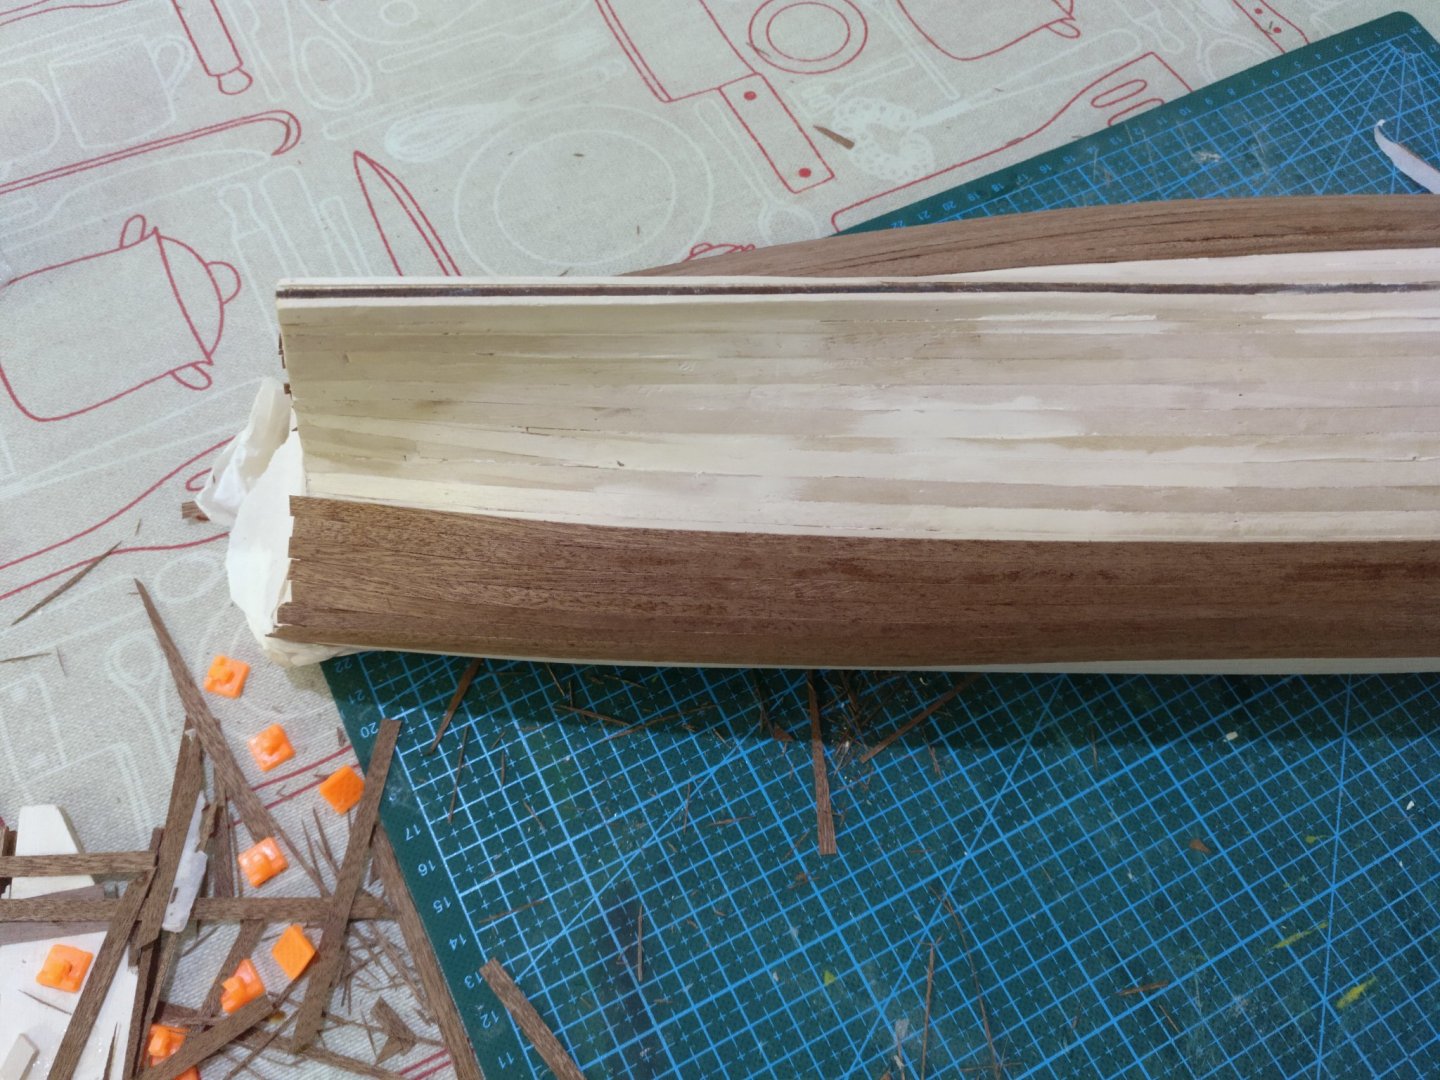
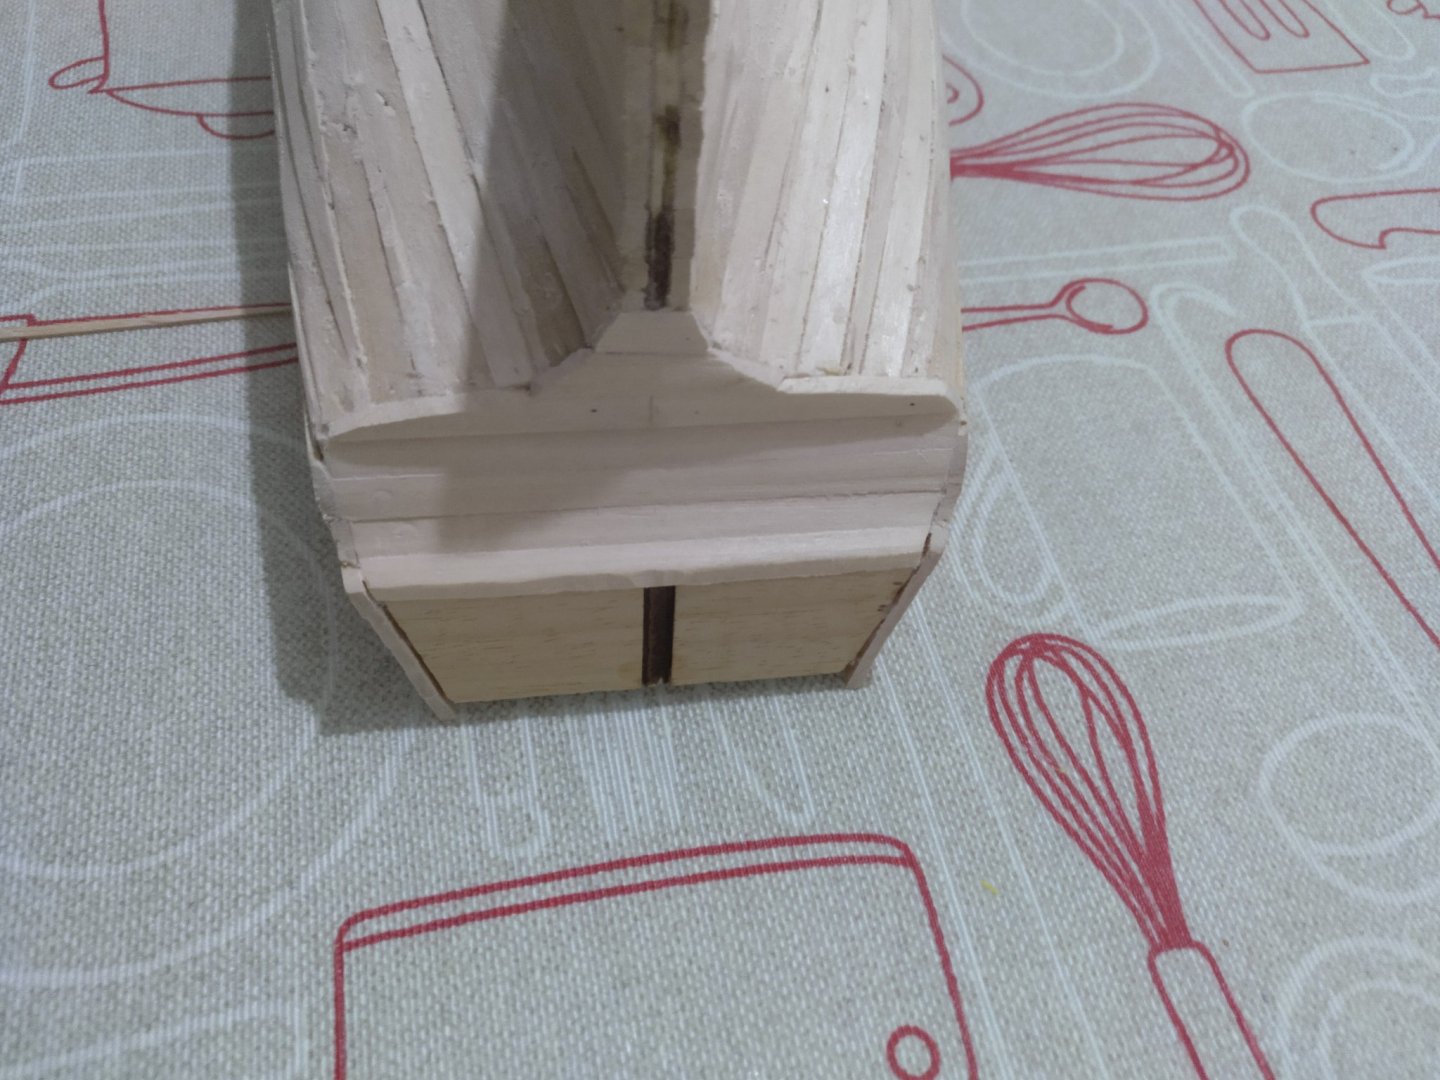
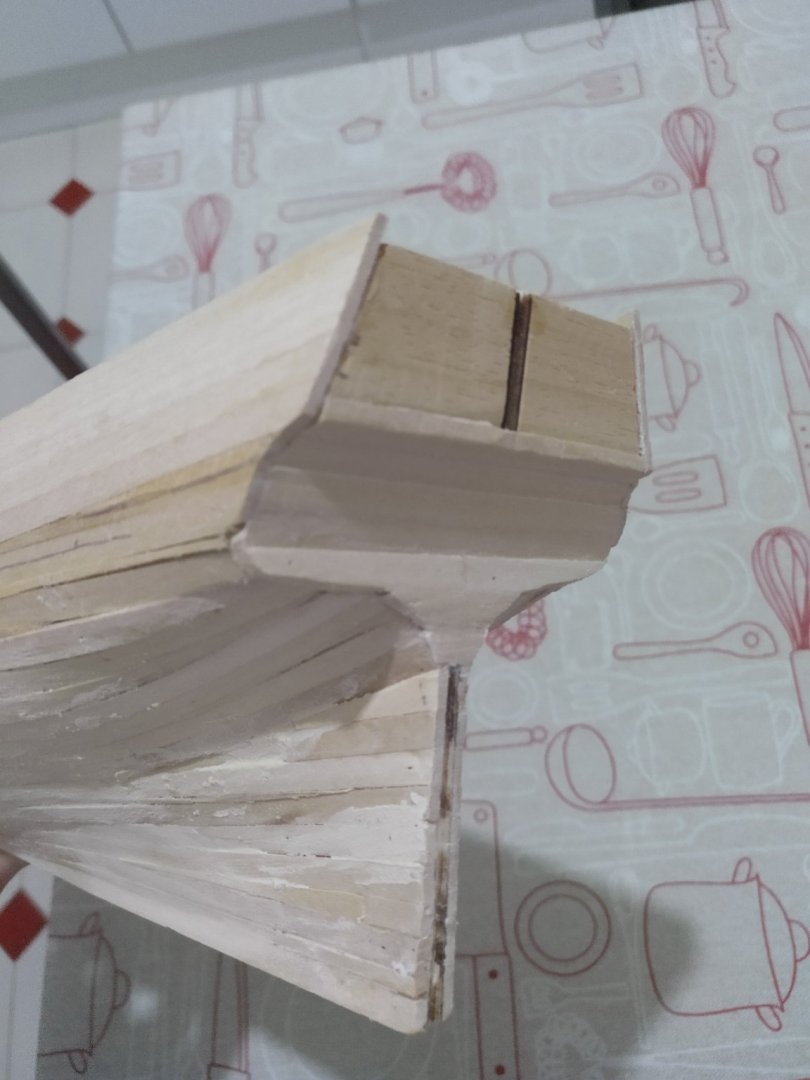
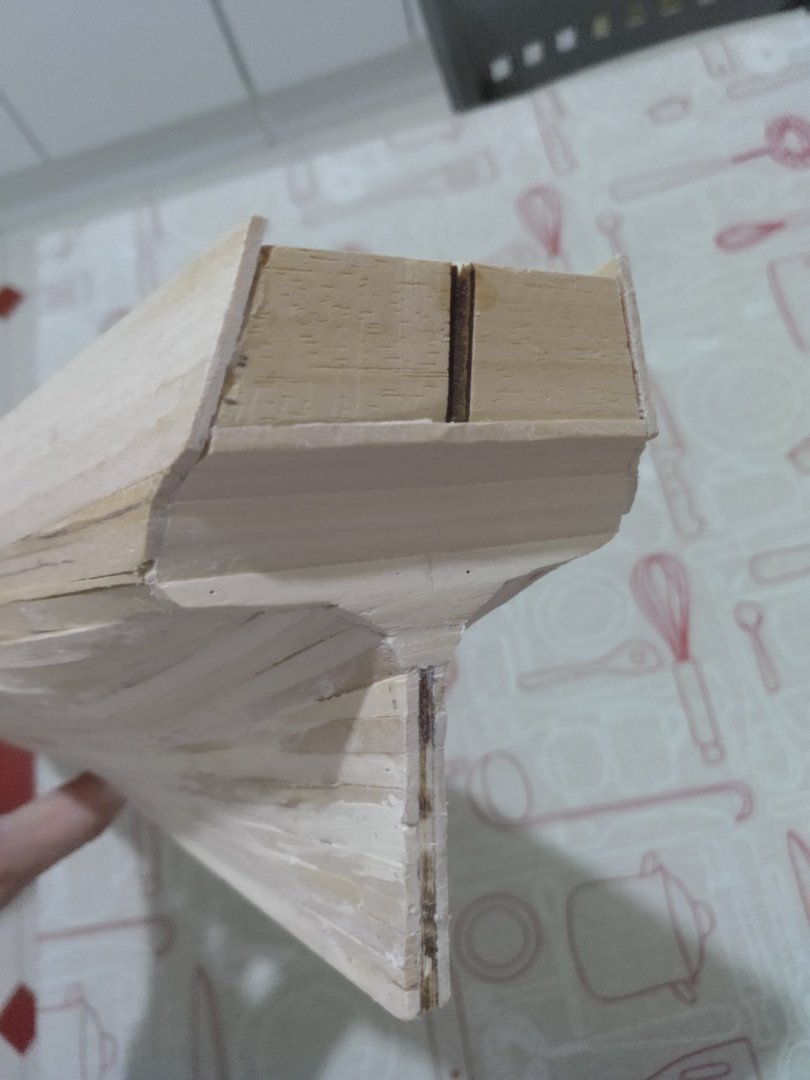
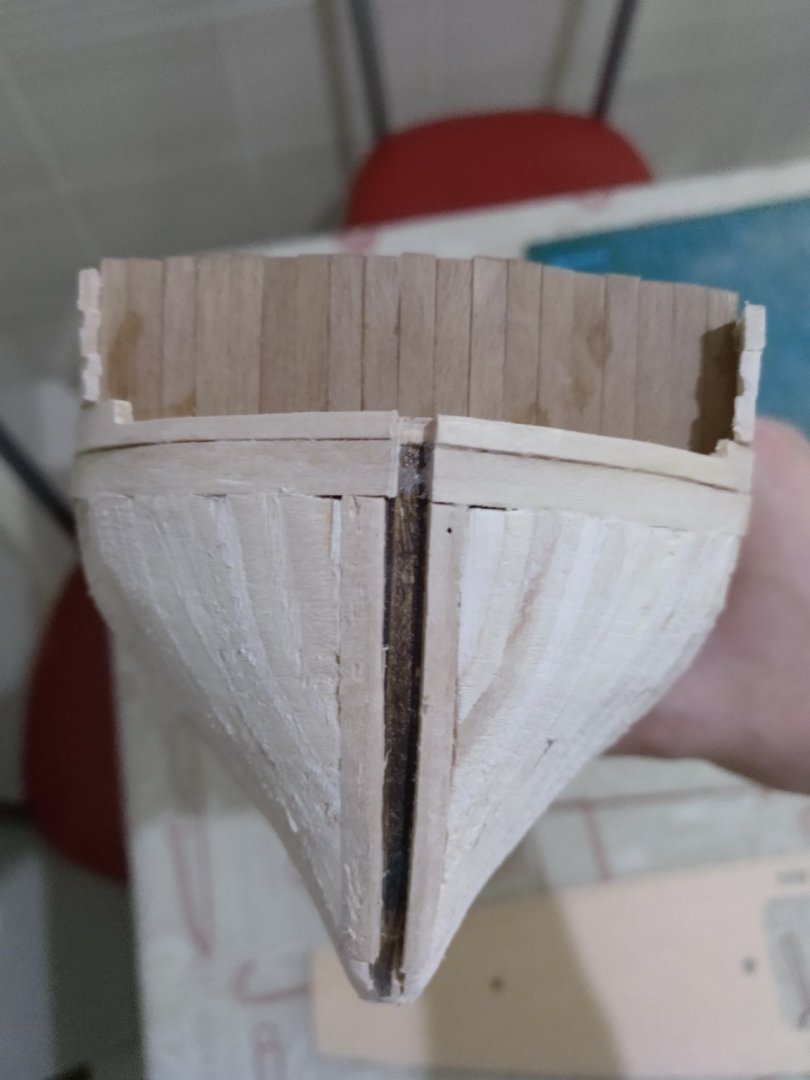
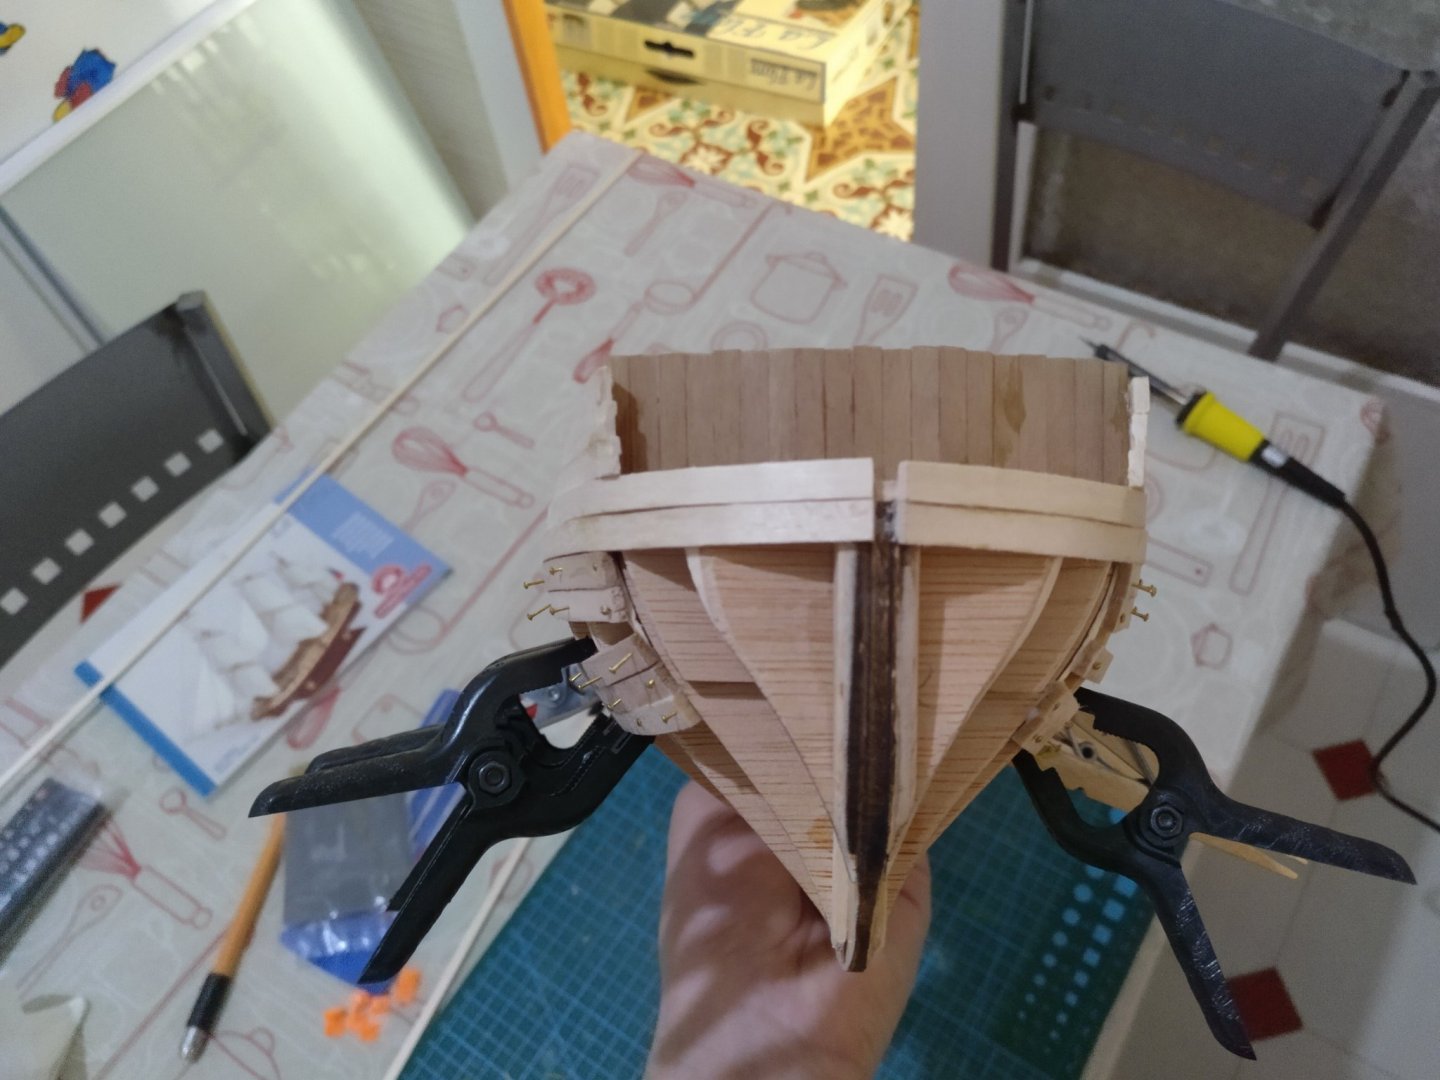
Now let's move to the auxiliary boat. At first, I just decided to paint it brown and white, but I am not really good at painting and making effects so finally I decided to line this steel boat with sapelli strips and make it look like a wooden boat. At first, I thought about keeping it simple but as I was covering it up with wooden strips I wanted to add more and more details so it could look nicer. I don't have photos of all these details I added on the go but you can see the result here. As you can see I added two oars and an anchor. Finally, I stopped adding details and this is how it looks like: That's all the progress for now. As I said I have more time than before and I am going to keep working on my wonderful flore. I won't be a fas progress but a steady one. I hope you liked the photos. Thank you.


-
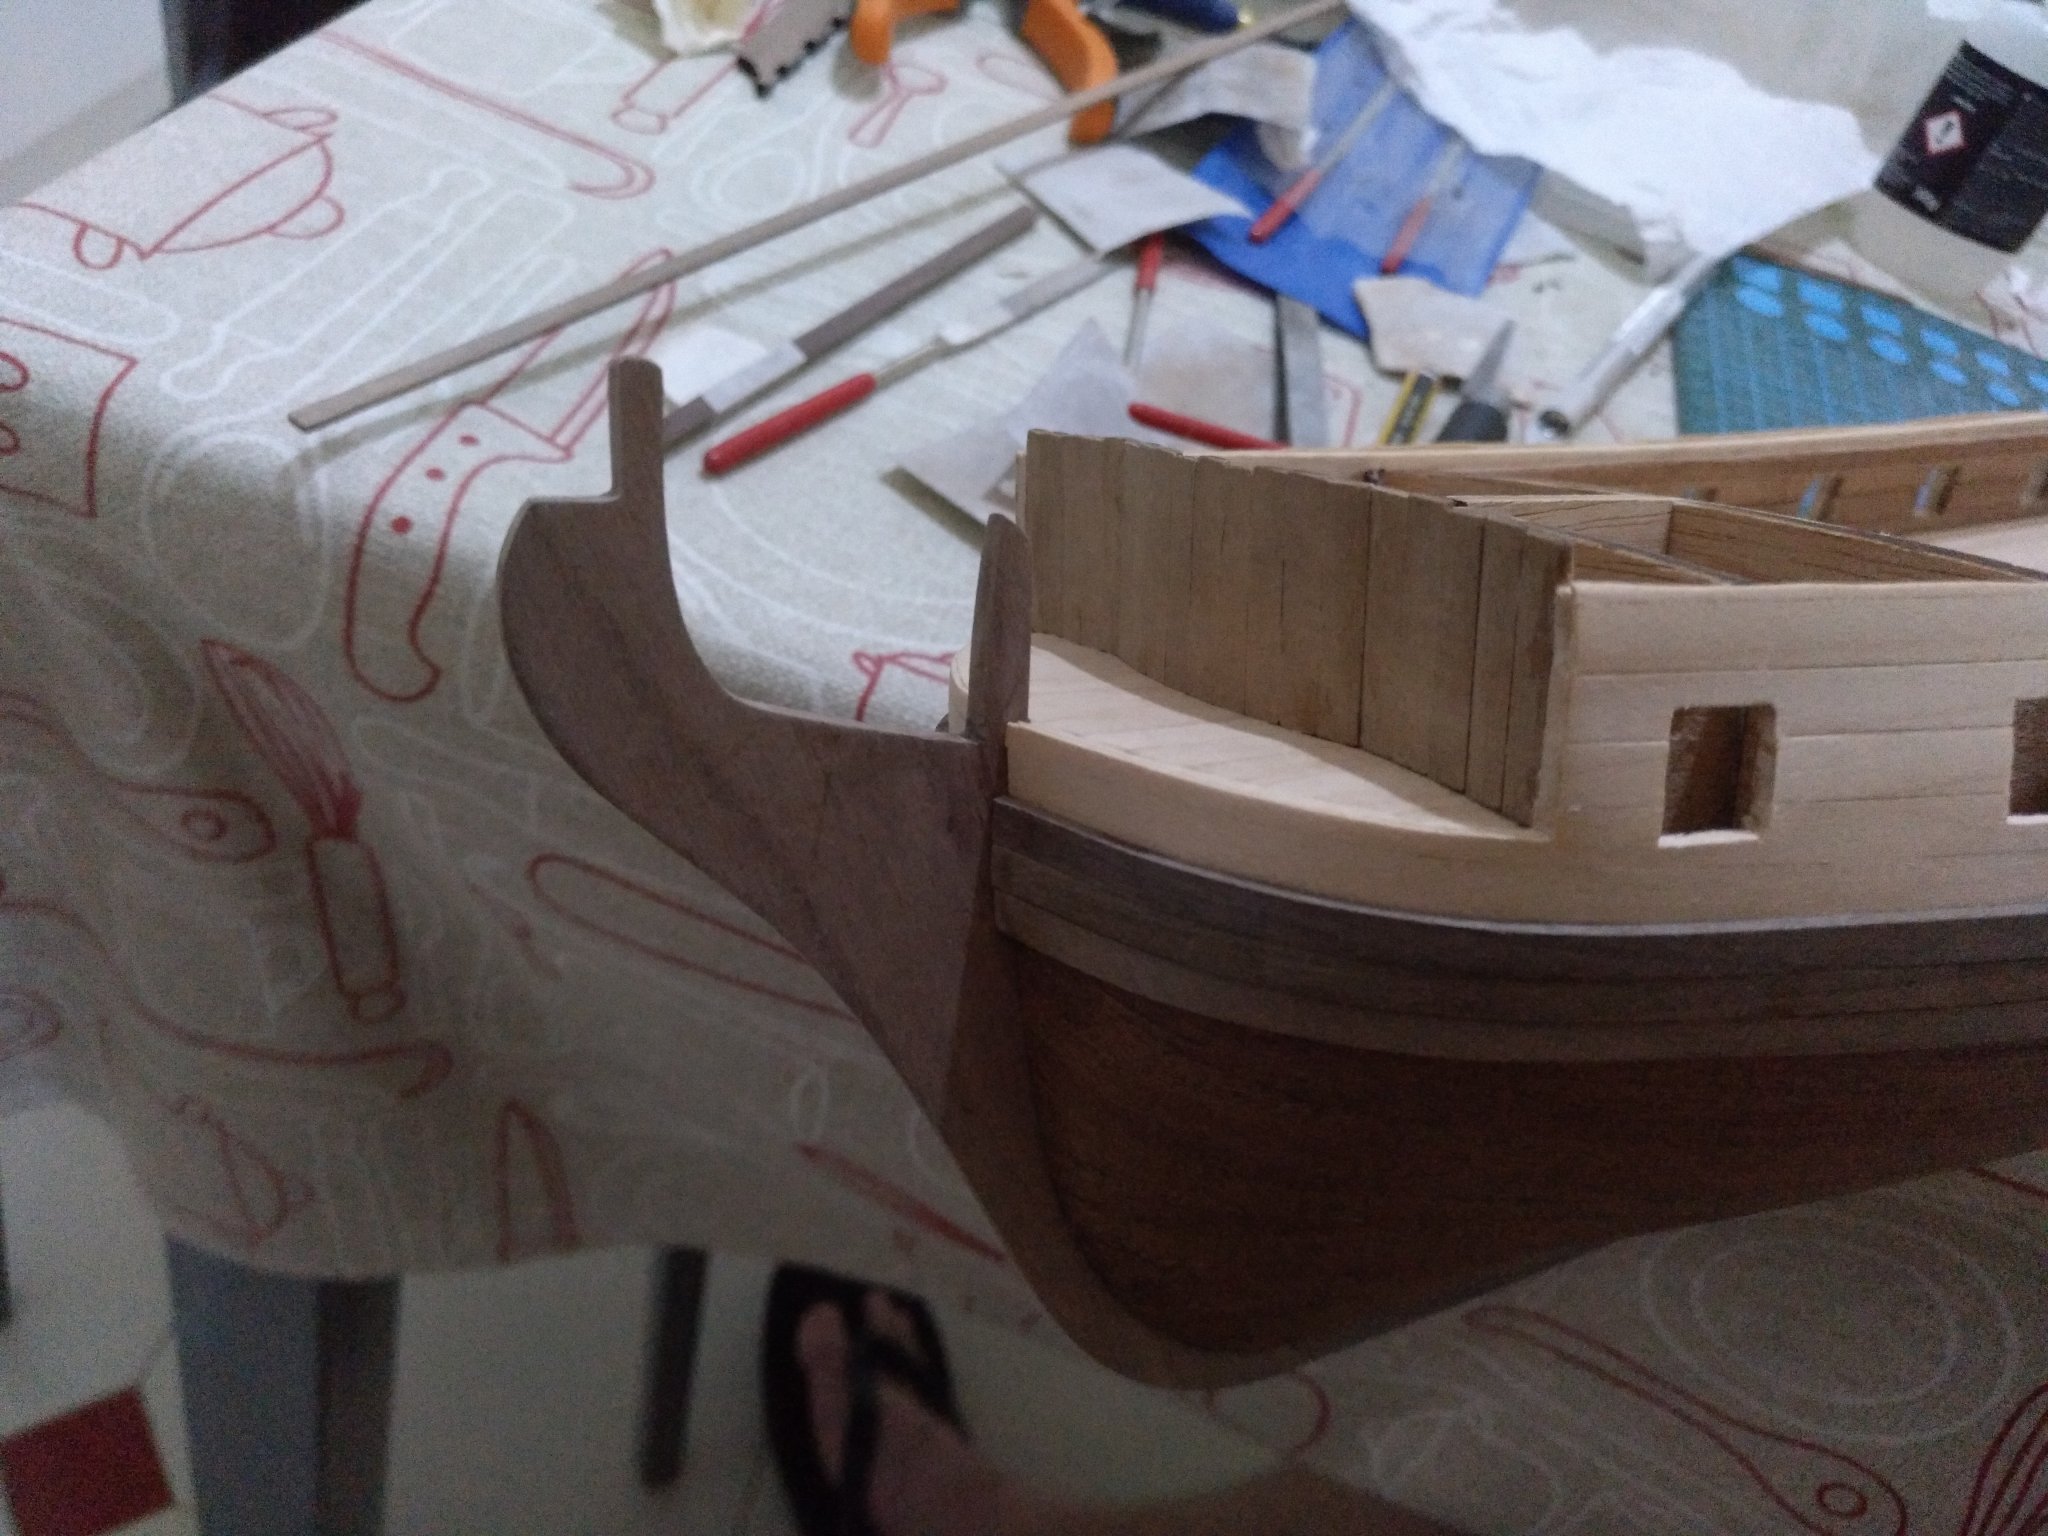
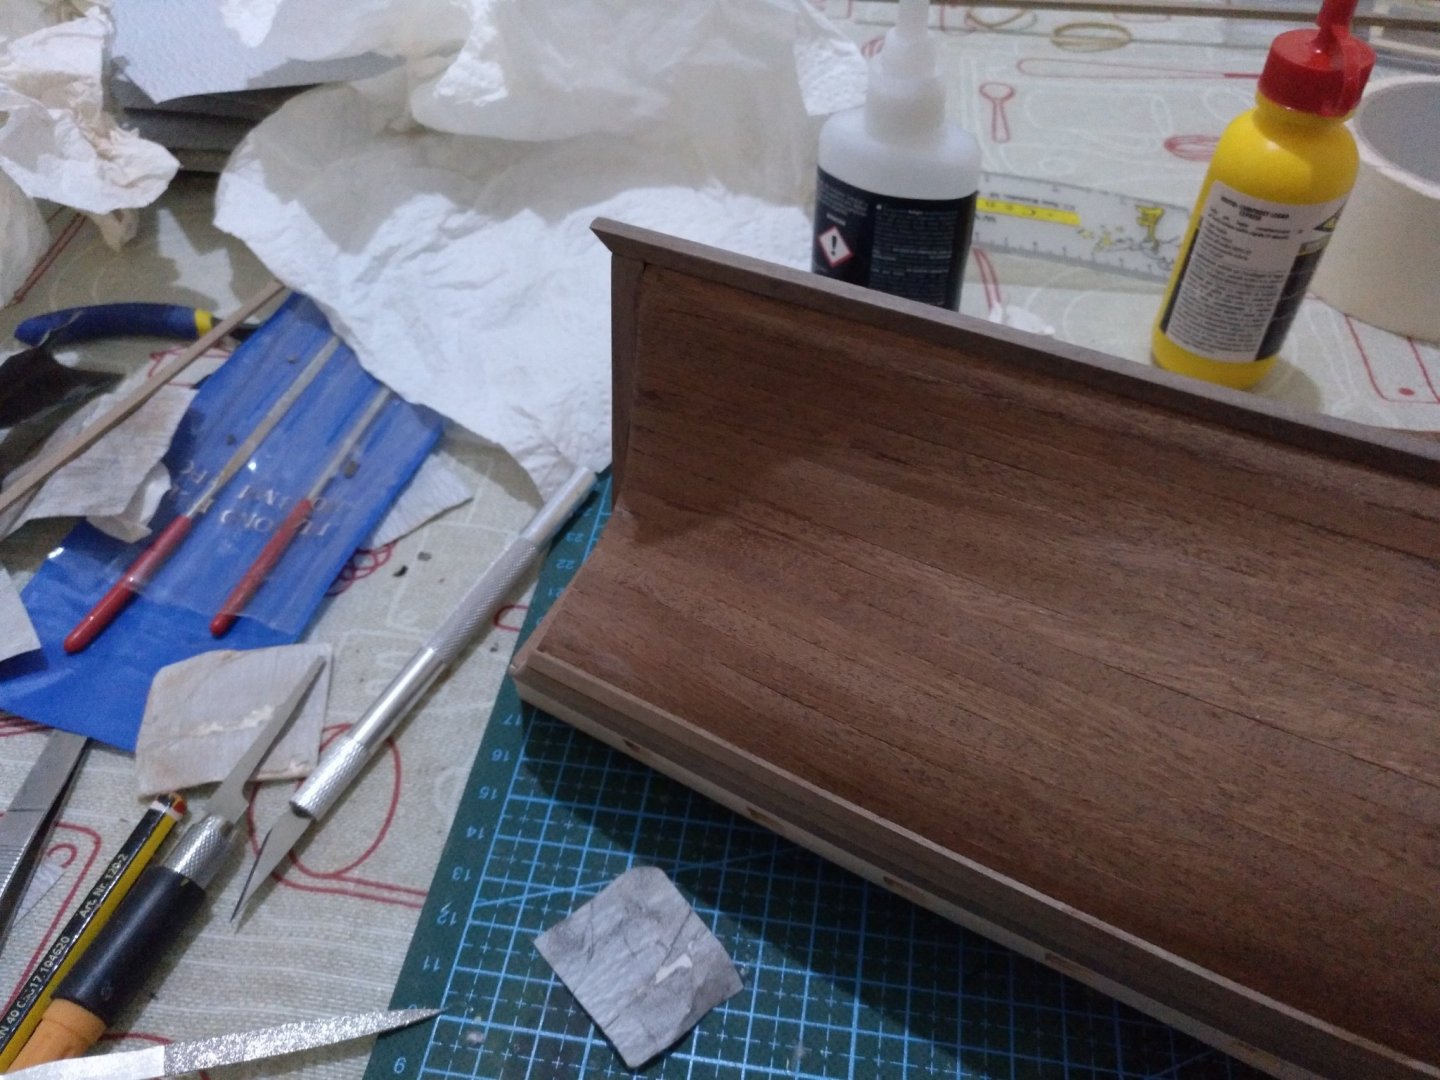
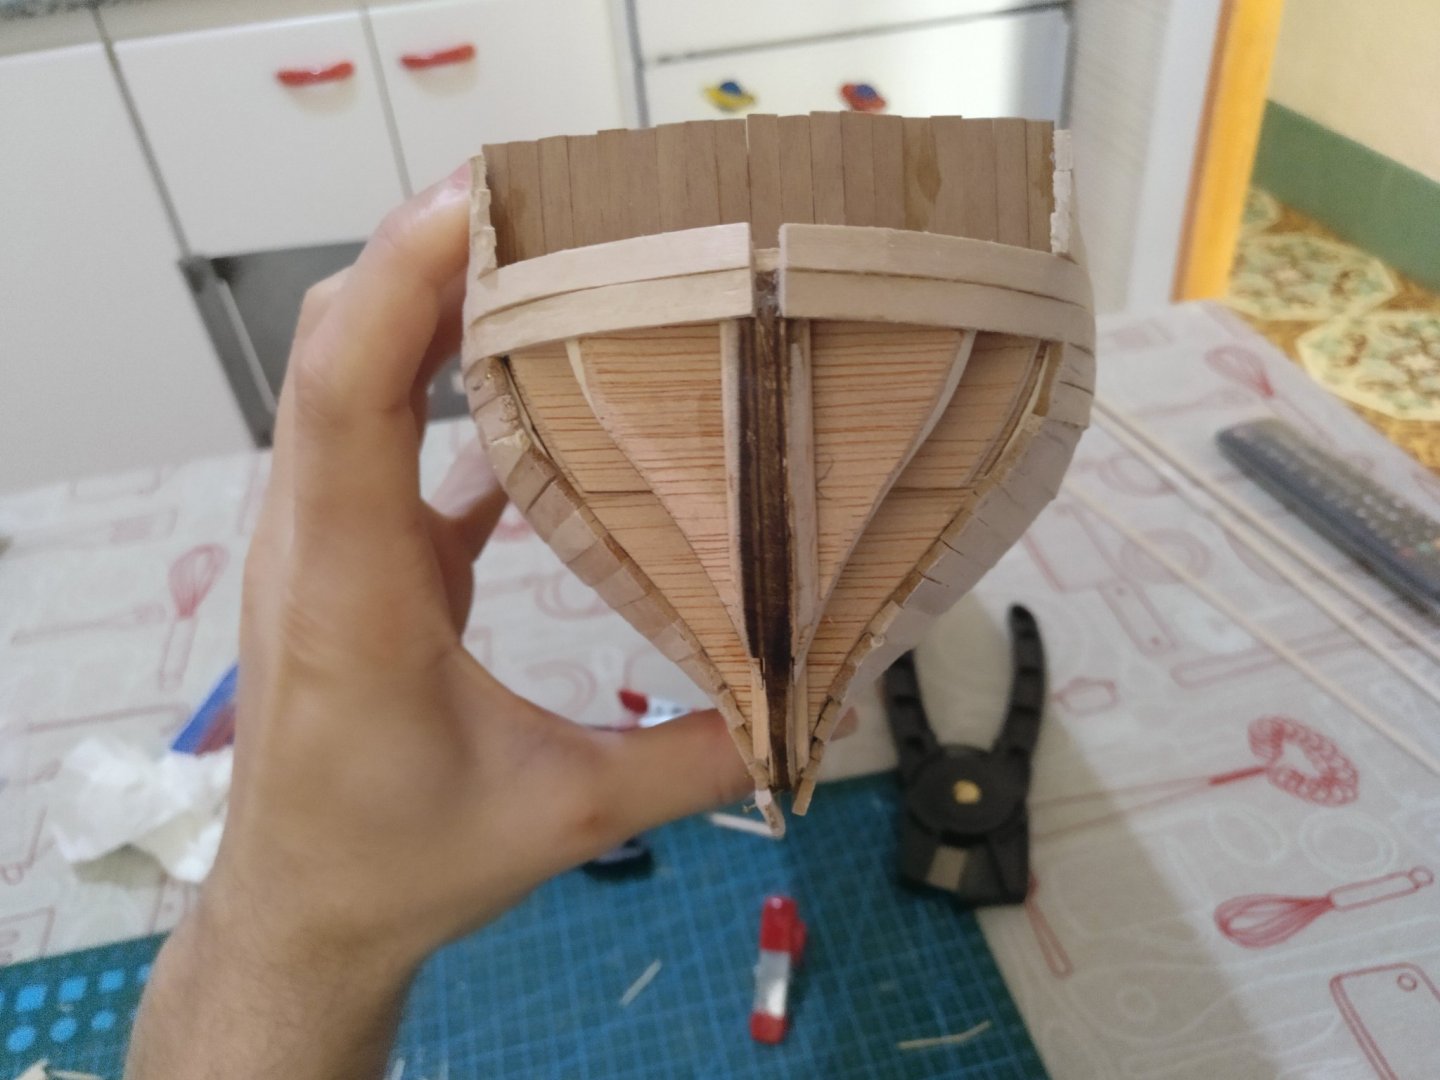
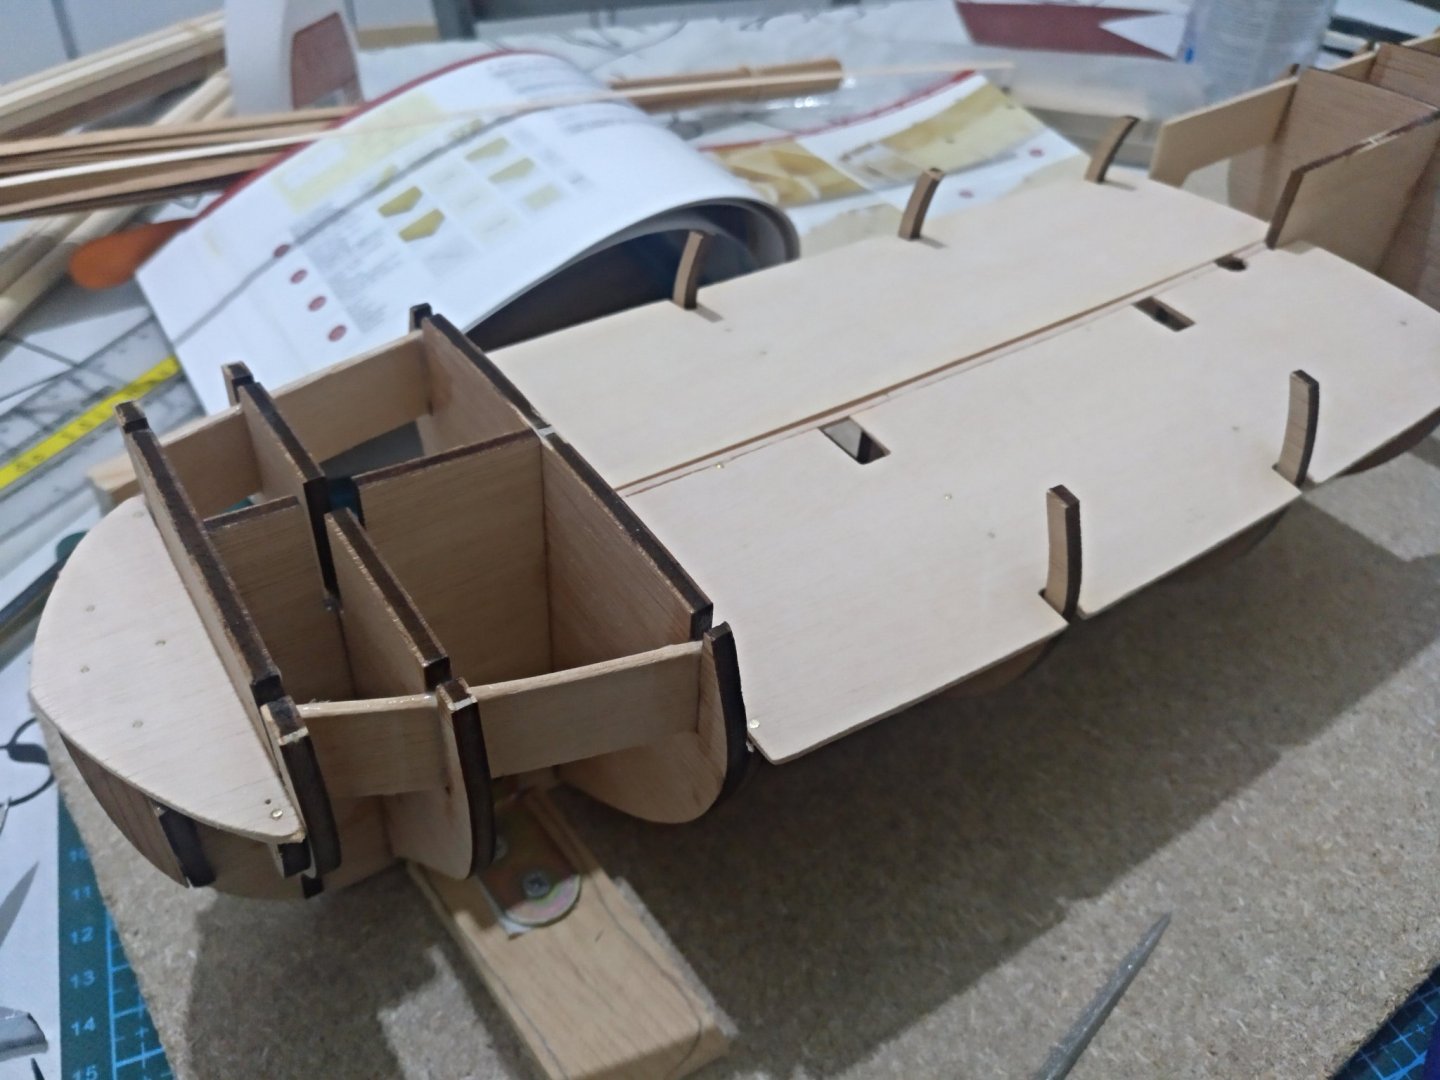
Then, I primed the transom stern, quarter galleries, and the auxiliary boat which is made of steel too but later I thought it would not look nice painted and I changed my mind.... I think it looks pretty nice After this, I also glued the walnut stem stringer Then the head rails
-
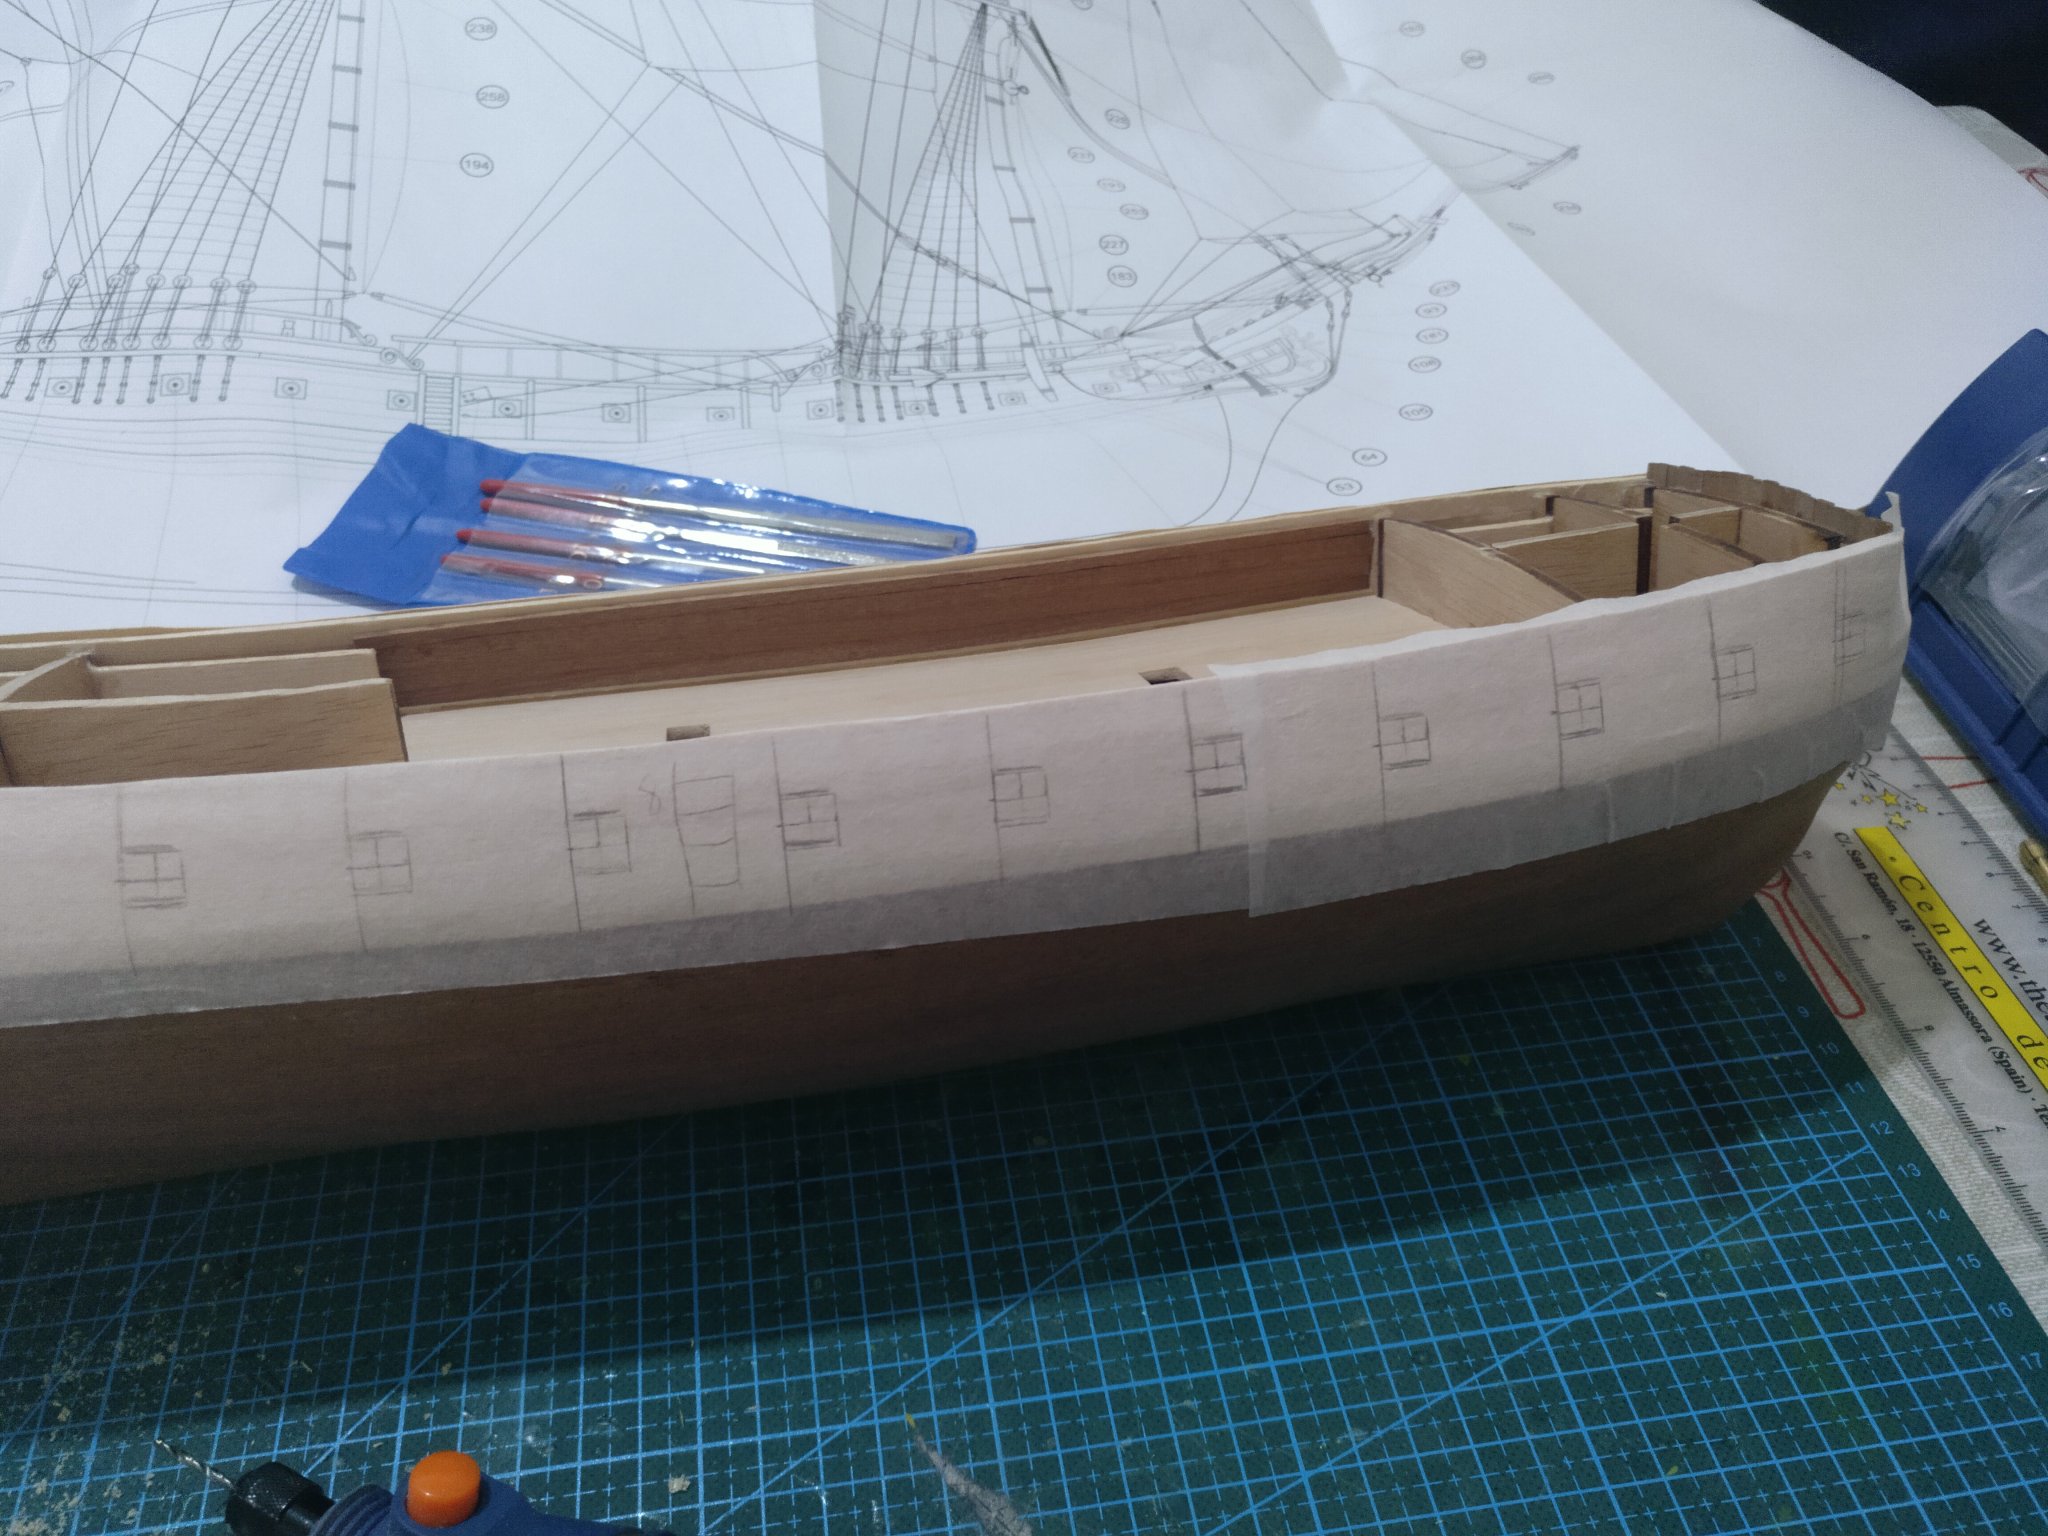
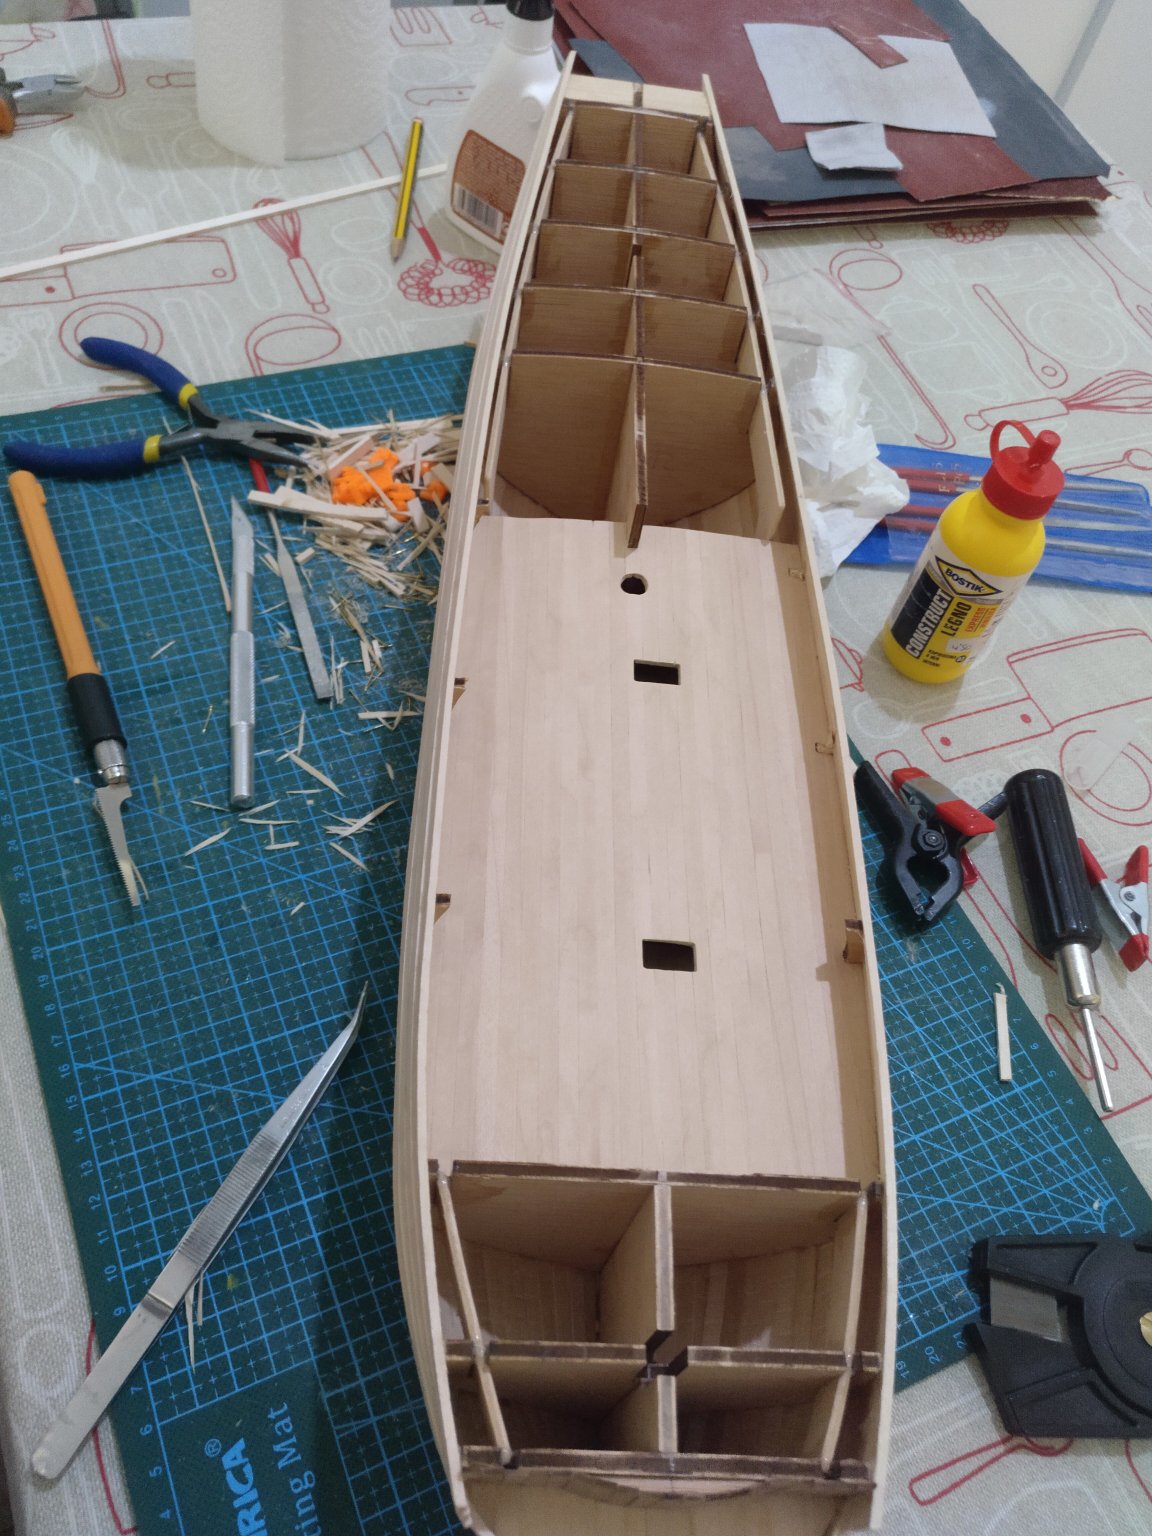
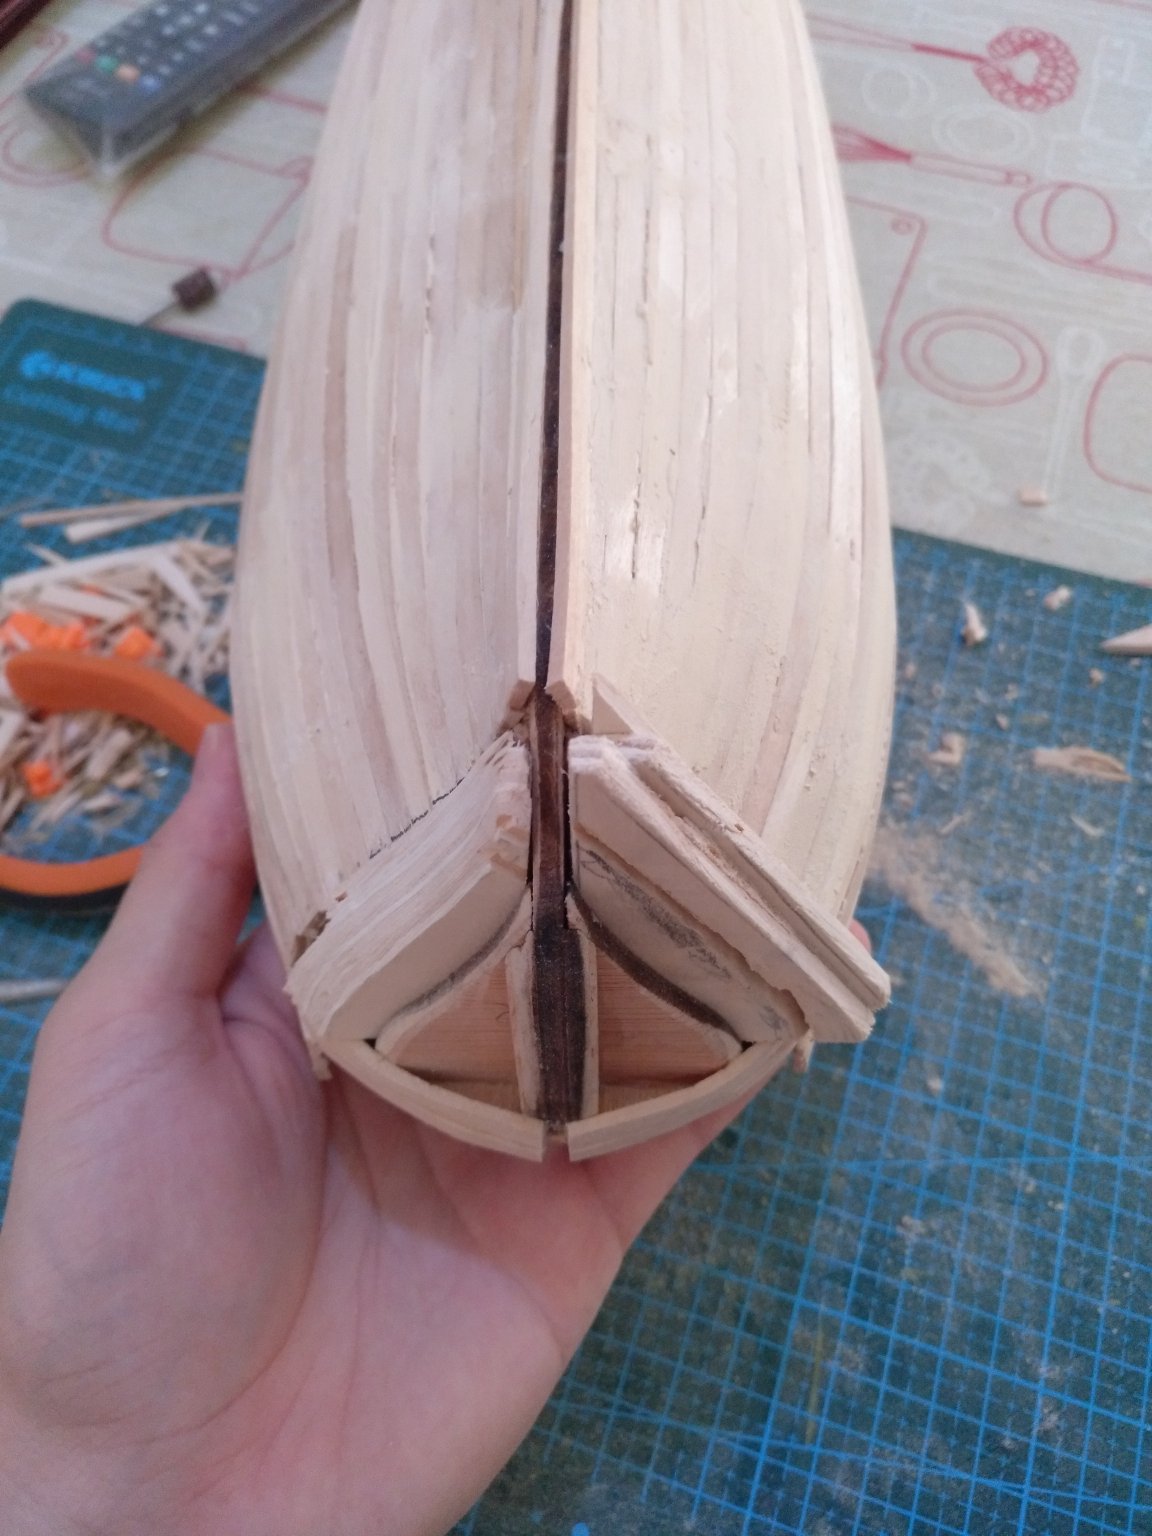
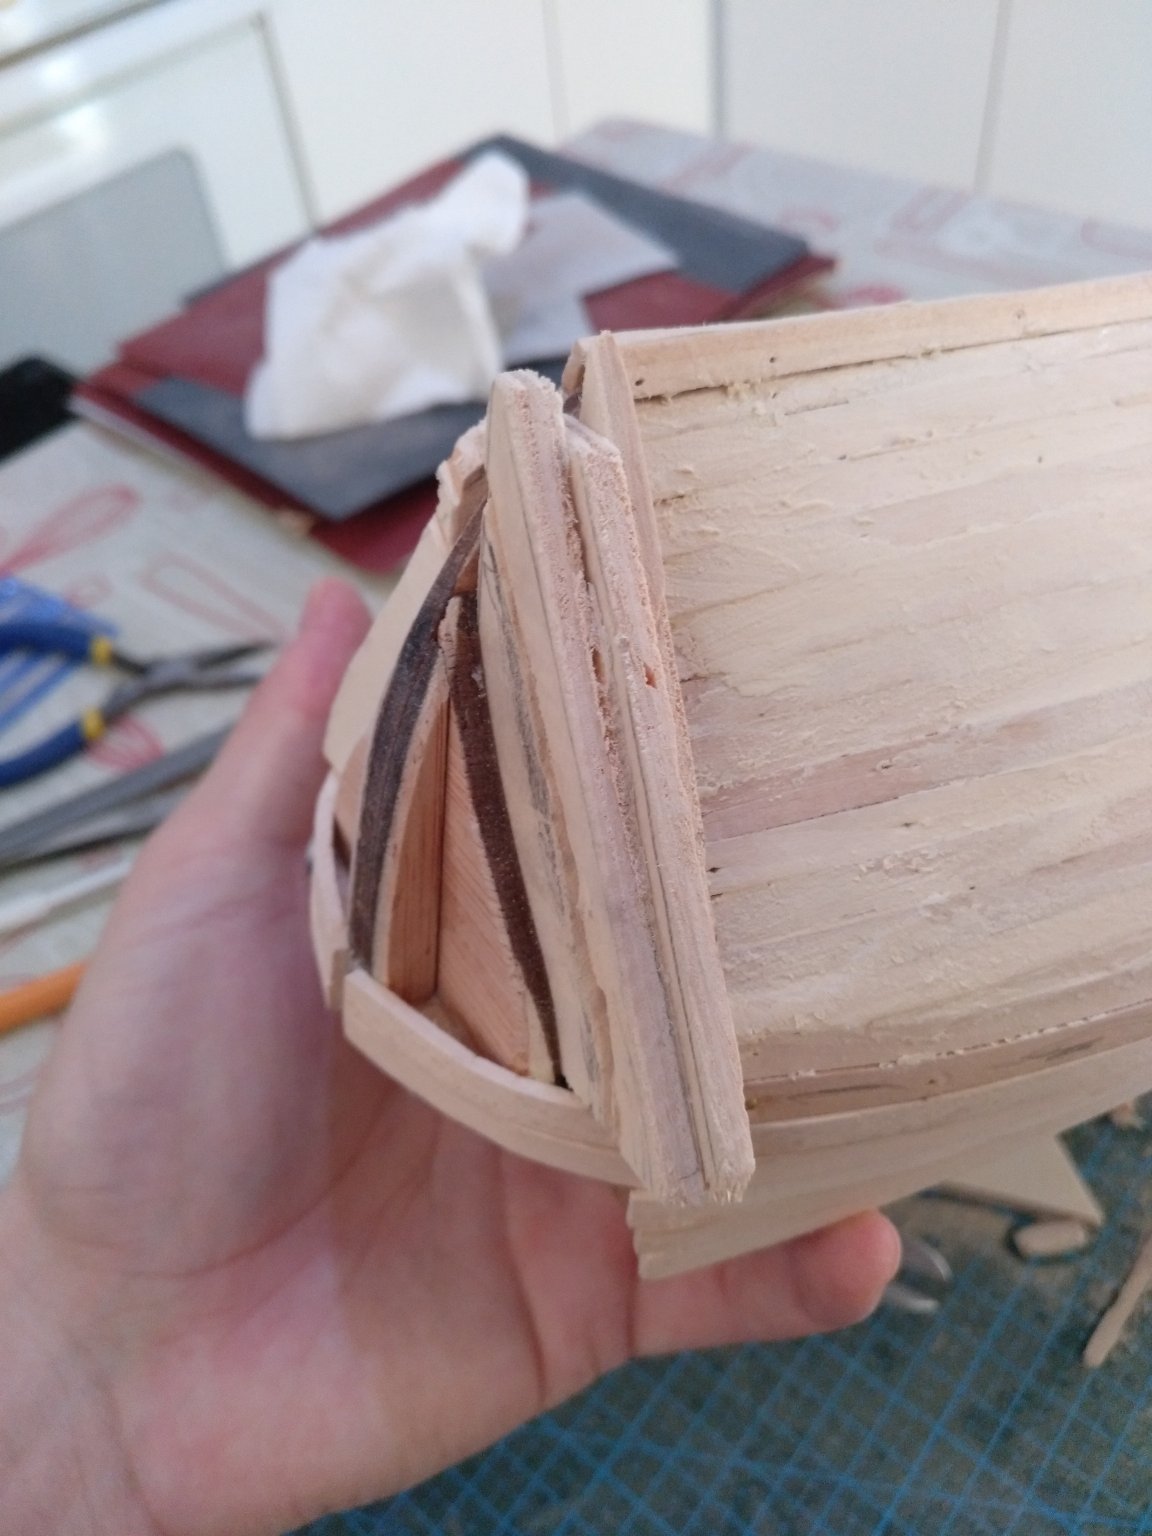
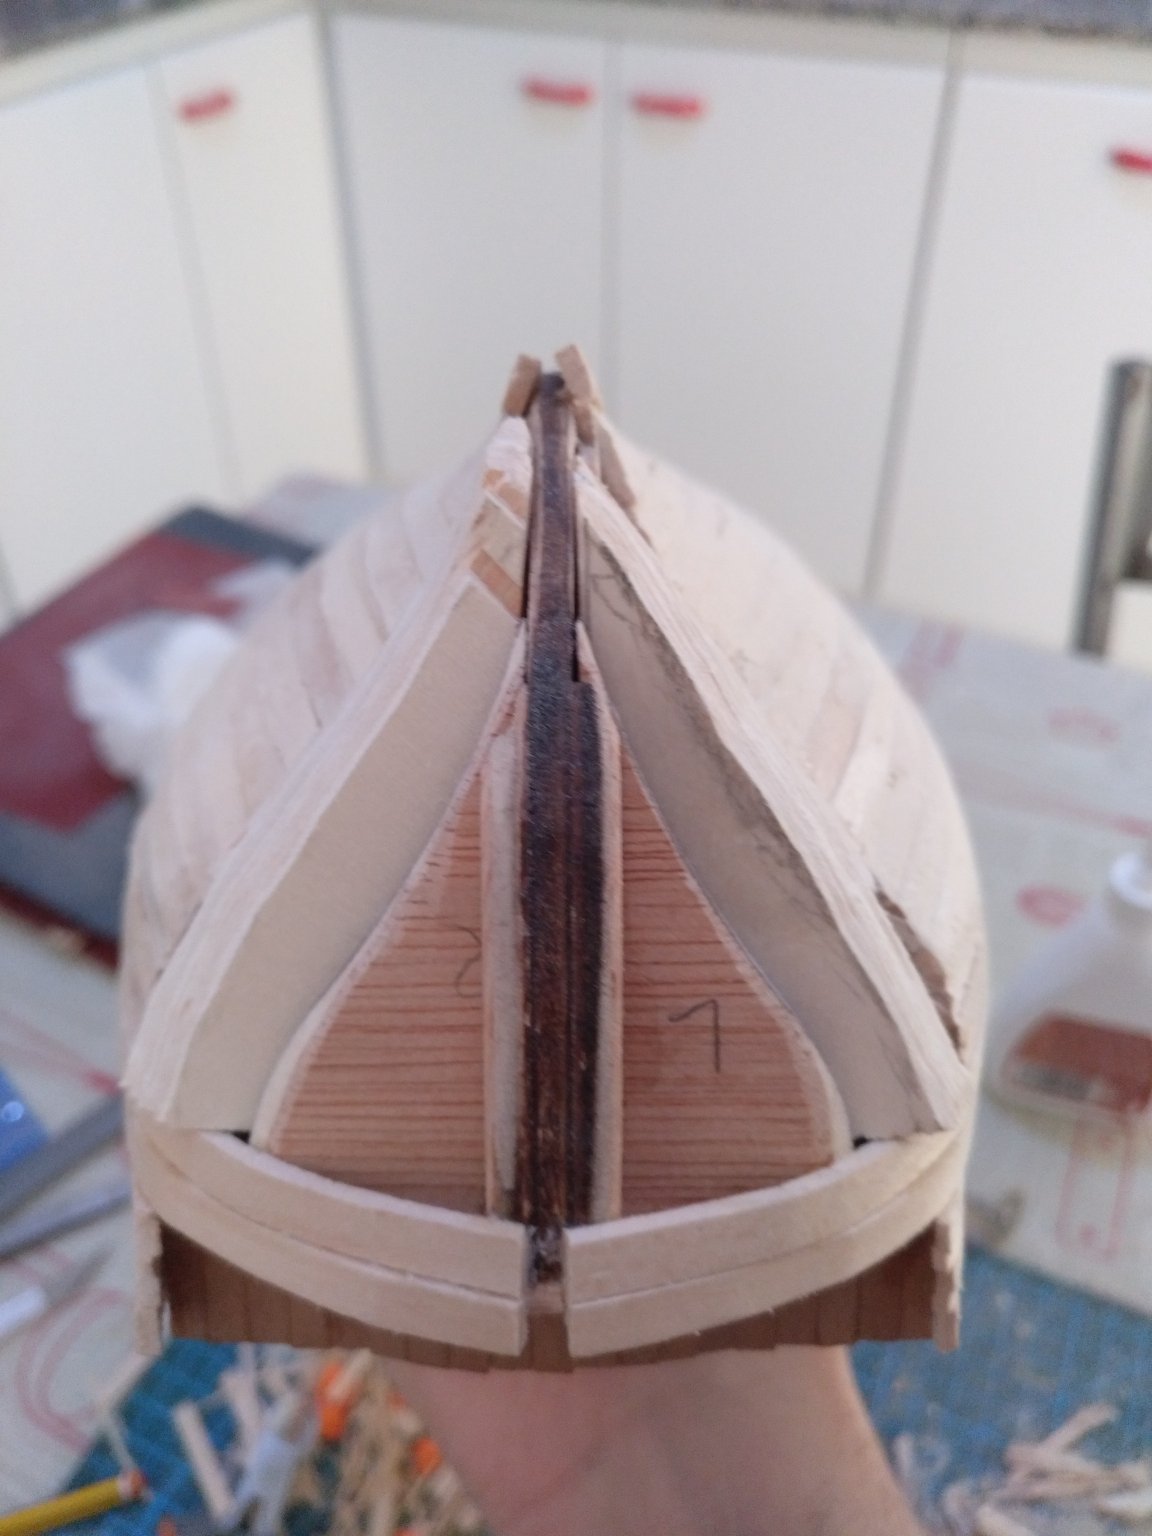
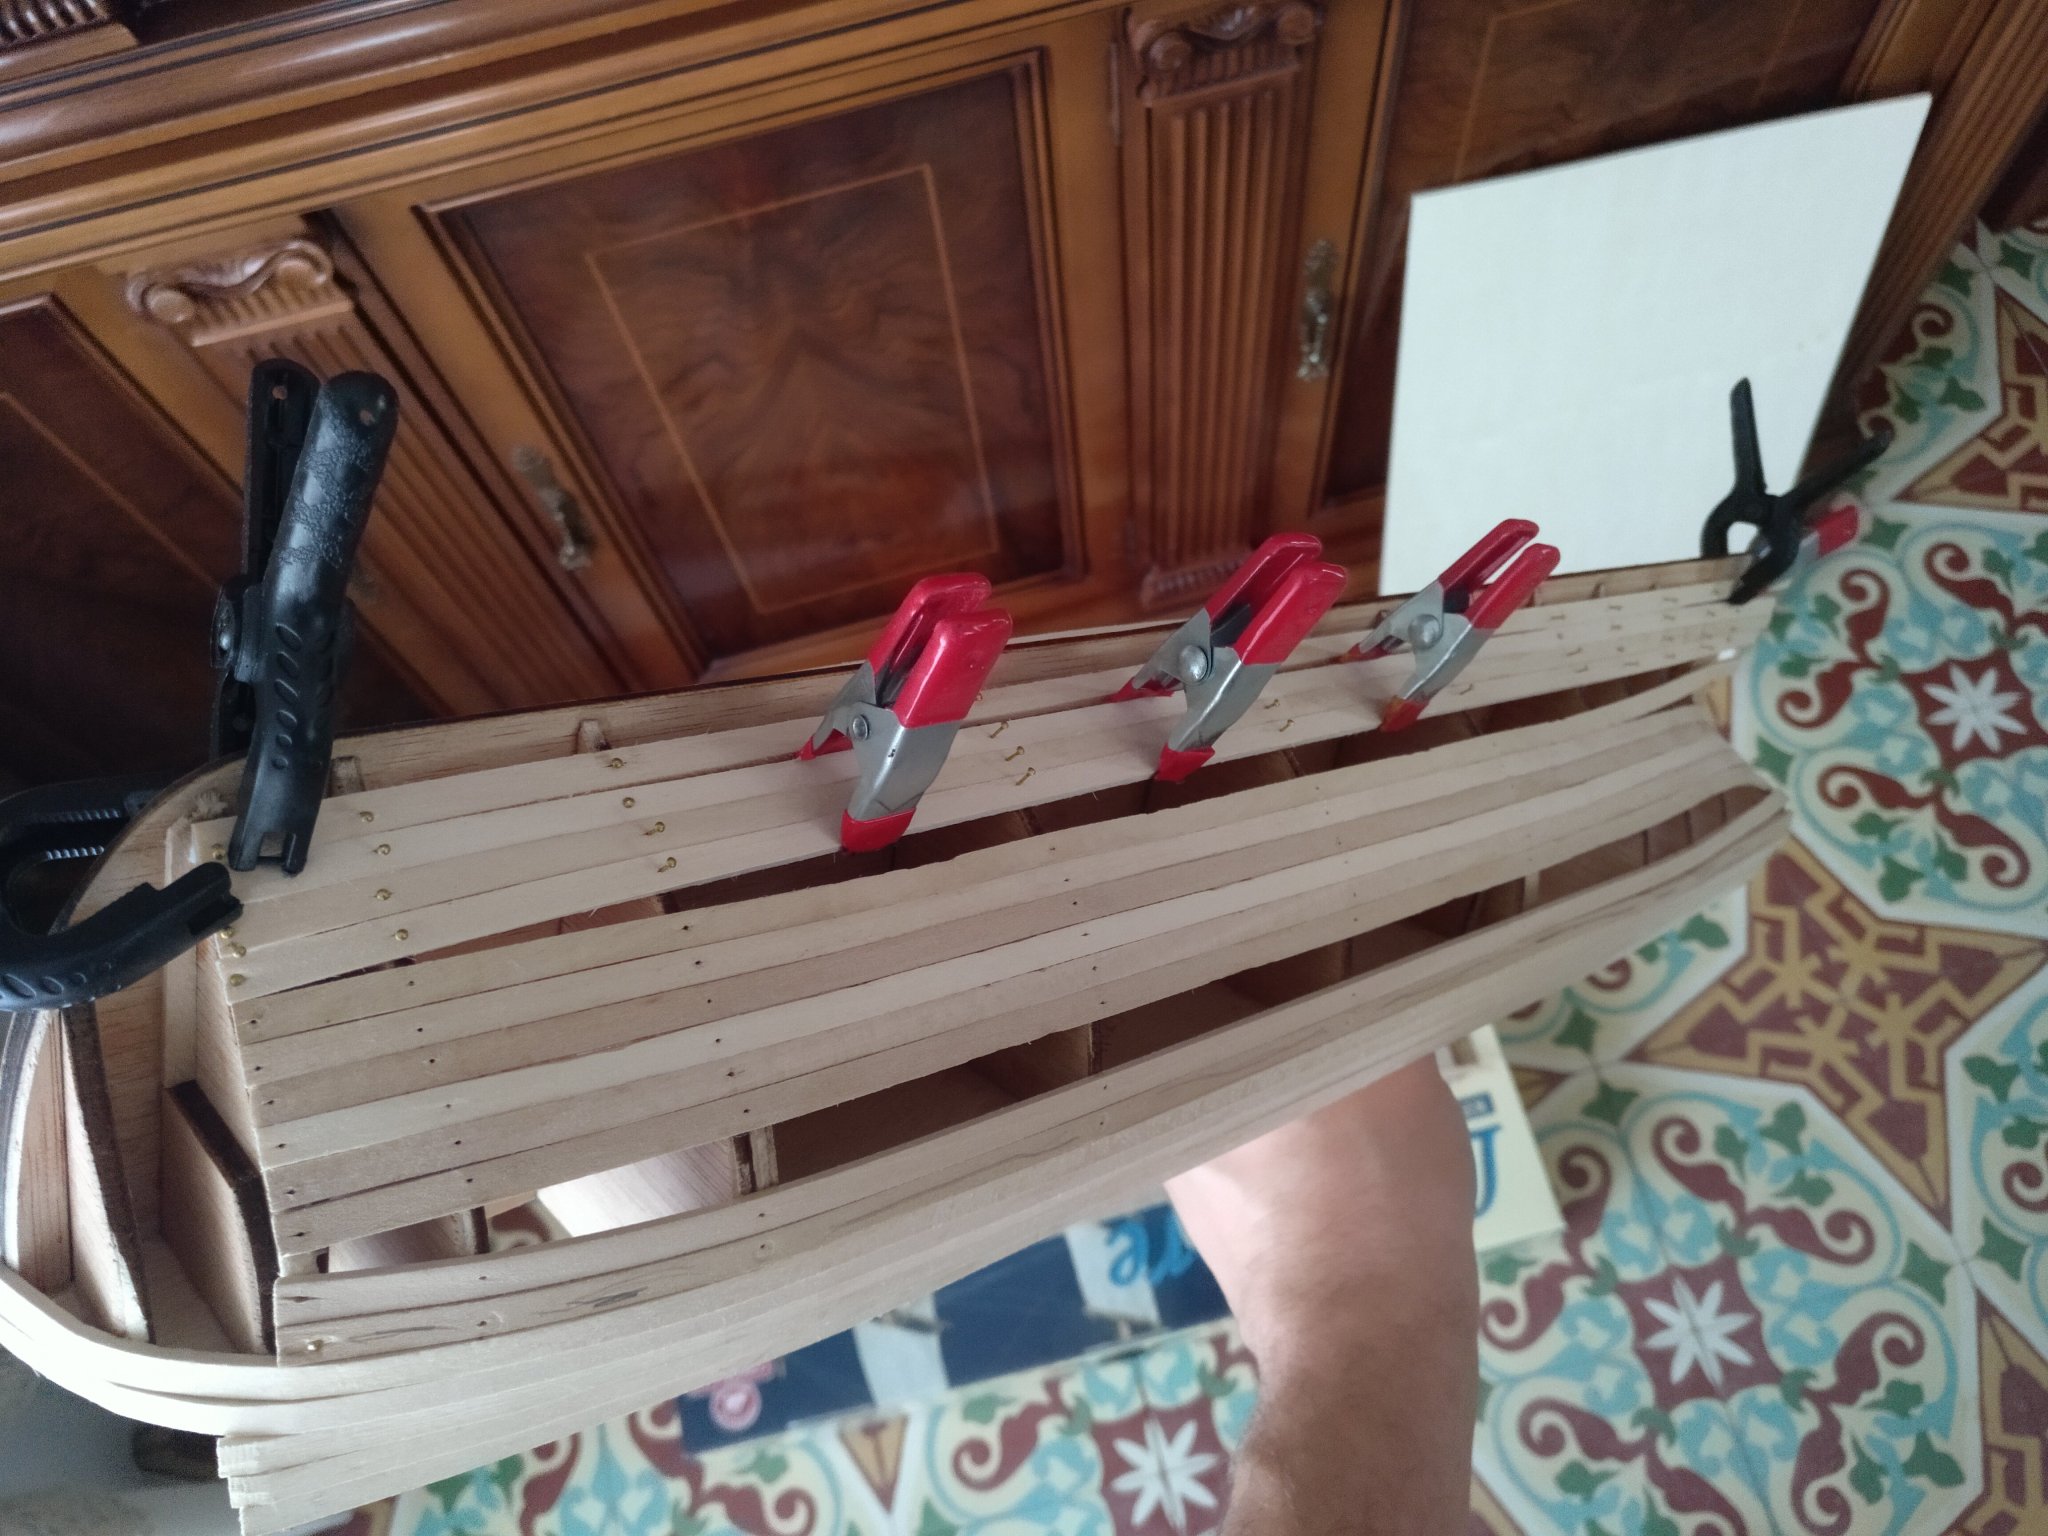
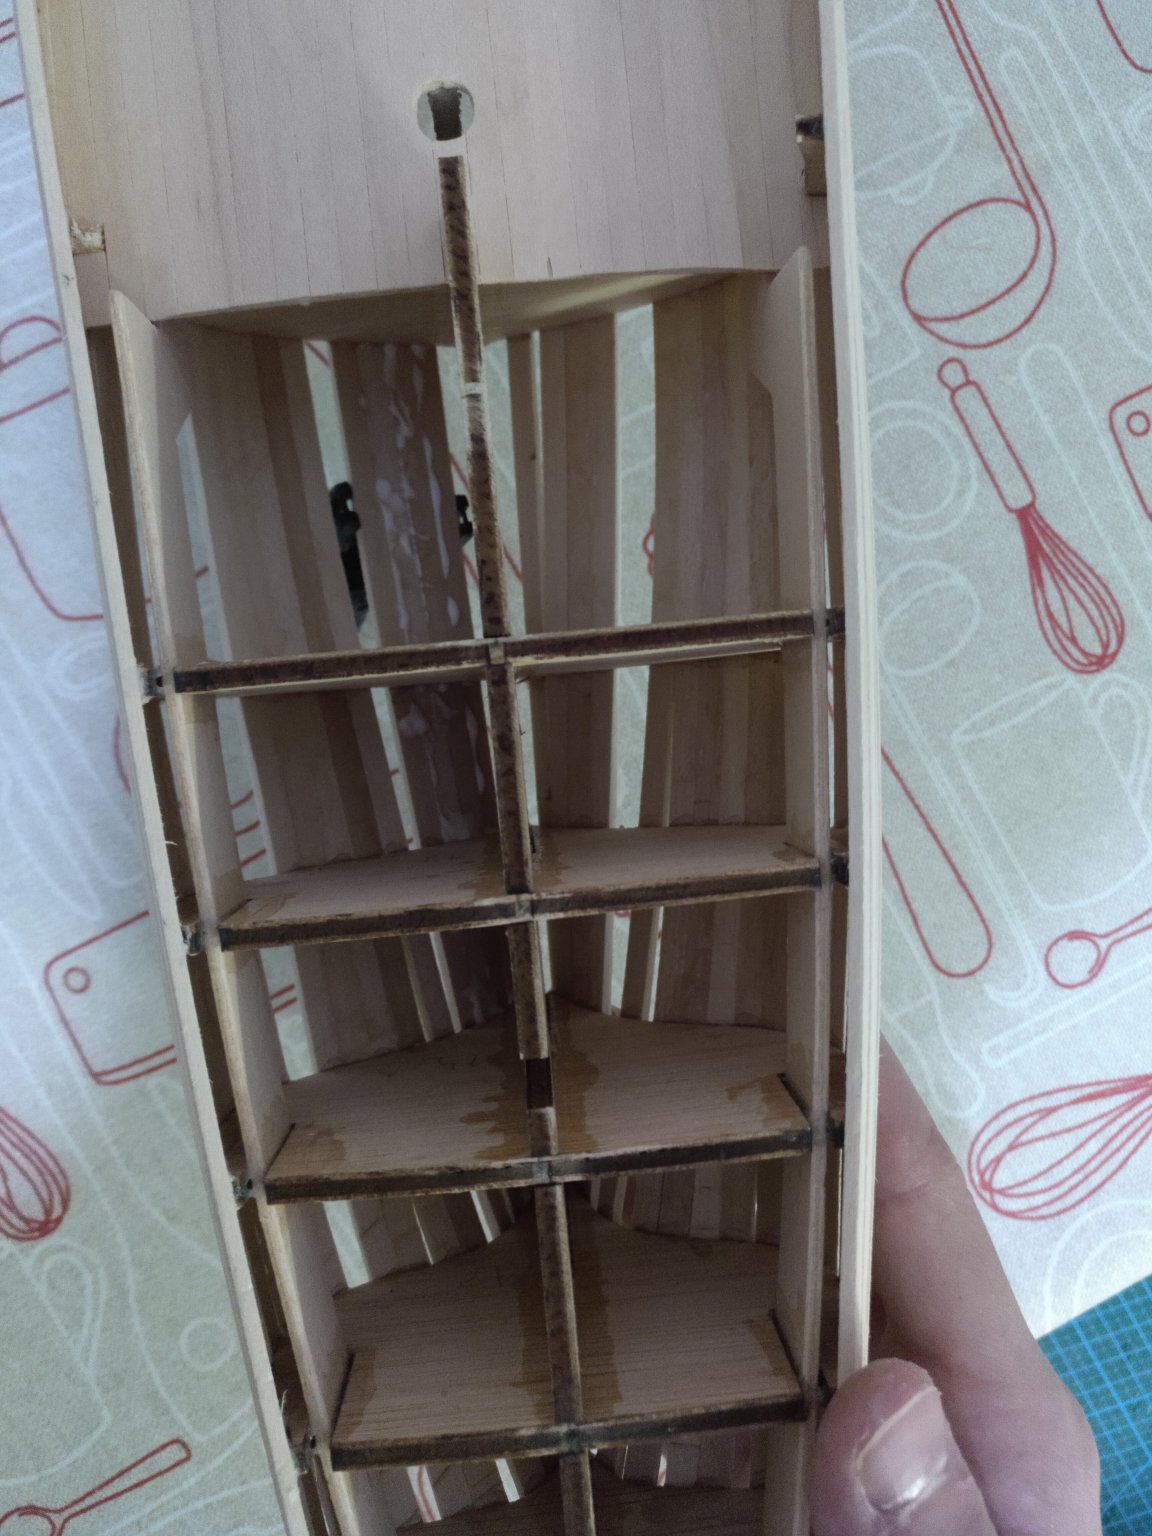
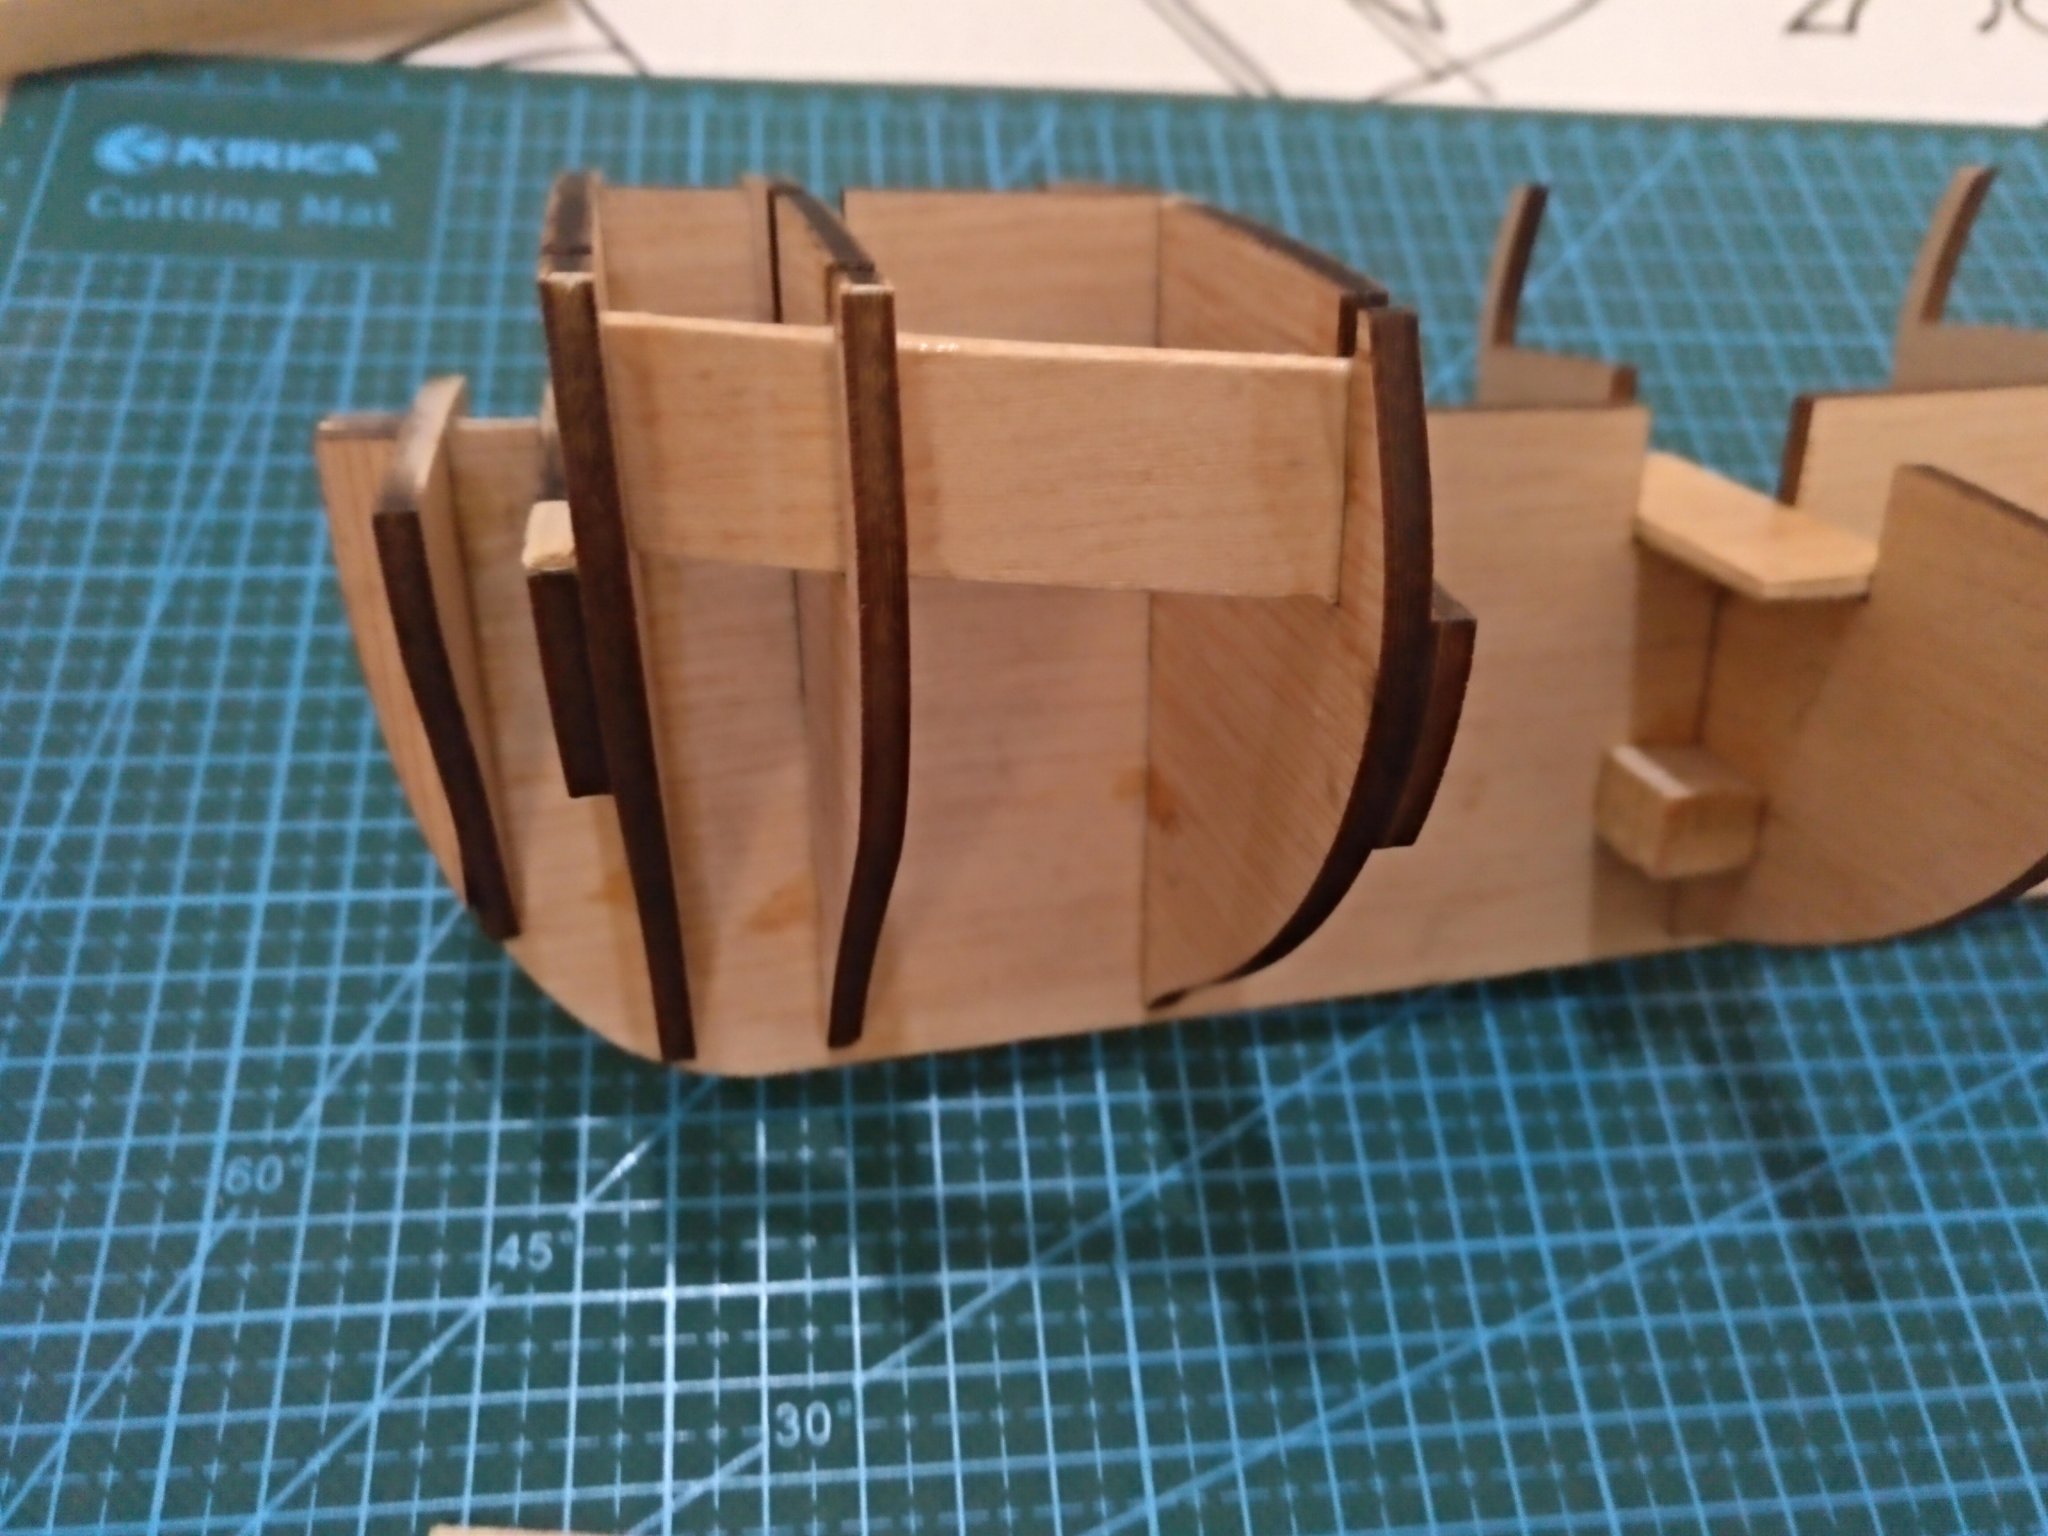
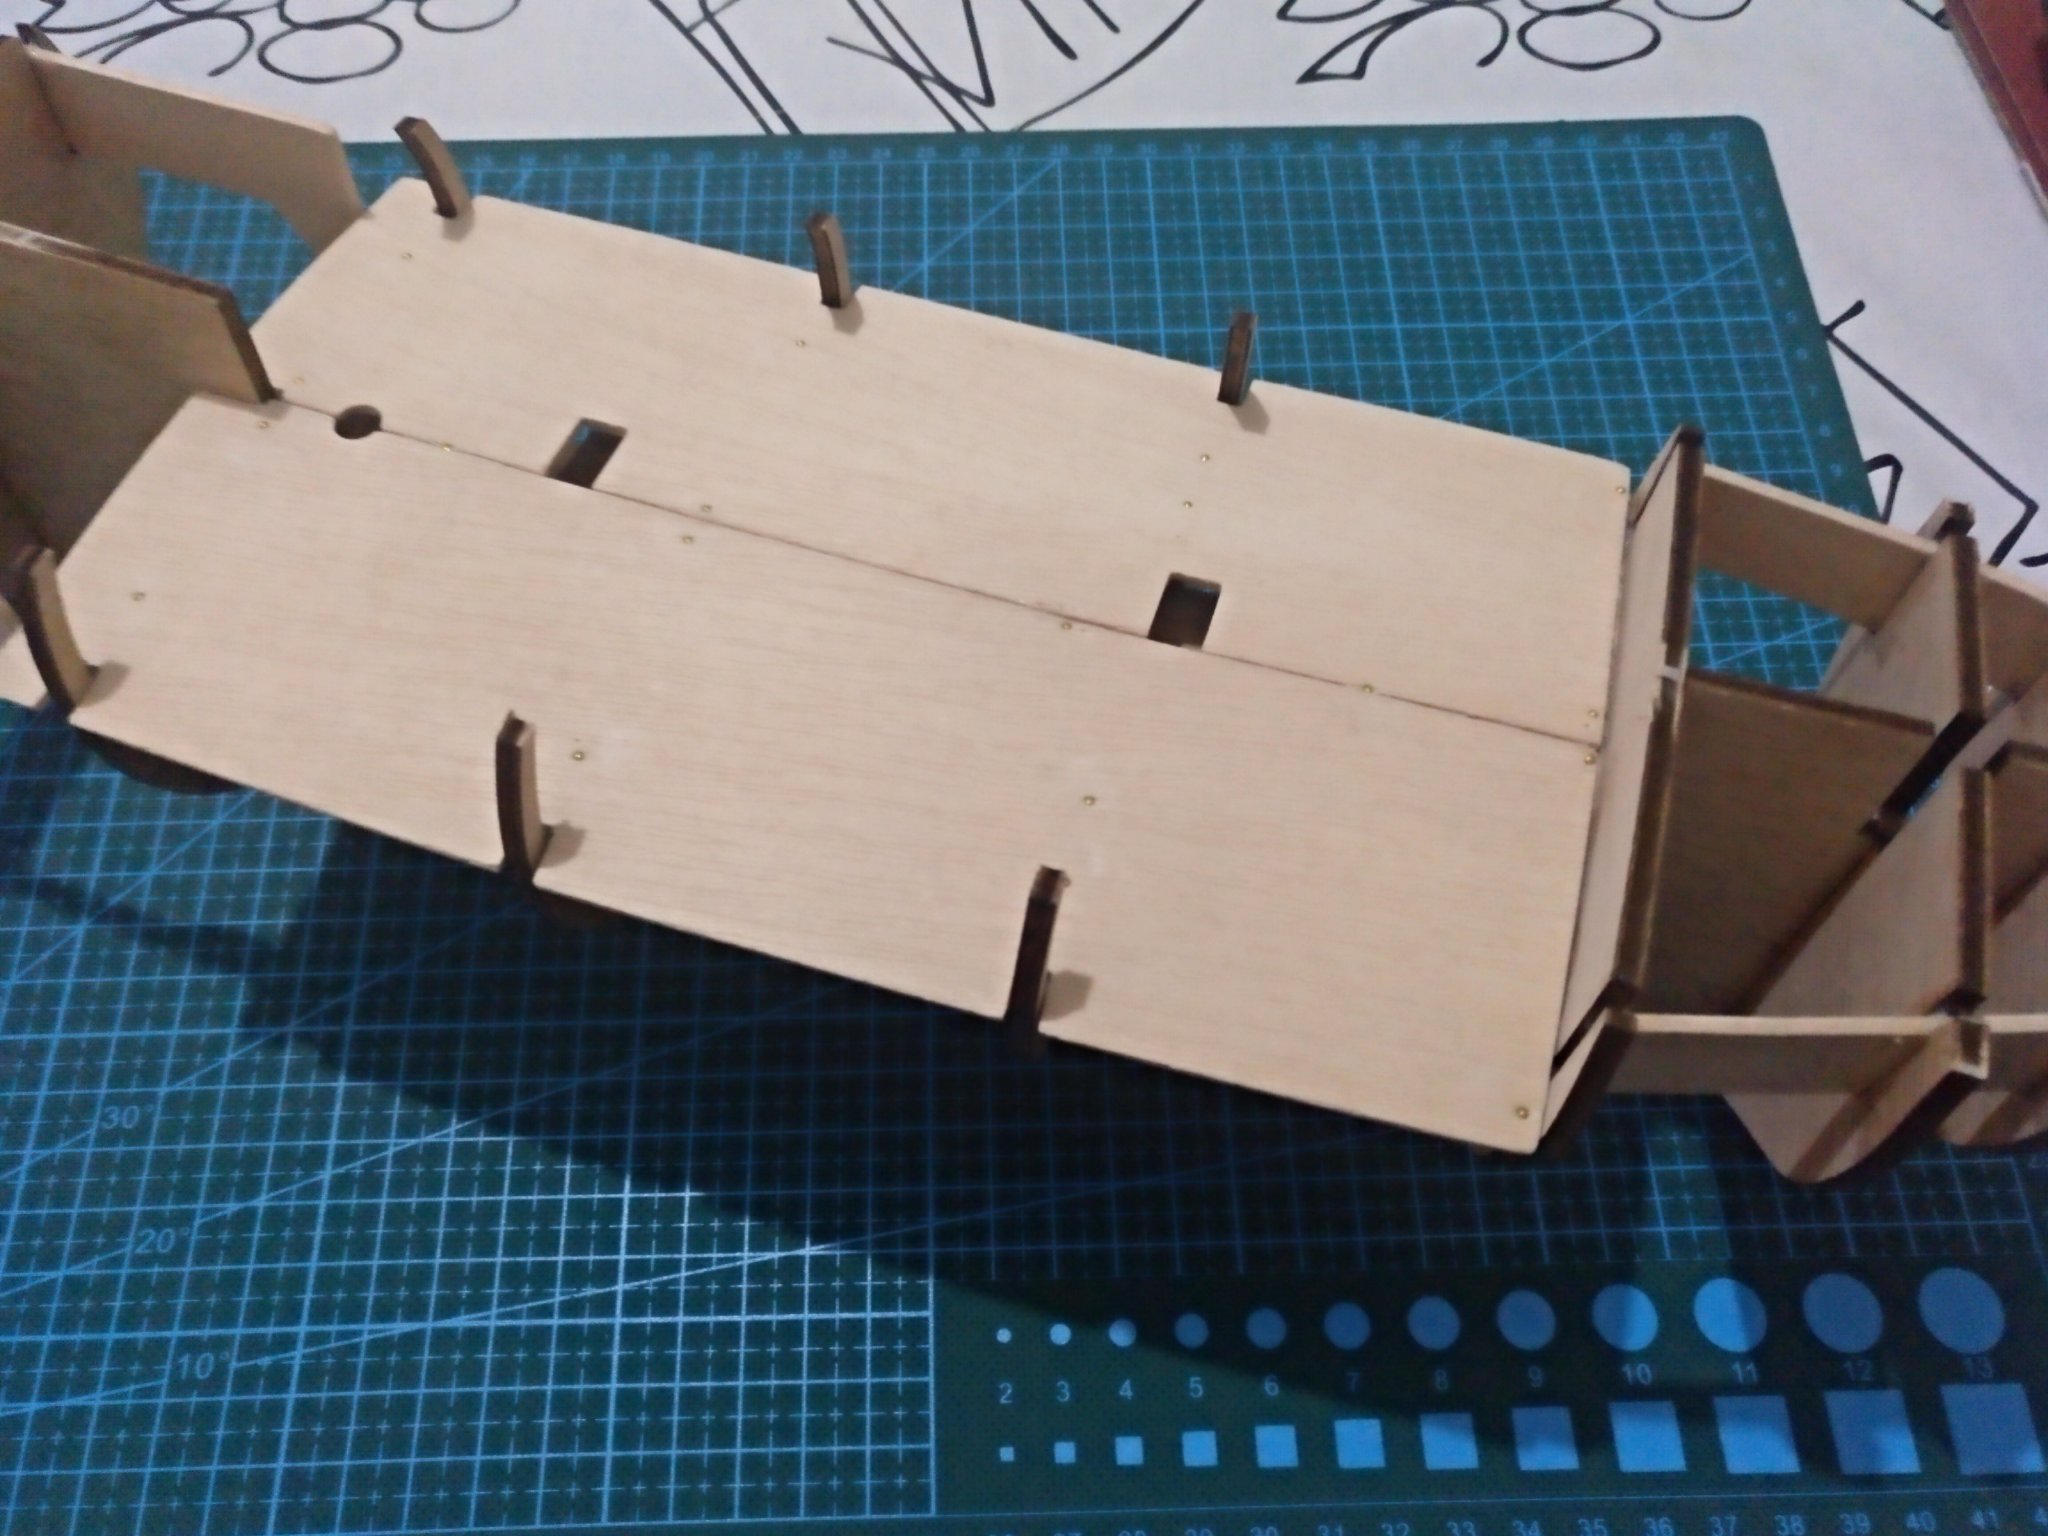
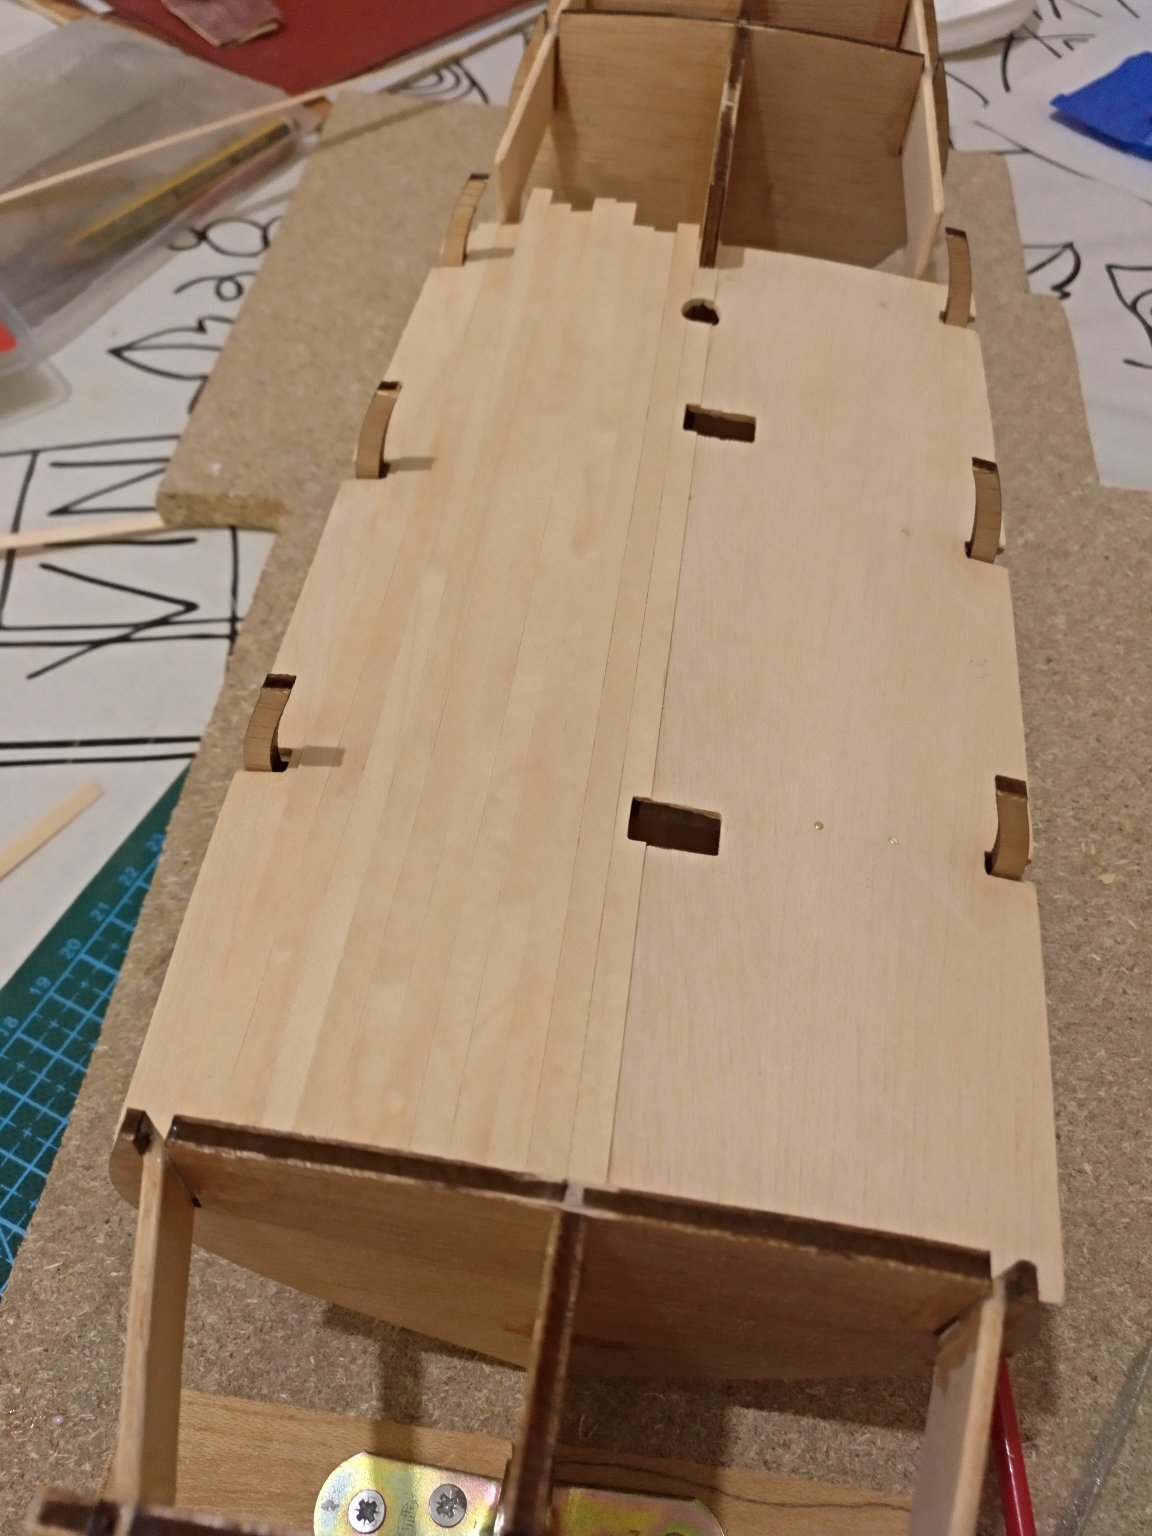
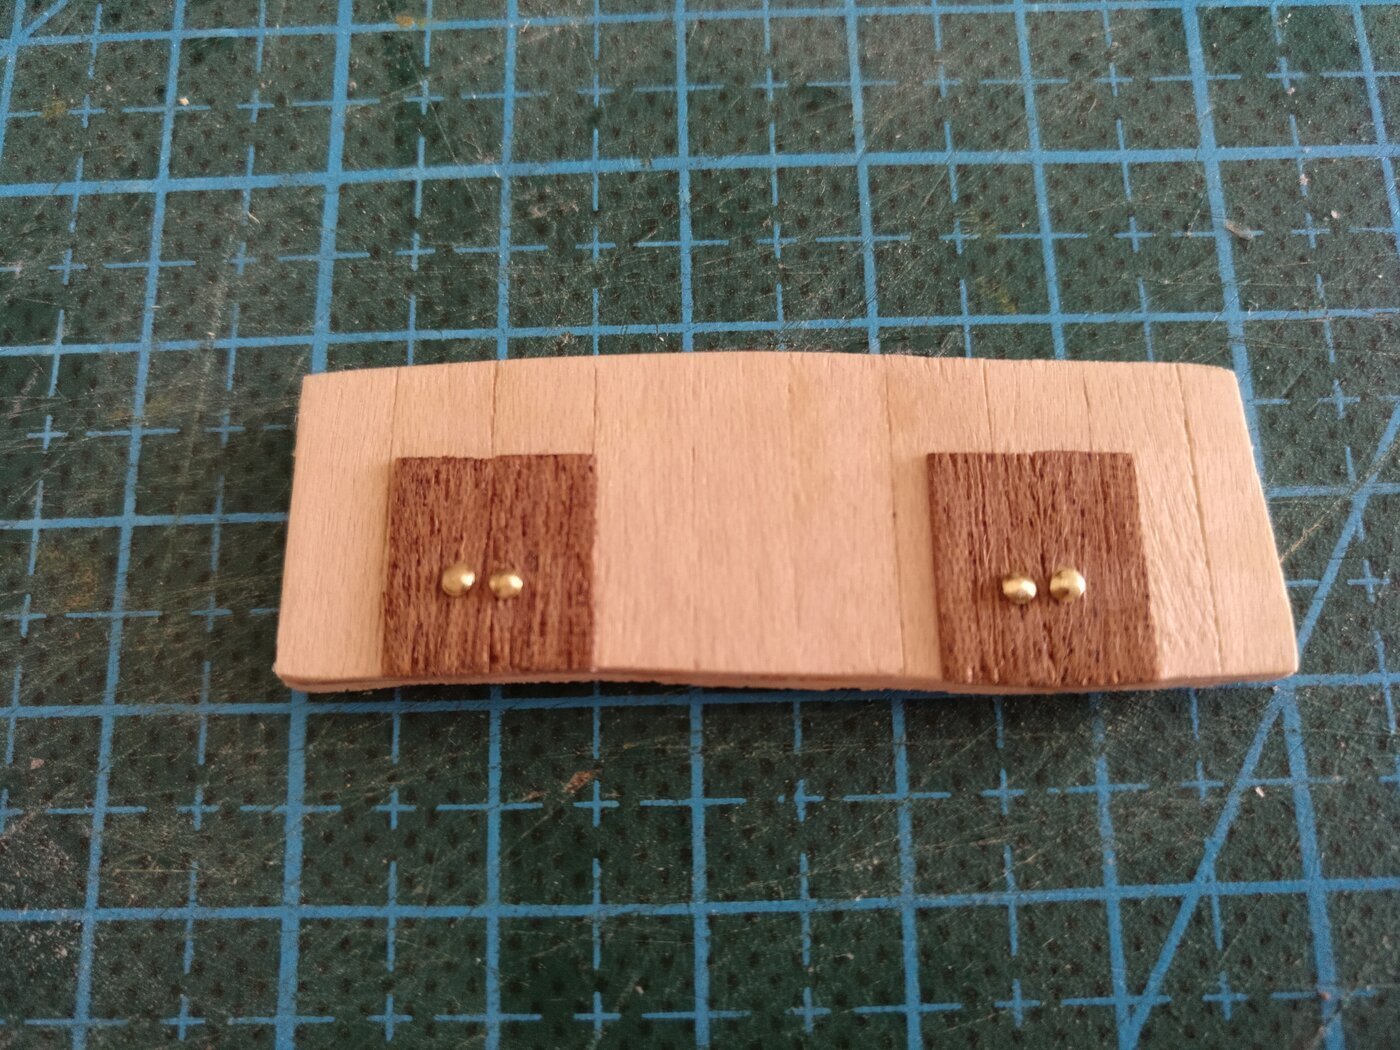
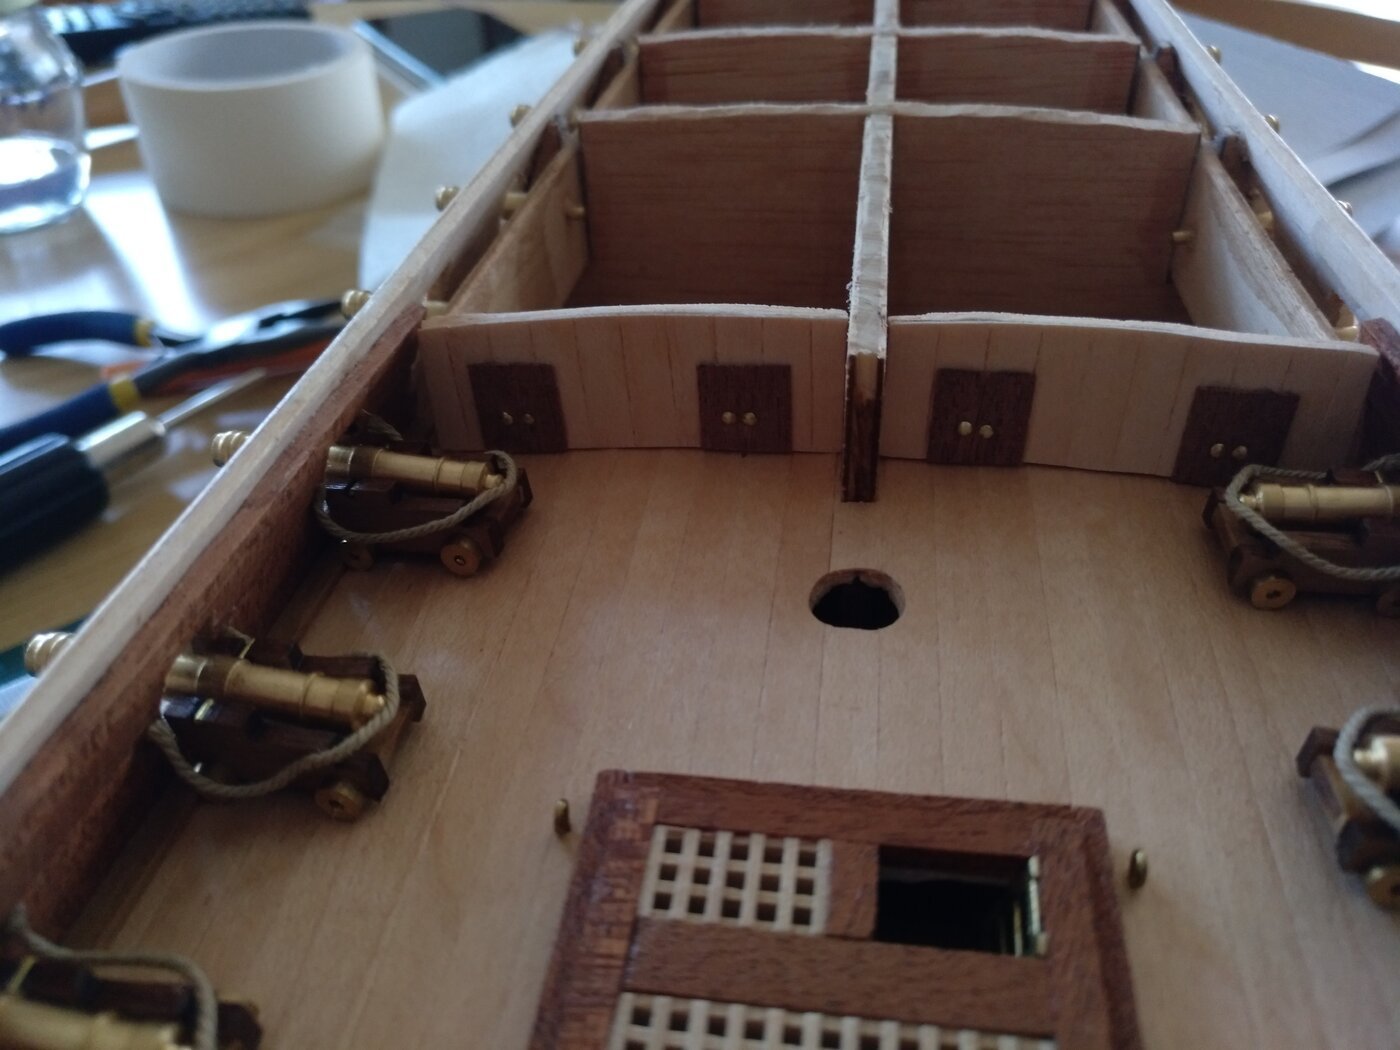
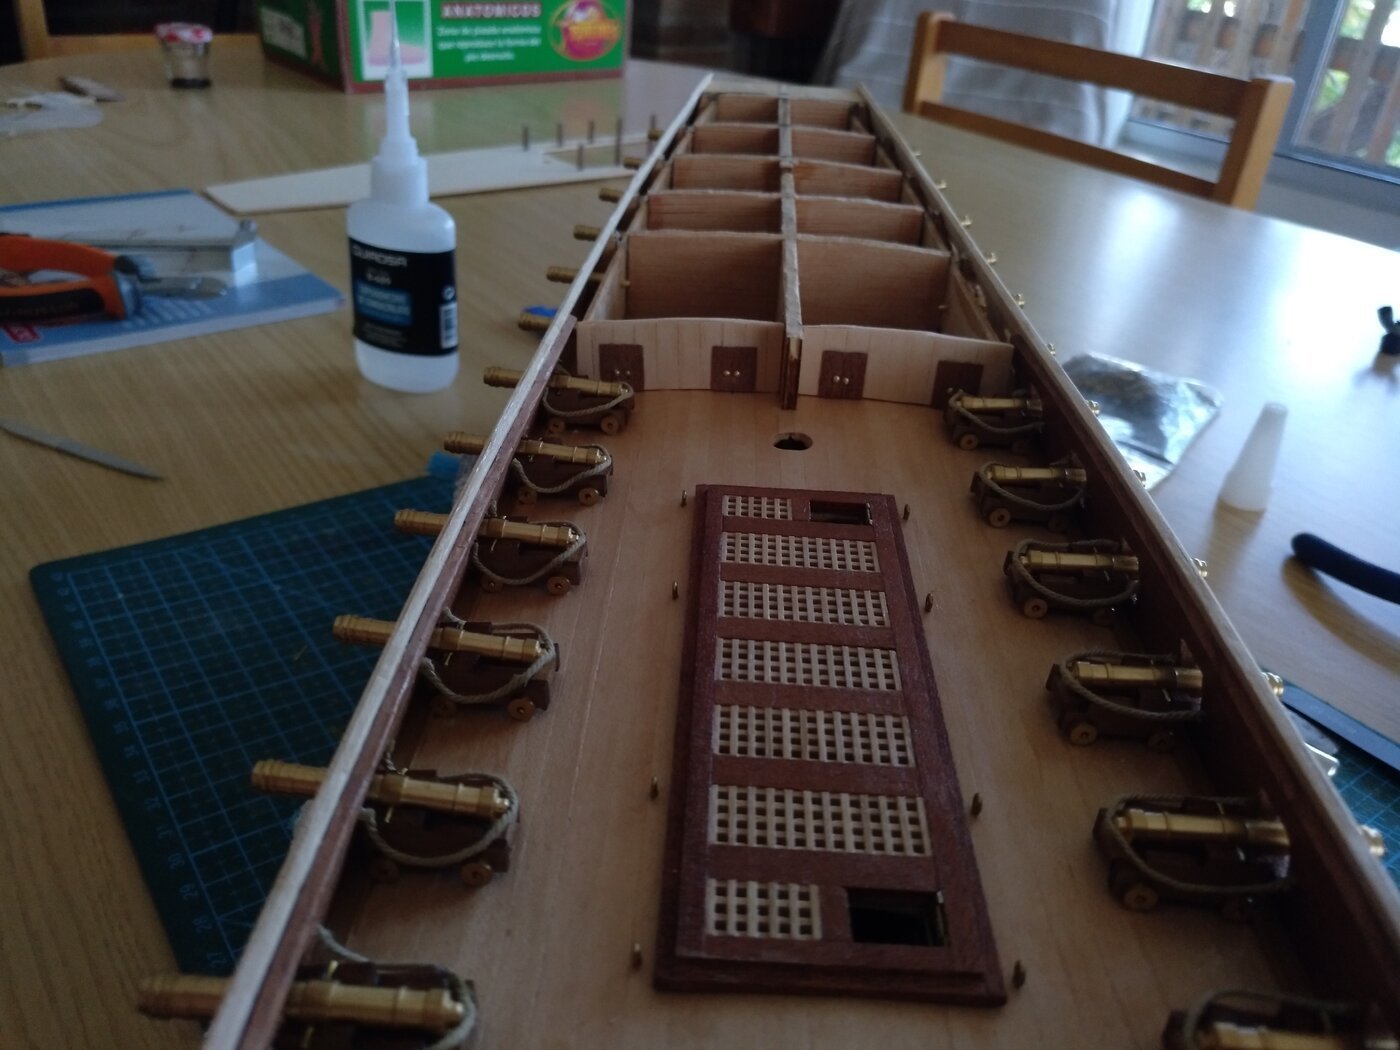
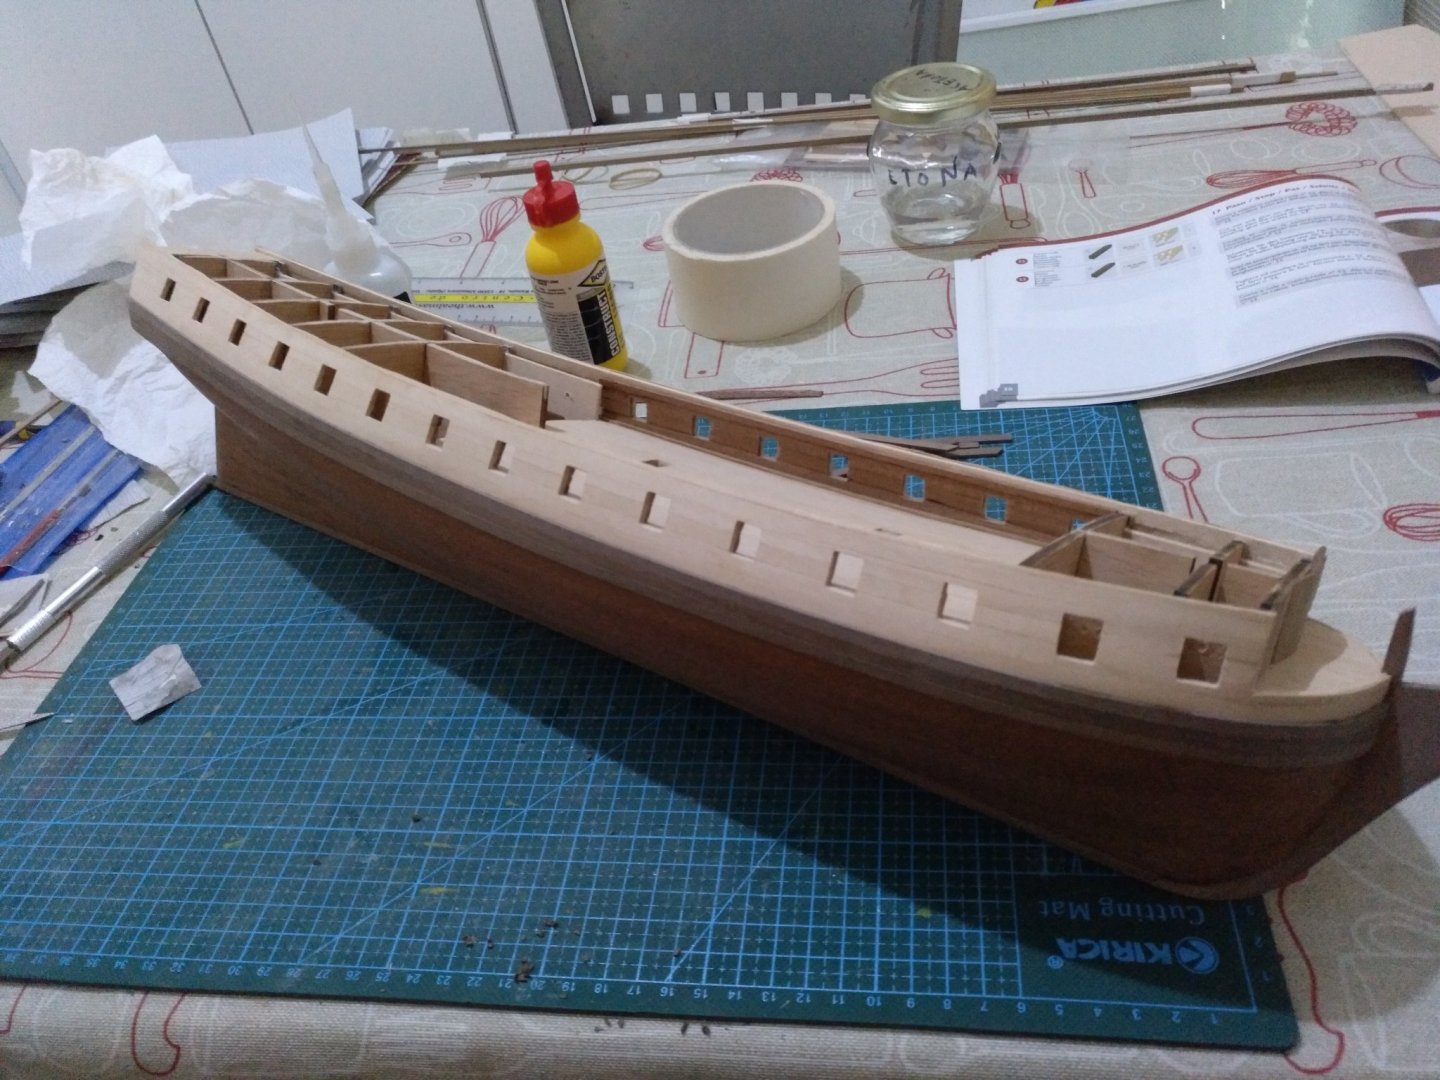
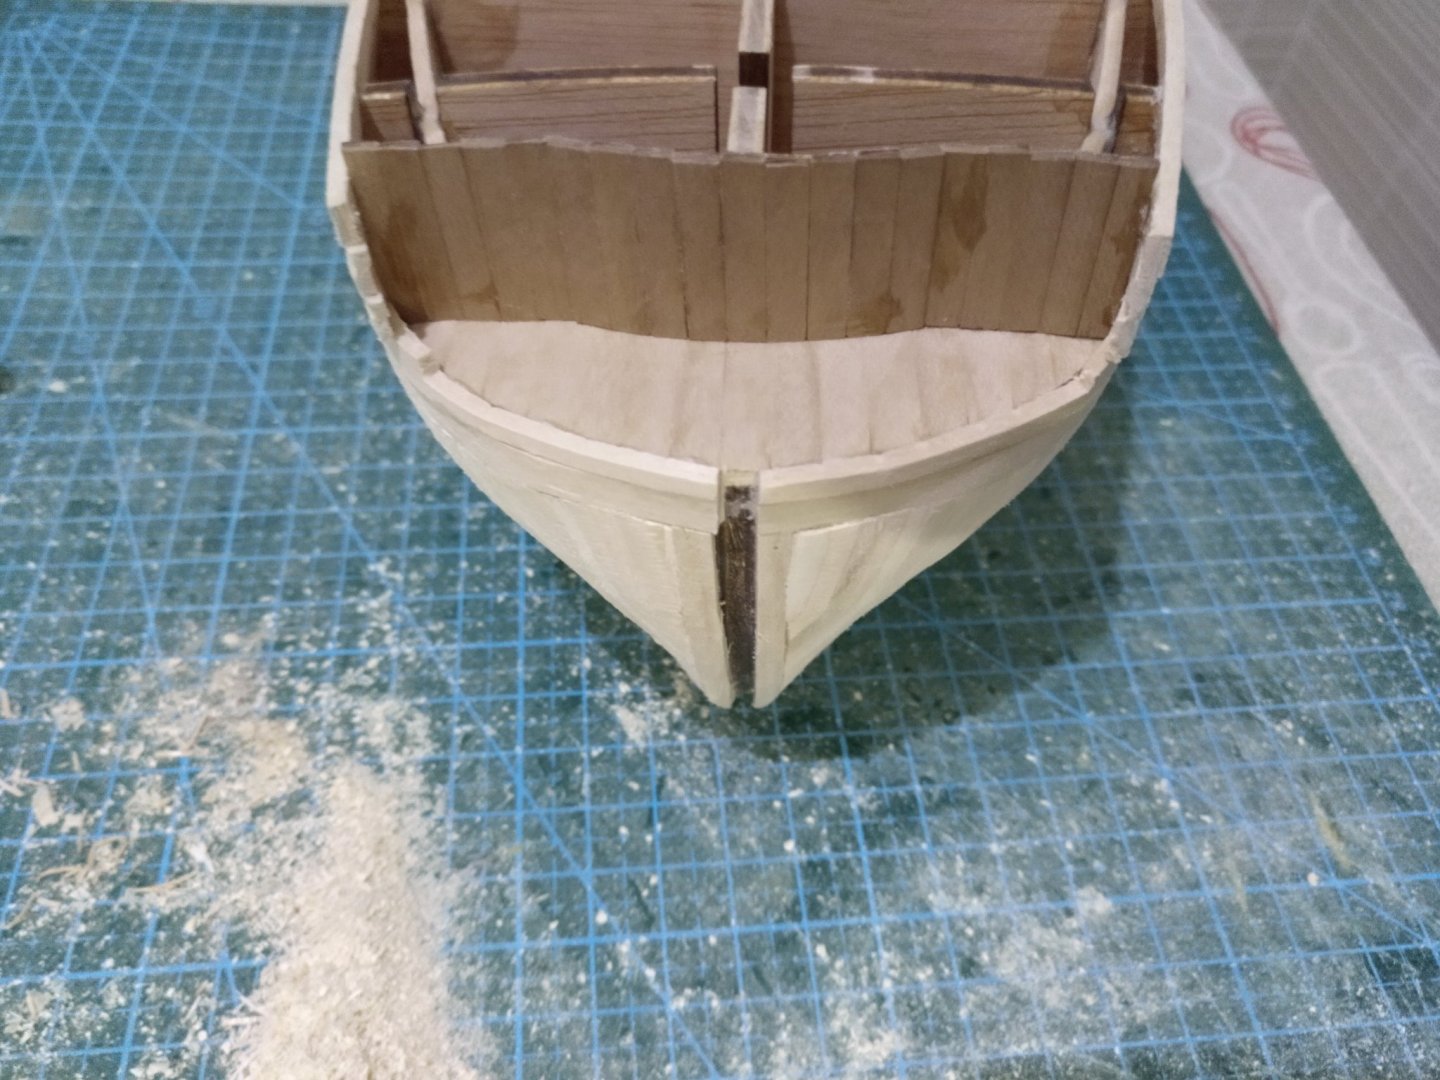
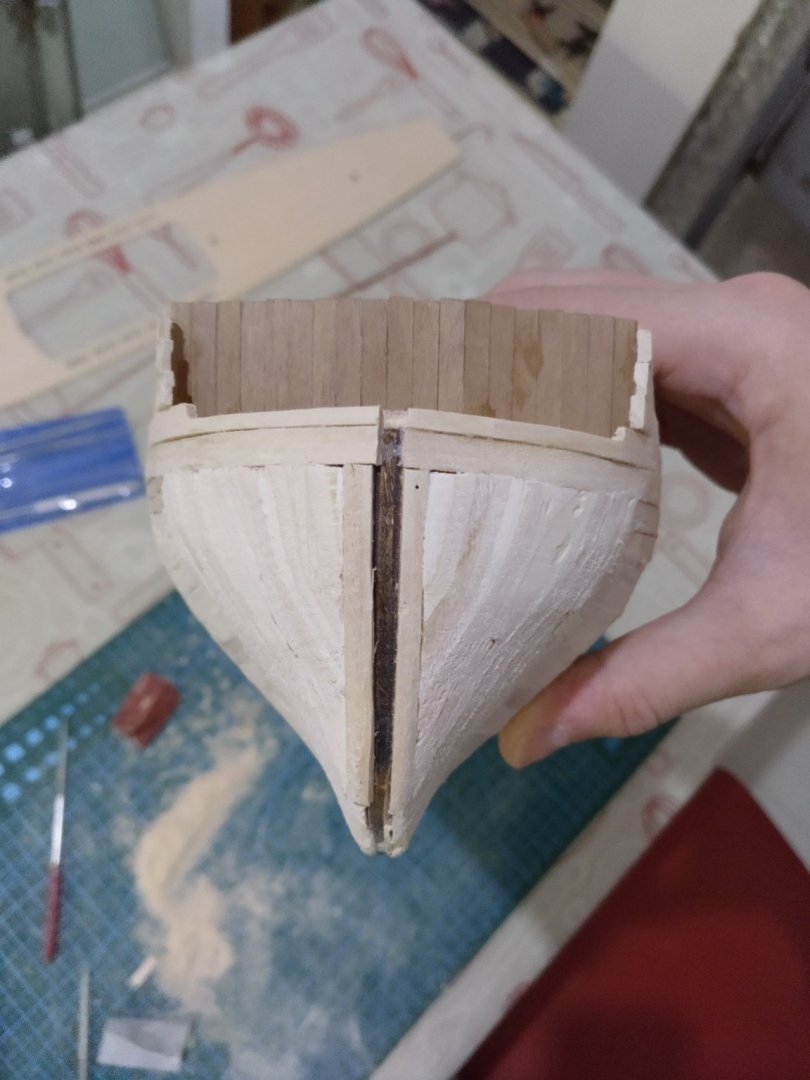
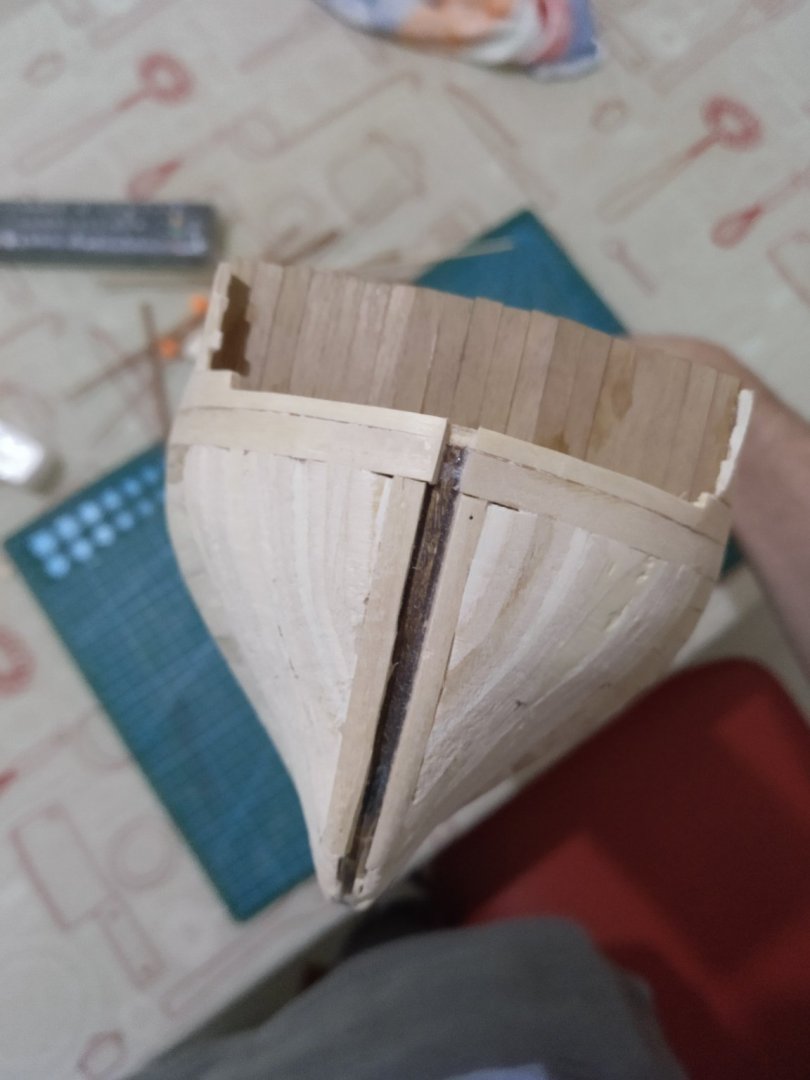
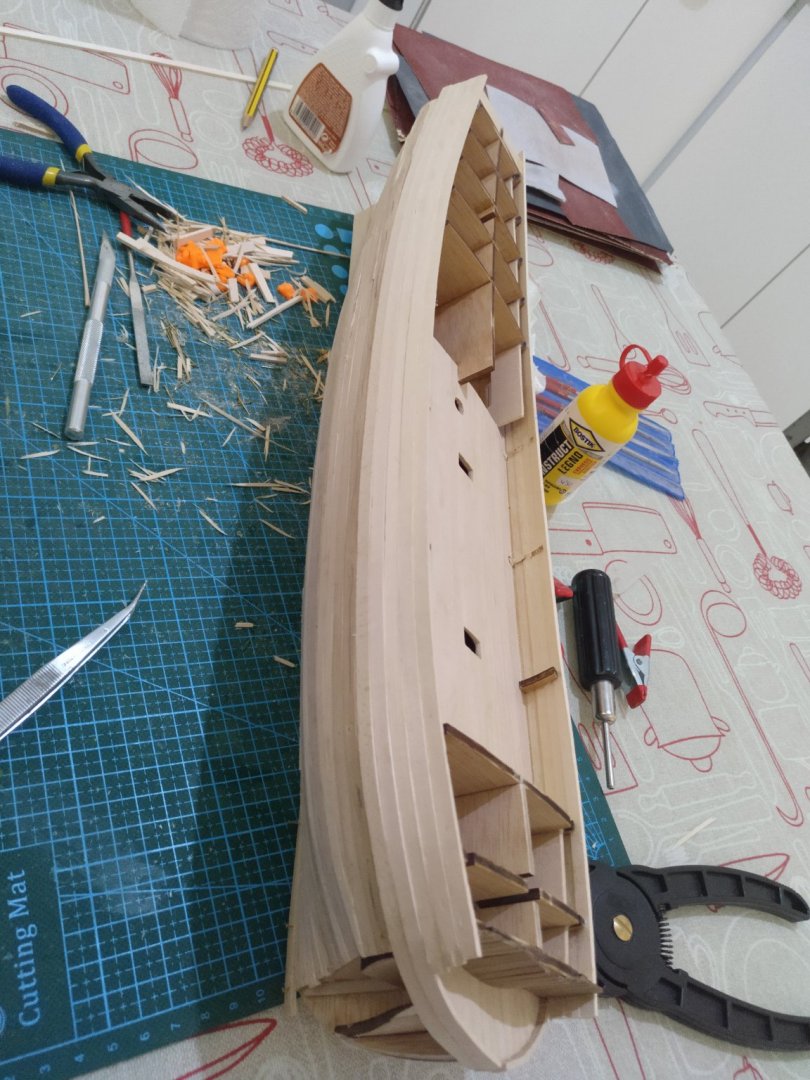
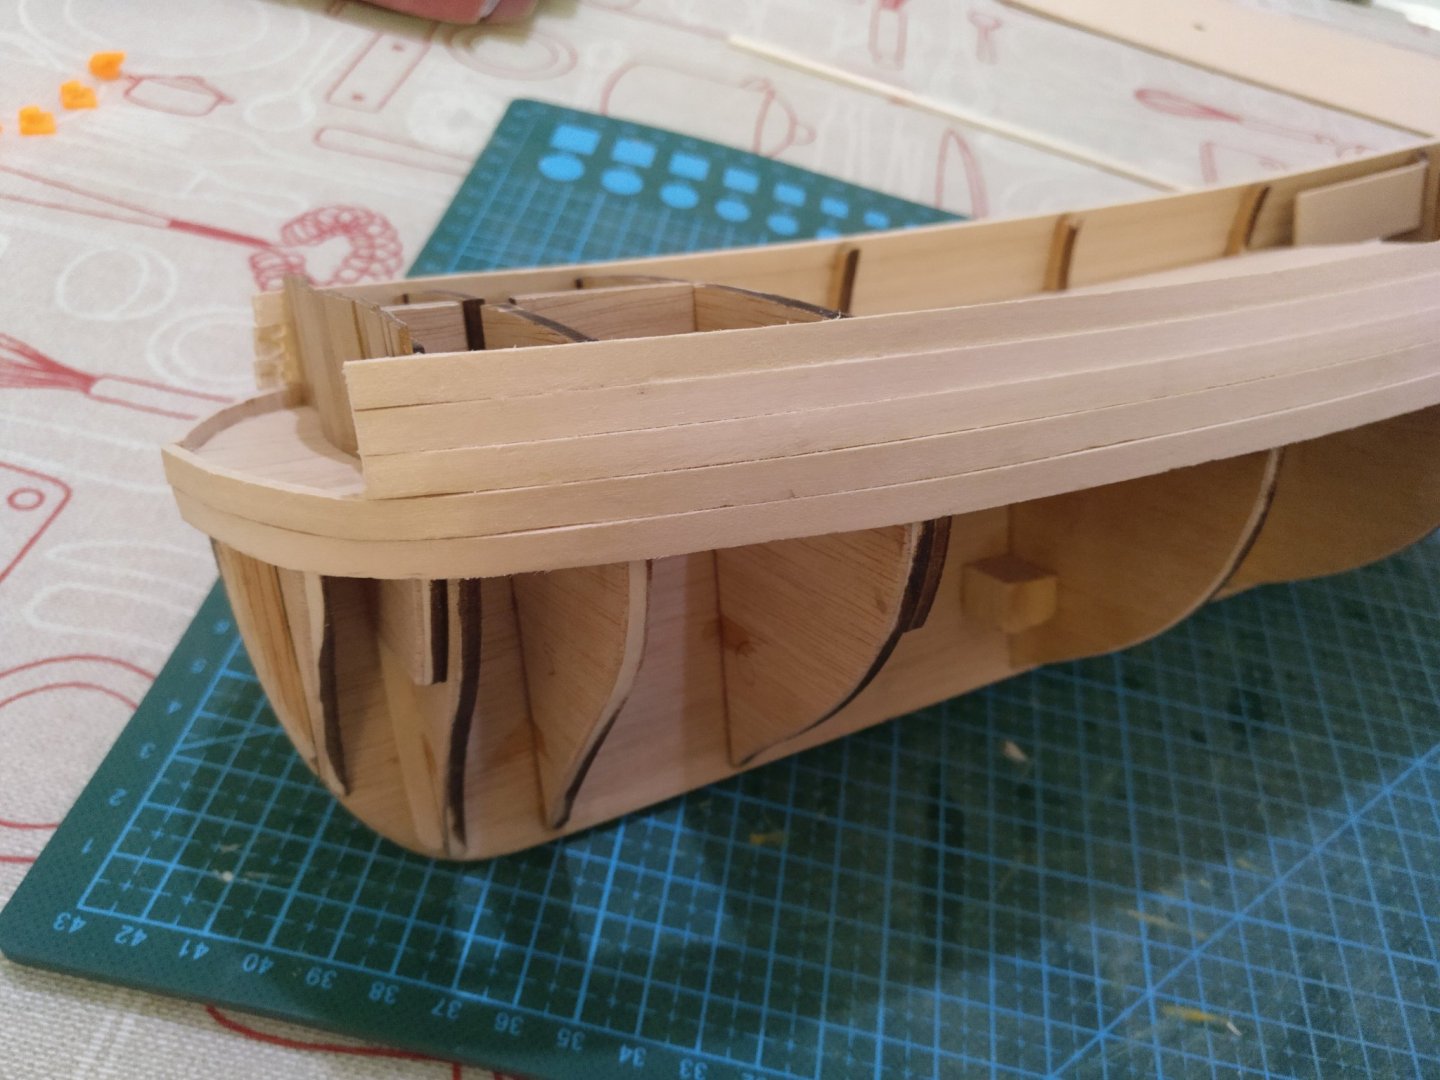
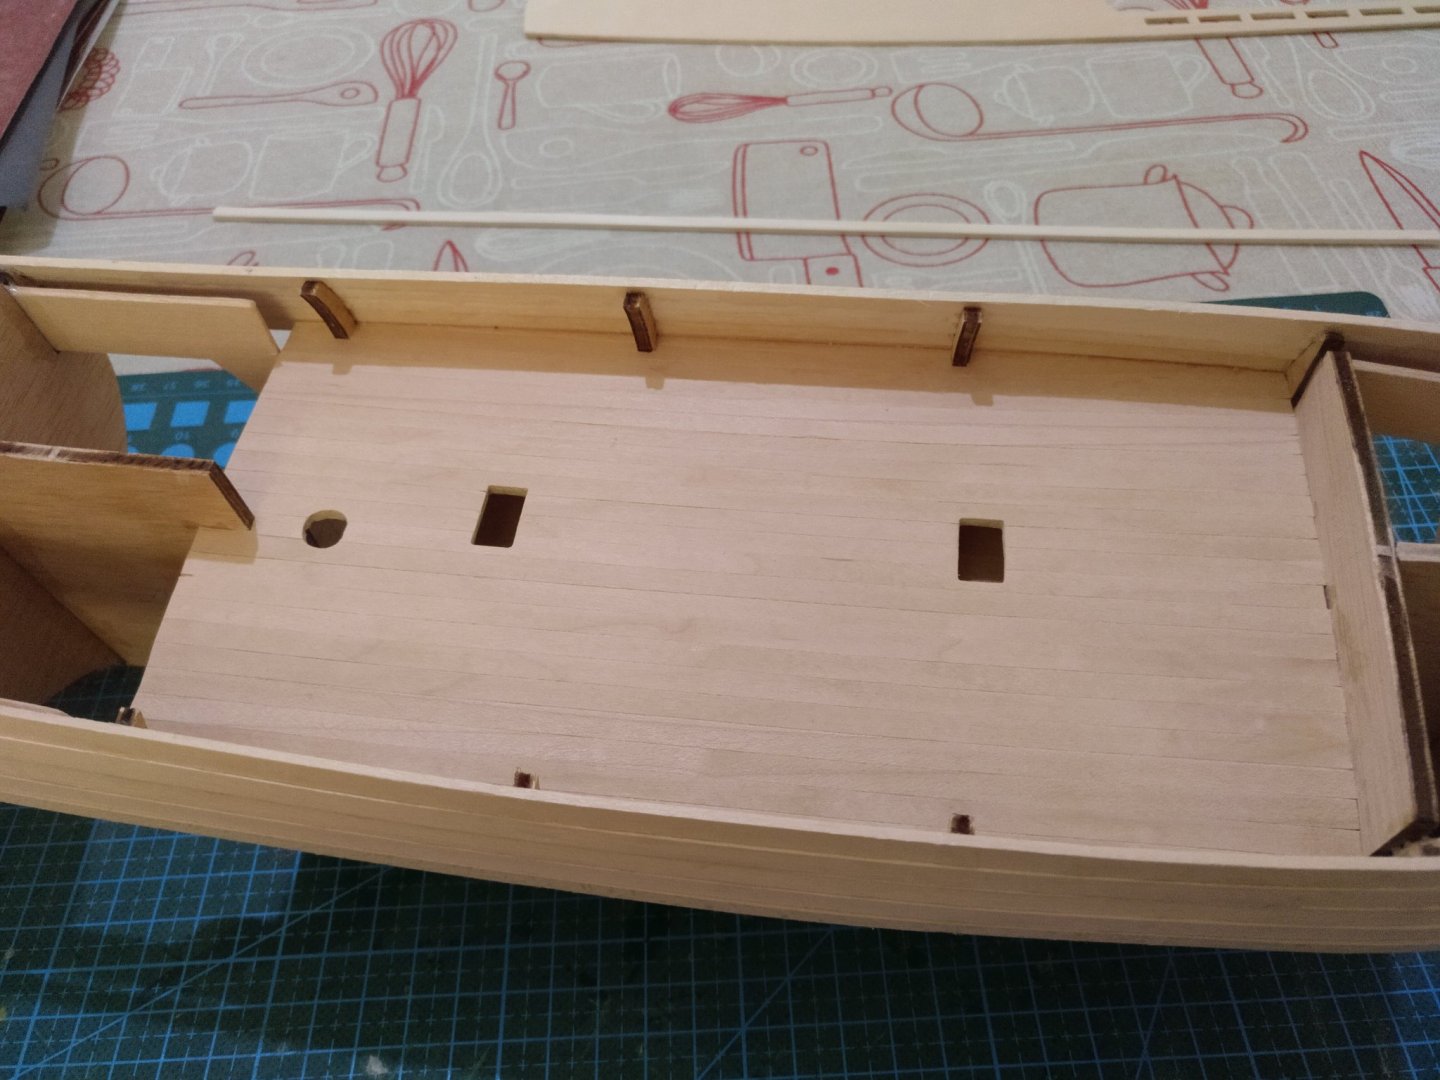
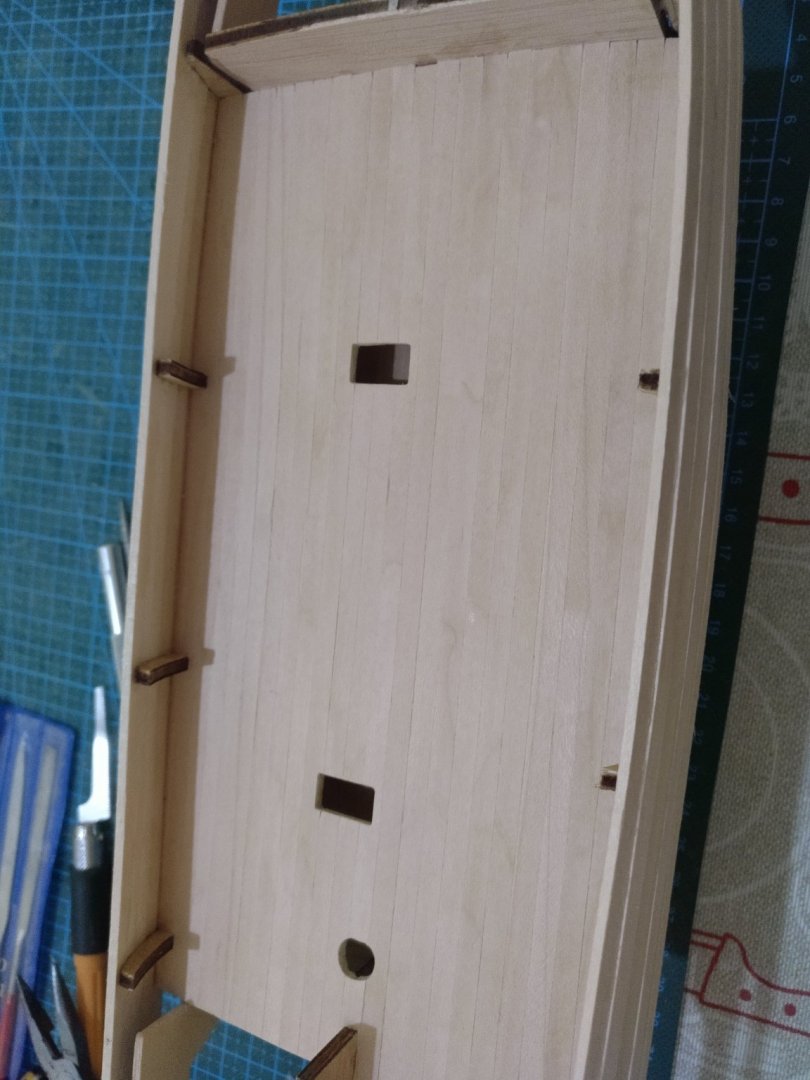
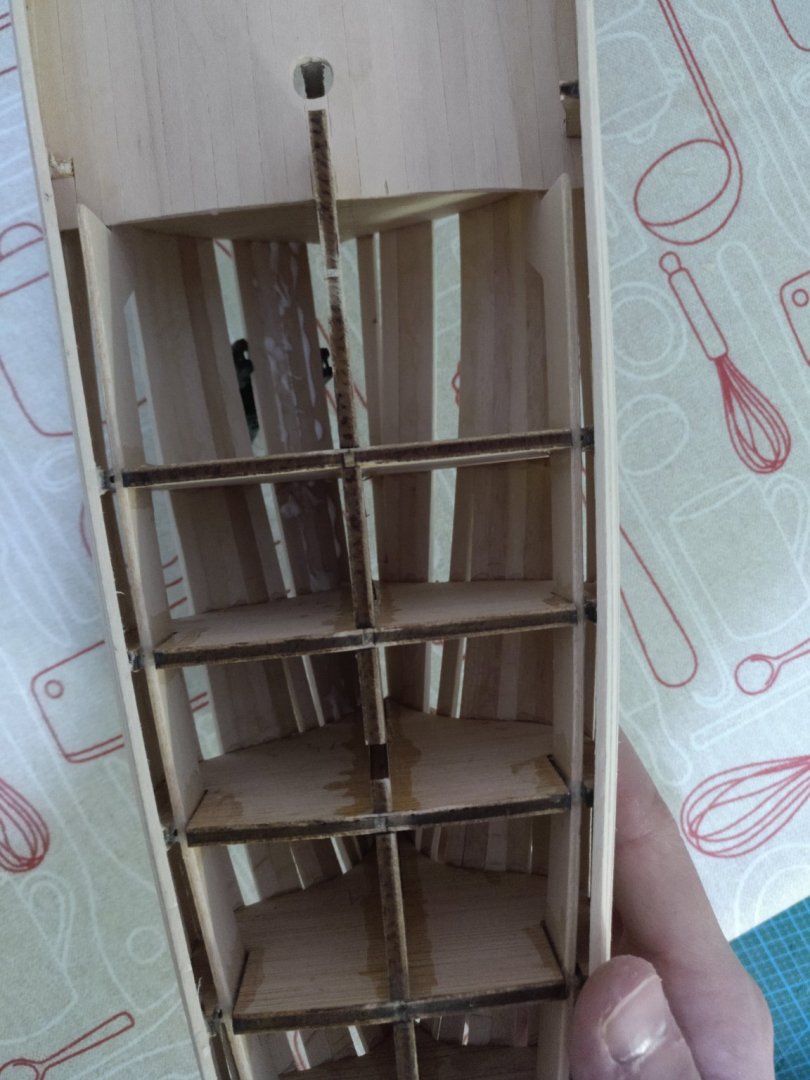
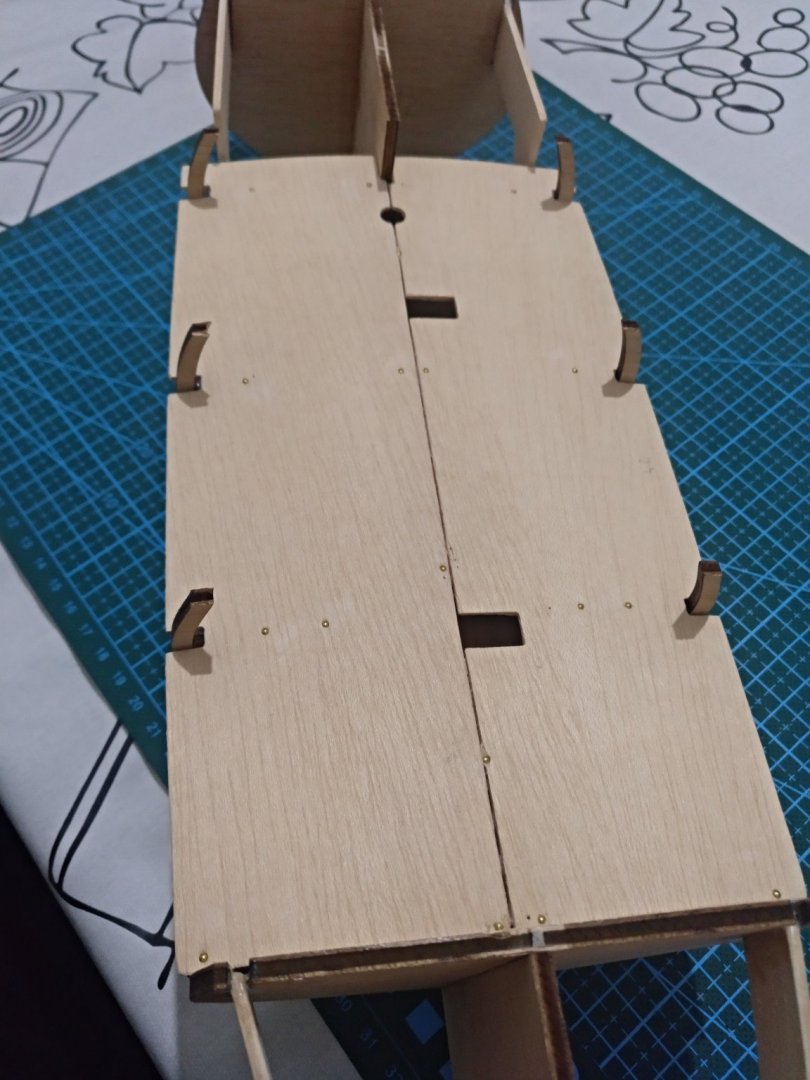
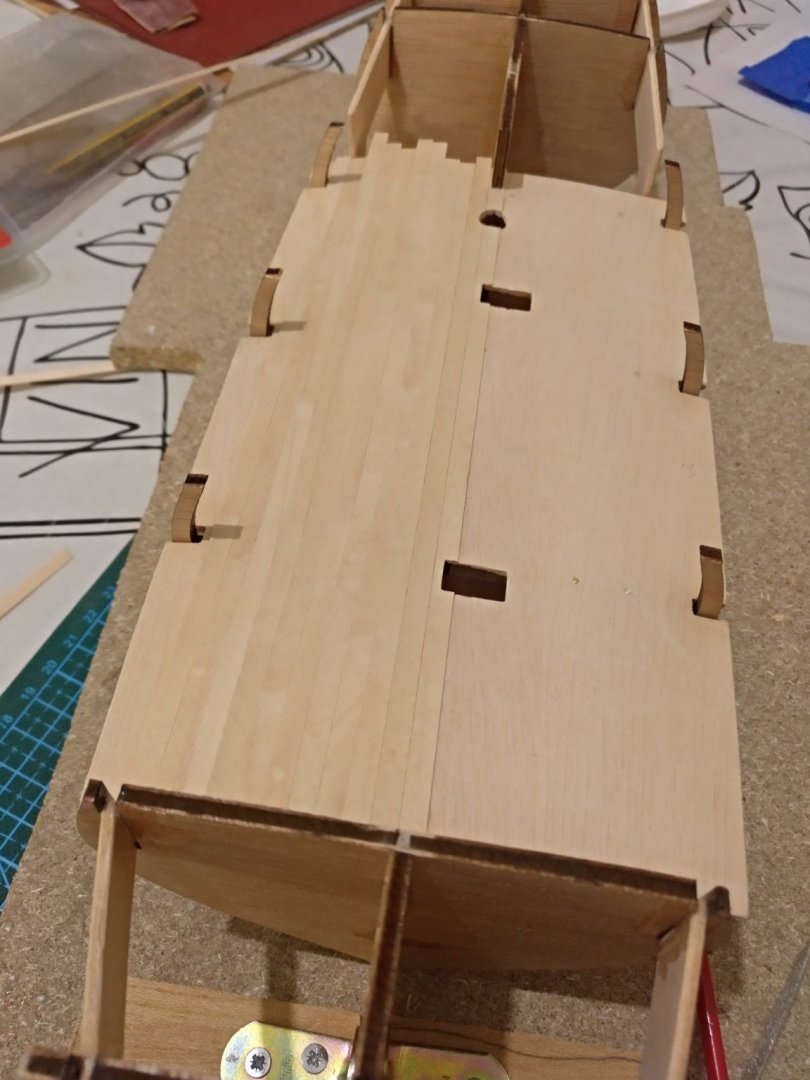
Hello everybody, I have finally managed to get some free time to keep the work on my Flore. I am going to upload some photos for you to see the progress. Enjoy them. I made some fake doors to put at the back end of the lower deck because when putting the top deck you could see a hole there and I decided to put this kind of decoration and I think it looks really nice. After this, I proceeded to glue the top deck and started planking it As you can see as well as planking the deck I also glued the stem and side stringers.
-
Mantua "blue painted" photo-etched brass
Alexisgm97 replied to Alexisgm97's topic in Metal Work, Soldering and Metal Fittings
Thanks! As I said I will try with acetone first but if it doesn't work or doesn't work properly the grit 1500 will be my second option. It can be used with water too right? -
Mantua "blue painted" photo-etched brass
Alexisgm97 replied to Alexisgm97's topic in Metal Work, Soldering and Metal Fittings
I see. Thanks! I think I will try with acetone and see how it goes. The old brush with the acetone of course is also a good idea to try to remove it with something less agresive than sand paper. Thanks -
Mantua "blue painted" photo-etched brass
Alexisgm97 replied to Alexisgm97's topic in Metal Work, Soldering and Metal Fittings
Hello, Thanks, I know it is made to resist different solutions so I think I will try acetone first because that's what I have got at home if it doesn't work I will have to go with sanding -
Mantua "blue painted" photo-etched brass
Alexisgm97 replied to Alexisgm97's topic in Metal Work, Soldering and Metal Fittings
I have alredy thought about that but I don't know why but brass appeals more to me. It is just my taste but that would be a good idea too. Thanks -
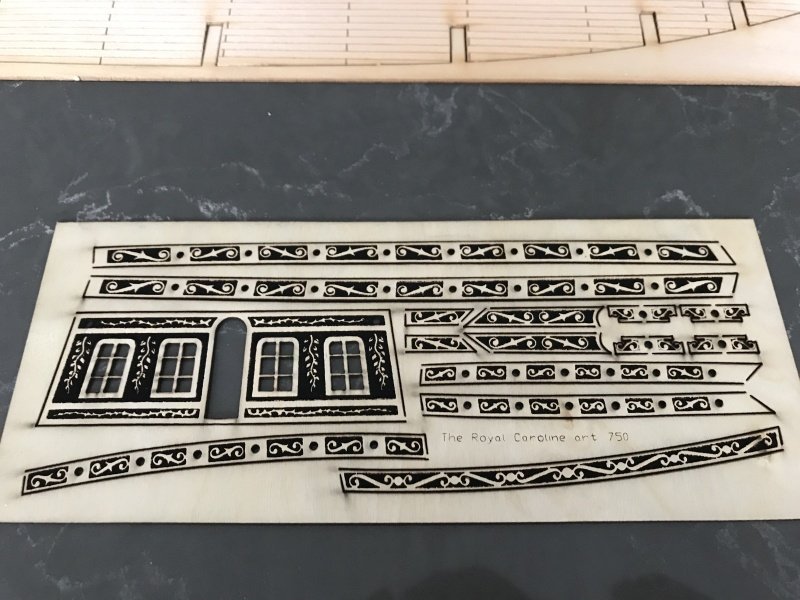
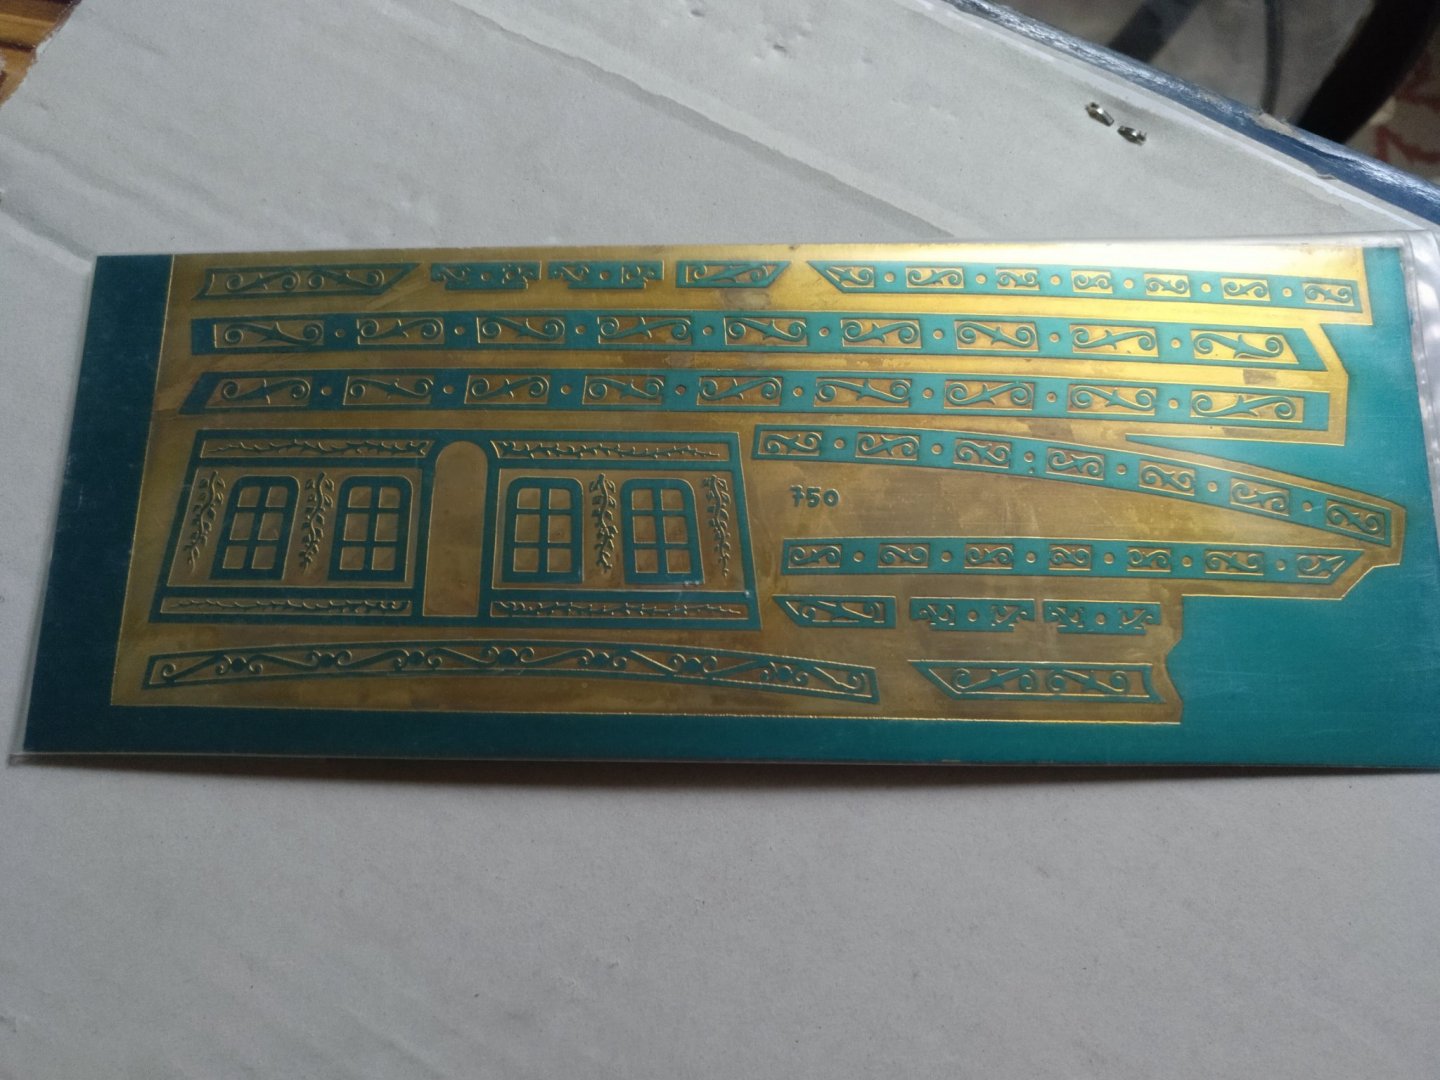
Hello, I have recently bought the Royal Caroline kit by Mantua and as it is a quite old model (I got it at a very good price from second hand although everything is new) some parts that are now made of thin wood are a photo-etched brass sheet. See the images below to see what I mean, please. Here you can see the wood parts that come with the new version of the model (The photo is from Katsumoto's build log found here). However, in the old kit I bought, this same part is made of a brass sheet and it has a blue colour on the embossing, which I imagine is to protect it against scratches or oxidation as we all know brass tends to get a brown colour very fast. So my doubt is, how do I remove this blue colour without damaging the brass too much? Mantua's instructions say that it can be removed with sand-paper but I'm afraid it can be too abrasive and mess it up. I hope you can give me some advice on how to remove this blue paint without damaging the brass and give it a really good finish. Thanks and stay safe. Alexis G.
-
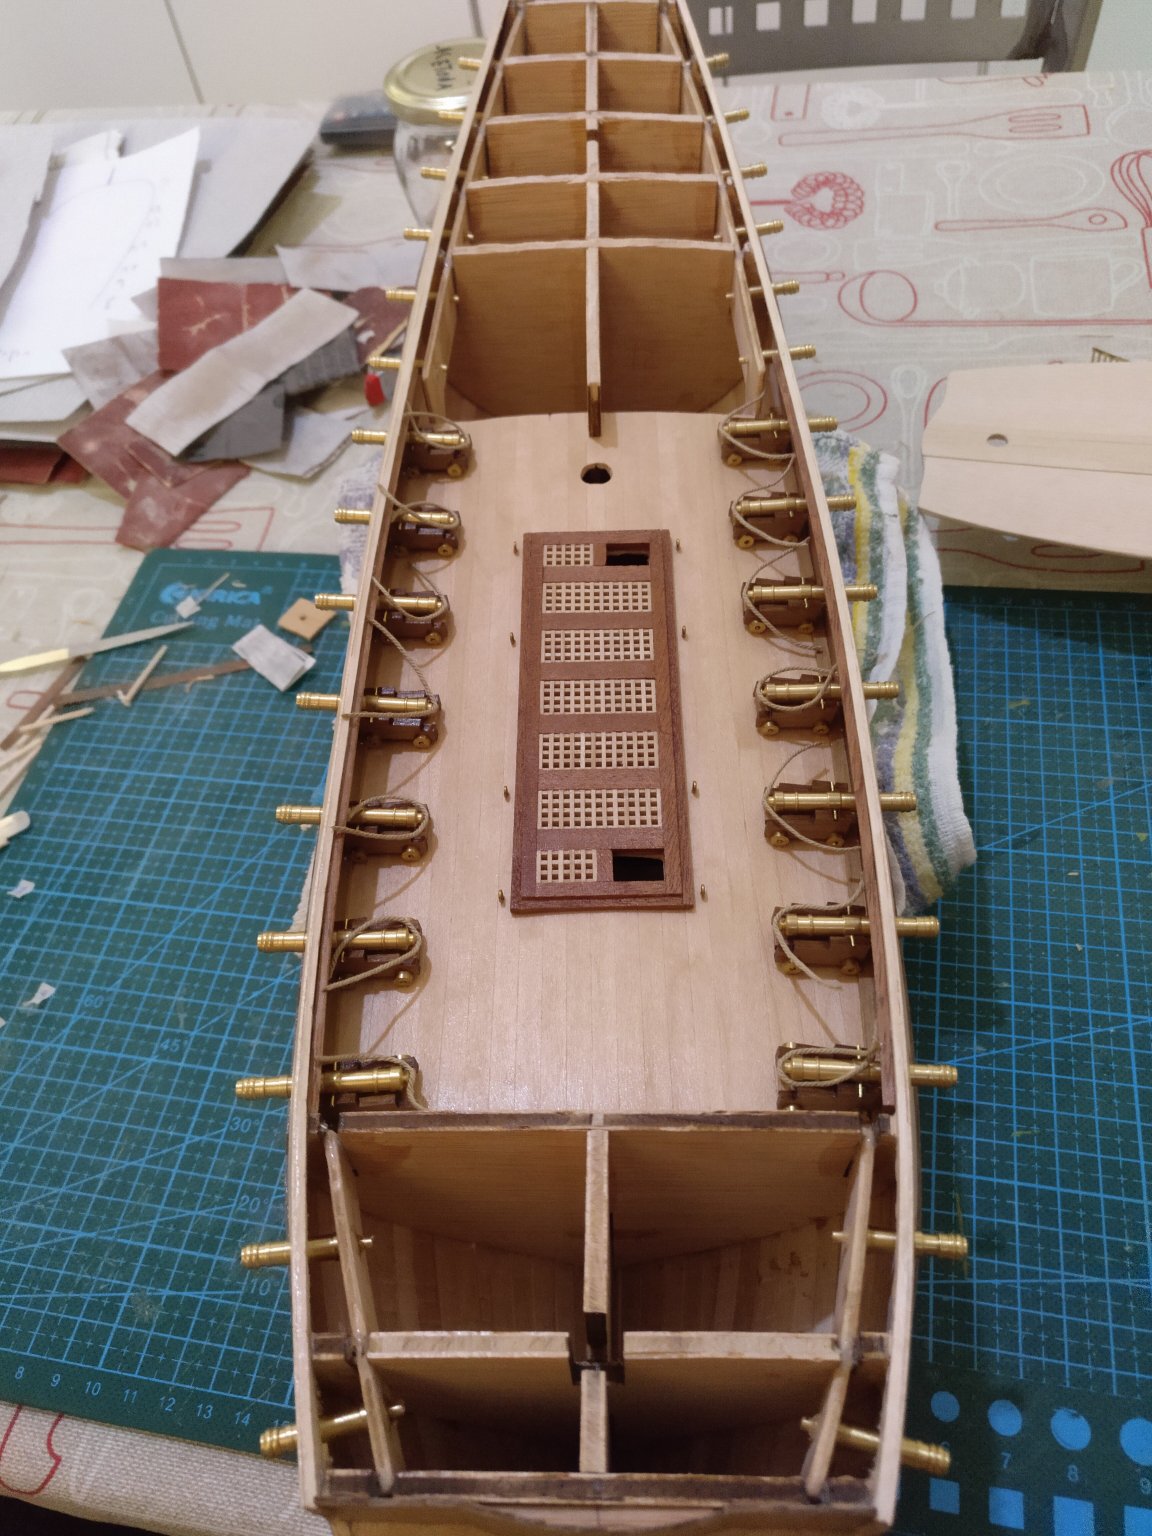
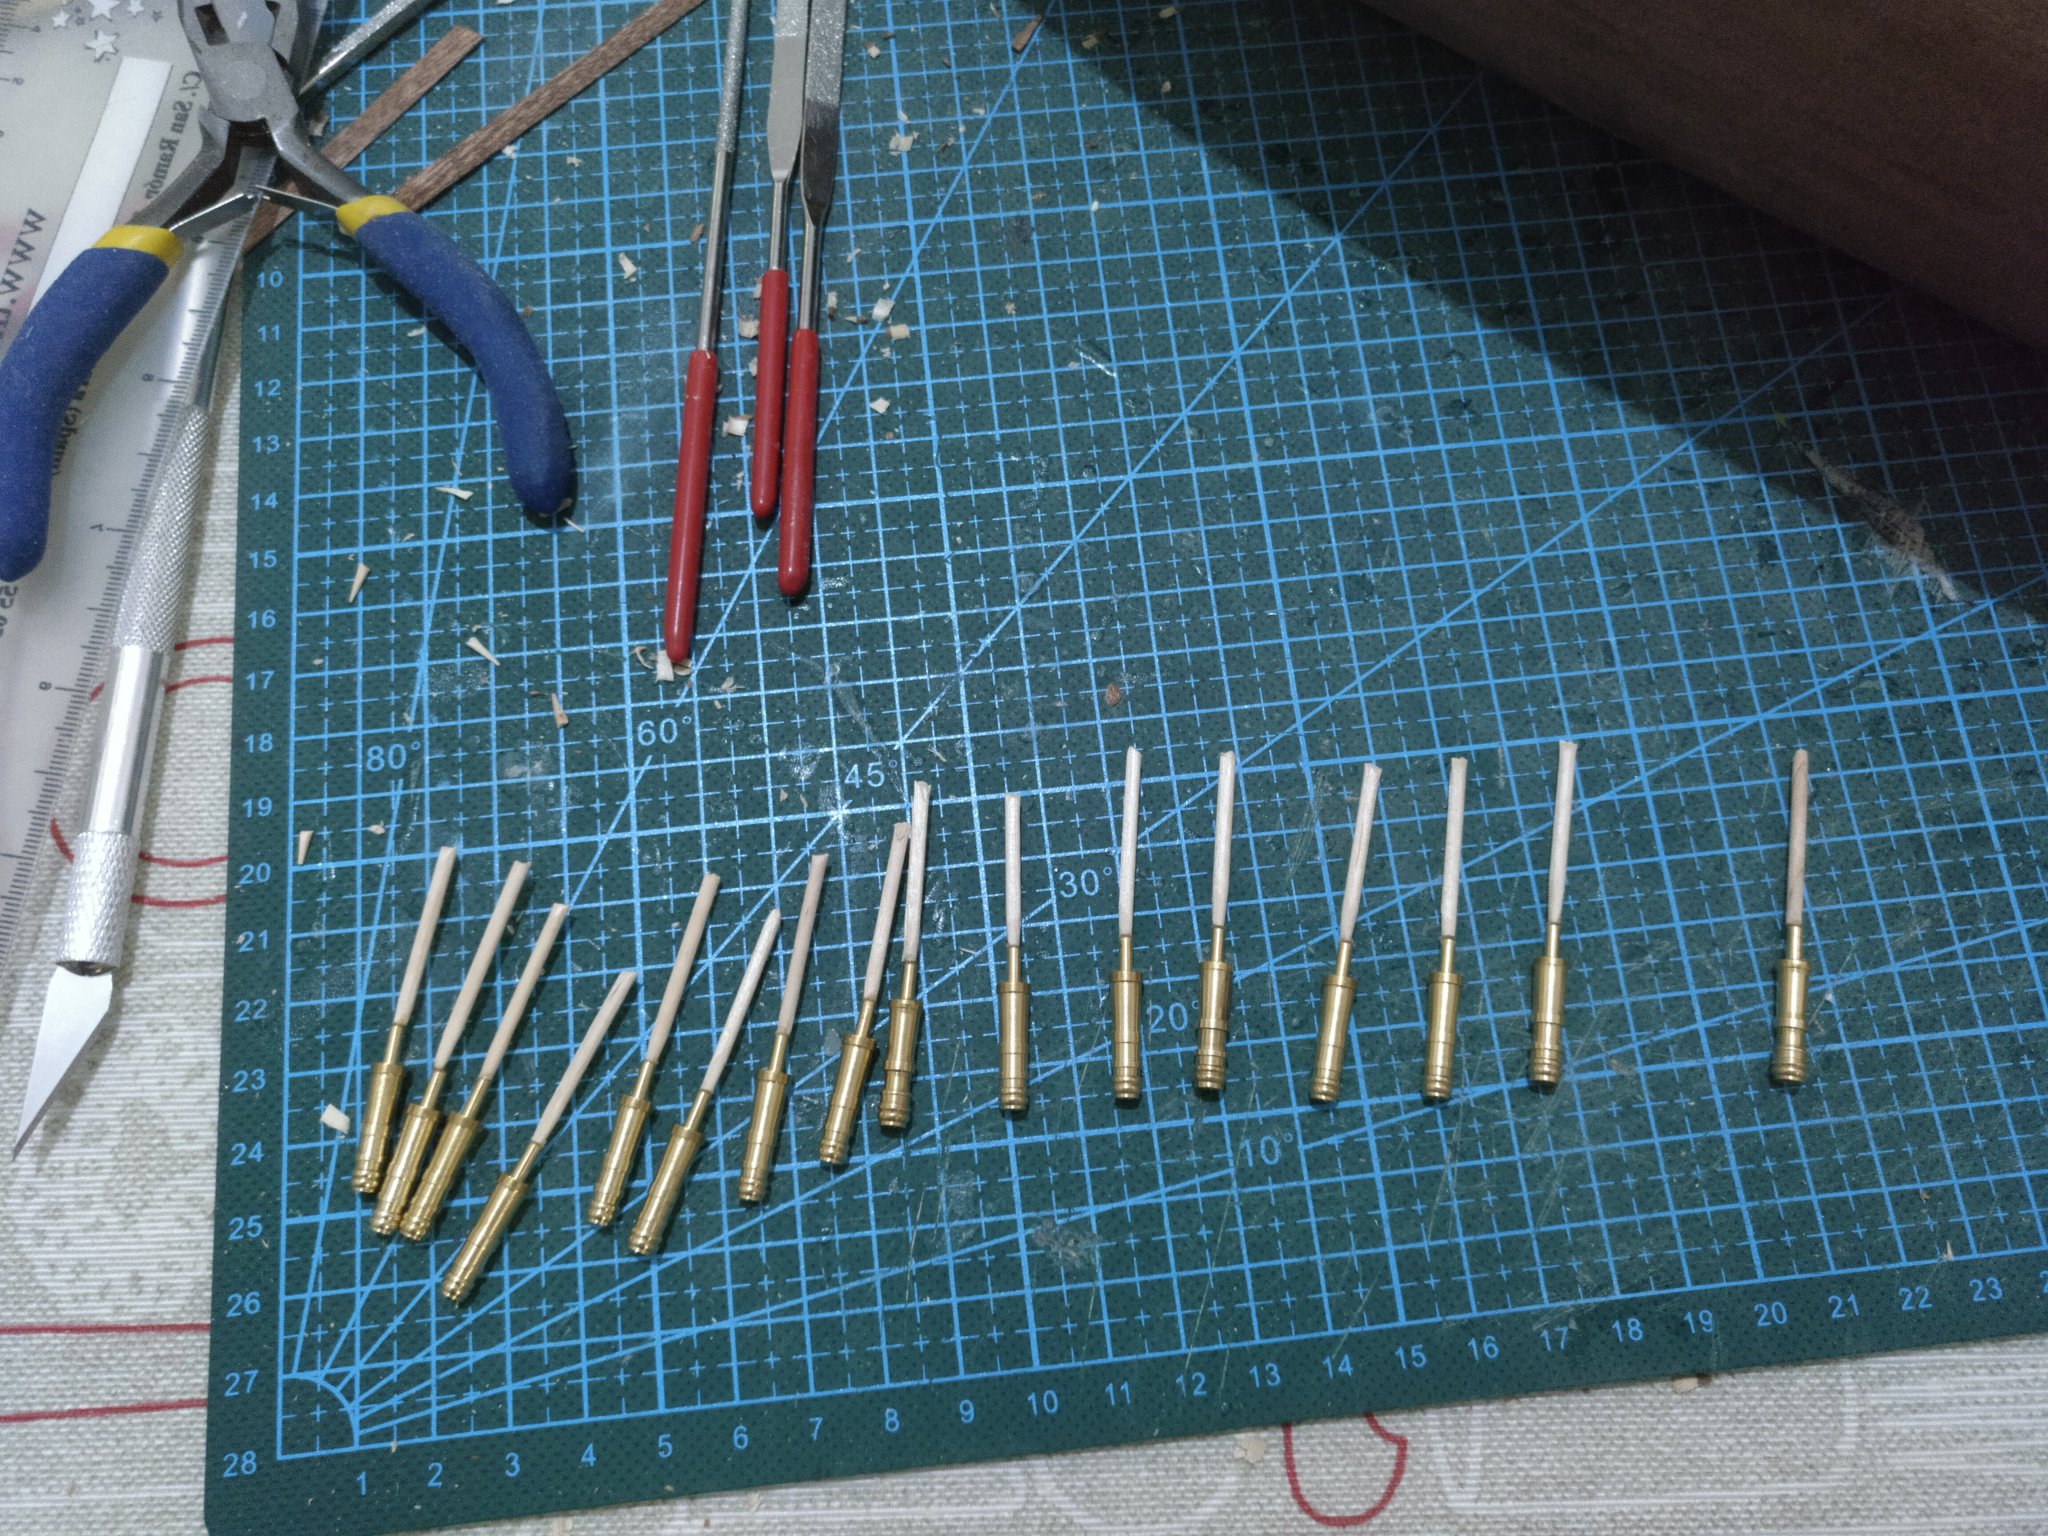
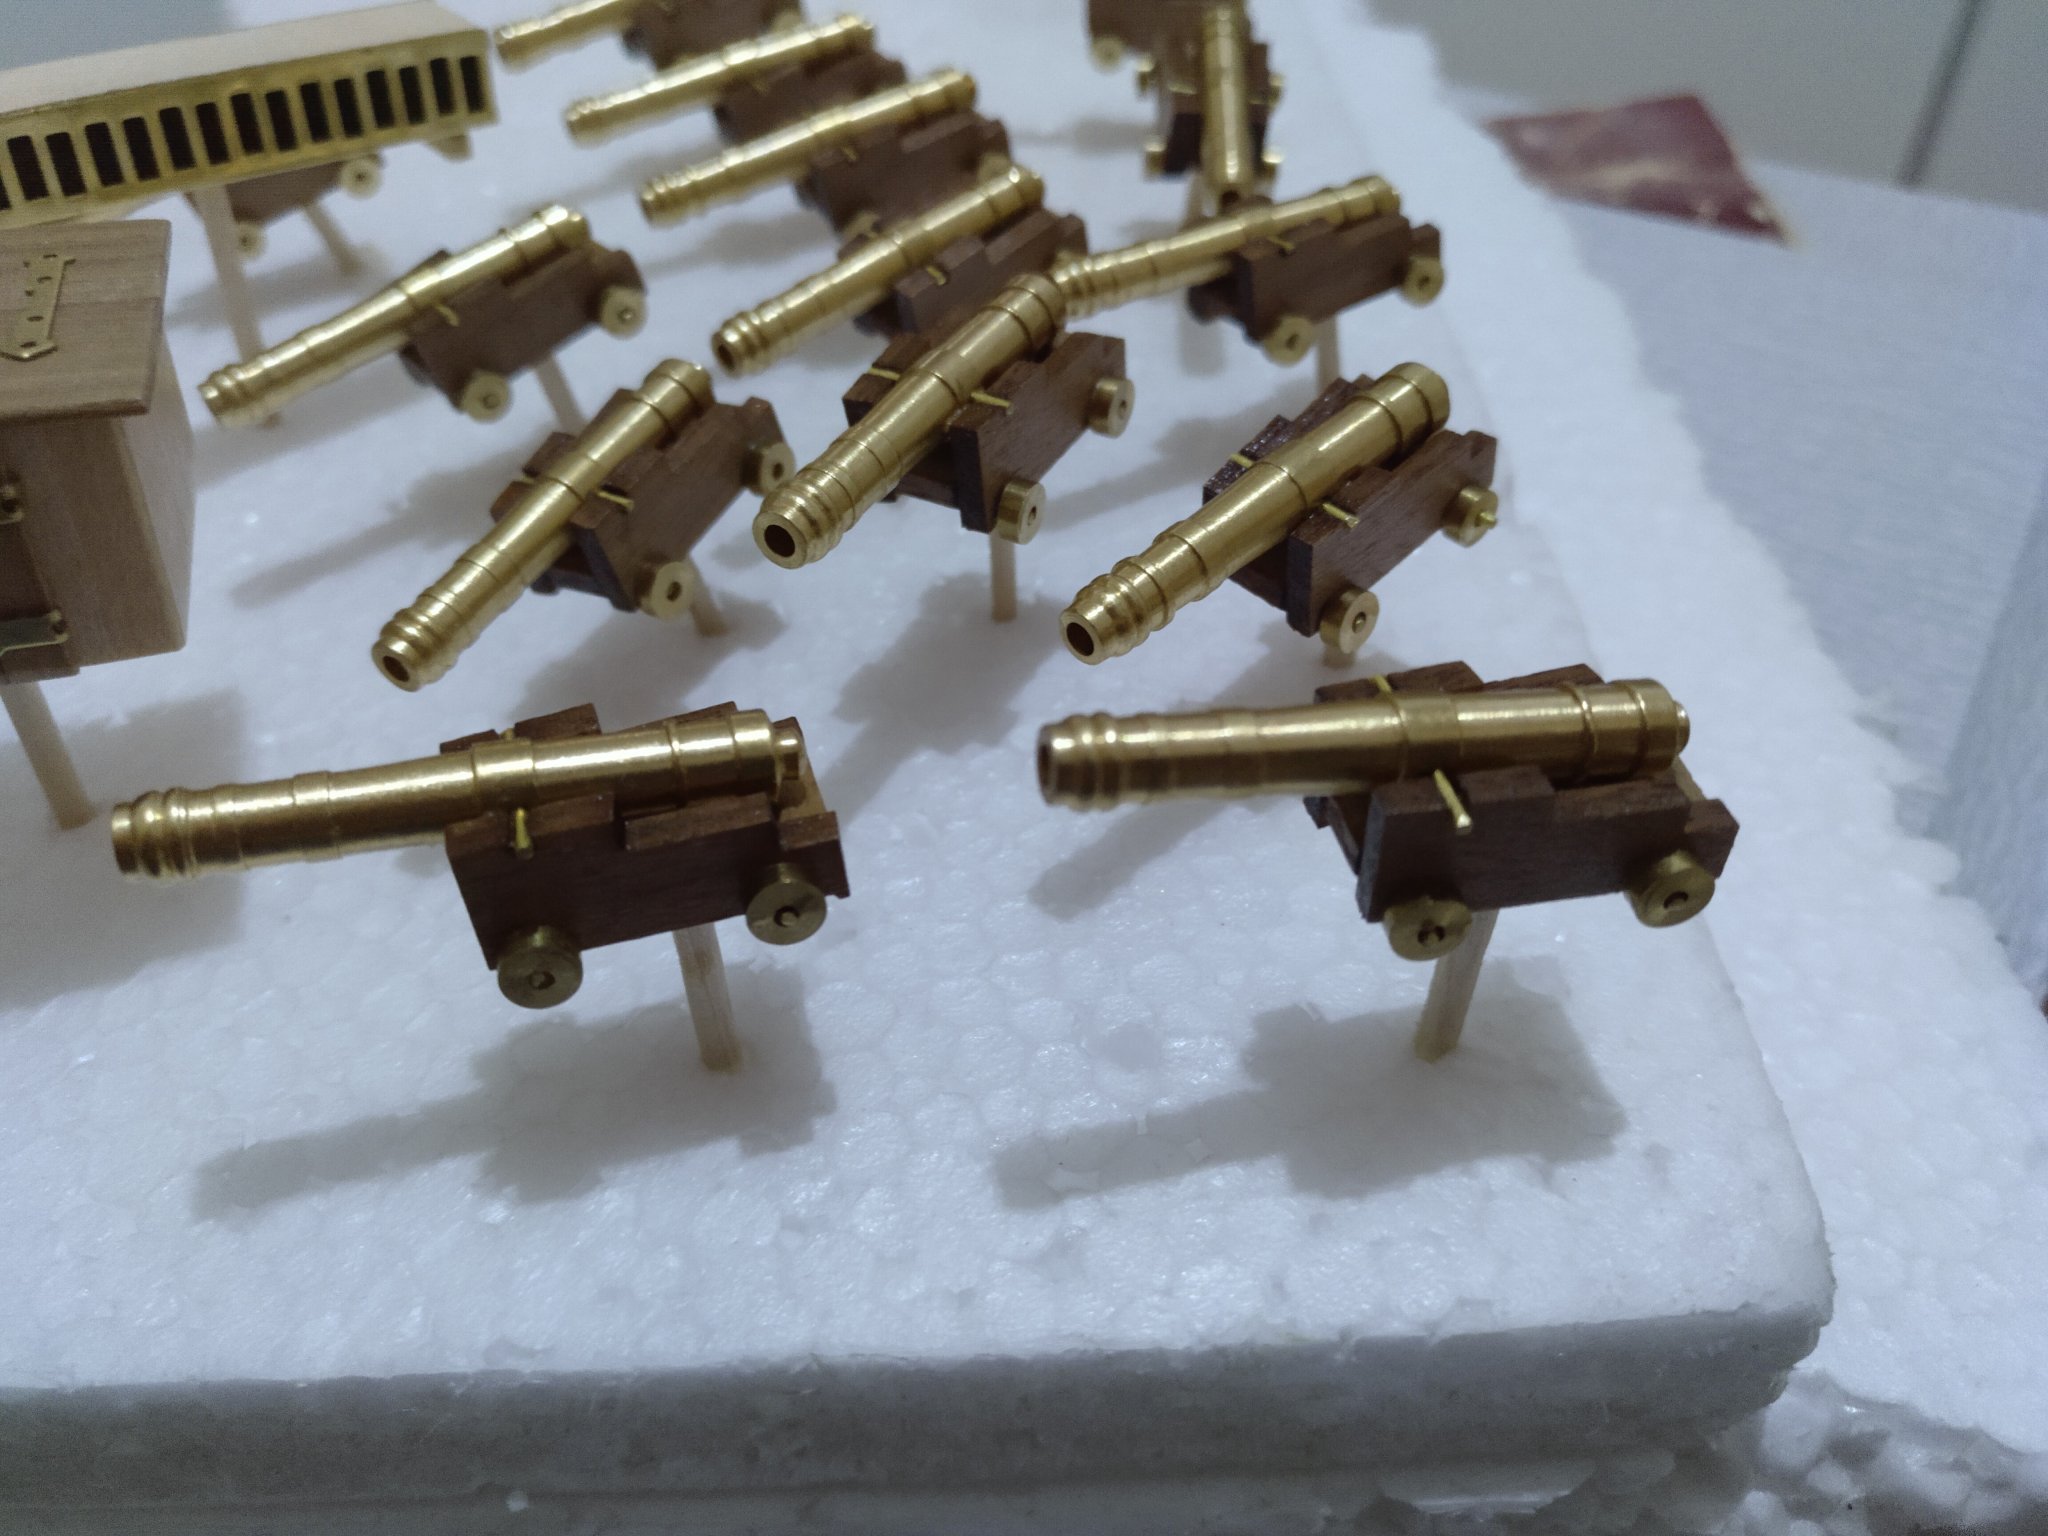
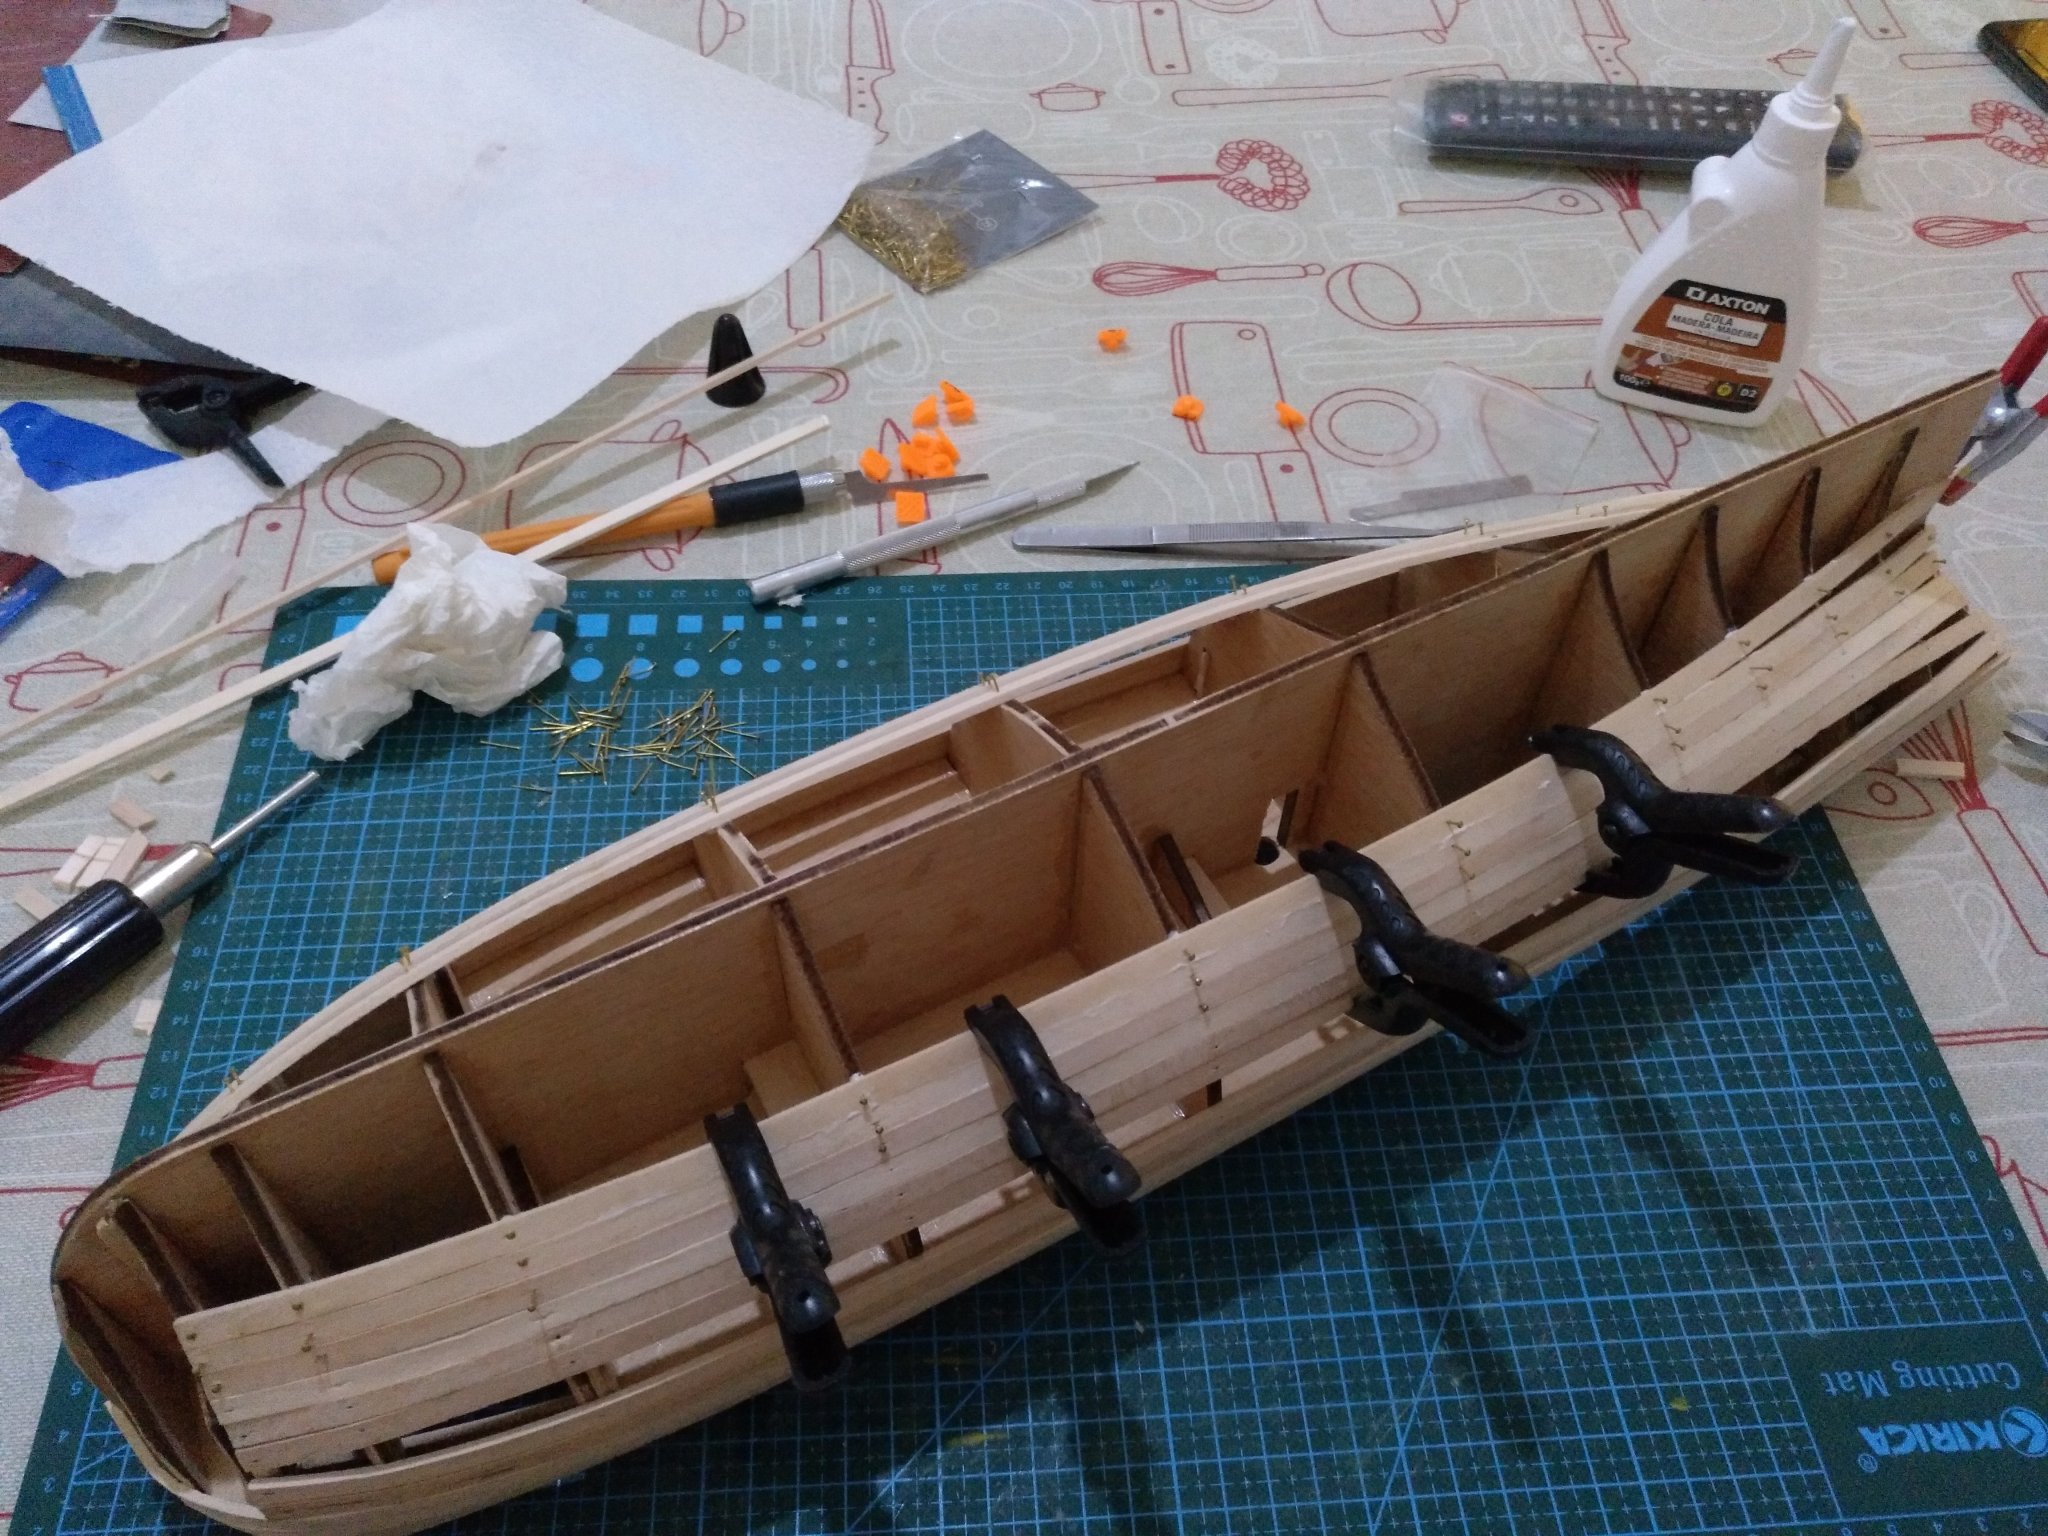
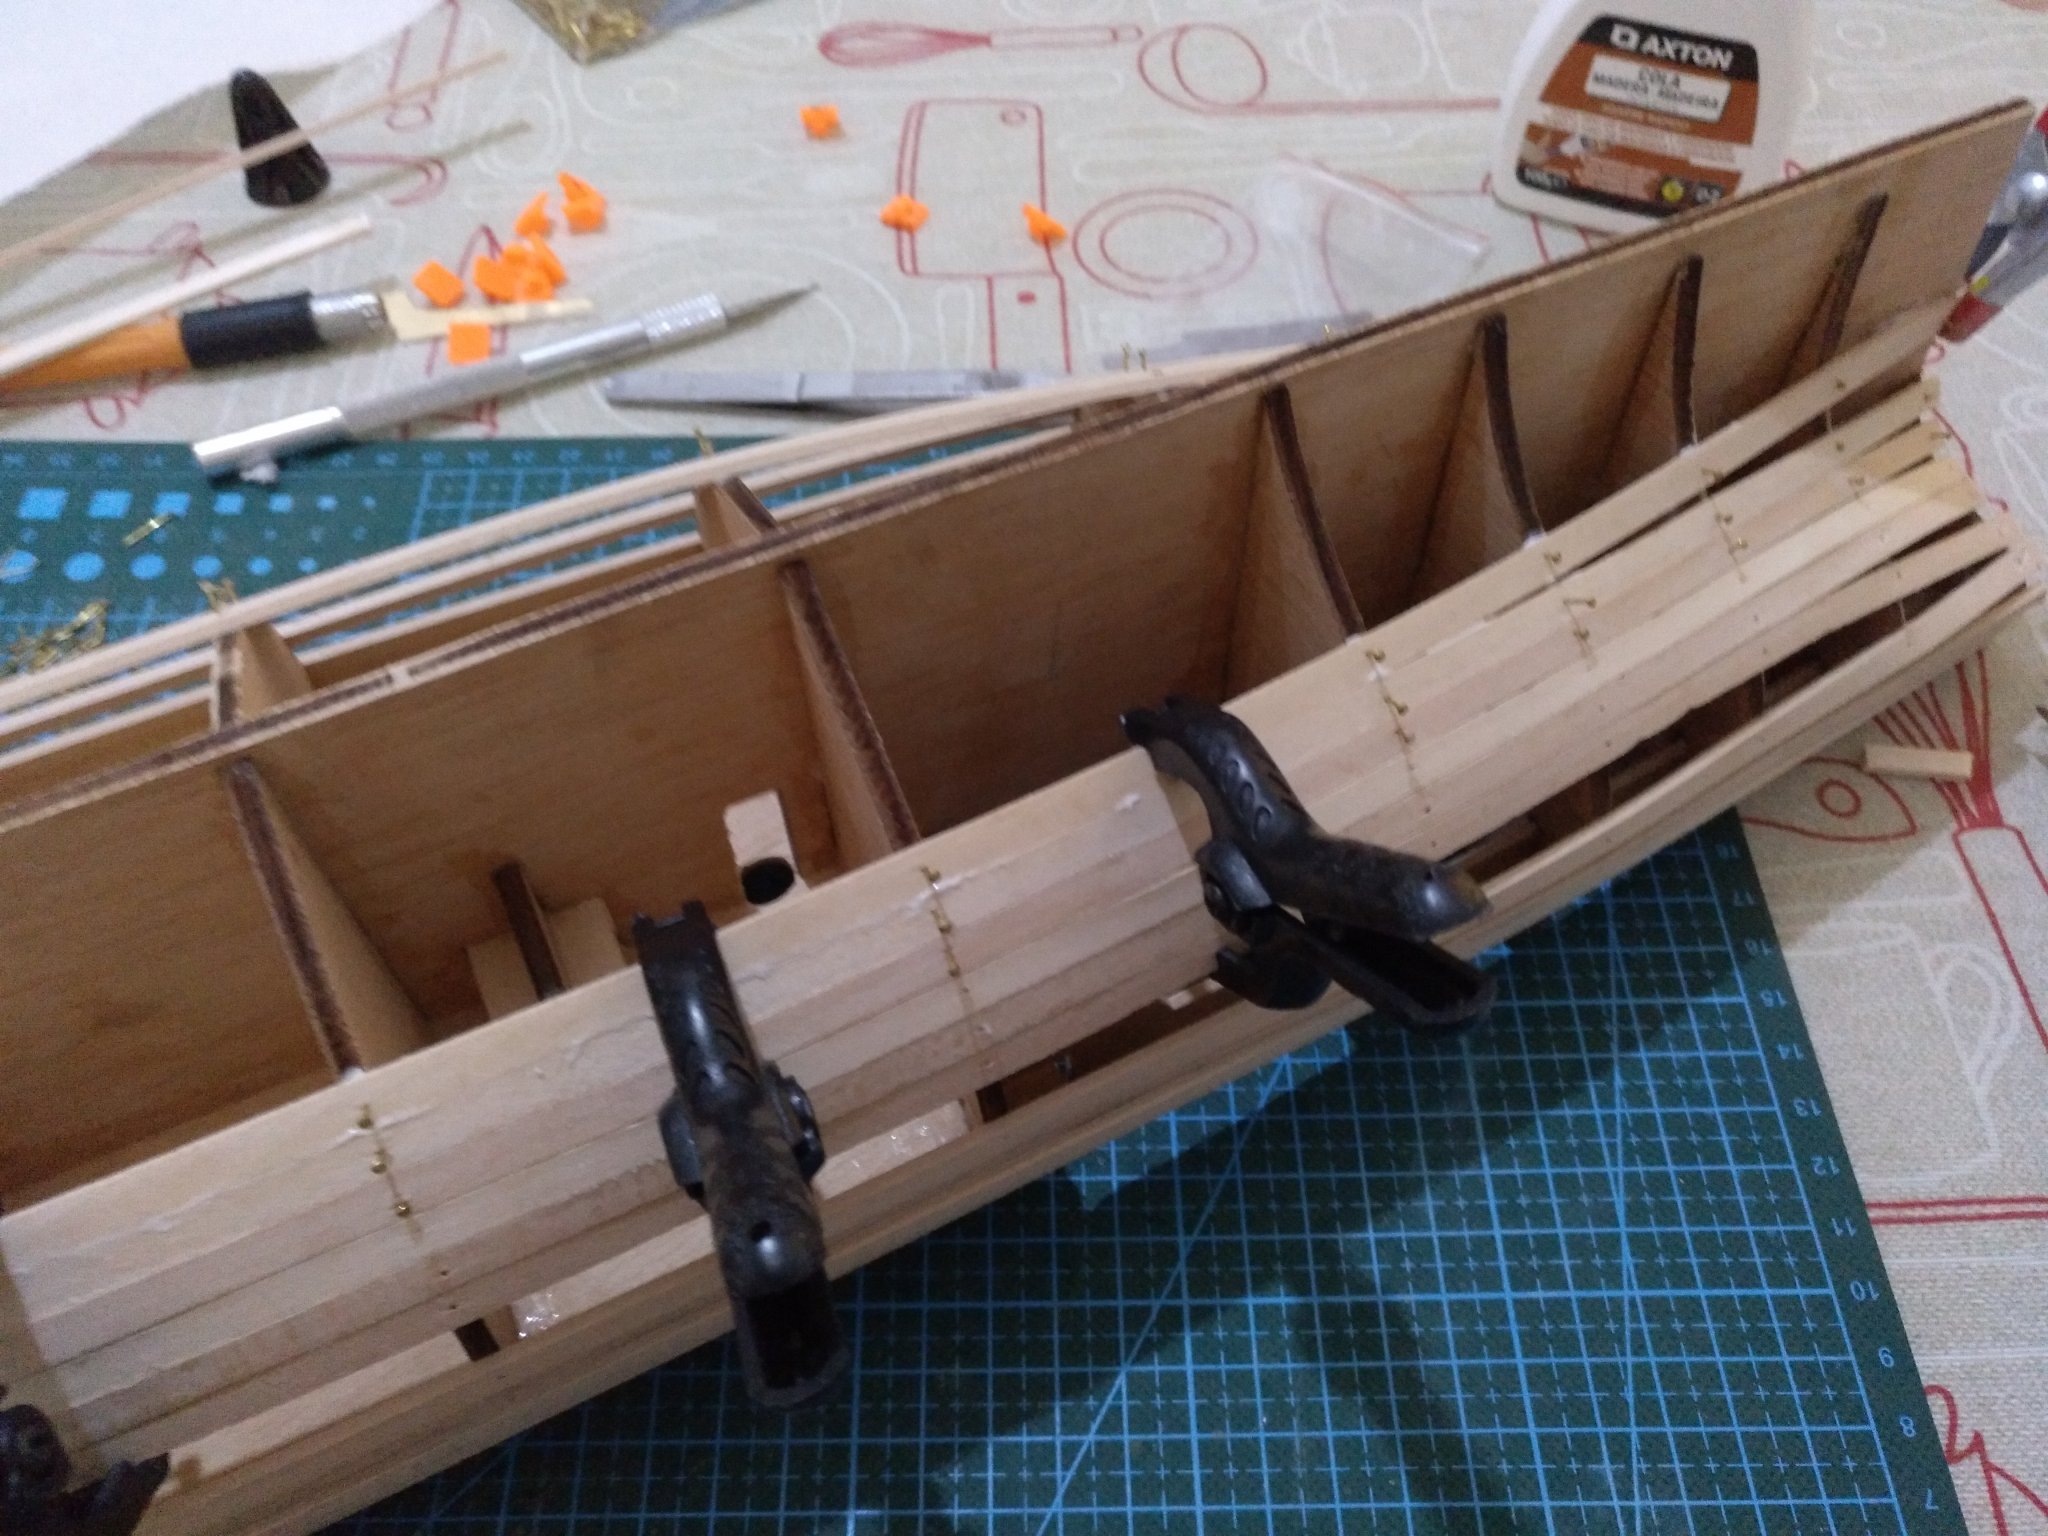
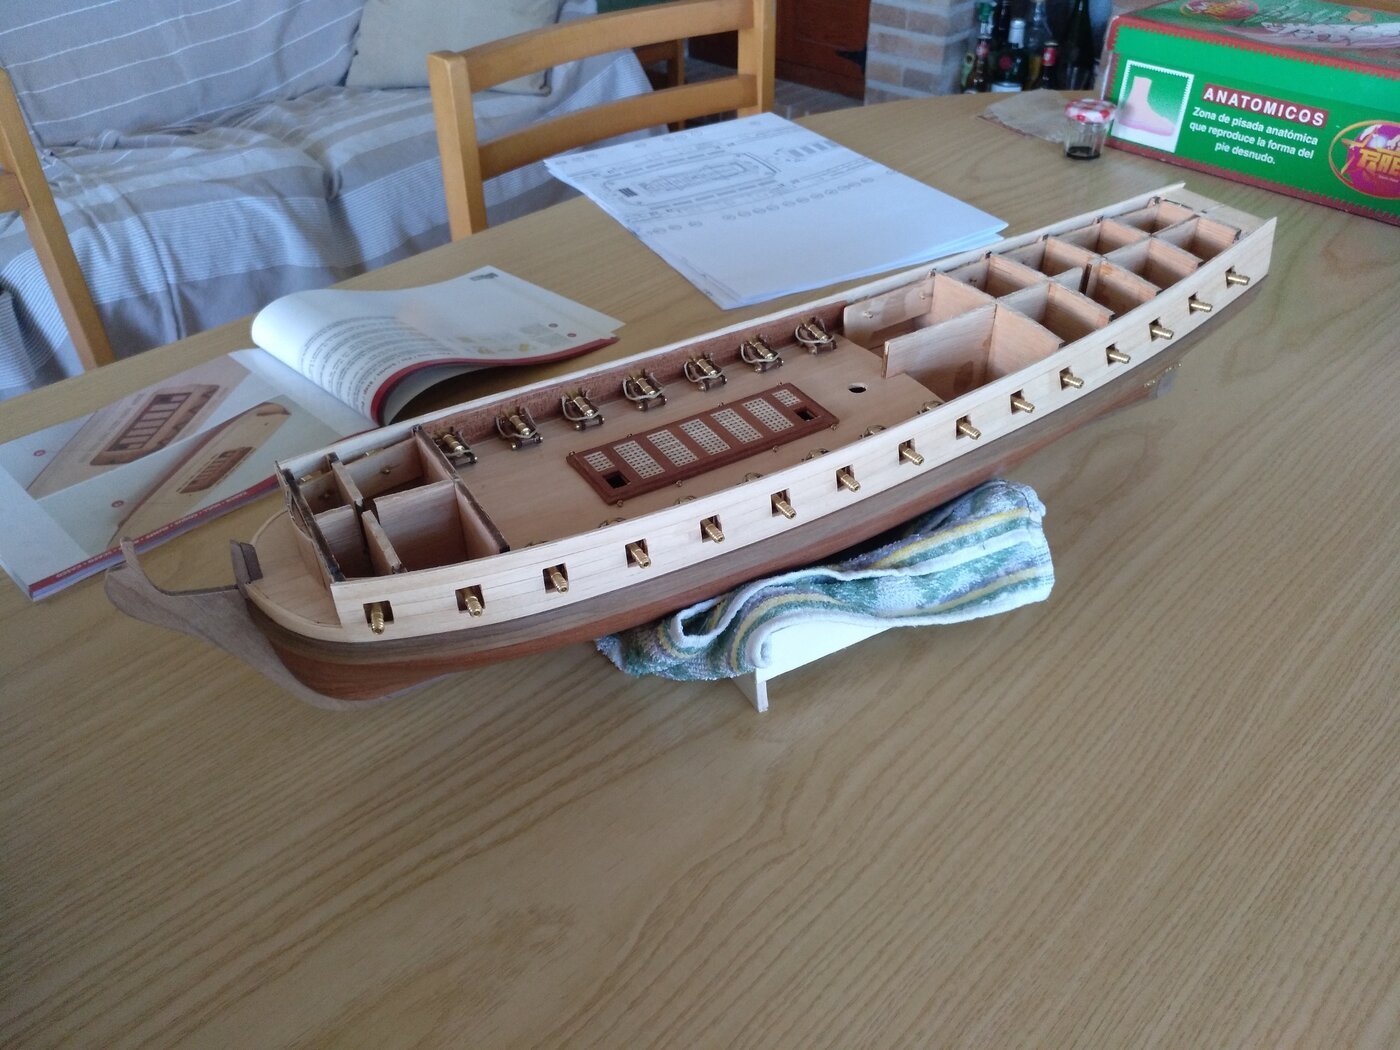
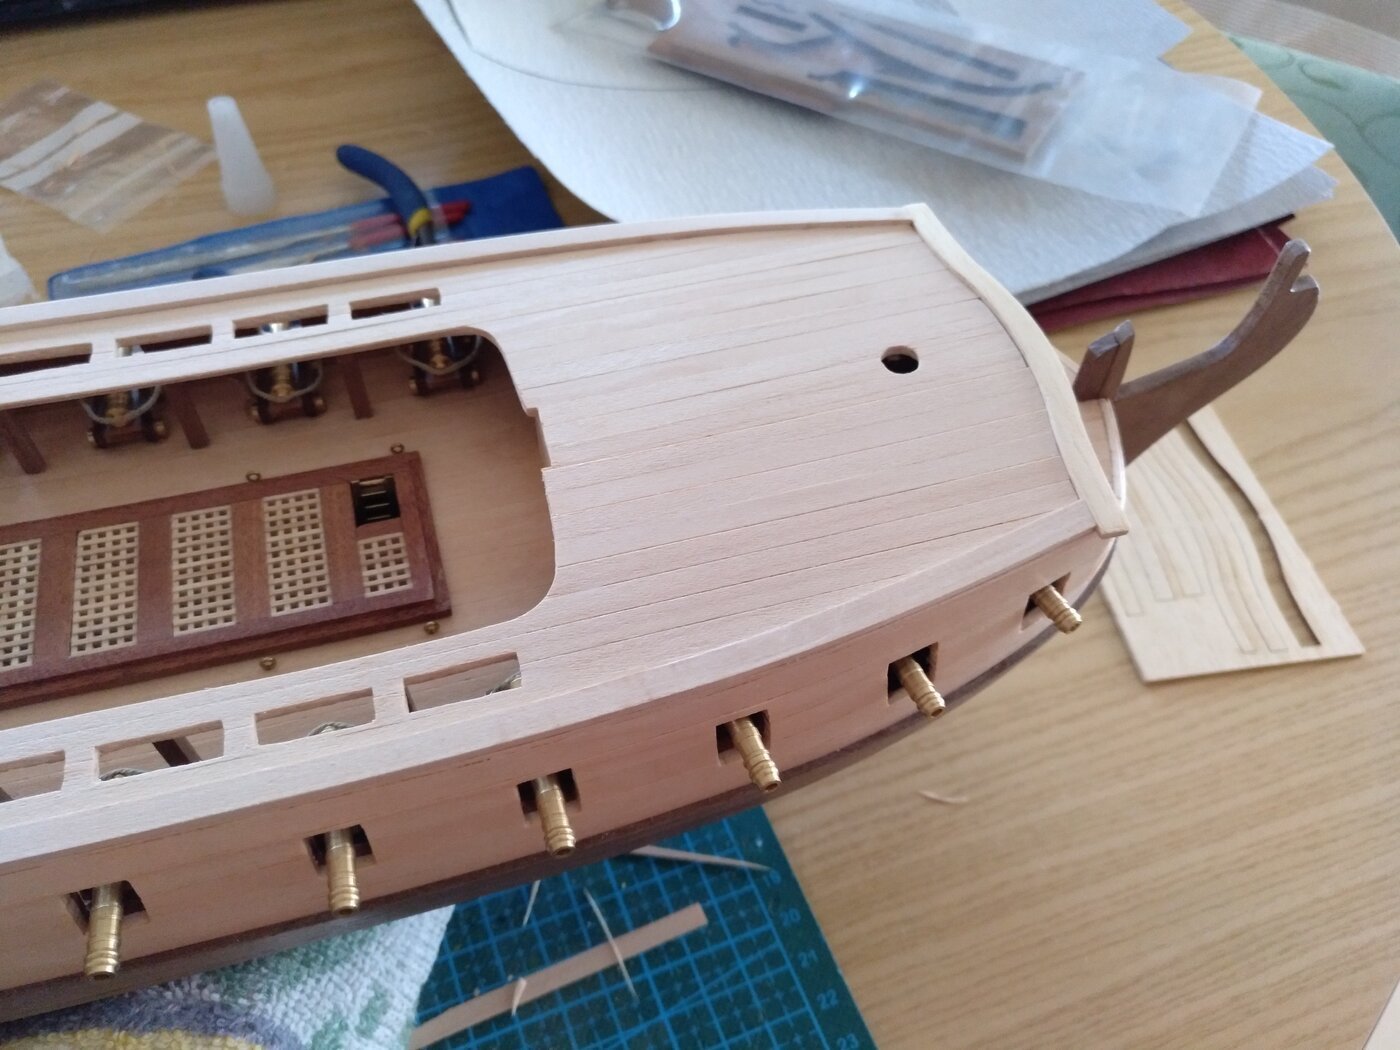
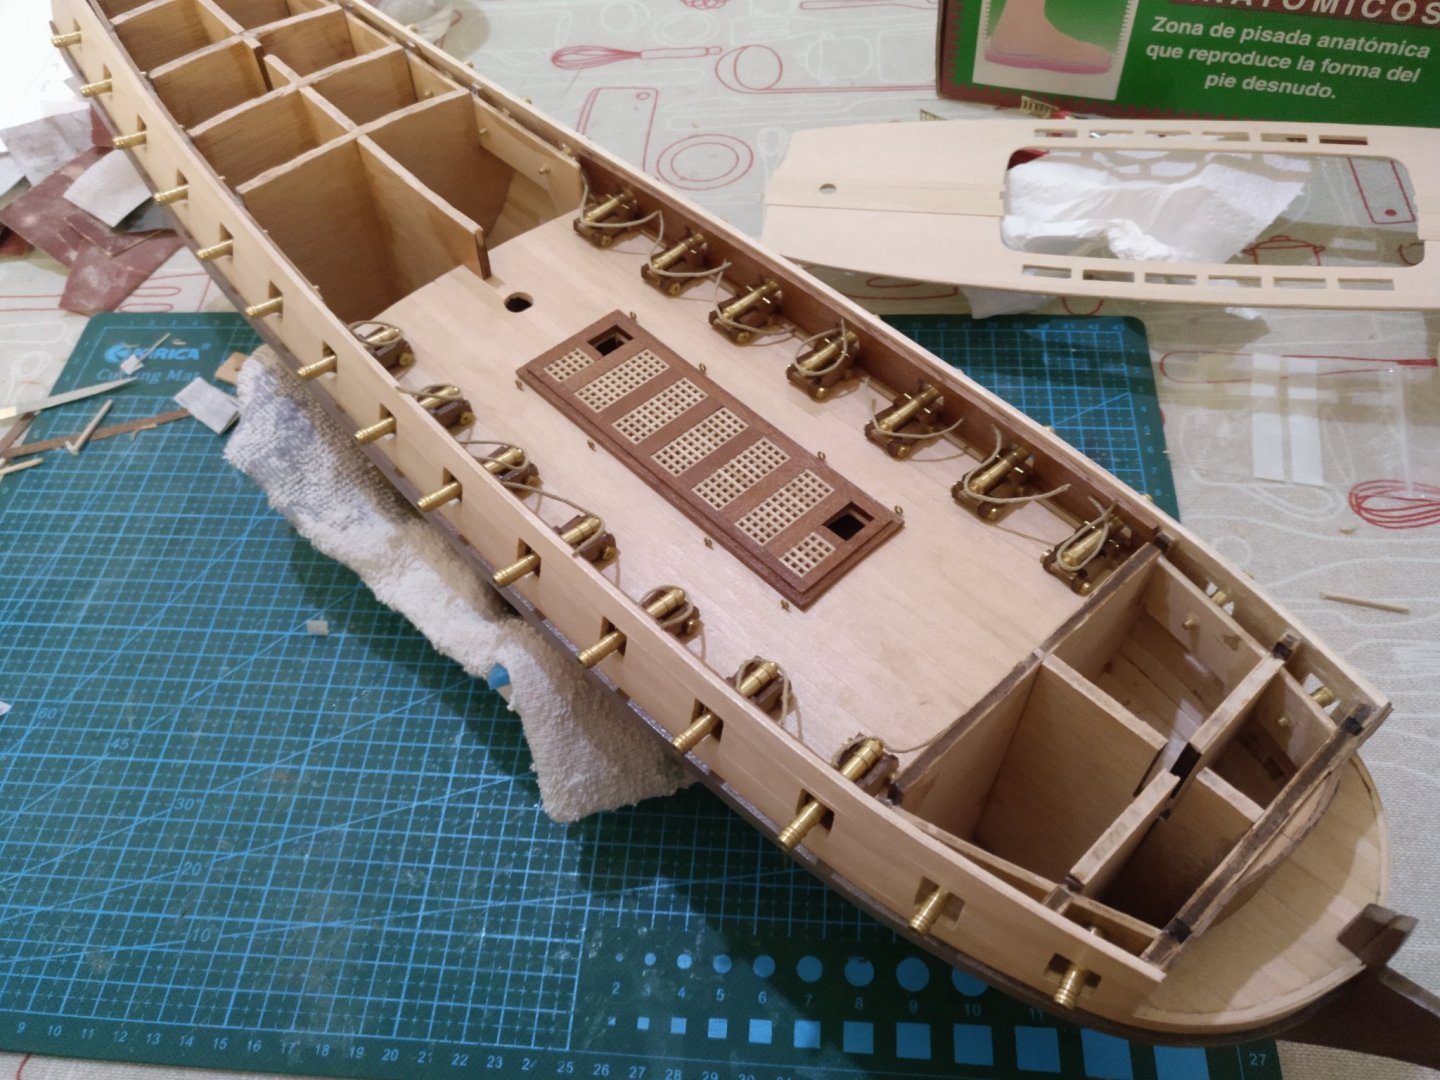
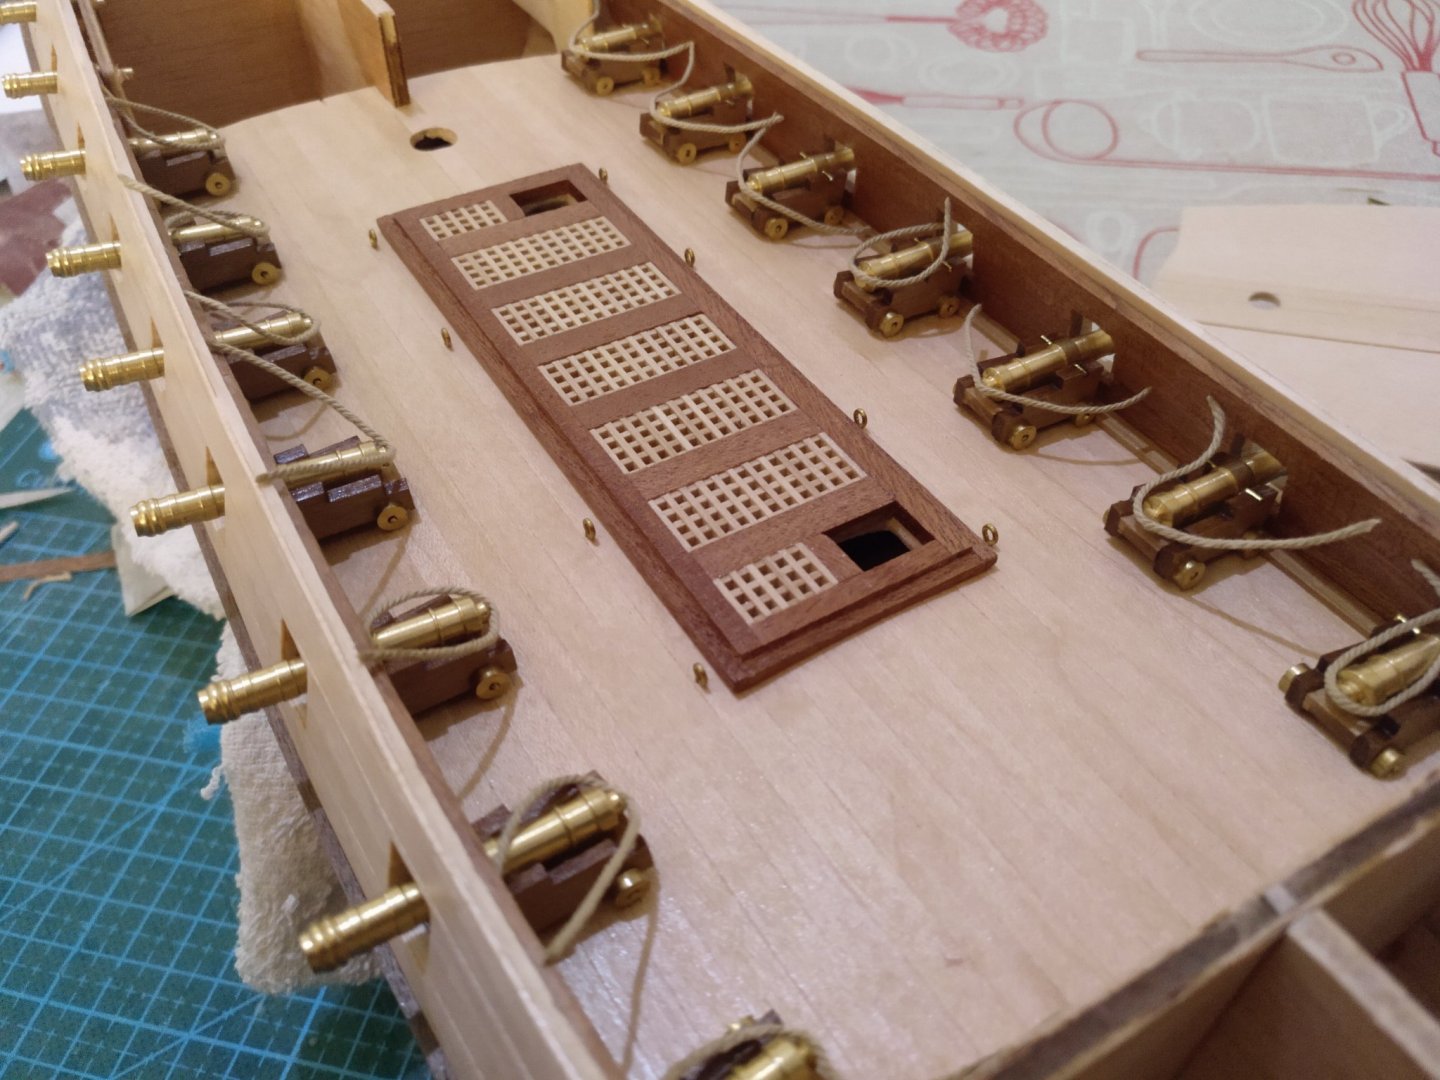
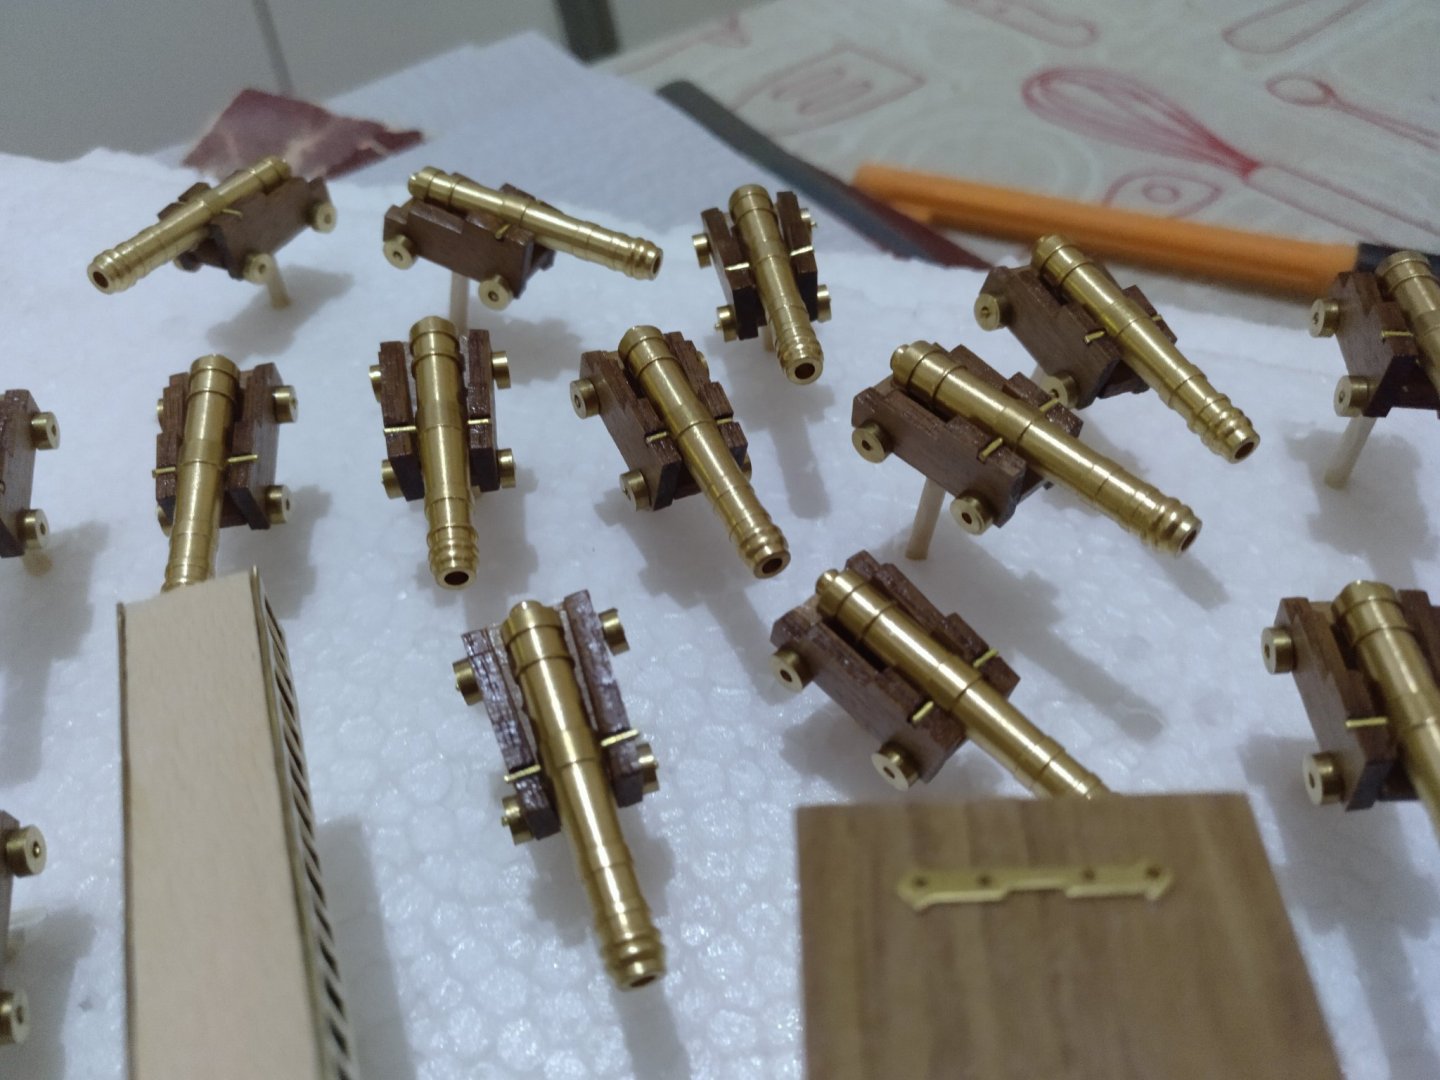
After this, I started gluing all the cannons on the lower deck. I also went a bit further and added some thread to simulate the ropes that hold the cannons in place in real life. This is something Constructo doesn't say in their instructions but I recently saw it in a build log and I liked the idea so I tried it and the result is pretty neat. I have also glued the "false" cannons. I still have to glue the thread to the walls of the gunports. I also have glued the grating and I made some holes to glue eye bolts in order to attach some rope to hold the lifeboat which still needs to be painted and mounted in place. Also, if you look closely at the gratings you can see two little pairs of stairs. I really like this kind of detail. They are made of brass and cut to length.


-
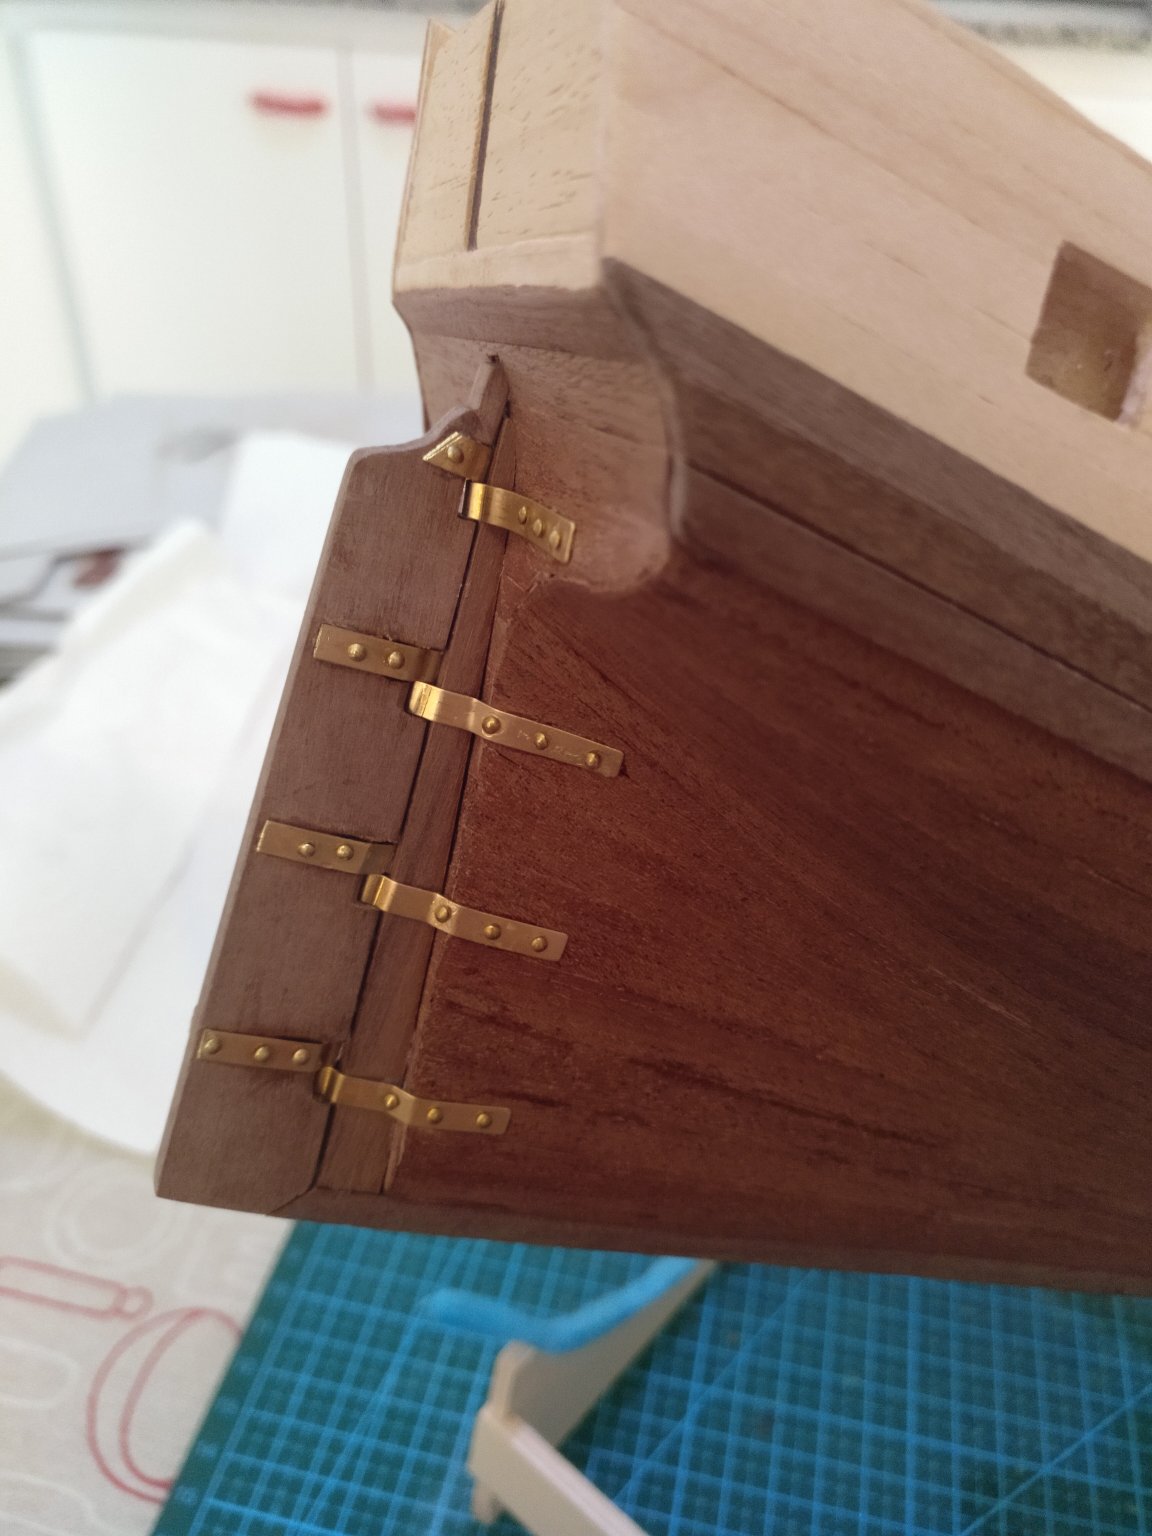
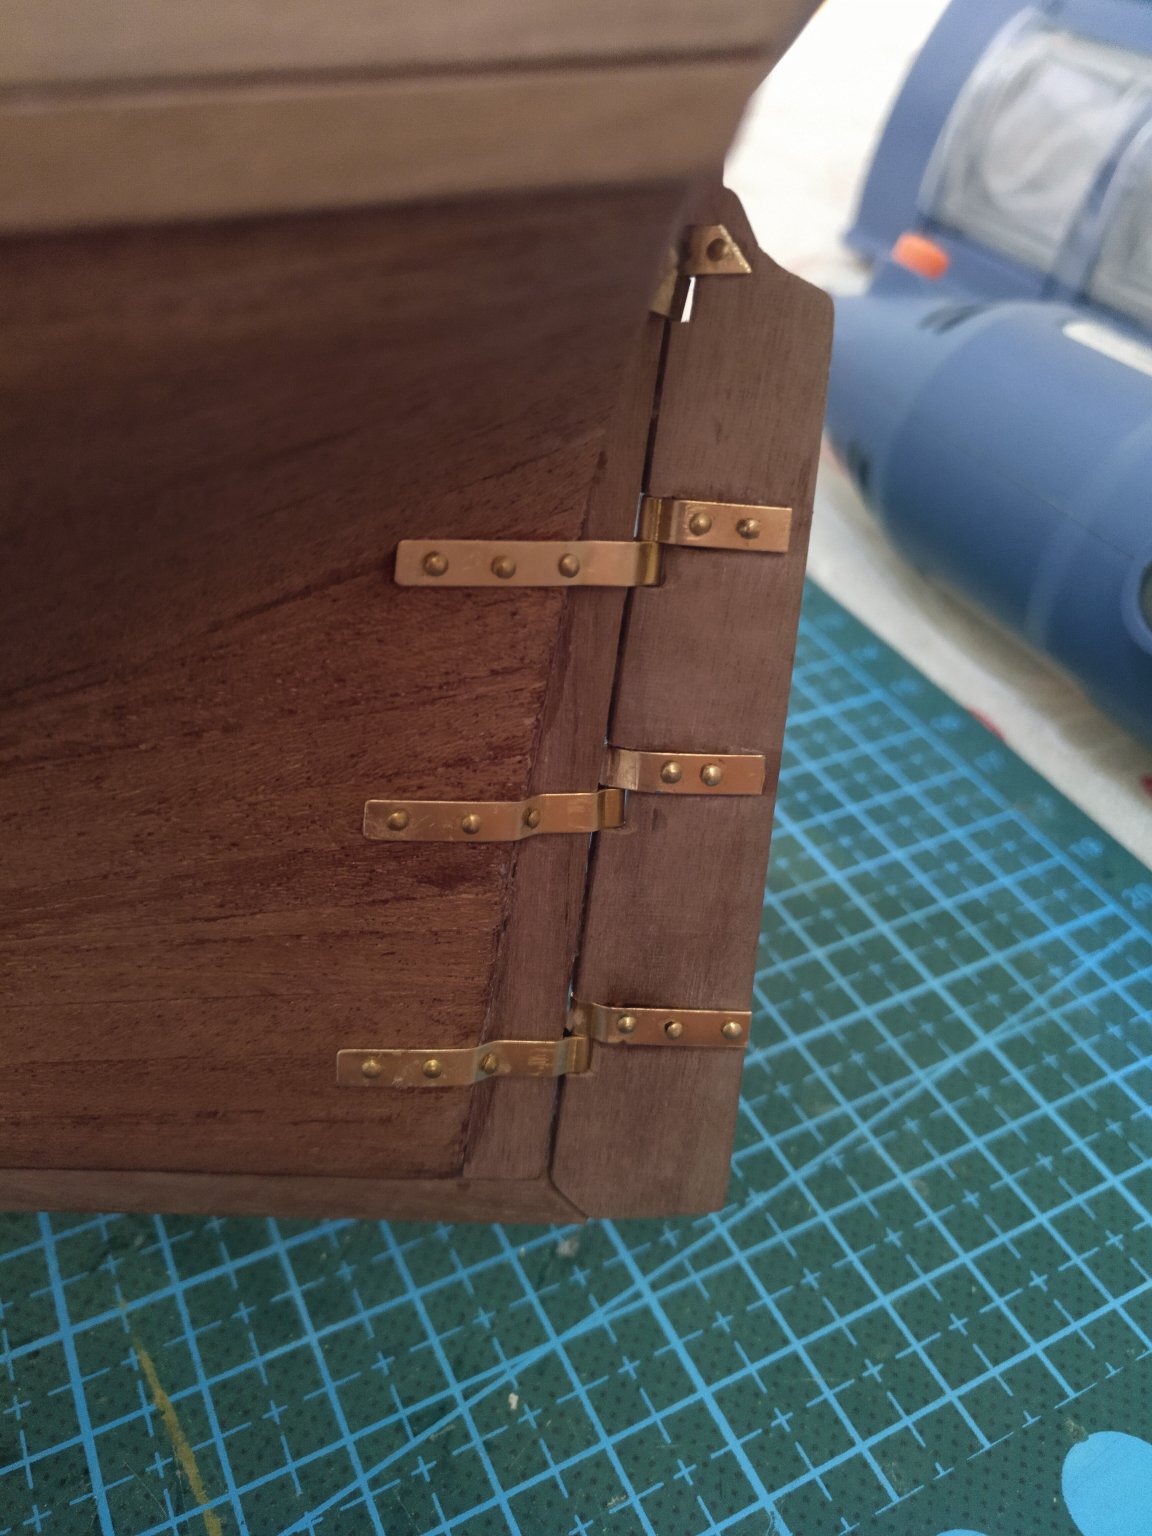
Hello everyone! I am still making progress on my Flore. Now the rudder is already glued with its brass hinges. Here you can see some photos.


-
Thank you very much Bill, gthey were a lot of work but at the end it pays off!!
-
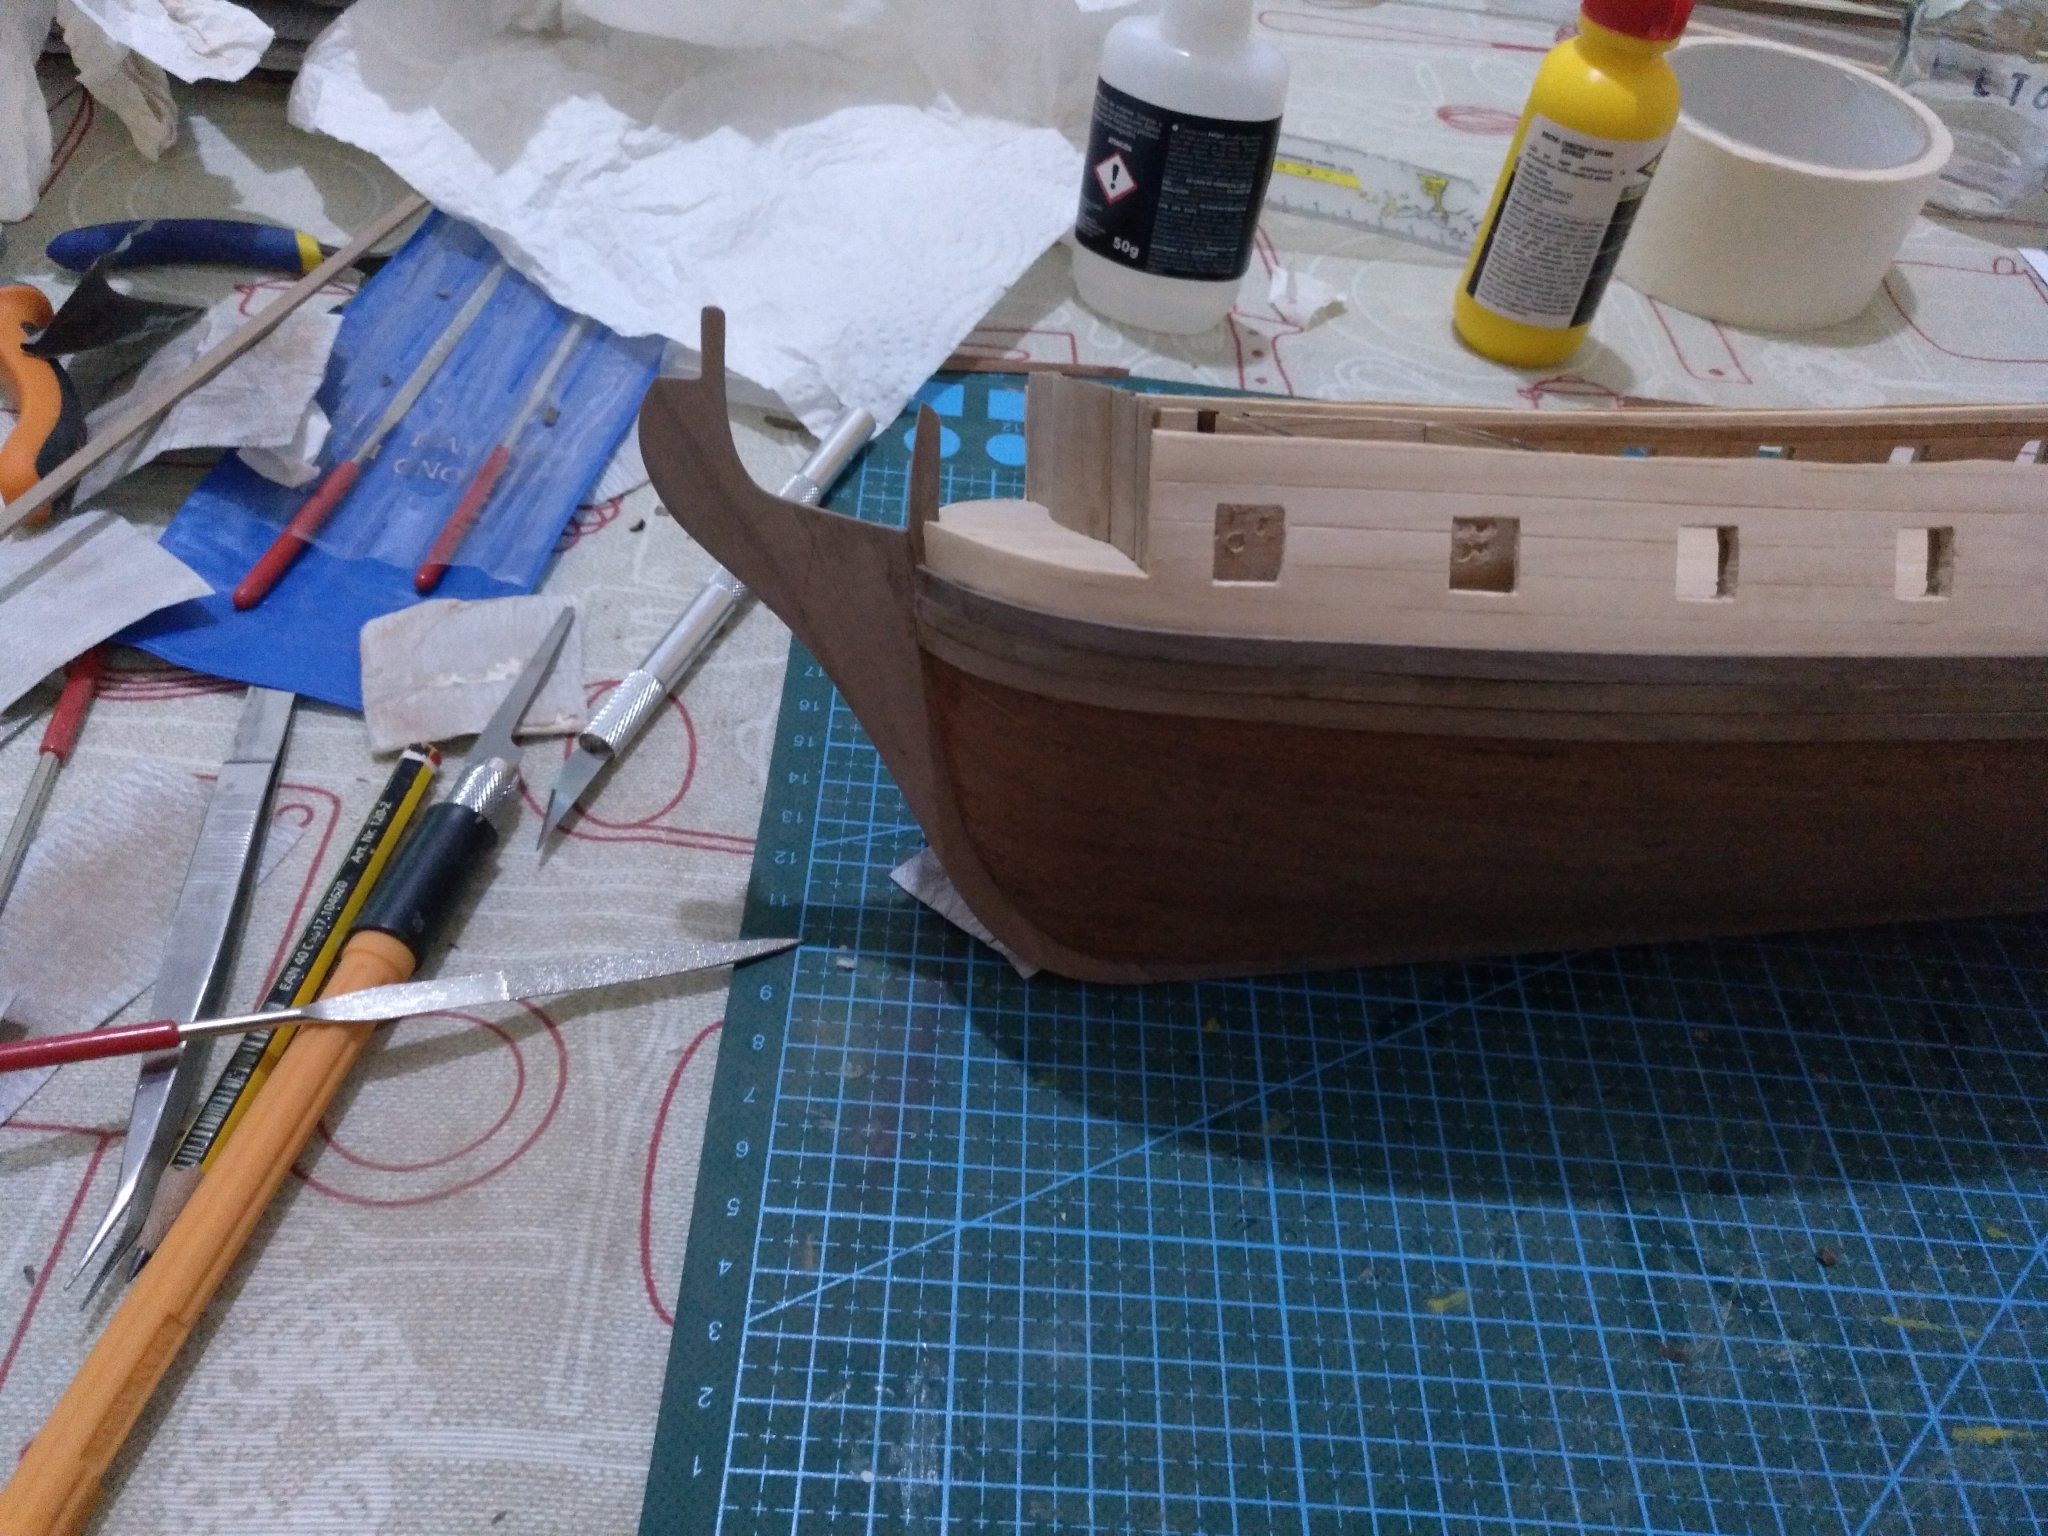
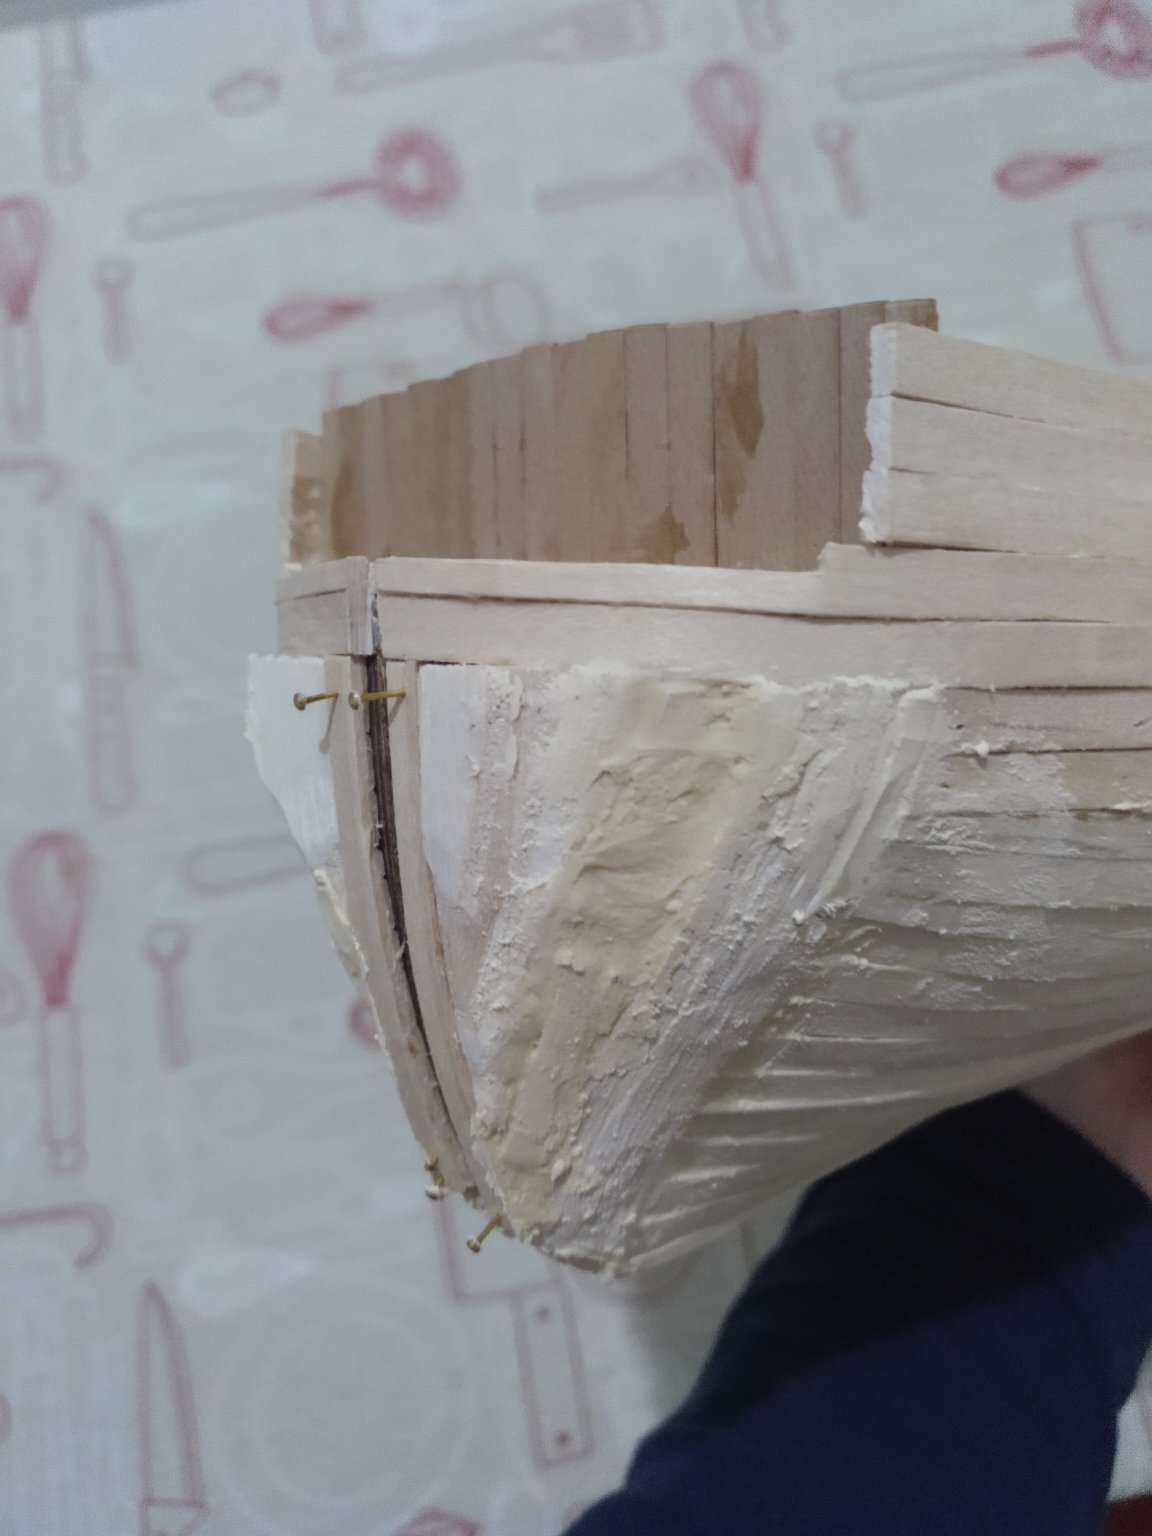
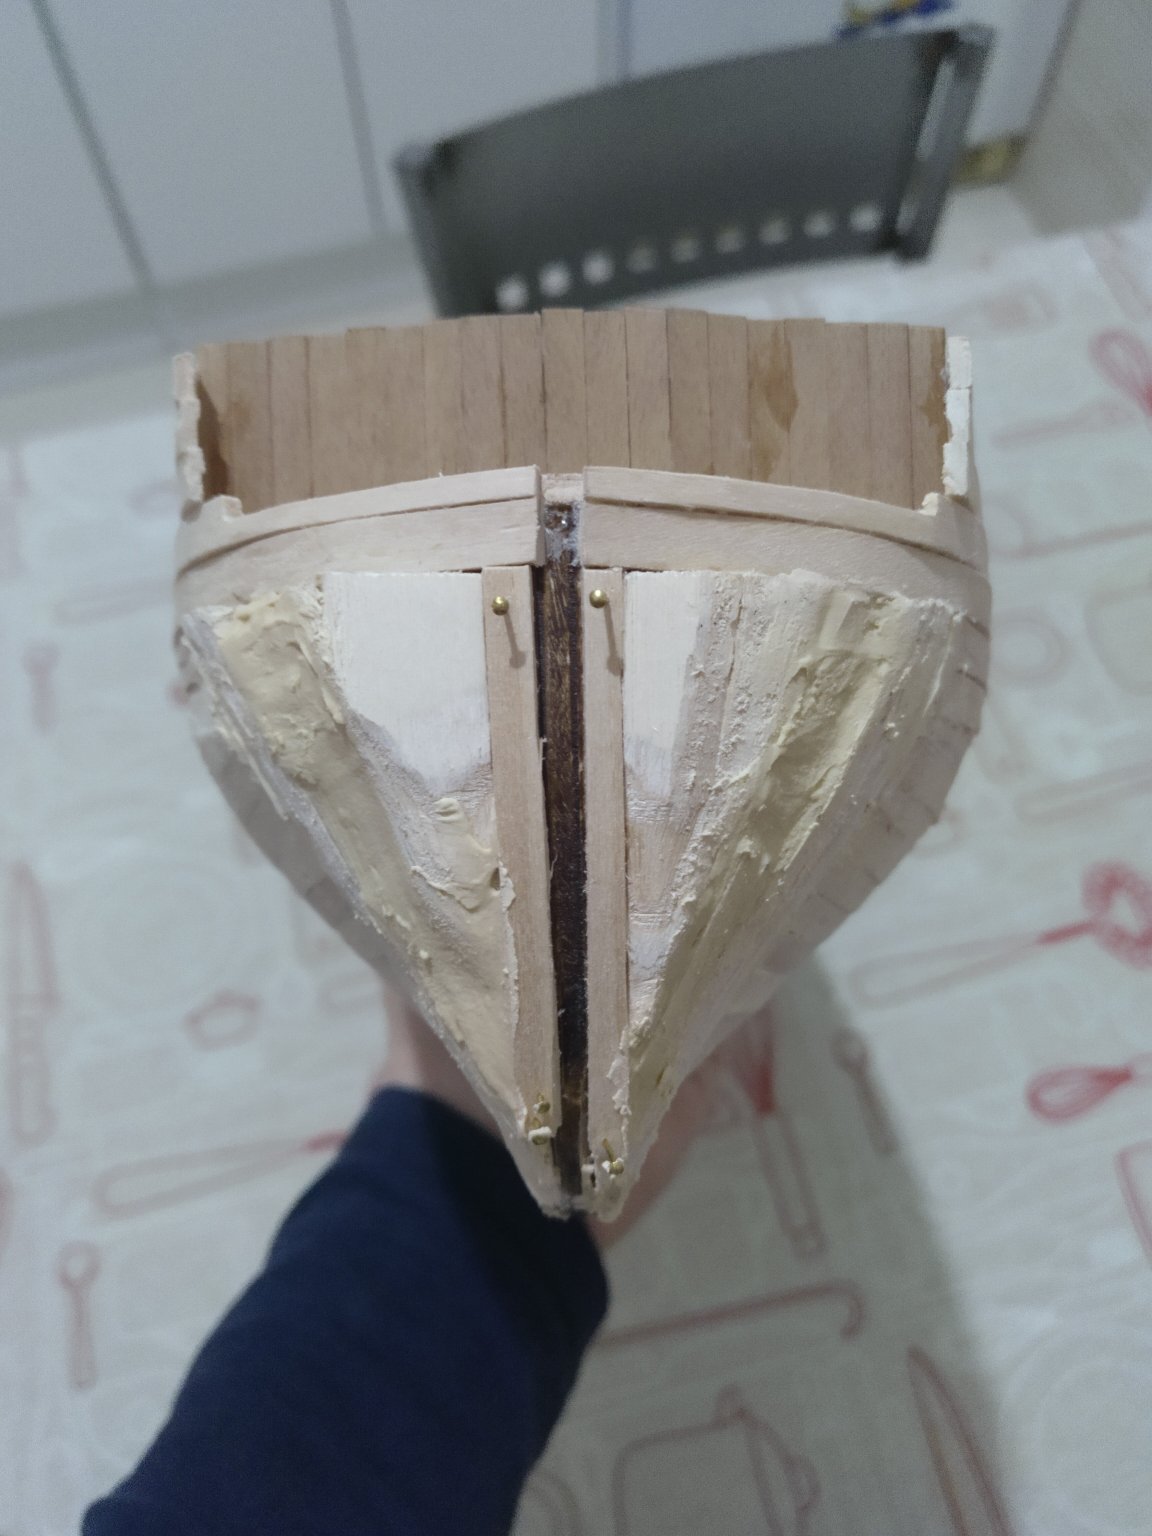
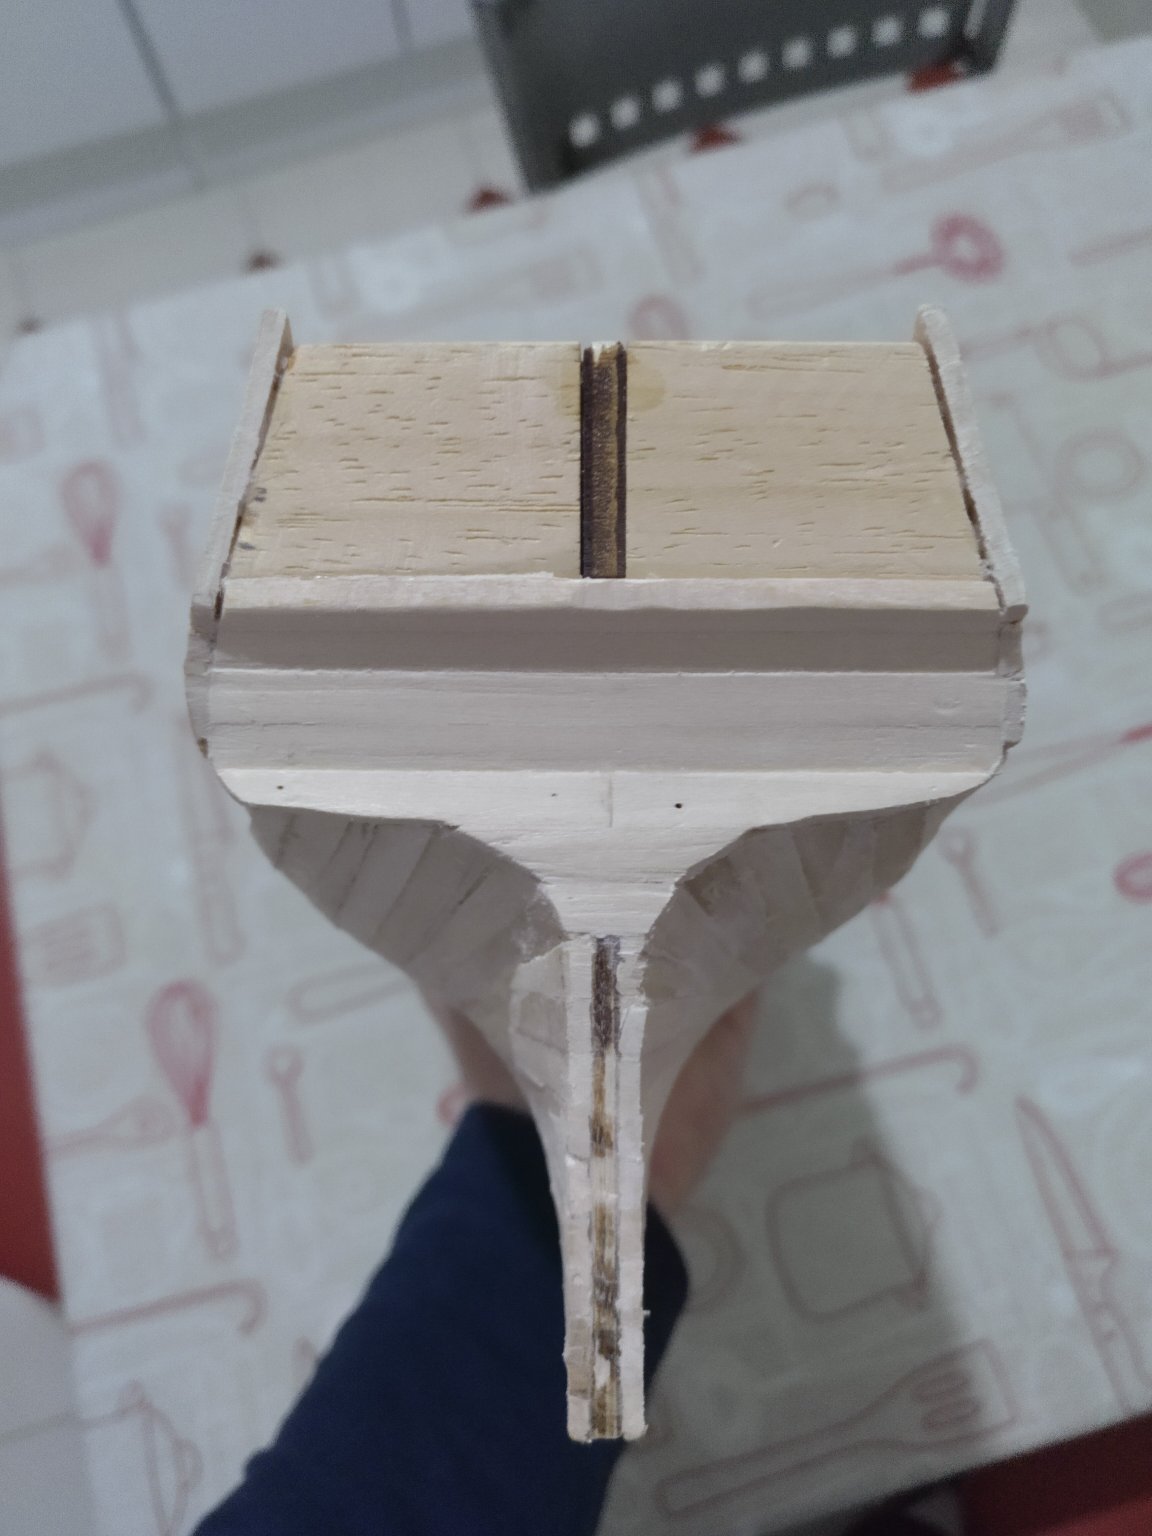
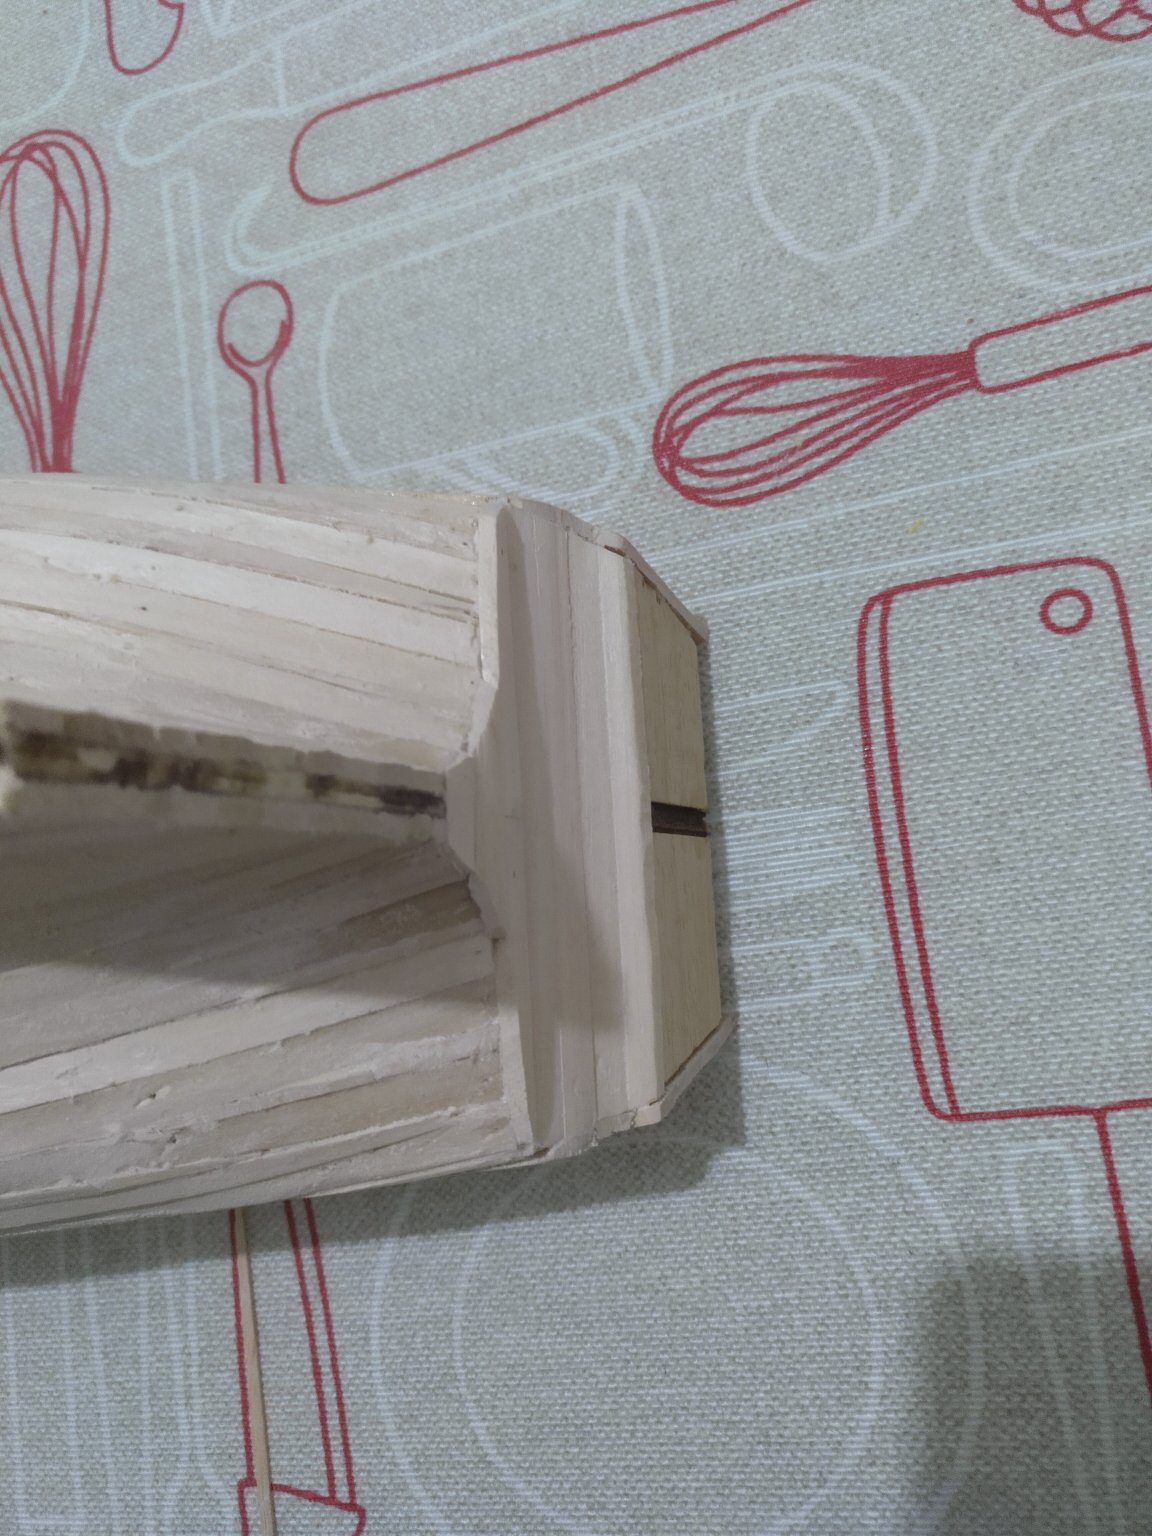
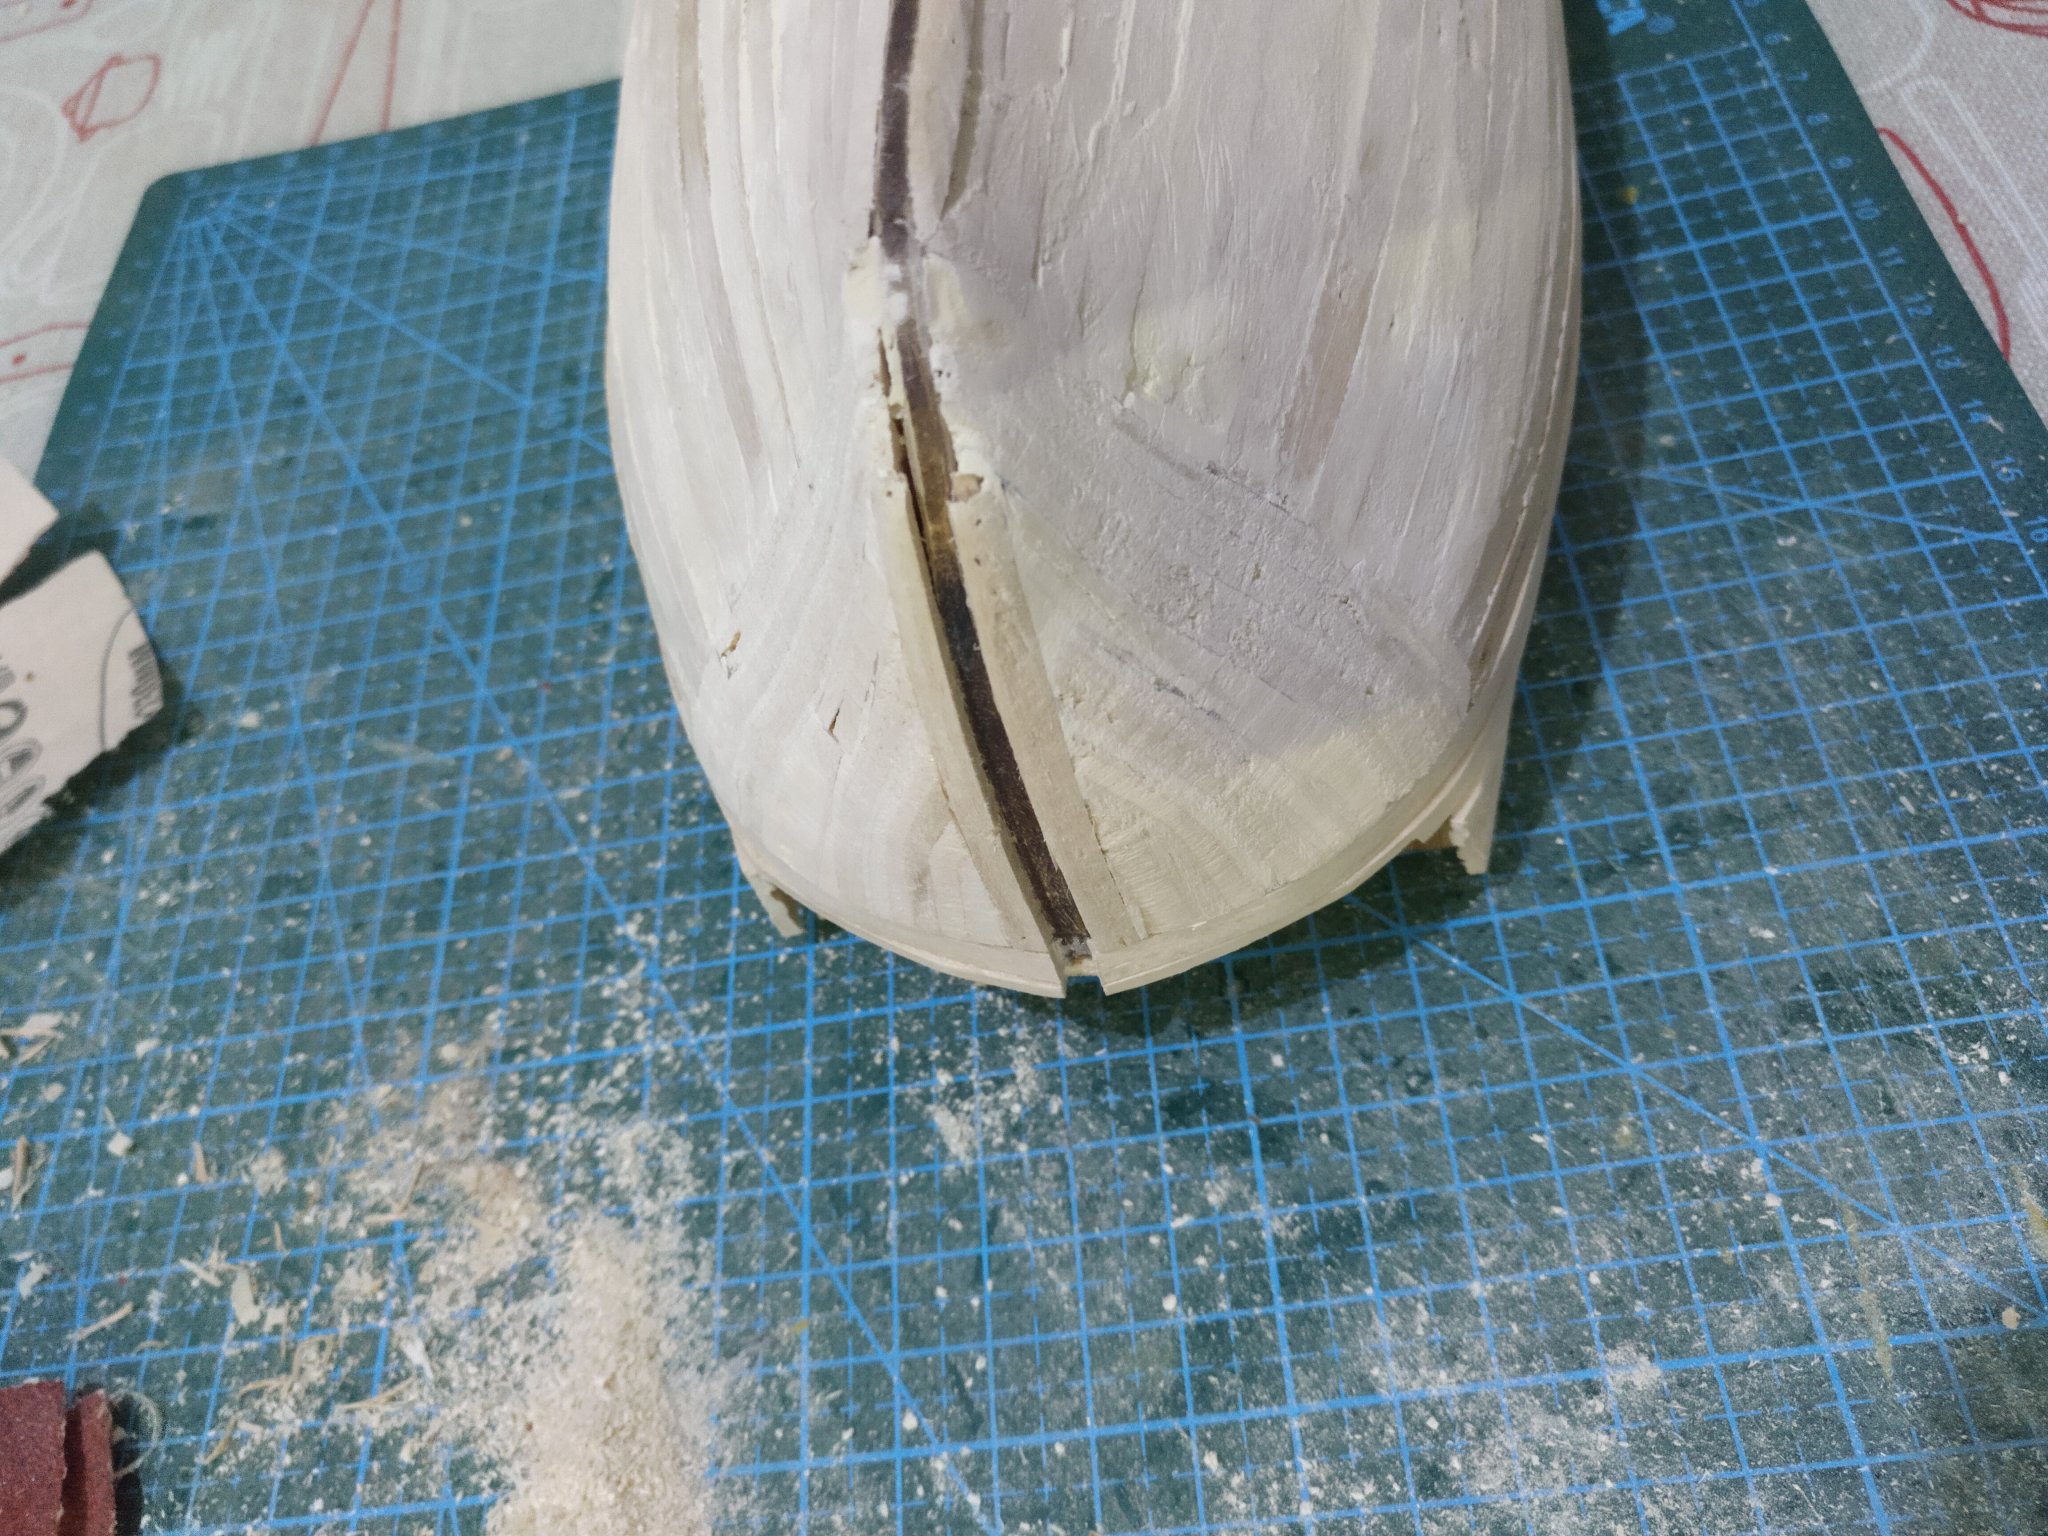
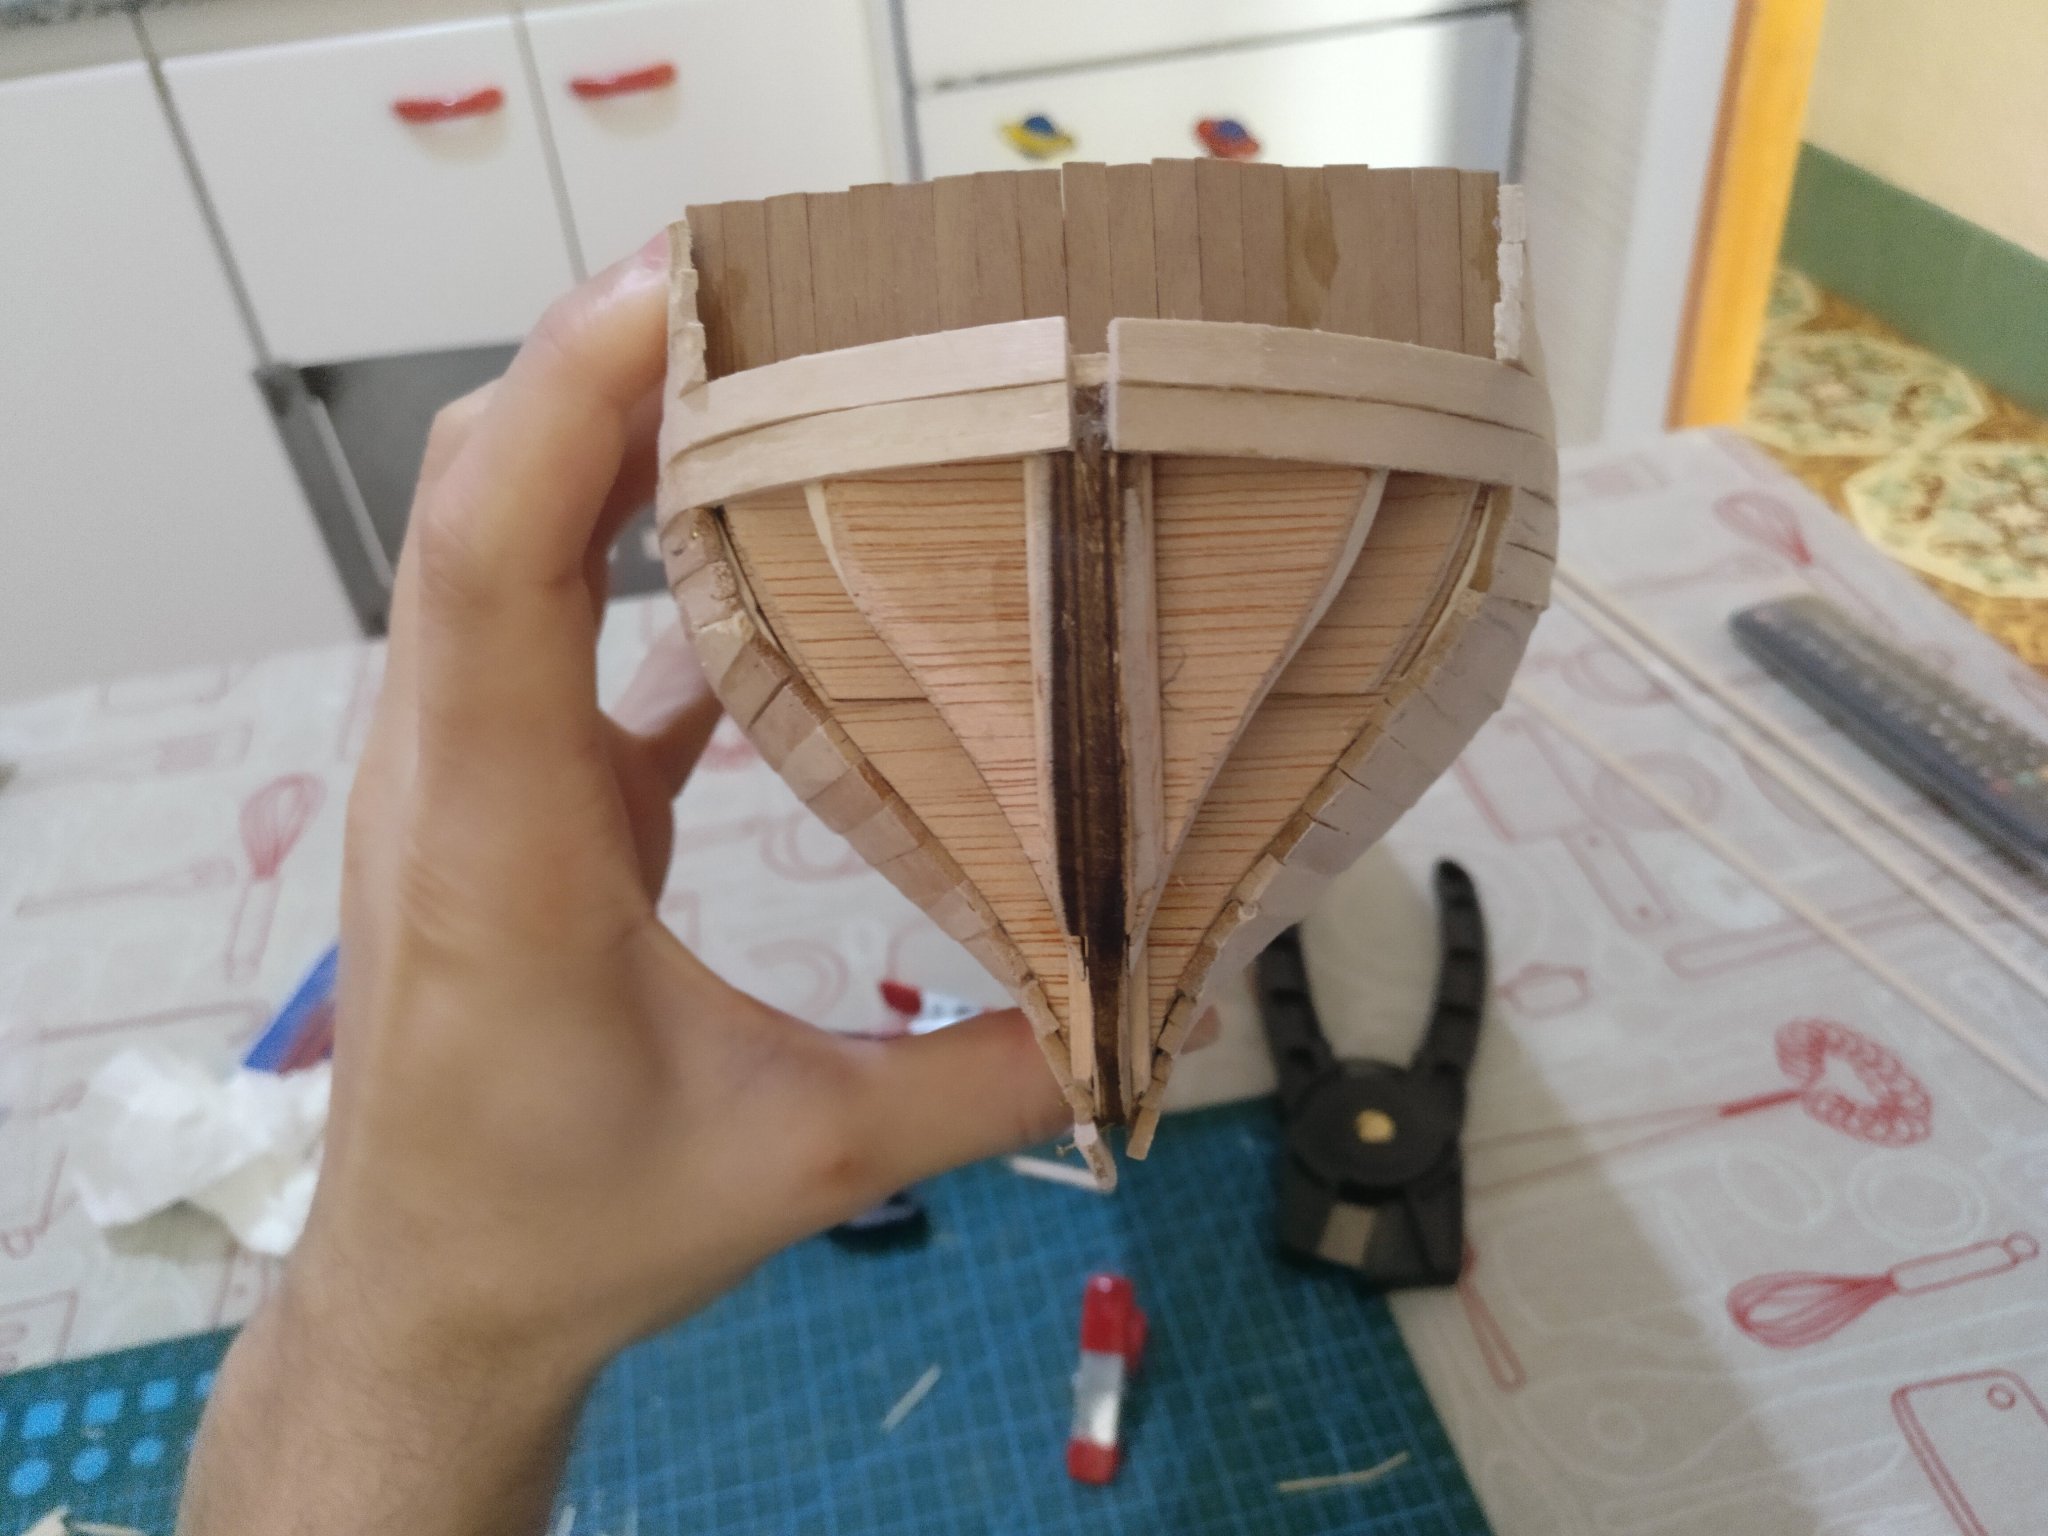
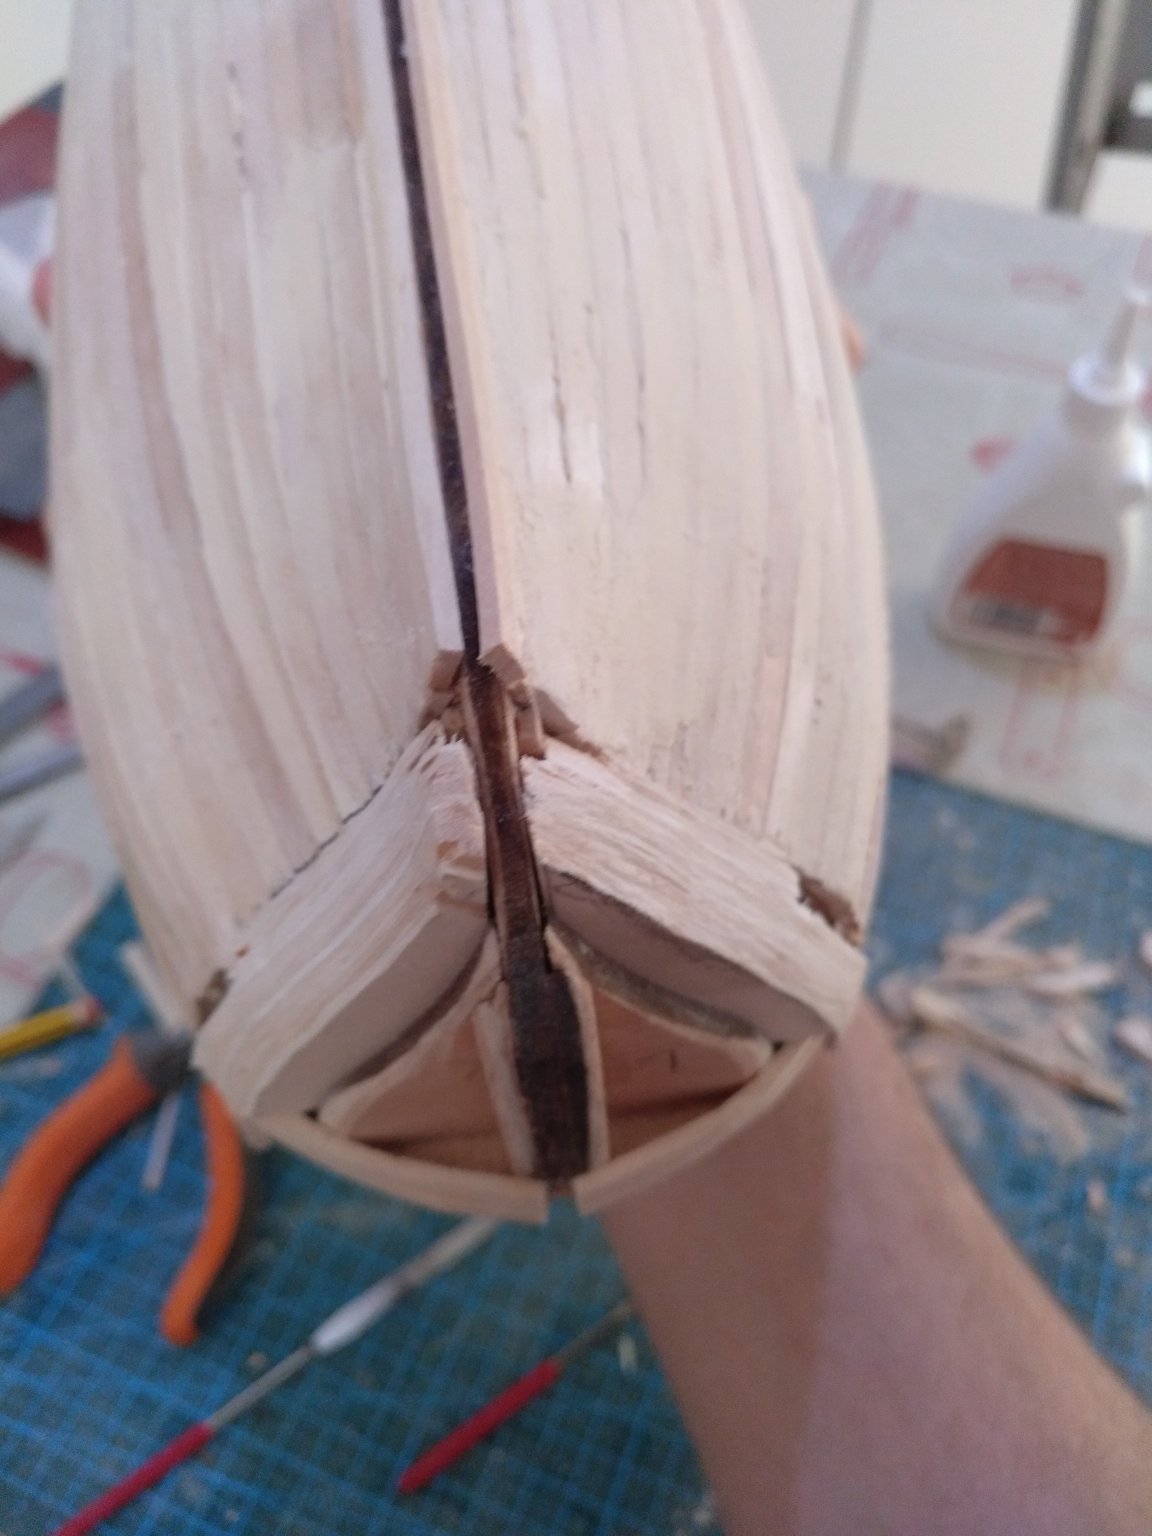
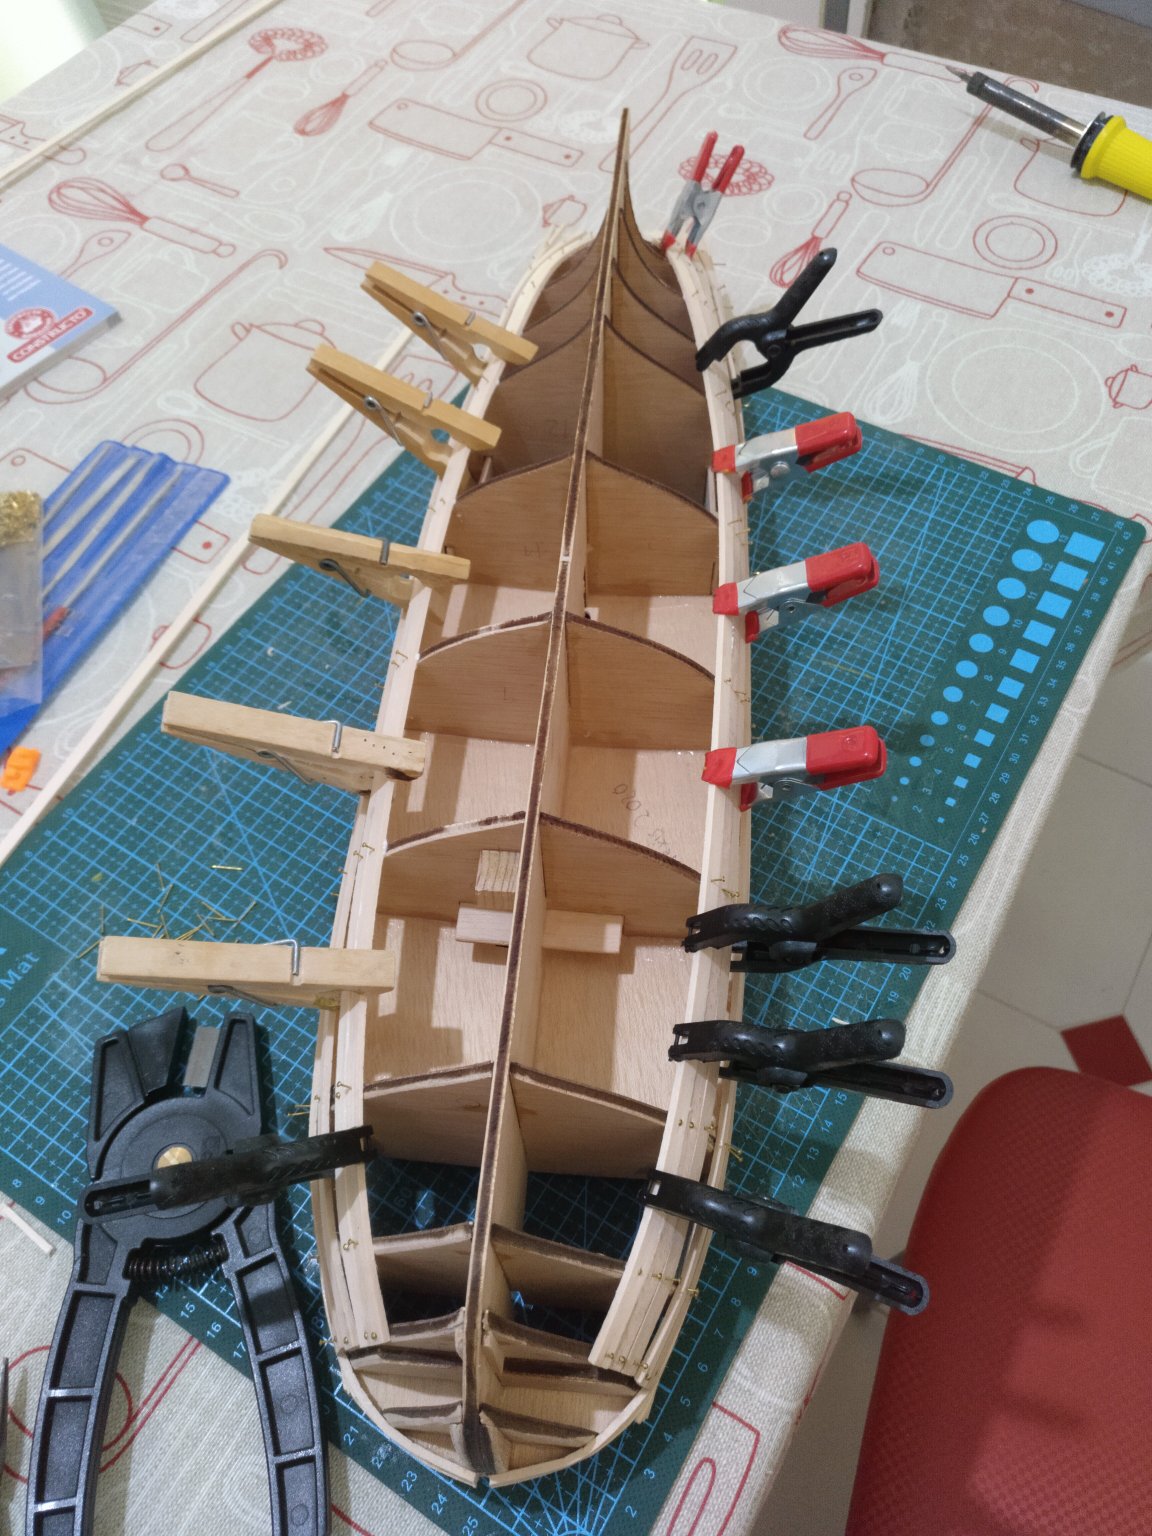
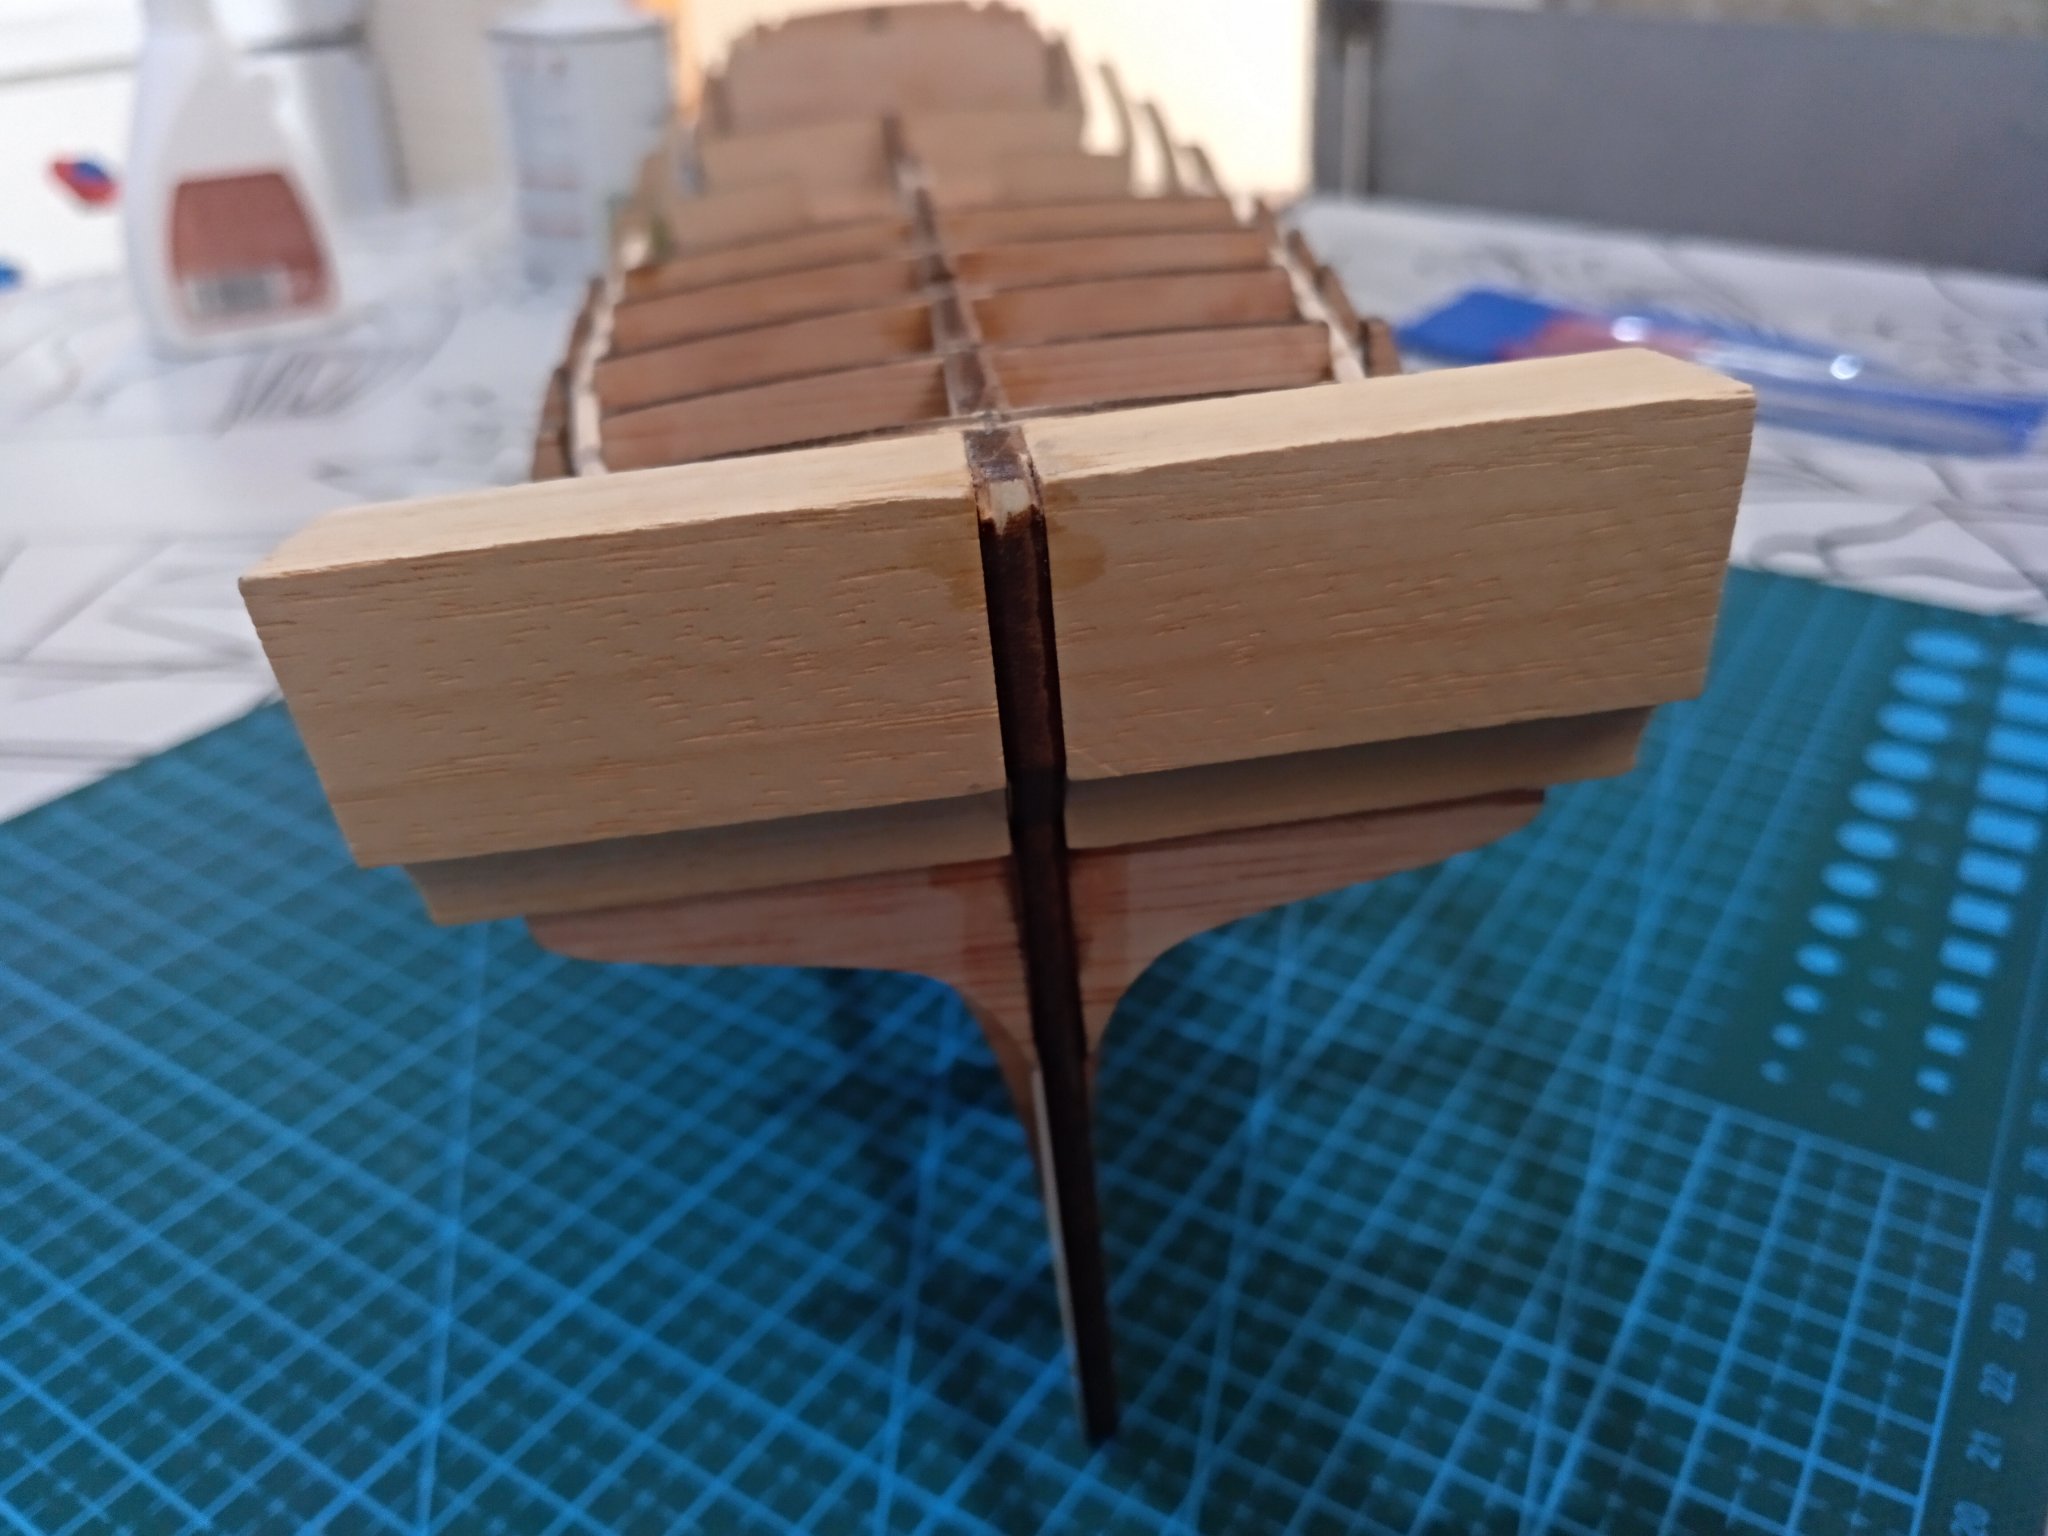
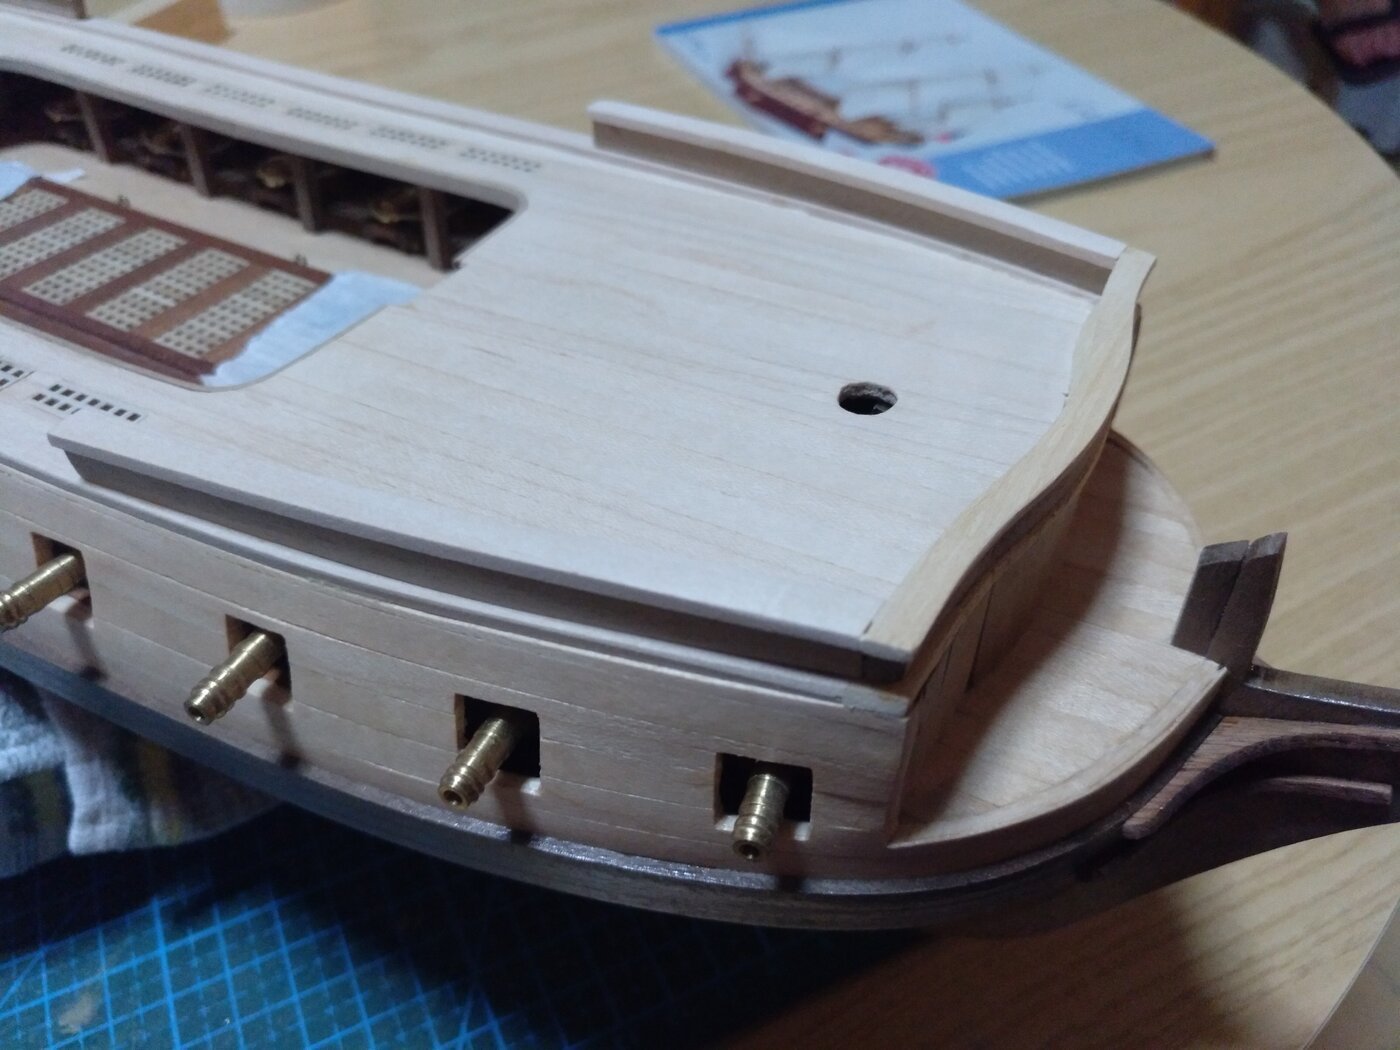
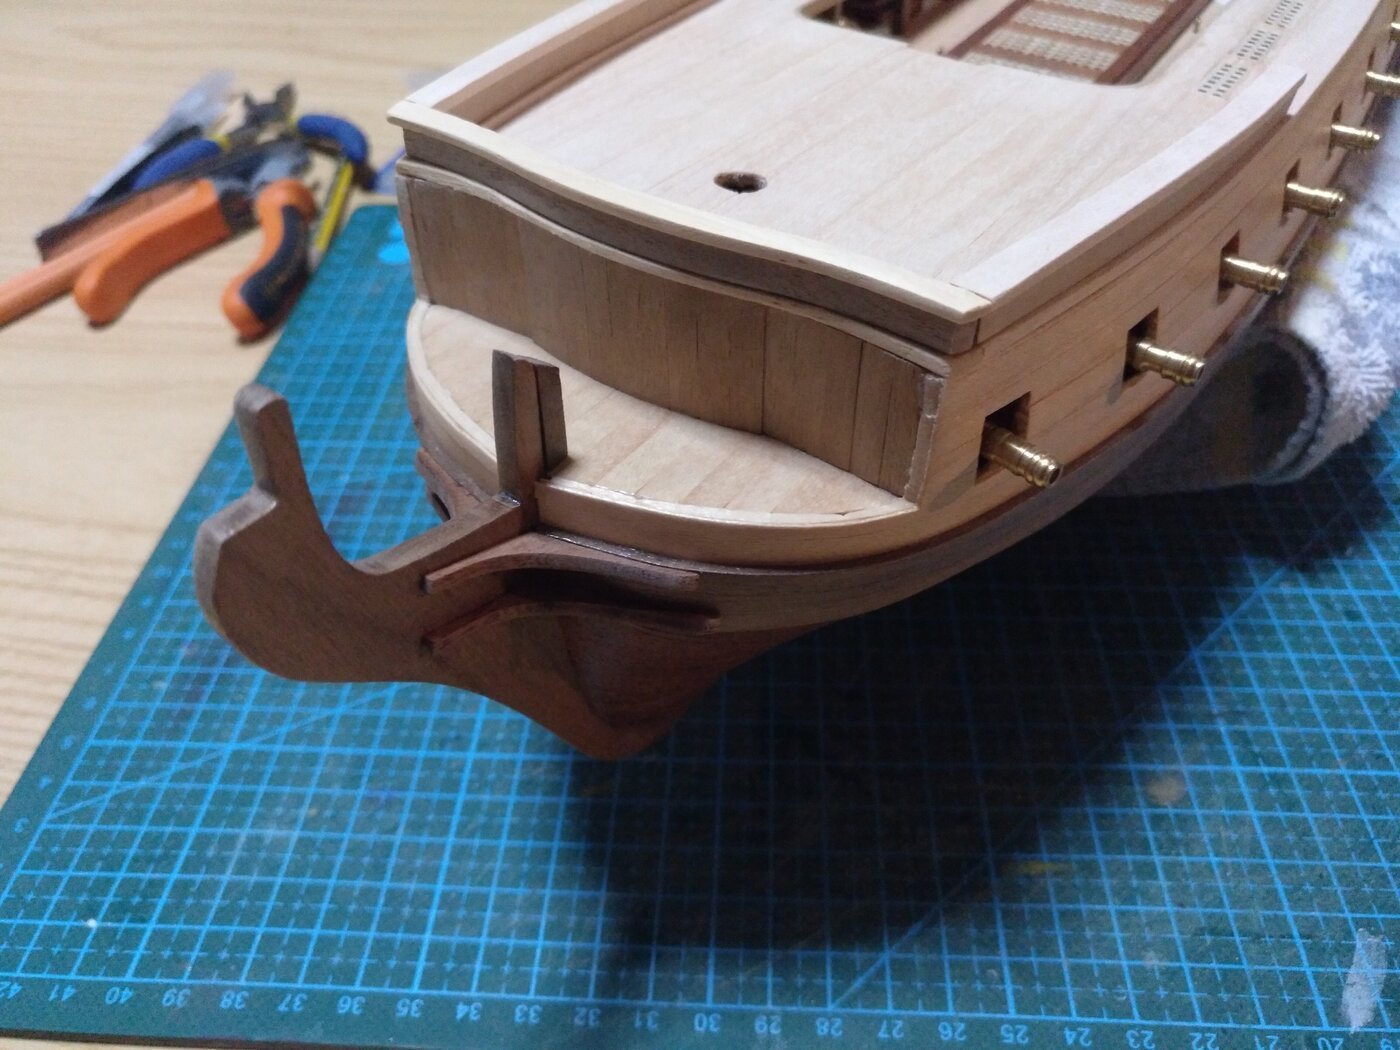
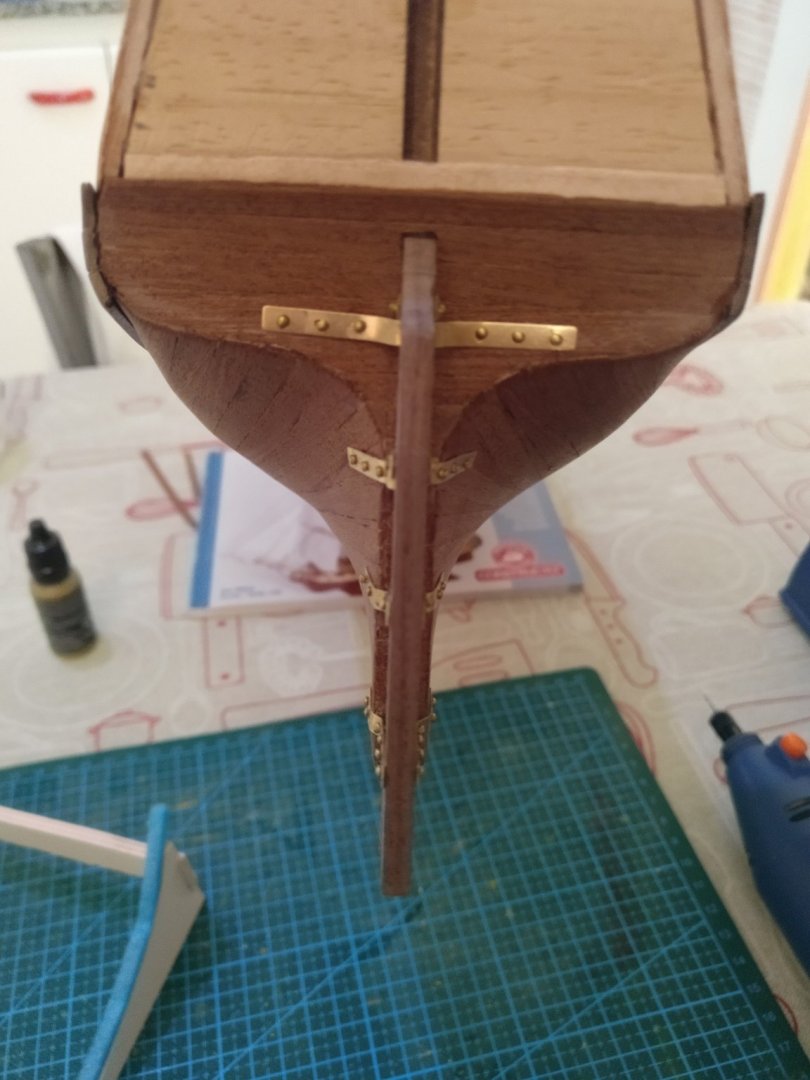
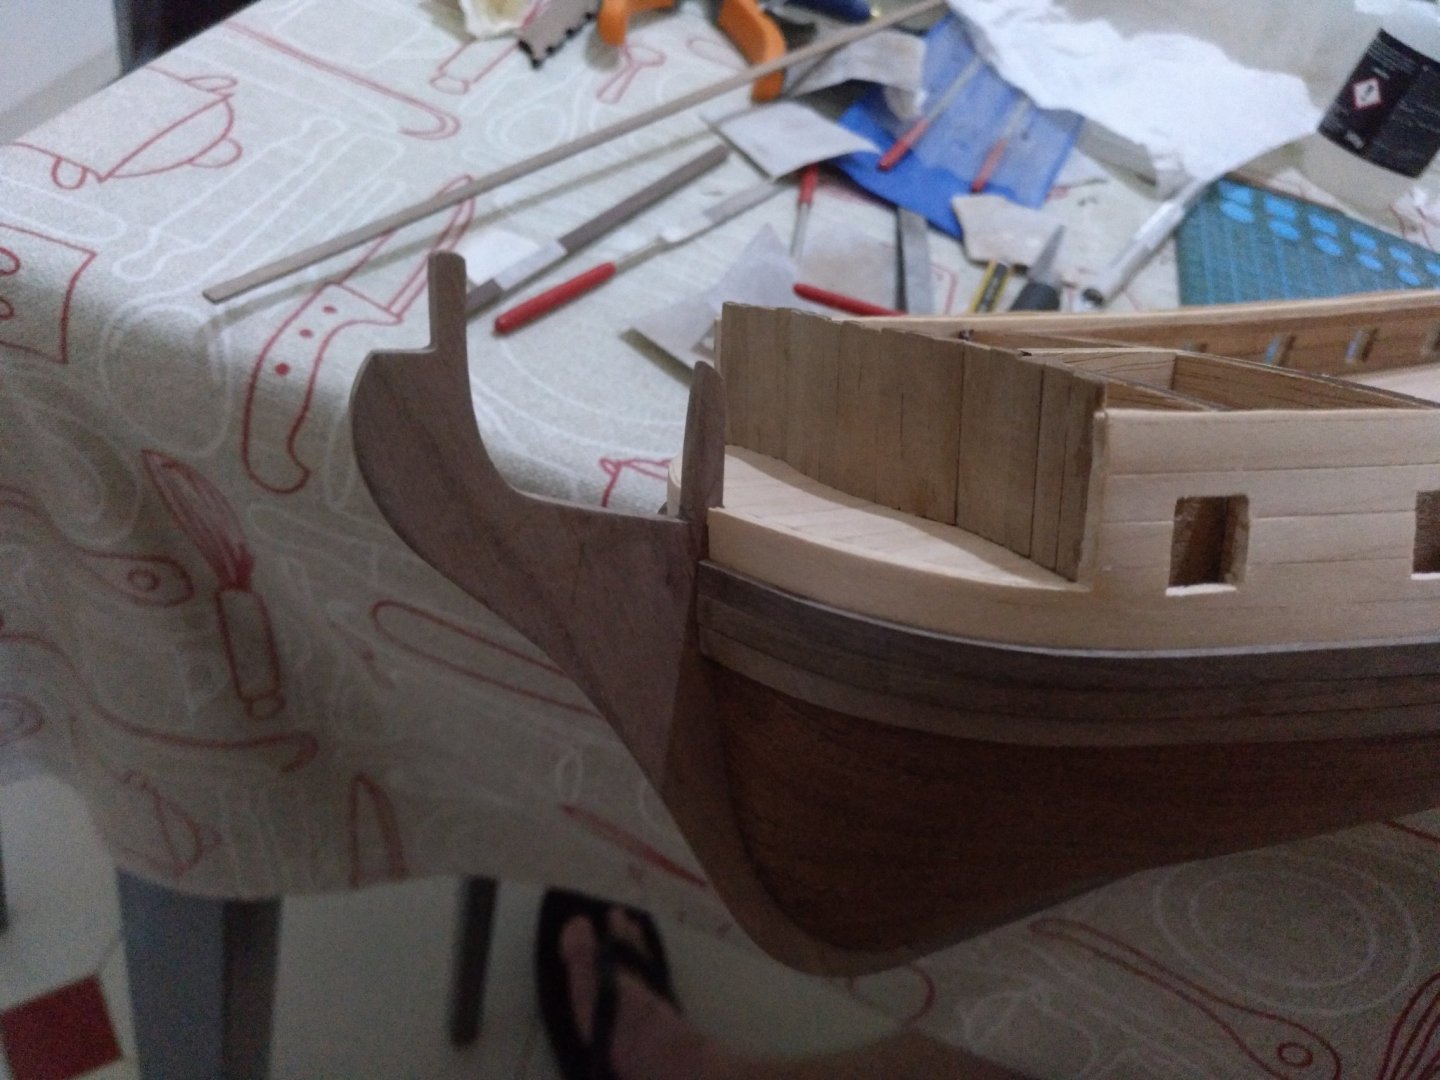
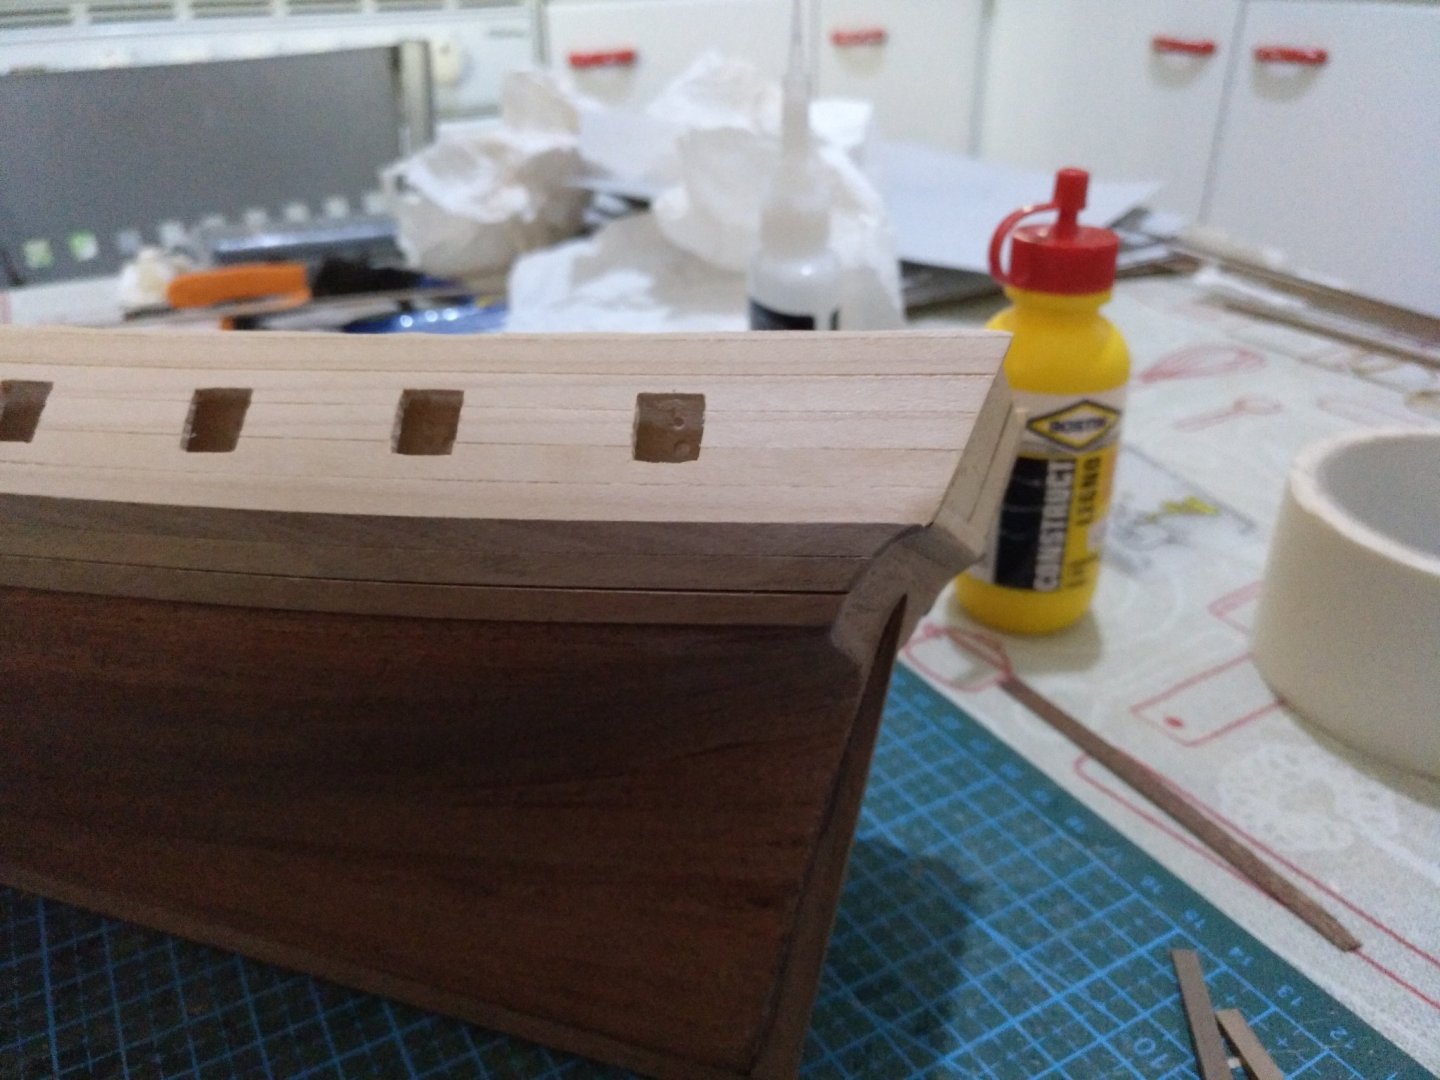
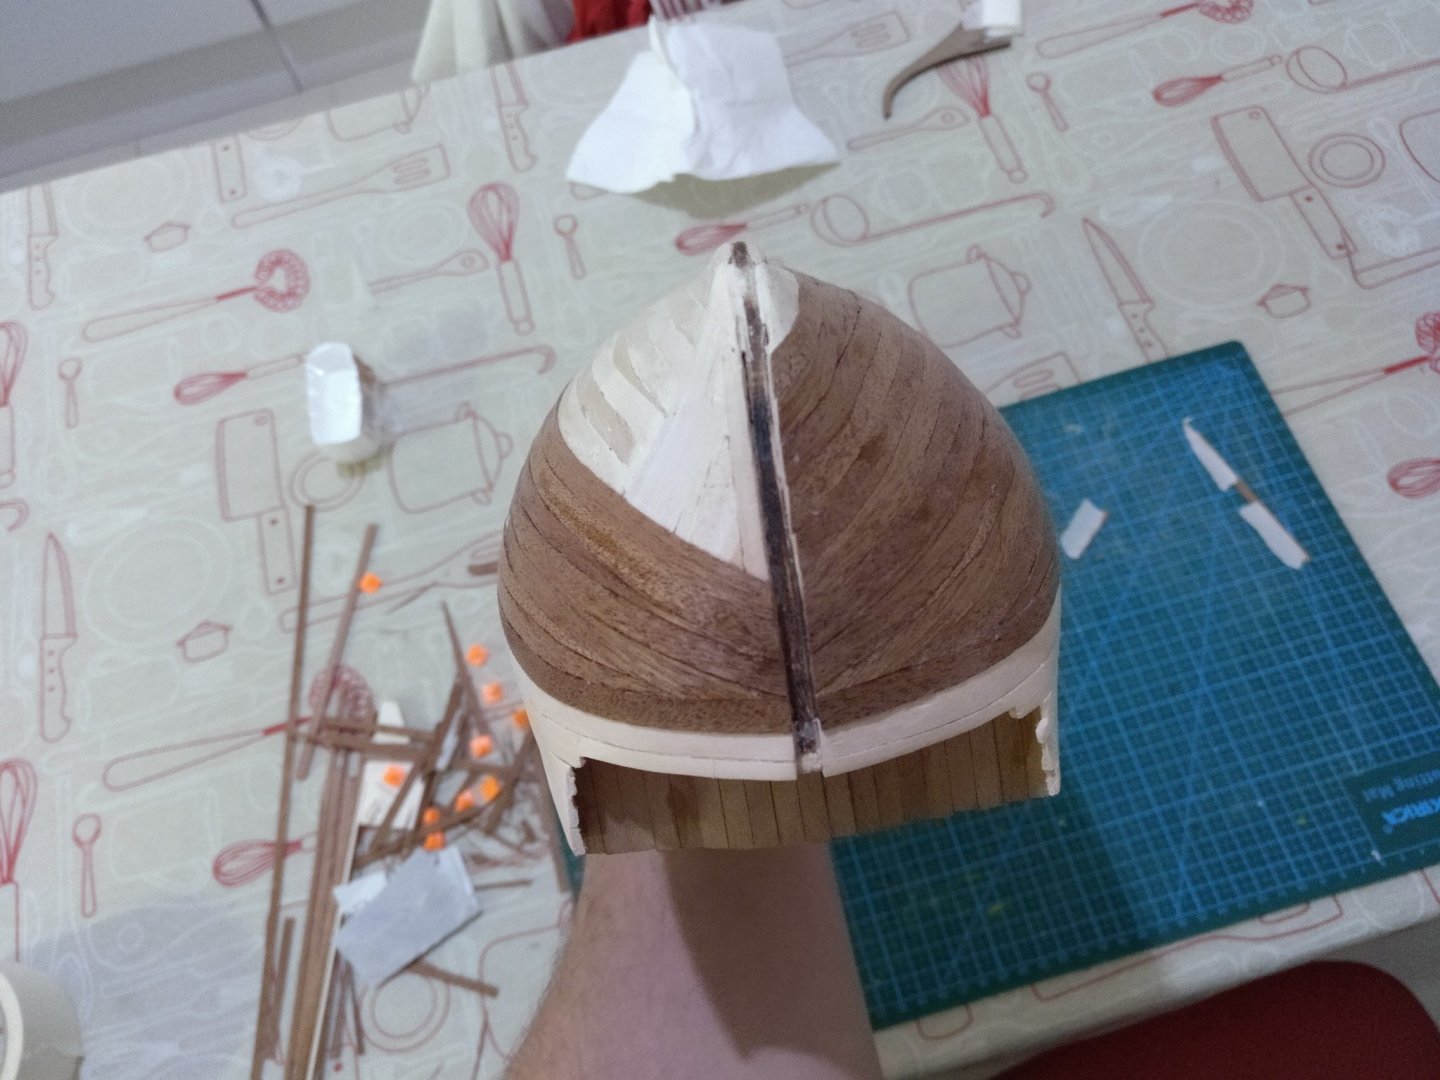
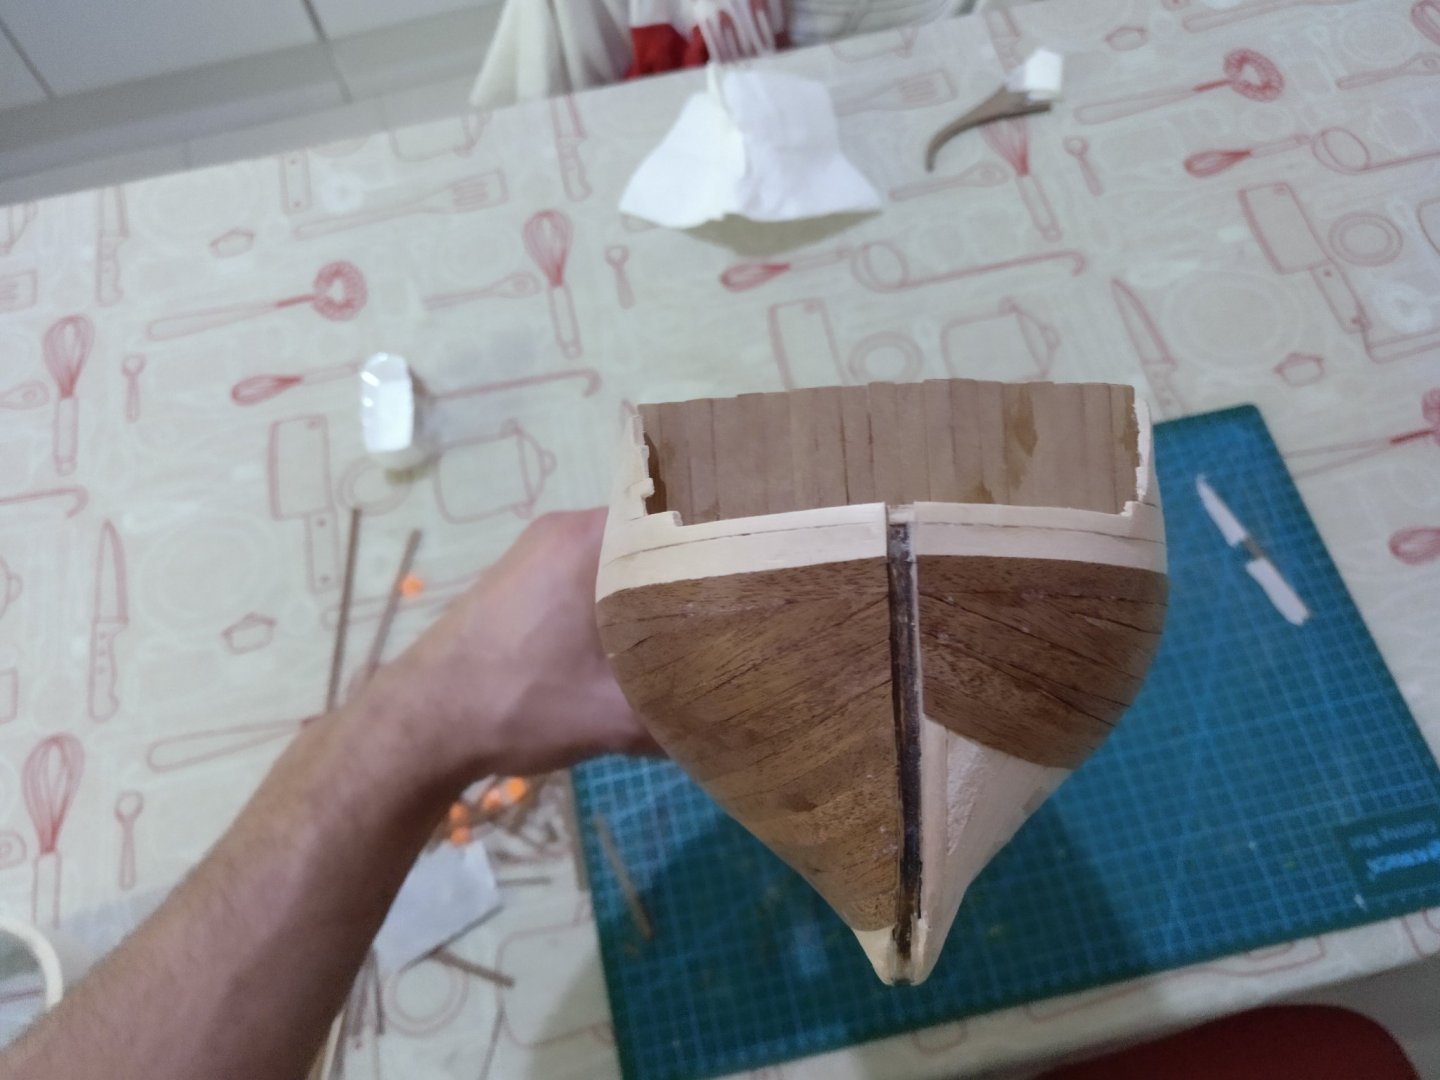
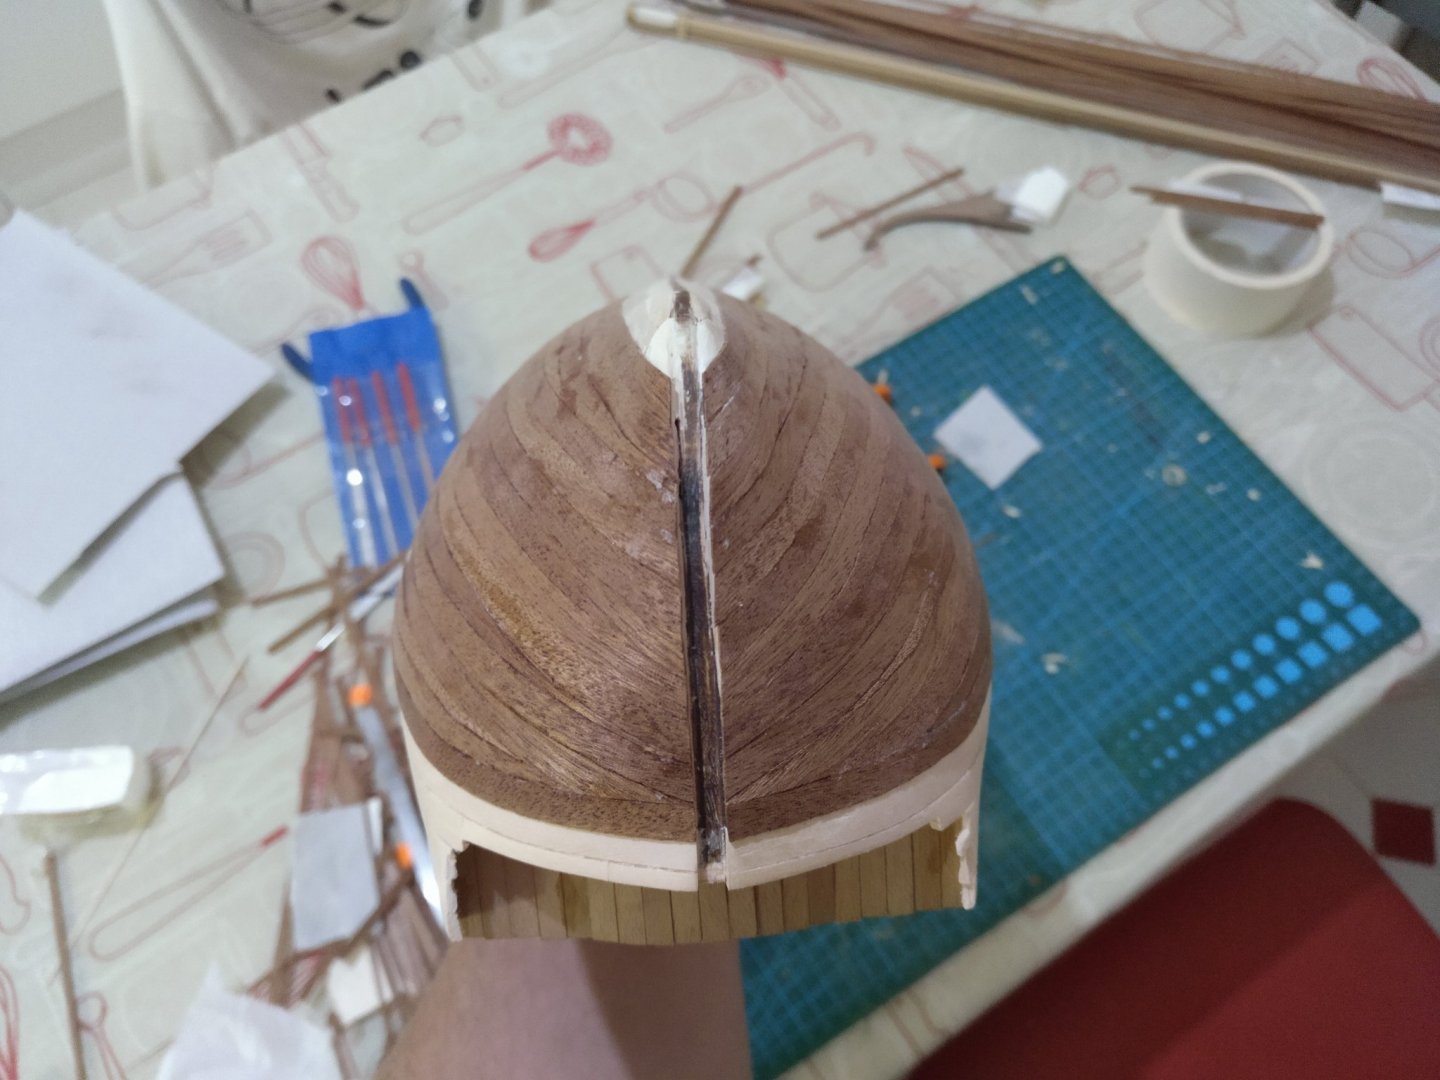
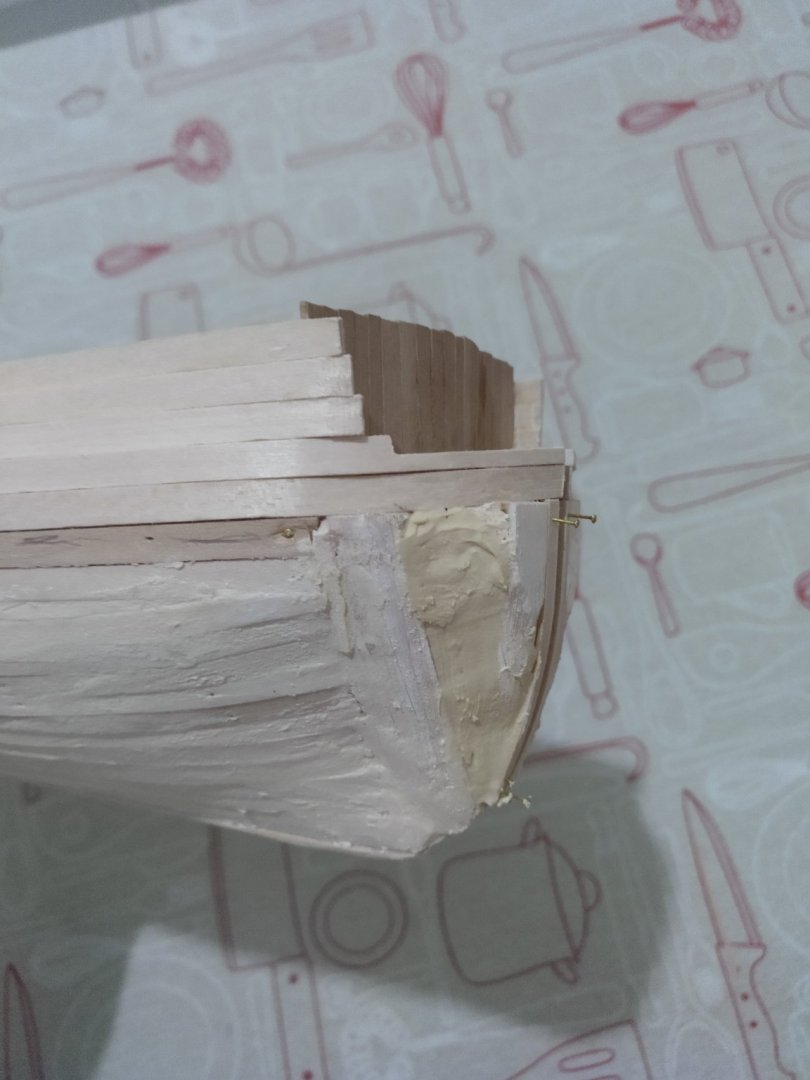
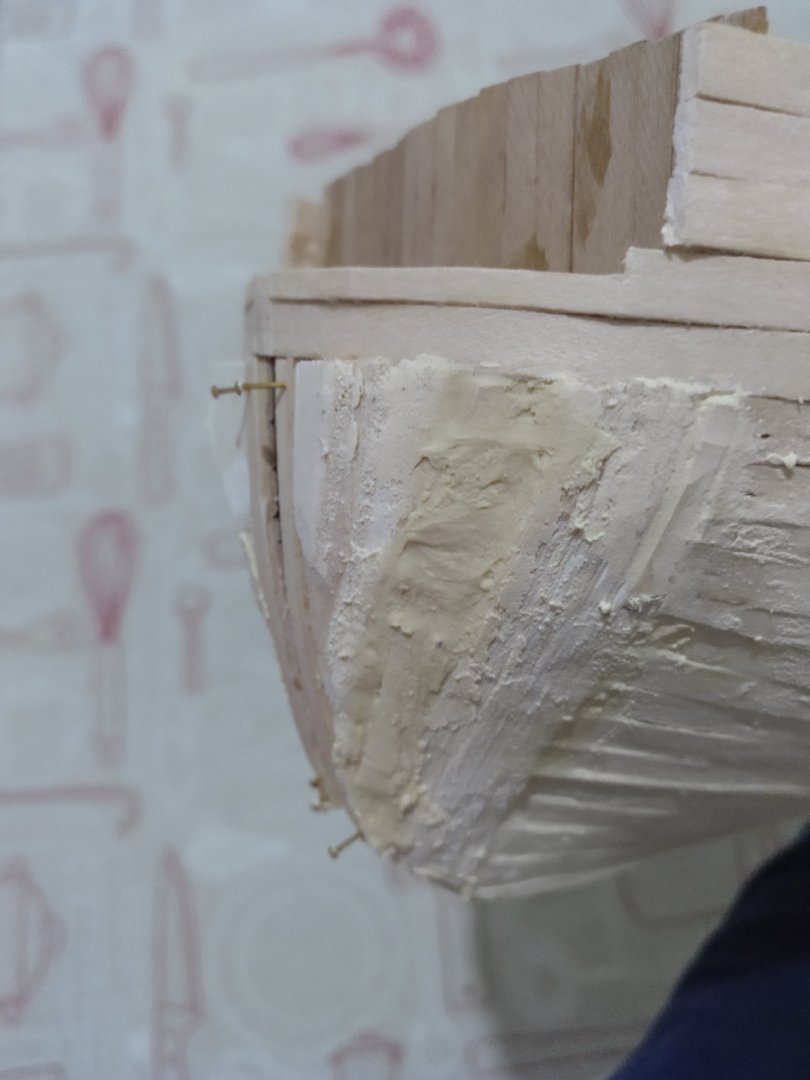
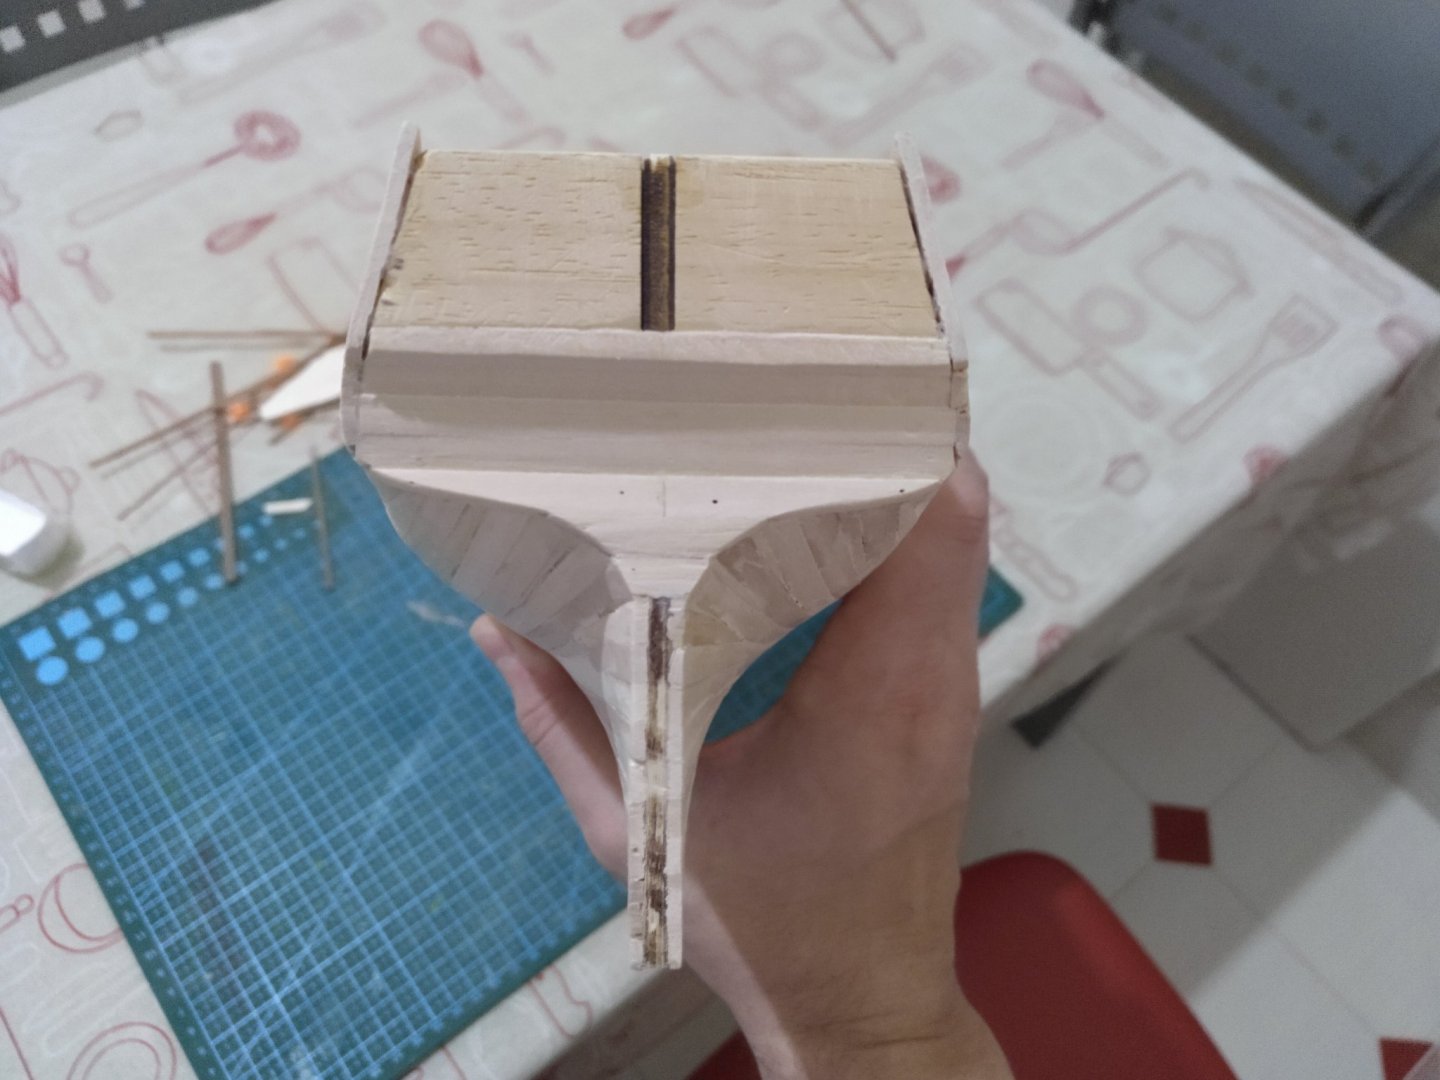
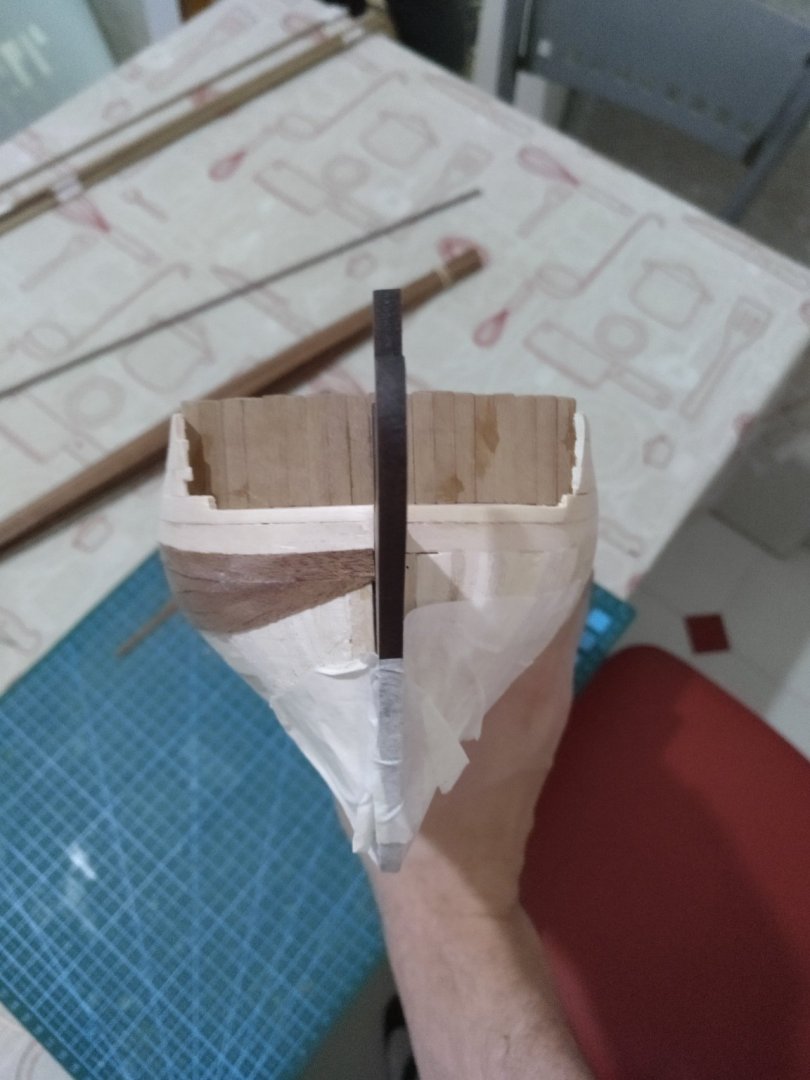
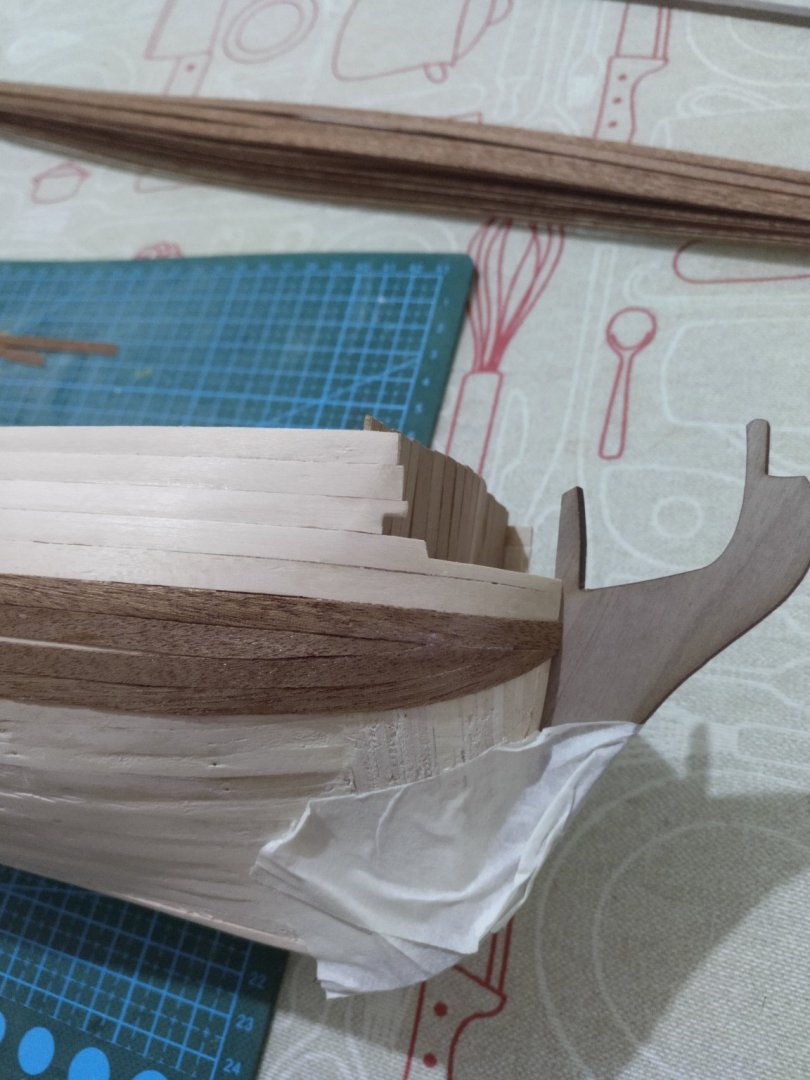
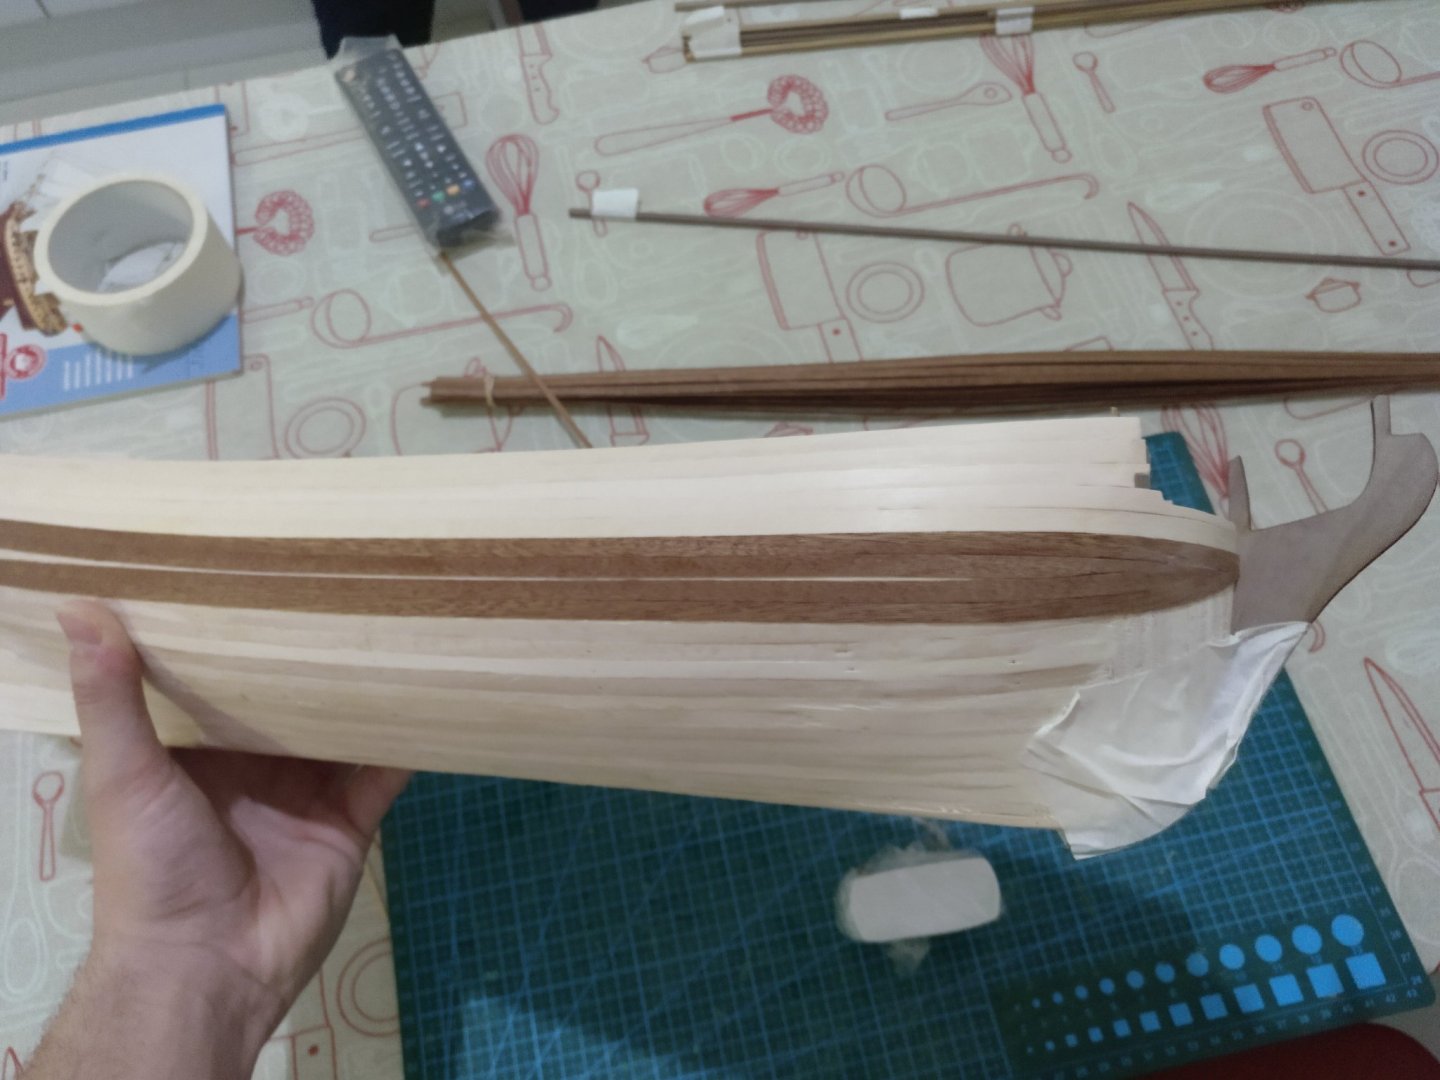
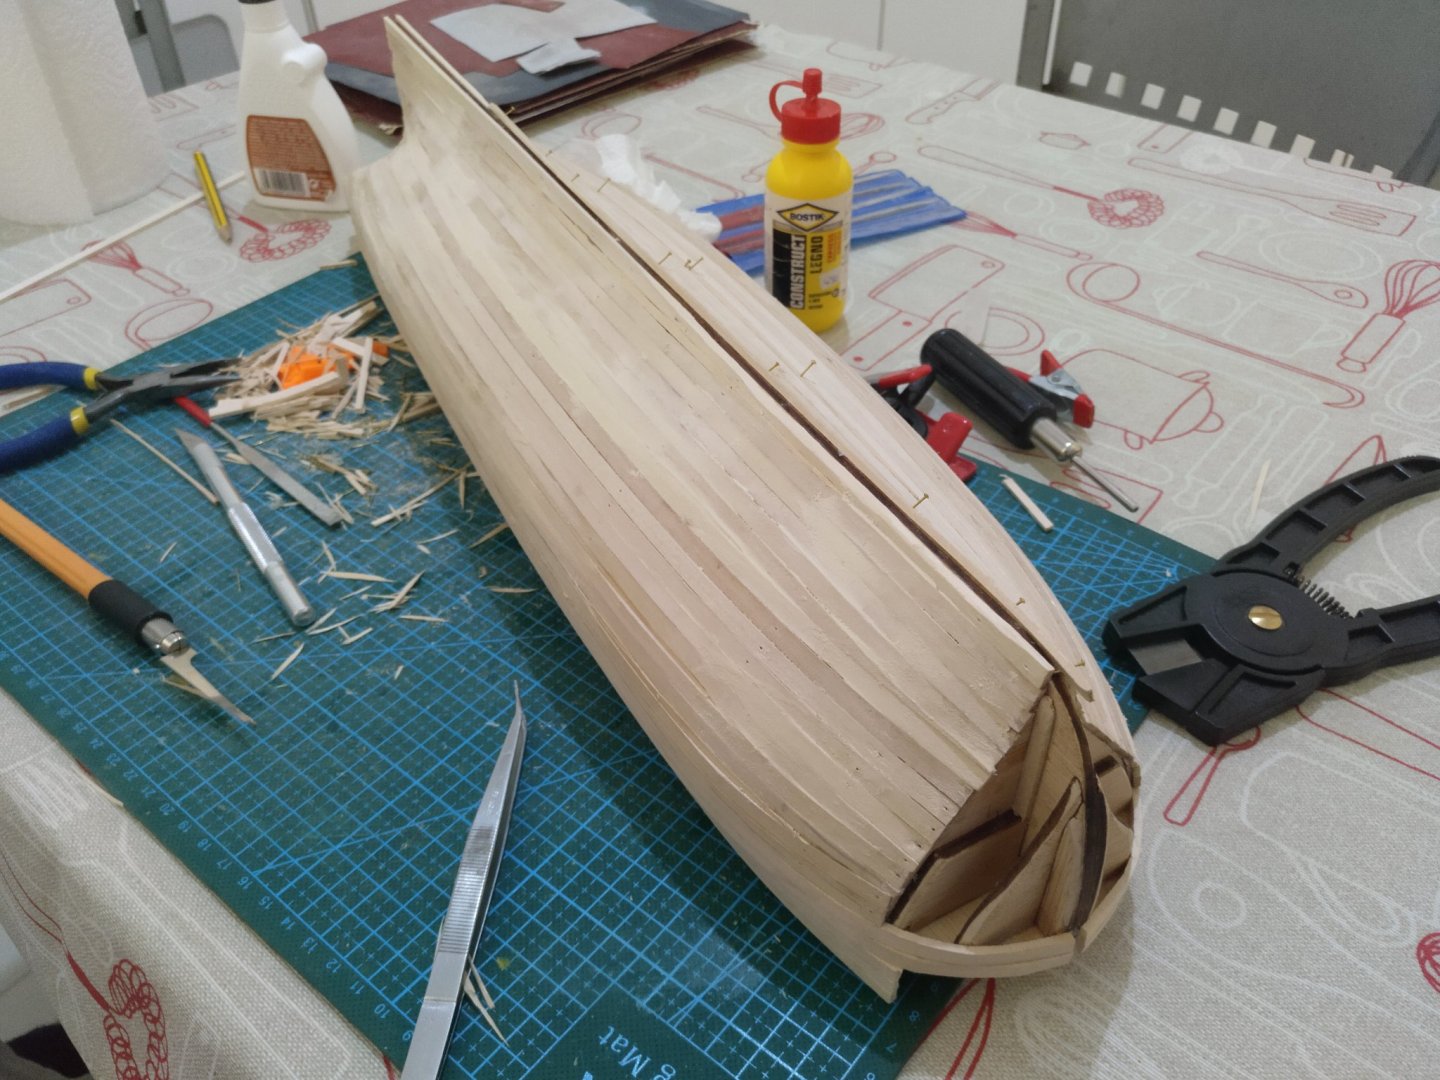
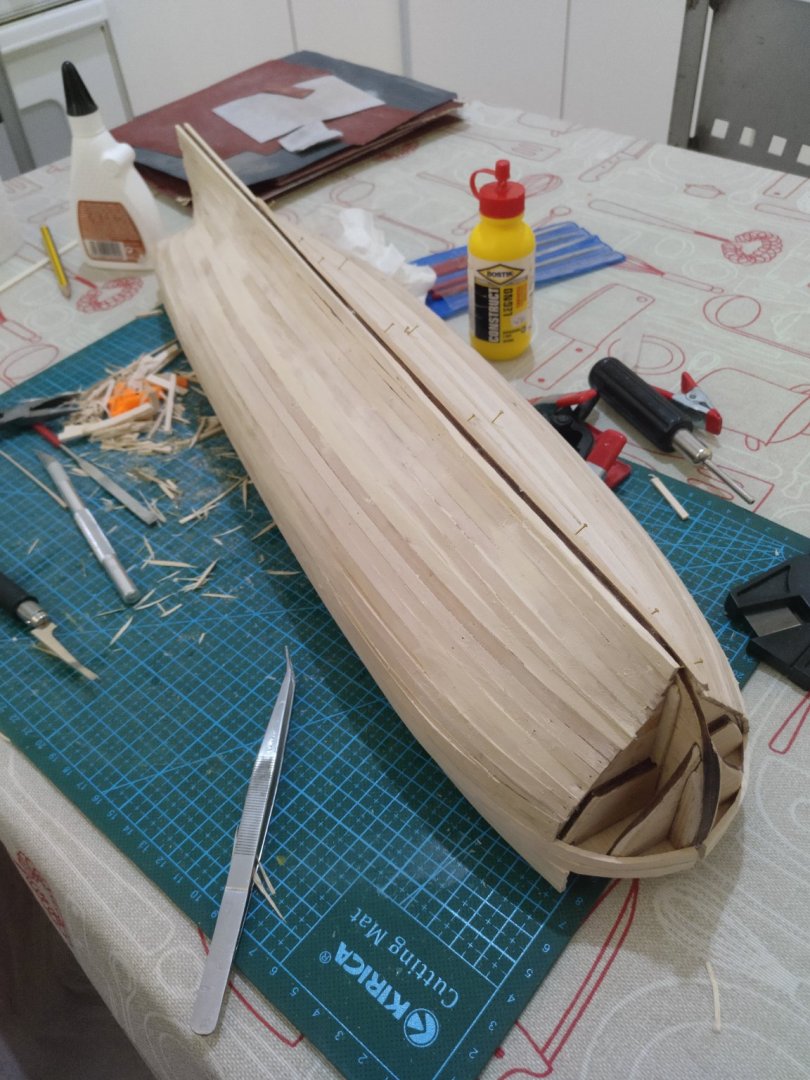
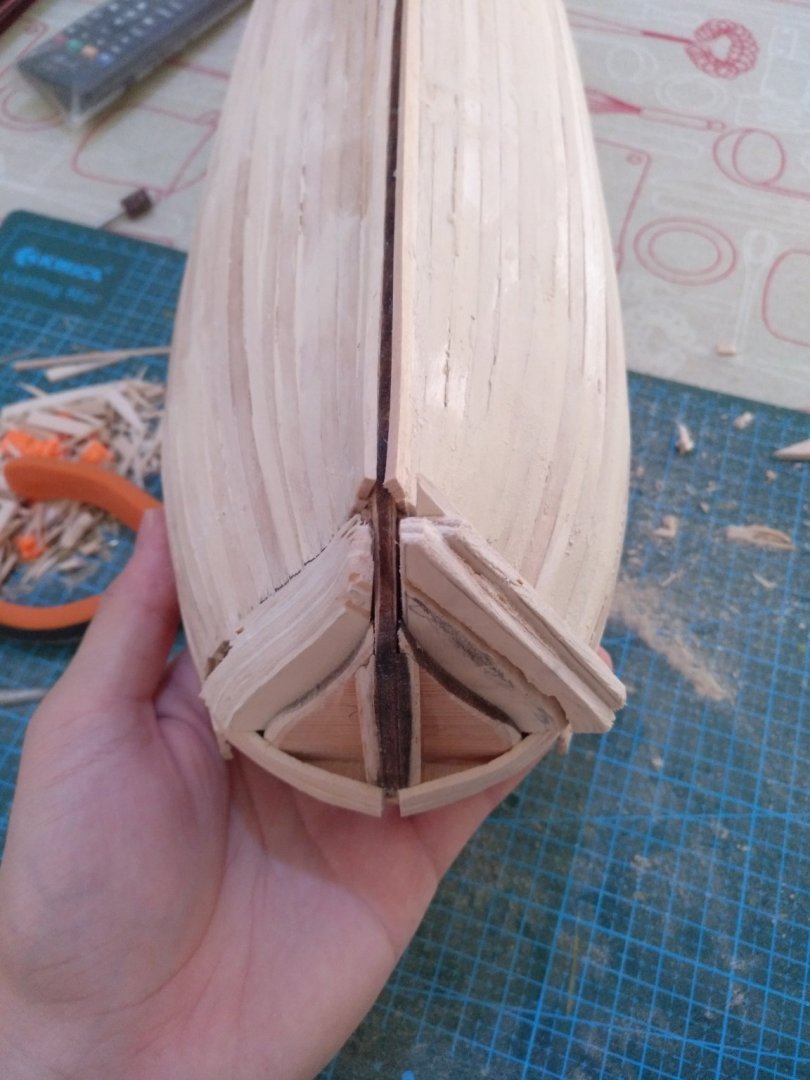
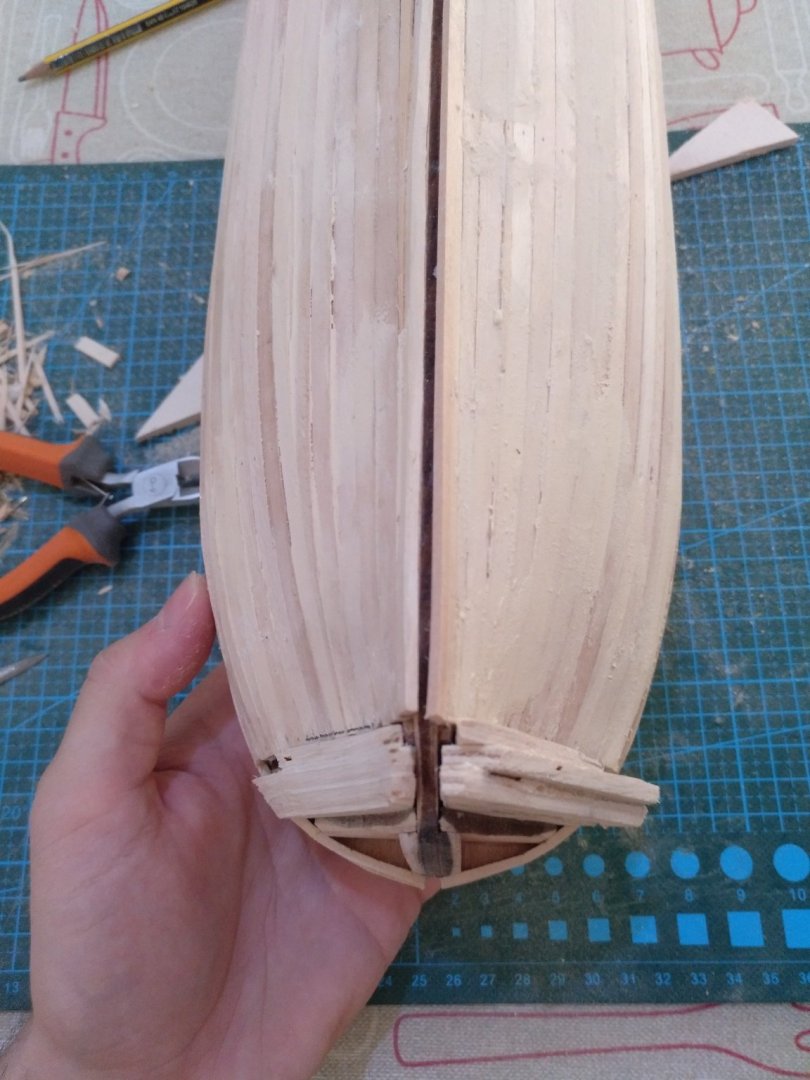
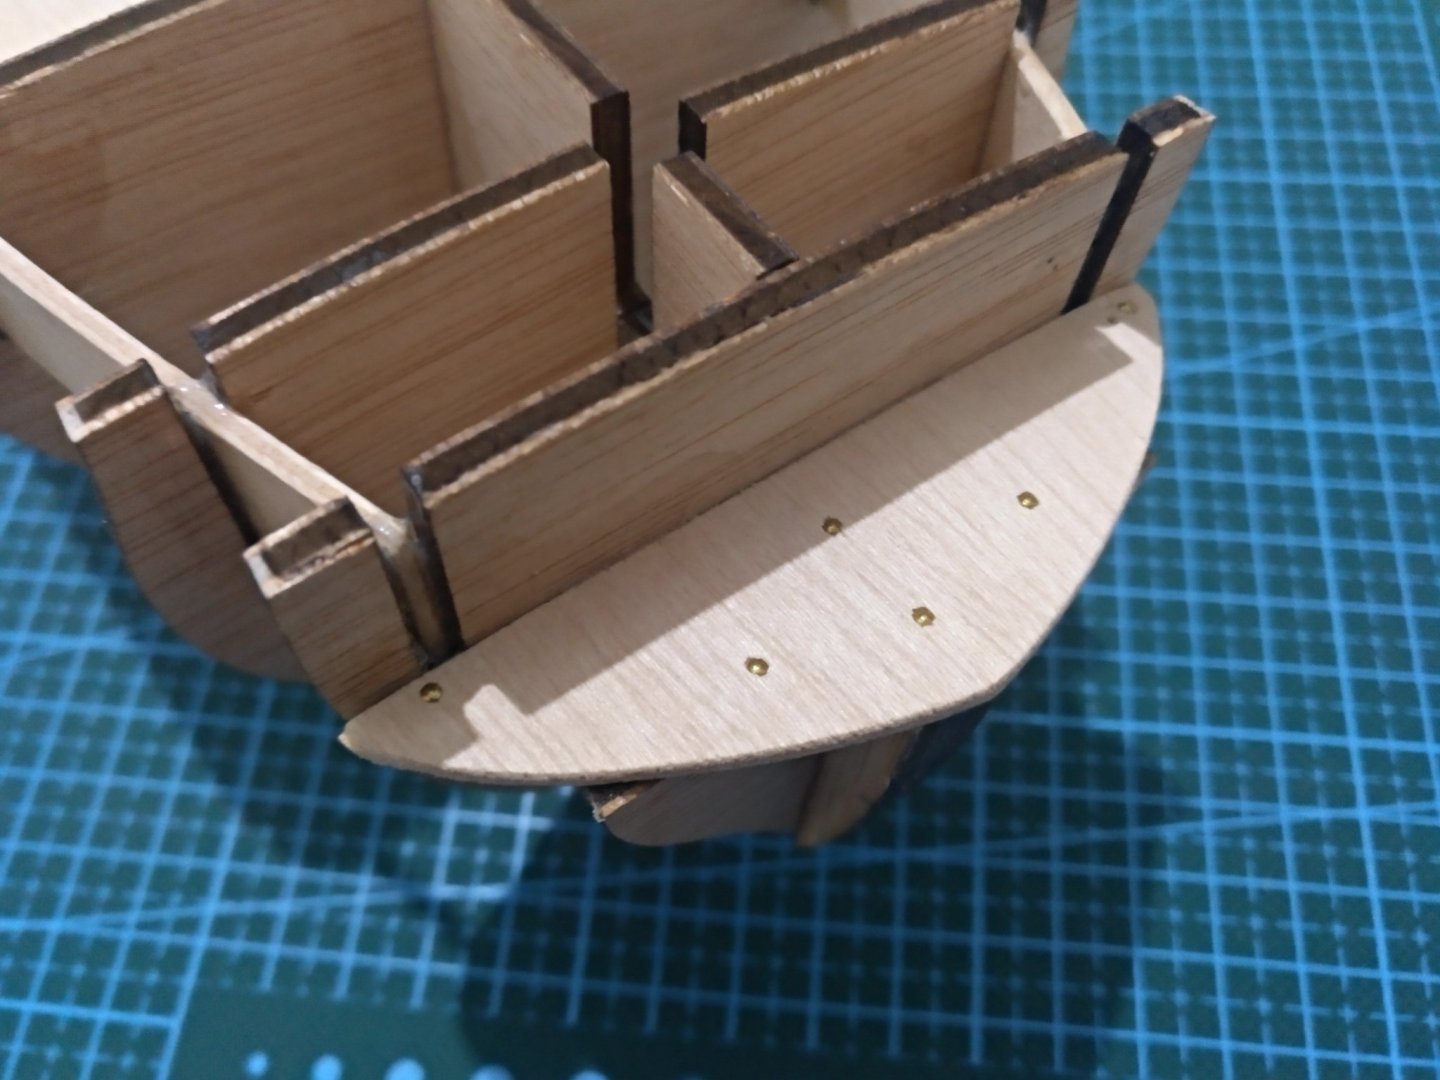
I am now closer to finish the hull. I have glued the stern, the sternpost and I have cut and glued the keel. I had to sand down the sternpost a little. After this, I also glued 3 whales on each side of the ship. I thought they were too many as they were 4cm width, but now I have placed them, it looks great. The next and almost last step is to make and put the rudder blade. I think that with this, I would have finished the hull and I could start populating the lower deck with the canons and so on, and also the upper deck.


-
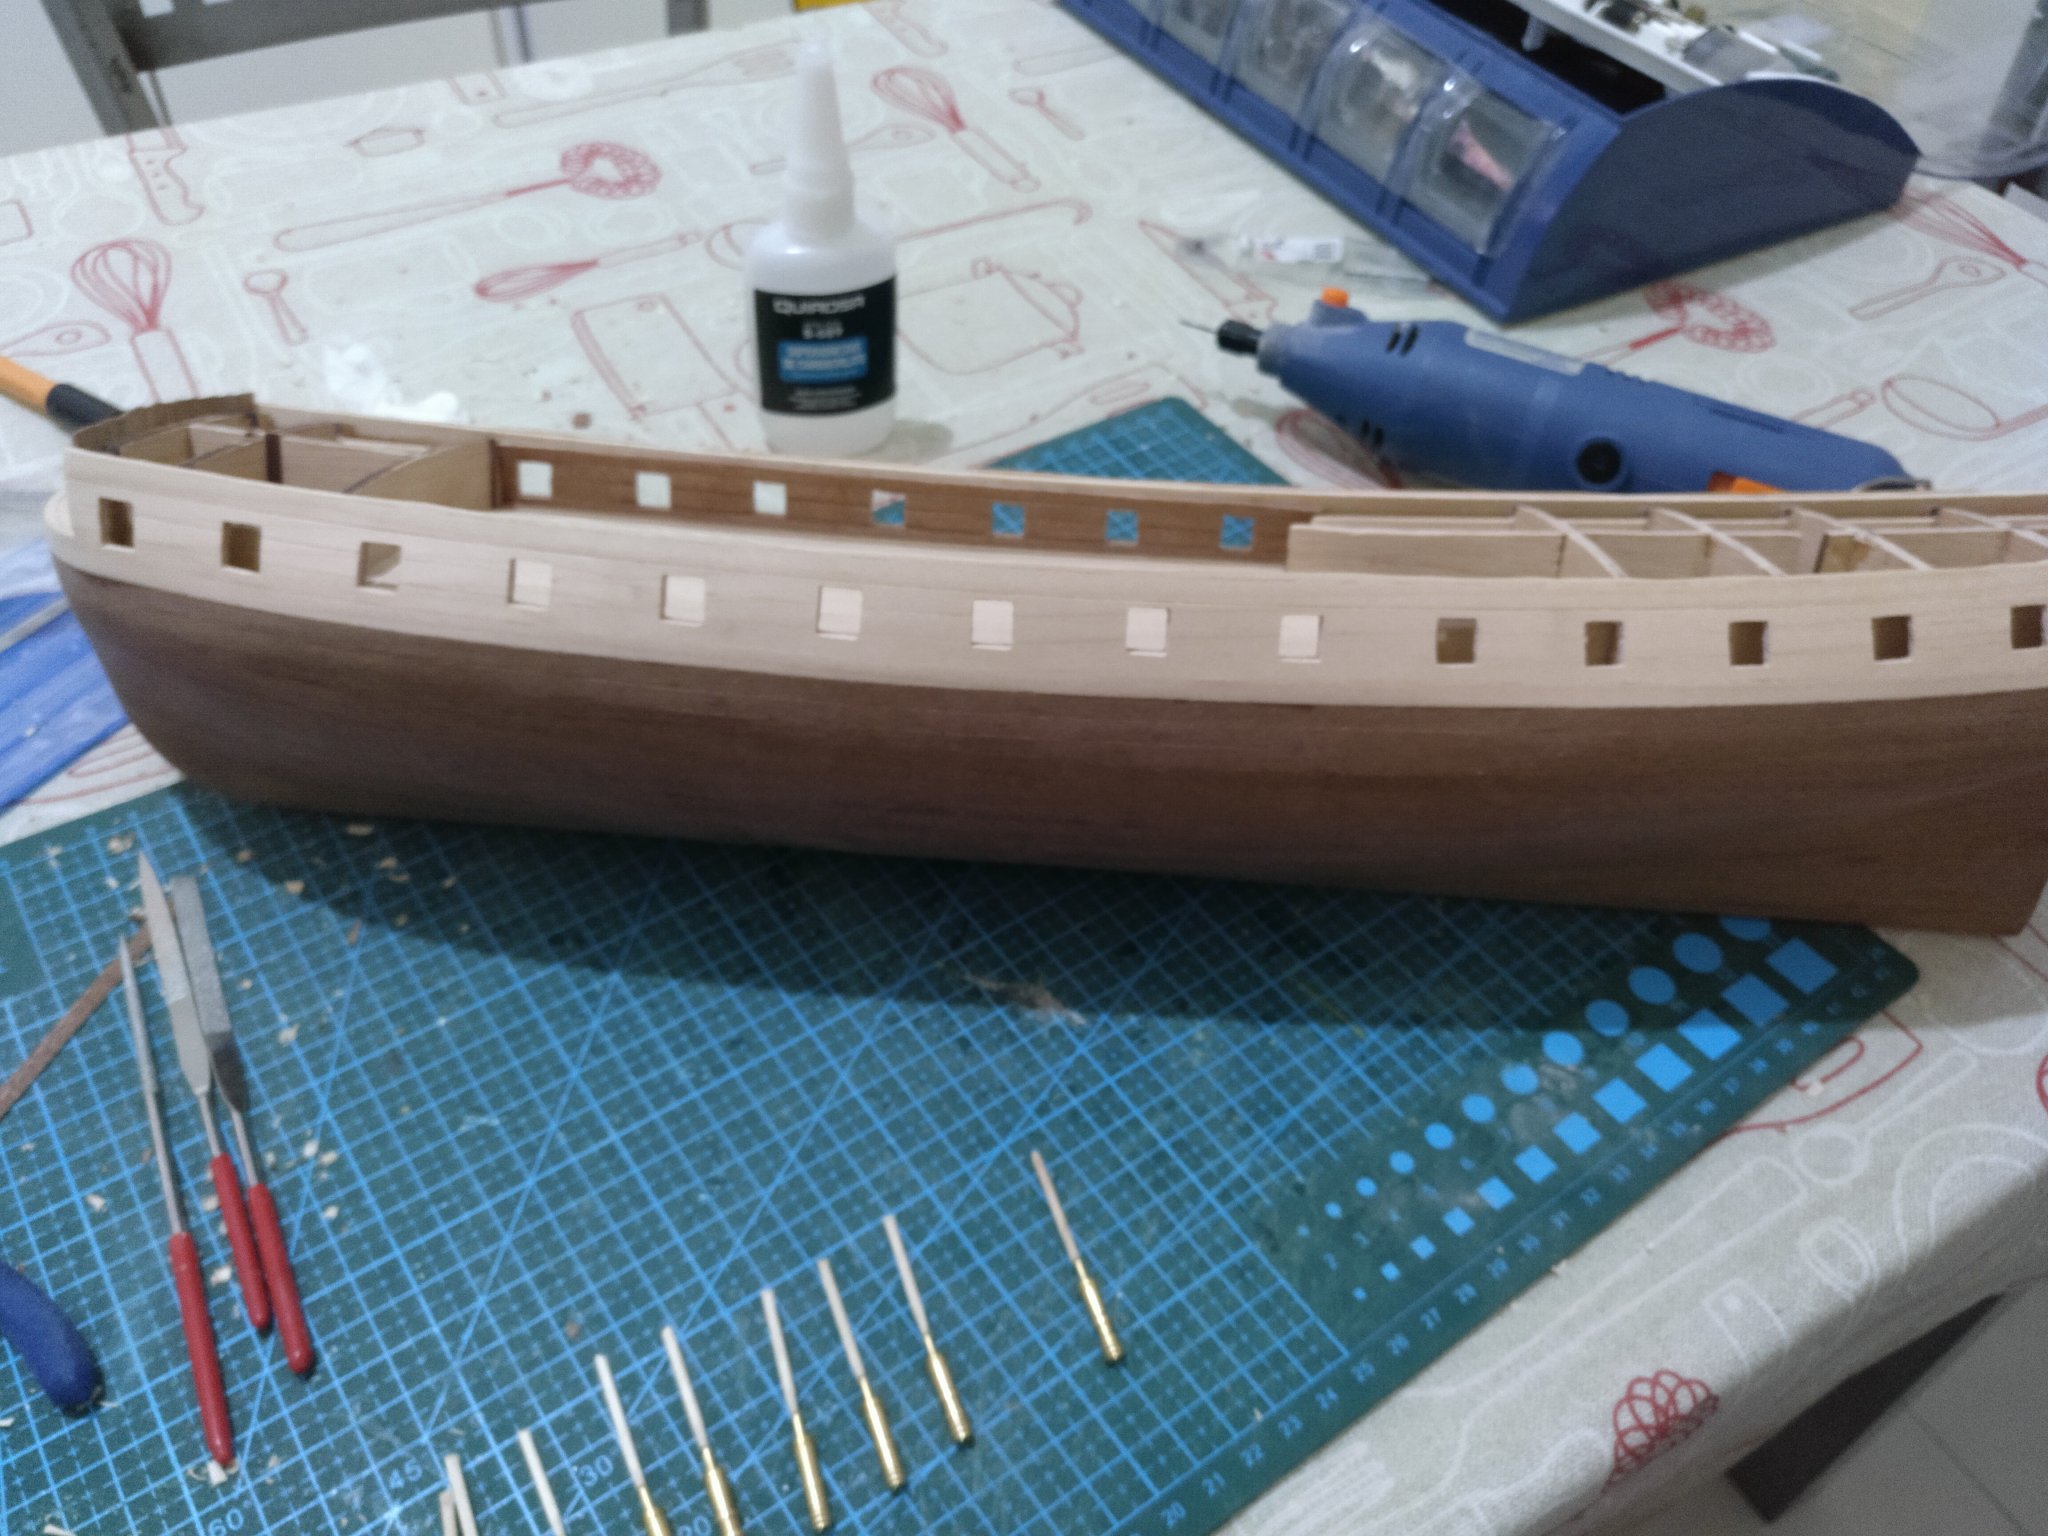
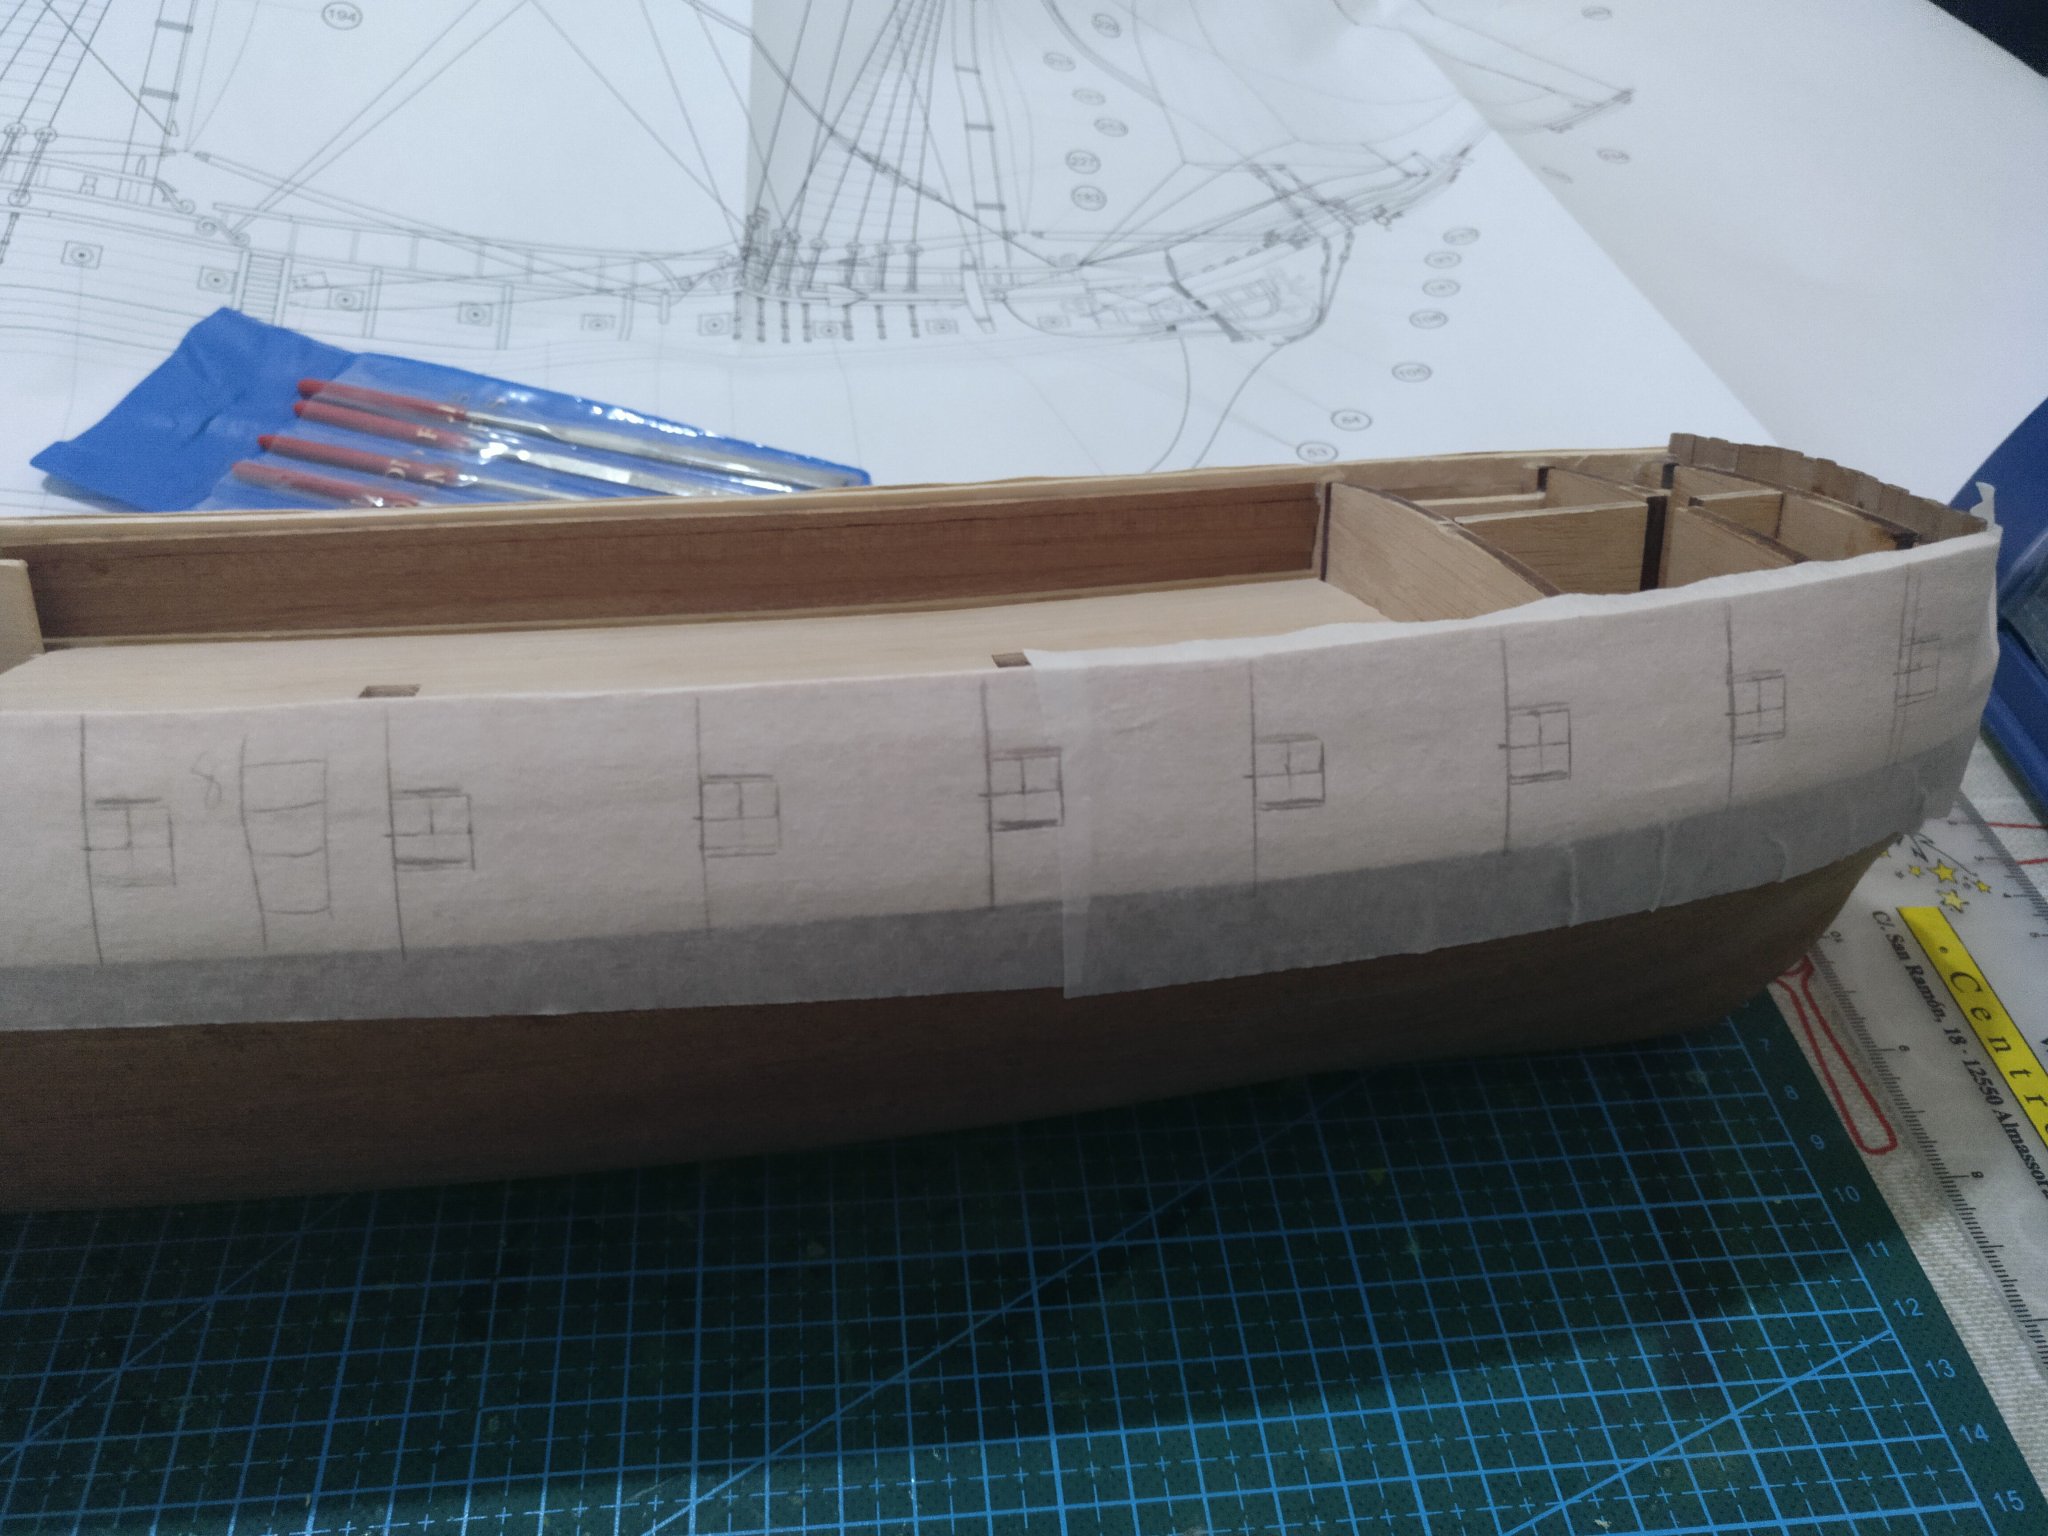
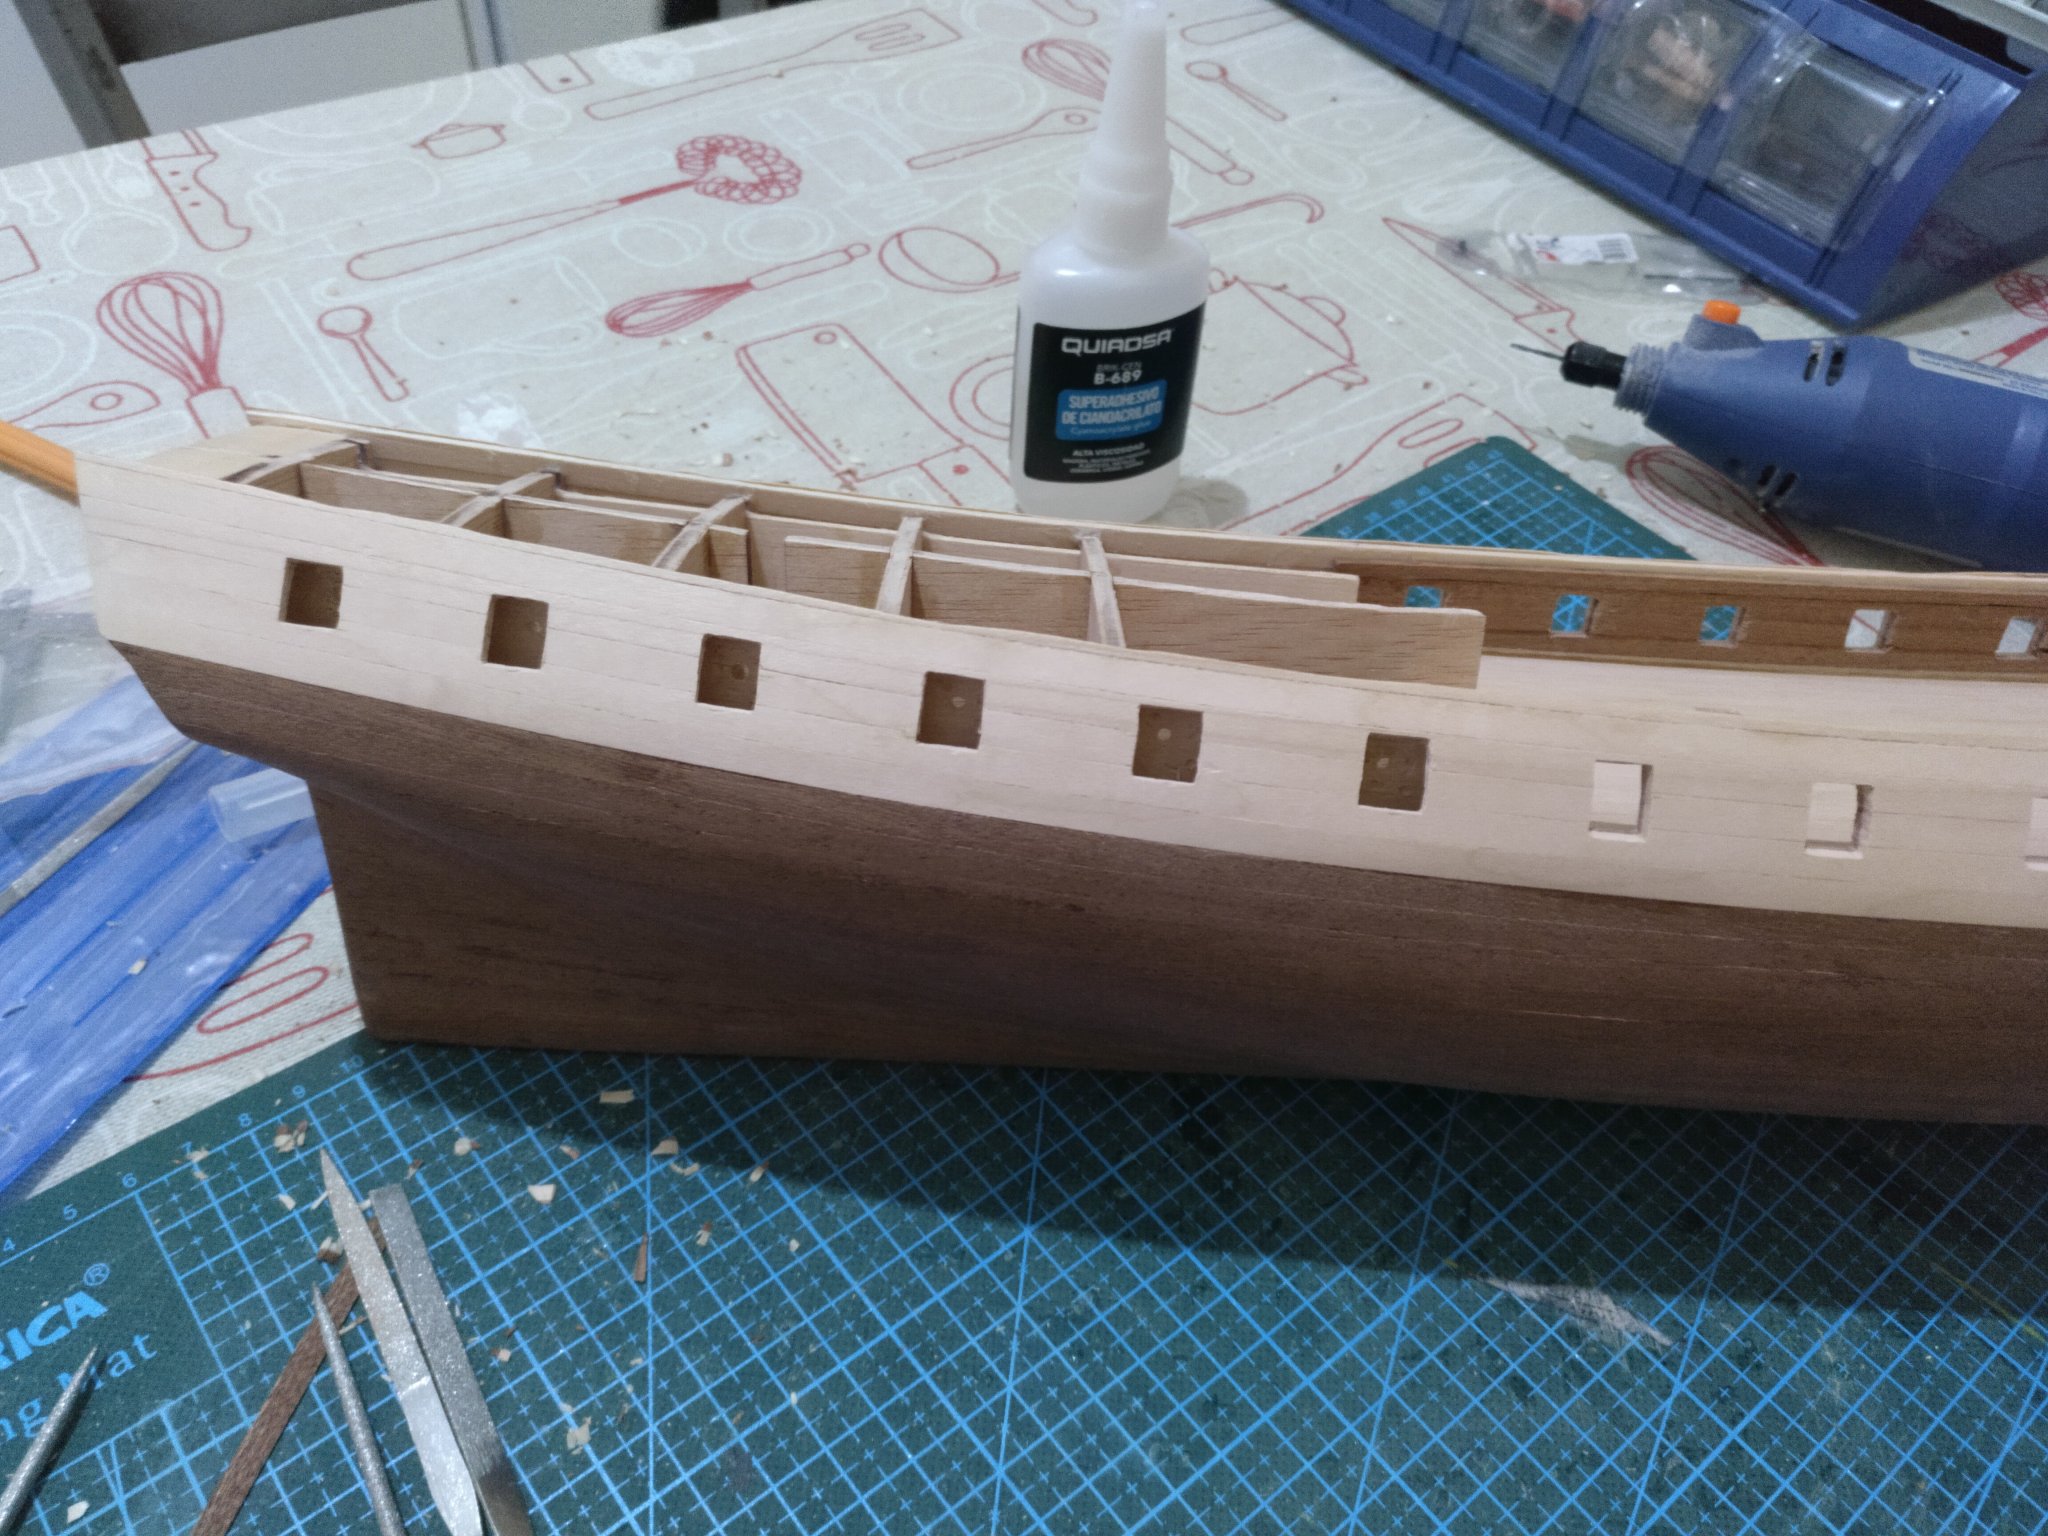
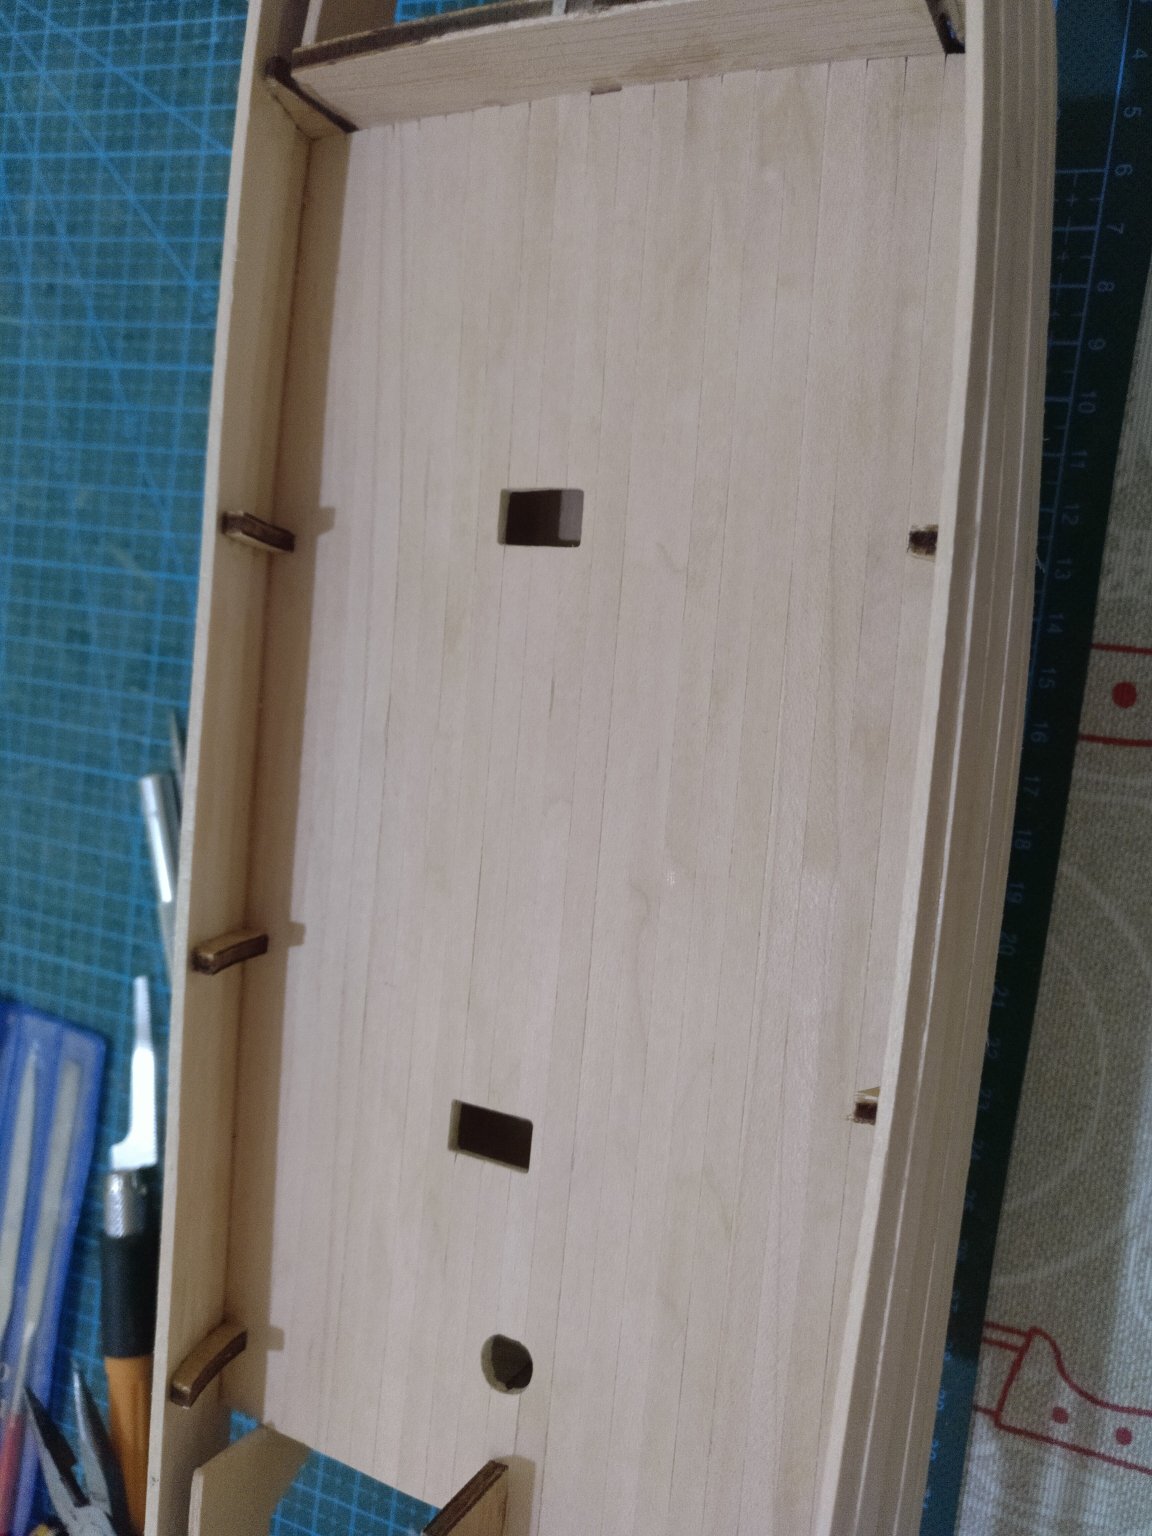
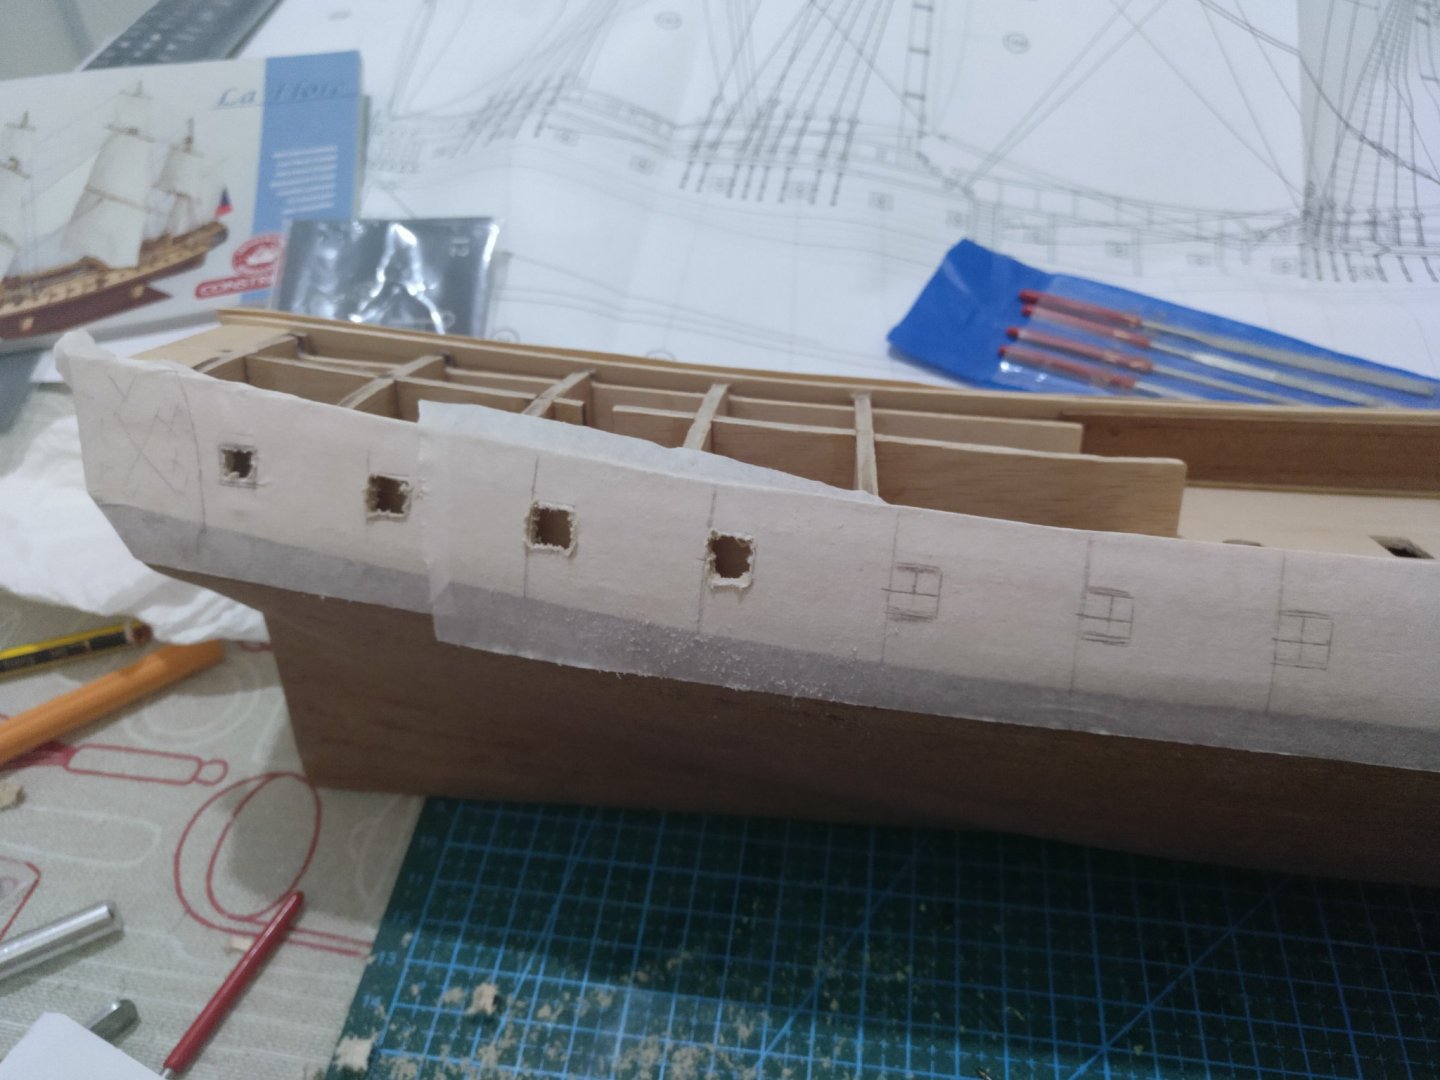
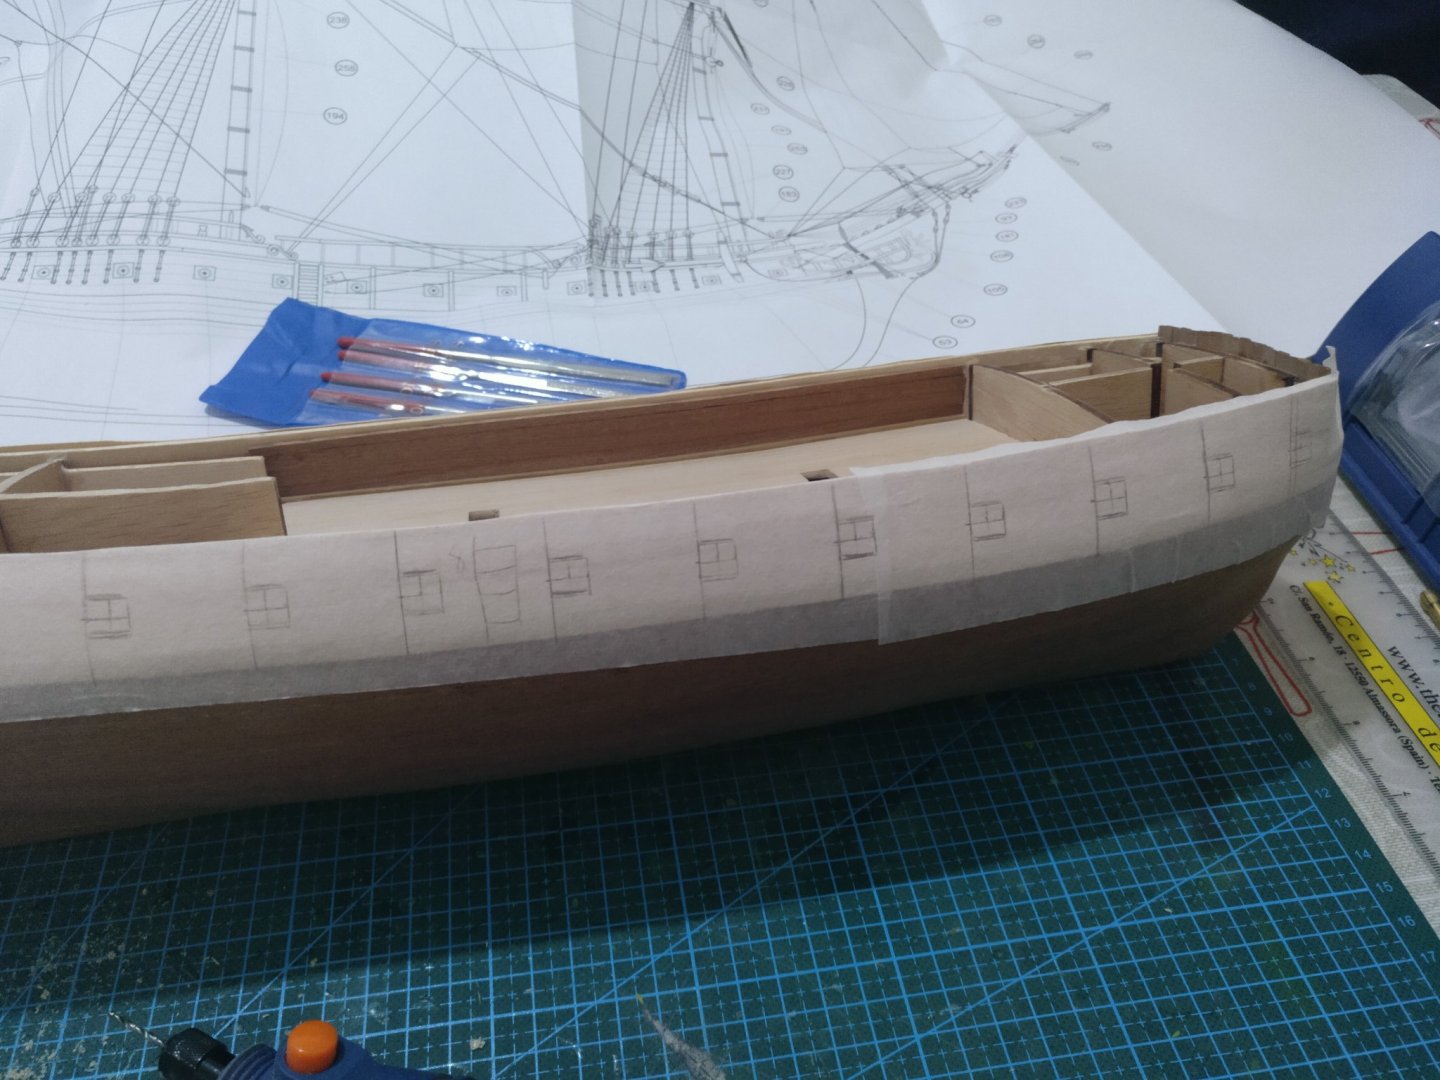
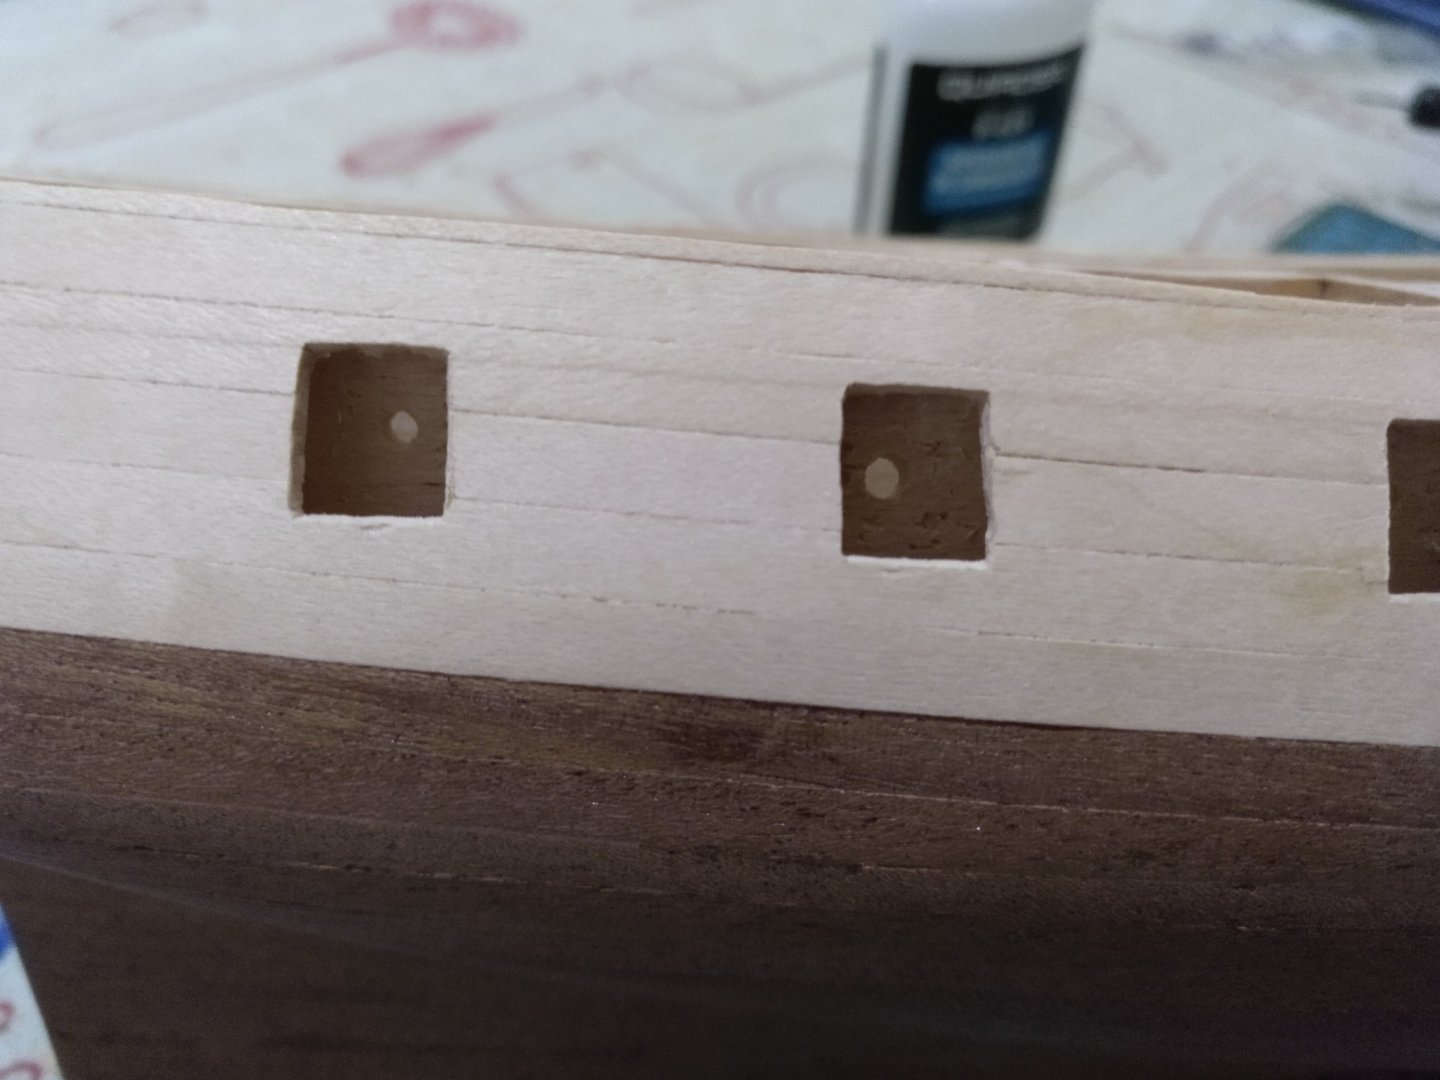
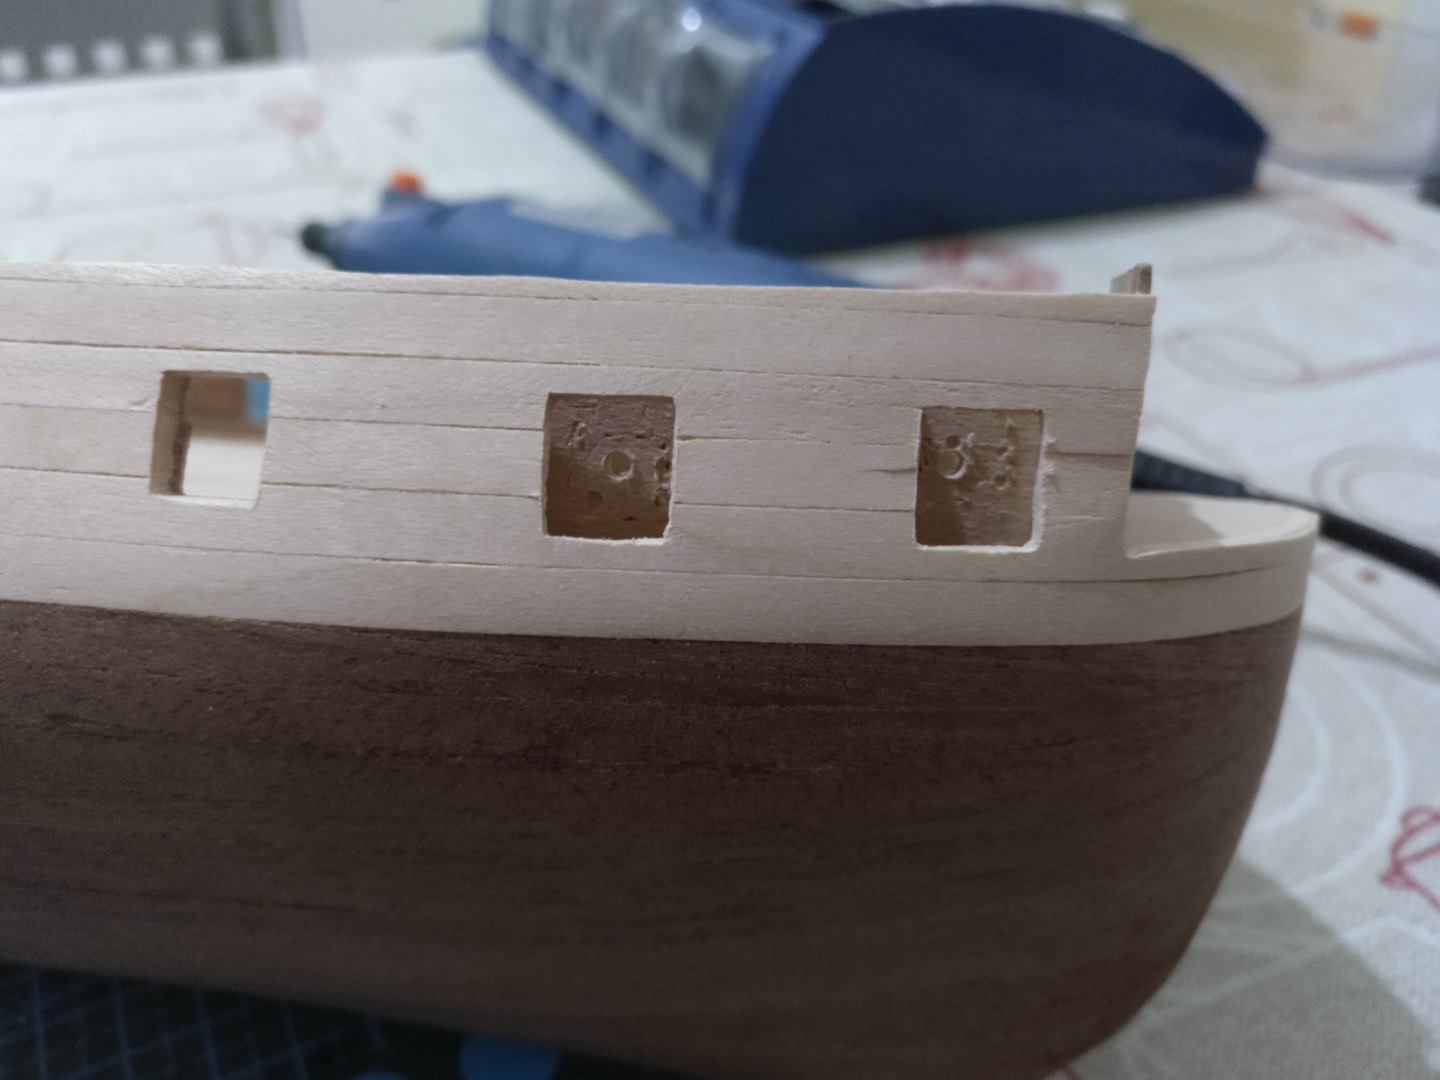
Here you can see that I drilled all the gunports. 15 on each side. Pretty easy task but has to be made carefully. The most tedious part is sanding them to be a perfect rectangle. Here you can see the process. I used painters' tape to draw where each one should go, then I drilled them and with the Exacto knife I cut the hole and with the file I sanded it to make a perfect rectangle. Once I did this, I drilled holes to hold the small cannons that don't have carriages.


-
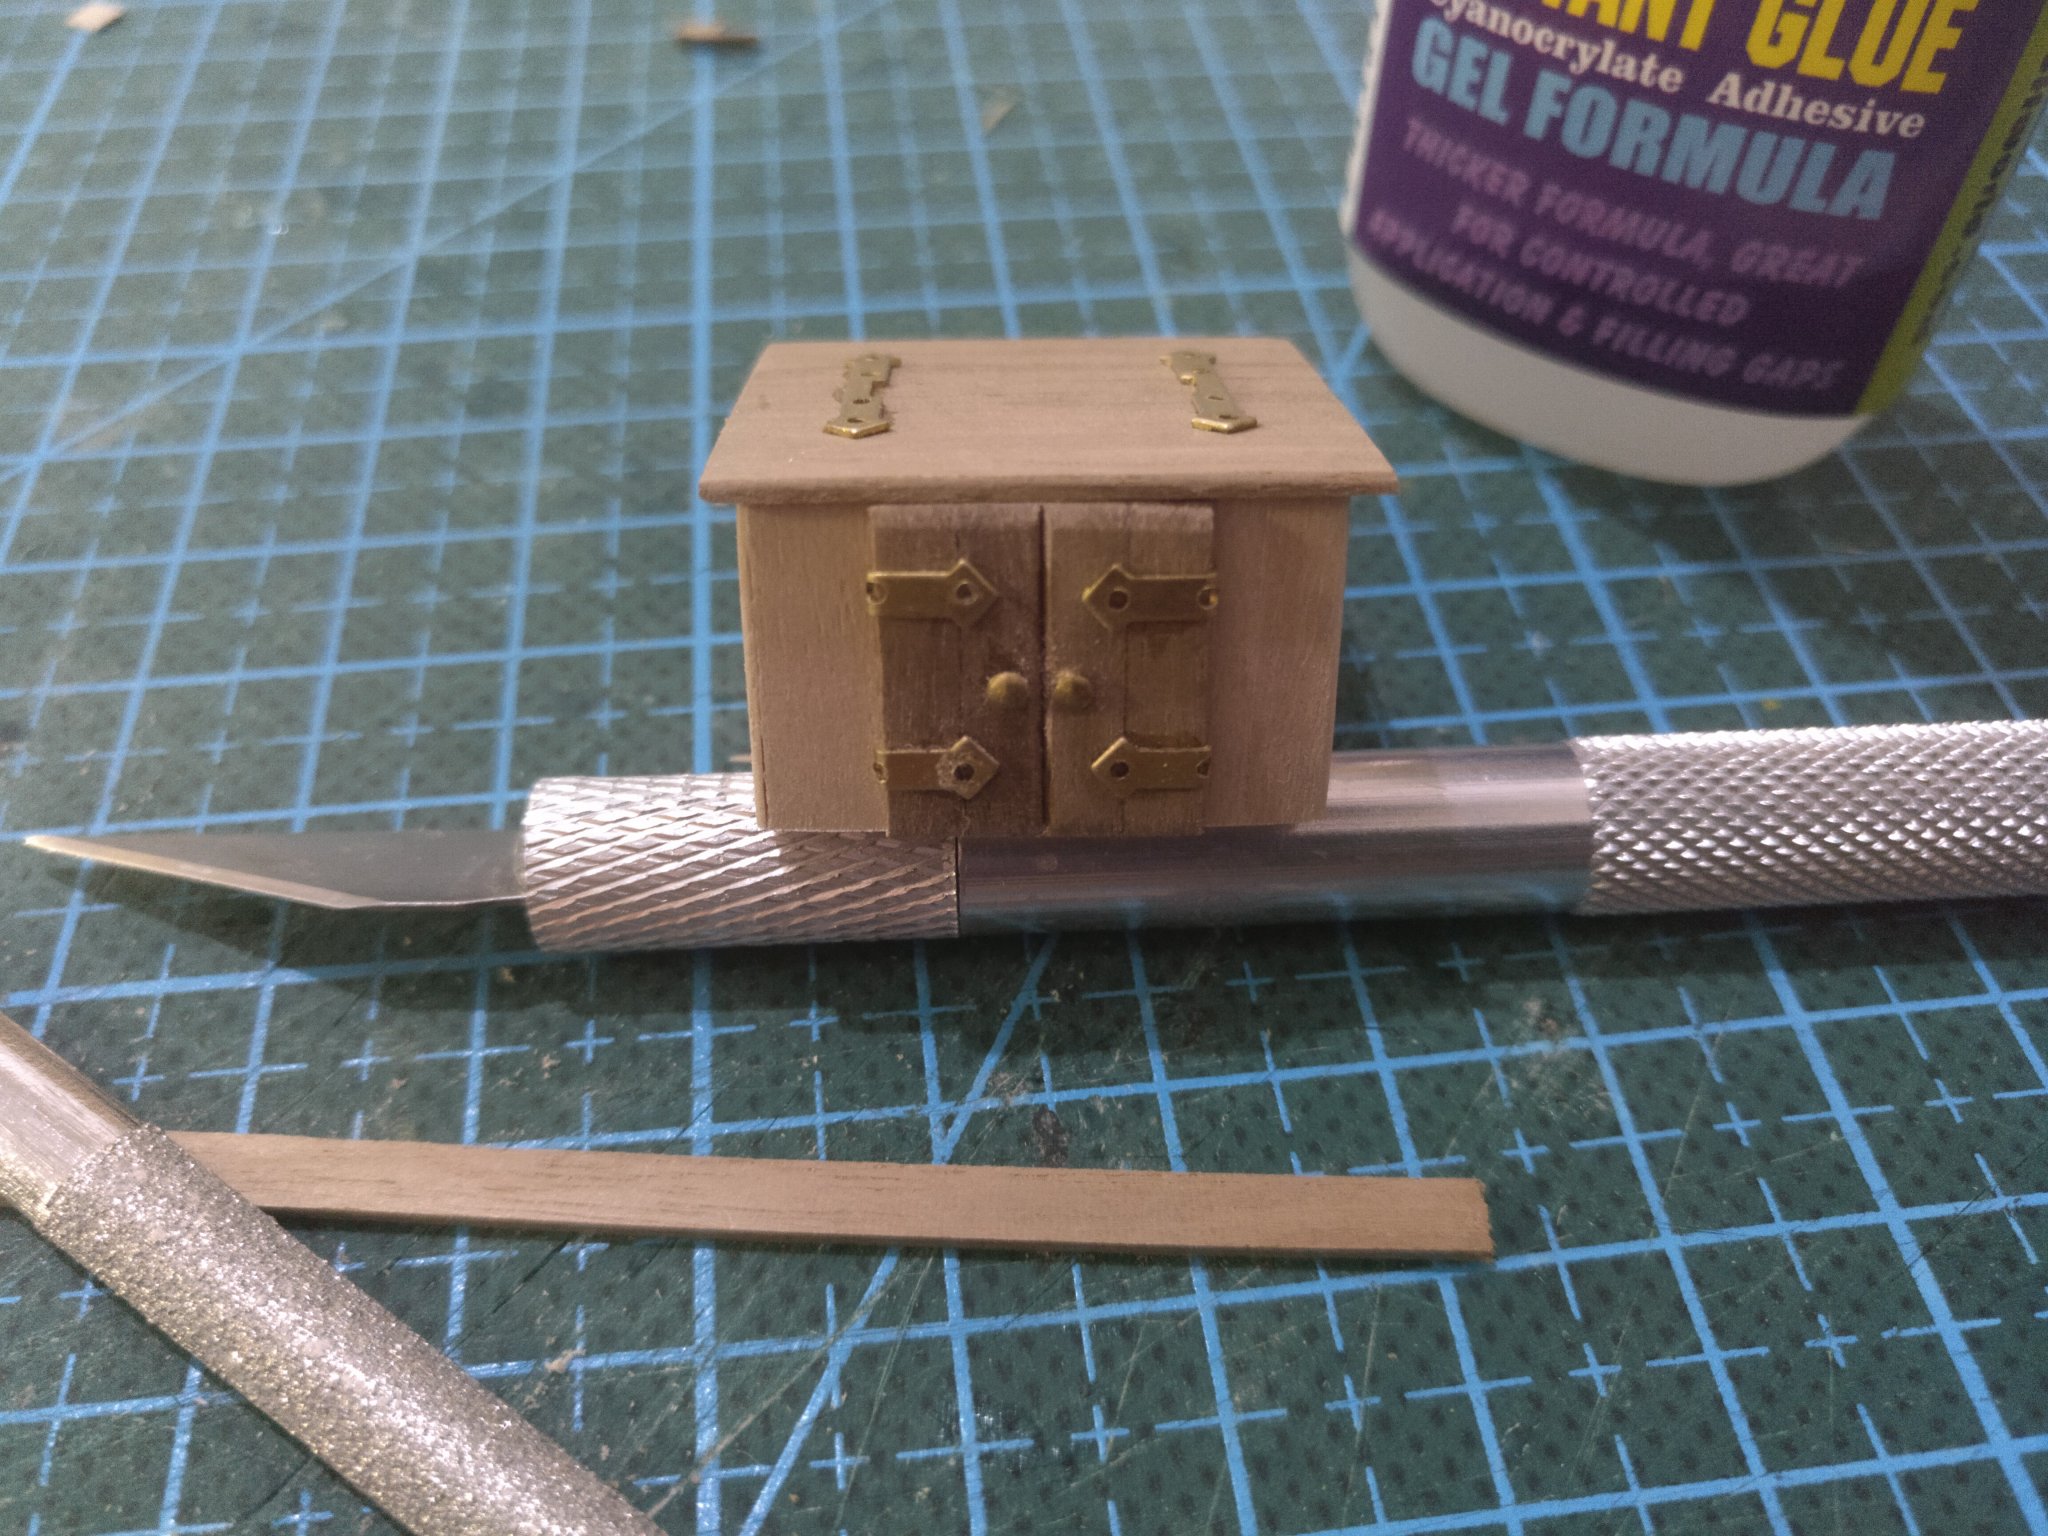
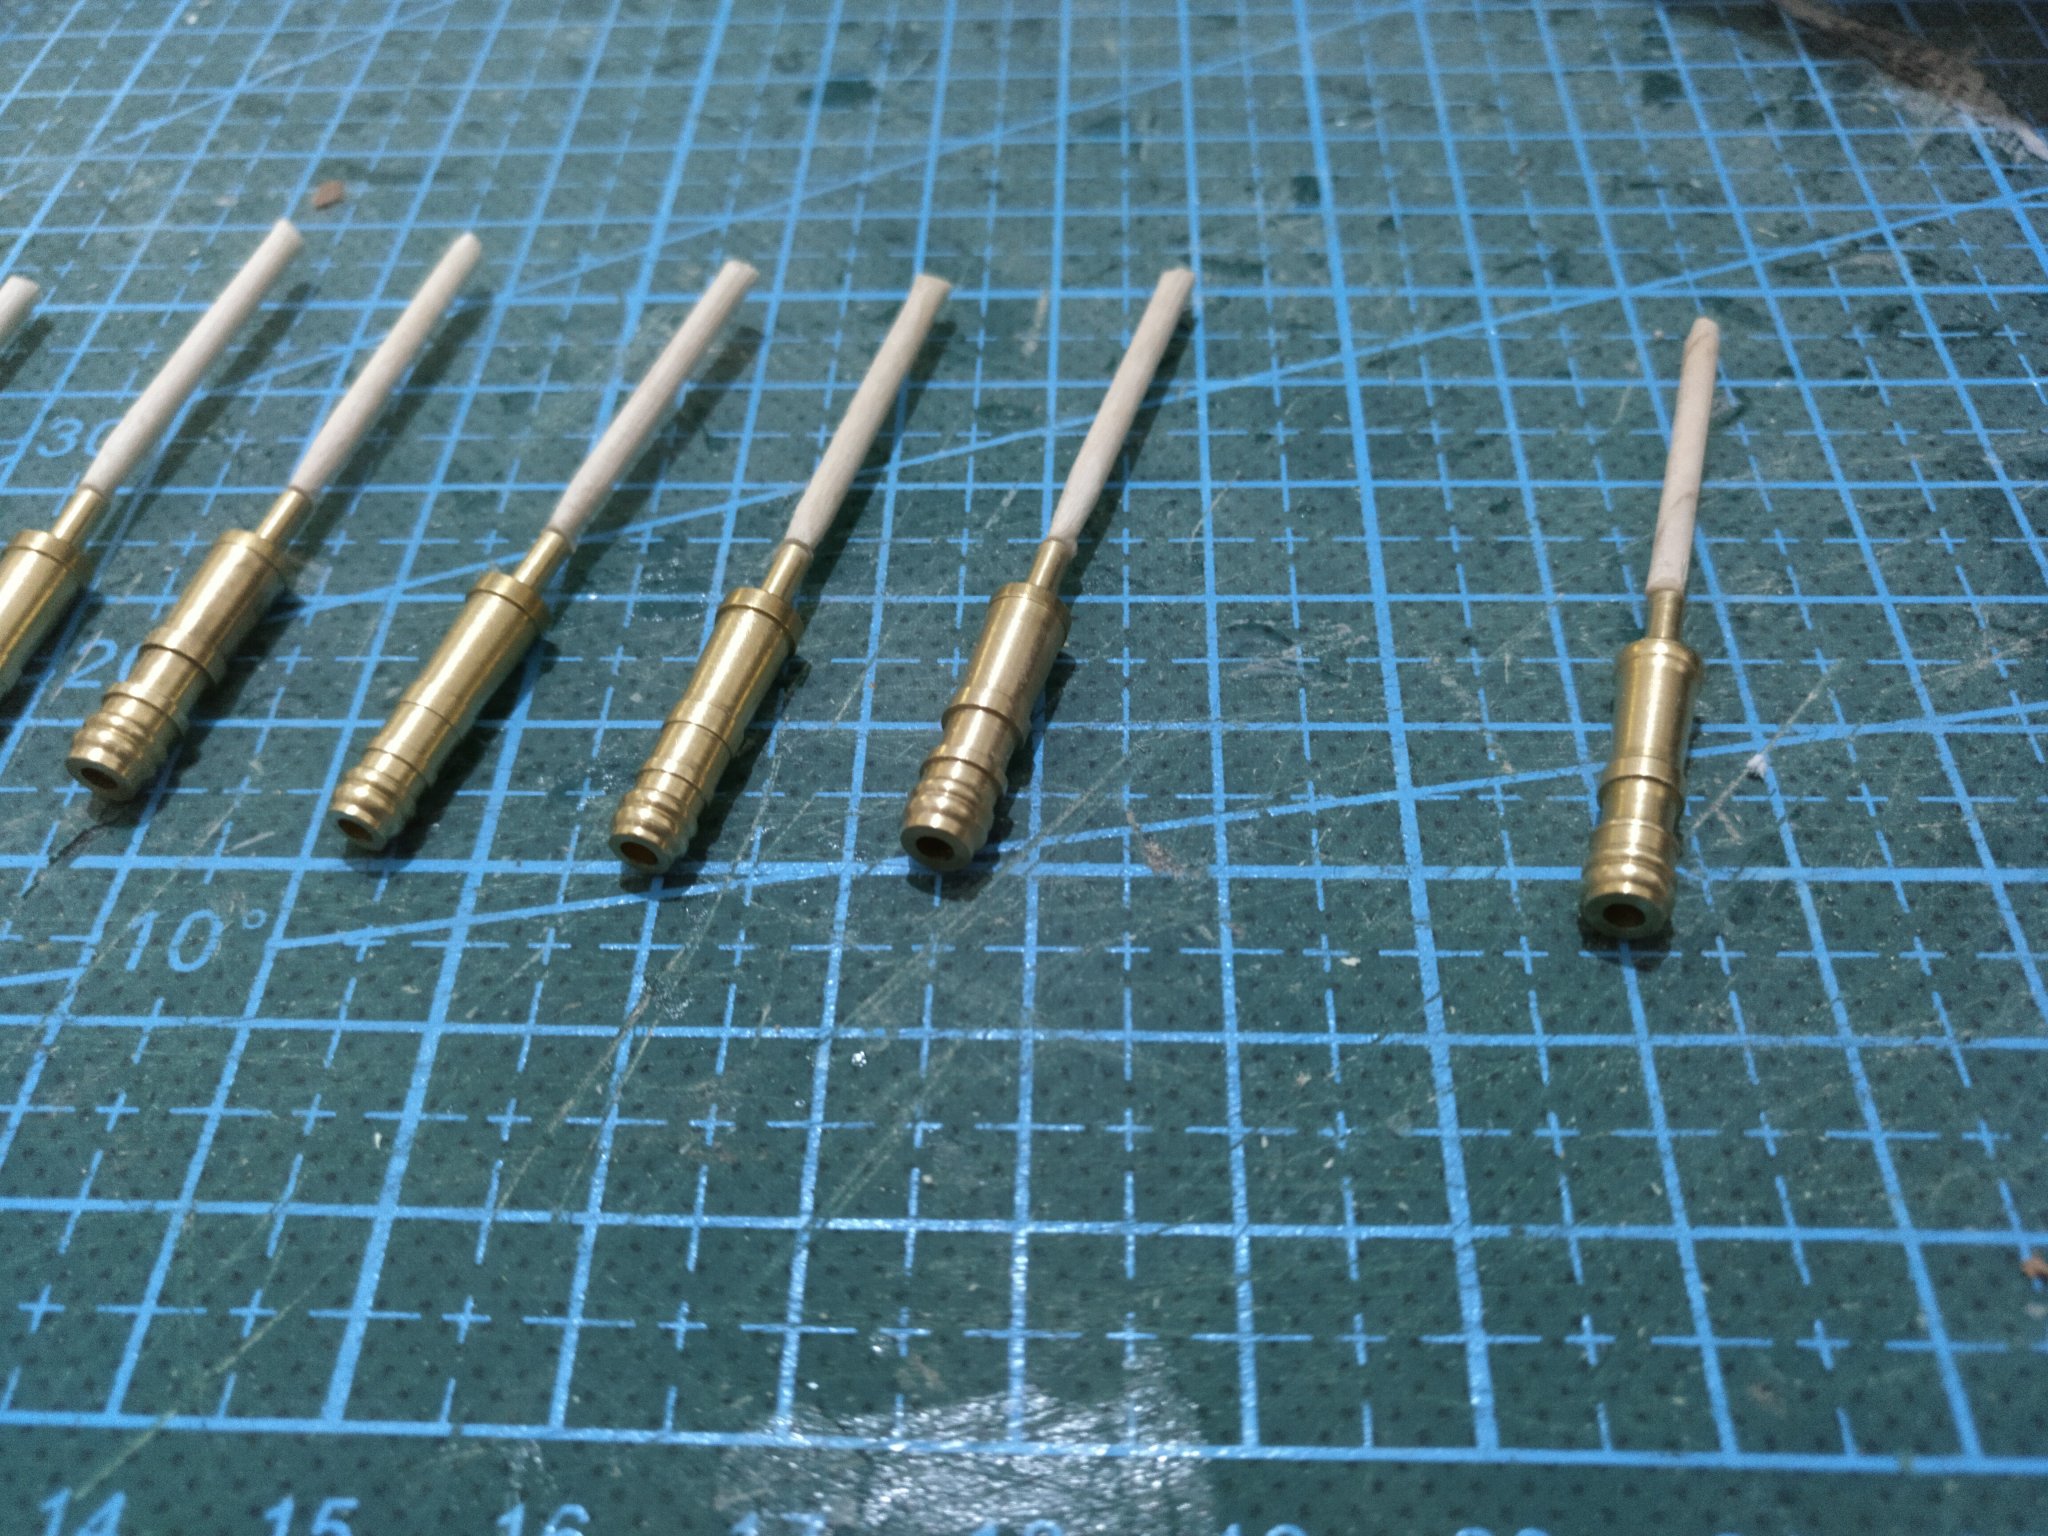
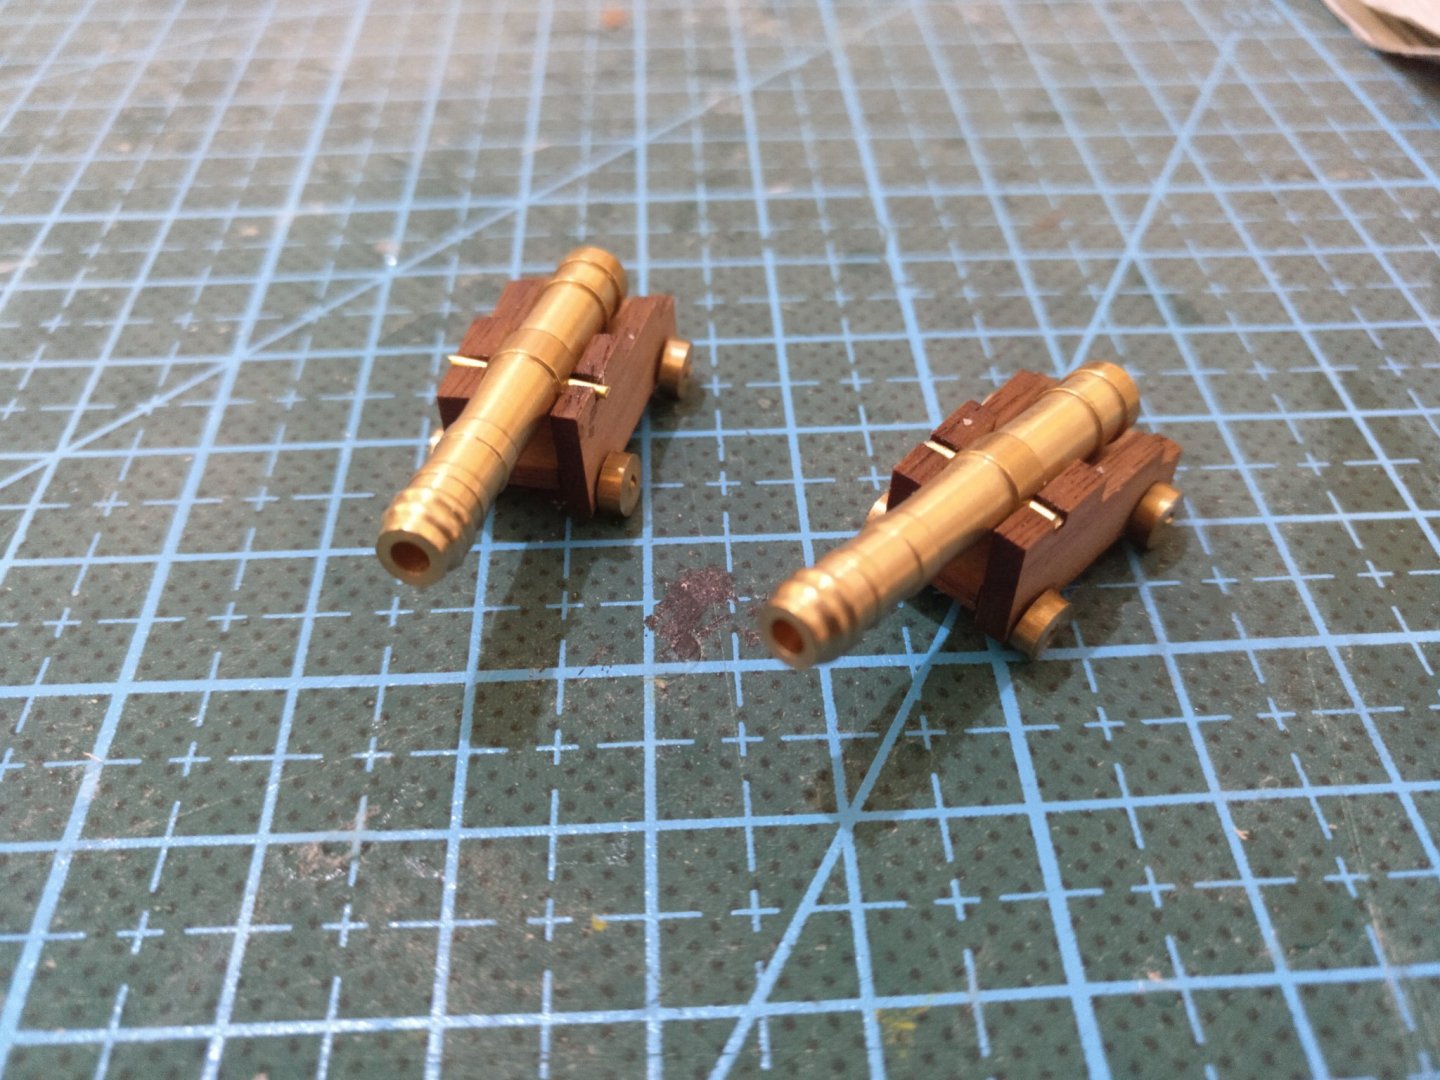
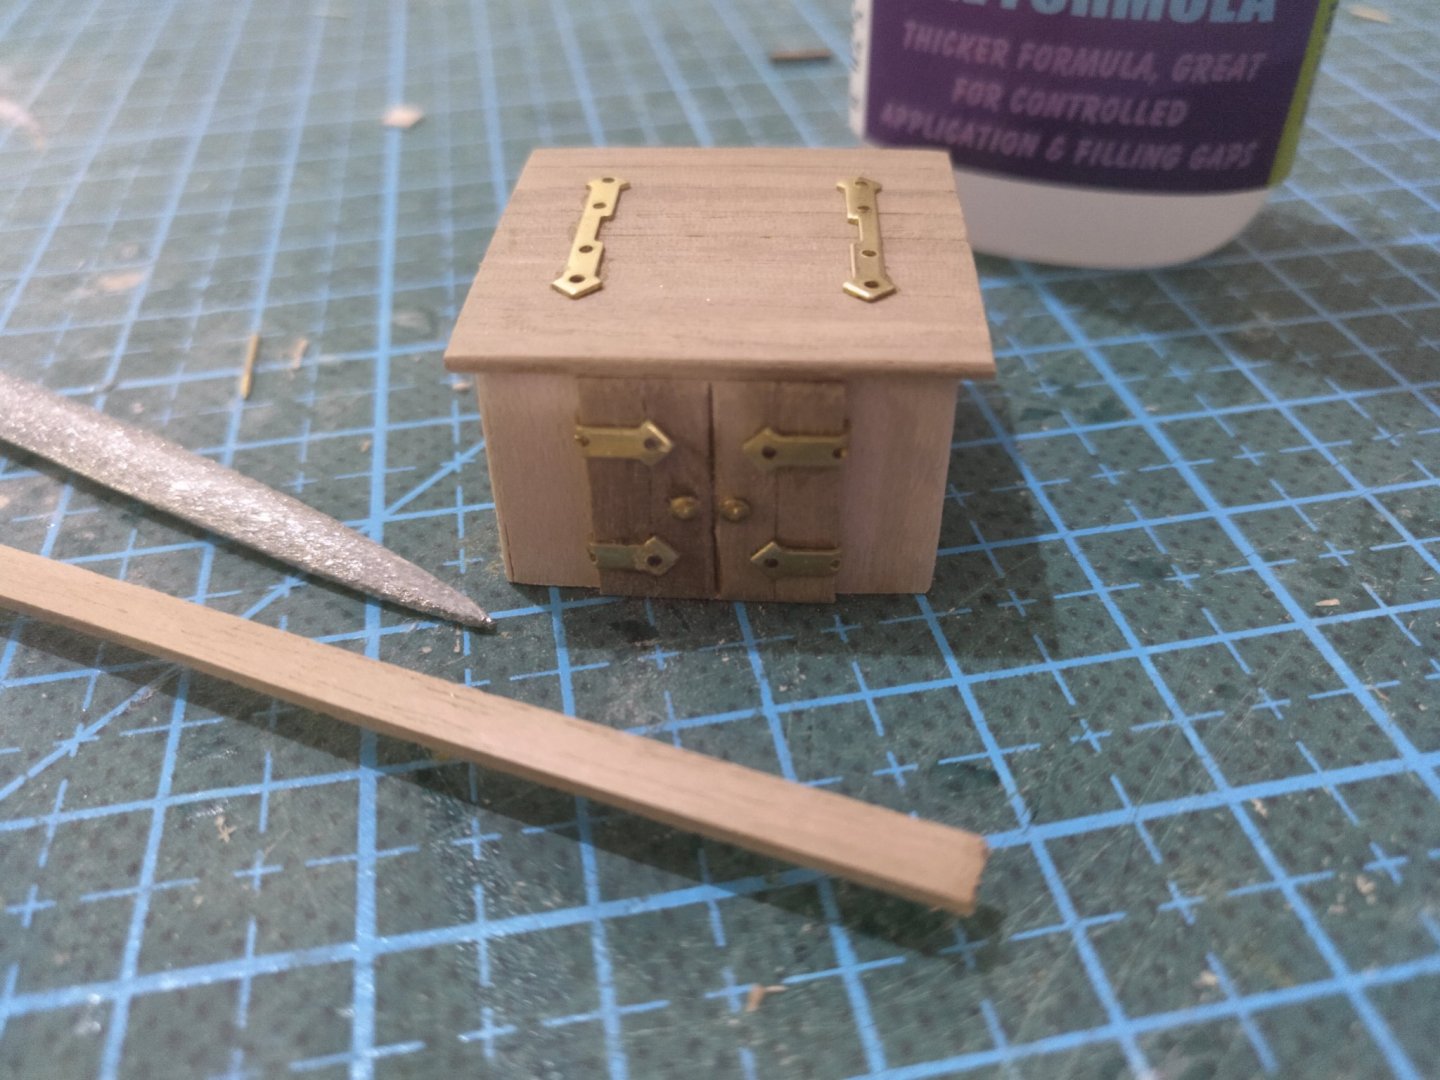
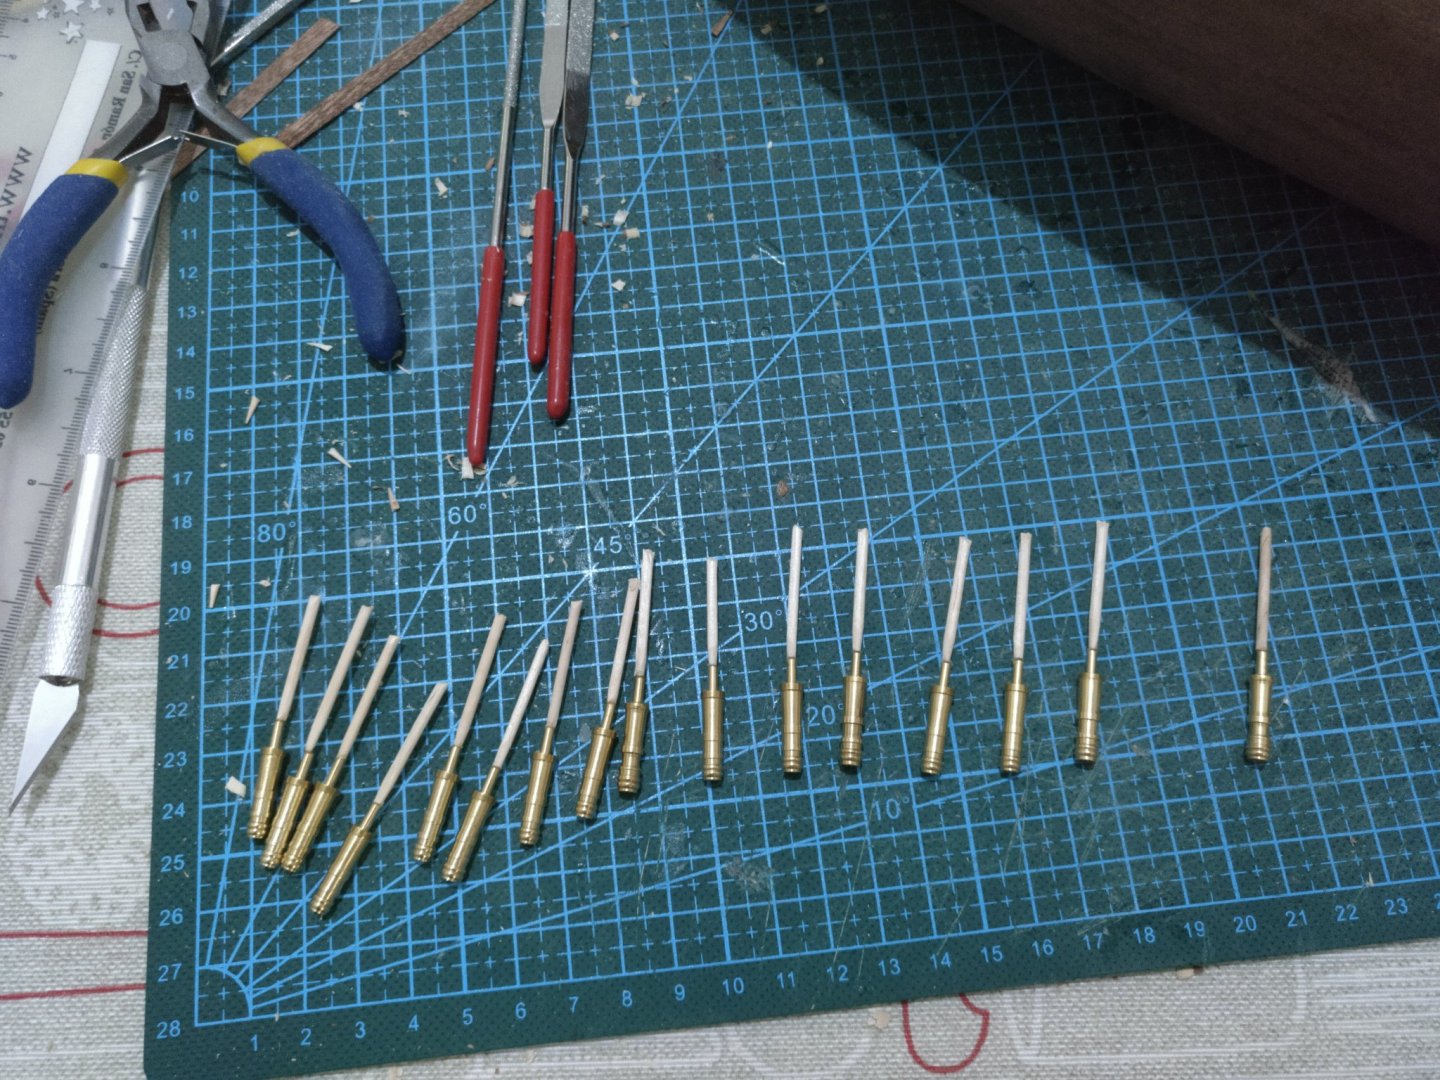
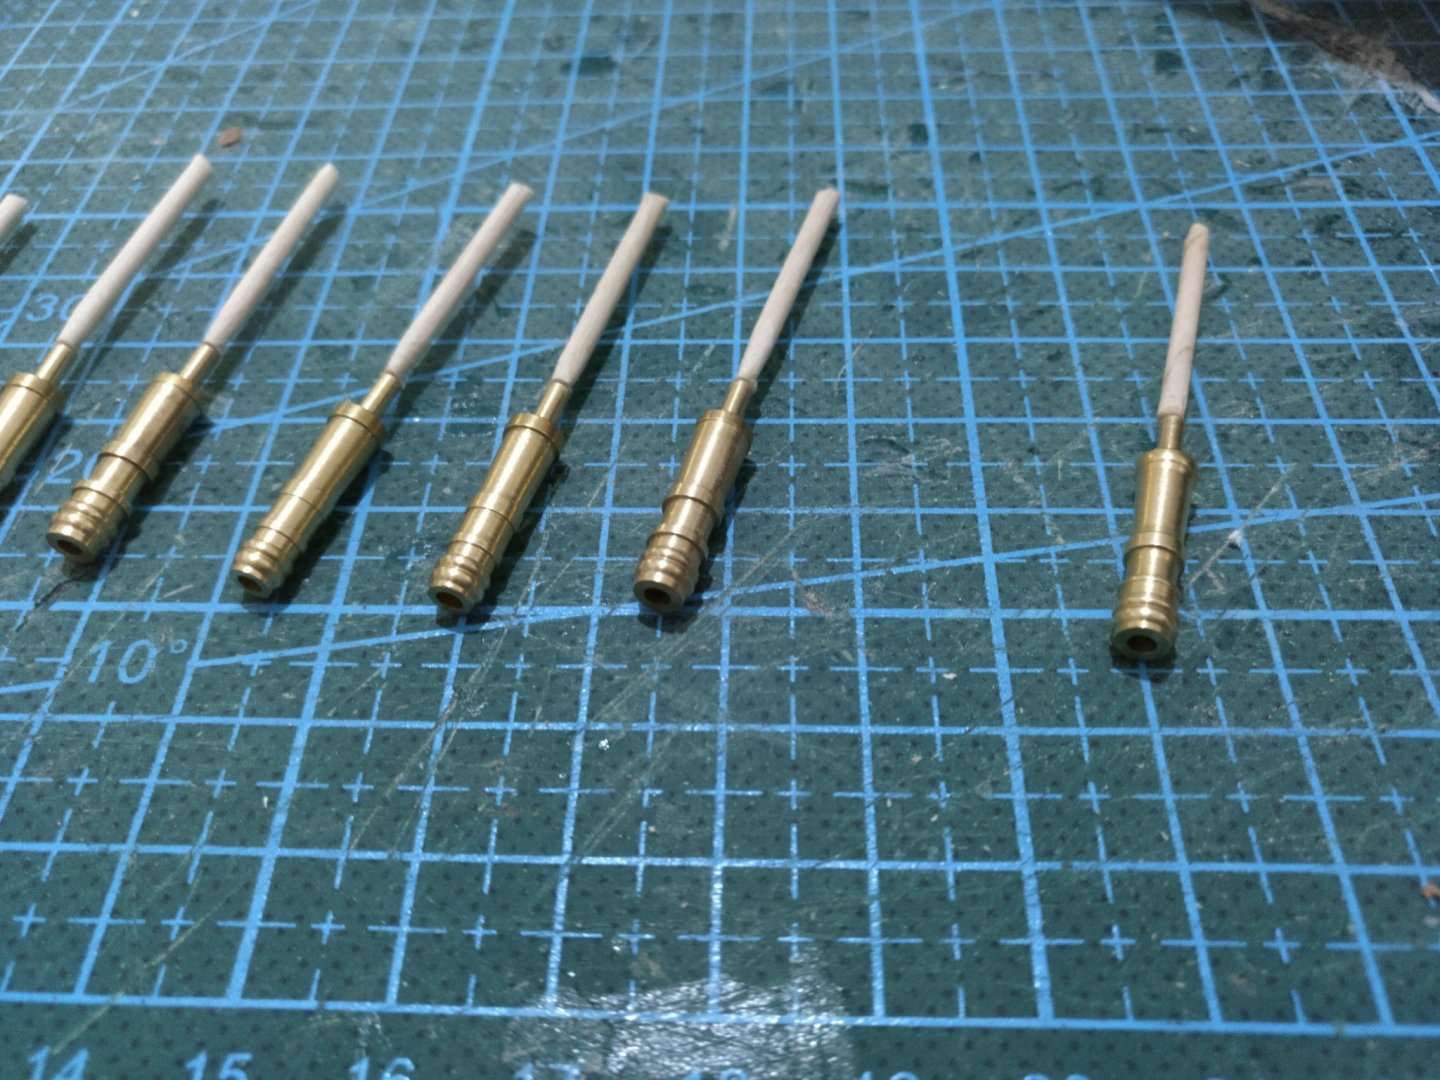
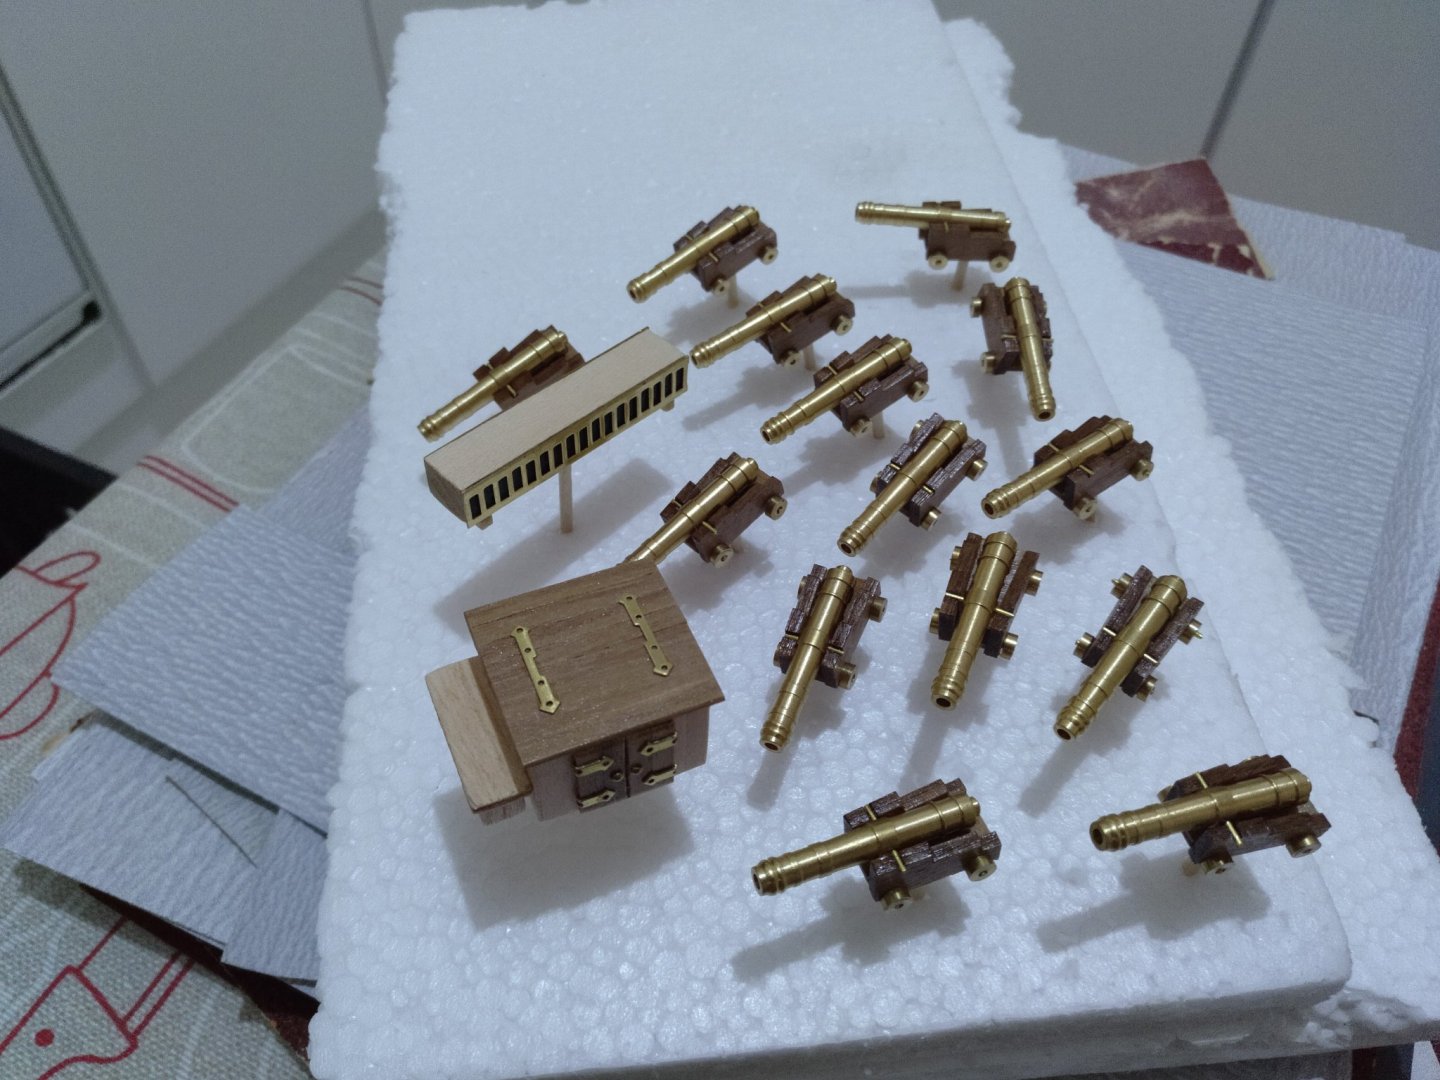
At the same time, I started making various decorations that go on the deck for example this cabin. Also the cannons. I made the gun carriages and then added the canons and the brass wheels. Then I varnished the canons that go in the gunports. I didn't go into much detail as these aren't going to be very visible.


-
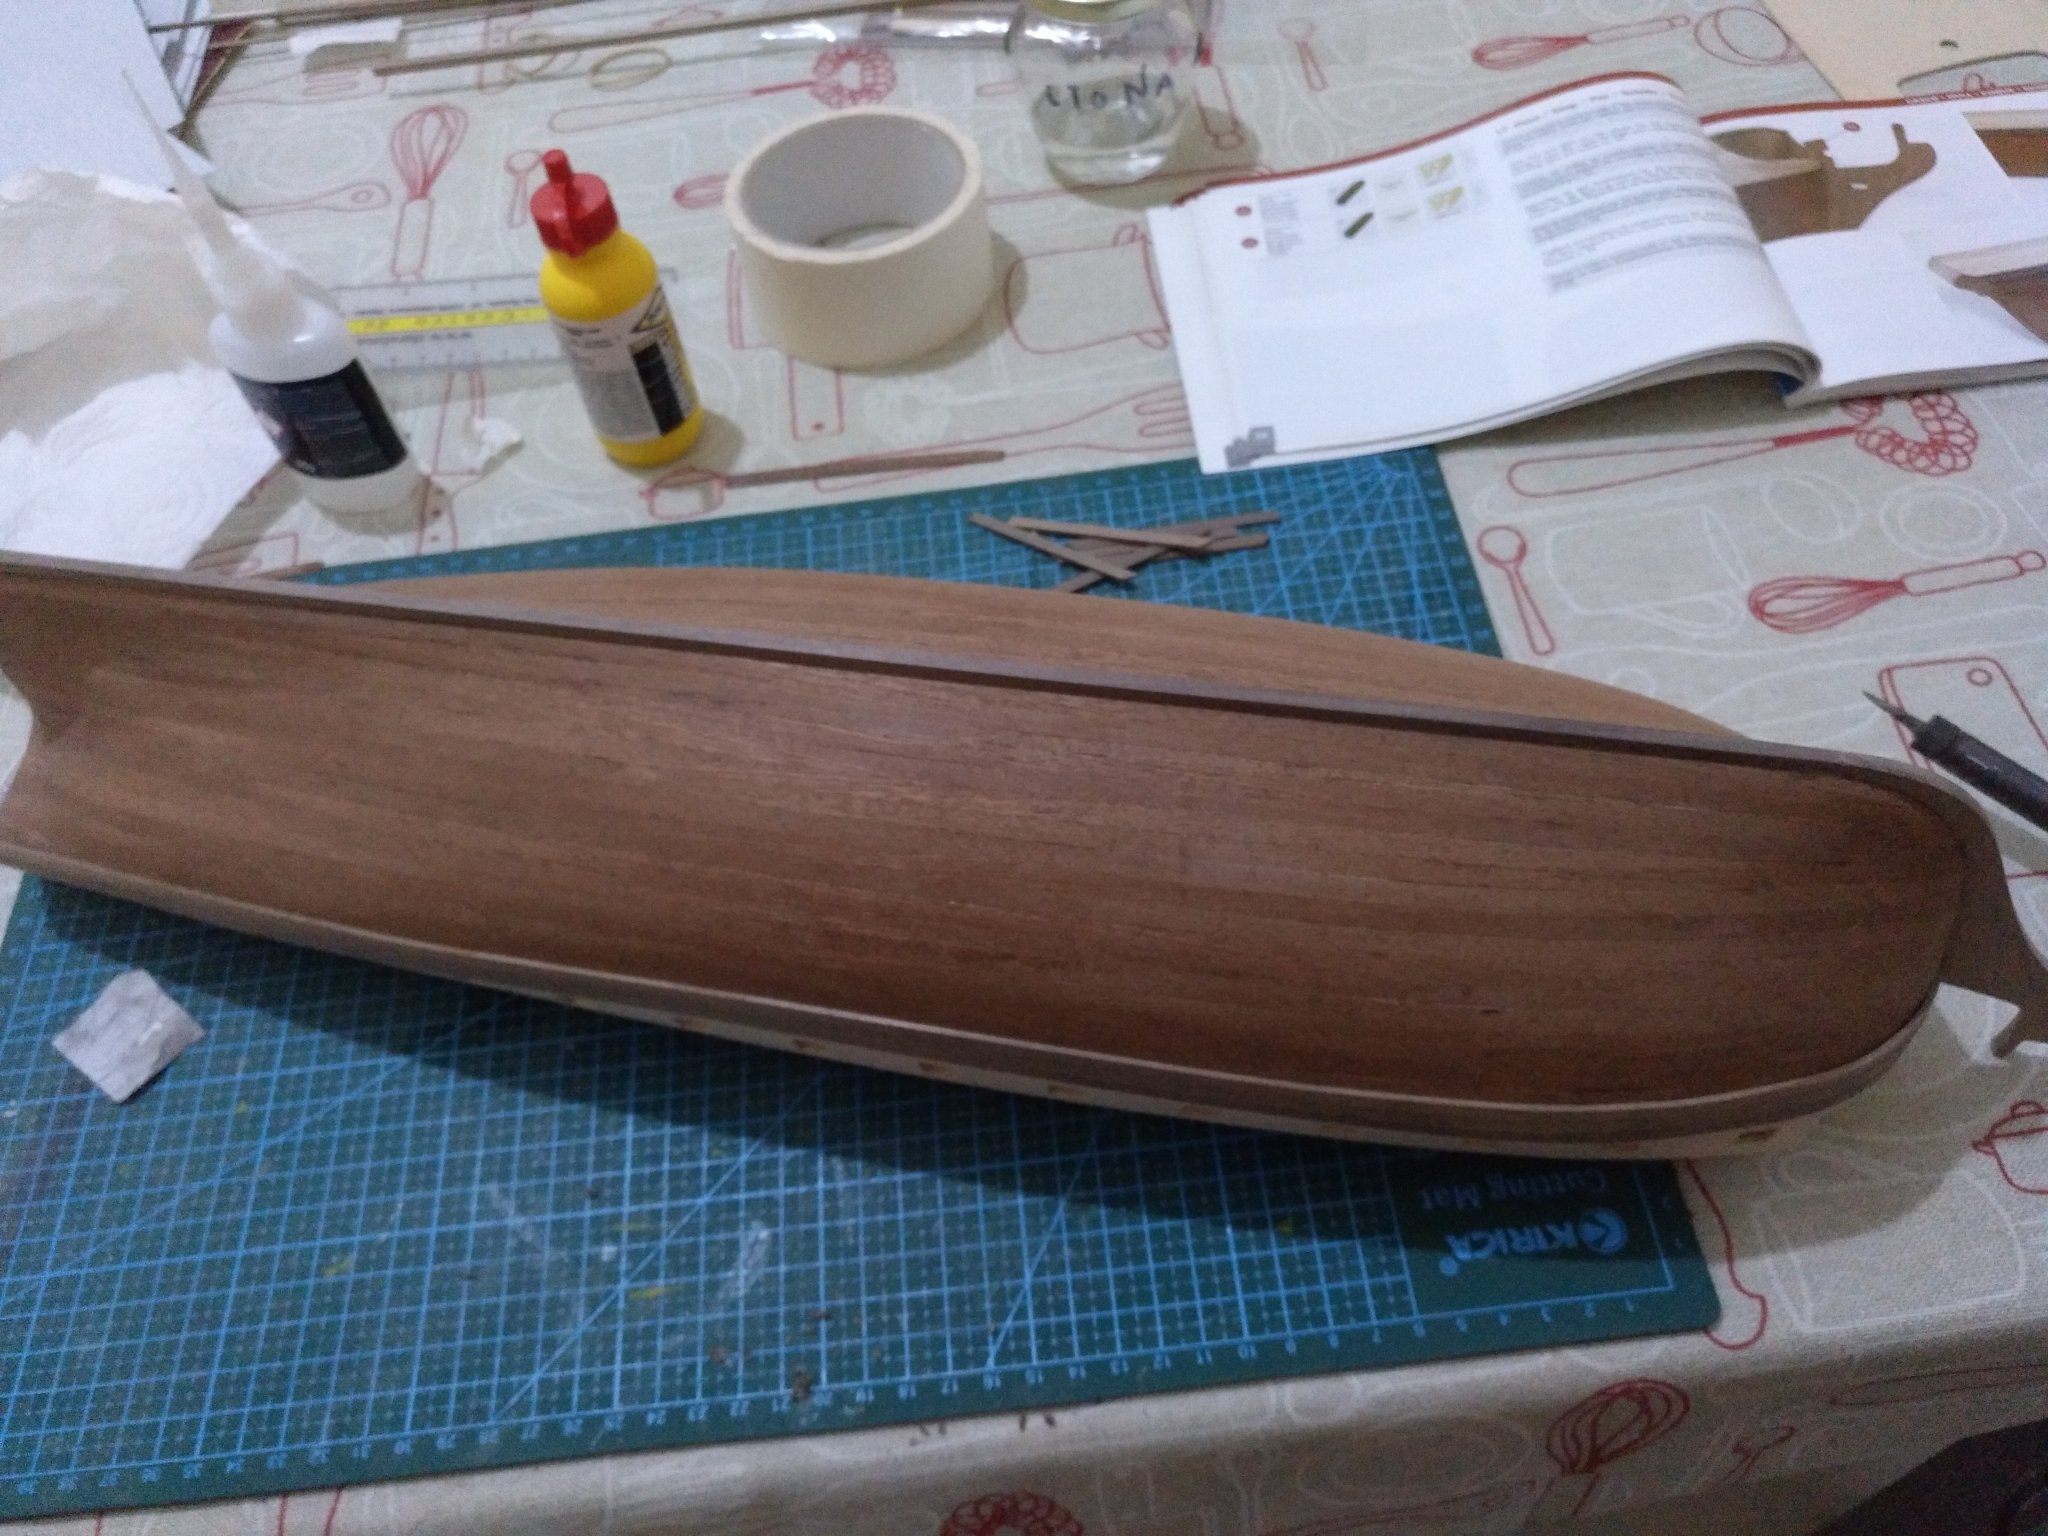
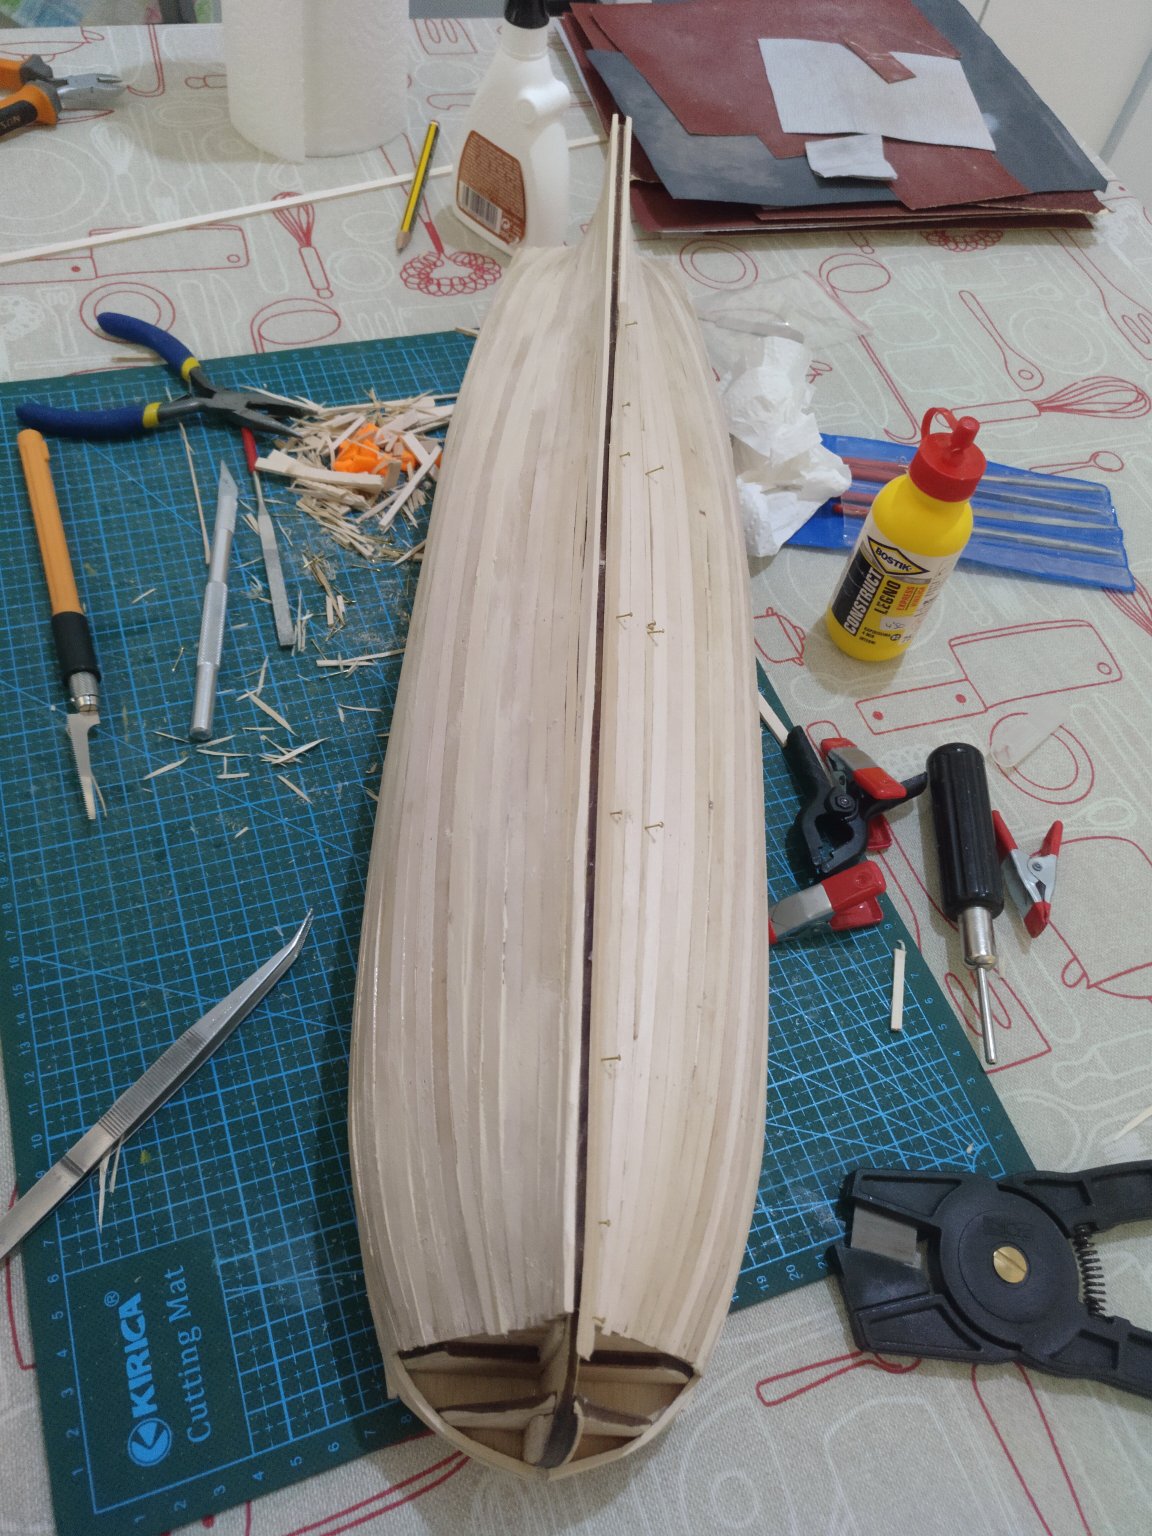
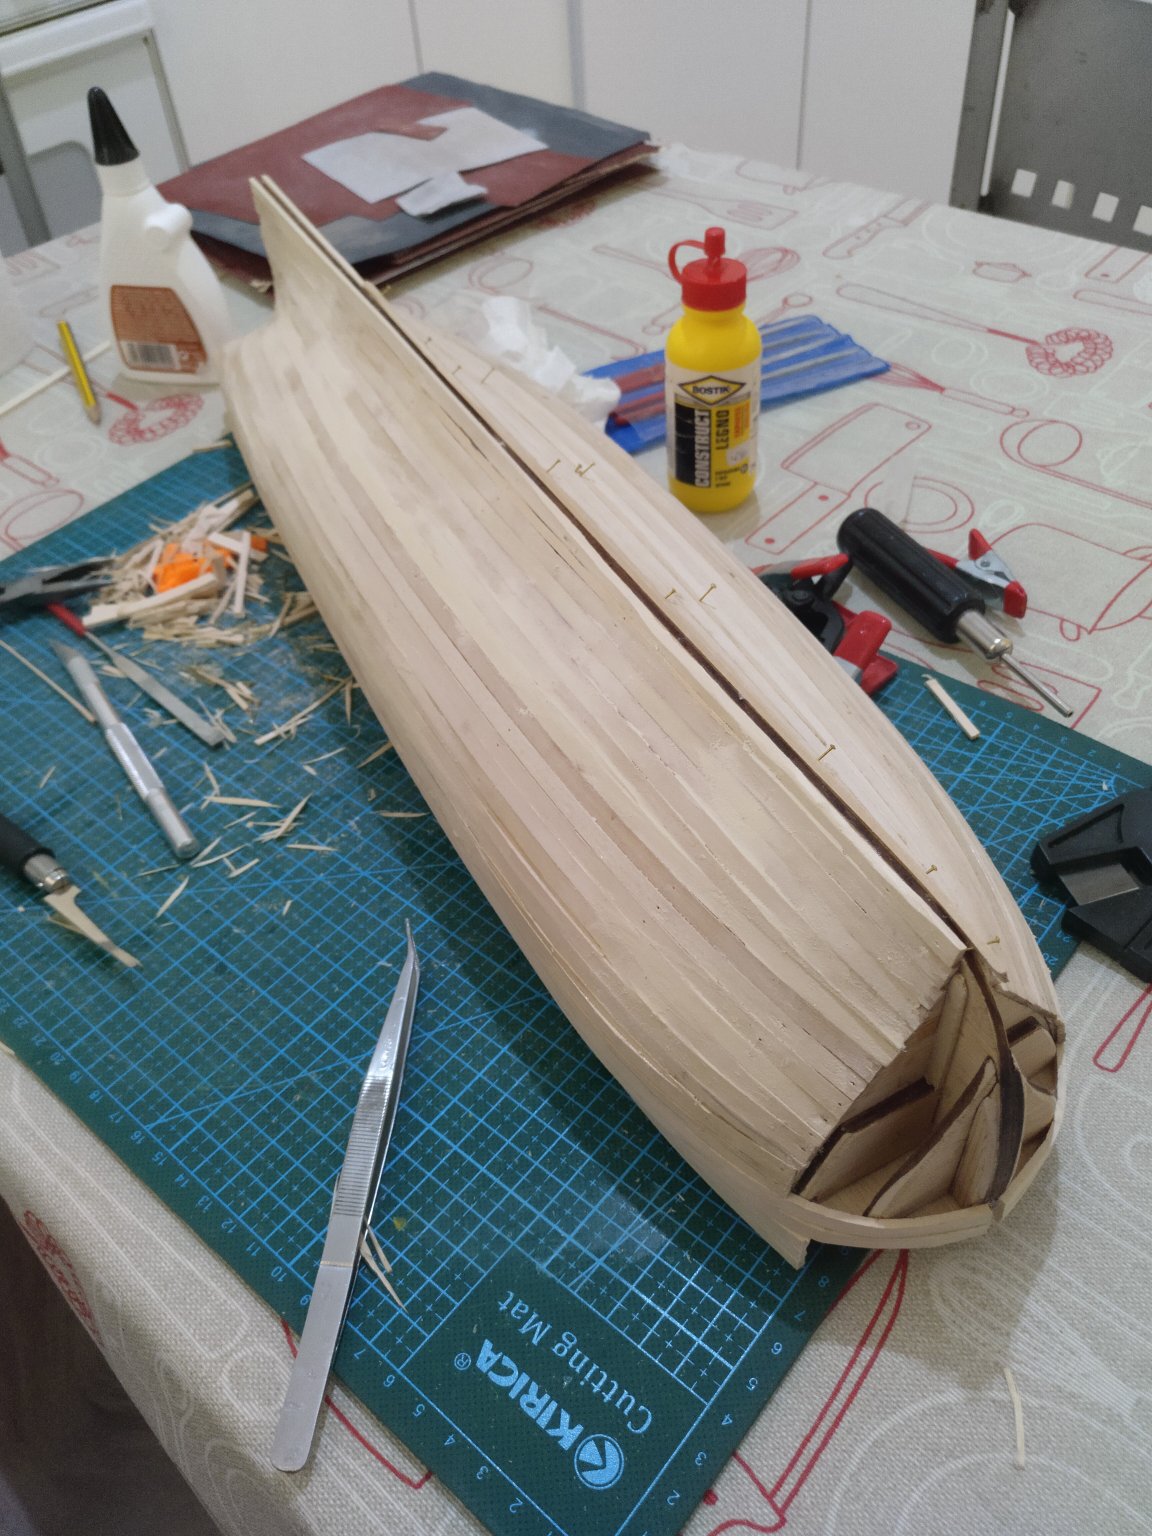
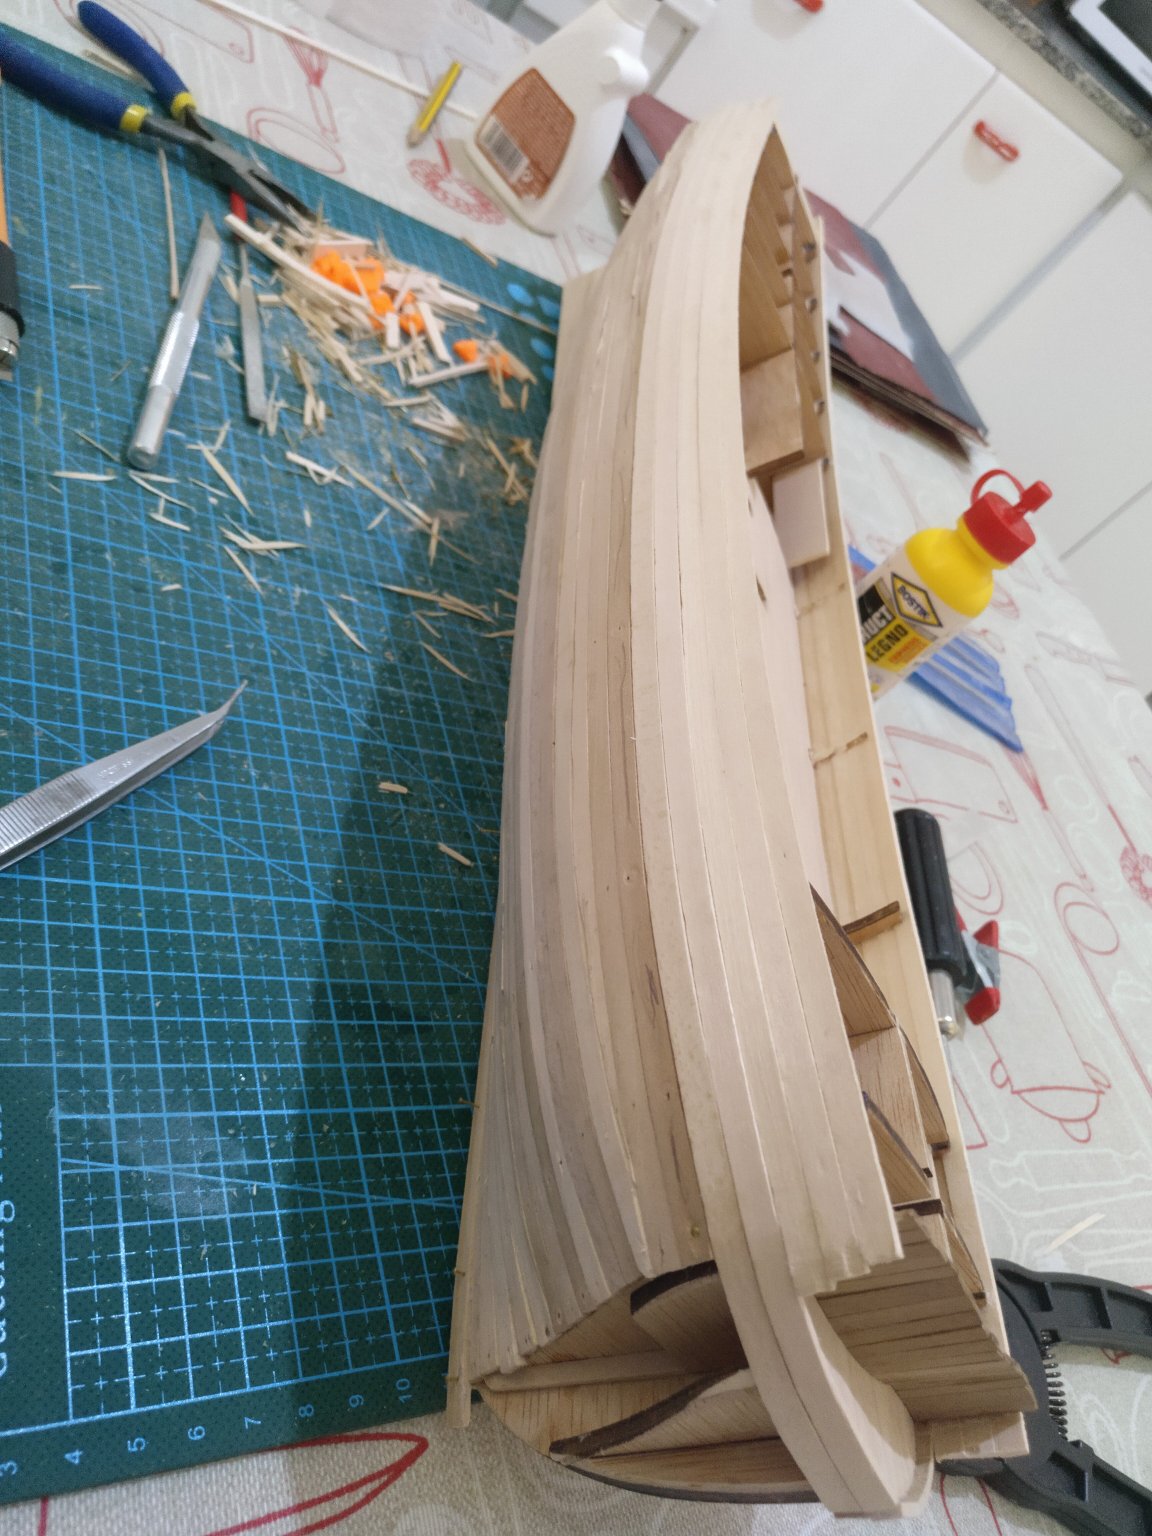
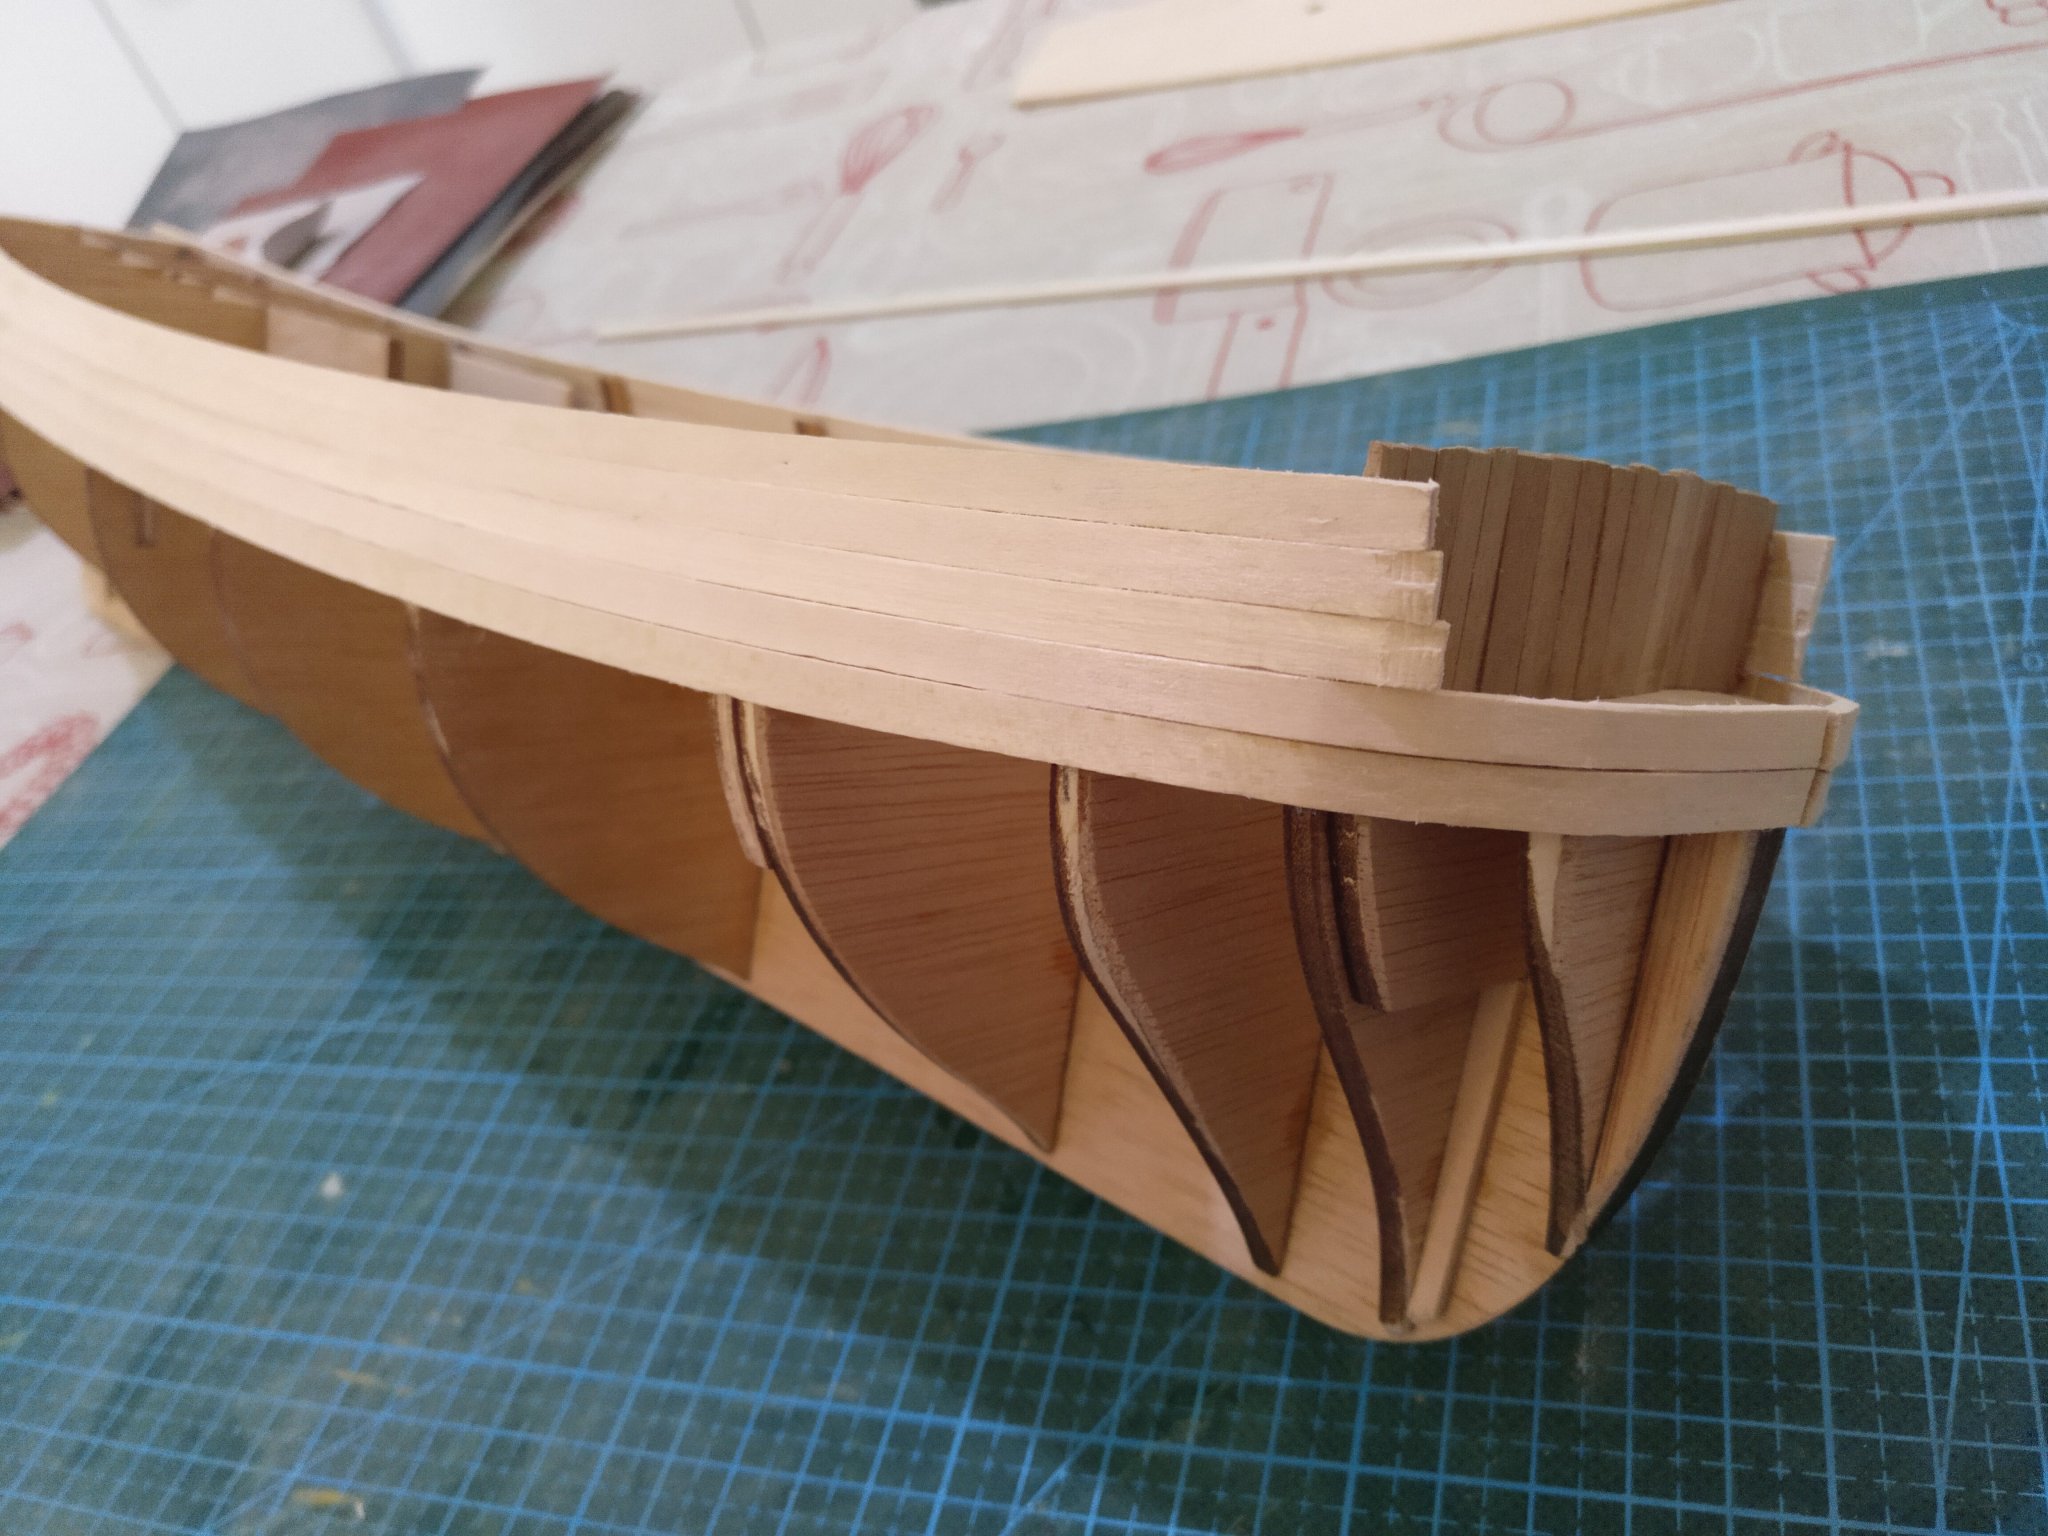
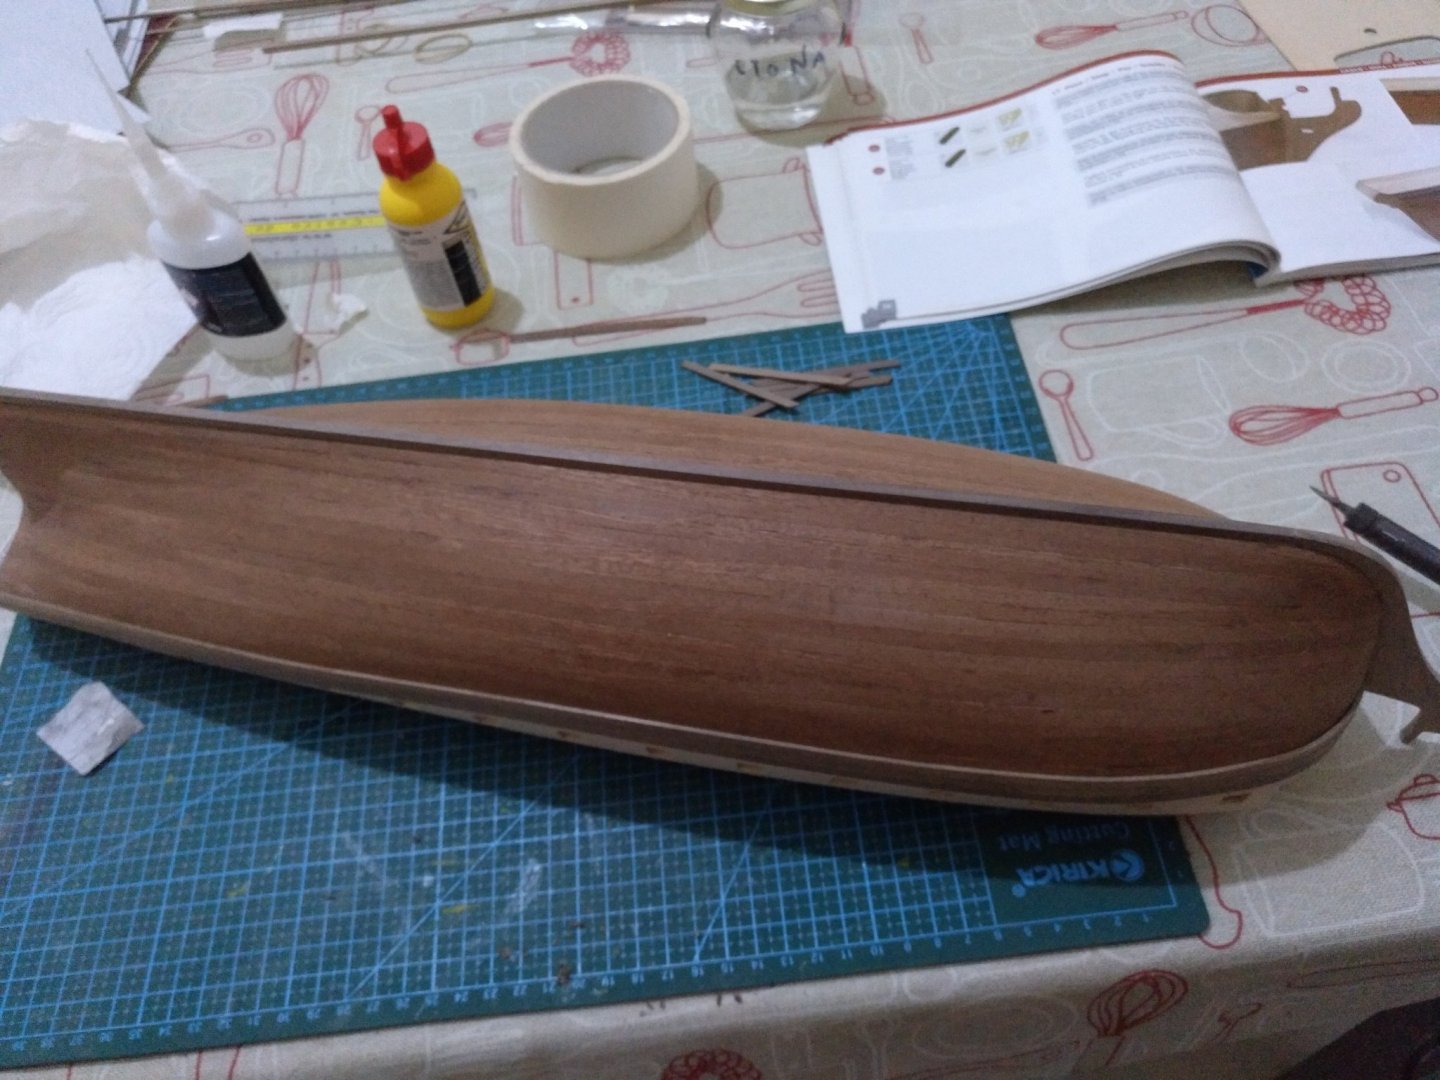
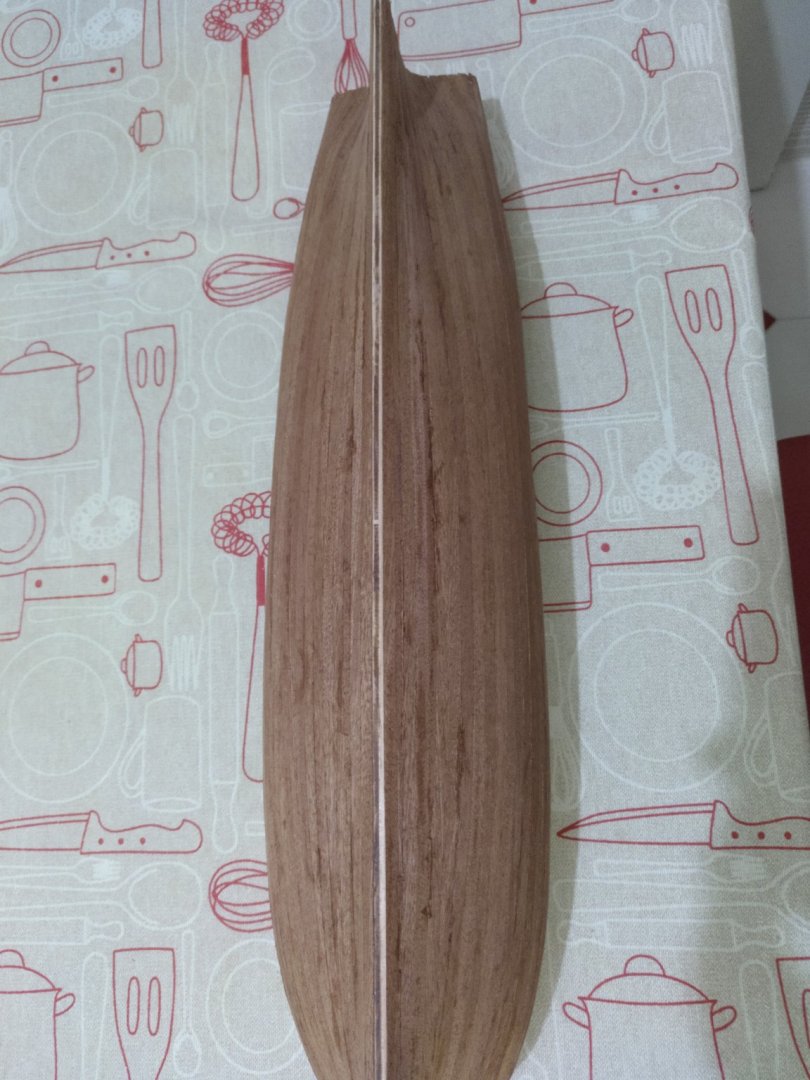
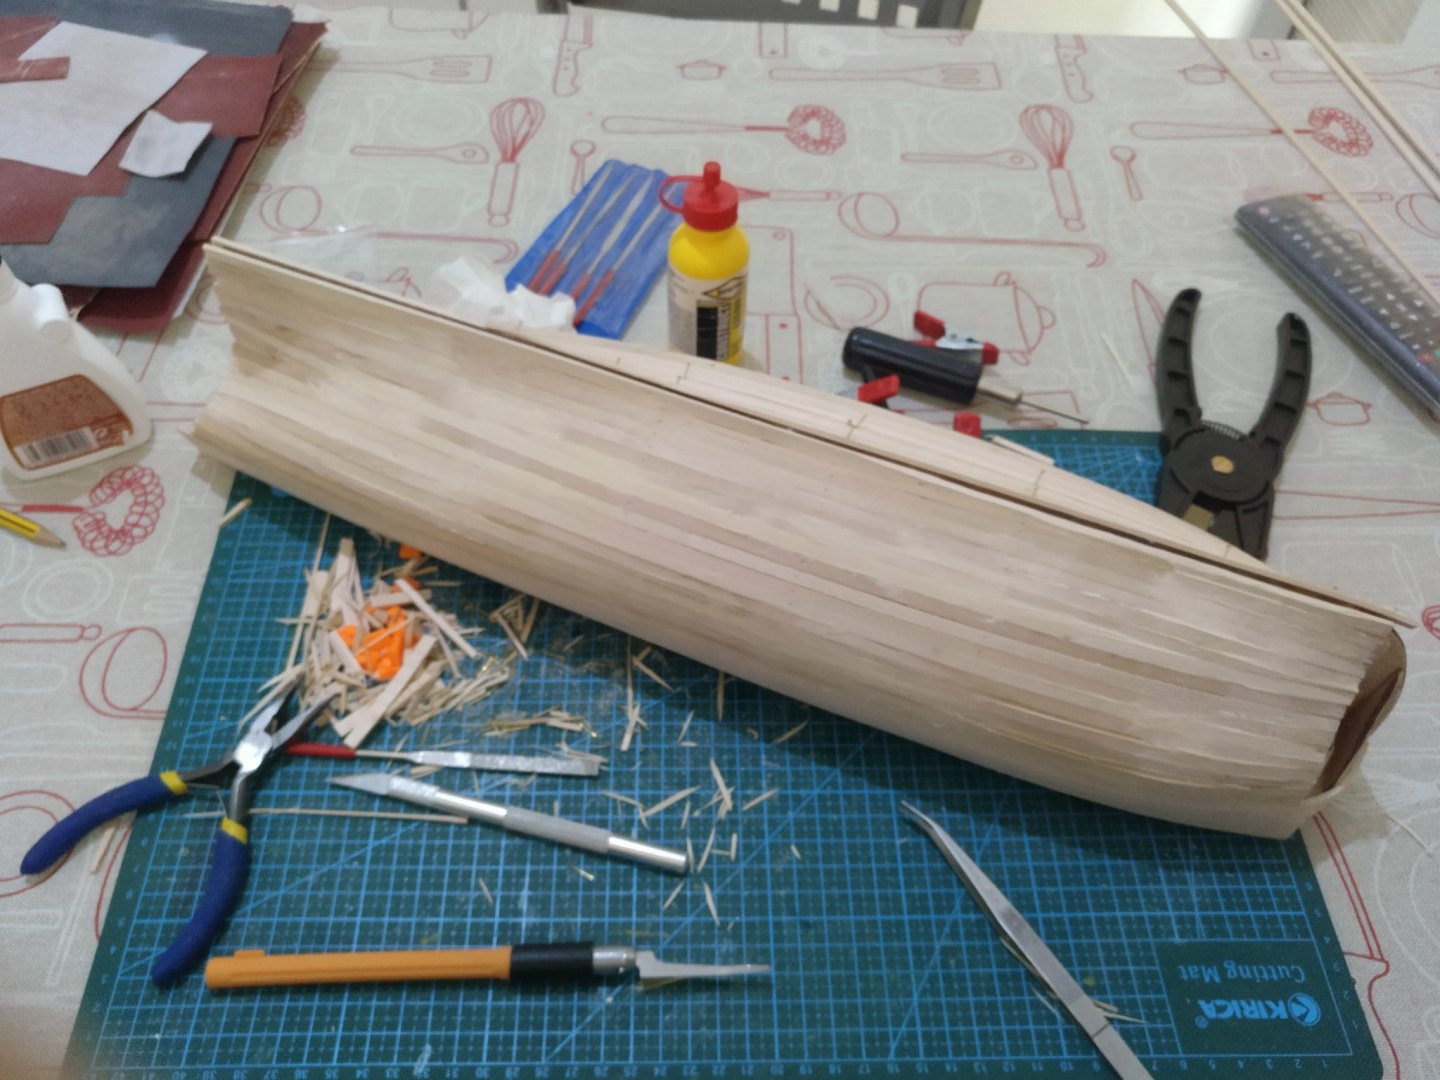
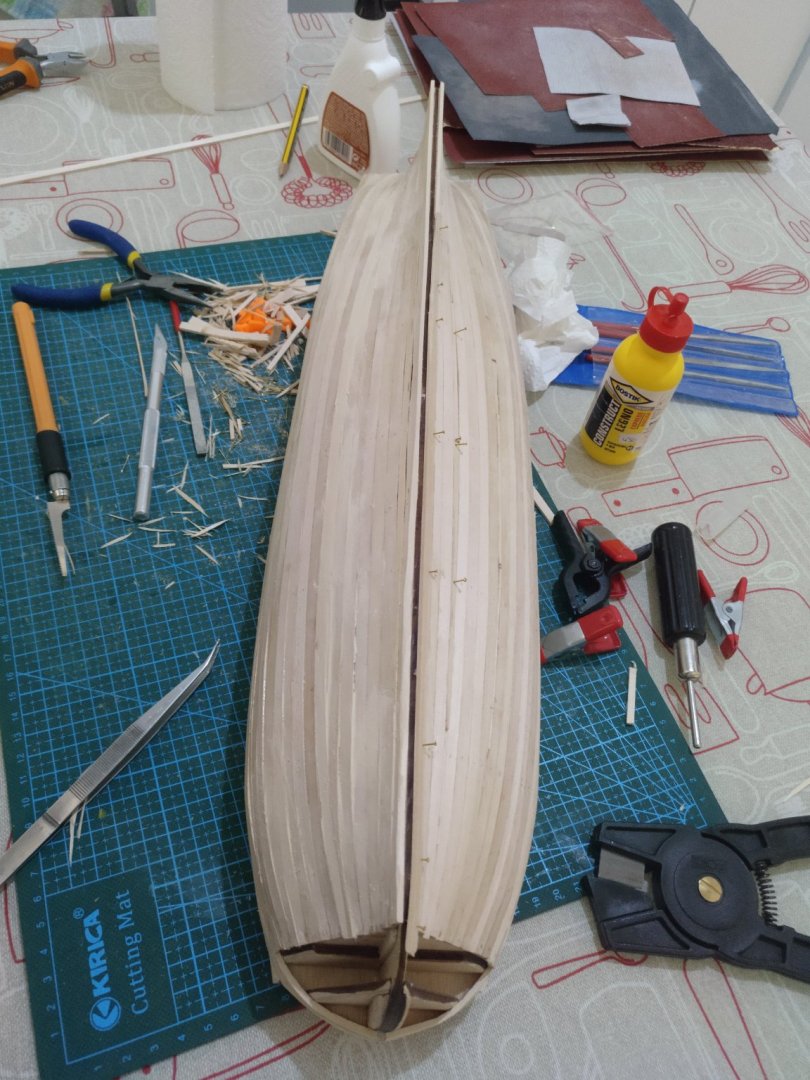
Hello everyone. It has been a while and a lot of progress has been made. I have completely planked the hull with the Sapelly strips. Here are some photos of the progress.


-
Very nice build! I am also building this model and I have the same problem with the plans. Could you please send me the .pdf plans? I would download it from Artesania Latina's webpage but sadly, it has closed down. Thanks! Stay safe.
-
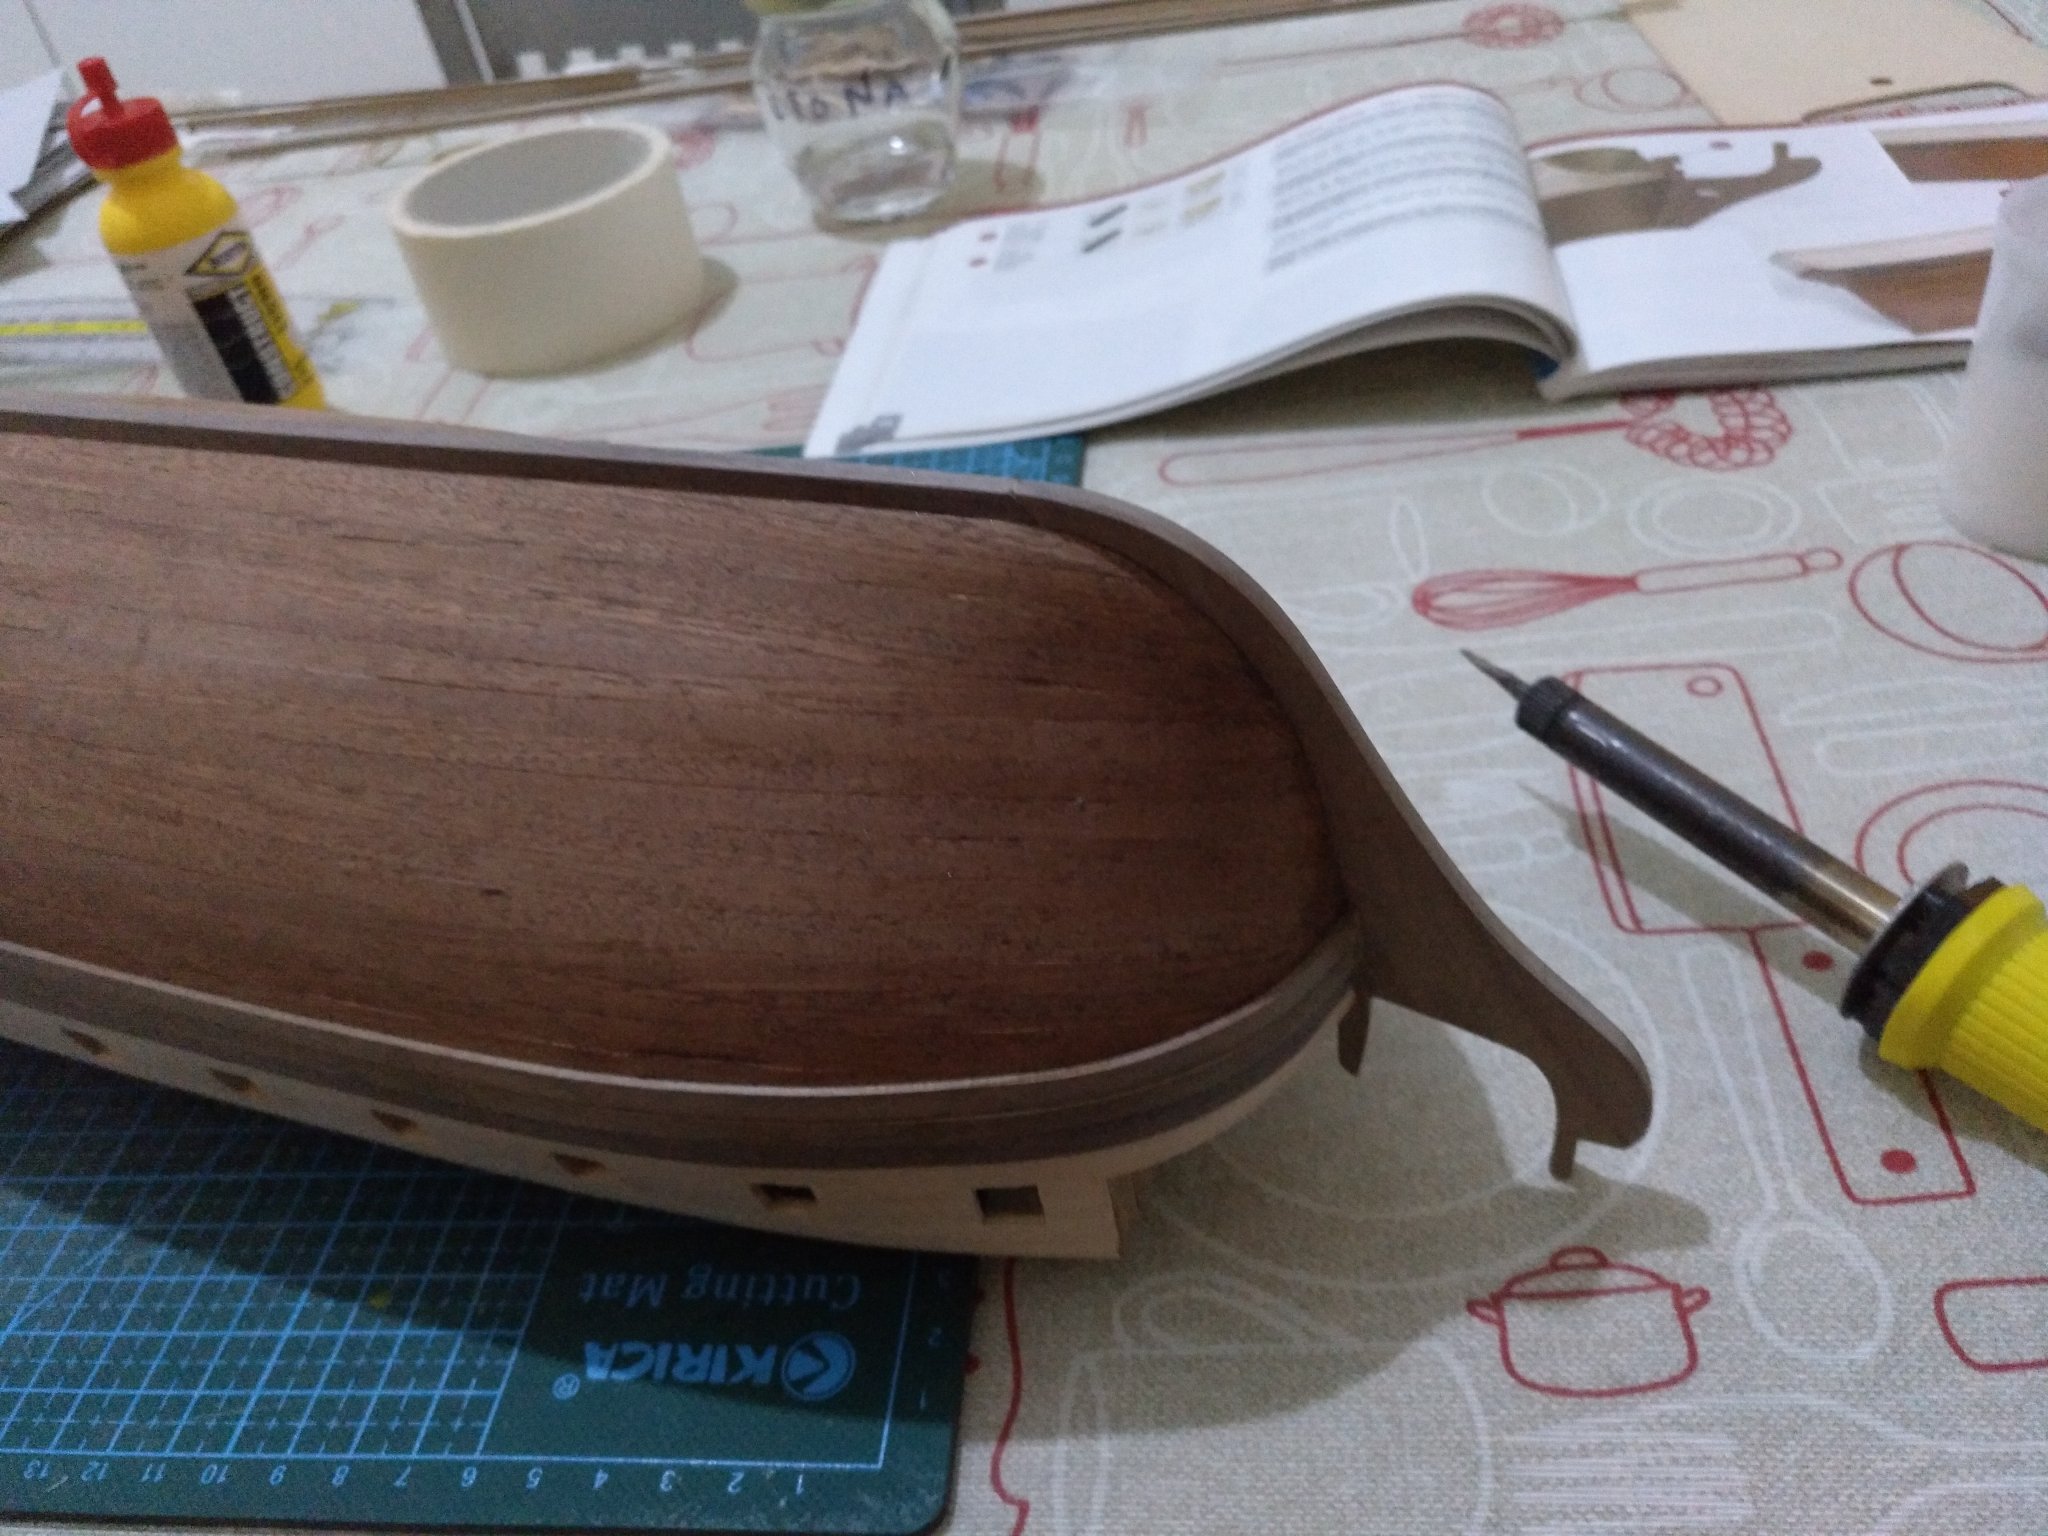
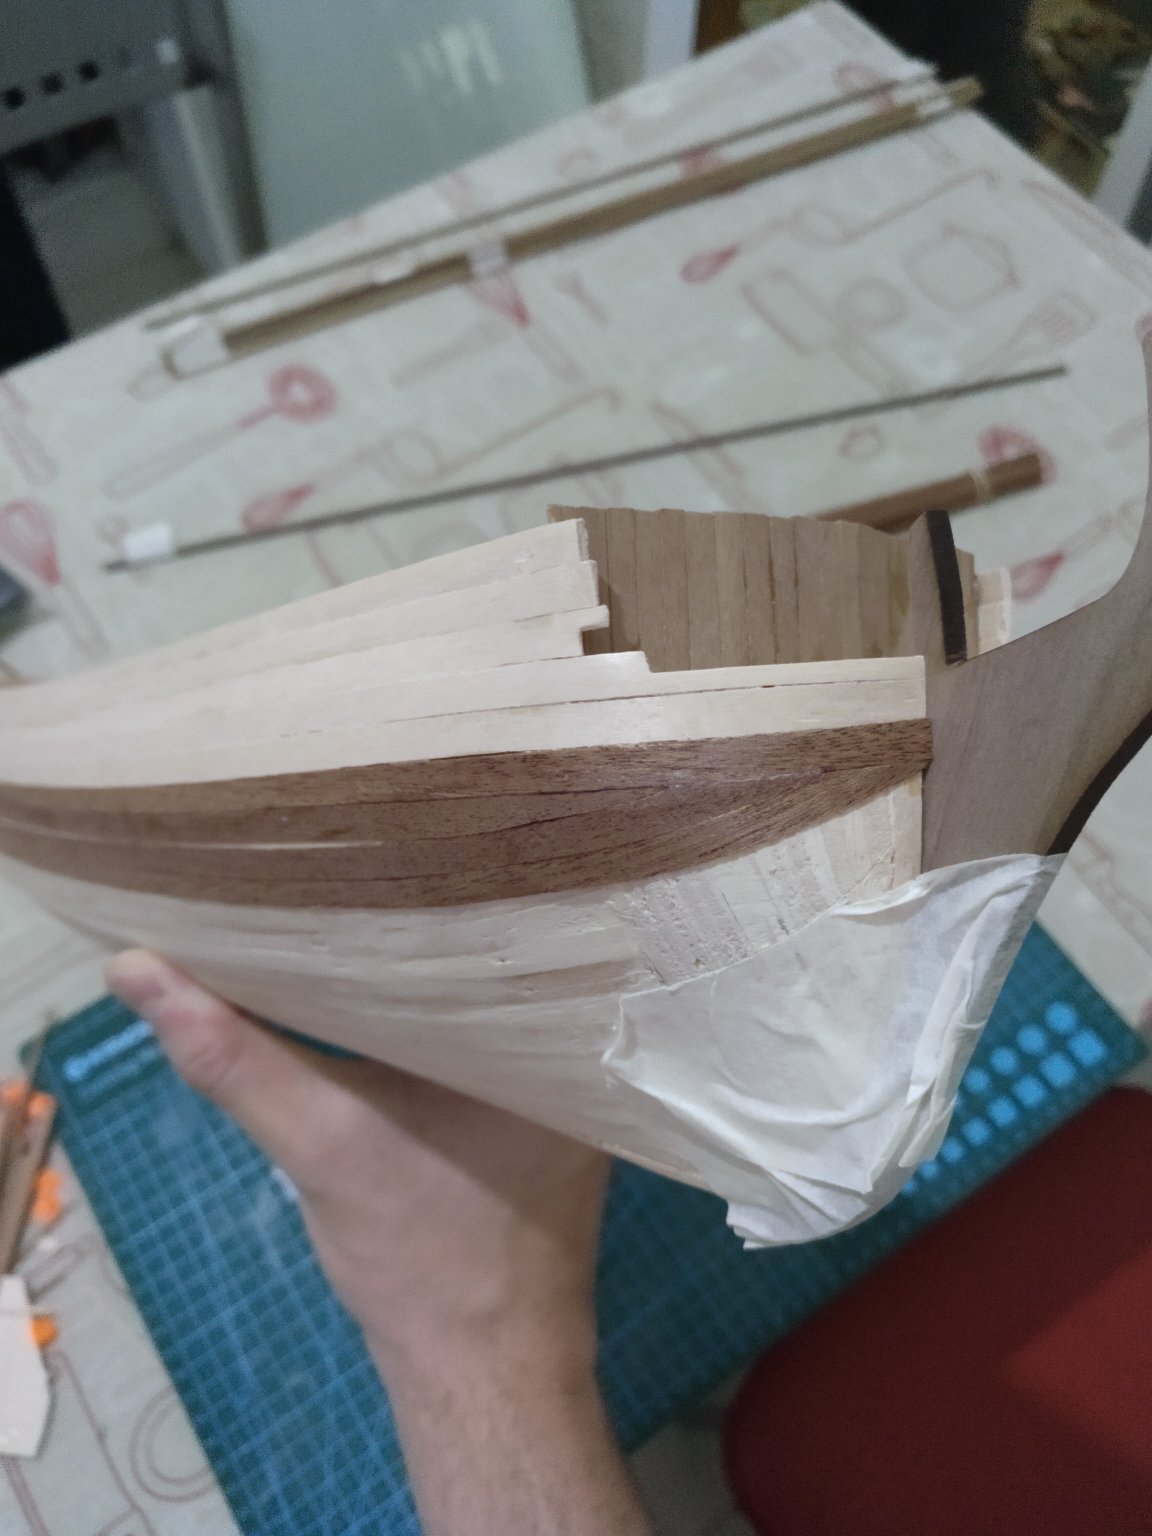
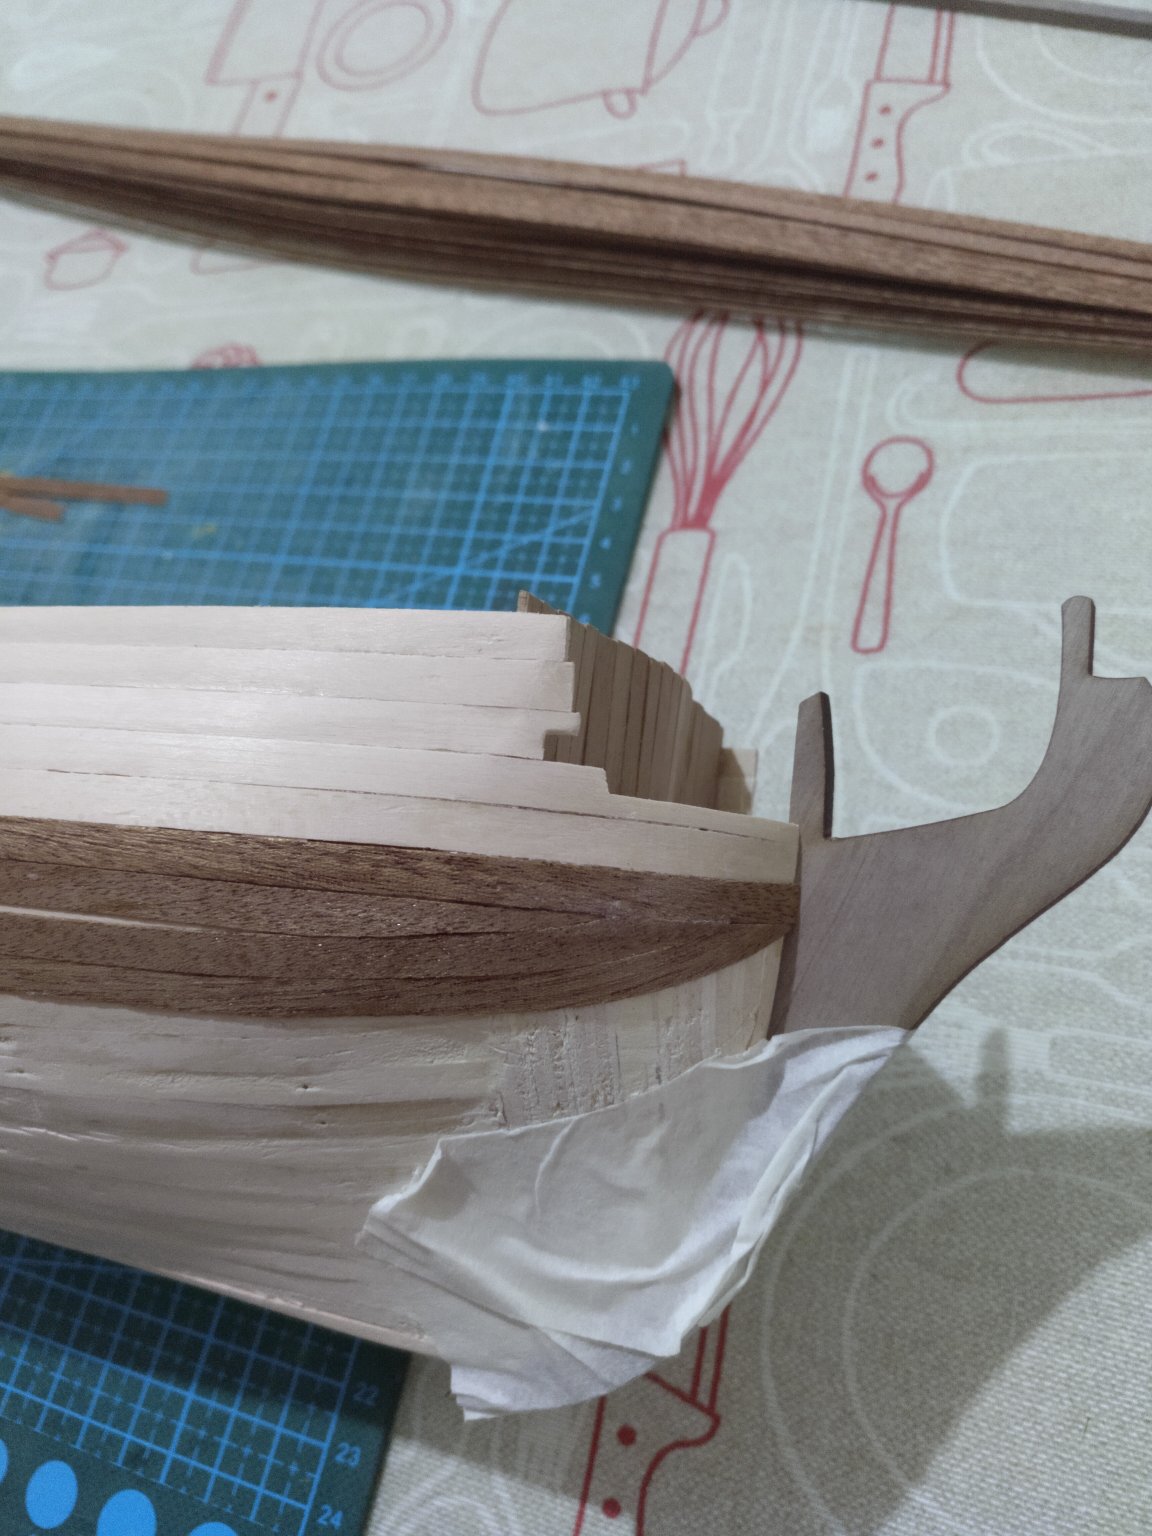
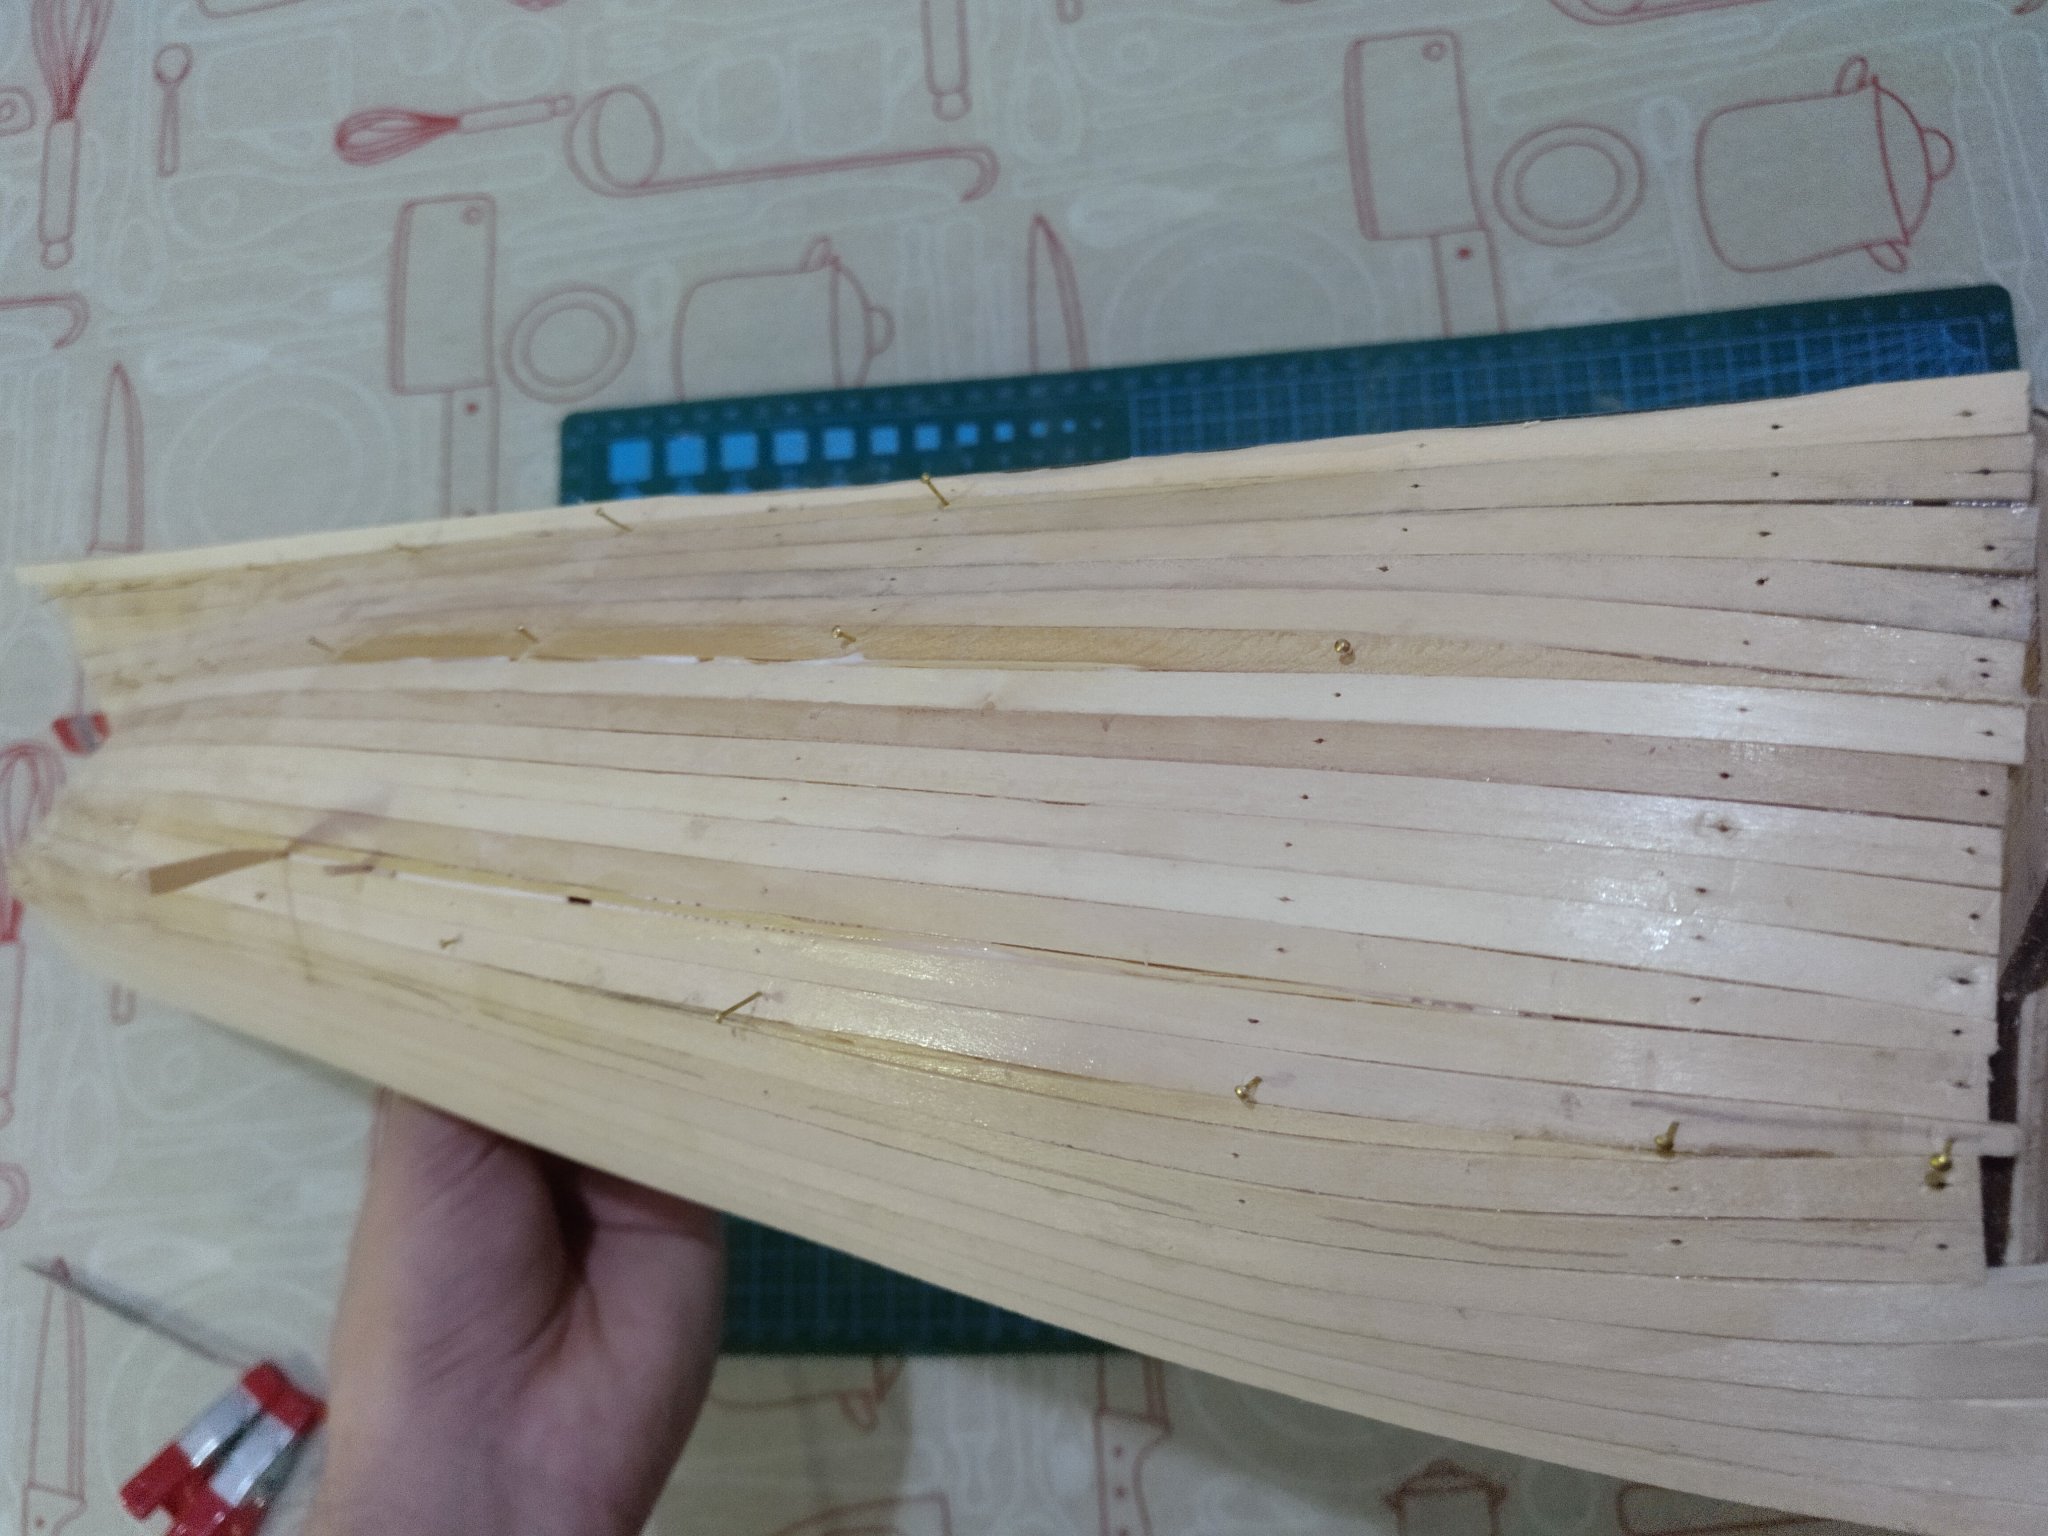
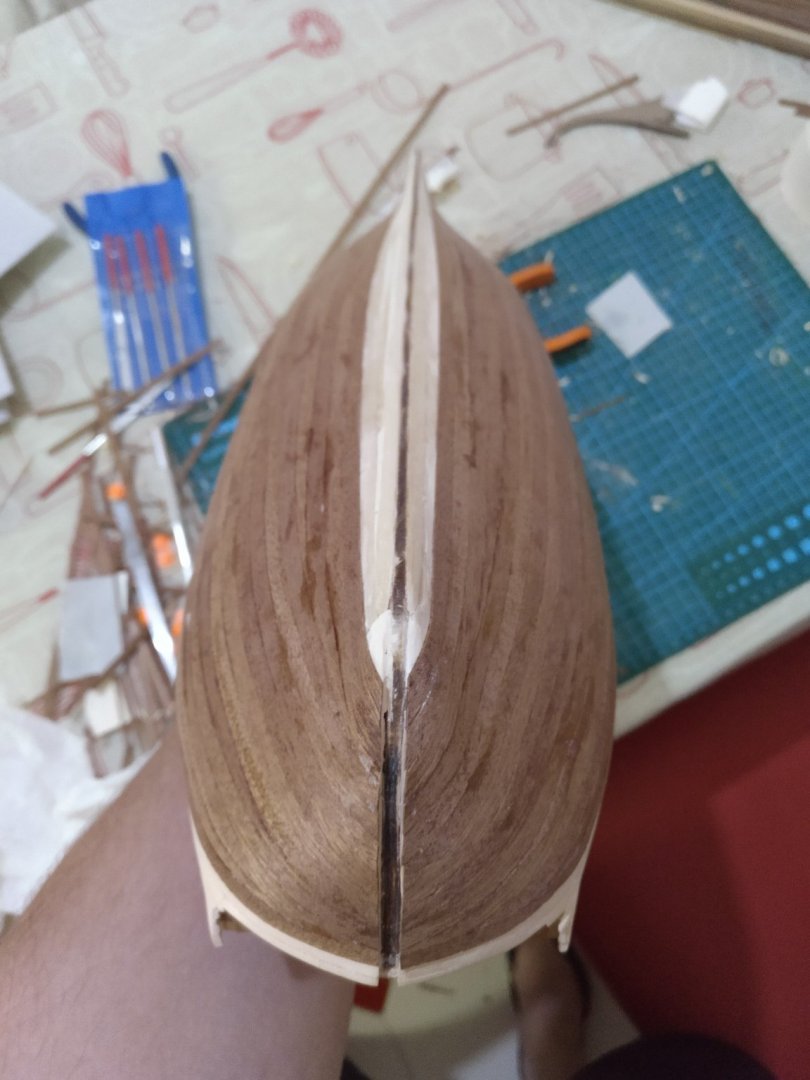
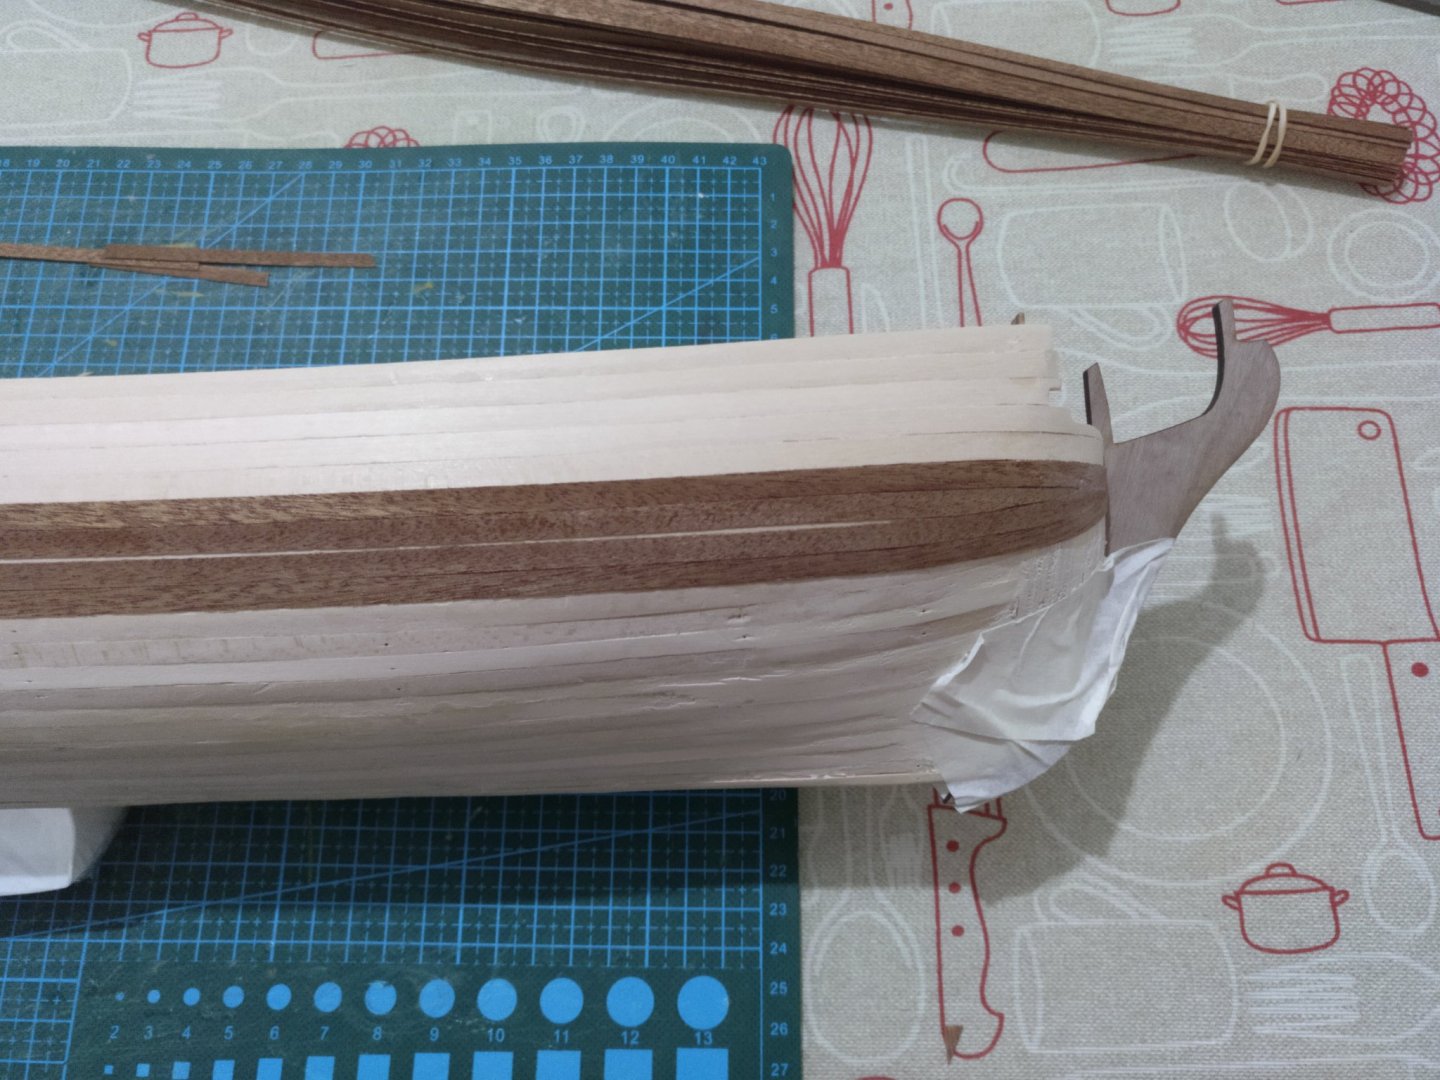
Hello! I have finished sanding the wood parts in the bow and now it is smooth and ready. I also sanded all the hull ready to plank it this time with sapelly strips. Here you can see it. I also planked the stern Here I started planking the hull with the Sapelly strips. I also put the stern with tape to know where the strips should go. Once I finish I will glue it.


-
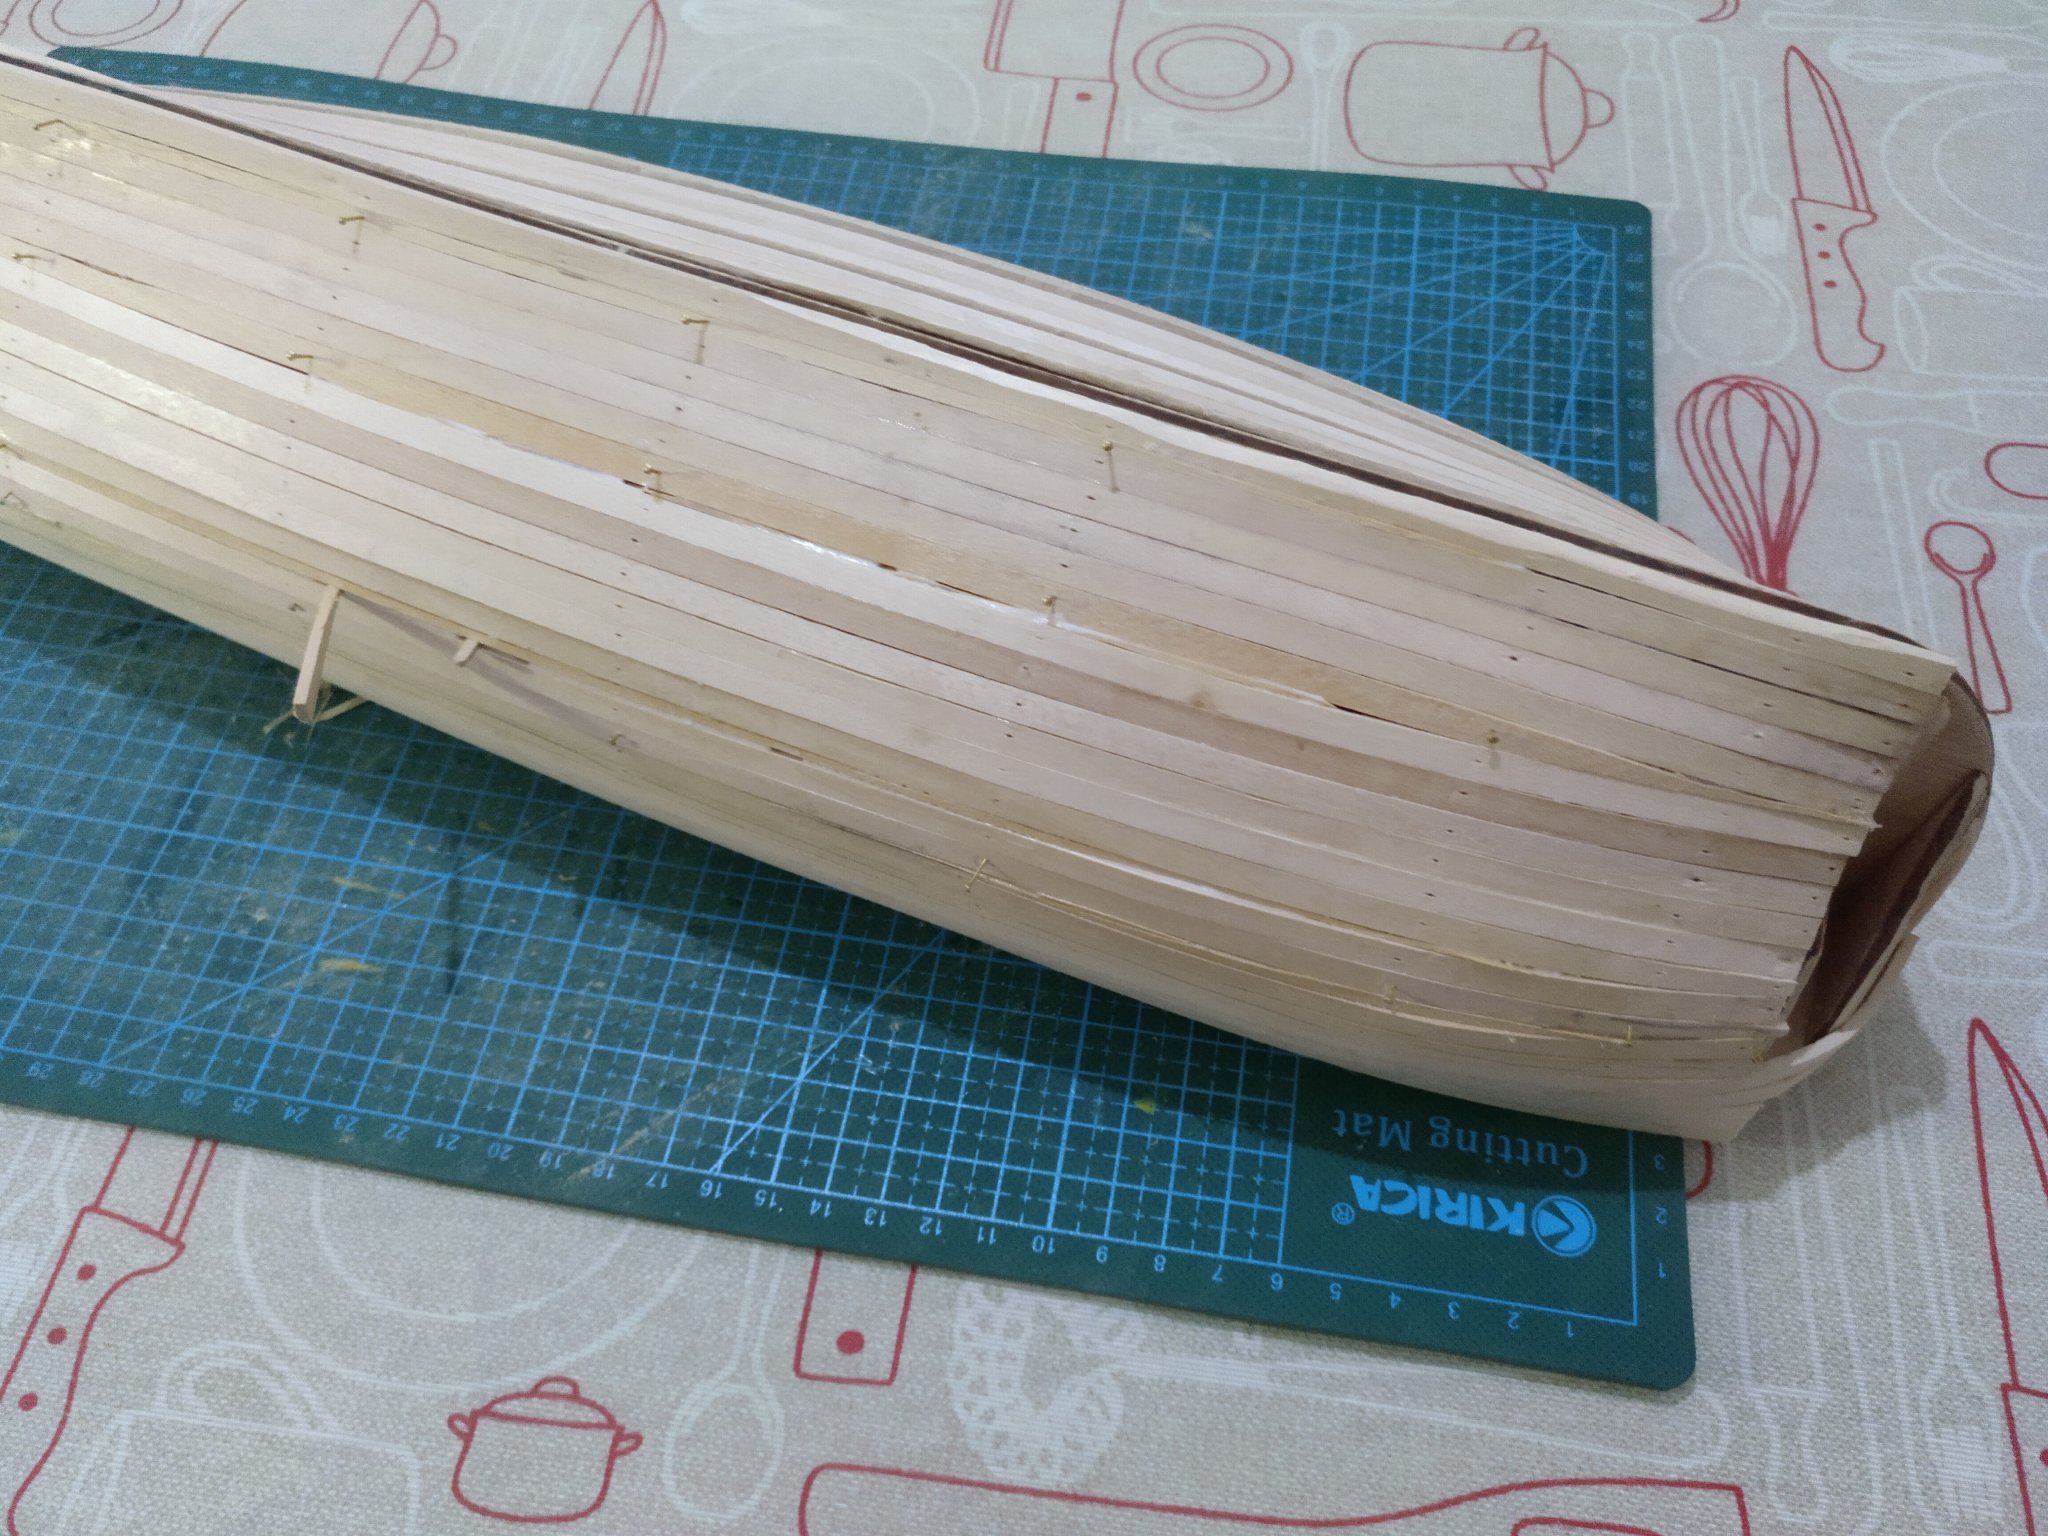
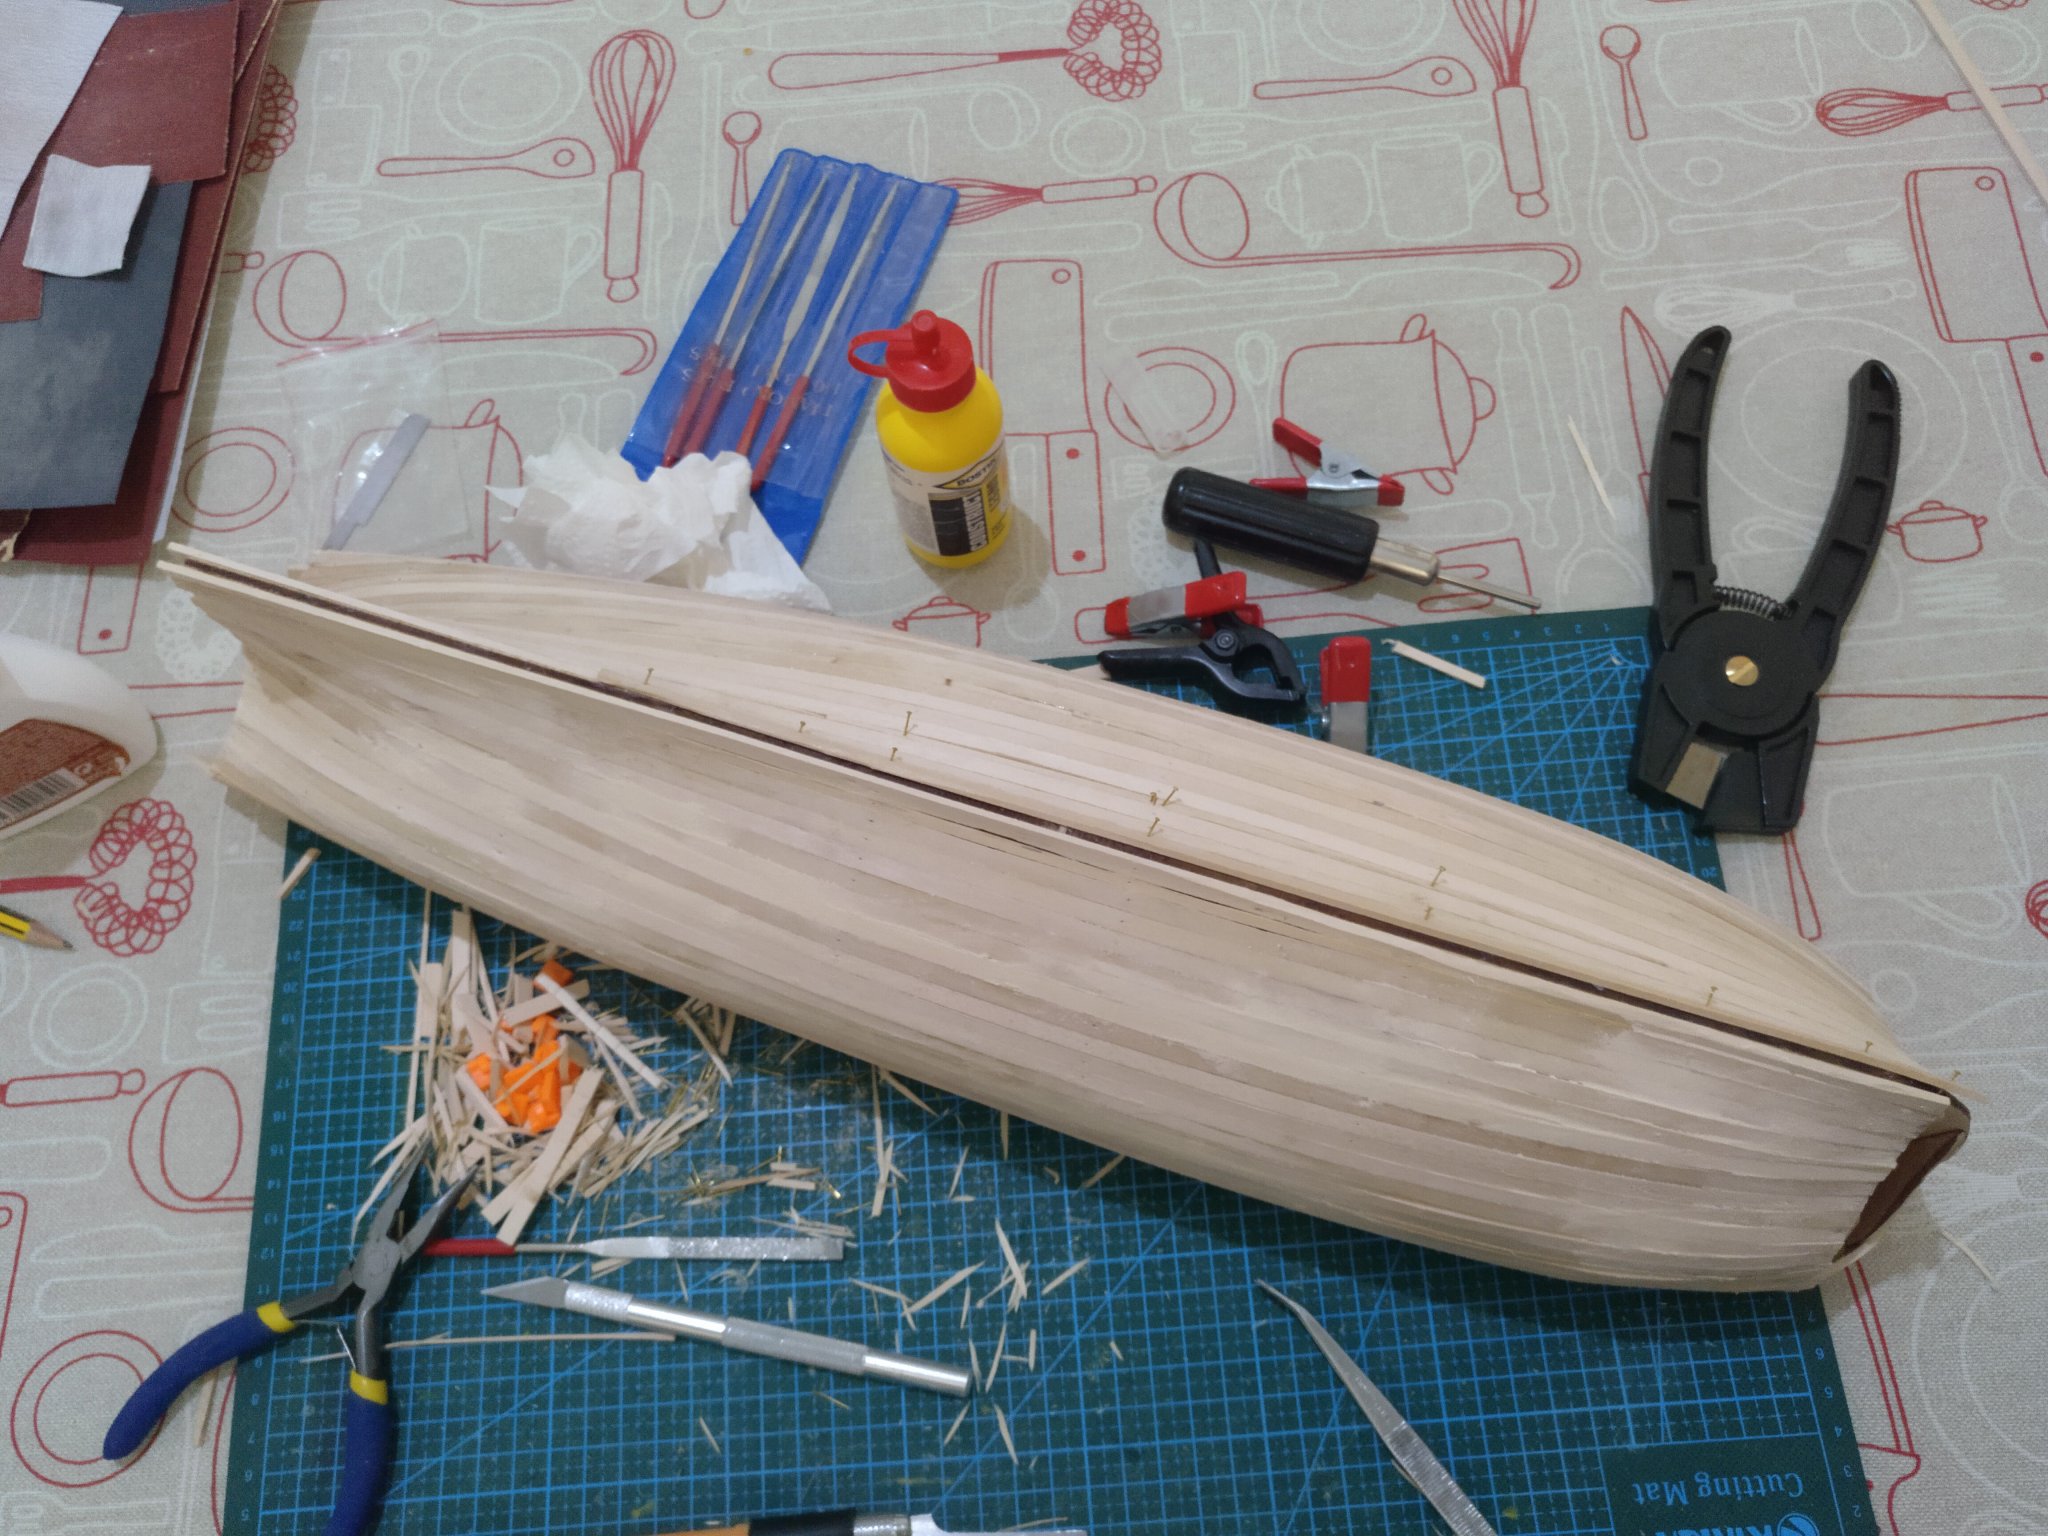
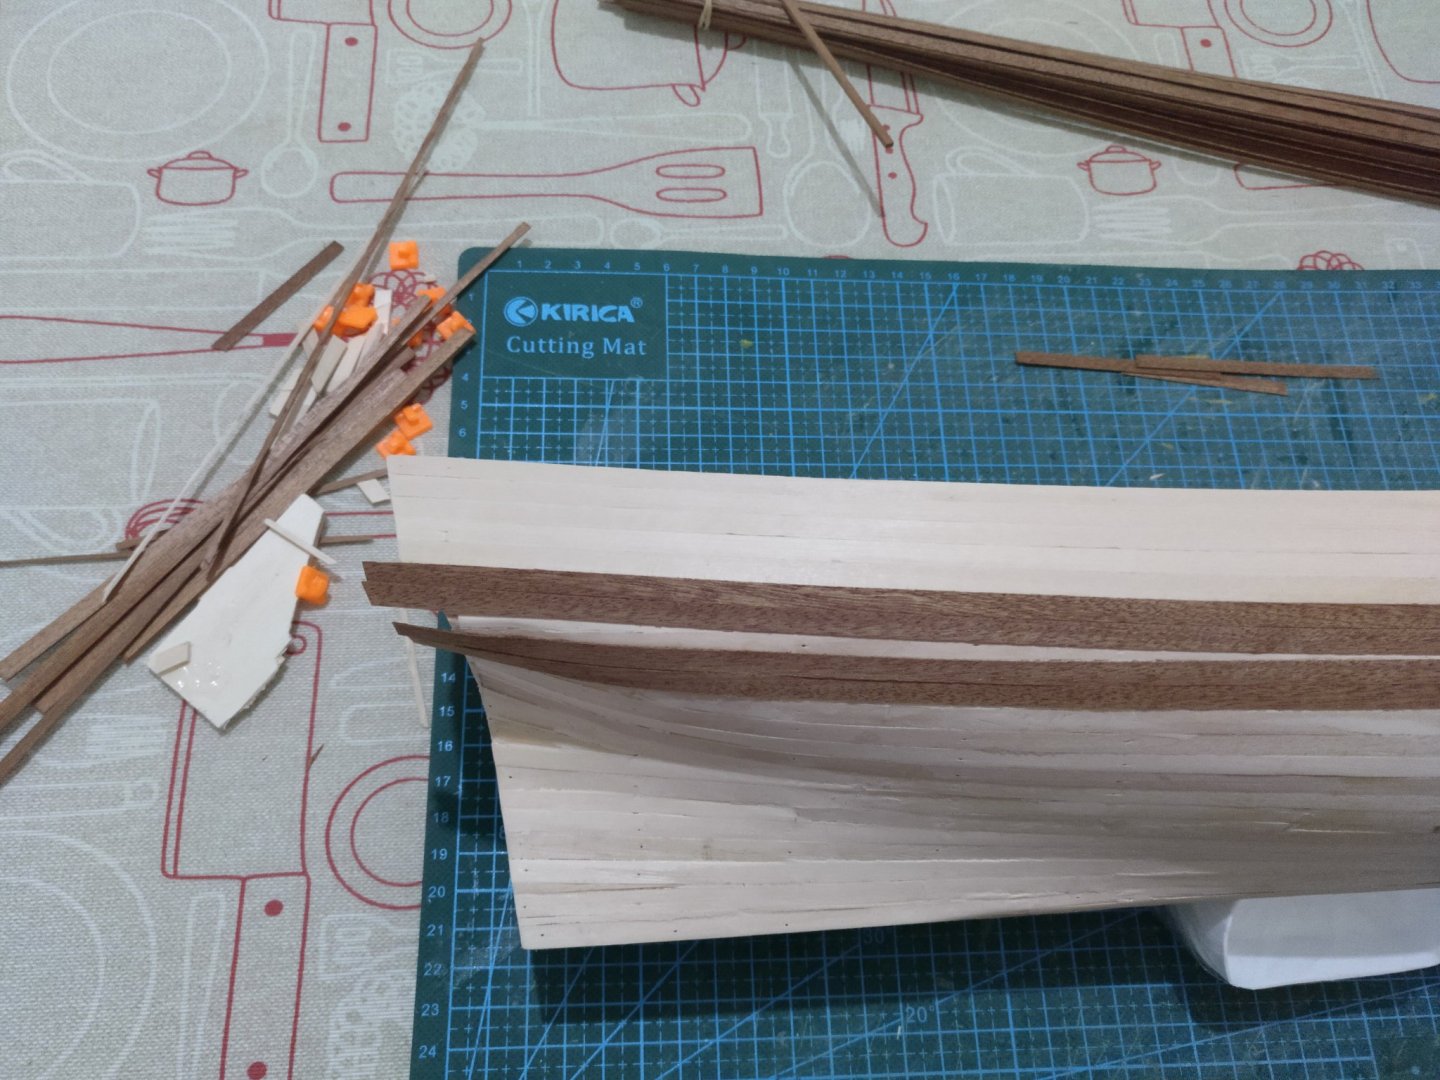
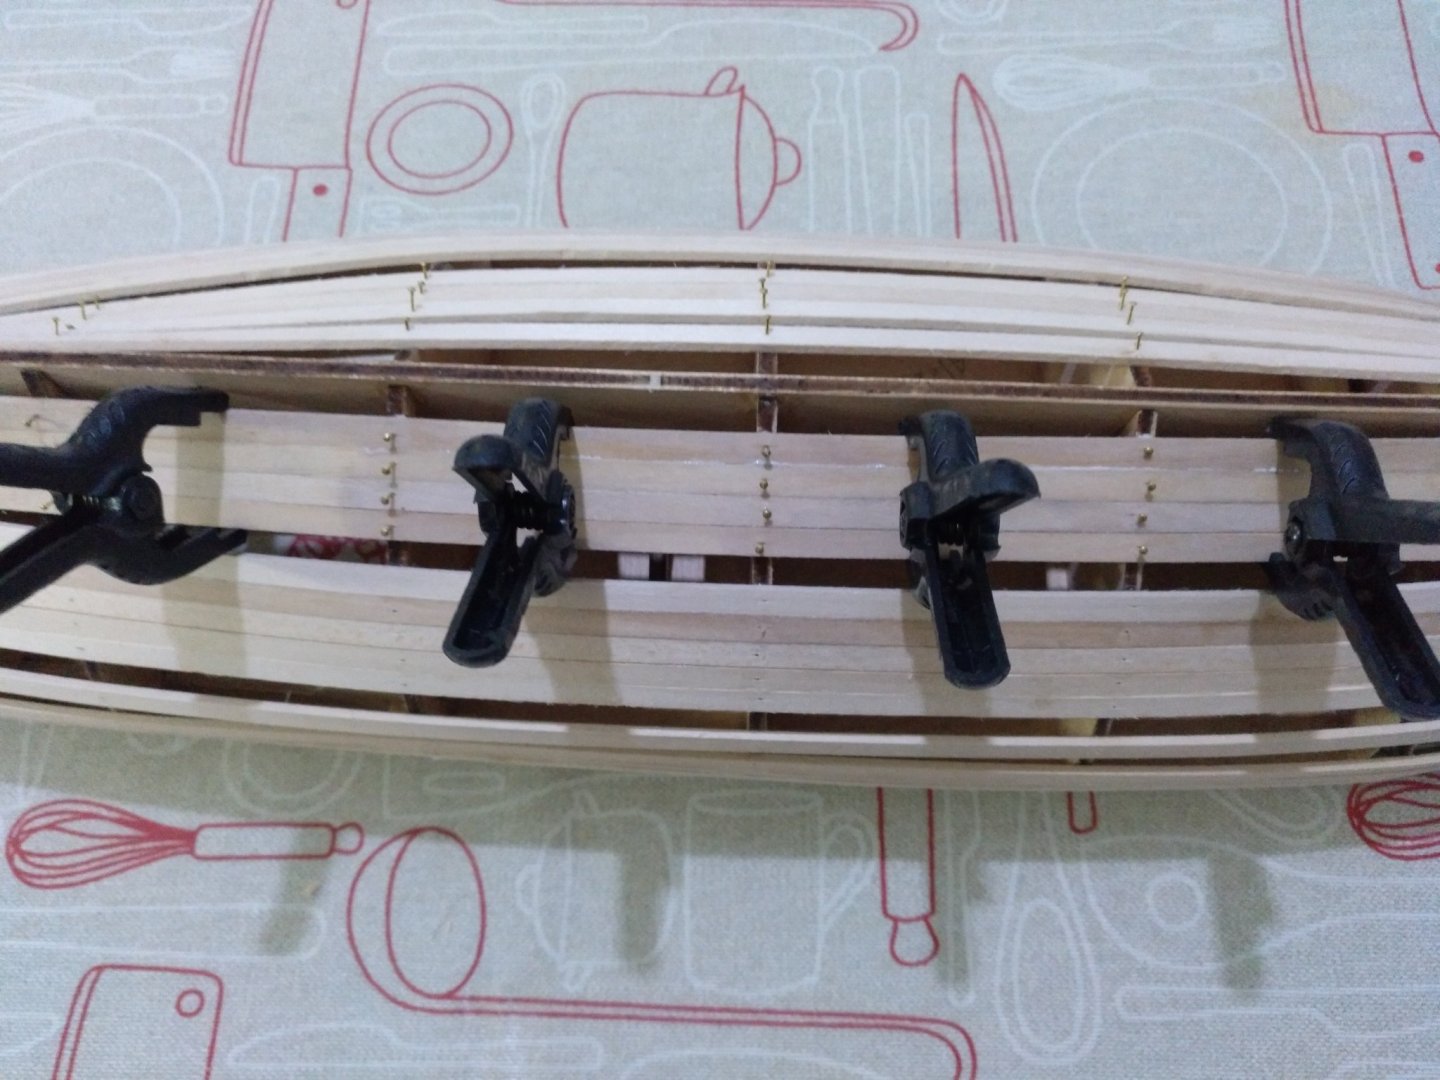
Hello everyone! Some advances have been made and now the first hull planking is complete (well almost)! I still have to sand down the wooden planks that are going to form the bow. But as you can see I made some progress.


-
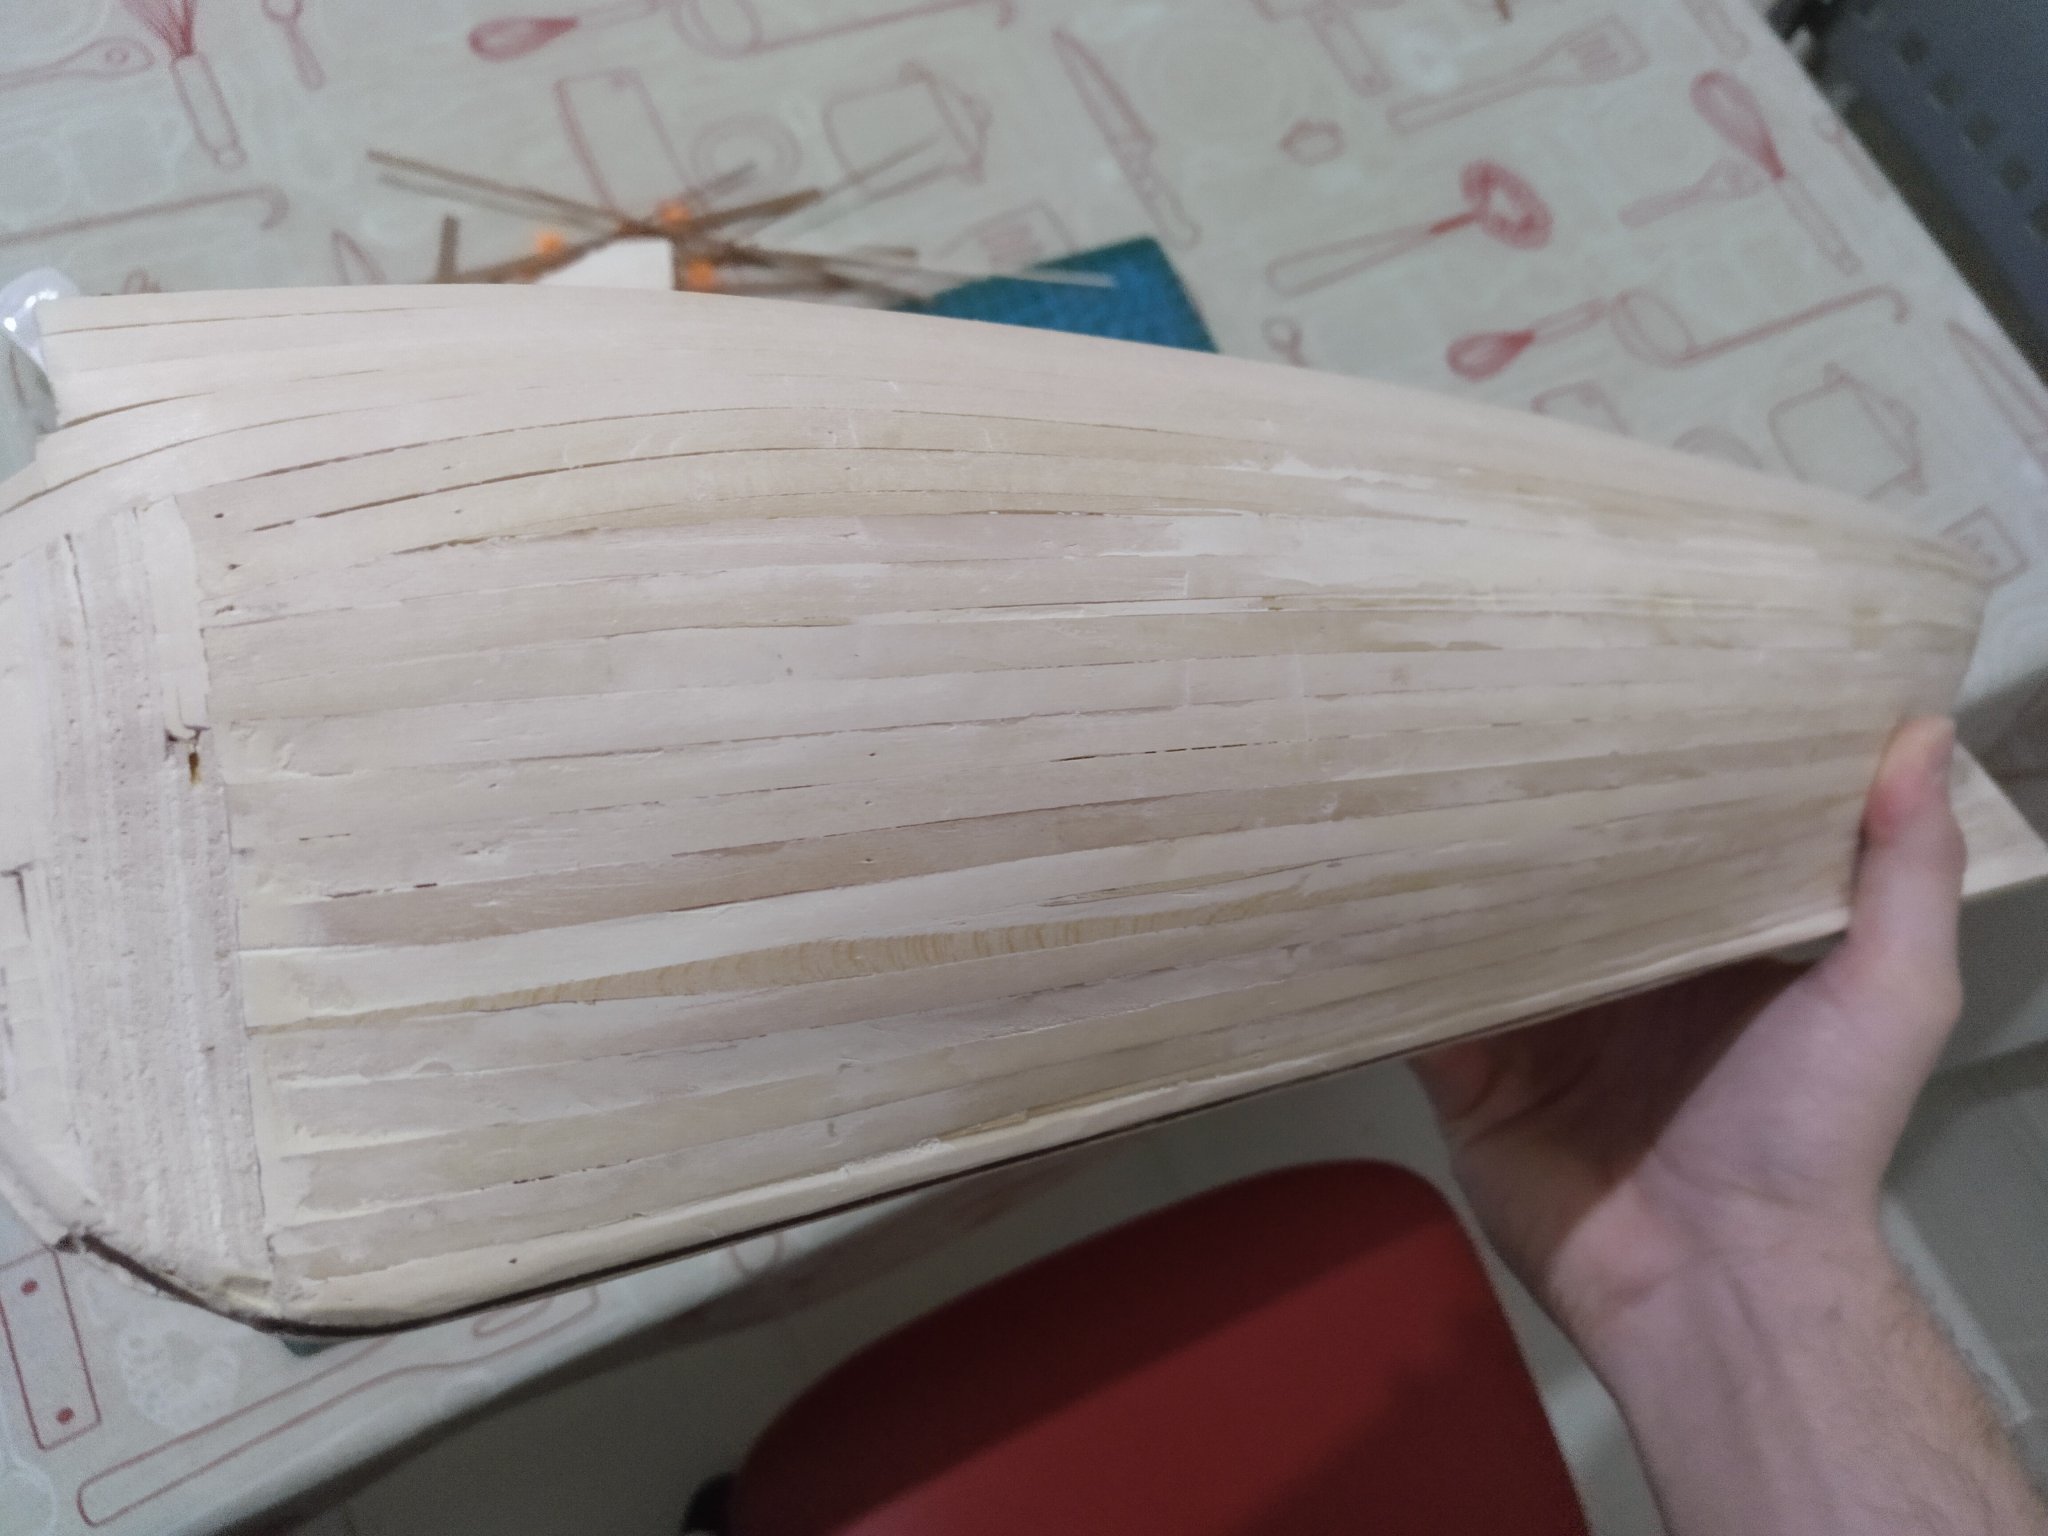
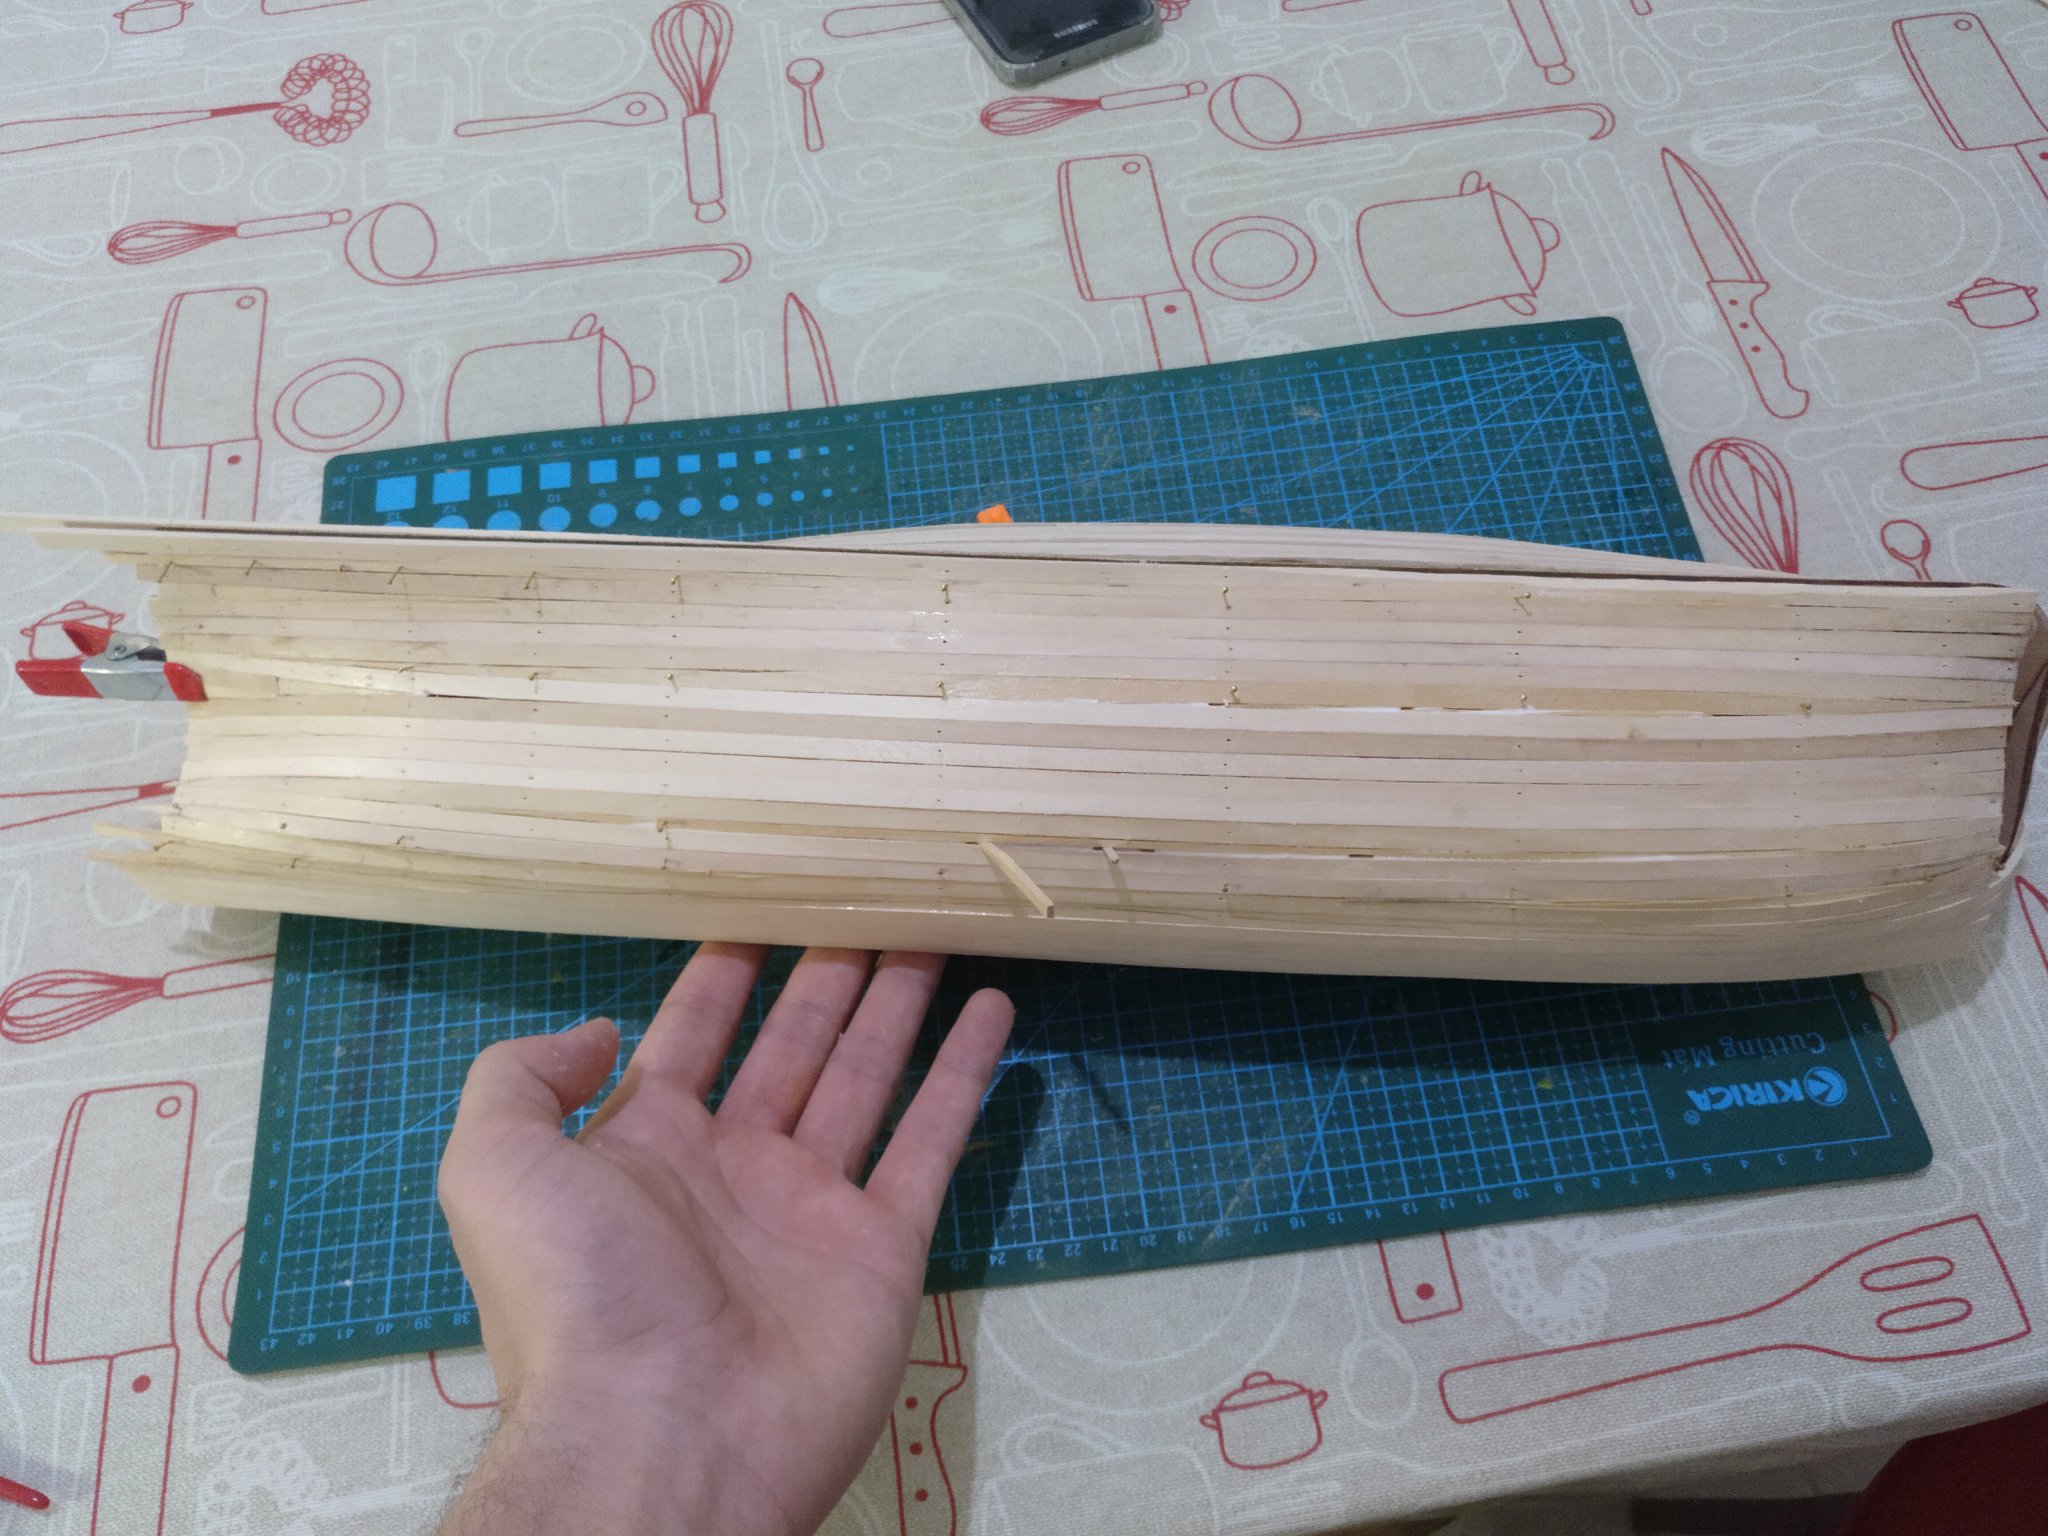
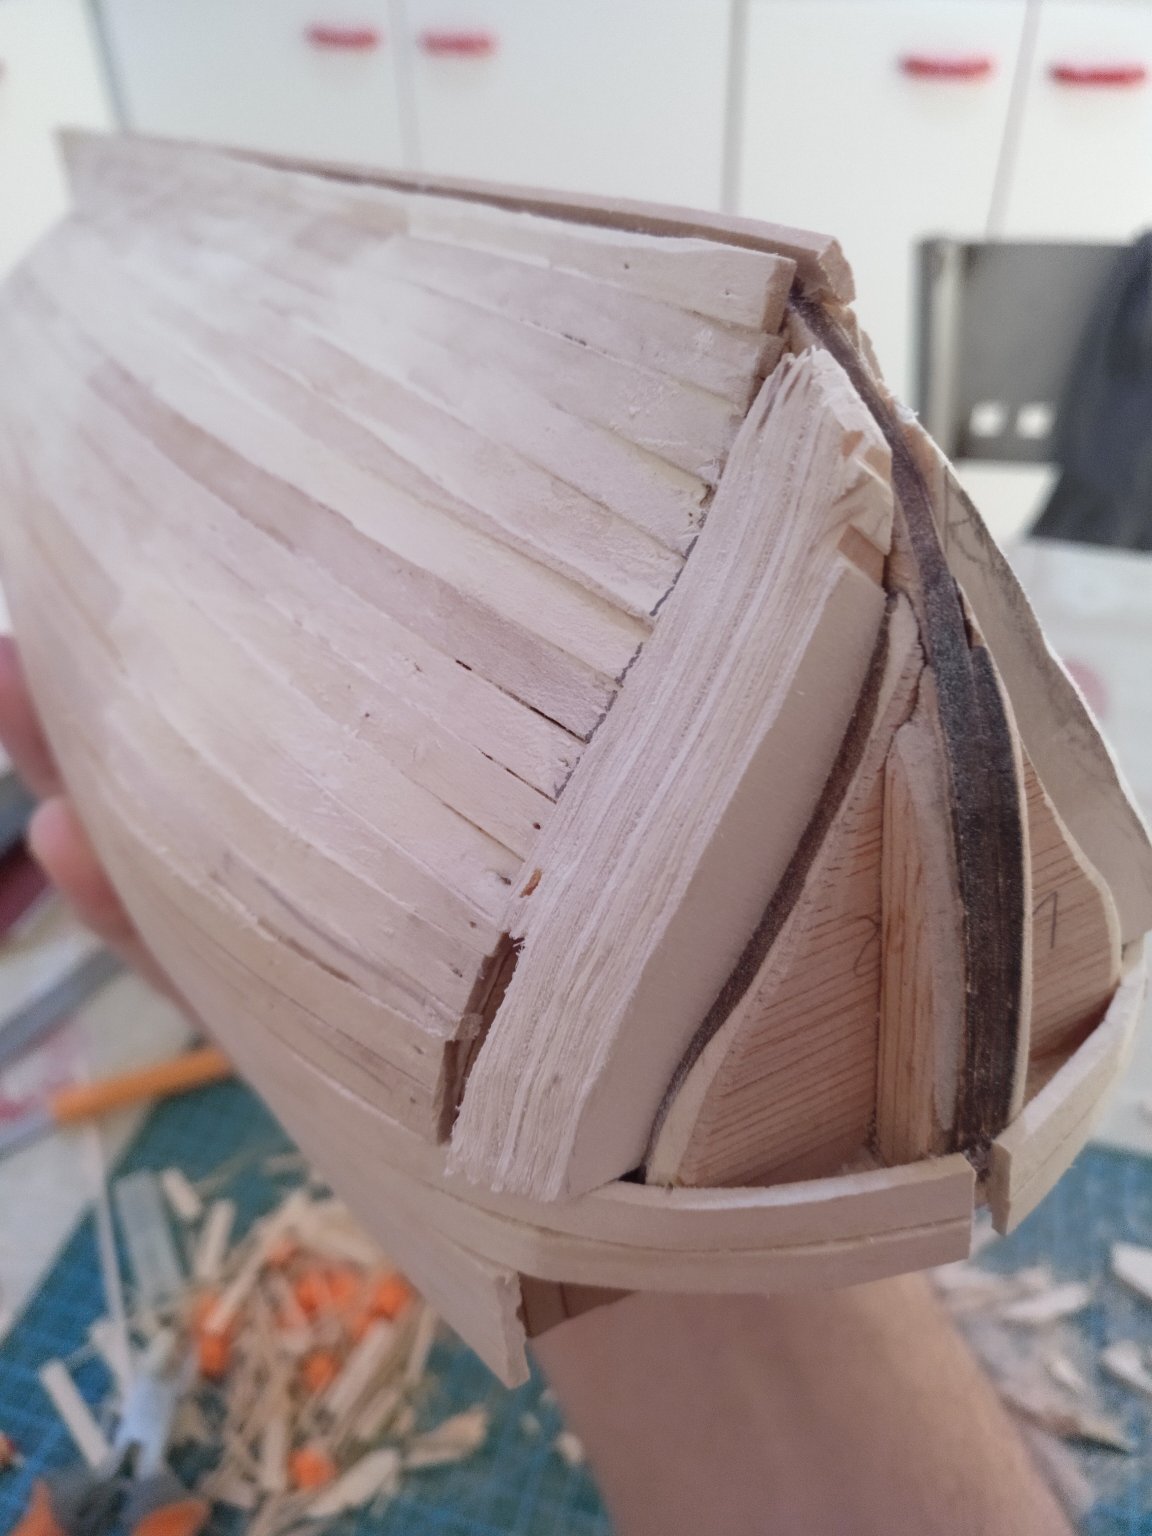
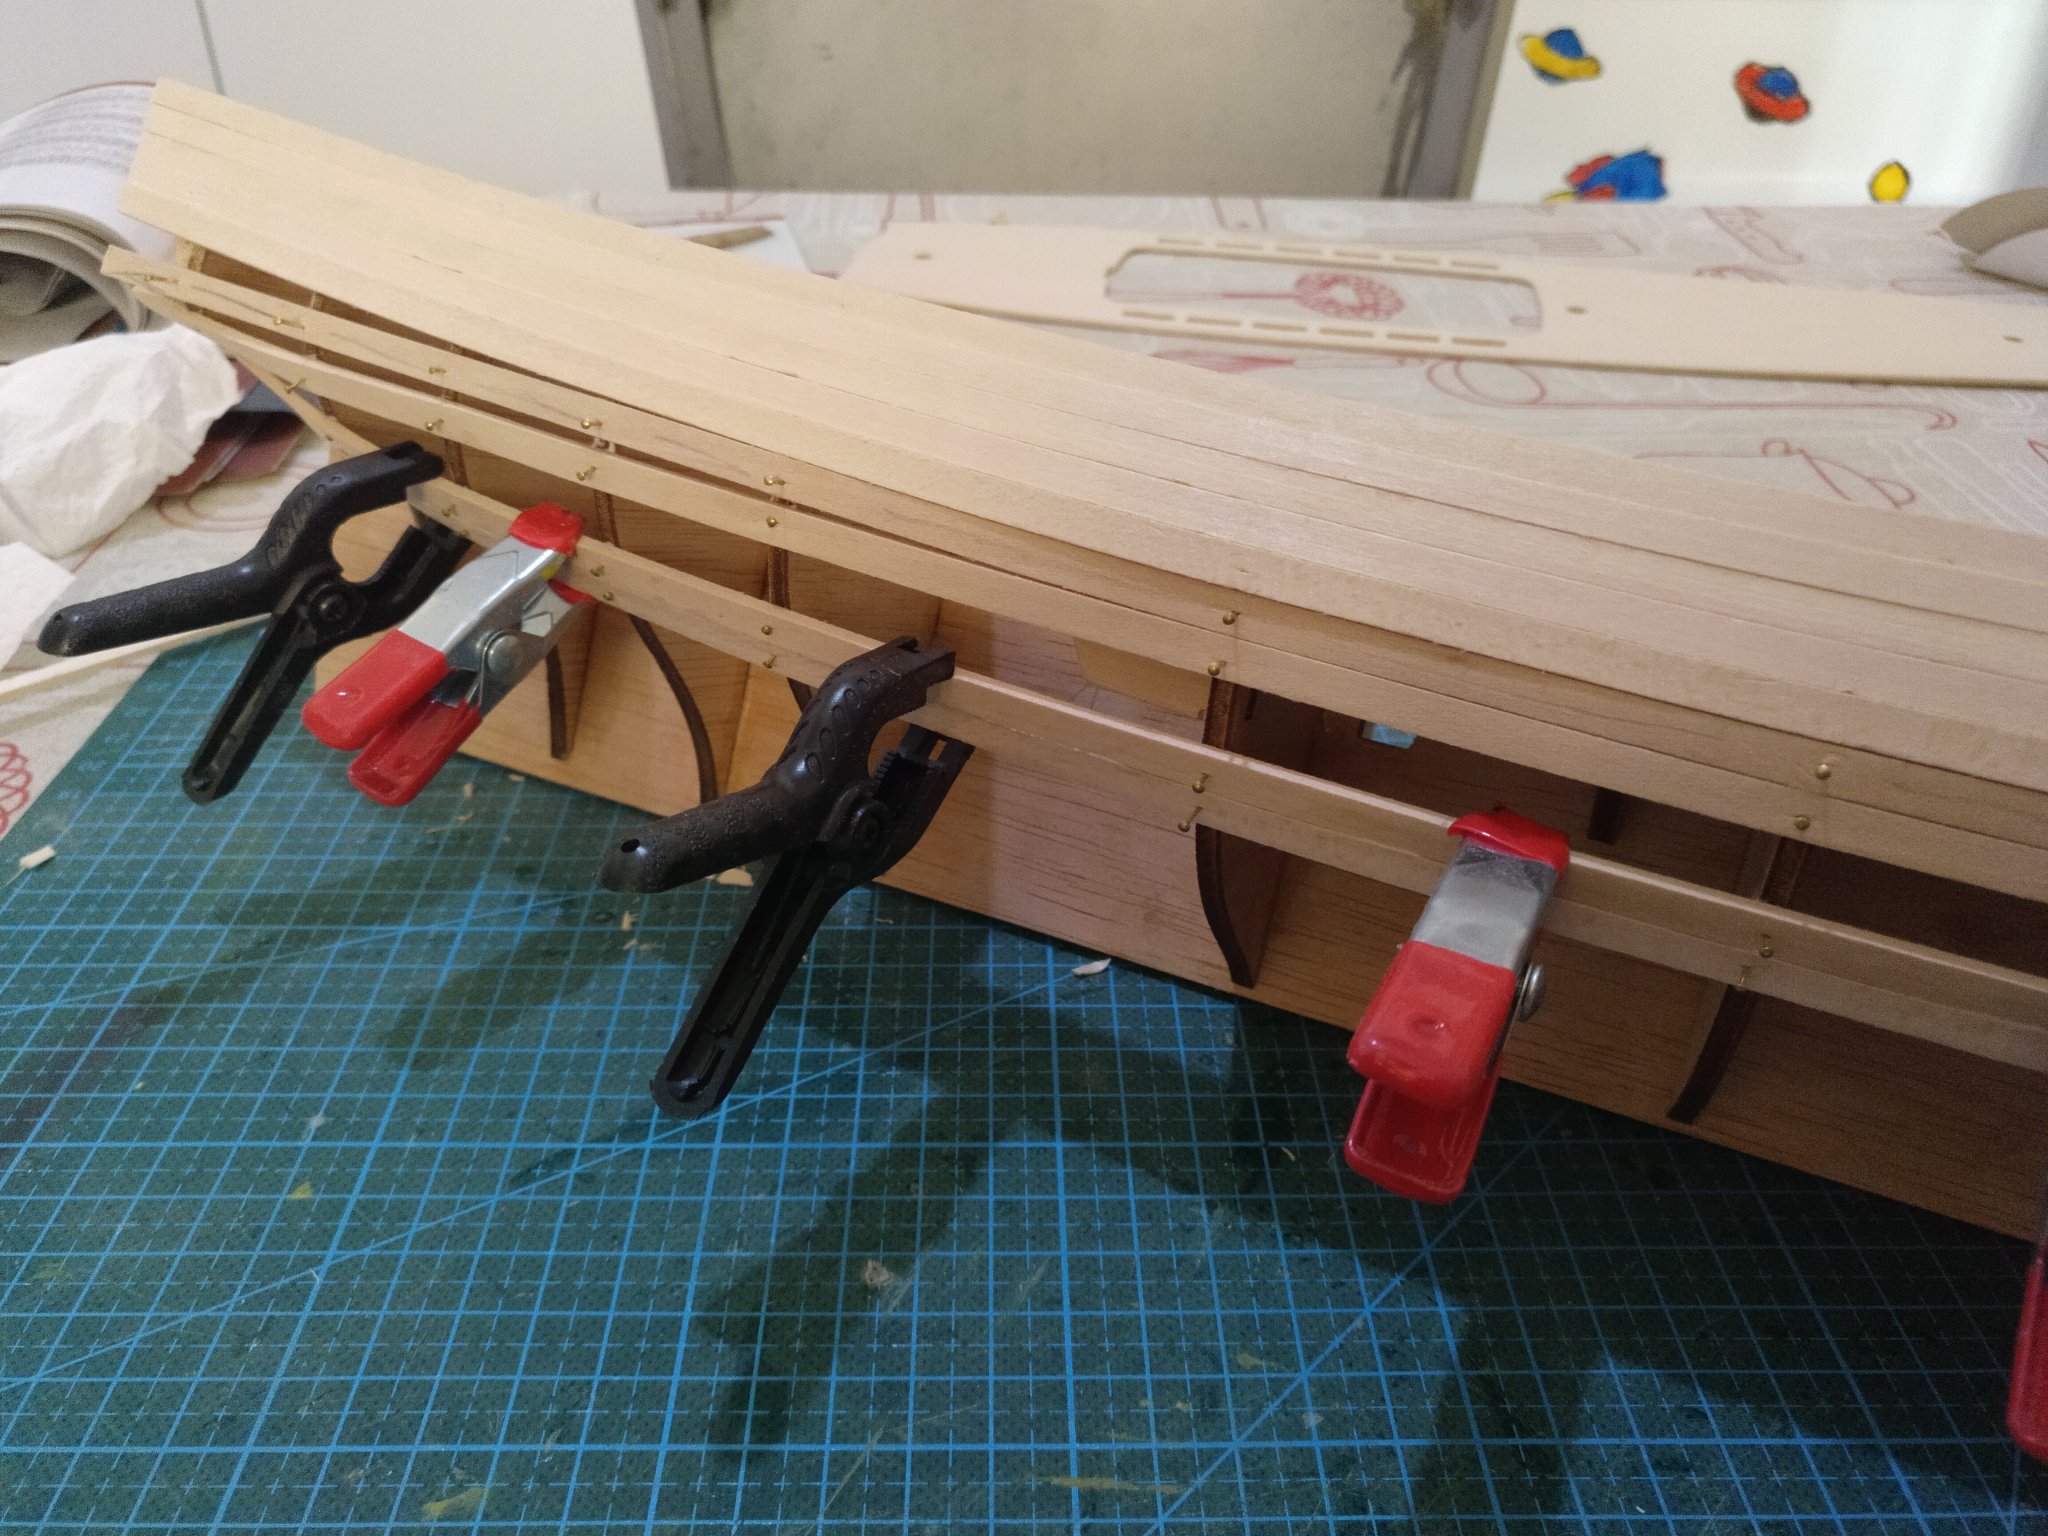
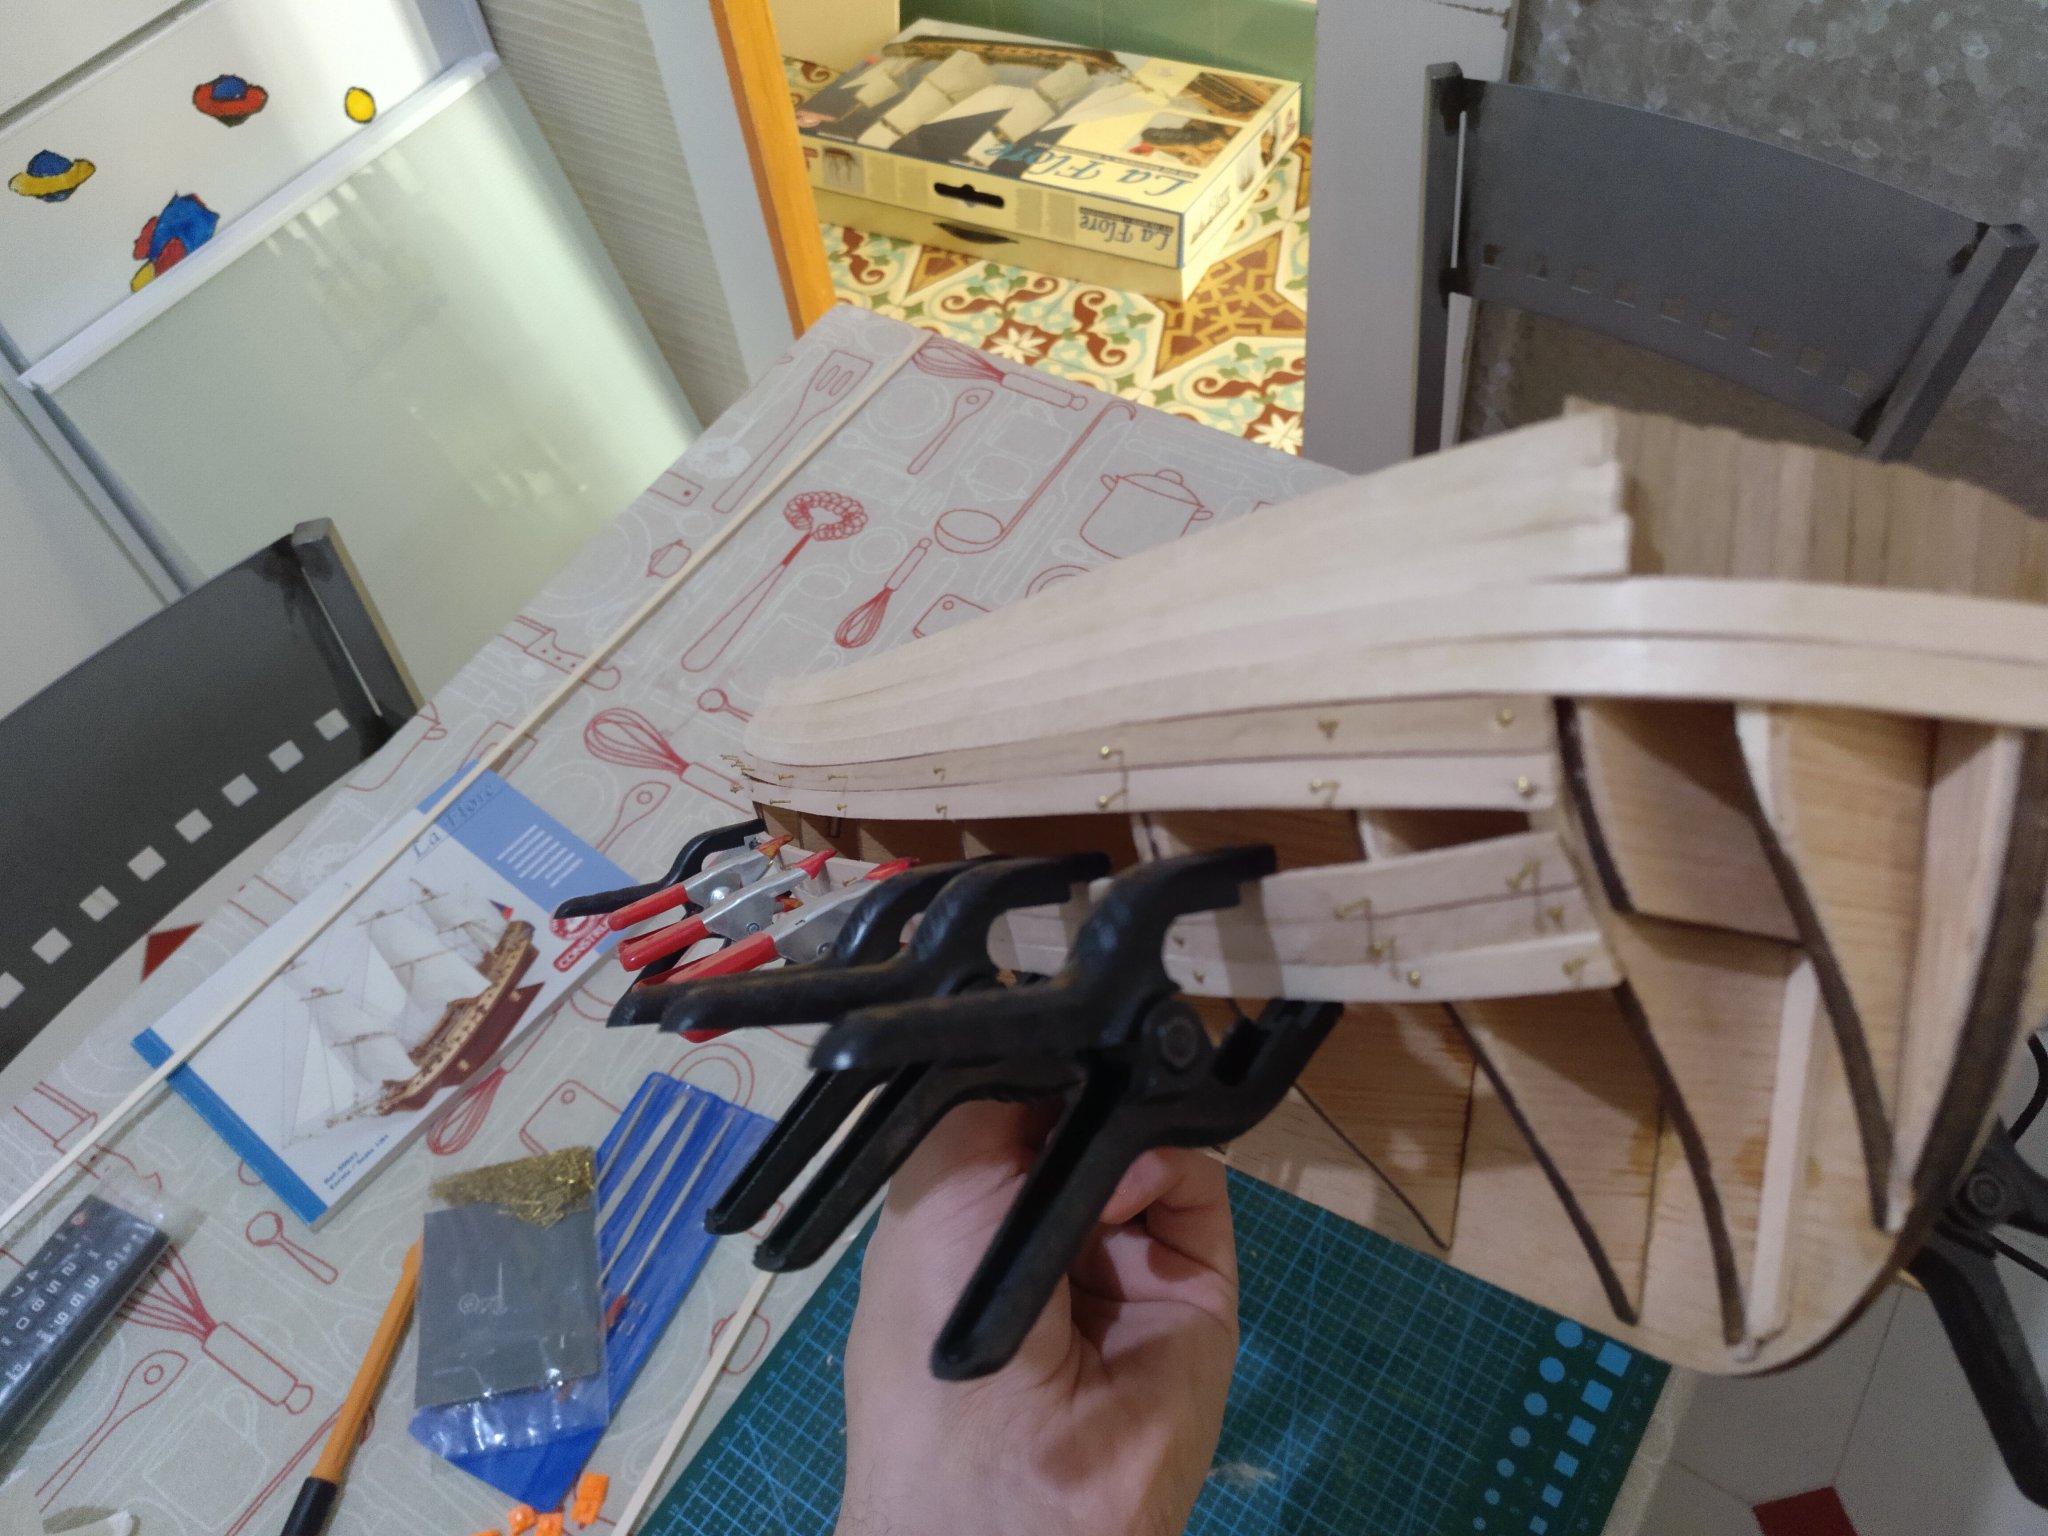
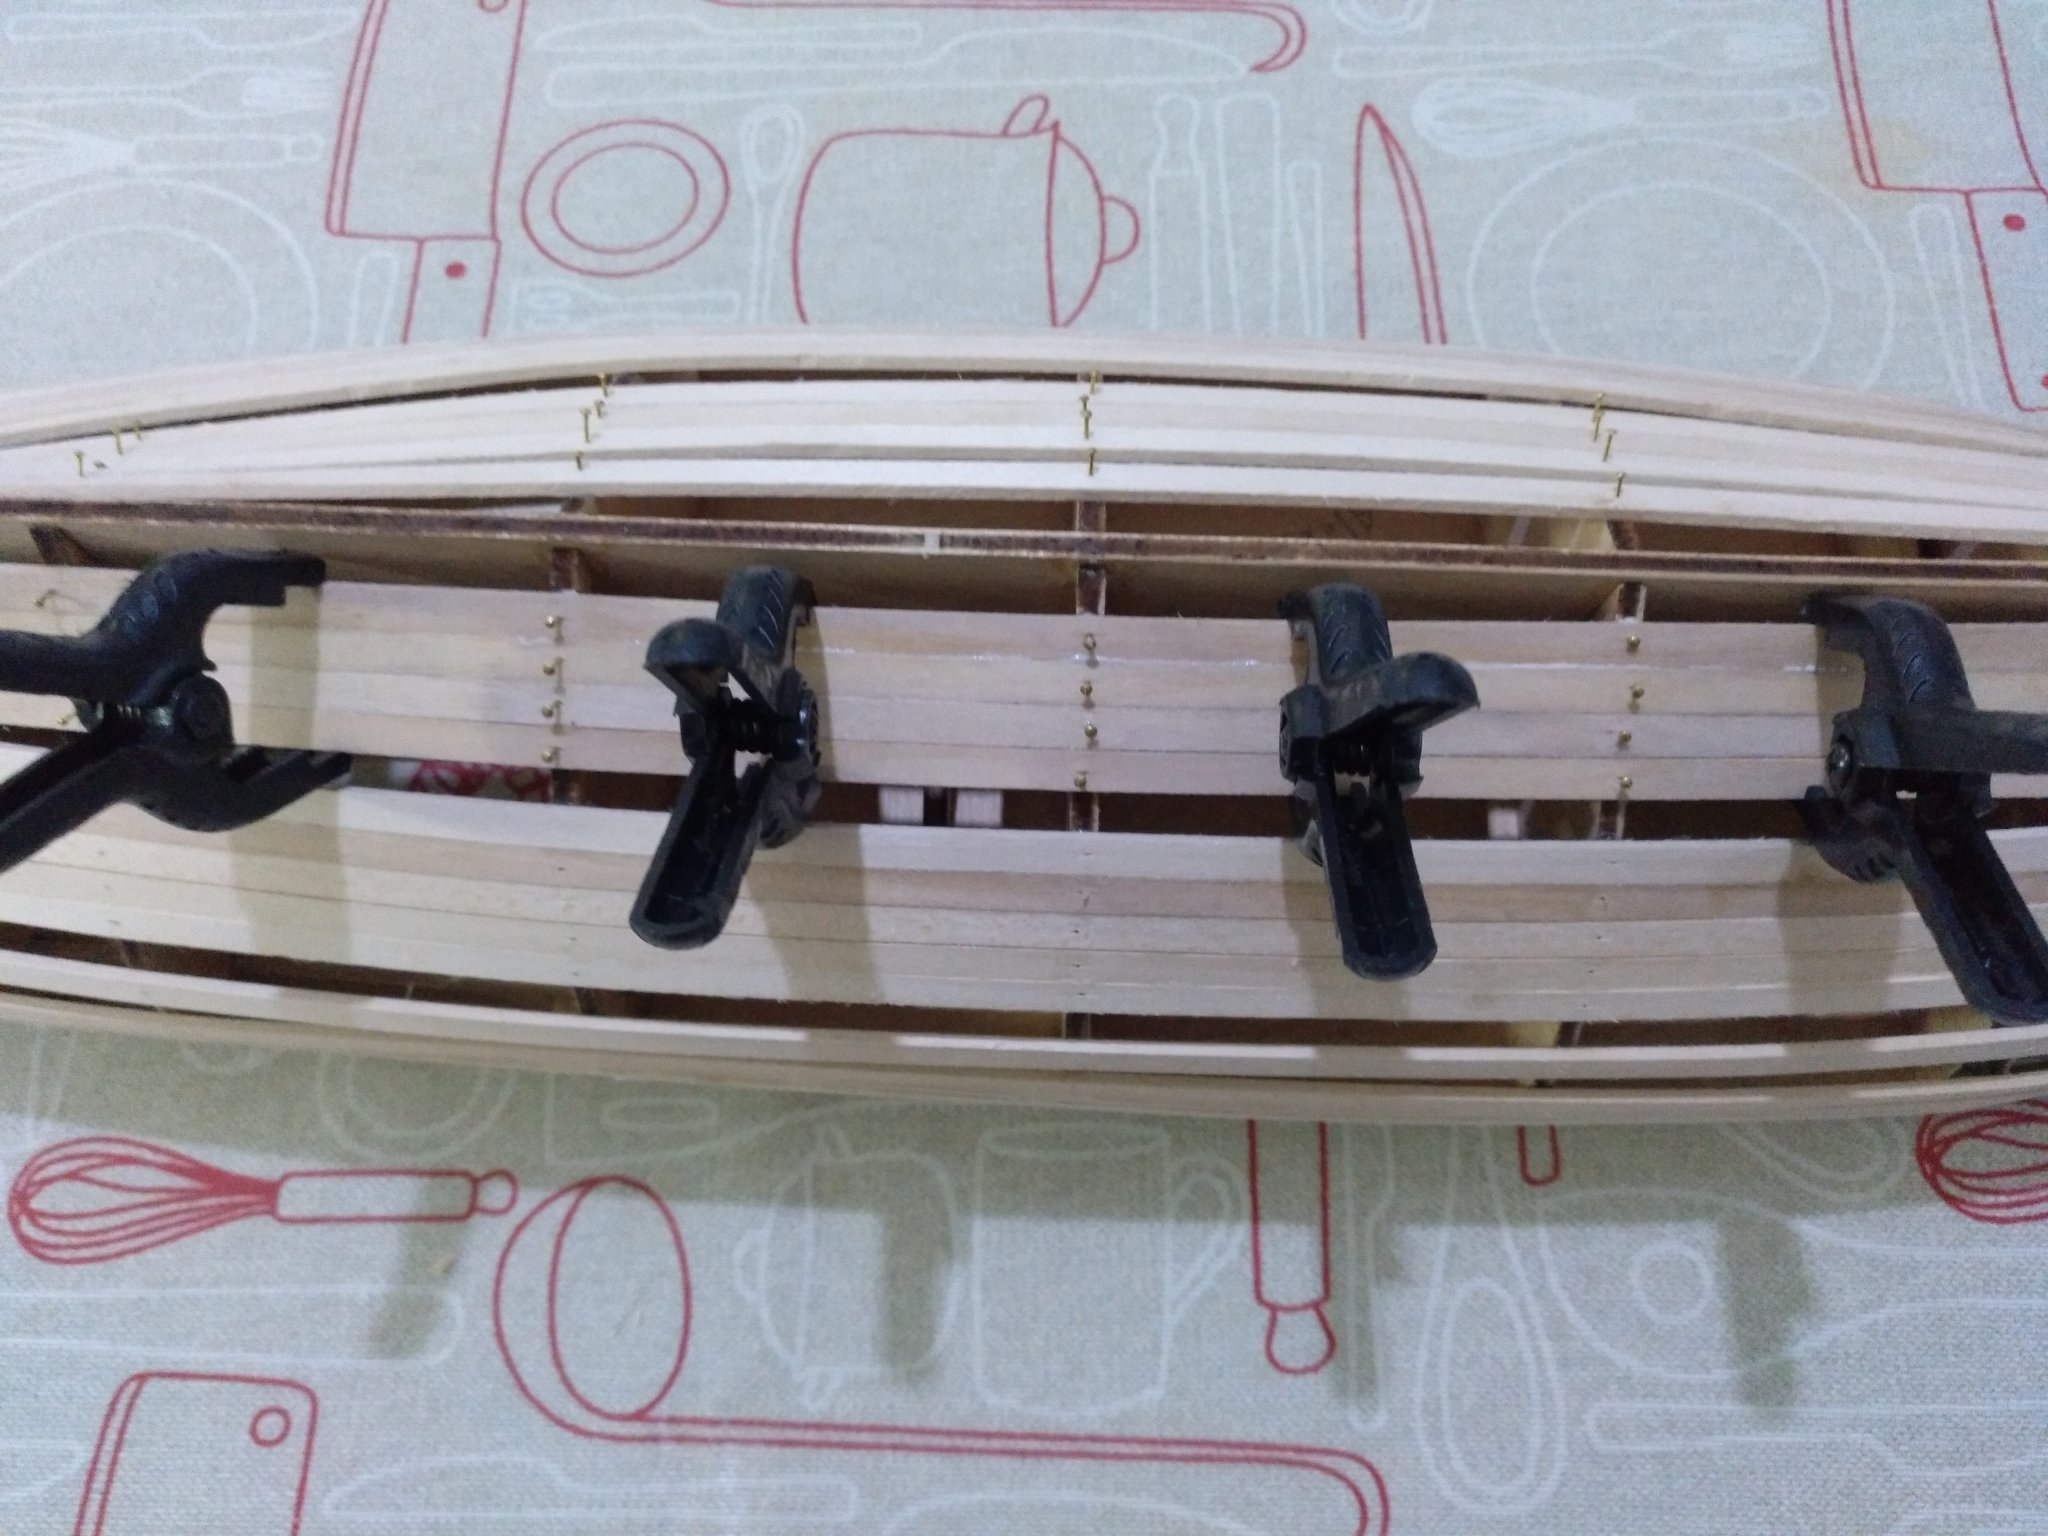
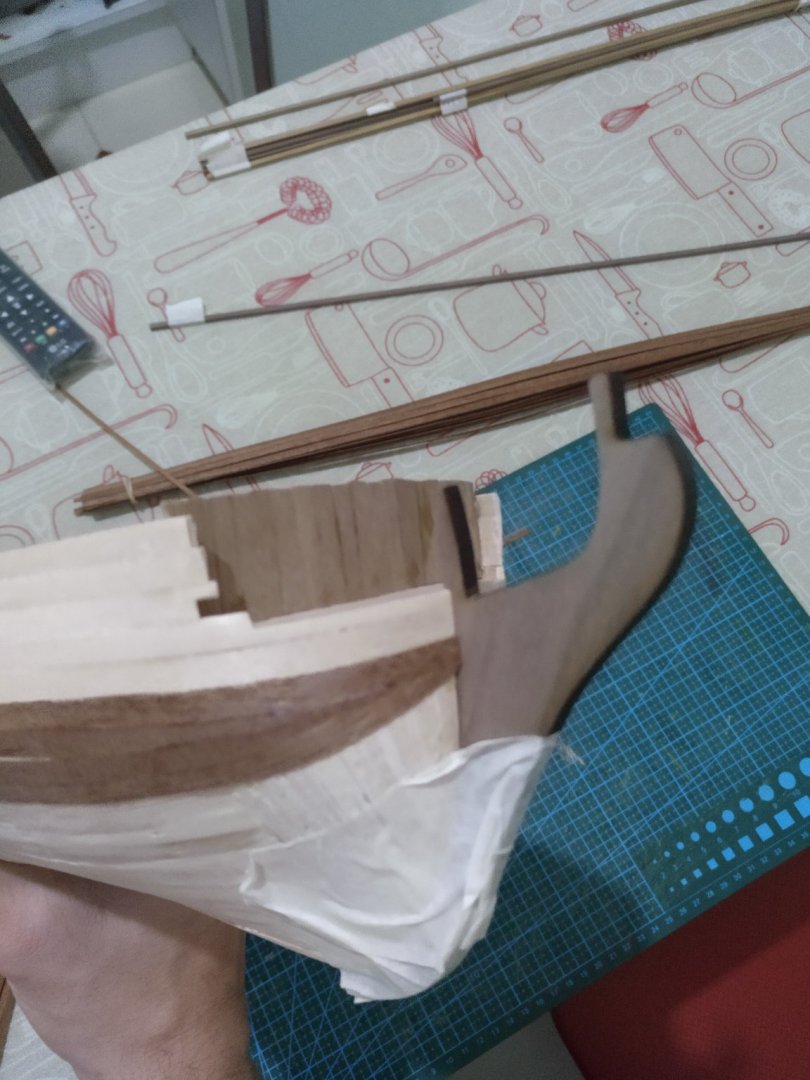
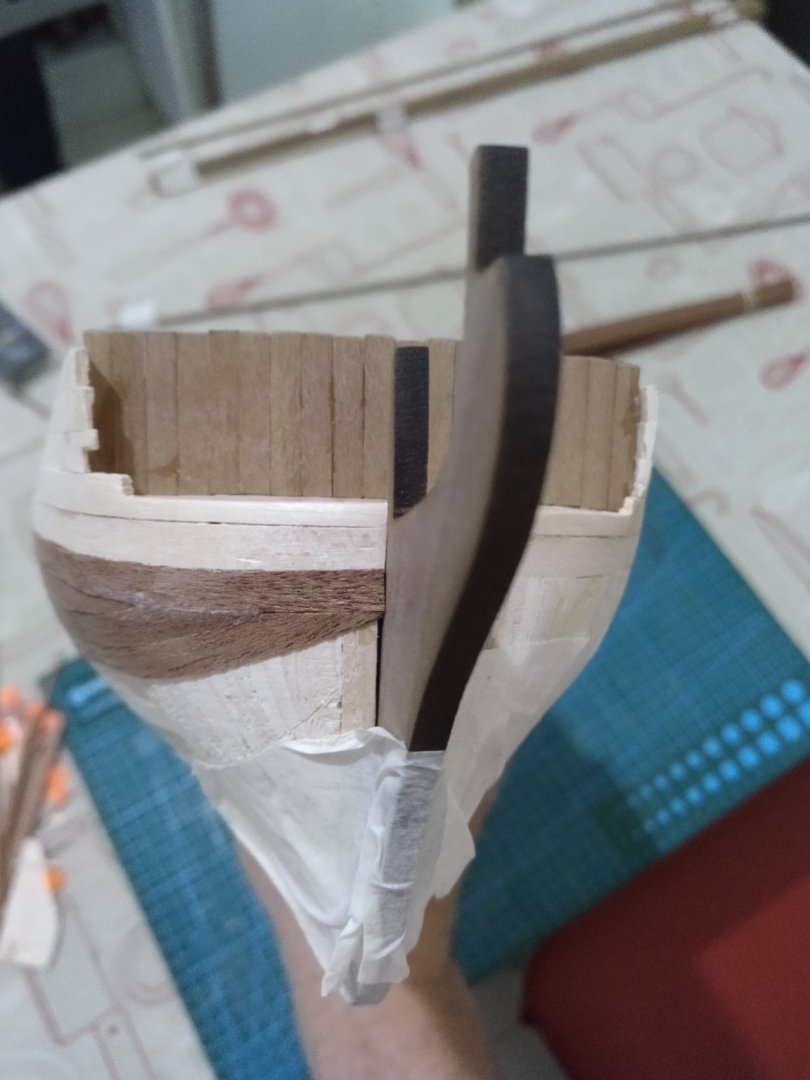
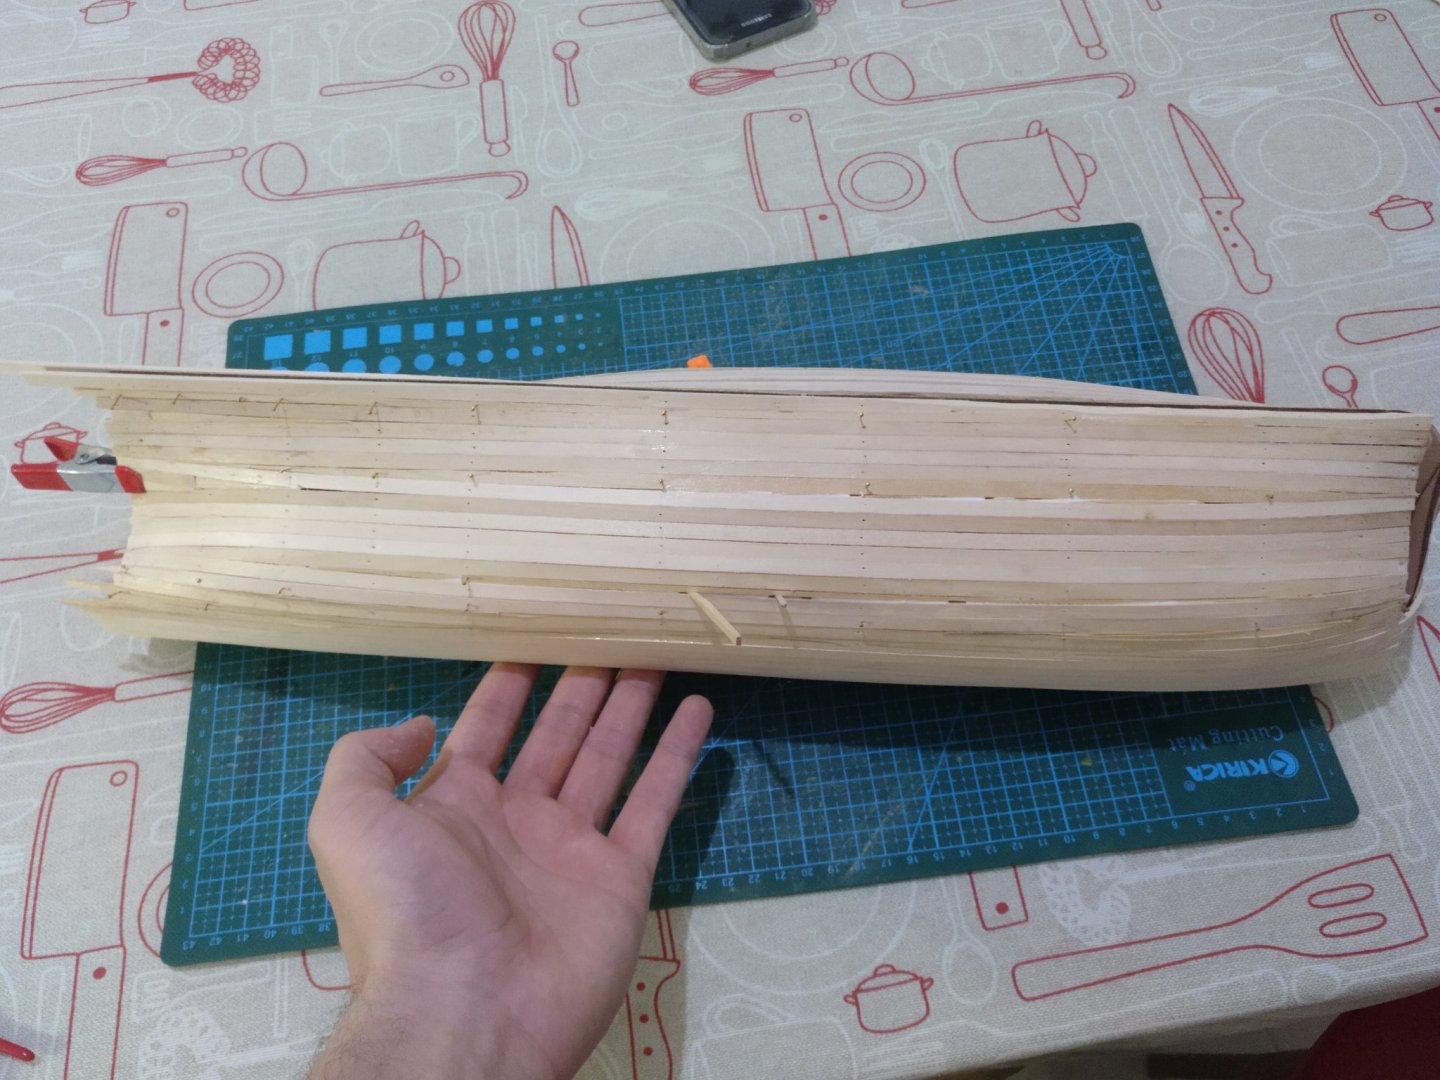
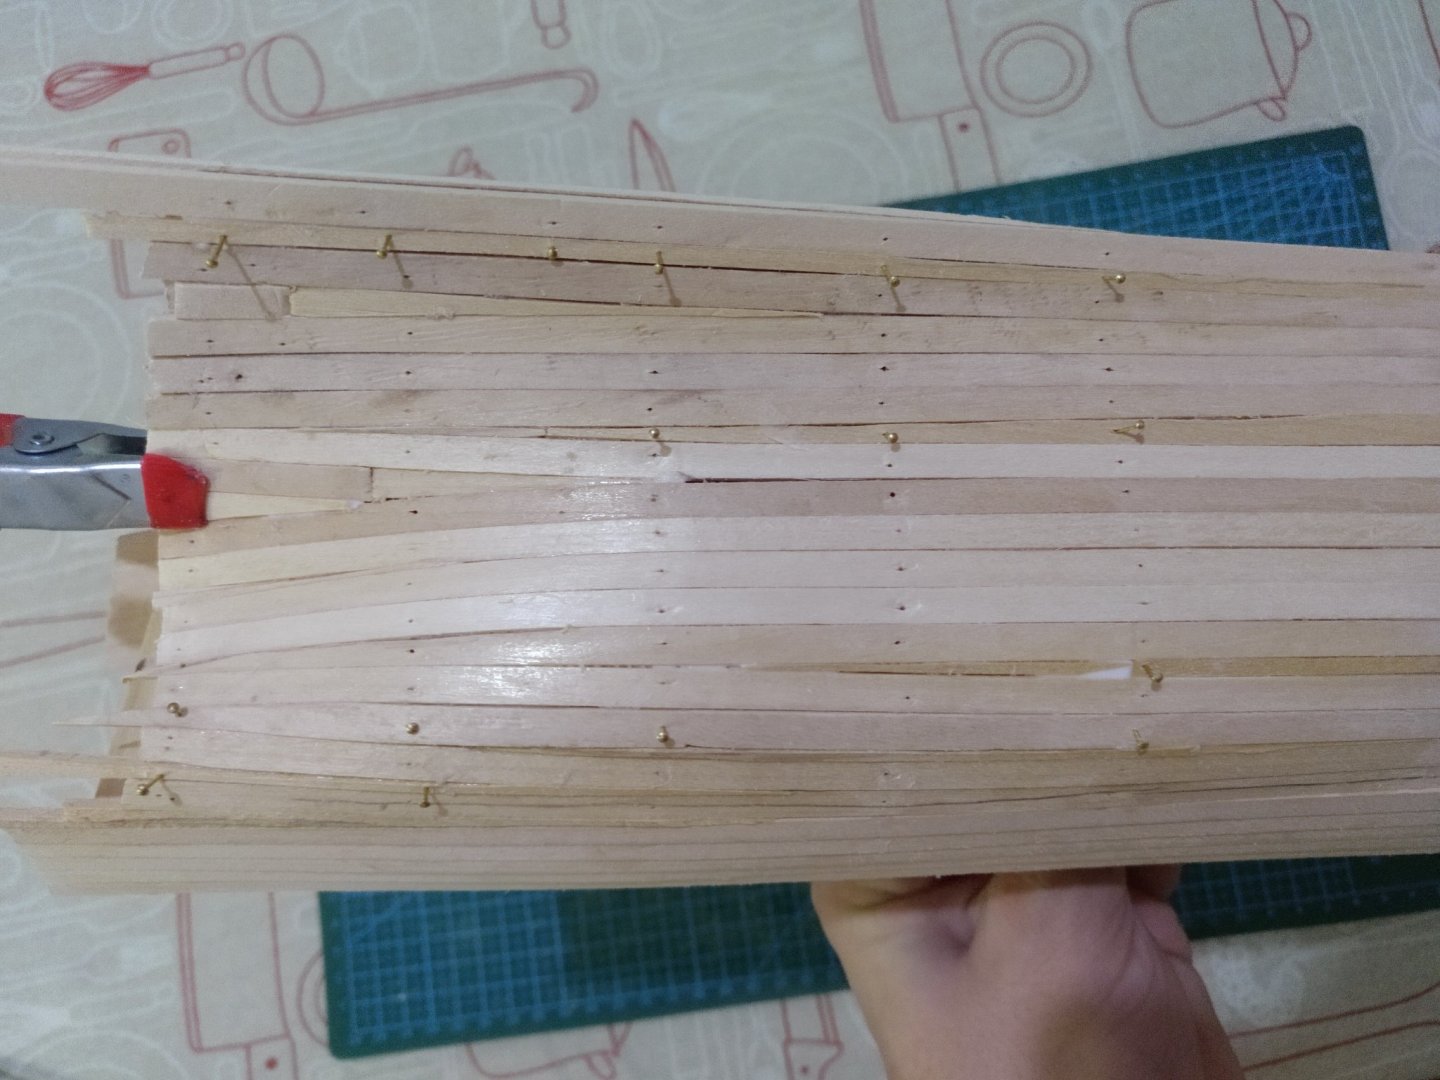
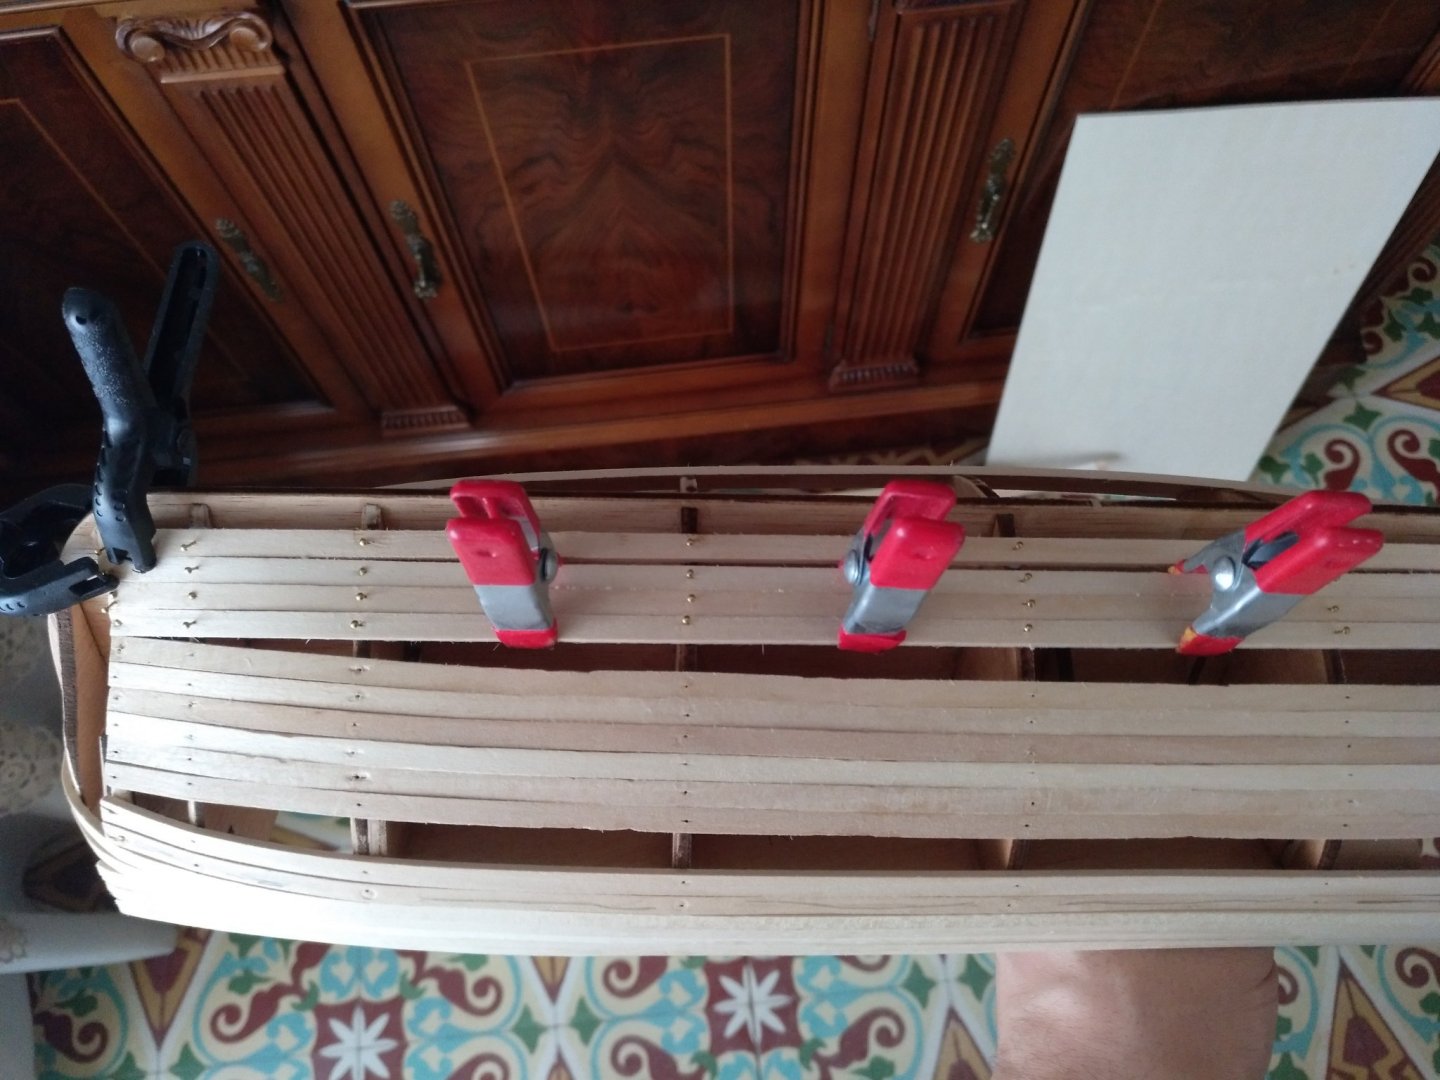
Here I started planking the hull. I started from the gun line. Before this, I sanded the decks and also the two blocks at the back. These still need to be sanded to fit at the front. I will do it when I finish all the hull planking. Now I have started planking the hull. Here is the thing with Constructo. Constructo's kits do not come with double planking (which I like because, in my opinion, it is easier although some experts or purists may disagree). So the kits come with 2x5mm Sapelly strips. I have already made other Constructo kit (Carmen) and I planked the hull with these strips. In my opinion, they are really strong to bend even though they were soaked in water and then heated to keep the shape. So this is what I really dislike about Constructo's kits. Some new models (this one too) indeed includes enough 0.6x5mm Sapelly strips to plank the hull again, after planking it with the thicker strips. I really appreciate this but as I said, these thick strips are very difficult to work with (or maybe it is me, maybe I don't have enough patience!). Anyway, with this kit, I decided to buy 2x5mm Tilo strips because these are much easier to bend and another advantage is that you don't have the pressure to make the hull perfect on the first try because then you are going to re plank it with the final Sapelly ones. So this is what I did! I bought some Tilo strips from a local shop (quite cheap) and started planking the hull with them. Here are the pictures. As this ship has a very curved "nose" I also decided to glue wood planks (I will show them) and then sand them to fit into place. And then plank the entire hull with the thin Sapelly strips. I wanted to try this because I saw some kits do this, although these kits included the wood pre-cut. As you can see there are some gaps. I am first gluing the "complete and straight" ones and then I will fill the gaps cutting and sanding the strips to place, which is a more time-consuming work. I really like this planking method because, as you can clearly see, I made some mistakes (some planks are a little bit too bent or curved...) So this way, I can make little mistakes because then I will do a great filling and sanding work to make it almost perfect and then, after this, plank it again perfectly with the easy-to-work thin Sapelly strips. They are included in the kit! They must be used!!! hehehehe. I am really satisfied with the result (not finished though) and I am really happy that I am able to put a lot of hours of work on this beautiful ship.


-
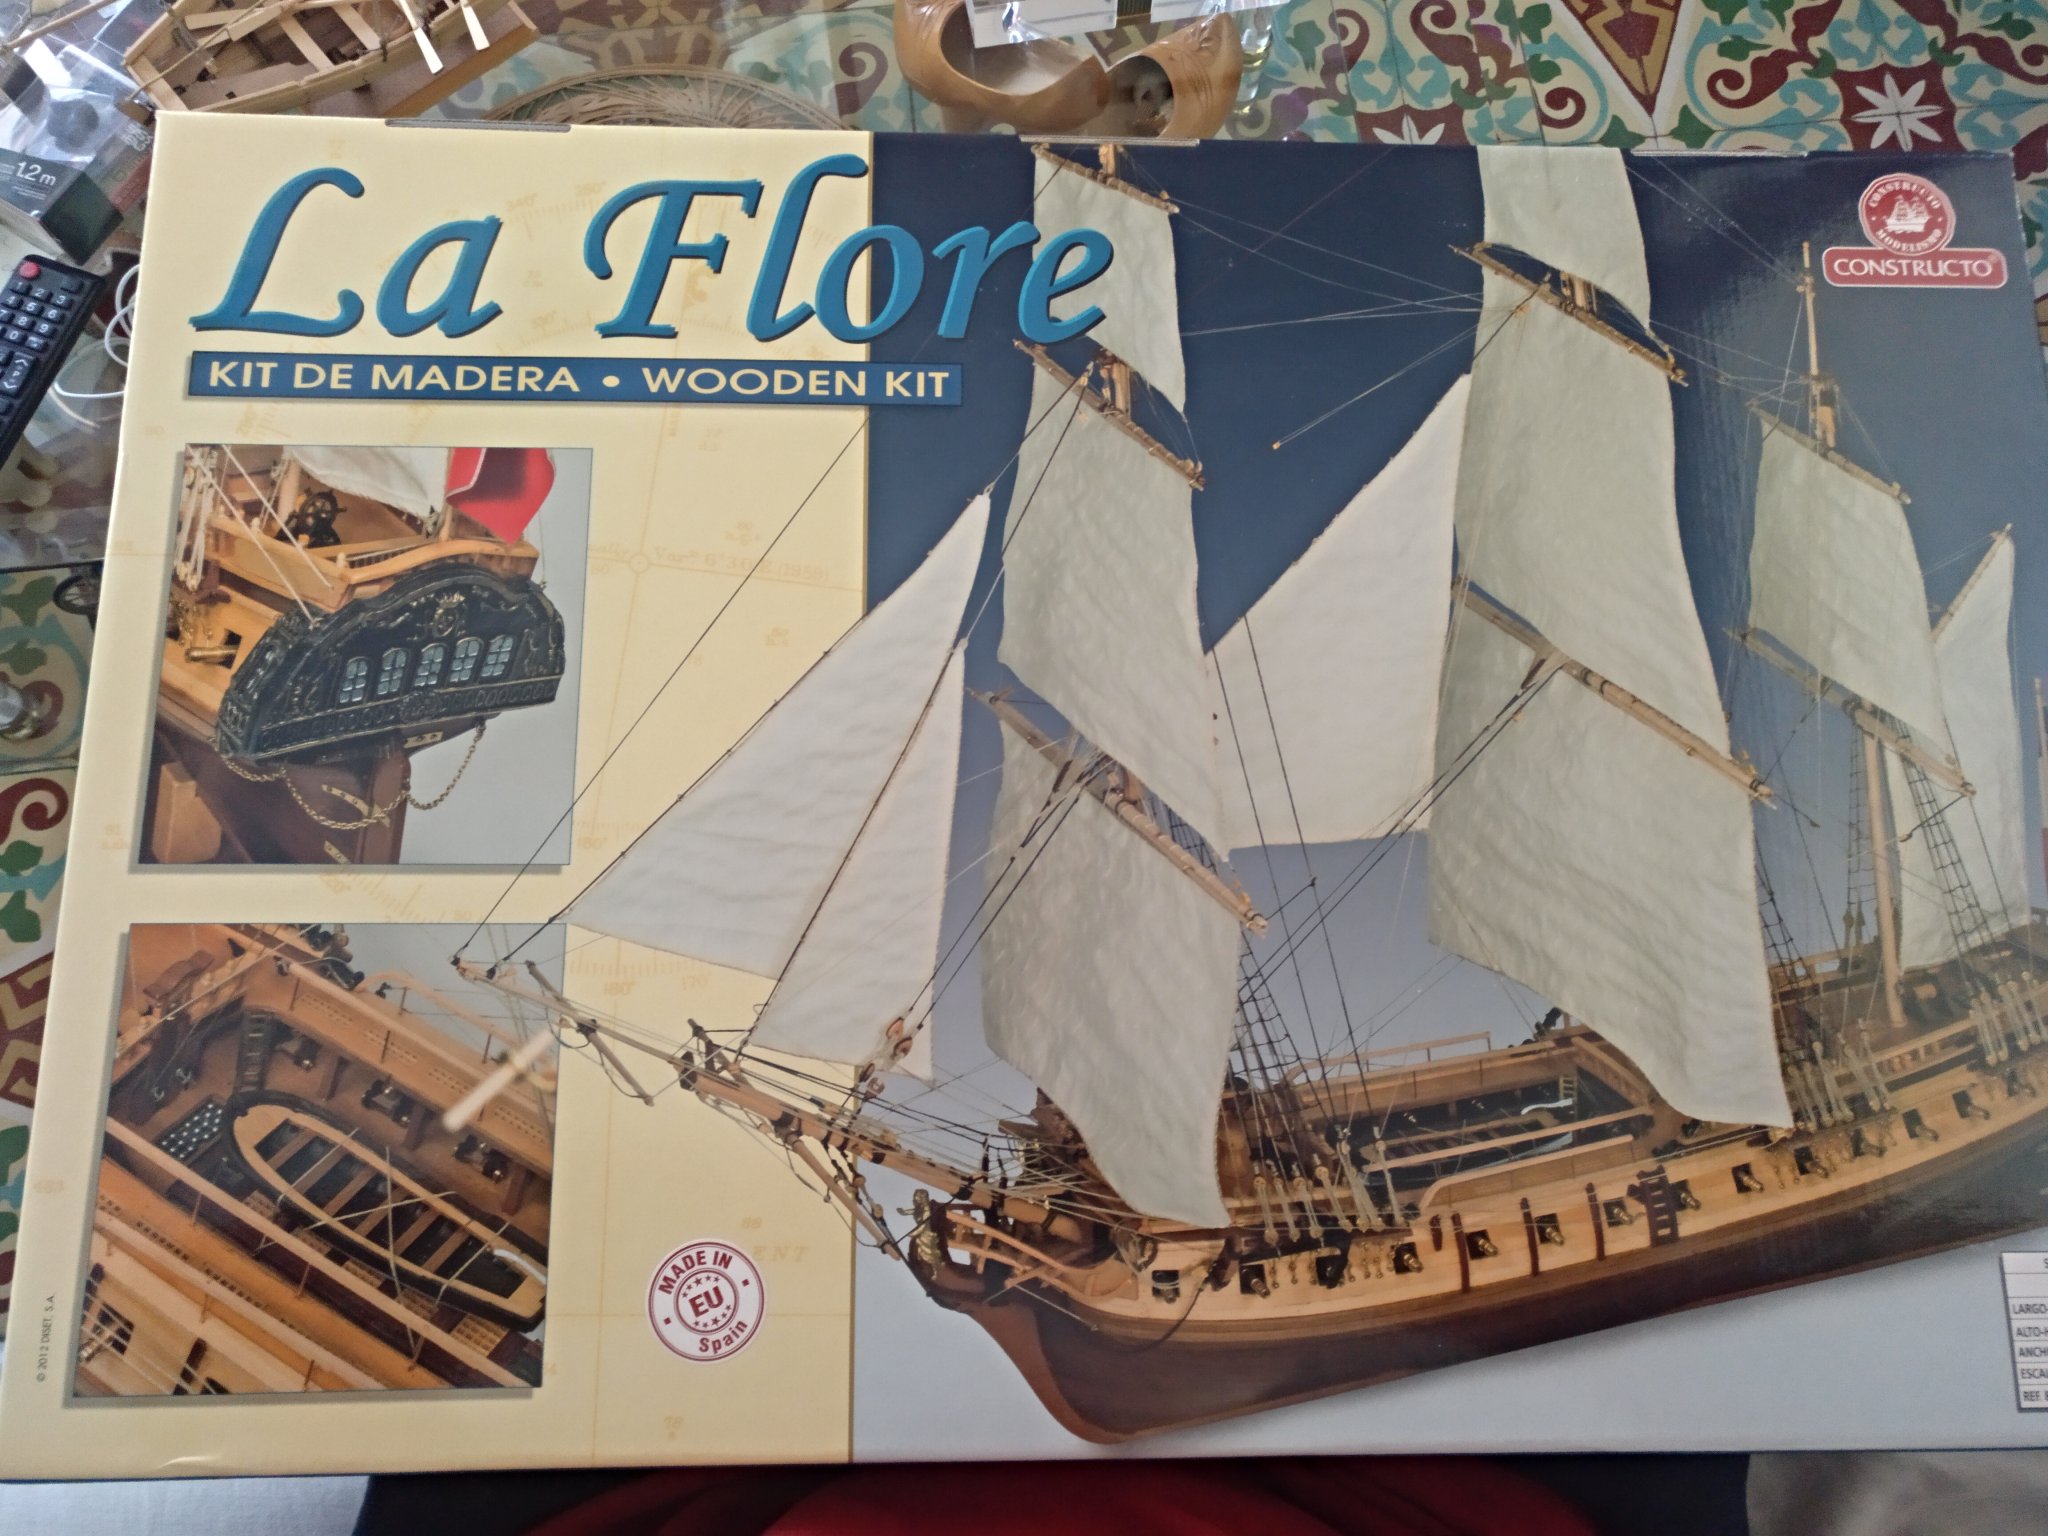
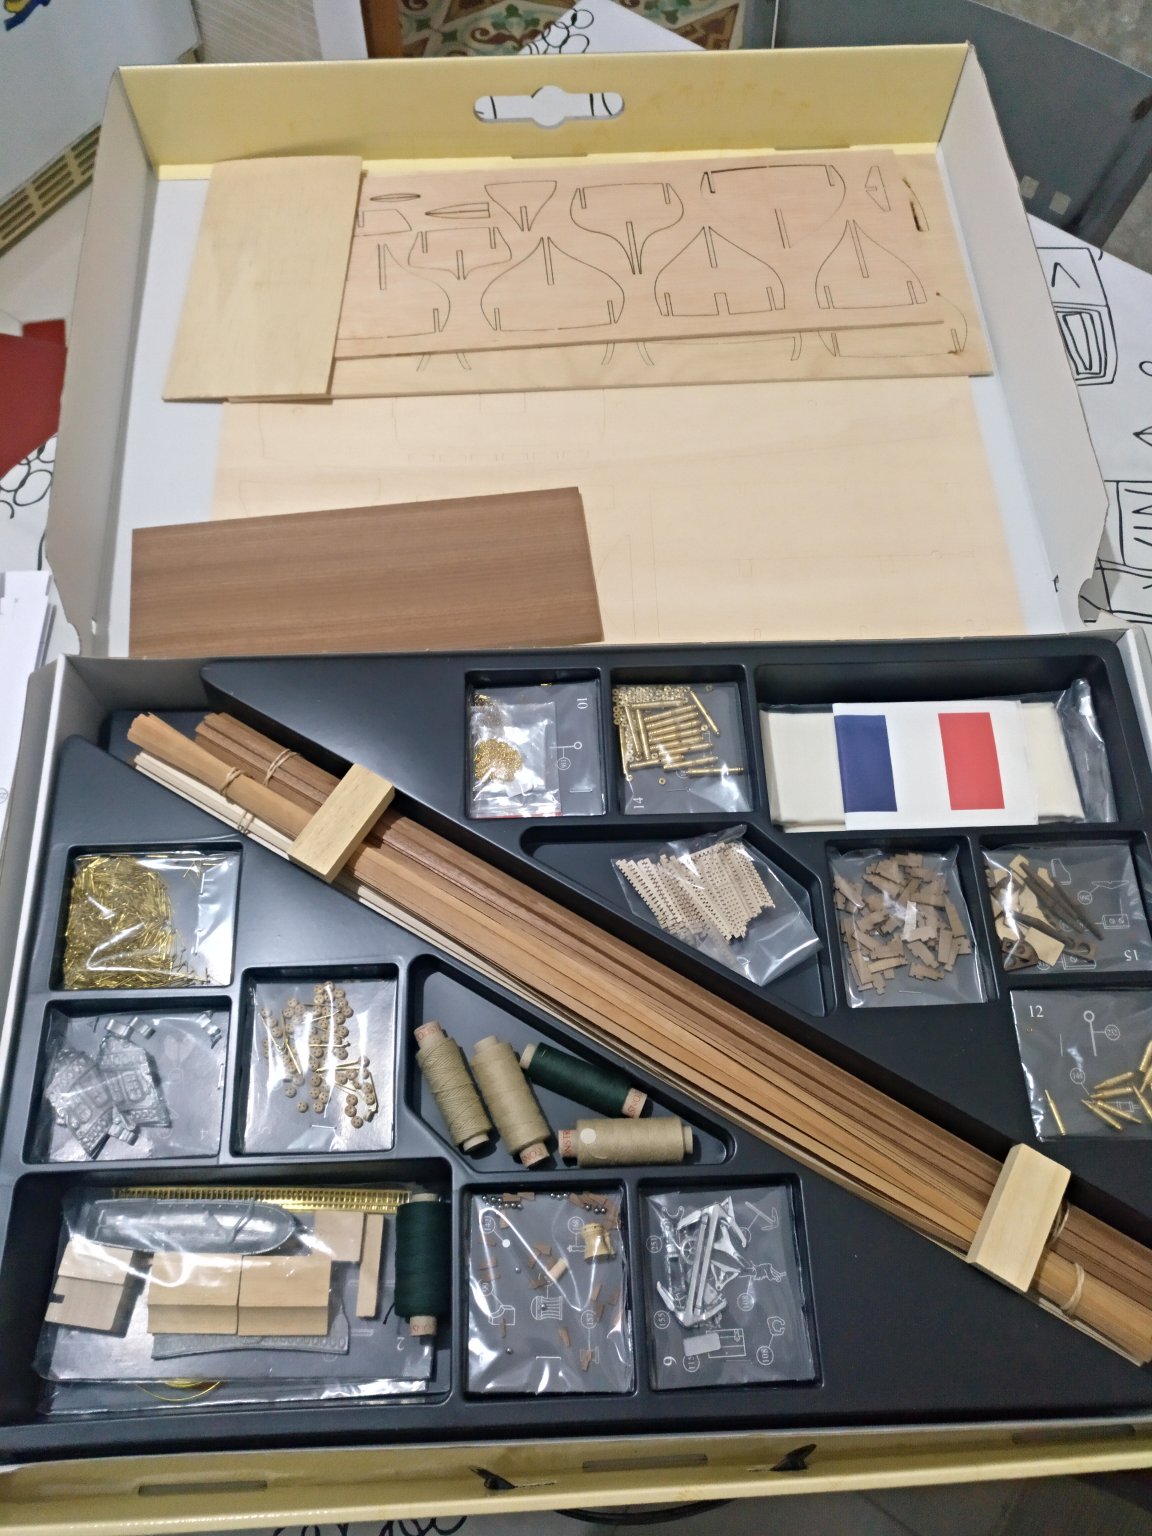
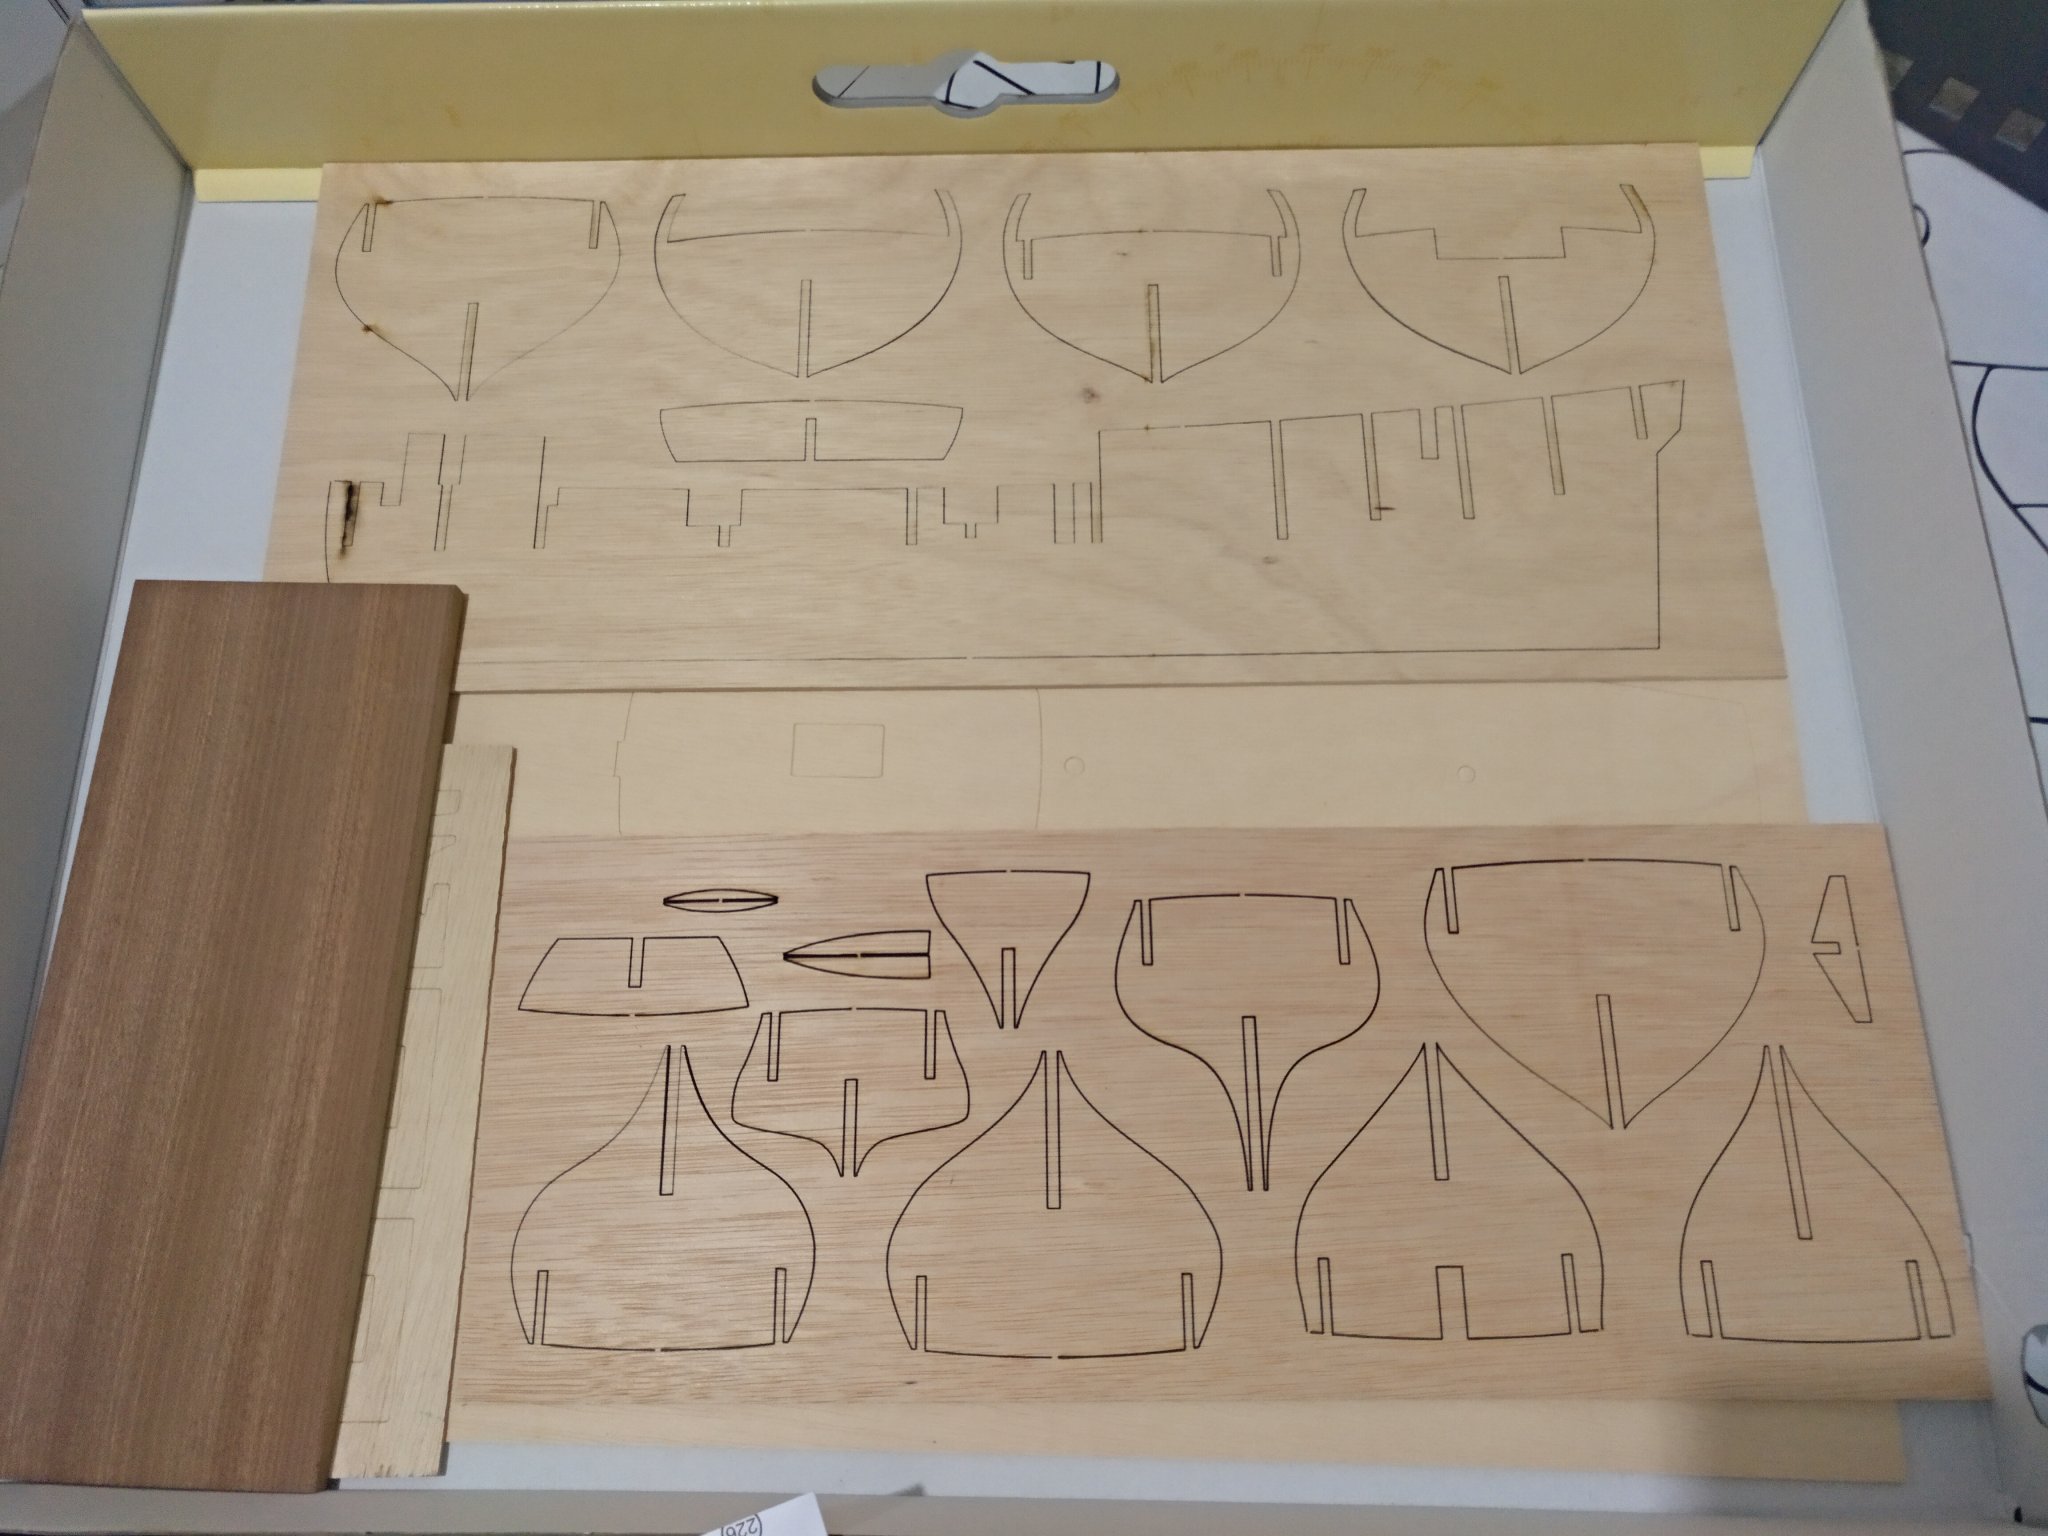
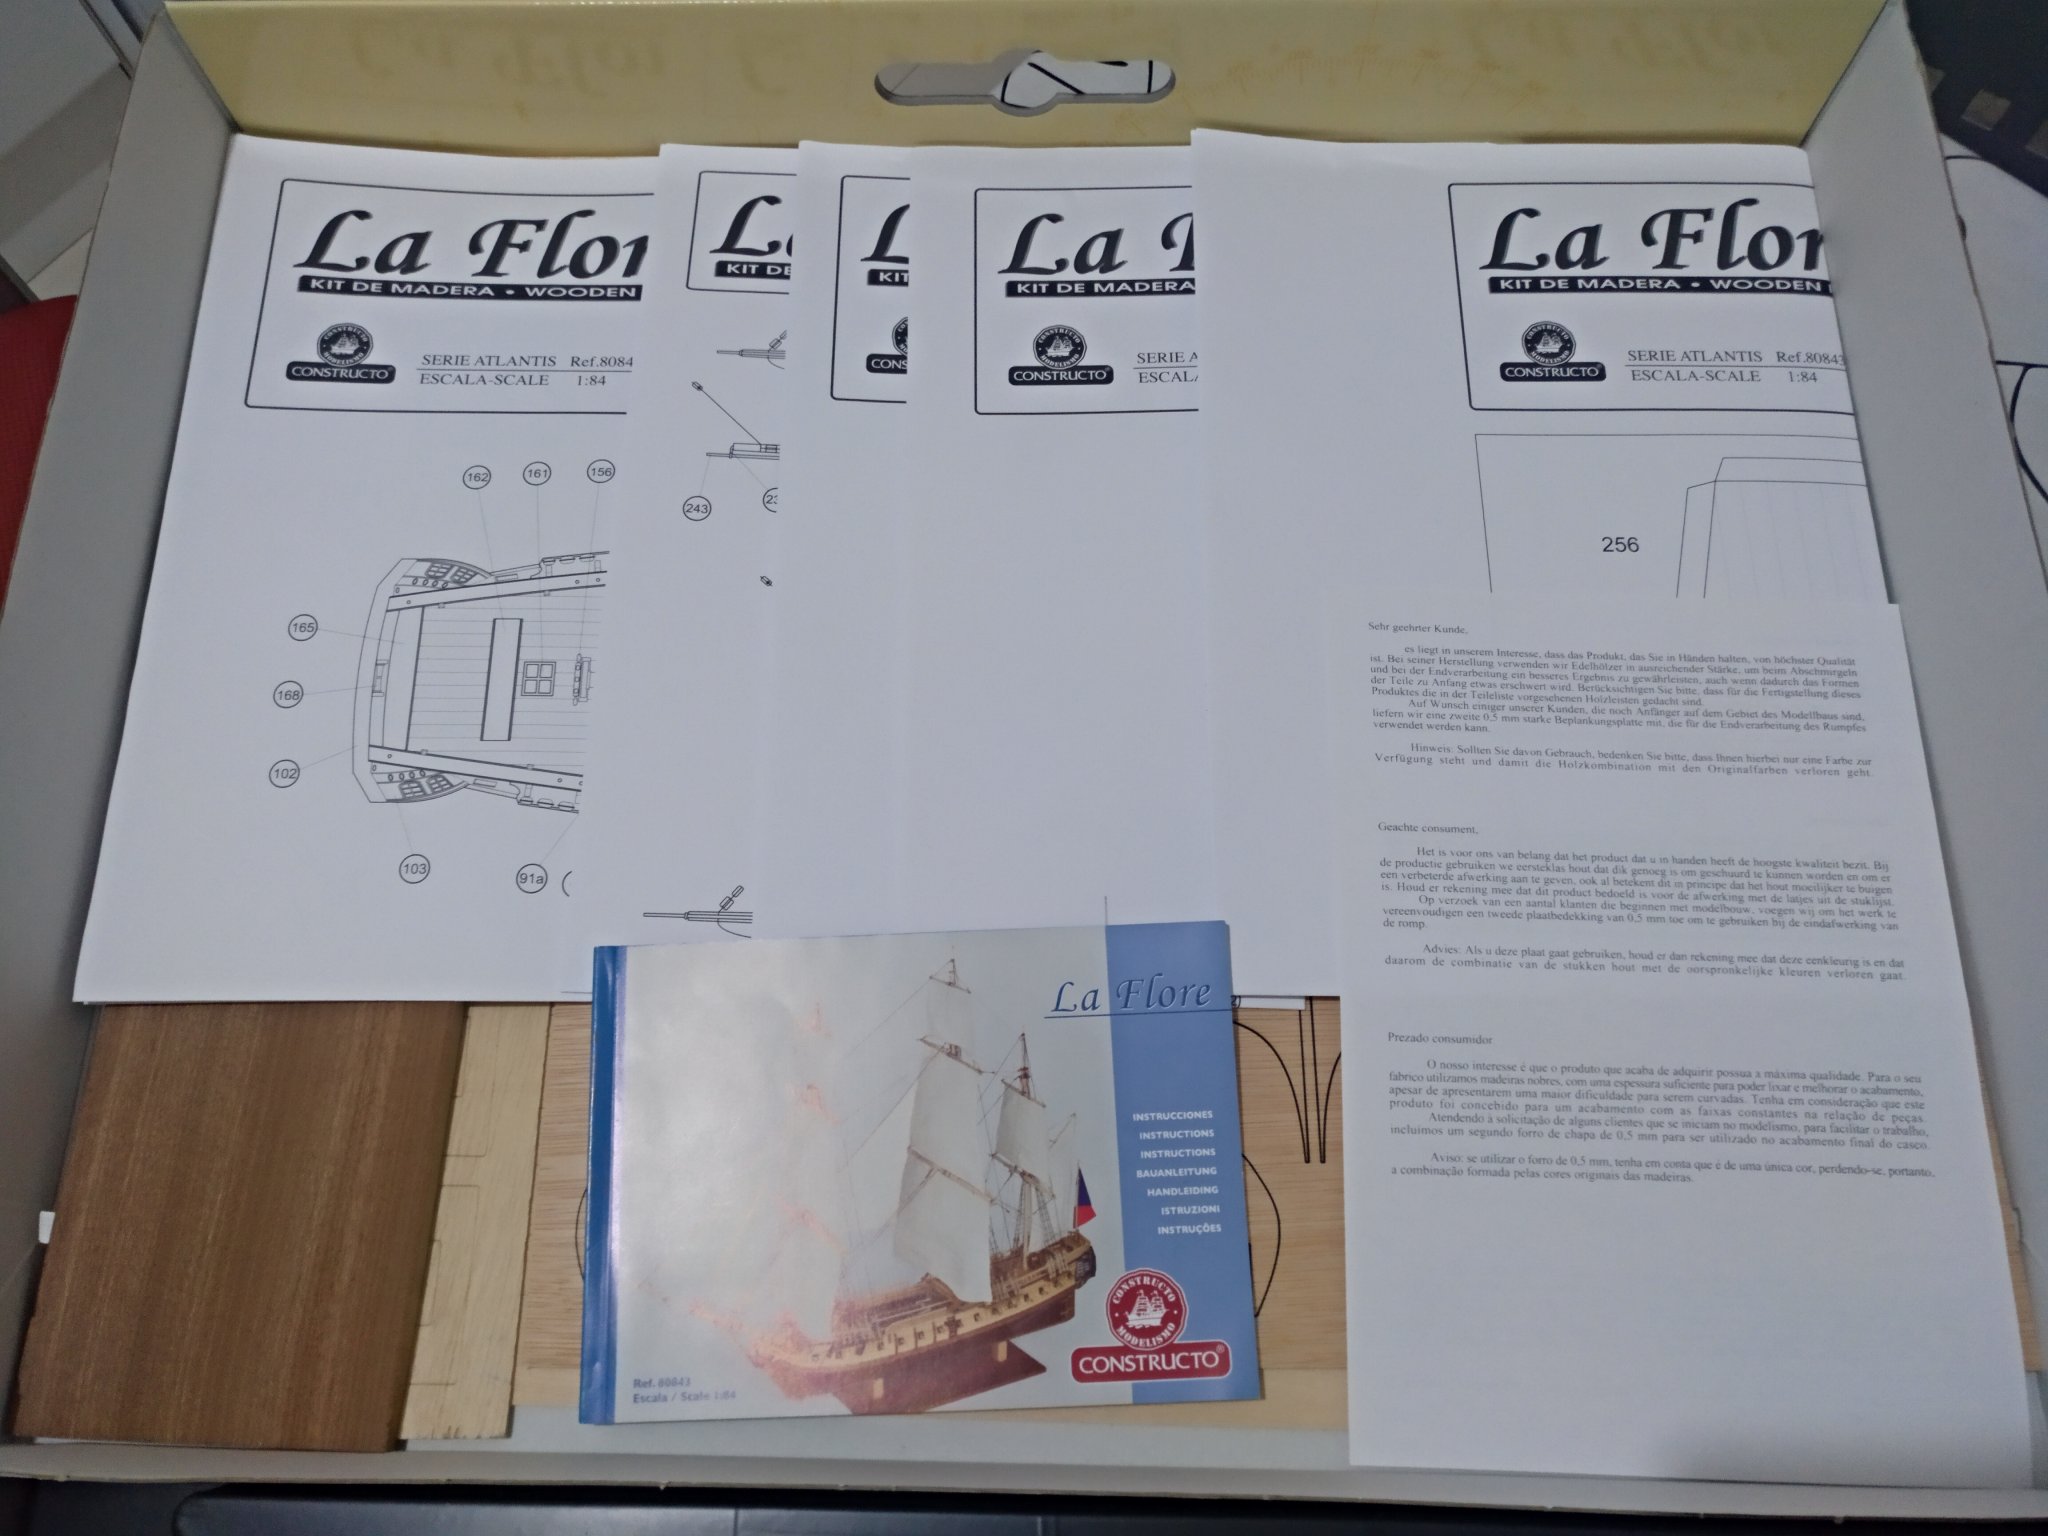
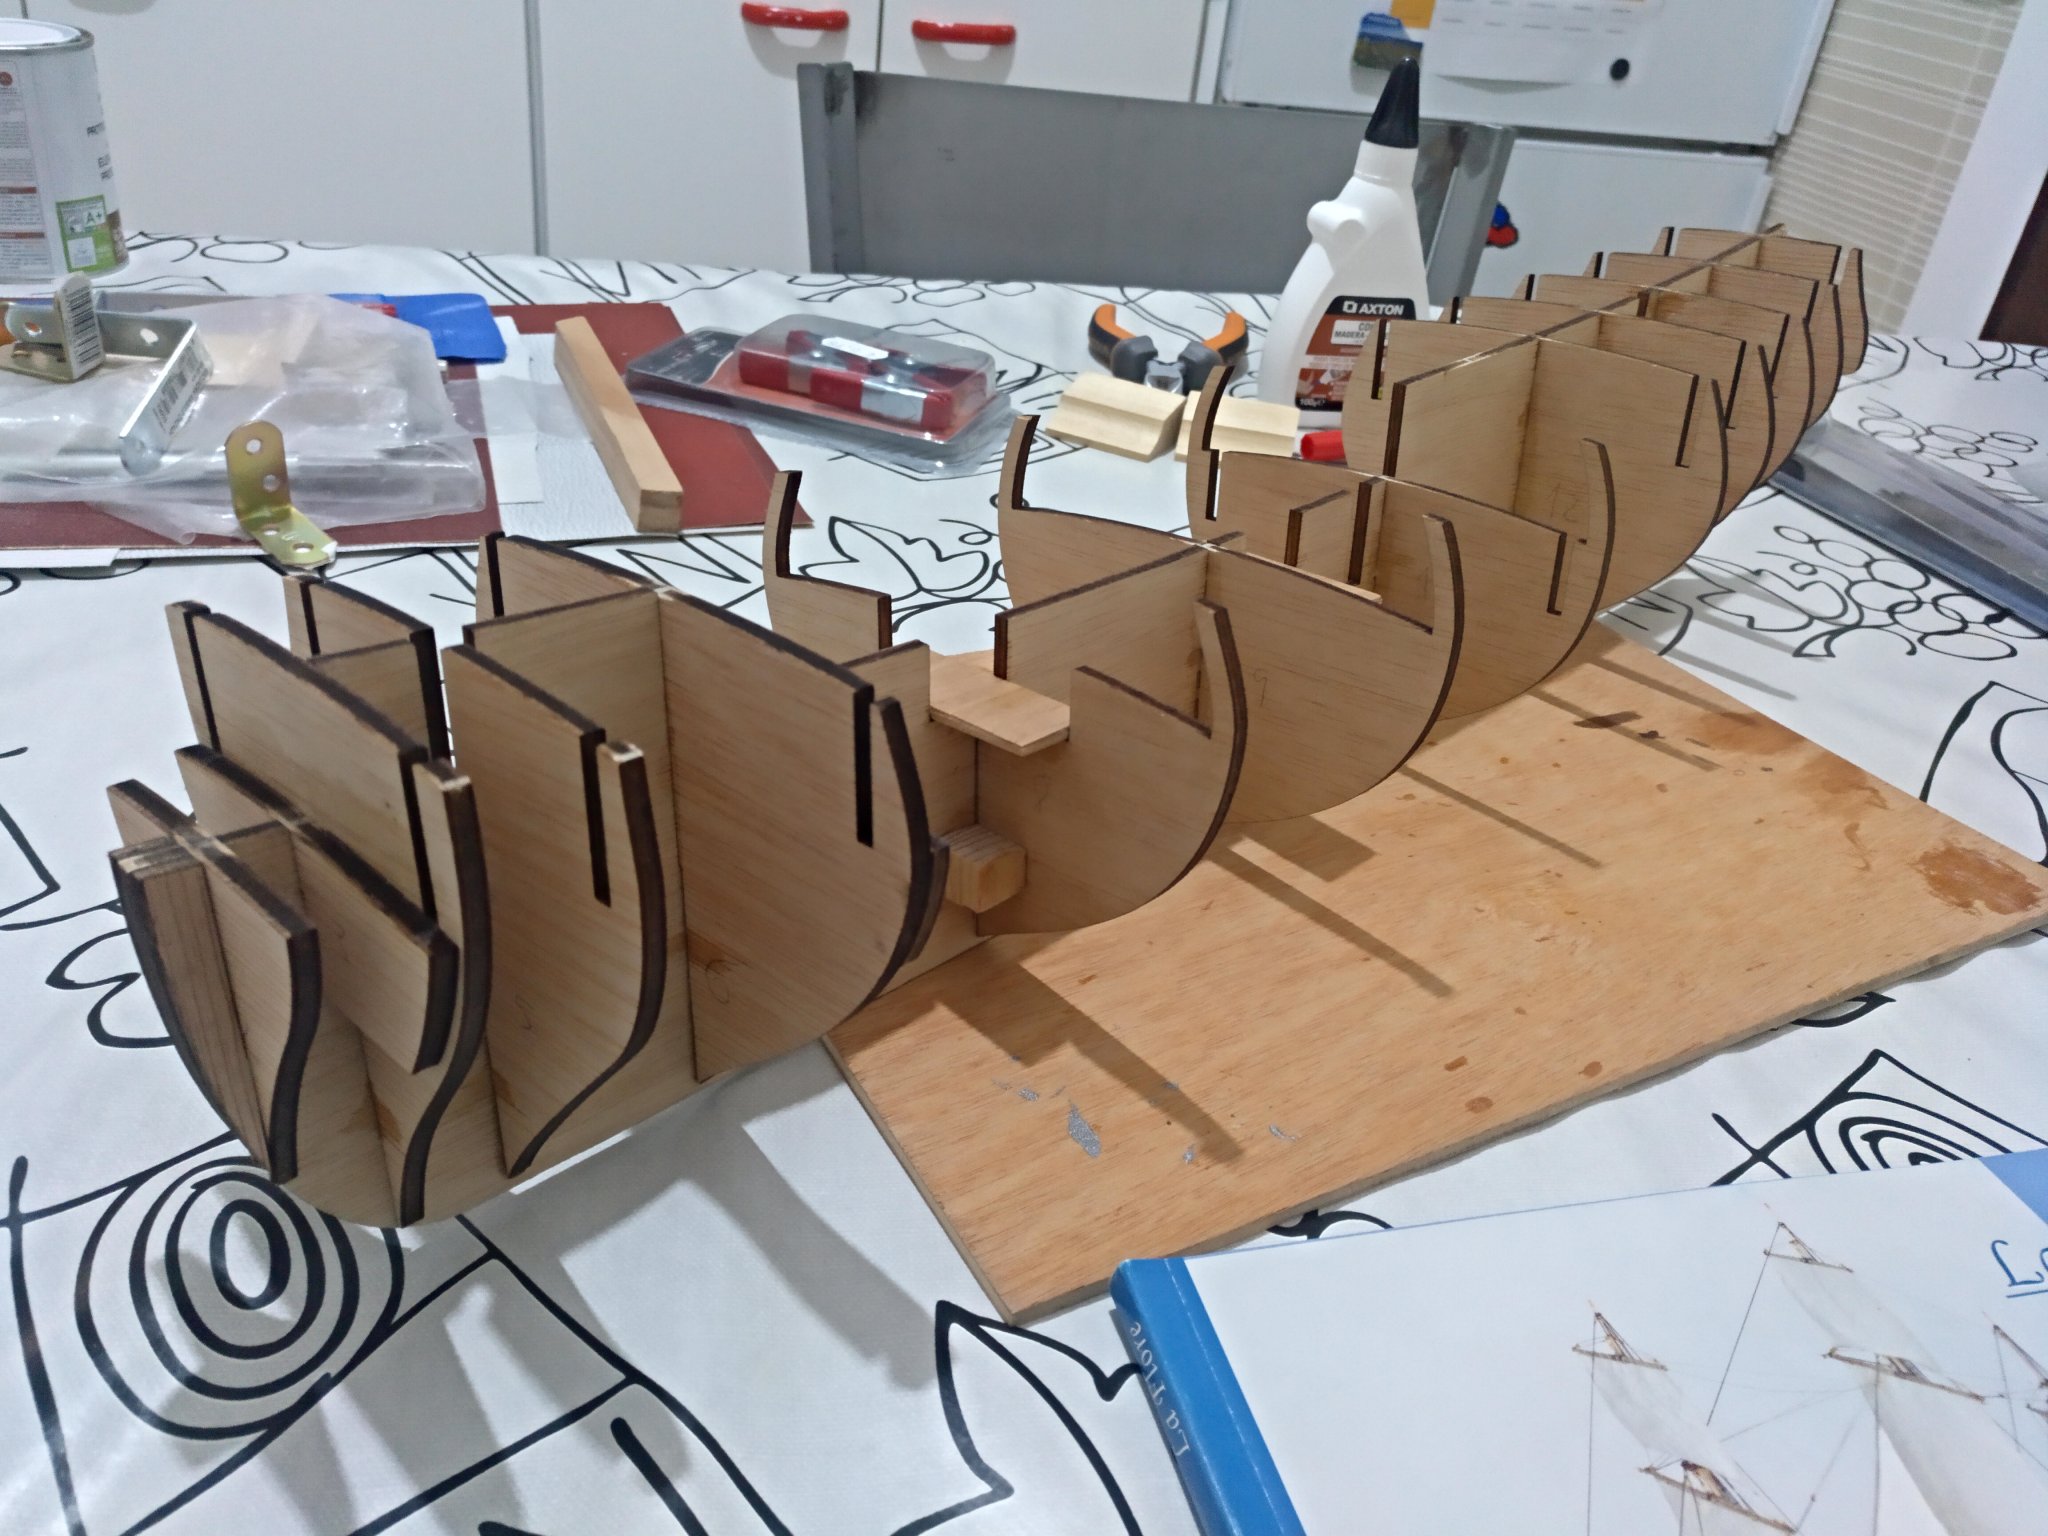
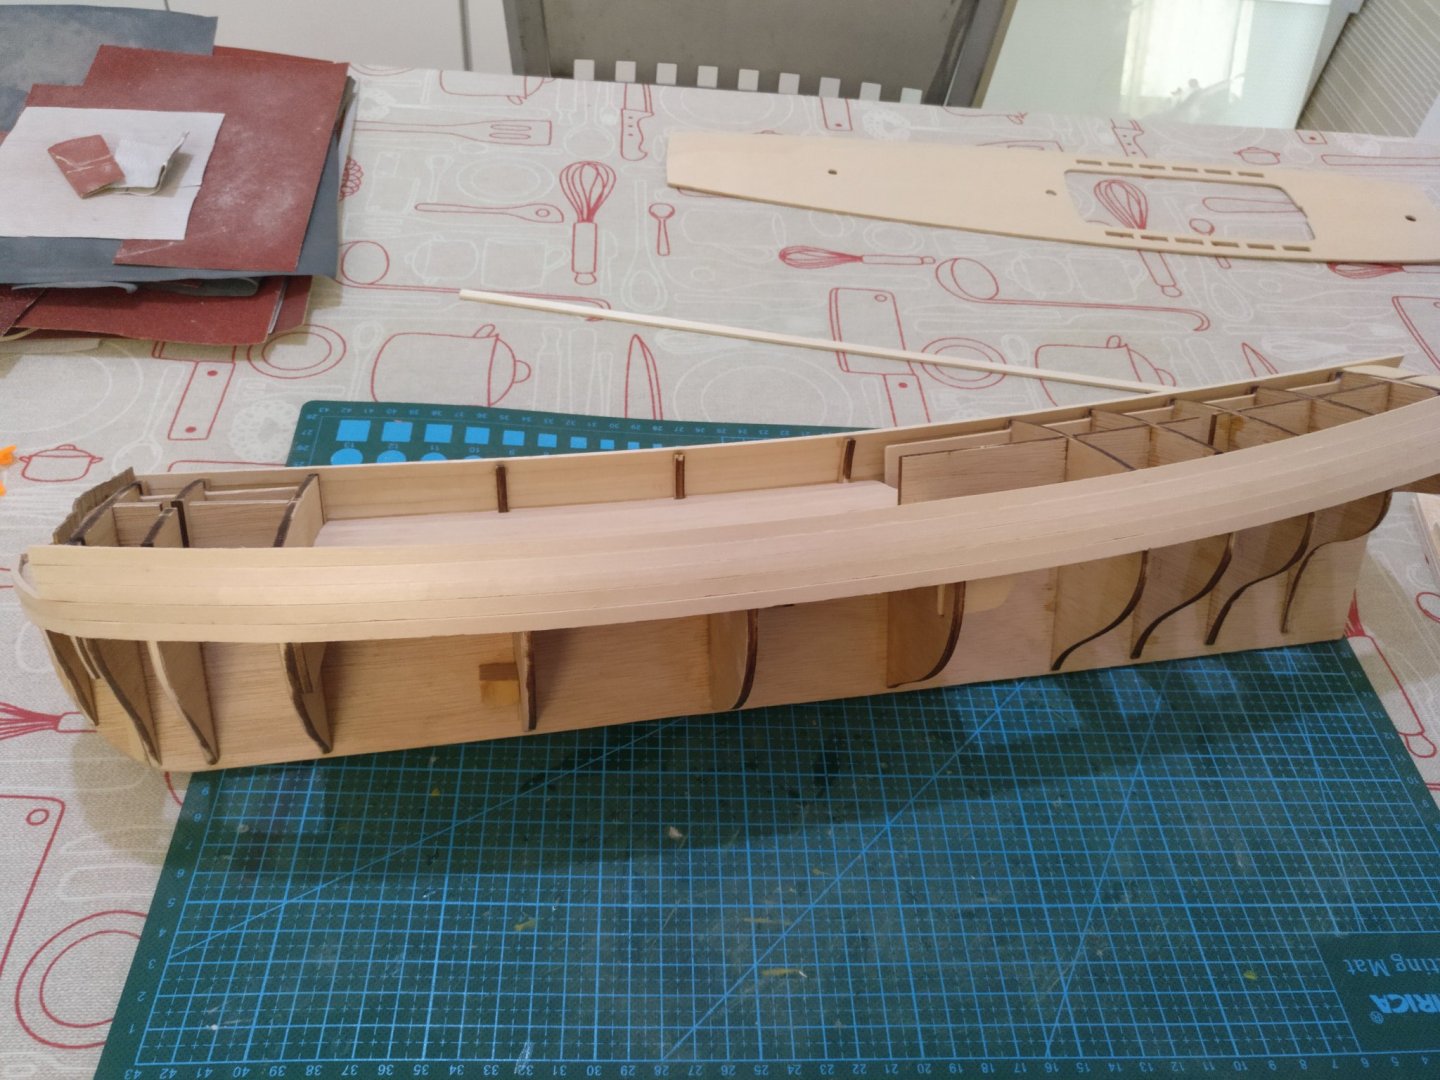
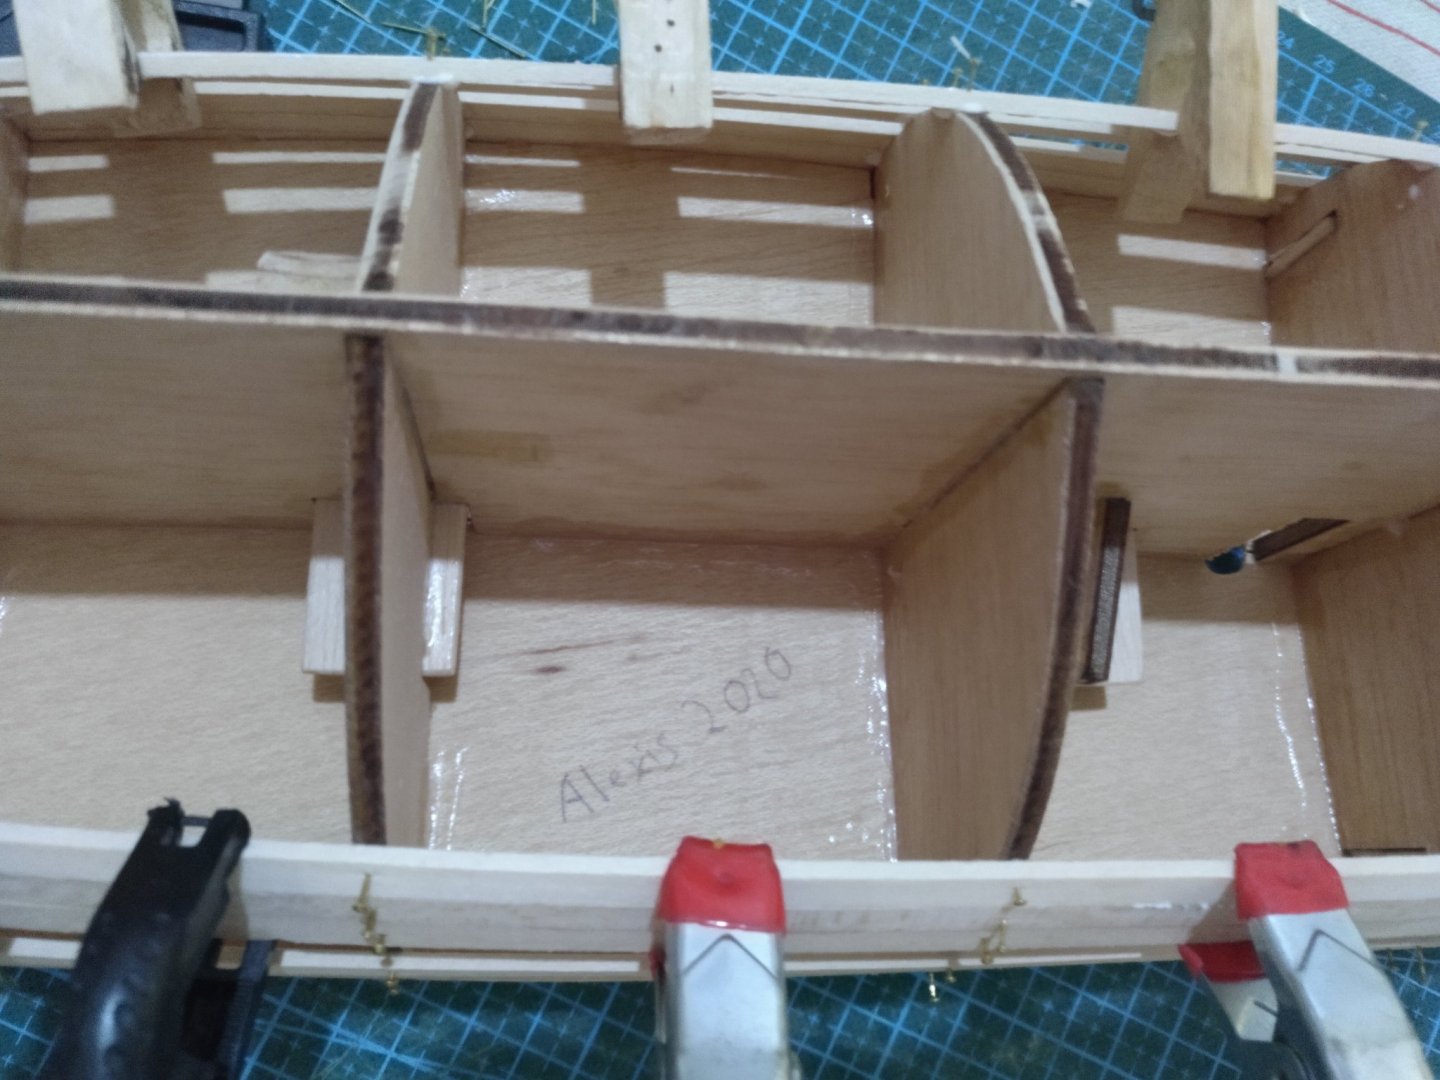
Hello everyone. In this thread, I am going to attempt to document the building of my latest model La Flore by Constructo. I bought this kit last year although I really hadn't had the time to build it until now, during the lockdown I have plenty of time and I work on it about 5 hours a day! I won't be writing many of the parts' names and forgive me if I make any mistake as English is not my first language and I don't even know some of the parts' names in Spanish! I am open to all the advice you can give me so come on!! I hope you like it!!! First some photos of the contents of the box. I had some issues with the "black" thread because as you can clearly see it is GREEN! I emailed Constructo but they didn't help me. They said sometimes this happens when the black colour is "lighter" than normal. I have been searching to buy a new thread and I think I have found some. As this is going to be used towards the end, at the moment it doesn't really bother me. Apart from this, everything is on the box well packed and in good condition. Constructo has good quality. Here I started with the false keel. Here I put some wood strips to hold the cannons on each side of the ship. I really liked this ship because of the gun line on each side. Then I glued the two lower decks. The prow deck and the waist deck. After this, I sanded the pins and started to plank both decks.


-
Hi! Thank you very much! It really makes sense! It can be easily seen that you sanded all the corners and the strips look really rounded which also gives them a really good look and thus, it changes the measurements a bit. So now I have the correct ones to make an order This explanation along with the photos makes a really good tutorial to make my own stand just like yours. I really appreciate your fast response and the time you took opening the case and everything! Thanks and take care.
-
Hi! Don't worry I'm not in a hurry. Thank you very much!! I'll wait! Thanks again!
-
Hello!! This one really amazing build of the Virginia Schooner!!! I am currently building the same model and I would also like to make the same stand as you. I guess that the majority of the strips (those at the corners and crossing the boat) are the ones supplied with the kit, 2x5mm. So I would like to know what the measure of those holding the keel of the boat is please. If I am mistaken or it is easier for you, just tell me a bunch of measures and I am sure I will work out which one is which. Thanks!