HOLIDAY DONATION DRIVE - SUPPORT MSW - DO YOUR PART TO KEEP THIS GREAT FORUM GOING! (Only 66 donations so far out of 49,000 members - Can we at least get100? C'mon guys!)
×


Katuna
-
Posts
79 -
Joined
-
Last visited
Content Type
Profiles
Forums
Gallery
Events
Everything posted by Katuna
-
 Finally got a few minutes to sit down at the desk the past weekend and do a little work. Most of that consisted of some long needed organizing of all my supplies and paperwork. I love doing the research of a project, especially one as specific as U-371. Most of my data is on my computer but I'm old school and I like holding a piece of paper in my hand. That and I had tons of notes and drawings I've done. Consequently, my bench and the surrounding area were becoming quite a paper blizzard. Here I secured the remaining decking supports. How close this is to the prototype I'm not sure but the spacing seemed reasonable. I don't know if I need one in the center as well. It wouldn't line up with any ribs and there are some large valves on top of the center tank. There will be one more support near the aft end of the main beams, just before the step up to the hatchway. I also remade the main walkway deck plates. Before I had it at an angle from the forward step all the way to the rear but I found later this was incorrect. The walkway overall is probably a bit too wide but I had to accommodate the Trumpeter dimensions. The engines should set on a slight angle inwards towards the aft end. Once again the manufacture blew it. I made the executive decision to leave it as is and try and visually cheat by tapering the walkway. That didn't work out as planned, obviously but I think in the grand scheme of things it'll be just fine.
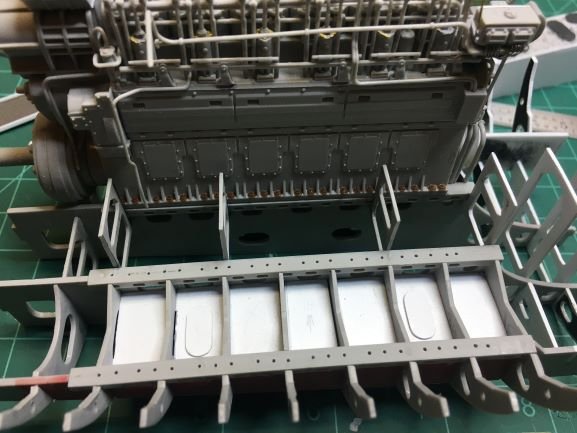
- 26 replies
-
- 12
-

-
yves - Your engine looks great. Best to keep the kiddies out of swearing range when you build that! Can you imagine what the model kit would be if they put that much detail into all the compartments. It would be a 3000 part kit. But, where's the fun in that. Everyone needs a challenge, right?
-
Don - This is way off of topic but, are those Donald Duck's on your shelf cookie jars or just figures. Those guys look like they go back to Donald's very beginning. Really cool. Oh yeah, your U-Boat is pretty neat too. ; )
-
G.L. - Thank you for the kind words. I hope to get a bit done in the next couple of days.
-
Ok Yves, you shamed me into it. I started a thread. If anyone needs something to help them fall asleep faster, it's slightly healthier than scotch.
-
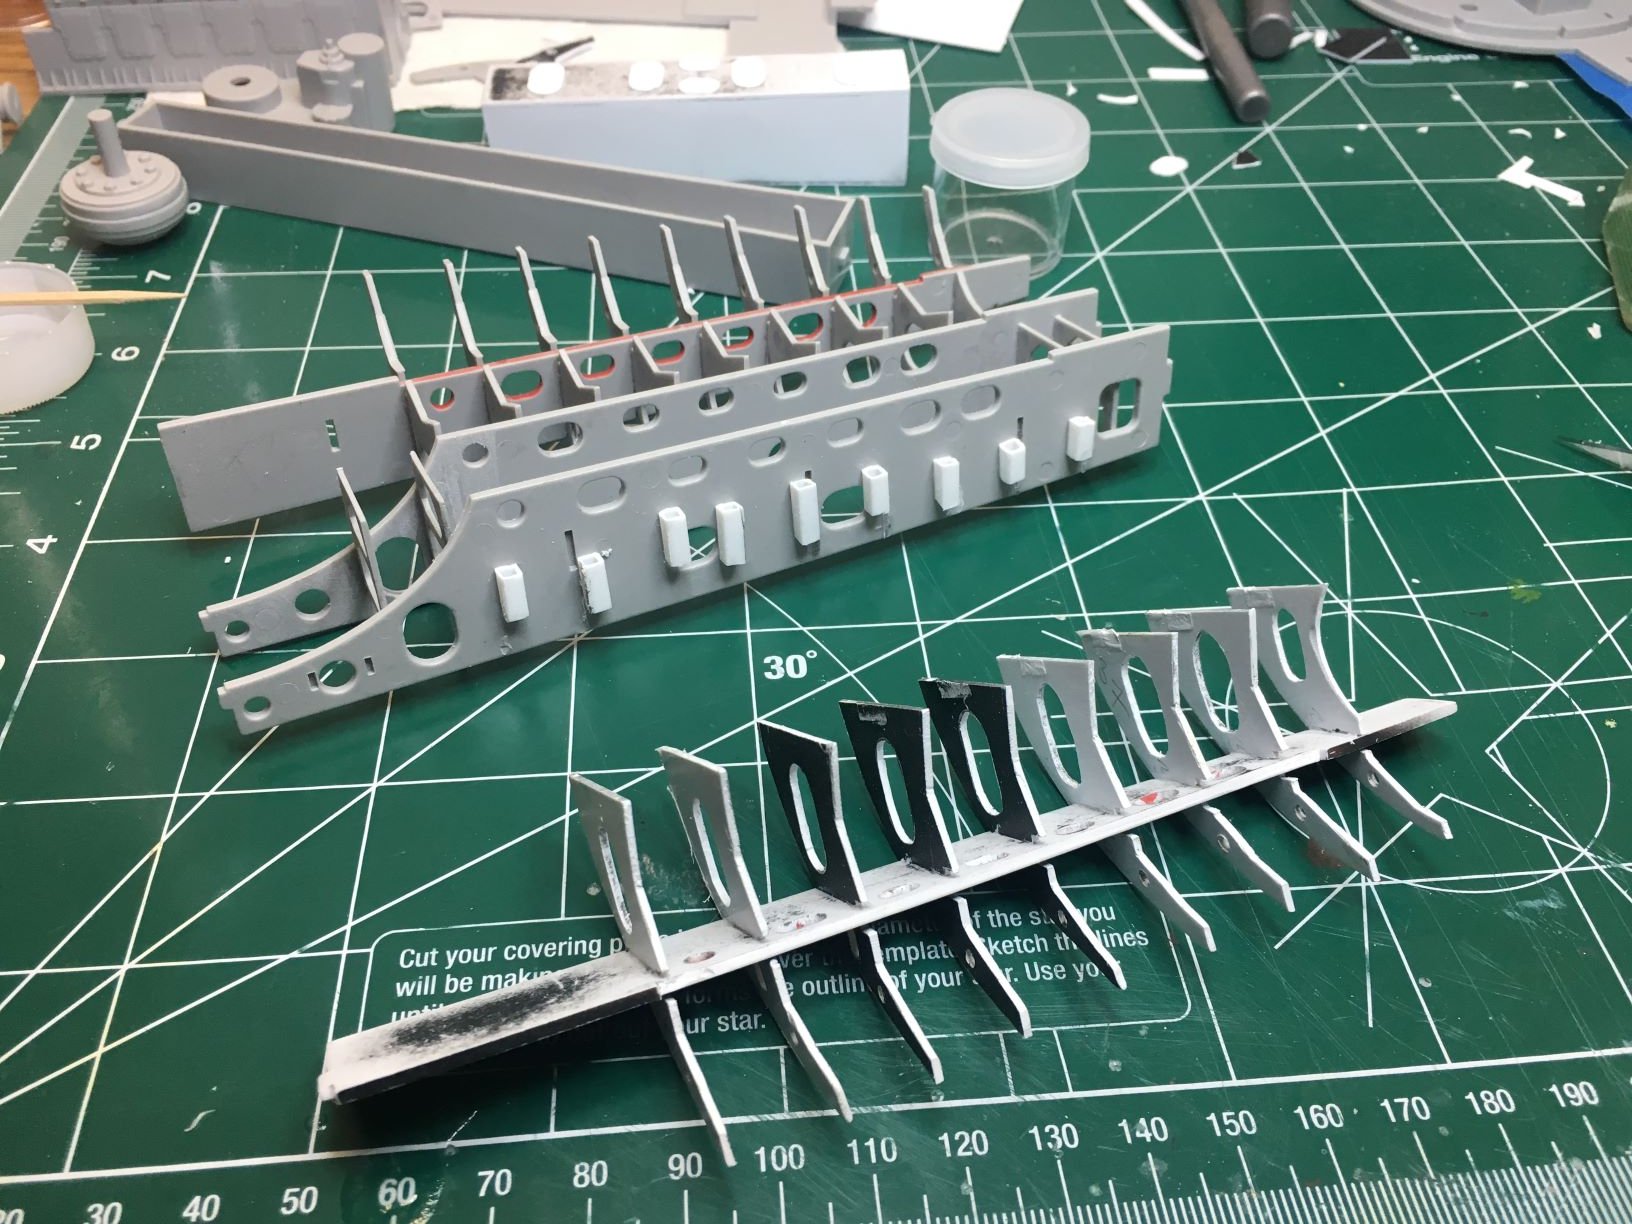
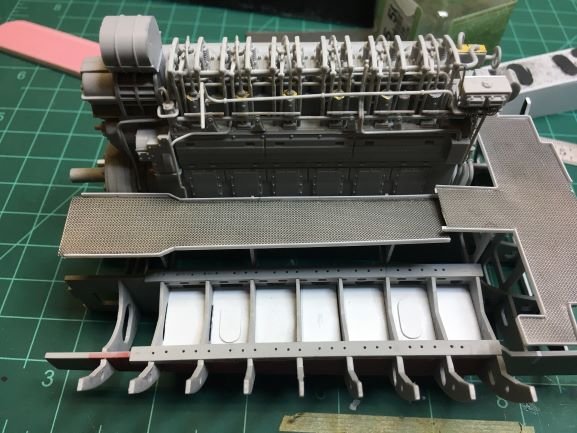
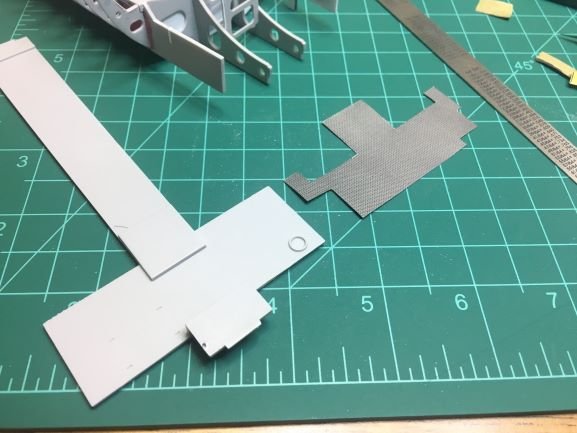
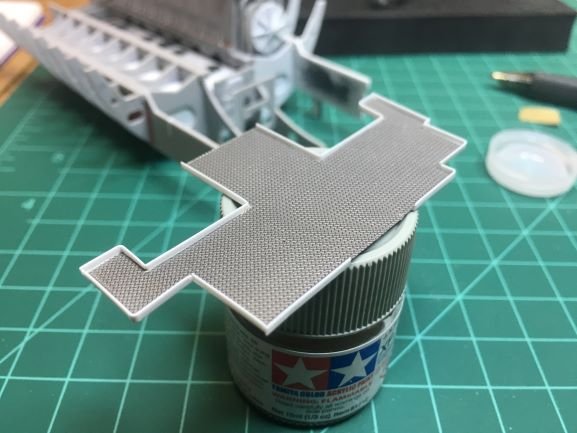
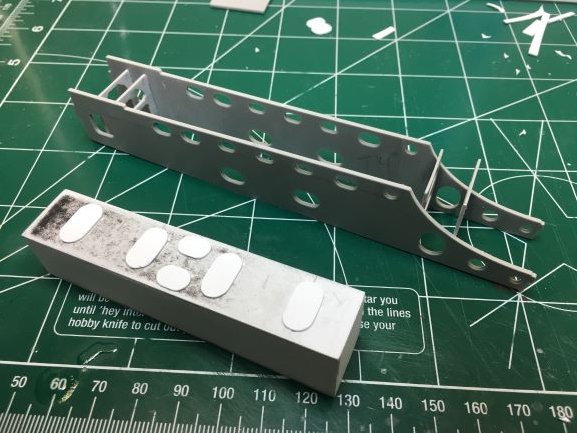
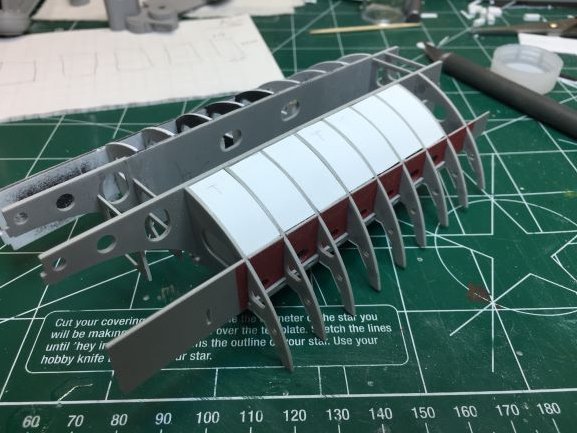
This brings us to the last item and where I am currently in a holding pattern. The decking plates throughout the boat are obnoxiously oversized in their thickness. I haven't measured them but they are probably a scale 6" or more thick. Yucko. After some extensive research, I came up with what appears to be one of the two patterns for the deck plates. Eduard made some different types of German decking and I was able to find the correct one even though Eduard isn't making them anymore. I began by recreating the uprights that support the decking. These were designed using some photos of U-995 in Germany as well as some of the 3D drawings. How accurate they are, I'm not sure but with what I could find they're pretty close. I started by using the kit decking for the basic shape then used the 3D drawings as well as original plan view drawings to refine then overall layout. I then trimmed it with some styrene angle. The decking is in sections so I need to add some panel lines with a scribe. There are also valve stem fittings (as can be seen it the 3D pic above) that I need to figure out how to replicate. And this is about where I'm at today. The decking isn't level as I'm still mocking it up. The long section along side the engine didn't come out correctly and I have since noticed there is a dog legged edge near the aft end. I need to finish the supports for that section too. I hope this hasn't been too boring. A lot of pics and yammering for not much progress. If I get 5 minutes to myself this holiday weekend maybe I can get a little more done.
- 26 replies
-
- 19
-
-
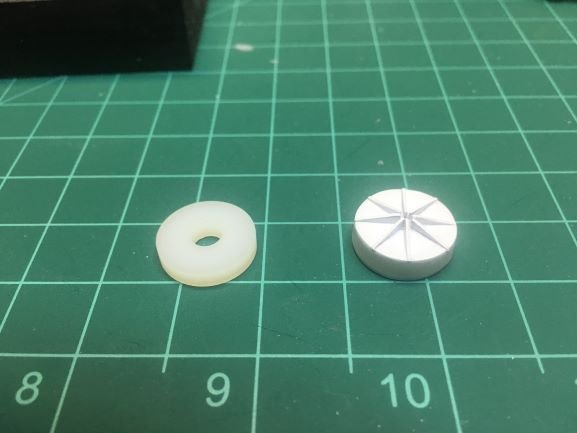
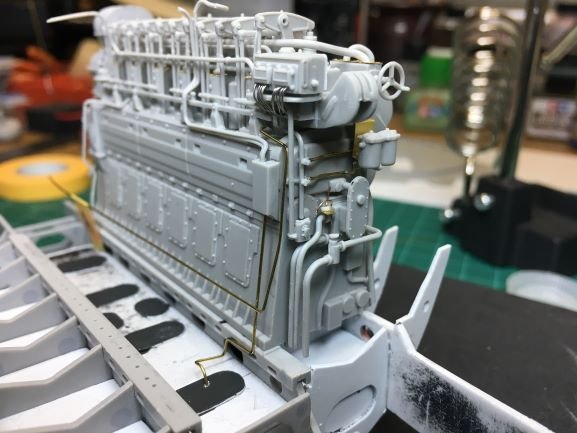
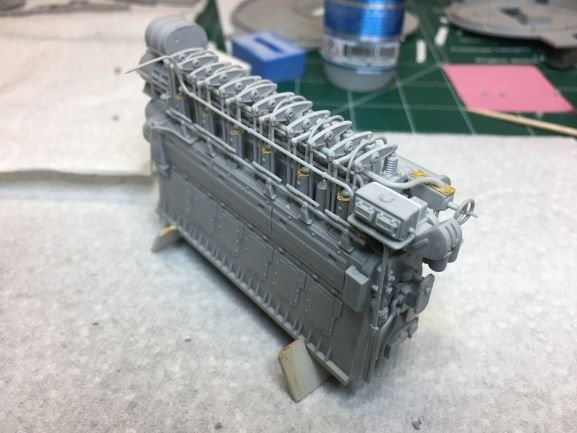
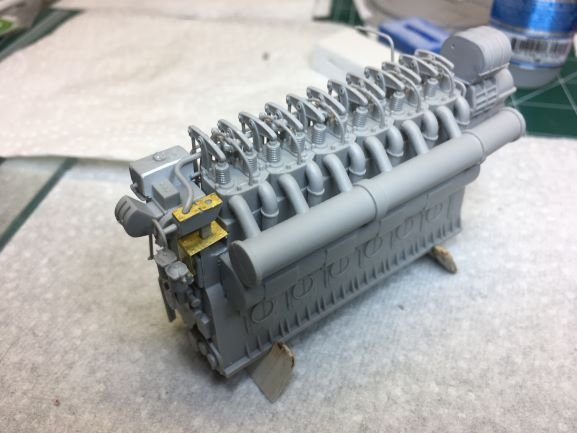
The next order of business was to address the completely missing flywheel/housing. This is a prominent feature on the forward end of the engine. I used a nylon washer, covered the front with styrene then made several of the gussets from styrene as well. While I was happy with the outcome of the flywheel cover, only after I had fixed it in place did I realize it should have had 12 gussets instead of 8. Put me in front of the rivet counter firing squad, I guess. Anther missing item were the large nuts that hold the engine down to the engine bed. I sourced these from Tichy Train Group. I had to shave just a touch off of the block side but they were the smallest I could find. Vast improvement however.
-
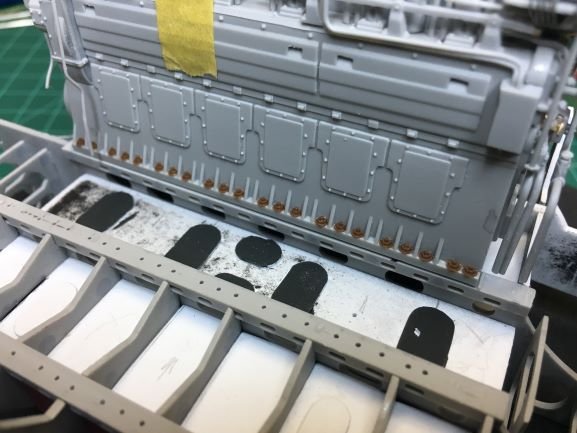
As stated, repeatedly, there's much room for detail. One thing I added was additional piping. As seen in any WWII movie that involves U-Boats, there's piping EVERYWHERE. One big improvement was the addition of the small lines from the Lubricator. That really improved the level of detail as it sits right out front. More was needed however. While it would be maddening to try and replicate every piece of tubing, my goal is to try and match the piping on the engine and under the decking plates as close as possible. A little more added. This a little closer to where I want to be. I'm an idiot.
-
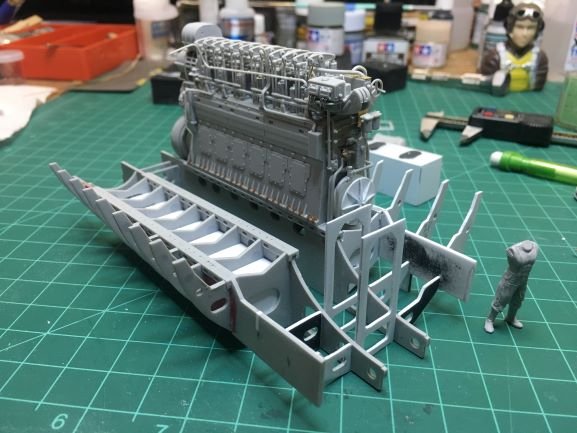
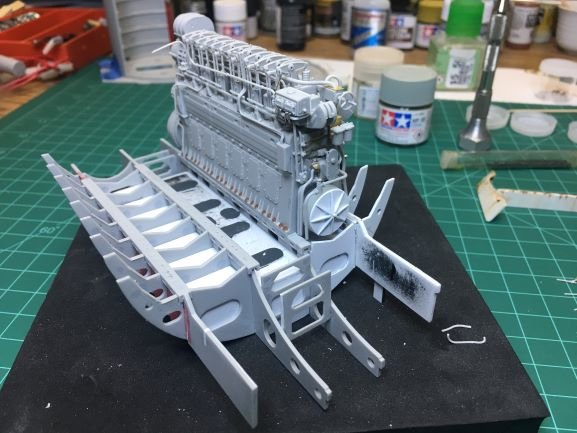
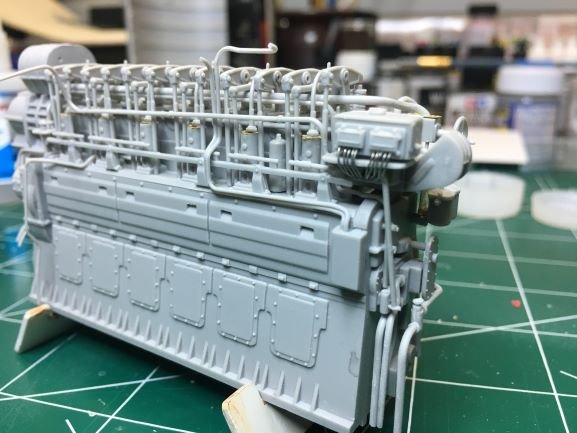
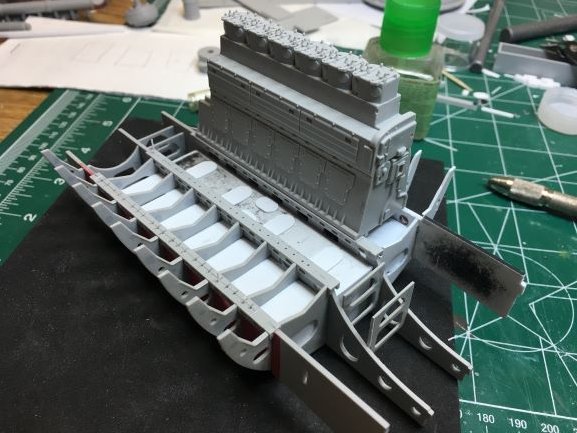
Once that was complete, I turned my attention to the engine itself. This, more than any other part of the kit is a masterpiece. That's not to say it doesn't have a few minor shortcomings but, pound for pound, it's by far the most detailed part of the model. It's too bad that the committee that designed the engine couldn't have been turned loose on the rest of the boat. While each of the different compartments is a model unto itself, the engine is a model, within a model, within a model. I started by building a stand for it to set level on (or "on which it could set level" if you prefer proper English.). I threw a little test paint and some basic weathering on for practice. Remember, its been 40 years since I stopped building. I was floored when I first started back up at the paint and weathering supplies as well as the fantastic jobs that even moderately skilled builders were achieving when weathering. There was hope for me yet. As said, the model has wonderful detail that goes together relatively well. The biggest issue I had was fitting the PE to the tops of the injectors (just below the rocker arms). Nothing a little Mr Surfacer (the single greatest invention in the last 40 years!) won't clean up.

-
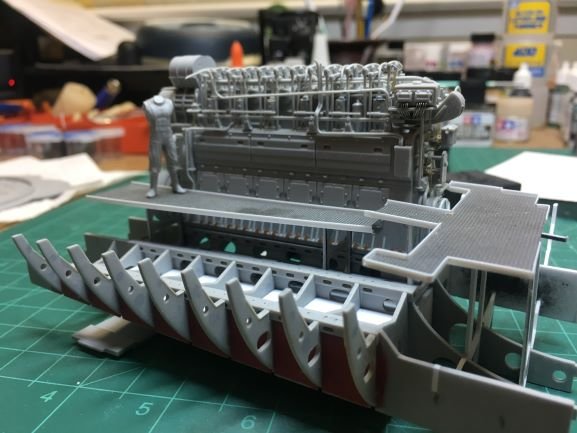
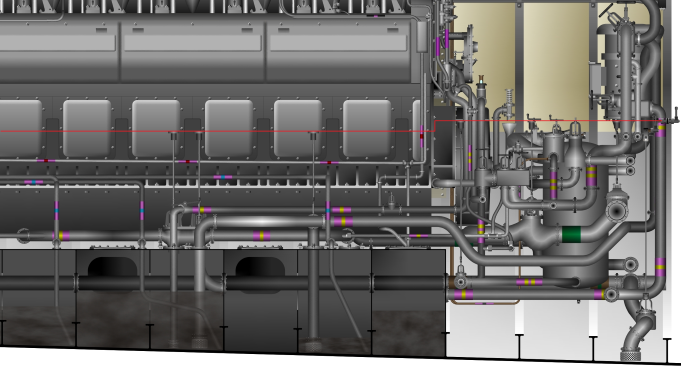
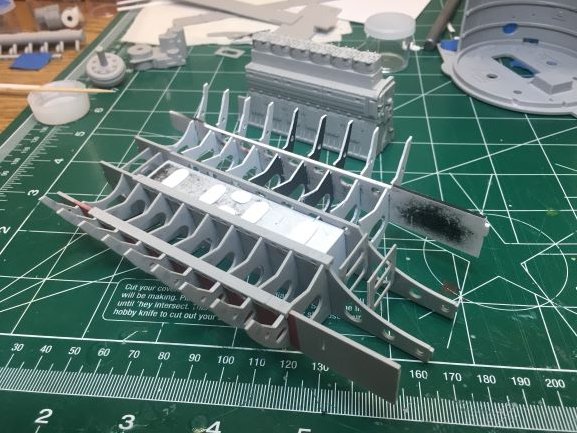
Another one of the glaring omissions of the kit is the complete lack of detail under the decking plates, especially the total absence of the oil/waste oil tanks. I fabbed up the center tank using several 3D renderings from Simon Morris from New Zealand. He is rendering a U-Boat in 3D down to the last nut and bolt. Yay, that size is much better! These are the two main beams in the compartment. The tank is primarily for waste oil. The center tank and all the ribs/beams fitted. The tank is still removable at this point. There is still much detail work to be done on the top hatches. I filled in the Stbd. ribs for the tank on that side. It has minimal detail on top. The Stbd,center and Port tanks. The Port tank is actually only what is visible. Almost all of the Port side under the decking and engine is impossible to see when the compartment is finished, which was such a waste for the to put rib detail back there and not out front where you can see it.
-
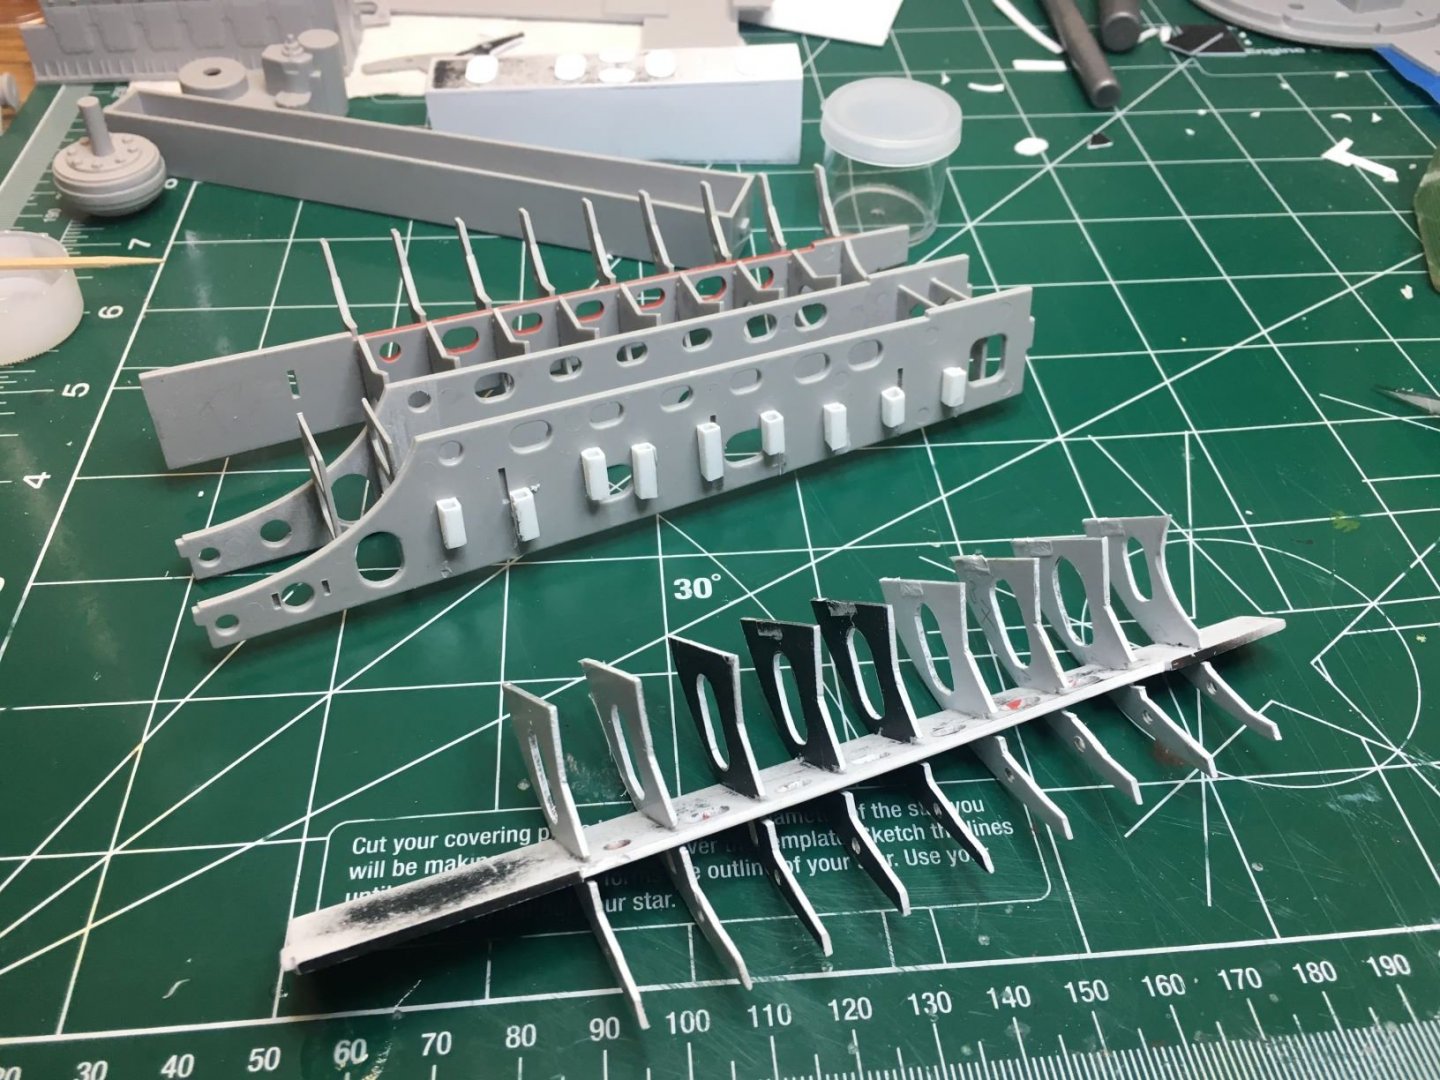
Once I fabbed all of the ribs, they were fitted onto the beam, dryfitted and the ribs sanded down to match the contour of the pressure hull. I can see I'm missing something with the resizing. Maybe third time will be the charm.
-
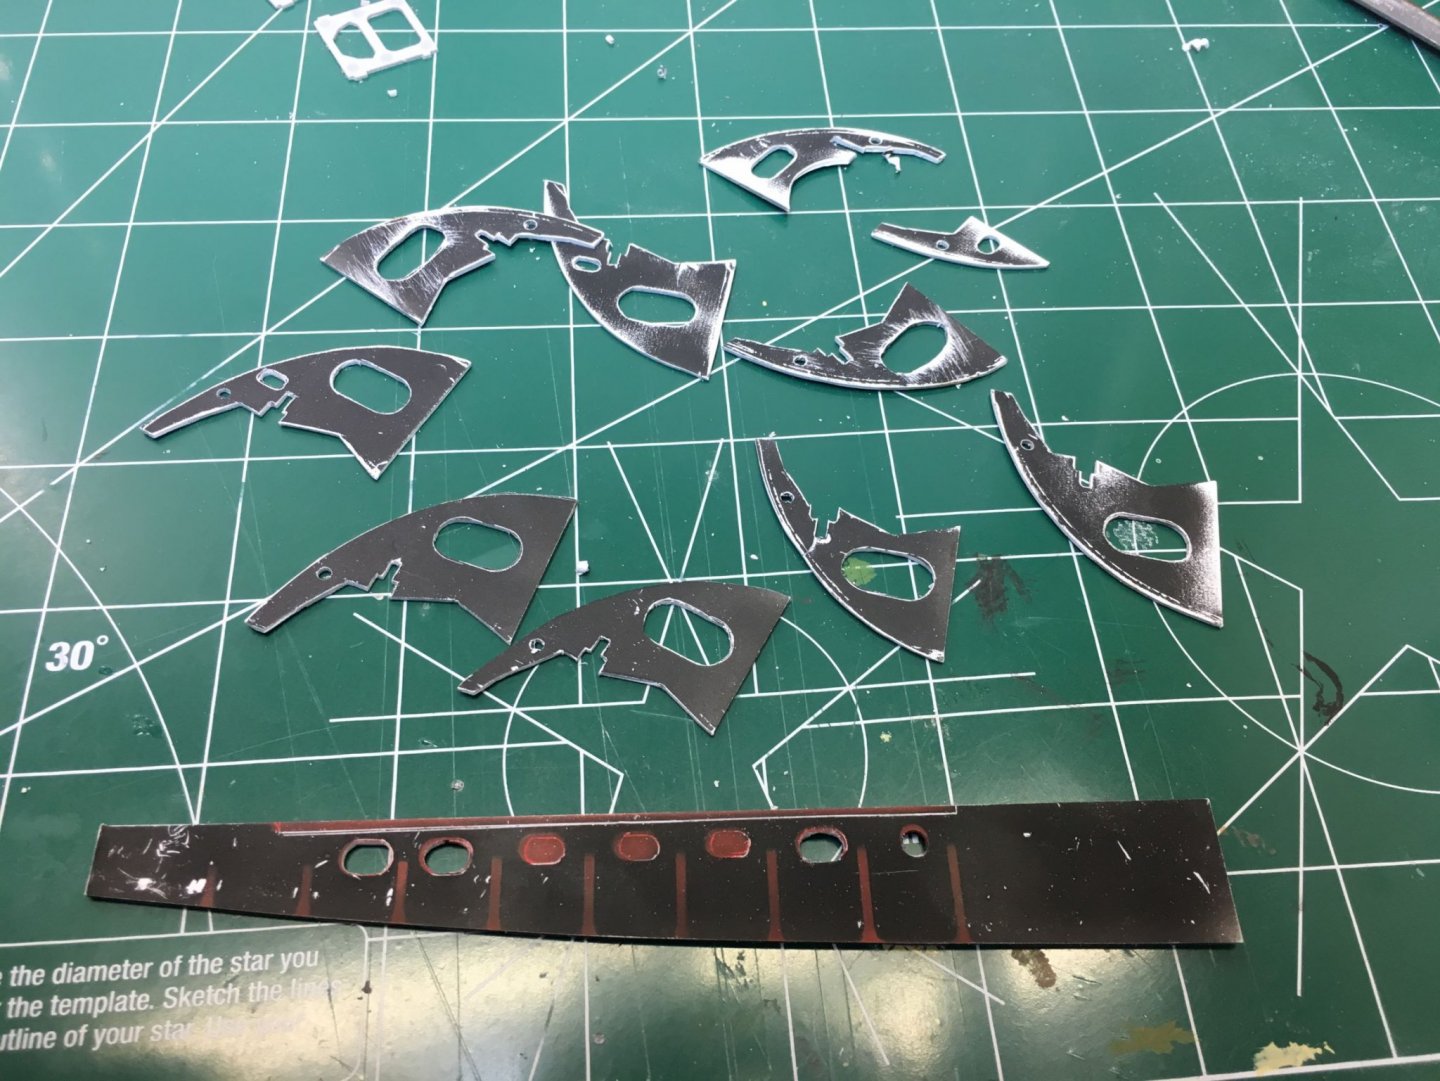
Ok, enough history lessons, on to my build. I have begun the build starting with the Engine Room. For no other reason than it looks really cool, I chose to start there. Now, a word of warning. I don't work at a blistering pace. My modeling time is pretty scarce. Often I go weeks without having the spare time to work on the model. That, along with all the scratchbuilding required, it slows my pace way down. Please don't expect to see updates every 2-3 days. If any of you follow yvesvidal, he could probably build 4 or 5 boats to my one, even with all of the extensive detailing he has included. That said, on with the show... If you're not familiar with the kit, one (of several) design issues with the kit has to do with the ribbing in the various compartments. In the Engine Room, there is some very nice rib detail under the decking. Unfortunately, they put it all on the Port side. The viewing side is from the Starboard side so, where you should have a web of ribs, piping and tanks, you have a great void. To remedy this, another full set of ribs has to be built as well as the Starboard most beam. As my scratchbuilding skill aren't quite up to full potential yet, these ribs will be used on the Port side. Sorry about the giant sized photo. I resized it but it still came out large. I'll try harder on the next one.
-
For my build, there are several design details, primarily on the exterior, that distinguish this boat from an "as launched" boat. By late 1943, most boats had had their main 88mm deck guns removed because surface hunting had all but ceased due to the advancements of allied radar tracking and increased aerial patrols. Also, the towers had been modified to include a second aft gun deck. These were for the fitment of an anti-aircraft gun. At the beginning of these retrofits a Quad 20mm gun was installed but later, a single 37mm gun replace these. On the upper gun deck, two single barrel 20mm guns replaced the former lone gun. These guns gave the boats some added defenses for surface running, mainly while recharging batteries. Another, somewhat unique feature on U-371 was the addition of "armor boxes" to the sides of the Bridge portion of the Conning Tower. This was to give the Bridge crew a protected coverage during a surprise aerial attack. These were later remover from most boats as they tended to make the boat top heavy in rough seas however, they were never removed from U-371. Presumably this was because U-371 was sunk before the removal could be performed. All these added details will give the model a distinctive look and set it apart from a standard Type VIIC. Of course, it will also add a considerable amount of work and expense. Me and my bright ideas.
-
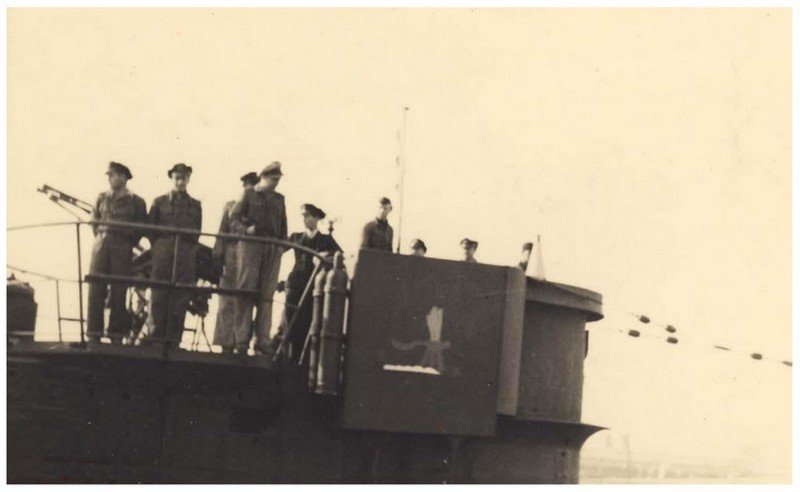
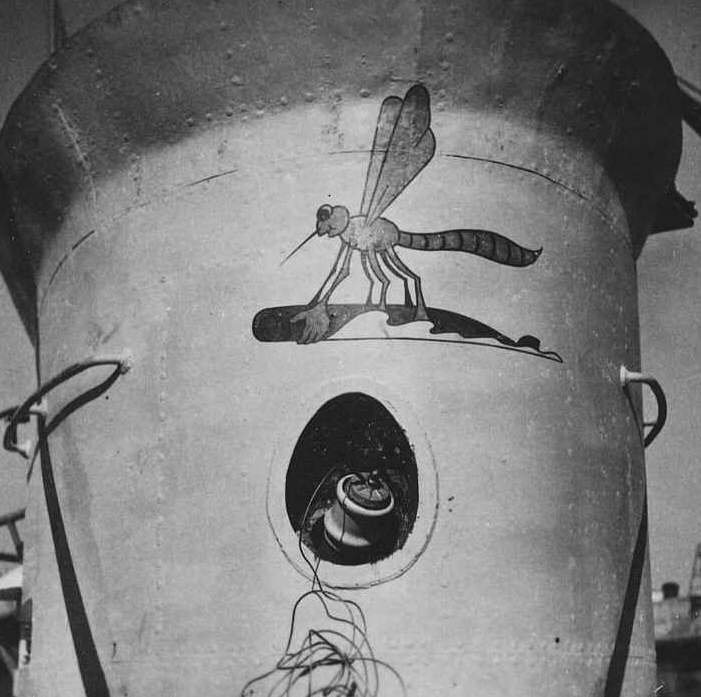
Well, at the urging of yvesvidal, I'm starting this build log on my Trumpeter 1/48 scale U-Boat. I had wanted to build this kit after watching SkipperTed's build videos on YouTube. I had been out of model building for about 40 years (that seems to be quite common these days). I've always liked a challenge and this kit delivers that in spades! I love superdetailing my models and, as this is a full cut-away, it's a detailers dream. Little did I know what I was getting myself into. First, a little background on the kit and the particular boat I chose to model. If you're unfamiliar with the kit, it's like many Trumpeter kits as it is heavily detailed in some sub-assemblies and woefully short of detail in many others. It definitely feels like a "designed by committee" kit. While the Engine Room has a fantastically detailed diesel engine, the Conning Tower is sadly vacant of detail in any amount. However, if you enjoy adding lots of little fiddly bits, it's a perfect kit for this. Several detail parts suppliers, primarily on Shapeways, have some wonderful pieces that make huge improvements to the model. There are also 2 very large PE sets available. Unfortunately, all of the details available are for the exterior of the boat and, if this were a closed hull model, that would be more than sufficient. However, creativity can make up the shortcomings. Don't get me wrong, built straight from the box this builds into a very impressive model but, with the added details, it can easily be built into a museum level display. As for the boat I'm building, the kit is a Type VIIC U-Boat. This was the most common type built during the war and my boat, U-371 was commissioned in March of 1941. I picked this boat at random from the list of all of the Type VIIC boat numbers. It was simply because I liked the number. It was the first one I picked and it turned out to have a very long career, by U-Boat standards anyway. She patrolled the Atlantic off of the French and Portuguese coast during her early career, then made the passage past Gibralter into the Mediterranean. She would patrol there until 4 May, 1944 when she was sunk. During all but her last patrol, she was commanded by Kapitanleutnant Waldemar Mehl. His personal insignia, a dragonfly riding torpedo, is the only positively identifiable photo of U-371.
-
I may just do that. Thank you so much for the complements. You are definitely too kind. Unfortunately I haven't had much time recently to work on it and it's probably been over a month since I even touched it. The most fun I have had with this project is the research. I kind of picked a boat number at random then dove into the research to find out as much as I could. I love history and especially WWII. It took considerable digging to find details on U-371 but that's the fun of it. My avatar, a dragon fly riding a torpedo, was the captains logo. Fortunately there is one photo that clearly shows this. Yes, it is a dragonfly and not a mosquito. I guess dragonfly's look different in Germany.

-
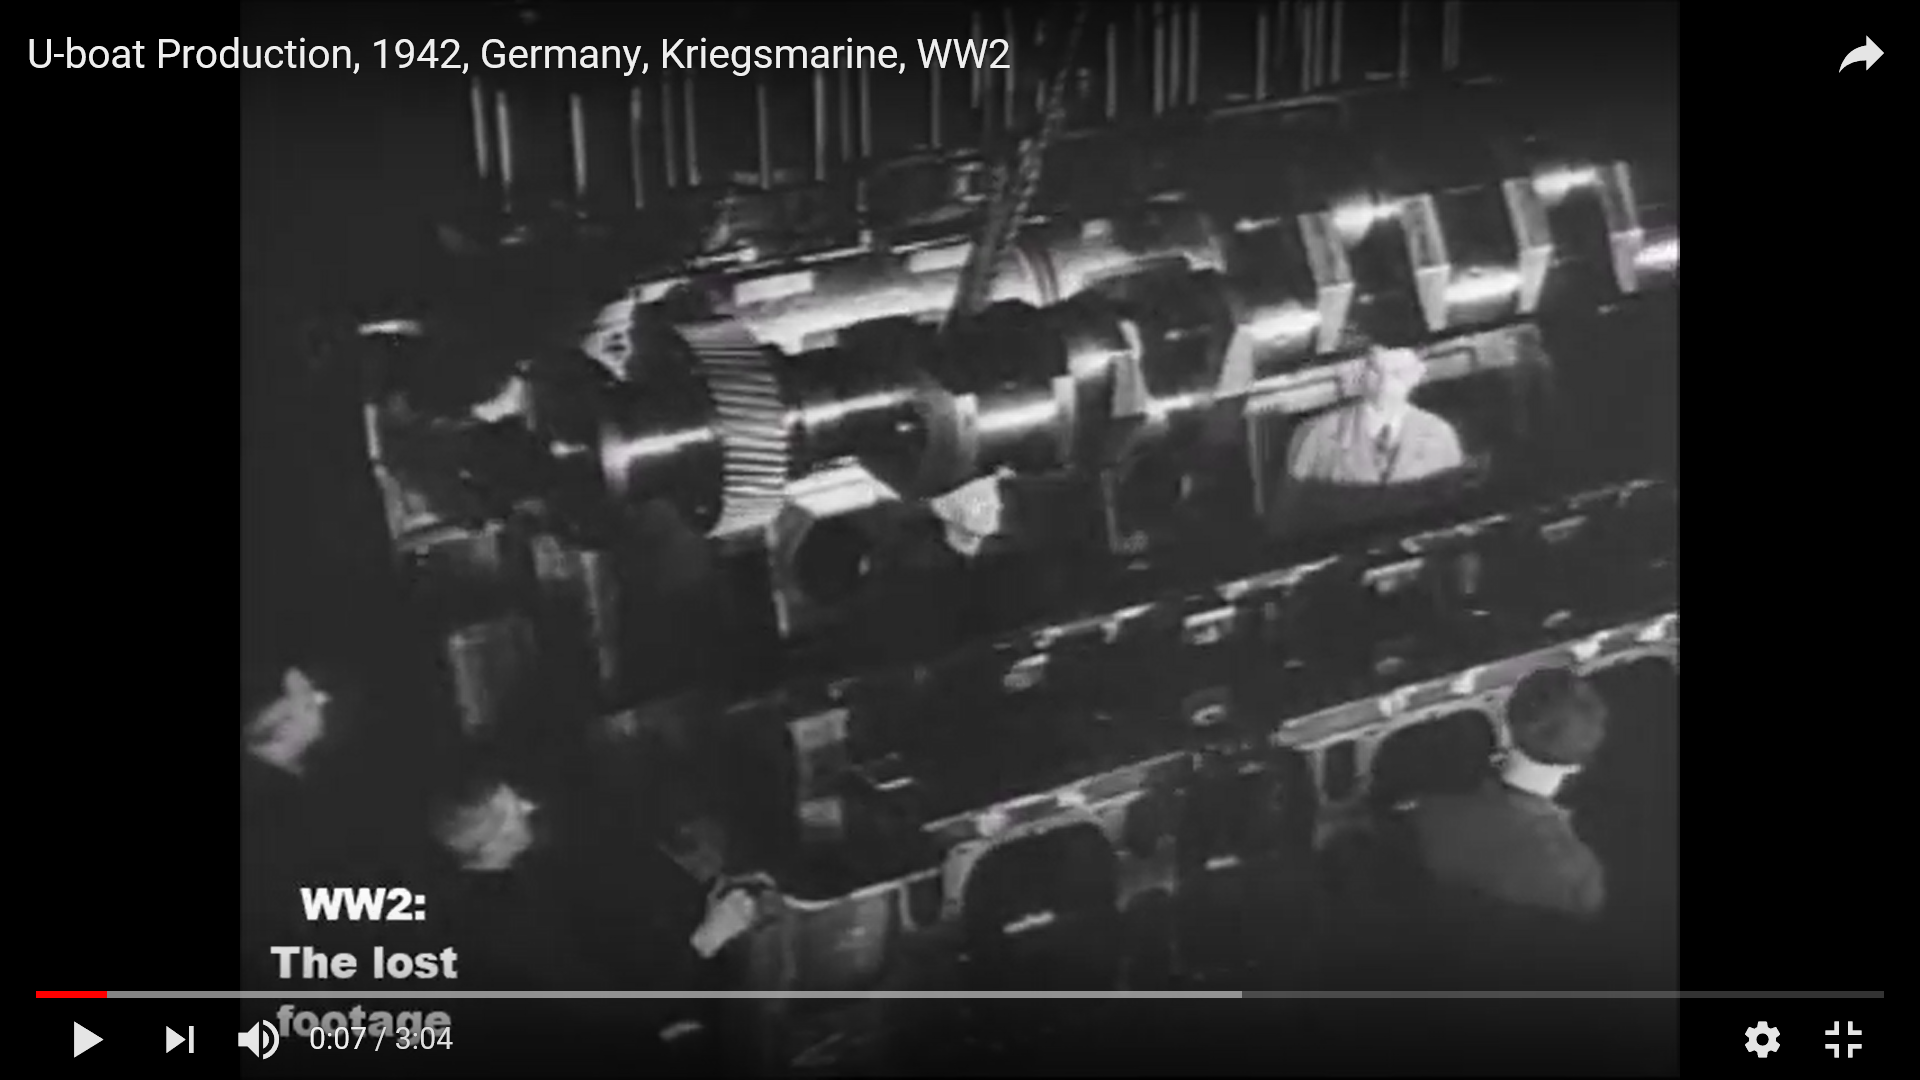
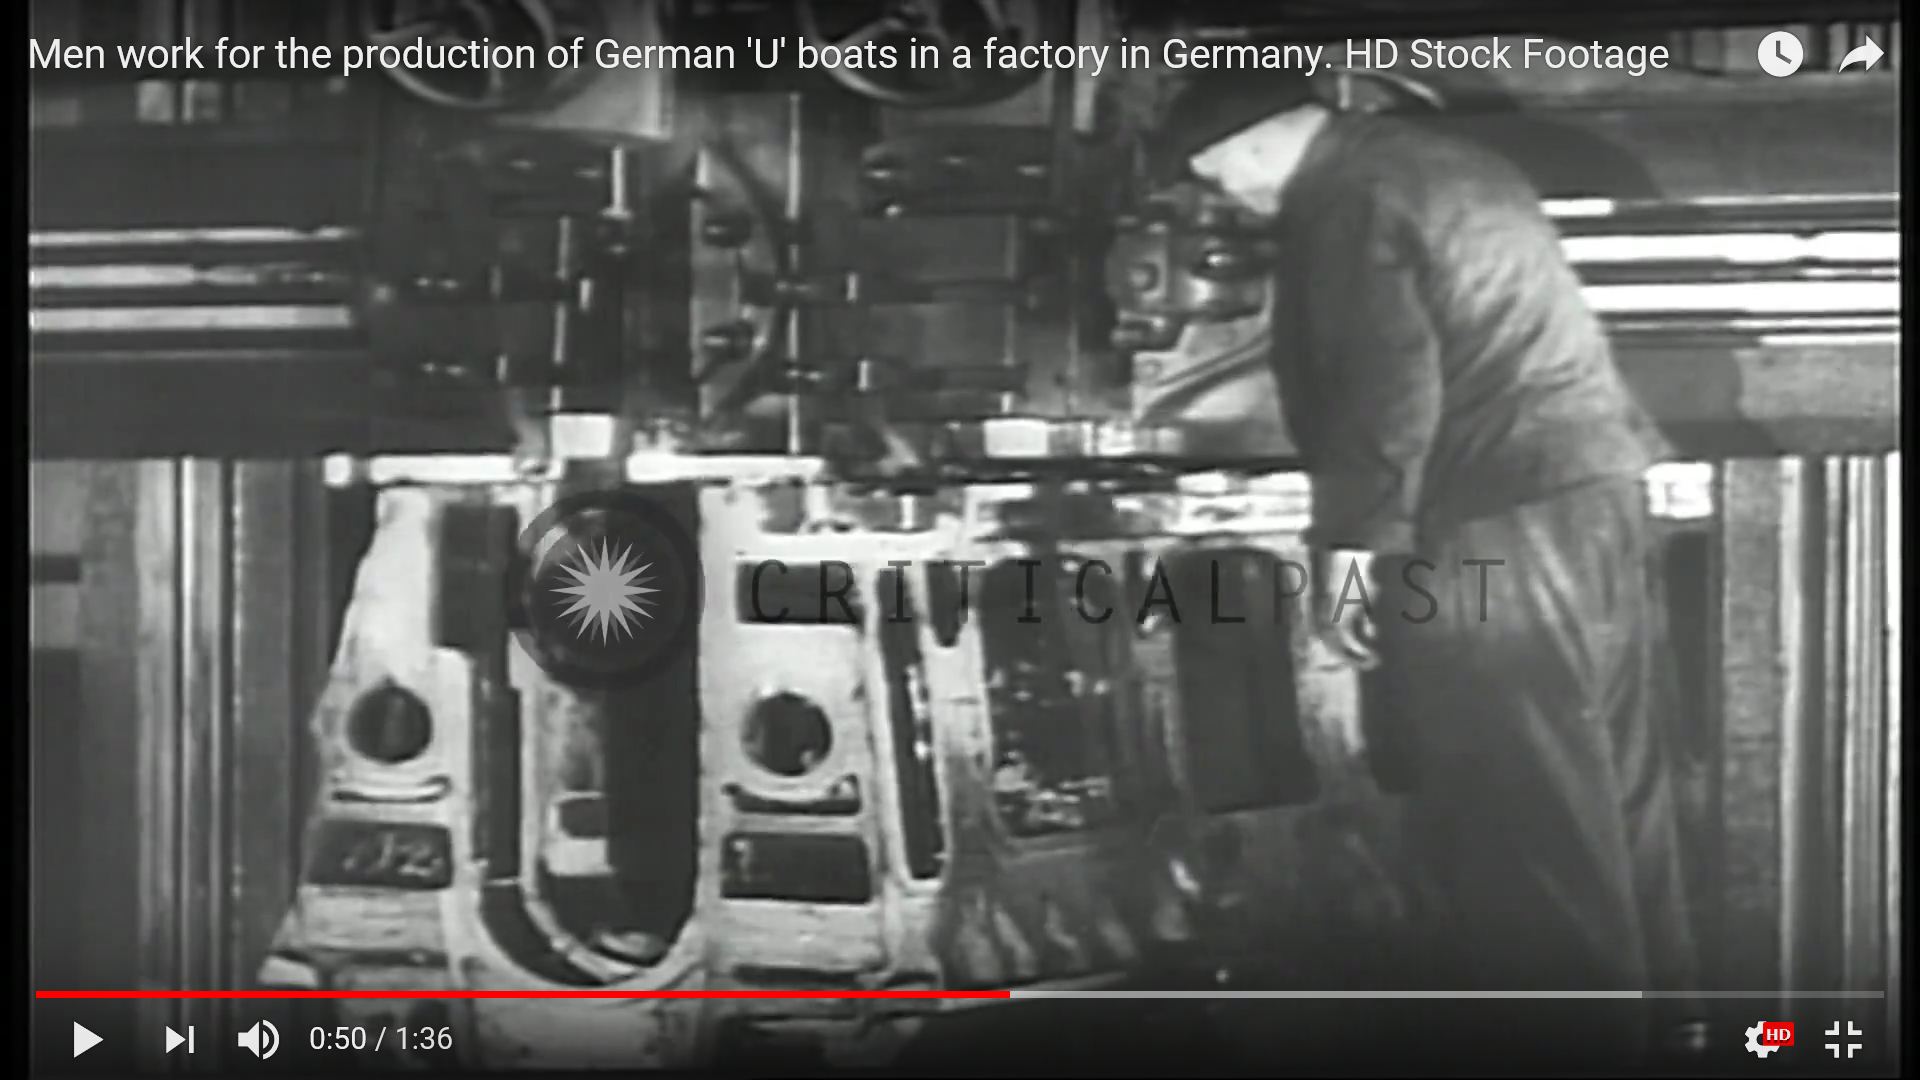
Here's some of the blurry pics I worked from. The entire video is on YouTube but I don't have the link. I have a few more if anyone is interested.


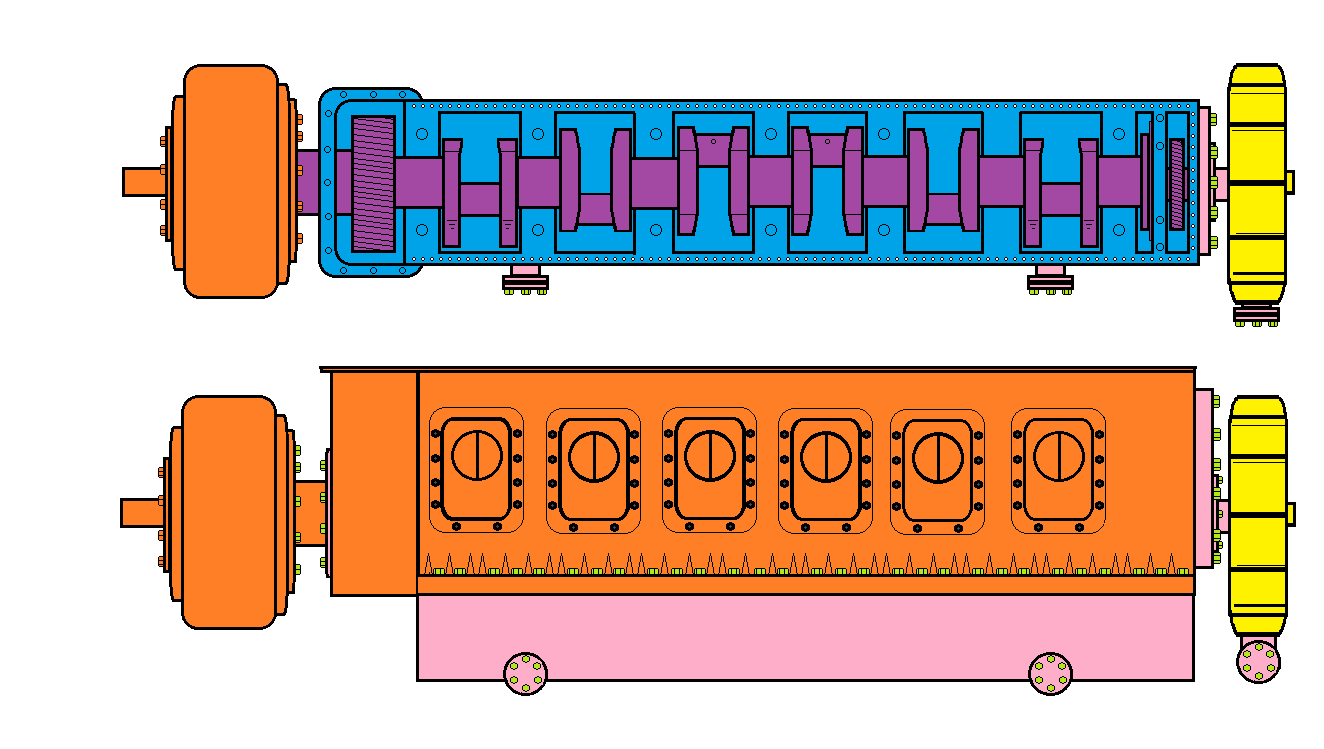
-
You flatter me sir but I'm just a hack compared to most of these guys. You're no slouch either. You've done some great work. This boat is a challenge for anyone just out of the box. I just wish you didn't work so fast because you're modeling a lot of my ideas. Here's the drawing I made. I added the lower oil sump as the Trumpeter engine is missing this as well as the flywheel housing at the forward end. I believe the throws on the crank are clocked correctly. I went by some factory film stills. The drawing is not to scale, of course but it's close. The forward end gear and thrust bearing are a "best guesstimate". Hope this helps. I gave up on it because when I started making the crank throws I realized how tiny all the parts were going to be and my gnarled old hands just can't hack it anymore. A suggestion would be to make the mains as one rod from front to back and load the counterweights on, add the rod shafts then cut out the main rod in between the counterweights. I think it would be best to use brass rod but it would be very difficult to cut the rod throw sections out without damaging the rest of the crank. It could all be done with plastic but you would definitely need to make a jig to hold it in alignment. If you can pull it off, I will surely envy you, lol.
-
I think I know where you're going with the starboard engine. If I'm correct, good luck! I was going to go that route, although I was going to have to scratchbuild the lower engine block. I abandoned that idea so I wish you God speed in your endeavor. You're going to have a great compartment when you're done. I have some drawings I did of that area that might be of some help if you're interested. Shoot me a PM if you want to take a look.
-
Where did you find that top photo? I've never seen that one before. It is awesome! FYI, the access plating at the top of the pressure hull was designed to be removable, as in that pic. If you notice the layers of muck on the outer hull, that boat has been in service for quite some time. I'm not sure but I believe the only time an engine would need to be removed is if either the block was cracked beyond repair or if the crankshaft had to be replaced. All other repairs could be done in place. Oh yeah, and using two kits is cheating!
-
Crew compliment was 45-50. Lack of a full crew definitely makes it look a lot roomier. Agree on the blue LED's. That video has been out for quite some time so he must have been one of the first to build one.
-
Hatches look 100% better now. Good work! Trumpeter has not made it easy, have they? I've got to get my RCSubs sets ordered. I wonder if the Eduard set is any thinner. It's a lot (a LOT) of money but having both sets to pick and choose which parts look better would sure be a plus. Funny how fast a $400 model becomes a $1000 model.
-
In reference to the lighting in Das Boot, the Red & Green in the Engine Room denotes Port & Stbd engine commands from the Bridge and/or Control room. That's why you see them flash for attention. This let the engineers in the Engine Room know a command was being sent for a specific engine. I know the Red lighting was restricted to the Control Room and Conning Tower/Attack Periscope areas. As for the Blue lighting in Das Boot, I've never come across anything regarding these lights on an actual boat. If I remember correctly, the blue lights were shown in the Torpedo Room.
-
"Duh" is an understatement! This is what happens when you design by committee. Perhaps their instructions were not Port and Starboard but Left and Right. Depends which direction you're facing. Now that that's off my chest, I think yours is a wise decision. With the nearly complete lack of Conning Tower/Attack Periscope detail, you'd be much better off superdetailing the Bridge and Flak deck. There is a lot of parts available on Shapeways for the Bridge that are a vast improvement over the kit parts. That, along with the RCSubs and/or Eduard PE sets will build into a very nice "sail".
-
Looking fantastic! I really like the way the base came out. Very simple but elegant. Wonderful job so far.
-
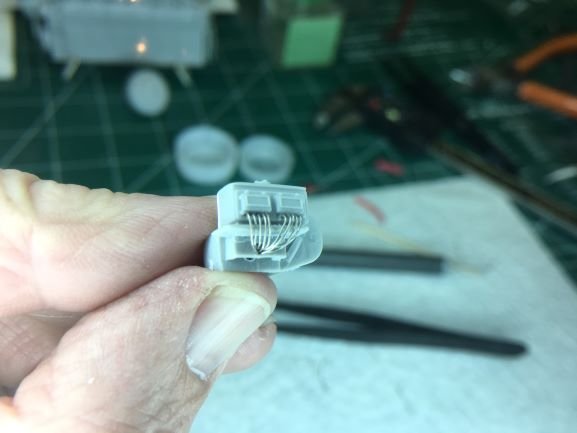
Welcome back. The recess for the switches reminds me of the sub pens (hintity, hint hint).