PC52
-
Posts
29 -
Joined
-
Last visited
-
Le Coureur by PC52 - Mamoli - 1:54
PC52 replied to PC52's topic in - Kit build logs for subjects built from 1751 - 1800
thanks for the suggestions. It's pretty crowded now and wont be easy with all the ropes hanging around but I'll give it a try. Thanks again Gregory. -
 PC52 reacted to a post in a topic:
HM Cutter Cheerful 1806 by glbarlow - FINISHED - 1:48
PC52 reacted to a post in a topic:
HM Cutter Cheerful 1806 by glbarlow - FINISHED - 1:48
-
Le Coureur by PC52 - Mamoli - 1:54
PC52 replied to PC52's topic in - Kit build logs for subjects built from 1751 - 1800
Thank you for the suggestion Gregory. I took a look at it (page 25) and it looks excellent. My issue is that there is no belaying pin available inside to attach the anchor rope to. I have a picture below of what I could do to free up a belaying pin. Here is my thinking but it could be heresy: the two ropes in the green box have to be tied together on belaying pin 3 (green circle) and the two ropes in the blue box are supposed to be tied to belaying pin 4 (blue circle), next to pin 3. To free up pin 4 for my anchor, could I tie the two ropes in the blue box to the free pins under the red circle? There are a couple of pins available there. (Note that the laundry pins are only temporarily holding the lines in place.) Thank you!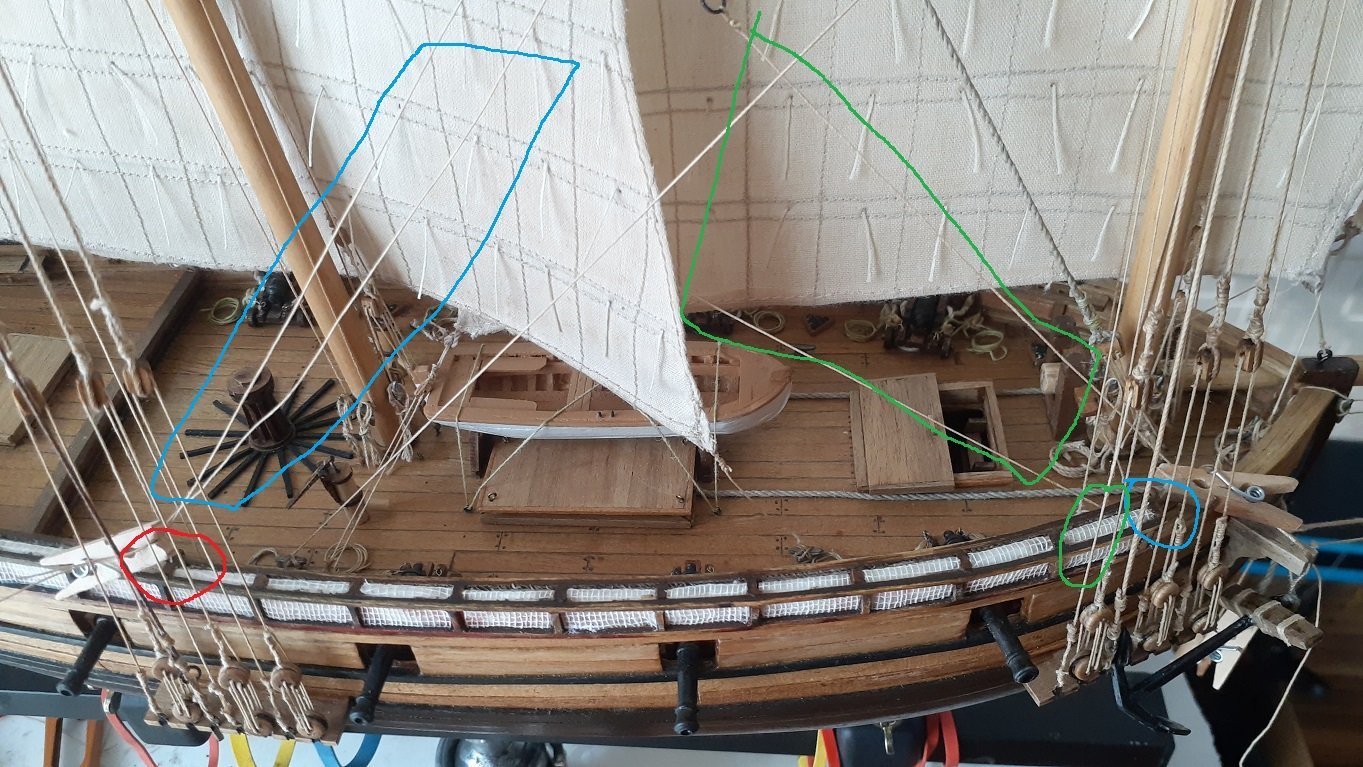
-
CiscoH reacted to a post in a topic:
Le Coureur by PC52 - Mamoli - 1:54
-
CiscoH reacted to a post in a topic:
Le Coureur by PC52 - Mamoli - 1:54
-
CiscoH reacted to a post in a topic:
Le Coureur by PC52 - Mamoli - 1:54
-
Le Coureur by PC52 - Mamoli - 1:54
PC52 replied to PC52's topic in - Kit build logs for subjects built from 1751 - 1800
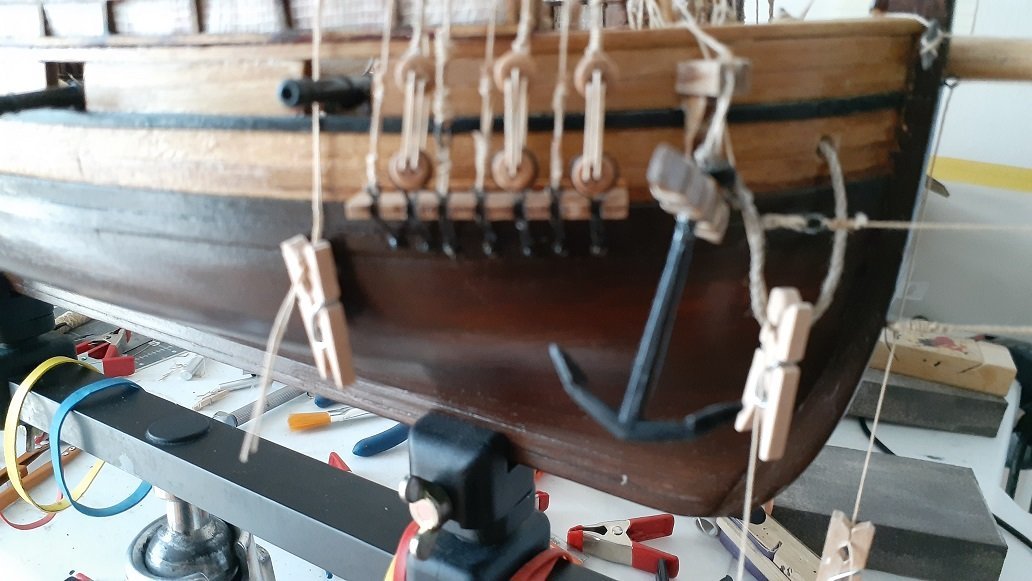
Hi all, This is another call for help. I am finishing my Le Coureur and I don't know how to rig its anchors. As expected no instruction from Mamoli on this topic. Any suggestion? Thank you in advance. PC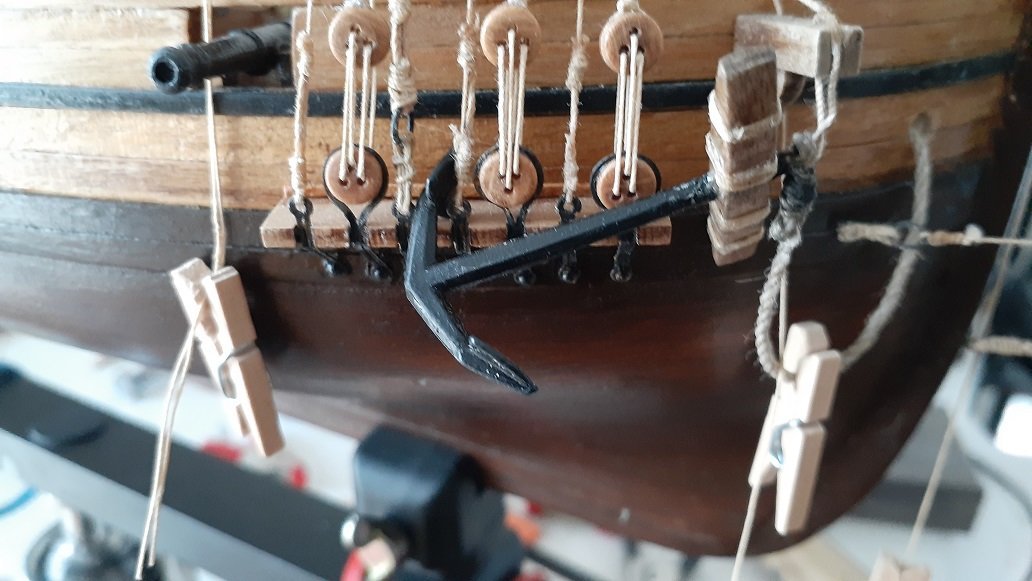
-
GrandpaPhil reacted to a post in a topic:
Le Coureur by PC52 - Mamoli - 1:54
-
Gregory reacted to a post in a topic:
Le Coureur by PC52 - Mamoli - 1:54
-
Le Coureur by PC52 - Mamoli - 1:54
PC52 replied to PC52's topic in - Kit build logs for subjects built from 1751 - 1800
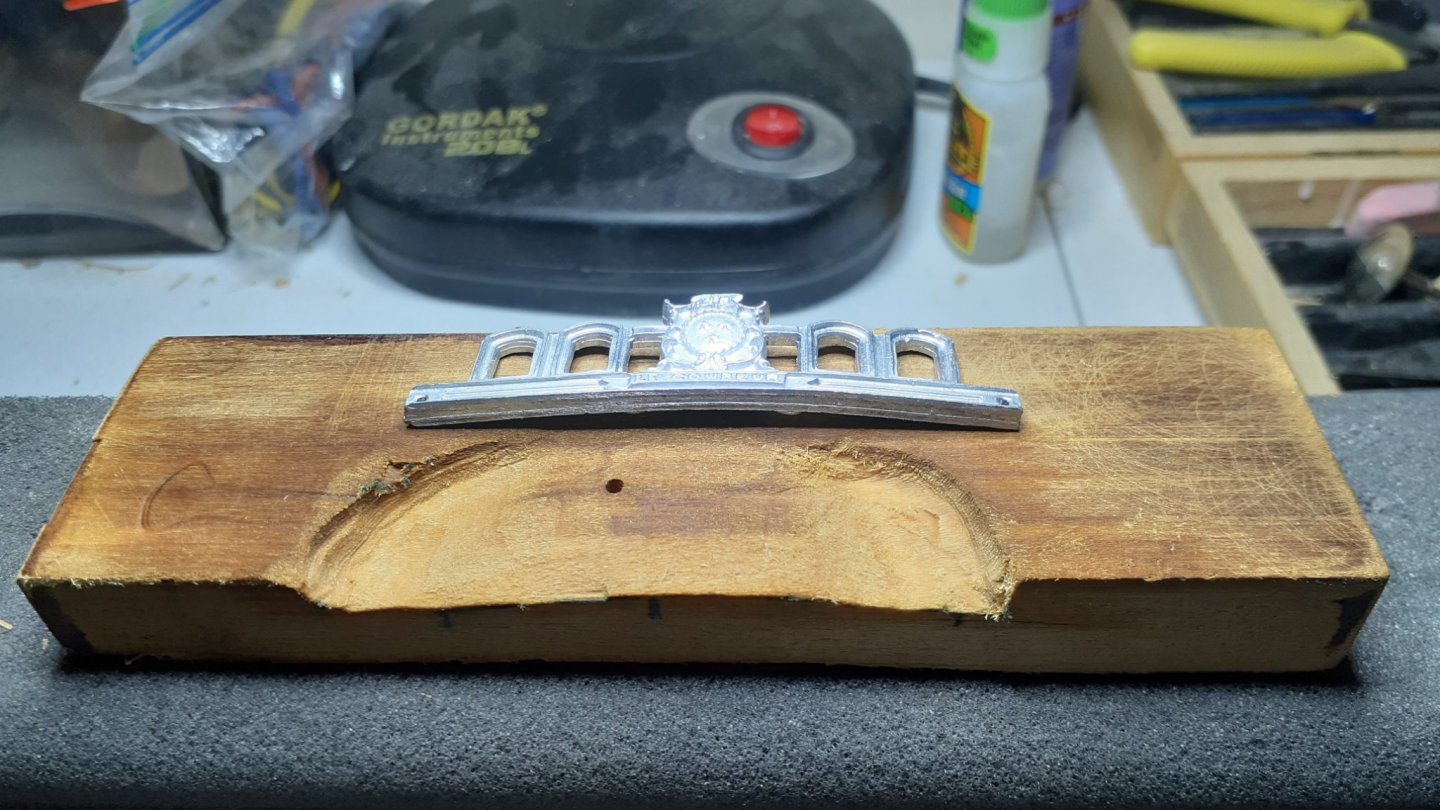
Here is a picture of my finished transom. Although not part of the instructions I decided to add transparent tape to mimic glass windows.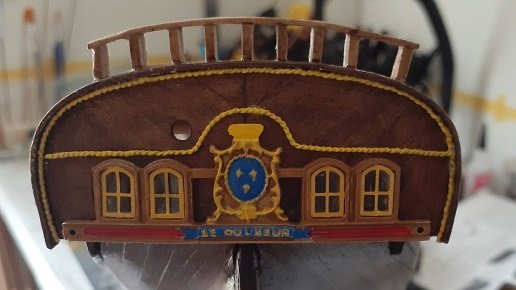
-
Gregory reacted to a post in a topic:
Le Coureur by PC52 - Mamoli - 1:54
-
Le Coureur by PC52 - Mamoli - 1:54
PC52 replied to PC52's topic in - Kit build logs for subjects built from 1751 - 1800
Thank you Gregory. I applied several coats of wood stain. And thanks for the tissue suggestion for the hammock. Daniel Dusek suggested using the extra gauze so that's what i did. More to come.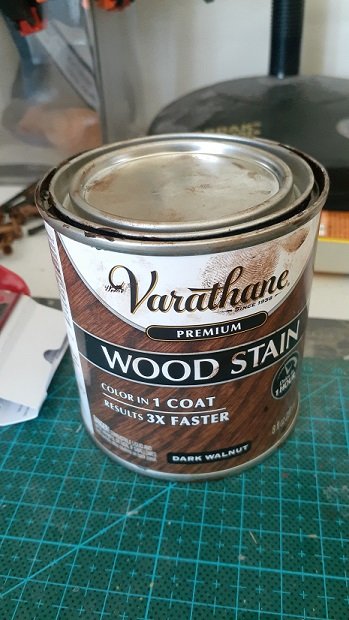
-
Gregory reacted to a post in a topic:
Le Coureur by PC52 - Mamoli - 1:54
-
PC52 reacted to a post in a topic:
Le Coureur by PC52 - Mamoli - 1:54
-
Le Coureur by PC52 - Mamoli - 1:54
PC52 replied to PC52's topic in - Kit build logs for subjects built from 1751 - 1800
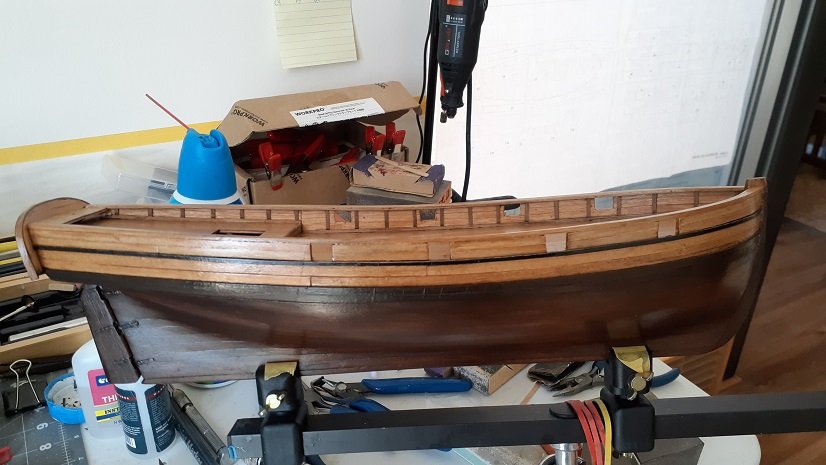
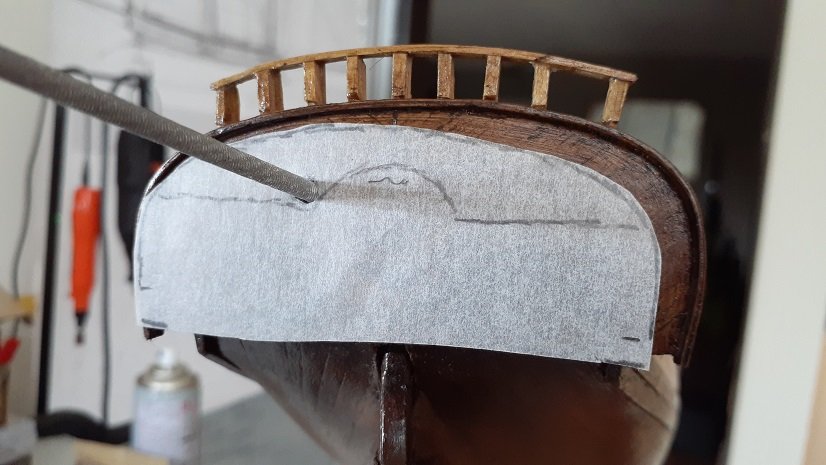
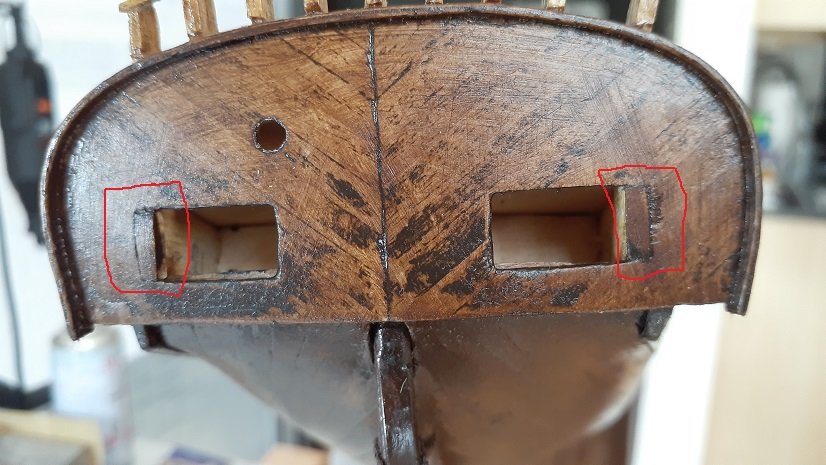
Well it's been quite a while since last time i posted. I hit several snags but also took pictures so i am going to share with you what happened the last 4 weeks. First i planked the hull again with 0.5x 5. It looks much better now the i stained the hull About the basswood supplied with the kit: First the basswood is not good quality. The 1x1 broke when I attempted to bend it and the 1x3 brittles under a band new blade. I tried to strengthen it with a mix of white glue and water but it didn't work Also I replaced the 1x1 with 2x2 and sanded it Next issue was the plans scale. With very skimpy instructions i wanted to use the plans for positioning parts. The plans are not 1:1 scale Next the transom rough opening were cut too wide. I had to resize them More to come later. Unfortunately my impression is that Mamoli cut a lot of corners. I would not recommend this kit for a beginner. There is too much guessing work to be done and without experience it could become overwhelming.

.jpg.24827e11c1a727bd7cf6cfa9c12072d3.jpg)
-
Rob S reacted to a post in a topic:
Le Coureur by PC52 - Mamoli - 1:54
-
Gregory reacted to a post in a topic:
Le Coureur by PC52 - Mamoli - 1:54
-
Le Coureur by PC52 - Mamoli - 1:54
PC52 replied to PC52's topic in - Kit build logs for subjects built from 1751 - 1800
thanks for the suggestion Gregory. BTW I bent my new transom successfully. A home made jig, 20 minutes in the over at 400F (350F then 375F was not enough) and voila!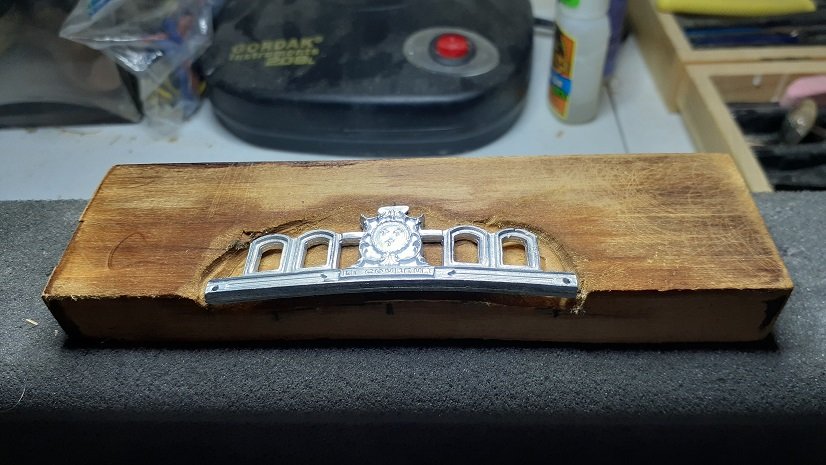
-
Le Coureur by PC52 - Mamoli - 1:54
PC52 replied to PC52's topic in - Kit build logs for subjects built from 1751 - 1800
Although i thought the maple strakes were similar in color the result is awful. I will cover the entire hull with some 0.5 by 5. Oh well...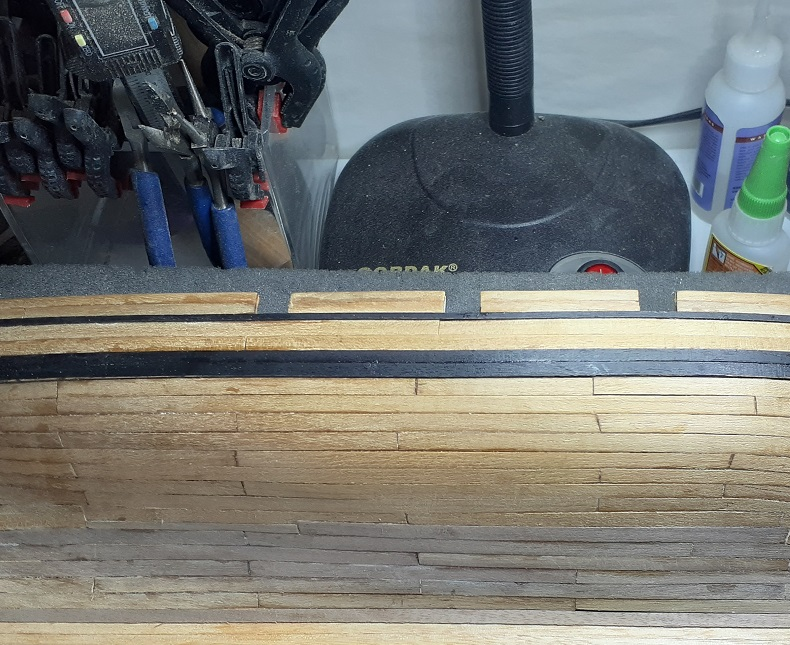
-
Le Coureur by PC52 - Mamoli - 1:54
PC52 replied to PC52's topic in - Kit build logs for subjects built from 1751 - 1800
Hi all, New snag with this Mamoli kit. As I am moving along Part 41 is missing (nastro elastico). Unfortunately this part has no reference number so I am sending you a copy of the instruction sheet for help. I contacted Daniel Dusek but he cannot find this part either. The description goes like this : false mattresses made from rolled up resilient cotton ribbon or "nastro elastico" I guess it's a ribbon that is missing. Any suggestion as to how to replace this part? Thanks in advance. Phil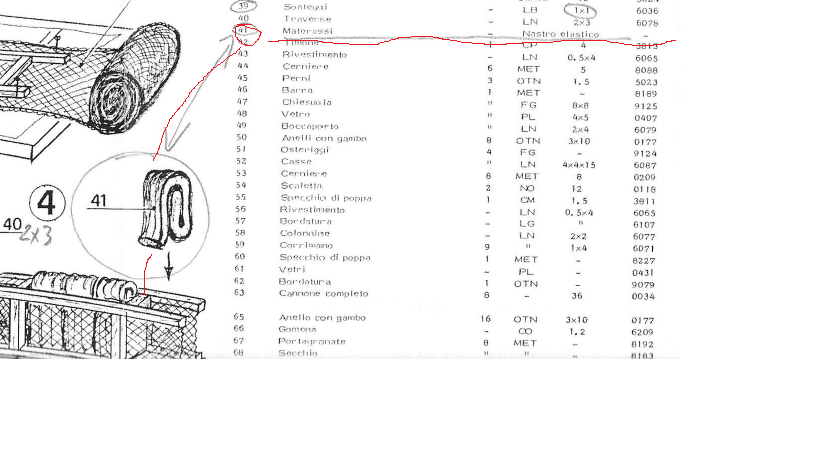
-
Gregory reacted to a post in a topic:
Le Coureur by PC52 - Mamoli - 1:54
-
Le Coureur by PC52 - Mamoli - 1:54
PC52 replied to PC52's topic in - Kit build logs for subjects built from 1751 - 1800
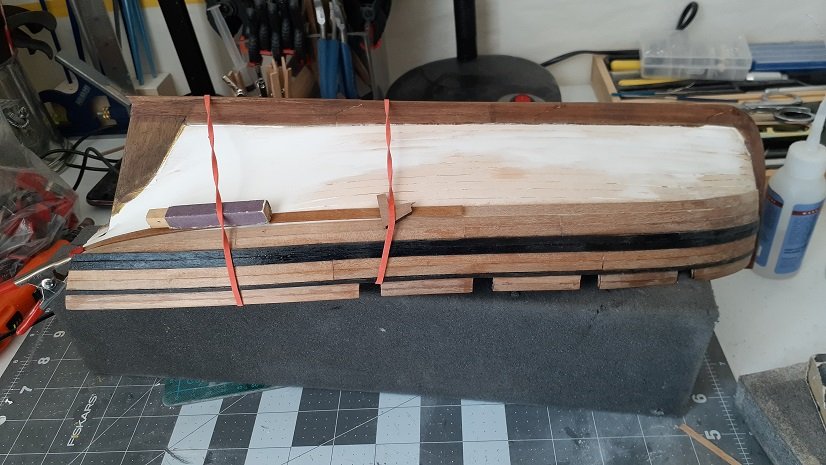
Thanks for the tip Gregory. Back to my project. As I wrote initially the instructions are very skimpy and the drawings quite imprecise, which leaves lots of room for pondering/dreaming/fuming/extrapolating and more -ing... Here we go with the second planking: Basically the instructions say plank with number 25 or 30. The rest is up to one's interpretation of the drawings. Luckily i noticed a small picture on the box cover. I enlarged it and saw what the second planking should look like around the keel I also ran out of strakes for the second planking (about 10 short).. Fortunately i had some 1x5 walnut strakes from a previous jb so I'll be able to complete the second planking without contacting Daniel Dusek again. The color is not an exact match but i plan the stain the hull so it should not be too much of an issue.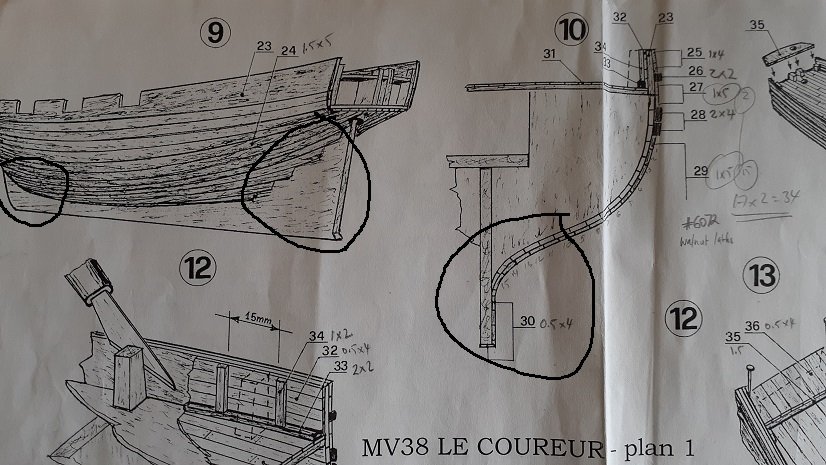

-
Le Coureur by PC52 - Mamoli - 1:54
PC52 replied to PC52's topic in - Kit build logs for subjects built from 1751 - 1800
Thanks for the tip, Gregory. This part is 3.3 mms thick or 0.12 in. Seems thick to me. Out of curiosity what did you use to sand your zinc alloy parts? -
Le Coureur by PC52 - Mamoli - 1:54
PC52 replied to PC52's topic in - Kit build logs for subjects built from 1751 - 1800
Started the second planking. Will have to send and stain the wood to get rid of the glue blotches...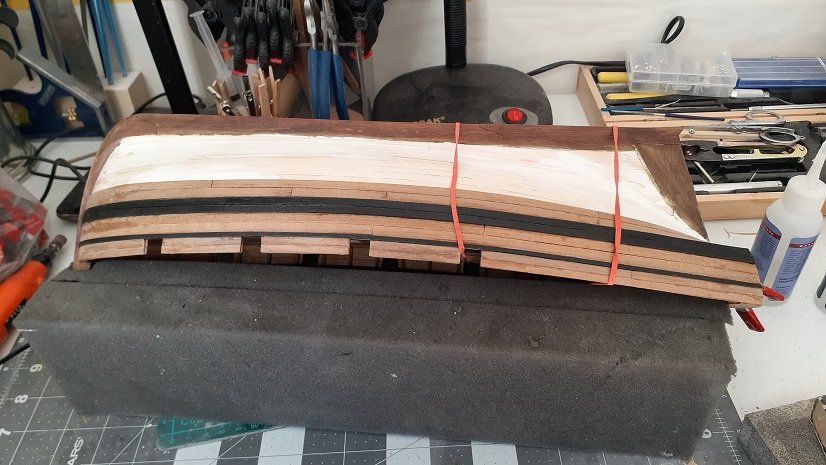
-
Le Coureur by PC52 - Mamoli - 1:54
PC52 replied to PC52's topic in - Kit build logs for subjects built from 1751 - 1800
It's my lucky day. Not only will Dusek send me a new transom, it will be bent. Great customer service. For the inquiring minds the transom is zinc alloy, it is possible to bend it after heating it in oven (100-150 degrees celsius). -
Le Coureur by PC52 - Mamoli - 1:54
PC52 replied to PC52's topic in - Kit build logs for subjects built from 1751 - 1800
Unlucky. Someone who built Mamoli Le Coureur told me he was able to bend the metal transom by hand. So i tried and mine broke. I emailed Dusek and asked if they could provide a new one. I am keeping my fingers crossed. -
Le Coureur by PC52 - Mamoli - 1:54
PC52 replied to PC52's topic in - Kit build logs for subjects built from 1751 - 1800
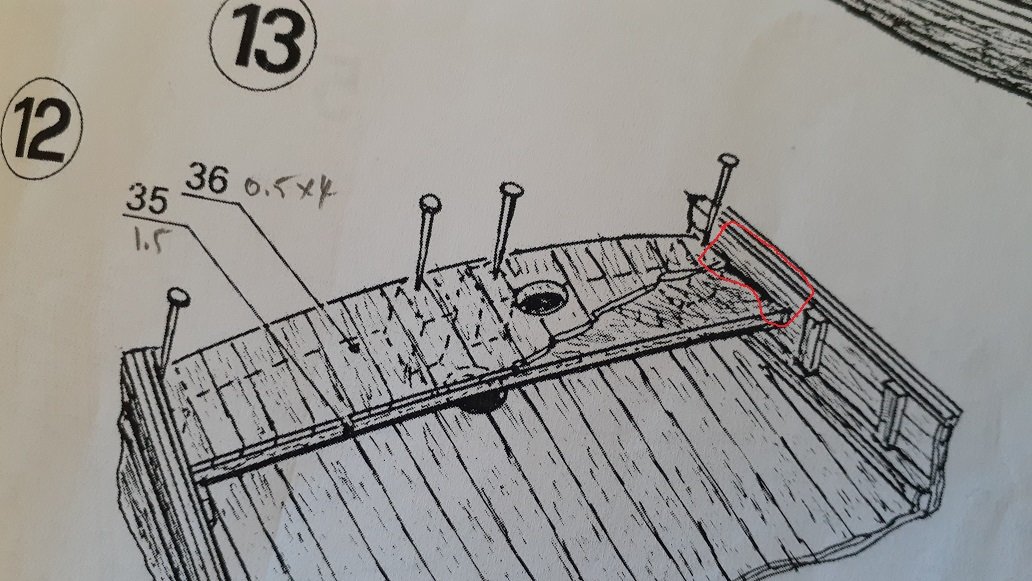
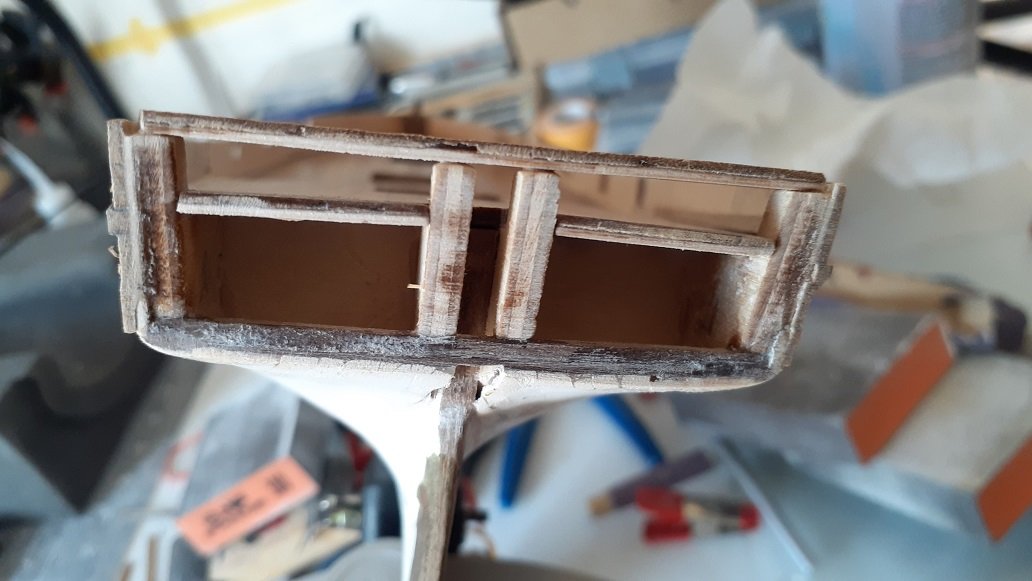
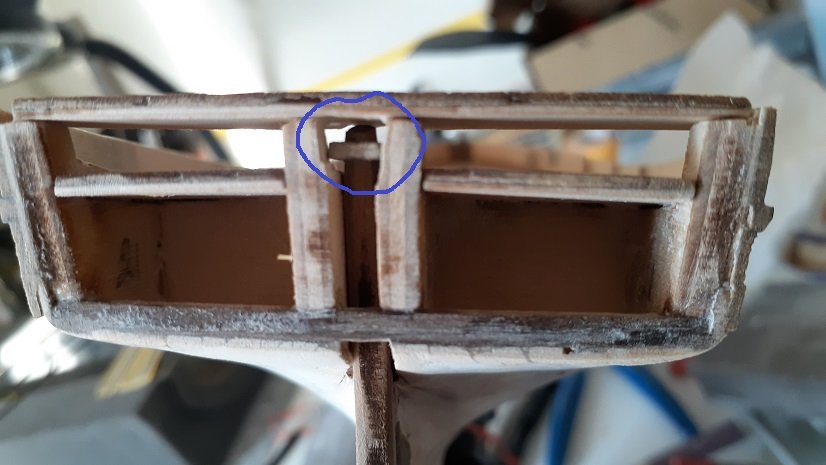
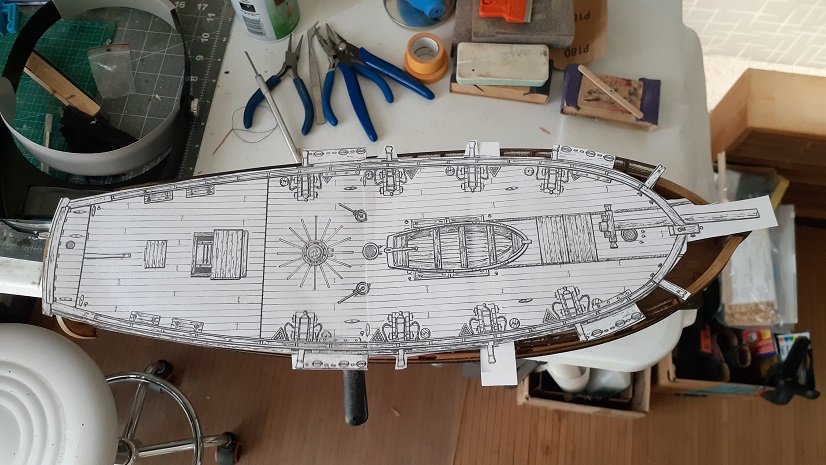
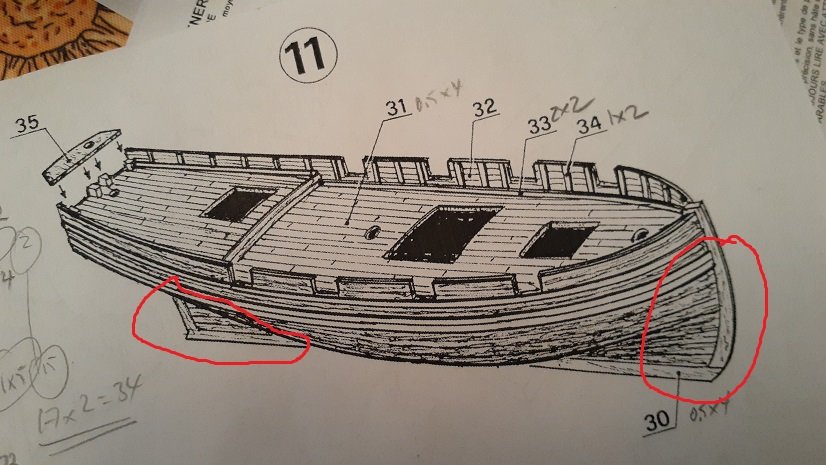
Today I hit a snag with the small quarterdeck. The instructions are pretty skimpy: Glue the small quarter-deck 35 and sheathe the planking 36. The snag is that the quarter-deck will sit too high. On the drawing it shows the quarterdeck is sitting about the height one strip below (circled in red) Here is what happens The quarter-deck sits flush. If i shorten the posts i have an issue with the rudder post and tiller. If i cut the top of the posts then the quarter-deck will sit too low for to squeeze the tiller on to the rudder post. I hesitate between setting the quarter-deck on the posts and let it sit flush or cut the top of the external posts and bend the quarter-deck... which may spilt... Suggestions? Thanks in advance.