KrisWood
-
Posts
314 -
Joined
-
Last visited
Content Type
Profiles
Forums
Gallery
Events
Everything posted by KrisWood
-
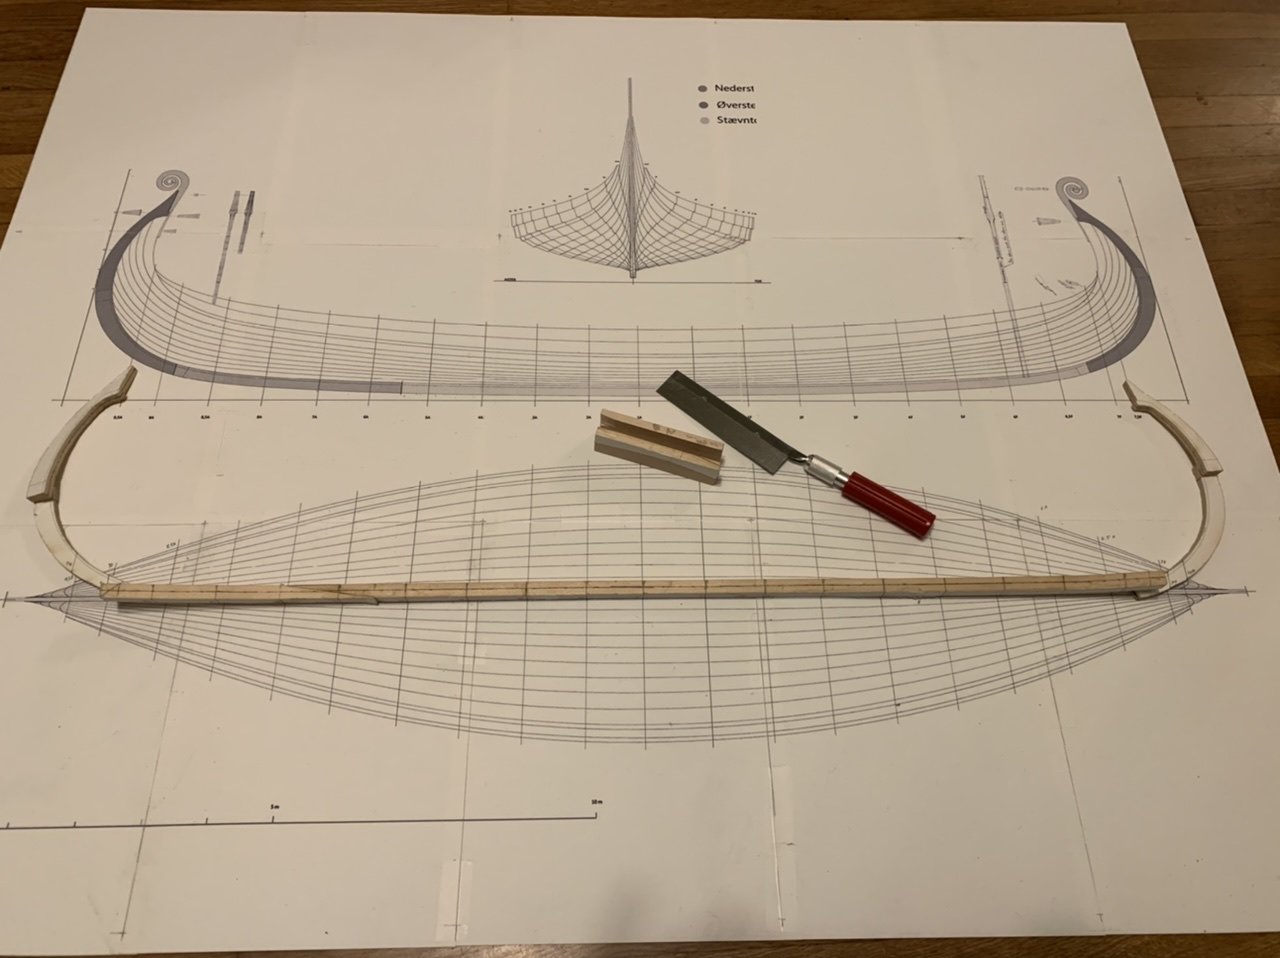
 Stem and stern posts are scarfed together. They match the plans almost exactly, so I didn't screw up as bad as I'd thought! Next I'll scarf them to the keel. 🙂
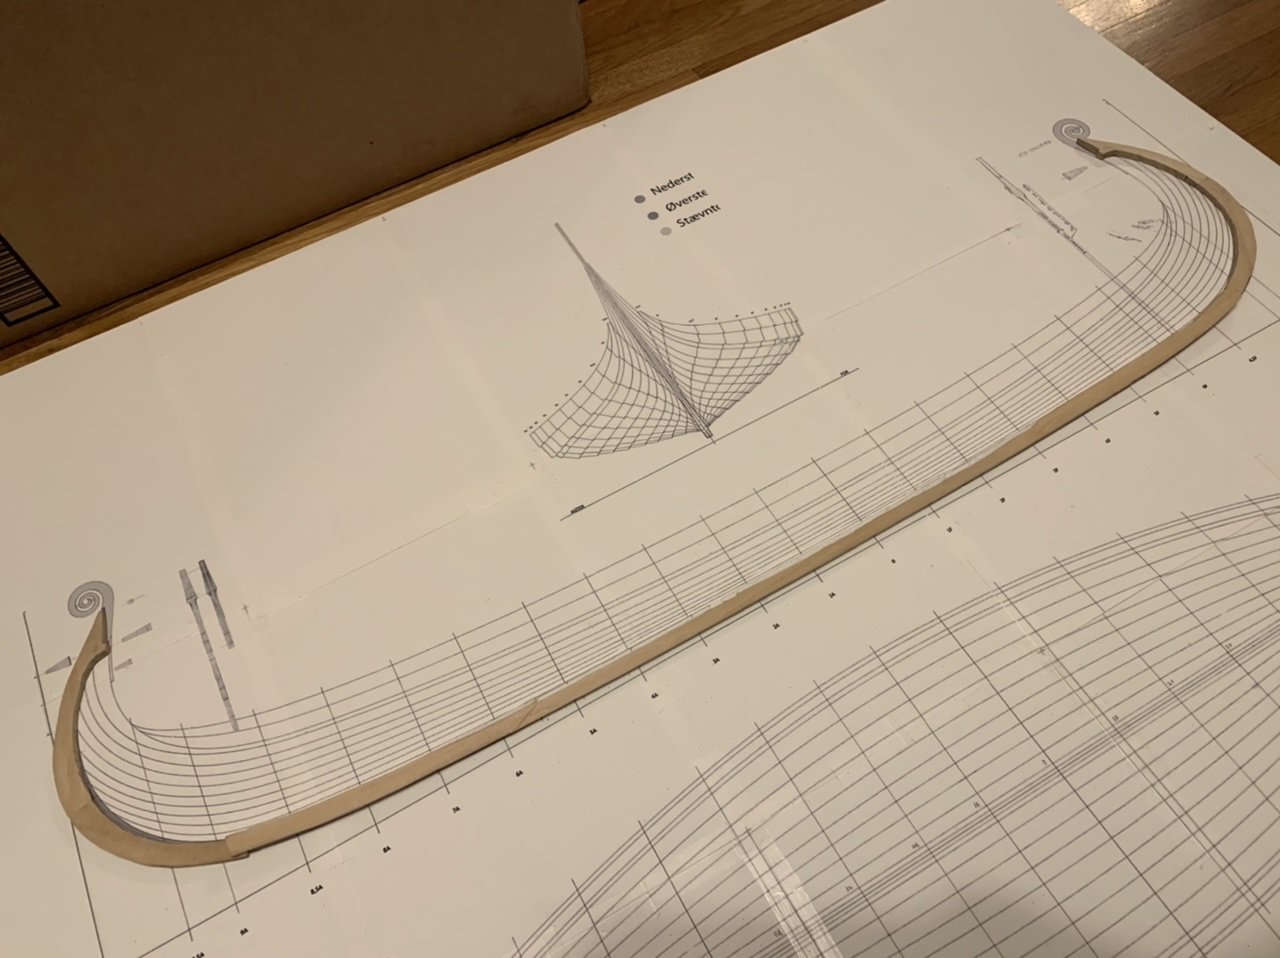
-
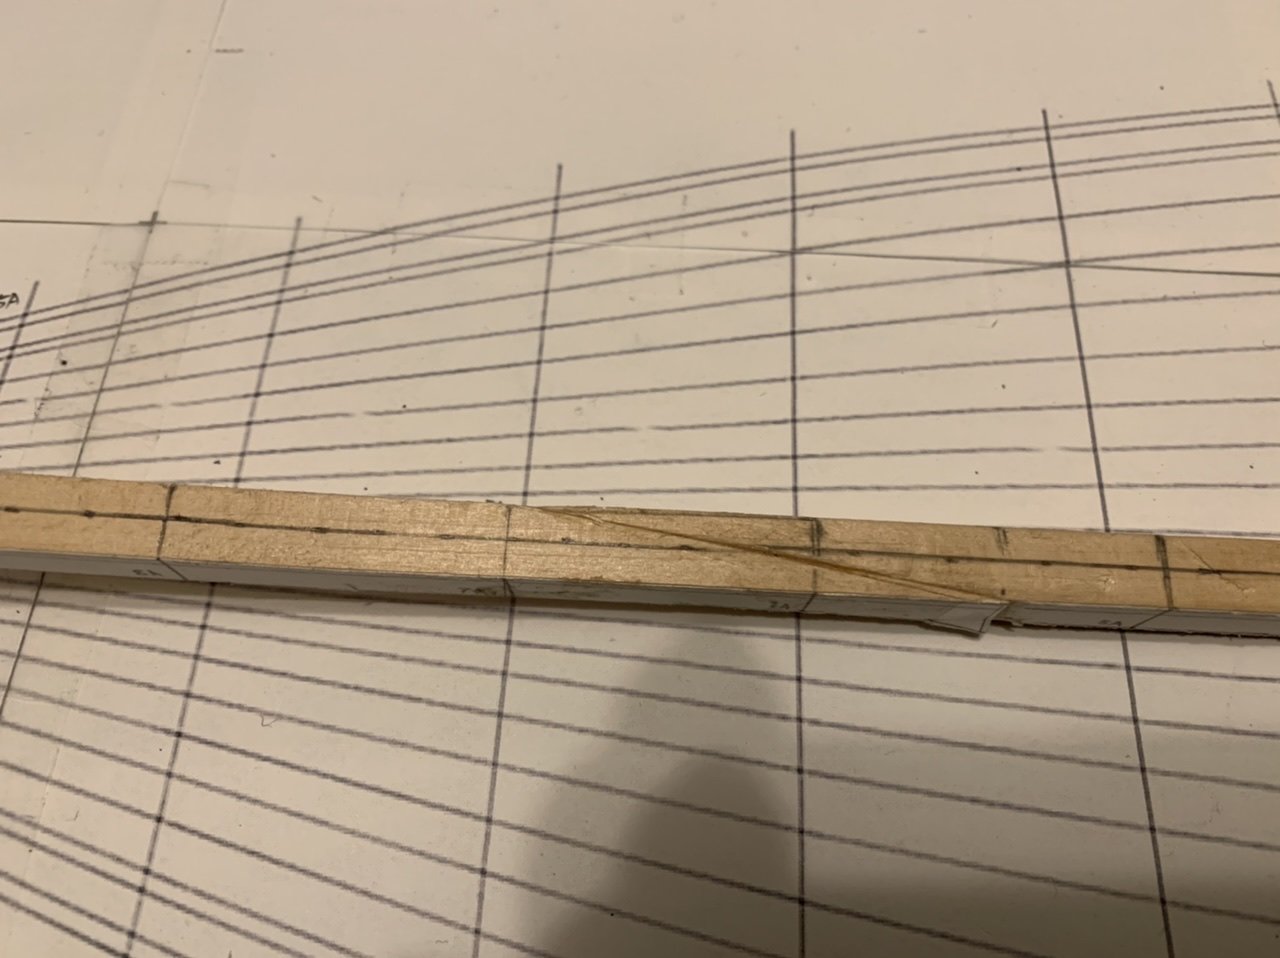
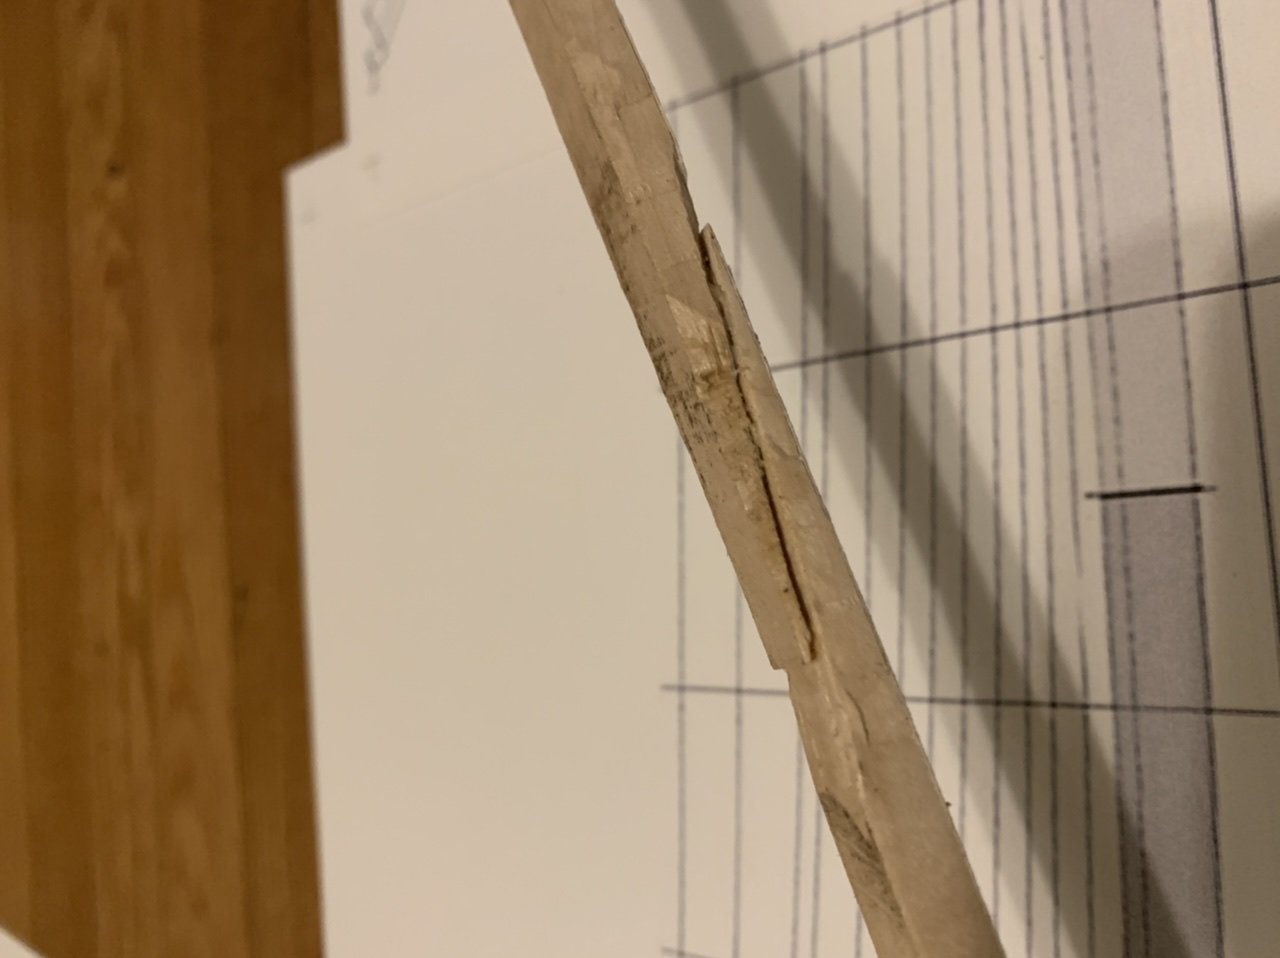
I ran into a critical flaw in my scrap wood miter box method this morning. It only works if the razor saw is perfectly vertical. I cut the scarf for the two parts of the stem this morning and had my saw at a slight angle without realizing it. My top edges lined up perfectly. My bottom edges had about a millimeter too much material left over. "Well", I thought, "better too much than too little." So without thinking much about it I flipped the pieces over and cut the bottoms at the same angle. That's when I realized my mistake. Now the top and bottom match perfectly, but there's a raised triangle /\ ridge shape in the middle. Nothing a little careful filing can't fix but it means a little more work to make it right. On my next scarf I'll draw the lines on my miter box BEFORE I cut, so I can make sure to follow a vertical path with the blade. 😆
-
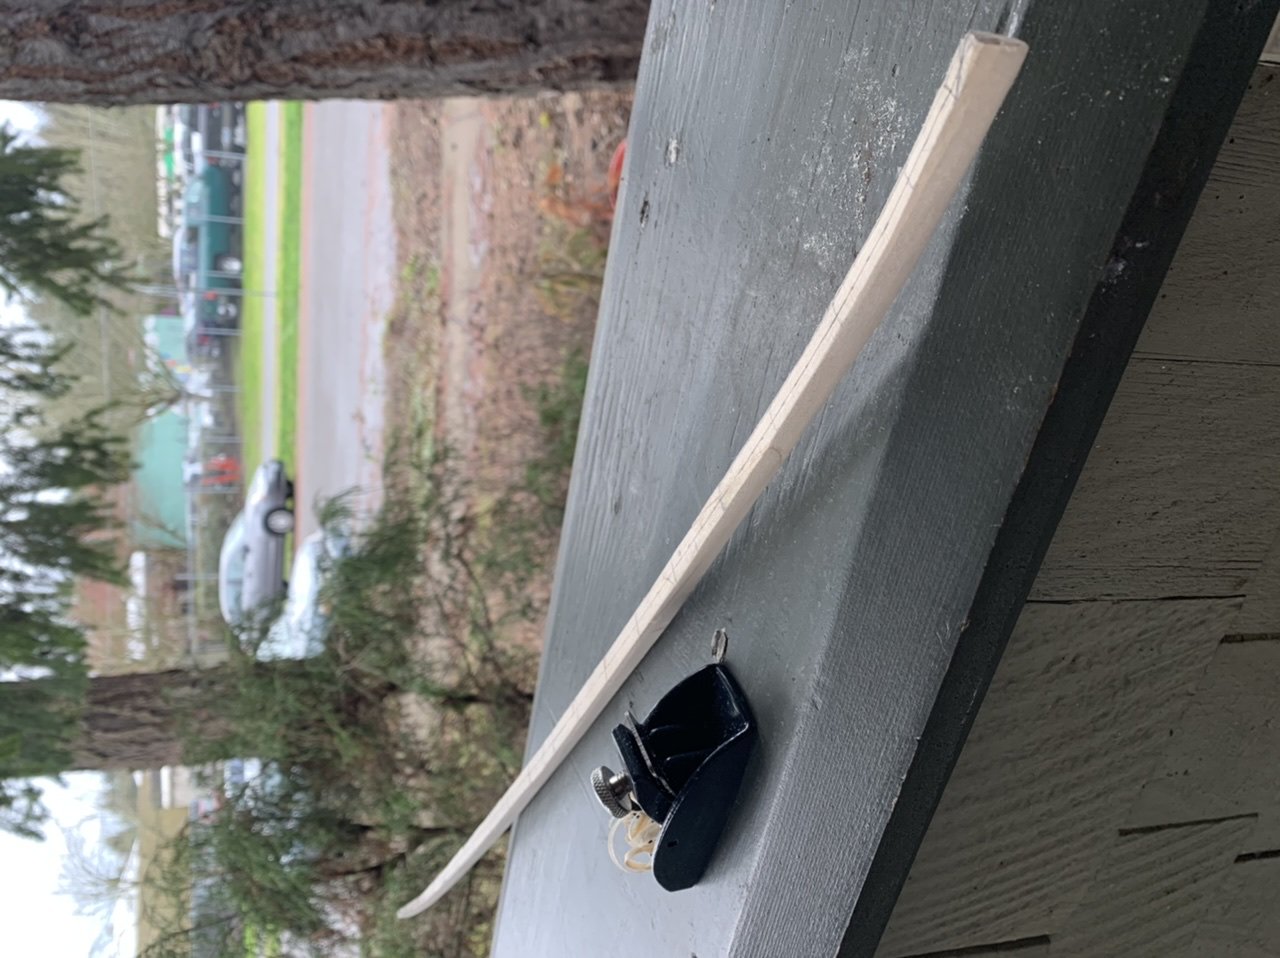
The mini plane is my new best friend. After a few minutes of planing and light sanding the keel is now a wedge, and the place where the rabbet will transition to the T is easy to see as a natural result of the curve of the keel's cross section. I'm super happy with how easy that was. I hope to scarf the stem parts together and plane them tonight.
-
@Cathead, I don't have a table saw, so that's out. I have a full set of X-acto blades (straight, curved, and chisel, large and small), a rotary tool that I could make into a router but building a frame for that would be a project in itself, and various files both full size and needle. The vikings cut theirs with broadaxes, so I think the closest I've got are the X-acto knives. At the moment I'm leaning toward a large file to rough it out, then needle files and sanding blocks to fine tune it. I figured out last night that I can scarf together the pieces while they're square as long as I draw the lines to cut where they'll be AFTER the pieces are beveled into wedges. If I cut the scarfs where they are on the plans at their current widths, the scarfs will end up too short after beveling. As for the transition from T to wedge, the T of the keel transitions into a rabbet shortly before the curve of the stem and stern. The garboard strake follows the rabbet until it gets to the T, at which place it is riveted along the bottom of the T, then follows the transition to the rabbet on the other end. You can see the cross sections before and after the transition between rabbet and T on the left hand side of the plan of the keel drawn of the original ship by Fr. Johannessen in 1933: http://www.unimus.no/felles/bilder/web_hent_bilde.php?id=12384245&type=jpeg Here is a photo from the construction of Saga Oseberg showing the garboard strake being fitted, where the transition is clearly visible toward the forward section of the ship in the right hand side of the photo:
-
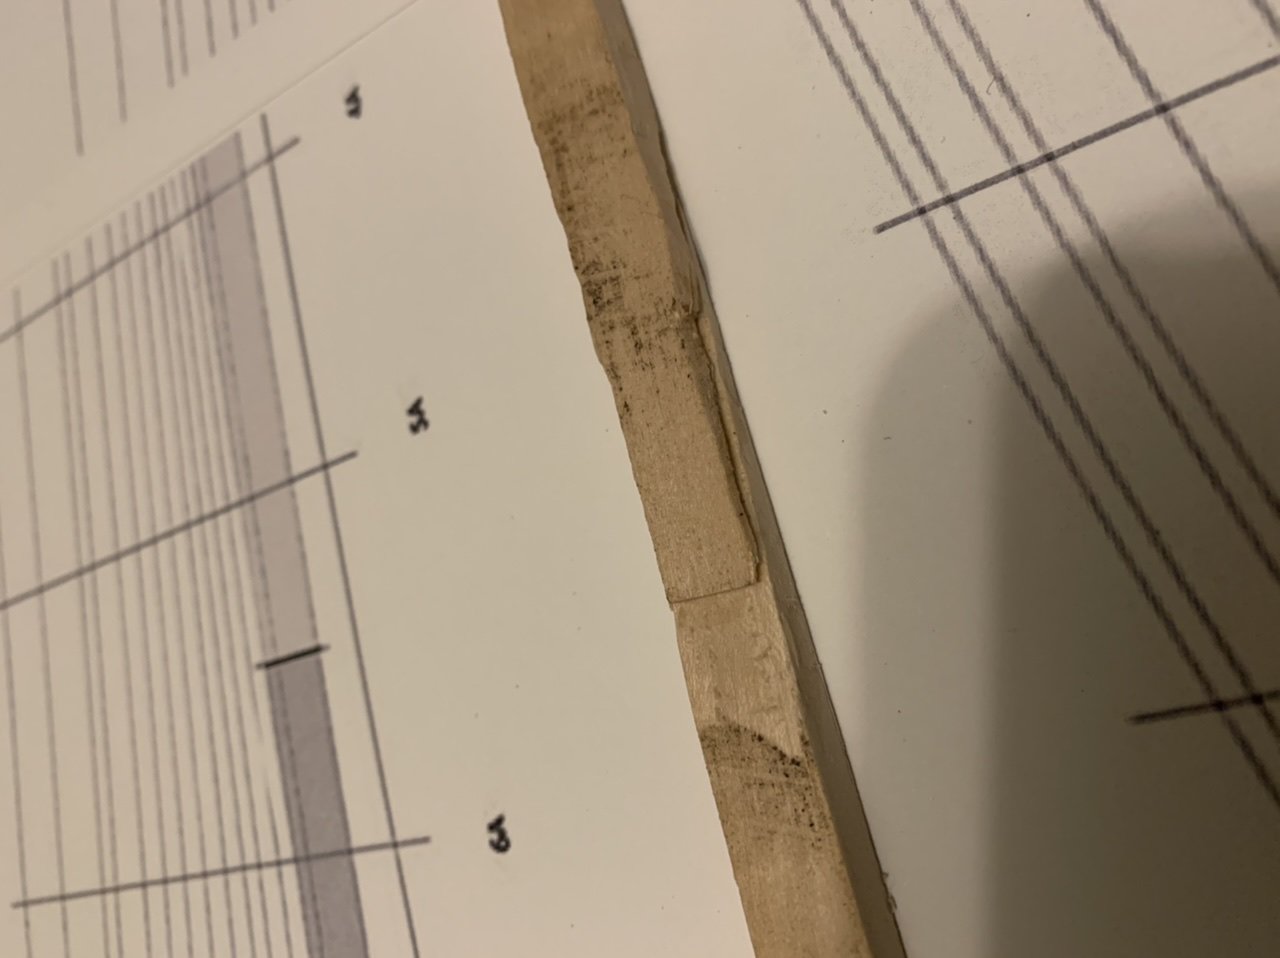
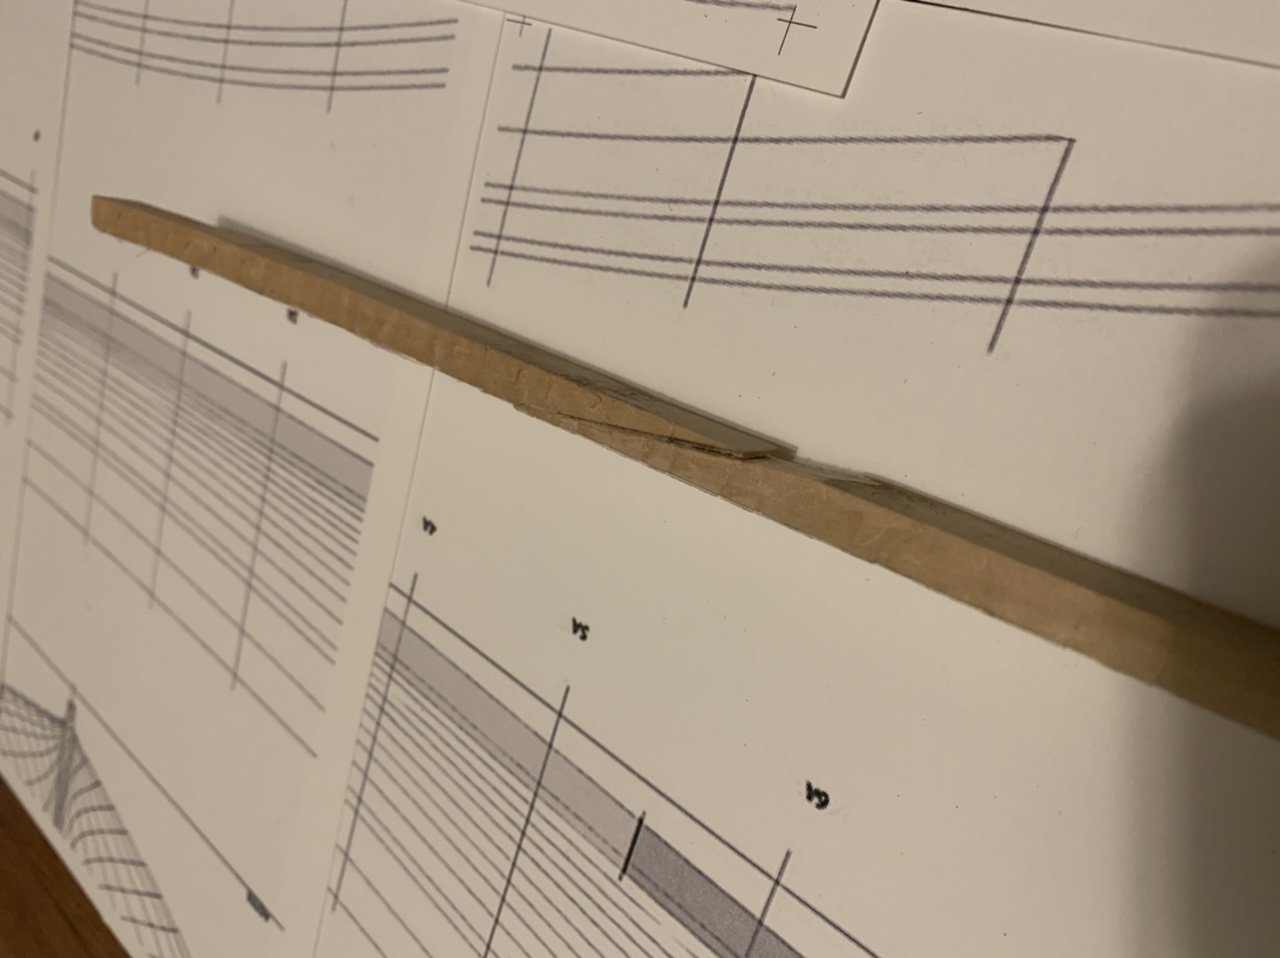
The scrap wood miter box worked flawlessly! 😁 Thank you @Cathead! The paper is peeling but the center line and stations still line up almost perfectly and the joint feels as strong as the wood. Next step will be figuring out how to cut the T shaped cross section of the keel and the wedge shaped cross sections of the stem and stern. Do I do that shaping before or after scarfing them all together?
-
I have a mini miter box but it only has slots for 45 and 90 degree angles. I can probably build one with the correct angle for the keel scarf out of scrap wood, though. Thanks for the idea!
-
On this attempt I used a razor saw. I've also got a coping saw but that never cuts straight in any direction. I'm thinking about using an X-acto chisel for the next attempt. Edit: I think I figured out a way to do it. If I mark the line on both top and bottom, and then saw from the end rather than from the top, I can make sure the razor saw follows both lines. If I cut along the outside of the line on the second piece then it should be pretty easy to sand it to fit.
-
My first attempt at a scarf, practicing on the too small version of my keel. I can't figure out how to do a straight vertical cut. The saw always angles to one side or the other. Any suggestions on how to do this better?
-
I finished roughly cutting out the pieces of my keel today at 1:25 scale. 😁 I'll practice scarfing on my smaller scale attempts before finishing the edges and scarfing these together.
-
On that note, does anyone have a good how to on scarfing? I have no idea how I'm going to make cuts exact enough that the parts will be straight when glued together...
-
@AnobiumPunctatum, that’s a great idea! I’ve been working with my plans at 1:100 scale and having a hell of a time doing the math to get them to 1:36. Doing them at 1:1 would make that much easier. Most of the plans I’m working from are indeed metric so you make a good point there, too. I cut my keel out at 1:36 last night. I had to do it without the stem and stern posts because I couldn’t find any 1/4” basswood wide enough to do it all in one piece at the local hobby shops. It looks like I’m going to need to learn to scarf joints no matter what I do. I’ll see if I have any basswood long enough to handle 1:25 or 1:20. I agree that 1:36 will make the detail work much more difficult.
-
Hi Patrik! Thank you for your reply! I'd already bookmarked your build when I first started this project. I noticed you worked from the same plans I started with. Kris
-
@Cathead, I was in the process of re-uploading the image at 1:36 scale with the station lines included. I'll check the local hobby shop today after work to see if they have wood that will work for a 1:32 scale keel.
-
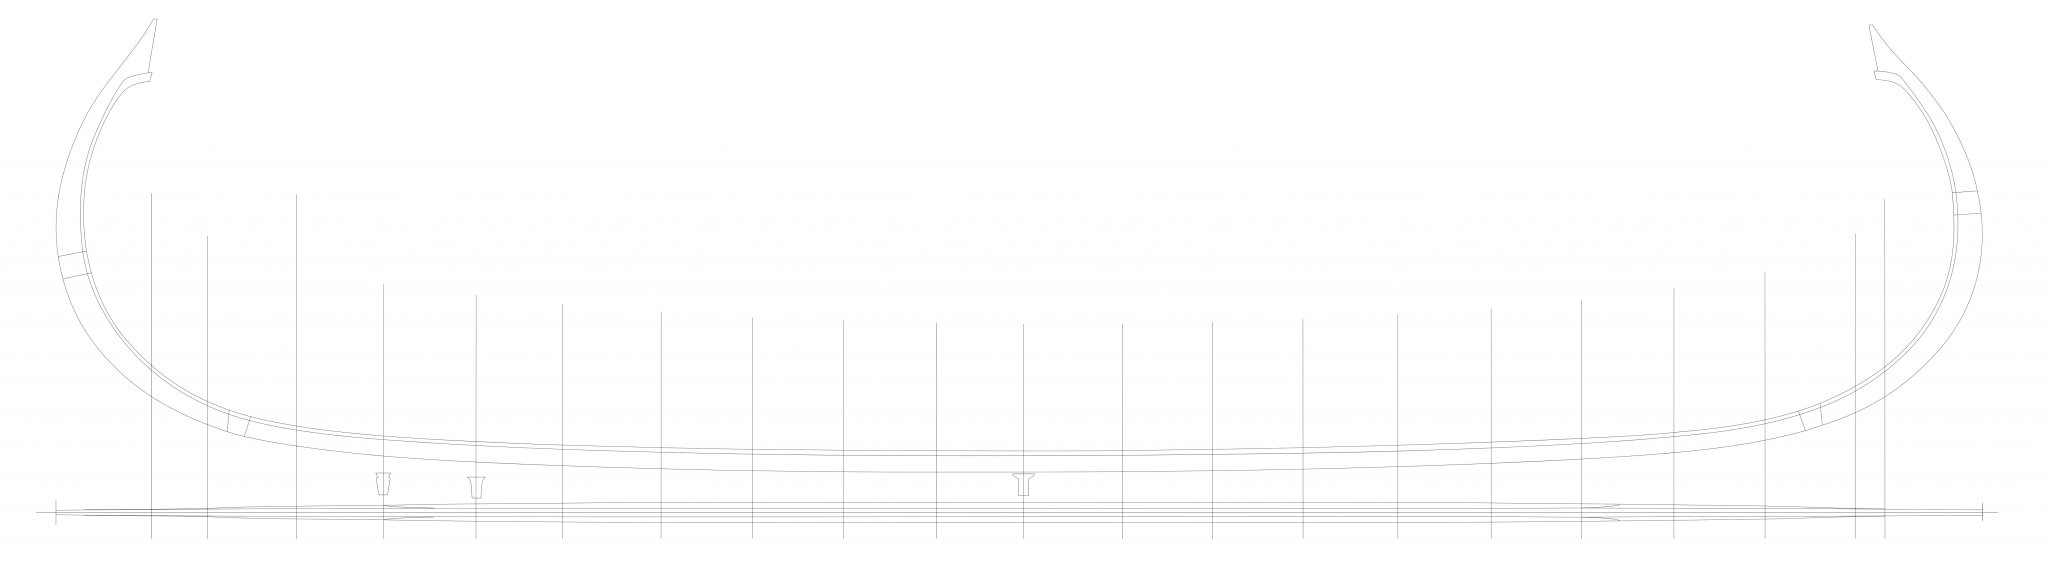
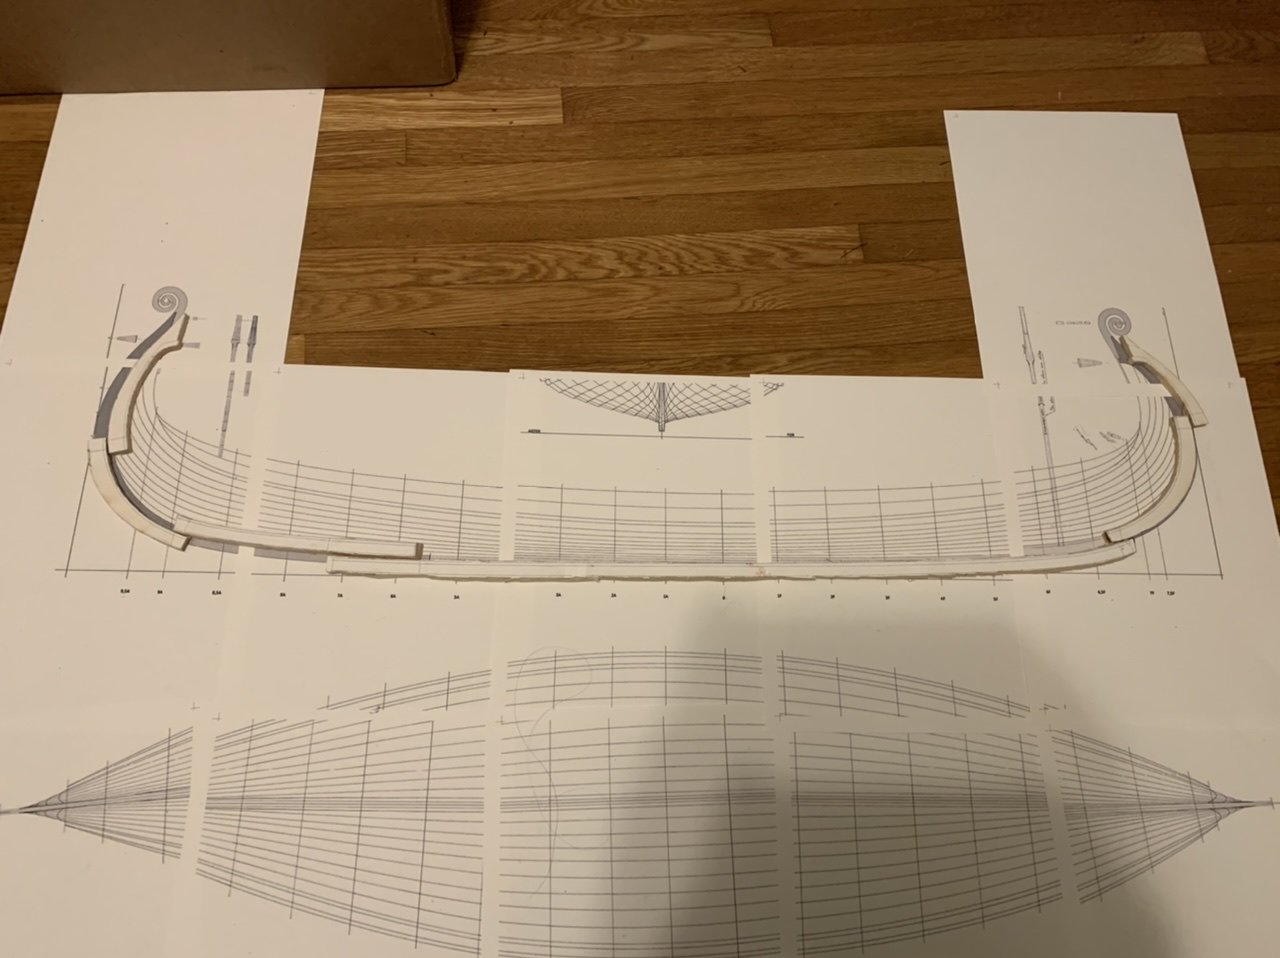
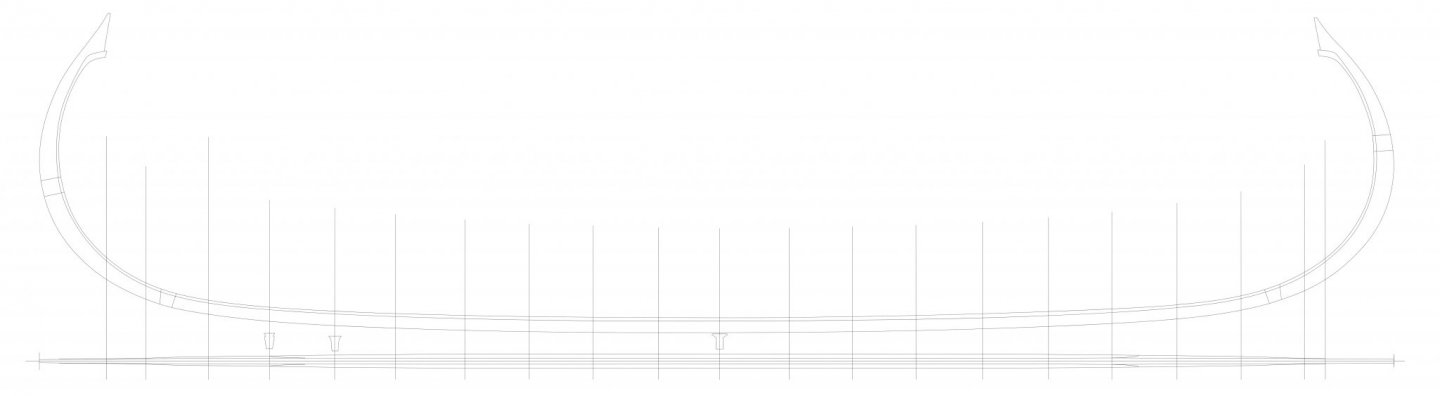
Here's my re-drawn keel, stem, and sternpost (combining elements from multiple plans) ready for cutting out. I'm thinking maybe I should mark the station lines first so I know where to put the frame templates. Edit: It occurred to me that at 1:32 scale my keel would be 0.29" but my thickest basswood is 0.25" so I re-scaled it to 1:36 scale. I think this is what I'll go with unless the nearby hobby shop has any wood thicker than 0.29". This makes the final plan about 2ft long. I've replaced the image here with the one at the correct scale with station lines included.
-
Hi everyone, I’m finishing up drawing my parts to cut out for the keel, stem, and sternpost. On the actual ship this adds up to five pieces to cut out. What I’m wondering is, is it easier to cut the multiple parts and scarf them together, or is it easier to cut the whole thing out as one piece? I know across the grain for the stem and sternpost will not make as strong a ship as cutting along the grain for each part, but I don’t know if it’ll be any harder to cut out the parts by hand one way or the other.
-
@reklein, no worries, I don't mind that you posted a few pictures. It means a lot to me that you'd share something so personal. Thank you!
-
@Cathead, I'm of Swedish and Norwegian descent on my father's side. My grandfather had a lifelong passion for sailing. I've never been on the open ocean myself but I've always had an affinity for wooden sailing ships. This project is a mix of symbolism, heritage, and meditation for me.
-
I looked it up and couldn’t find a copy I can afford. The originals are very expensive and the reprint available have terrible reviews saying they’re badly photocopied and some of the plans are missing. If anyone has that book and wants to send me a scan of the Gokstad chapter I’d love to read it!
-
Oh also, I've ordered a copy of the Saga Oseberg book by the master boat builder of that ship: https://mindzone.dk/saga-oseberg/ This should help immensely with the project. It looks like it has far better plans than anything I've got so far.
-
@Louie da fly, I forget the search terms I used to find them before, but amongst the drawings of the excavation finds from 1904 there are multiple shields of various designs. There is also a rail along the top wale (I dunno if it's called a gunnel when there's no guns) for shields to fit in.
-
I won't be putting any figures on the deck. At most I might put a couple viking tents like the one from the Gokstad ship.
-
@reklein Thank you for your reply. It's good to know that I'm not alone. Which ship did you use for your viking funeral? I had planned on using 1/8" basswood for the planks. If that doesn't work out I'll try the end skins. The Graupner plans I started out with on this project are about 2ft long (1:48) but the floor timbers are tiny and difficult for me to work with. I've printed out the lines from the research paper linked above at 1:24 (about 4ft) and 1:36 (about 3ft) but it seems like a huge model at that point, which is daunting in its own way. I'm thinking the 1:36 might be the best mix of less-tiny parts and not-so-huge a model. What do you think of this choice of scale? Maybe I'll go with 1:32 to make it just a little smaller. Maybe I'm overthinking things. I'll make another attempt at the templates tonight, this time in basswood.
-
@mtaylor, I don't have a mill but I do have a generic rotary tool that resembles a Dremel. I had planned on doing the rabbet with an X-acto knife using the curved scalpel blade. @Louie da fly They used both, actually, but I have no good way to fabricate rivet heads on the outside of the hull. The original conservator's plans clearly label wooden trenails in the keel, stem, and stern joints. It'll be more water-tight if I use wood anyway. I made an attempt at cutting the bulkhead templates and a keel template out of my otherwise useless stockpile of balsa last night using the coping saw last night and immediately saw why everyone cautioned against it. The wood was so soft that it just splintered under the blade, and the blade tended to go wherever it wanted, carving chunks out of the lines instead of following them. I tried scoring the wood with the X-acto in hopes that the saw would follow that instead but no luck. It's all basswood for me from here on. I'll try my templates again in cardboard today. Thanks! Kris