
bolin
-
Posts
482 -
Joined
-
Last visited
1 Follower

About bolin

-
 hollowneck reacted to a post in a topic:
New kit on the horizon - Winchelsea Nef
hollowneck reacted to a post in a topic:
New kit on the horizon - Winchelsea Nef
-
ospetty reacted to a post in a topic:
Will Everard by bolin - FINISHED - Billing Boats - scale 1:67 - second build
-
ospetty reacted to a post in a topic:
Will Everard by bolin - FINISHED - Billing Boats - scale 1:67 - second build
-
ospetty reacted to a post in a topic:
Will Everard by bolin - FINISHED - Billing Boats - scale 1:67 - second build
-
ospetty reacted to a post in a topic:
Will Everard by bolin - FINISHED - Billing Boats - scale 1:67 - second build
-
ospetty reacted to a post in a topic:
Will Everard by bolin - FINISHED - Billing Boats - scale 1:67 - second build
-
ospetty reacted to a post in a topic:
Will Everard by bolin - FINISHED - Billing Boats - scale 1:67 - second build
-
ospetty reacted to a post in a topic:
Will Everard by bolin - FINISHED - Billing Boats - scale 1:67 - second build
-
ospetty reacted to a post in a topic:
Will Everard by bolin - FINISHED - Billing Boats - scale 1:67 - second build
-
ospetty reacted to a post in a topic:
Will Everard by bolin - FINISHED - Billing Boats - scale 1:67 - second build
-
bolin reacted to a post in a topic:
Pomeranian Rahschlup 1846 by wefalck – 1/160 scale – single-masted Baltic trading vessel
-

The Gokstad Ship 900 AD by Siggi52 - 1:50
bolin replied to Siggi52's topic in - Subjects built Up to and including 1500 AD
Very nice. Beautiful lines. -
bolin reacted to a post in a topic:
The Gokstad Ship 900 AD by Siggi52 - 1:50
-
bolin reacted to a post in a topic:
The Gokstad Ship 900 AD by Siggi52 - 1:50
-
bolin reacted to a post in a topic:
The Gokstad Ship 900 AD by Siggi52 - 1:50
-
bolin reacted to a post in a topic:
The Gokstad Ship 900 AD by Siggi52 - 1:50
-
bolin reacted to a post in a topic:
The Gokstad Ship 900 AD by Siggi52 - 1:50
-
bolin reacted to a post in a topic:
The Gokstad Ship 900 AD by Siggi52 - 1:50
-
bolin reacted to a post in a topic:
The Gokstad Ship 900 AD by Siggi52 - 1:50
-
bolin reacted to a post in a topic:
The Gokstad Ship 900 AD by Siggi52 - 1:50
-
bolin reacted to a post in a topic:
The Gokstad Ship 900 AD by Siggi52 - 1:50
-
new kit alert! New kit on the horizon - Winchelsea Nef
bolin replied to James H's topic in Wood ship model kits
This is great news. That era is very underrepresented among model ships (scratch built or kits). I look forward to it's release.- 15 replies
-
- 4
-
-
- winchelsea
- medieval
- (and 1 more)
-
Unfortunately I don't know where old plans or instructions for Billing Boat models can be found. There was a complete set in the box I got. You are not the first to ask for plans, so I made copies som years ago. I sent you a PM with them.
- 118 replies
-
- 1
-

-
- billing boats
- meta 484
- (and 1 more)
-
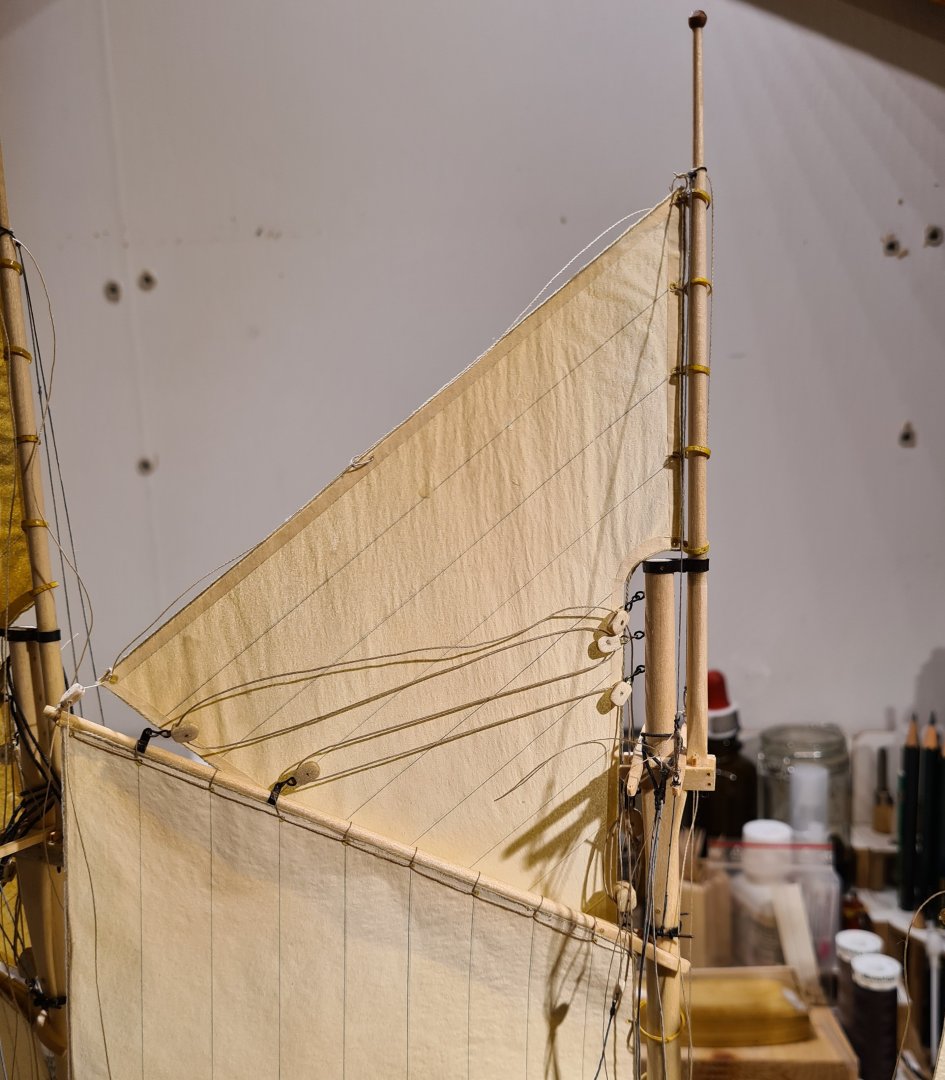
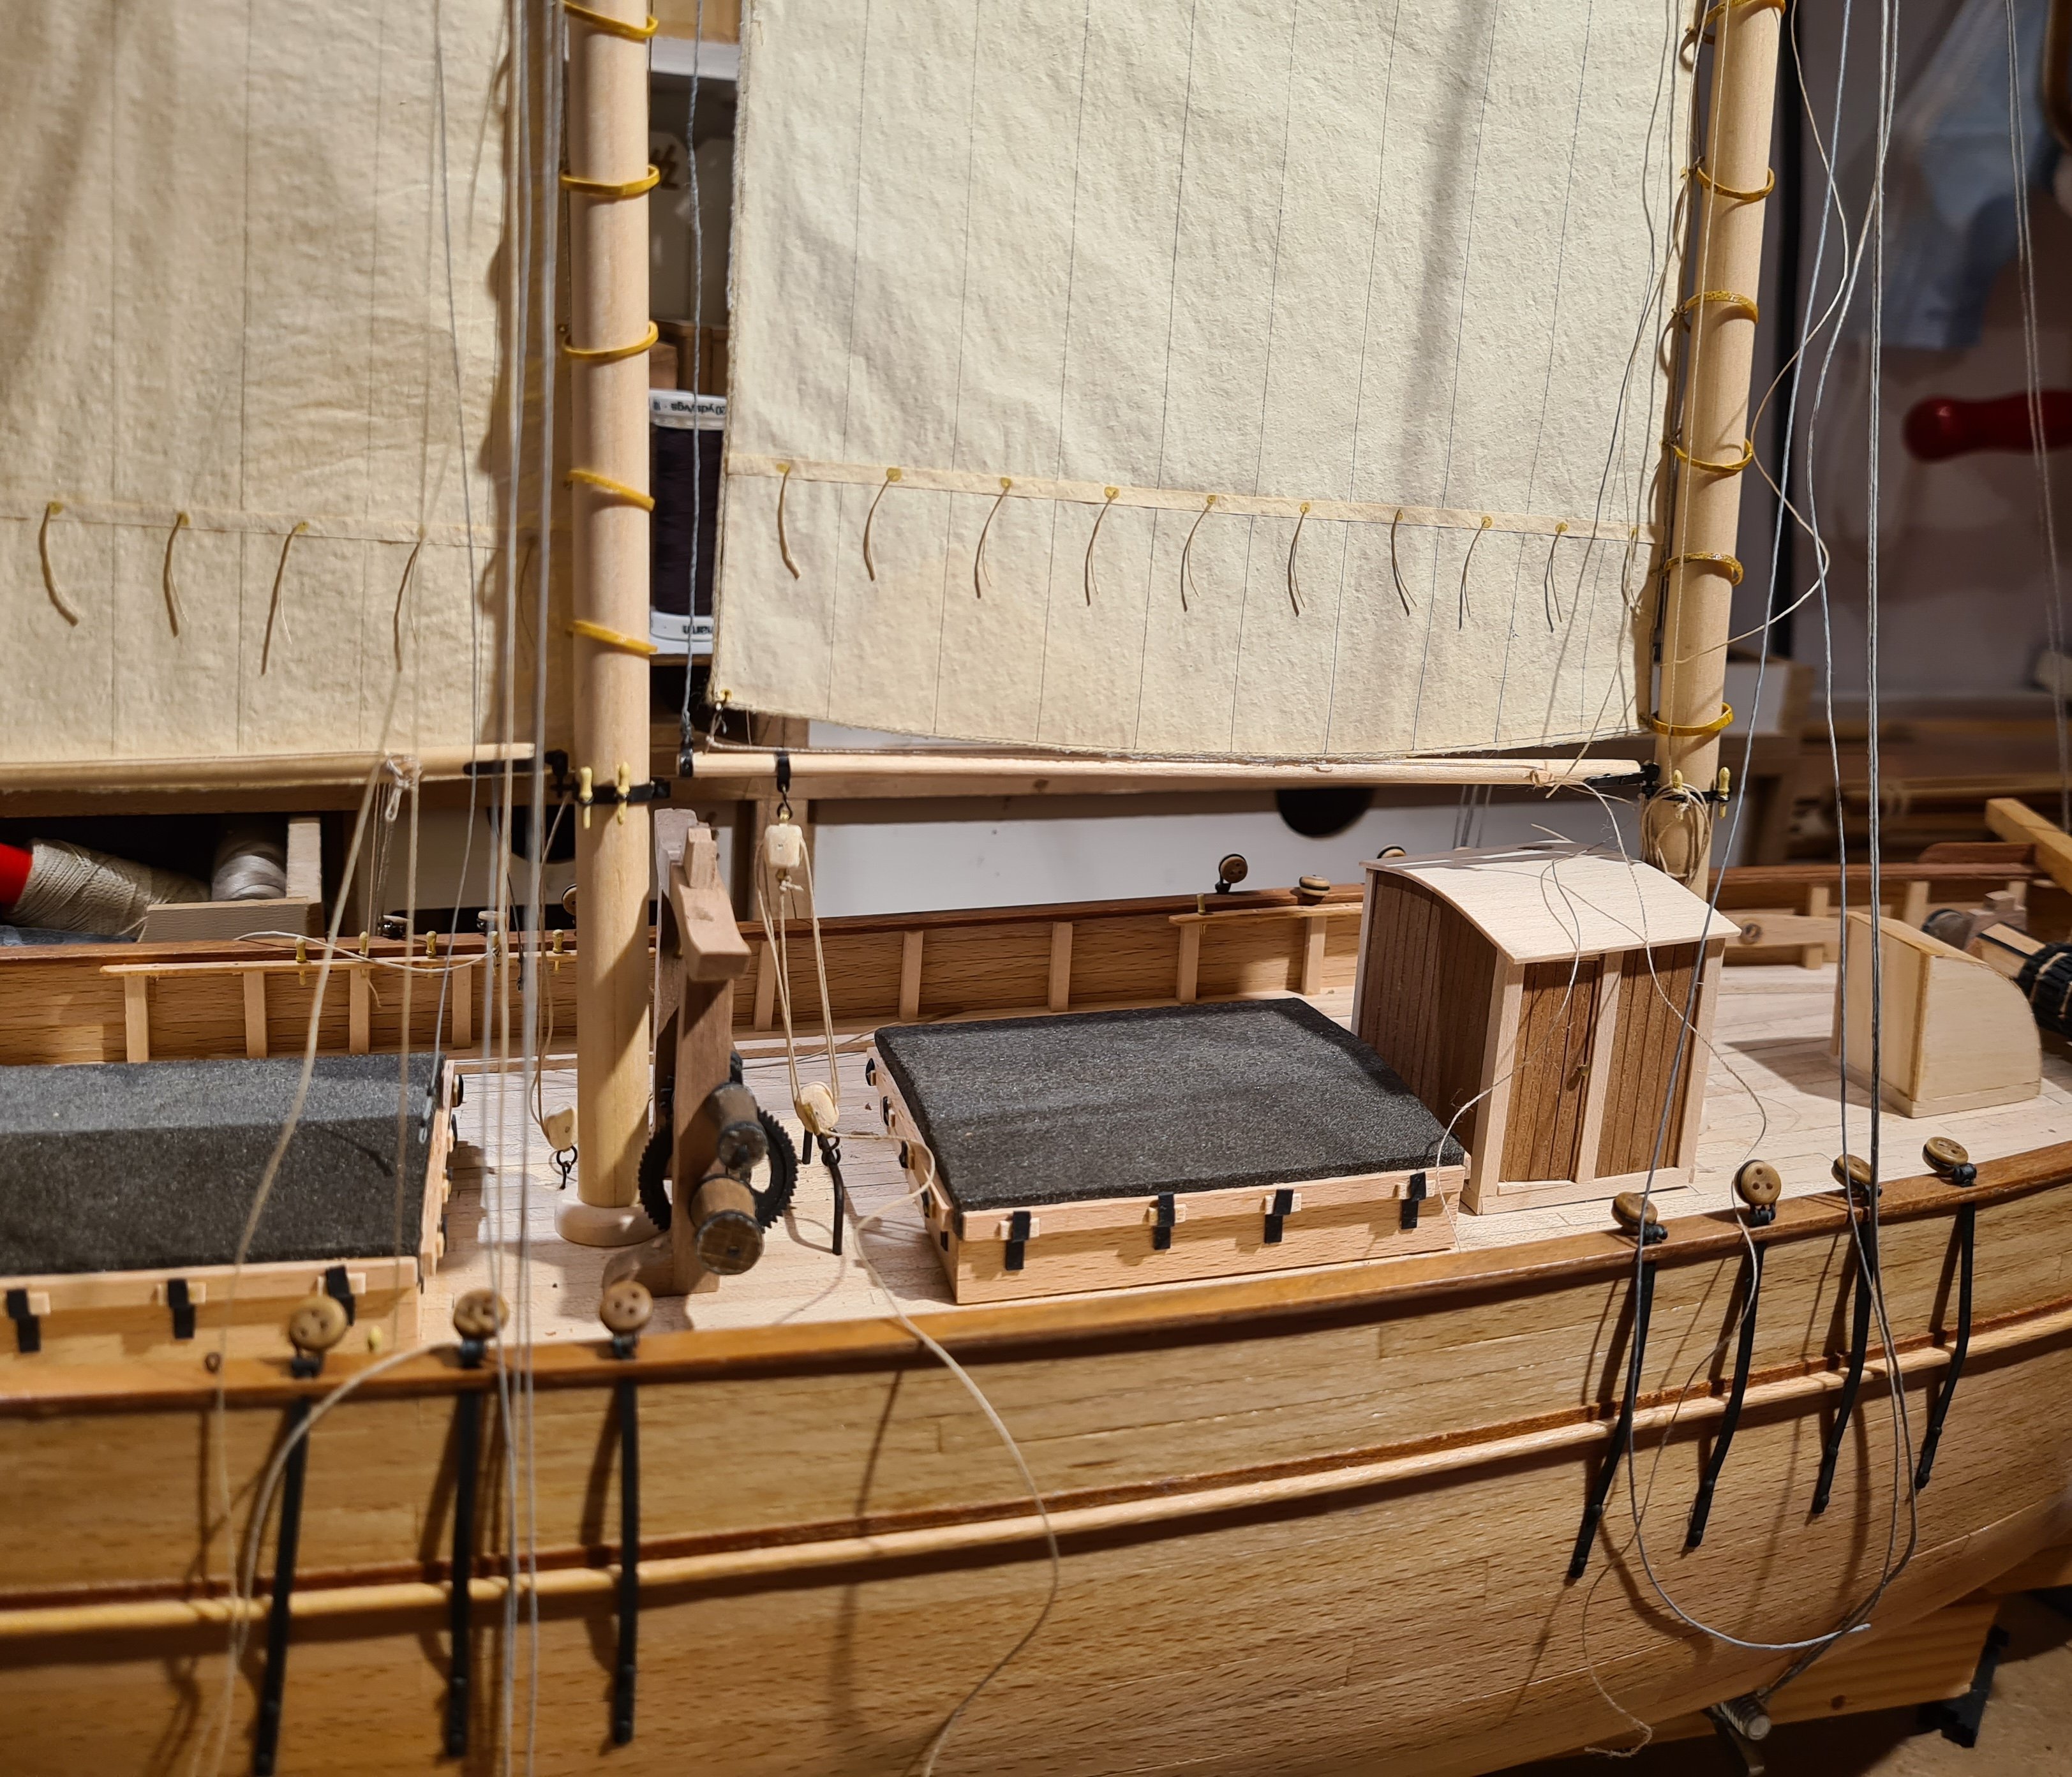
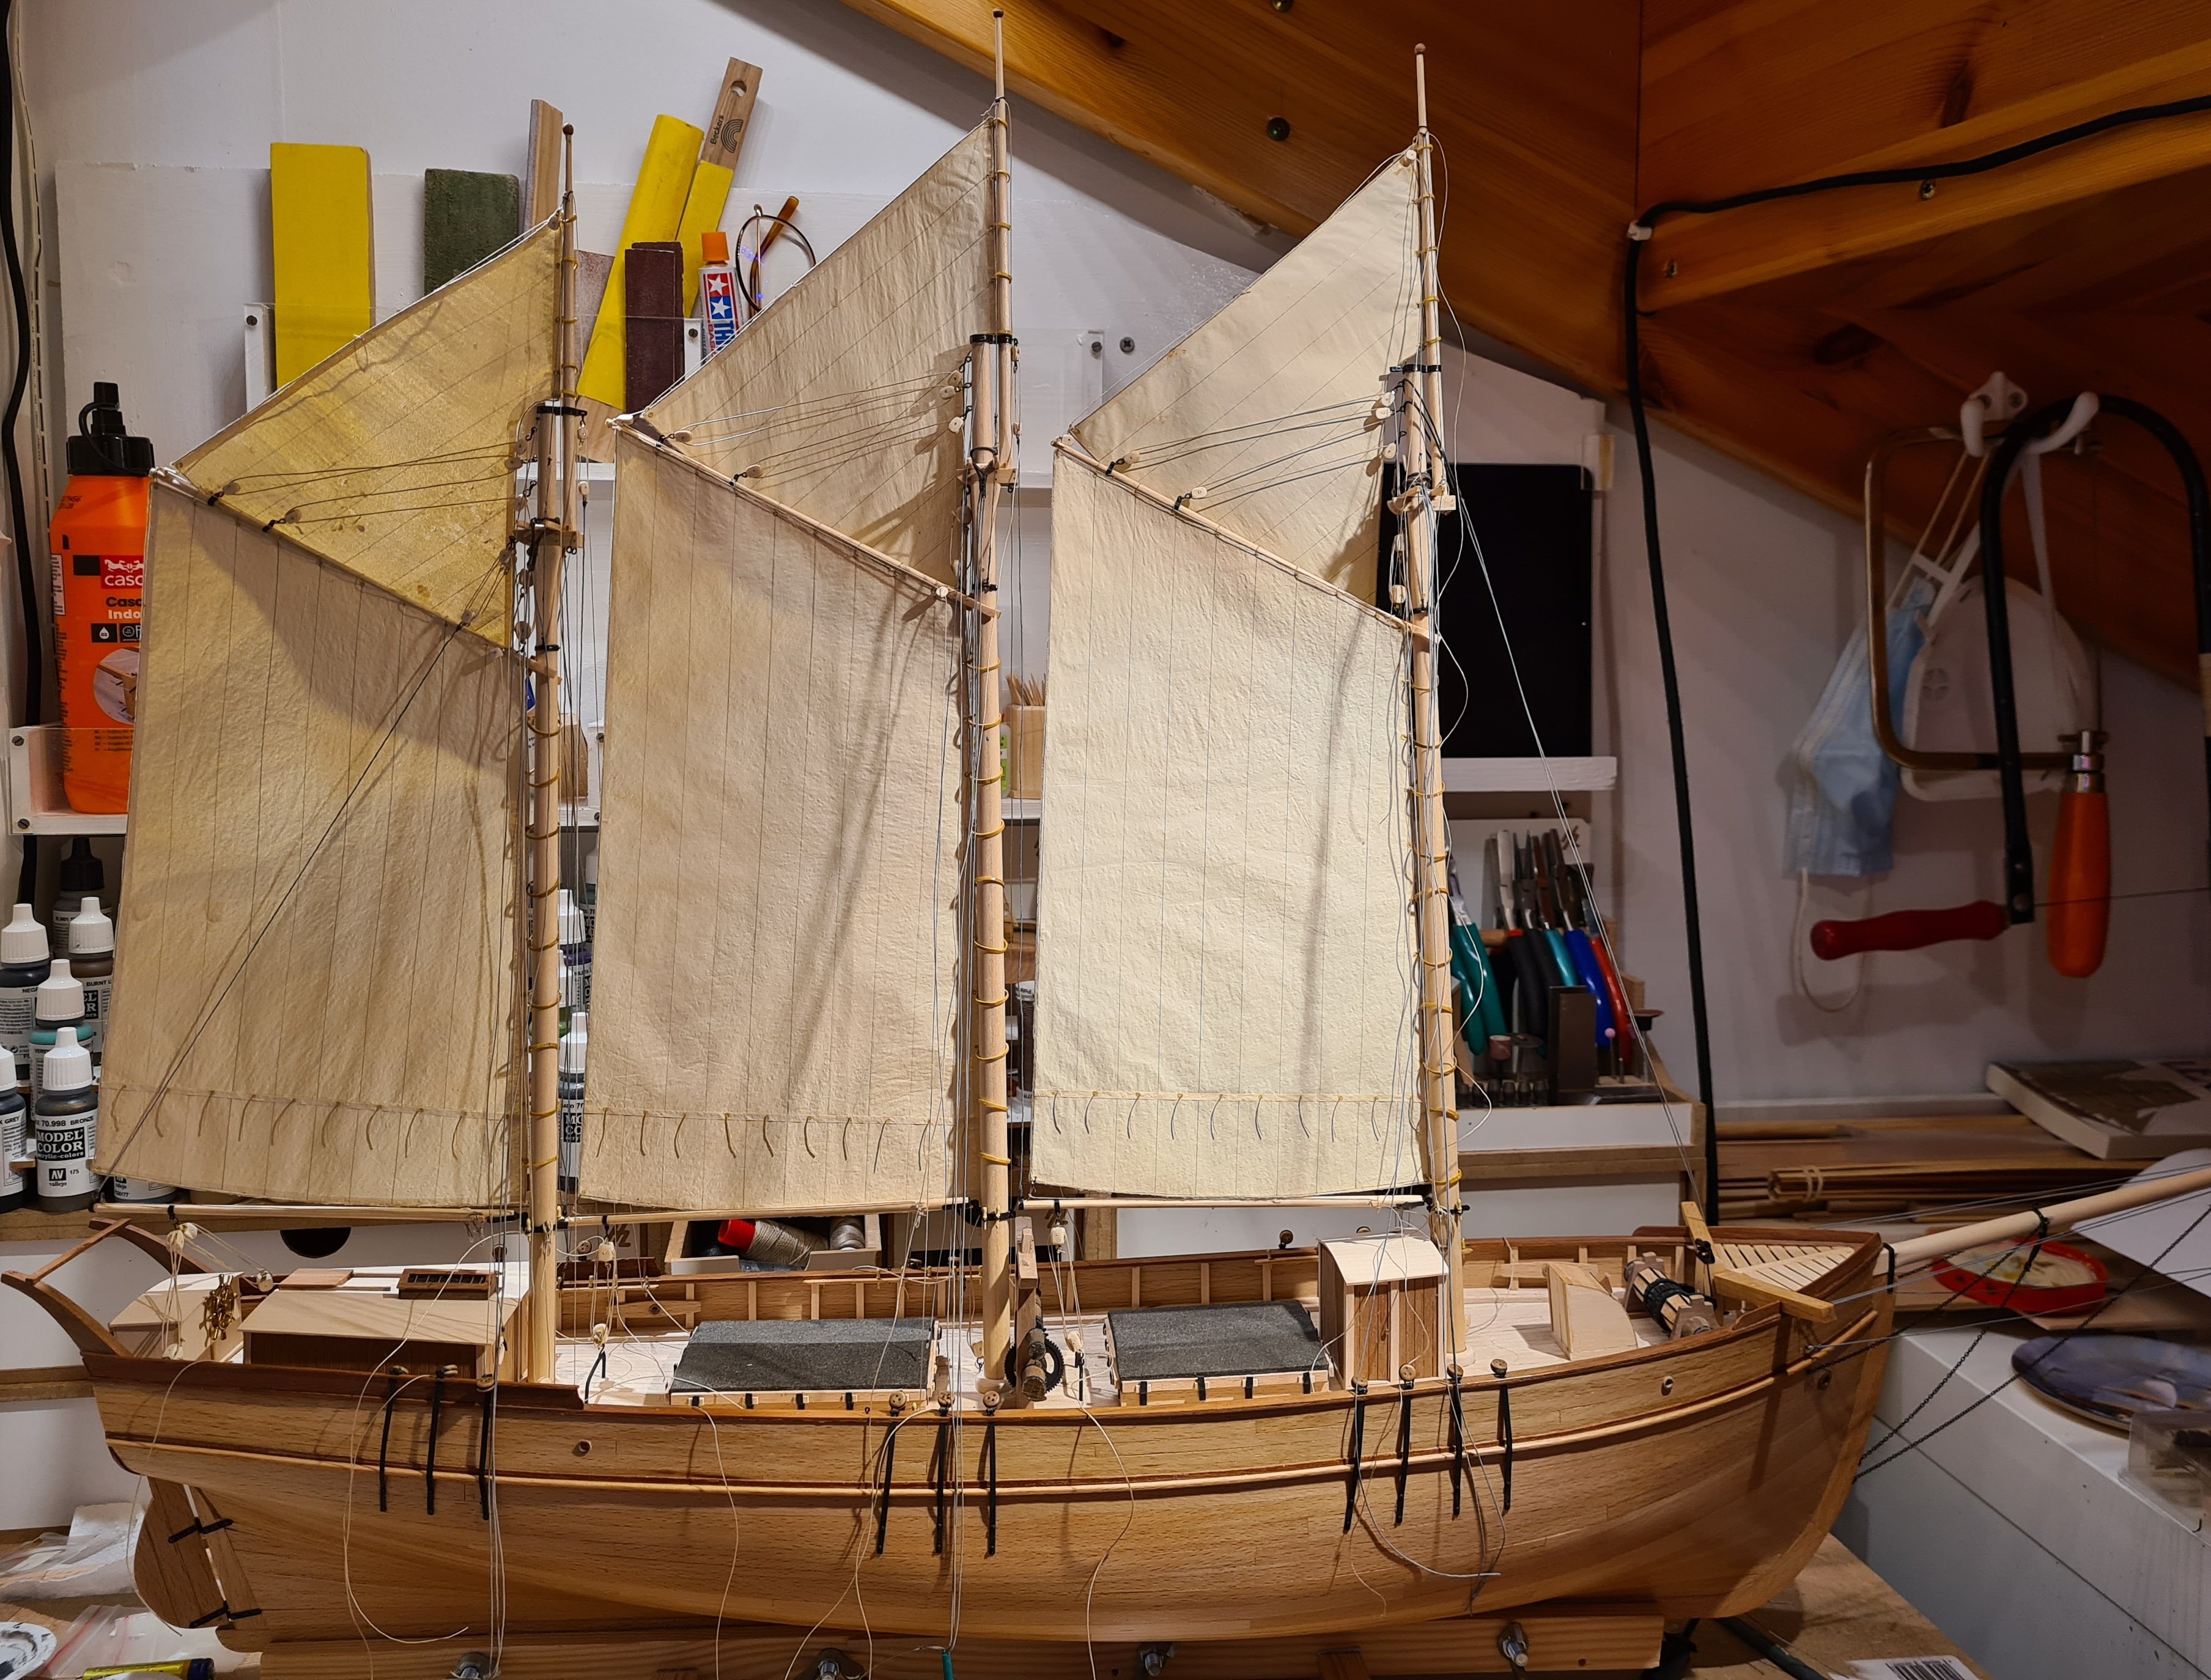
I continue in a slow pace. A few hours here and there. The masts got rigged separately and finished as far as possible off the ship. Then the mast where stepped onto the ship. I'm now working on belaying the lines of the running rigging.


- 118 replies
-
- 7
-
-
- billing boats
- meta 484
- (and 1 more)
-
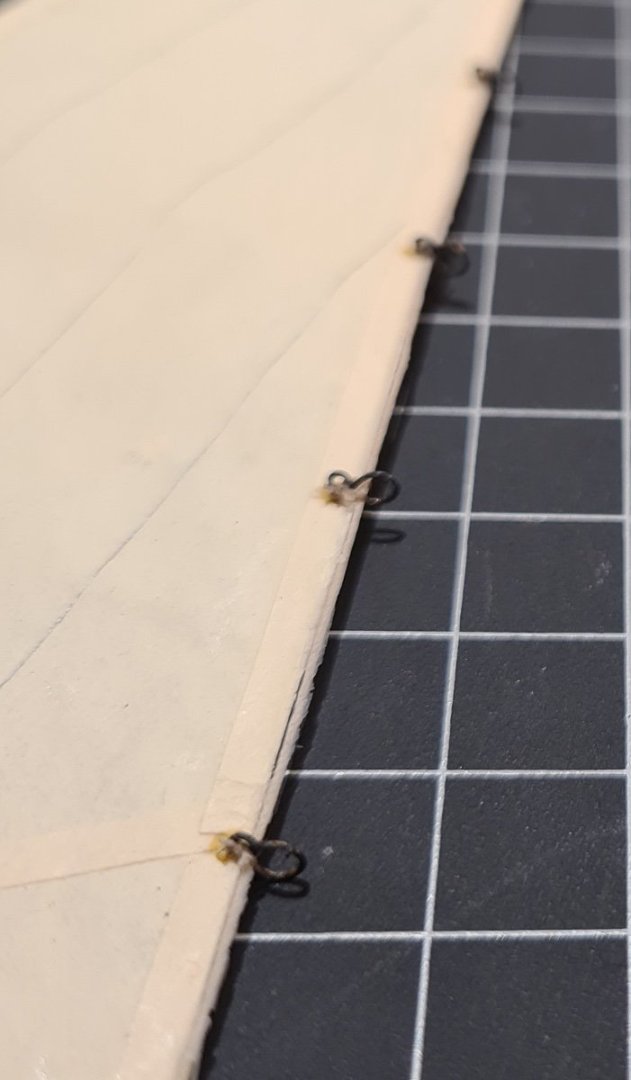
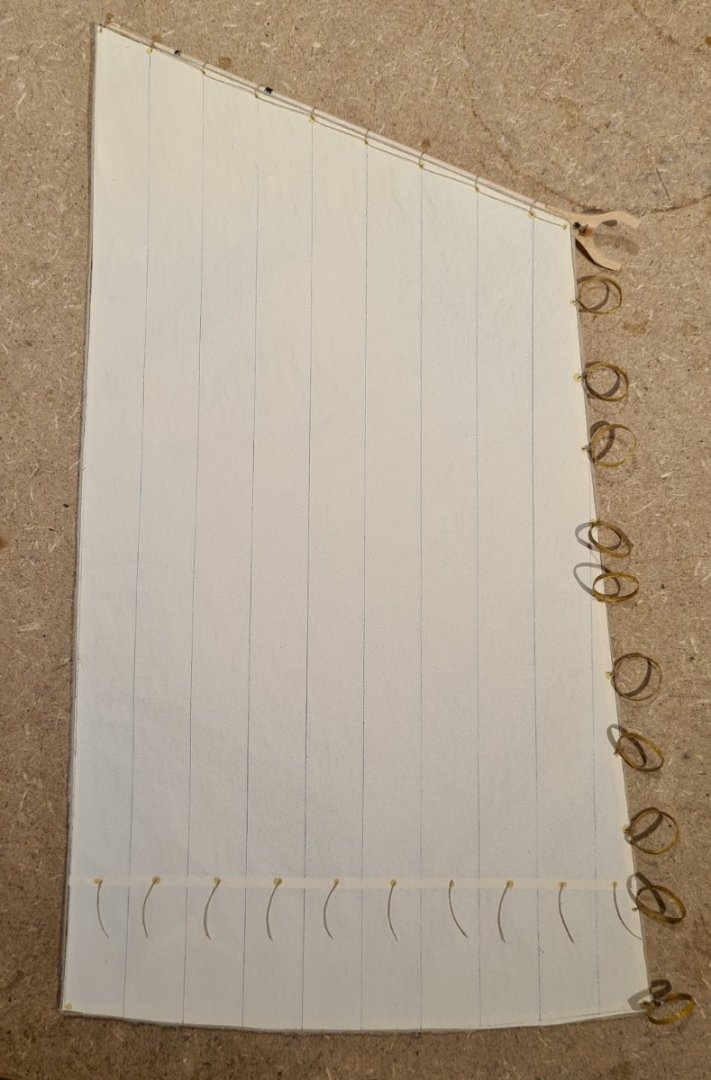
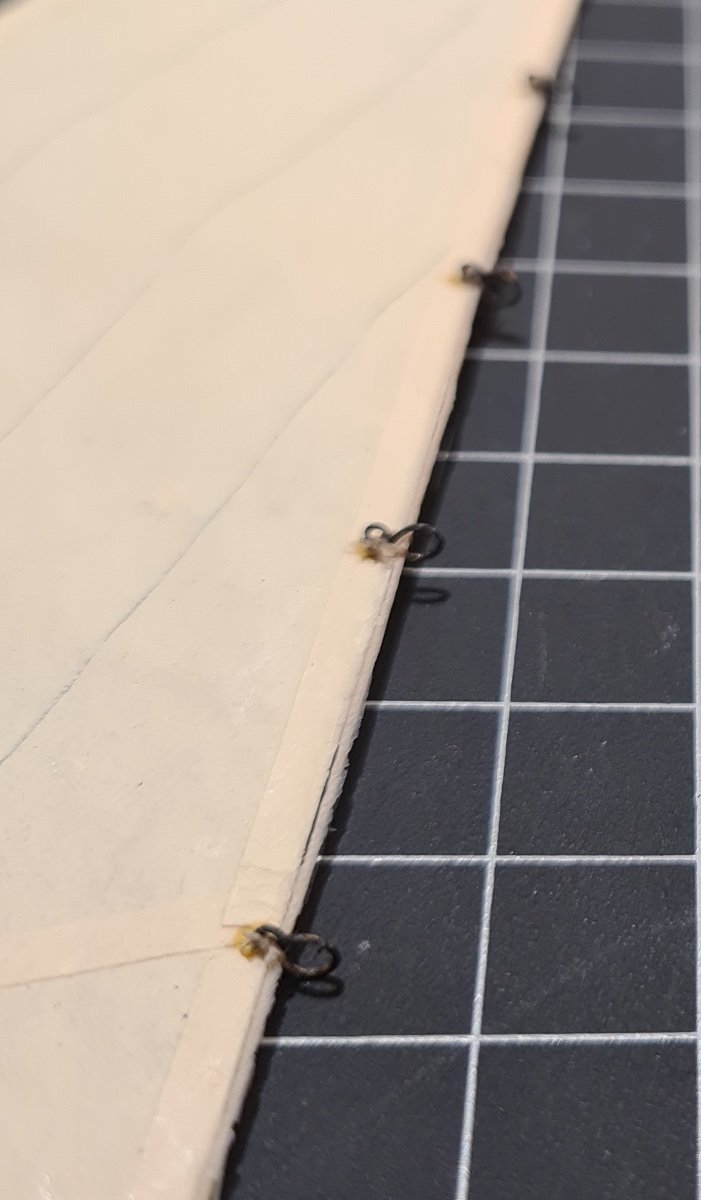
Yes, the bolt ropes are “edge glued” with diluted PVA glue. As you can see, I have not perfected the method. I will need to repair the glue bond in some places before I mount the sails.
- 118 replies
-
- 2
-
-
- billing boats
- meta 484
- (and 1 more)
-
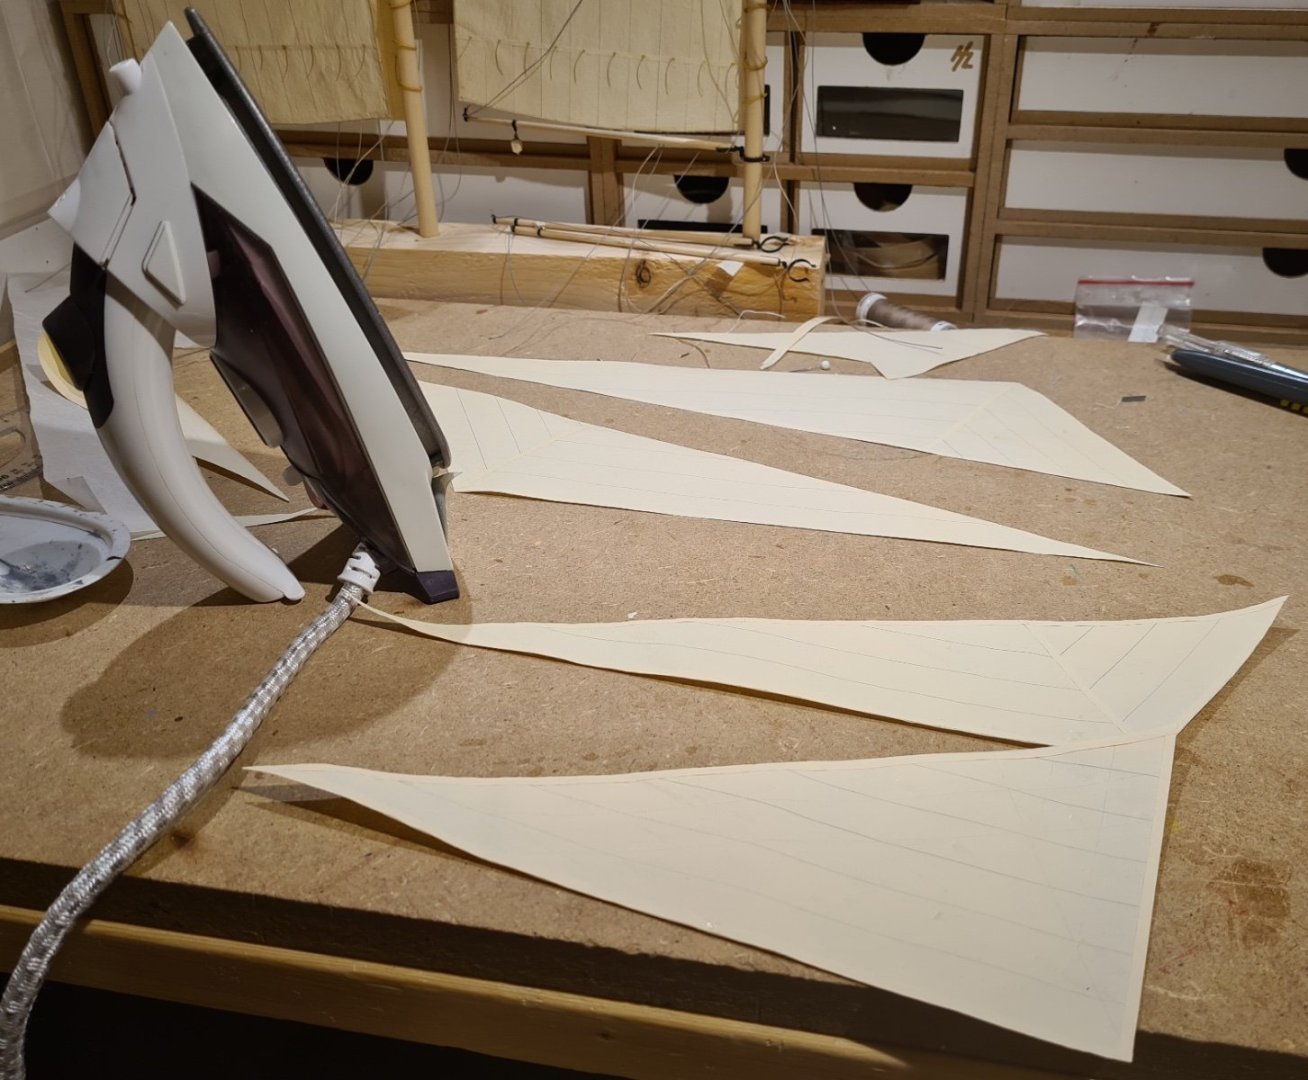
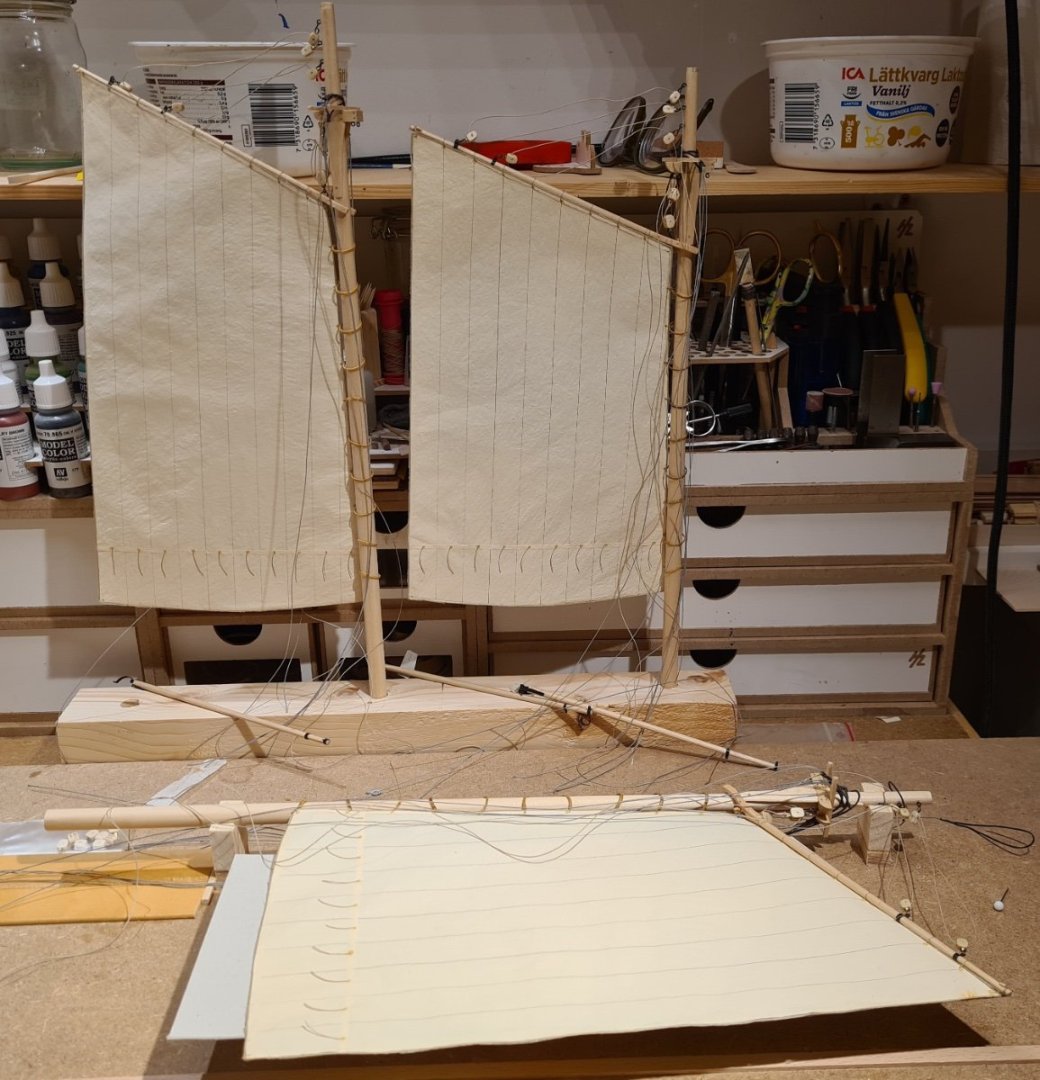
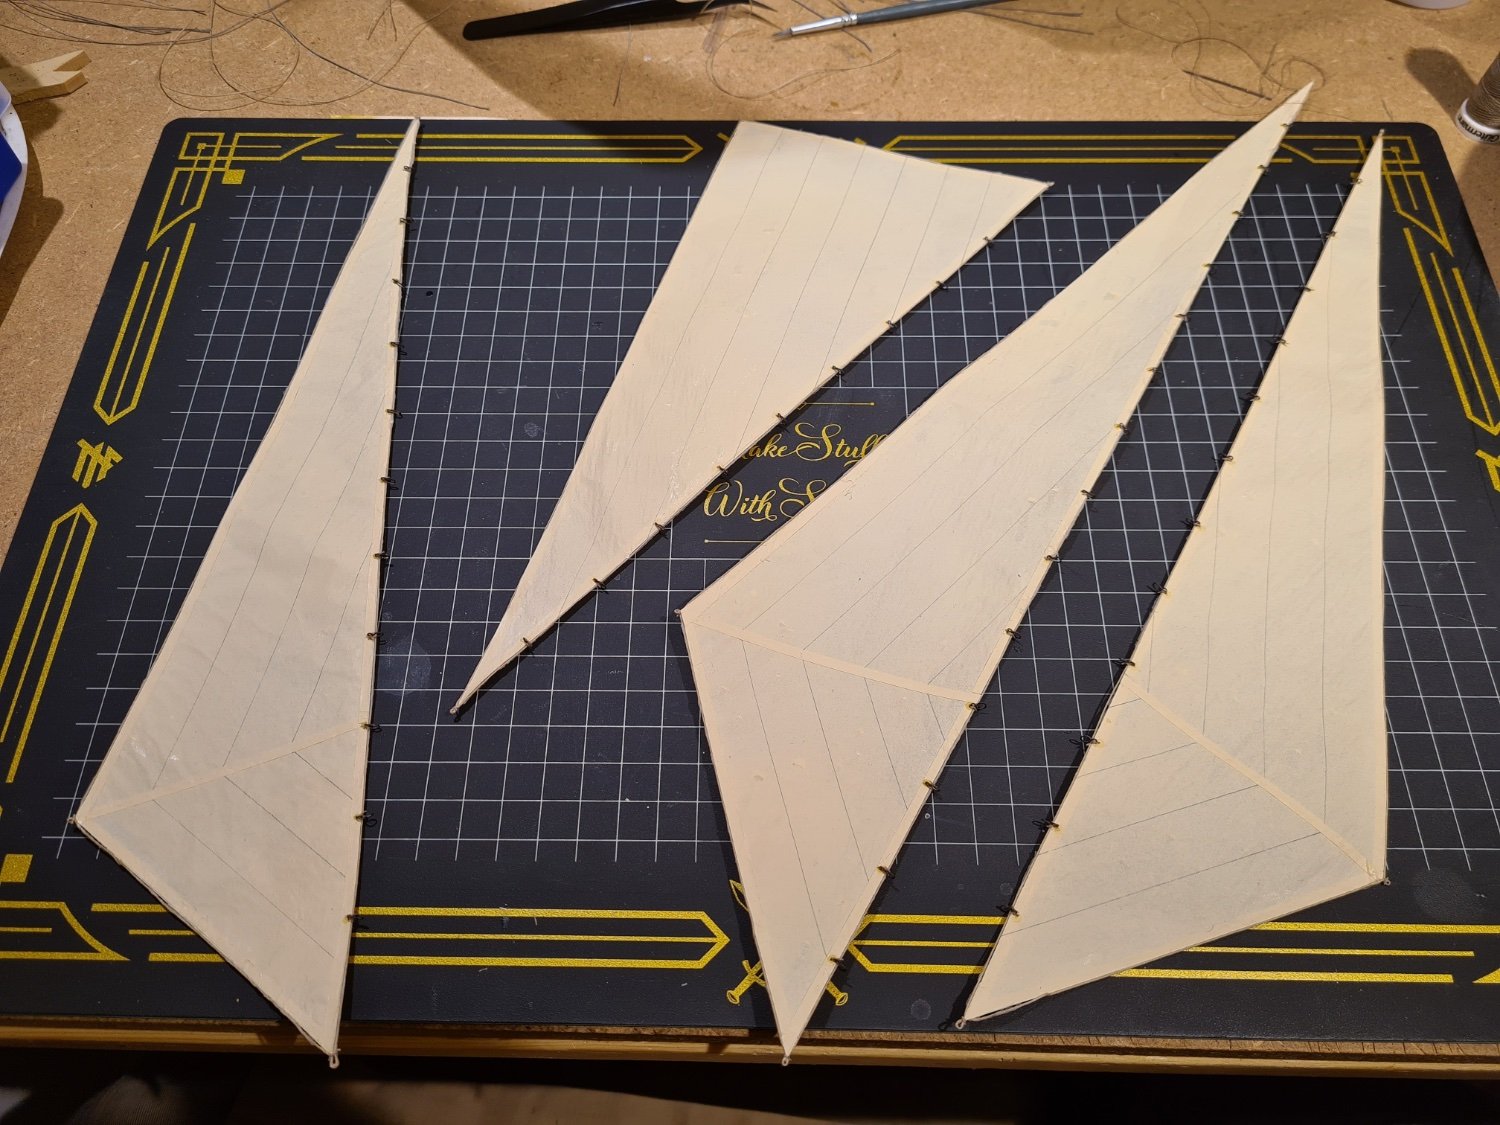
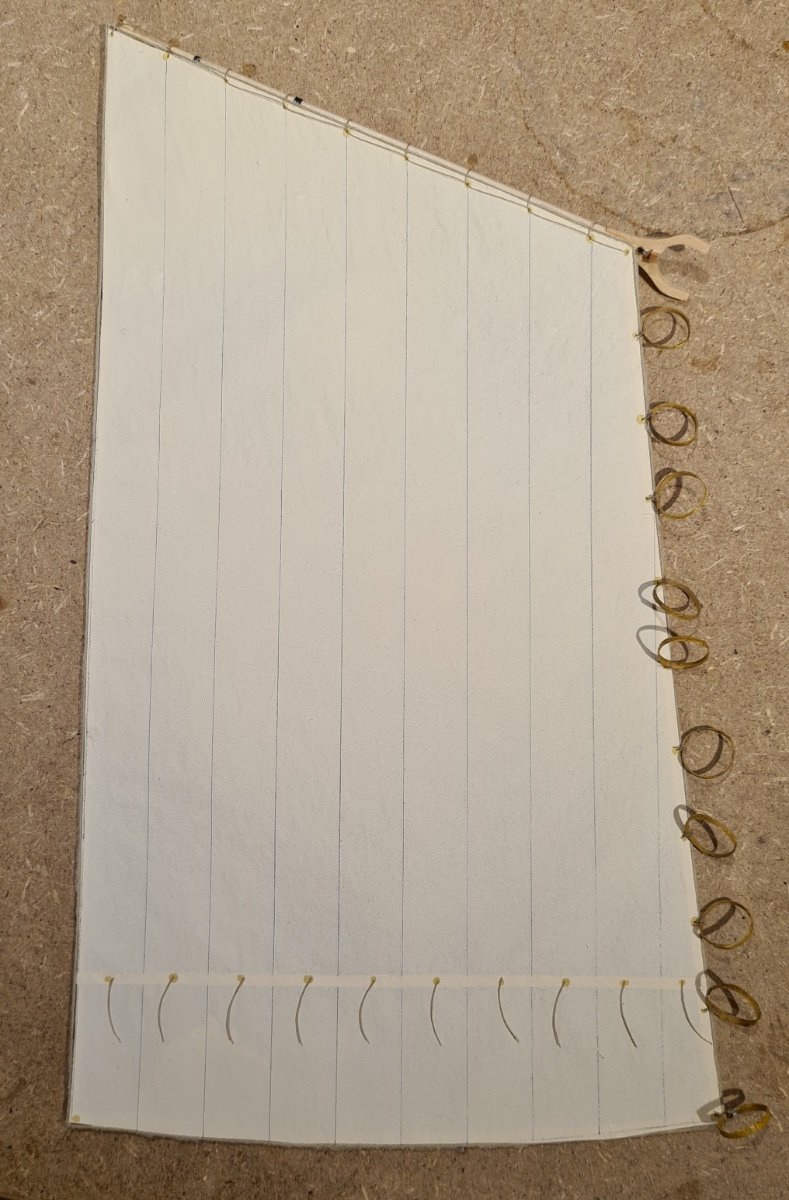
The stay sails ar now ready. They are painted, glued, ironed and then equipped with bolt ropes and hanks.


- 118 replies
-
- 4
-
-
- billing boats
- meta 484
- (and 1 more)
-
Thanks. I built a boat for my Will Everard from a kit by Mater Korabel. That was in 1:72 scale, so I'm thinking: How hard can it be to do it in 1:40? One reason I haven't started the boat is that I have used all of the 0.5 mm maple sheet I bought for that purpose for the deck and other details. I will provide more detailed pictures later. One thing I discovered when I made the templates for the sails was that I haven't prepared anywhere for the fore stay to attach! So I started to dig through my photos and books and discovered that the fore stay should be a double wire. I think I will run it through the grating and under the bow spit. Pictures will come later when I get around to it.
- 118 replies
-
- 3
-
-
- billing boats
- meta 484
- (and 1 more)
-
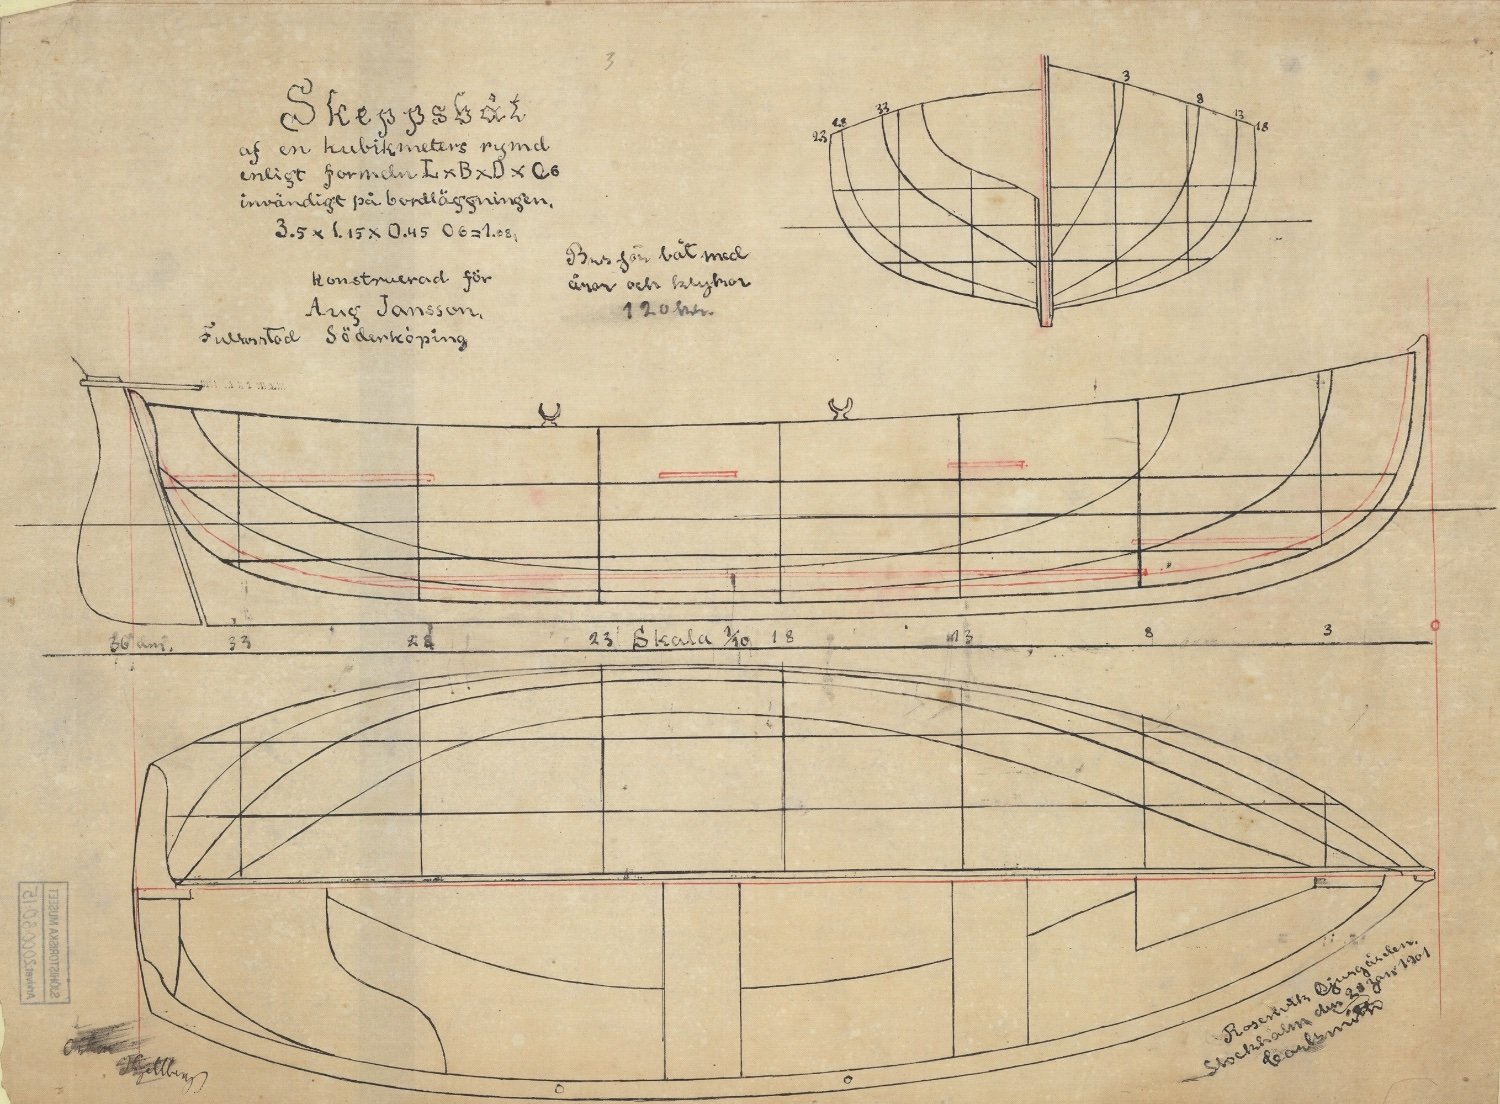
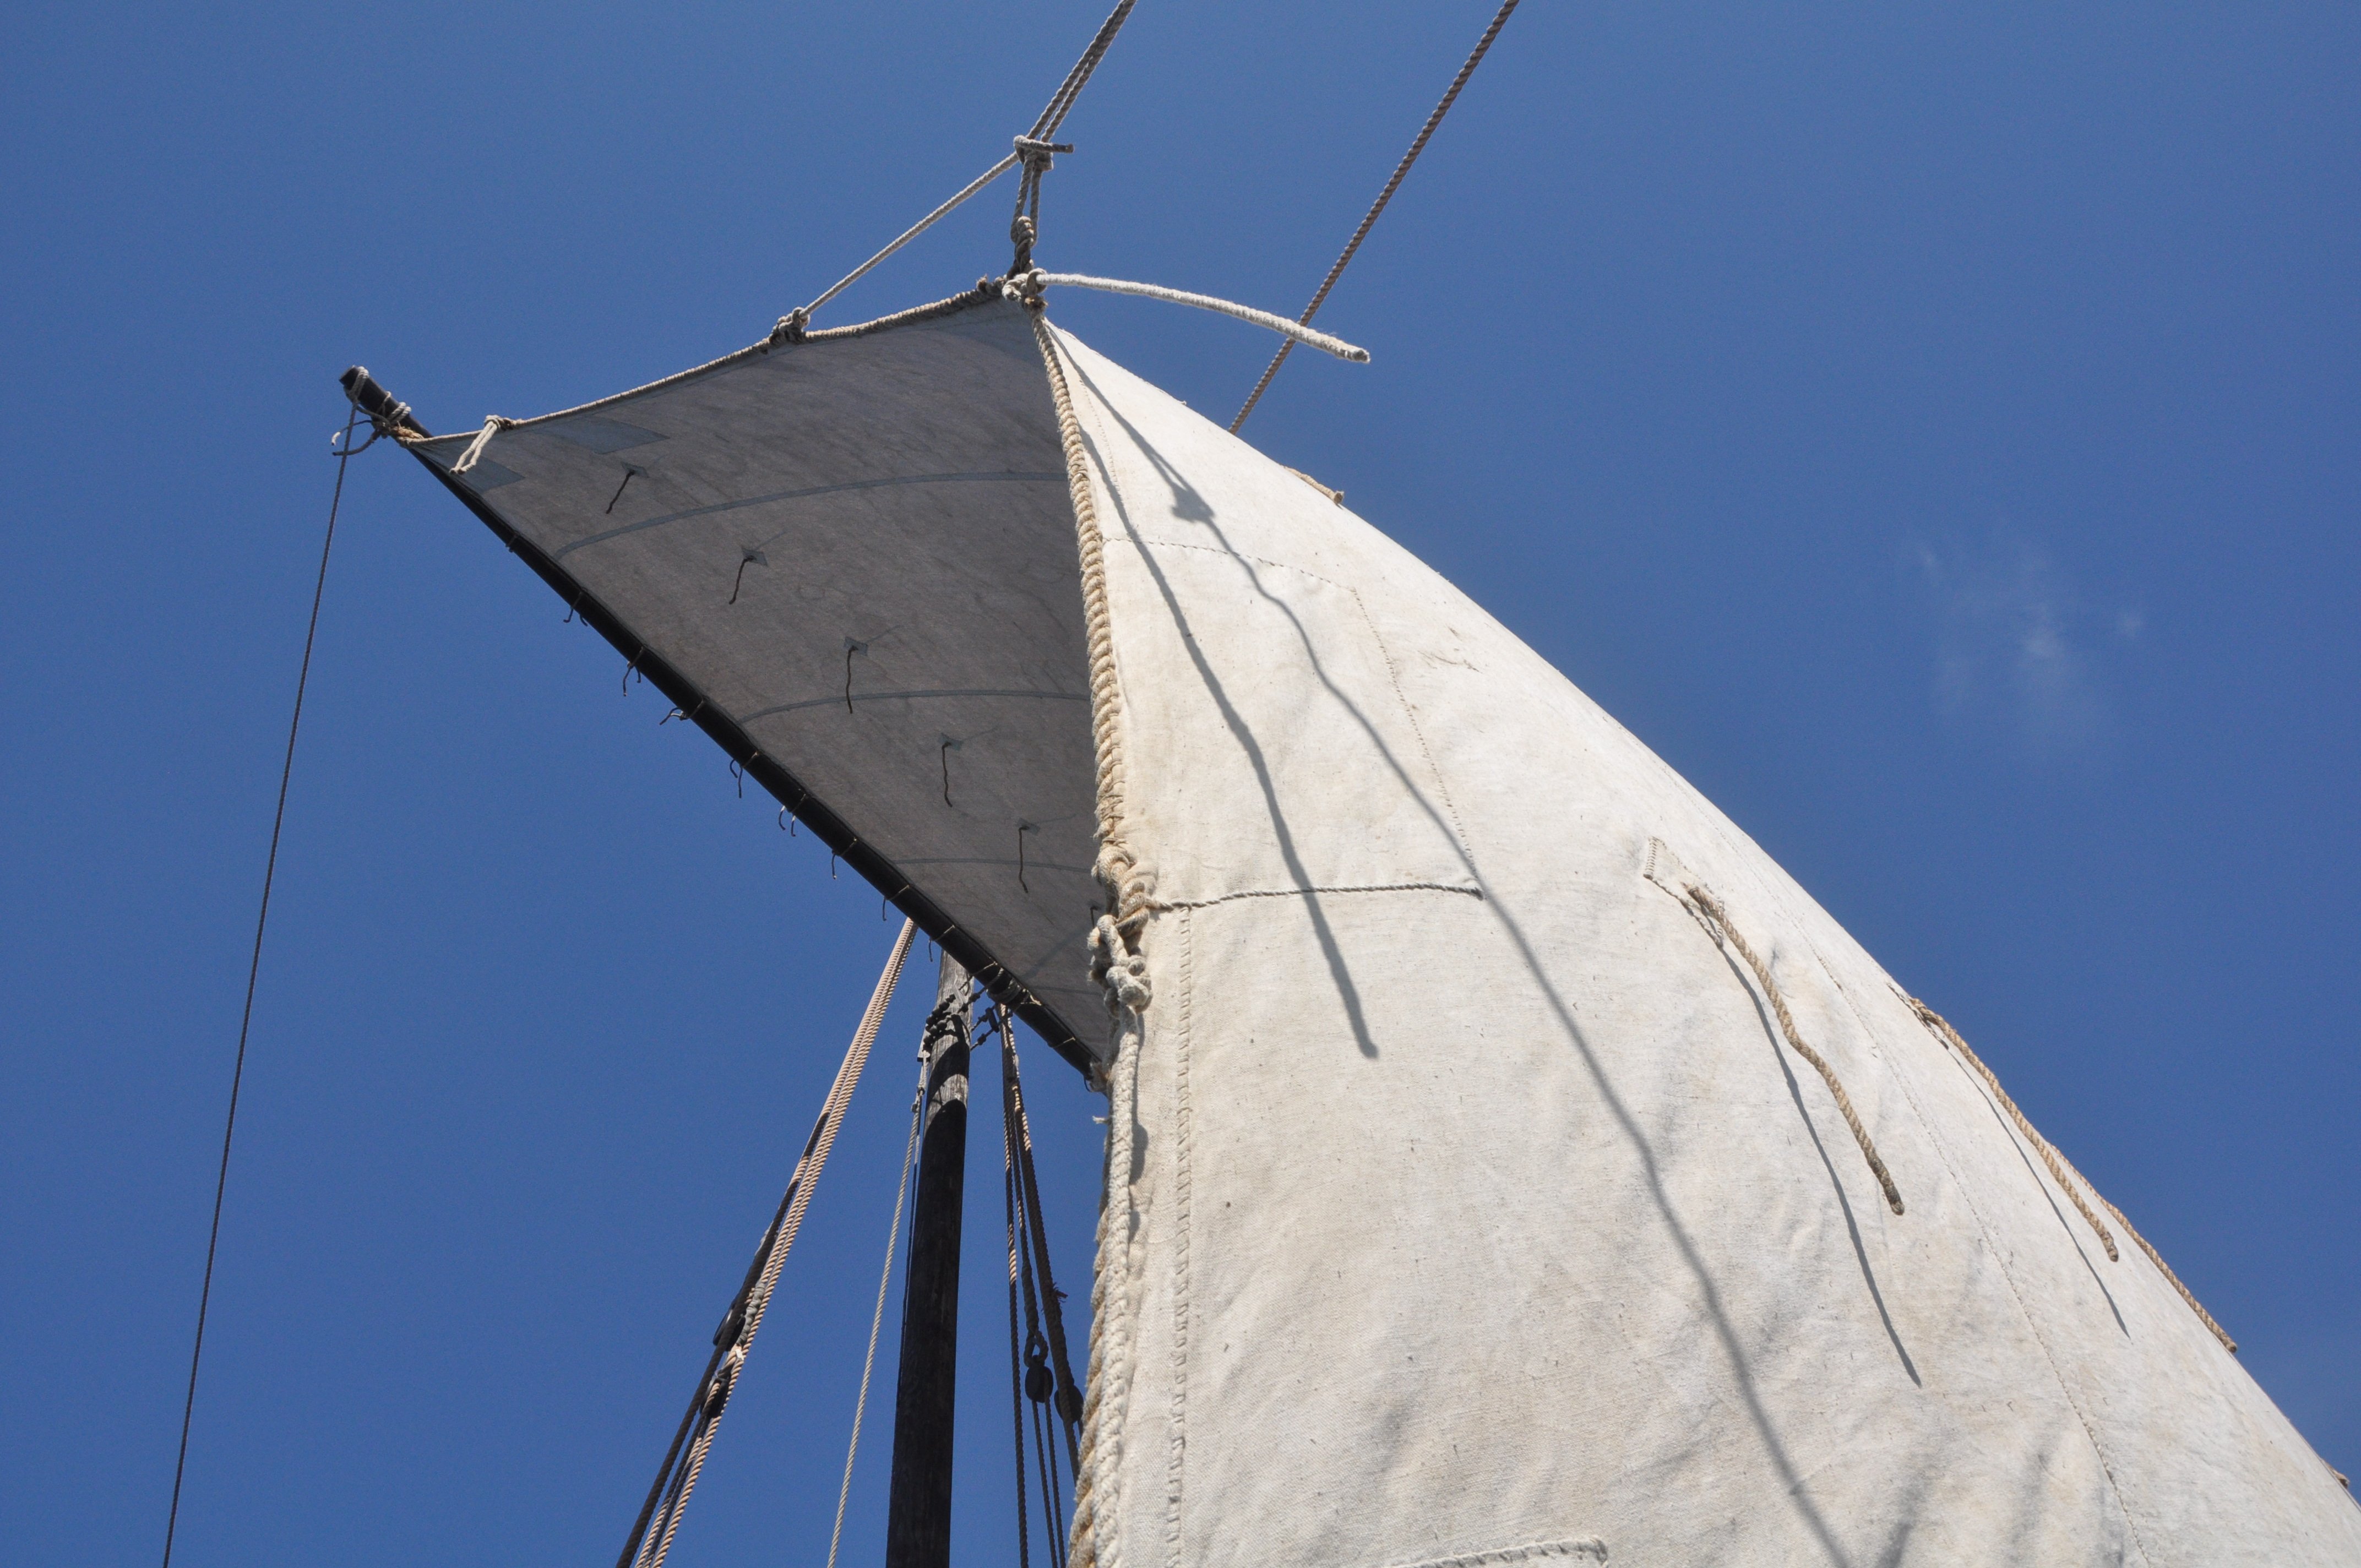
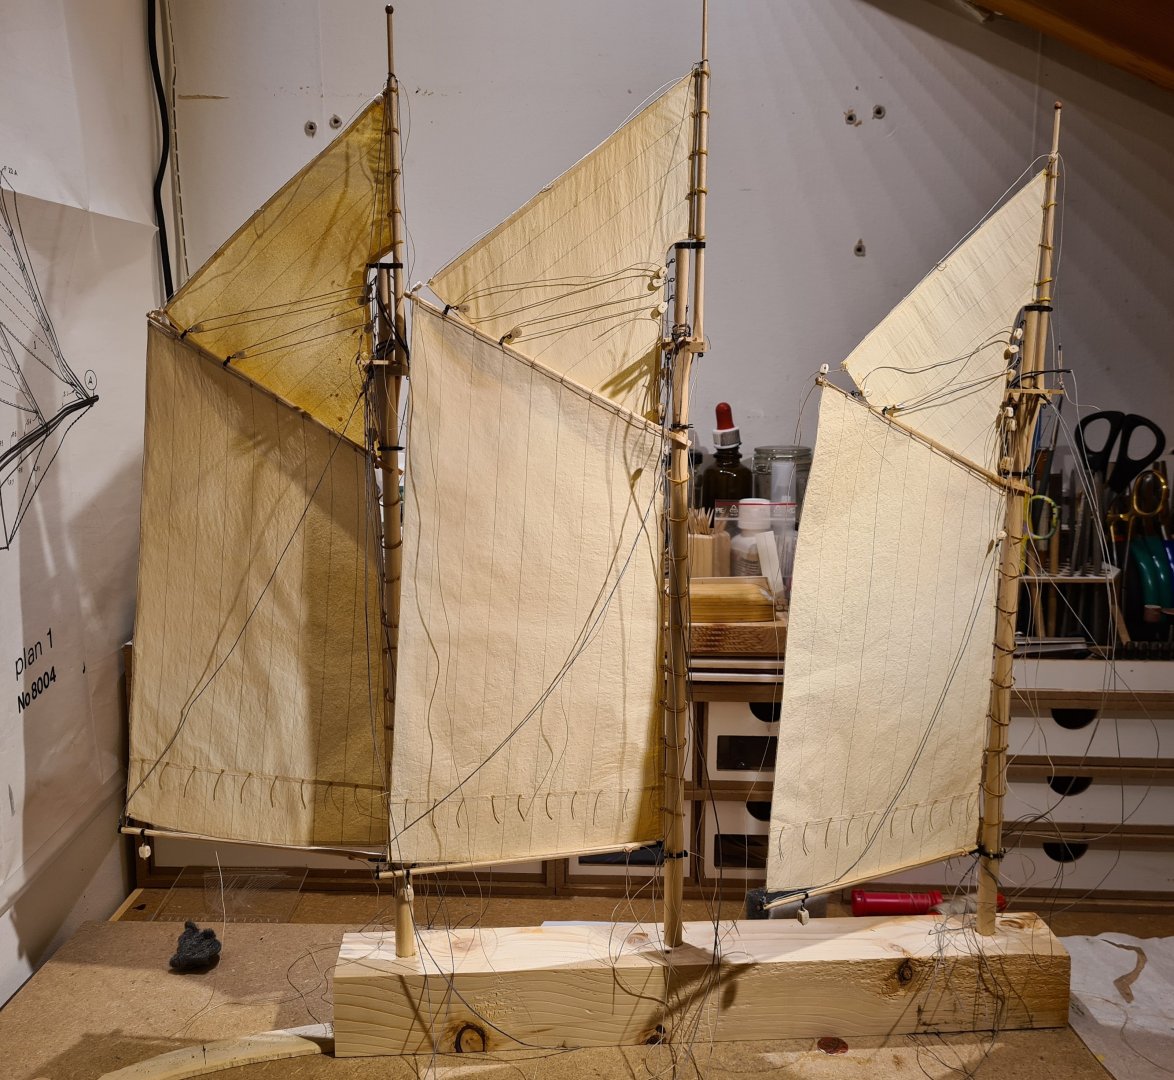
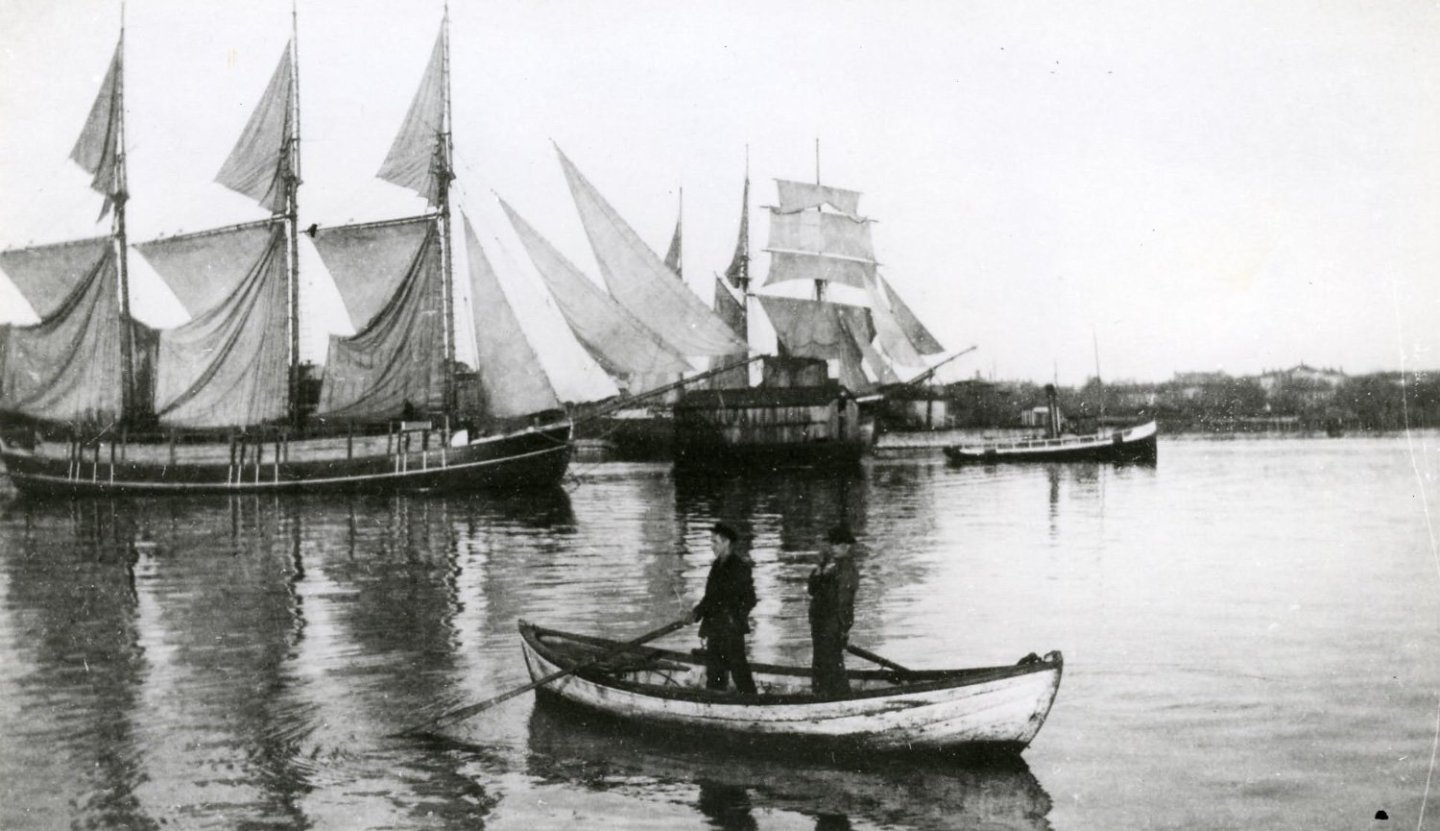
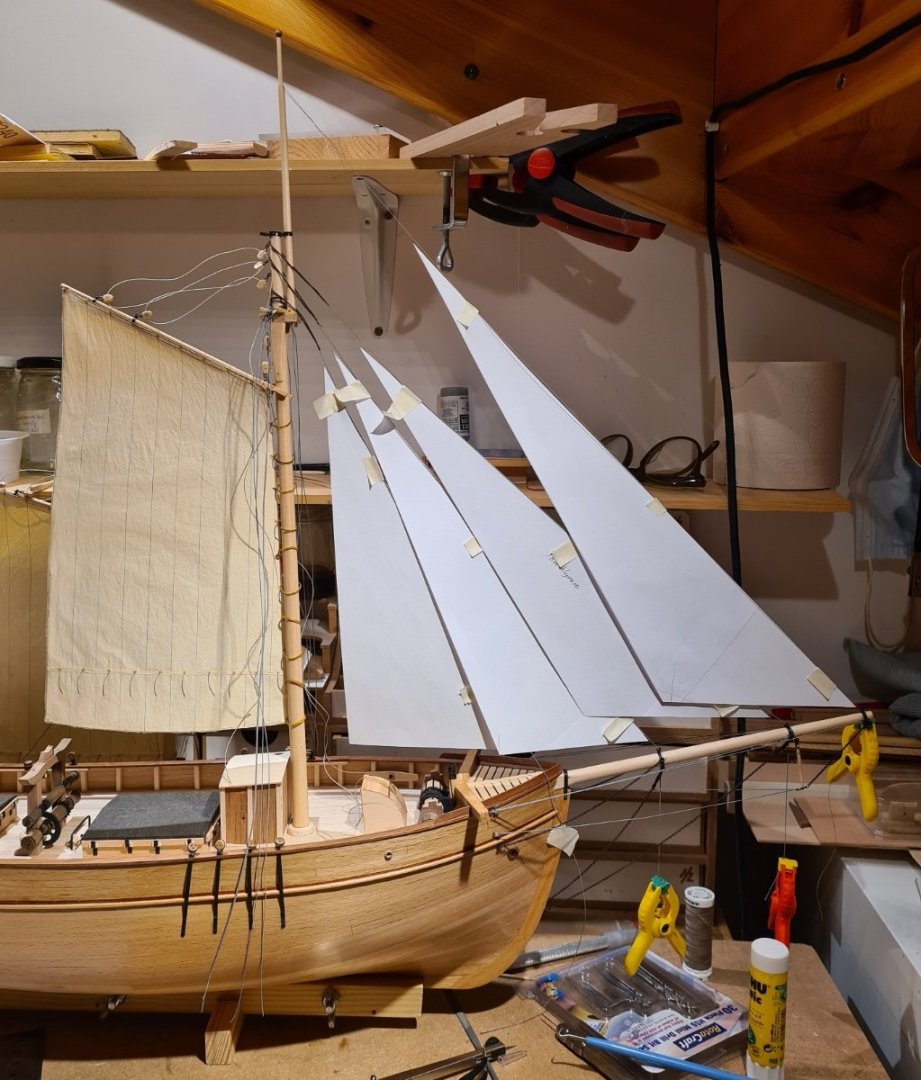
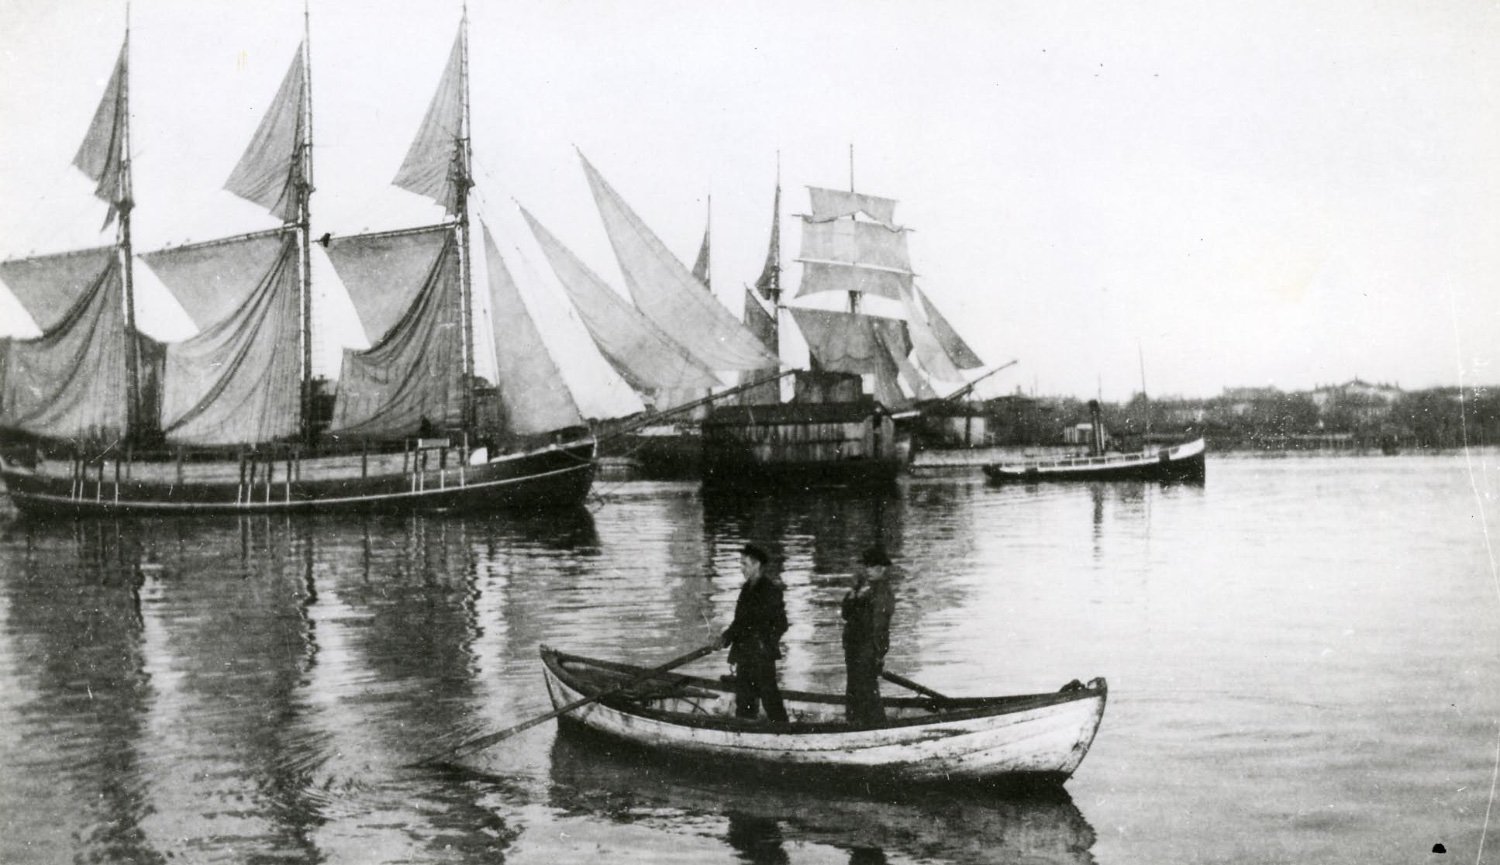
Since I only have photos of the original Metas rig I have not been able to determine the size of the fore staysail and jibs until now when I can step the mast and measure in place. None of the photos of Meta show here with the sails set. However the following photo seems to be close what it would have looked like. Here I'm part way through fitting templates for the sails. The inner and flying jibs still look a bit oversized, so I have later reduced them a bit.
- 118 replies
-
- 4
-
-
- billing boats
- meta 484
- (and 1 more)
-
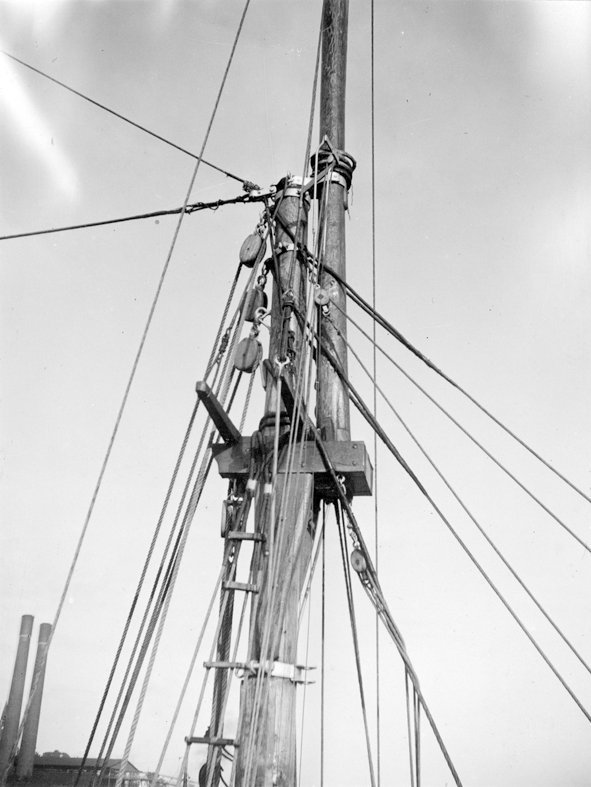
With the sails done I have all the parts to start rigging the masts. I will try do as much as possible off the ship. It should make it easier. I have made a simple jigg so that I can work on the masts when they lie flat rather than being horizontal. Most of the standing rigging would have been steel wire. I have chosen to use the rigging thread that I already have and paint it grey using acrylic paint, rather than using real wire. I think that will be a good enough approximation of the colors in the following picture. The wire lines have also been served as in the picture. Painting the lines also makes them stiffer, which I think is good.
- 118 replies
-
- 4
-
-
- billing boats
- meta 484
- (and 1 more)
-
Some slow progress was made during the autumn. The gaff sails and the top sails are now done and are ready to be rigged on the masts.
- 118 replies
-
- 3
-
-
- billing boats
- meta 484
- (and 1 more)
-
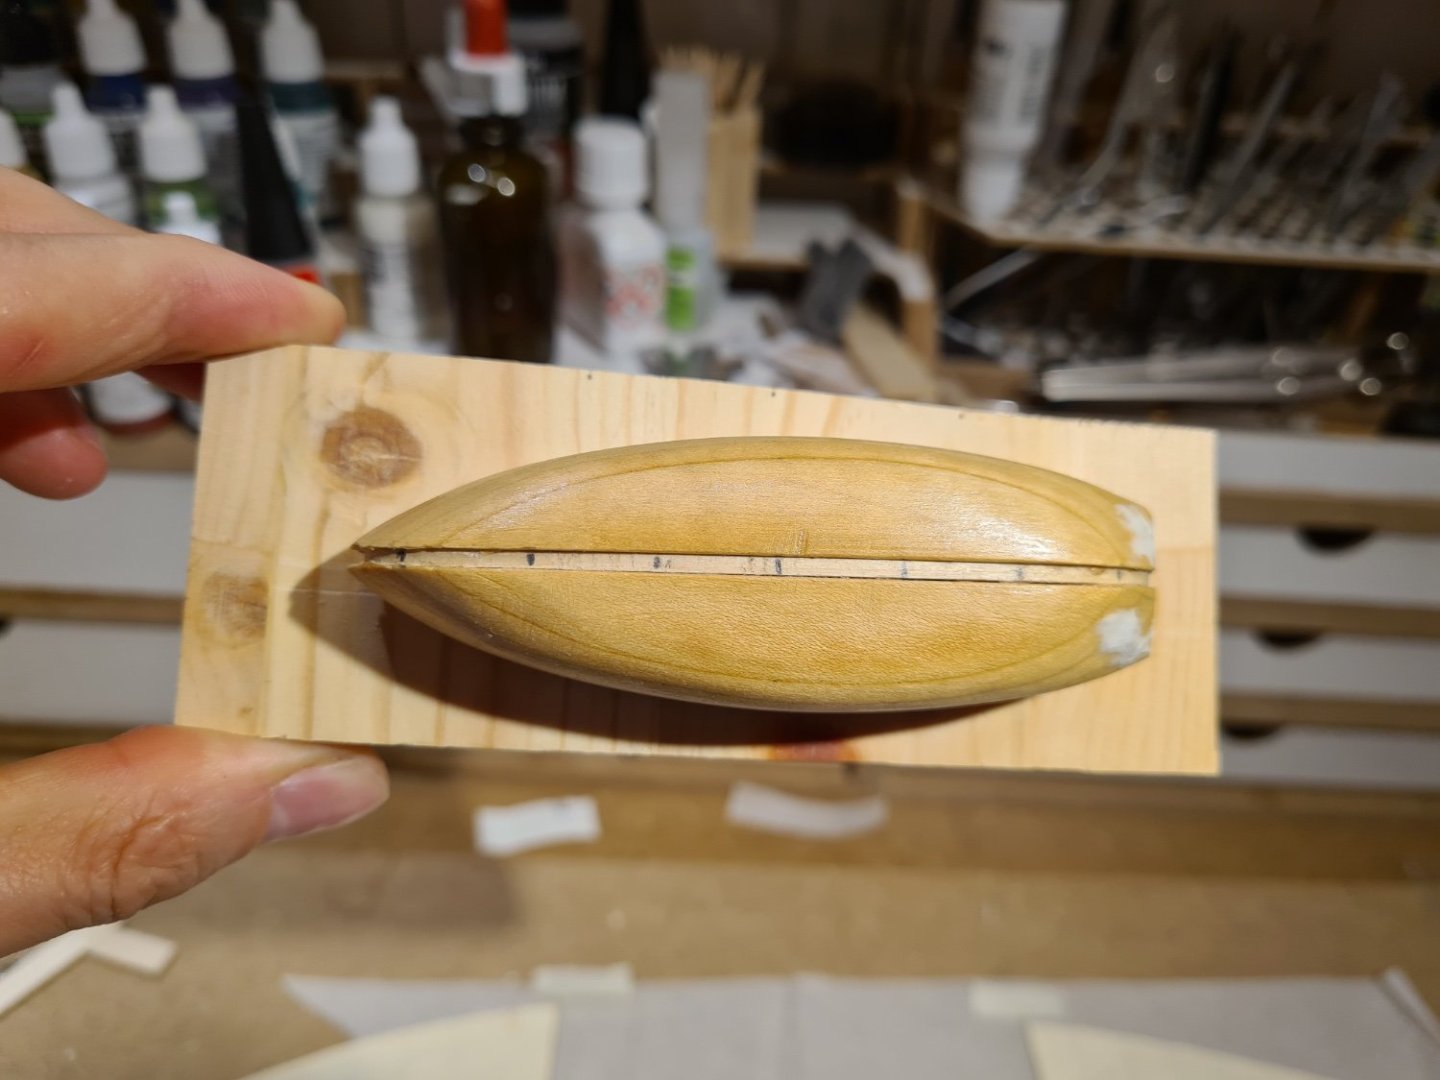
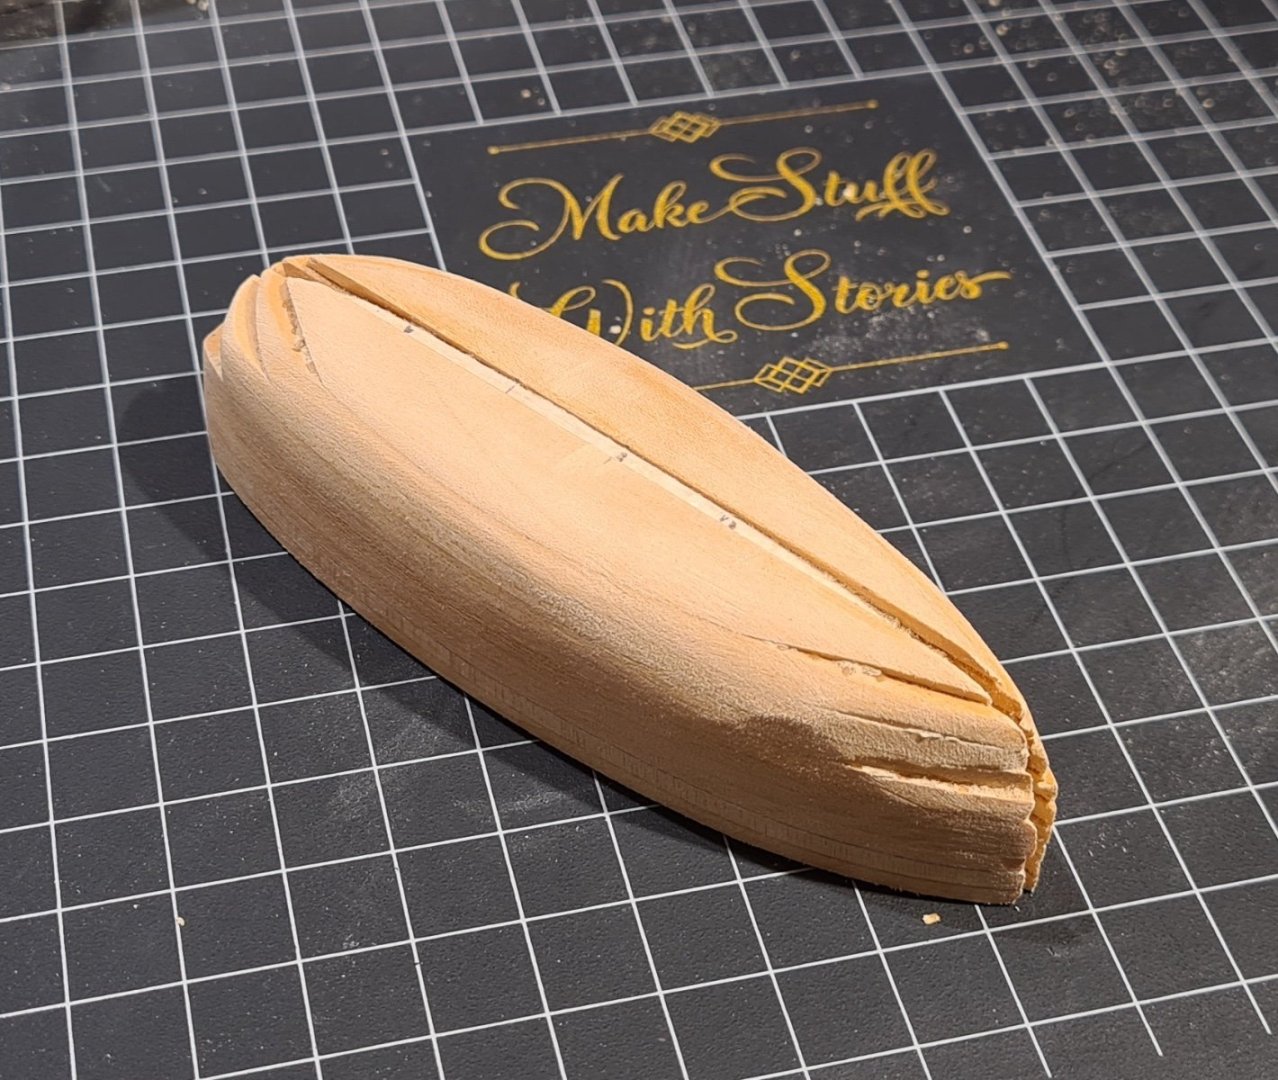
Long time since I posted an update. I have some progress to share with you all. A mold for the ships boat. It is based on a plan that I found at DigitaltMuseum. It's laminated from thinner strips and formed using files and sand paper. The final mold is treated with shellac, and I plan to wax it so that glue won't stick to it. I have also started with the sails. The are made in thin paper. The paper is nothing fancy like silk span. Just something a shirt I bought was wrapped in. The paper is spray painted in parchment color. The seams are marked with a hard pencil. In the picture below I'm gluing the edge rope (bolt rope?) to the top sails.
.thumb.jpeg.a68f221cc834d26d0d25a6f7ebf5a5f2.jpeg)

- 118 replies
-
- 7
-

-
-
- billing boats
- meta 484
- (and 1 more)
-
Thank you Per for your interest in my build 🙂 . I will answer your post in English, but also send you a private message on this site in Swedish. It is fascinating to hear from someone that has actually sailed on Meta. I would be delighted if you could share some of your pictures. It's quite easy to share them in this thread if you want. When you answer a message, click on "choose files..." I don't know if there are model builders that would take on a commission to build a Meta model. I would assume so, but I don't know of any one. Cheers

- 118 replies
-
- 1
-
-
- billing boats
- meta 484
- (and 1 more)
-
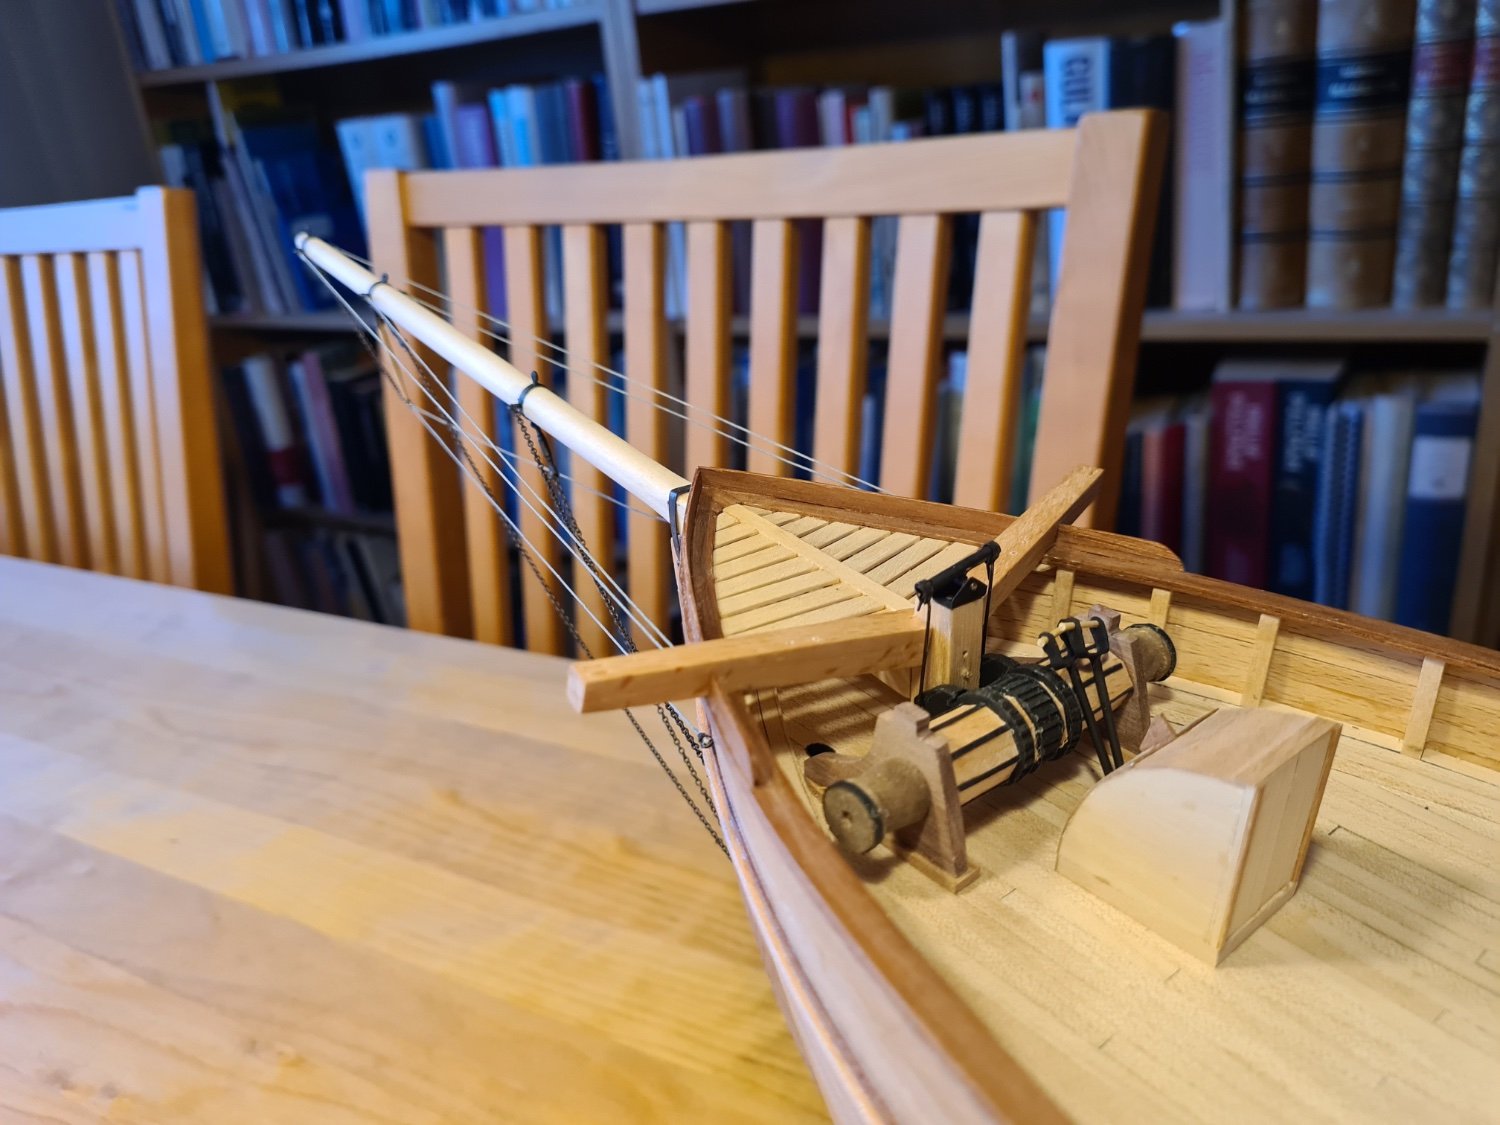
Today I installed the windlass. The handles are detachable, and I'm unsure where to put them. They where probably stoved when not used.

- 118 replies
-
- 7
-
-
-
- billing boats
- meta 484
- (and 1 more)
-
Pentikontoros by bolin - Navarino - 1:50
bolin replied to bolin's topic in - Kit subjects built Up to and including 1500 AD
During easter we visited our vacation home again (where I build this model). I only had time for a brief building session, so not to much progress. I have started assembling the two halves of the hull. It is done by gluing pre-cut pieces on to each other in a sandwich fashion. The only potential tricky thing is the alignment of the pieces. The instructions, at least in the English translation, uses a lot of words to say that the second layer shall protrude 13 mm in the fore beyond the first layer, the second layer 11 mm etc. It's hard to write good instructions. In this case, and at least for me, fewer words and more diagrams would probably have made them easier to follow.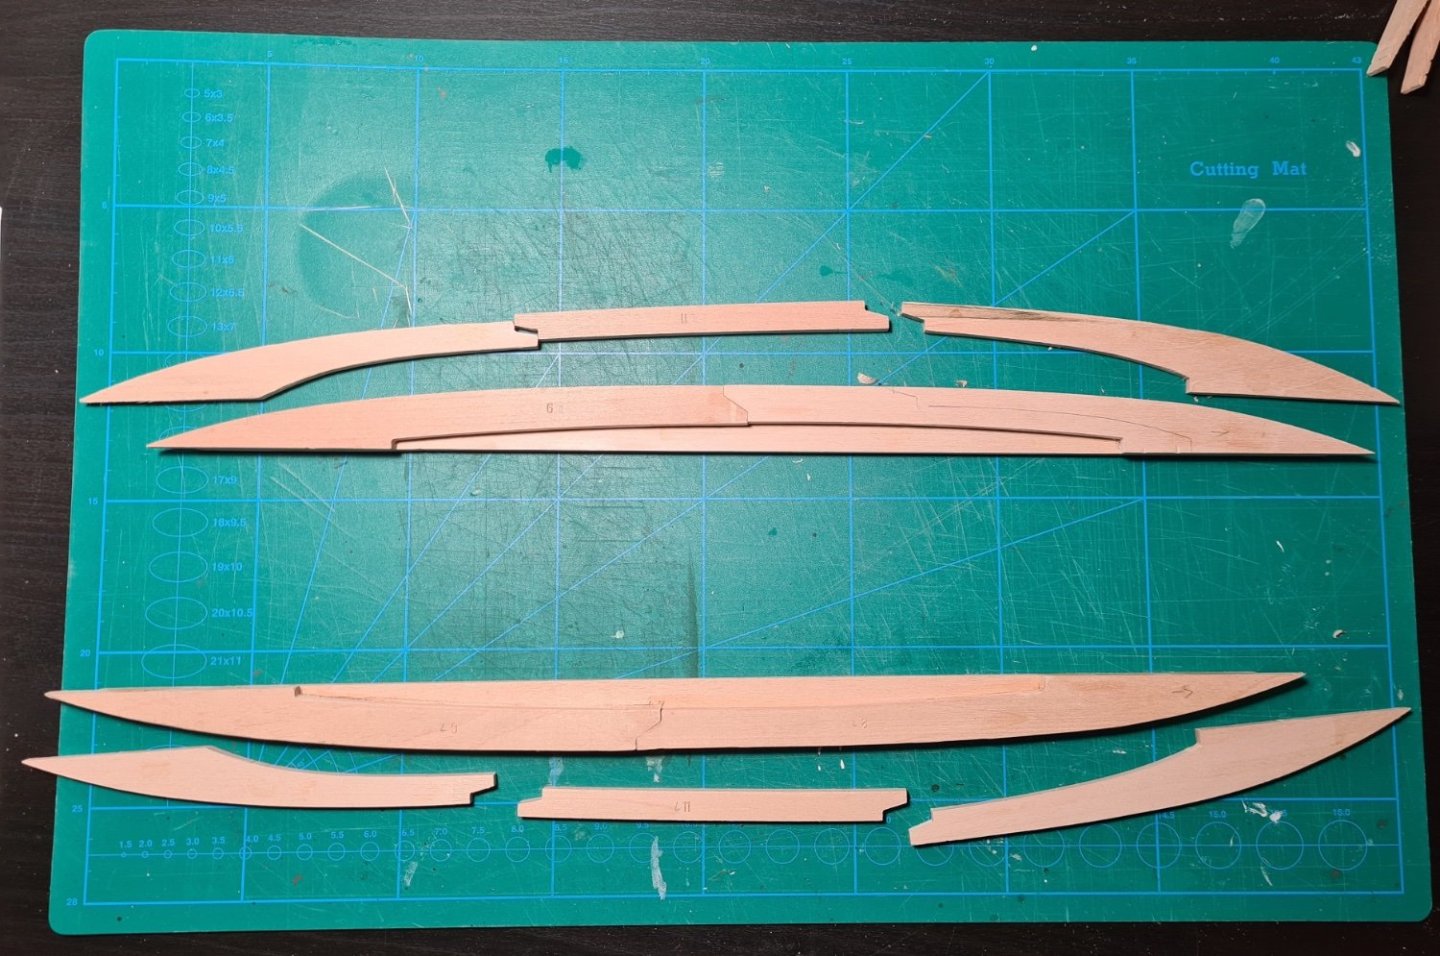


.jpeg.b6c8cfb1c8e6766cd98237afa9671b39.jpeg)