HOLIDAY DONATION DRIVE - SUPPORT MSW - DO YOUR PART TO KEEP THIS GREAT FORUM GOING! (Only 20 donations so far - C'mon guys!)
×


Egilman
-
Posts
4,377 -
Joined
-
Last visited
Content Type
Profiles
Forums
Gallery
Events
Everything posted by Egilman
-
 Thanks dennis, yeah that kit has been redone many times over the years and remains a popular kit for those on a lower budget... Thank you for the compliment... One of the points of using RnB is that it never loses it's reflectiveness, according to Paul, his birds retained their shine and reflectiveness for 25 years on his first one and his B-29 looks the same as it did when he finished it... (20 years ago) if anything they seem to age the same way the metal ages when protected, the color will just darken slightly according to him...... I don't know, it's going on my shelf right now and if it's still around in ten or so years I guess we will see... Next one will be a smooth skinned bird...
 -
Thanks Ken, I obtained a Tamiya P-51D, I'm gonna do a Red Tail scheme for her... but I also want to do it justice... so it might be a bit....
-
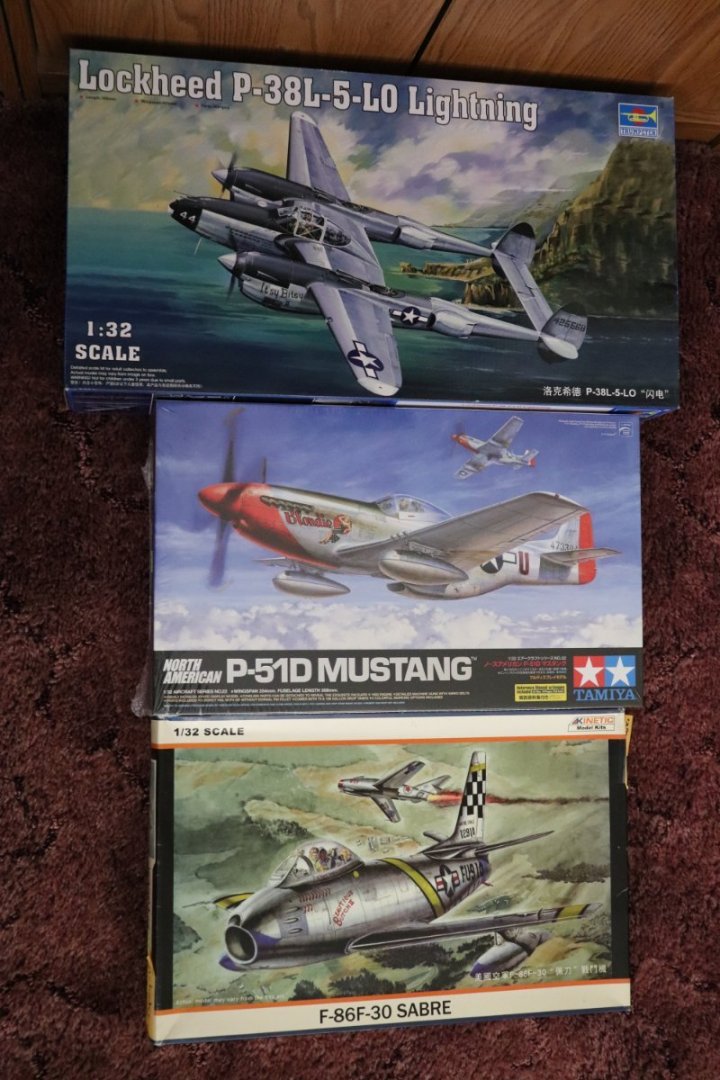
Now, with the P-51 experiment done... I feel it's time to do another experiment, I've confirmed a few basic things... #1 Rub N Buff is easy to apply... (use rubber gloves, it comes off the fingers with IPA, but it will transfer to whatever you touch so gloves can be removed before handling anything) #2 Apply it thin, very thin, rubbed in with a fingertip... #3 It can be applied over anything... #4 If you want a smooth shiny reflective surface apply it over a smooth glossy surface... The higher the smoothness/gloss the higher the shine/reflectiveness... #5 It can be sealed with Future without damaging the reflectiveness and only a very slight change in color.. (not really noticeable) #6 It can be decaled over directly, Micro Sol/Set doesn't effect it... (but I would personally over coat with future first before decaling) Pretty much everything else about building a model remains the same.. No change... The deficiencies of the kit I chose made for some issues in the finishing of the P-51.. Of course it was chosen on a cost basis in case the experiment failed.. But it didn't fail, In fact it came out much much better than expected... But before I go to town on my F-104 Blue Jay 4, I really want to be confident in the process... so I'm going to do another test build... This time a complete BMF bird... The only paint will be details... Two days ago I had a chance to visit the only local Model Shop local to me... Skyway Models in Skyway WA... I grabbed about ten varied models that I need for my collection... Five of them will easily lend themselves to a complete BMF... The other two are the HK models B-25J glass nose and the B-17F... (I didn't include the pics of these cause I probably won't be using them as an experiment) So I've narrowed down to the three above, and as much as I'm familiar with the P-51 now, I probably won't be doing that one either... So I'm left with the F-86 and the P-38... Both are favorite aircraft of mine... I'm leaning towards the P-38 at this moment but the F-86 is a draw... I have nothing in extras for the 38, I have a cockpit and instrument panel and masks for the 86... Enough to do a decent build on her... Anyway, out of those two, which would you like to see in Rub n Buff? EG
- 139 replies
-
- 12
-

-

-
That looks good, excellent in fact, like a newly minted Patton just issued to the troops.. it hasn't had time to fade out yet... if you want to give it a couple of months in country, throw some brown dust on it, that's all you really need... And the tracks? throw a brown and rust wash on them, they were rubber cleated so there wouldn't be a lot of shine to them anyway... Really, really nice job in my opinion... Not all armor has to be mud gooped up to look good... (and this looks very good my friend)
-
Porsche flat 6 boxer engine by kpnuts 1/4 machine works
Egilman replied to kpnuts's topic in Non-ship/categorised builds
I always put them on a new line brother, put the text above and below if that is what you mean... I like your stippling brush, well used is good for some very special effects... Stiff and scrubby but not so stiff as to scratch.... Gives that chipped area of paint effect and layering gives the surface, undercoat, primer, bare metal effect of prolonged wear... Old technique but still the best technique... And you use it like a master of it... The pics prove that.... Nicely done... -
Ok Jav, Just to let you know I really mucked up the canopy, that liquid cement, aluminum paint, glue fingerprint thing... So I'm going to show the best side if it and call it done... High flash on a white base.... And one in natural light.... I already have acquired a Tamiya P-51D to do a display bird in this finish, I won't have to deal with the rivets anymore... I think it came out ok for what it is, my first decent BMF... EG


- 63 replies
-
- 11
-
-
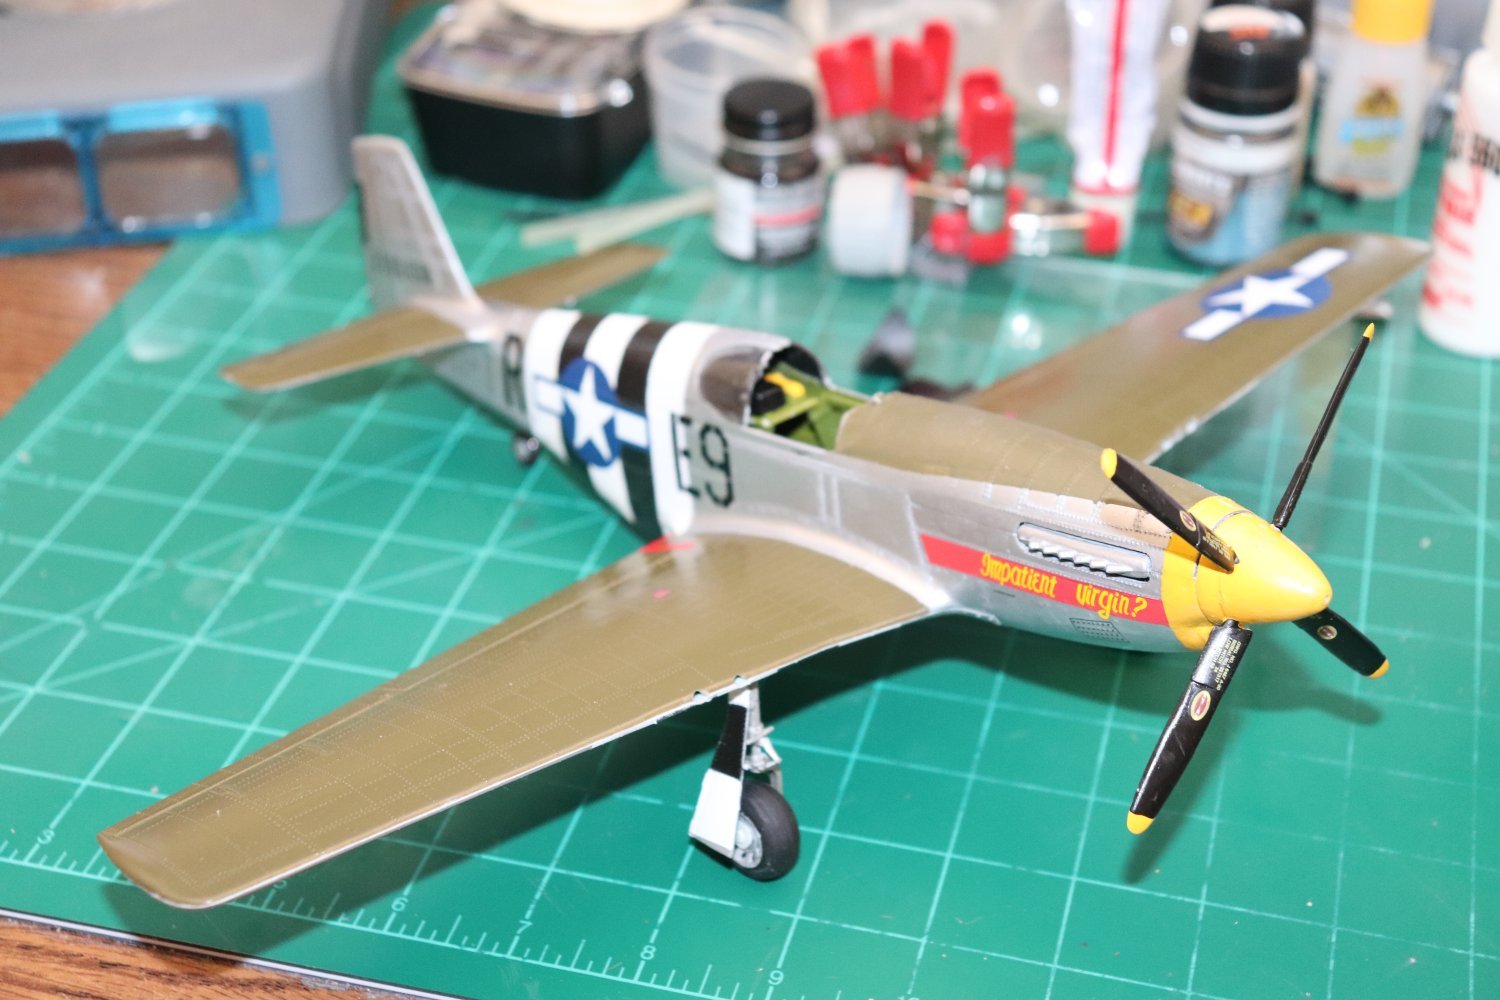
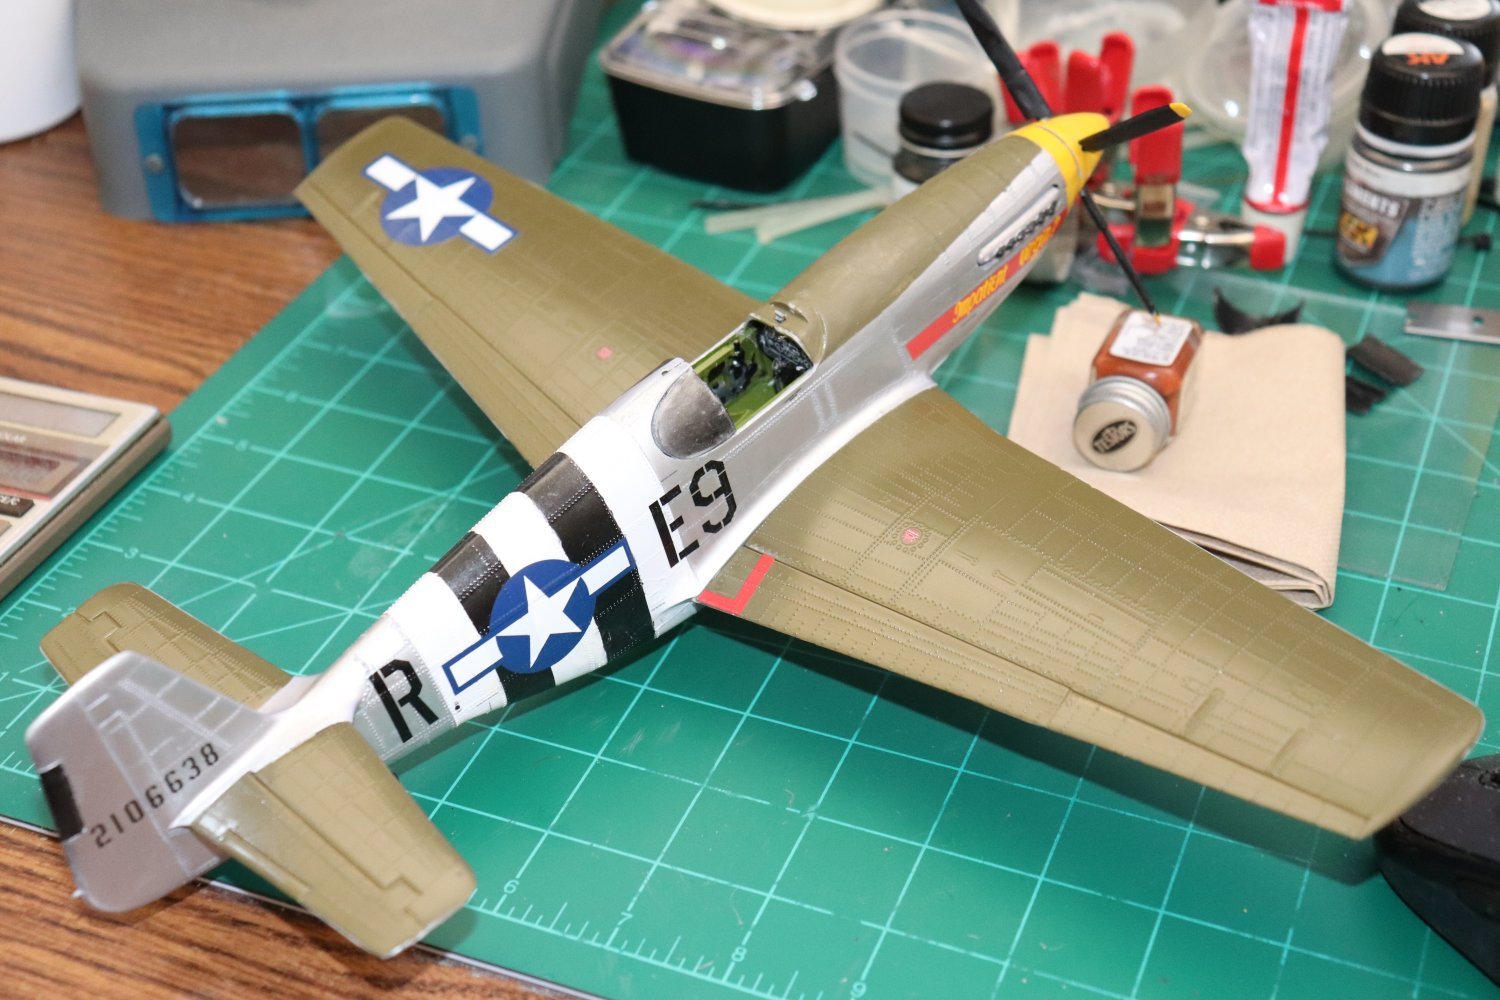
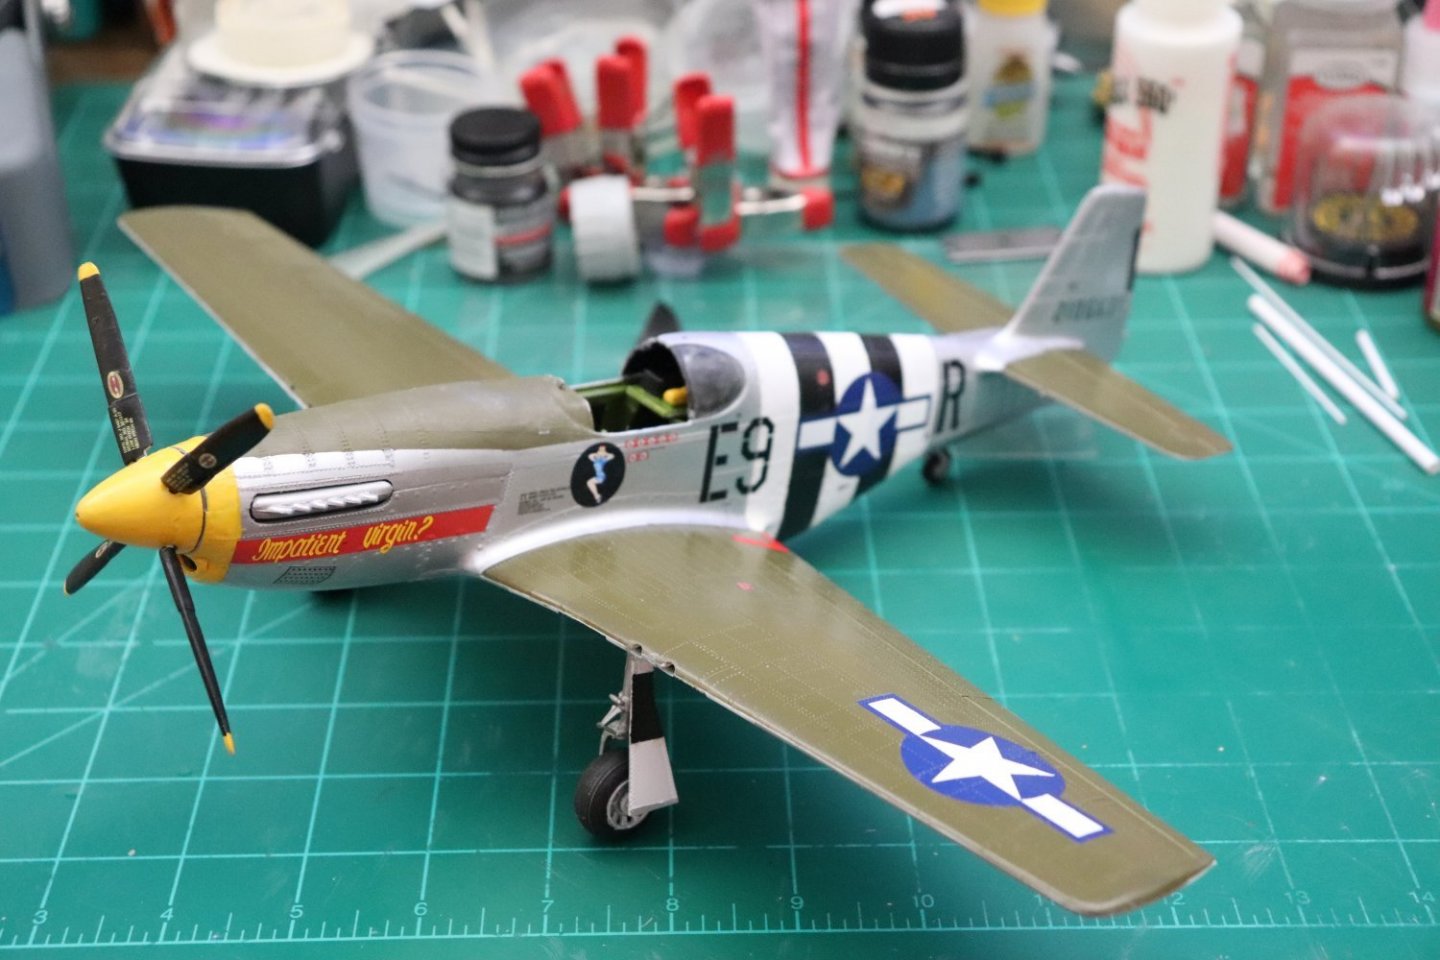
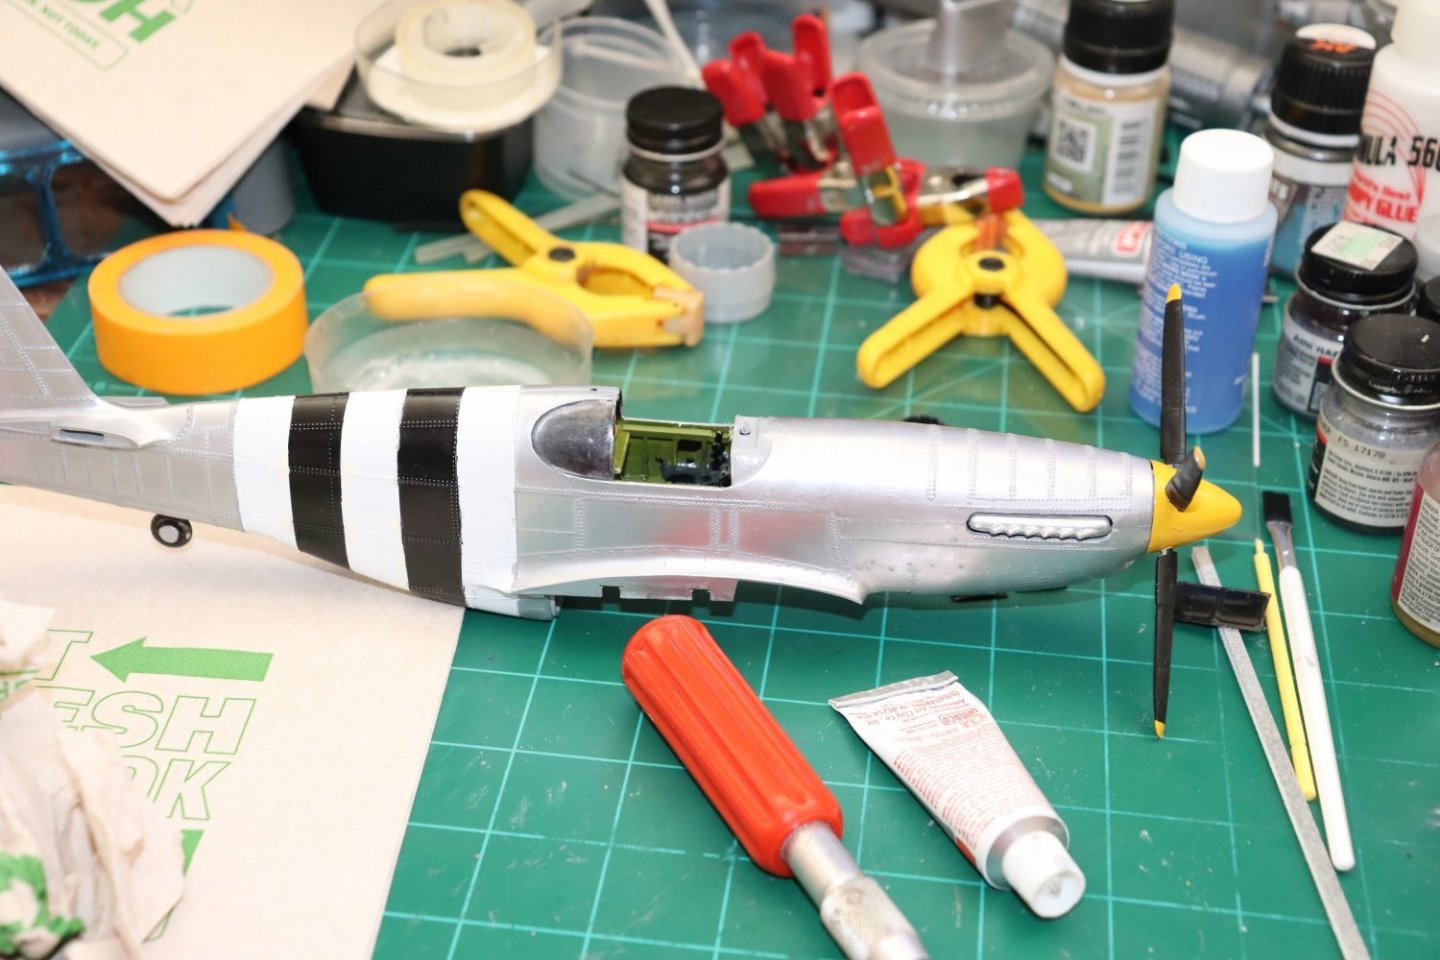
I certainly appreciate that Mike... Thank you... But unfortunately this one is a hack job, a cheap test to see if I could get a decent BMF on a plastic model... For this the himalayan mountains sized rivets all over this thing actually served to show what is possible when I thought at first is was going to ruin the experiment... The wing is painted Testors Aluminum Plate rattlecan over Tamiya Fine Grey Primer rattlecan, then overcoated with Testors wet look automotive gloss rattlecan The upper surfaces of the wings and horizontal stabilizers is Testors Olive Drab rattlecan paint in the same manner as the bottom surfaces substituting OD for the AP The Fuselage and vertical surfaces are Rub n Buff, rubbed on very lightly with a rubber gloved finger, a very small amount is critical, too much and it doesn't buff up... It went over Tamiya Fine Grey Primer rattlecan the same as the wings, which was then wet coated with future before the Rub n Buff was applied... Once the Rub N Buff was applied, it was then wet coated in Future again to protect the surface and give you something to decal on... Details were painted as normal... The secret is using very thin coats the thinner the better as long as you have complete smooth coverage... And that is it.... No massive surface prep, no mixing paints, no non-curing lacquer primer coats, no multiple airbrush coatings.. All by hand in the simplest manner possible... You might want to check out my Rub N Buff testing in the Blue Jay 4 article it where I try to show what is possible... I still need to get it out in the sun for a good natural light look at it, but I think it will be fine... This stuff is simply amazing on what it can do.... (and it's been around for over 60 years) amazing that very few have tried it and experimented with it... In my opinion, it beats everything else hands down for a scale, direct application, BMF finish... I believe I'm going to do a full aluminum modern model bird to see what it will really do, I understand that it can be tinted to produce some spectacular effects... As much as I want to finish Blue Jay 4, I want to know what I'm doing with this first...
-
THANKS Gary!!! I'm glad I'm not the only person that sees it! I tried to get pics that highlighted this exact effect which is what got me excited about it in the first place... And, when exposed to the weather and starts oxidizing, the gran of the sheet oxidizes at different rates making the effect splotchy, which is one of the very hard effects of real life aluminum sheet to model... This stuff duplicates it with ease... You have to see it in real life to get the full effect... In my humble opinion I've found my realistic BMF finish... And the best thing, it's a LOT easier that anyone would think... (and FAST as well) I need to test this on a smooth surface airplane model A more modern kit... (an F-86, or F-84, which when originally used weren't painted when in BMF, no aluminum paint {chuckle})
-
I think so Dan, I think it came out a lot better than I expected it to for the type of surface I put it on.... Final pics coming in a few... Thank you...
-
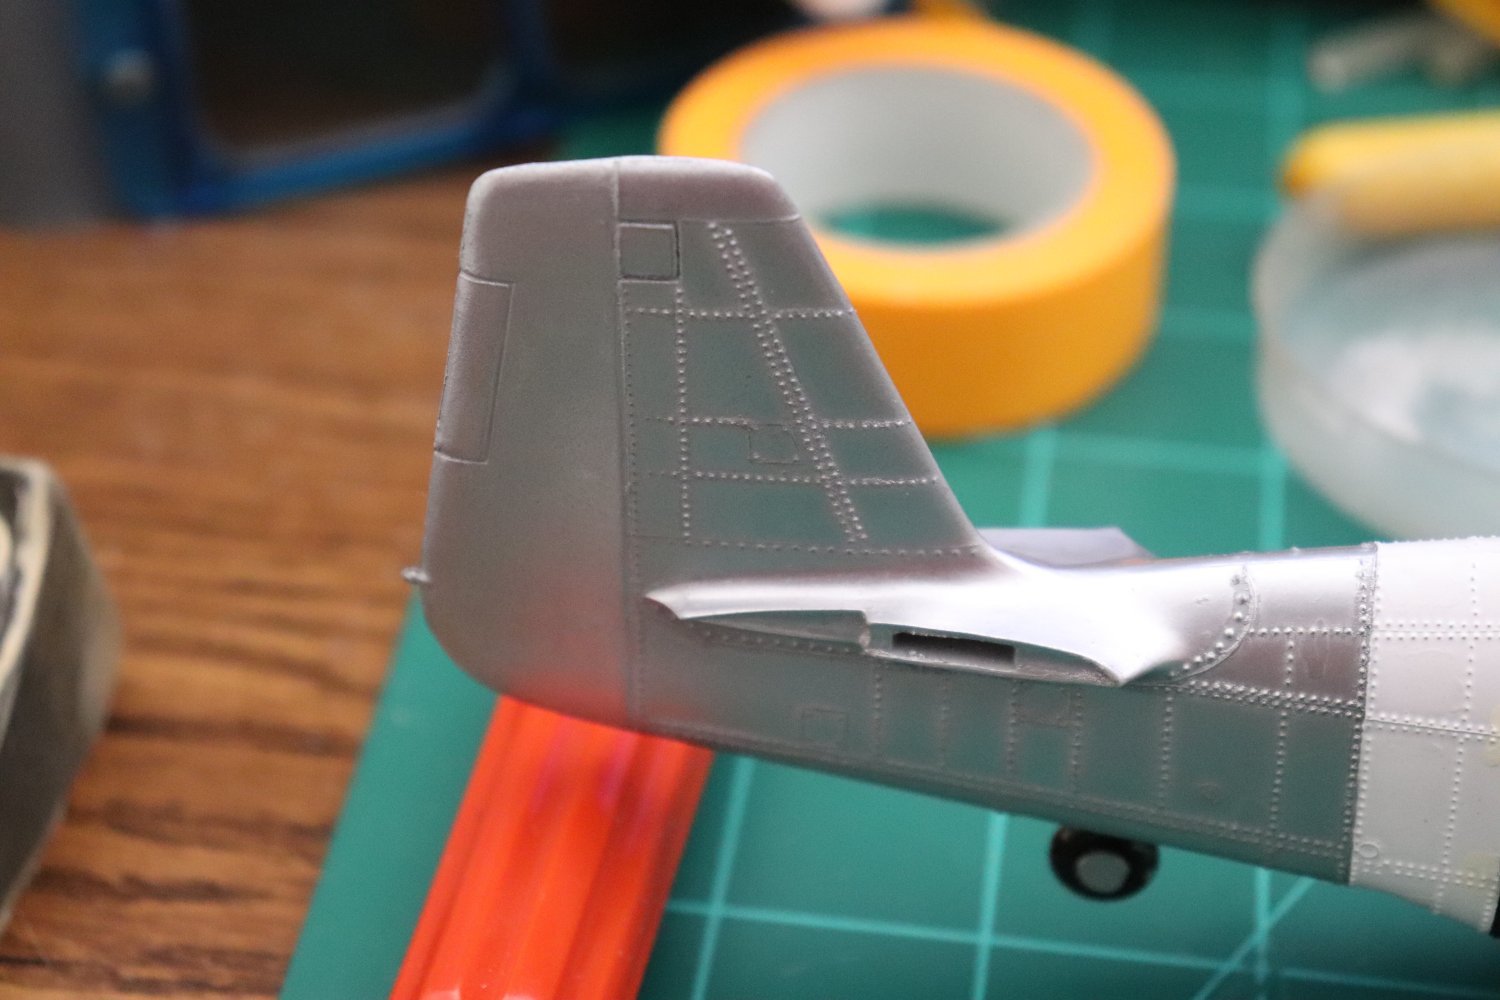
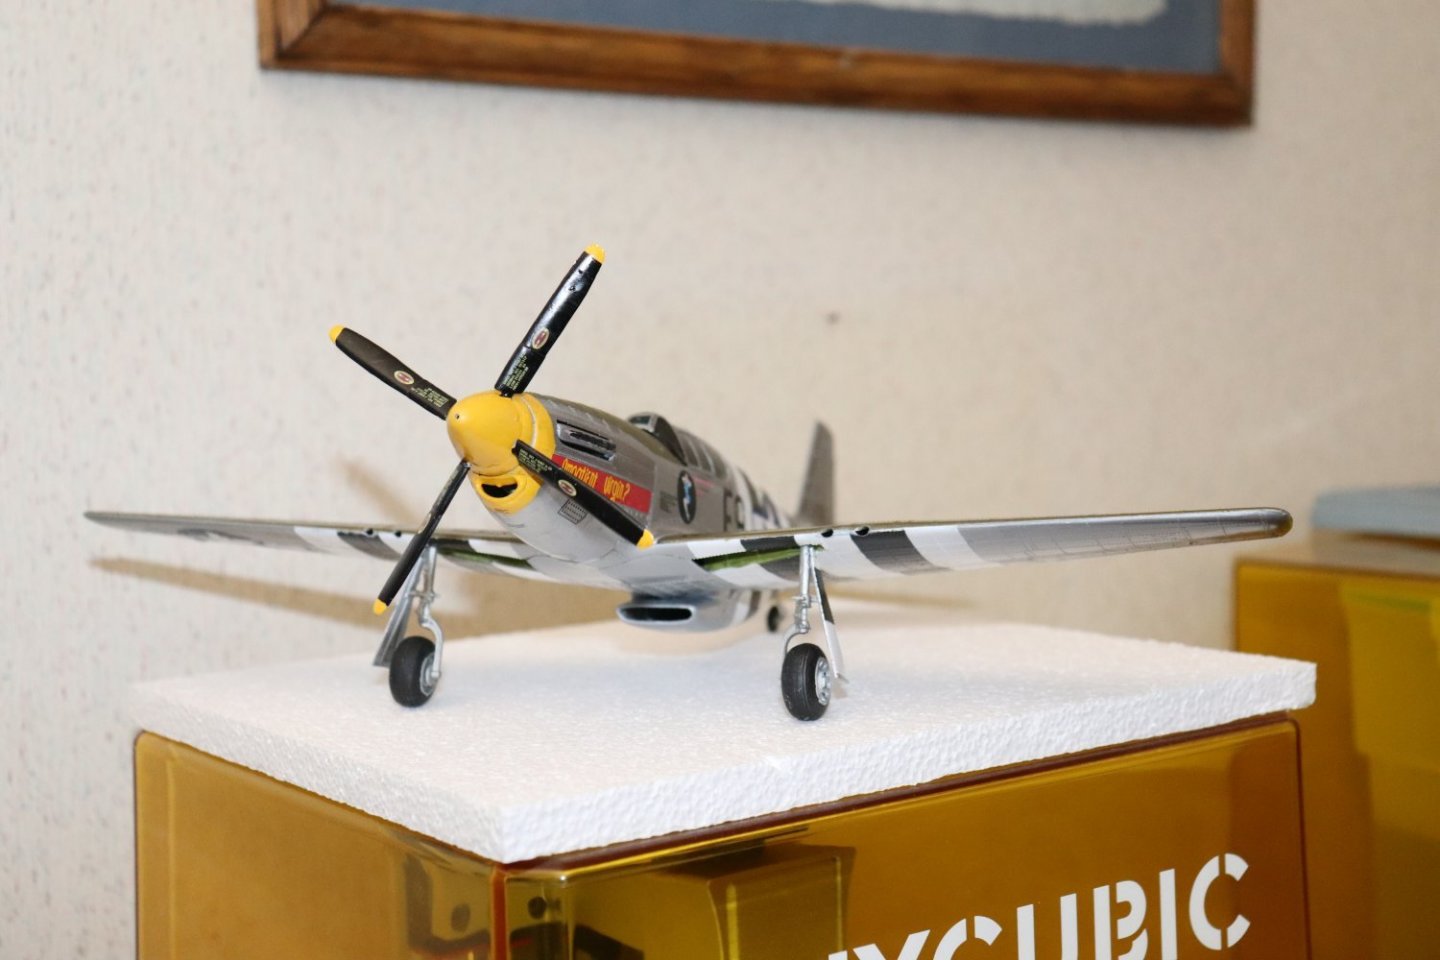
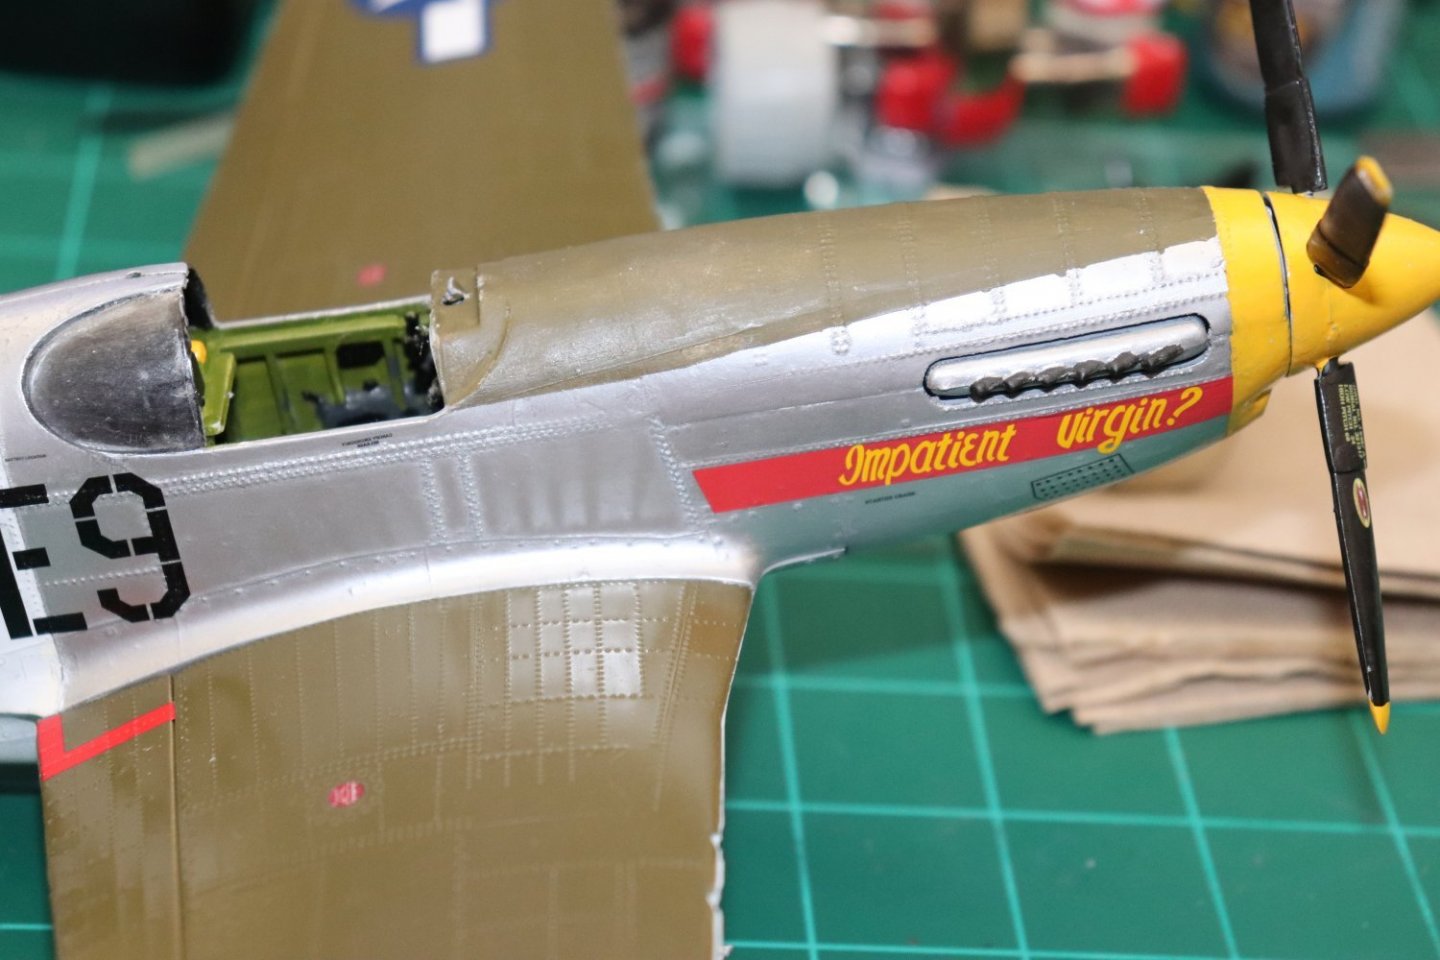
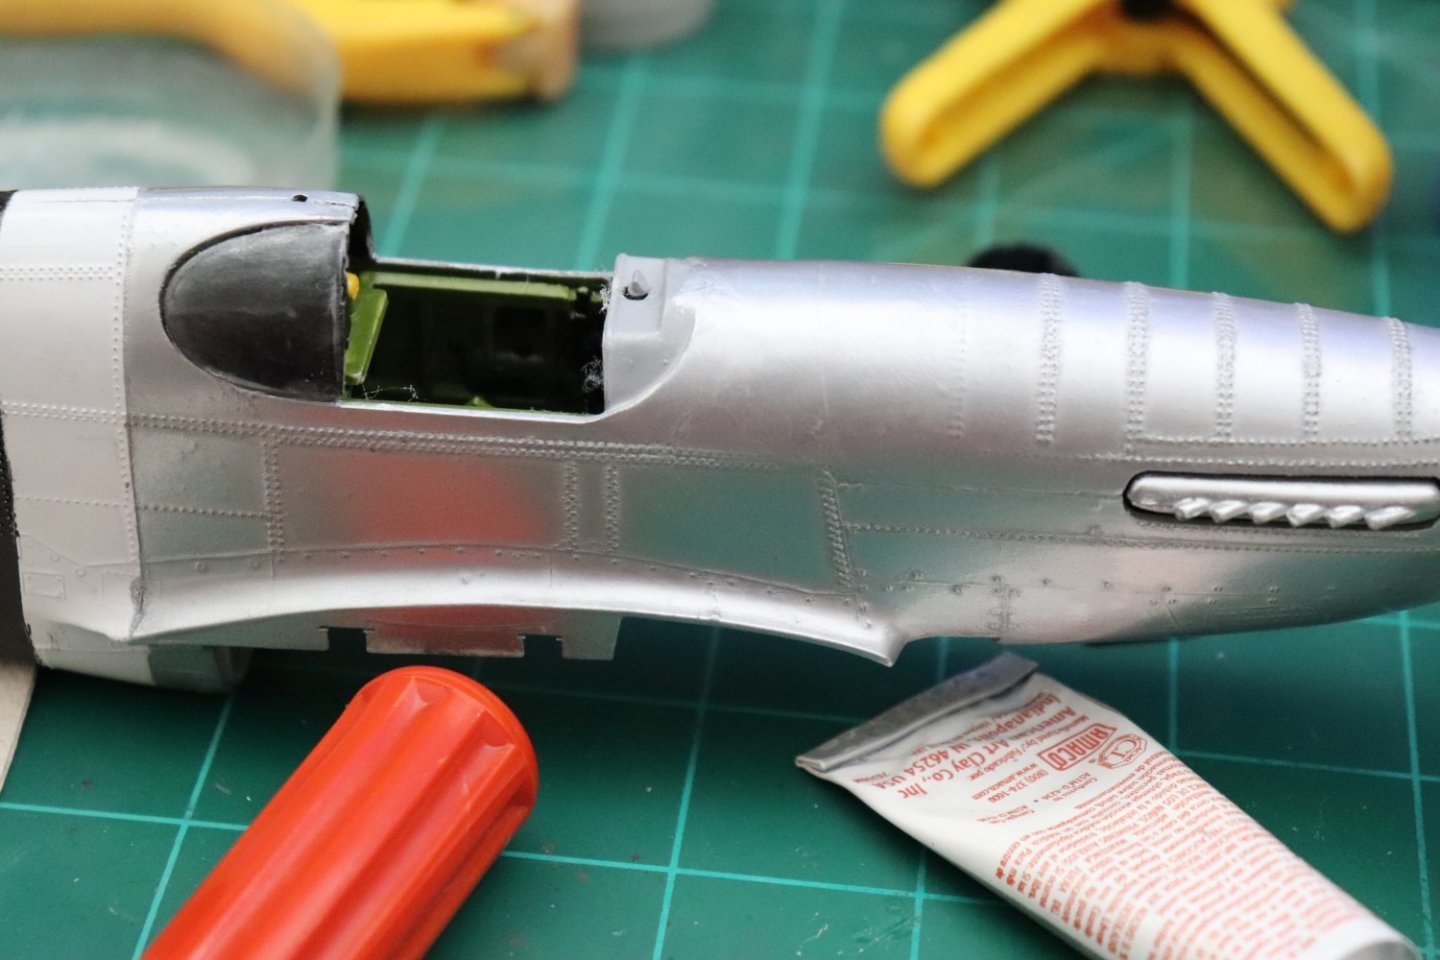
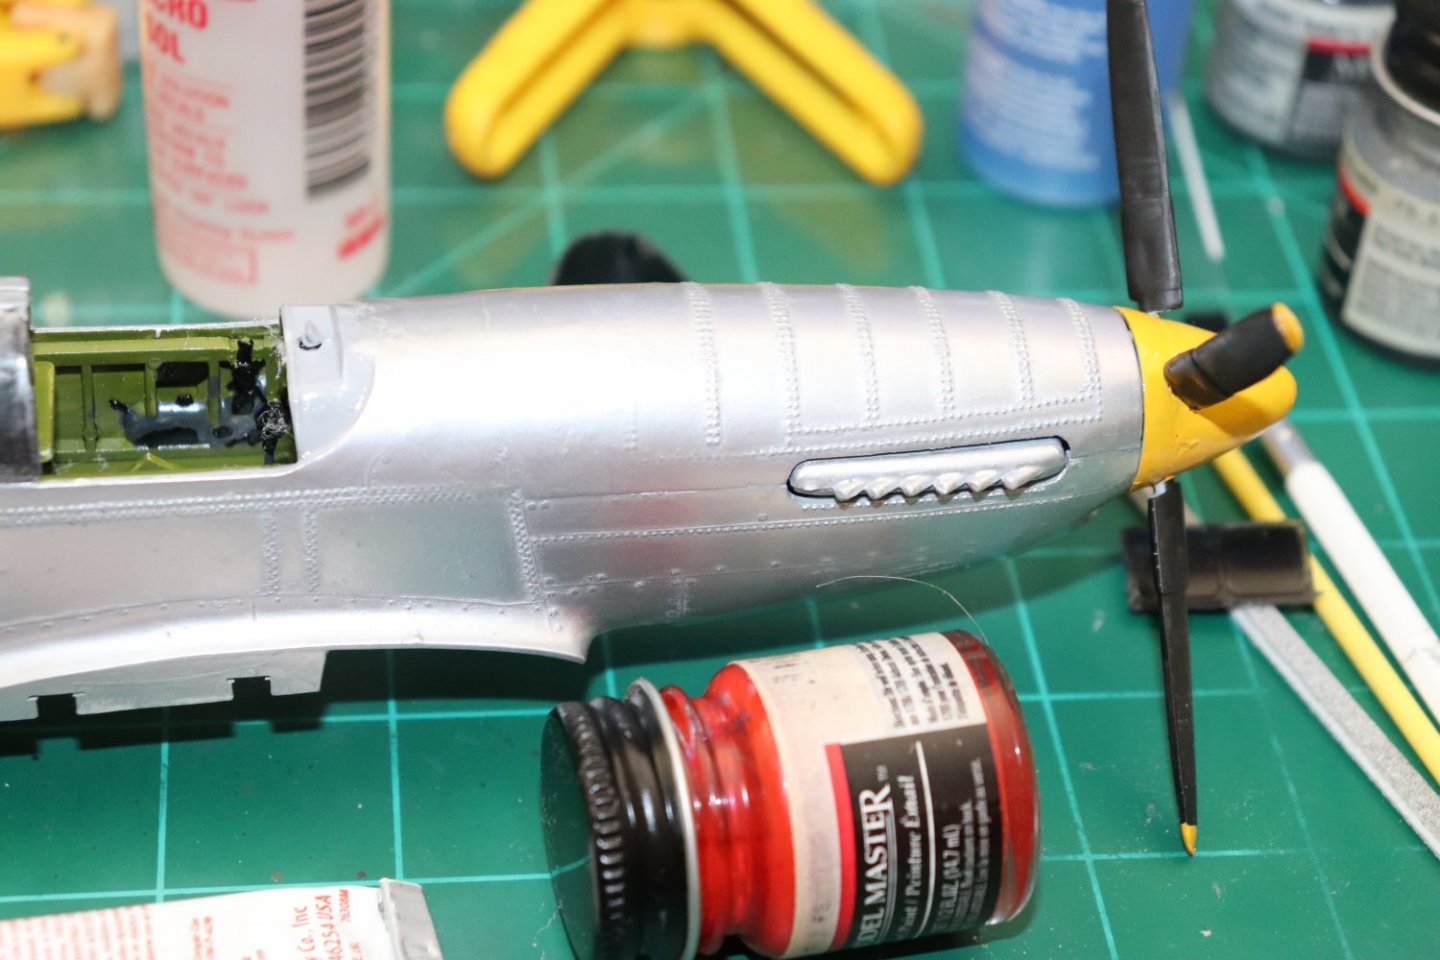
Thanks Ken, The differences in sheen are what you would expect with RnB when you have a smooth surface from a rough one... The nose has long panels which allows you to rub it more than the after sections... The effect works for a riveted skin cause if the differences not in spite of it... The noses of P-51's were usually shinier than the rest of the fuselage anyways, that is where the most handling was done and hence the most cleaning... I didn't plan for it that way, it just happened... (a bonus in this application if you ask me)
-
Thanks Mark, the pics don't really do it justice is all I'm going to say, the effect on this is stunning to say the least... I might need another experiment on a smooth bird before I go forth with Bluejay 4, that's the one I don't want no issues with.... (going to be center stage in my case) I want to be sure before I rely on it...
-
Possibly, I remember it in 1/48th along with Ding Hao! (Major James Howards P-51B) Revell did the 'Shangri La' in all three scales.... H295 1/32 P-51B Mustang, Don Gentiles P-51B is certainly a possibility.... In fact pretty much all the manufacturers at one time or another did Capt. Gentile's P-51...
-
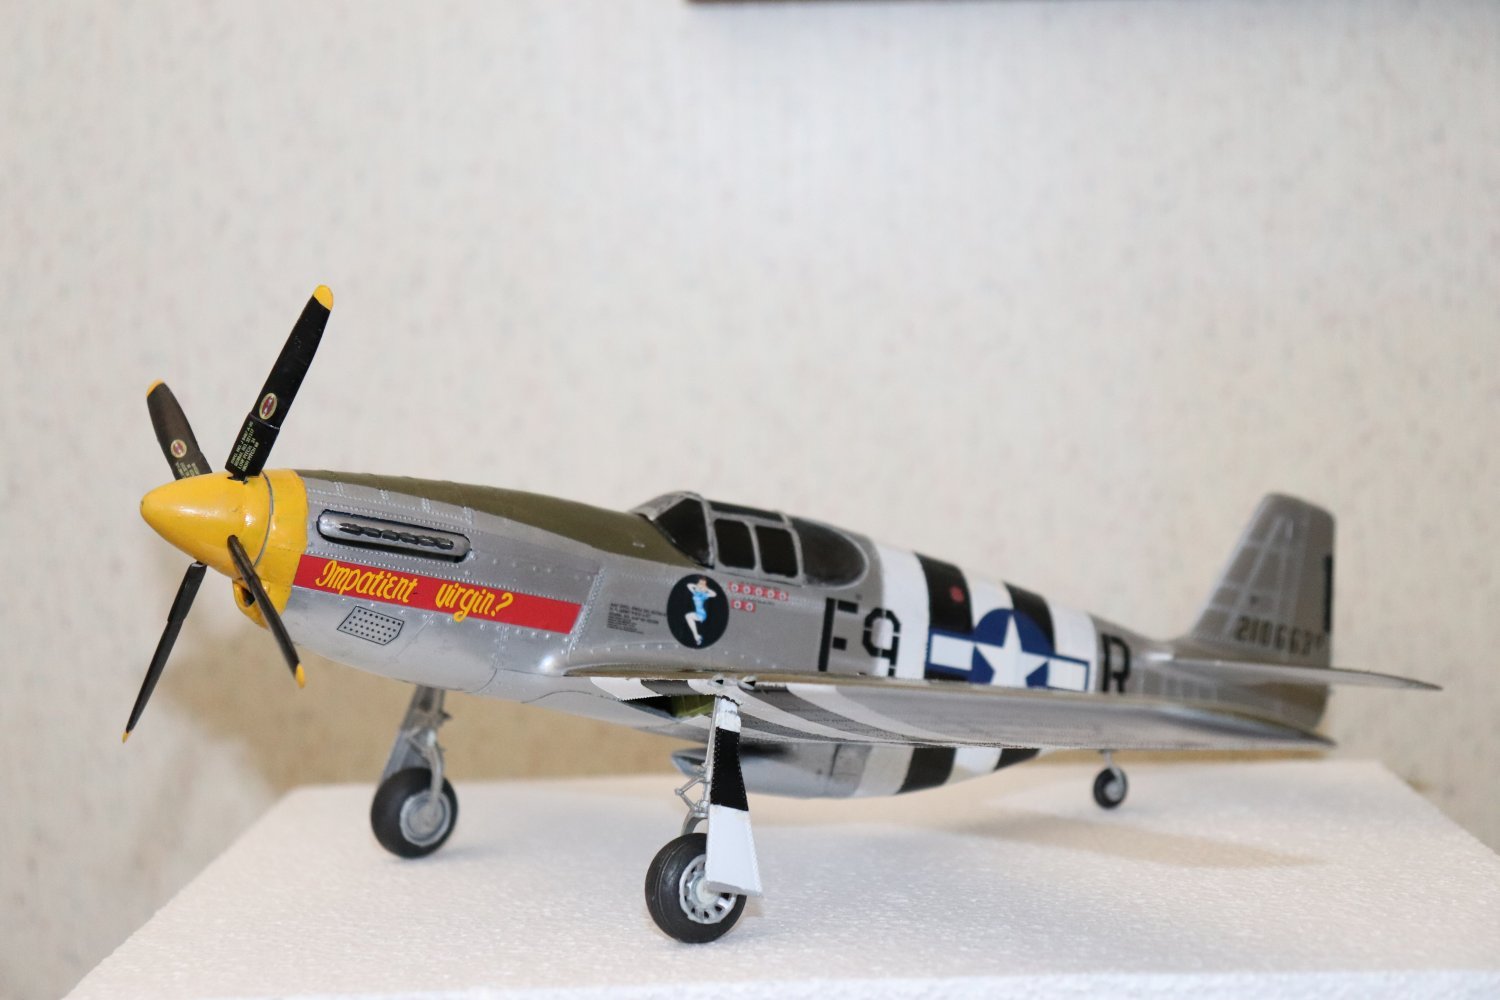
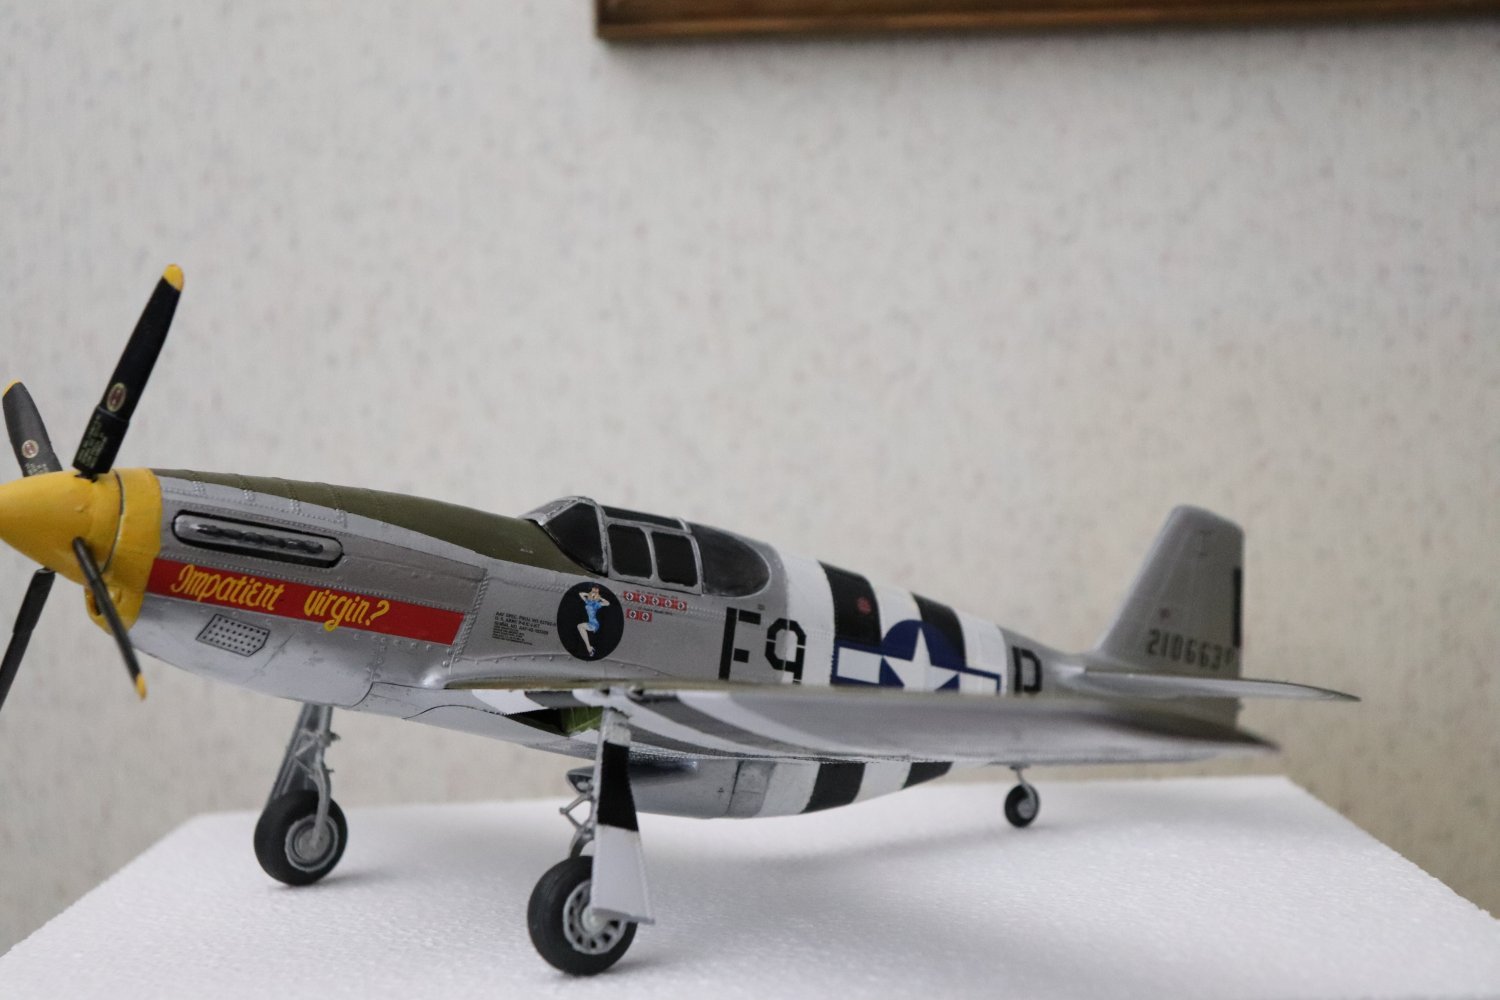
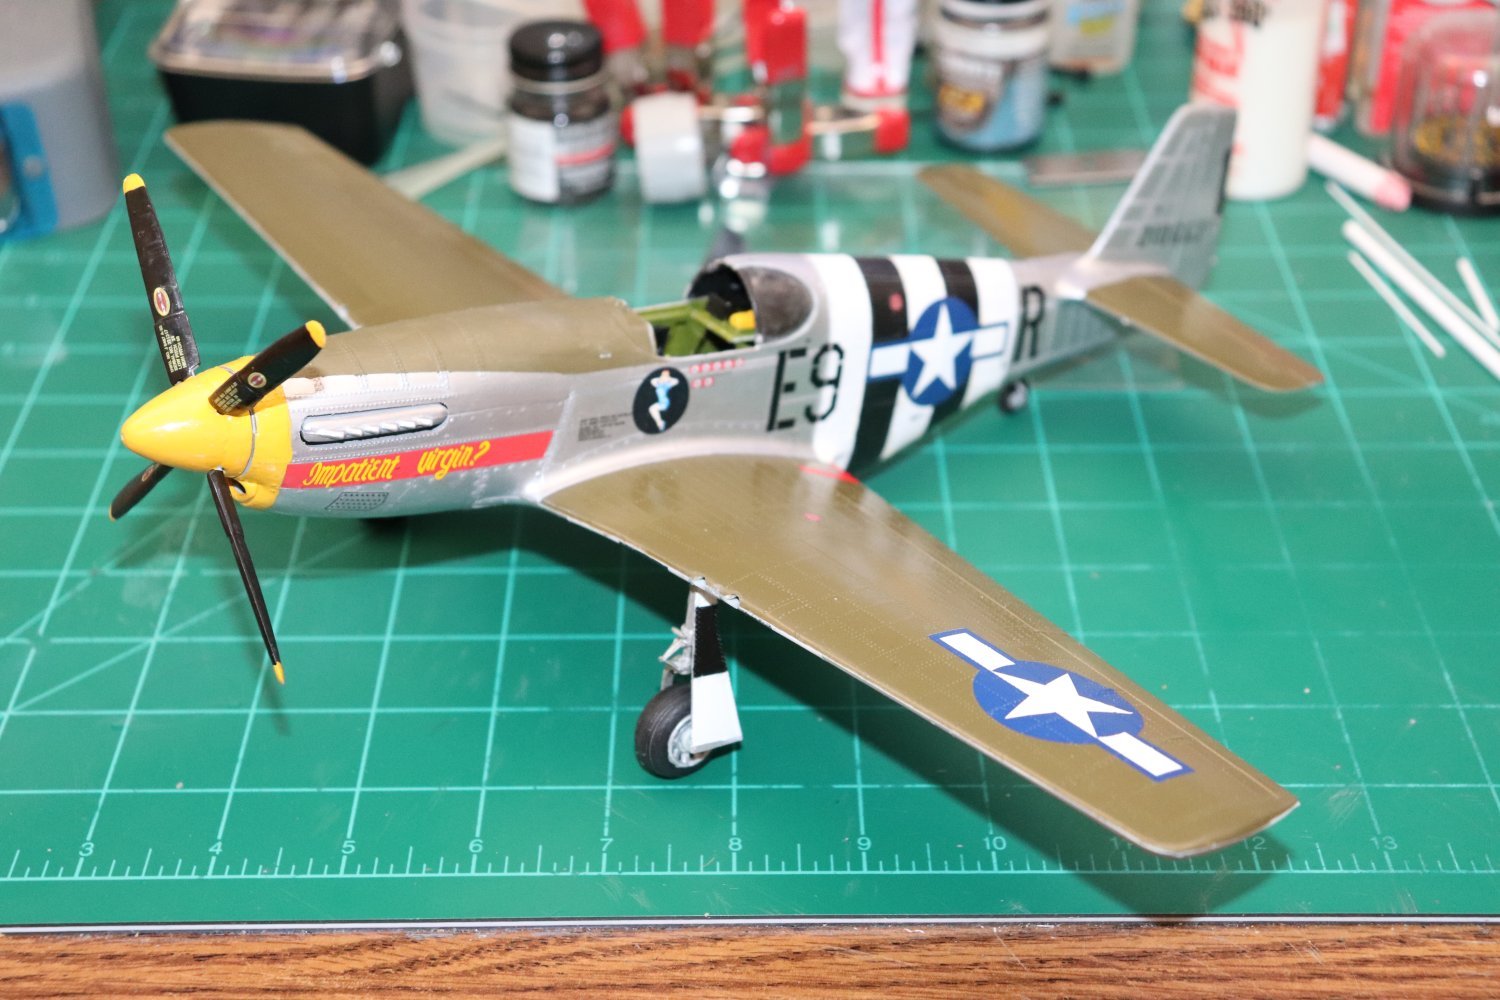
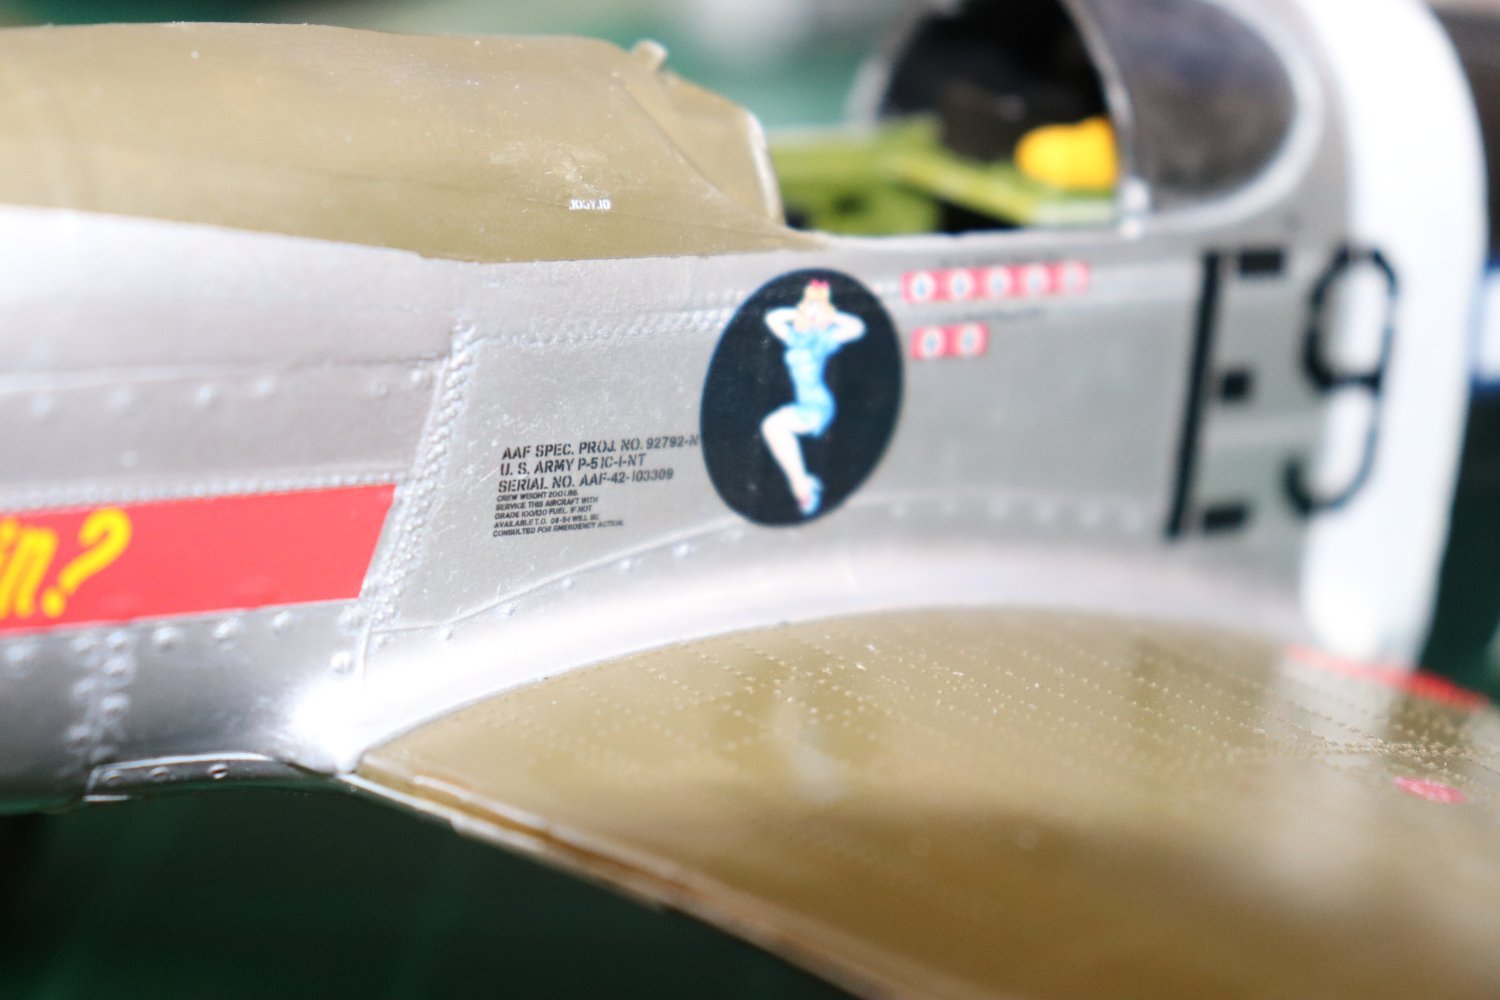
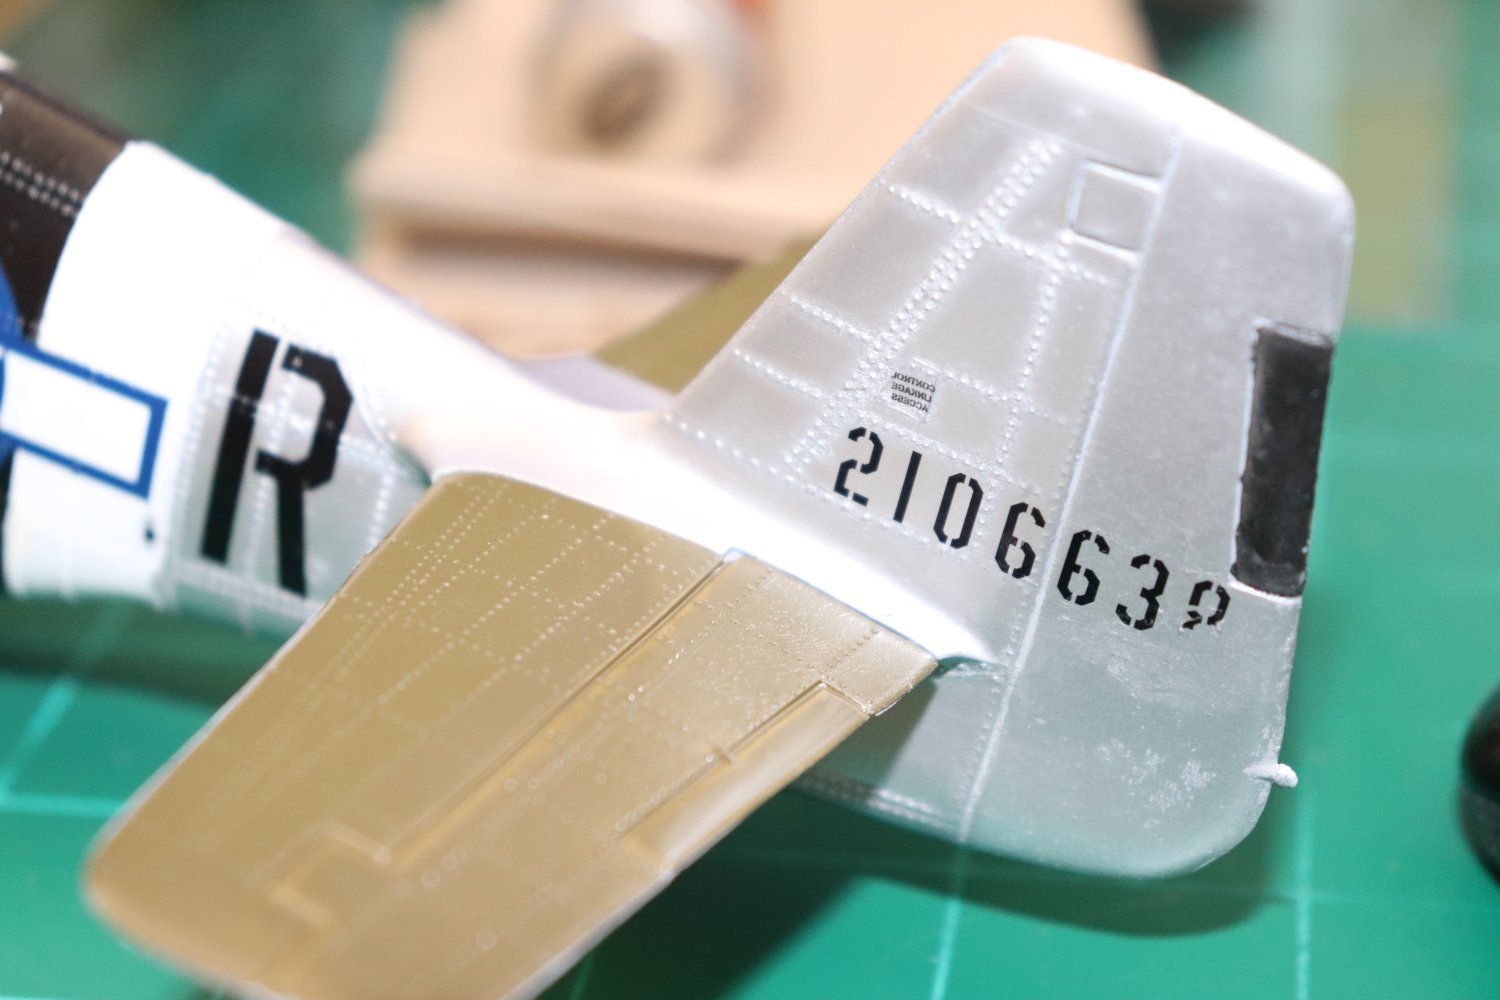
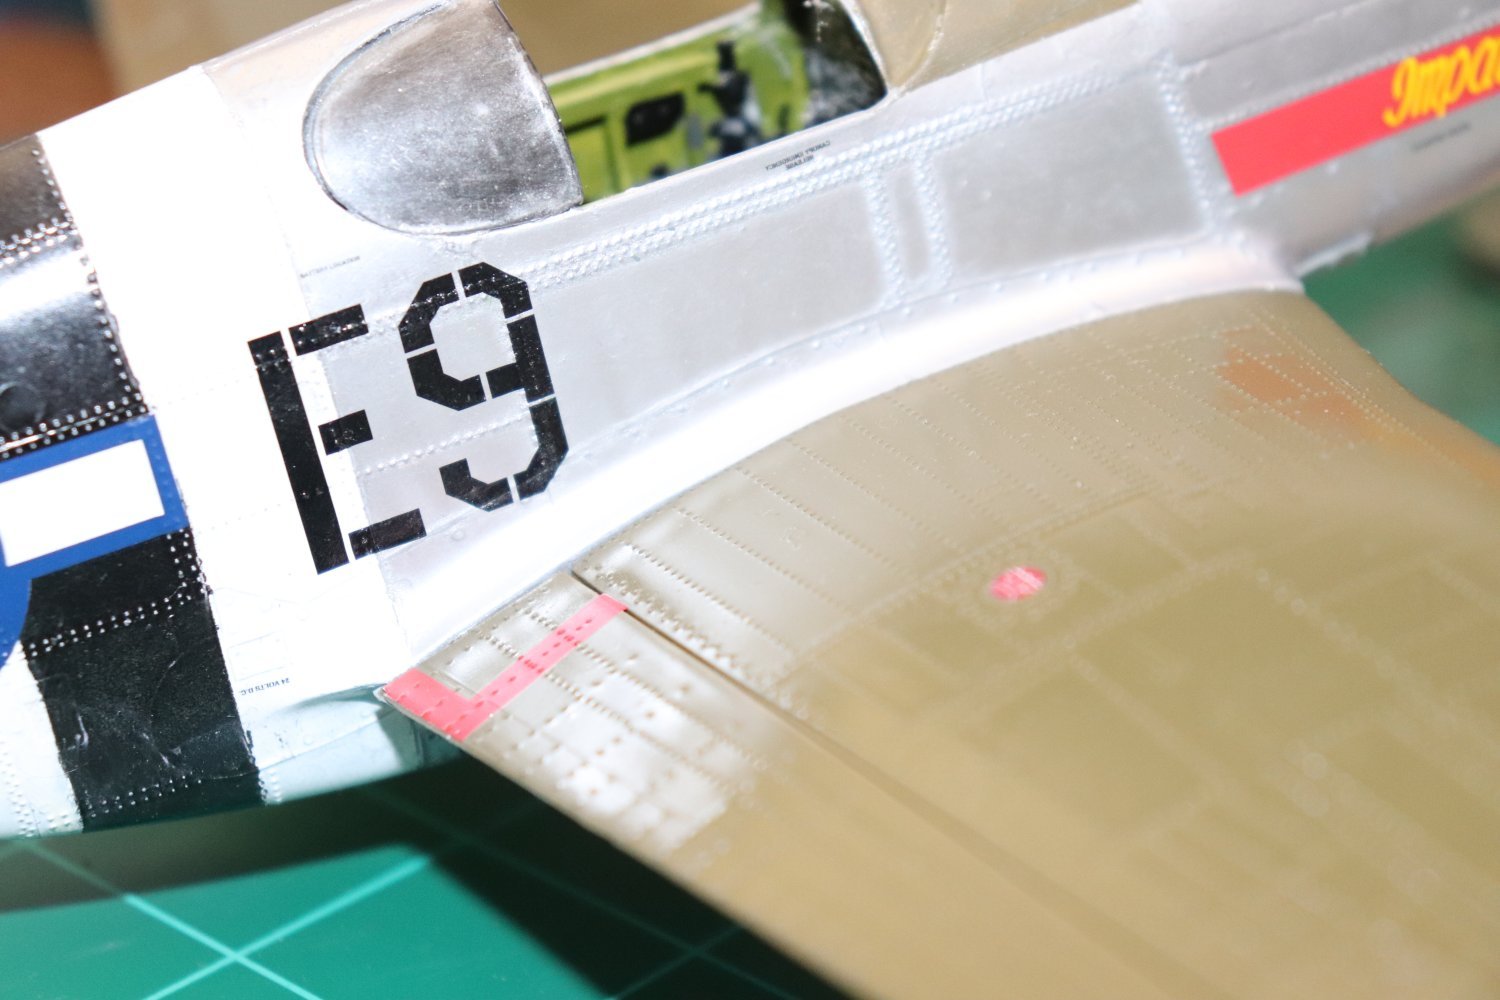
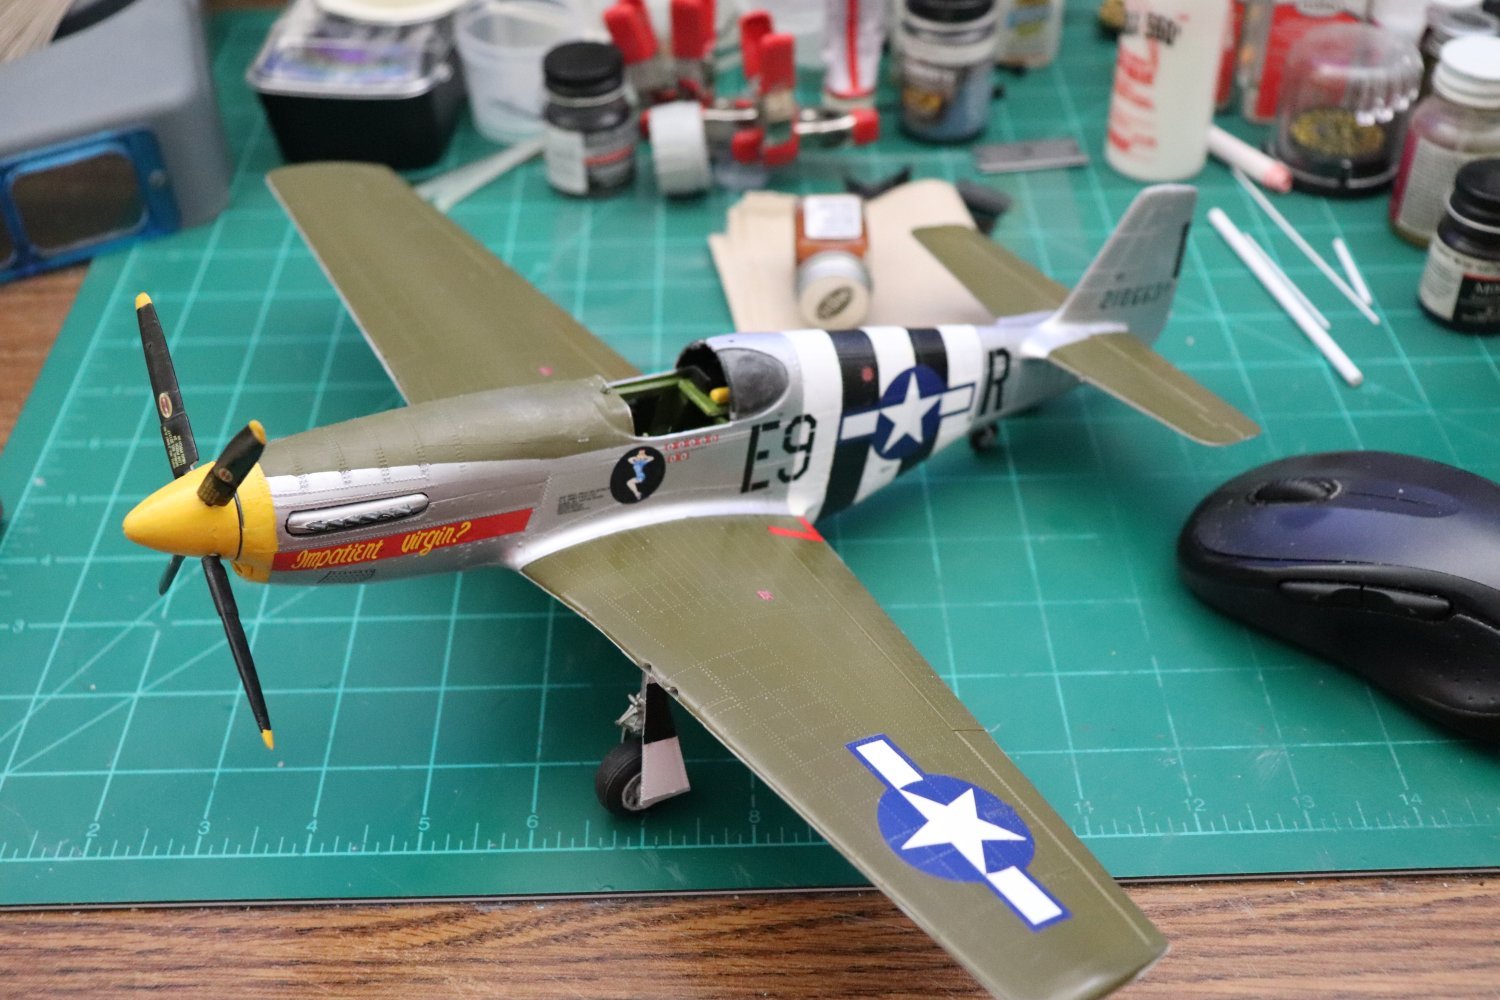
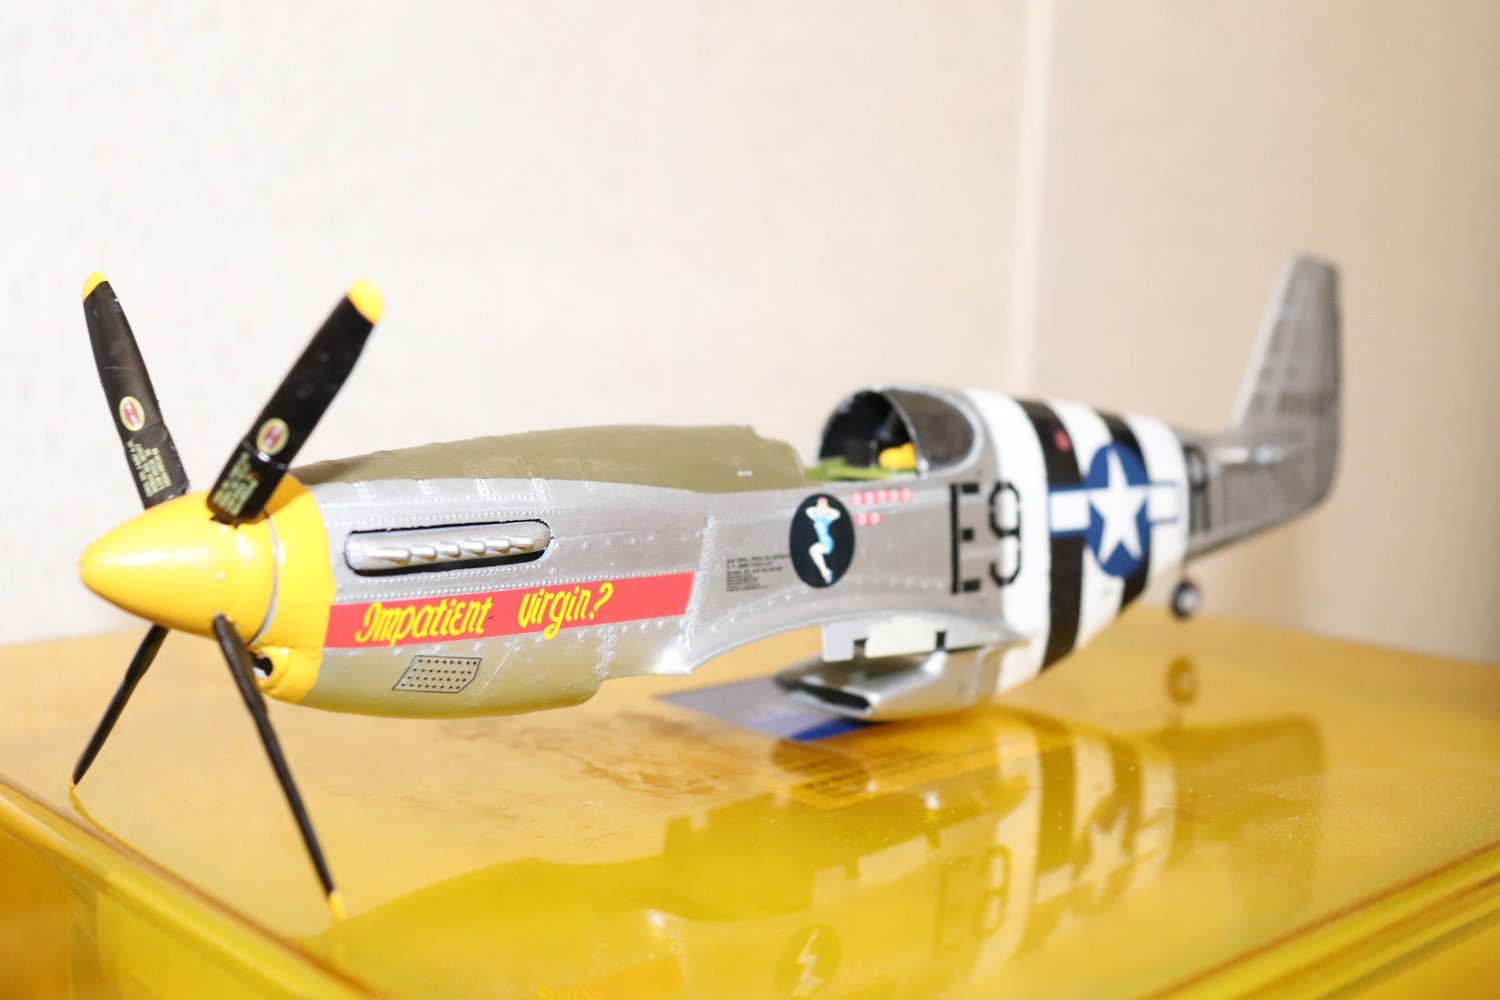
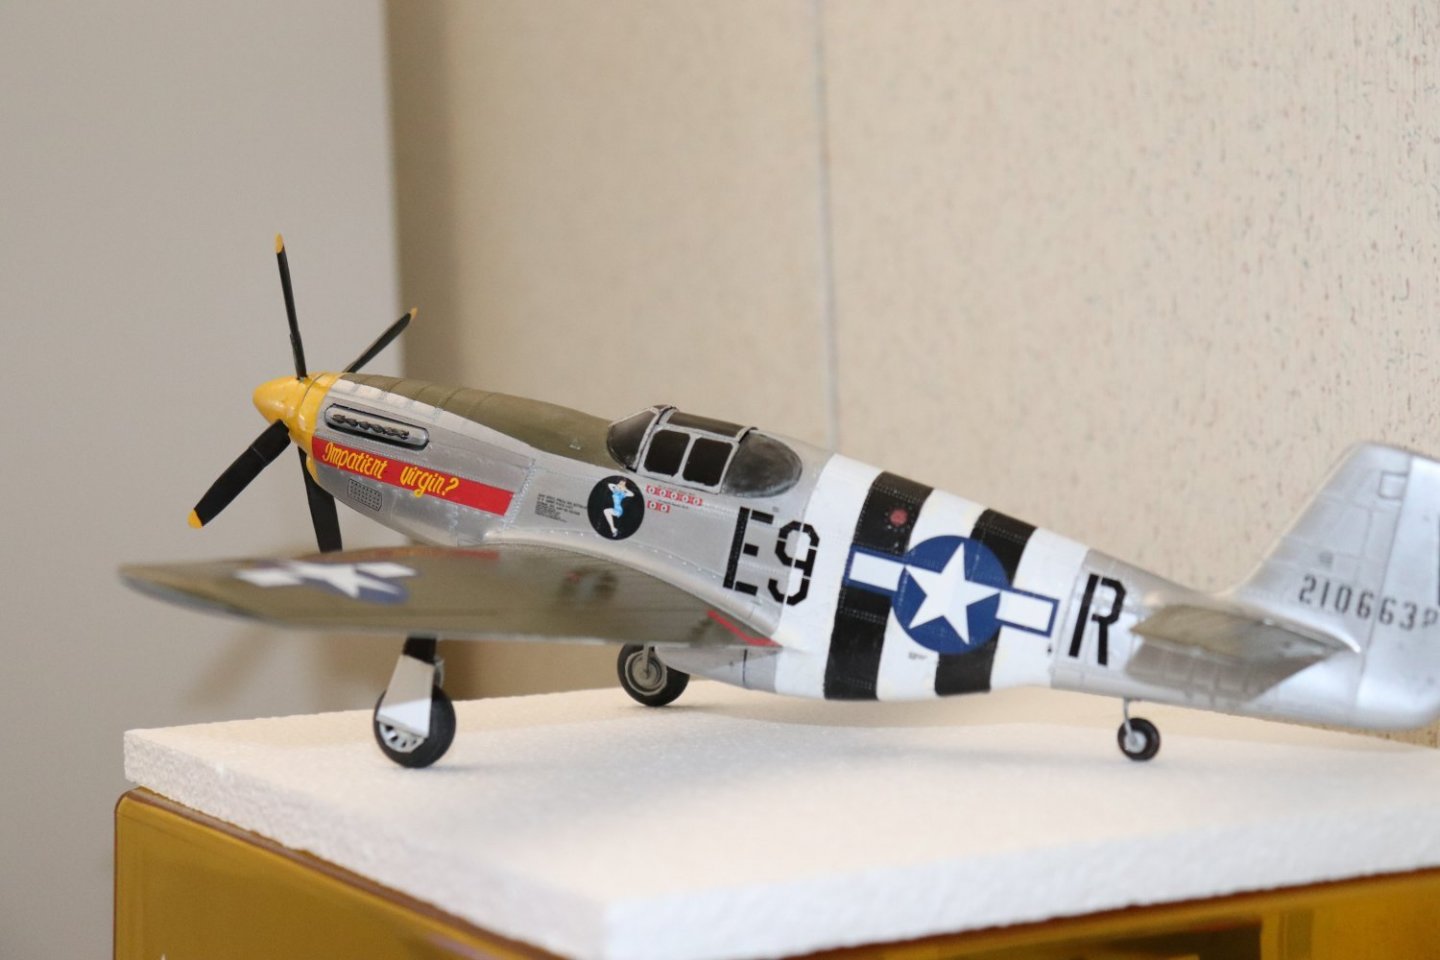
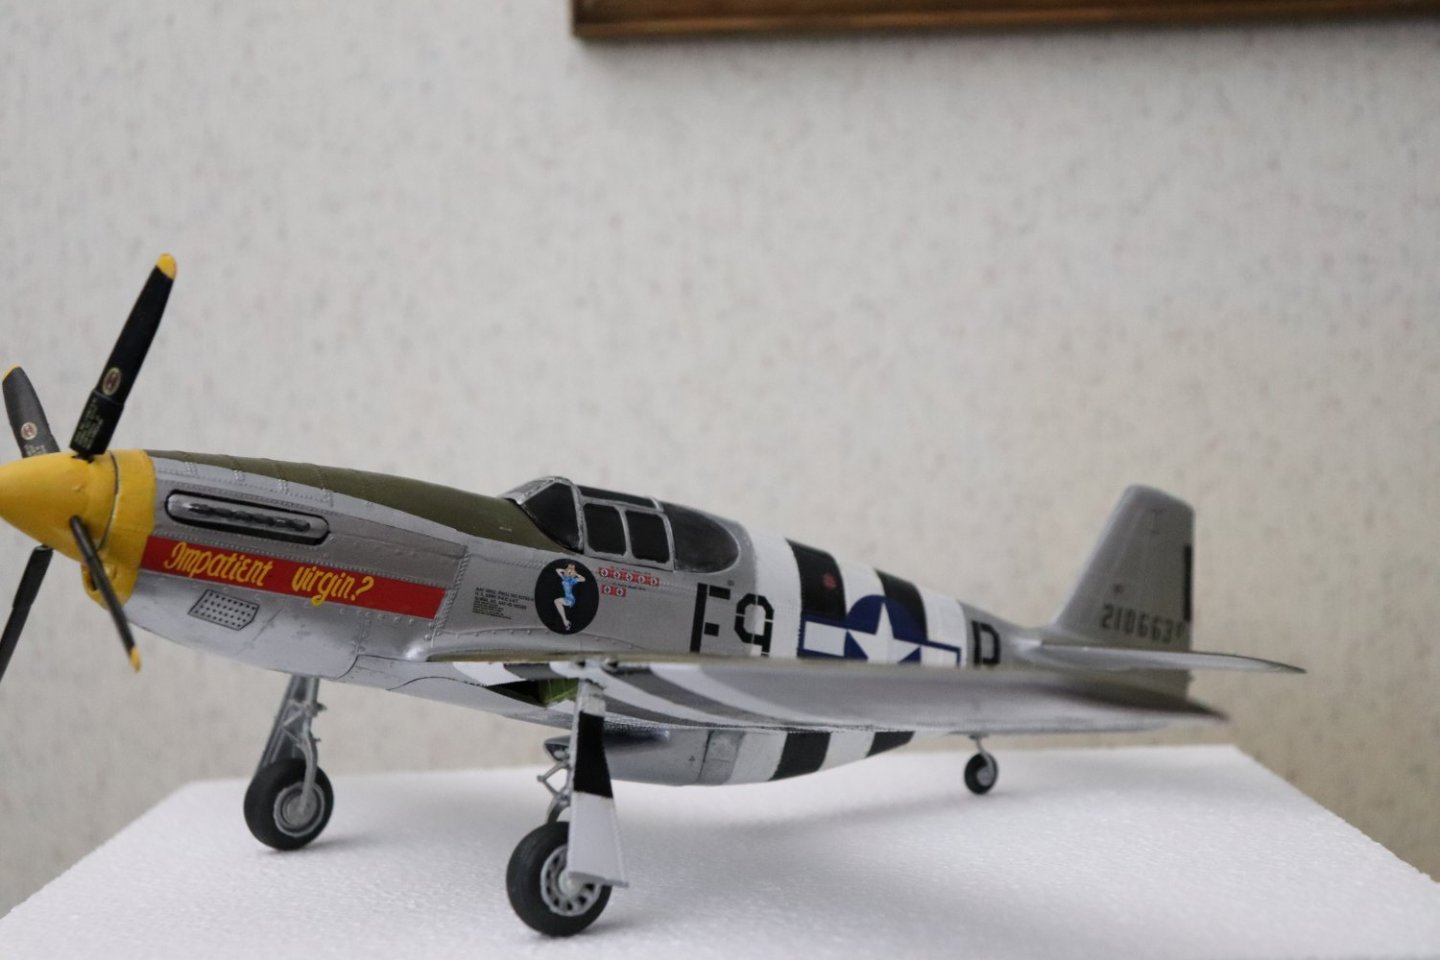
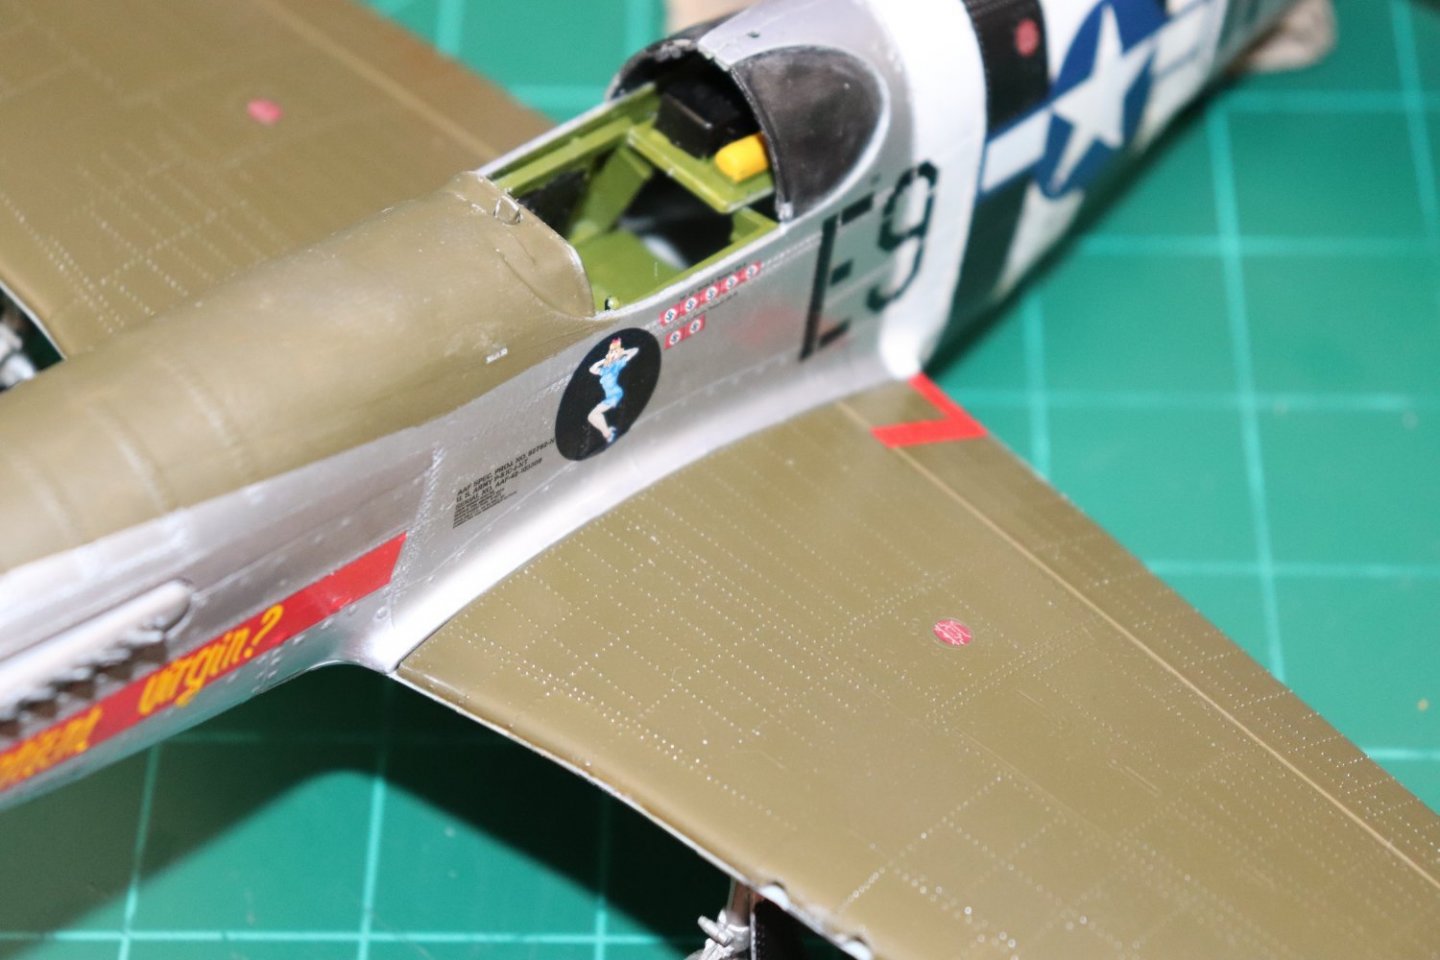
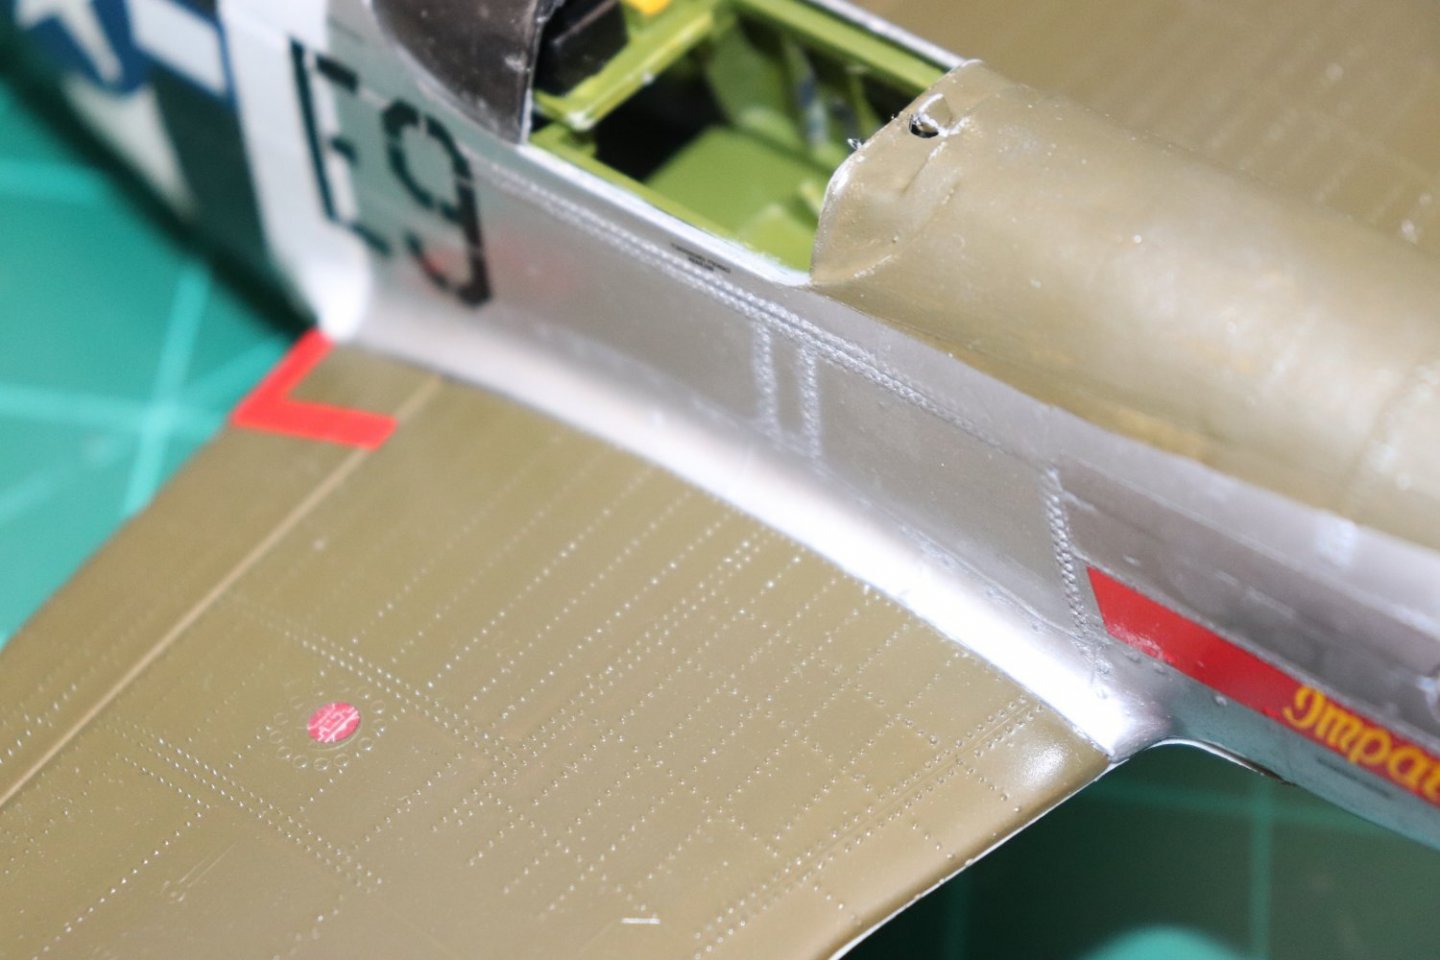
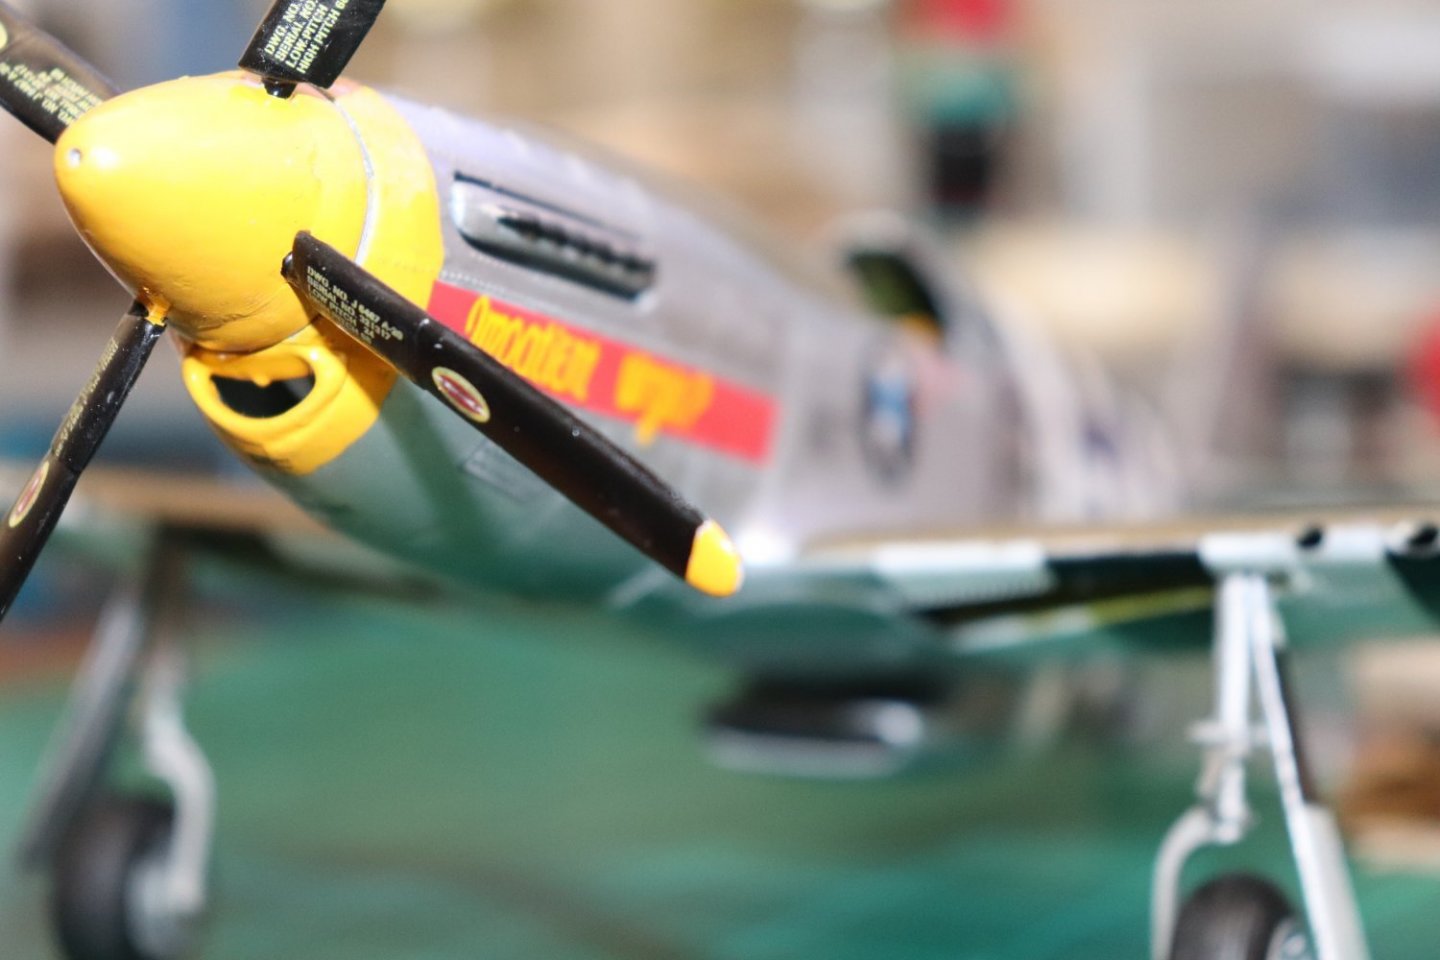
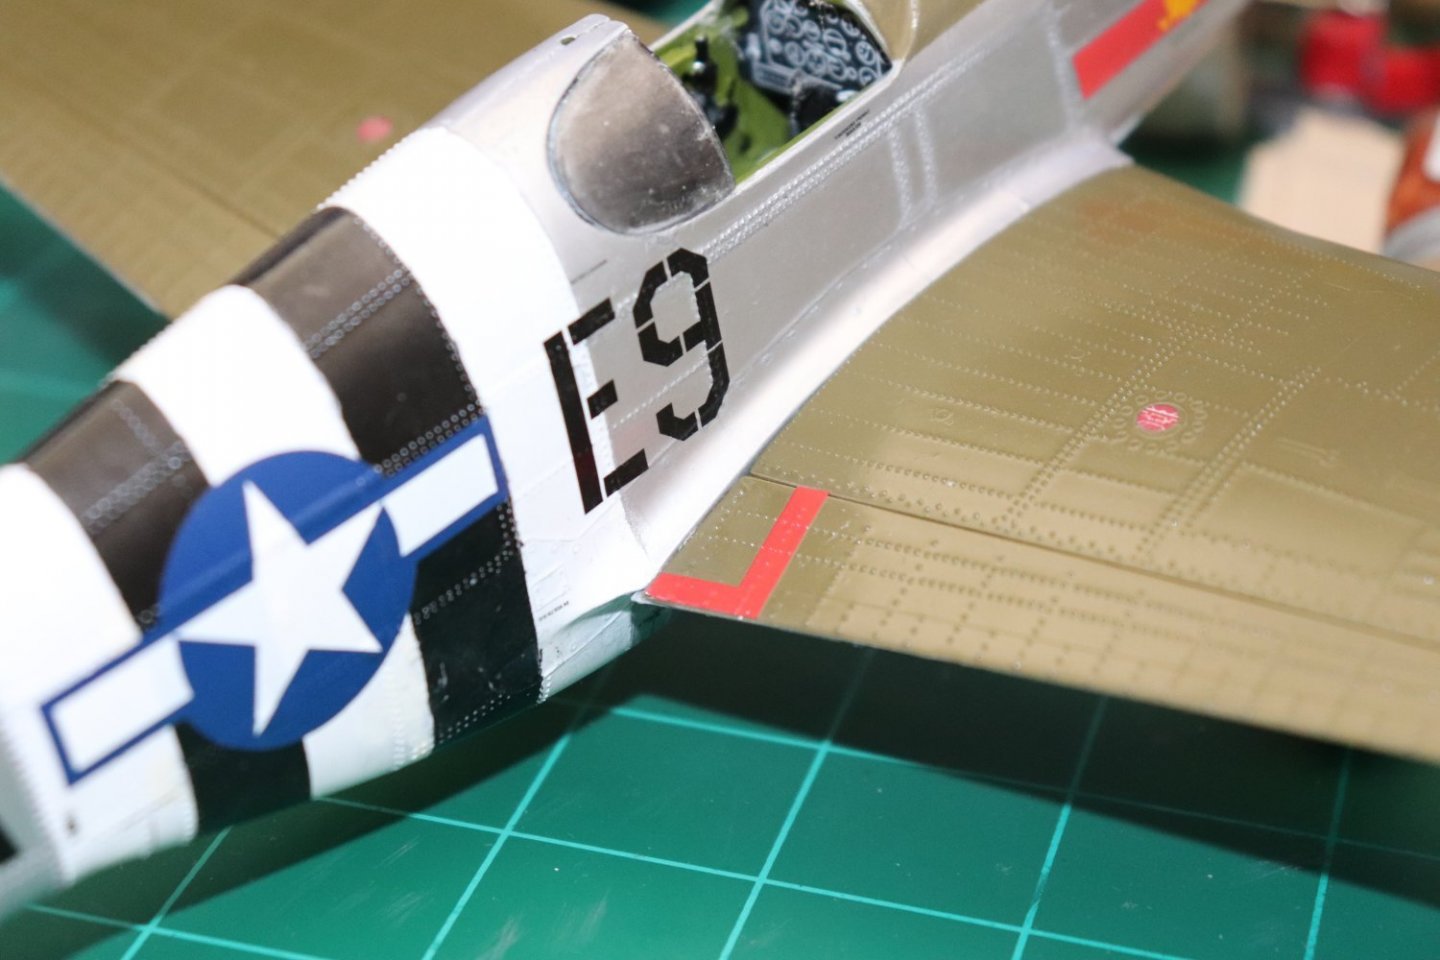
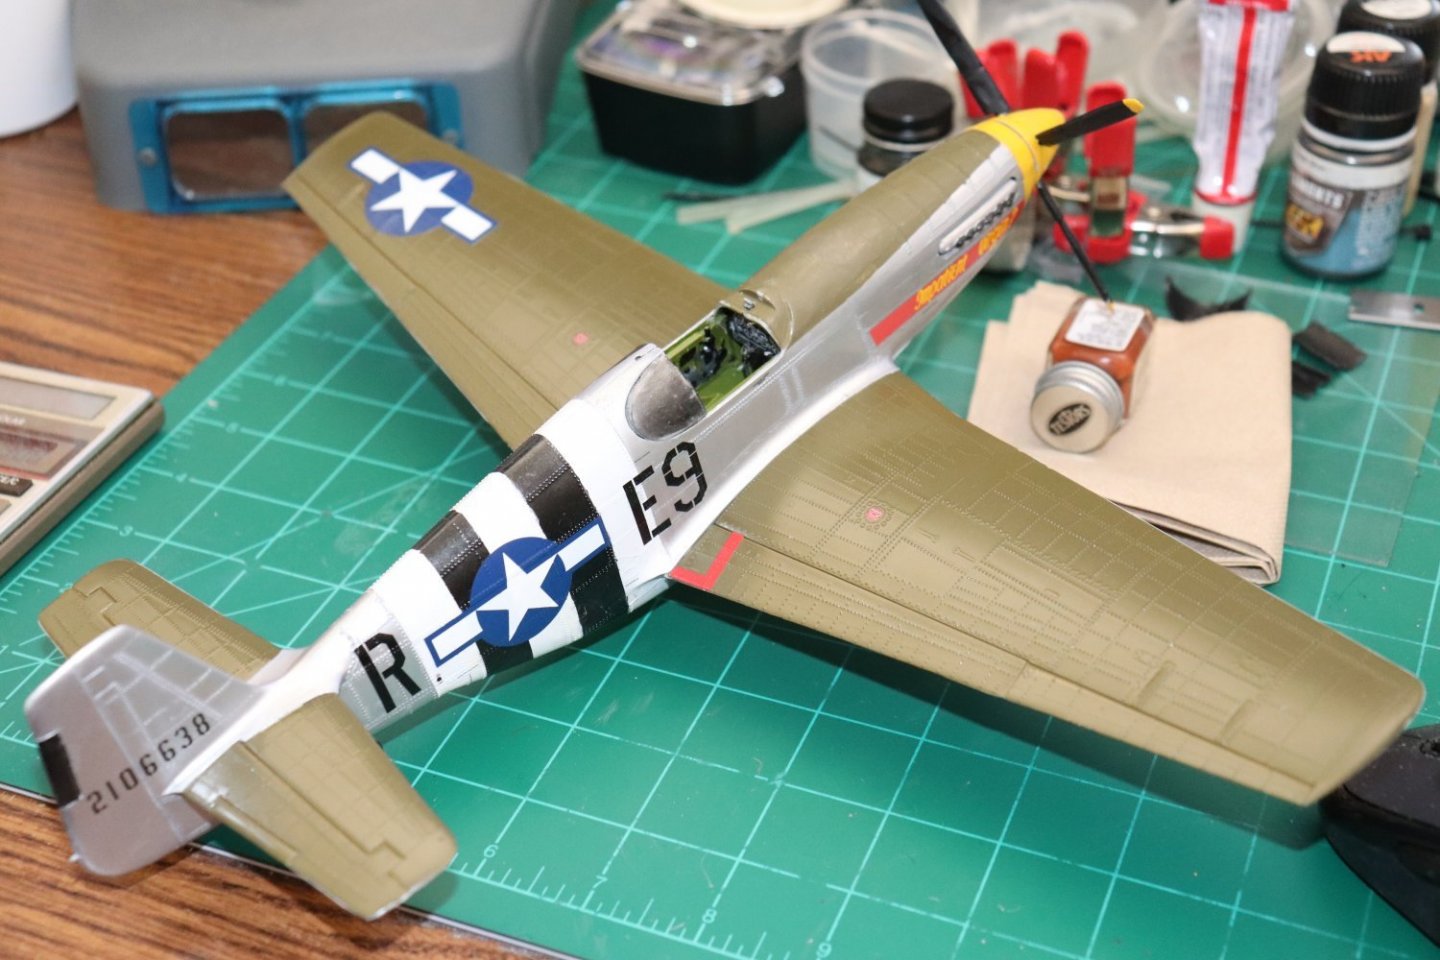
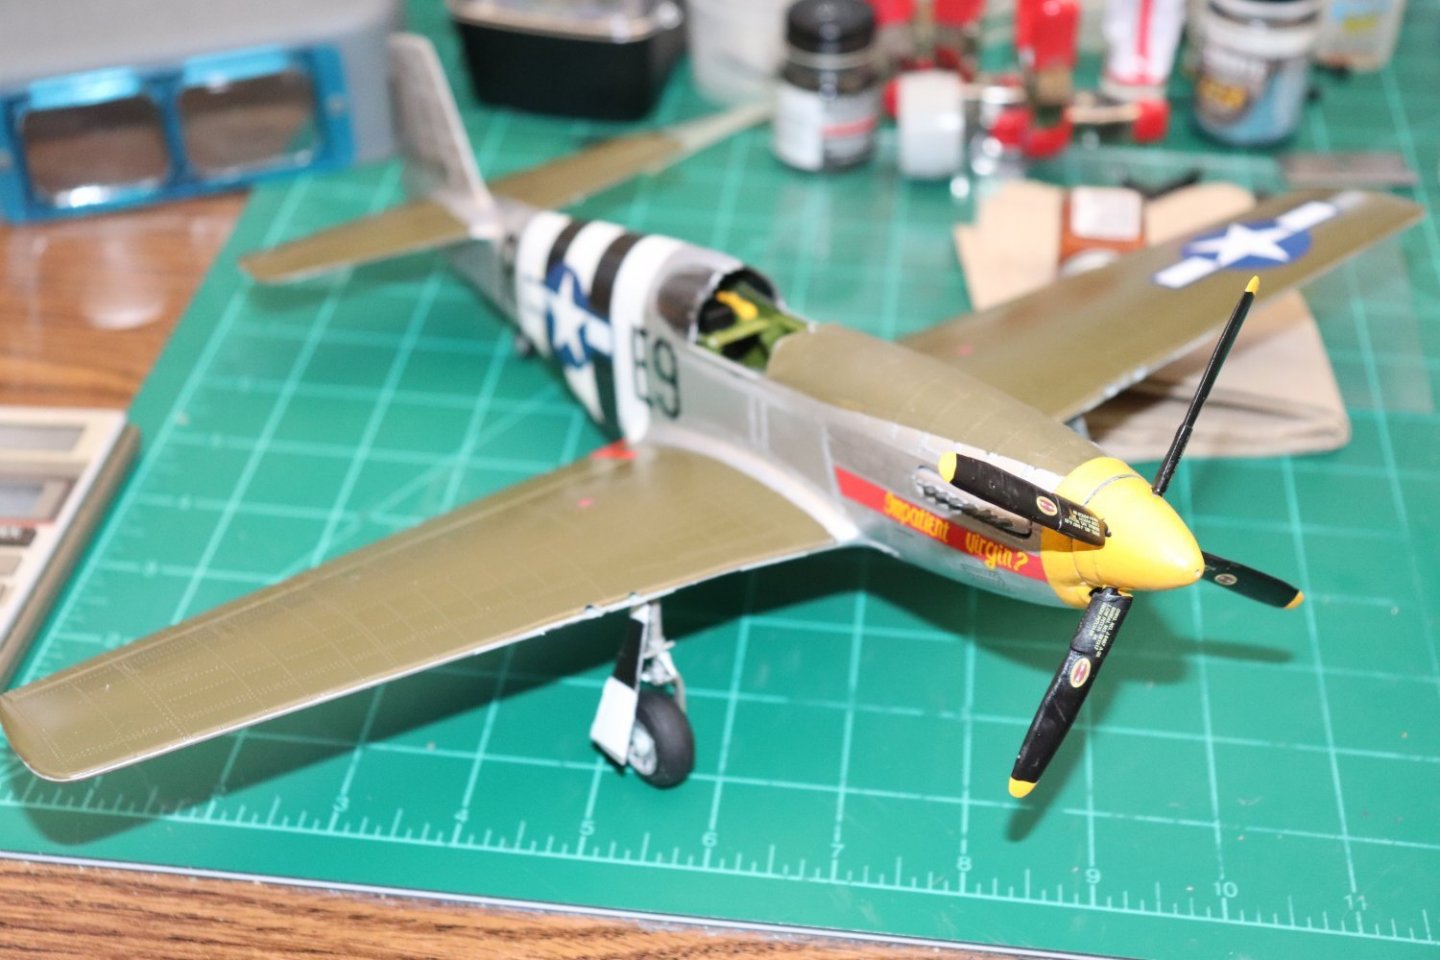
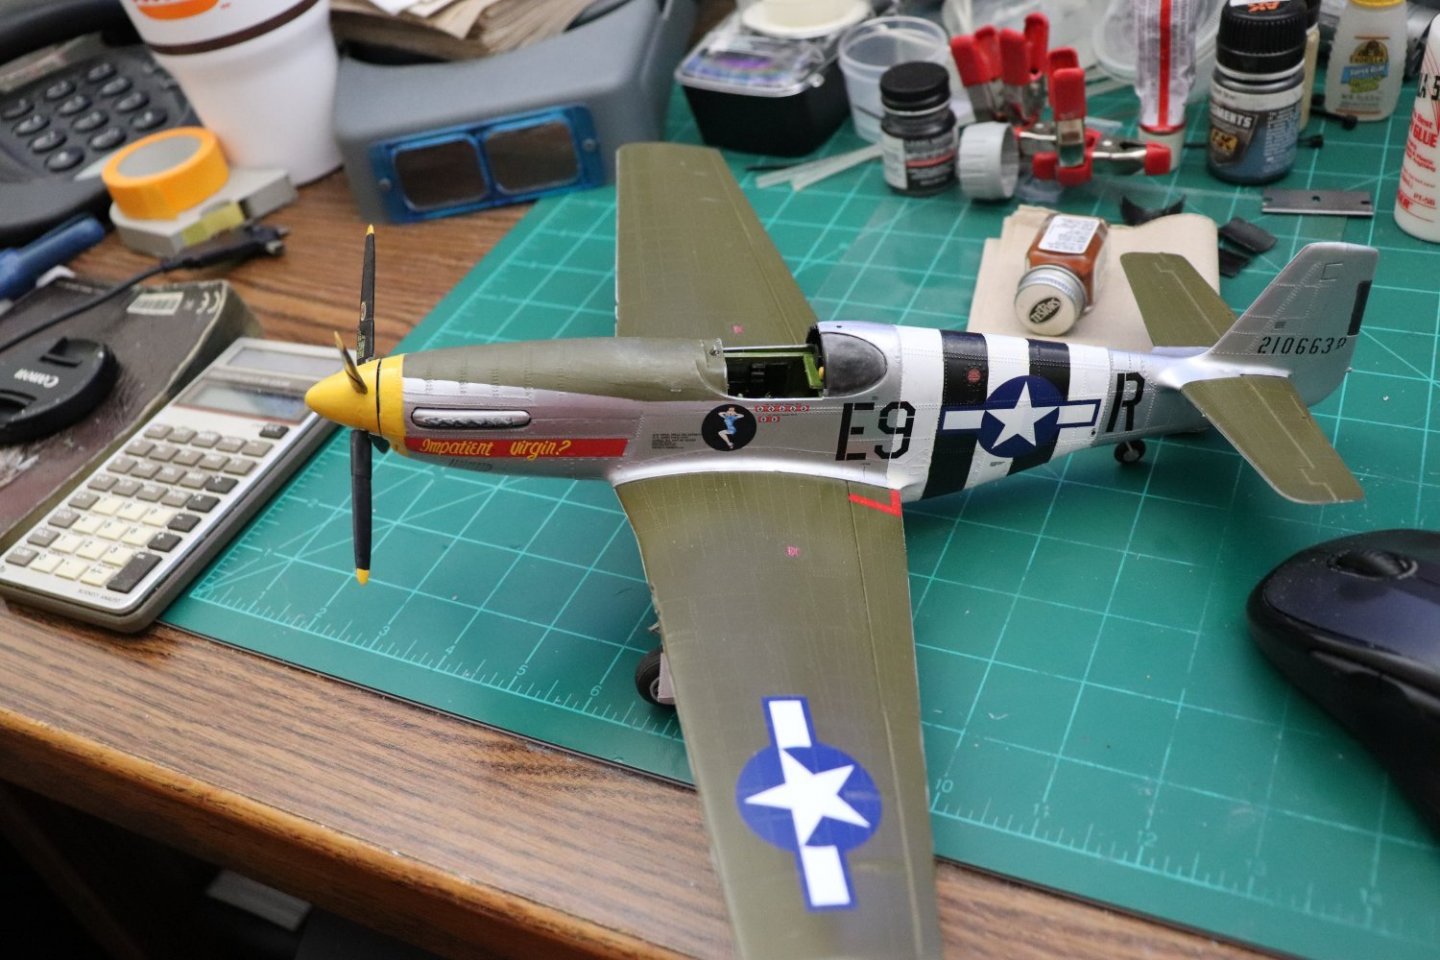
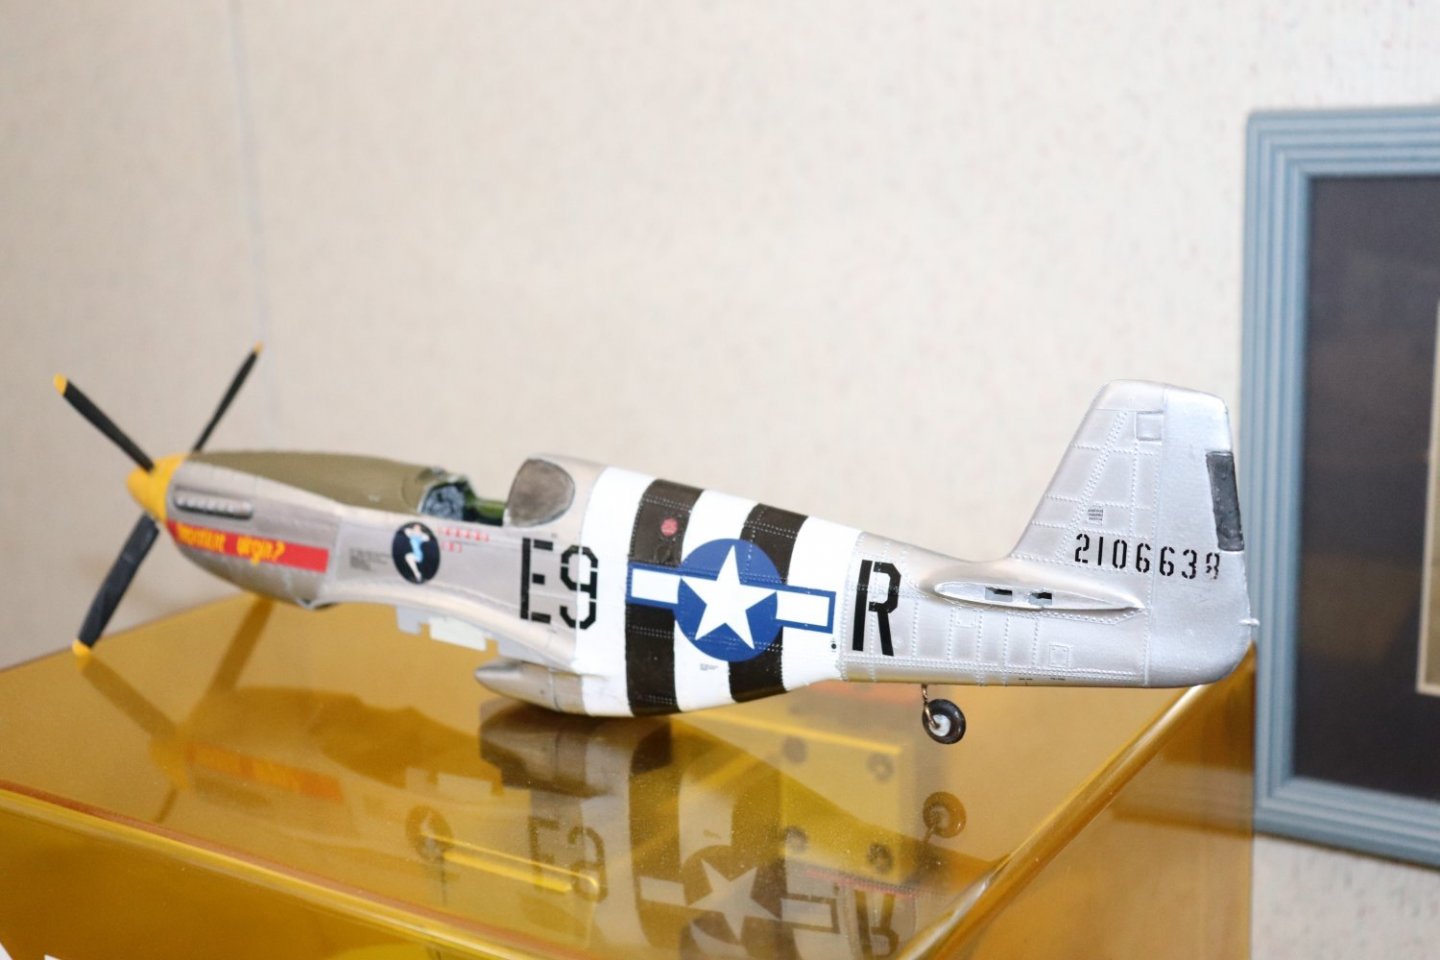
Update: As far as completeness, all that is left is to glue on the propeller and canopy.... This is a series of shots under natural light and heavy flash that will hopefully show what I was driving at as far as this finish surpassing anything I've ever seen done before... Aluminum when new has a reflectiveness, but it is muted by the whitish grey pasty oxidation that is always present on bare aluminum... Aluminum can be polished into a mirror but for working warplanes, this is seldom done so we are stuck trying to replicate that innate reflectiveness and dulling oxidation that such materials represent... We can paint aluminum and put a gloss coat on top of it and get a reflection from the gloss surface, but the surface has no reflection at all... You are going to see that here... Overall status now in natural light.... In these shots you get muted hints... Overall status in heavy flash... Your beginning to see the olive drab color reflection in the fuselage sides and the green surface on the underside of the fuselage... You can clearly see the fuselage reflection in the wings from the gloss coat... Closeups... (under heavy flash) On this one I'm going to point something out... Notice the red reflection on the olive drab wing? then look along the wing to the fuselage side.... the first square vertical panel back from the leading wing root? That's a reflection of a reflection... You see a diffuse secondary red reflection of the red reflection coming off the gloss surface of the wing from the red name label on the nose... Note the reflection between the E and the 9..... THAT's the reflection I'm talking about, REAL aluminum sheet does that, PAINTED aluminum does not... And two final shots under natural light... Ok you see the red tint behind the exhaust and above the name label? that is my red shirt from two feet away... Look between the E and the 9 (on the fuselage side) in the lower half you see the warning strips from the wing flap reflected... Look at the tail in front of the 2 of the registration number... You see the reflection of the olive drab horizontal stabilizer... That is what I was seeing on Paul's airplanes and what I was seeing on real BMF non-polished airplanes... Can't get any more scale that that in my humble opinion... I'm going to call this one finished at this point, I'm sure you all know how to glue up multipart canopies so there is no need to illustrate that... I will post a couple of finish shots in a few days, real life is coming on hard at the moment and the next few days are going to be hectic... Thanks for following this experiment in BMF and I hope you all don't think I'm crazy.... EG


- 63 replies
-
- 13
-
-

-
-
Thank you very much brother, after the next photo update we will see if everyone sees the same thing I was seeing... It's kinda difficult to describe with words...
-
Thanks Gary I think so as well, and am about to do an 18 pic closeup update under high camera flash to show what I mean... It looks real and in scale... (scale being the part paint and foil can't replicate in a typical BMF)
-
Thanks my friend... Yep the riveting was an issue, nothing like a Himalaya's worth of peaks to prevent a smooth coat... but we got it done, I couldn't apply it with a smooth circular pattern, I had to go with the rivet lines and cross them to get in between them... A lot more work... The mostly smooth skin to the Starfighter should take this beautifully...
-
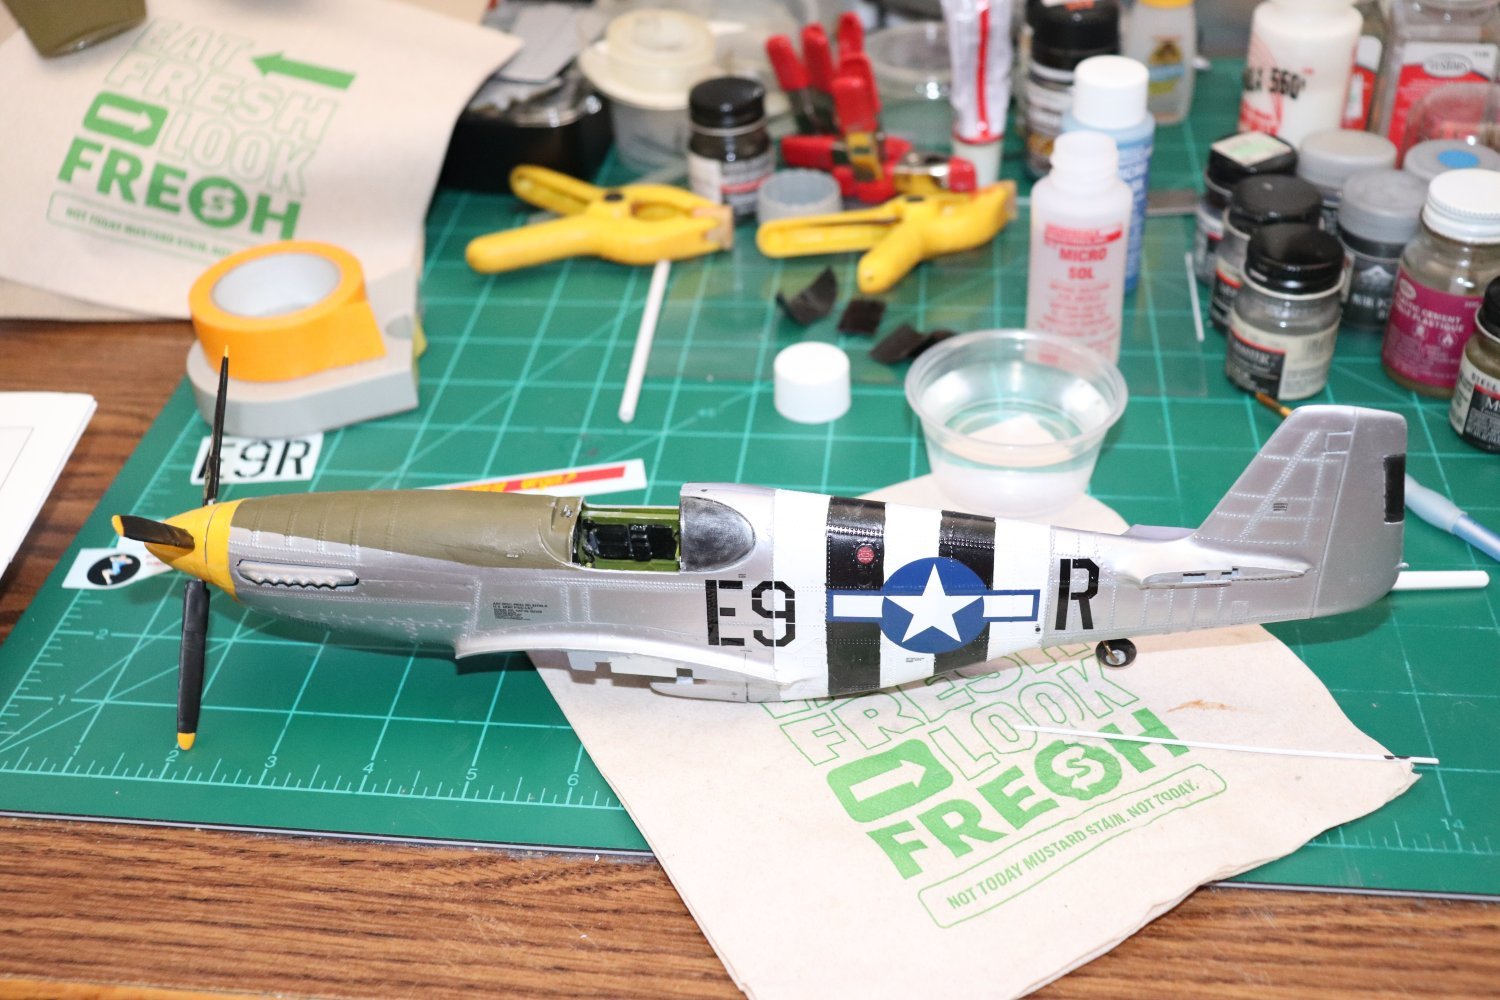
Minor update... Fuselage decaling done..... Working on finishing the wings now, Then a final once over for missing stuff... Finish coming soon now... EG

- 63 replies
-
- 12
-
-
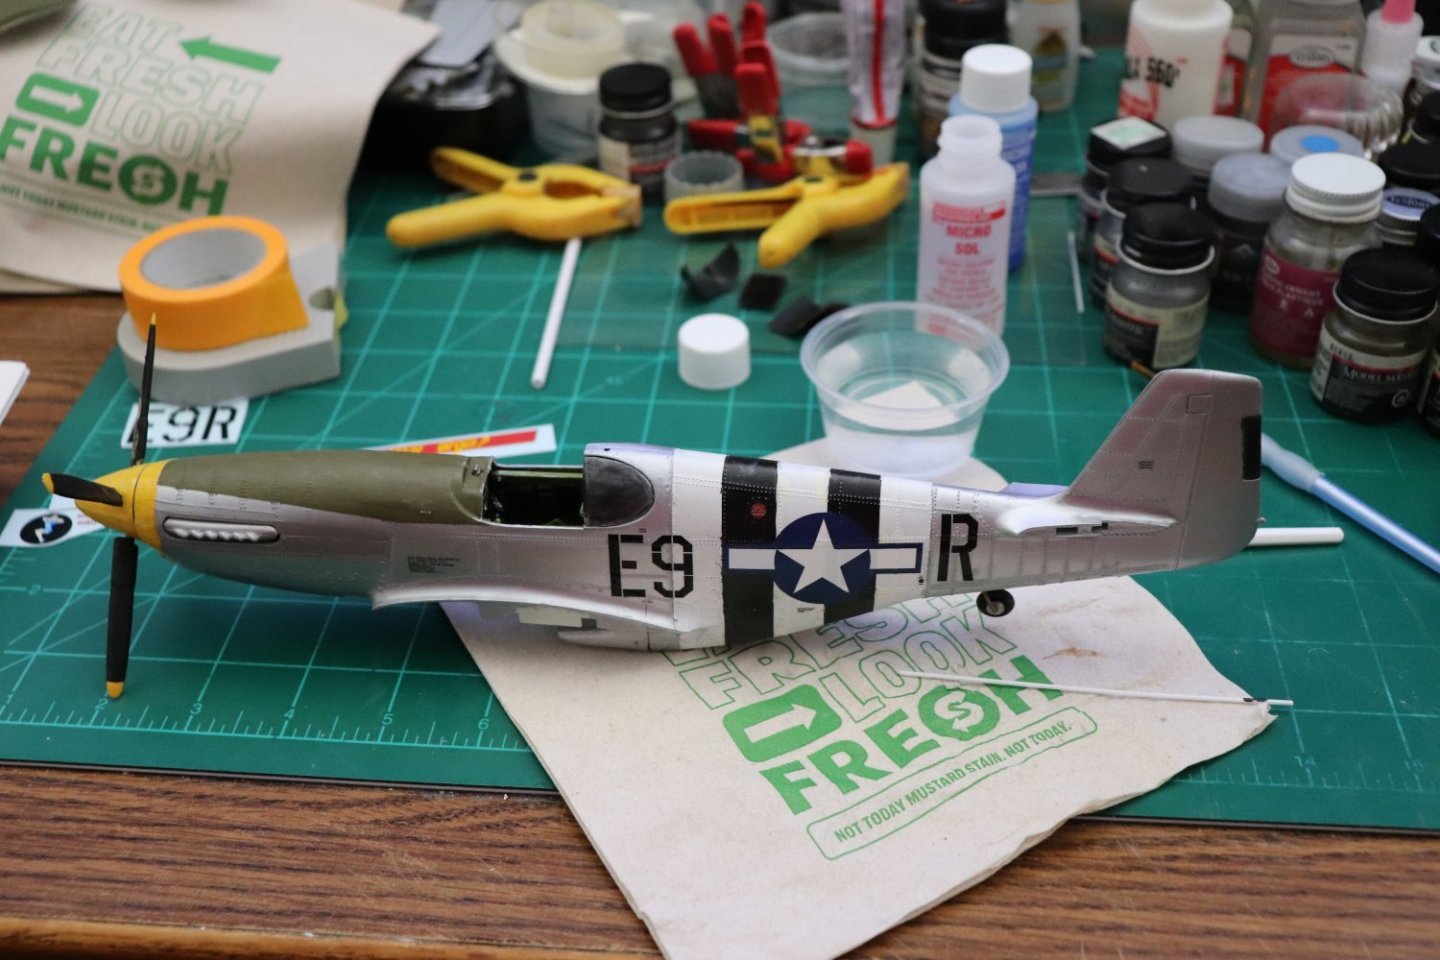
Ok minor update... Partway thru decaling this bird... Normal light... High flash... Seems like I got the fuselage invasion stripes a bit too wide and hence extending too far astern... Oh well too late to change it now... Steady progress, gonna get this one finished then go back to Bluejay 4.... Onwards..

-
I think it would Jav, just the fact you can seal it with Future is the ticket... According to Paul Coudyrette, decals will go down right over it, But you need to seal it to weather it... Me, I'm putting a coat of future on it before decaling, just to be on the safe side... Since future is one of the products used to seal paint for washes I believe it would be fine to weather over it... I will say this, I think it is a lot easier than setting up an airbrush for several varying coats that may or may not come out right... (and most of the time still look like a coat of paint) Paul Coudyrette did most of his posting on a french website... http://fighters.forumactif.com/ Like MSW is to ships? Fighters is to airplanes, I seen him post on several others as well but that was his primary home... Here I posted the most complete post he made on his method translated from french... (post #7 in this log) The rest I learned from reading his posts, he would usually drop a tidbit here or there on various postings about stuff he did to get certain effects... Viewing his work, he could have taught everyone a lot about building models... Take a wander over there, there are some master aircraft modelers there... (but don't forget to come back home {chuckle} we would miss you)
-
Well when I first saw this on a model that's exactly what I thought Dan... a non polished aluminum working surface, semi reflective and a little washed out... I think with a flat panel recessed lines model you can actually bring out a bit more shine... Future really doesn't effect the metallic finish either, but I will say this, mine I wet brushed, put down a wet coat and allowed it to dry, it allows you to handle it somewhat, but prolonged handling will cause it to wear off just like paint on the sharp edges... It does allow good decal application and I do believe you can weather over it... Personally, I'm going to do another wet coat after the decals are finished just to seal them in as well... Thank Dan, trying not to do a quickie job and make it at least presentable...
-
Thanks my friend, I believe it looks good Ed, even if the rivets gave me a fit... {chuckle}
-
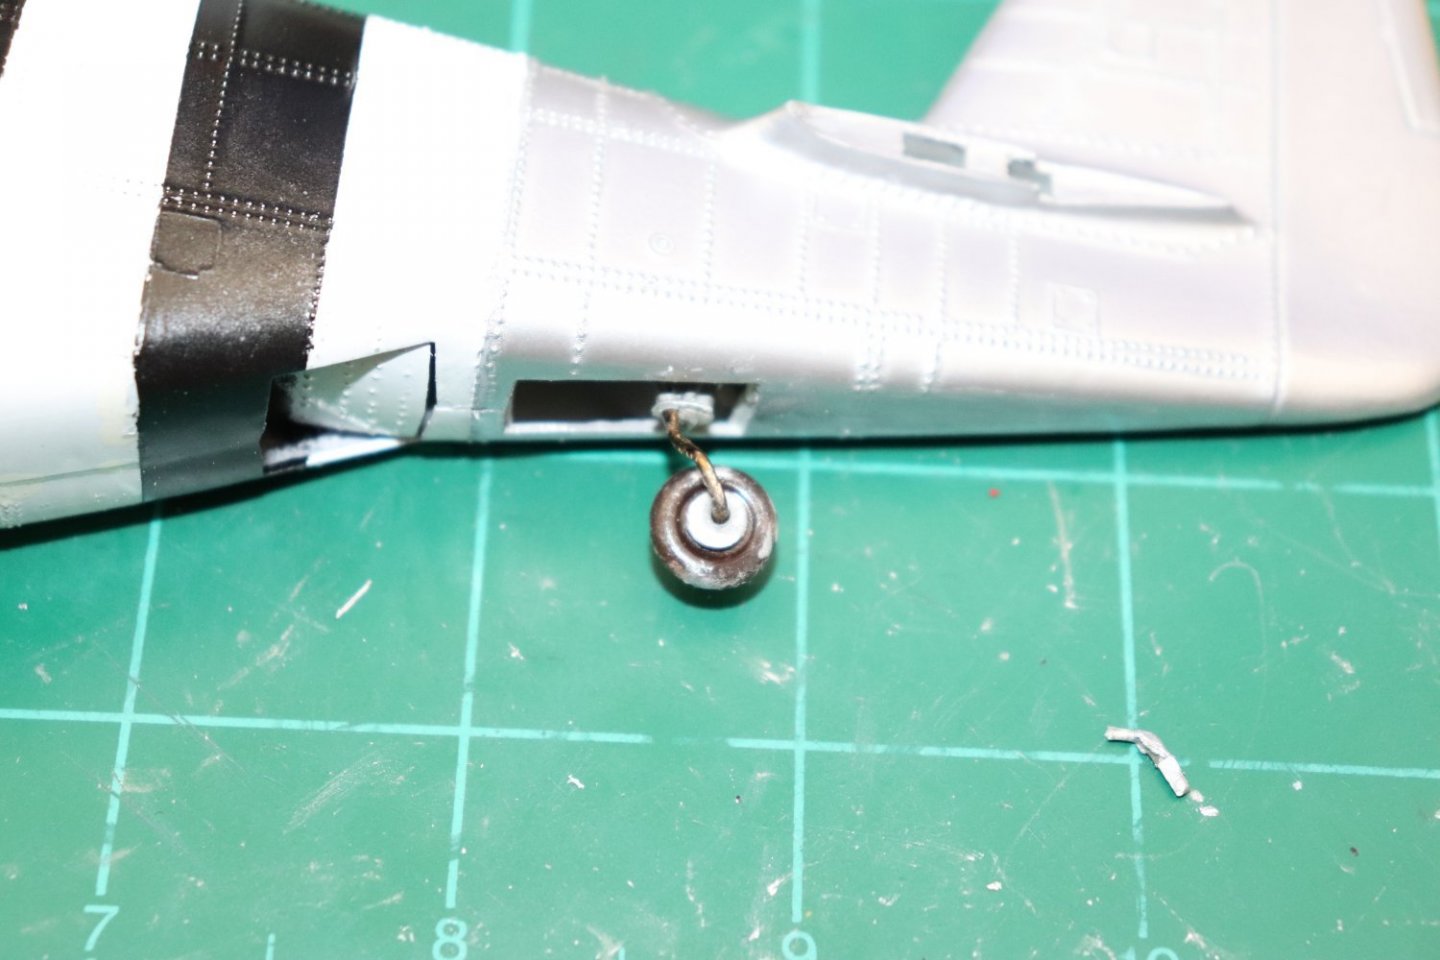
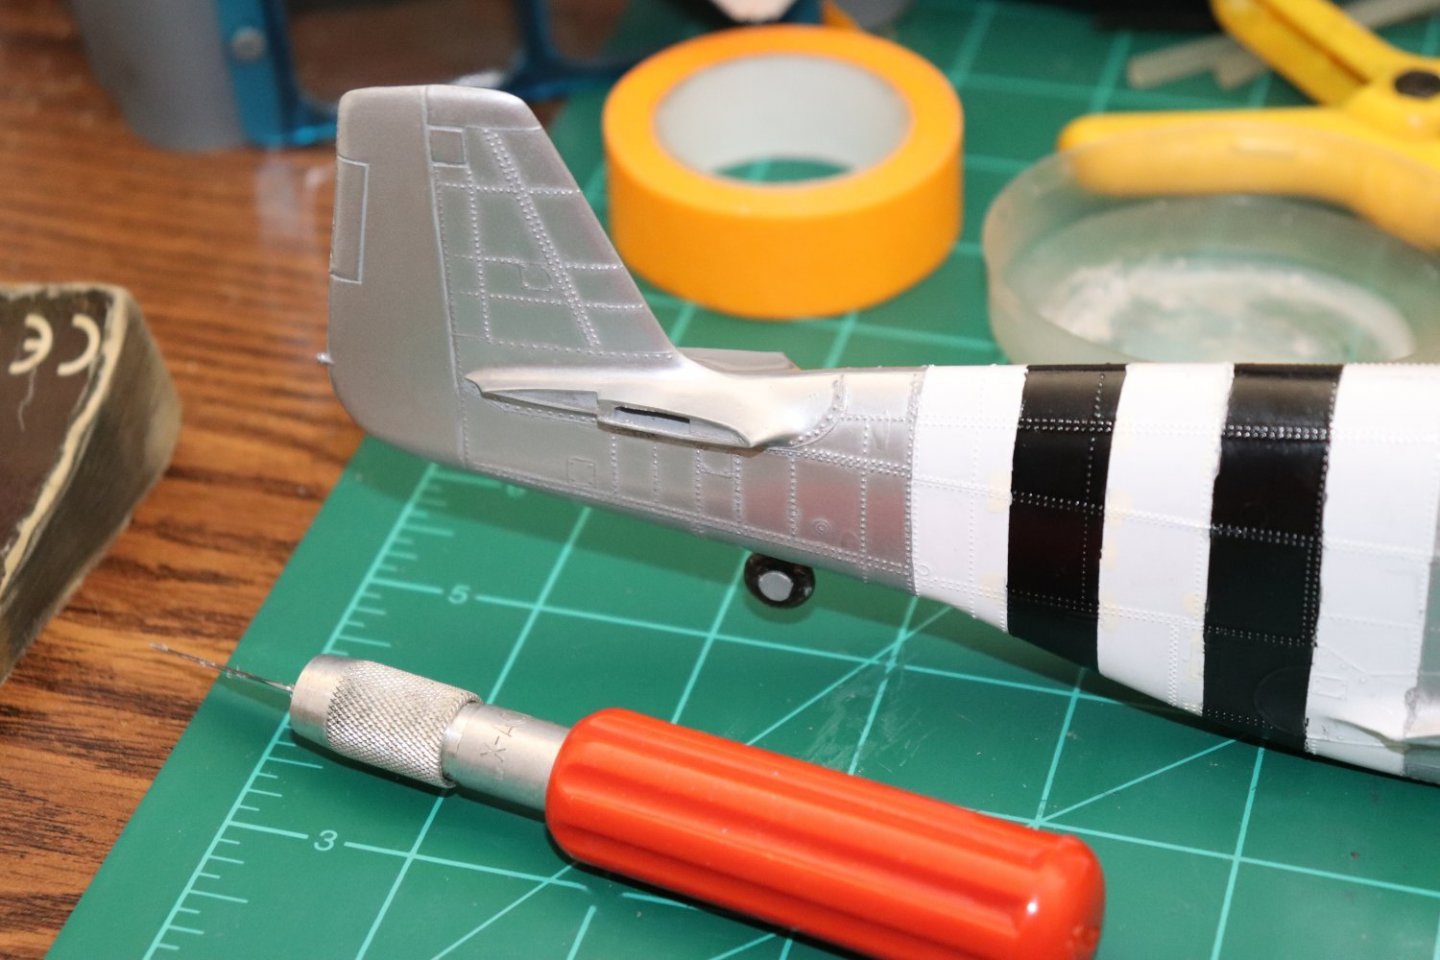
Thank you OC & Mark, I think I'll run with it... Of course something just had to happen.. Remember those weak landing gears? Well, the tail wheel broke off when I sat it on it's landing gear test fitting the wing.... So I has to repair it with a piece of wire... Superglued in place awaiting a touch of the paint brush.... you can see the broken leg where I had to cut it off cleanly... .035 thousandths of an inch is the diameter of the plastic leg, it's now /.040 brass wire... Will be doing some decaling tonight as soon as the touch ups are done... Going to deal with the canopy last... seems like where it want's to reside in the big scheme of things... I'm happy, could have been better, but could also have been a LOT worse... Onwards...
- 63 replies
-
- 11
-
-
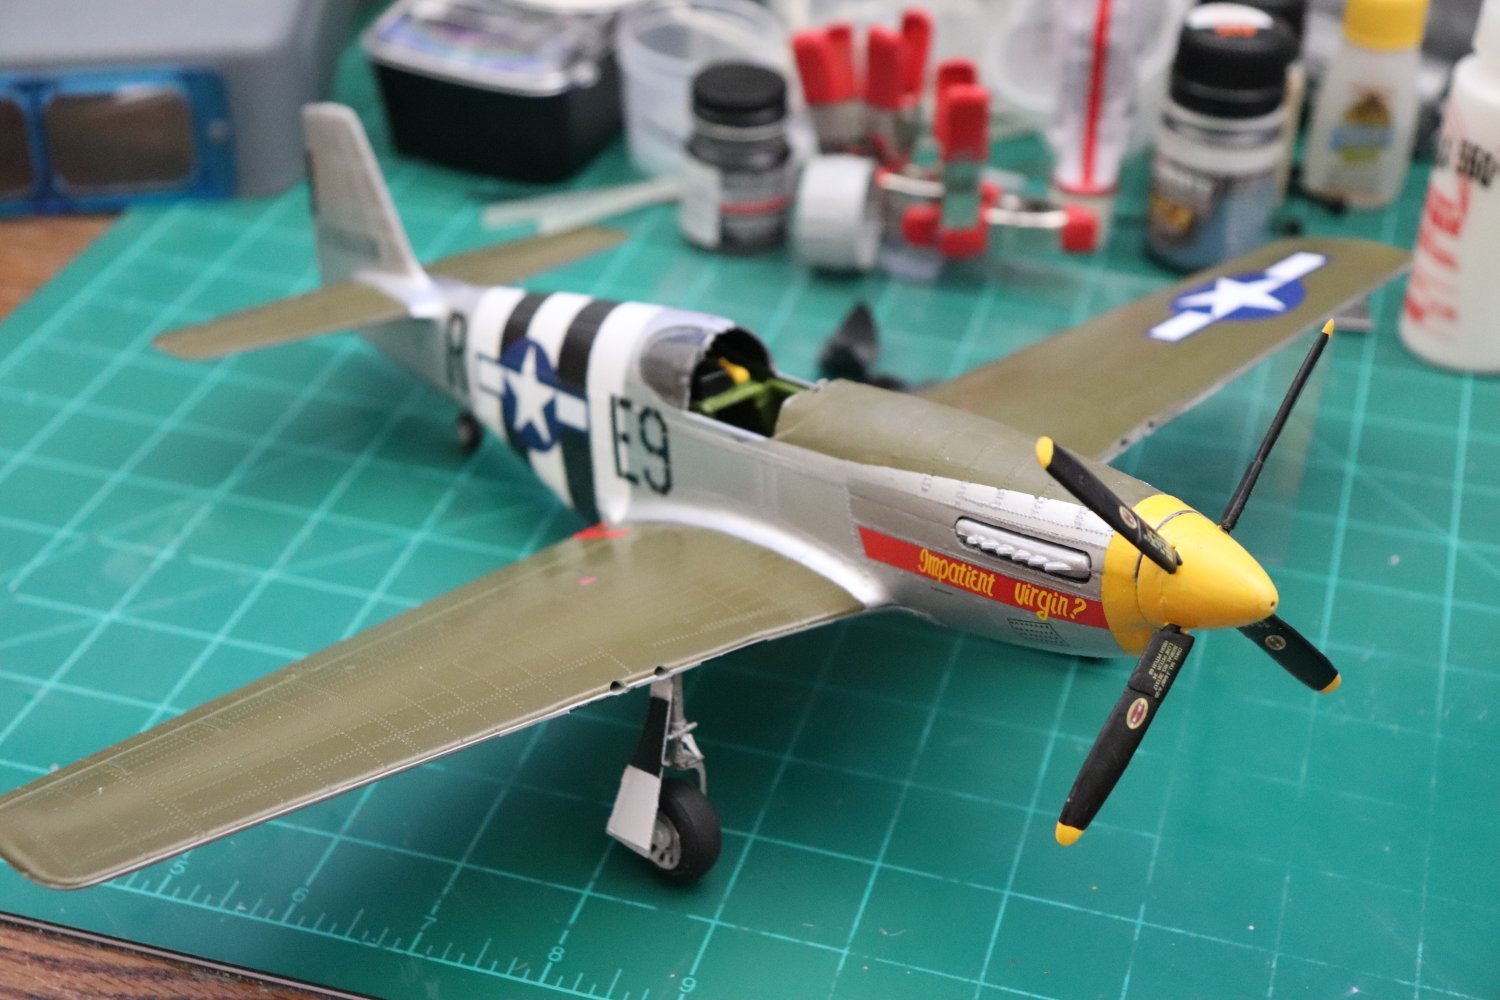
Ok Brothers, judgment day is here... She's Buffed! (and futured) It does retain some reflection after sealing... Yea Team!!! The rivets were a pain requiring multiple applications to fill in between... The reflectivity is quite nice.... Lets see some more... I think it is a success, but I should have taken off all the rivets first, you really can't get a good polish on it with them in the way... What you see here is about the best you can hope for with a non smooth surface... So, tell me what you think? EG

-
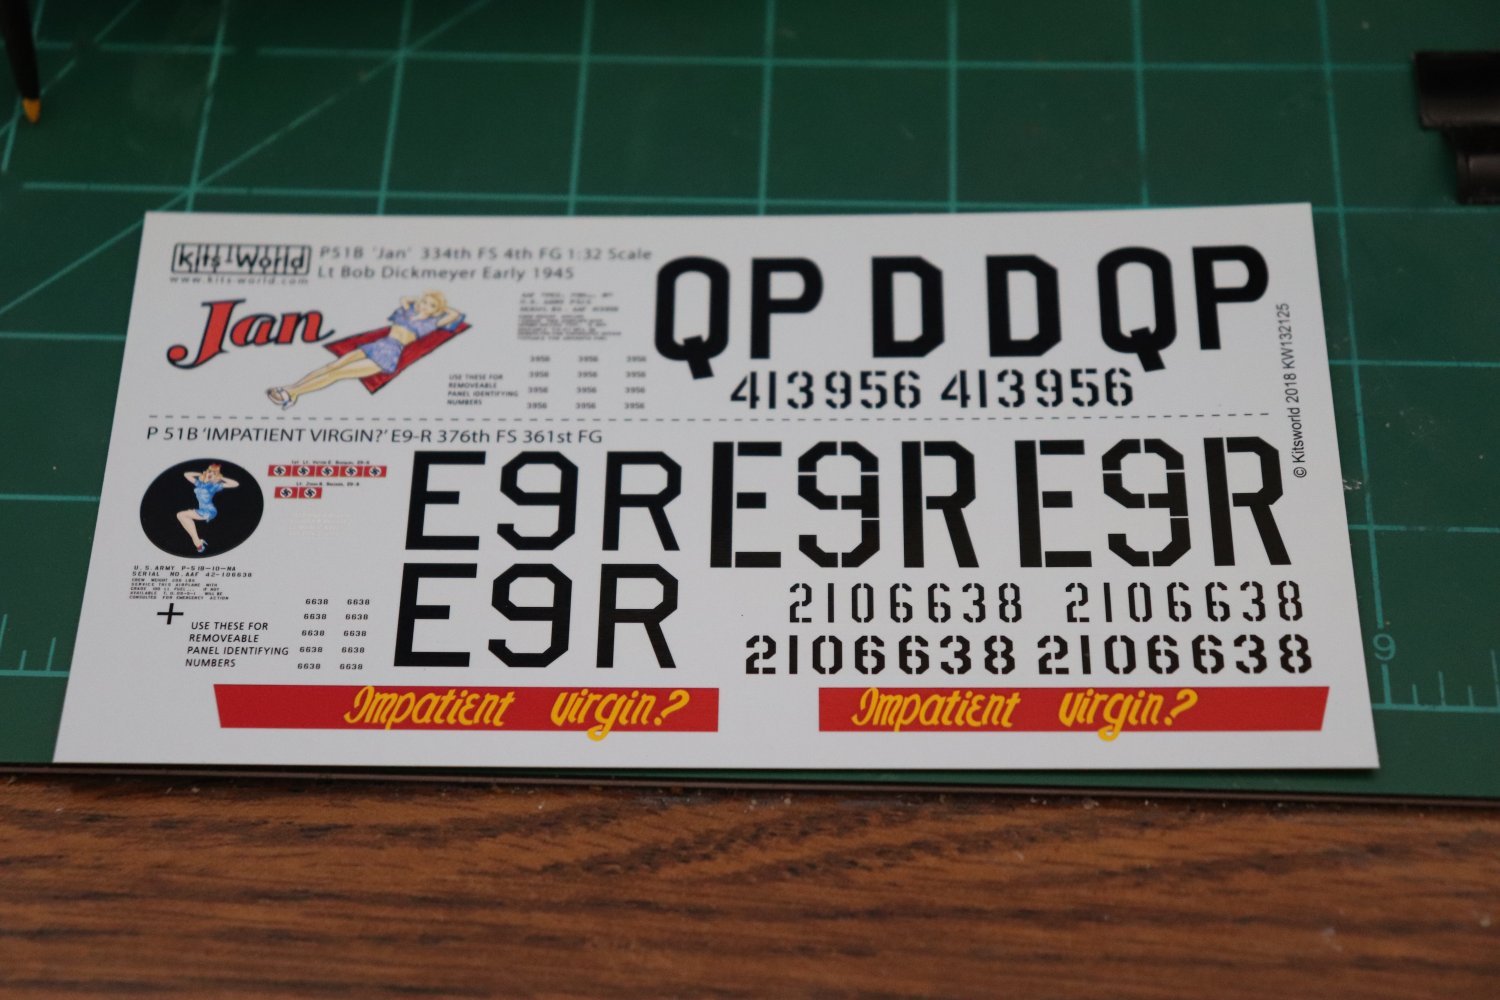
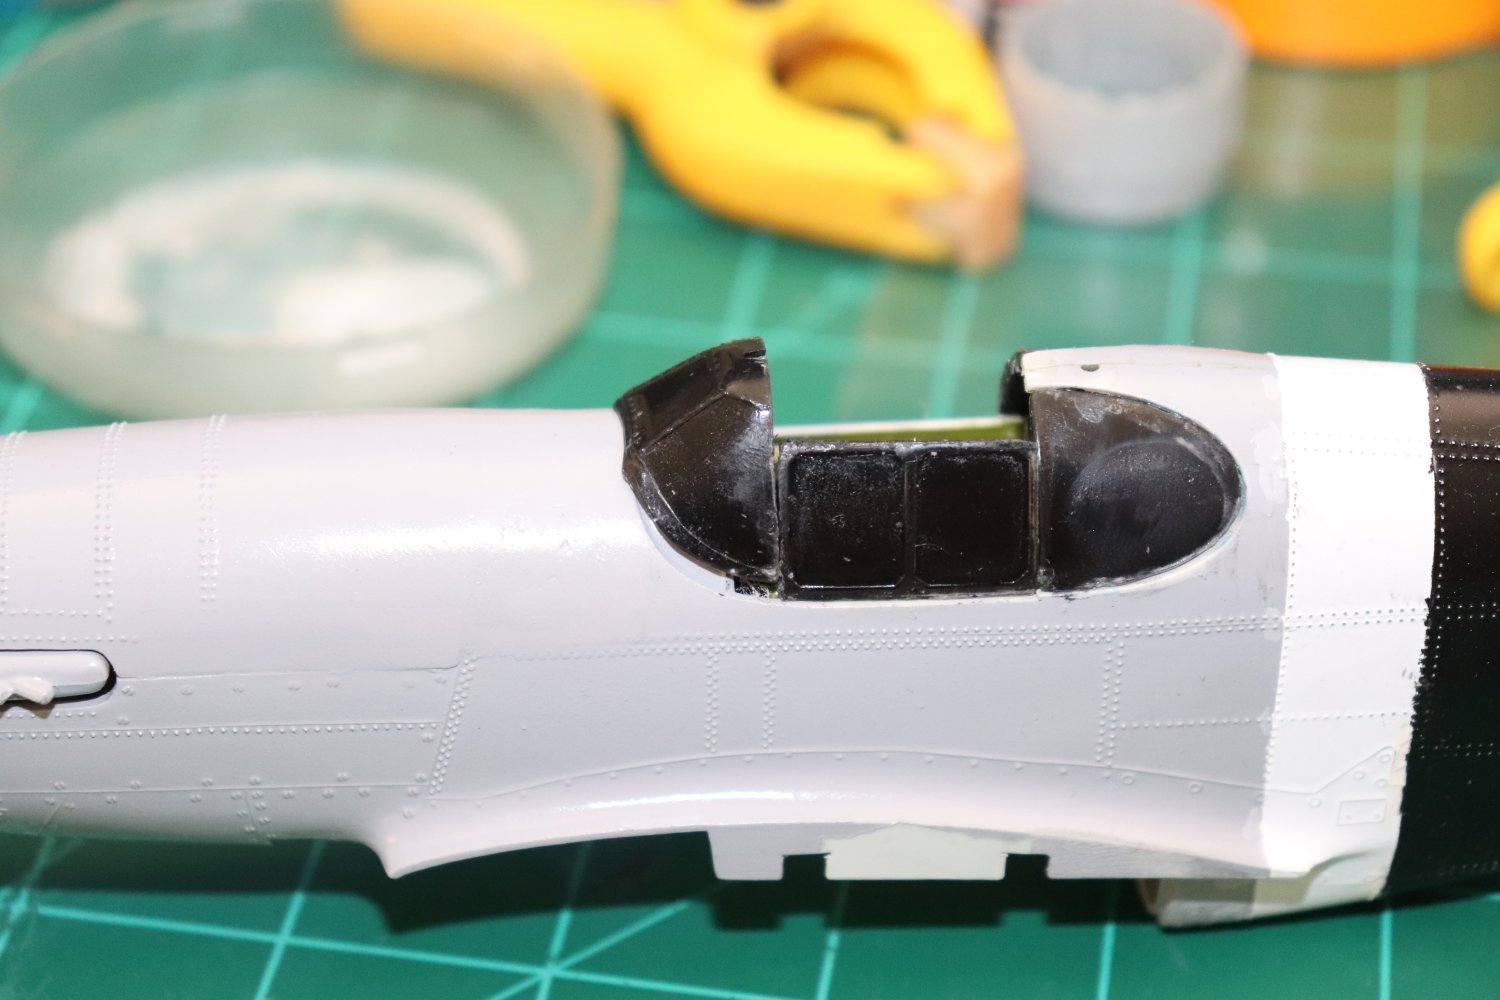
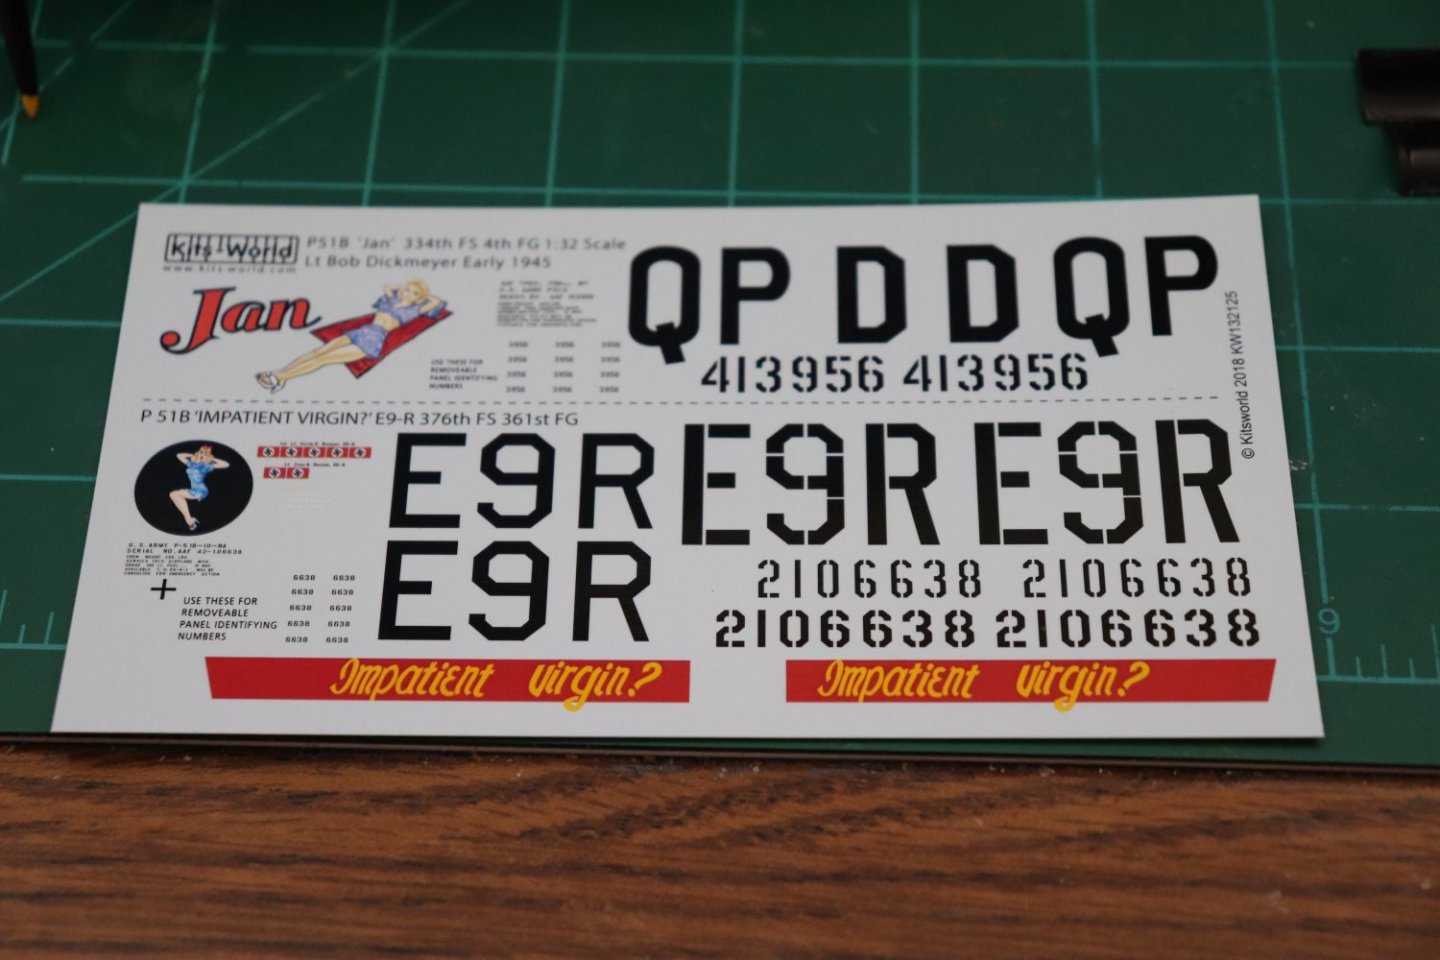
Well my decals arrived today.... Since this will be the WWII bird before they removed the Invasion stripes, it will receive the stenciled letters and numbers... The solid versions is for the current incarnation of the plane doing the airshow circuit... I will be using the stenciling and insignias from the original model as well...... Had to take a break today, the Admiral had an impromptu trip to the the local dispensary for a prescreening before her visit and stay next week... So I was unable to get much done on the Impatient Virgin today... And last night I ran into a bit of a problem with the canopy... Now I did have it glued together, and painted it with micromask, and it fell apart in my fingers when I went to cut the masks... That was my third attempt to assemble it as a single piece... (the last one with Testors Liquid cement cause Formula 560 doesn't seem to want to hold on this stuff) As usual, when using liquid cement on clear parts, I got the typical crazing in places and UGH! a glue fingerprint... I'll have to buff that out and paint it with future... but another issue presented itself, the Micromask didn't want to stick to it either!!! I've never had MM not stick to anything I've used it on before! Since there is no 3rd party canopies for this bird I'm kinda stuck with what I have... This is part of the problem.... Aside from the issues with Liquid glue and clear parts, take a look at the windscreen? on the other side it is sitting in it's position groove, on this side, it is 3/32nds short... Right now only the aft windows are glued, the side window is just sitting there and the windscreen is positioned against it... The forward curve of windscreen to side window match.... The windscreen is too narrow/small... So pretty much all day I've been figuring a way to get around this... The only thing I can come up with is strip the paint off, glue the side panels to the aft windows/fuselage, paint the insides, then glue the top hatch to the side panels and fuse after painting the insides... From that point centering the windscreen and gluing it into position matching the curve of the other panels and calling it good... At that point hand painting the ribs in aluminum... When I built this as a kid decades ago I don't remember the canopy being such a difficult piece... Of course that was my tube glue days before the revelation of liquid cement and glue fingerprints wasn't an issue... (chuckle) I'll get it figured out.... And we will be buff sometime tomorrow... (gotta remember, she is impatient) Ever onwards hanging on to my sense of humor I hope... EG

-
Beautiful bird, classic fighterplane lines.. need to dust it off every once in a while Brother... Mine, which is the 2017 release of this '69/'70's tooling, actually warns you about the weak landing gear as does every build review I've seen... they may have changed it for the "D" model release... And I don't have to deal with that brittle, tough to cut, silver plastic... Relatively simple model it is... Hoping mine comes out ok... Doesn't need to be spectacular, it will go on the shelf until I replace it with a "D" model myself... Hoping against hope I don't flub this one... Thanks for the vote of confidence...