HOLIDAY DONATION DRIVE - SUPPORT MSW - DO YOUR PART TO KEEP THIS GREAT FORUM GOING! (Only 13 donations so far - C'mon guys!)
×


Egilman
-
Posts
4,377 -
Joined
-
Last visited
Content Type
Profiles
Forums
Gallery
Events
Everything posted by Egilman
-
 Thanks Dan, as far as the document holders they aren't seen now and anything of an appropriate size wouldn't be seen either... Absolutely a requirement for a pilot to fly yes, but what's the point of putting in something that no one else can see...
 -
Thanks Dennis, oh not that far along yet my finners are crossed as well, but I at least understand what needs to be done this time... but you know me, if there is a way...
-
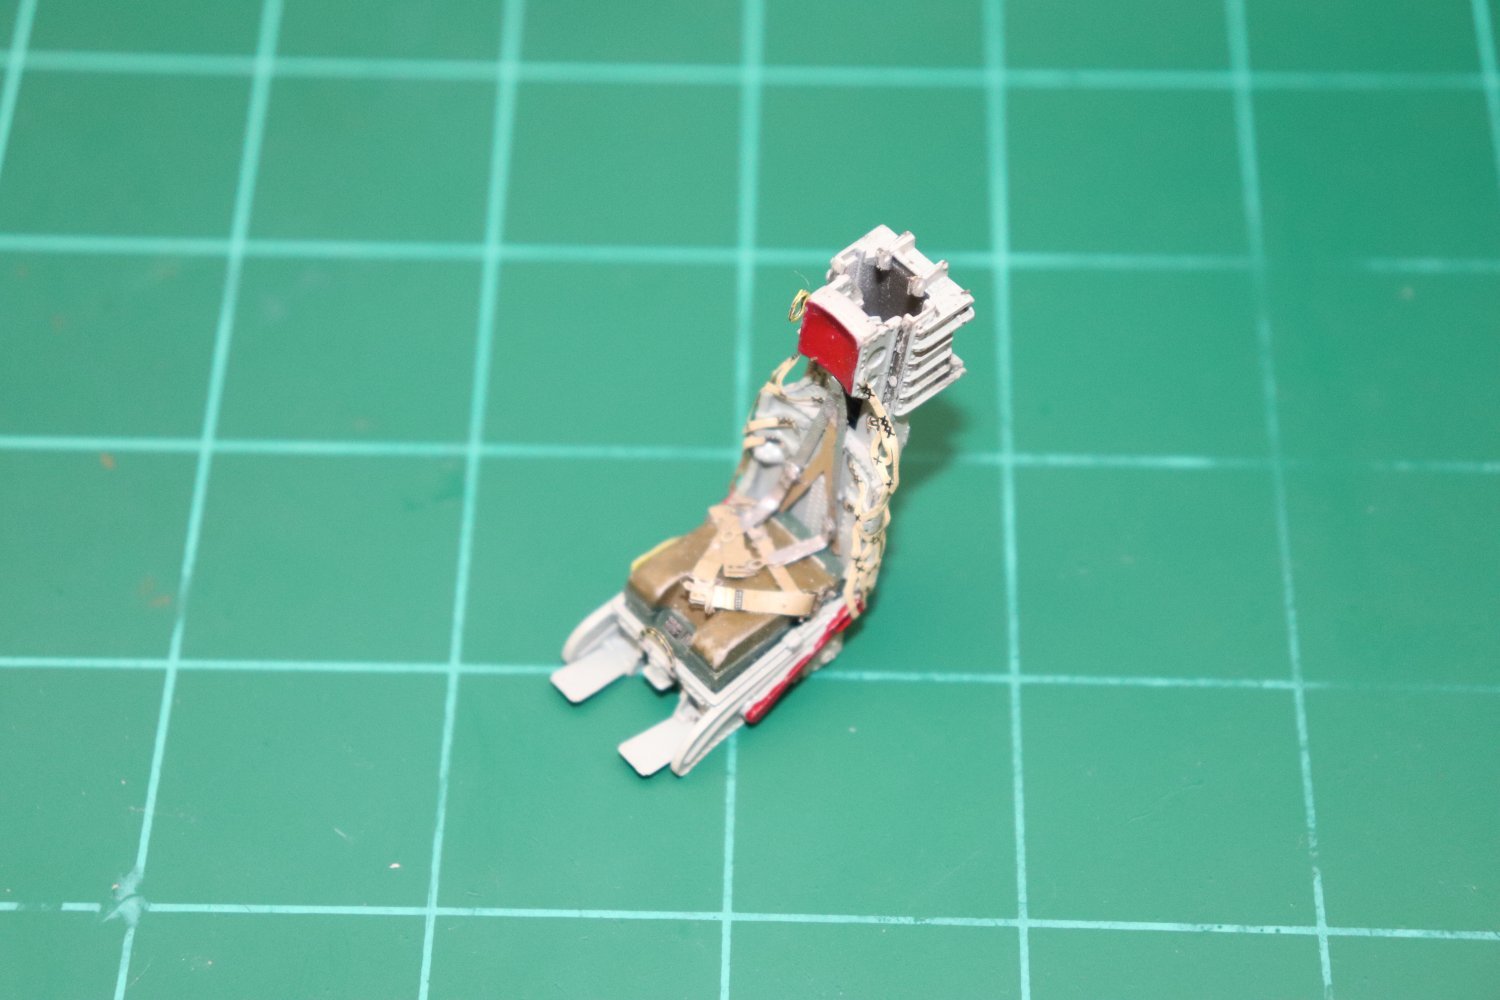
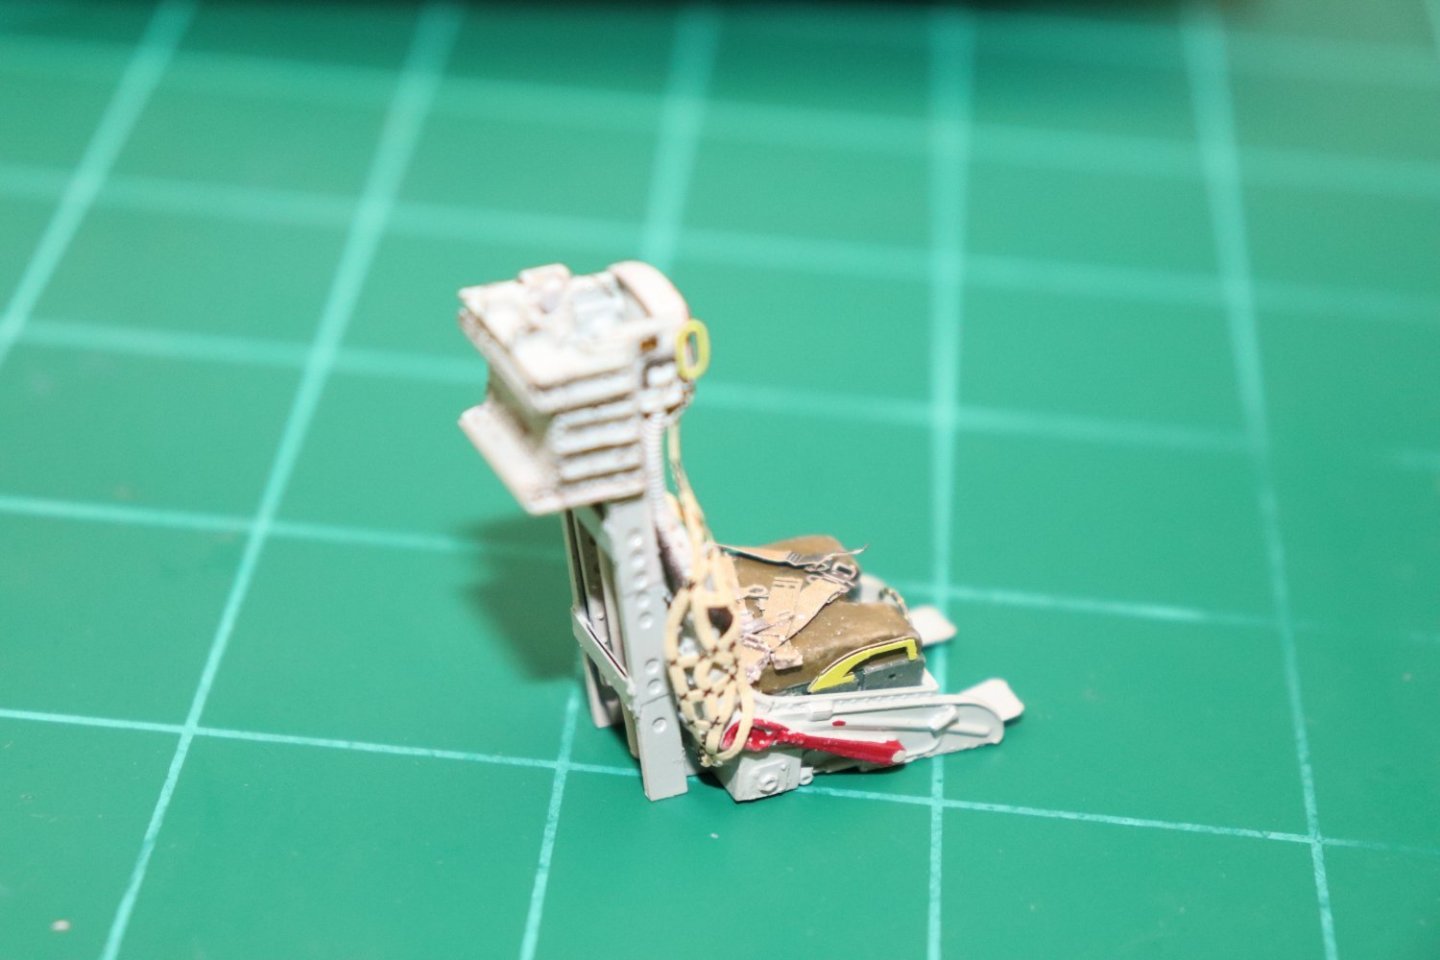
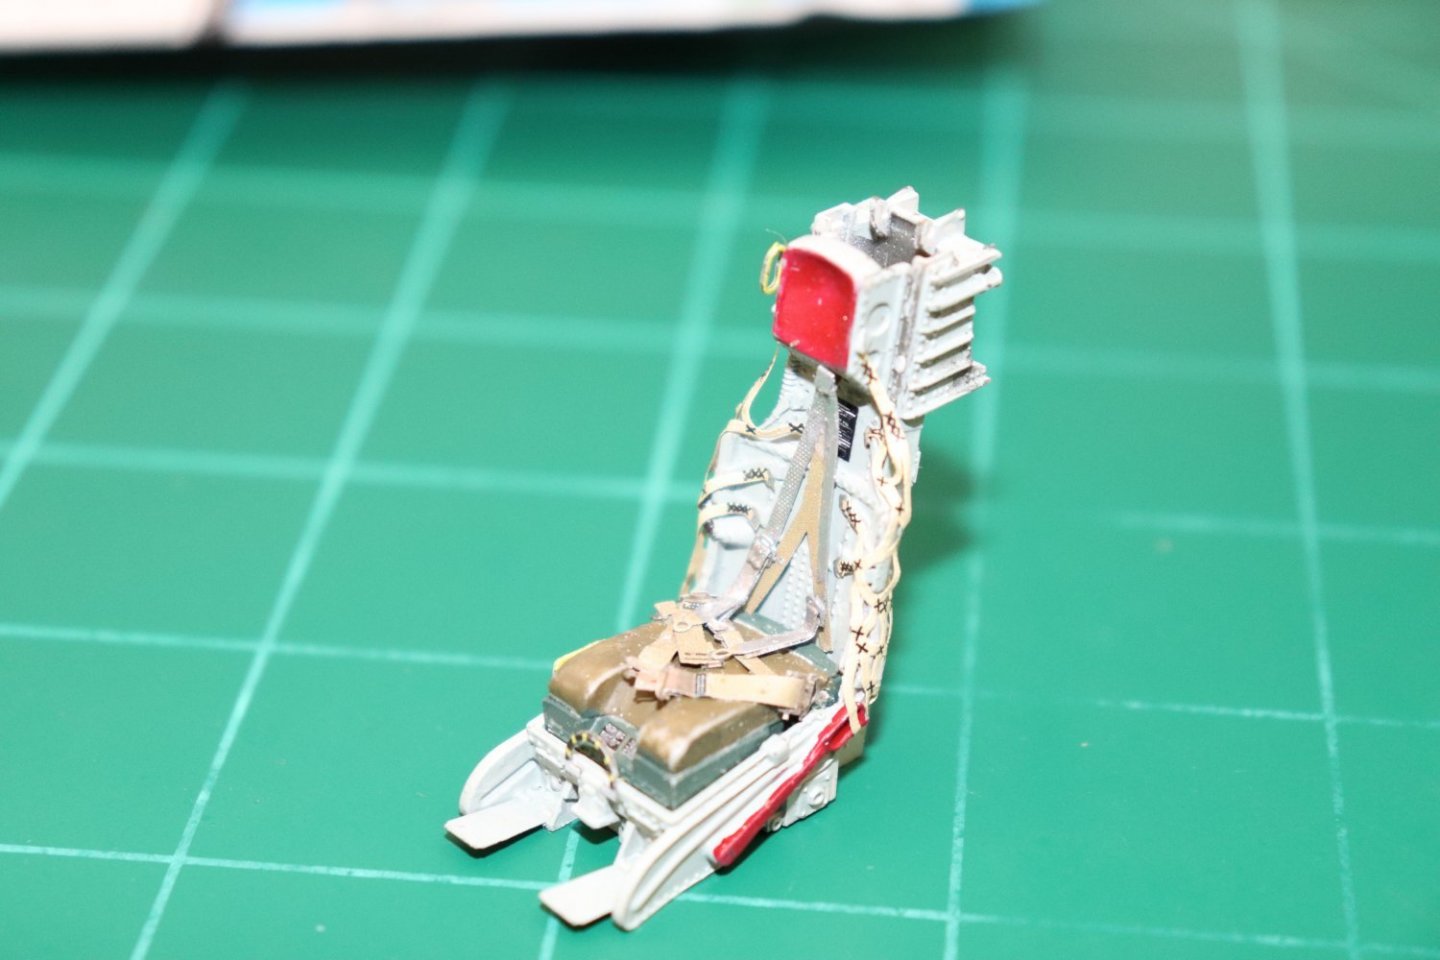
I would have dropped a couple of papers in them if they would be seen brother, but they won't.... Yes they had boot clips they needed to wear, they were nicknamed "spurs" cause they looked the part and clicked on the floor when they walked... When you see a video if a pilot climbing in to an F-104 cockpit with a C-2 ejection seat, you see them pause for a sec and act like they are stomping bugs or something... when they get the other foot in they repeat the motion.. What it is, is the pilot hooking his "spurs" onto the ball end of the foot retracts.. Yes the seat has cable retracts that attach to the feet of the pilot so when he ejects the retracts trigger and pull his feet and legs into the seat frame and lock them there while the seat is fired from the cockpit... There are two arms (red) on the sides of the seat that attach to the webbing that looks all bunched up on the sides.. When the ring is pulled those arms rotate forward pulling the webbing up above shoulder level so the pilots arms don't go flopping around in the windstream ... The C-1 seat had the same equipment installed after Yeager's ejection experience, the reason he spent six months in the hospital recovering from it was he had two broken arms, a dislocated knee, and a severe concussion from his head buffeting around in the windstream ... A high speed ejection from a supersonic aircraft is no picnic ... (you could survive the damage to the aircraft but the ejection could kill you anyway, ejection was definitely the last and only option left) As an aside, Yeager had to get a special medical dispensation to continue to fly afterwards, he was too experienced/great a pilot to ground permanently, although his cutting edge test pilot status was lost as well as his shot at becoming an astronaut....
-
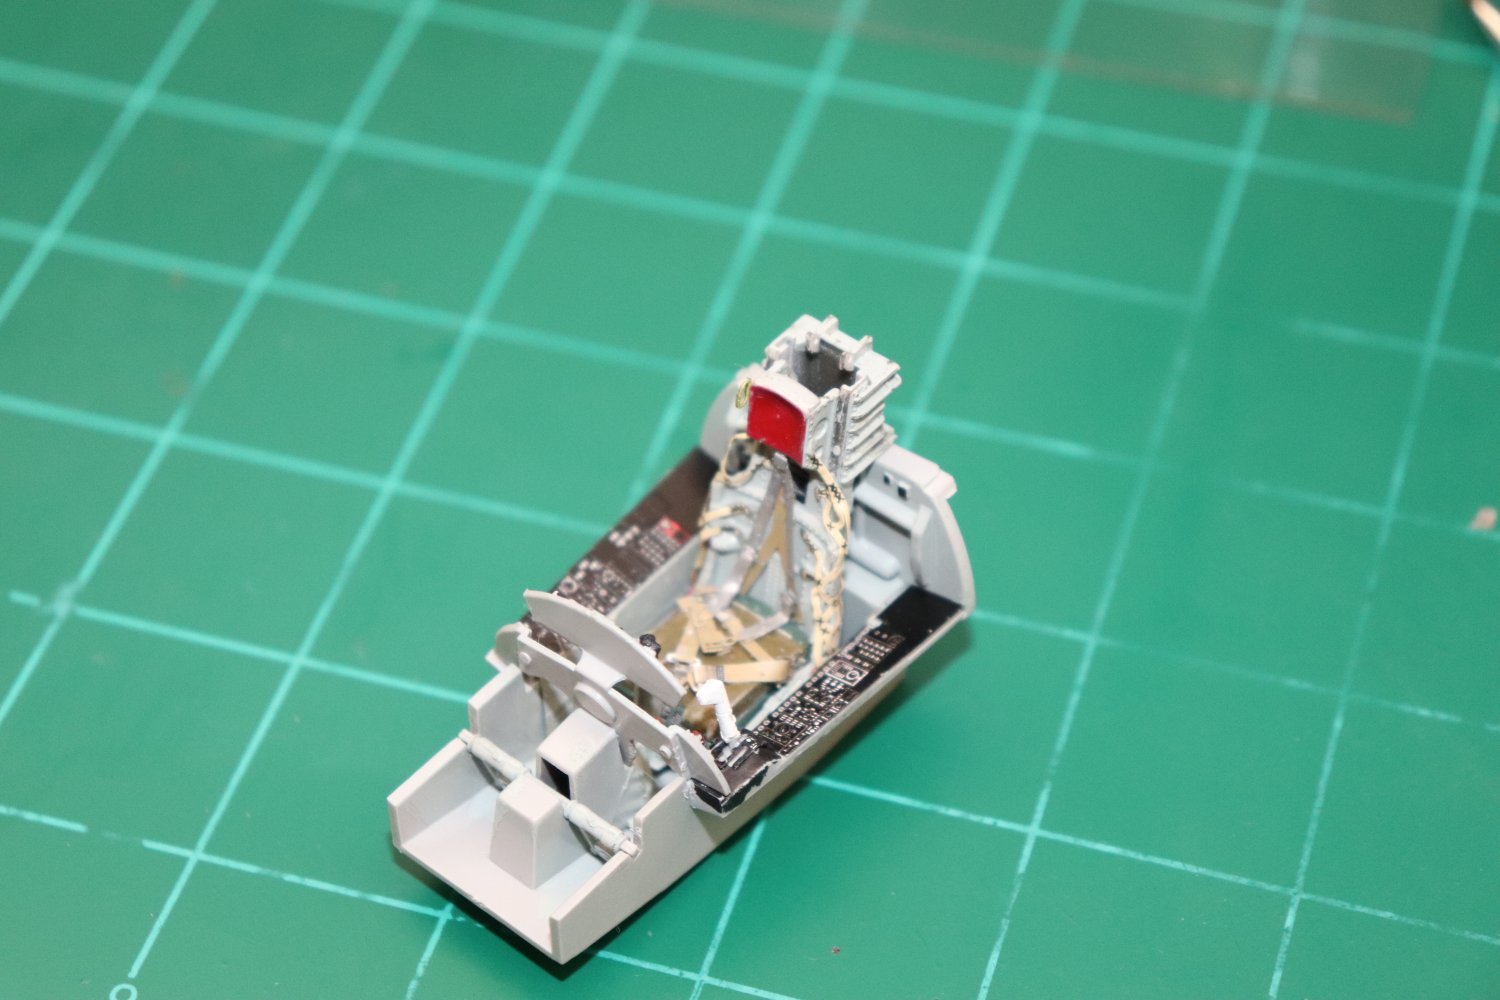
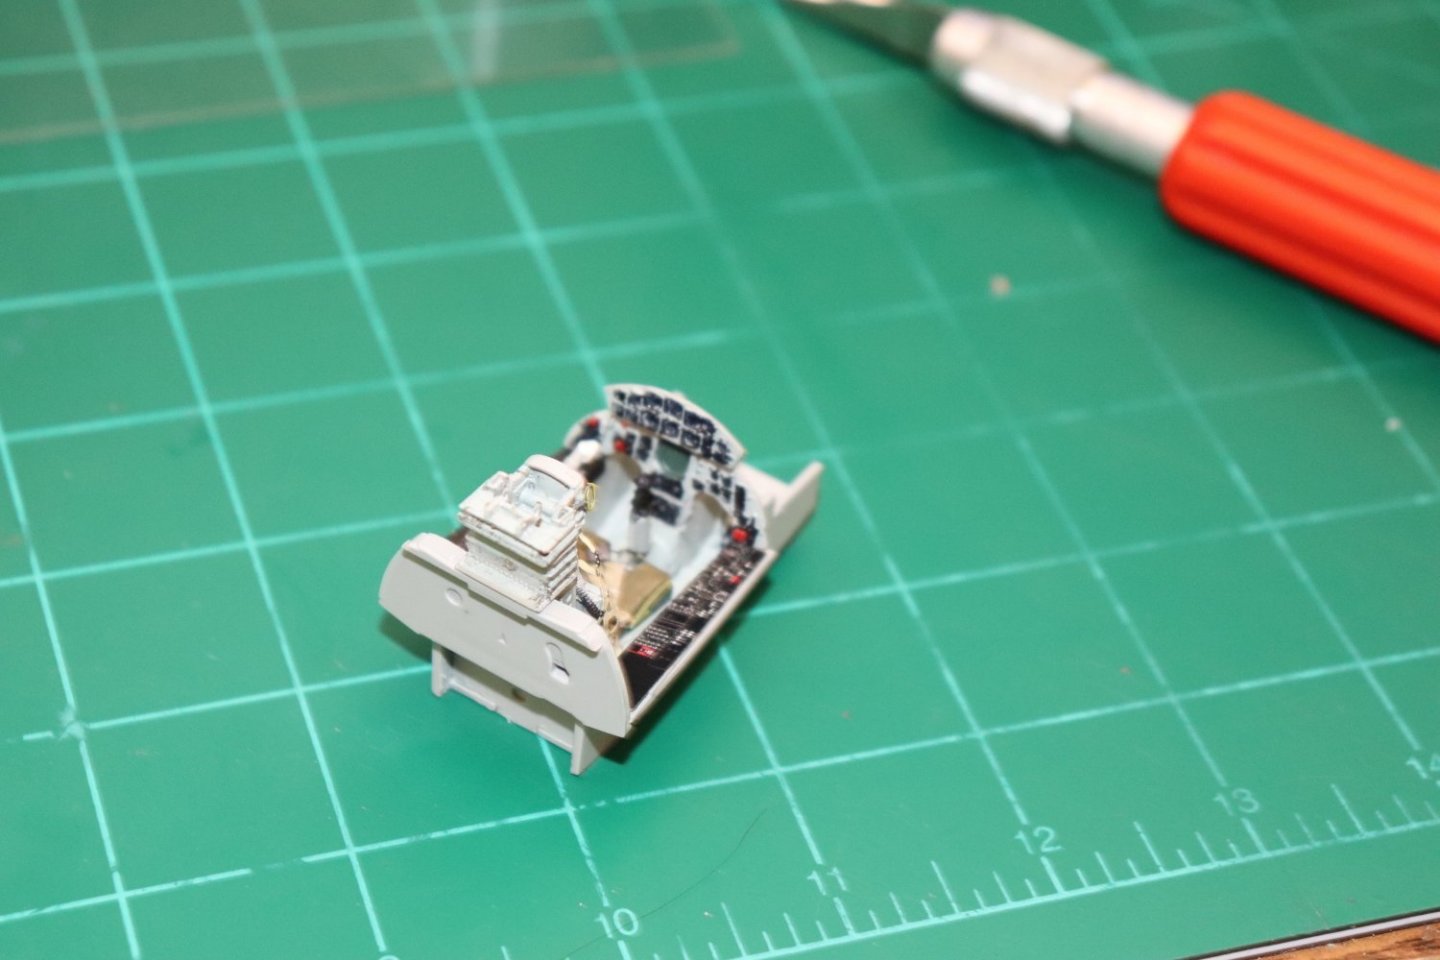
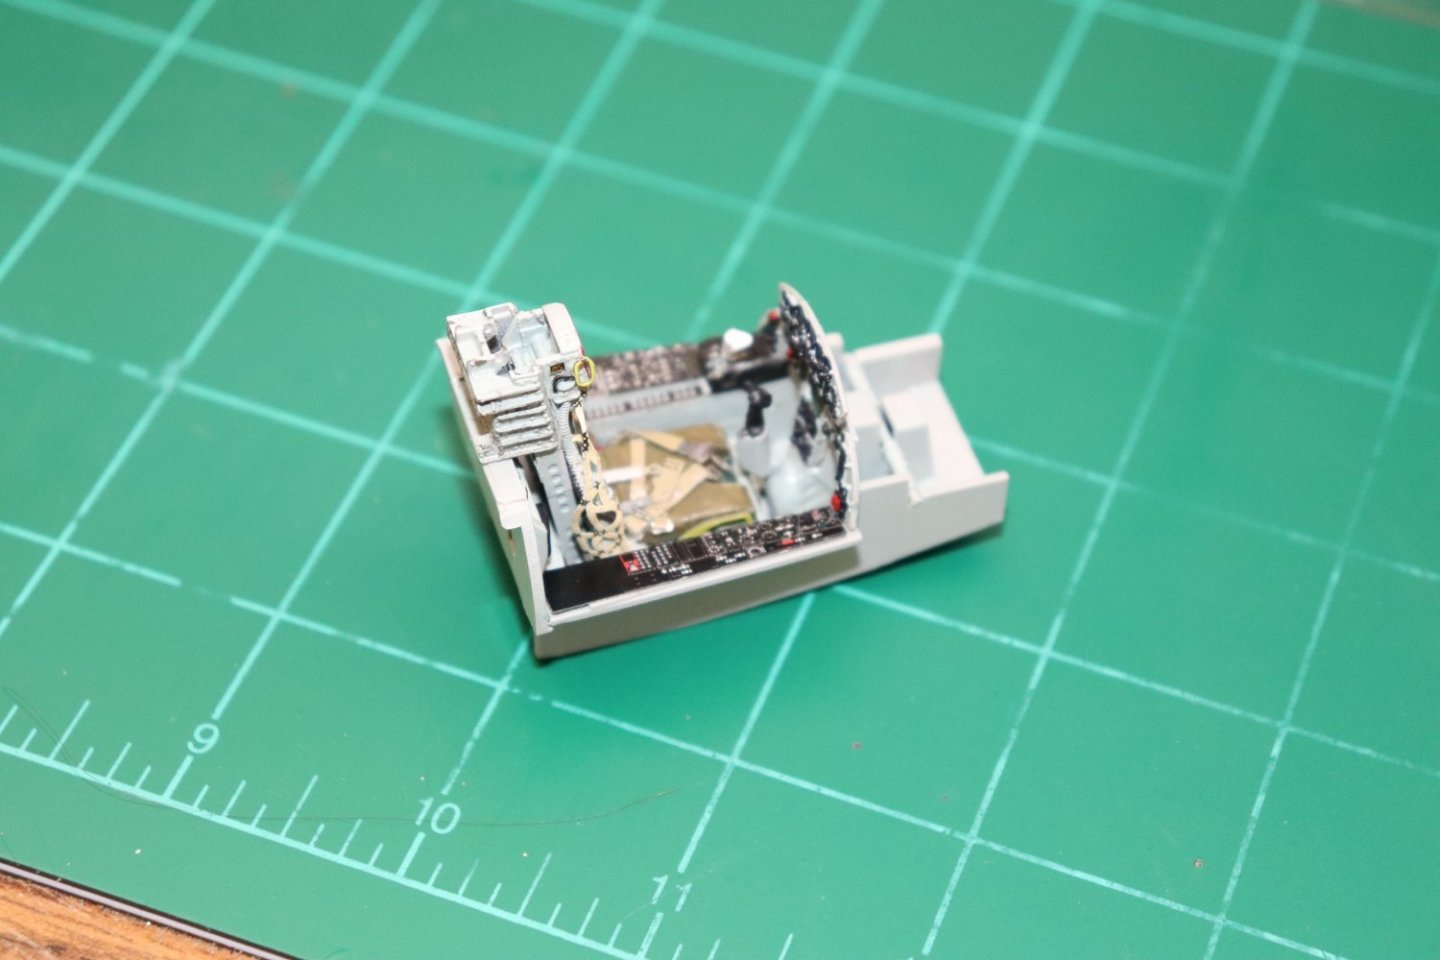
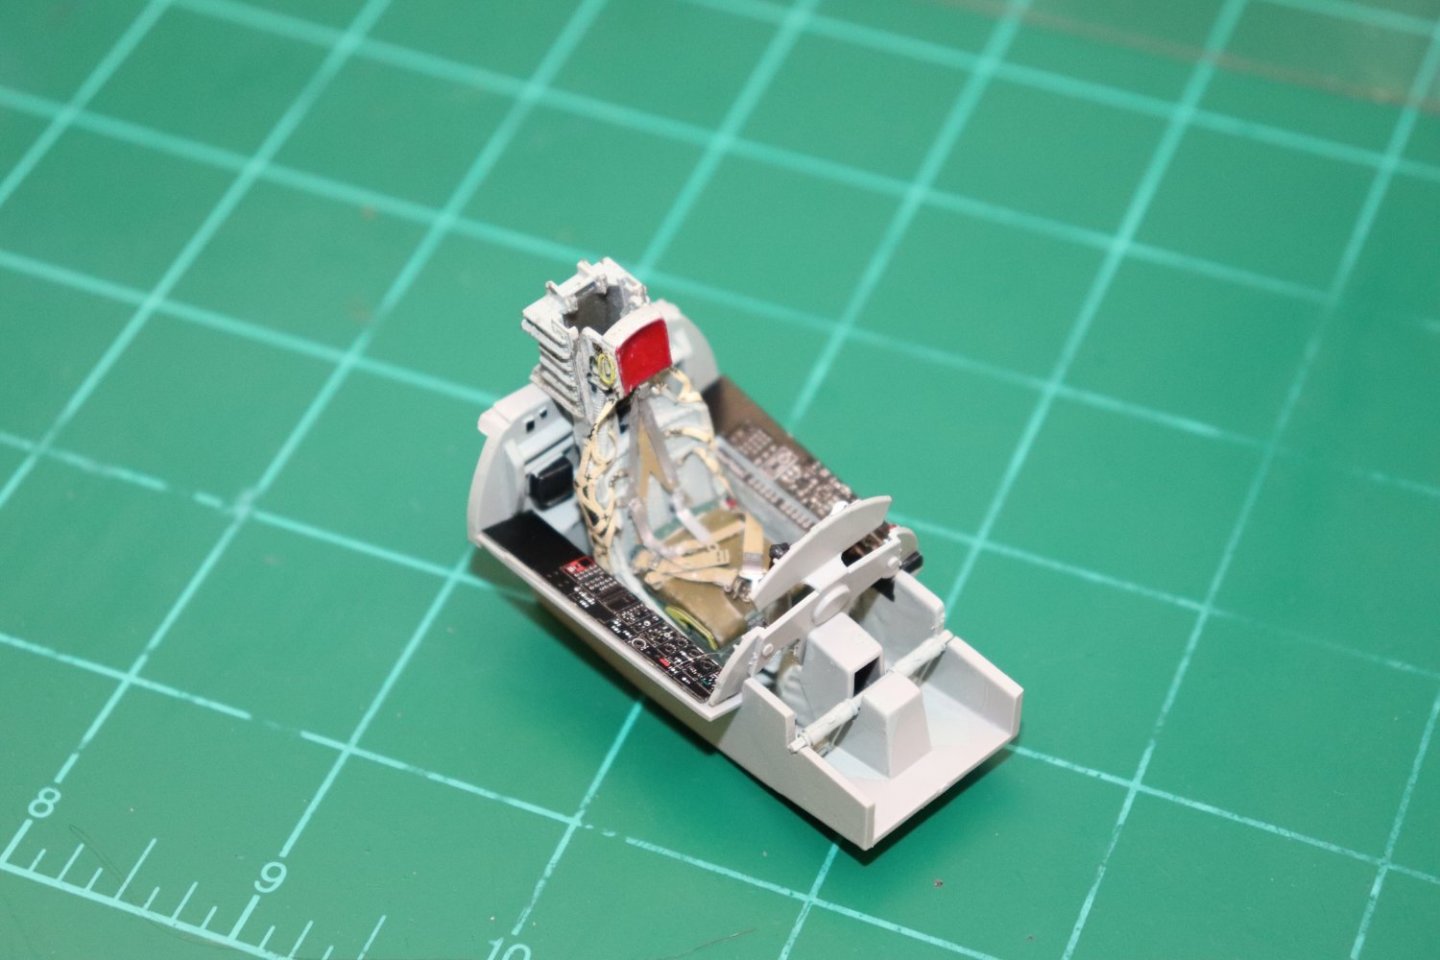
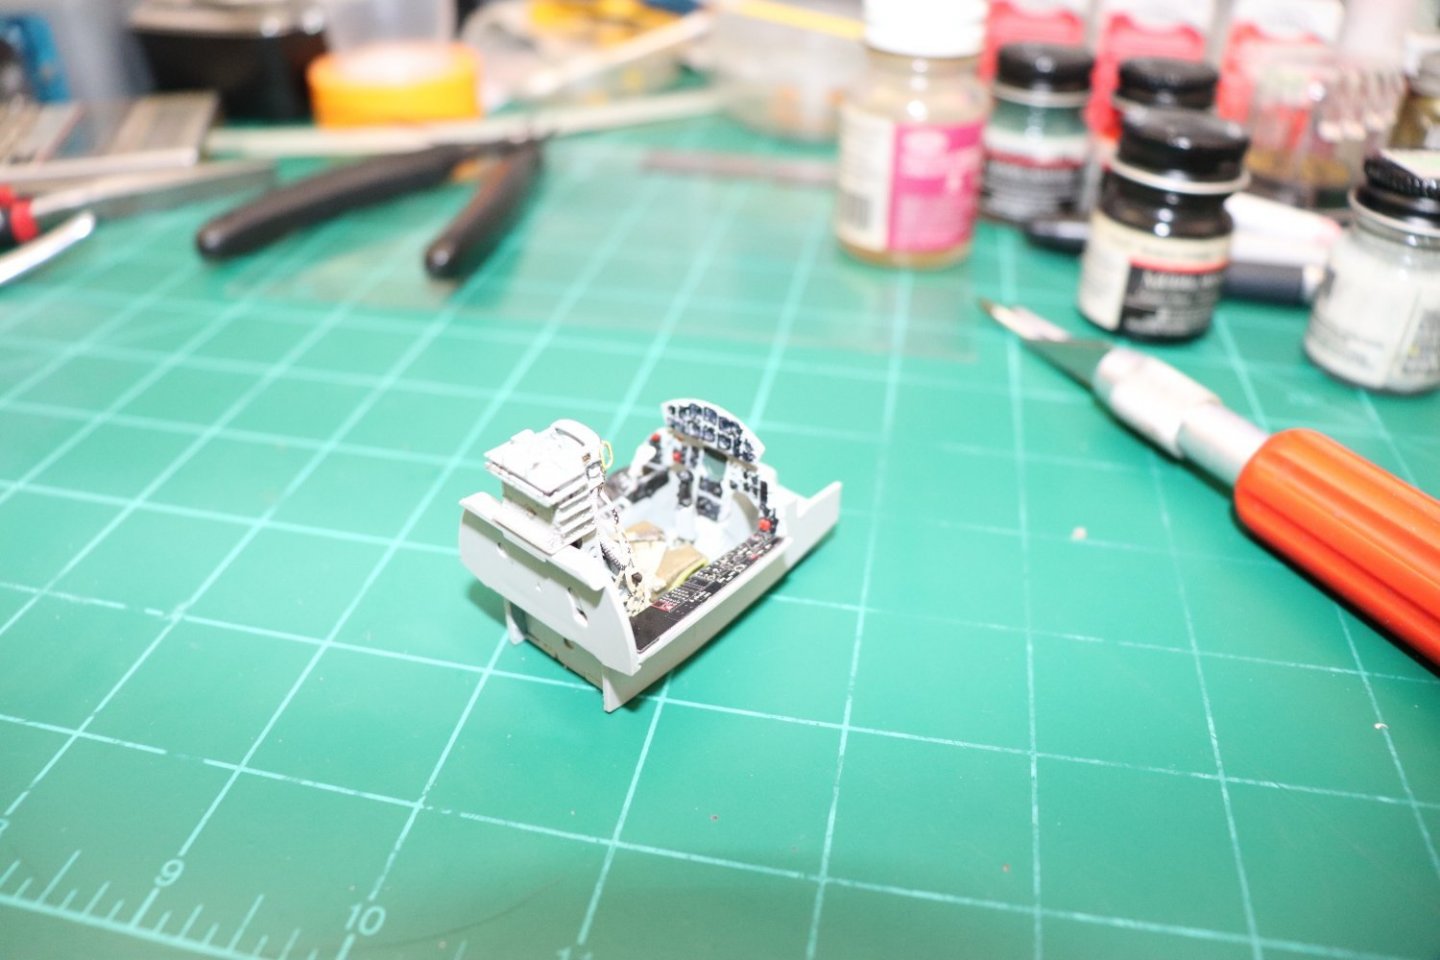
Finished Cockpit... Sorry bout the pics, it didn't want to photograph well for some reason.... I think it fits the picture of the real thing at least it resembles what it should be.... And the seat fits perfectly.... EG


- 139 replies
-
- 13
-

-
I believe that 3D decals are the coming thing for doing ultra fine cockpits, they are expanding the line rapidly but alas probably won't get around to the less demanded models until they have saturated the the what everybody wants crowd first... So like this one the modeler will have to decide what works best to get the representation they want... This kit, painting the part is the best way to go IMHO.... Thanks, you know what they look like Ken, so that is high praise as far as I'm concerned... Update on the finished cockpit in a few moments... EG
-
Thanks Mark, I'm probably going to do Canopy open and a few other panels open as well... The kit gives you just about every option you could want including positionable slats... It will pretty well fit any situational display you can see in a pic... It's a great kit very very well done...
-
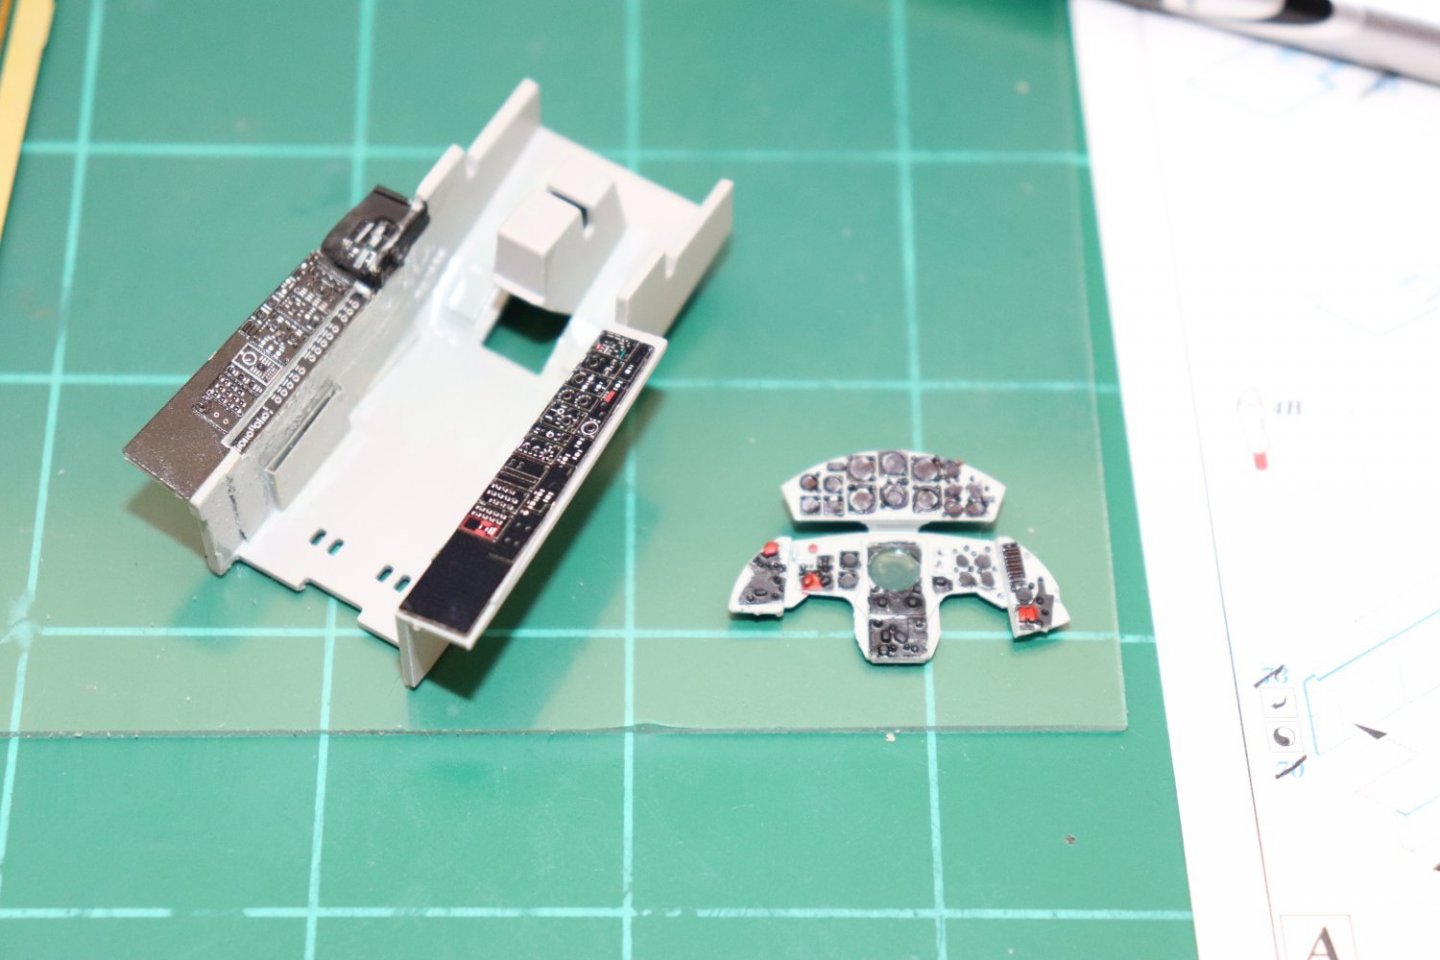
Thanks Ken, Appreciate it... Not cross eyed but definitely eye tired from looking through the magnifying glasses.... If your asking about the color I used for the scope, the previous one I used MM pale green, (FS 34227) but it was too light, so this time I used MM Euro Dark Green, FS34092, from a distance it gives a hit of green but up close it shows dark green... a lot like the detail pics I've seen... The side panels are pre-painted photoetch, (eduard #32819) and do have some texture to them, although they do look very nice, they do come off as a bit flat... And your right most of it won't be seen once the cockpit is in the aircraft... Thank you my friend, I think I'll go with it....
-
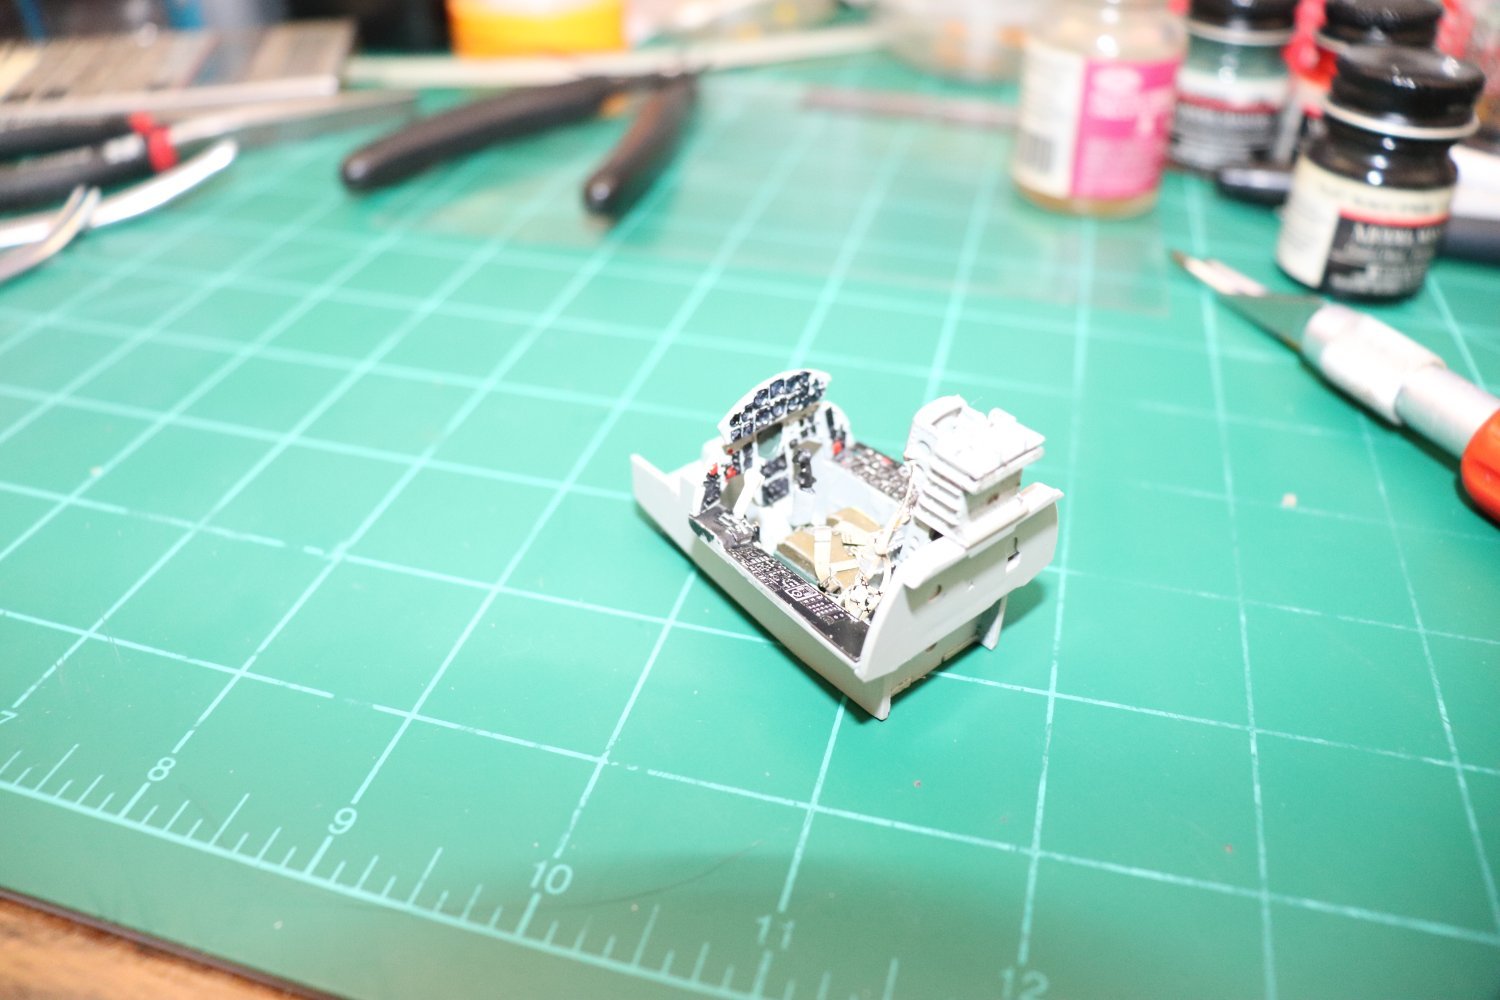
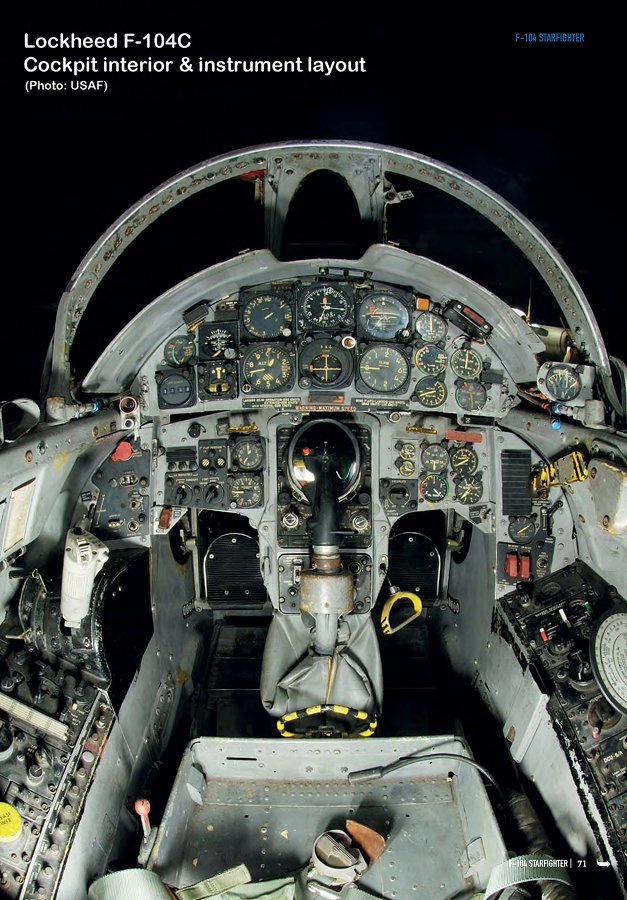
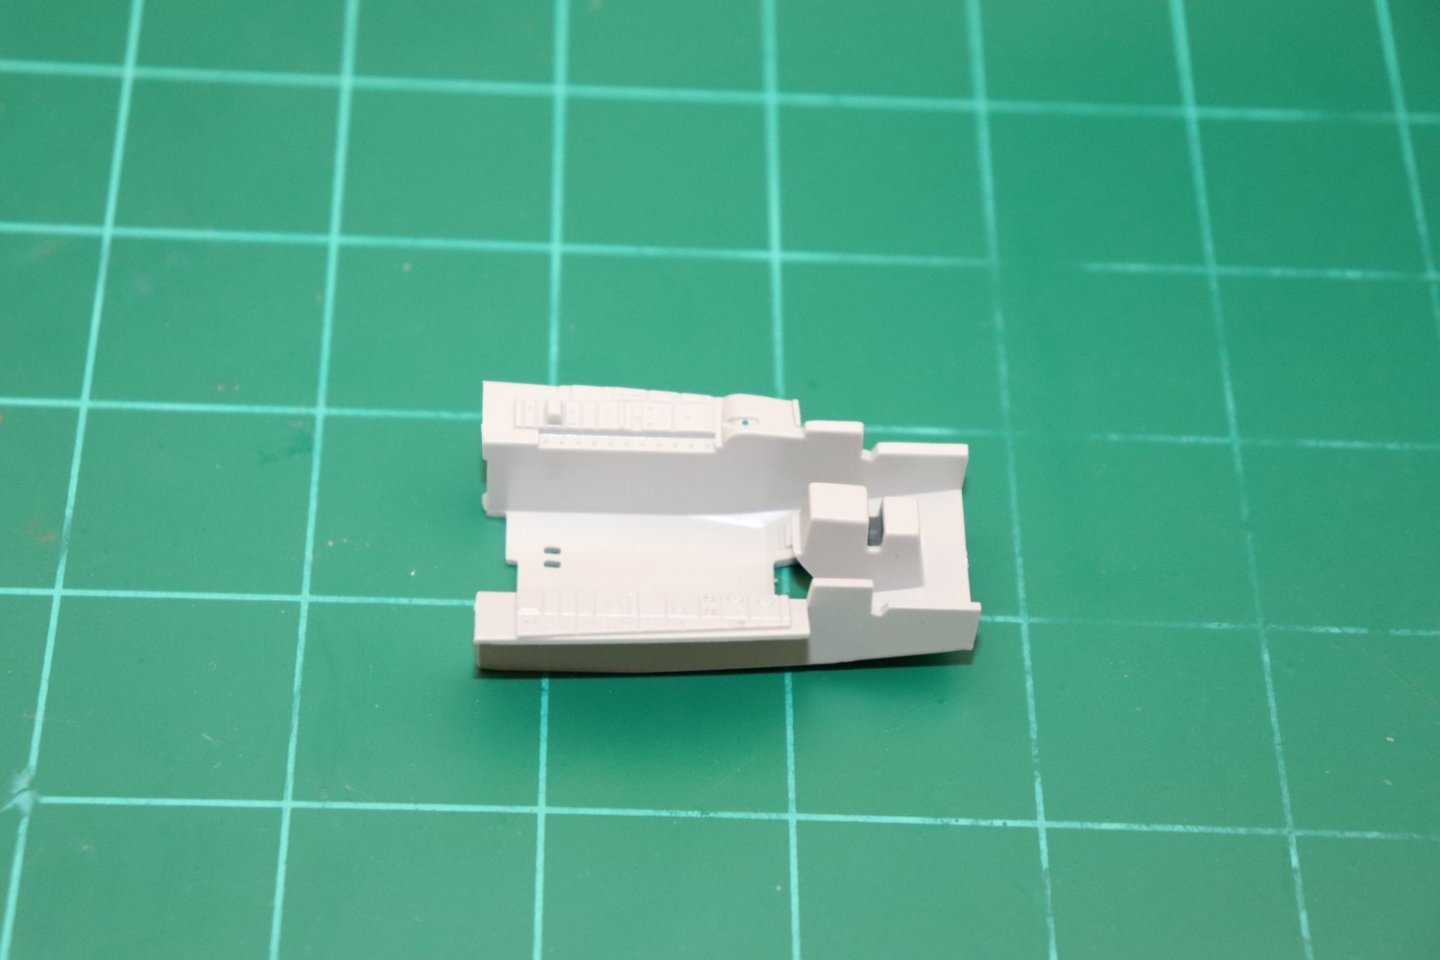
Ok, short update... Decided to take a break on the tub PE and see what I was going to do with the Instrument panel... the Tub was easy to clean the detail molding from and although nice was a bit soft on the details... the Instrument panel on the other hand is extremely detailed, clean and crisp with deep details not easily removed... The debate I had was do I actually want to try to remove it or build a new instrument panel to accommodate the PE, (which looked flat in comparison to the moulded in detail) or detail paint the existing.... I figured it would probably be best to first see what the status of my ancient 5/0 brush skills were... This is what the real instrument panel looks like.... And this is my attempt to replicate that in paint.... My attempt to detail paint... Please, I would like to know what you guys think, remembering that it's going to be inside a cockpit and under the Hud shroud...
-
It was the first axial flow turbojet that wouldn't compressor stall in transition from sub-sonic to supersonic speeds... it was a revolution in engine tech... Also, depending on aerodynamic condition and throttle commands, the stators in the compressor would change their pitch automatically maintaining smooth airflows while increasing the volume of air almost instaneously... The built this capability to stop compressor stall which it did in all except the most extreme conditions, solved the aerial restart problem as well... What they didn't expect and surprised the heck out of them was the instant thrust response it gave them... Most jet engines have a delay between throttle up and thrust increase, it takes a bit of time for the compressor to spin up faster and deliver the increased airflow.... Variable stators in the compressor altered that to next to nothing.... instead of waiting five seconds for the increased thrust on throttle up, the increase in thrust was right there, now, almost immediately..... And yeah it wasn't carrying a B-17's worth of bombs slung under it's belly either...
-
Yep, until the Phantom II came along.... To be completely candid there were only two other aircraft ever built that could keep up with an A-12/SR-71 at speed... The MiG 31, and the XB-70... and as far as the MiG 31 went, SR-71 pilots said all they would have to do is push the throttle a little closer to the firewall....
-
Welcome aboard brother, I made sure there was room up there for you... I'm sure the goodies will be passed around with abundance in a bit.... And the brittle? At least I won't be shelled again.... {chuckle} Enjoy my friend...
-
It was a revolutionary aircraft when first built, pushing the edge of the envelope of aircraft engineering... Nasa flew several of them for decades as a research aircraft.... It really was a manned missile... It was chosen as the chase plane for a number of experimental aircraft including the XB-70... And when they did the highspeed runs with the experimental's, the starfighter was usually the last chase plane left behind... Welcome aboard Brother...
-
Welcome Gary, It's a gorgeous kit and the PE looks great as well... the finish I'm hoping comes out like the others show there are... Praying I don't muck this one up as well.. Thank you...
-
Yep, the F-104 had HAoA issues as well but they were more from the configuration of the wings, they eventually put a warning stick shaker on it and then a force return to keep the aircraft within it's flight envelope to prevent stalls, but pilots routinely disabled it... When the F-104 went into a stall, it usually did one of two things, started tumbling, or flat spinned... Both unrecoverable conditions... The first pilot to experience it was Chuck Yeager in the XF-104 he crashed from flight level 22.... He reported that the aircraft dropped like a anvil and there was no aerodynamic control from the control surfaces... He spent six months in the hospital recovering from the ejection experience.... The Air Force eventually made 1500 flight hours in supersonic aircraft a requirement to become a zipper pilot.... Thanks Brother, not having to rebuild the cockpit tub is a bonus with this one...
-
Yeah she did have some not so nice nicknames, "Widowmaker" "Lawn Dart" and several others... The wing loading was particularly high on this bird, heck it was made for speed in the interceptor role not as a fighter bomber... It's had a couple of bad habits and one of which the only recovery was to bail out... But it was the ride everyone wanted to fly...
-
Thanks Dan, Your welcome anytime.... I agree she is one of the most beautiful aircraft ever built and flown...
-
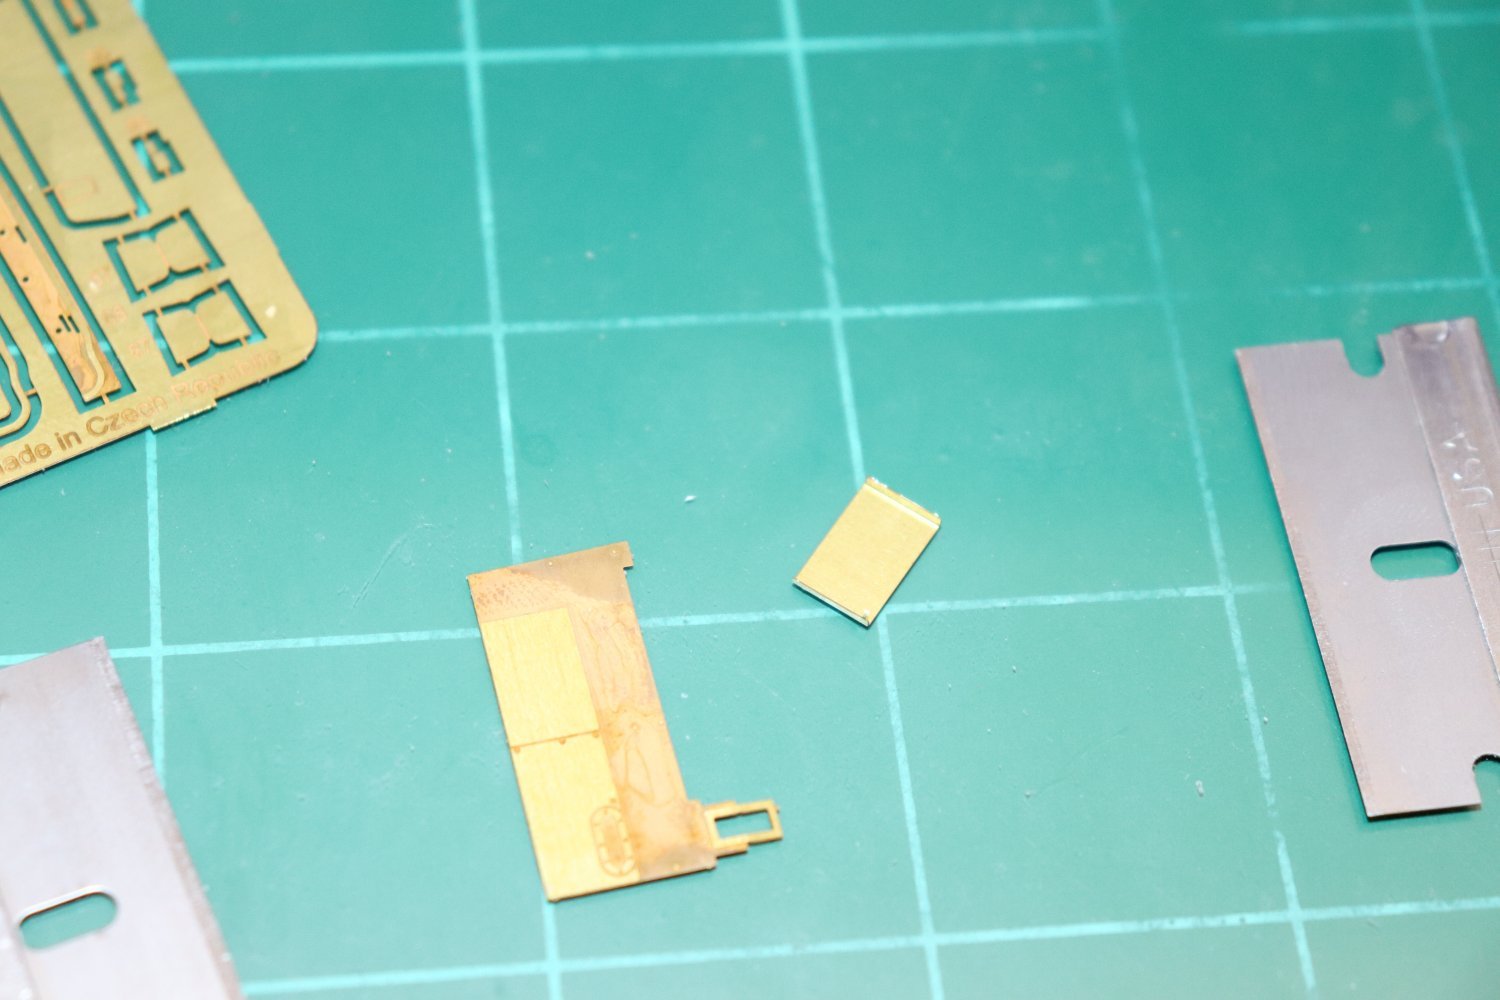
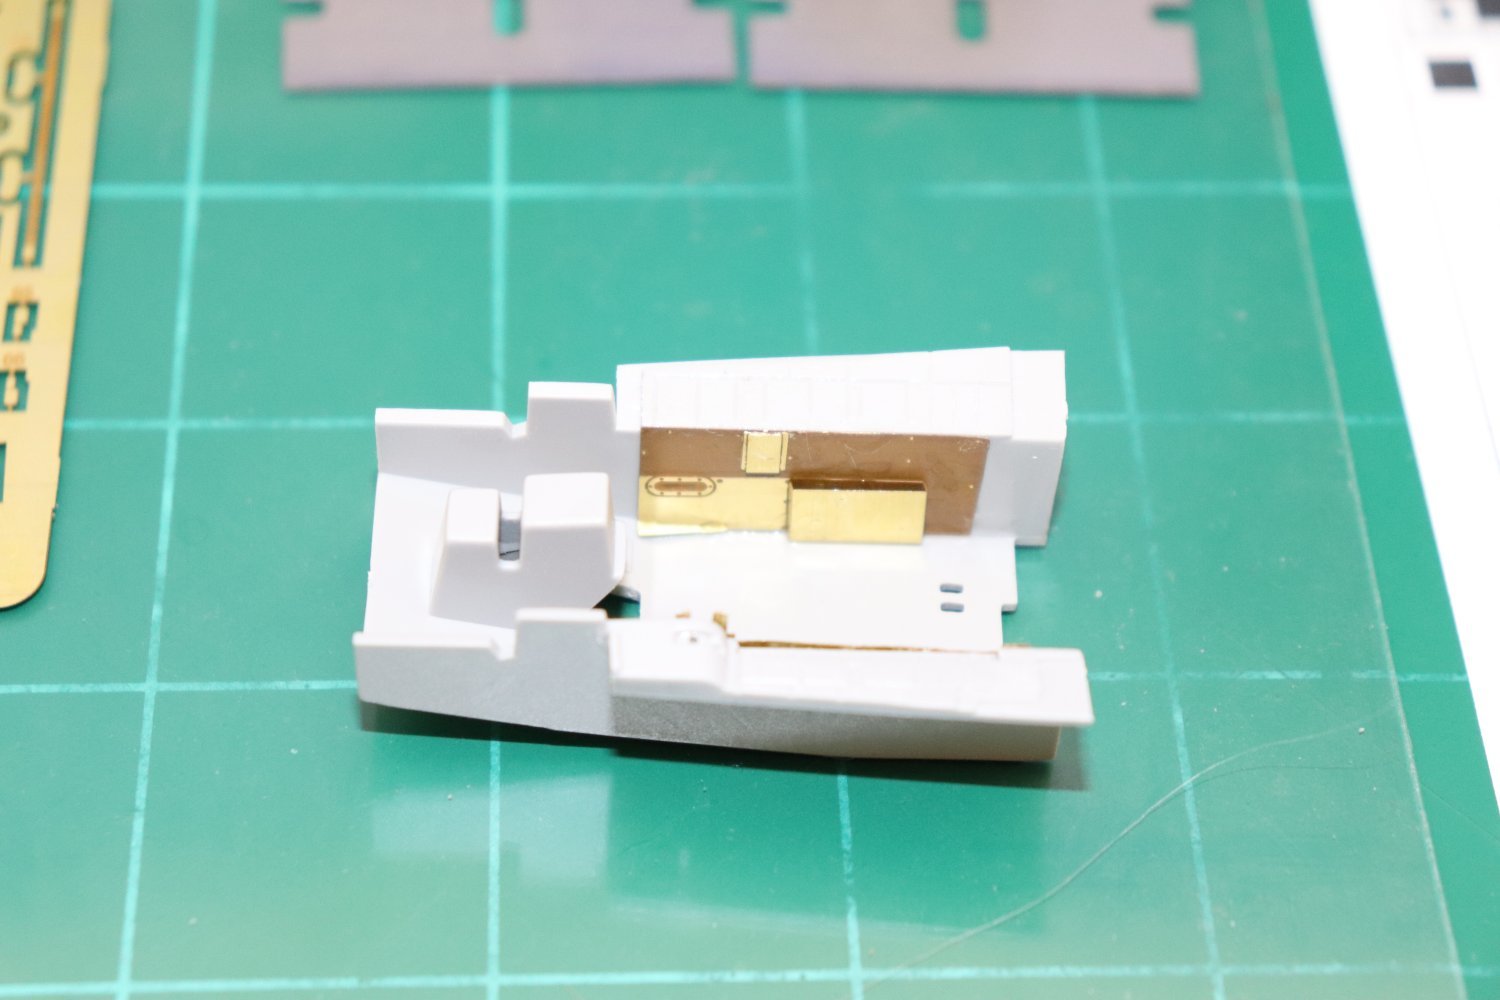
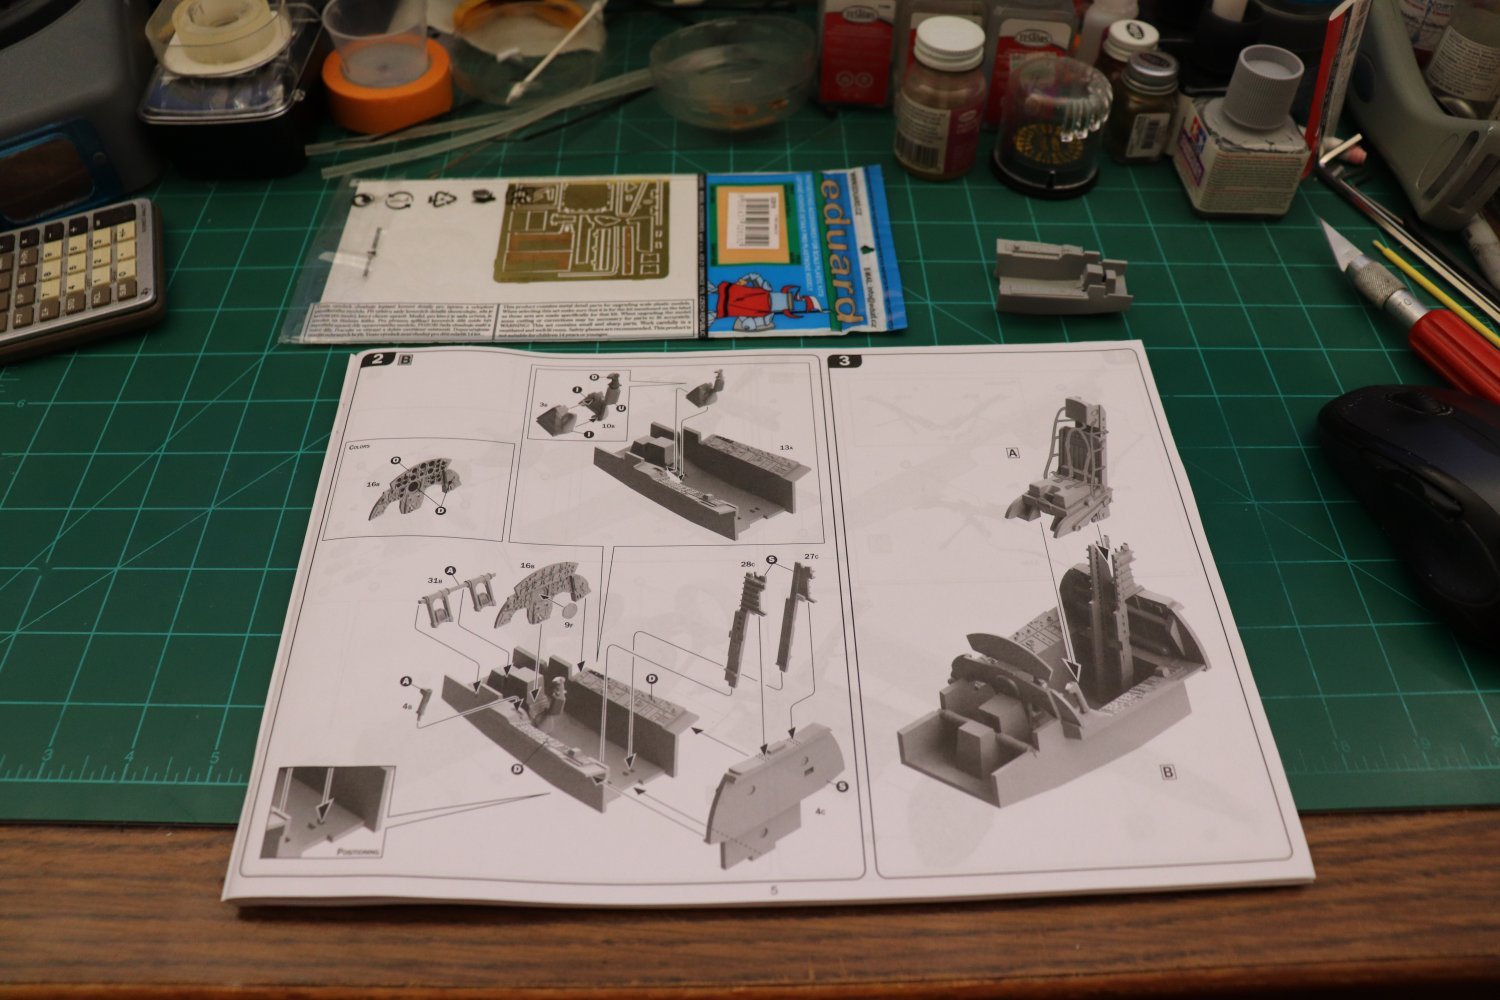
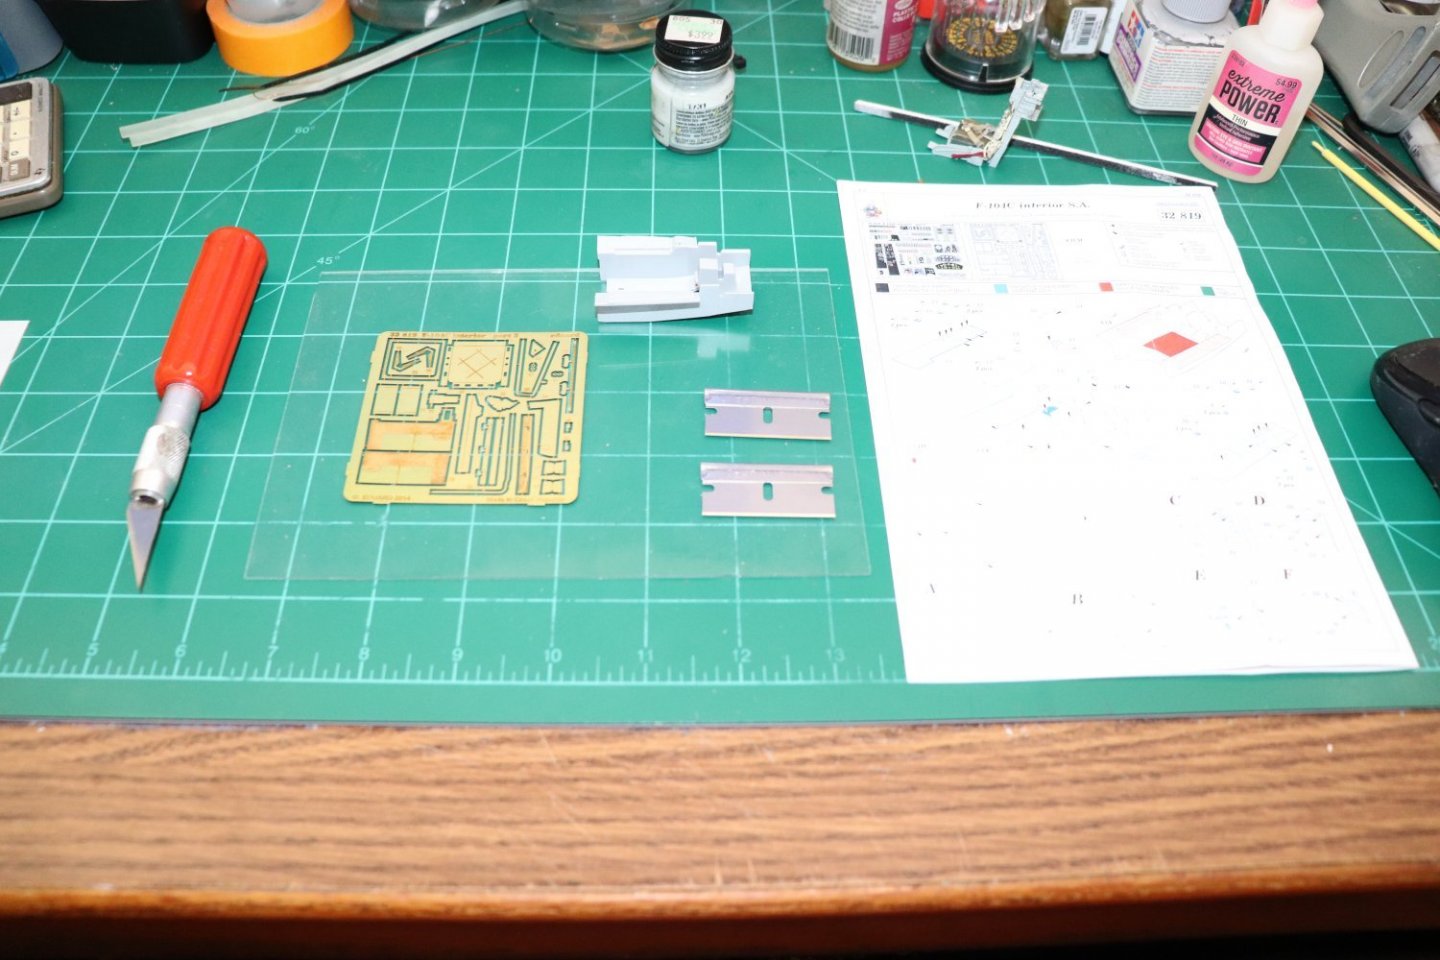
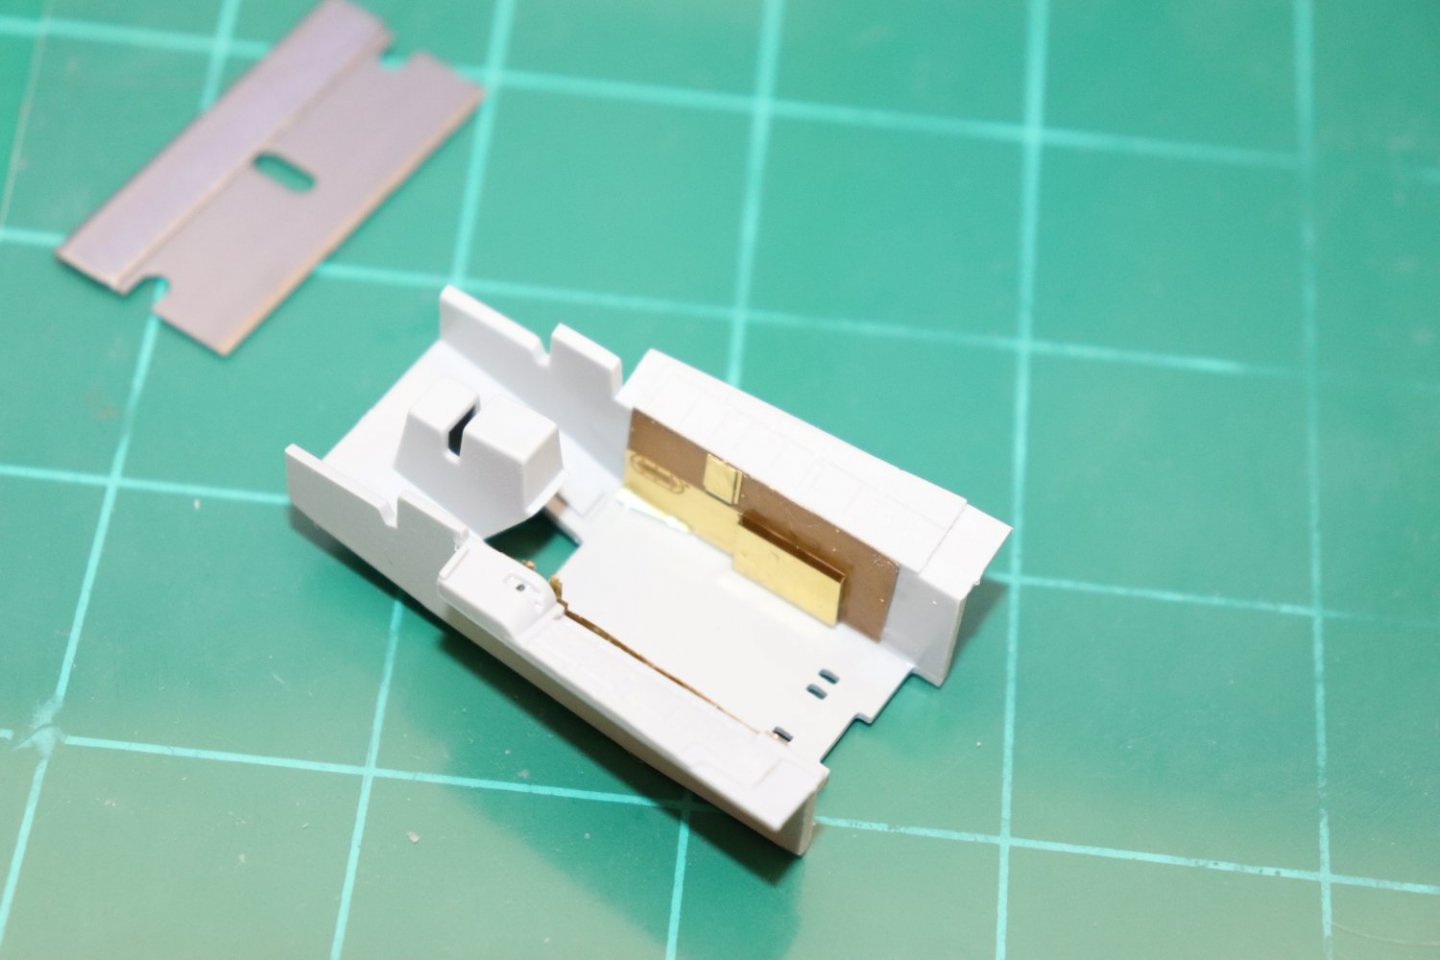
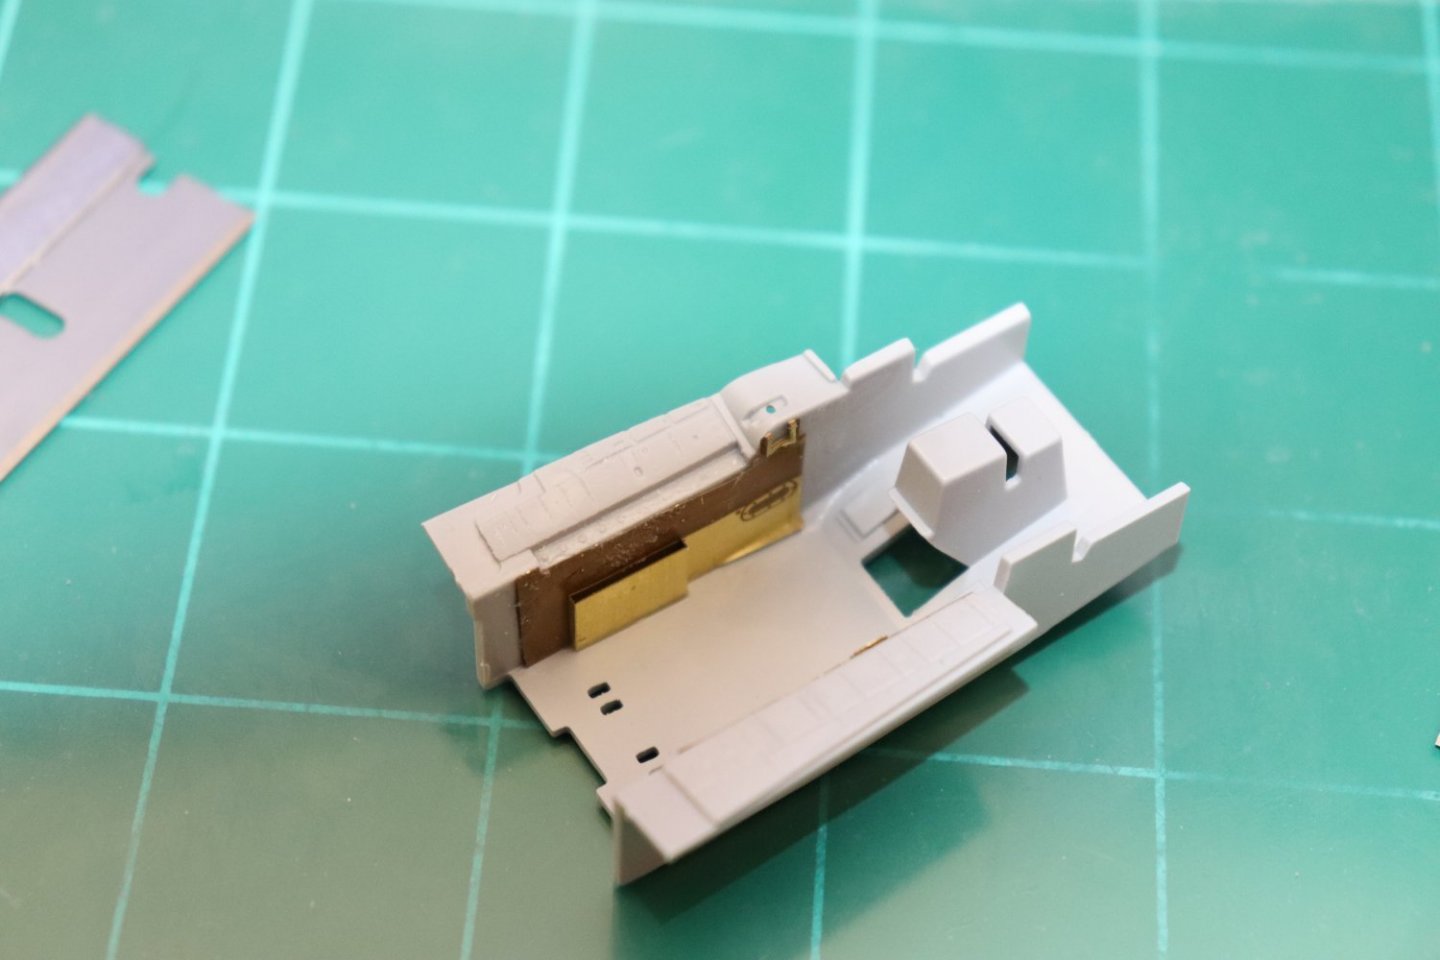
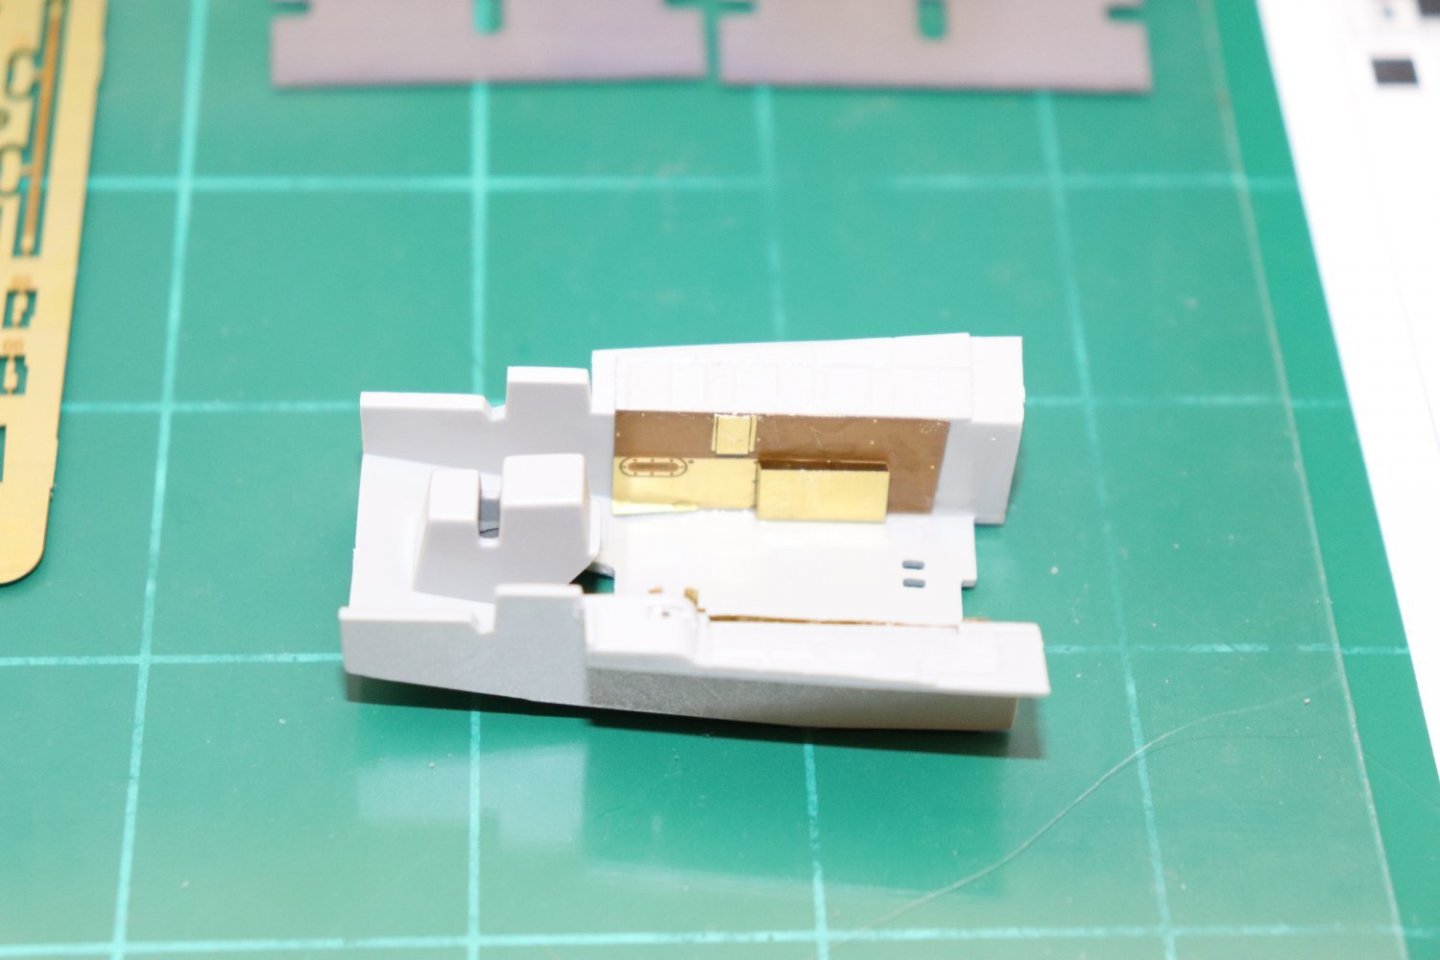
First update, Installing the base brass for the cockpit sidewalls.... Structural brass, not all of those parts will be used, the kit and brass is designed to allow the building of an "A" model if you so choose... To do that you have to modify the cockpit tub by cutting out the floor... That red square, designated for removal, we are building the "C" variant so no need to cut, but the pink areas needed to be sanded away to accommodate the photoetch (PE) details to be installed... For example the left cockpit wall... (with it's magazine holder) Installed... I'm using Extreme power thin CA to attach these, had the dickens of a time getting it placed correctly before it set, it's been a while since I did any serious PE work... The passenger side... (with it's magazine holder as well, chuckle) Now all we need is a coat of Aircraft Grey paint and we will be ready for the side control panels.... Onwards Brothers... EG


- 139 replies
-
- 12
-
-
Actually, Right on Time Brother.... Just putting first glue to brass & plastic... Welcome, lay back, relax and enjoy the journey....
-
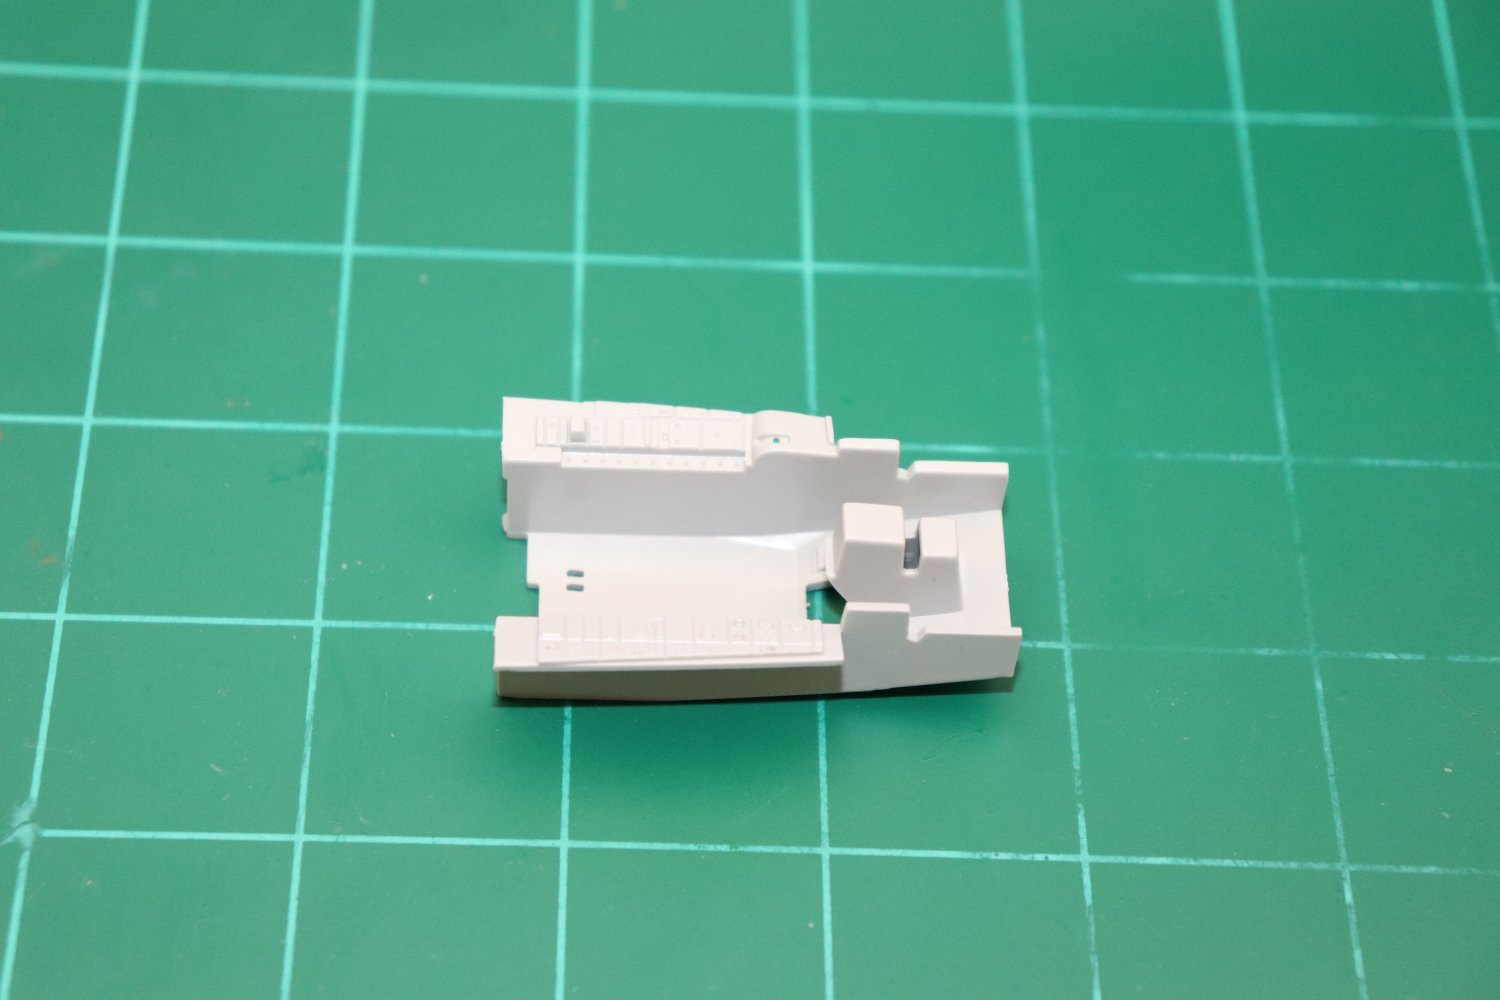
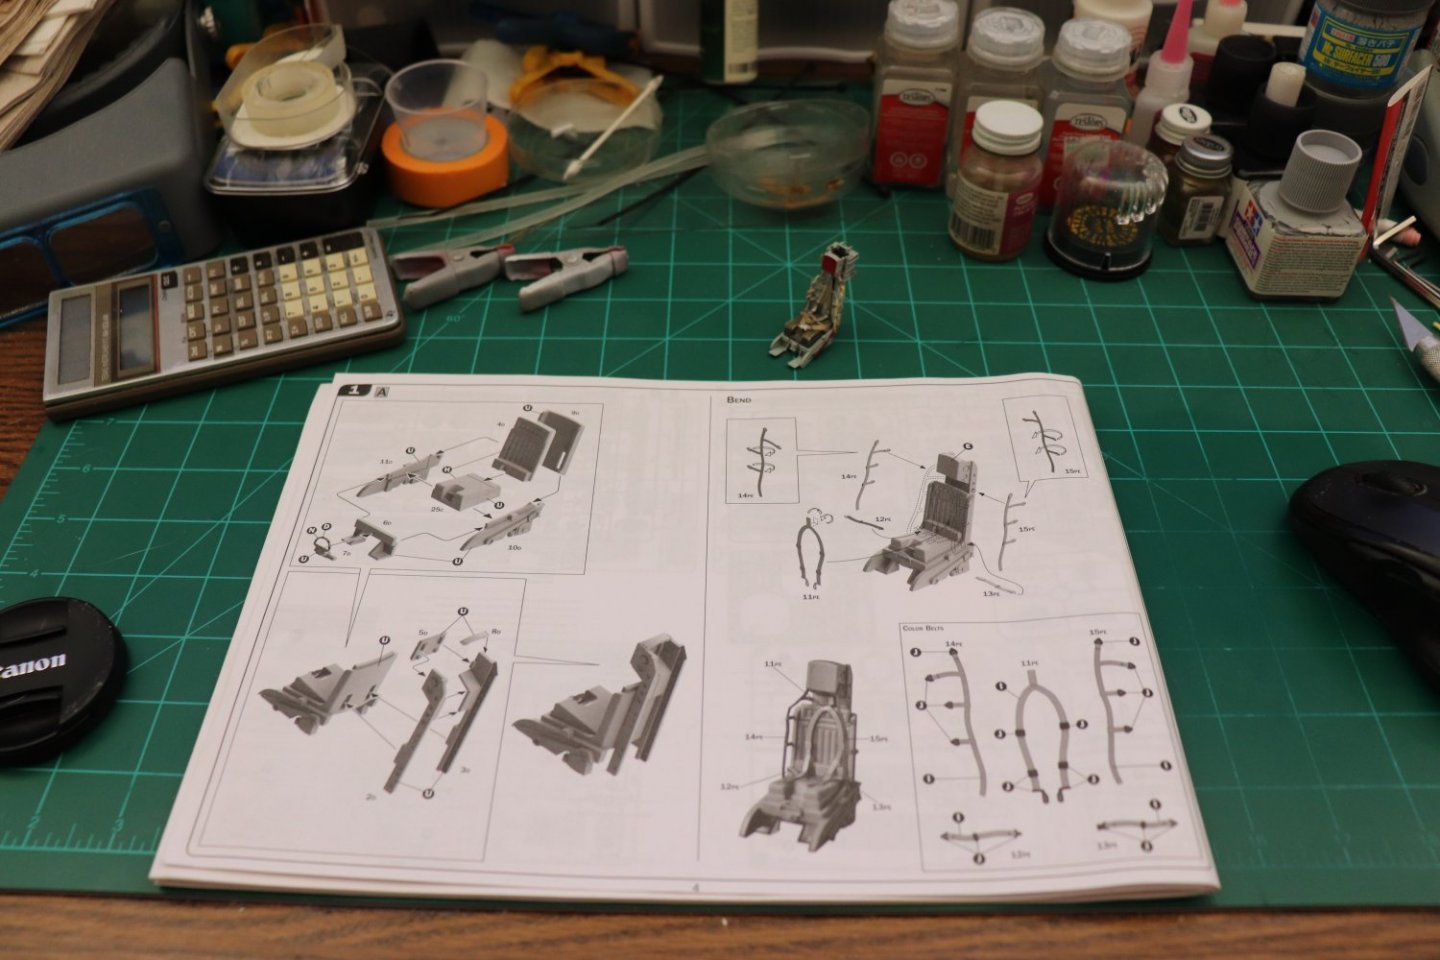
Now, just like most modern model airplanes, the Italeri kit starts with the seat.... As you can see, from the last build I did an aftermarket Lockheed C-2 ejection seat for that build and fortunately I saved it for this build.... Unfortunately I could not save the cockpit itself, if we remember I had to completely rebuild it to fit the aftermarket into the fuselage... Trying to save it would have destroyed it... So here, we start with the Cockpit... And the actual cockpit tub... Beautifully modeled details and a lot more accurate than the old Hasegawa cockpit was, but to add the photoetch, all that detail has to be sanded off so the panels will glue into correct positions... Here we go brothers, first steps down the path.... Wish me luck.... EG


- 139 replies
-
- 13
-
-
Thanks Ken, hopefully it turns out better than the last one.... I don't know about that one brother, everyone is welcome of course... just take it easy on the liquids ok? and don't forget to share the popcorn... I added rafters to the building so those that like to hang out up there can be more comfy...
-
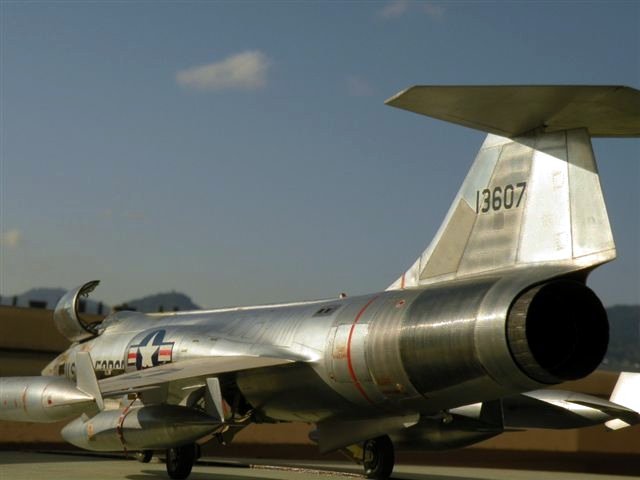
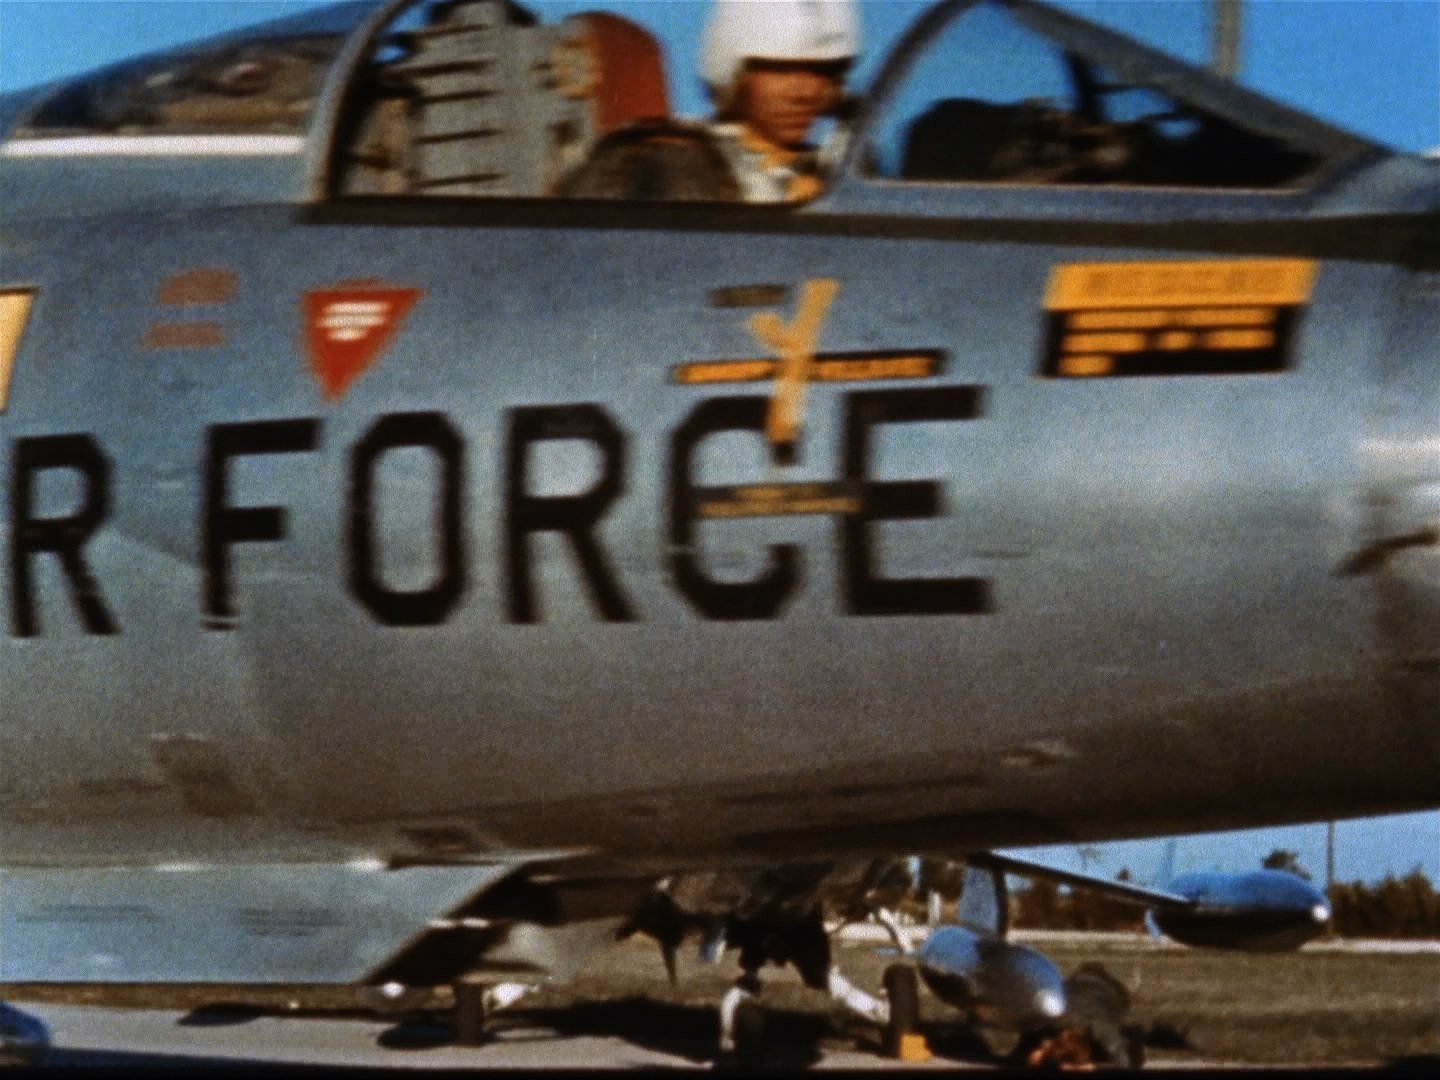
Now the pressure is on, {chuckle} I'll do my best, if I do it right it should look something like this.... Hasegawa... Or this, Original Italeri... Two different models, two different modelers... Both used the same product to produce that finish... There is a third as well (did a CF-104) This finish cannot be replicated with paint... Actually I'm going to go straight into the build with this one... I'll add a link to the old build to make the connection with the history... Your vampire will really look the business with this type of finish on her... I sincerely hope Alan, I can show it correctly, to a certain point this is still an experiment, my second attempt... But, if they could do it, I can do it...
-
Thank you Gary, Very Very much... It's greatly appreciated....
-
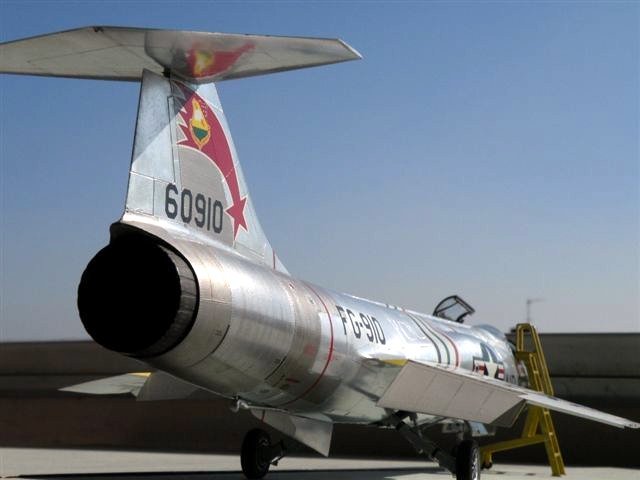
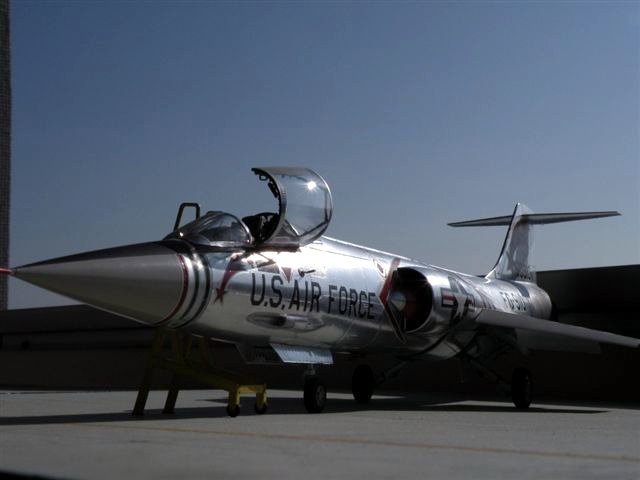
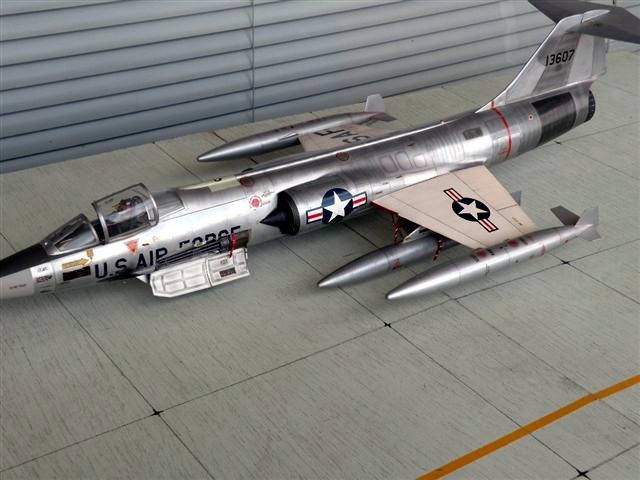
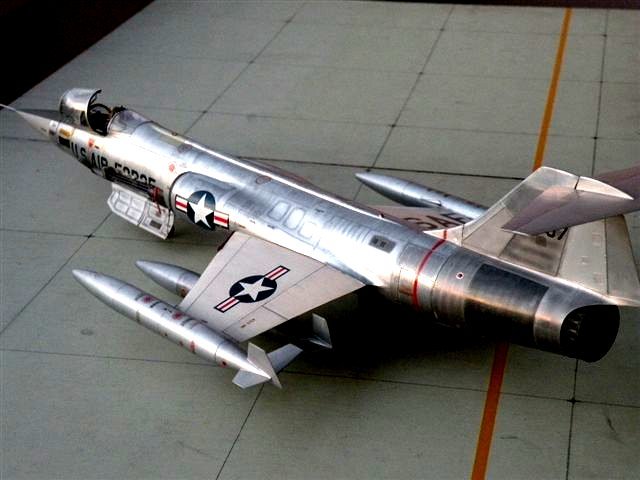
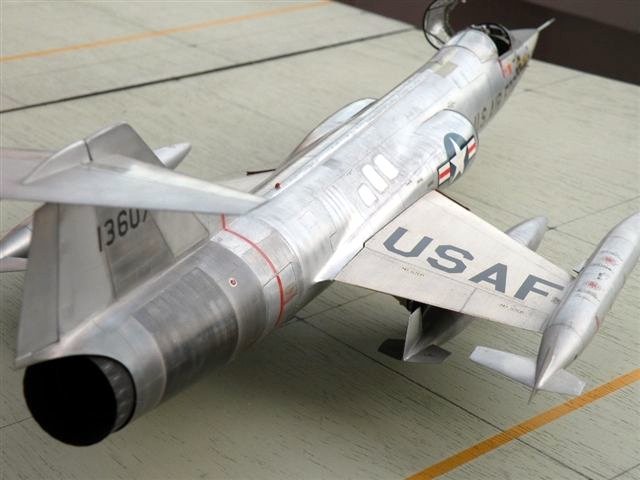
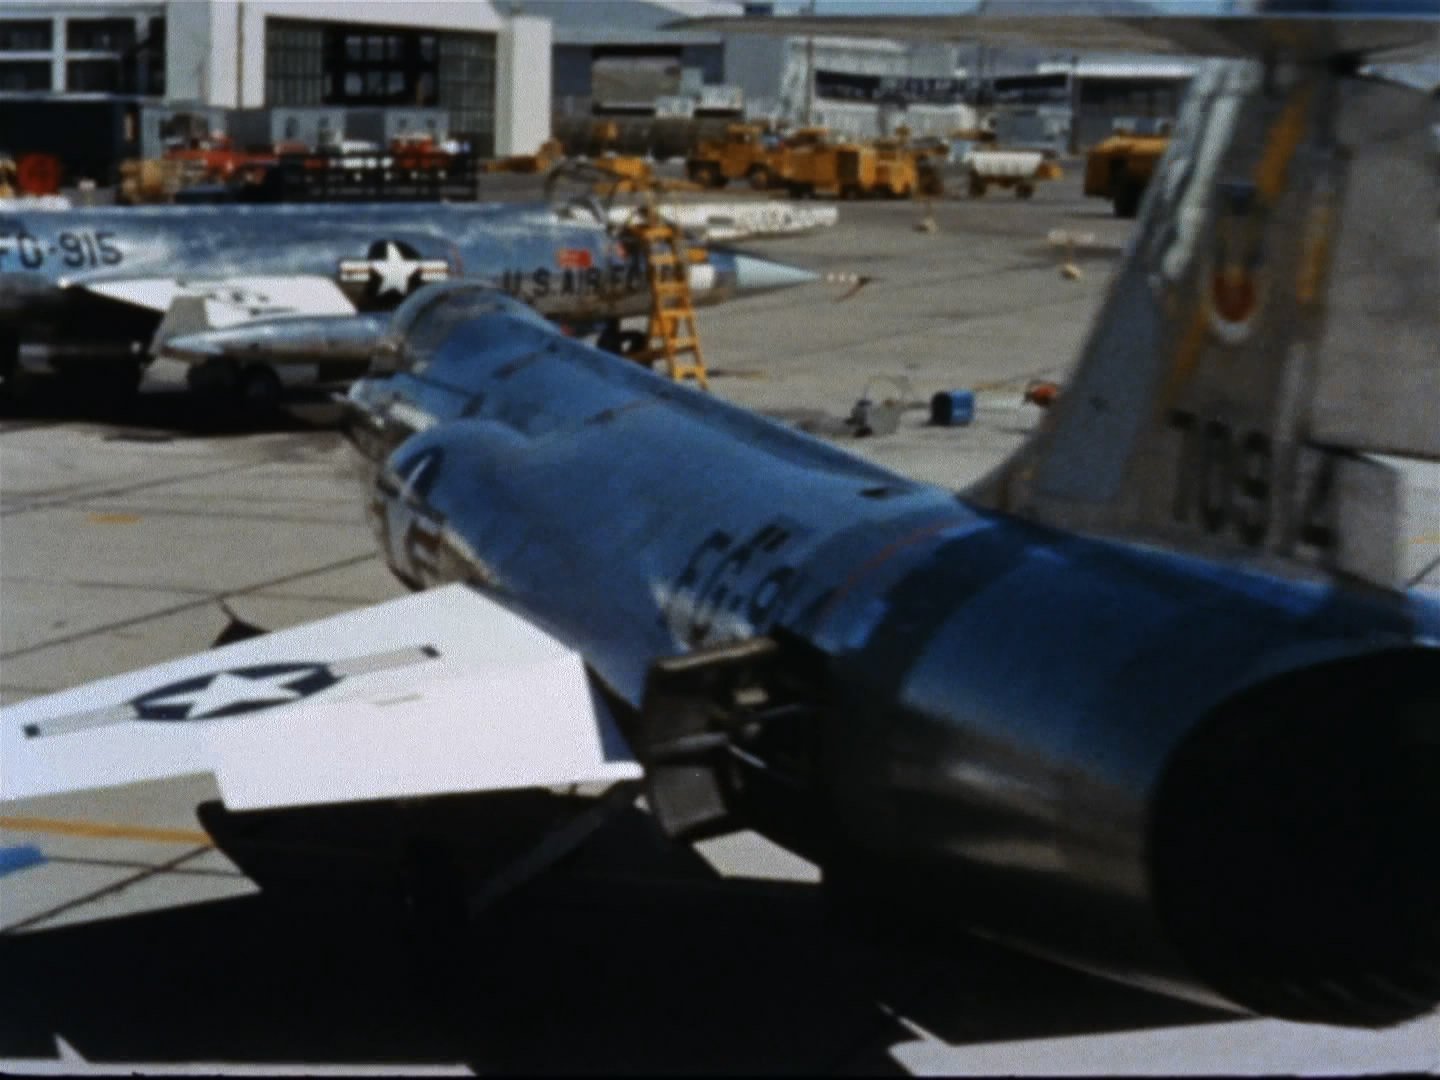
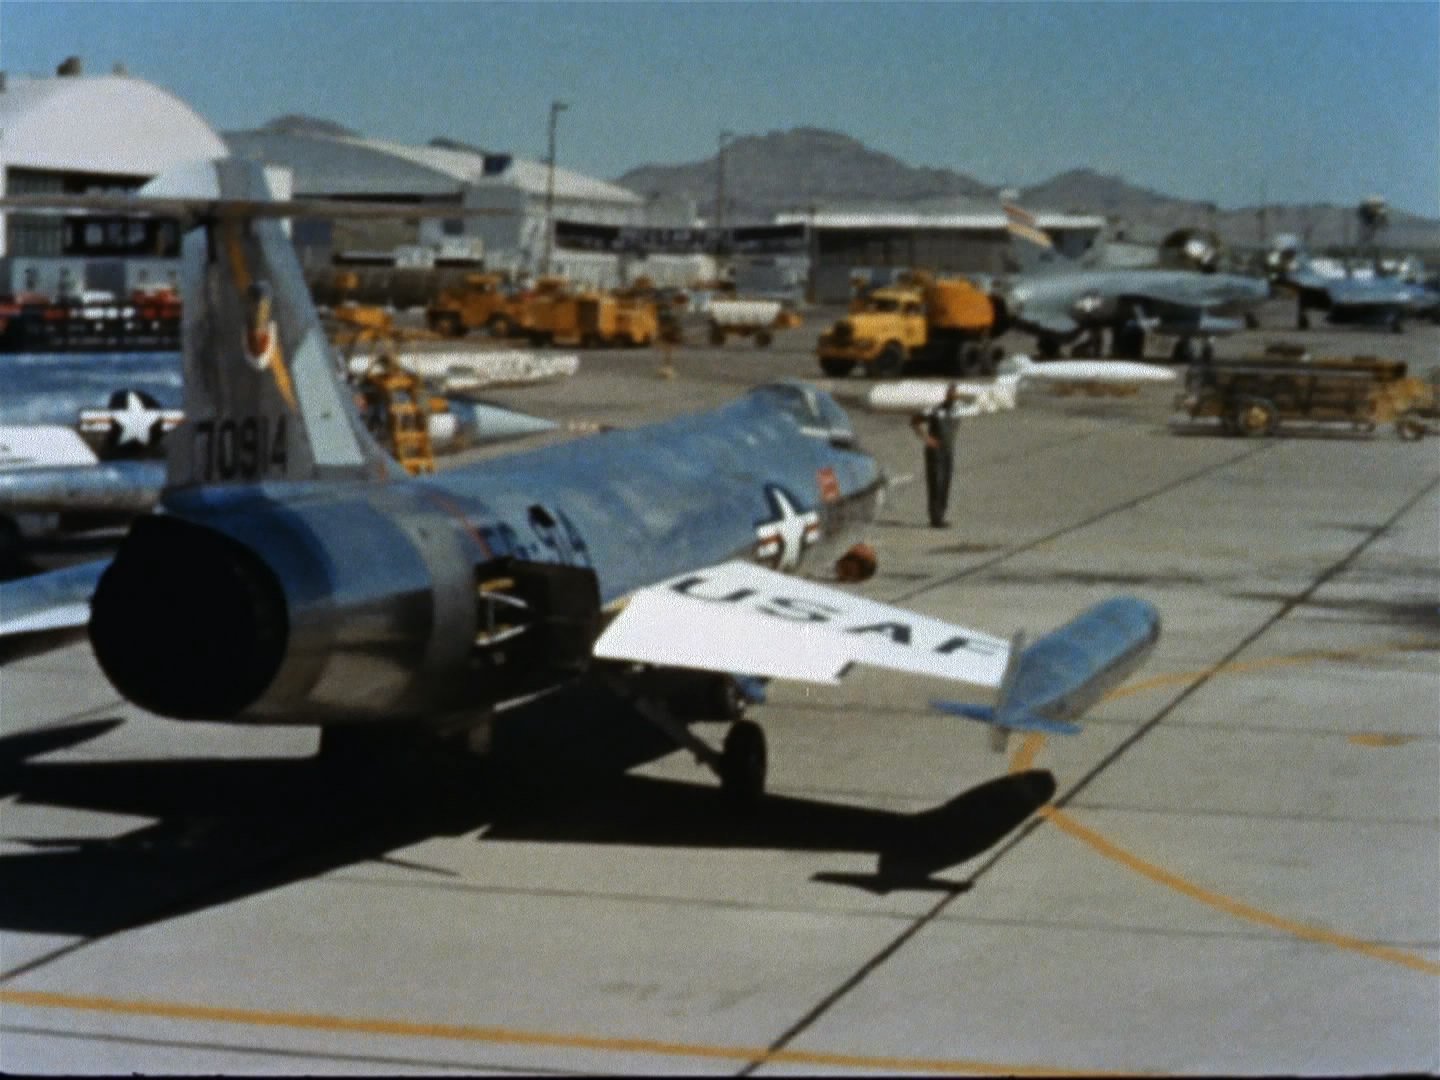
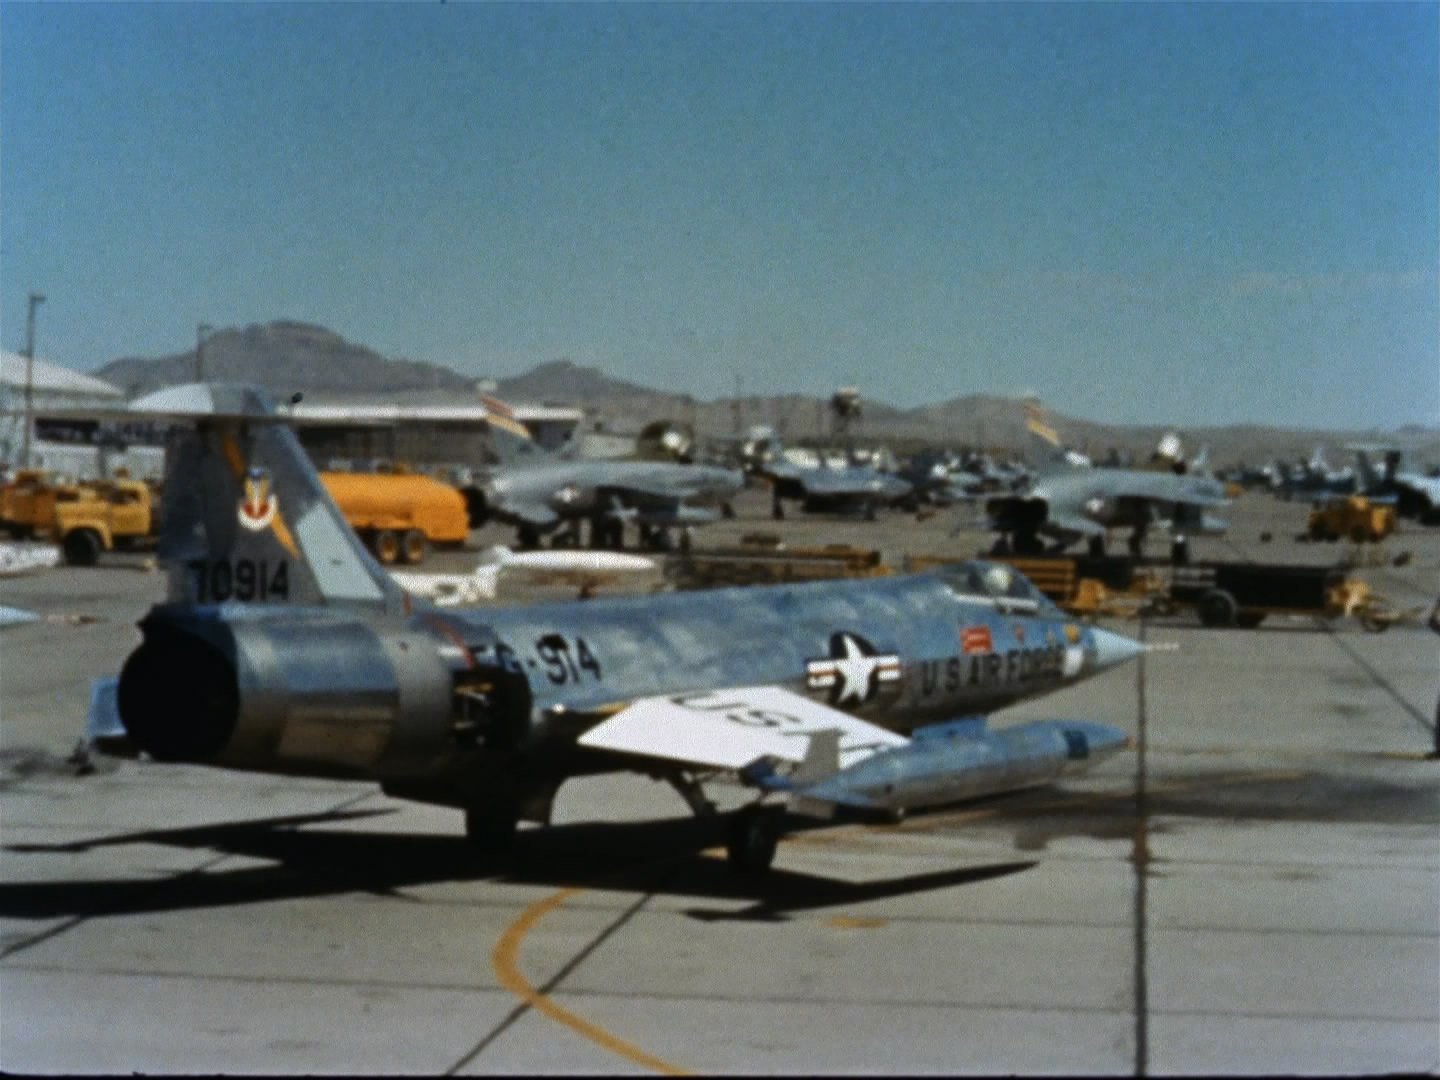
Ok, here we go, ROUND 2!!! Bluejay 4, the Iconic Starfighter as seen in The Star Trek Episode "Tomorrow is Yesterday" I call it round two cause most are familiar with the last time I tried this and failed to finish cause I basically didn't know what I was doing when trying to get an accurate Bare Metal Finish... By the time I finally burned out on it and had to quit I had learned how other great modelers did it and am now going to try again... Old Thread here... This time with a more modern version of the F-104C (latest Italeri kit) and I acquired the Eduard "Big Ed" photoetch set for this one... I still haven't decided what view I'm going to do with this model, I know it's going to represent the real aircraft though, but I think I'm going to put more details into this much improved kit that the previous Hasegawa kit would allow... Instead of the roll-out scramble view I was doing I'm going to do the full detail version like she is being maintained ready for the call to get the Enterprise... At least, that's the plan.... Anyways, I'm preparing for this one... It's going to be a long journey and of course since this is a real airplane with a real history I will go into parts of it's service history and it and it's pilots tragic ending... F-104C #57-0914 A great airplane with a great pilot... More when I get organized... Onwards
- 139 replies
-
- 13
-
-
When I watch all the old Vietnam war movies I chuckle when I see that or the guys that wait till the blades have stopped before they even open the door... Now on the early choppers yeah it was a consideration, those blades did have some droop and some of them actually were designed in a way that made such mandatory... (The Kaman Huskies & H-21's come to mind) but the Huey, the blades were stiff enough and high enough to not need to worry about it... On TV and the movies you can always tell a chopper guy from the wannabe's when they get closer to that rotating wing... chuckle