HOLIDAY DONATION DRIVE - SUPPORT MSW - DO YOUR PART TO KEEP THIS GREAT FORUM GOING! (Only 13 donations so far - C'mon guys!)
×


Egilman
-
Posts
4,377 -
Joined
-
Last visited
Content Type
Profiles
Forums
Gallery
Events
Everything posted by Egilman
-
 Thanks OC, Layering is the old school way of doing them... It's not a new technique...
 -
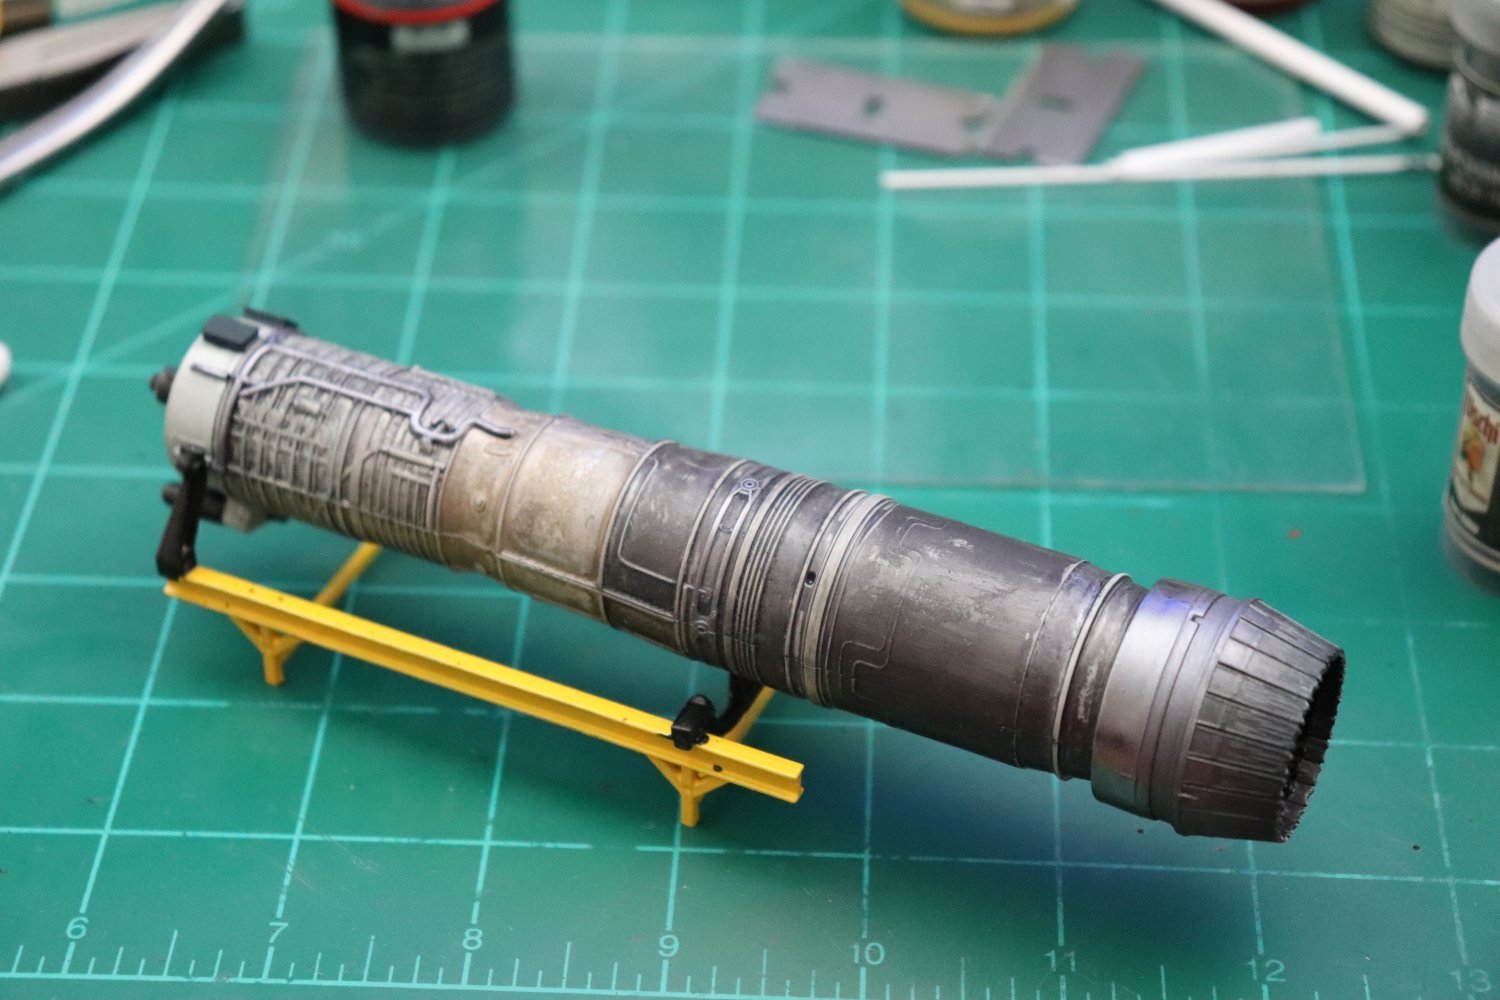
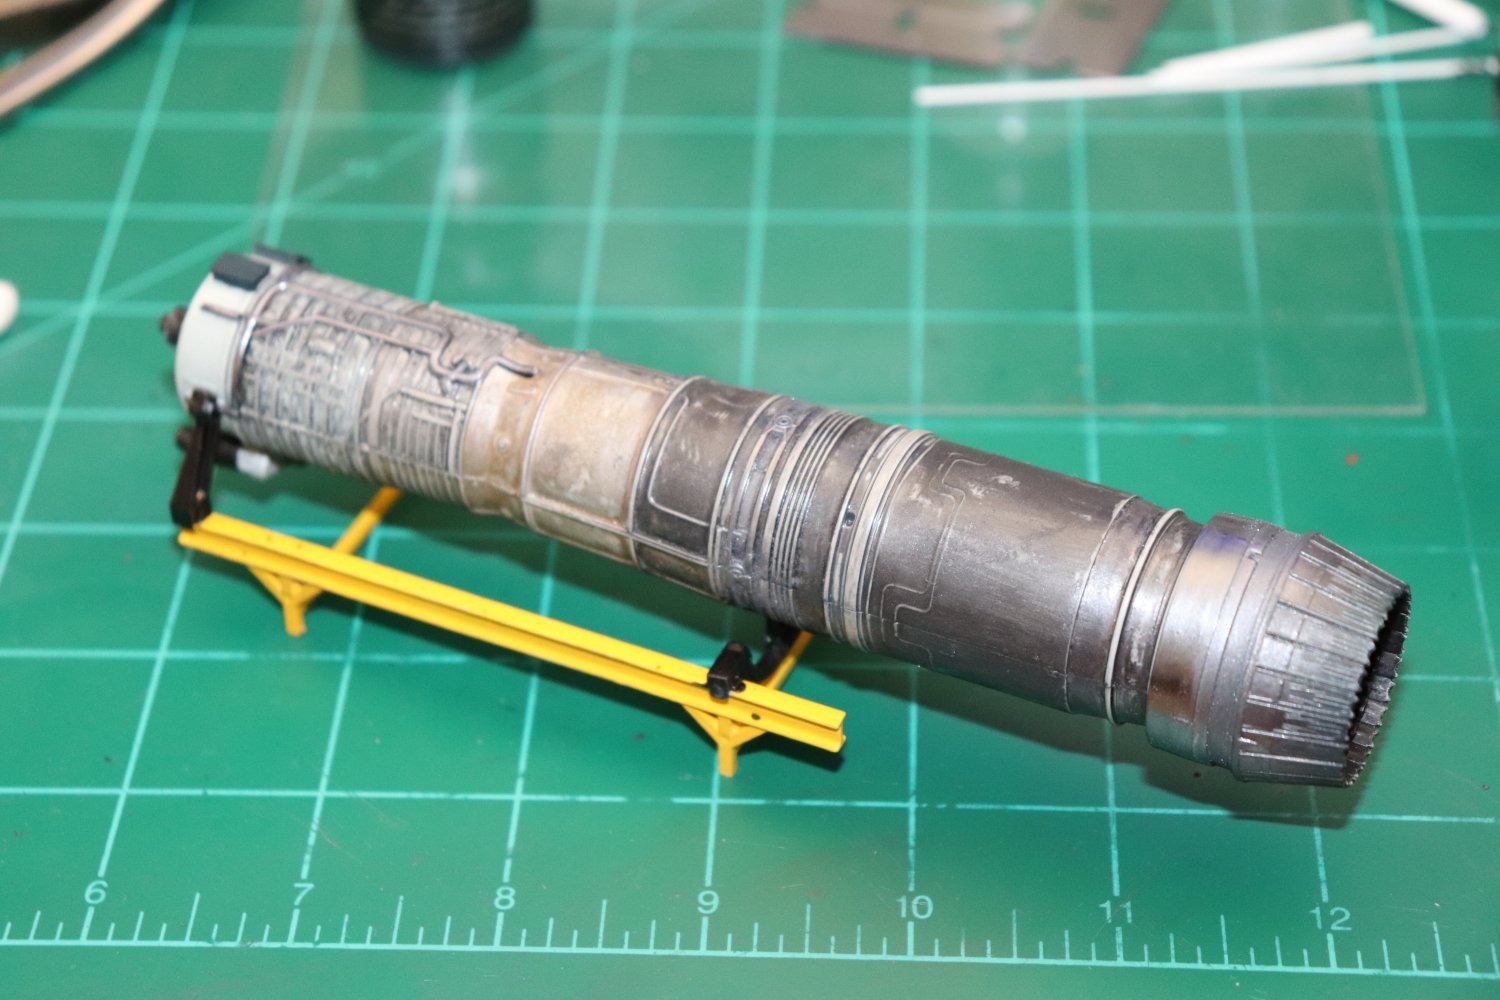
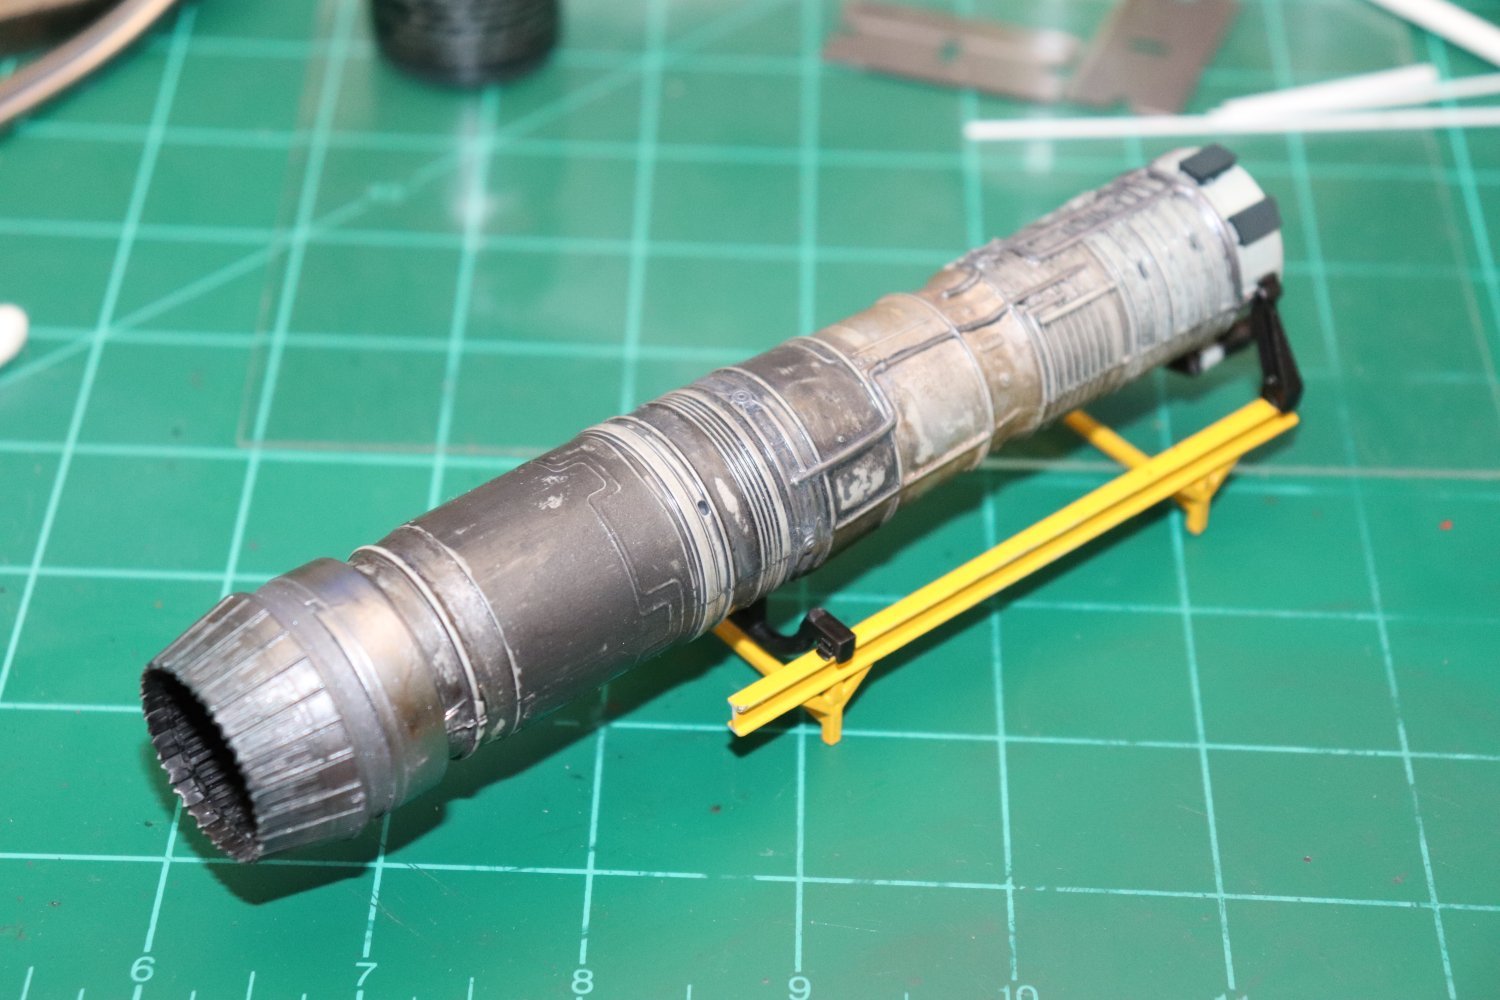
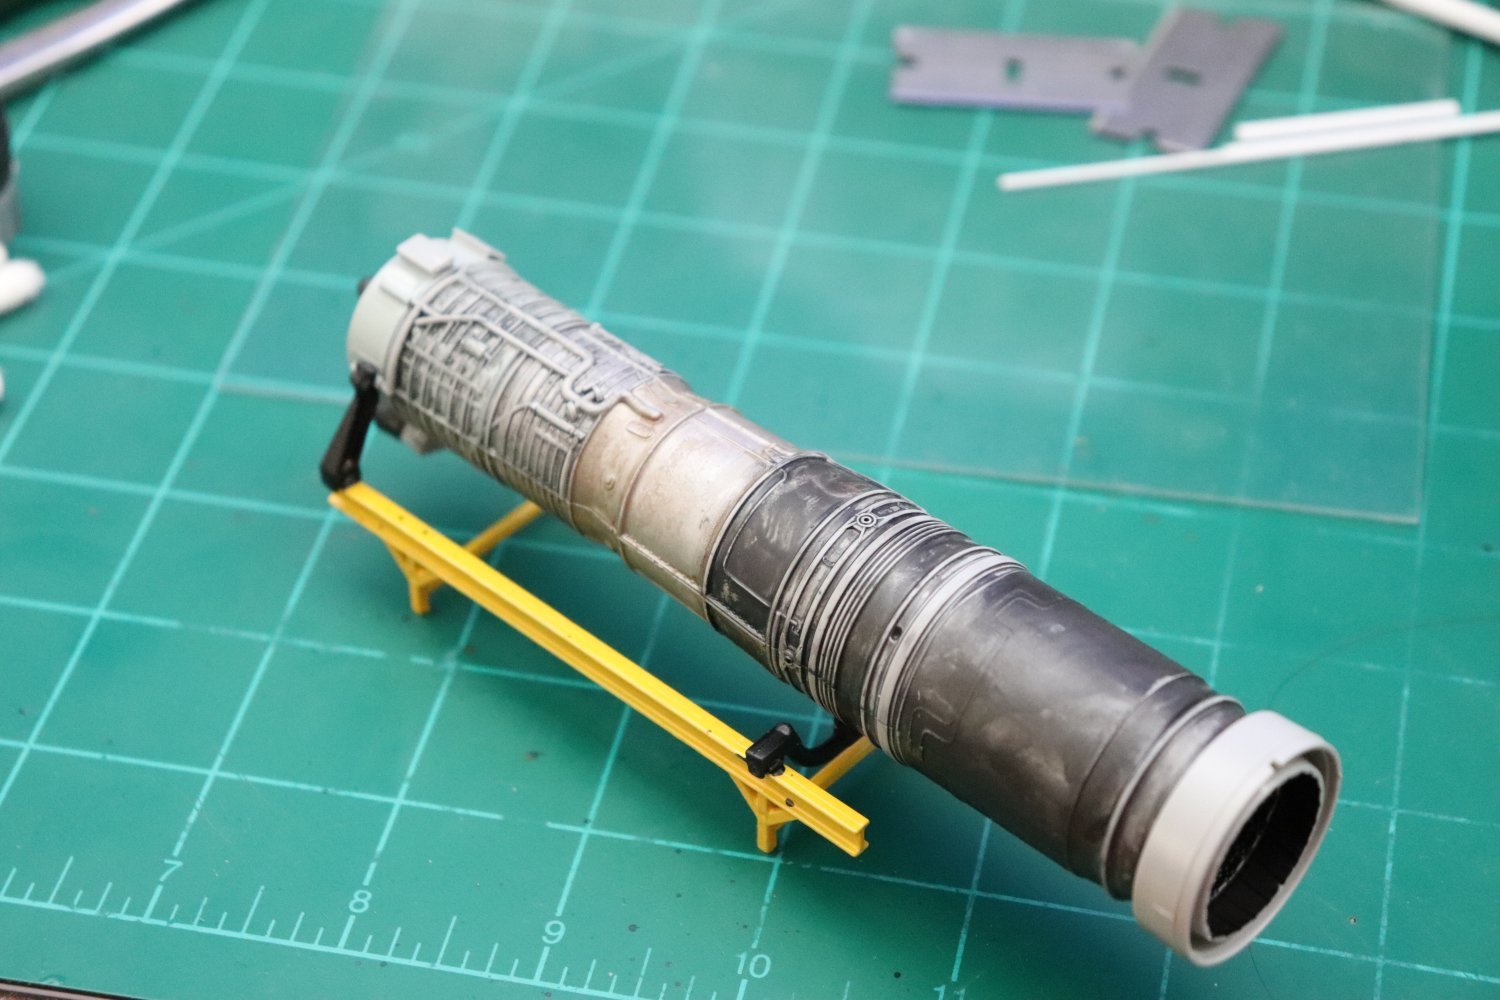
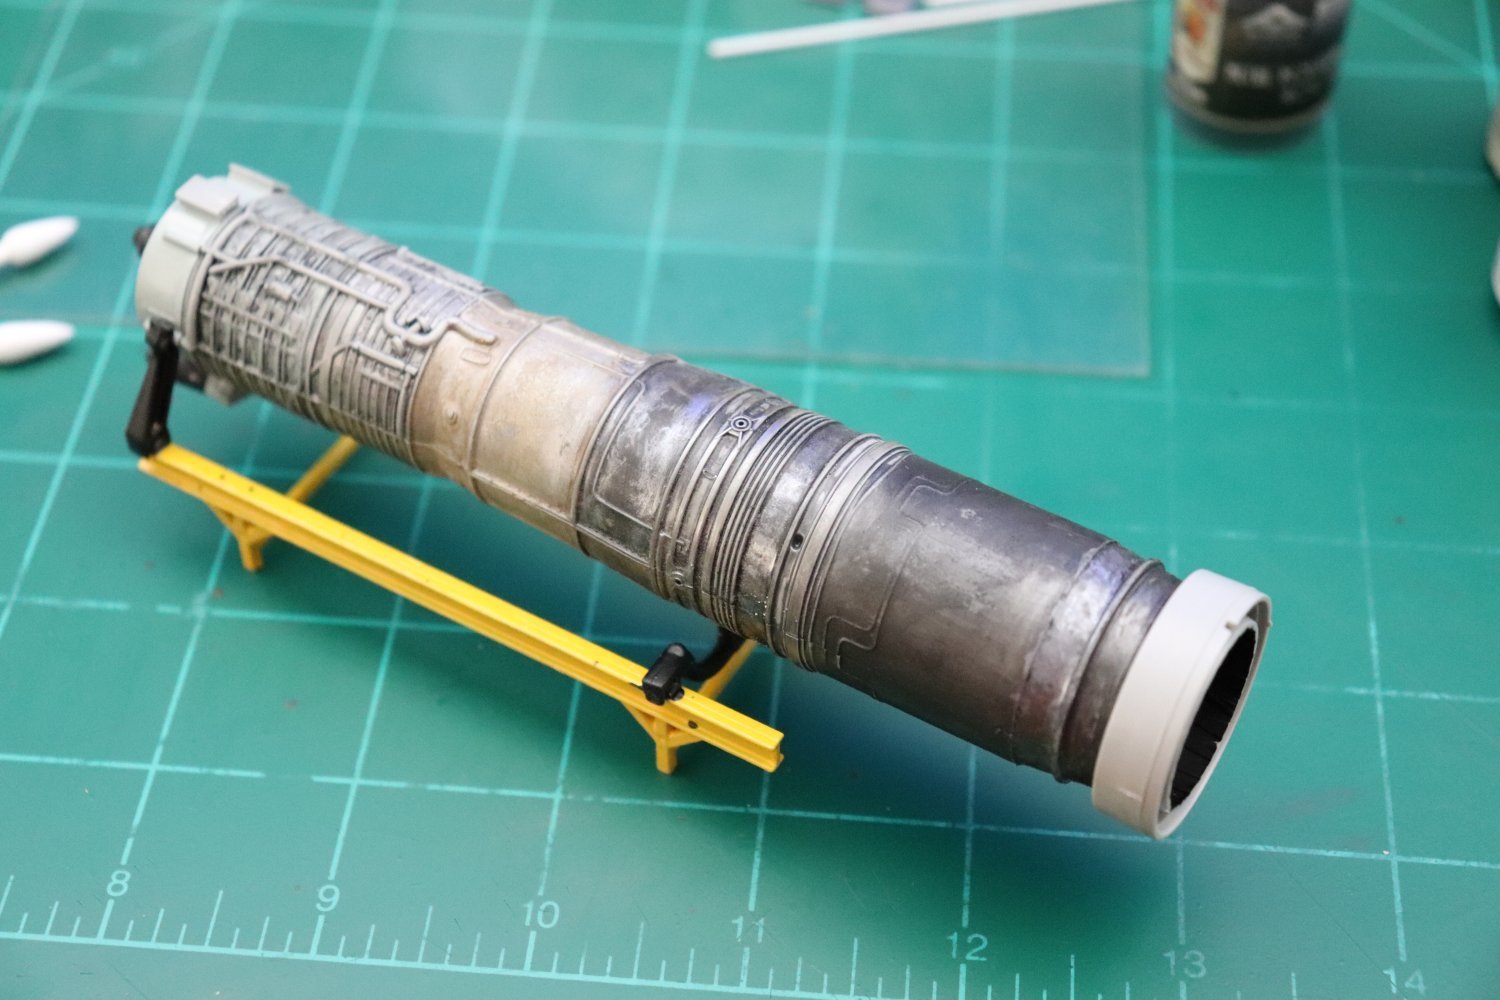
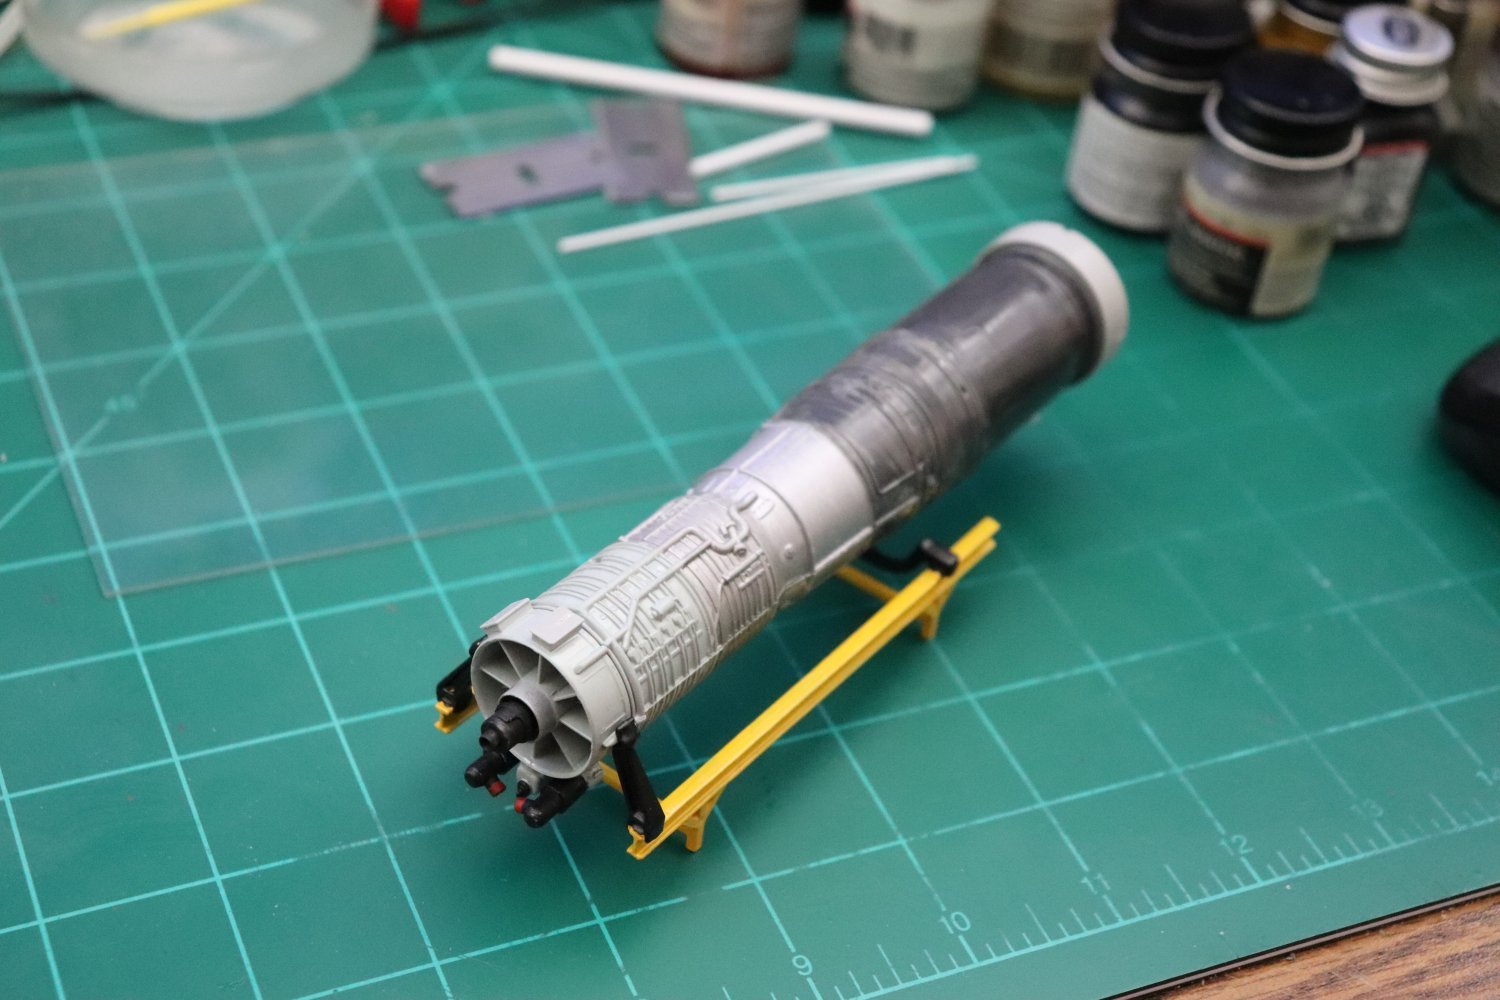
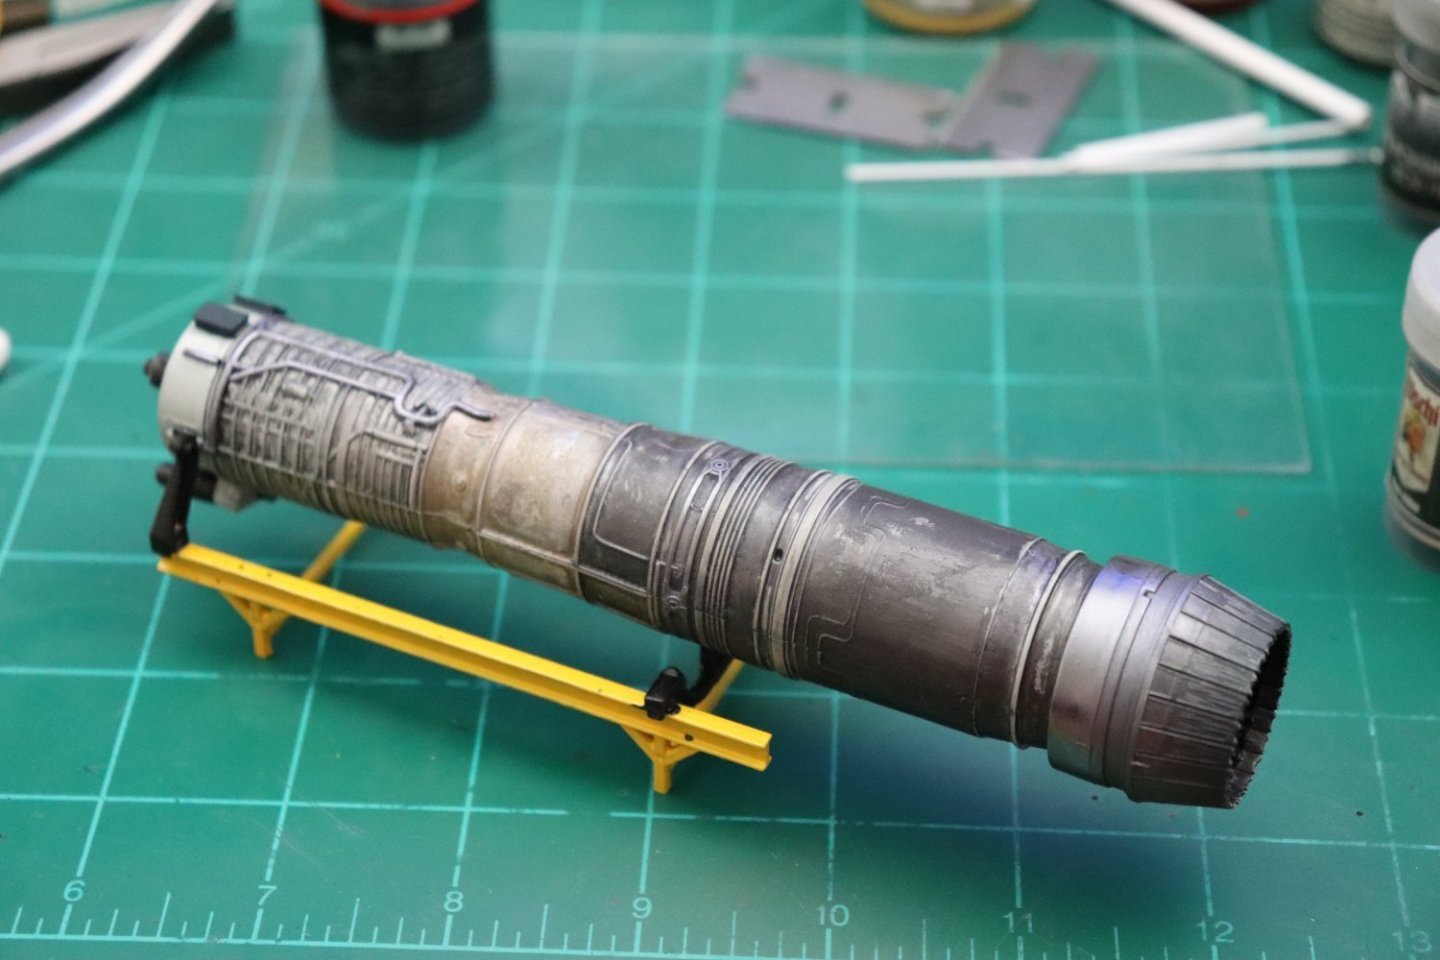
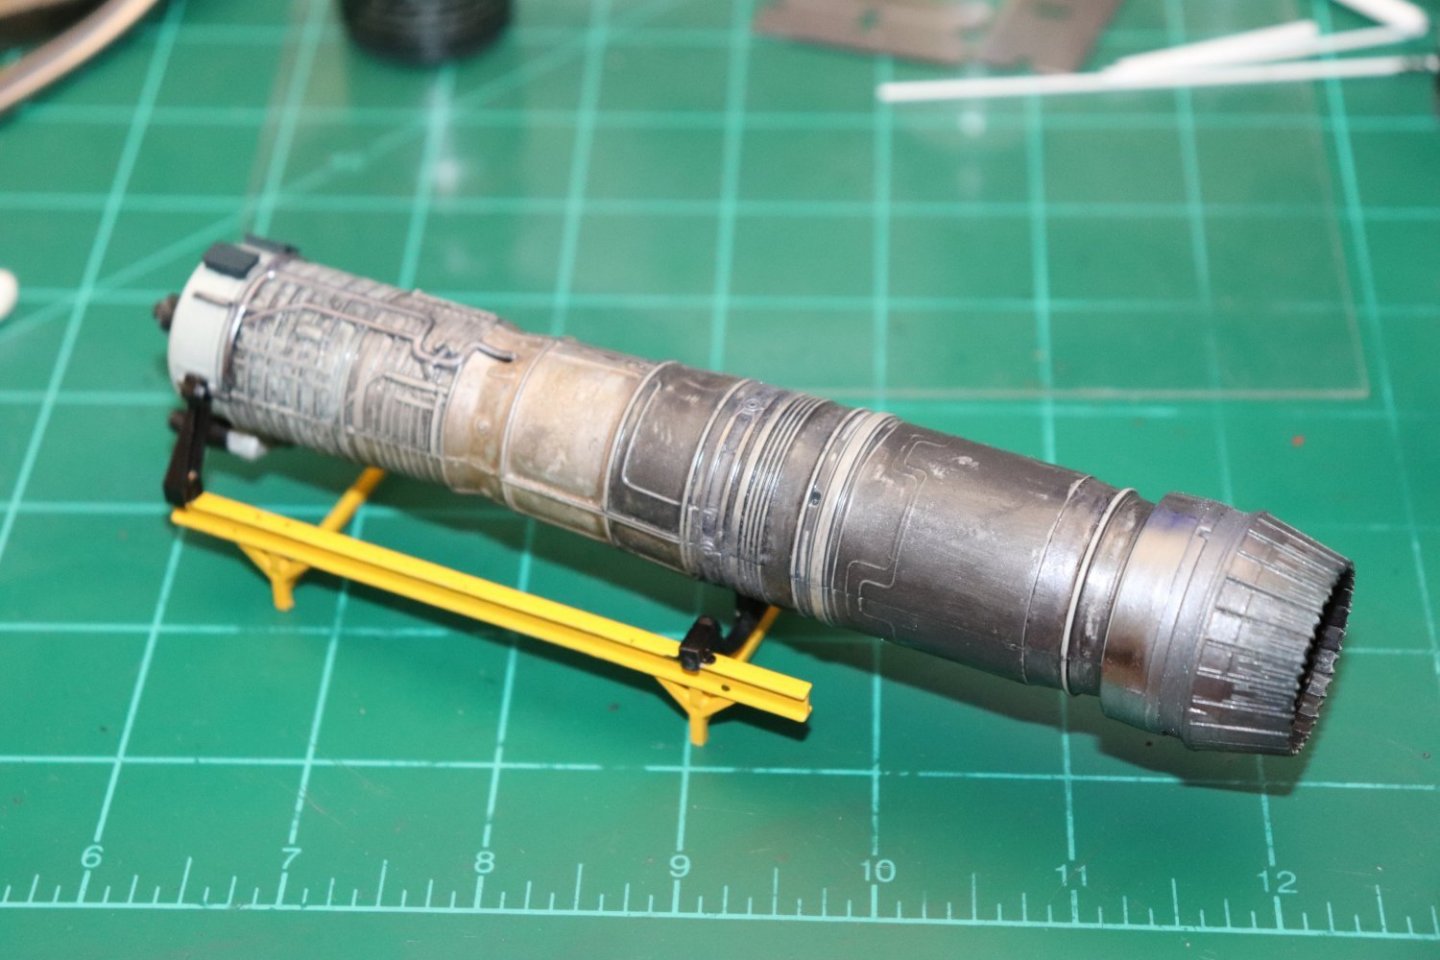
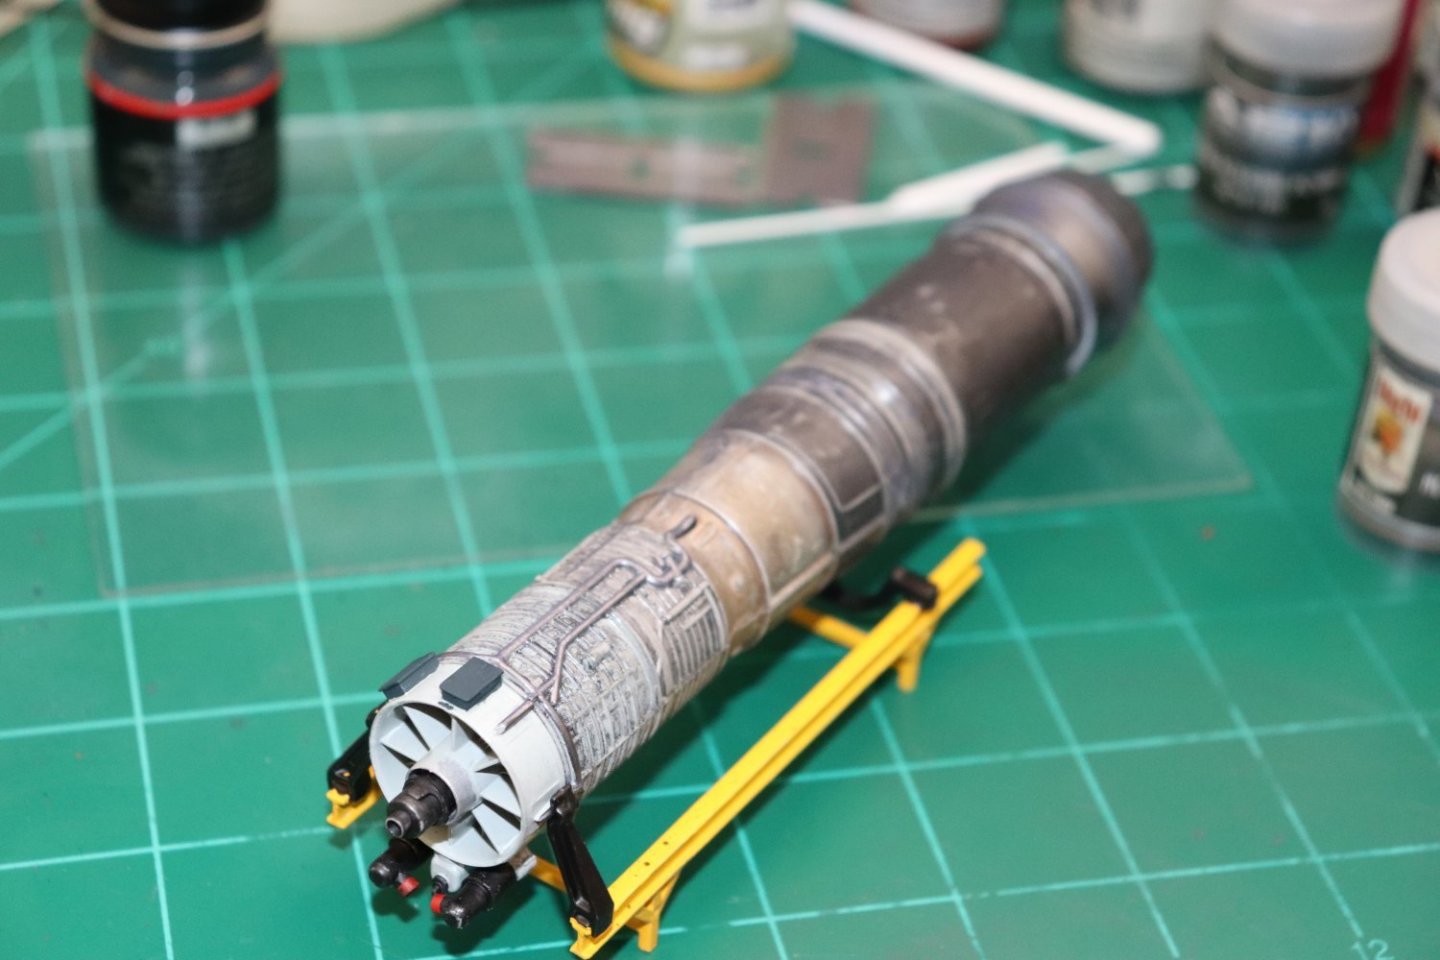
I think I'm done with the paint and powders for at least a little while.... Chrome bleed air tubes... they don't stand out as much as I thought they would... And the next few shots are of the complete basic engine with thrust cone.... I still have the oil Tank to add and the thrust cone actuators... Then I will call it done... Onwards..


- 139 replies
-
- 14
-

-

-
Thanks Alan, I certainly hope it looks the part, we gots brothers here that know... {chuckle} It's going to be what it's going to be...
-
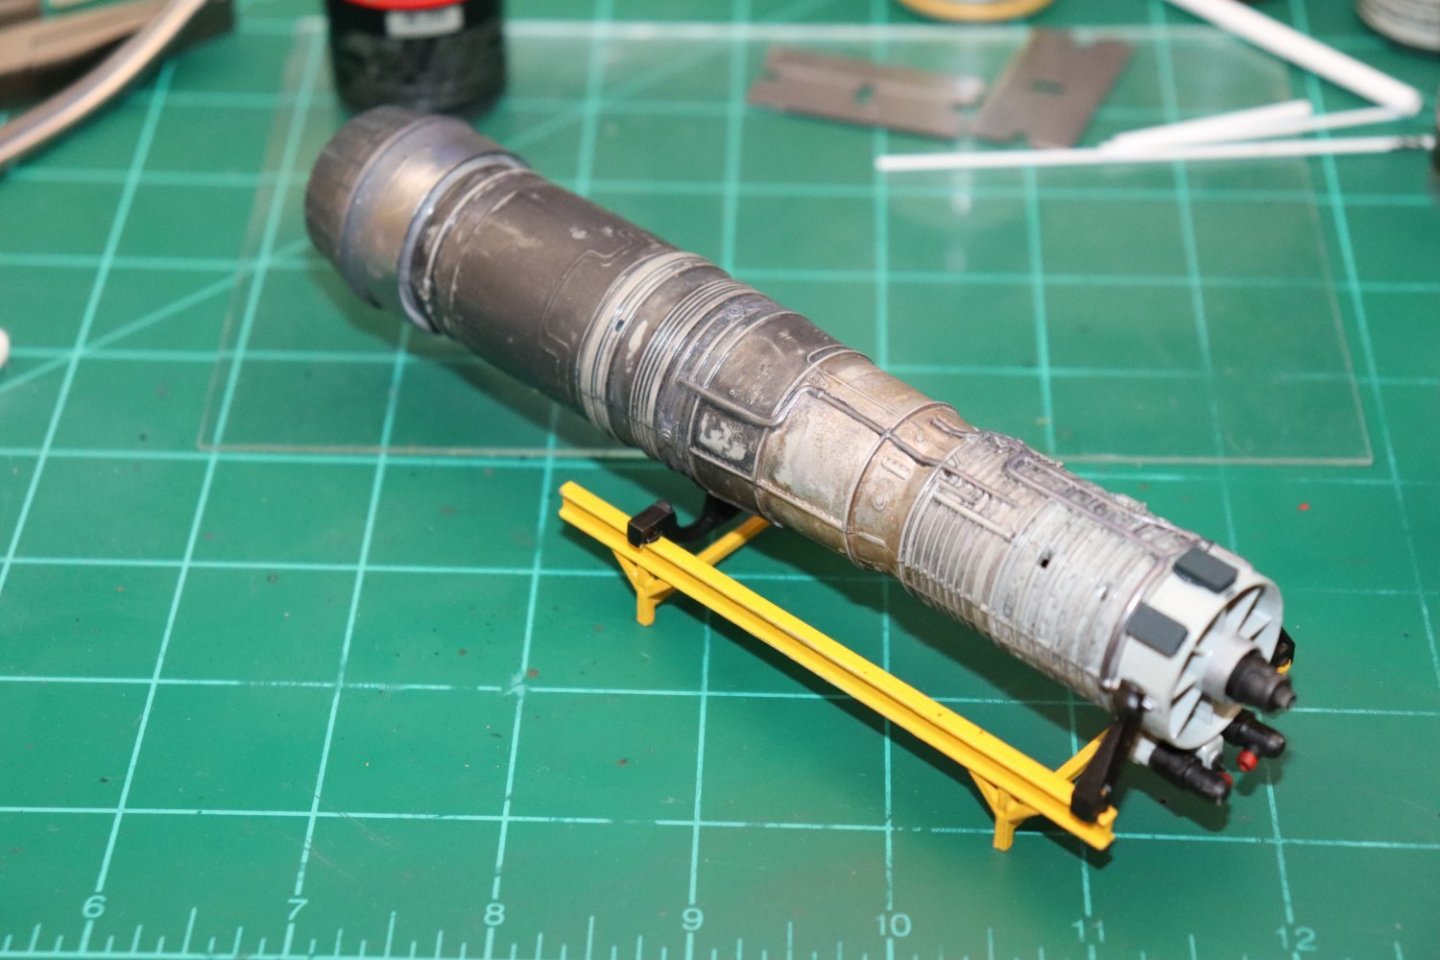
Another update: Wash, both black and brown... Metal powdering next, lightly of course which allows the silvery blue sheen to peak out a bit... We just want a hint of it, it's not like a chrome exhaust pipe with a rainbow of colors... The brown gives the darkening effect around the burner cans from heat flow and usually results in a fairly even color distortion on a used engine that isn't worn out yet.... There are no afterburner injectors on the engine, as well as the aft bleed air tubes.. I was thinking of making some up but most of the museum engines I've got pic of show them as removed... so I'll leave them off... Next up, picking out details with paint and metal powders... The forward bleed air tubes will be very shiny as that is how they look and I will try to pick out the control rings for the variable stators on toe forward compressor... Onwards Brothers... EG


- 139 replies
-
- 13
-
-
Oh, so you go get the good stuff... (I see how it is) I put extra rafters up there to make sure you can relax comfortably while the paint flies... Good to see ya brother enjoy the journey...
-
Welcome aboard Roger... I think that they are reference materials for location, and airport pattern maps, Landing Patterns, radio contact frequencies, hazard avoidance information... Nothing about flying the plane at least not for Airforce pilots, airline pilots on the other hand, they should be trained up on procedures before being let loose with a load of passengers... And when they throw a manufacturers programming defect into the mix all bets are off... What I read about the 737Max is yes the procedure is in the flight manual, but they weren't trained on it. and training for that specific malfunction is now mandatory, both recognizing it and resolving it... Generally they reference such info at least 20 to 30 miles out from the marker... Landing is no time to be consulting charts...
-
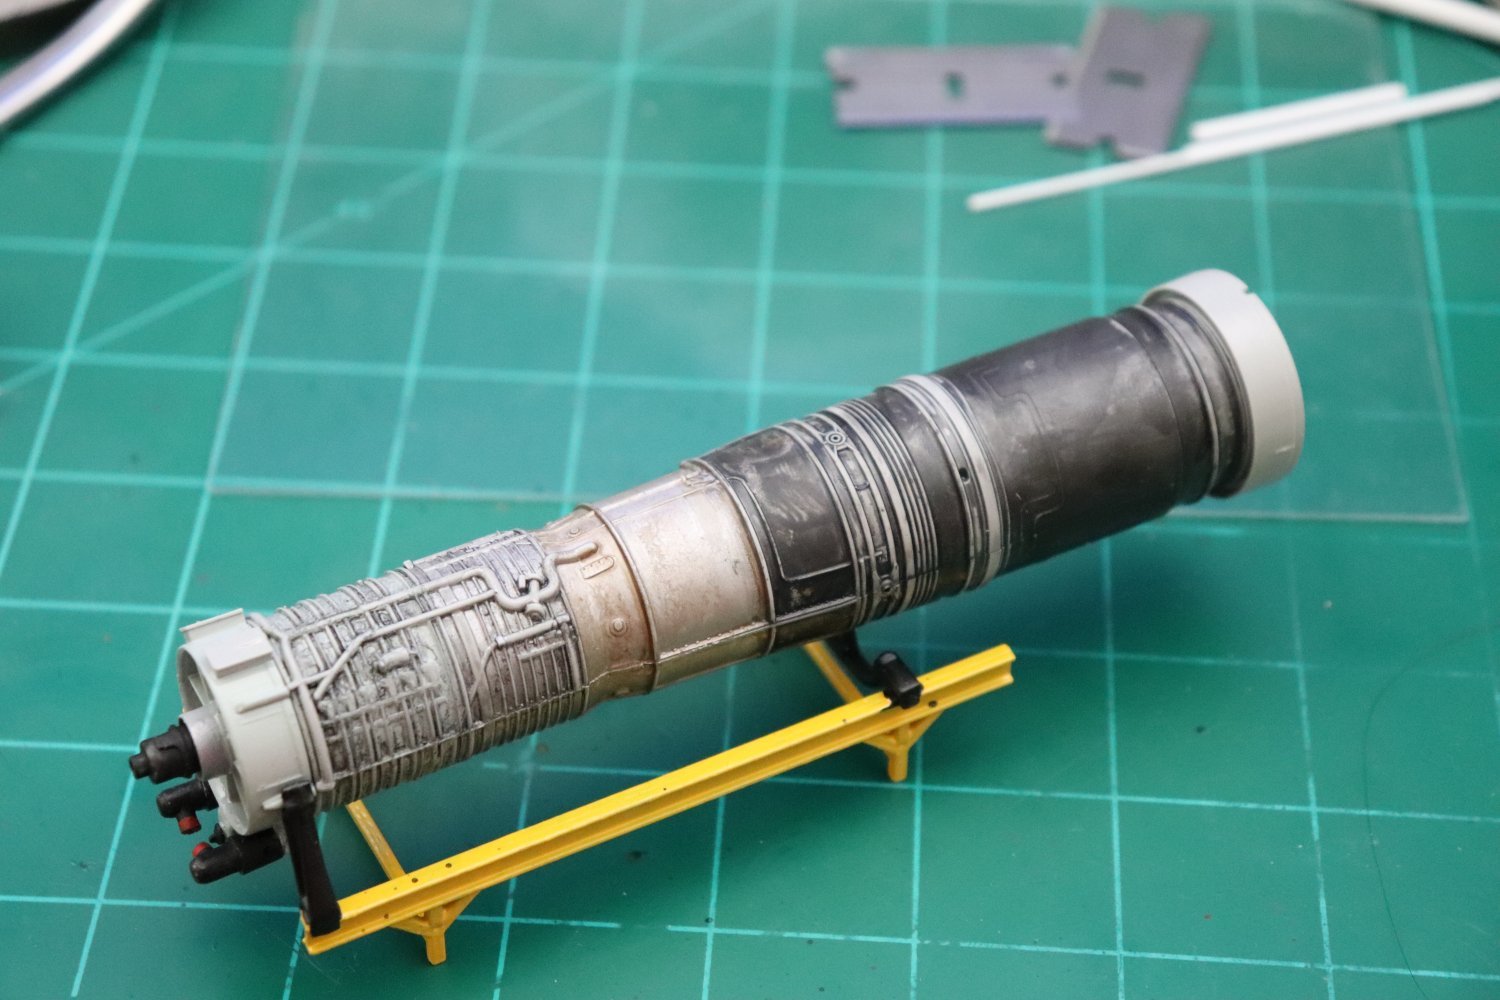
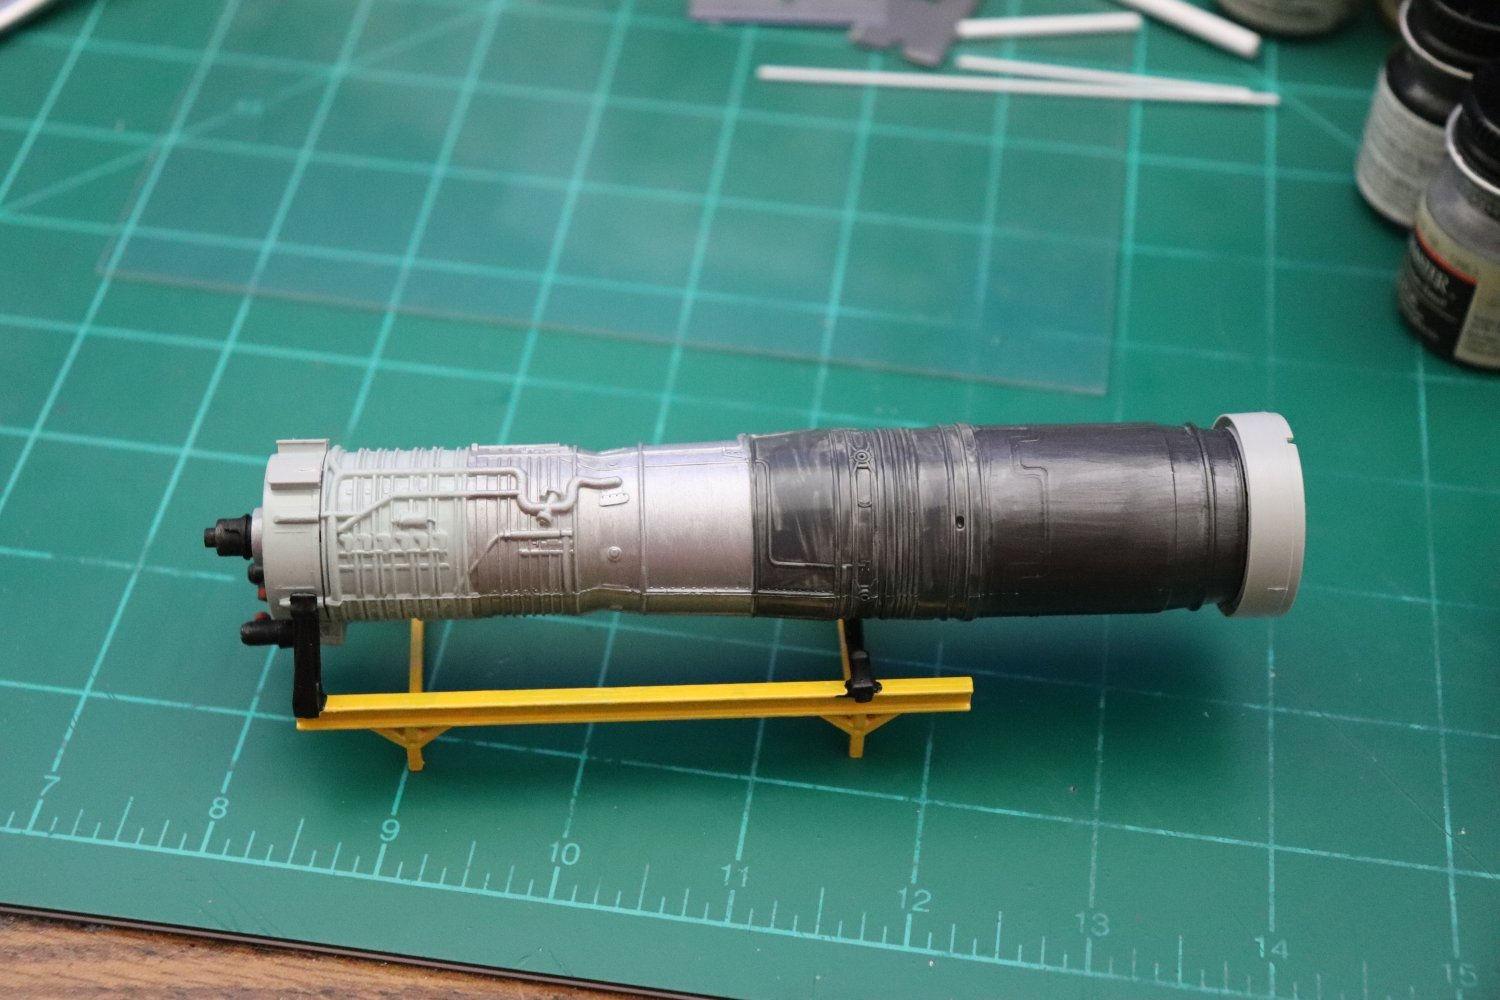
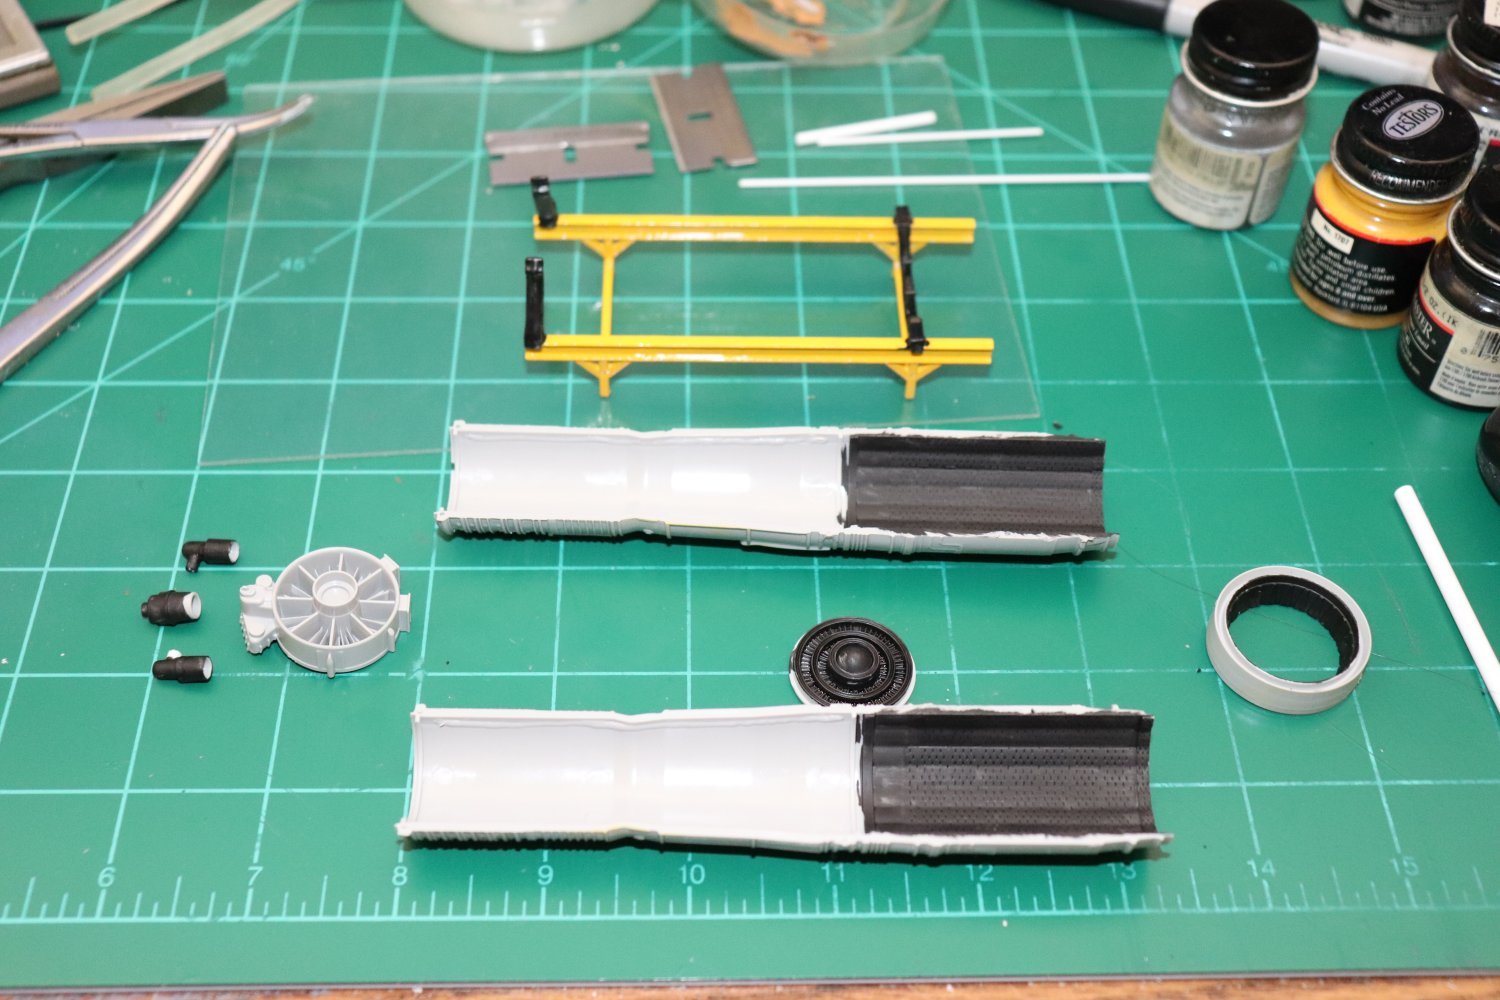
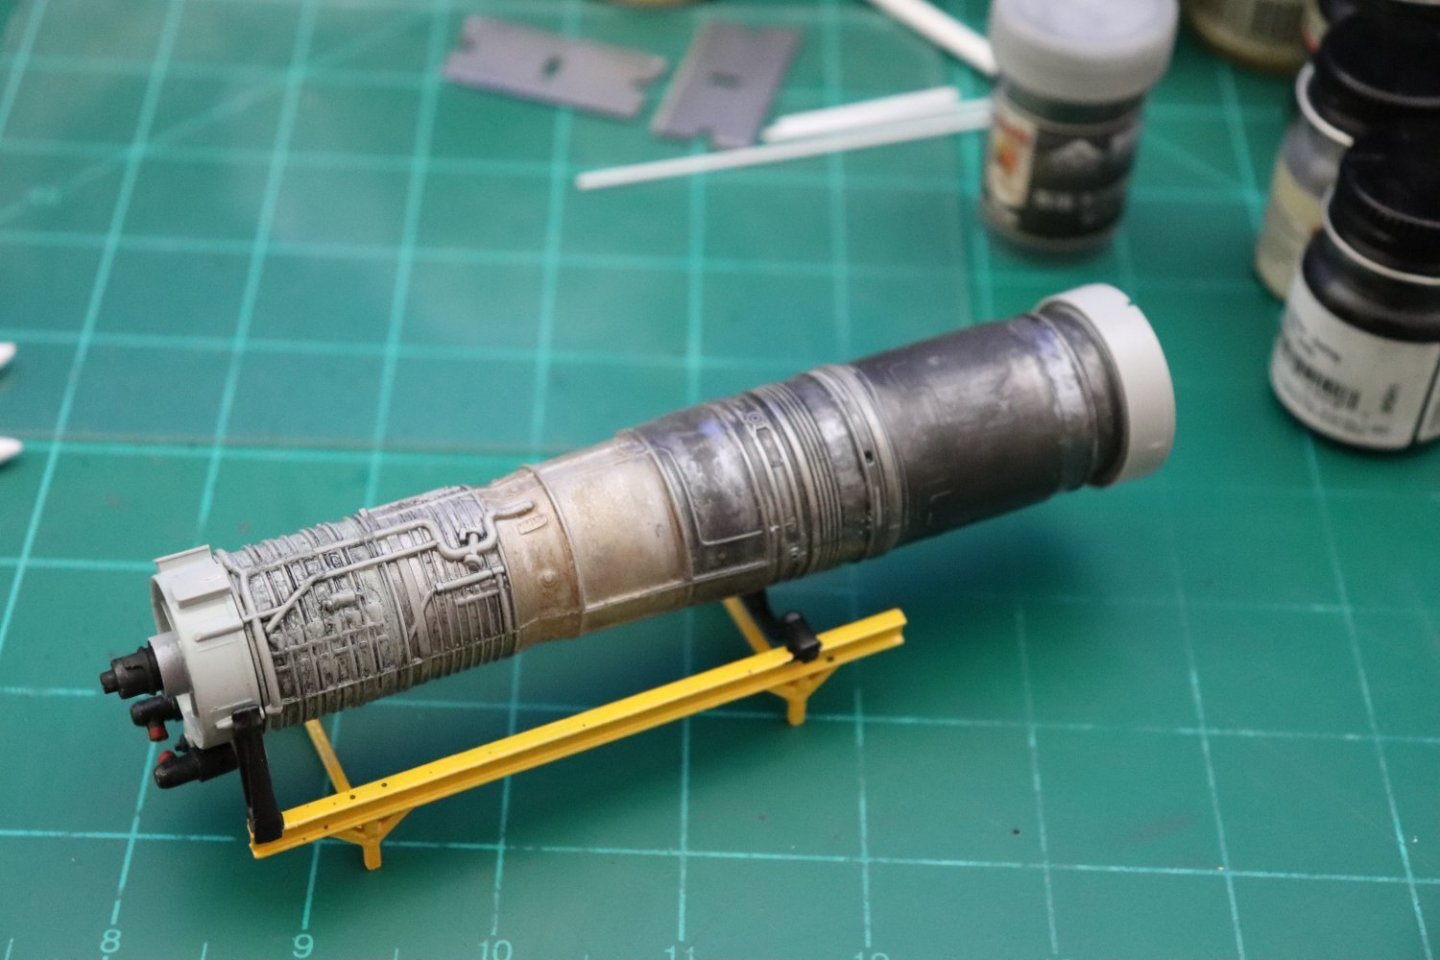
Small update... Engine, J79-GE-7 Base colors are down and a bit of detail paint added to the intake... Currently coated in future to start the highlighting process... I haven't done the thrust cone actuator ring yet, I still have to determine the base color, black or grey... Ready for highlighting black in sections, brown in others, still looking for a decent sponge for layering... More later, Onwards... EG


- 139 replies
-
- 12
-
-
Hey Brother, I'll never call you late, just delayed... {chuckle} Thanks, that Instrument Panel was the job, haven't used a 5/0 in about ten years... I got lucky.... Welcome aboard my friend relax and enjoy the journey...
-
Yeah that's me old style... I'm familiar with Paul's work in fact his F-104 is the inspiration for mine... He had two techniques for getting metal finishes on models, the high polished ones and the weathered dull ones... Both are fantastic and look real when done right... old school... On the engine, I'll be aiming for coloration on the base metal, I kinda want an engine that looks like it's clean but used so there won't be a lot of dark oilyness on it base colors and tinting and highlighting is the ticket, then afterwards picking out details... Still debating if I want to add anything to what the kit offers... Those last four photos above is the scheme I'm looking at... Should make a very good display, sitting next to the aircraft... Thanks my friend and keep the suggestions coming, it's how we learn... (and yes it may be 50 years later but I still learn things about this hobby)
-
Thanks my friend, The early models had 16 lids and the late models had 24, I have both in the kit... The early version is open and the late version is closed... Now BlueJay 4 being a late "C" model should have the cone with 24 lids... I saved the thrust cone off the old Hasegawa kit, it's an open 24, so If I do decide to display the engine out of the aircraft I'll use the closed 24 for it and the open one in the tail... I can't find any info on when they changed from one to the other, and I've seen shots of the 24 on engines as early as a -5.. so it was a retro-fitted upgrade... The 24 would be the most common one... I imagine by the time the F-4 went into service they were all 24's... Your info is invaluable brother, Thanks a BUNCH!...
-
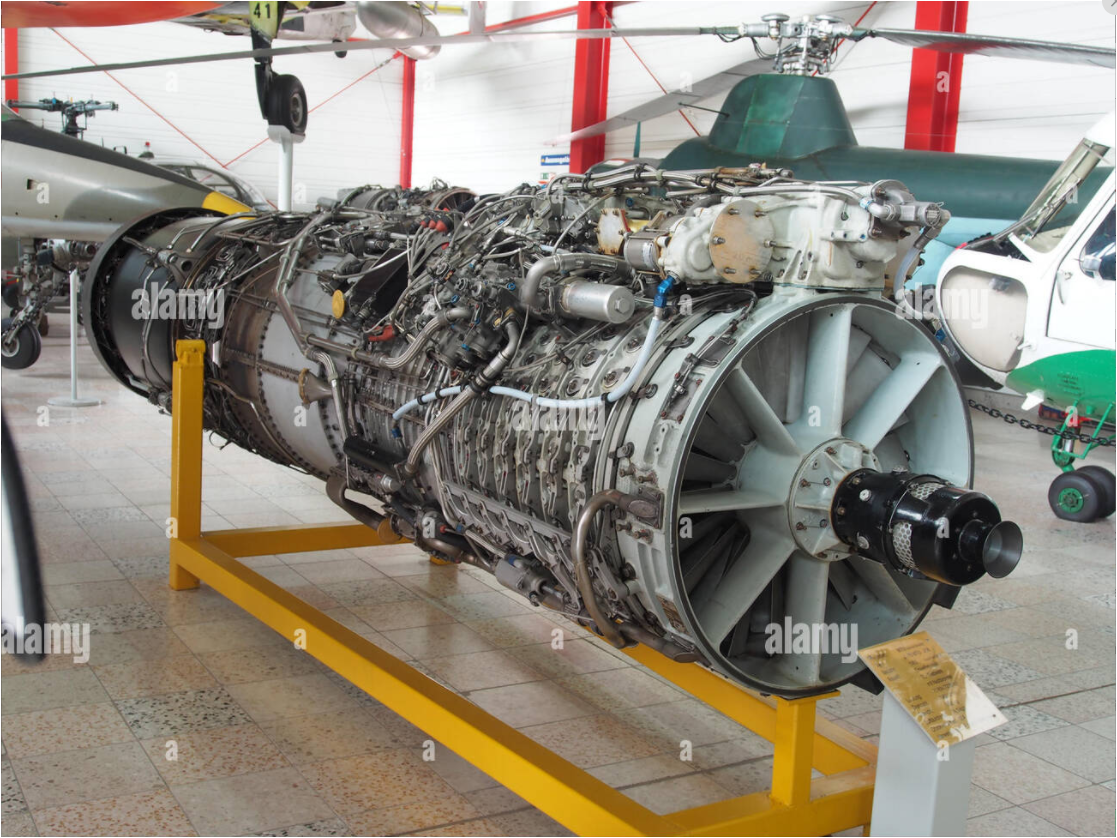
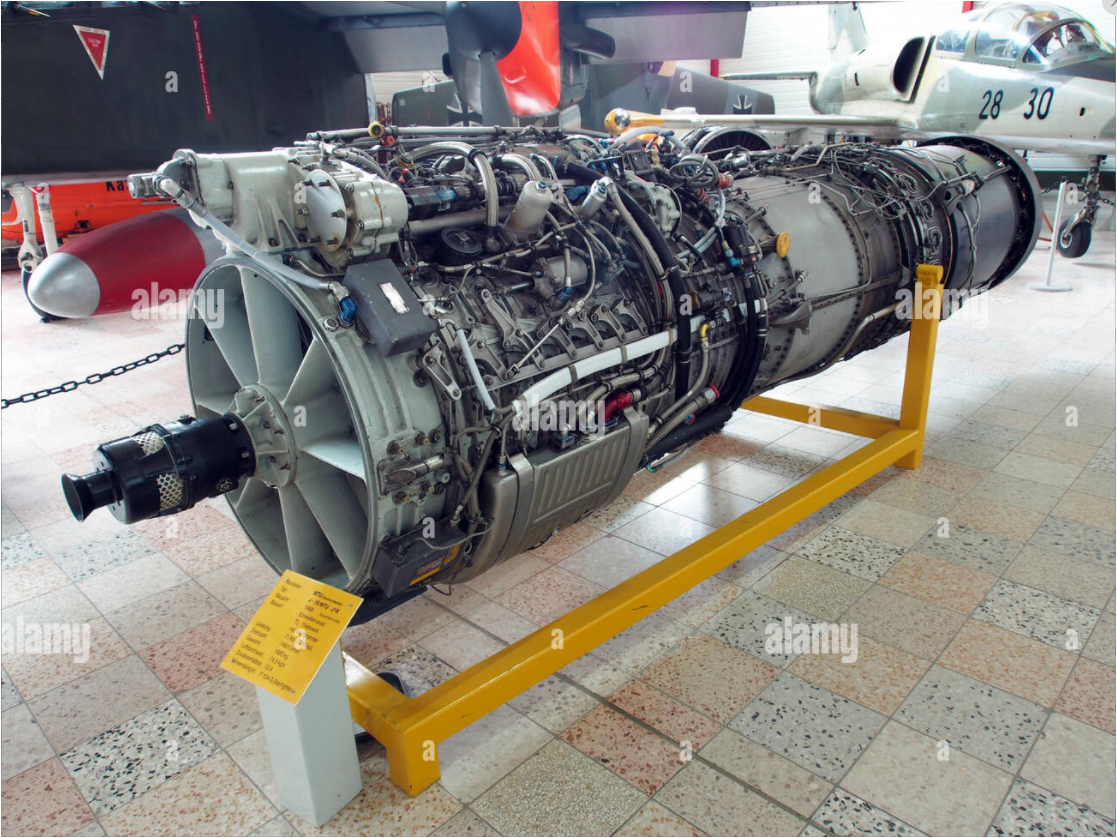
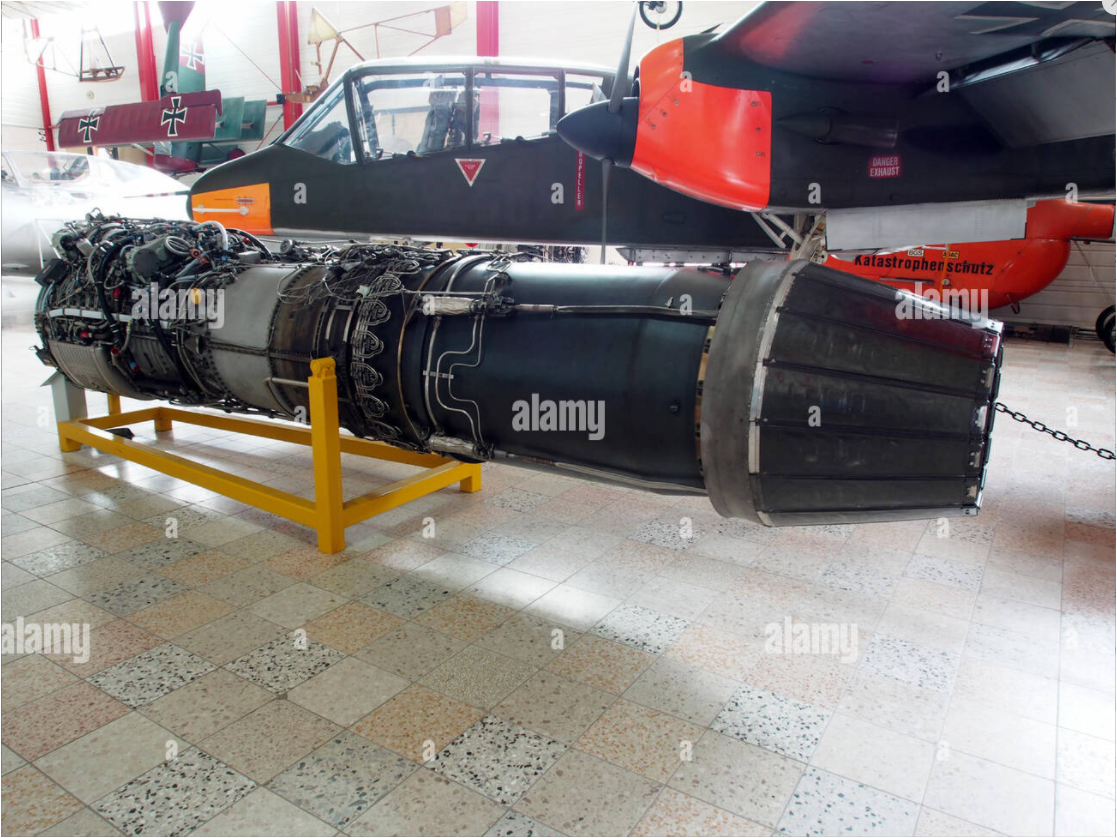
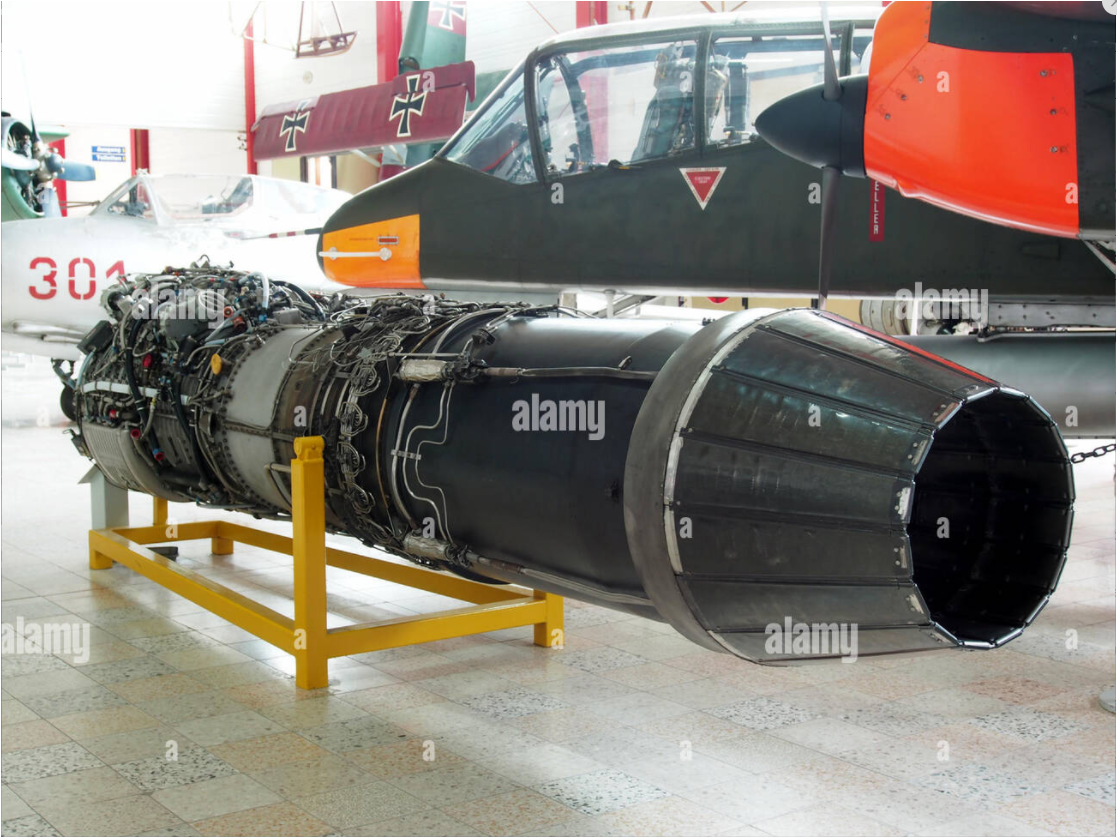
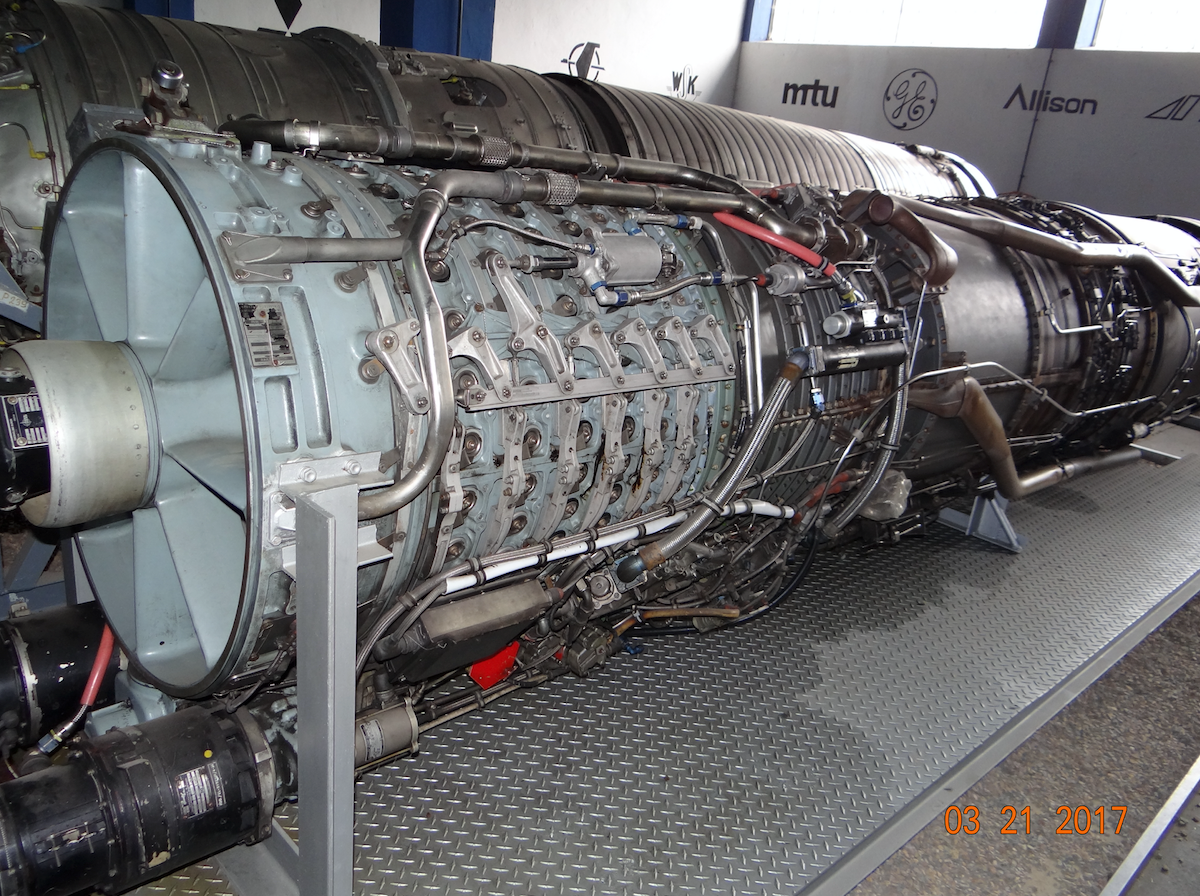
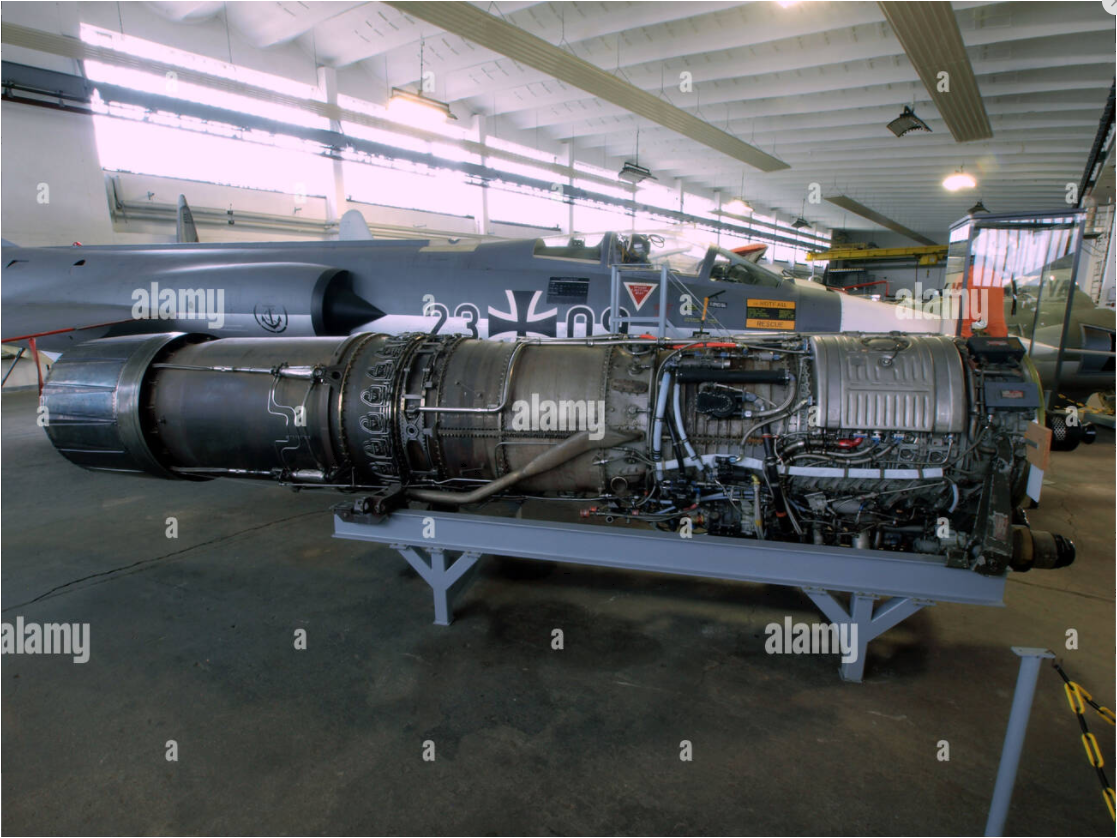
Thanks Ken.. I was looking at a refurb engine, used but ready to re-install rather than an overhaul pull... more along the lines of this... I know it's upside down, but it does represent a cleaned up pull or ready to go re-install... And the colorations appear correct for the preponderance of them I've seen... (yeah the museum's display is way too clean and sparkly) but the German one is way too dark in my opinion, looks well used... I think the above sample is a fairly good rendition of a decent used J79... It's actually a GE-11 rather than a -7 but that should be close enough... The burner can is a bluish brown tinged dark grey, the afterburner is a bluish tinged metallic and the nozzle is a bluish tinged burned steel/iron... It's clearly not a re-manufactured engine and it does look complete like a length of hours maintenance pull or something... I want the effect of a used engine but not worn out.... Think I'm on the right track?
-
Thanks Dan, it's going to be interesting for sure, I'm doing this with a furry stick, I don't own an airbrush... {chuckle} Everything I've done so far in my sig has been done with furry sticks (brushes) and rattlecans... Old school I know... And easy to screw up.... And thanks, I can use all the luck I can get....
-
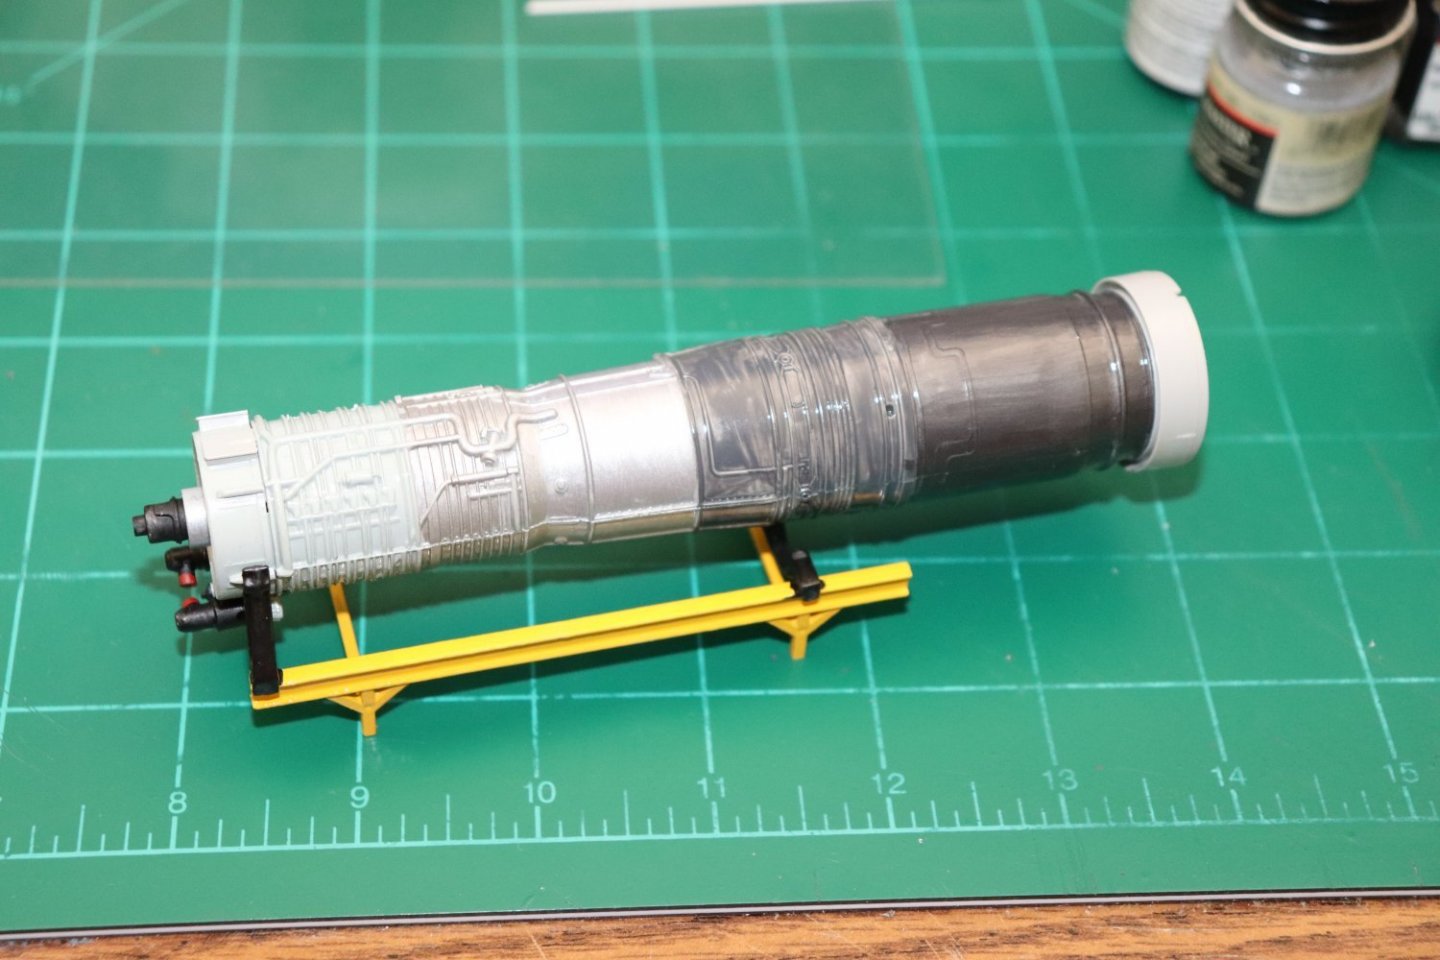
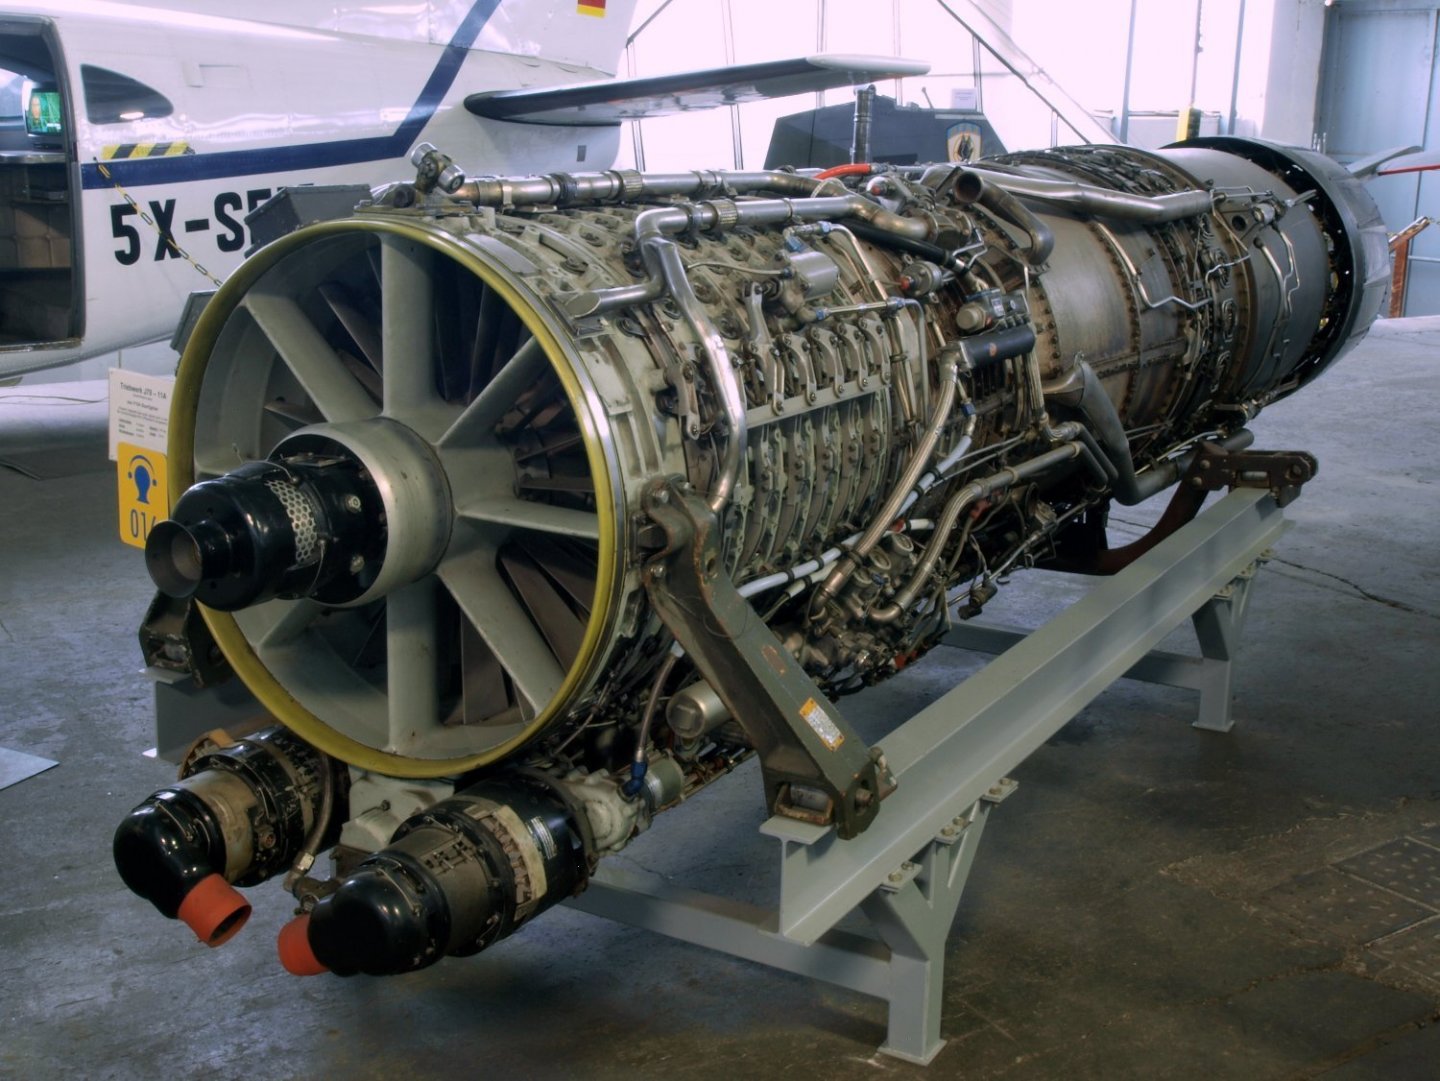
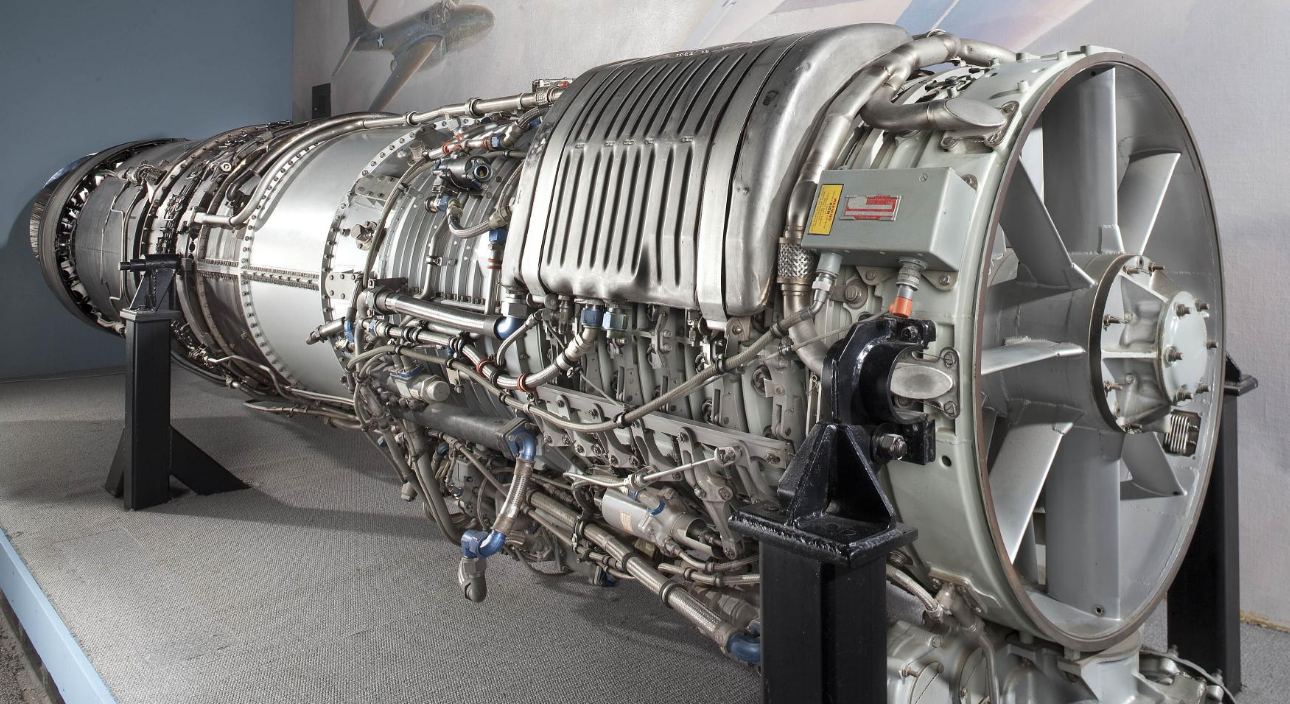
Short update... The J79-GE-7 Complicated engine, and this is only one color configuration, there are dozens of others... Like this one..... Or this one... They varied greatly depending on model and date of manufacturer... All the above are F-104 engines... The scheme the instructions give is the intake and first half of the compressor is gull grey, the high end of the compressor is steel... The mixing chamber is aluminum and the firing chamber and turbine/AB injector section is exhaust color and of course the afterburner is burnt metal... The tail cone actuator ring is gunmetal and the tail cone is burnt metal.... Of course there are not the colors I see in the above pictures of actual engines... So the only thing I see accurate is basically the intake section is aircraft grey with various detail colors and the high end compressor is grey steel, other than that, it is all over the place... I do have a shot of a J-79 from the USAF museum set up as a display piece.... completely clean.... This is what it would look like when first installed in the aircraft brand spanking new.... (in fact as a display piece it is cleaner than brand spanking new) So coloration is all over the map but I have a general idea of what it should look like, and interpretation is the name of the game... I only hope it looks like a jet engine when I'm done with it... Anyway, here is the first steps on the path to high thrust to weight ratio bling... The engine stand graciously provided by Italeri represents a number of actual stands used at various museums and works very well... Next up assembling this beast and painting.... basics and details.... Wish me luck... EG

- 139 replies
-
- 12
-
-
Thanks Brother.. Yes, sometimes it is more problem than solution.... What I wish is there was reviews of the PE parts that actually discussed the efficacy of some of the detail sets... (what's needed and what isn't) They are nice, but just aren't worth it if modeling an accurate object at times...
-
Short answer Mark is no it isn't redundant but the part with all the detail is the exposed part that will have a chance of being seen behind the landing gear.. 95% of the PE goes into the space under the door or on the door insides itself.... the only people that usually get to see it is the people that made them or the overhaul people that would take those doors off... Just isn't any point to it..
-
Thanks Ken... One has to be careful when ordering PE, A lot of it, depending on the model, is redundant and some of it just plain useless cause it will never be seen... Now in defense of Eduard, the kit offers you an option to have the forward doors in their normal almost closed position as with all starfighters or fully open showing all that detail except that would never be the way the aircraft was in real life... I guess that justifies creating the PE.... Since I'm building a representation of a real aircraft in a specific moment in it's life I have to go with the real deal, so the PE is out, the doors will be partially closed... Just got thru doing the basic black parts of the engine, pre-assembly stage brother, although I did assemble and paint the engine stand... (gotta have some place to put it)
-
Yep, the health of fingernail polish... It's not something you want to drink for sure, or sit around sniffing for any length of time... it's one of those everyday chemicals that are harmless when used properly... There are two types of paint thinner for models, spirit based and acetone based... Mr Color Leveling thinner and Testors Enamel thinner are Alcohol/Mineral Spirit based, True North Enamel thinner on the other hand is Acetone/Alcohol based... Normal modeling usage shouldn't be any health risk at all
-
Good deal brother... is this the group build we were discussing a ways back? or are you doing a one off... Either way brother I'm here... won't miss this....
-
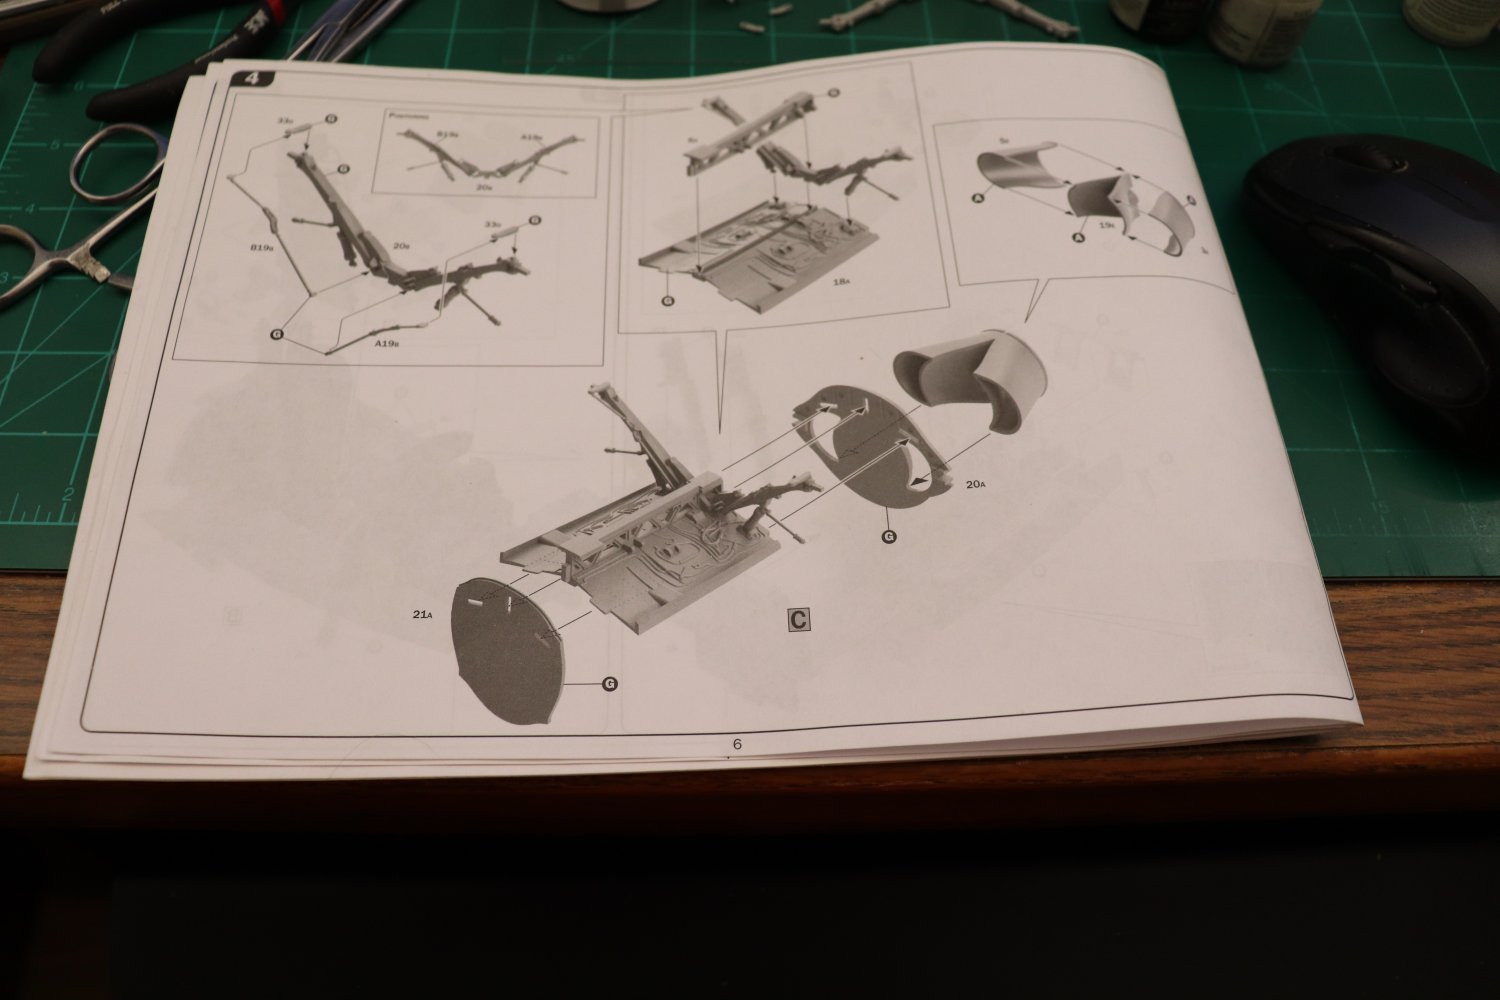
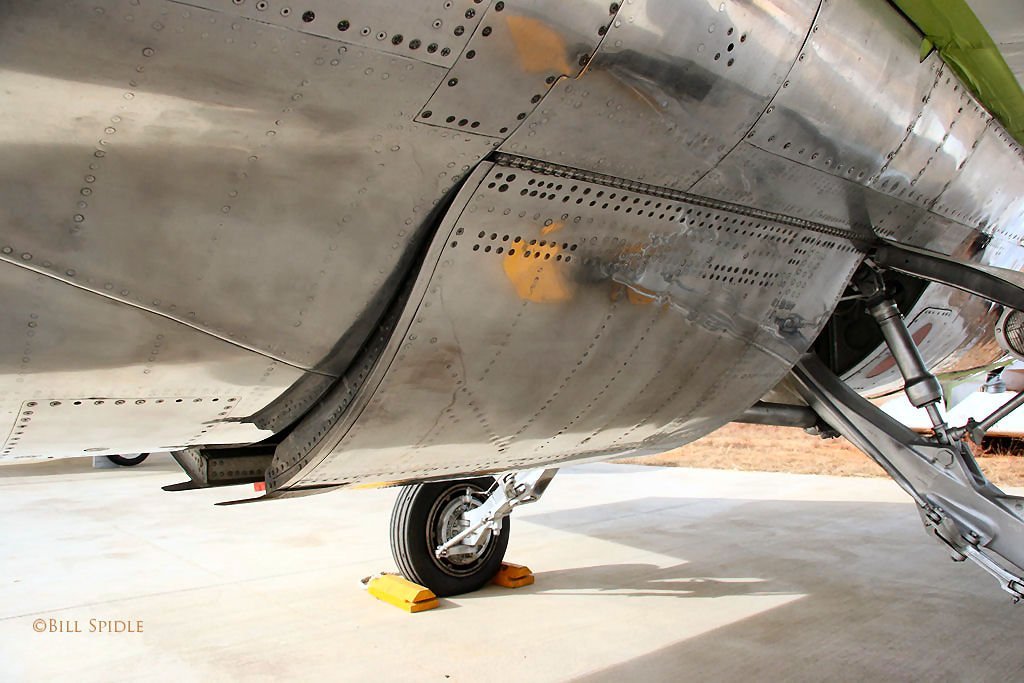
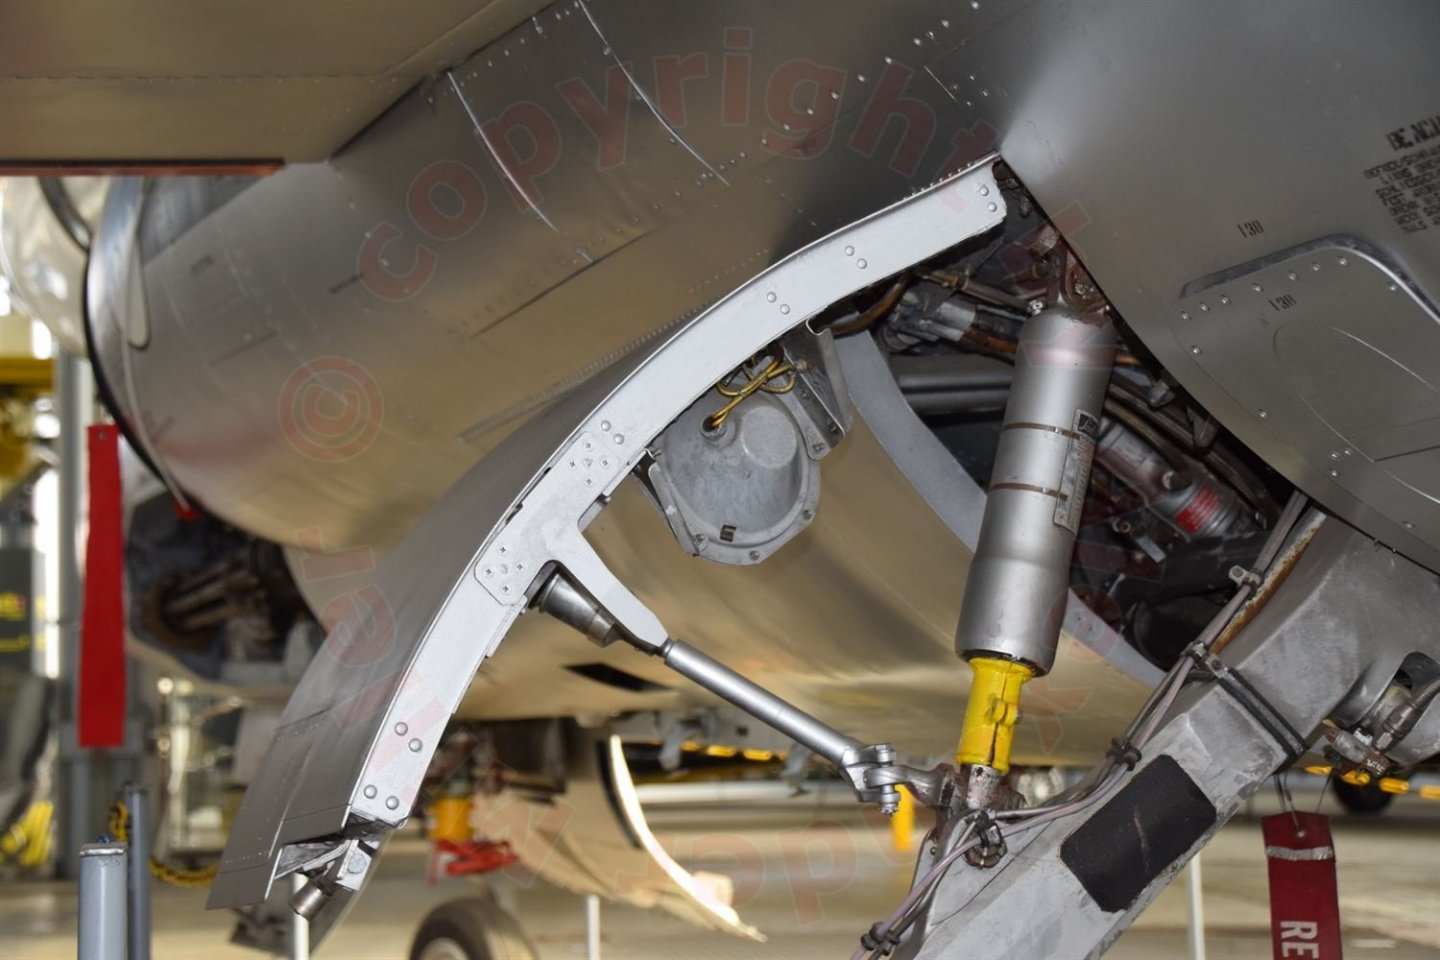
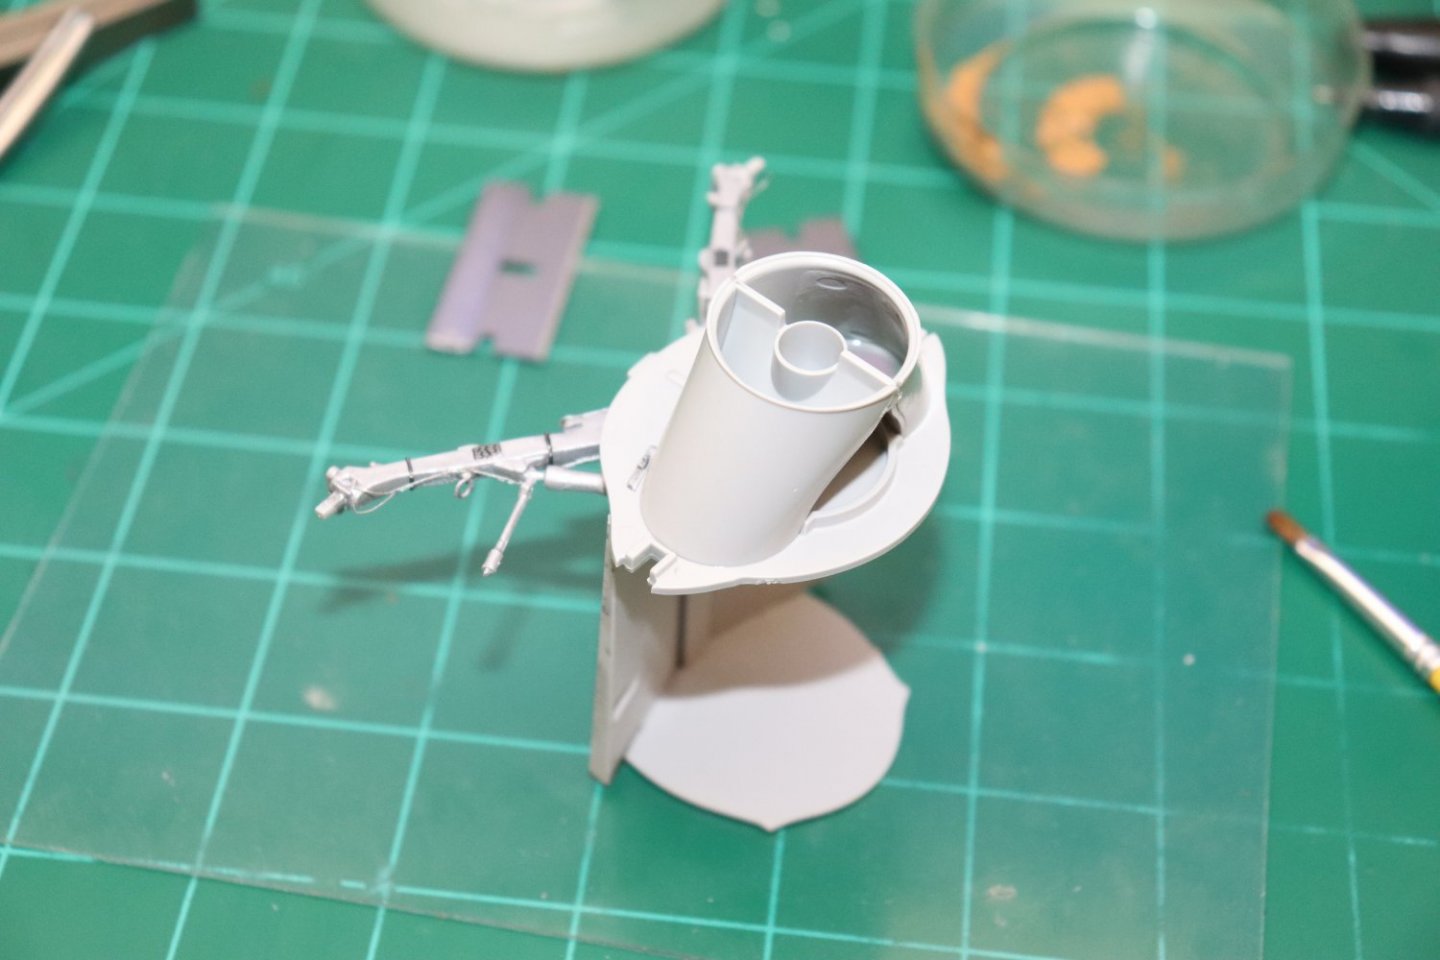
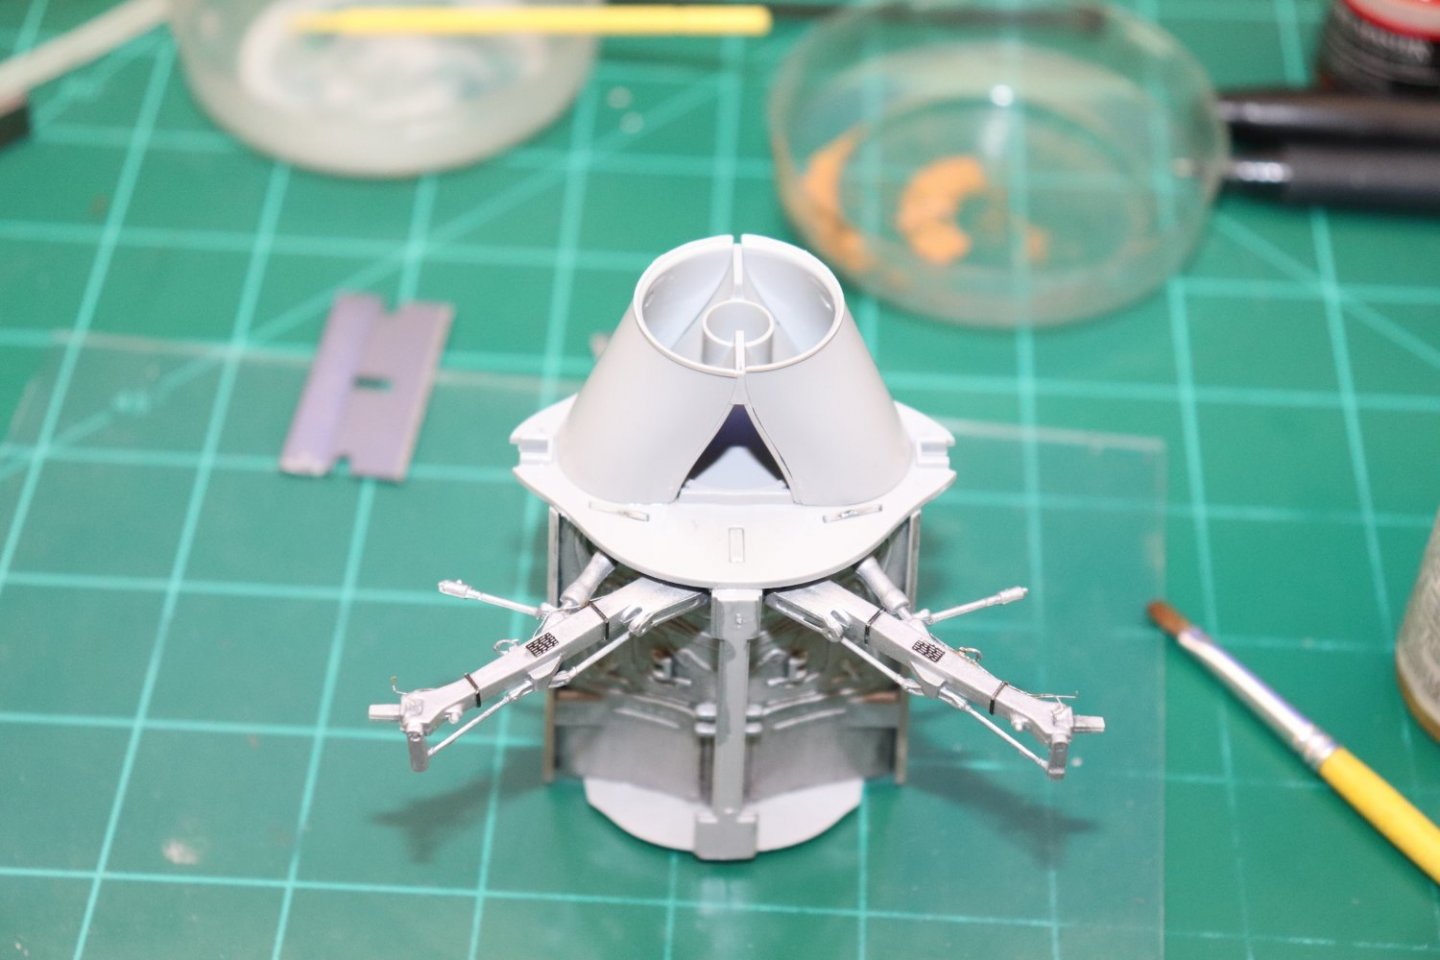
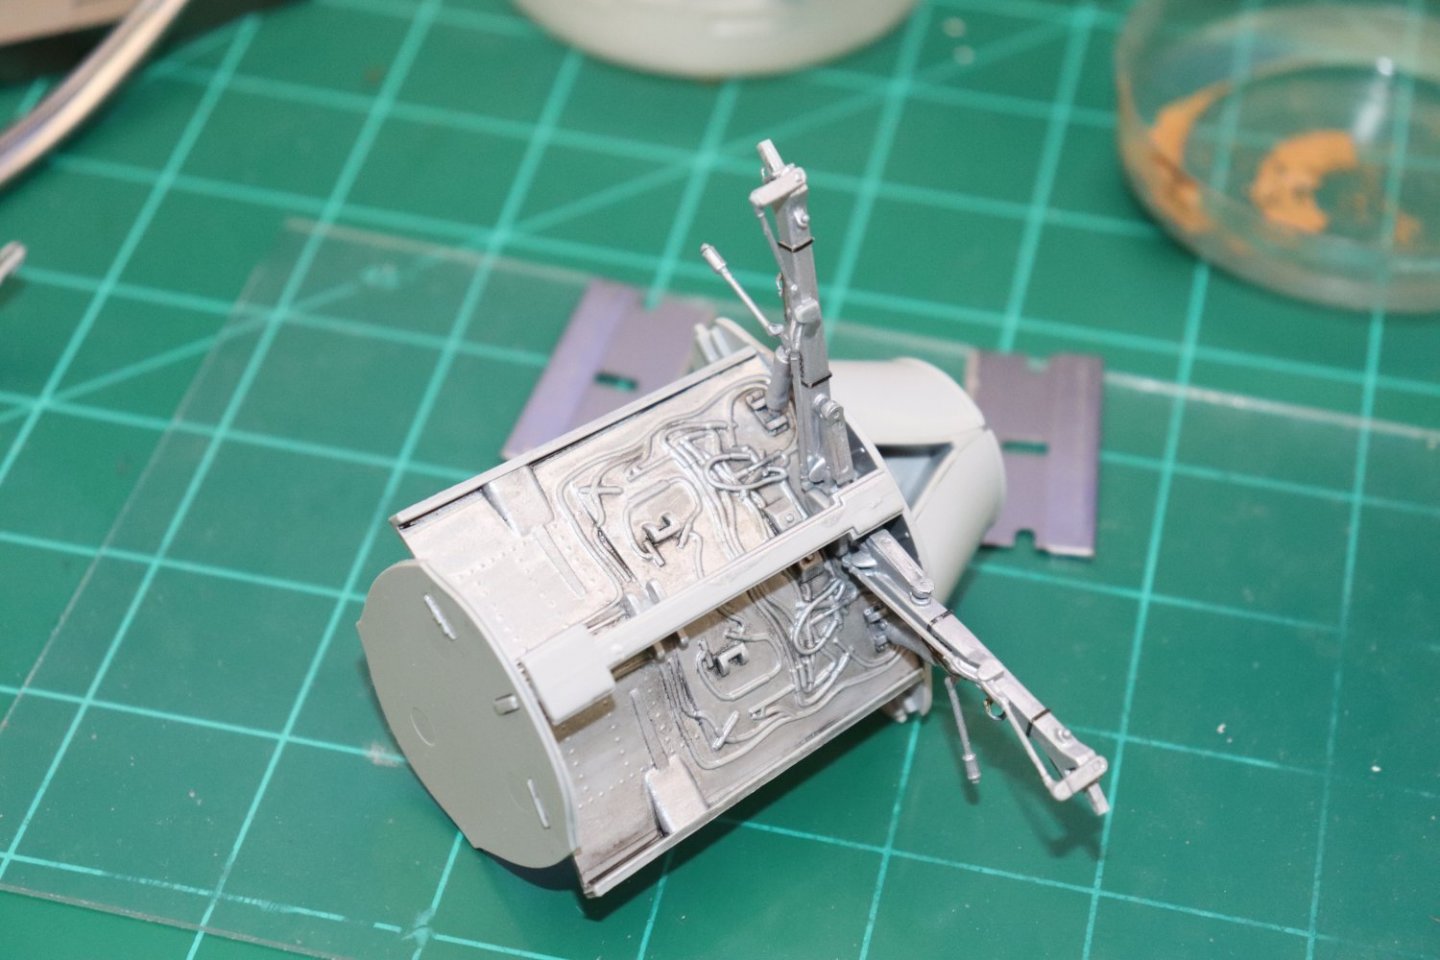
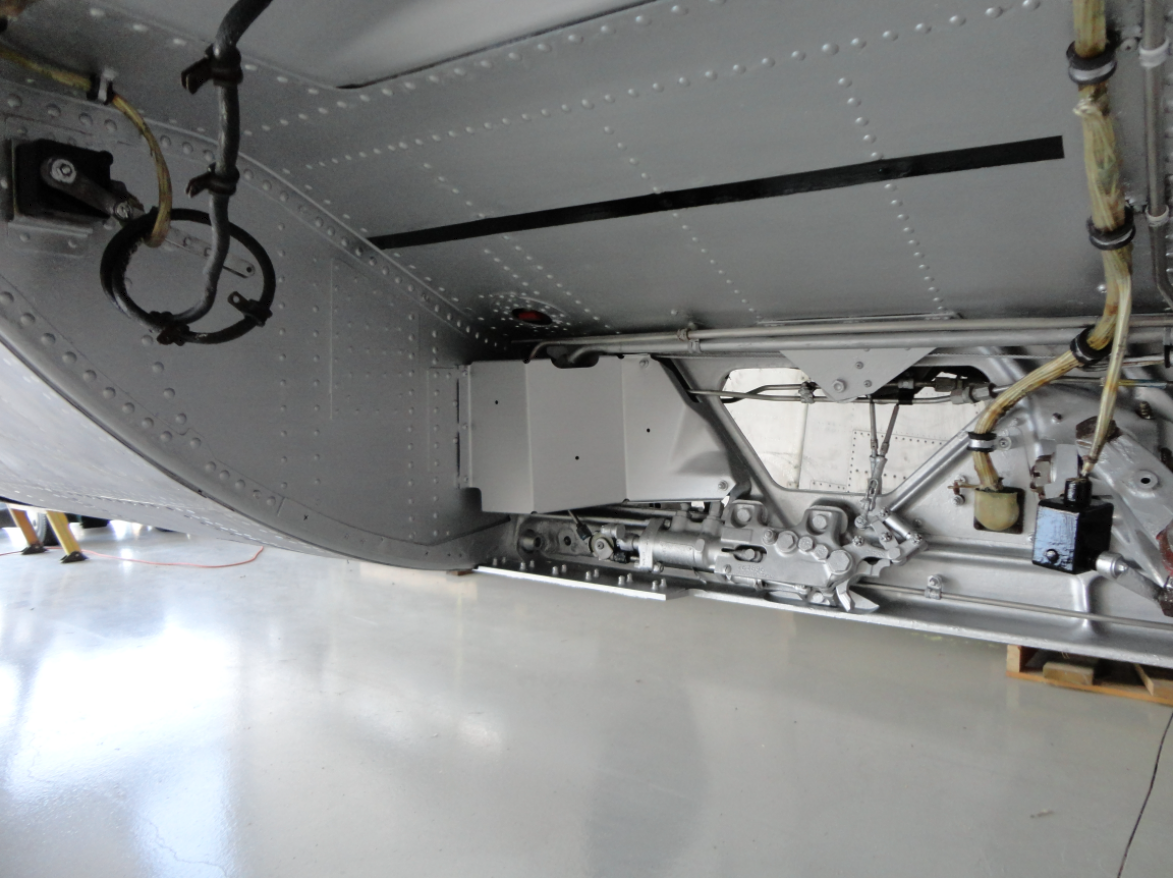
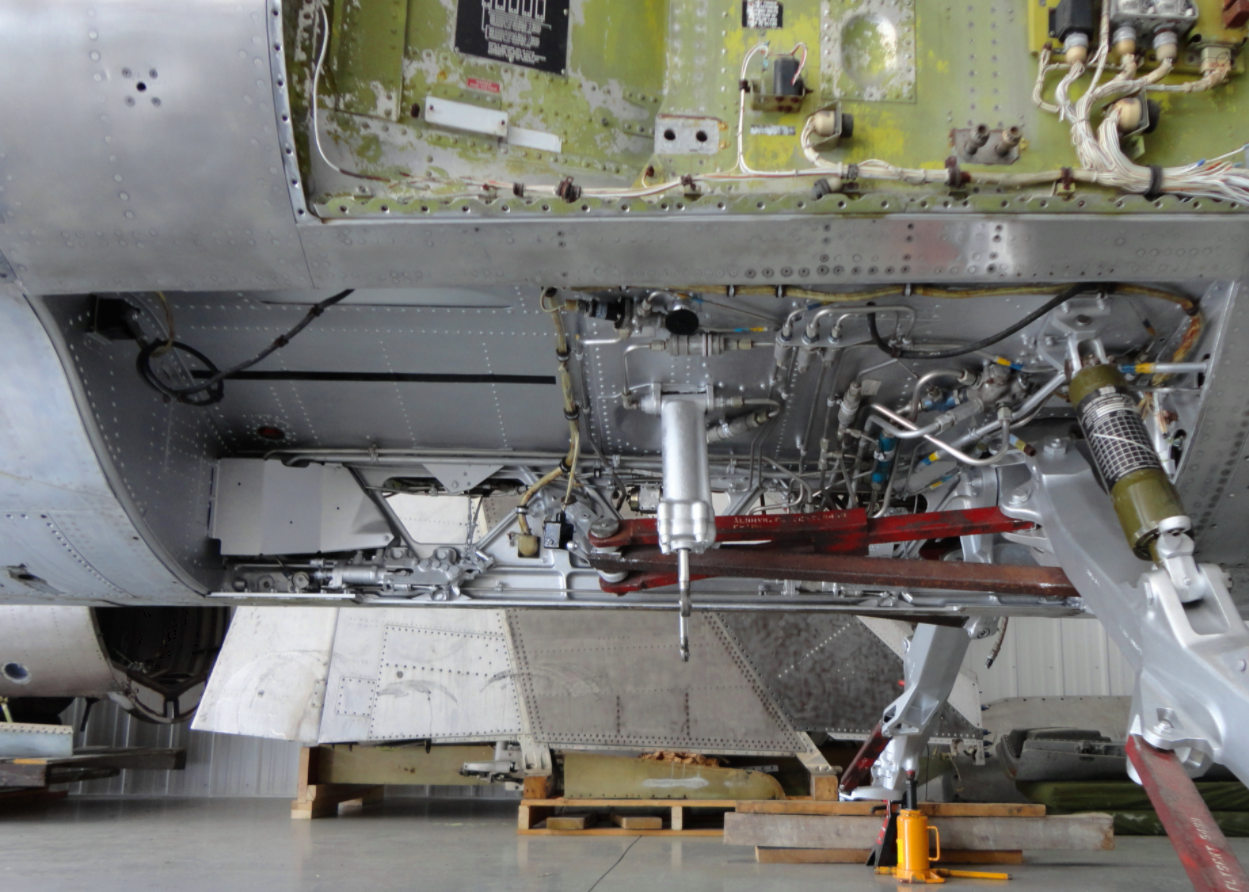
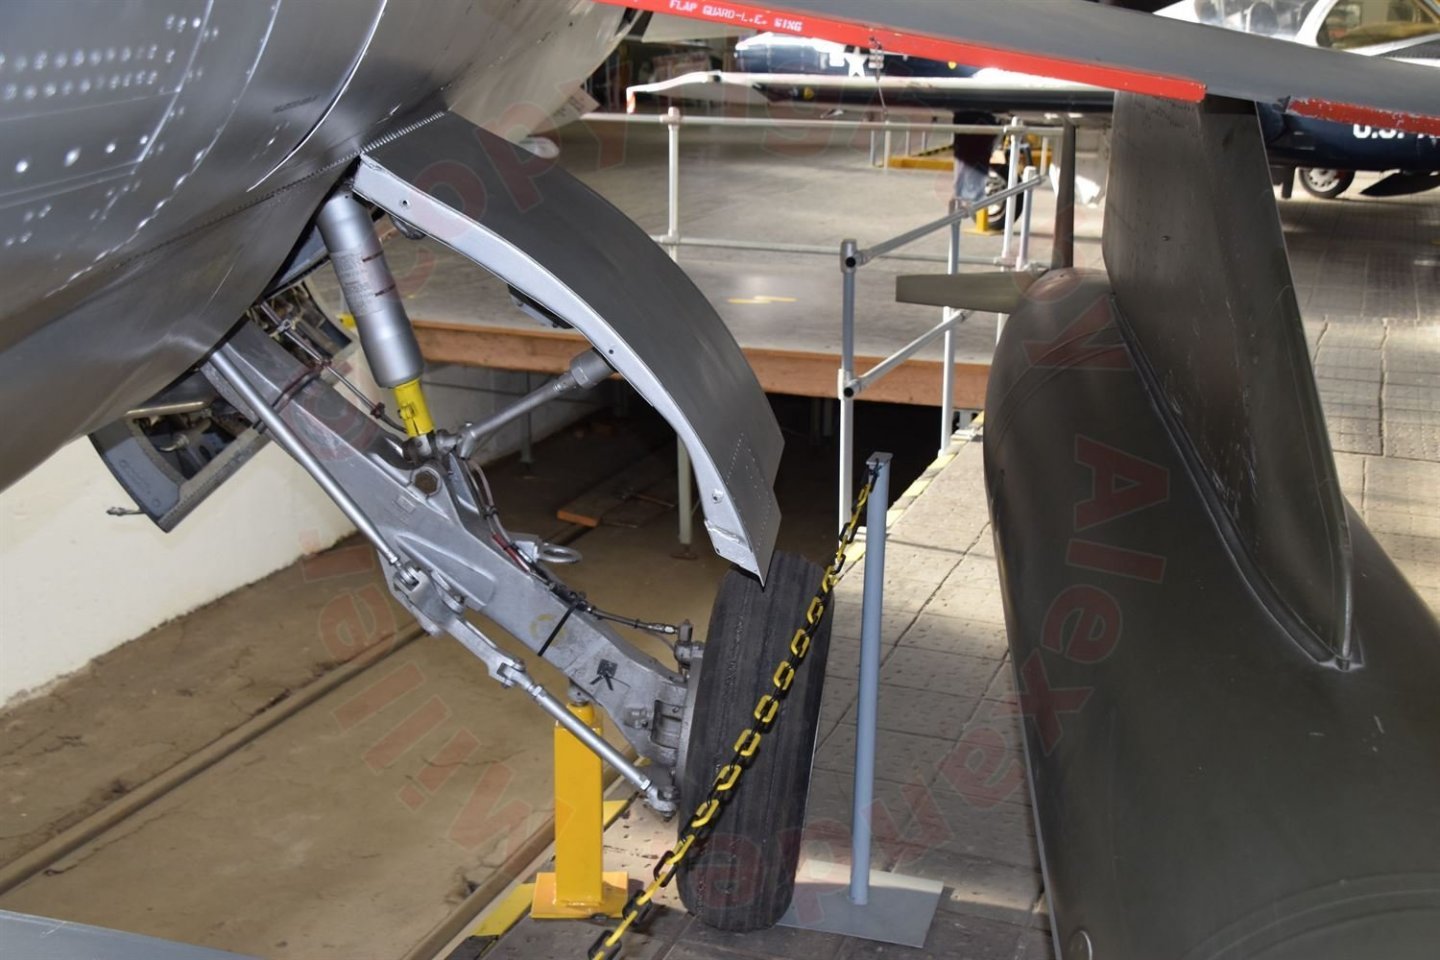
Well the next update comes fairly quickly.... The Main Gear Bays are an interesting conundrum... Plenty of detail to be added if you follow the PE manufacturers scheme, but none of it will be seen if you follow the Aircraft's configuration when sitting on the ramp.... Down & Locked LG position sitting on the tarmac... You have about 4" between the sill and the lip of the door... The opposite side... Look at the door in the gear down position... Then look at the bay behind the gear itself... How much do you see? Nothing... So I've decided not to install the PE on the inside of the bay, none of it will be seen.... and when sitting on it's gear the forward doors will completely cover it up... Another issue is parts of the PE are overscale... Clearly the PE parts do not fit the kit parts... I would have to trim that line of rivets off so the part will even fit... So, rather than go through a days worth of work making the 30 or so PE parts fit properly, and once done, covering them up, I'm not going to install them.... Not worth the work... I went ahead and completed the steps to finish the Landing Gear Bay build stage with this.... The third of the bay on the landing gear end will be seen, the rest will not... the Air plenum acts as the engine support when the engine is installed inside the model, I installed it cause I haven't decided yet if I'm building it with engine out or not... I think the dark highlighting of the interior of the bay works, given it will be dark and hardly seen.. it looks the part... The next step is assembling the J79-GE-7 engine.... Onwards Brothers... EG

- 139 replies
-
- 12
-
-
Nice job Patrick! A well worn winter field applied whitewash... just the way it should look....
-
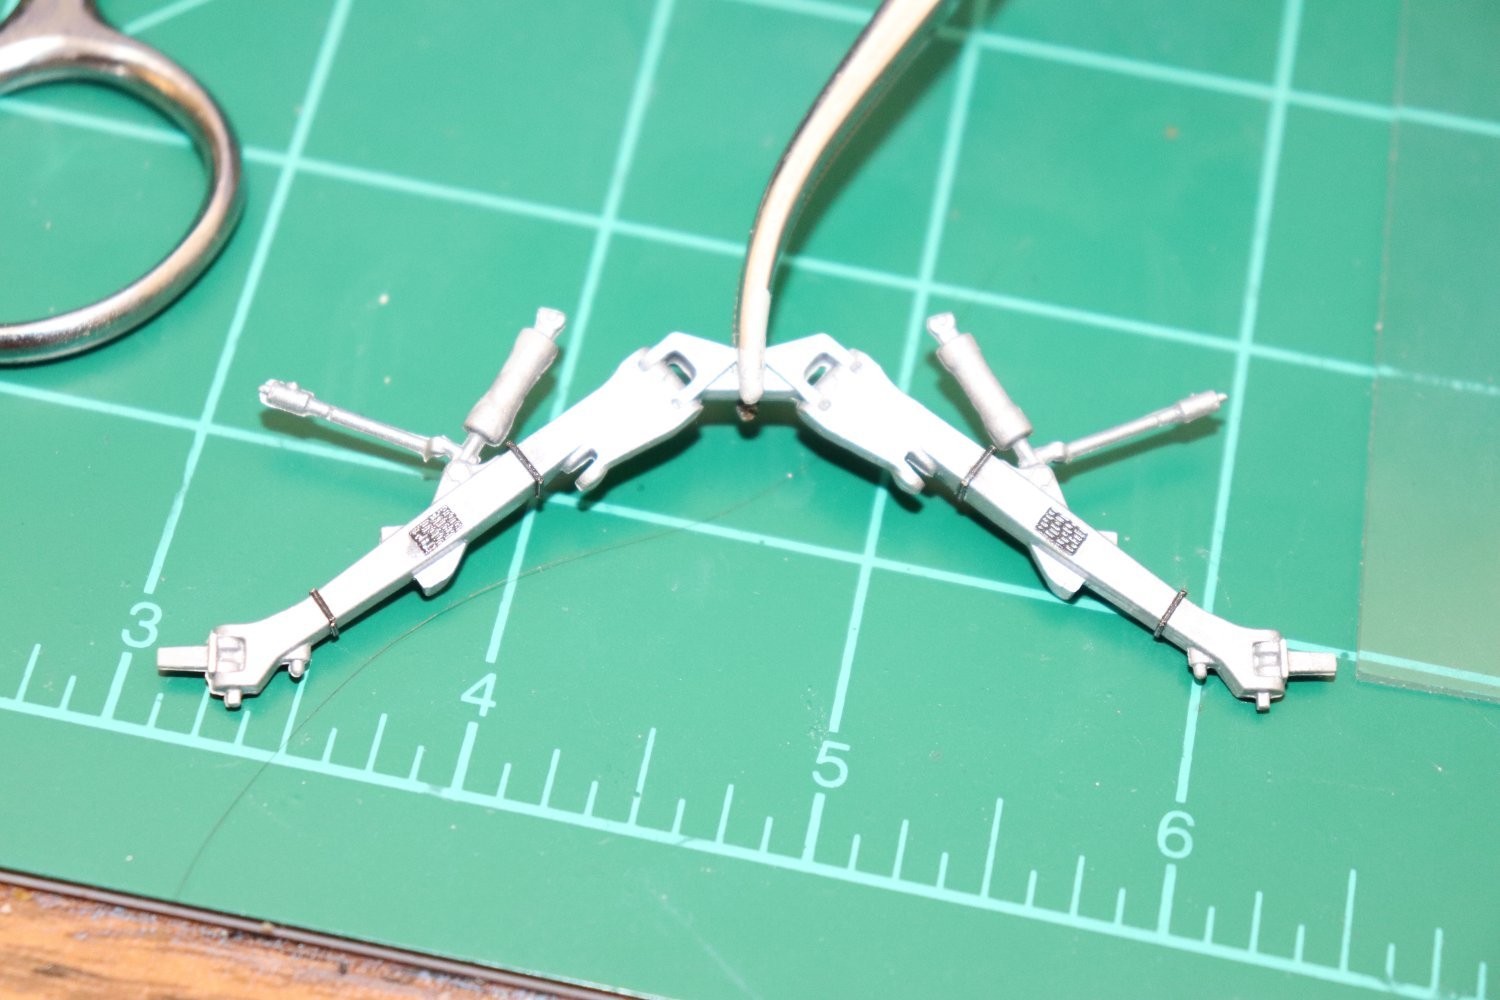
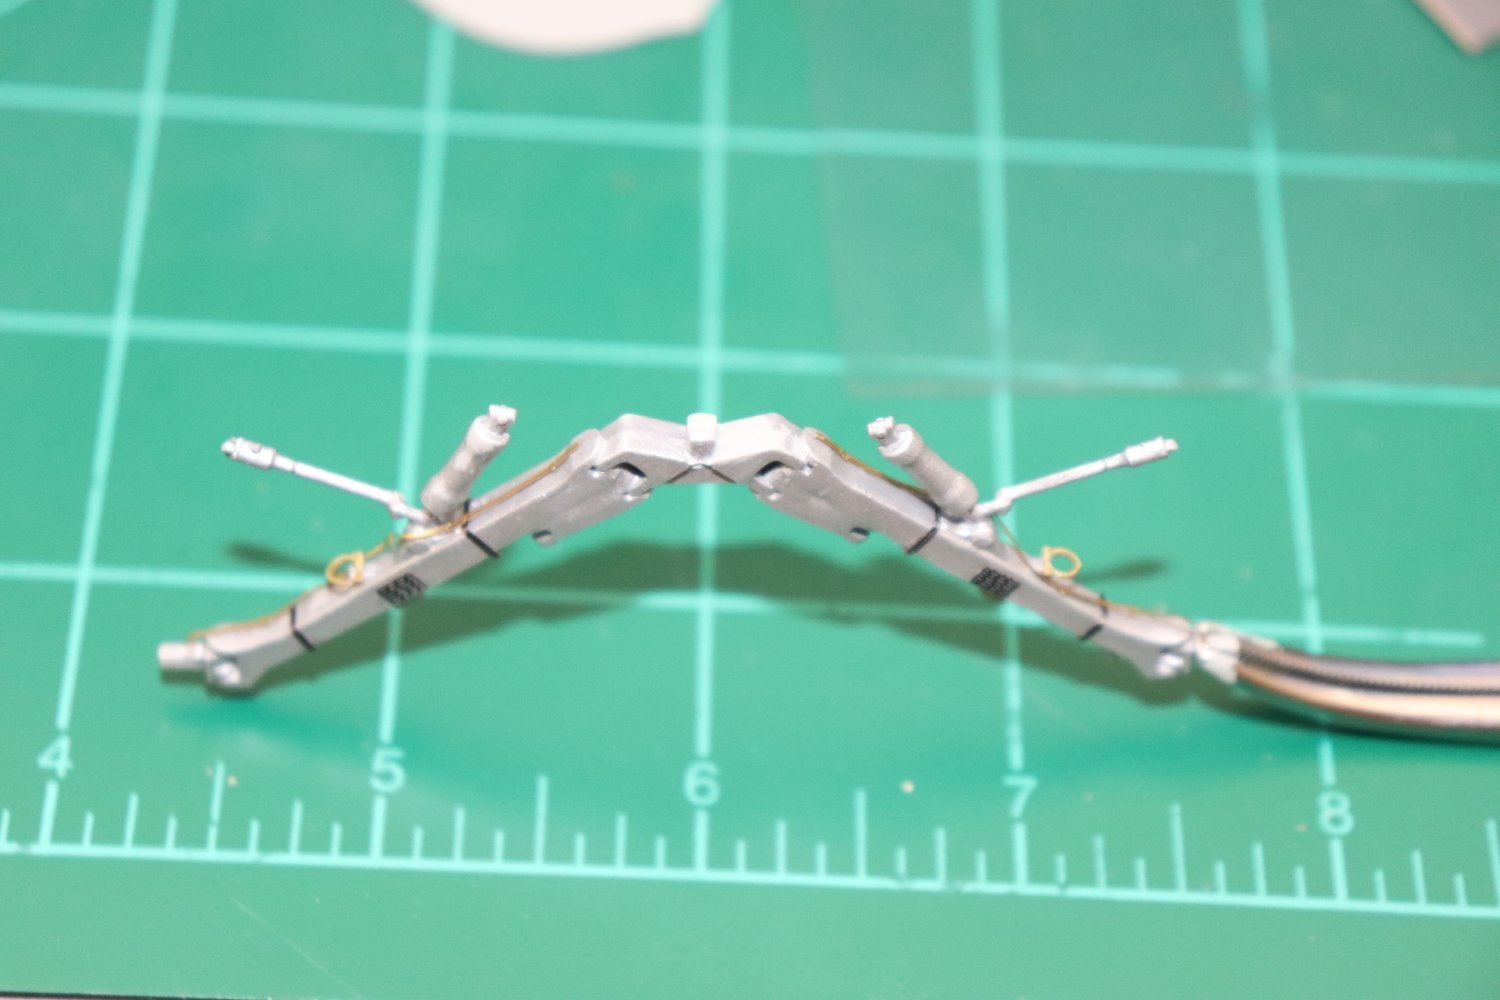
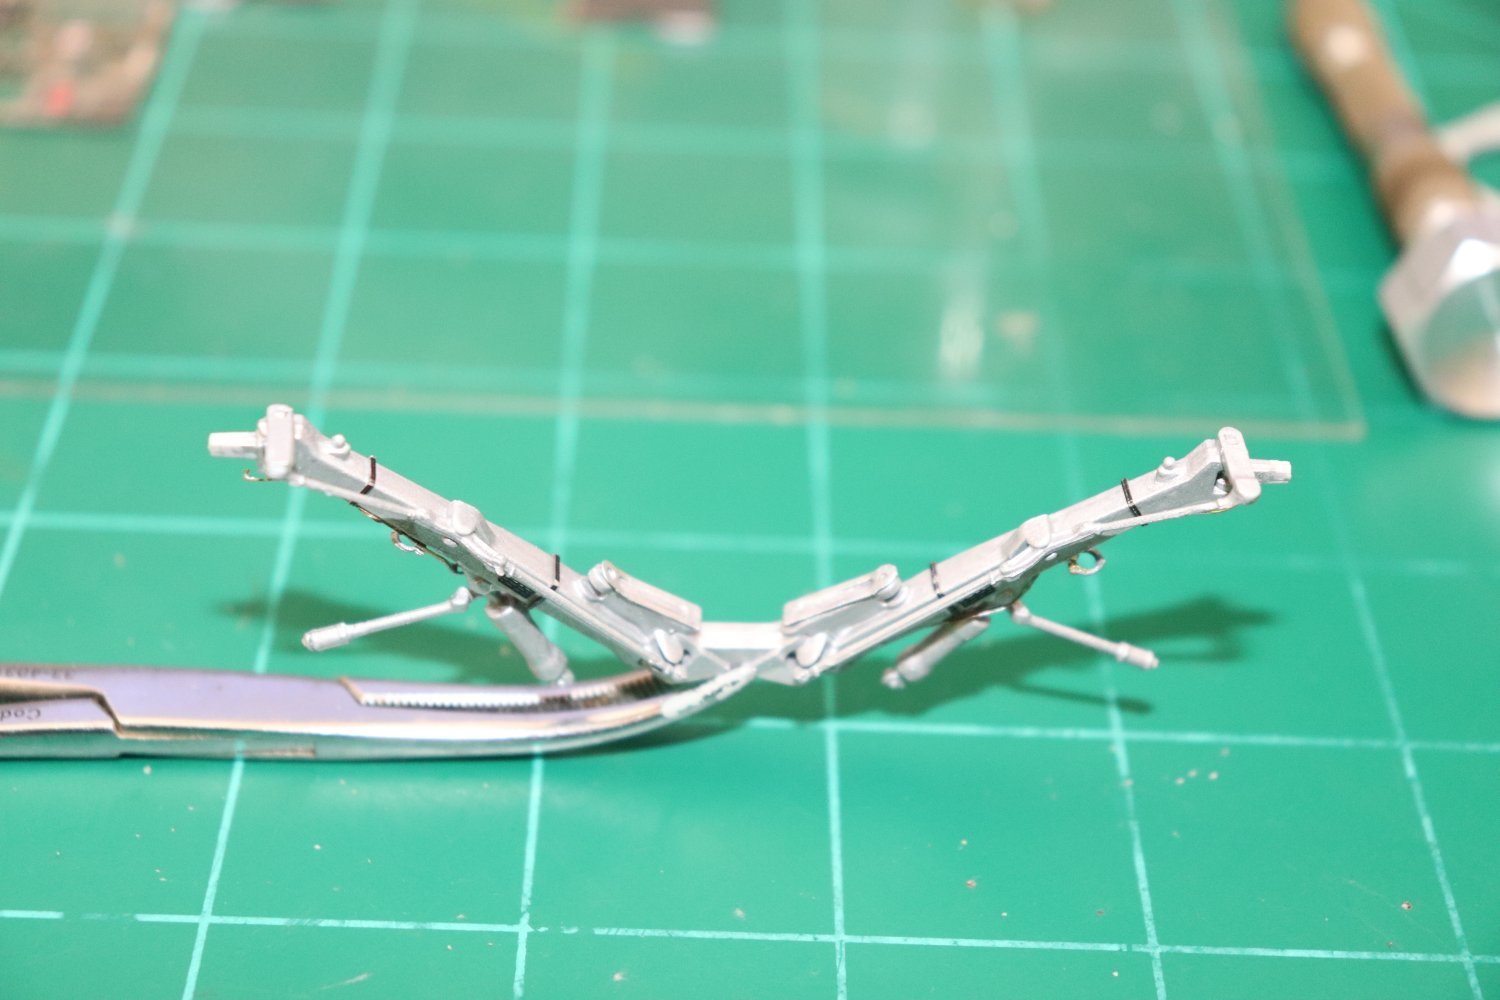
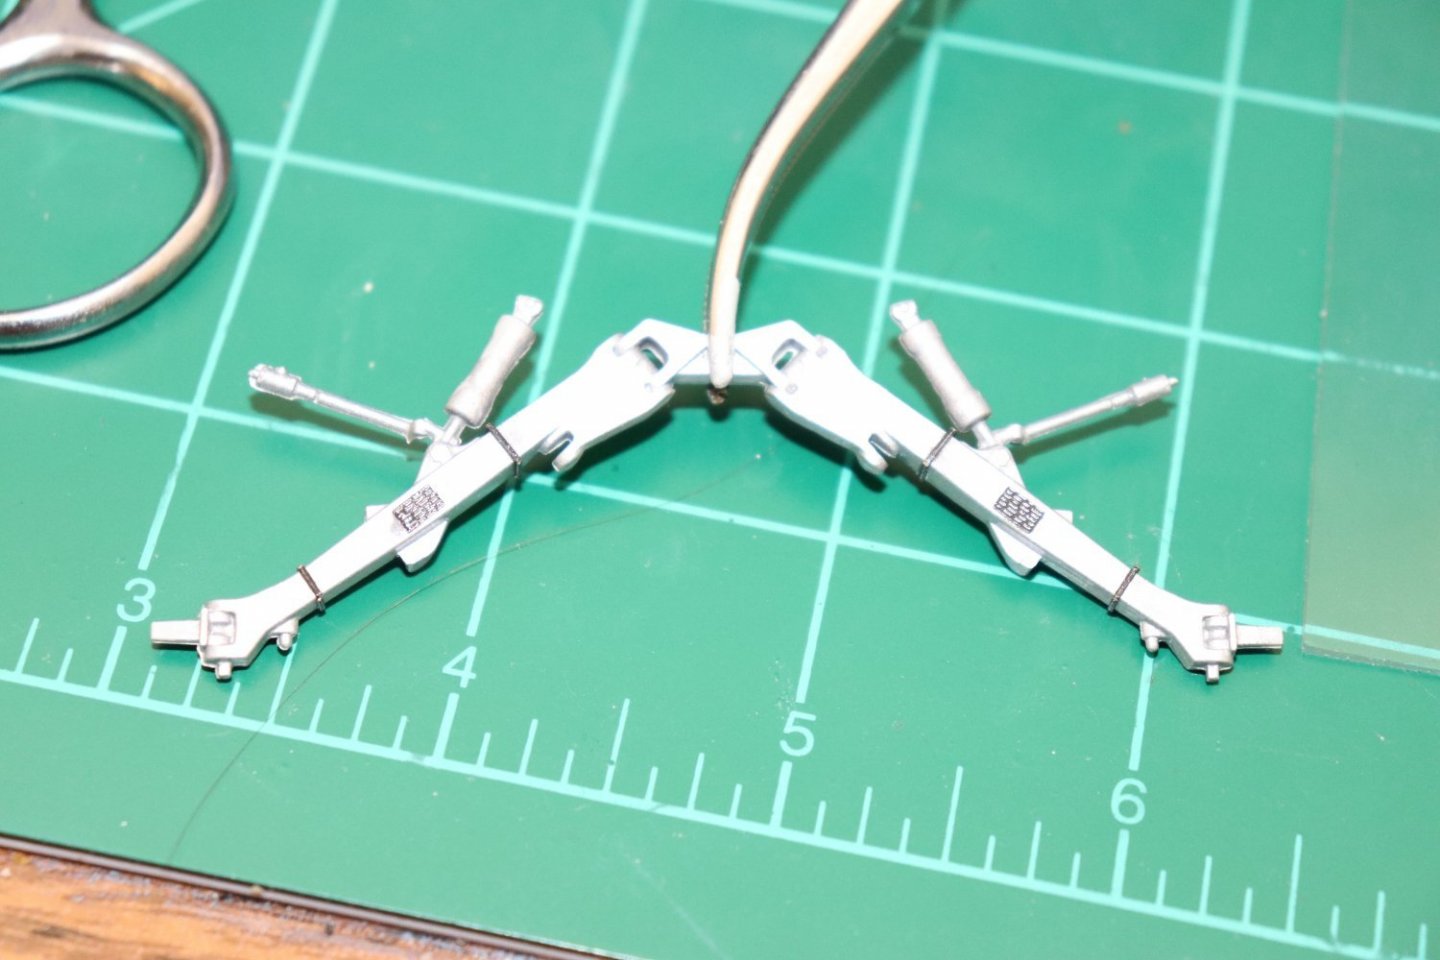
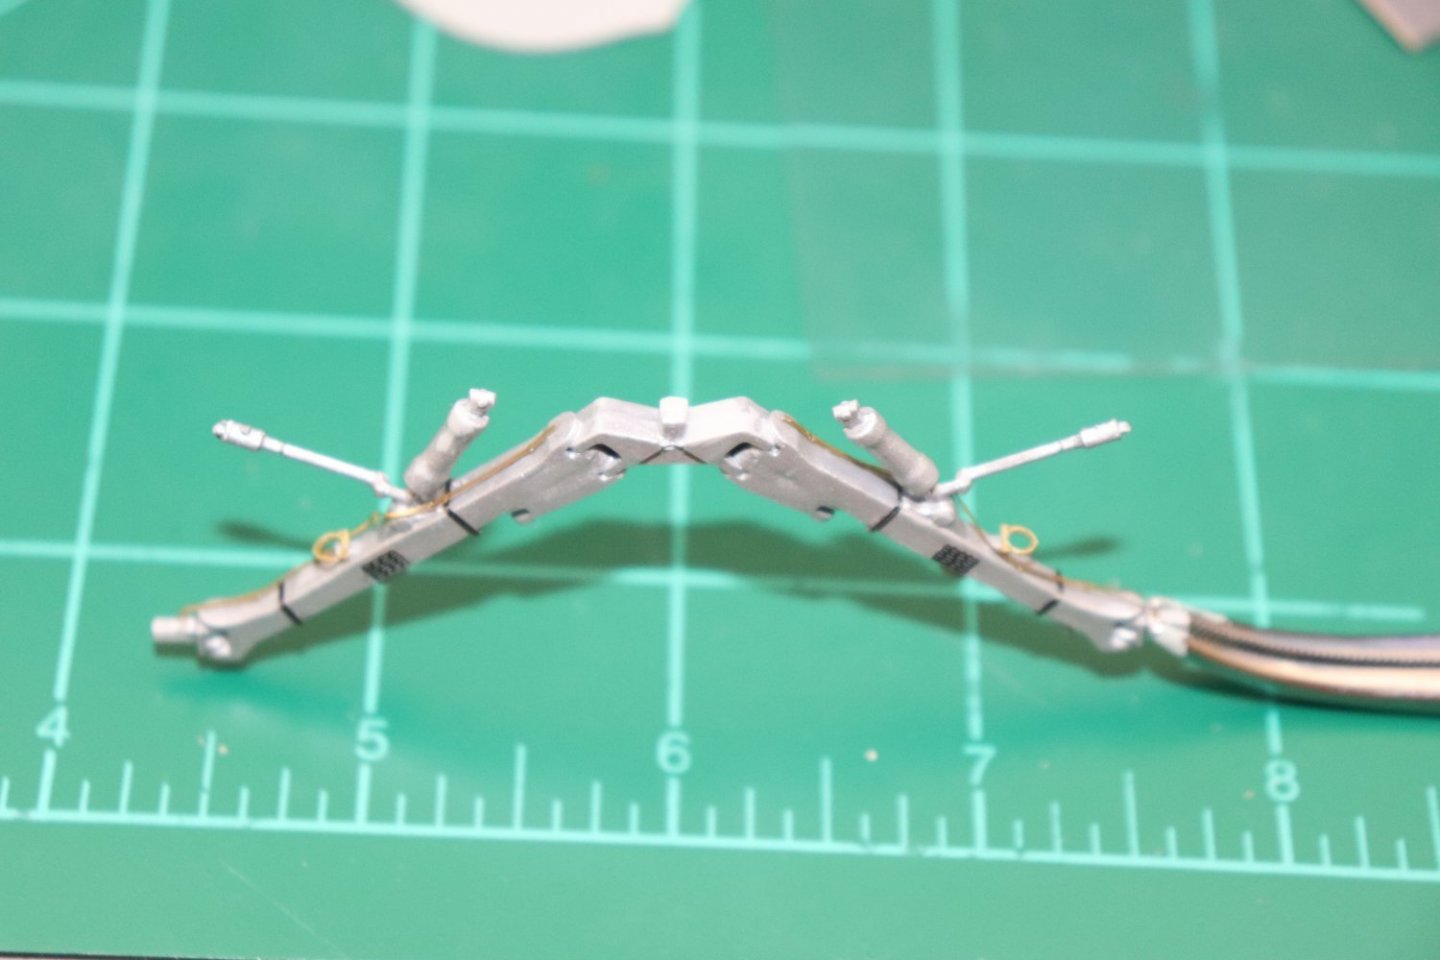
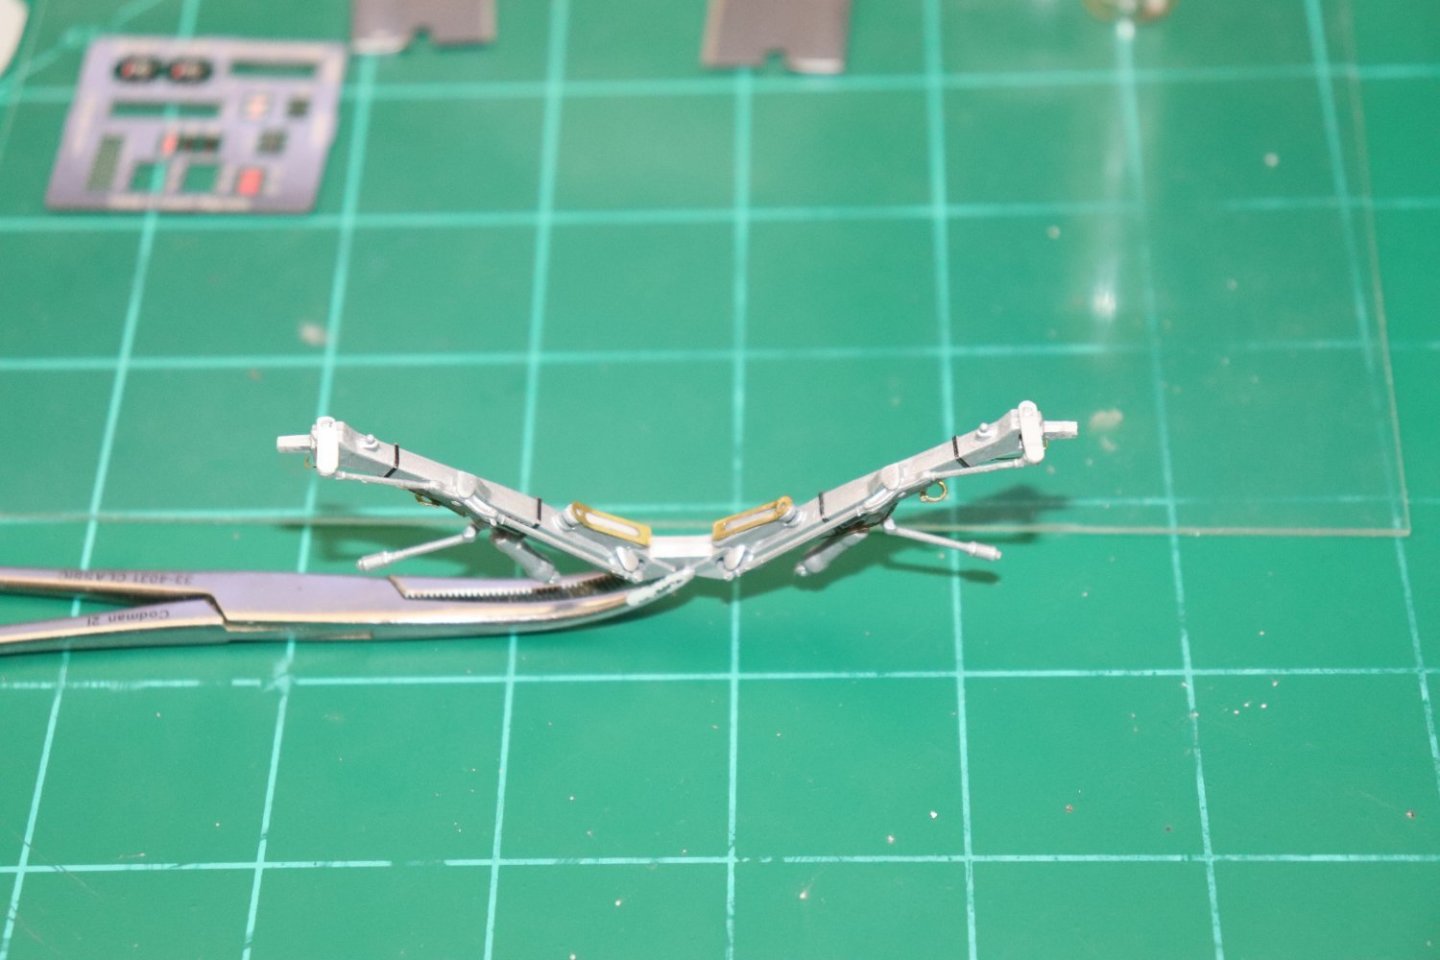
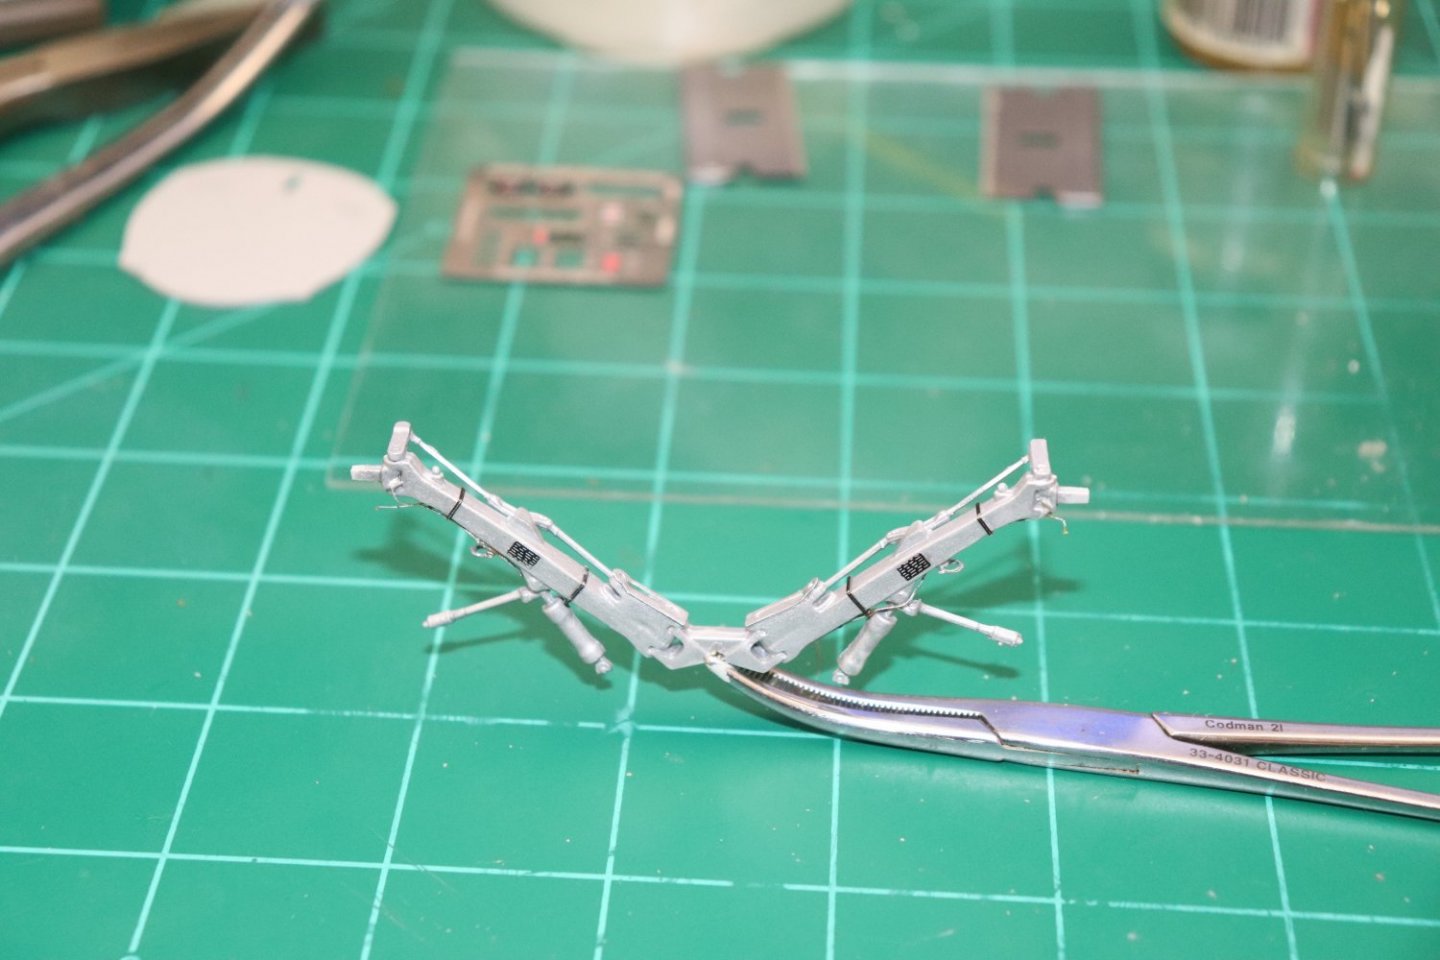
Thanks for all the likes brothers, today, another small update.. Main Landing Gear Struts.... In stages start to finish Initial painting in aluminum and first photoetch... Labels and brake line supports Brake Lines & Tie Downs.... Hinge Reinforcing plates & Wheel fold Drag Links... Final overall painted aluminum... This was a trip 15 parts altogether and some you couldn't see without mag glasses... And this is before the bay itself... This kits going to take a while... I can't say enough about this kit, clearly it is the finest large scale F-104 available... the detail is outstanding... The part sprues have alternative parts for the "G" model as well so both Italieri kits come from the same basic molds... this kit puts the rest to shame... Ten steps over the old Hasegawa kit and at least three over the Tamiya... Lots of work, but well worth it... Onwards to the Bays now....

- 139 replies
-
- 12
-
-
-
Amen, it's what makes this place special....
-
Complete agreement...
-
Sometimes glue is just easier.... Beautiful work Aydin...
-
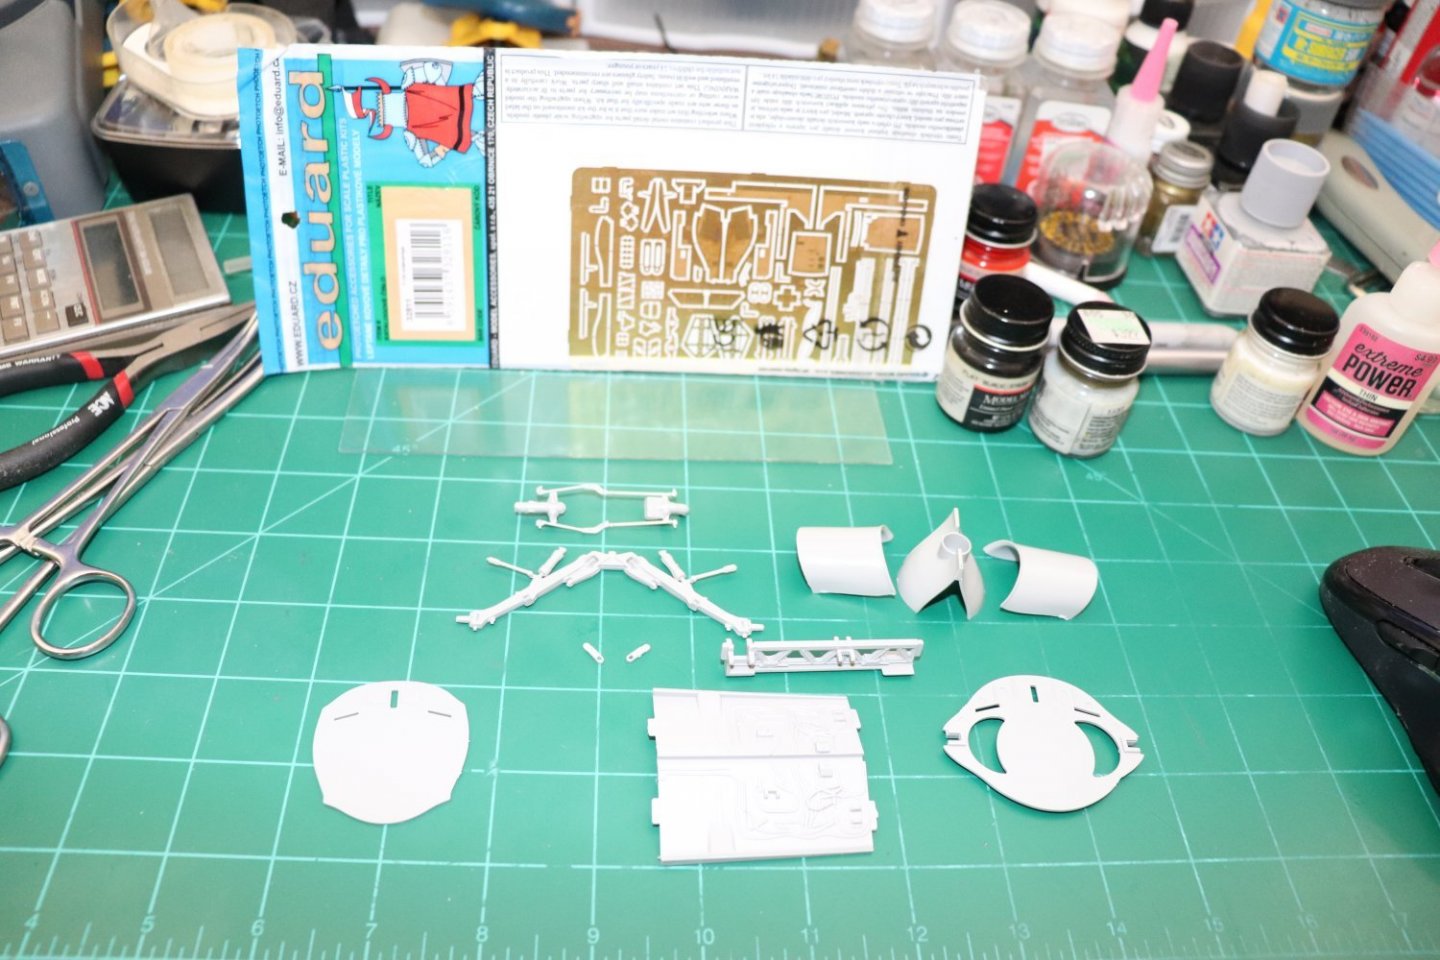
Ok the next step is the Main Landing Gear Bay... Spent the last day researching colors and configurations... Seems like the design didn't change any over all the various models although the "G" models had it beefed up for the greater all up weights the airframe had to carry... And they were all painted aluminum... (according to AF TO-10) The parts and instructions.... Not a lot here, glue it together and paint it... The photoetch is interesting though they include brake lines... gonna try and install them, they are kinda visible on this bird... Will probably coat it in future and do some highlighting to it to make the details pop... Onwards.... EG

- 139 replies
-
- 14
-