Riotvan88
-
Posts
124 -
Joined
-
Last visited
Content Type
Profiles
Forums
Gallery
Events
Everything posted by Riotvan88
-
Can anyone identify this model/kit
Riotvan88 replied to Riotvan88's topic in RC Kits & Scratch building
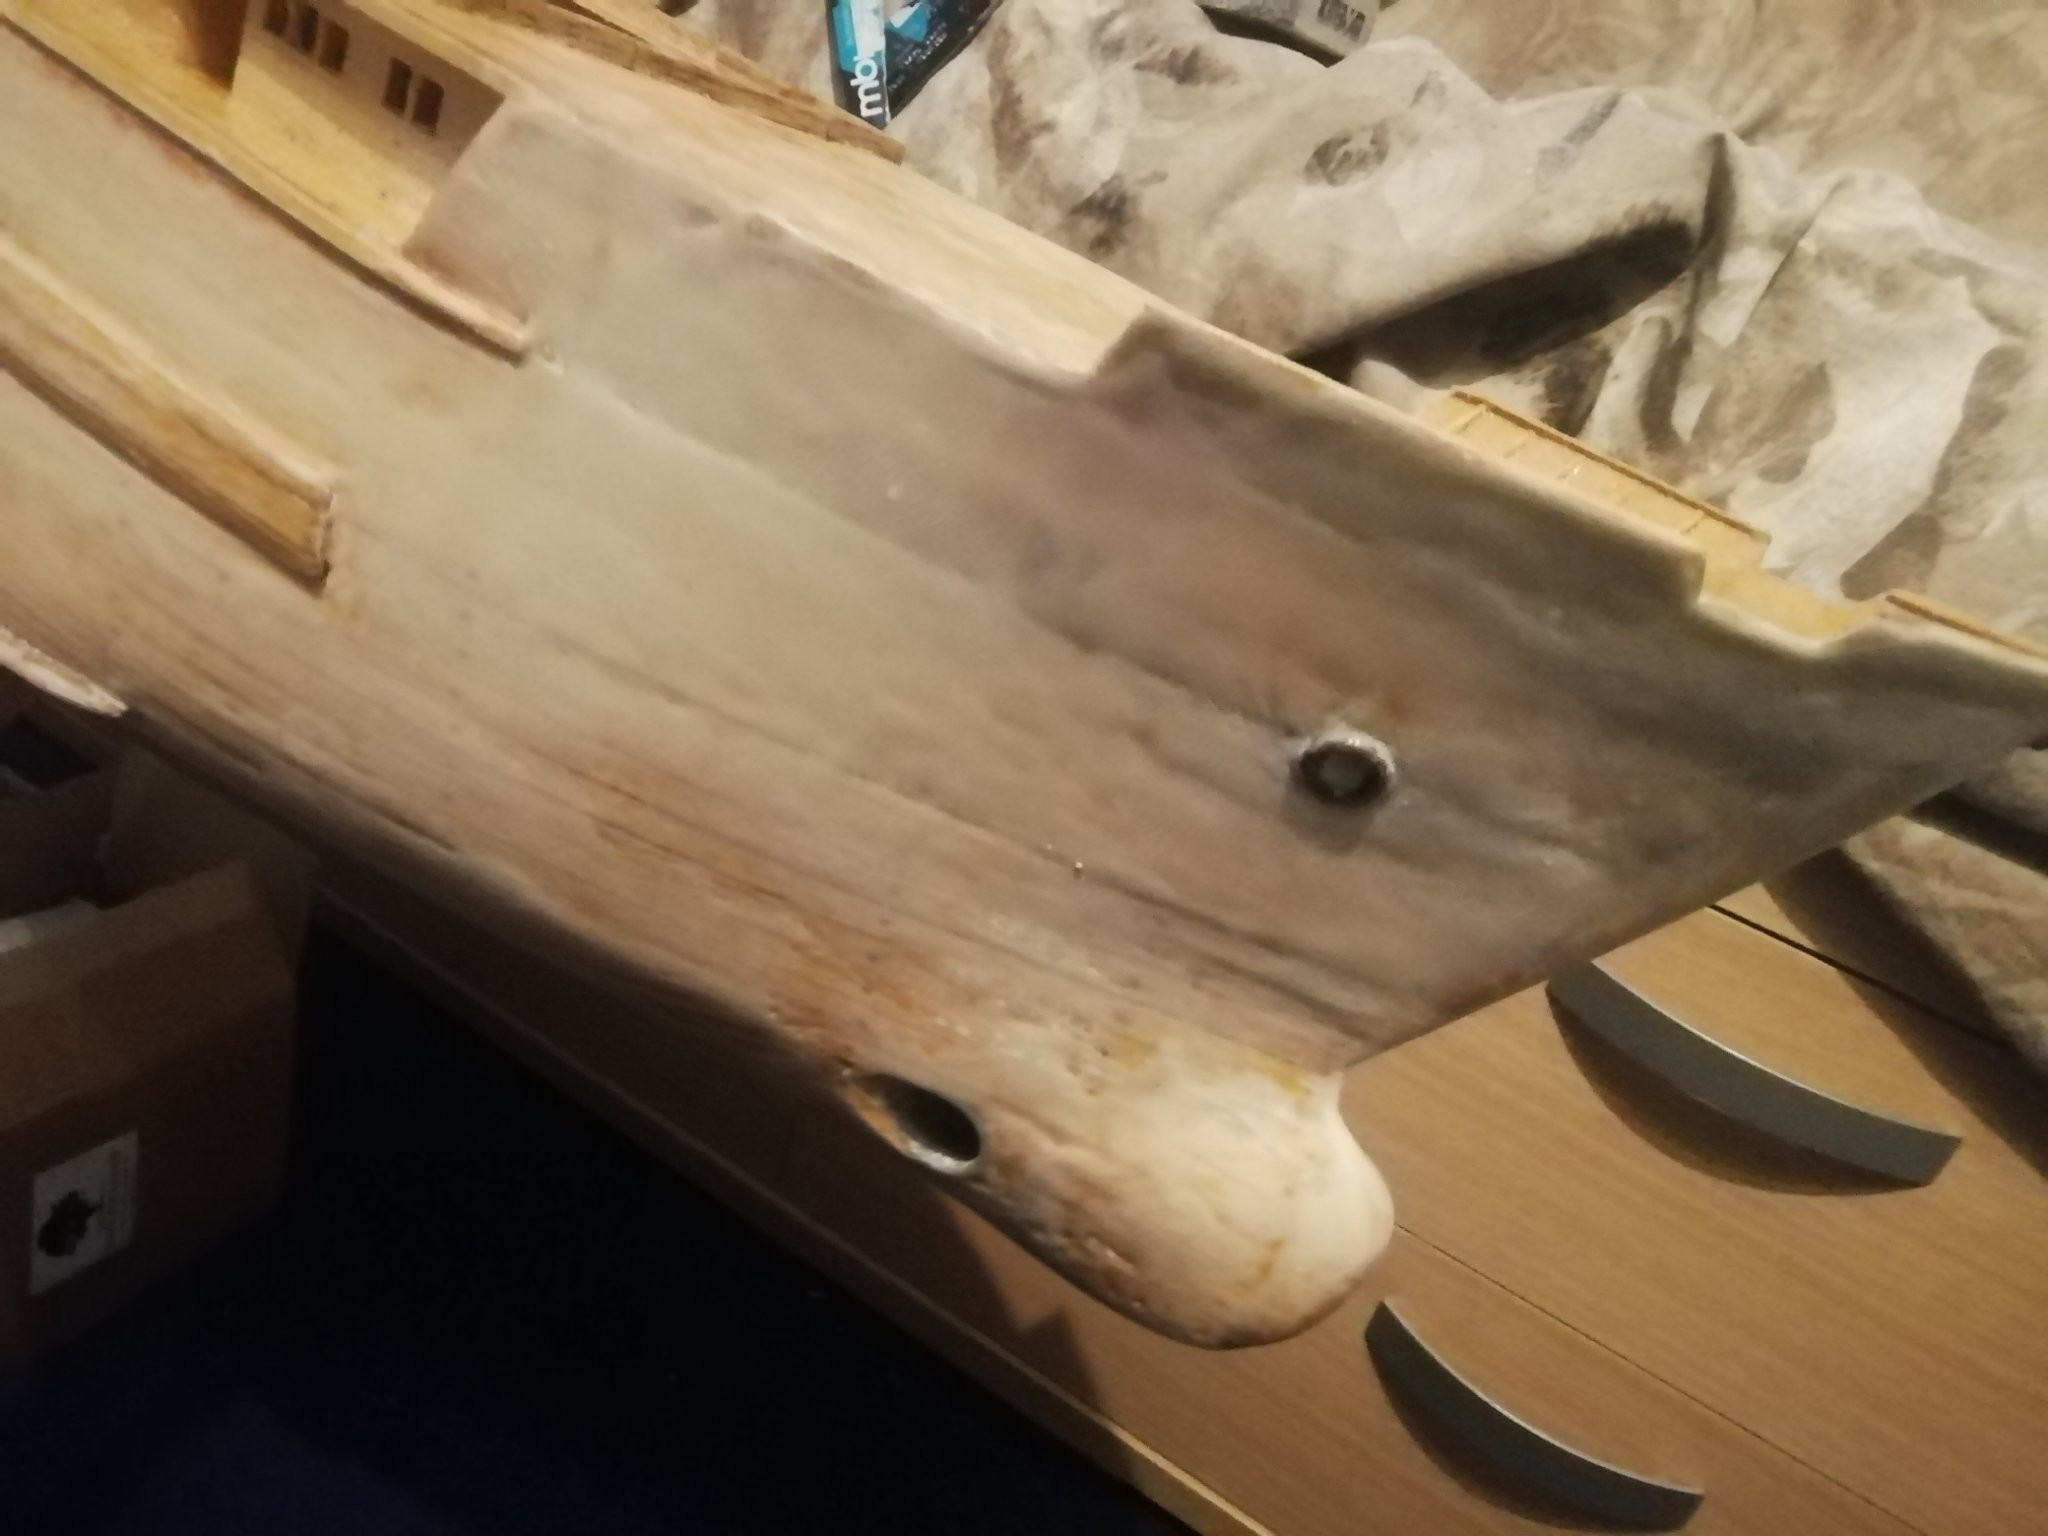
Do you mean the fender? What's wrong with it? I've seen plenty of real yachts with a bow fender like that -
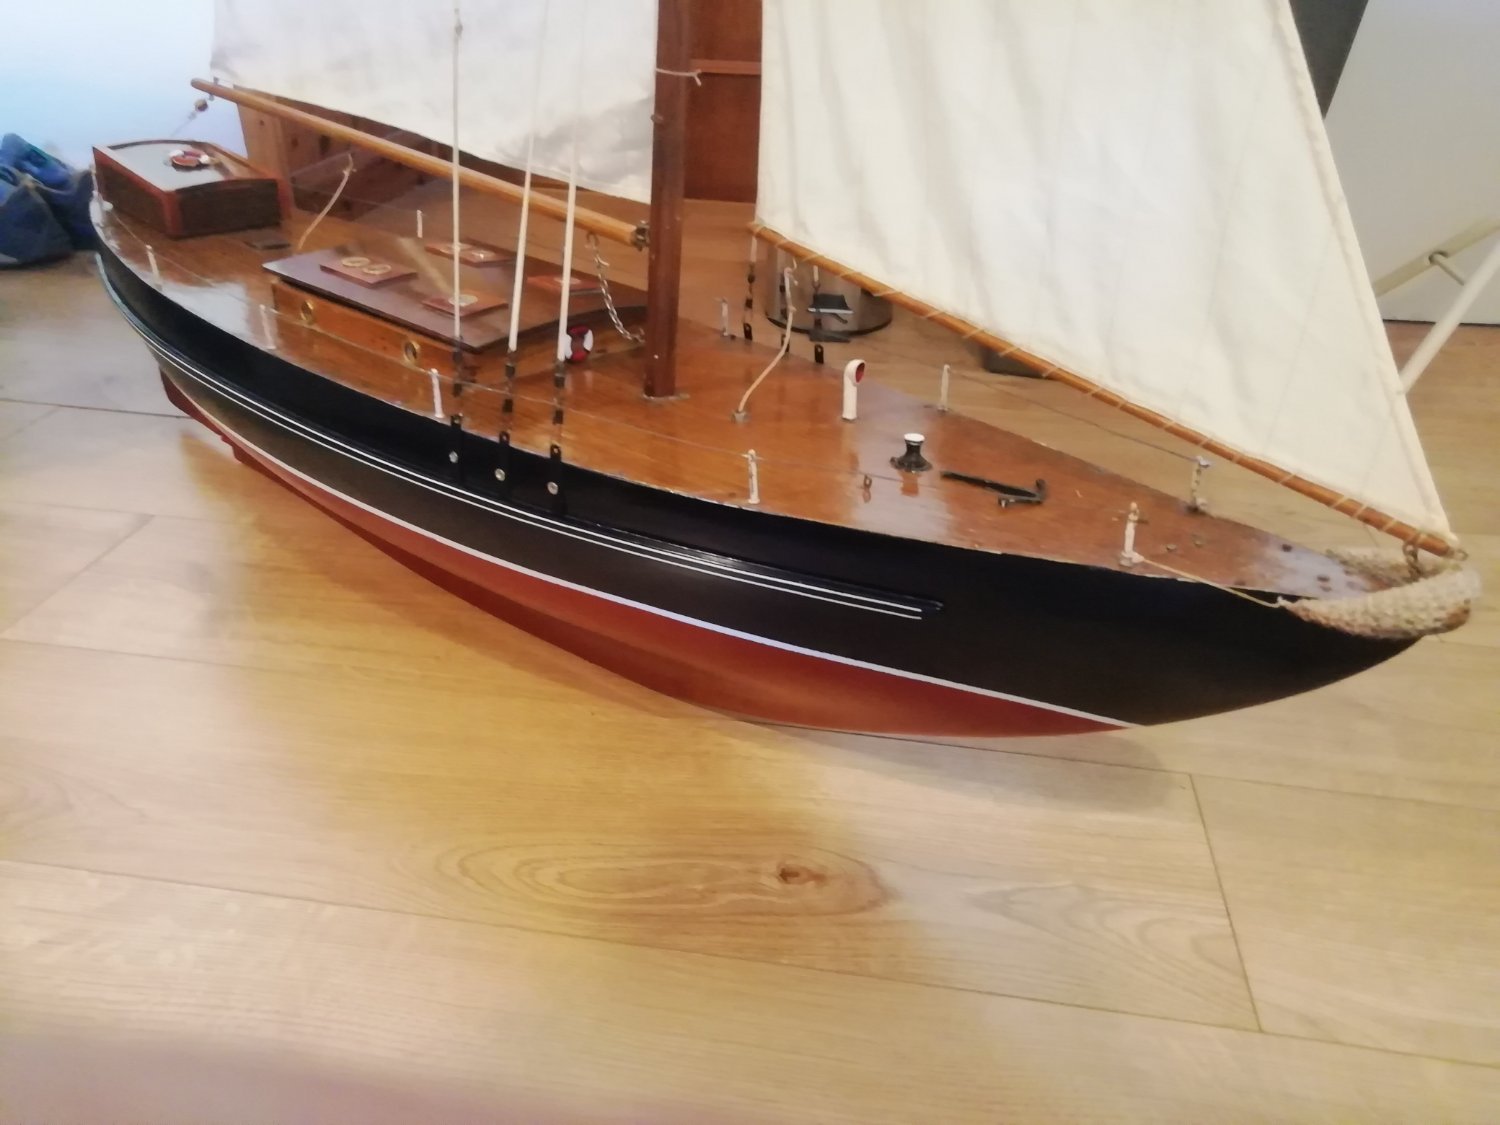
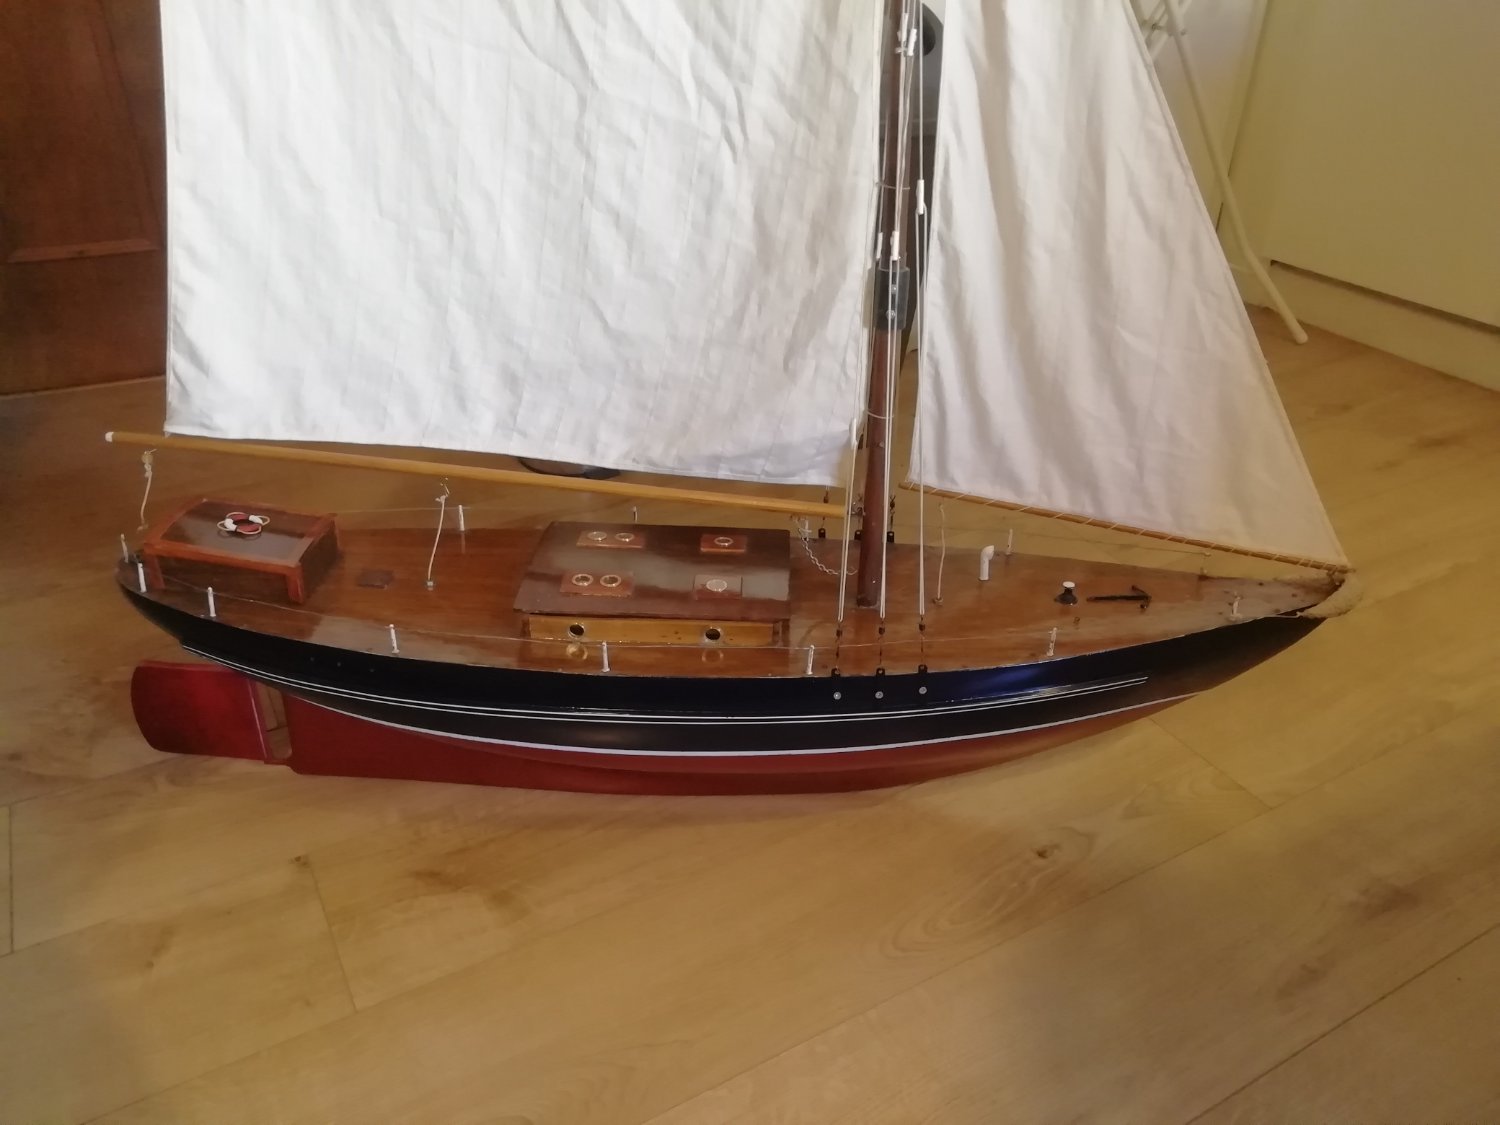
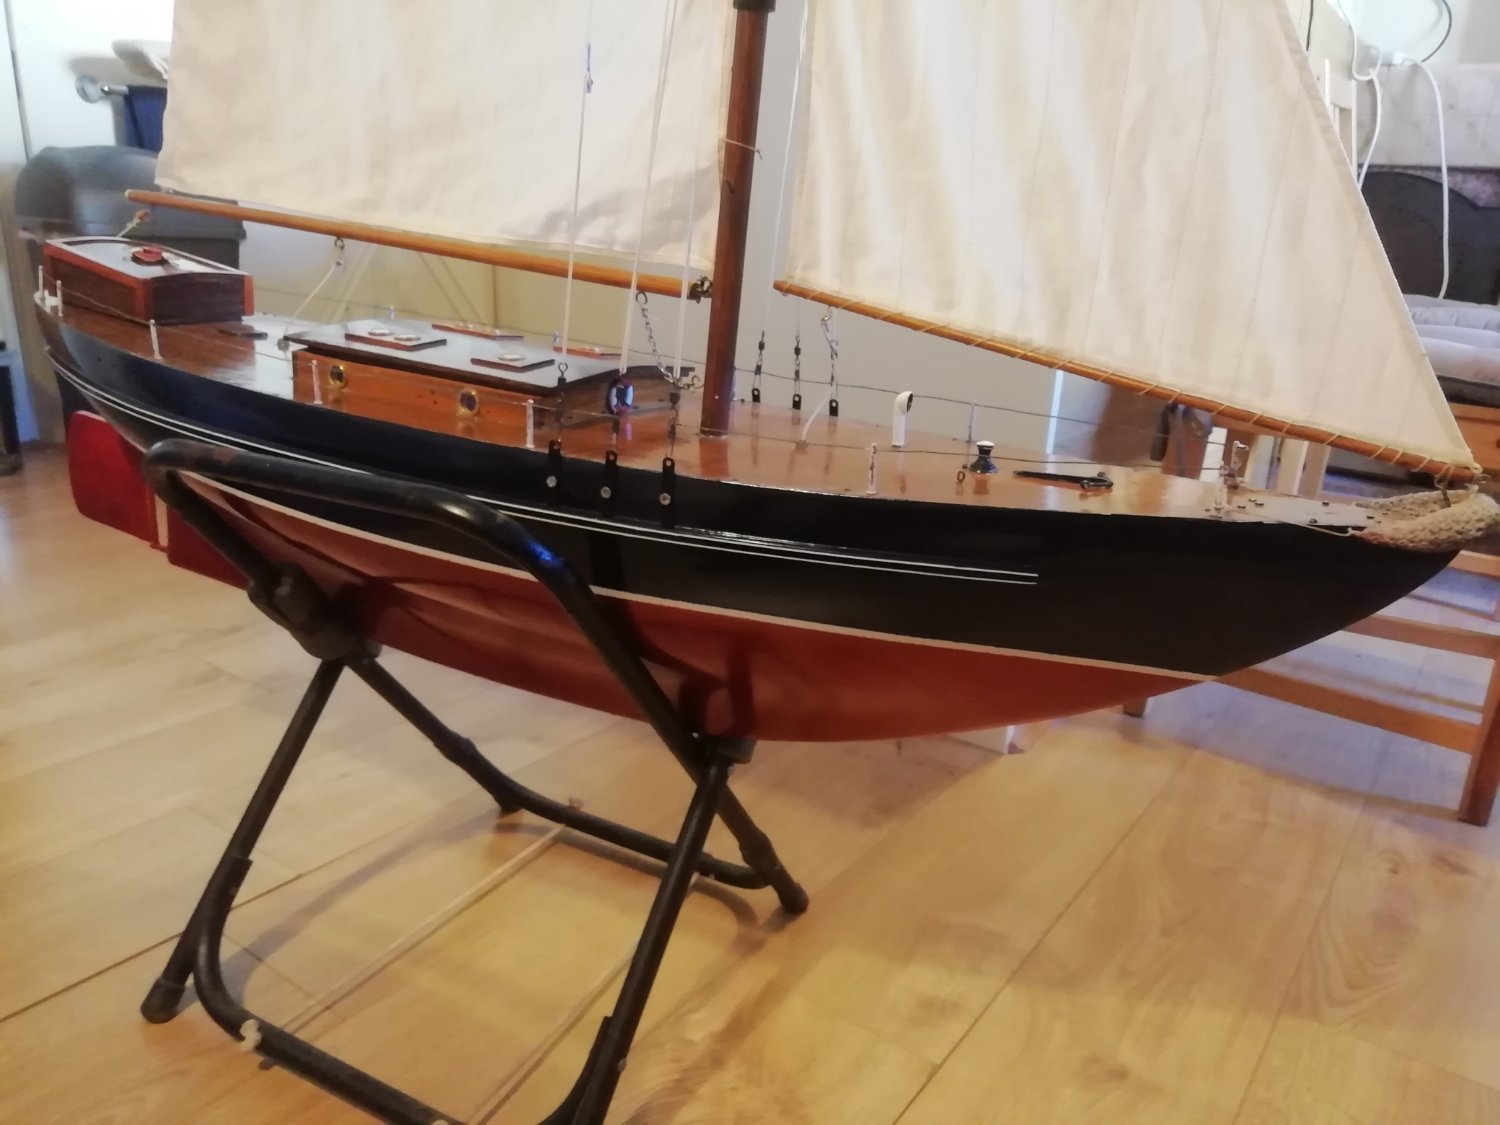
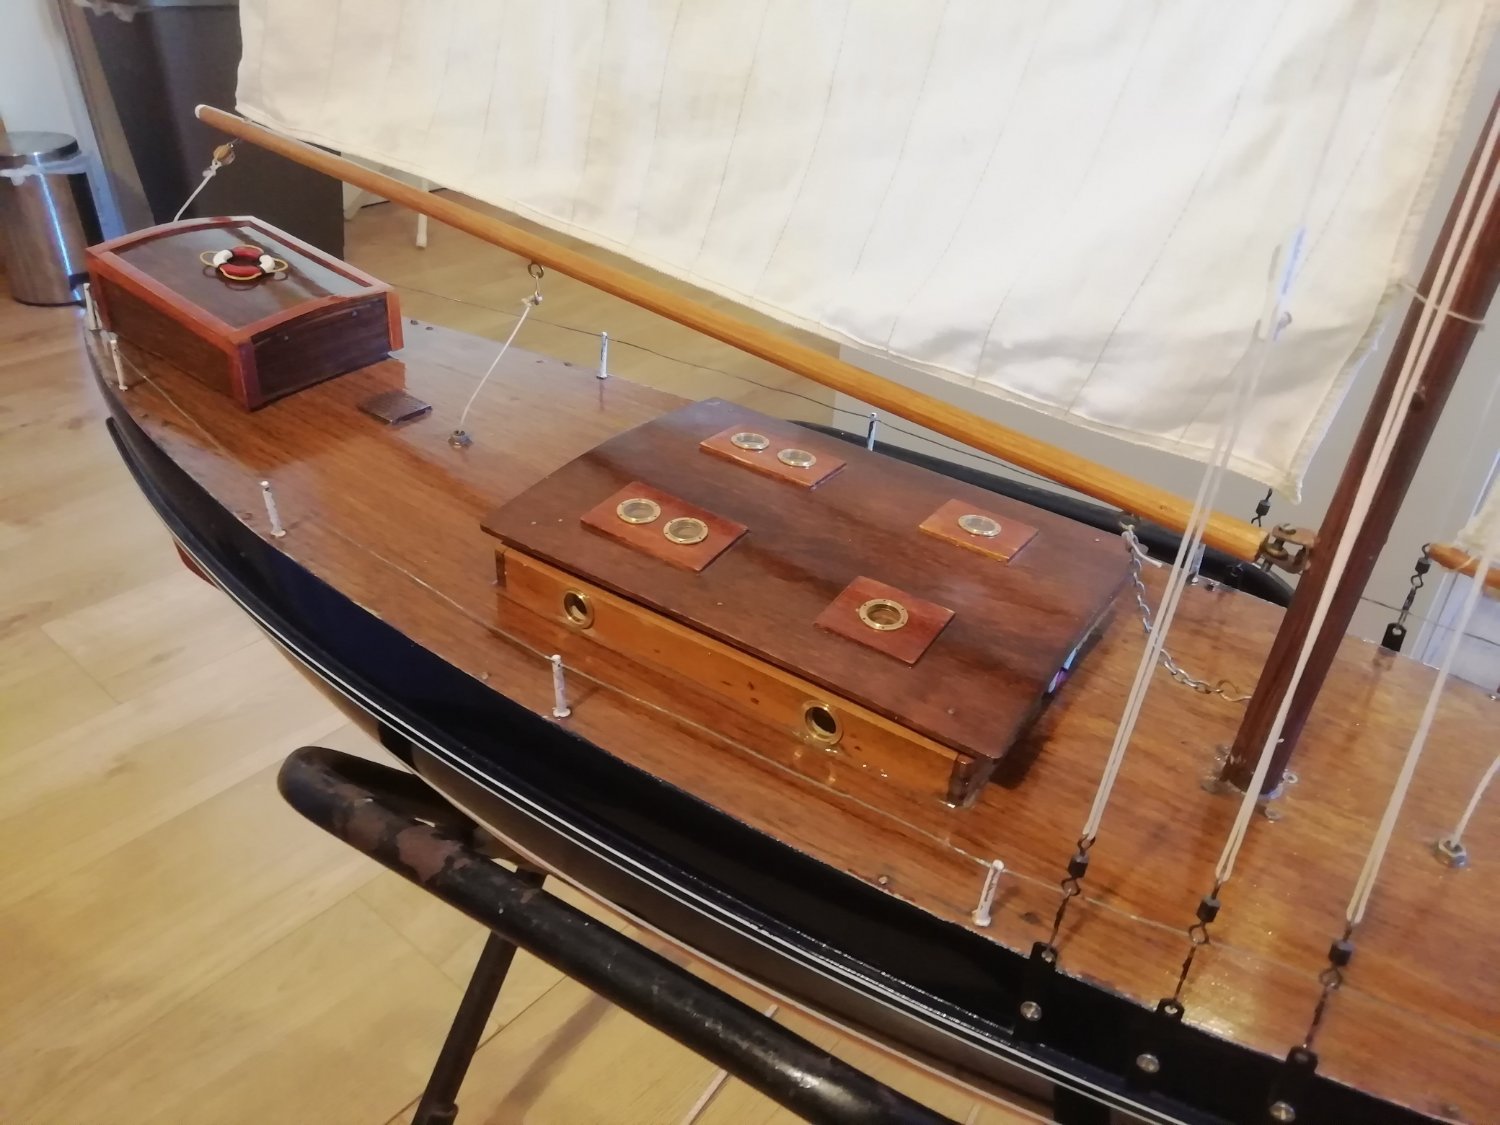
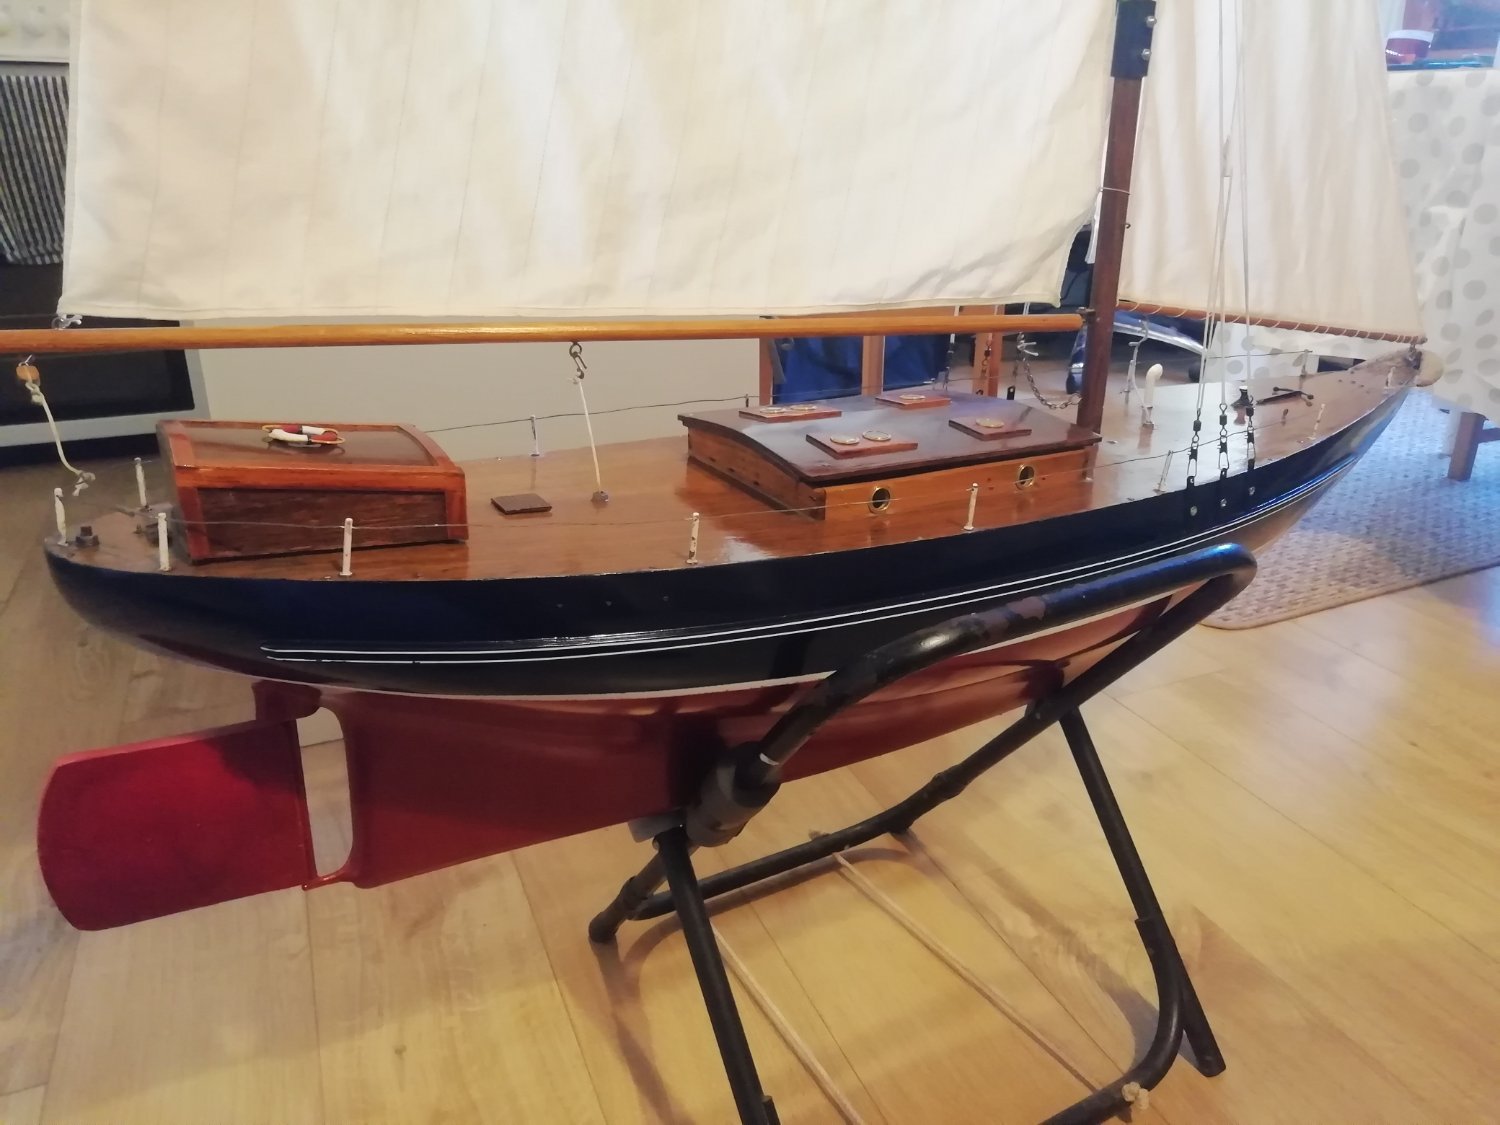
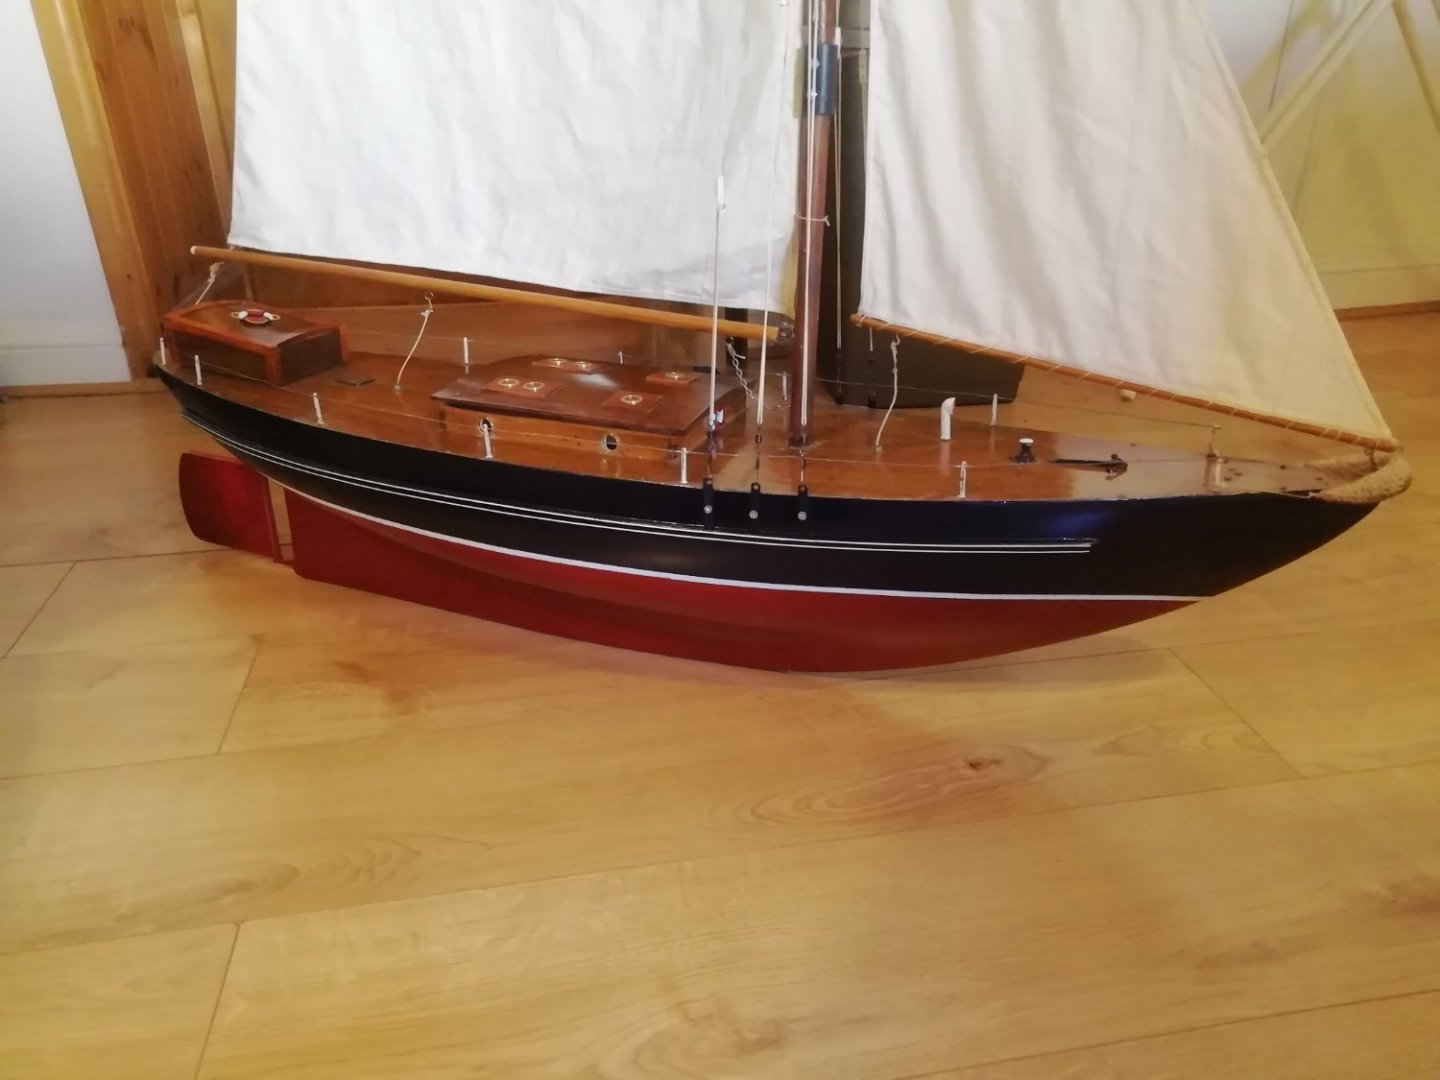
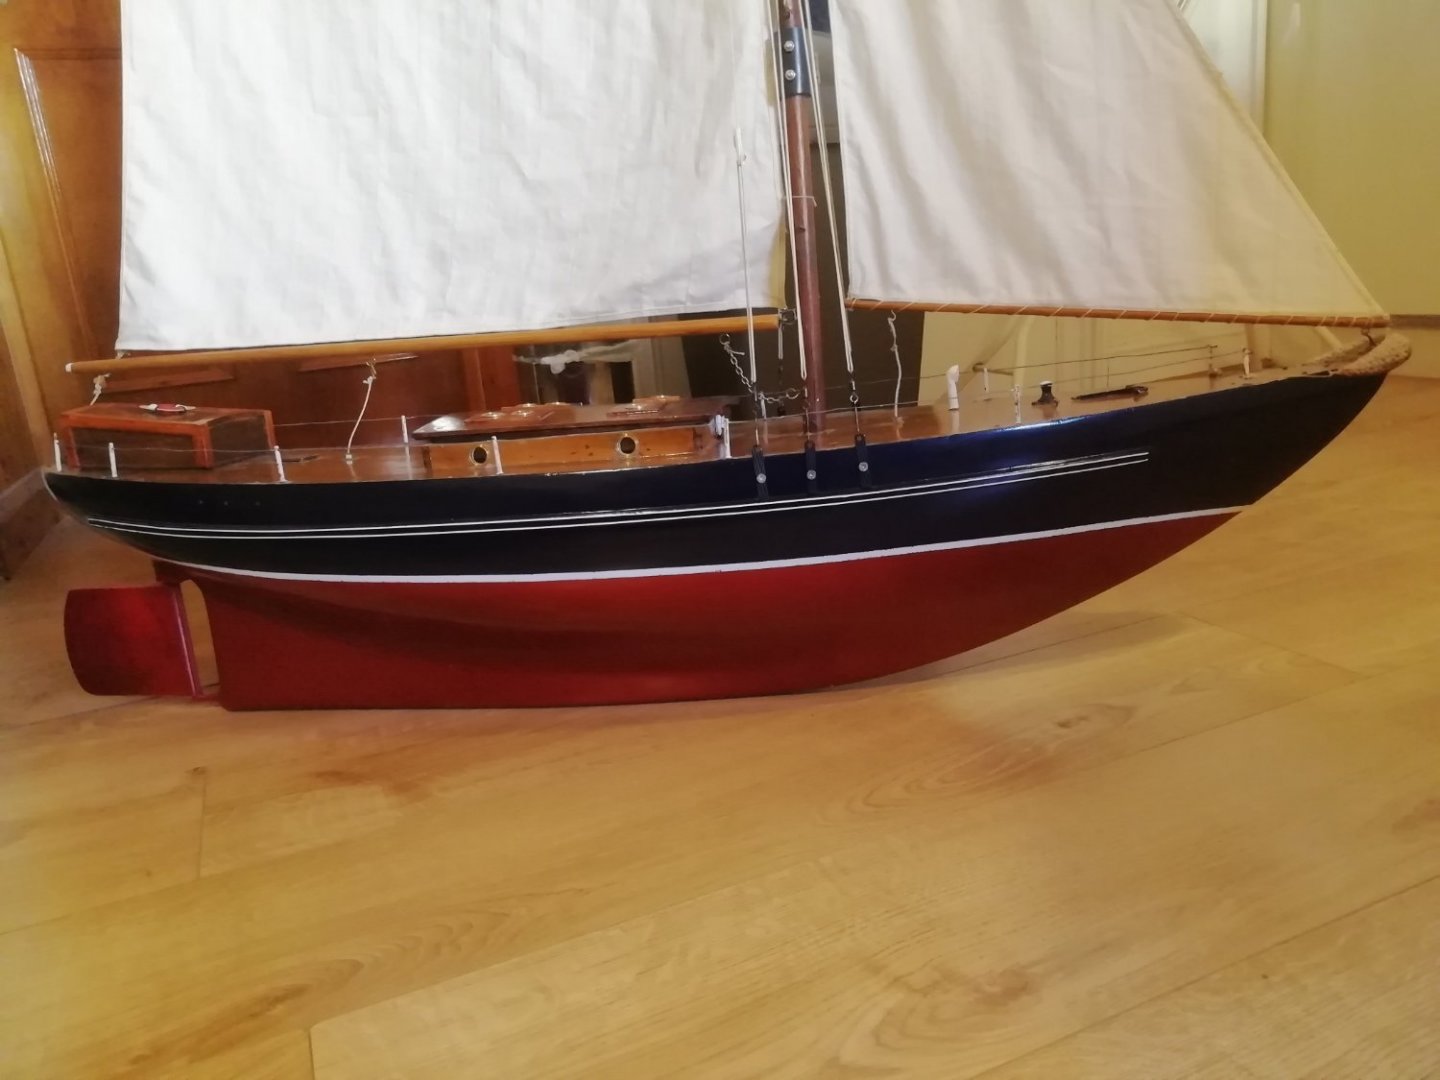
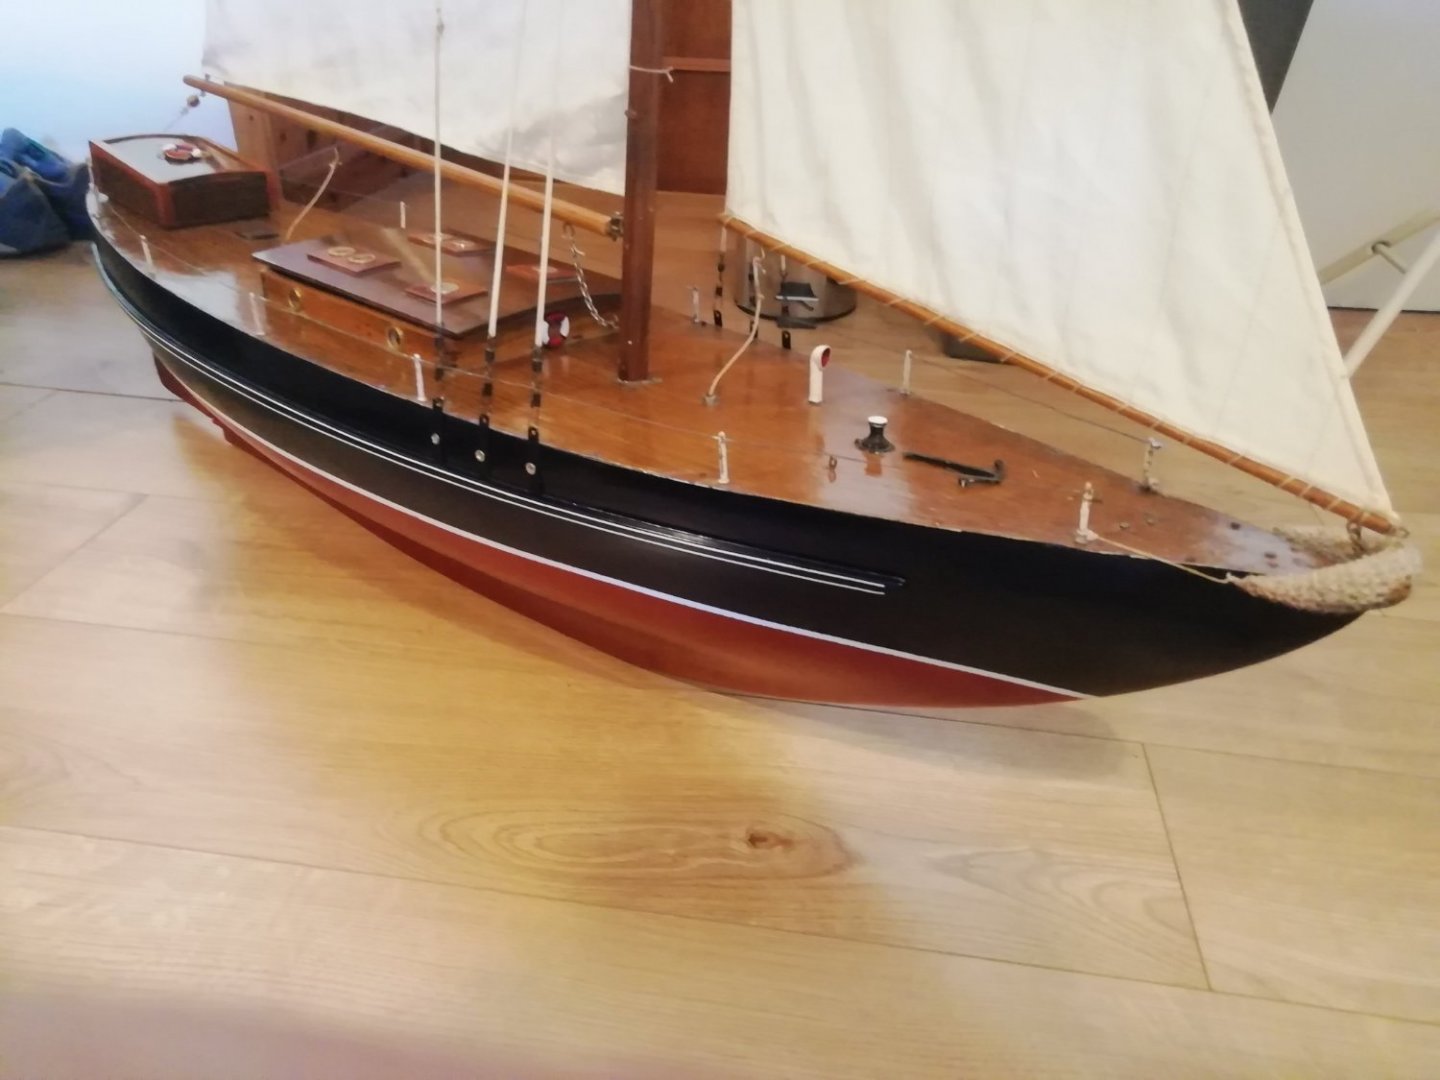
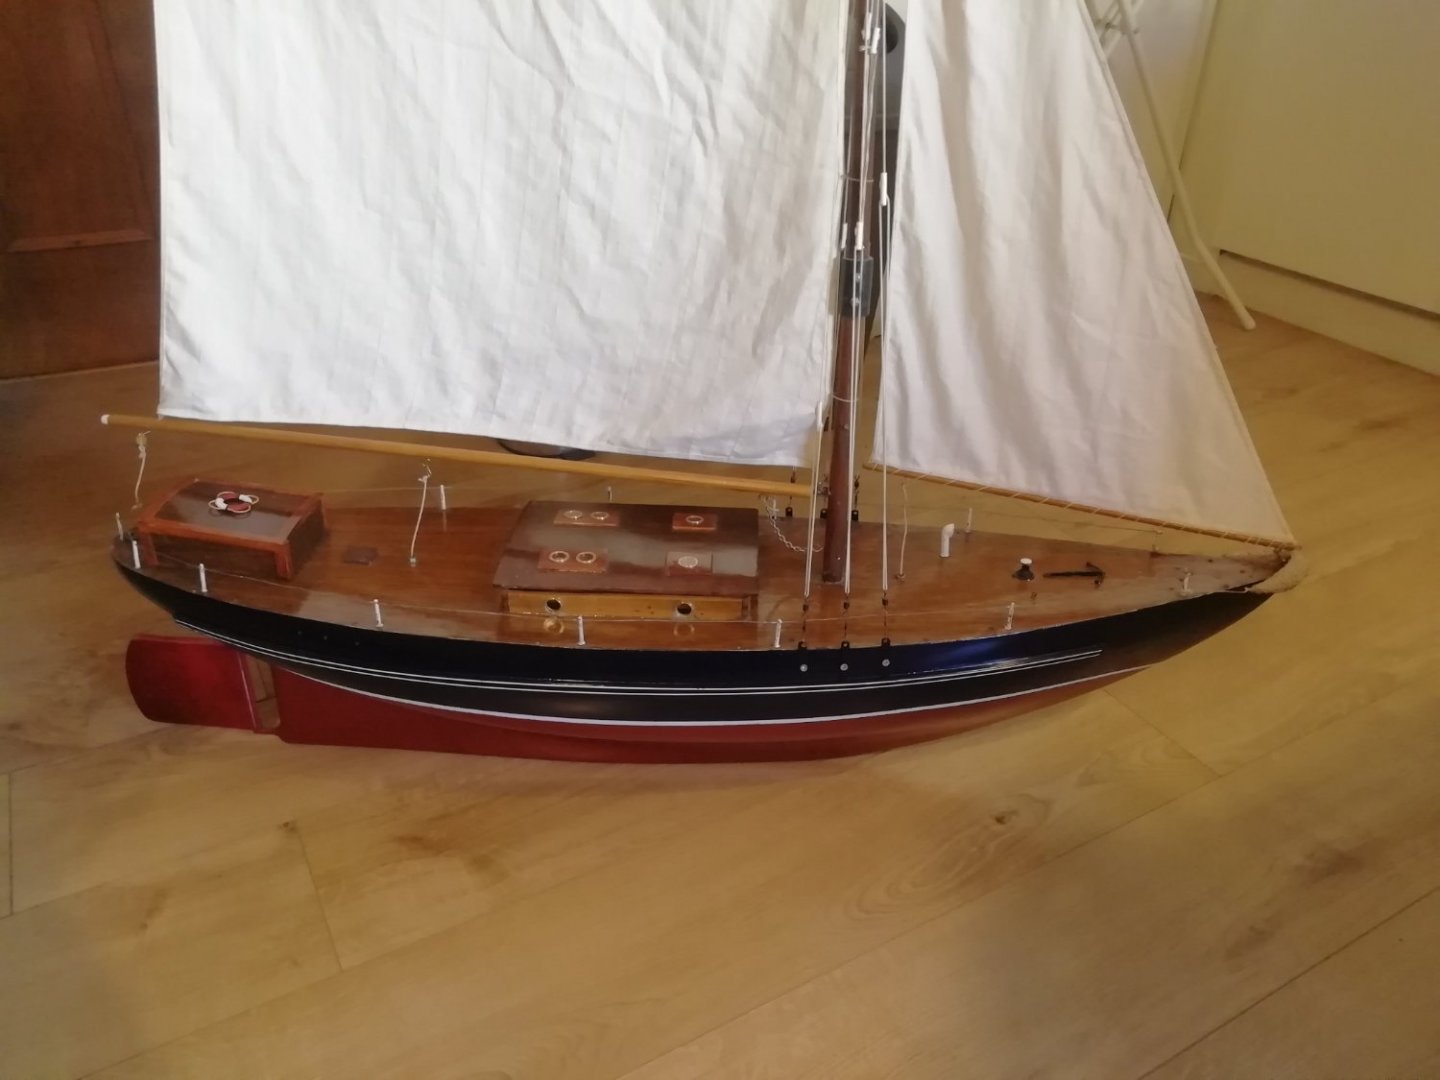
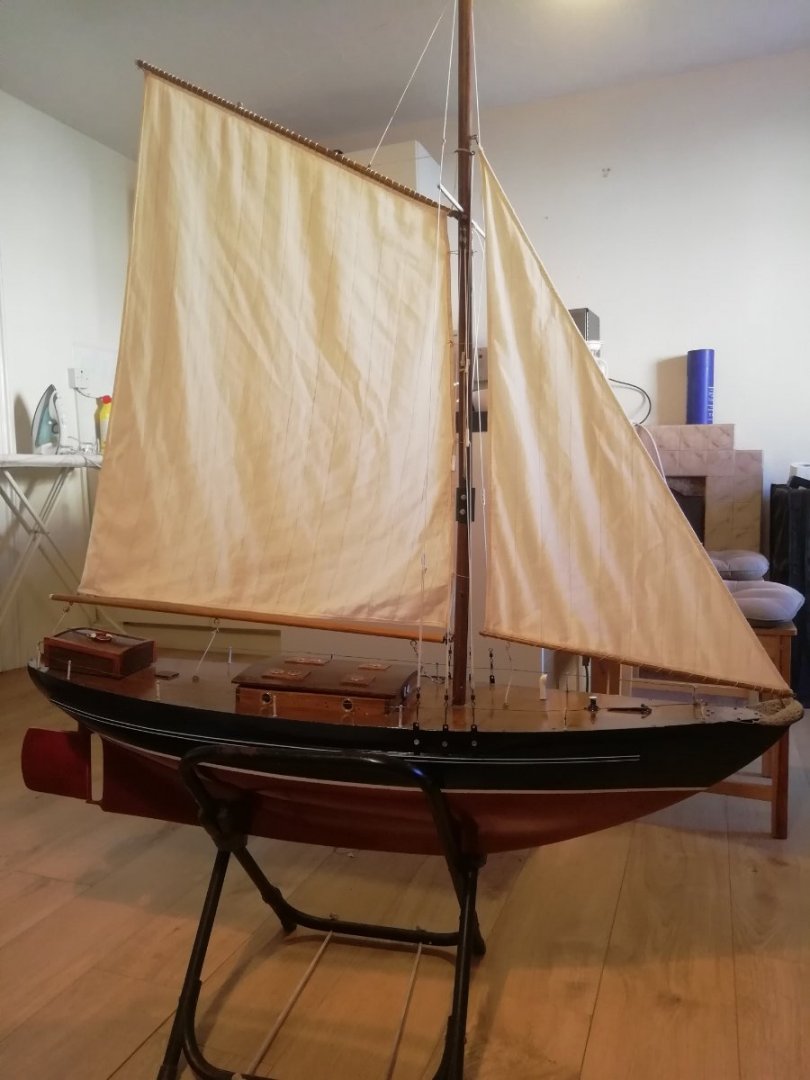
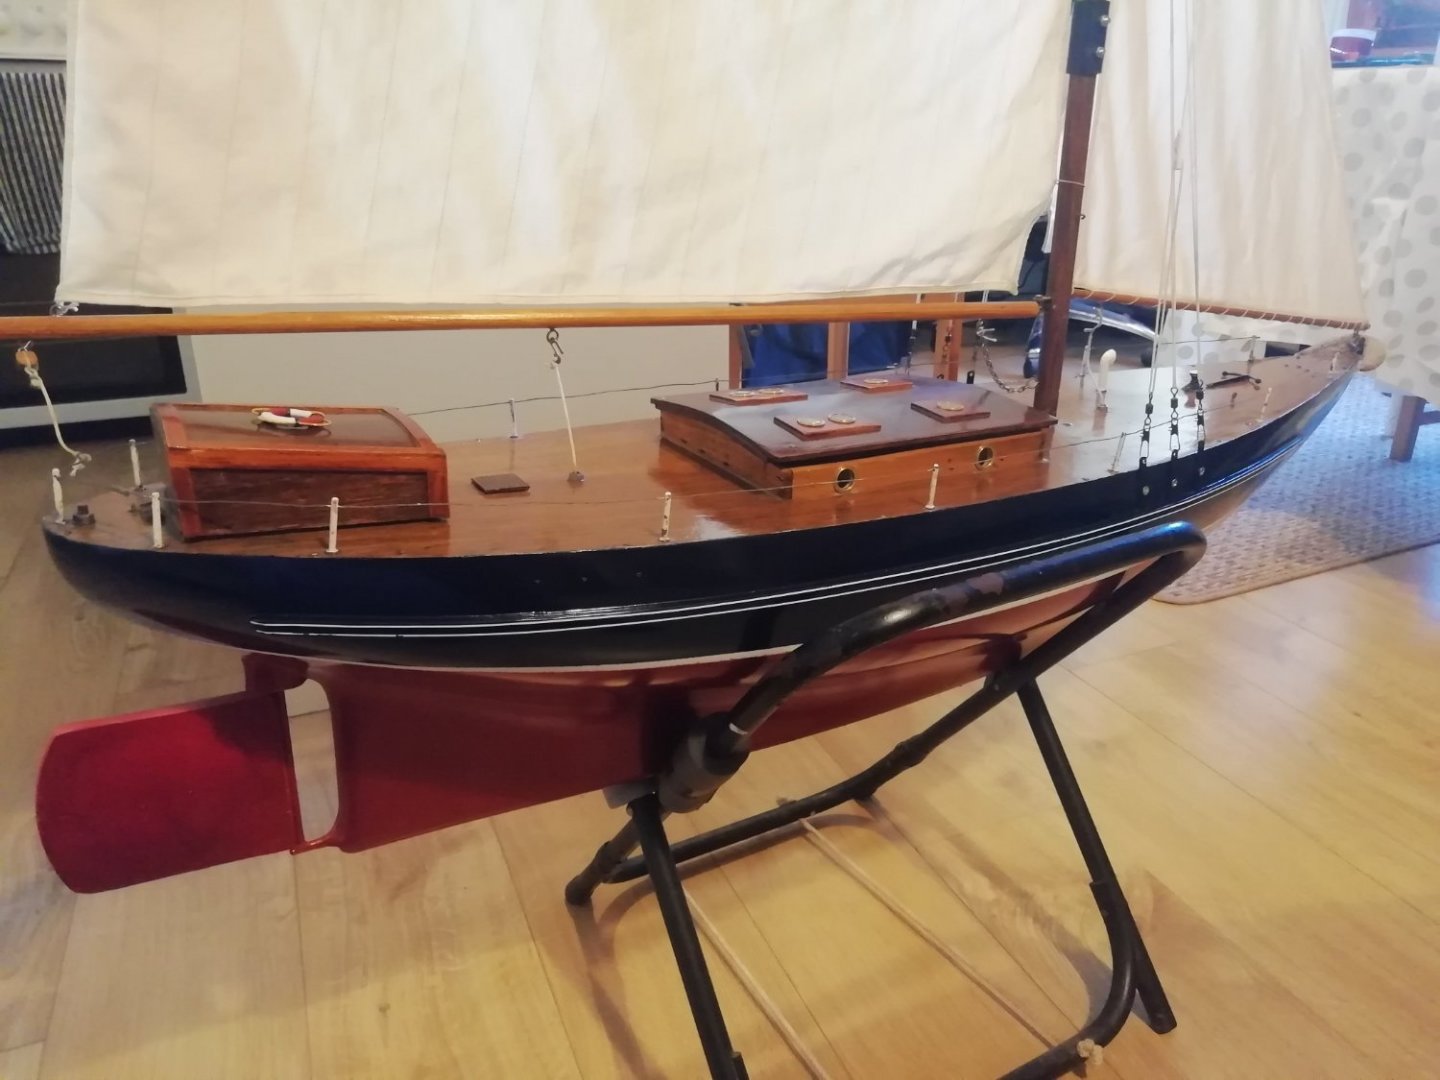
Picked up this RC model sail boat second hand. Seller didn't know anything about it. I really liked the look of it and bought it. Its a fiber glass Hull with wood mast, decks and superstructure etc. The Hull looks exactly like a Revell Inga IV but the superstructure is totally different as well as the rig. It also looks like it either had 2 masts at one point or possibly the kit had the option to fit two masts. Perhaps its a custom design using an Inga Hull or modified Inga. Can anyone identify it?


-
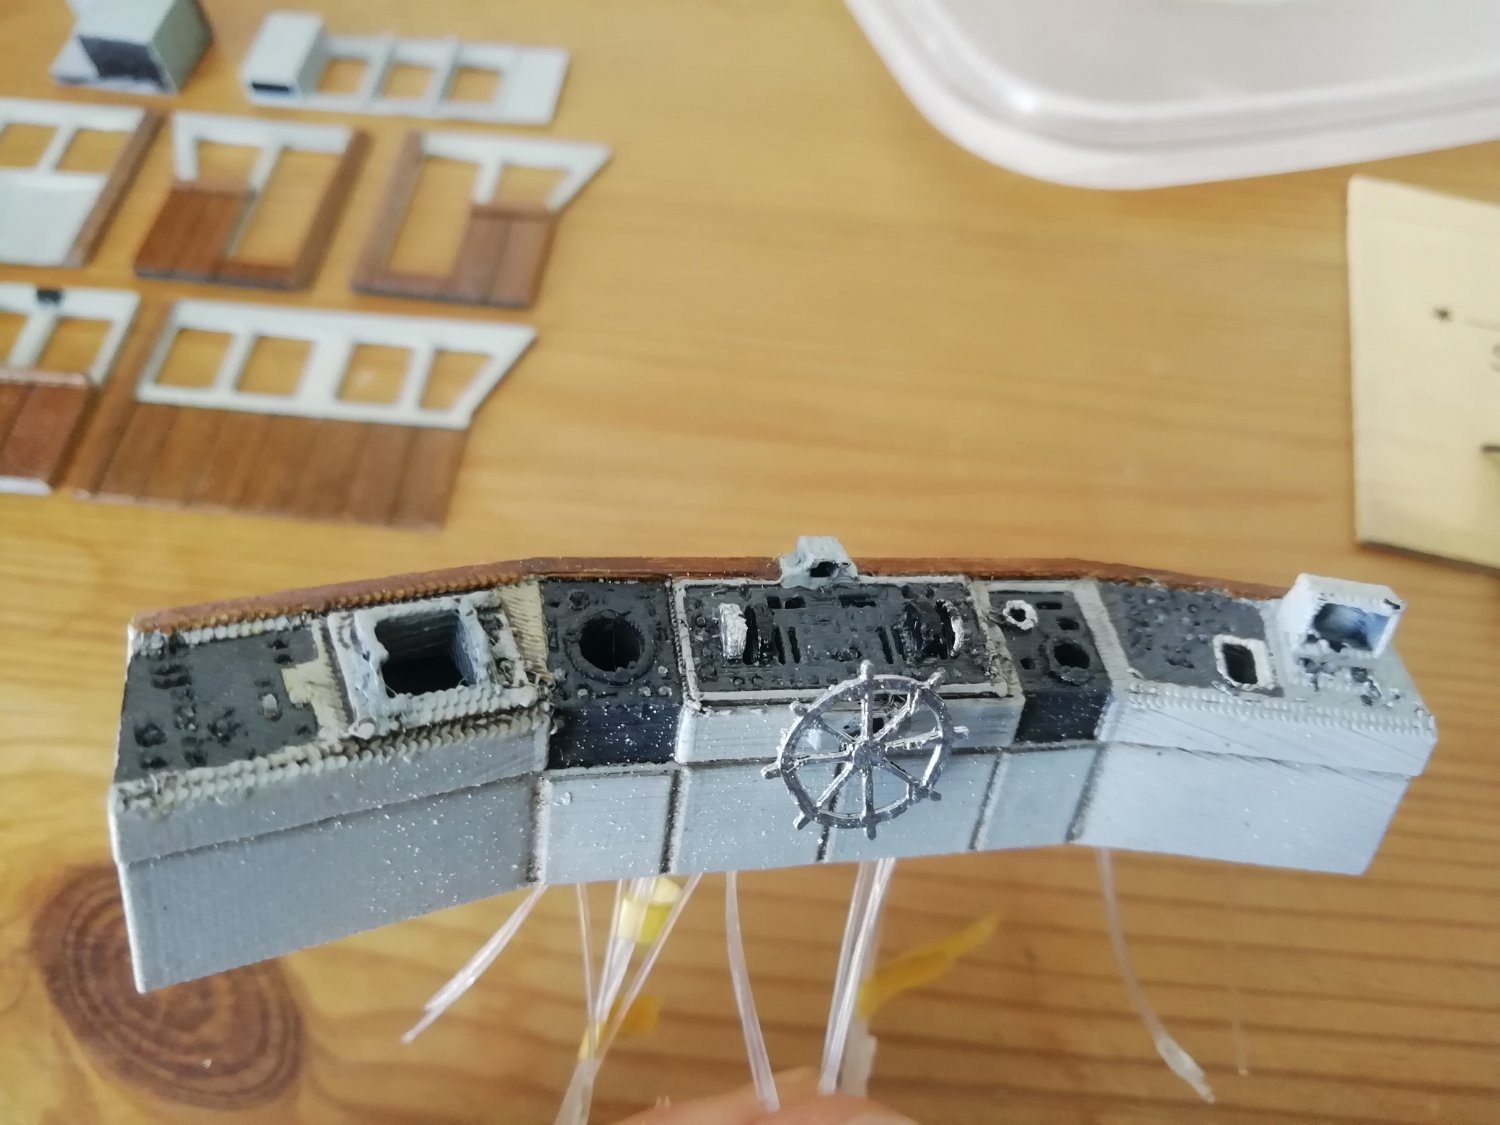
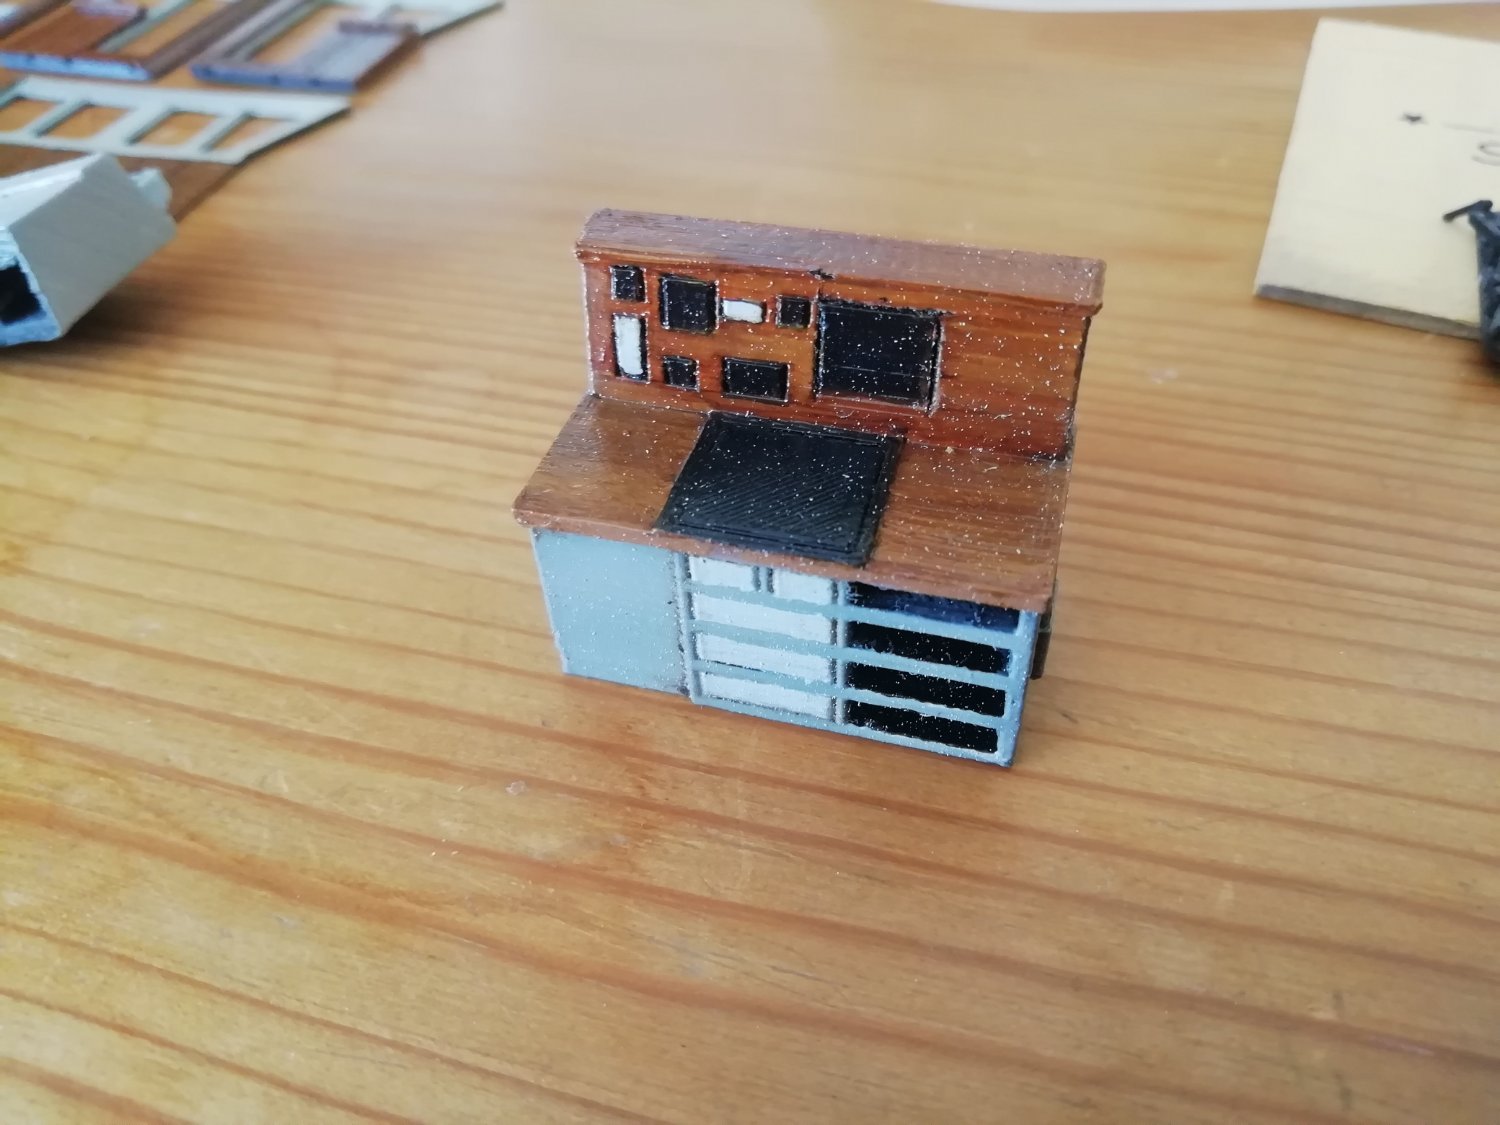
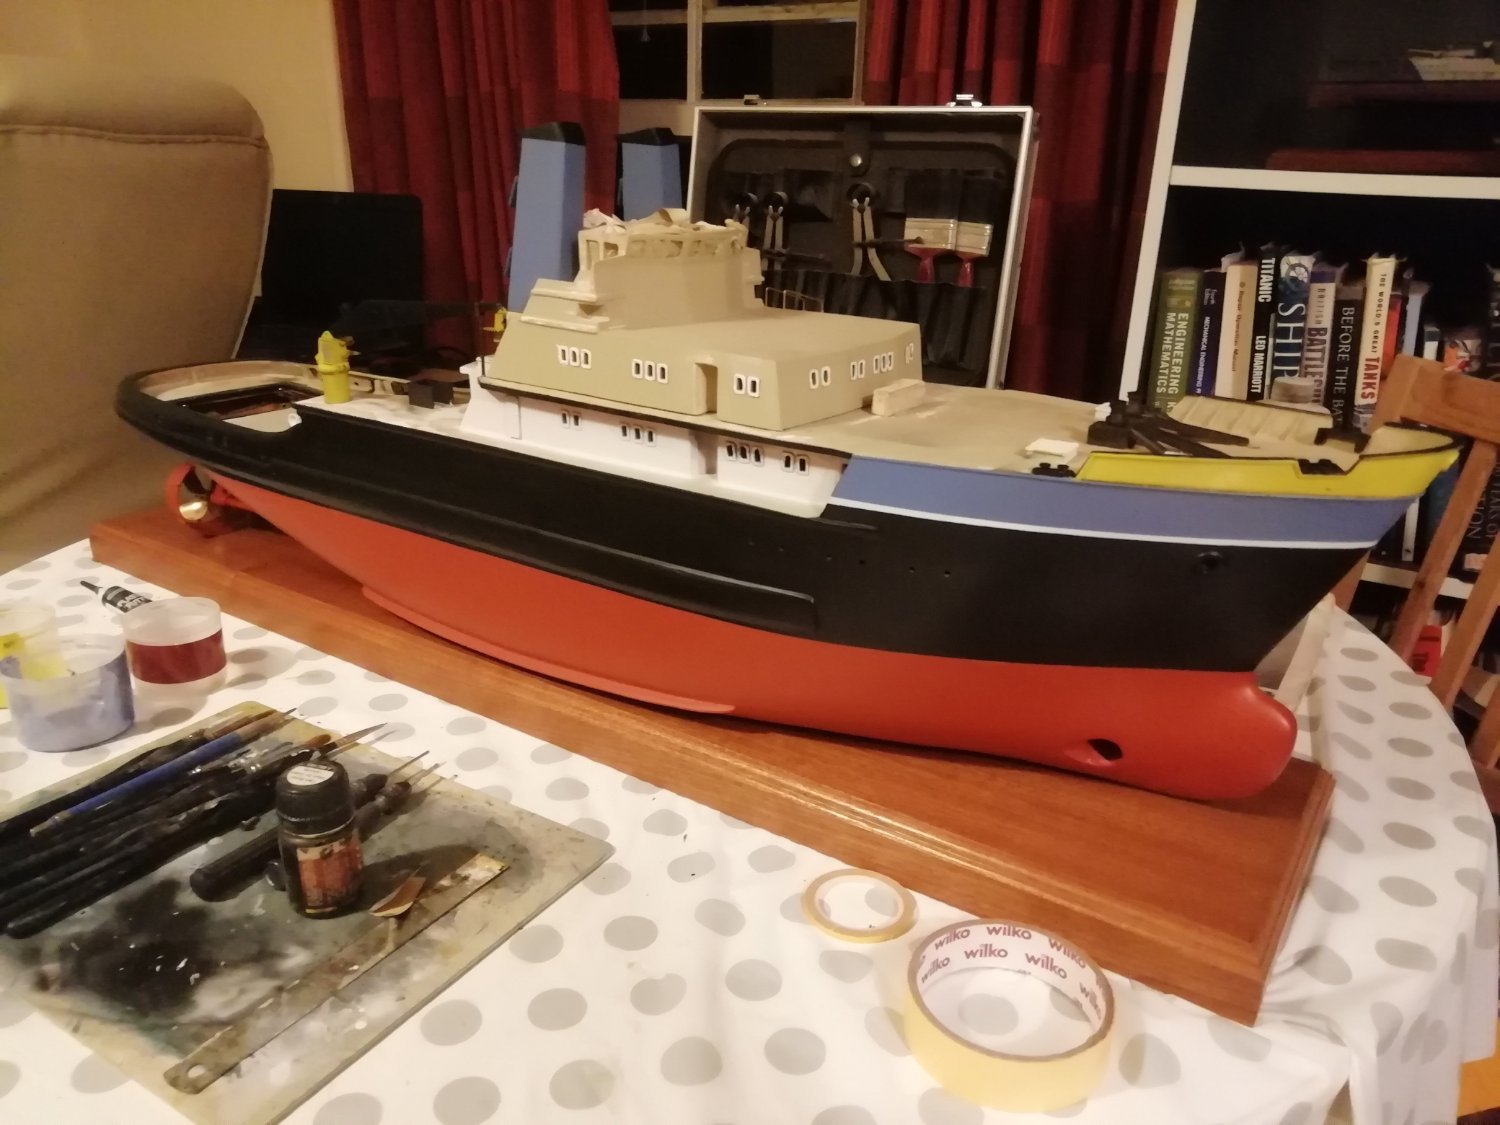
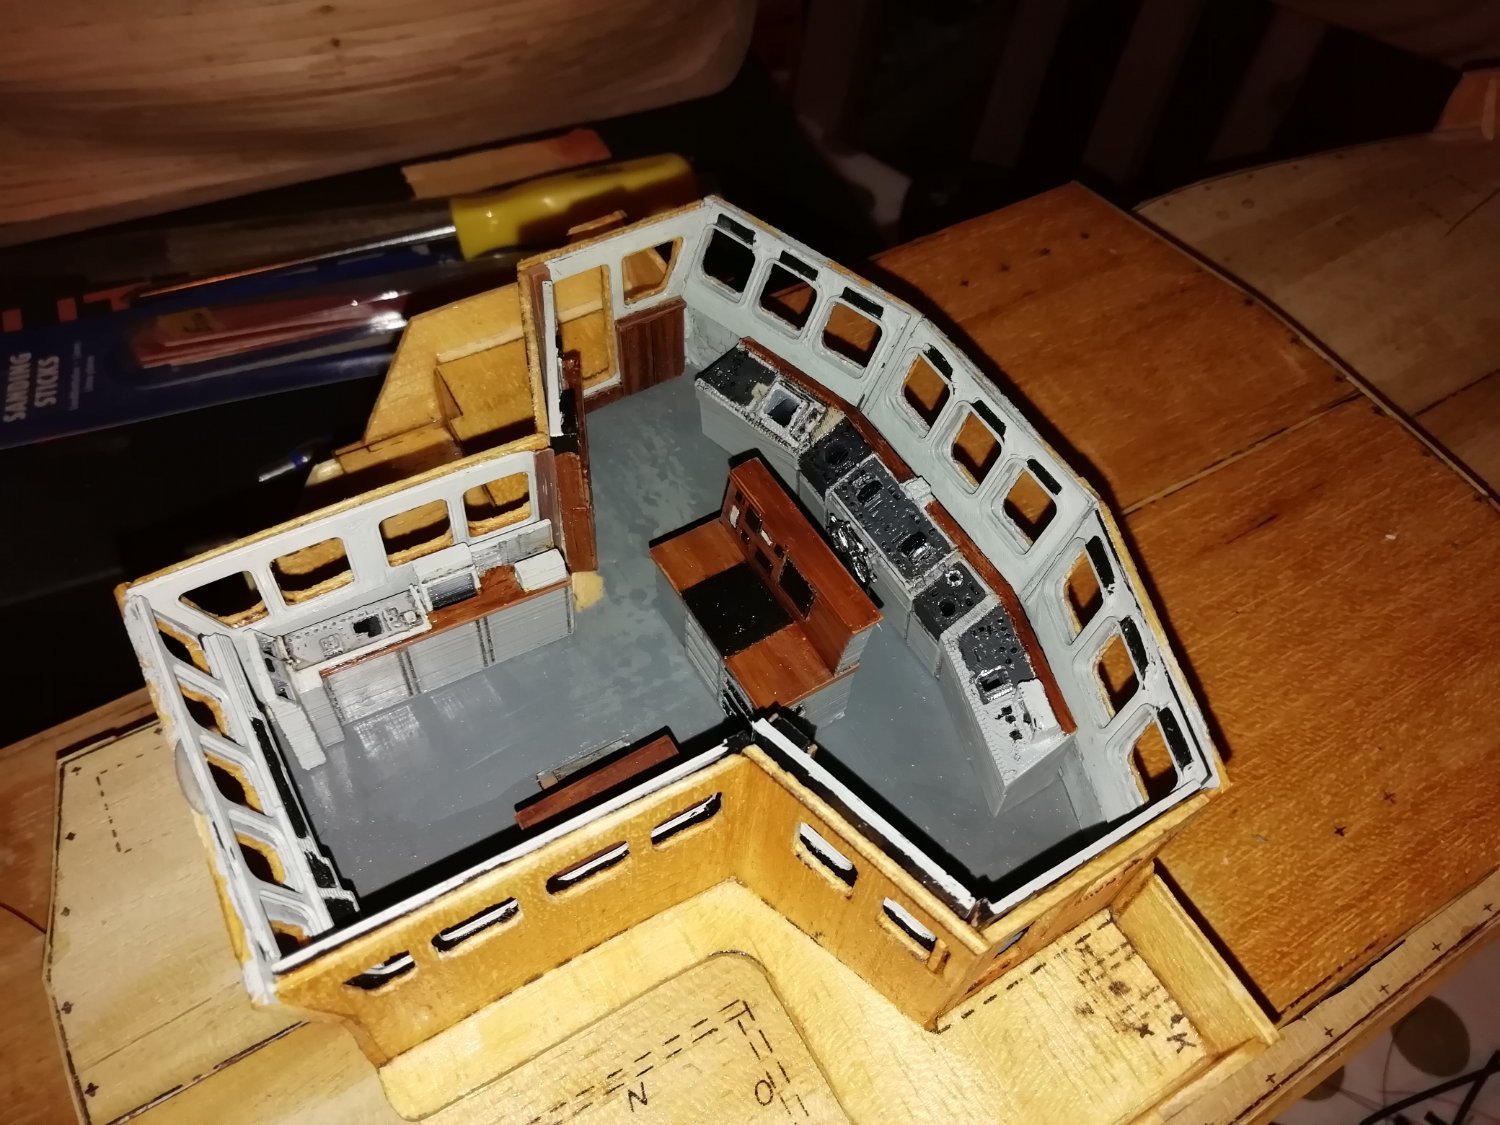
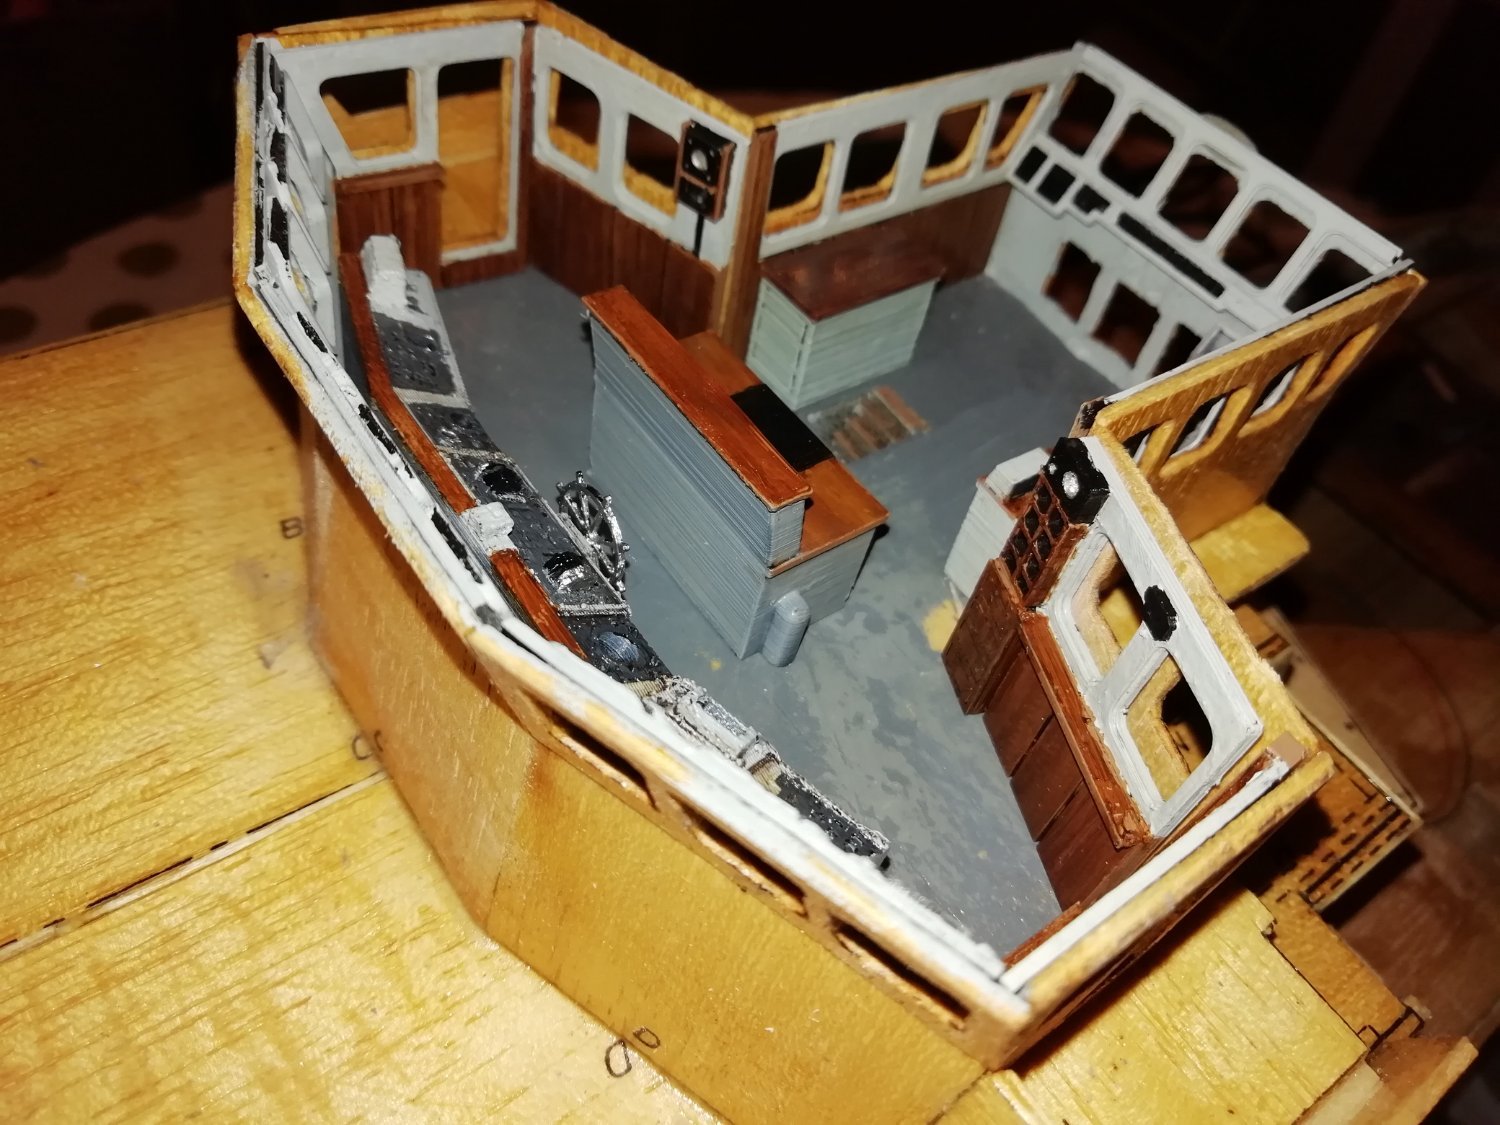
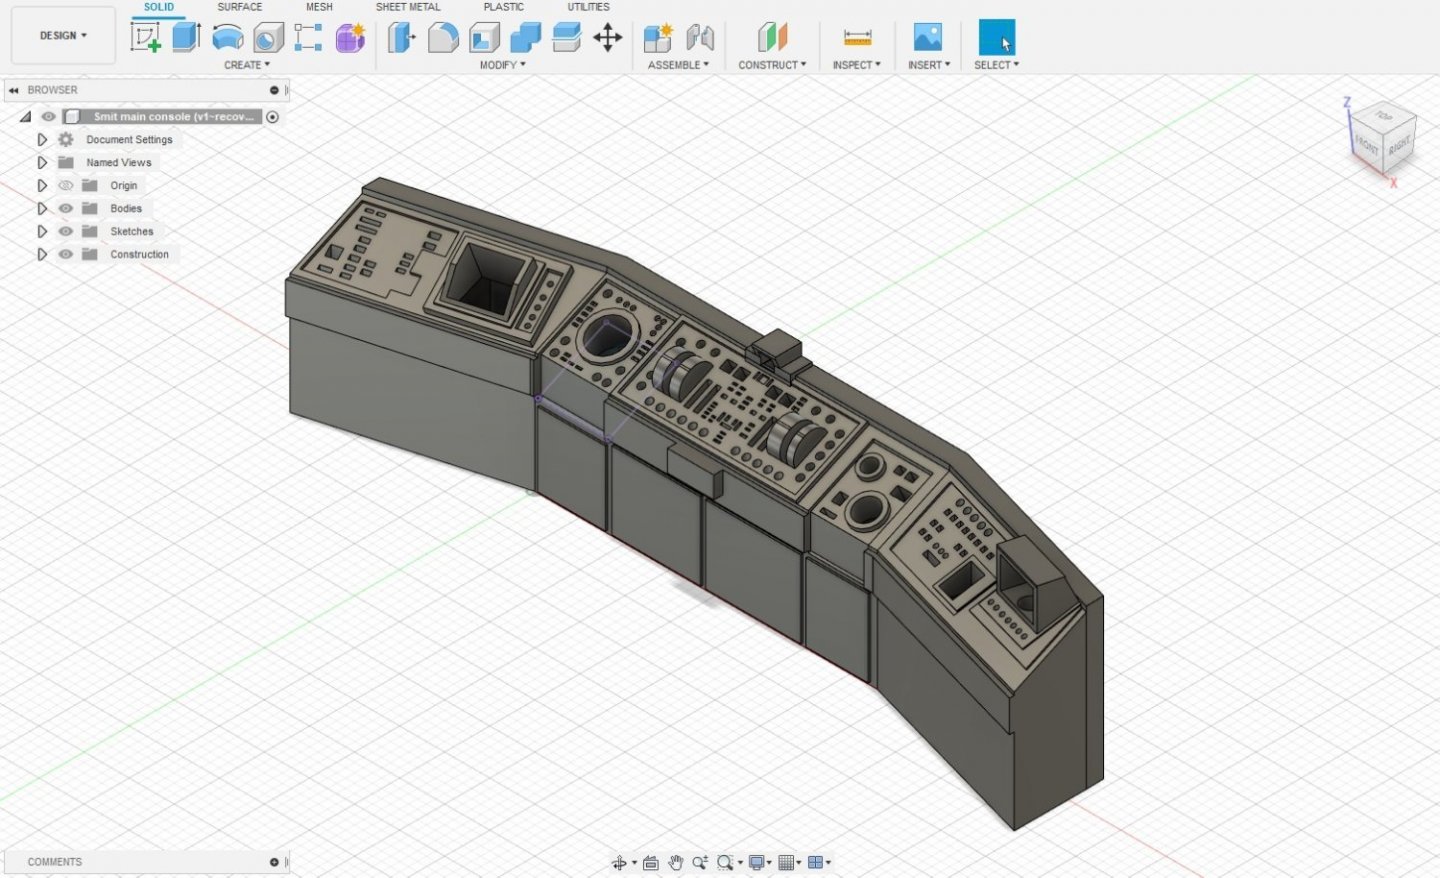
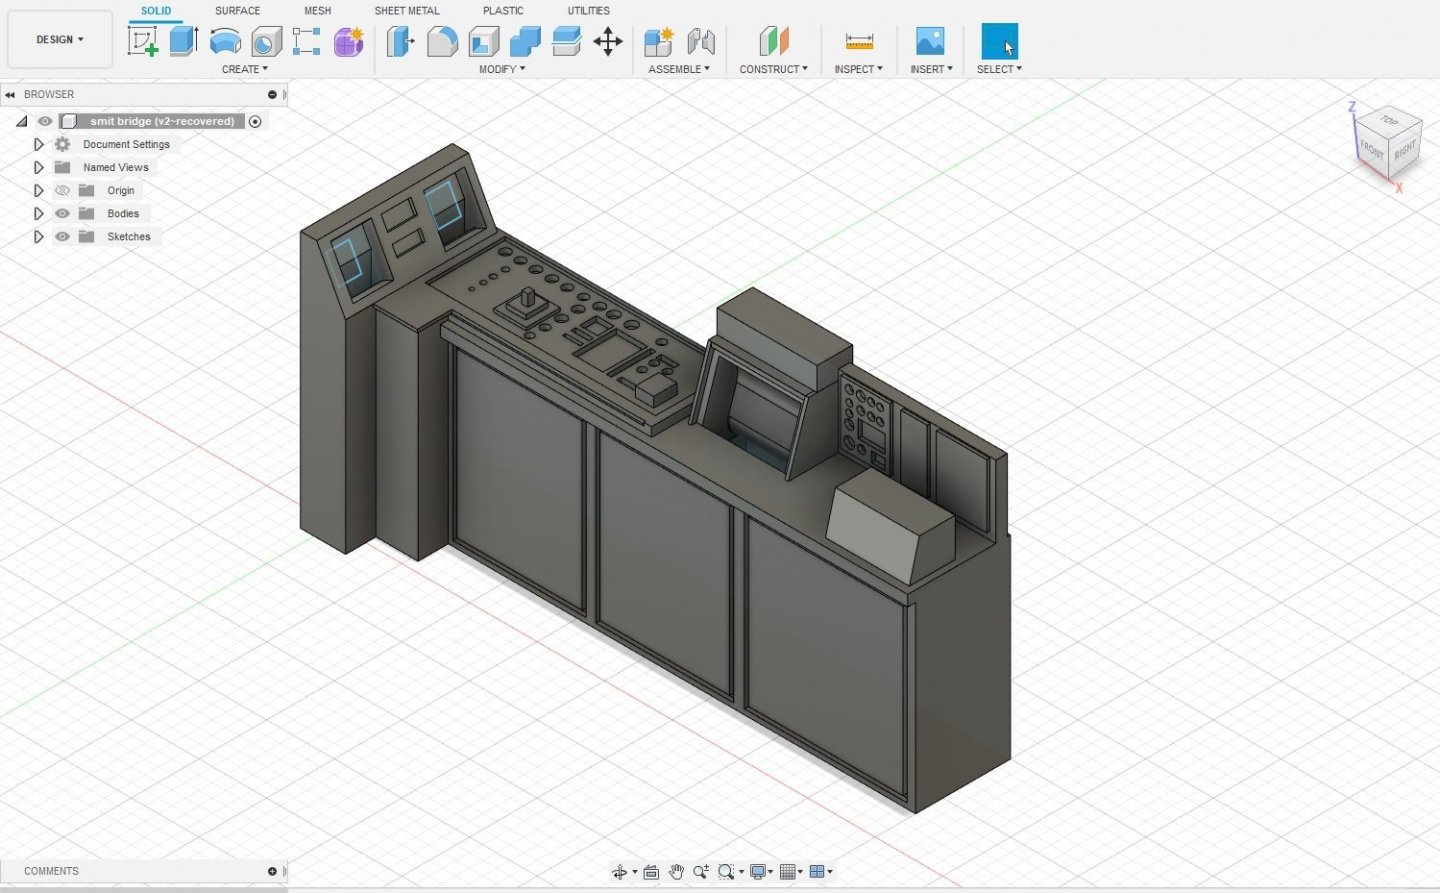
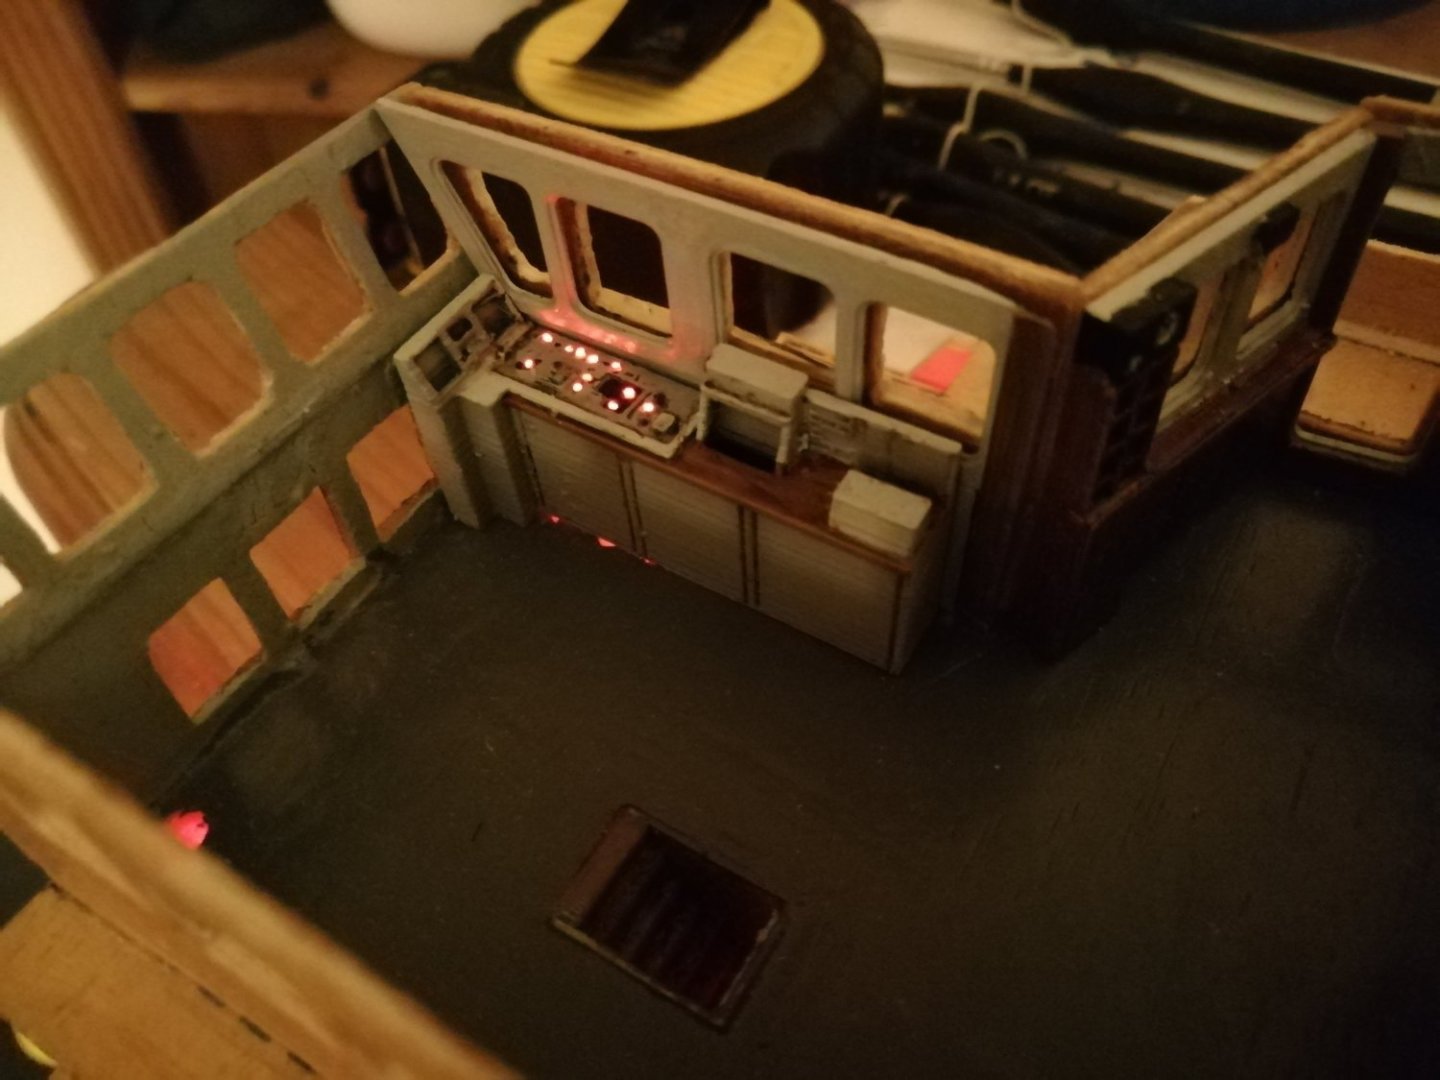
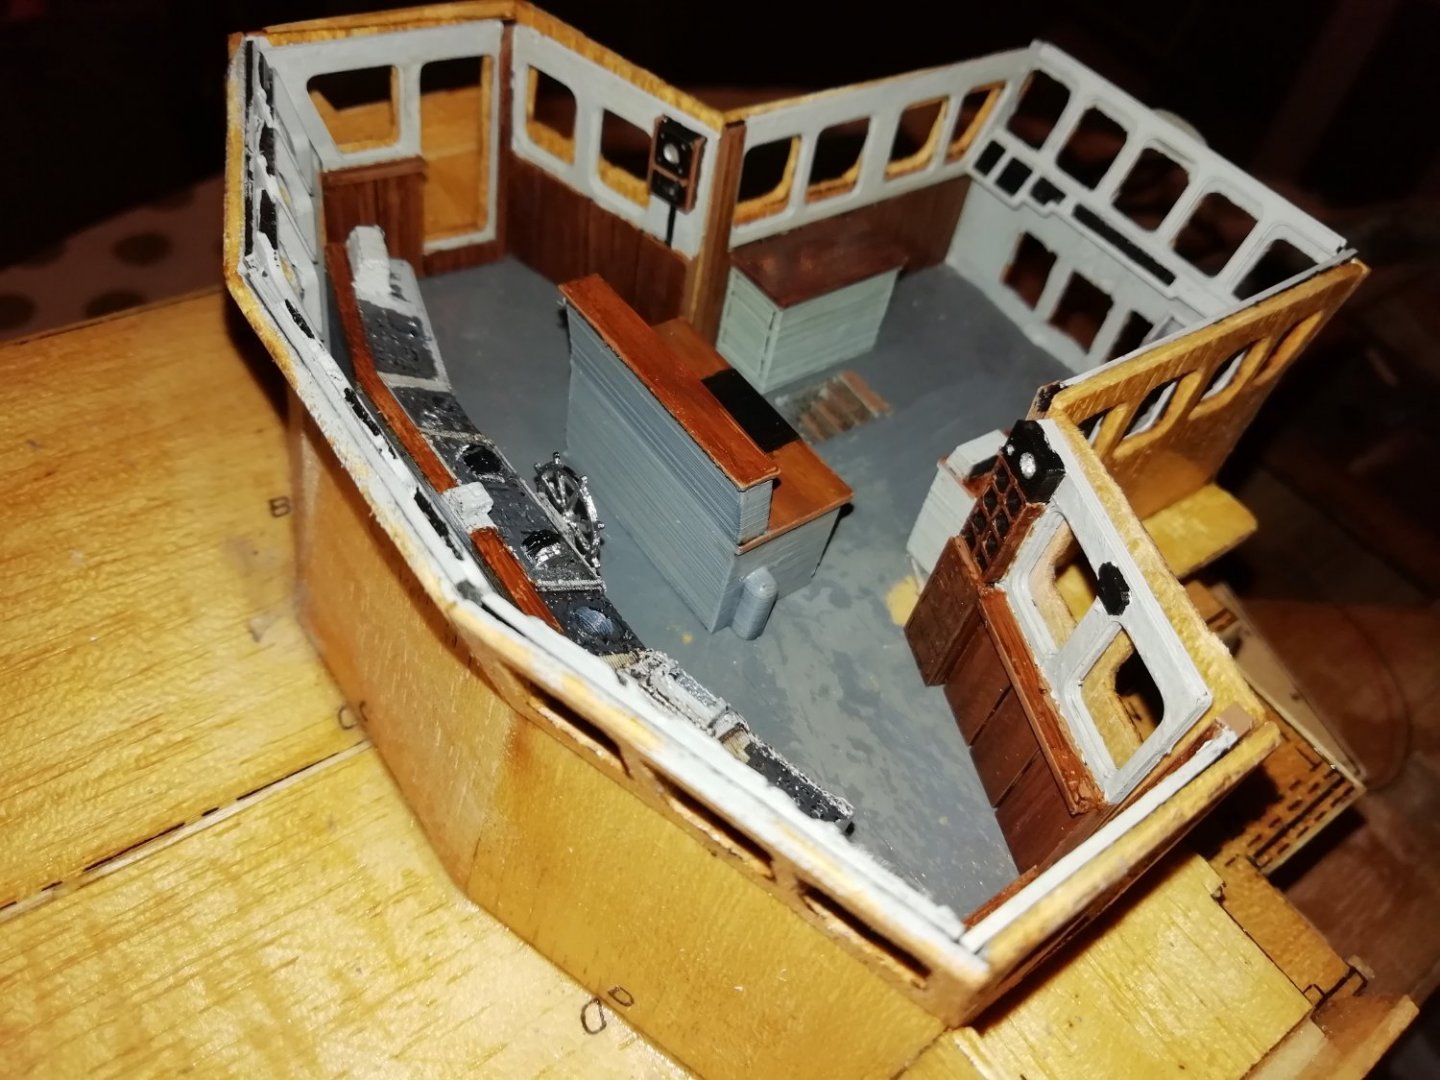
Hi Jan. No this kit is the old version so the interior is very basic. I have made my own interior based on photos I found online. It is made in a CAD program and 3D printed into pannels that I painted and will assemble into the bridge. I've added fiber optic wire to the main consoles as I'm going to light the control panels. I've tested this with everything lose fit and it seems to work quite nicely.


-
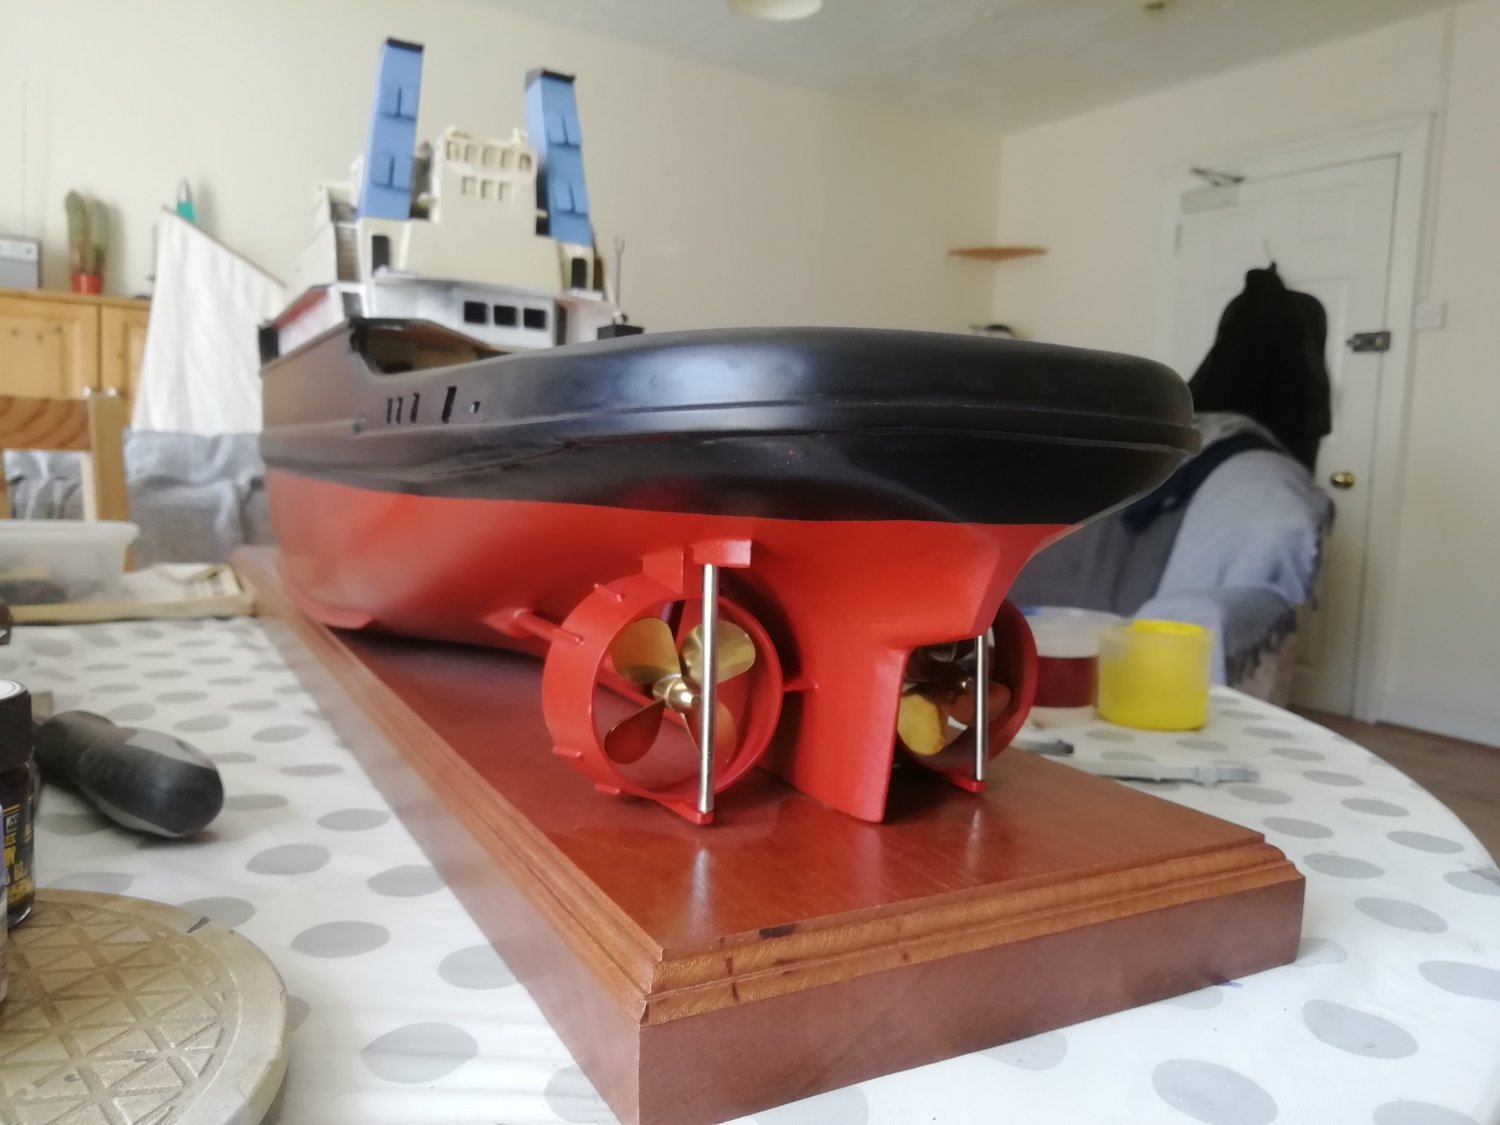
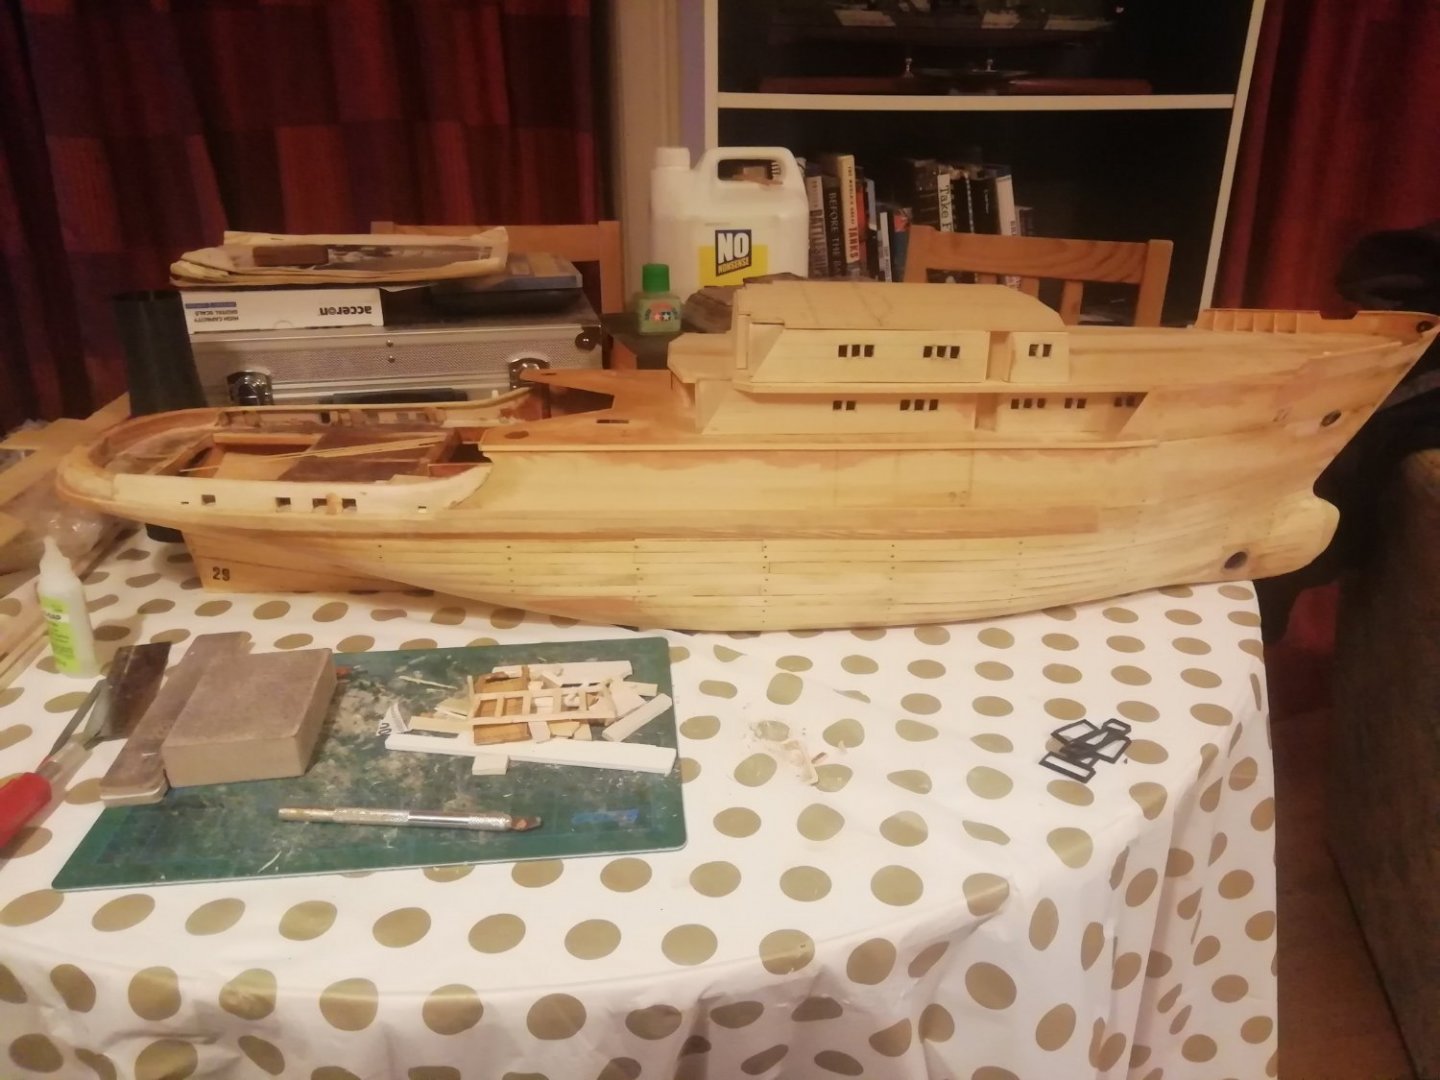
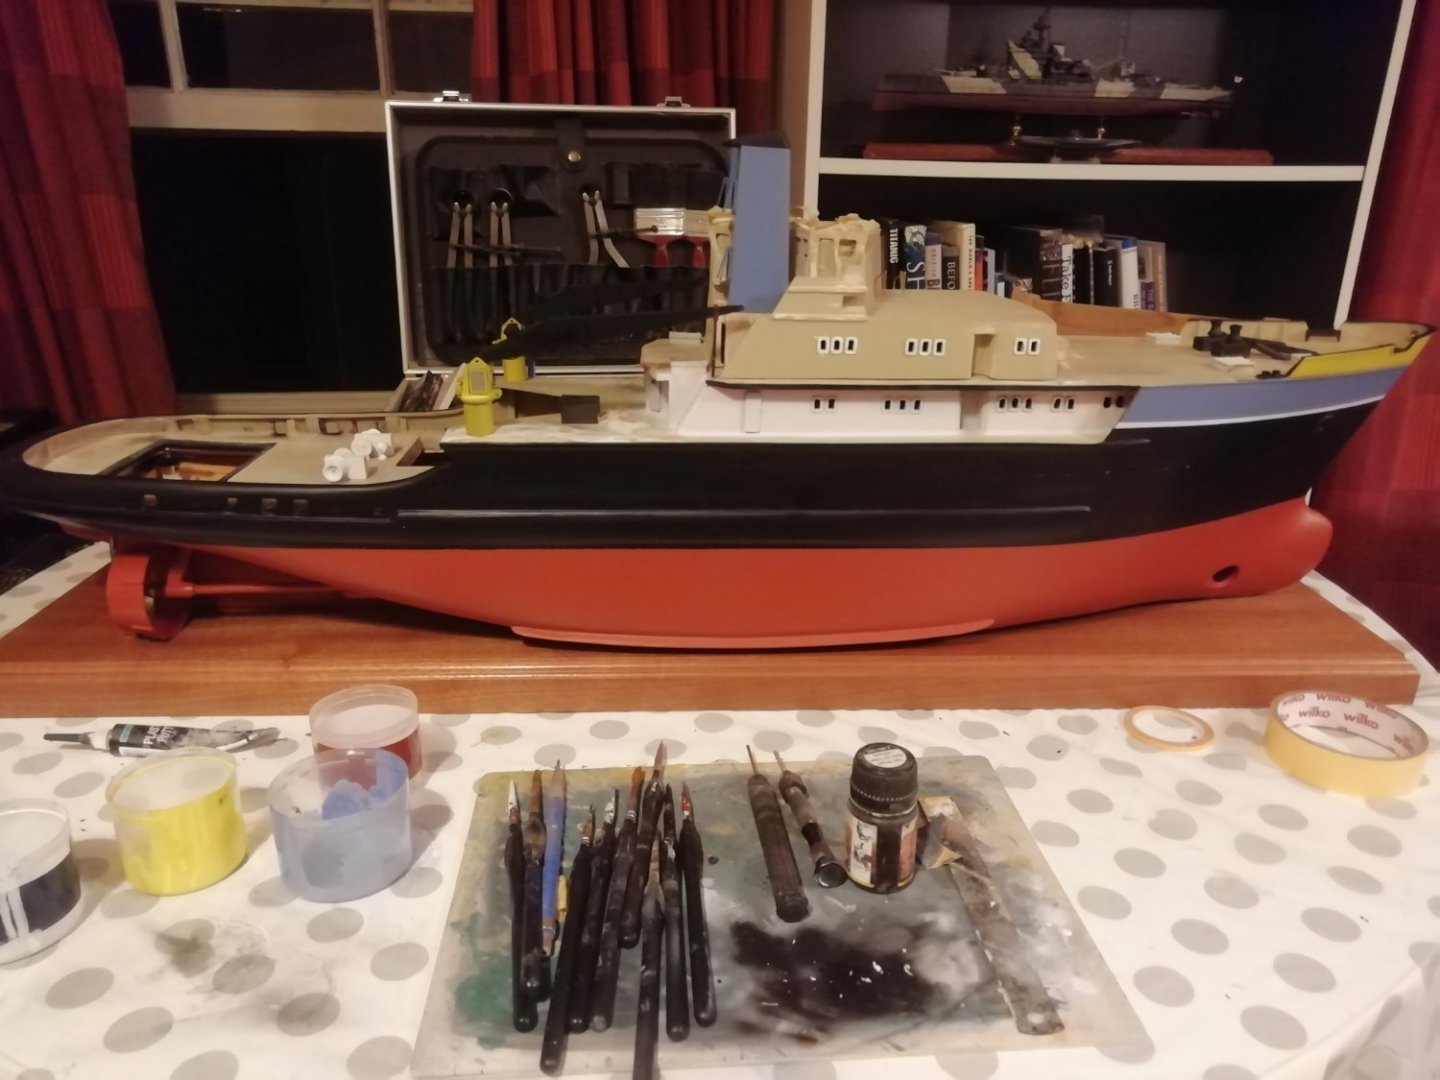
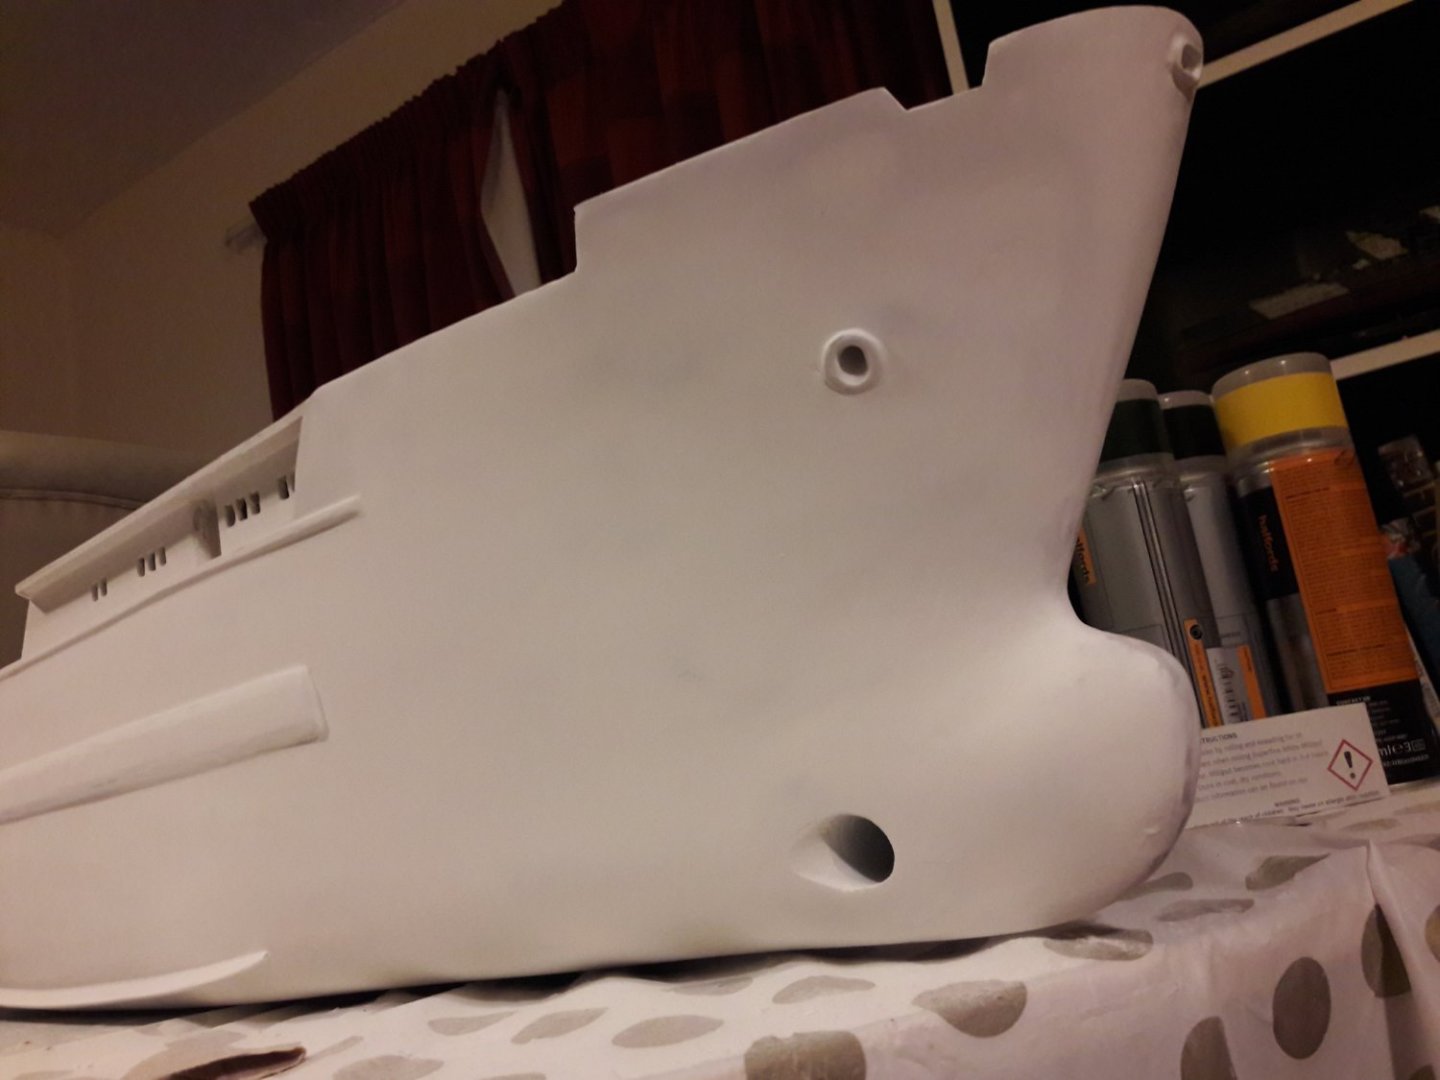
Sorry for the late reply. I went for an industrial outdoor matt spray paint in the end. Here are some pictures of my build so far. The bridge interior pieces are just loose fit as I'm waiting to finish all the paint before gluing it into position.


-
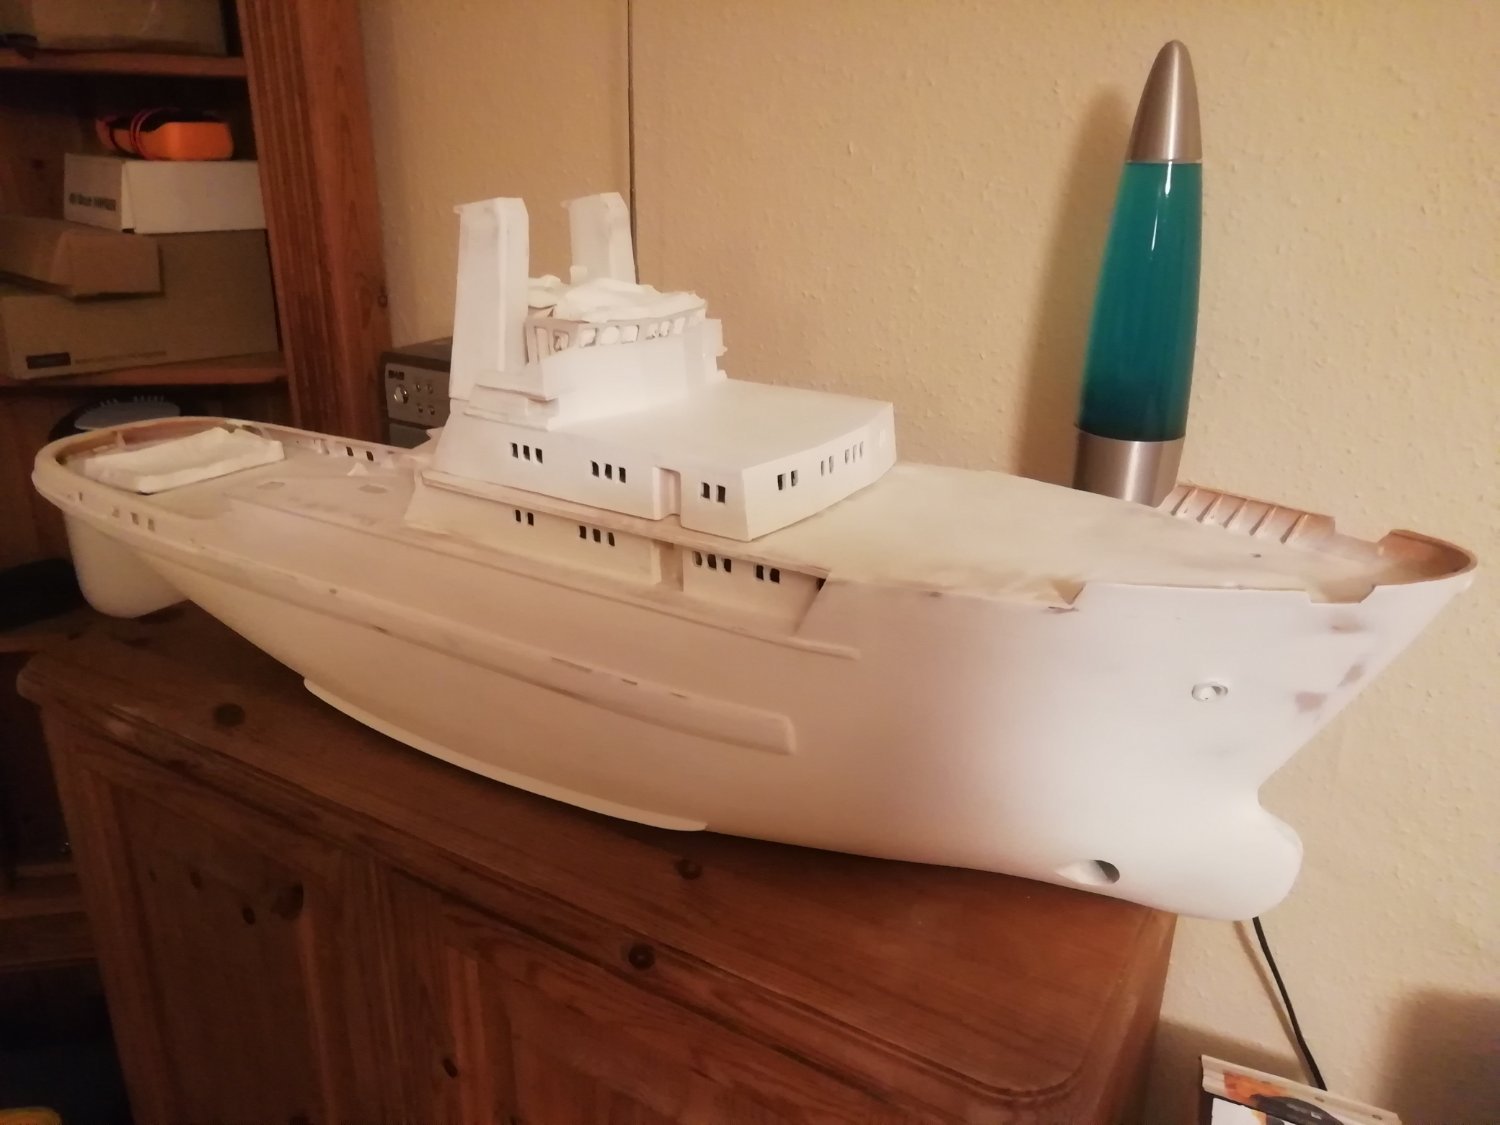
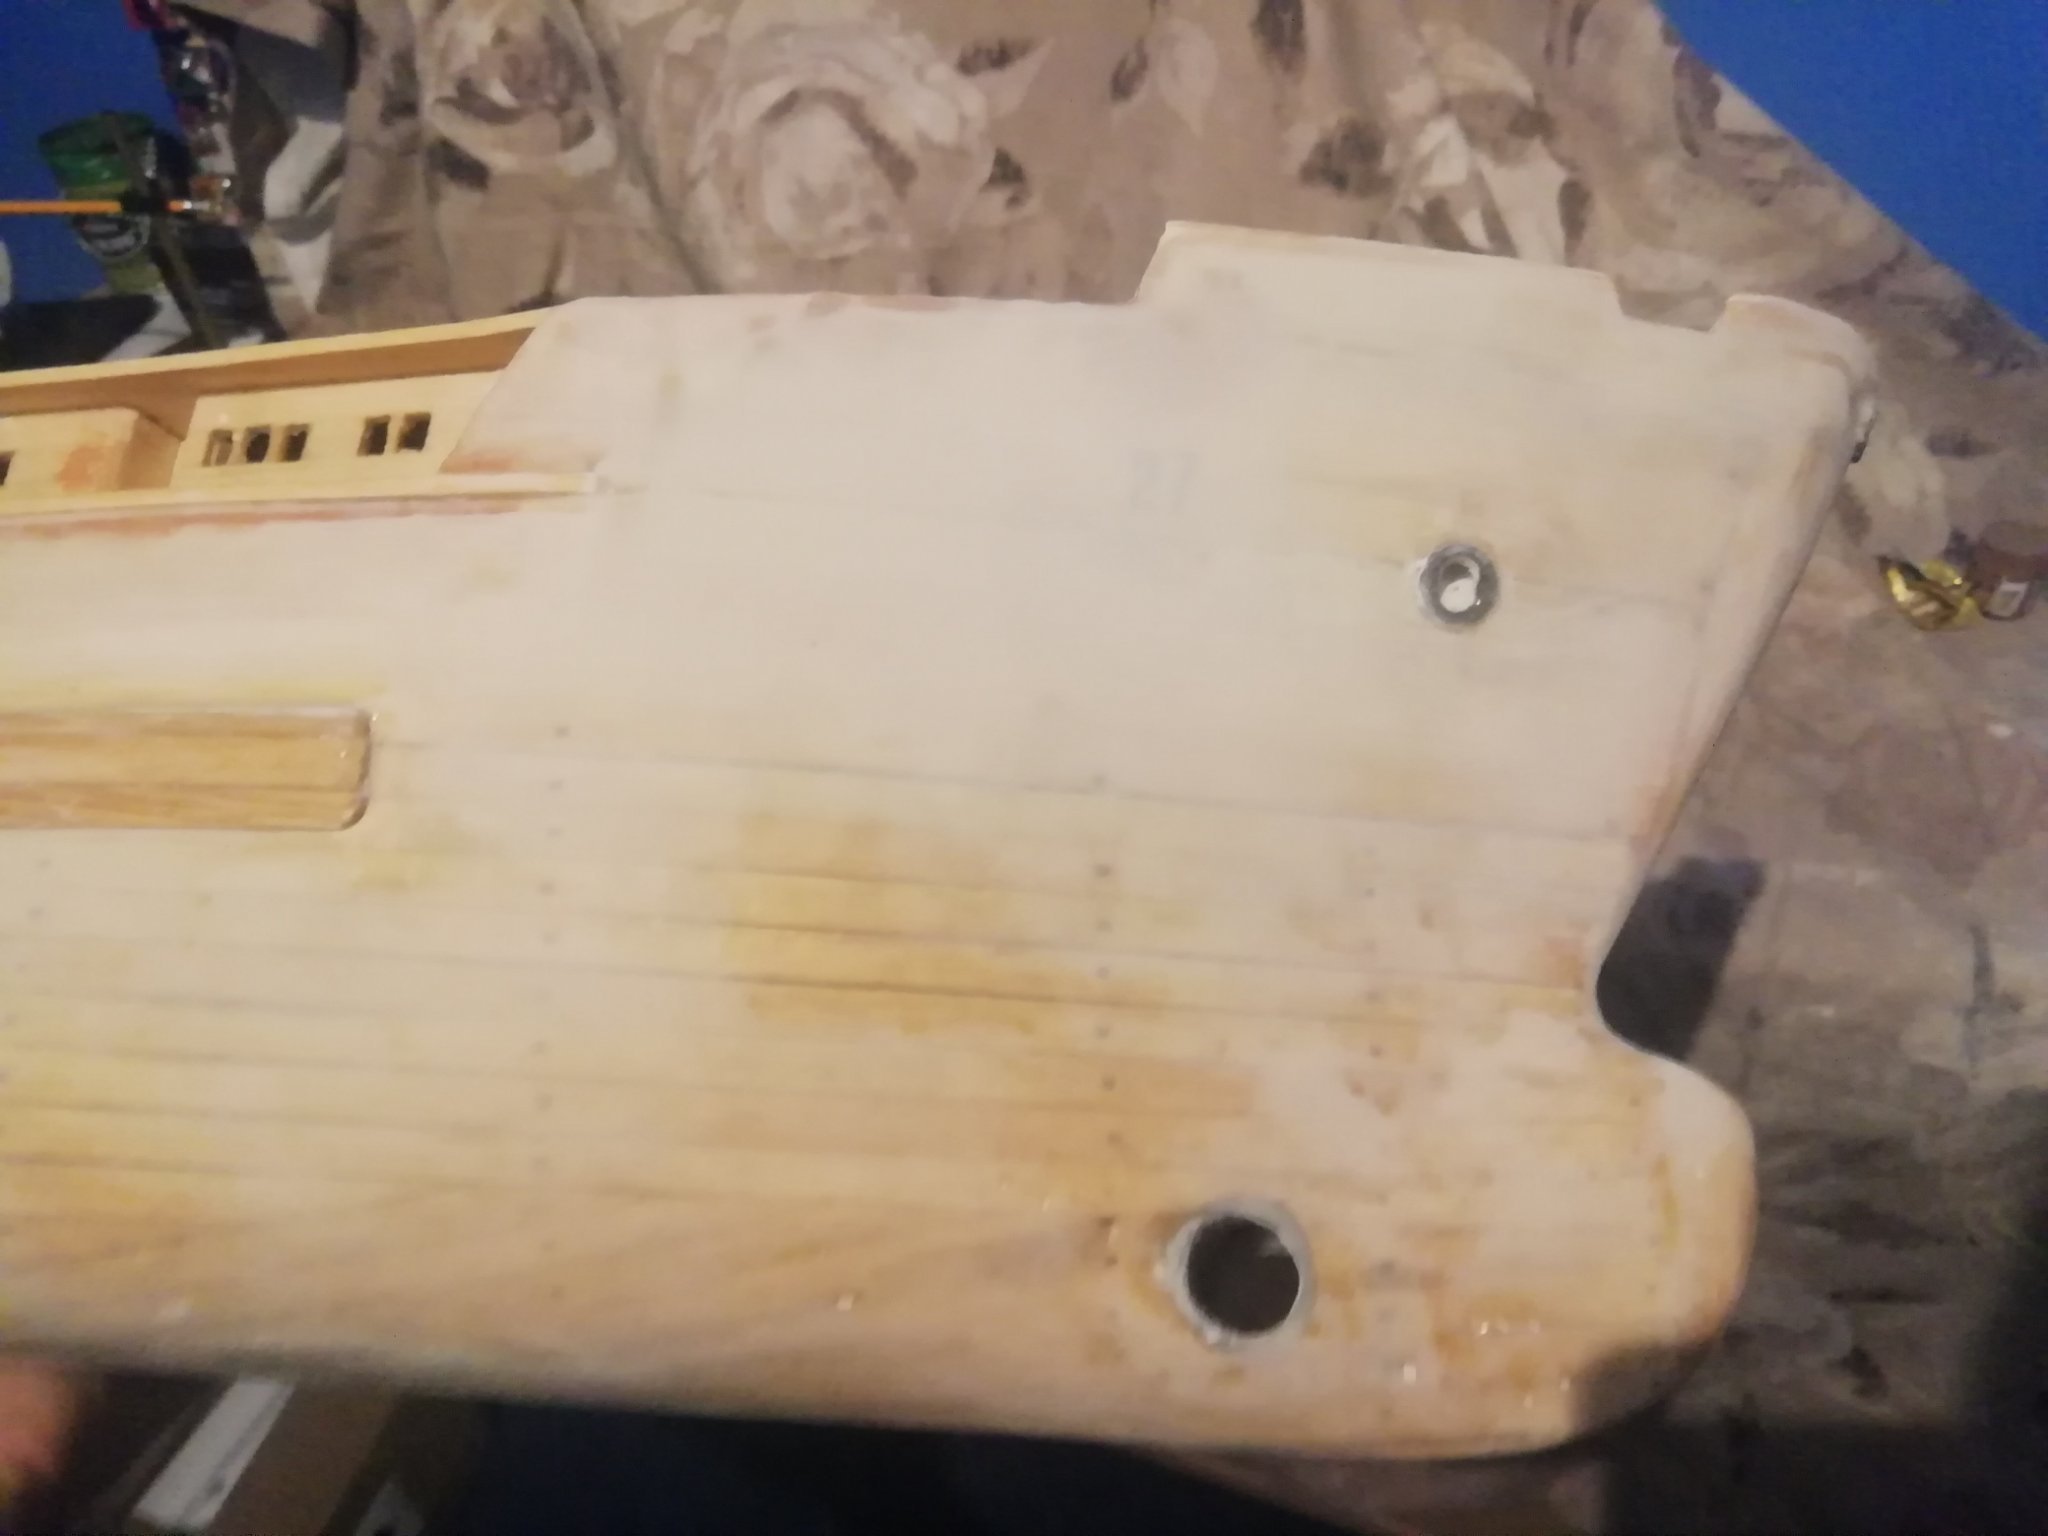
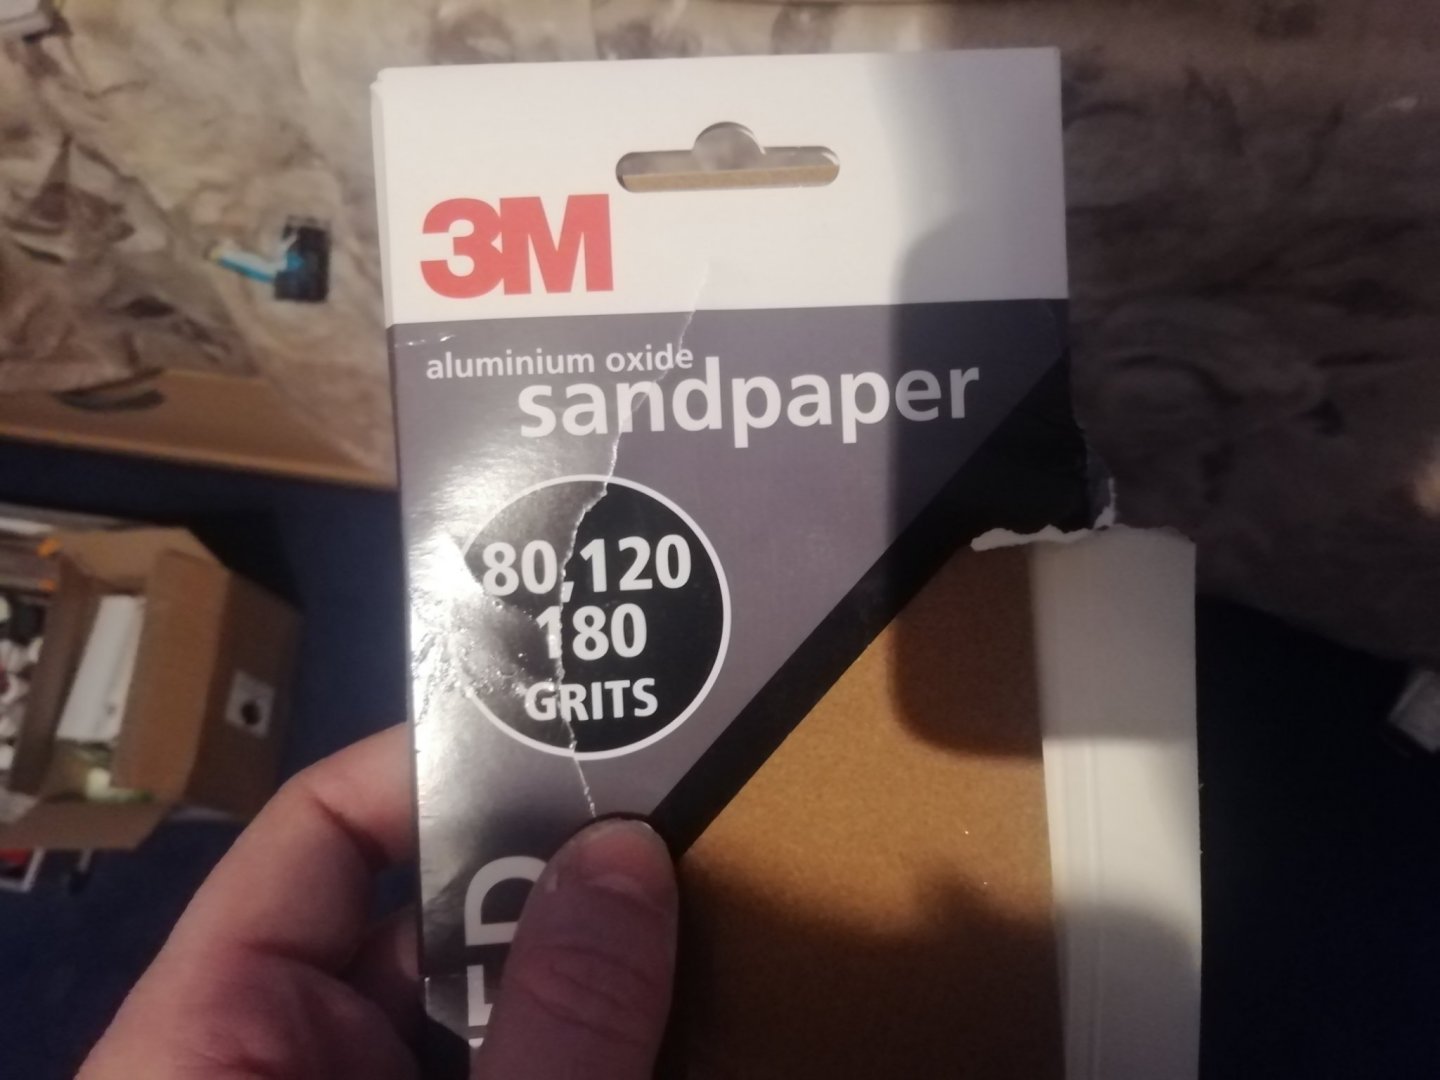
*UPDATE* Managed to sand the epoxy smooth and is now in primer. 3M aluminium oxide sanding paper 80 grit and then 120 followed by 400 did the trick. Ready for paint now
- 26 replies
-
- 10
-

-
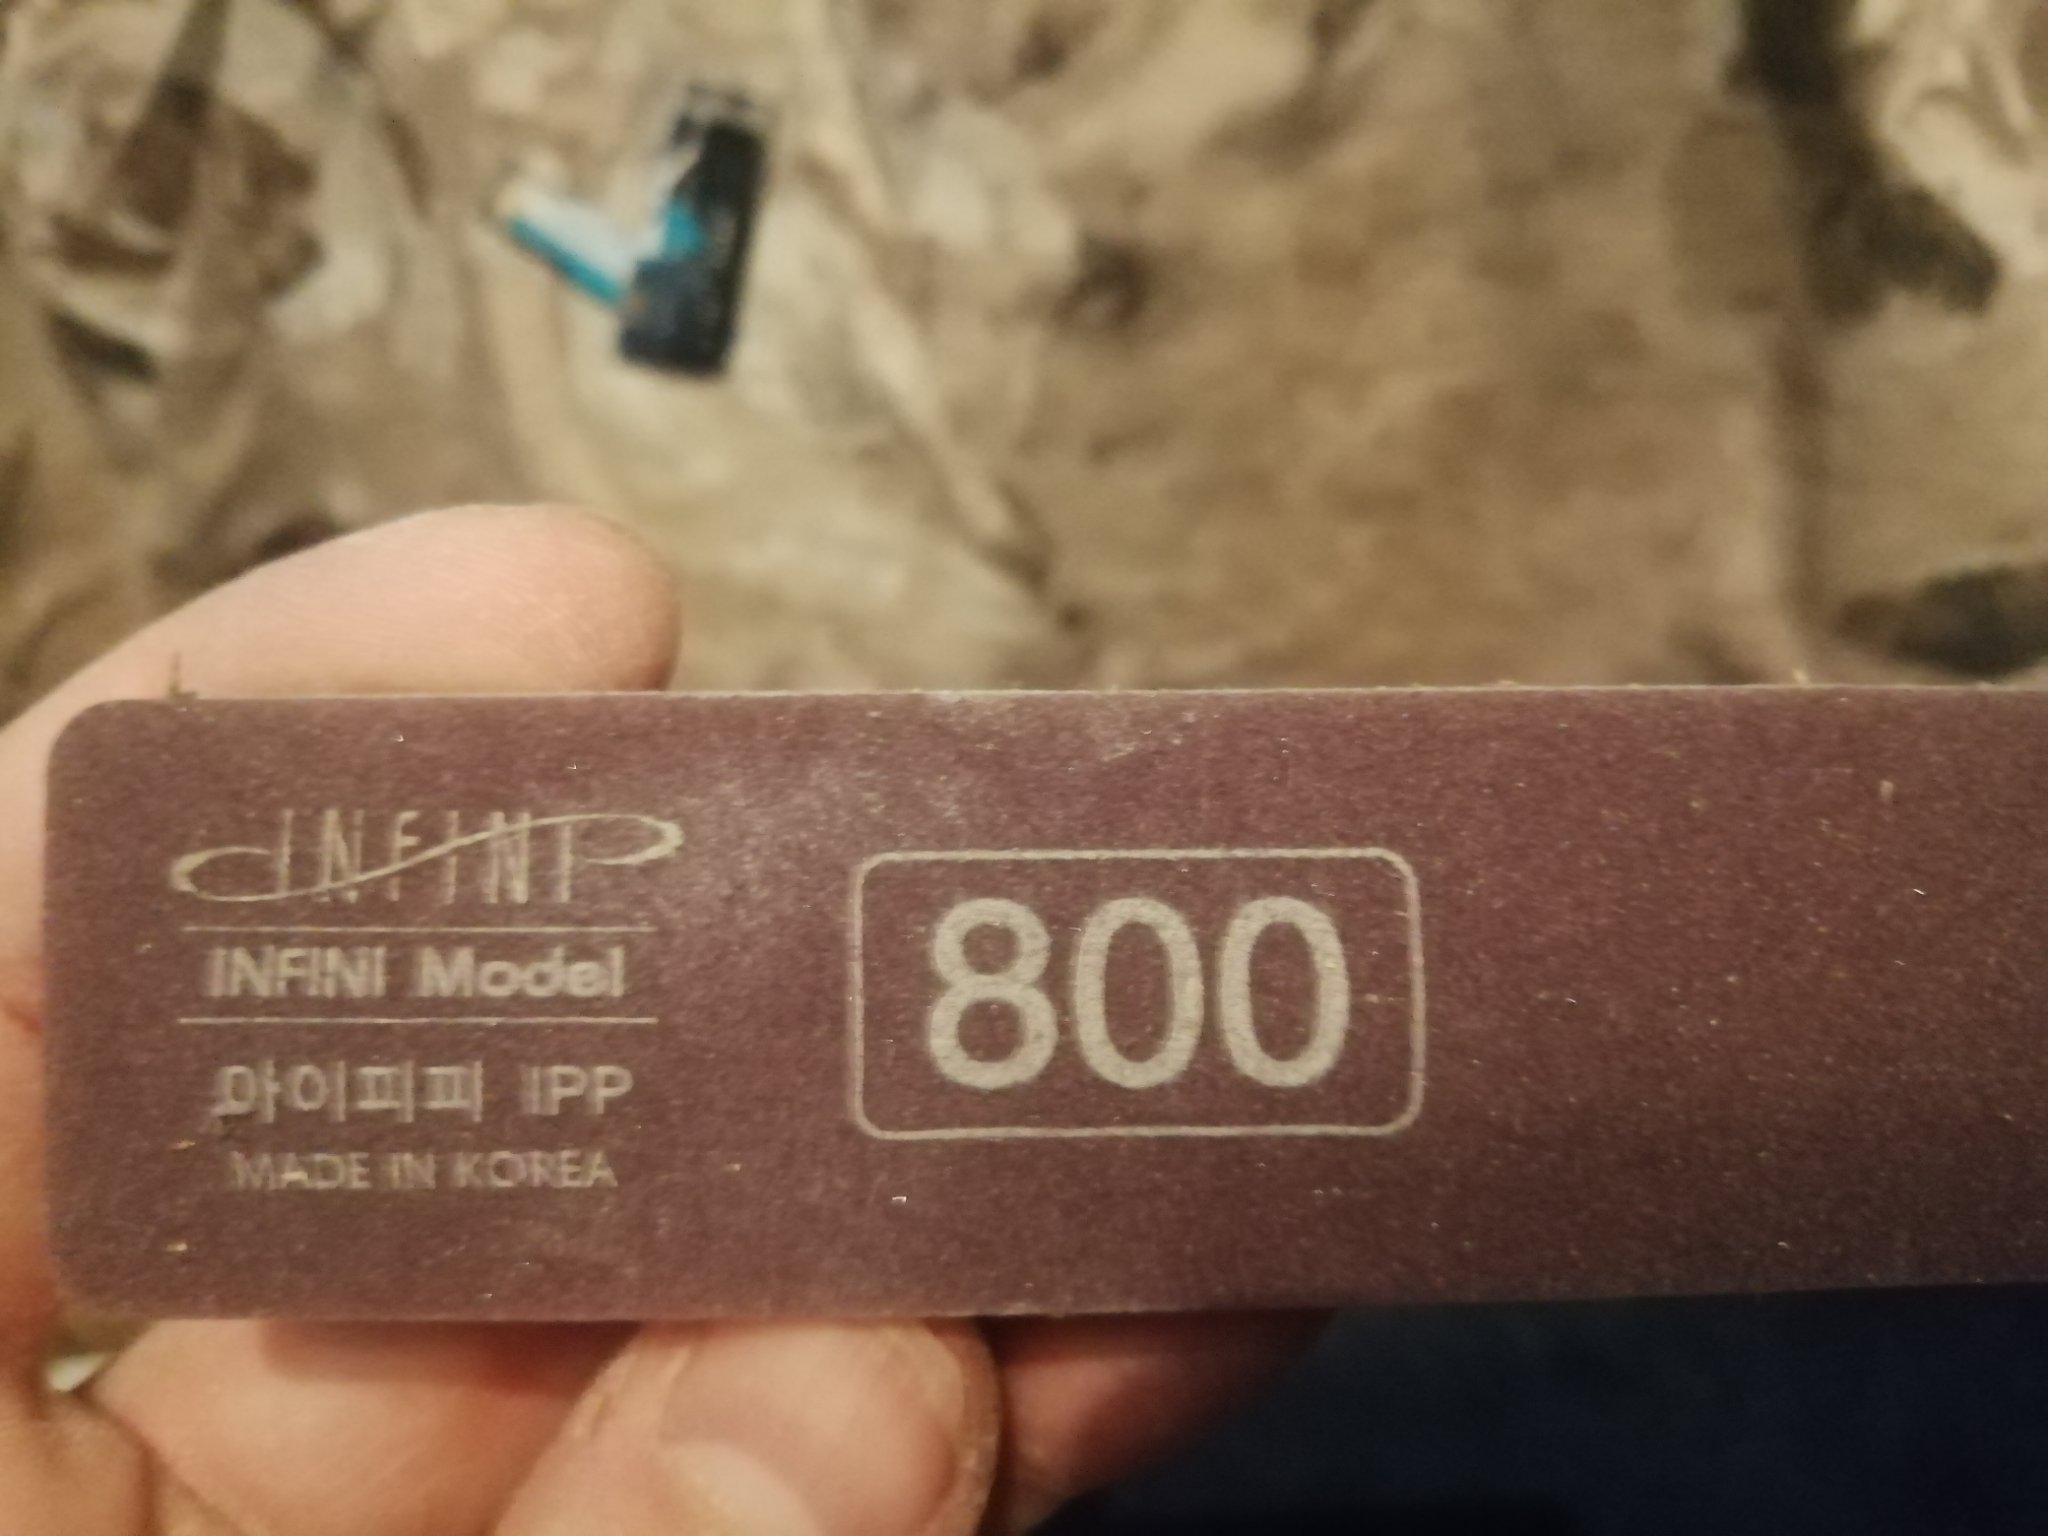
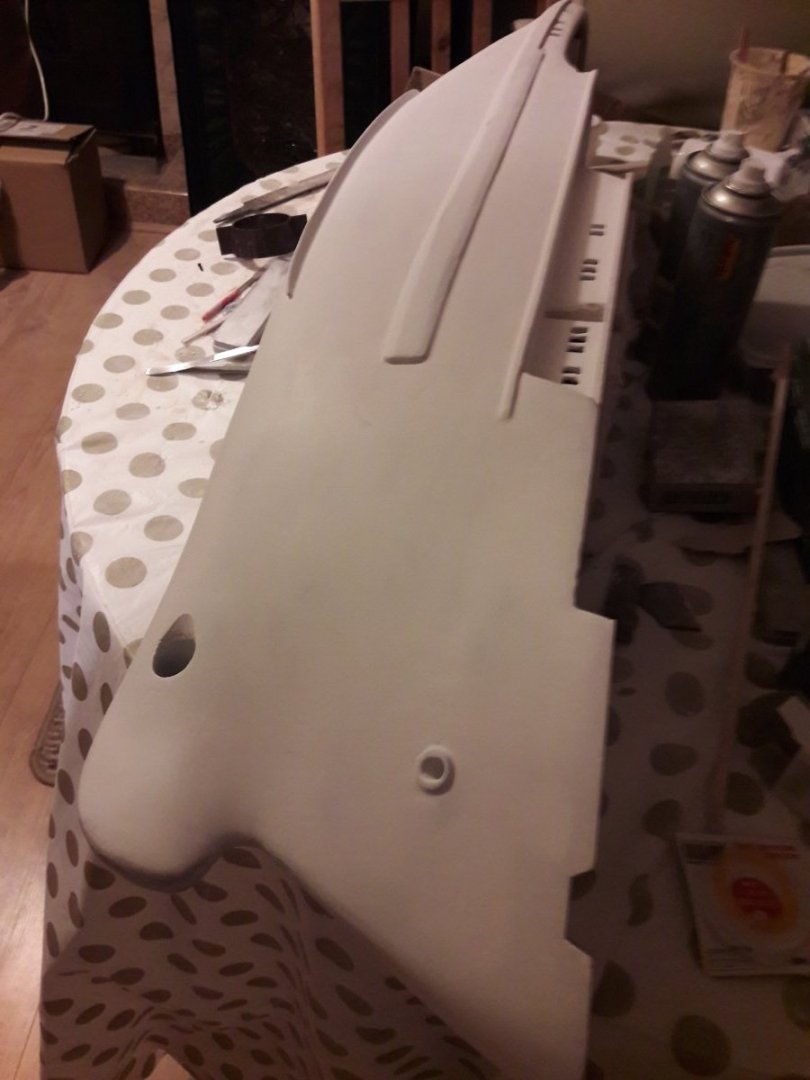
Update* Thanks for all the advice in the end I used 3M sandpaper as someone else suggested previously. This sandpaper on a wooden block has knocked back the lumps and high spots in about 2 minutes of sanding. I didn't apply the epoxy thick, I used a credit card to try to squeegee it thinly onto the Hull rather than slather it on with a brush. I intend this to be a radio control model which is why I used epoxy. Now that the 3m paper is sanding it very easily I think the issue is exactly what someone suggested poor abrasive products. The surface is already smooth after a few minutes with 80 grit so I'll keep going with it. Perhaps worth mentioning is the sanding blocks I used previously were infi model sponge pads as pictured (I used 220g not 800g)


-
Thanks for the advice, I'll try to sand this with different abrasives as has been suggested. The epoxy is actually designed to be sanded so I do not believe this is beyond salvage with a better choice of abrasives. This is a kit and a re purchase is simply not an option. The choice of epoxy was actually a recomendation from this site.
-
I'm going to try your suggestion with some 3m sandpaper. The blocks have been ok for balsa,milliput and the like but don't seem to touch this epoxy
-
Thanks for the advice, I'm using sanding block by infi model. The model is getting smoother but at this rate it will take weeks of sanding. I'm going to try with some m3 sanding blocks. See if that madrs a difference.
-
So just throw away then? Must be some way to sand this smooth

-
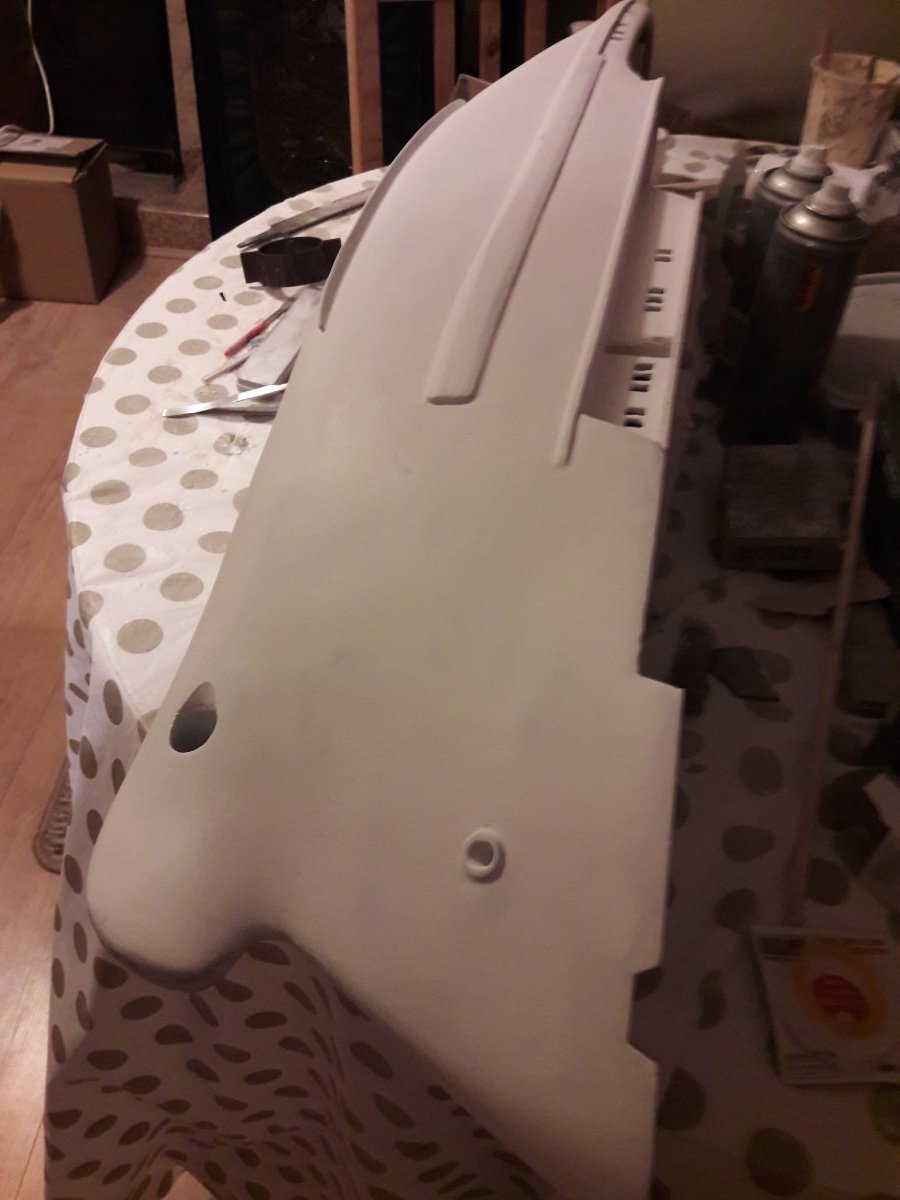
Hello I've been building a smit rotterdam kit. I've gone and used west systems 650 gflex epoxy with 410 microlight fairing additive to seal the Hull and provide a base for painting. The problem is the epoxy just does not sand at all. I've spent over 12 hours sanding with everything from coarse grit, fine grit, wet sanding, tried everything. The microlight additive was supposed to make this easily sandable and give a smooth finish. It's like sanding solid rock. I mixed the epoxy exactly as instructed. It has fully cured. After 12 hours of sanding I'm now left with a horrible lumpy model and several threadbare sanding pads. Picture is after 12 hours of sanding and multiple pads worn through. Any ideas?
-
Hello Building a smith Rotterdam wood kit with intention to make RC. I've used west systems epoxy to seal the hull. I'm wondering if anyone has suggestions for spray paint? Laquer paint be any good? Enamel? Brand's to buy/avoid. I'm guessing the paint needs to be as water tight as the epoxy so as not to flake or absorb water? Cheers
-
That looks like fun but where do you go to do this is this some type of RC boat event? Something I'll definitely be interested in looking into once she's up and running. My nearest model boat club is almost an hour drive away
-
Thanks again Bob, great advice. I'll definitely test it out first on some scrap. Really looking forward to getting the hull sealed ready for paint.
-
Thanks again for this advice this is the route I've decided to take. I'm now almost ready to do this part now I just have a few questions. How much Gflex will be needed I've seen half liter bottles at force 4 but not seen any larger quantities. And can I mix multiple additives in sucj as the fairing additive and the water barrier in one mix or would these need to be two coats? Lastly would you recommend fitting the korts nozzle before or after the cpes and epoxy coats? Sorry for the questions this is my first build and Thanks again for the help.
-
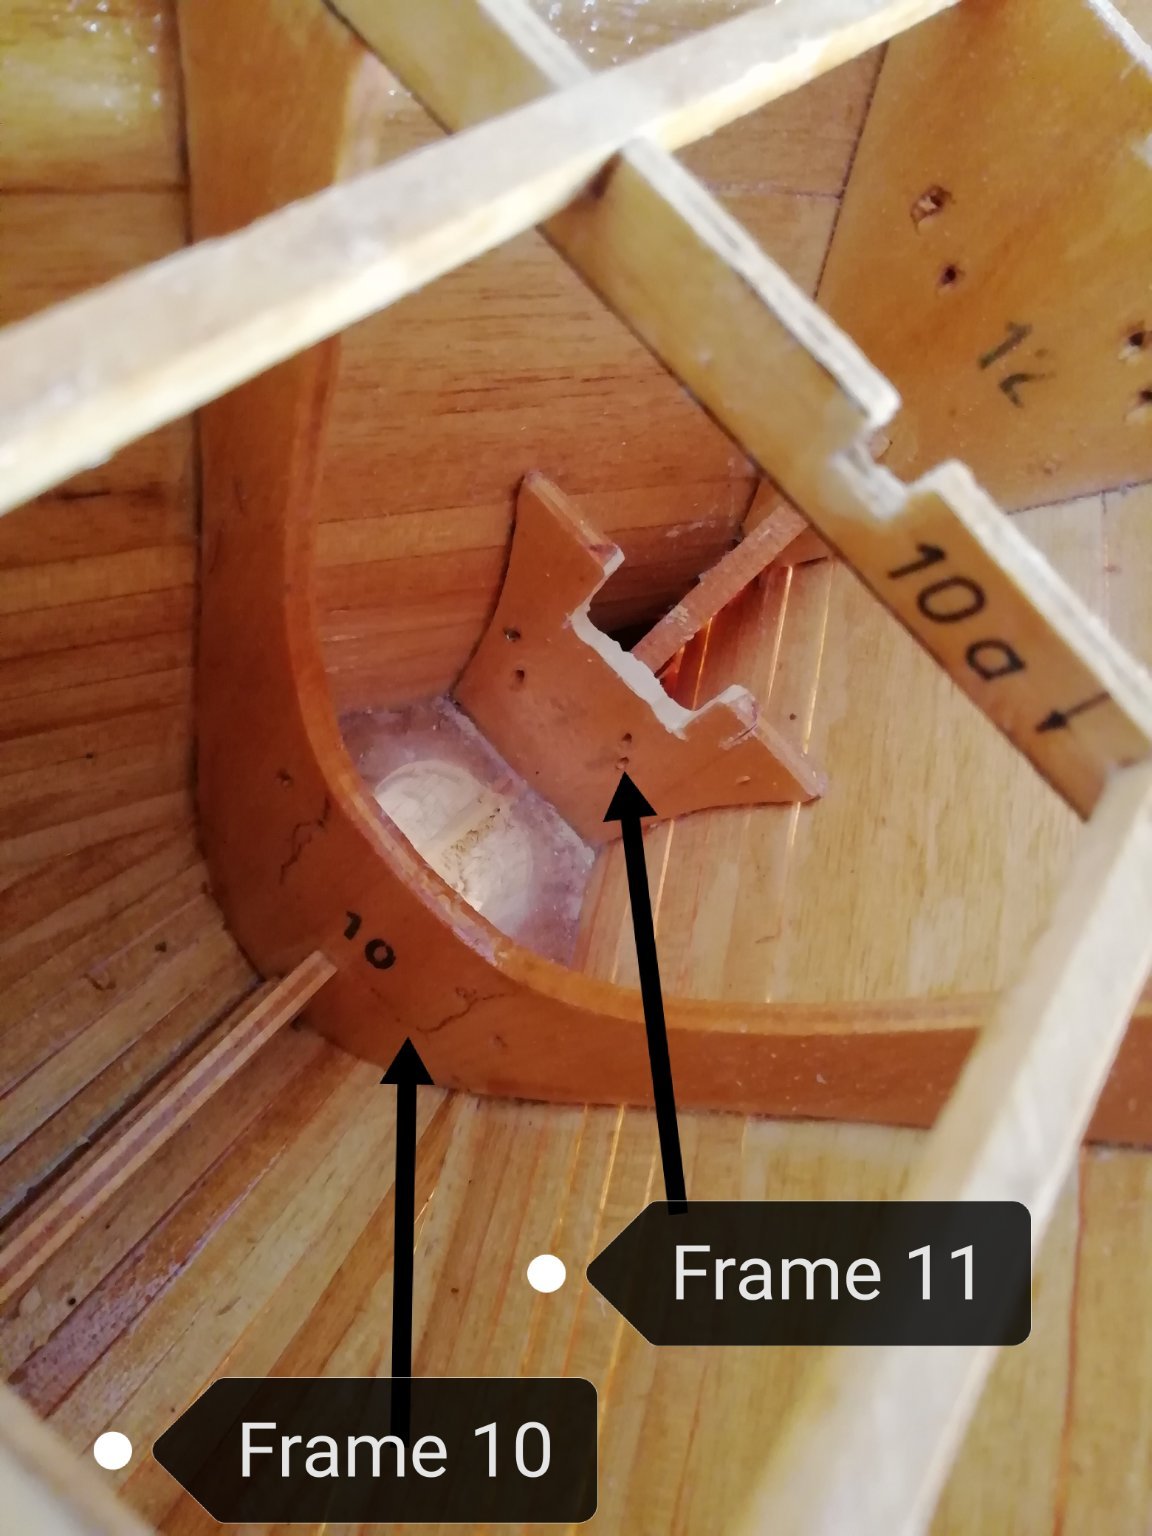
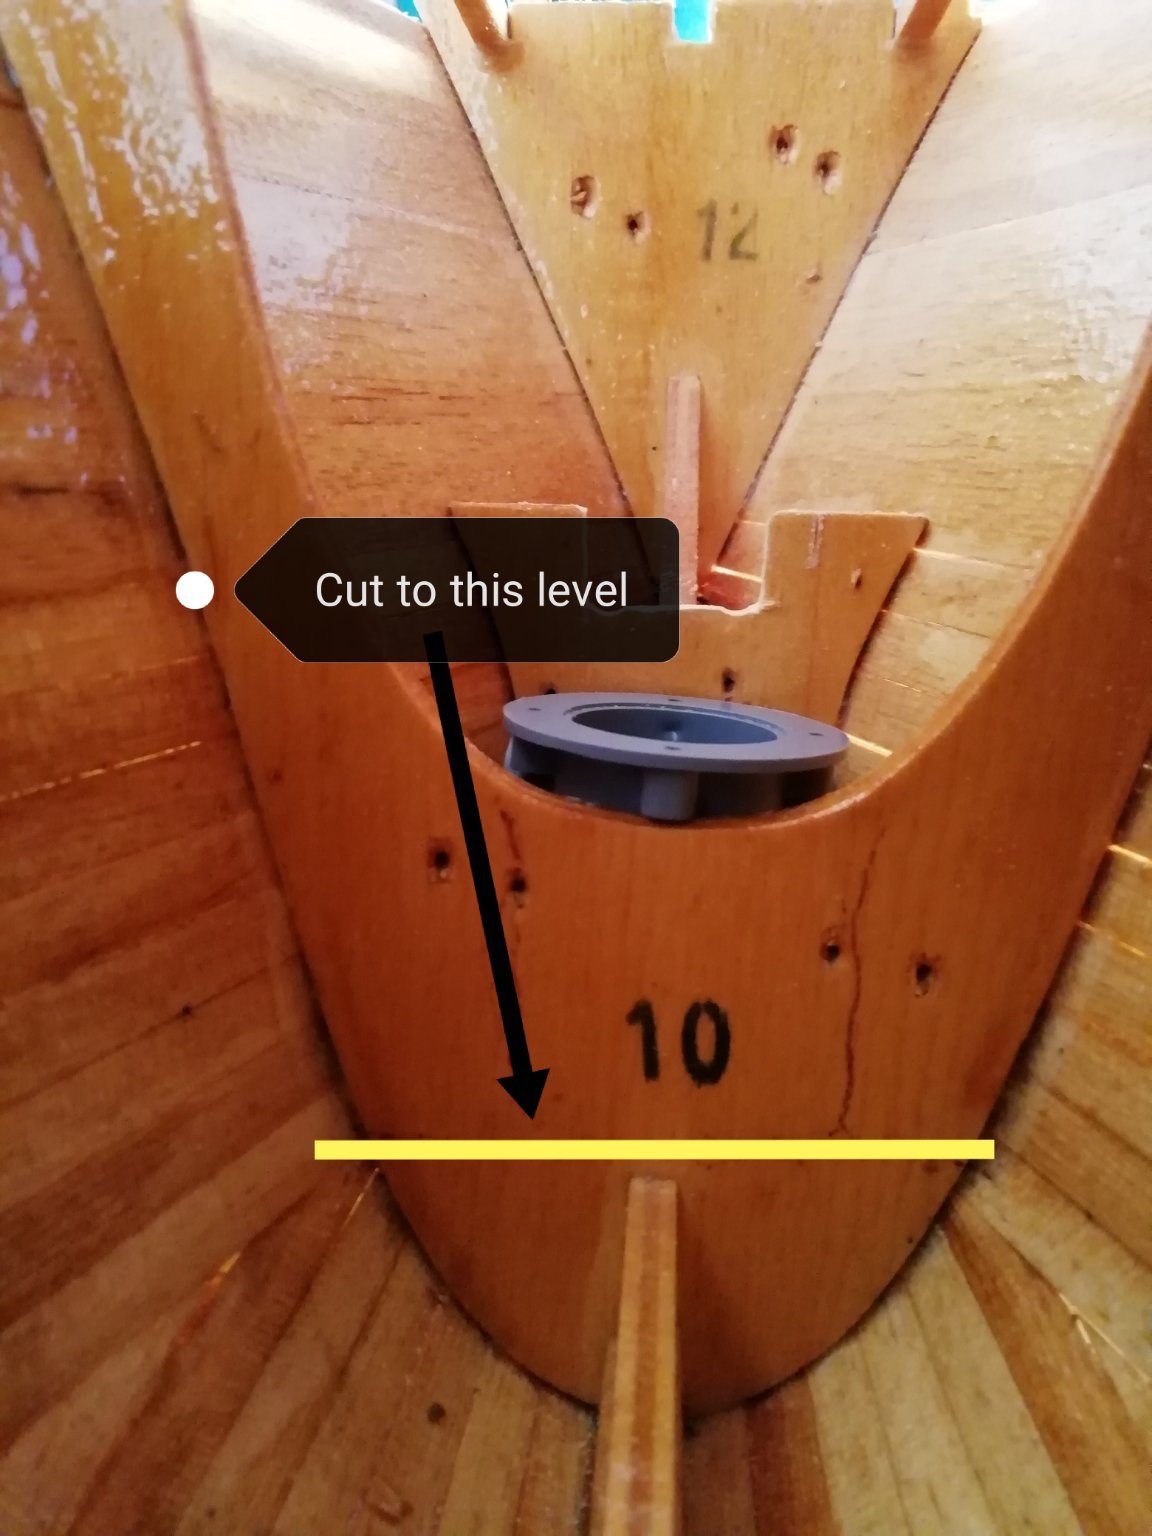
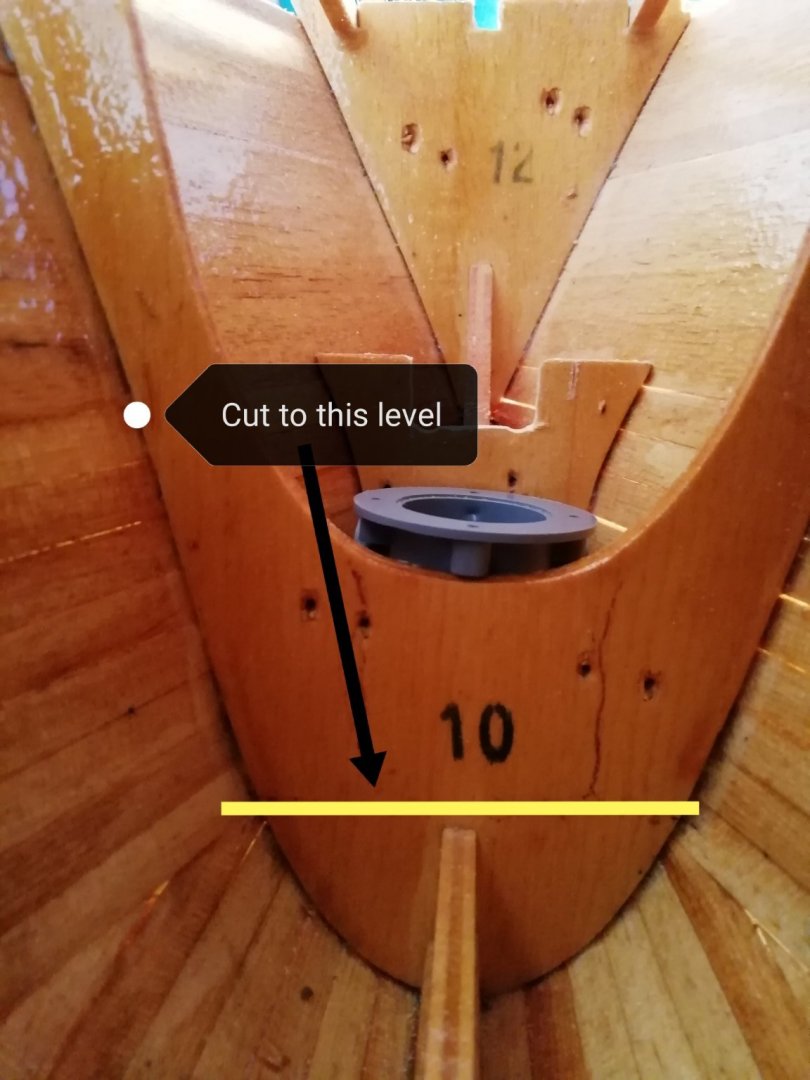
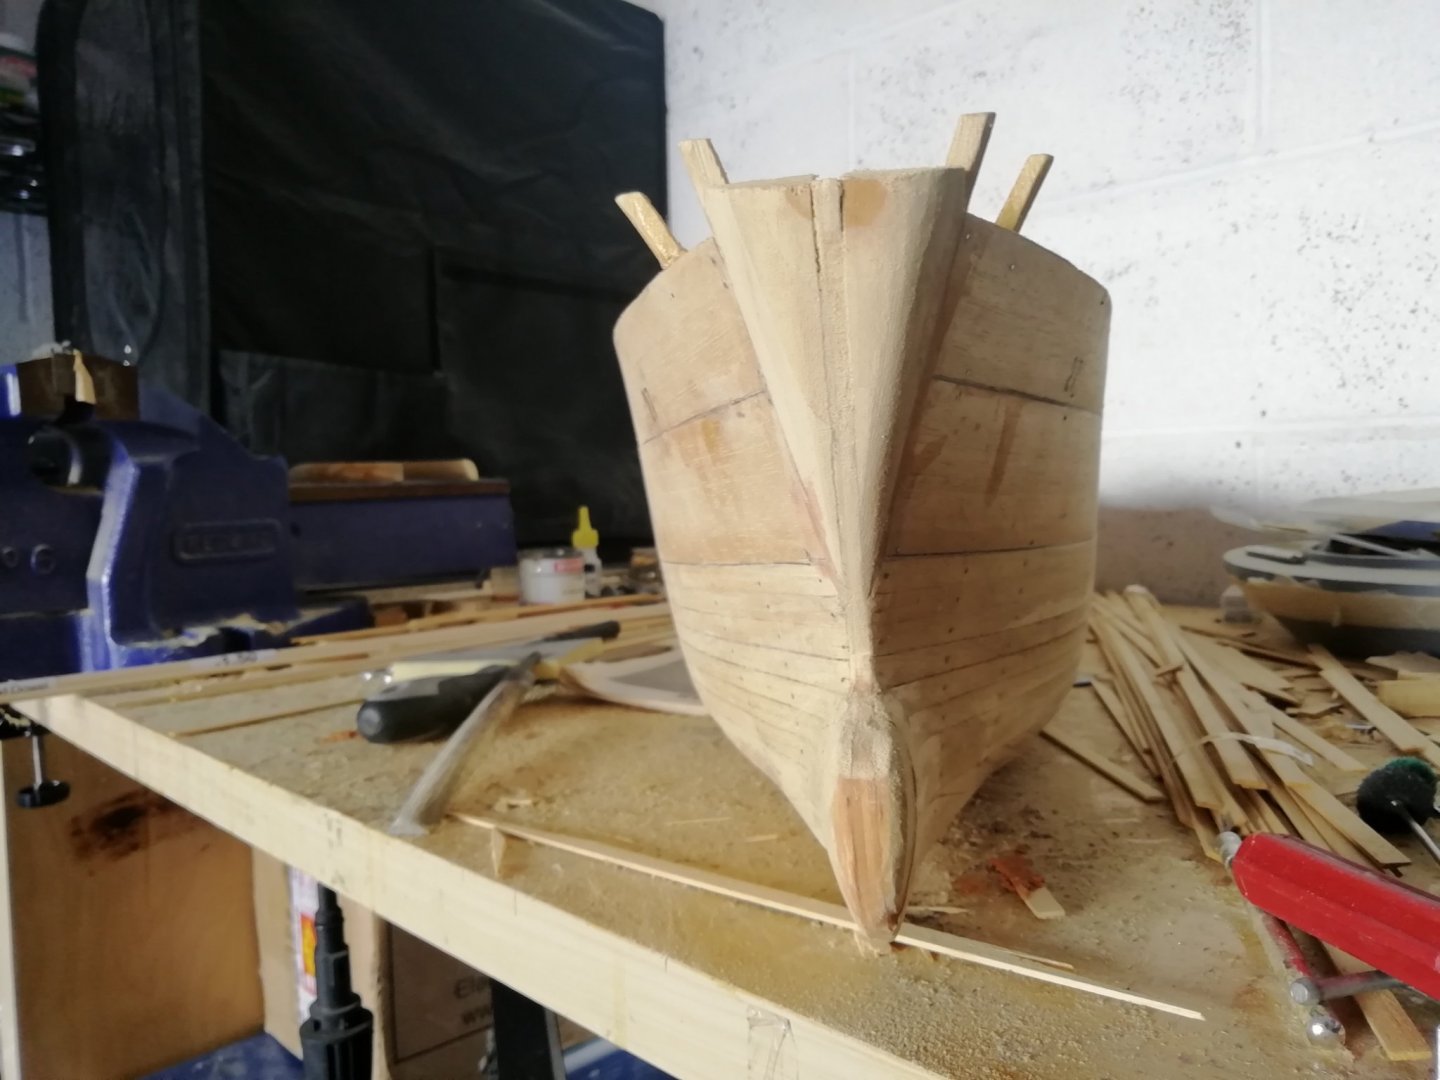
Hello I'm trying to fit a raboesch 108-03 bow thruster on my billings smit rotterdam kit. The problem is that the forward hull frames are in the way and would need some serious cutting to make it fit. As I see it the way would be to cut frame 11. The cut will need to be down to the yellow line and I'm wondering if this may cause problems? Has anyone got any advice for fitting this kit with a bow thruster? Thanks


-
Hello I'm building an old smit rotterdam kit I bought second hand as an unfinished project. I intend to make it RC. So far I've planked the hull and now the next task is to install a bow thruster. I was wondering of anyone has any suggestions as to the size of bow thruster I should look at. I know many people on the site have probably built this same kit so I'd be interested in hearing any recommendations for a suitable bow thruster unit. Thanks

- 1 reply
-
- 1
-
-
I've decided to leave them in if water gets in its just as big of a problem to the wood as it is the nails so I don't feel they're an additional liability. I'll just be sure to make it absolutely sealed before painting.
-
I have one more question possibly I have made a big mistake. I drove the planking nails all the way in as I planned to leave them in the hull. Should I remove these? Is it irrelevant? I guess the potential is for them to rust but they should be completely covered by the epoxy and water barrier sealers you recommended. I could still remove them but would be a pain to do.

-
Excellent. Thanks for the information. Although I've made static models this is my first wood RC boat. I think I'll go the epoxy route. What's the kevlar additive you mentioned for the bottom? I may add this to protect from grounding. I always prefer to over build and over engineer for durability and redundancy, anything that adds strength and longevity peaks my interest. Thanks again
-
Because I'm wanting to make it RC and I had seen others do it. I've read it makes for a strong hard wearing surface and is easy to sand smooth for painting
-
Thanks for all the info. Can I just varnish the inside? I've already applied varnish to parts that will be inaccessible when planked. Ideally I only wanted to fiberglass the exterior of the Hull. Also in the past I've used PVA mixed with sawdust to create a thick paste and used it as filler. Will this be OK to fiberglass over?
-
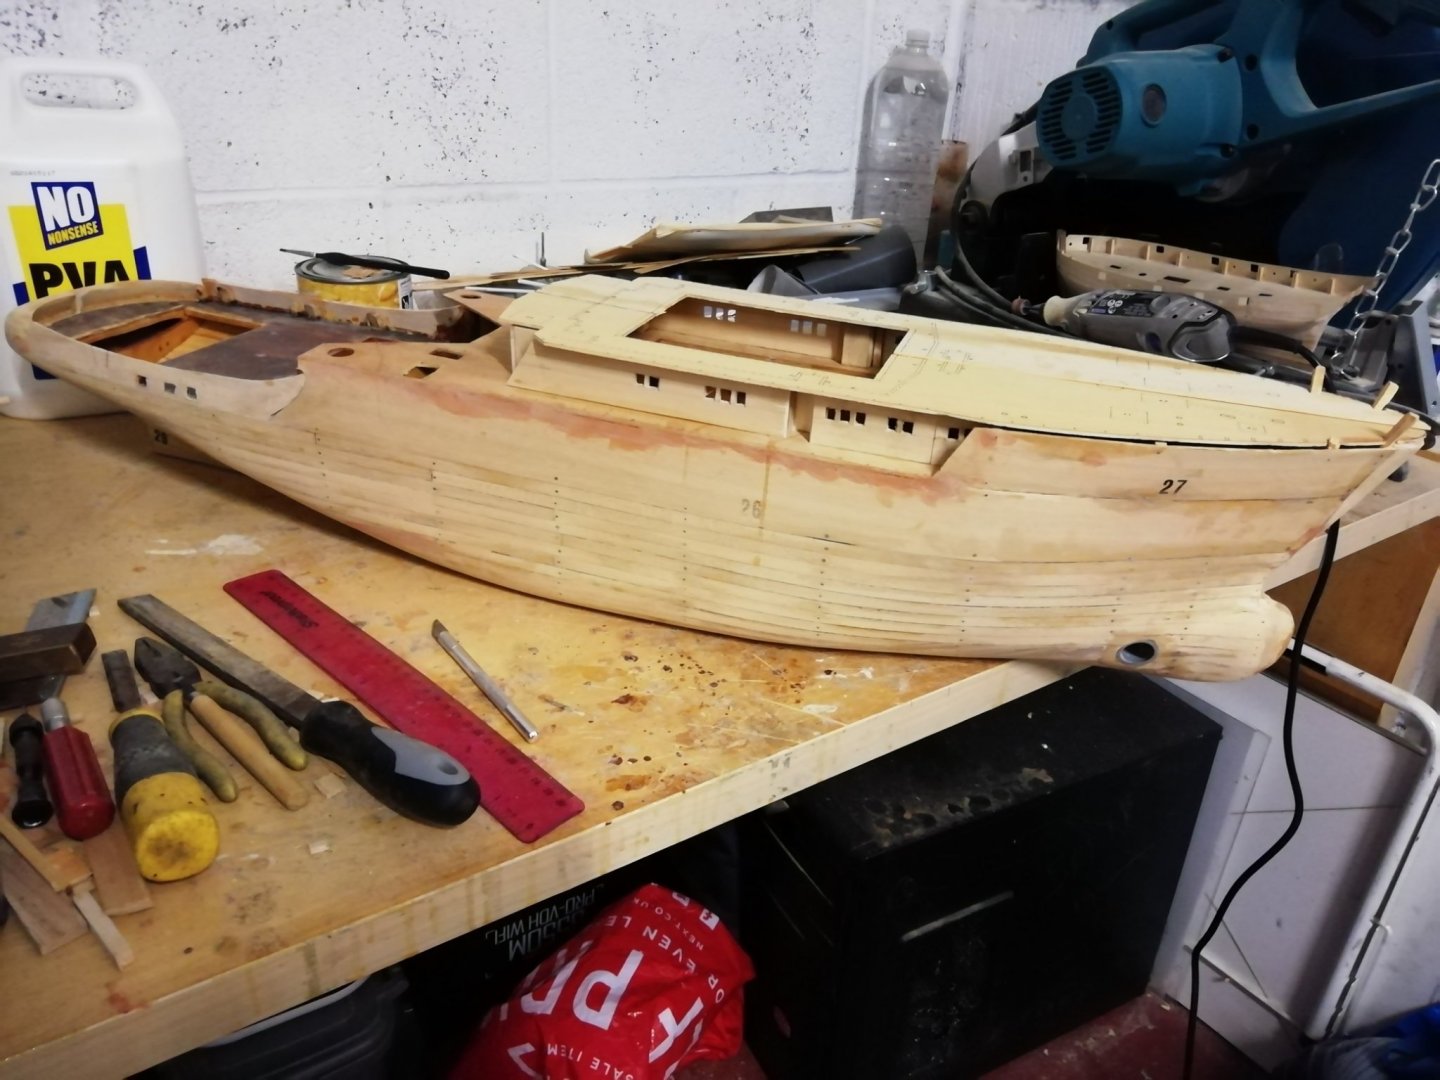
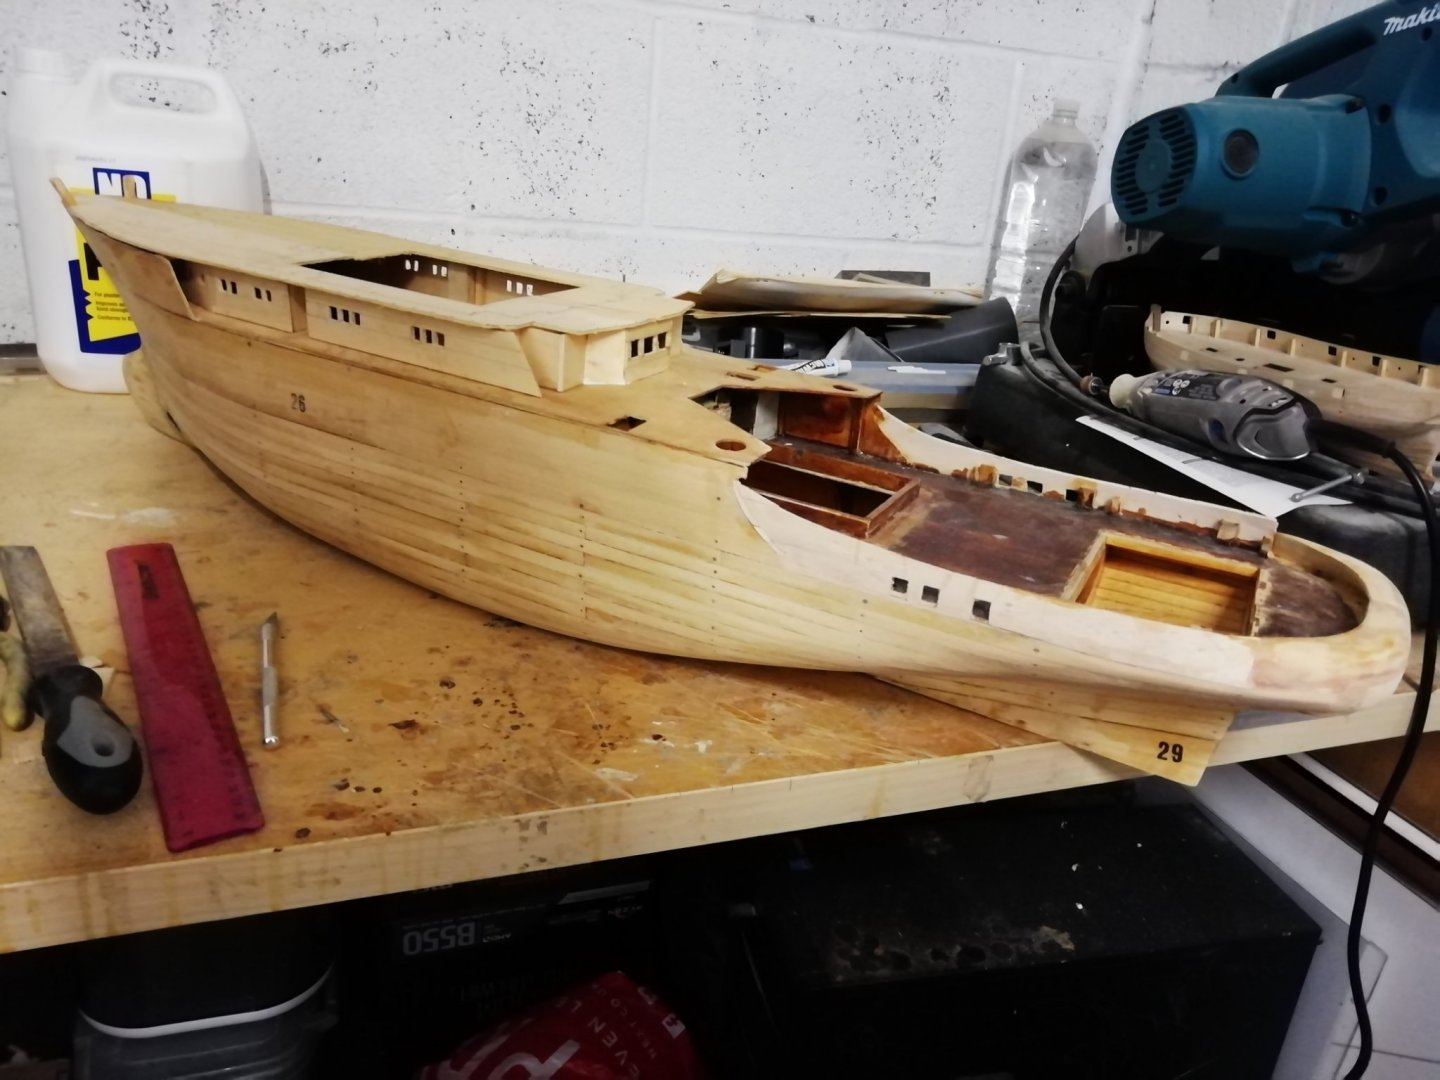
Hello I've been building a billings smit rotterdam kit and have almost finished planking the Hull. I plan to fiberglass the exterior but this is the 1st time doing this type of work. I'm not sure in what order the next steps are. My plan was to sand the Hull smooth use wood filler if and where necessary then fiberglass it then prime it and then any last minute sanding/filling before painting the base coat on. Does this sound right? Should I sand and fill and prime the Hull before or after fiberglassing it? Thanks much appreciated
-
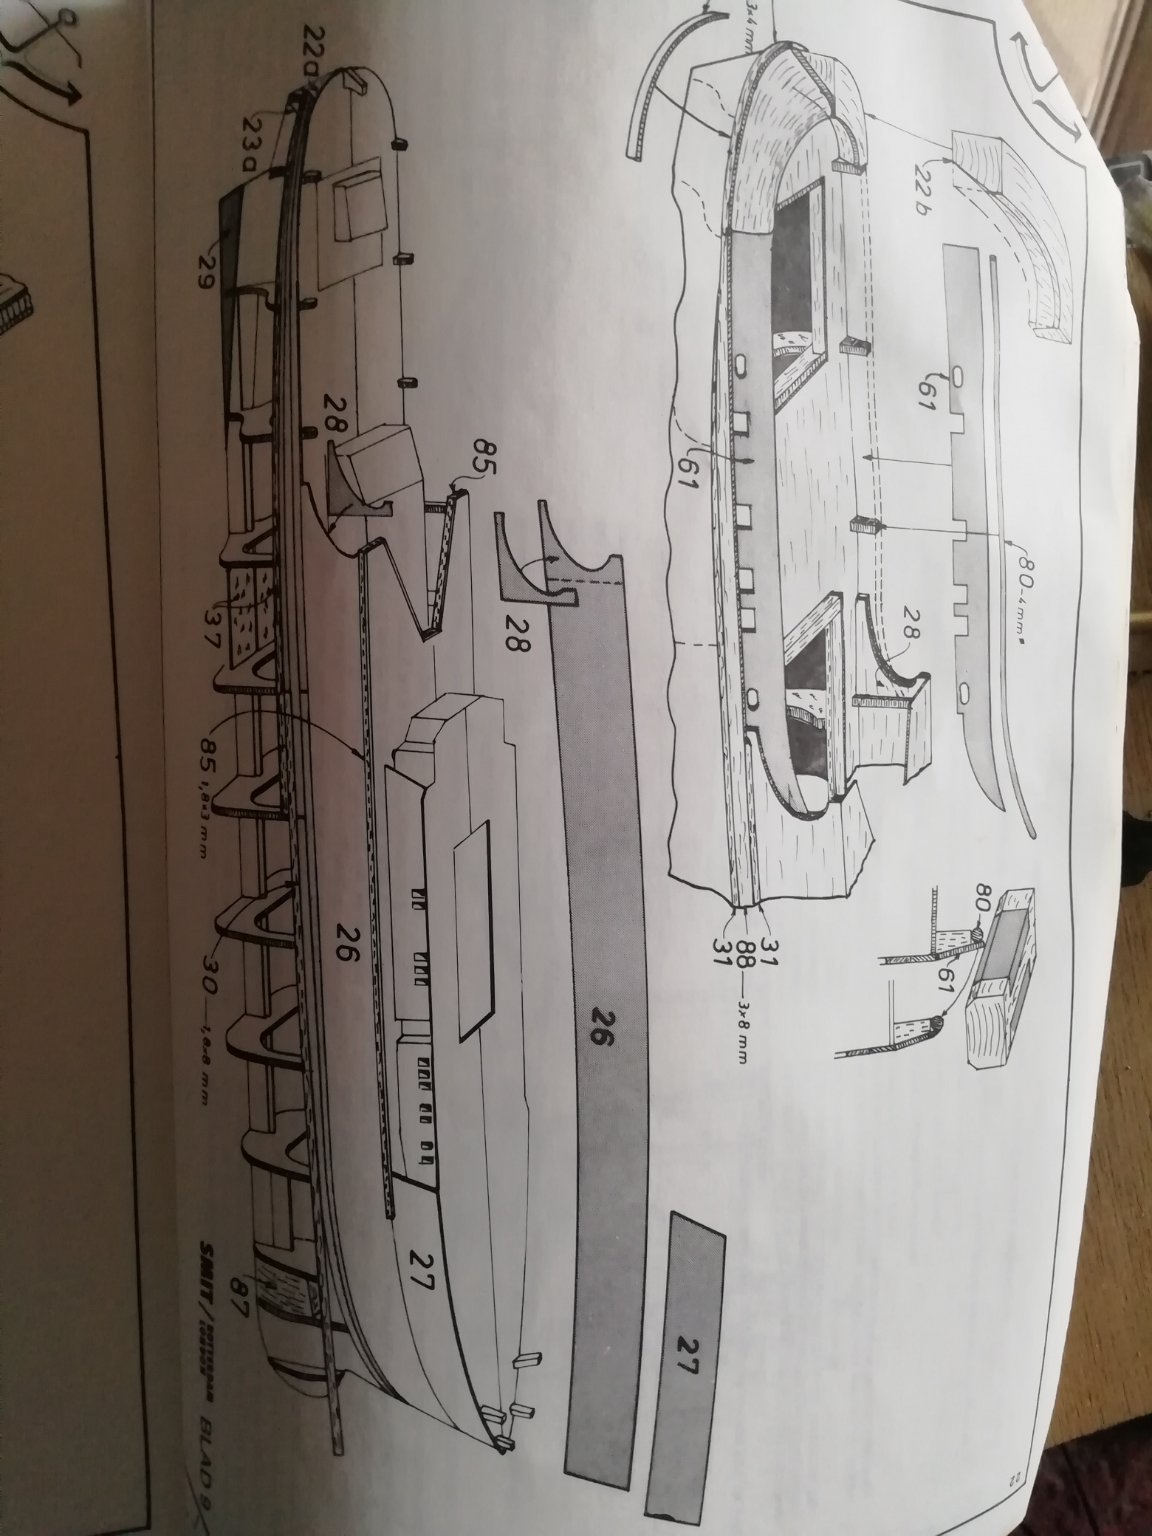
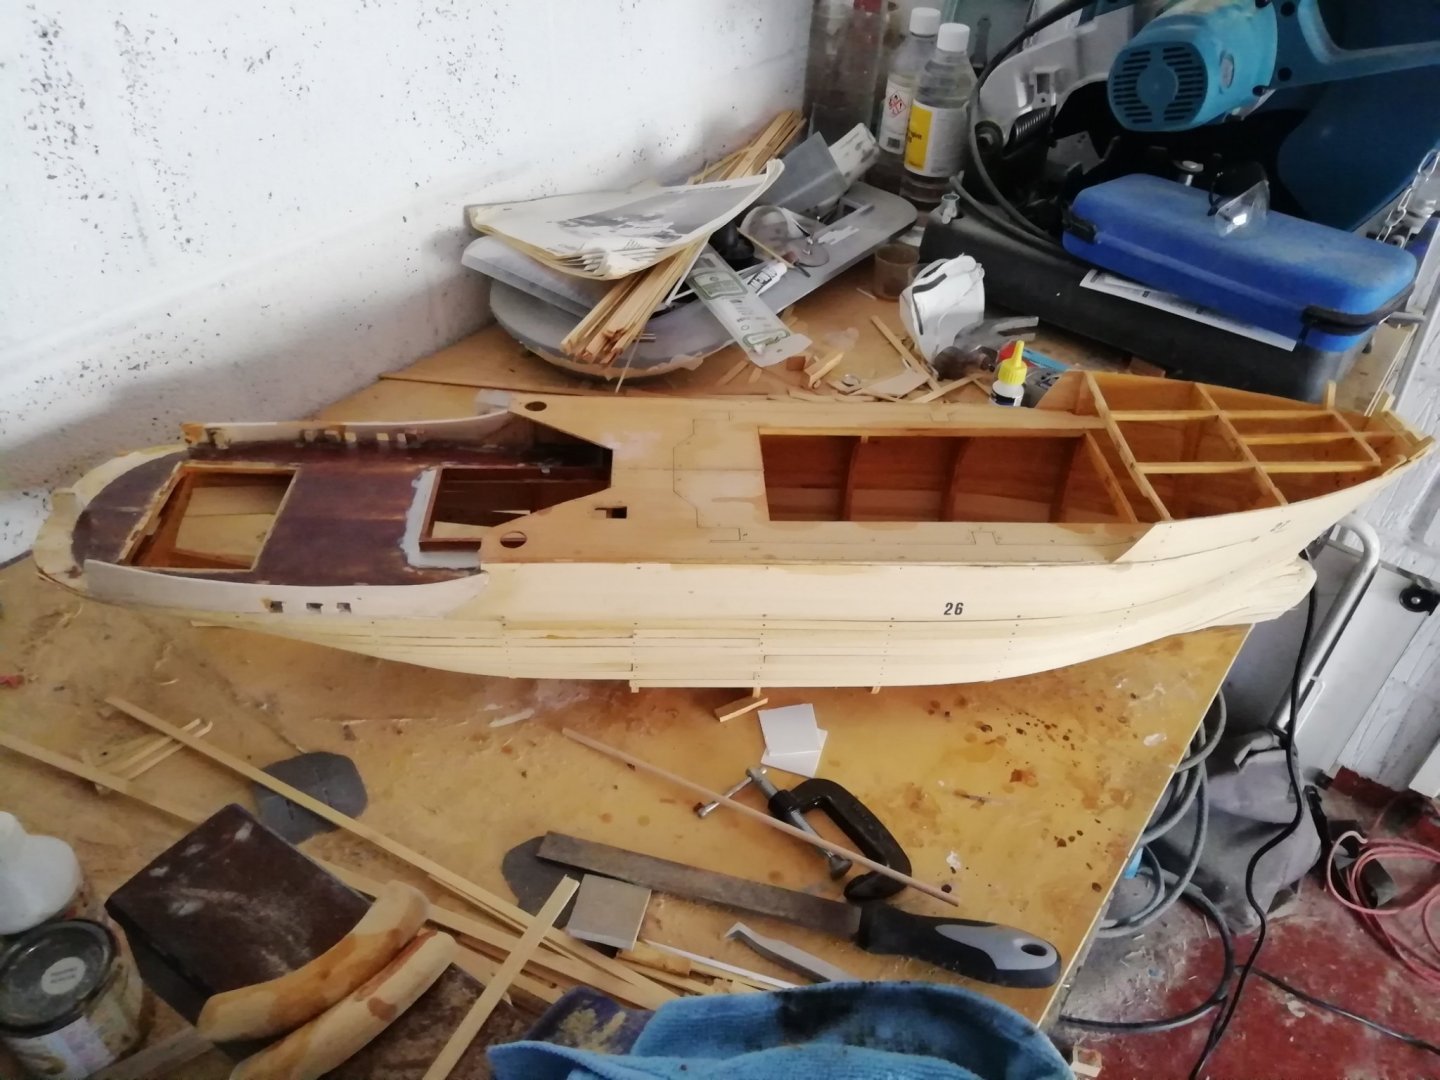
Hi picked up an old second hand rotterdam kit. I'm about to glue the flat sides on part 26 and start planking. The instructions say to glue each side (part 26) on one at a time however I've always planked a POF model with both sides done together to prevent warping. Should I do one side at a time? In my view it seems both of these side pannels should be glued together.

-
Thanks when you say printing paper do you simply mean a4 paper for a desk top printer or some specialist paper? I think I'll give this a go along with the miniture chisels I've ordered.