Jonathan_219
-
Posts
176 -
Joined
-
Last visited
-
 uss frolick reacted to a post in a topic:
HMS Victory Forecastle Snatch Blocks
uss frolick reacted to a post in a topic:
HMS Victory Forecastle Snatch Blocks
-
 Update: Spent most of the afternoon poking around and have gotten better at googling queries that have gotten me more information. The best information I've found comes from a PDF from Chris Watton titled "A few aspects of researching a 1:64 scale Victory for the retail market" where Chris states that in his research he believes it unlikely the higher forecastle bulwarks were present at Trafalgar and he gives the evidence that lead him to this decision, but there are people who believe they were and at present it seems like there's no way to definitively prove it one way or another. For an afternoons searching Chris' document seem the best researched thing I've found and tend to agree that it's unlikely the higher bulwarks were present at Trafalgar. That said I think I'm too far into this to go back now but I'll at least sleep on it. There were a couple other discussions in forums where people on both sides stated their case and probably won't change their mind. I do find it very interesting that even on what is probably the most documented ship of that era we still have things we're not completely sure of and unless some new evidence pops up we'll probably never know. And just FYI, here's a picture of where I am currently on the build. I didn't start a build log because there are so many great ones already.
-
Keith Black reacted to a post in a topic:
HMS Victory Forecastle Snatch Blocks
-
Building the Caldercraft Victory and I'm unsure about the placement of the forecastle snatch blocks which has raised other questions. In the Caldercraft instructions and on the plans the blocks go in a notch in the forecastle bulwark where the top of the snatch block is level with the top of the bulwark. I've been having trouble visualizing how that area is going to go together but in looking at MccKay, Longridge and a Victory walkthrough video the snatch block is clearly on top of the bulwark. I have that hole in the bulwark where the snatch block should be placed but I guess I could fill that and make it pretty clean since both sides will get painted. One other thing I've noticed is that my forecastle side bulwarks are quite different and much higher in the Caldercraft kit than in McKay/Longridge/videos, and in the Caldercraft instructions it mentions that if you're building the "Trafalgar condition" add the two side pieces that make it different and I did add those. Does that mean that McKay and Longridge aren't documenting the Trafalgar configuration? That would also mean that the pictures online I've seen don't show the Trafalgar configuration, I thought the plan was to restore back to the Trafalgar configuration but I think there's a lot of restoration going on and I'm sure the pictures I'm pulling up on the internet are several years old. If this is the case then the Caldercraft plans are probably right it's just different than all the resources I've been using. That brings one final question which is if that area in McKay, Longbridge and videos of the current ship isn't Trafalgar what else might be different? Is this where I just need to trust the instructions/plans and the research Caldercraft has done? Appreciate any thoughts, I've been reading online what I can find about changes in configuration over time but there's a lot to go through and a lot of it goes over my head as I try to learn more.
-
 Ryland Craze reacted to a post in a topic:
Caldercraft Victory Replacement Parts
Ryland Craze reacted to a post in a topic:
Caldercraft Victory Replacement Parts
-
Ronald-V reacted to a post in a topic:
Caldercraft Victory Replacement Parts
-
Building the Caldercraft Victory and I need a couple of replacement parts. I emailed the Jotika email address a couple months ago and never got a response so tonight I noticed the Aeromarine email address on the plans but my email to them bounced back and the Aeromarine website appears to be nonexistent. If anyone has information about where to go to get replacement parts in the US it would be much appreciated. I registered my kit and have the email from Jotika confirming that if it makes any difference
-
Keith Black reacted to a post in a topic:
HMS Victory Steam Trunk
-
Keith, I didn't know what it was but I think Gary and Henry have answered that for me. Their answer makes sense and fits with the position and size of it and also matches what I thought I saw in one of the videos. Thanks everyone for taking the time to assist.
-
 Keith Black reacted to a post in a topic:
HMS Victory Steam Trunk
Keith Black reacted to a post in a topic:
HMS Victory Steam Trunk
-
Keith, Thanks, I found much the same pictures when I Googled but for some reason it seemed that the Victory steam trunk is a different type of steam trunk as it goes from the deck up to the bottom of the deck above much like a room but possibly serving the same storage purpose. I could be totally wrong but the difference in shape made me think it was something slightly different than these trunks. Since it goes up to the deck above it couldn't open like a typical steamer trunk but would need a door also making me think it's different. Considering the accuracy of the Caldercraft kit and no instructions on finishing it I'm still a bit unsure if it should be finished like a typical steam trunk or finished like the wall dividers in other parts of the ship.
-
Keith Black reacted to a post in a topic:
HMS Victory Steam Trunk
-
I'm putting together the steam trunk on my Caldercraft Victory and I'd like to know what it looked like to give it the correct finish. I've Googled and Googled but can't find a picture of any period steam trunk, or any ship steam trunk for that matter. In one video I caught a glimpse of what might be the Victory Steam Trunk and it was off-white with some molding in rectangles on at least one side but I'm not sure it was the steam trunk. Since it's called the steam trunk I thought maybe it looked like a typical traveling trunk. Any thoughts or pictures would be greatly appreciate.
-
Gregory reacted to a post in a topic:
HMS Victory Companionway Ladder Colors
-
Kenchington reacted to a post in a topic:
HMS Victory Companionway Ladder Colors
-
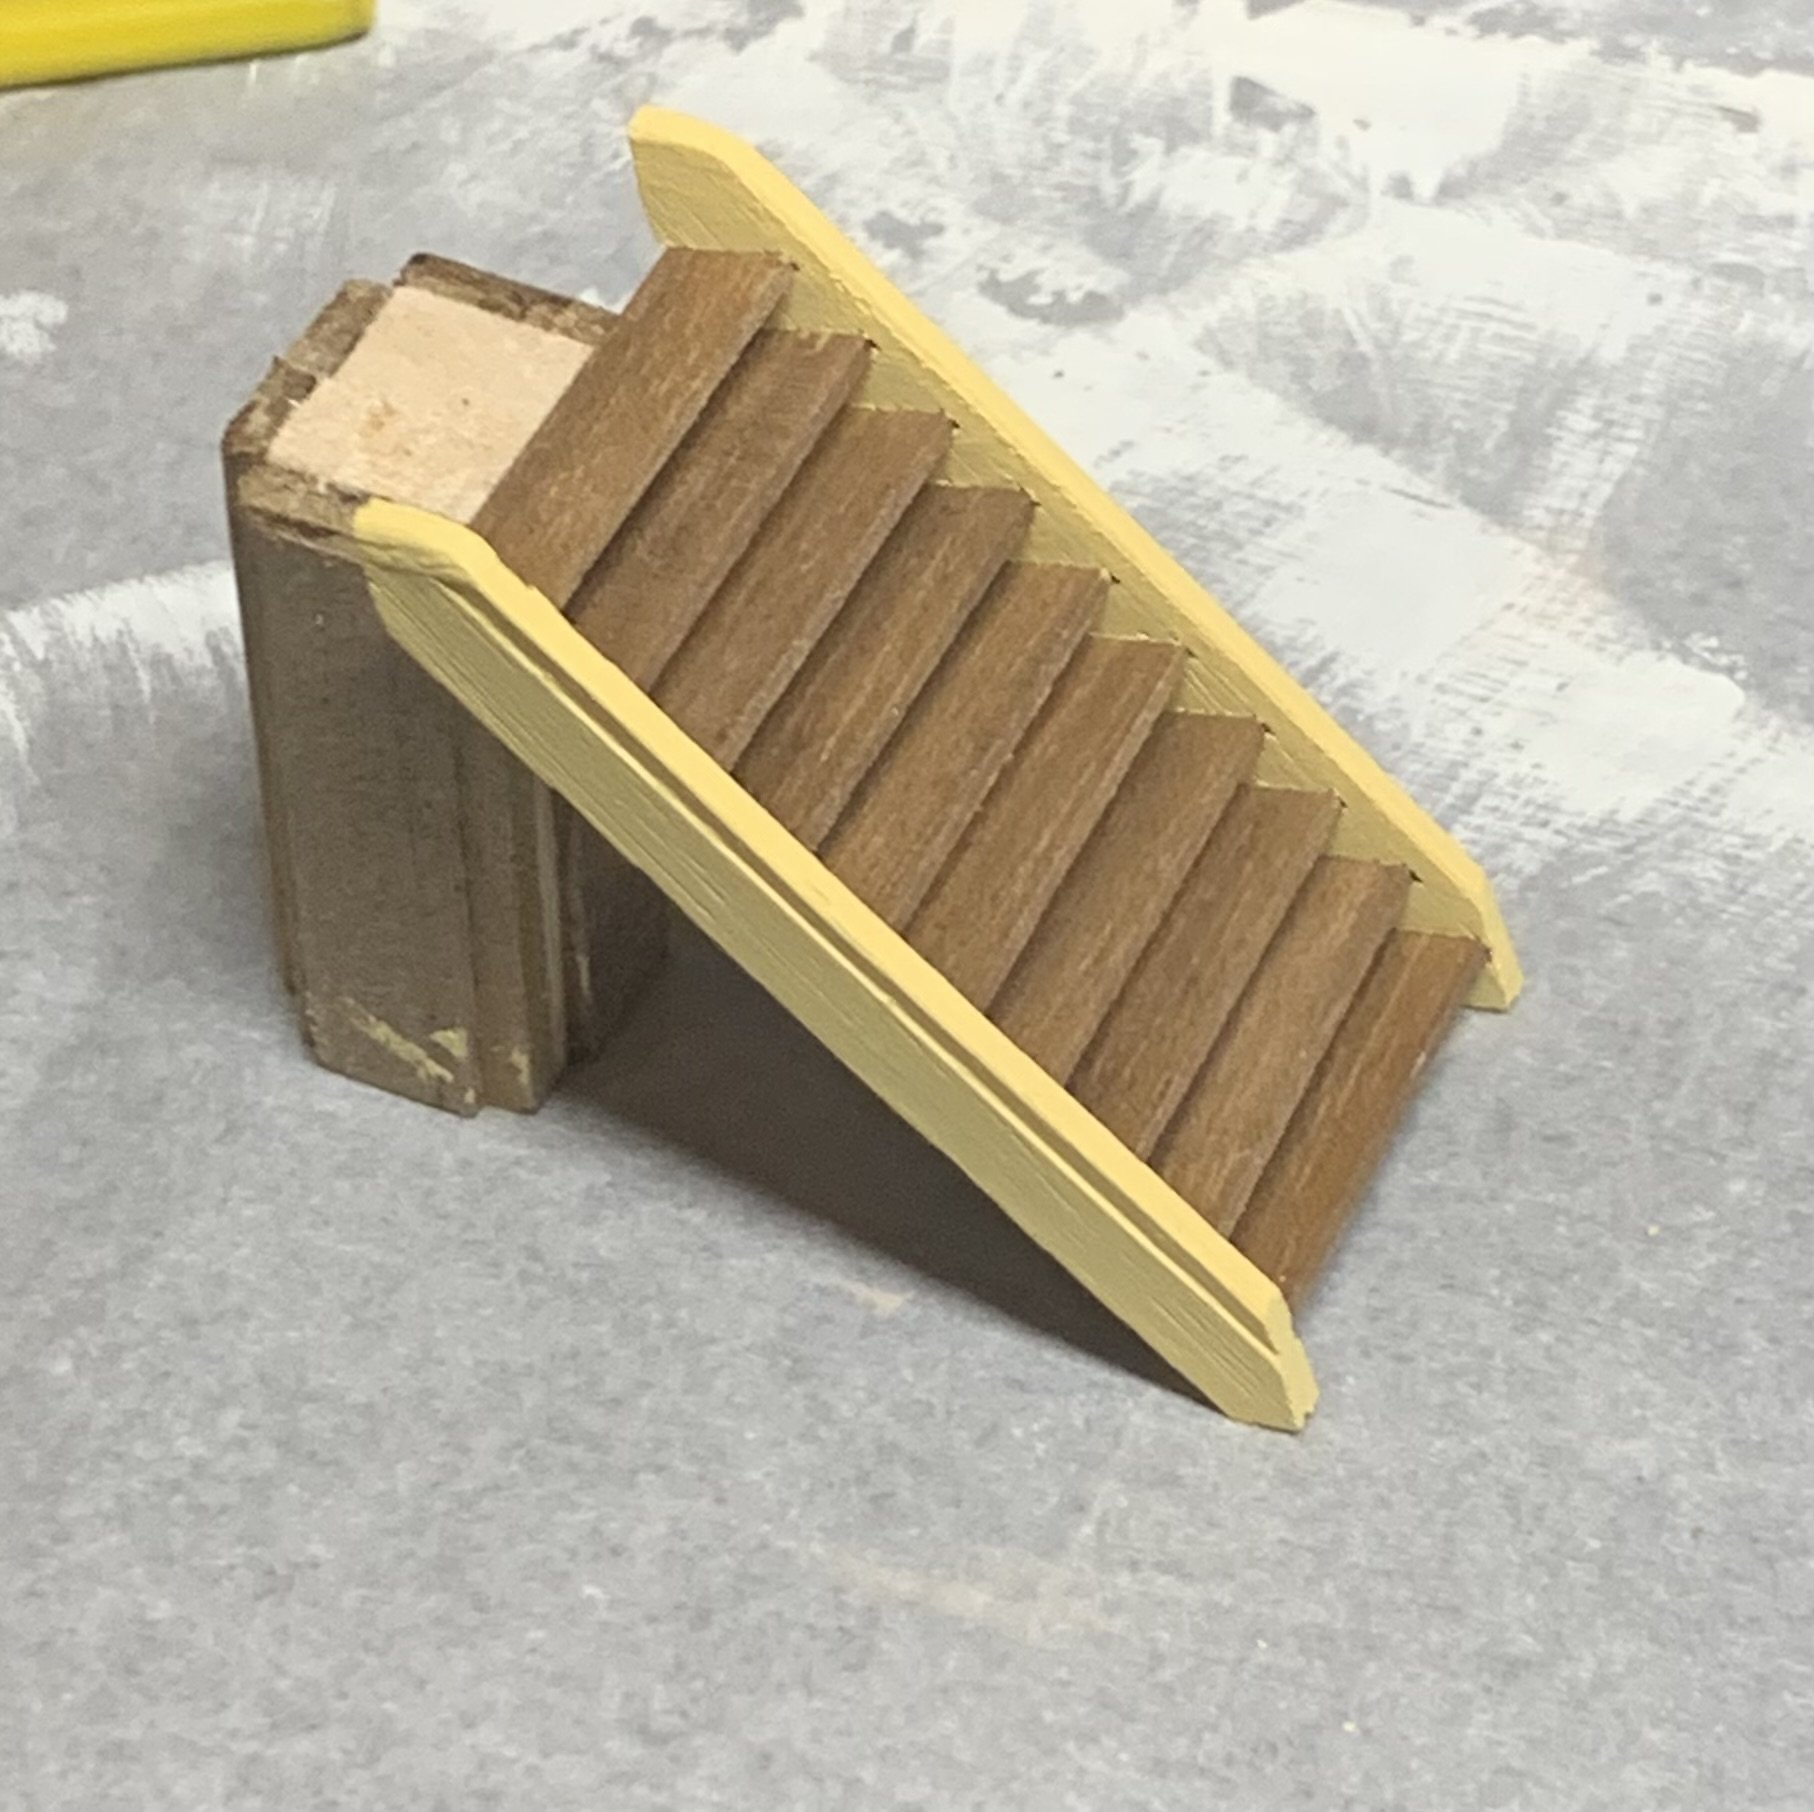
Thought I'd show what I came up with, used Victory yellow for the sideboards and stained the risers (walnut) with the lightest stain I had. I also added a 1x1mm strip on the front of each sideboard as I didn't like the look of the grooves for the risers showing.

-
Kenchington reacted to a post in a topic:
HMS Victory Companionway Ladder Colors
-
Thanks Trevor, I'm running through some ideas and will make a decision soon and move forward.
-
Jonathan_219 reacted to a post in a topic:
HMS Victory Companionway Ladder Colors
-
Trying to determine what to do with the finish on the first companionway ladder I'm coming to in my Victory build. Google AI says a combination of the black and yellow, while in the pictures and videos from current Victory it looks more like a natural light brown, like varnished pine but I can't find anything with great lighting so I'm not sure. Going for the Trafalgar look and if anyone has thoughts I'd appreciate it. Also considering whether all the ladders are the same. Slightly side note, the current Victory companionways look a little different from the Caldercraft kit, I'm thinking that's for the safety of visitors but I would think the colors would still be right.
-
Thanks Trevor, I've been leaning to following the current retrofit but some confirmation of this thinking is nice. I really wish I could visit her but that's just not in the cards right now so I have to settle with pictures and videos. Thanks again.
-
Building the Caldercraft Victory and while the instructions say to paint the inside lips of the gunports the same color as the adjacent hull the pictures of current Victory have those lips painted the red/orange ochre same as the interior of the gunport. I'm going for a "best I can do" recreation of Trafalgar Victory and wonder what the current thinking is on those gunport lids. Both Caldercraft and the HMS Victory foundation seem to have done a lot of research so I'm not sure why they disagree, of course it could have been both of those ways at some time in it's history so I'd like to get as close as possible to Trafalgar. Appreciate any thoughts anyone has on the matter.
-
Follow Up: I got the Vallejo Gloss Medium (70.470) and I added 3 drops of it to a brand new bottle of Vallejo Black (70.950) and it gives me what I was looking for which is just the slightest bit of gloss on the, to my eyes, very matte Vallejo Black, it's still quite matte just not as much as before. For me this is a very simple way to getting some control on the amount of gloss on the paint I use. For some reason too little or too much gloss just doesn't look right to me so I'm happy that there are ways to adjust the gloss. I tried taking a picture of the normal and gloss-added black paint tests on some wood next to each other but I just can't get a picture that shows the admittedly subtle difference. Thanks for all the ideas and suggestions, I may end up coming back to them but for now I think adding the gloss medium gets me what I wanted.
-
Thanks for the info, I really like Vallejo paint too, I'd just like to be able to adjust the finish some and hoping that's possible. I have seen the black gloss Vallejo, I'm just thinking that it's going to be too glossy. If flat matte is 0 and full gloss is a 10 then I'm looking for a something around a 3 on that scale of glossiness.
-
I'm working on getting the colors and paints selected for my Caldercraft Victory. I like the Vallejo Black (70.950) but it's a little too matte for my taste. I found a Vallejo product that appears to add some gloss finish Vallejo Gloss and have ordered some but wondered if anyone has used this or a similar product and has any tips or suggestions. I'm hoping I can somehow measure how much I add so I can replicate the same finish if one bottle of paint doesn't finish the job. I have the Admiralty paint set for the Victory but the Dull Black provided is a little too glossy for me so I'm hoping there's a way to gloss up the Vallejo Black a little bit. If that doesn't work is there a way to find a black with the finish I like without having to buy a sample of a bunch of blacks and try them out. I also wondered about mixing some of the Vallejo and Admiralty blacks but I'm concerned that duplicating that mixture and getting the results the same could be difficult. So far I've just been testing on scrap wood to try and get the color/finish combination I want and the finish is almost harder to get right than the color. I think I've found a yellow I like and hopefully the gloss additive will work on it as well even though it's not Vallejo. If you're curious, here's the color I picked for Victory Yellow: Victory Yellow, The samples I've done have turned out a tiny bit darker than the sample on my monitor but I think it's going to work. Any thoughts or tips on adjusting the finish gloss/satin/matte on acrylic model paint would be greatly appreciated.
-
Thanks, I've learned so much as I've been doing this ship. I wish I could go back and fix the mistakes.