Jonathan_219
-
Posts
165 -
Joined
-
Last visited
Content Type
Profiles
Forums
Gallery
Events
Everything posted by Jonathan_219
-
 Follow Up: I got the Vallejo Gloss Medium (70.470) and I added 3 drops of it to a brand new bottle of Vallejo Black (70.950) and it gives me what I was looking for which is just the slightest bit of gloss on the, to my eyes, very matte Vallejo Black, it's still quite matte just not as much as before. For me this is a very simple way to getting some control on the amount of gloss on the paint I use. For some reason too little or too much gloss just doesn't look right to me so I'm happy that there are ways to adjust the gloss. I tried taking a picture of the normal and gloss-added black paint tests on some wood next to each other but I just can't get a picture that shows the admittedly subtle difference. Thanks for all the ideas and suggestions, I may end up coming back to them but for now I think adding the gloss medium gets me what I wanted.
 -
Thanks for the info, I really like Vallejo paint too, I'd just like to be able to adjust the finish some and hoping that's possible. I have seen the black gloss Vallejo, I'm just thinking that it's going to be too glossy. If flat matte is 0 and full gloss is a 10 then I'm looking for a something around a 3 on that scale of glossiness.
-
I'm working on getting the colors and paints selected for my Caldercraft Victory. I like the Vallejo Black (70.950) but it's a little too matte for my taste. I found a Vallejo product that appears to add some gloss finish Vallejo Gloss and have ordered some but wondered if anyone has used this or a similar product and has any tips or suggestions. I'm hoping I can somehow measure how much I add so I can replicate the same finish if one bottle of paint doesn't finish the job. I have the Admiralty paint set for the Victory but the Dull Black provided is a little too glossy for me so I'm hoping there's a way to gloss up the Vallejo Black a little bit. If that doesn't work is there a way to find a black with the finish I like without having to buy a sample of a bunch of blacks and try them out. I also wondered about mixing some of the Vallejo and Admiralty blacks but I'm concerned that duplicating that mixture and getting the results the same could be difficult. So far I've just been testing on scrap wood to try and get the color/finish combination I want and the finish is almost harder to get right than the color. I think I've found a yellow I like and hopefully the gloss additive will work on it as well even though it's not Vallejo. If you're curious, here's the color I picked for Victory Yellow: Victory Yellow, The samples I've done have turned out a tiny bit darker than the sample on my monitor but I think it's going to work. Any thoughts or tips on adjusting the finish gloss/satin/matte on acrylic model paint would be greatly appreciated.
-
Thanks, I've learned so much as I've been doing this ship. I wish I could go back and fix the mistakes.
-
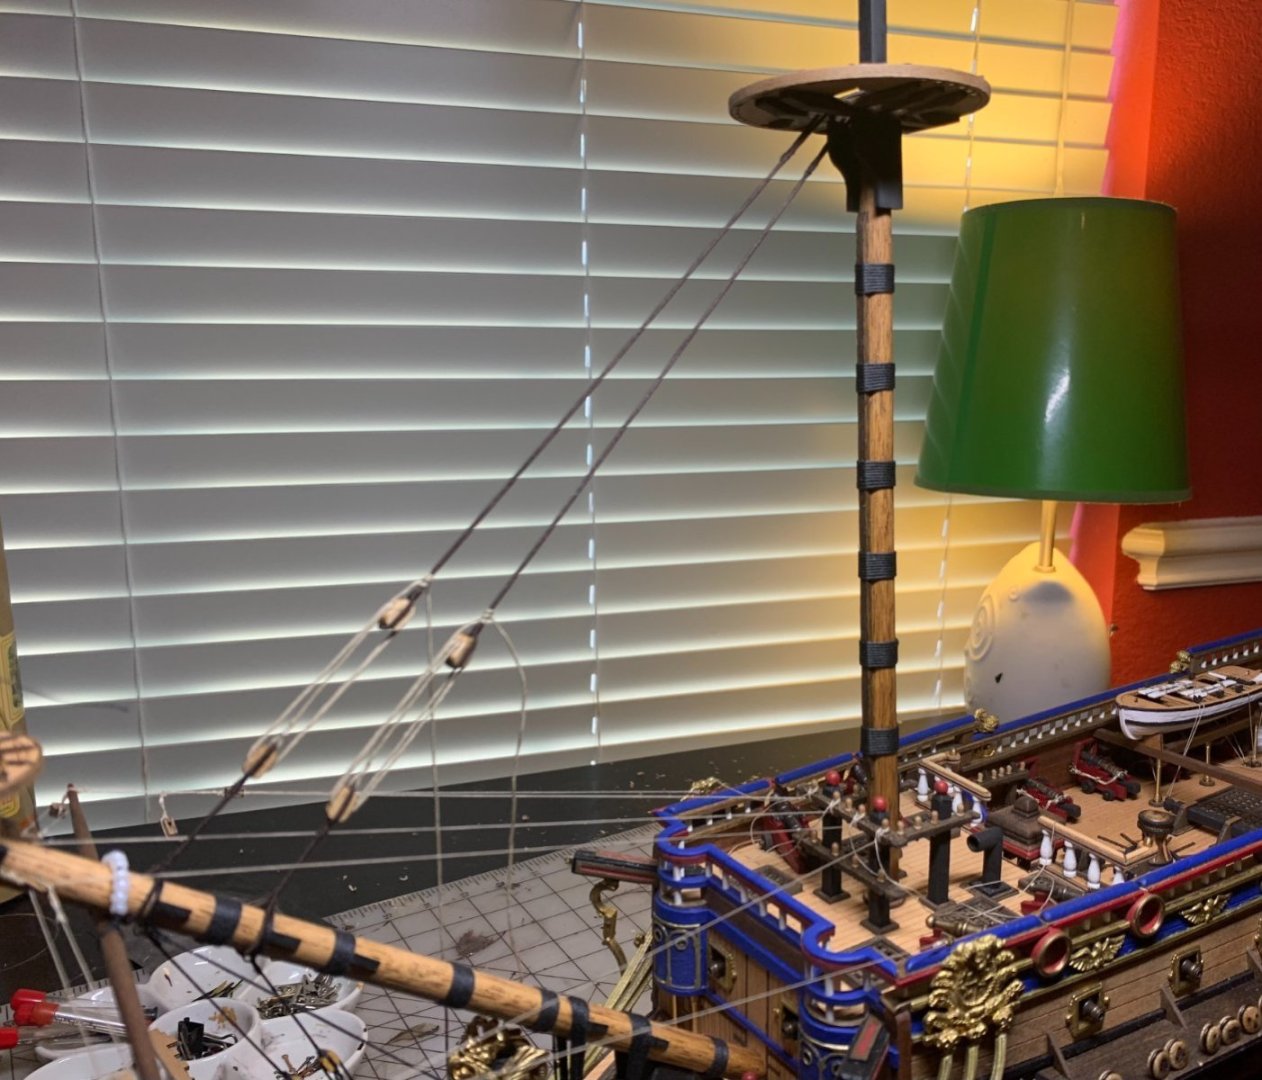
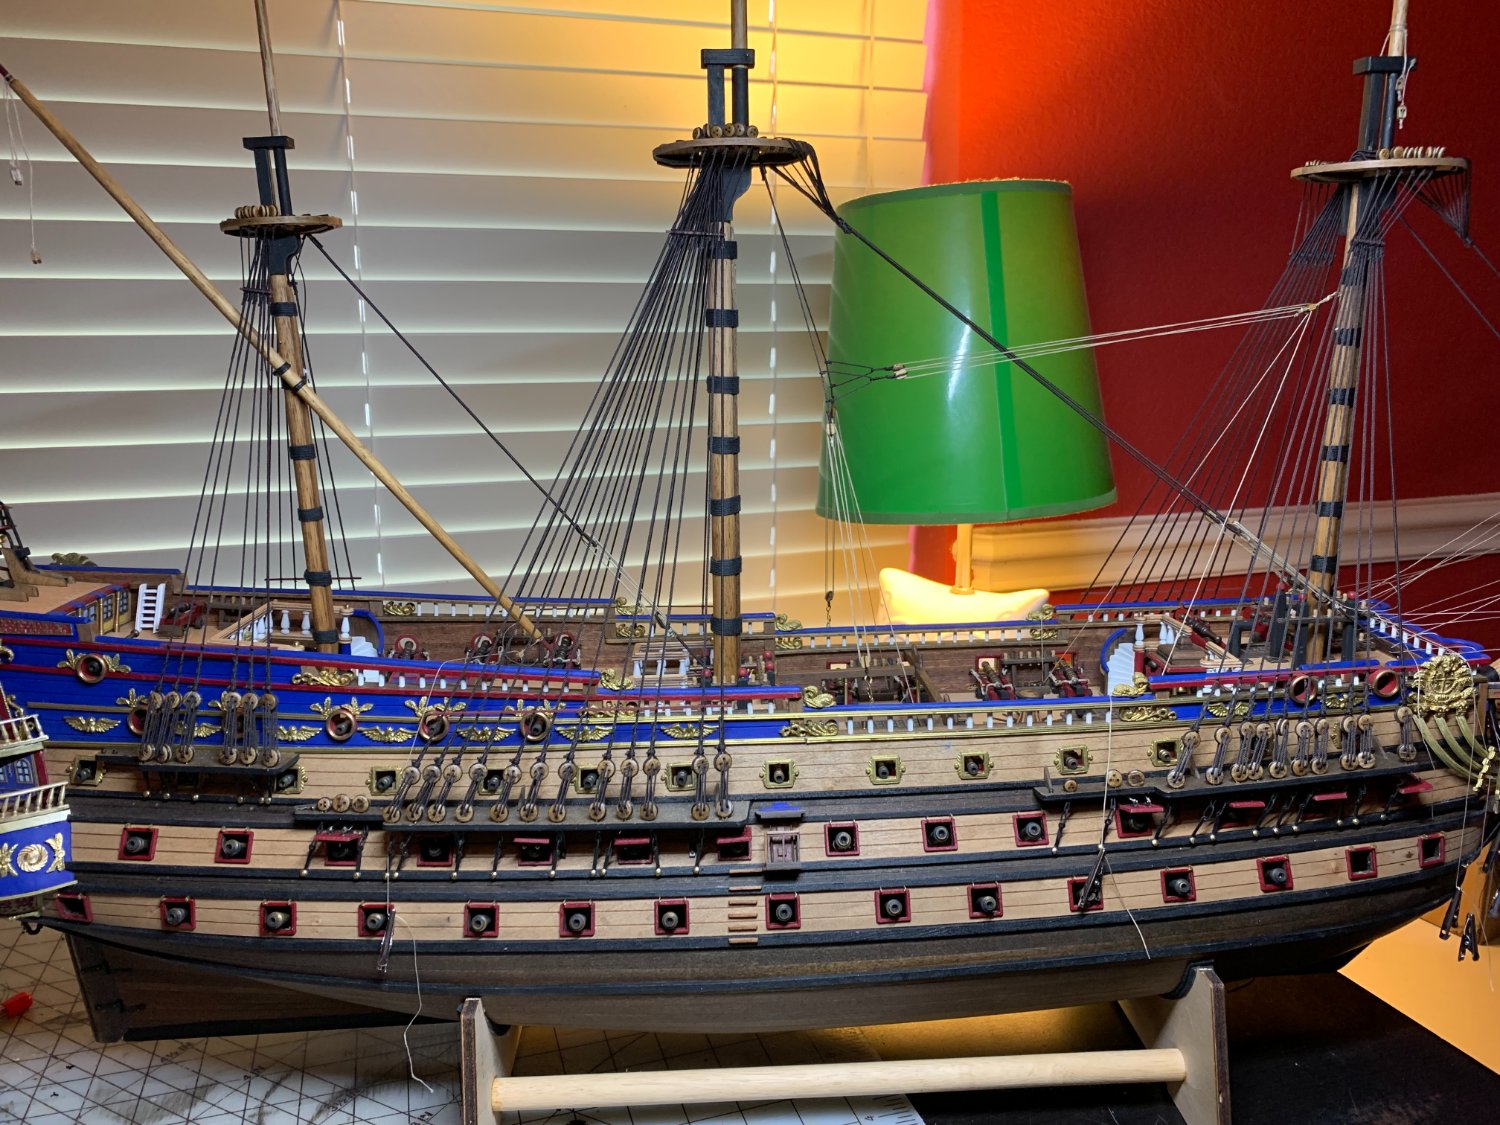
Lower Stays and Shrouds: Finished the lower and futtock shrouds plus a few miscellaneous pieces of rigging to break things up some. Will do the upper shrouds next and will continue only serving the forward most shroud to protect it from sails rubbing. Will probably do the ratlines once all the shrouds are in place. Still trying not to tie off lines as long as possible to make any adjustments easier but I think I'll need to tie off the bowsprit rigging pretty soon just to tidy things up for rigging the foremast. Started reading "Rigging of Ships in the Days of the Spritsail Topmast" by R C Anderson and I probably should have started this book with the kit just to give myself time to digest all the information in it but I'll try to focus on the areas in the book that correspond to what I'm working on and try to rig as authentically as possible. There's still a lot of guesswork involved but can always fall back on the plans (for better or worse) if needed.

-
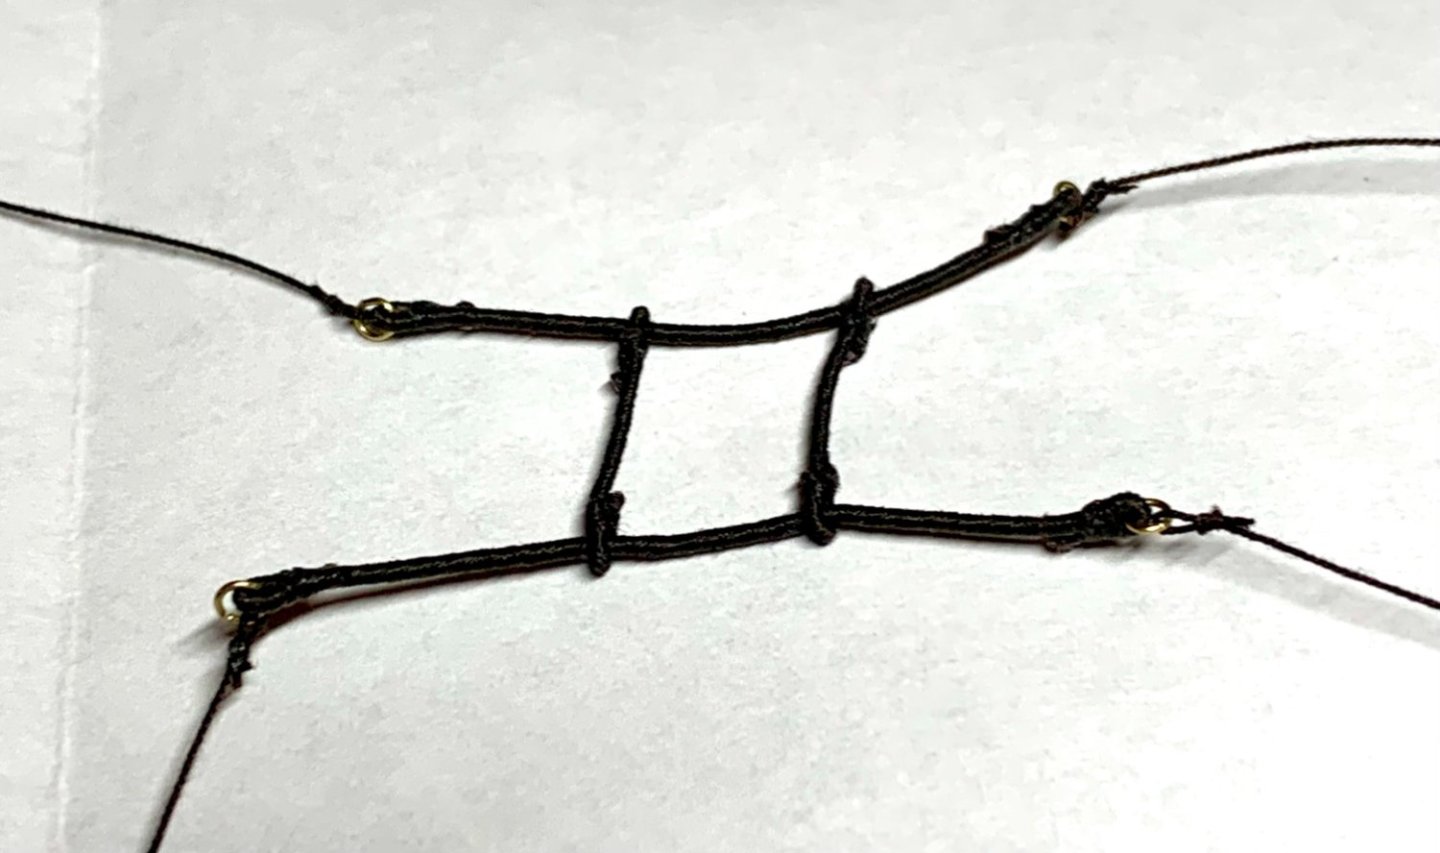
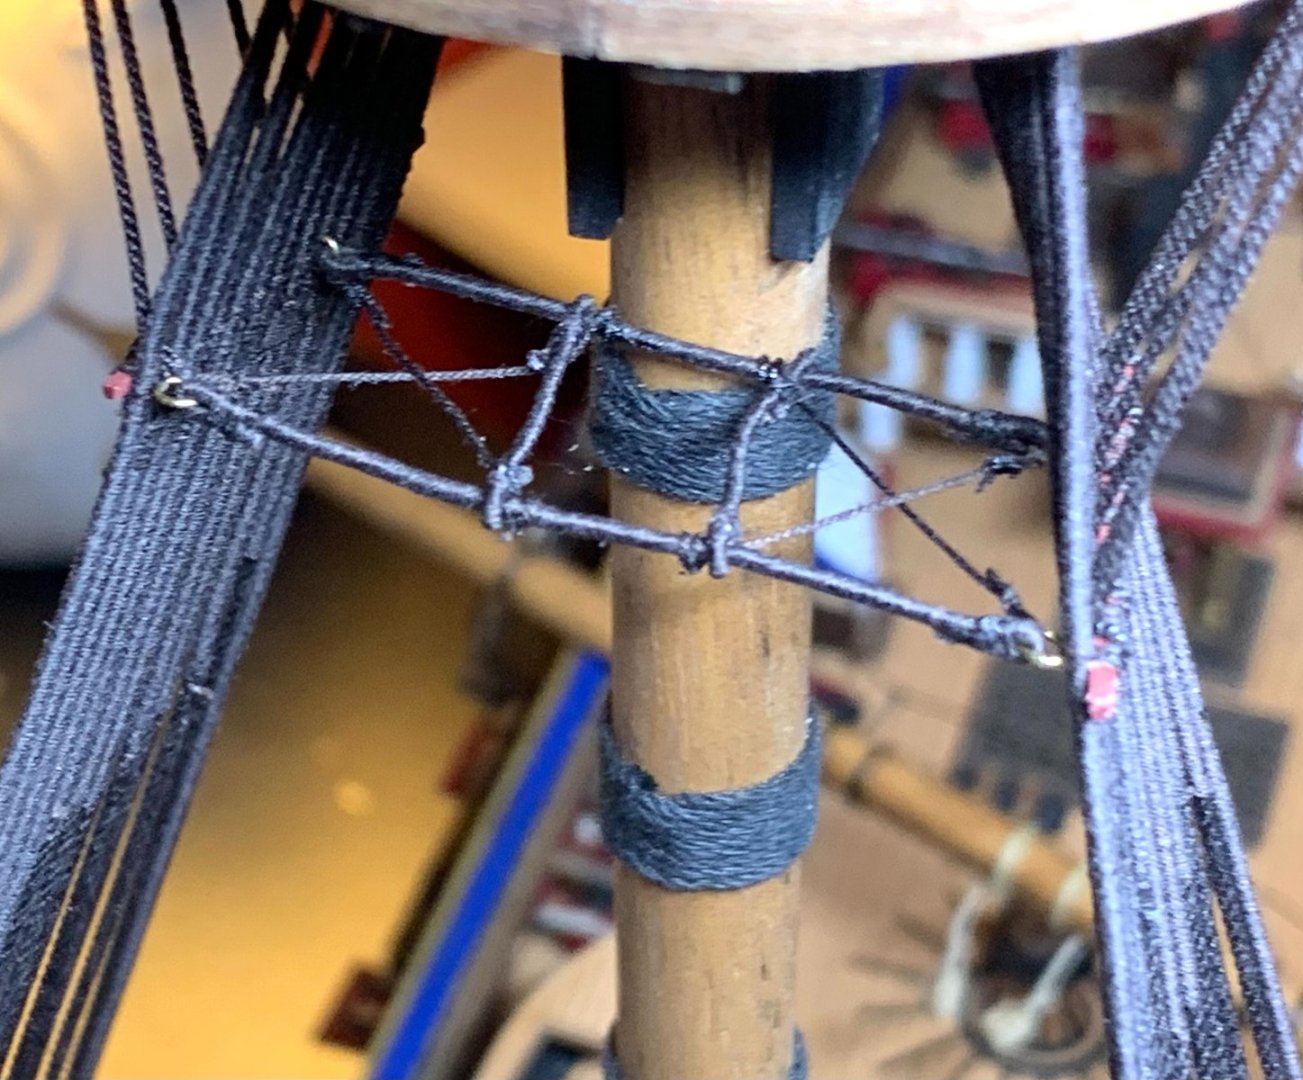
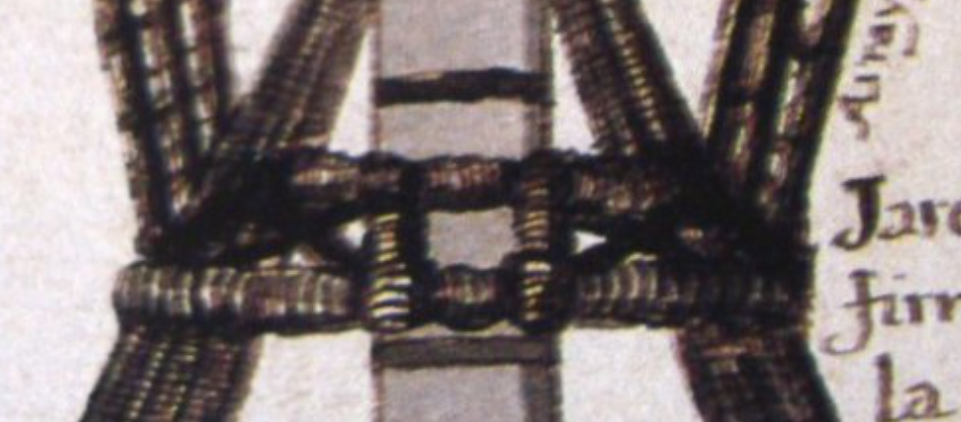
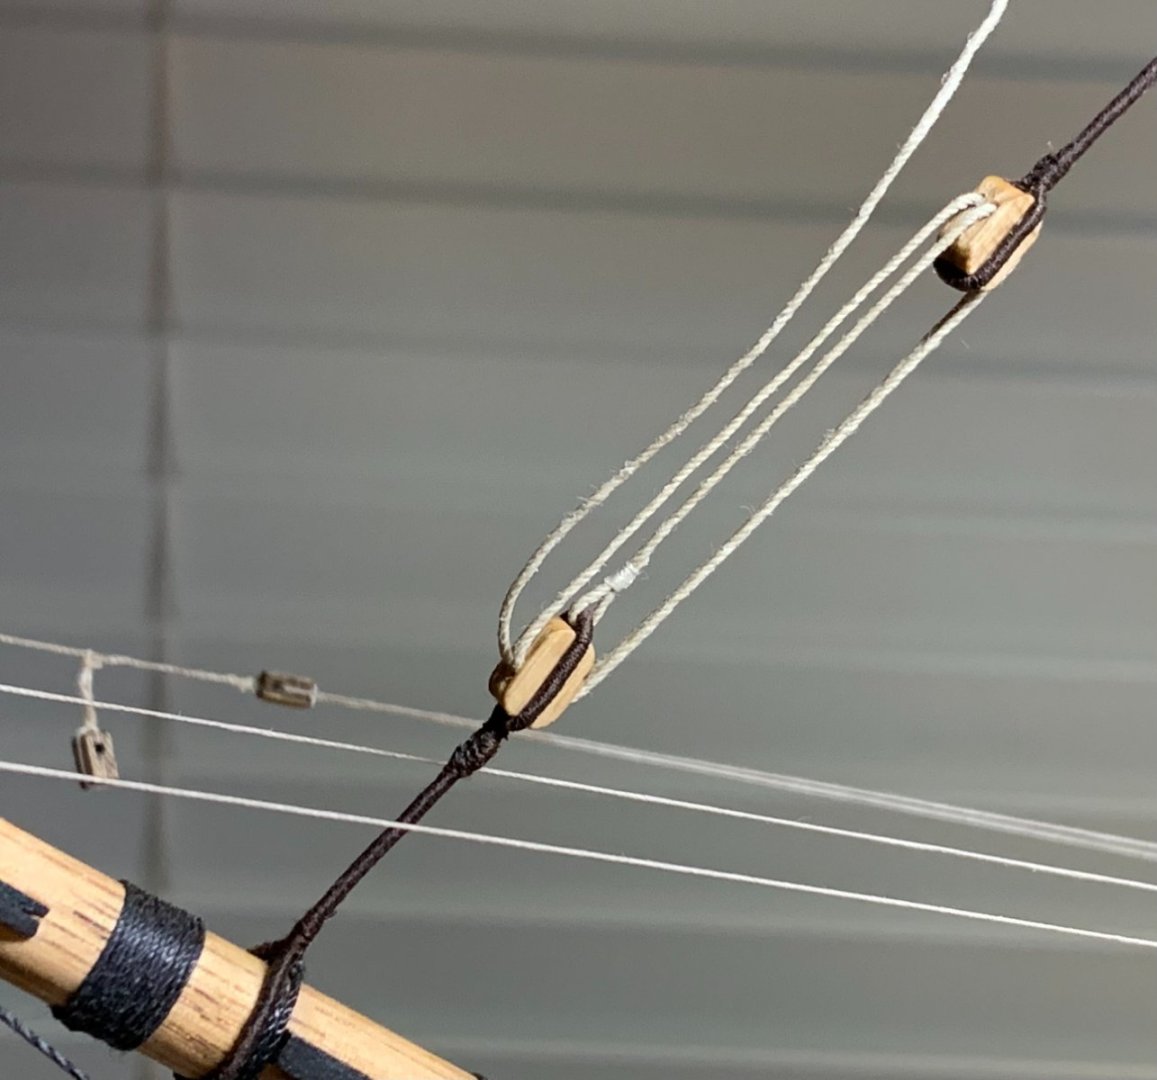
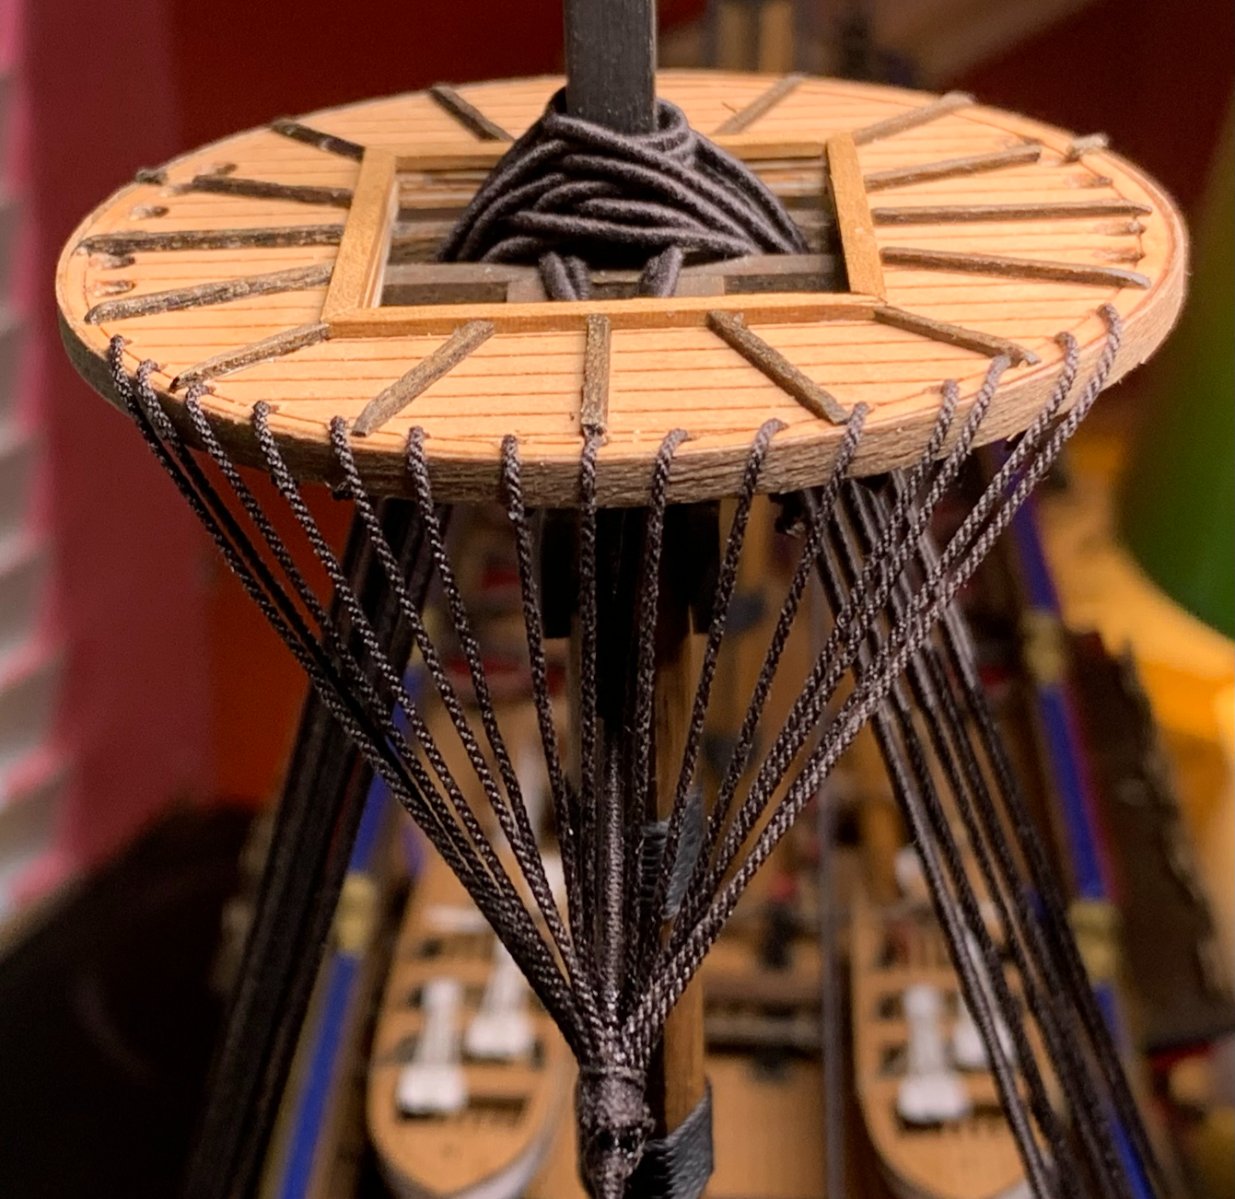
My Solution Well here is what I've come up with, not thrilled but it's ok. If the one cross piece didn't have the slight curl to it I'd be really happy but I think I will leave it. Thinking about this I had two factors that drove the construction, the first was that I needed to use rings to tie it to the futtock staves since I didn't feel there was enough space between the shrouds to add more fairly thick ropes and the second was I needed to construct as much of it as possible off the ship as working in that space is pretty tricky for me. The two main pieces are Syren .88mm dark brown, served and then seizing the rope around the ring, the inner length was 40mm end of ring to end of ring and the outer length was 45mm, longer because of the spread of the shrouds as they lay on top of each other coming off the mast. The two cross ropes were Syren .76mm dark brown, served and then seized over the first ropes. Each was 13mm. The four cross ropes were Syren .30mm and seized to the rings left quite long to aide in putting them in place once the main piece was attached to the futtock staves. Installing it was easier than I expected, I just pulled one corner up at a time and then put the four cross ropes in once it was in place. I expect the next one to be better but it will be a while before I get to them so I thought I'd post with the first one. Thanks again for all the great input.
-
Thanks for all the great information. I'm starting to understand why great reference books are so highly valued, I need to start adding more of those to my library. I have a lot to consider and the illustrations from Álbum del Marqués de la Victoria seem especially pertinent. It seems obvious that the complete lack of anything resembling catharpins in the plans is a serious error and I'll need to put something there and I'll probably try to do something that replicates this detail but I haven't worked out how I'll do that yet. I'll post a picture when I come up with and install a solution.
-
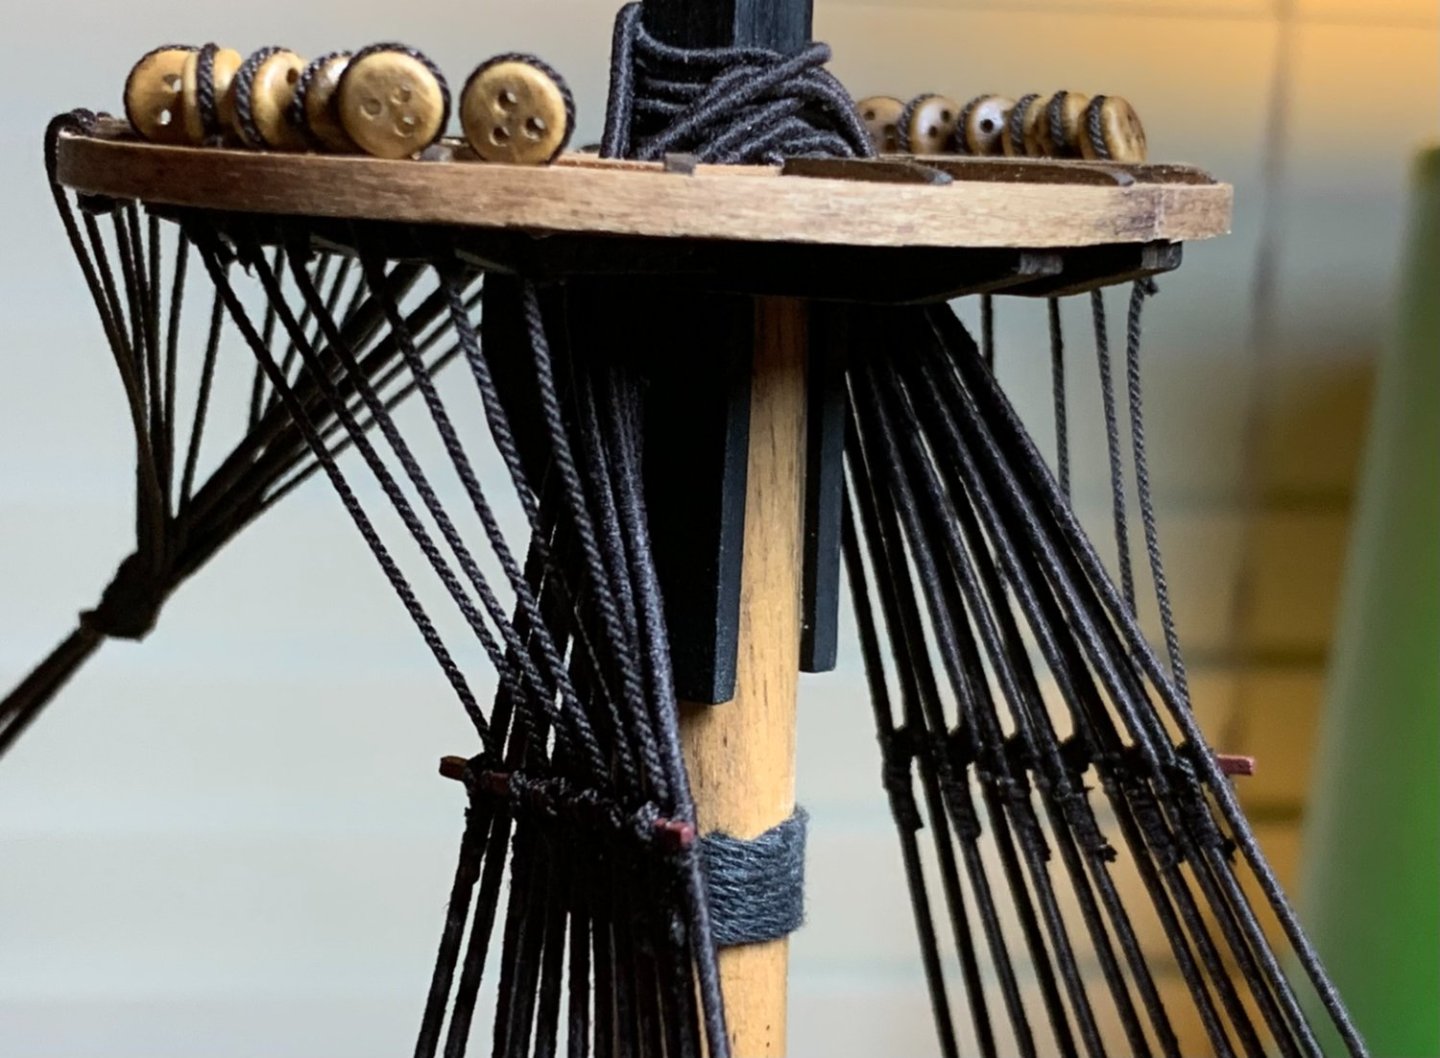
Not even sure that Catharpins (or Cat-harpins) is the correct term for what I'm asking but it's the only name I could find for the rigging that goes between the port and starboard futtock staves for what I assume is to counteract the pull from the futtock shrouds outward on the shrouds and stabilize the upper shroud area. My concern is that my plans for San Felipe show nothing at all for anything between the two futtock shrouds and research online hasn't given me much guidance other than they grew less necessary as stronger materials were used in construction. My gut tells me there would have been something performing this function on an early 18th century Spanish ship but would appreciate any thoughts or information on their usage or what type might have been used in this period. I've seen several examples of different types online but nothing I can tie to a ship of this period and nationality. I'd like to add them if they'd have existed on a ship like this. My Revenge build had them and looking at The Anatomy of Nelson's Ships I see that Victory had them and all the pictures I see of replicas show something there, so it makes sense to me that San Felipe which falls between the two in time would have had something as well.
-
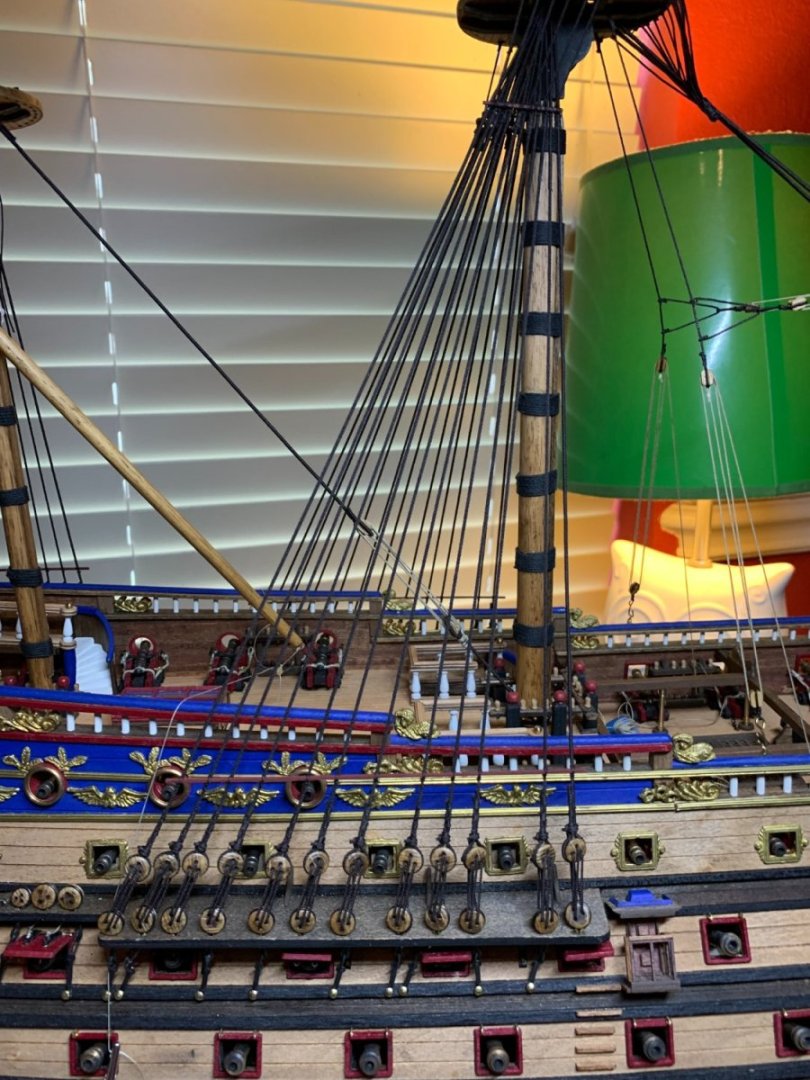
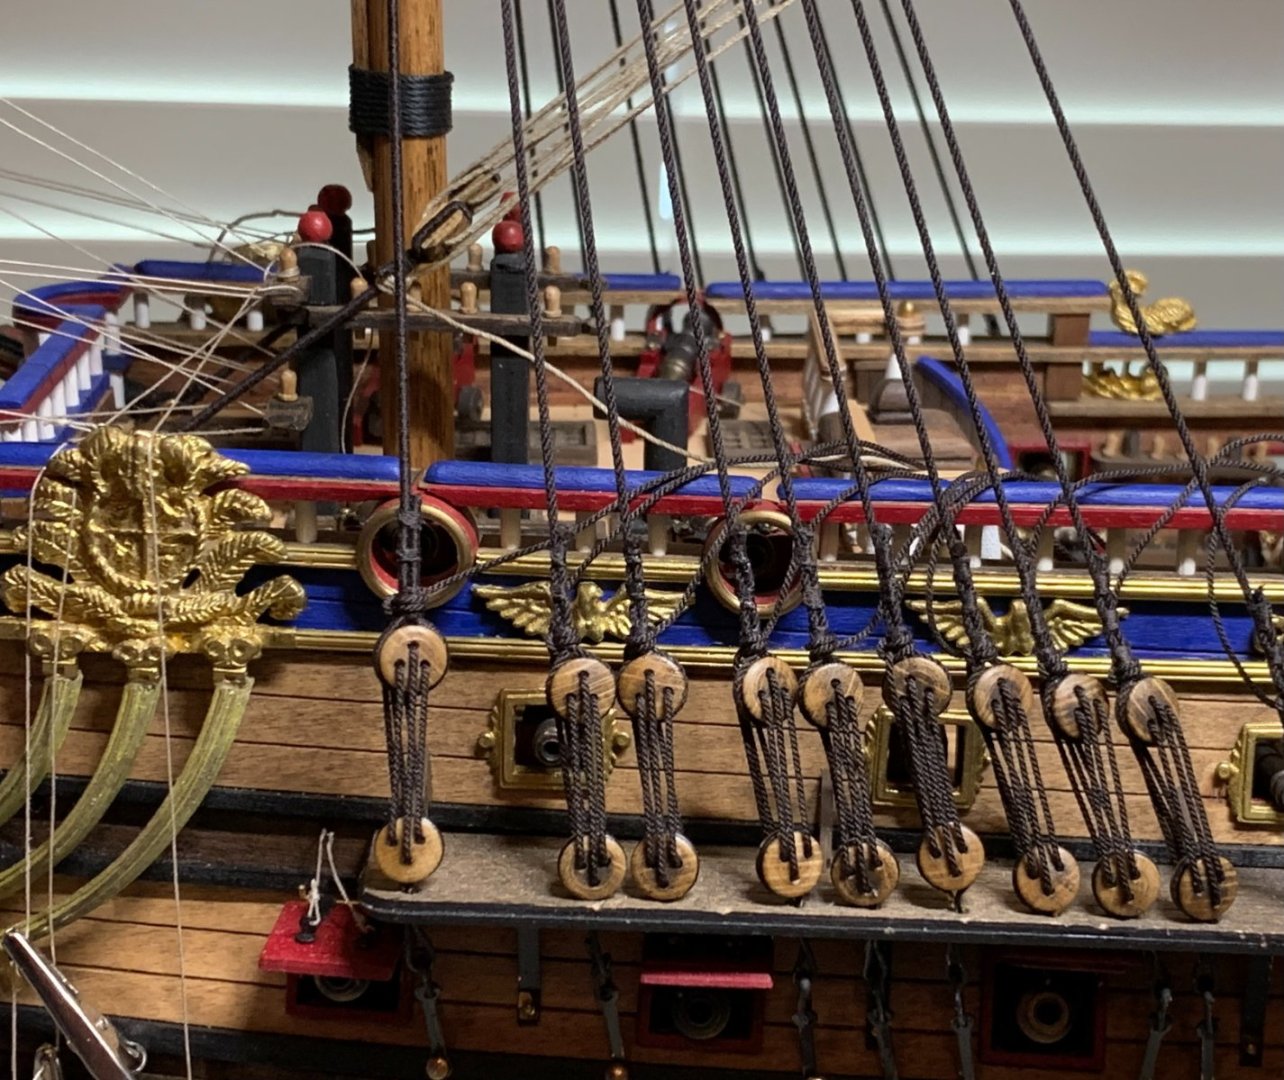
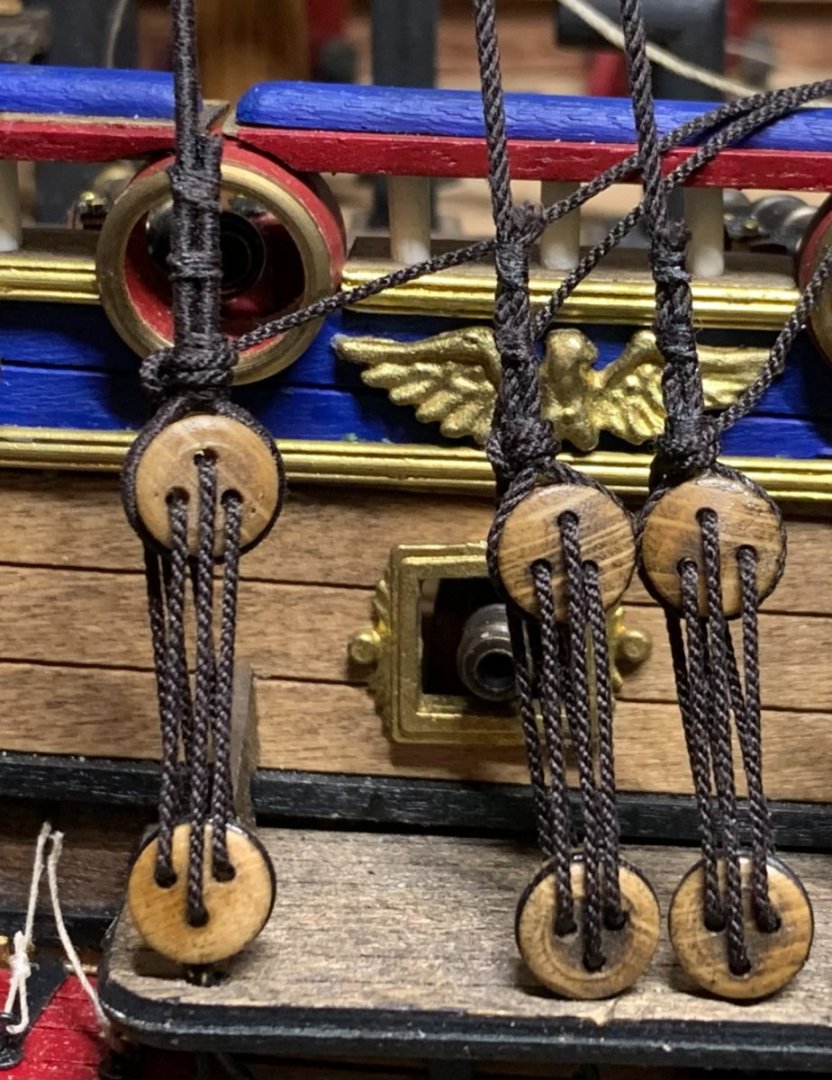
Foremast Shrouds and Deadeyes: I served the entire first shroud on each side and then only served down to where the futtock will be on the other shrouds. I used the wire spacer technique for the deadeyes on each shroud with a little variation. Since the upper part of the foremast weren't glued yet I was able to remove the shrouds even with the loop served at the top so I would put on the shroud, attach the wire spacer to the lower and upper deadeyes and then pull the shroud around the upper deadeye and then use a clip to hold the shroud in place around the deadeye. I could then remove the shroud from the mast and work on serving the three areas around the shroud to affix it to the deadeye and then repeat the process for the second shroud of the pair. Once I had all the deadeyes attached on both sides I added the ropes to the deadeyes and started tightening everything up slowly. Some minor adjustments in the deadeye position could be made by adding more or less tension which pulls it down or lets it up slightly. One thing I noticed as I tightened was the tendency of the upper deadeyes to twist as tension was added so I started each deadeye pair by putting the rope through the first hole in the upper deadeye and and then pulling the rope to about the tension I thought would be on the shroud when in place. This pulling would spin the deadeye a couple of times and I'd hold the deadeye in this position when threading the rope through each deadeye. The deadeyes would start out pointing fore or aft with no tension but as tension was added the deadeye tried to spin back into the correct position so I was able to get most of them to point correctly without additional tweaking. I've tied off the deadeyes but still left the remaining rope in case I need to adjust later. One of my biggest issues on my first rigging attempt was getting a rope in place and perfect and putting a knot in it that pretty much prevented me for adjusting it later so this time I'm trying to leave everything possible adjustable. This results in a lot of thread everywhere but I'm pretty confident that I'll be able to find the correct thread if I want to adjust later and I'm not really sure when I'll start putting in more permanent knots and cleaning up all the loose thread. I believe I'm going to do the mainmast stays next, for some reason I find the stays and deadeyes really enjoyable.

-
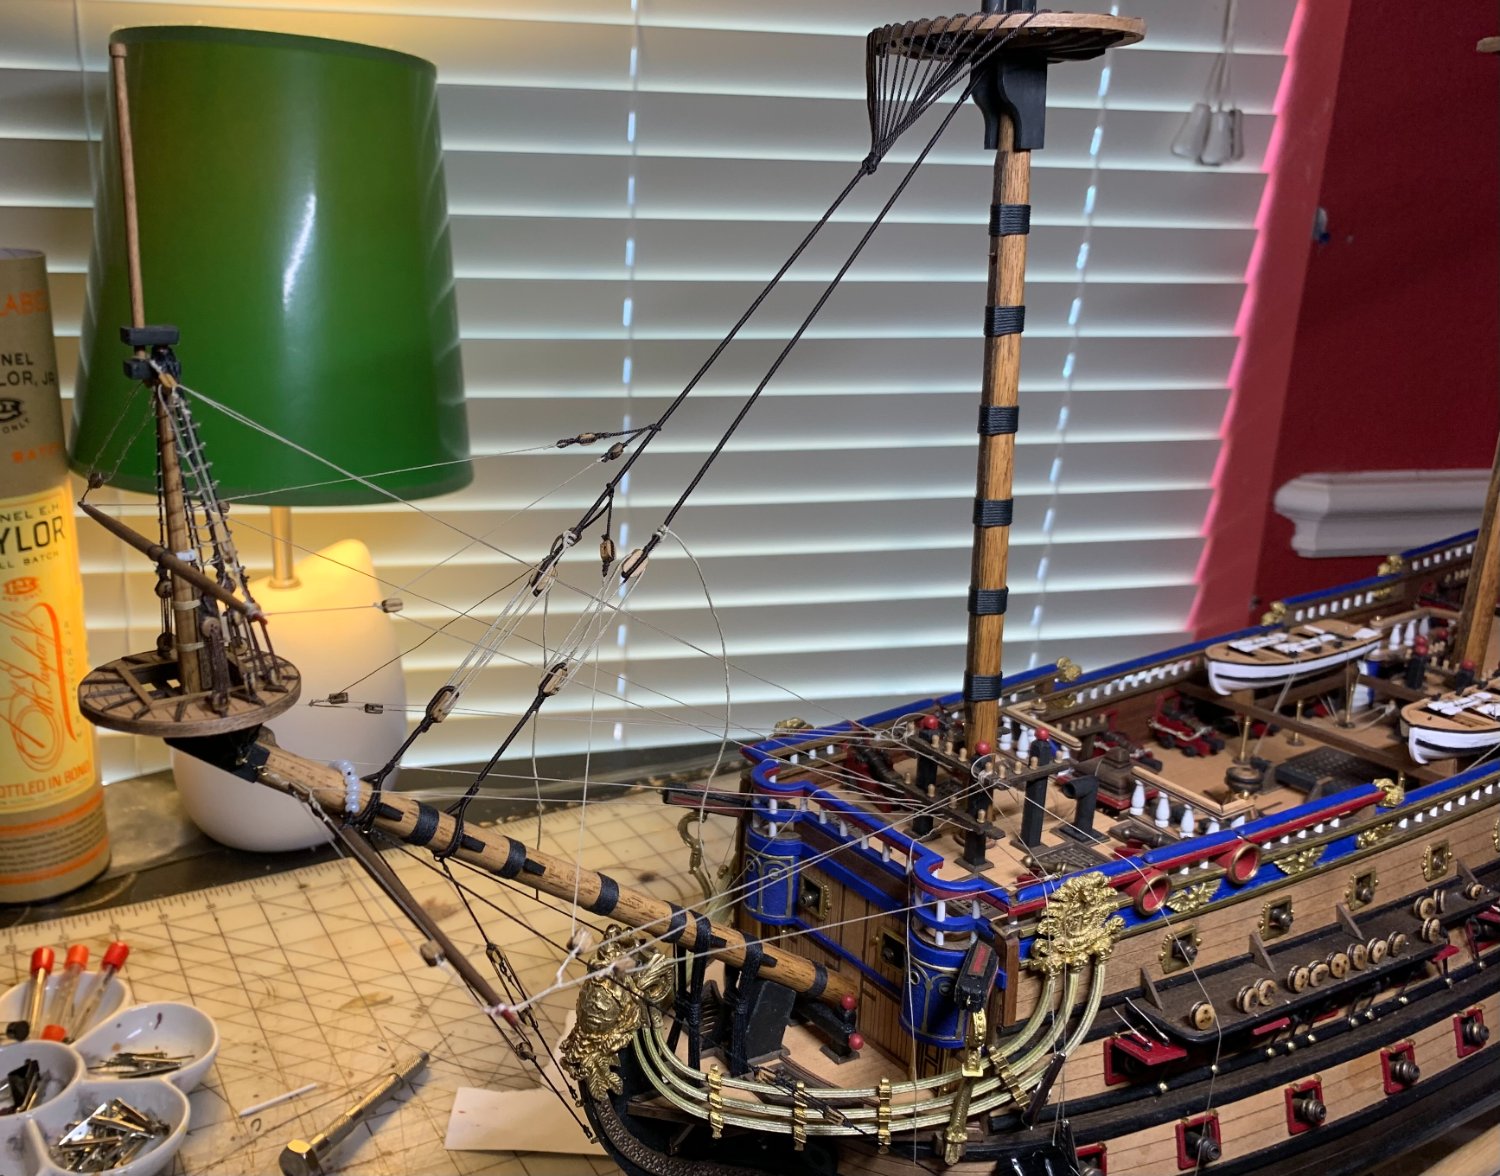
One of the things that's the hardest for me to do is to tear out something that I've finished, especially if I think it's pretty well done but I had to do that. After serving the stays with Gutermann Mara 696 (Dark Brown) I decided that I would order some dark brown rope from Syren to do the shrouds and as I read what I could find about how much of the shroud to serve I decided, at least to try, serving the first shroud all the way and only serving the other shrouds a little down past the futtock. When I received the rope from Syren (beautiful rope BTW) it was a little darker than the Gutermann 696 I had been using to serve and Chuck suggested I try Gutermann 682 (Darker Brown) so I ordered some of that and it's perfect match for the Syren dark brown rope so I can serve and stop without a color change. But that left my two completed foremast stays served in the 696 and after much foot dragging I went ahead and took them out. I guess when you're learning that tearing out something is just something that happens in the process. Replacing the stays turned out to be less work than I thought and I don't think I could have ever gotten used to having different colors on the serving in different parts of the ship. So now the foremast stays are back in, and I've loose rigged the rest of the bowsprit rigging and the foremast crowsfoot. I'm going to put in the mainmast stays next and I'm still trying to decide if I'm going to attach the main foremast spar first or do the foremast shrouds first. Either way something is in the way when you do the other thing but on Revenge I attached all the spars and had all their attachments done first and it seemed to work out pretty well. I'm also working on the footropes and seeing what I can do with them to make them lay in a way that looks natural. I'm trying thin gauge wire based on something I found online and stopped that for a while to work on the stays and bowsprit rigging. It seems everything I learn leads to even more questions as now I'm wondering since the stays and shrouds are dark brown, simulating the tar used I believe, why wouldn't the ropes that wrap the masts be dark brown too? My foremast is wrapped in black and so far I don't think I'm willing to go back that far but things like this are things I need to figure out before my next build.

-
Frist Stays: Finally finished the second side of deadeyes and chainplates, probably my least favorite part of the build so far but at least now I'm ready to get into the rigging in earnest. After looking at lots of build logs and finished ships I wanted to serve the stays and shrouds, I just really like the look once they're served and it can be done with a hand machine so I got the Syren Serv-o-Matic and started practicing. I had some initial issues with fuzz on the practice bits I did and posted on the Masting, Rigging and Sails section, thread here: https://modelshipworld.com/topic/32544-thread-for-serving-rigging/ and by ordering a different thread, Guntermann Mara, and using a candle to melt off the fuzz I was able to get really good results so I've gone ahead and served by first two stays. One of the ideas in the discussion on serving thread was to use a very dark brown instead of black and I ordered both so I could try them and see which one looked best and I've decided to go with the dark brown on the San Felipe. Very happy with the way the serving looks and glad I decided to do that. Now just a zillion shrouds to serve. I'm looking at constructing as much of the masts and yards as I can off the ship and then adding them as the rigging goes in place, this is a little different than how I constructed my Revenge and I'll see how it goes. It seems like the order here is about what works for me and I just have to try some slightly different things to know how they work for me. I'm also trying not to permanently tie anything off and leave some spare hanging so I can go back and adjust as things move slightly. I'm a bit afraid that things will get really untidy and it will be hard to determine which piece of thread comes from where as the number of loose threads build up but we'll see and if I need to I can go back and finish off areas where any movement should be over. Foremast shrouds are next.
-
Thread for serving rigging
Jonathan_219 replied to Jonathan_219's topic in Masting, rigging and sails
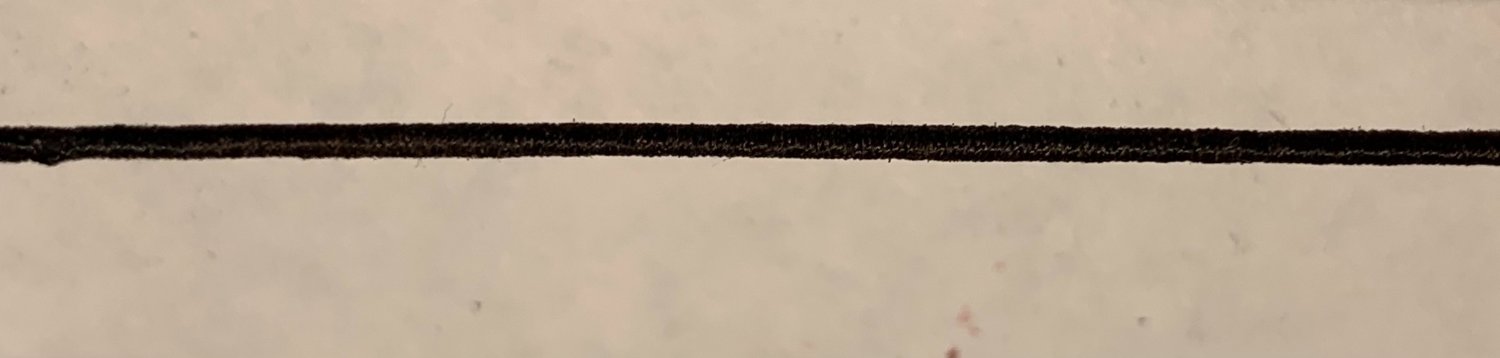
I tried the candle method and it works great. With the cotton thread it left quite a bit of the fuzz but with the poly thread the fuzz is eliminated quickly. I just had to adjust as after working with the cotton which was harder to remove I left it in the candle a bit too much and some of the thread melted but that's easily eliminated now that I know how much heat to give it and looks great now. Thanks everyone. Picture is the exact thread as before just treated with candle. A couple very tiny pieces of fuzz left, more visible in picture that naked eye but on production pieces I'm sure I can get it perfect.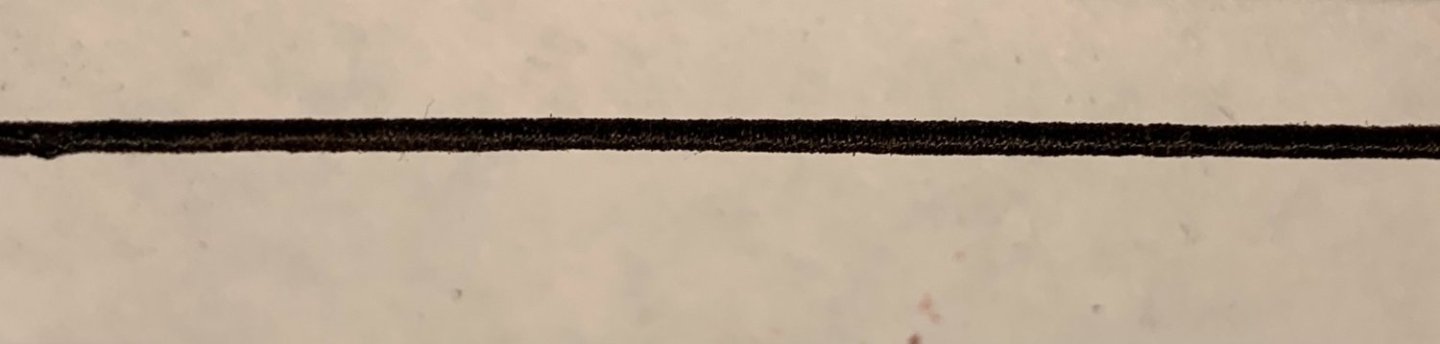
-
Thread for serving rigging
Jonathan_219 replied to Jonathan_219's topic in Masting, rigging and sails
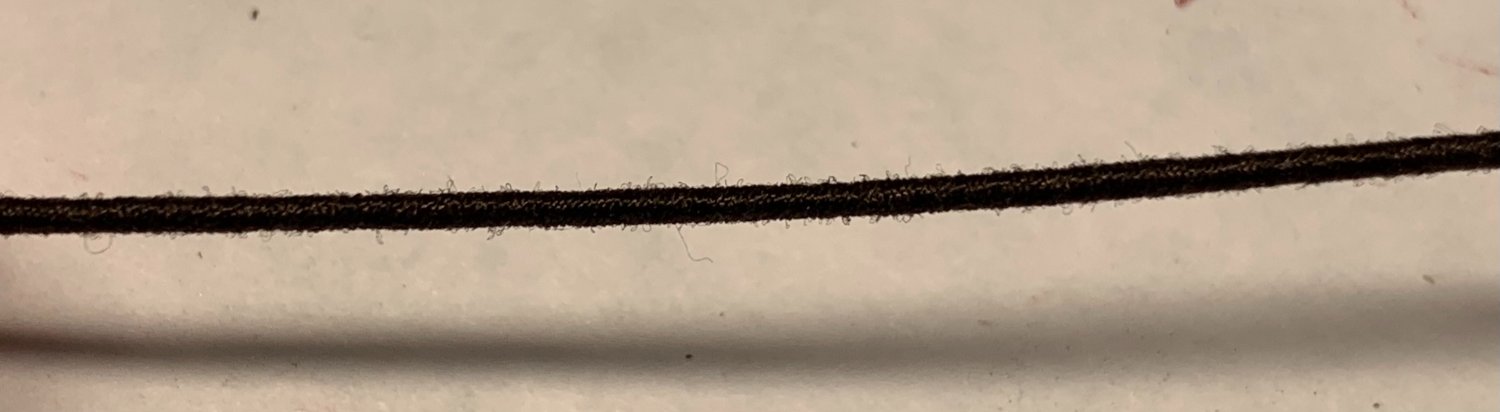
I ordered some of the Gutermann Mara thread in both black and dark brown to see which color I liked best but my first test gives me at least as much fuzz as my first test with the cotton thread maybe even more. I'm including a picture so you can see what level of fuzz I'm talking about. I'm not sure if I'm doing something wrong or what, when I look at the pictures from DelF I just don't see any fuzz at all. Should I be waxing the thread before using it for serving, I'm not quite sure how I'd do that and when I tried it on a small section of the cotton thread on my initial tests it did not work well. Possibly waxing after serving? I'll try passing the completed serving over a candle to see if I can get rid of the fuzz but I'm still searching for how to get a clean serving, I wouldn't use what I'm getting now. Any idea greatly appreciated.
-
Thread for serving rigging
Jonathan_219 replied to Jonathan_219's topic in Masting, rigging and sails
Great information thanks. I looked at making rope once a while ago and decided not to, but have become increasingly dissatisfied with the look of the rope my current kit has so I'll investigate that again. Everything you and Chuck make looks great and I'd love to be able to have that quality of rope available. One question, do you use a heat gun on the rope after you make it and if you do does that leave the rope flexible or once hit with the heat gun does it keep it's shape? -
I am finally starting the work on the rigging on my San Felipe and in observing other build logs I really like the look of served rigging where it's appropriate. I bought a Syren Servo-Matic and starting doing some practice serving to see how it goes. All in all it's quite good but I'm not very happy with the thread I'm using for the serving as it gets pretty fuzzy after it's wound on the rope. I've tried using a candle flame and some beeswax to try and tame the fuzz after winding, but neither are giving me the nice clean results I'm looking for. The instructions mention to use as fuzz free thread as possible and I'm using some that looks pretty good on the thimble but once it's wound the fuzz really comes out. The thread I used is SewOlogy all purpose 100% cotton that I purchased at my local hobby store. I'm looking for recommendations for a specific manufacturer and/or type of thread to use, black of course, that has produced good serving results for others. I have a Hobby Lobby, Michaels and a Joann near me plus several other fabric stores and it would be nice it was something I could go pick up but if I need to order online to get the right thing that's ok. Appreciate any thoughts or ideas.
-
Did DeAgostini leave the model ship business? I have a kit that's been back ordered for almost two years now so I check their website every once in a while to see if they're selling it again and when I checked in today their site has completely changed, all the model ship kits are gone and the only thing they seem to be selling is some collectable cars? I had already give up hope on ever receiving the kit so not a big deal, just curious if they've decided to go in a different direction.
-
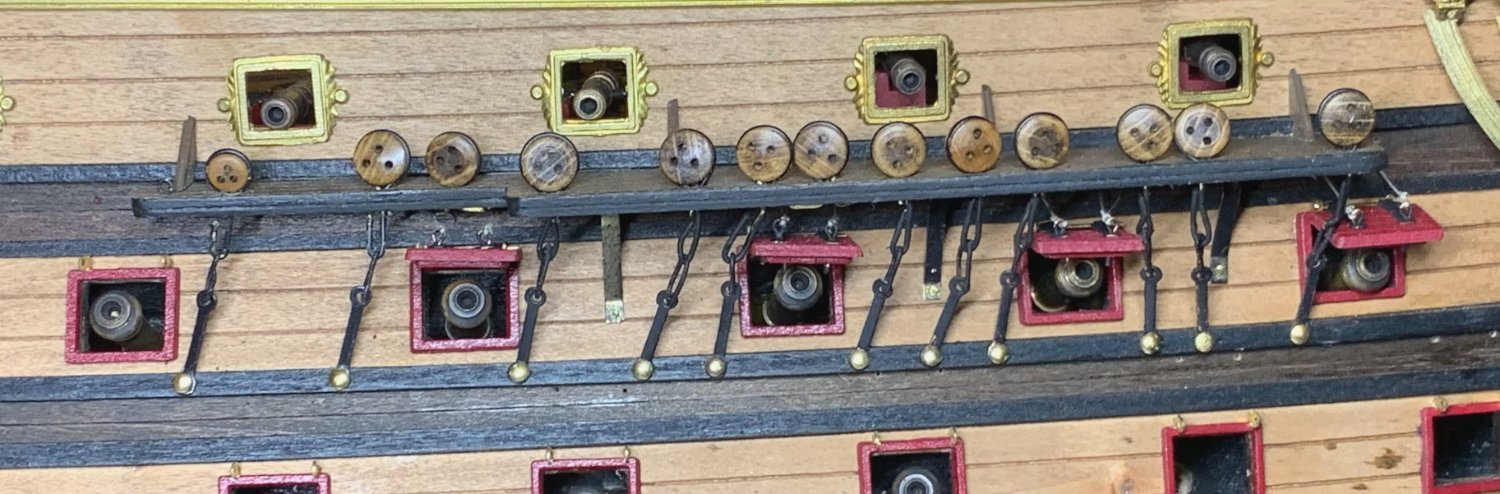
Chainplates: I have really struggled with the chainplates, from the positioning, the soldering and assembly it's been a serious challenge. I've had to just spend days looking at the instructions and ship trying to figure out what to do, try things and fail and come up with different approaches, but I think I've finally got something that works. The first issue was the positioning, I thought I had placed the side boards that hold the deadeyes in the correct place according to the plans and instructions but several of the holes for the chainplates were right above the center of a gunport requiring the chainplate to come out a a very ugly (to me of course) angle to not block the cannon. The plans show several of the chainplates coming out at very odd angles and mine would have been even more awkward and I just didn't like the way it would look so I made a decision to eliminate the chainplate on deadeyes that were directly over a gunport. If the hole was more to the side then I'd install a chainplace and angle it away from a straight line with where the shroud will be as little as possible. For these deadeyes with no chainplate I wrapped the copper wire around it and then just bent both legs back on the underside of the board hole to hold it in place. Not ideal but better to me than having a chainplate at a wonky angle. My next issue was soldering the loops. I tried several methods and while I could sometimes get a solder that seemed good as soon as I put any pressure on the link installing the wire loops they almost always broke. I watched several silver soldering videos in the metal forum here and on YouTube but decided that was more than I wanted to get into for this one small part of the project. I went to the local hardware store and found some metal epoxy and it seems to be working pretty well. It hardens in a very short time, only a couple of minutes, so I mix up a very tiny amount and do 6 at a time and let them cure overnight before installing. It seems like the epoxy has a slight bit of flex where my solder joints pop the second any sideways force get put on them, which is pretty inevitable when installing. I also had a minor issue where the supplied nails for the bottom of the chainplate had heads that were smaller than the holes in the bottom section so they just fell off. Another trip to the hardware store found me some small brass nails but the diameter of the shaft was slightly bigger than the hole so I had to do a small bit of filing on each lower chainplate piece to allow the nail to pass through. The last issue was just the installation of the plate, getting the wire that wraps around the deadeye to have the U-turn in the right place to get some tension on the chainplate but not be so tight as to pull down the side board with the deadeyes was very trickey, a very small difference in the position of the U-turn makes a huge difference in how tight or loose the chainplate would be. I would wrap the wire around the deadeye with one long leg and place it in position. I would then install the lower part of the chainplate, nail and all and then use tweezers to hold it in place and then mark the wire where it needed to bend, pull the lower part of the chainplate off and test install and if it was good then finish putting the nail in and if not then take the lower piece off, adjust and try again till it fit. I got better at guessing were to put the U-turn in the wire and by the end was getting most of them first time. I painted the wires and chainplates before installation but of course of bending and grabbing with pliars some will come off so just touched up the paint after it was all in. This has been by far the most difficult part of this ship so far and I'm just glad I have something that is semi-decent. One side of the ship is done and it's time to work on the other side now.

-
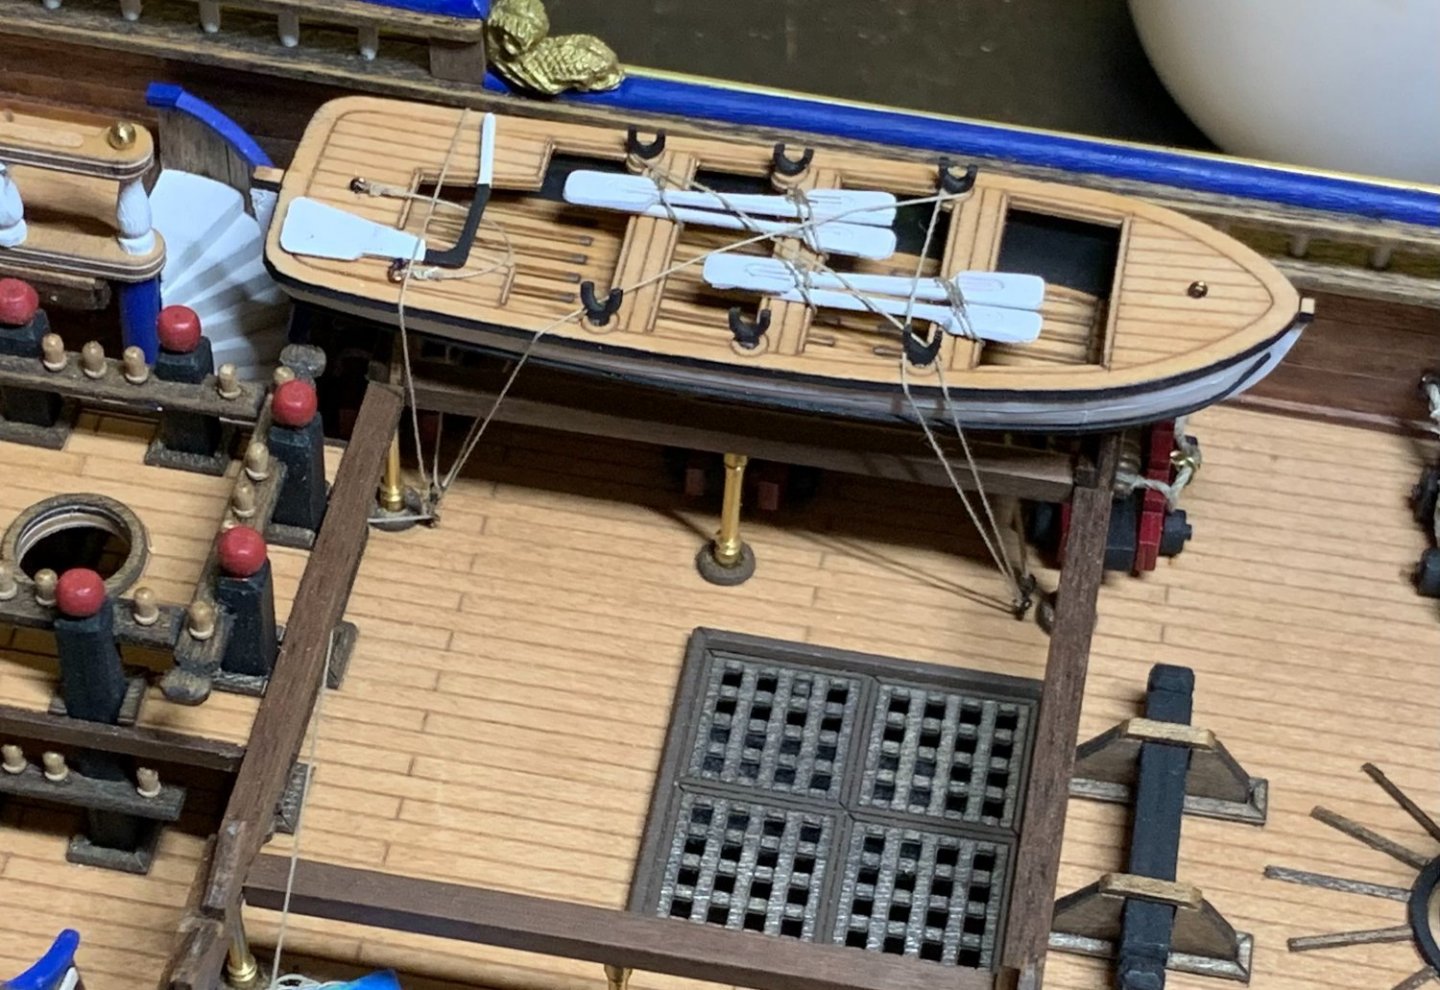
Things have been a bit slow lately, just working on the gunport lids and the structure on the lower deadeye assemblies with the chains etc. so decided to take a break and do the lifeboats. Not thrilled about the plastic hulls but decided to just go ahead with them and see if I could get a decent looking finished product. Planned ahead and put the tie down ropes in place along with the hardware so it was easy to tie in place on the boat was finished. Almost done with the second one and will tie it in when I'm done.
-
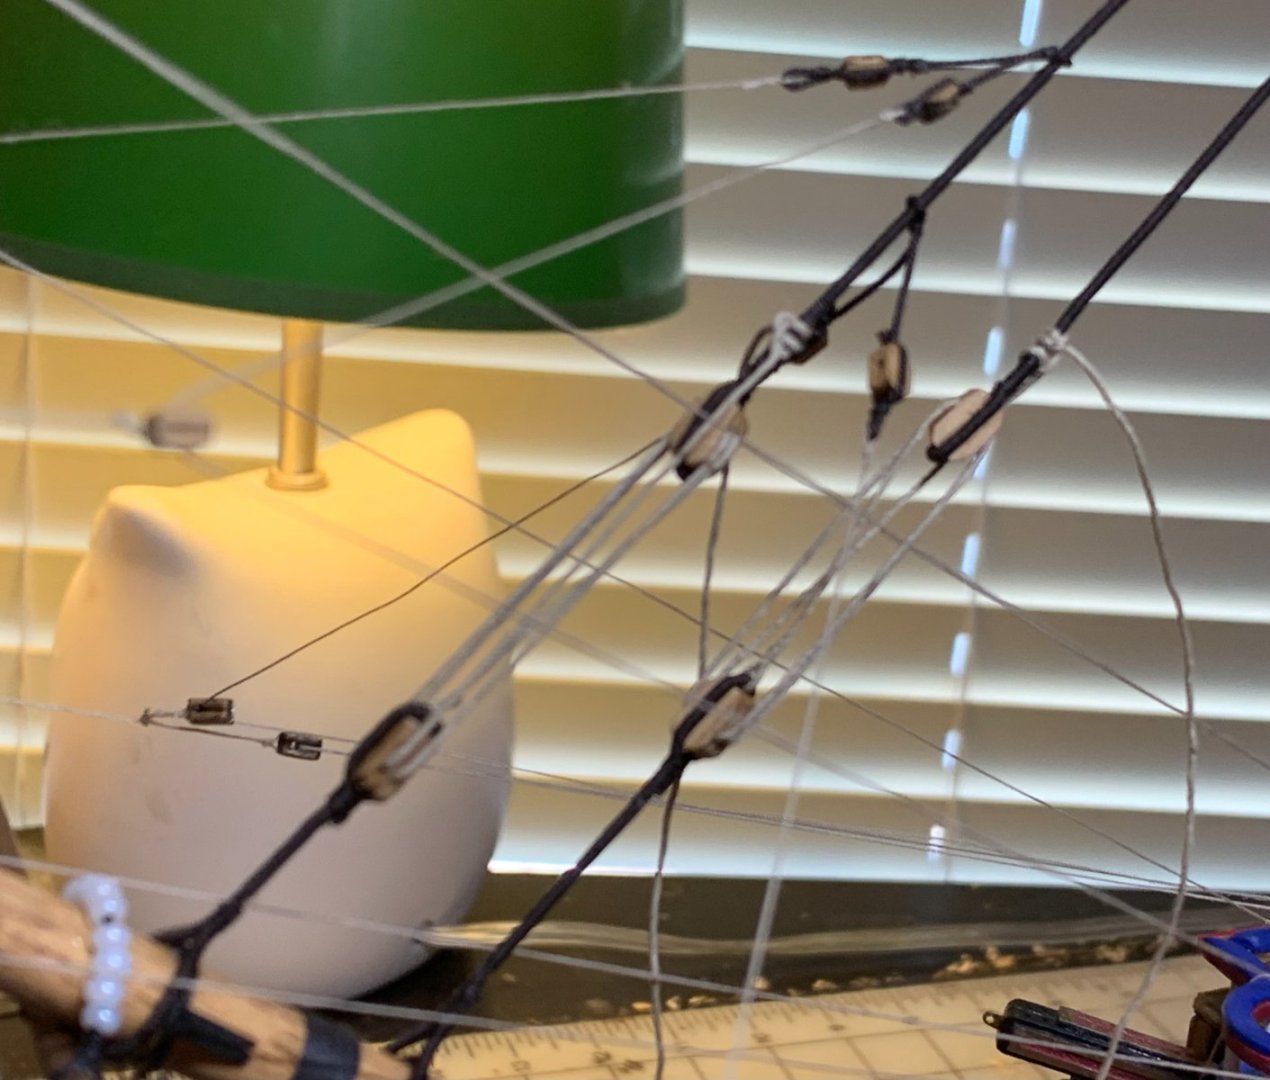
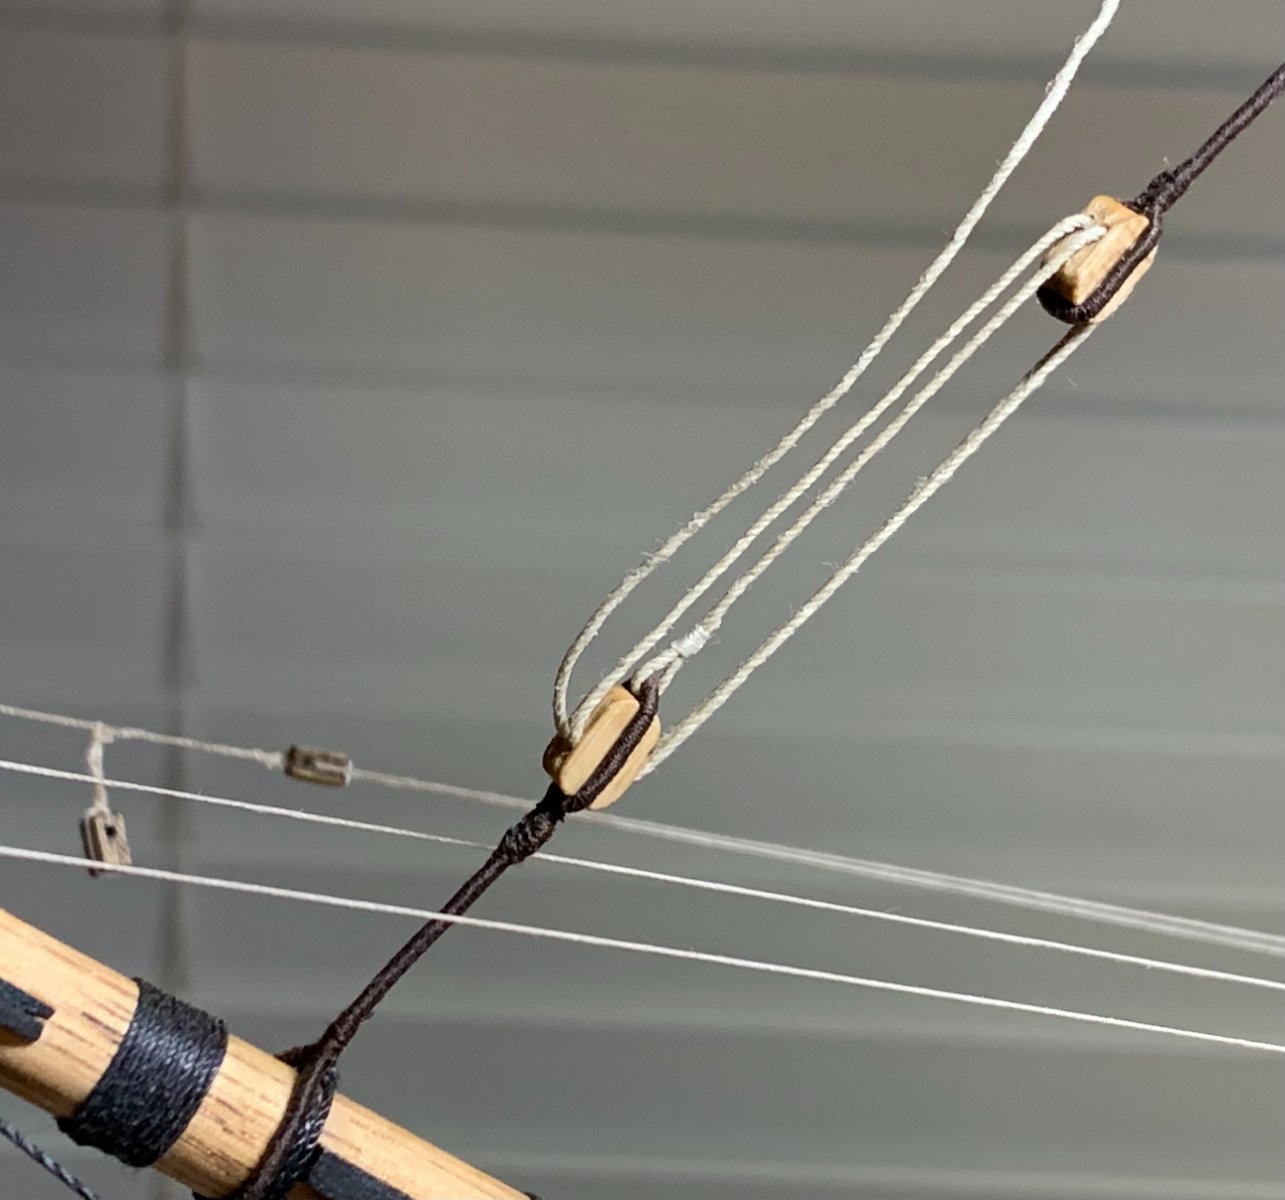
Bowsprit and rigging: I've finally been able to start on the rigging, for some reason I really enjoy the look and work on the bowsprit. I've made some very minor changes like adding rings to give an anchor point for ropes attached to the bowsprit and using some small beads from the local hobby store as parrel beads. The are several things that the instructions and plans don't agree on so I'm just trying to find what will work best. The first set of deadeyes is in and I decided to use a dark brown thread for the deadeye rigging. I've seen that somewhere, don't remember where, and really like the look and since it's decorative anyway just went with it. Bowsprit yard is loose on the bowsprit and I'm hoping I can position it and hold it in place with the rigging, I've used a pin previously. I'm working with the threads now to see at what point I want to tie things down. I'm hoping I can leave it where I would have the ability to adjust as things get further down the line but I'm not sure how that will work out yet.

-
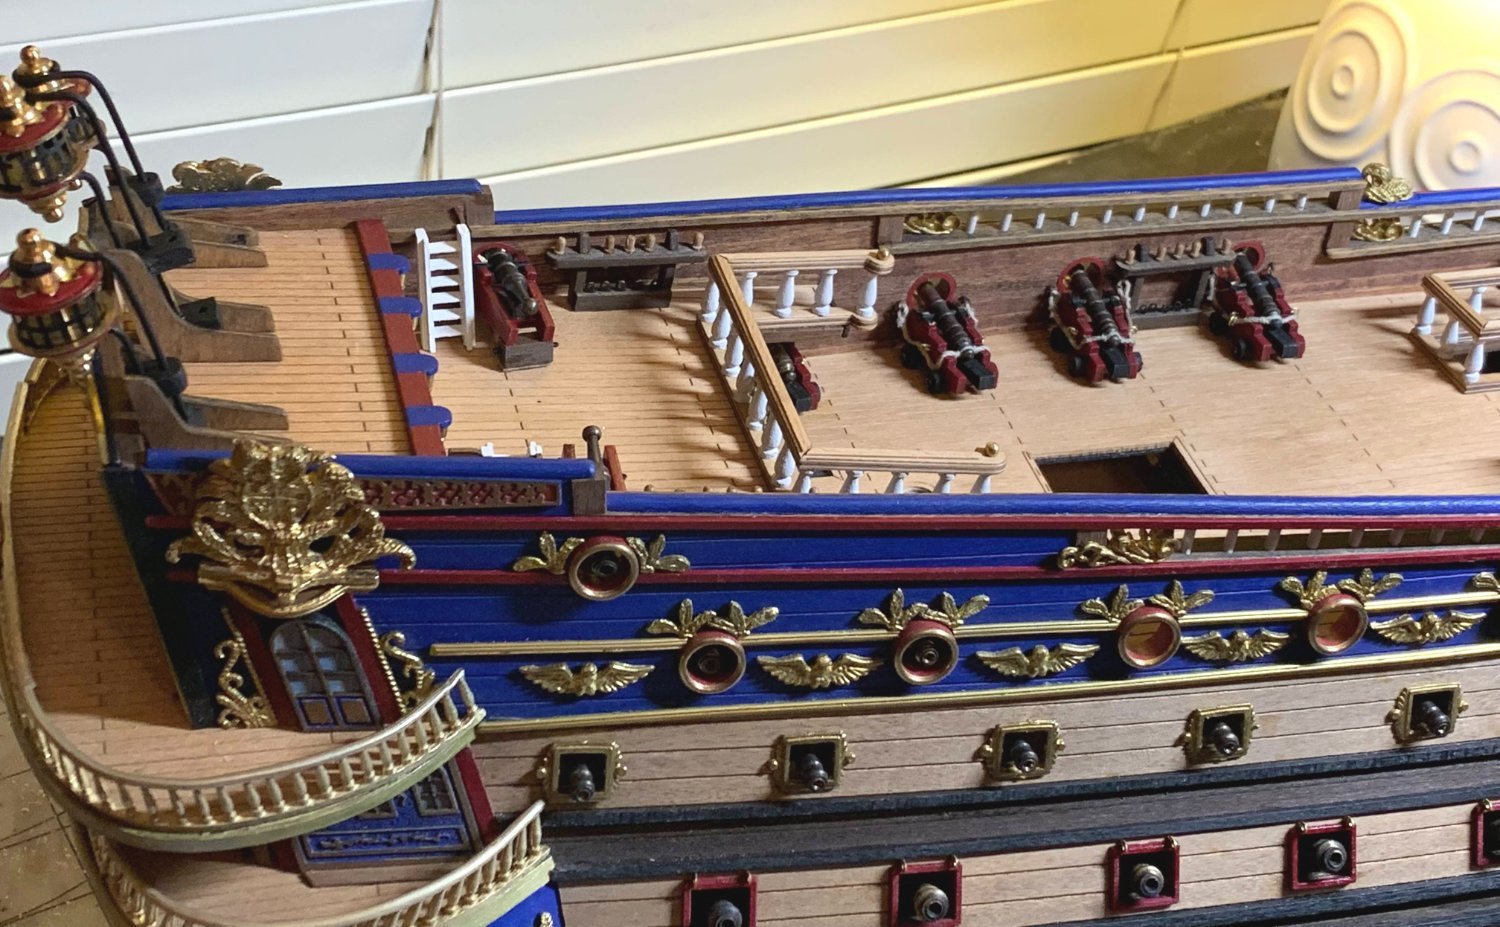
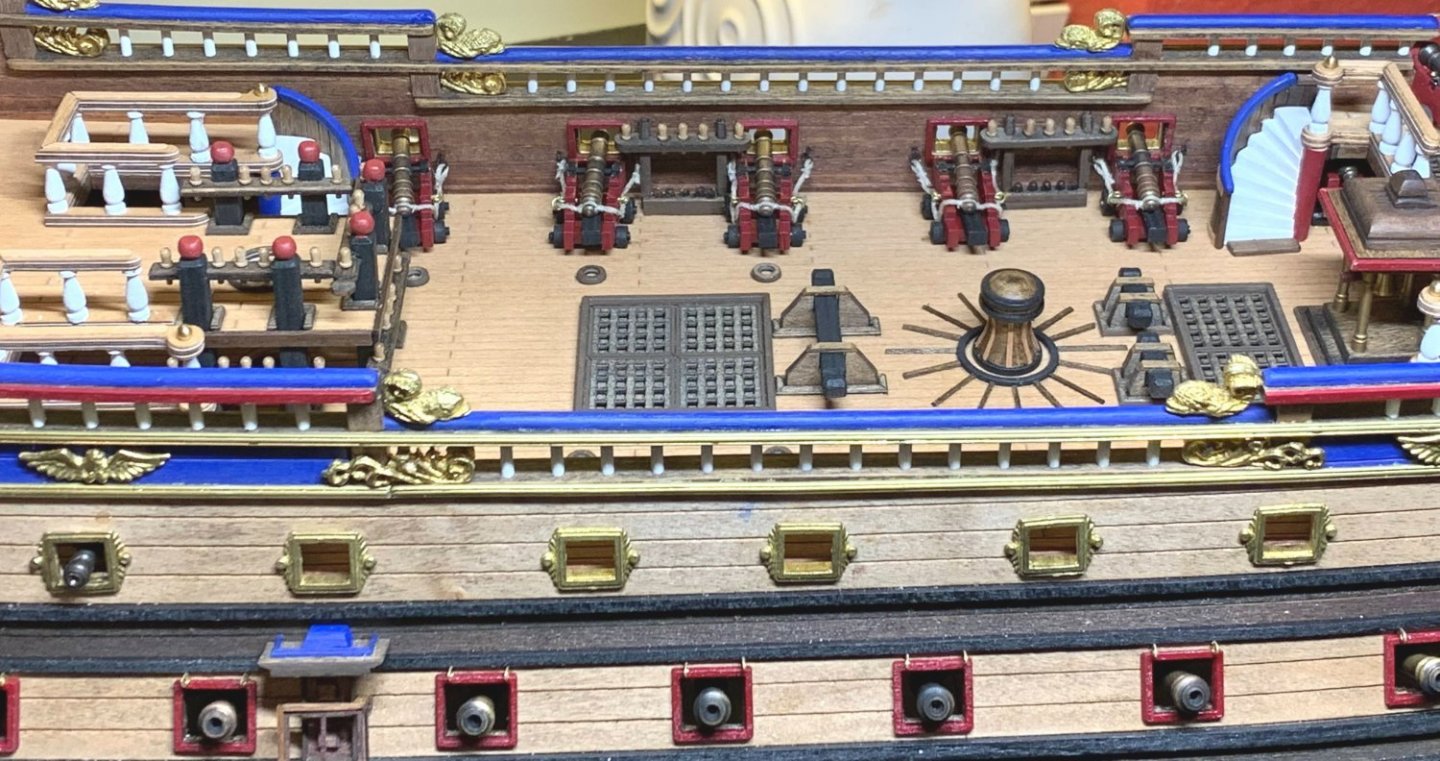
Allan, the cross piece for the bit pins did seem very high to me as well, I've just gone ahead with what the kit instructs. So many things on the deck look completely off scale to my eyes. I'm still at the point in my learning that I don't catch a lot of these things until after it's all together and looks wrong. I especially appreciate the plans resource as I need to learn how to dig into details like that as I progress though builds.
-
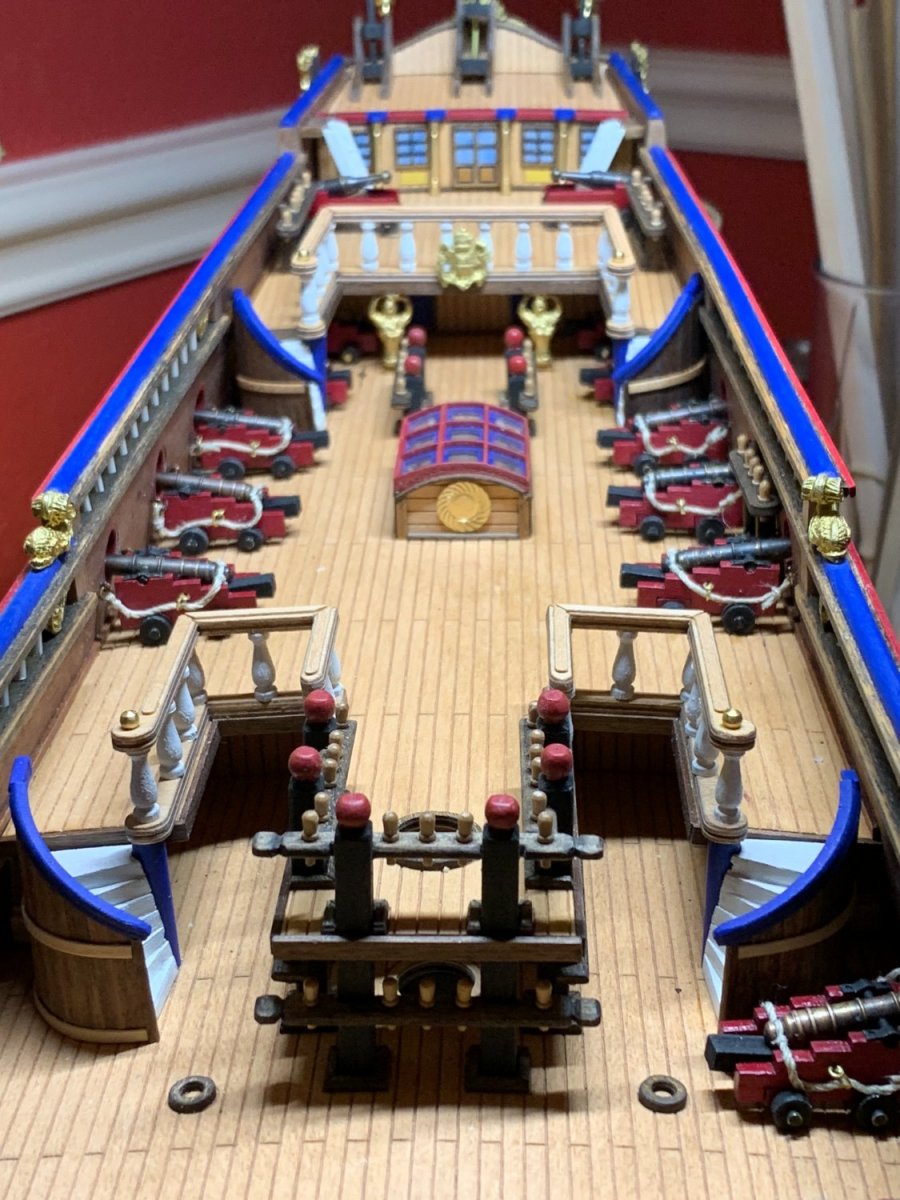
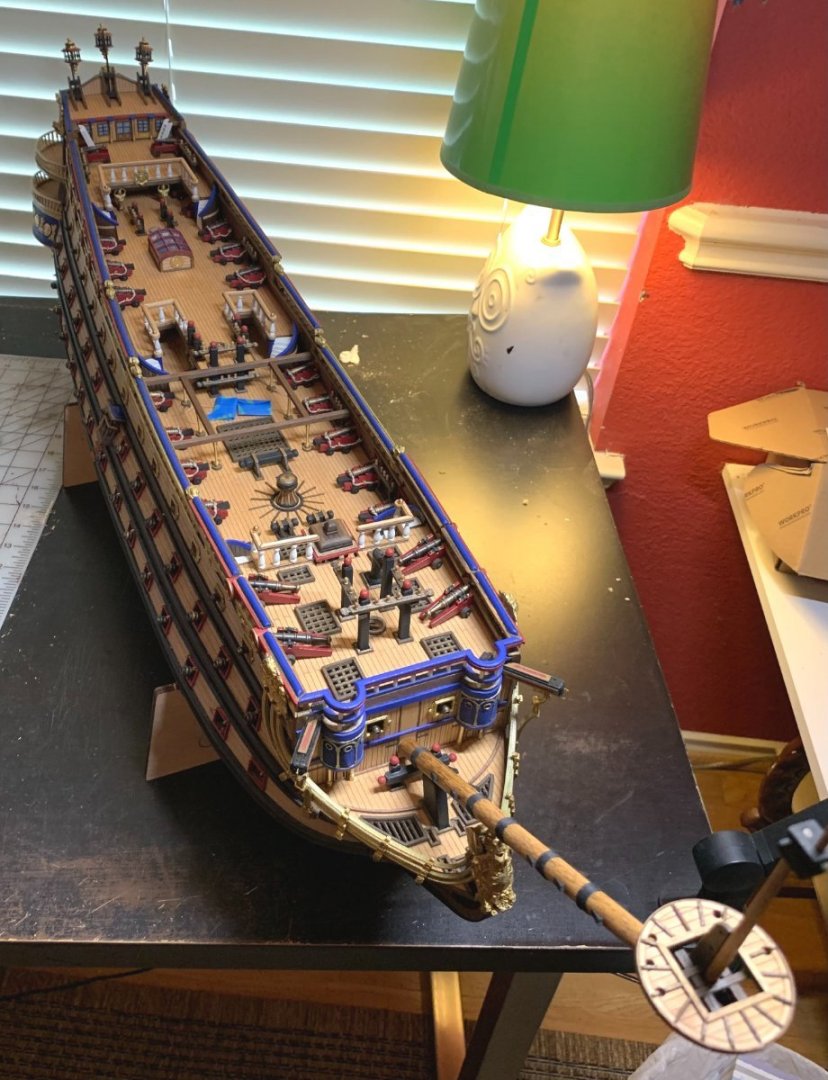
Deck Details Finished: Finished up the last of the deck cannons and the other assorted deck details. One thing stuck out to me which is the instructions don't seem to show any tie downs for the lifeboats which just would make them look really odd to me so I added four eyebolts for each boat, two near each of the end columns so they wouldn't interfere with passage in that deck area and I've already added the roap to one of those which I'll put in basically an X shape across each boat then back through the starting eyebolt and tied off on one of the pins on the lower main mast rack. I looked through the instructions and I couldn't find any other ropes that tie off on that lower rack so I'm hoping that I don't find something later that I missed that will need that pin. I just rolled up the two ropes for that and put some painters tape on them so hopefully they'll stay out of the way while I'm doing the other rigging. I felt that if I put the boats on the rack now that they would be very much in the way as I rig so I will hold off on including those for as long as possible. The bowsprit isn't permanently attached yet but I'm hoping that I don't need to remove it again but don't see any point to making it permanent till I have to. Really looking forward to getting to the masting and rigging, seems like that's a part that many of us really enjoy and it feels like a bit of a milestone to get to this point.
-
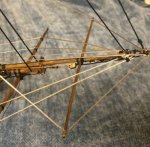
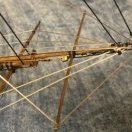
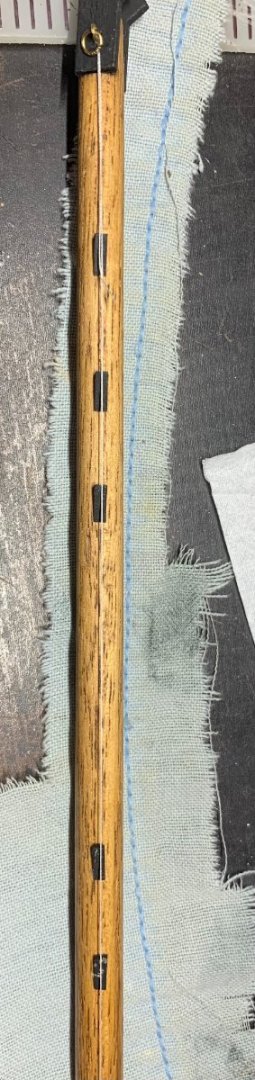
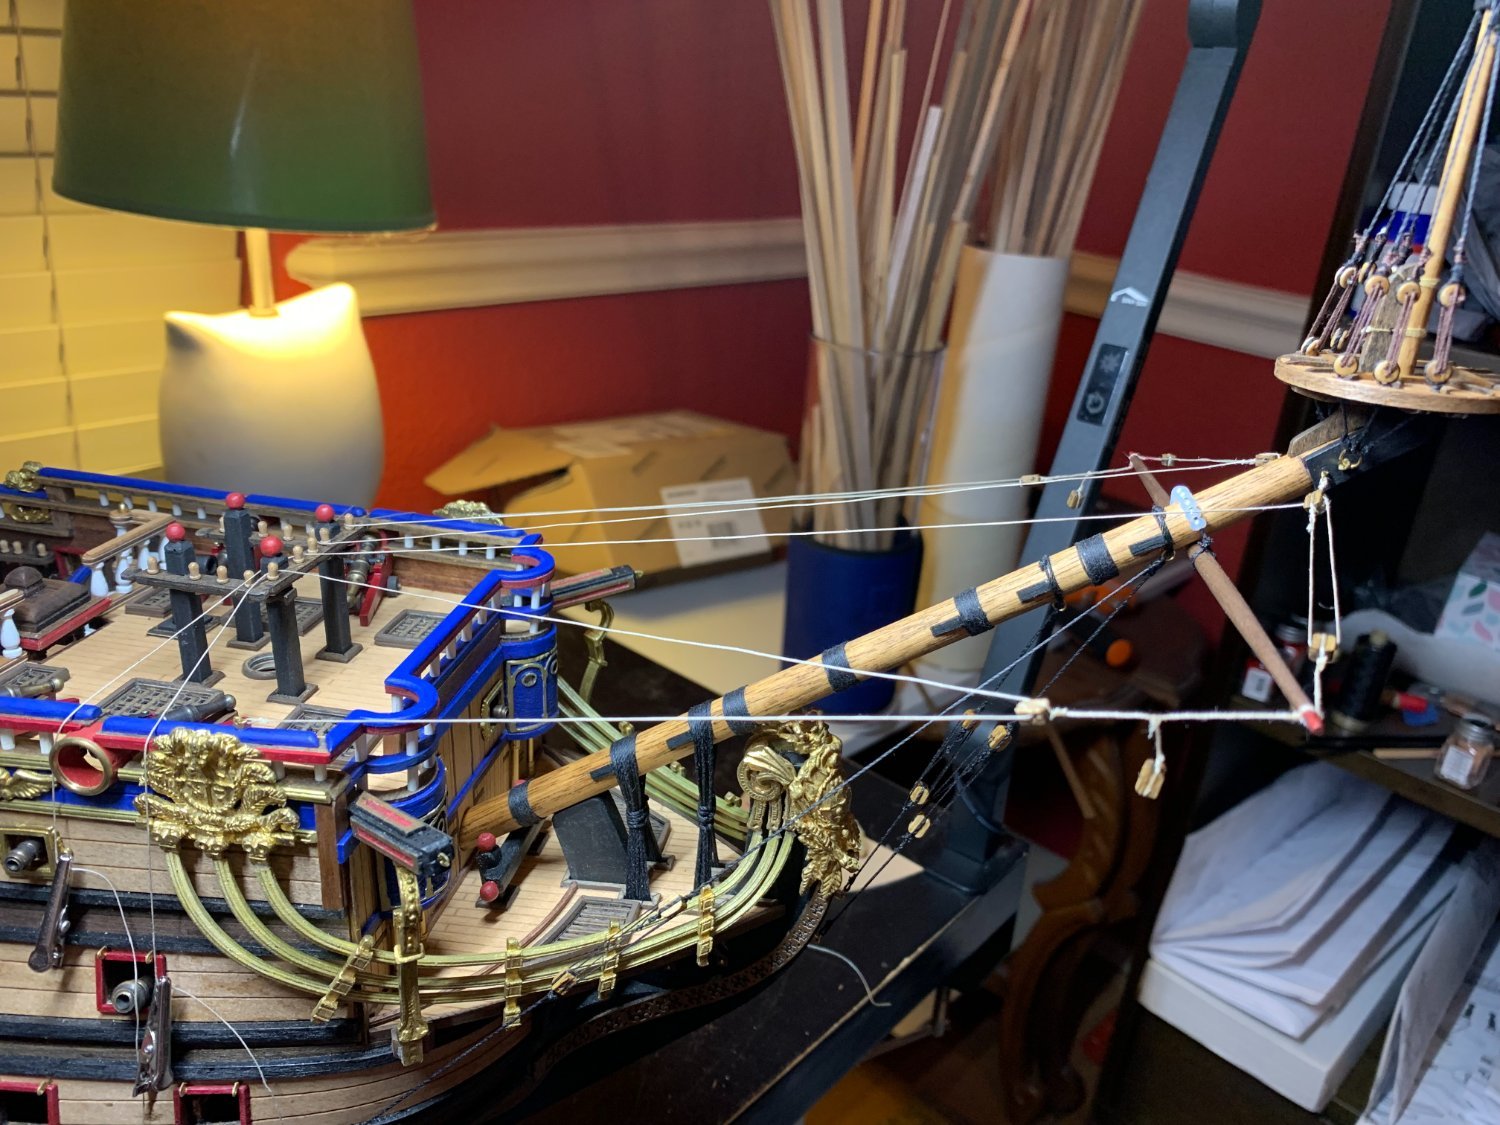
Eureka! I haven't posted a lot of my actual work process in this log because most of the time I'm just trying to figure out things and have no idea if they're the best way to do things but I had a bit of an aha moment today with a problem that's plagued me on both my builds. This problem is when attaching multiple pieces of hardware on a mast or spar that should be in a line on one side getting them positioned correctly. I've honestly tried to do this by eye and the results have not been as good as I would have liked them but I thought of just stretching a thread down the side of the spar or mast where the objects would be centered and using that as a position and straight line guide. I've started on the bowsprit and there's a line of 5 chocks (I think they're chocks) on each side so I tried this technique and it seems to have worked pretty well, certainly much better than just eyeballing things. I used hardware on one end of the thread and painters tape on the other to attach the thread. I used it as a center guide but it could also be edge guide if everything is the same width. Putting the thread on gave me a chance to eyeball where things would be and adjust the thread till I was satisfied and then glue pieces in place. This may be a common technique but I don't remember running across it in any of the build logs I've been through so thought I'd share.
.thumb.jpg.c75fb314efc1c618b3e9329395e92cec.jpg)
-
Allan, interesting point on the belaying pins, I was not aware of the timeframe of their introduction and that's great to know, what you see is exactly the parts and position of the kit. I was aware that the San Felipe in this kit was pretty much fantasy and had seen that link before I purchased and I've made some build decisions (mostly colors) based on this being a decorative build and I was ok with that when I started and will finish this out with that in mind, but I have decided to go historical accuracy with my next build. I don't think there's anything wrong with either approach, I built this for myself after all, but it's a different type of "fun" with one being "what color would look good here" and the other "this is how it looked, how can I make it like that" and I'm interested to give the accuracy approach a try so I have the Caldercraft Victory waiting for me when this is finished. This is the only Mantua kit I've built and it's a mess IMHO, looking around on the web before purchasing that seems to be well known but I plowed ahead anyway.
-
More deck details: Just working through all the cannons and deck details. Finished the last of the spiral staircases, I had to scratch build the banister for all of them I just couldn't make the included ones look right. Just have 5 more cannons to go and the last of the detail is done I think. Everything has gone pretty smoothly for these details. Will be able to start the rigging fairly soon now, looking forward to it.

-
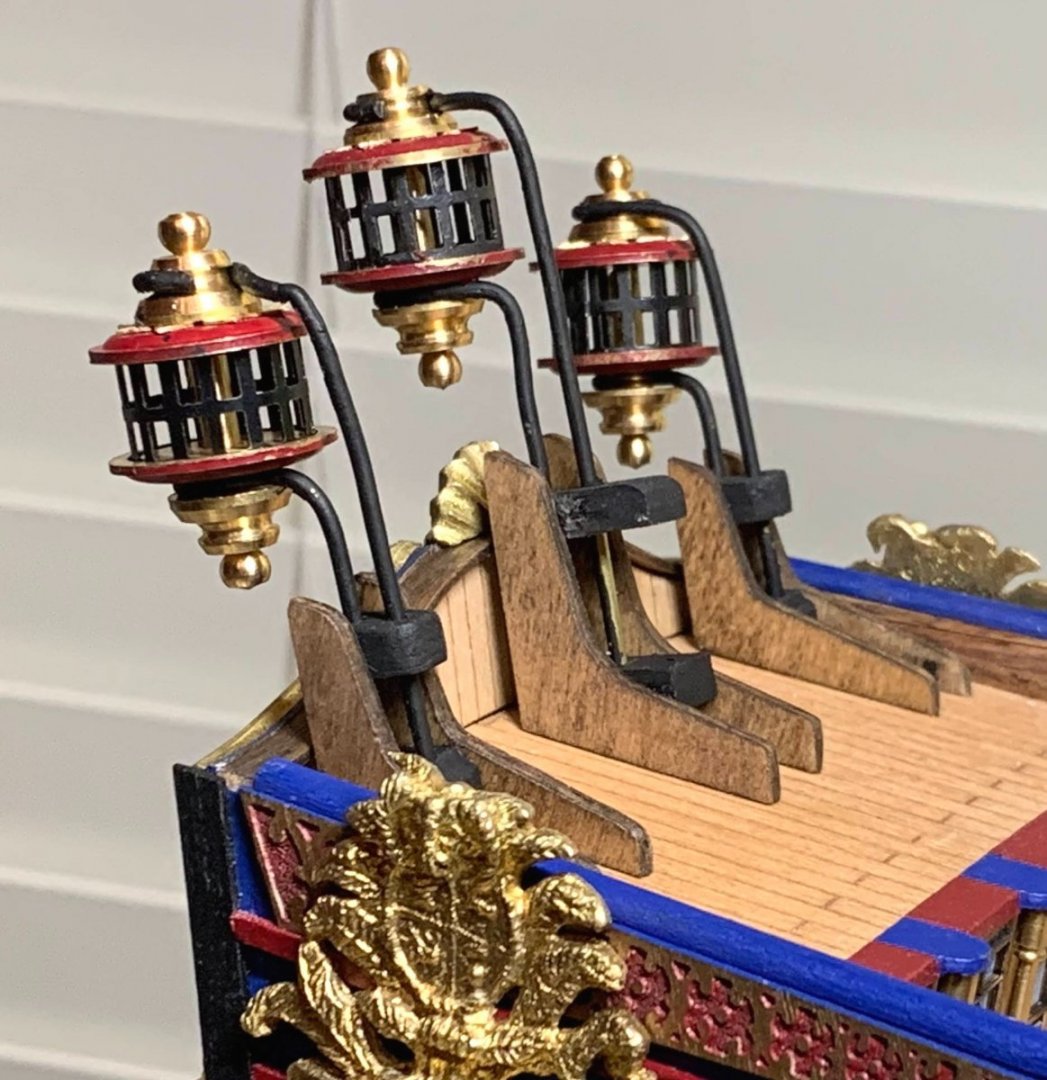
Deck Details and Cannons: Just continuing to work on the decks, and cannons, both the deck cannons and the false cannons. The instructions don't have any rigging on the cannons and that just makes them look funny to me. I had to decide between doing a full rig or just installing the restraining ropes and decided to just do the restraining ropes. The way pieces are positioned on the deck I just though that a full rigging would make things look too crowded. I still have the second side deck cannons to go and a few dummy cannons but soon they will all be done. The lanterns were a bit of a problem because they're supposed to have two end caps which screw down on a central shaft to hold the grate in place but even when the two end caps are screwed completely down it still left the lamp grating loose in the grooves so I decided to put a couple of spare brass 3mm o-rings on the shaft before installing the lower end cap. That pushed the lower end cap up enough that everything screwed down night and tight. I then filled that gap with the mounting wire so that all worked out ok. I'm also debating on whether I should install the gunport lids now or wait till the rigging is done. On my last build I had a tendency to catch my hand on the lids and accidentally tear them up. I'll just have to weigh the extra work adding them later vs. the risk of tearing a couple up.


.jpg.1c532e0a7be6237730d62f5f3c52ec55.jpg)