
travis
-
Posts
162 -
Joined
-
Last visited
Content Type
Profiles
Forums
Gallery
Events
Everything posted by travis
-
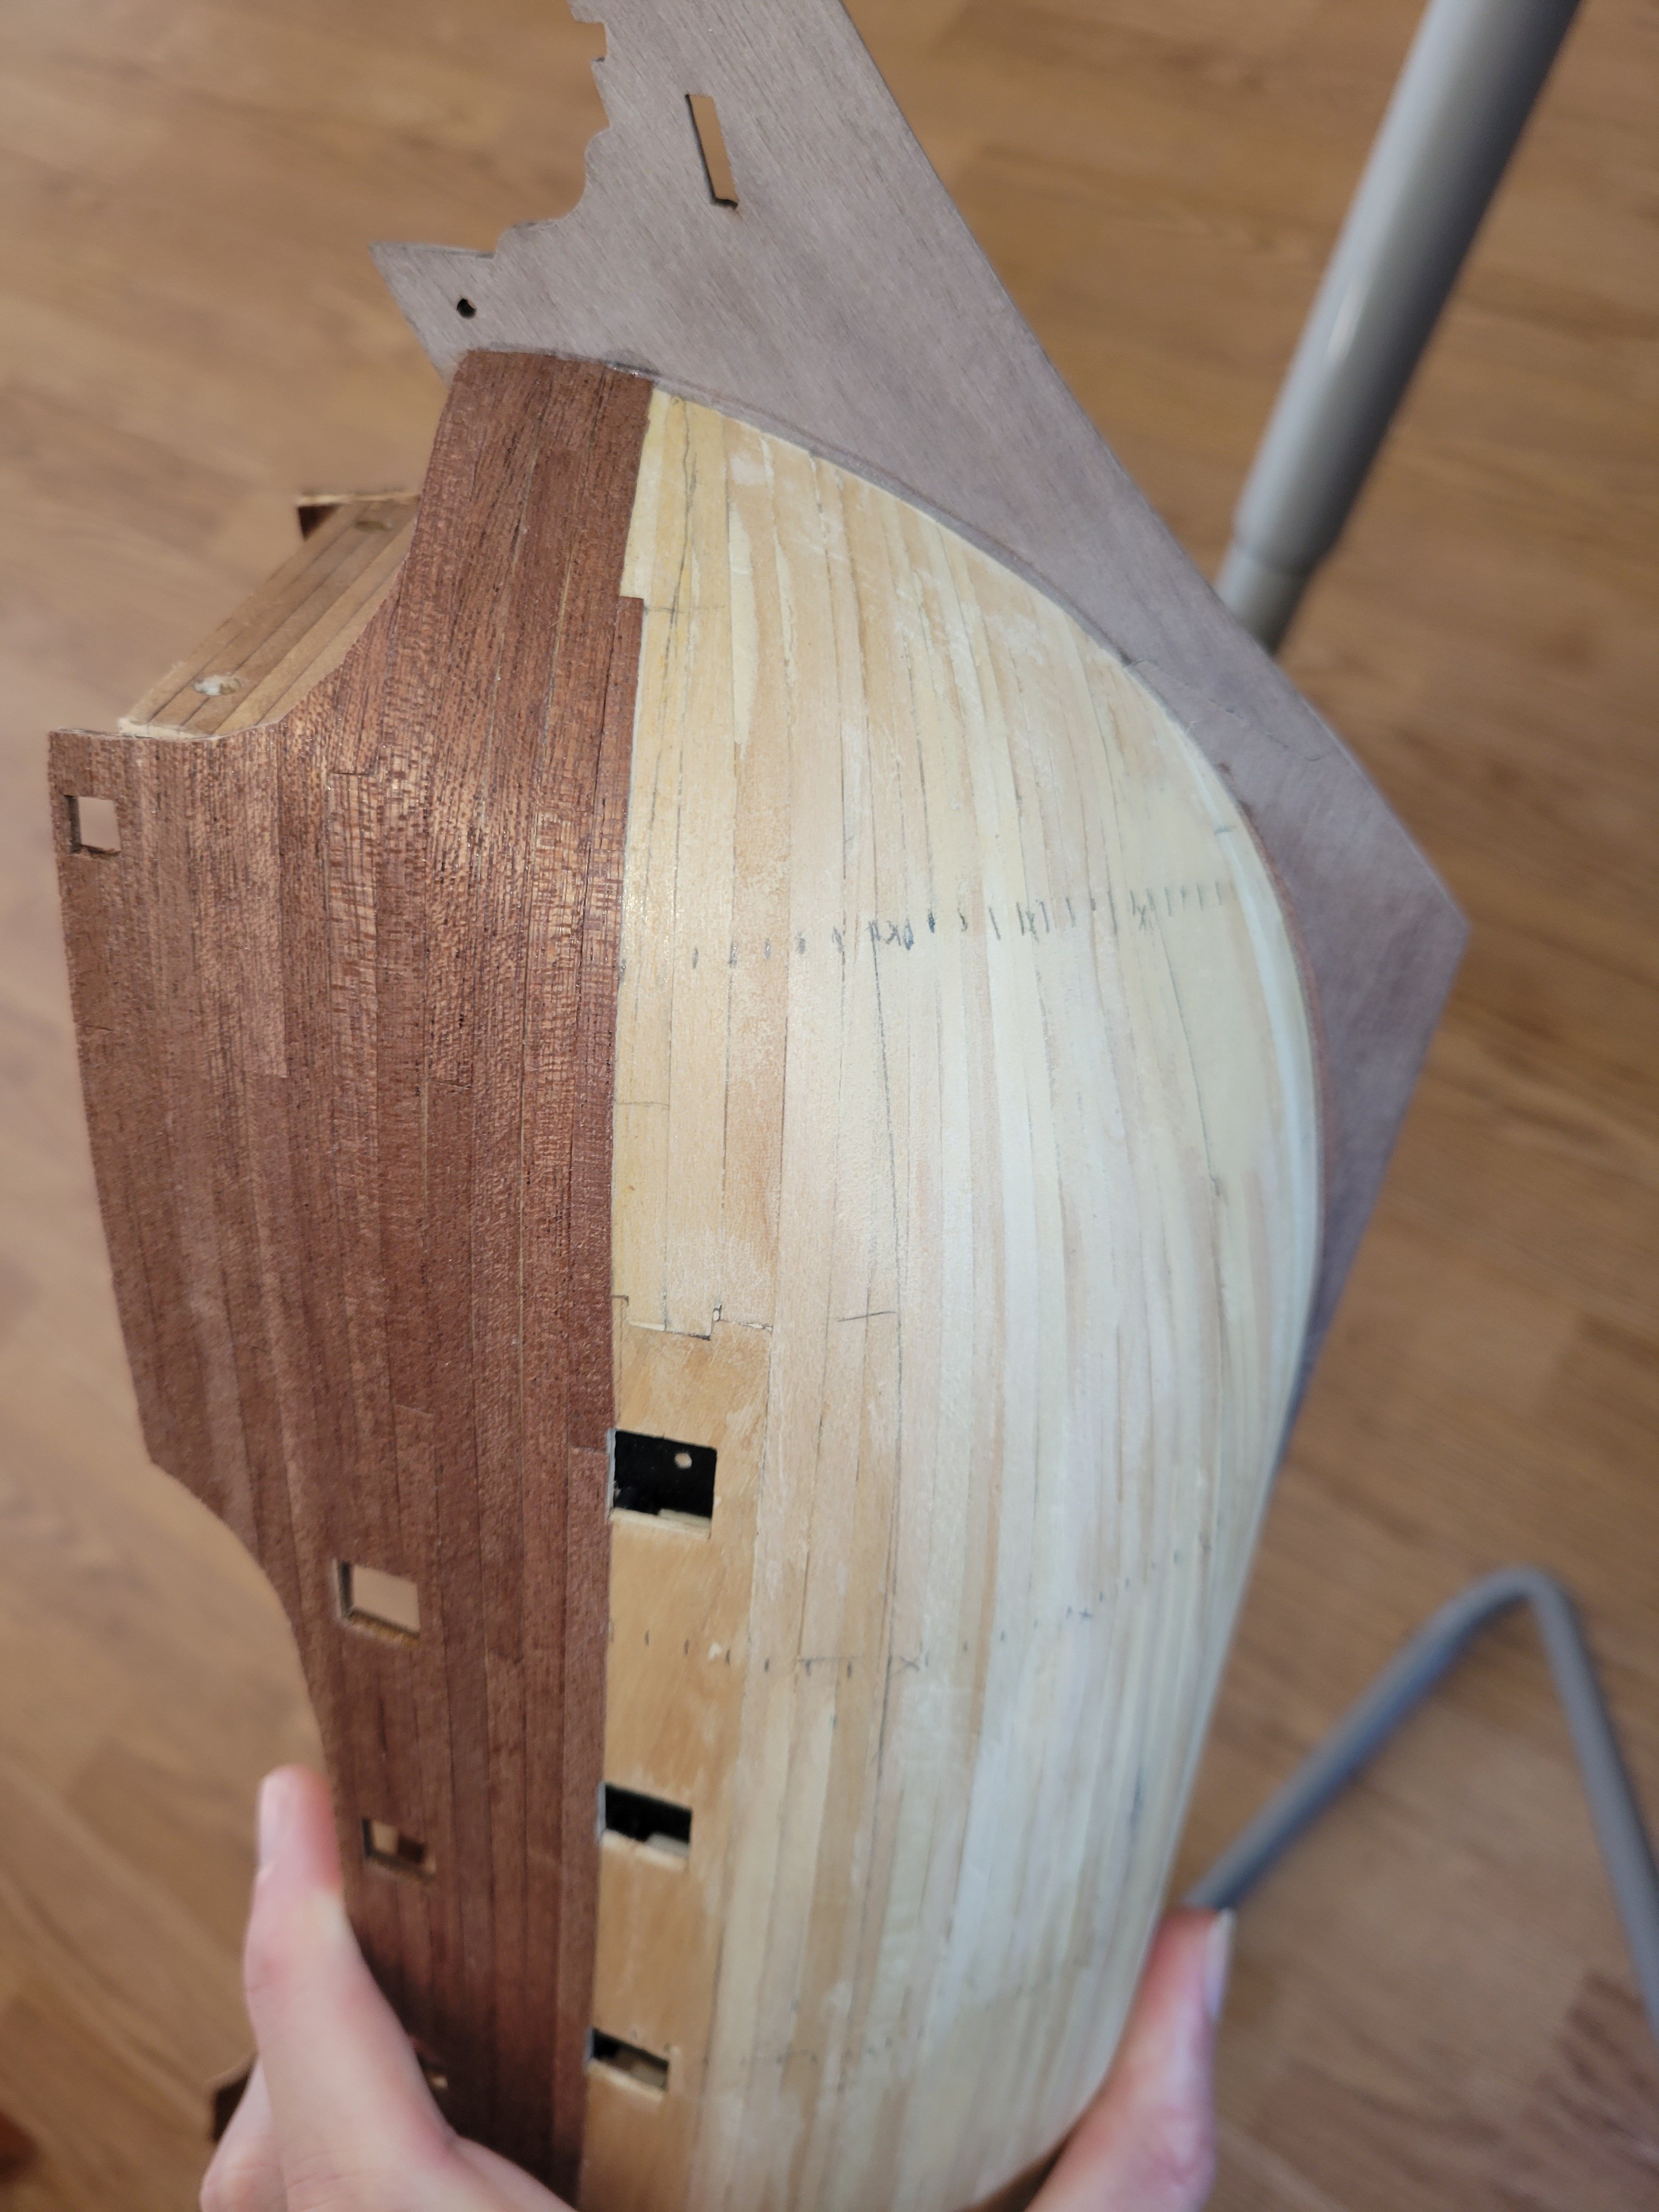
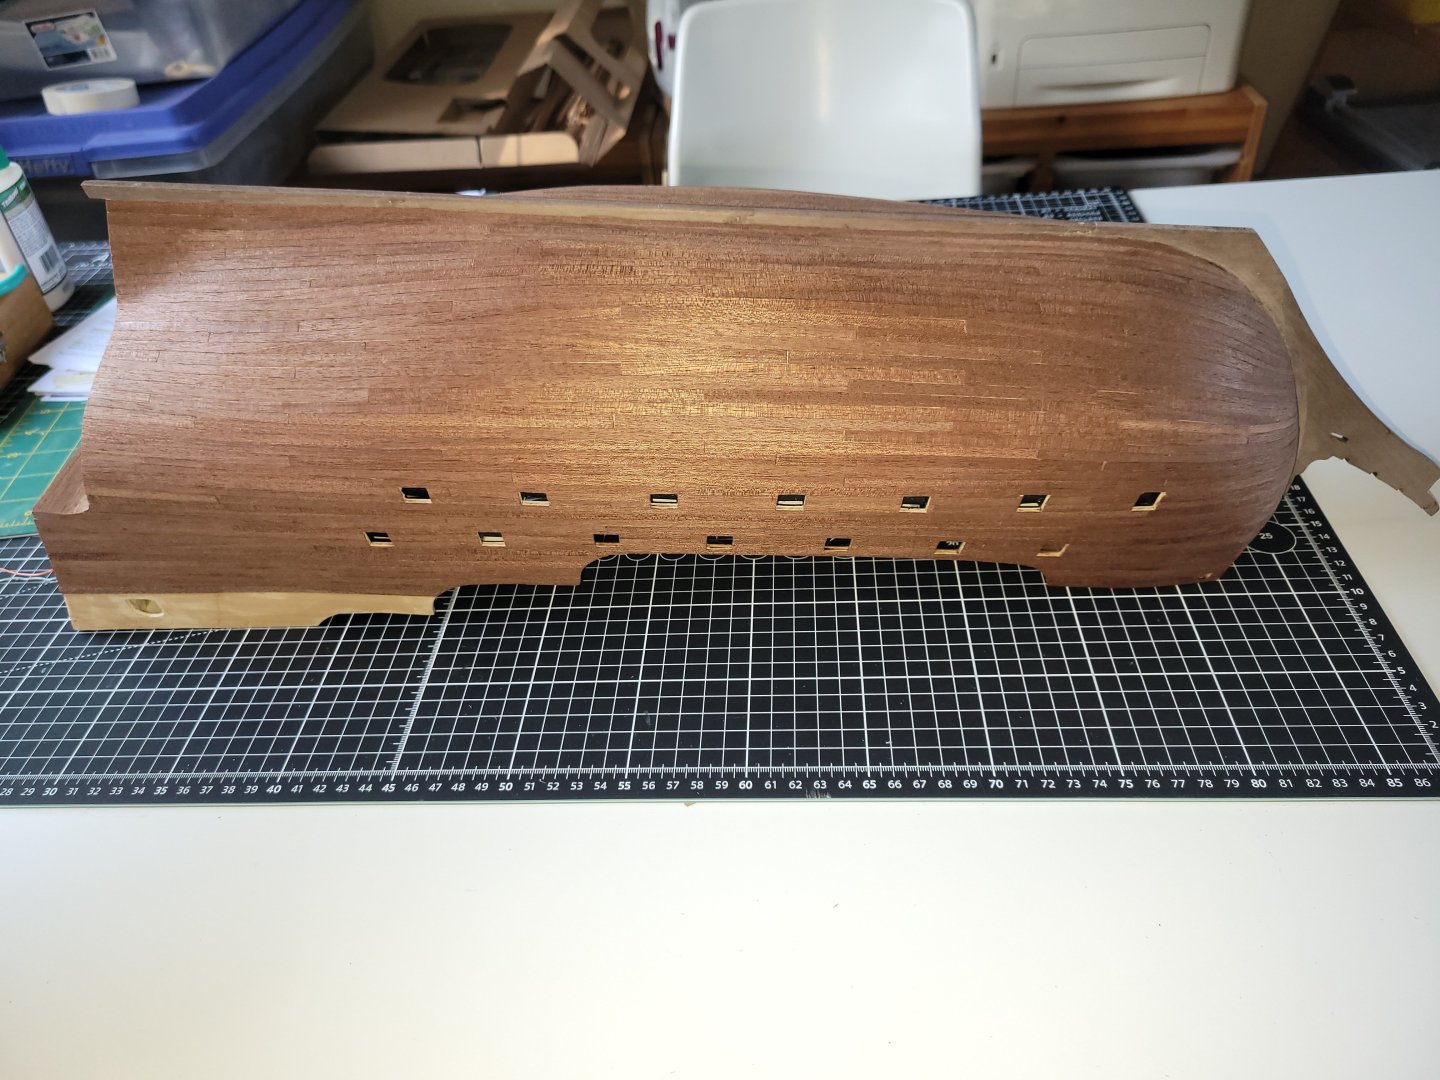
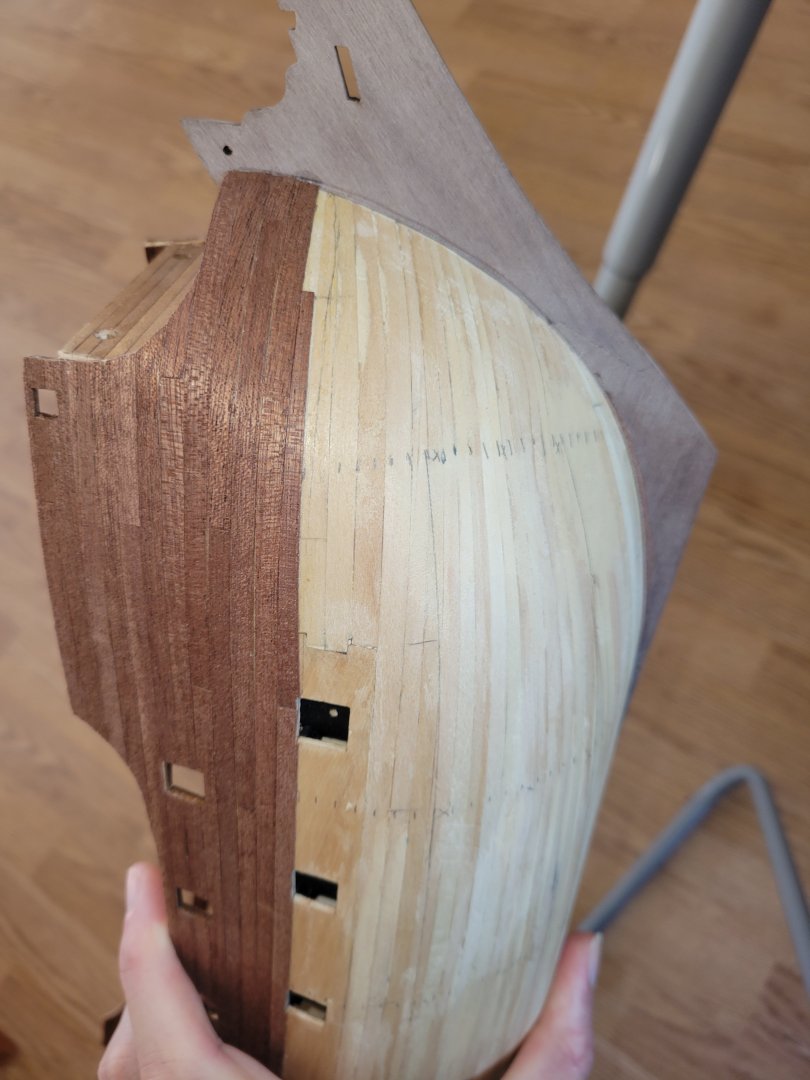
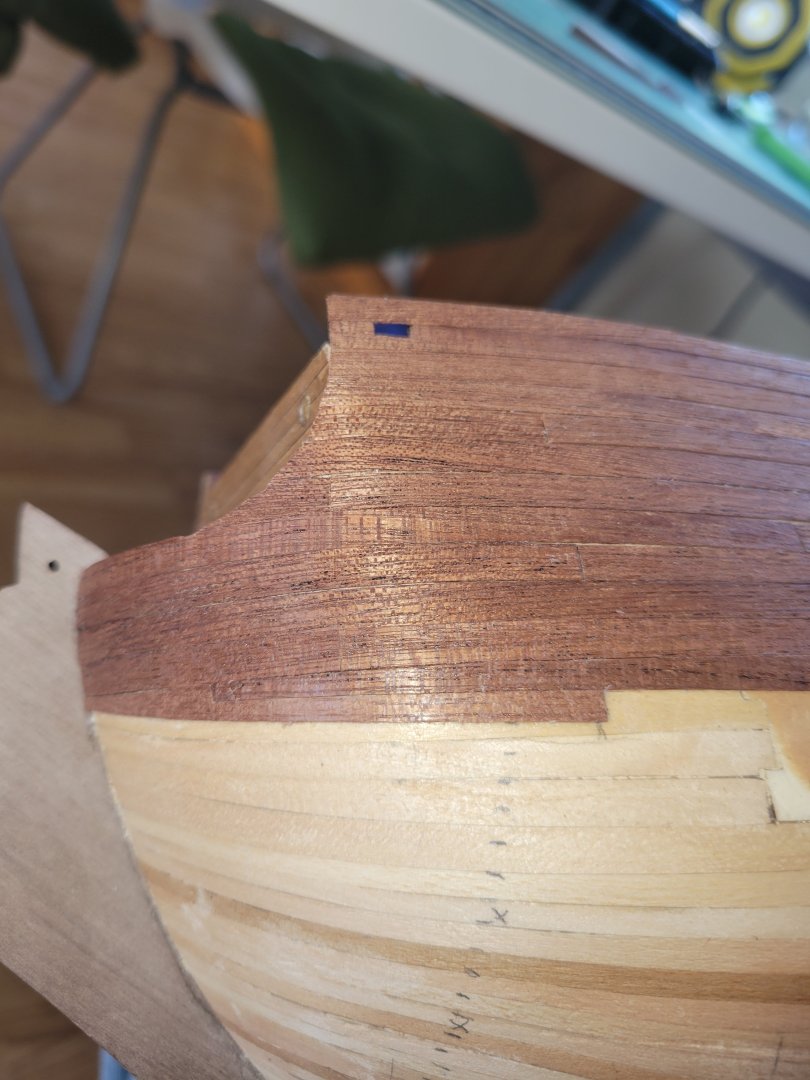
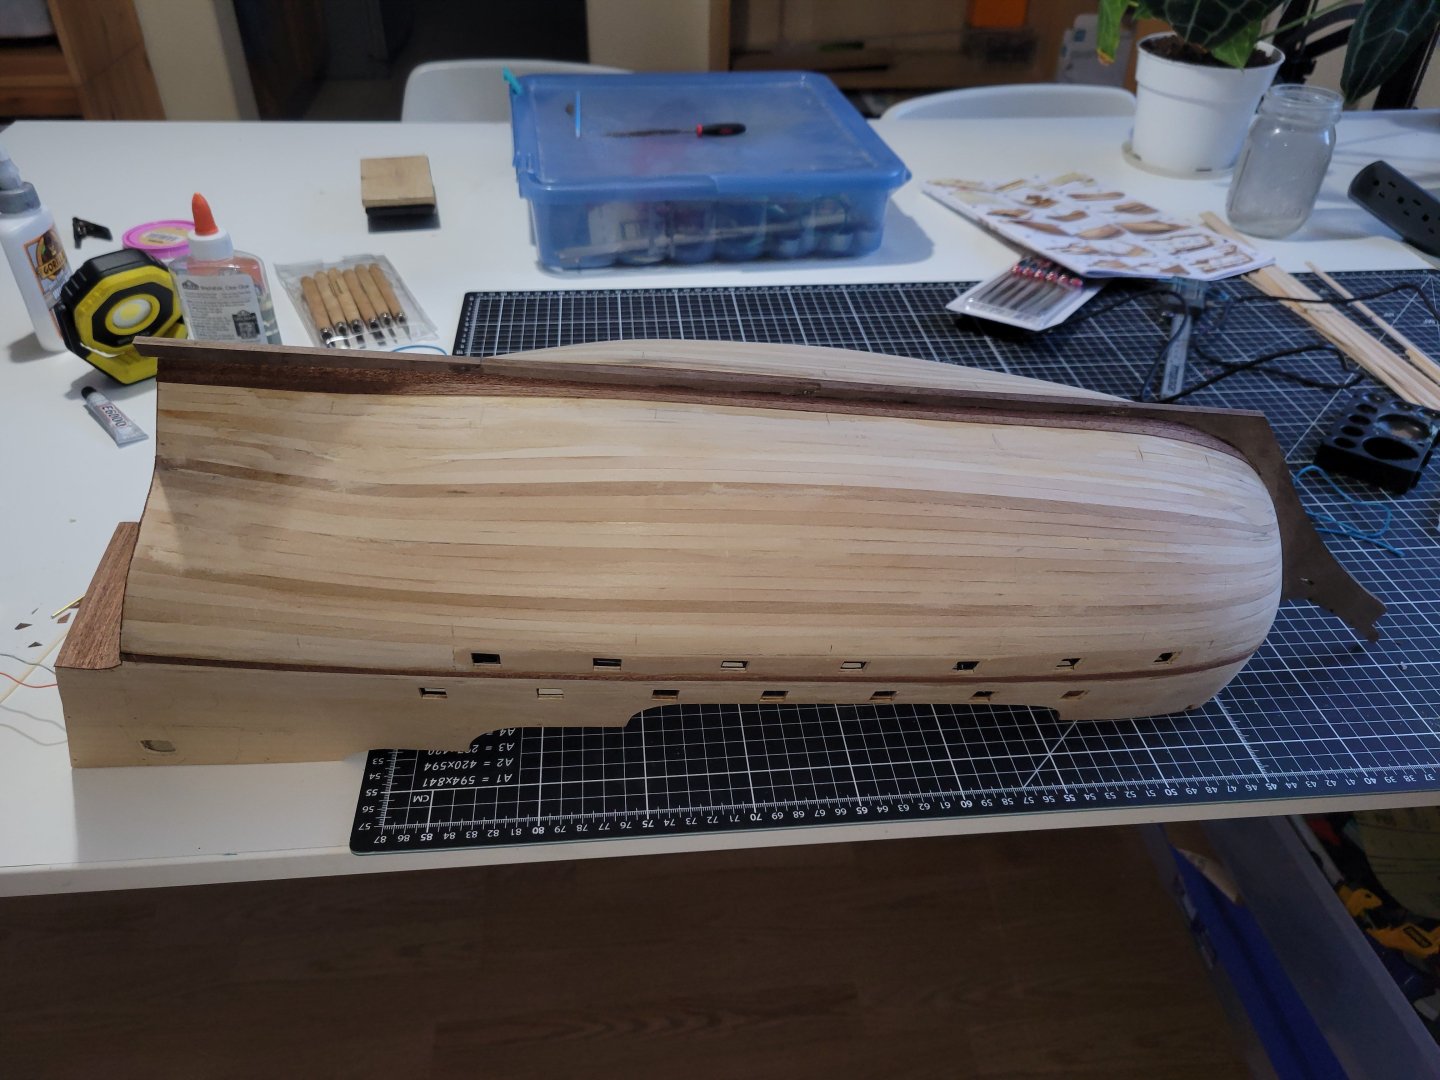
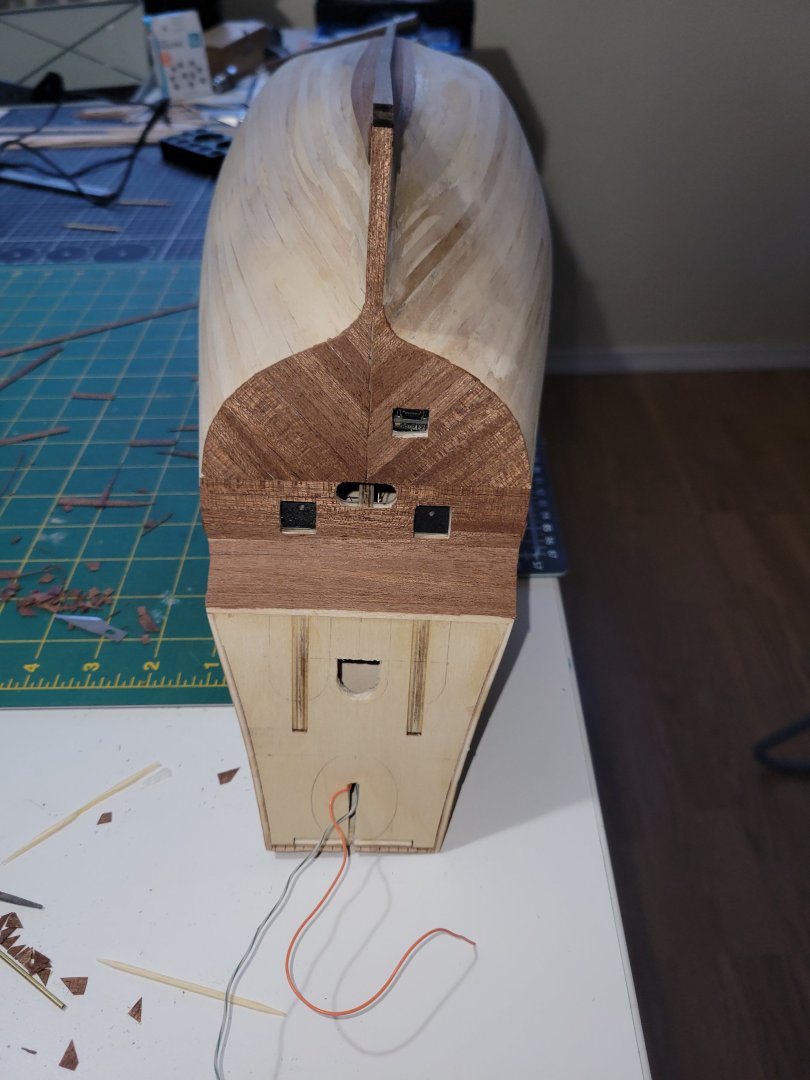
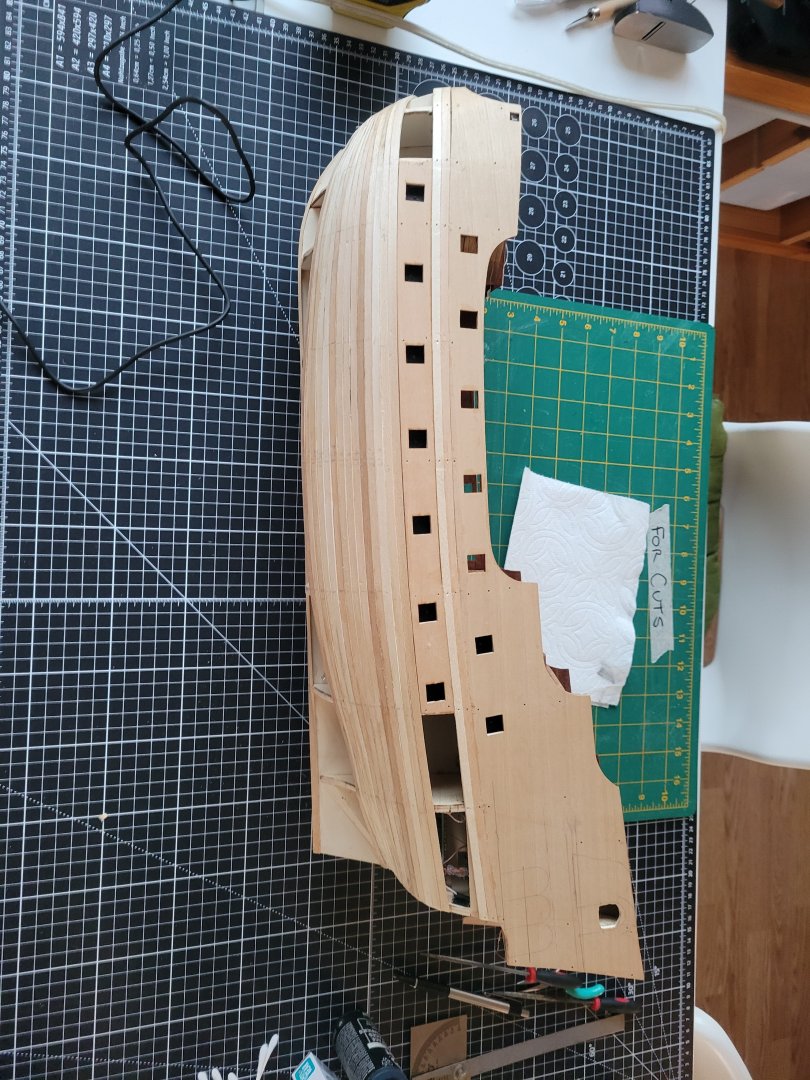
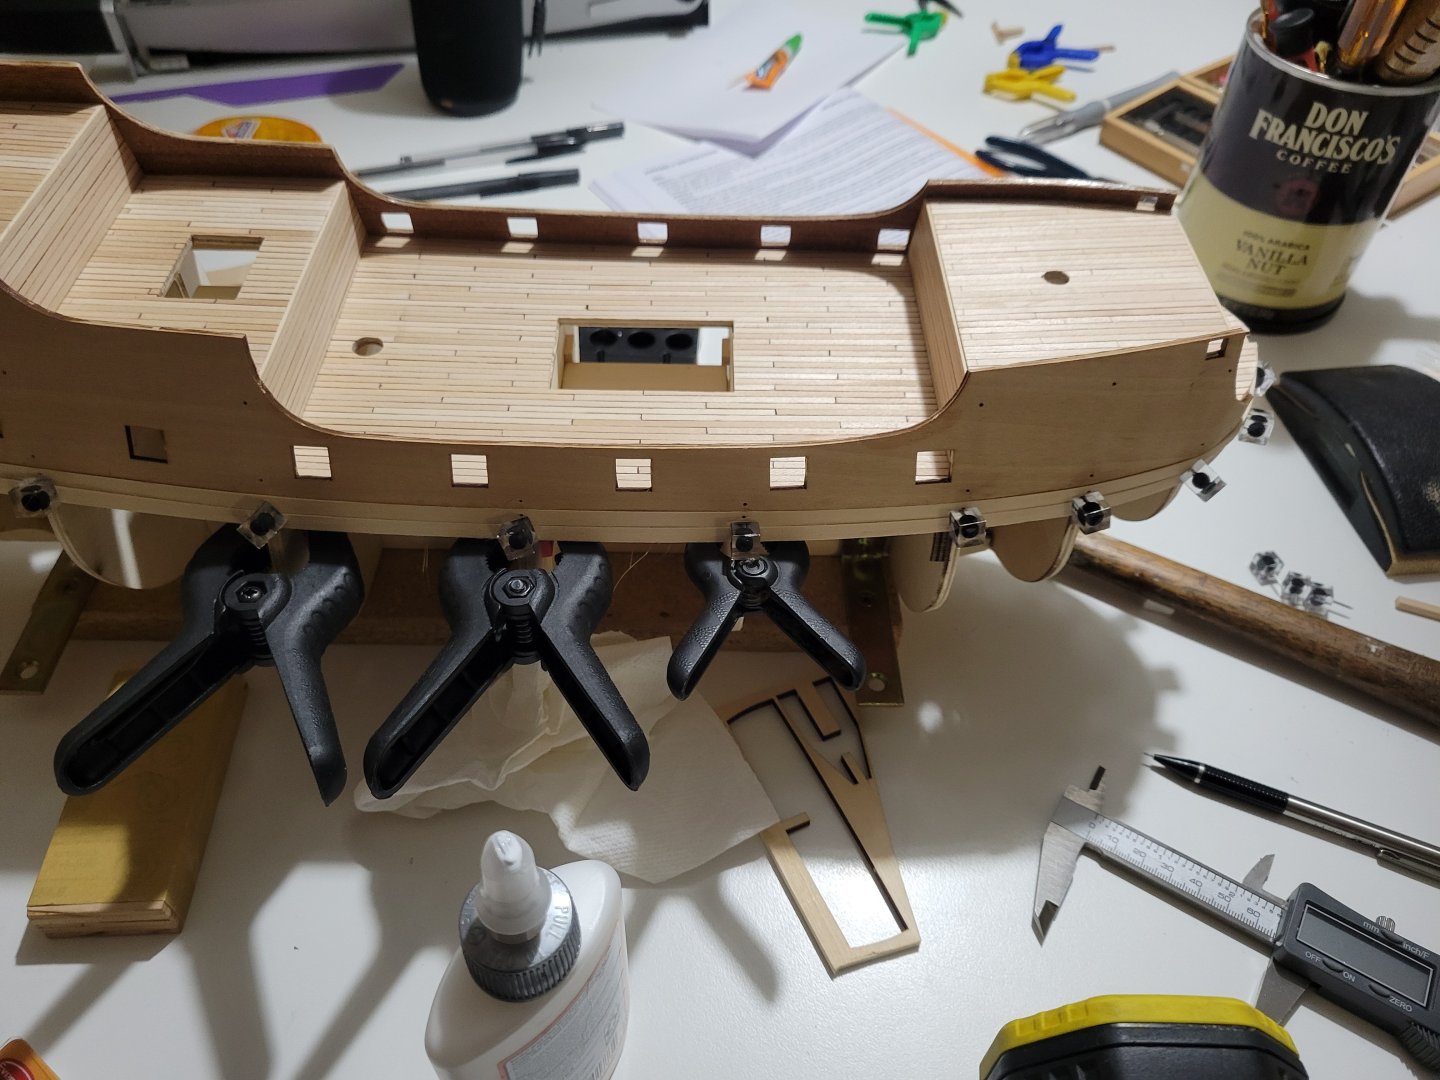
 Took a long time but the hull is finally planted! Got a little left to do at the upper stern but I'm holding that until I get further along and ready to wire in the aft lantern. My first layer was treated like a single layer and came out pretty good for first time trying to have that layer at finish quality. Second layer came out even better. So glad I cut all the planks to actual scale plank size rather than. Trying to bend full length straps. Allowed for a lot of adjustment as I went, especially with the more intense curves at the bow. Time to figure out bending the strokes. Haven't decided if I will cur them into smaller sections or not. Going to make a bending jig similar to the one amati sells and see how that works.

-
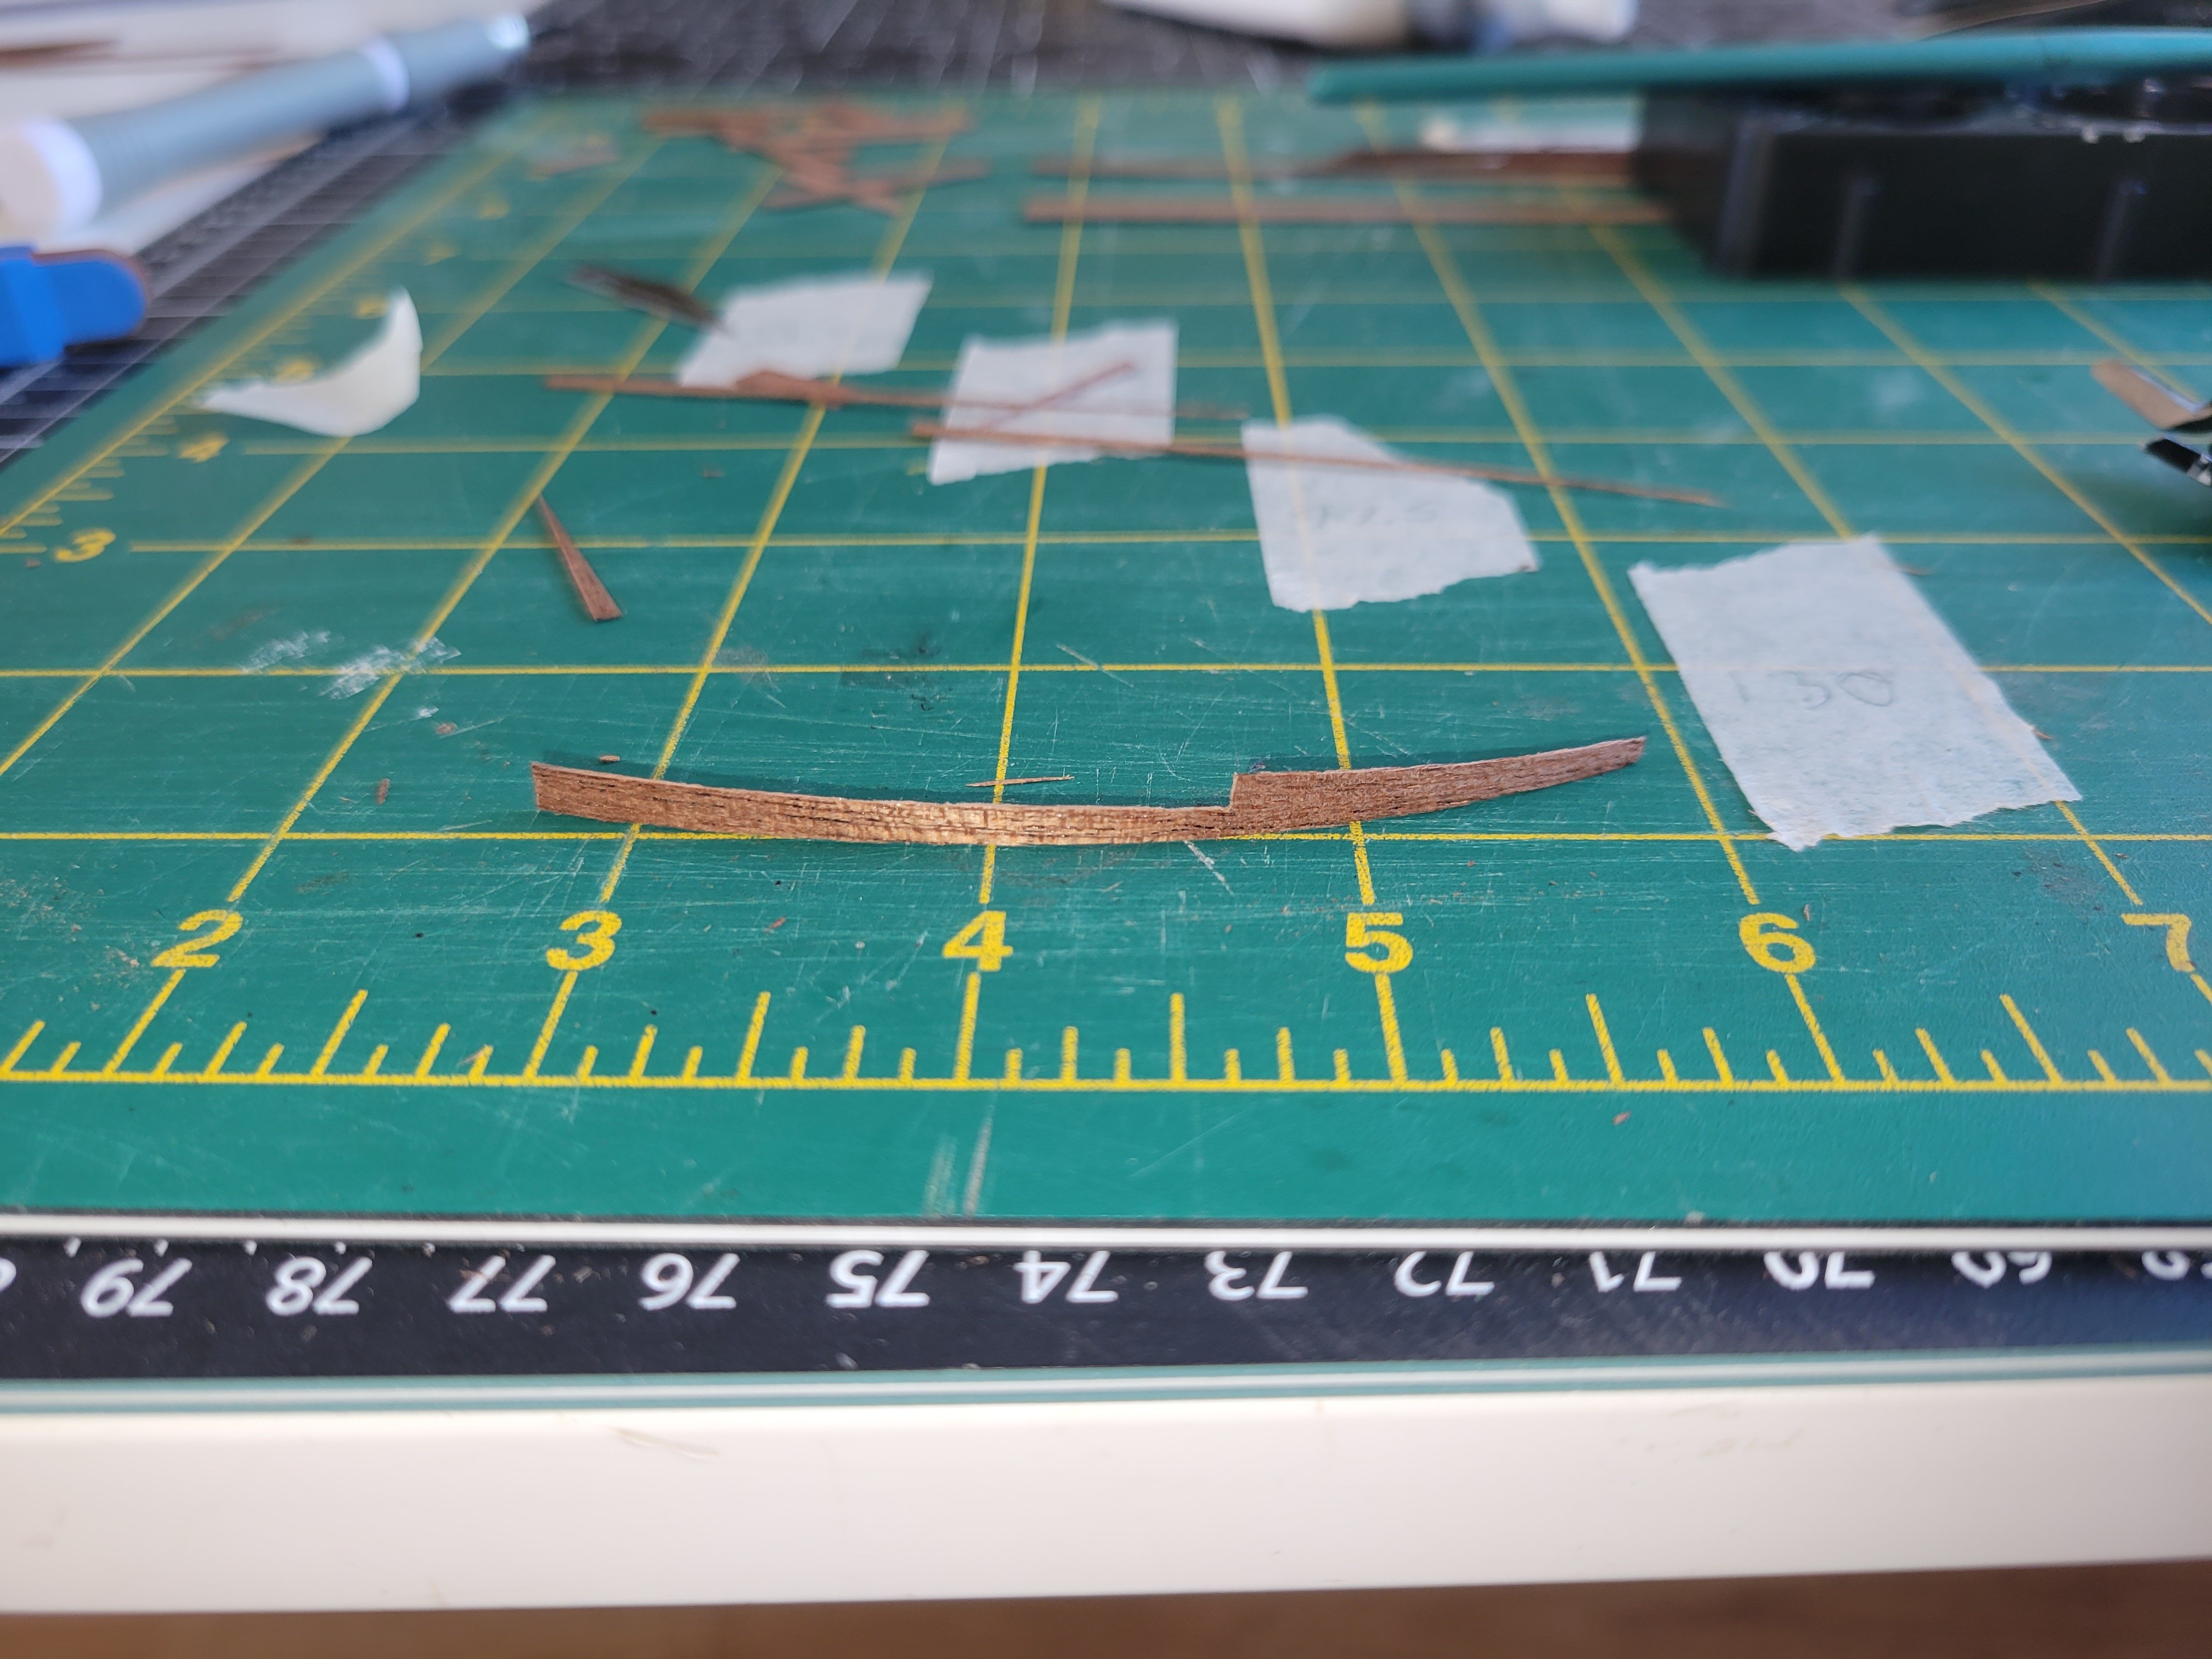
First attempt at a drop plank. This bow has a lot to curve so hoping this takes some of the stress off!

-
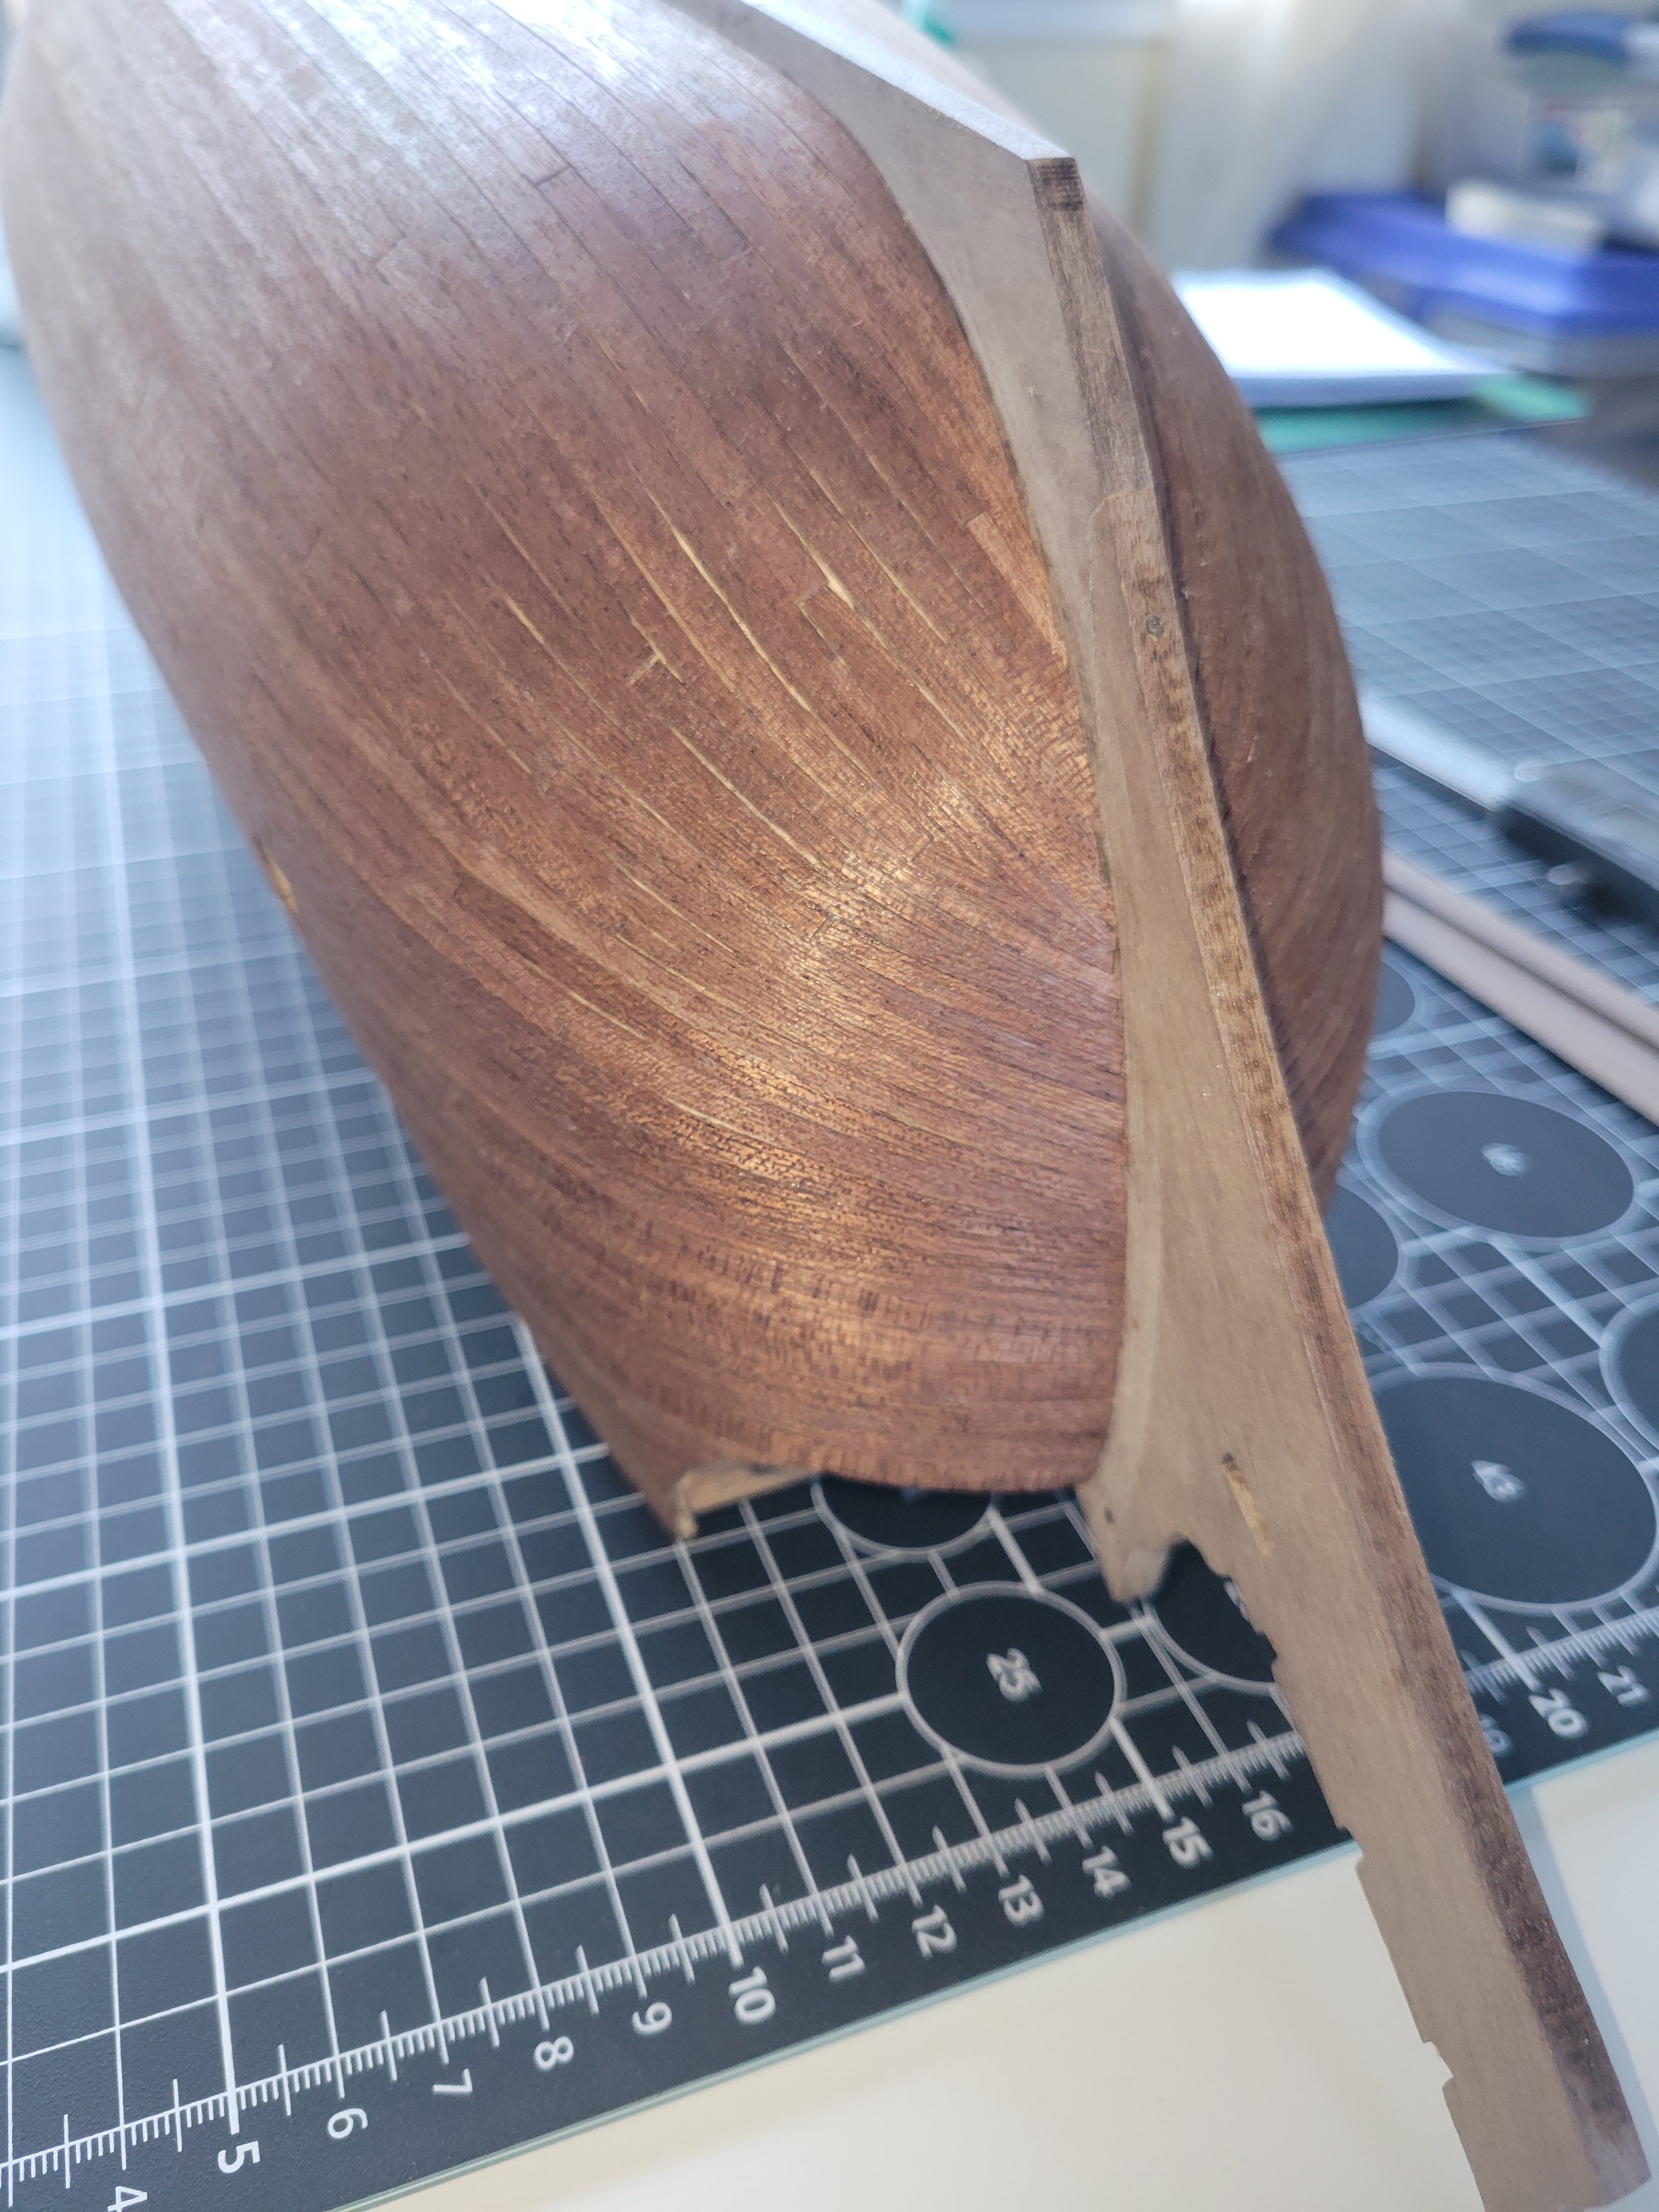
Decided to set the keel before the final planking so I can get a clean finish (even kinda did a kerf in the bow to help hold the planks flush ). Planked part of the stern, set the garboard and first full plank at the Wales. A big change using contact cement but I see how it is beneficial for the final plank if you take your time. Nice to have the planks stay exactly where I put them. Now to plan, measure and cut all the tapers!
-
Looks like you are just a little ahead of my on the apostol. I just finished first layer and am now working on second. I like bseing that you are running your second plank as individual planks rather than single planks the whole length. Are you doing the same below the wales too? I'm on my third build and for the first to, I used wood glue for second planks. Got real lucky and no glue bleed but what you are facing has been my fear with such thin planks. I'm trying contact cement this time but that comes with it's own challenges! I like the quality and detail you are putting in so I'll follow along.
-
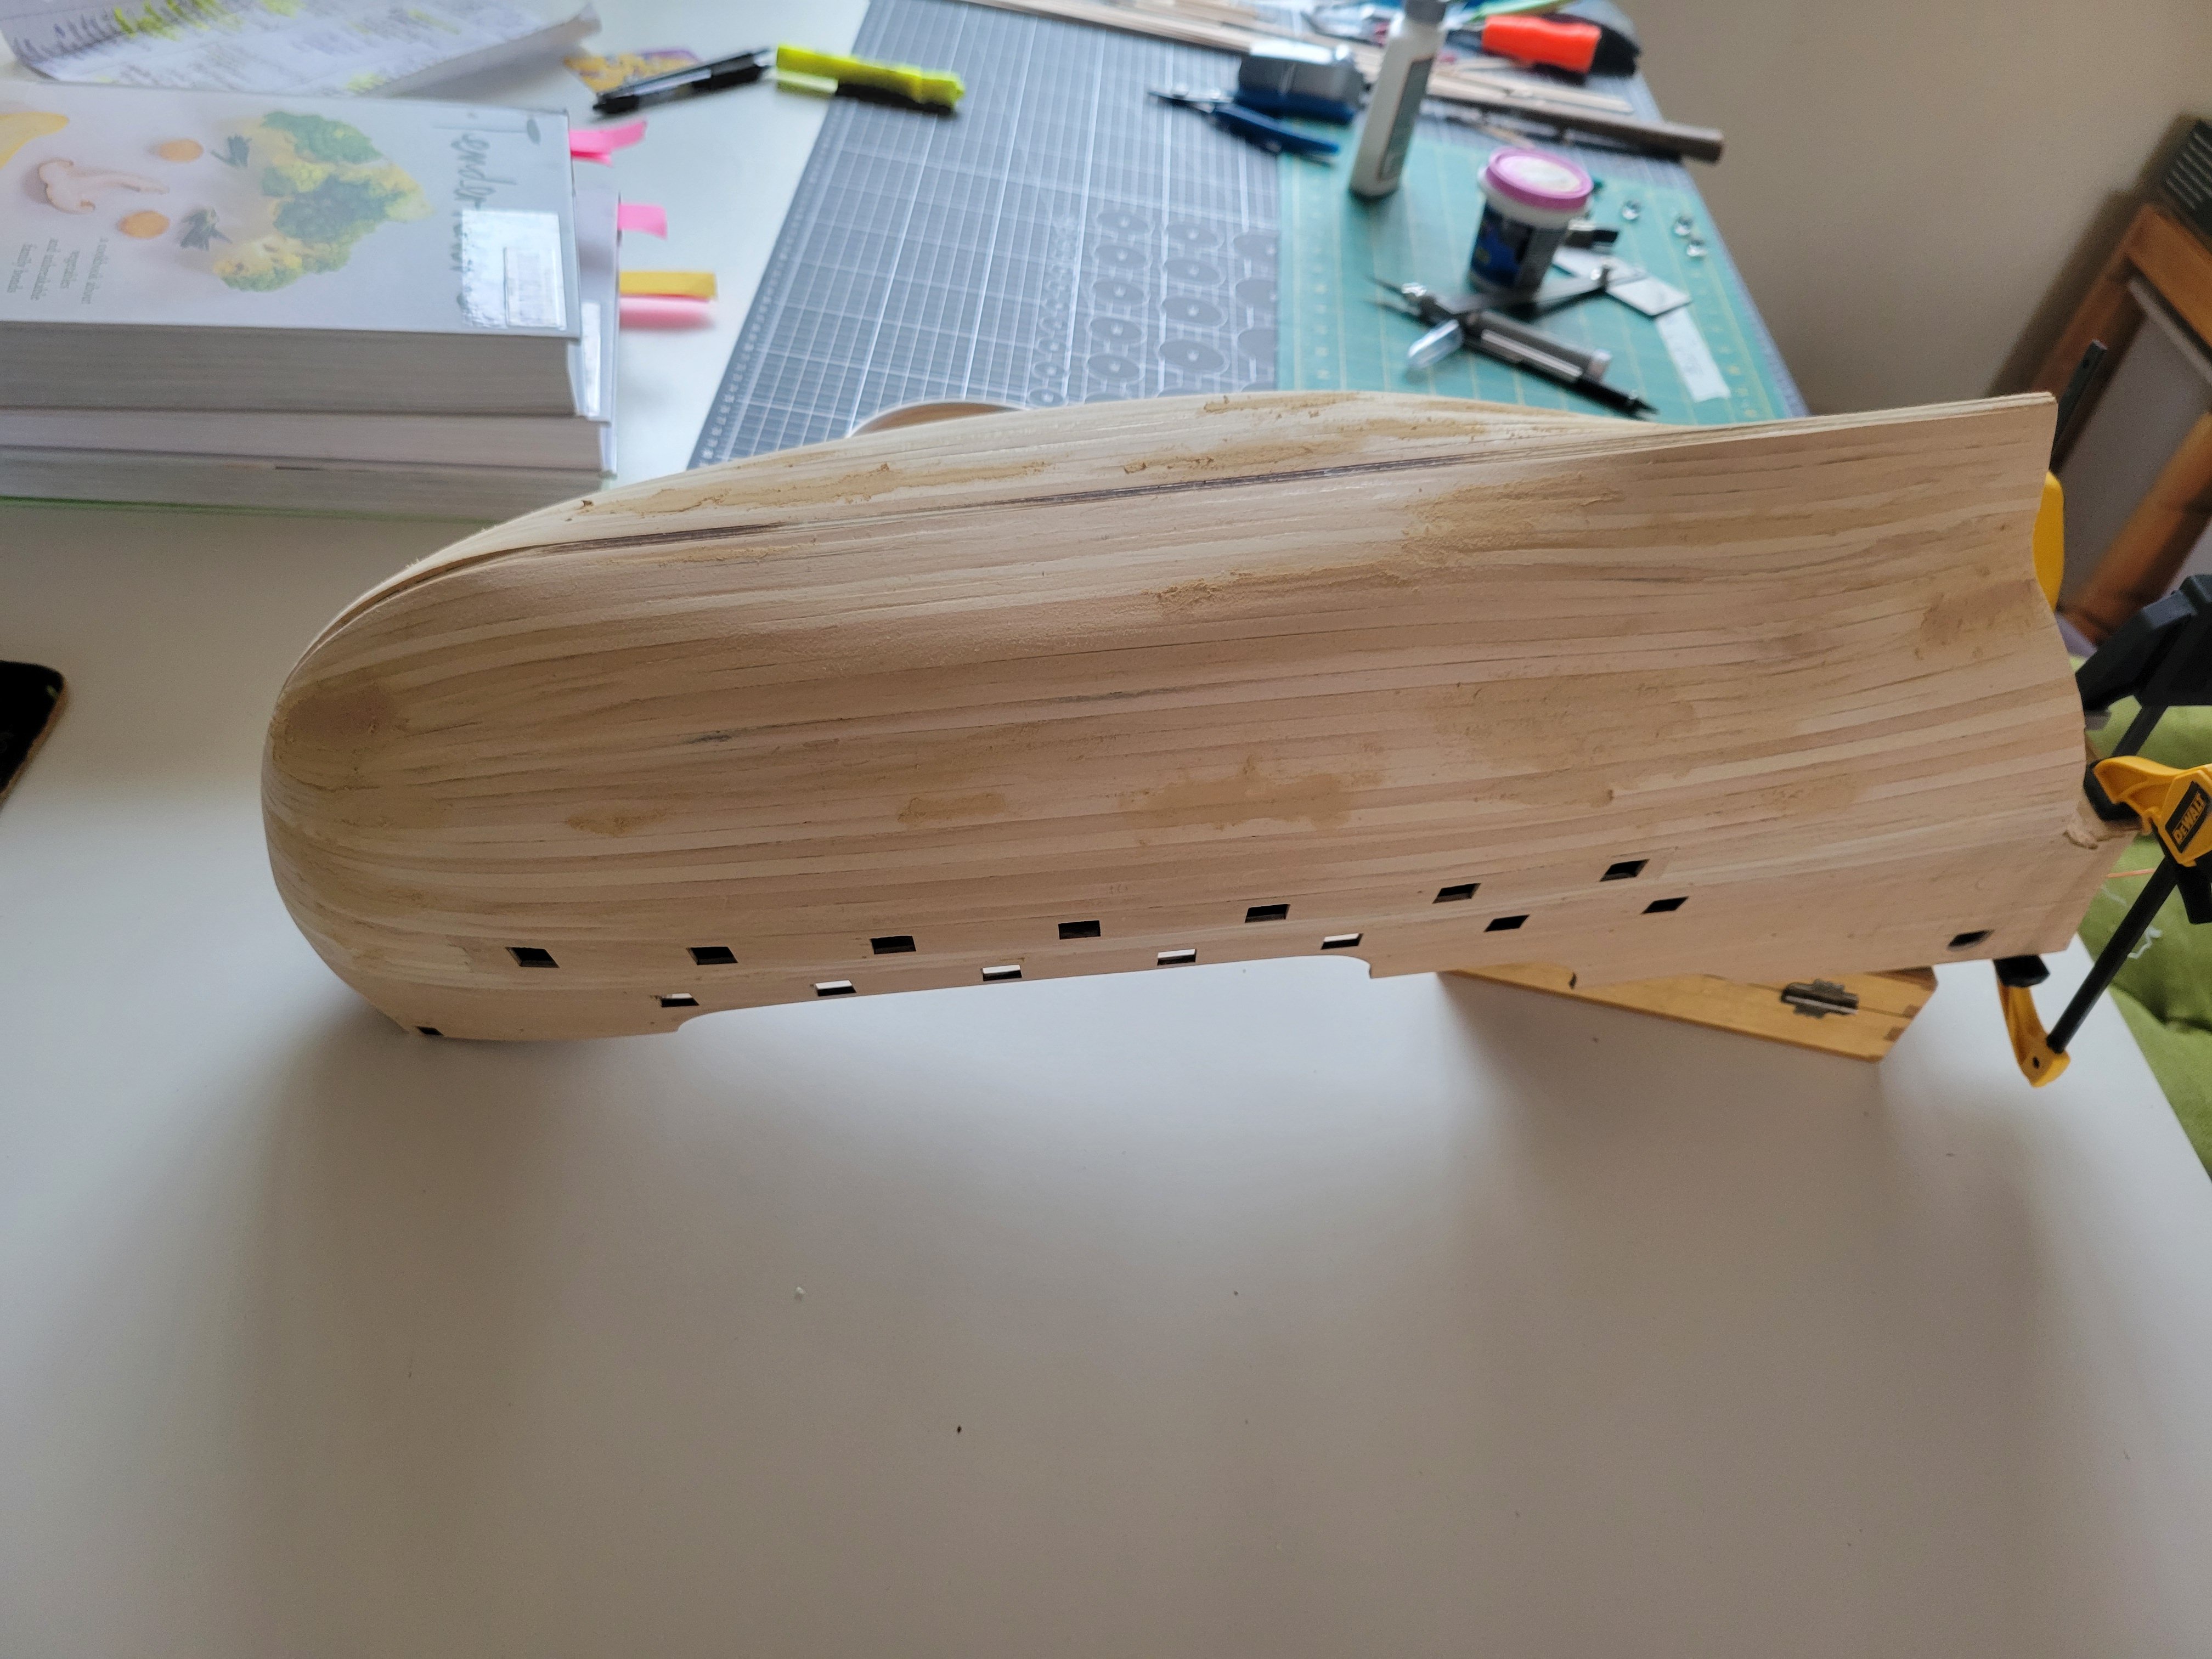
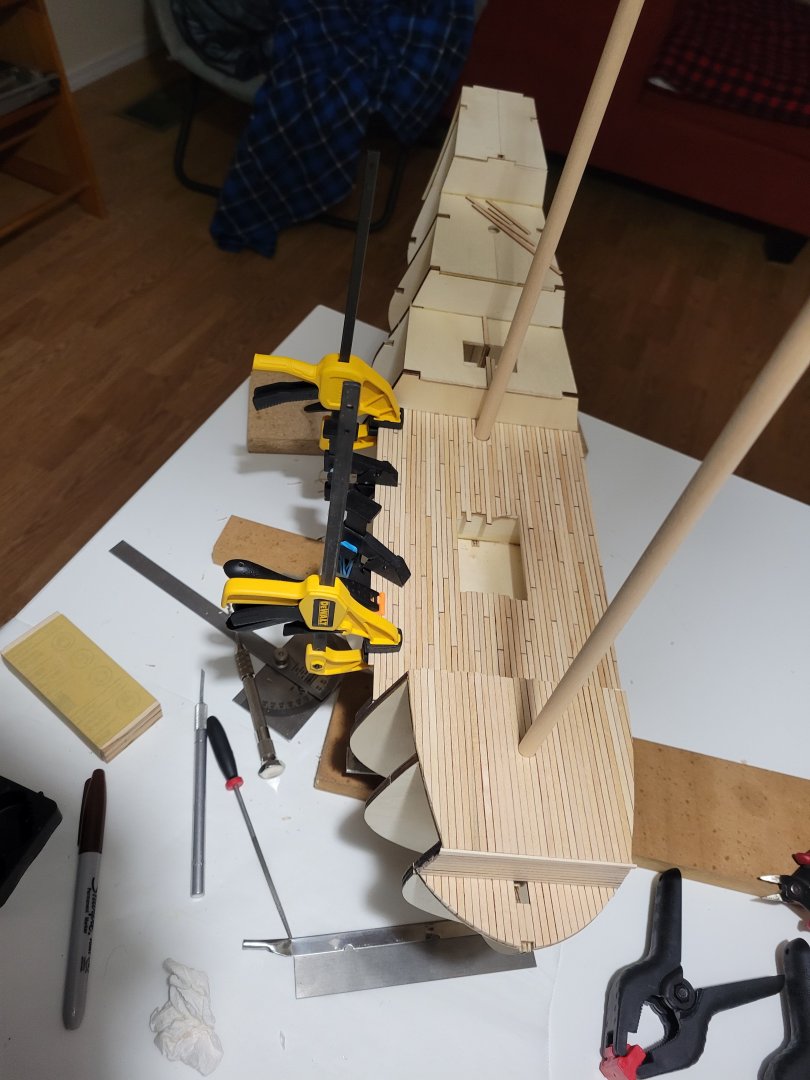
Hull is planked. Sanding and filling now. I tried planking like this was single layer. Came out pretty good for me but still need another round or two before I'm actually ready to do a single plank. But should be a nice underlayer for the second plank.

-
Been a long while. Still working through planking the hull but work and other priorities have made this very slow. I'm also treating the first layer as a final layer as practice for one day doing a single layer scratch build. Isn't perfect but first layer is a lot cleaner and tight than prior builds. I'm also painting a thick layer of black acrylic on the back side after glue set on each plank (with a bent qtip). Testing as I go it's actually doing very well to eliminate bleed from the leds. Getting a lot of bend at the bow and trying to avoid steelers/drop planks as I go on this so we will see how it ends up. 20250318_072541.mp4

-
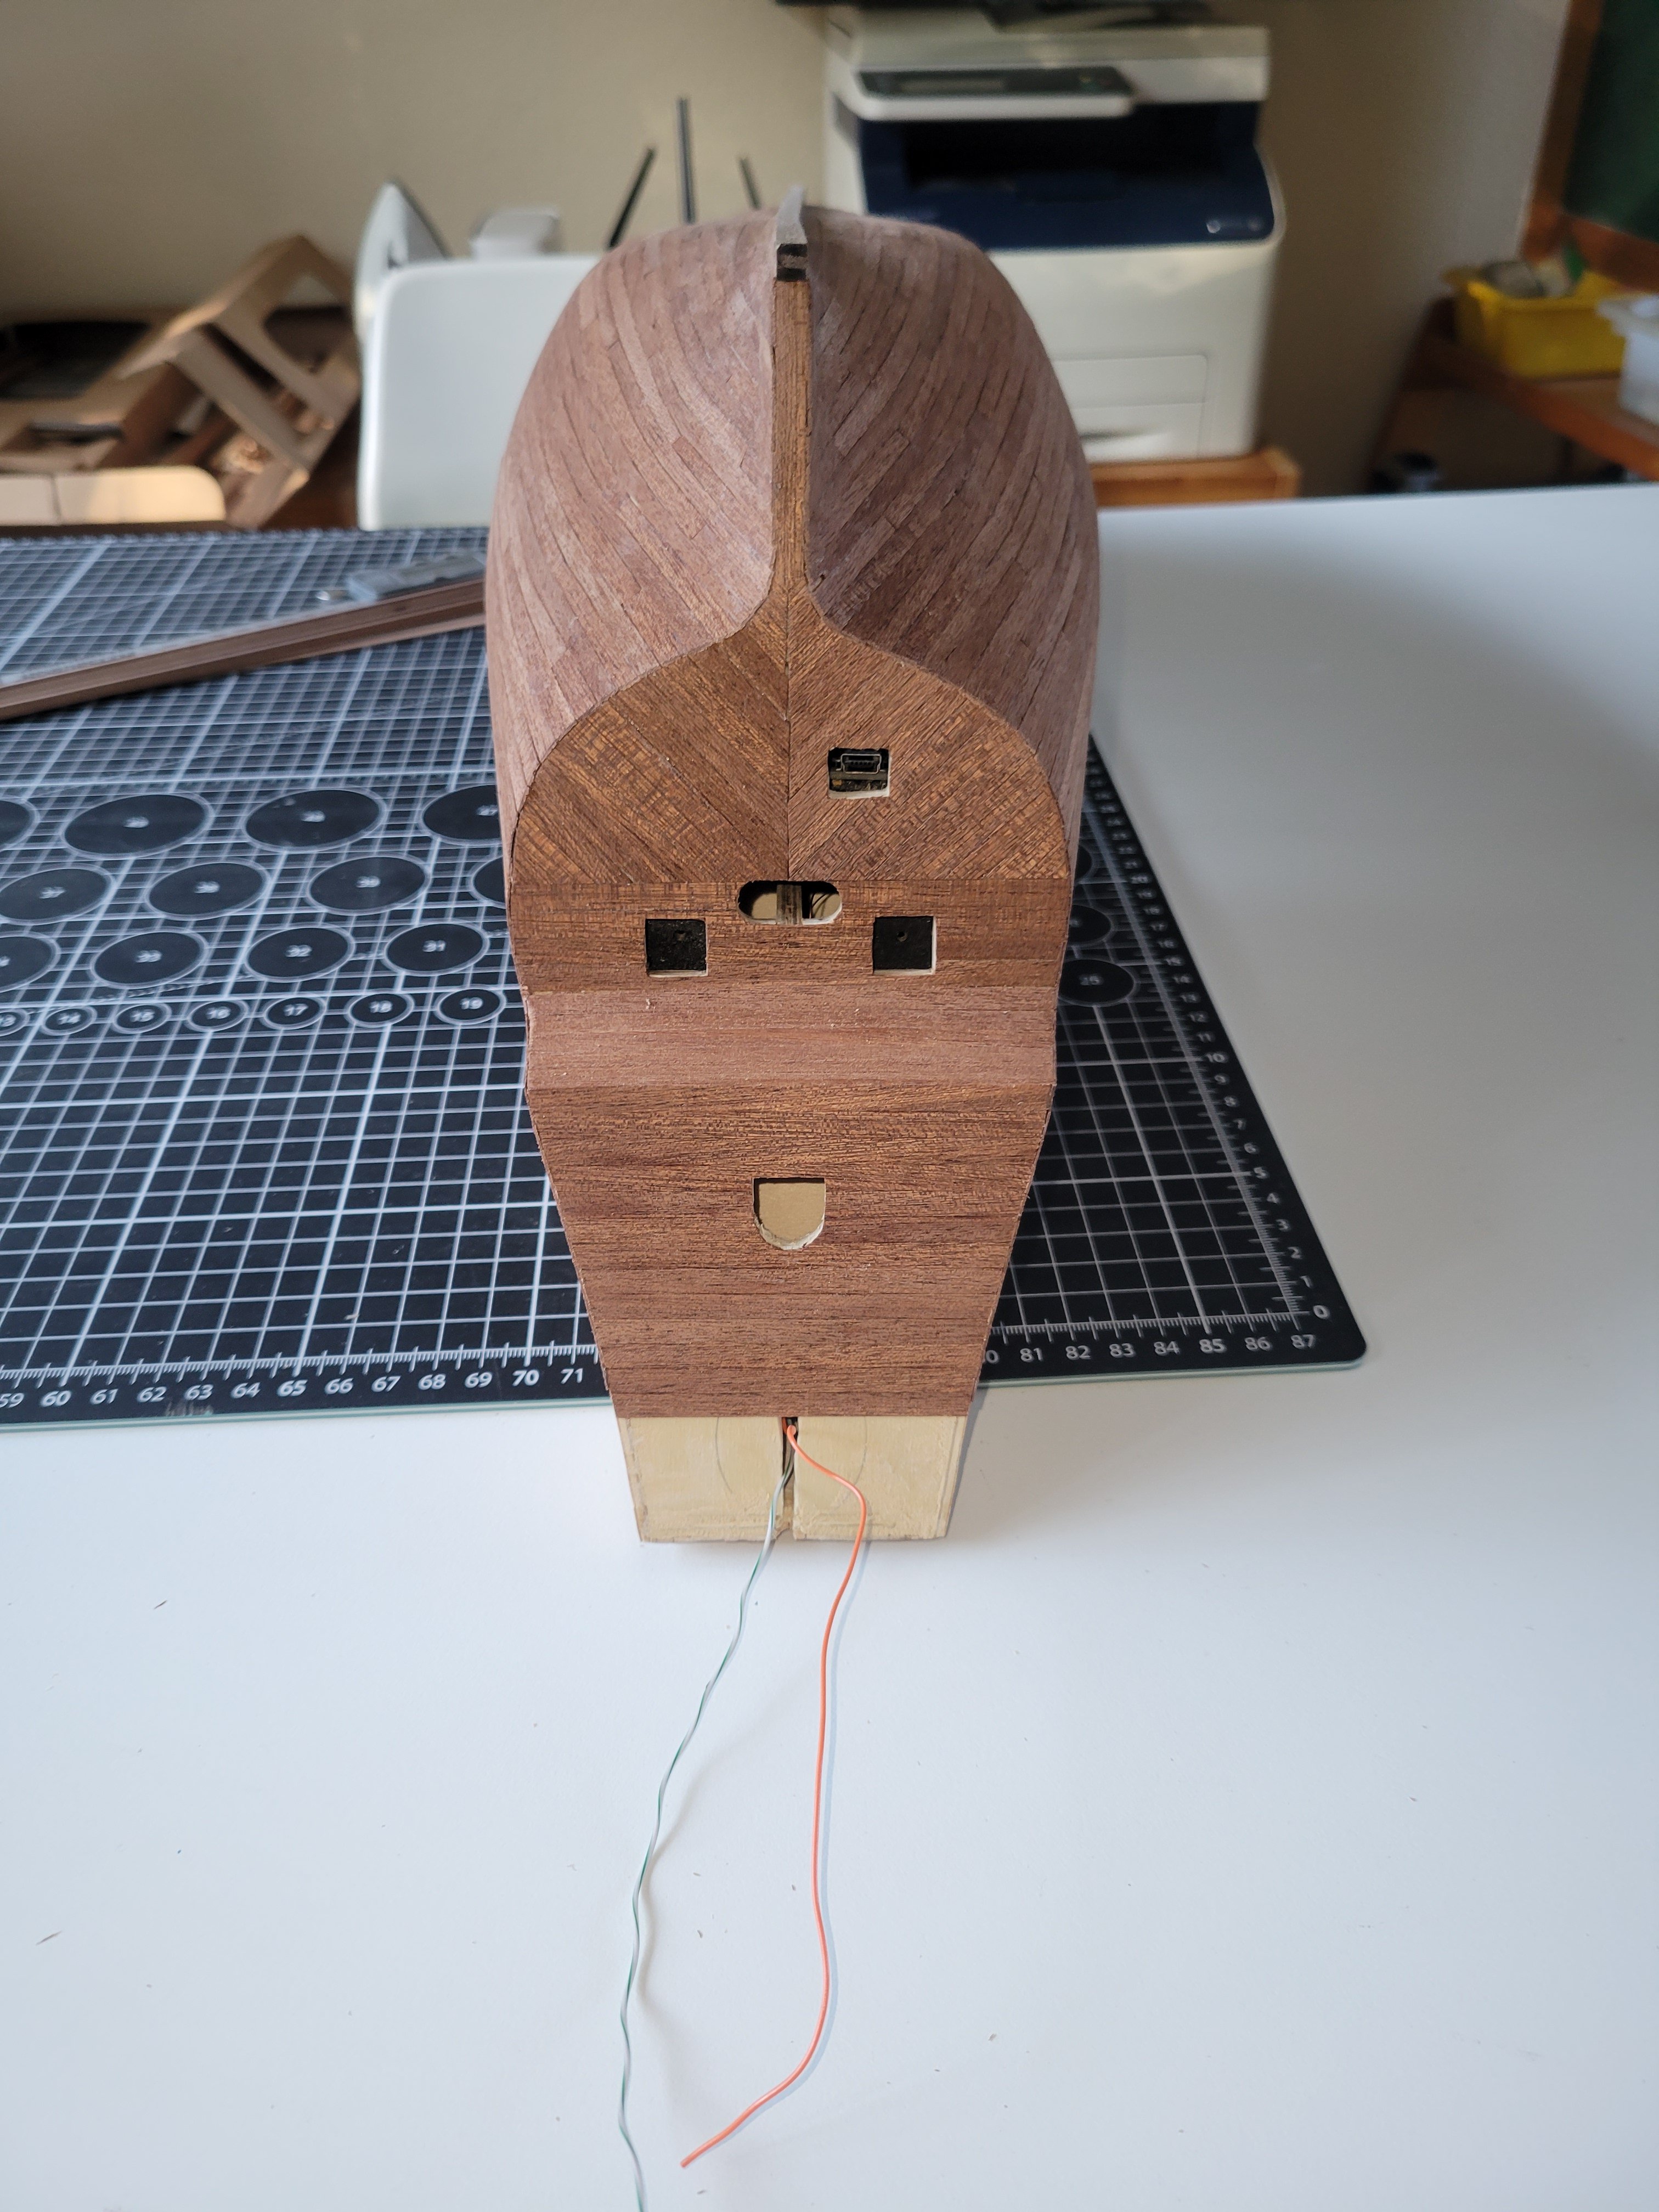
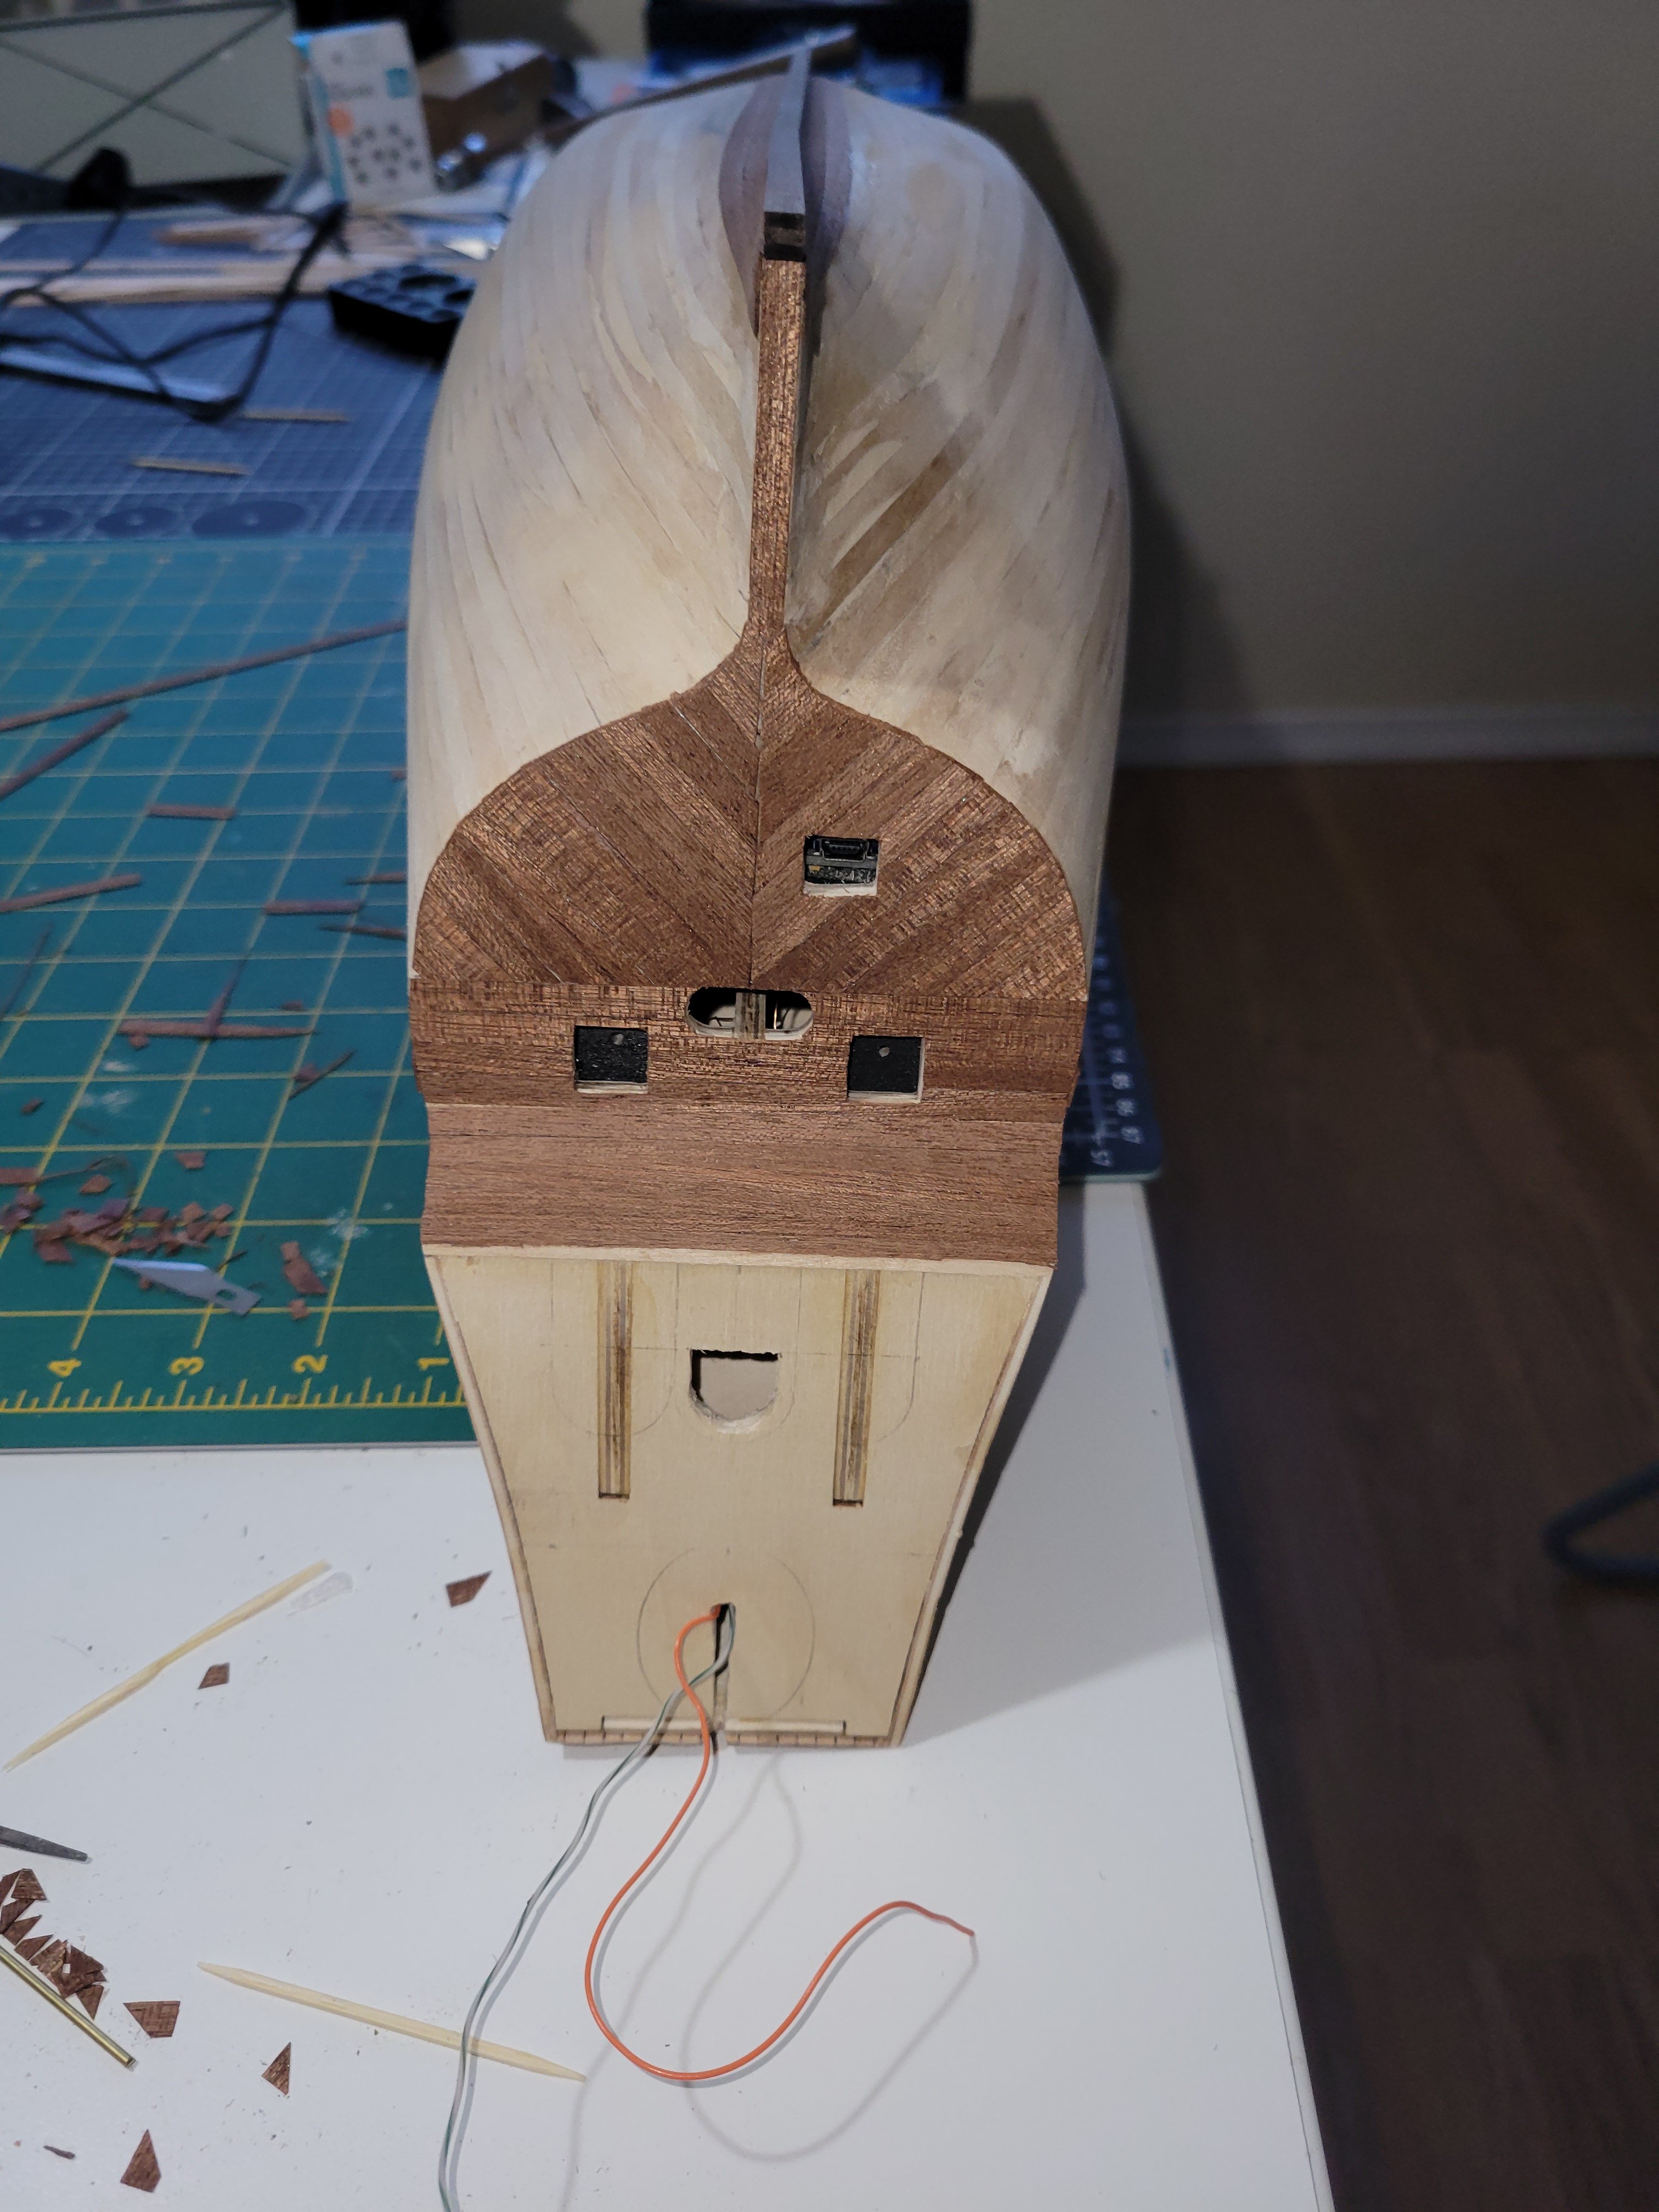
Made 2 final updates for the lighting. Added 2 leds for the front potholes and added a pin header under the micro usb port to easily power from a battery pack. Going to finish the hull before adding a video so... Time to plank!!!


-
No worries!! Criticism always appreciated if it makes the build better! I was thinking of trying a mixture or primer and elastomeric paint. the primary should improve adhesion and the elastomeric creates a thicker and more plasticised surface. If the second layer glue will stick well the the elastomeric that might be a good seal!
-
Plenty of putty on 1st layer should block for the hull. If needed I can add paint to remaining bleed there before second plank. The cargo holds will bleed too. I can reduce the light level at each bulkhead to make it lest prominent. Migh also add some tinted plastic around those areas before planking if needed. We'll see how it goes!
-
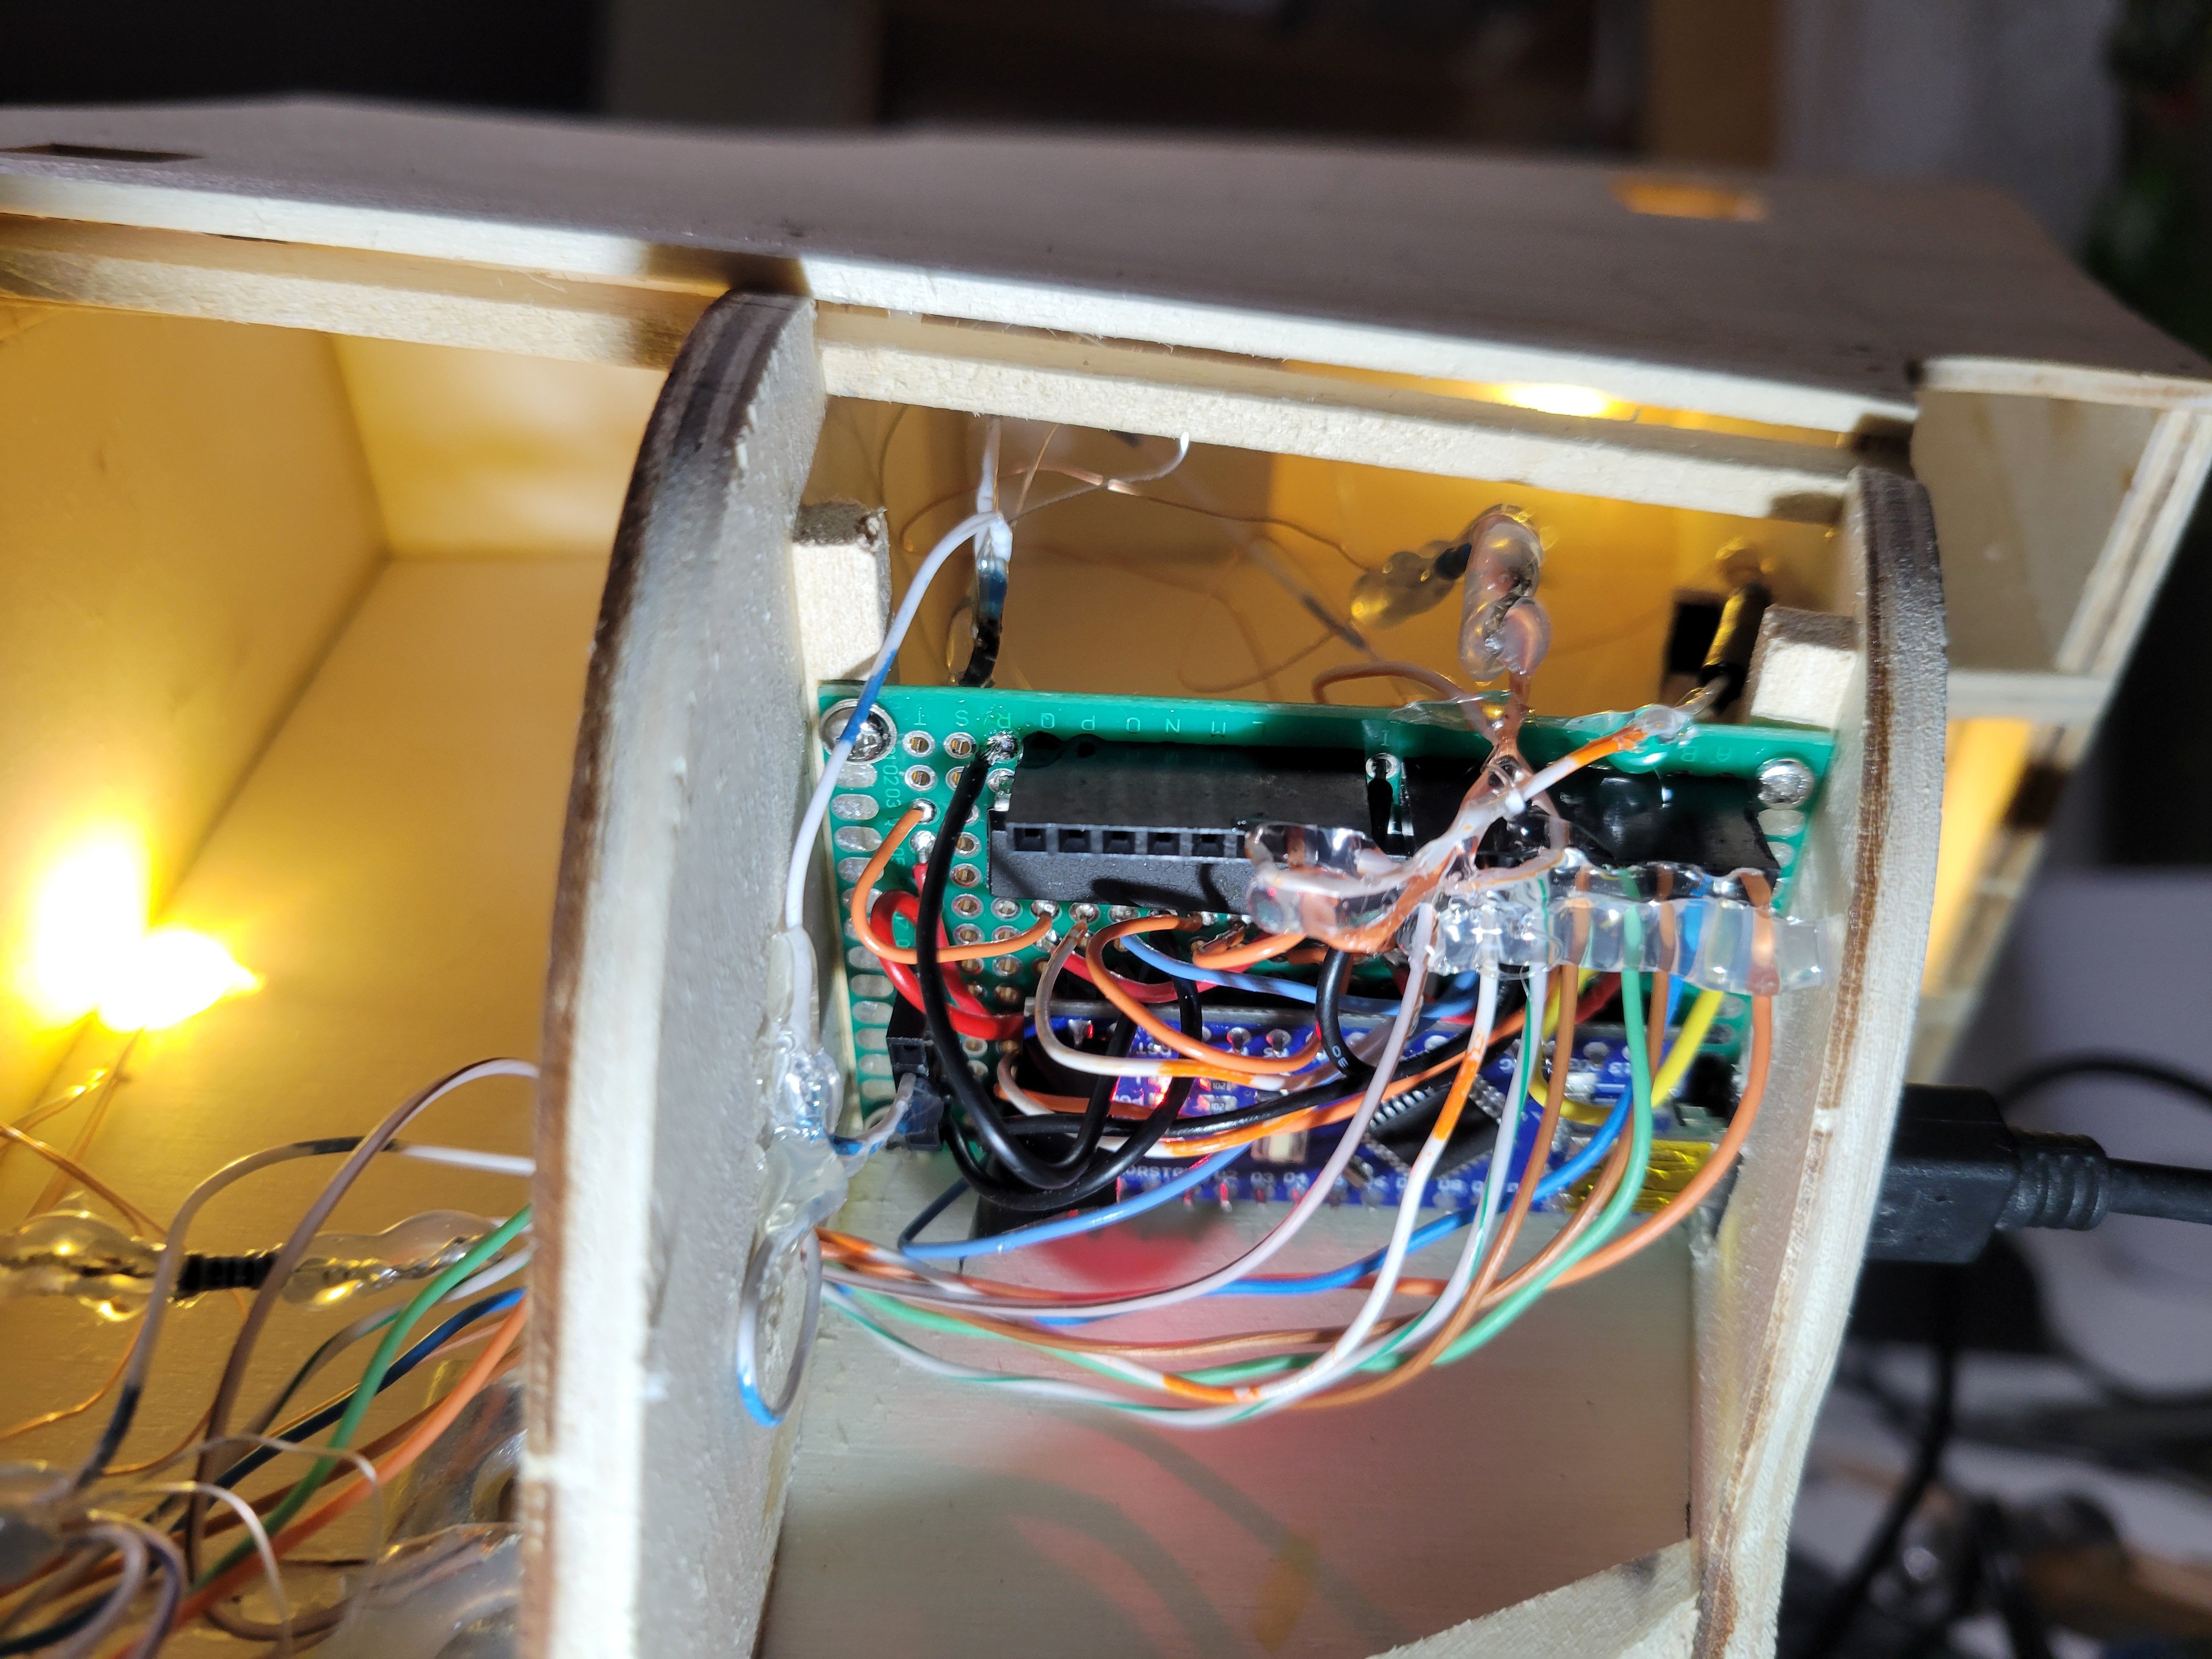
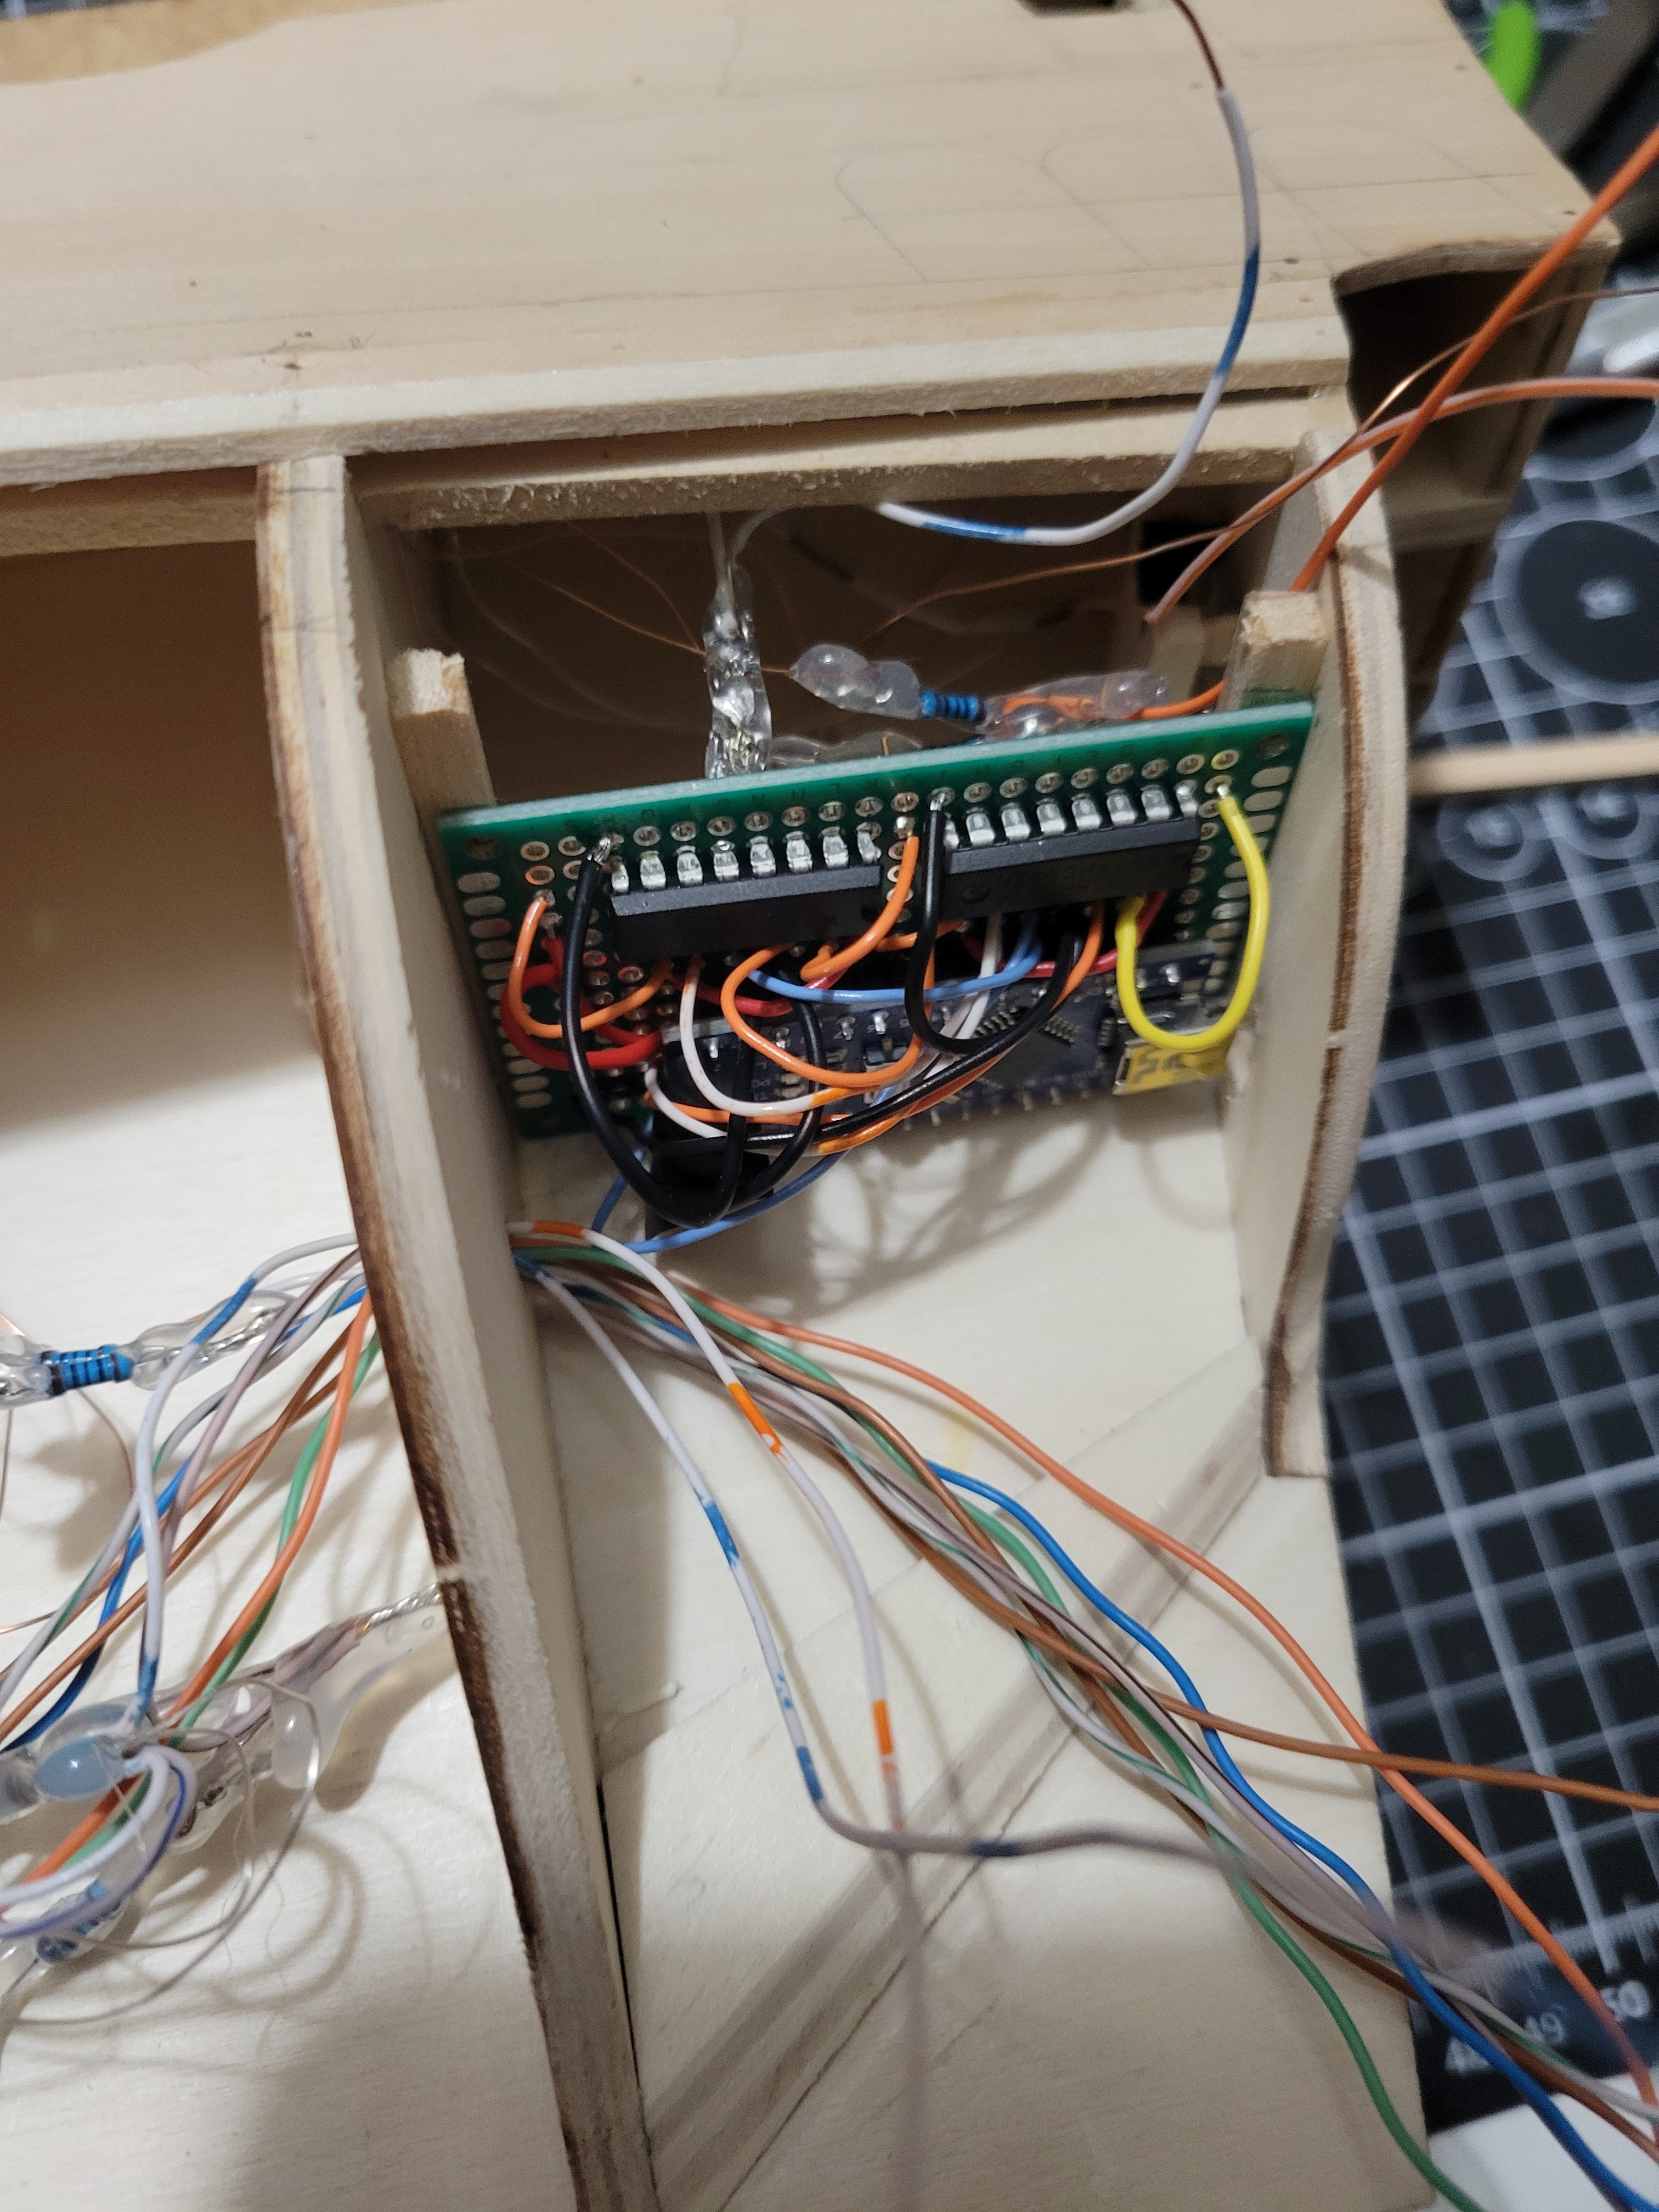
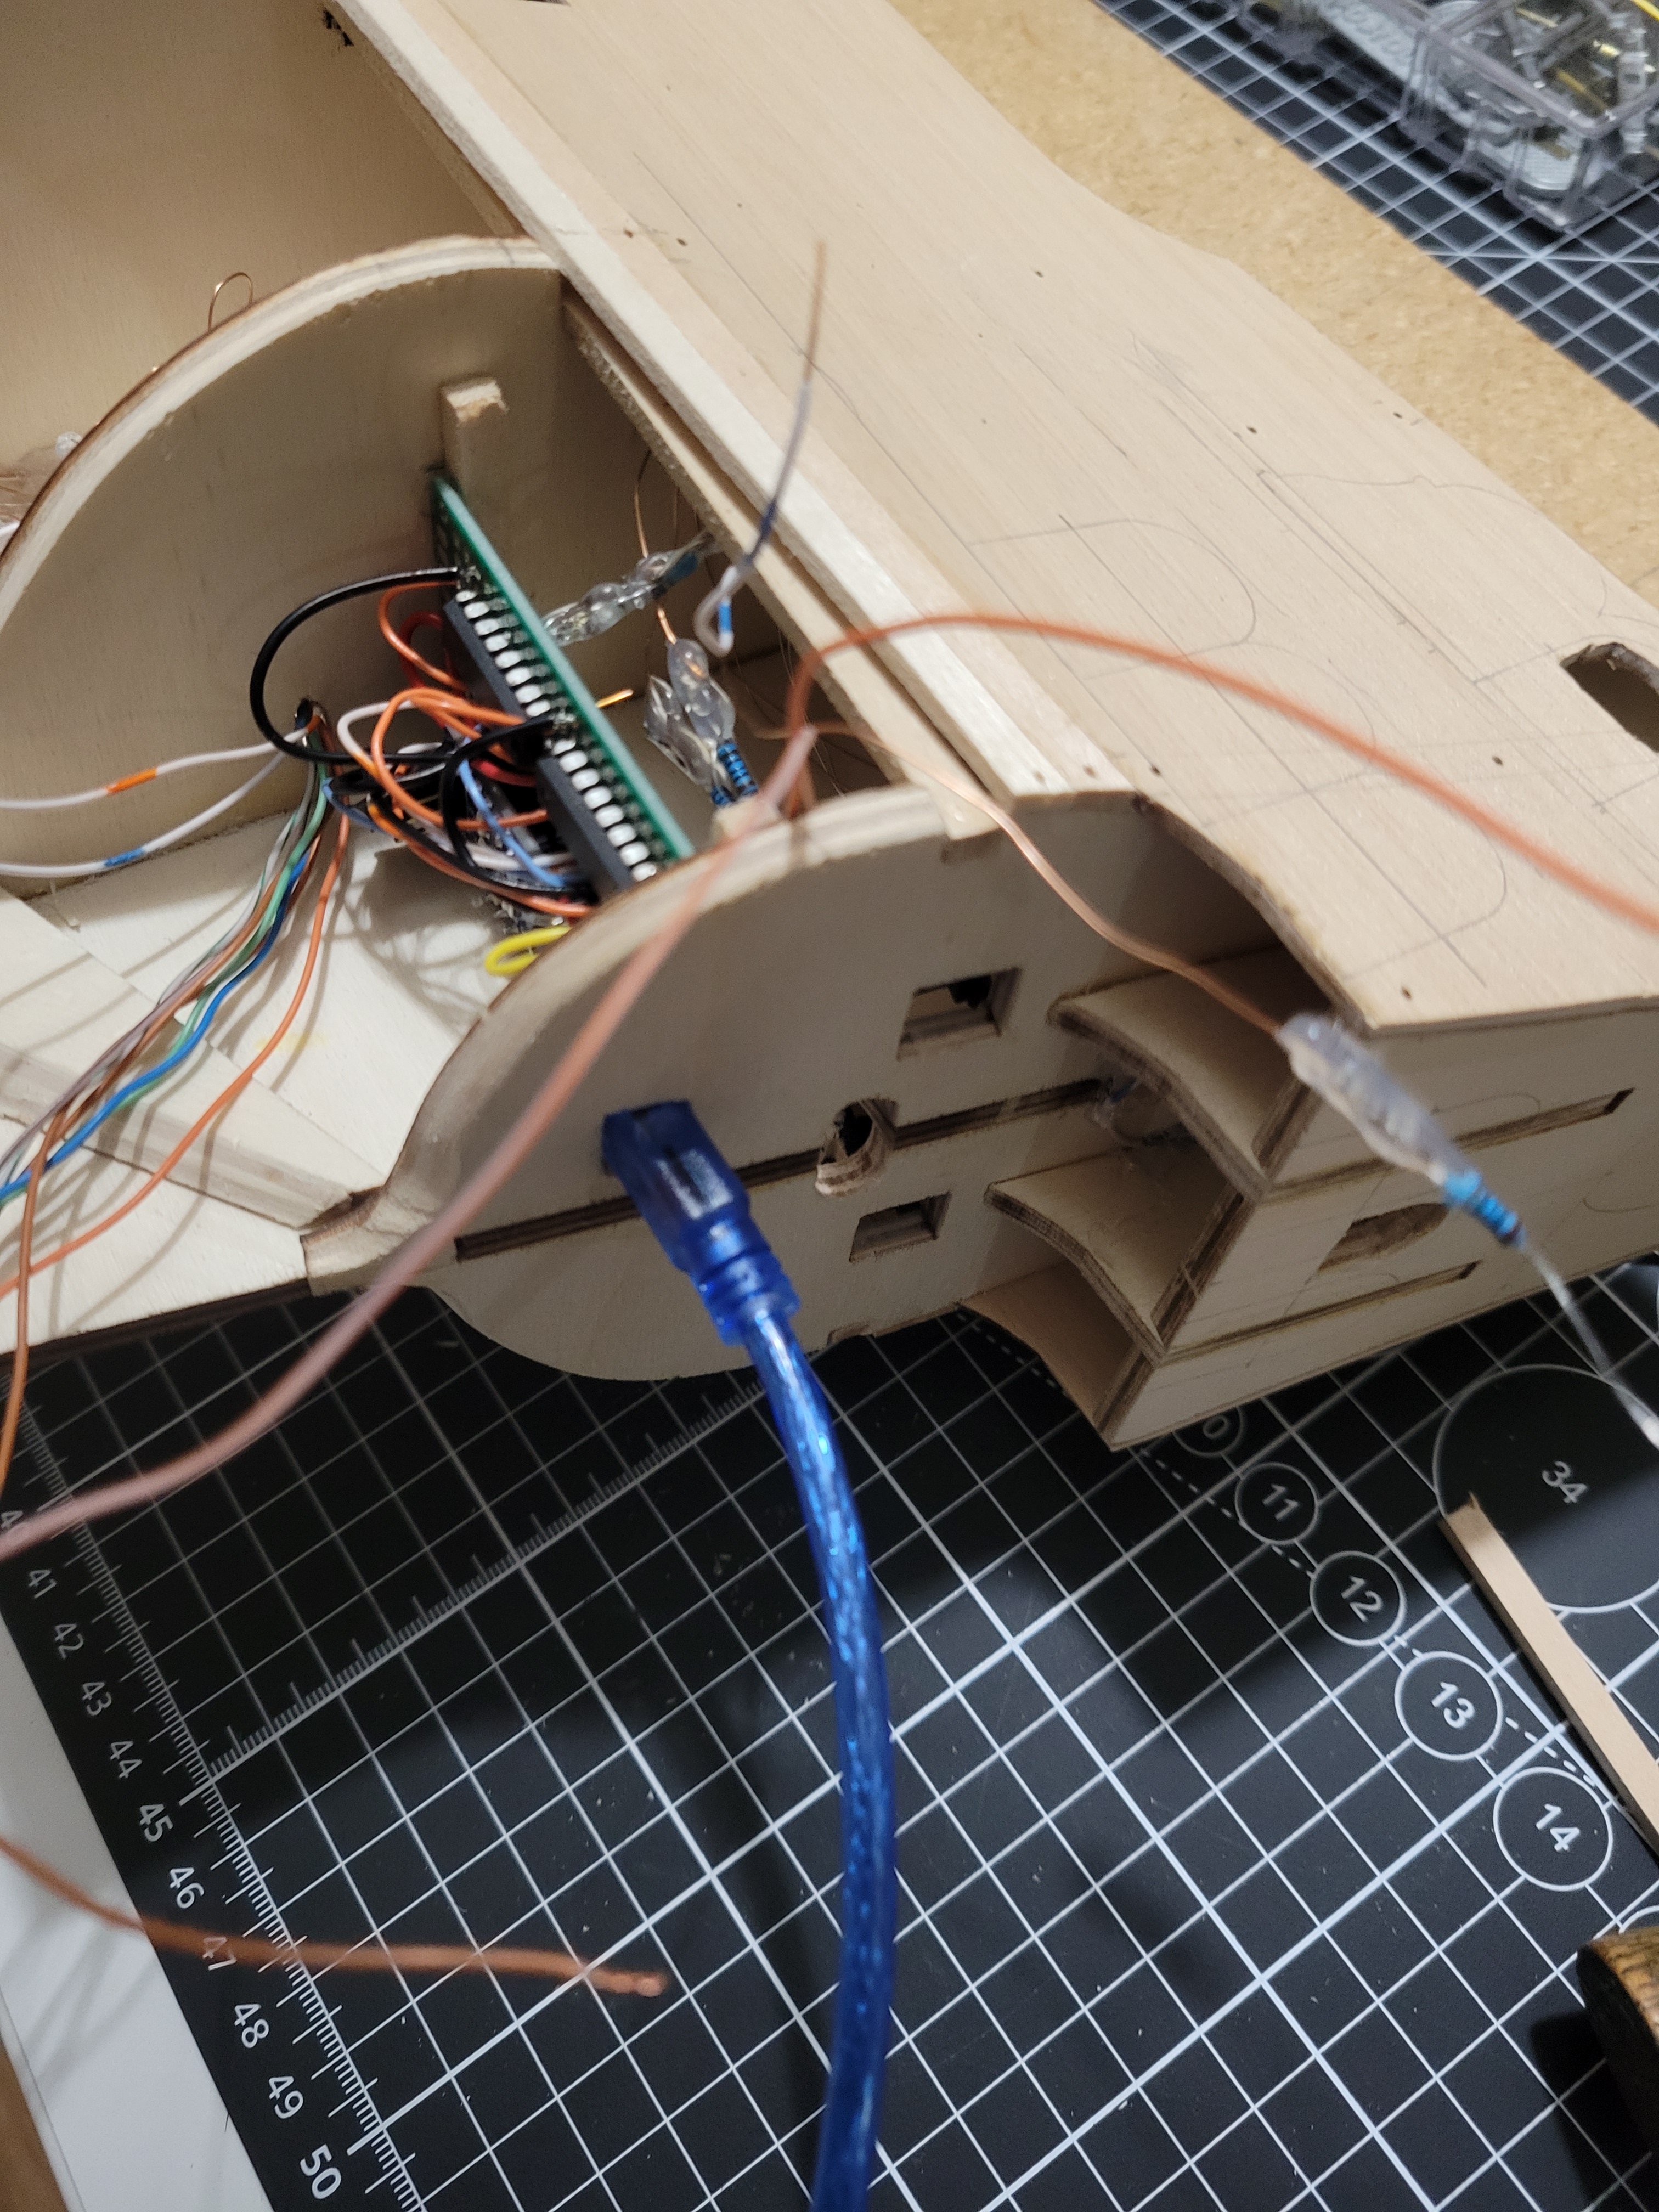
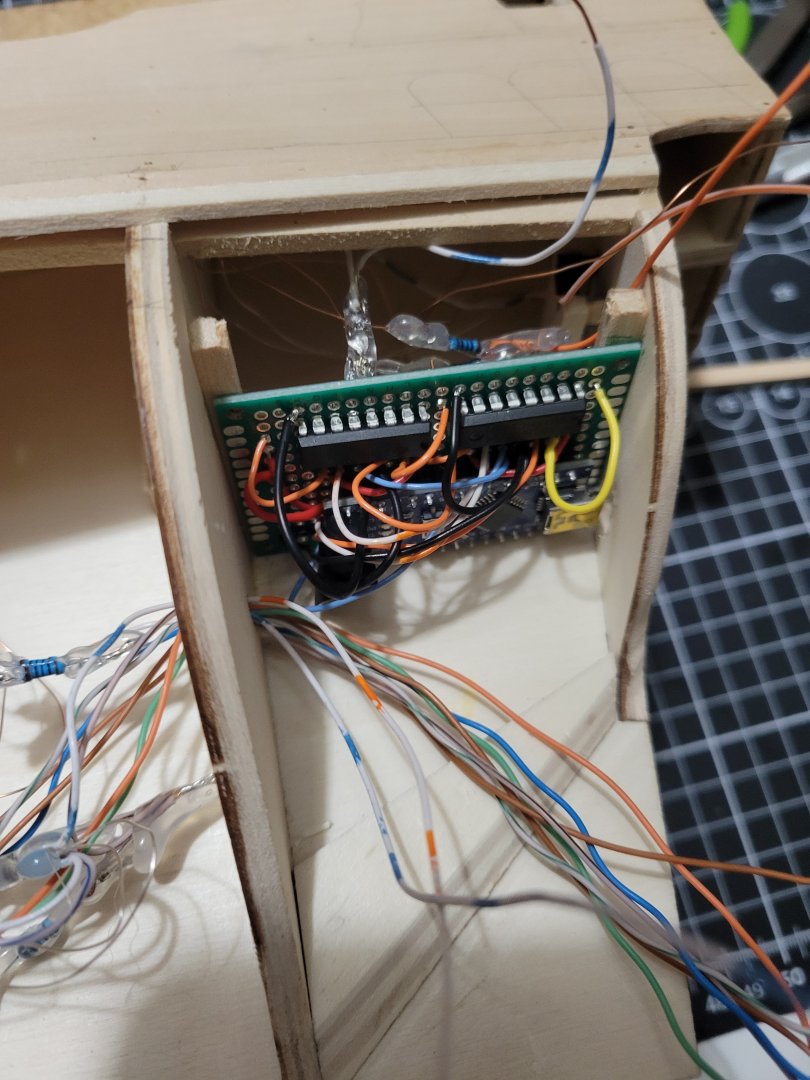
Pin headers arrived. Finished my lighting control board and set in place. Cut the wiring and using hot glue to keep wires from moving. As mentioned earlier, this board can control 16 independent leds so now i have to decide if I want any more! It's getting bright but the benefit of cutting in a micro usb is that I can update the code later to soften any or all of the leds once the hull is complete!

-
I was tempted to try that but wasnt patient enough to wait! Would like to see how you handle it.
-
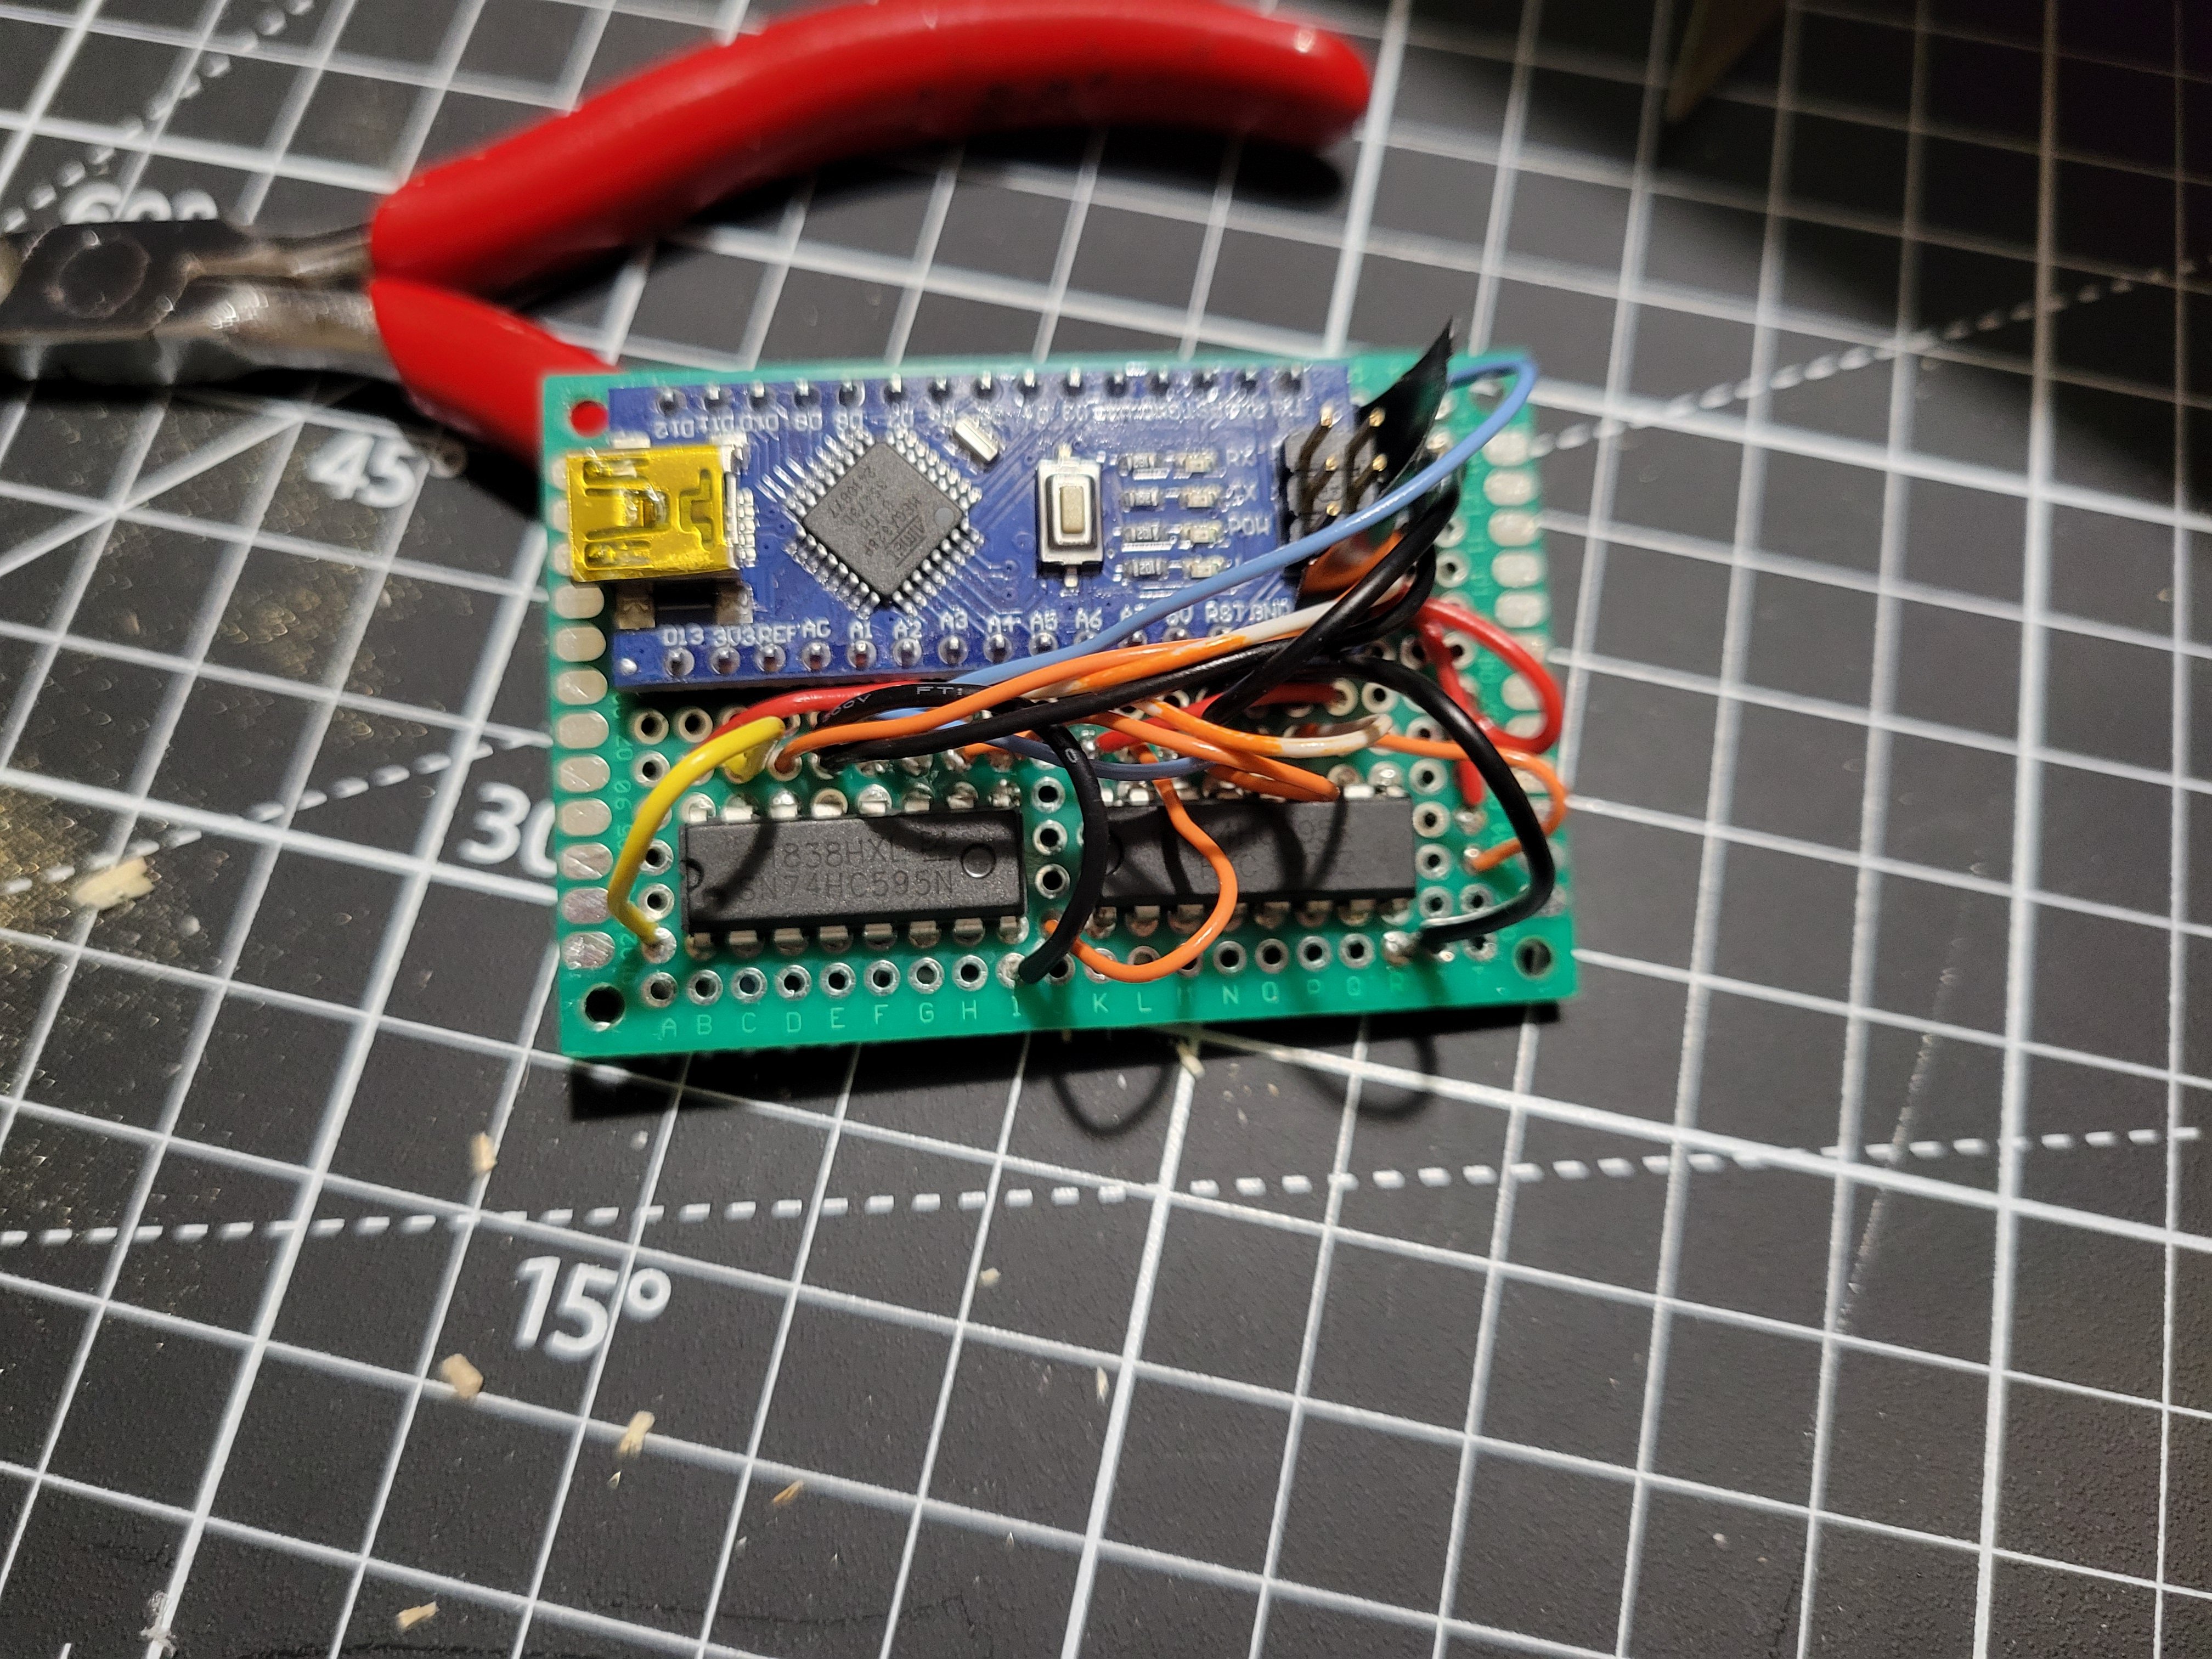
For lighting control, I have an arduino nano and two shift registers daisy chained (74HC595N). Each shift register can be sent an 8 bit value that can control 8 outputs separately (8 Leds per chip) the daisy chain makes it 16 bit, so 16 individual flickering leds. (And you could keep adding!) Perf board is almost done, just waiting on pin headers to arrive that will be connecting the wires for the leds. Could hide wiring more if you just have the power supply outside the boat but I decided to cut an opening at back for the usb (could play with lighting and power by usb after this project is done). I'll try to upload schematic/diagram of the perf board later and could provide the arduino code if anyone is interested.


-
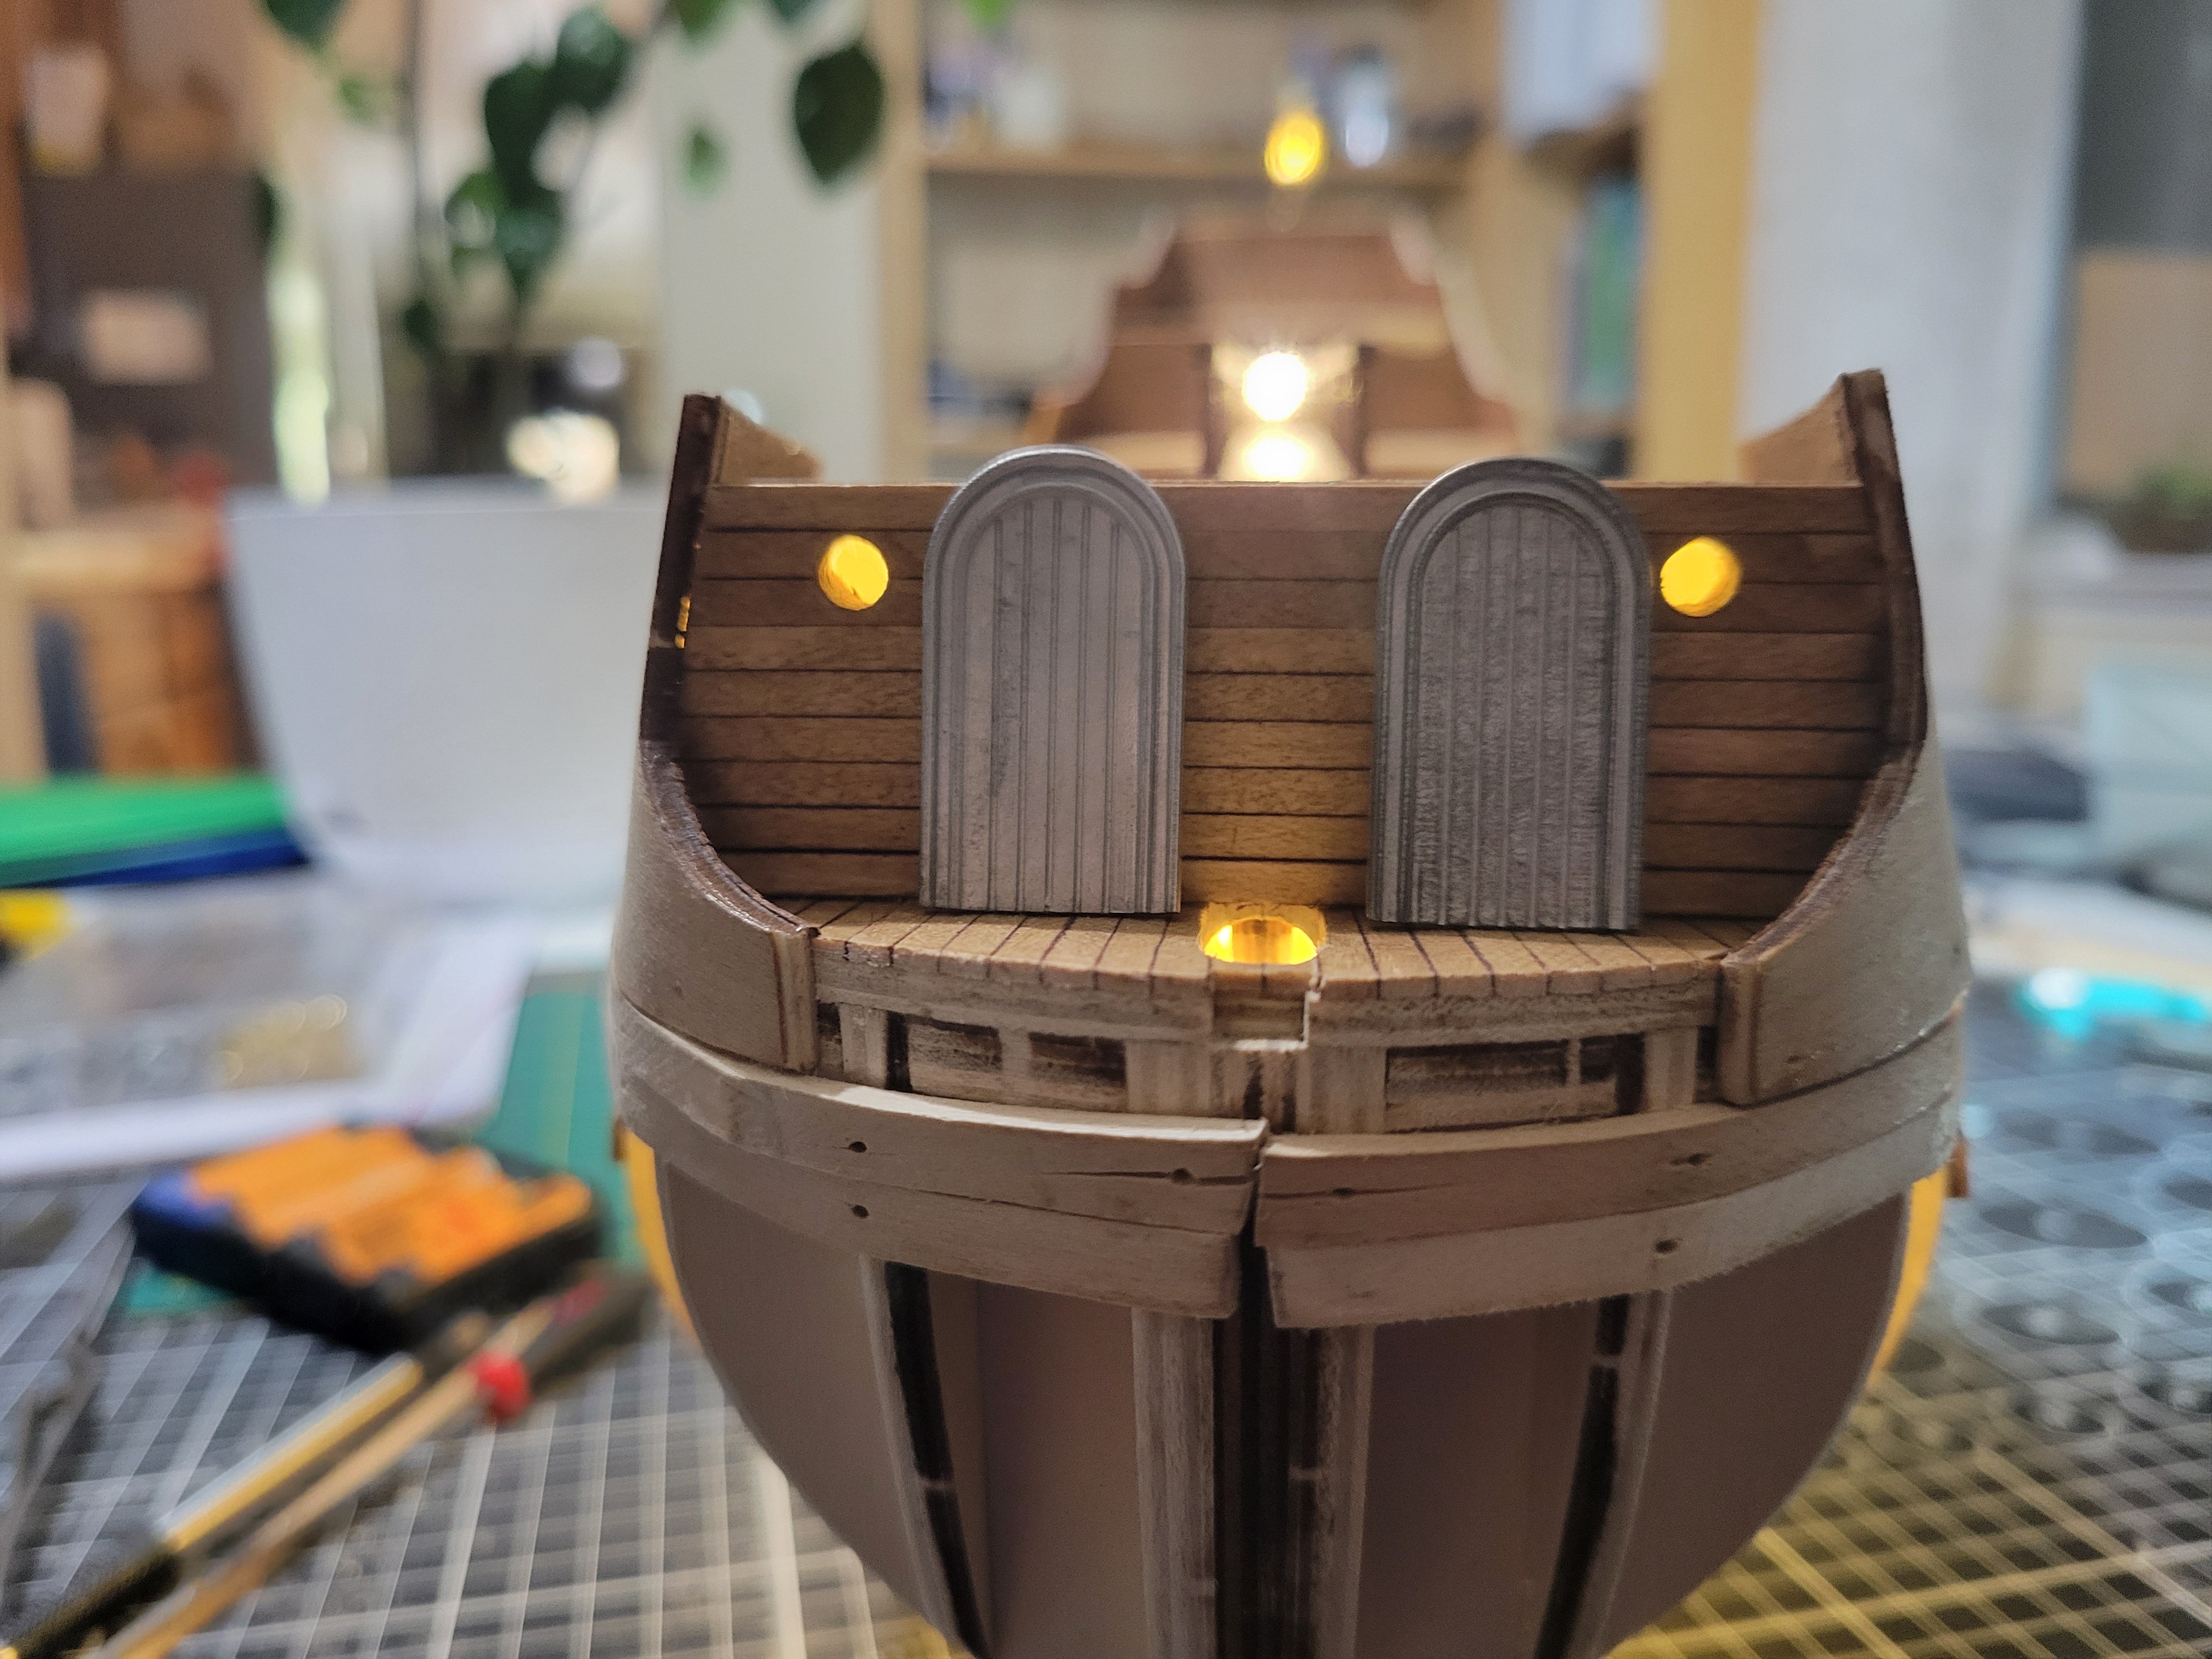
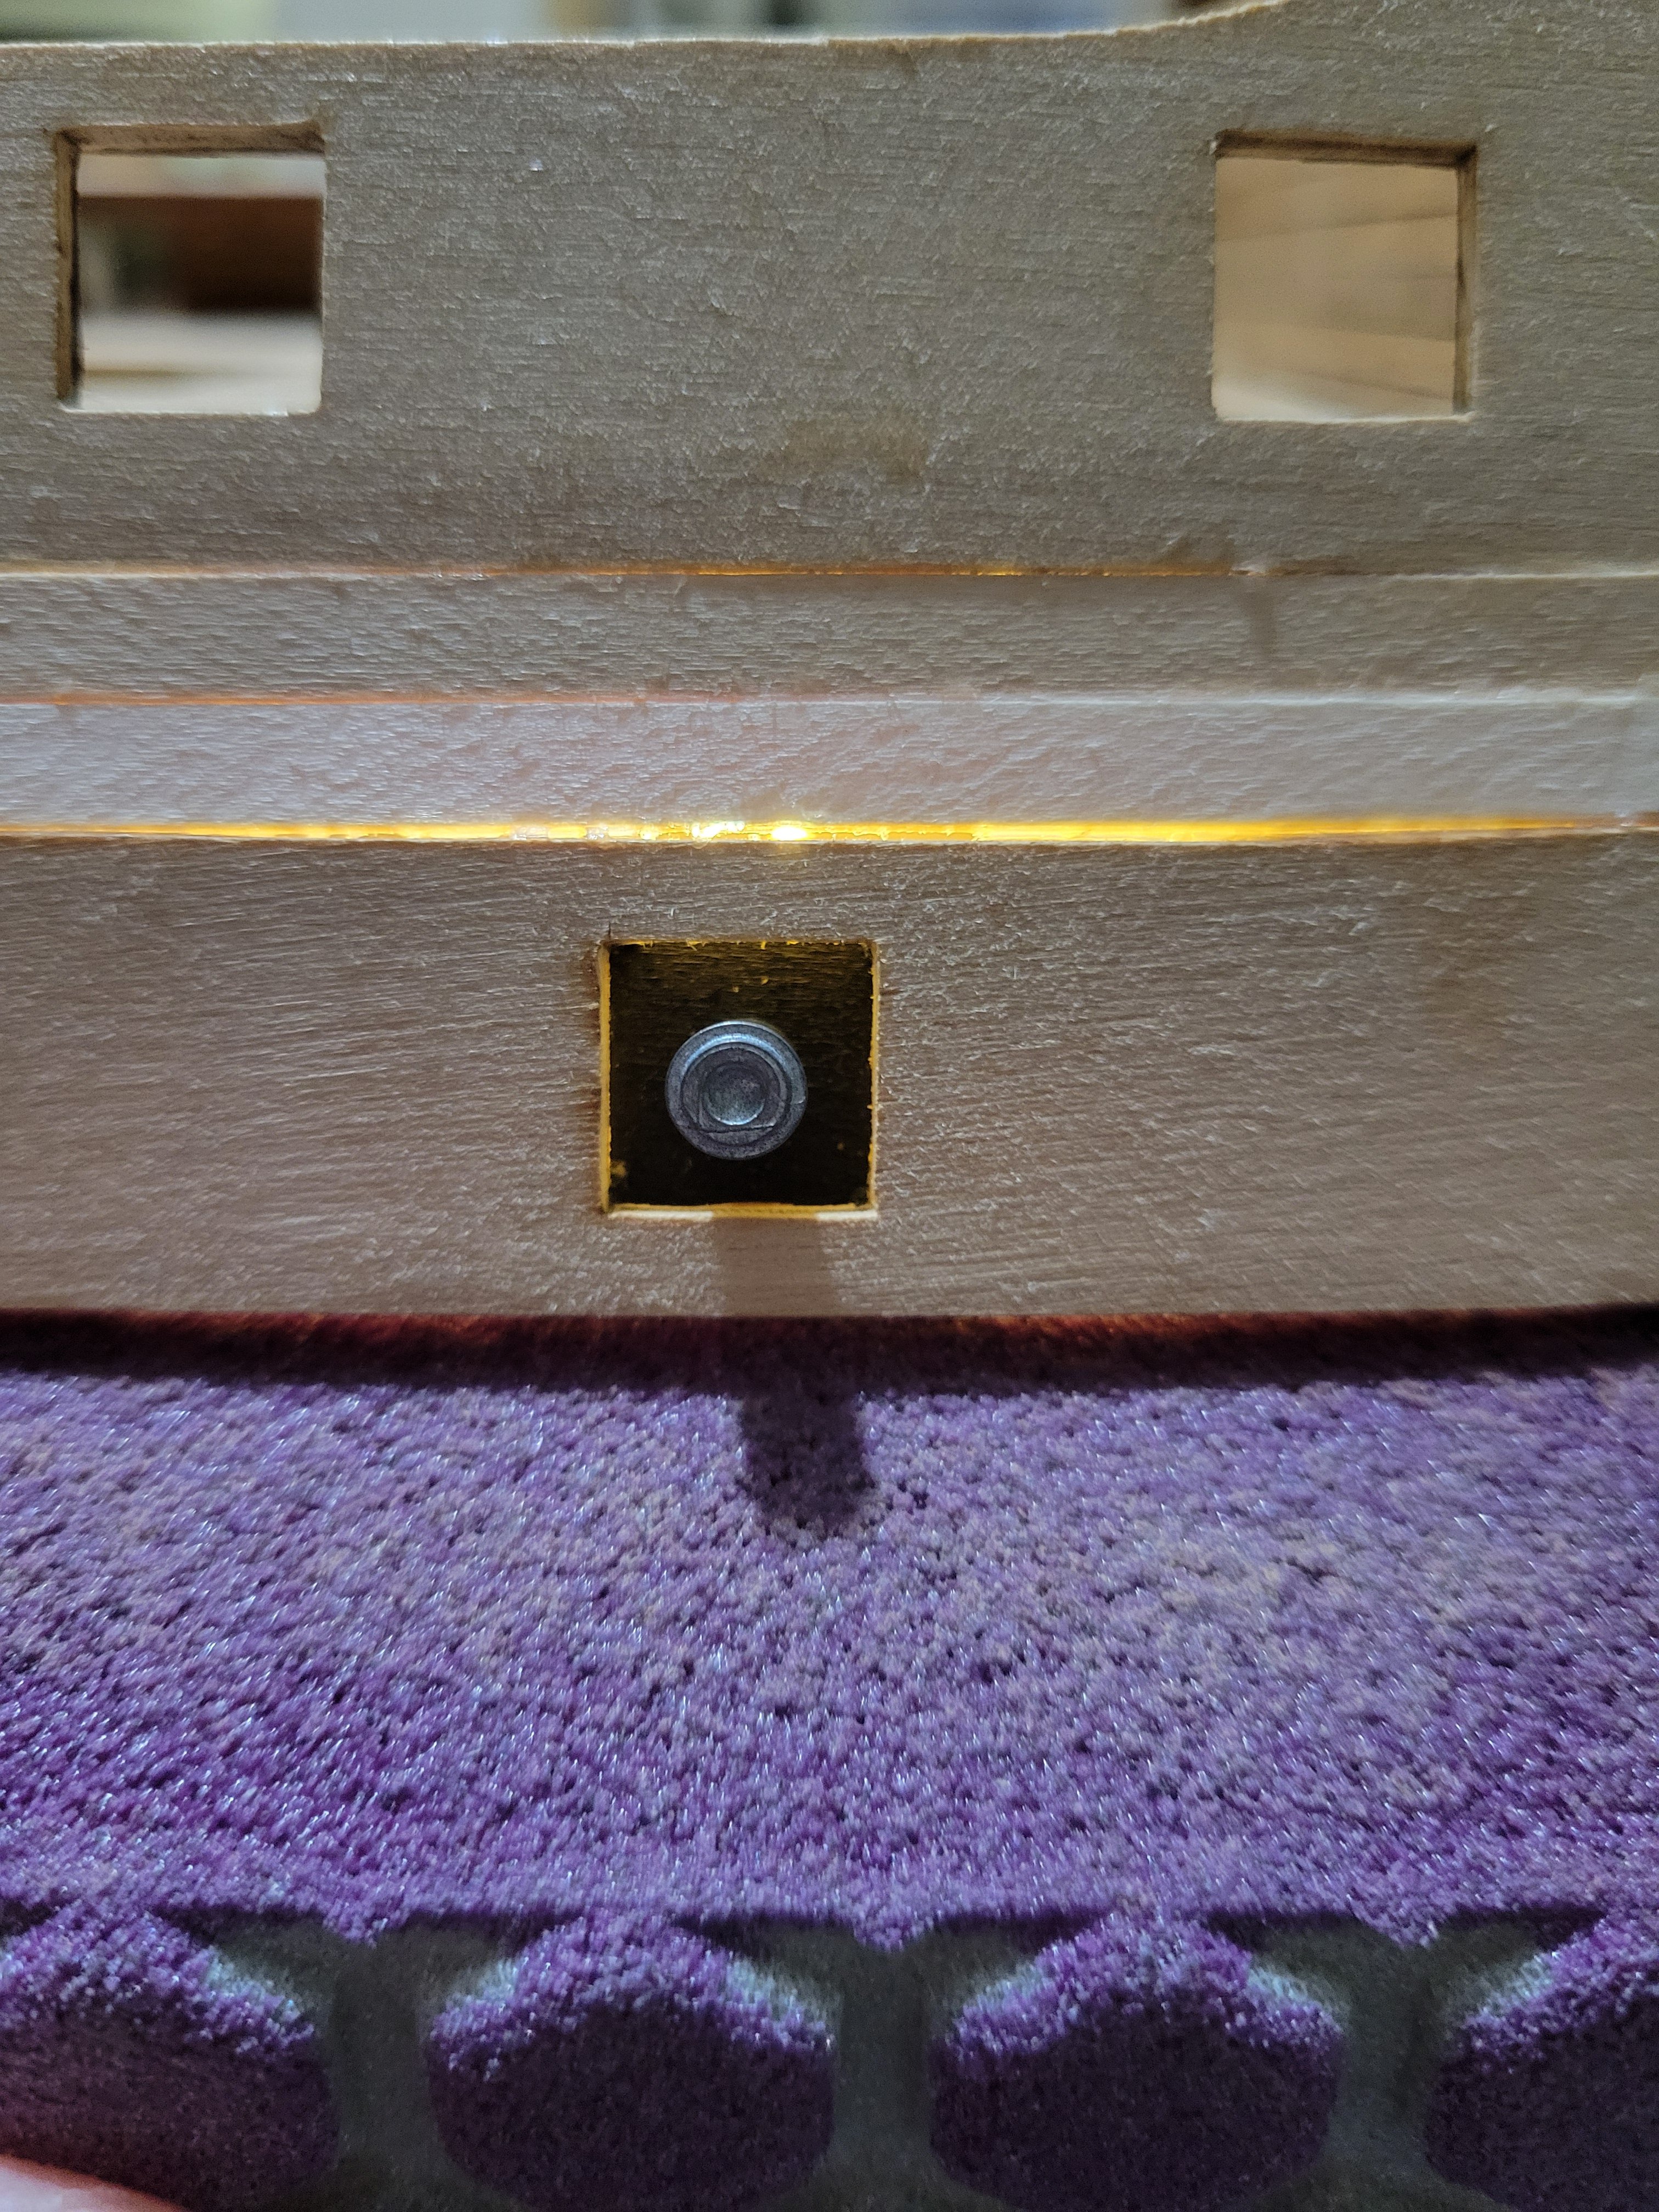
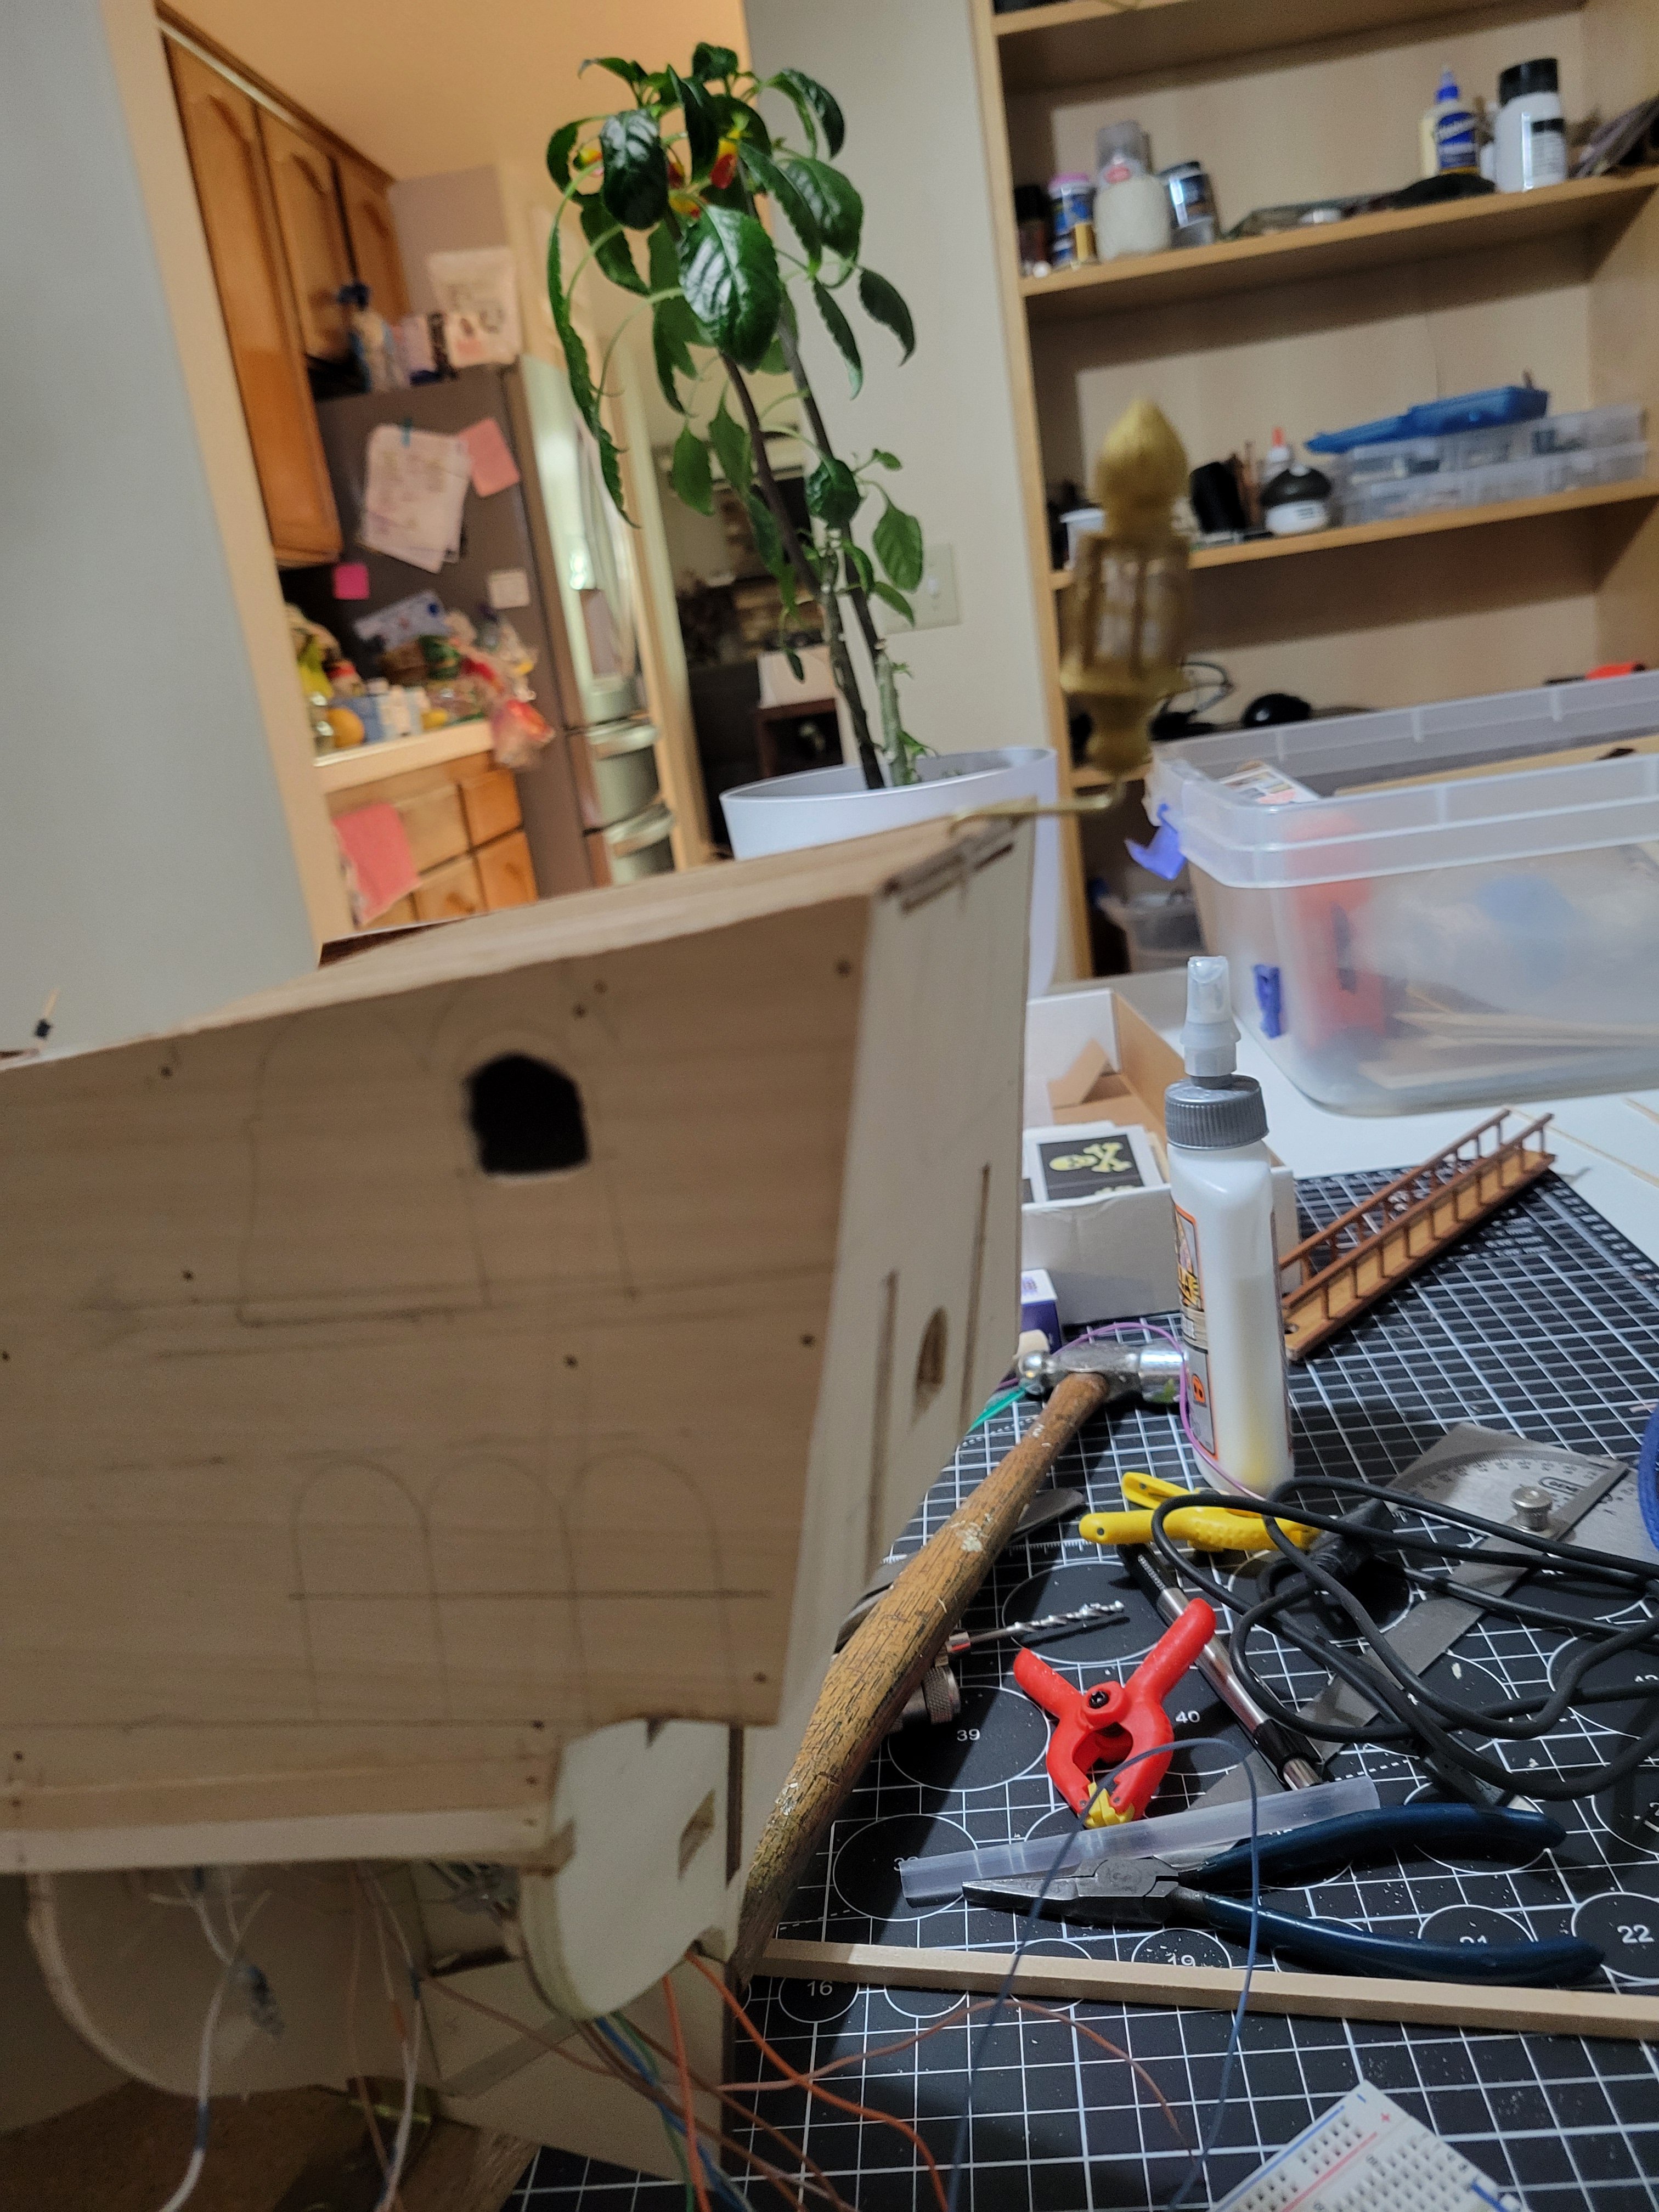
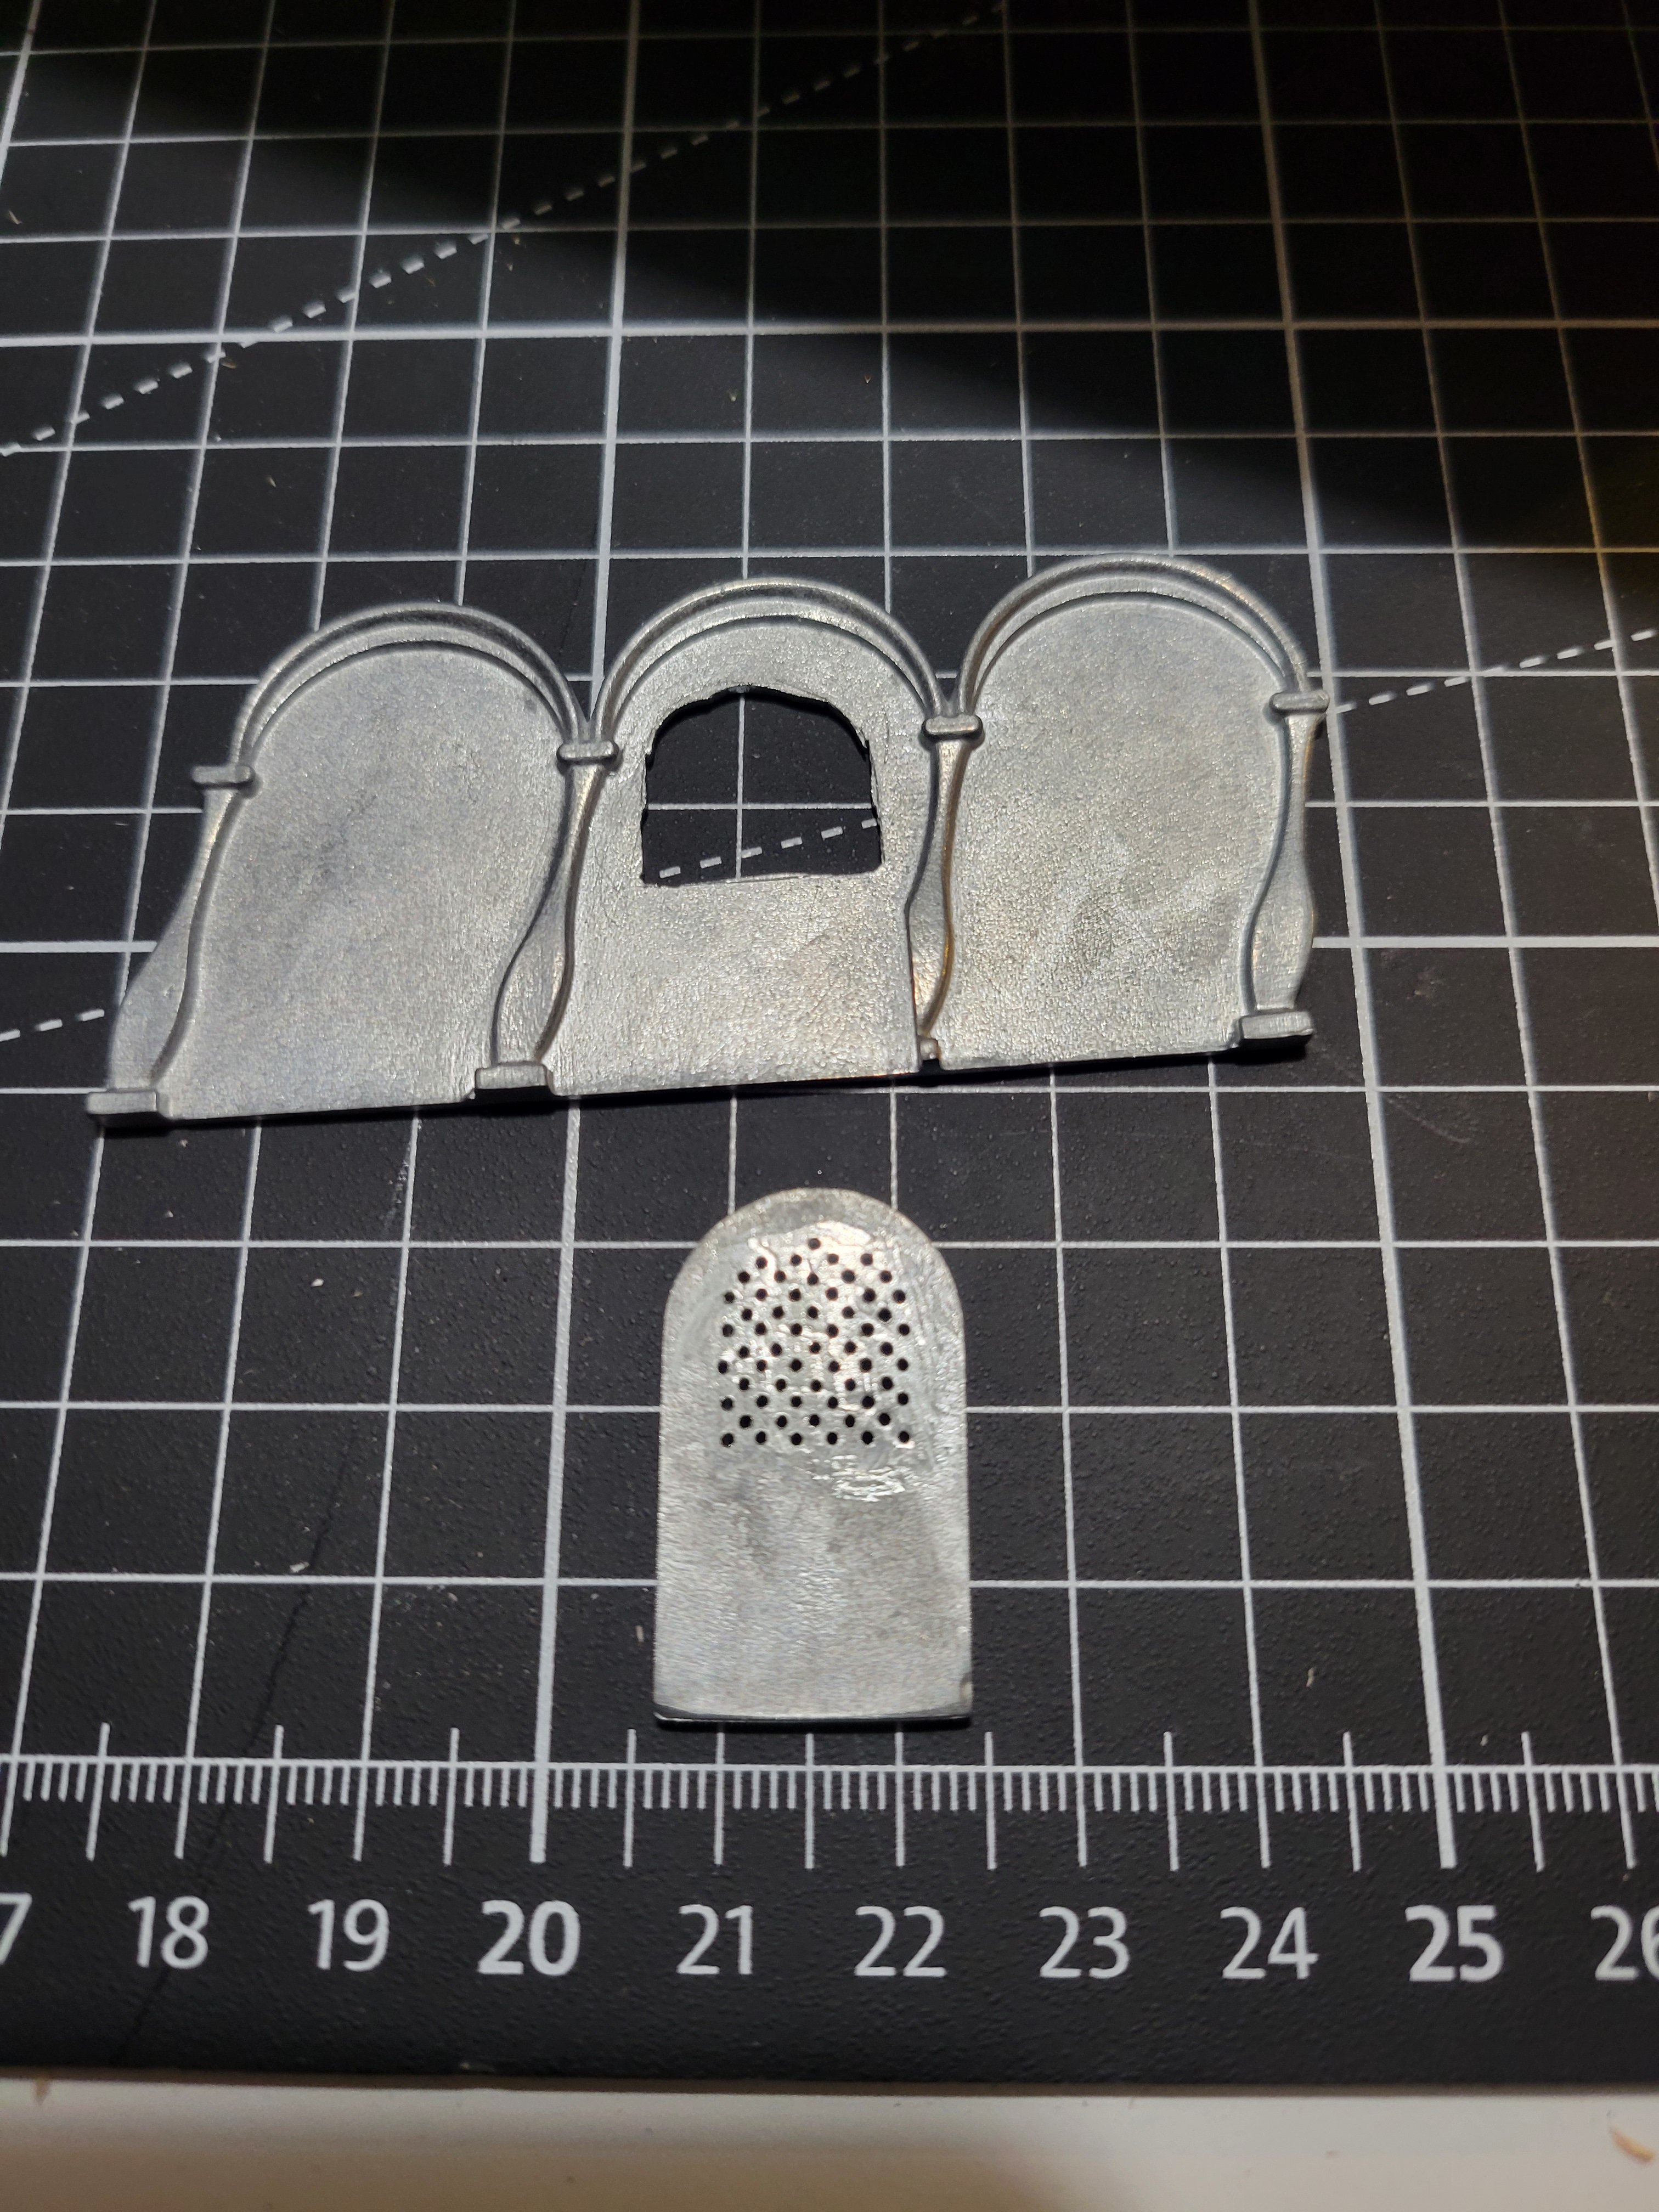
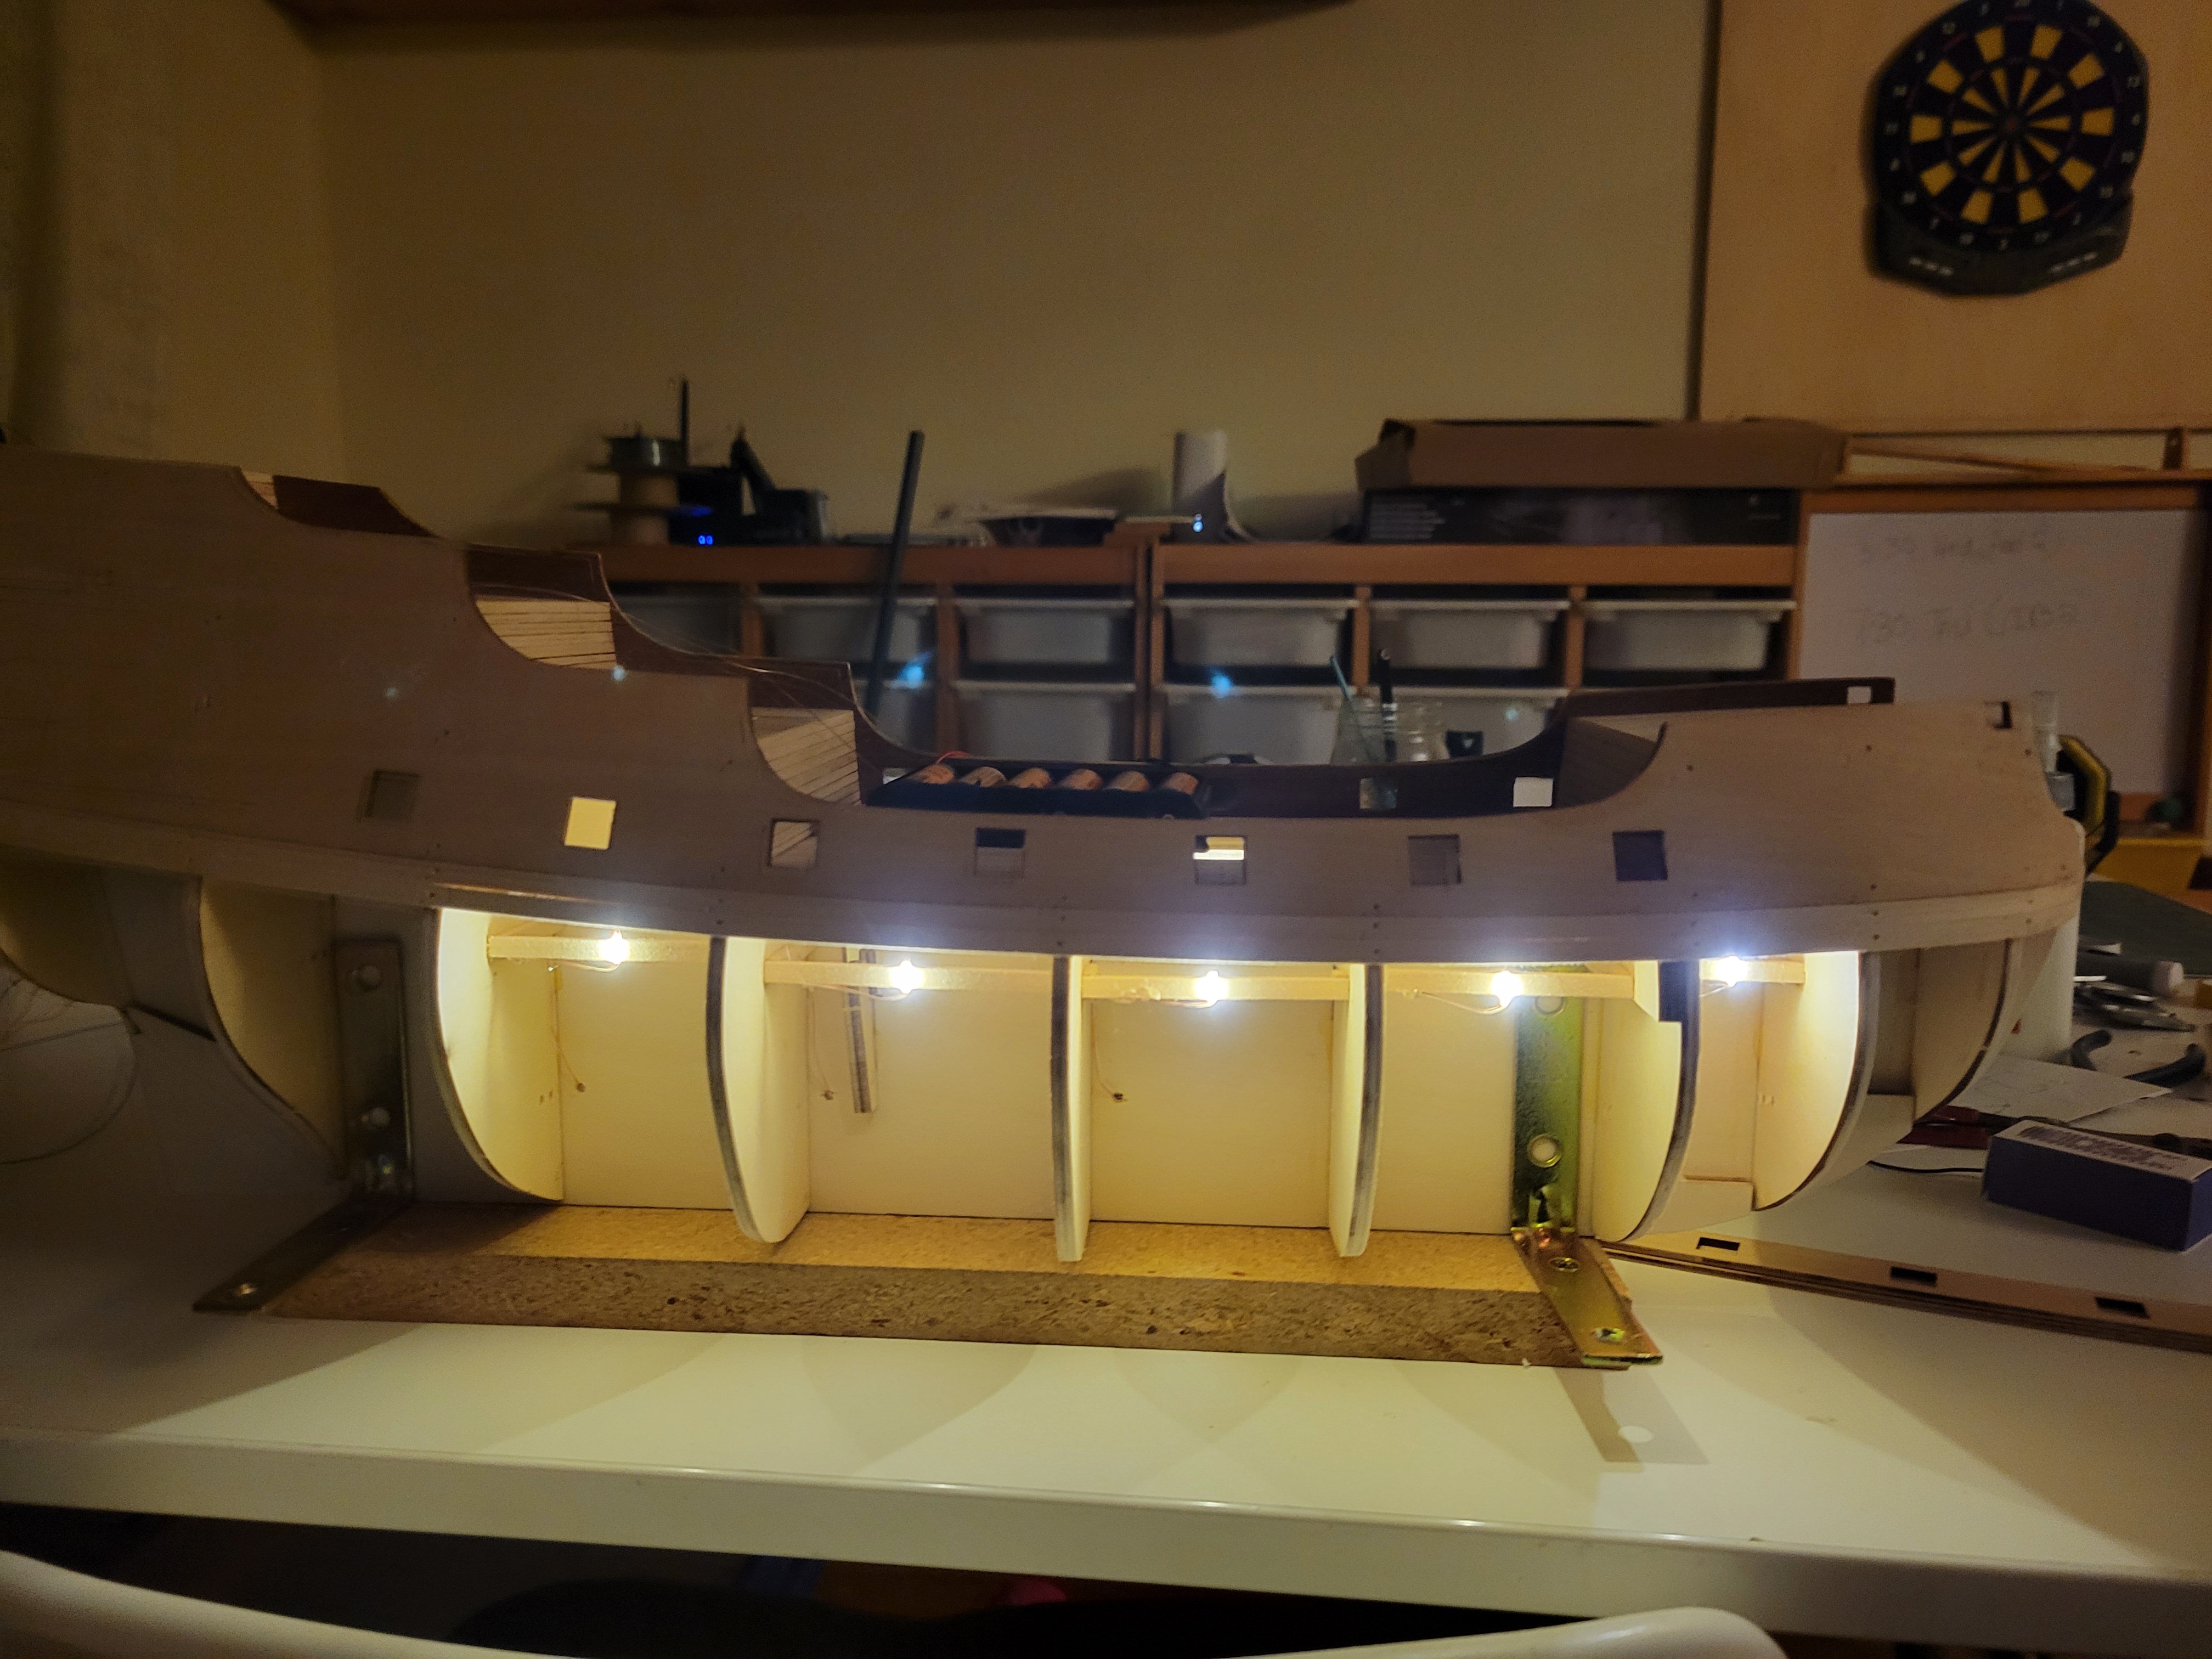
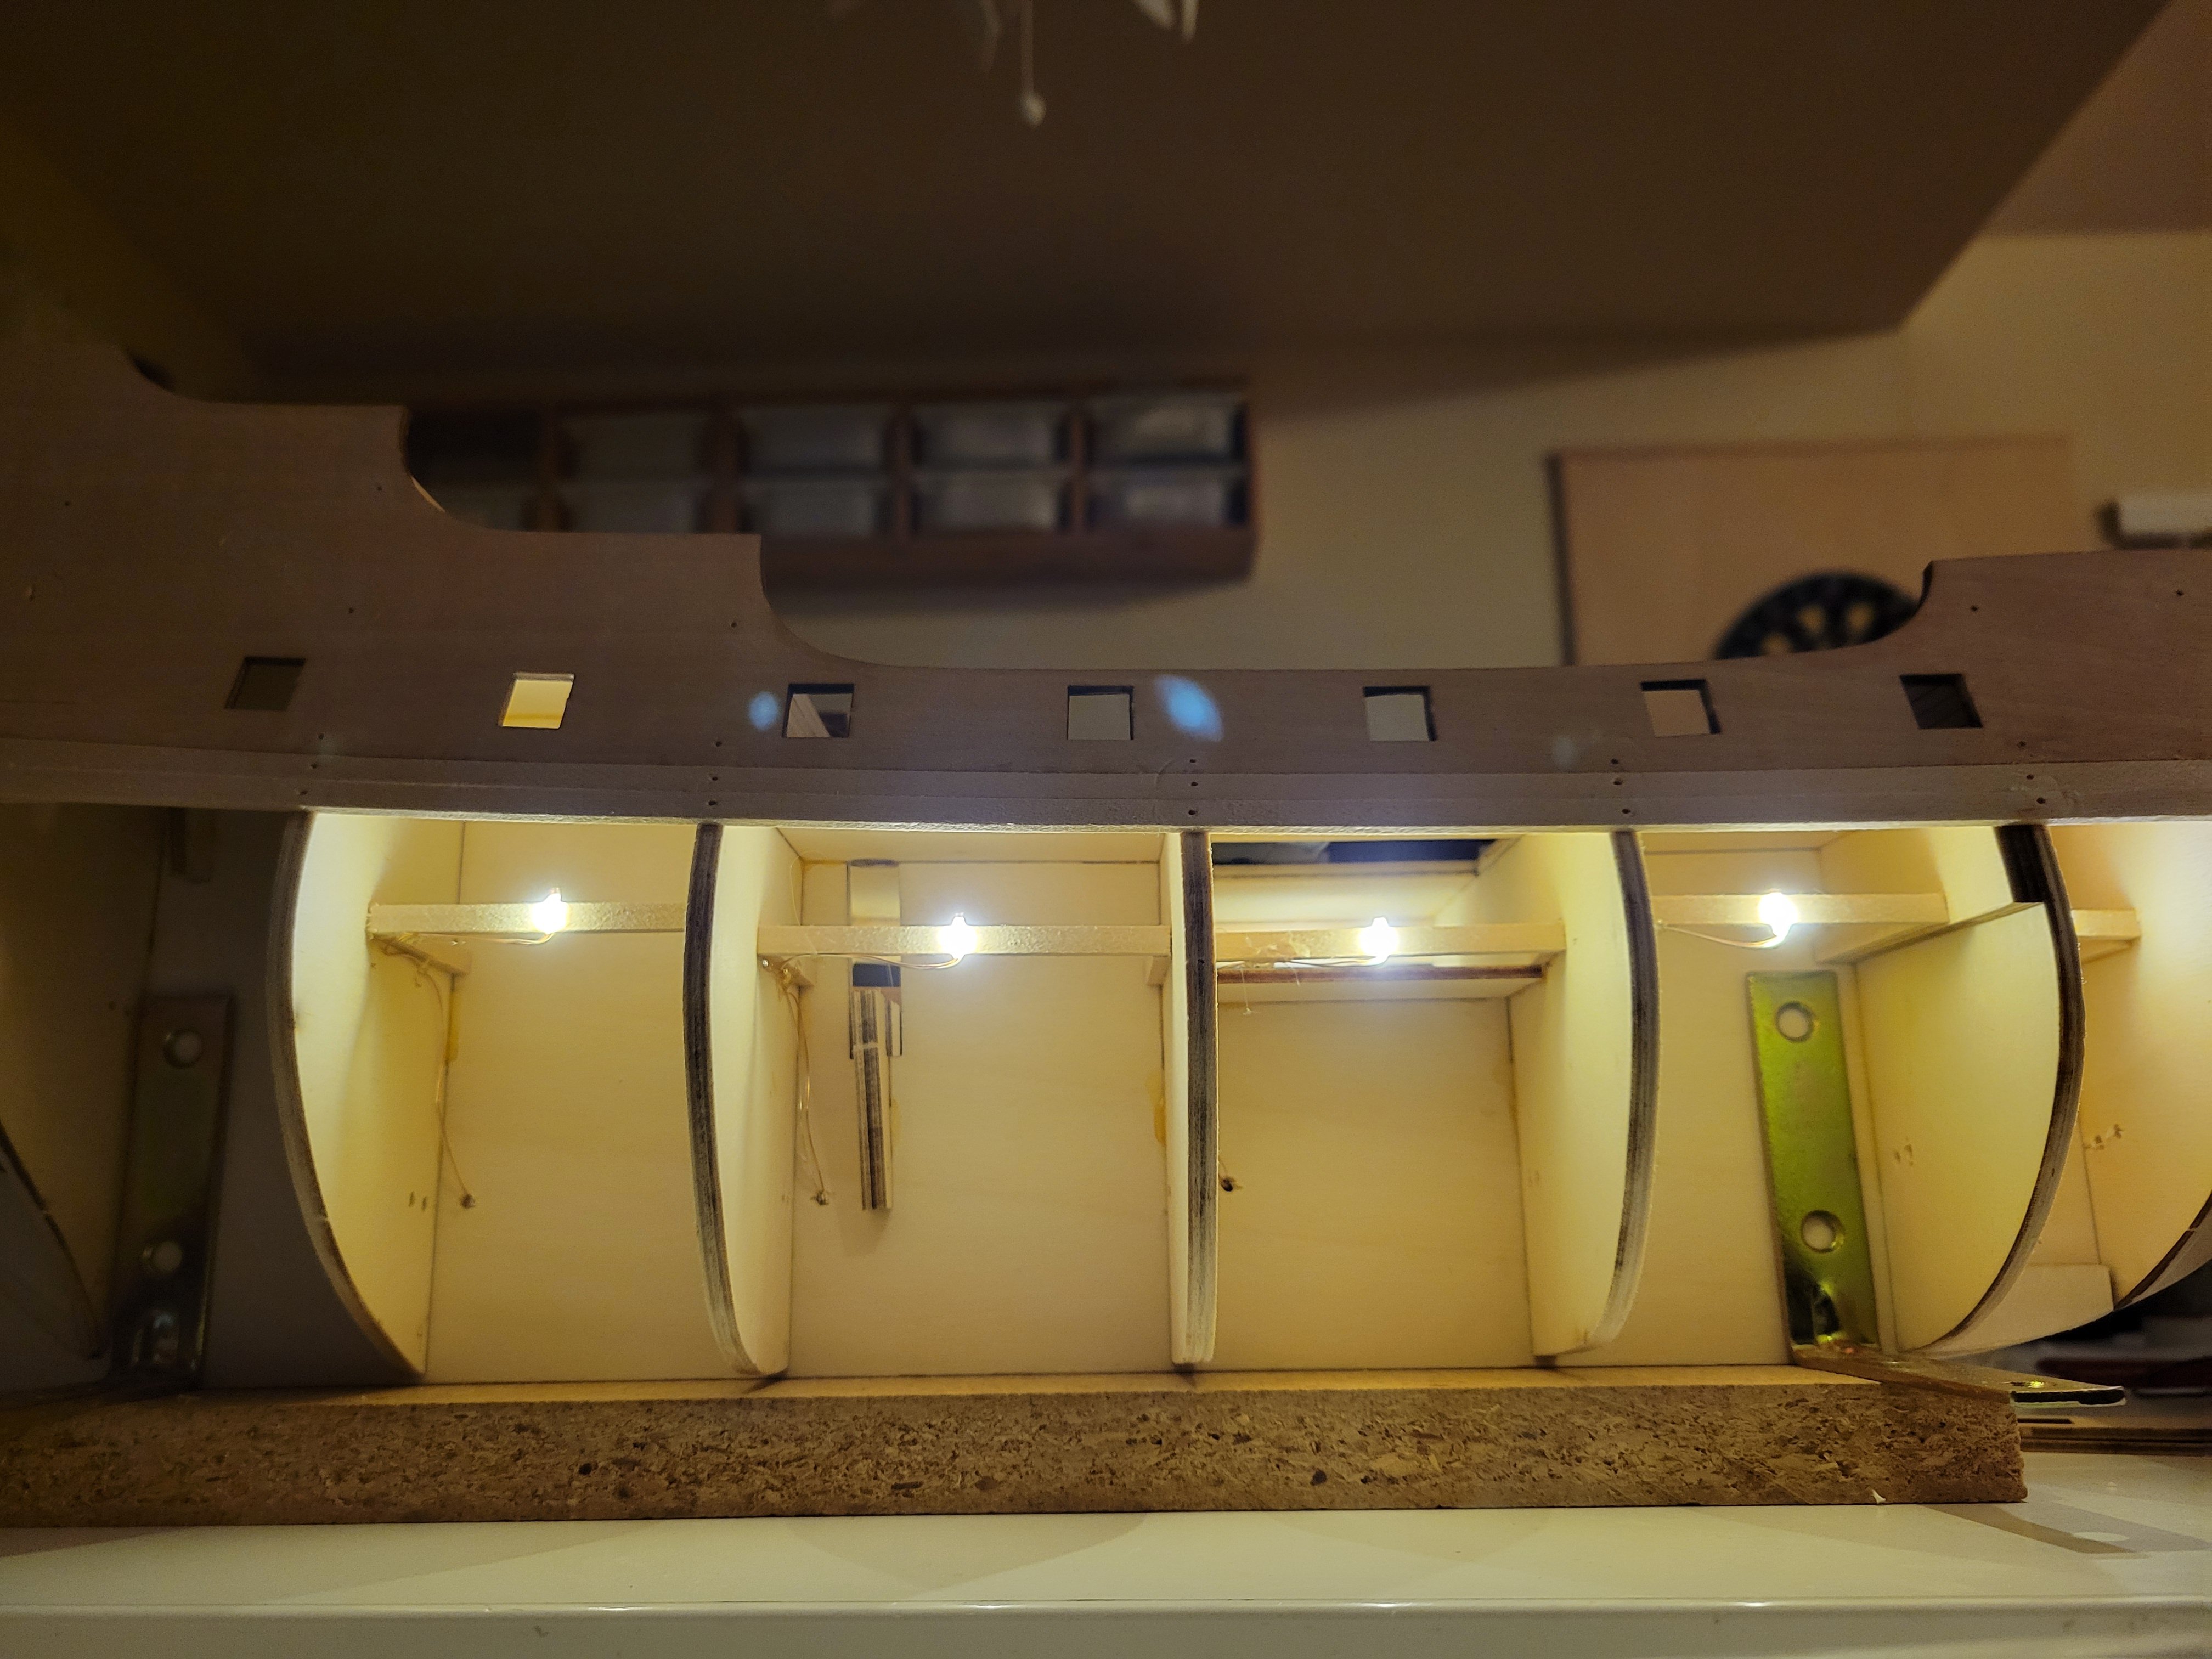
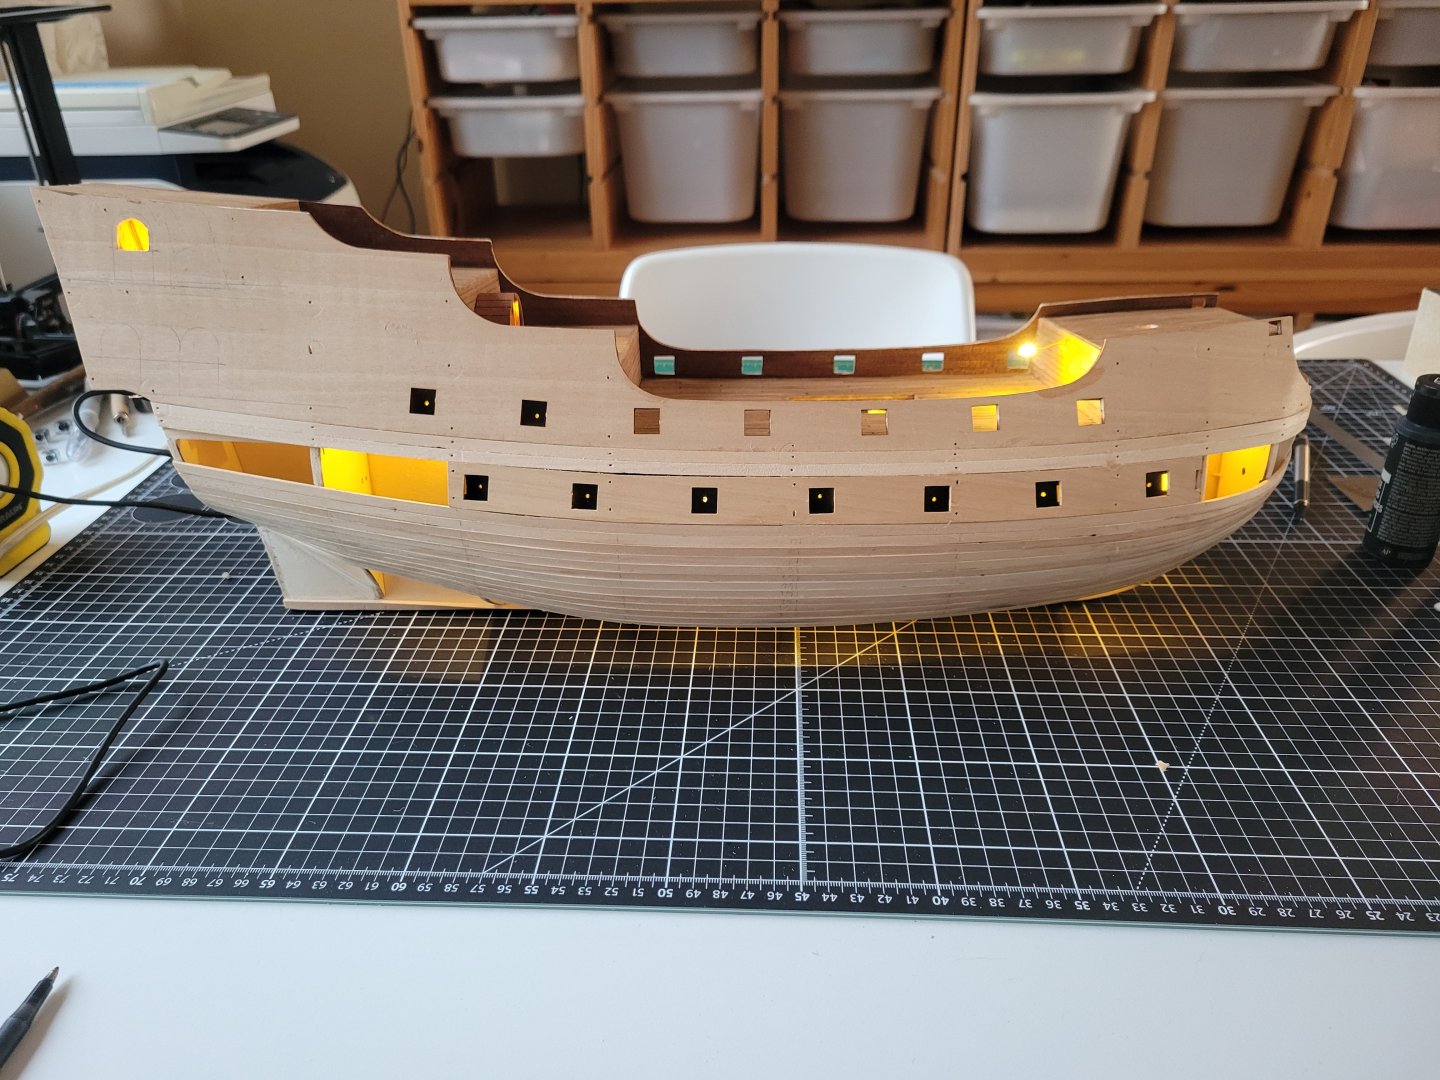
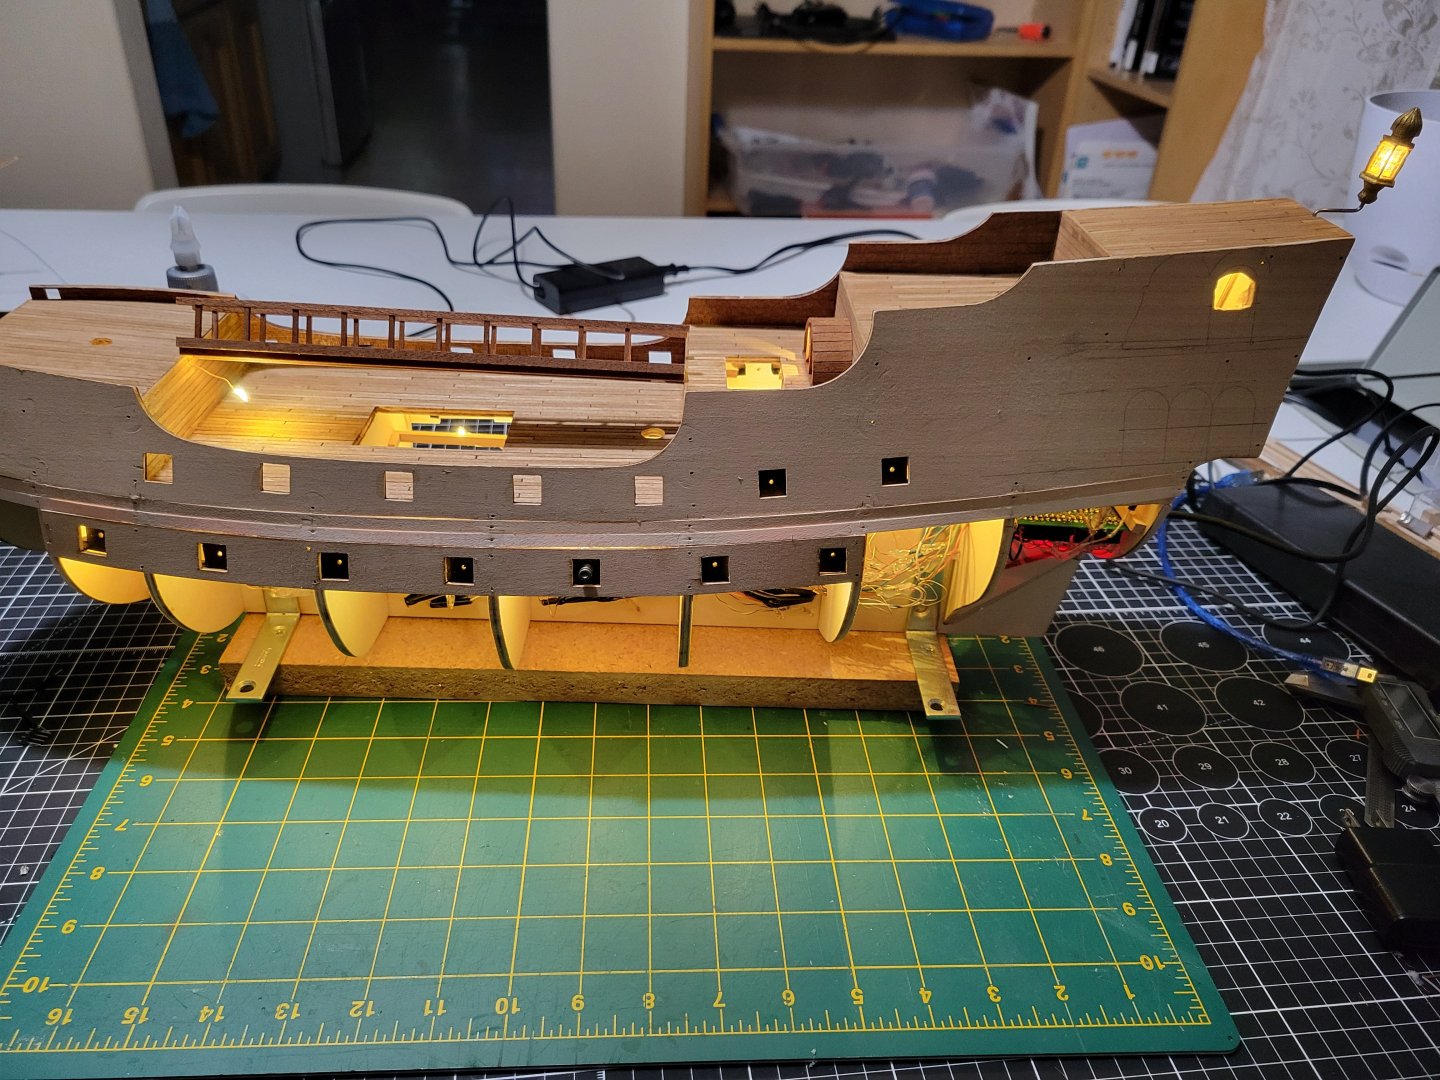
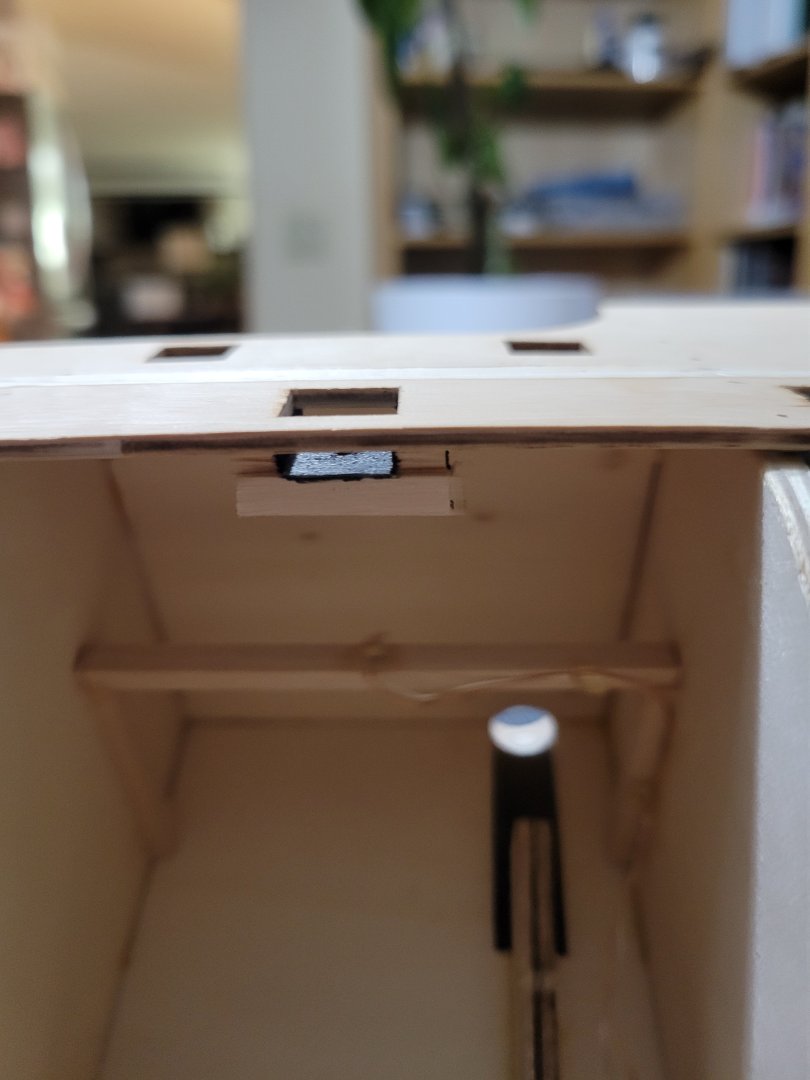
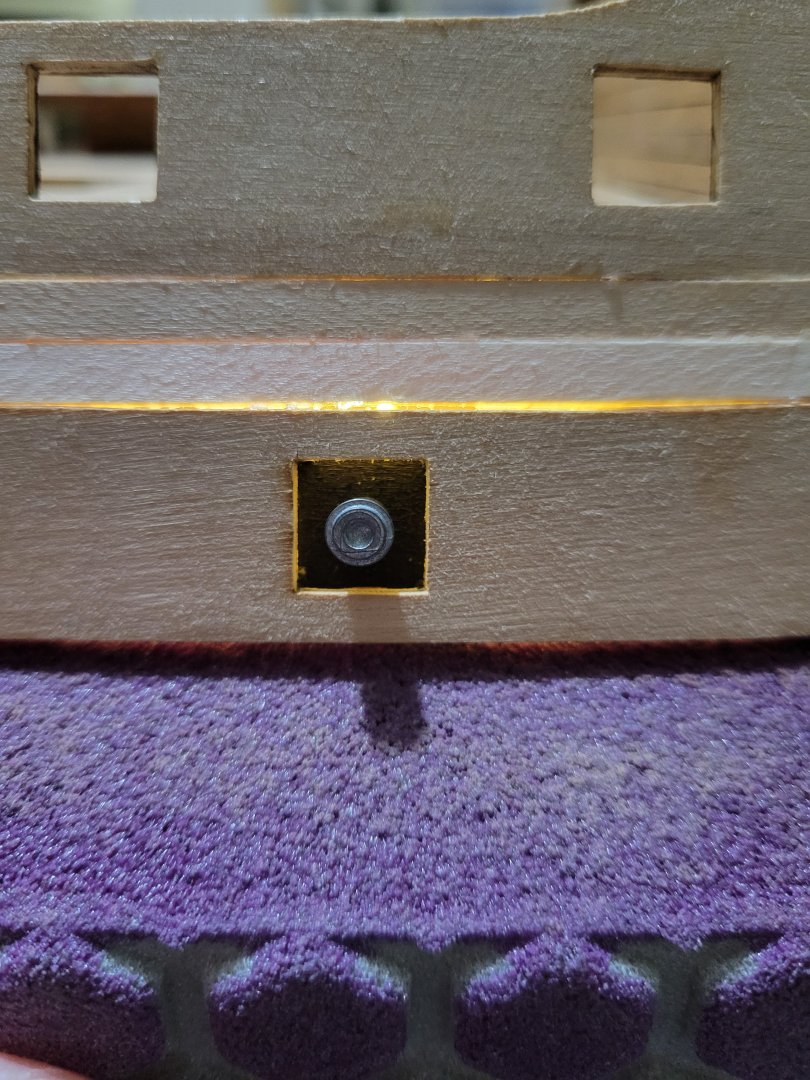
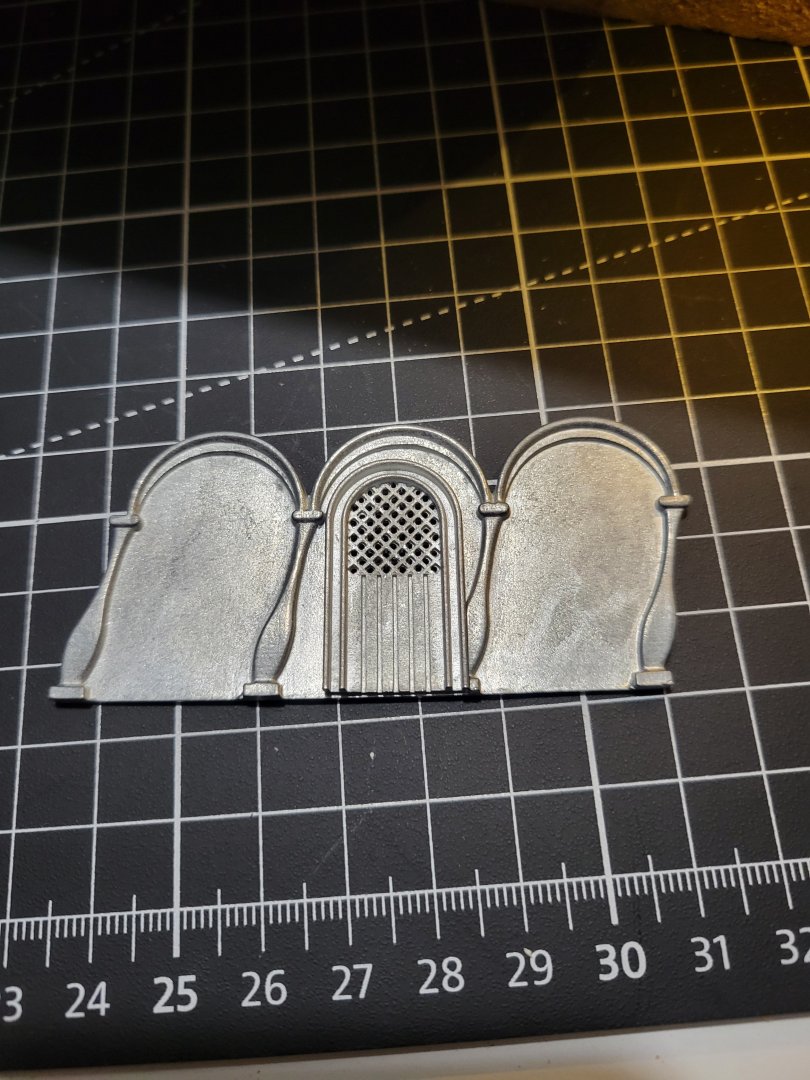
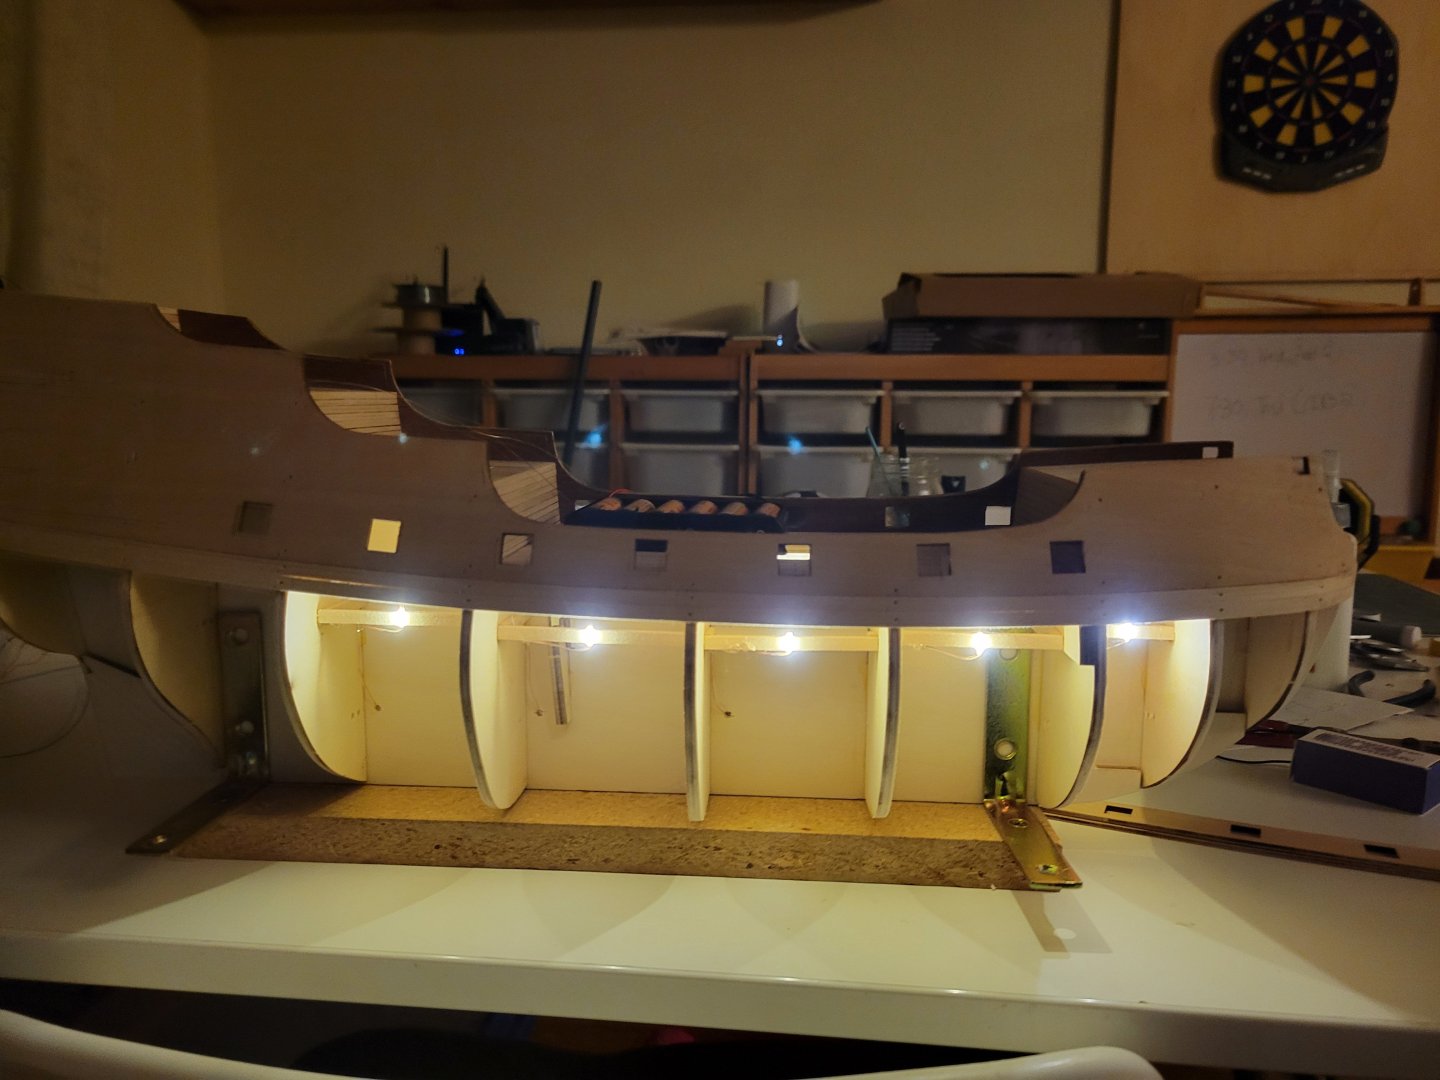
Been extra busy but have been continuing. A lot of work on the lighting. Basically. Every gun port below deck has a new led. In this kit, there's a false black painted backing on the back of the clgun port that a shortened Canon end would be glued to. I added some spacer so that those pieces had a gap all around the edges that light can come through. I'll have to seal well with putty along the first layer planking so light doesn't show through the planks but hope is that each gun port will "glow" a little around the Canon end (and the candle like flicker will make even better. Then i have an led under the walkway above deck, one in the pilot house/steerage, the stern lamp, and finally, some cut out holes where doors on the aft upper decks will be. The doors are solid metal with a grid where glazin in the doors would be. Drilled small holes throughout the grid tonget the effect of light shining through.

-
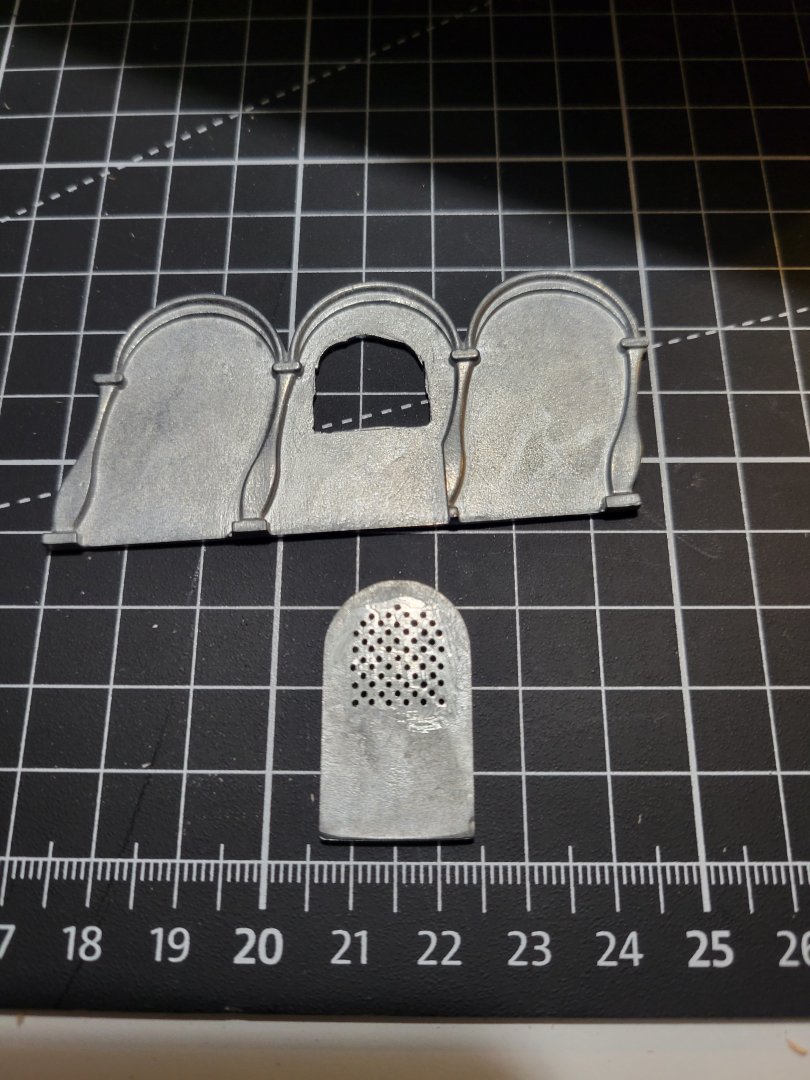
Gun port / lower deck lights set and wiring is soldered. Working on some of the other lights planned now around the decks/doors. Tried scratch building new doors but didn't like how it was turning out. Curves are really tight for bending wood and plastic didn't look great either. Next steps is to try drilling out small holes in the grid/grill on the metal doors. We'll see how that looks.

-
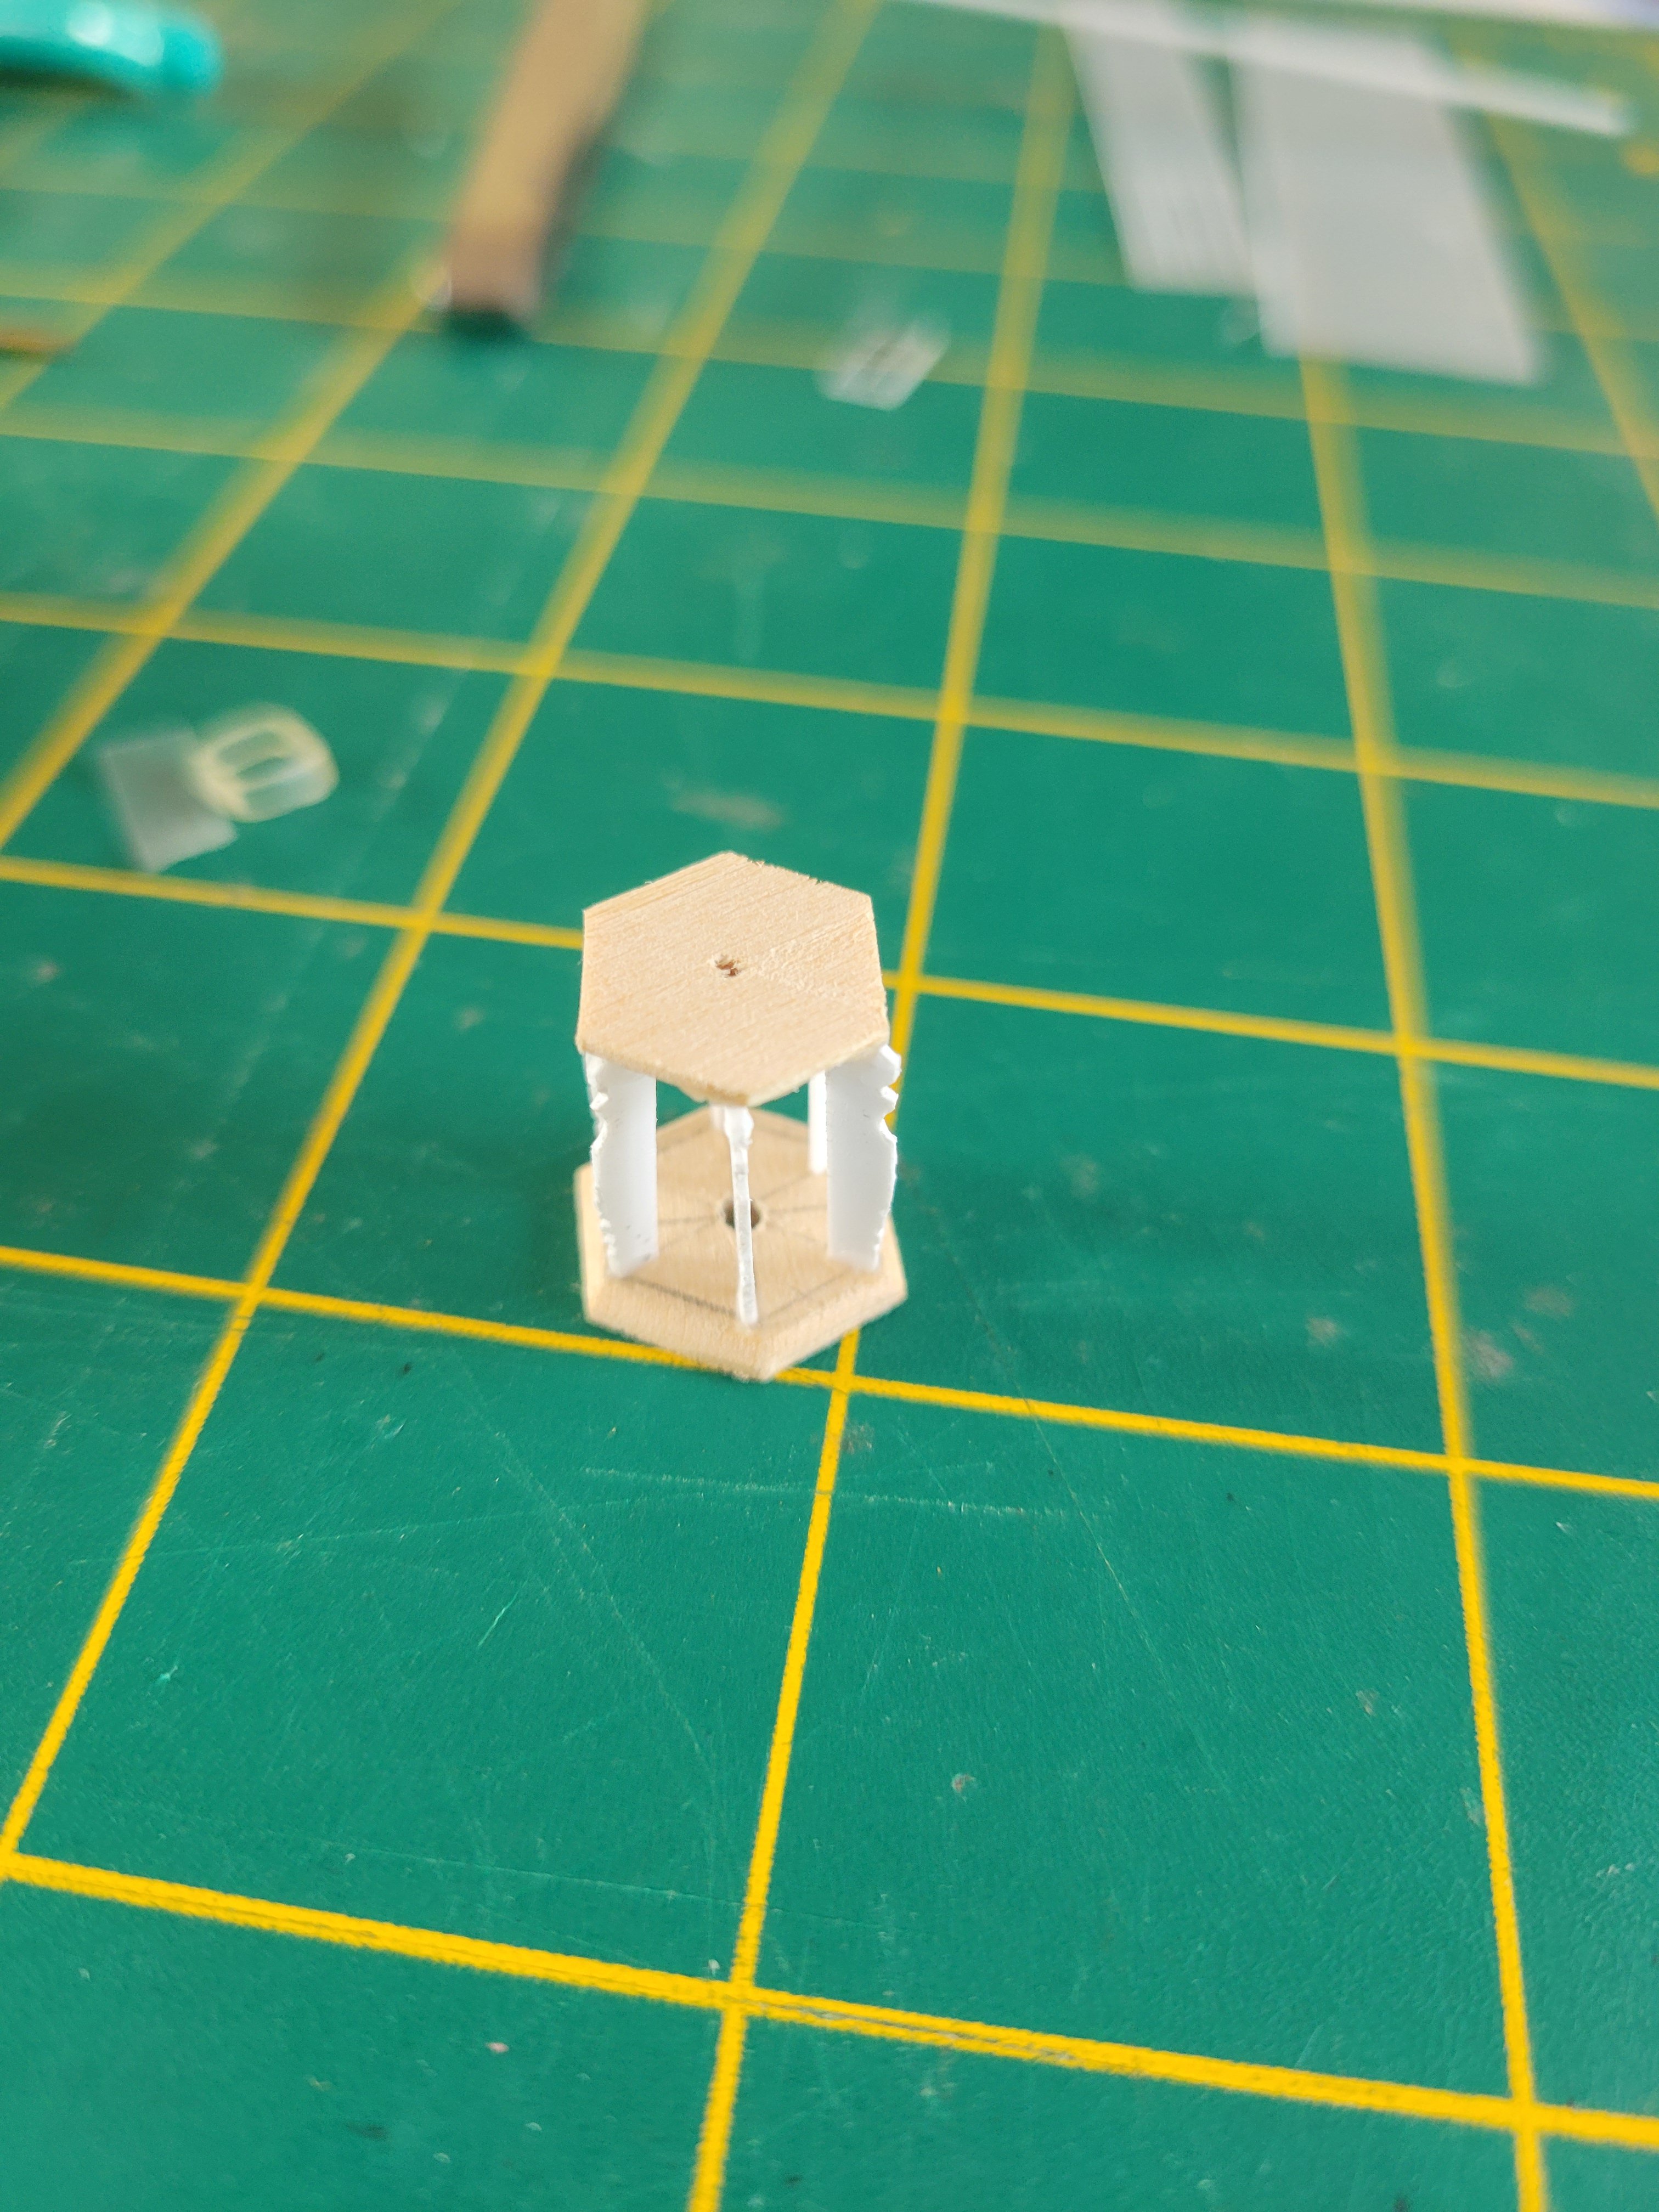
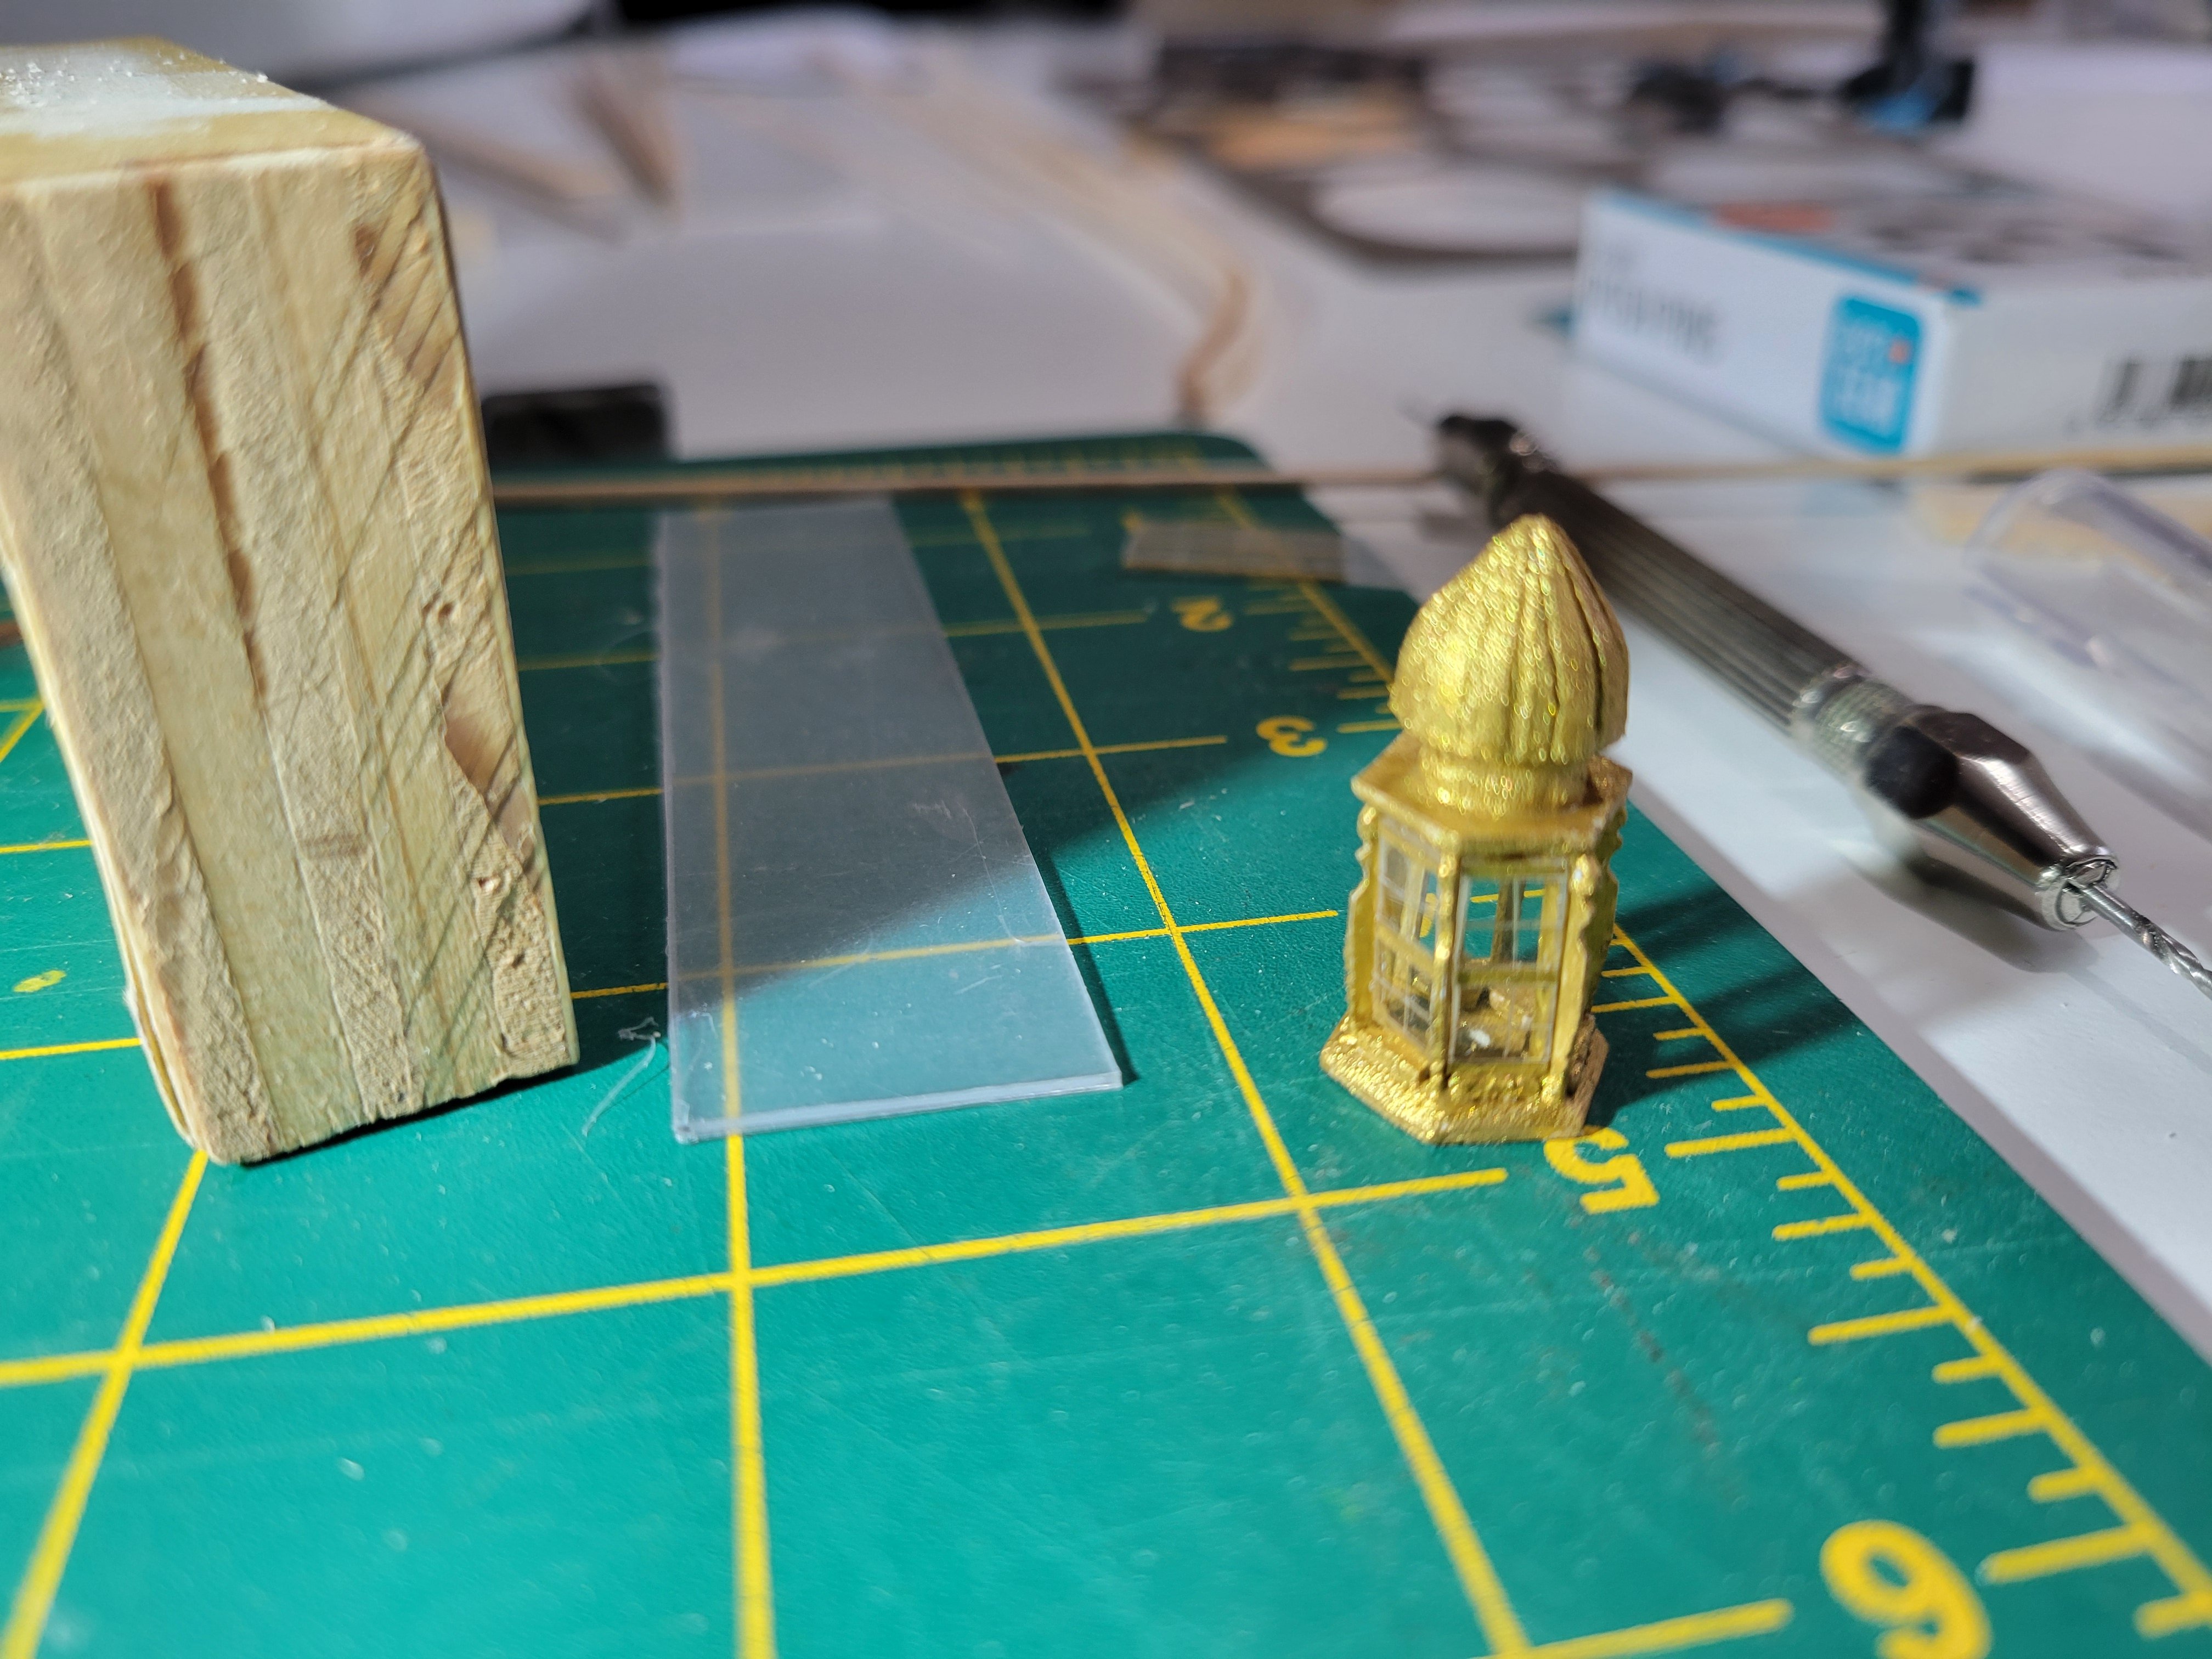
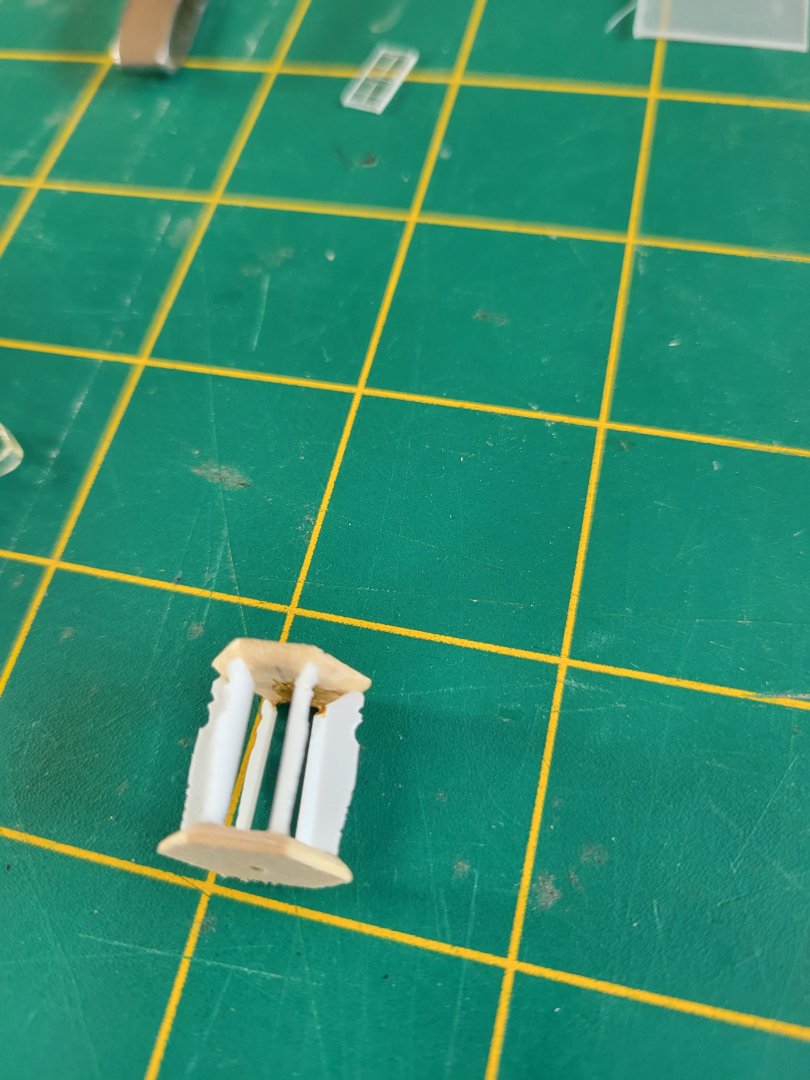
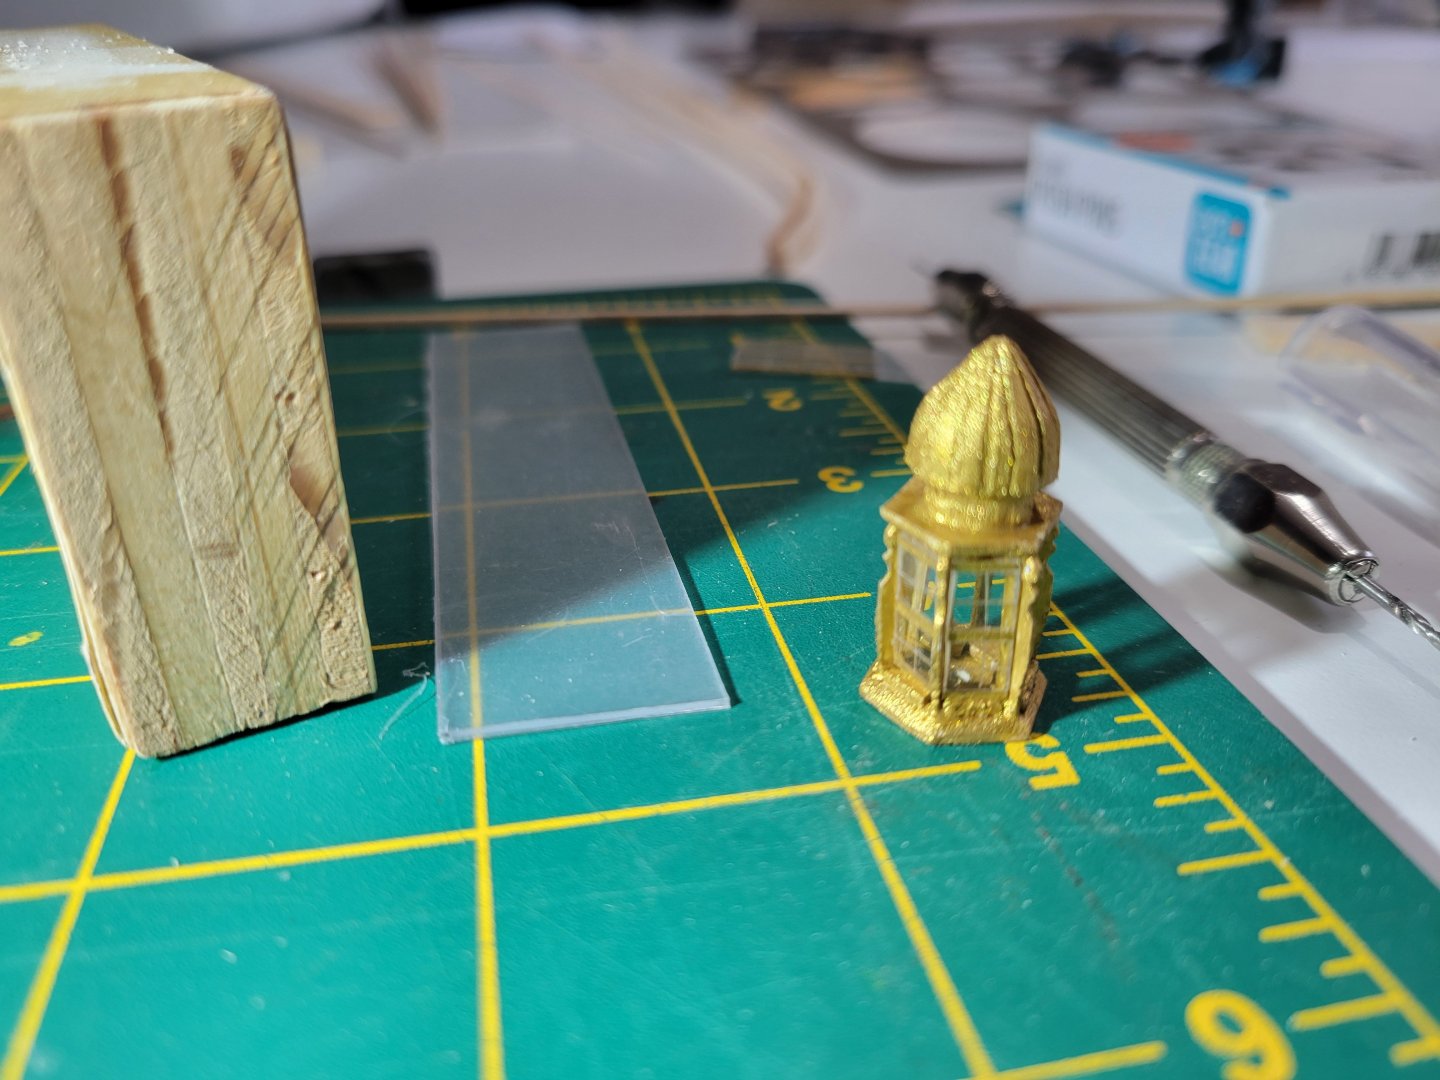
Also working on replacing the stern lantern with a scratch build version I can add an led to.

-
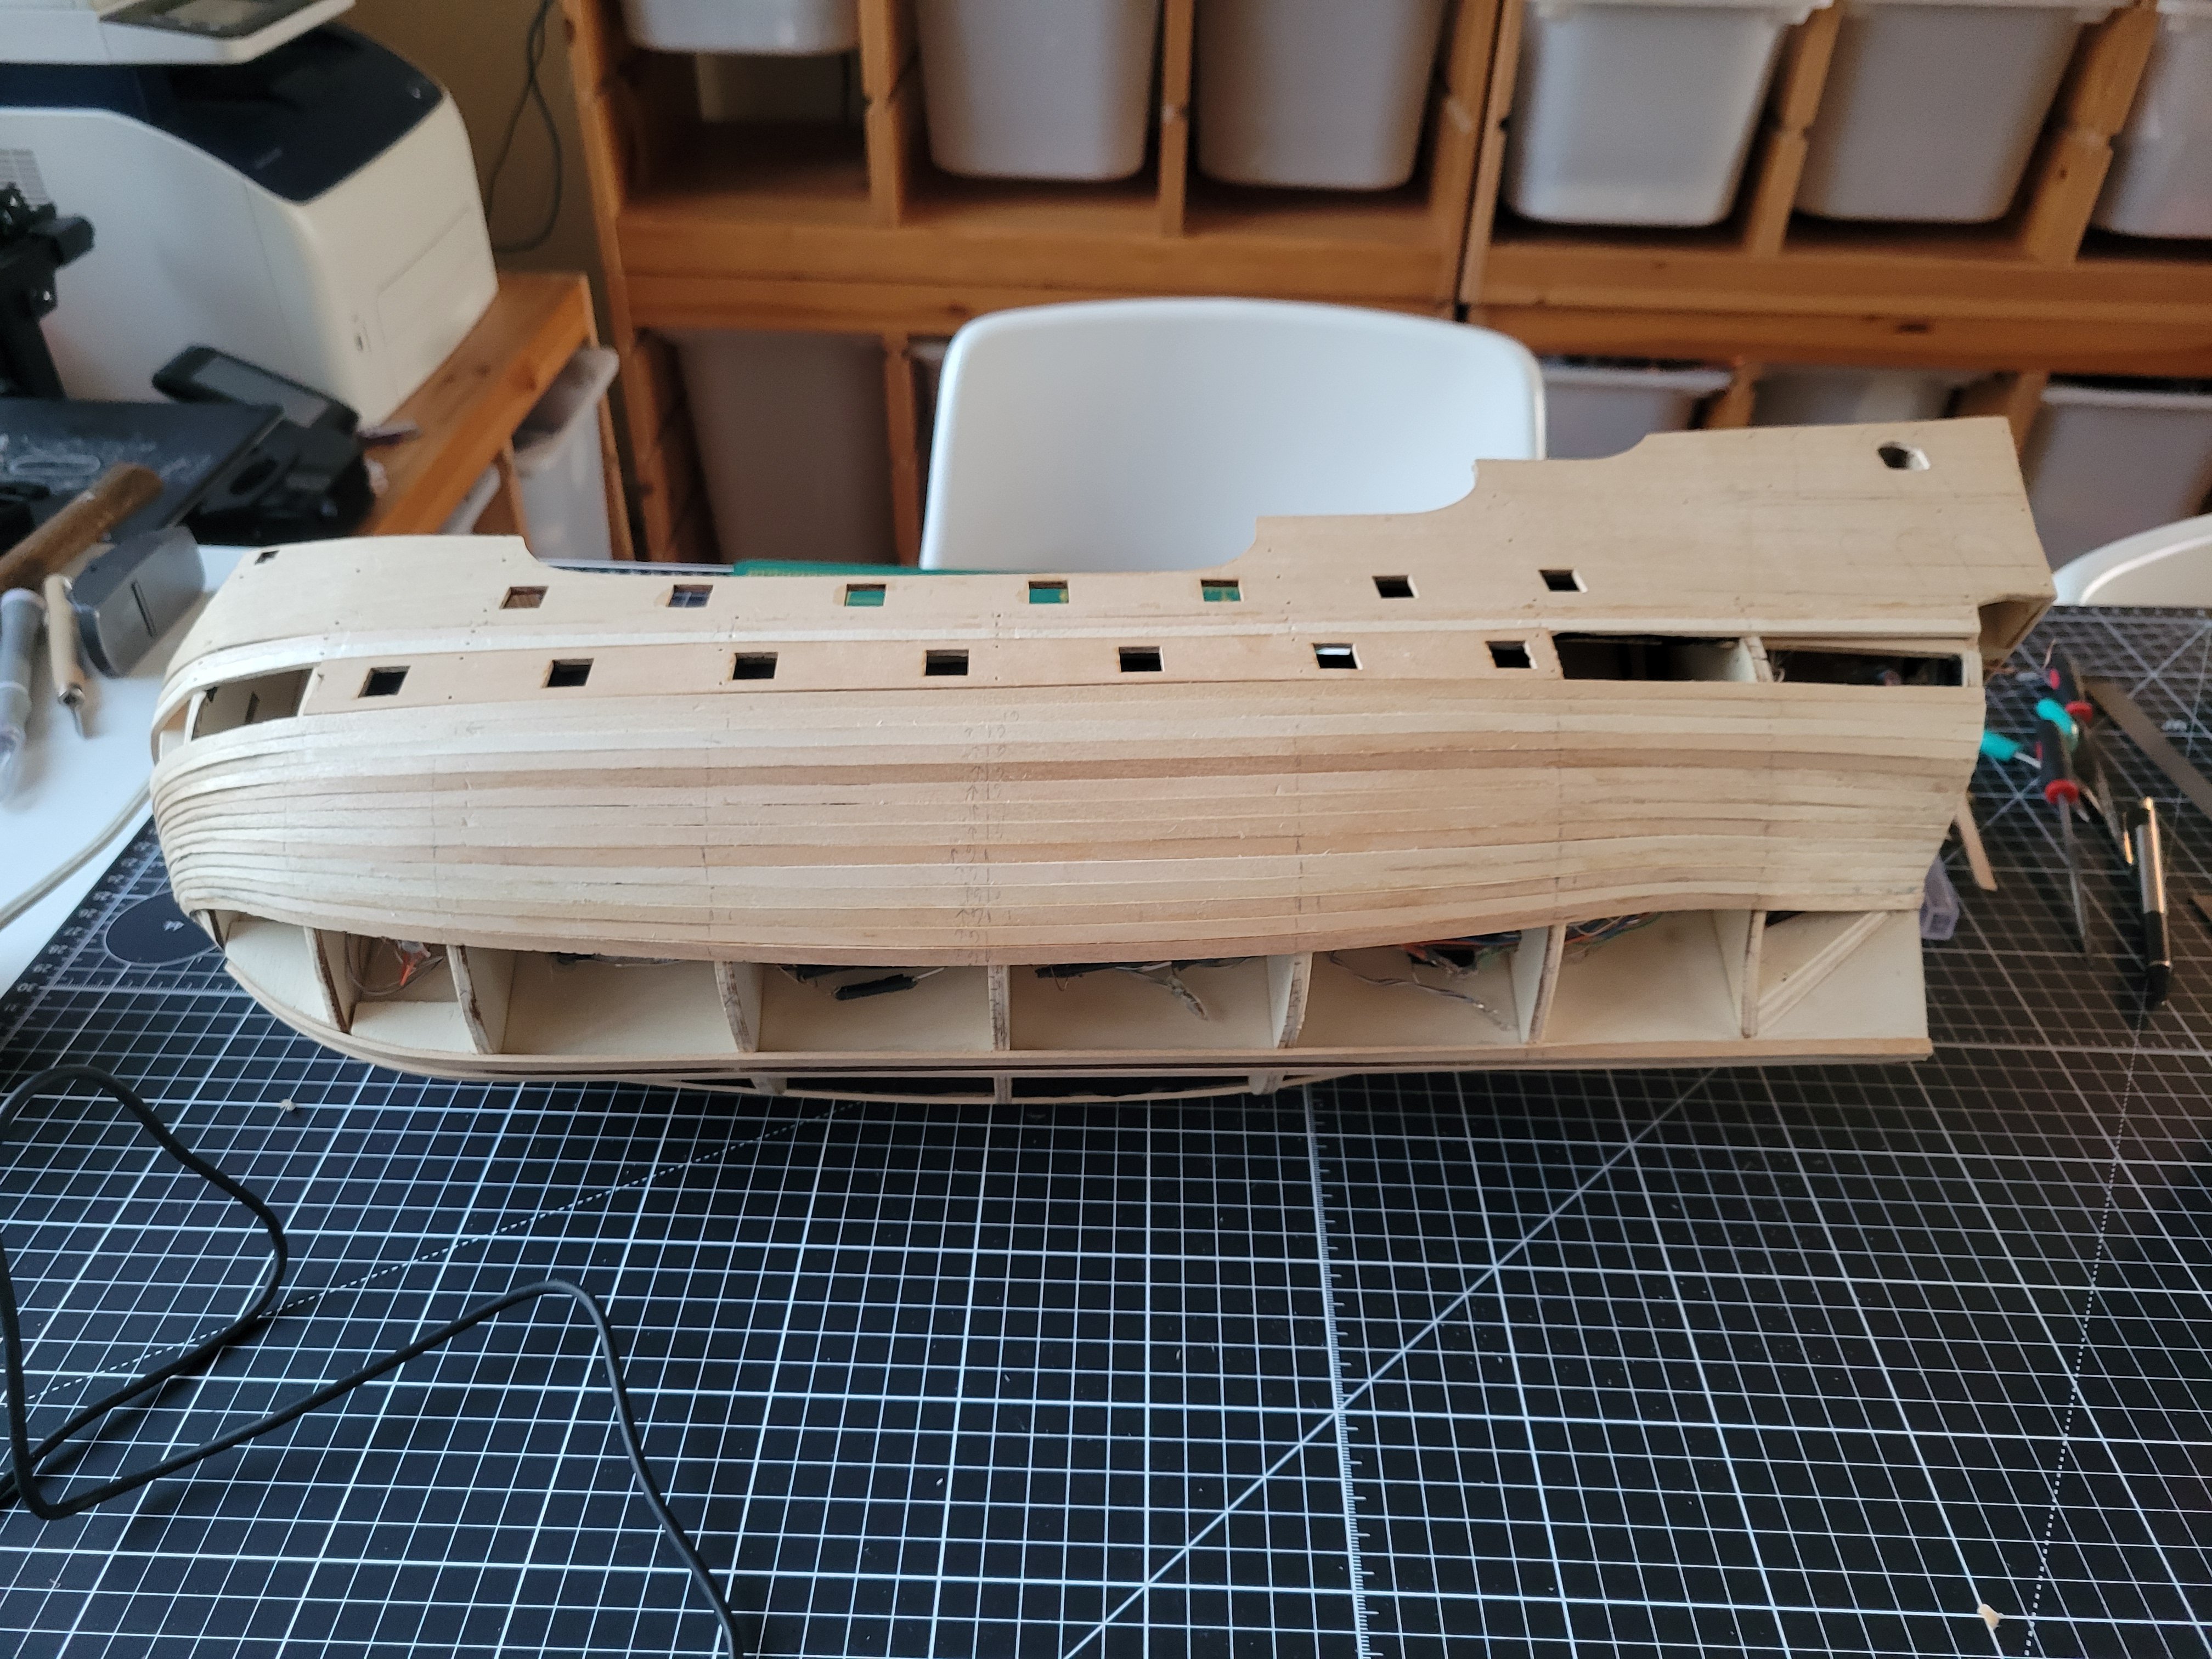
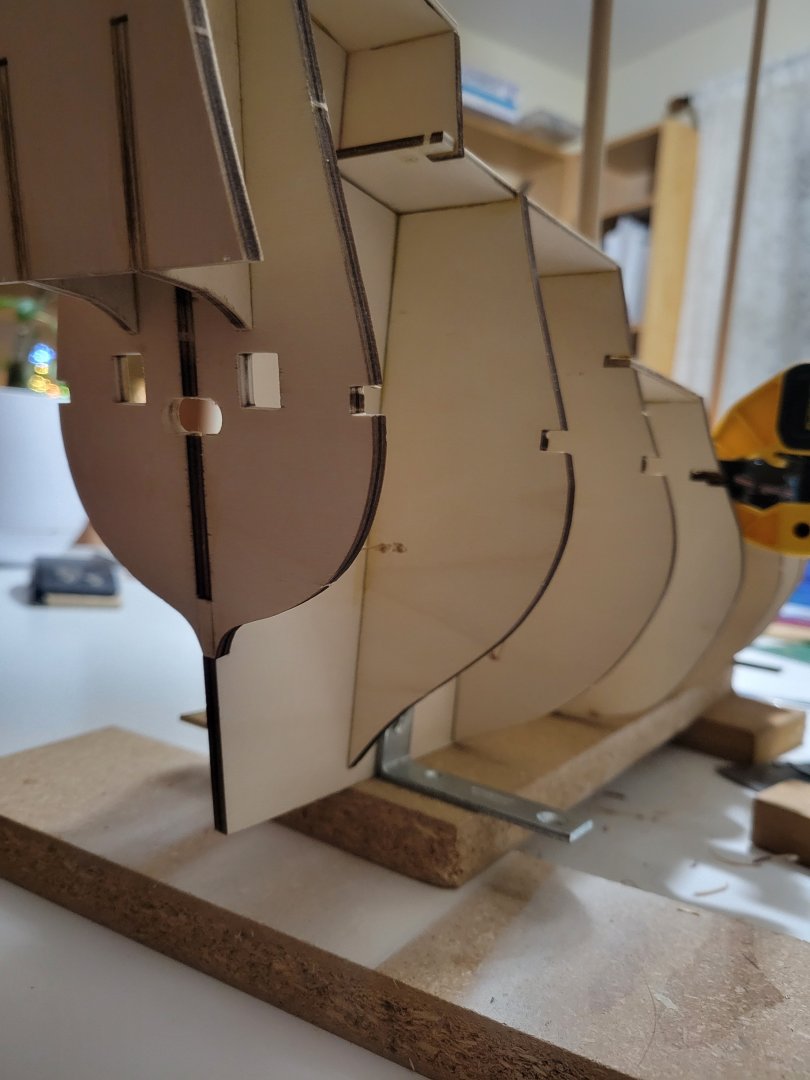
I've got bulkhead set now (not fun to bend!). All the primary decking is down too. Fairing the bulkhead wasn't too much work on the kit. With the prior ones I did it took more work to also deal with correct a lot of little defects but occre seems to make good bulkhead so it went faster.
-
This is actually my first attempt so I'm just figuring out as I go. Founds some small leds that are already soldered to wire and include resistors (at a model train supply on amazon). My son works with arduinos so he helped with the code. There's a couple examples on Google but for candle like flicker, the key is to randomly turn each led on and off at different rates to give the appearance of the flicker. Then the shift register chip to apply that affect to 8 leds individually. For the model, I'm just experimenting with where to place everything before I plank the hull
-
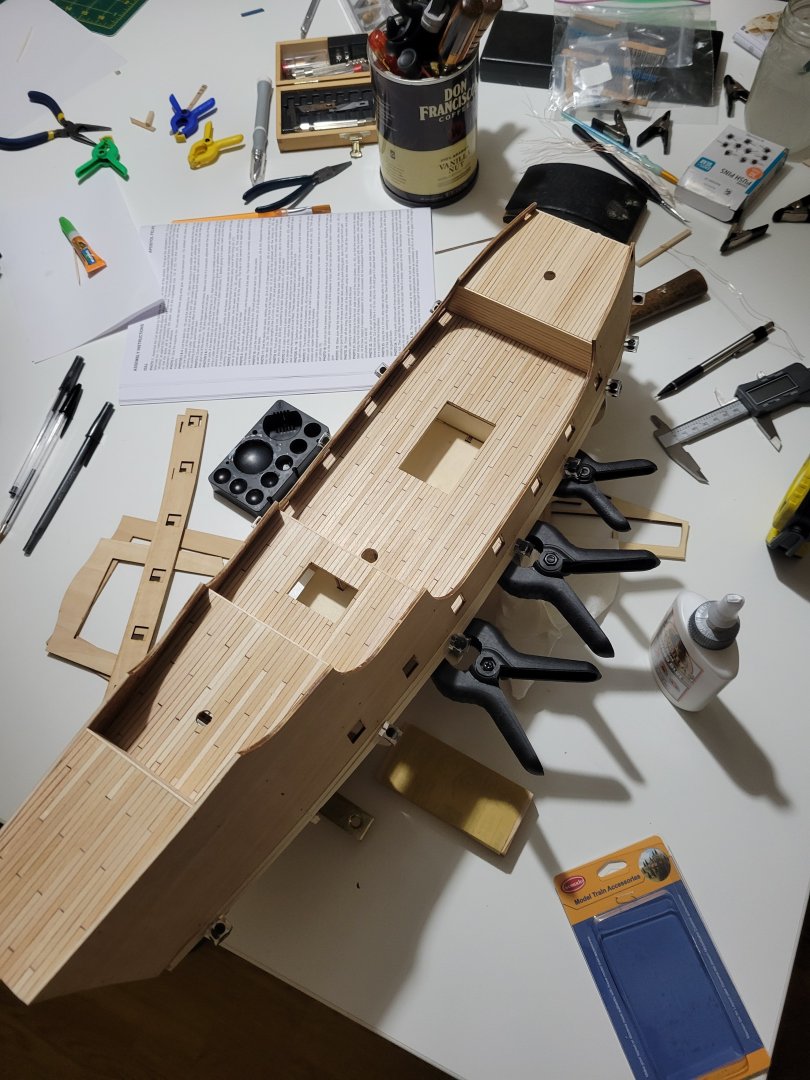
Frames are set (and staight!). Deck planking now. Forgot to start the pattern at the forecast deck but a brown colored pencil will probably look fine there. Getting leds set too. Some of the smallest leds I've worked with. I'm considering cutting a rectangle out of the back of the ship (below the overhang) and making that a sort of drawer to pull out the arduino (or batteries) I'd basically cut it out and then put right back so I can plank it. More to think about there.

-
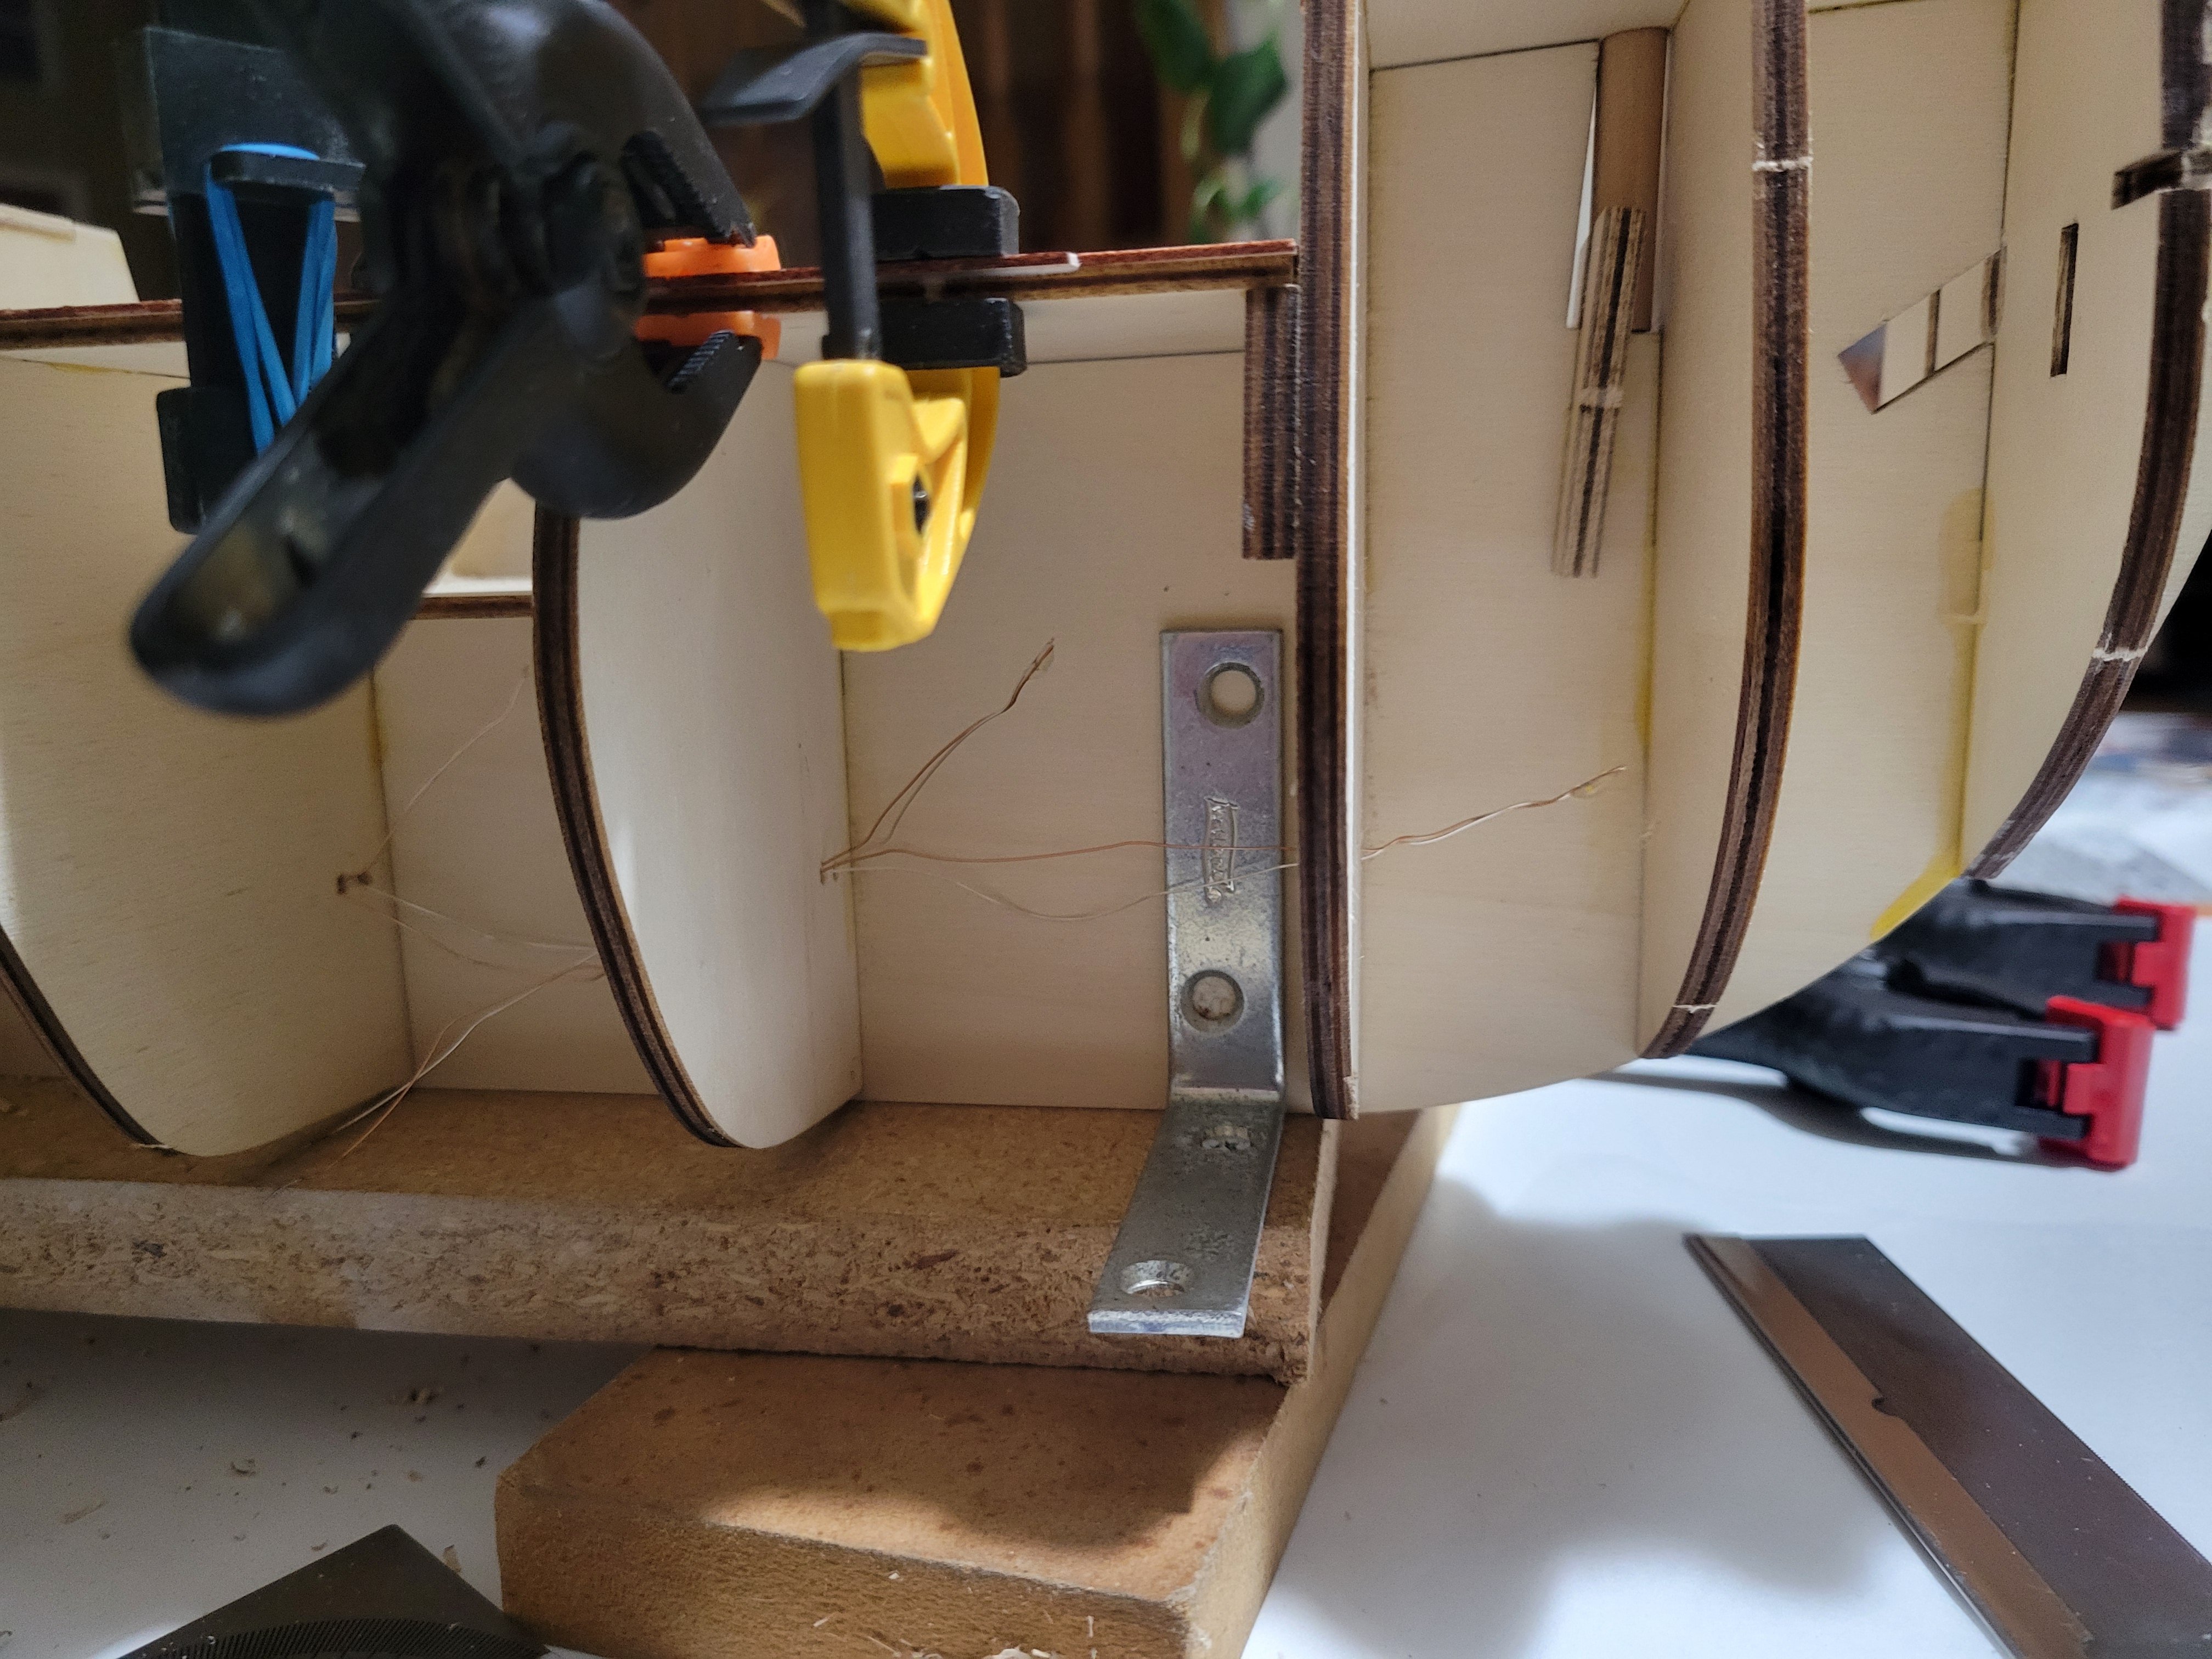
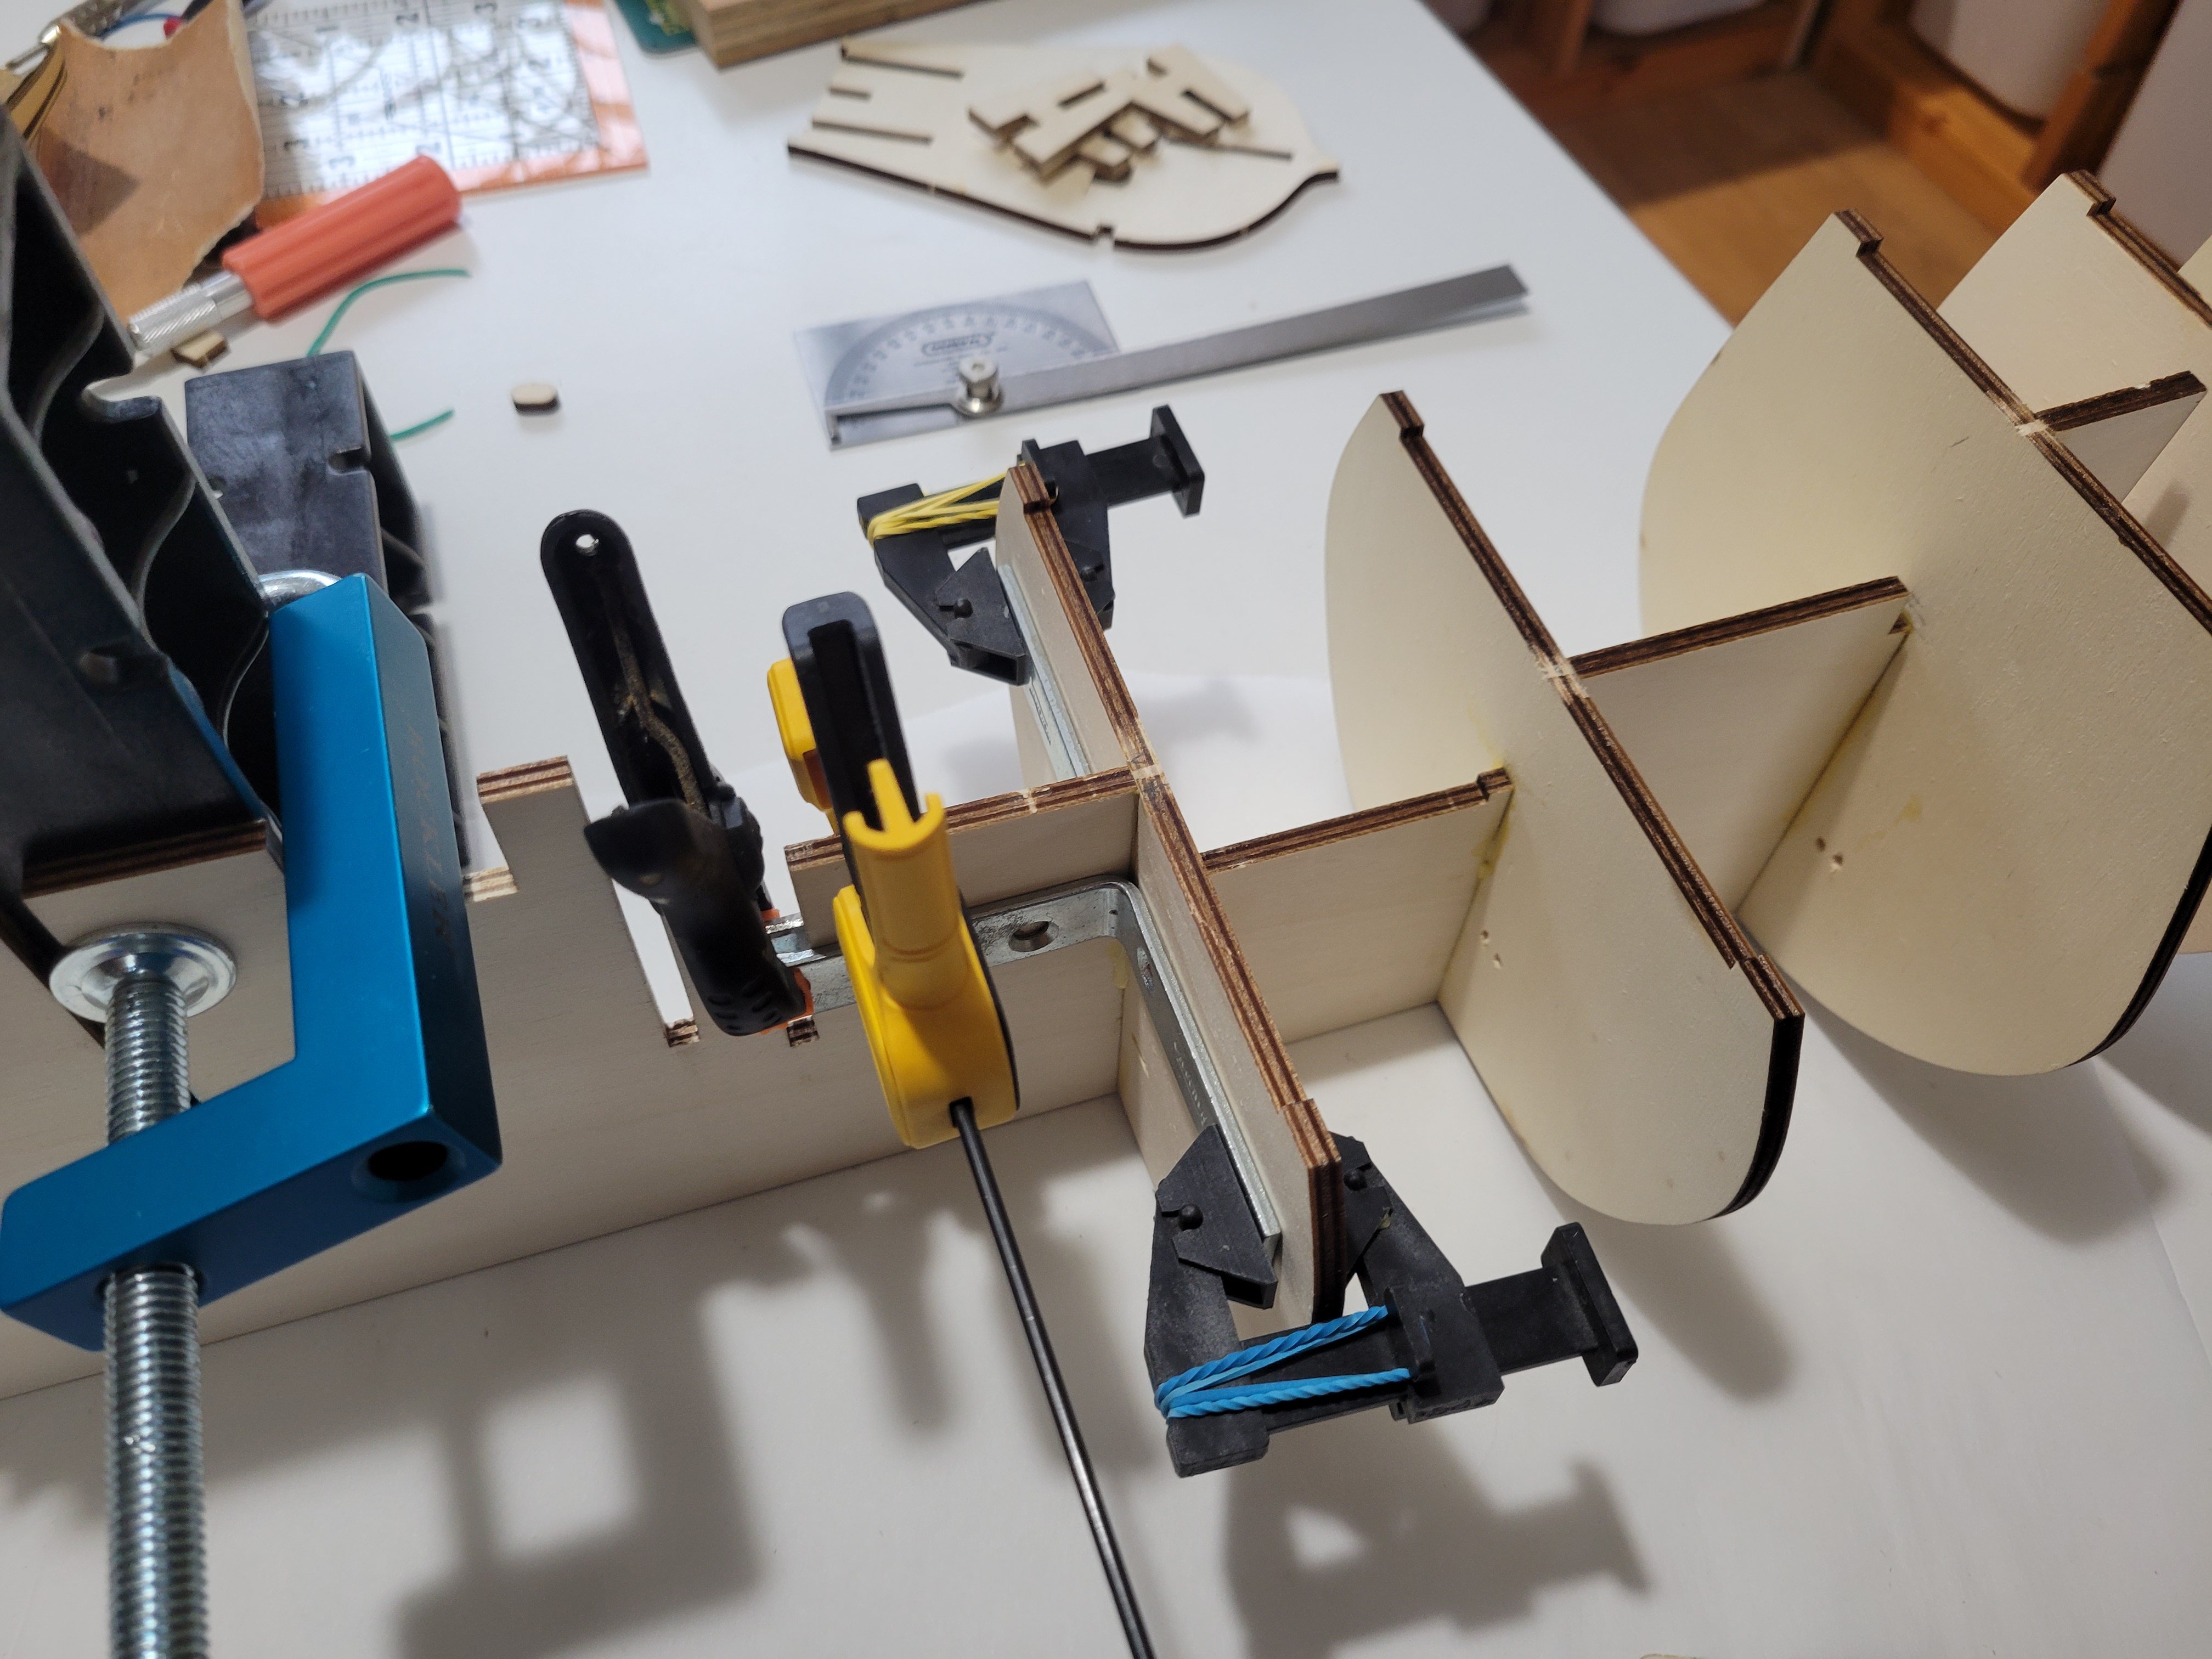
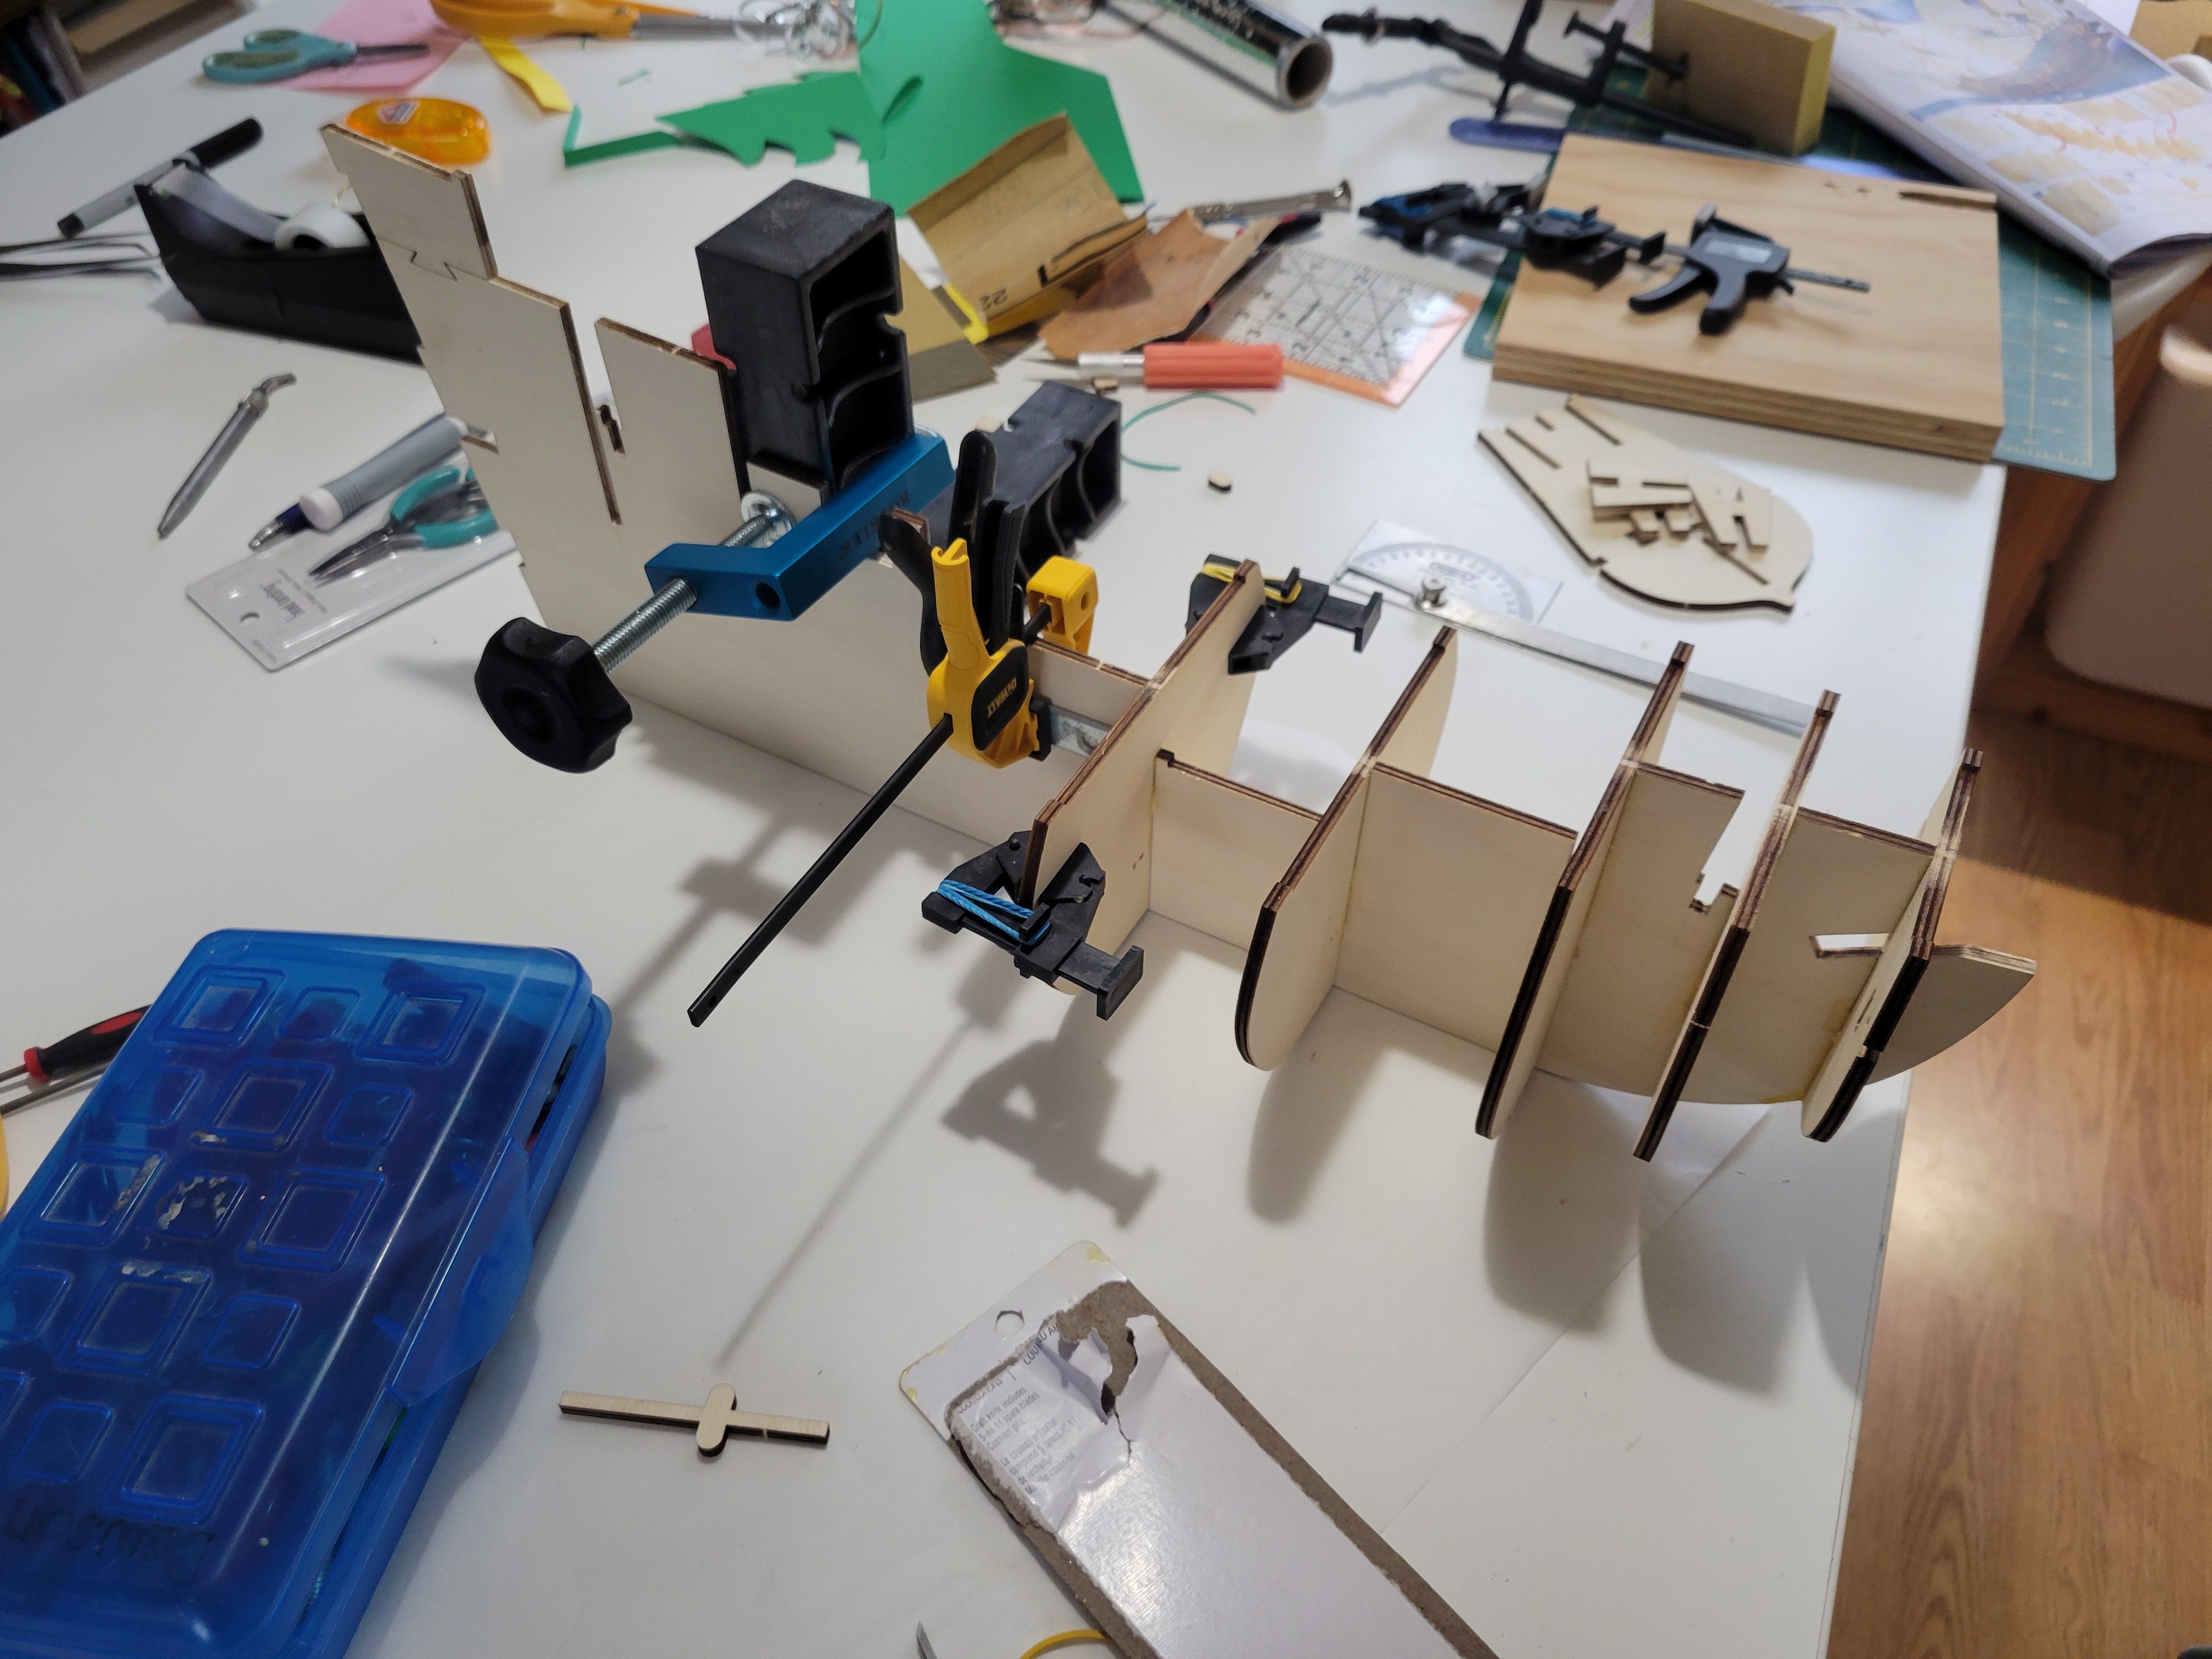
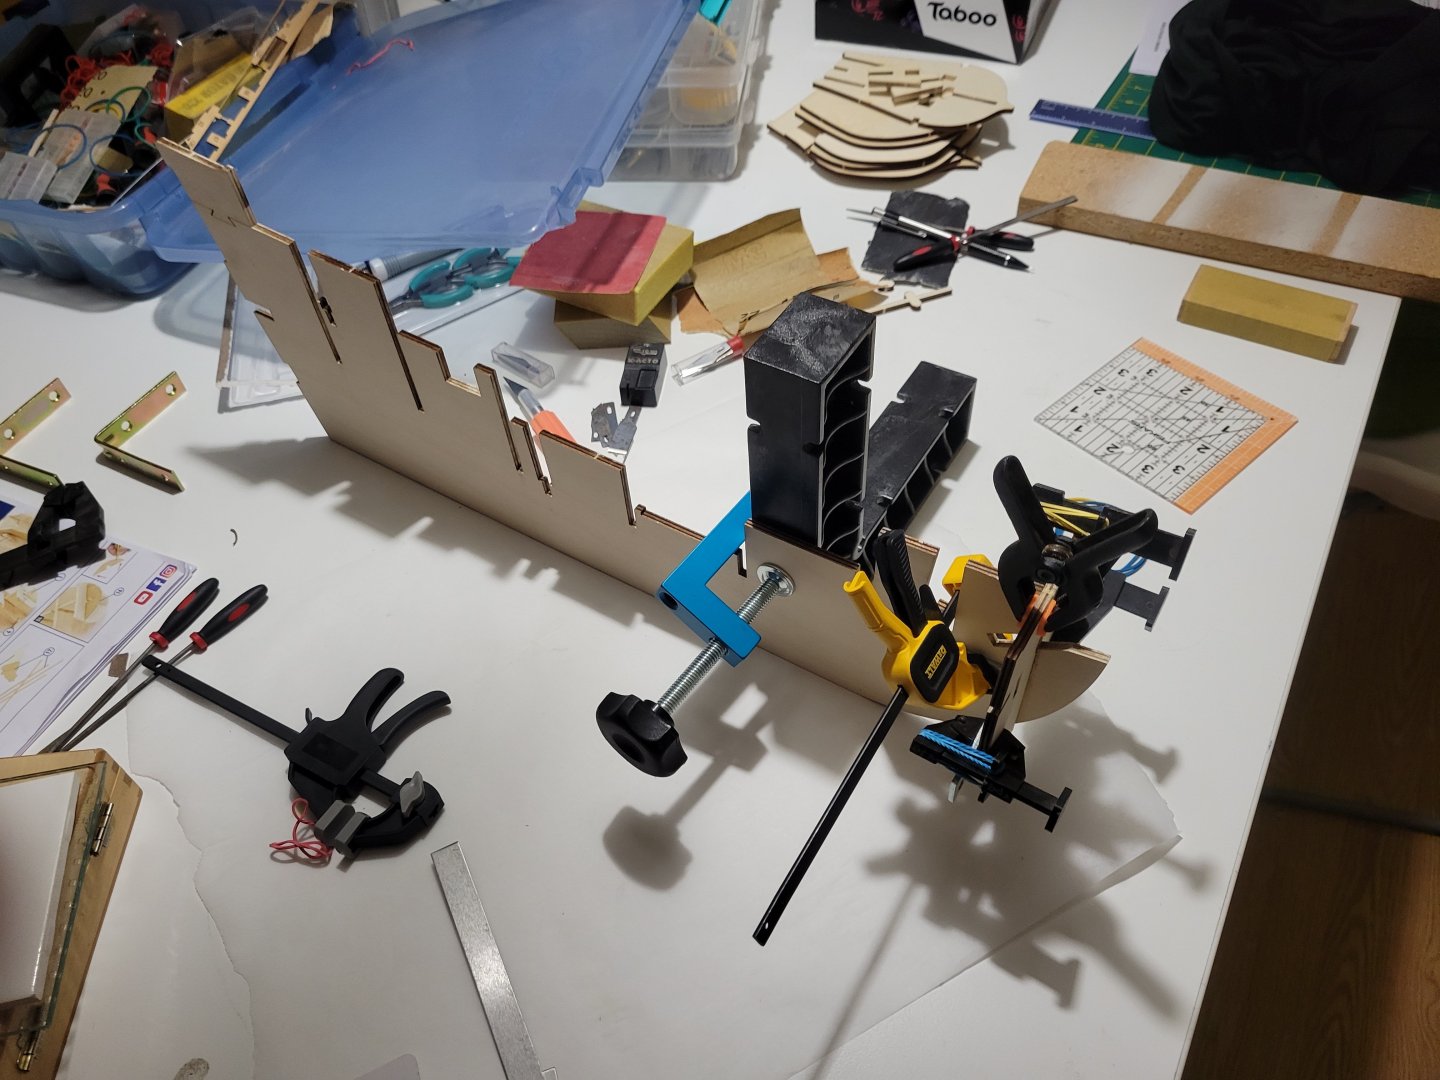
Further along with bulkhead. I almost went for a building slip but in the end, I get the sense they are "novelty" and a good strategy of clamps is just as good. The real secret: Take Your Time!! I'm using l brackets I checked for perfect square and gluing a bulkhead at a time. There is a very slight bow to the central keel frame but it's slight and I can straiten that when I plank (and the decks might fix it too)


-
First post on ship #3. This is my first Occre. Definitely a step up for me. The quality is better than my last kits (not that they were that bad, I did really enjoy learning with them!). I know there are others out there that may be even better but I'm happy with what I got so far. Also got an awesome deal on black friday. I'm going to try an light this one too. My son is putting some good work to figuring out how to maximize an arduino nano to power up to 16 super small leds to flicker individually like candles. More to come on that. For now I just need to make sure I get the bulkheads right!
-
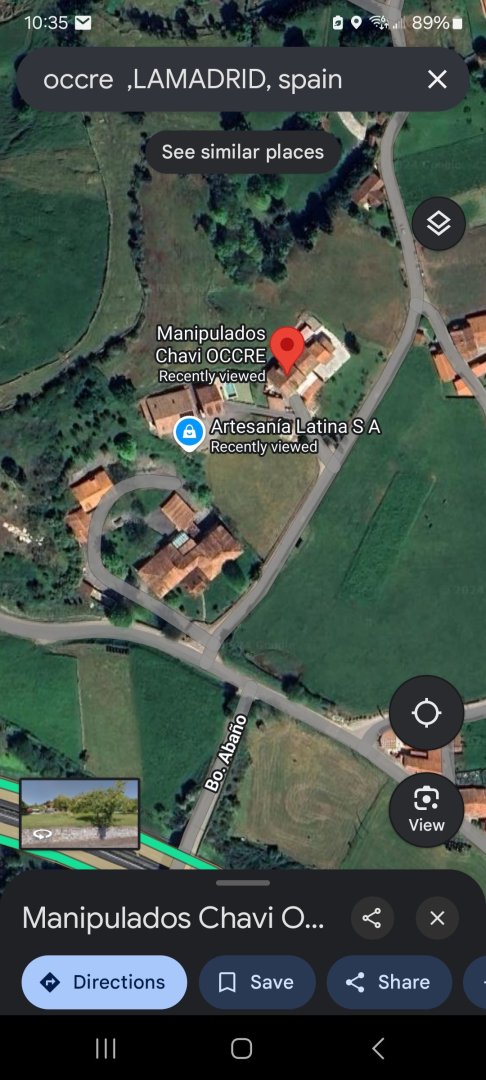
I know this is an old post but found this interesting for those still wanting to know. I found that artesania and occre have manufacturing facilities literally next door to each other in a rural area of spain. Can't help but wonder if the companies are either the same or at least associated? I do like both companies (my first two where Artesania and I just bought two from occre!) Was curious where the models were coming from (shipped from) and google showed this.
-
That's good to know Chris! Thank you.
-
Thank you for the feedback everyone. Losts of options. I think at this point i will focus on a solid build first and then attempt the cutaway next. I was leaning towards the Model Shipways options and then the day after writing this the prices went up! They were pretty well discounted and then they reduced the discout before I could buy For example, the Syren was $267 and now is $320. More than I planned so I will probably focus on an Occre for now. I think the Terror would be the best cutaway opporutnity due to available plans so maybe the next build will be the Revenge. Lets see what I decide this weekend!
-
Thought I'd get some advice here. So far I have completed to AL builds, the Virignia and the Bluenose II. Happy with how both turned out. Had to do a lot of mods/bashing. In part due to just the level of detail/quality from AL and my own need to go above and beyond. Looking for a next build and wanting to step up to a period ship. There are a couple ALs at a local shop near me but within my price range (200 - 300 USD) the option are the spanish caravels that I am less interested in. They do have an Occre Buccaneer but that one seems a little small/simple. Doing research, I'm thinking one of the following: Occre HMS Terror, Occre HMS Revenge, Model Shipyard's US Rattlesnake, and Model Shipyard's US Syren. Obviously, the quality is better with Model Shipyards but the Occre options look like nice builds too. I do like the challenge of needing to mod/bash a little. Curious what everyones thoughts on this might be! On another note, I am really intrigued with the cutaways. I love the idea of detailing interiors and being able to show the work (and maybe a little lighting too). Not many kits with cutaways. Occre has the Bounty but it is just outside my price range (almost $500). I though about just moding one of the kits above. I know it's hard to show with the POB but my thought was to frame up, lay some initial framing boards to firm up the frame and then carefully cut into a section, adding shoring and floors as I go. to make one portion of one side open as though that part had been POF. Adds a bit of risk (and maybe too much for my third build?). That might rule out the Shipyard builds as neither seems to have good below deck plans. The HMS Terror would probably be the best one to attempt. Any thoughts or anyone seen a build log where someone tried this. (or is it just a crazy idea and I should just get a little more experiend and target a scratch build in a few years!!)
-
Did you ever get this kit? I'm thinking about it too. I've done two ALs and it seems like Occre is a good step up from AL. I really like the idea of a cutaway.
- 1 reply
-
- 1
-