travis
-
Posts
162 -
Joined
-
Last visited
Content Type
Profiles
Forums
Gallery
Events
Everything posted by travis
-
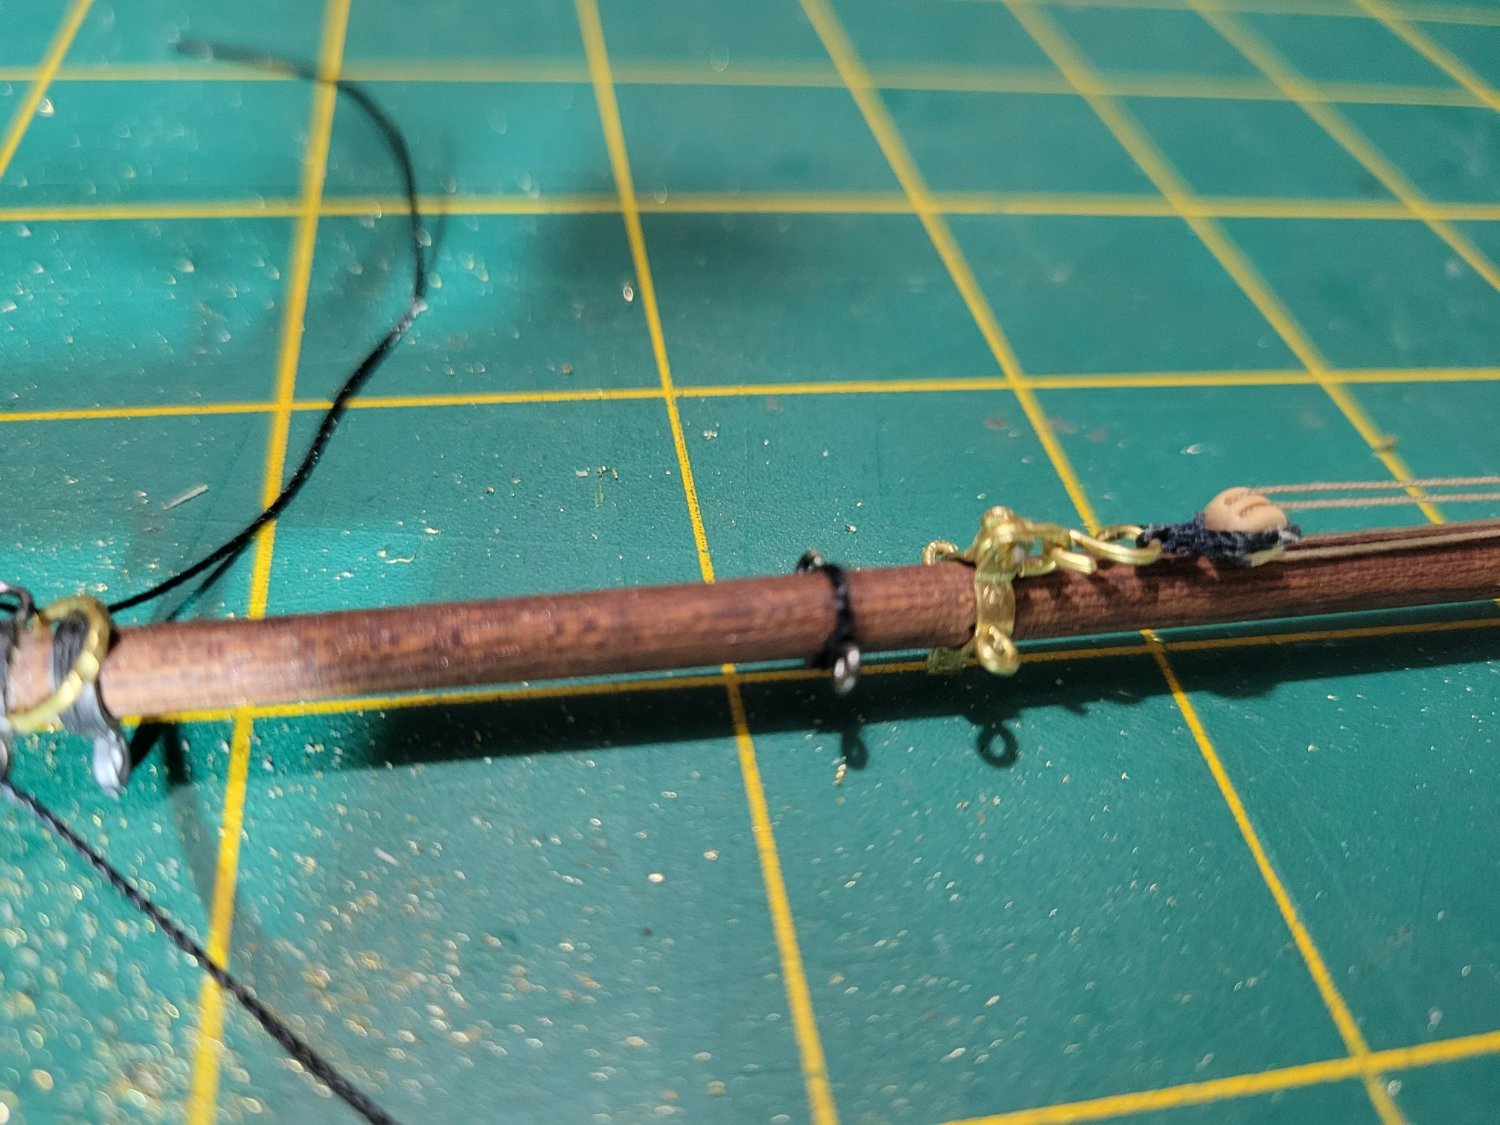
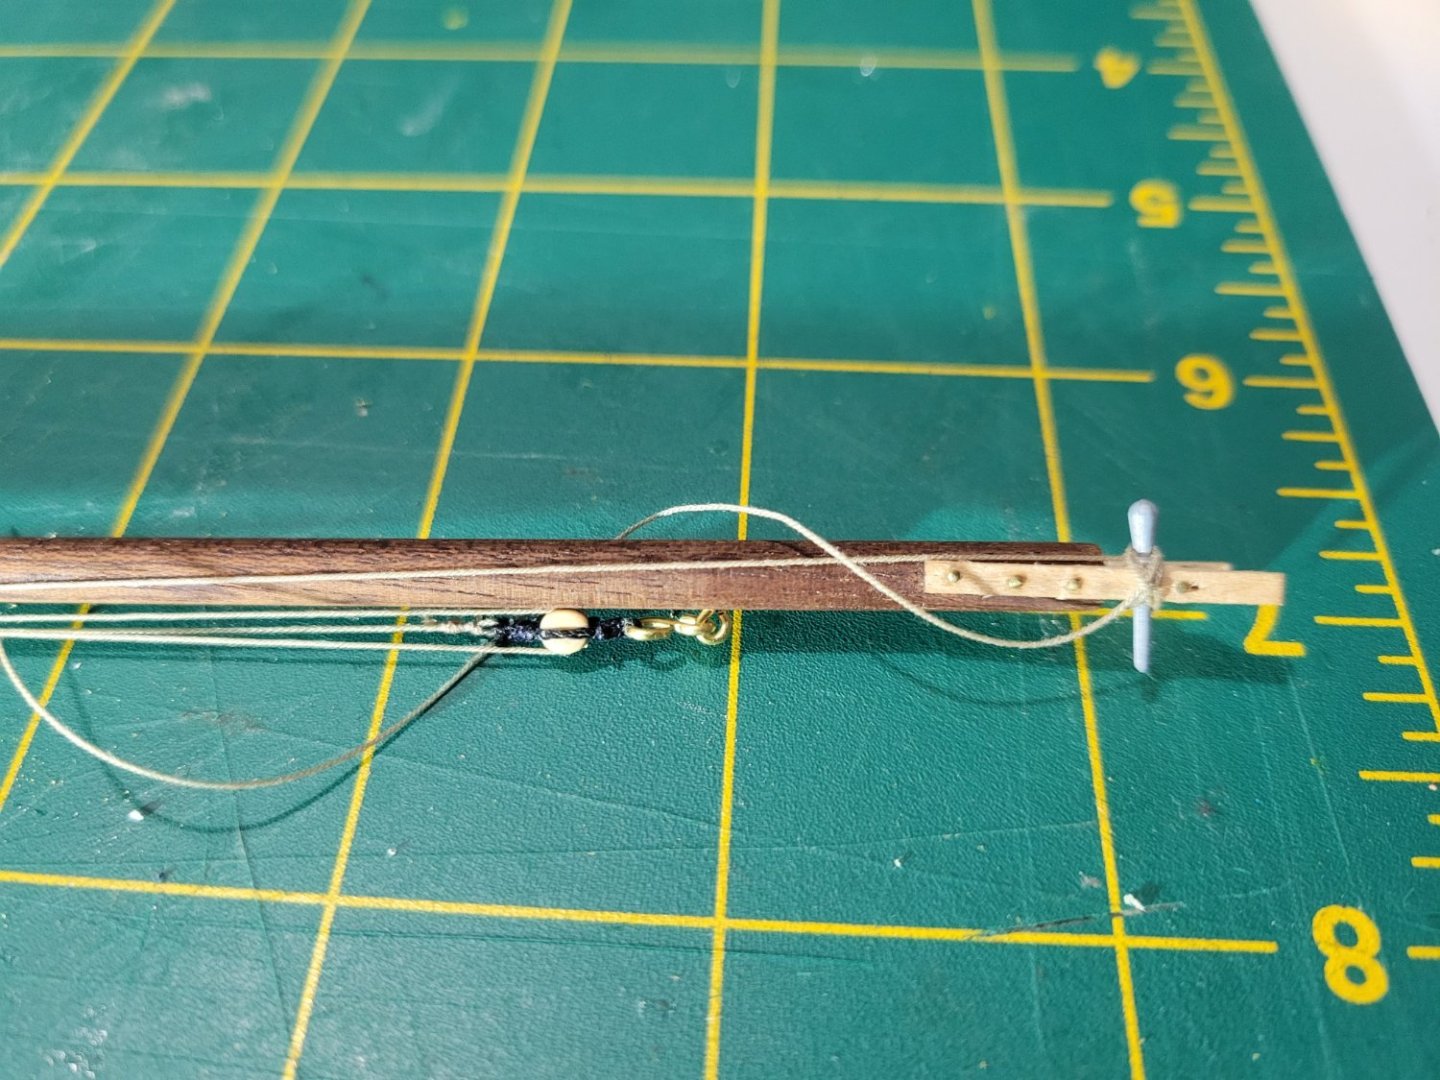
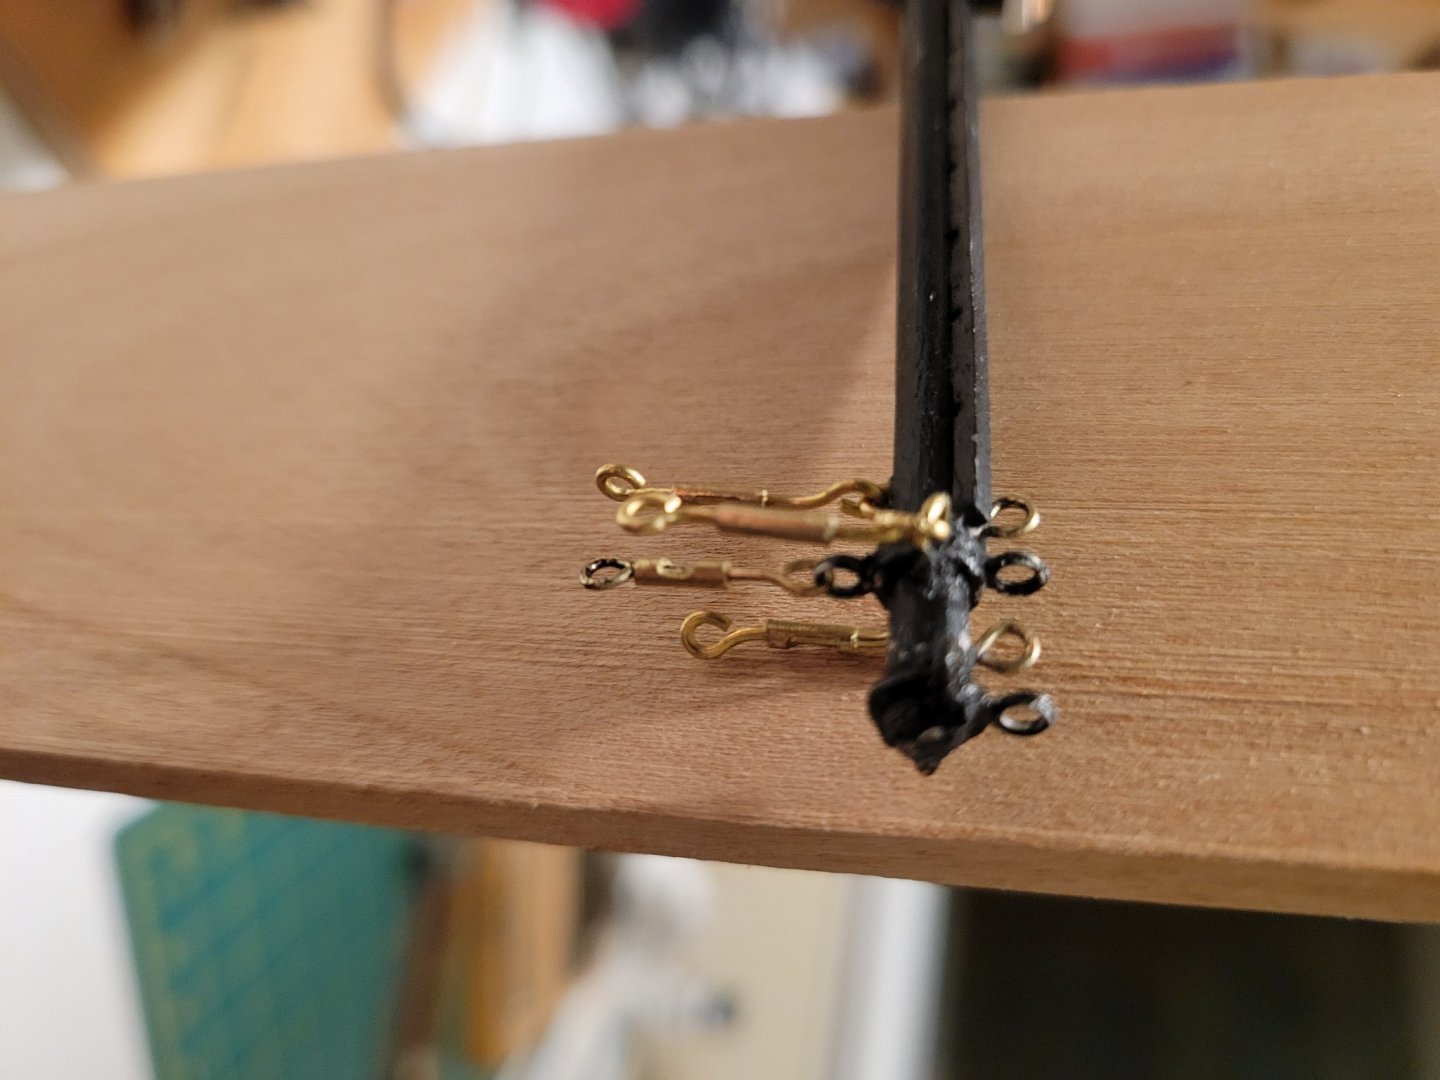
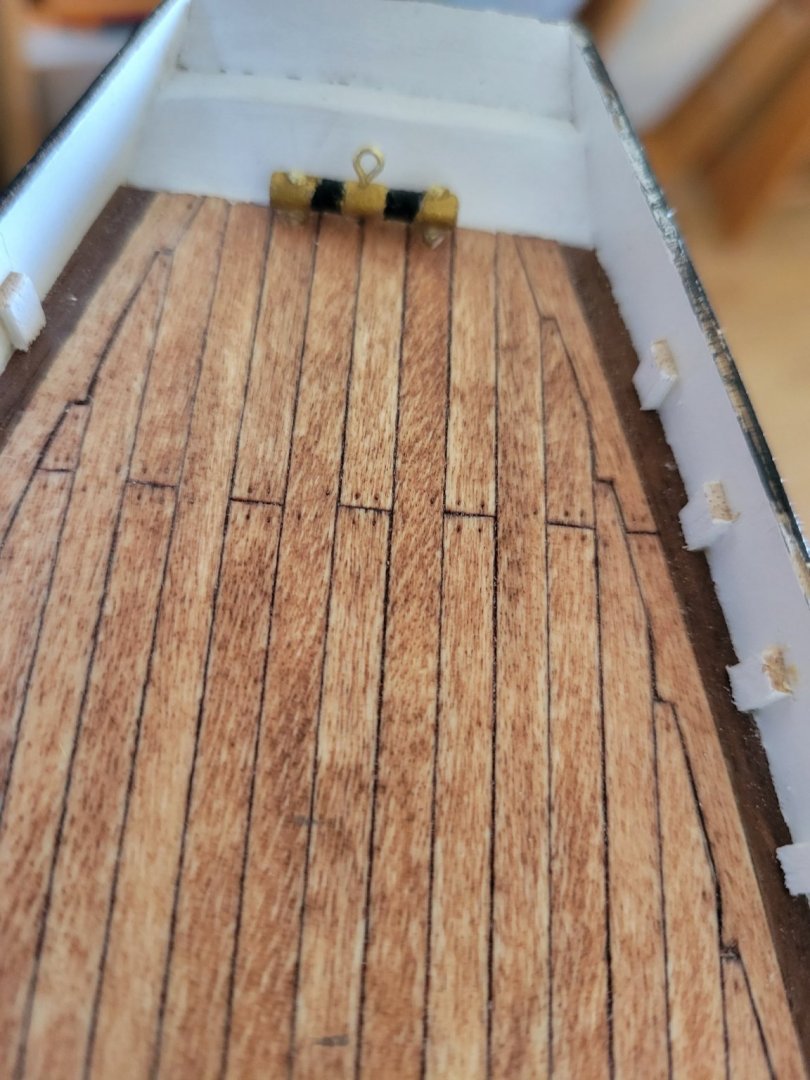
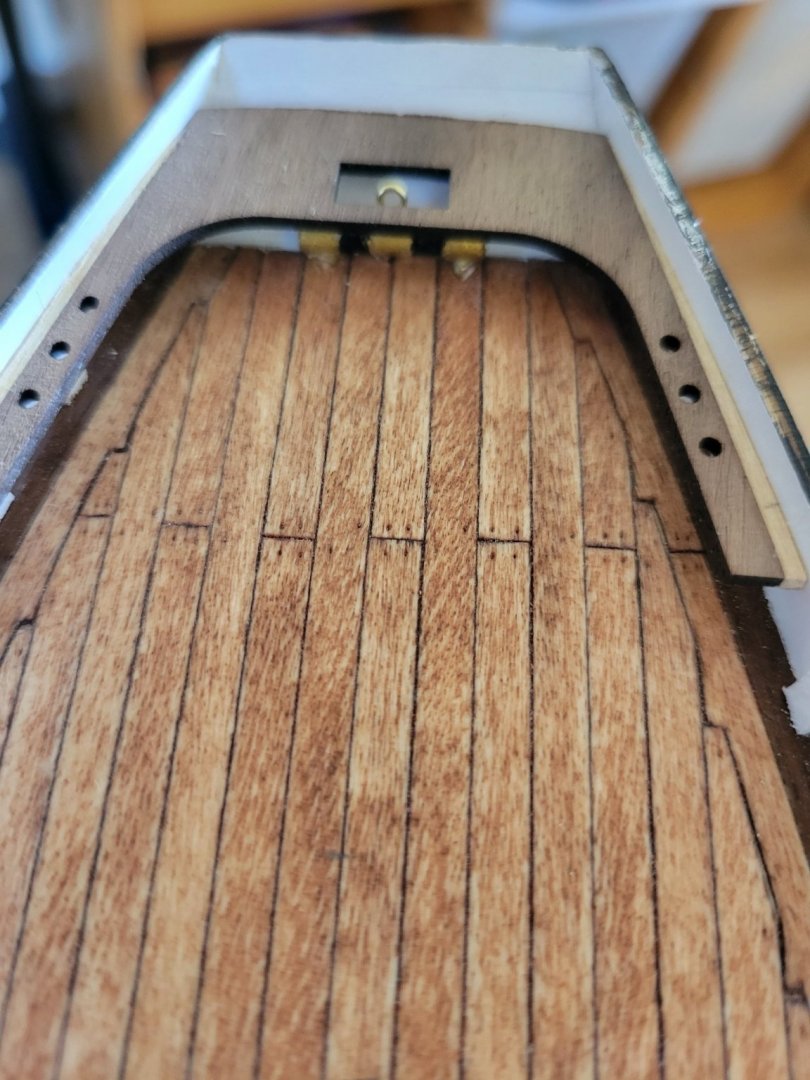
 Main boom tackle started. Testing the fit. The boom crutch ring always shows the blocks attached by small rings but I just could not get it to work the way I wanted. Either the ring was too thin and would bend under tention or too thick for the scale. Not to mention hard to work with in this area. I decide to take an easy route and instead mock the rings by wrapping thread. At this scale, can't really see a difference anyways
-
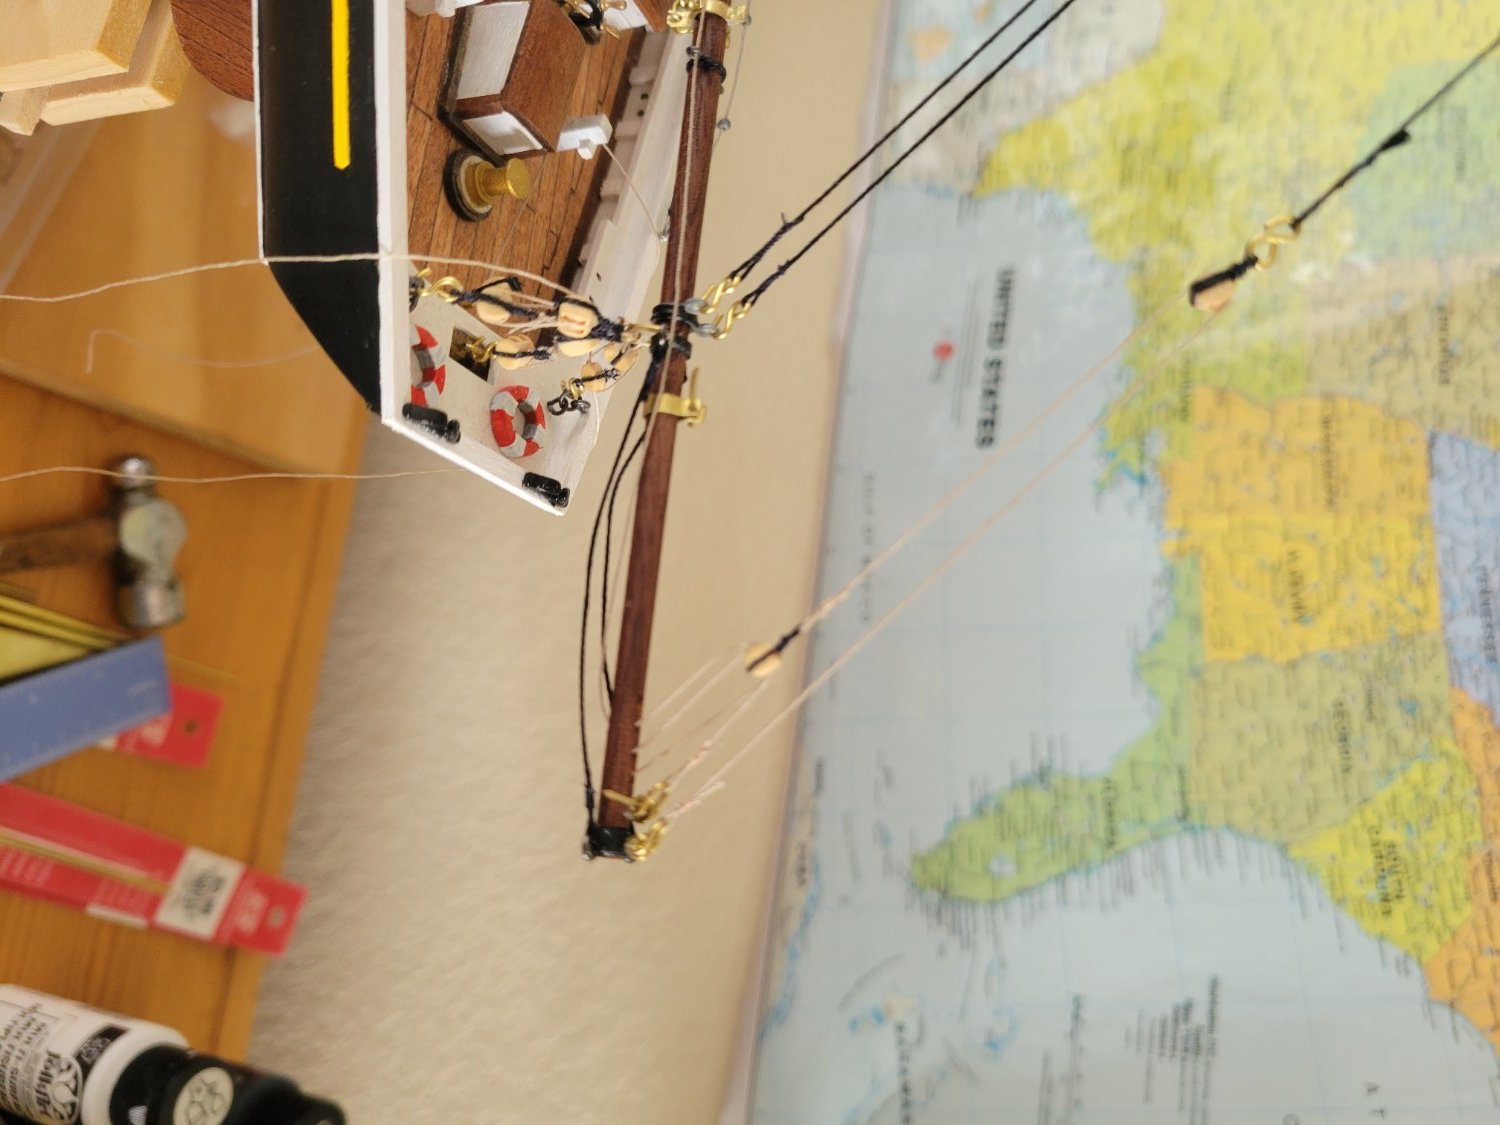
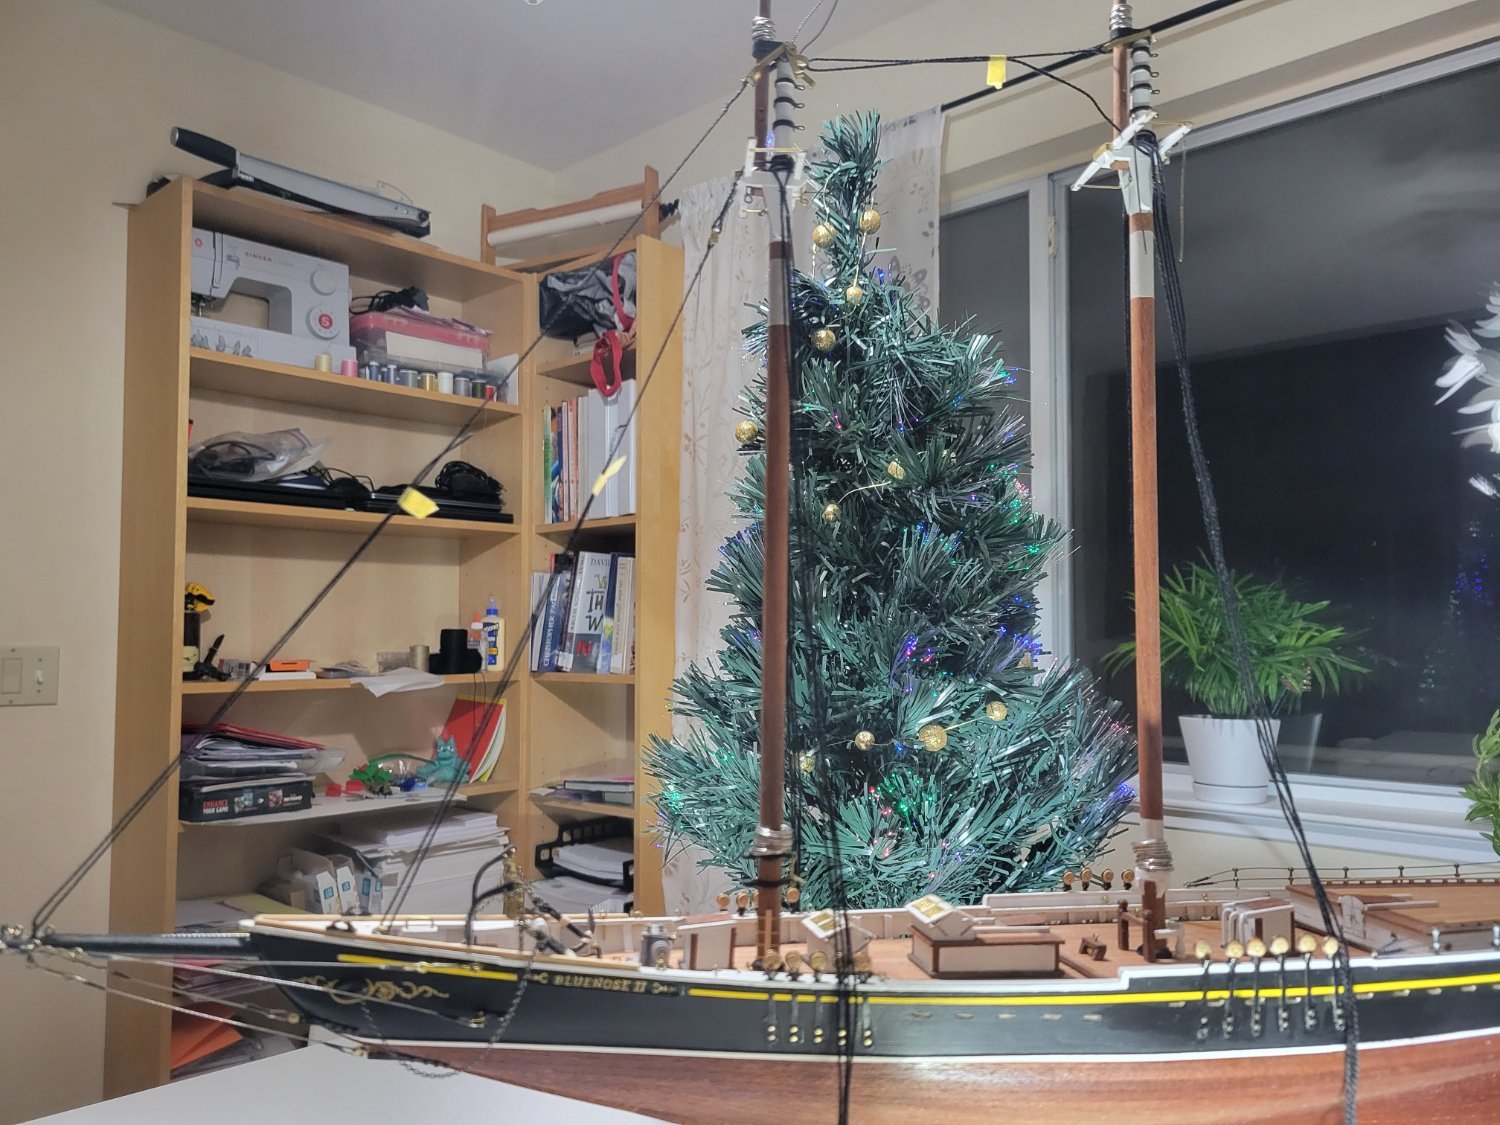
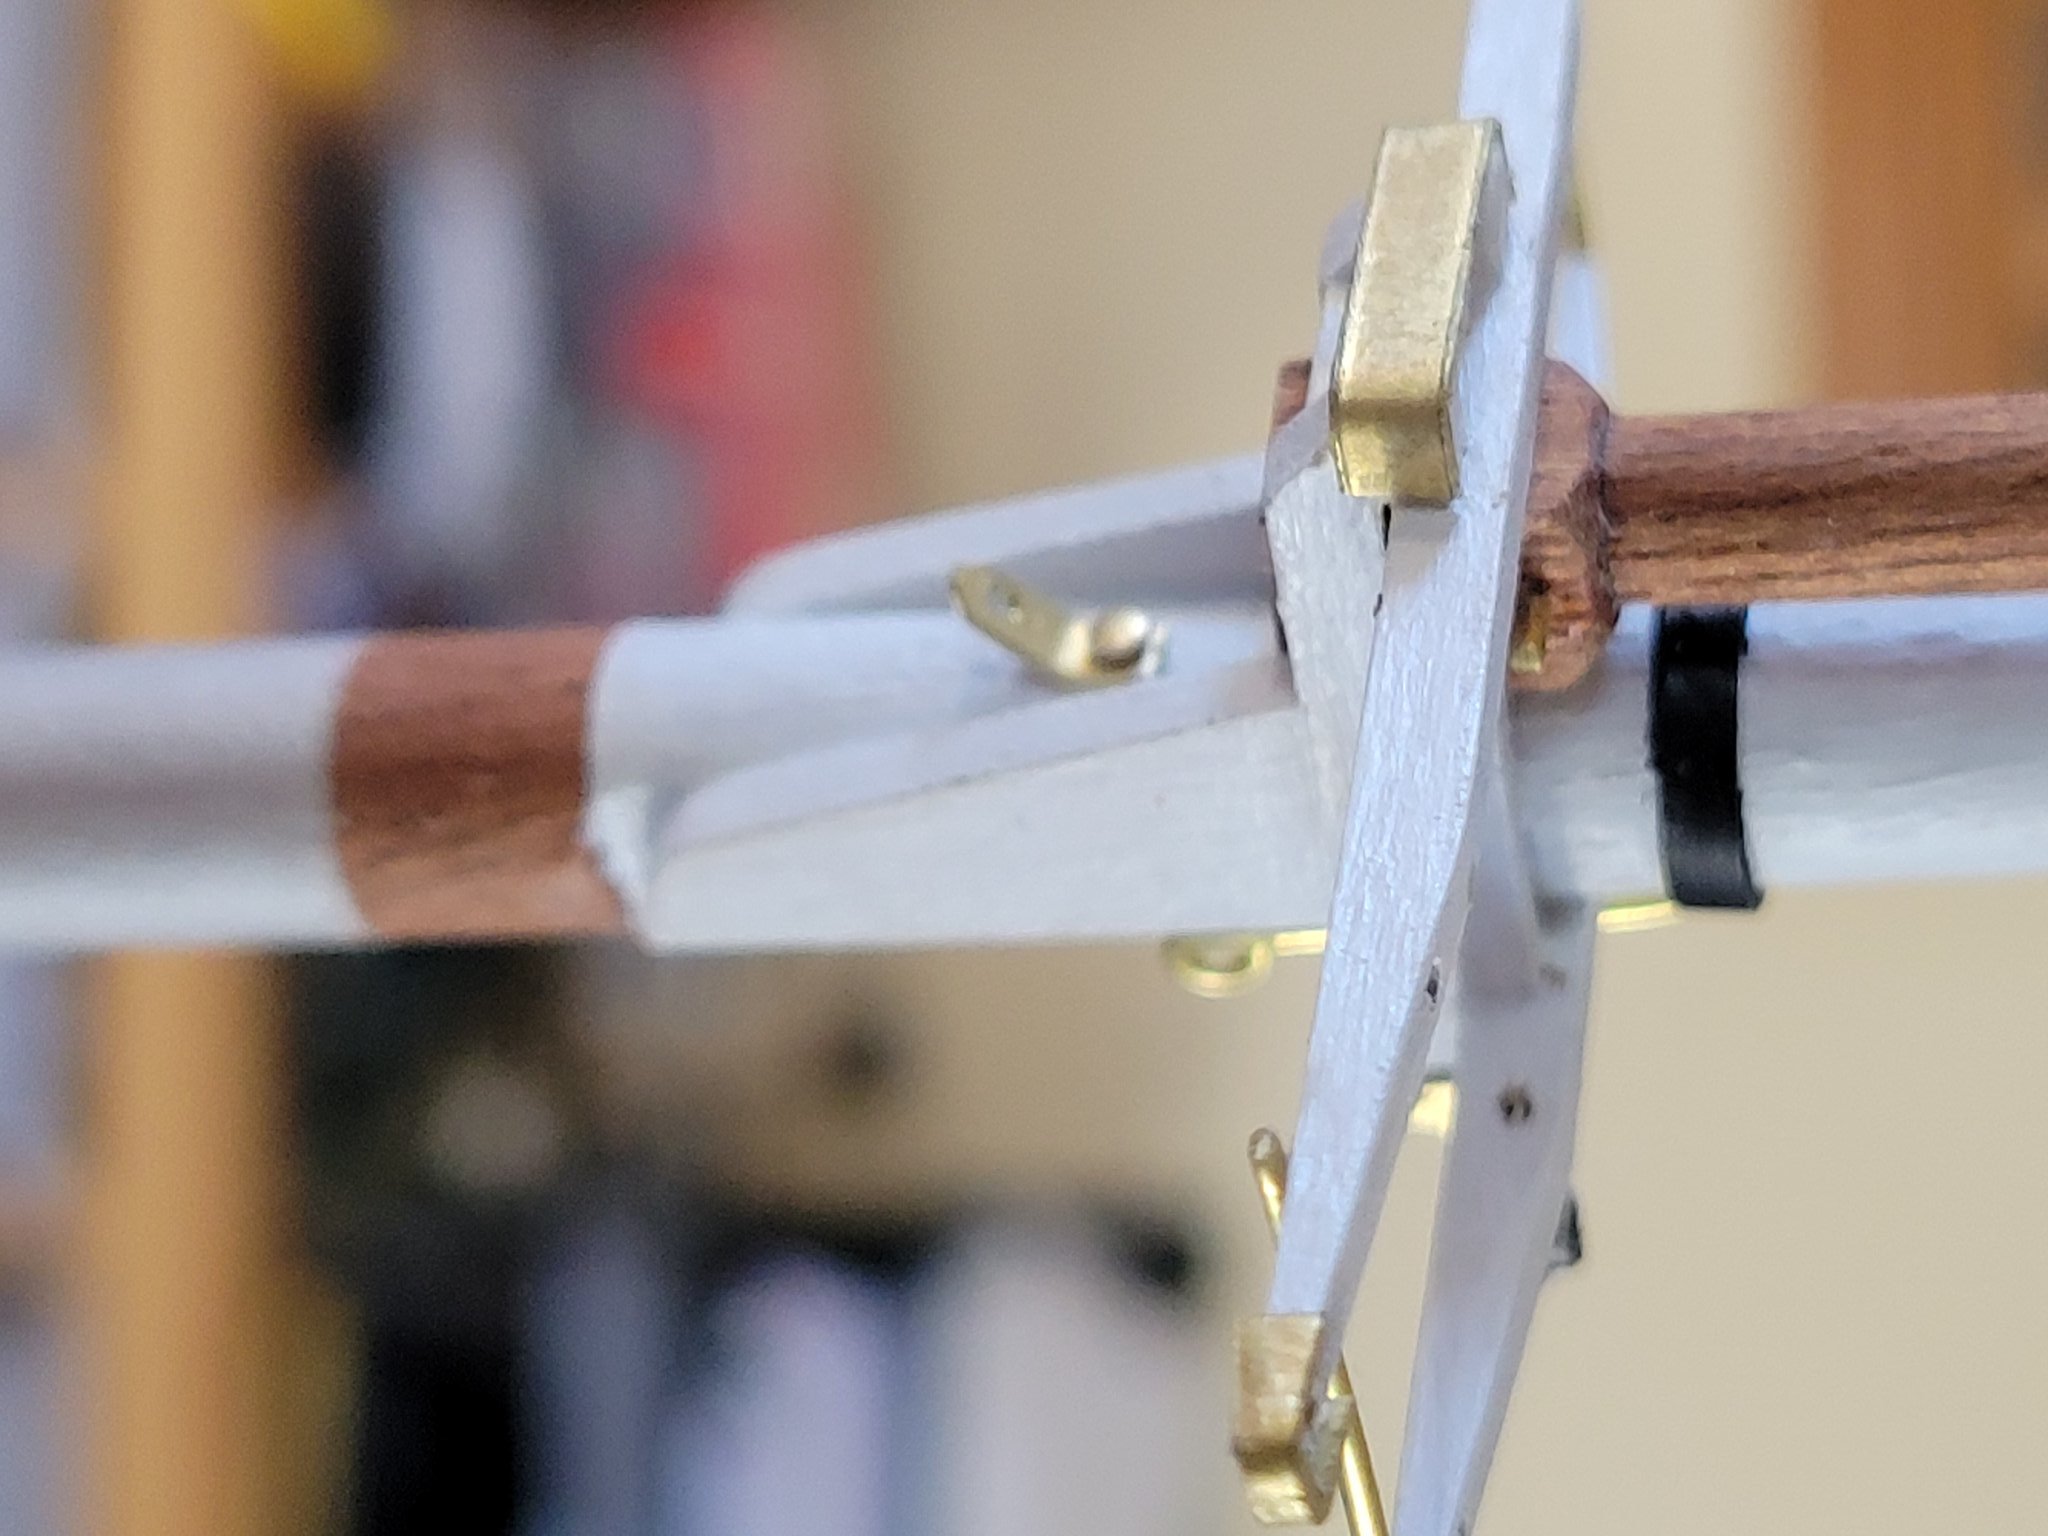
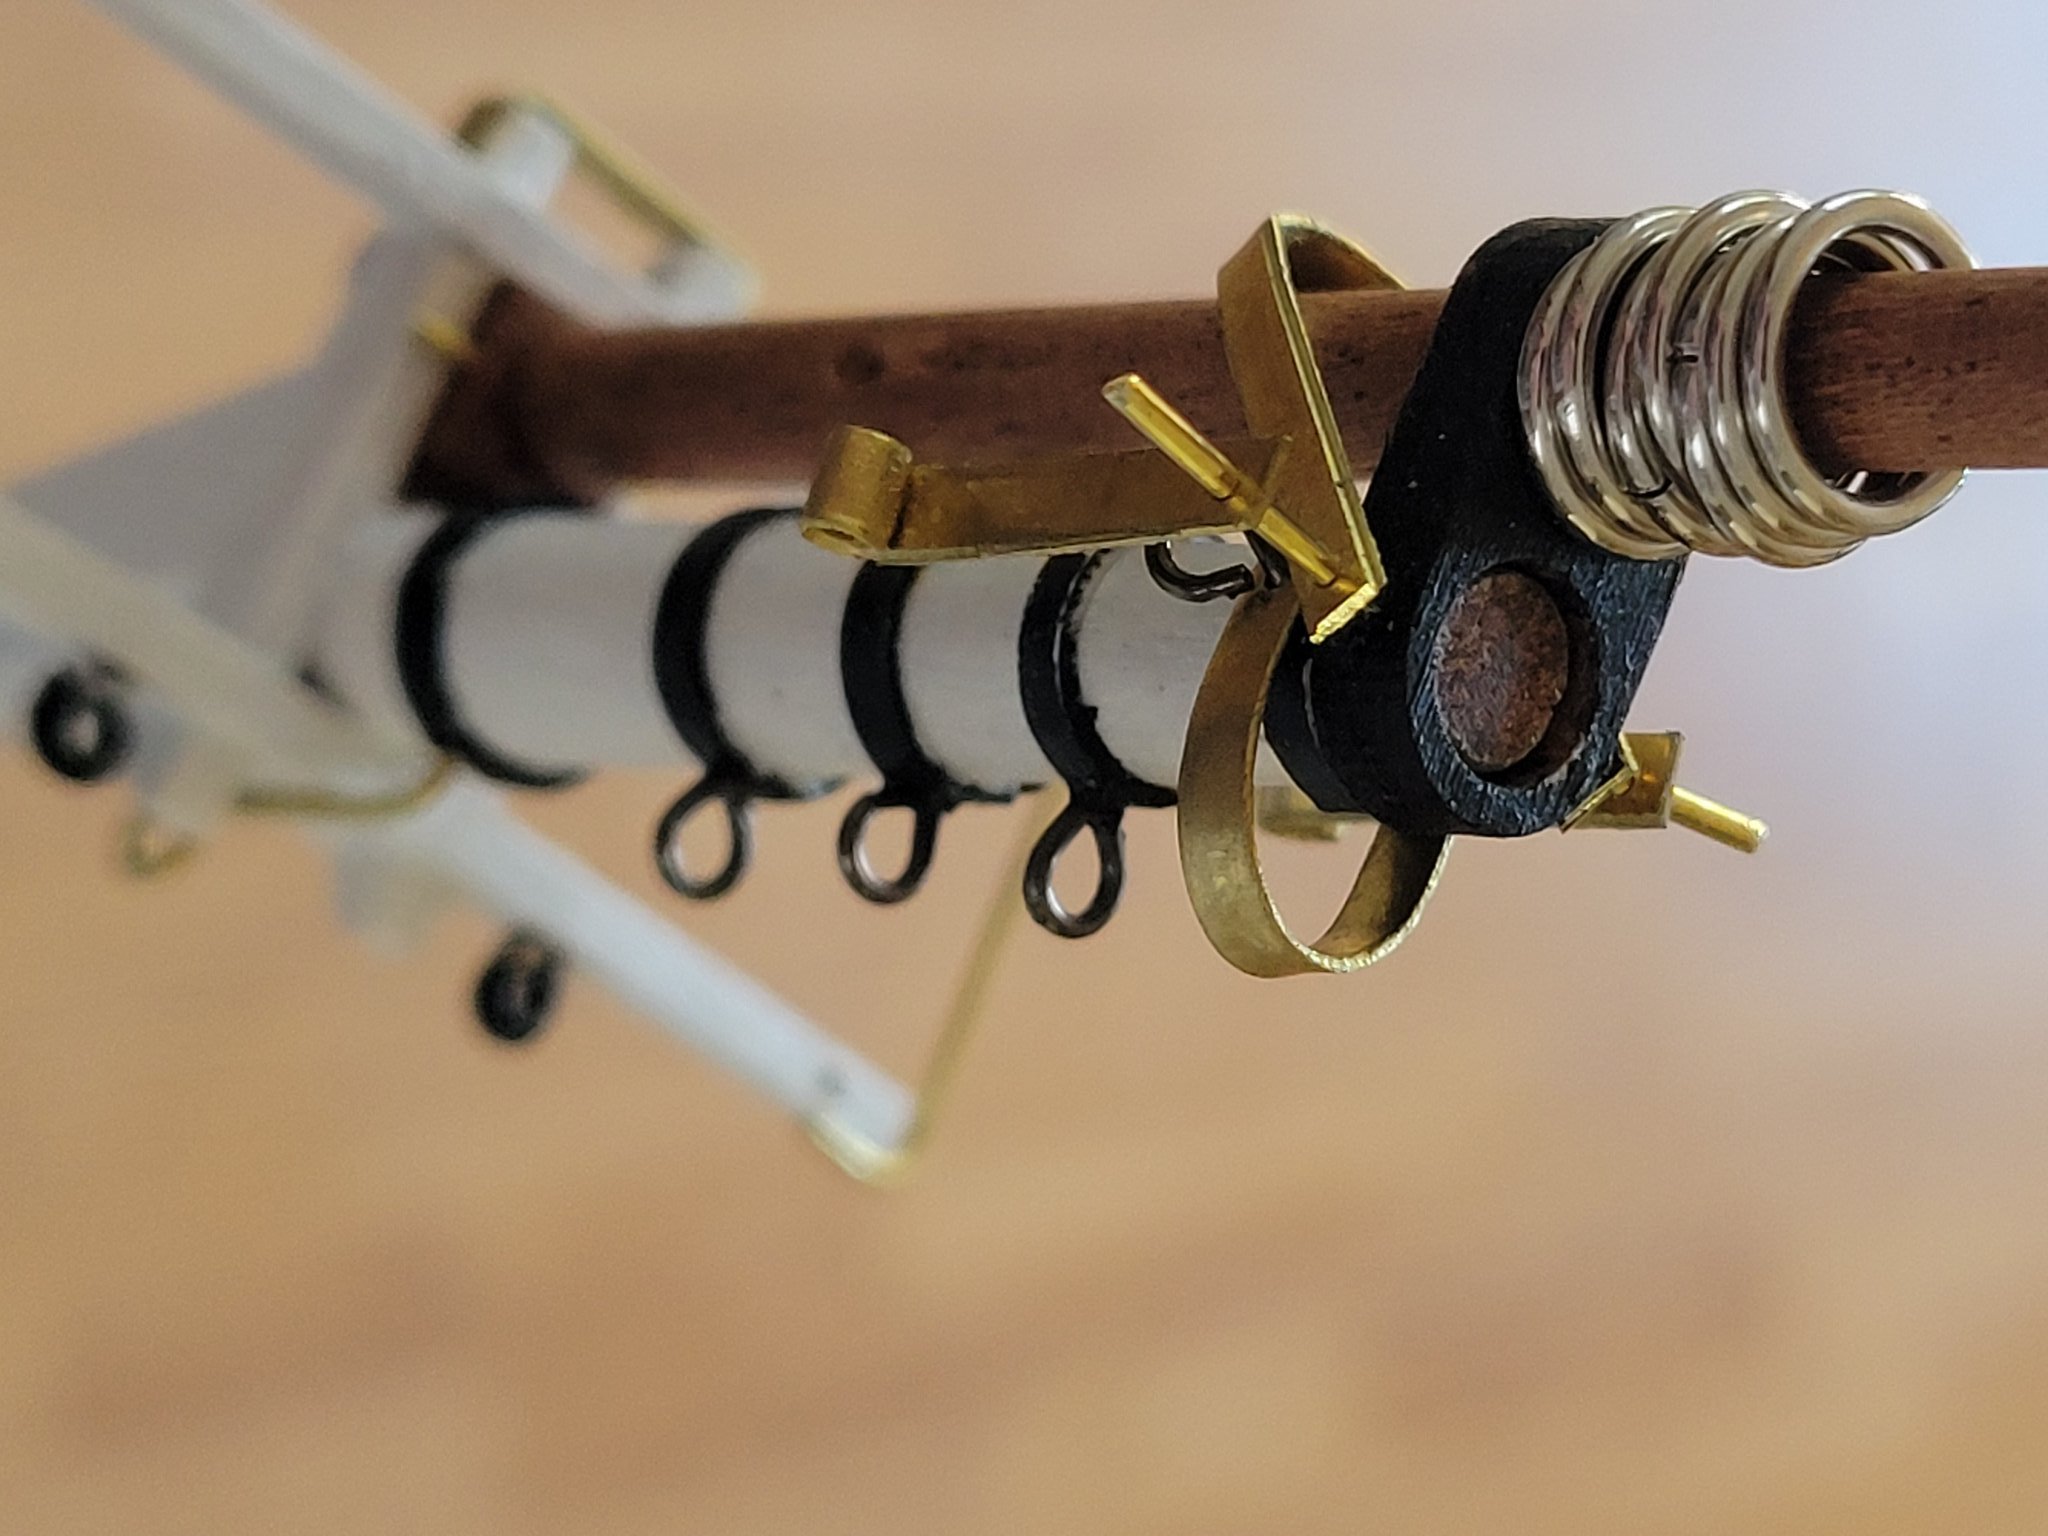
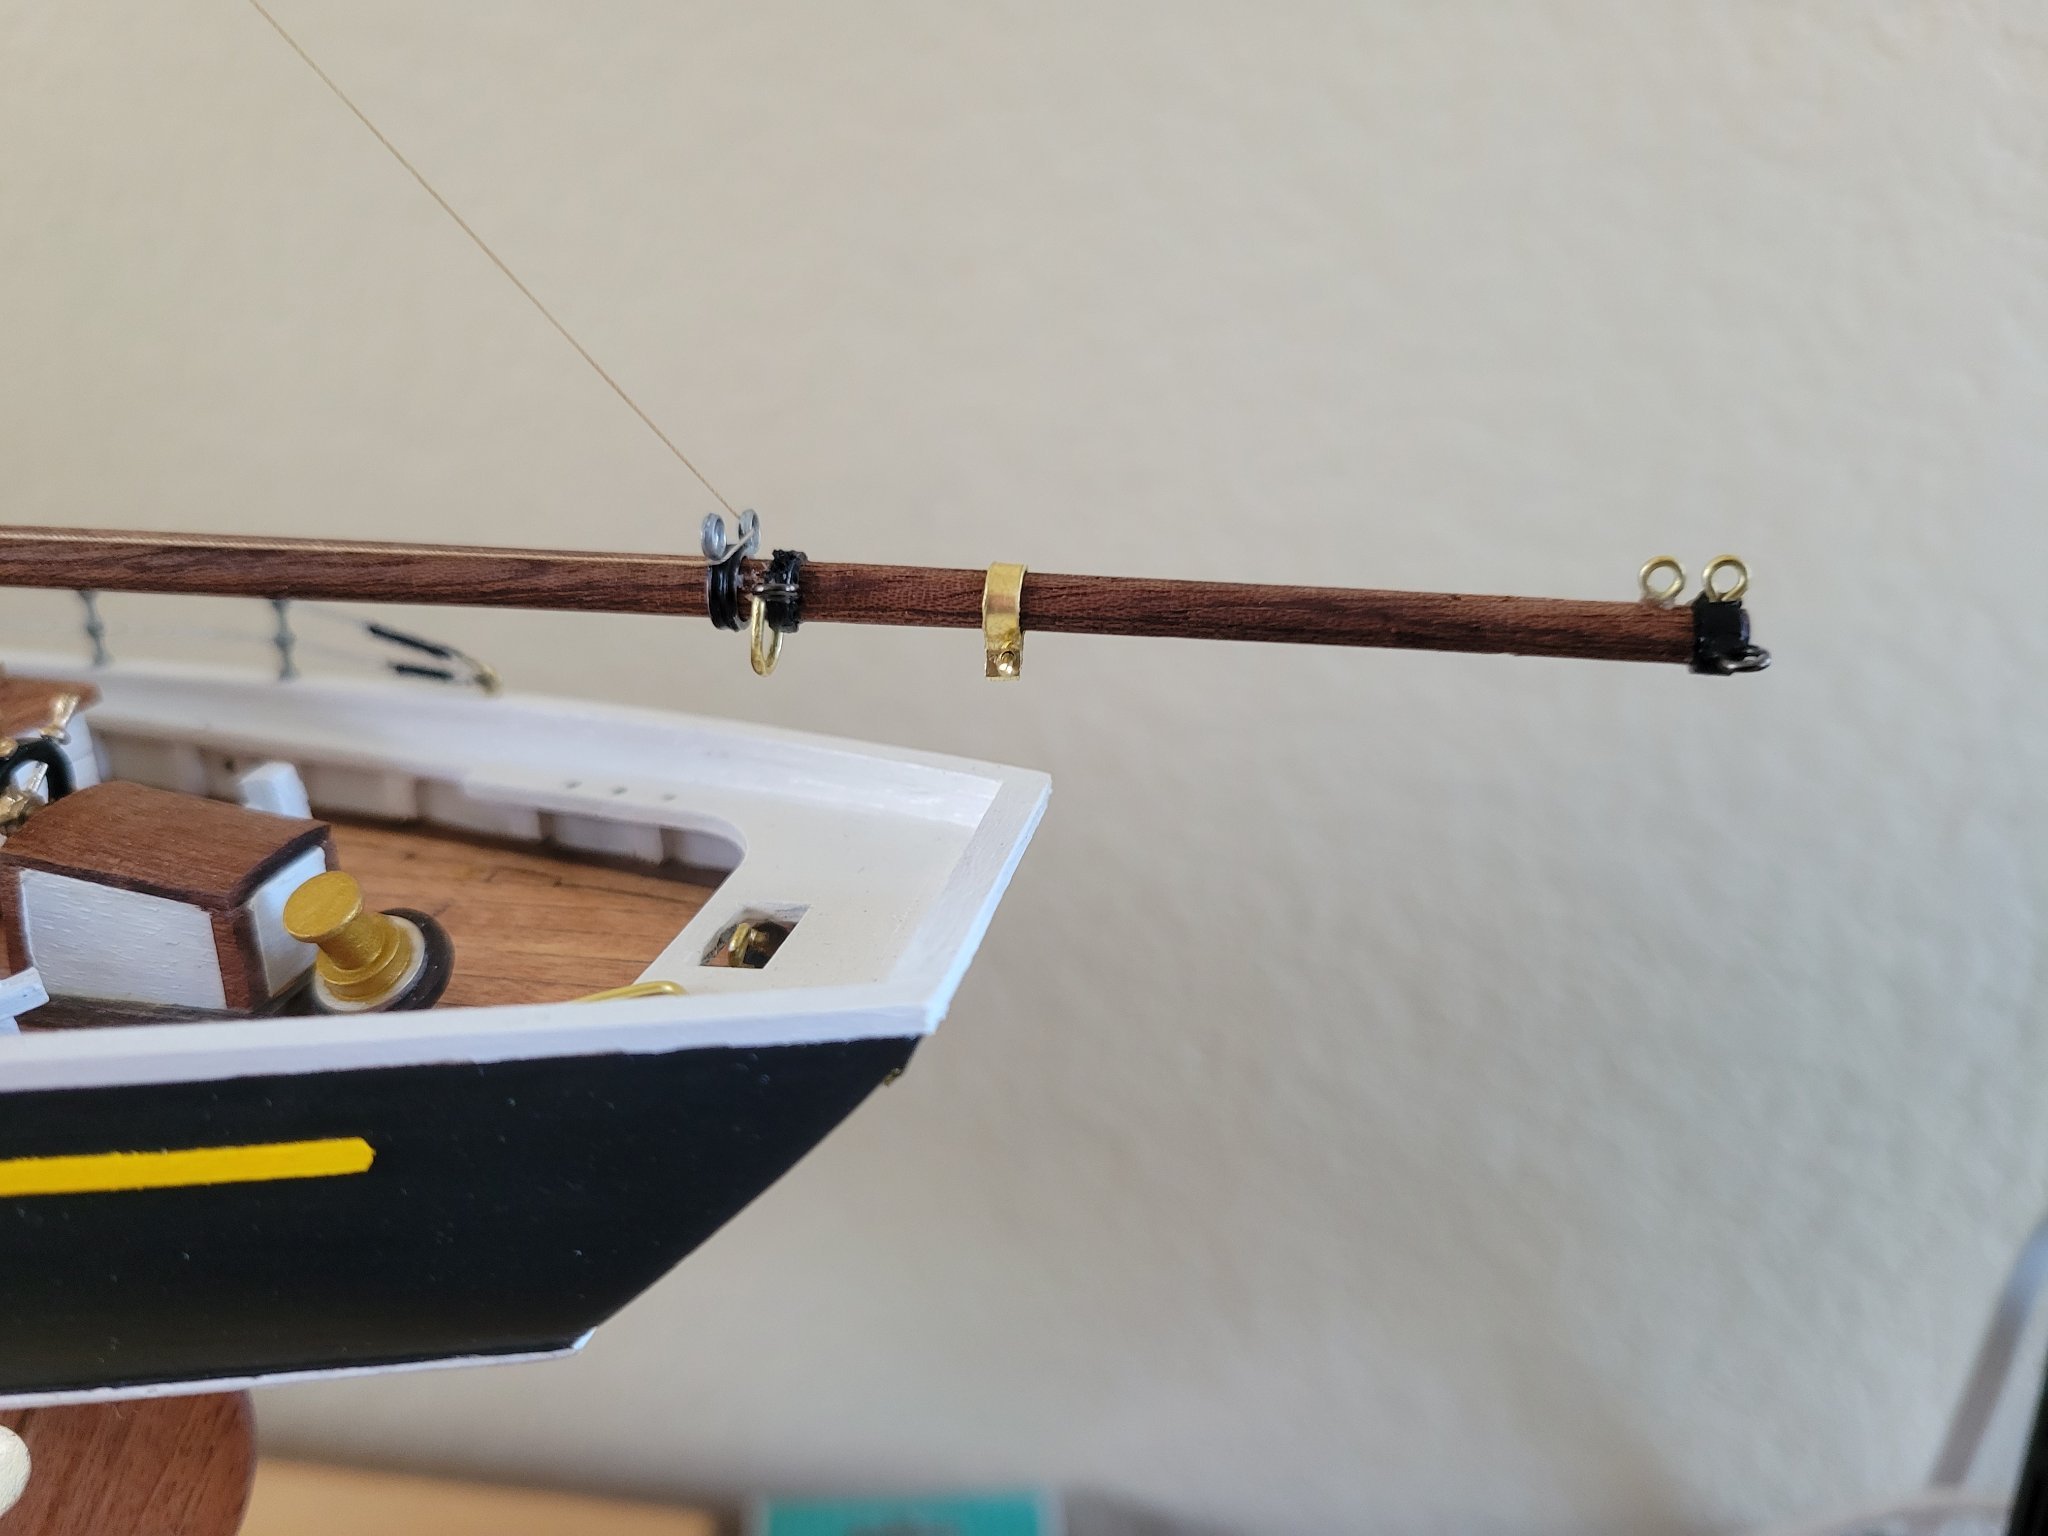
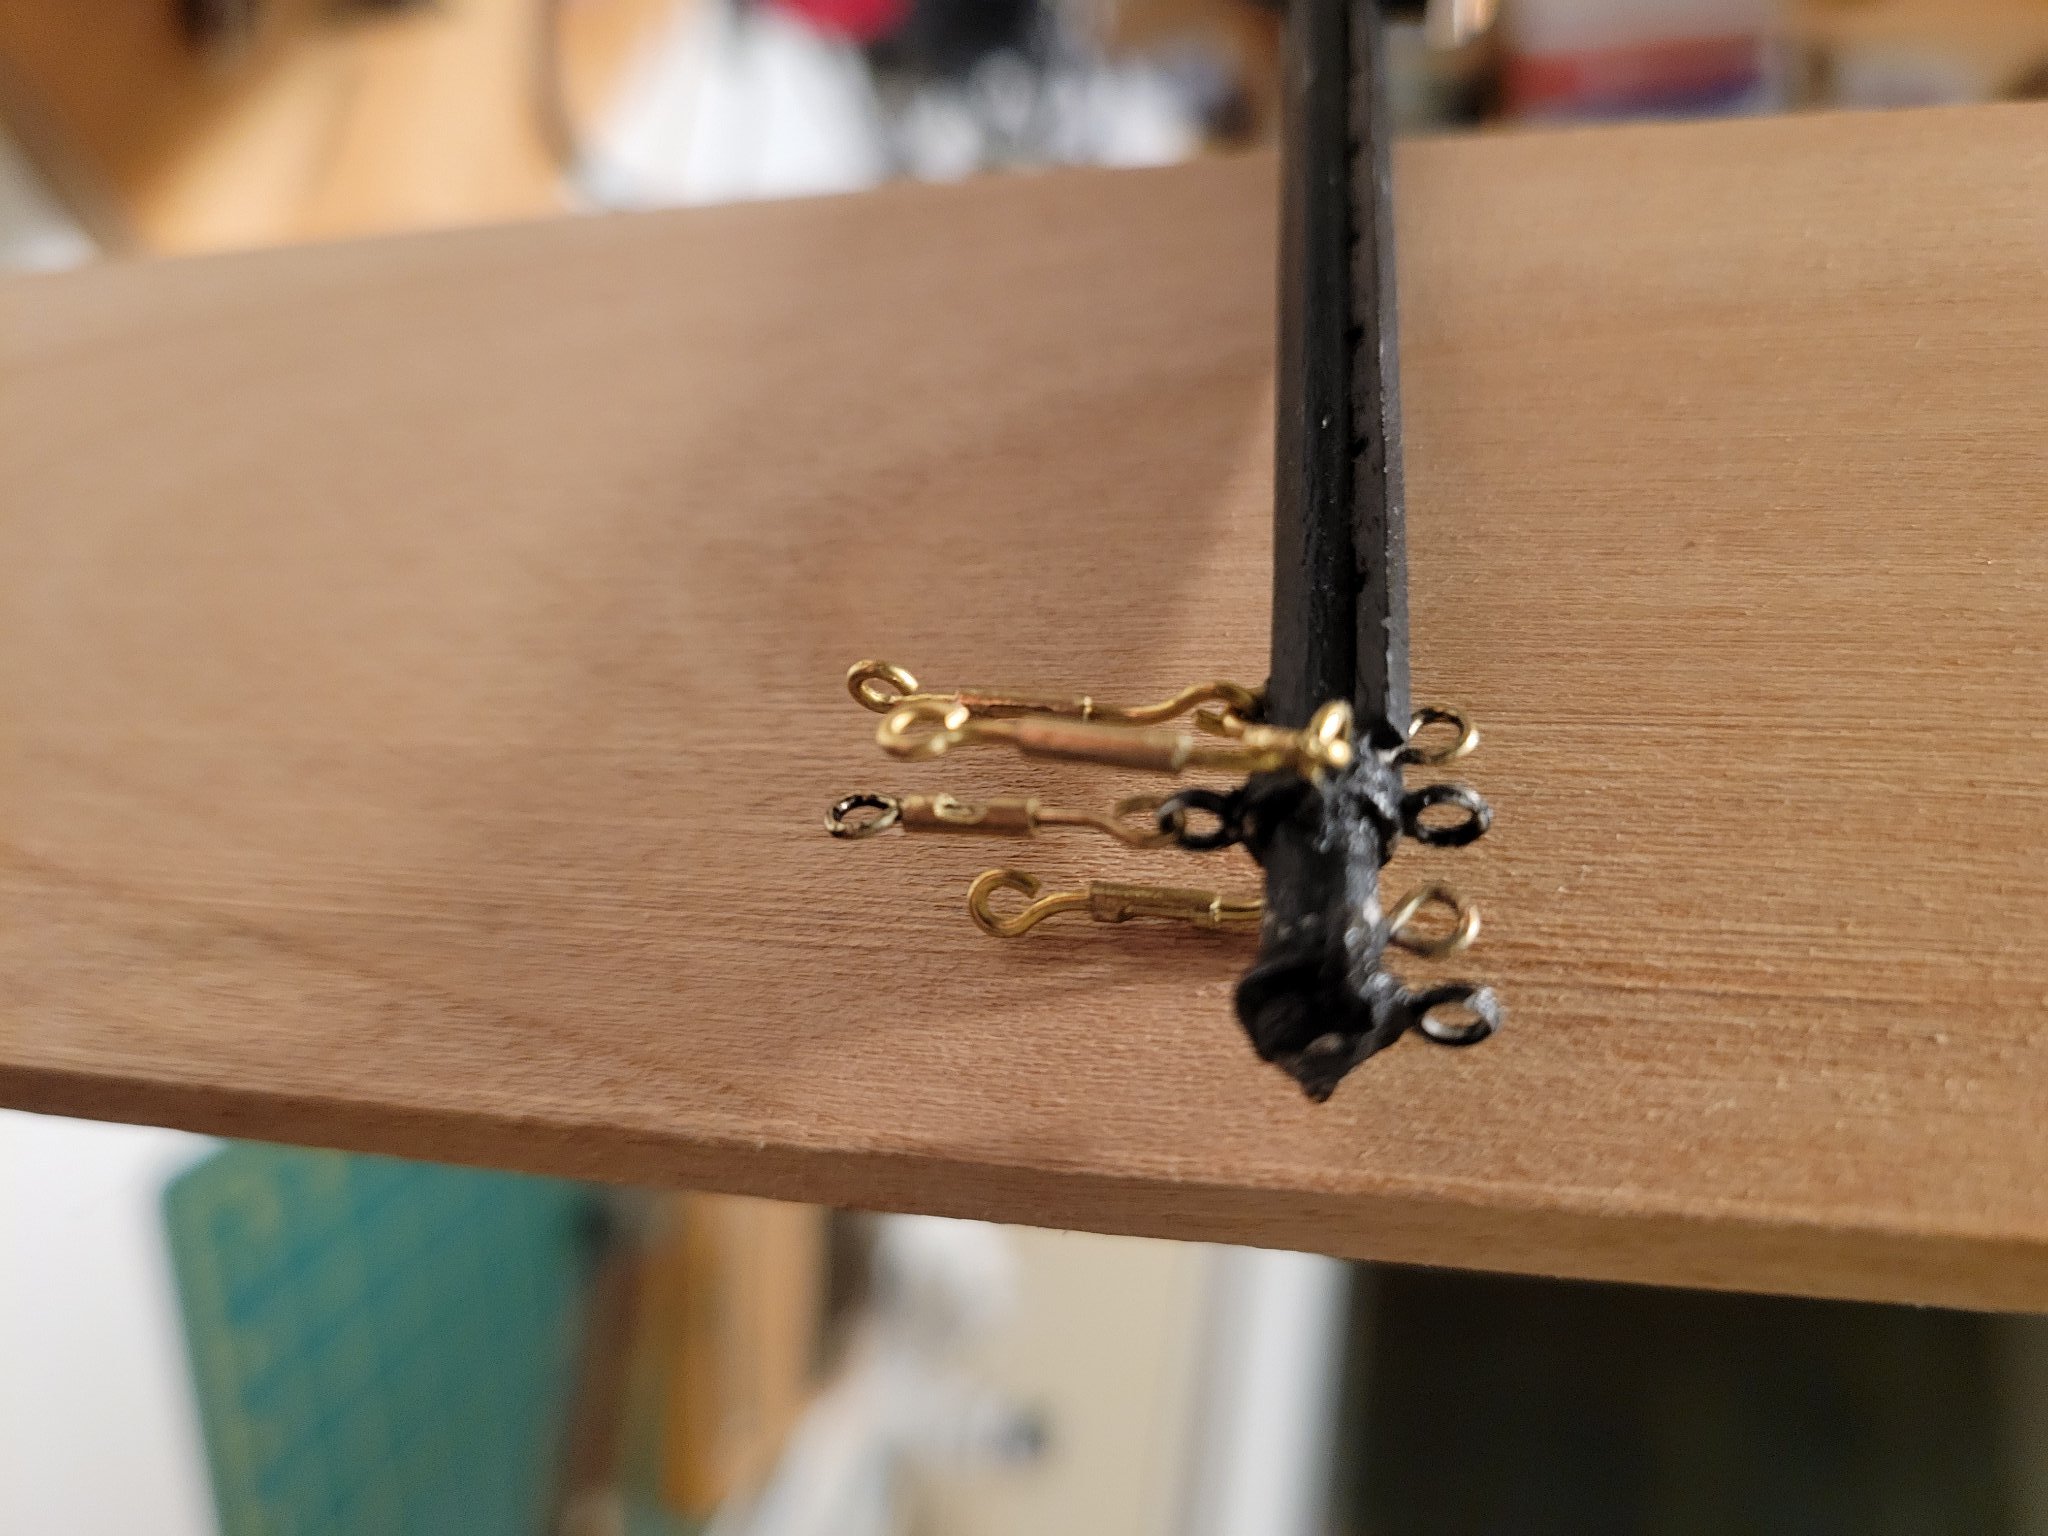
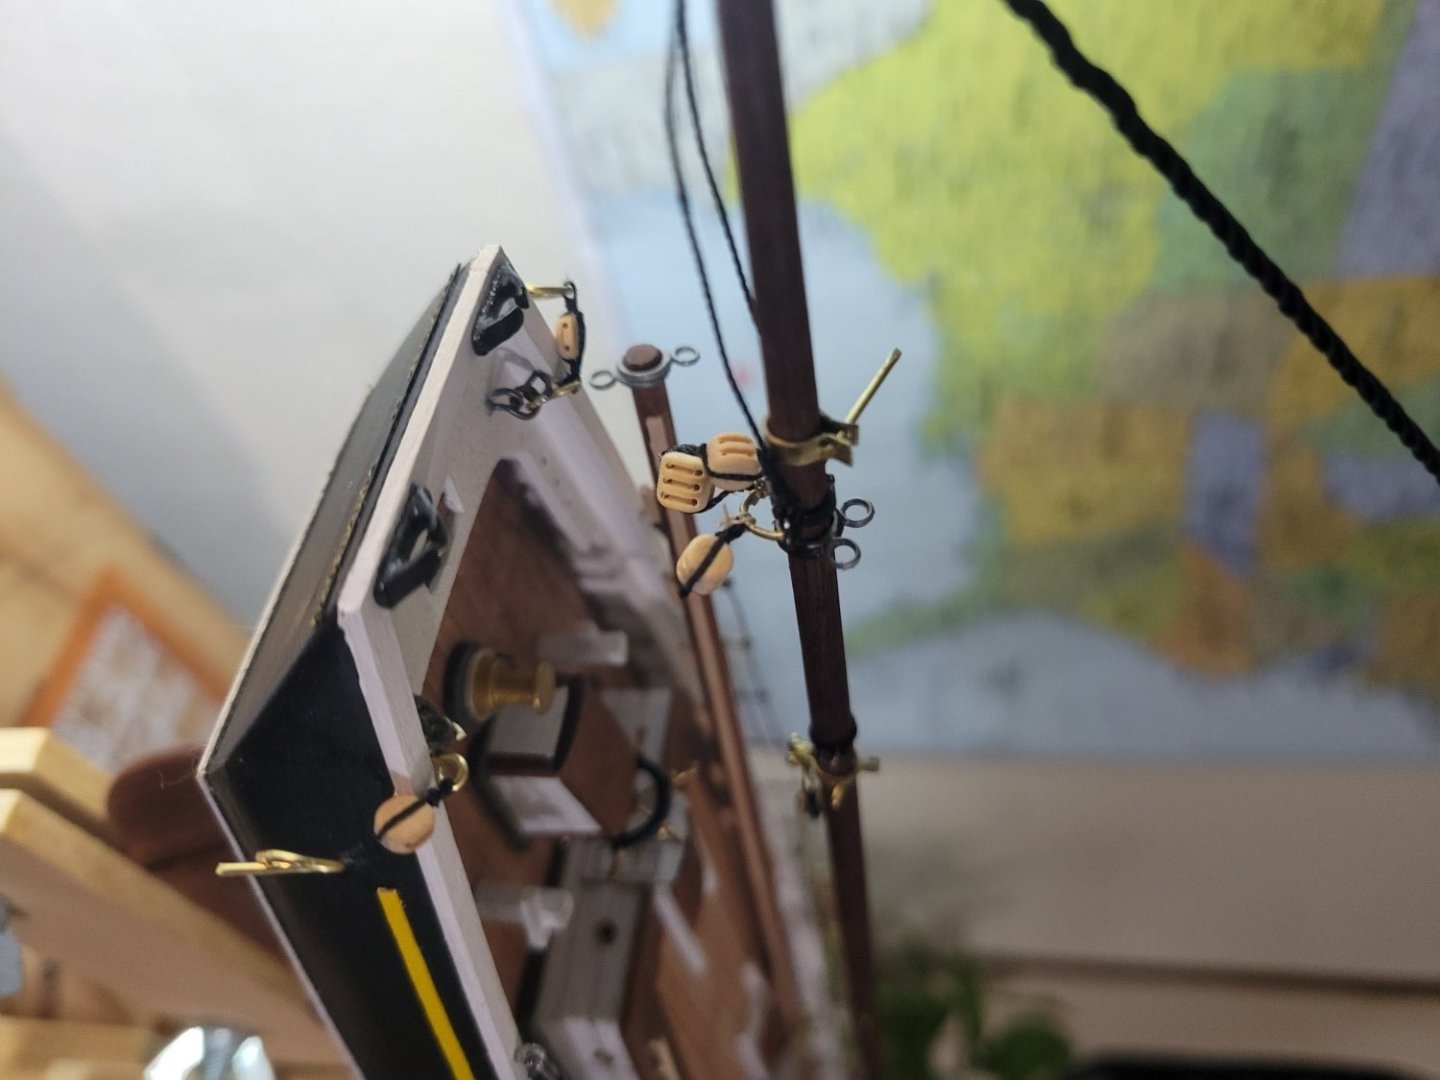
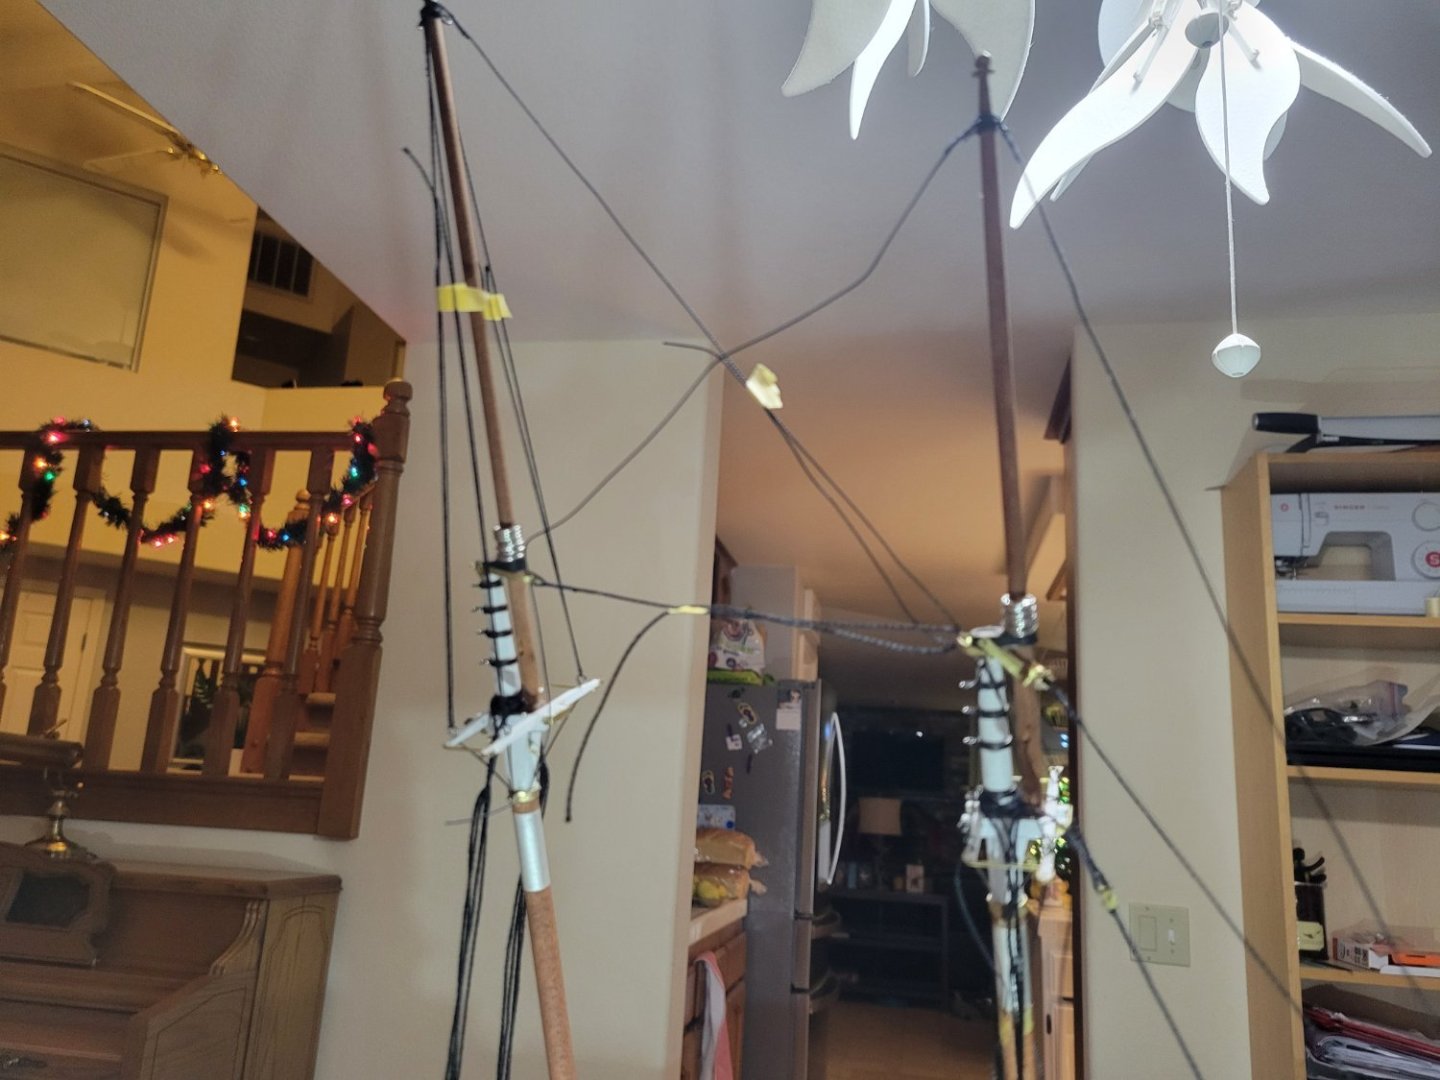
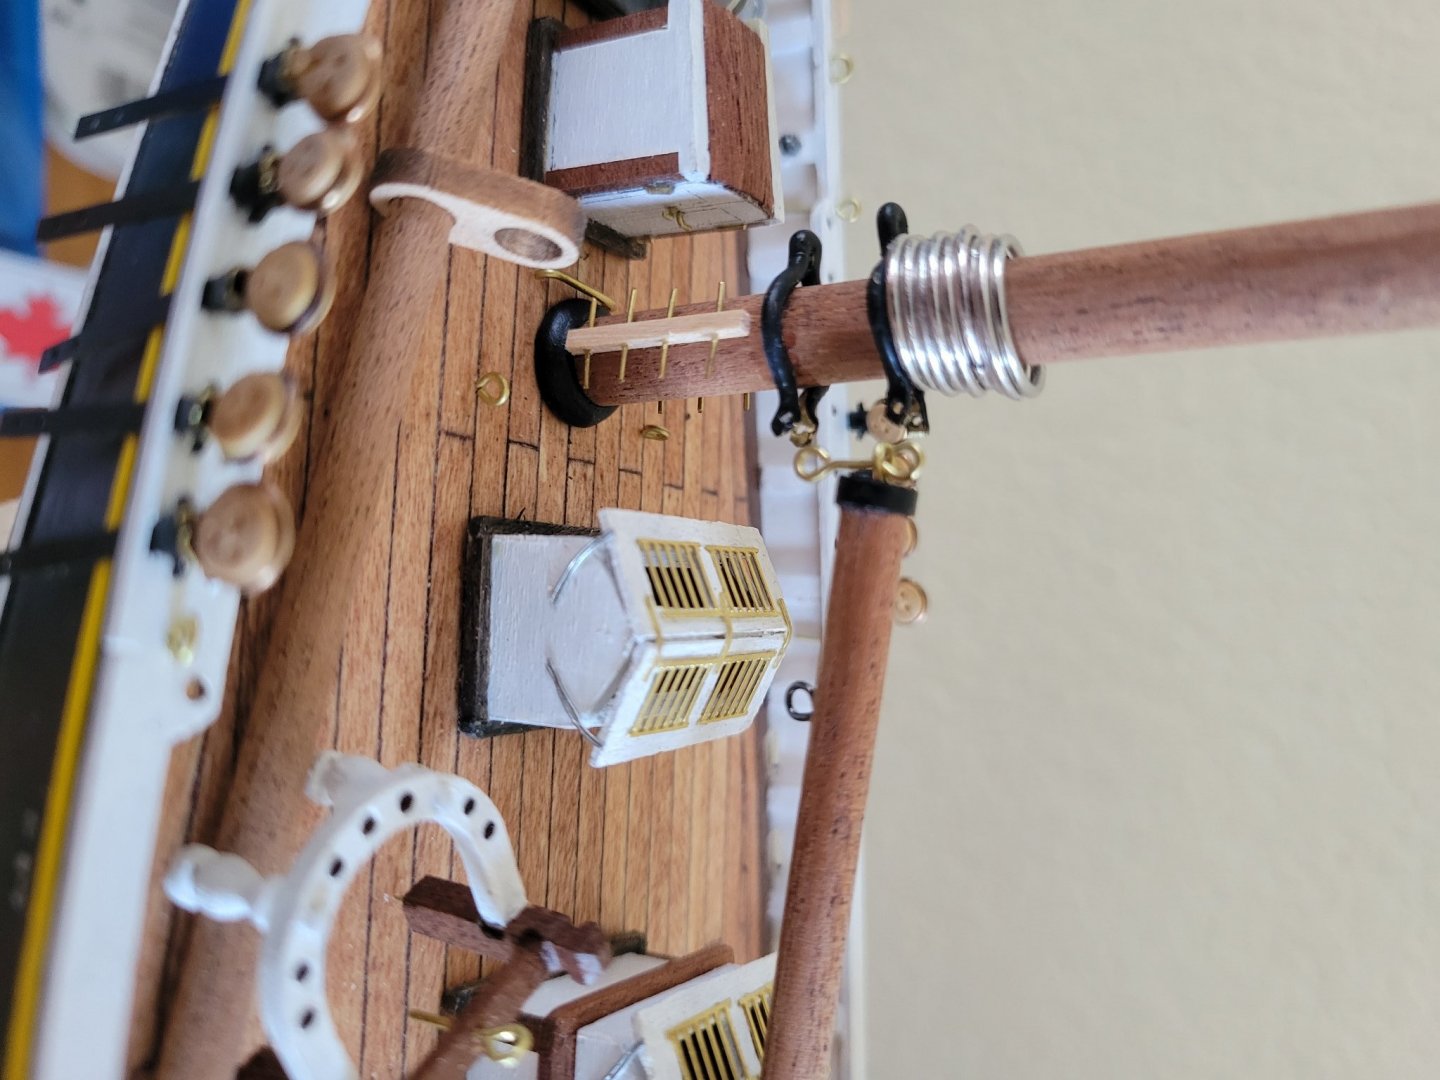
Upper shrouds started. I'll do the lanyards later when I have all the initial rigging set. Couple more stays. Moving to the booms. Needed another ring for the boom tackle and added the staples for the lazy jack and Fairless. Moved on the the boom tackle. Ordered some blocks from syren and wanted to see how the smaller 1/8" blocks would look. Man, those are painful to work with! Finally gave in an used ca for the stropps to the blocks and then sized the stropps. As painful as it was to work that small, I like this scale much better that what came in the kit.


- 84 replies
-
- 2
-

-
- Artesania Latina
- Bluenose II
- (and 1 more)
-
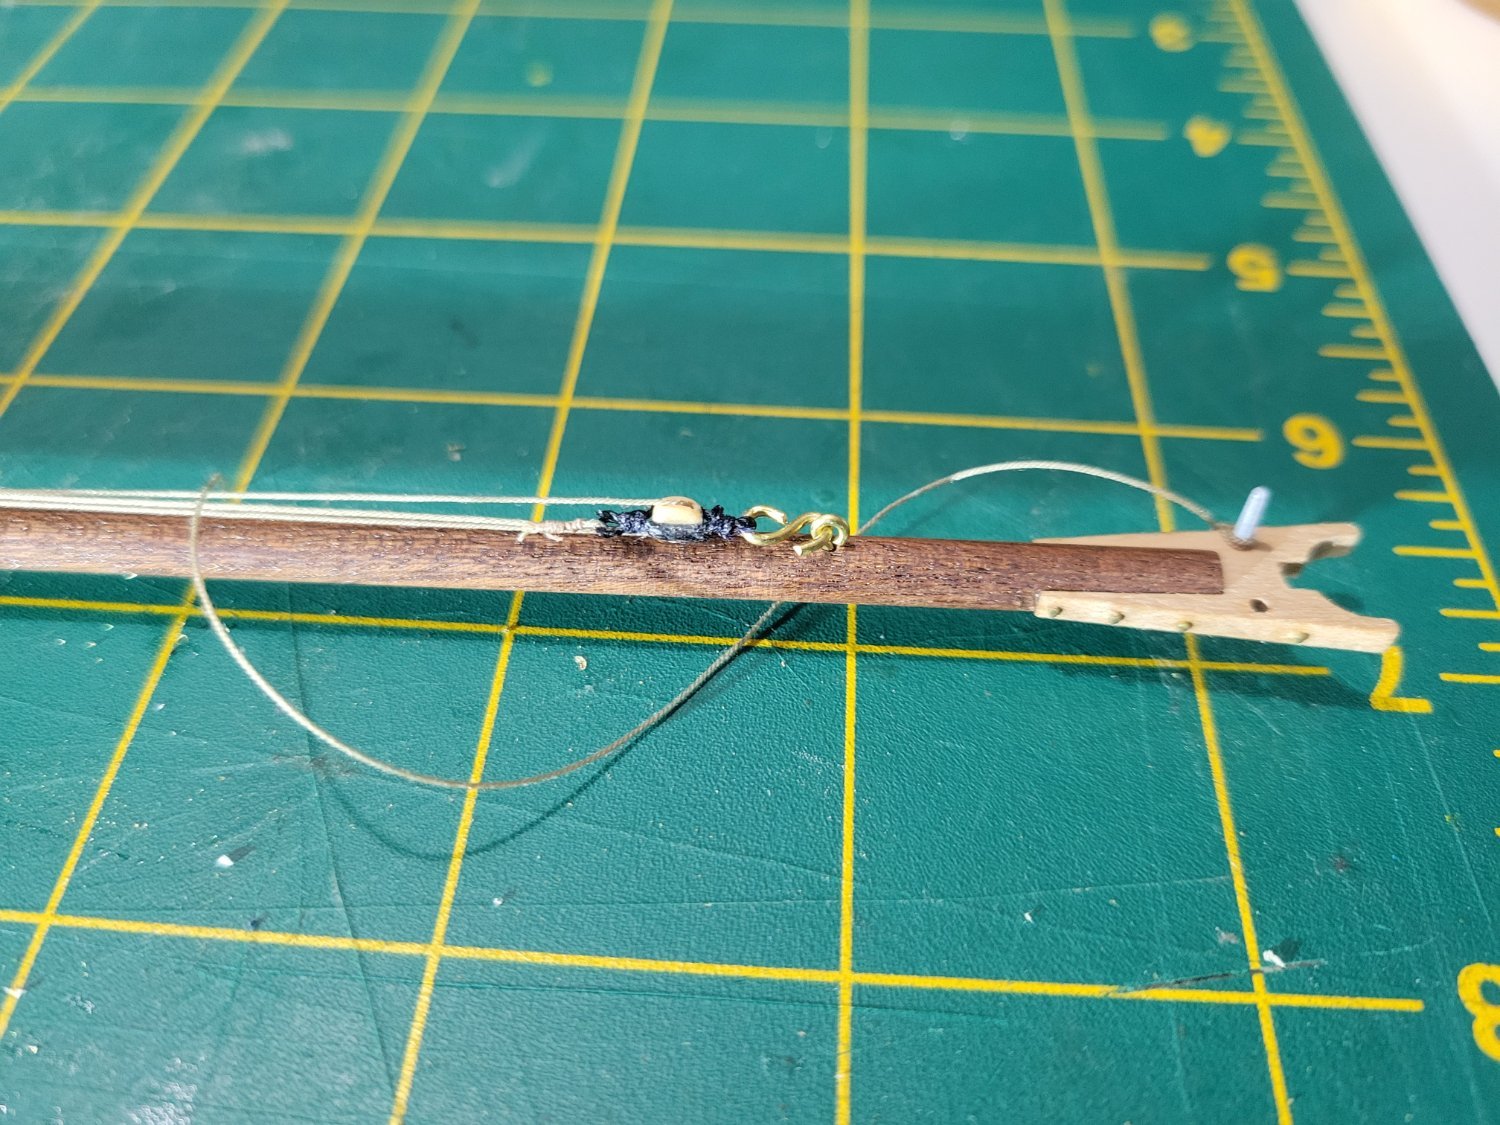
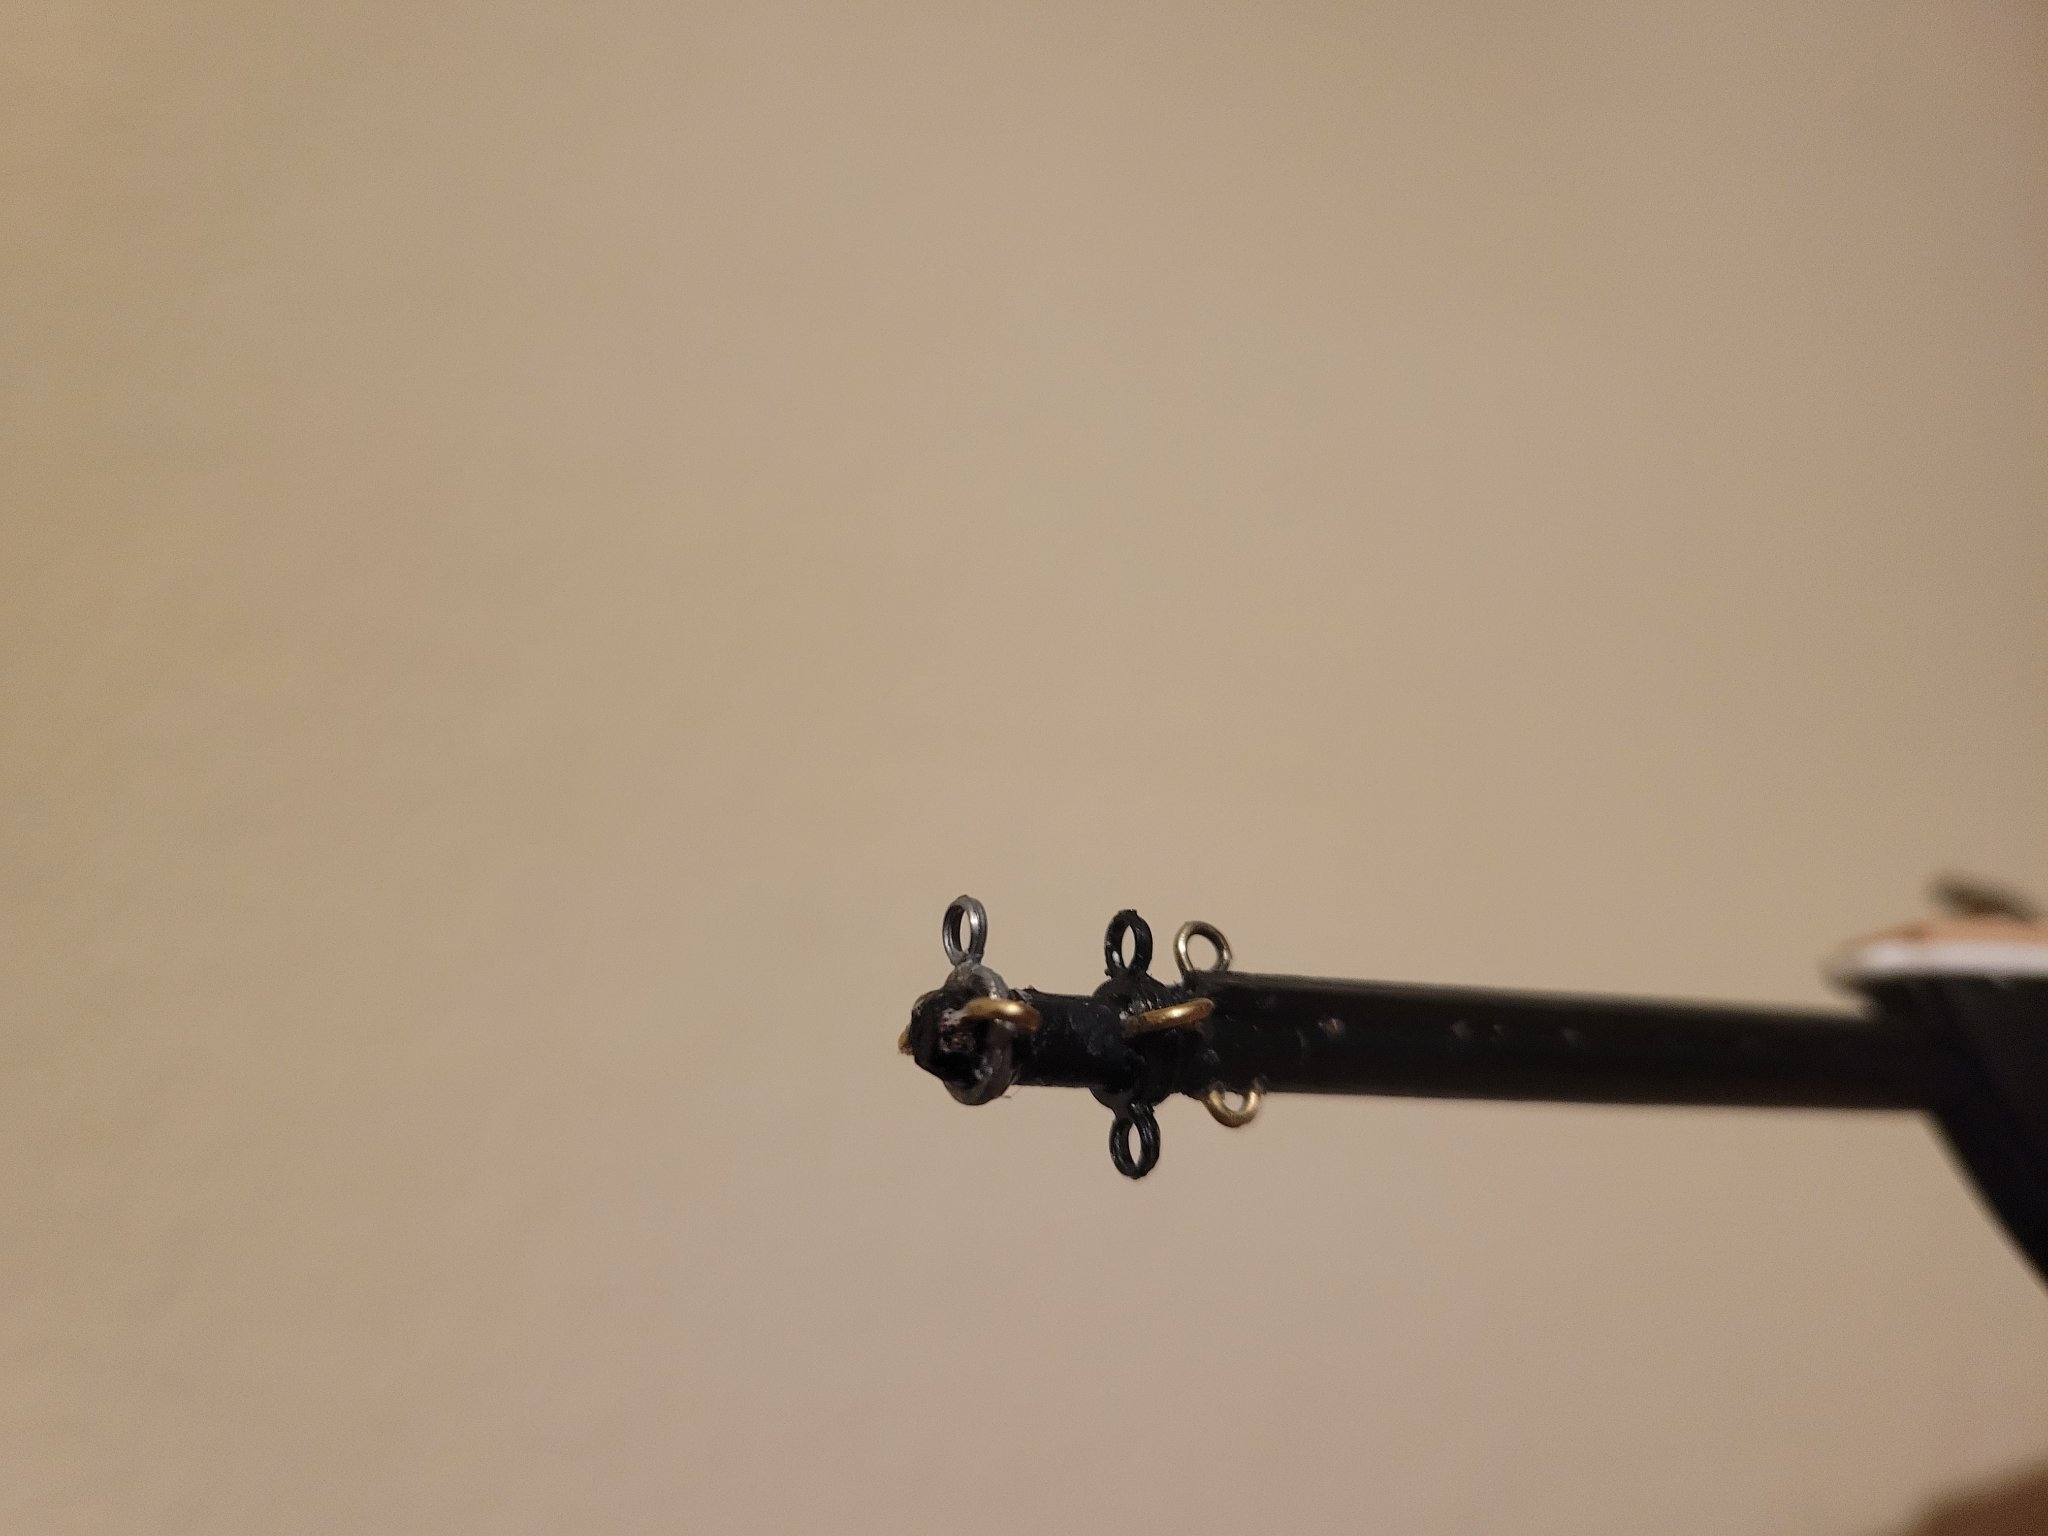
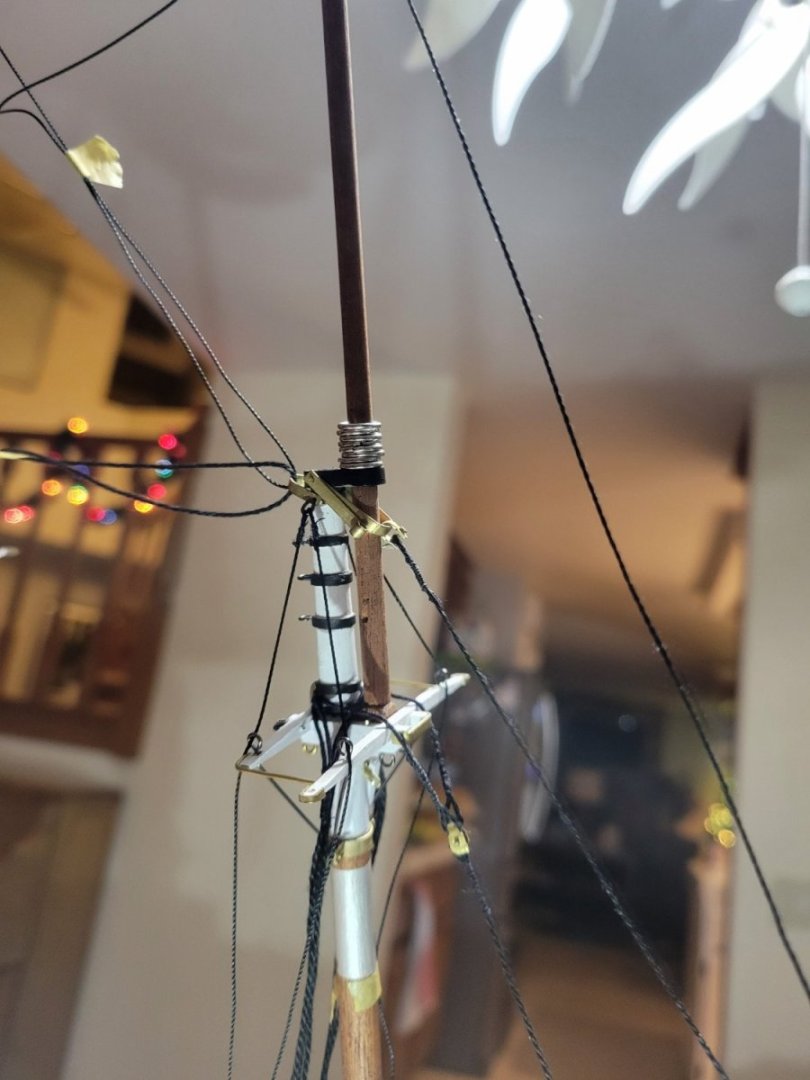
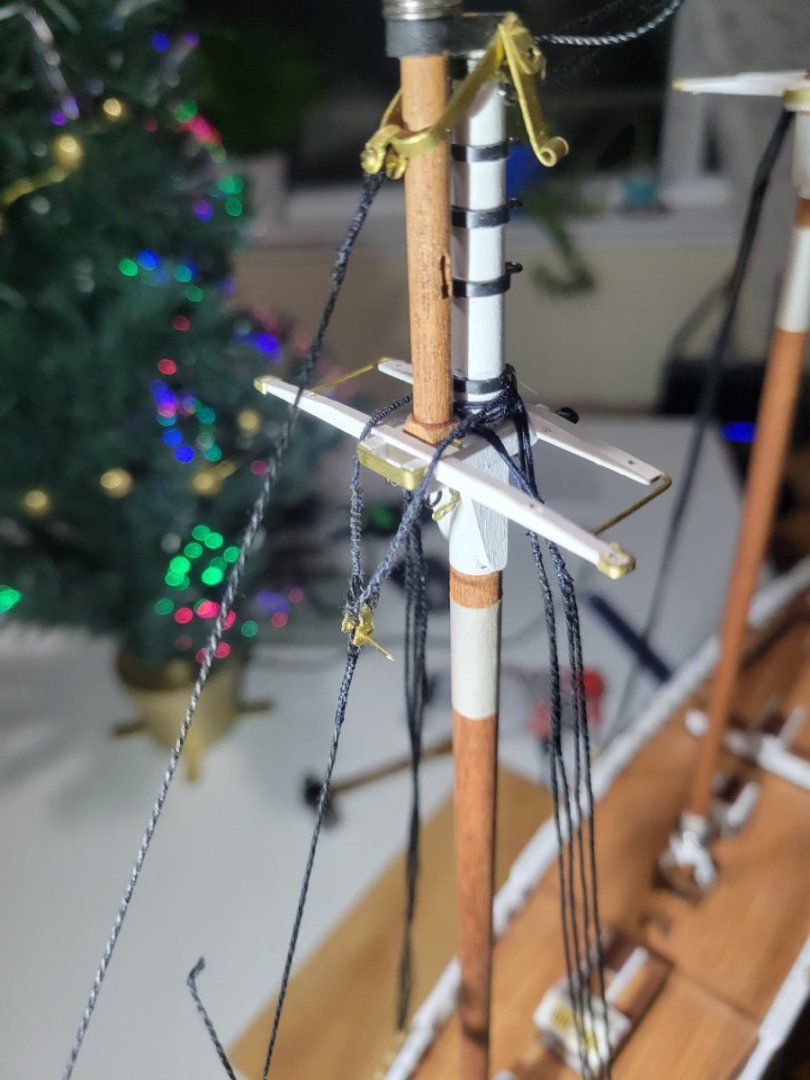
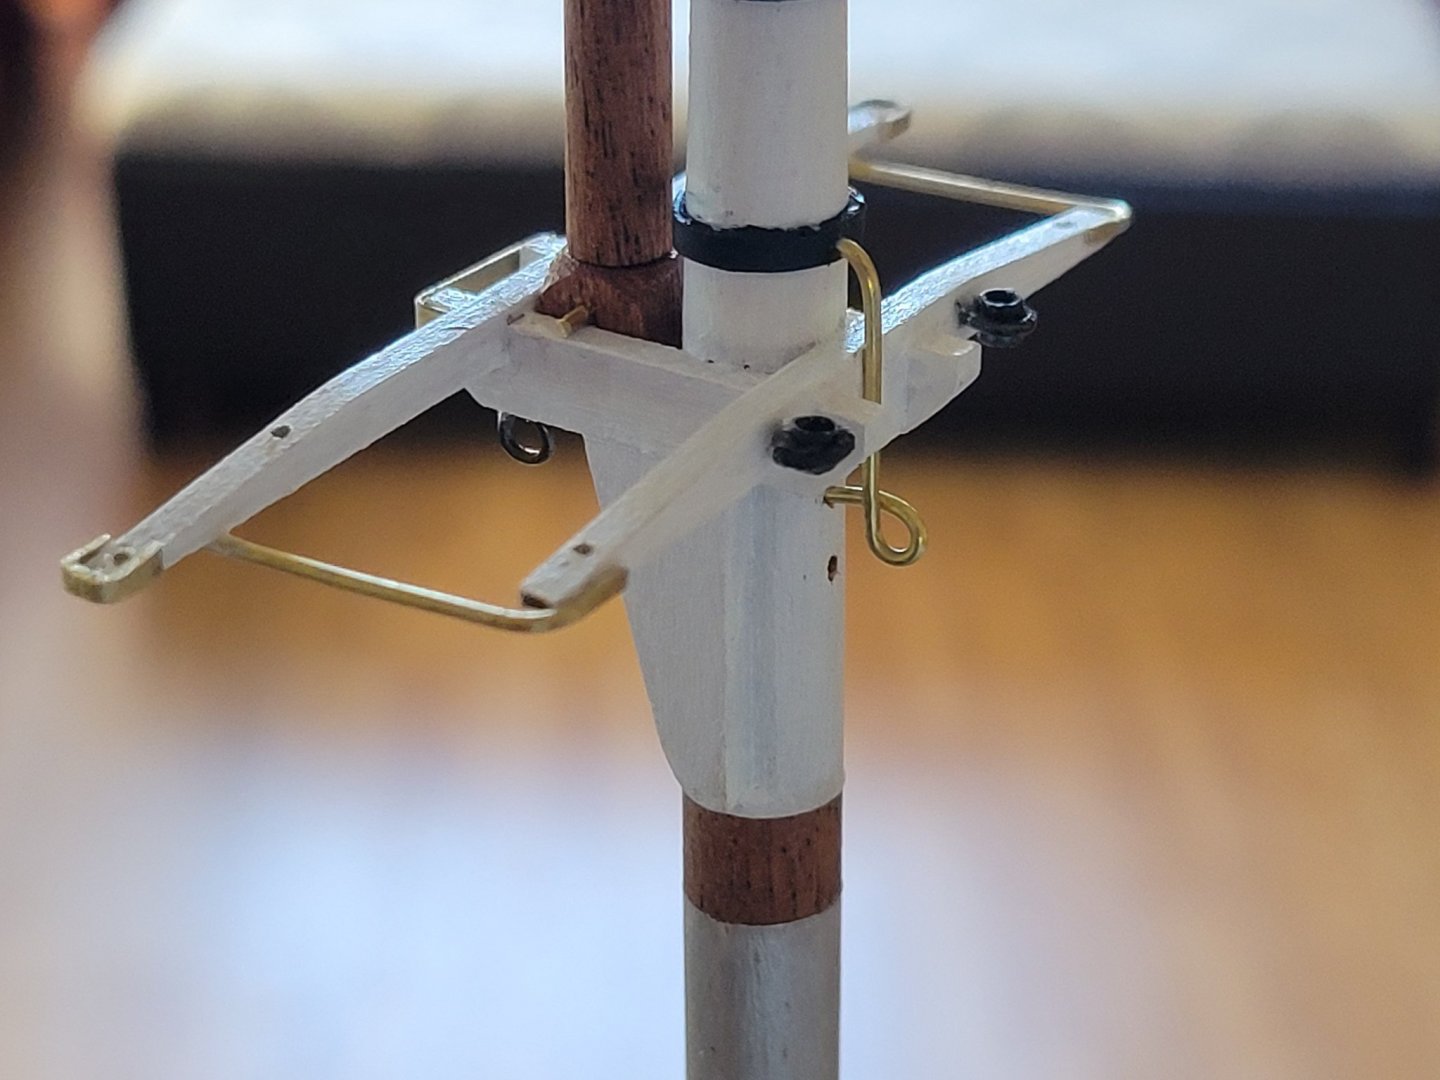
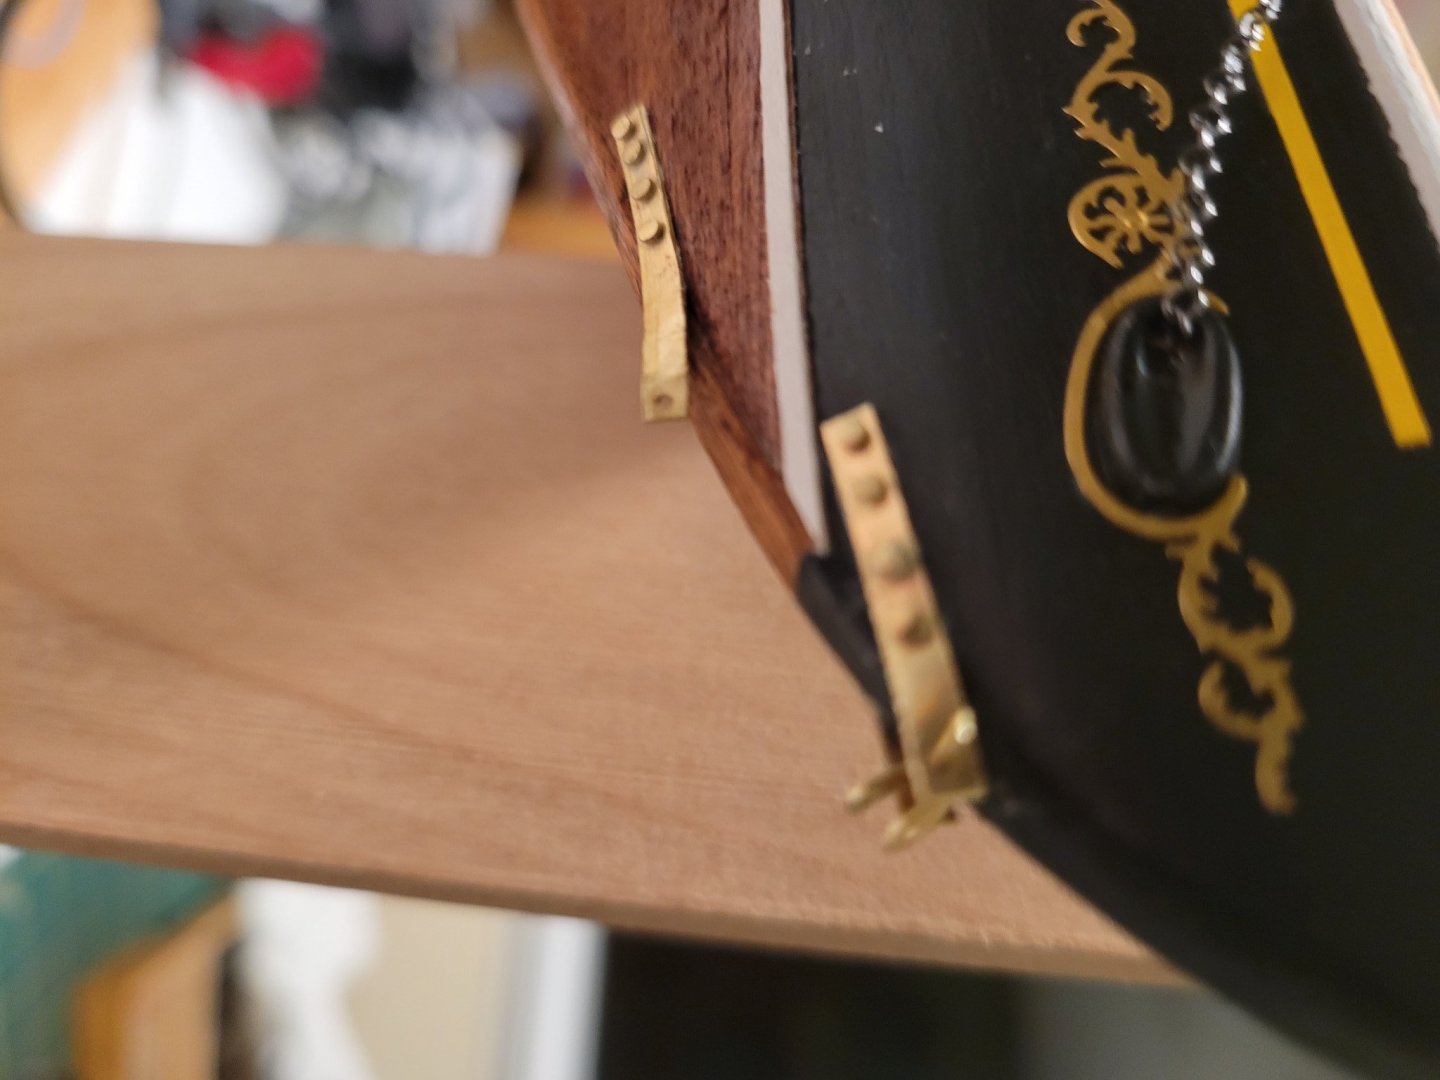
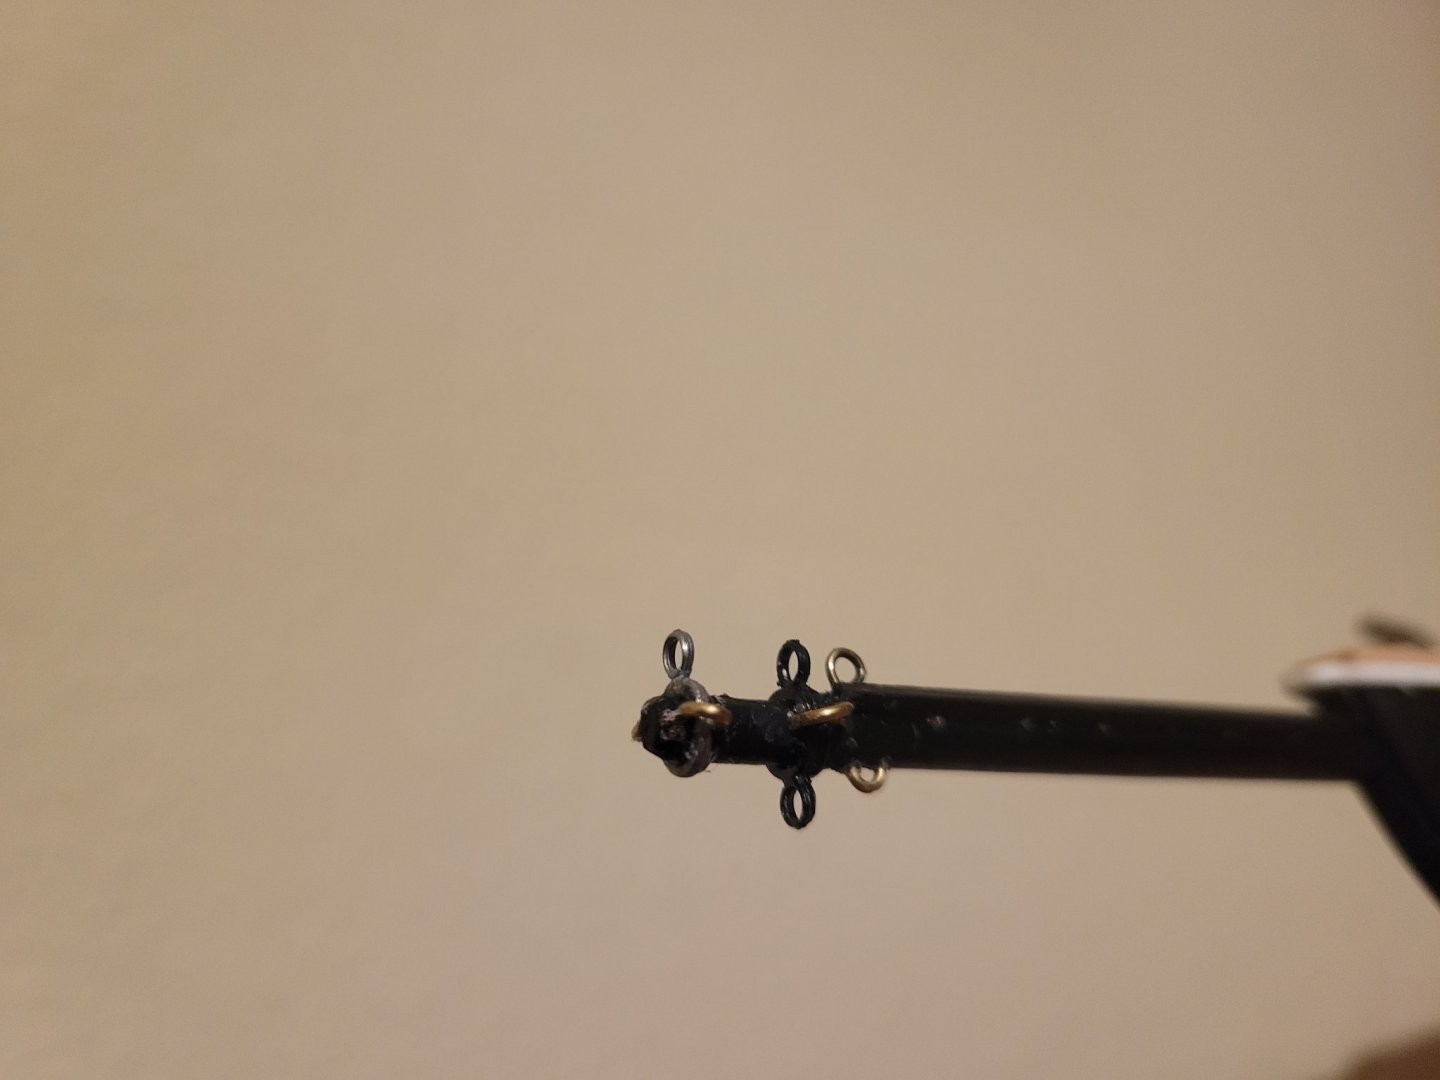
Moving to futtock shrouds. Al doesn't really even attempt these in a realistic way so back to scratch build! I also found that every model I have seen and every practicum seems to show the foremast without a real futtock under the trestle. Just eyelets to hold down the upper shrouds. Photos of the bluenose show both mast with the futtocks so I'm going to make both. Main mast is on. Combo of shaped wire and brass rings.

- 84 replies
-
- 1
-
-
- Artesania Latina
- Bluenose II
- (and 1 more)
-
Finally getting back to this after a very long break! Picked up a serving machine from Syren. Finally getting the chainplates installed. I found the AL has a mistake in their design. They have an extra chainplate that doesn't exist. There are only 5 on each side of the main maste. They included six in their design and the sixth one is actually ahead of the mast instead of behind. Going to have to figure out removing one with ruining the bulwark but I'll figure it out. Also getting the rigging started on the masts. Focus right now on perfecting my eye splices and scratch built shackles.


- 84 replies
-
- 3
-
-
- Artesania Latina
- Bluenose II
- (and 1 more)
-
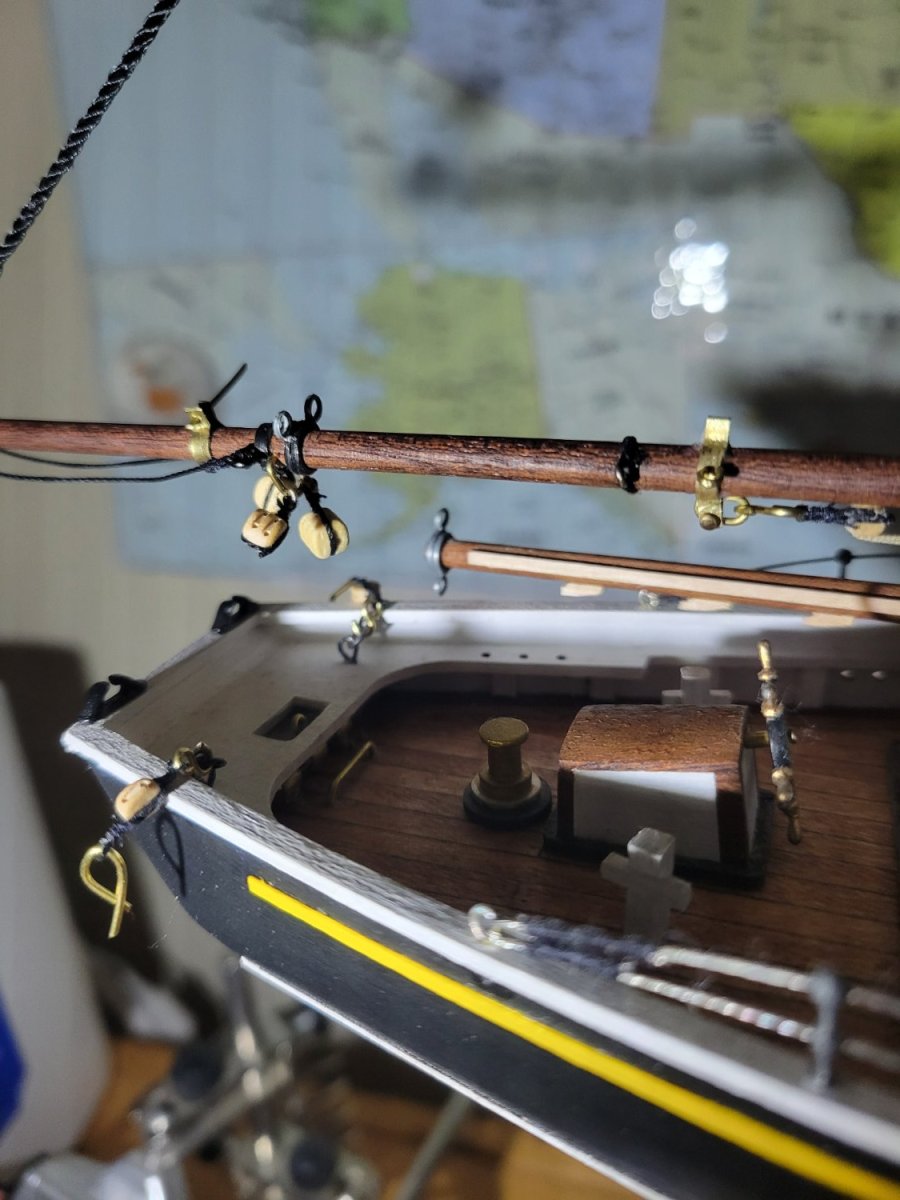
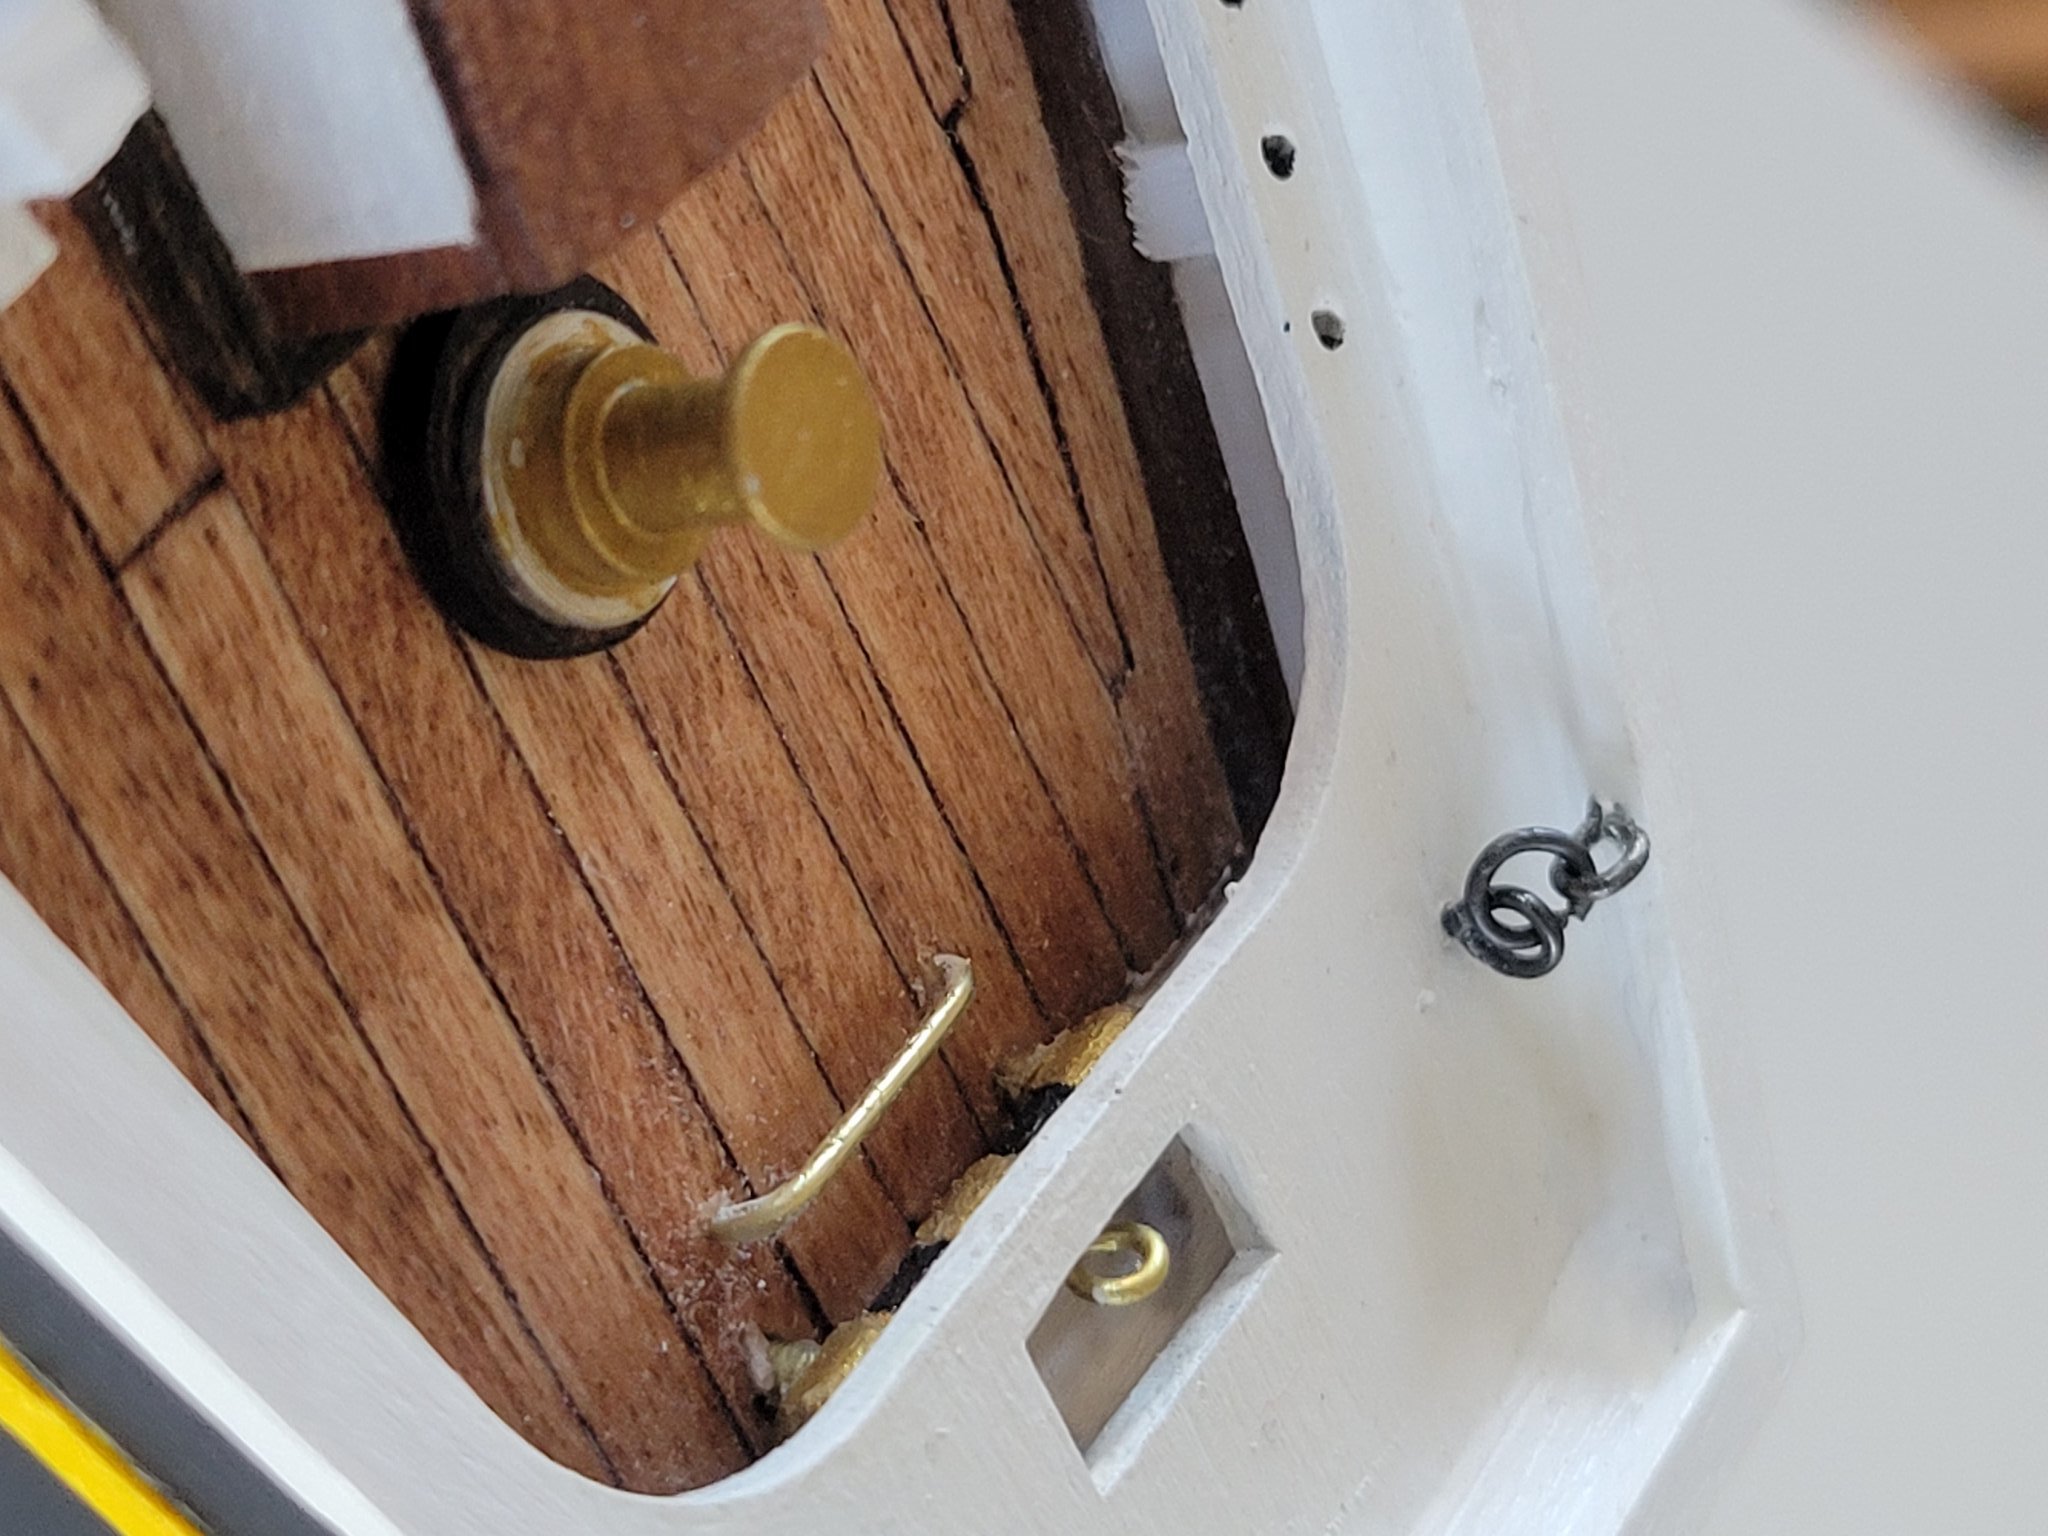
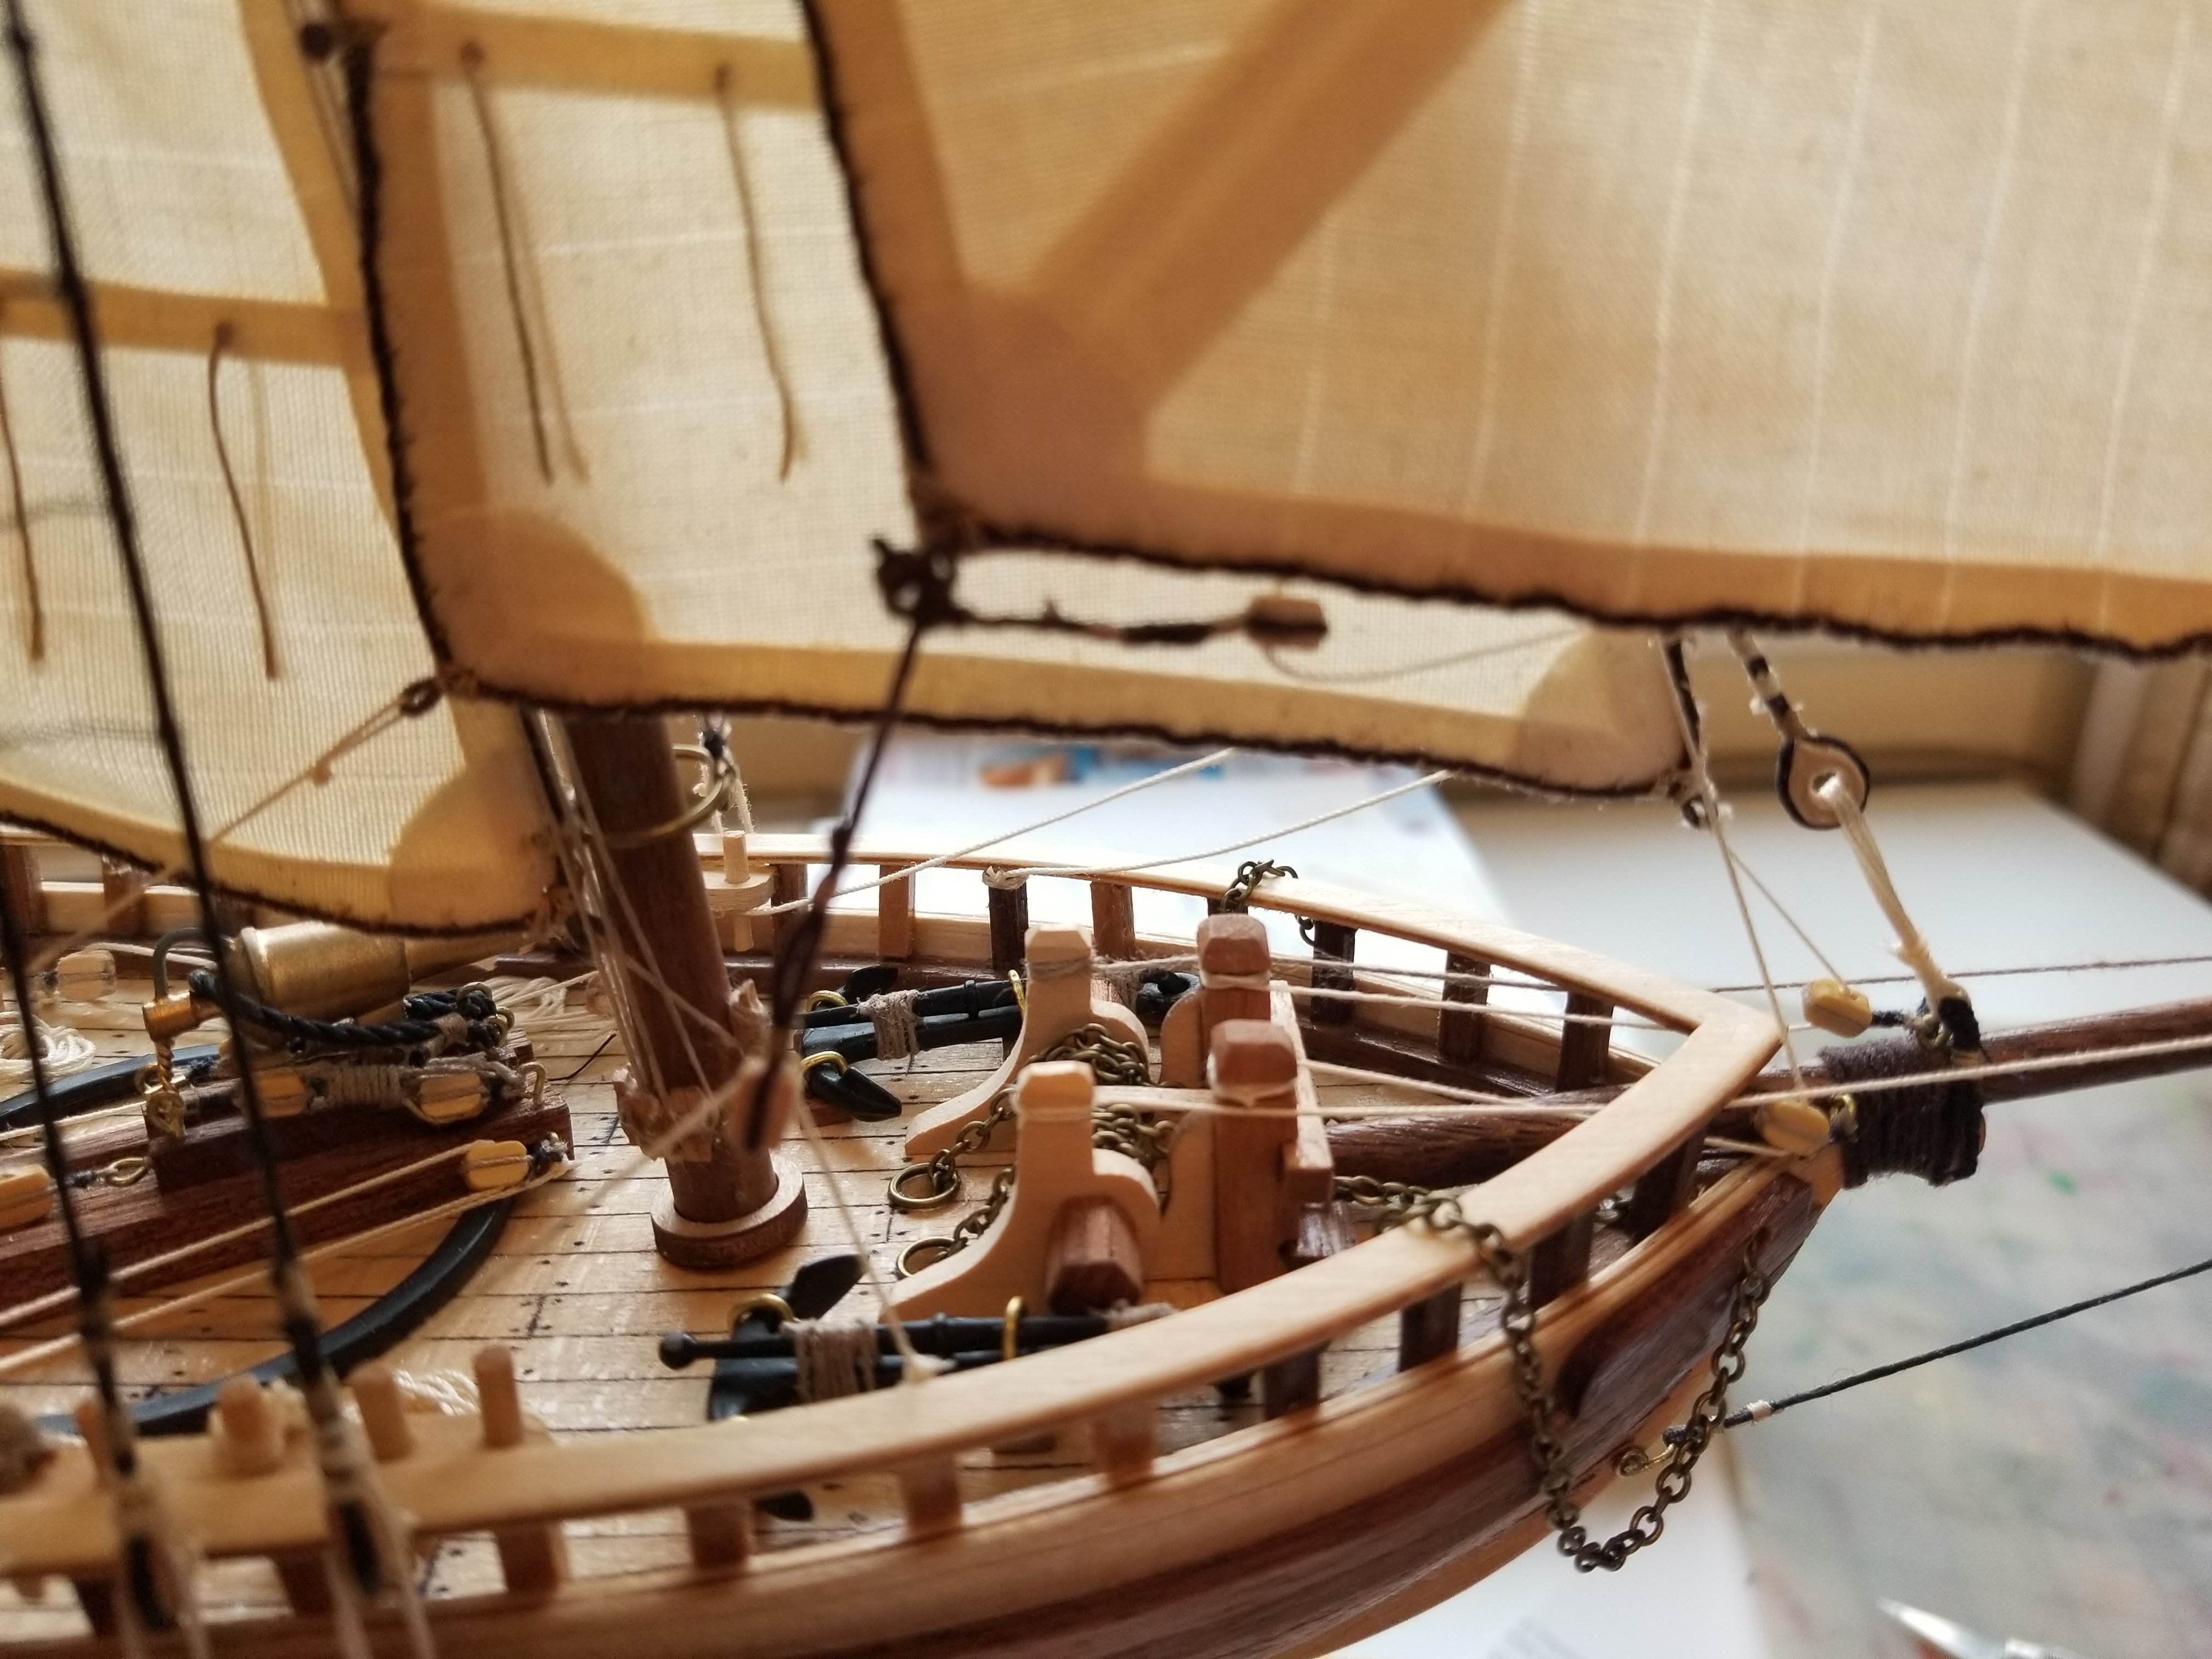
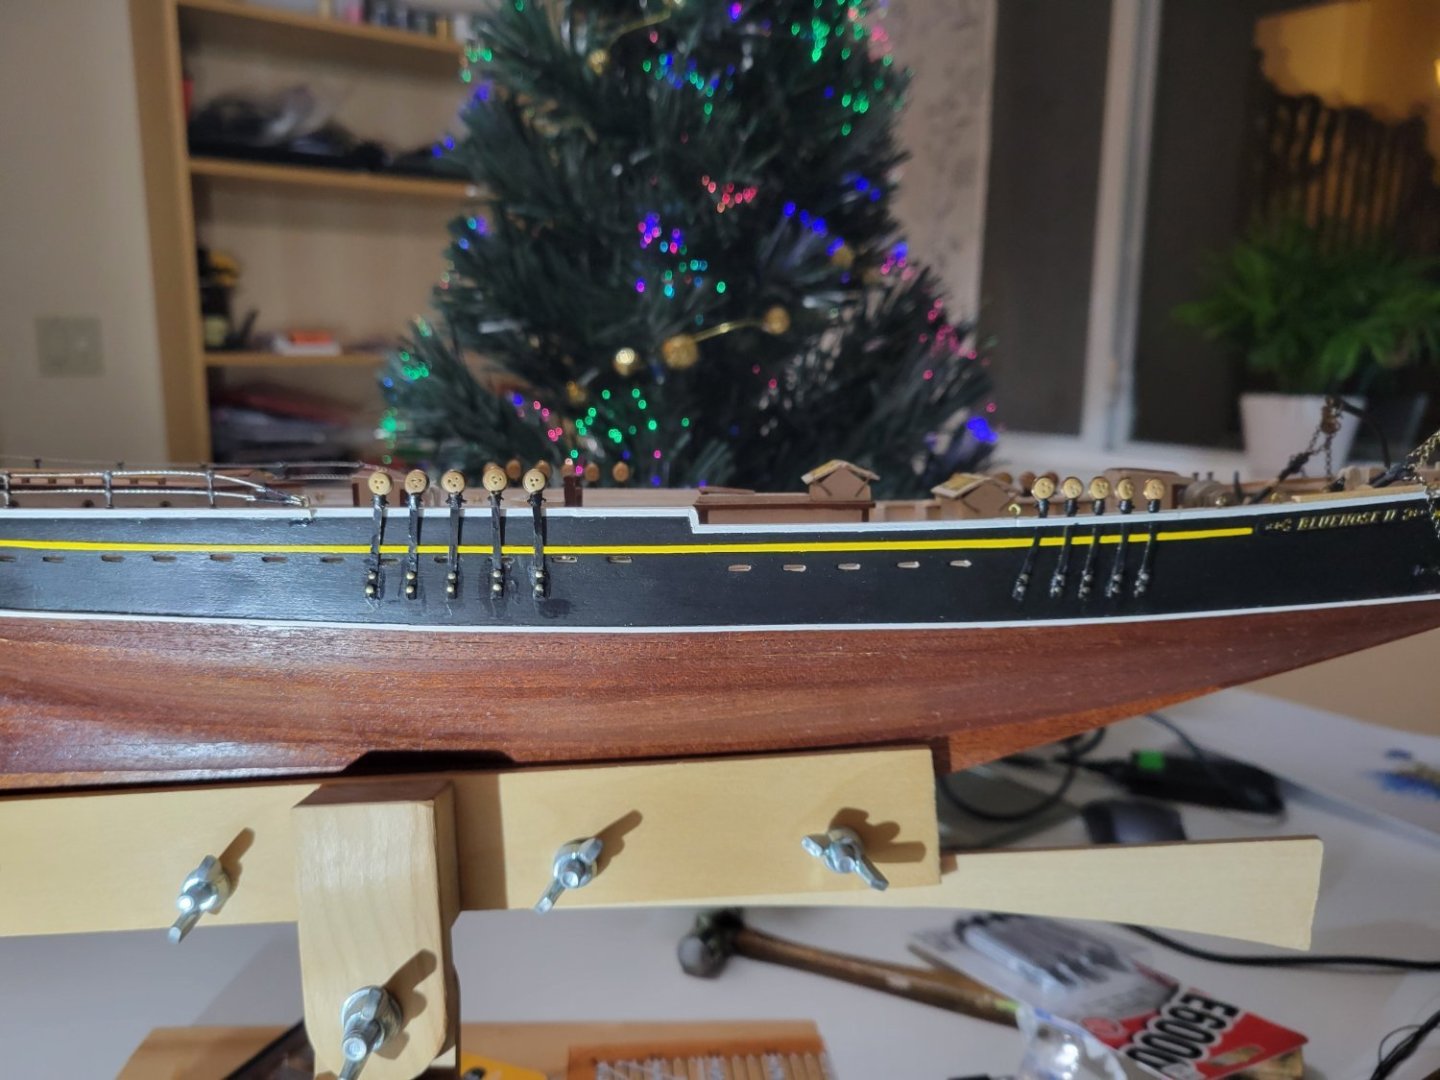
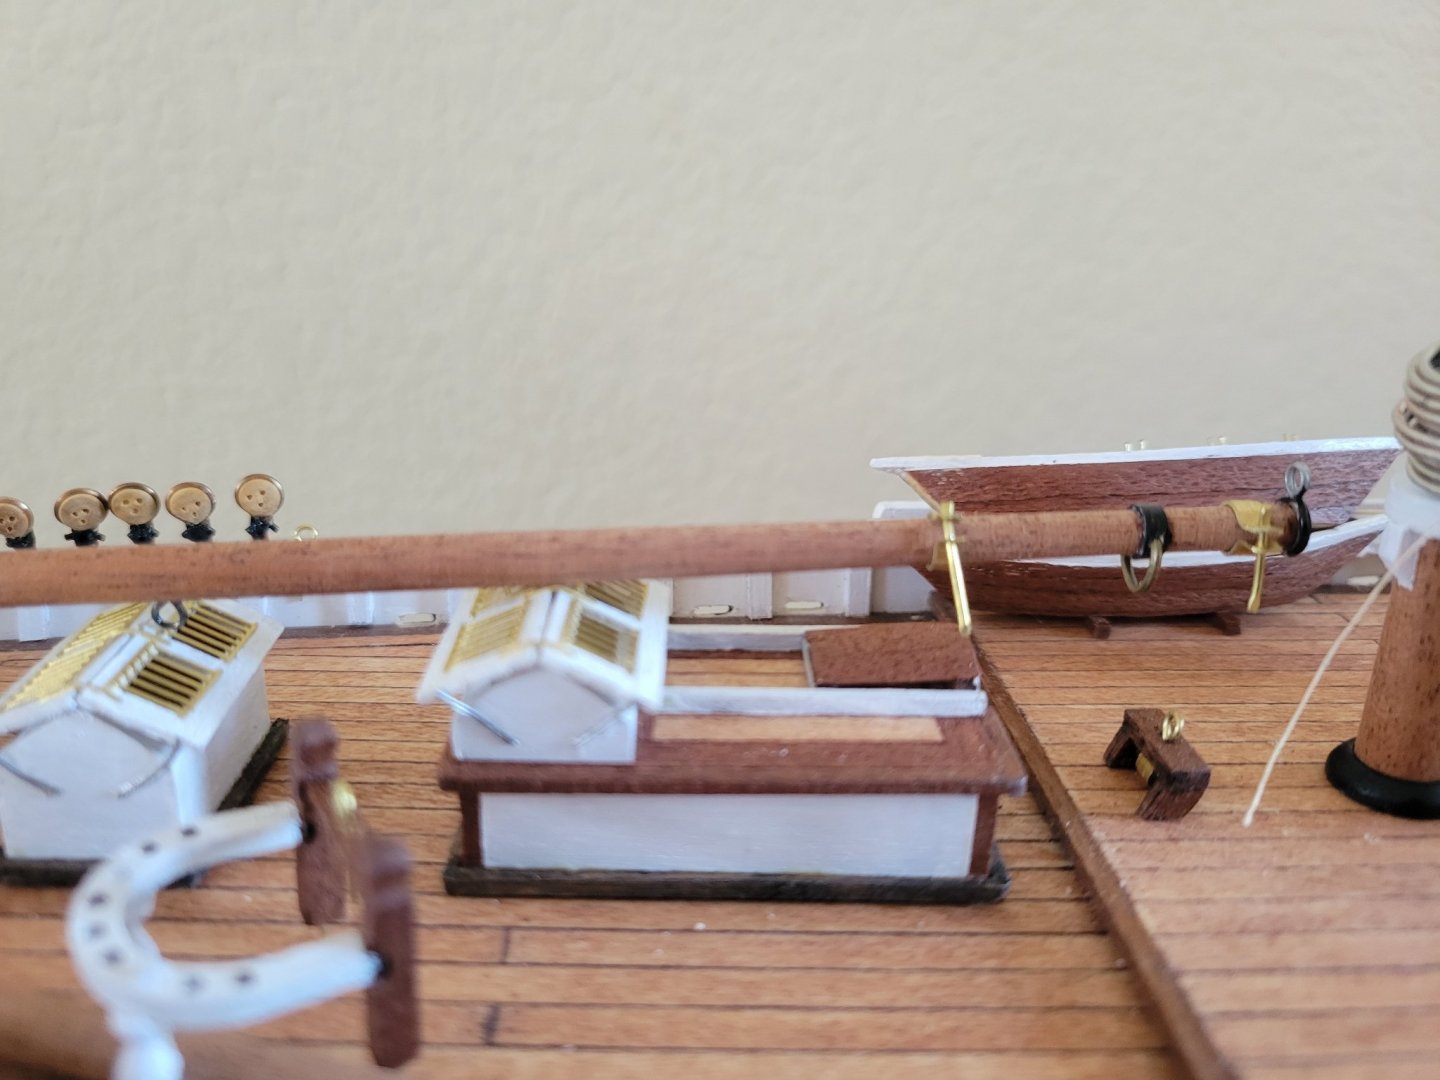
Also adding various eyes, u bolts and horse traveler around the rails.


- 84 replies
-
- 2
-
-
- Artesania Latina
- Bluenose II
- (and 1 more)
-
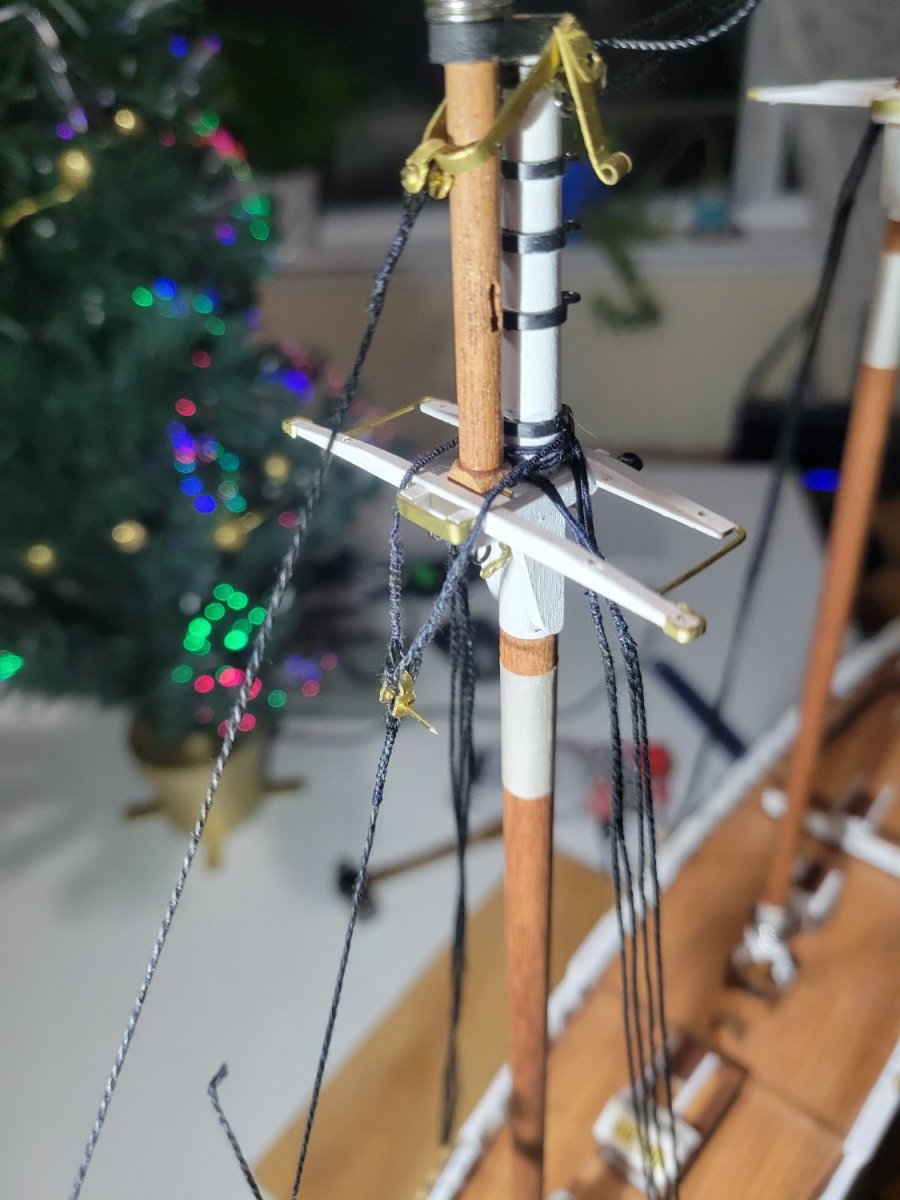
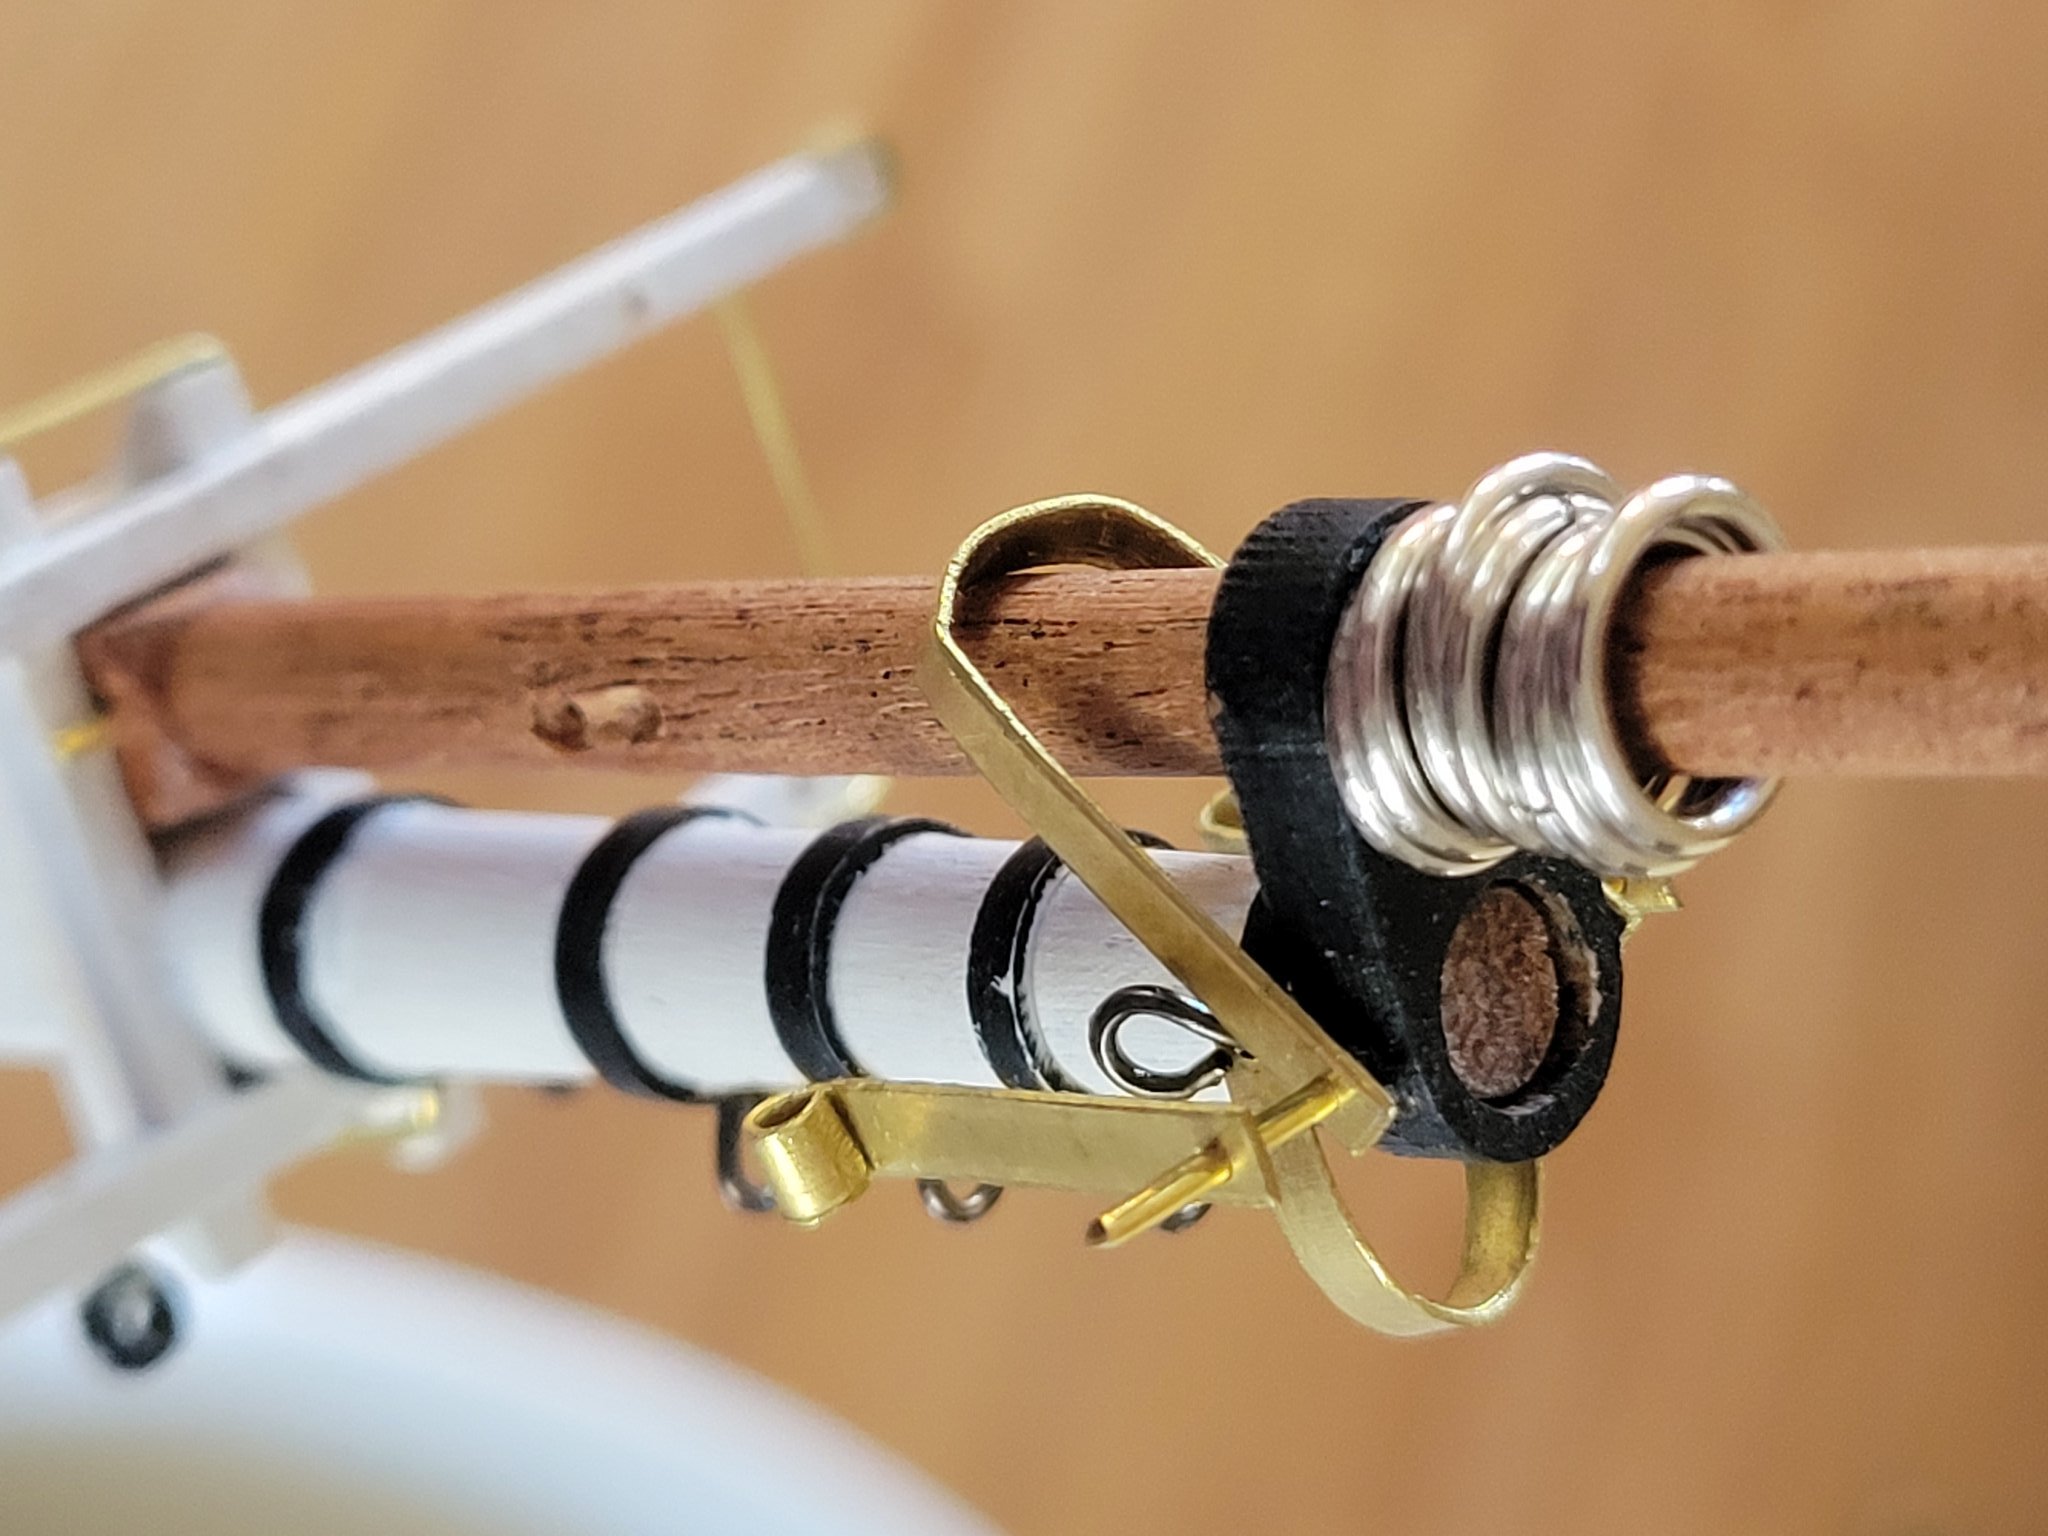
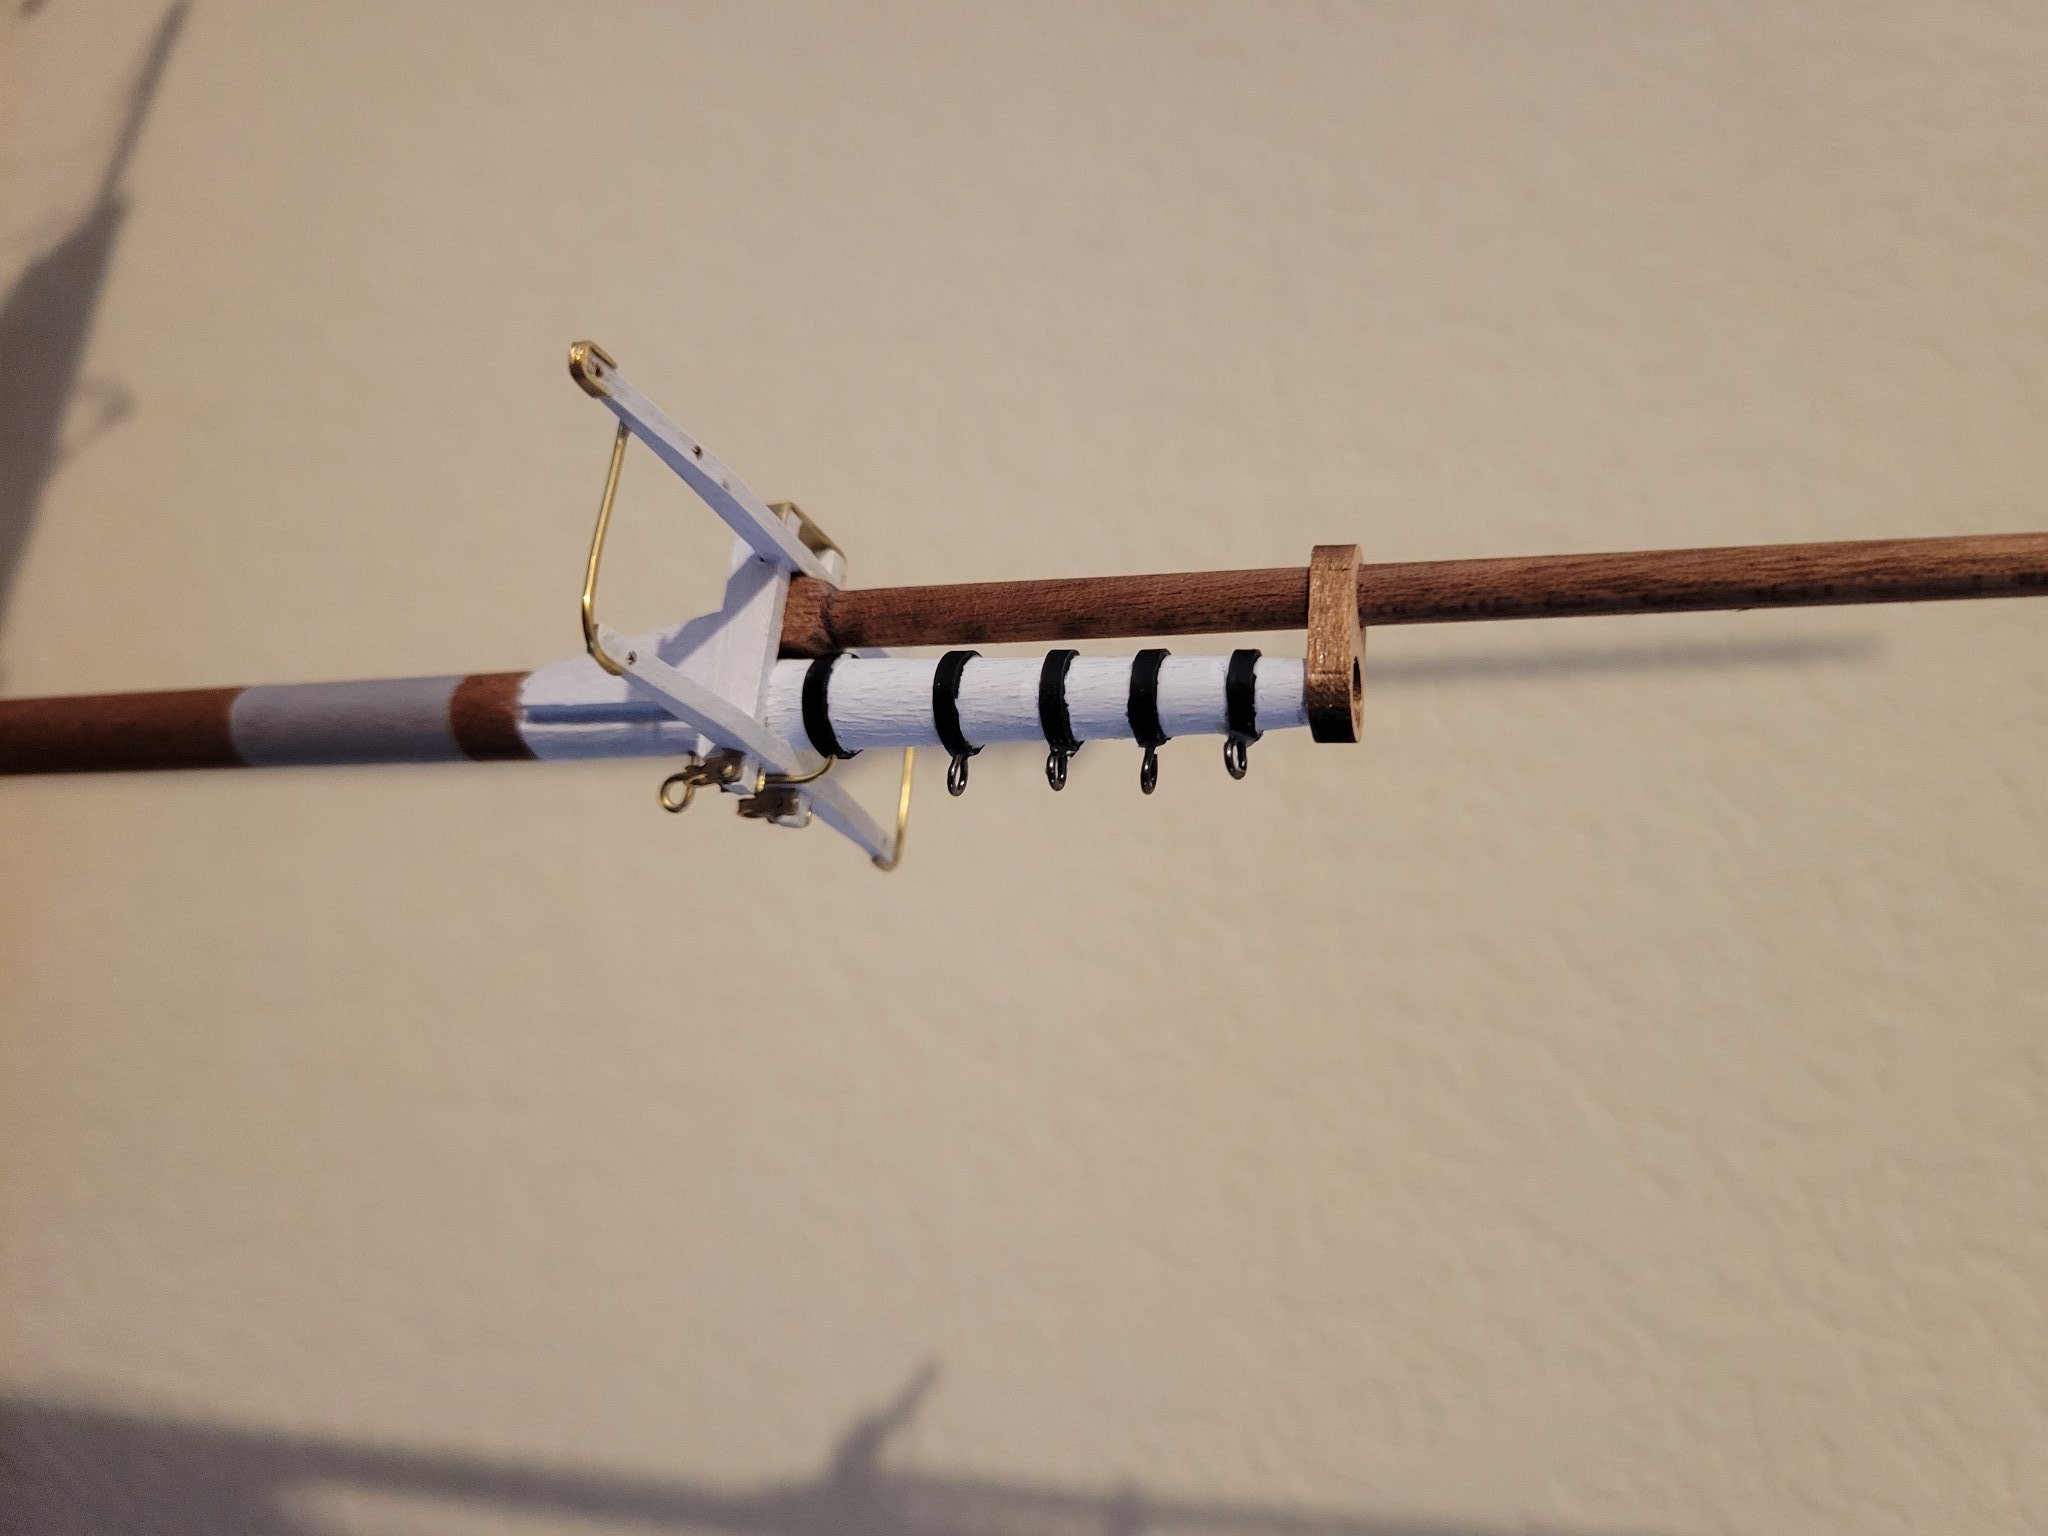
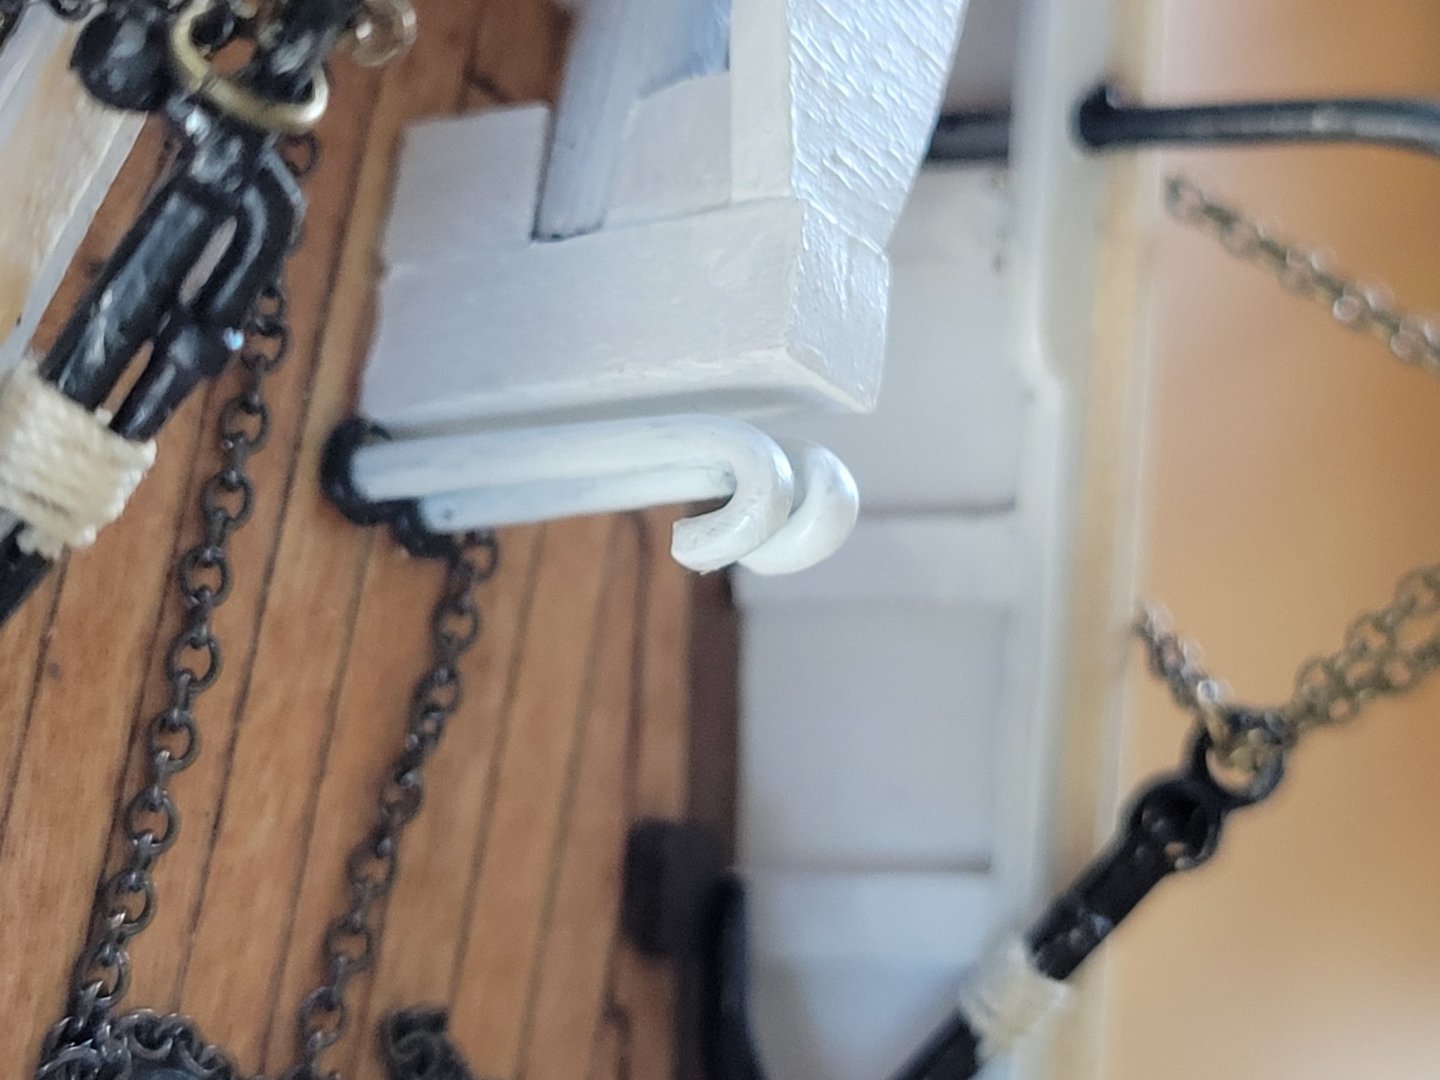
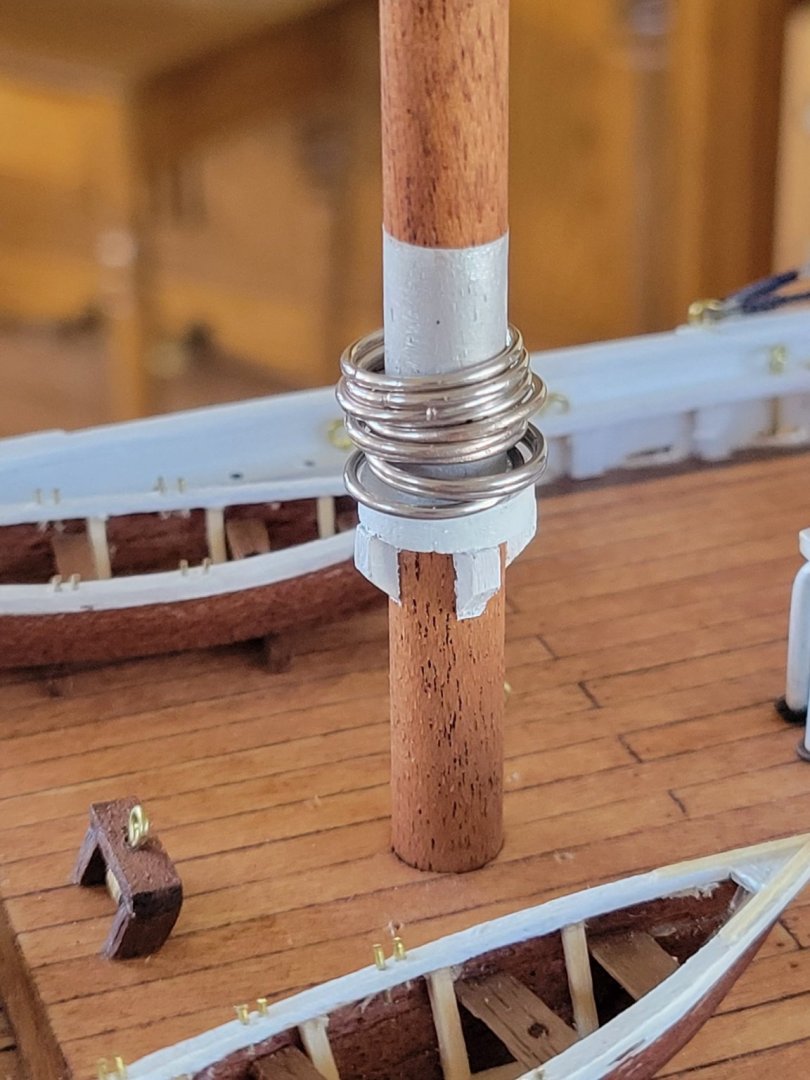
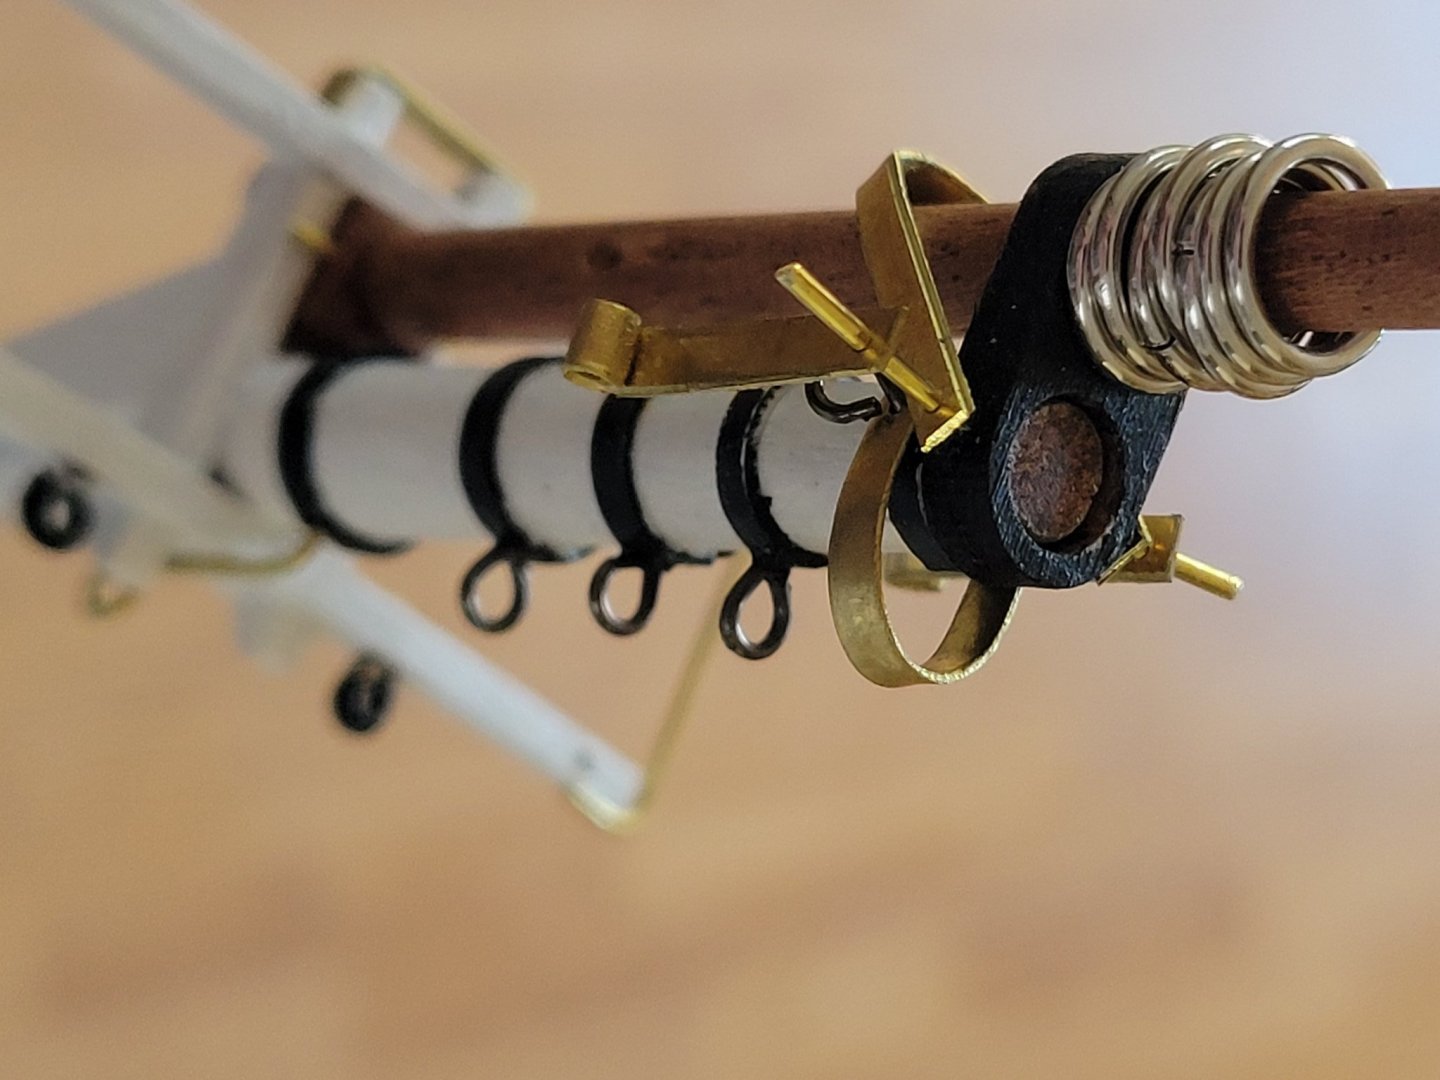
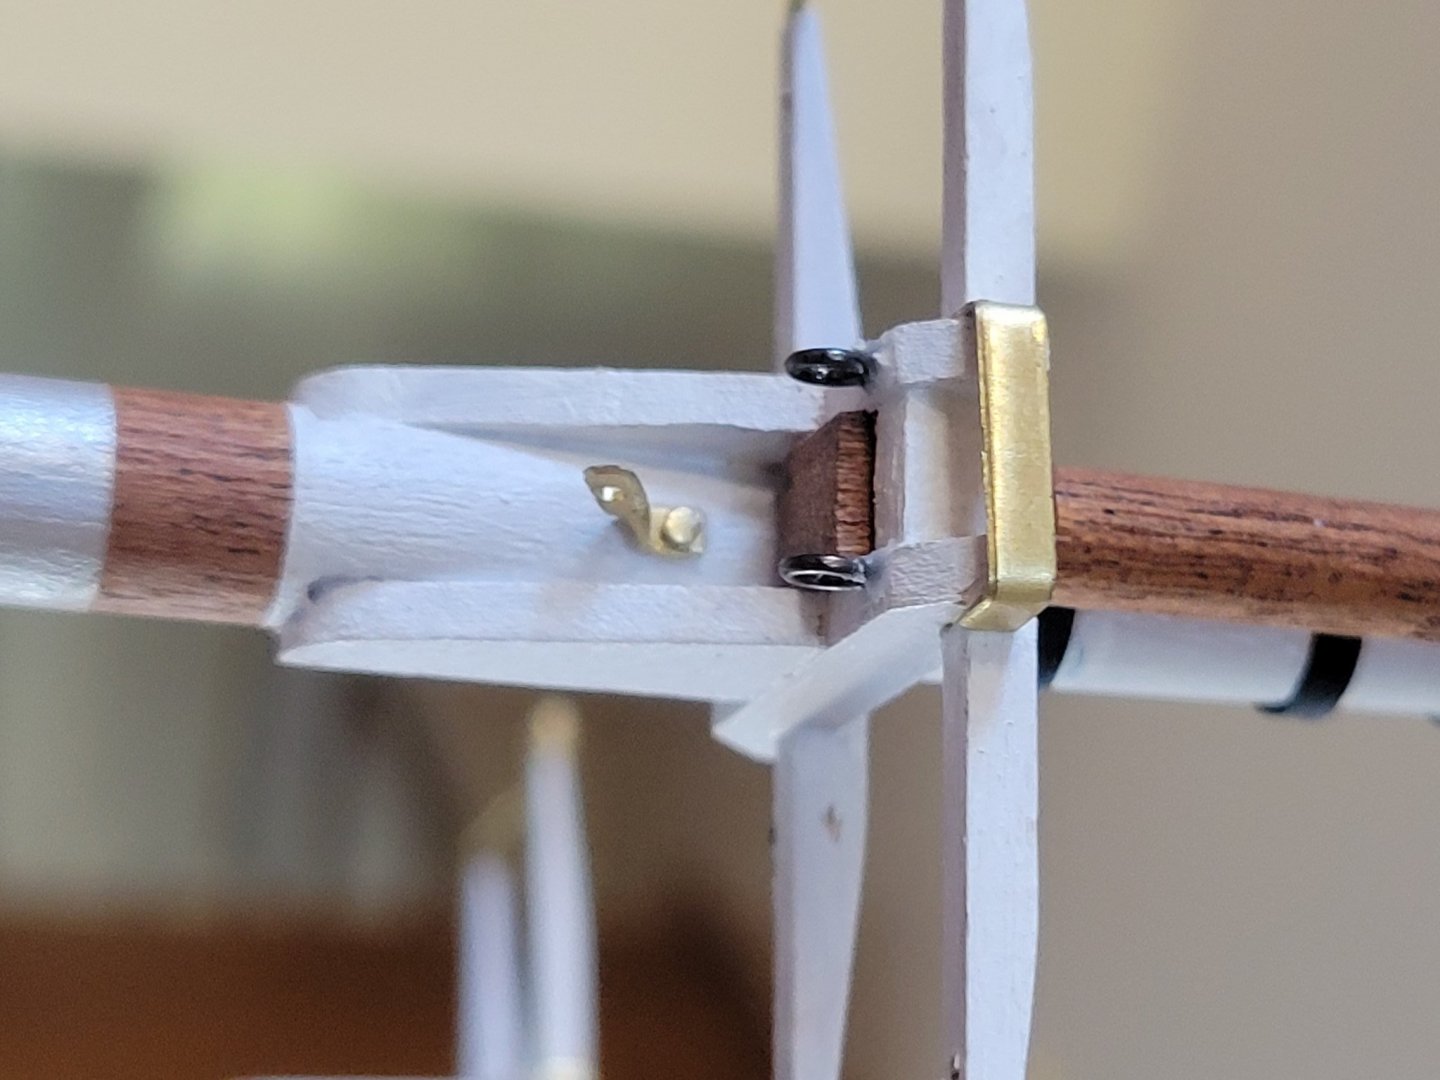
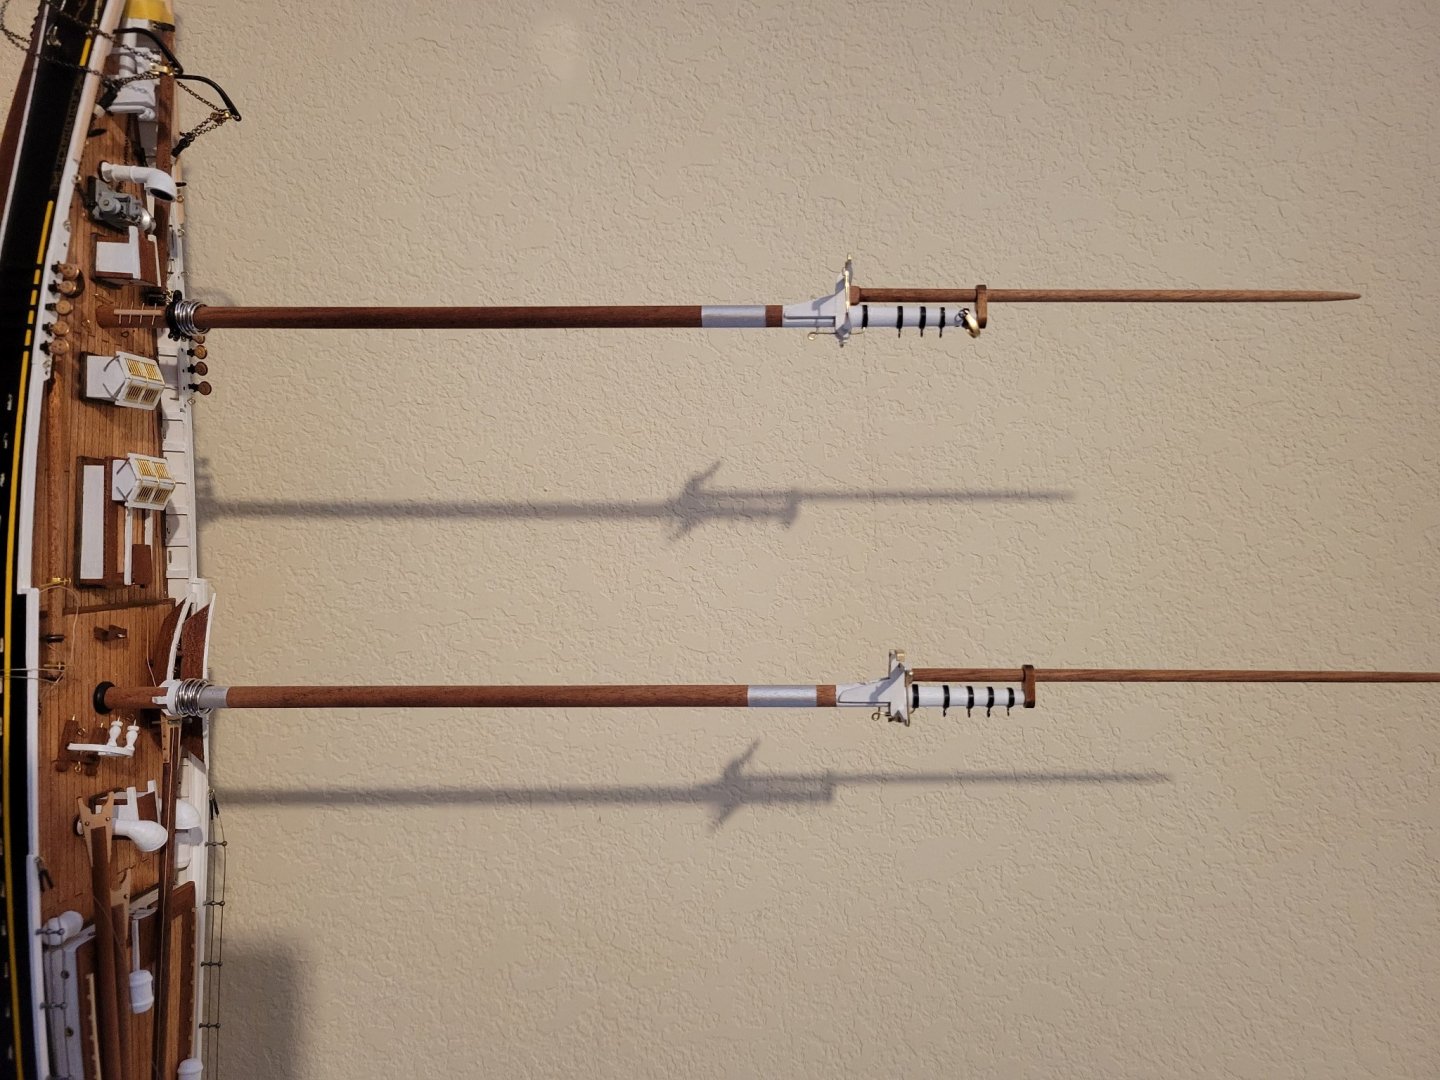
A lot of similar work on main mast. Only one bail component at top of lower main mast. Couple changes in brasswork at trestle. And kept the standard rest for the goosneck. Two metal wraps on the mast for both the gaff and the boom.

- 84 replies
-
- 2
-
-
- Artesania Latina
- Bluenose II
- (and 1 more)
-
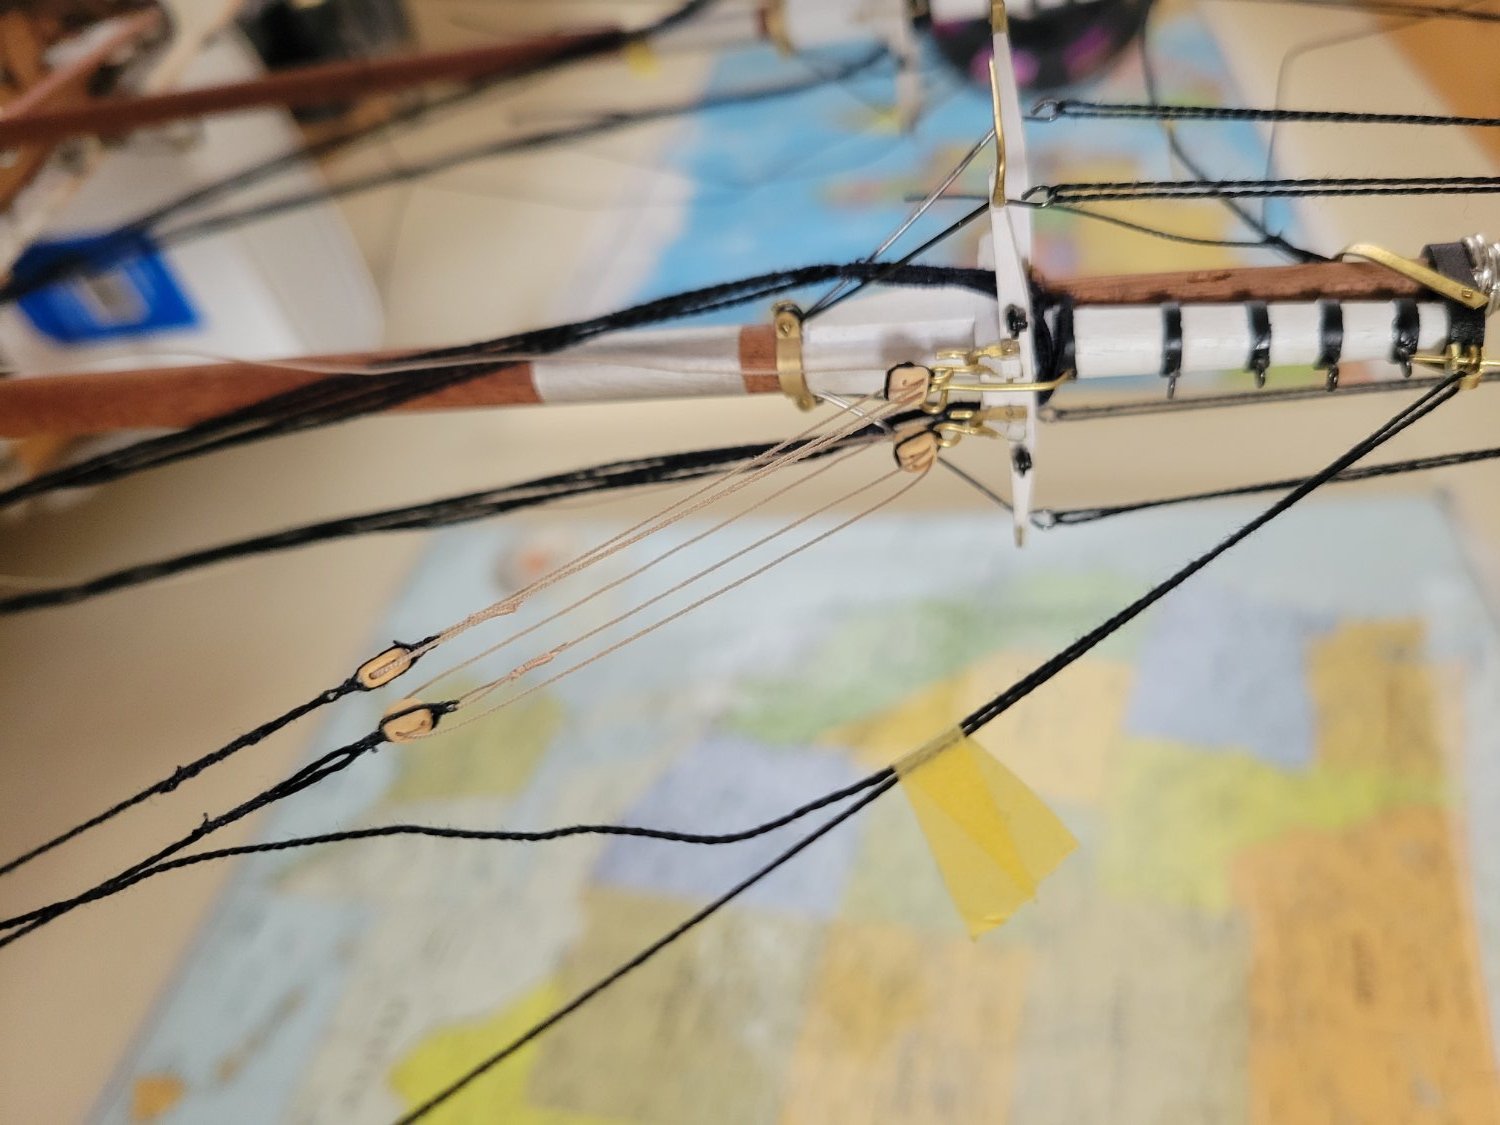
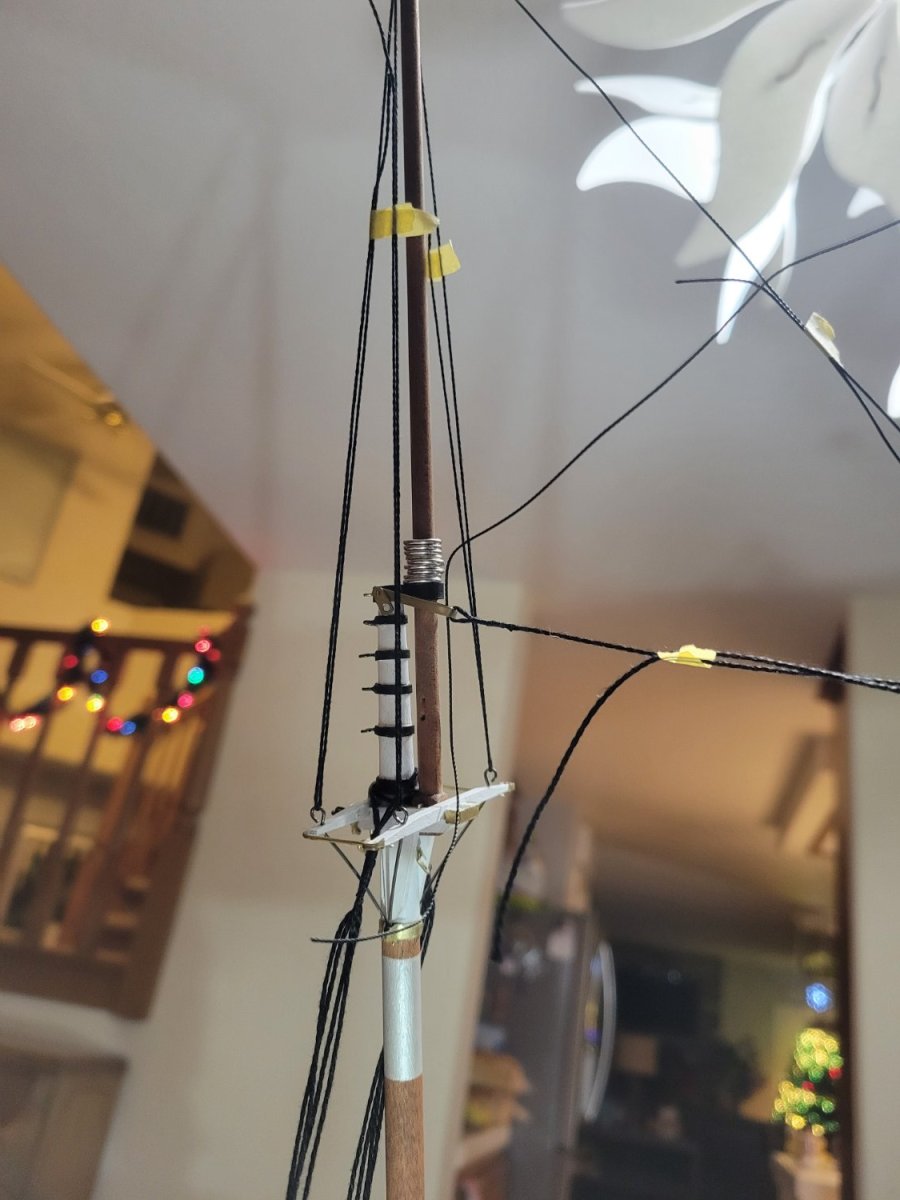
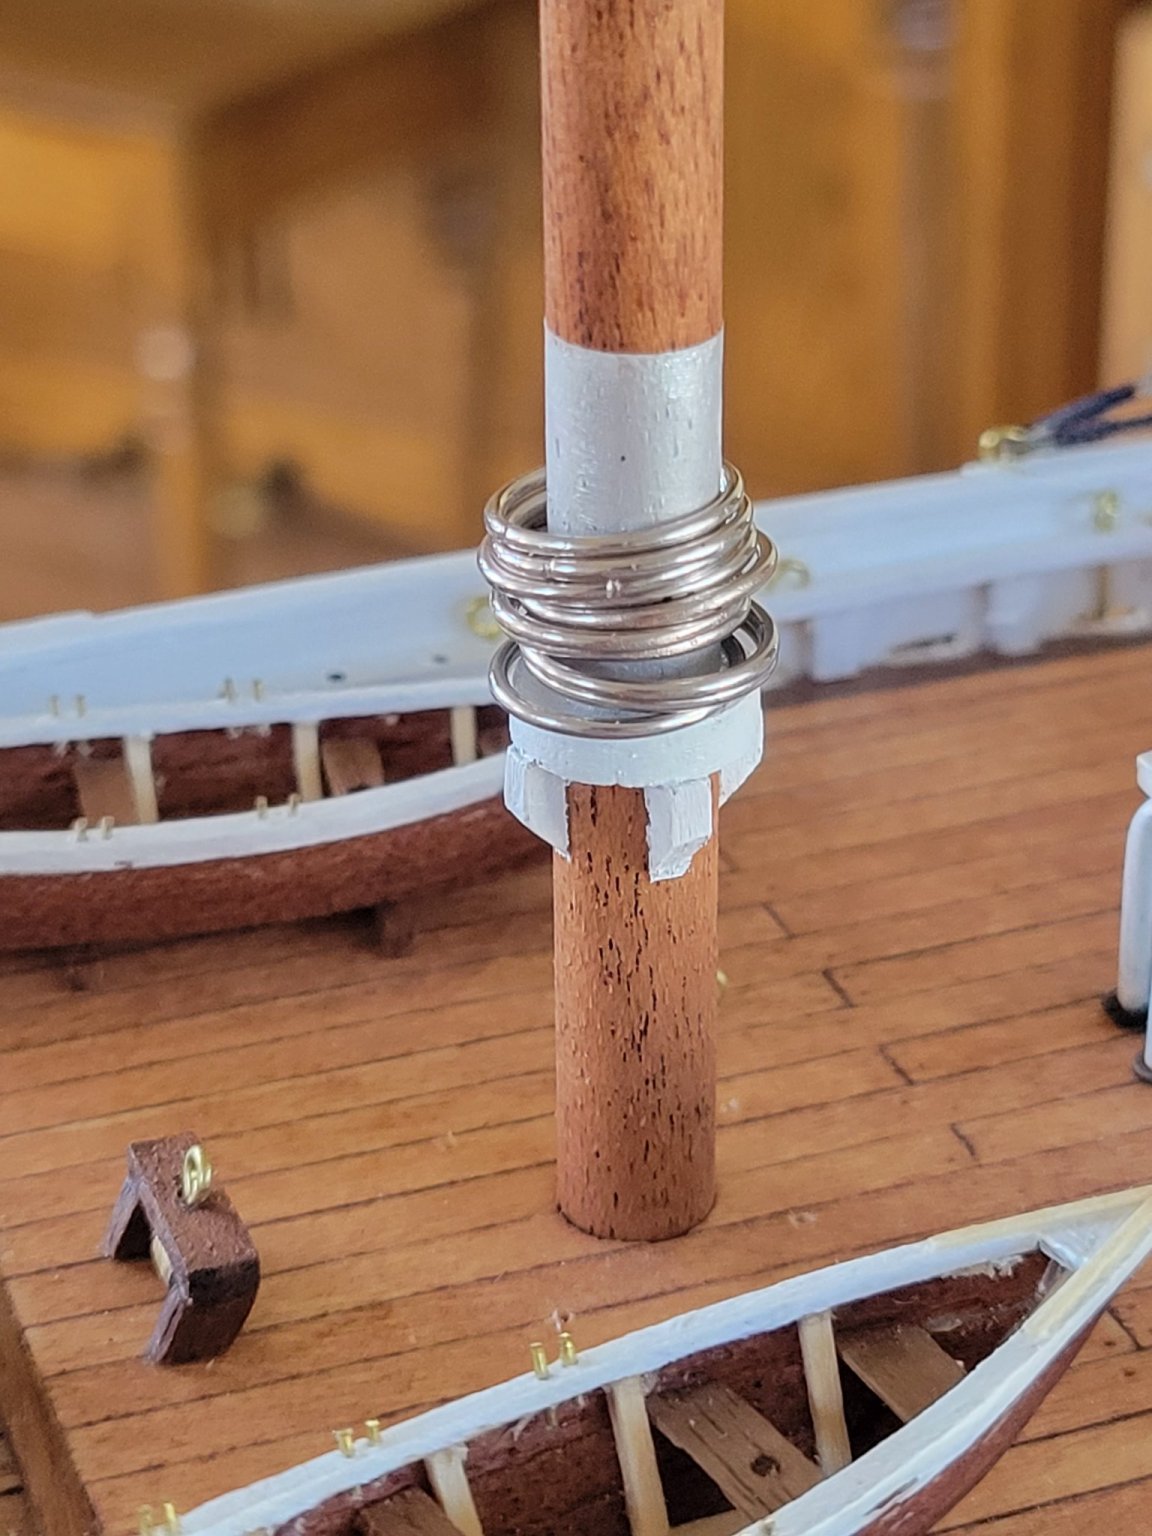
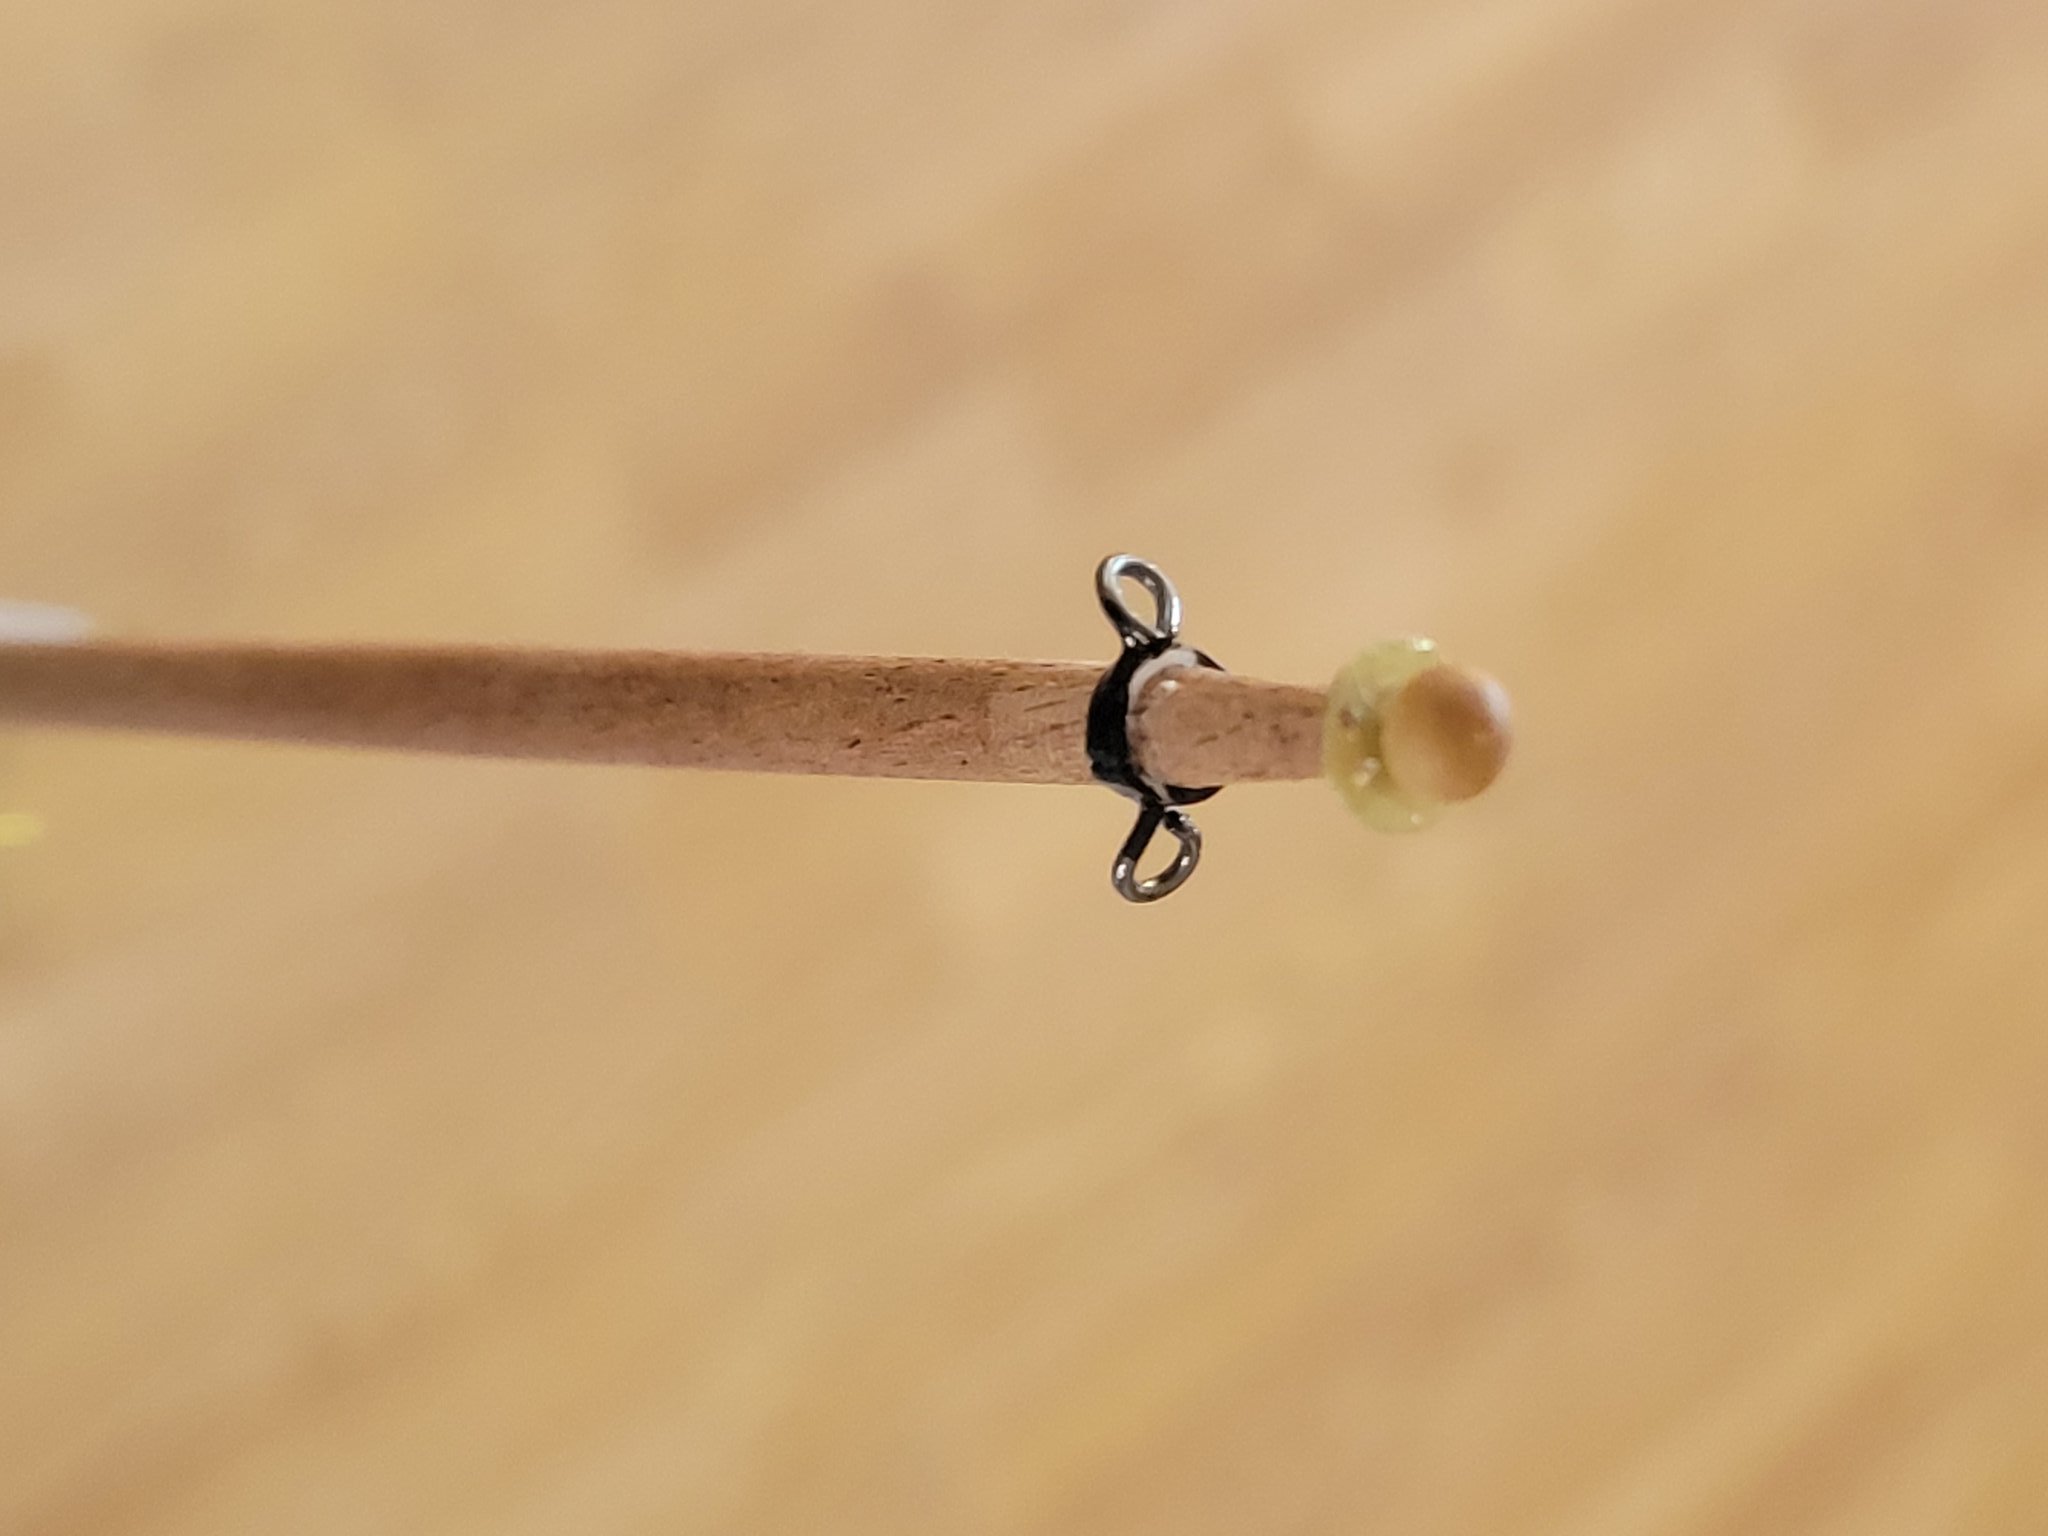
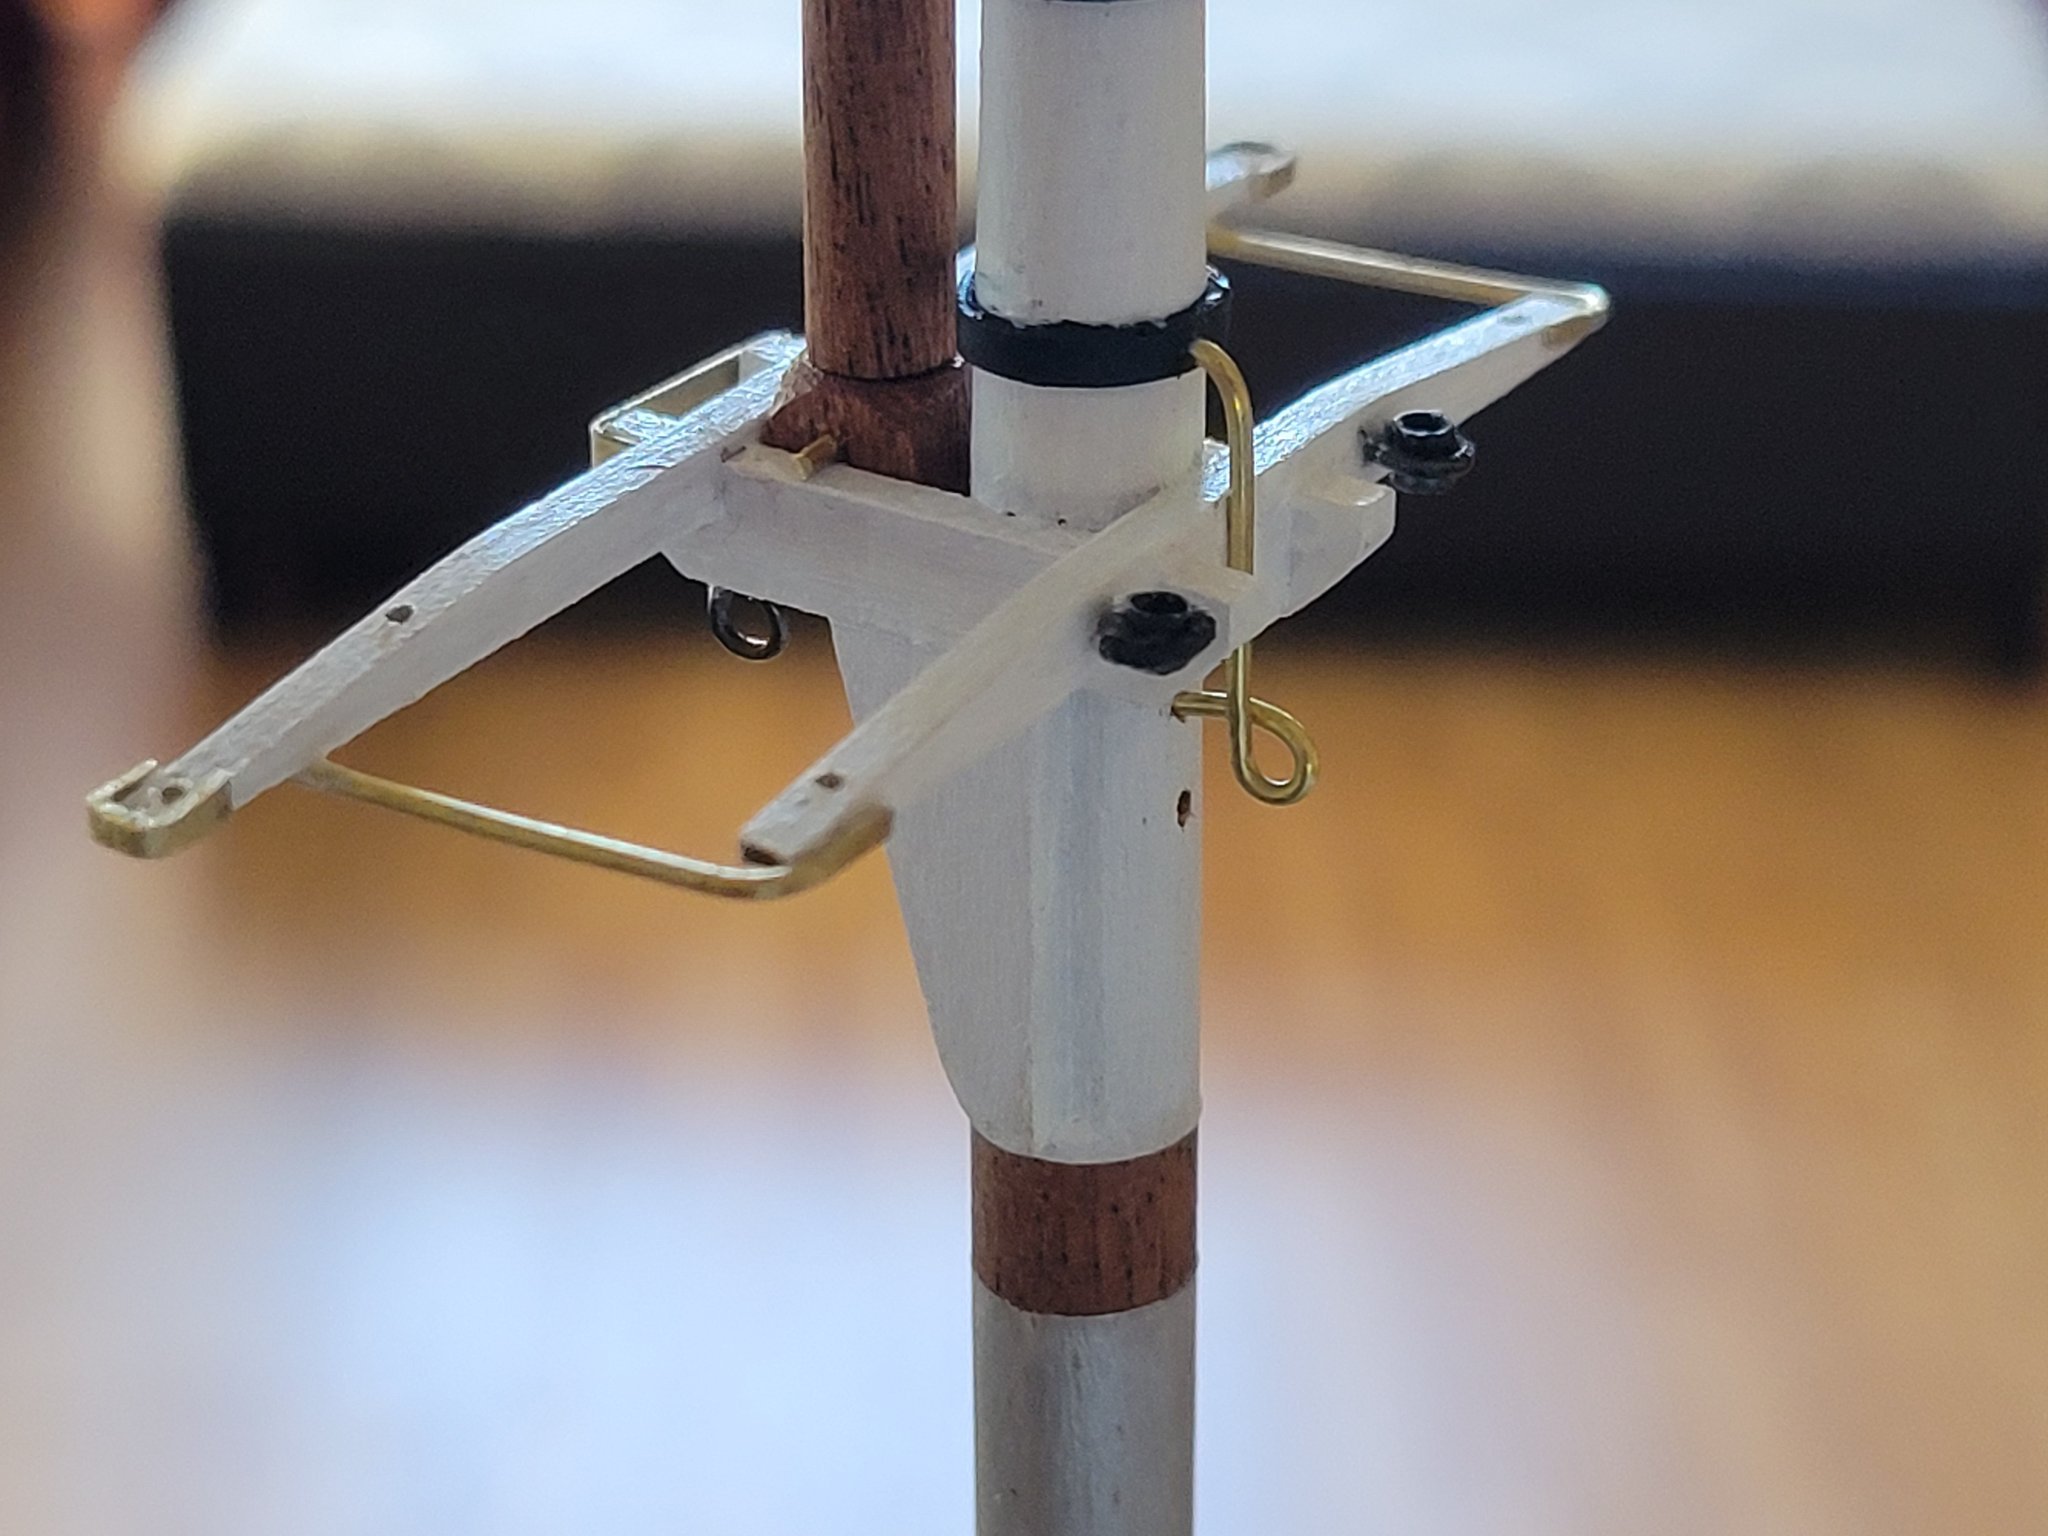
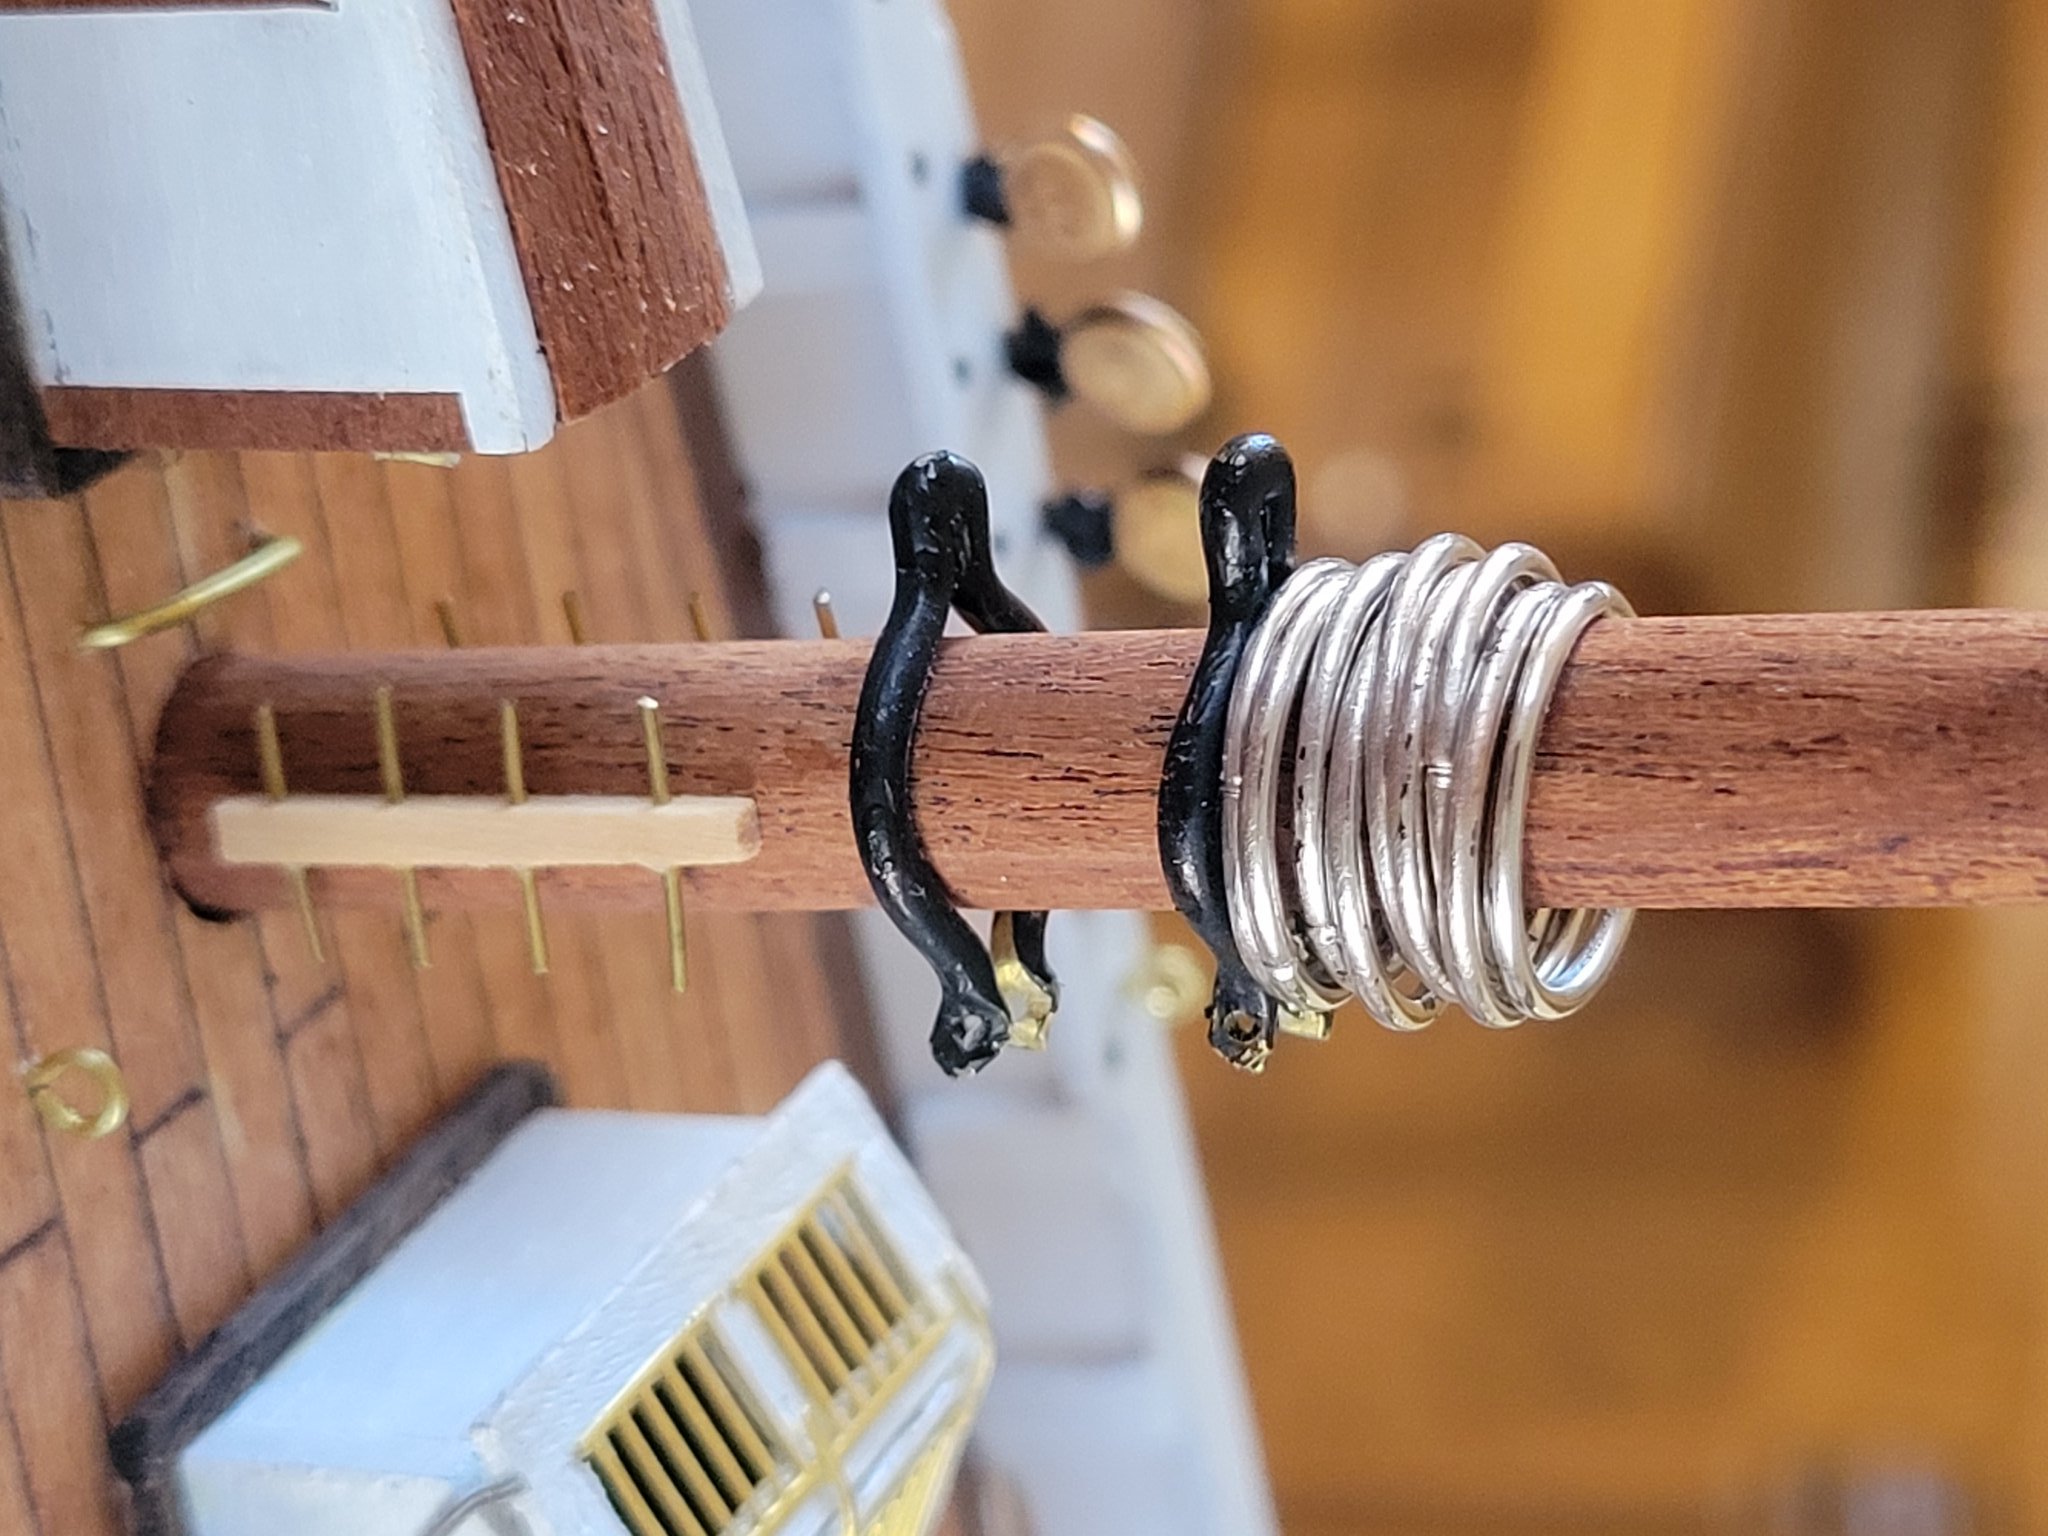
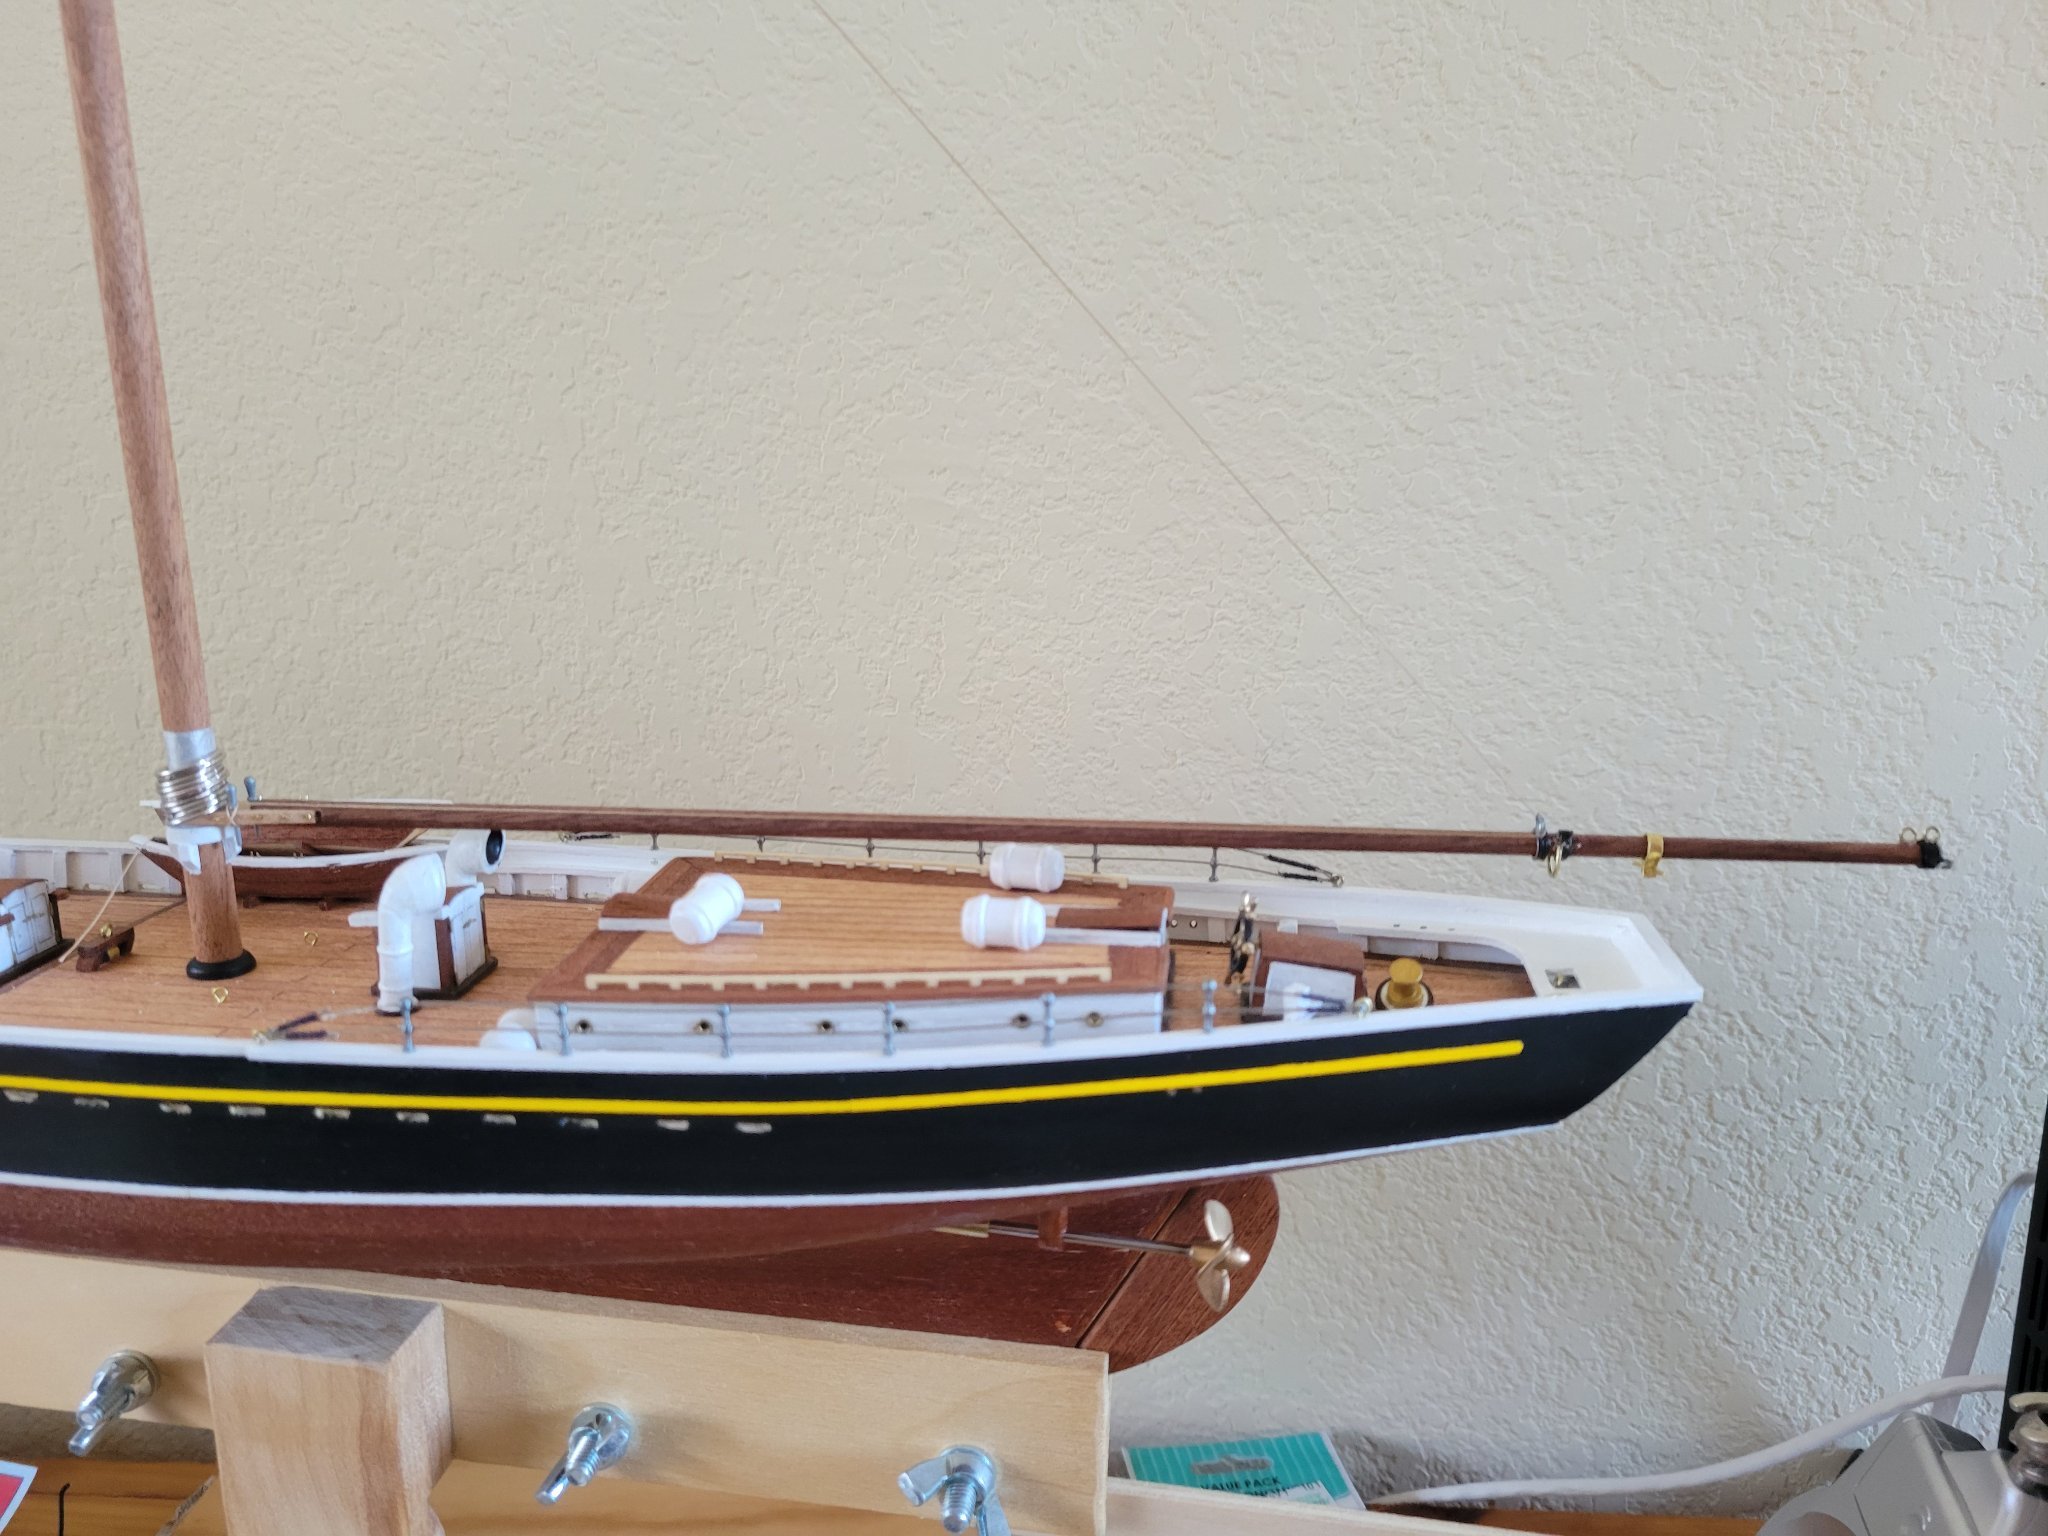
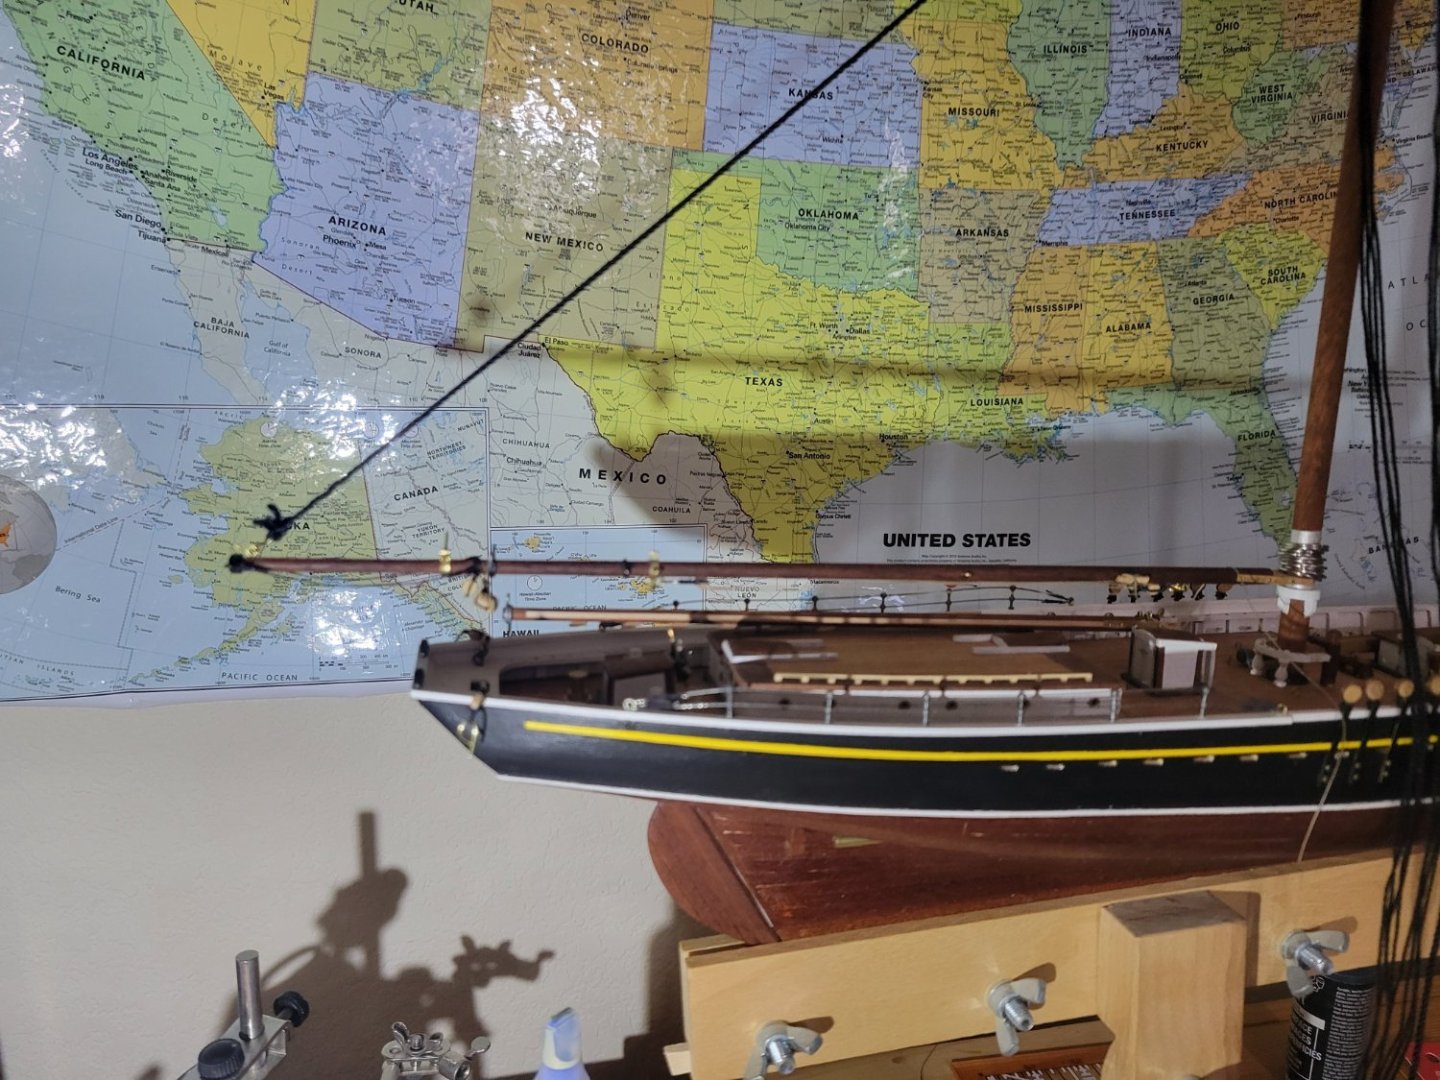
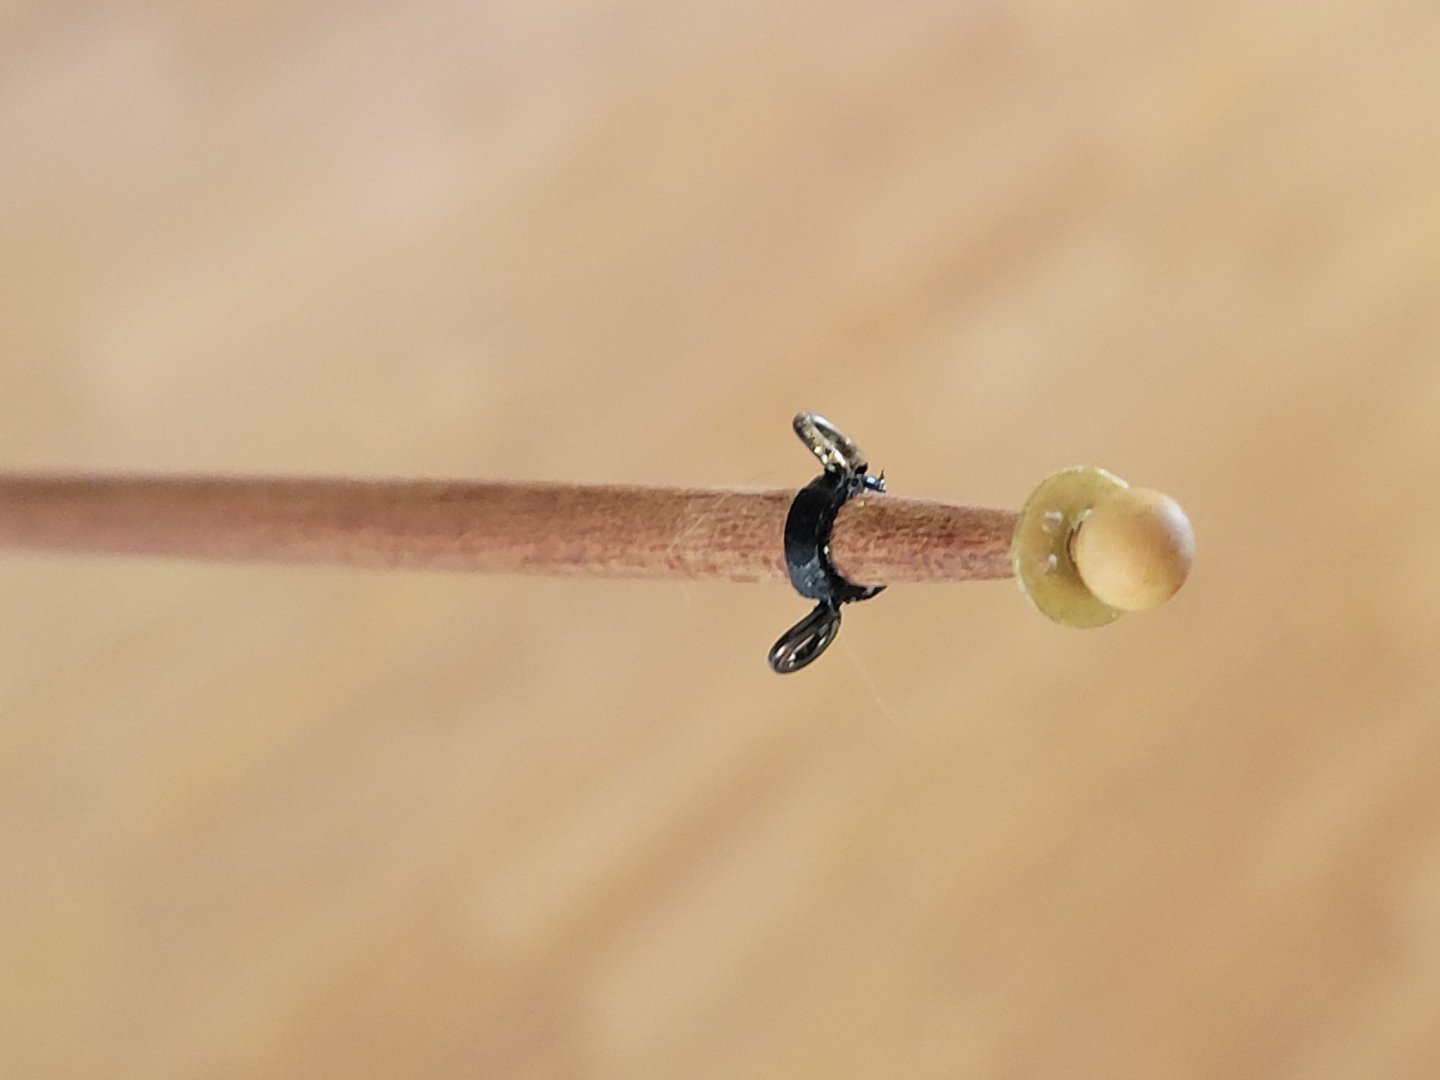
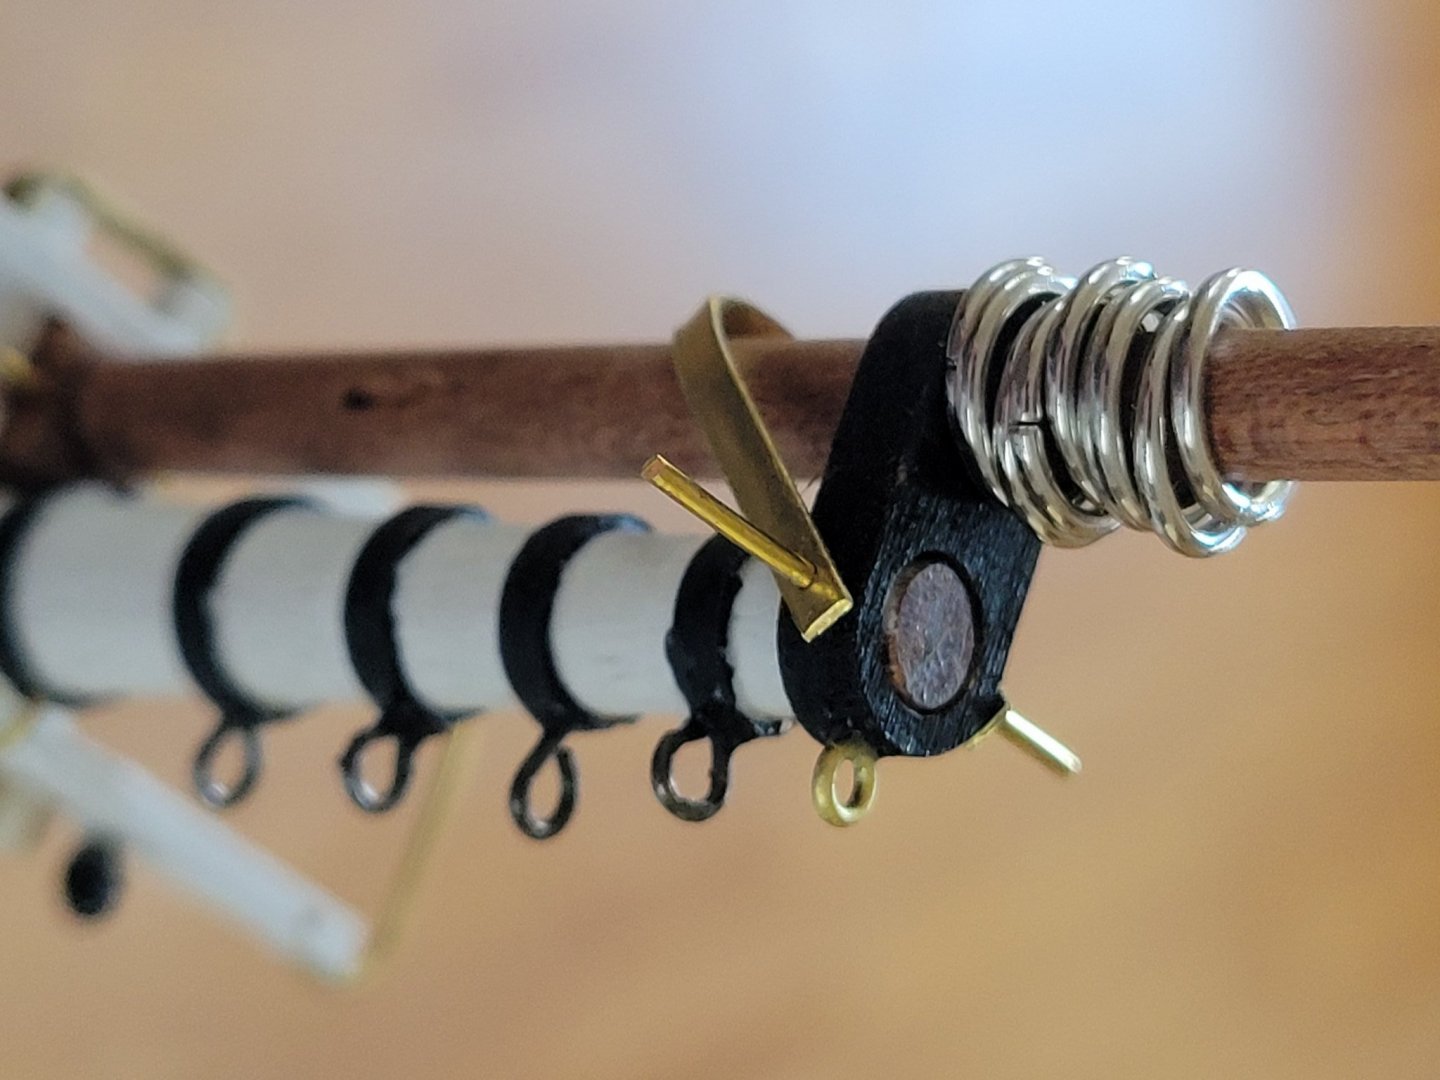
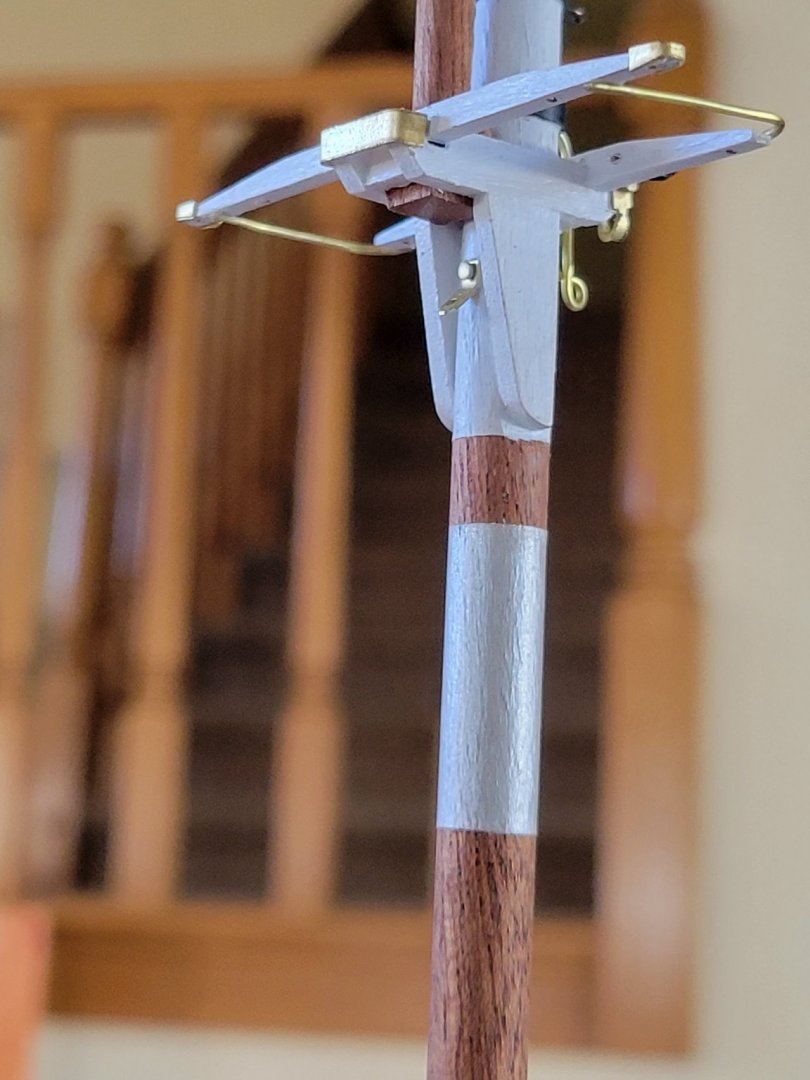
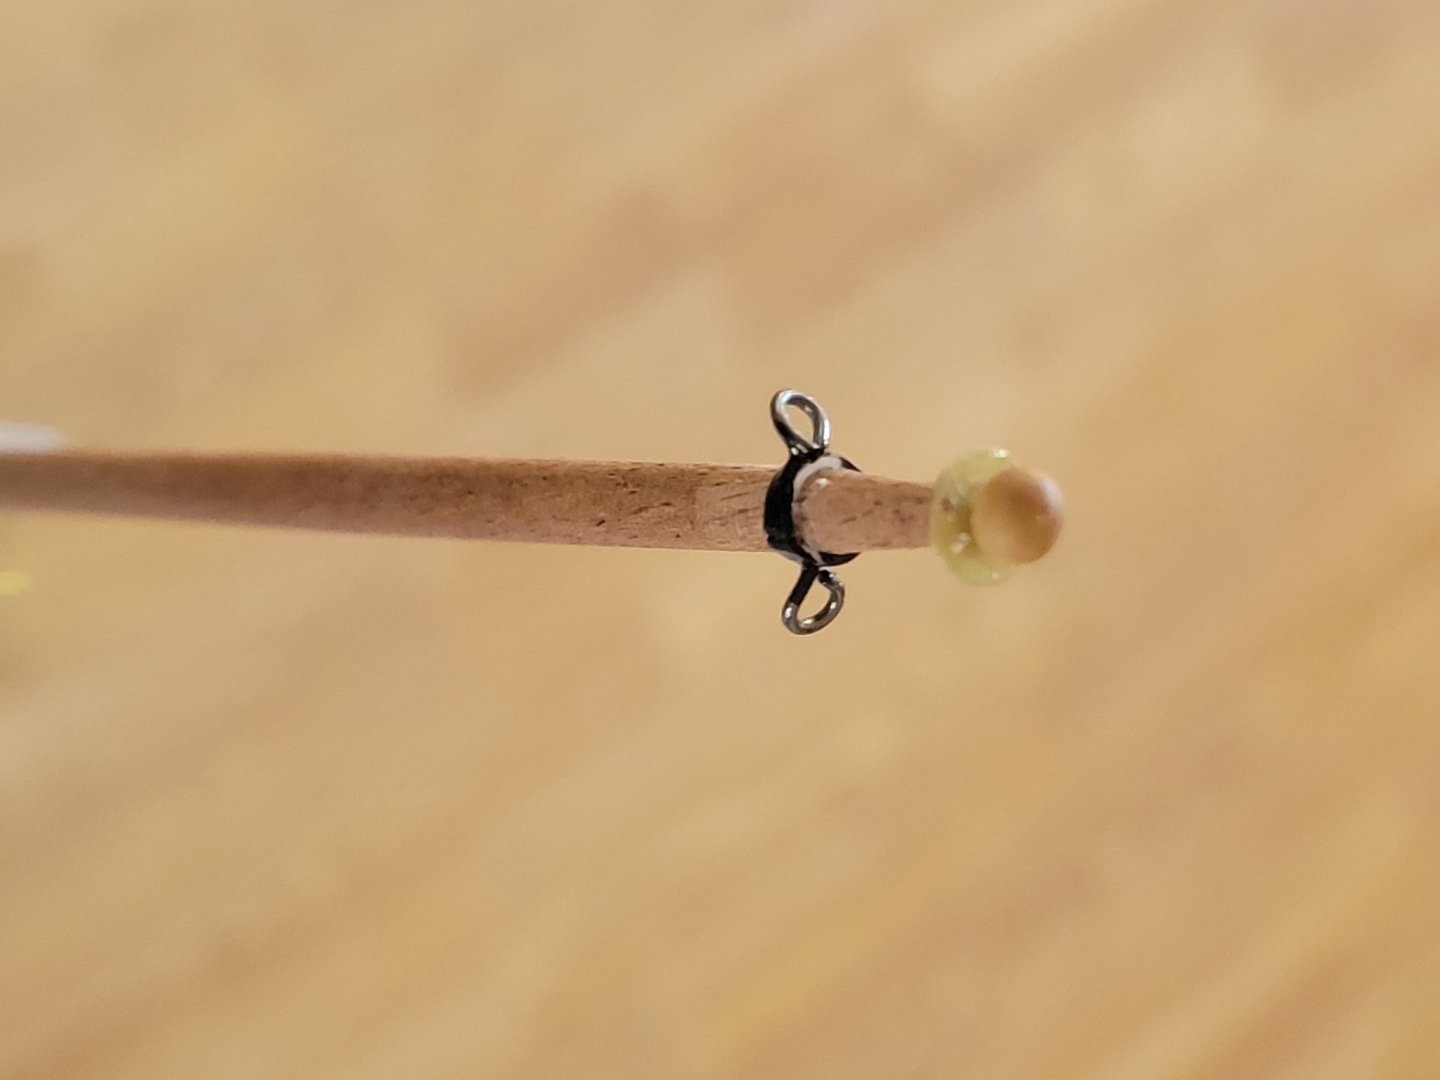
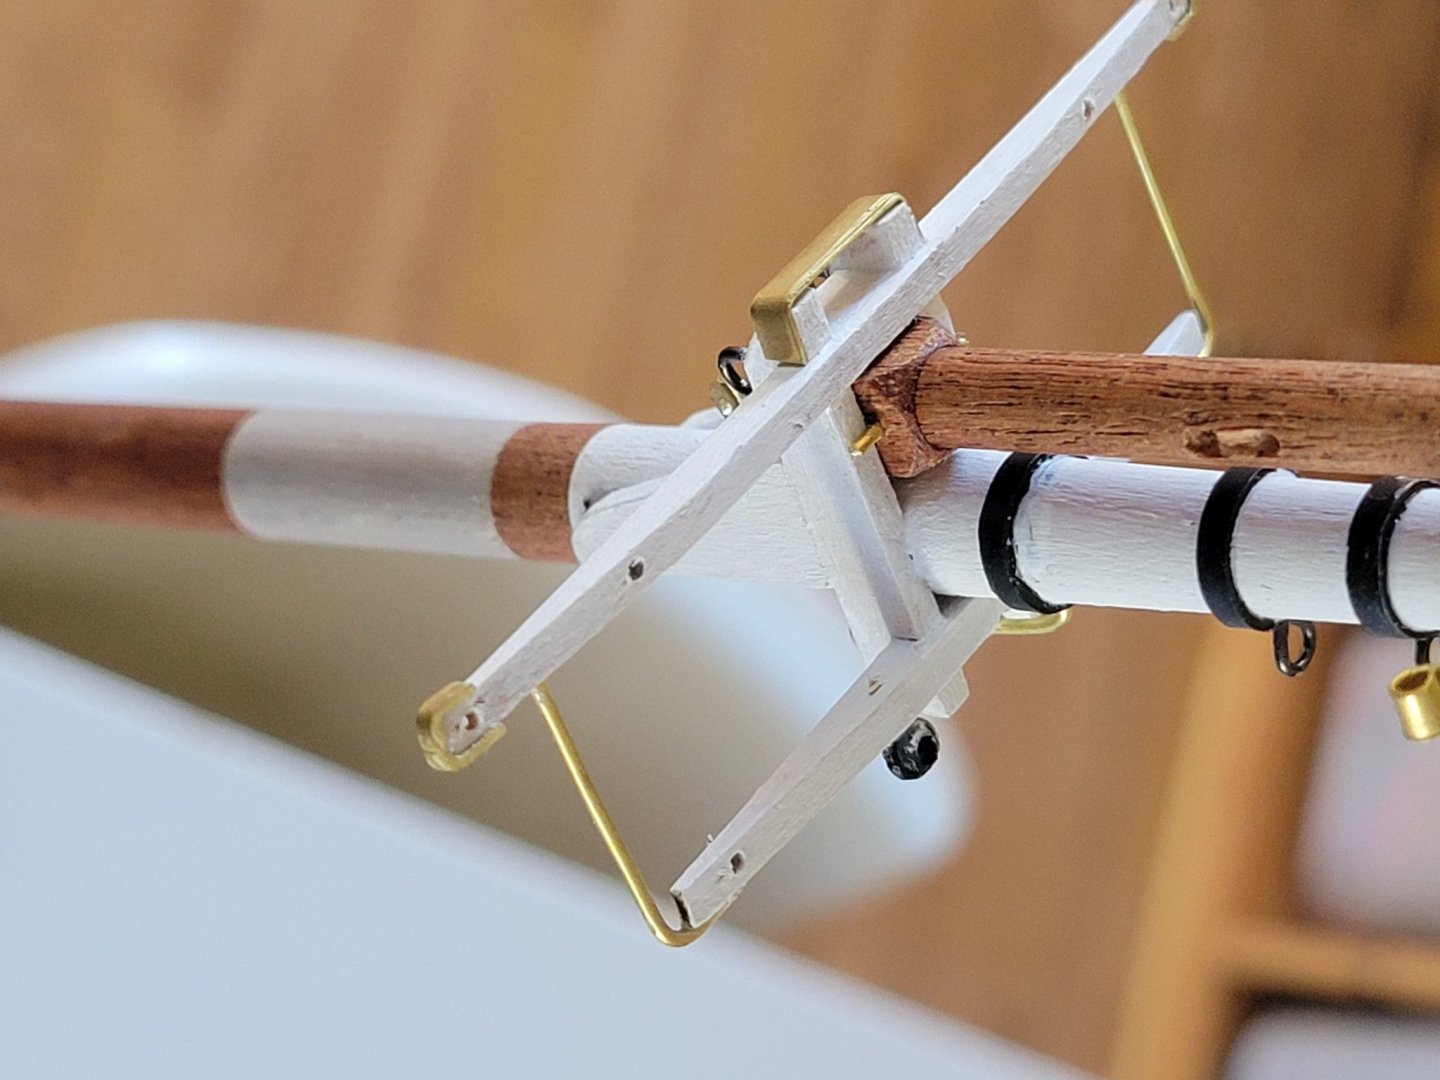
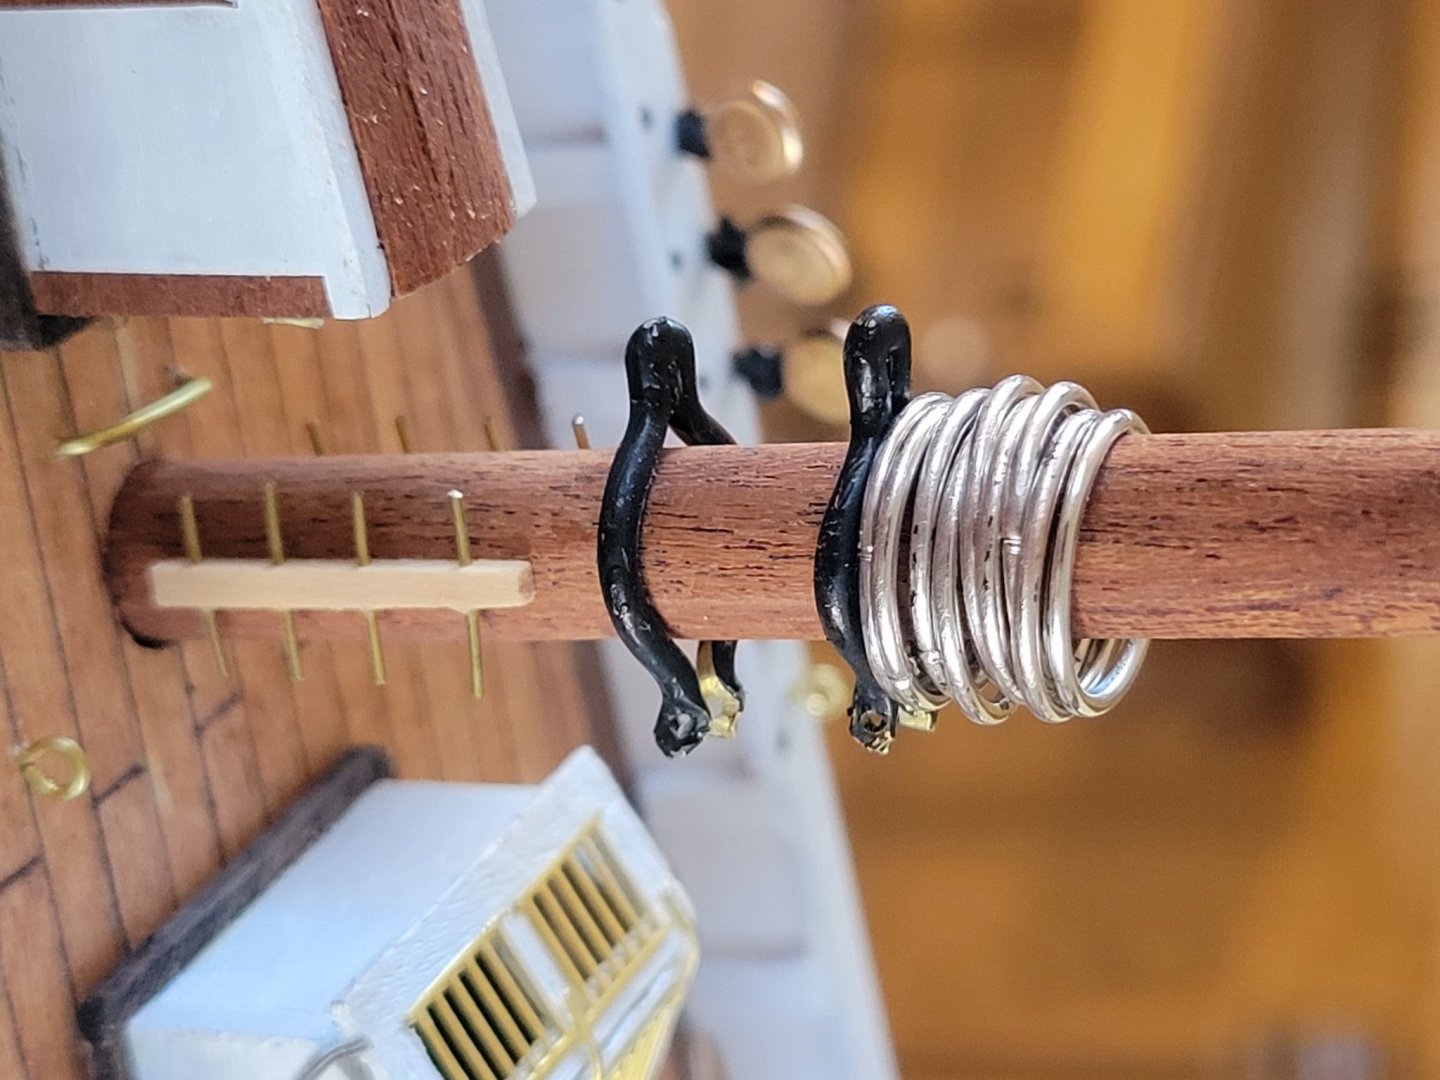
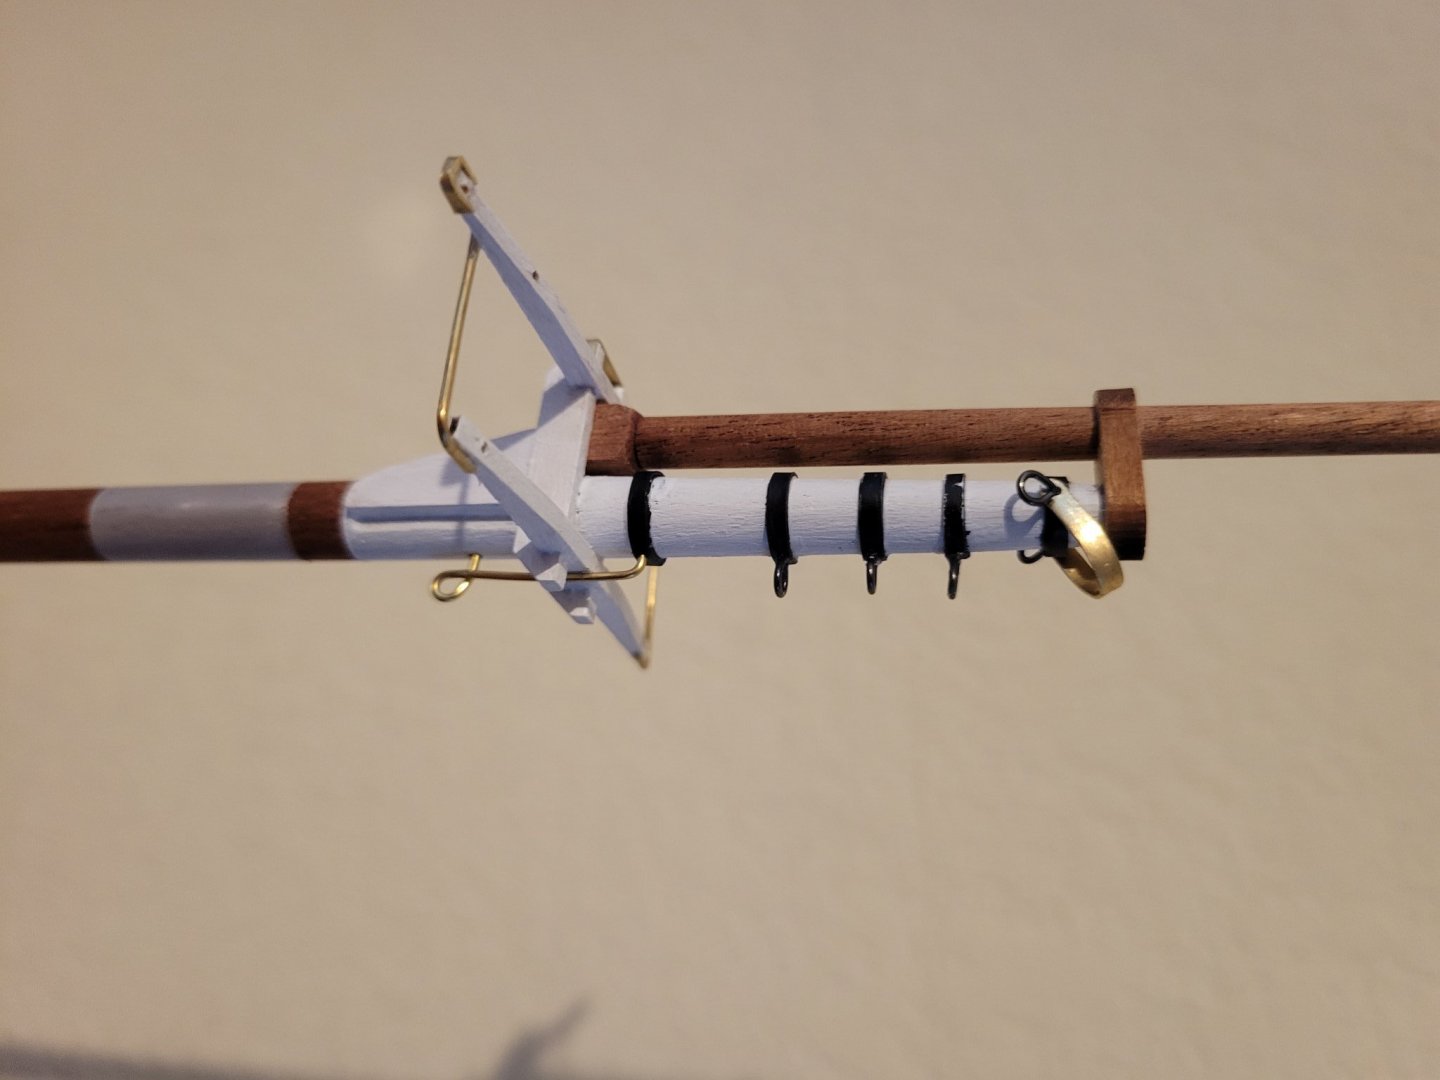
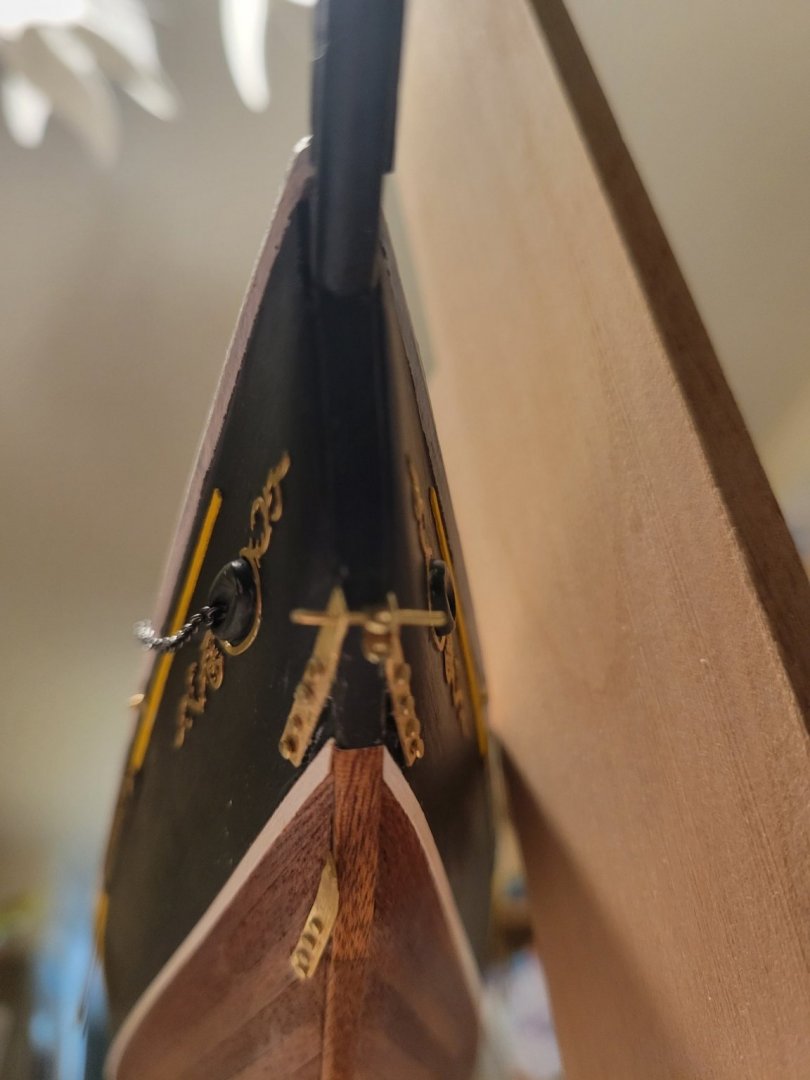
With the masts nearly constructed, though I should document the mids, starting with the forecast. Added a small round plate at the top ball of the mast that will be used for the flag halyard. Replaced the master rings on the masts so I cloud have more. Could only find a silver color which isn't ideal but all I had nearby. Tried paint but didn't take well so just sticking with it. Constructed a bail for the jib stay and jib sail and a second for the sprint stay. Added additional band/block for each peak gaff halyard. For the trestle, added the crane with attach for peak halyard, some brass works for both detail and realism, and bracket for fore throat halyard. Pinned the base of the upper mast (it's sitting free in the trestle, just the pins keep it in place. This way i have a little flex in there when setting the stays). Added the sheave in the lower mast that was used to hoist rigging when needed. Couple Fairleads (small eyeball with a beading crimp tube through it). Painted the metal mast wraps for the gaff wear. Then replace the goosneck.

- 84 replies
-
- 1
-
-
- Artesania Latina
- Bluenose II
- (and 1 more)
-
Thanks Bob. Now in need to figure out blocks. With my mods I now need twice as many of each block type from what AL gave me. Would like to fabricate my.own but will be very slow and the wood I have might not be dense enough.
-
A little further. Bands for halyard (I'm using polystyrene straps for bands because they are easier to just bend/glue and then paint). But trestles are assembled now. Realizing more that AL is consistently off in proportions. The lower masts above the trestles are shorter than they should be but making it work.
- 84 replies
-
- 2
-
-
- Artesania Latina
- Bluenose II
- (and 1 more)
-
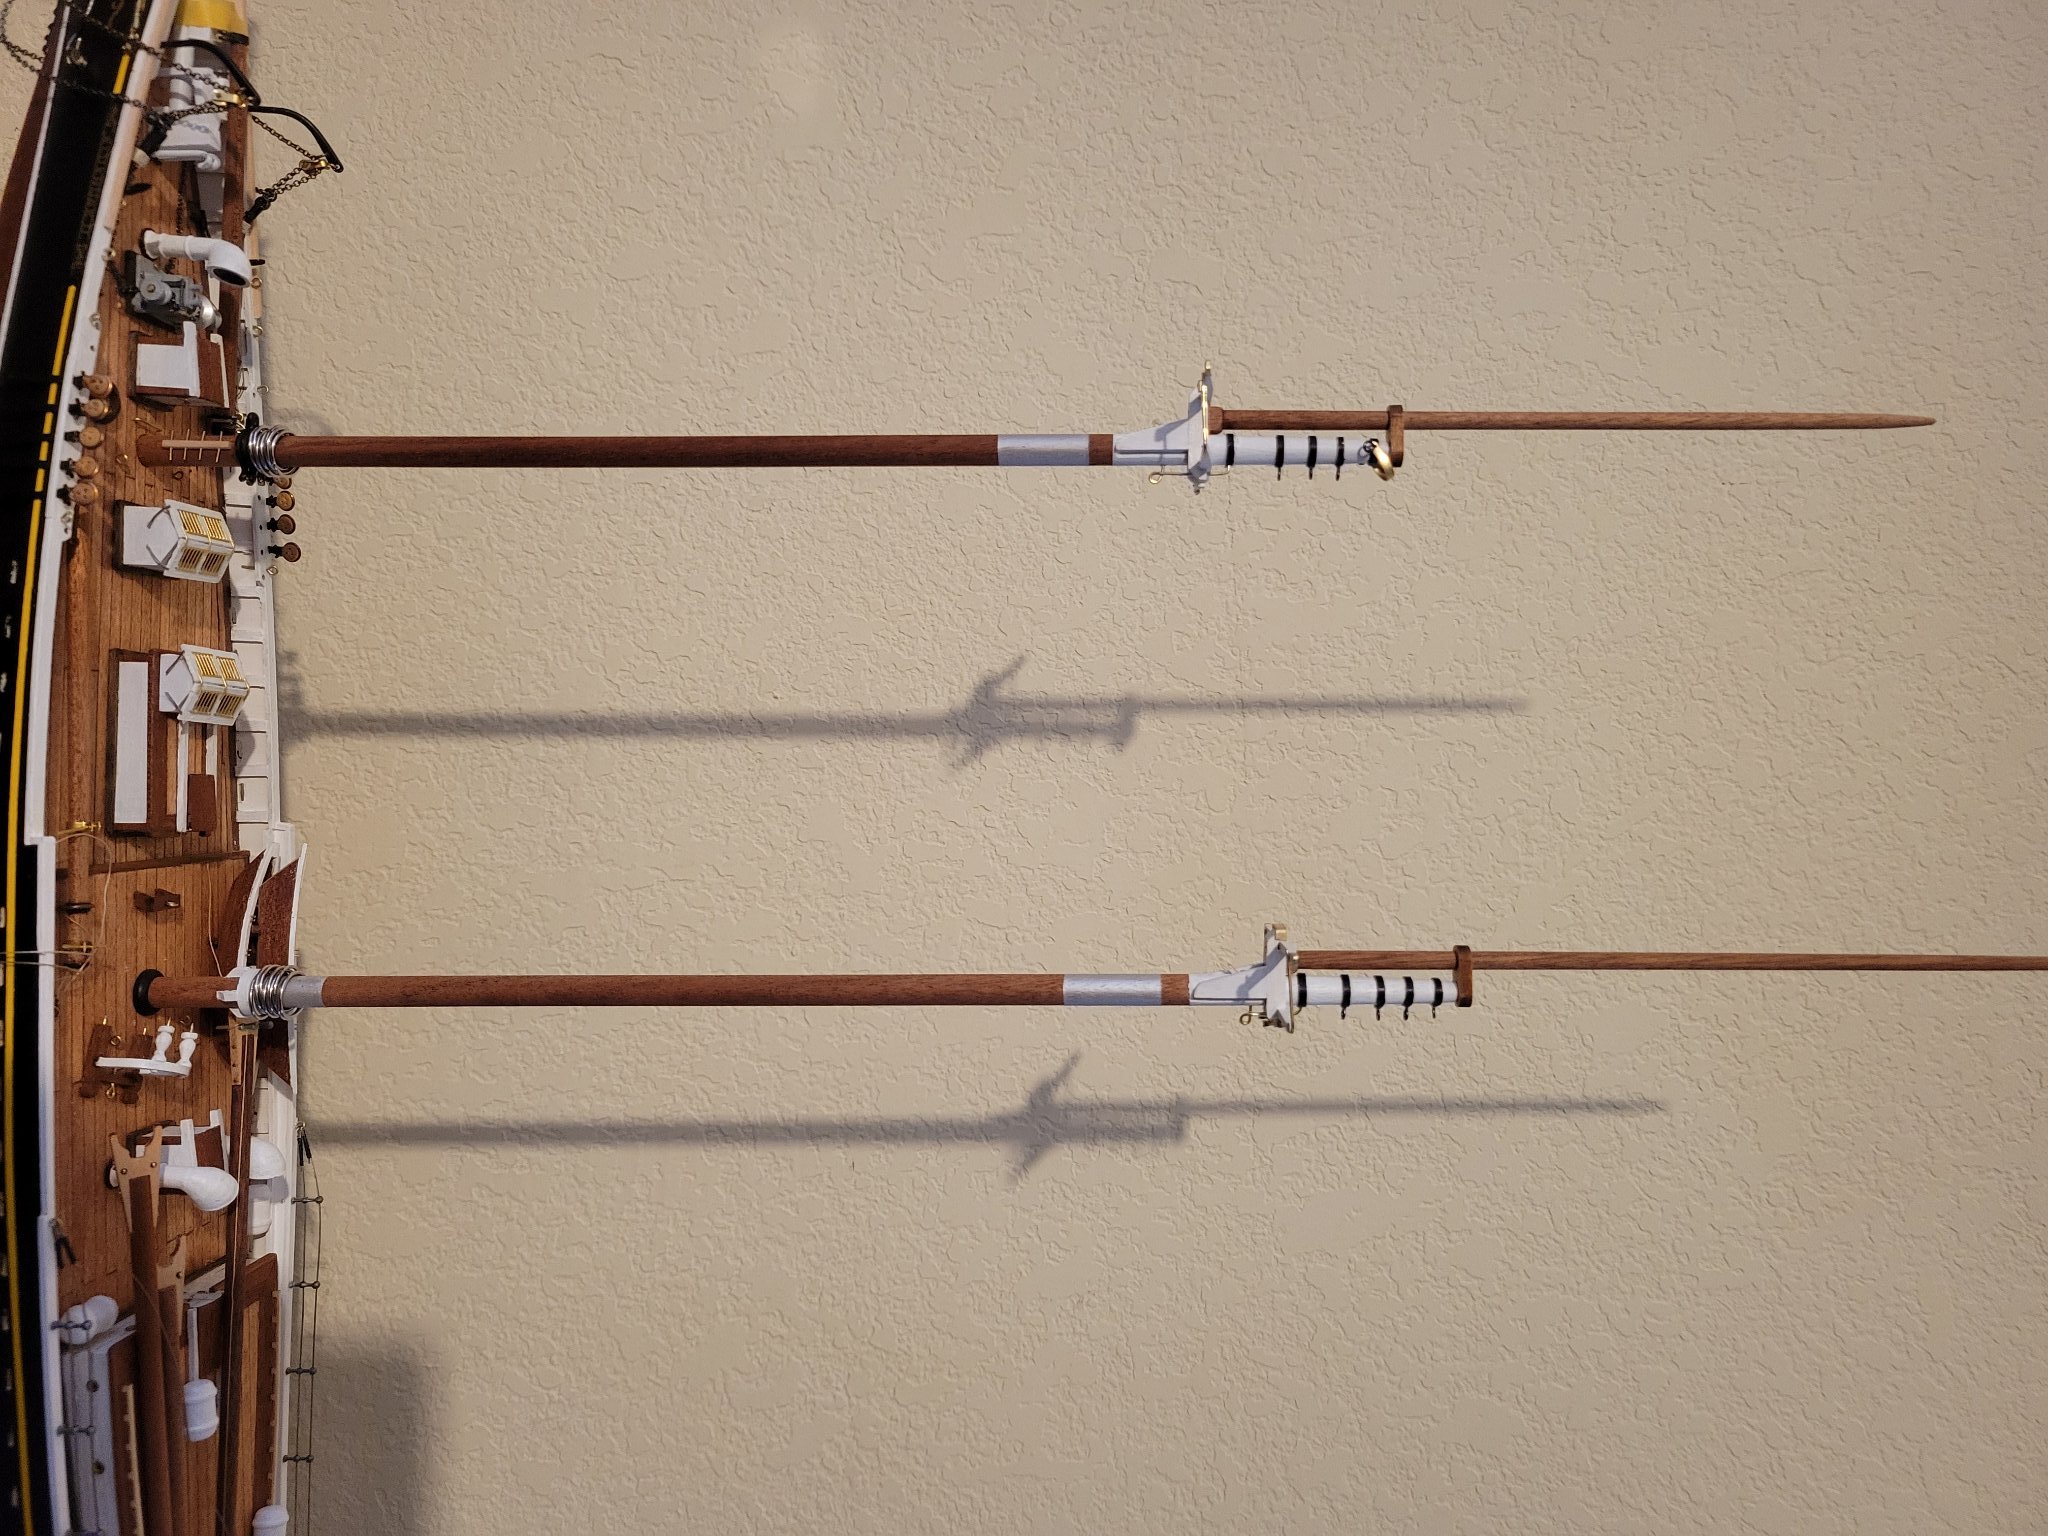
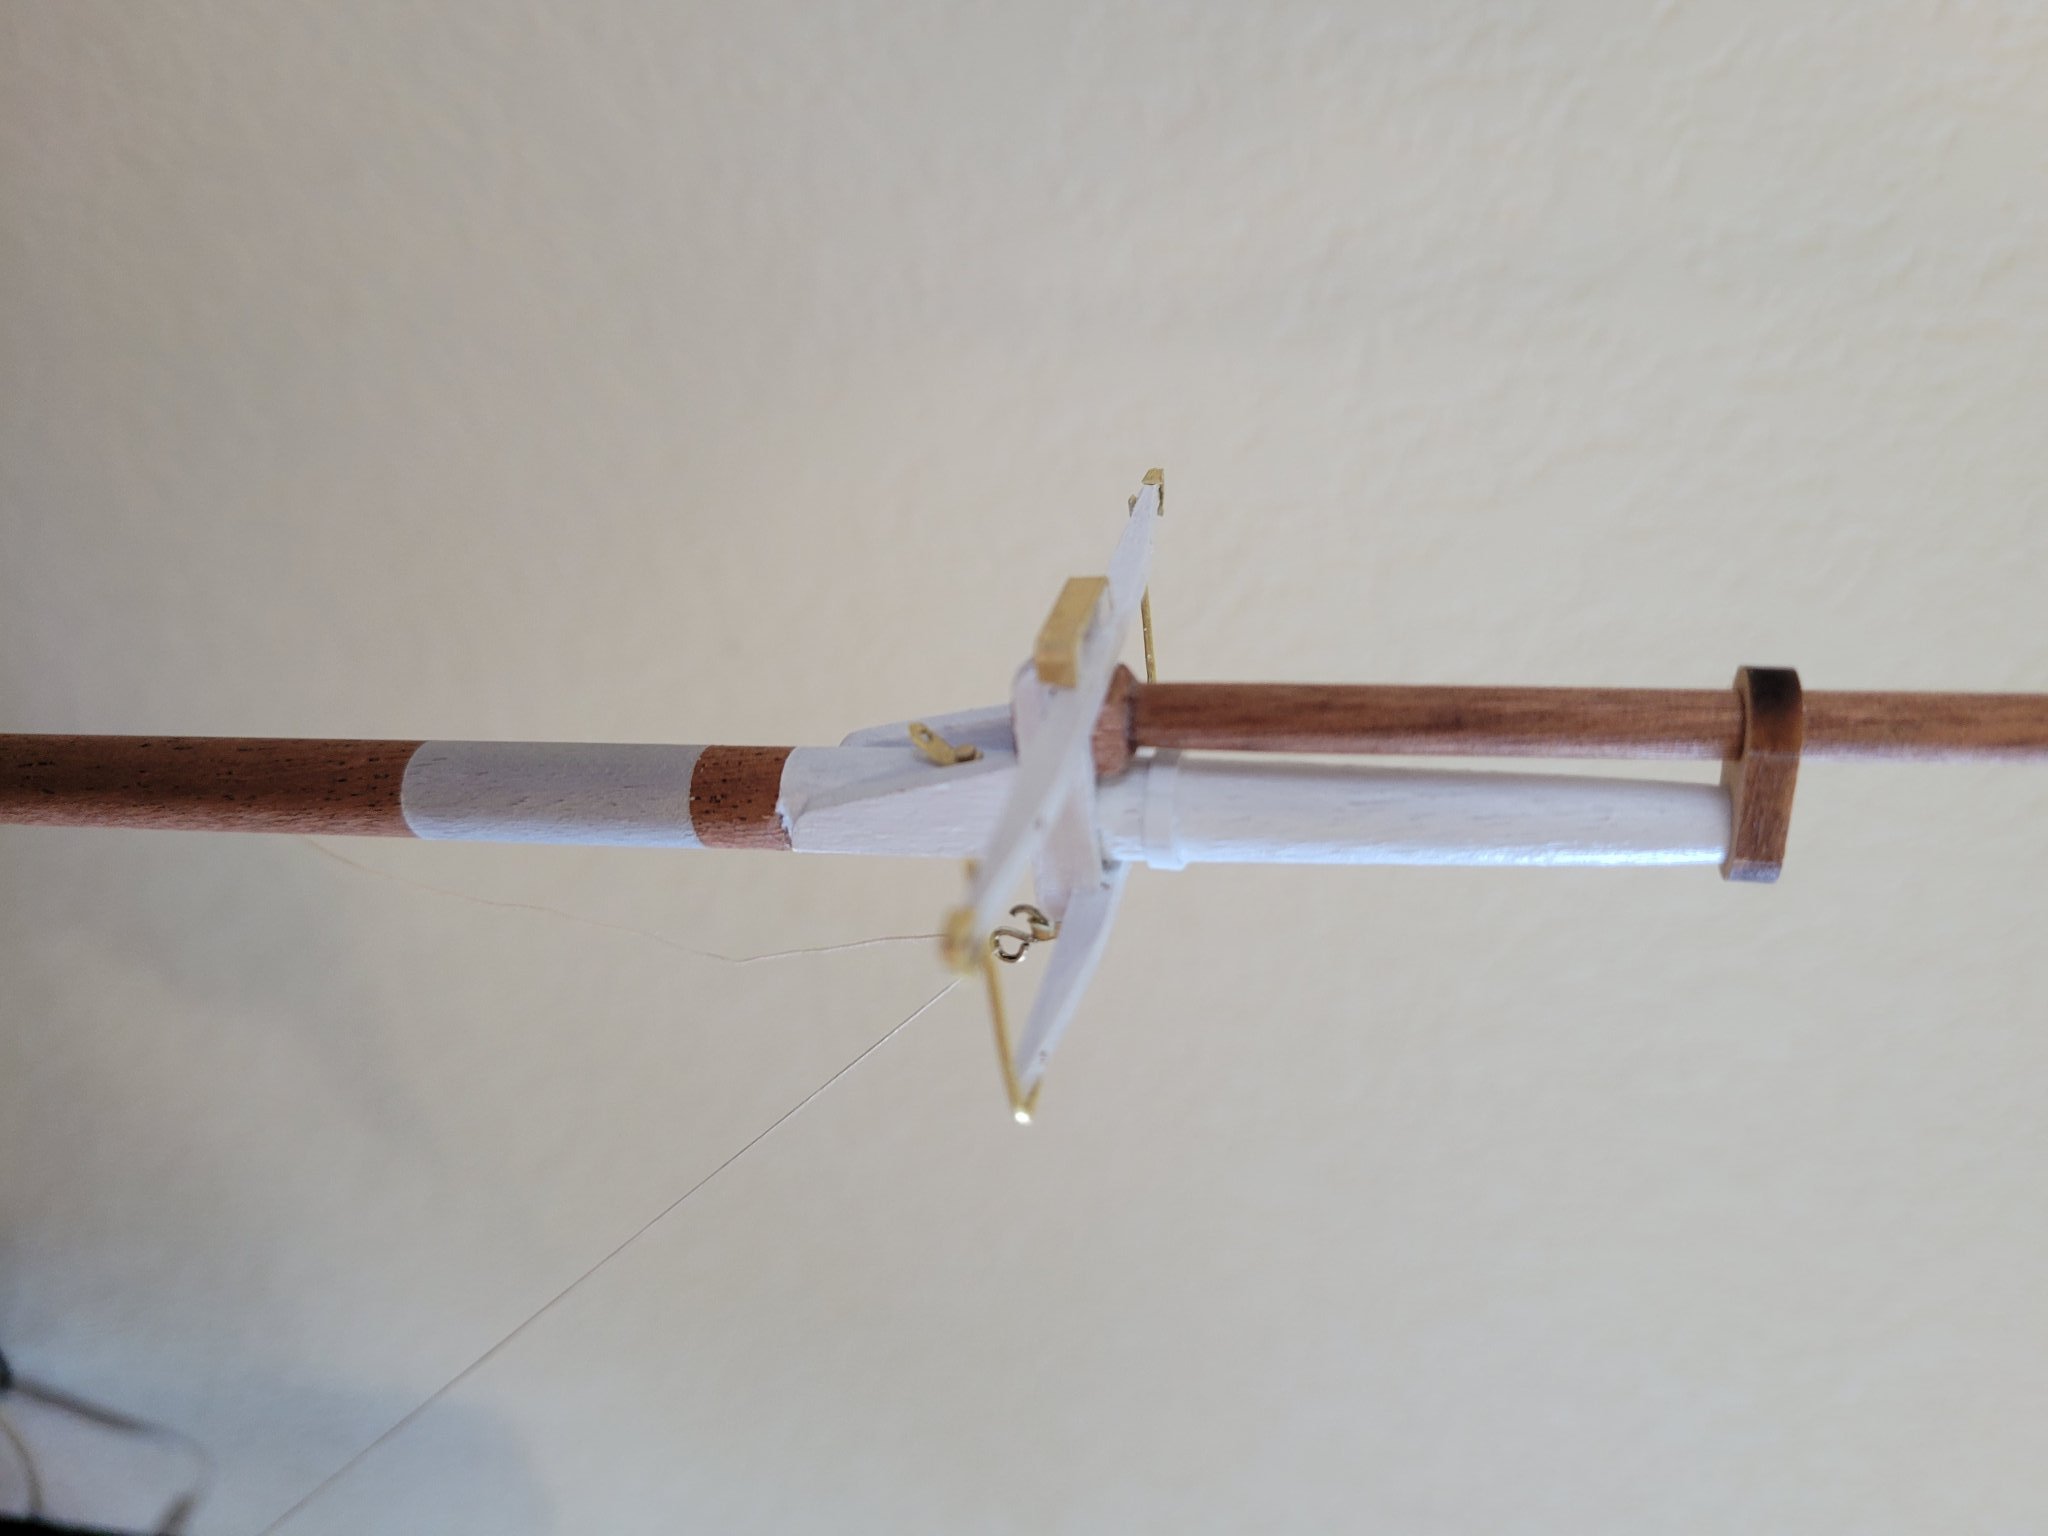
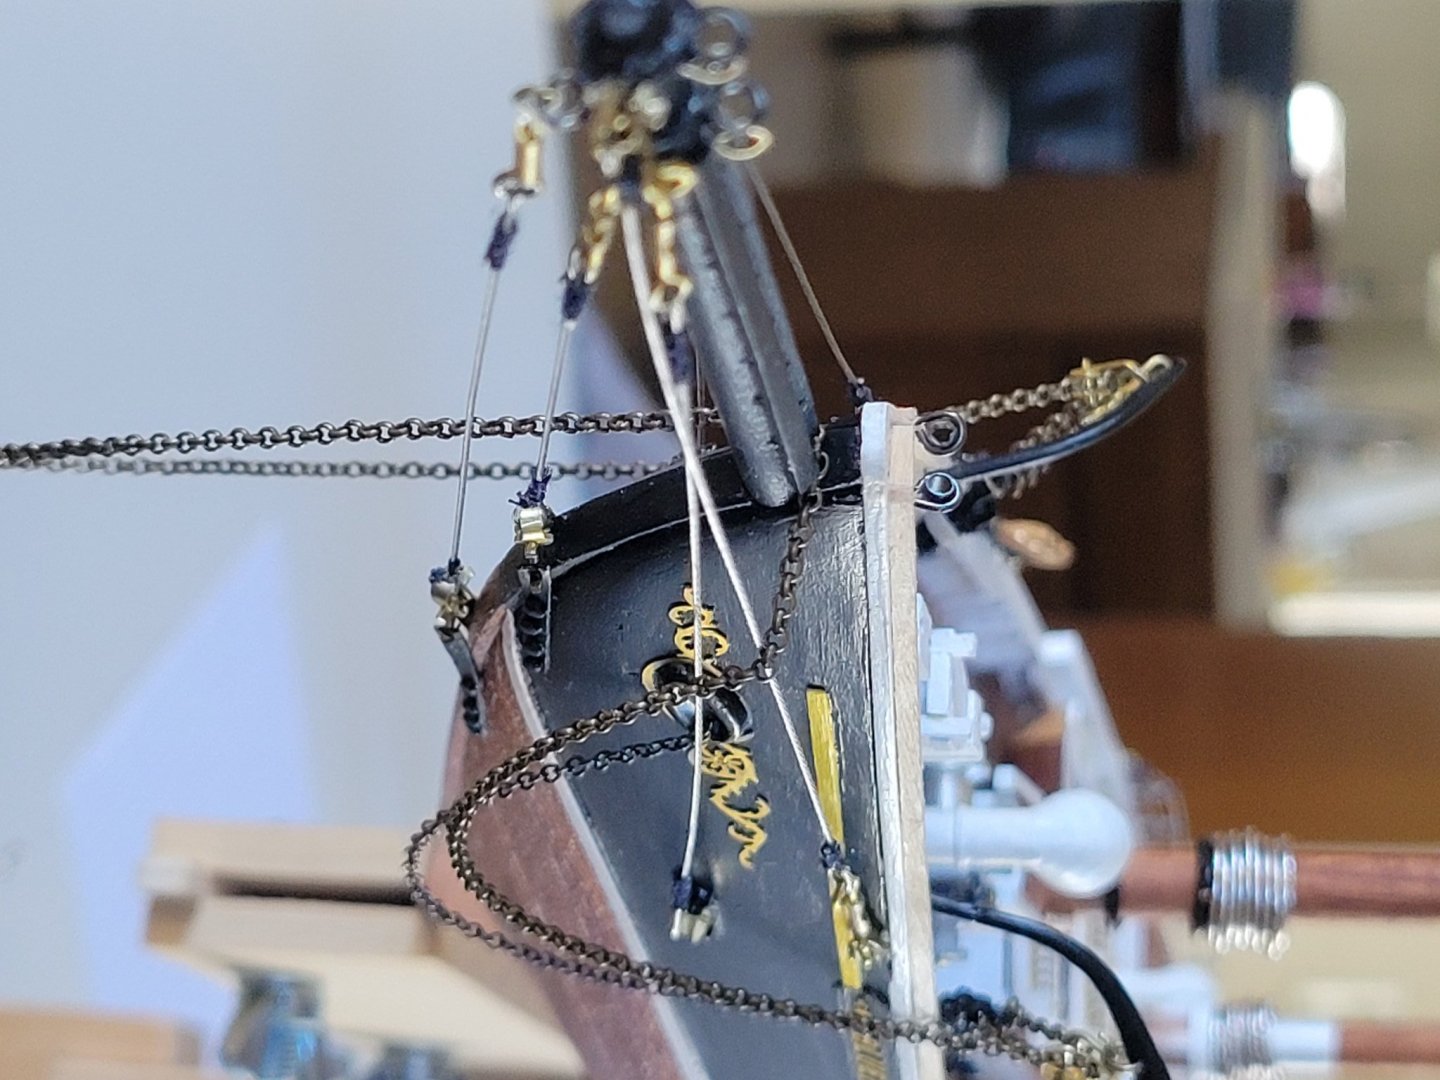
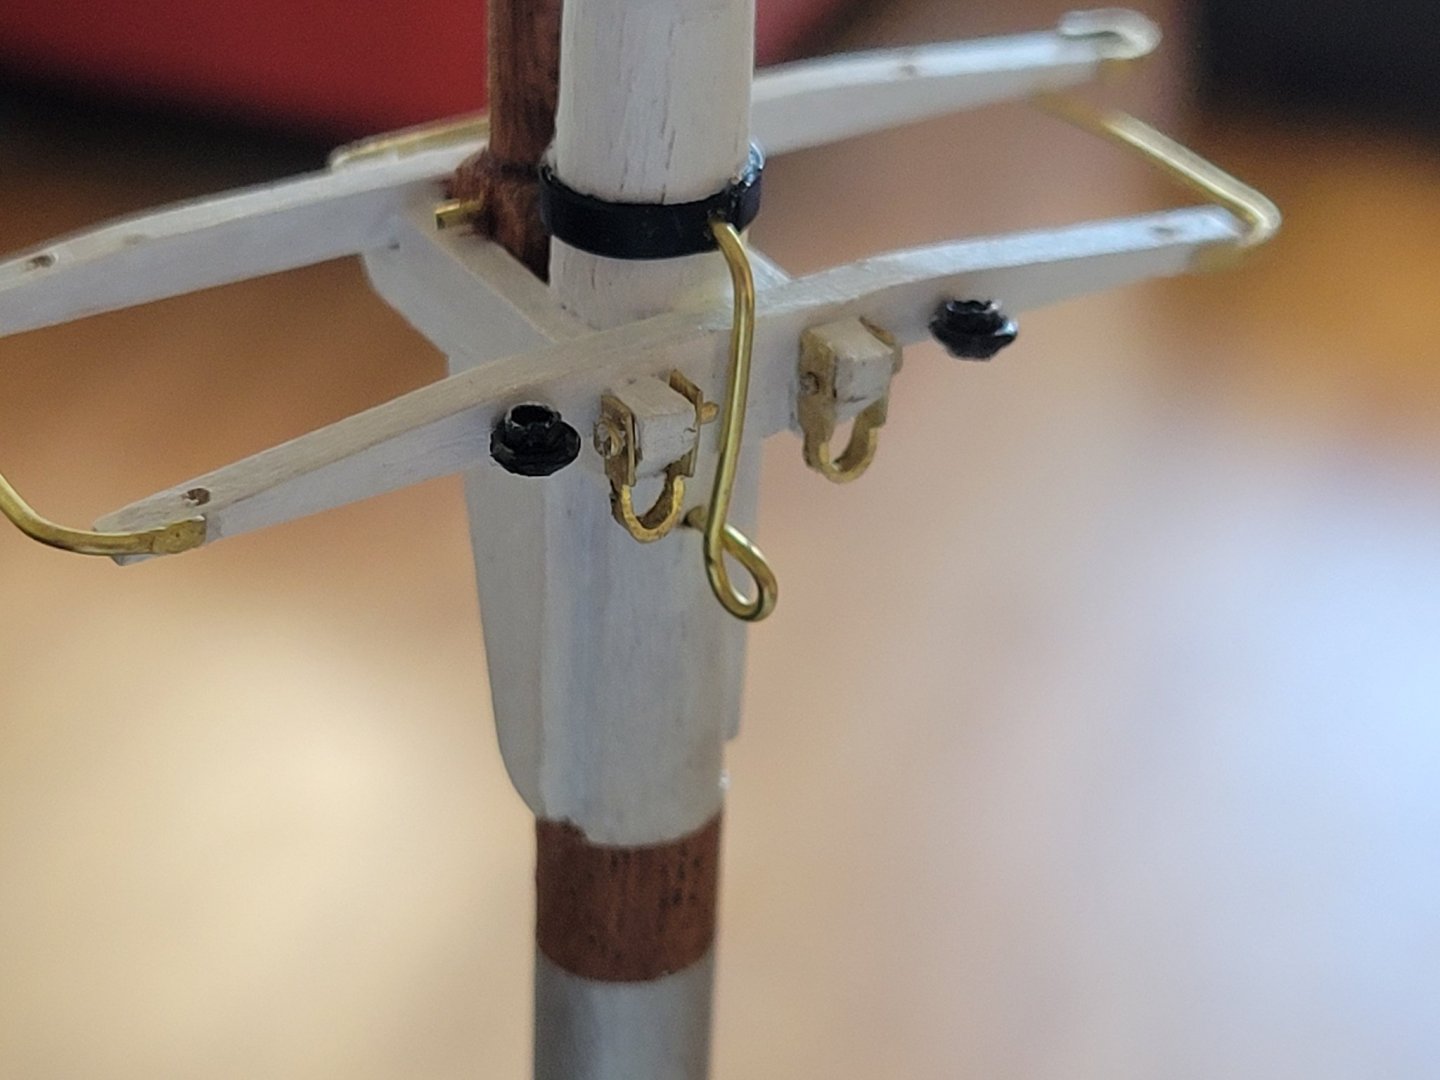
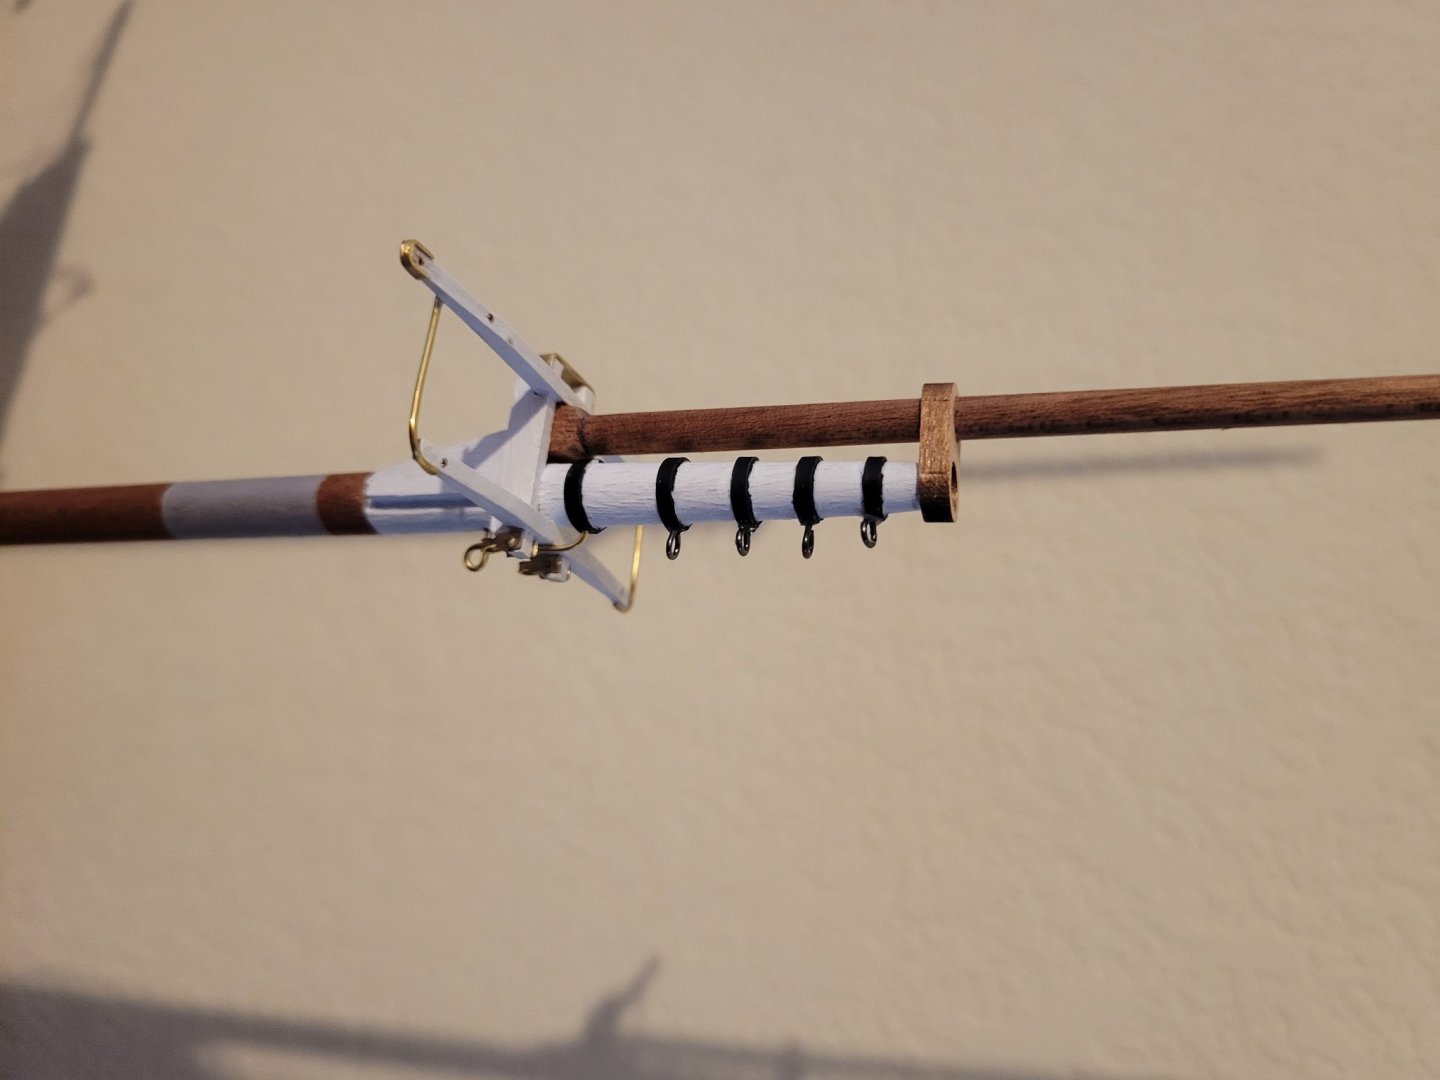
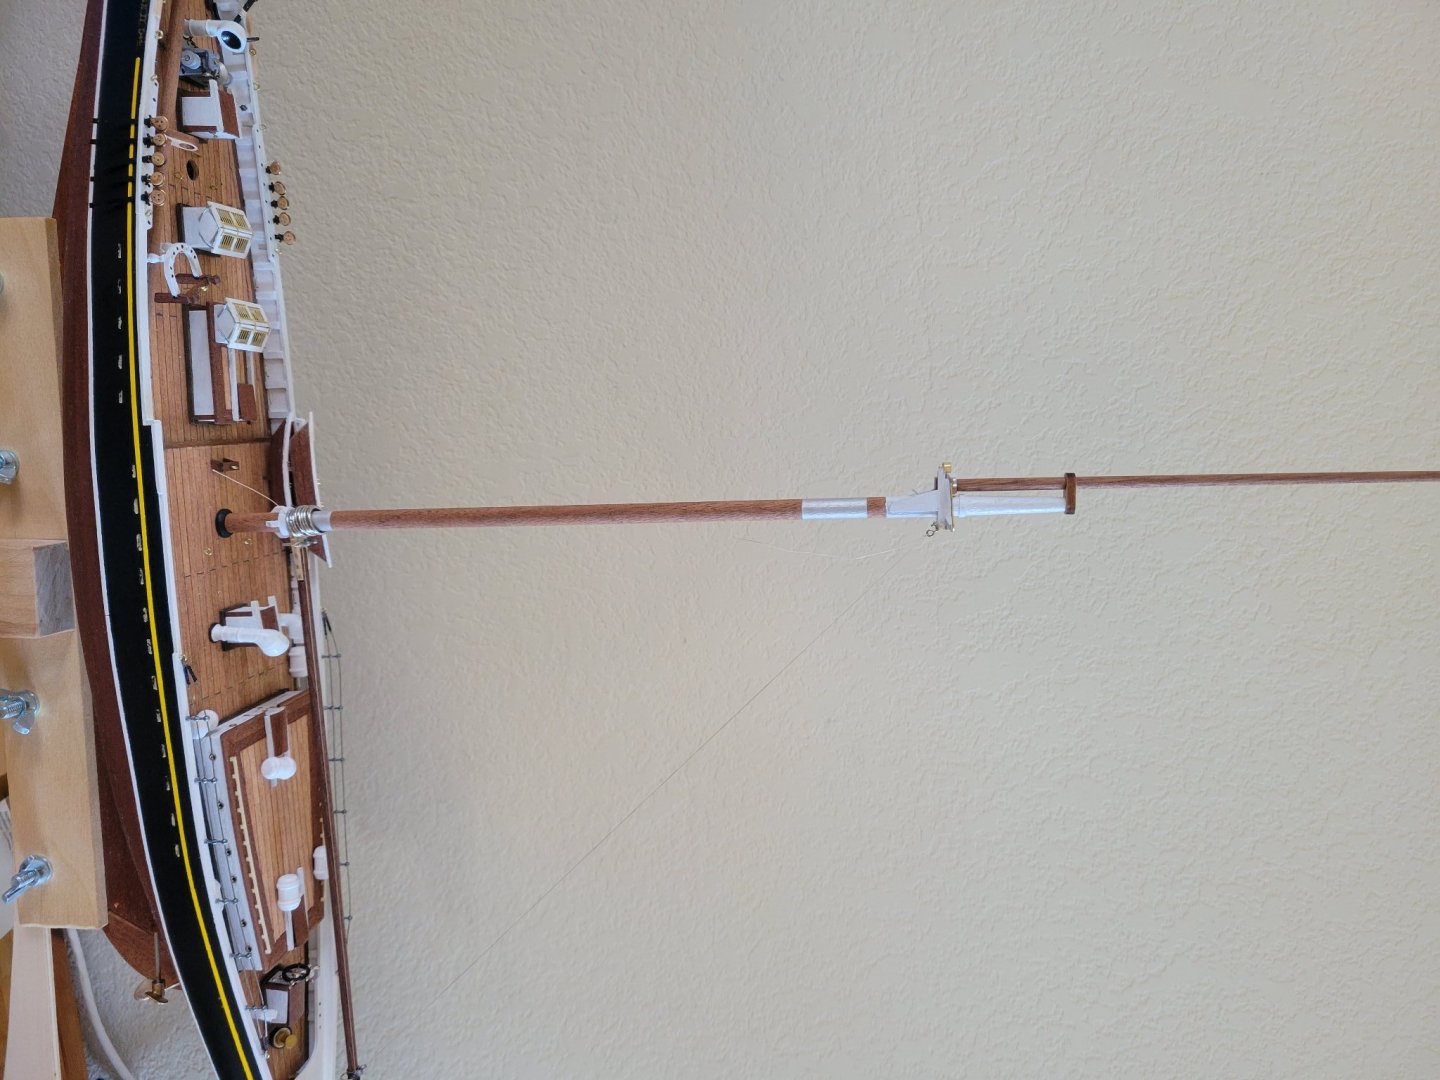
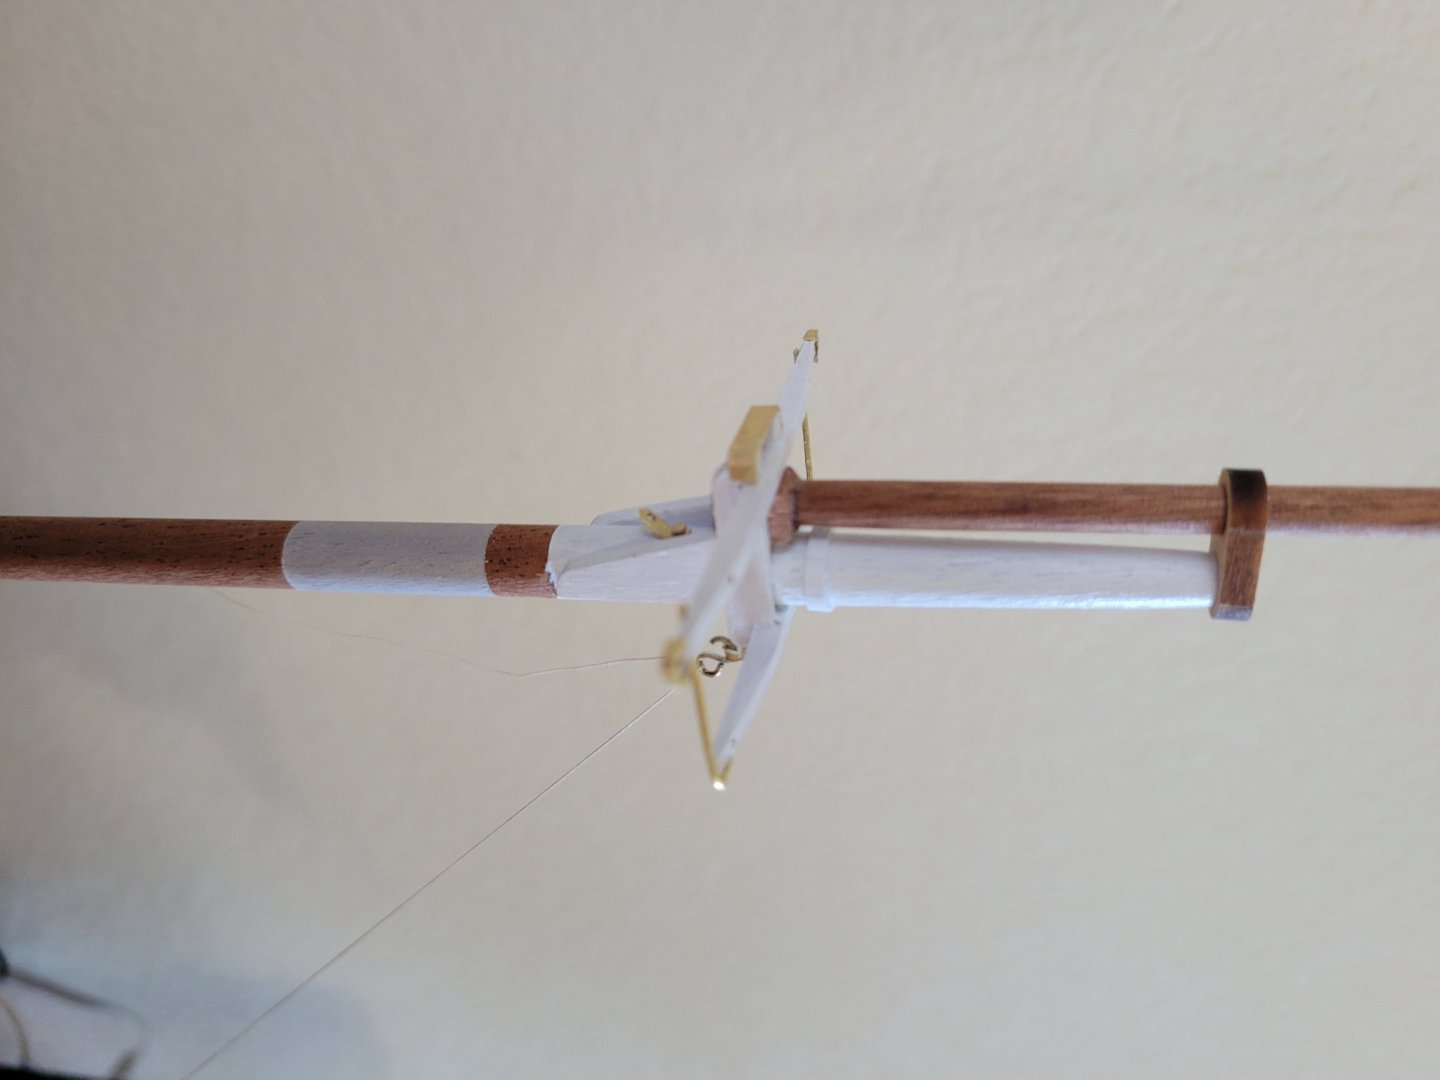
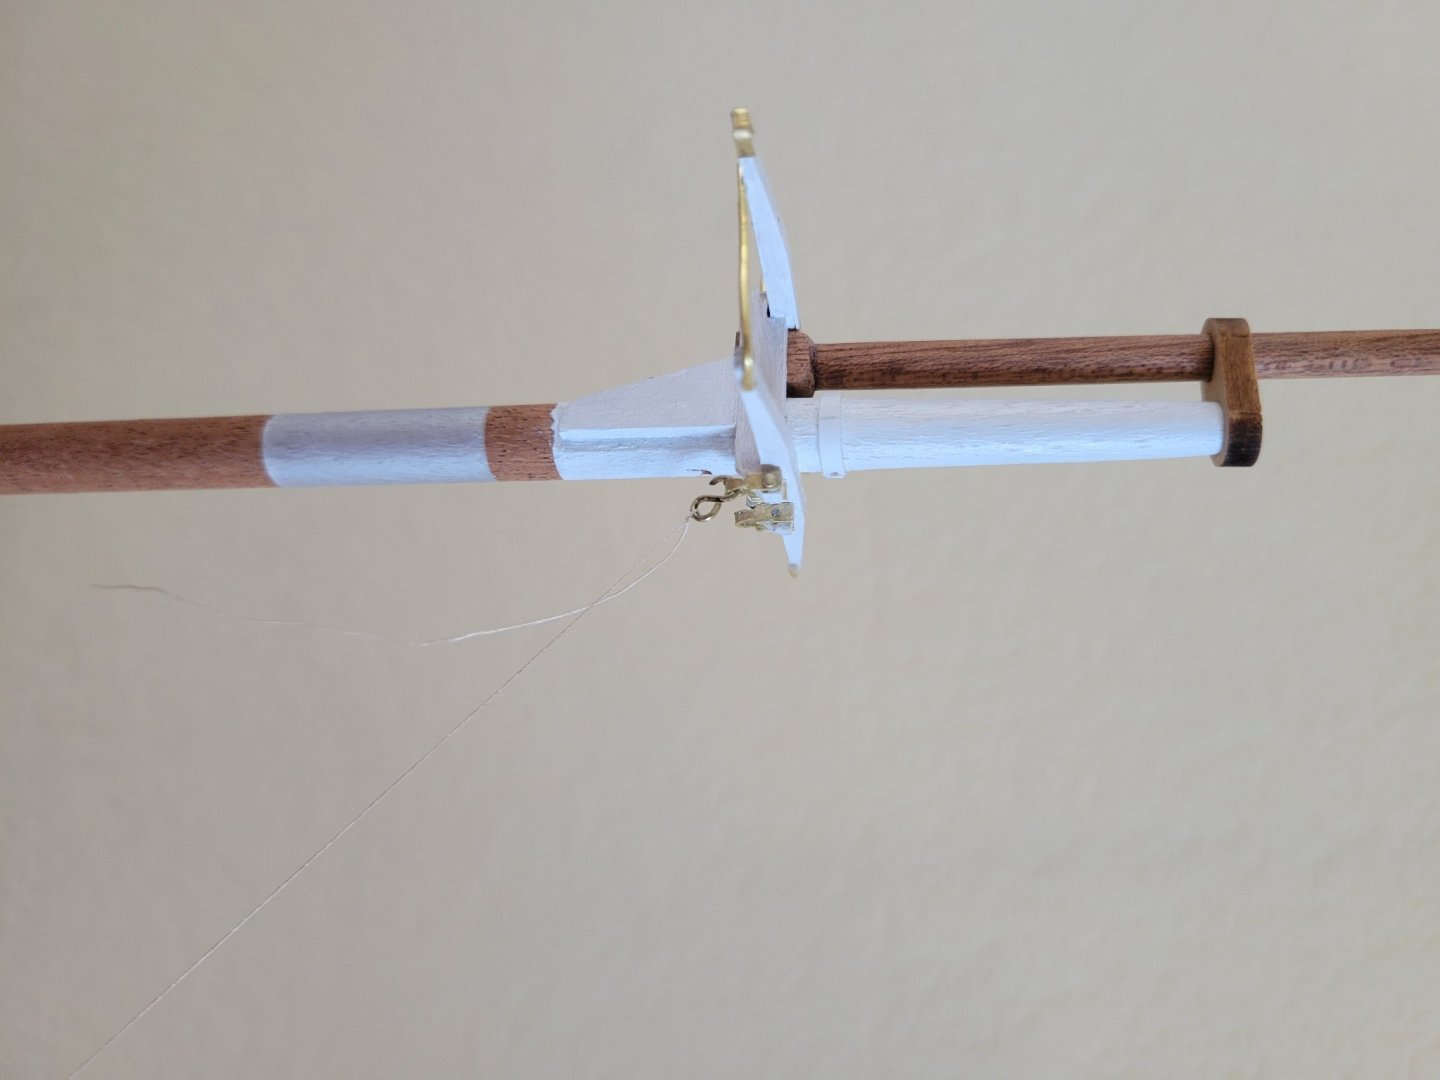
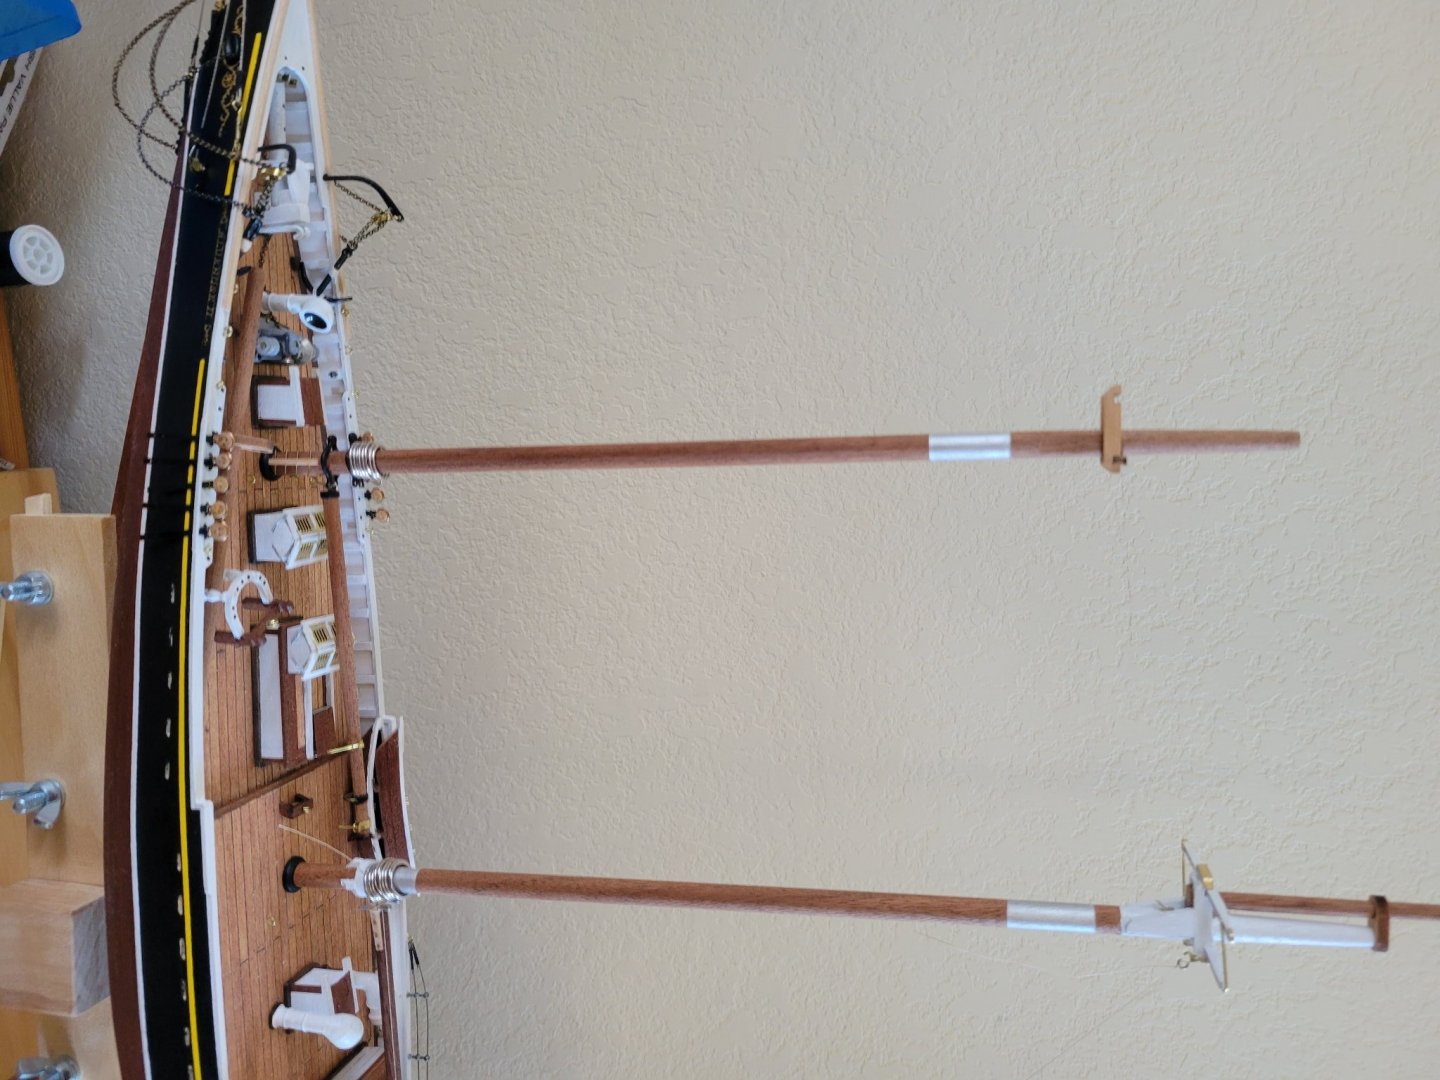
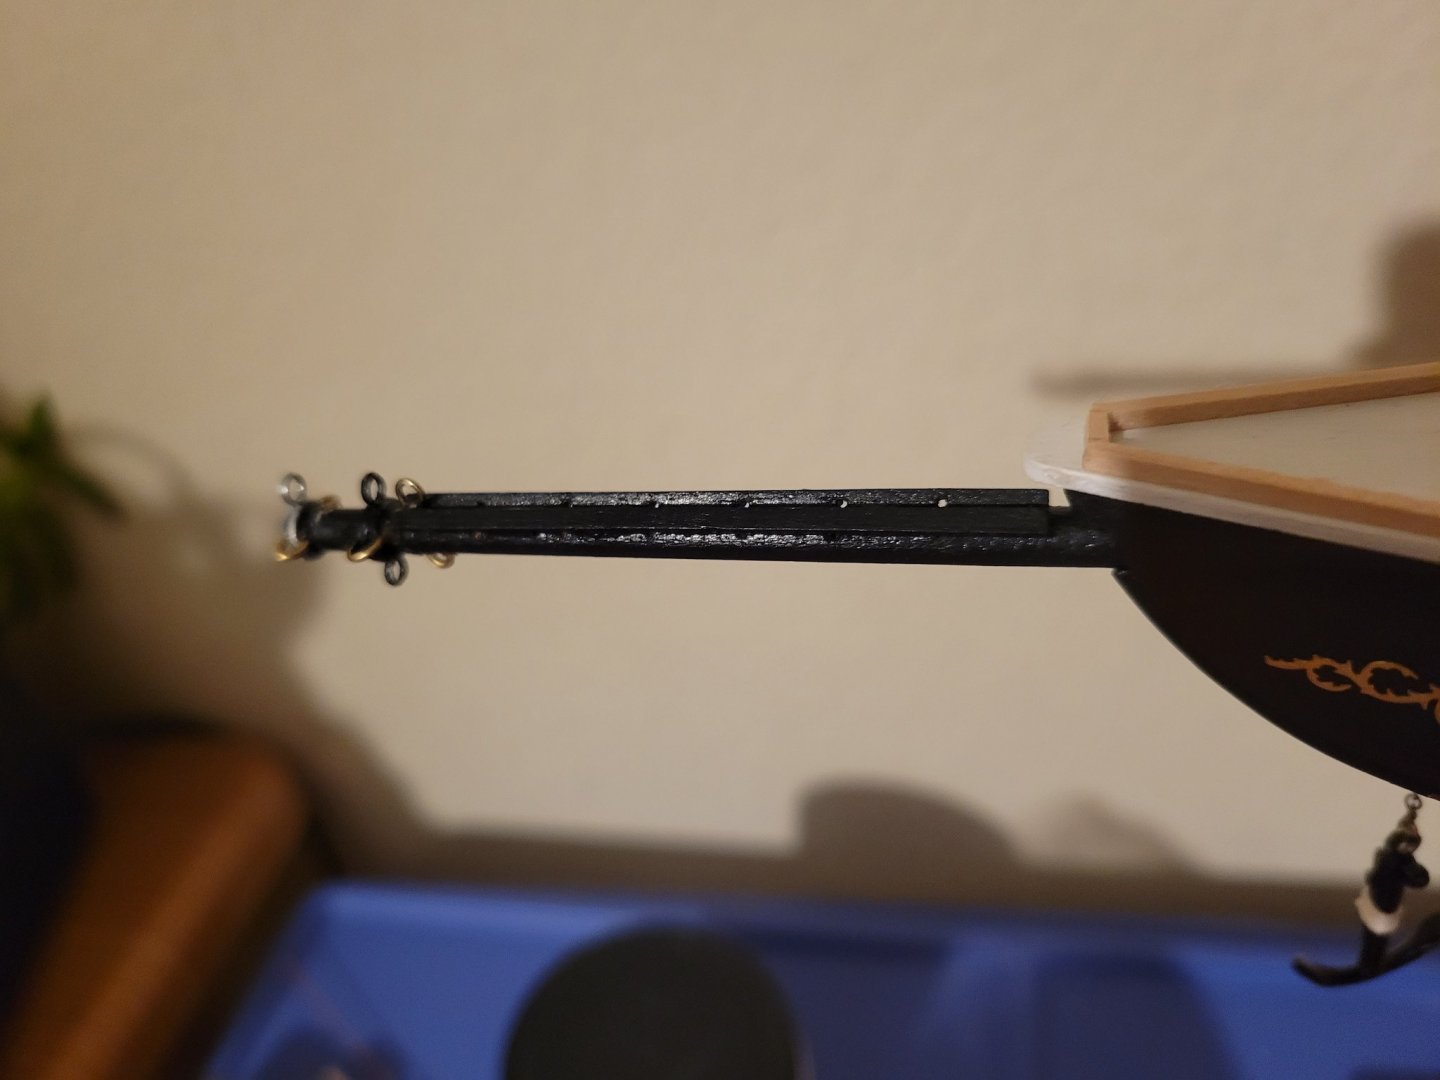
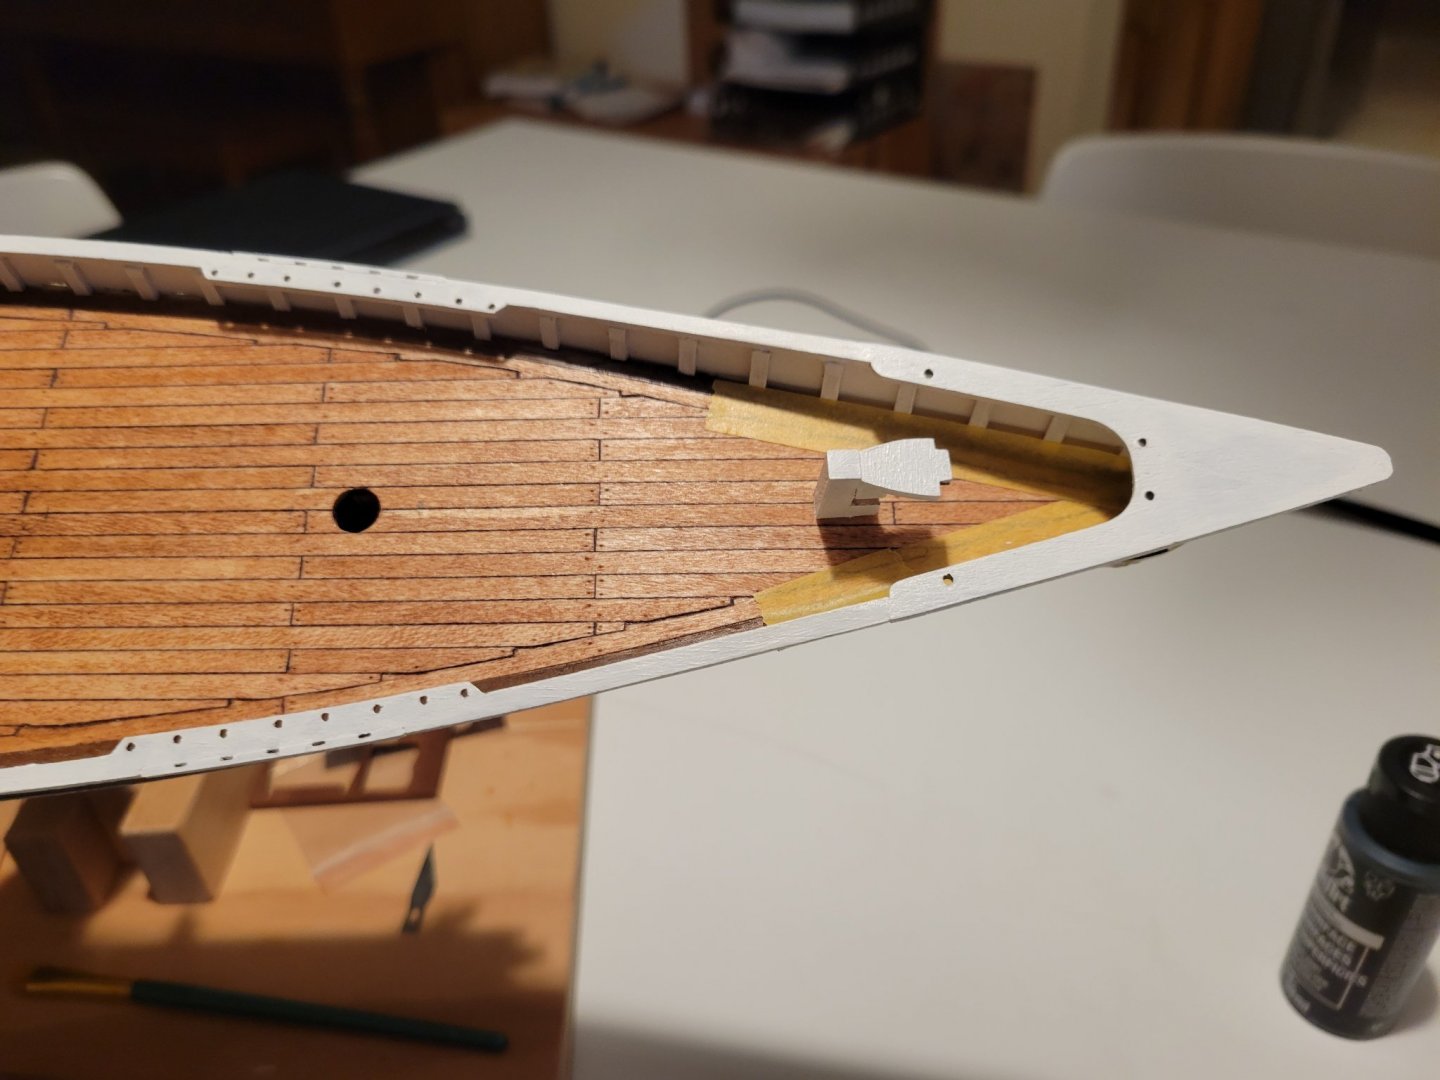
Created a bowsprit bail. Working on masts, booms, and gaffs. Modifying various bands. AL'S trestle trees are fairly inaccurate. Augmenting where I can. Goosneck on forecast is wrong kind too so moding with wire.


- 84 replies
-
- 4
-
-
- Artesania Latina
- Bluenose II
- (and 1 more)
-
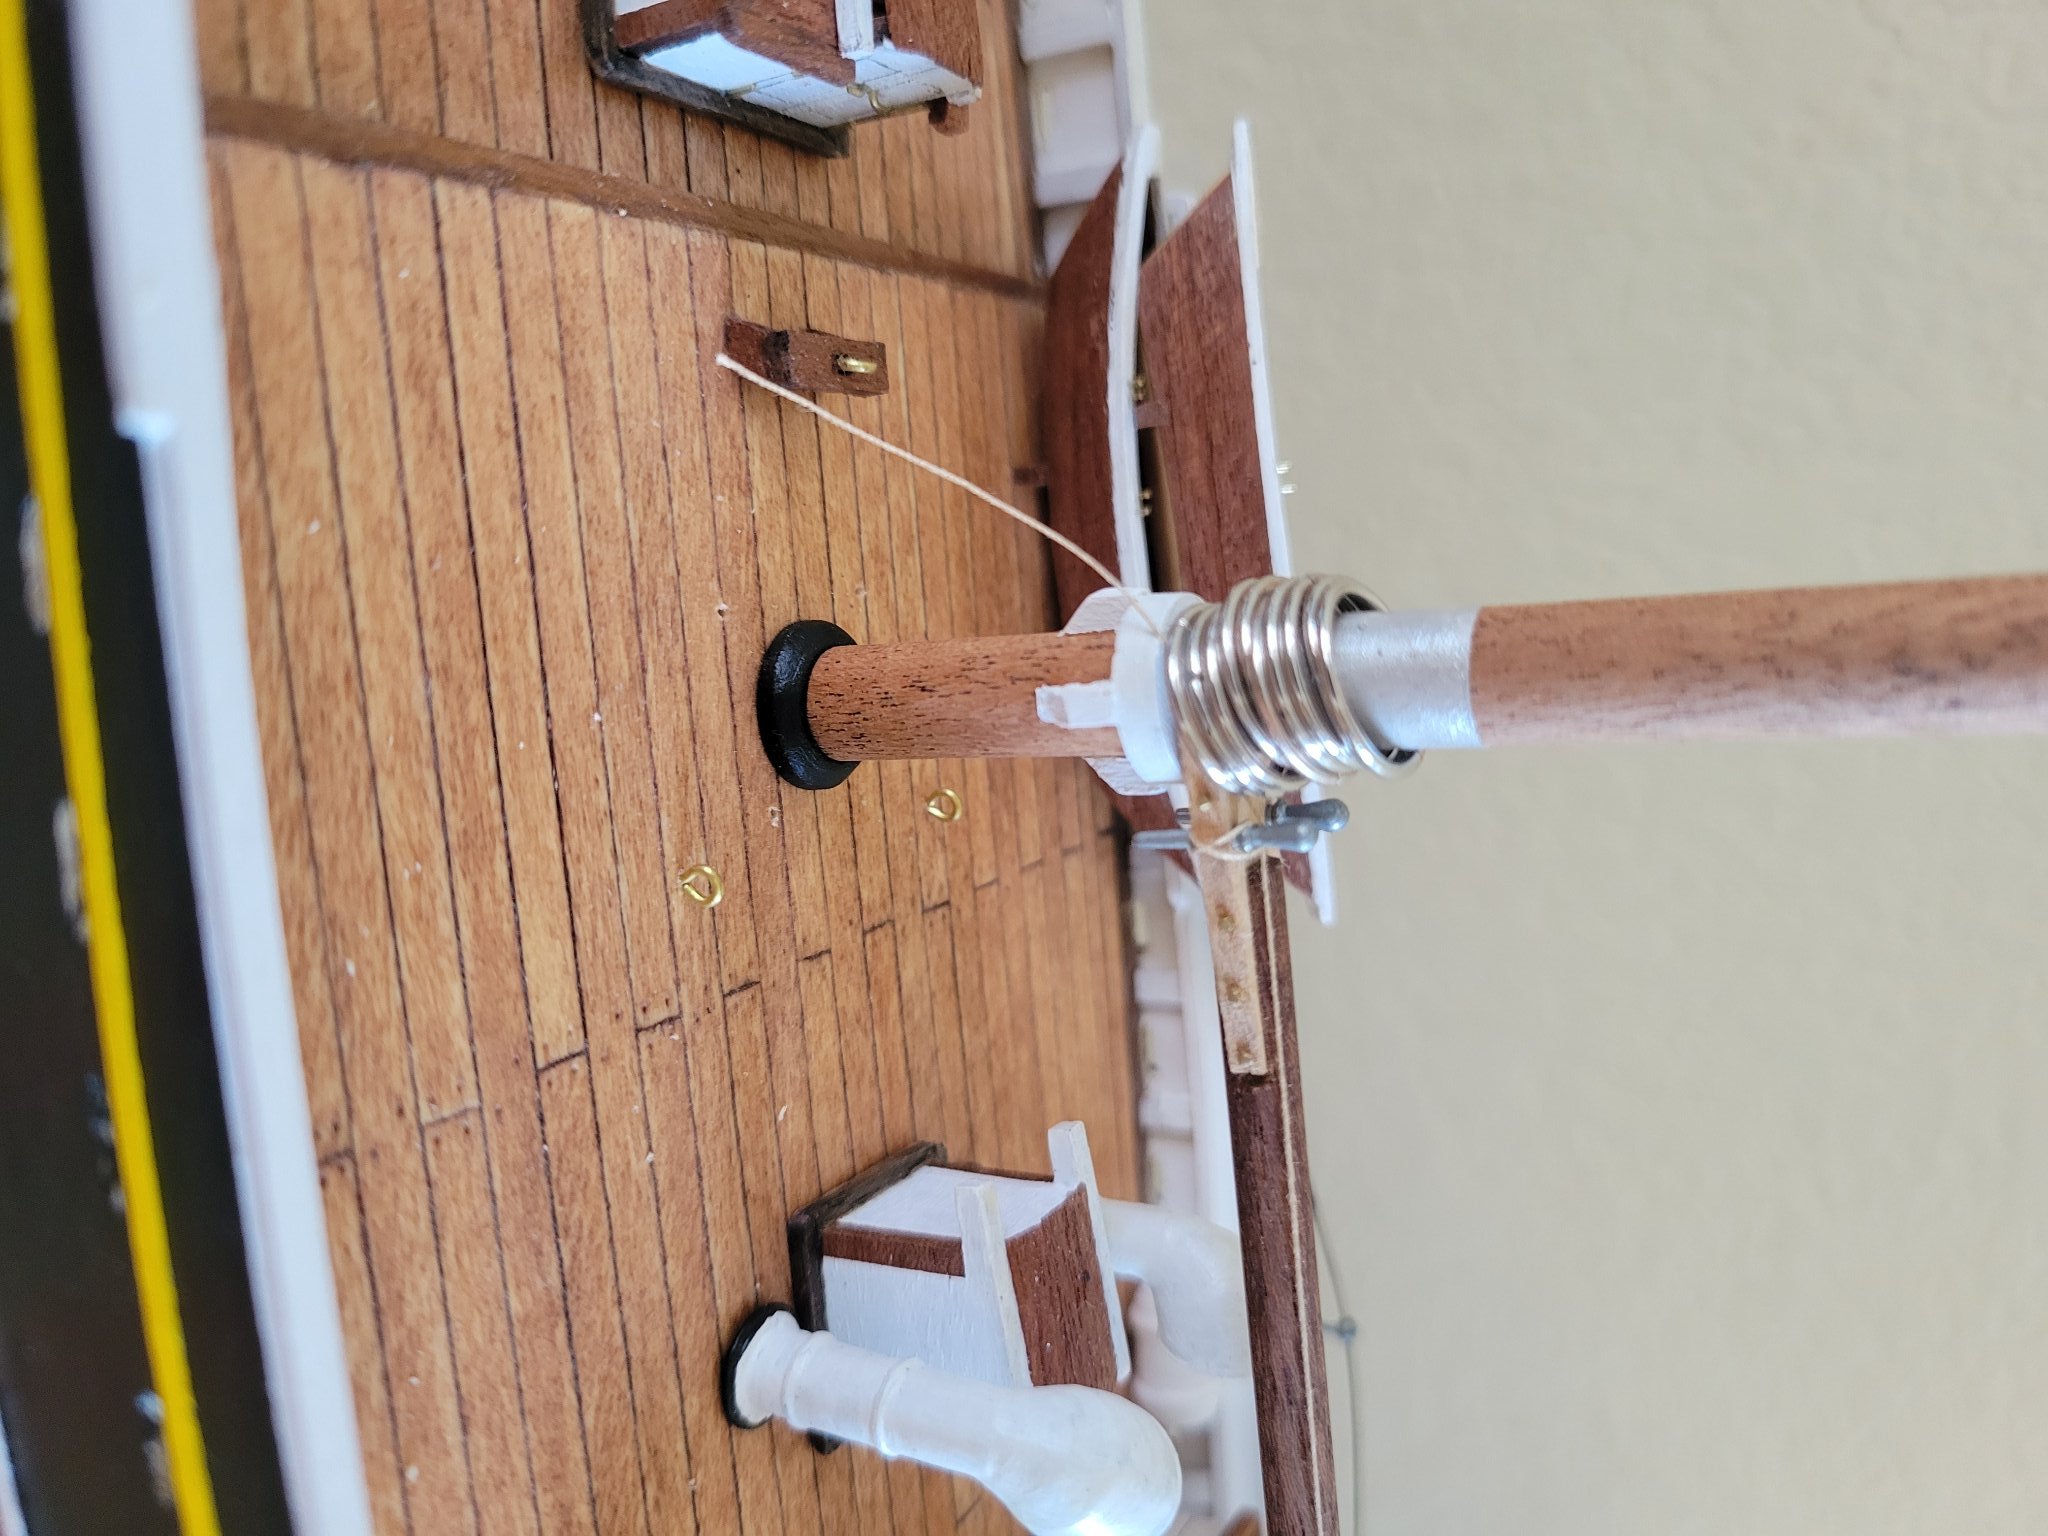
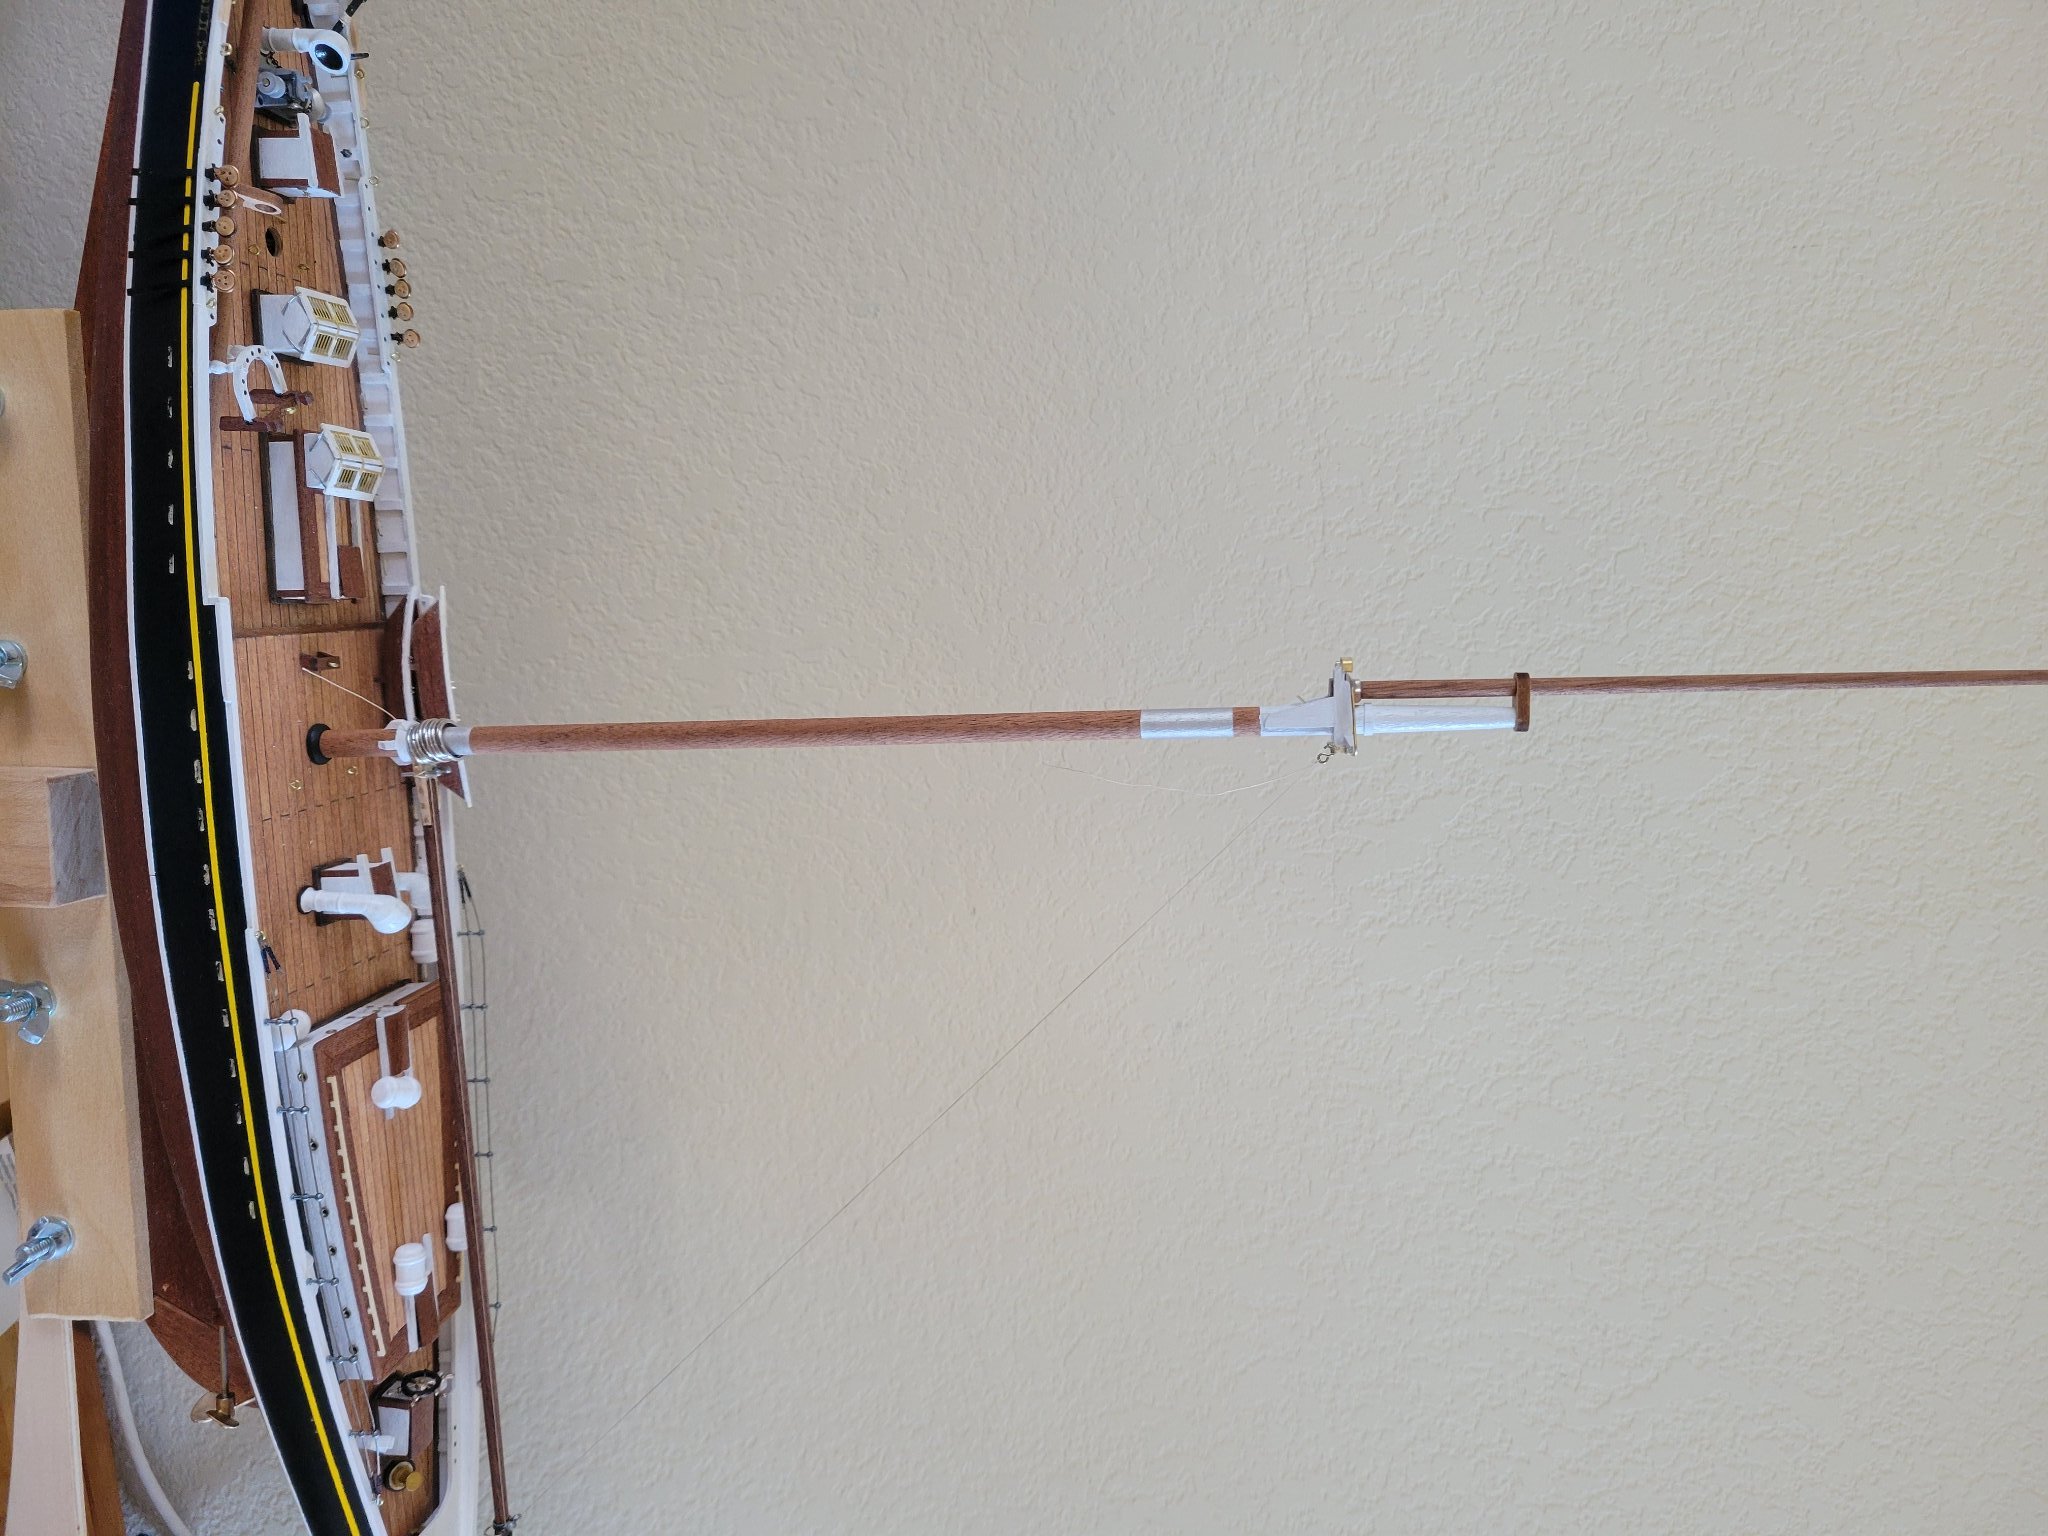
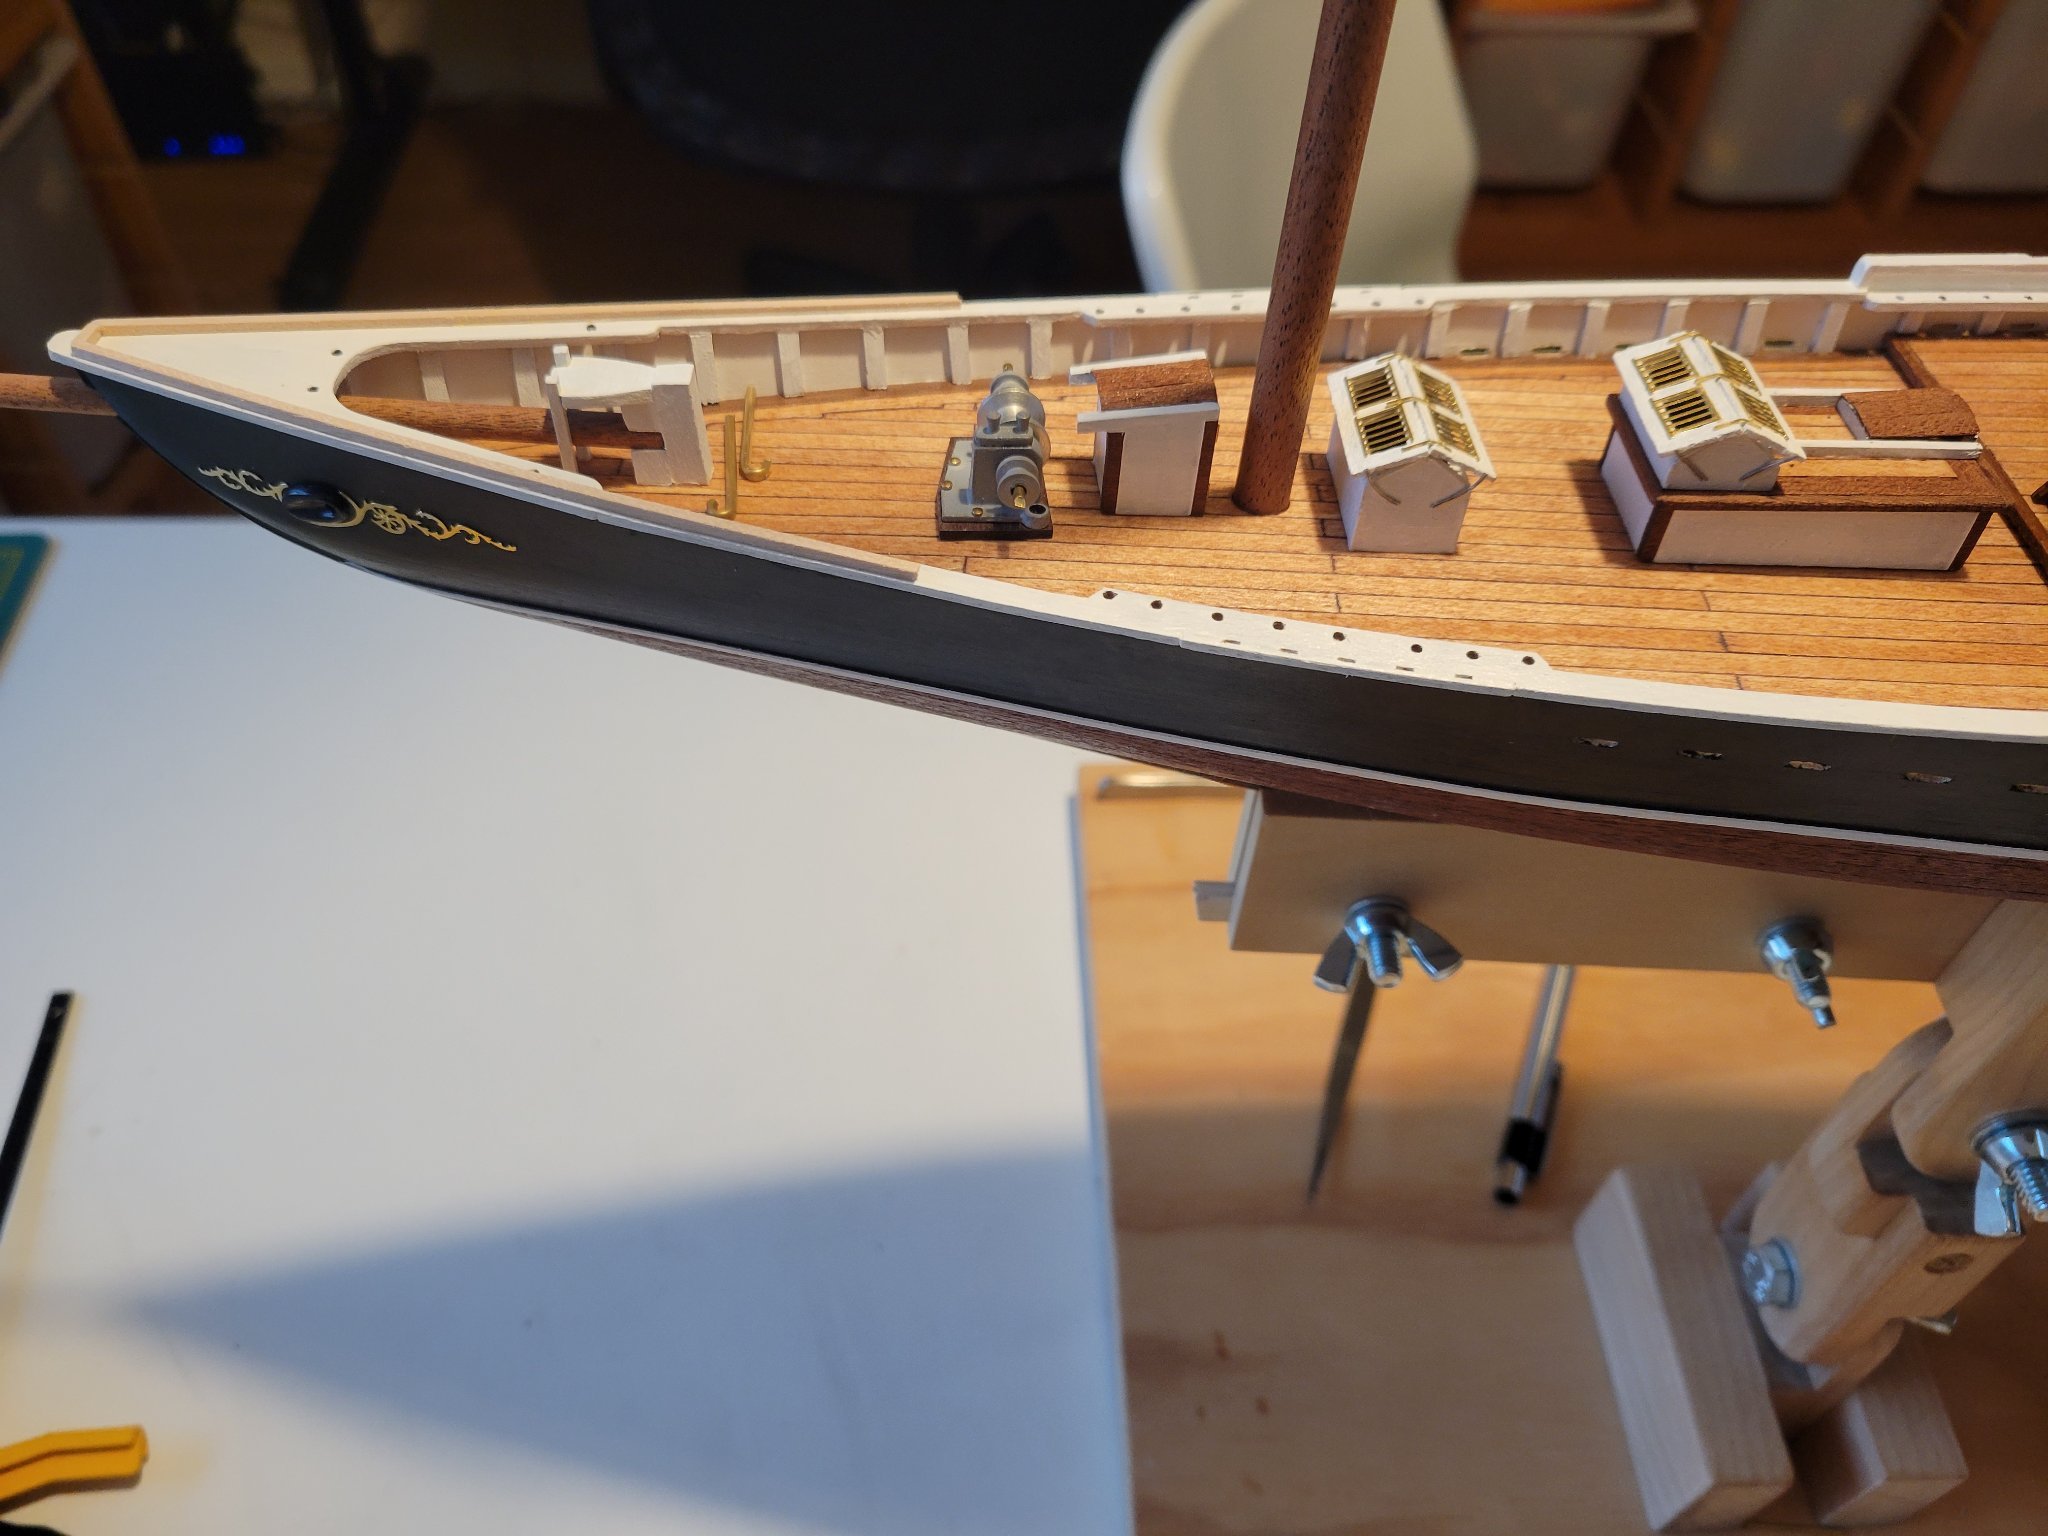
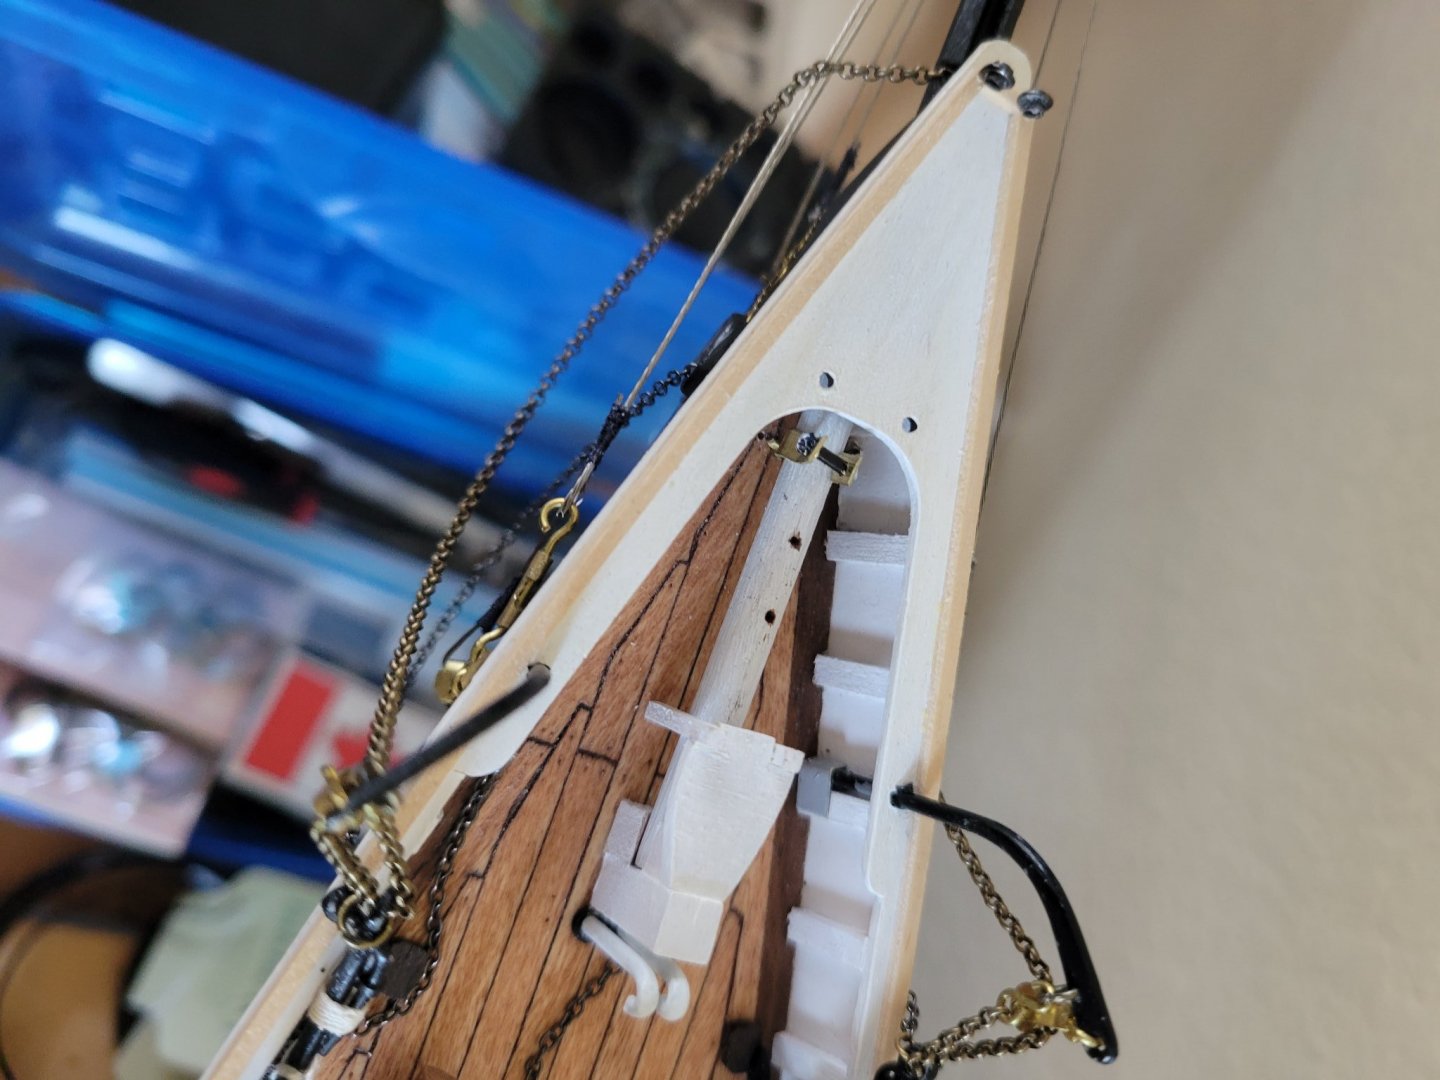
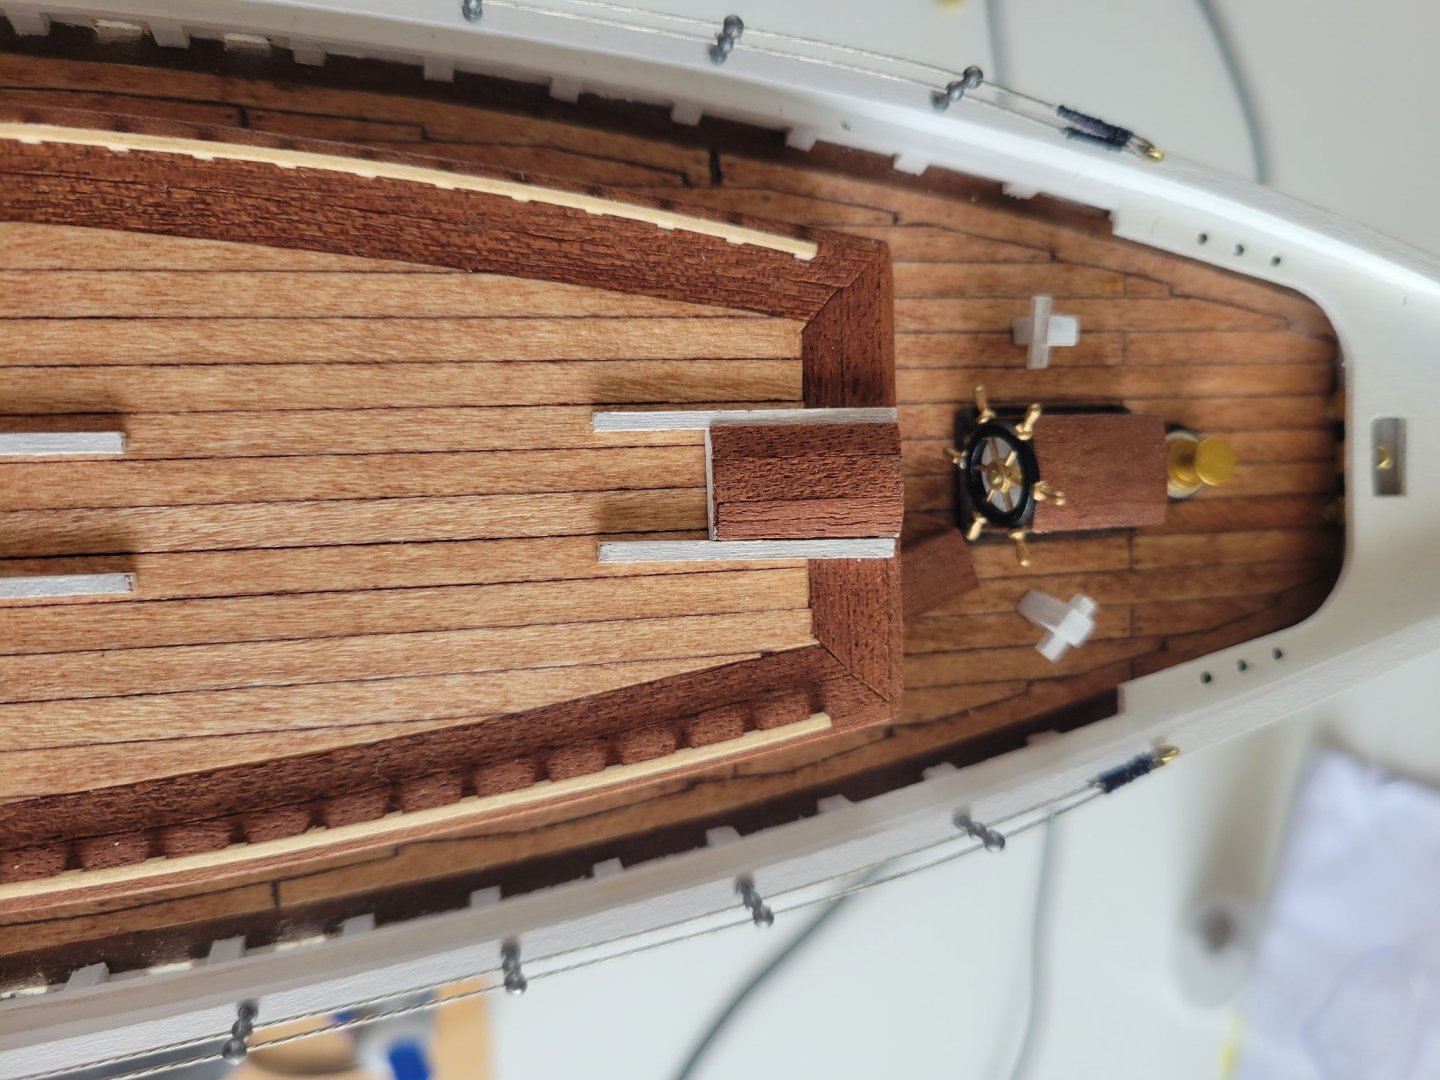
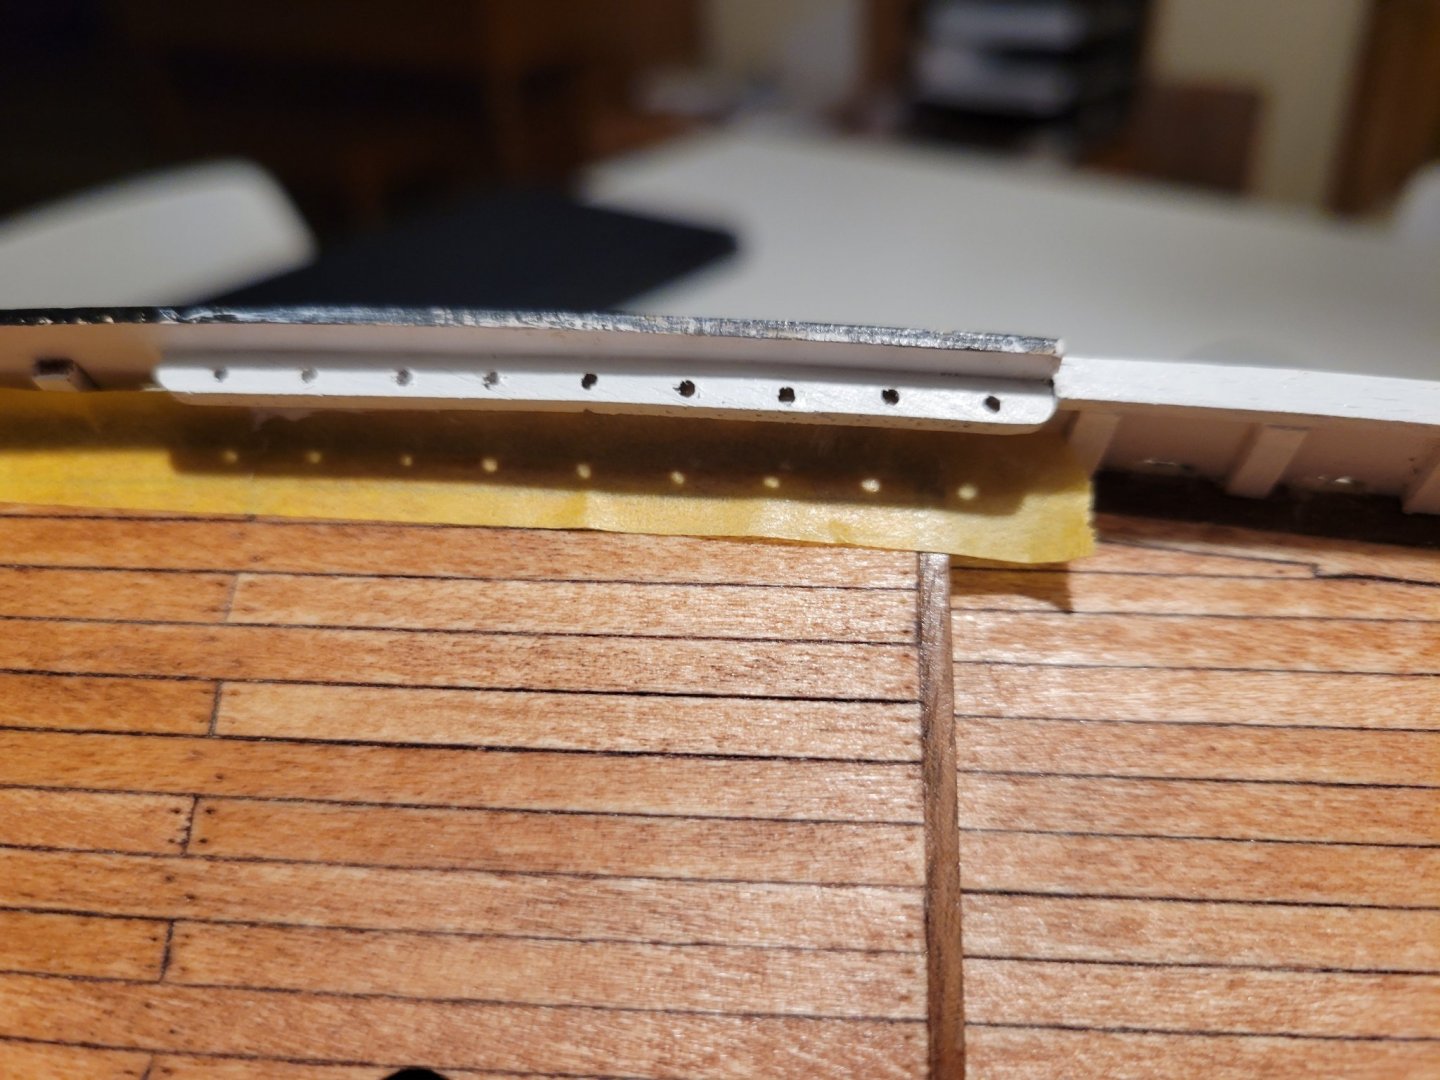
Finally getting pics in again. Been working on deck fittings, adding pins to everything (nothing is glued to the deck yet). Added the railings. Set the anchors and davits. Been working through rigging planning to see where eyeballs are needed in the deck/rail. Most recently, just set the bowsprit.


- 84 replies
-
- 2
-
-
- Artesania Latina
- Bluenose II
- (and 1 more)
-
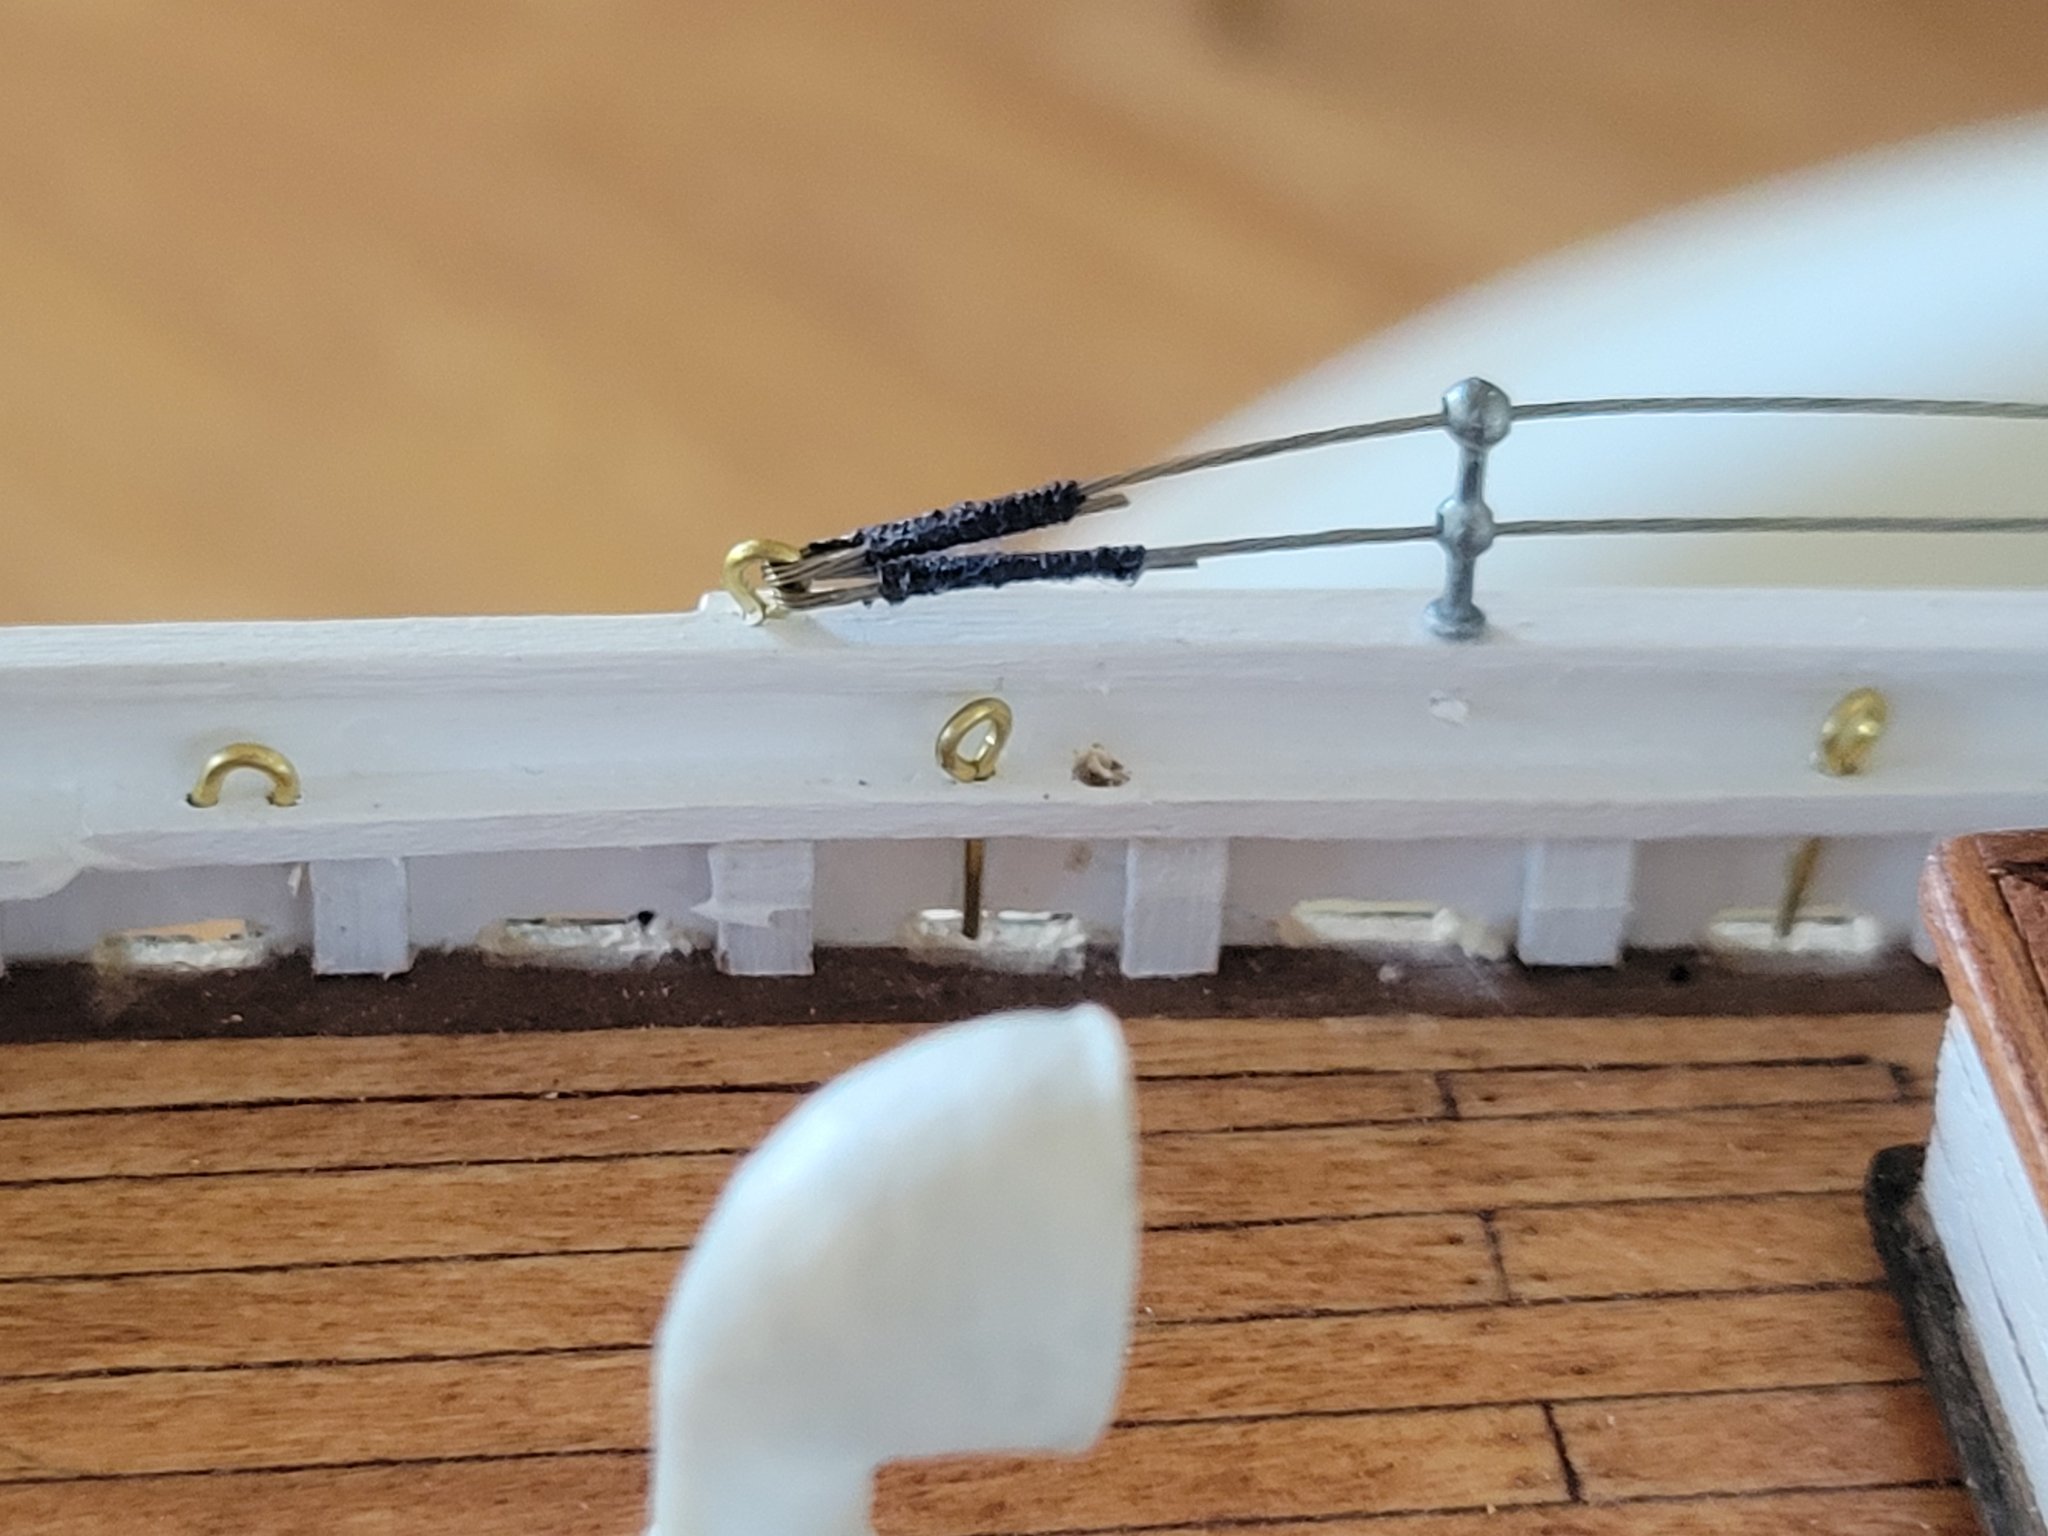
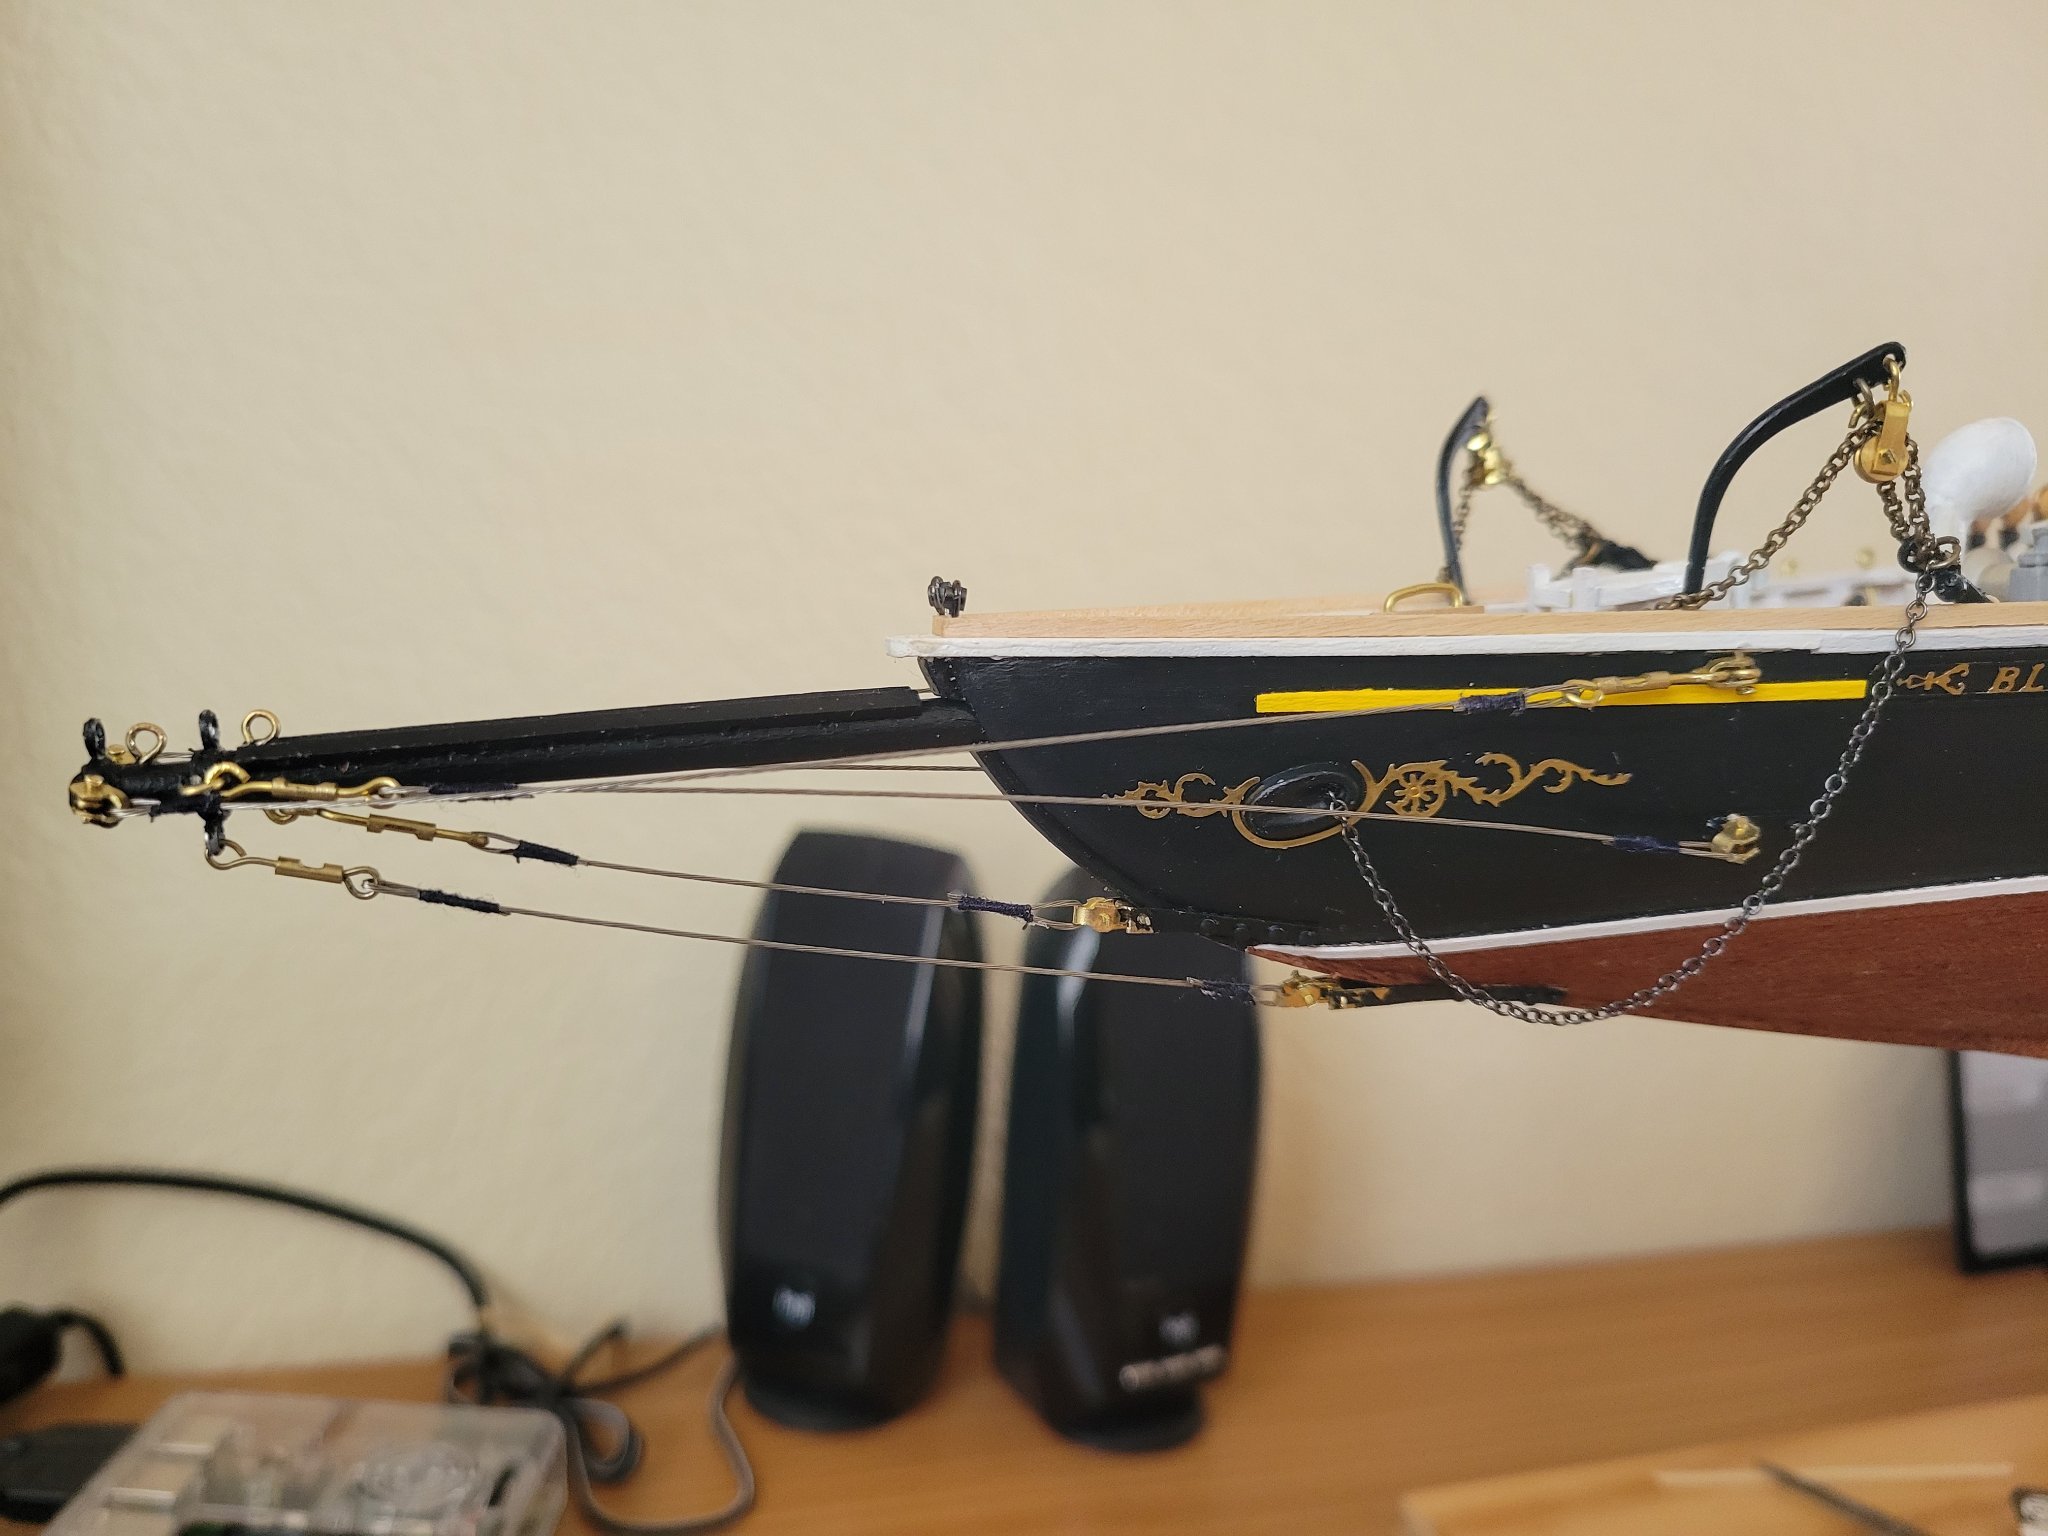
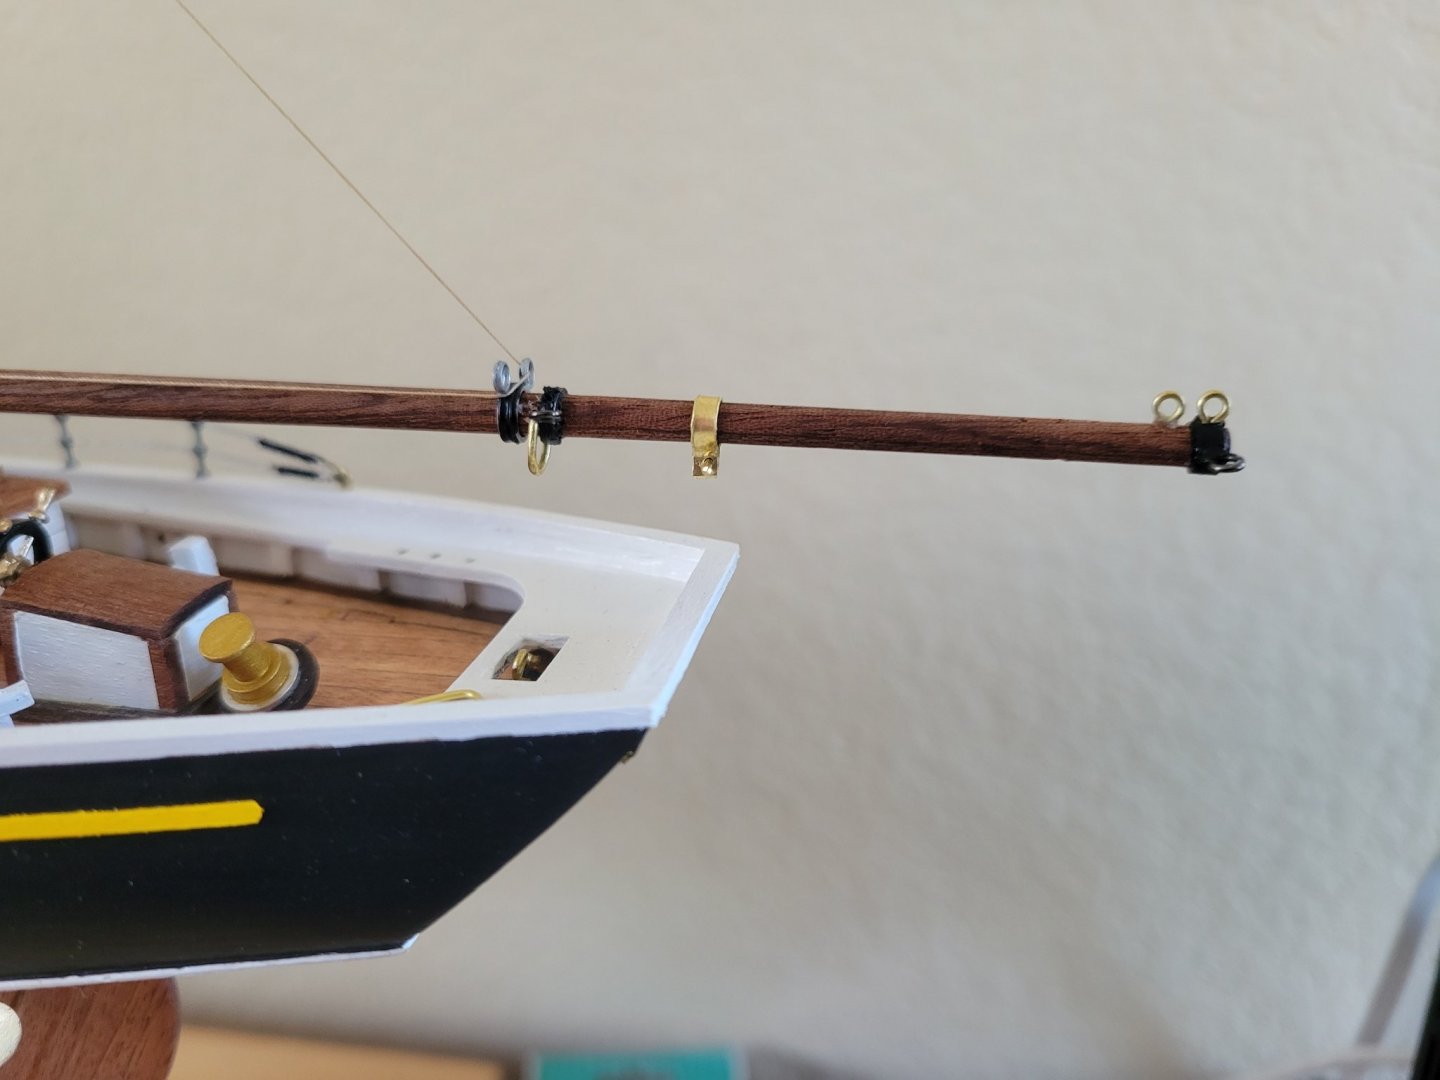
Turnbuckle on bowsprit fittings. Stay straps in process.
- 84 replies
-
- 2
-
-
- Artesania Latina
- Bluenose II
- (and 1 more)
-
Continuing forward, chainplates don't look as bad once I build up a little ca and then paint them so going with that for now. Working on the bowsprit too now. I've crafted the wood rails that are just to either side of the top centerline with thin slots to put the tie down lines for the foresheet when it's stowed. Modding the rigging connections to look more like the real thing too.
- 84 replies
-
- 3
-
-
- Artesania Latina
- Bluenose II
- (and 1 more)
-
Yep, I'm tempted to just layer up CA or use modeling paste at the joint of the chainplate and strope so i can pain and hide how bad it looks. Kind of doing the same with some of their other metal works the are inaccurate or just crude!
- 84 replies
-
- 1
-
-
- Artesania Latina
- Bluenose II
- (and 1 more)
-
These chainplates really suck! The AL design. Just doesn't work. Makes me wish I had a soldering setup. Maybe time to get one and learn. Pictures don't show the issue well bit their design is just flawed. Now to find a better approach!
- 84 replies
-
- 2
-
-
- Artesania Latina
- Bluenose II
- (and 1 more)
-
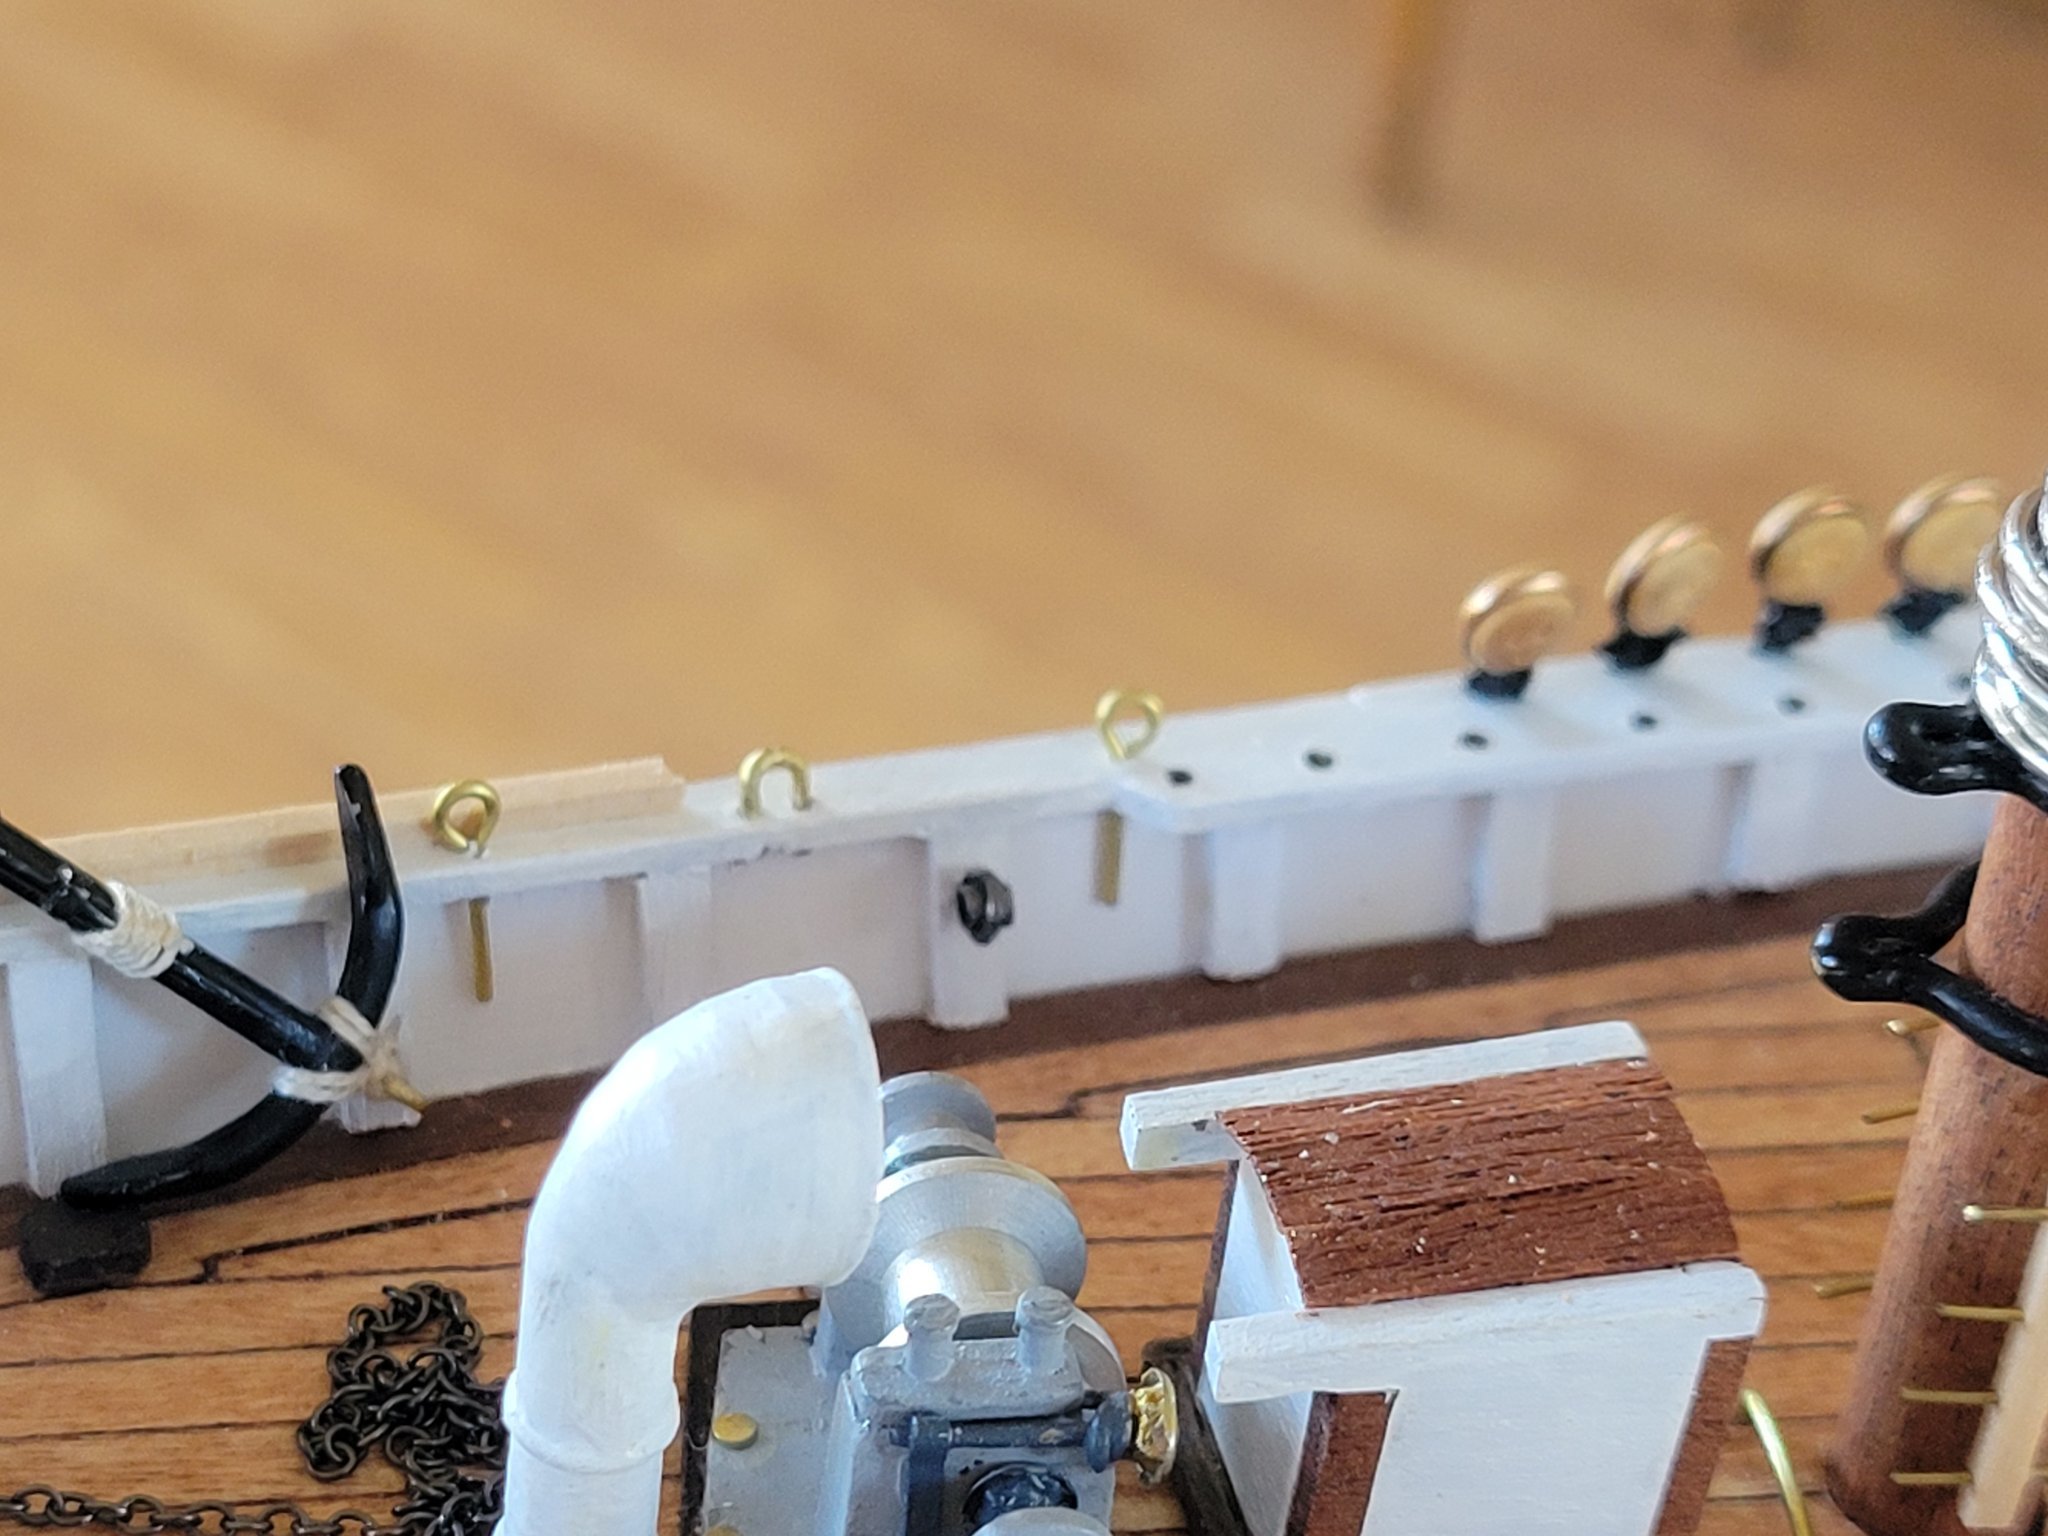
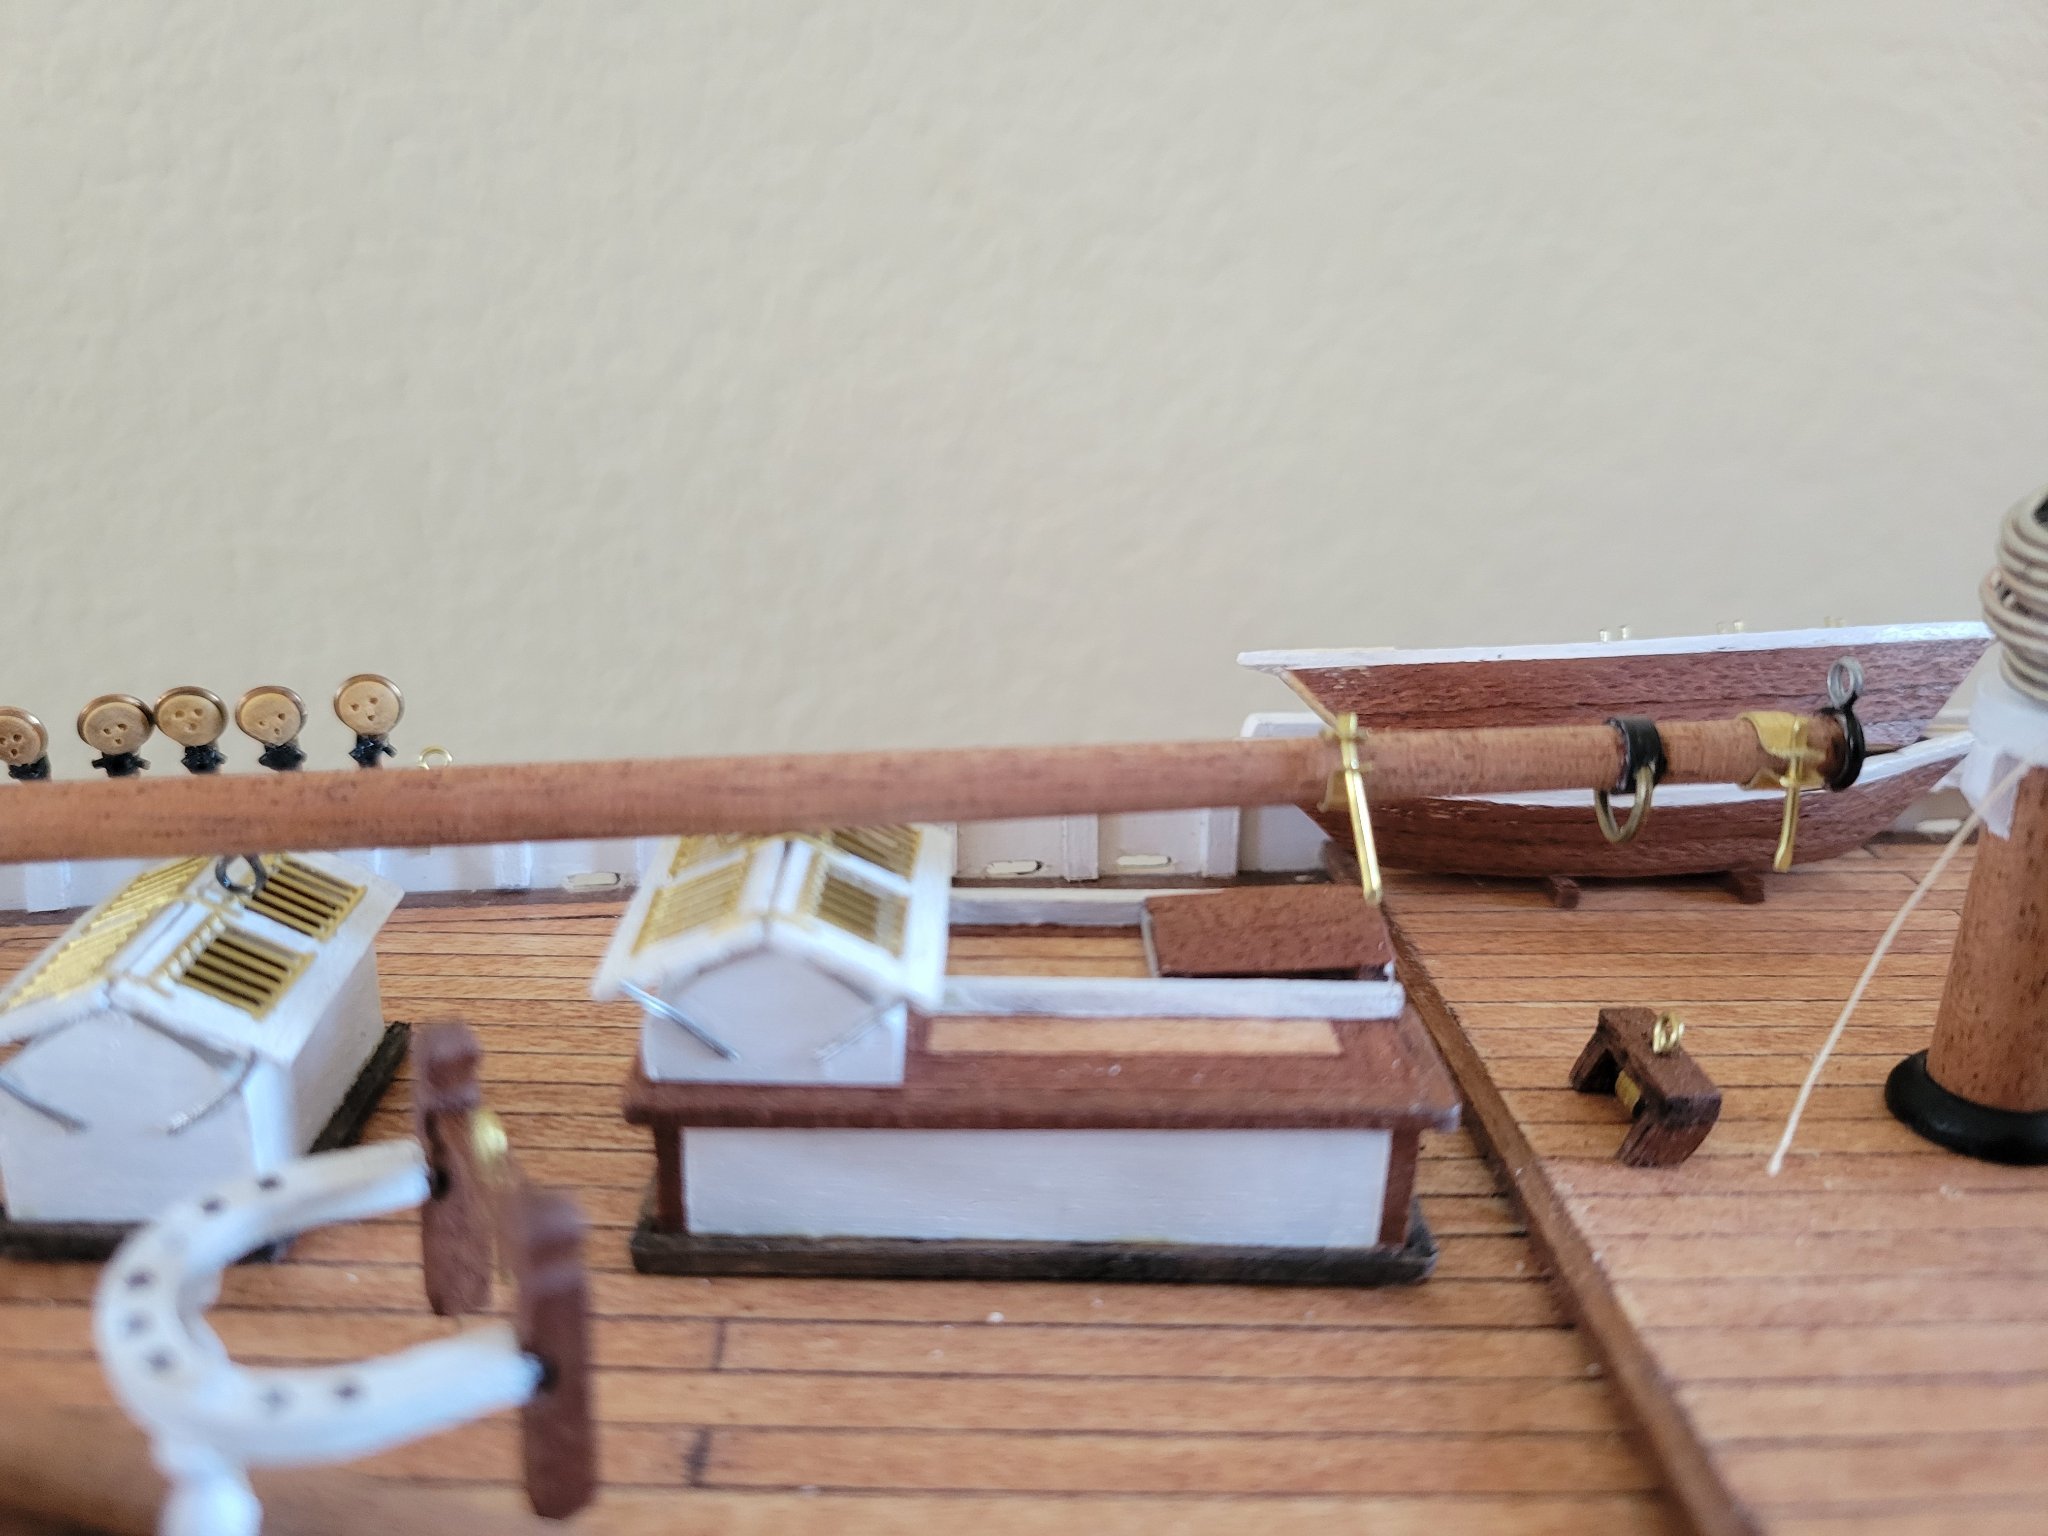
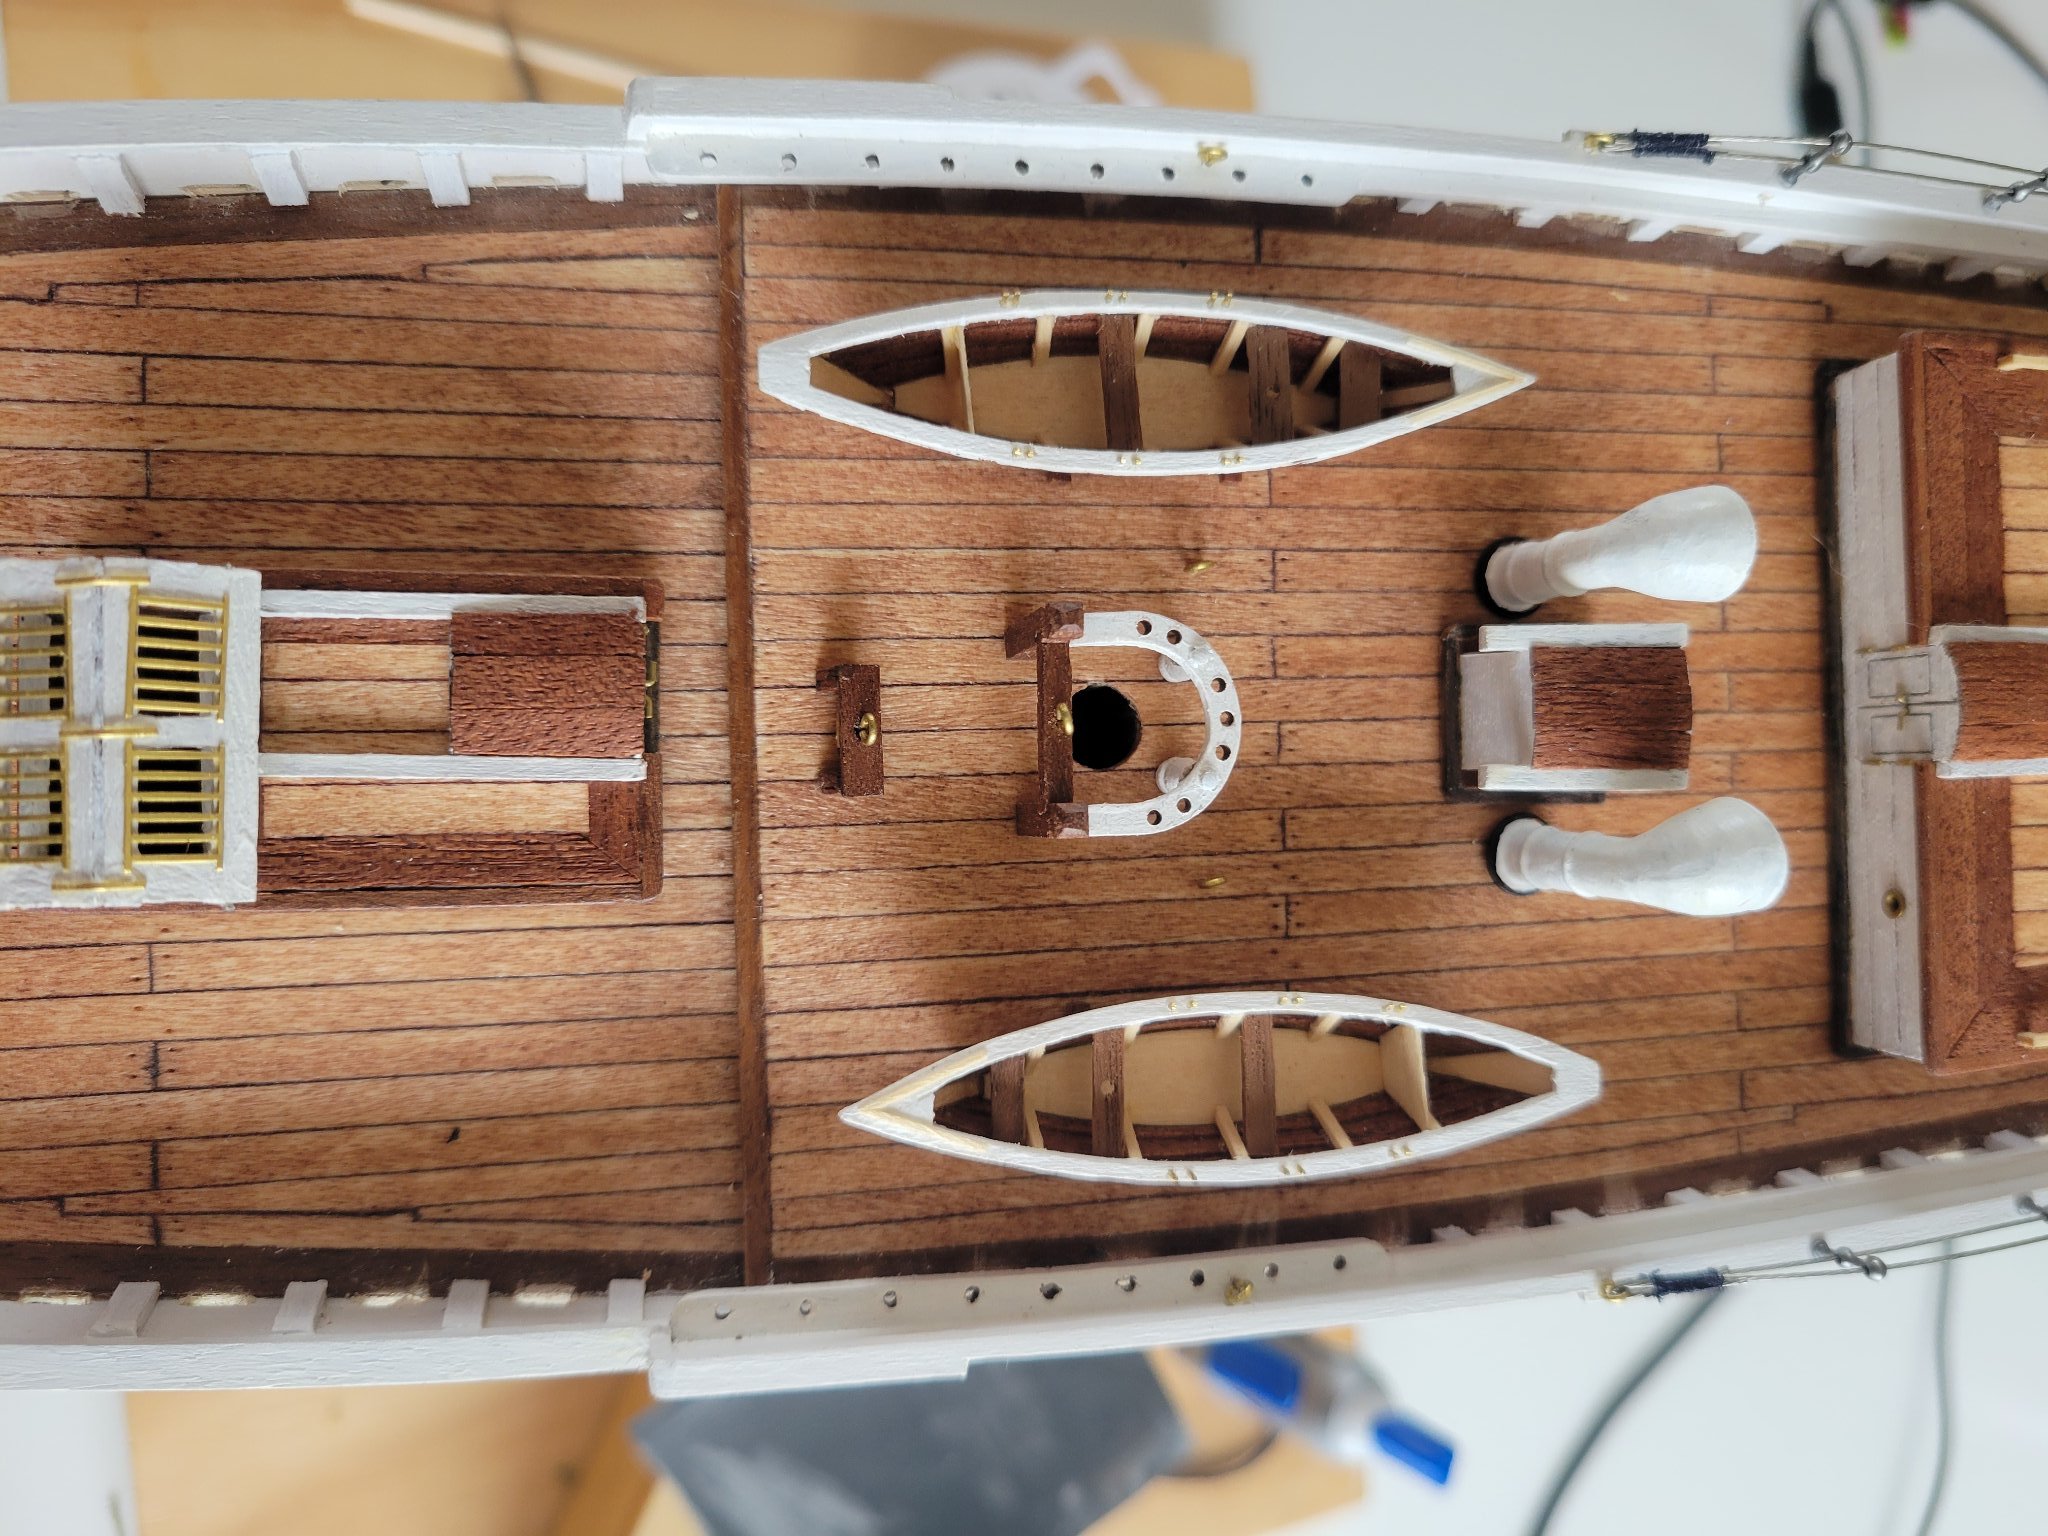
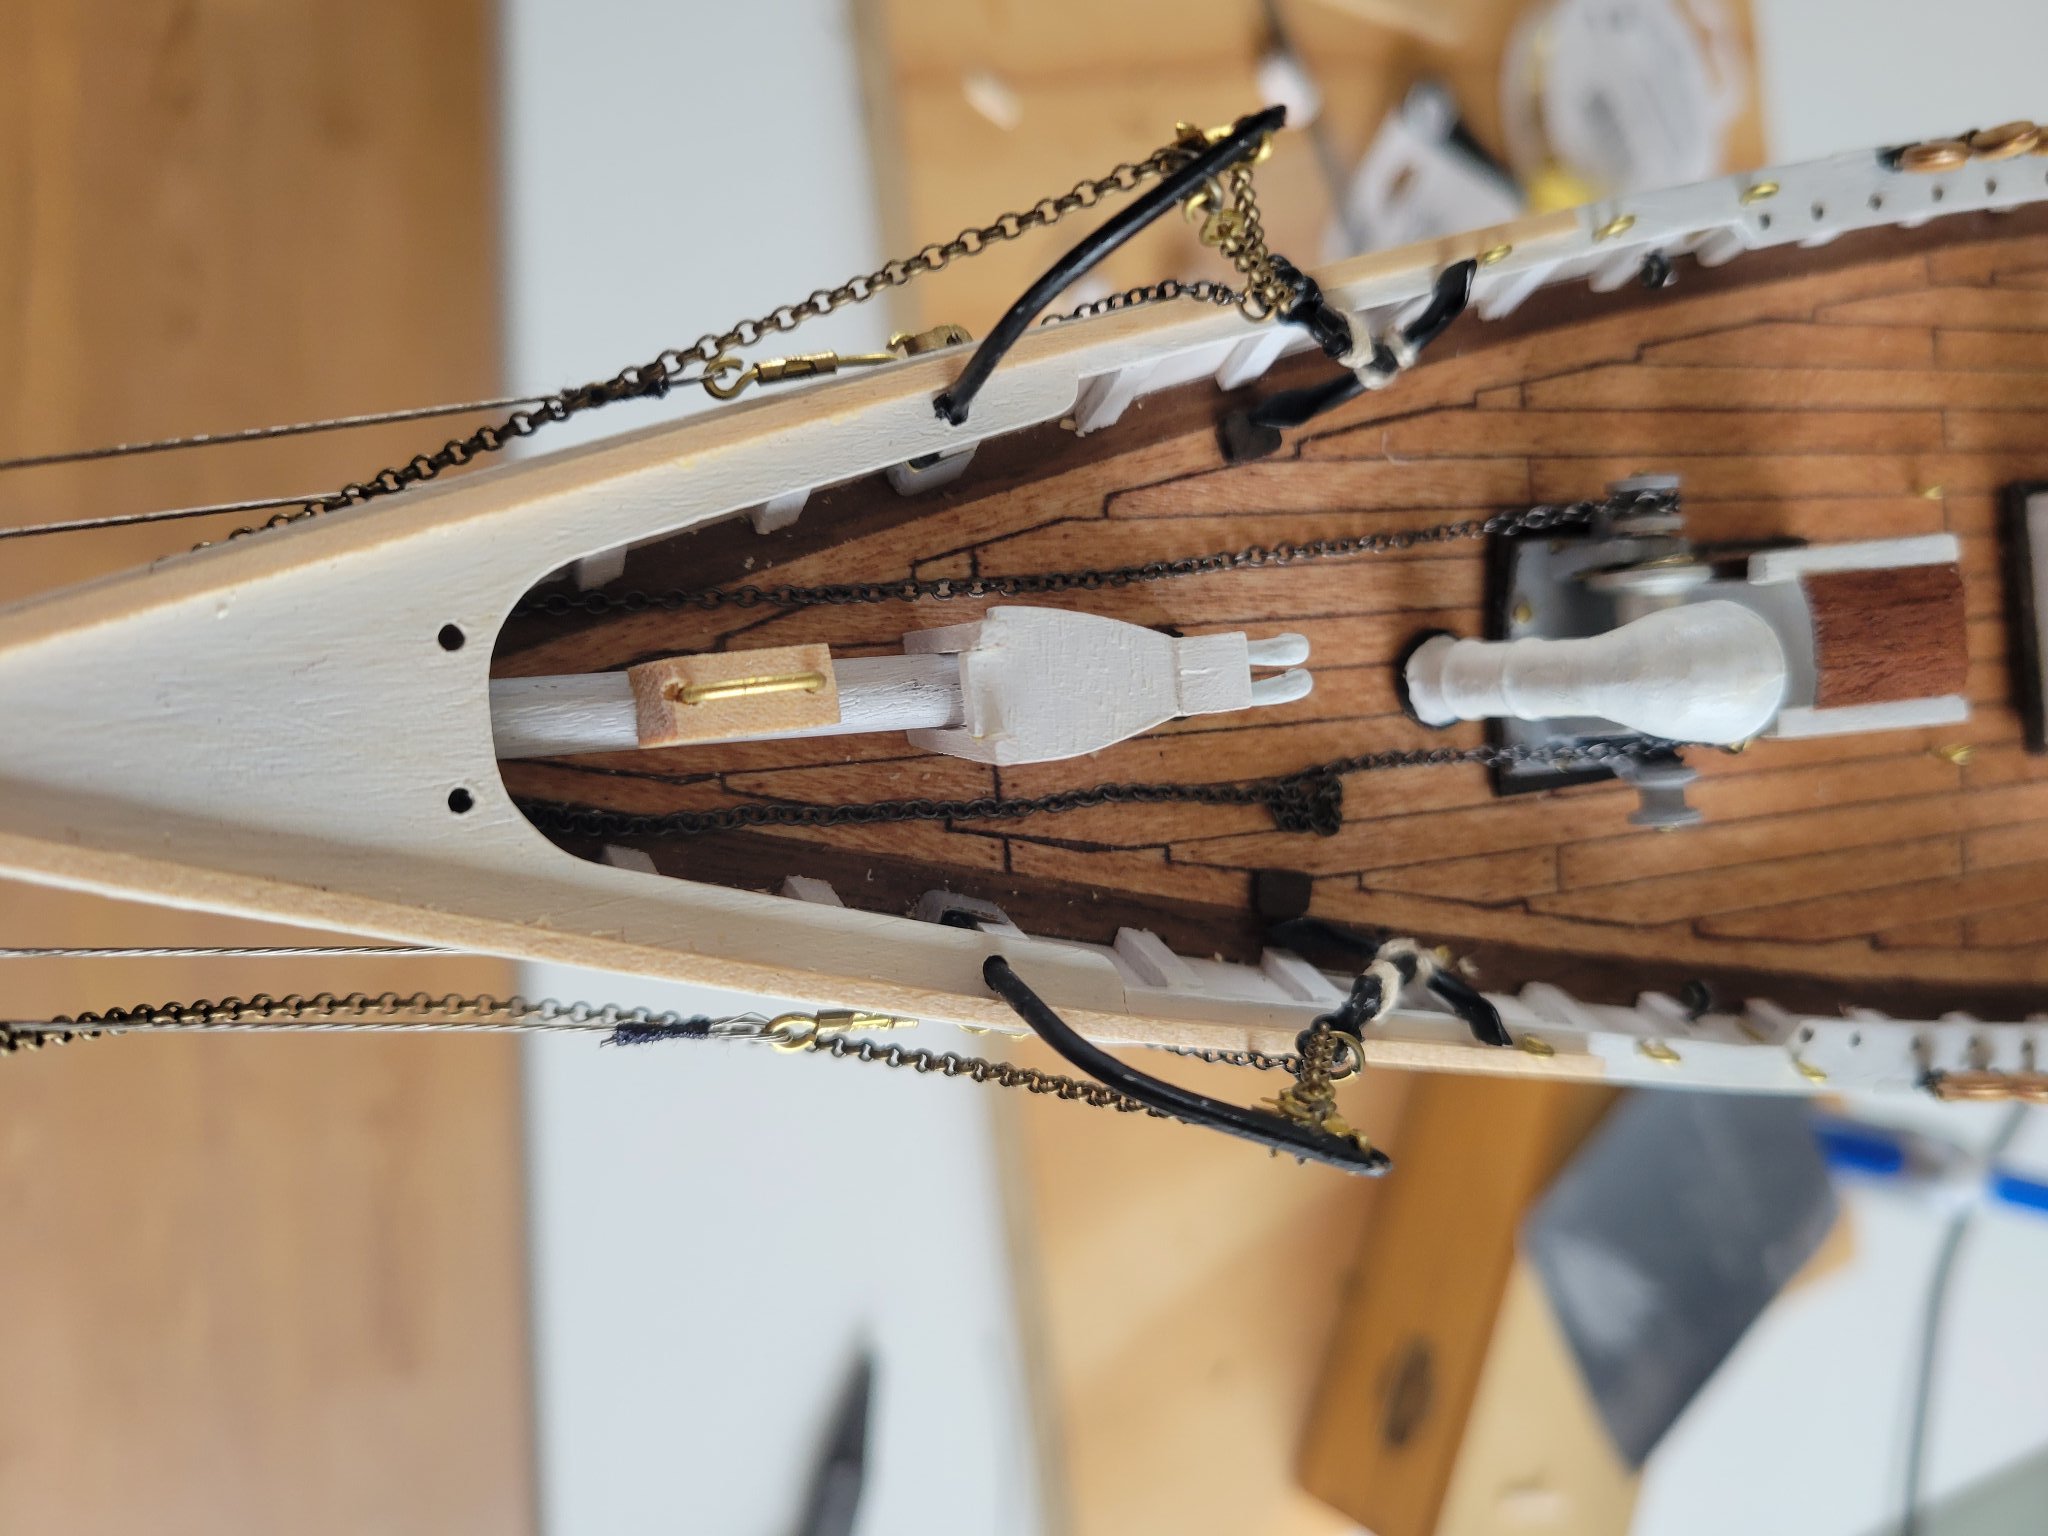
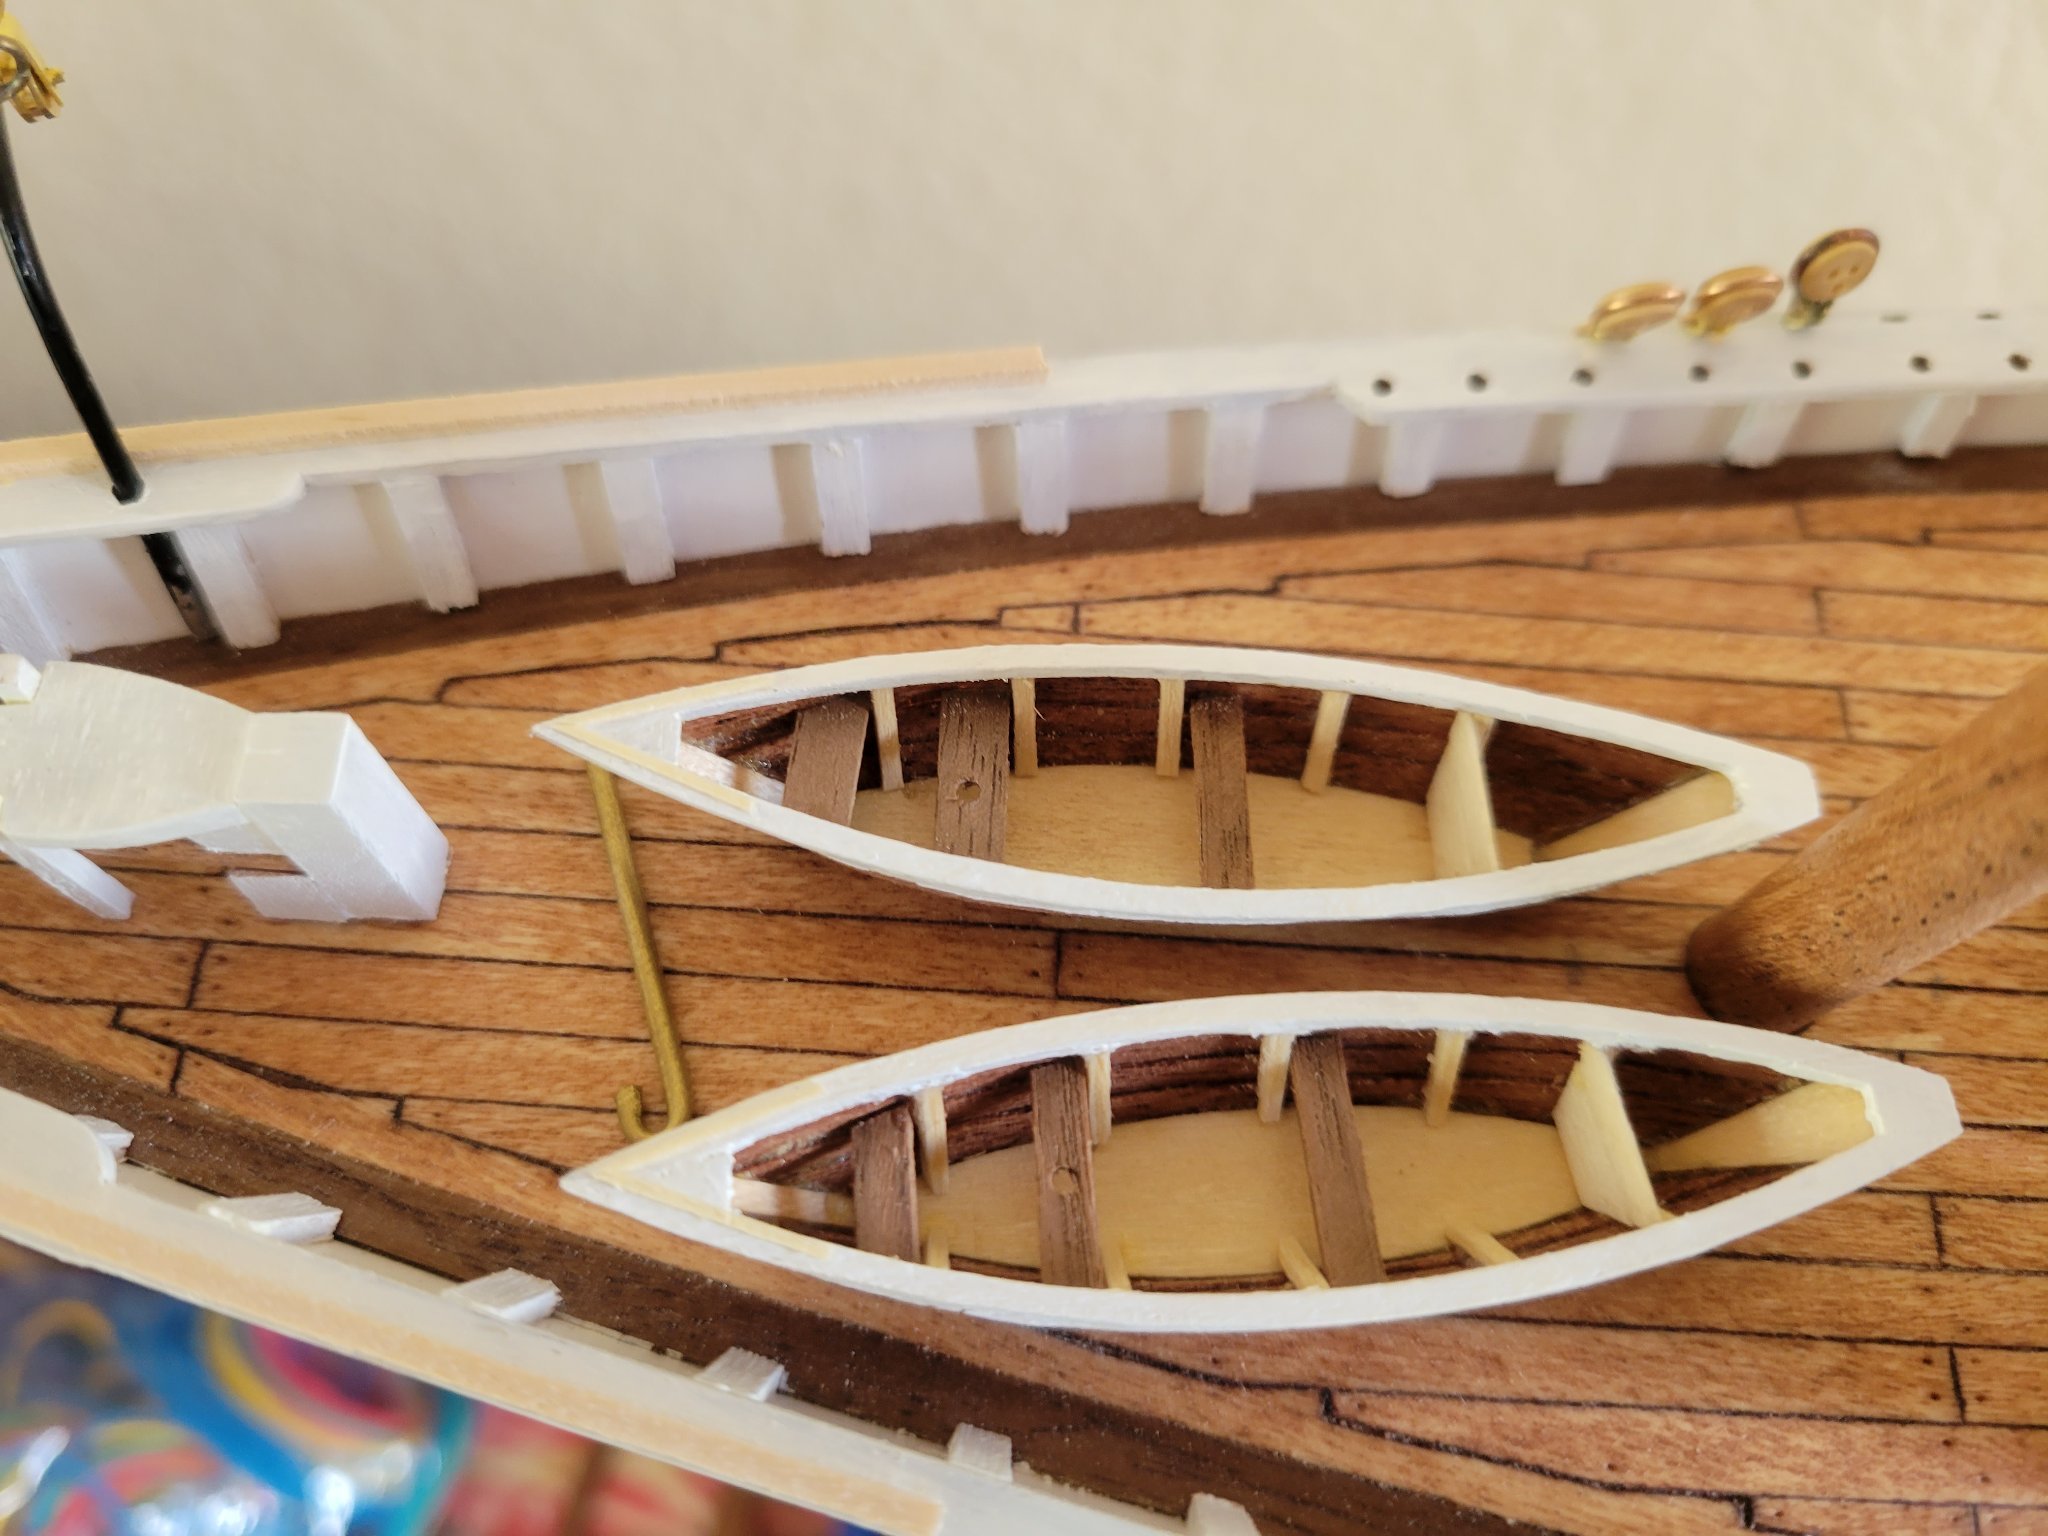
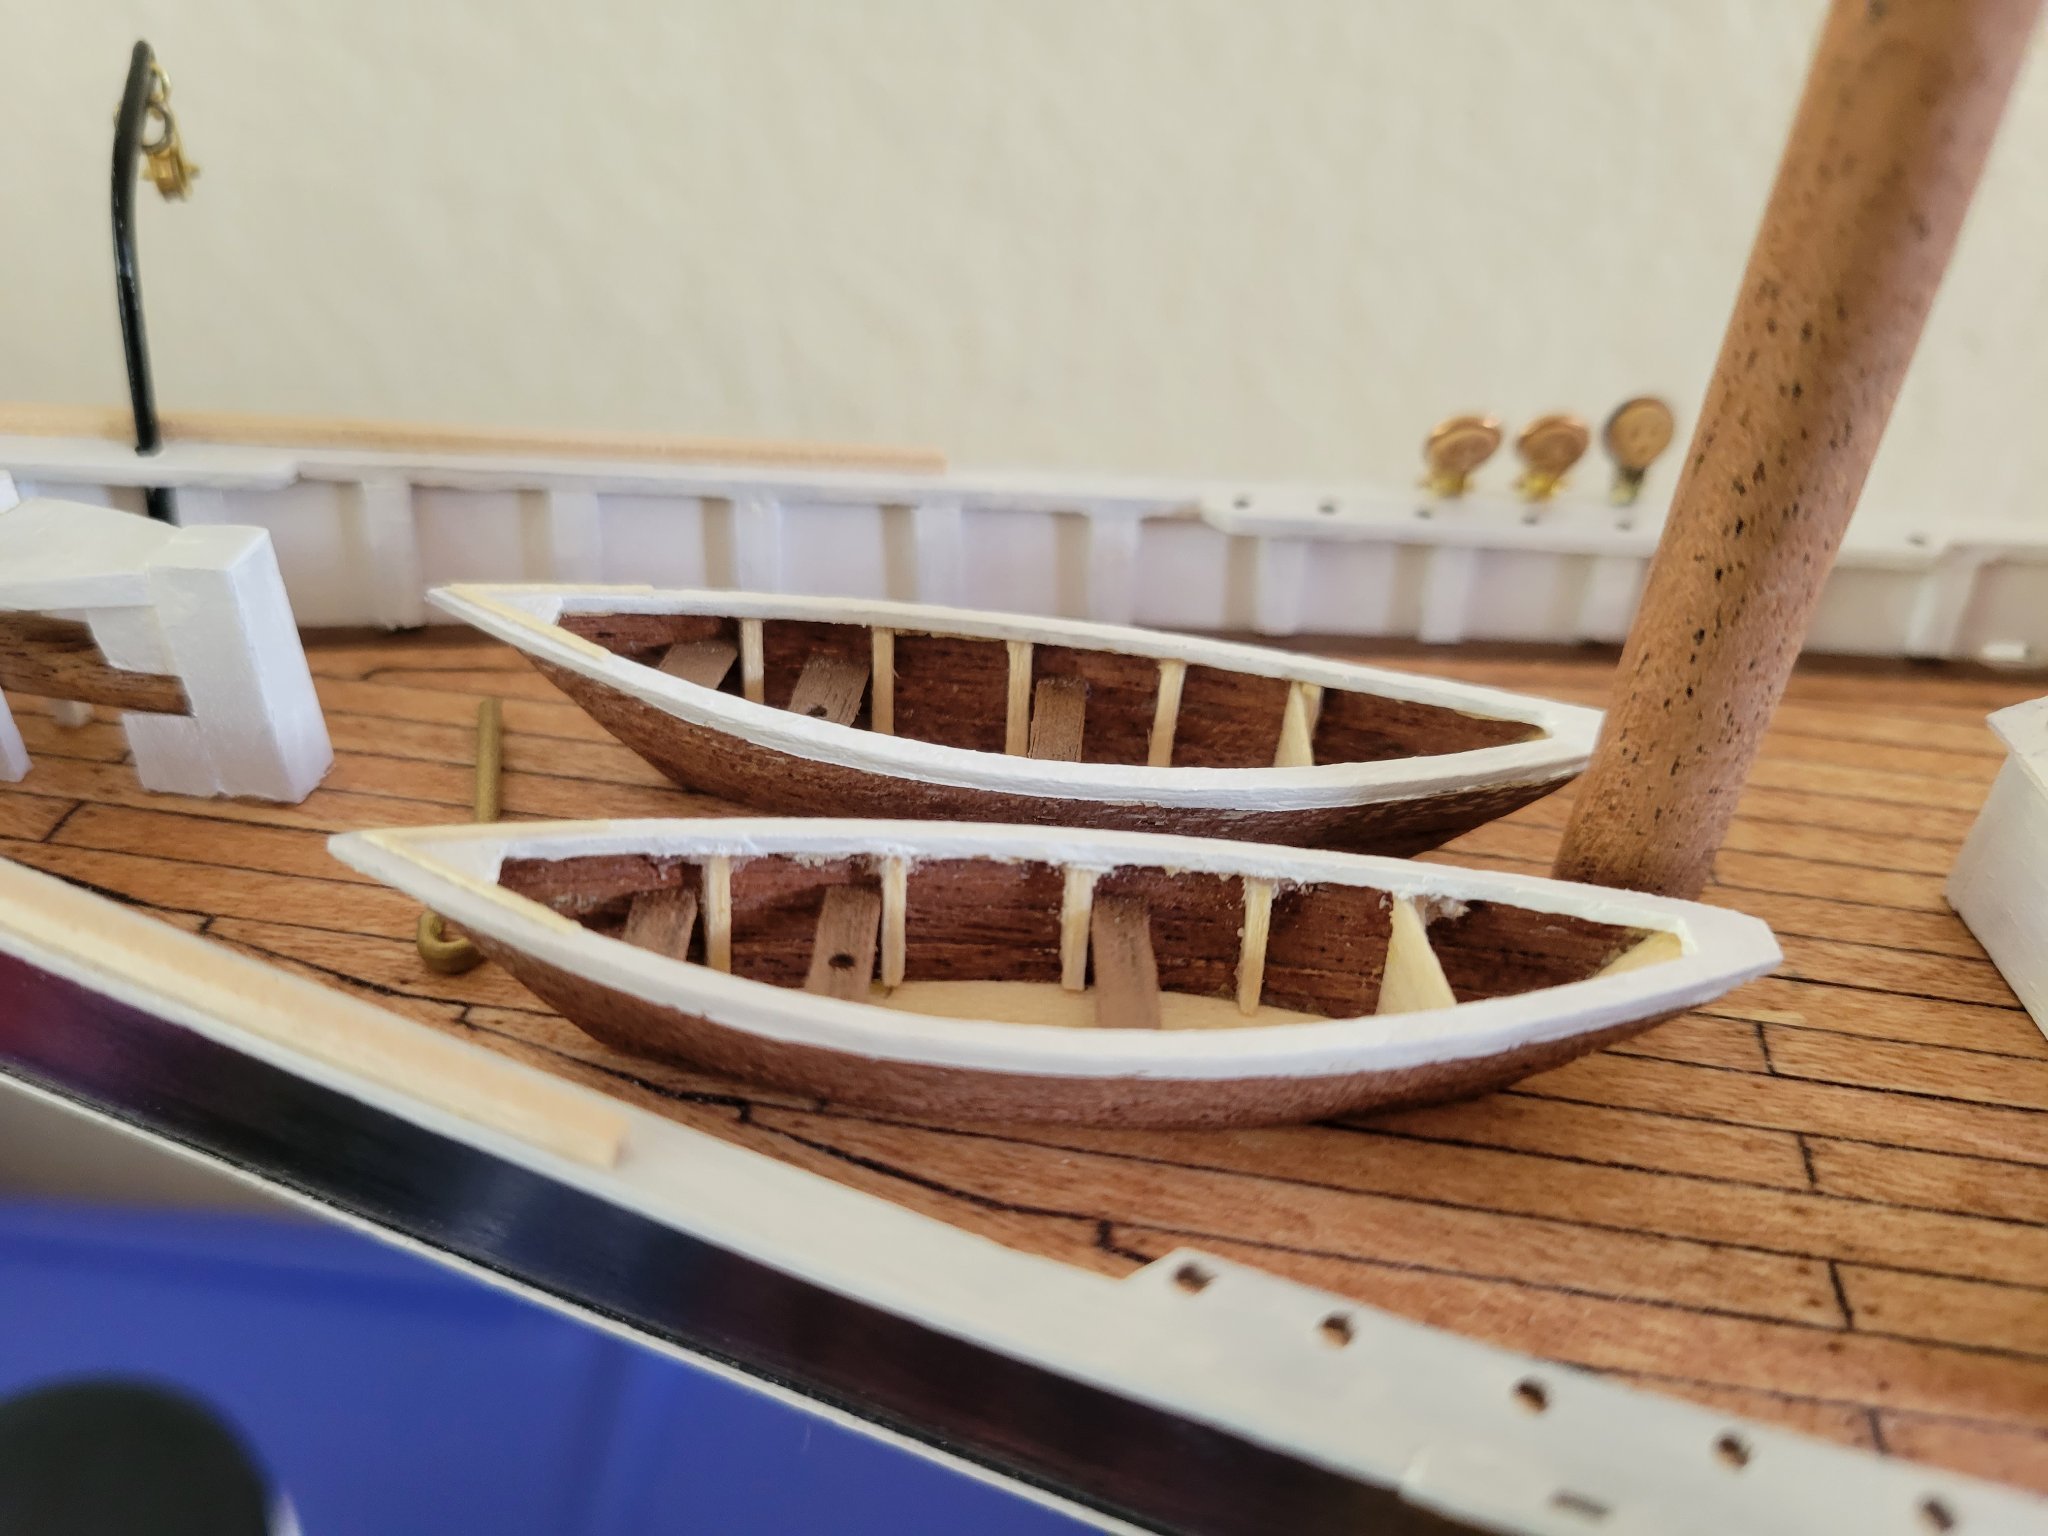
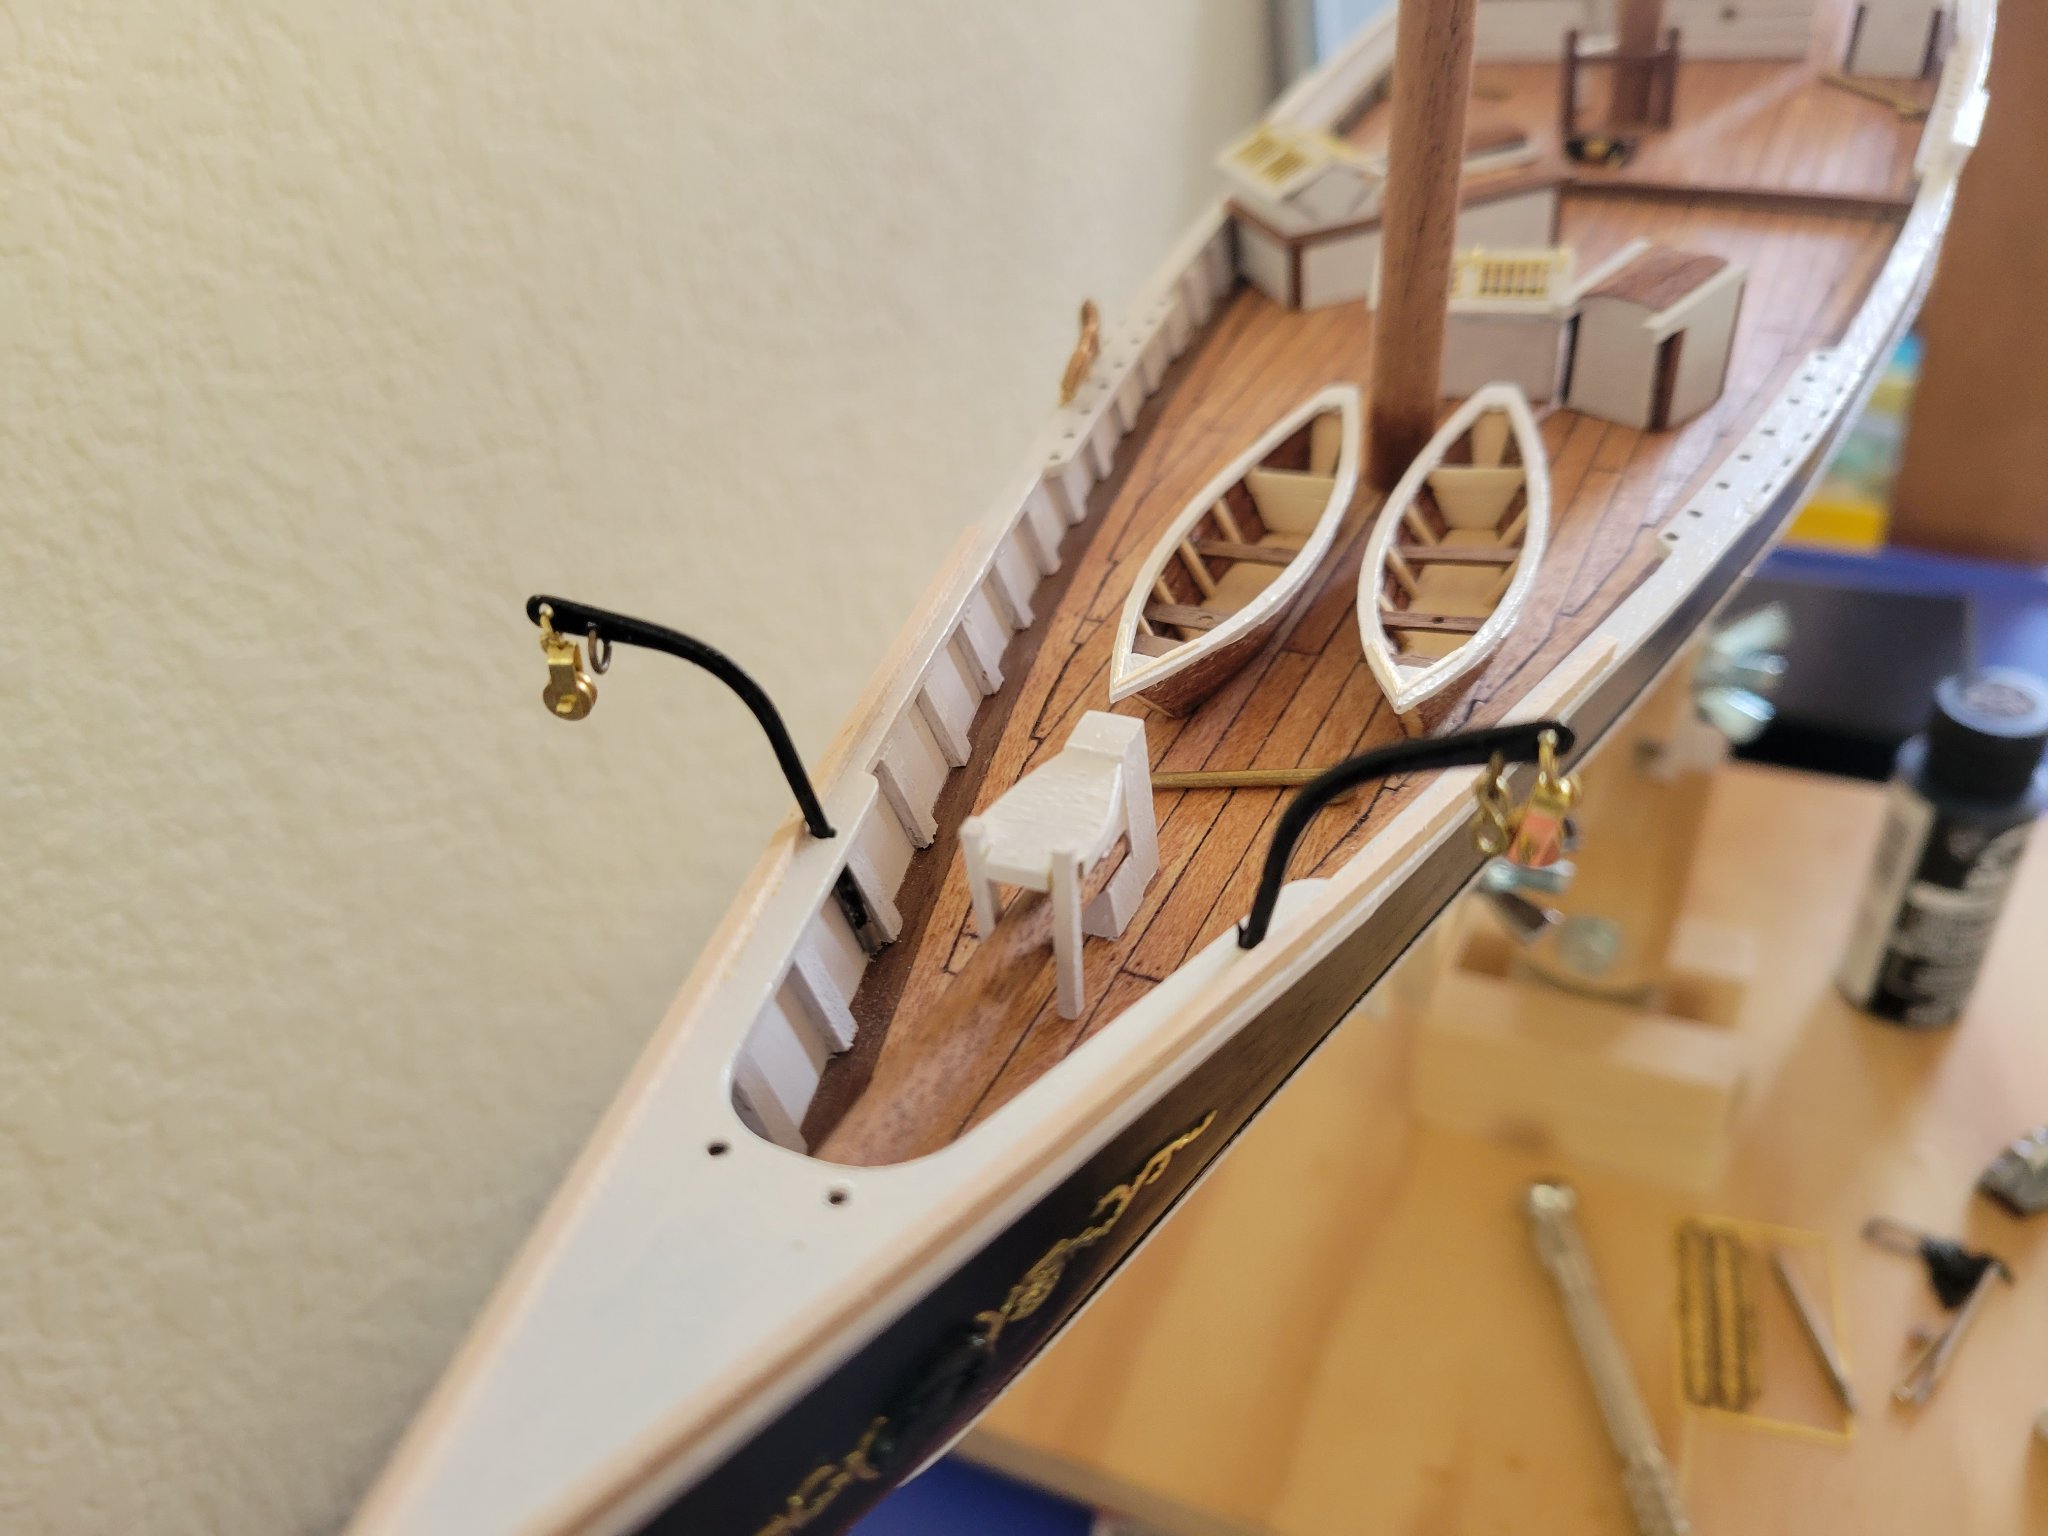
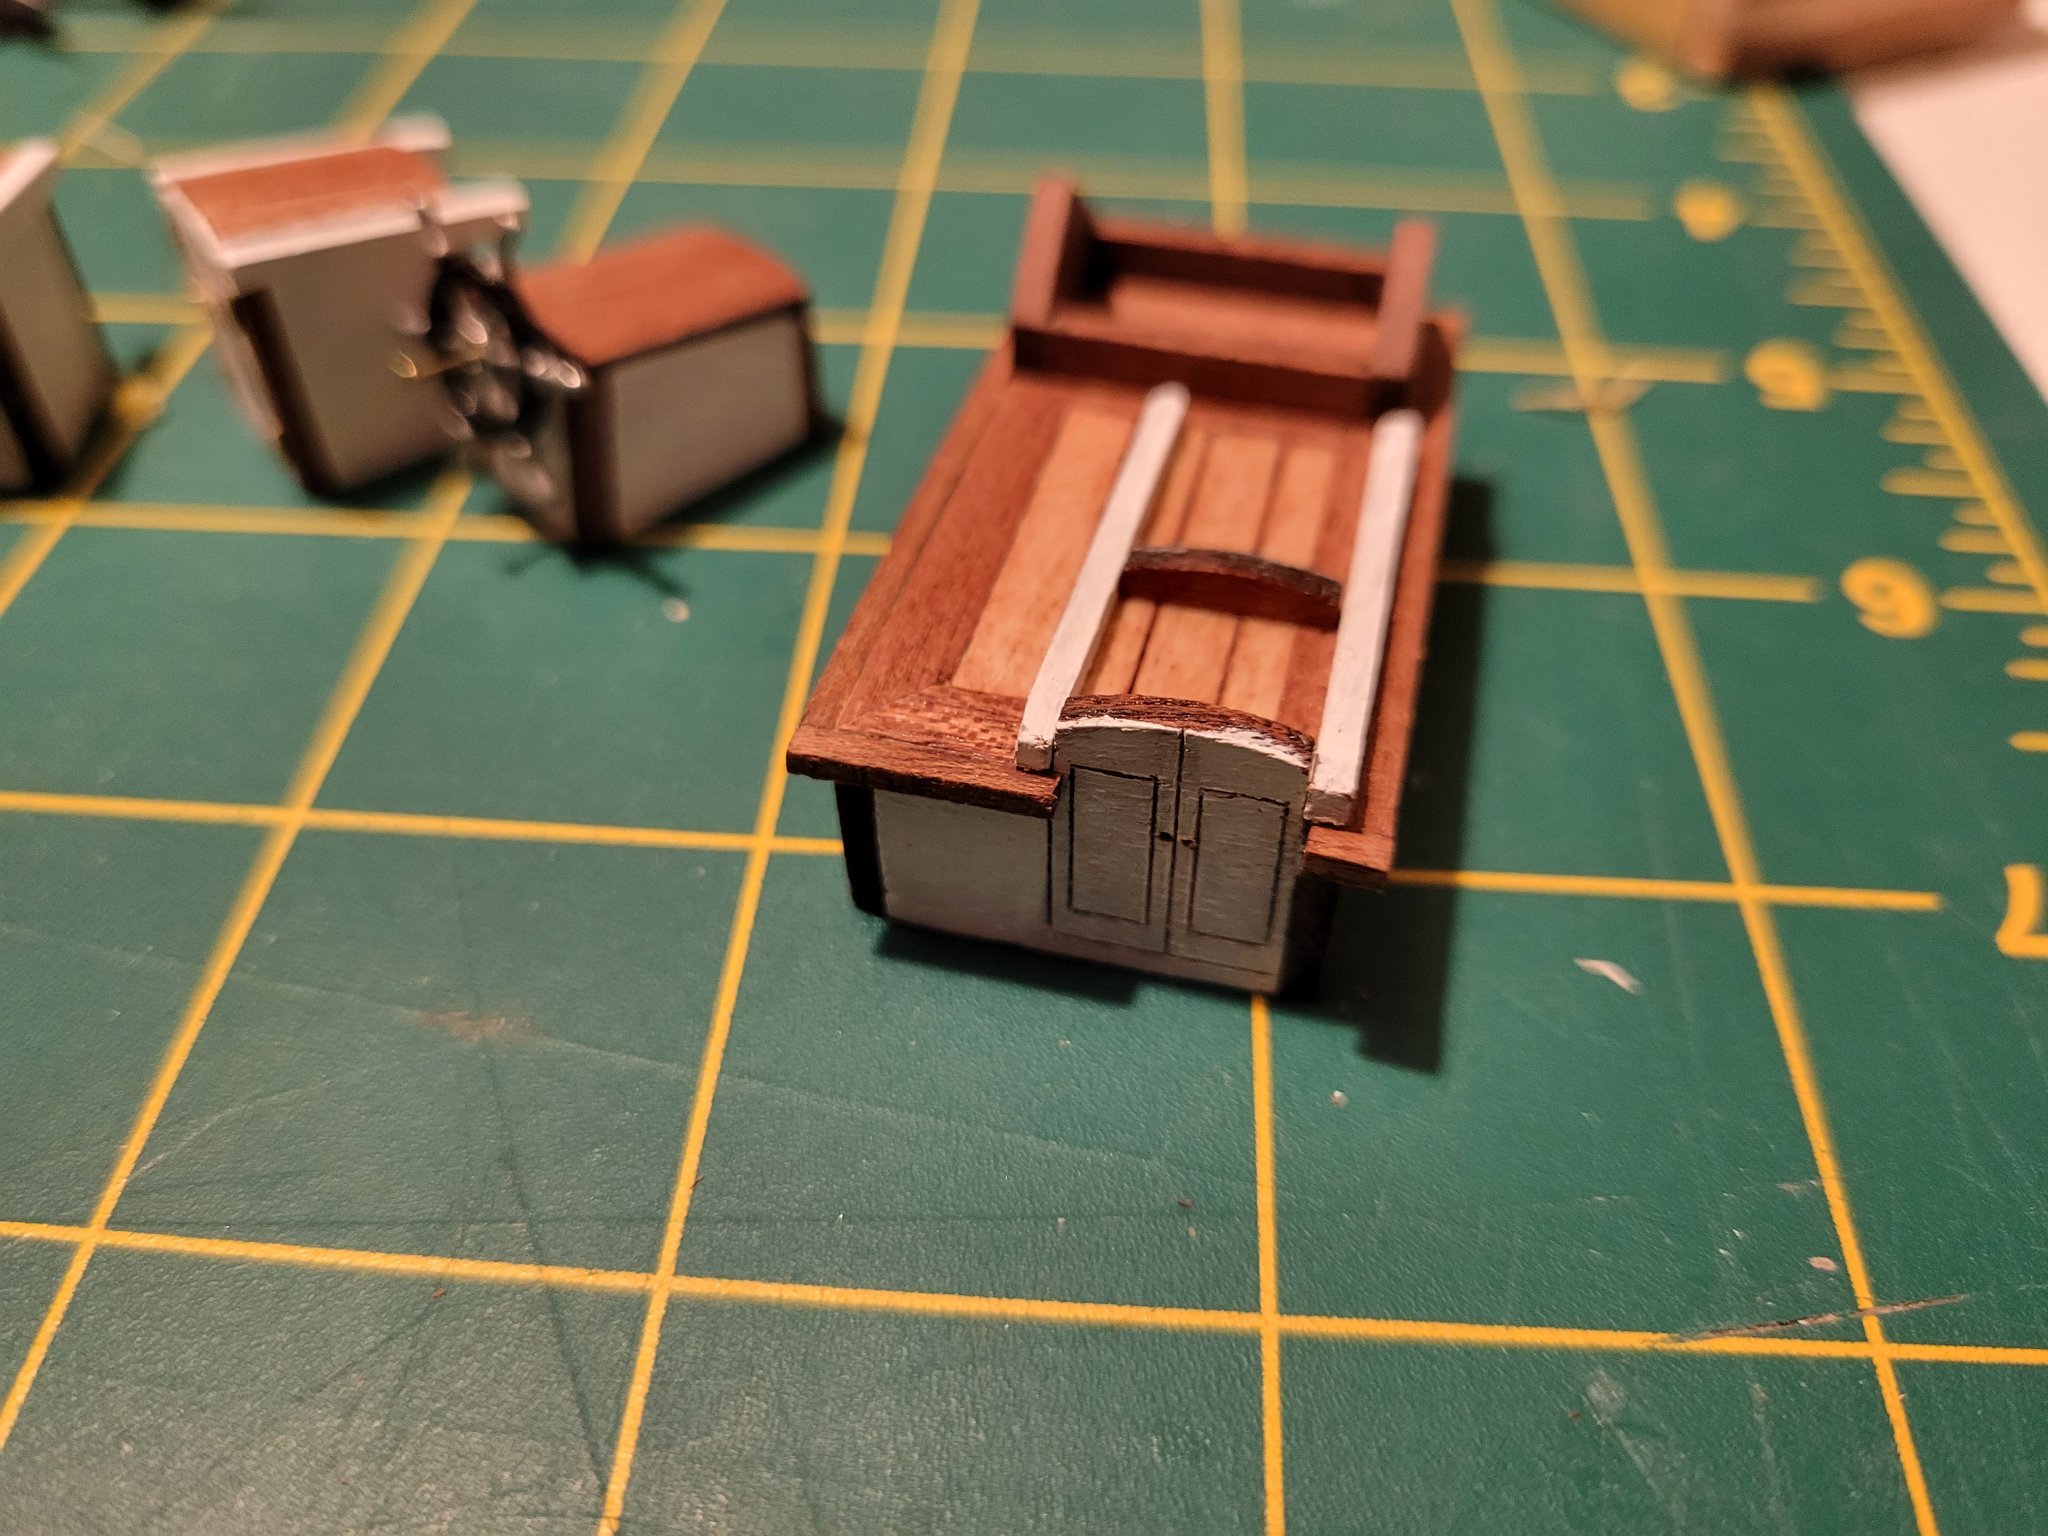
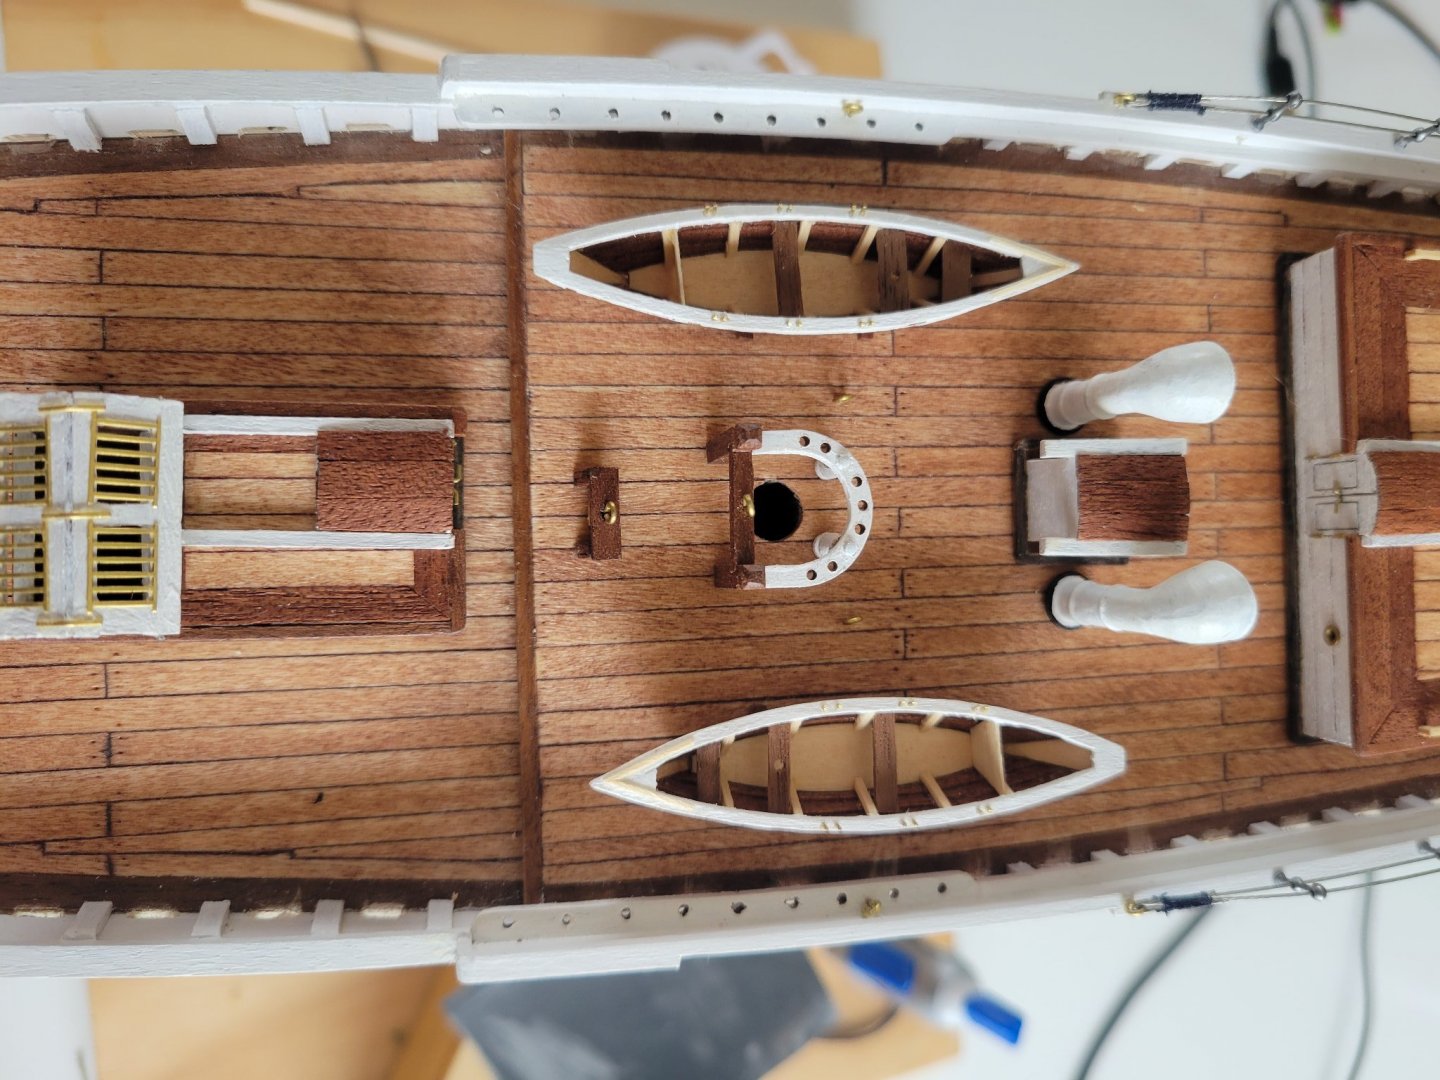
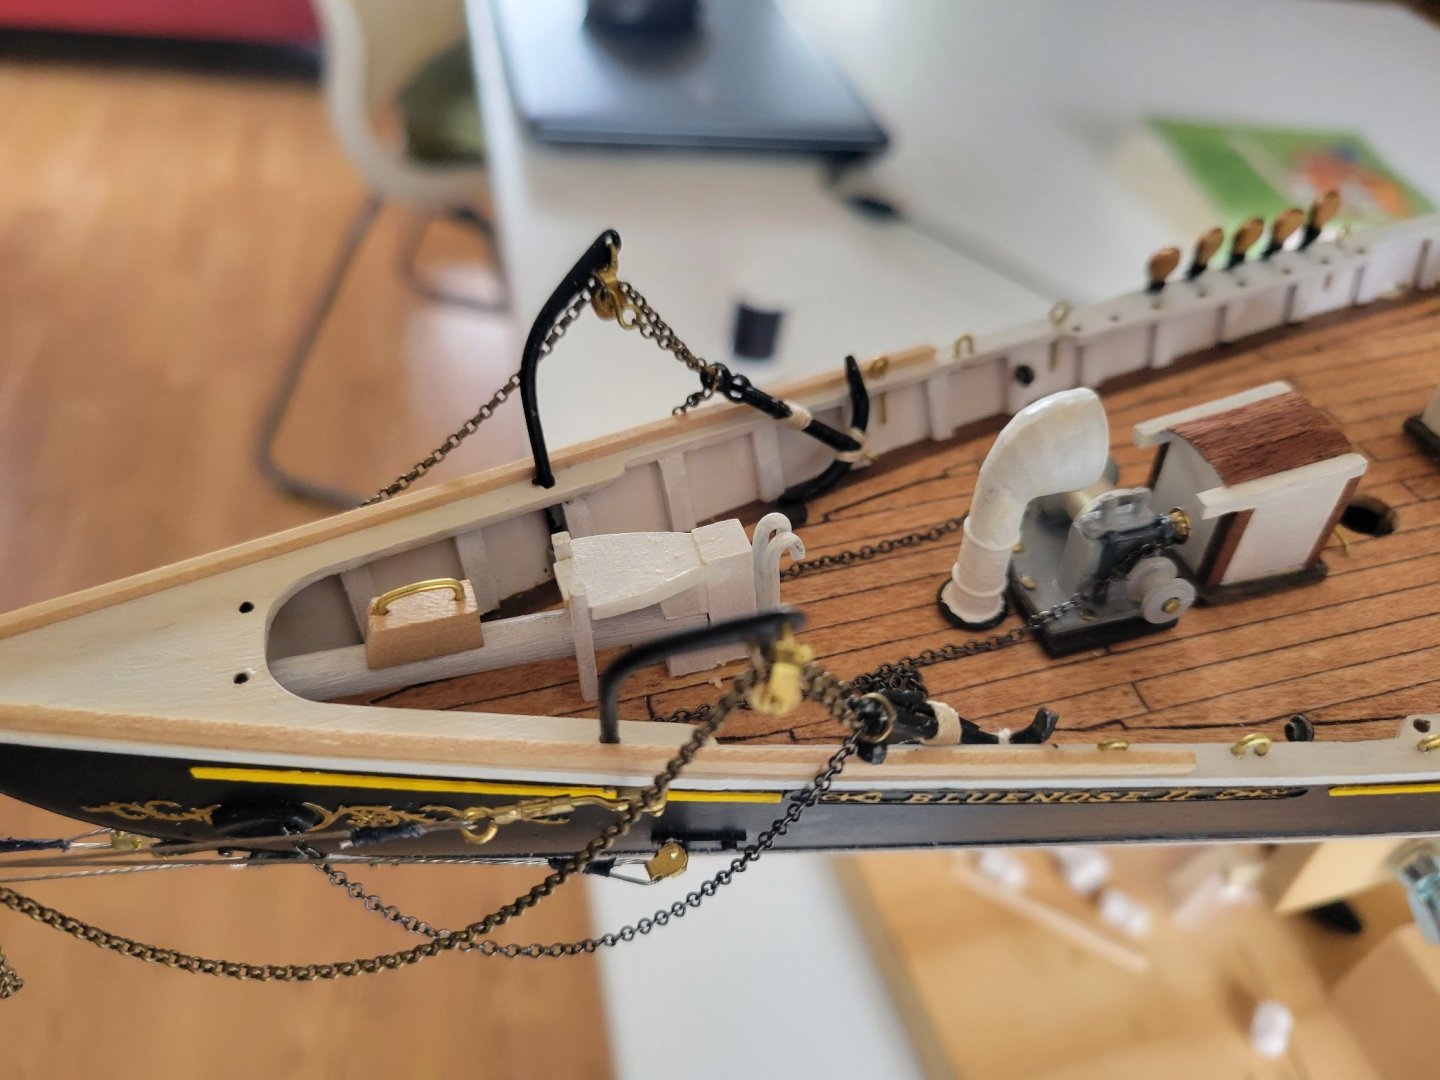
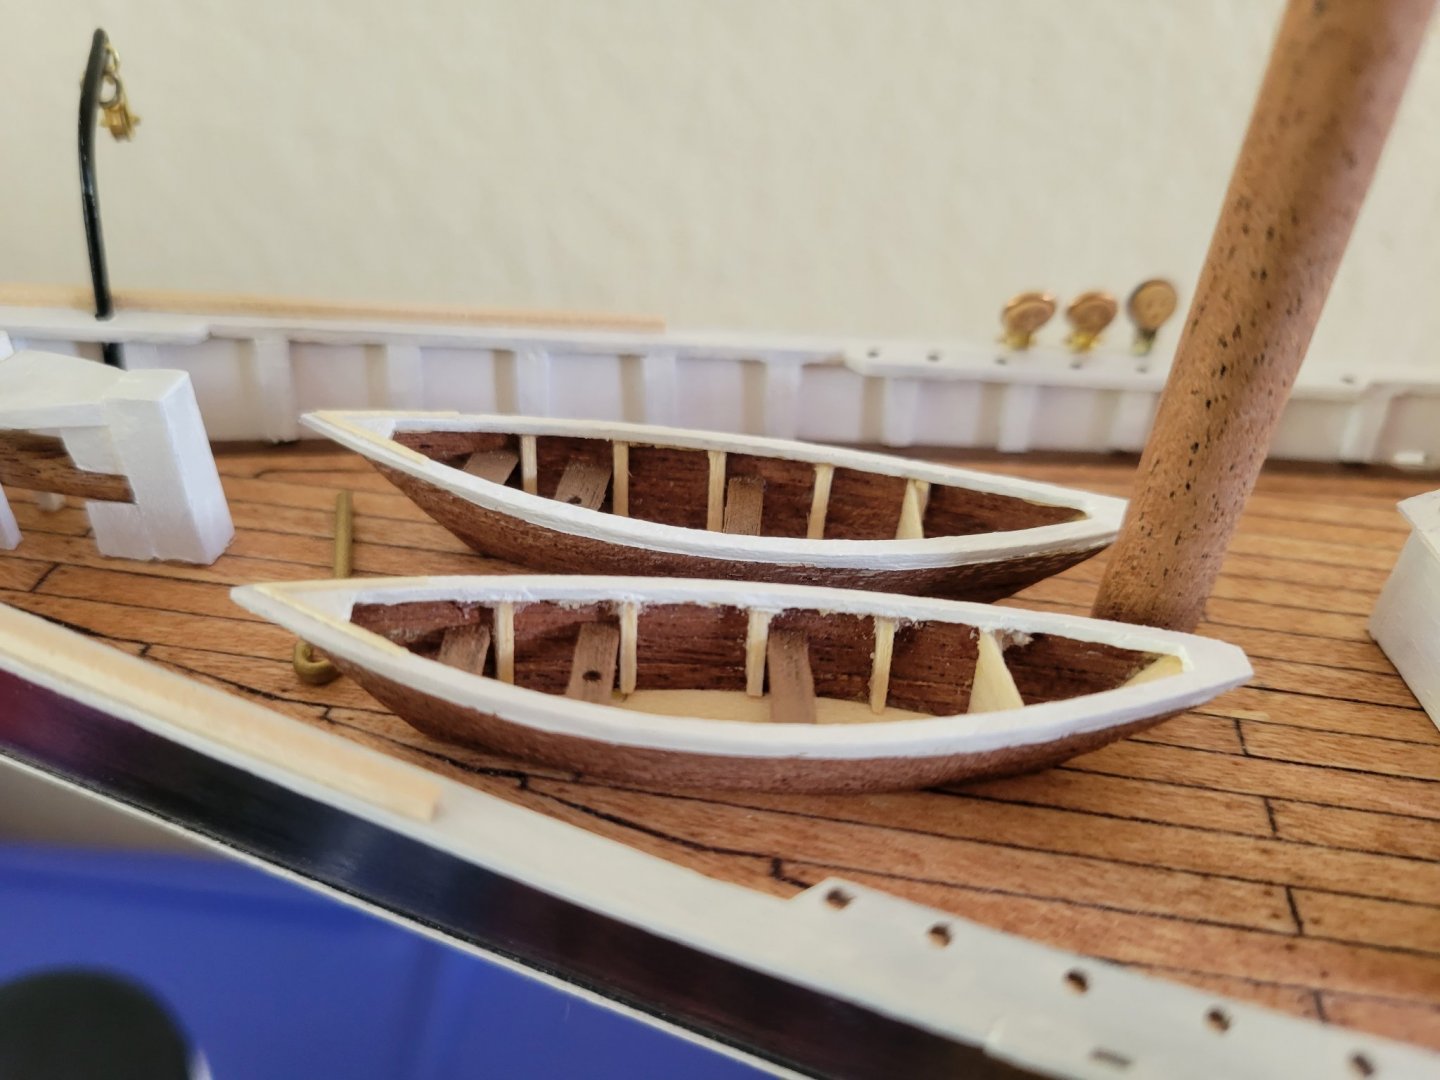
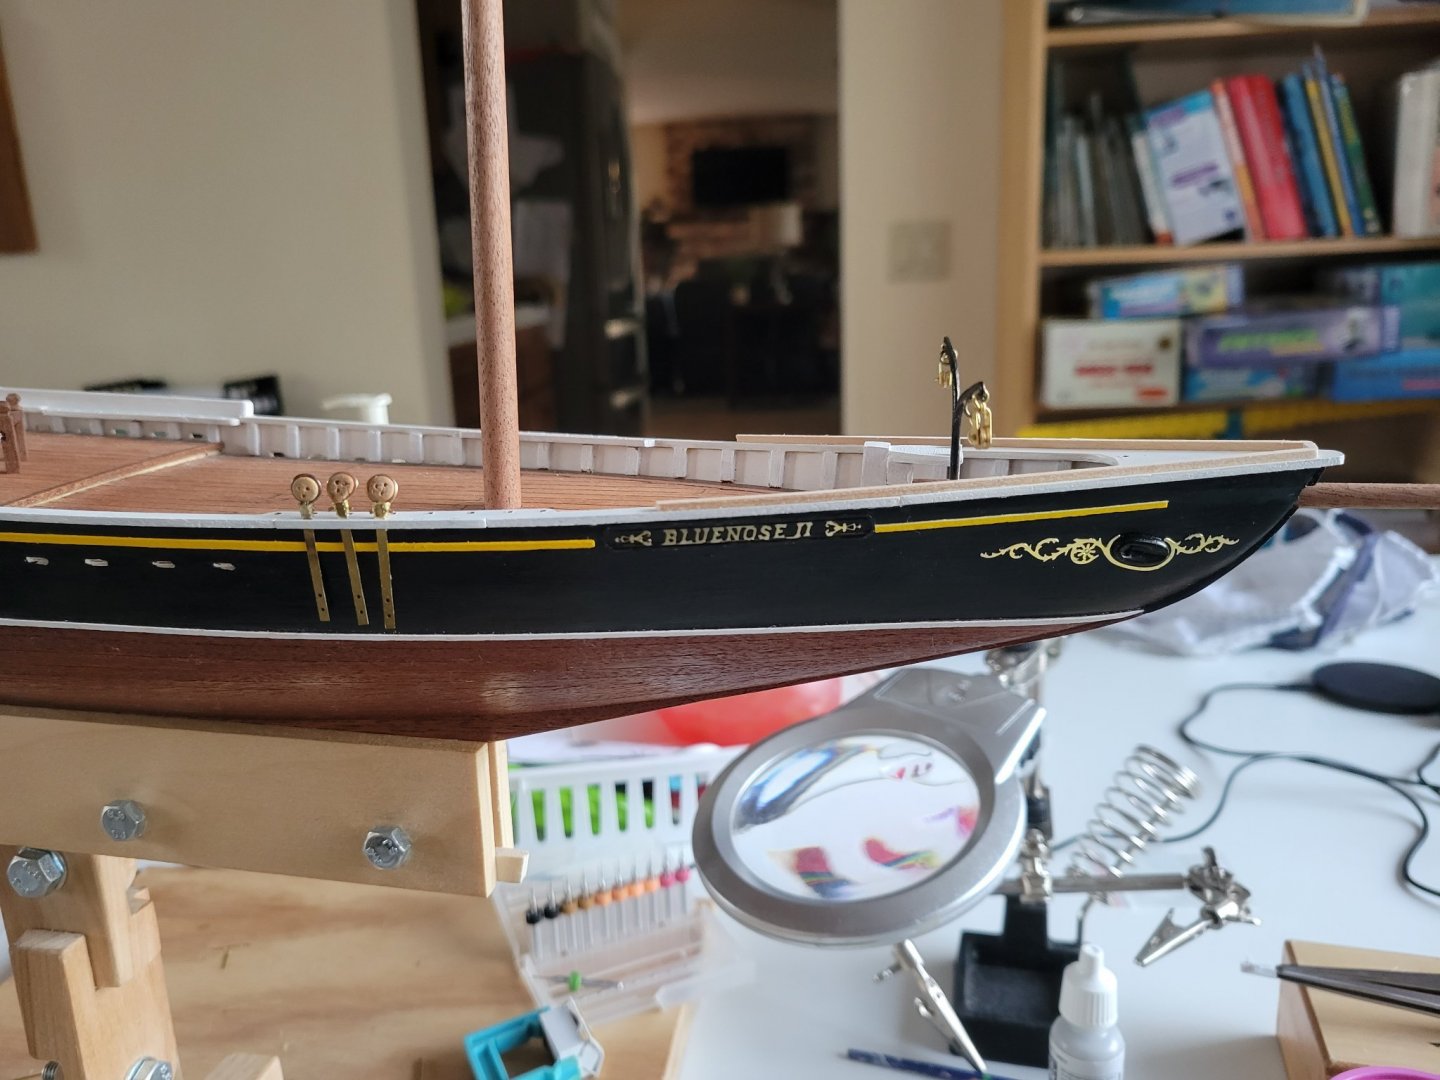
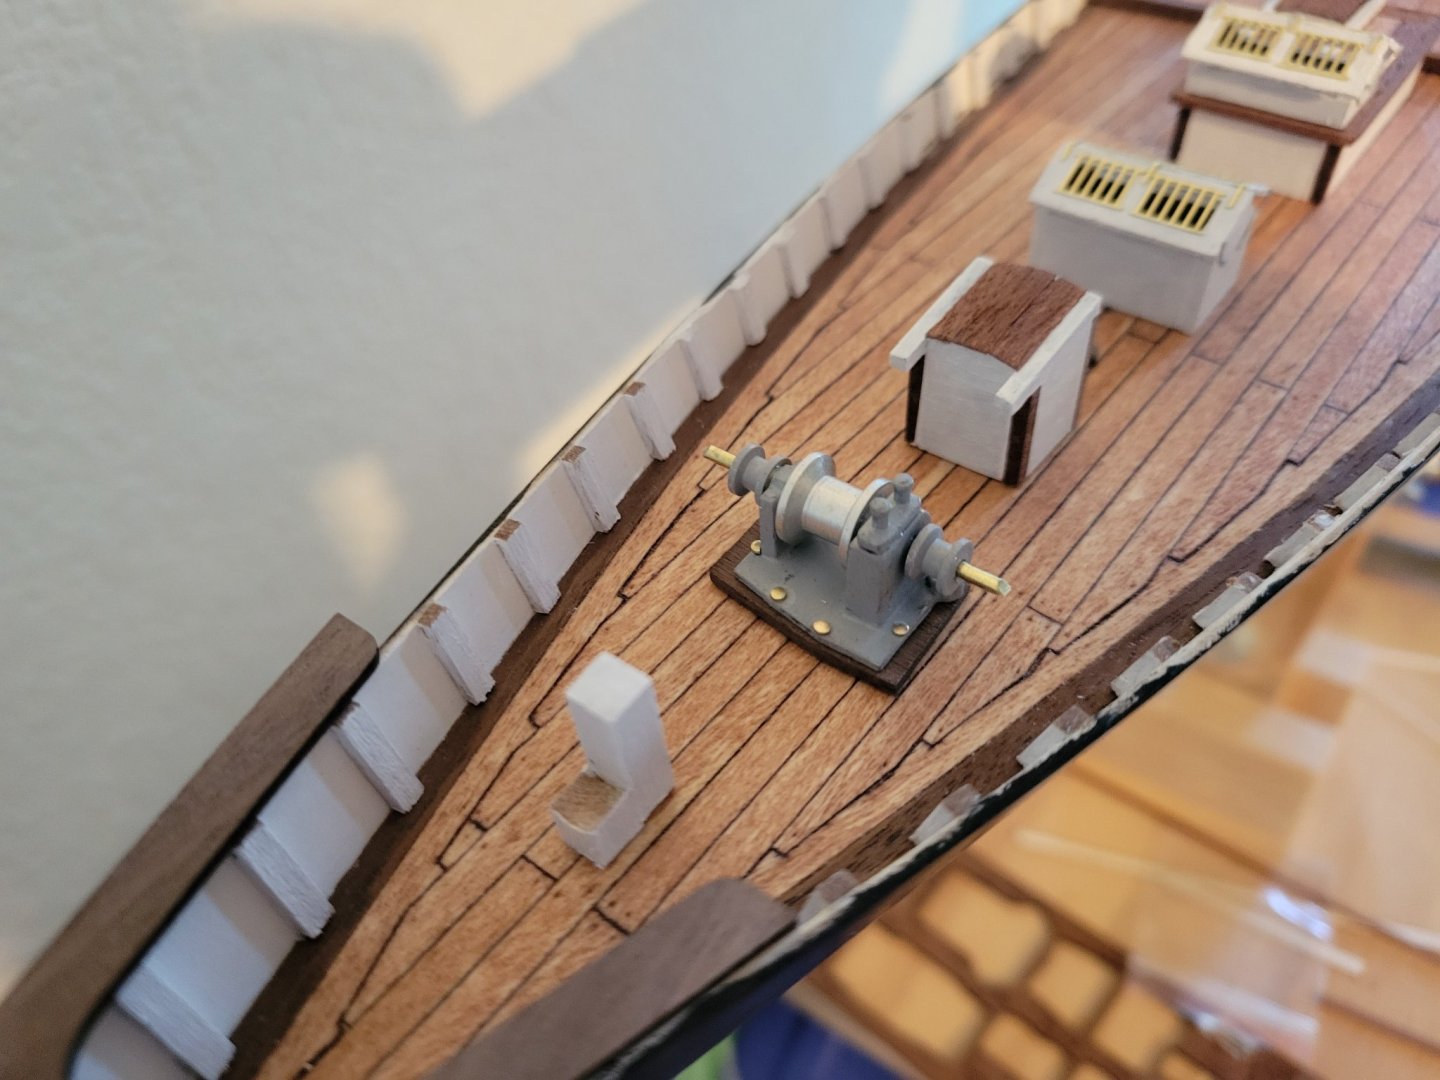
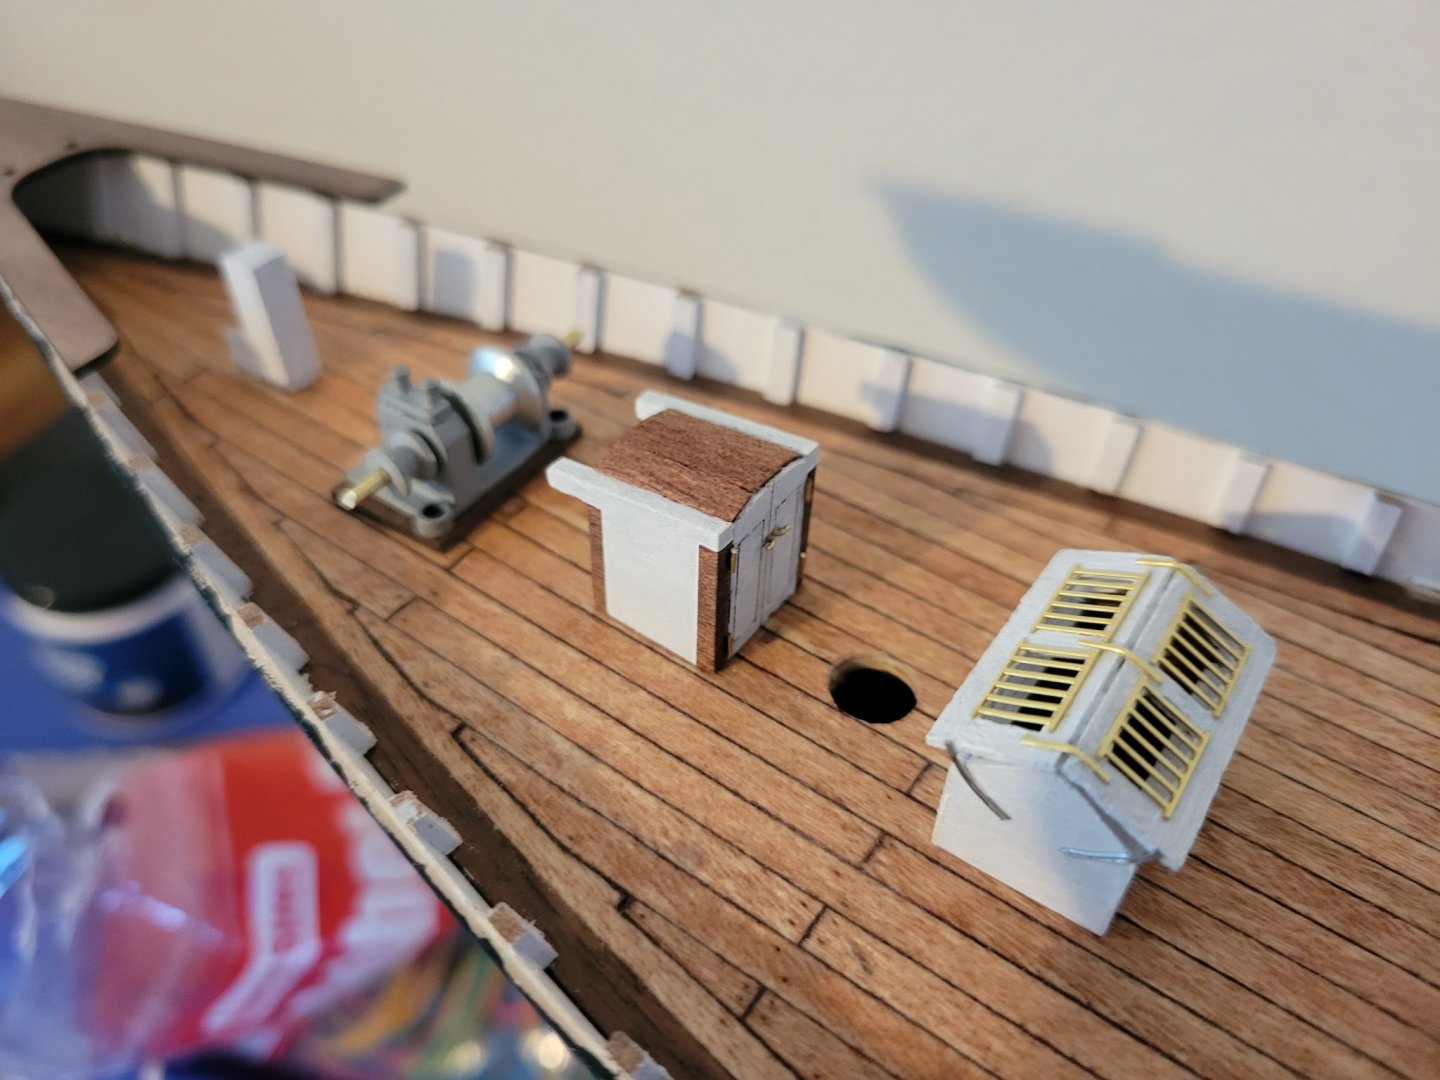
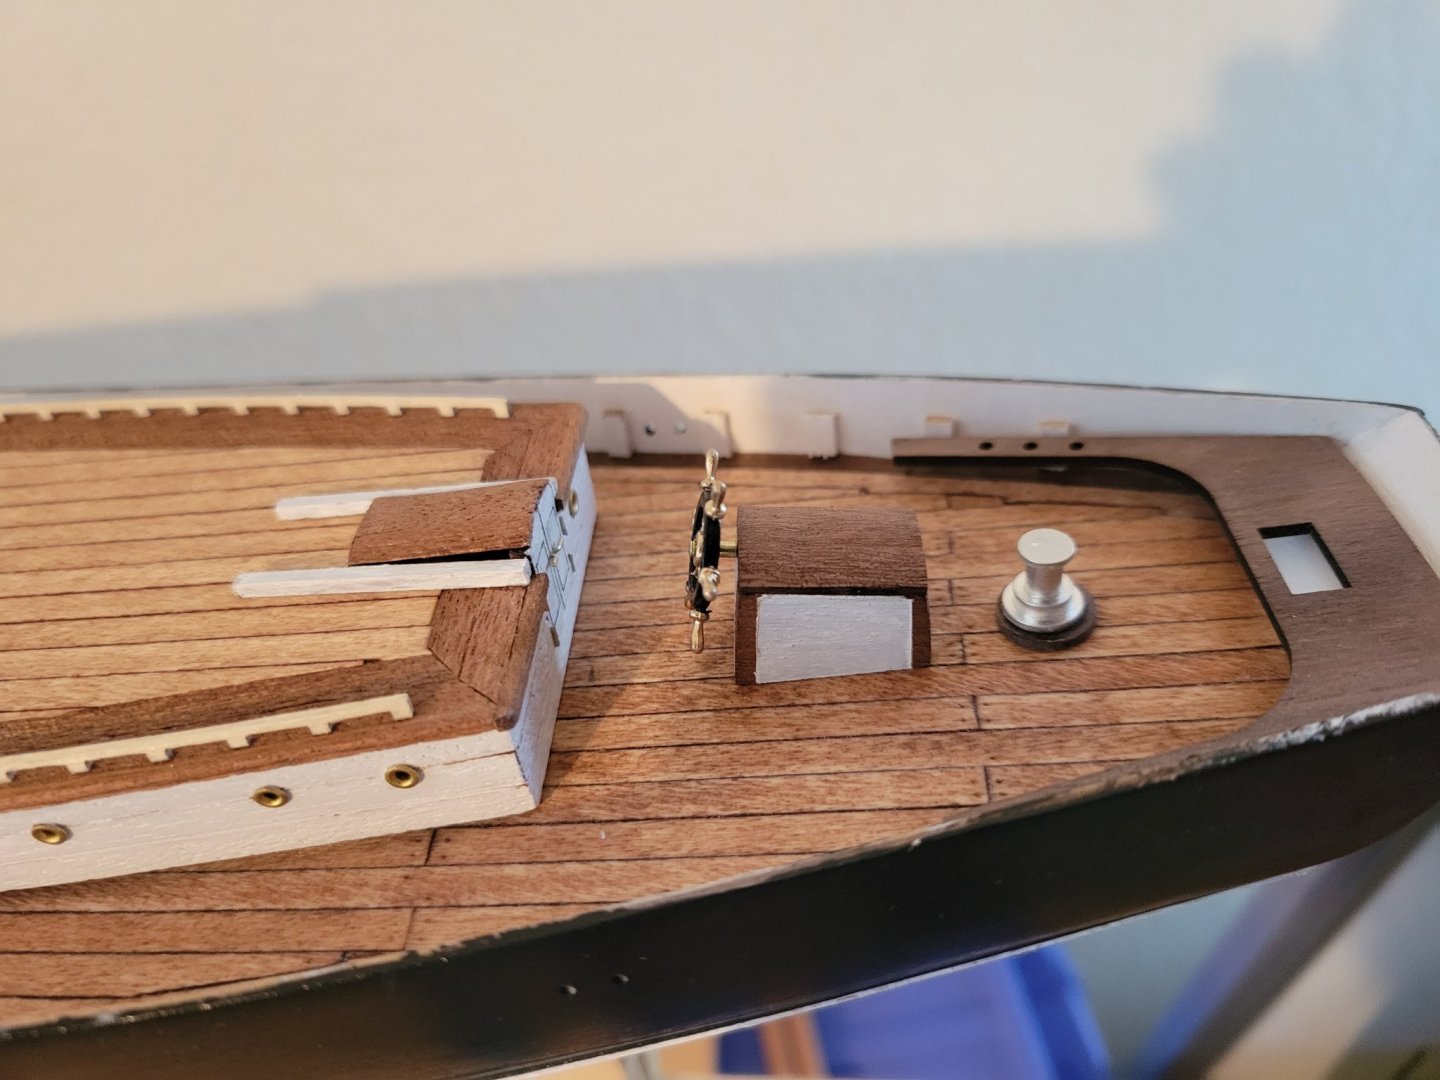
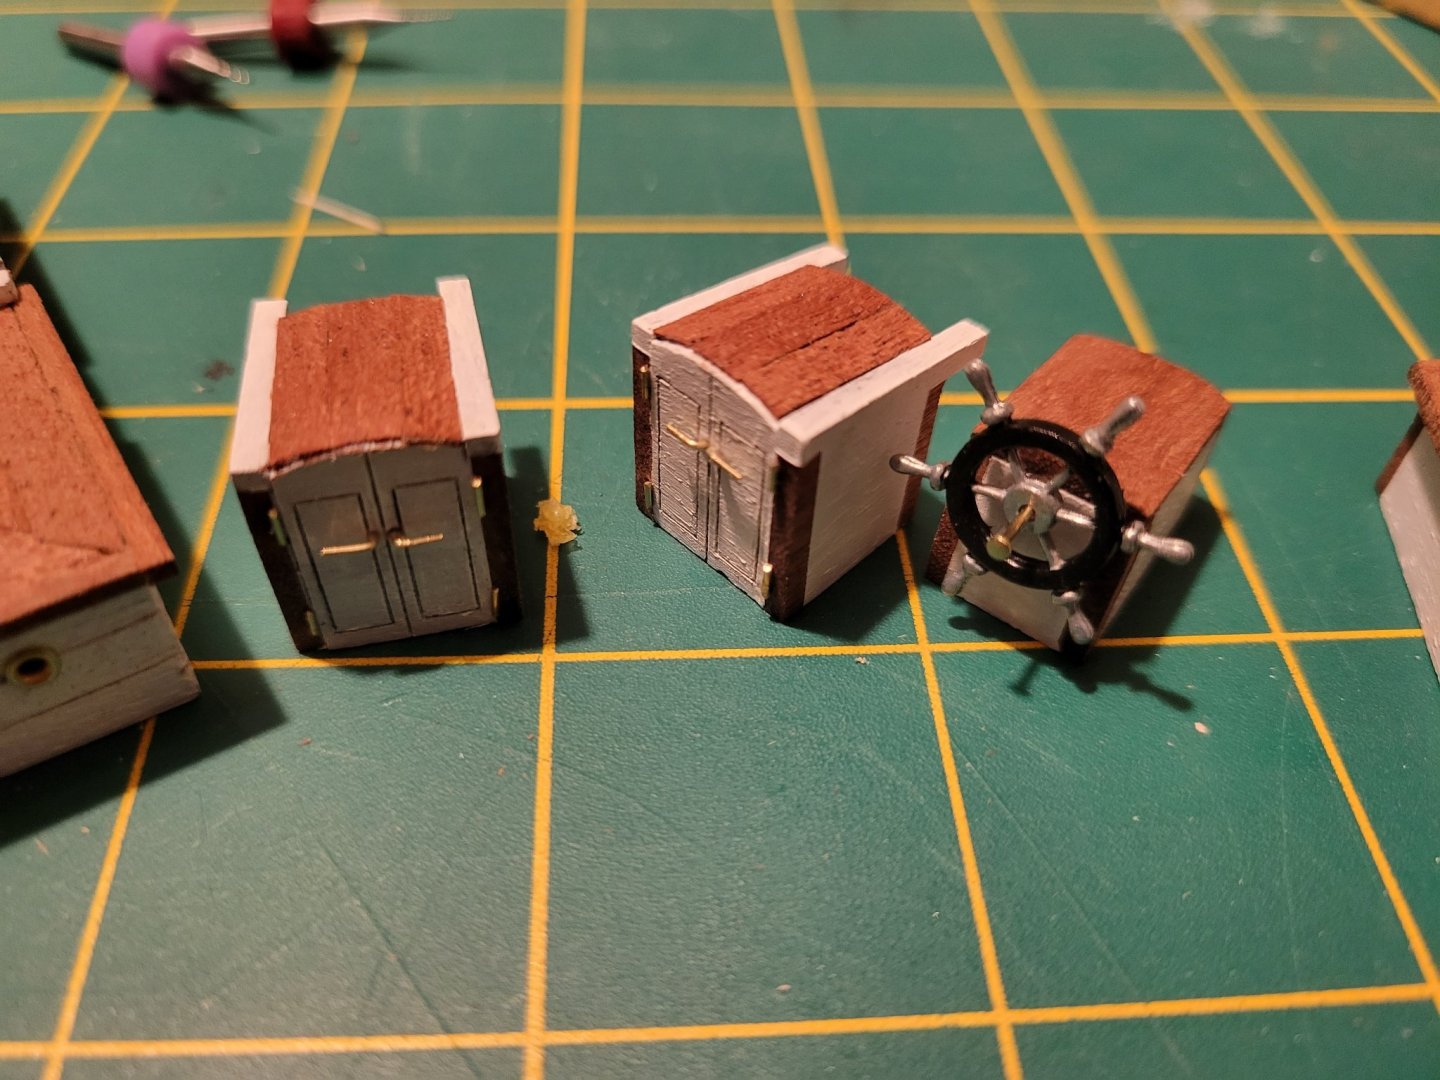
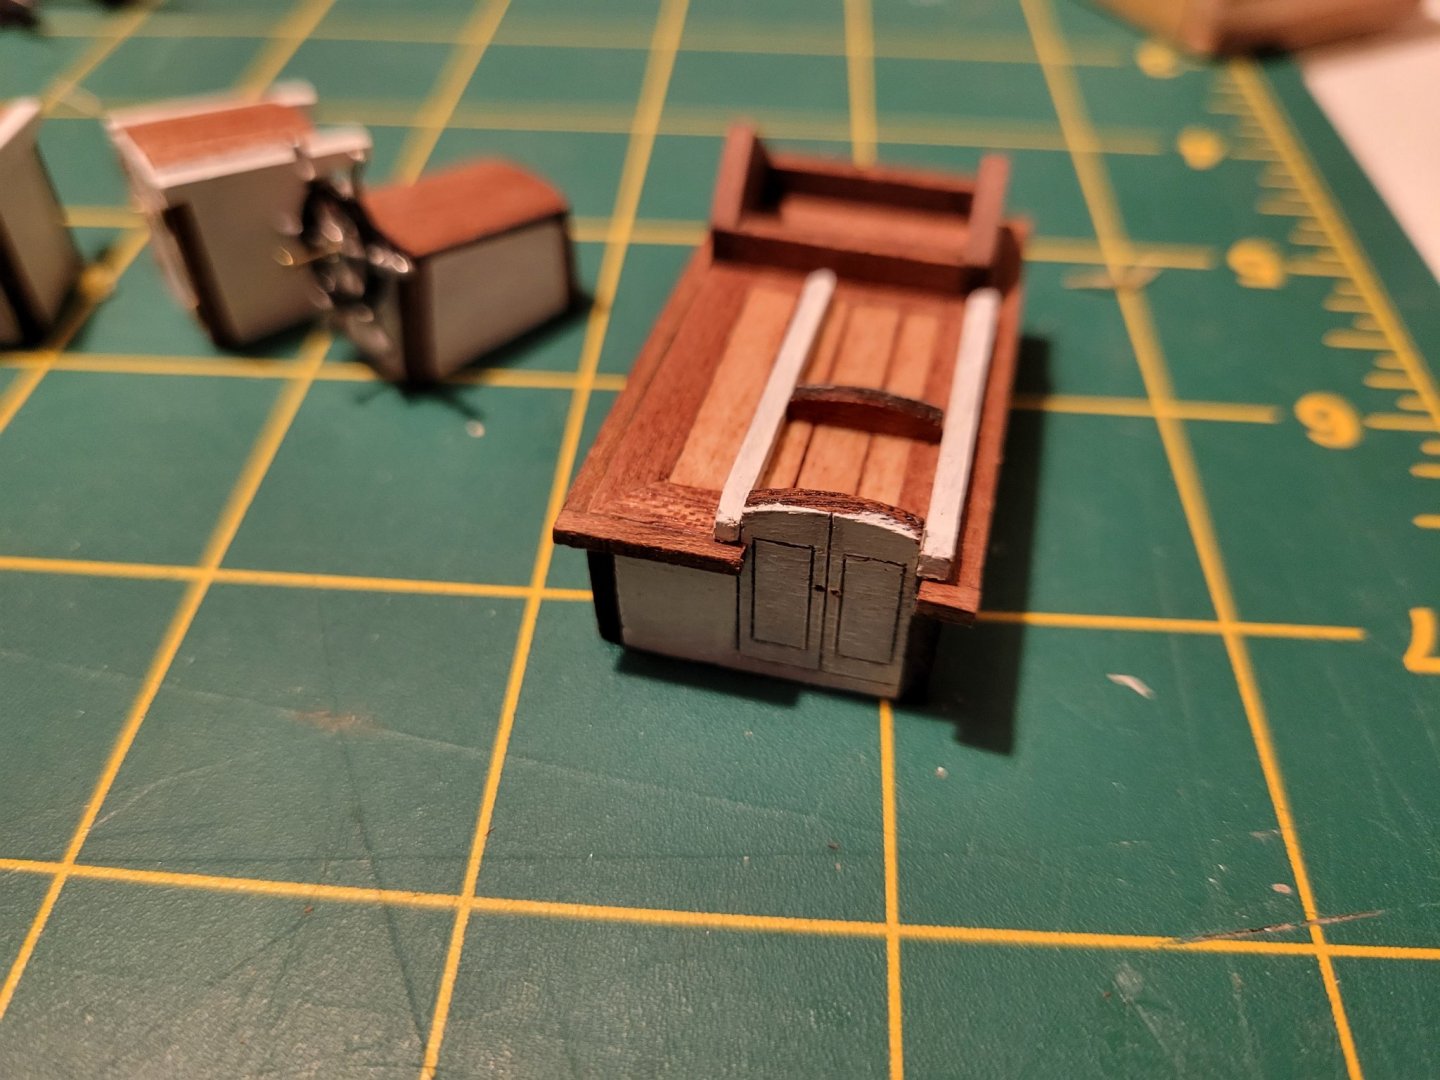
Just taking my time here. Making dories. Kept the white rails but I think I'll stick with wood finish on the hulls. Also putting together the anchor davits? Add an extra ring behind the pull to setup the chain hook and haul line.also added the yellow stripe on the bulwark same as the white. Just cut thin strip of the decking,painted, and the glued on. More crisp than I could probably paint on.im also model the windlass. There is an extra section on the port side AL leaves out. Took apart on of my daughters beads to make it. Also adding some additional elements I can see in the bluenose picks like the breaker bar and a valve handle.


- 84 replies
-
- 3
-
-
- Artesania Latina
- Bluenose II
- (and 1 more)
-
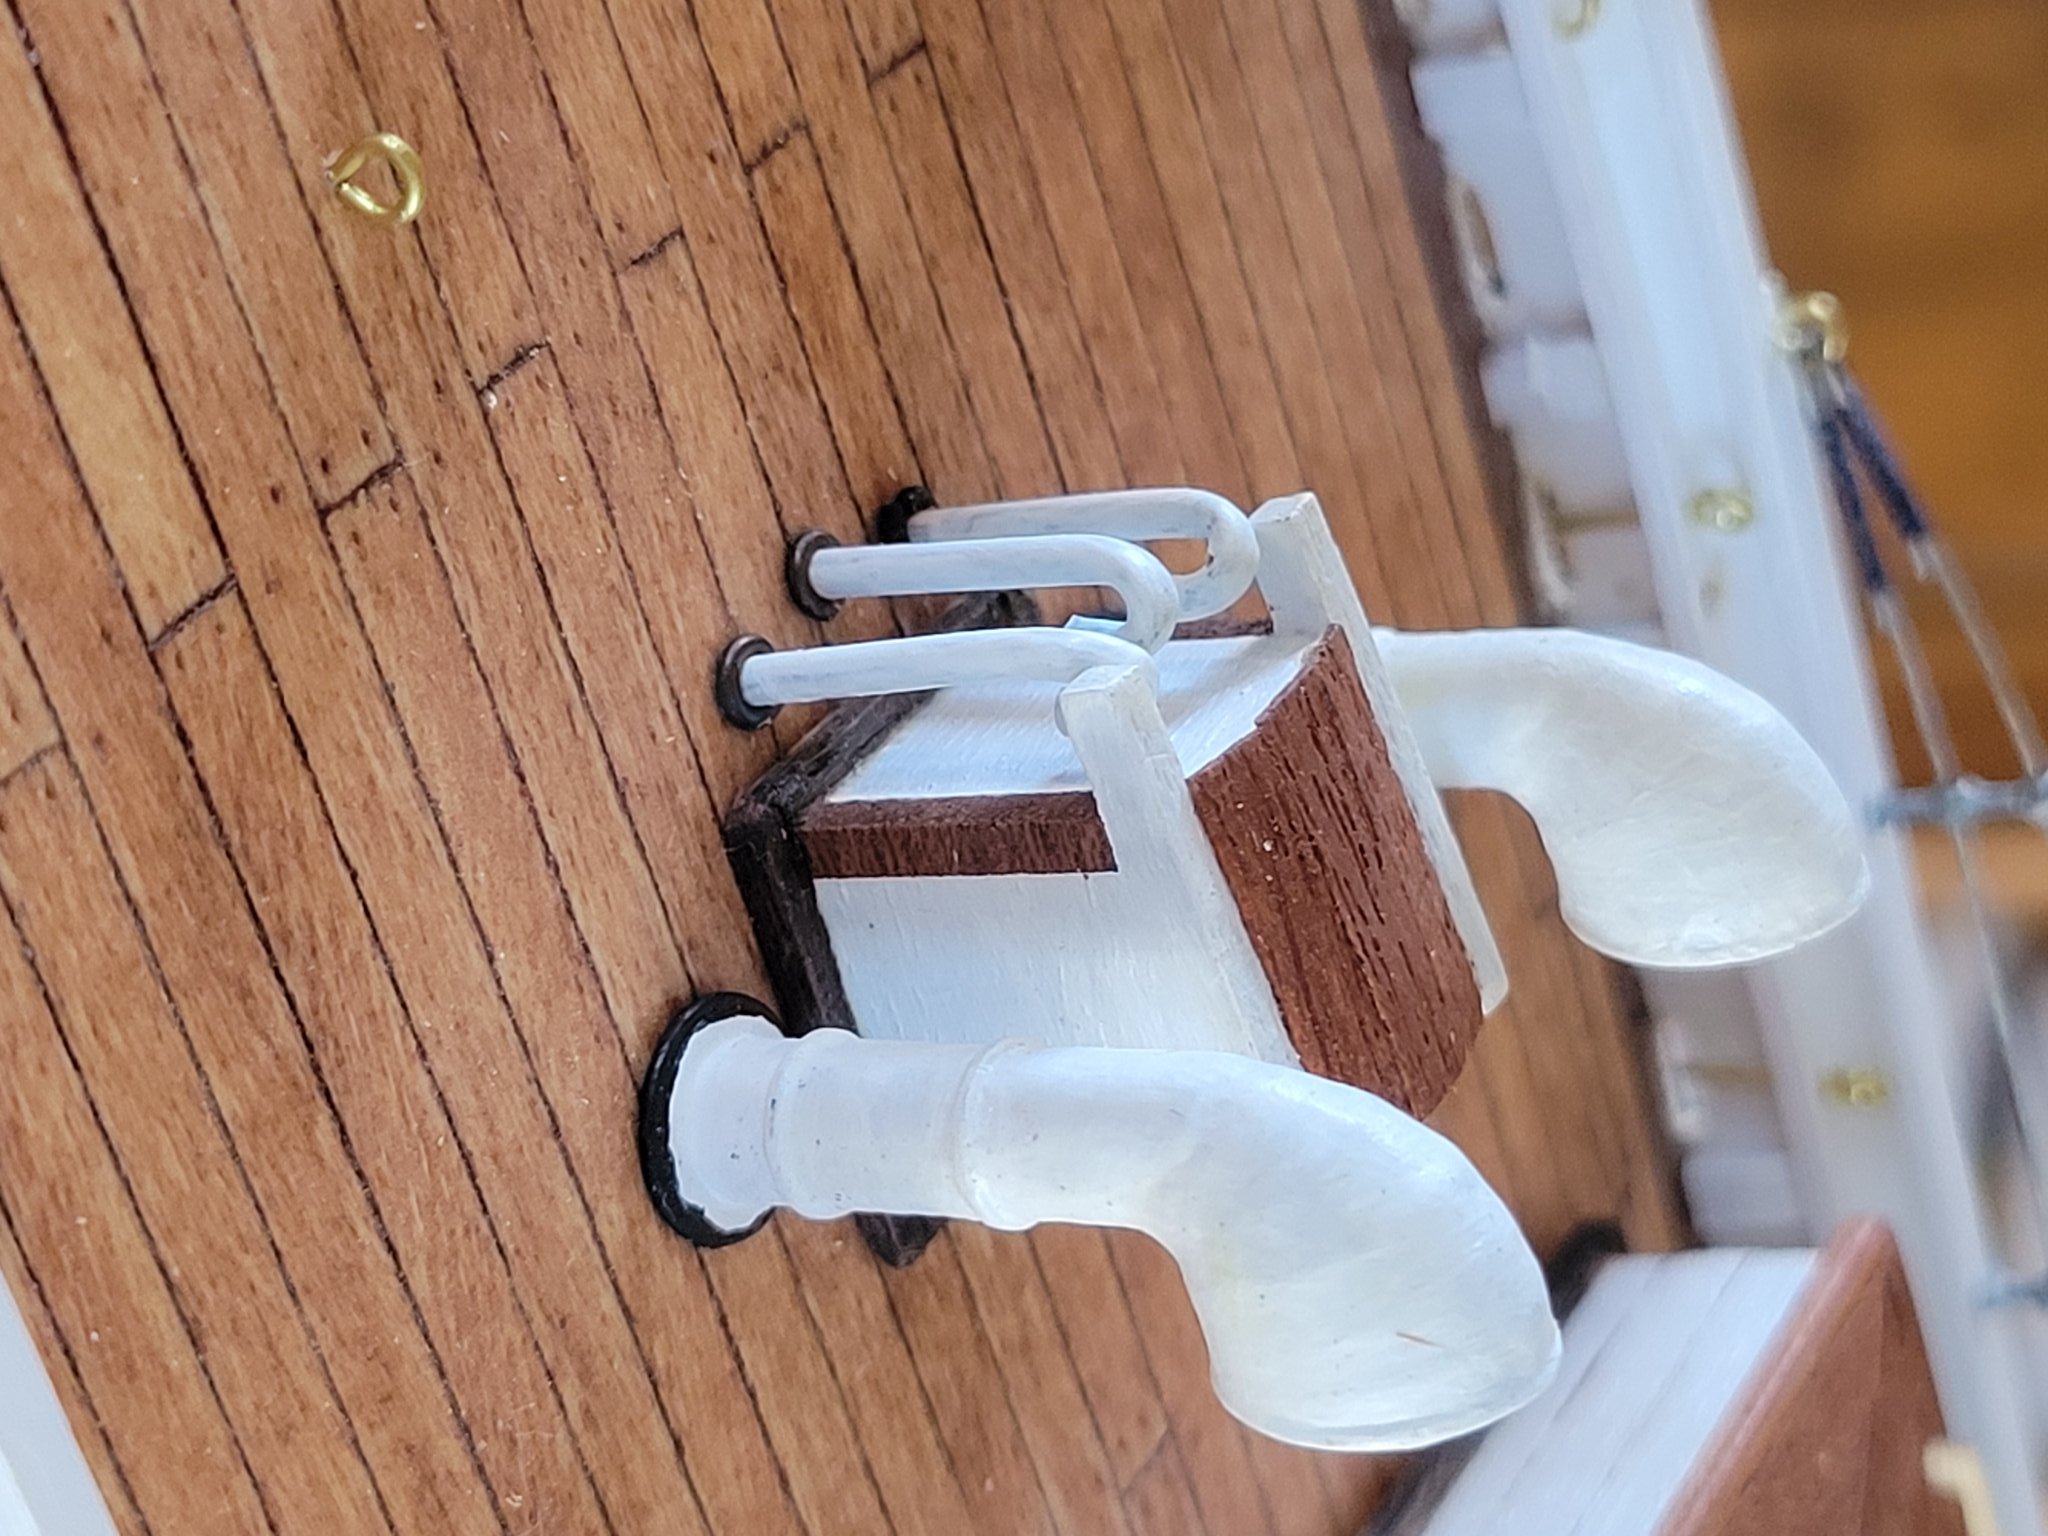
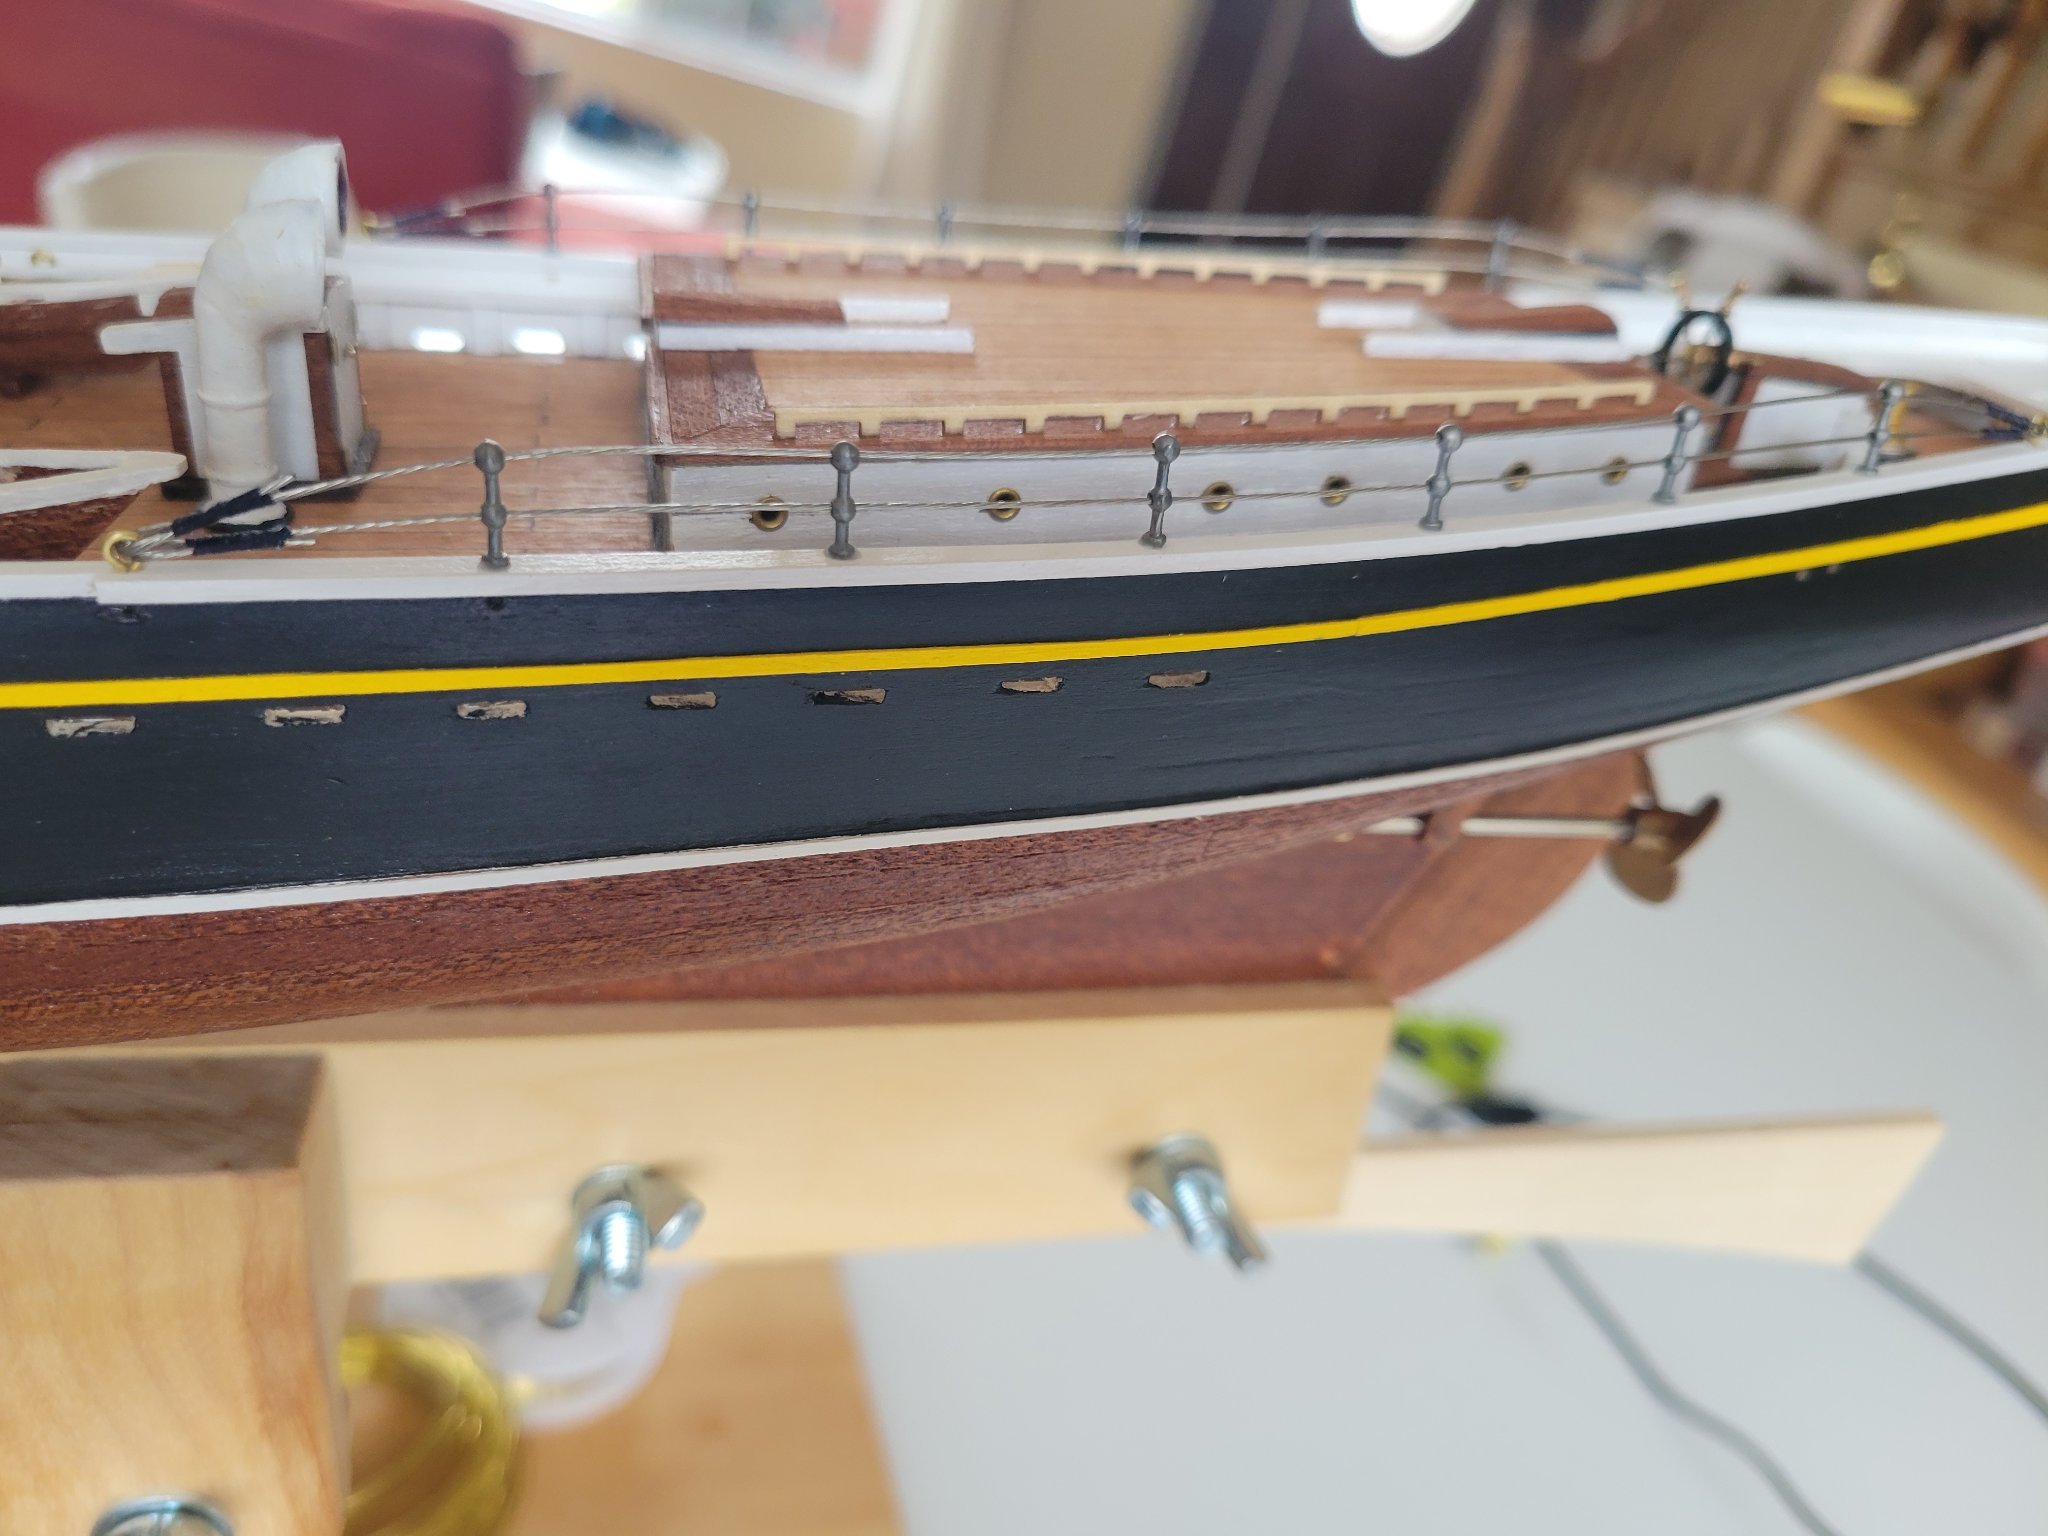
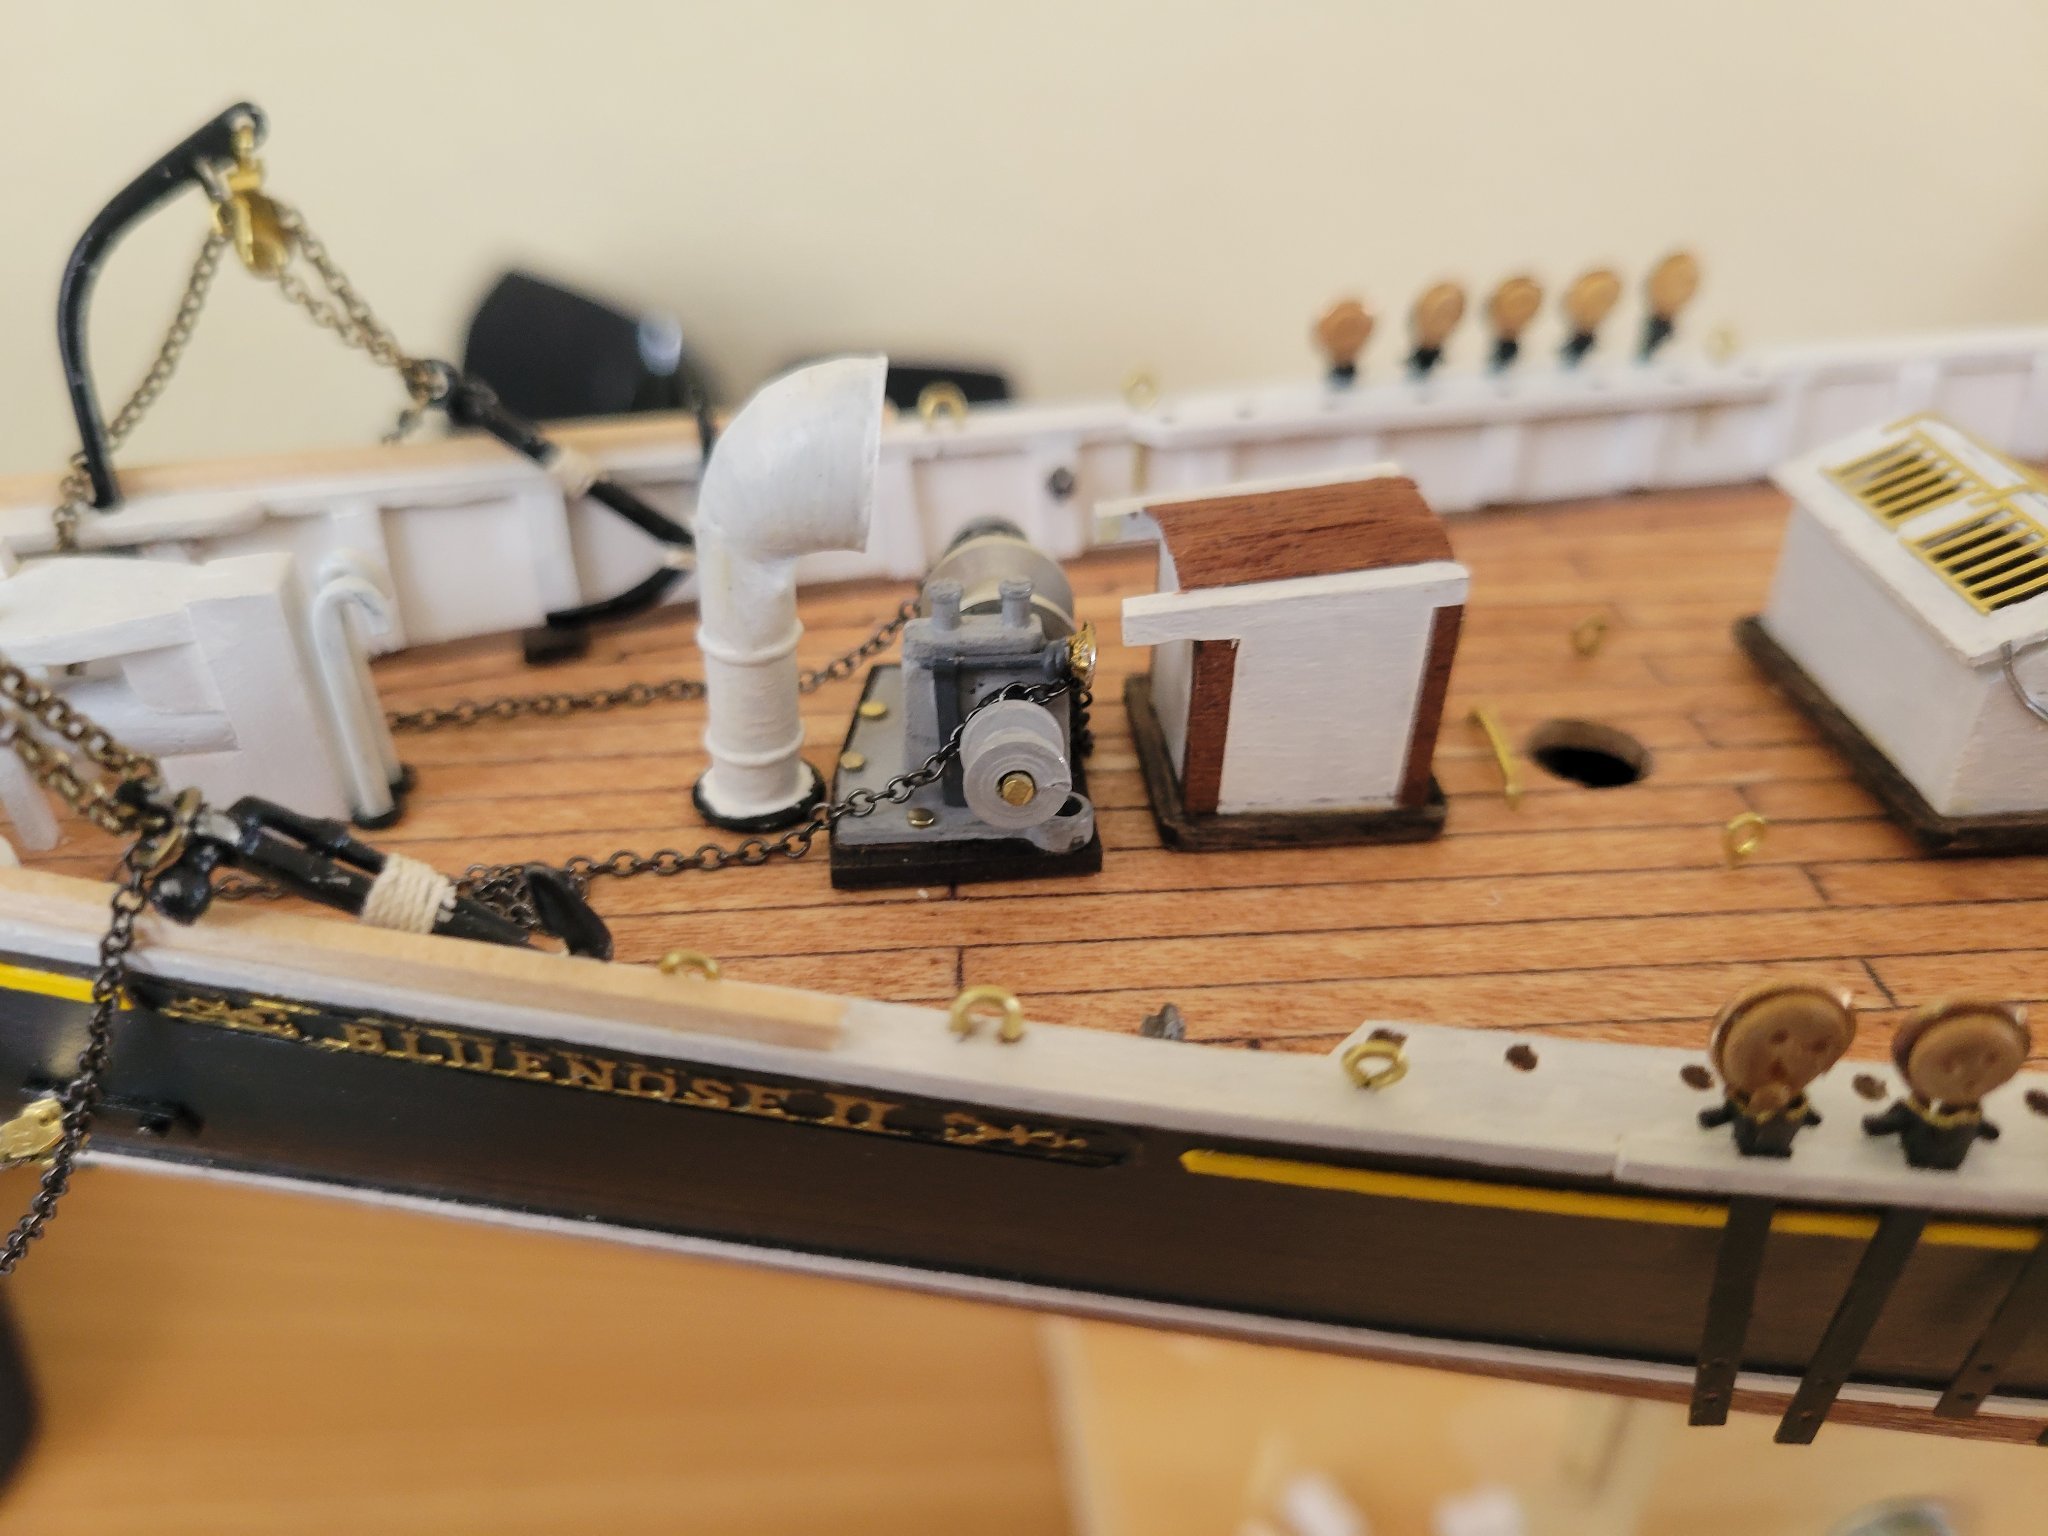
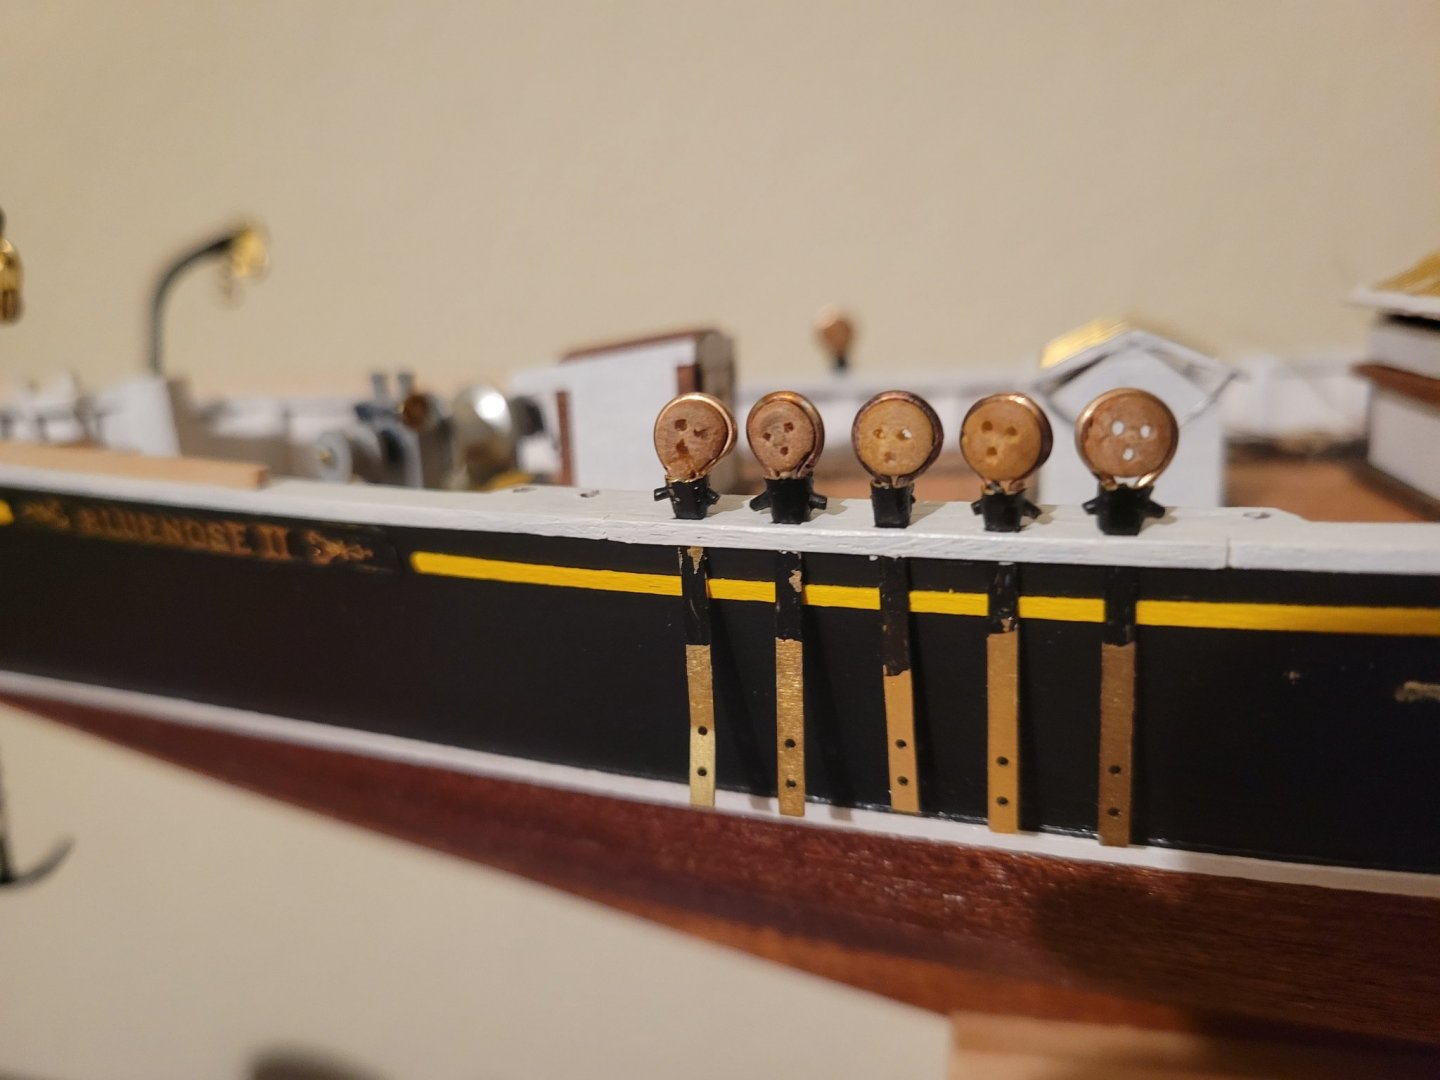
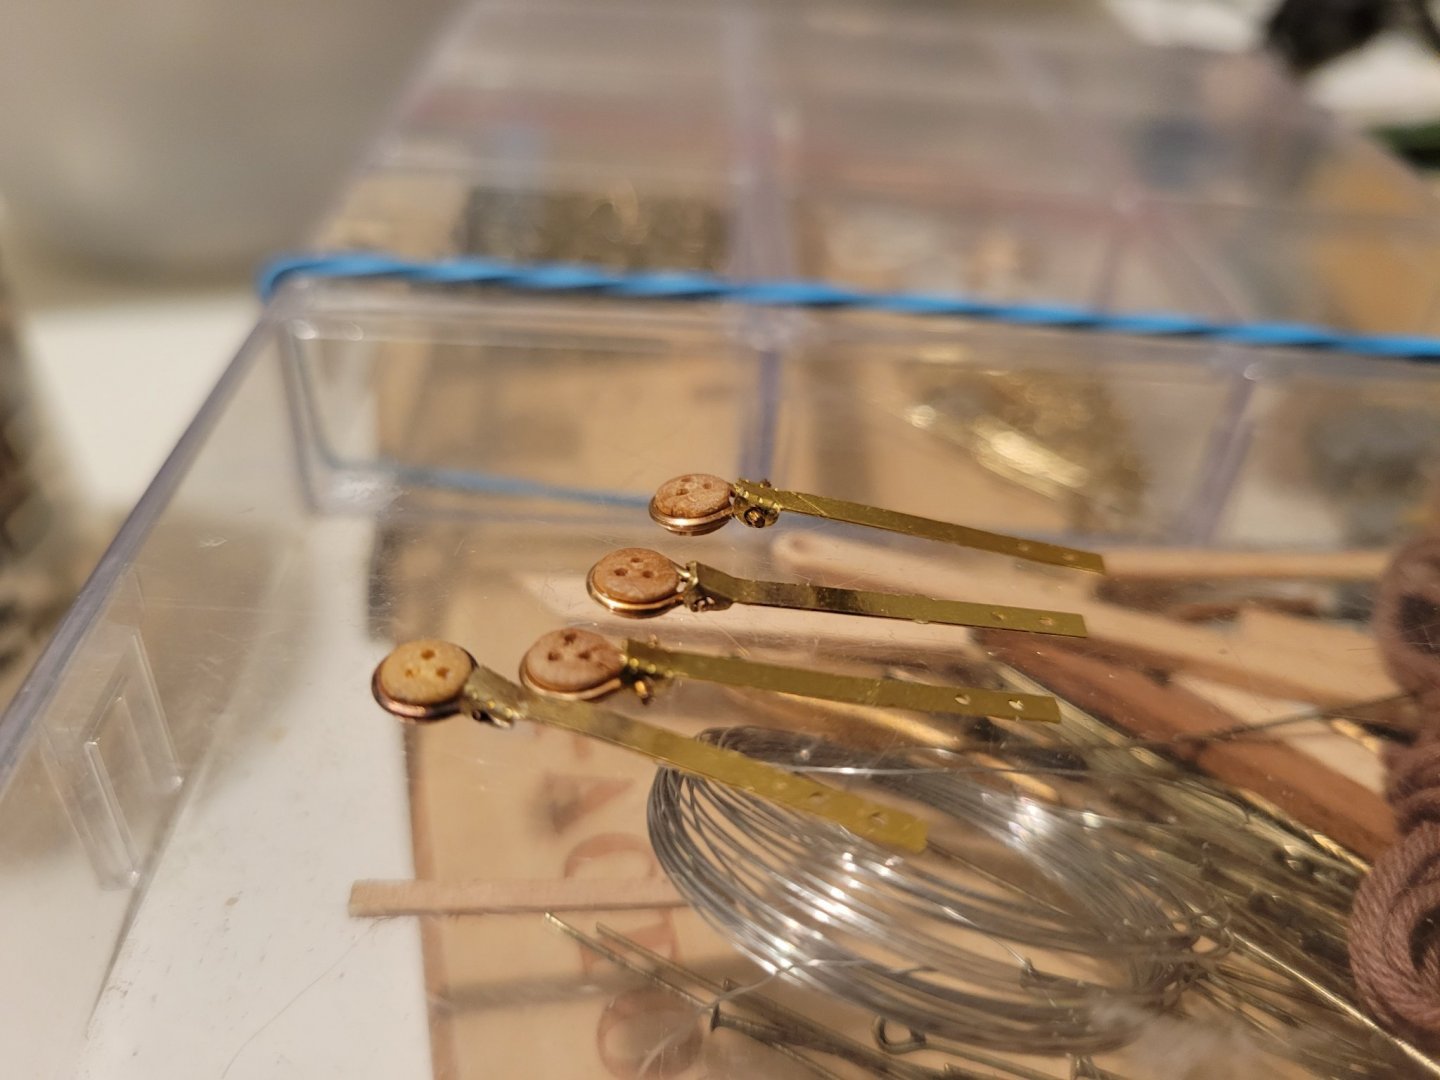
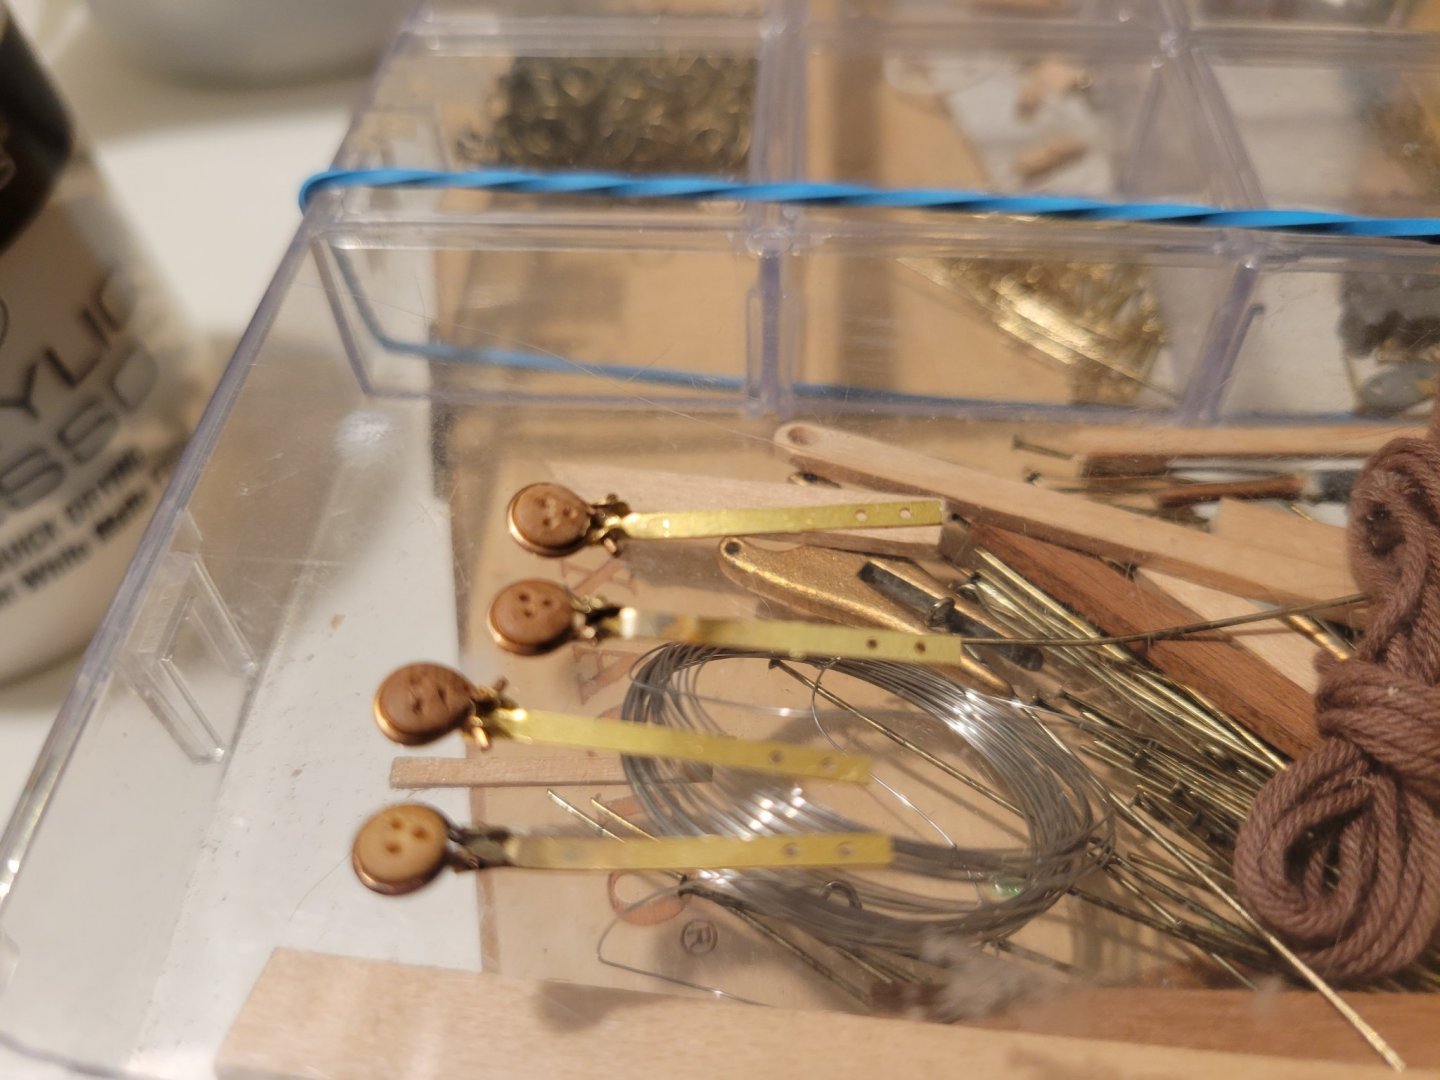
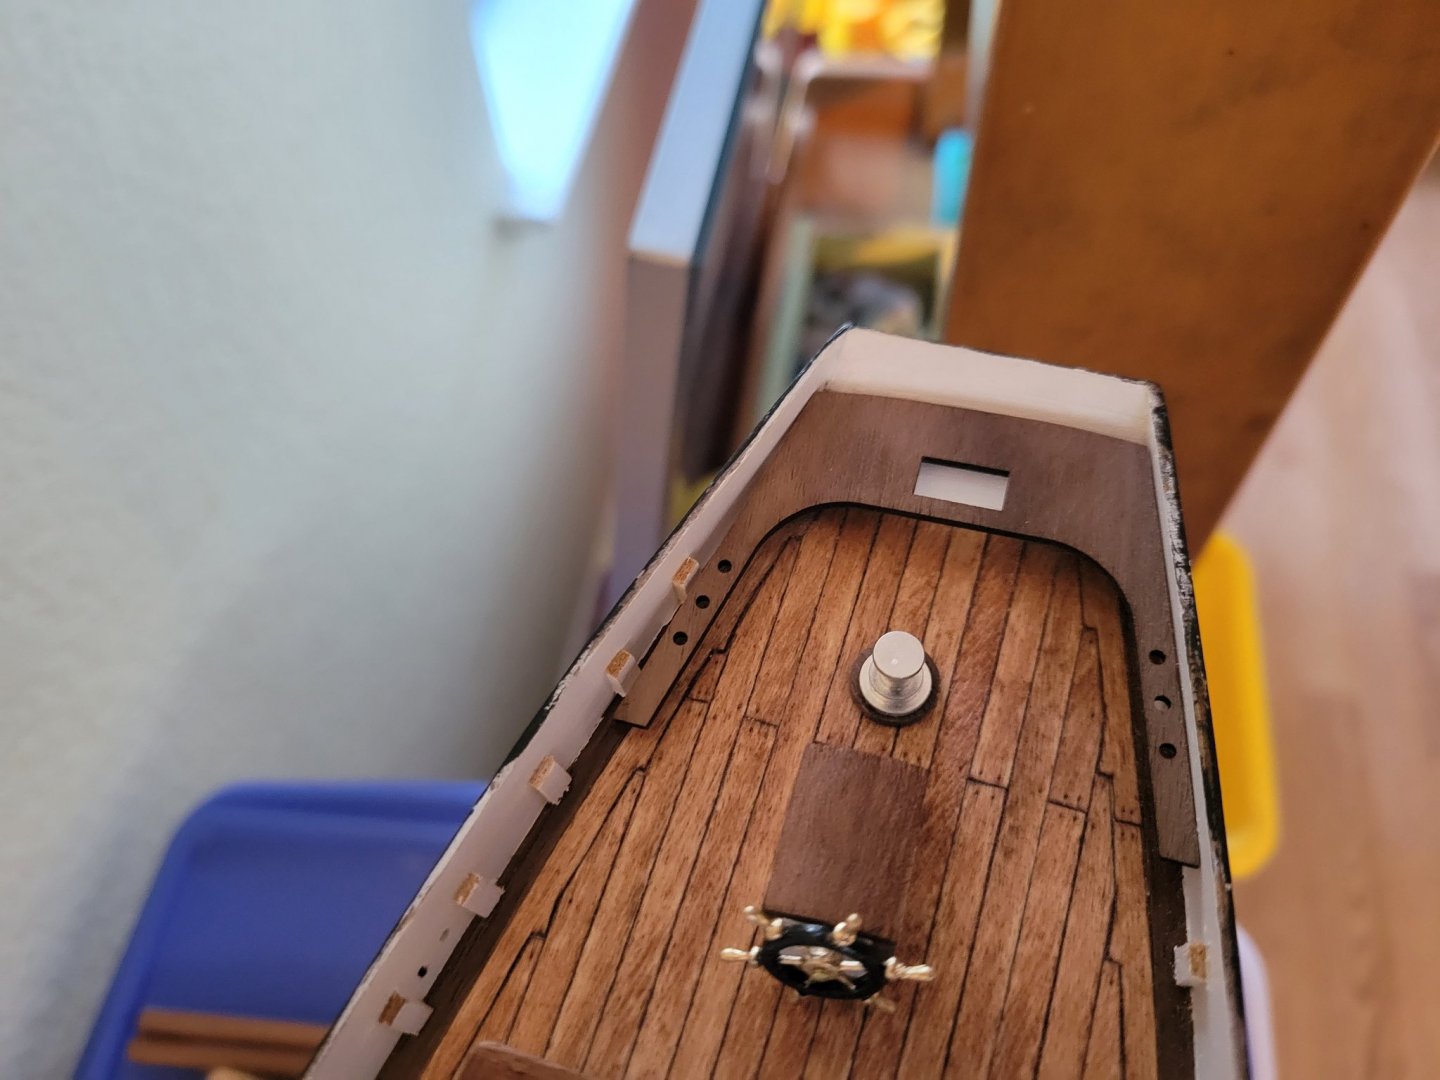
Railing done. Deckworks are still all just dry fit. Also creating the gooseneck vent pipes using 1/16 brass tube.

- 84 replies
-
- 4
-
-
- Artesania Latina
- Bluenose II
- (and 1 more)
-
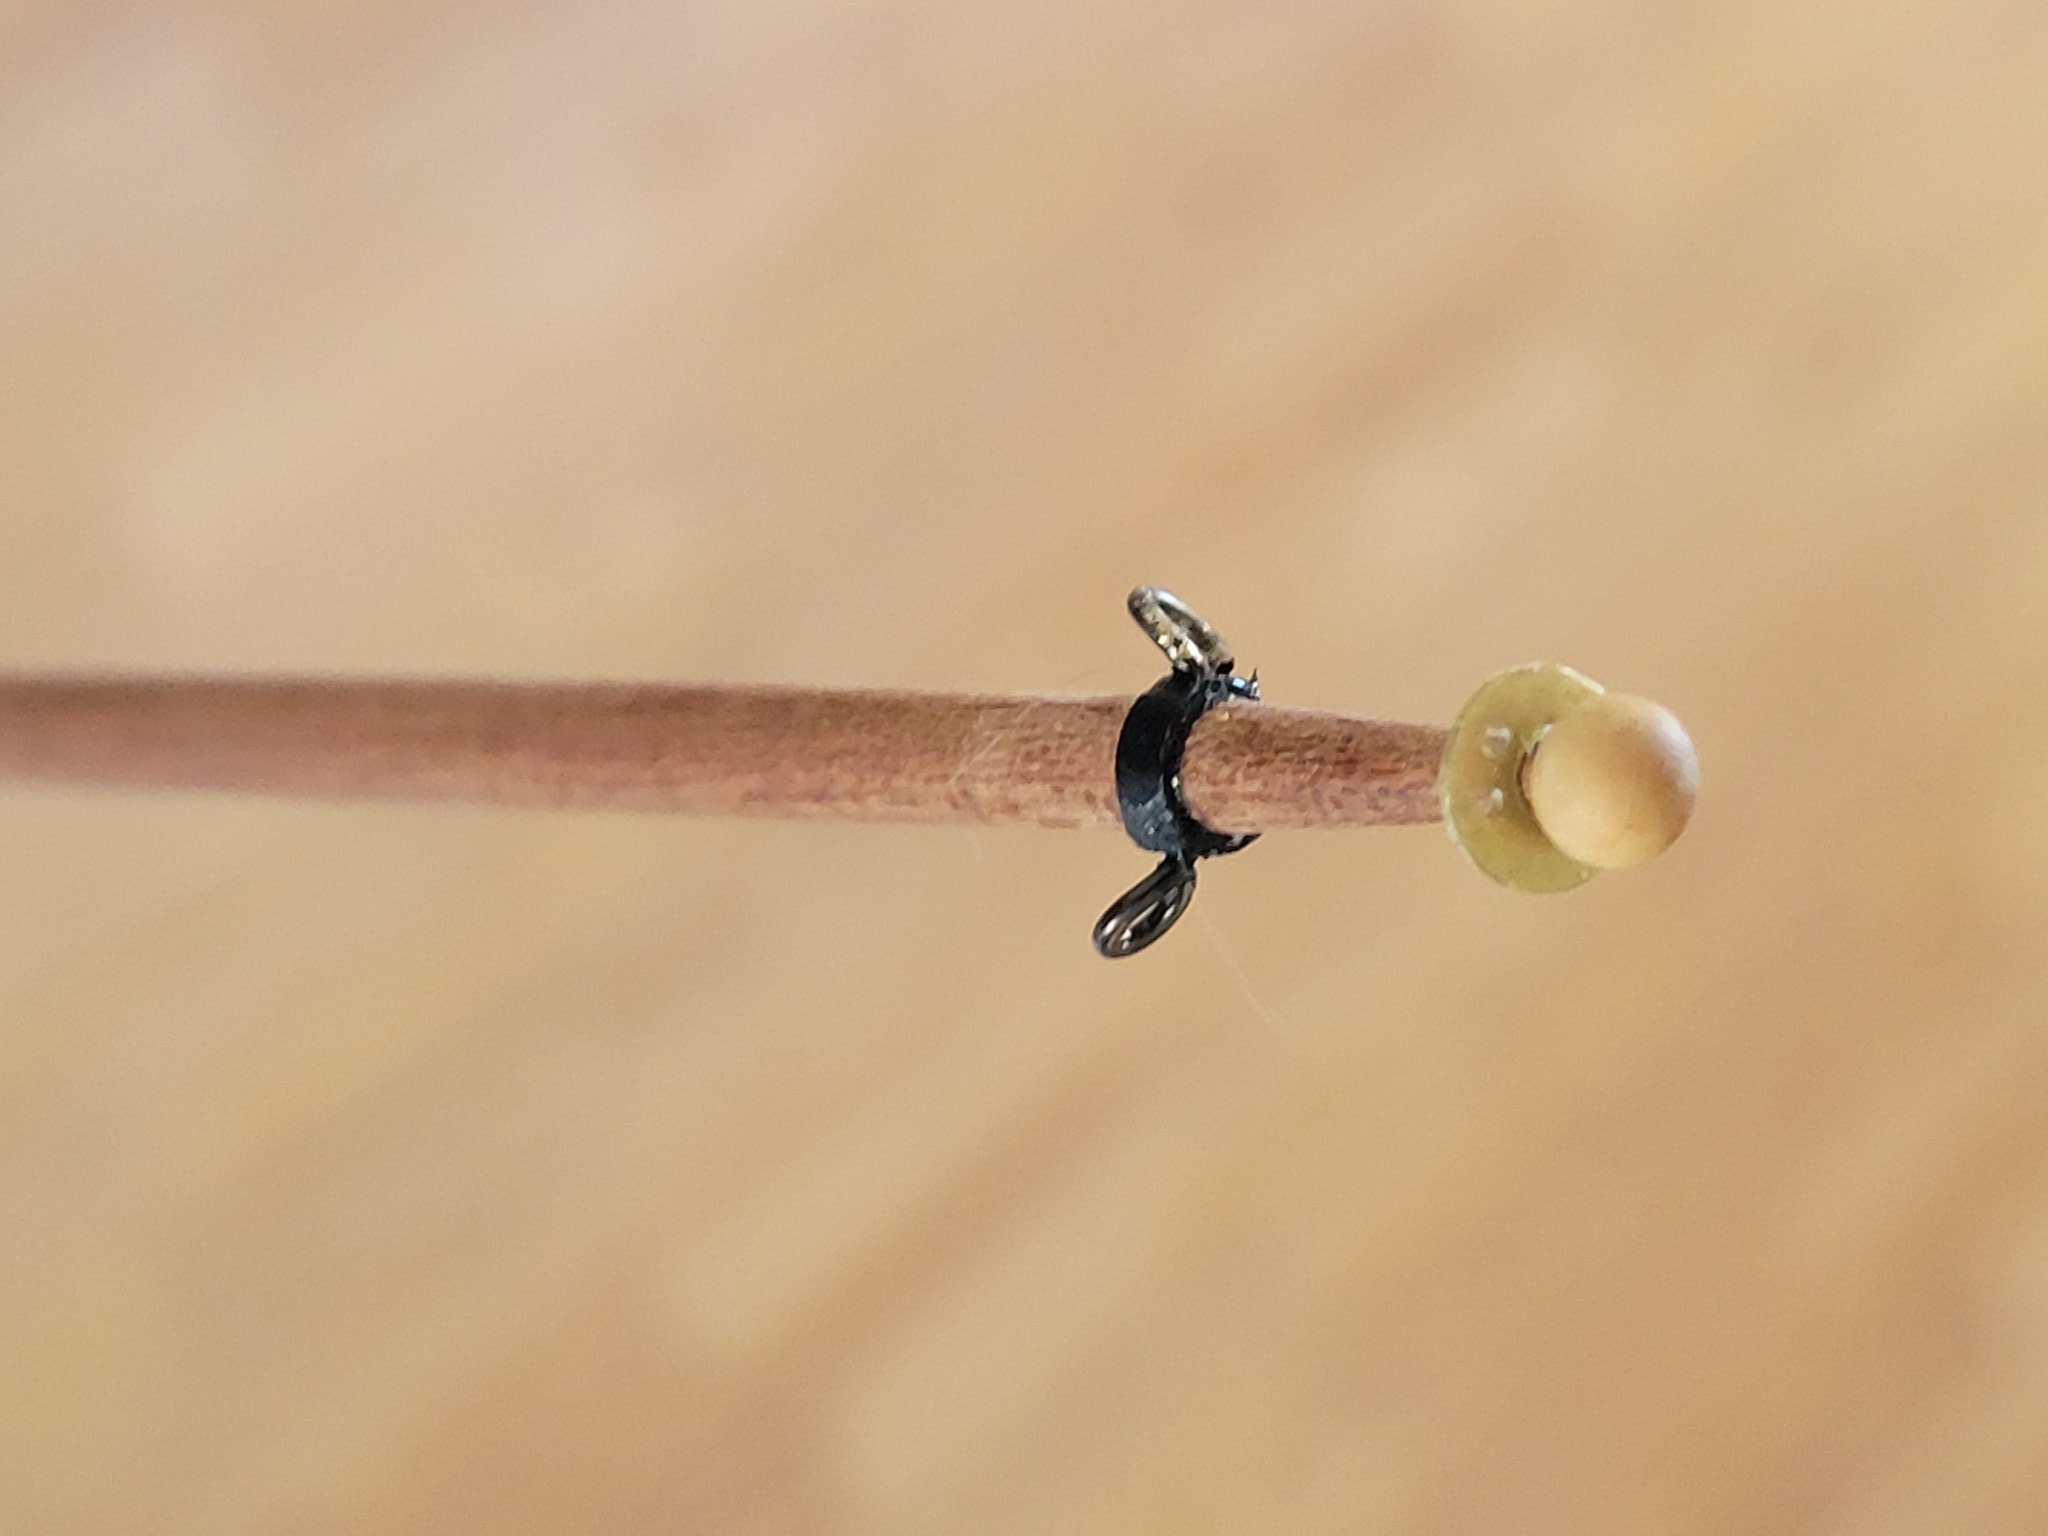
Looks better with less tape! I also scratch built a boom buffer.

- 84 replies
-
- 3
-
-
- Artesania Latina
- Bluenose II
- (and 1 more)
-
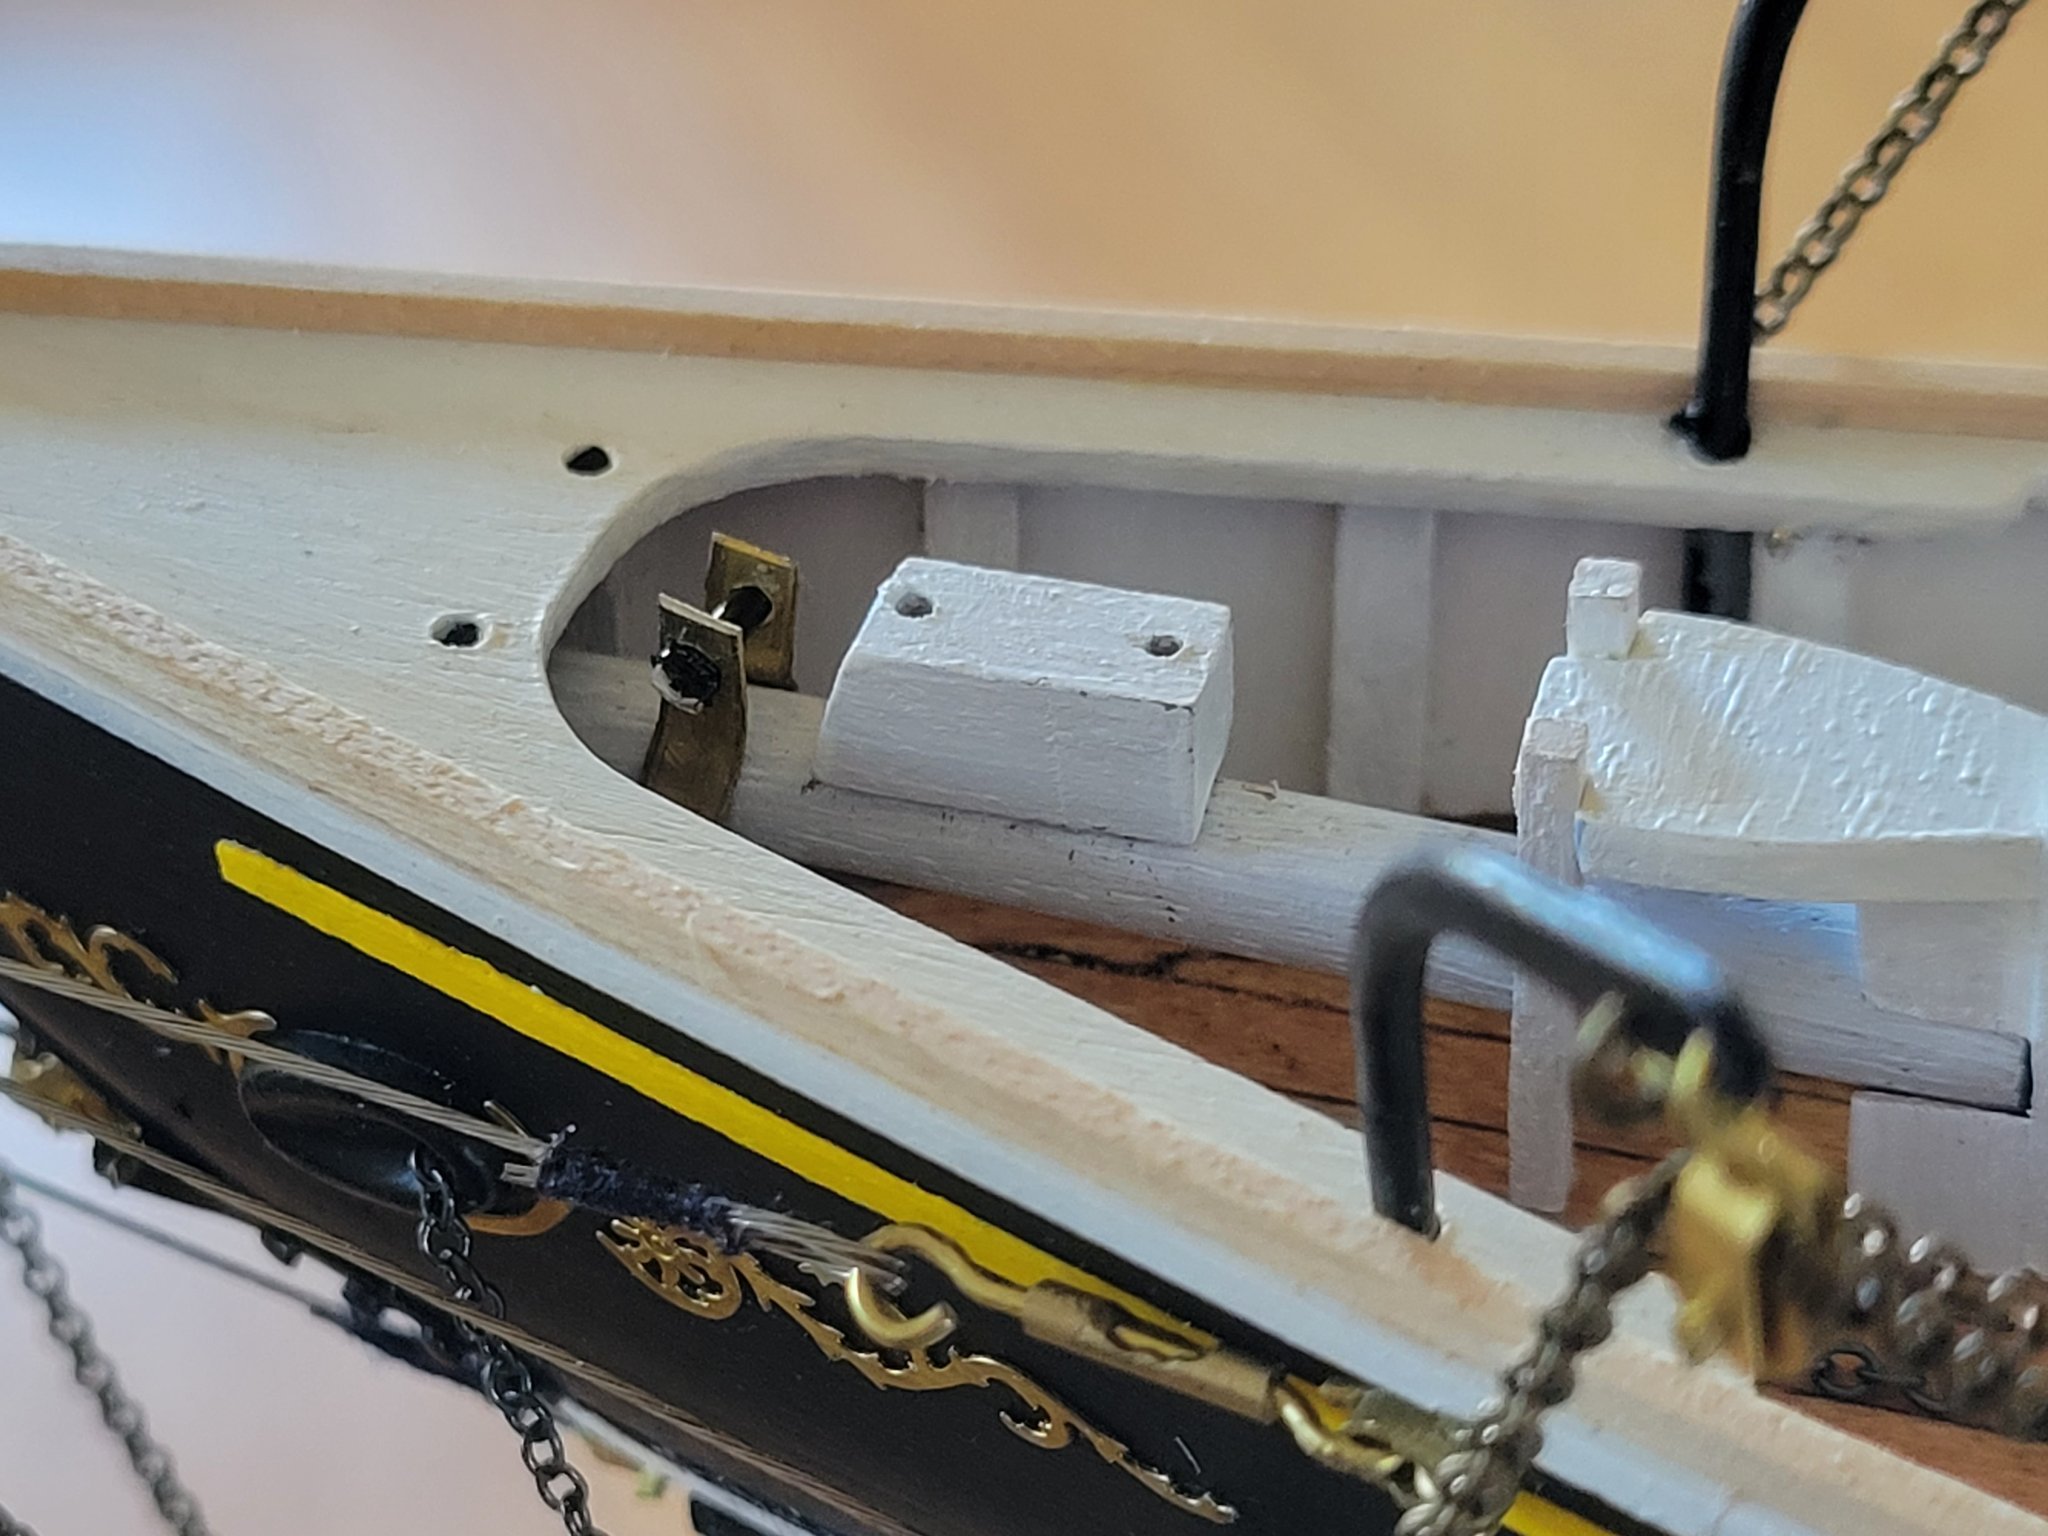
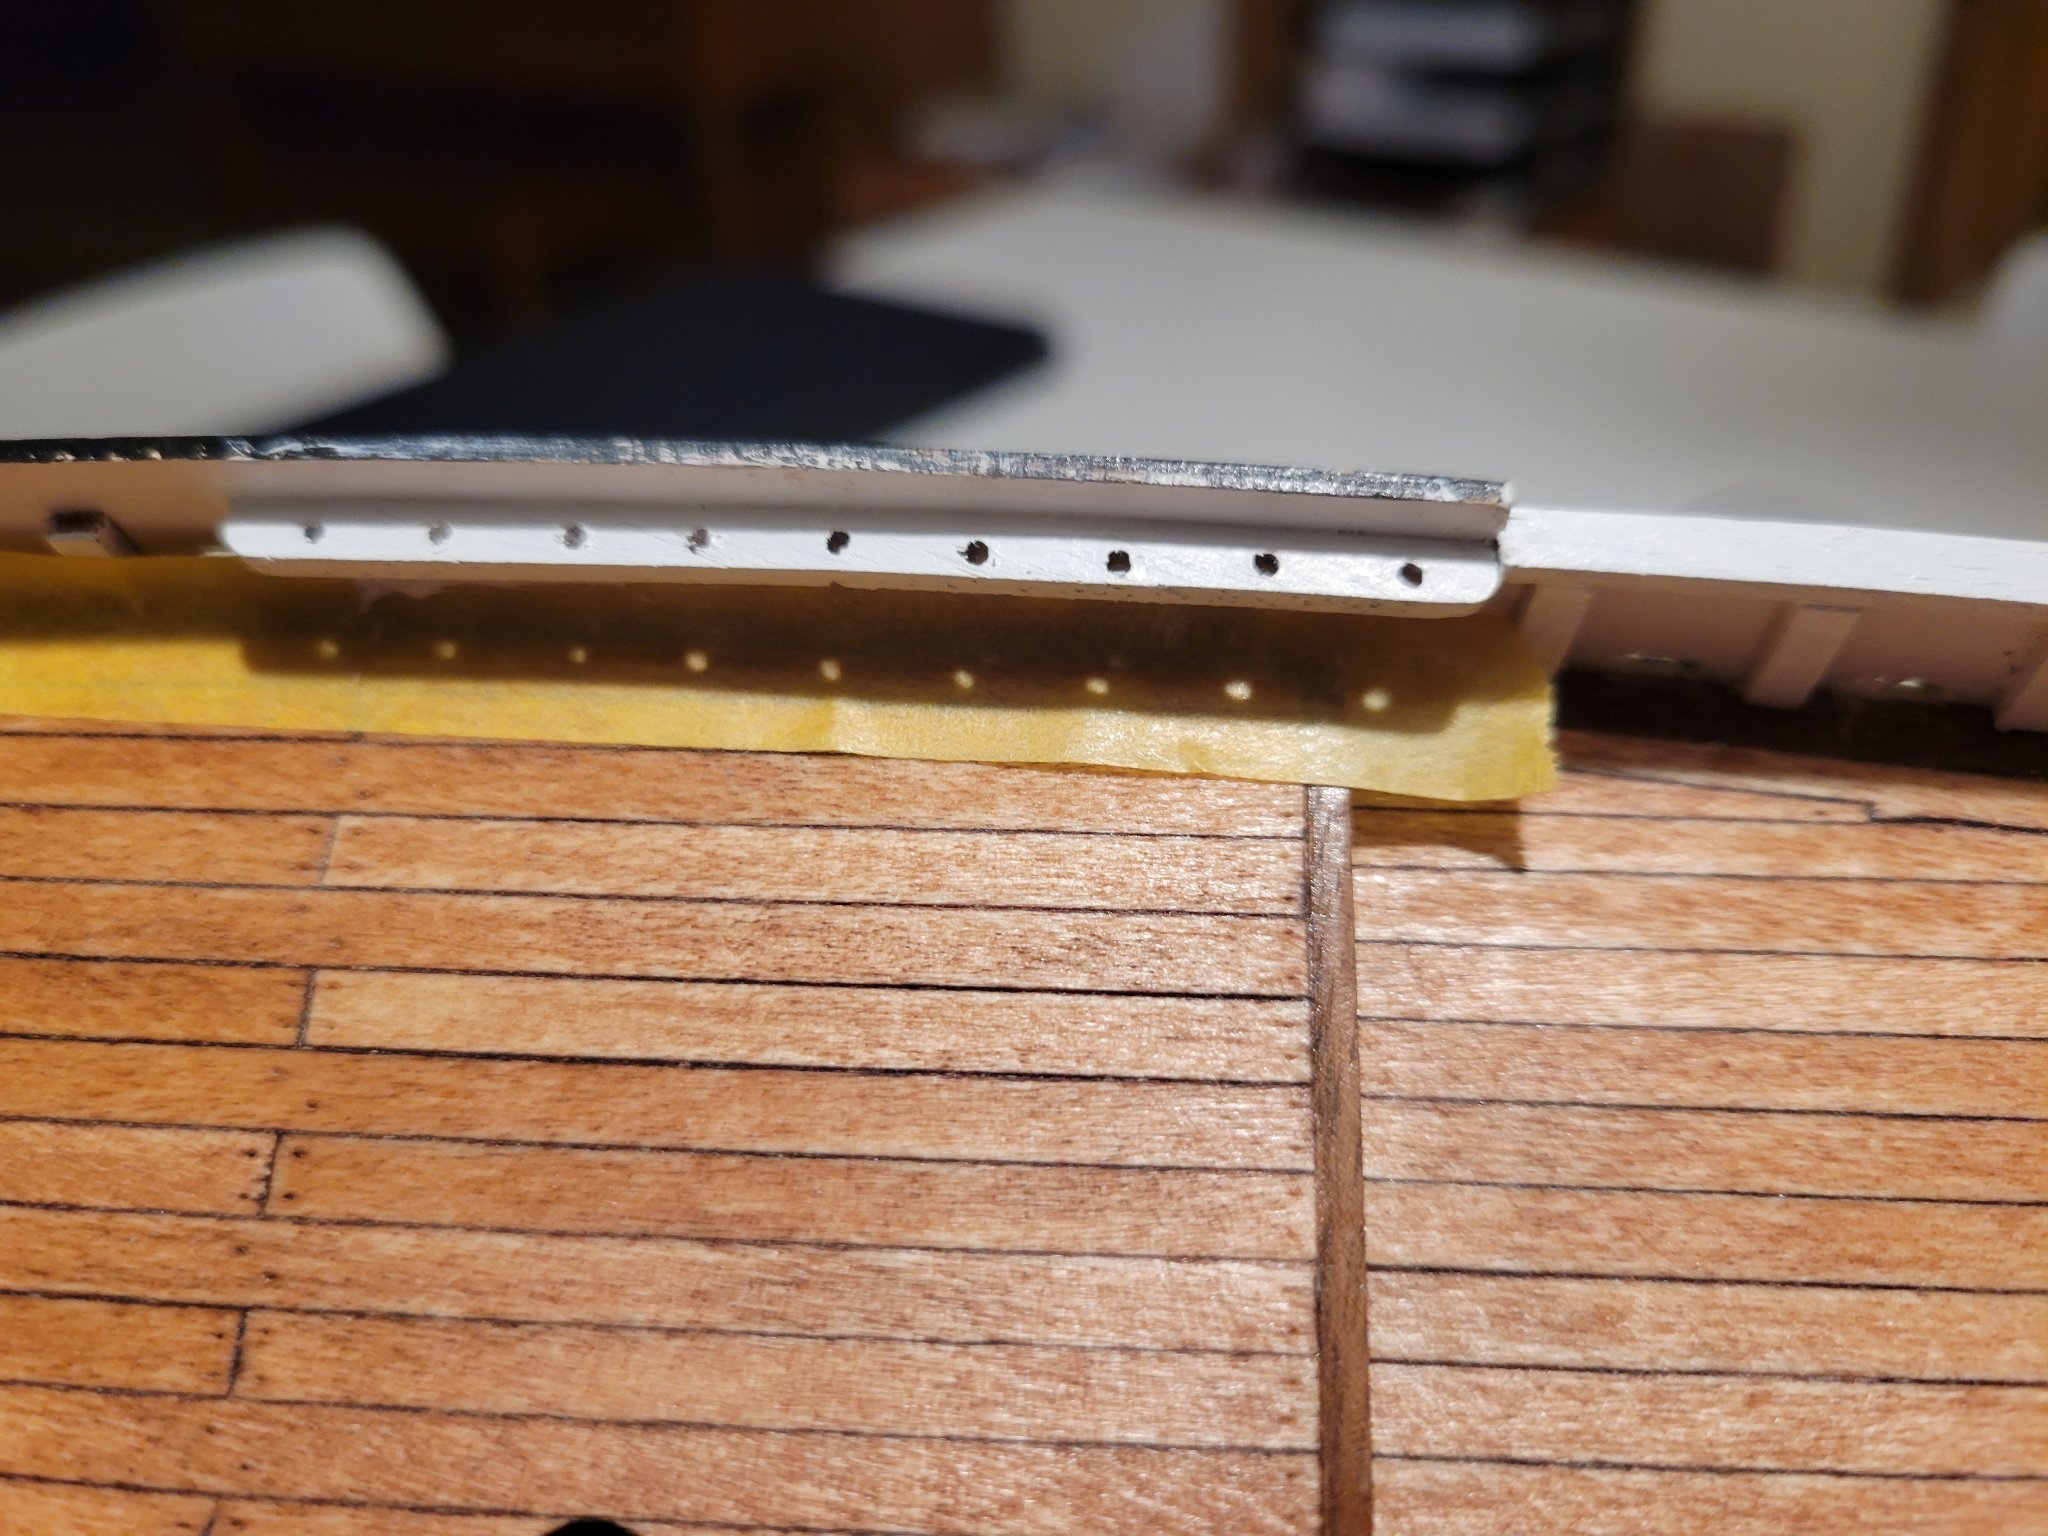
Adding rails. You can also see how I fixed the poop deck with some basswood. Hawse pipes attached with the embelishments.

- 84 replies
-
- 6
-
-
- Artesania Latina
- Bluenose II
- (and 1 more)
-
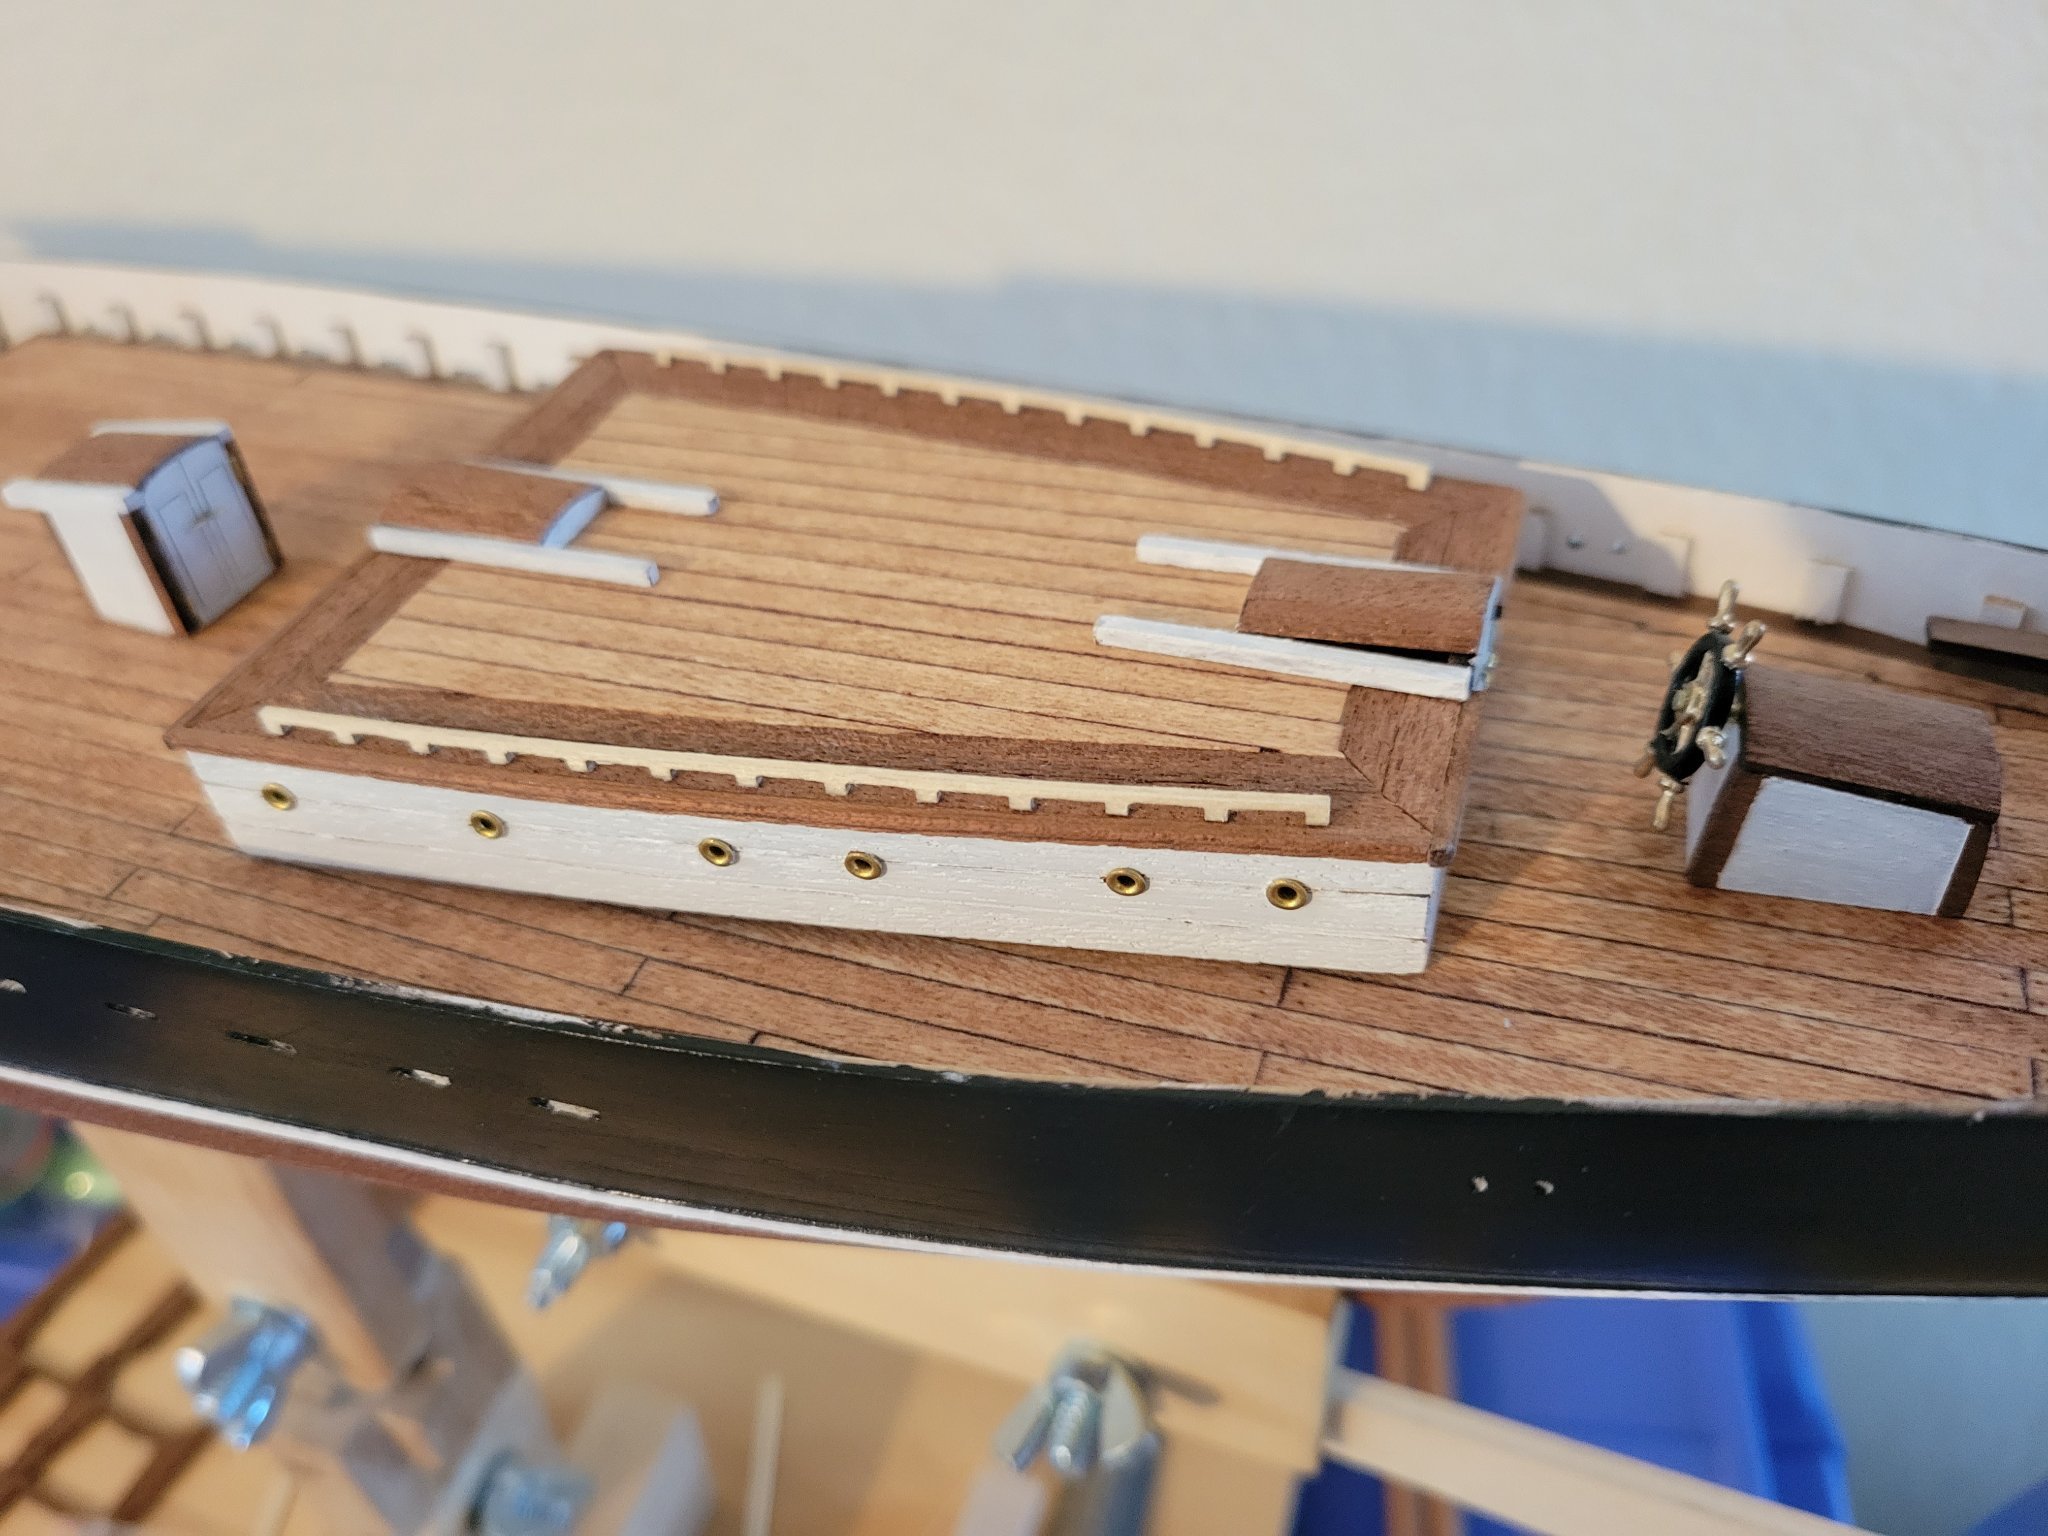
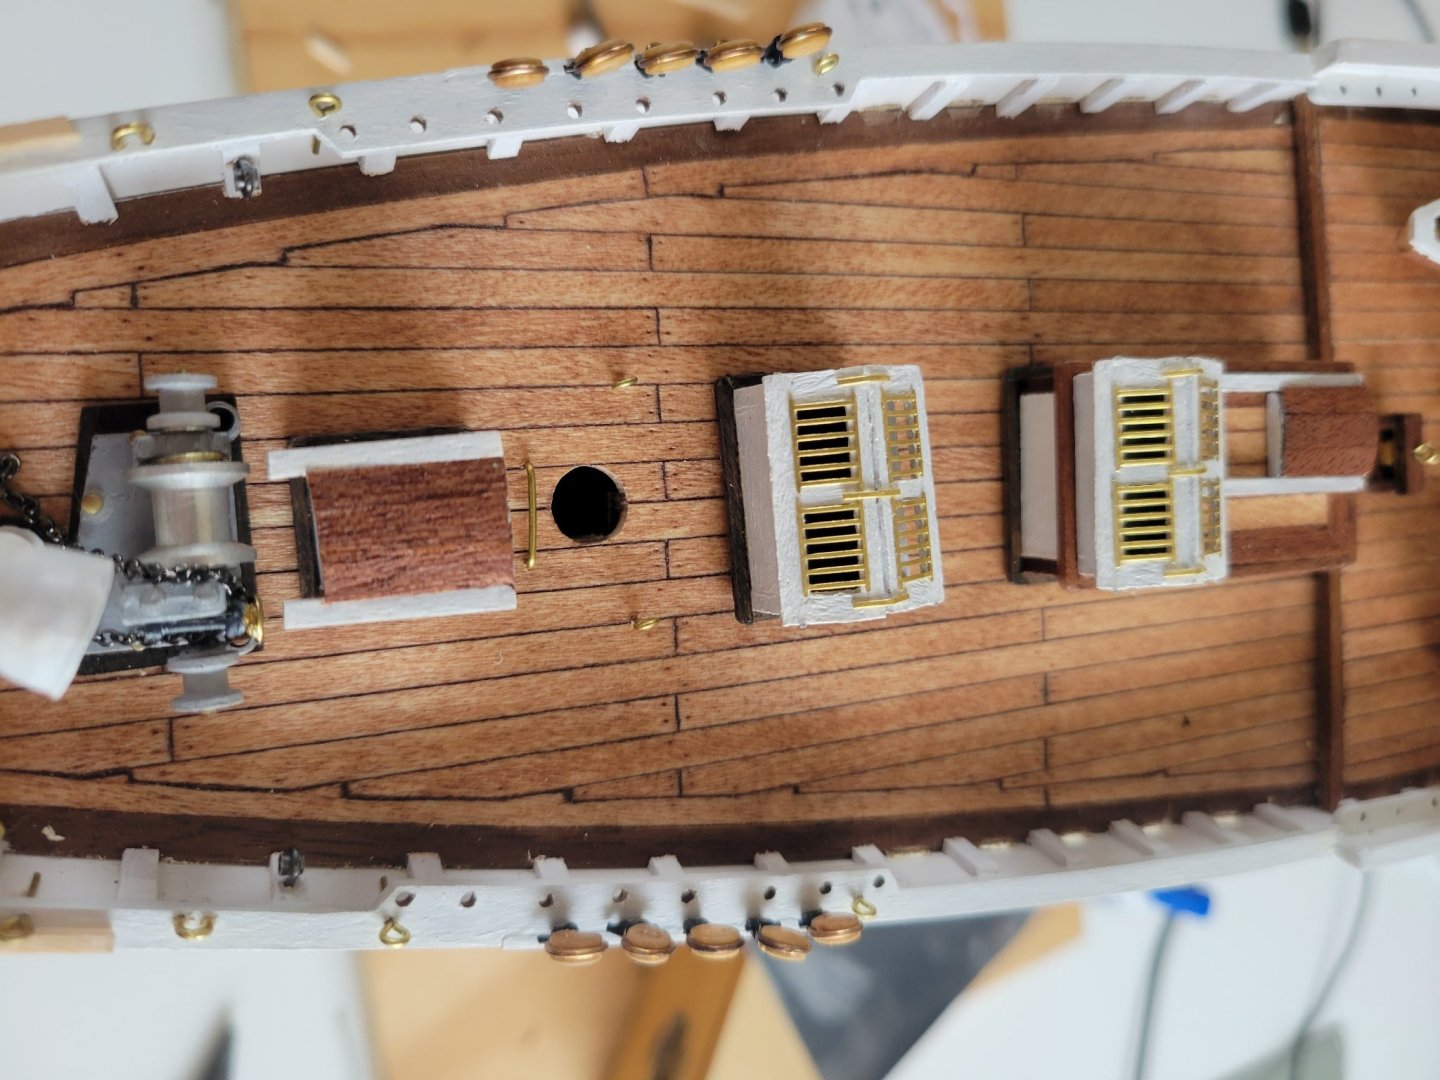
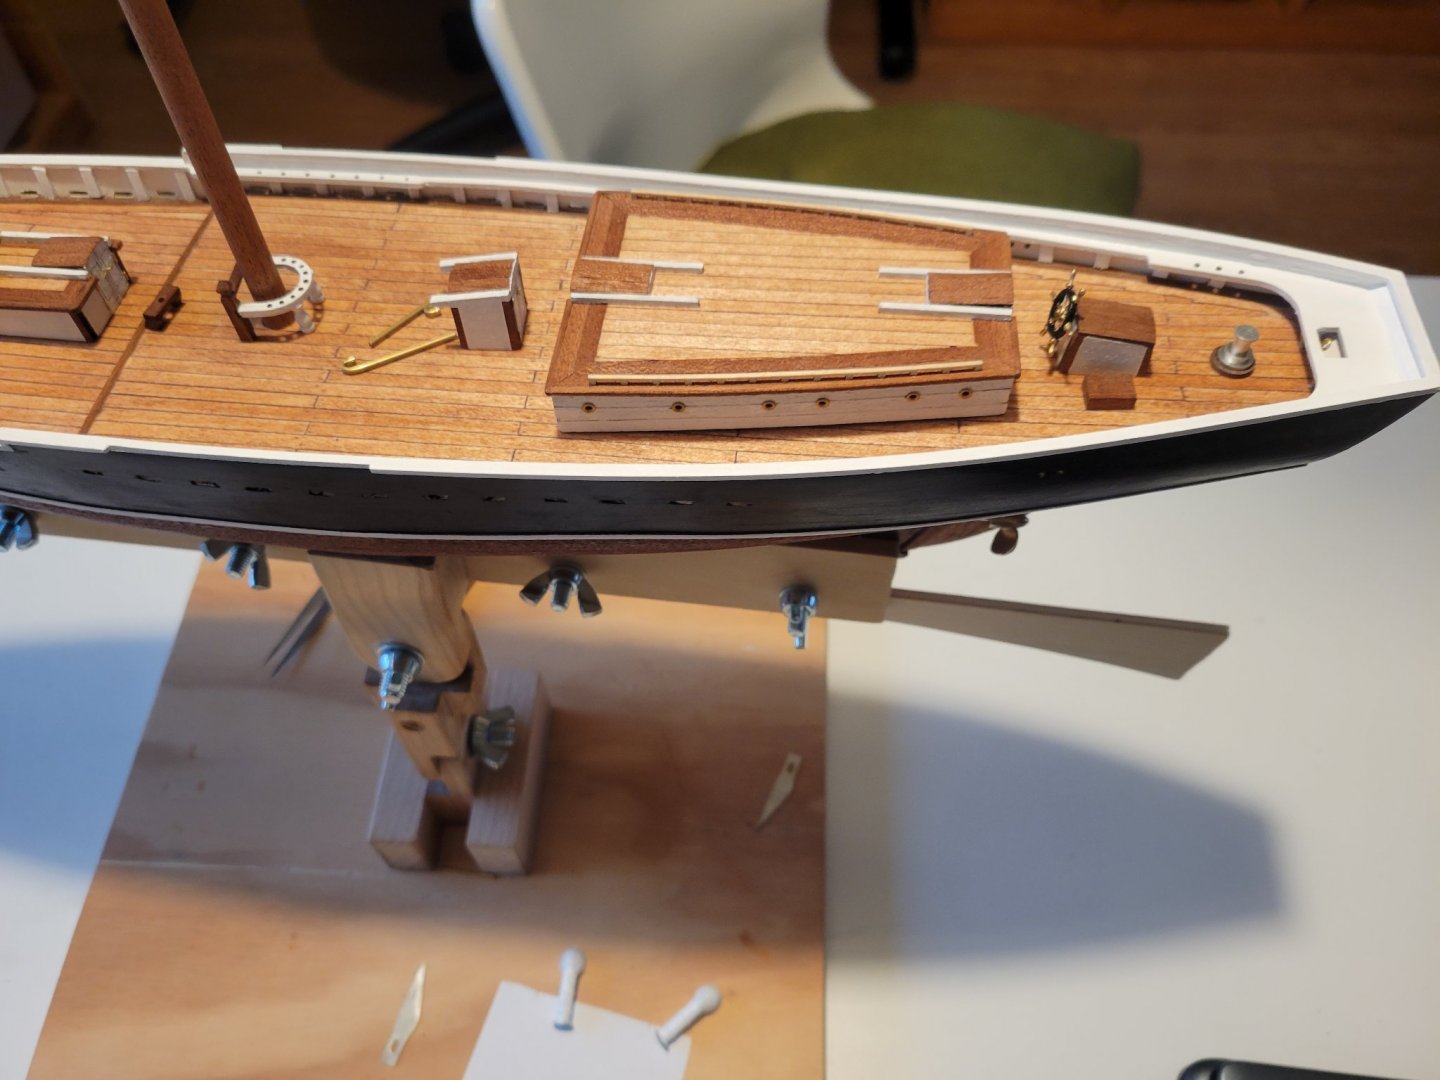
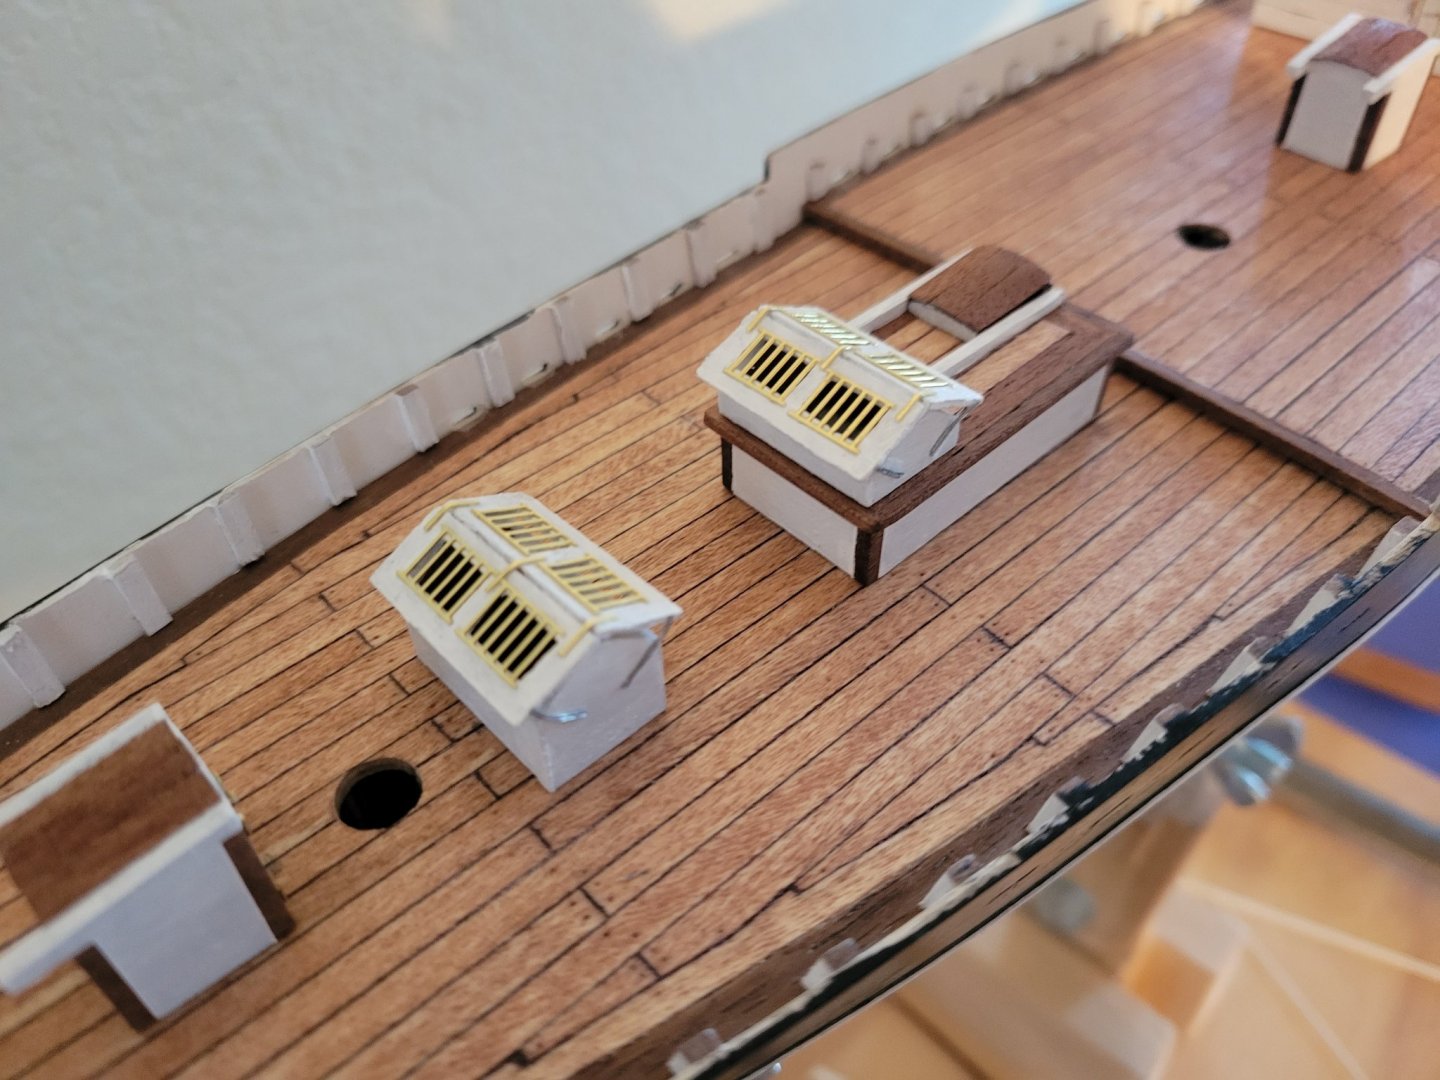
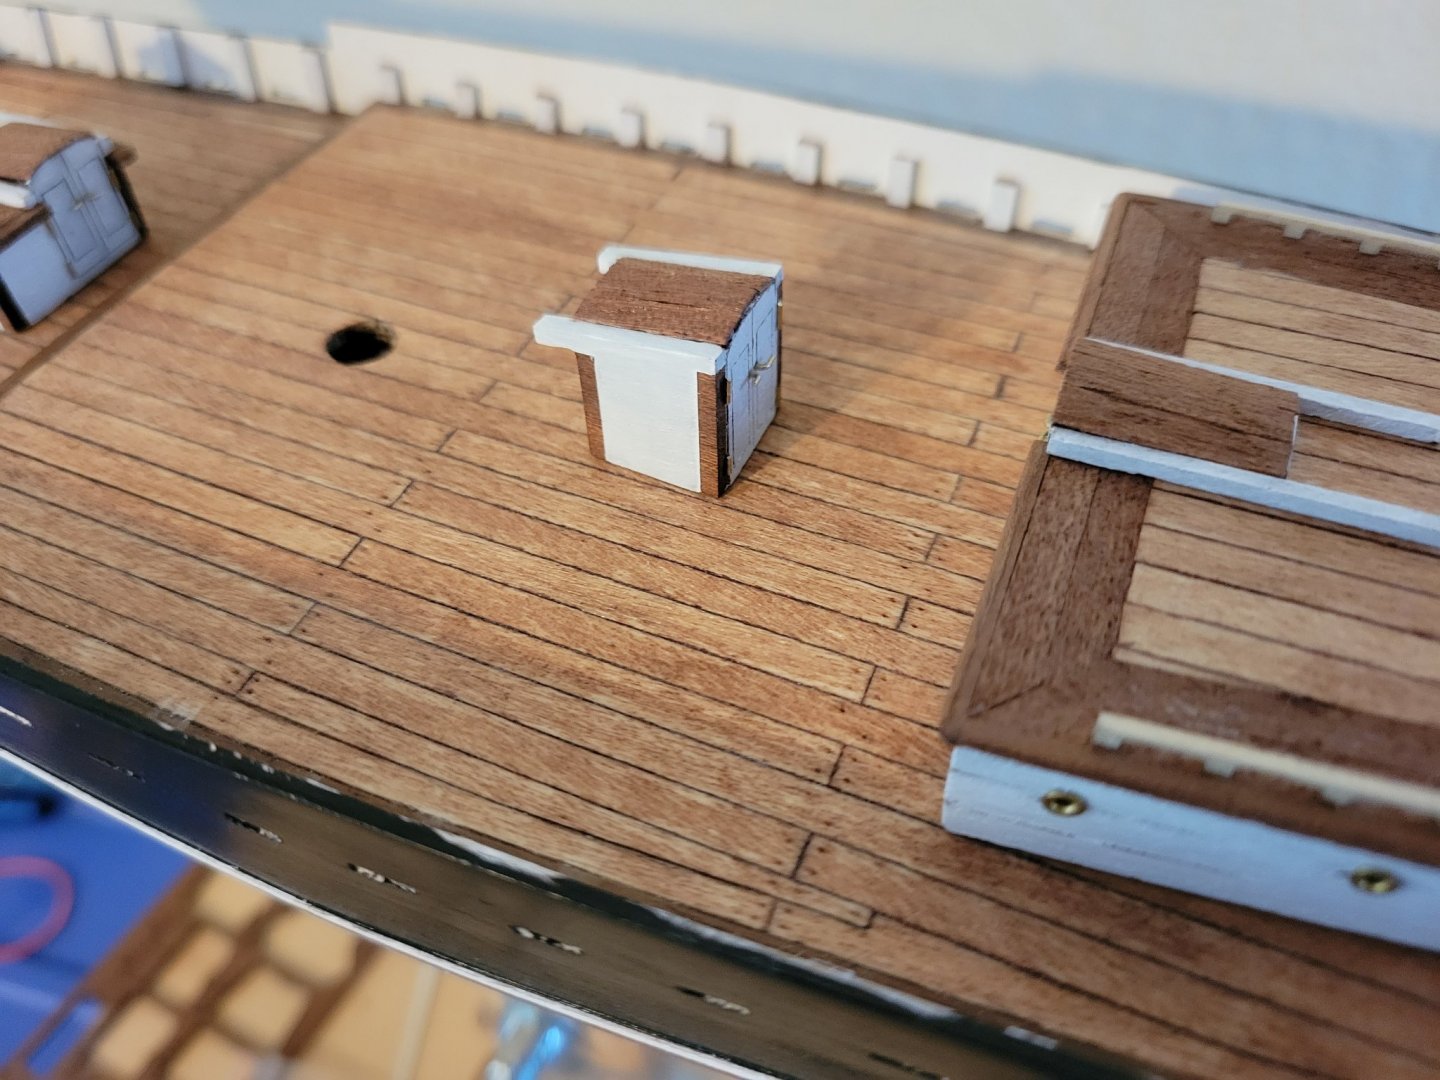
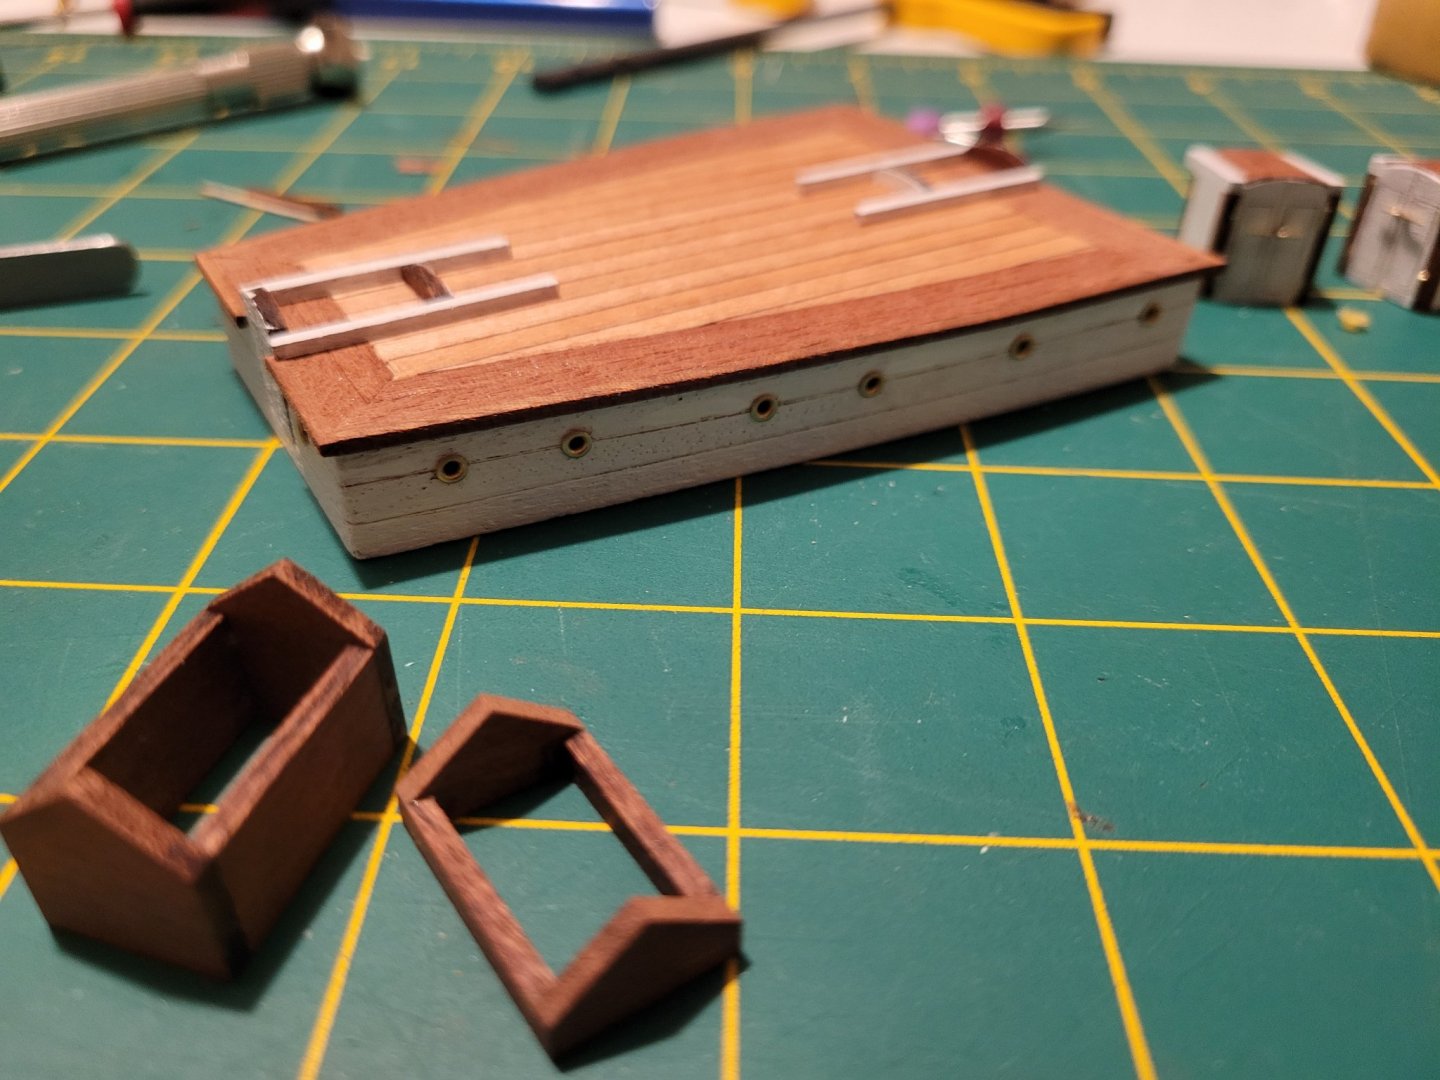
Deckworks update. Working on the windlass. Haven't glued the axel yet as I'm thinking of adding a section between the right drum and the windlass housing to be a drum for the chain haul (to be more accurate?) In photos, looks like it's two drums, housing, main drum, housing, final drum. AL left out the double drum setup on the port side Skylights ate built and painted. Both cabins are read for finish. At the helm, I added a short tub behind the helm so it would stand off the steering gear cabinet a bit. I have two challenges now. First, the poop deck from AL is a poor fit. Try to decide if I should modify or rebuild from scratch. I also made my first big goof. When I started building the skylight panels, I grabbed the wrong wood. Grabbed some walnut of similar size instead of the sapely. Oops. Fortunately, I plan on painting the rails anyways so I can use any wood as long as it's the right size.

- 84 replies
-
- 5
-
-
- Artesania Latina
- Bluenose II
- (and 1 more)
-
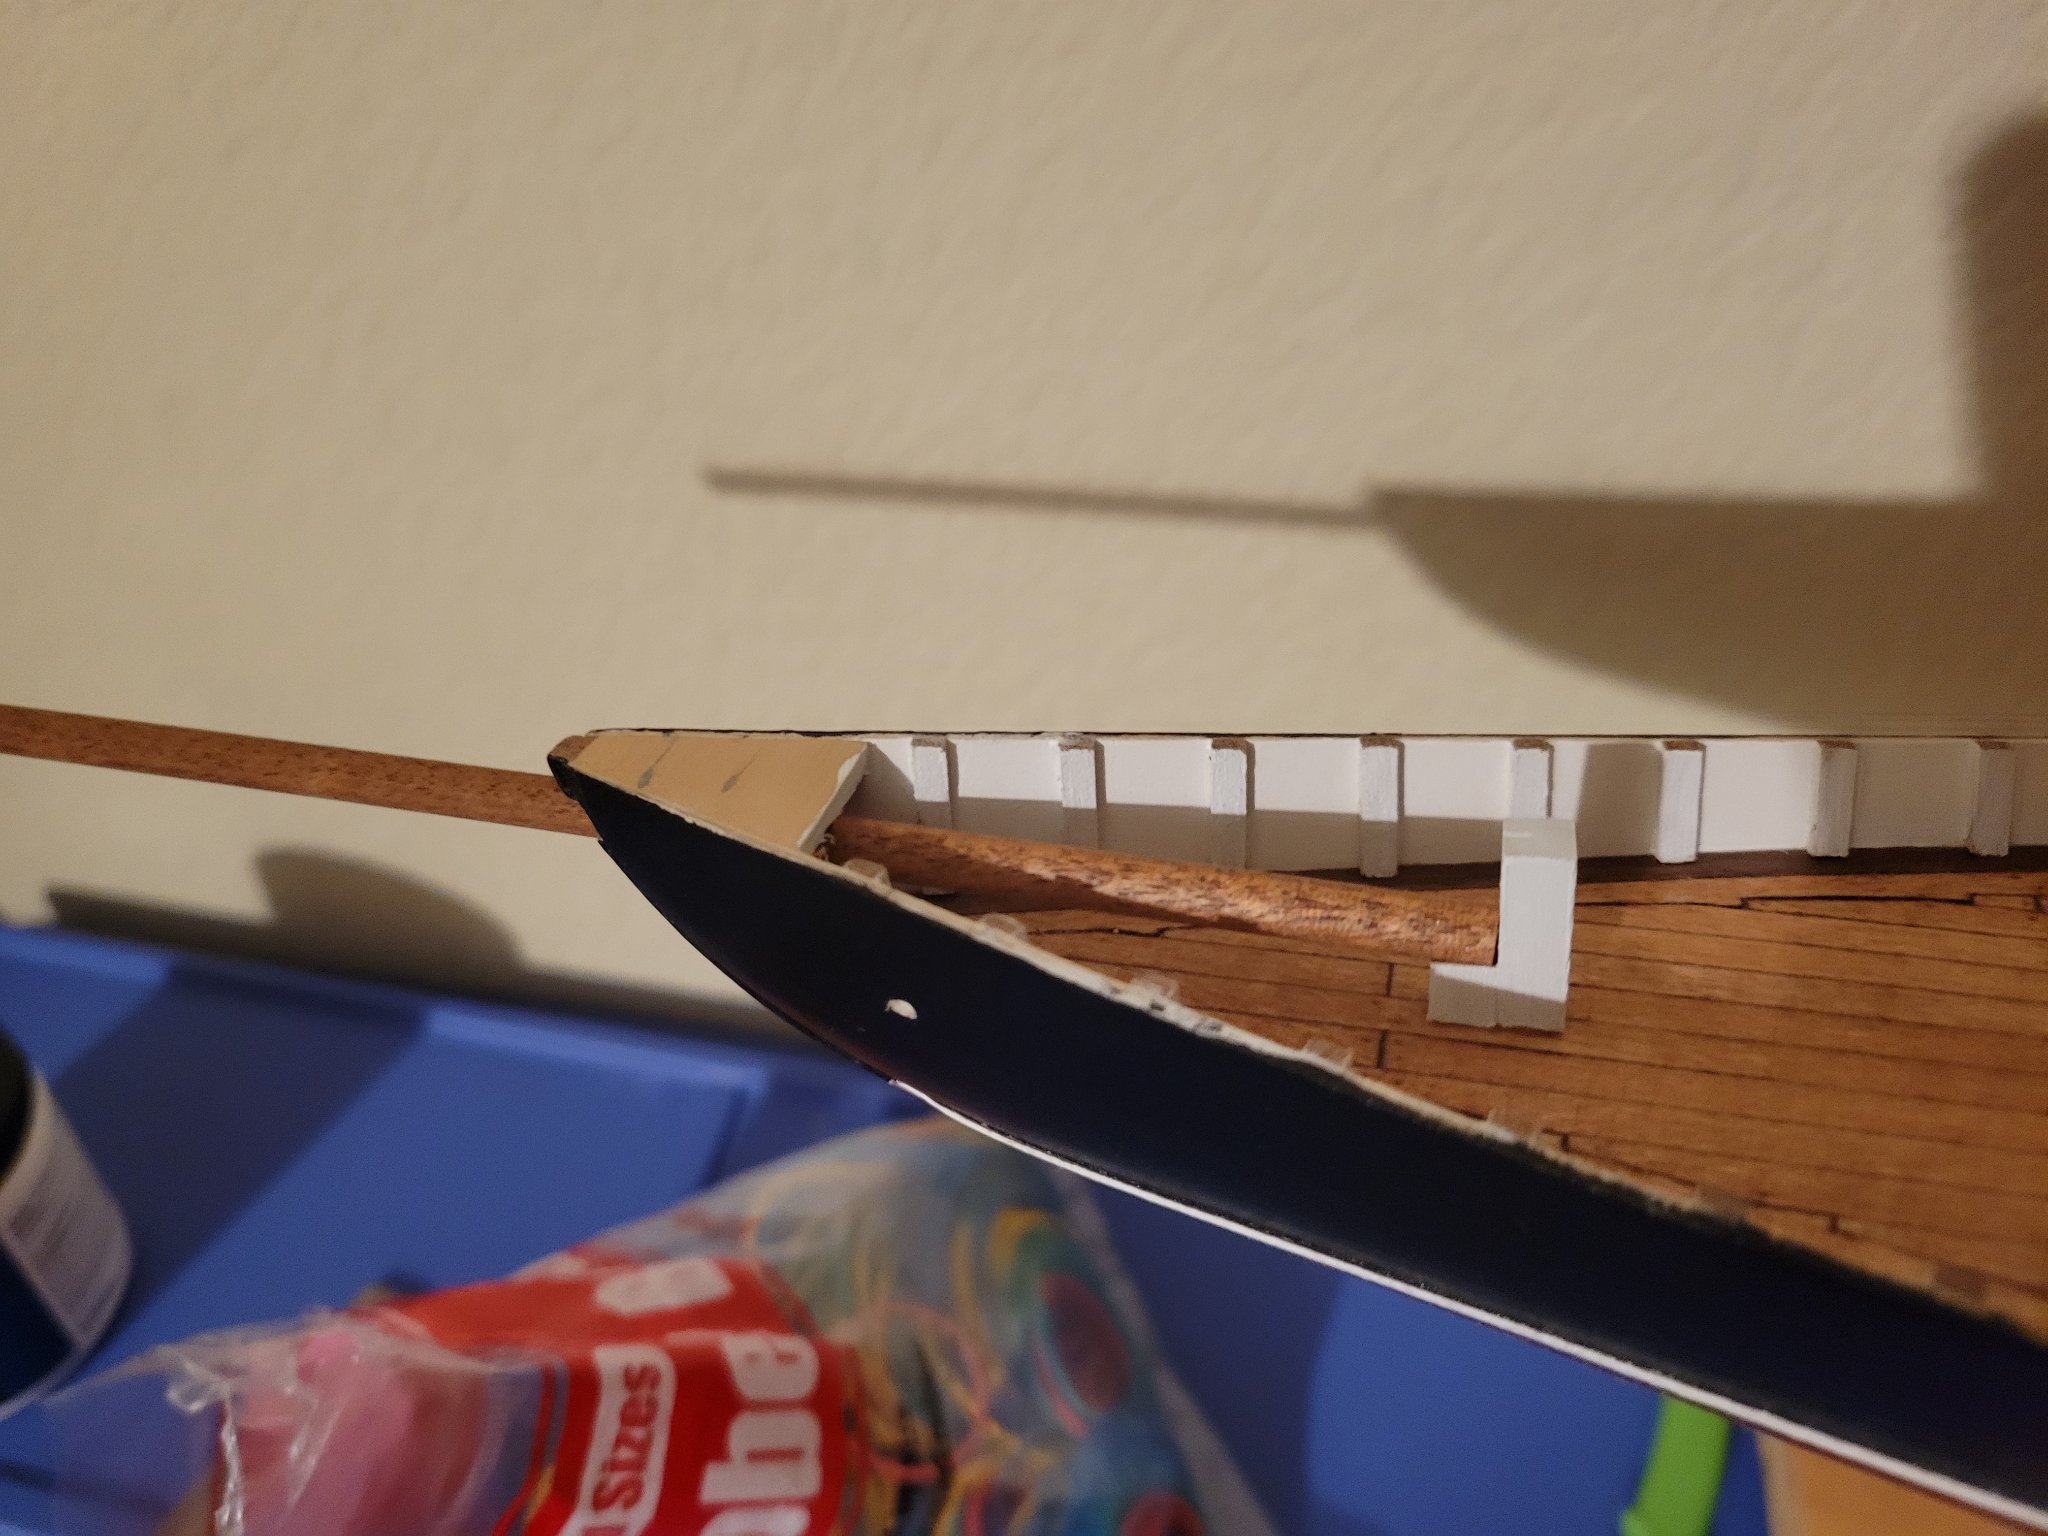
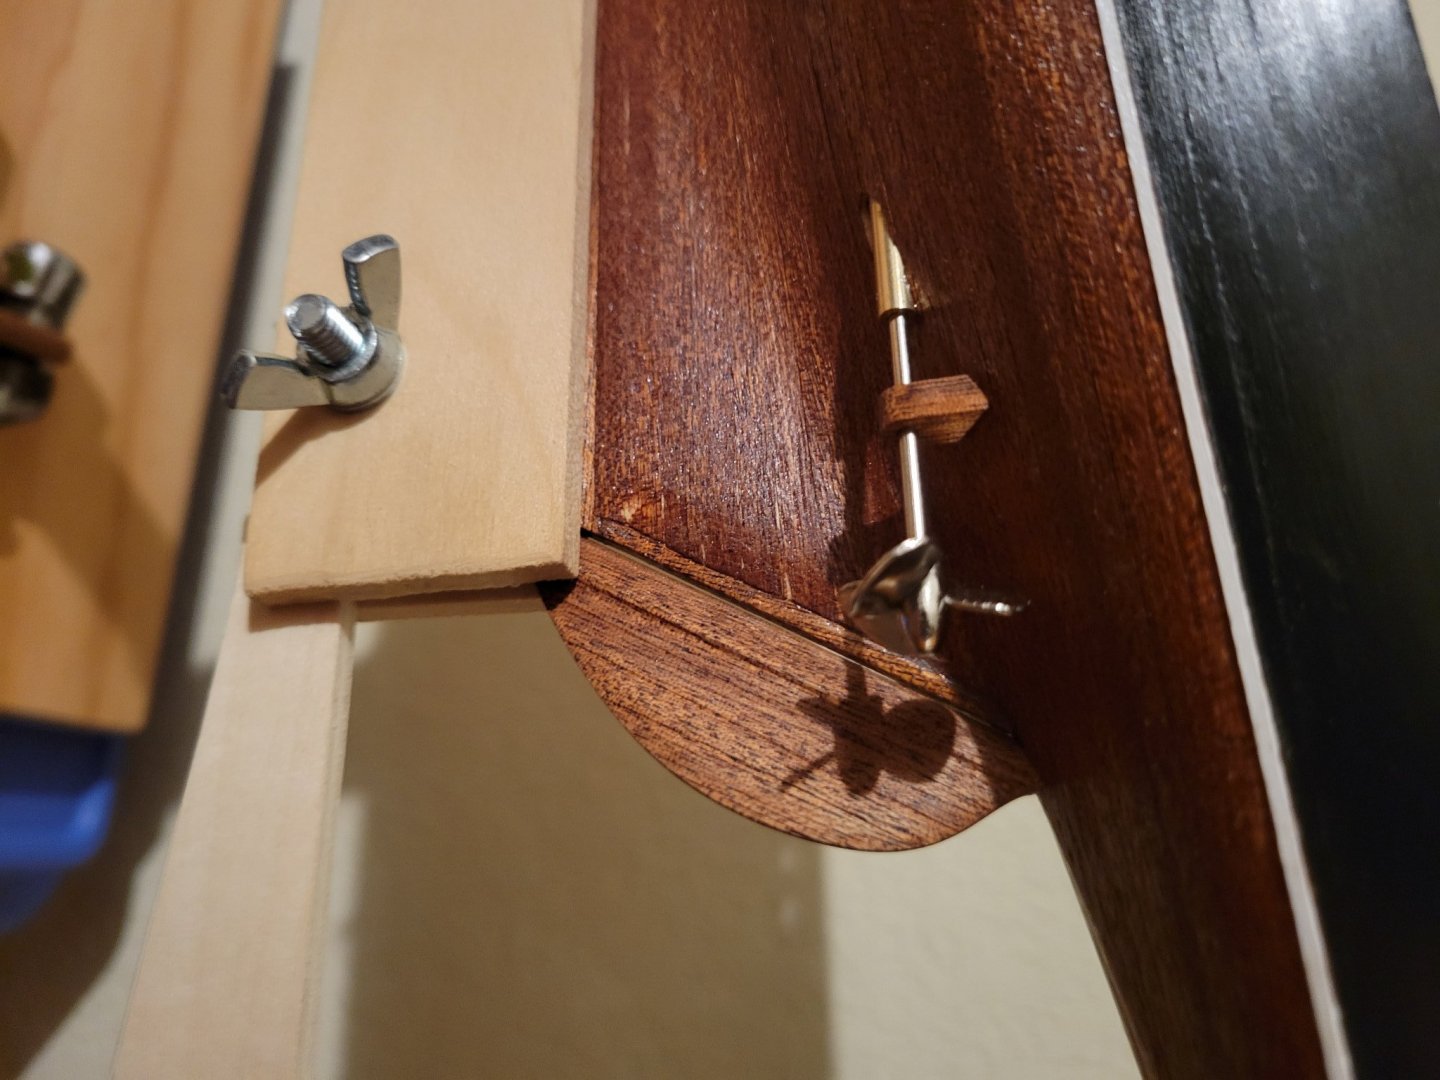
Working on the bowsprit and deck works. Screws are just dry fot for now. Looking for a good paint to make them brass. Struggling with getting started on the bowsprit shaping. The instructions call for an overall length that seems short compared to pics. Trying to figure out how to estimate proper length. There also seem to be some errors on the deckworks. The main cabin area shows two entries but the bluenose ii only has one. Too late to adjust that. They also have the actual barrels on the main deck, not the cabin deck. The skylight is also on the main deck, not the smaller galley deck (which doesn't have a doorway access). Looks like AL decided to cut some corners on these. Maybe just kept designs from their original bluenose or another kit? Adjusting where I can as I go.

- 84 replies
-
- 3
-
-
- Artesania Latina
- Bluenose II
- (and 1 more)
-
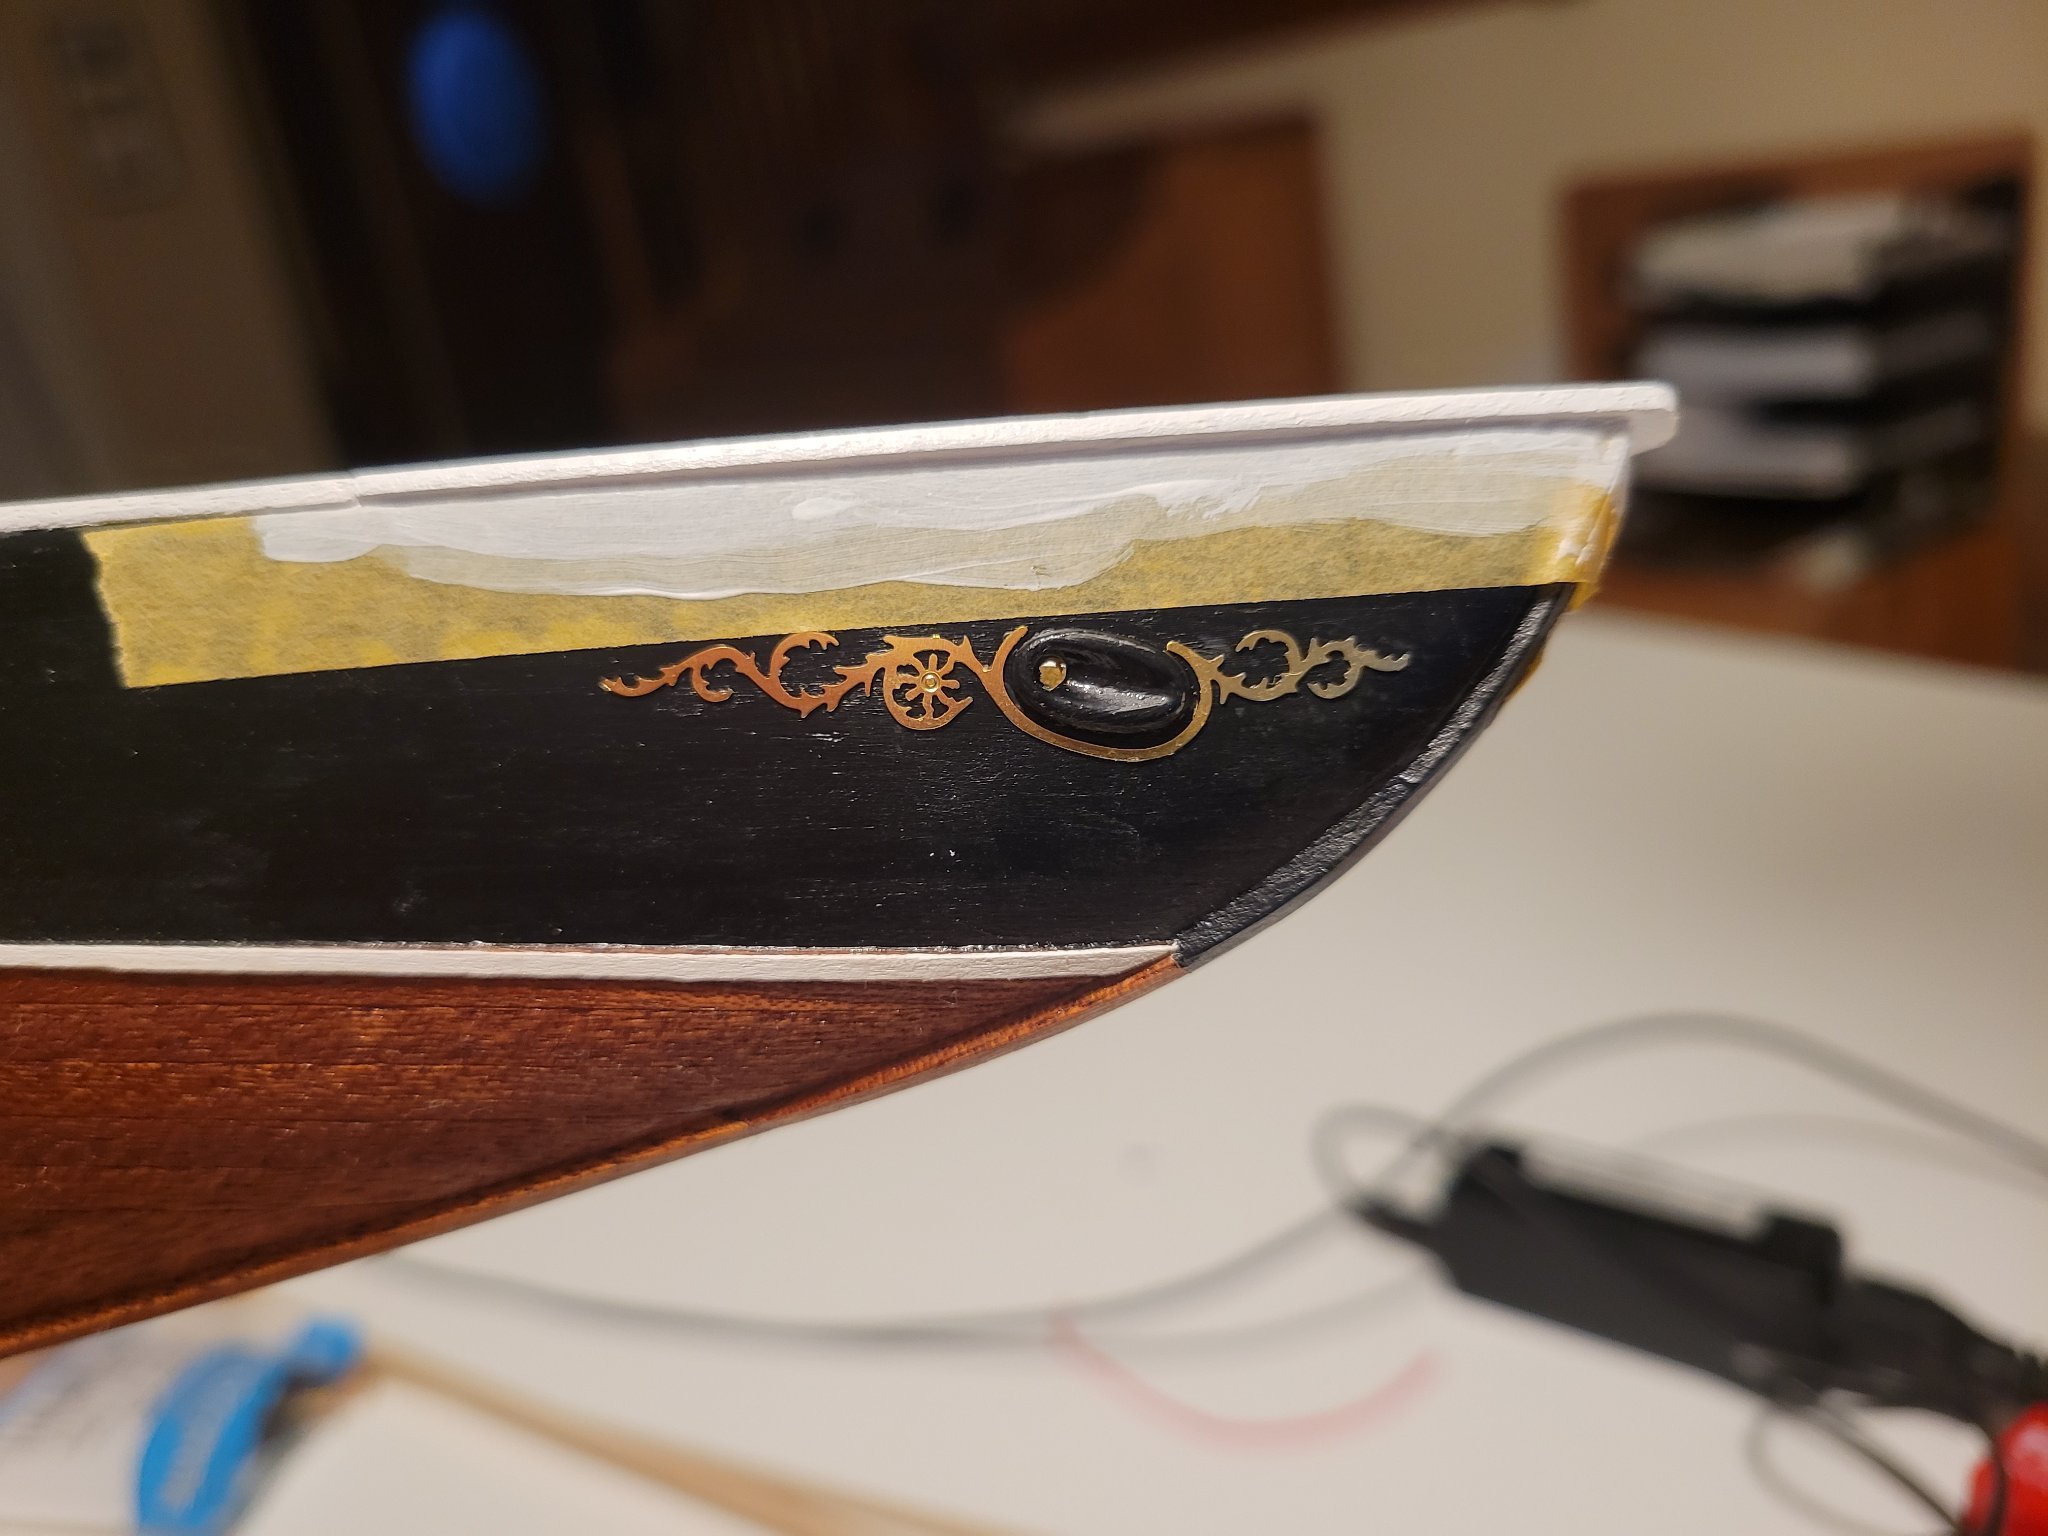
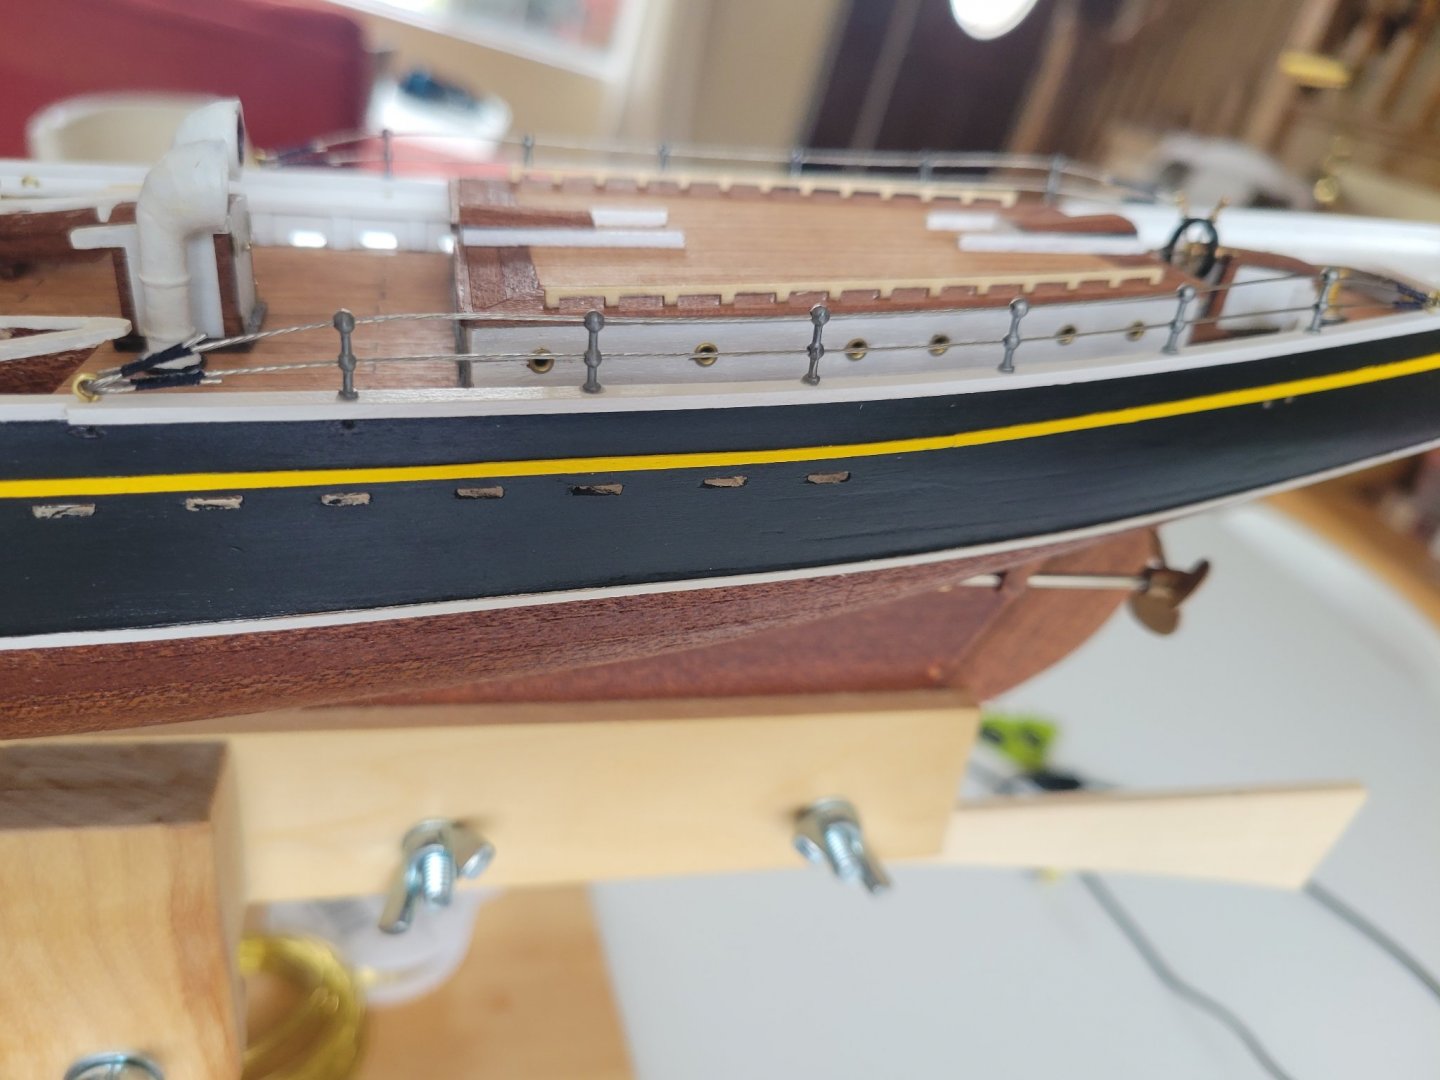
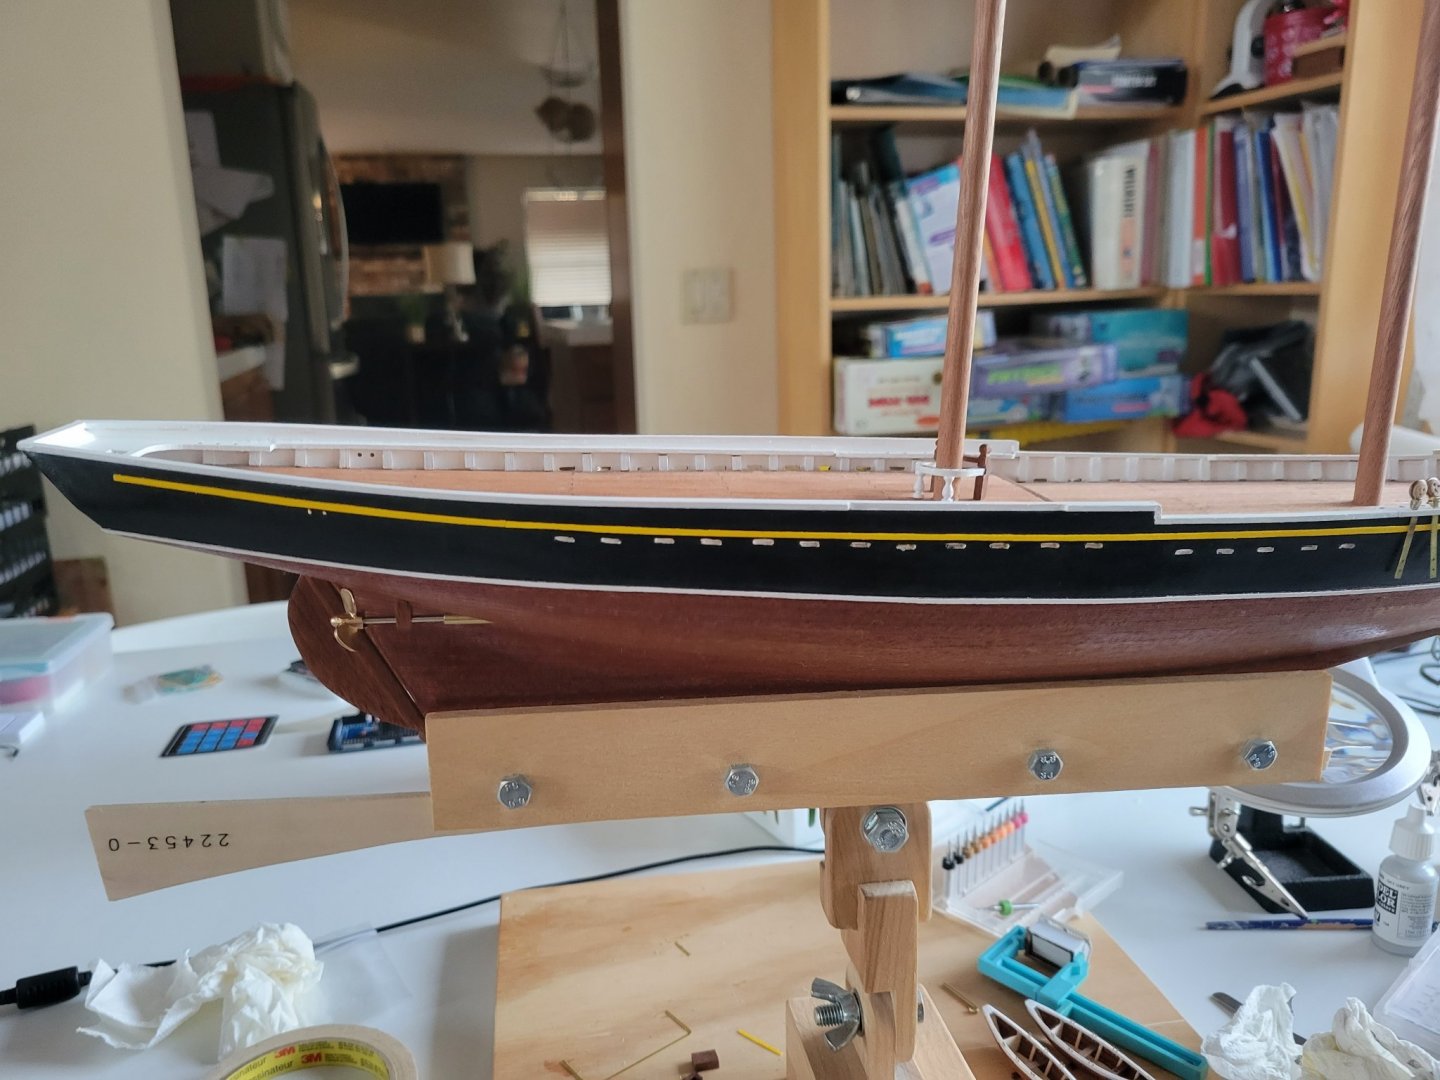
Decided to swap the approach to the white stripe at the waterline. Instead of the 1.5x1.5 sapely, I trimmed down extra deck planks, primed and painted them, and then attached. Makes it look more like a really good job masking and painting but actually easier. My waterline isn't exactly correct (especially at the stern) but I'm not going to worry about correcting that. Looks good enough for me!
- 84 replies
-
- 4
-
-
- Artesania Latina
- Bluenose II
- (and 1 more)
-
Thanks for the comments Bob and Josh. Just going slow and steady.
-
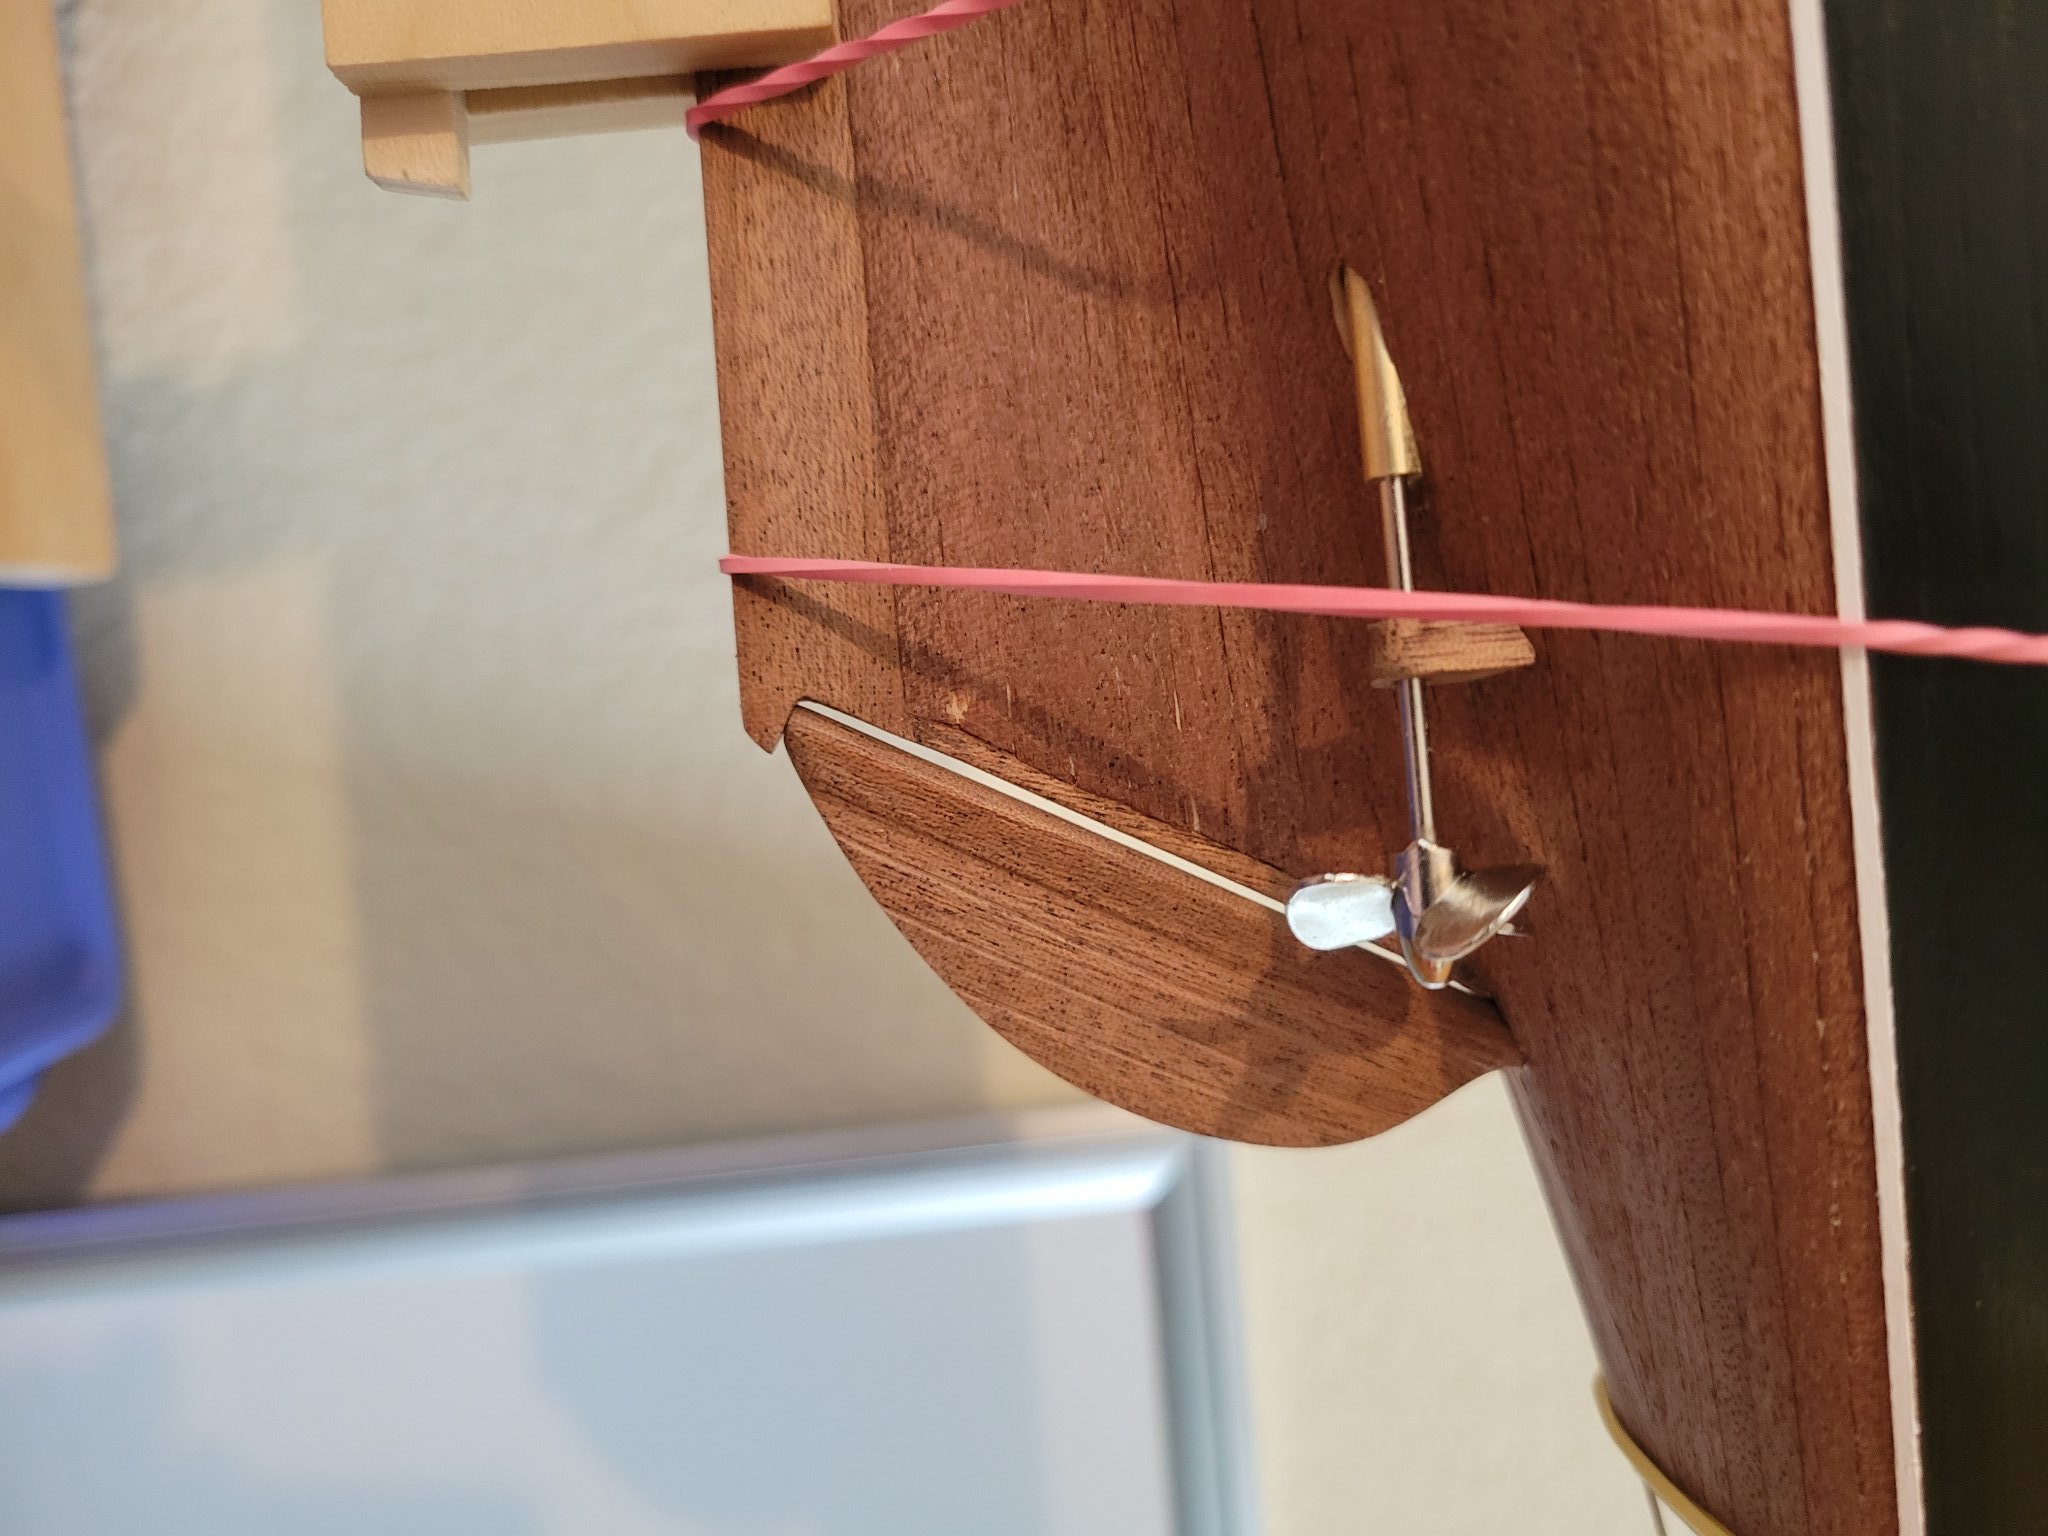
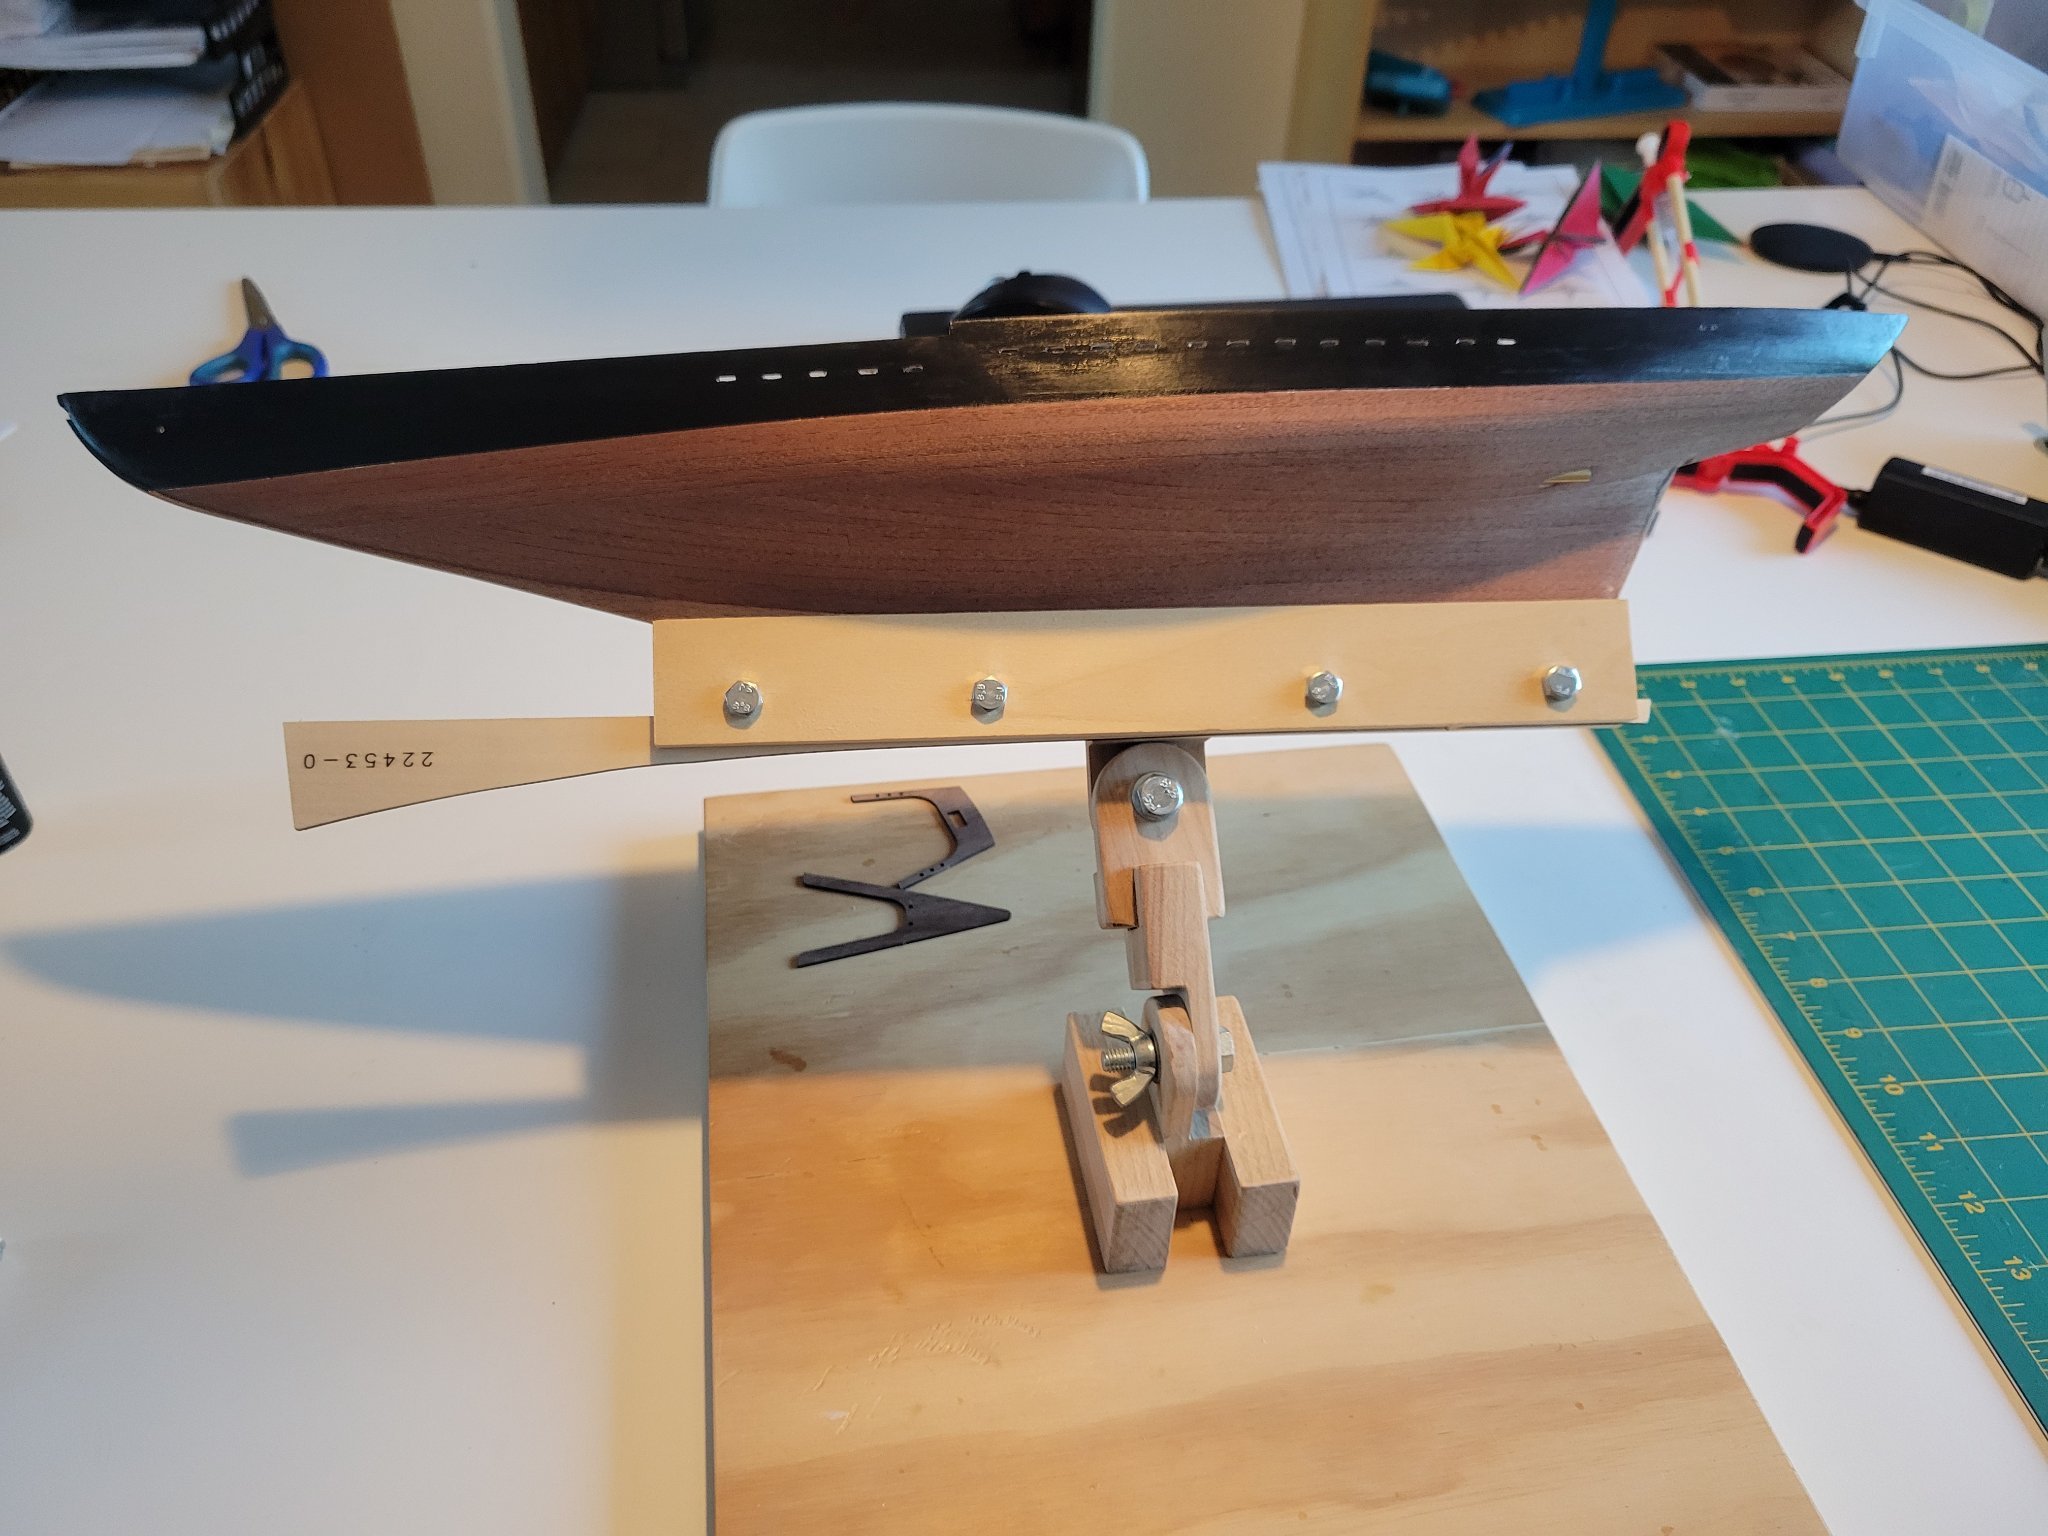
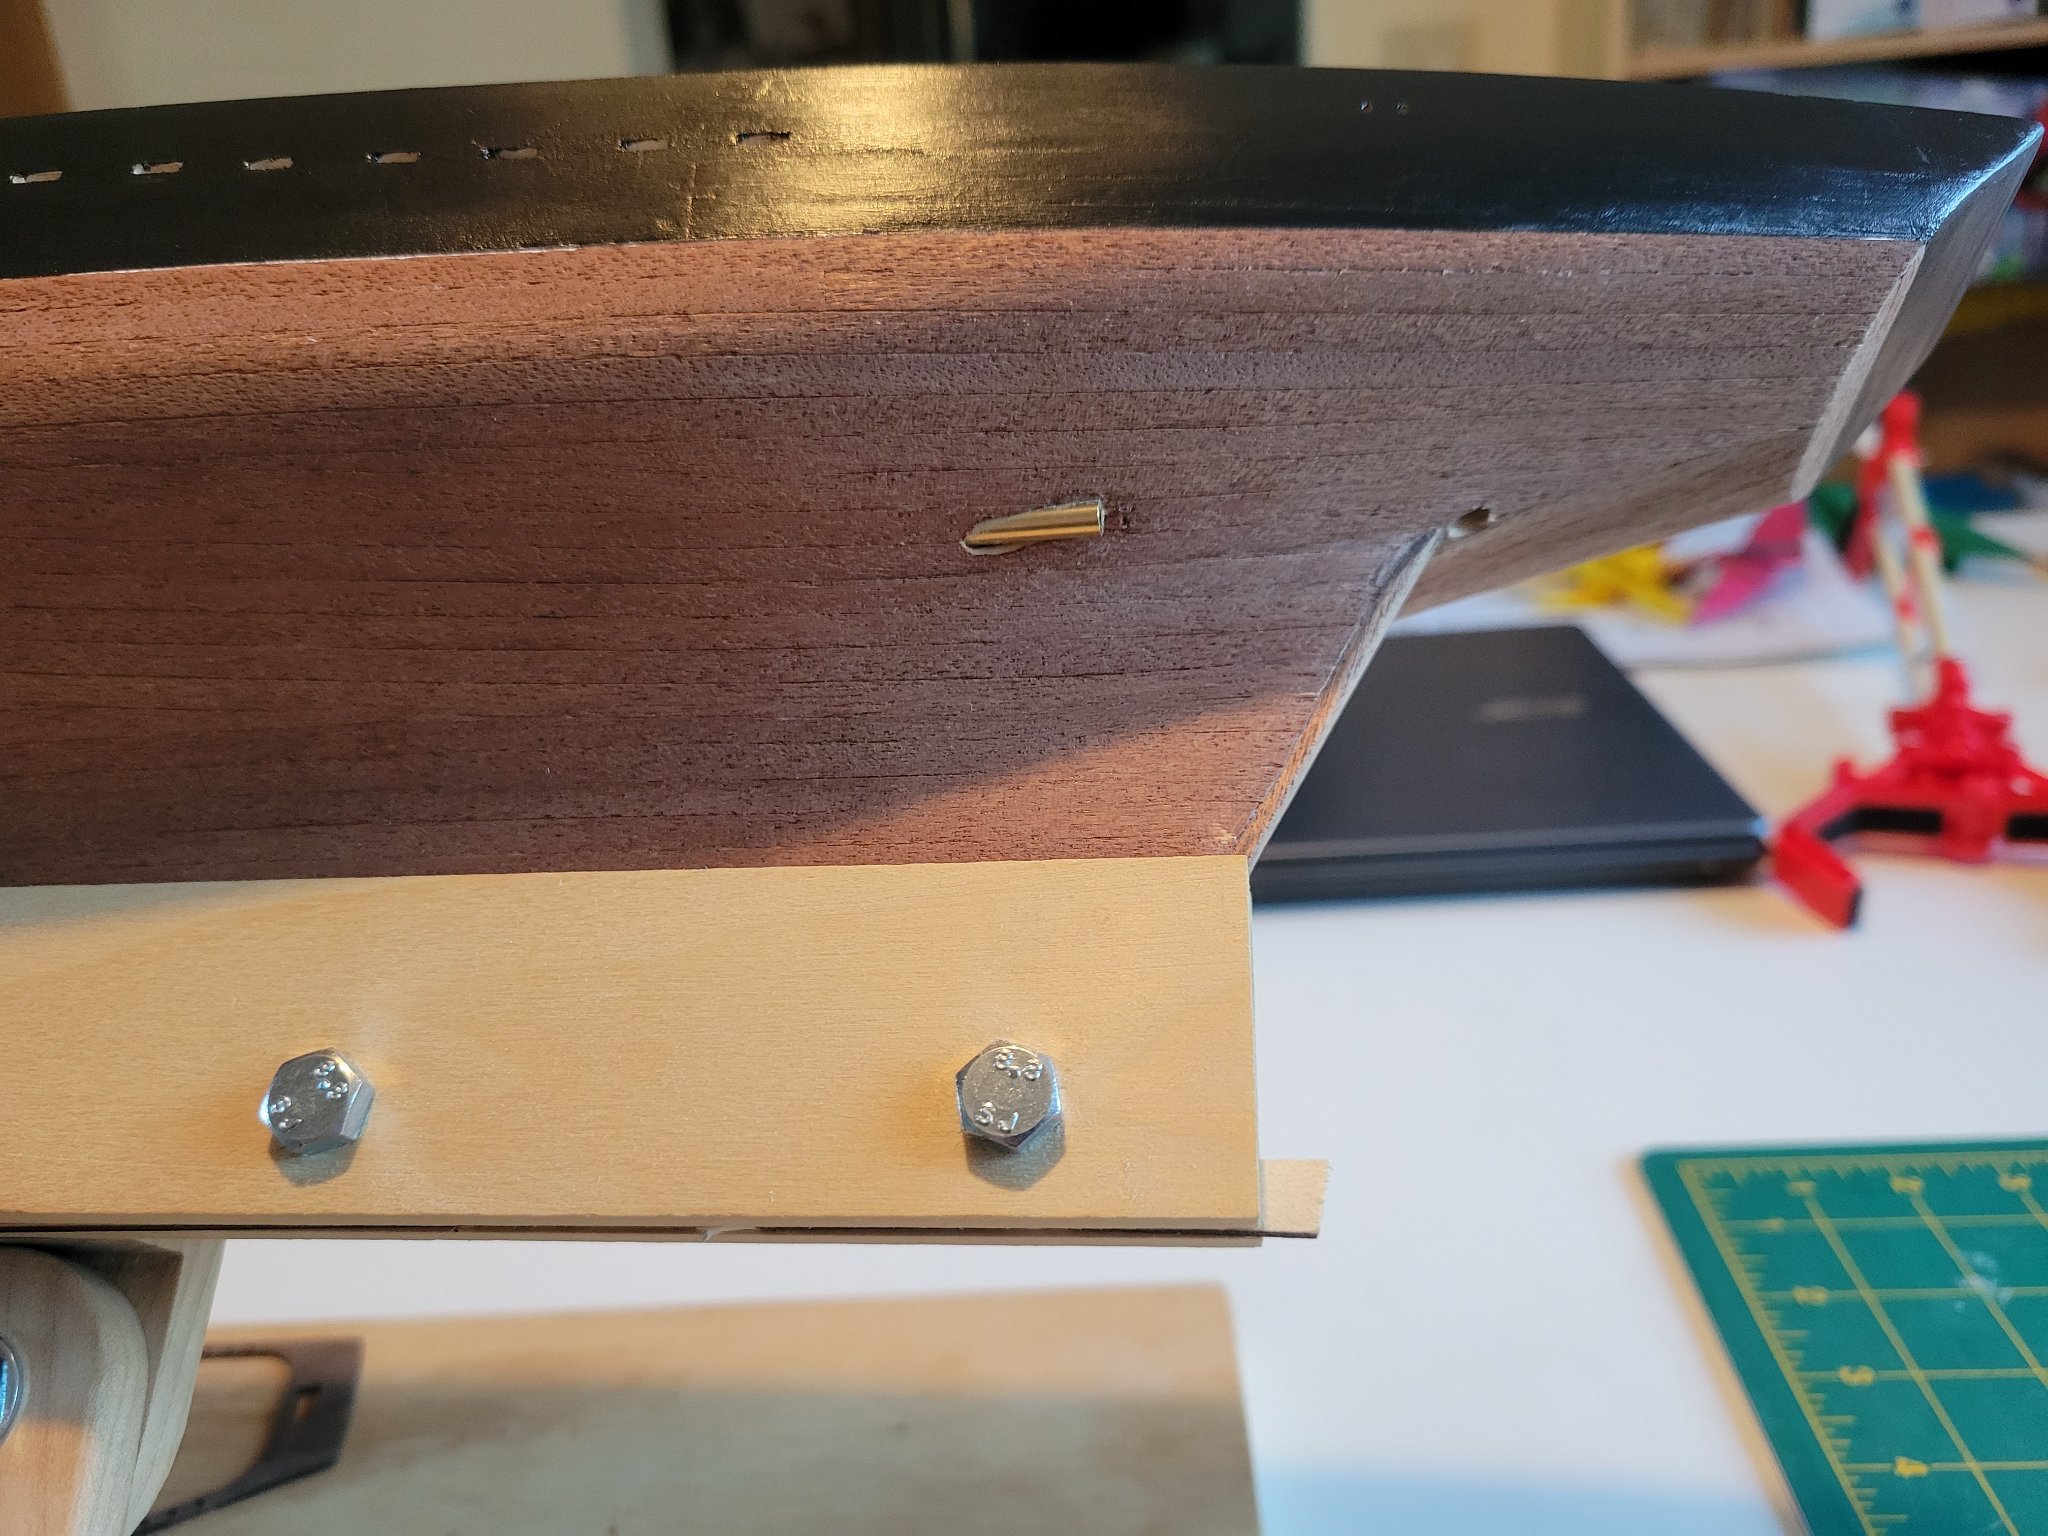
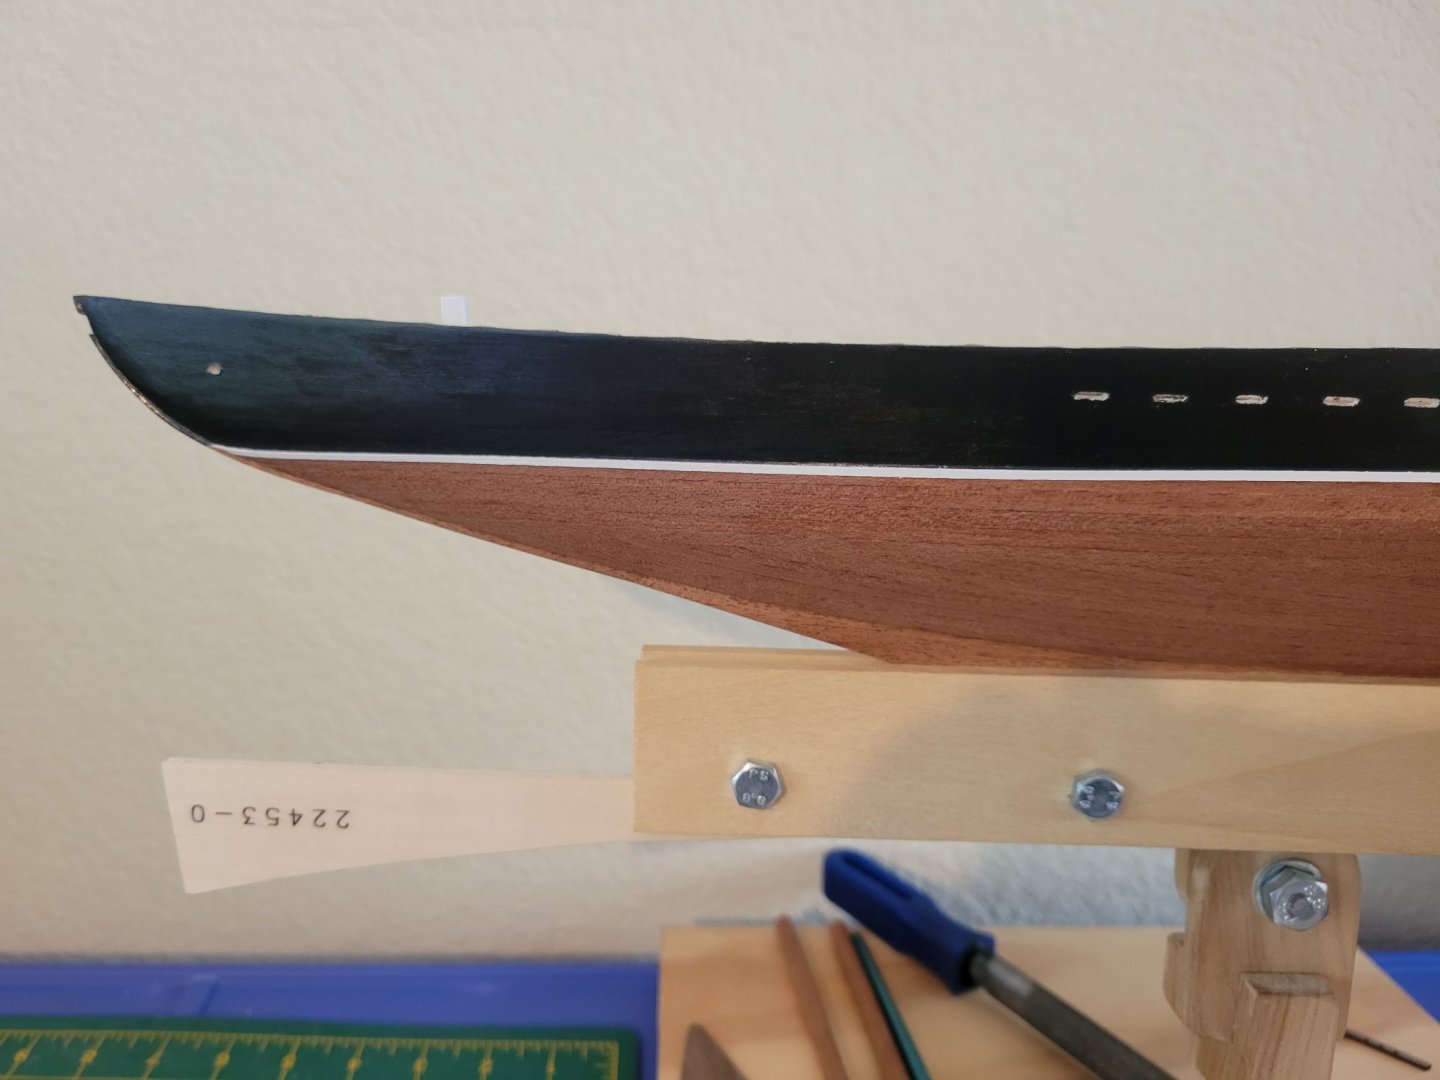
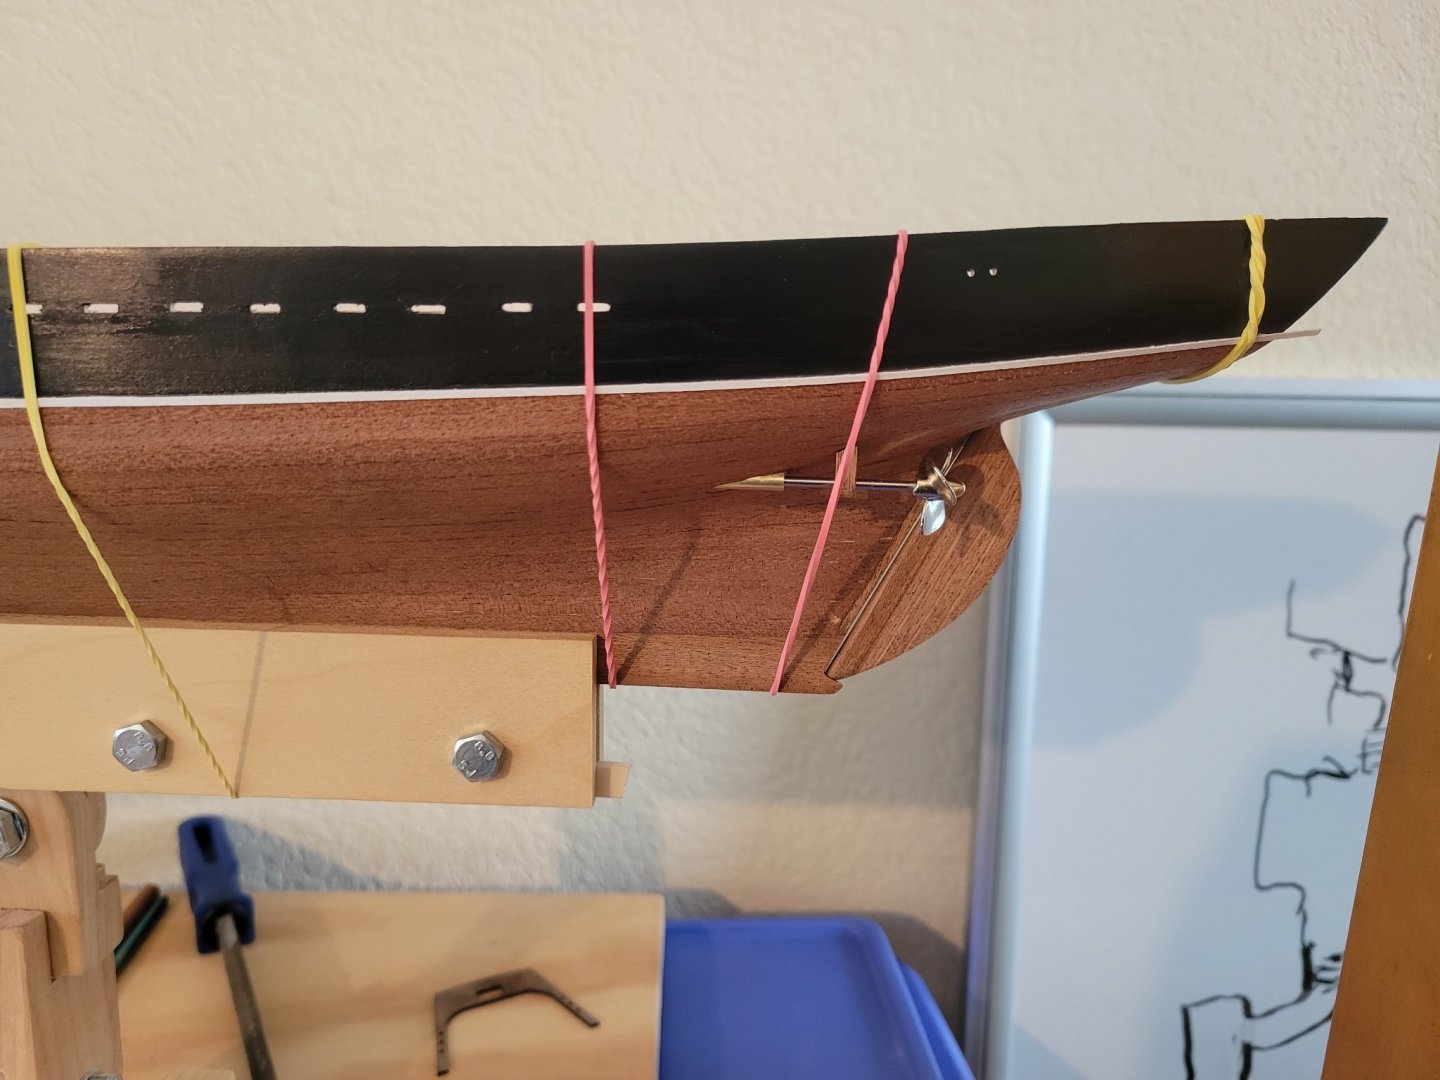
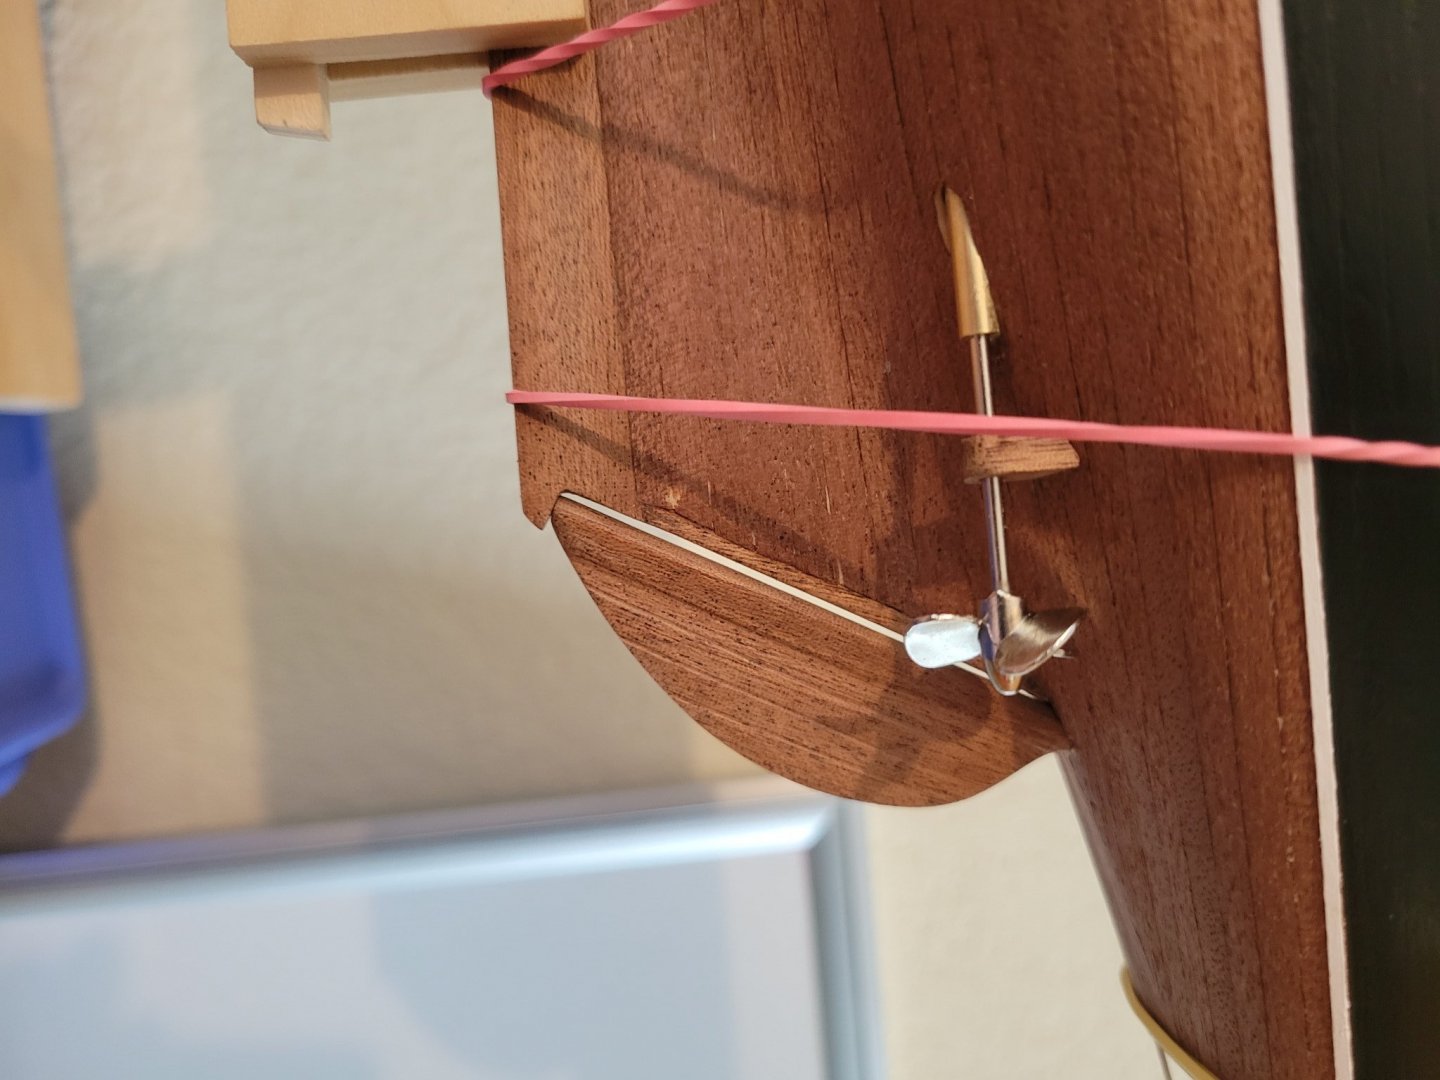
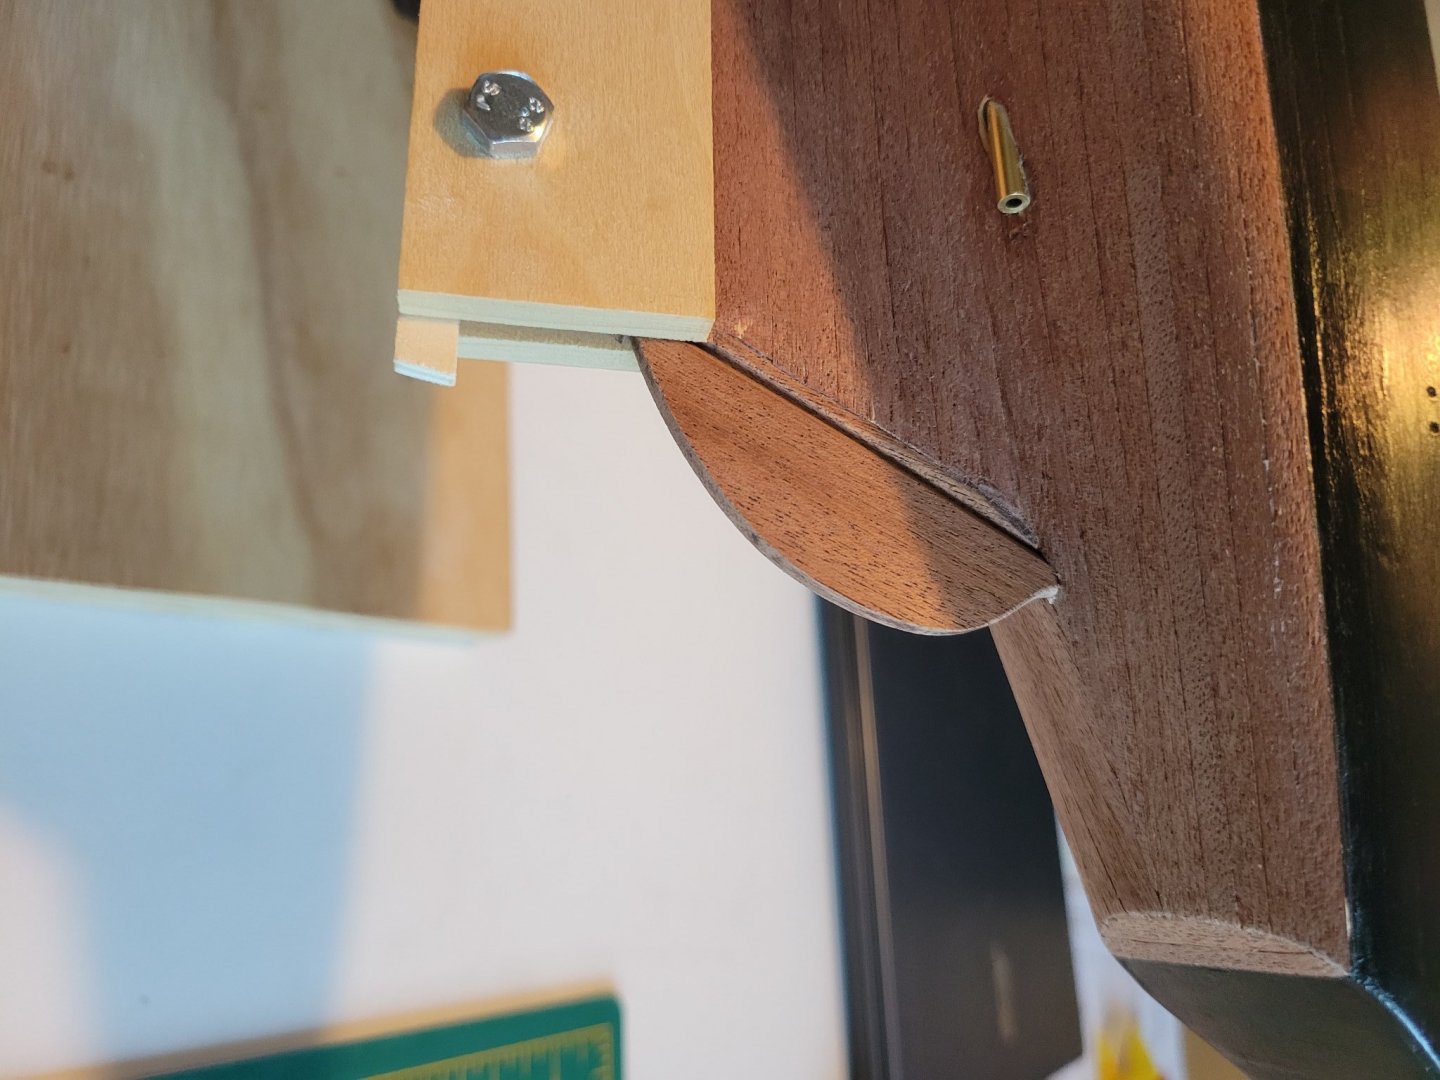
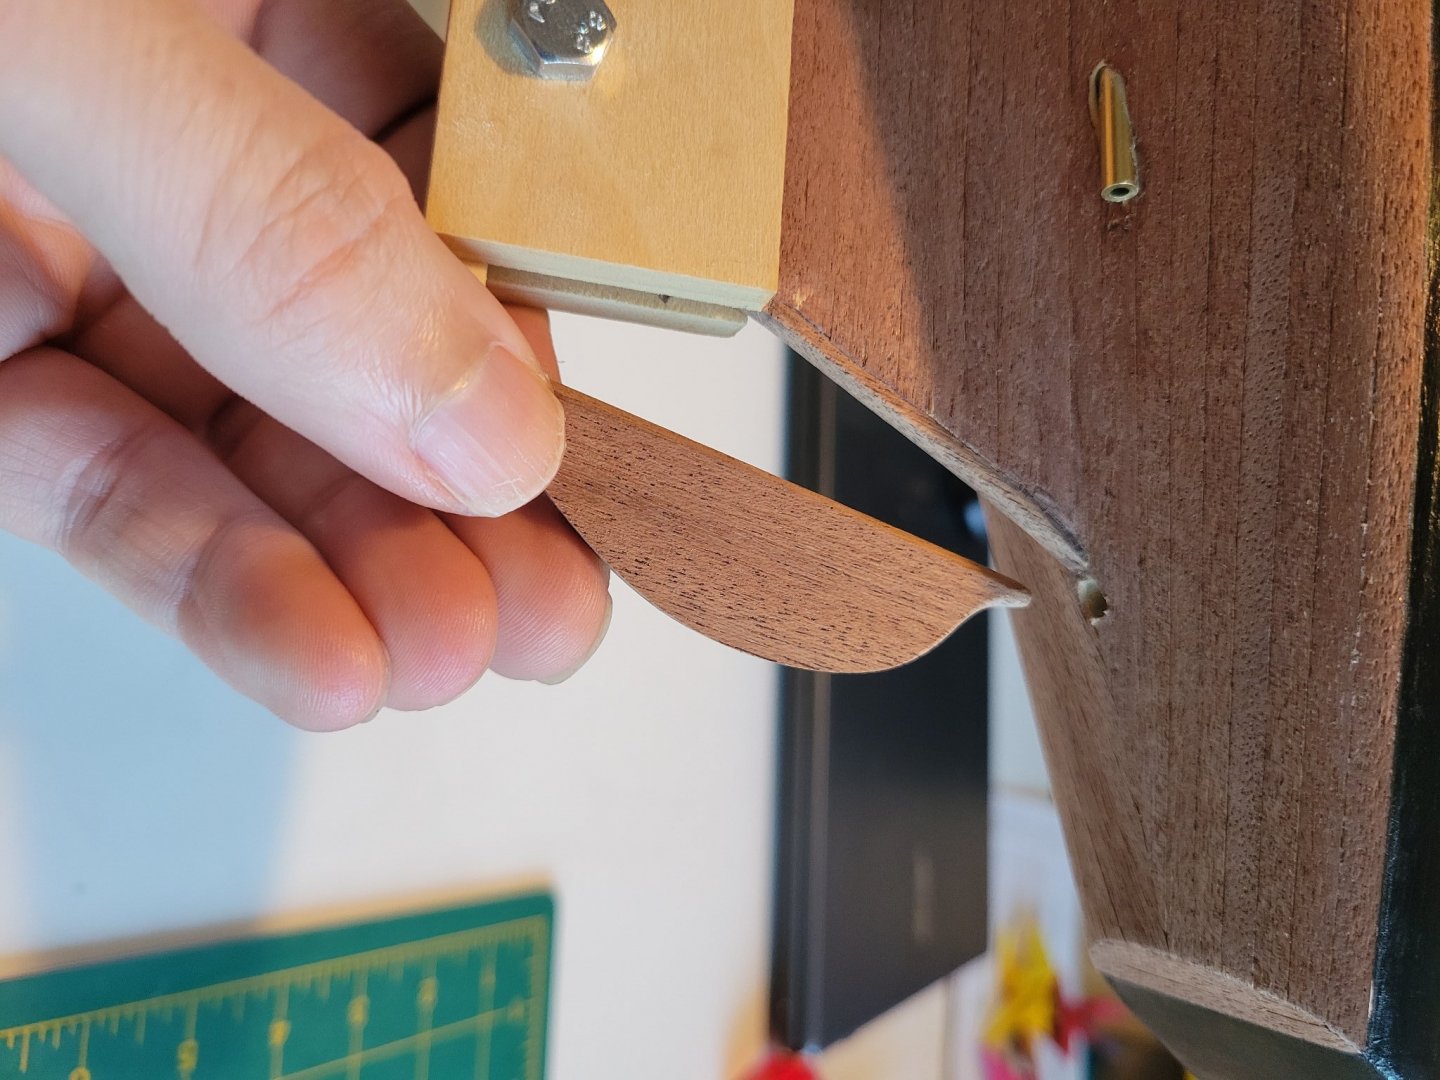
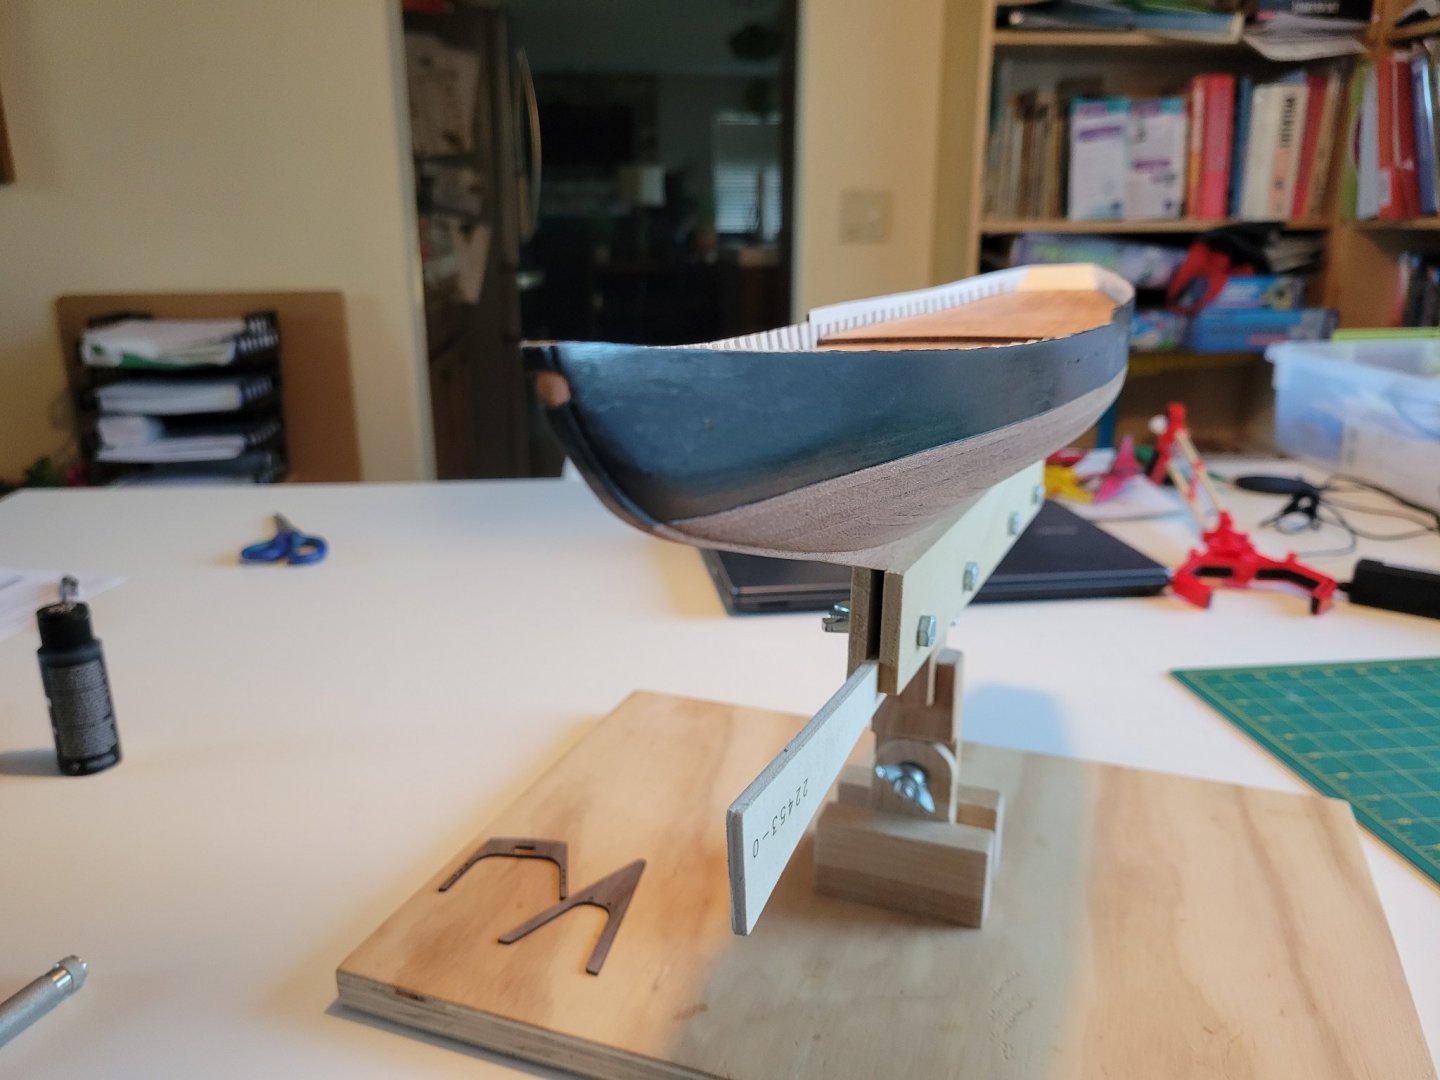
She's cleaning up well. Bulwark are drying. My process here was 1 coat of gesso (nice thin "primer"), filer where needed, gesso again, final filler, gesso, then two coats black. All with sanding between. Drilled and set the shaft pipe for the screws. Trimmed rudder to fit. Next is fully shaping the rudder and bowsprit deck assembly.


- 84 replies
-
- 3
-
-
- Artesania Latina
- Bluenose II
- (and 1 more)