Greg M
-
Posts
183 -
Joined
-
Last visited
1 Follower

About Greg M

- Birthday 12/06/1974
-
 Trussben reacted to a post in a topic:
HMS Winchelsea by Greg M - 1/48 scale
Trussben reacted to a post in a topic:
HMS Winchelsea by Greg M - 1/48 scale
-
FrankWouts reacted to a post in a topic:
HMS Winchelsea by Greg M - 1/48 scale
-
 FrankWouts reacted to a post in a topic:
HMS Winchelsea by Greg M - 1/48 scale
FrankWouts reacted to a post in a topic:
HMS Winchelsea by Greg M - 1/48 scale
-
FrankWouts reacted to a post in a topic:
HMS Winchelsea by Greg M - 1/48 scale
-
Thanks Steve. Once I've finished the decking, I'm going to see how many cannon can be built before needing a break and starting chapter 5. The stove is a great idea too.
-
shauer reacted to a post in a topic:
HMS Winchelsea by Greg M - 1/48 scale
-
JpR62 reacted to a post in a topic:
HMS Winchelsea by Greg M - 1/48 scale
-
Chuck reacted to a post in a topic:
HMS Winchelsea by Greg M - 1/48 scale
-
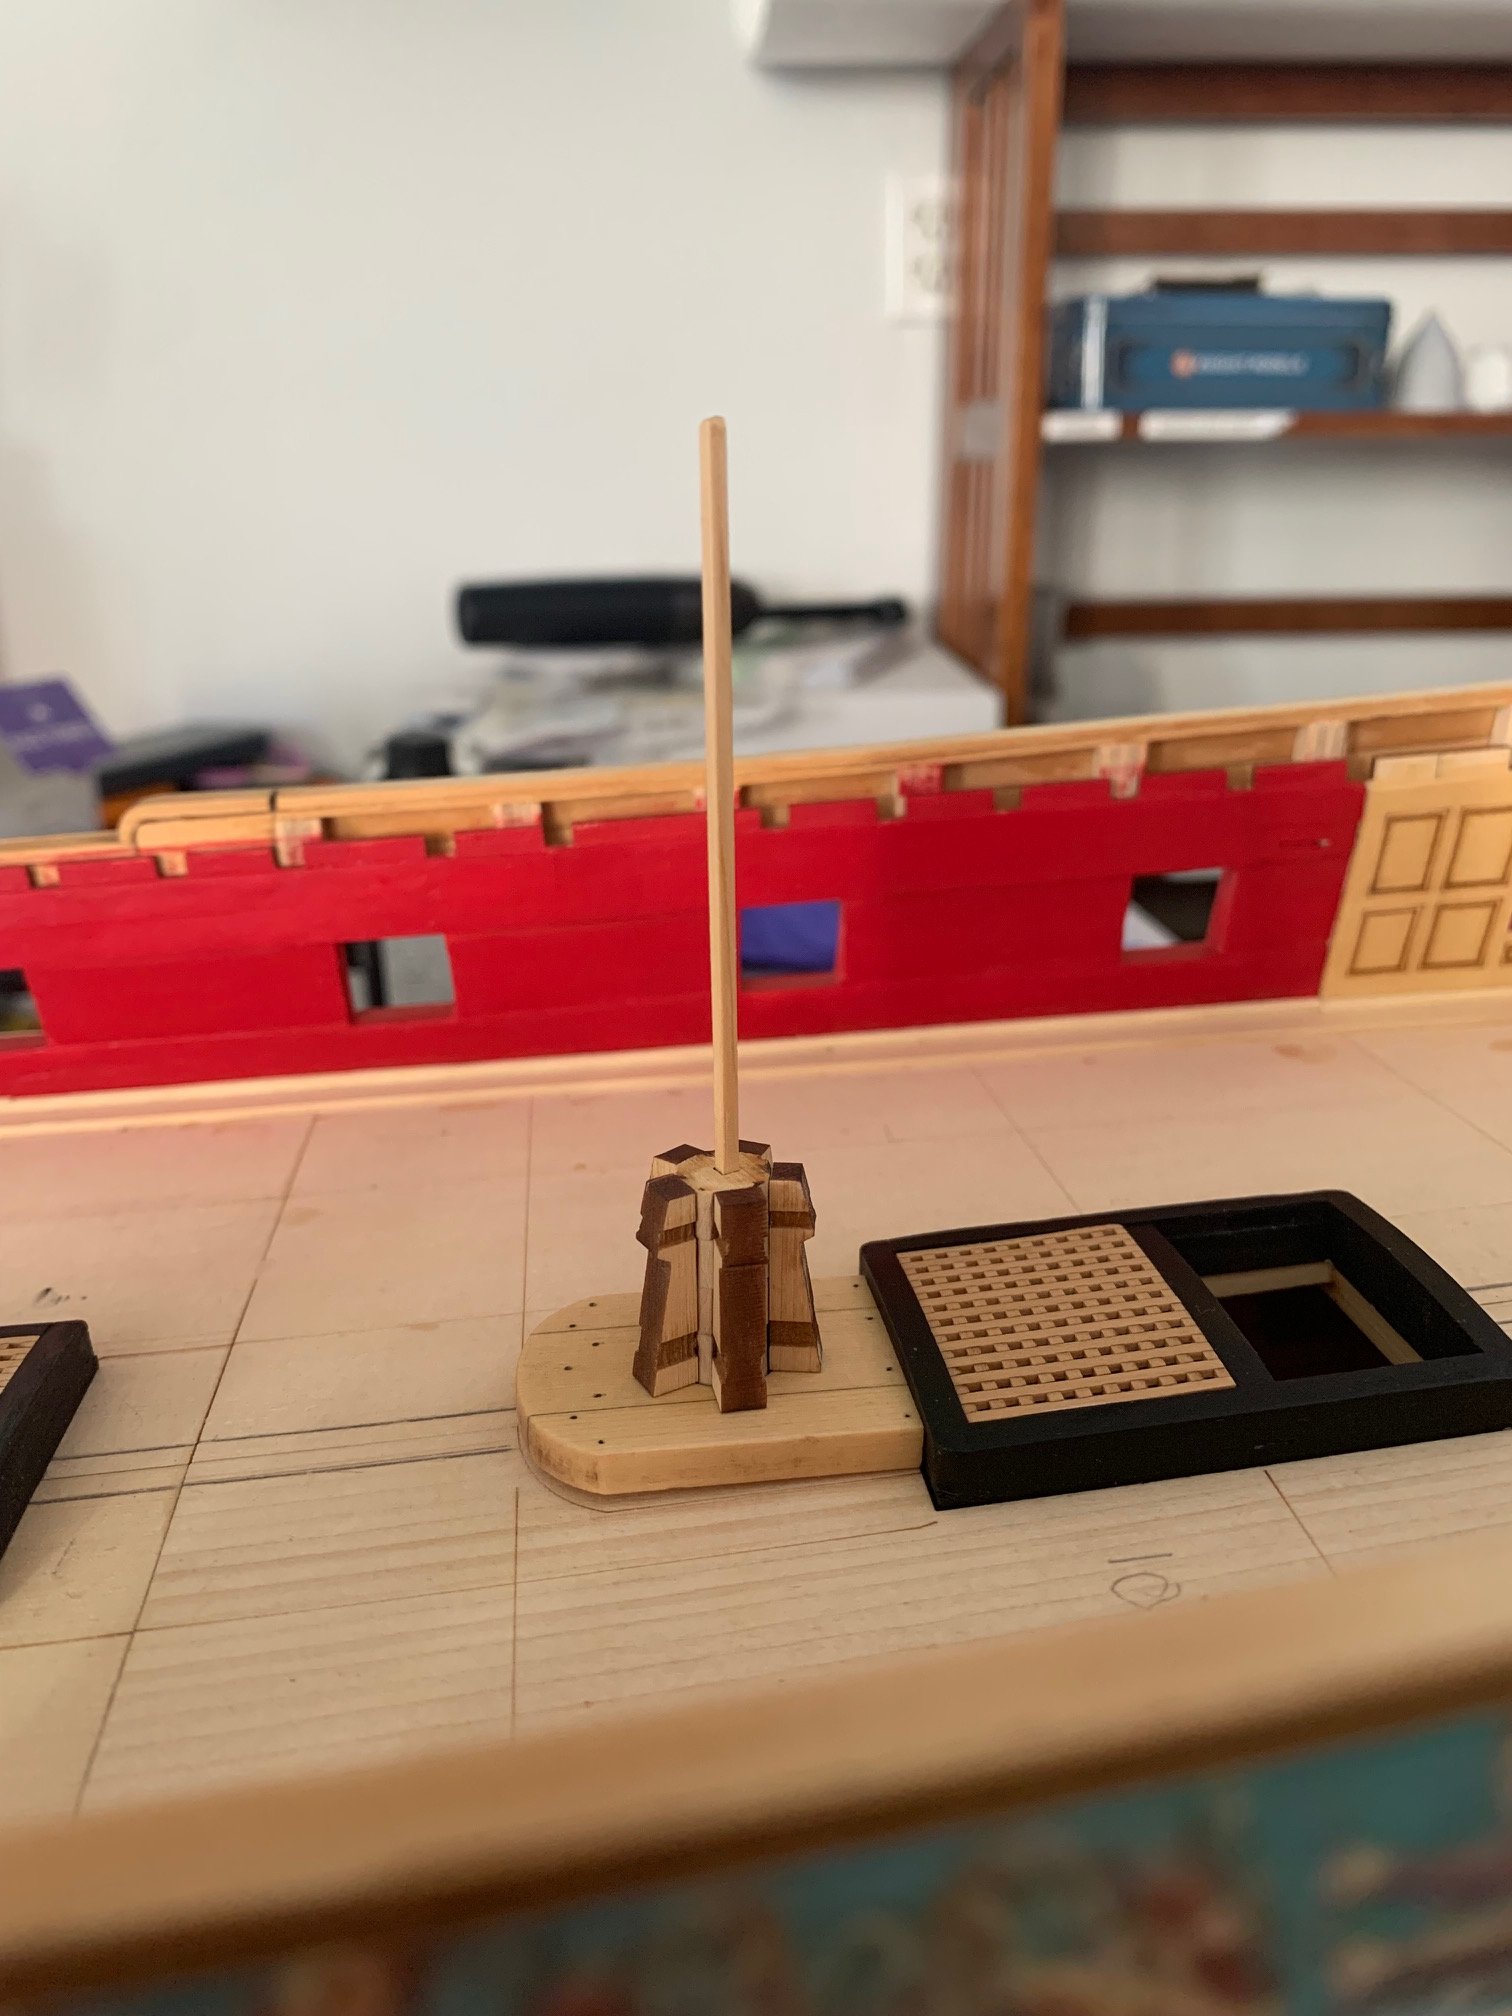
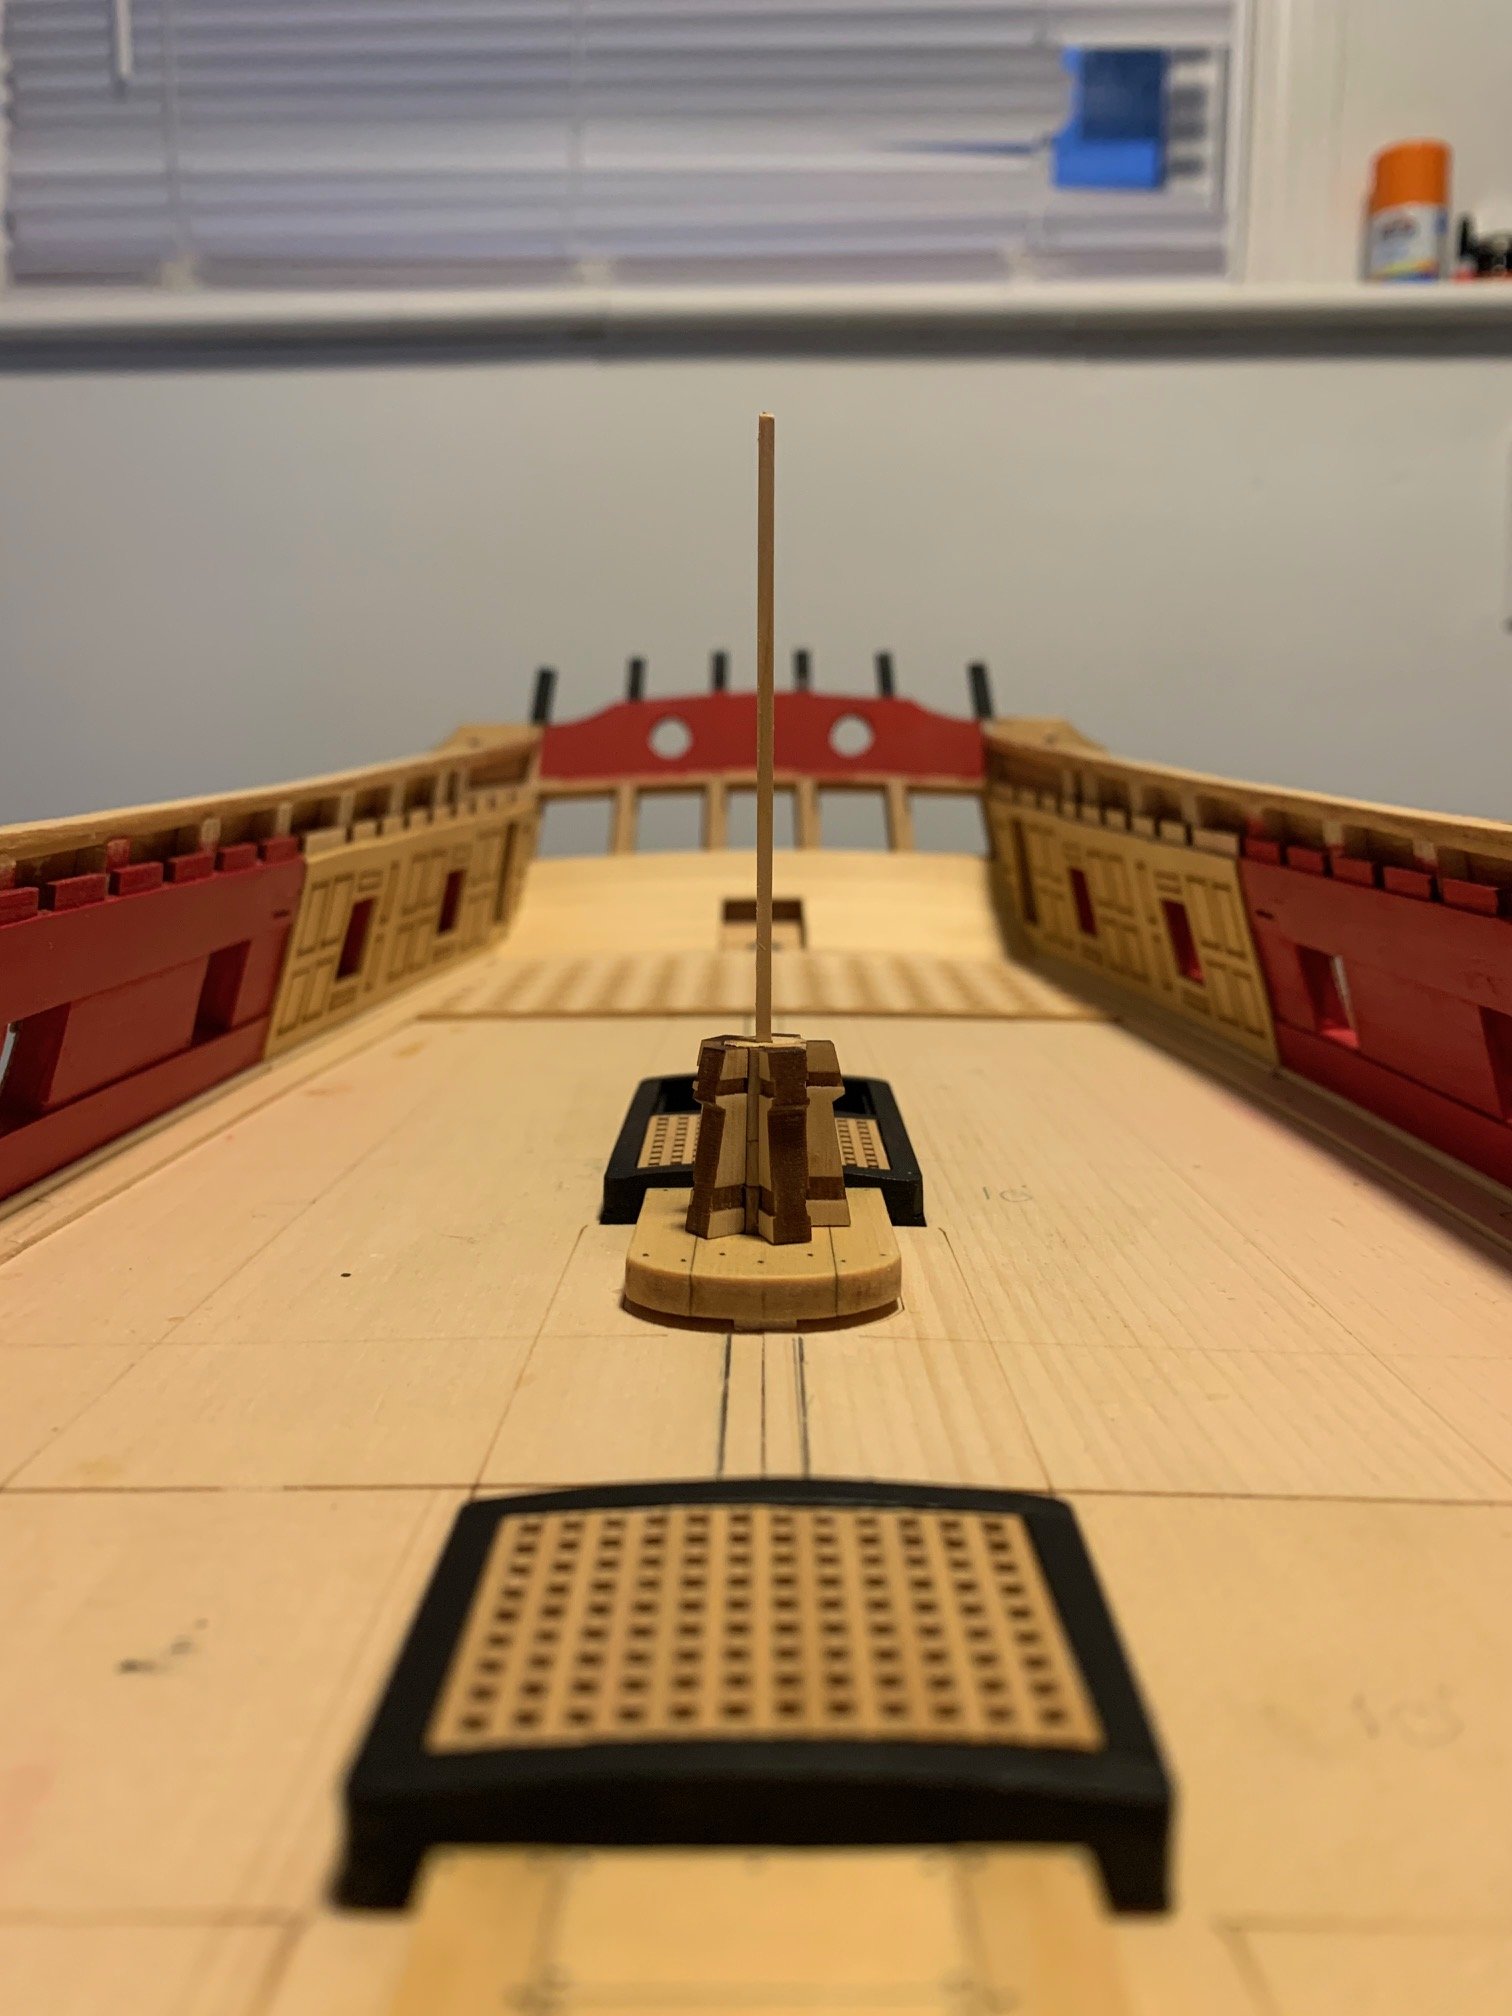
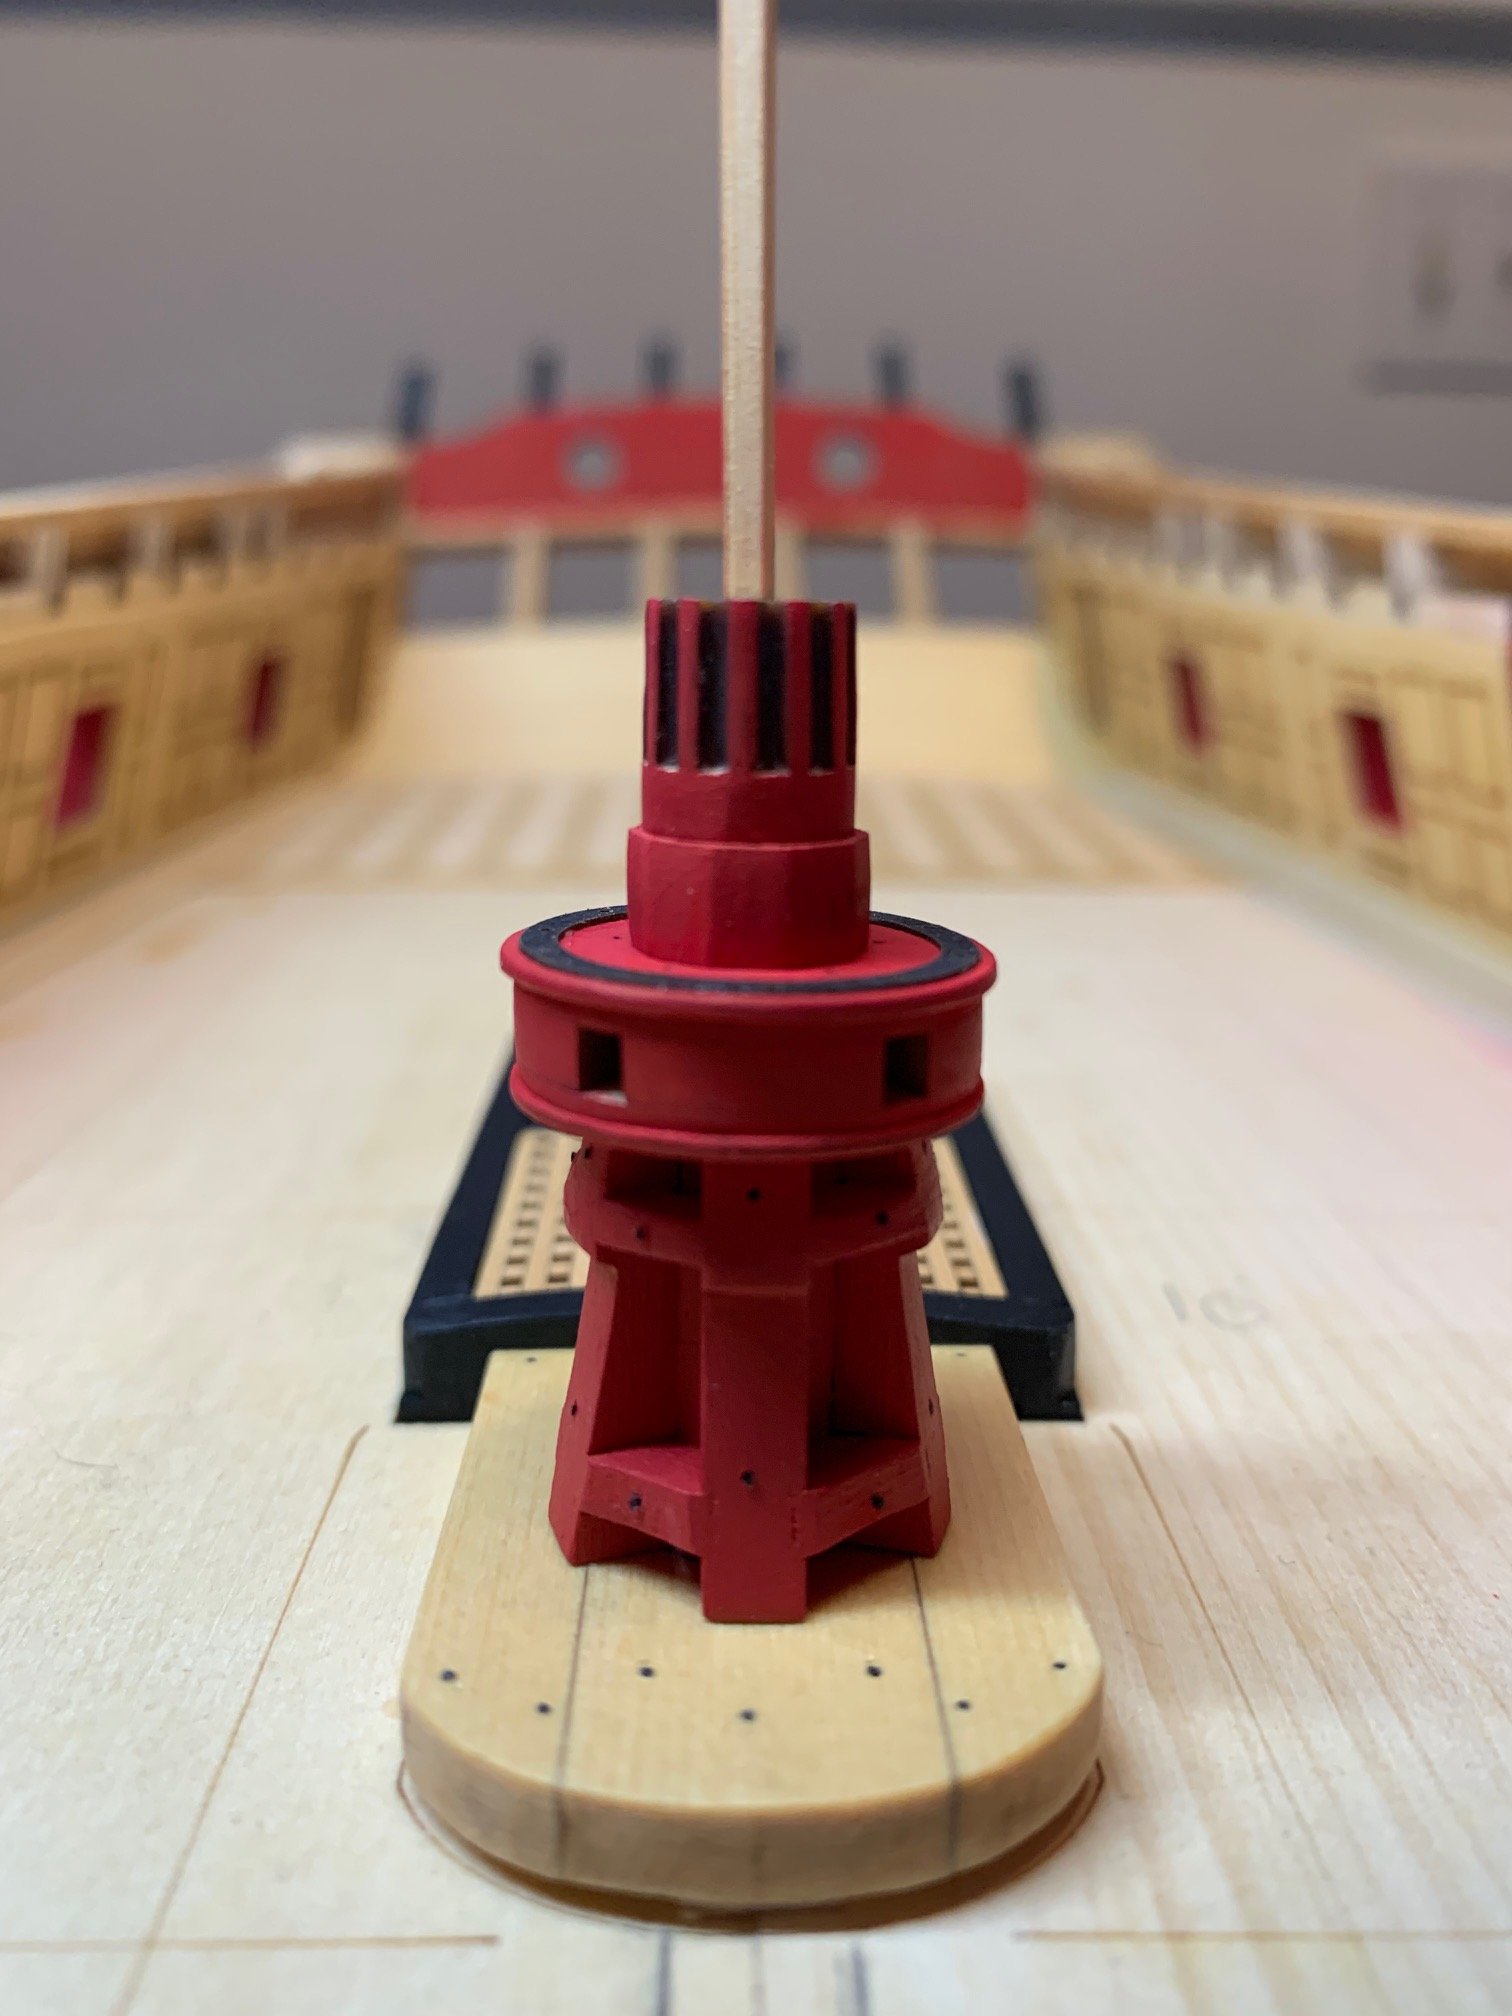
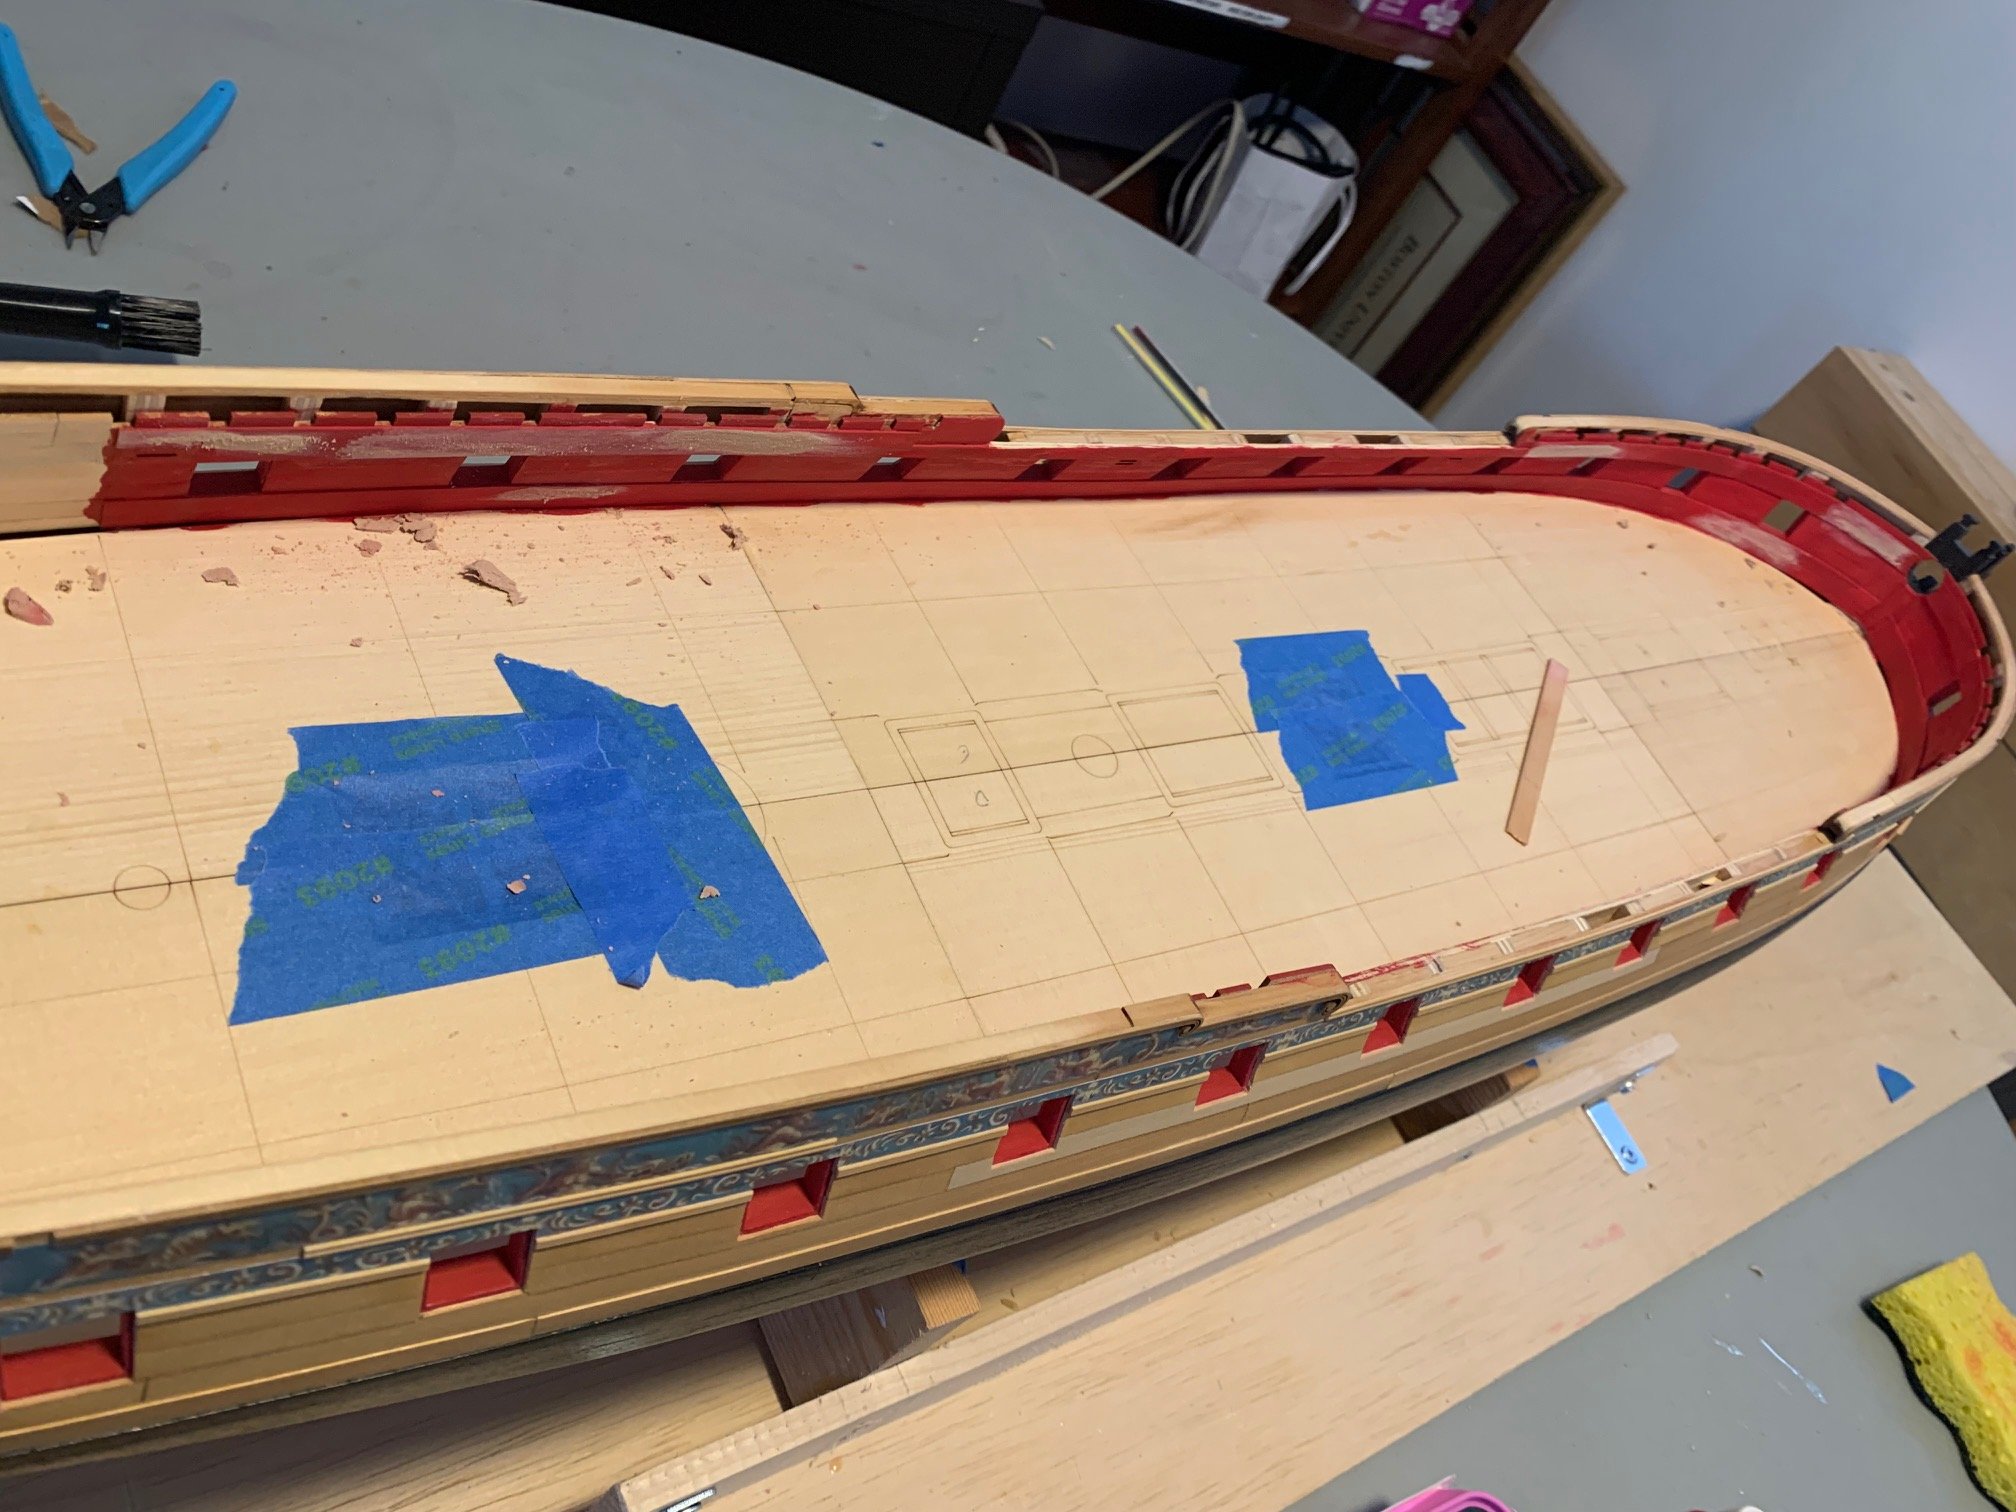
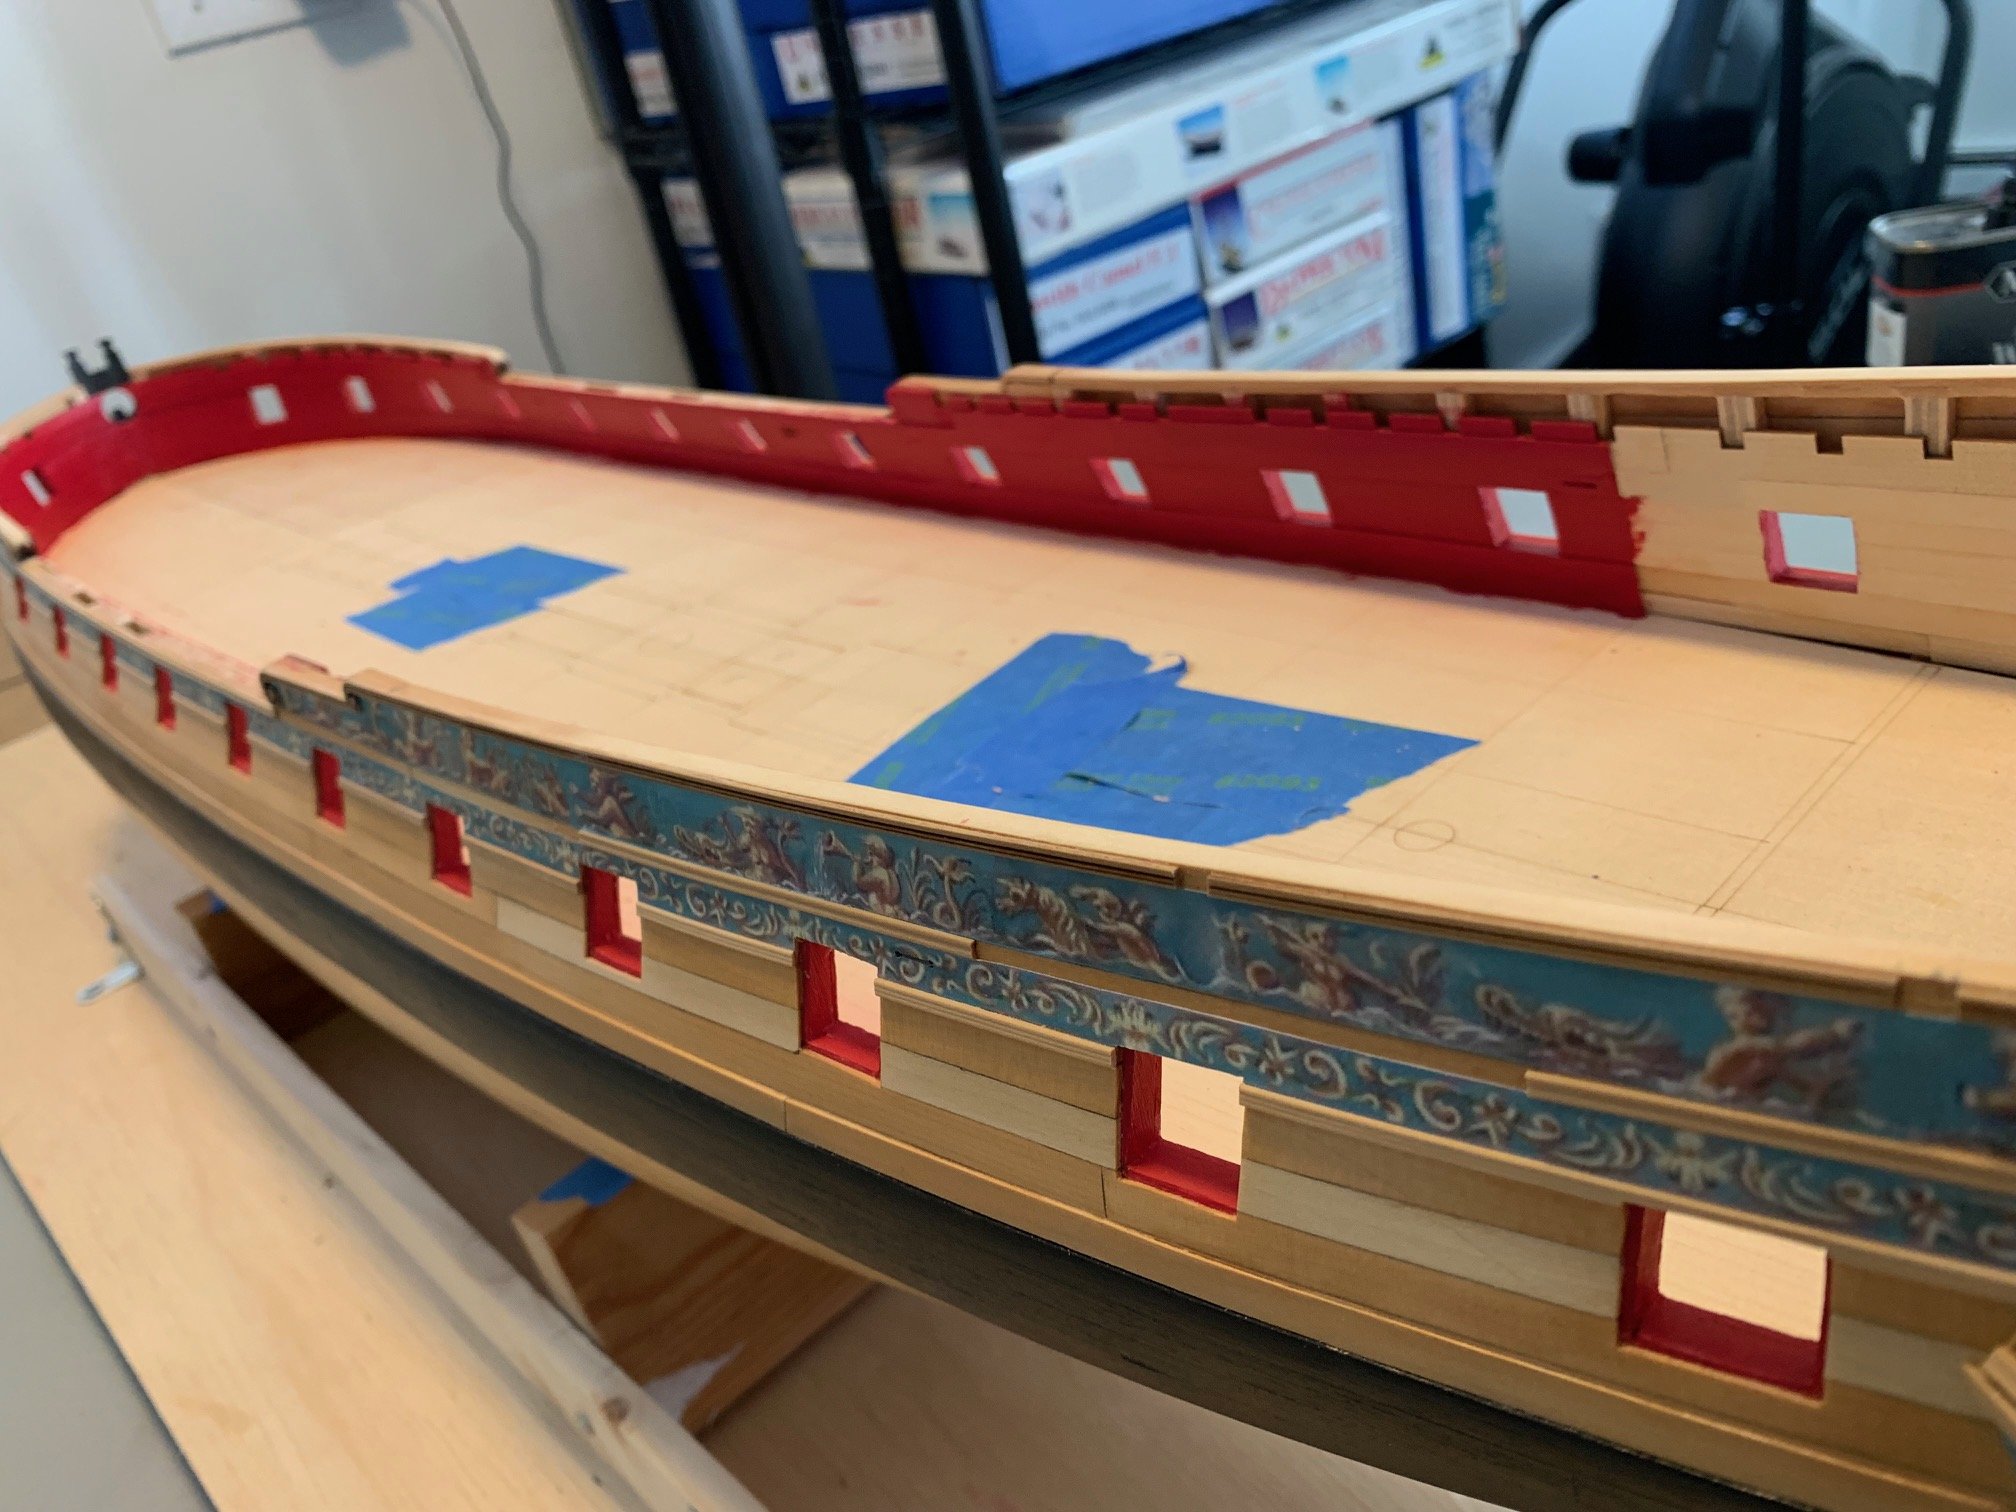
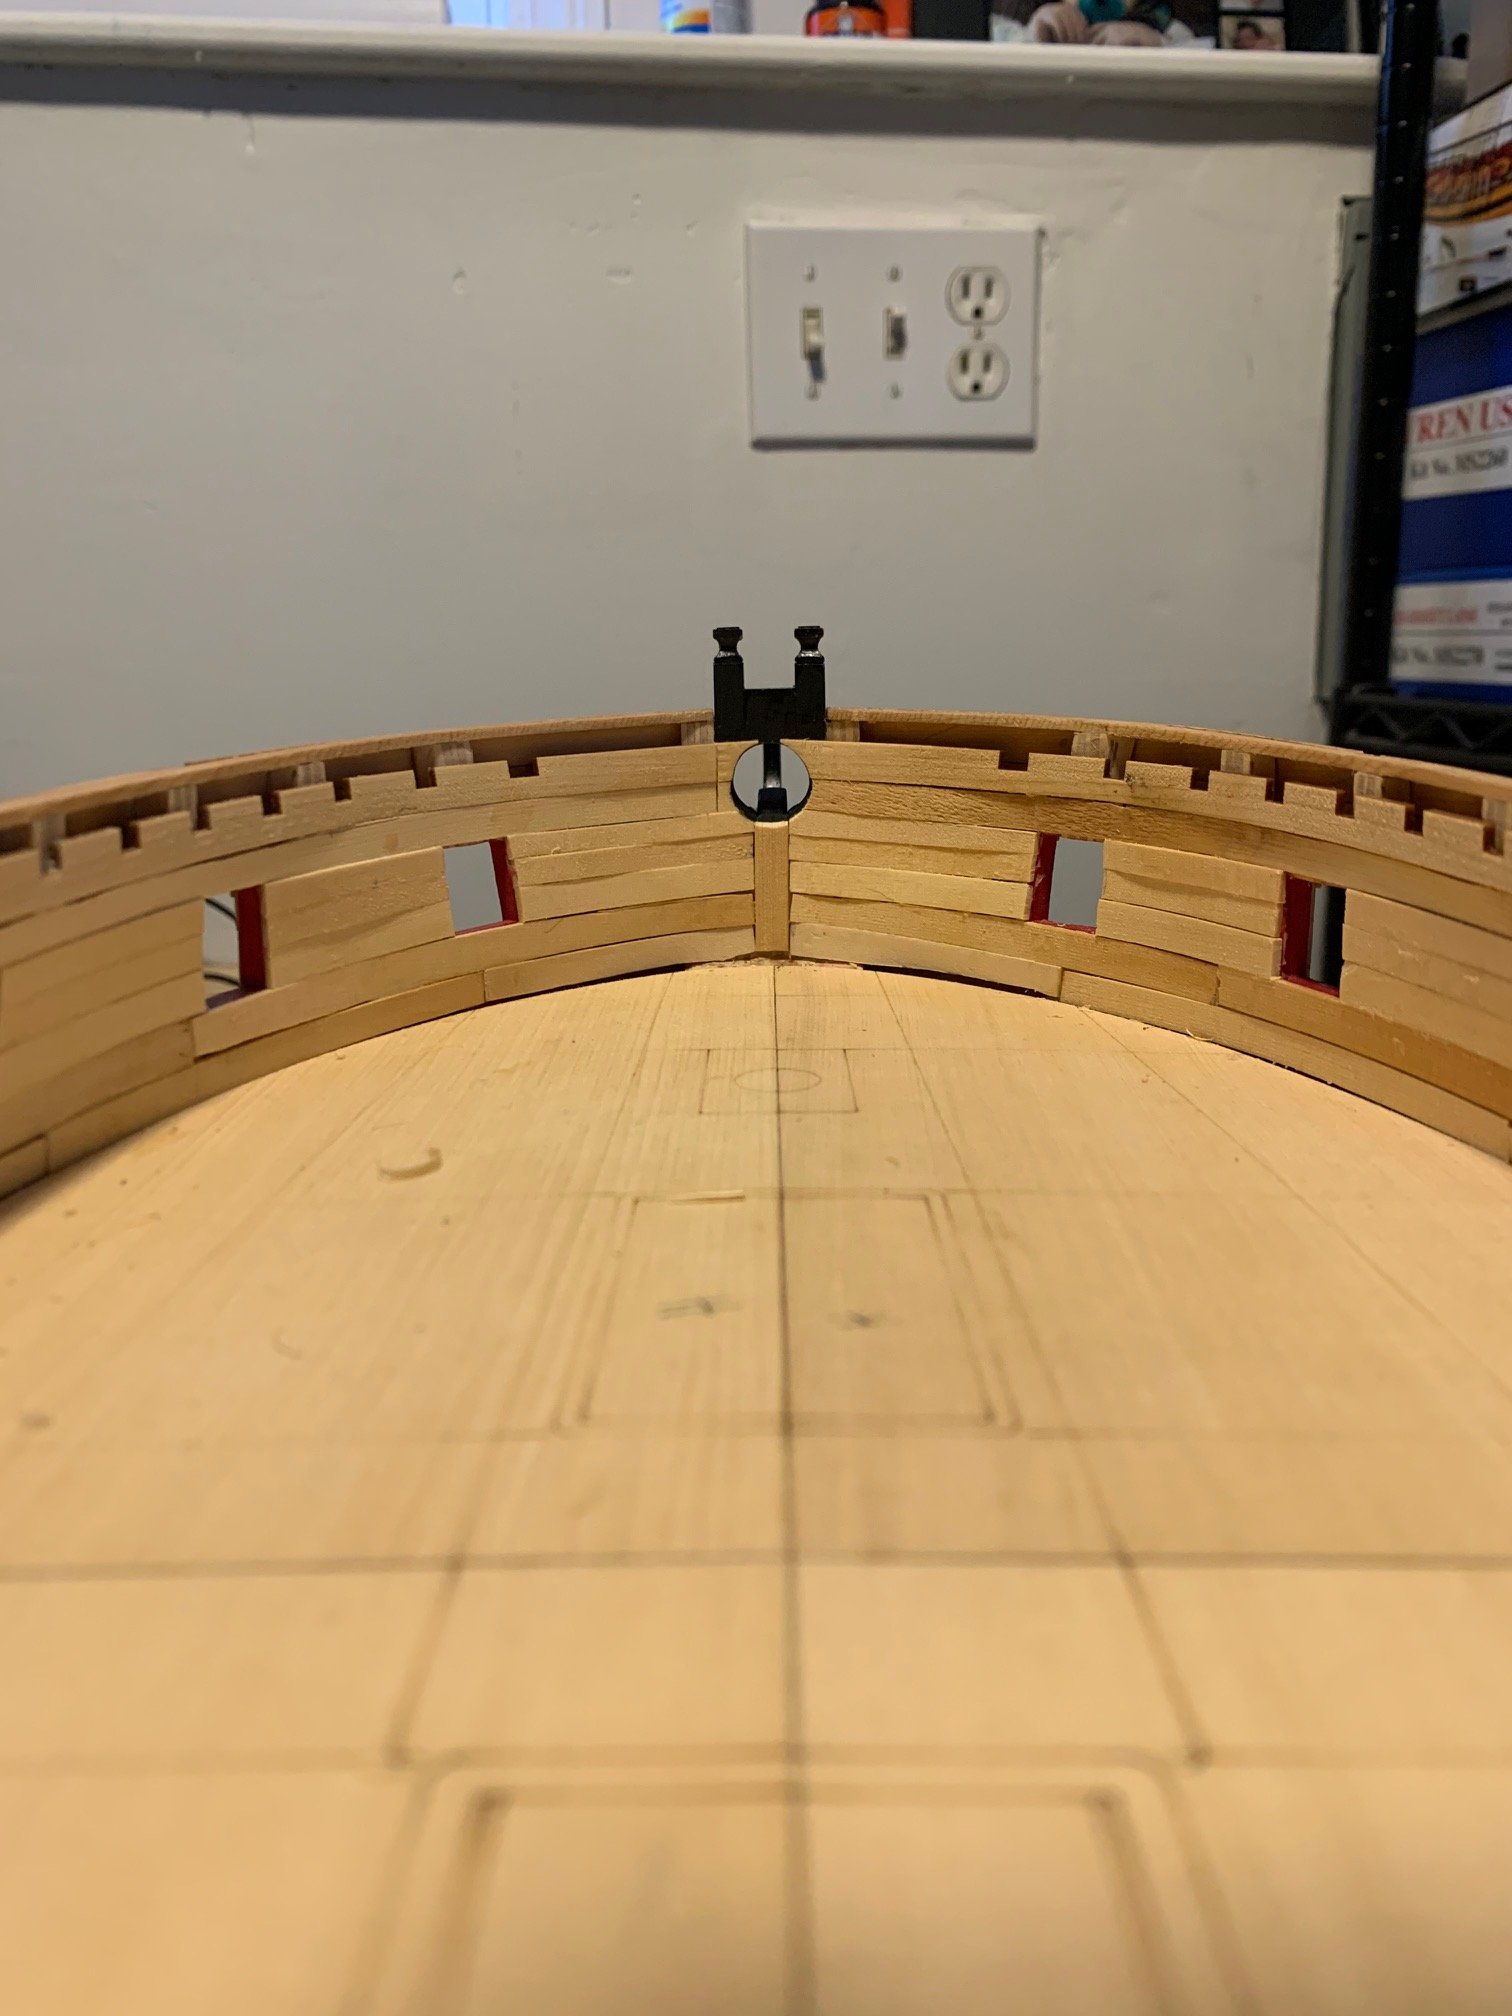
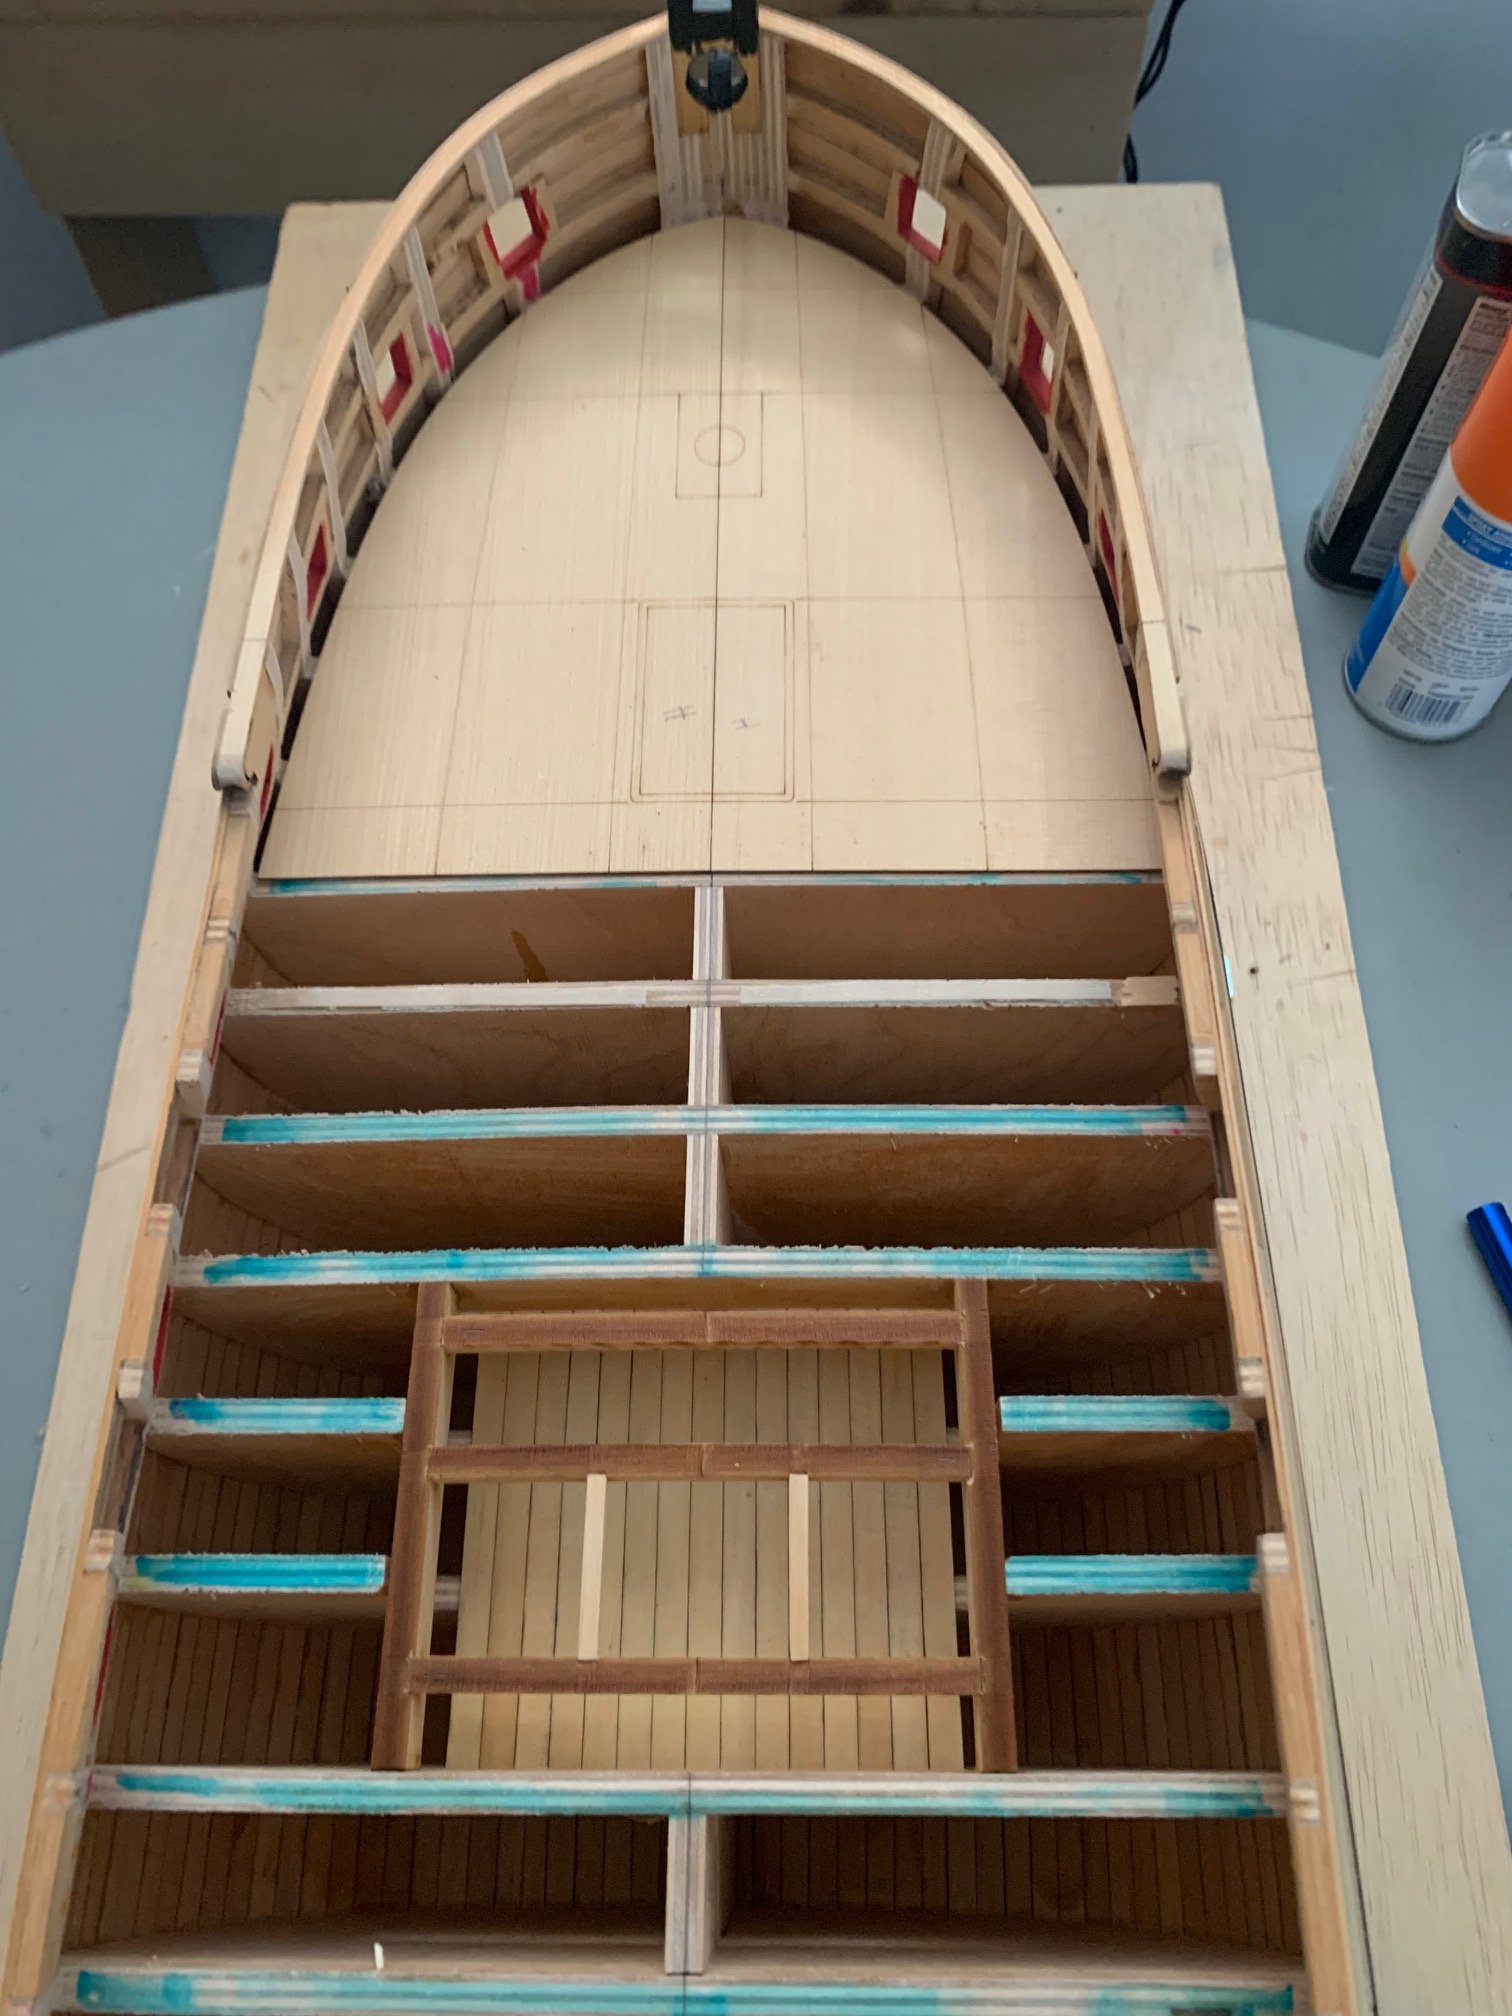
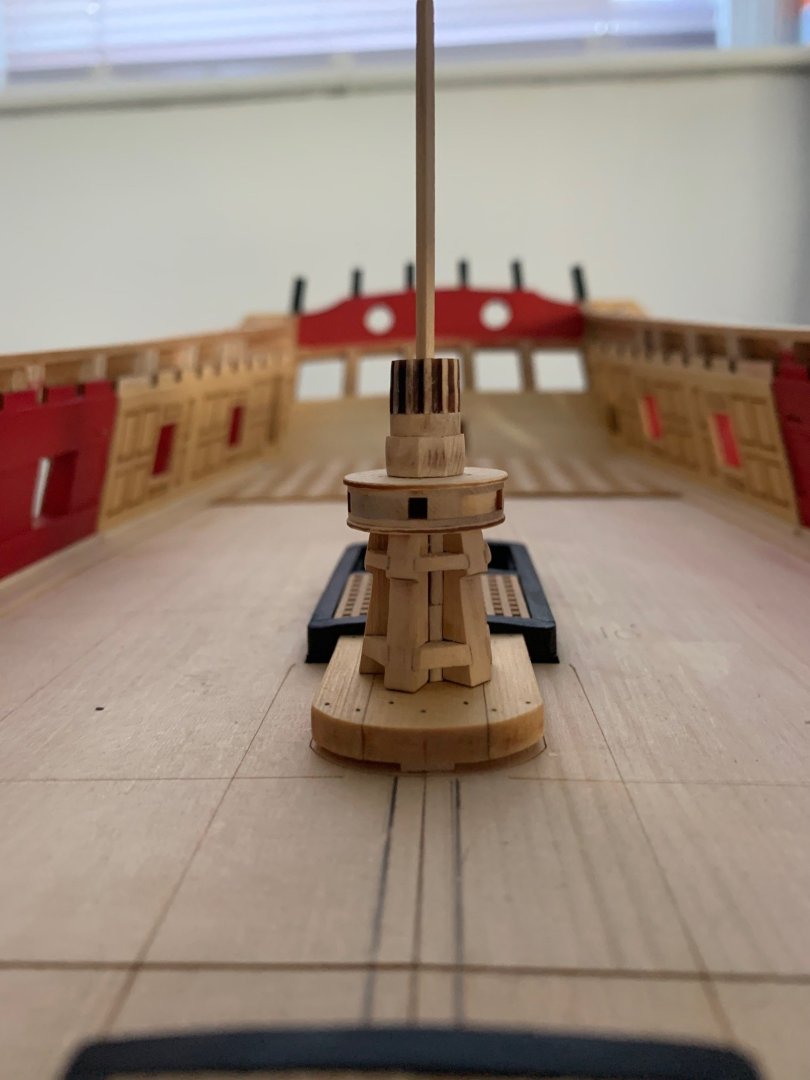
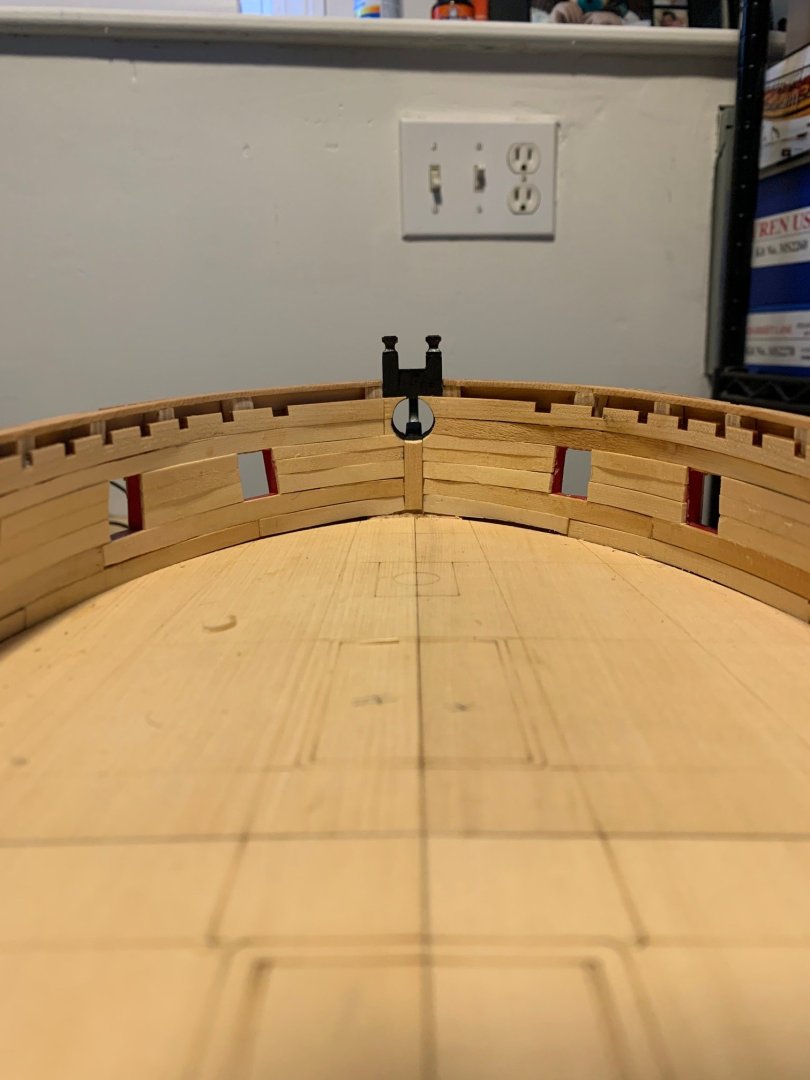
I’ve spent the last week working on the lower capstan. What a fun mini kit! It turned out to be a good time to level and glue down the capstan partner once the whelps were glued on. I used the fore edge of the gunport as a visual guide and a 1/32” piece of scrap worked perfectly to level it just as the instructions called out. There's a lot of play where the whelps sit on the partner, which should make fine tuning straightforward for matching up the lower capstan with the upper capstan partner when the time comes. I’ll get some shims under the edges of the partner once I start decking as it’s only lightly glued down with the shim at the center. I used a very light hand with 320 grit to sand away the char so as to not distort any of the angles. Much easier to add another coat of paint to remove any contrast. Once painted, I touched up the gear with pencil and installed the bolts and hoop to finish it up. Nothing has been glued up yet and I’m going to save the upper capstan for a later chapter as a change of pace. There are no excuses left to avoid the decking any longer. I’m taking the last 2 weeks of the year off from work, so my game plan is to finish up chapter 4 before the new year.


-
Jack H reacted to a post in a topic:
HMS Winchelsea by Greg M - 1/48 scale
-
scrubbyj427 reacted to a post in a topic:
HMS Winchelsea by Greg M - 1/48 scale
-
shauer reacted to a post in a topic:
HMS Winchelsea by Greg M - 1/48 scale
-
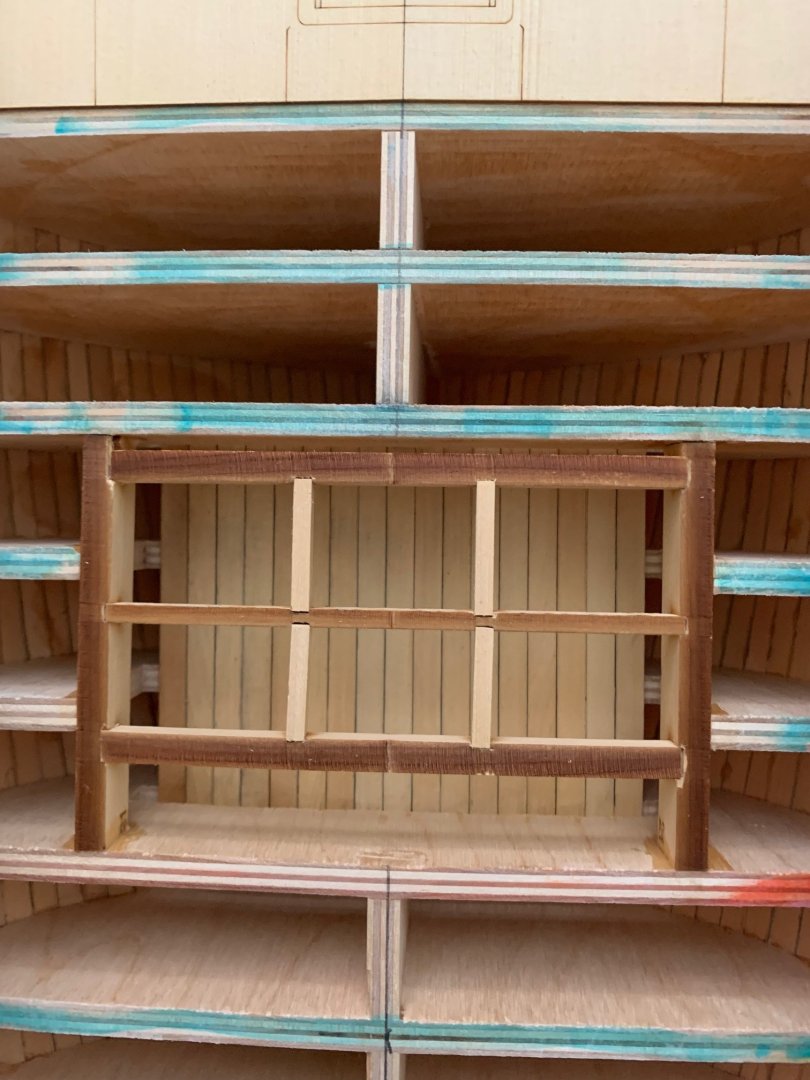
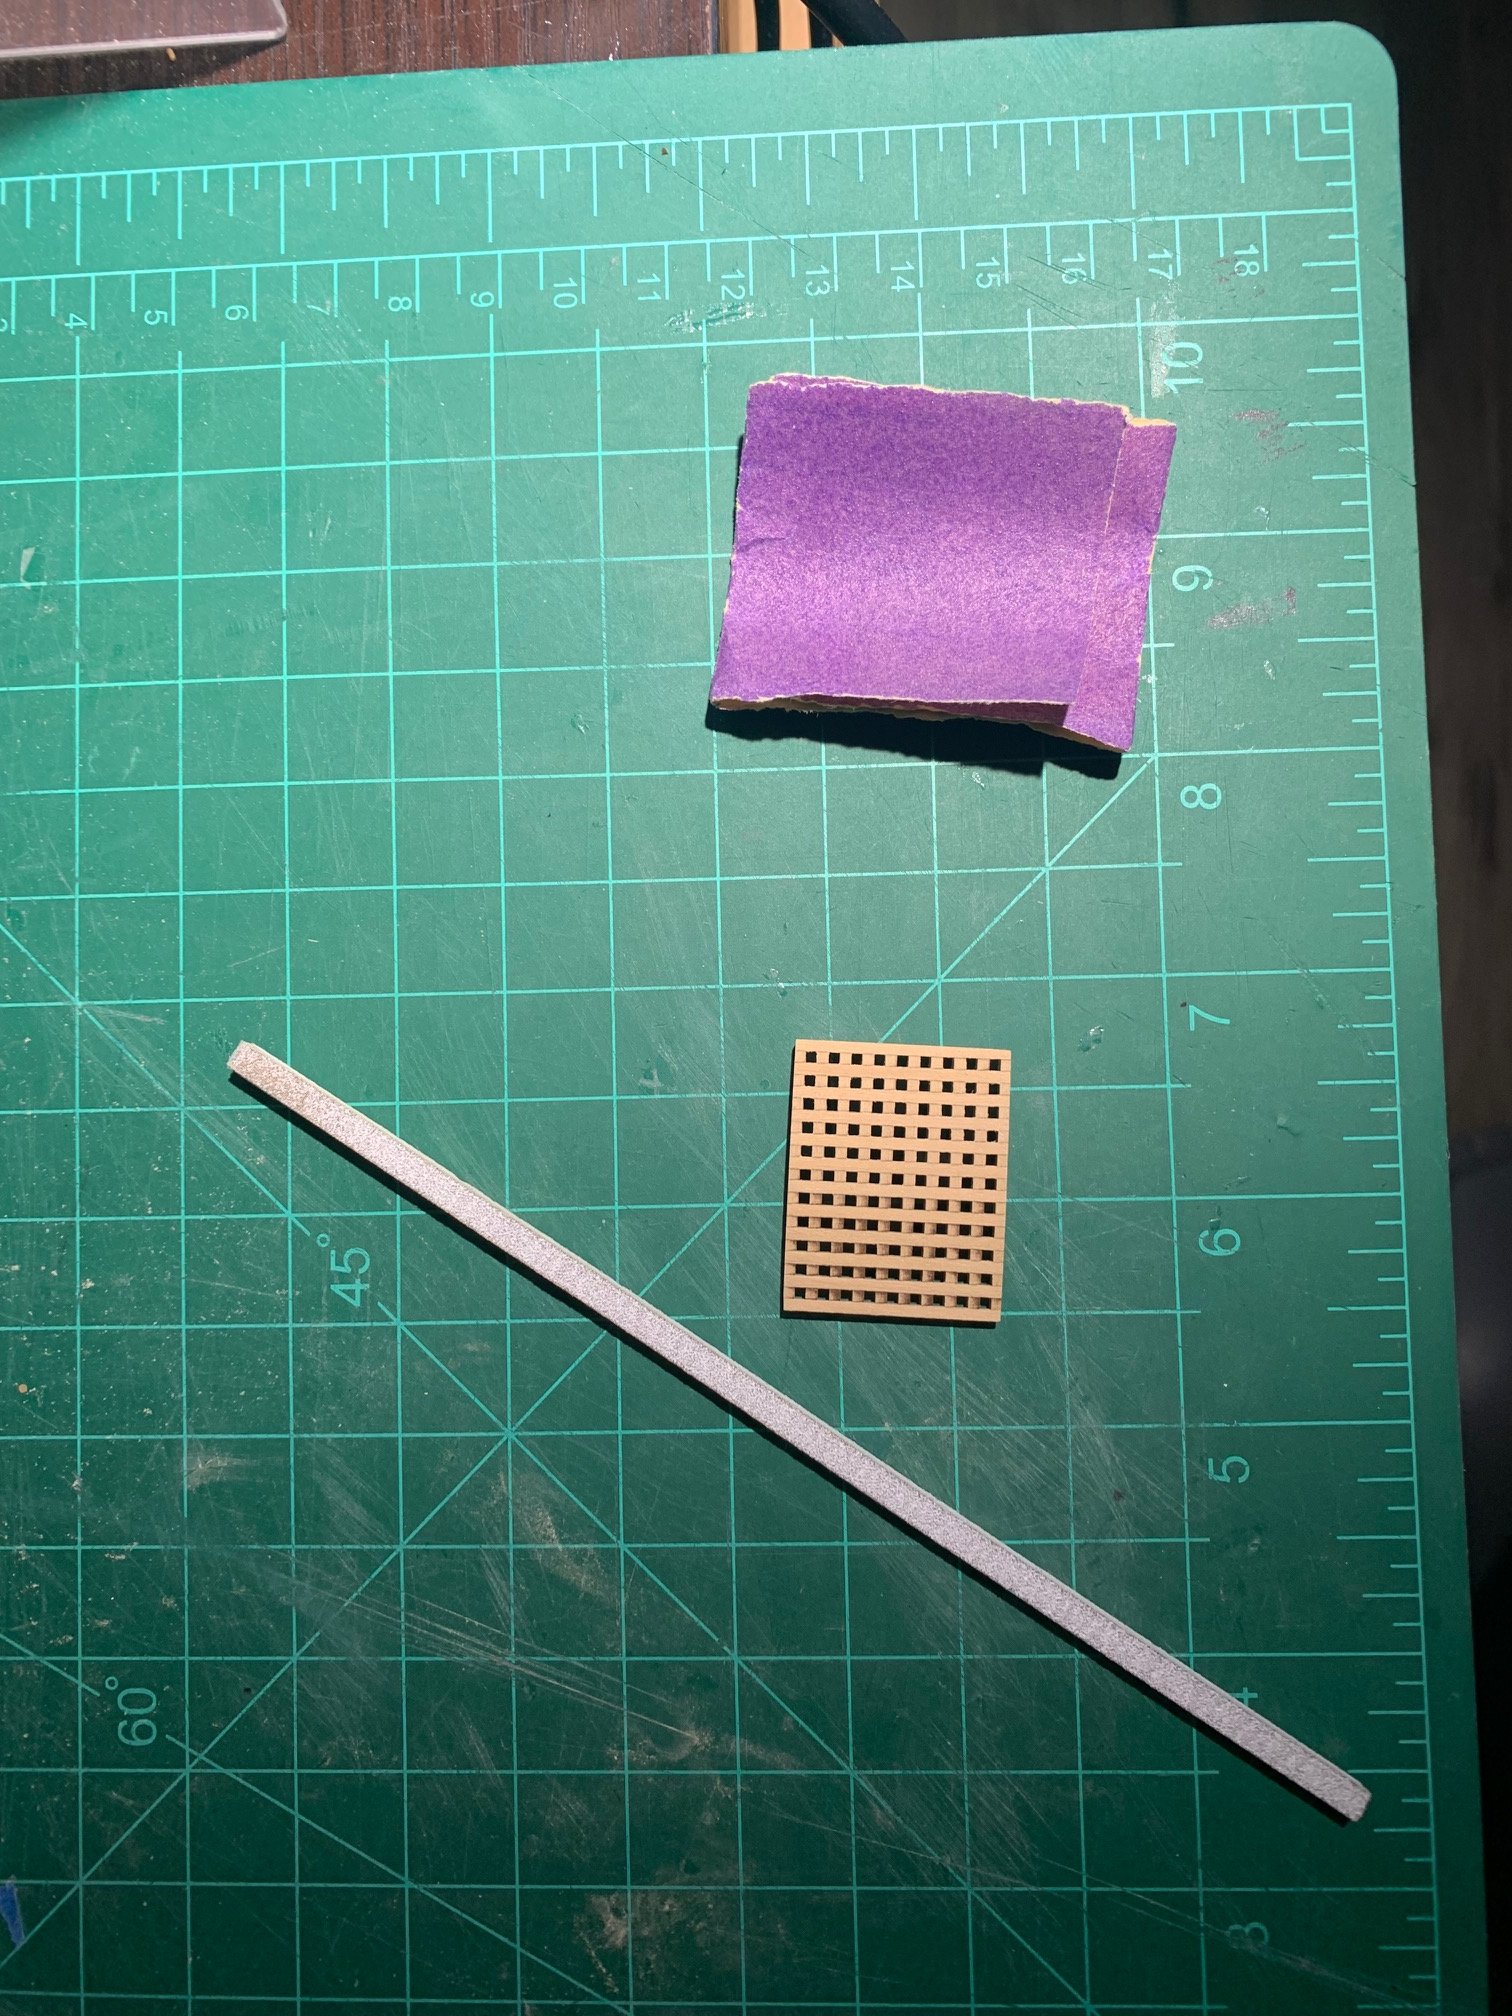
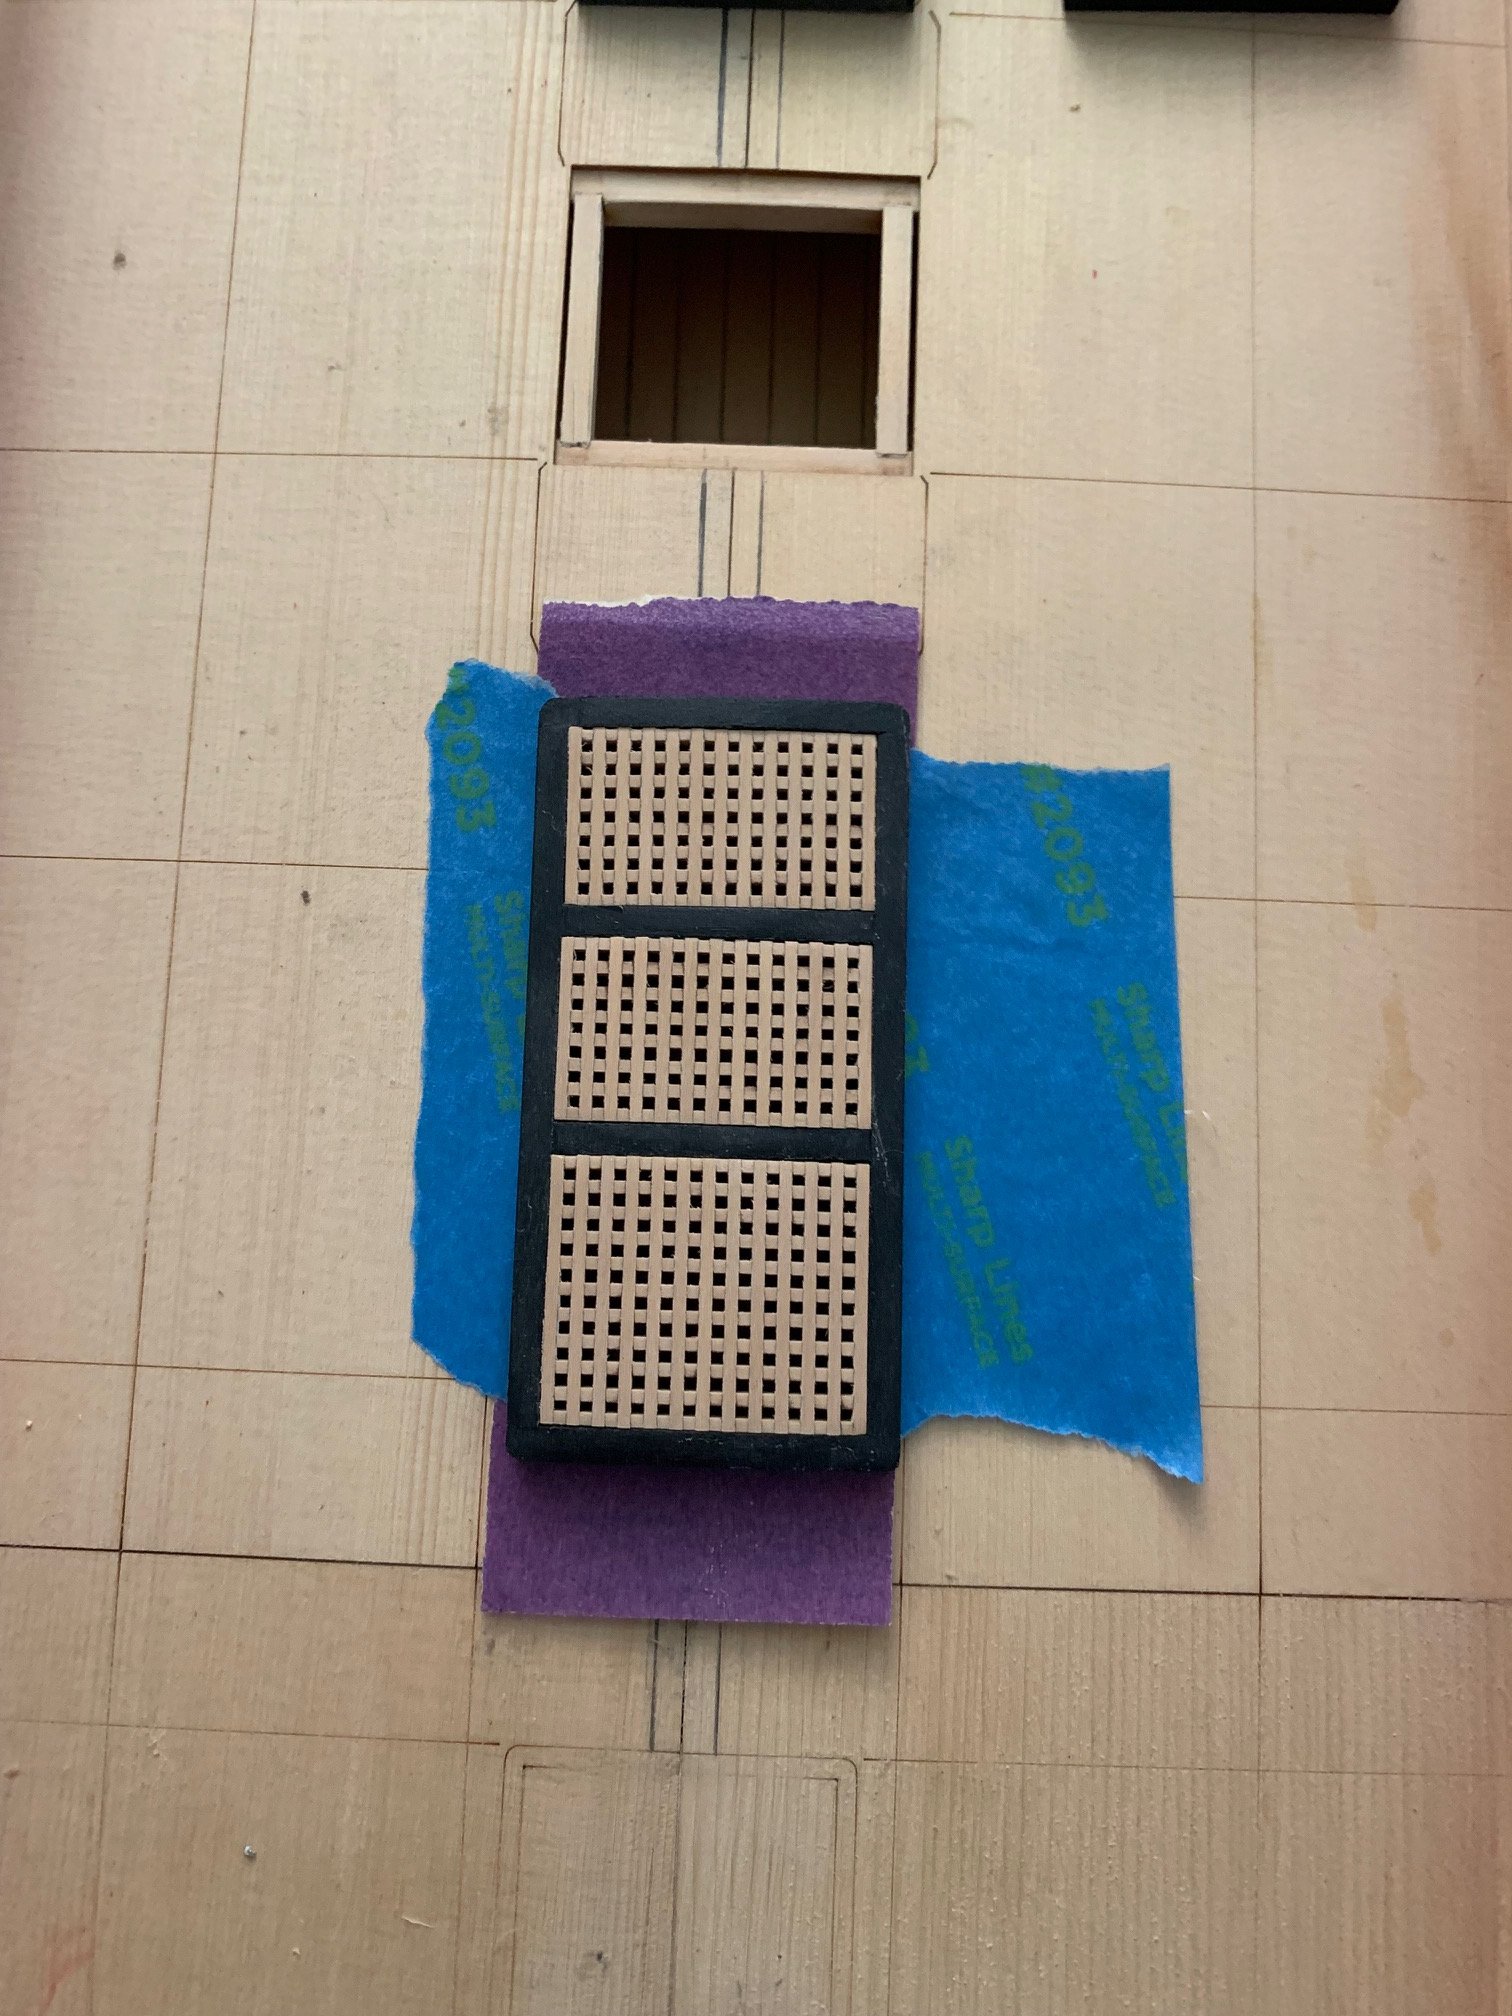
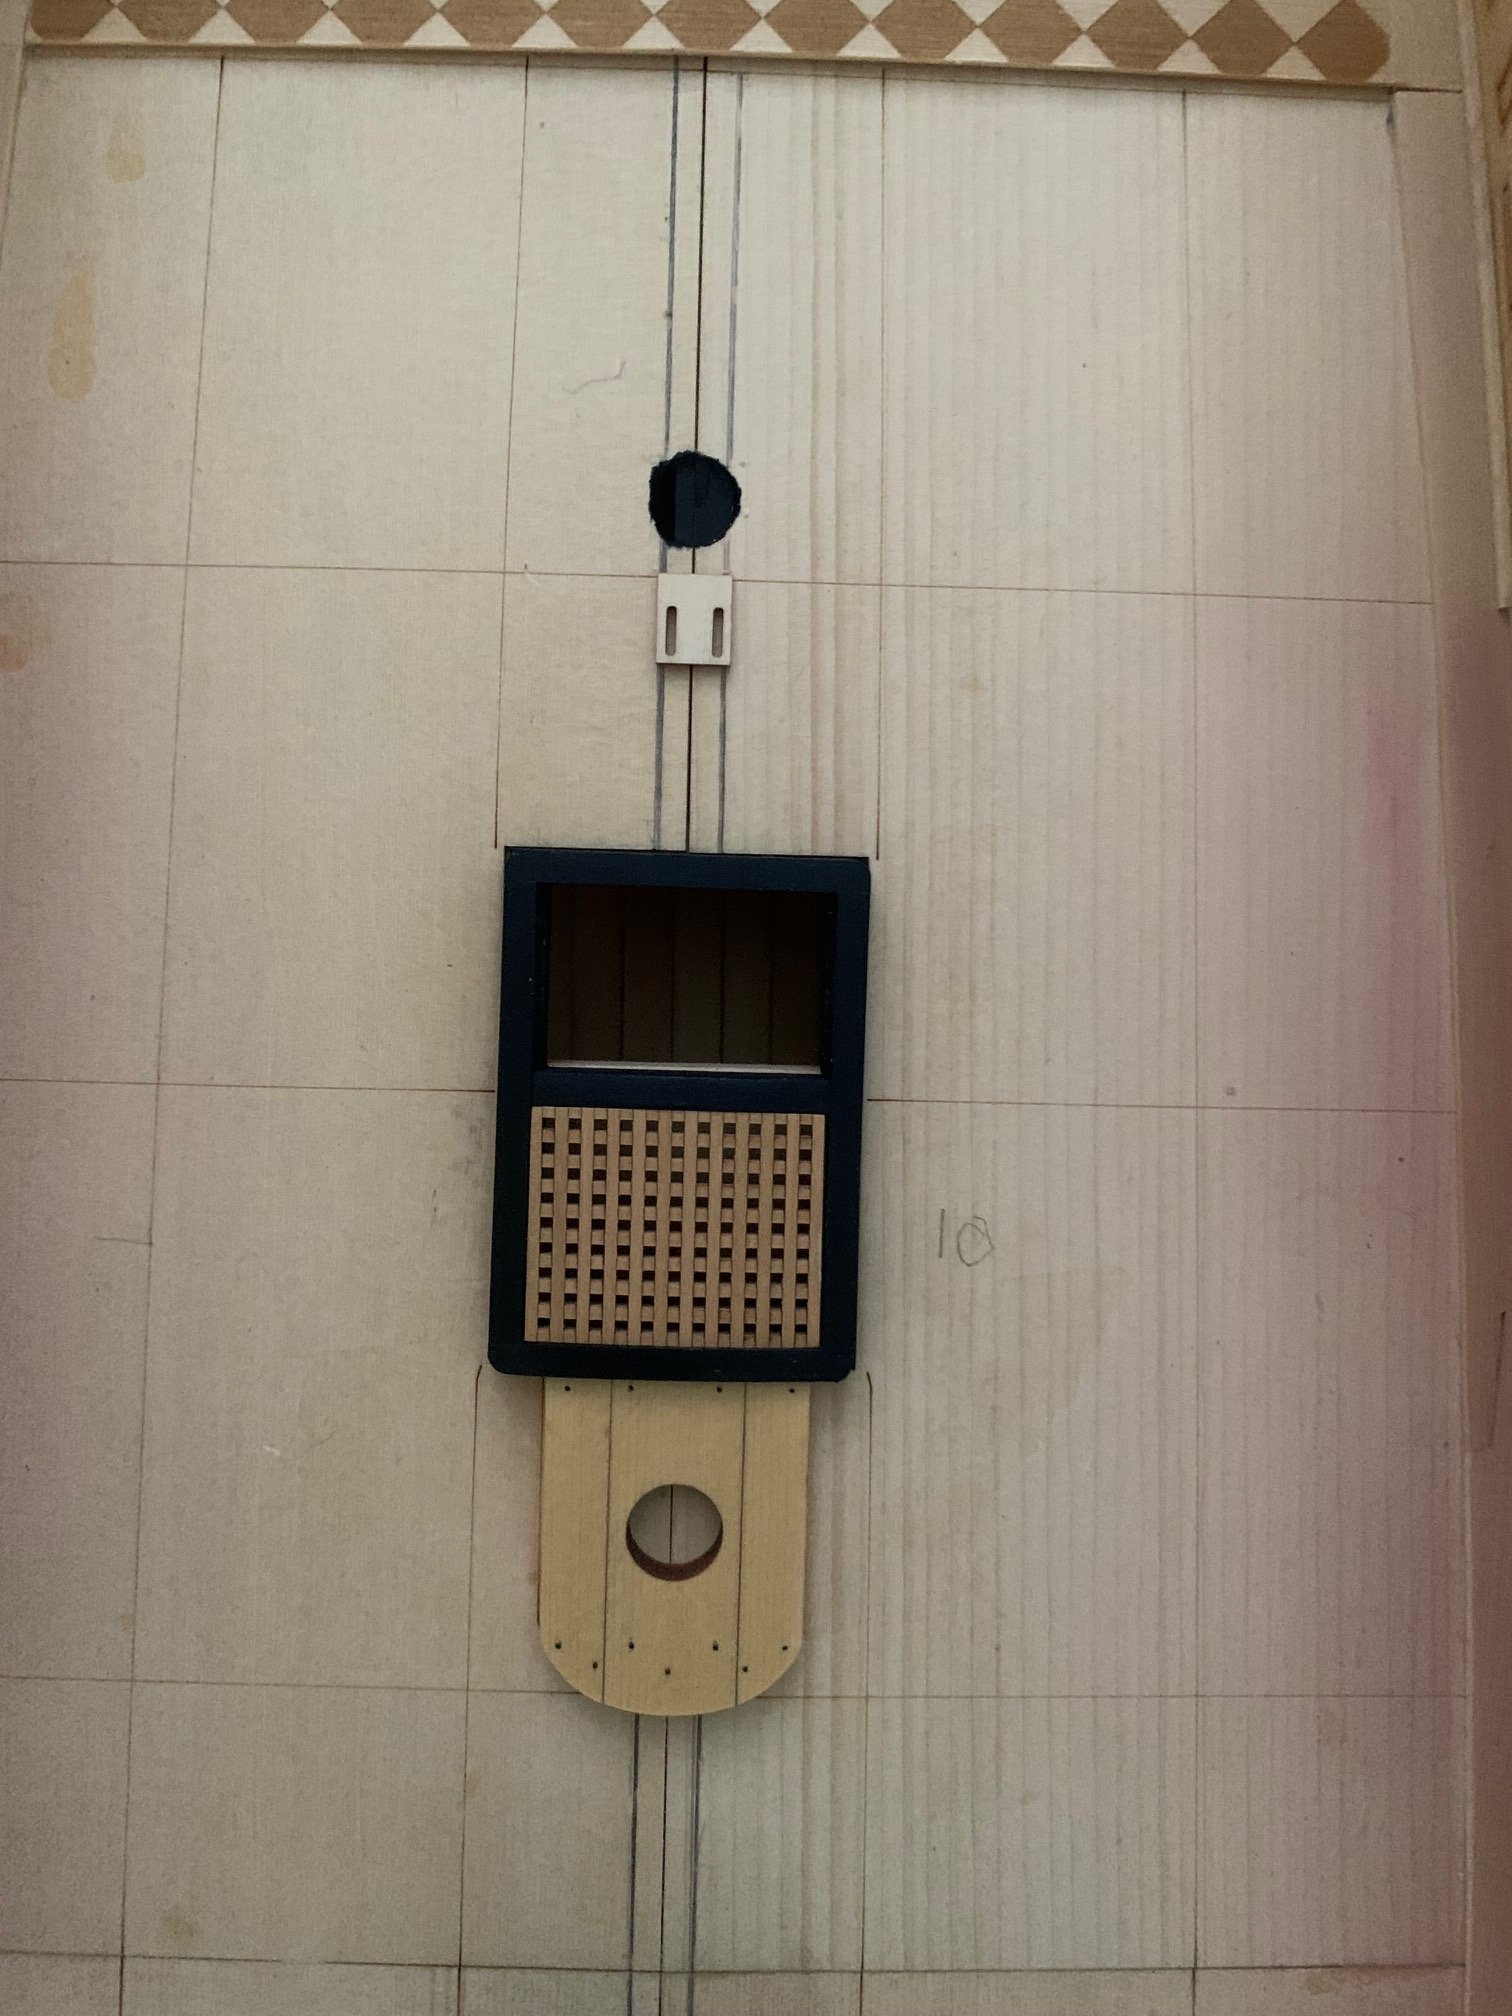
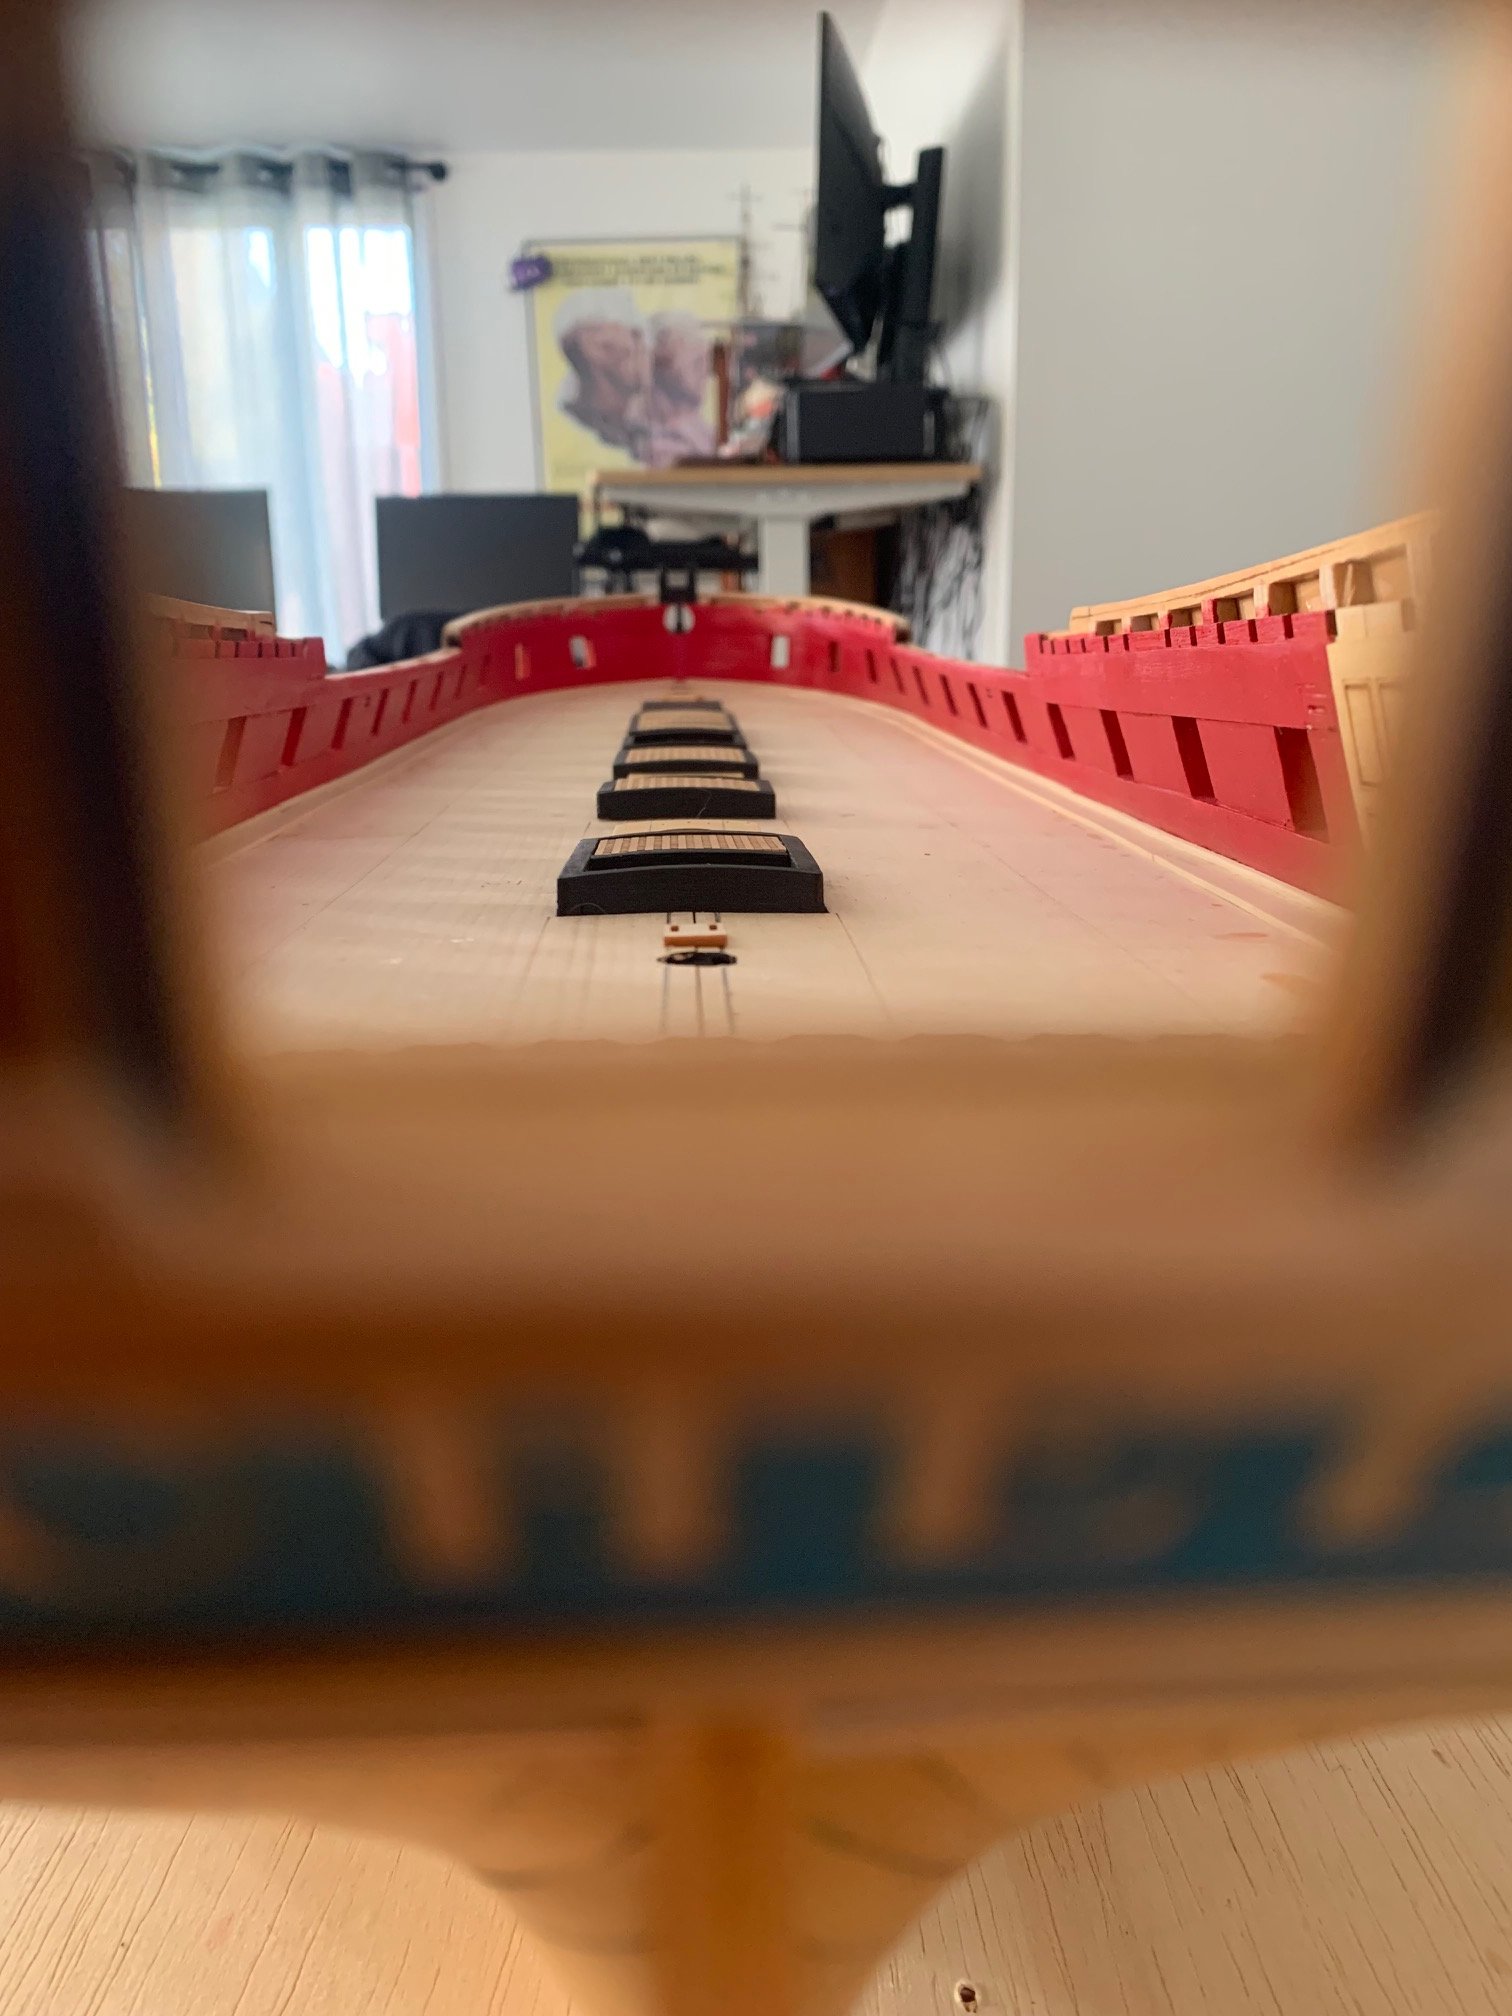
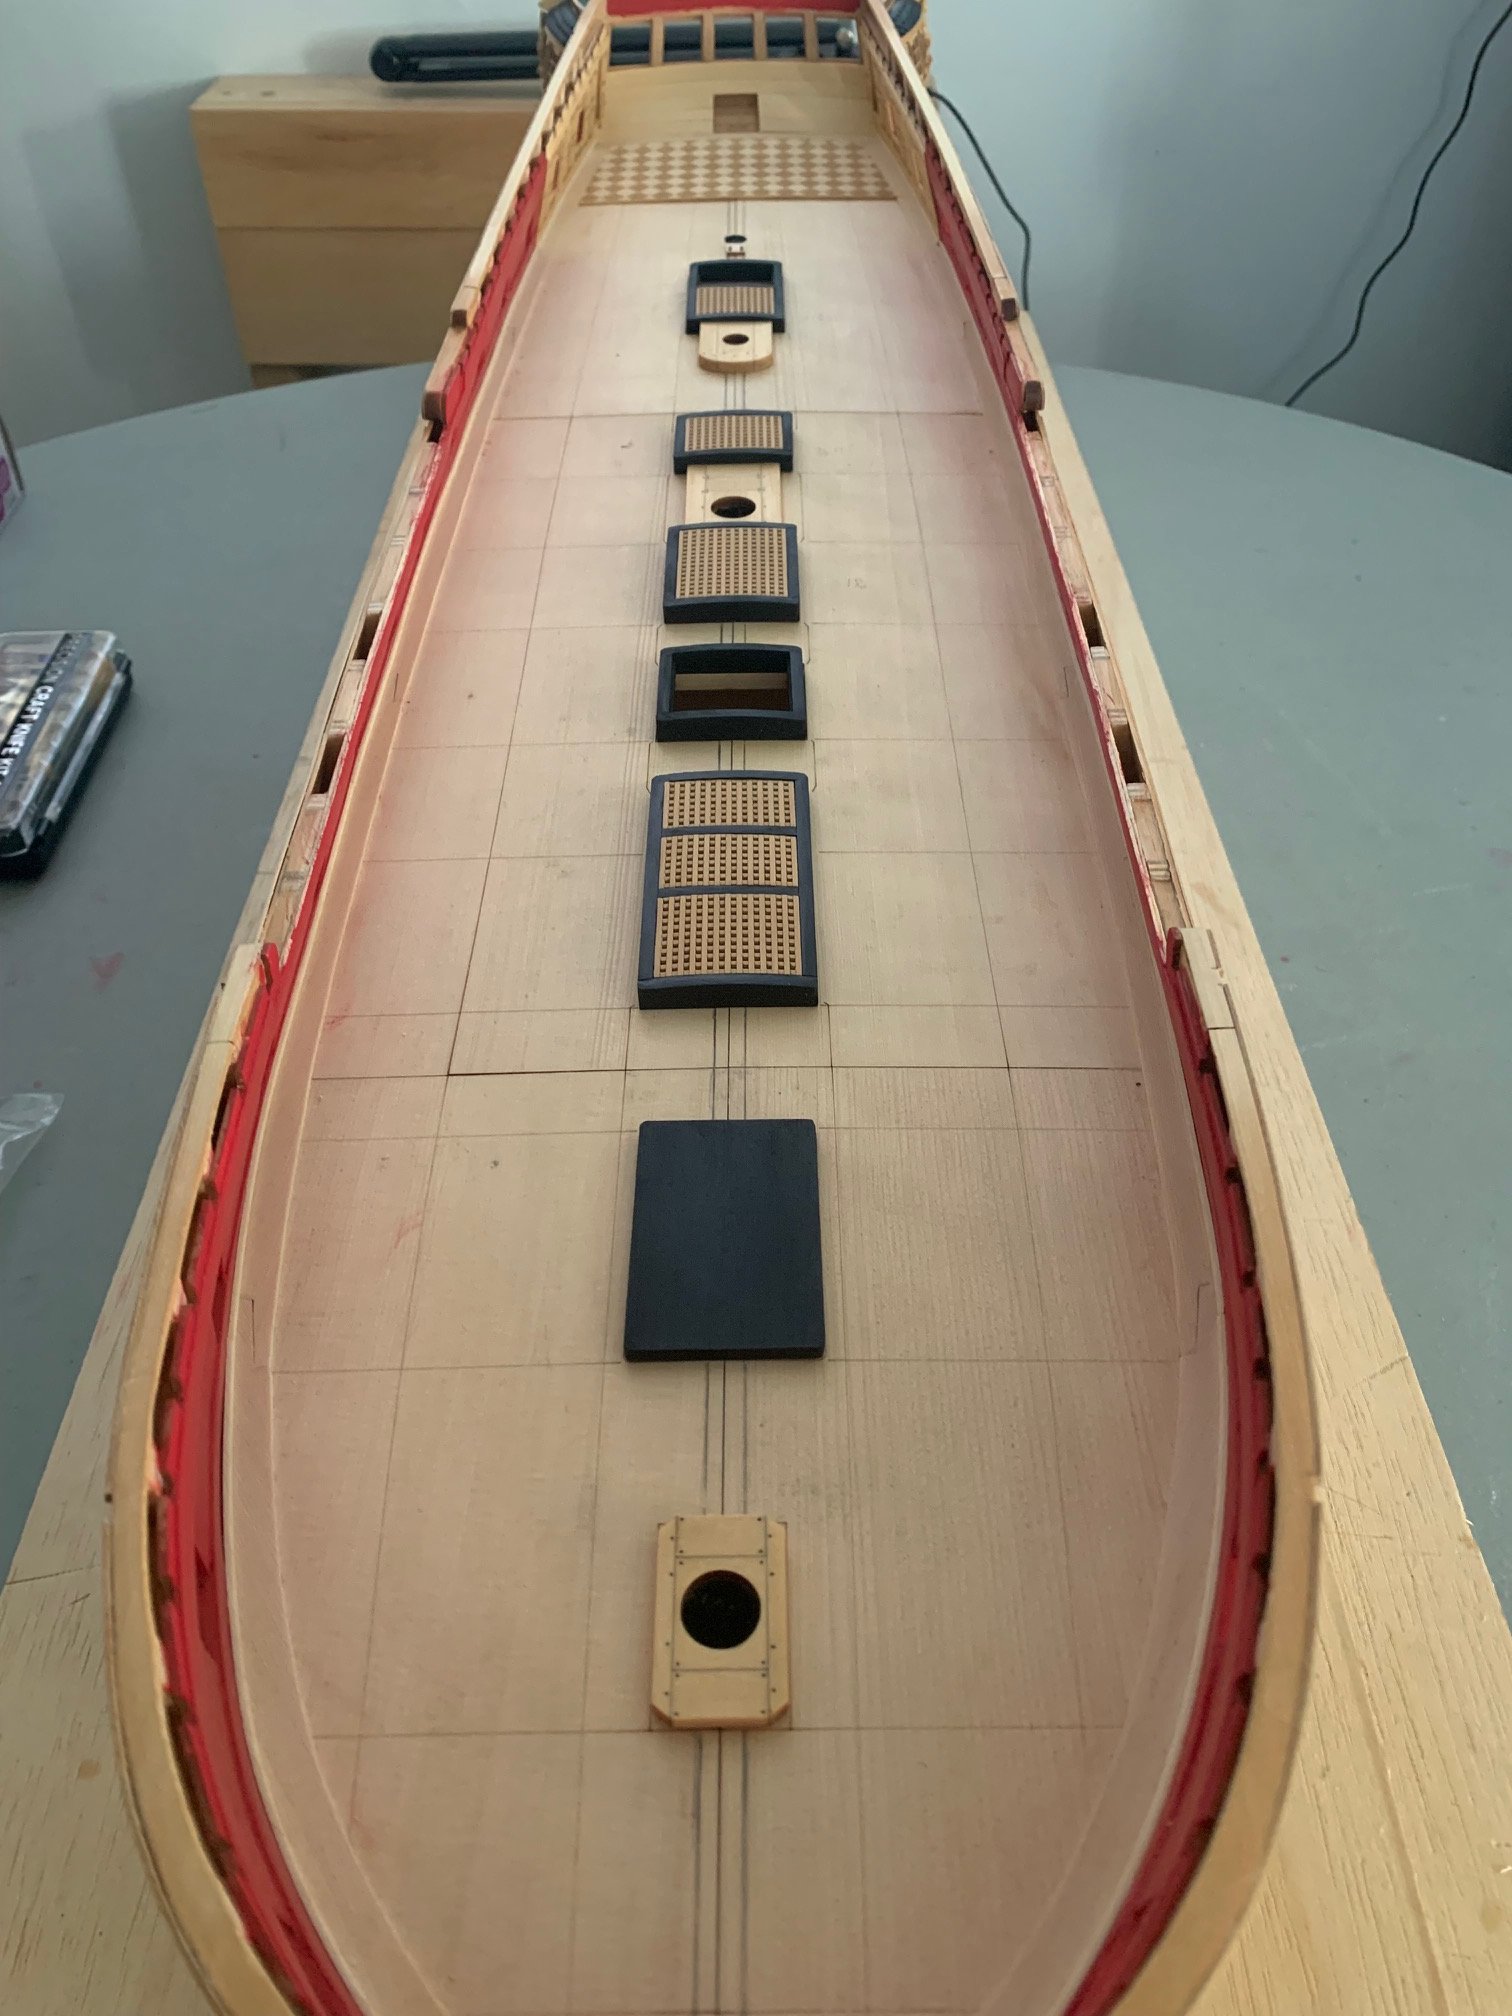
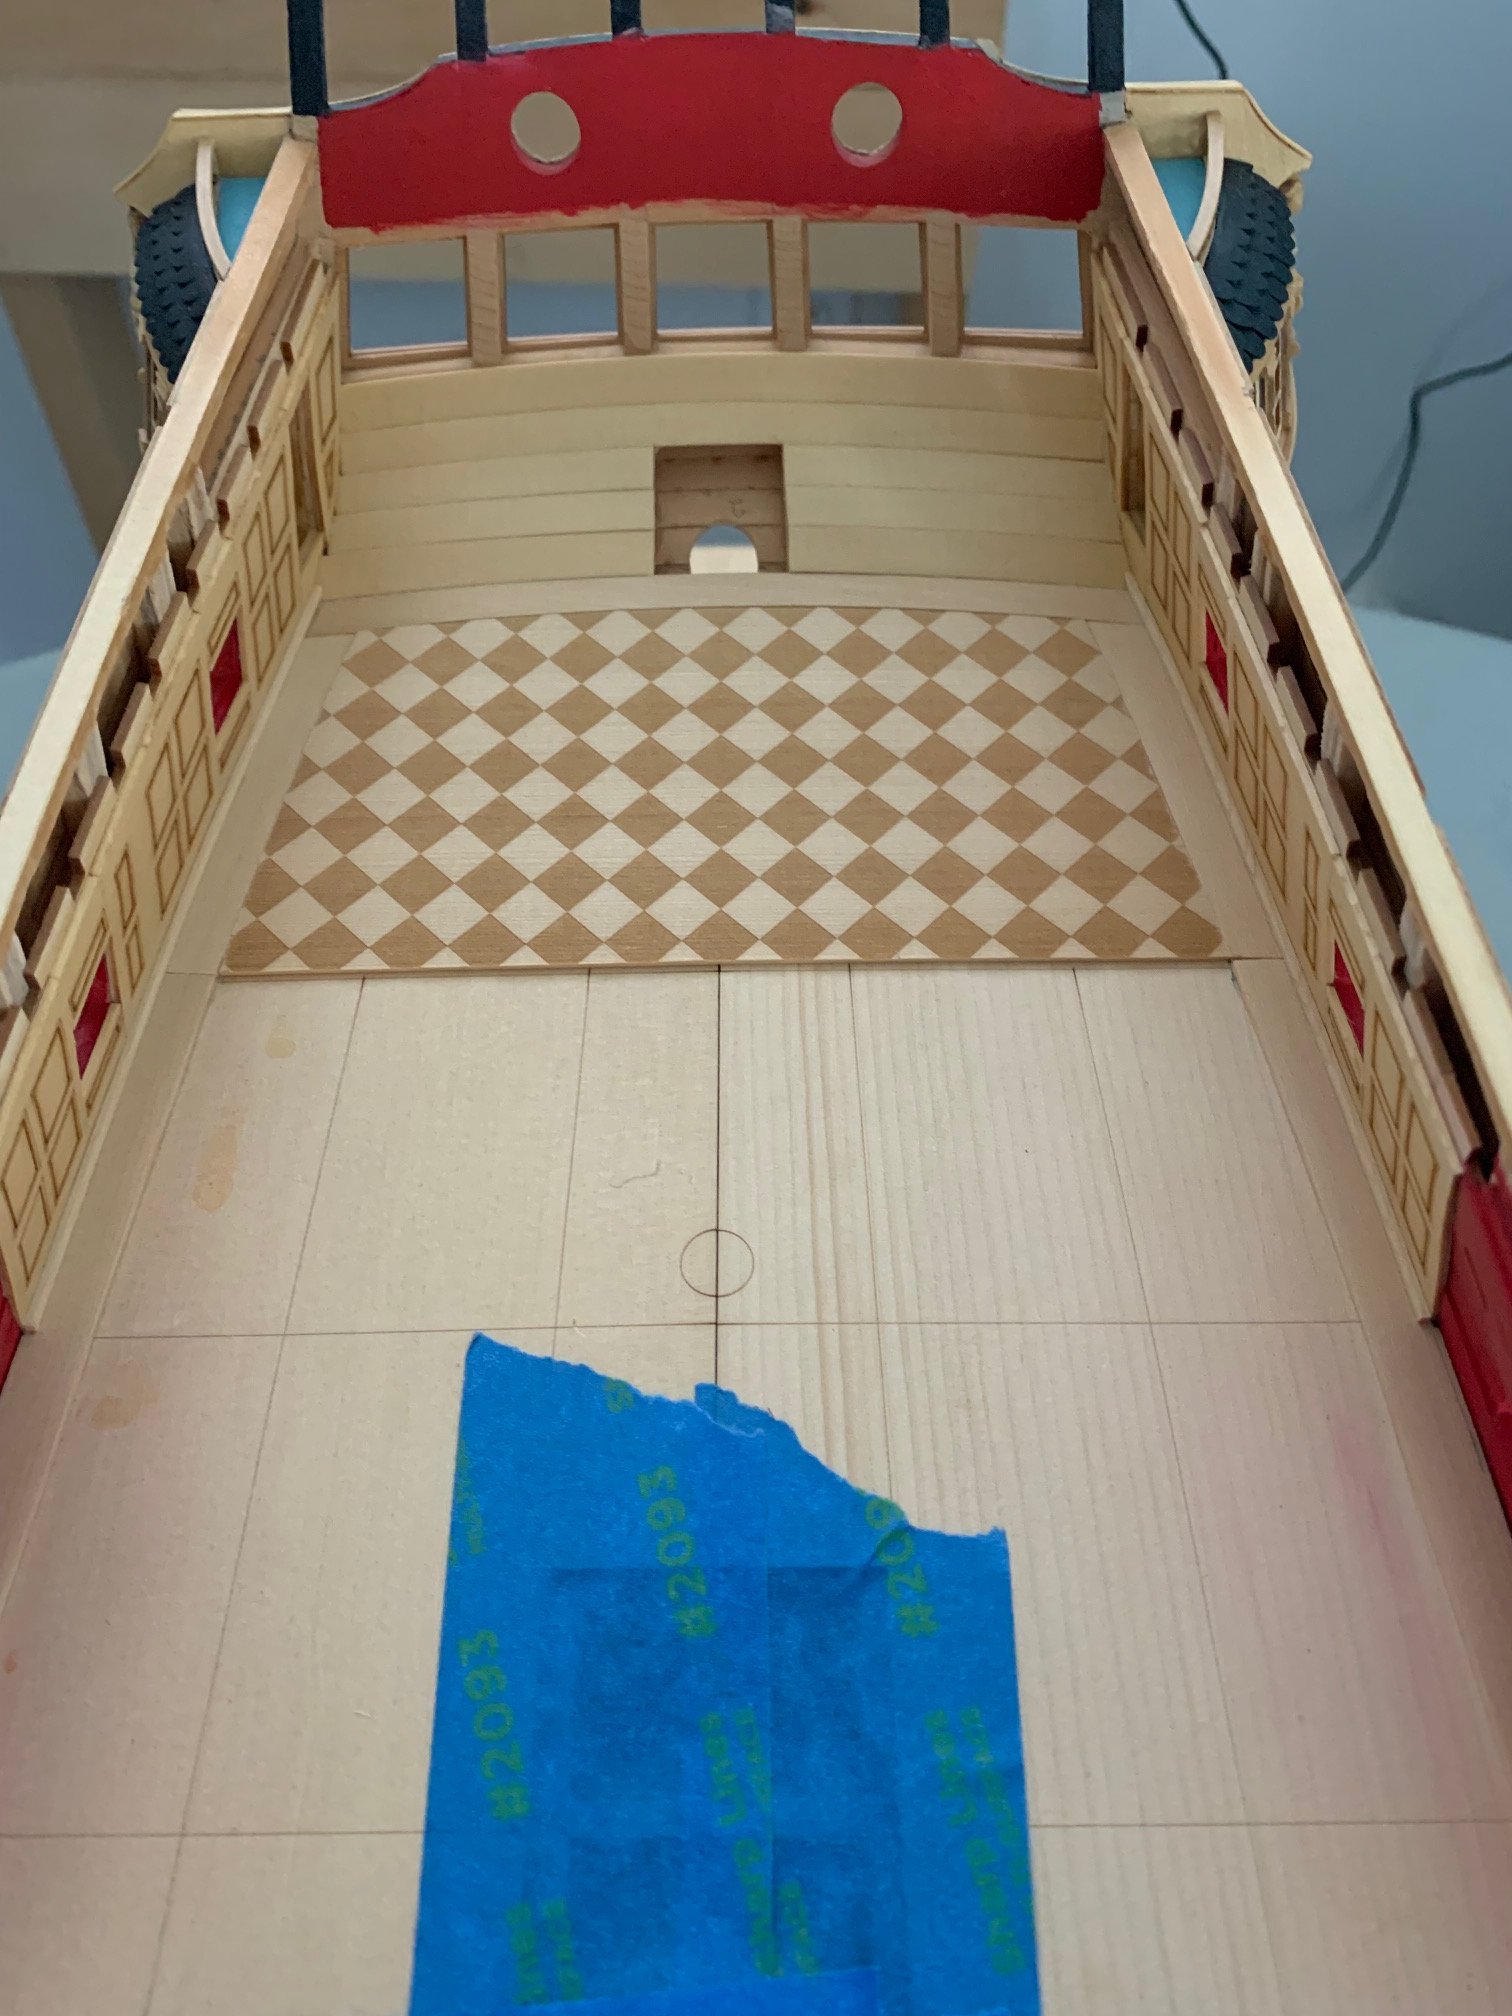
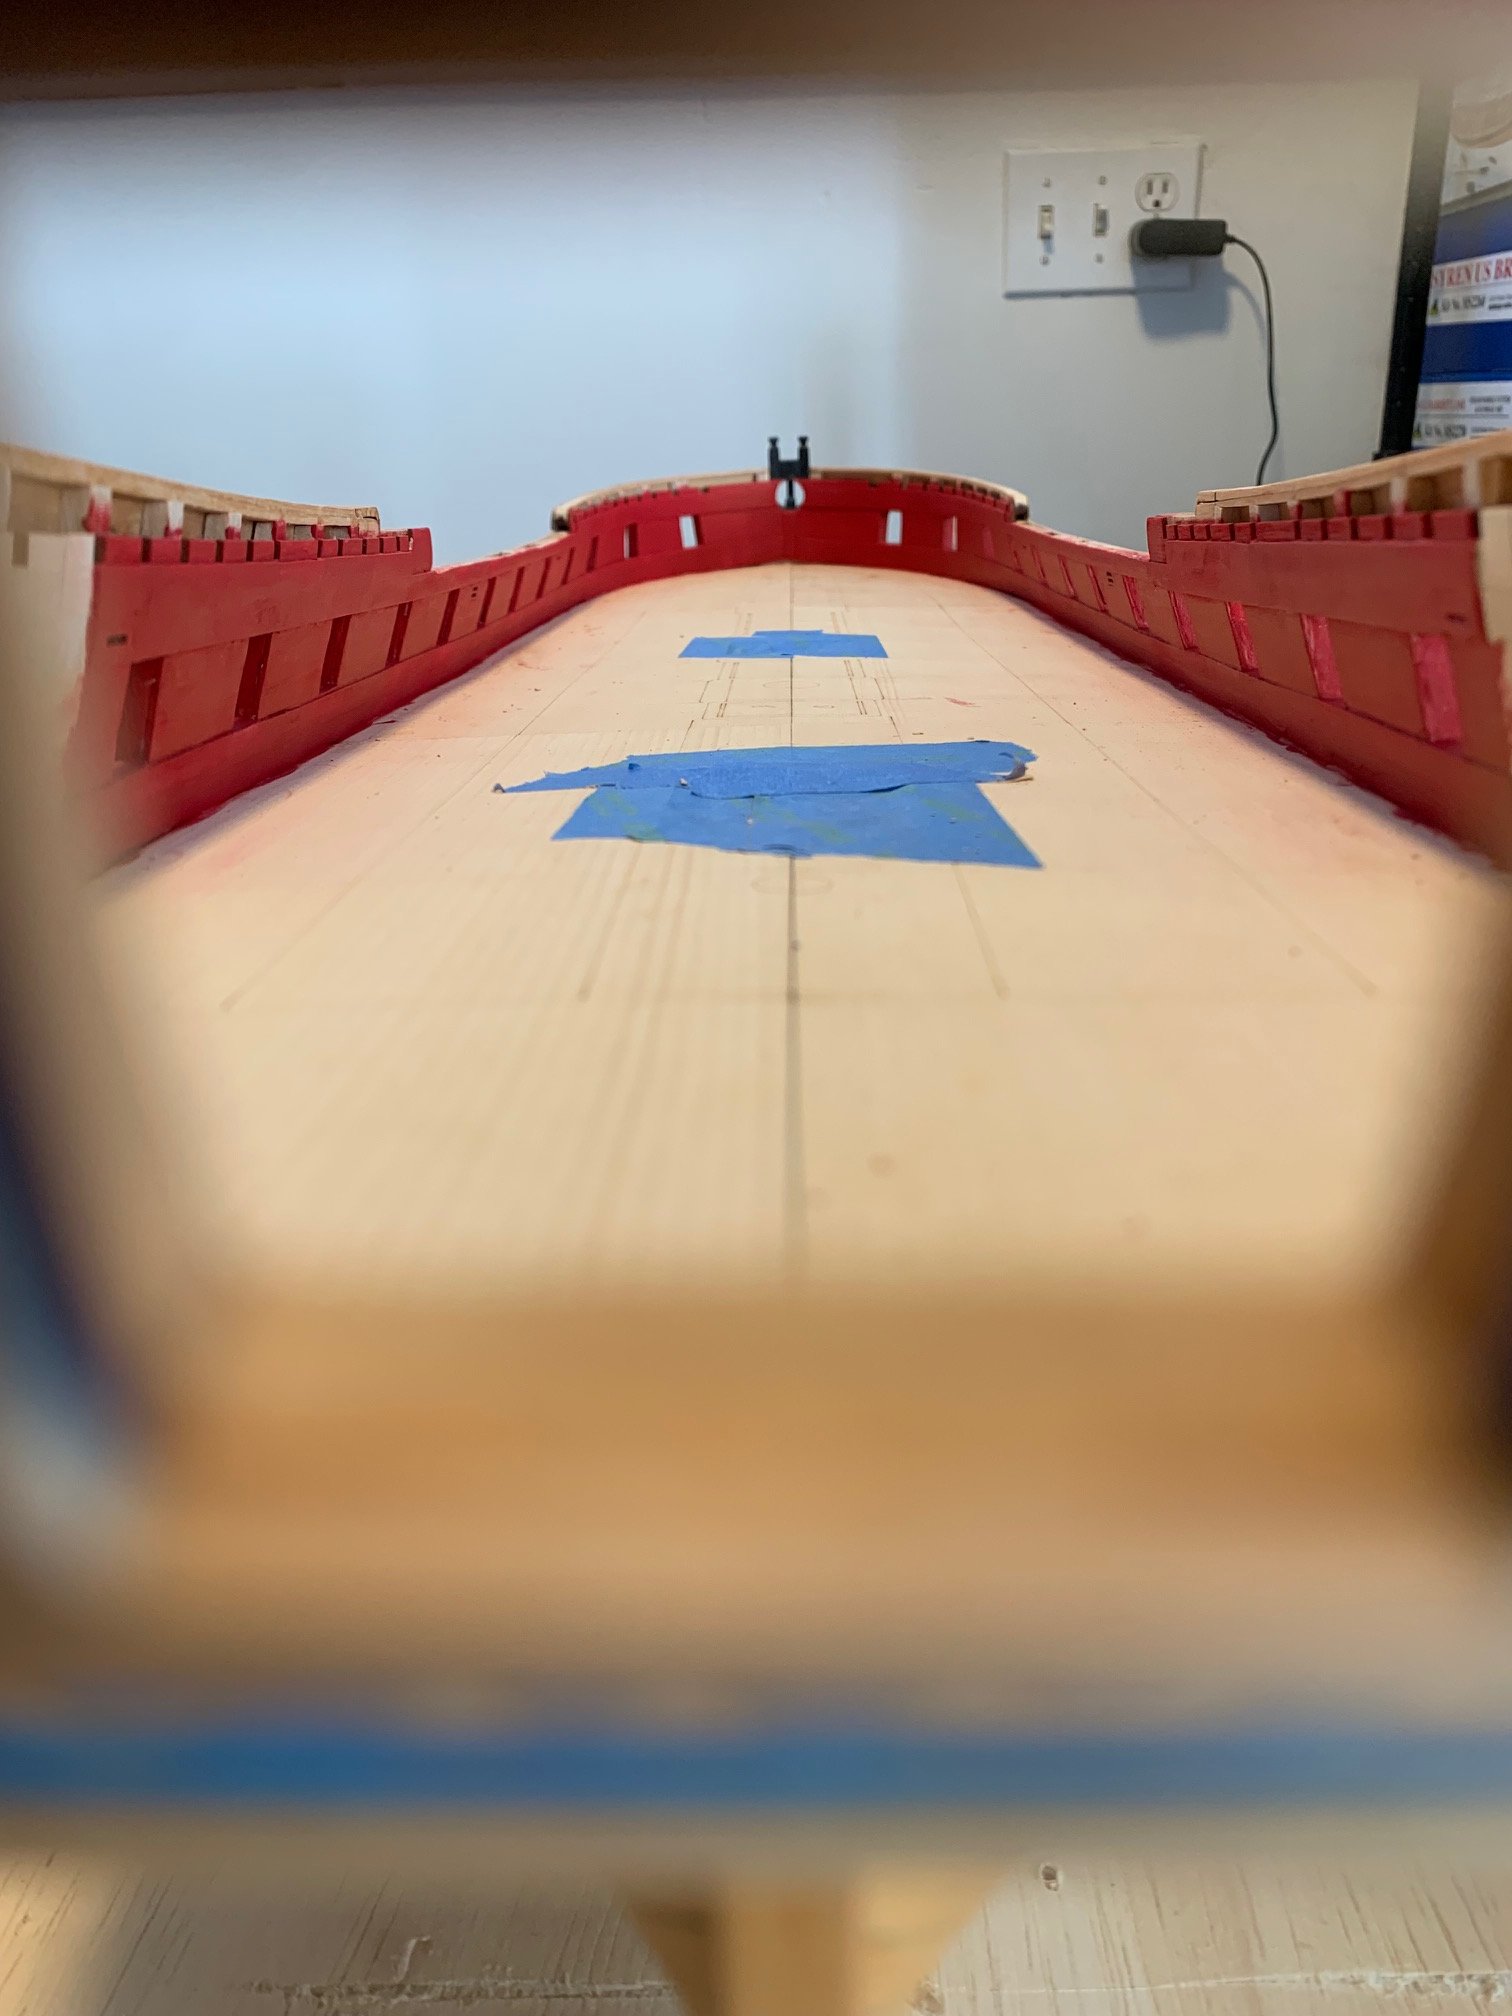
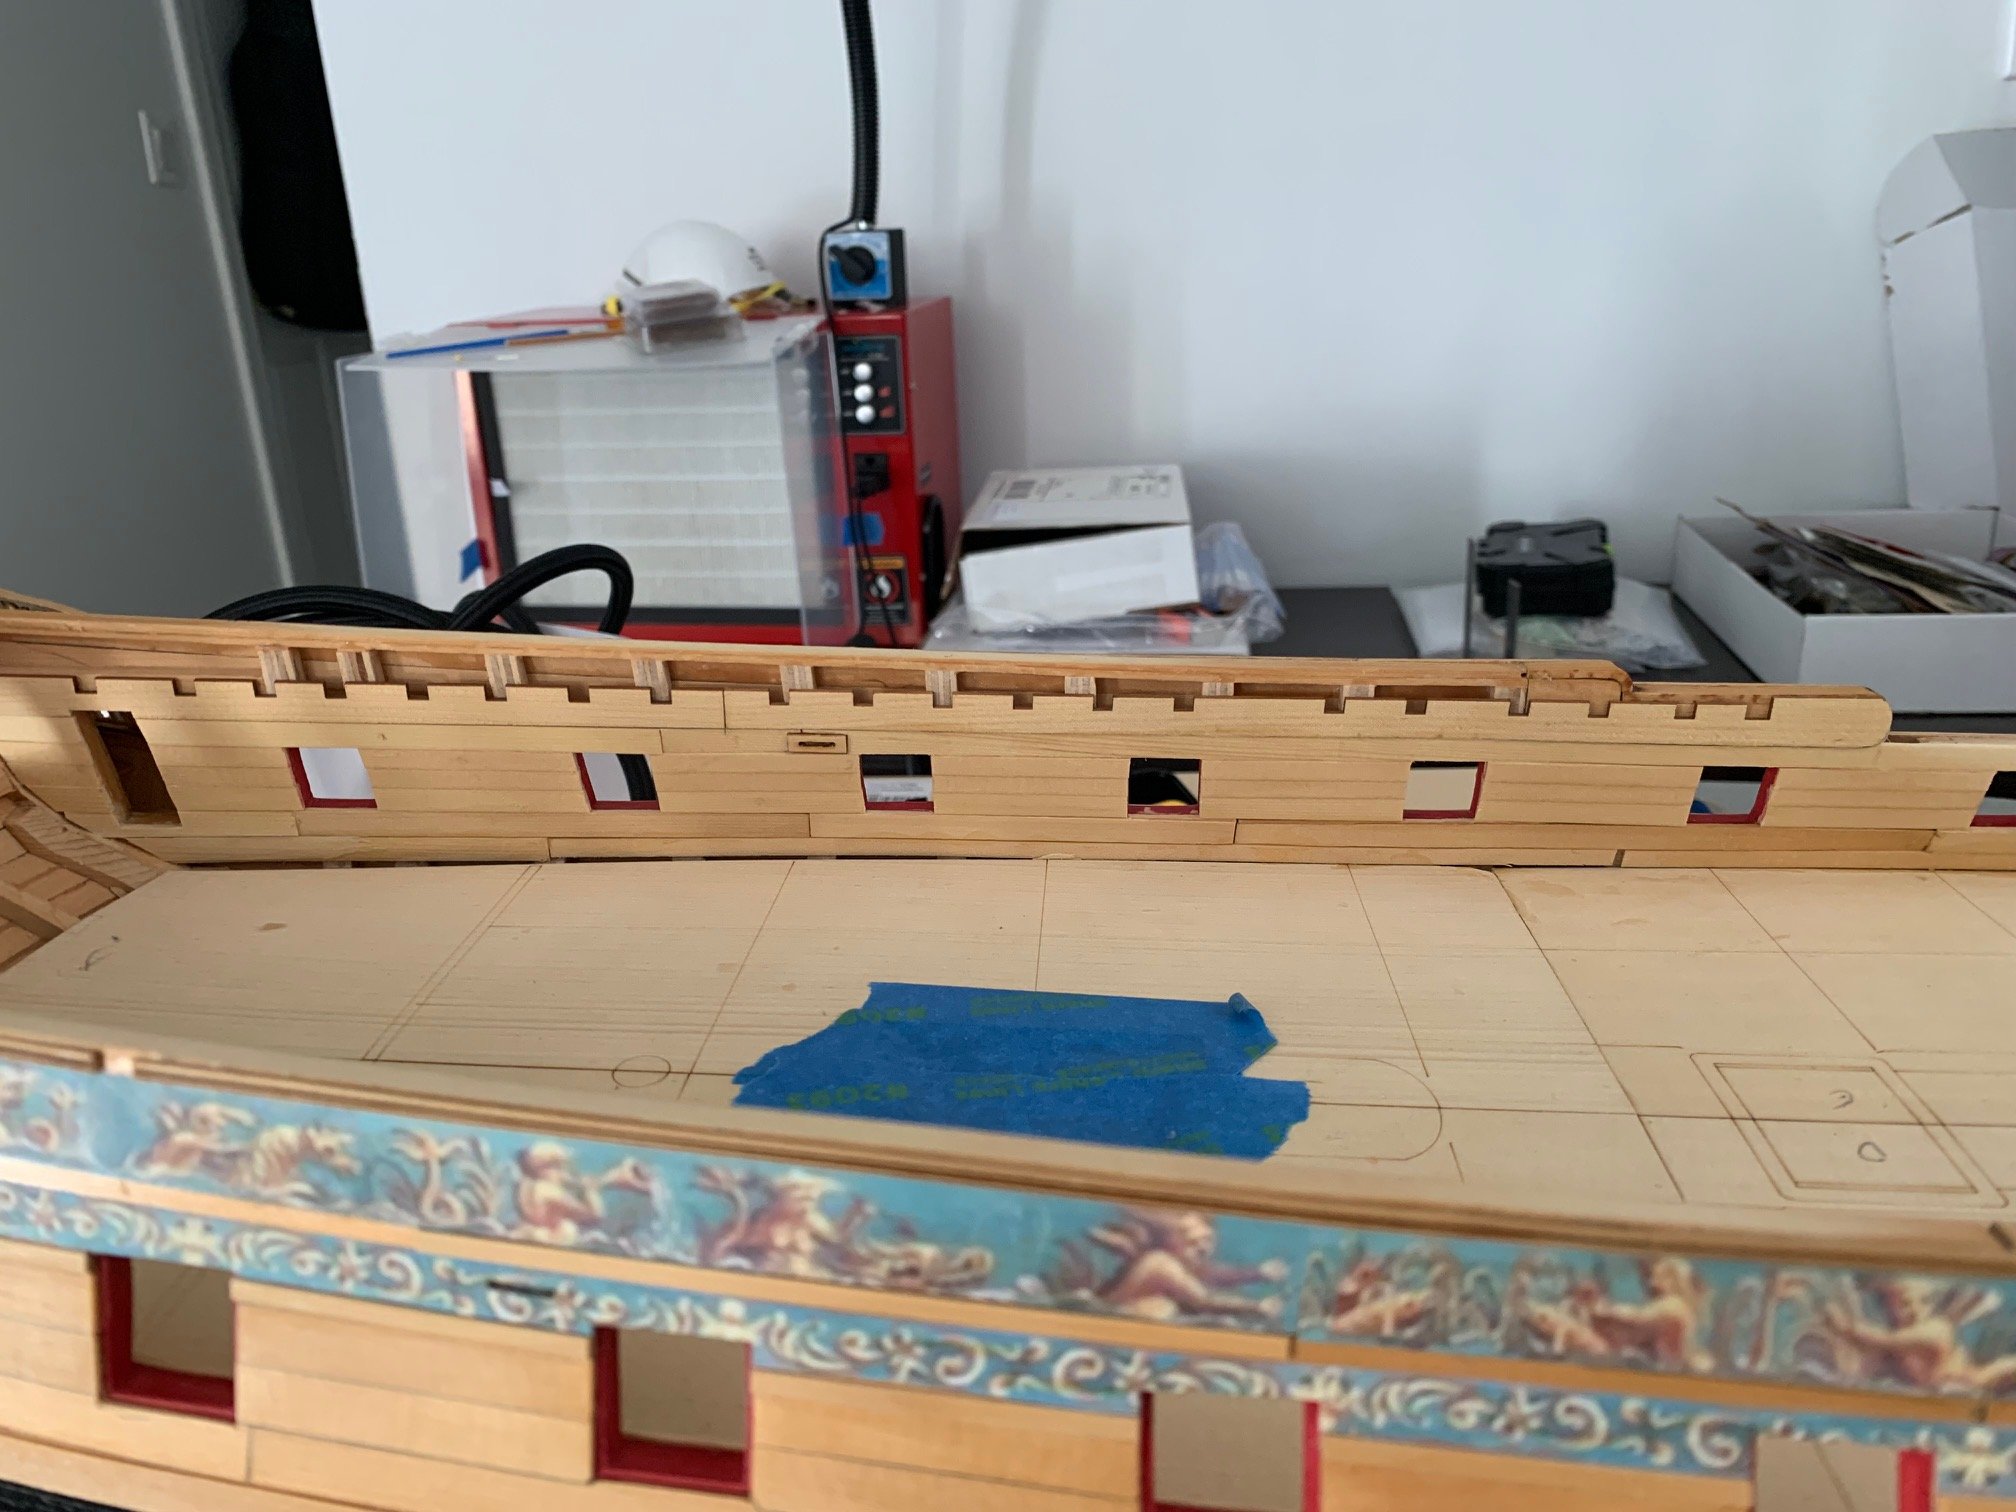
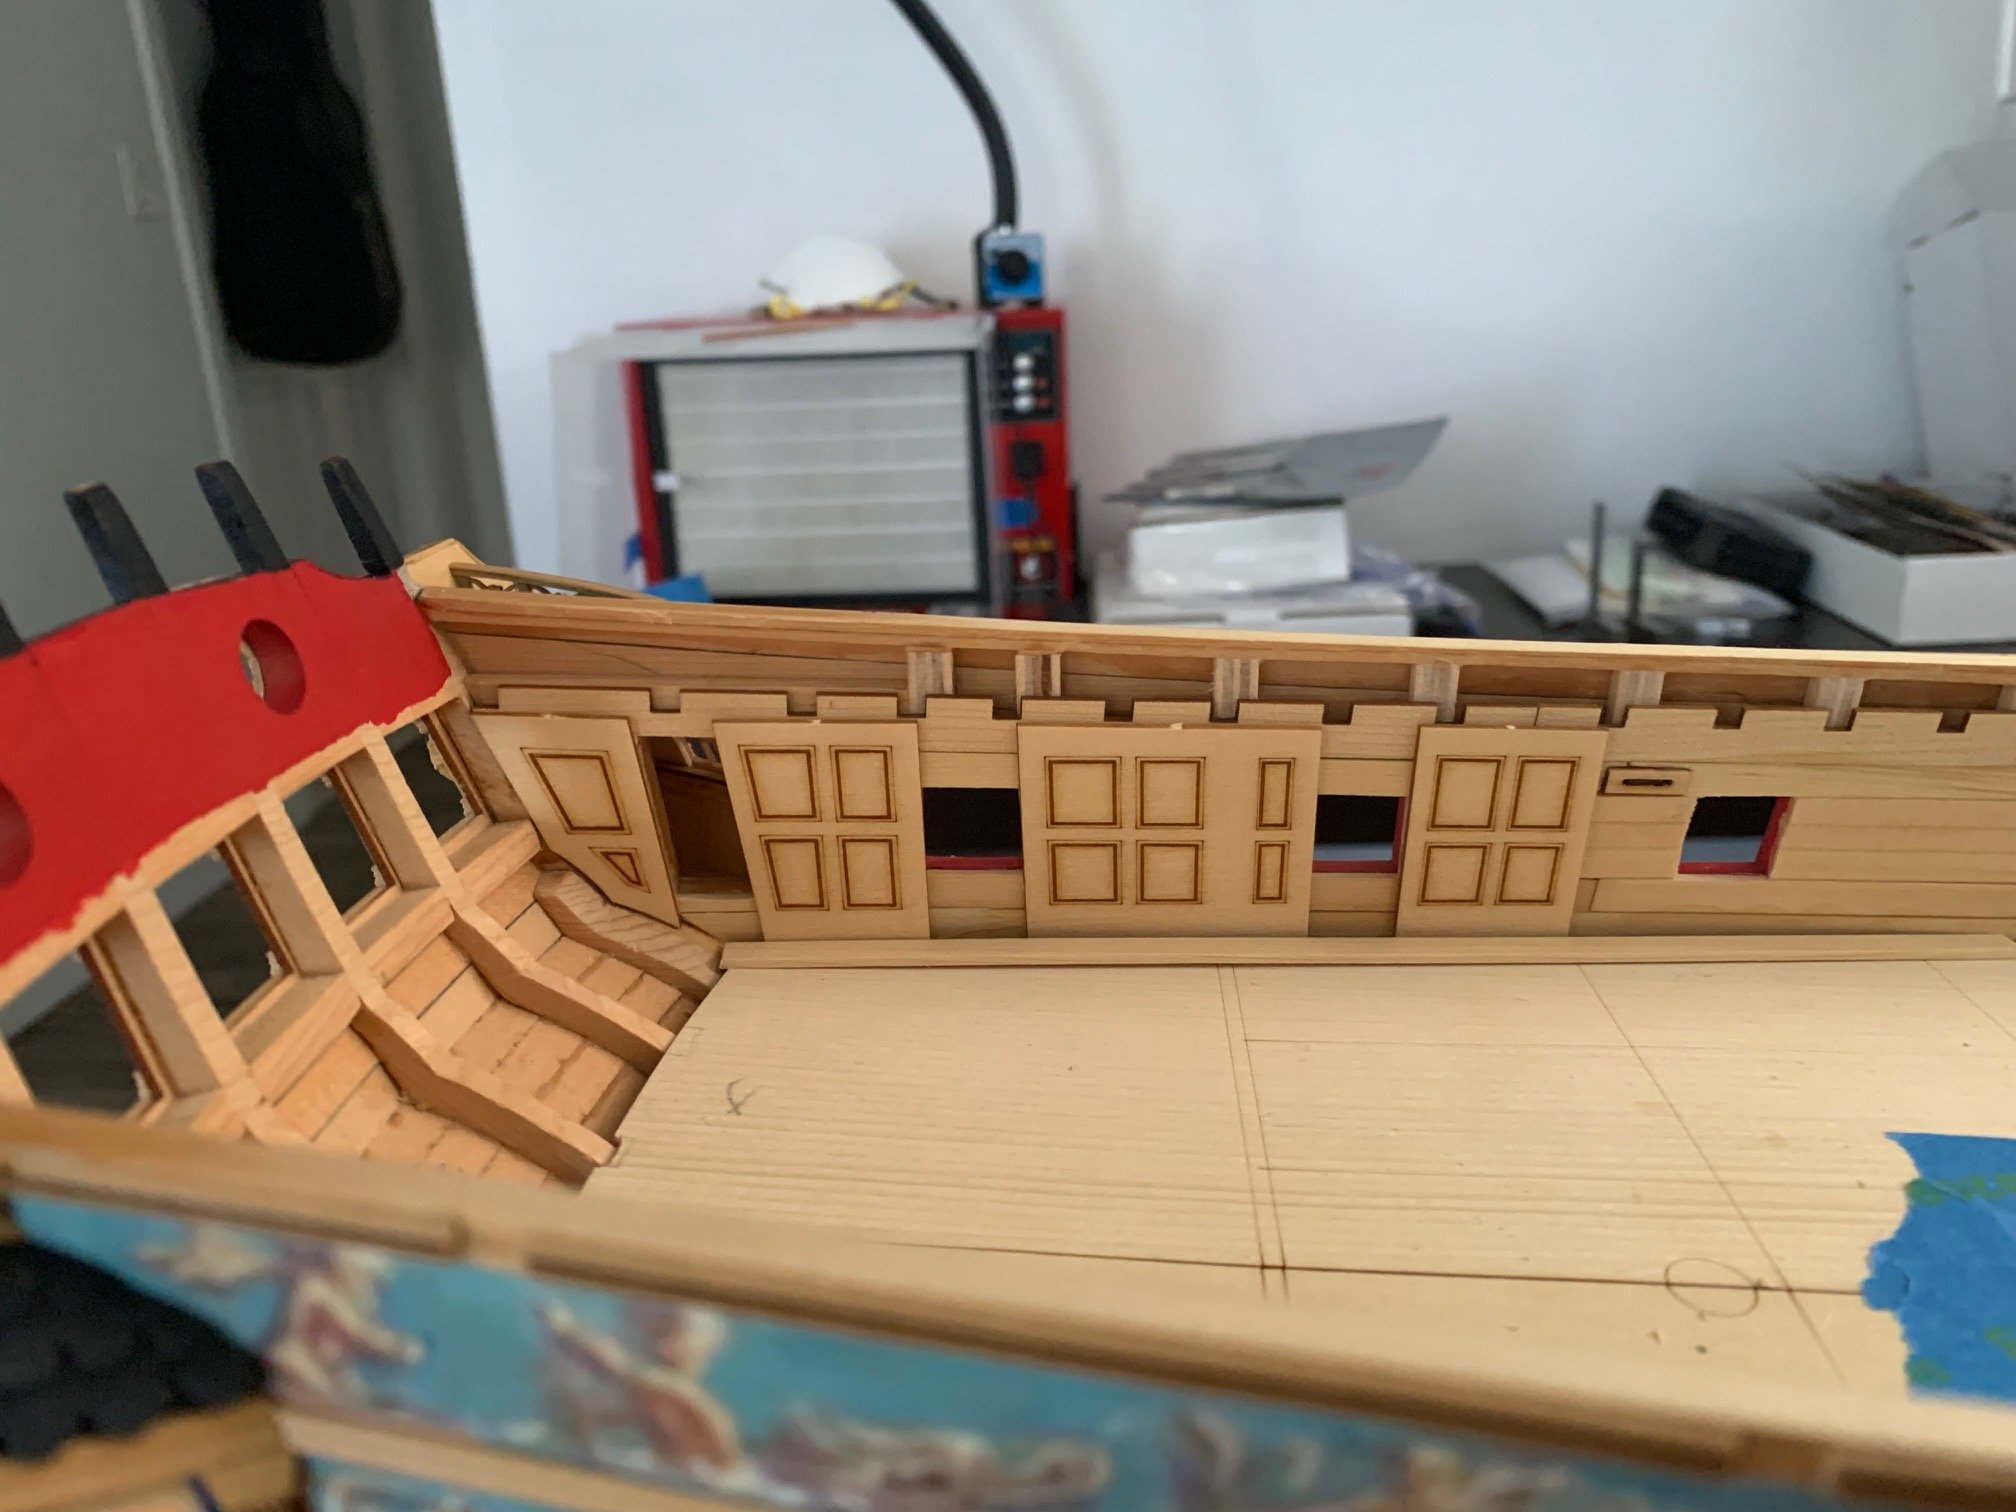
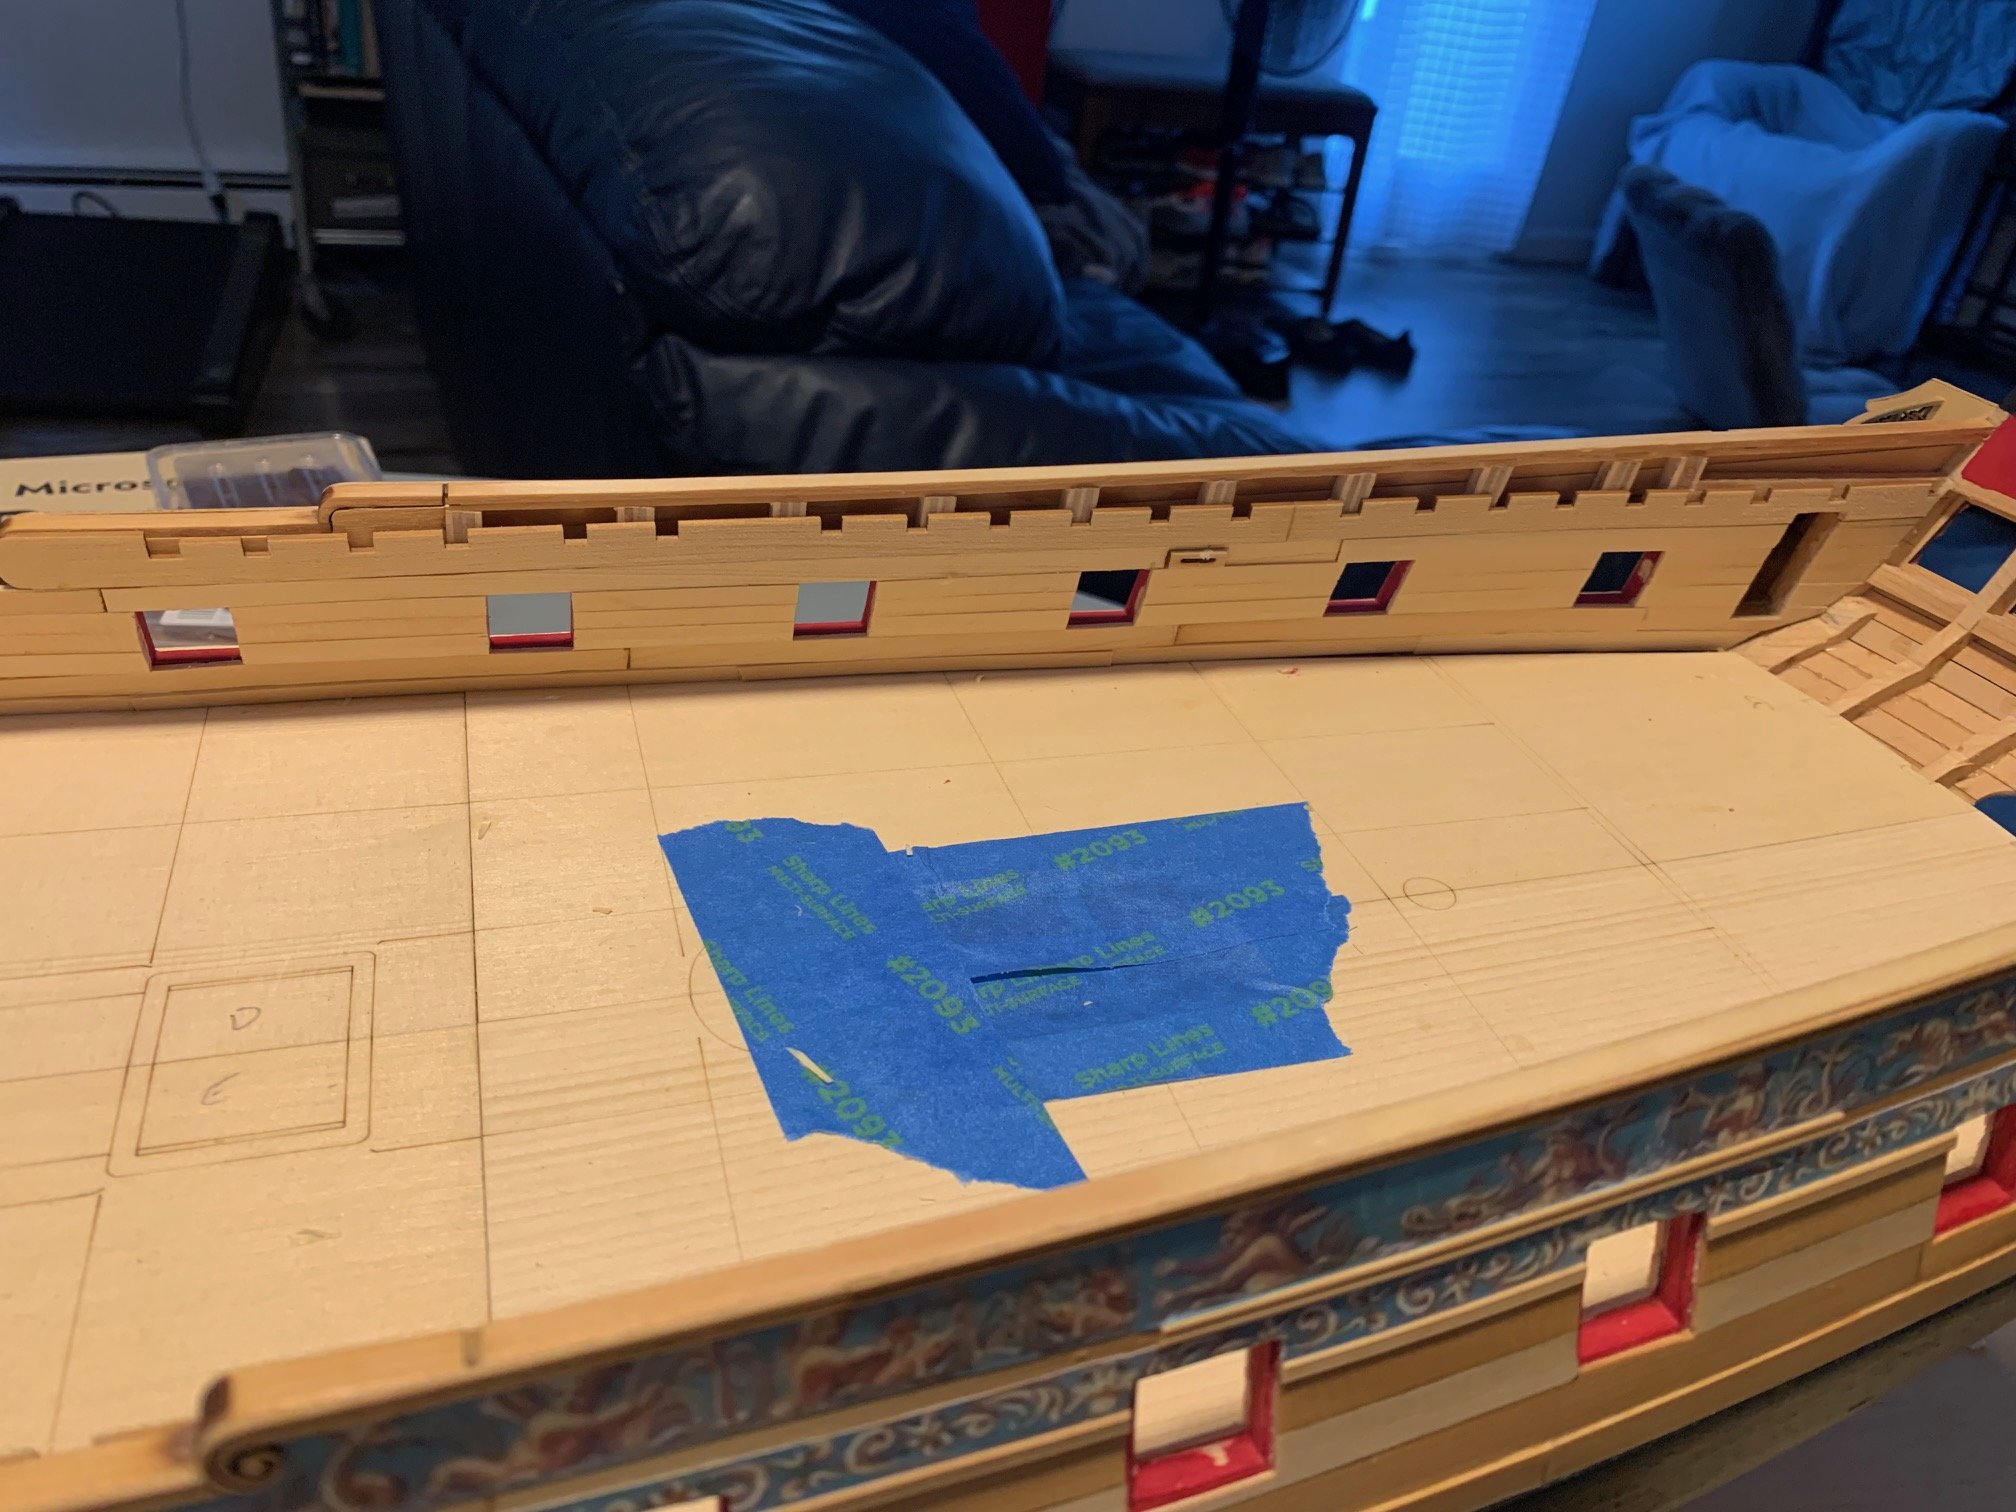
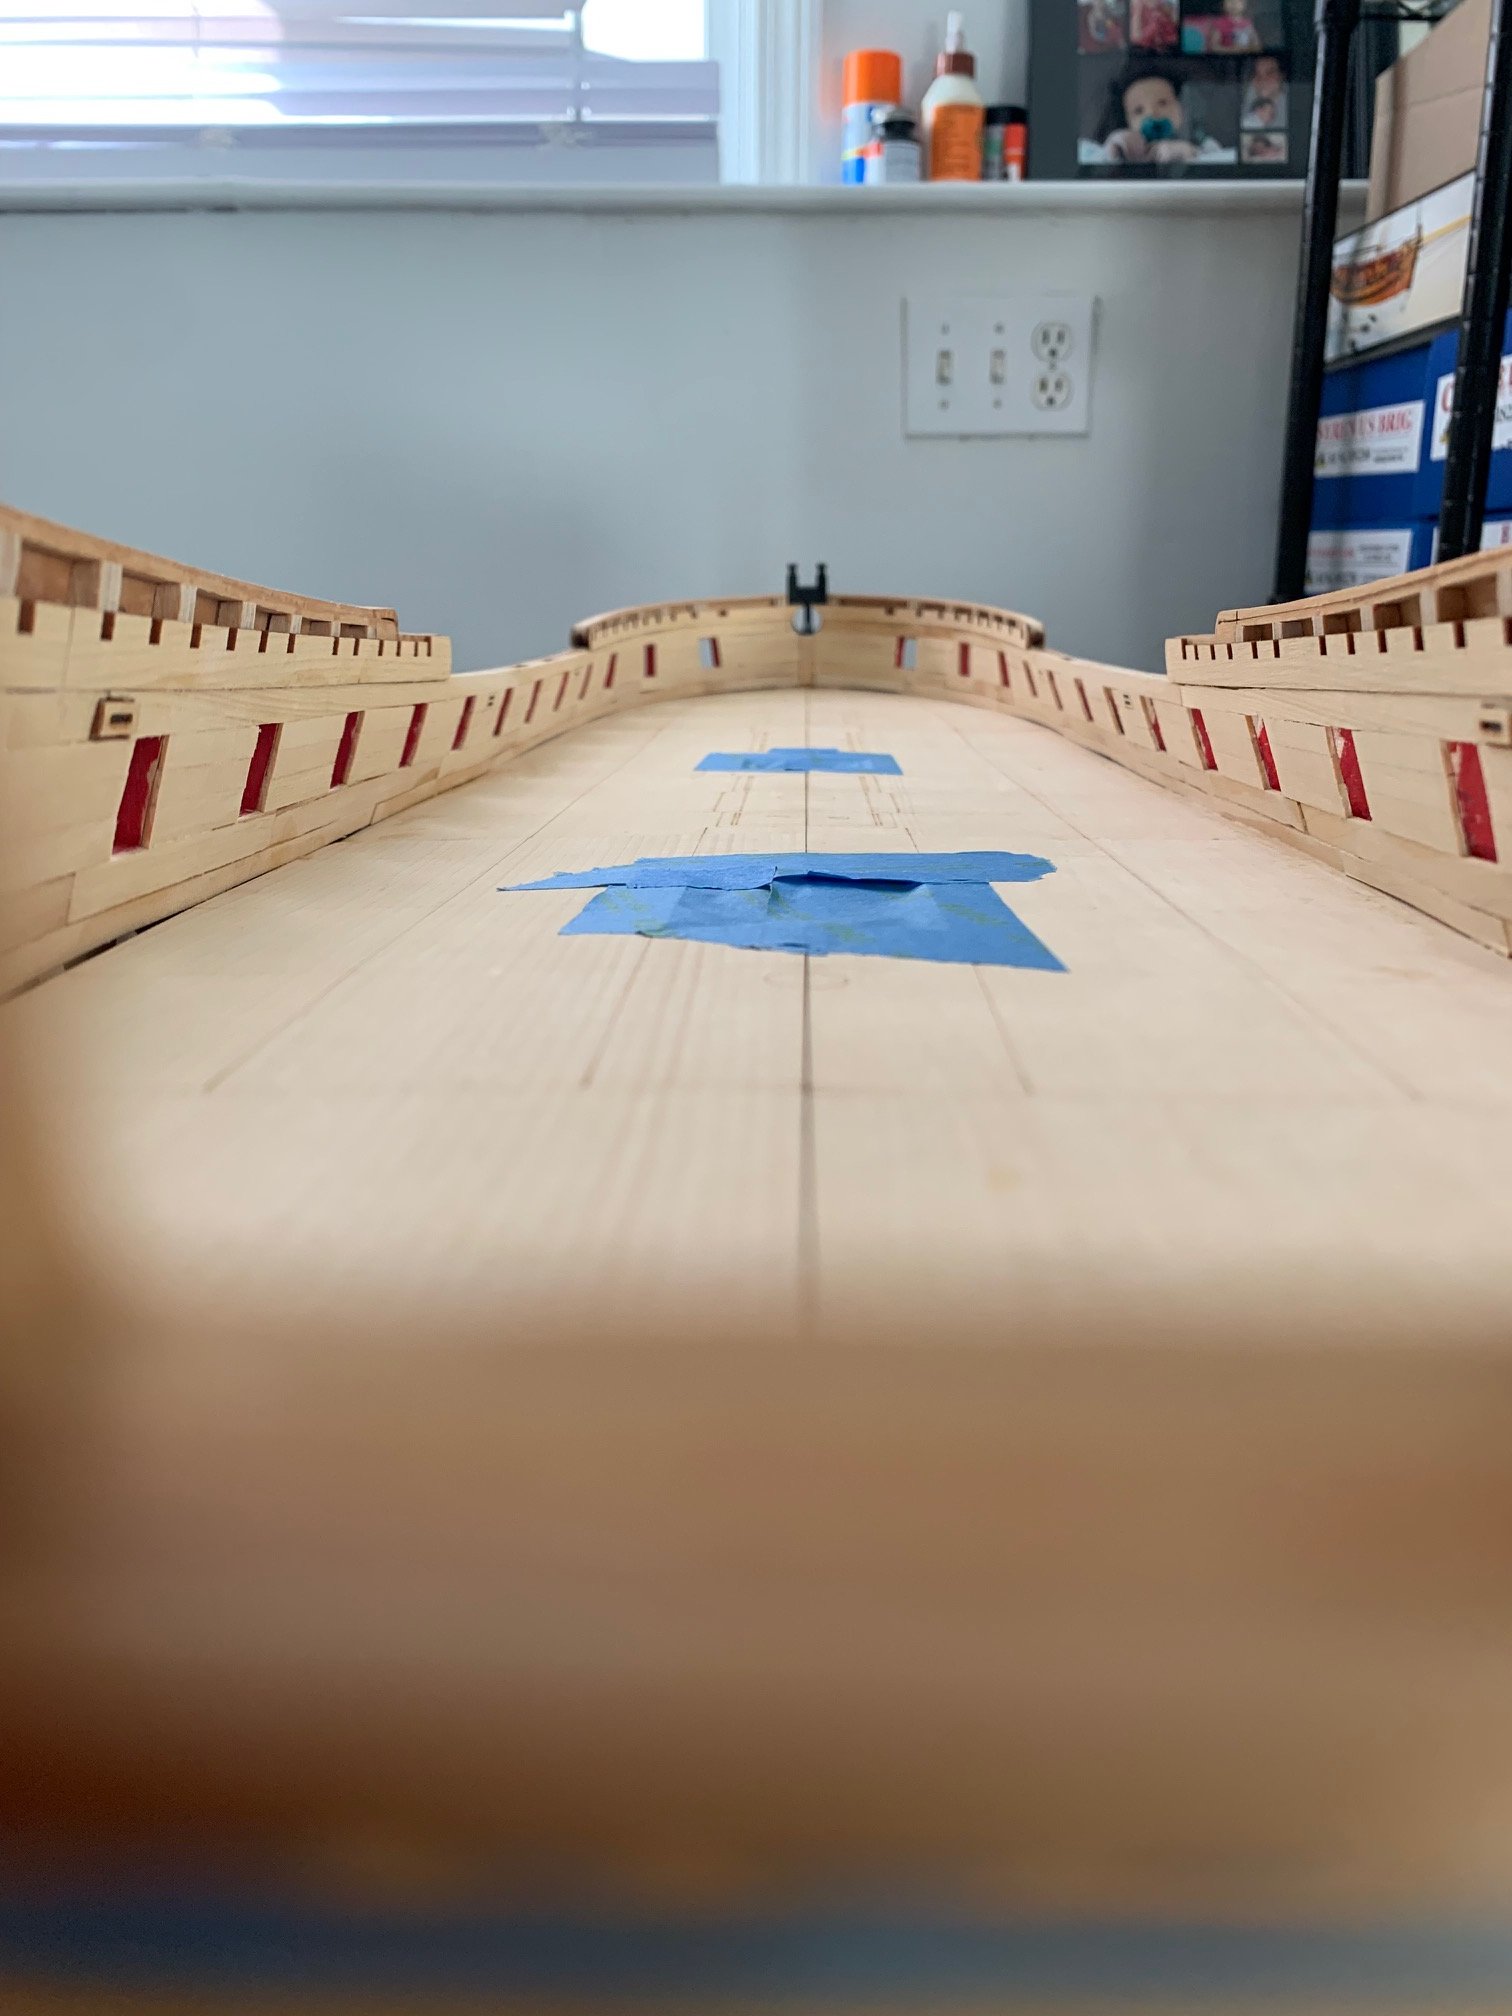
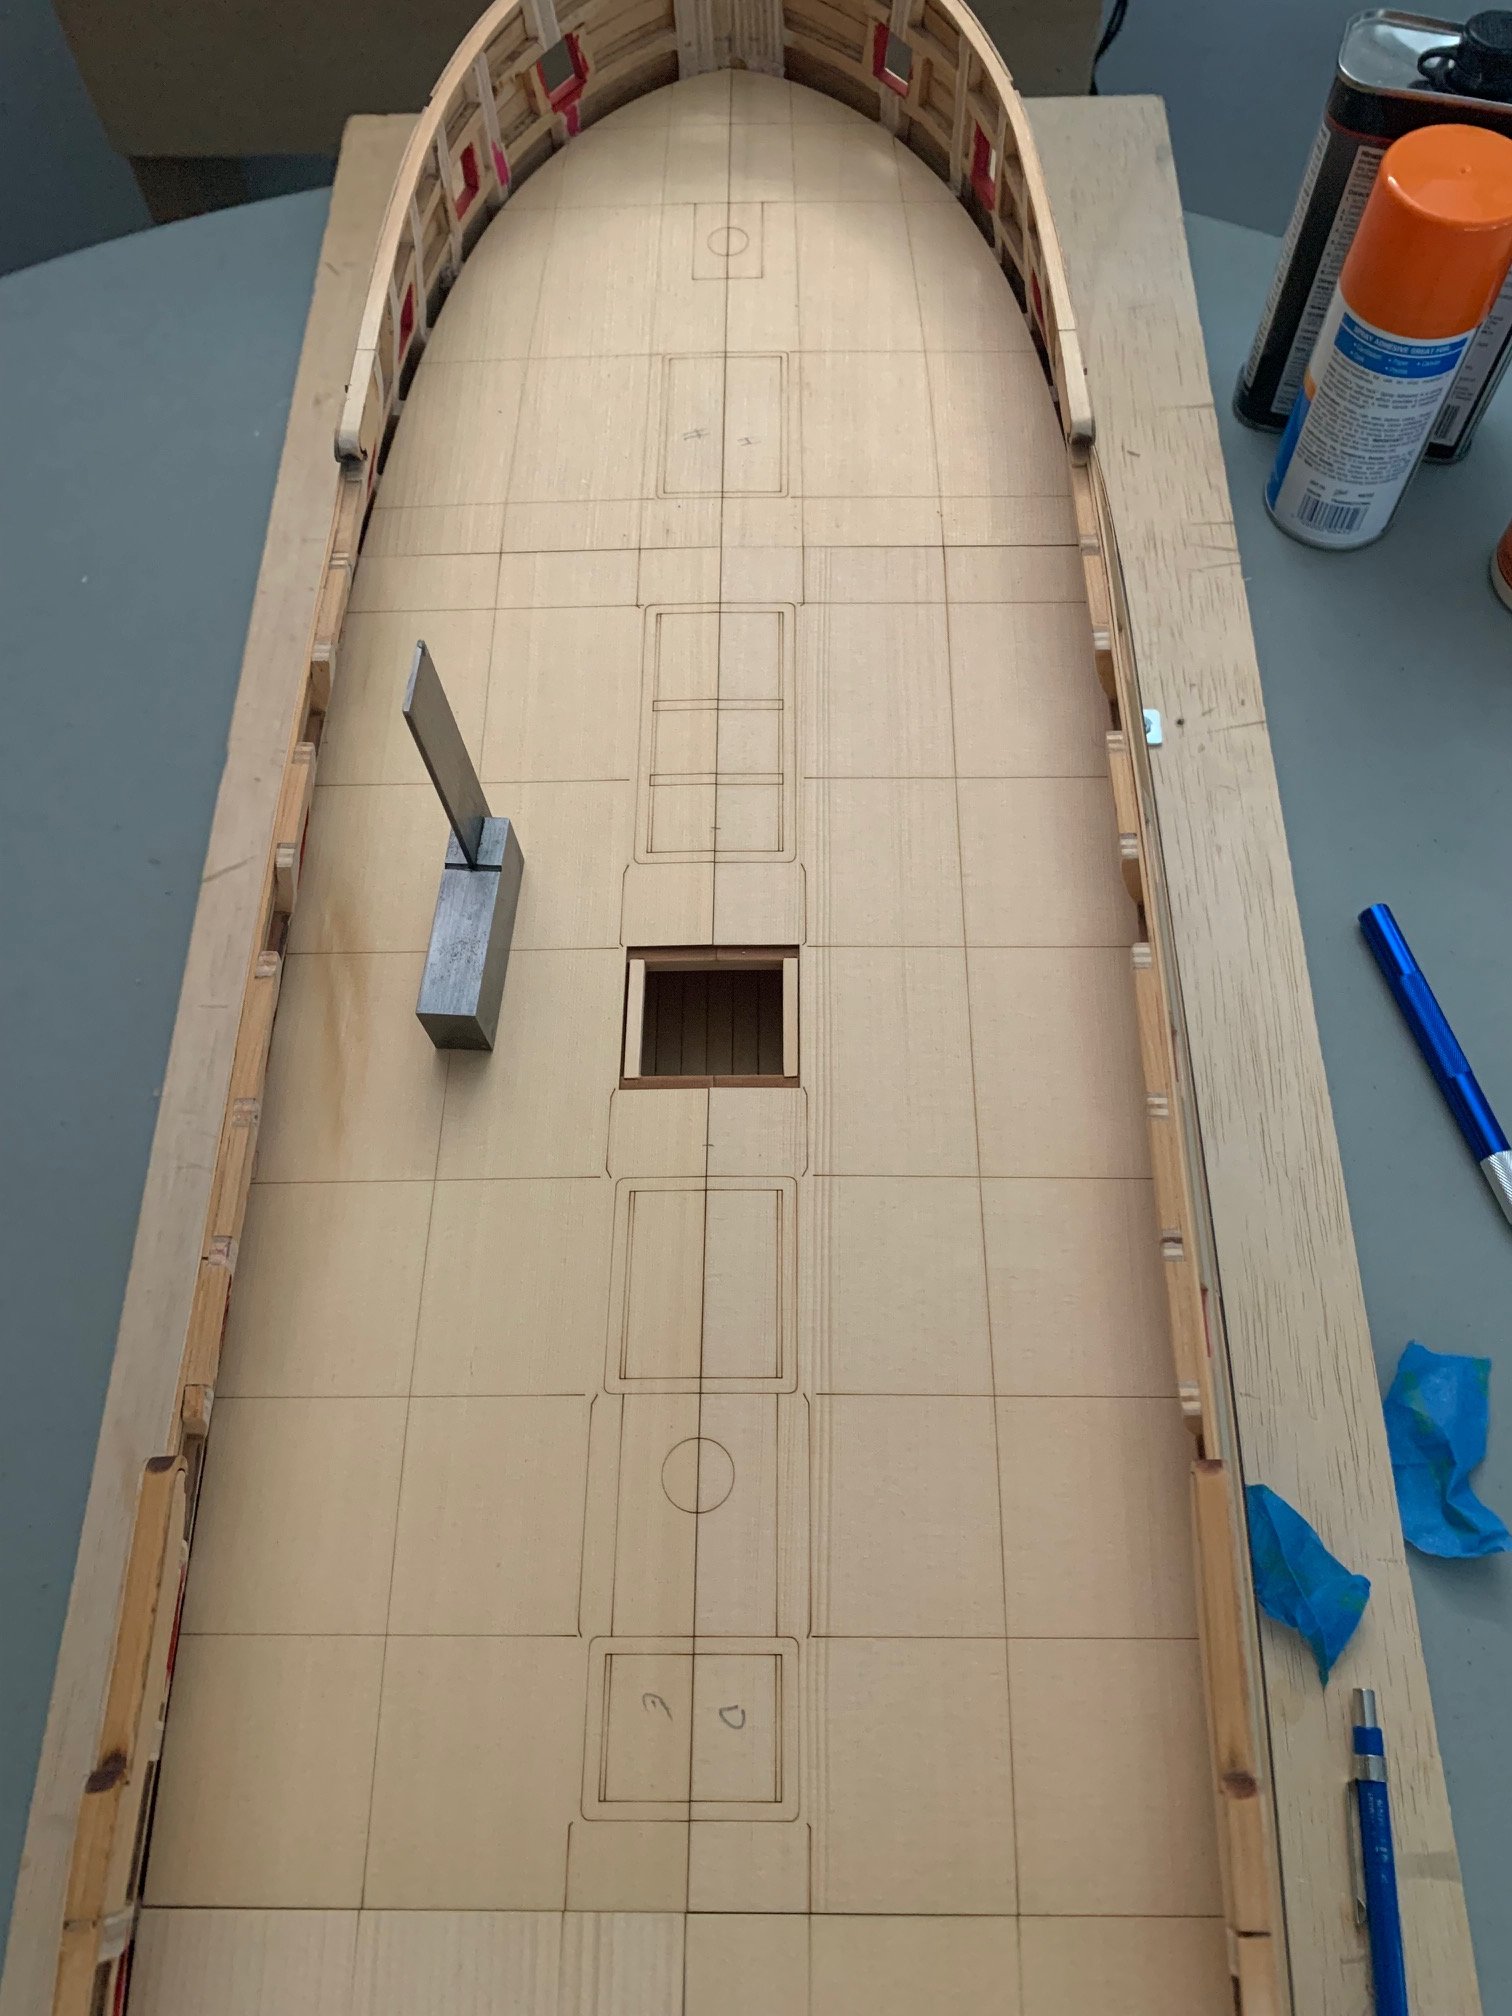
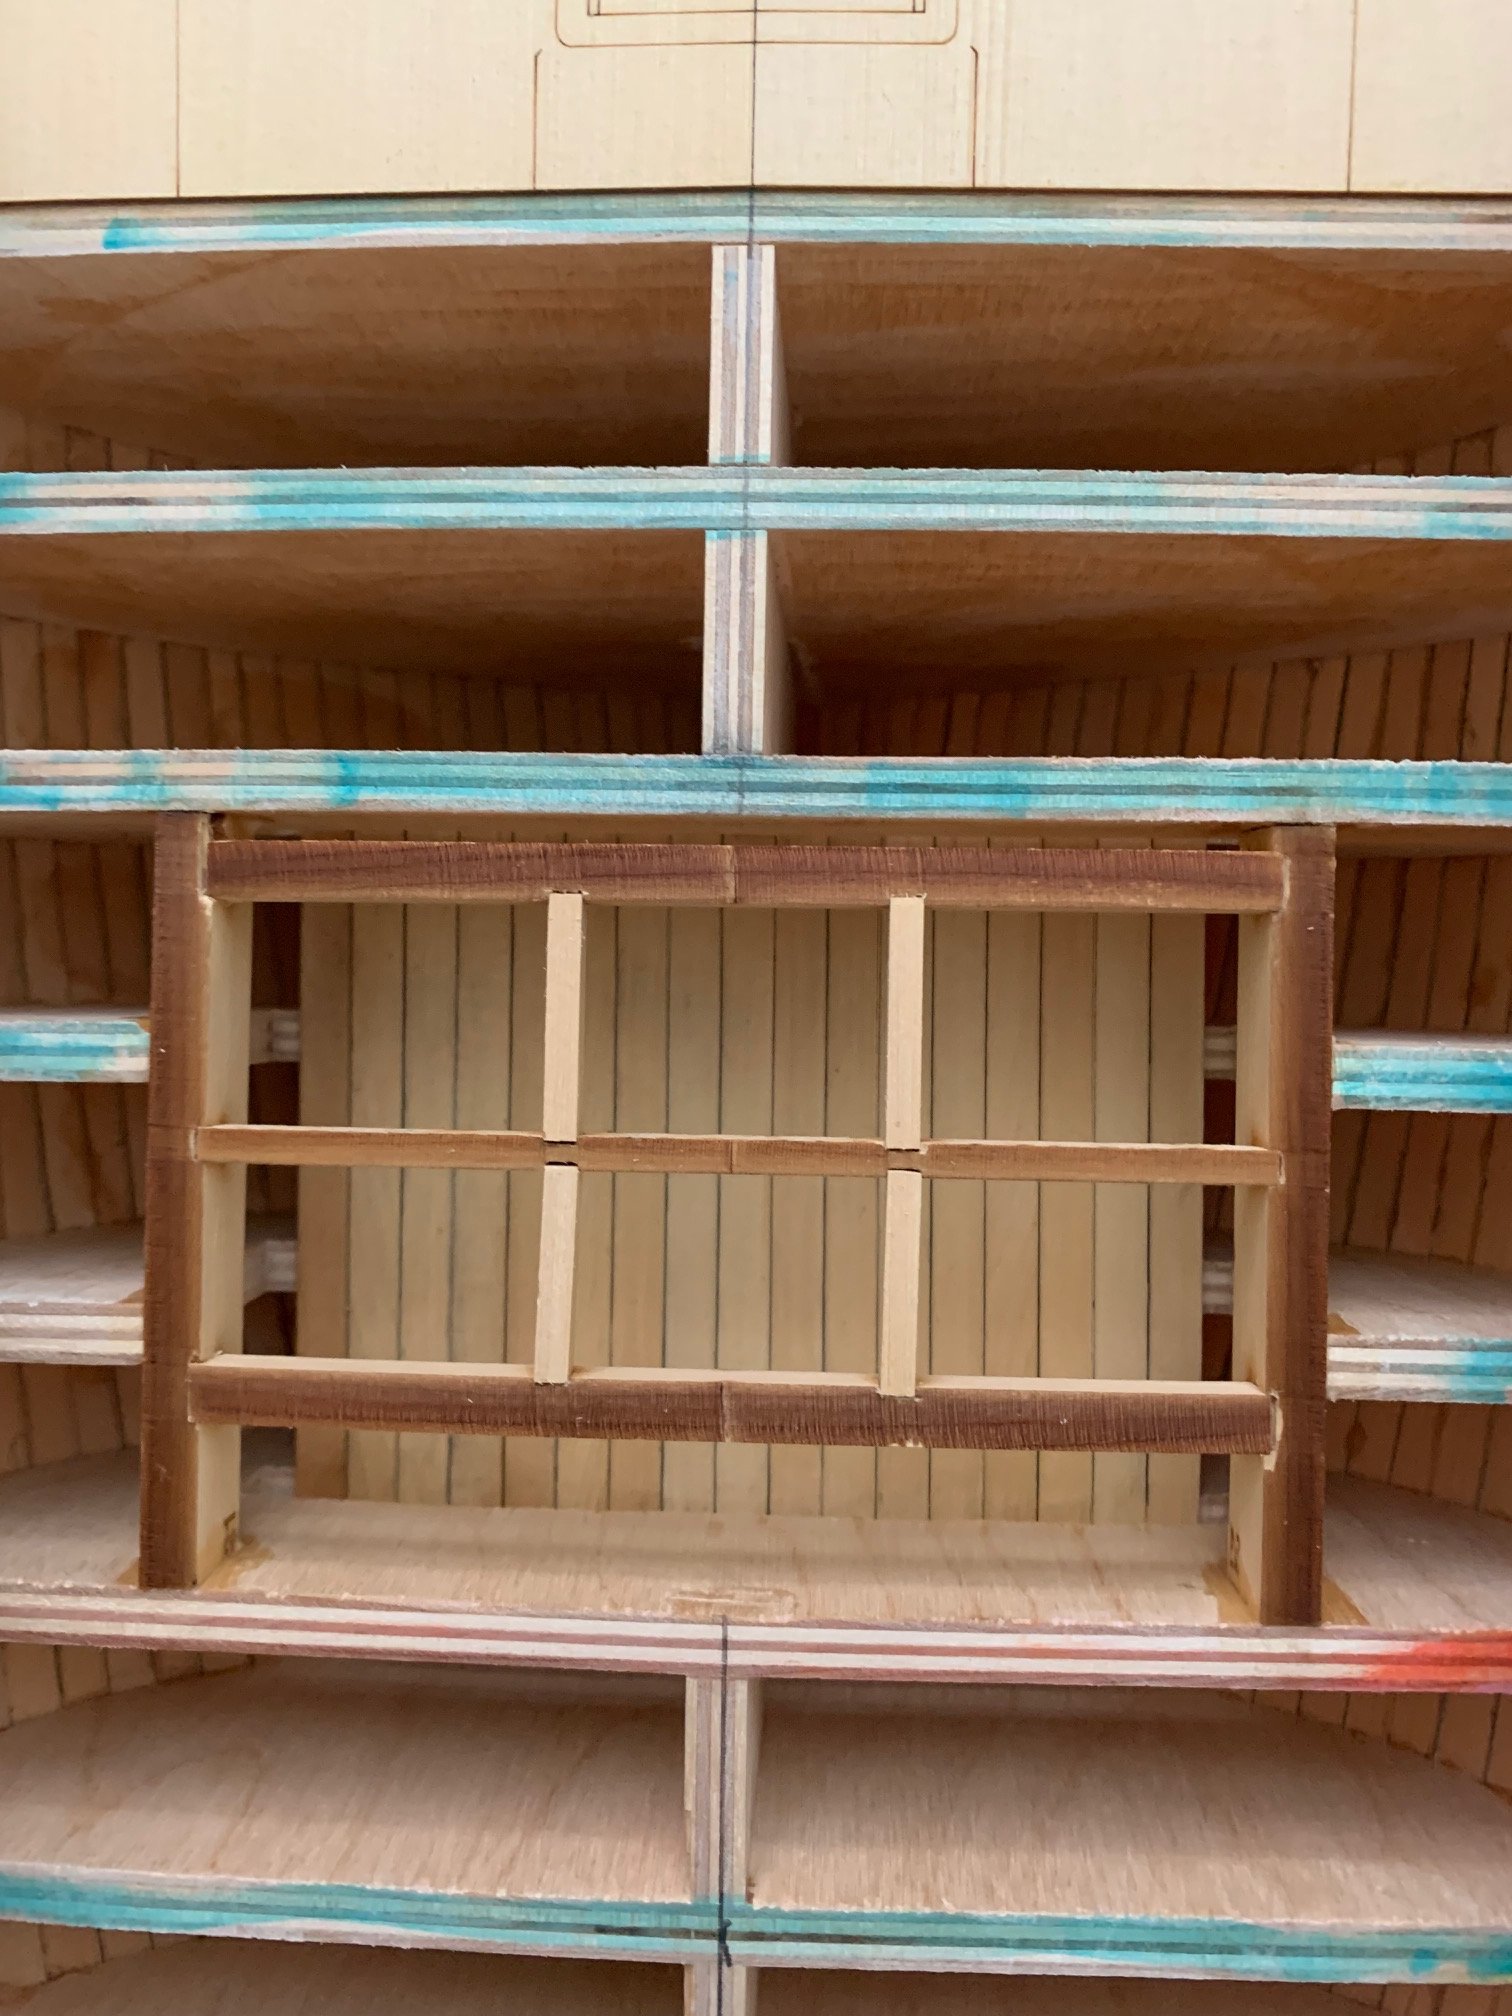
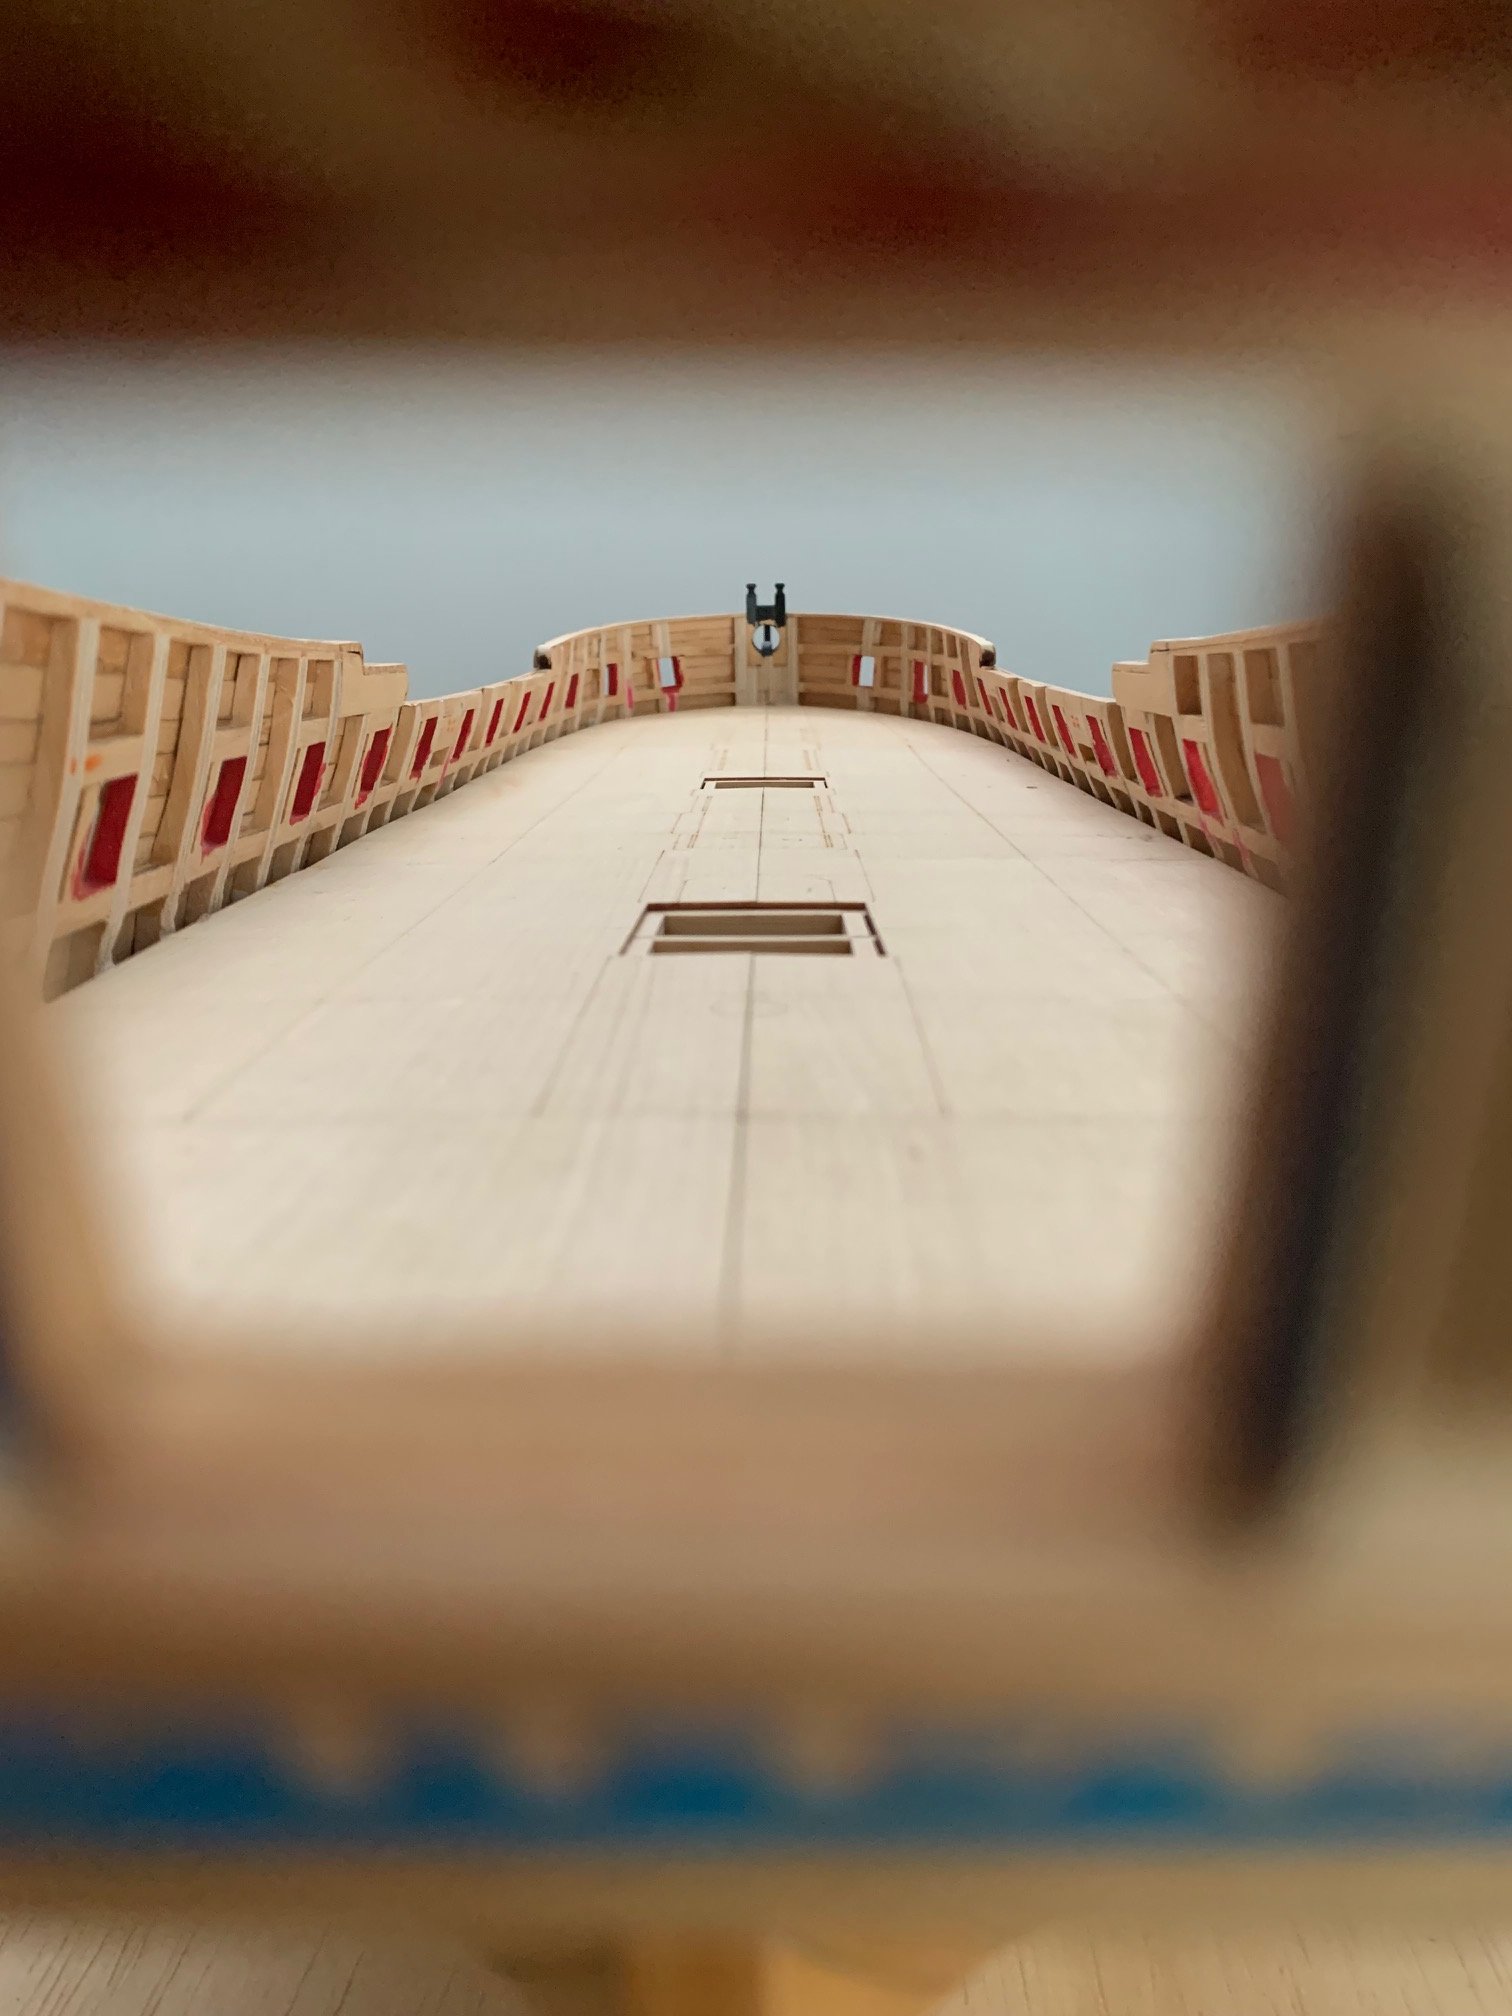
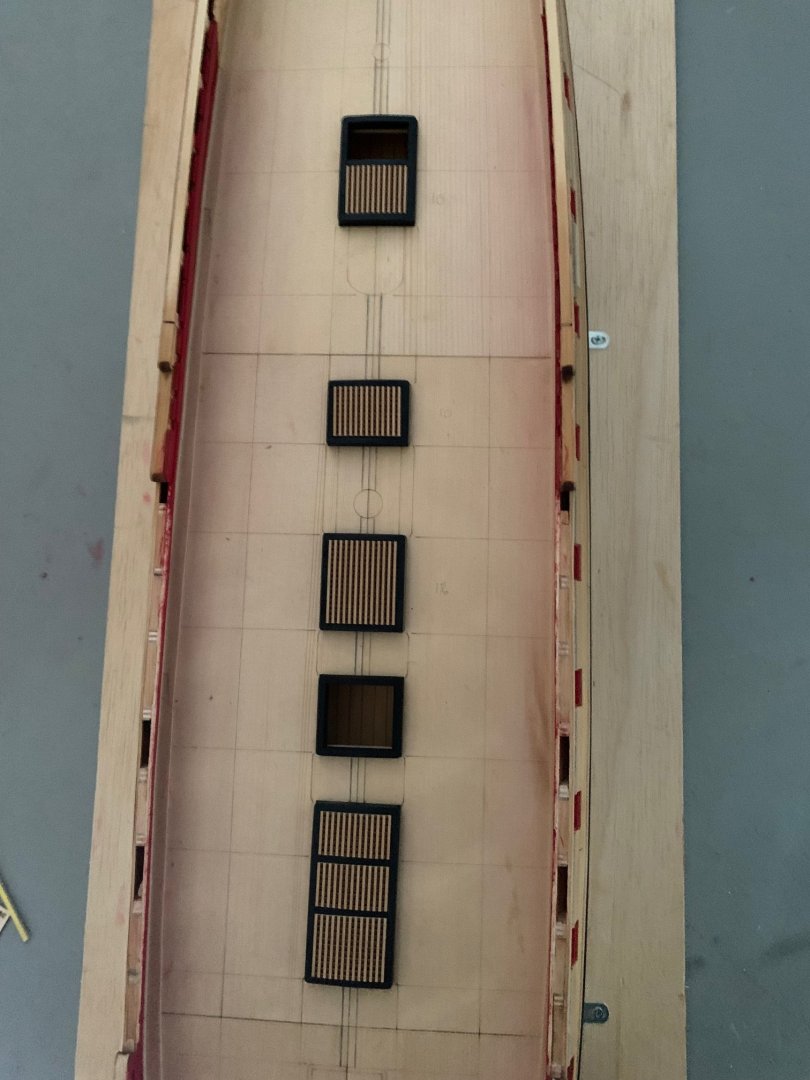
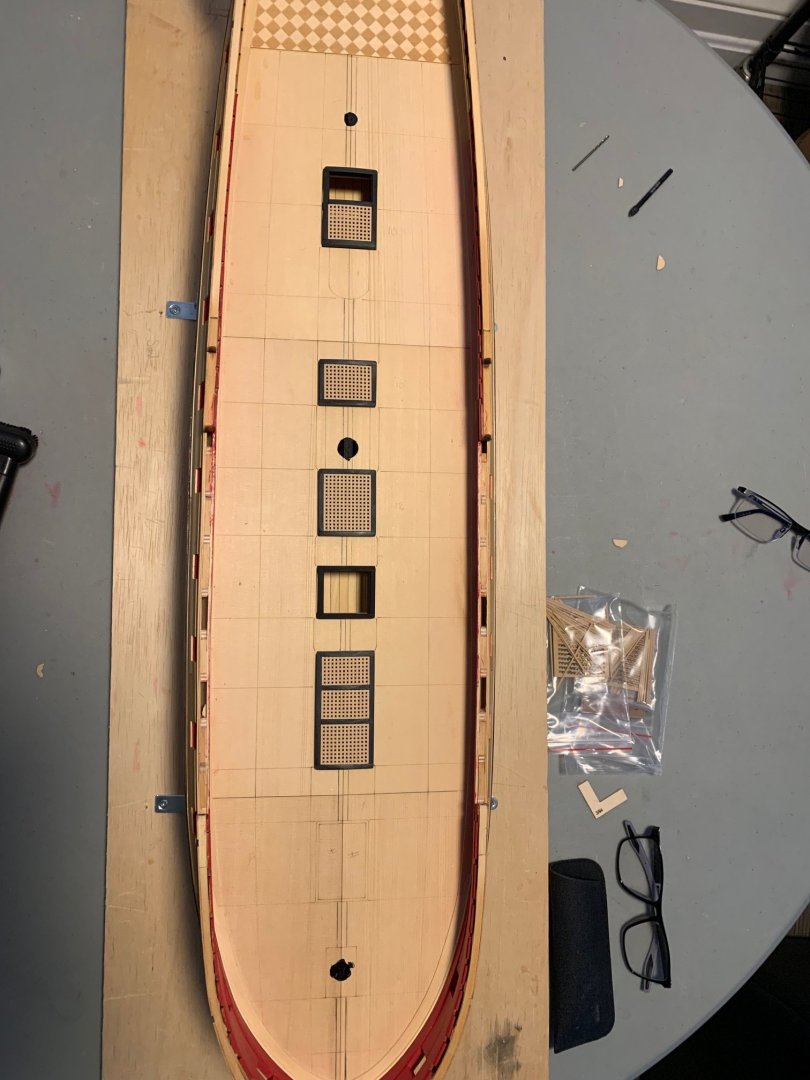
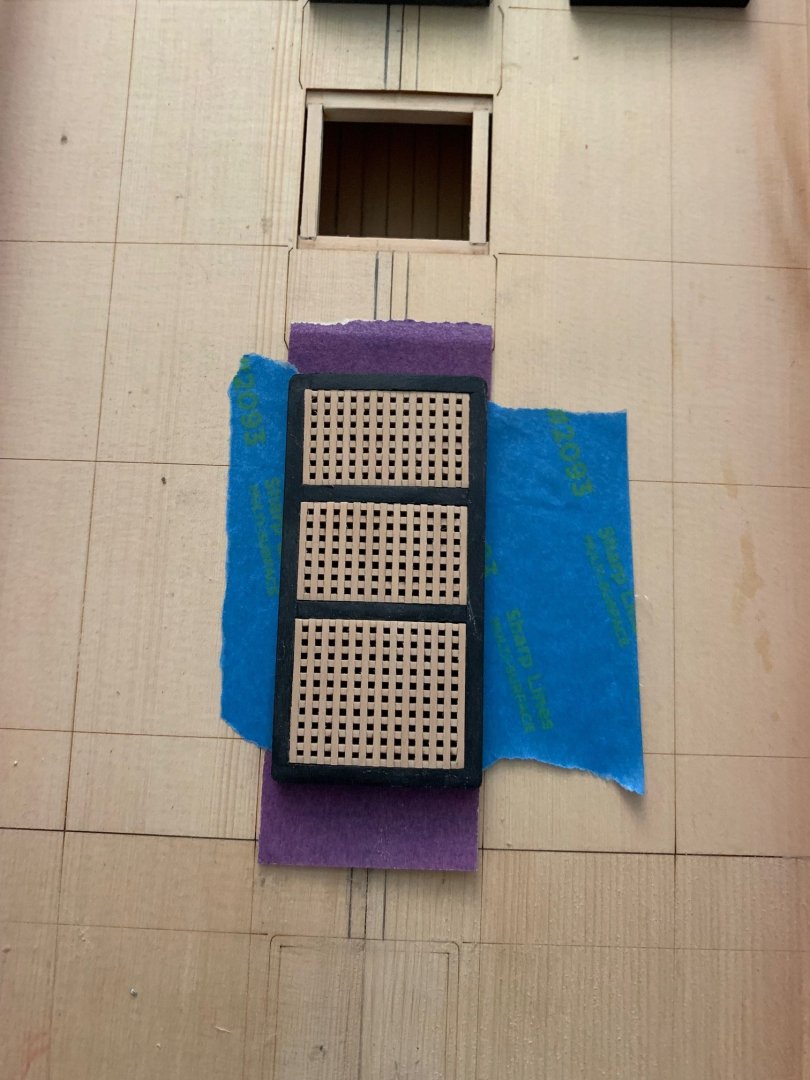
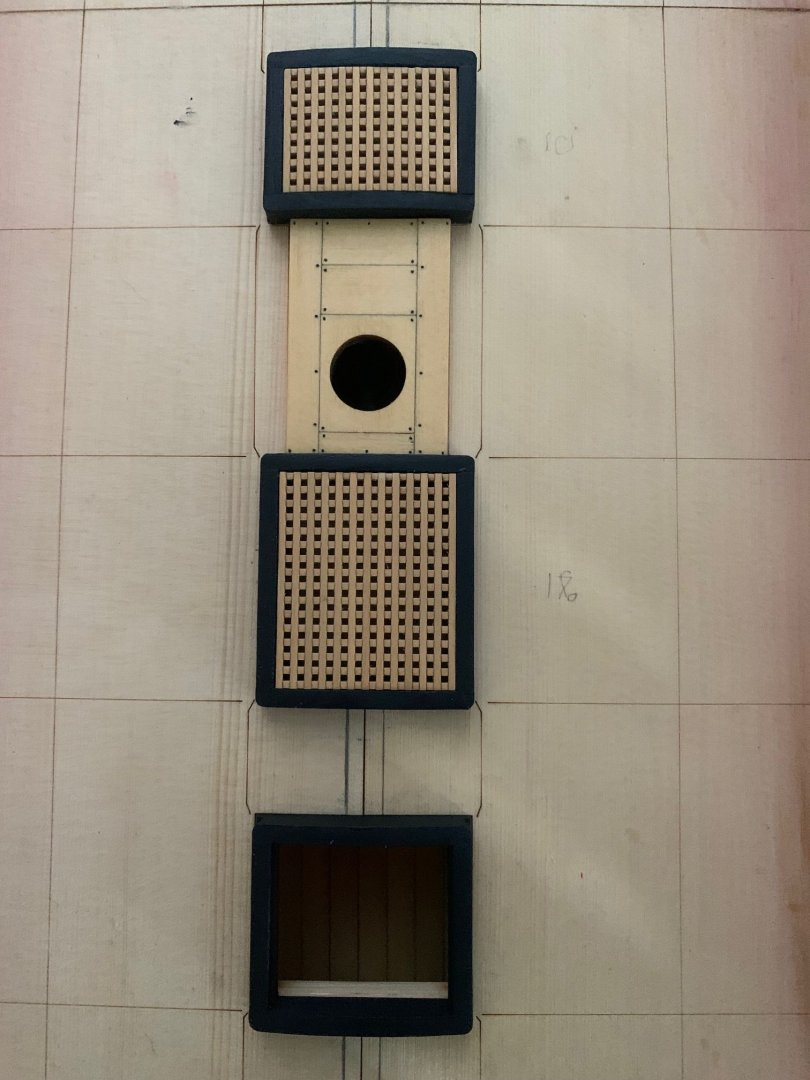
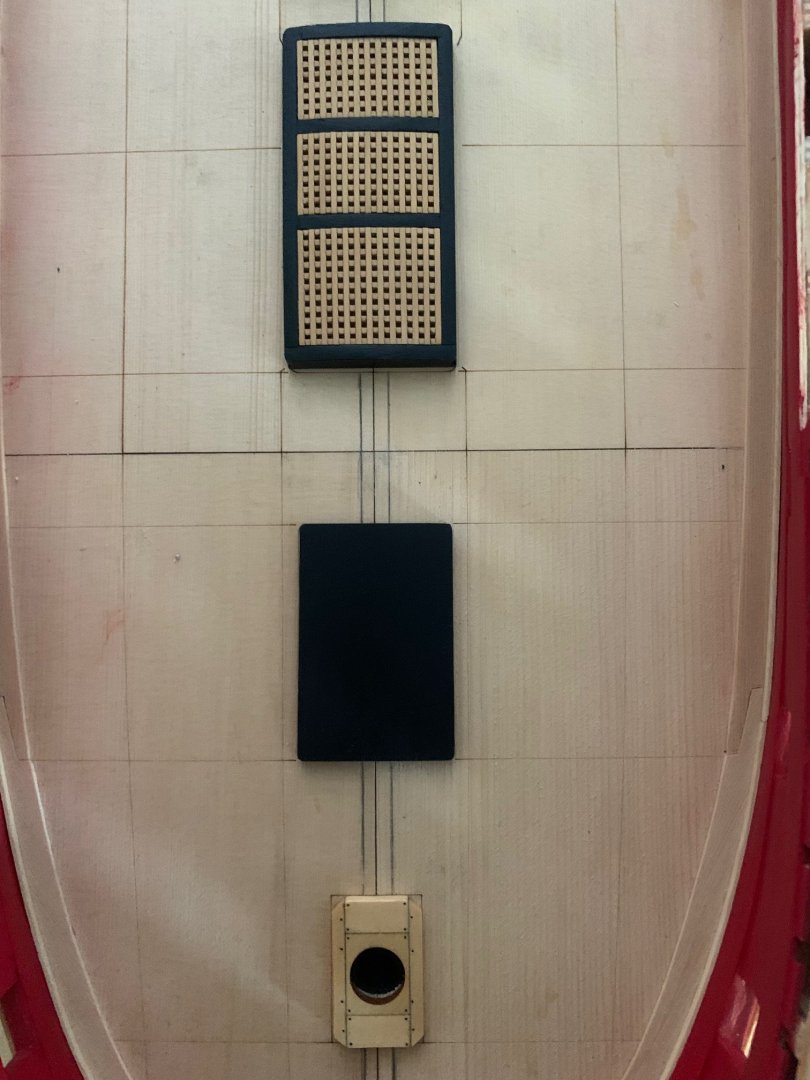
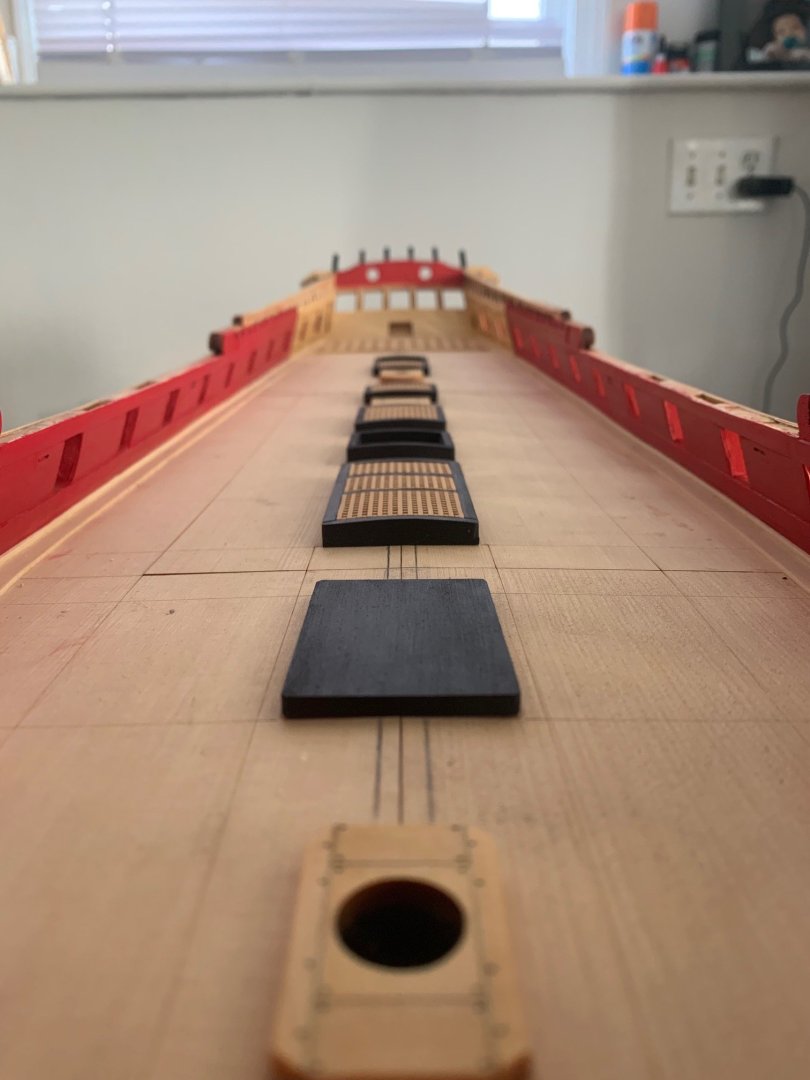
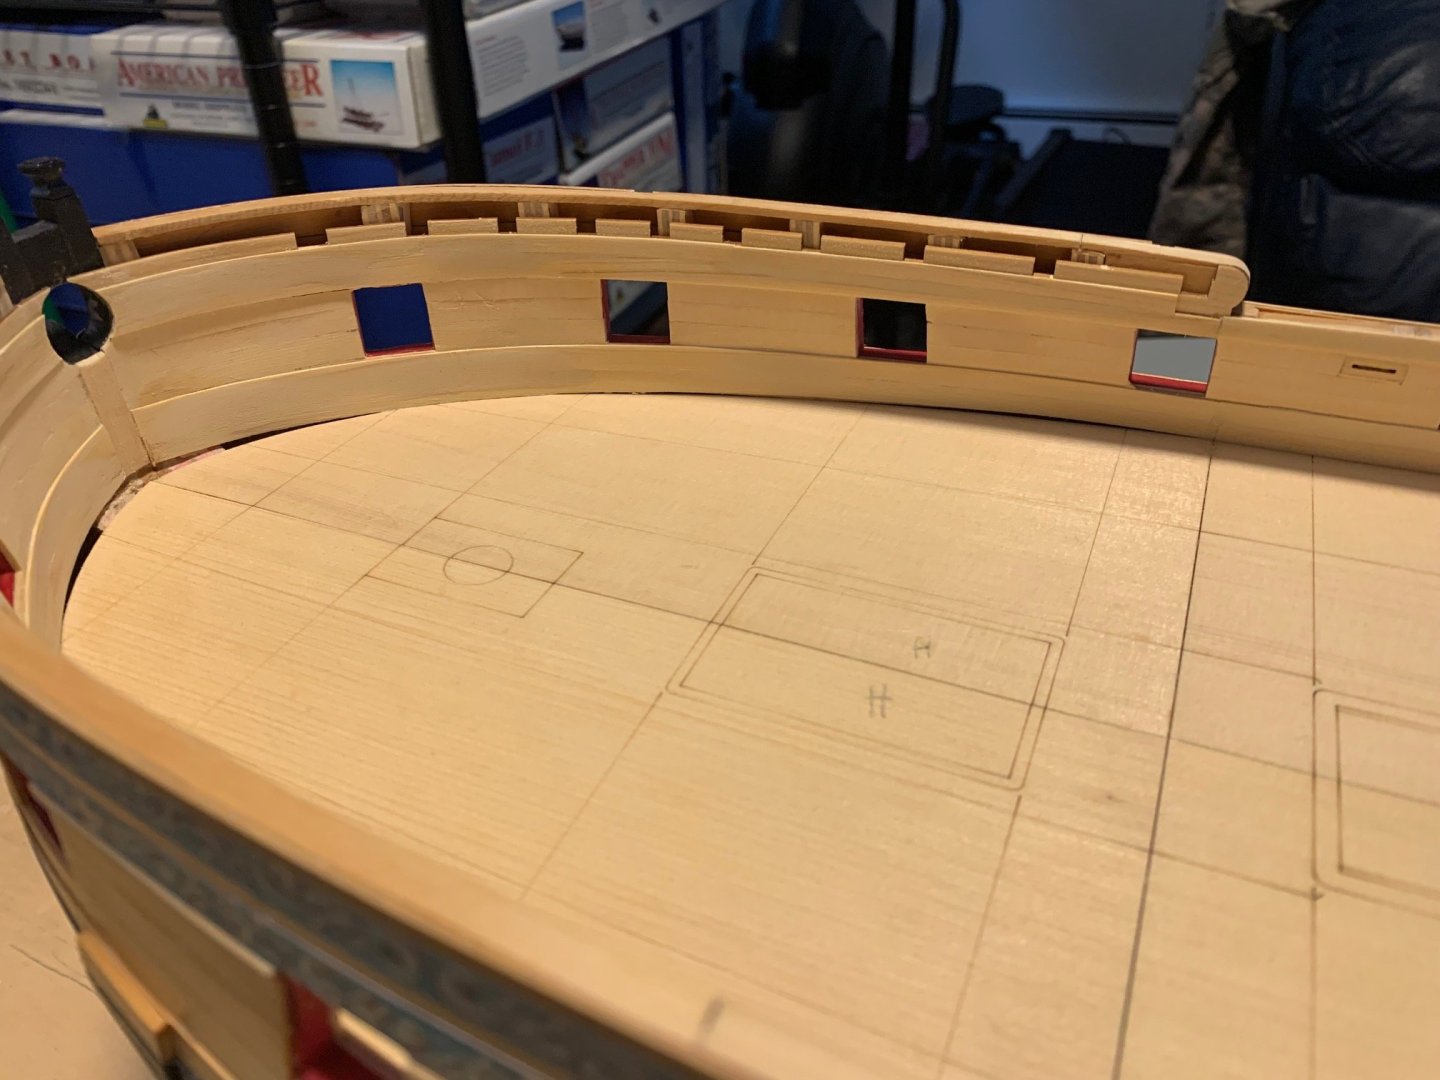
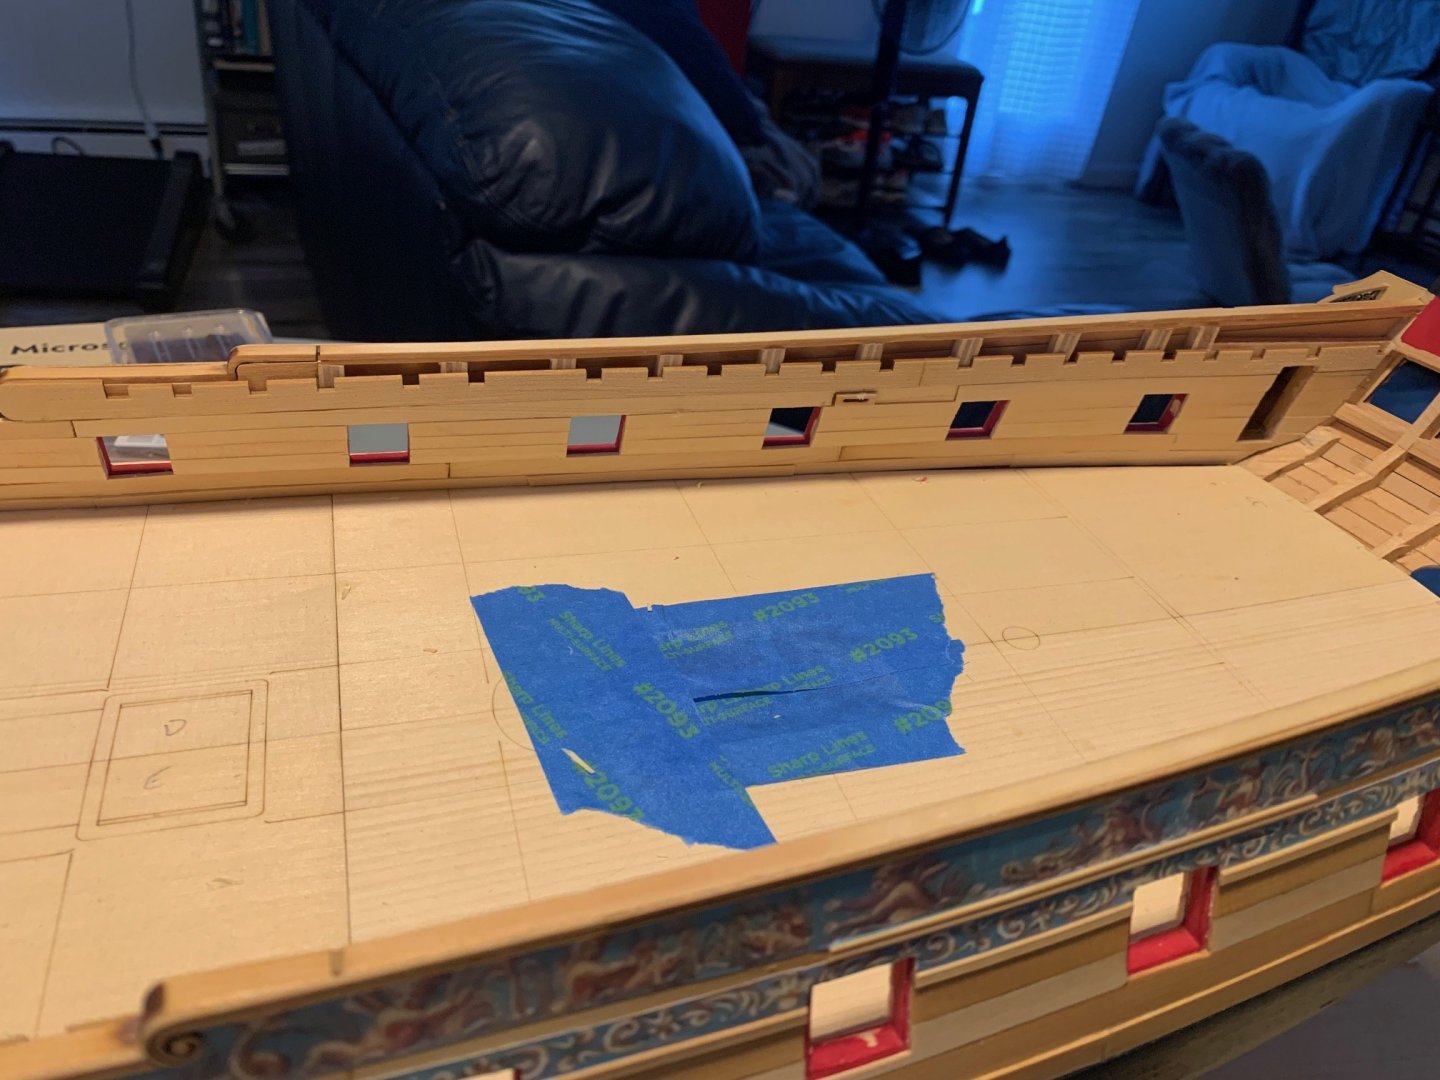
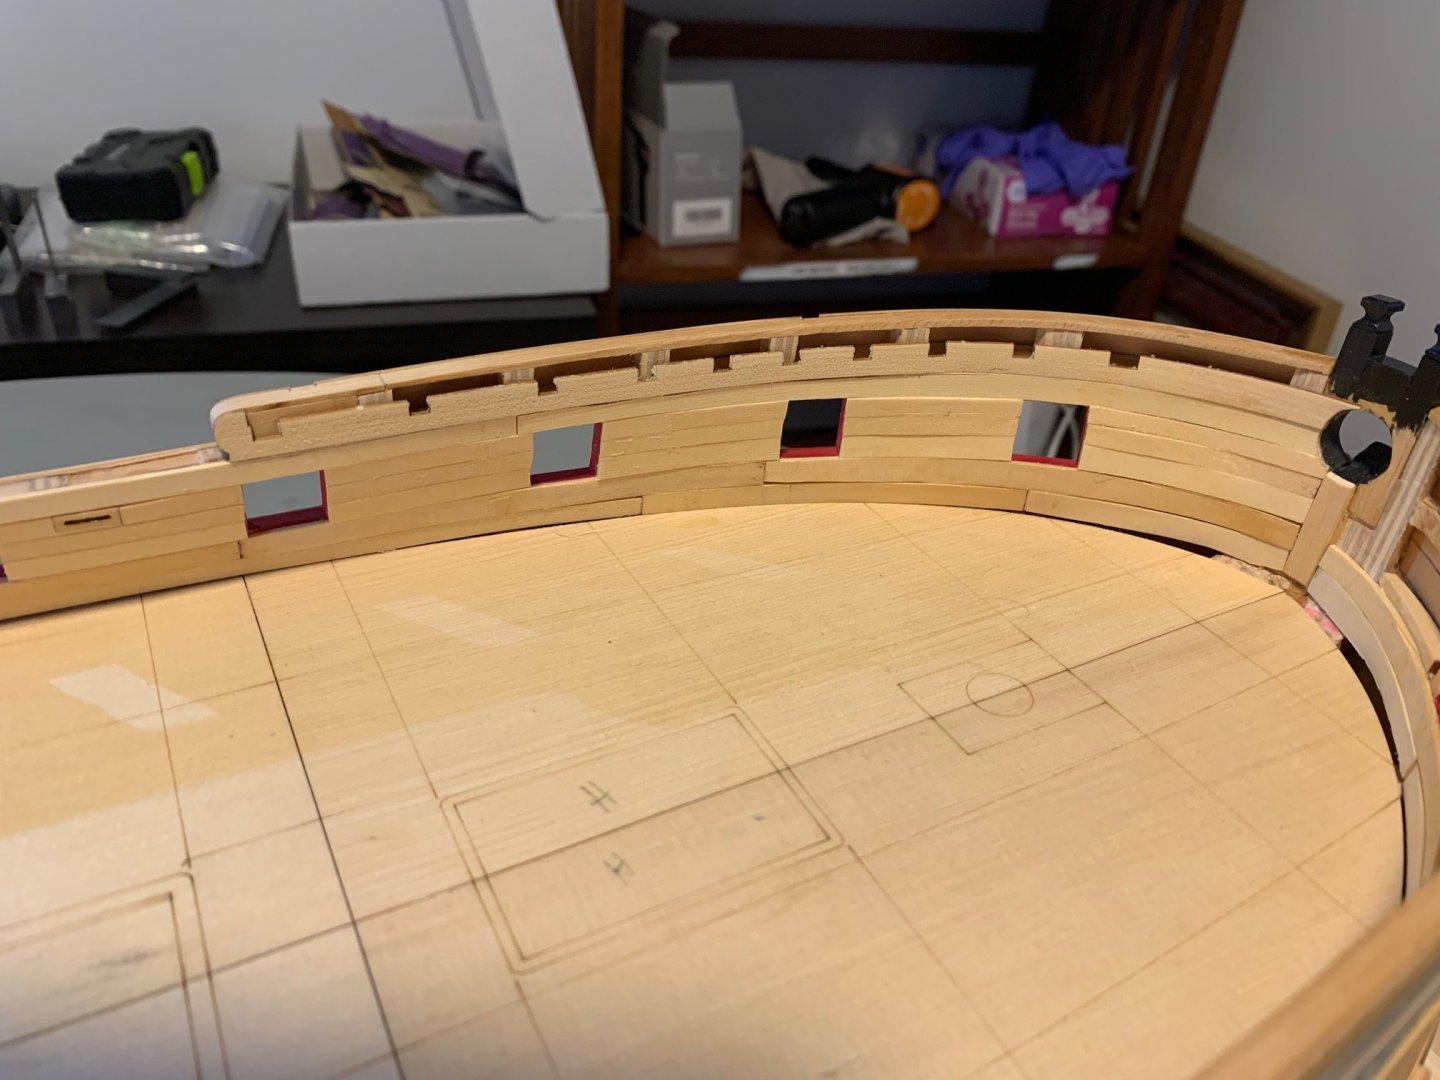
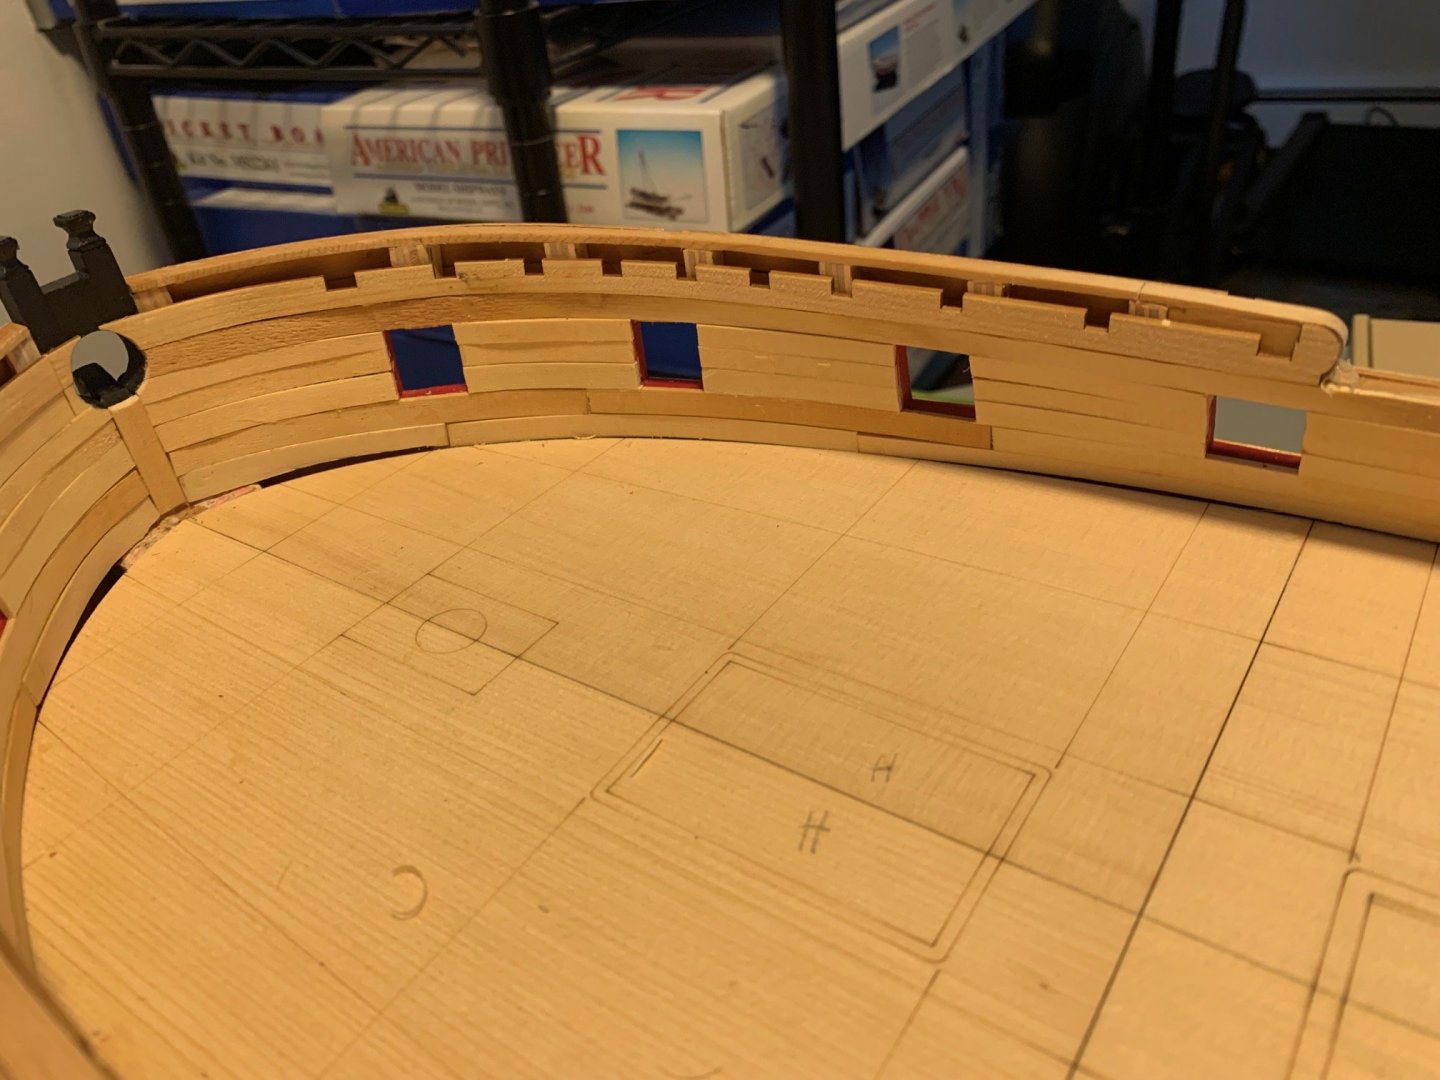
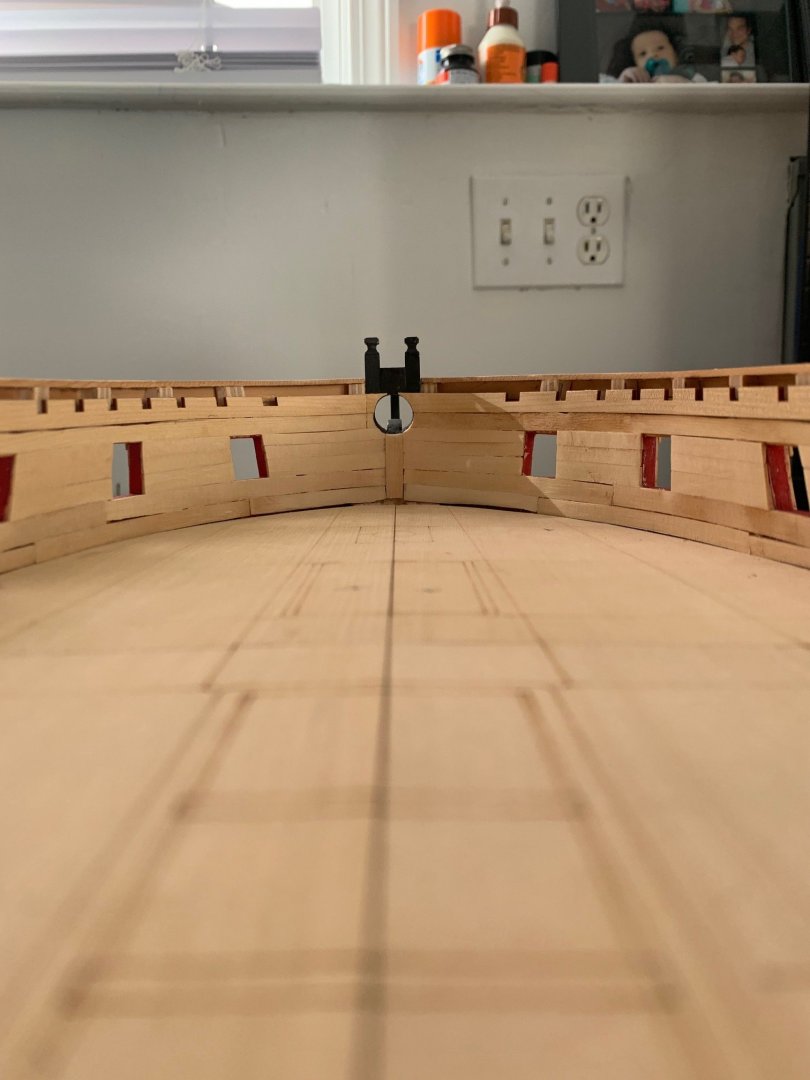
Thanks Steve. Made me realize how long it's been since my last update as it looks like you are very close now. Work has been surprisingly busy the last few weeks, so progress has been slow, but I’ve been plugging along. I started by lining off the center plank and then assembling the coamings. The provided jig is so simple, yet made this step pretty effortless including shaping the corners to the proper depth. Moving on to the gratings, the jig made these extremely easy to assemble as well. Once trimmed, I found the watered down glue didn’t create a very strong bond for the strips on either end, so I made a habit of applying more glue after trimming them up. The aft most grating threw me off for a moment as it’s one strip narrower than the others. Sanding down the gratings, I found I could be fairly aggressive with a 180 grit sanding stick and then once I saw the char start to sand away, switched to folded 220 grit. I chose not to thin the gratings at all as I thought it would probably give a bit better view of the false deck and they look really good. I did open up the false deck for the masts and carved back some of the plywood and then painted black. This would have been a LOT easier if I had done it before installing the false decks. Finally I taped some 220 grit to the deck to sand the camber in the bottom of coamings (and platforms). It only took a few strokes and removed any wobble. Platforms have been assembled and everything (with 1 obvious exception) has been given its obligatory WOP bath . Final dry fitting part 1 Part 2 Part 3. I decided to use the unfinished side for the stove Glued down and everything looks aligned from the stern. I only used a few dots of glue with each component in case I do need to adjust. From the stem, it looks aligned as well Overhead appears fine as well. The only piece that is not glued down is the capstan partner. I'm going to take a little diversion to build the capstan and mock up that area of the quarterdeck before shimming and glueing it down.


-
Greg M reacted to a post in a topic:
HMS Winchelsea 1764 by woodartist - 1:48
-
Greg M reacted to a post in a topic:
HMS Winchelsea 1764 by shauer - 1:48
-
Greg M reacted to a post in a topic:
HMS Winchelsea 1764 by shauer - 1:48
-
Greg M reacted to a post in a topic:
HMS Winchelsea 1764 by John Murray - 1:48
-
Greg M reacted to a post in a topic:
HMS Winchelsea 1764 by Frank Wouts 1/48
-
Greg M reacted to a post in a topic:
HMS Winchelsea 1764 by John Murray - 1:48
-
Awesome job. Chapter 3 is a lot of fun and a confidence builder and also had a lot of nervous moments. Chapter 4 is just plain fun..
-
Greg M reacted to a post in a topic:
HMS Winchelsea 1764 by shauer - 1:48
-
Greg M reacted to a post in a topic:
HMS Portland 1770 by scrubbyj427 - 1:48 - 4th rate 50-gun ship
-
Greg M reacted to a post in a topic:
HMS Winchelsea 1764 by shauer - 1:48
-
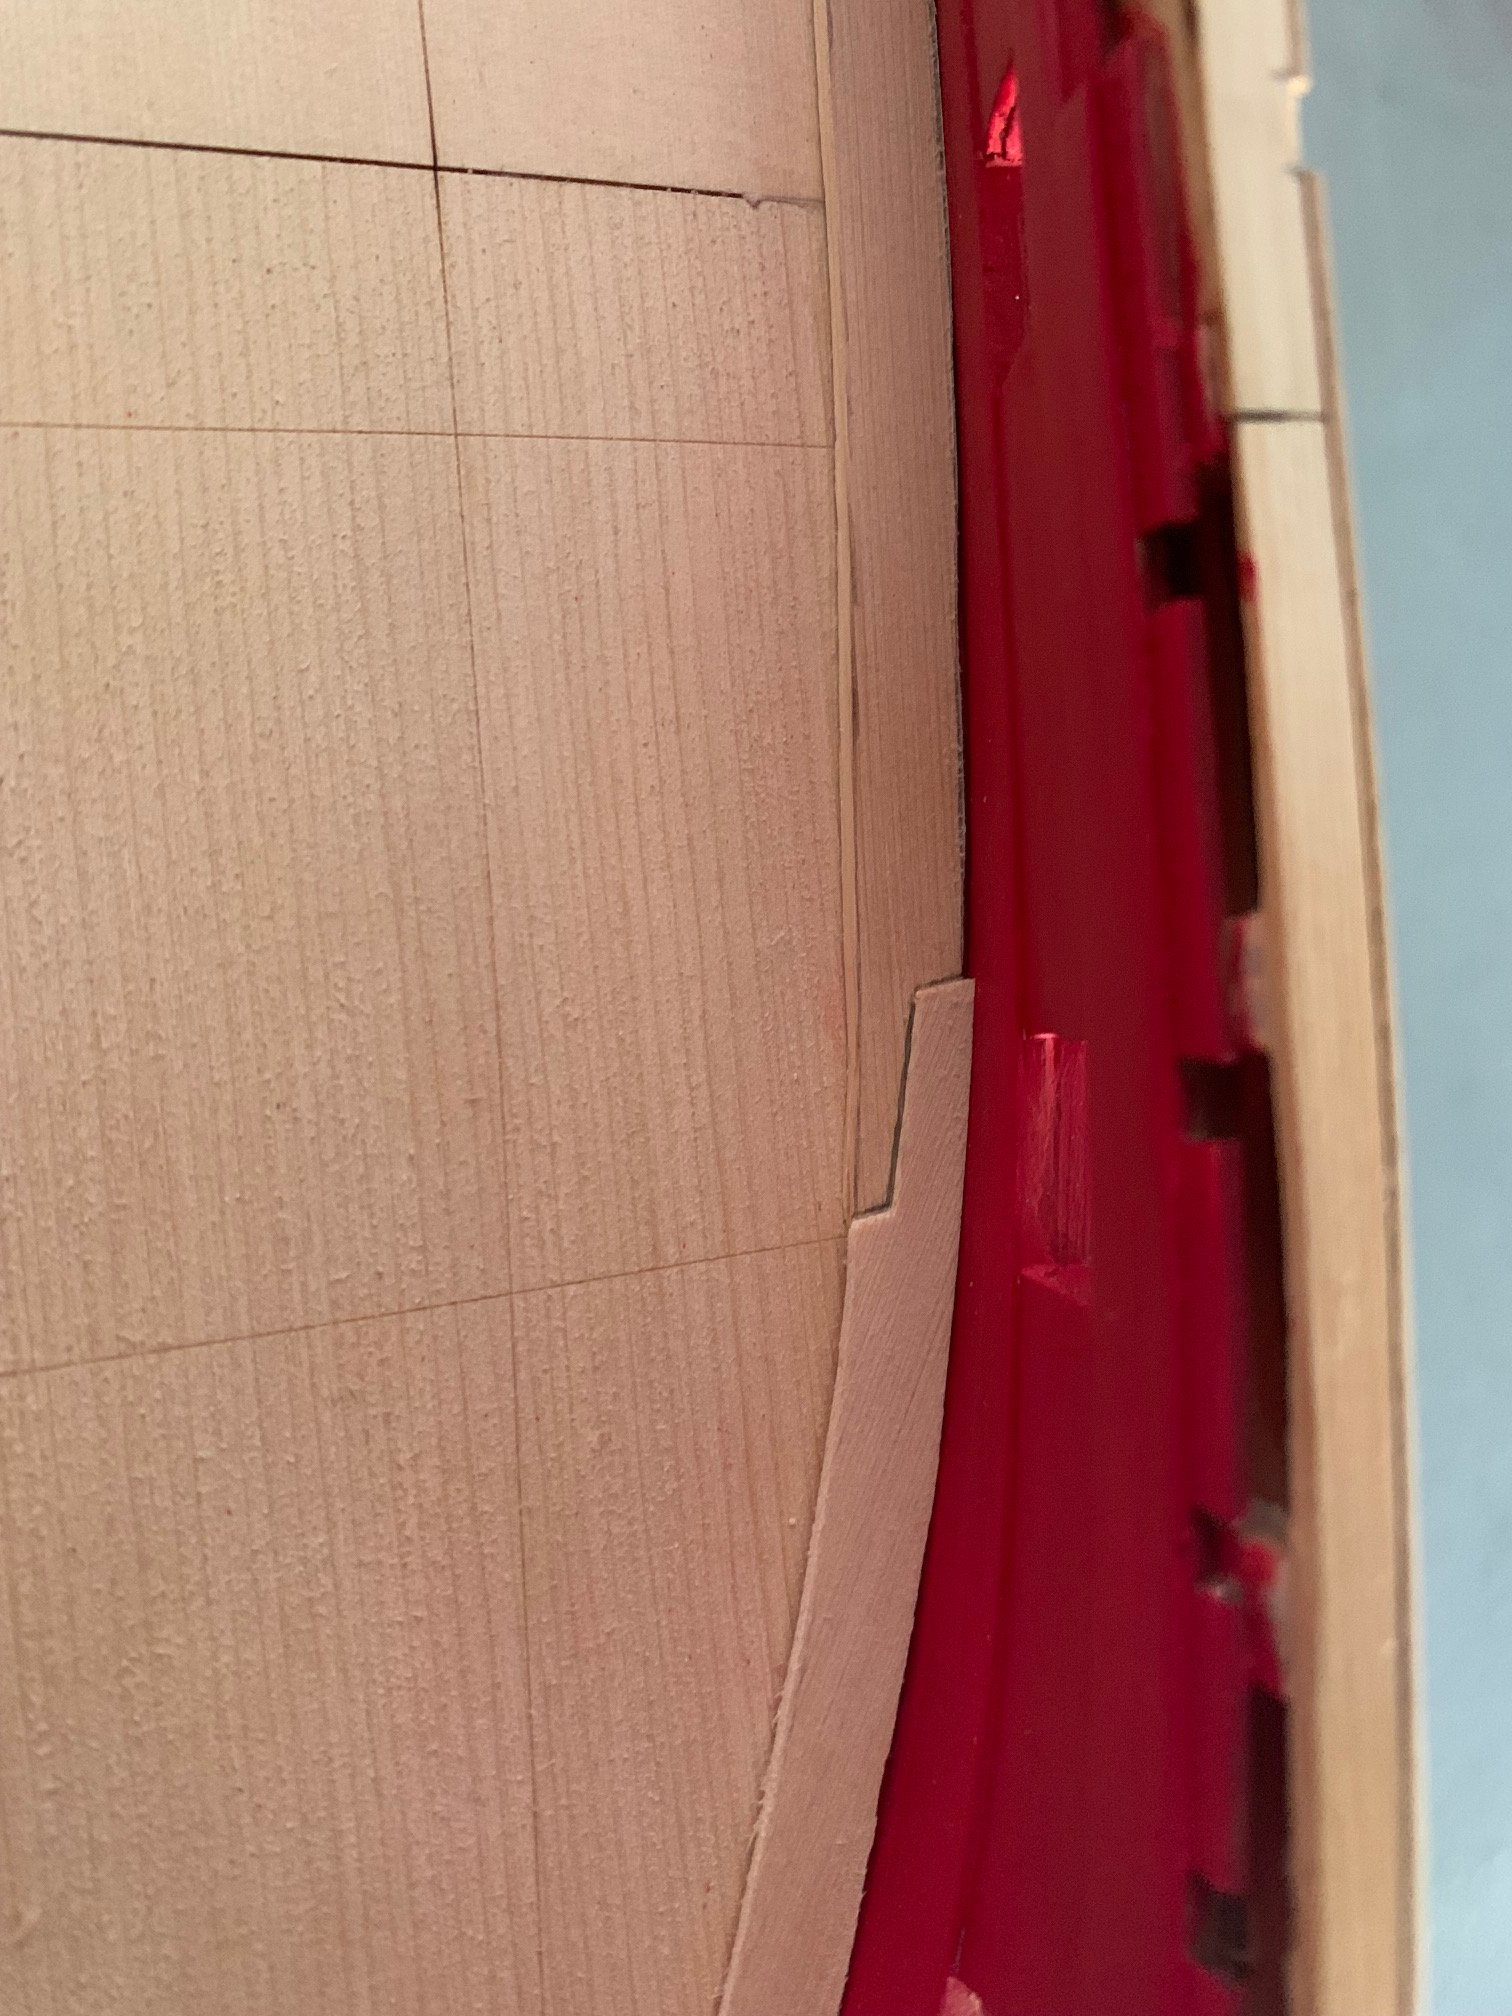
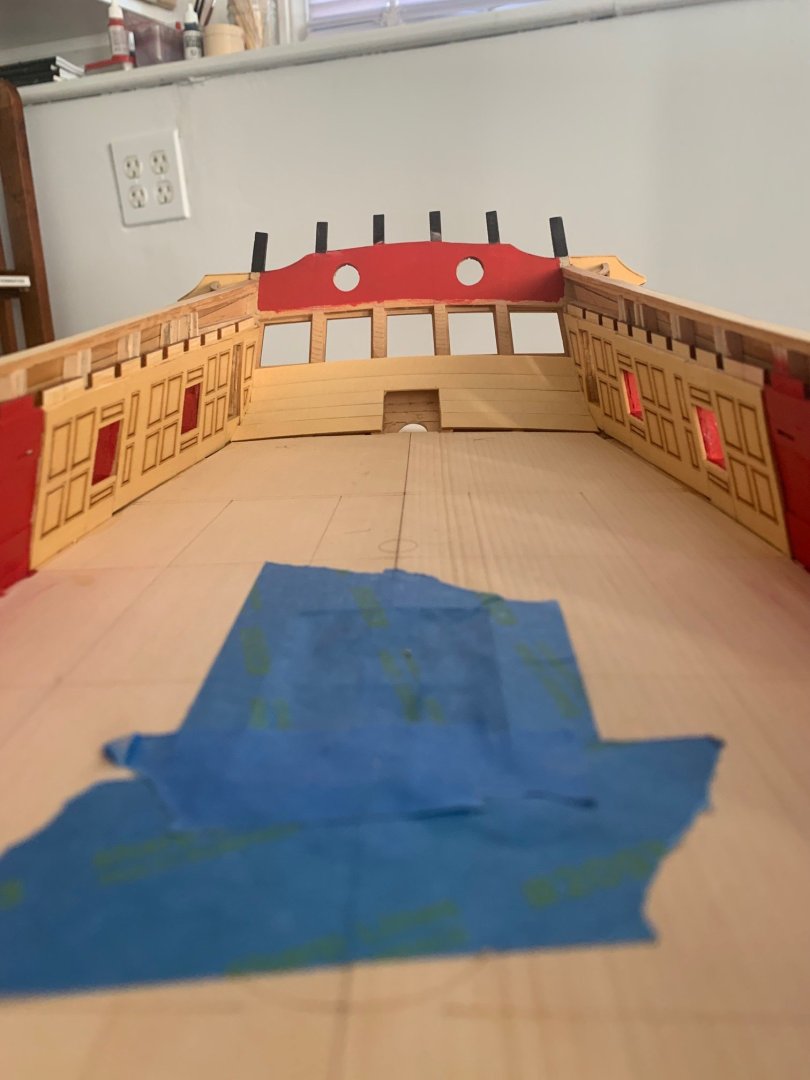
Thanks a lot Frank. It definitely feels like I've turned the corner on the build and I've tried to slow down a bit, which has made things more fun. The panels and counter planks went in without too much fuss. However, the port side is a little wonky at the deck. The gap in the false deck is quite visible below the q gallery entrance on the port side versus the starboard side. It’s going to require some creativity with the margin plank in the captain’s cabin, but the good thing is it doesn’t seem to have any visible effect elsewhere on the ship. I moved onto the margin plank and decided to give the scarf joints a crack. I’ve struggled in the past with scarf joints, but with a bit of patience they eventually clicked I found that cutting and finishing the first piece based on the template and then sliding the second piece under the first piece to use it as a template gave a nice joint instead of trying to cut both edges separately and then mating them. The joint matches up nicely and the end result is a great fit once the 2nd piece is finished and the edges are sanded flush. I kept working my way back and knew the fit of the cabin flor was going to be a bit of an issue due to the gap on the port side. Trying to juggle the scarf joint, matching up to the margin plank at the stern and balance the margin plank where it meets the floor was going to be pretty daunting. I decided to split the final margin plank in line with the front of the floor where the bulkhead will rest, which will hide the seam. I got a nice fit and with the waterways installed, nothing looks awry. Regarding the waterways, it’s interesting how much more polished things look once they are installed. I made sure that all the joints will be hidden by a cannon or bulkhead. Onward to the coamings. Looking forward to finally making fancy gratings.


-
Great job Frank. She's looking good. Where did you get the table and figure? It's a nice addition.
-
Greg M reacted to a post in a topic:
HMS Winchelsea 1764 by Frank Wouts 1/48
-
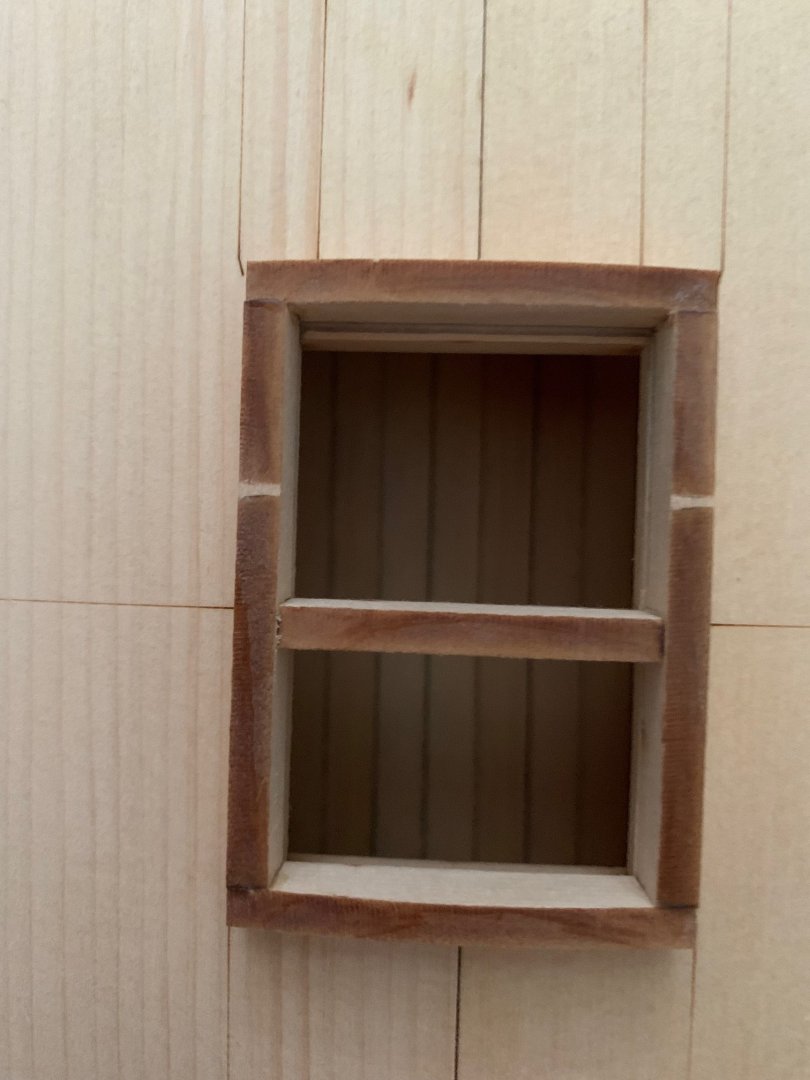
The detail on the QG's is really impressive. The advances in this hobby over the last 10 years have been pretty amazing. Is the molding over the top laser cut cedar? It must be incredibly thin and fragile.
-
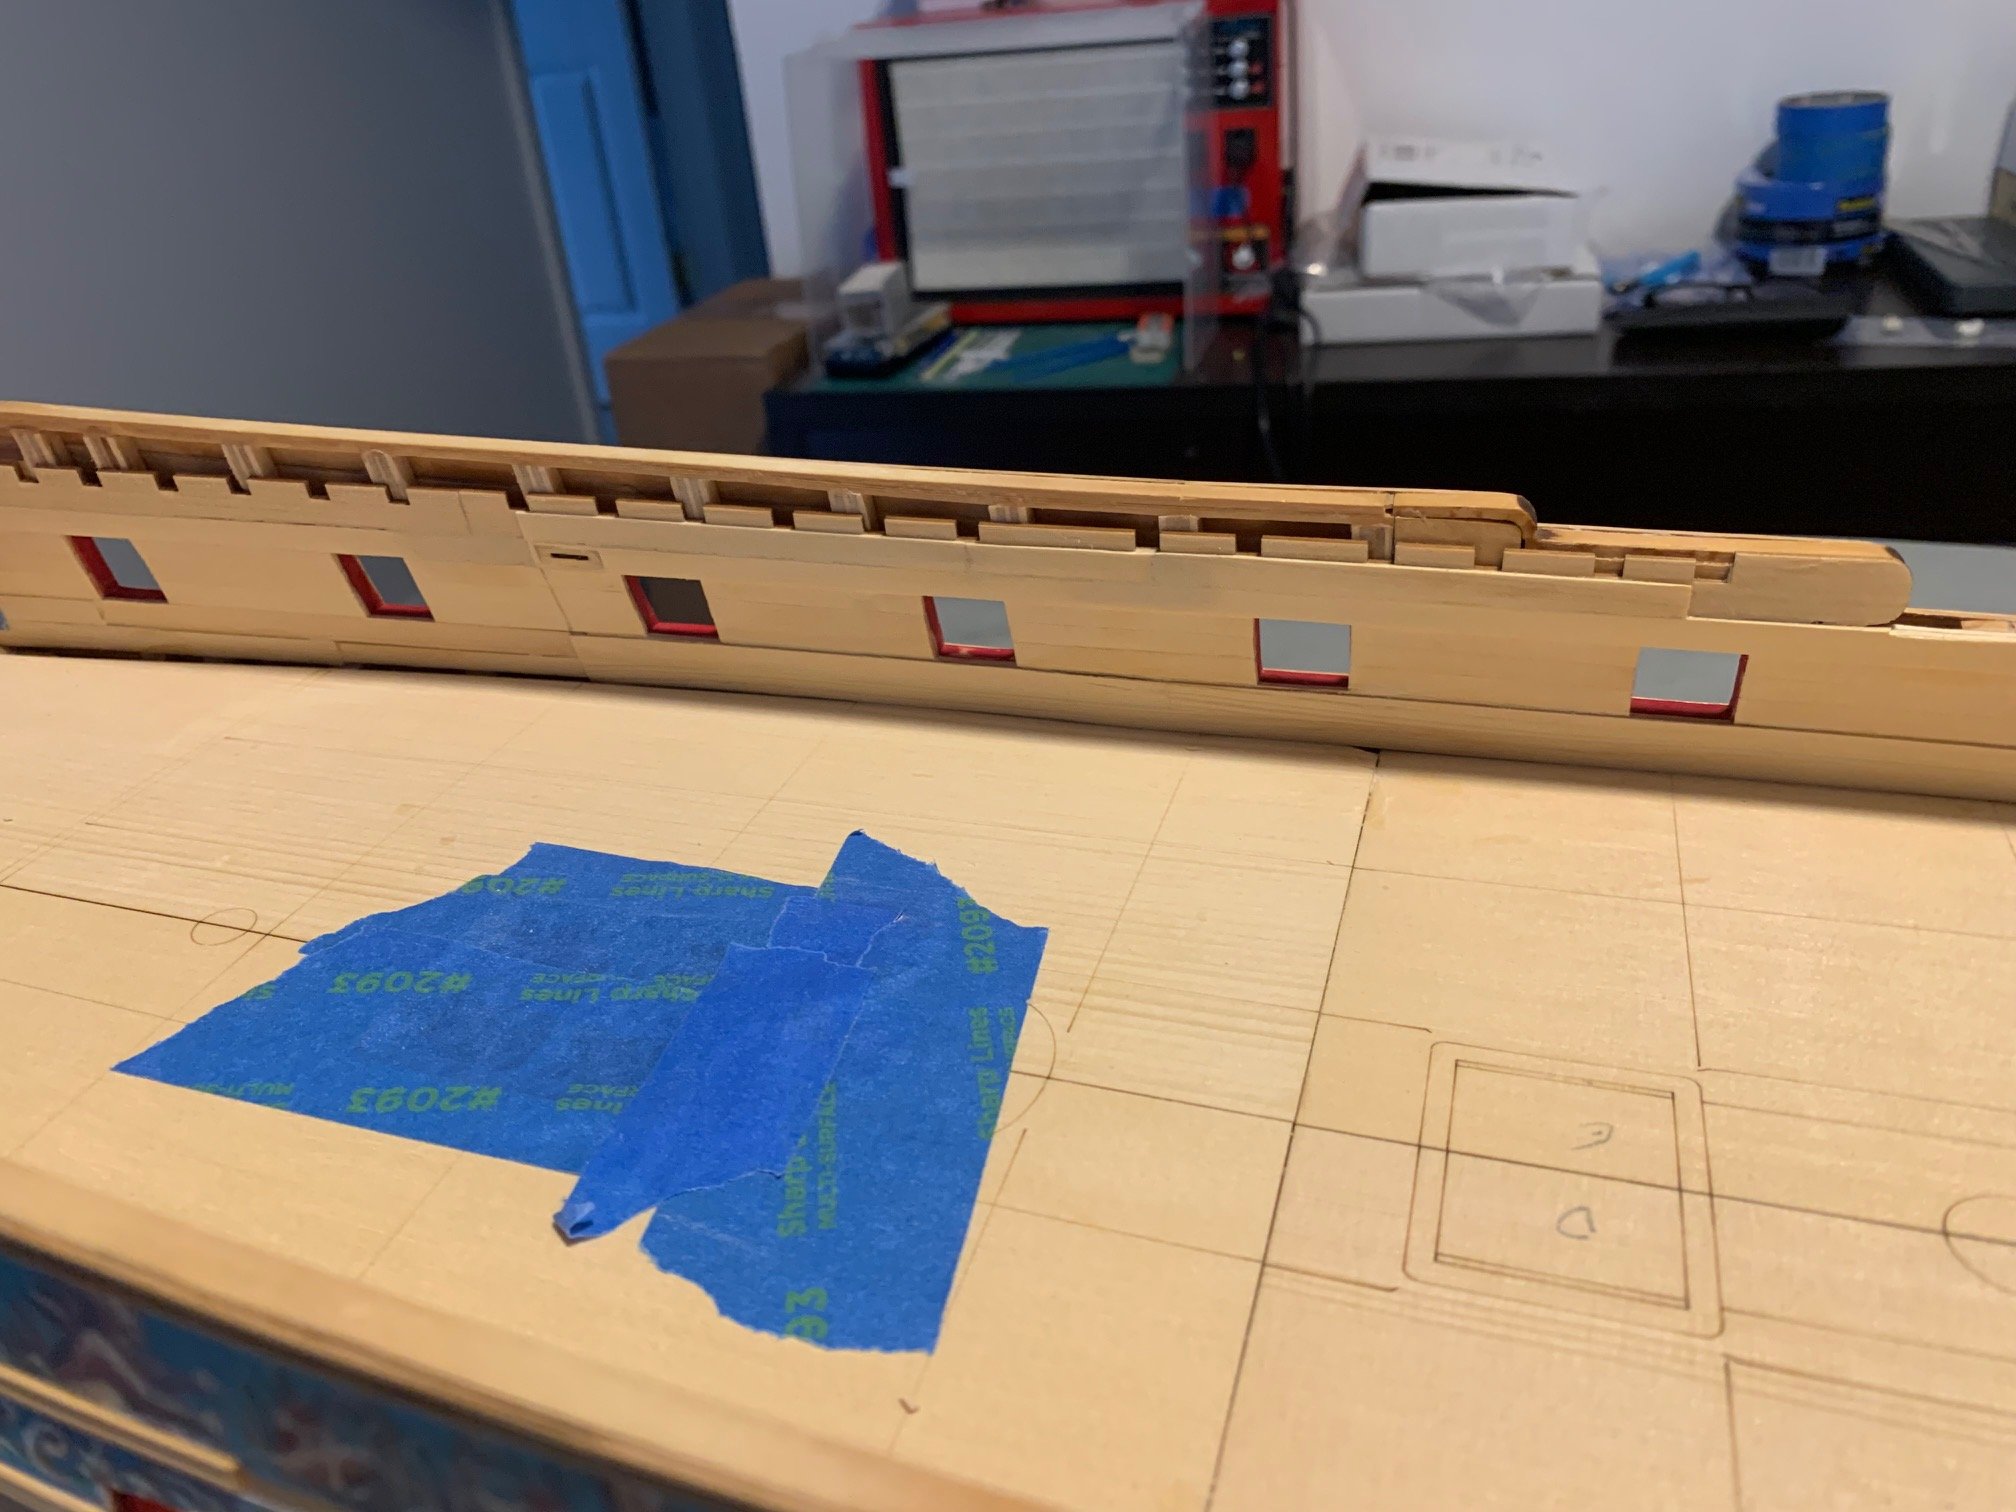
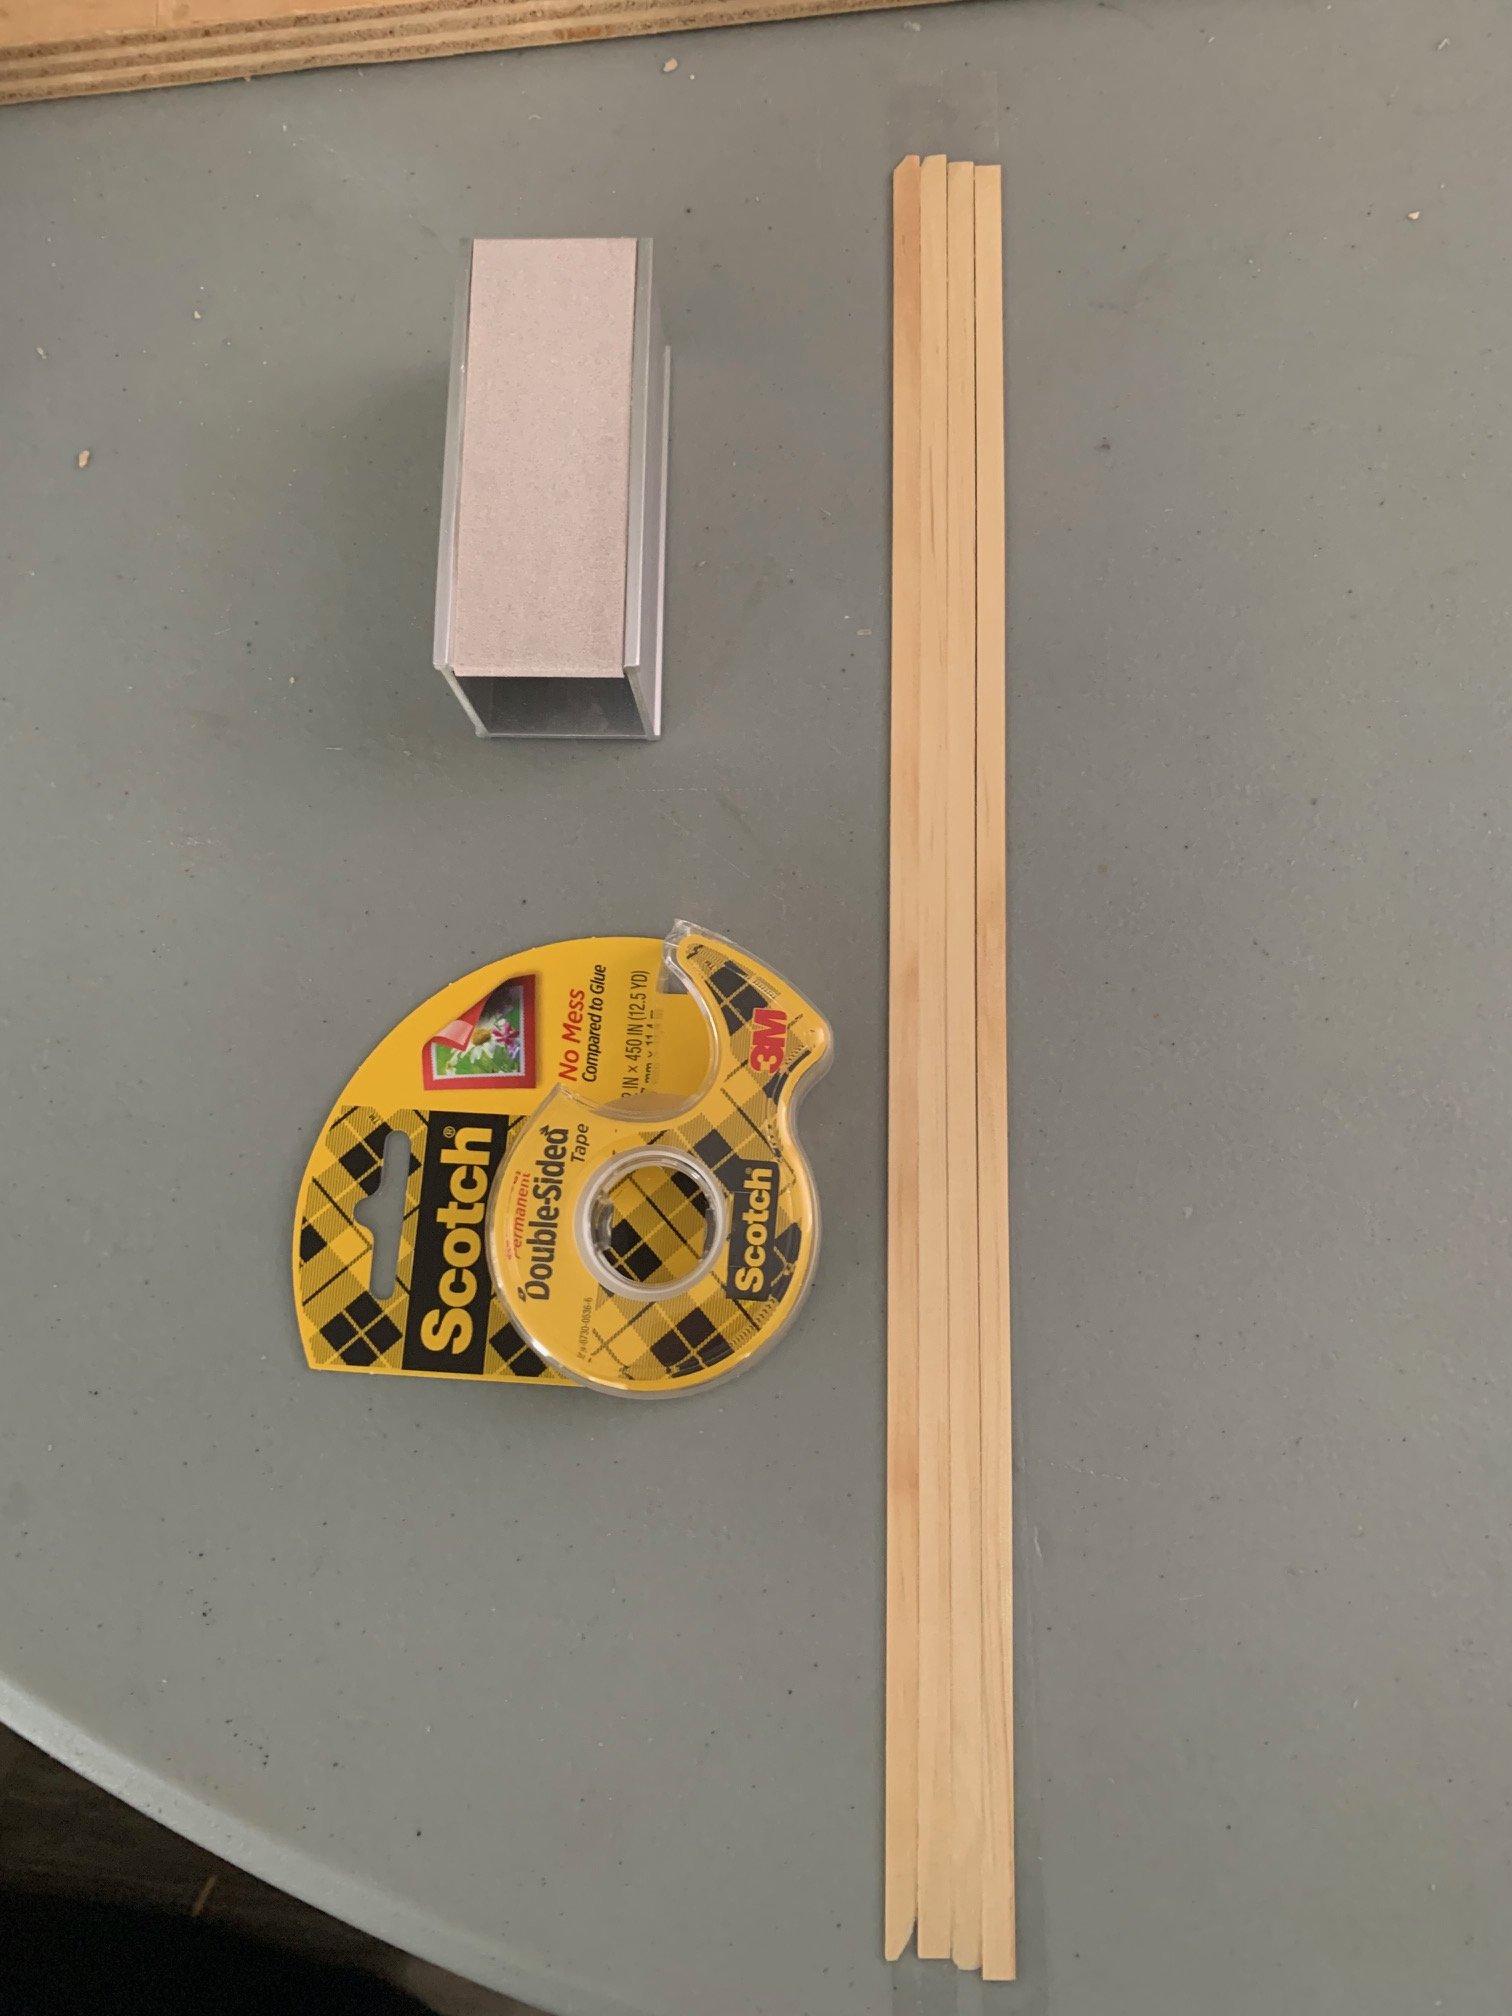
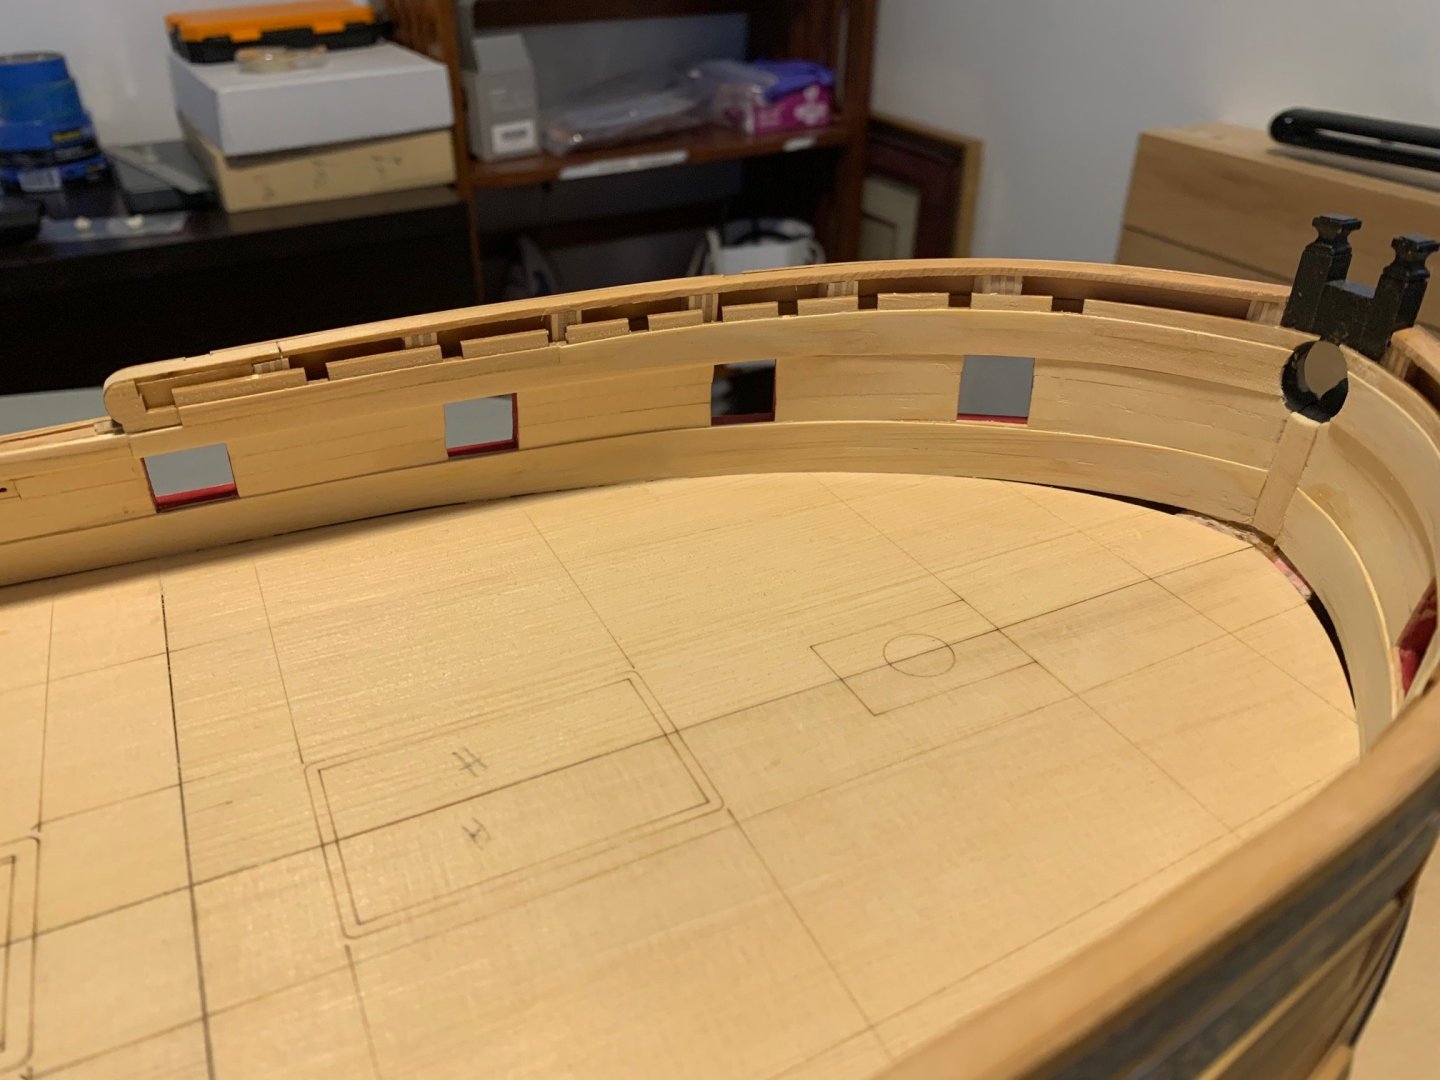
Thanks JJ. Now that the plywood is almost completely covered, it feels like I finally have cleared the trough of despair. The spirketting and the planks above the gunports were installed and the most obvious gaps puttied. It’s already a huge improvement. I used 3/128” plqnks for the second layer of spirketting. The thinnest I’ve been able to consistently mill wood with a slitting blade is 1/32”, but I found using the metal sanding block that came with the Sand-It tool, double sided tape and a hard surface were all I needed to get uniform planks. The Sand-It tool is rubbish, but the sanding block has a little bit of a recess for the sandpaper and taping a few 1/32” planks down to my workbench and sanding until there was no wobble on the block gave a consistent 3/128” plank. I also spent some time making sure the waist was consistently narrower than a 5/16" plank. I measured for the panels and planked up to the point where they will meet so I won’t have to worry about errant brushstrokes once I start painting. I cleaned up and painted the gunports then applied a coat of Vallejo Model Color Flat Red to the bulwarks. I looked for any seams that were still visible at all and puttied those, then sanded with 220 grit. After applying a 2nd coat of paint, I gave a light sanding with 320 grit sandpaper to knock down any raised grain, then applied a 3rd topcoat of paint followed with a coat of WOP. I’m glad I applied the WOP now and not after the panels were in place as there was a bit of paint transfer that would have made a mess on the panels. Onward to the panels.


-
Really nice work with the scrapers and being able to get the profile right. It seems a lot more intimidating at first than it turns out to be.
-
She looks wonderful.
-
Thanks a lot Frank. Appreciate the encouragement.
-
So many amazing little details that really make this pop. Looking forward to Chapter 3.
-
Thank You everyone for the likes. I debated whether to take pictures at all until the bulwarks were planked and painted as I knew the work in progress on this is going to be messy. Aircraft plywood is definitely off my list of modelling materials as fairing the bulwarks to the degree needed is next to impossible . At least at the stern and bow there was enough access to use a Dremel , but the waist below the gunports required a mix of hand sanding and chiseling making it very difficult to get a clean run. For the spirketting, I installed the 1/4” top piece first in short segments (typically 2 gunports long). After that, I installed the lower piece with 3/16” except at the ends where 7/32” worked well. There were also areas where I need to shim the frames as I had undercut them so much. There’s a lot of gaps in the first layer, but my goal is just to set up for the second layer. Once I finished the first layer of spirketting, I tackled the port side first and started planking from the stern and working my way forward. Due my fairing difficulties, I measured for the caprail at the waist and need to be extra careful to make it too chunky. The plank under the clamp from just aft of the fixed block forward is 1/32” thick and the fixed black has a 1/64” shim under it. This creates a little ledge and will make it easier to get a thinner plank for the 2nd layer. I test fit the panels to make sure they would fit ok. I worked my way around and finished up on the Starboard side and didn't have any difficulties. The port bow was straightforward. The area between the forward most gunport and bollards needed extra care, but I went slowly and kept test fitting the clamp and measuring until everything lined up properly. The thinner plank under the clamp really shows. The starboard side was tough getting the clamp to perfectly line up at the bowsprit; ugly planking and all. I found fully painting the bollards black helped with eyeball math. I had a moment where I thought I really made a mess of it when I noticed that I hadn’t glued the bollards in securely enough. Before getting too far on the starboard side there was enough spring left in the clamp to have pushed them forward a bit. Carefully cutting the clamp and plank below it was enough to relieve the pressure and allow me to glue it back up in the proper position. I brought the Winnie outside to clean the bulwarks up. A pen sander with 120 grit took care of a rough fairing of the bulwarks. I sanded all the high points off the spirketting and smoothed out the planking between the gunports. I didn’t touch the clamp or plank below it other than where it will be covered by the panelling. A better shot of the light touch above and below the gunports and the heavy touch between the gunports. My next step is going to be to clean up and paint the gunports and the bulwarks between them. There are a few gunports that need some filler and they all need a couple coats of paint. I also want to take a trip to Chapter 7 and test fit the deck beams now. I glued the starboard clamps with small dots at each frame, so I can pop them off still and make adjustments if need be. I did some tests for level with a few planks at different points and I’m sure they’ll be fine, but if I wait until I get to Chapter 7, I’m sure they’ll have magically moved.


-
Looking really nice. Your planking looks awesome.
-
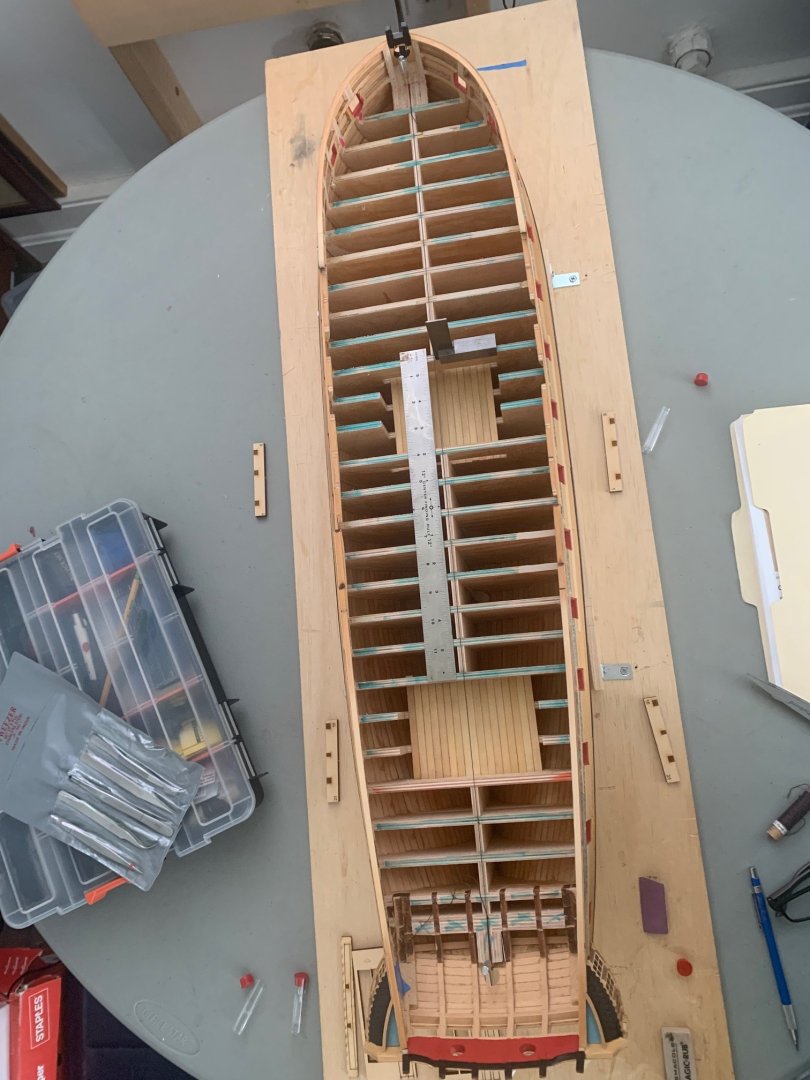
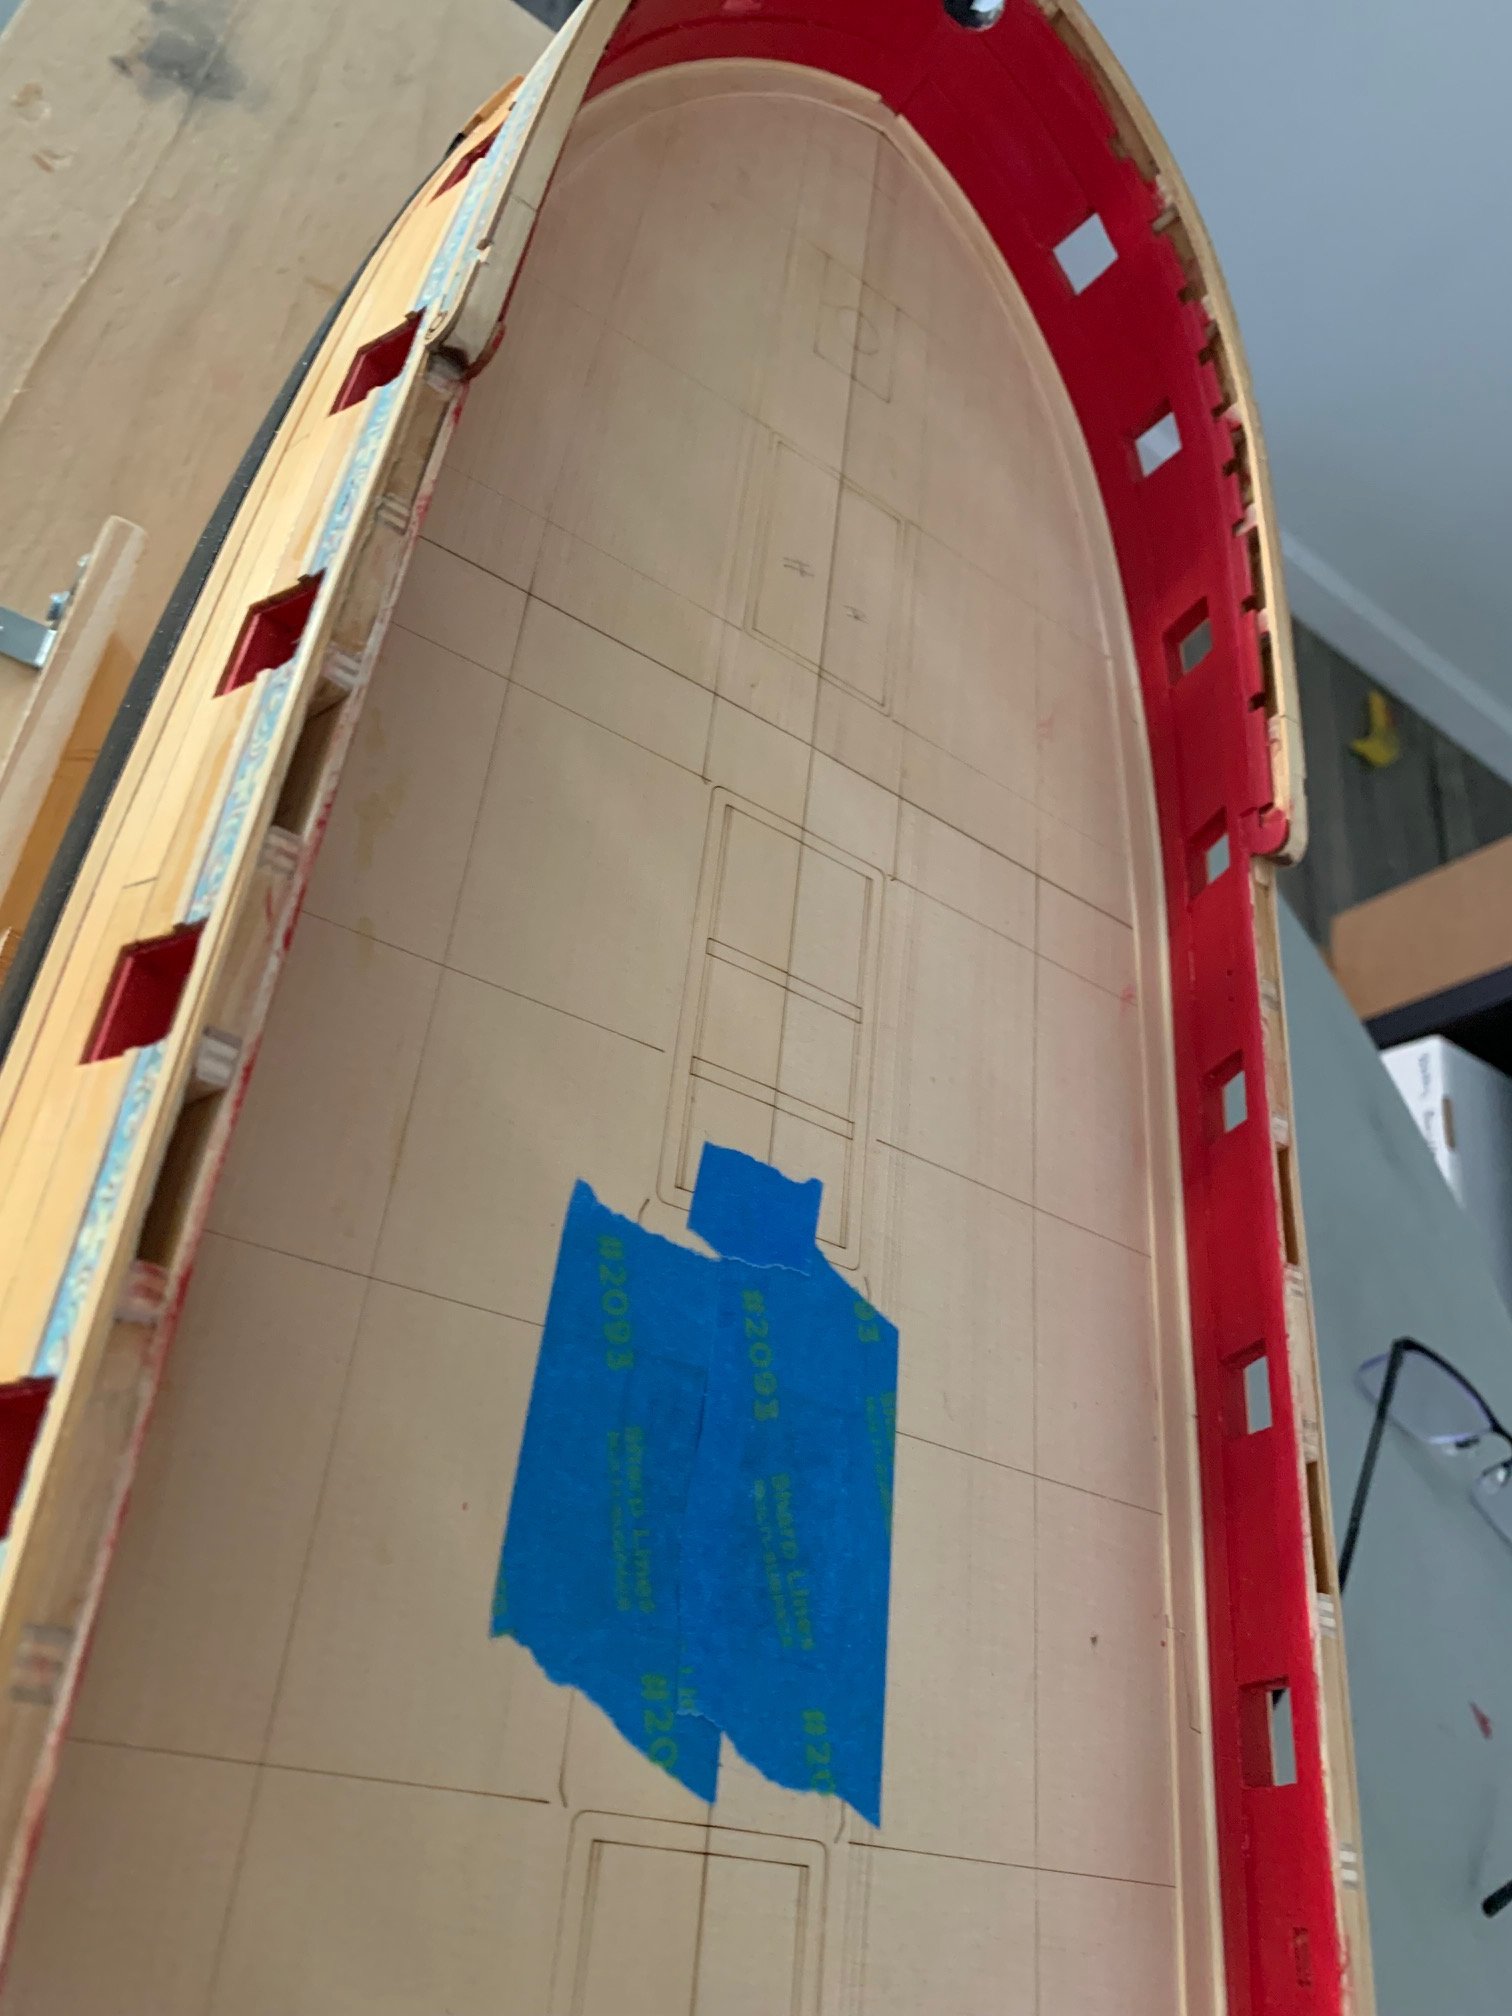
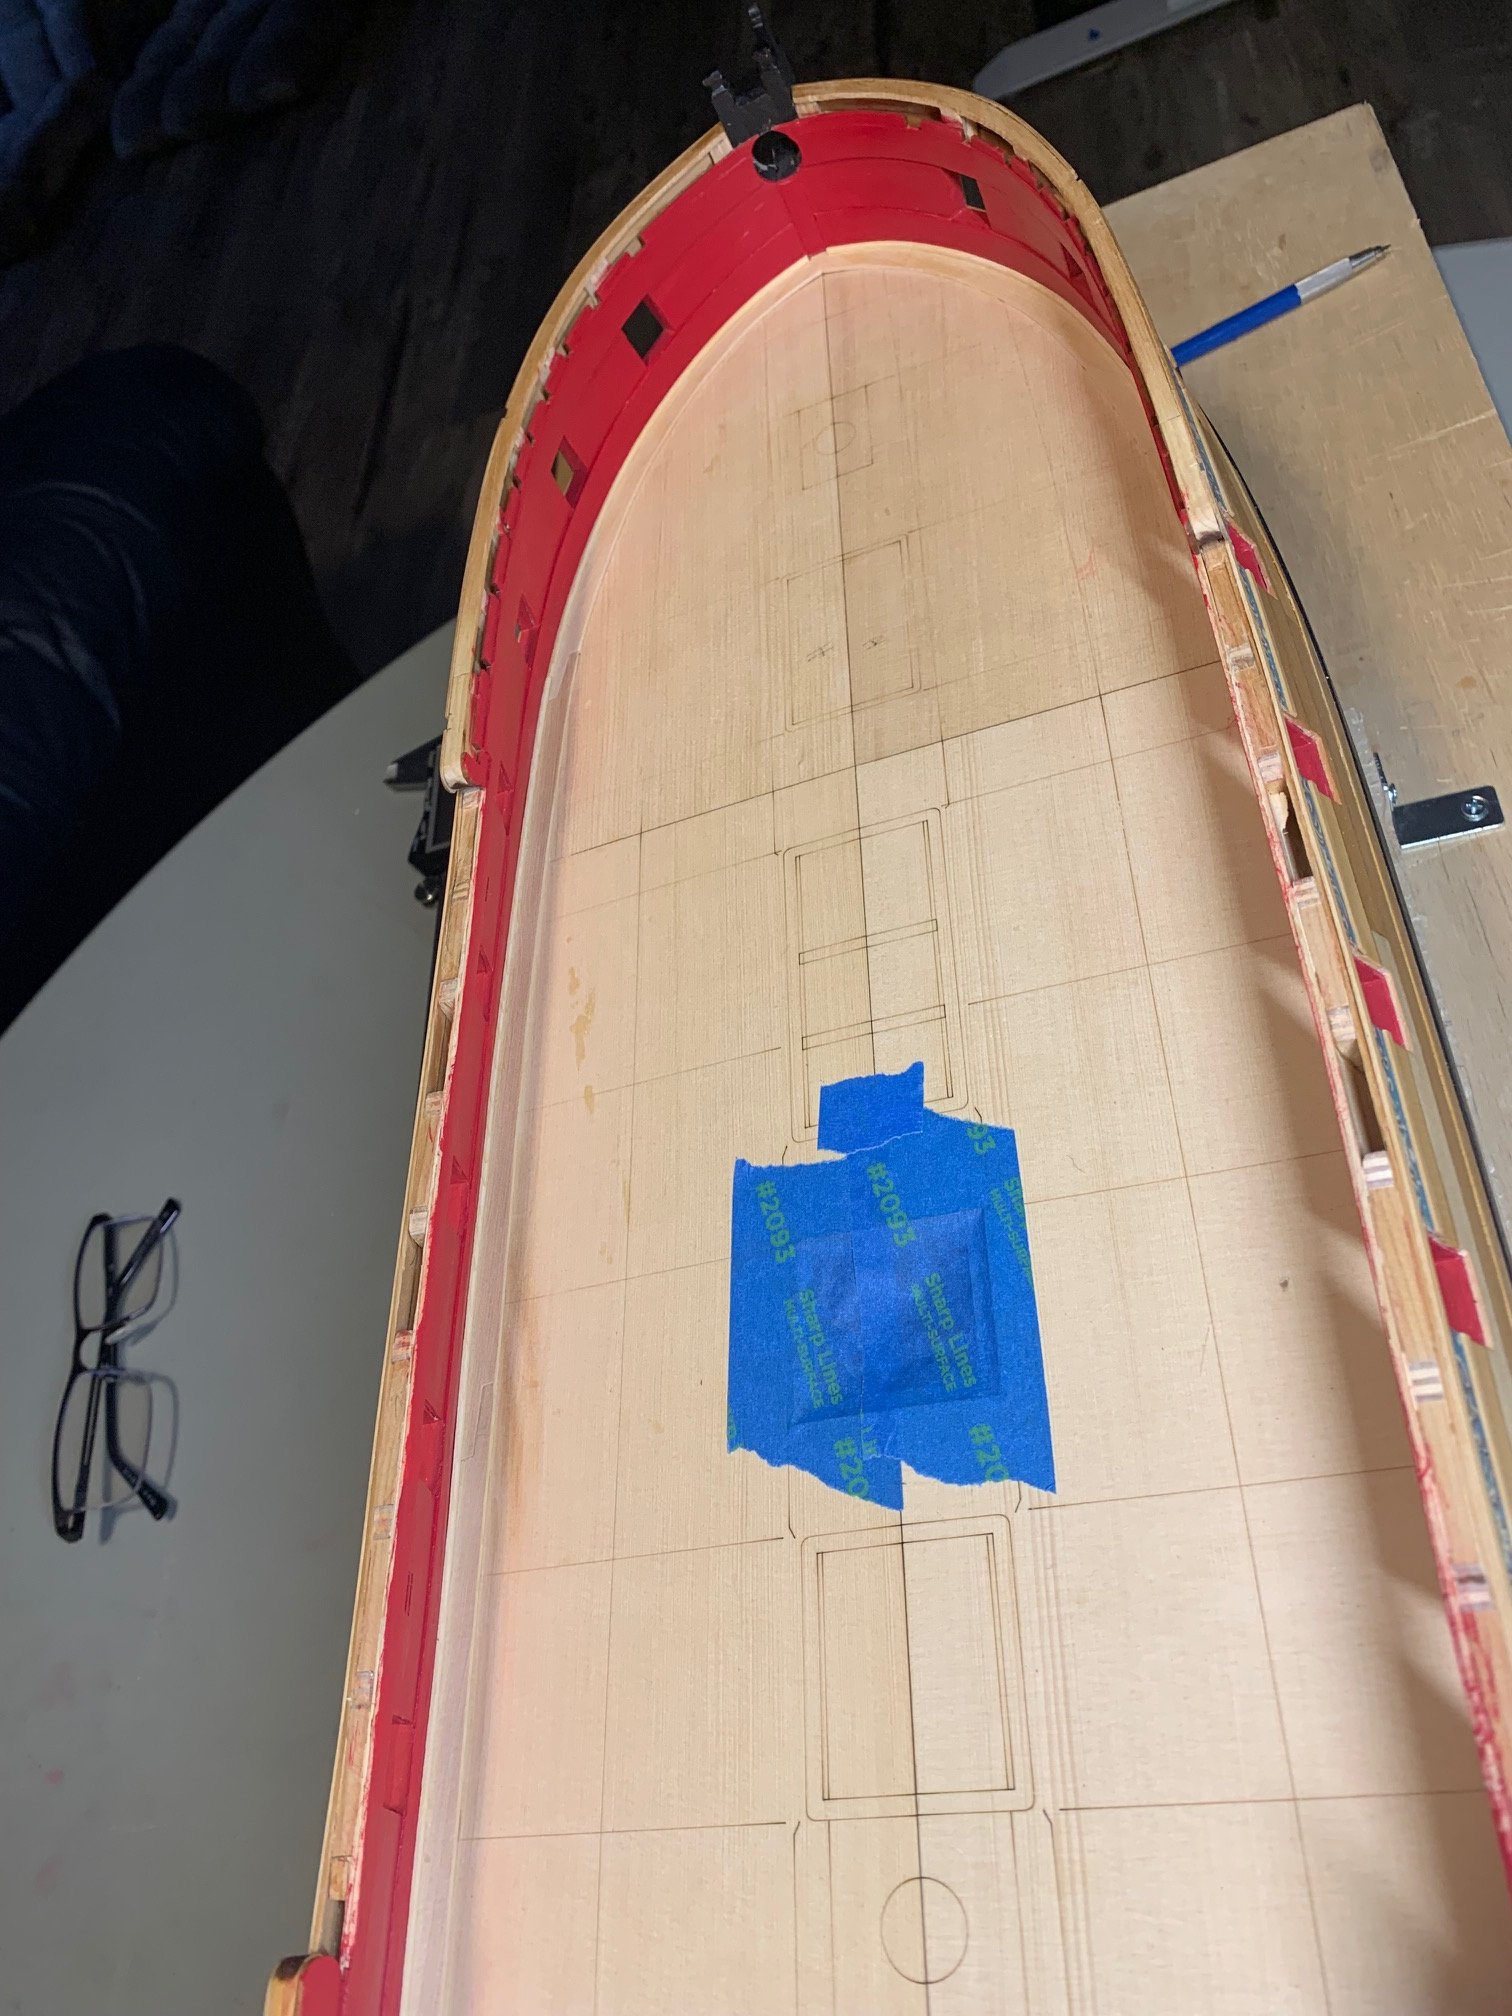
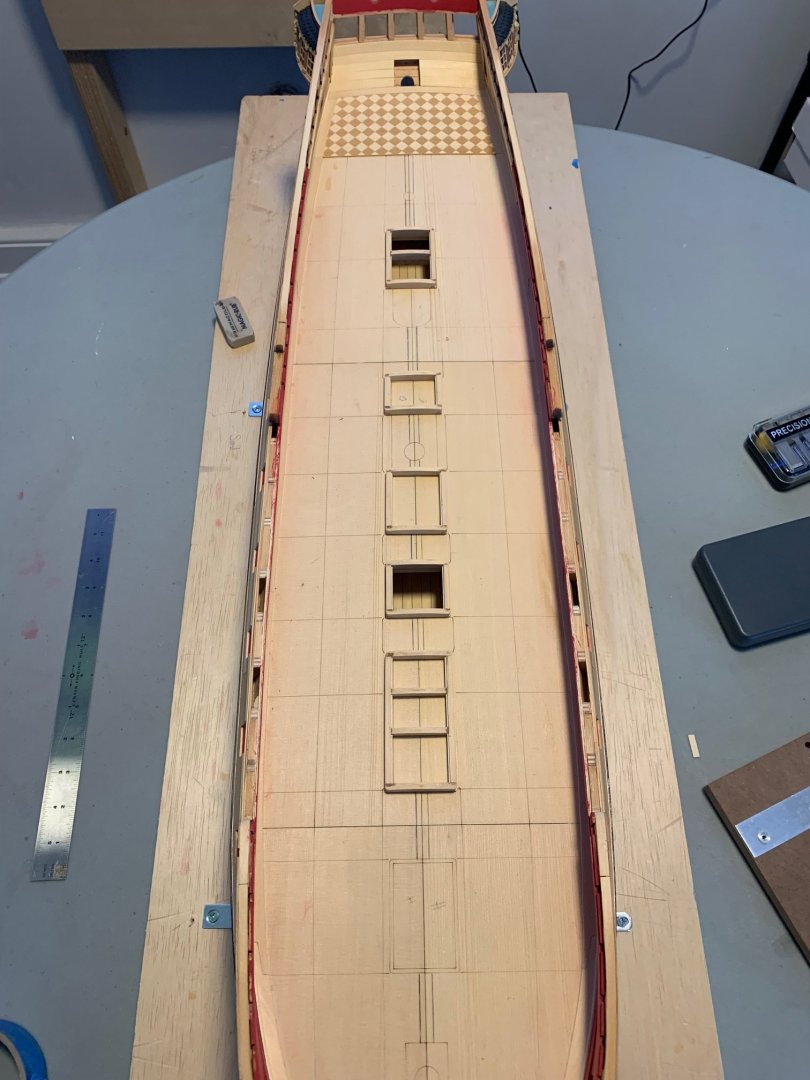
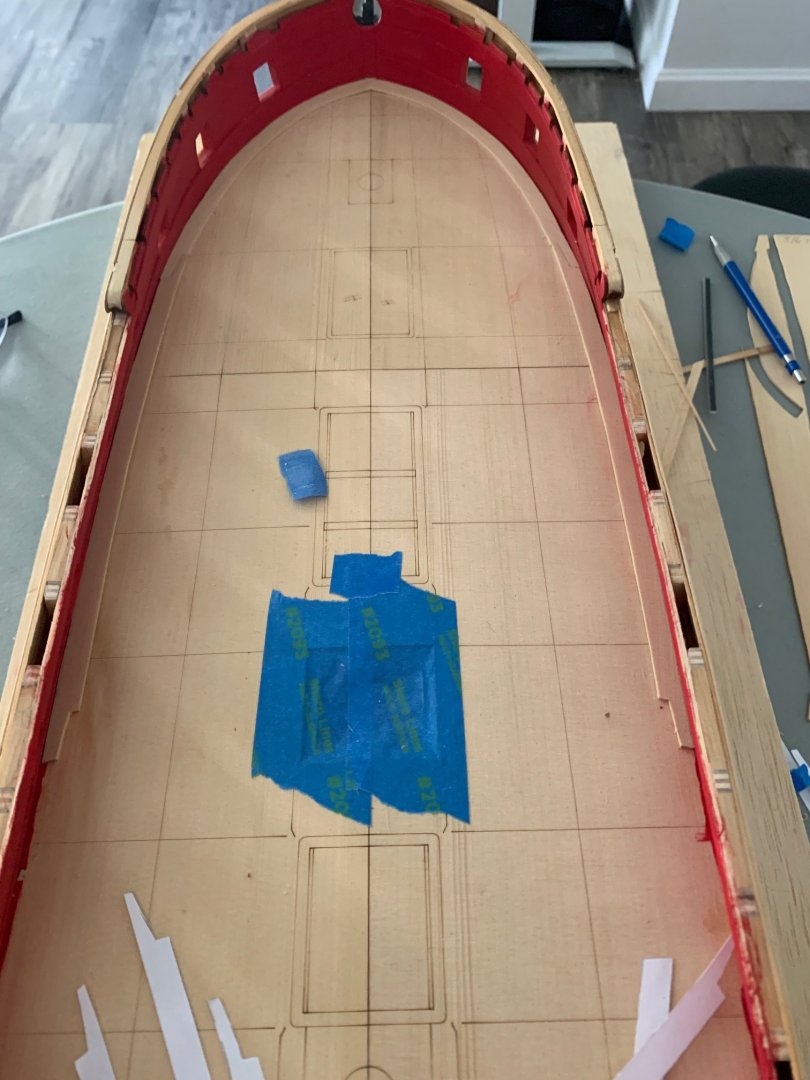
I had plenty of off cuts leftover from planking that just needing a trim so installing the subdecks went extremely quickly. The supports between the bulkheads all needed to be trimmed about 1/16” so instead of making a best guess how much to trim at each end, I decided to fit the decks at the same time as the companionways. First order of business was to find the centerline. I centered a pin as close to the bow and the sternpost as possible. I then put a small loop in a piece of string and put it over the bow pin. I made a much larger loop in the other end of the string and put it over the pin at the stern. Finally, cutting the hole for the rudder helped here as I fed the end of the stern loop through it and then applied tension to it. This gave me a nice line where the string was centered on the pin rather than wrapping around one side of it. I used the machinist square to mark the center point every few frames and the ruler to connect these marks. I have a straight line down the center that I could key the deck pieces off. I made my final adjustments to the false deck and then installed the 2 pieces at the bow. I found the false decks was shifting a little bit when I was trying to take measurements for the beams and installing those pieces ensured there was no movement and it made tweaking the beams easy. The forward companionway went extremely smoothly. I cleaned out the mortises and taped the beams together before cutting and everything was square up and centered on the first try. I then faired it and installed the center decking (which I forgot to take a picture and this is the final test fitting of the deck before fairing and glueing it down). I repeated this process with the stern companionway. This one had a small issue with the aft most beam and required some tweaking to the starboard mortis to get it to seat properly. The photo is before tweaking and really just involved scraping the mortis a little more. After adjusting the aft beam and making sure everything was square, I then faired it and installed the final deck pieces. The aft companionway is about 1/64" off center, but everything else looks fine. I assembled the coamings and the aft one requires just a very small adjustment. I’m not going to touch the opening where the grating will sit. I’m looking forward to getting the inside of the bulwarks planked as I really struggled with fairing the inside of the frames and twice got so frustrated that I quit for long periods of time. The inside of the bulwarks are a bit of a mess and there’s going to be some additional fairing especially under the gunports, so for the first layer of spirketting, I think I’m going to focus on small sections under the gunports of just a couple frames at a time.