Greg M
-
Posts
146 -
Joined
-
Last visited
1 Follower

About Greg M

- Birthday 12/06/1974
-
 ccoyle reacted to a post in a topic:
Phantom 1868 by Greg M - FINISHED - Model Shipways - 1/96 - New York Pilot Boat
ccoyle reacted to a post in a topic:
Phantom 1868 by Greg M - FINISHED - Model Shipways - 1/96 - New York Pilot Boat
-
James G reacted to a post in a topic:
HMS Winchelsea by Greg M - 1/48 scale
-
Greg M reacted to a post in a topic:
HMS Winchelsea 1764 by Wxchsr - 1:48
-
Greg M reacted to a post in a topic:
HMS Winchelsea 1764 by Frank Wouts 1/48
-
Rustyj reacted to a post in a topic:
HMS Winchelsea by Greg M - 1/48 scale
-
Greg M reacted to a post in a topic:
HMS Winchelsea by Greg M - 1/48 scale
-
Matt D reacted to a post in a topic:
HMS Winchelsea by Greg M - 1/48 scale
-
FrankWouts reacted to a post in a topic:
HMS Winchelsea by Greg M - 1/48 scale
-
FrankWouts reacted to a post in a topic:
HMS Winchelsea by Greg M - 1/48 scale
-
FrankWouts reacted to a post in a topic:
HMS Winchelsea by Greg M - 1/48 scale
-
FrankWouts reacted to a post in a topic:
HMS Winchelsea 1764 by Frank Wouts 1/48
-
Looking real nice Frank. Love how you built in for the channels already. A short detour to Chapter 11 looks like a good idea.
-
Greg M reacted to a post in a topic:
HMS Winchelsea 1764 by Frank Wouts 1/48
-
Thanks Glenn. Chapter 3 is incredibly fun, nerve-racking and feels like it's designed to make you say "can I really do this?" followed by "that wasn't so bad after all". I think your comments on the moulding is exactly where I am right now; I was dreading it back in 2021 and it's been top of mind for the last couple weeks. Probably one of those things I need to stop overthinking the mechanics and grab the eye protection and Dremel and just start cutting moulding and practicing. I've got a ton of spent razor blades sitting in a dish just waiting to be cut up. and found some leftover 1/8"x1/32" planking from a kit I built a while back.
-
glbarlow reacted to a post in a topic:
HMS Winchelsea by Greg M - 1/48 scale
-
CaptMorgan reacted to a post in a topic:
HMS Winchelsea by Greg M - 1/48 scale
-
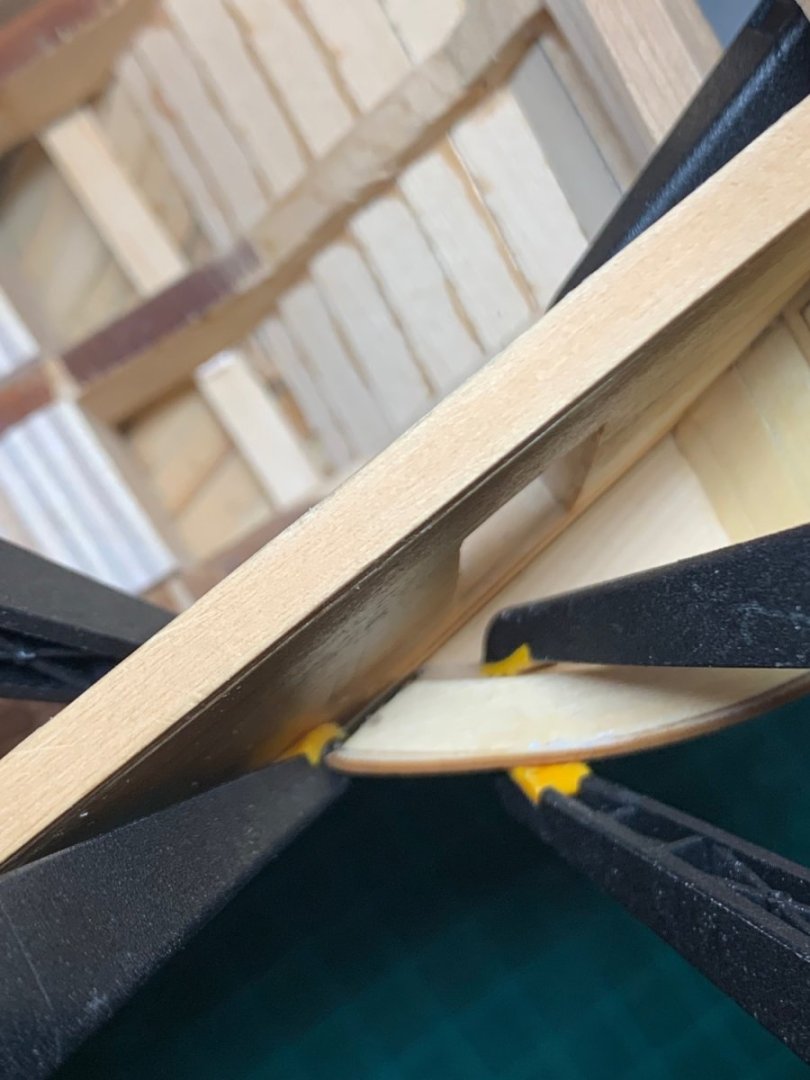
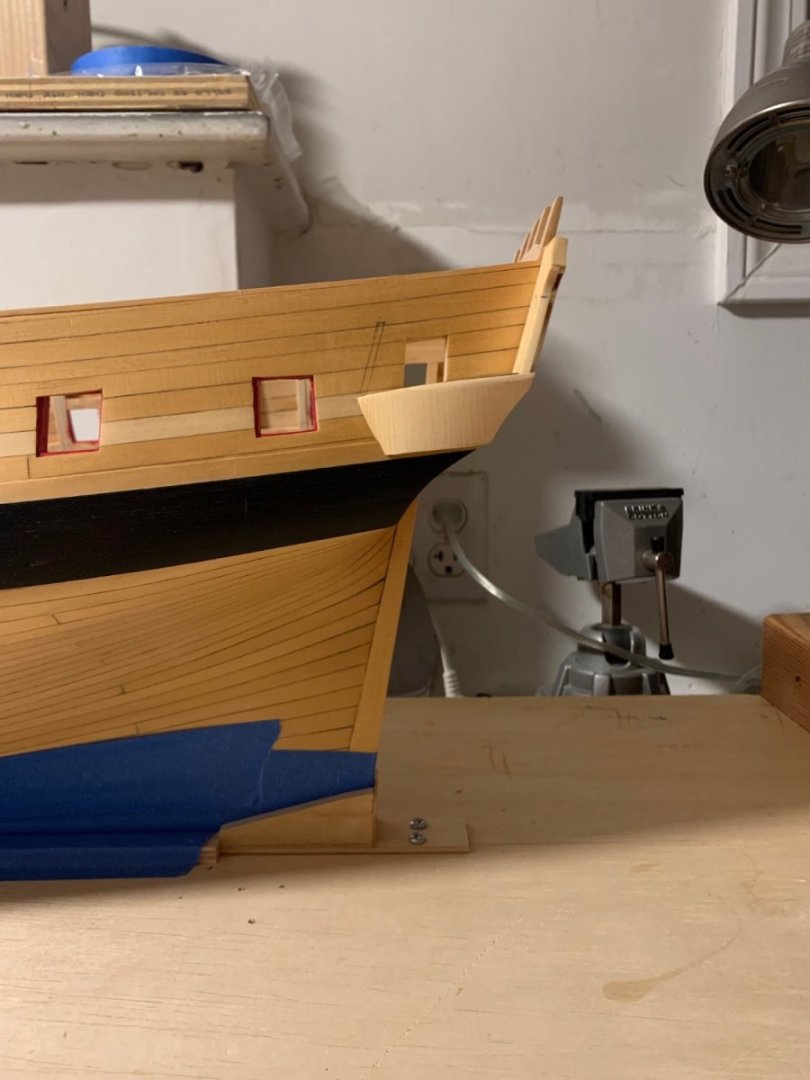
Thanks Matt and everyone for the likes. Cats are funny; we had an older cat when I first started on the Winnie and she loved to plop down on sheets of sandpaper when I was working. Never gave much interest in the ship, but loved the tools. The transom gnawer just turned 1 so hoping she’ll get through that phase and be allowed back into the workshop. Chapter 3 is probably the biggest transformation of Winnie into a work of art and I’m guessing the likelihood of completing the build goes way up after chapter 3. A lot of activity in the past week getting the lower part of the quarter galleries built, but first a little detour. When I stopped work on chapter 3 previously, I had installed the 3 upper counter planks and not done any sanding or shaping. As I was setting up the q gallery timber on the transom I realized I had not shaped the the upper counter in any way where it met the transom. If I didn’t clean this up now as well as generally sanding the upper counter, it would become a real mess trying to add the frieze’s later. I also wanted to shape the outer edges to the curve on the plans. Luckily, I discovered the little piece that sits on top of the gallery timber has the same exact curve I was looking for as a template. Cleaned up counter, no flat spots where the transom meets it, no bumps and a nice camber on the edges. Much more respectable looking. Time to start on the starboard side. One last check with poster tack to make sure the angles are right. I thought every was going swimmingly, but I made the mistake of not pre-fairing the timber enough and did not rough up the hull where the timber joined it, so the timber broke free several times before I figured out why the glue joint kept failing. WOP and wood glue do not mix well. So glad I cleaned up the upper counter before starting this as it was pretty easy to fair the timber. I had a lot of difficulty getting the laser cut planking to bend properly and ended up cutting my own from a sheet of 1/32” cedar. Even still, the angle where I got the best results caused a little triangle wedge at the top of the timber that I’d have to patch in later. The patch will be seamless once it’s cleaned up. The planking lined up pretty well with the counter as well. Just wish I’d been able to get a second clamp on the top plank to get rid of that little gap. The port side progressed about the same. But I’d forgotten to rough up hull again and the timber end popped as I was going to glue up the planking, so I ended up having to start over again. It was a blessing in disguise as I’d placed the timber a touch too high against the hull. Planking turned out the same in the end , even the patch. Cleaned up and I’m happy with the starboard side. A tiny chip cane out of the top right corner when I was cleaning up the cedar, but it should be fine when covered by the molding. Happy with the port side as well. The bottom is a tiny bit higher (~1/64") than the starboard side, so either the wales are slightly misaligned or the bottom plank of the counter could be a touch off. Regardless, I’ll probably be the only person to ever notice. The measurement from the front top of the timber to the sheer is the exact same for both sides. Now that the structure is in place, I can start visualizing how the transom is going to look once all the friezes and moldings are in place. Pretty exciting. Time to break out the grinding wheel and scrap basswood and learn (yet another) new skill, which will probably take a week or two. If anyone sees anything that looks off, please let me know.


-
Greg M reacted to a post in a topic:
HMS Winchelsea by Greg M - 1/48 scale
-
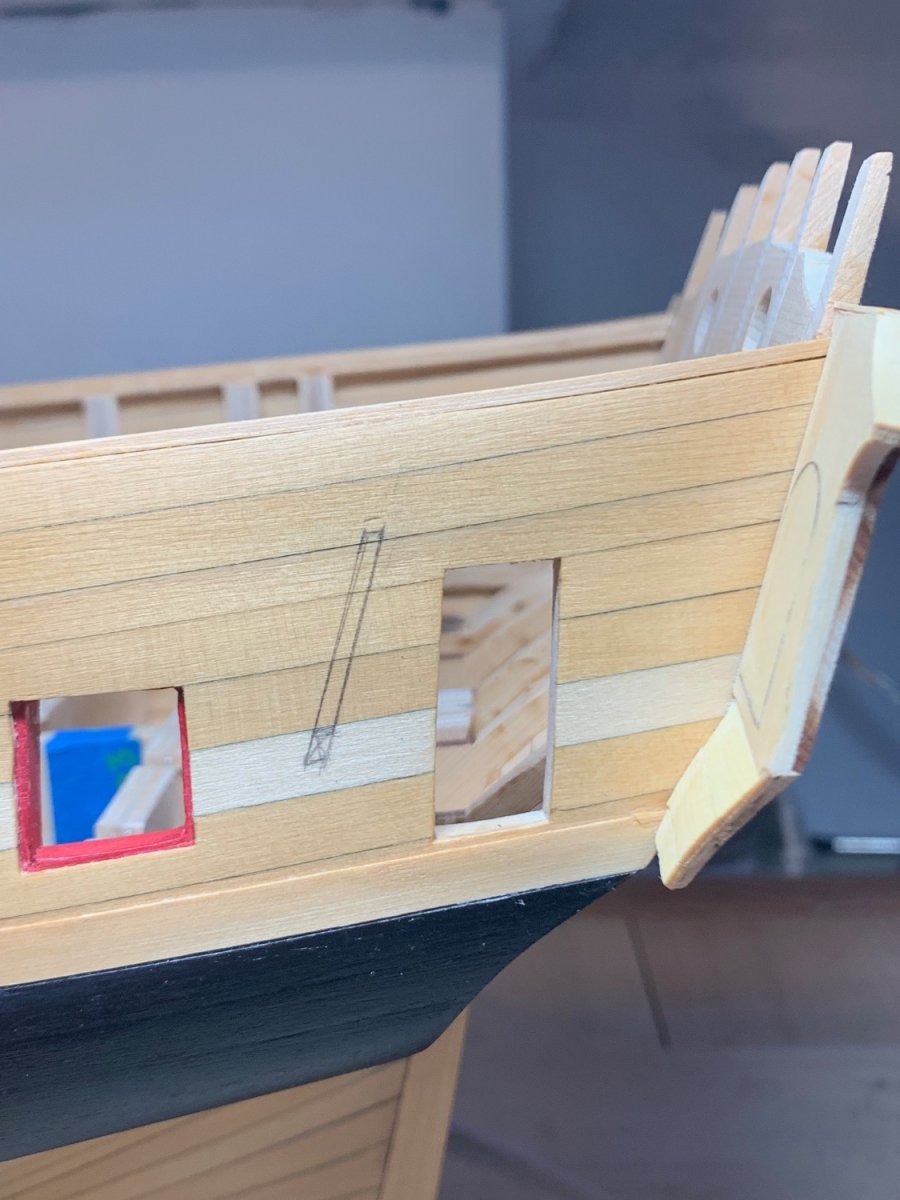
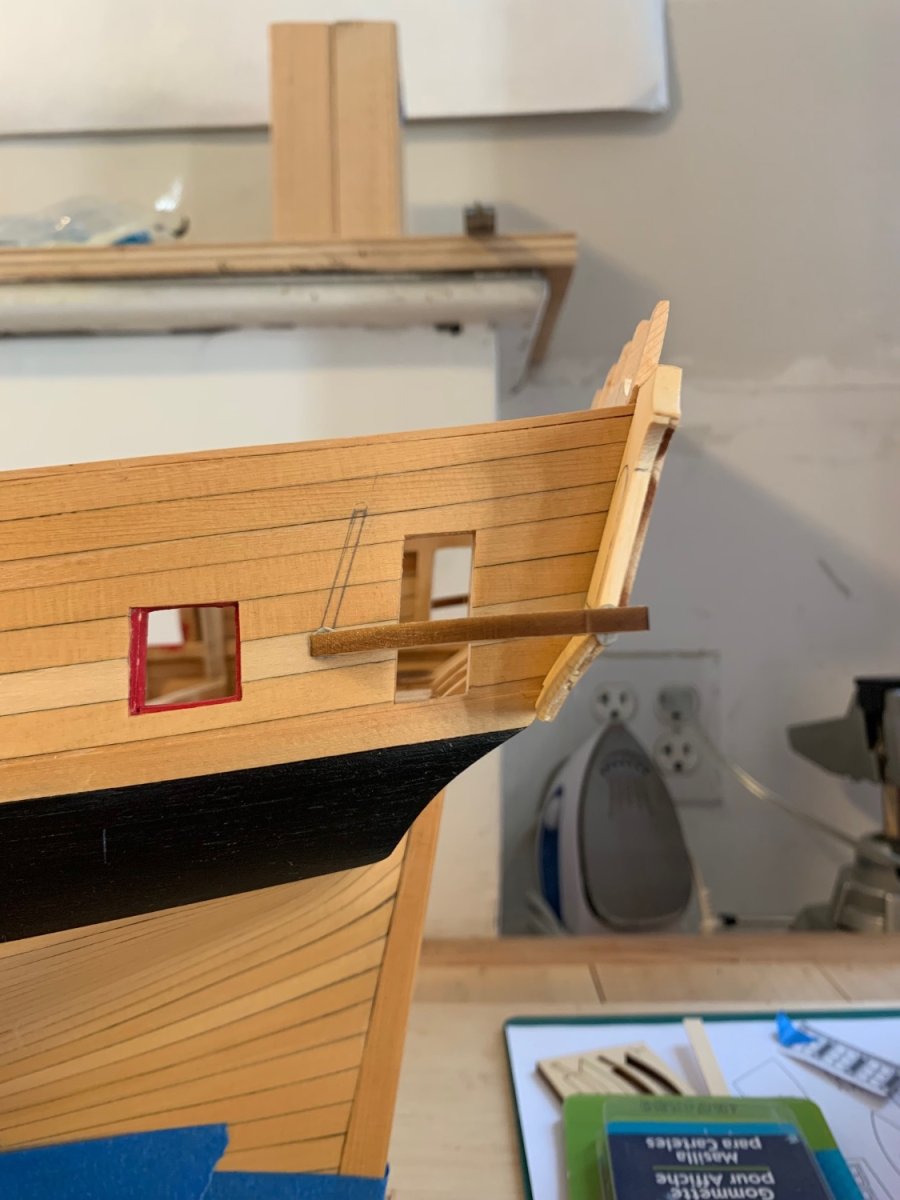
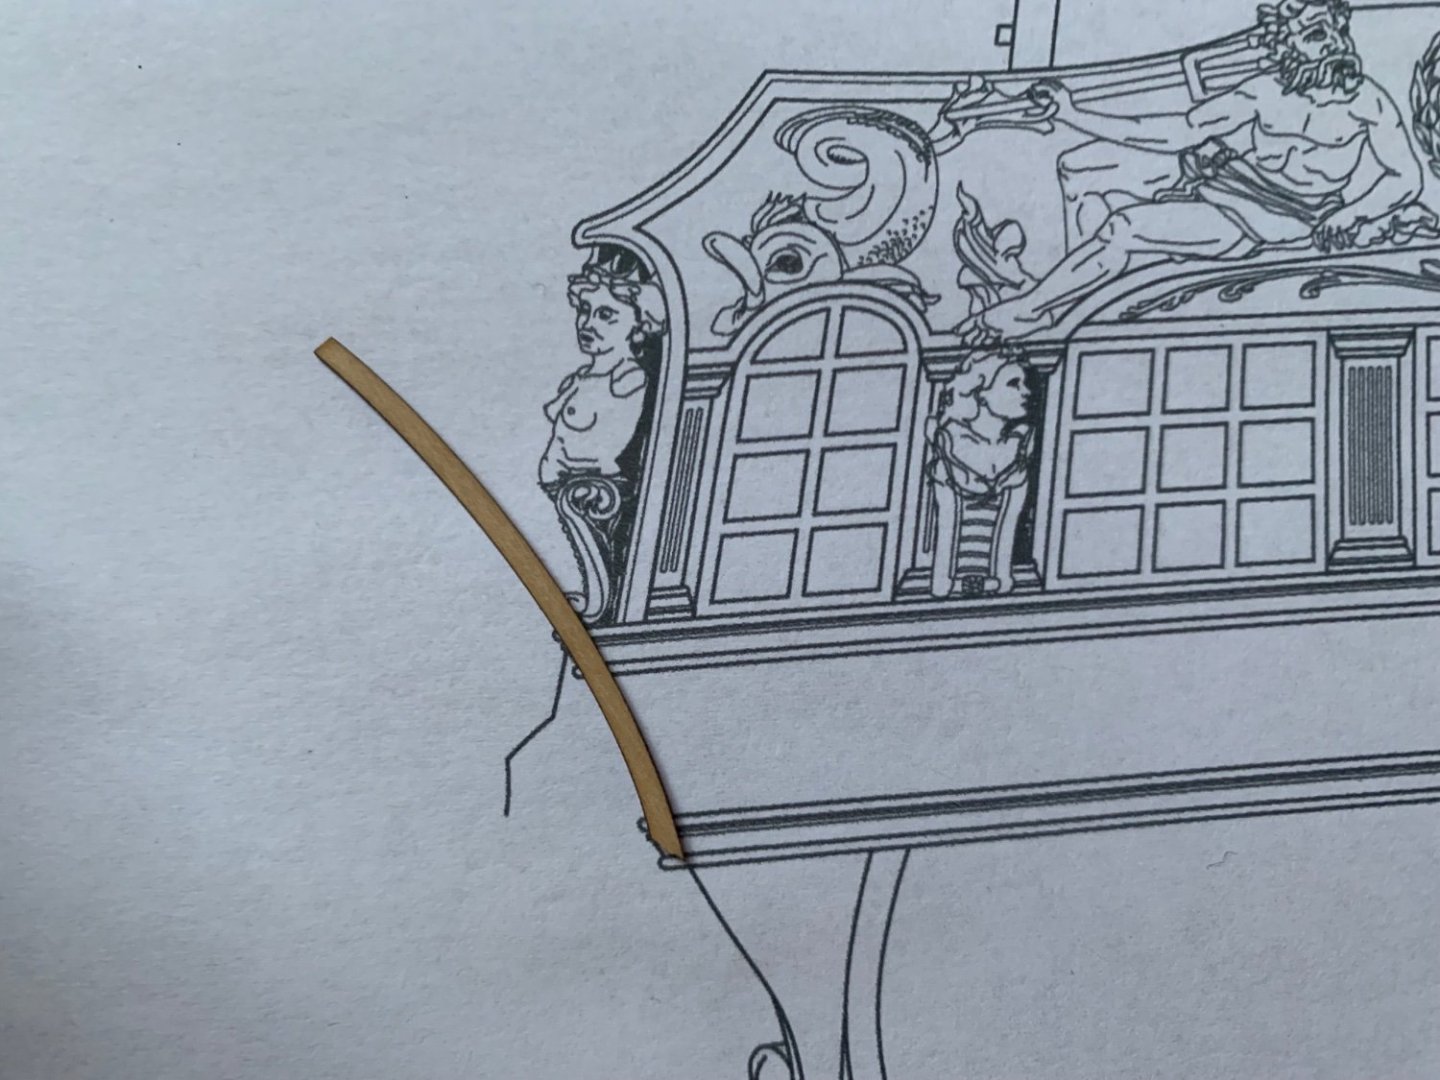
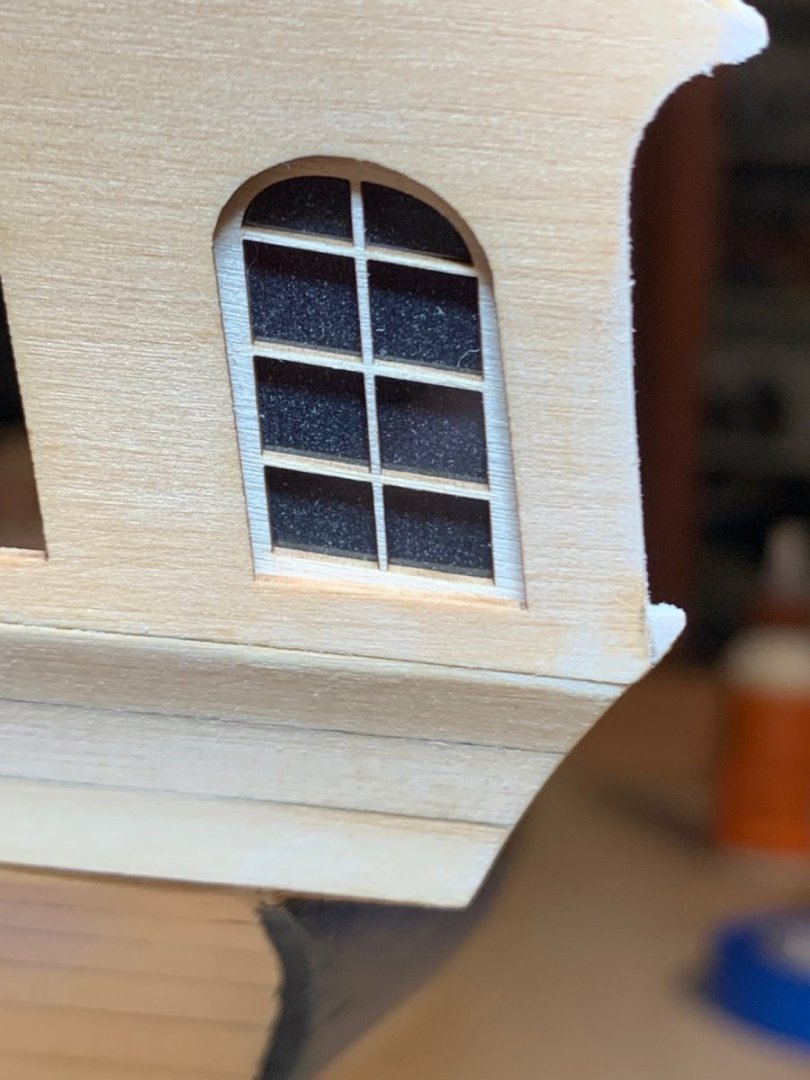
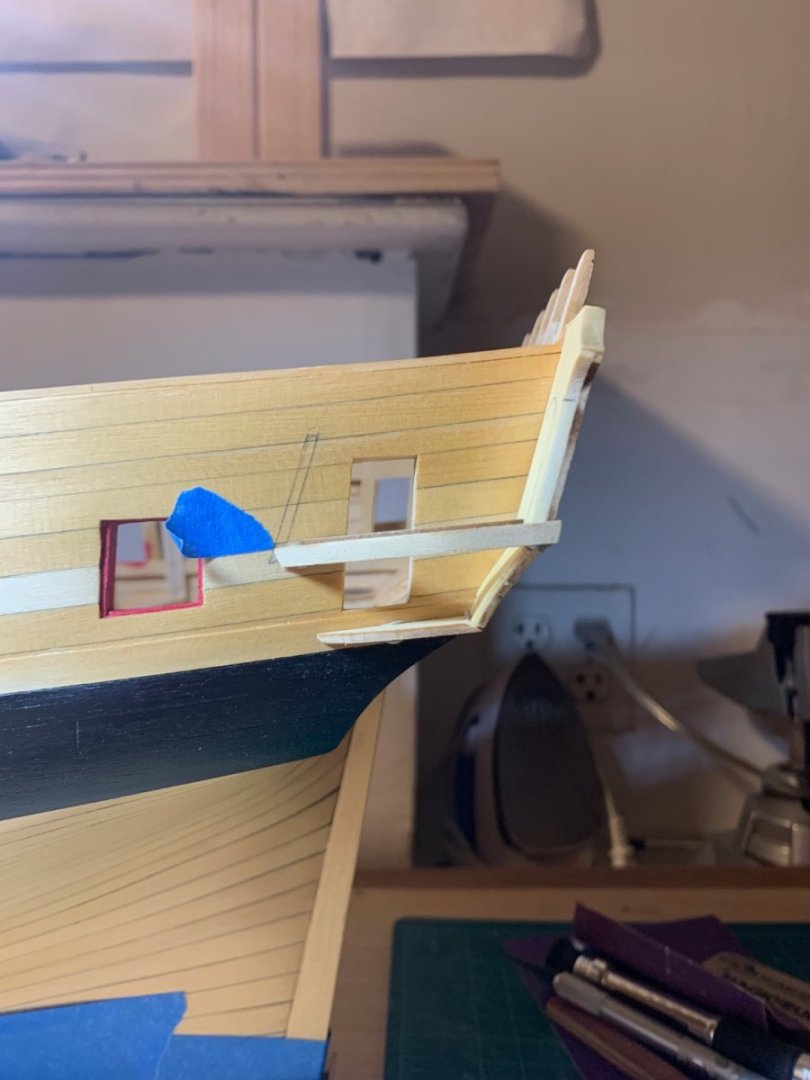
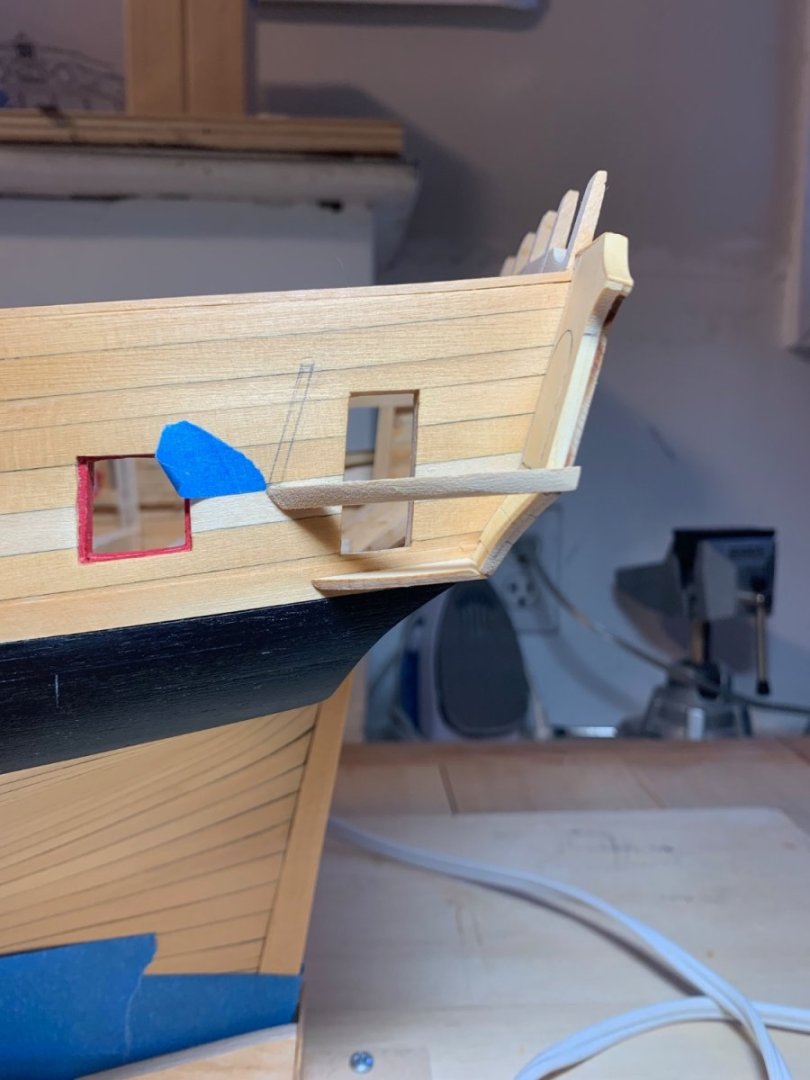
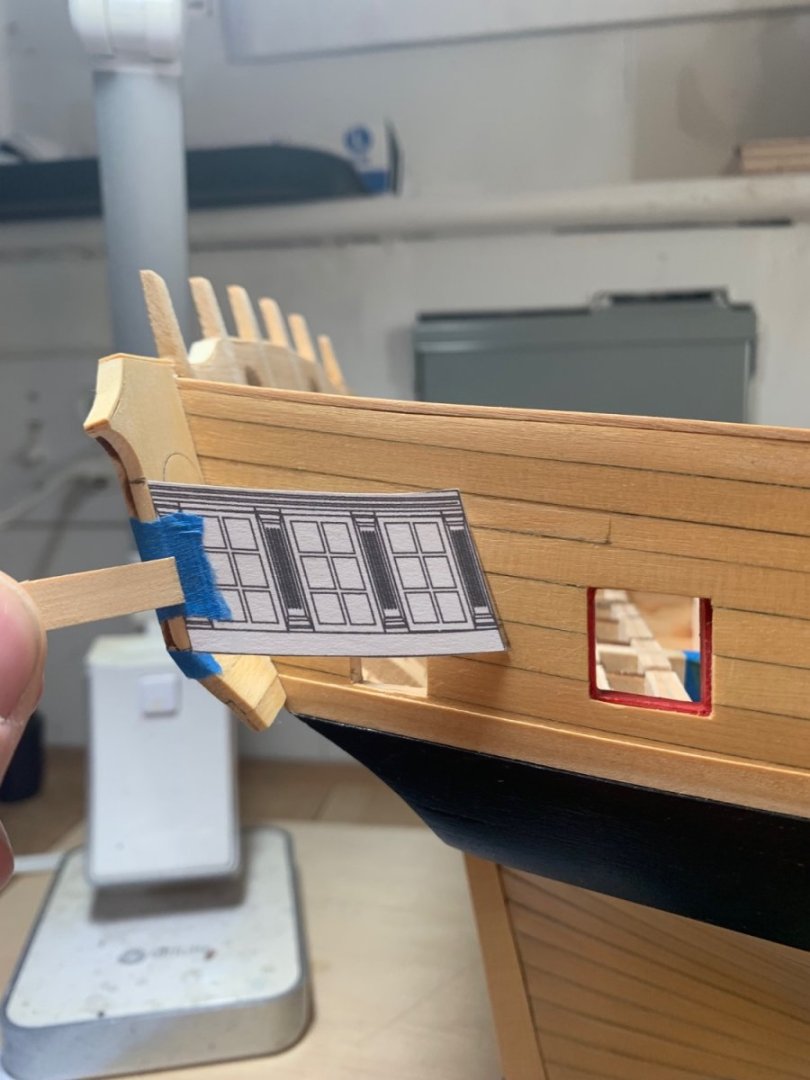
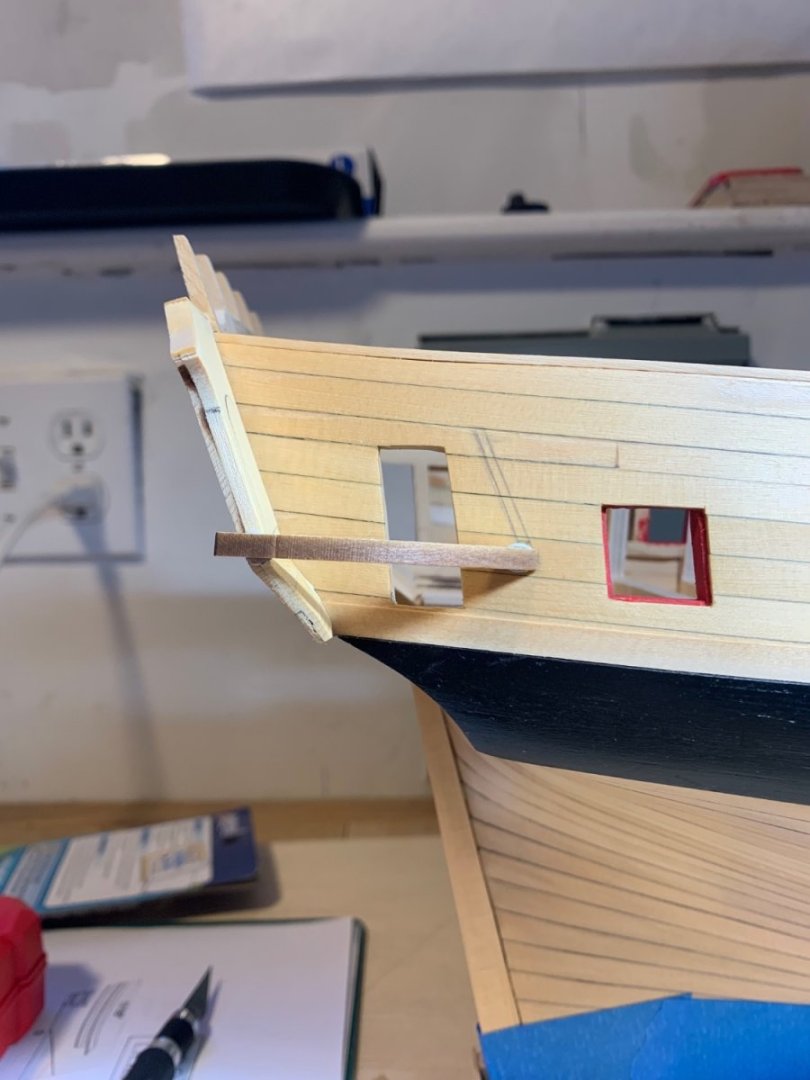
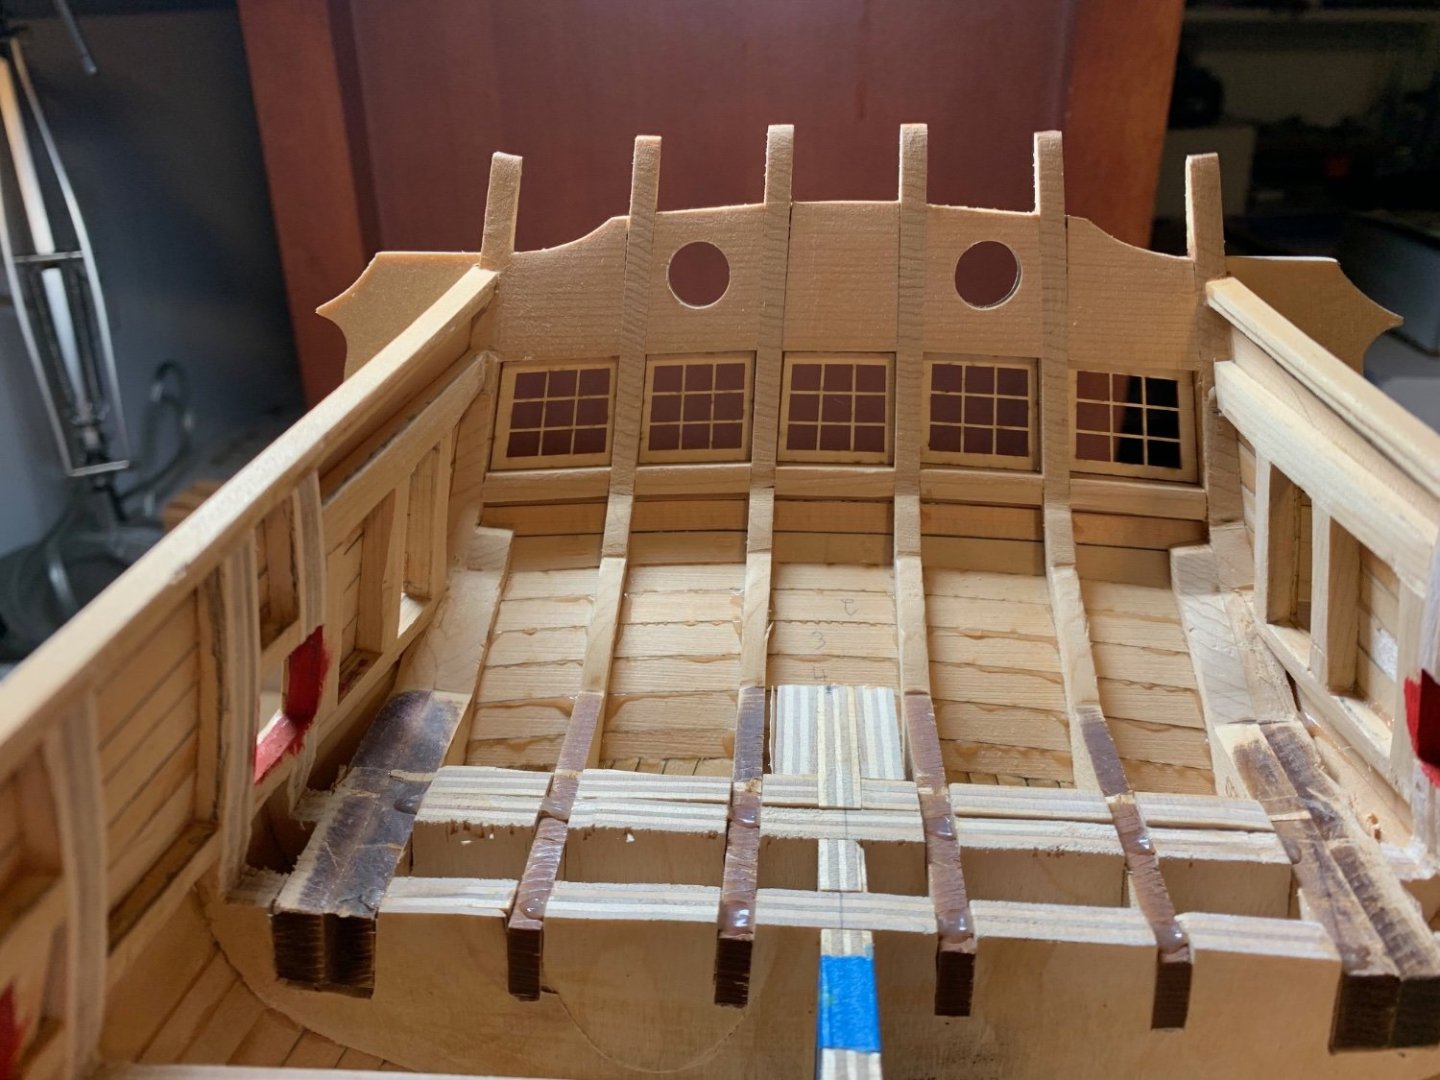
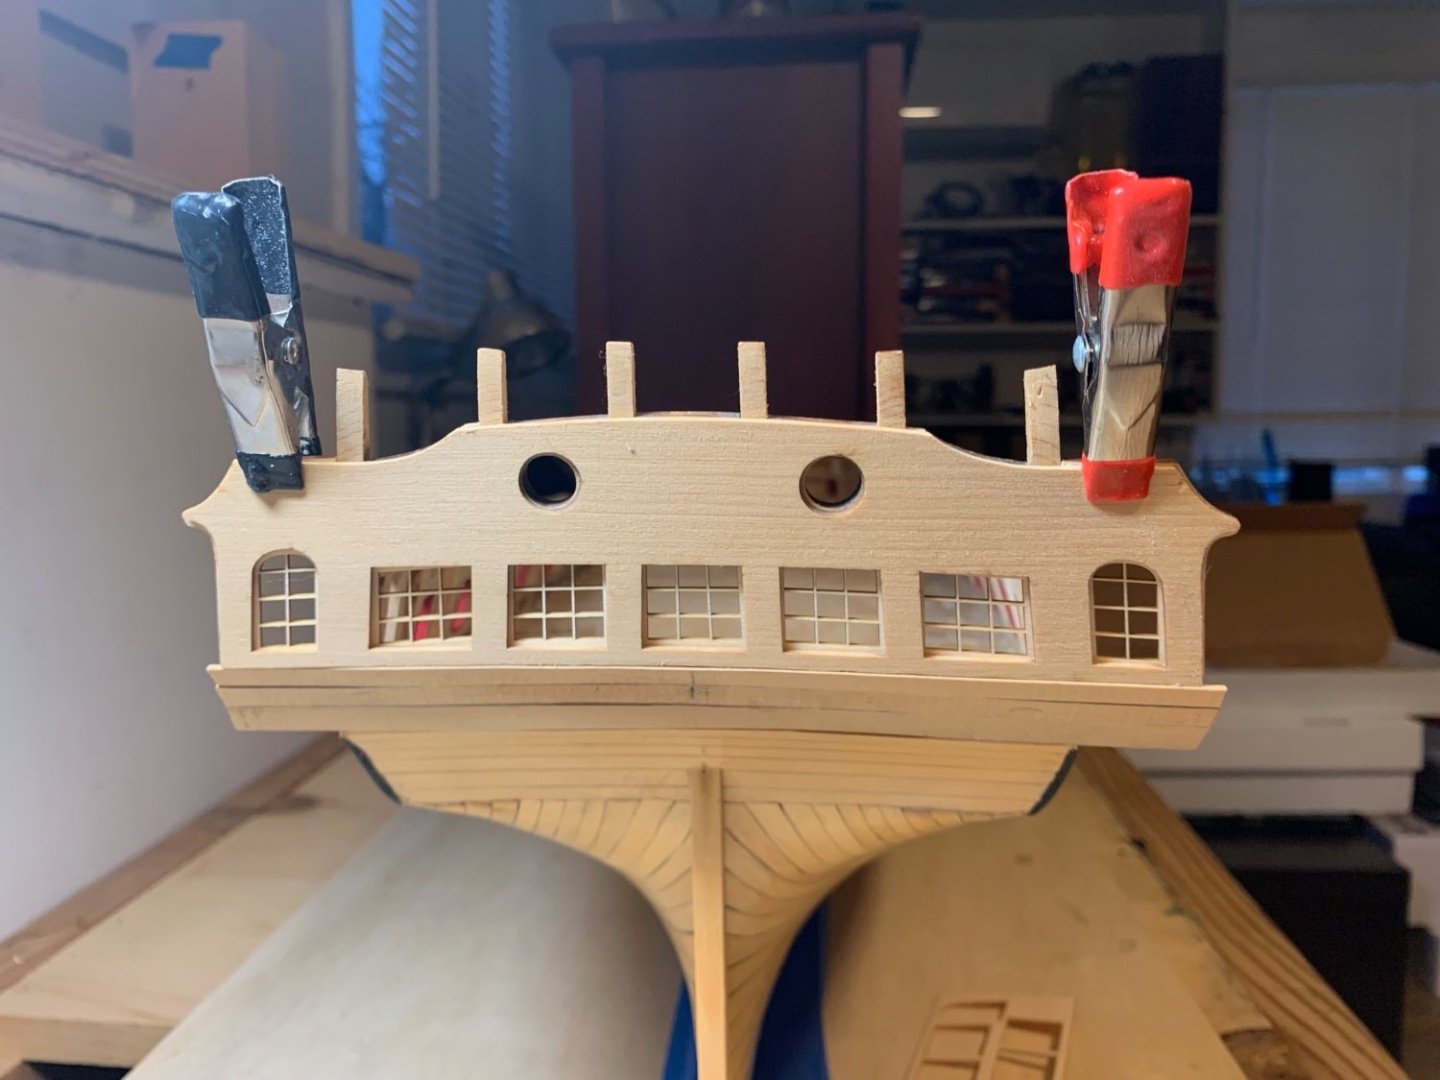
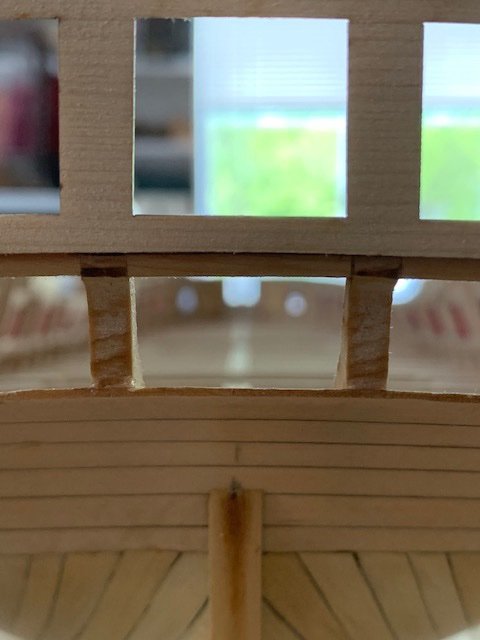
Thanks for the likes guys. Progress continues. I applied the thin strip along the top of the transom and it definitely cleaned up the lines a bit. There were some leftover wood strips from chapter 1 that served very well for this. The 5/32”x1/64” for the top of the bollard timbers was perfect for the top edge of the quarter galleries where the filler piece is a bit thinner. There was also a 3/16”x1/32” piece that was very easy to thin out with sandpaper for applying over the stern fillers. I think when the fancy moulding is applied, everything should look just fine. In 2 1/2 years of my Winnie sitting on the workbench collecting dust, the only damage that occurred is that little chip out of the starboard side of the transom and a visible ding on the right-most post. Turns out my 1 year old cat got into my office a couple week ago and for some reason decided to gnaw a little bit on the transom. Luckily the rest of the damage was on the inside of the starboard quarter gallery that just got covered up with just those two small dings remaining. I’m very careful about keeping her out of the workshop now. Installing the quarter gallery windows went off without a hitch and then everything got a couple coats of WOP. It took me a couple hours and multiple attempts to get the templates just right on both sides to where they were symmetrical. You can see with my second attempt on the starboard side the line underneath was just a little bit off the first time. I was a tiny bit off on the port side as well the first time and a moment of panic set in that I thought one of the sides of the transom was off and it was going to look lop-sided. Please let me know if these look wonky to anyone. There’s a bit of an optical effect going on with the sheer and the doorways are not quite symmetrical, but the foremost line measures the same length on both sides and the same distance from the sheer to the top and the wale to the bottom. I had hoped that one white piece of cedar would mellow with time, but alas, there’s always going to be that one goofy plank. I noticed from Chucks pictures that the template seems to sit a little bit closer to the gunport. I’m guessing maybe my transom doesn’t have quite as much arc, but I don’t think this should have any major effect. I’ll double check all the measurements again one last time tomorrow, but by the end of the week, hoping to have the continuation of the upper counter done and be back to figuring out fancy molding. Edit: The measurements are fine so I tacked up the first timber. It looks like the angle is a little bit off against the run of wale. If I lower the front 3/64" so the bottom lands on the seam it eyeballs up better. My concern is if I do that then I think the gallery windows may run into a spot of difficulty. I went through a bunch of others build logs and the gist I got out of it is that it's a great time to sit back and solicit feedback. Would it be better to keep the alignment based on the template against the transom or is there enough tolerance with the windows to adjust the timber to align along the wale?


-
 Greg M reacted to a post in a topic:
HMS Winchelsea 1764 by Frank Wouts 1/48
Greg M reacted to a post in a topic:
HMS Winchelsea 1764 by Frank Wouts 1/48
-
Greg M reacted to a post in a topic:
HMS Winchelsea 1764 by Frank Wouts 1/48
-
Greg M reacted to a post in a topic:
HMS Winchelsea 1764 by Frank Wouts 1/48
-
Greg M reacted to a post in a topic:
HMS Winchelsea 1764 by Frank Wouts 1/48
-
Greg M reacted to a post in a topic:
HMS Winchelsea 1764 by Frank Wouts 1/48
-
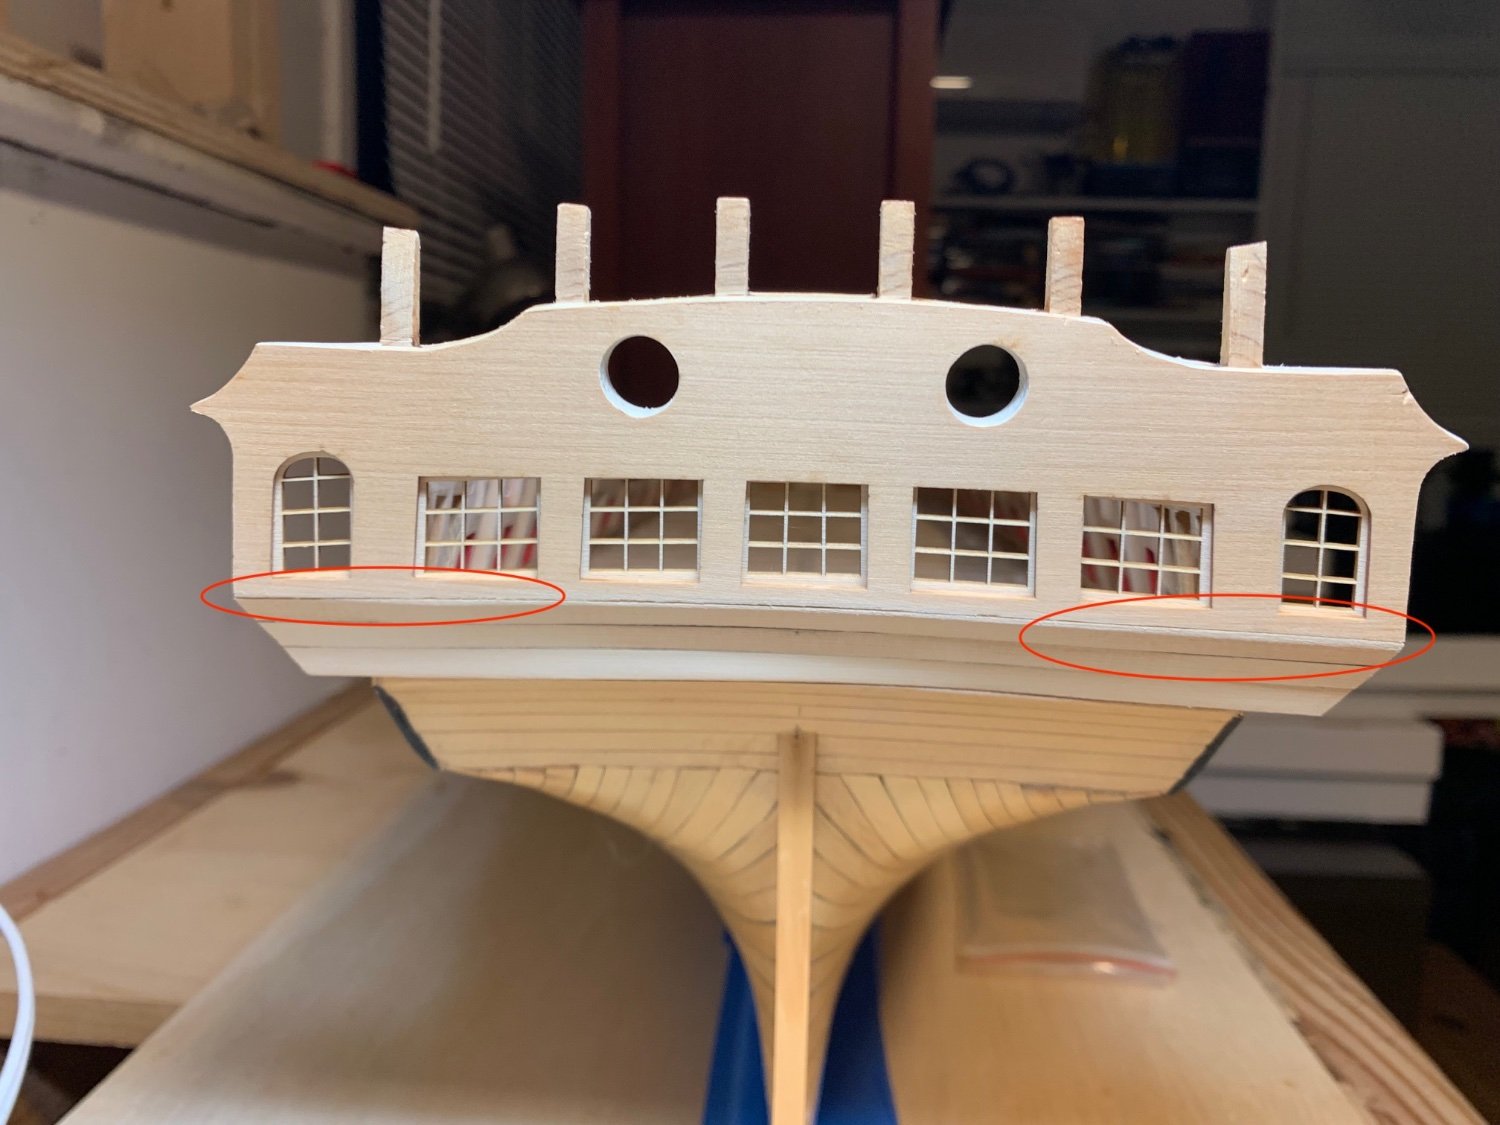
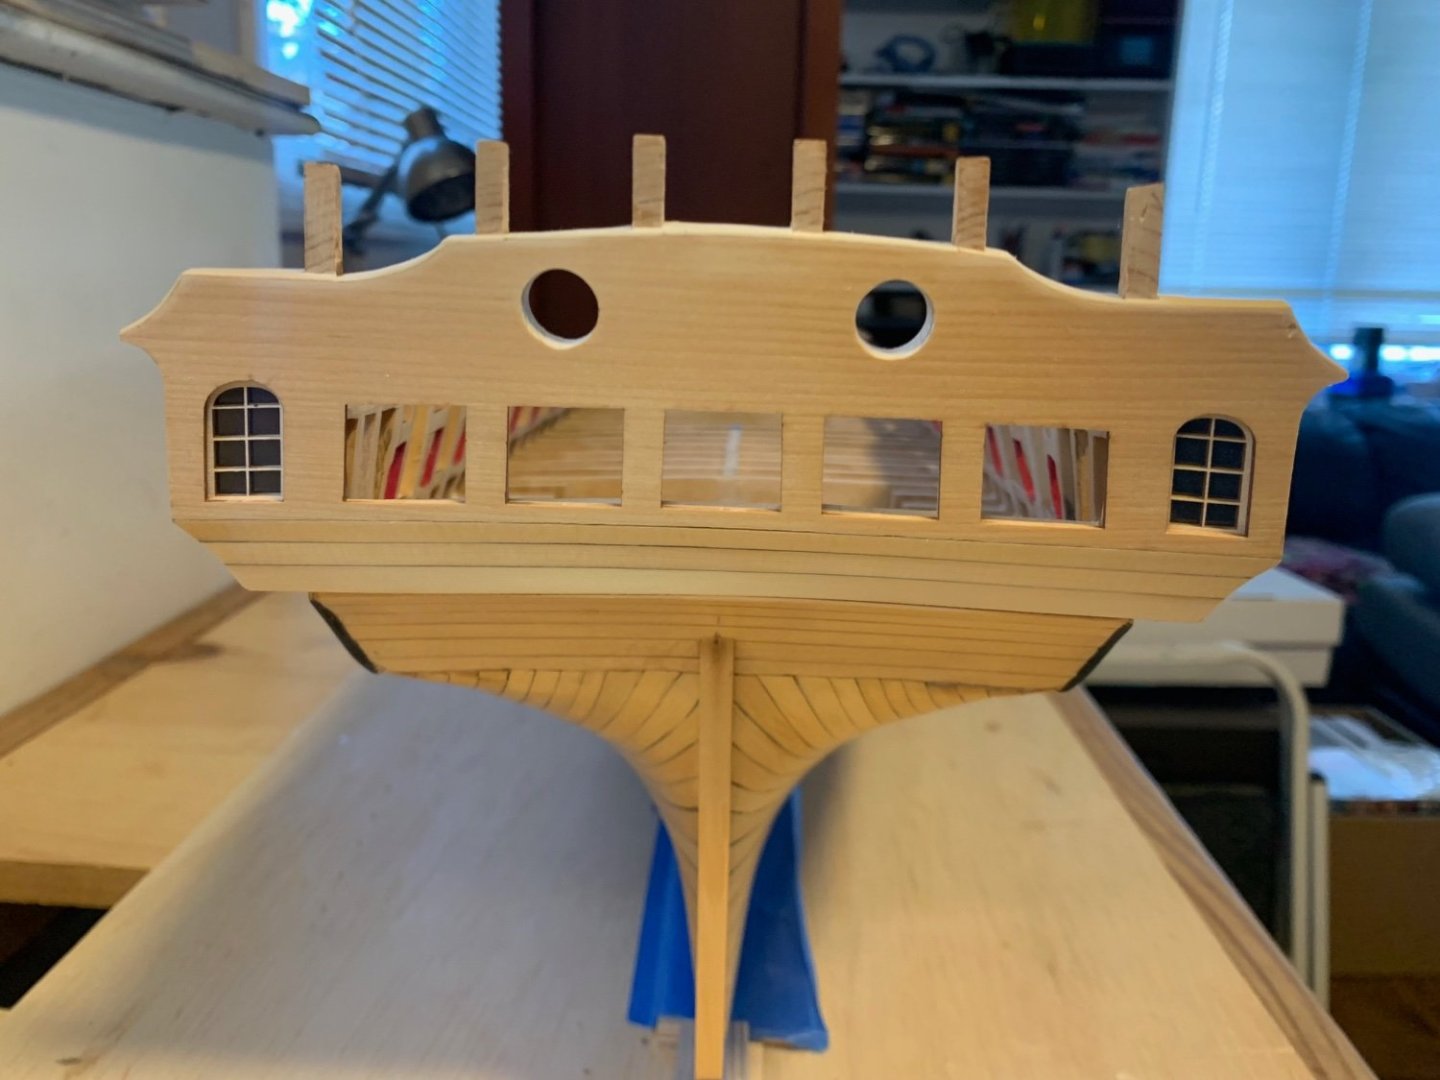
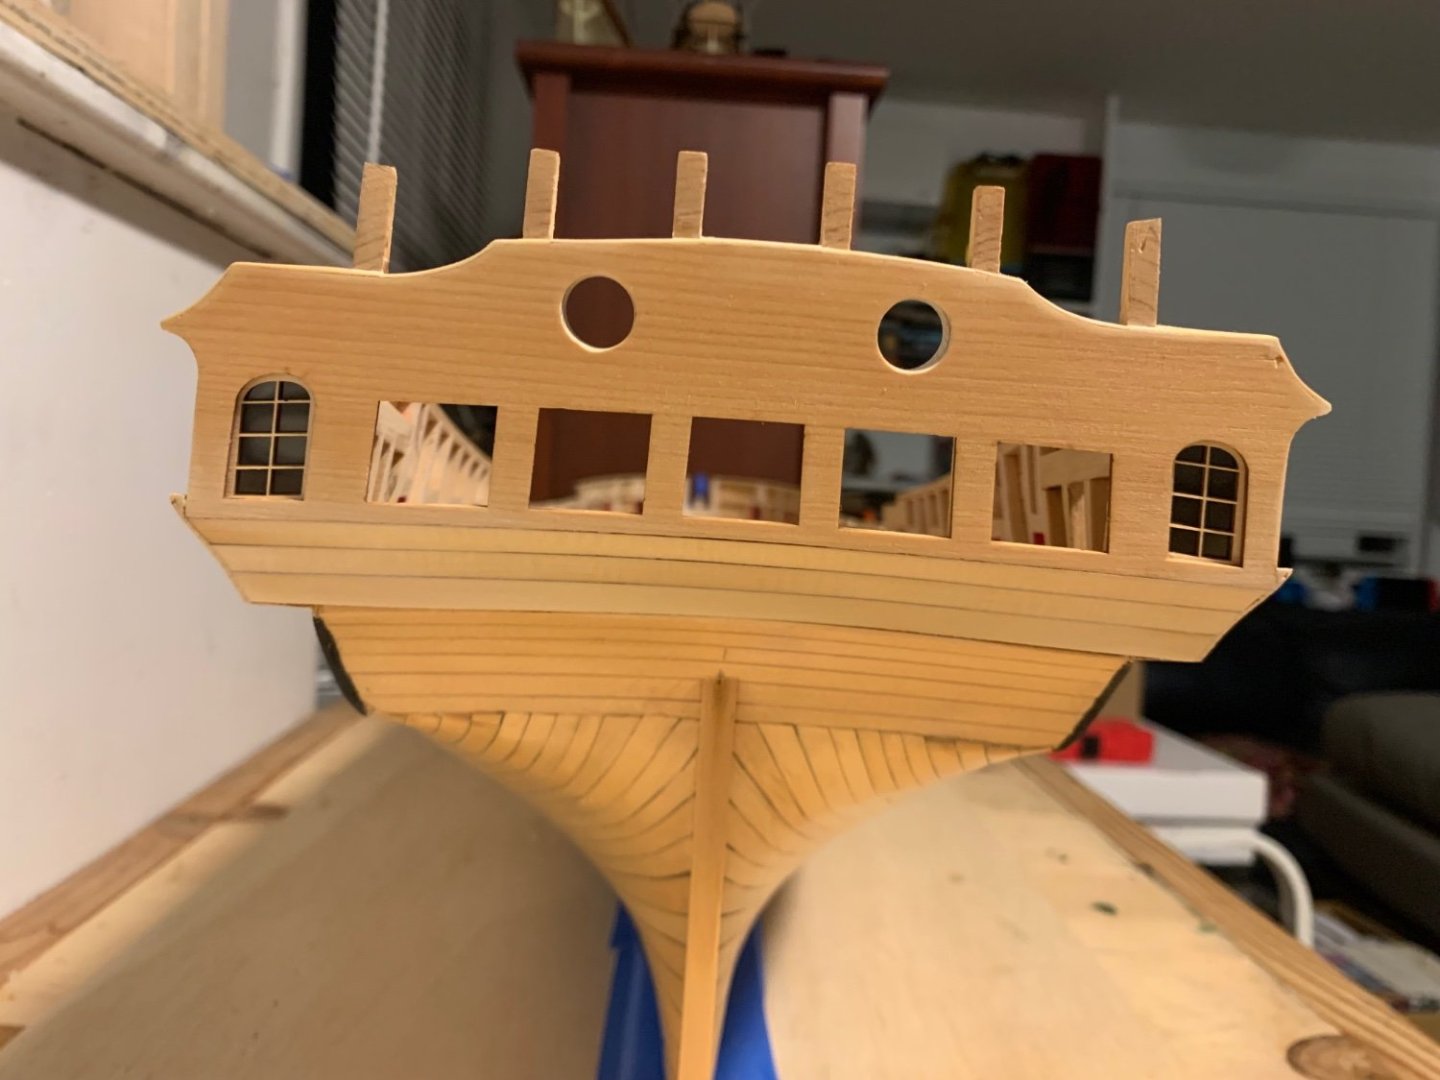
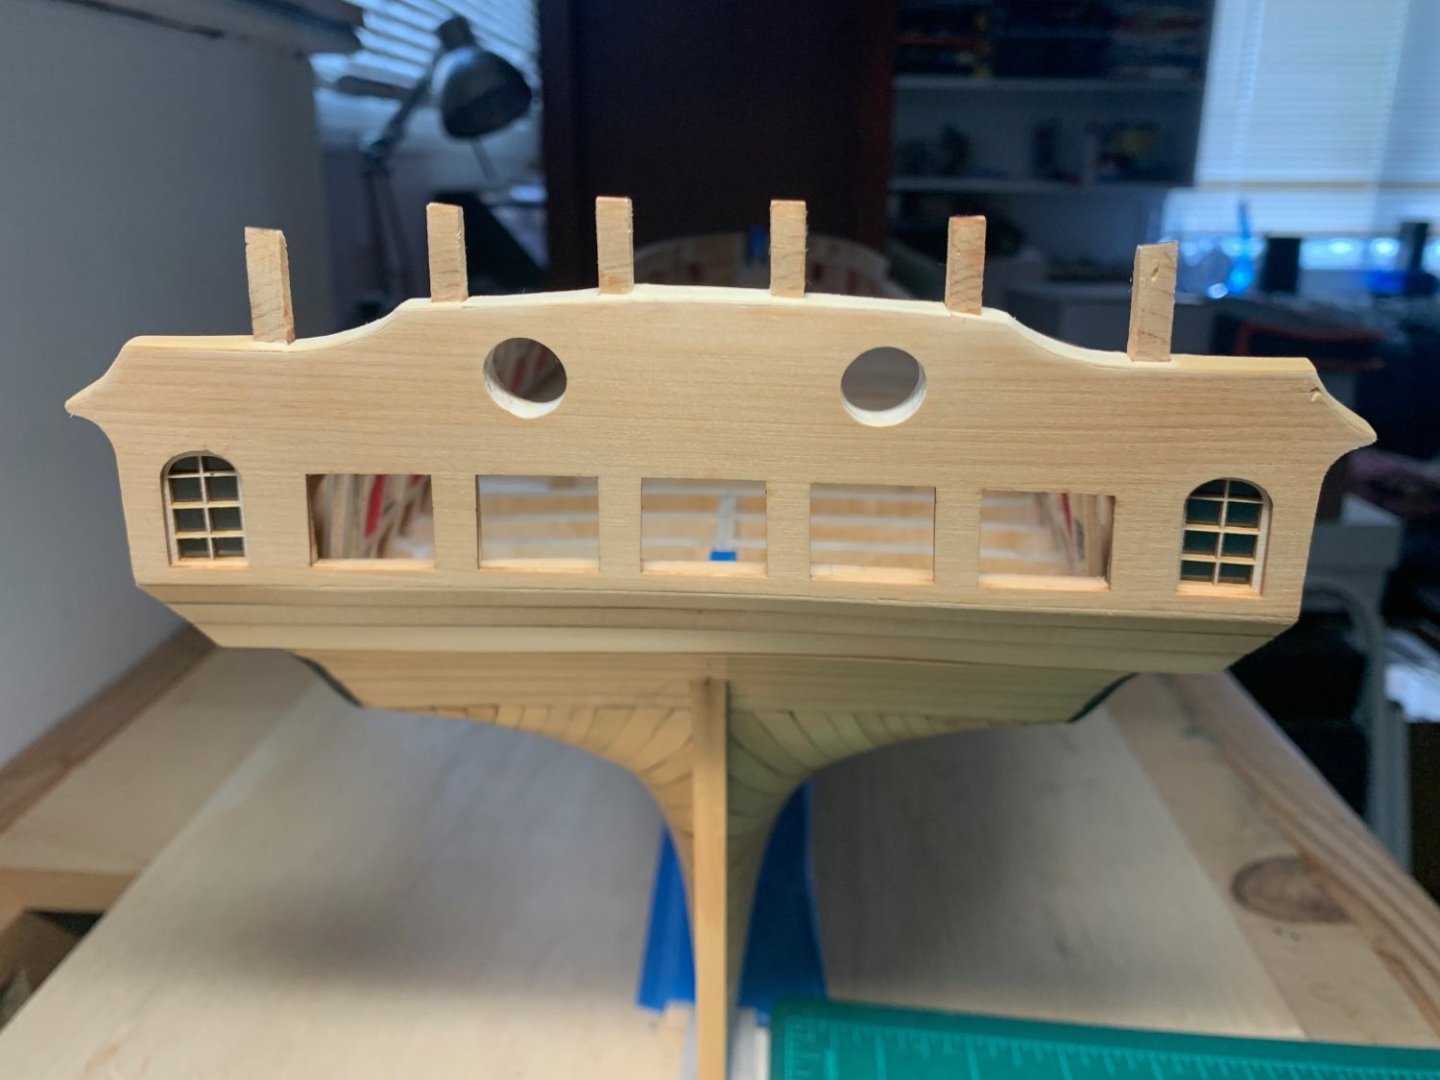
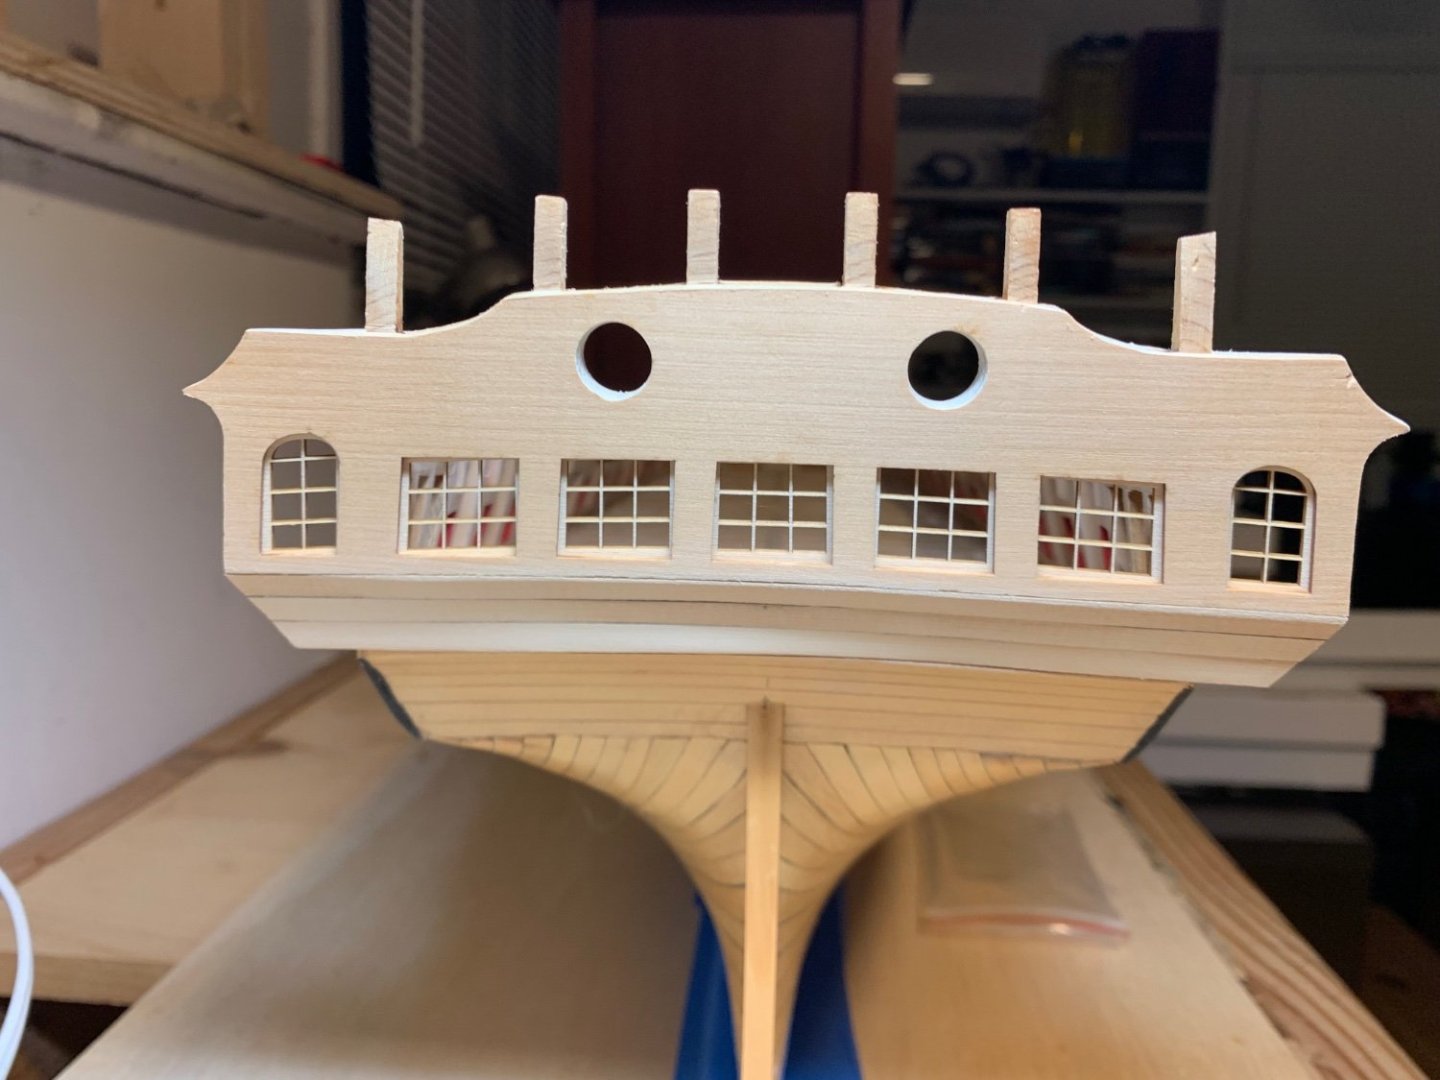
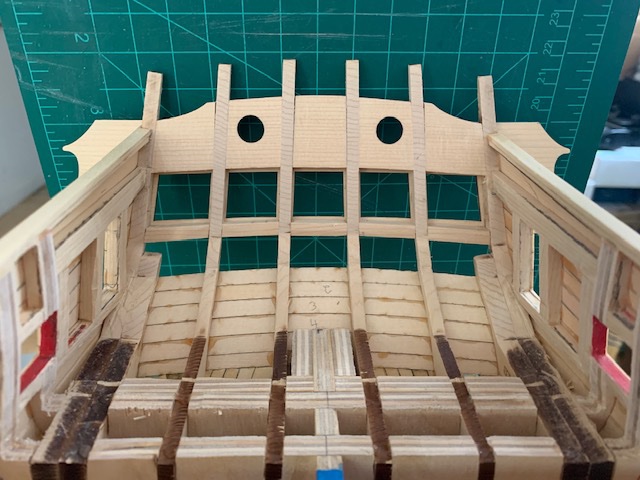
Thanks Frank and JJ and everyone for the likes. Feels real good to be back again. Work on the transom is progressing. The round ports came out very well; I always worry enlarging a circle that I'm going to run the file at a bad angle and elongate it, but that didn't happen here. Not entirely happy with shape of the top of the transom. The arc above the 2nd and 5th window is a pretty awkward angle and I struggled trying to get the arc consistent. I think when I add the veneer to the top of the transom, it may smooth it out a bit. I tested the windows again and got the 2nd window squared away. Just needed to shave a tiny amount off the top. The window alignment looks perfect from the inside, so they are going back in the bag and I'm not going to give them a moments thought until it's time to install them. Onward to adding the veneer to the top of the transom and then installing the quarter gallery windows.
-
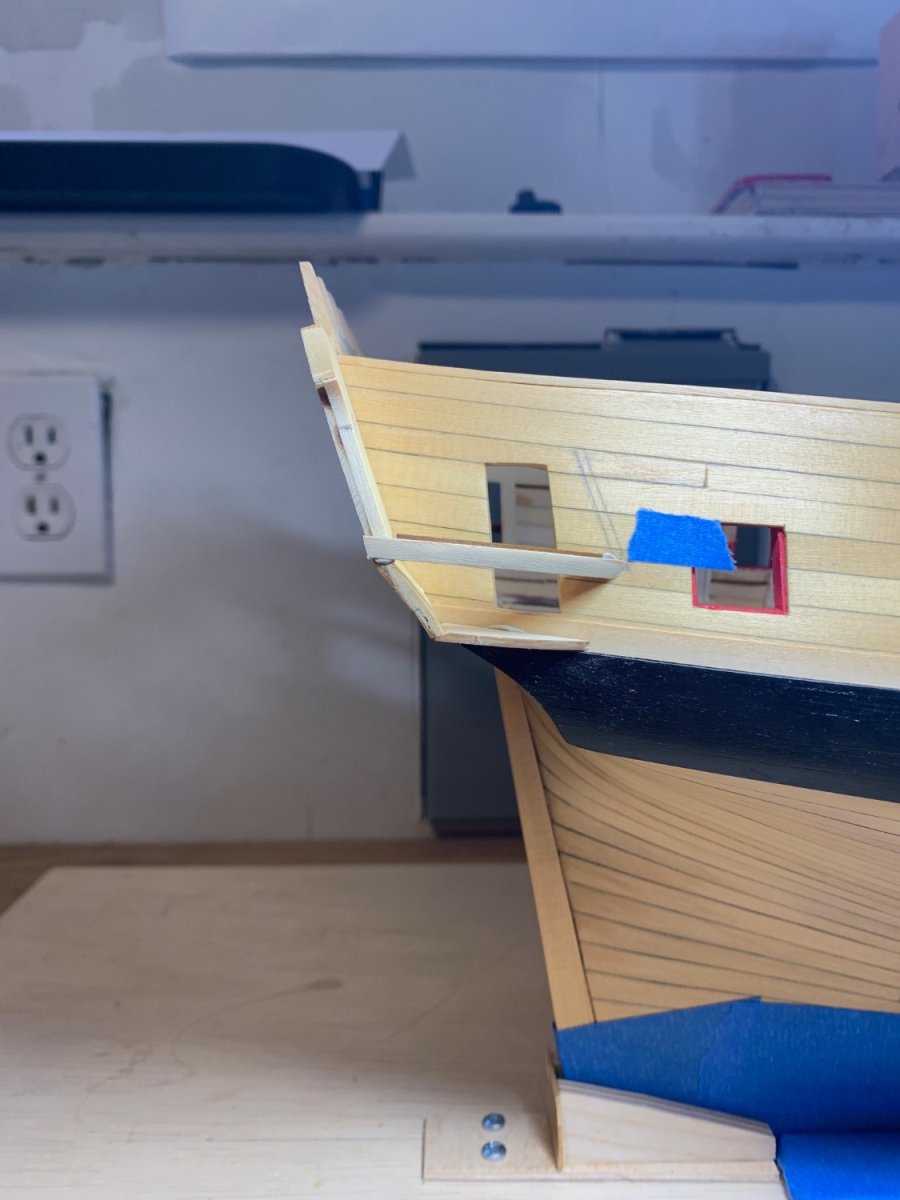
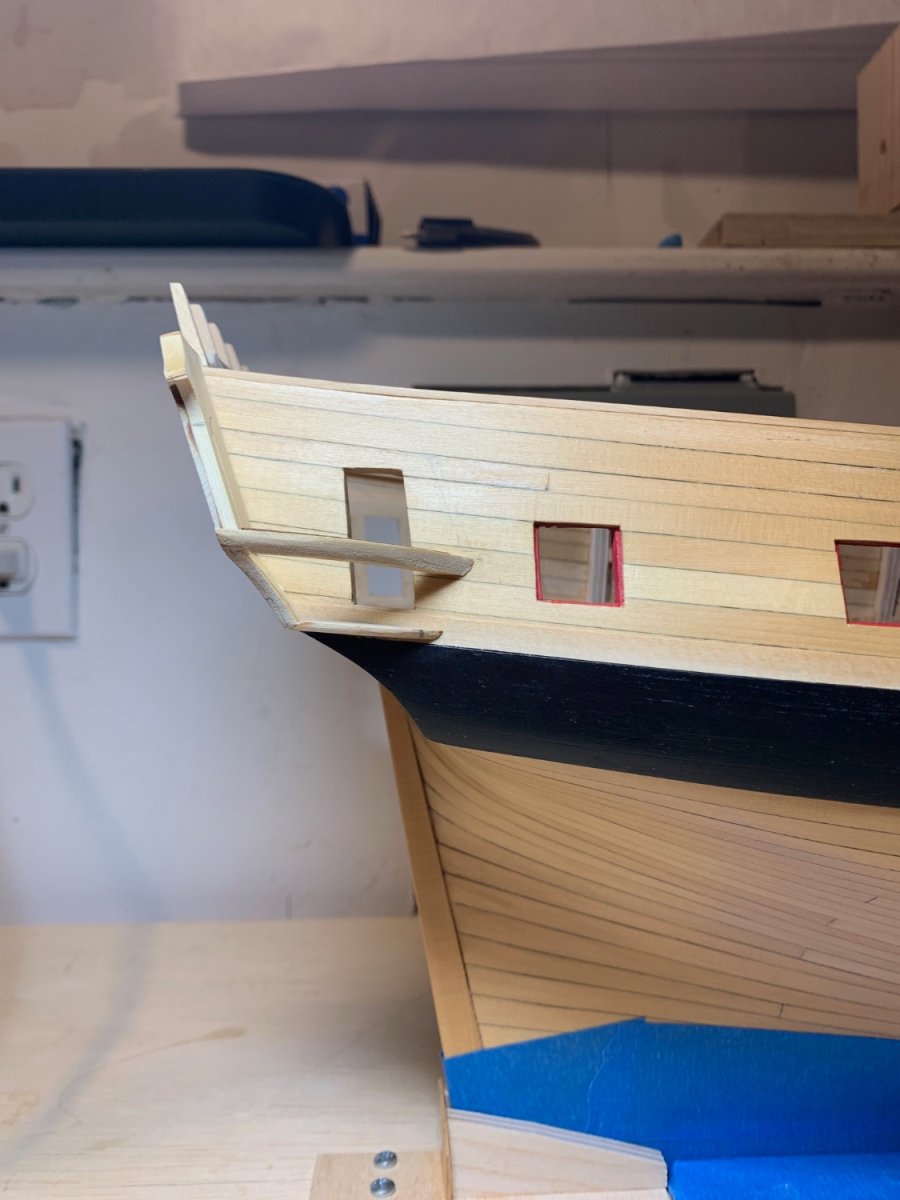
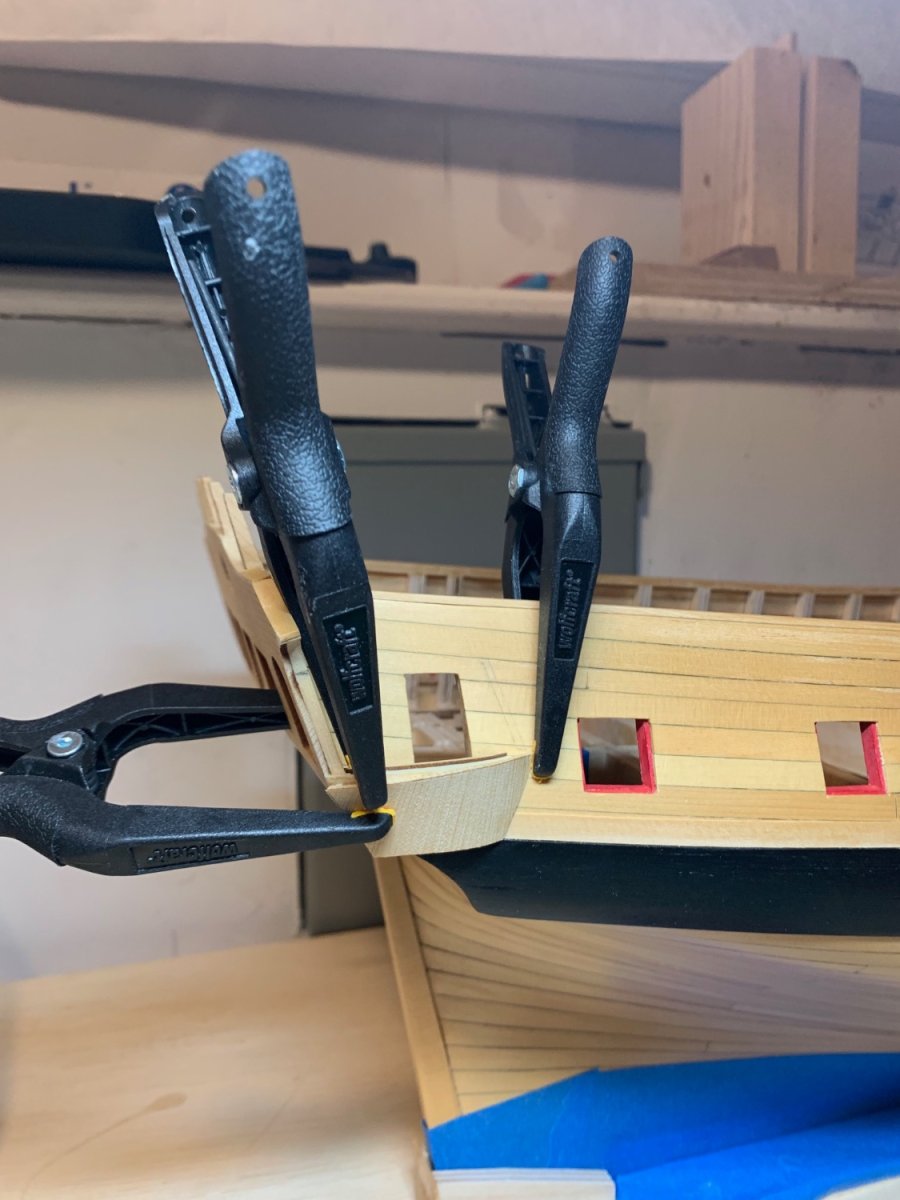
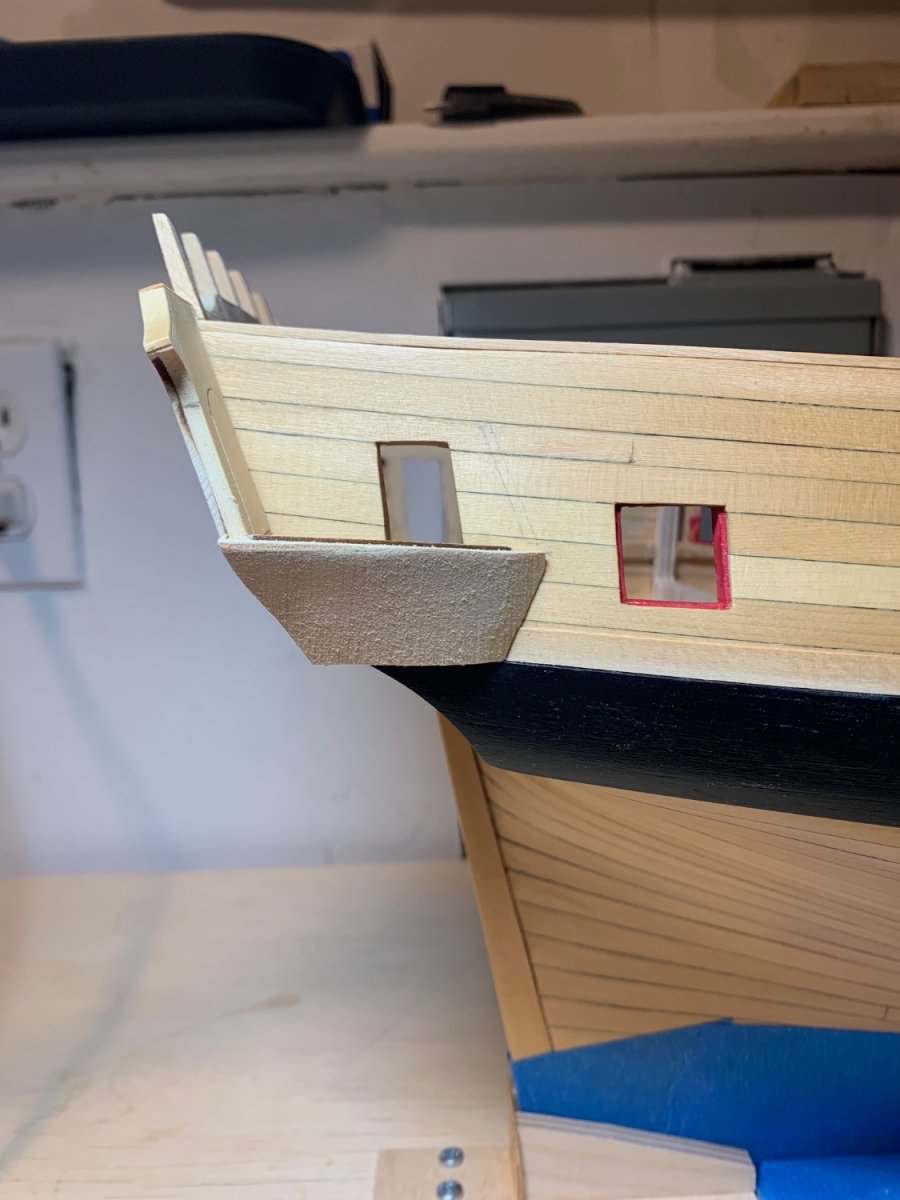
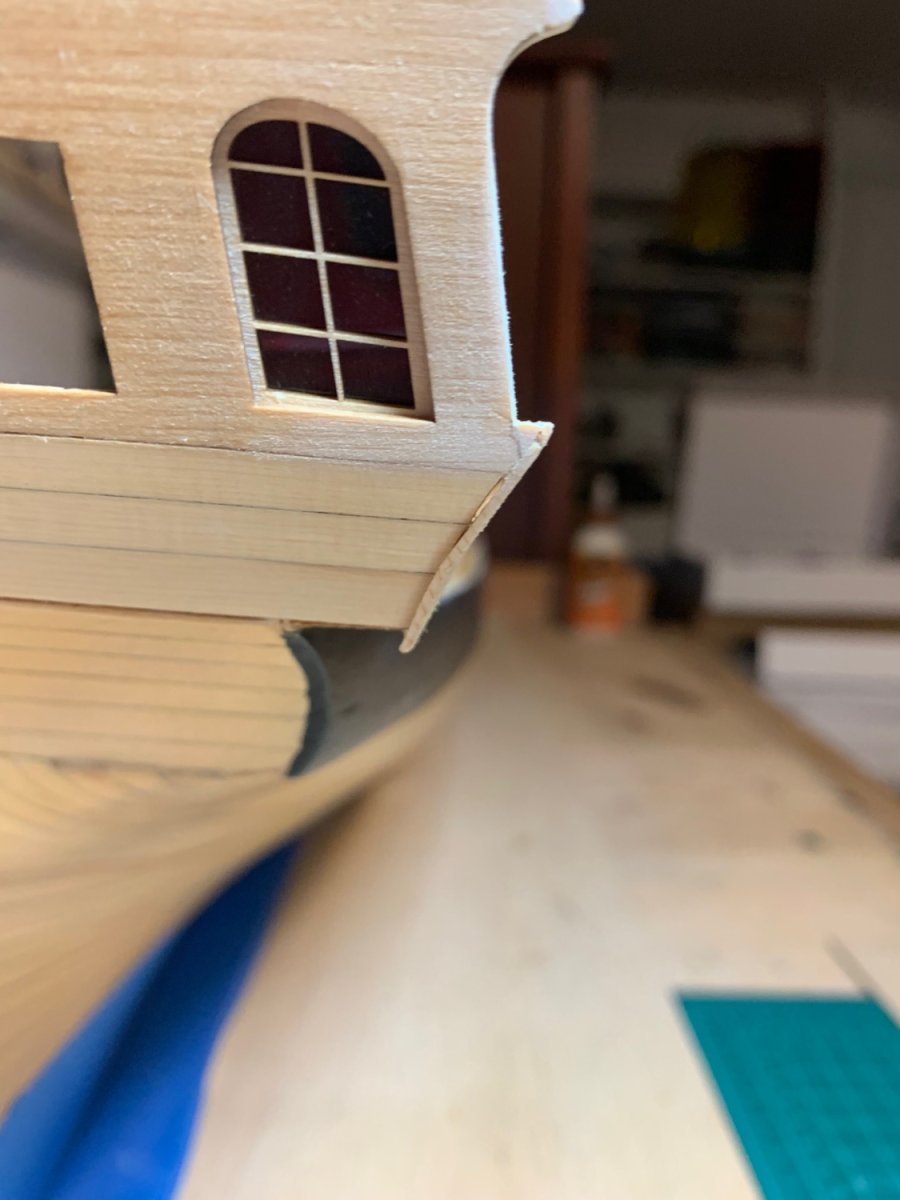
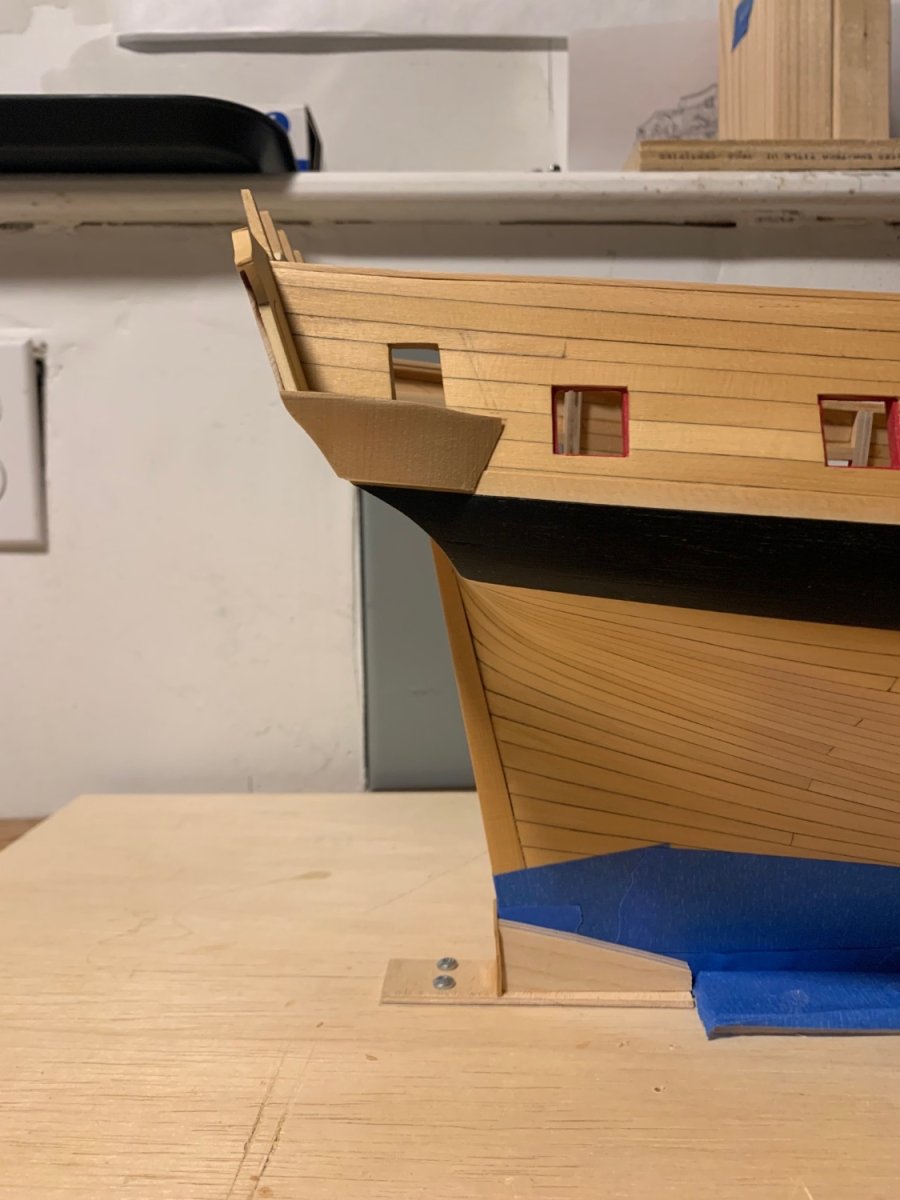
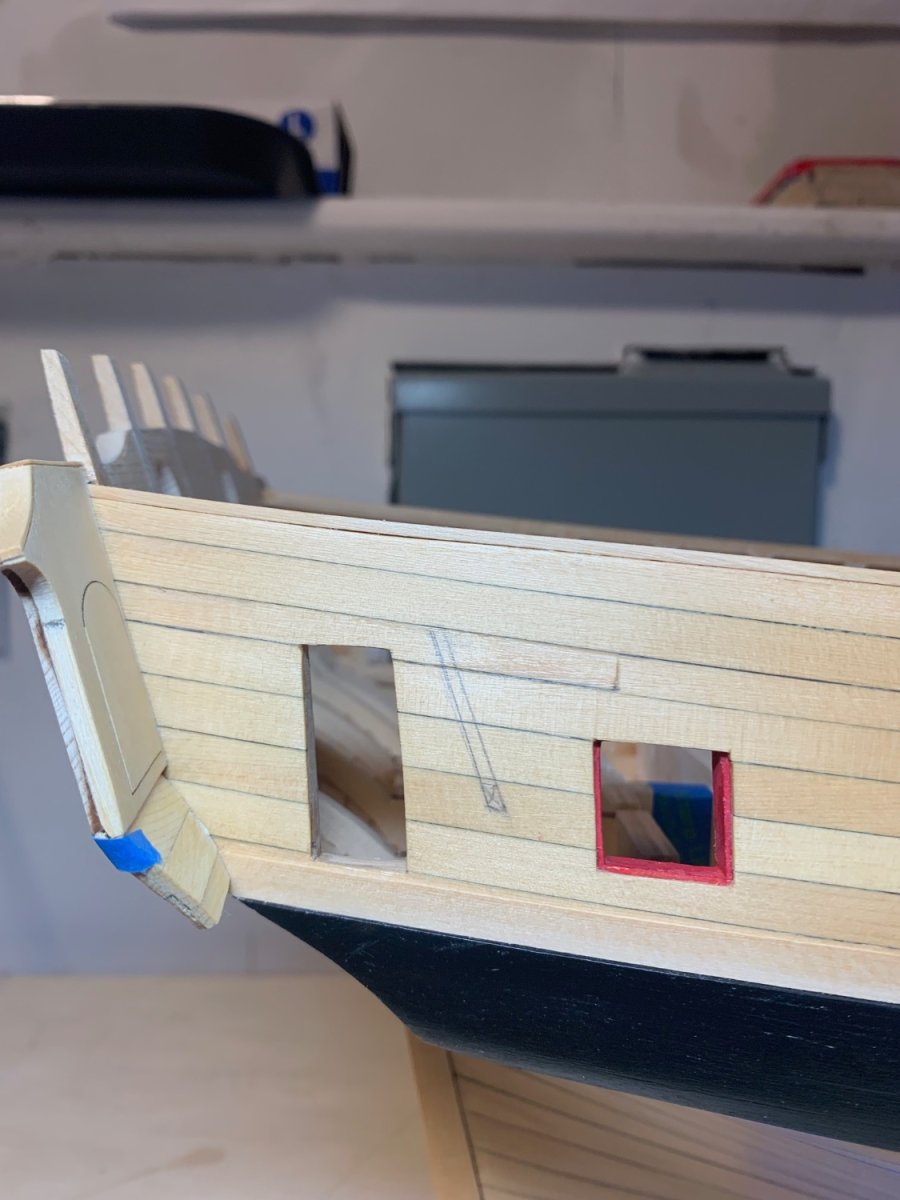
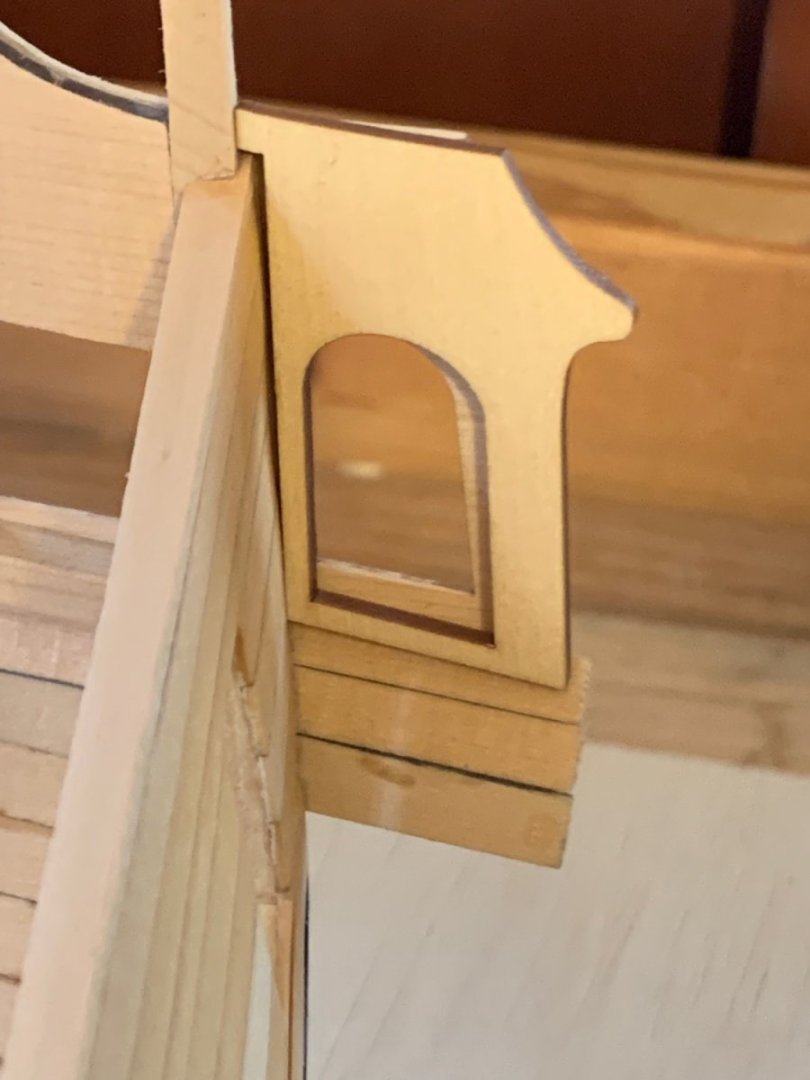
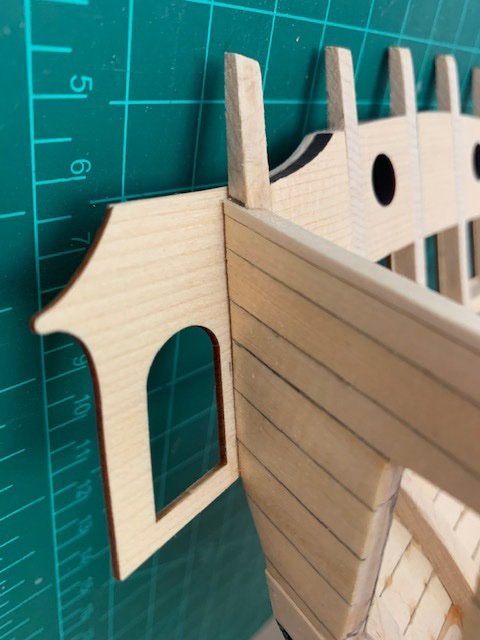
Not a huge update today, but trying to document everything as I get the ball rolling again. I remember being really worried about how to attack fitting the first quarter gallery piece that attaches to the transom. With multiple areas needing to be bevelled and worrying whether the cedar would split in the areas that get thinned out, I spent a lot more time thinking about it than executing on it, but I’ve had quite some time to come up with a gameplay that made it simple. I started by putting the piece up to the transom and seeing that trimming the tab would be a good place to start. with the piece aligned alongside the hull, it jumps out that the whole left side is going to need to be trimmed to about half the width of the lip around the window. Once that’s been done and a slight bevel along the bottom edge to get it to lay flat, everything looks right. Rinse and repeat on the other side and test fitting the windows. It looks like I’ll need to trim the 2nd one from the left a touch or else maybe there’s some debris in the slot causing it to be a little cockeyed, but everything fit and other than that one window, everything centered nicely. So, back into storage with the windows for now. I need to sand and apply WOP to the upper counter along with cleaning up the 2 round ports before getting back to the quarter galleries, but that shouldn't take very long and it’s nice to be back into the swing of things


-
It’s been 2 1/2 years since I last updated my build and I hate to say that very little progress has happened in that time; although that is soon to change After my last post, I installed the upper counter that night and then noticed I never finished fairing the inside of the frames. I used aircraft plywood and the material choice has come back to bite me so many times during the build. During Chapter 2, I spent about 10 days fairing after planking above the wales and I knew that I still had another week or so of fairing work. I felt like I had to stop and plank a belt or two before coming back and finishing the job. Of course, I forgot to come back and finish it up before finishing Chapter 2 and beginning Chapter 3. It was so discouraging that I still had quite a bit of fairing to do before I could work on the galleries that I rage quit, stopped coming onto the forum and before I knew it a year went by. Last year, I attacked that final bit of fairing and had just about finished it when I got sick thinking it was the birch dust causing health problems. I found out recently it’s not the birch dust causing problems and the motivation has finally returned. I’ve spent the past few nights poring back over my notes, reading and re-reading Chapter 3 and finally pulled out the pen sander and tuned those last few frames today. Whew; I have finally put the fairing behind me and can get back to what is one of the most exciting Chapters of the build. I'm hoping to be able to show some progress again by the weekend, or worst case end of the month.
-
Very nice crisp work Steve. The cedar and a light touch make a beautiful model.
- 99 replies
-
- 2
-
-
- winchelsea
- Syren Ship Model Company
- (and 1 more)
-
Thanks GrandpaPhil and SkiBee. It was a fun little build and scratched the right itch for jumping back into the hobby after being away for so long.
- 24 replies
-
- 1
-
-
- phantom
- model shipways
- (and 1 more)
-
Thanks Matt and everyone for the likes. Funny. I've had that plan hanging on my wall since I started Chapter 2 and I think looking at it so frequently made me completely look past those views of the moldings. Thanks for the advice on the scrapers Joe. Seems like a great way to create uniform thickness.
-
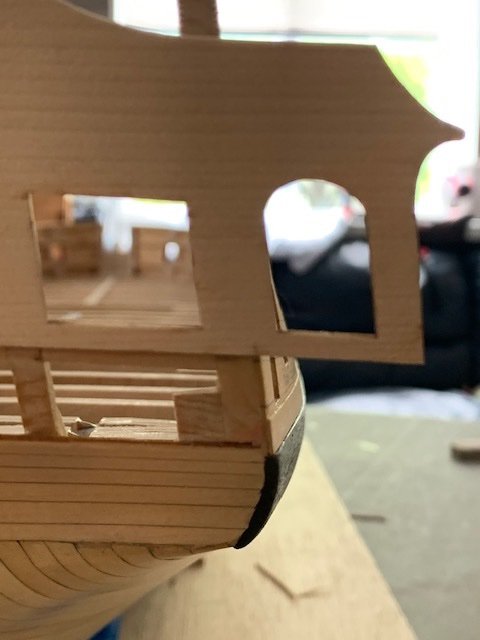
Chapter 3 has officially begun. It took awhile to get the transom lined up properly and marked out, and then about 3 tries to glue it up so everything is aligned. They aren't very visible, but I drew some key marks in the outside, lower corners of the outermost windows that were my primary marks when I went to glue it up. I also put a tiny mark on each side of the transom where it touched the hull, plus (not visible) one underneath the transom at the center and each edge. I made sure to glue sparingly as I (correctly) anticipated that it was probably going to take a couple tries to get all the mark lined up and clamped. One thing that I'm trying to sort out is that I have a small gap between where the transom ends and the upper counter begins. I realize there's going to be a bit of fancy molding covering this, so the least invasive fix would be to put a small filler piece in here. but not sure if that would affect the molding placement or if the best solution is to smooth out the knuckles/counter to meet the transom. On the subject of molding, I've never scraped fancy molding before, but it seems fairly straightforward. Is there a particular pattern that would have been used or is this a creative moment?
-
Awesome work Fred. What color blue is that you are using? It meshes up well with the friezes. The stem looks like the one area where everyone has created their own look.
-
Thanks JJ. Now that Chapter 2 is done, I built a cradle and have her upright again, it feels like I can work at a much more leisurely pace. I've put enough coats of WOP over the last two weeks that it's probably structural by now .
-
Beautiful work Rusty. The cherry really pops out.
- 642 replies
-
- 2
-
-
- winchelsea
- Syren Ship Model Company
- (and 1 more)