HOLIDAY DONATION DRIVE - SUPPORT MSW - DO YOUR PART TO KEEP THIS GREAT FORUM GOING! (78 donations so far out of 49,000 members - C'mon guys!)
×


BikerMart
-
Posts
336 -
Joined
-
Last visited
Content Type
Profiles
Forums
Gallery
Events
Everything posted by BikerMart
-
Instructions for, say, the Amati HMS Vanguard call for the bow pattern and keel pieces to be fixed and then for the final bulkhead fairing to take place. Being careful, of course, not to damage the aforementioned walnut pieces. It strikes me, though, that if those pieces were not in place, the fairing would be easier. Is there any reason not to leave the fixing of those pieces until after fairing is completed?
-
Sanding and the white paint covers the 'steps' in the lower hull. Note to self: Don't get glue on the surface of the planks because stain won't penetrate if you do.

-
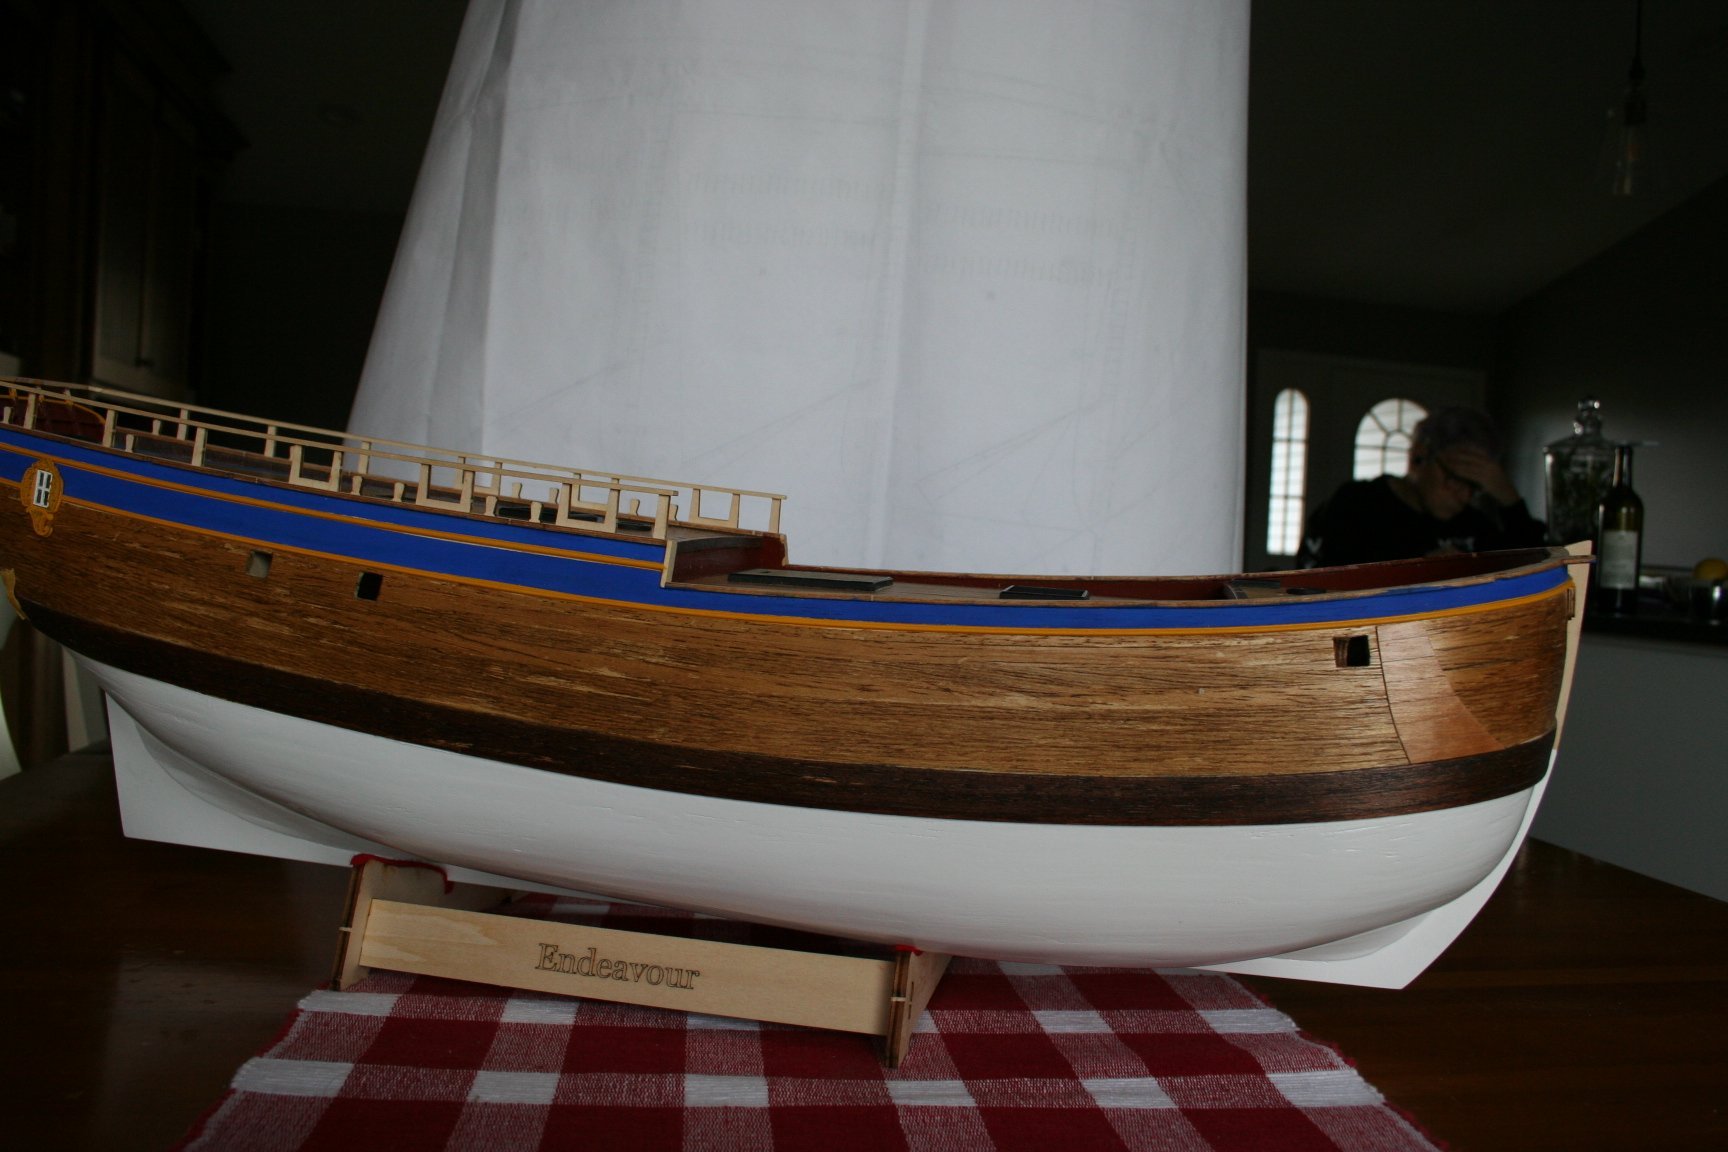
And so you should be! For me, it tends to be the journey rather than the destination that is the object of this exercise. The planking on my Endeavour looked rough - but now that it is sanded and painted, it (almost) a joy to behold. I have yet to post a picture or two. Have to wait to get the camera out.
-
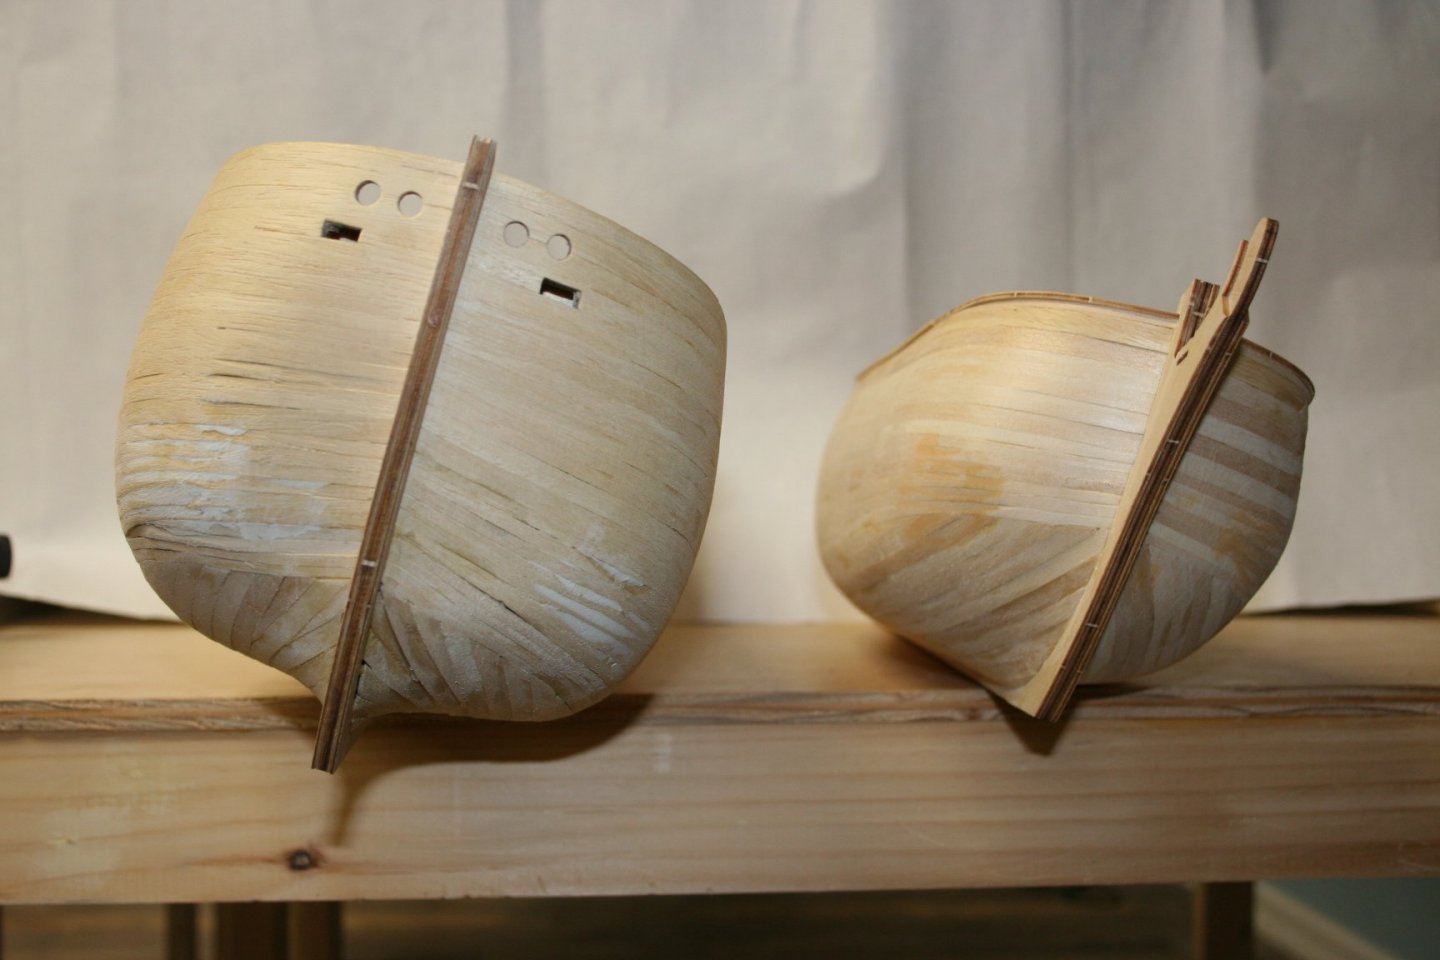
Maybe that's progress? Endeavour on the left and Bounty on the right. I think that my planking skills improved slightly from left to right. I am glad that some of the faux pas will be covered by wales and white paint. Despite my attempts at spiling and soaking/bending the planks, I still ended up with more steps than Russia (steppes, get it?) I think that perhaps I should continue to practice on small vessels before attempting HMS Victory.

-
One for Mr BlueJacket. Will the battens be available separately? I am almost at the stage of requiring them for my Charles Notman.
-
Finish the project? I am aware of that concept, just not familiar with it!
-
I am curious. Way back when I was interested in producing photo-etched kits for '0' gauge locomotives, I recall that, in the drawings, one had to add an extra few thou to allow for the 'meniscus?' left by the etching process to be filed off. Does the same hold for the laser-cut wooden pieces in model ships? Is there any allowance made - does there even need to be - for the 'char' to be sanded off and still leave a piece that fits correctly?
- 1 reply
-
- 3
-

-
Slowly progressing... I swapped out the planks in the Billings kit for 1/16 x 1/4 basswood. I didn't like the way that the planks supplied - obechi? - split when I tried to curve them around the bow -despite a lengthy soak in ammonia/water. The first few planks are full-width; subsequent planks will be 'spiled'.

-
Thank you Grandpa Phil. Amazon should deliver it by Friday!
-
Thanks for all of your replies. You all make very valid points. I think on balance that I will go with the Billings HMS Victory. I have seen what a number of MSW members have achieved with the Billings kit; I am sure that it will be more than enough to challenge my skills and - maybe more importantly - patience! COVID notwithstanding; I will be in England for my daughter's wedding next March; maybe I will get to the see the real thing up close and personal again.
-
That was what my wife said, too. Pointing at other incomplete projects around the house.....
-
Hmm. I'd better start saving then. The Amati HMS Victory situation reminds me somewhat of an Alan Gibson Somerset and Dorset 2-8-0. This was an 'O' Gauge etched brass locomotive kit. When asked, it was always just a few weeks away from being ready.
-
Early days yet. I am cutting my teeth on Billings HMS Endeavour and Billings HMS Bounty. Next up - HMS Victory - but which one? I favour Billings because I have made several of their kits in the past - Boulogne Etaples, Nordkap, Evelyn and Elbjorn - and I am comfortable with the quality and level of expertise needed to construct them. Better the devil that you know? I appreciate that the Billings - and other - kits of HMS Victory might not be exactly historically accurate. And that the Caldercraft kit is probably the most detailed. But at the end of the day, are any of the other HMS Victory kits going to give me - a pretty 'average' modeller - any more or less of a good representation of the ship than the Billings kit?
-
"Cheating" with alternative materials?
BikerMart replied to Brewerpaul's topic in Wood ship model kits
Absolutely. 1/16 sq styrene bends far more easily than 1/16 wood and rarely breaks. -
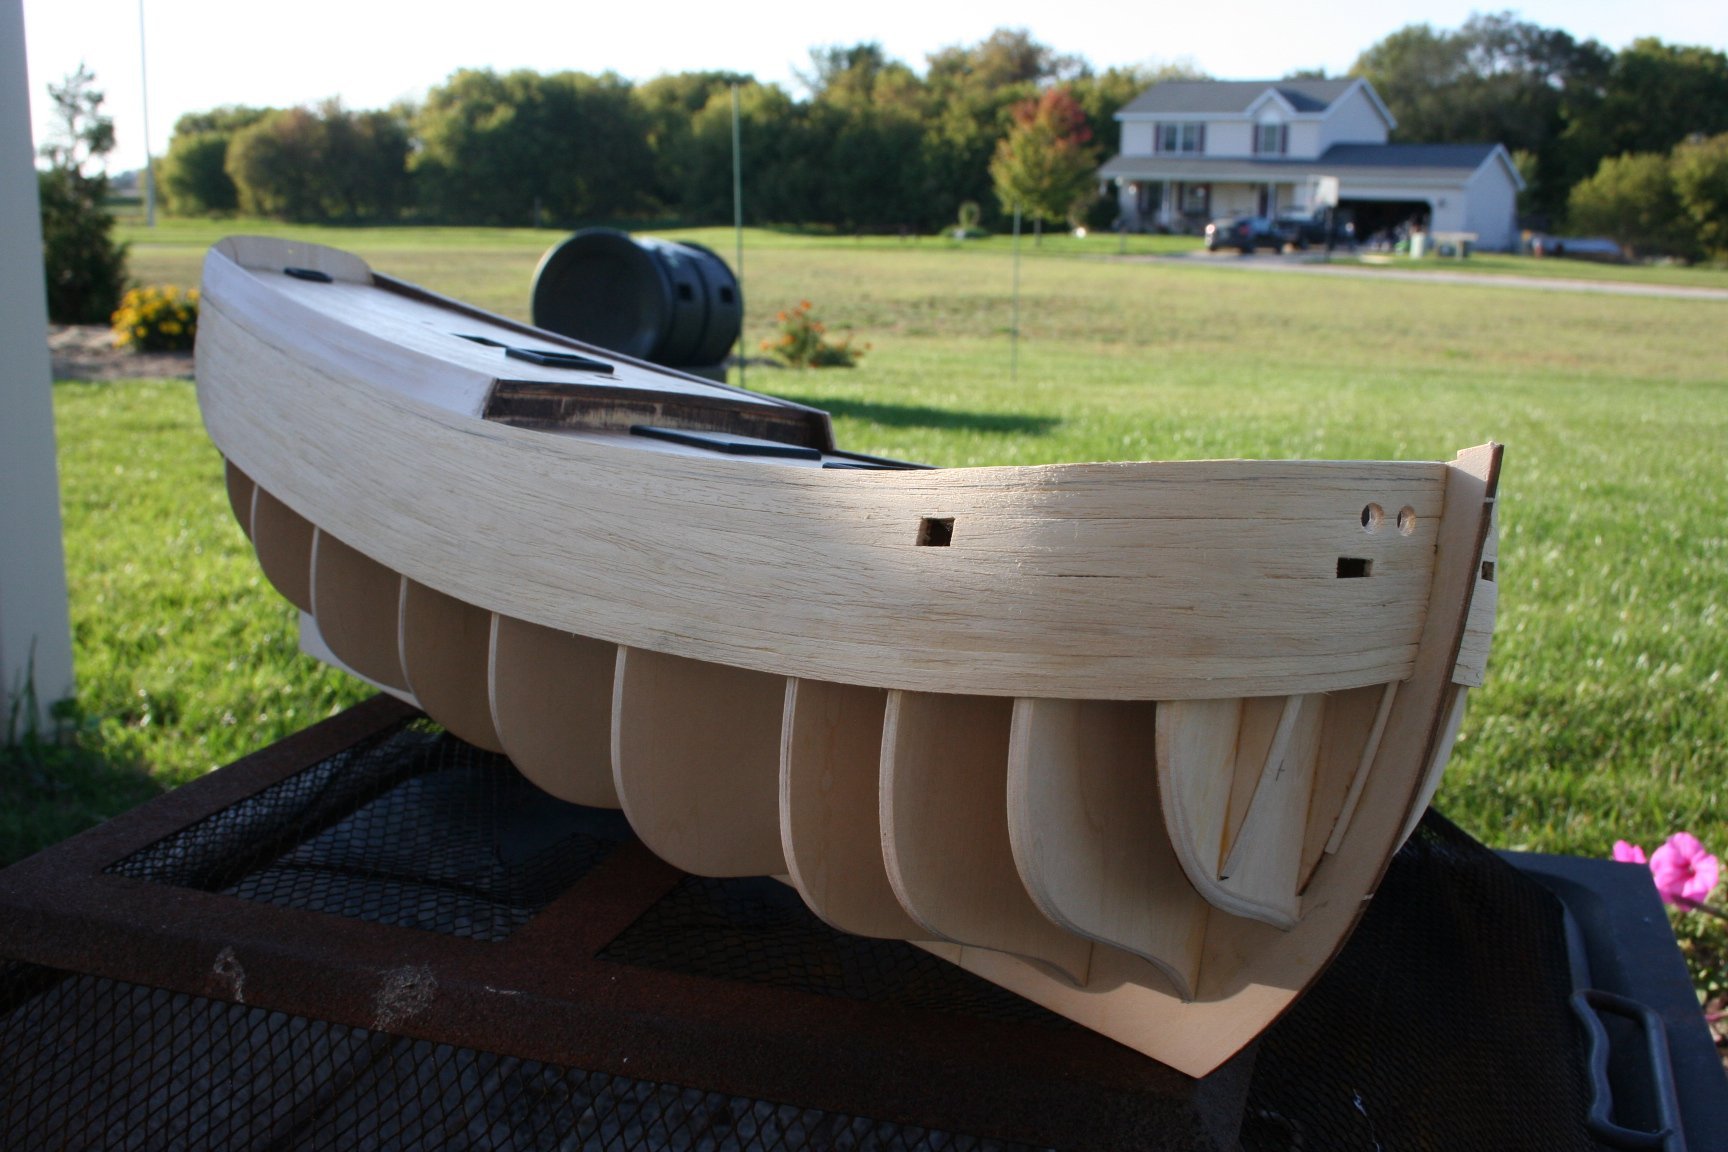
9 planks in place so far, and some filler added to the upper works that are to be painted blue.
-
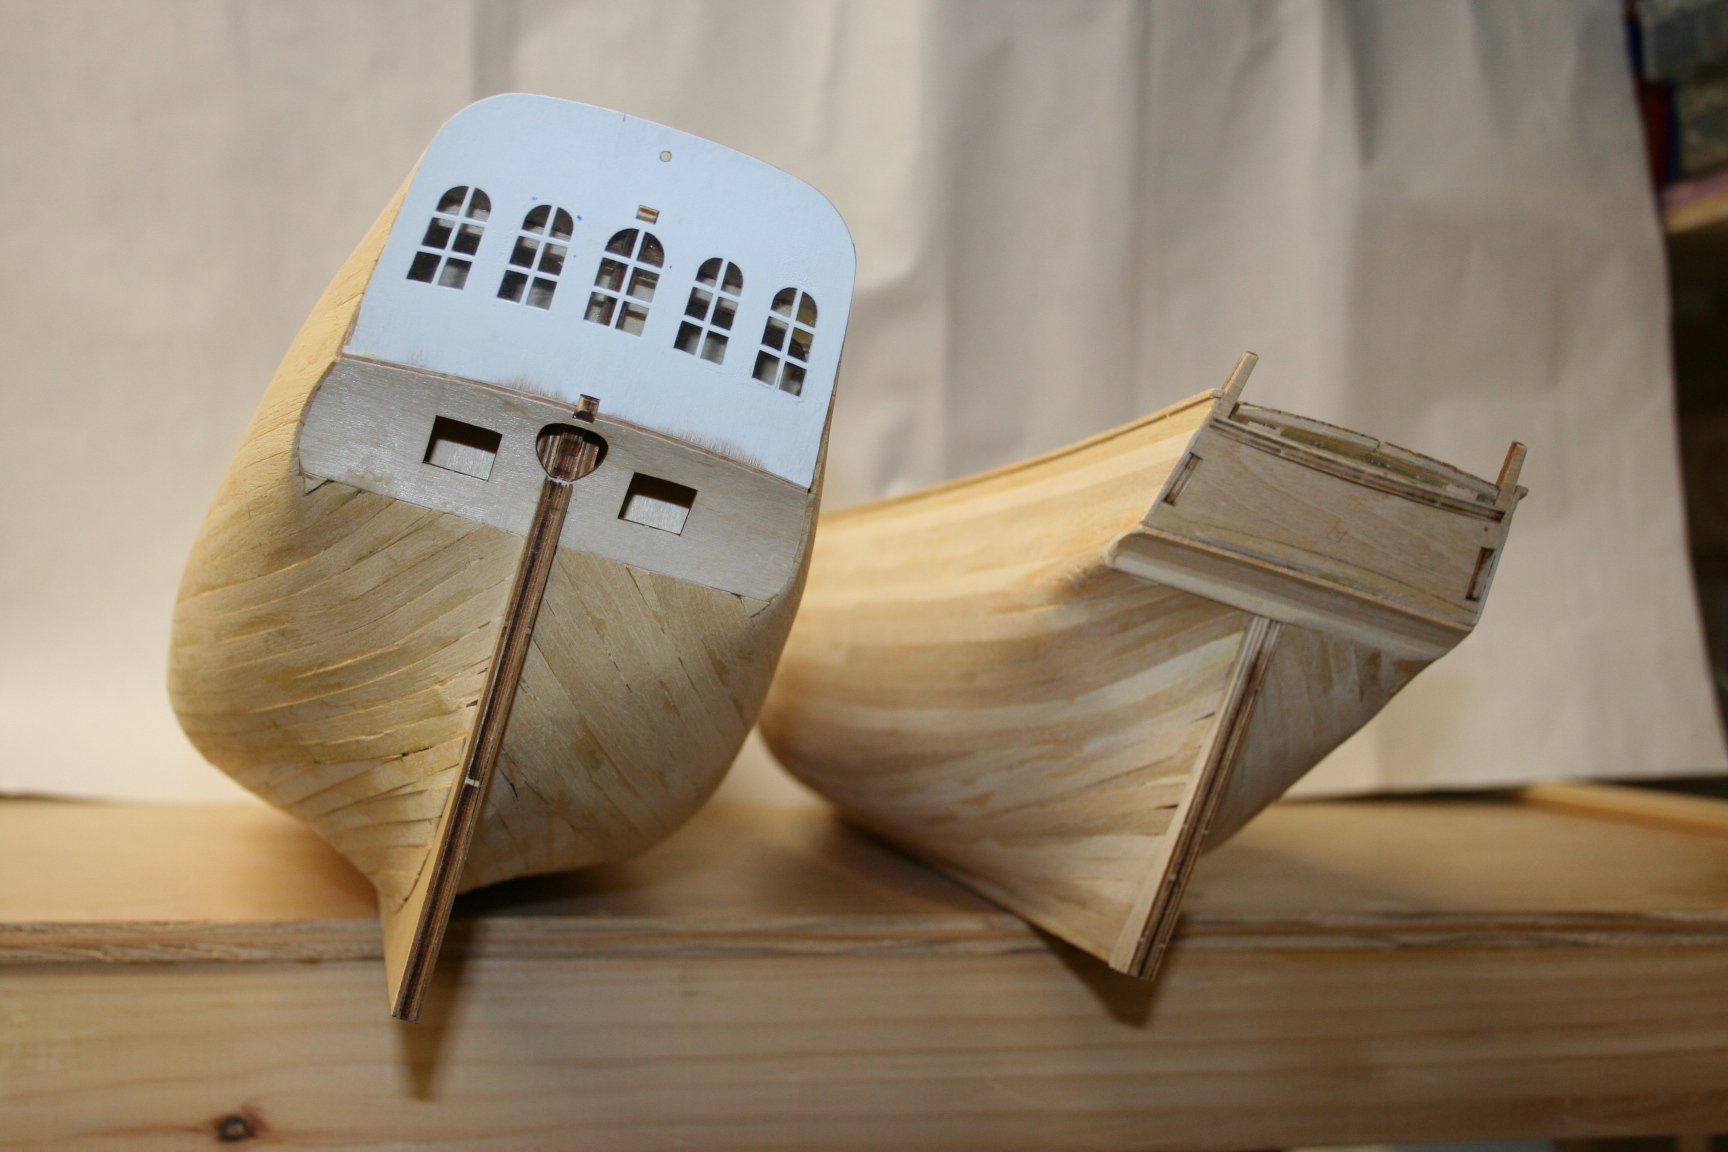
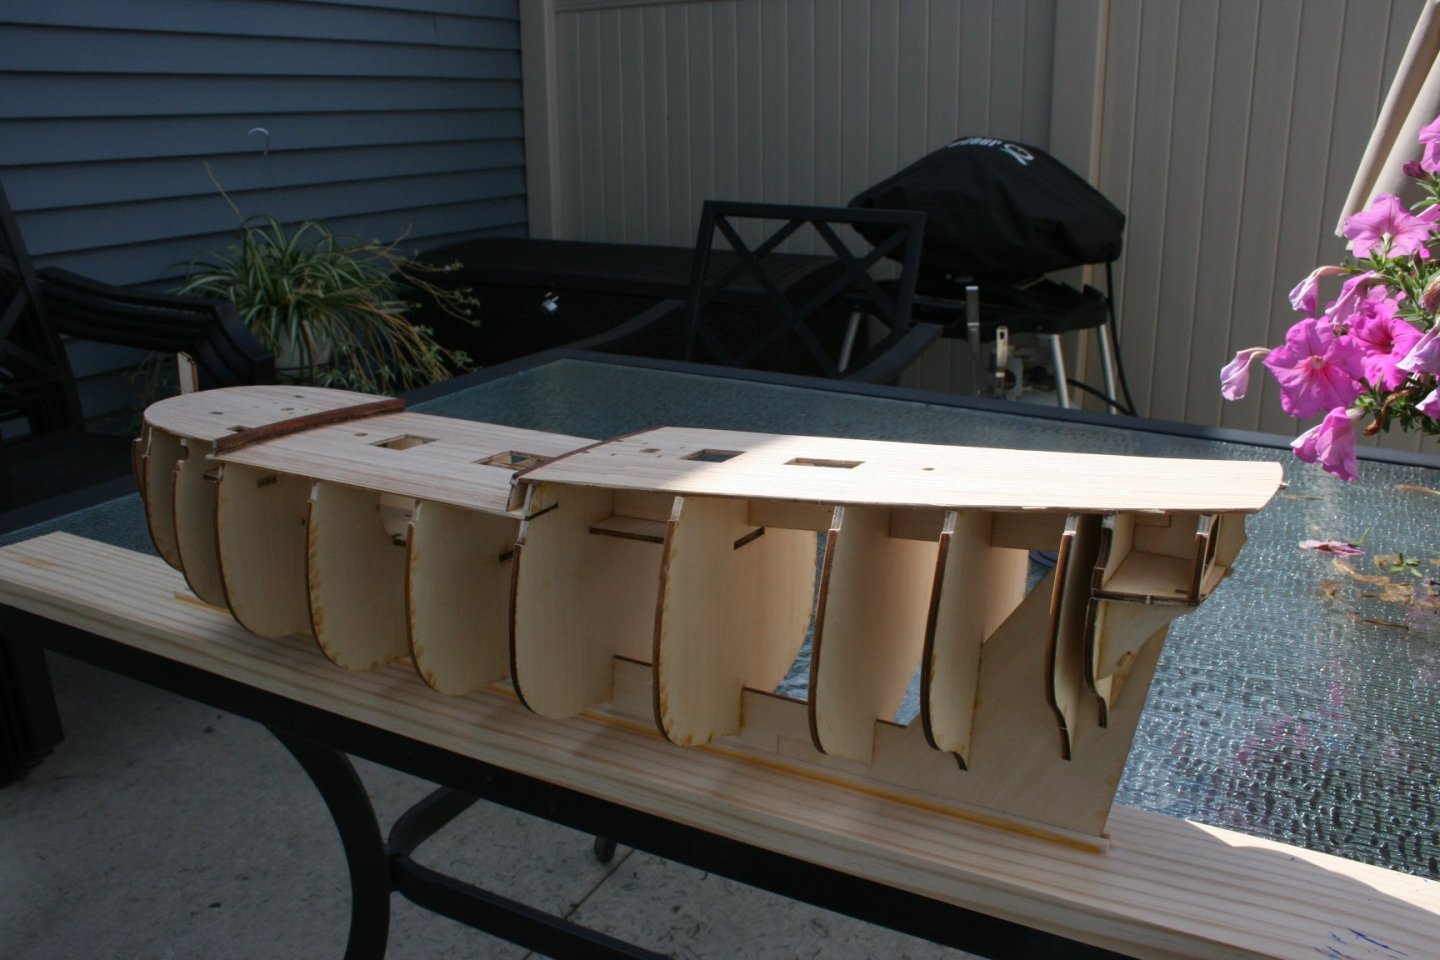
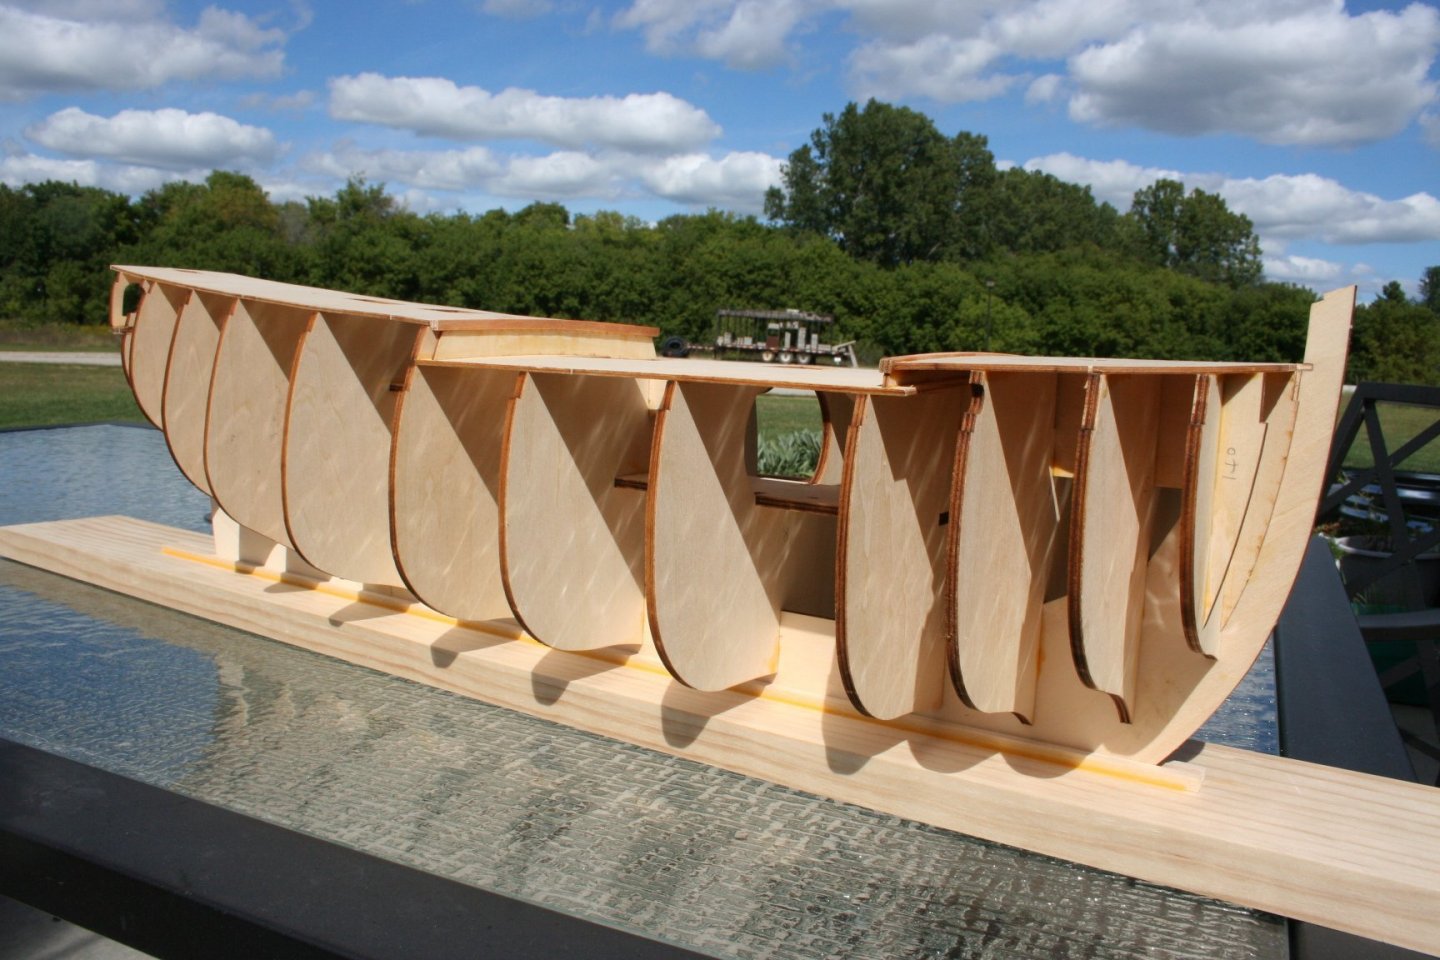
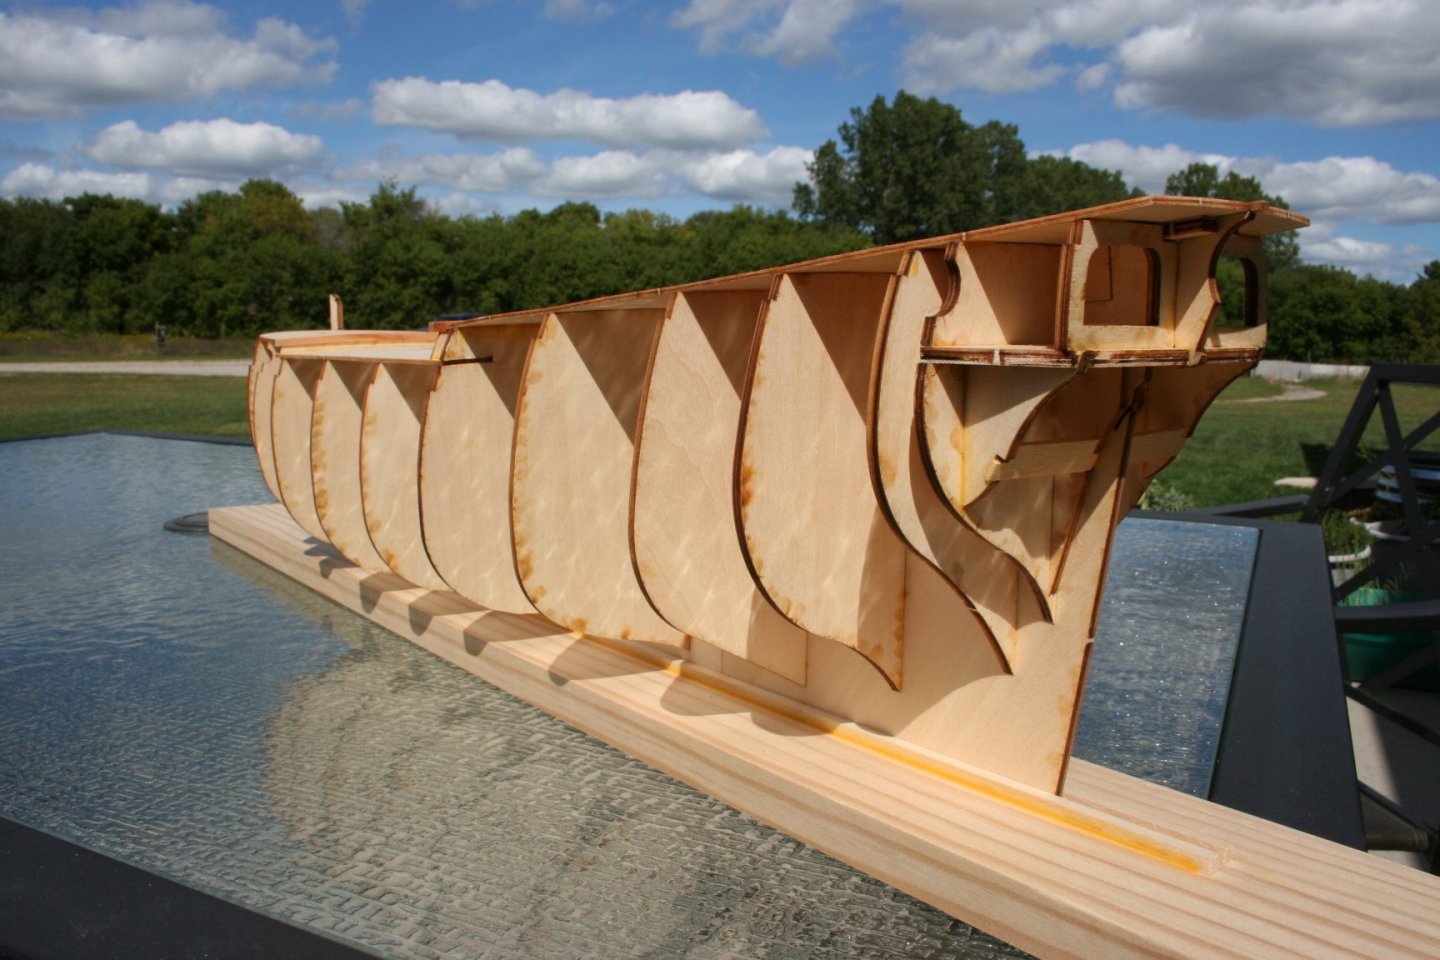
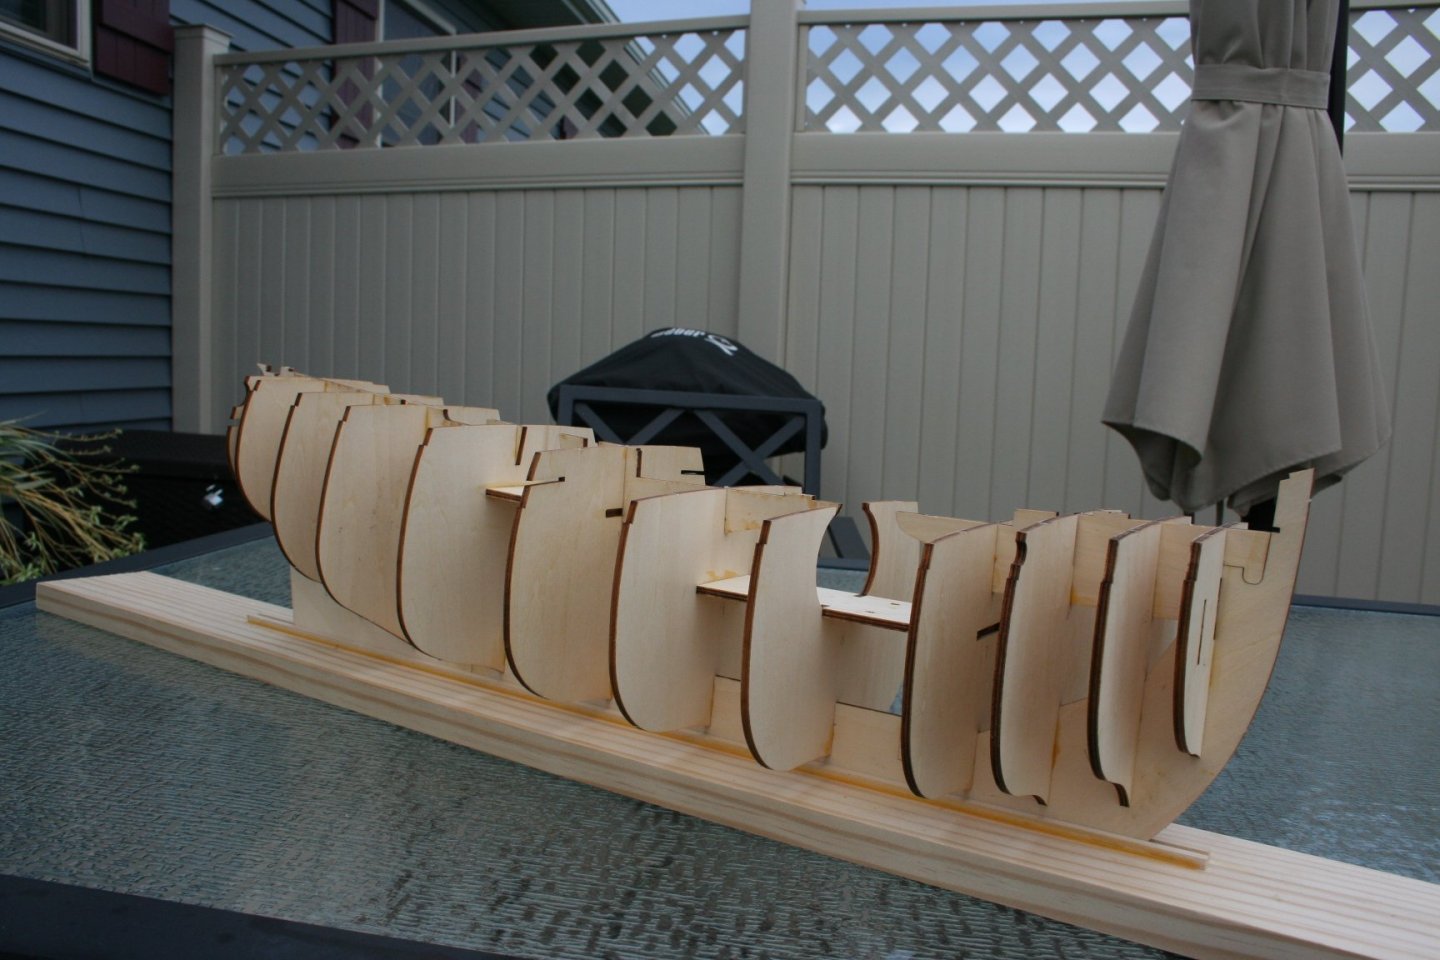
A sucker for punishment, I decided to give myself something to do while waiting for the glue to dry on the planks of HMS Endeavour. The bulkheads and sub-decks are in place.
-
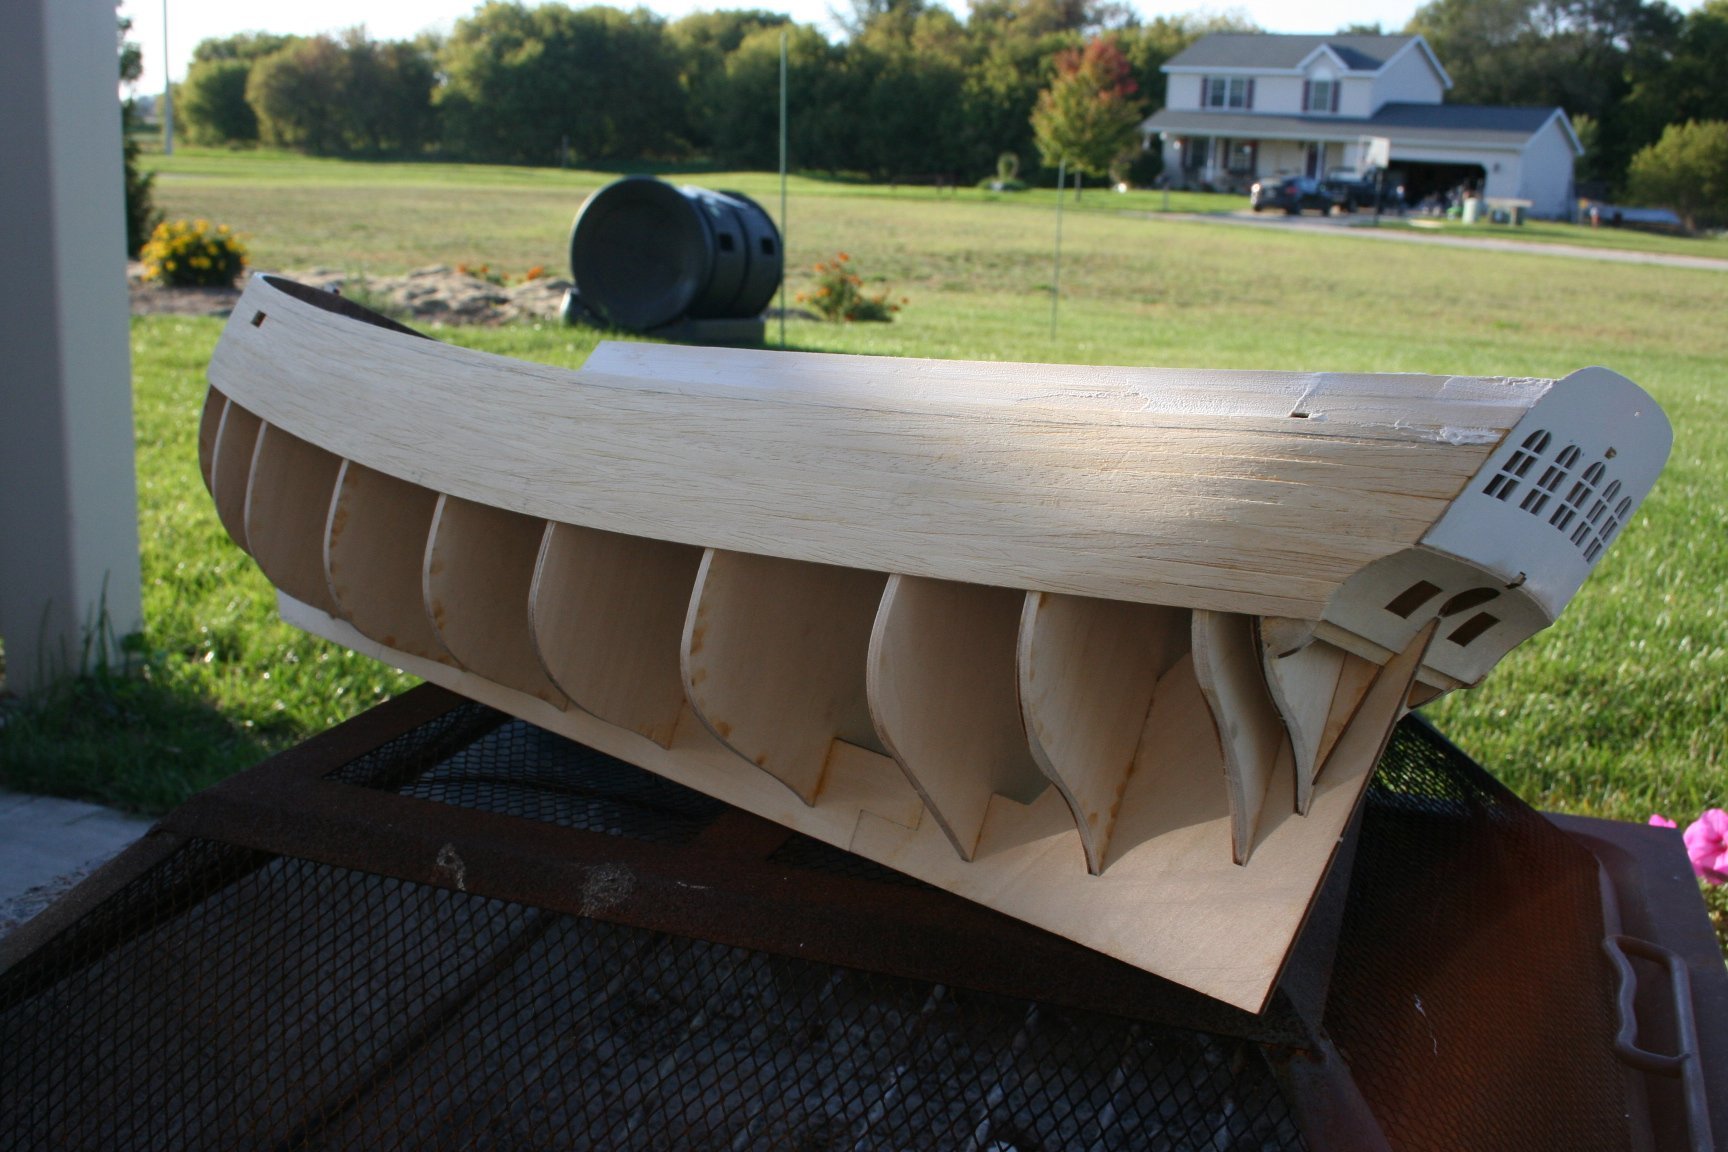
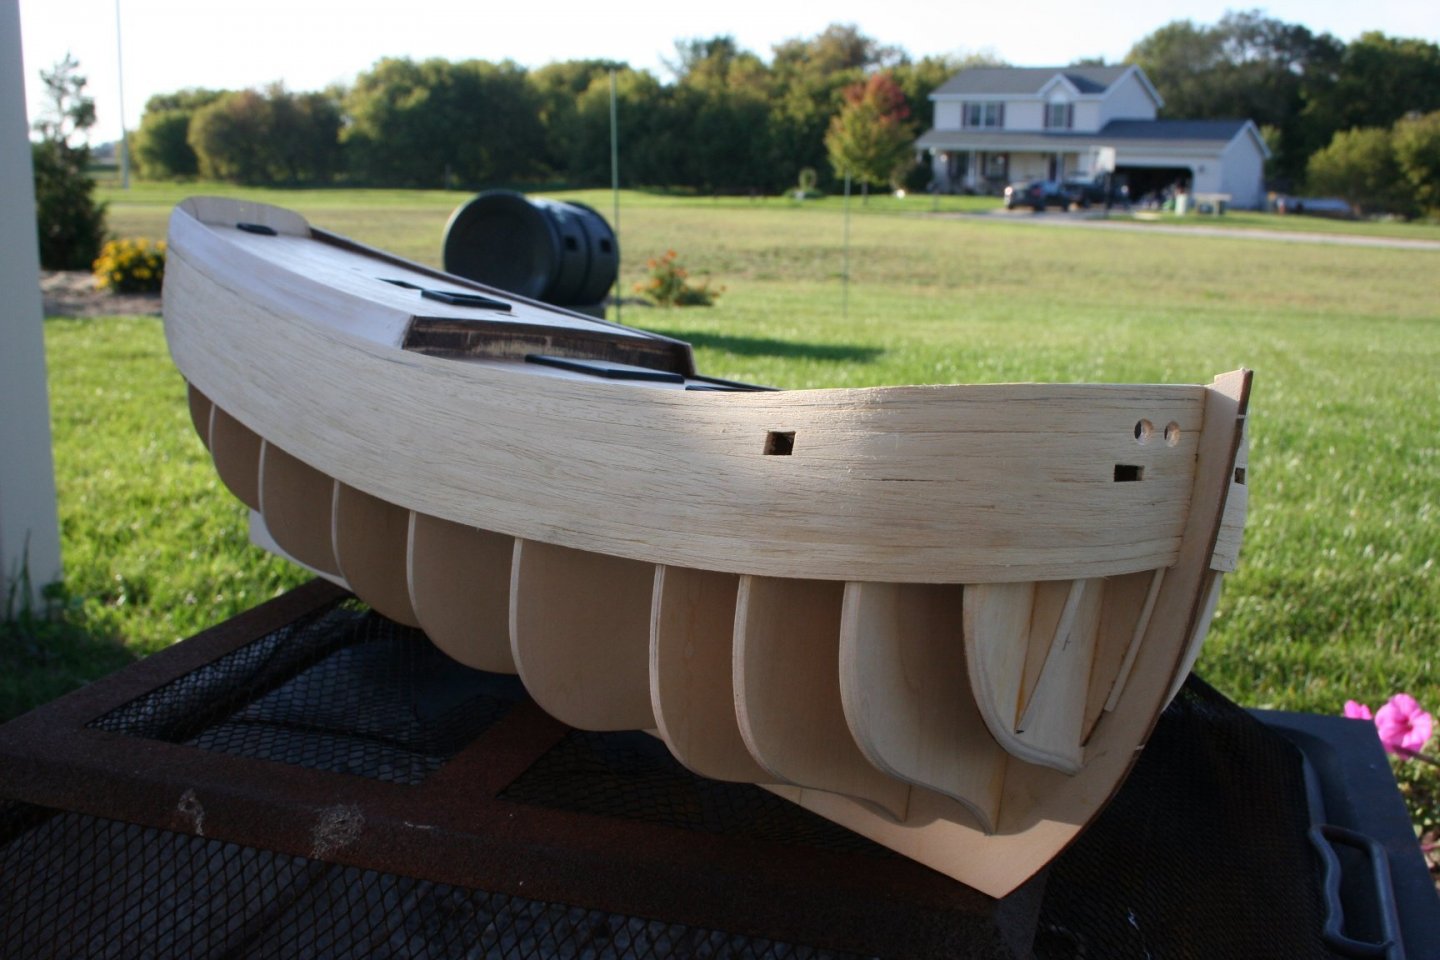
Back to work after a brief break camping in Interlochen State Park Decks are planked and a couple of coats of satin varnish have been applied, rubbed down after each with very fine steel wool. Then the ply bulwarks have been added to act as a template of sorts for the fairing of the hull, which is now a work in progress. The Billings instructions indicate that some parts are to be painted red - but I understand that red was only used on fighting ships?? So I am going to use a mahogany stain on most of the wooden pieces such as capstan and inside of the bulwarks.

-
Follow along by all means! I chose the Billings kit because of familiarity with the brand. I don't know that my skills - or patience! - would allow me to do justice to models from, say, Caldercraft or Amati. Cases in point are a past attempt at building 'Boston Typhoon' from Mountfleet Models and 'Charles P. Notman' from Bluejacket. The former was sold in an unfinished state. The latter has languished on a shelf for 3 years. However, with renewed enthusiasm, I am determined to complete her and will start a build log for her in due course.
-
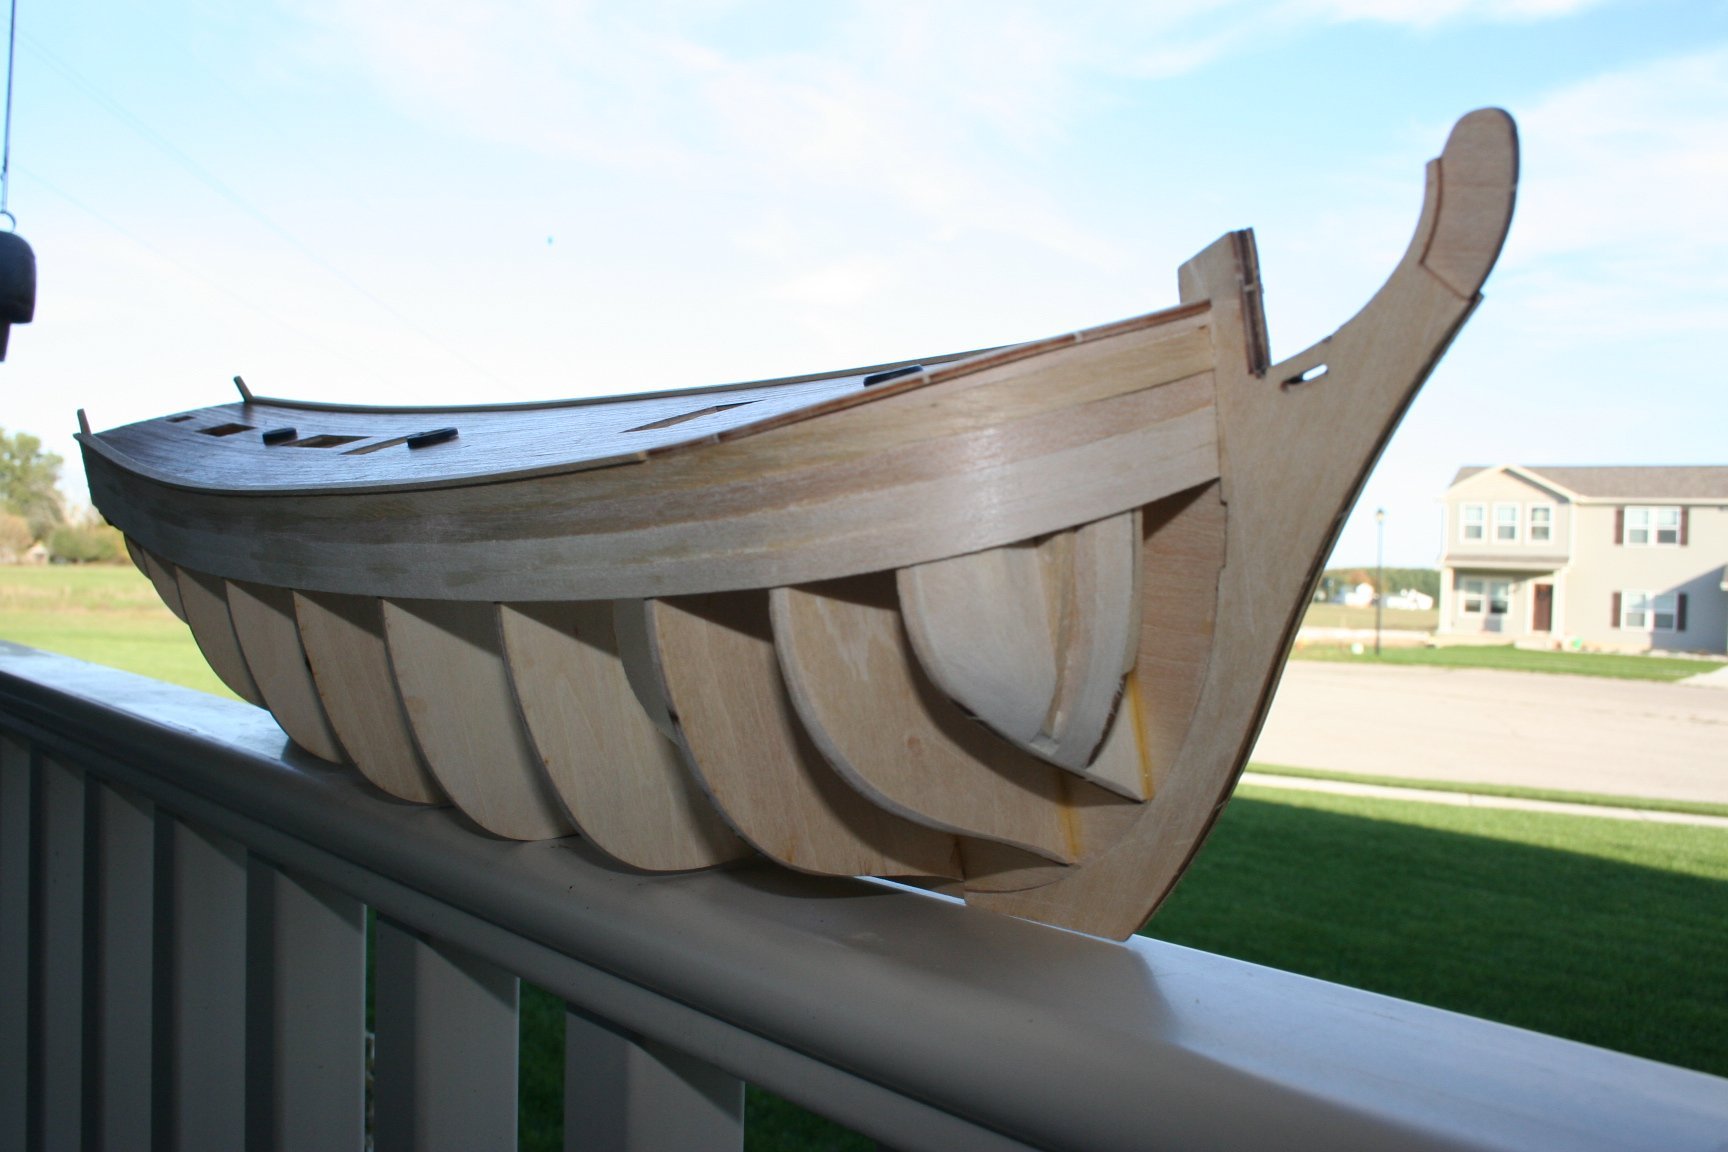
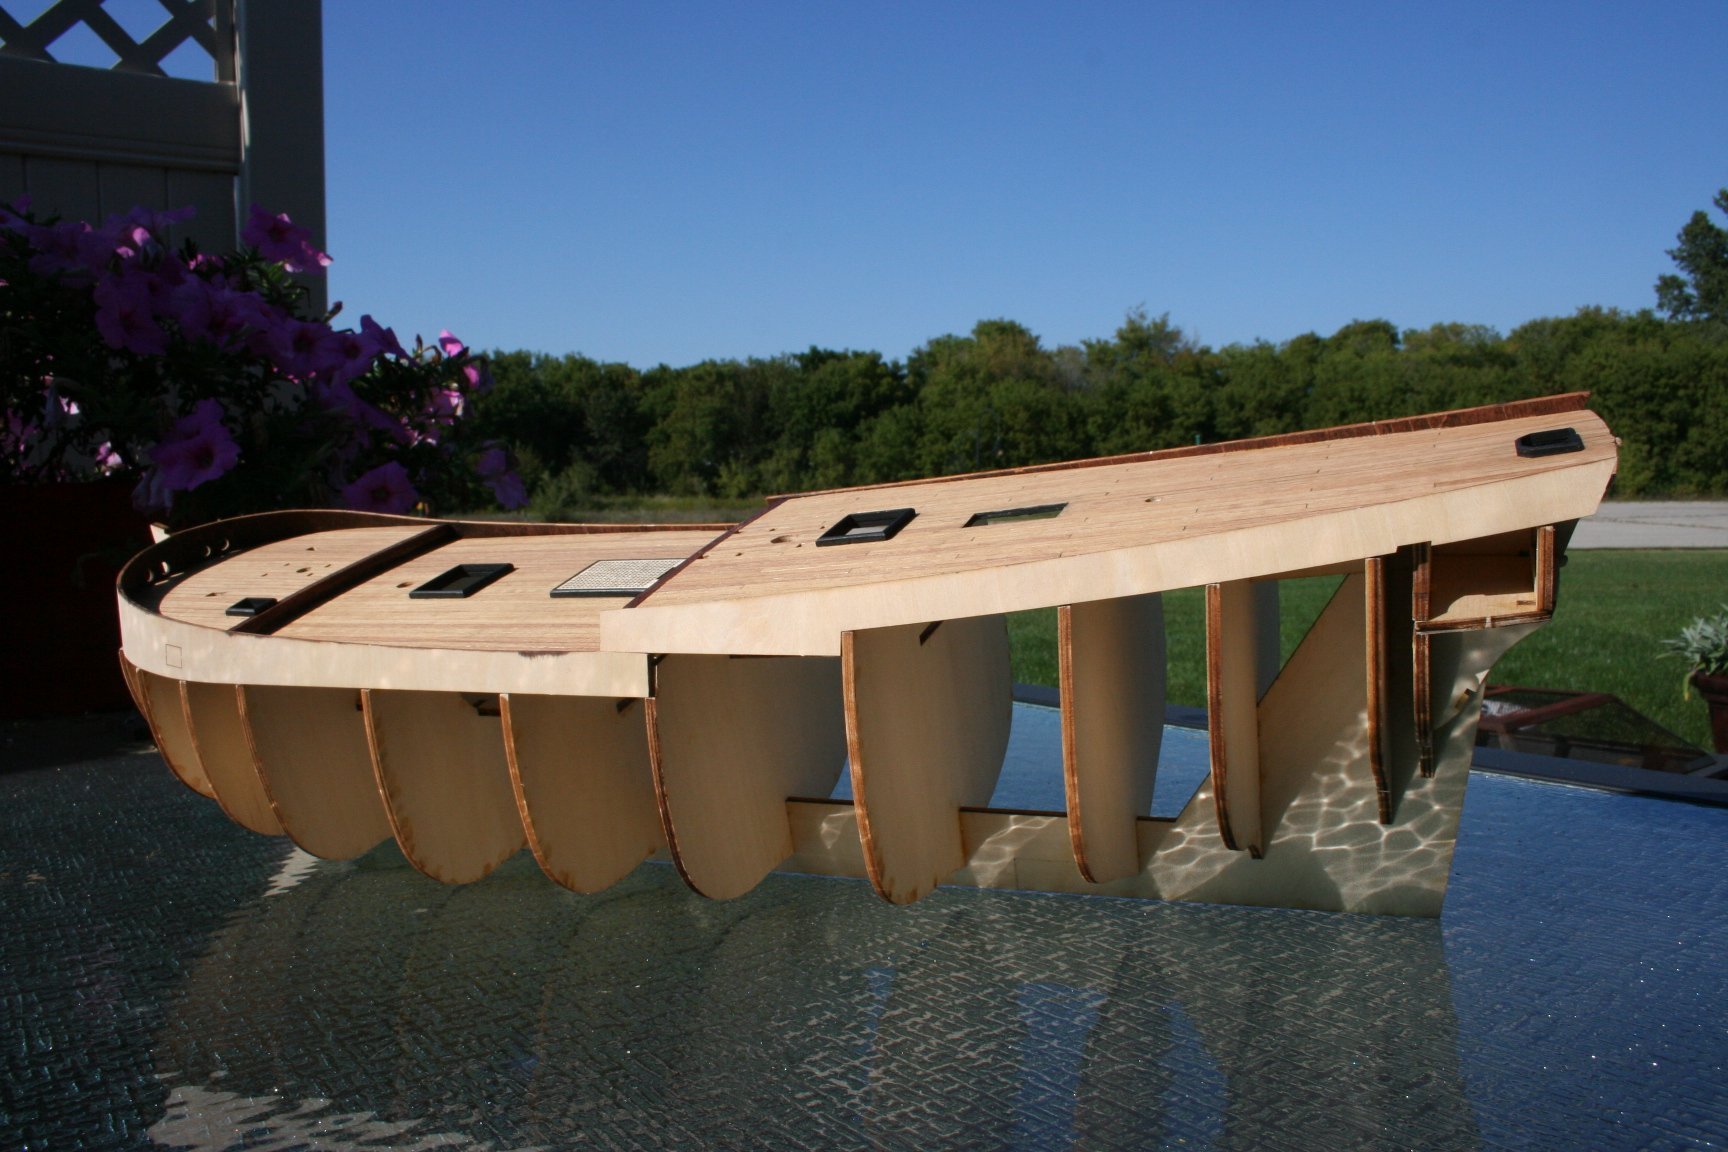
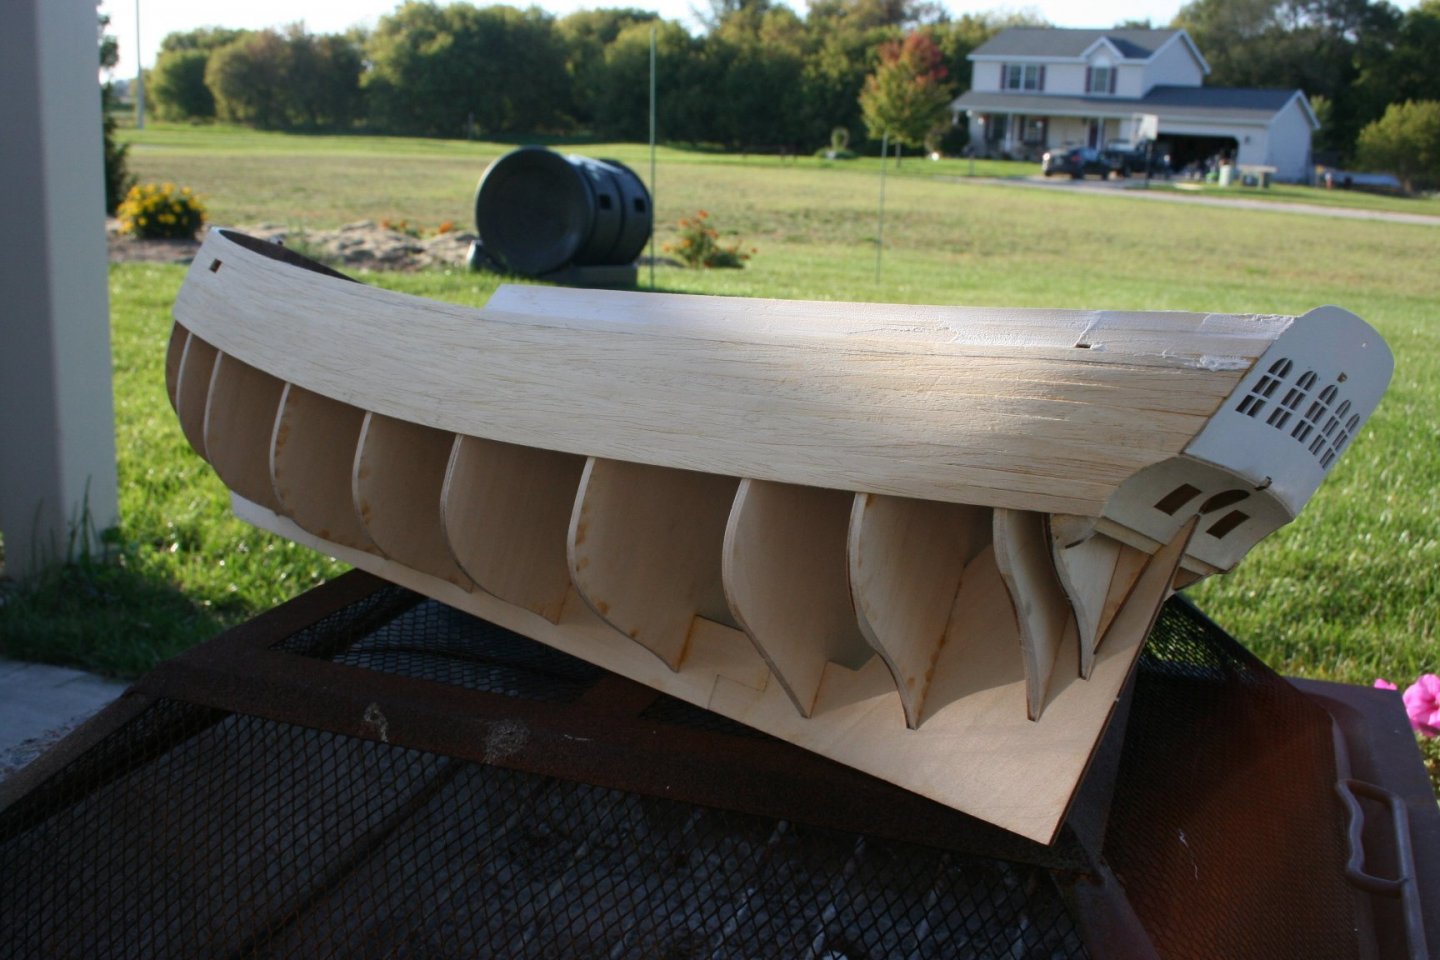
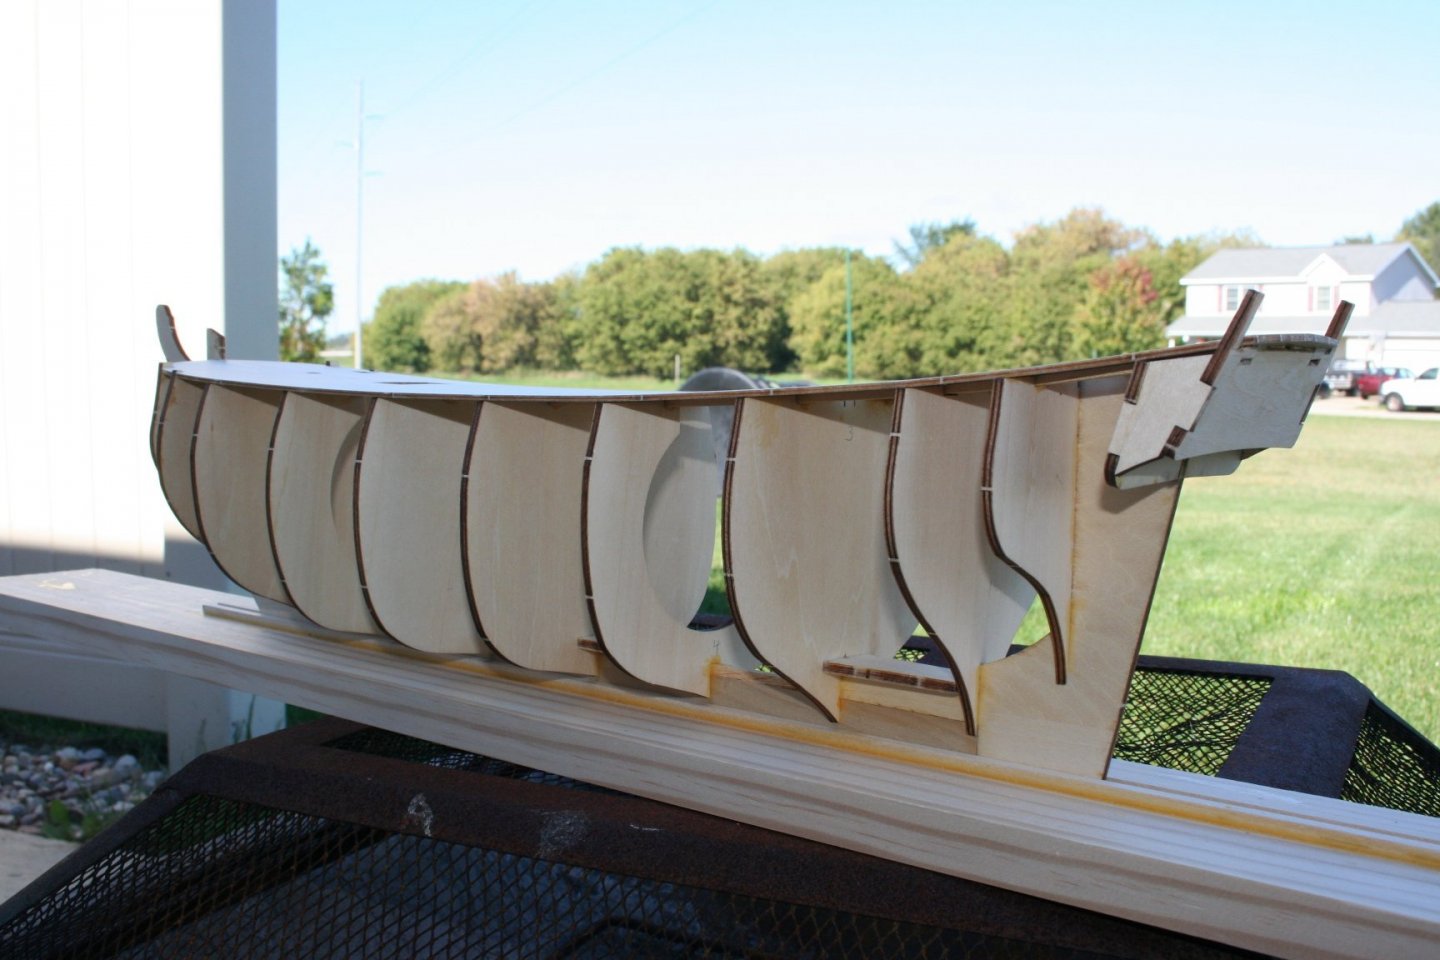
Remaining hull formers are in place and sub-decks are installed. I plan to follow Allan Tyler's advice and plank the decks before fairing the bulkheads and planking the hull. No big issues so far although some 2mmx7mm strip wood was missing from the kit. Fortunately, I had some on had from previous builds.
-
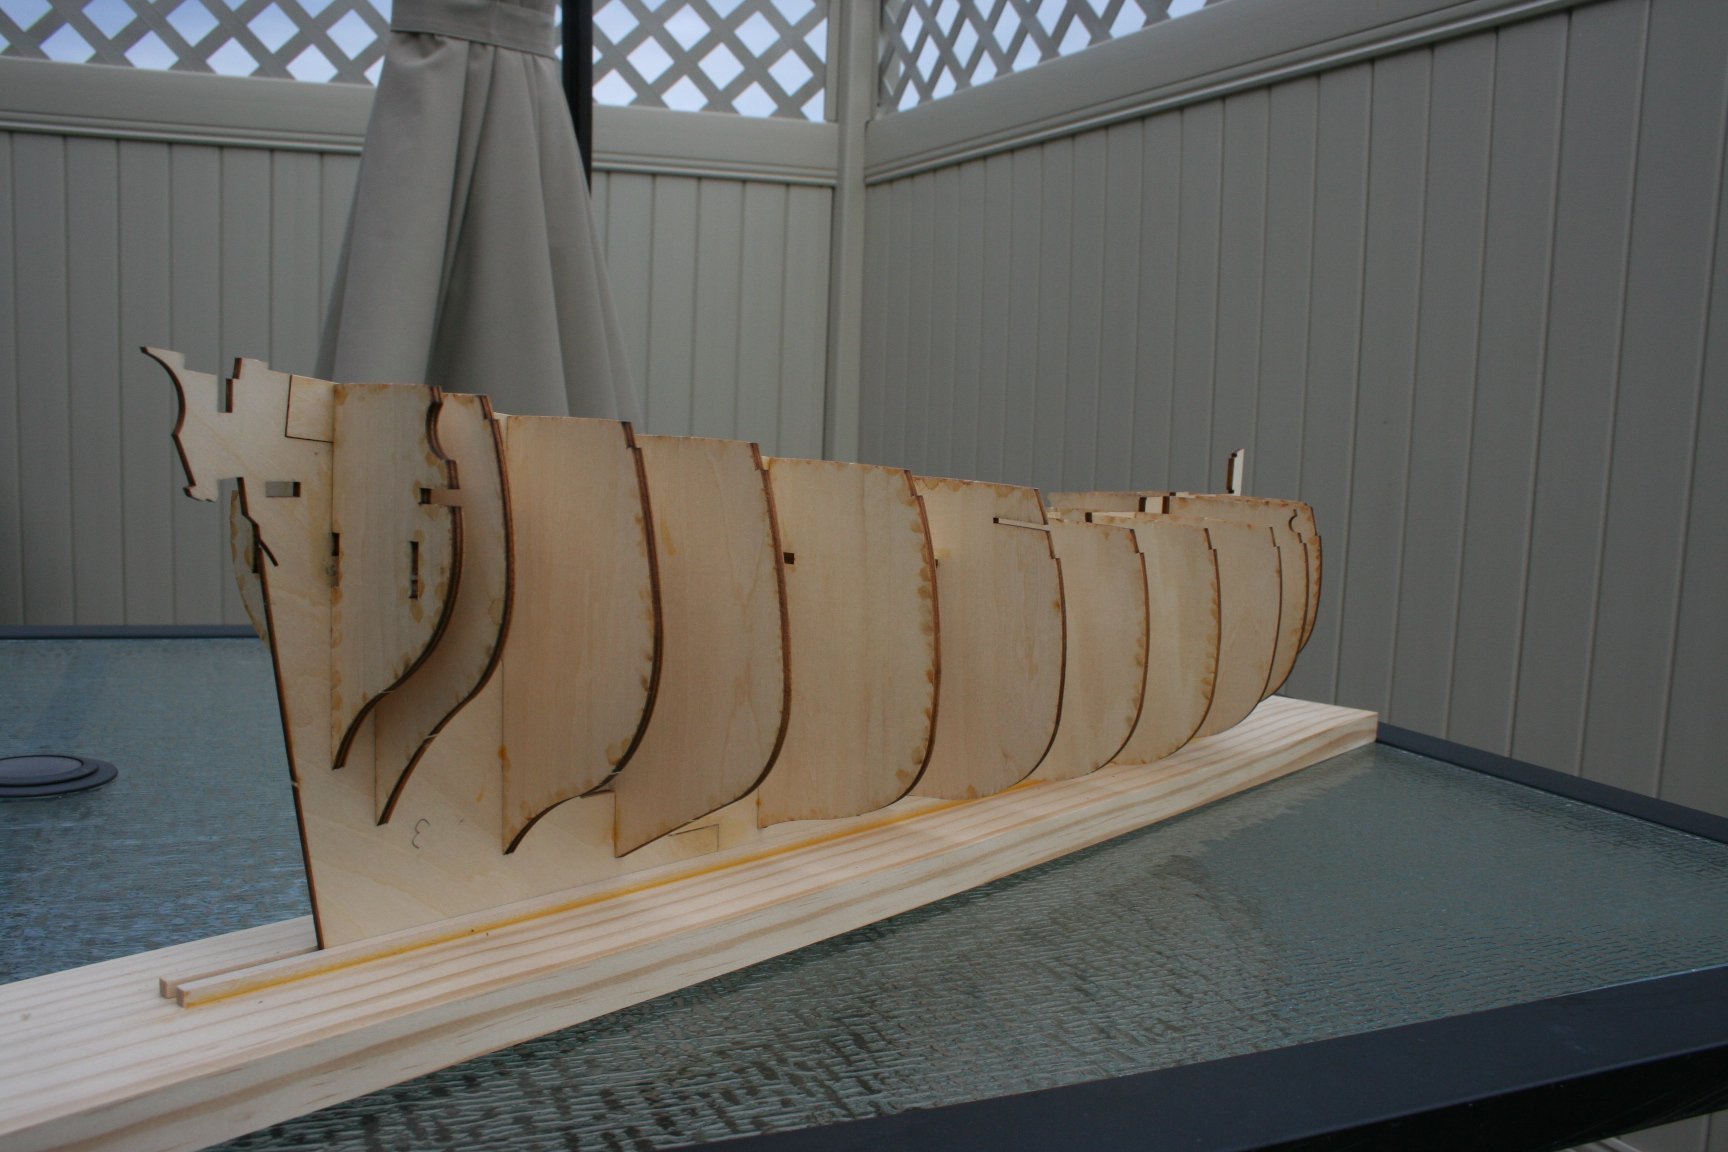
The bulkheads are fixed in place. Fit and finish of the laser-cut parts is pretty good so far. Thanks to all who have contributed tutorials on planking hulls. Unlike my previous builds, where hulls have been filled, sanded smooth and painted, this one will have the planks exposed. I am determined to do the planking properly!

-
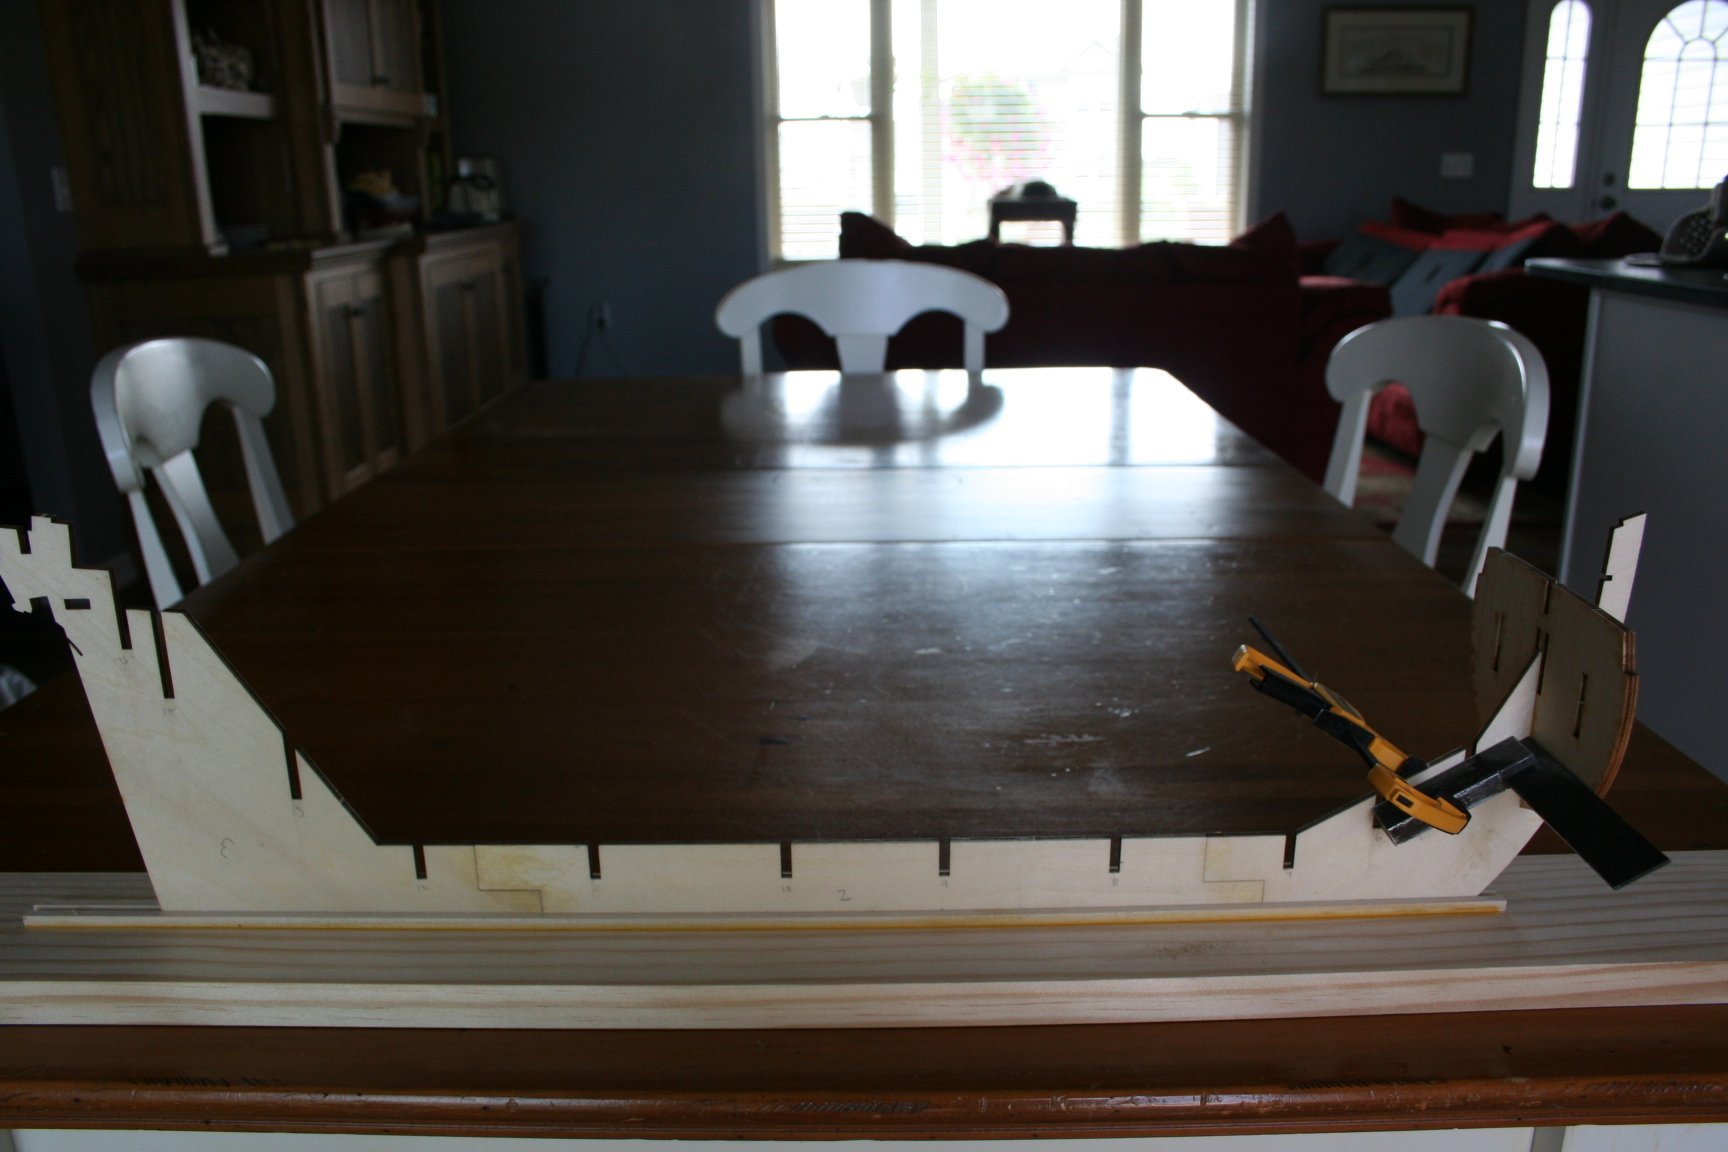
This is my first attempt at a build log, though not my first build. The first pic shows the first frame in place on the keel in my home-spun 'building jig'. I promise that the pictures will get better!