HOLIDAY DONATION DRIVE - SUPPORT MSW - DO YOUR PART TO KEEP THIS GREAT FORUM GOING!
×


BikerMart
-
Posts
336 -
Joined
-
Last visited
Content Type
Profiles
Forums
Gallery
Events
Everything posted by BikerMart
-
Dave. I have found that the combination of a Billings kit and my experience level has produced a reasonable representation of the vessel. As I have said before though, I am not seeking to produce a historically accurate ship. For me, it is the build process itself that generates the pleasure, not necessarily the end result. Martin
-
In my experience the wood supplied for planking in Billings kits has been sub-par. More often than not I used 1/16 * 1/4 basswood strips instead, as you suggested.
-
Interesting. And like a palindrome. The name with the backwards 'N' appears the same whether read left to right or right to left.
-
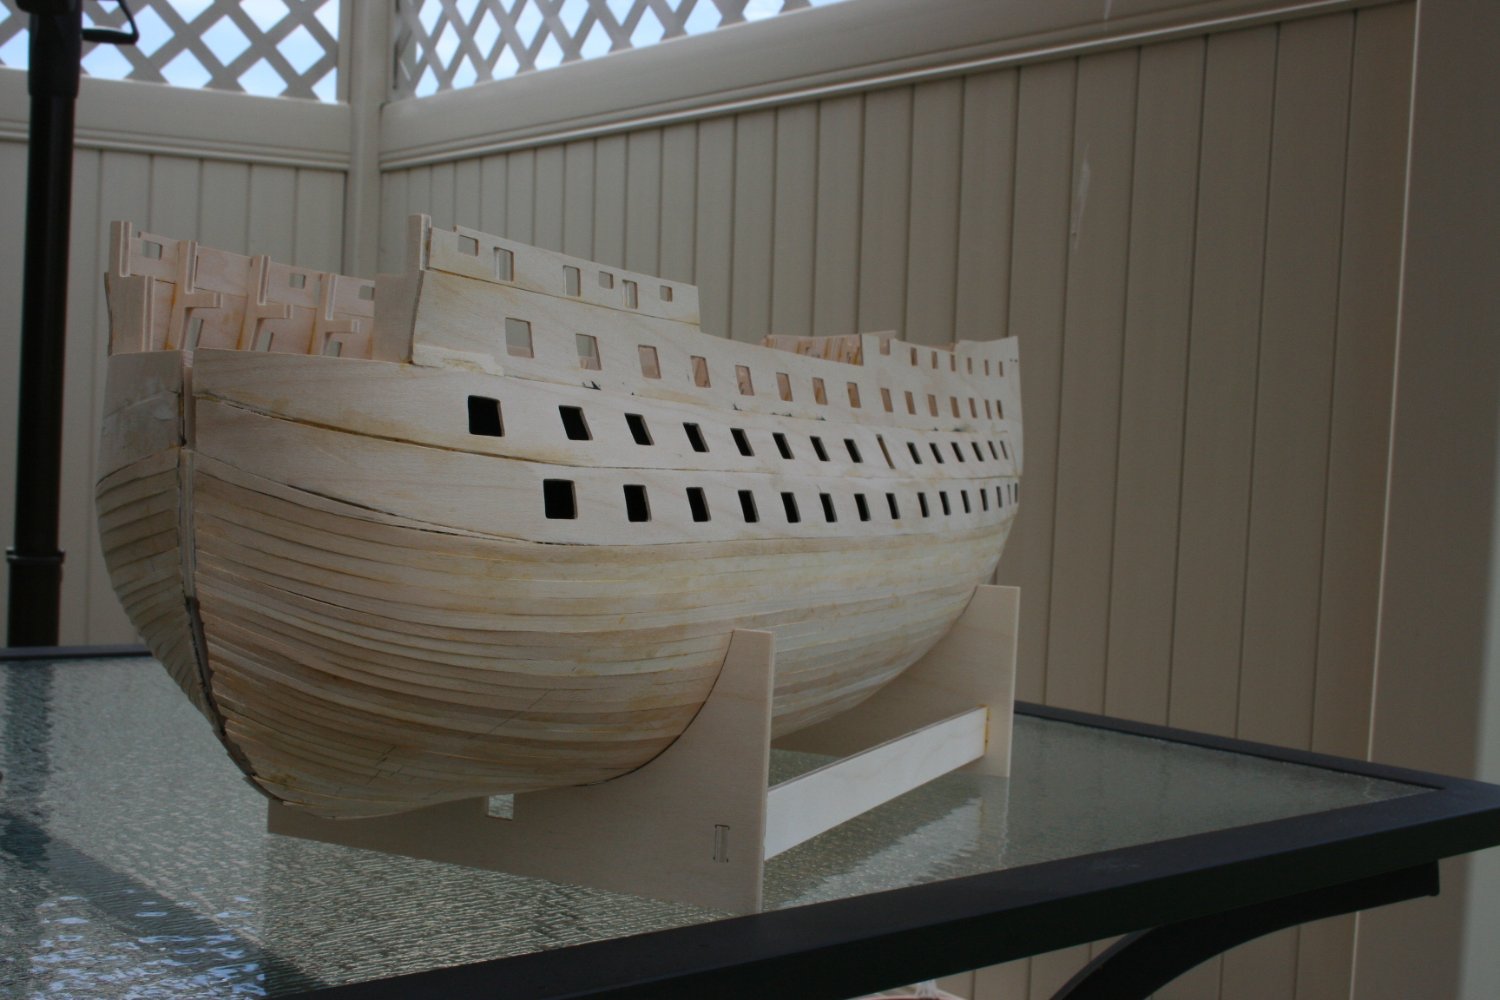
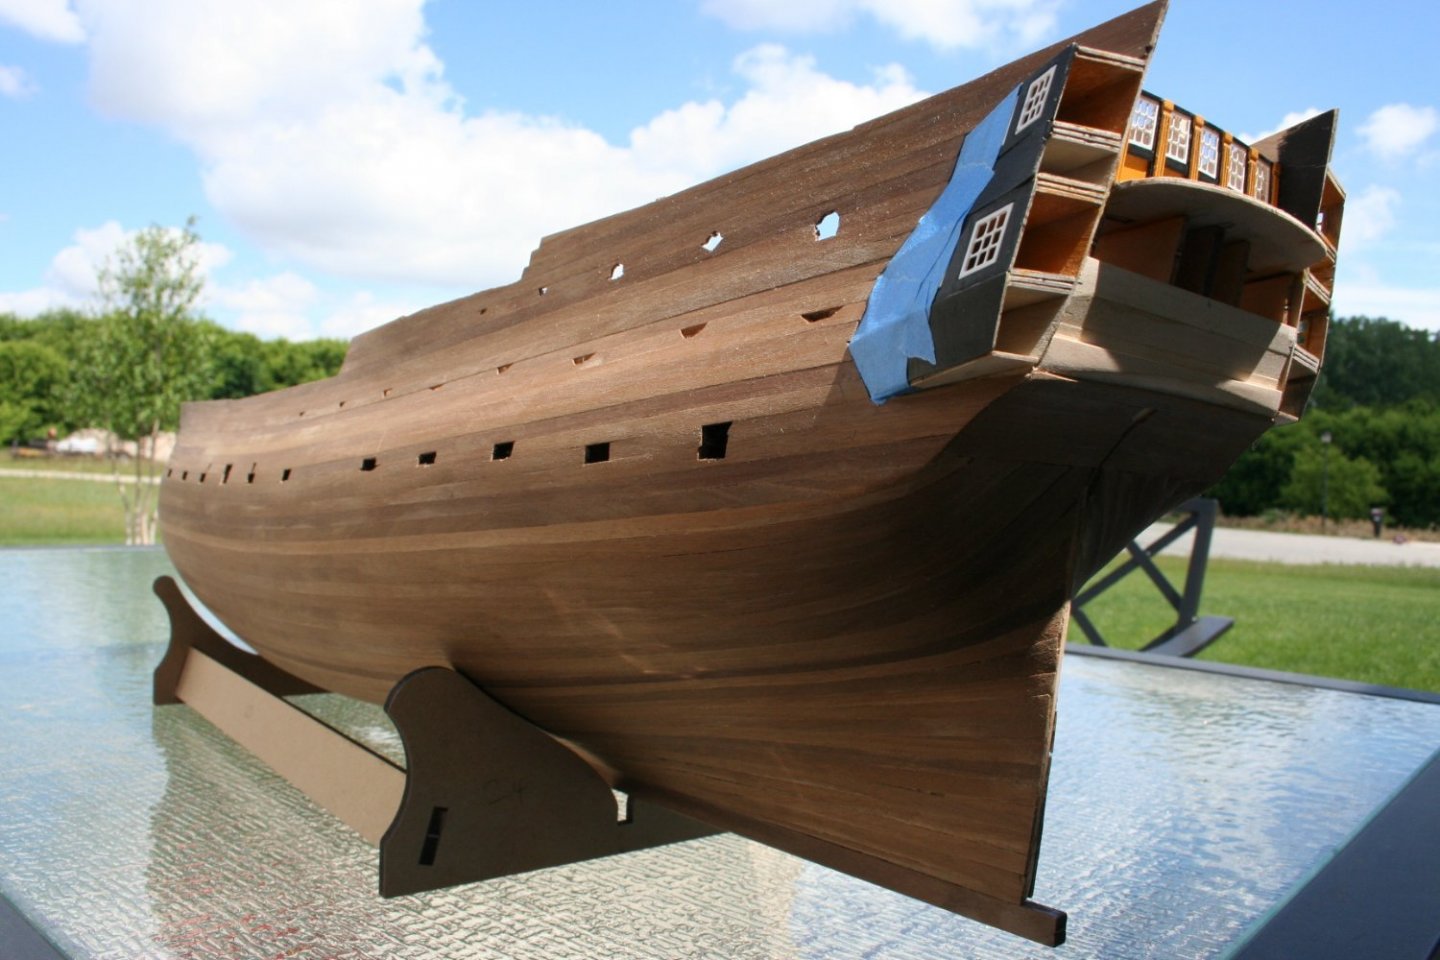
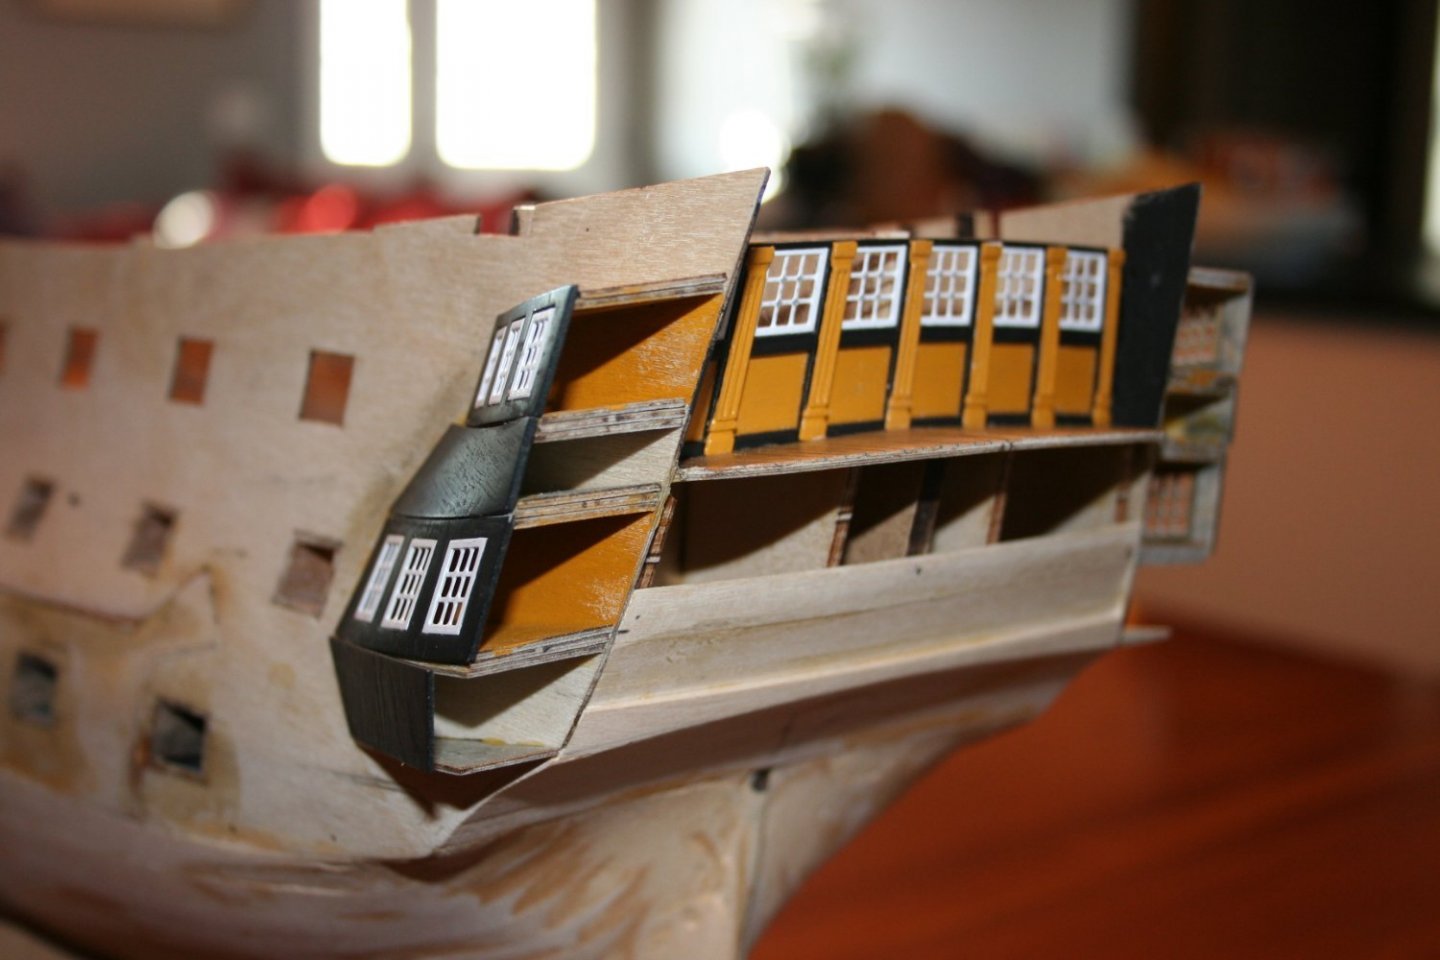
Work proceeds on the stern galleries and the second planking. Oops! I painted the stern galleries black and realised that parts should be yellow. I don't know how many coats will be required to cover up my mistake; about 3 coats have been applied so far.

-
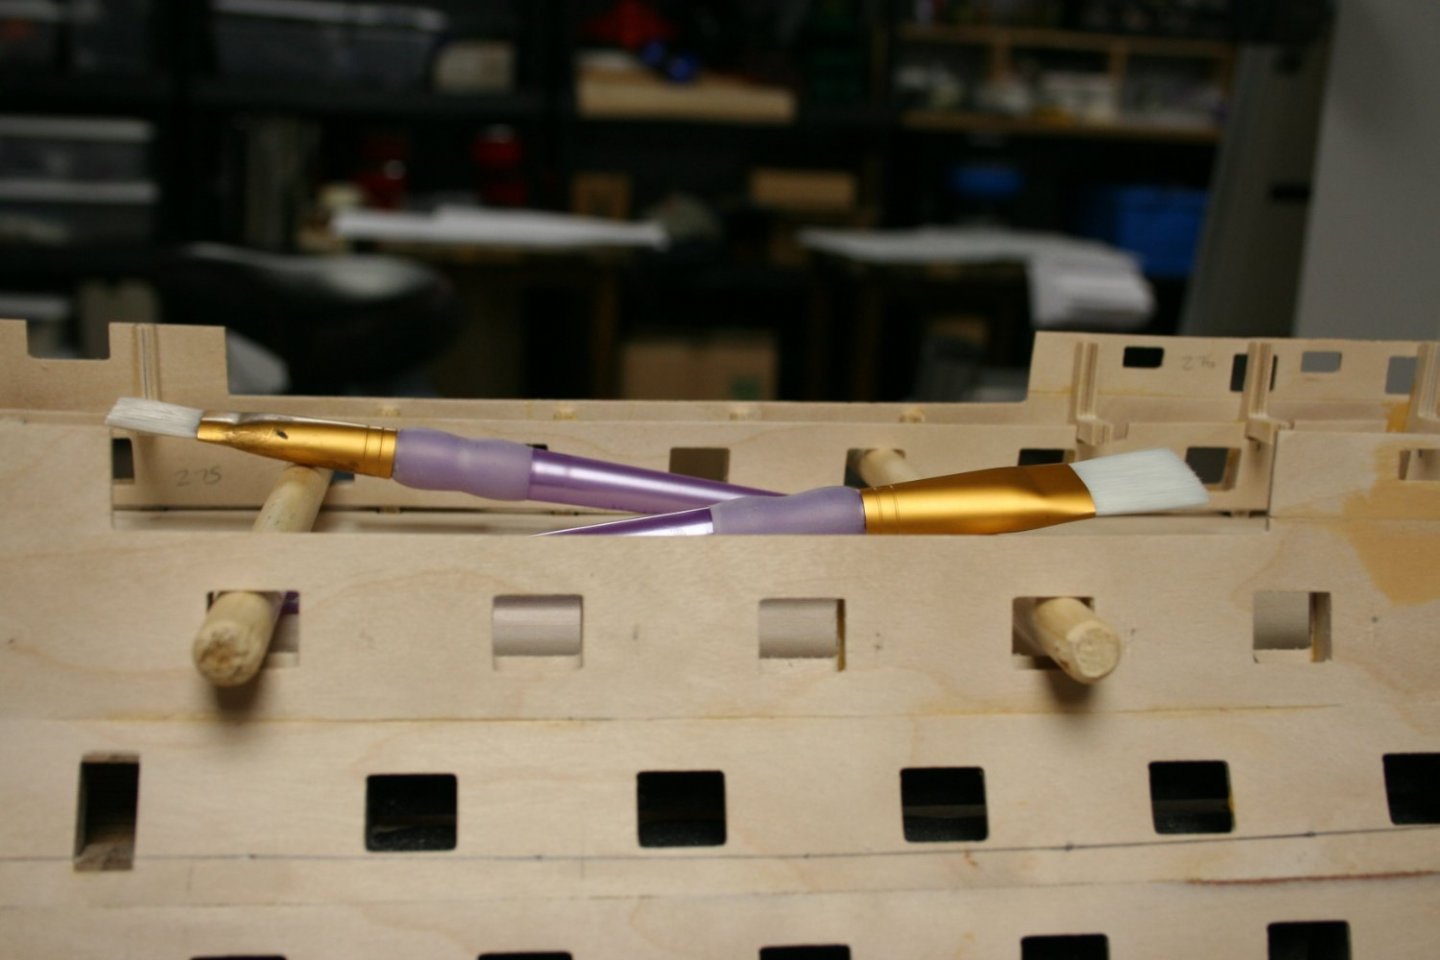
Tilehurst was where I was born and raised; then Caversham when I got married and started a family. I lived in Bracknell briefly; shared a council flat in ?Wordsworth? if I remember correctly. Anyways, as per suggestions, I shaved off the bottom of the inner bulwarks and used dowels for alignment while the glue set. Tapered paint brushes held the dowels firmly in place. Worked a treat!
-
Thanks Graham, that was really helpful. Can you say whereabouts in Berkshire you are based? I spent the first 50 of my - about to be - 70 years in Reading.
-
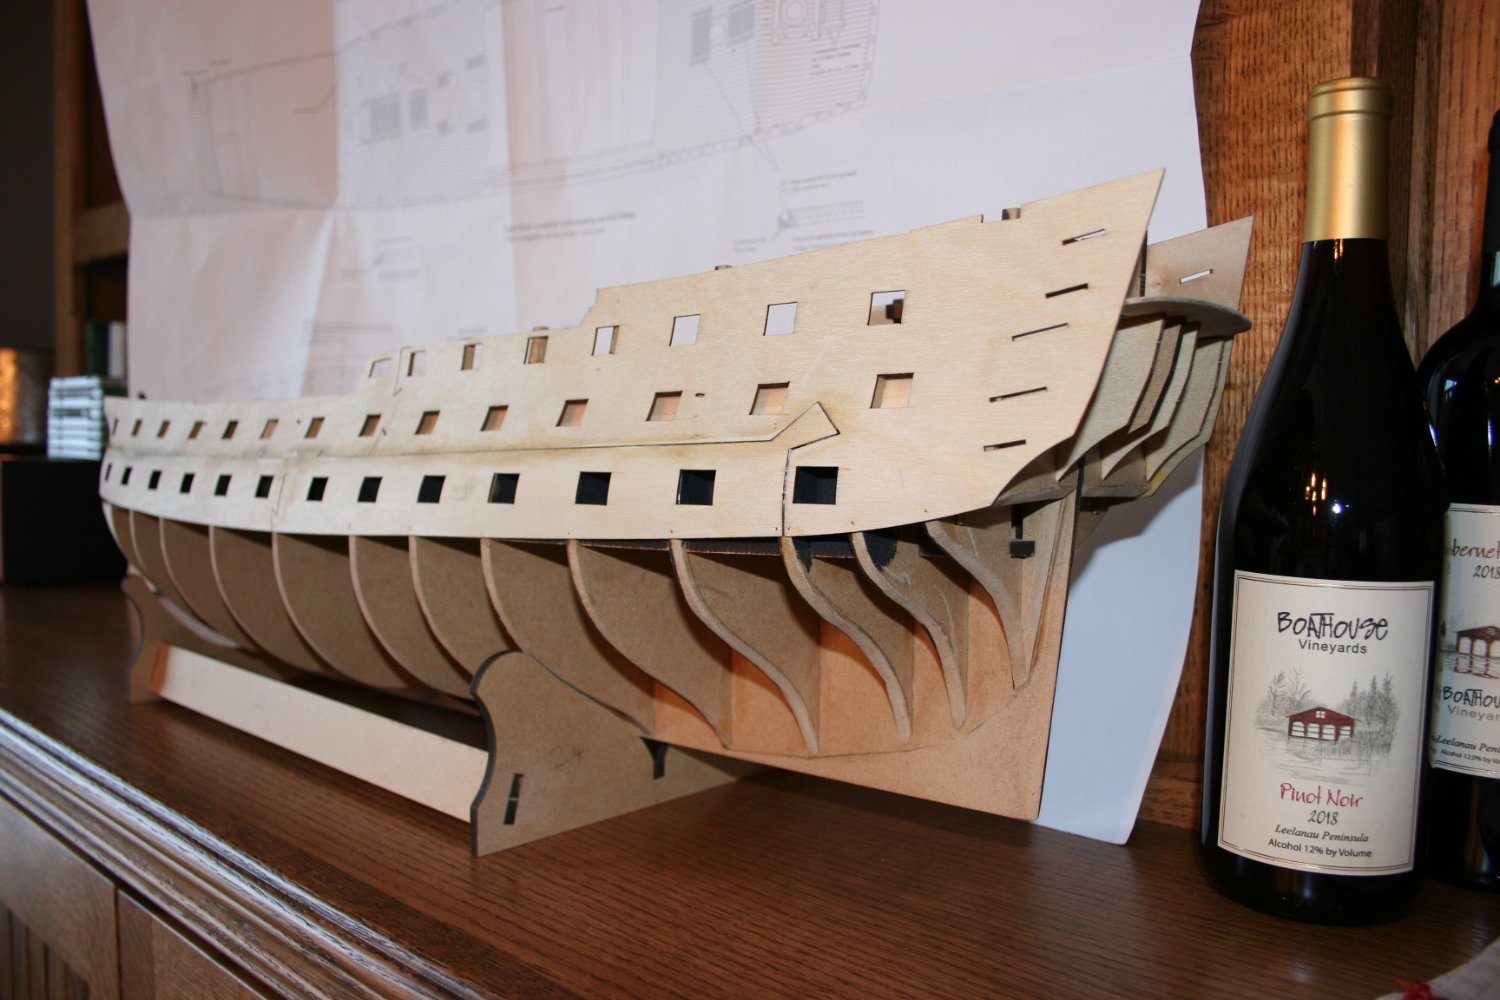
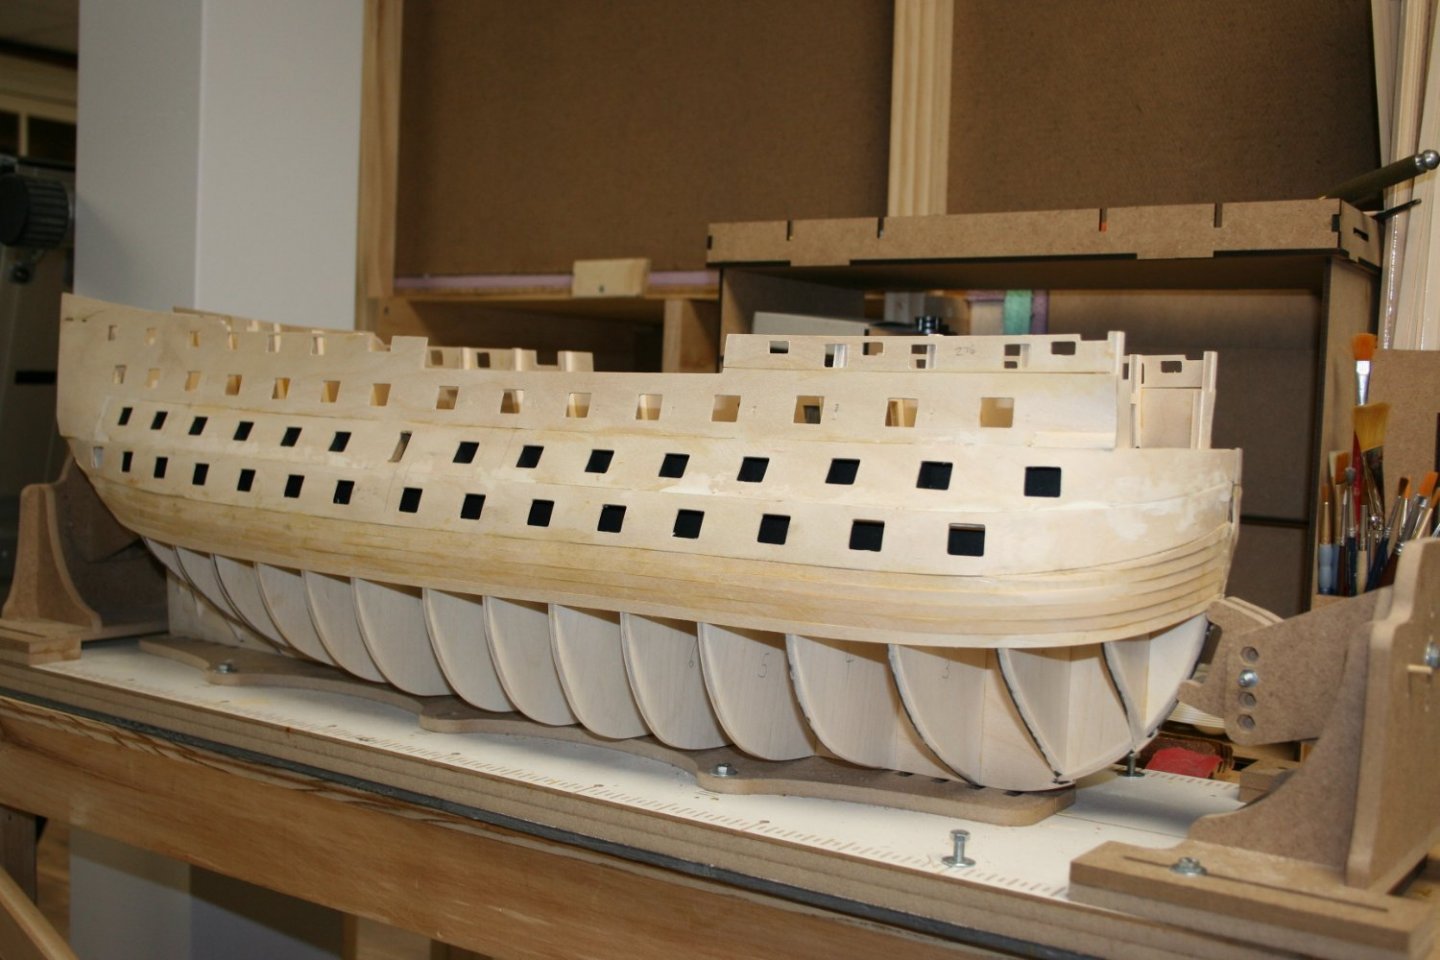
I just offered up the inner bulwark pattern, part 275. The gunport openings appear to be about an eighth of an inch out of vertical alignment. I am pretty sure that the outer gunport pattern is in it's correct position - about 1mm above the top of where the upper deck would be. I can of course trim the one eighth of an inch off the bottom of the inner bulwark, but thought that I would see if anyone had a similar experience with their Victory build before I did so. Thanks! Martin

-
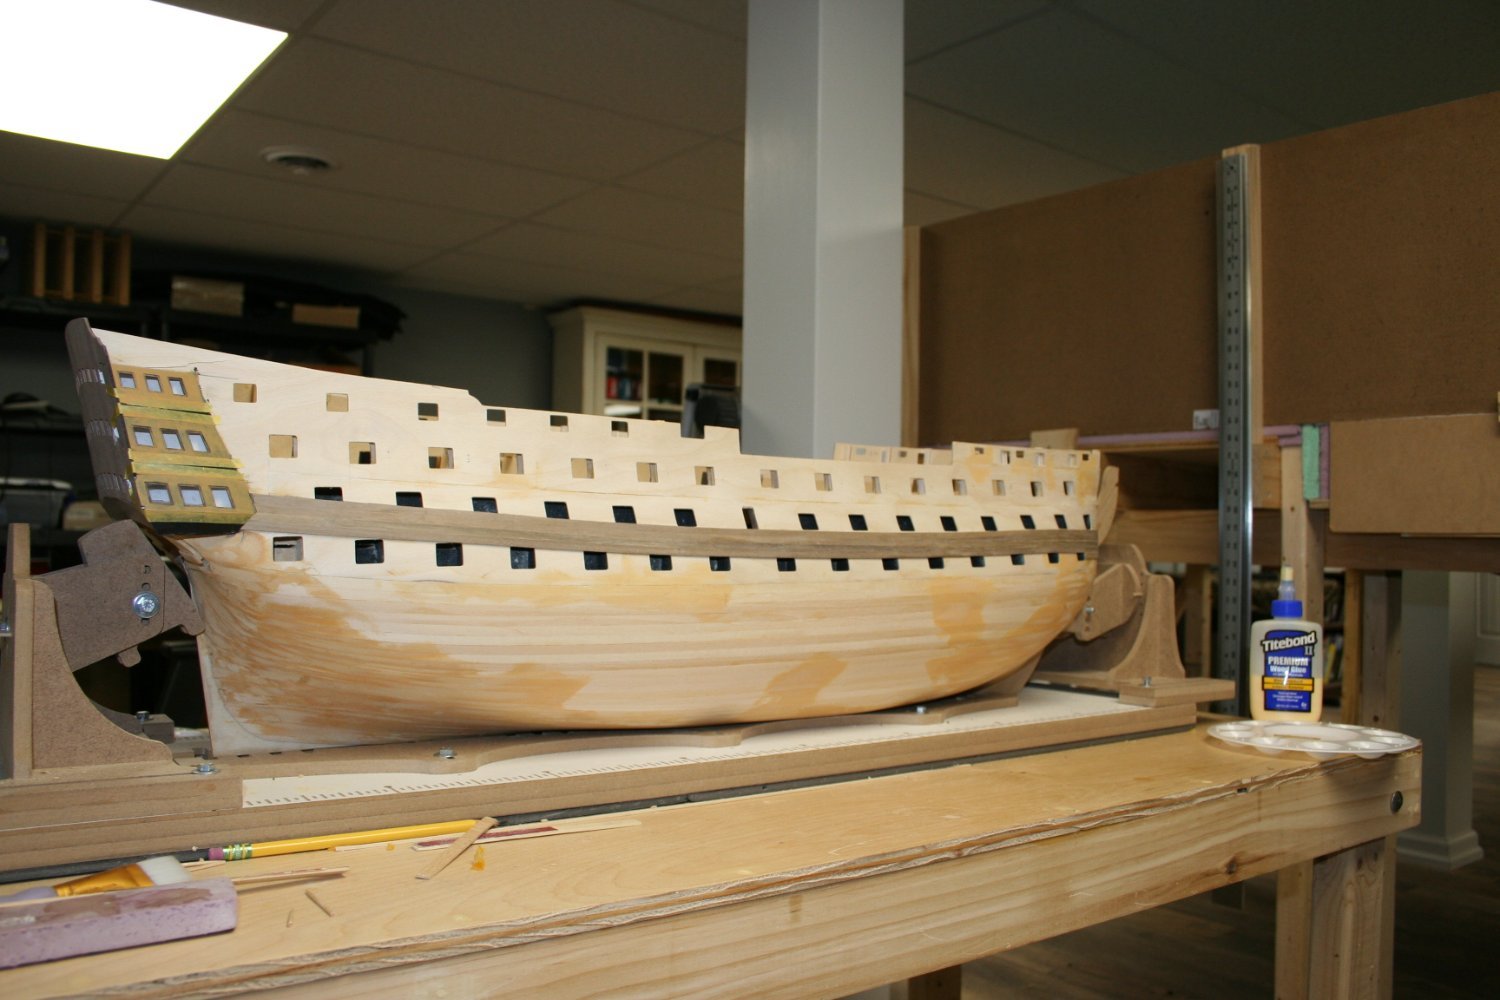
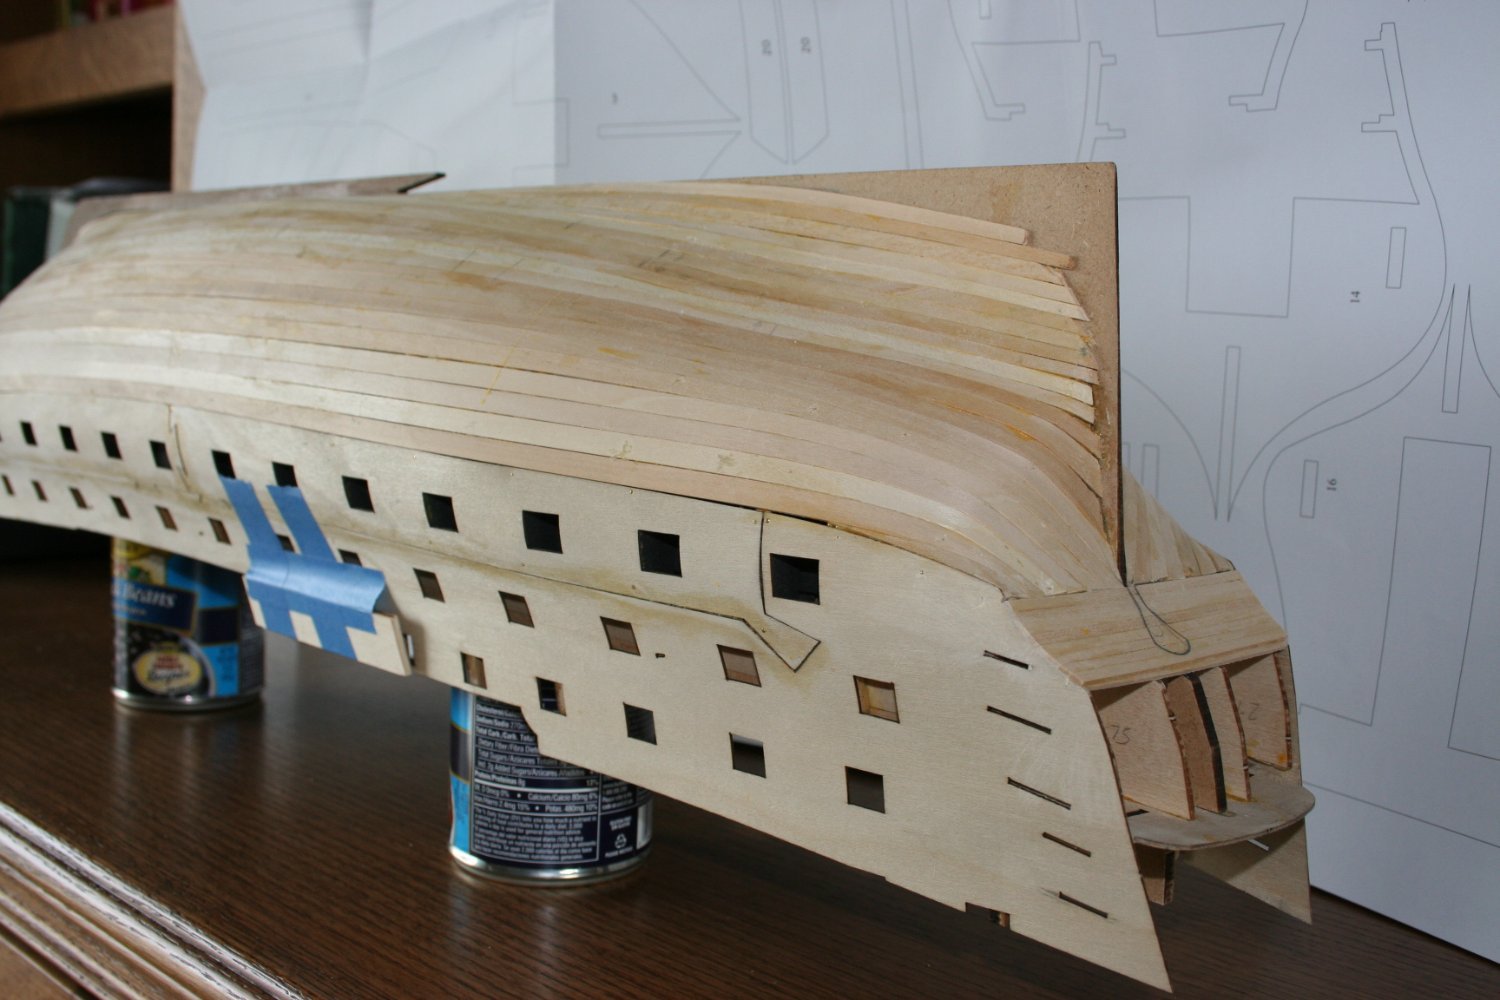
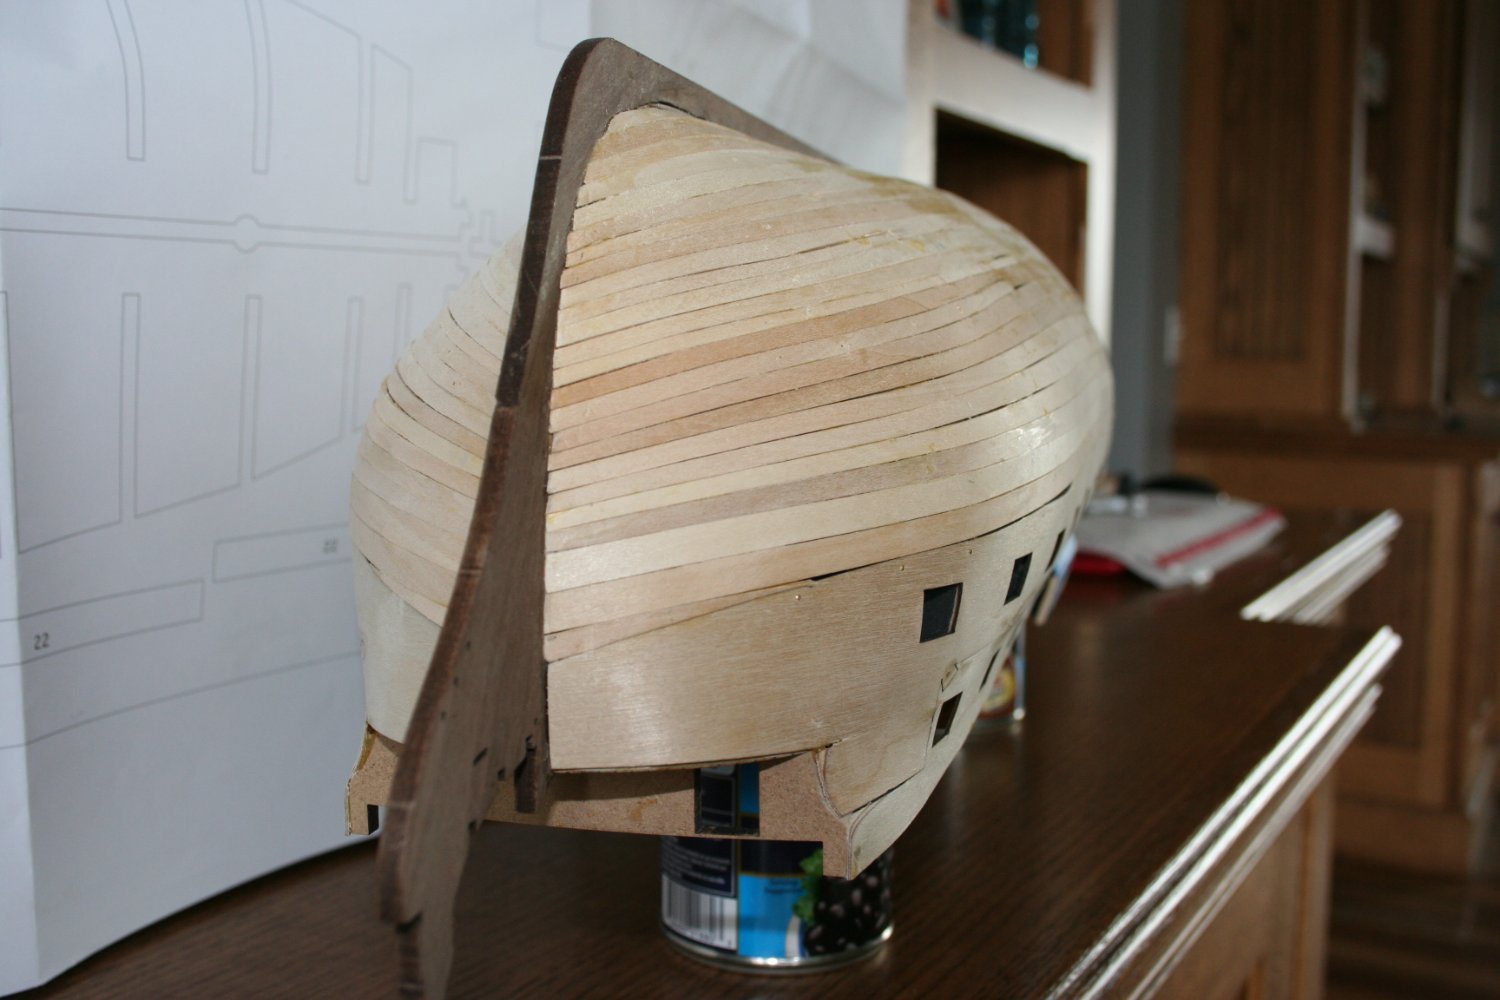
First planking filled and sanded, and work has started on the stern galleries. The location of the center wale has been marked in readiness for starting the second planking. Instructions say to start the second planking from the center wale down to the keel, although the illustrations of the prototype on the JoTiKa site show the planking starting from the main wale down. I guess I'll follow the printed instructions.

-
Maybe not the place for such a joke but I couldn’t resist. This is for the oldies among us. Fill and sand fortifies the over forties, right?
-
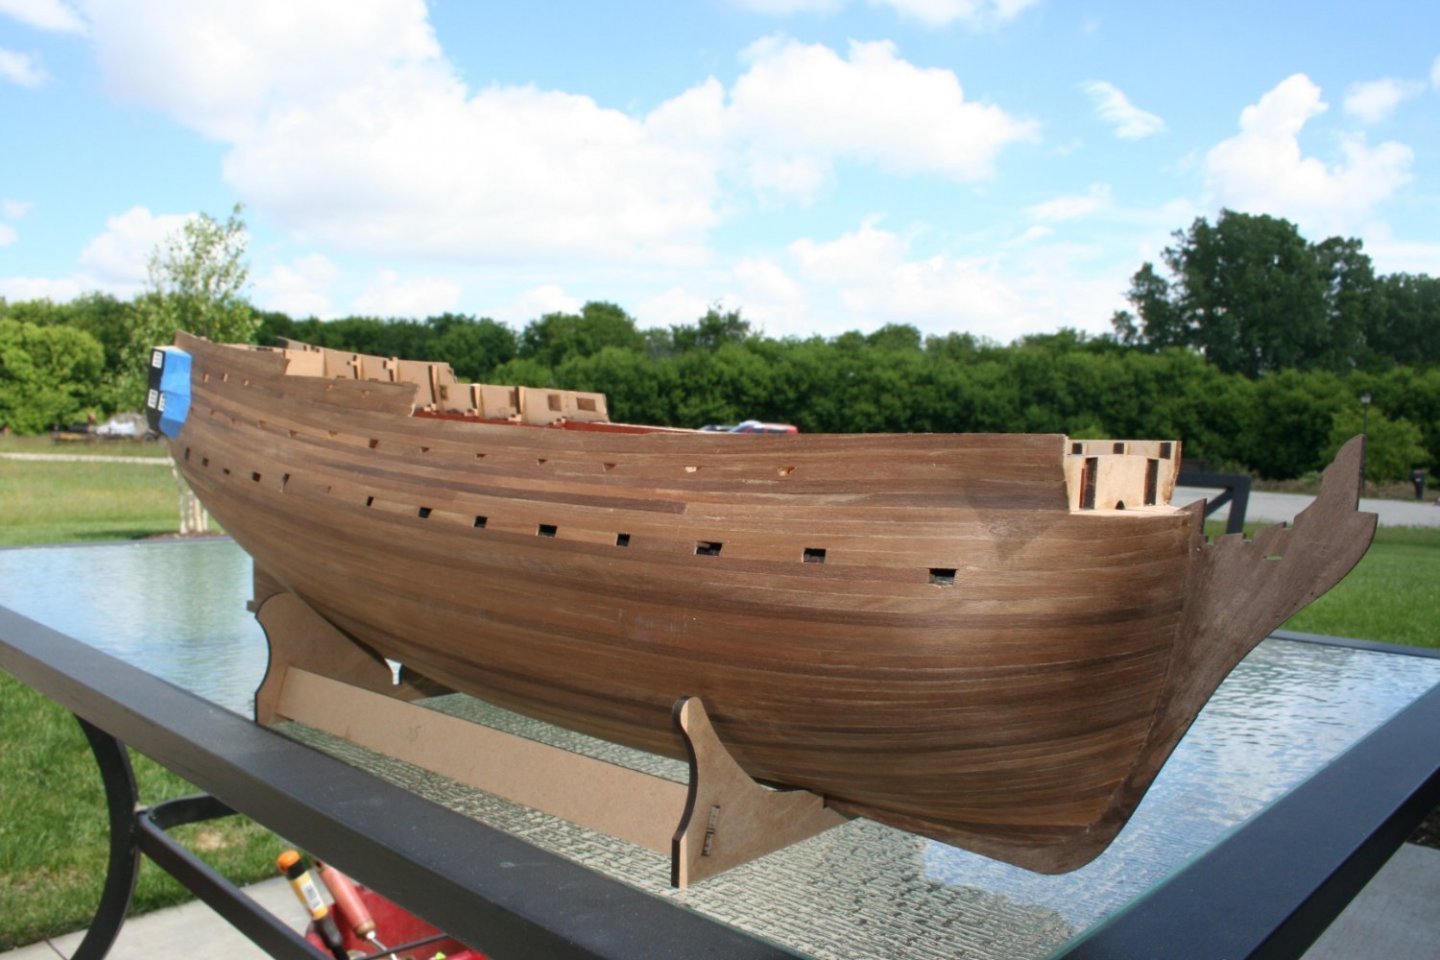
Three weeks on and the first planking is completed. Now I need to sand and fill and fill and sand.
-
A couple more pictures to add to your confusion! These, like the previous one, were taken in March of this year.


- 21 replies
-
- 5
-

-

-
- Amati
- Victory Models
- (and 1 more)
-
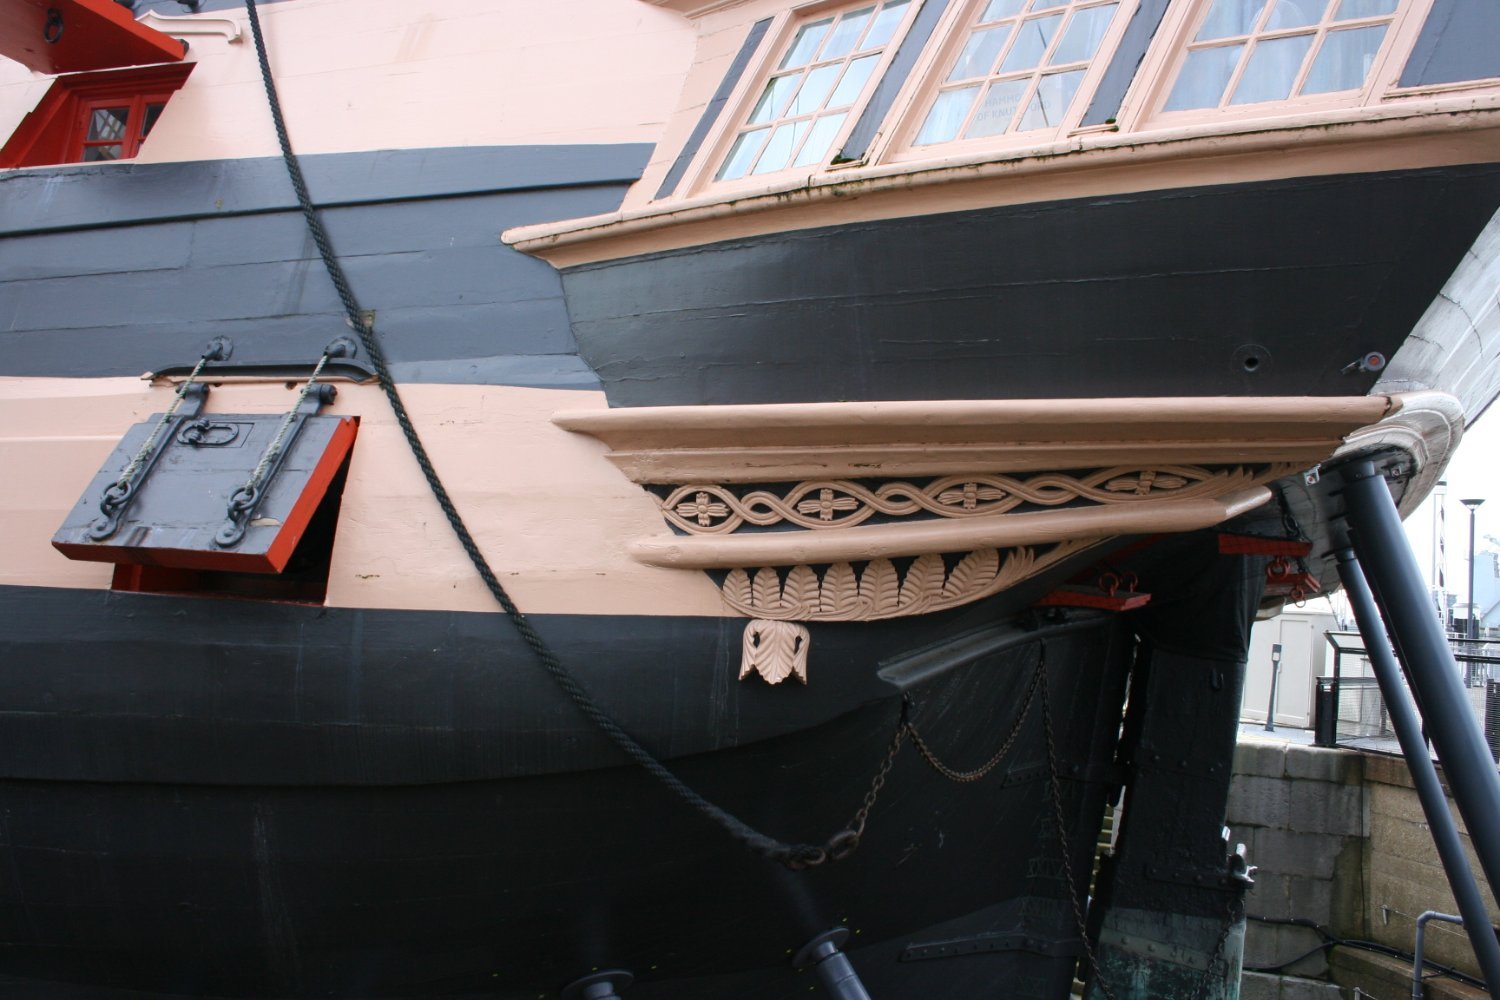
Thanks Peter and oldsalt. That makes perfect sense. What threw me was the drawing provided with the kit that, to me, showed the wale ending short of the transom. Plus, I took some pictures of Victory back in March and that showed the wales terminating in a similar fashion to how I terminated mine. Well, at least, that's what it looked like to me. Maybe that was wishful thinking. Martin
- 21 replies
-
- 7
-
-
- Amati
- Victory Models
- (and 1 more)
-
So I succumbed and have used some filler in a few places. I then added the main wales and that raised a question. It may be obvious to an old hand, but to a newbie like me, who has not built such a ship before, it is not obvious. How should the wales terminate at the transom? At the moment, I have left them standing proud and rounded off and, from the side, they do appear as per the plan, But should they in fact curl under and lay flat against the hull planking?

- 21 replies
-
- 8
-
-
- Amati
- Victory Models
- (and 1 more)
-
This is very nice. Are you sure that you are a total beginner?
-
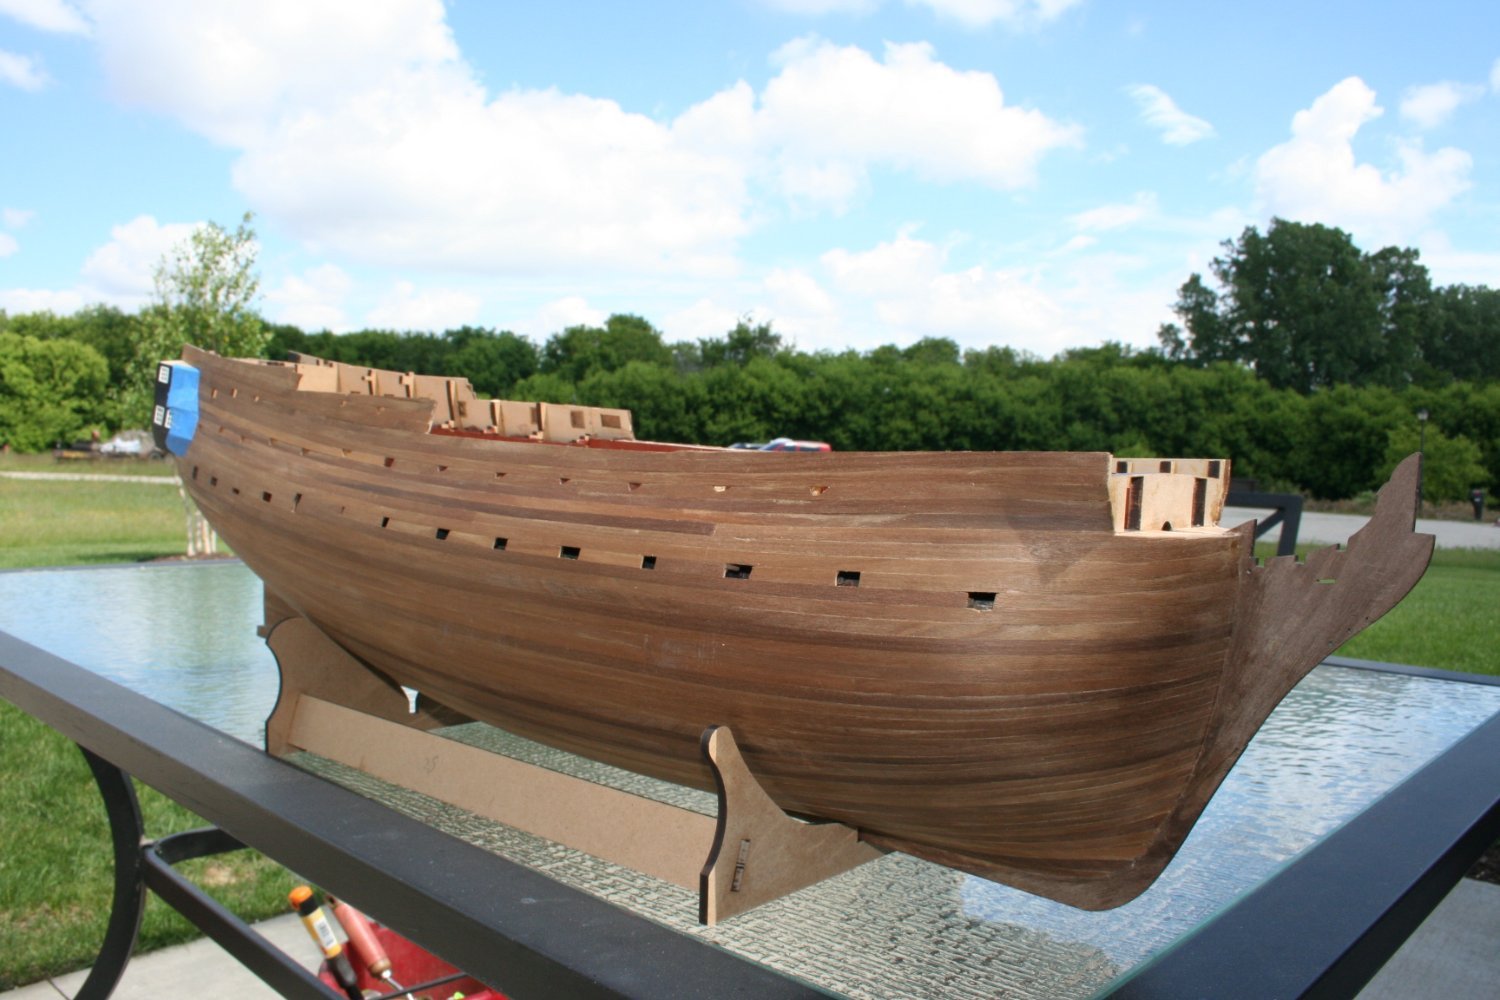
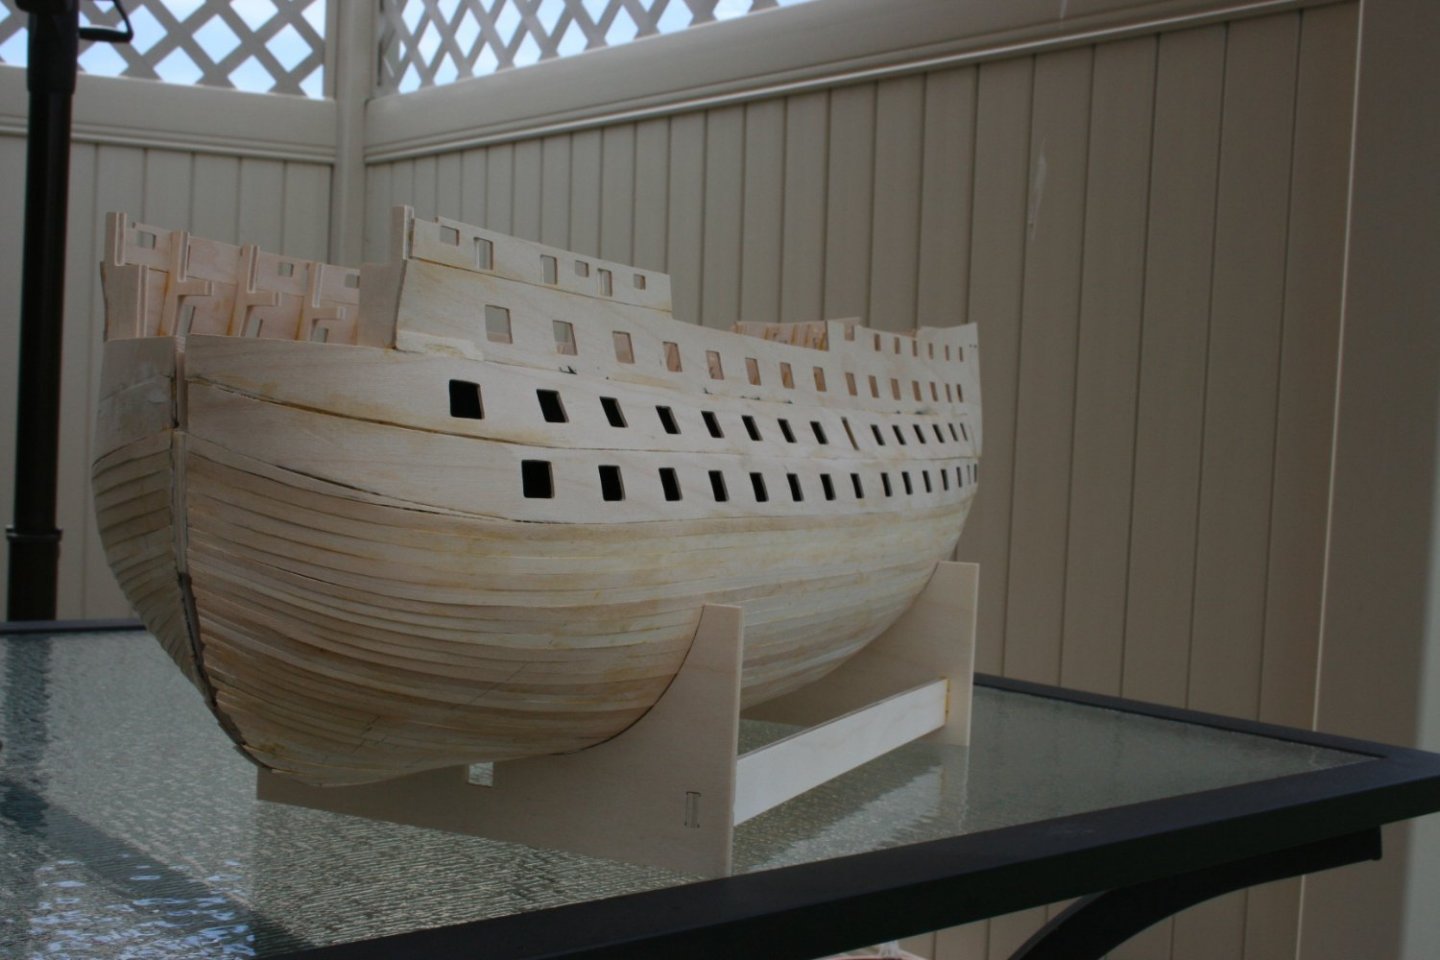
Thank you, Peter. If you had included this picture in your build log, I must have missed it. My fault. I have now completed and rough-sanded the second planking. I need to tidy around the top of the bulwarks and cut the gunports. Rightly or wrongly, I wiped on a coat of poly, as an aid to determine where and whether filler would be required. Given that the hull will be either painted or coppered, I think that it is smooth enough as it stands.
- 21 replies
-
- 9
-
-
- Amati
- Victory Models
- (and 1 more)
-
A start has been made on the first planking.
-
Beautiful. Who cares about a boat that might be upside-down, or copper plates that might be slightly out-of-scale? She looks good and I am sure gave you a ton of pleasure building her. I just hope that mine looks as good when she is - eventually - completed.
- 49 replies
-
- 2
-
-
- victory
- billing boats
- (and 1 more)
-
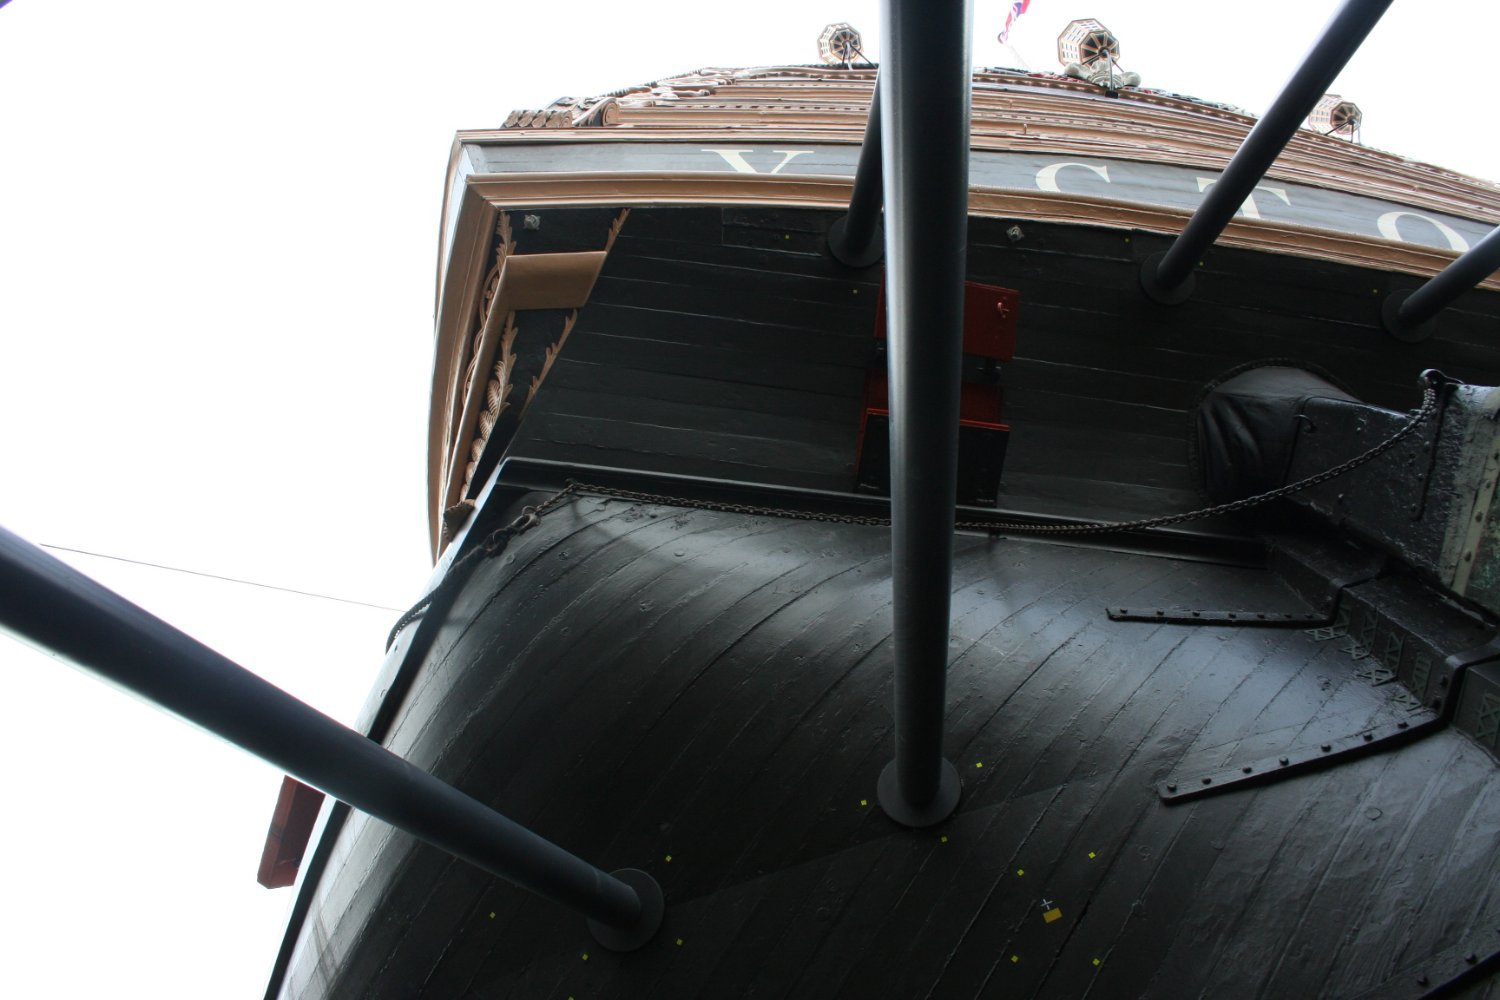
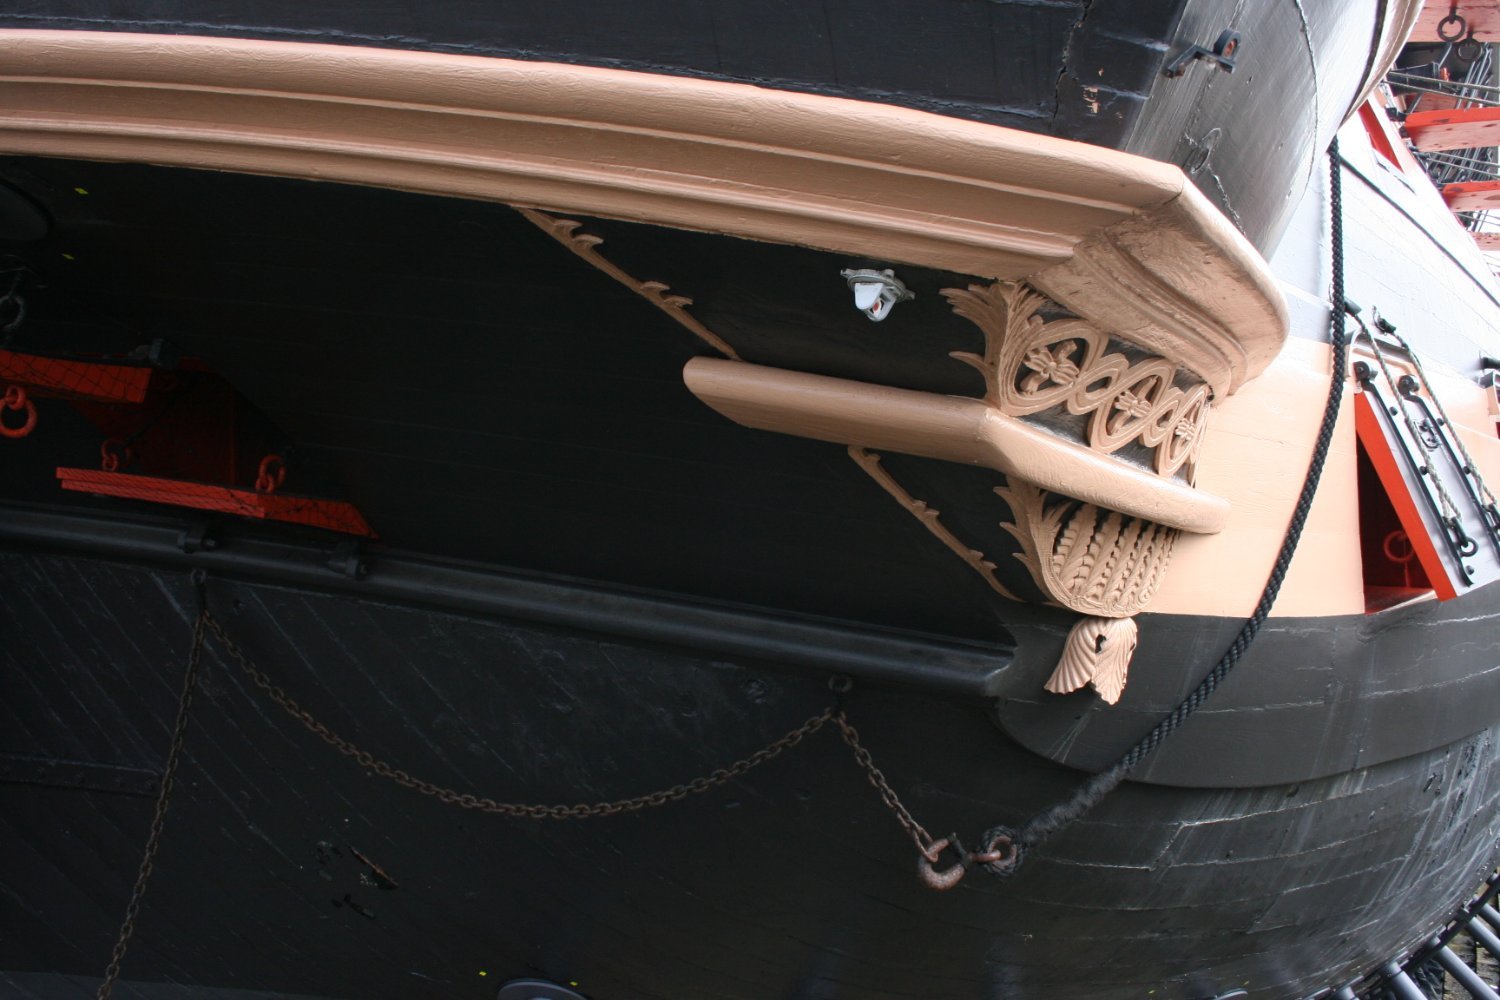
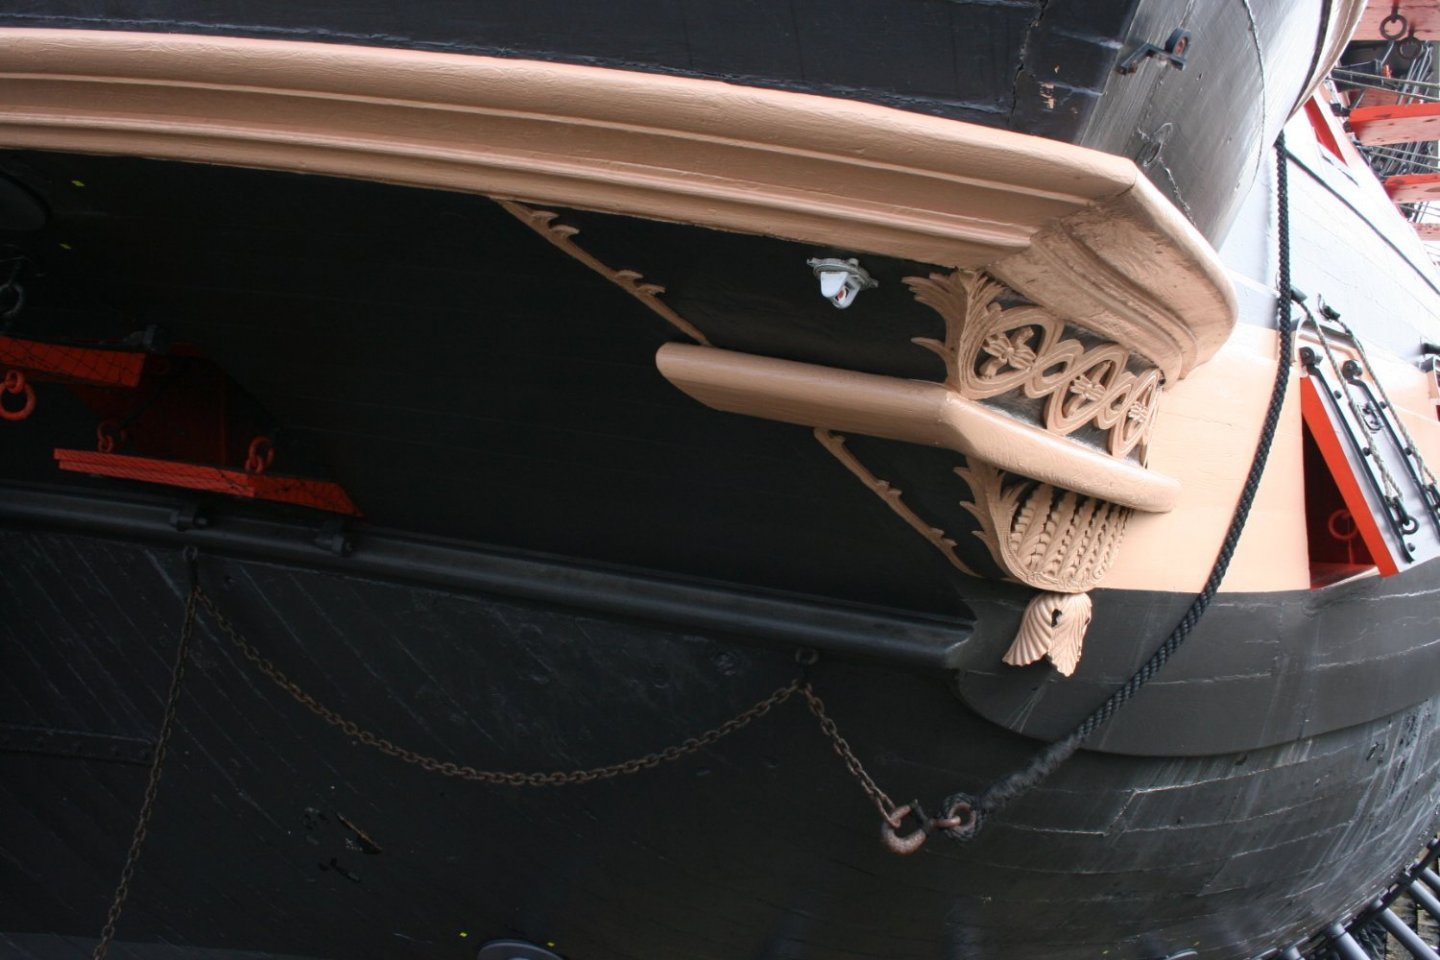
Further to a posting by allanyed on May 14th, in which he commented on the distance between the pins. The attached is a picture of the real thing, with the pins pretty close together. I don't know who the woman is - she insisted on being in the picture.

- 218 replies
-
- 6
-
-

-
- Victory
- Caldercraft
- (and 1 more)
-
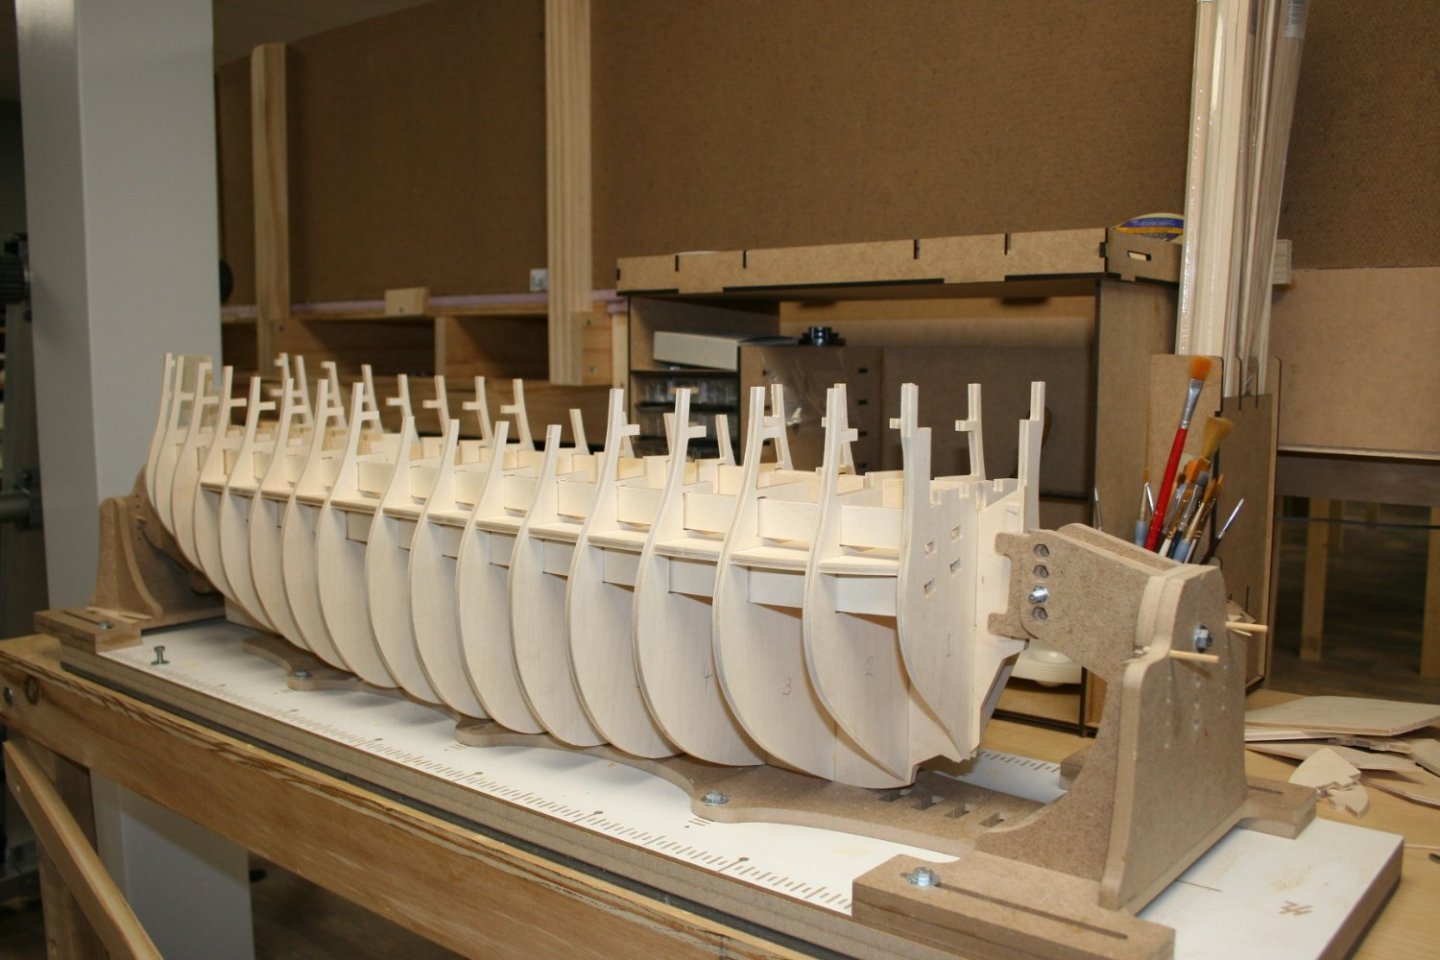
As per previous post, bulkheads, lower gun deck and dummy barrel strips are in place.
-
I couldn't resist adding a sixth model to my list of works in progress. I must say that I think that I prefer the CNC-routed approach of Caldercraft to the laser-cut approach of Amati. My fingers don't get so dirty! Pictures will follow. So far the bulkheads, false deck and dummy barrel strips are in place.
-
Thanks, Bill. I am pretty sure that my wife said a similar thing. But as I get older, my hearing tends to be getting more selective.
- 21 replies
-
- 3
-
-
-
- Amati
- Victory Models
- (and 1 more)
-
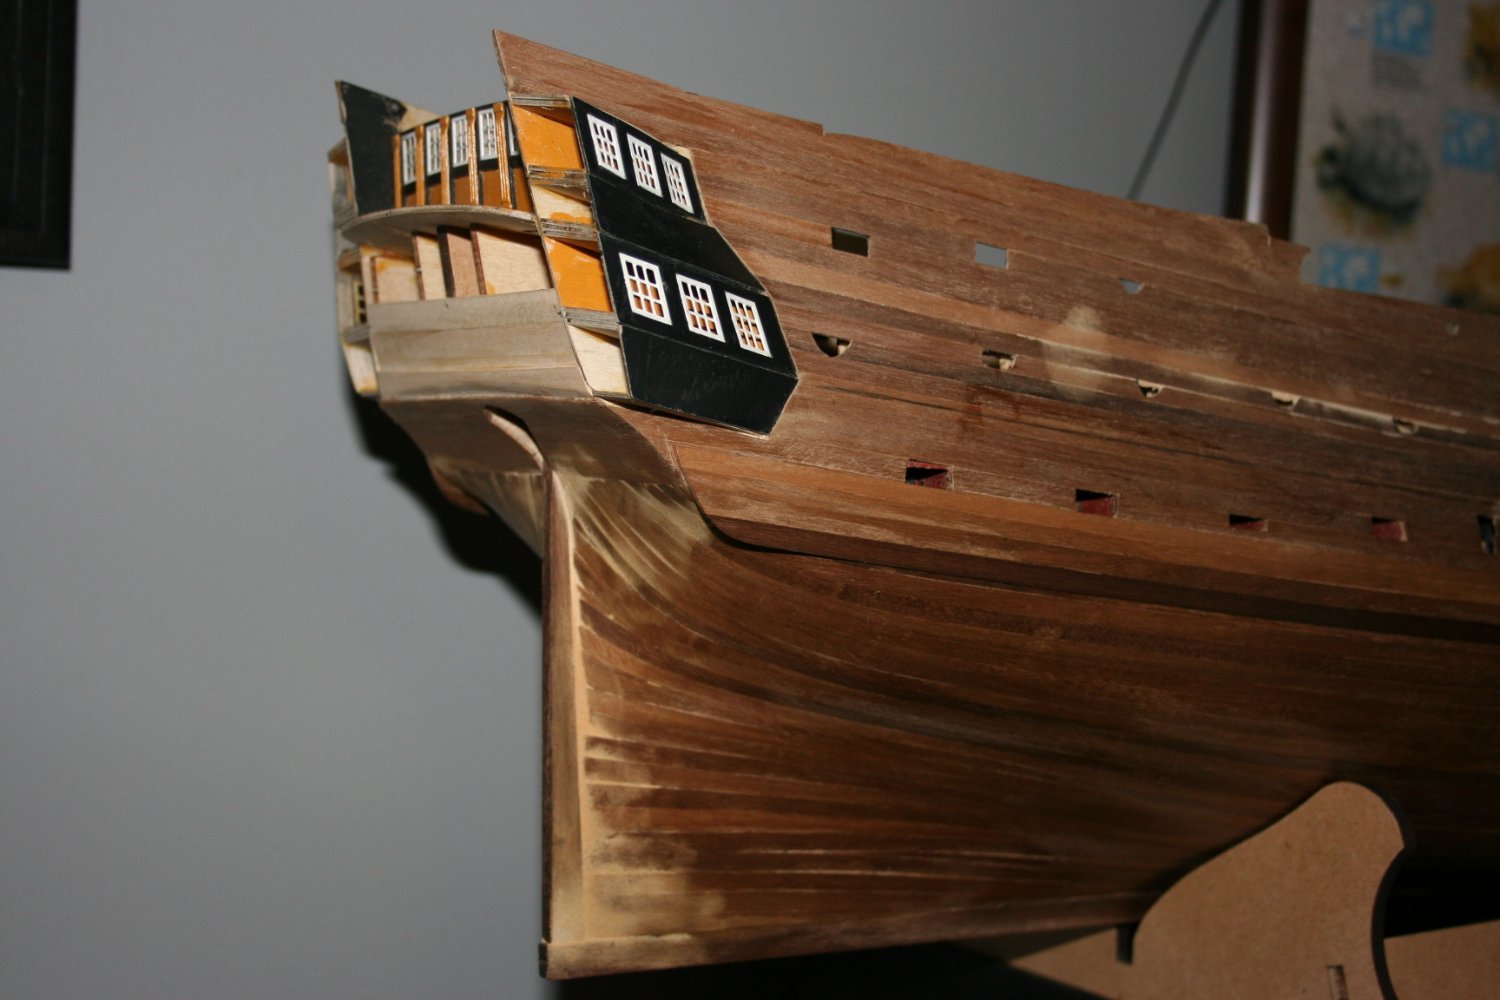
Quarter galleries now being installed. And a question. The parts list refers to parts 27 and 28 as 'side gallery up and down finishing pattern' - but there appears to be no reference to them in either the written or illustrated instructions. Is this an oversight; should the parts in fact be (shaped and) installed?
- 21 replies
-
- 10
-
-
- Amati
- Victory Models
- (and 1 more)