


achuck49
-
Posts
129 -
Joined
-
Last visited
Content Type
Profiles
Forums
Gallery
Events
Posts posted by achuck49
-
-
Now I fully understand. Thanks to all.
Chuck
-
Good morning,
I am wondering if there is a video of a serving machine being used? I have seen several that only show how to assemble the thing, but not being used. I am not at all certain what this machine does (bring me coffee about now?) and being a visual learner to actually see it in use would be very helpful.
Thanks so much
Chuck
-
Super job...I have one in the box that I should start.
It is a bit late in the build for this question, however, when planking the ship, did you use 'shorter' pieces or one long piece of wood. From studying your photos it looks like short cut lengths.
Chuck A.
-
-
-
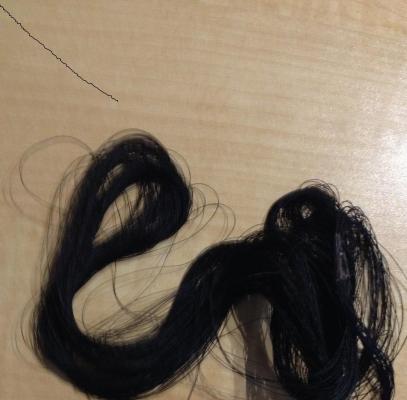
This question will get me banned for life, but I have been bounced out of any number of places by very angry fathers.
So many model makers send thread that looks like the attached photo. I used to try to salvage it, because of incorrect reasoning concerning "supposed to be this way"; now I toss it out.
Is there a way to untangle this mess or is donating it to the land fill the proper battle plan?
Chuck
-
This question is in conjunction with my question concerning drilling holes into dowels.
When I study build logs, all of the blocks attached to the masts and spars look so clean and neat. I 'think' this means that a hole was drilled, thread inserted and glued, to give this appearance. Most of the instructions for various models are not clear how this should be done. I do state that there are cases where a block is extended for a certain distance, at the end of a spar for example.
How is this type of block attached? Should I just wrap some thread around a few times and glue it in place? Should I use some type of glue that has some flex to it?
I have one more question of the truly absurd type.
Chuck
-
Greetings
My steady stream of questions never seem to end.
I study build logs many times a week as well as the other forums to learn all that I can. One problem that I have and must have missed the solution is how to drill straight holes through dowels, in particular the sides.
I make a lot of ships in a bottles (these are very thin dowels) for grand-kids and silent auctions at charity groups. When working on any scale ship, accurate placement of mast or spar holes is essential.
I have created "V's" out of wood to cradle the dowel and help to center it, but then the very thin drill bits will often bend and roll off target. I have filed a flat spot to try to help stay on target, but it does not mean that there will be consistent results across all of the stock of dowels.
I have a Dremel with work station, push drill, and hand drill that I turn manually so there is no shortage of tools or bits.
Any suggestions for consistent results???
Chuck
-
This site is full of great people.
Progress is better...I found an alligator clip which I placed into a vise. I then put some glue on the string and quickly wrap it around the block. This works 'most' of the time. The string sometimes is slightly off the groove on the back side of the block. I then get it in place and tie it off. This reduces the time from 8 to 2 minutes per block. I believe that a major part of the problem is the thread that I am using is synthetic instead of natural. I studied the pictures that were sent and noticed that a more natural thread was used in all of the illustrations. Lesson learned.
I will finish this model (not at all happy with the results) and give it to some very young nephews who think that I am a true master.
Thanks again to everyone.
- CaptainSteve, mtaylor and edmay
-
 3
3
-
super fast responses!
I have tried the clips, and vises with out much luck. However, I have not tried them by first putting some CA into the small grooves first.
I am going to try to blend the given ideas with the CA in the grooves.
Thanks so much
Chuck ... wanting to just finish, learn and try again
-
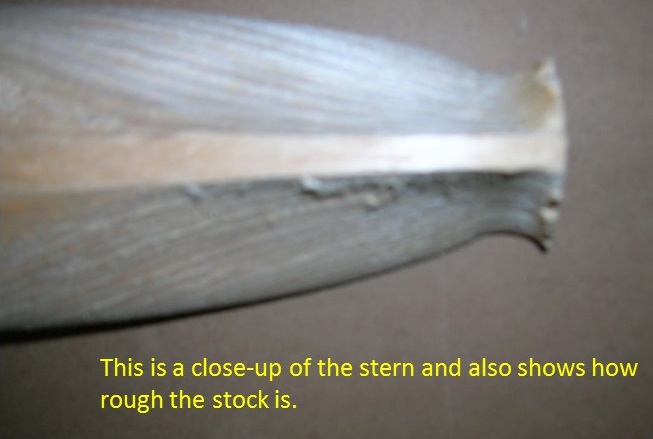
I am nearly finished with the Dominica from Amati and have run into a 'painful' process that is common to all of the models that I have worked on. How to wrap cord/string/thread around blocks that are as small as shown in the attached photo.
I have put pins in them and attached to cork boards, but when it comes time to place thread around the outside, into the grooves, the thread will move off the block, or the block will twist in circles. Placing it between my fingers is the only solution that I have come up with. However, this is not a great way to do it either. They are so small that I cannot see it when trying to capture with thread. When I finally get it right, I end up dumping glue all over myself and this often removes the thread when I separate my fingers.
I have tried tieing loops and any other methods that I can think of to no avail.
any ideas will be so welcomed.
Chuck

-
All of the sanding and shaping has been finished. I am currently waiting for the sealer stain to dry before proceeding to placing the deck panels on.

-
I am still placing 'stuff' on the hull of the Santa Maria, however, when I have the granddaughter over I will not use glues and other sharp objects around her. So I decided to also start a solid hull version of the Cutty Sark by Scientific. I started one other model from this company a few months ago, but sat on a box of parts and sort of brought that project to an end.
This is an old model, and that means no laser cut parts or other nice to have helps.
I will do my best to make this a very detailed account of how grandfathers used to assemble their museum masterpieces.

-
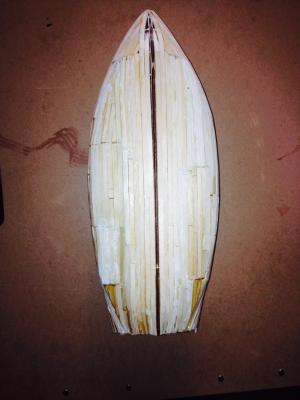
It does not look like much but it is my first completed POB hull. I experimented with long and short pieces, learned how to bevel and taper. The second layer will certainly cover a large number of boo boo's.
-
Thanks I will build one and at least have it
-
The directions for my current model recommended that I use a bow sander for uniformly shaping the bow and even fairing the hull. Is this something I should have in my rucksack and don't? Does one buy this or make it? Changeable sanding grades I would suppose.
If it looks good and fits good something else is wrong
-
Sorry for not posting sooner but 3 year old granddaughter had a bad ear infection and the Sooners lost to TCU.
I did work on Maria and discovered some problems that I had not anticipated.
The ribs making up the false hull were too tight. I was very concerned about making the fit too large so I spent two days carefully sanding everything to fit.
I lightly sanded all areas to be glued but the glue would only work in spots.
What is shown in the photo is mostly plywood. Initially I used Tightbond woos glue as I have many times. The glue would hold very well for half an inch but fail for three. This was regardless of degree of stress, amount of 'bite', or anything else. I broke out the super glue and had similar results.
Tiny nails and a new nailer finally worked.
After some cleaning up I will put the first planking layer on. The instructions and photos clearly state that a few full length planks are all that is needed because the rest will be filled in with stealers.
If fits well and looks good, there is a problem elsewhere

-
Photo failed to follow first comment

-
This is my 7th attempt at trying to hull a model. The first six ended up in the landfill.
-
I just ruined a Constructo model so tomorrow I will start a build log of a 1976 model of old Connie. Stand by for questions.
Chuck
-
Thanks
I have not seen such a build and was wondering.
Chuck
-
hello group
In a week or two I will start work on a Bi-Centennial version of the Constitution produced by Scientific. It is a solid hull model. It is my plan to construct it as closely as possible in the same manner as would a builder would have then.
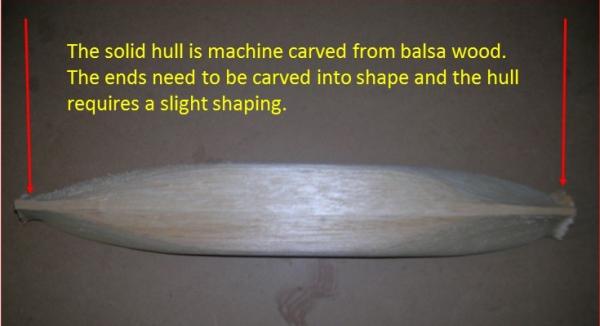
Is a solid hull worthy of hard drive space?
Thanks for your consideration.
Chuck
-
wow
Thanks!!!!
-
My newest brain rattler is the amount of space between deadeyes. Do the newer blueprints state this exactly and I am overlooking it? When working on small, very old and simple models (I give them to grandkids and neighborhood kids so the turn-around has to be fast) there will be an illustration and sometimes a drawing of knots but no specific length of rope between the two. Is there some "code" based on the scale of the model that would help me be a little bit more accurate? If it is based on appearance alone, that is just fine too.
The same question applies to the amount of rope that should extend past the individual deadeye when attaching it to nearly anything. Again, the illustration shows the rope encircling the deadeye, this rope and tied with various knots but no specific lengths.
Chuck


Which ship is easiest to plank?
in Building, Framing, Planking and plating a ships hull and deck
Posted
Greetings,
In the past several years I have tried, and failed horribly, to plank a ship. To be as honest as possible, I have tossed about 7 models into the trash because they had clinkers, huge gaps and just plain did not work. I 'suspended operations' and turned to solid hull models and have done very well with about 9 of them.
So now I am asking for advice as to what would be a good model to again start planking lessons.
There is no hurry for an answer as I am currently working (and enjoying) the Essex cross section model.
Also, when planking, is it easier to use shorter planks or planks that are as long as the model itself?
Appreciate your opinions.
Chuck