


DaveBaxt
-
Posts
1,324 -
Joined
-
Last visited
Content Type
Profiles
Forums
Gallery
Events
Posts posted by DaveBaxt
-
-
3 hours ago, Jerry said:
Good morning, Dave,
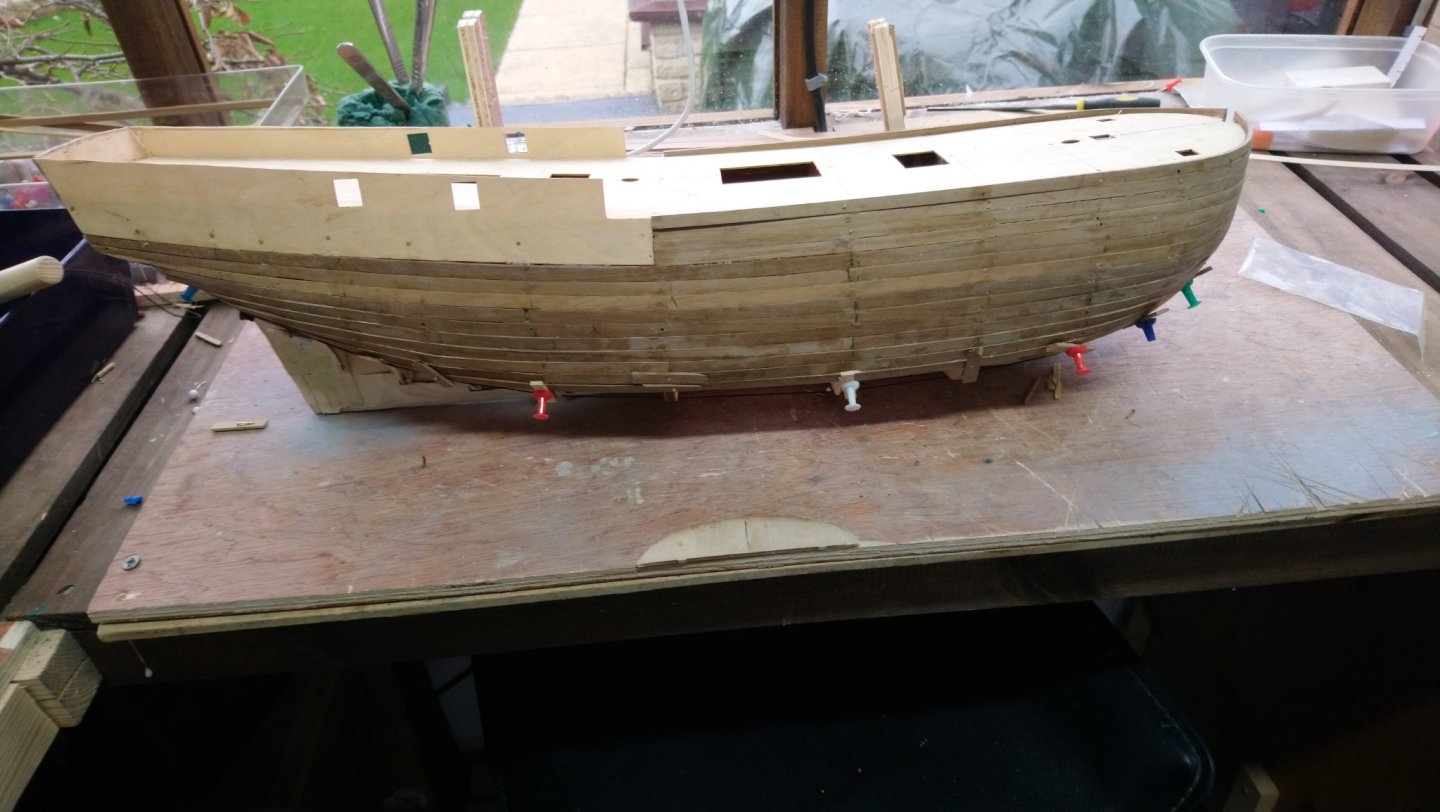
Nice work. Your planking looks excellent and it's obvious you've accomplished a very difficult phase of the build. Don't forget a light sanding before starting the second round. One reason the second application is easier is you now have a solid base to adhere to. No more spaces between bulkheads but a good overall base. Thanks for keeping me apprised of your progress and I look forward to seeing your future good work. By the way, there's a link to all of my logs at the bottom of every post I make in your log.
Again, I hope you and yours have very nice New Year,
Best,
Jerry
Thanks for that Jerry. I have one question to ask if I may regarding the second planking as I have not done this before. Do I taper the planks as per the first planking and do they need to be soaked to make it easier for bending? I will take a look at your bogs Jerry and see if I can get a few more tips from you. I notice that you have Build the Victory by Caldercraft and wondered what you thought of Caldercraft Kits as I am thinking of the Endeavour by Caldercraft for my next Model. I have always been interested in James Cook as he lived not too far from where I am from and he was always popular with his crew and had a very high survival rate of men due to looking after them.One day I would hope to do something really special as a model once I have learned how to do it properly. Best Regards Dave
-
-
10 hours ago, mtaylor said:
Have you looked at the other build logs for Bounty by the same kit maker? That's actually a very good starting place to find out what others have done.
I have Mark but had no joy. I did however find one answer in the video ( The link is in a previous post) Thanks for your input which is much appreciated.
-
4 hours ago, wefalck said:
I understand that point. On the other hand, the dedicated fora, such as MSW, open up the way to obtain informations and directions that in those dark pre-Internet ages would have not be so easy to come by. With this one can improve on kits, if necessary. This should give much more satisfaction at the end. There are many examples here on MSW, where people made magnificent and historically quite correct models out of the kit material.
Why don't you rephrase your question and re-post it to attract the attention of people who have more specific knowledge of HMS BOUNTY ? You could ask in the title of the post something like "How were the yards of HMS BOUNTY constructed ?". The answer may well be that they were hexagonal in the middle ...
I might well do that however I have started the a blog on the Bounty and will probably ask that very question on there. I am nowhere near the rigging stage yet but as I have never done any rigging before and I have what seems like lots of questions. I will ask this again once I am nearer to doing the rigging.
-
20 minutes ago, wefalck said:
I think what we meant, was whether you checked against historical sources or reference books based on historical sources. Interpretations of kit-makers are often not very reliable and dictated by kit-production convenience.
I see where he is coming from. However as it is only the second model I have built I think I will go down the route which is using what is supplied by the kit manufacturers which is the easiest way for me.It is something I will need to consider if I ever decide to scratch build or if the kits I buy are more authentic.
Thanks for clearing that up for me and for your input.
-
-
18 hours ago, wefalck said:
Where did you double-check ? And what kind of ship are you working on ?
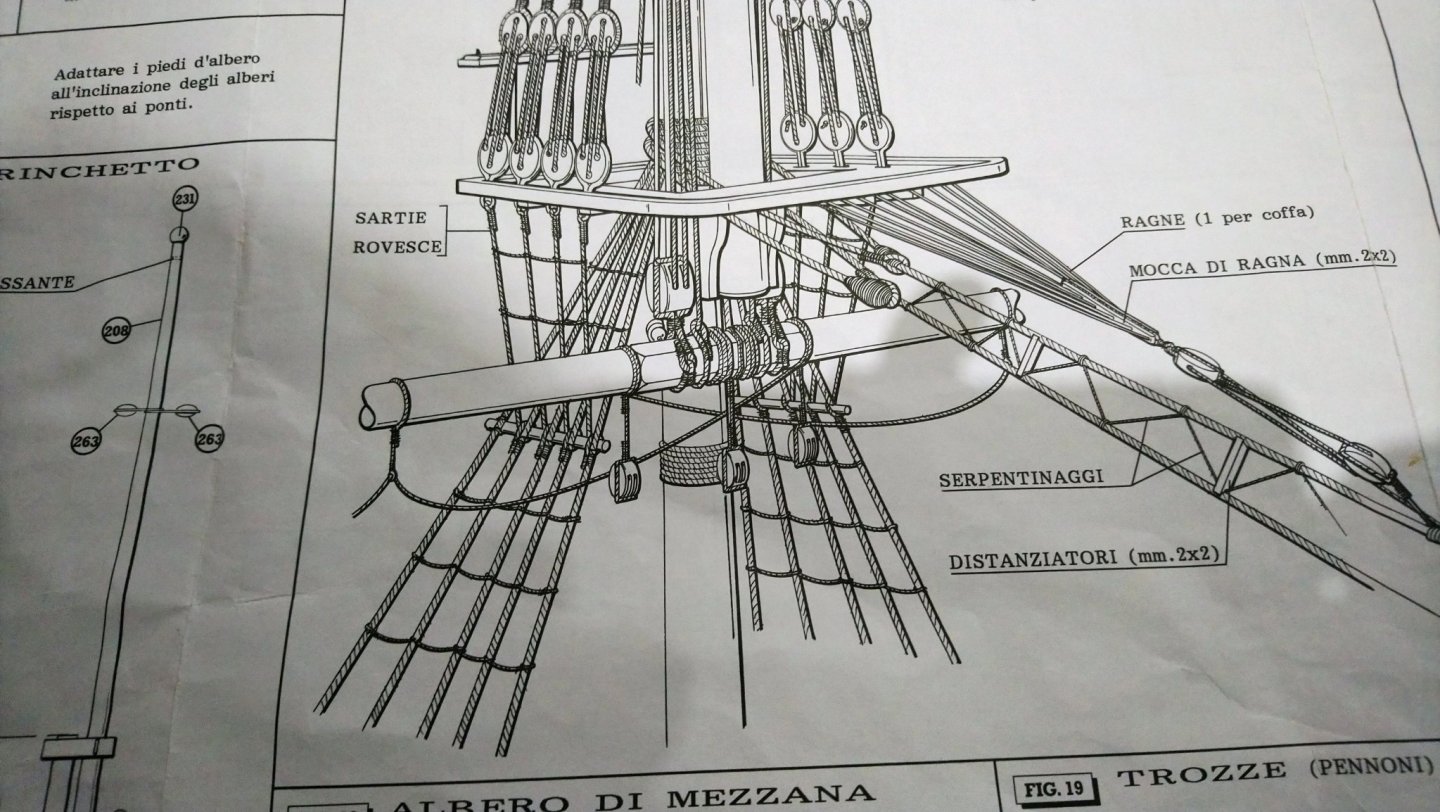
The Main Scale drawings. HMS Bounty by Amati. There is nothing mentioned in the instructions but looks like pieces have been added as the corners are a bigger diameter and the flats look flush. So I think this would mean that the flats would be filed then flat pieces of wood glued on . Decided to give you a couple of photos of drawings ( Not to scale ) Hopefully it will clear the matter so you can help me decide which is the best way forward. Once again thank you for your input
-
jerry I have just spent a good while looking at your blog you did of this model. Here is a link for anyone else who is thinking of dong this model.
Some very good photos of the progress especially of the different stages of the rigging which has been of great help showing the different stages. Also what turned out to be a superb example. I would be over the moon if mine turns out to be anywhere as good.
-
22 hours ago, amateur said:
Tom Lauria shows nice stuff (small boats, large scale)
https://m.youtube.com/channel/UC7JA3n2QuMoR2b68BzfxSoA/videos
And apart from a bunch of family video's that are not so interesting, this guy has some nice tutorials:
https://m.youtube.com/channel/UC1Cio5JqAxvQ92-vlyJgsJQ/videos
Not on rigging, but 'wood only':
https://m.youtube.com/channel/UCPfLMf2BV5PsI9m72Kqd8IQ/videos
And once you have seen all these, youtube will understand what you are looking for
")
Jan
Thanks for some great suggestions and some good links. I will also have a look at the blogs you have suggested.
-
6 hours ago, Dr PR said:
Dave,
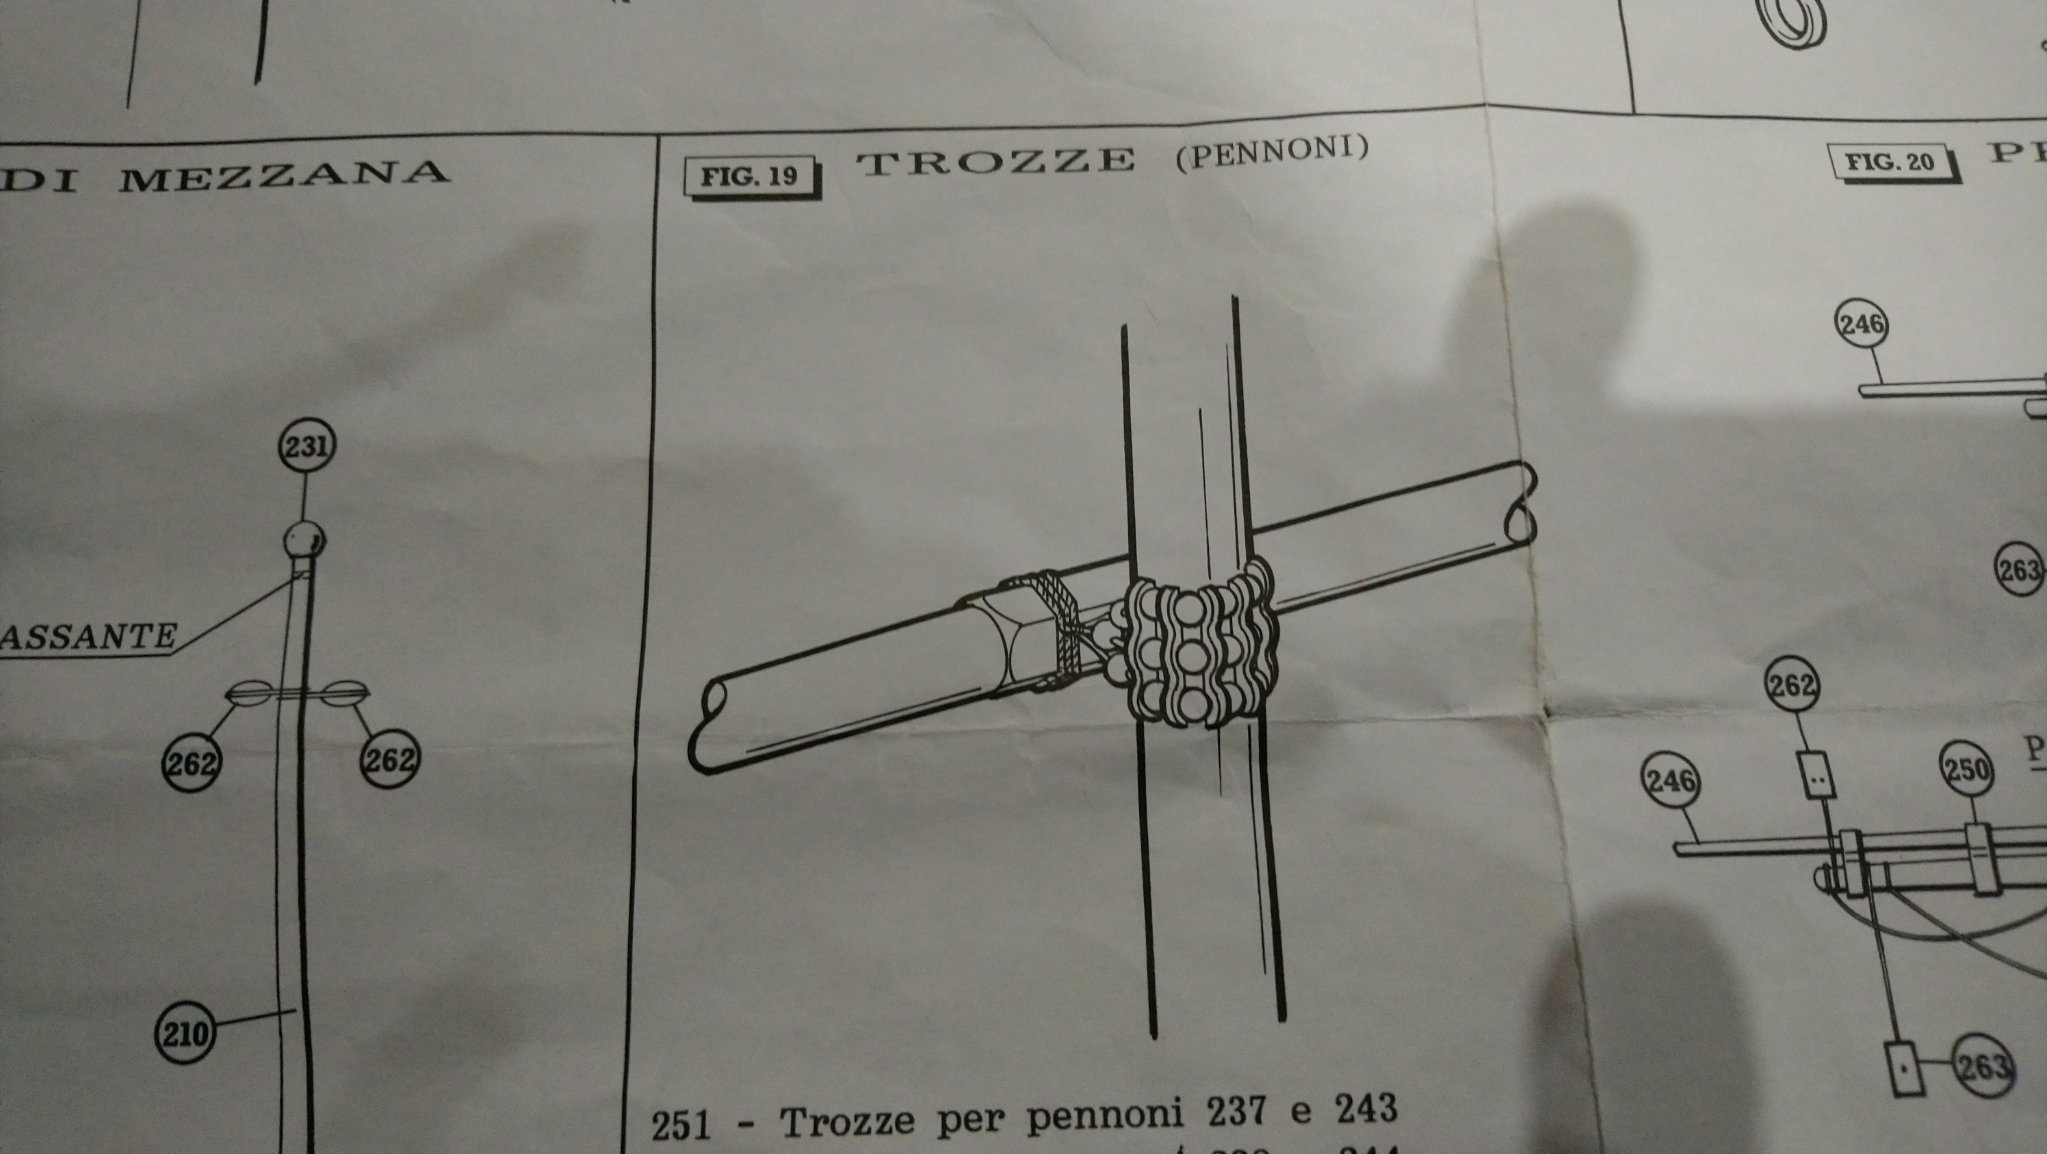
It is octagonal.
The normal way to create a spar is to start with a square cross-section timber. It is then tapered from the larger cross section in the middle to narrower square cross sections at the ends. This forms the basic shape of the spar. Then it is shaped to octagonal cross section, and the outer parts are trimmed again to sixteen surfaces, and then it is trimmed to make it round. This was/is the way to get cylindrical and conical pieces without having a lathe, using hand tools like planes and spokeshaves.
Sometimes the middle section is left octagonal. Sometimes it isn't.
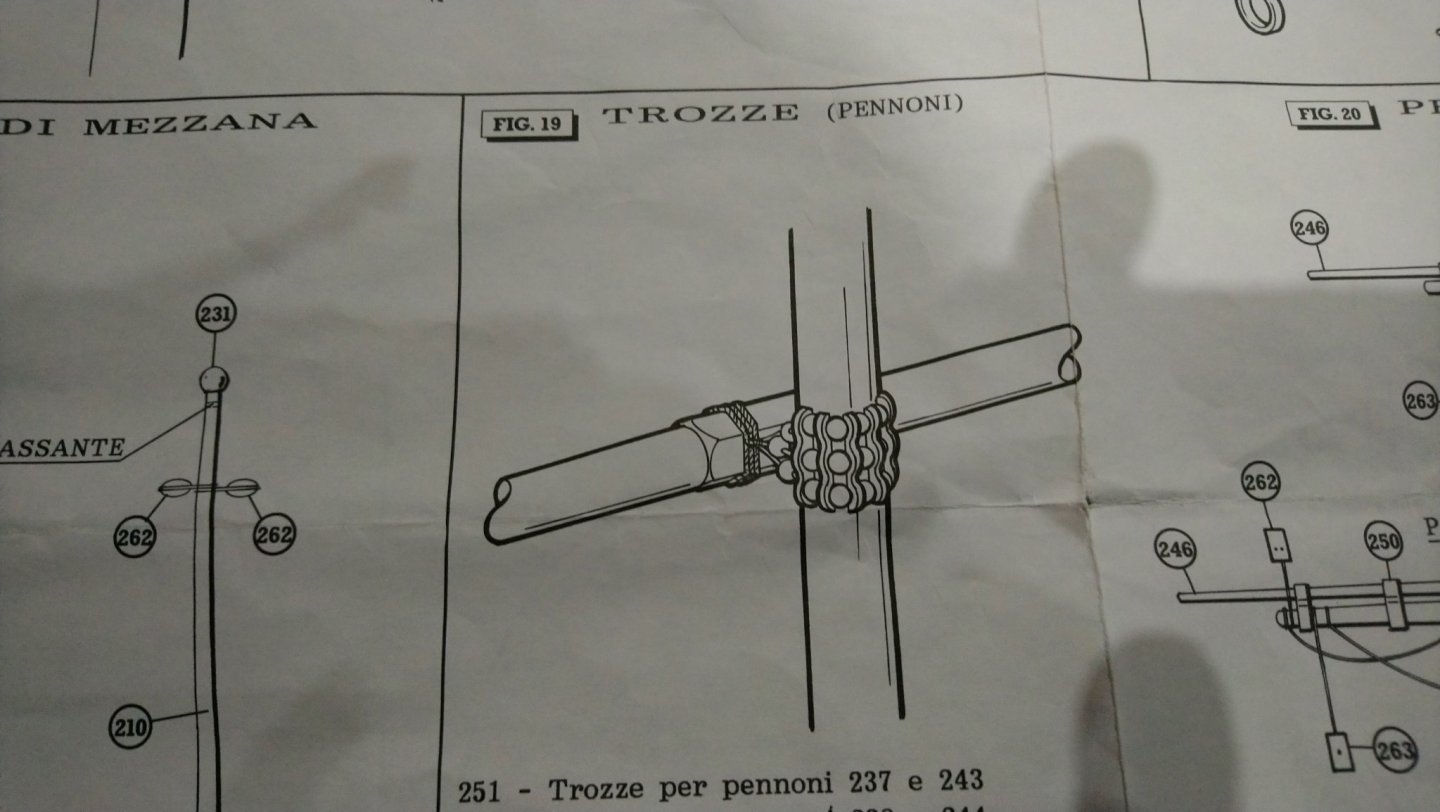
Thanks for that very interesting answer and will come in handy if in the future I am not supplied with dowels. However In this kit all the spars,mast are round. So do I need to add the sides by adding flat pieces of timber or just file the required shape? I just doubled checked. There are 6 sides (Hexagon) so not the normal.
-
The center section on a number of the yards are shaped to what looks like a hexagon . I Can,t make out from the drawing whether of not they are shaped or is there pieces of wood such as planking strips added to form a hexagon? Is this likely to be some filing to form a flat area to increase the gluing area between the Yard and the added strips of wood? Hope this makes sense.. Best Regards Dave.
-
Just now, DaveBaxt said:
Yes I think I am getting there and starting to get a routine going. Hopefully it will be easier for the second layer of planks. Happy new year to you Jerry and thanks again for your input.
-
59 minutes ago, Jerry said:
Hello Dave,
Looks to me like you now have the hang of it. Glad to see your fine progress.
Happy New Year,
Jerry
-
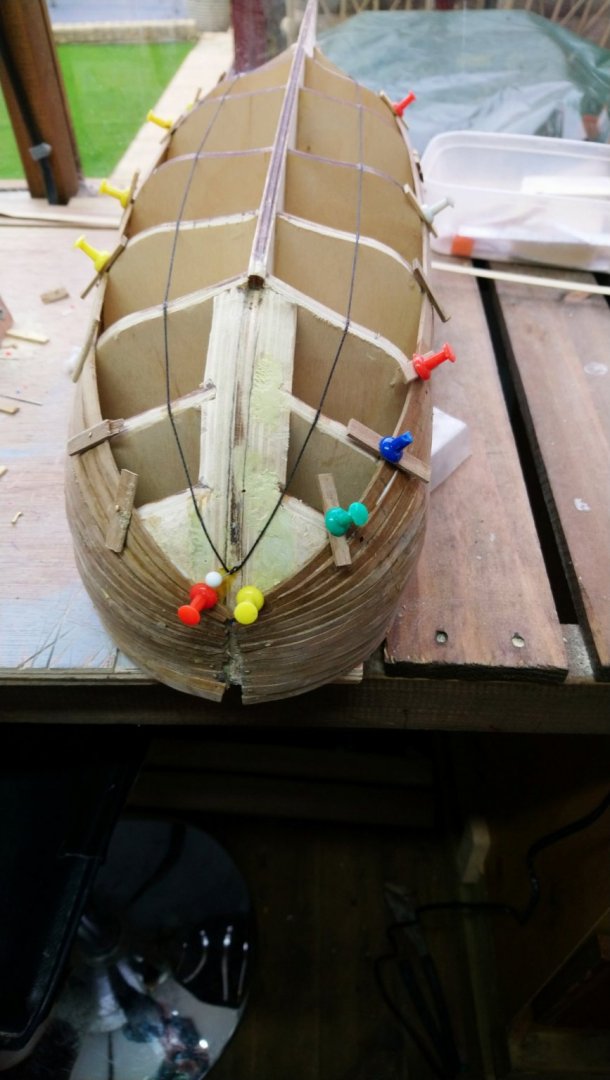
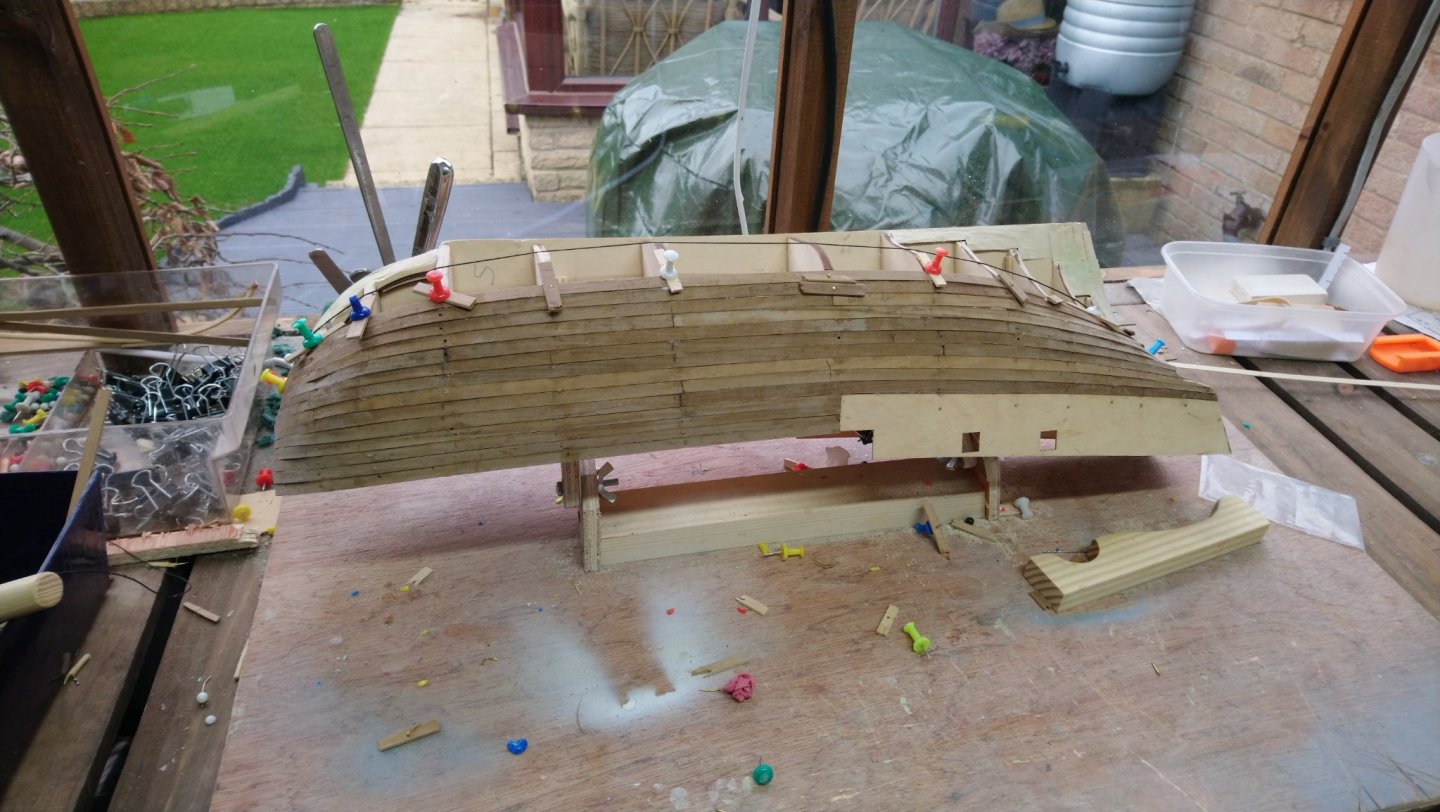
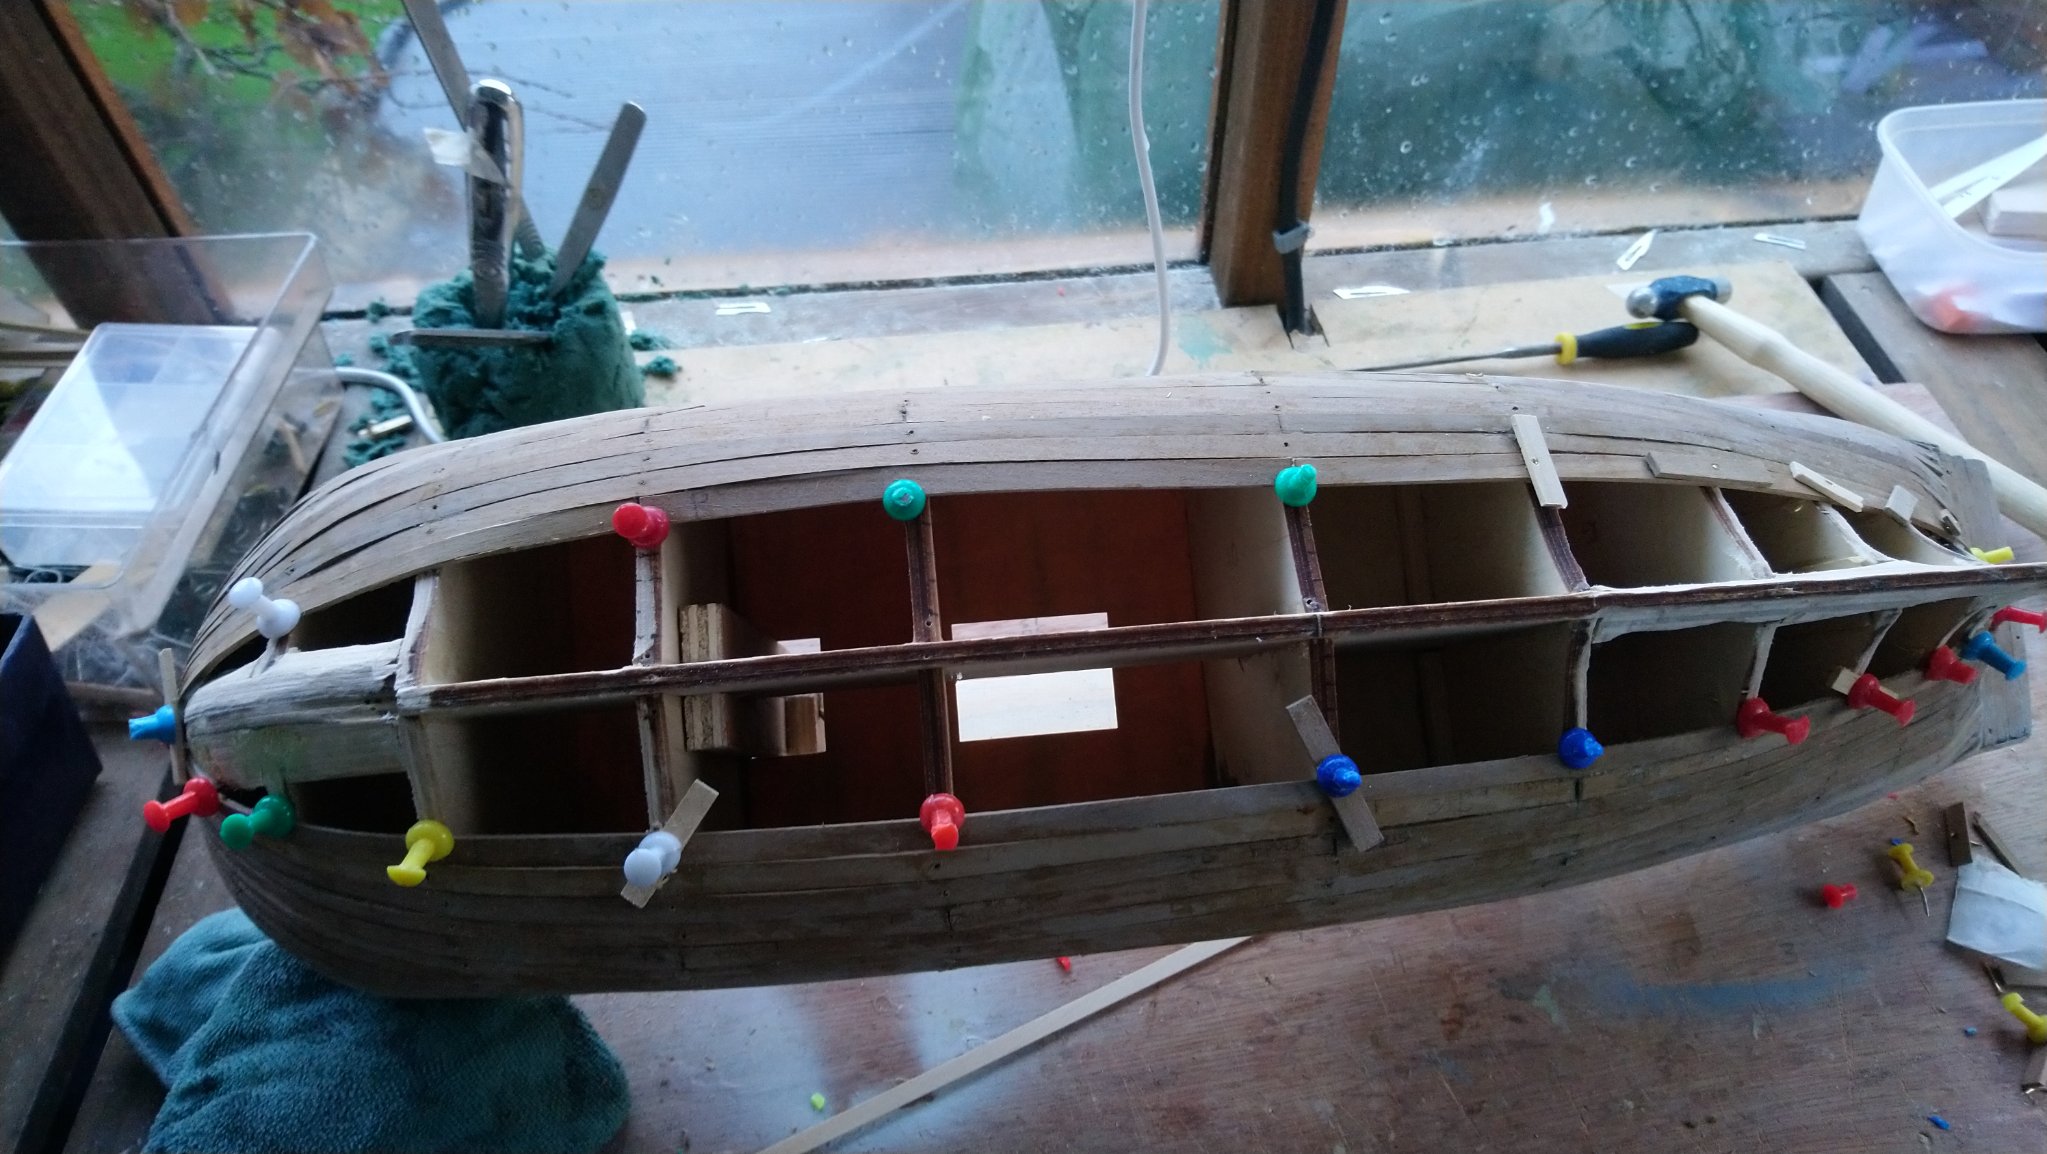
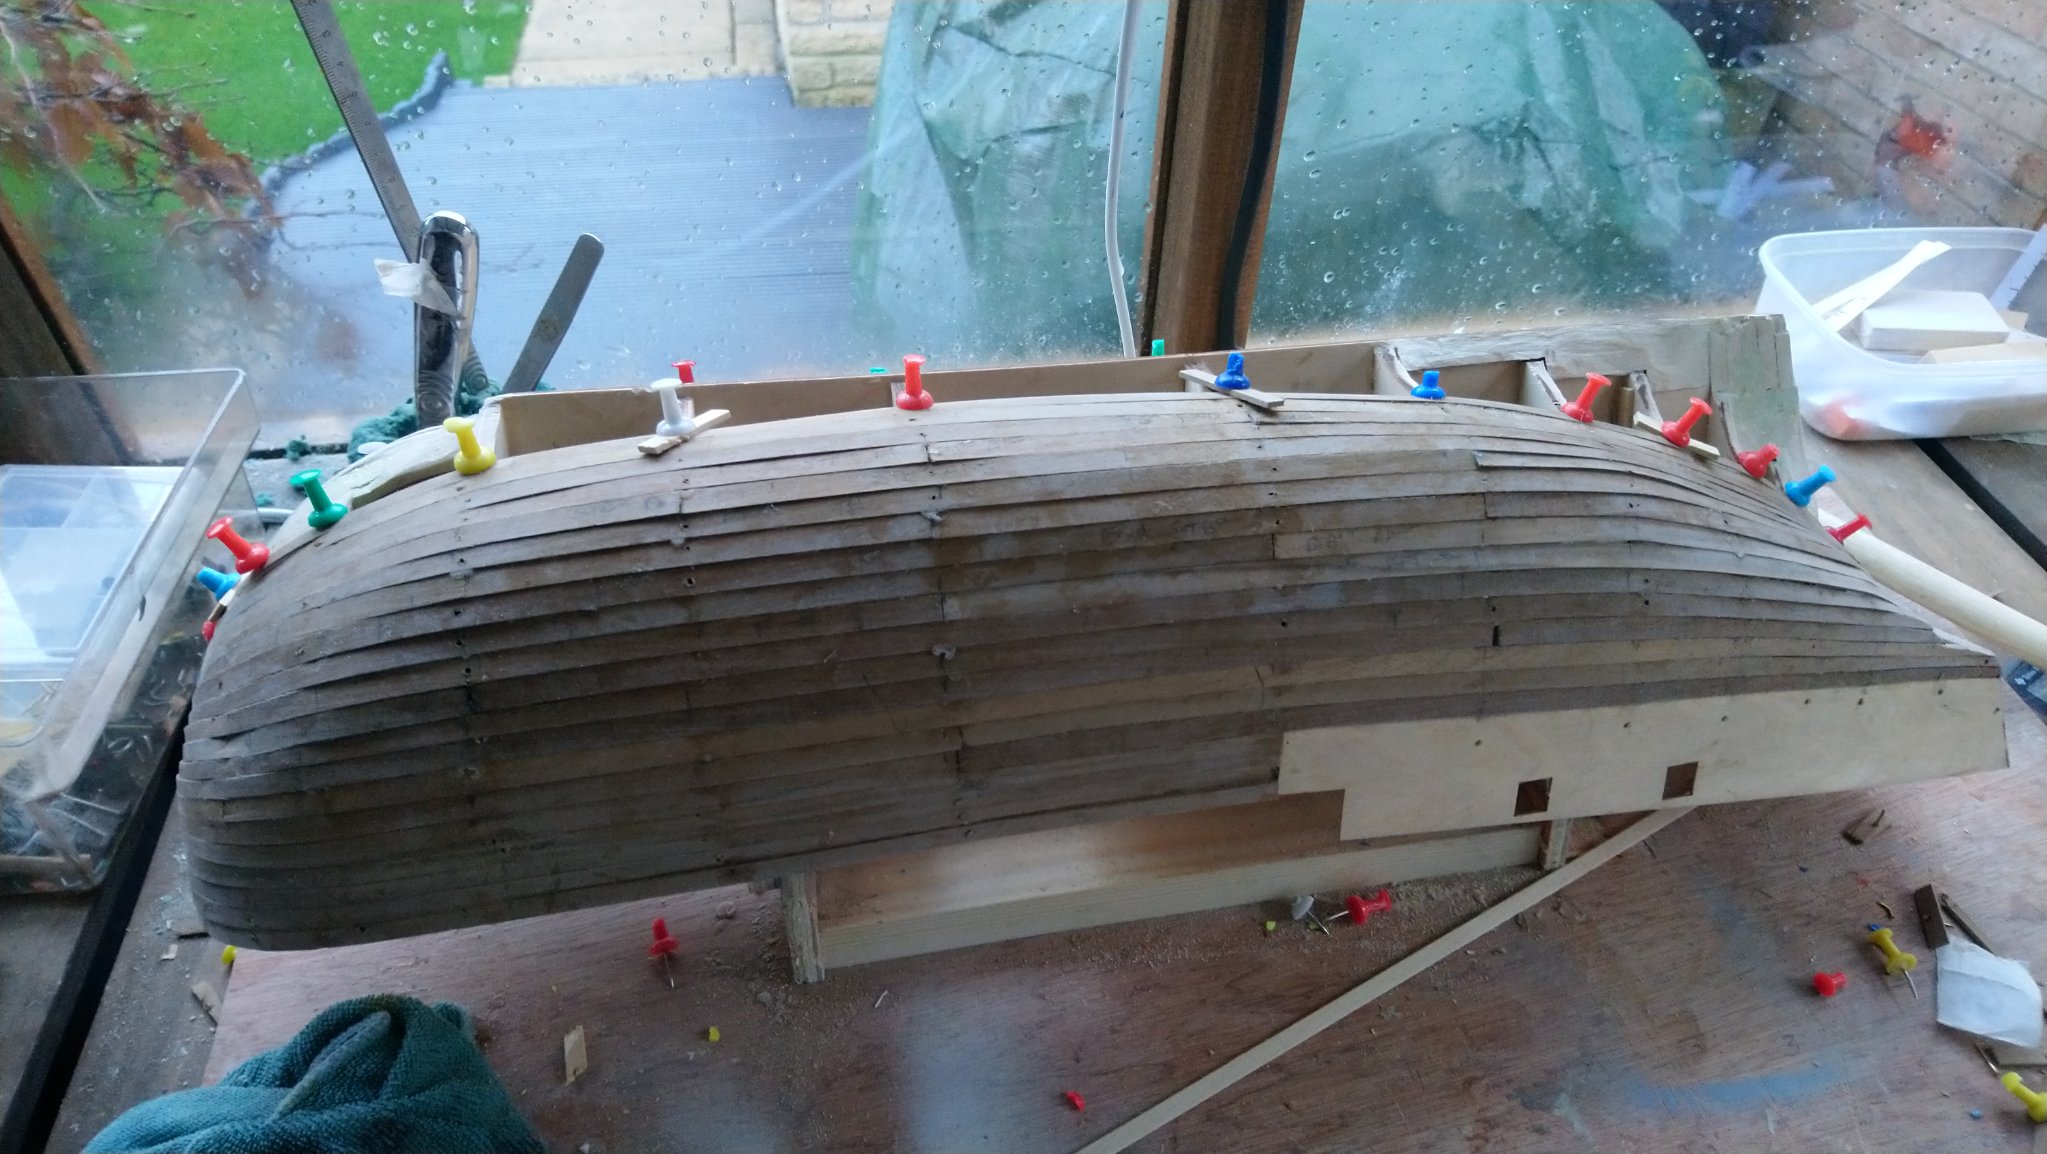
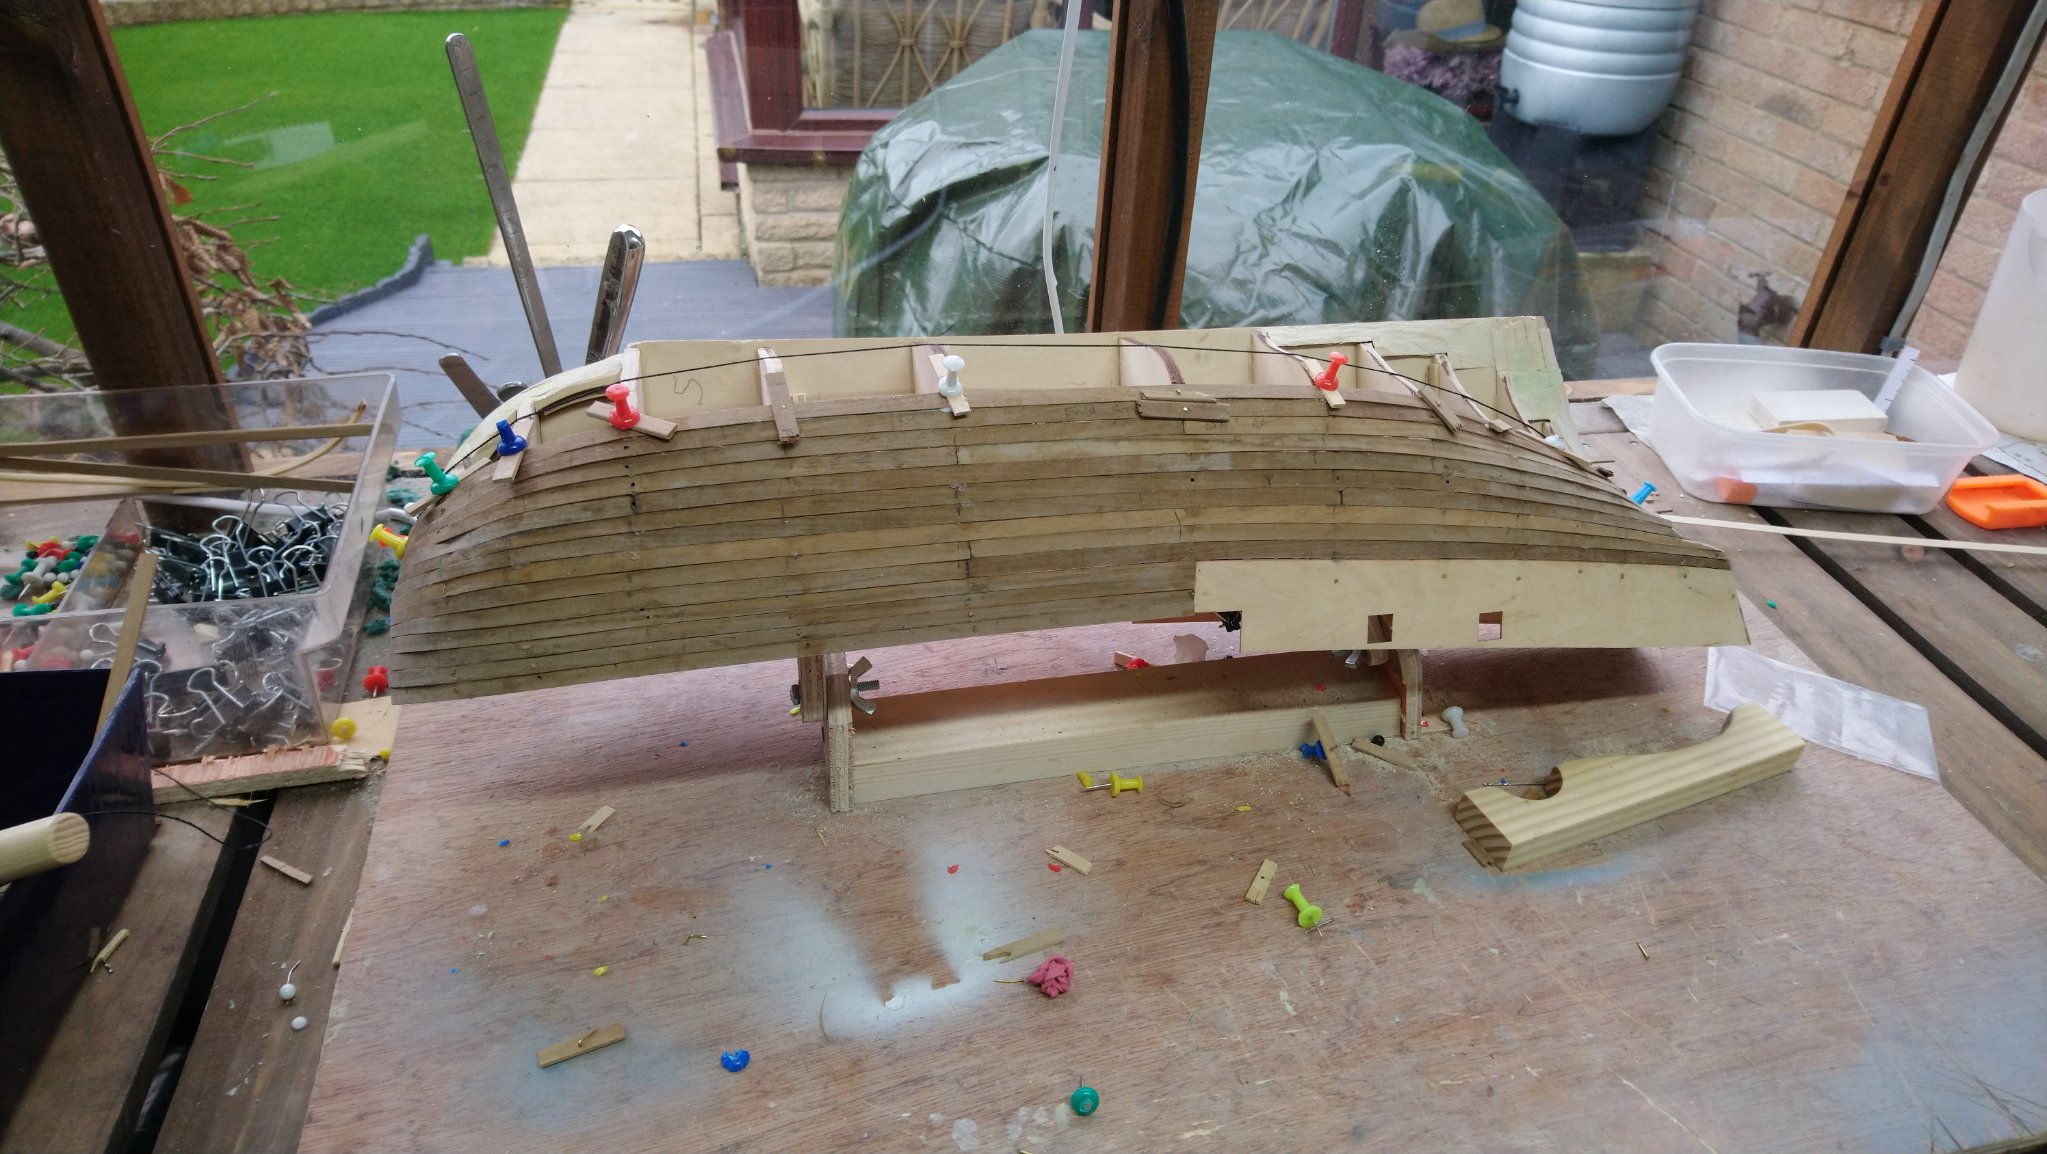
Despite my best efforts of planking and now finding the planking bending ok now that I am soaking the planks overnight I am still having a few issues when clickering even after bending the planks edgeways as per Chuck videos. The main thing is I am getting the general shape and after using filler and sanding should be ok for laying the second planks. I have now completed 50% of the first row of planks. As yet I have not had to drop any planks.
-
40 minutes ago, allanyed said:
Dave,
Yes a big ask, but an interesting idea. Don't know of any blogs, but there are books that show all the details one could ask for on rigging, from rope making to sail making with drawings and photos Drawings are actually sometimes are better in explaining than photos, and both can be found in some books. One example is Lees Masting and Rigging which starts with masts, then yards, then standing rigging, then running rigging with a hundreds of drawings and dozens of photos. It is period specific though, (1625-1860) Chapelle gives a lot of detail on schooners, Anderson on 17th century ships ares two more examples. Antscherl gives a ton of details on rigging and sail making but again is a bit period specific although the techniques can be applied to many ships and other years.
If there is a blog out there, this would be interesting to follow.
Allan
Thanks for the quick update Allan. I have bought a few books already but only one on rigging which is written by Lennarth Petersson. Although very good it is drawings only without any text and of one specific ship. I will take a look at the books you have mentioned and hopefully should be available in the UK. Best regards Dave
-
I know this maybe a big ask but can anyone recommend any good ships blogs with step by step photos of rigging? Even better would be some instruction on how they approached the task? Best regards Dave
-
7 hours ago, Jim Lad said:
Nothing extra special about it, Dave. Like all such pieces of rigging just a length of rope of the correct size to suit the job.
John
Thanks for that John, sound easy and this might be a daft question . So just a length of rope with each end wrapped around the block and the yard and then seized in a number of places at both ends .Best Regards Dave
-
Noticed that some of these are fitted to the ends of yards.Just wondering if the pendant is a specific part or is it just made up of extra wipping to create a long piece of rope between the yard and the block. Hope this makes sense as I have not done this before and wondered how it is achieved. Best Regards Dave
-
Beautiful looking fishing boat. Would you recommend this model to someone who is fairly new. Currently on my second model HMS Bounty which is also by Amati.
-
Cheers Jerry . Goodnight
-
Wow Jerry ,that looks fantastic and she looks much lighter than the one on the box. I have already bought the paint for the hull, so thought about painting her. On the set of videos the ships videos she is also painted and also looks really good. There are still some areas of the hull which are not painted so some wood is shown. However I do like the look of your copper bottom so might consider this for my next model. I did have a few issues with painting my last ship as the paint did not take too well to any areas with filler underneath, even after using primer. Both primer and top coat were acrylic based and Just wondering where I may have gone wrong. I know I am a good way off that stage yet, but I have some sand & seal which I thought I would try on the second planking in the hope that the acrylic paint will take to that better than the sealer. What do you think?
-
50 minutes ago, Jerry said:
David,
One more thing: when you complete the planking and are ready to use a wood filler, please let me know as I have learned an excellent trick (which you may already know) and would like to pass it on to you. So enjoy the meantime and get a good night's sleep.
Best,
Jerry
Thank you Jerry I look forward to hearing your idea . I am assuming you use the filler before any sanding takes place or do you remove some of the wood first. The last time I used the filler I removed about 90% of so wasn,t sure if I did it correctly. On my previous model there was only one layer of planking and although was far from perfect I think it wasn,t too bad, however the wood was very soft and much easier to work with. Take care best regards Dave
-
19 minutes ago, Jerry said:
David,
Many thanks for the "thread" explanation. I can see its use. Regarding the edgewise problem...that's when you have to consider tapering the planks.
Have a nice supper,
Jerry
Thanks once again for your input Jerry which is always welcomed. Even with my planks tapered I am still have a few issues with them breaking. I have found by applying heat with the heat iron before physically bending the plank I do have some success. However after your suggestion it is clear that I am not allowing them to soak for long enough. Hopefully I can now proceed without too much trouble. Best regards Dave.
-
Hello Jerry. The idea of the 4" pipe sound brilliant and just what I need. Please don,t take this the wrong way but the idea of the thread is to break it into sections. The idea behind is explained on MSW by Chuck Passario.Here is the link. I have tried using planks instead of thread but found thes just got in the way. I am assuming with this approach you can see whether of not you need to drop planks or gain planks ( sorry if this is the wrong terminology)
Here is the links. Chuck has also produced a few videos which shows his technique of bending planks edge ways which is where I am having a problem.
Hre is the link to the information which is on this website.
http://modelshipworldforum.com/resources/Framing_and_Planking/Lining Off your hull for planking.pdf
And here is the link to Chucks video, the first of three.


HMS Bounty by DaveBaxt - FINISHED - Amati - 1:60
in - Kit build logs for subjects built from 1751 - 1800
Posted · Edited by DaveBaxt
The Chair looks great. I also like the look of you wood paneling.Thanks for the advice too,much appreciated.