HOLIDAY DONATION DRIVE - SUPPORT MSW - DO YOUR PART TO KEEP THIS GREAT FORUM GOING! (Only 36 donations so far out of 49,000 members - C'mon guys!)
×


Roberts Orca
-
Posts
121 -
Joined
-
Last visited
Content Type
Profiles
Forums
Gallery
Events
Everything posted by Roberts Orca
-
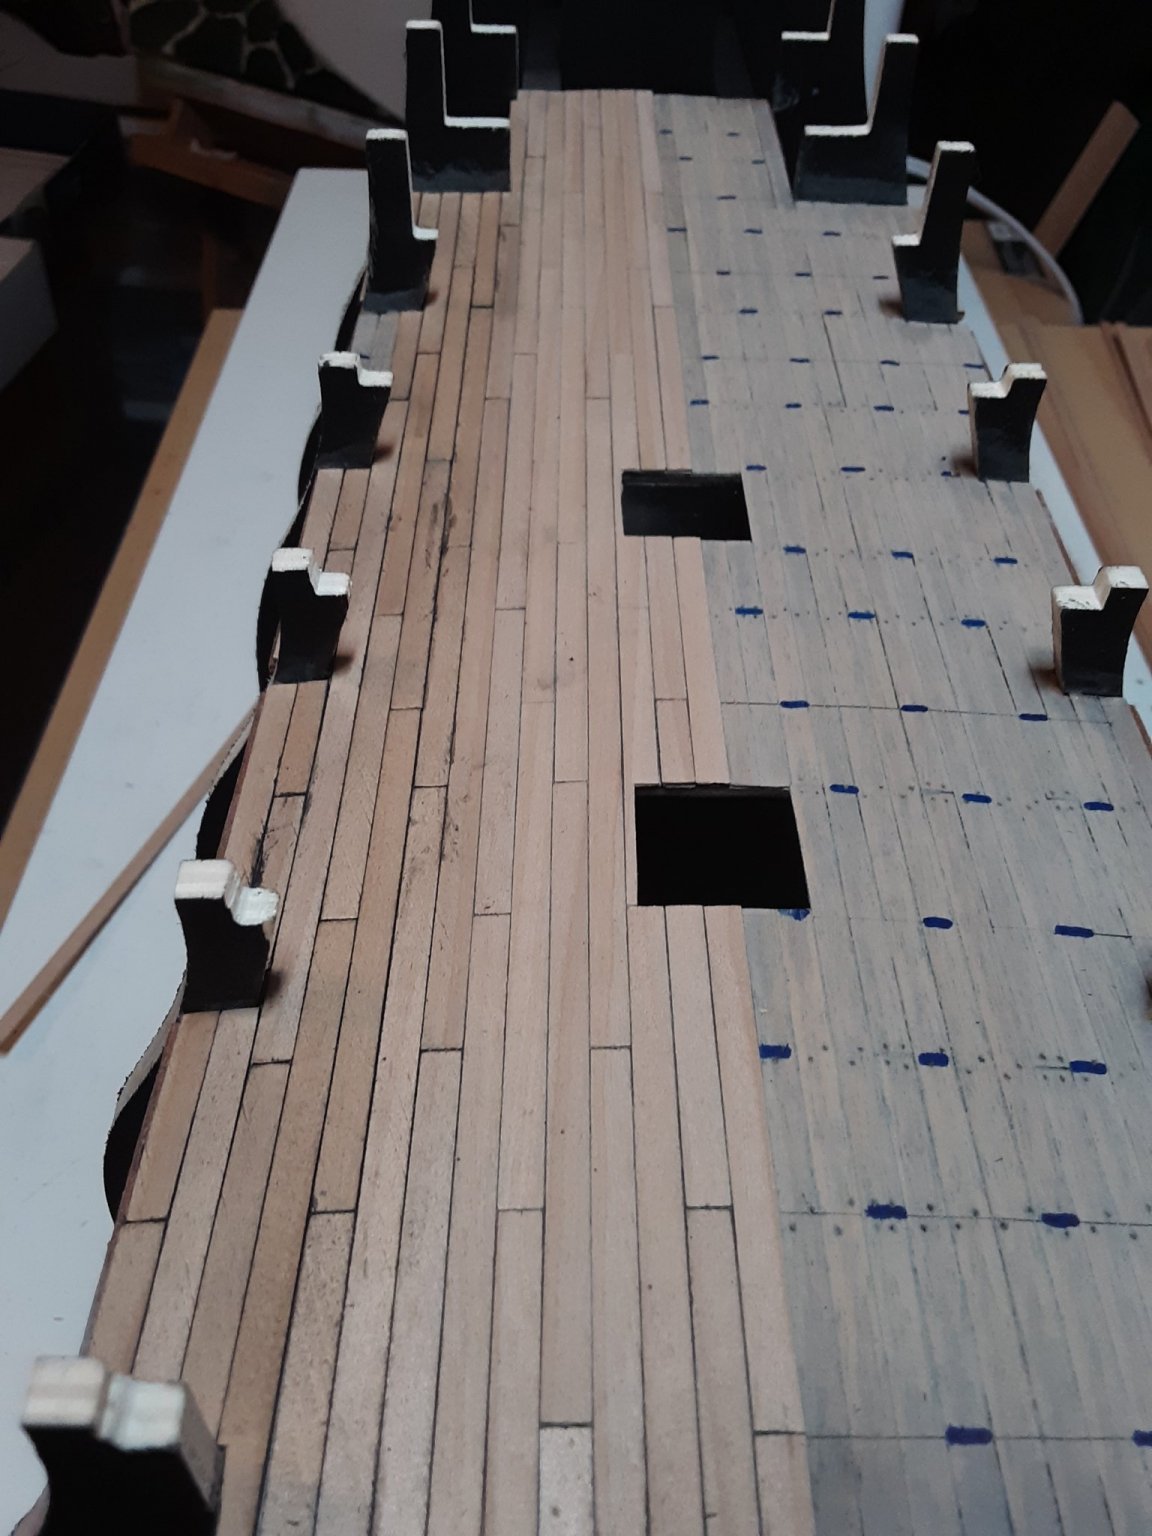
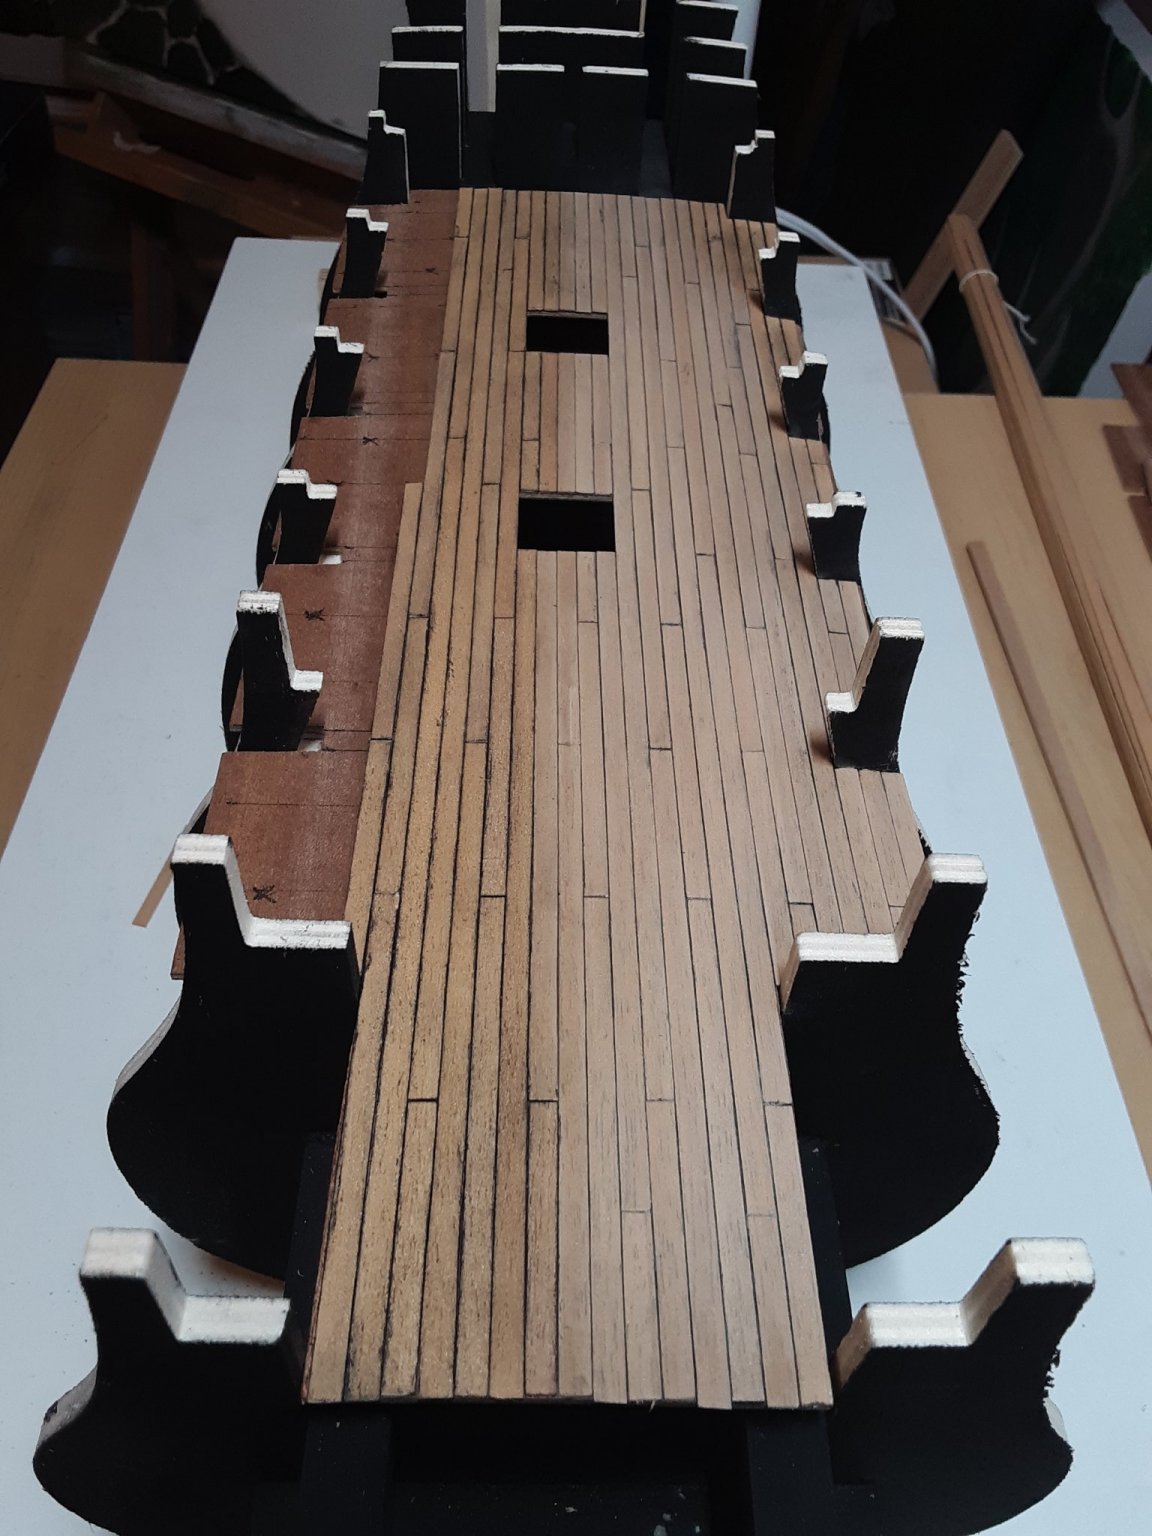
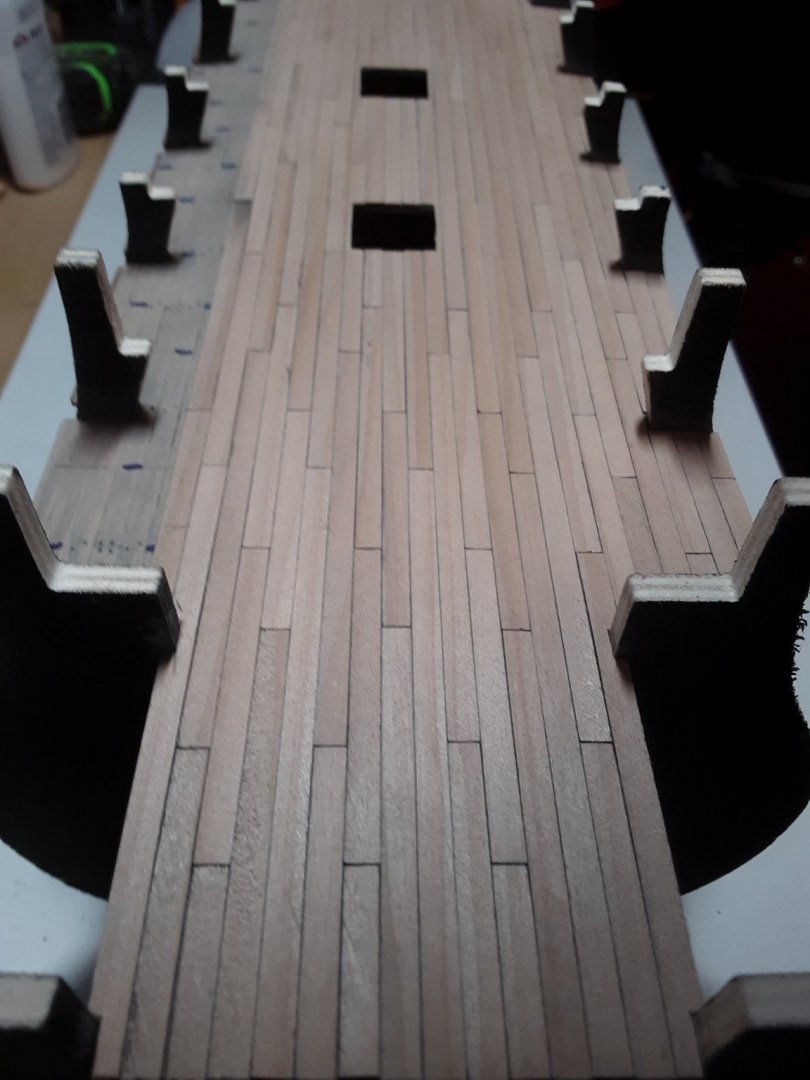
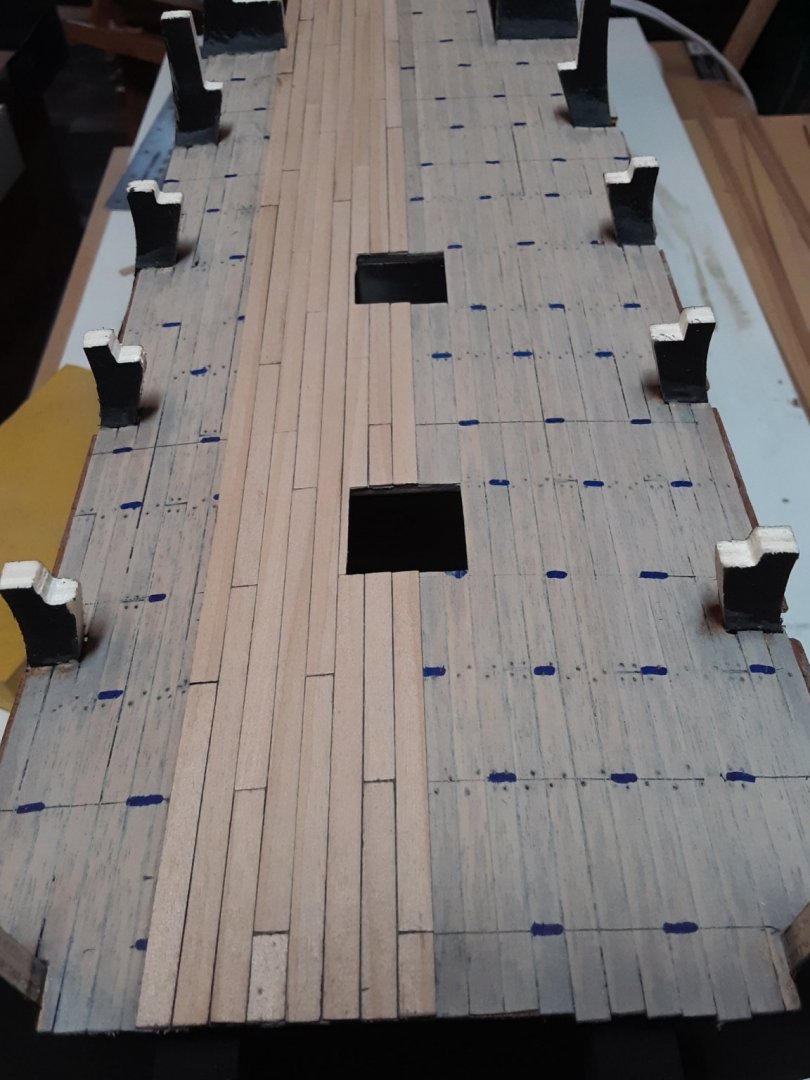
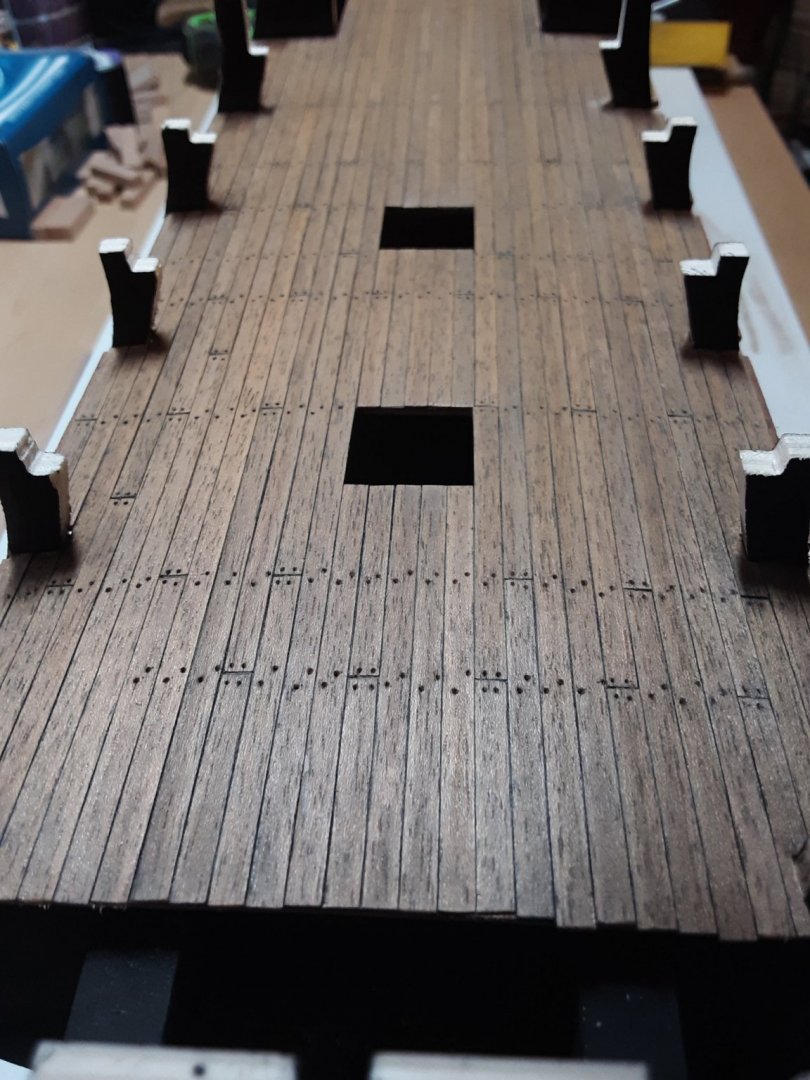
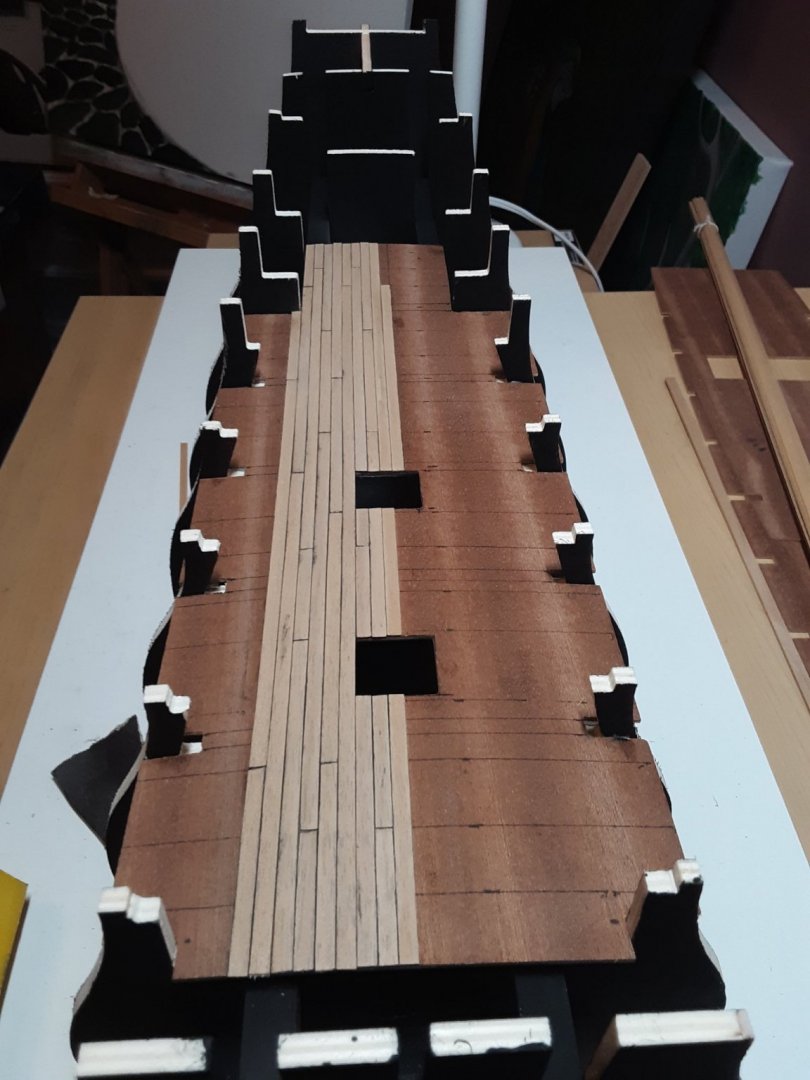
About 3/4 of the way now. Did some sanding on what is already down. I think I like this look.

-
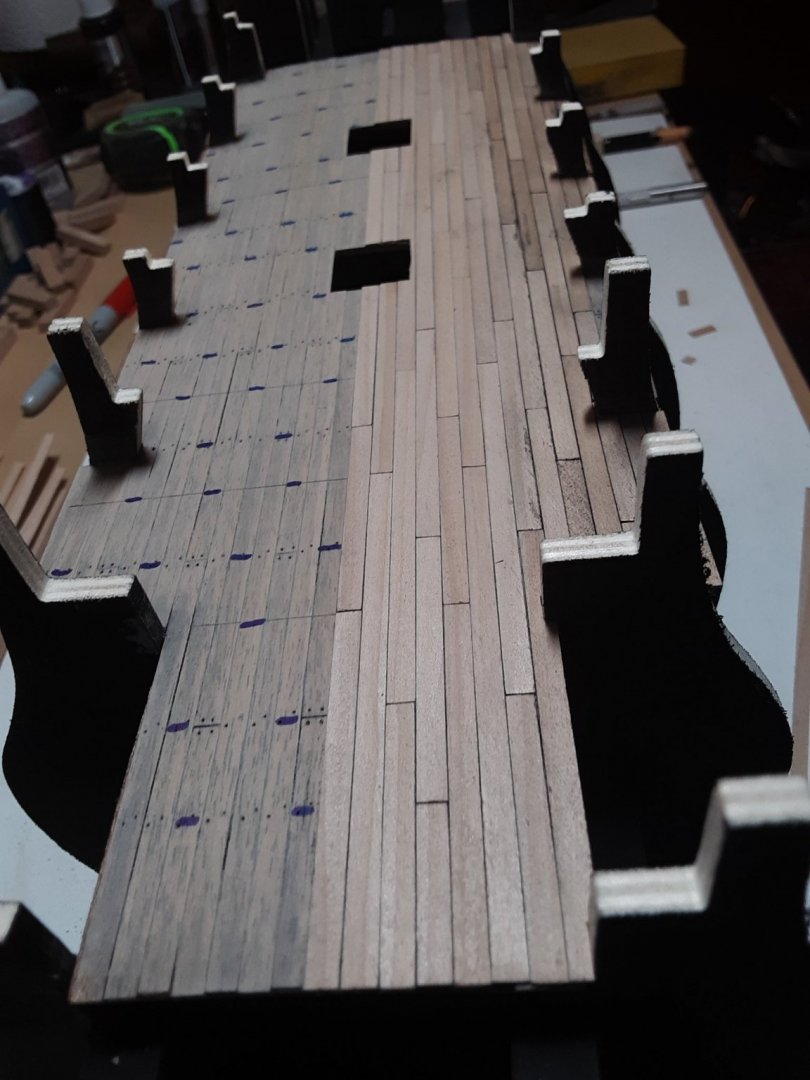
Half way there. I'm curious what other builders are using to seal their decks with. I'm considering using tung oil. If rubbed out properly, it leaves the surface matte to satin. Brings out the beauty of the wood. Any and all comments are welcome. Thanks for stopping by. Robert.

-
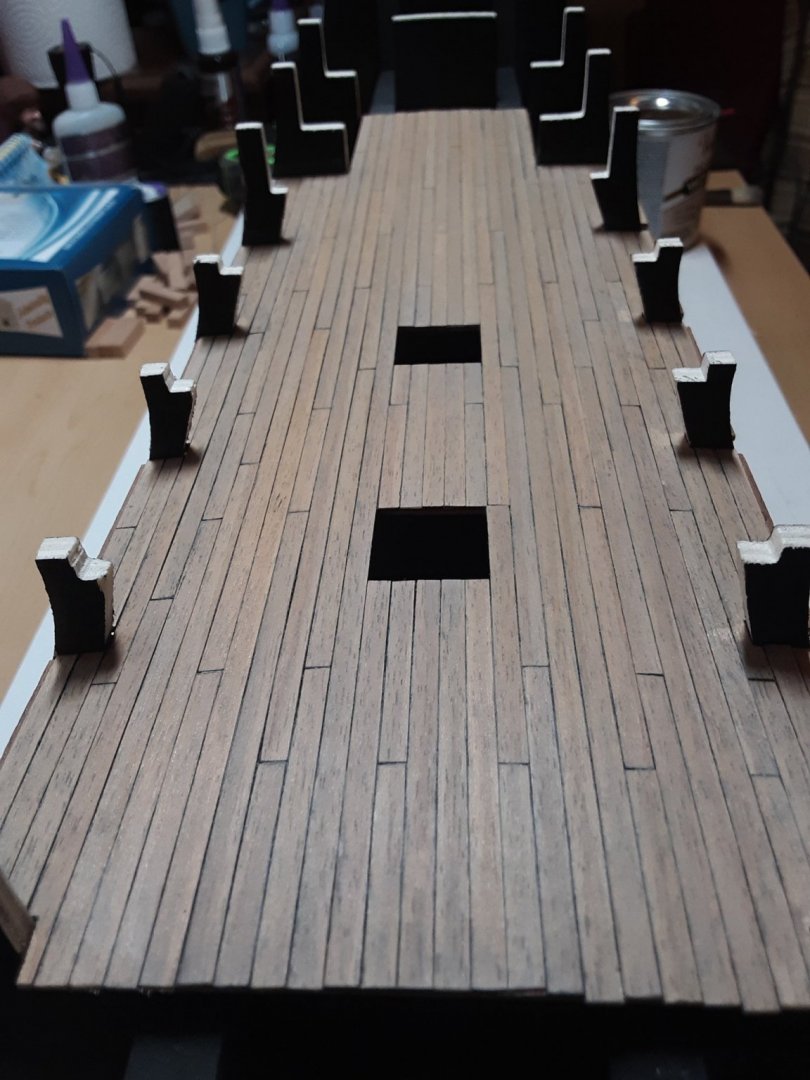
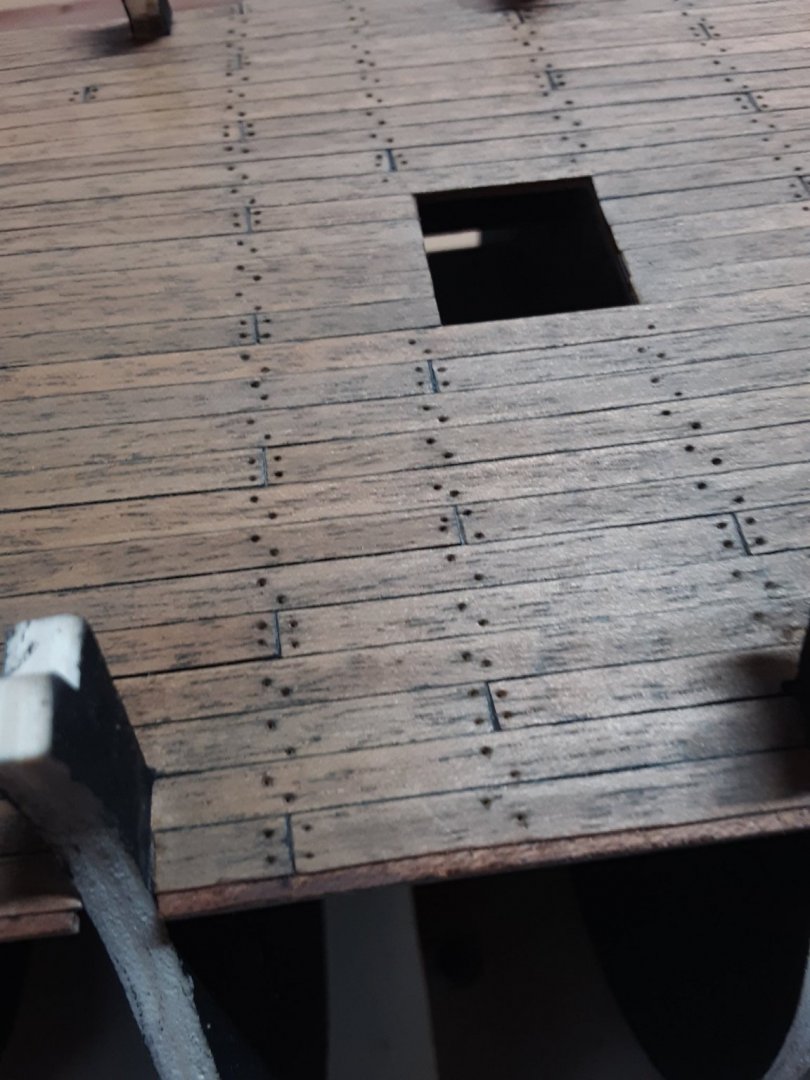
So after much deliberation I decided that I needed to redo my first deck. The tree nail attempt just didn't do it for me. I learned from my experience with oil painting that "less is more". In other words, just because you know something is there, doesn't mean you have to put it there. Here's some pictures of my redo. Thanks for stopping by. Robert
-
Thanks Eugenio. I really appreciate the compliment. I'm actually thinking of trying to lighten it up, and make the nail spots less noticeable. I might sand on it to brighten it up. Not a whole lot of this deck actually shows, so I'm glad I'm figuring things out here.
-
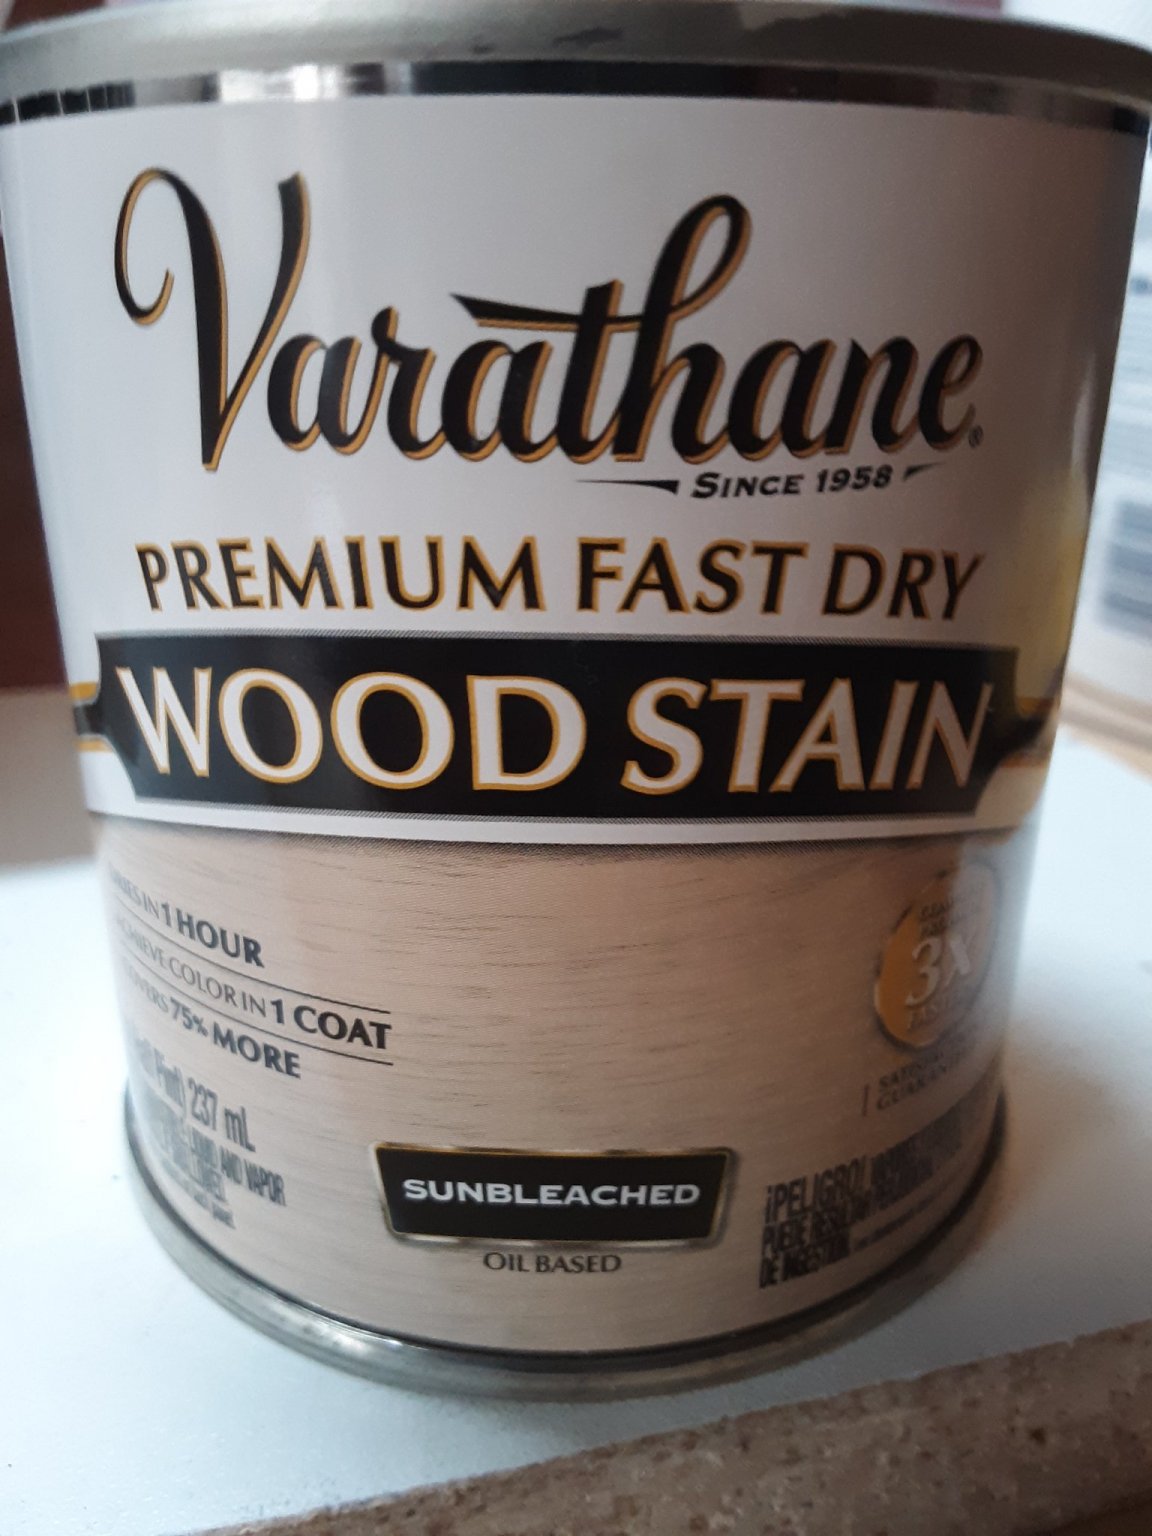
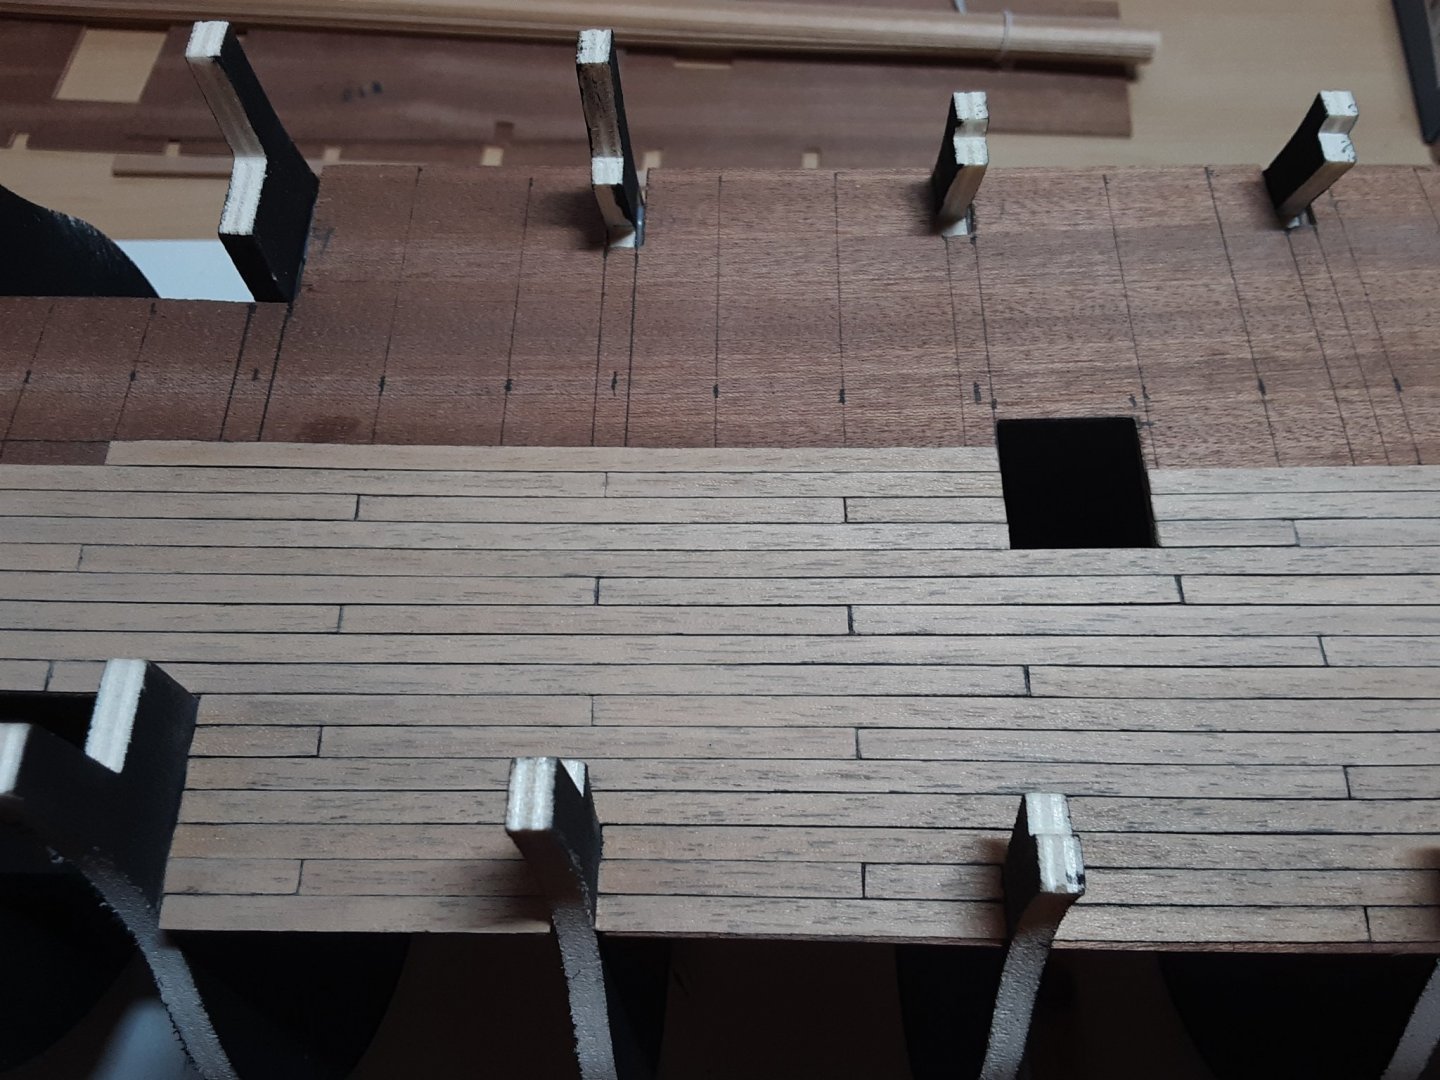
I used a wash of this "Unbleached" Varathane stain. I like the looks of that. Then I used an awl to put the look of tree nails. After that a wash of dark walnut stain. Really brought out the details. I like the rugged look, but if I had to do it over, I think I would have stopped with the sun bleached stain. It's just a little bit darker than I wanted it.

-
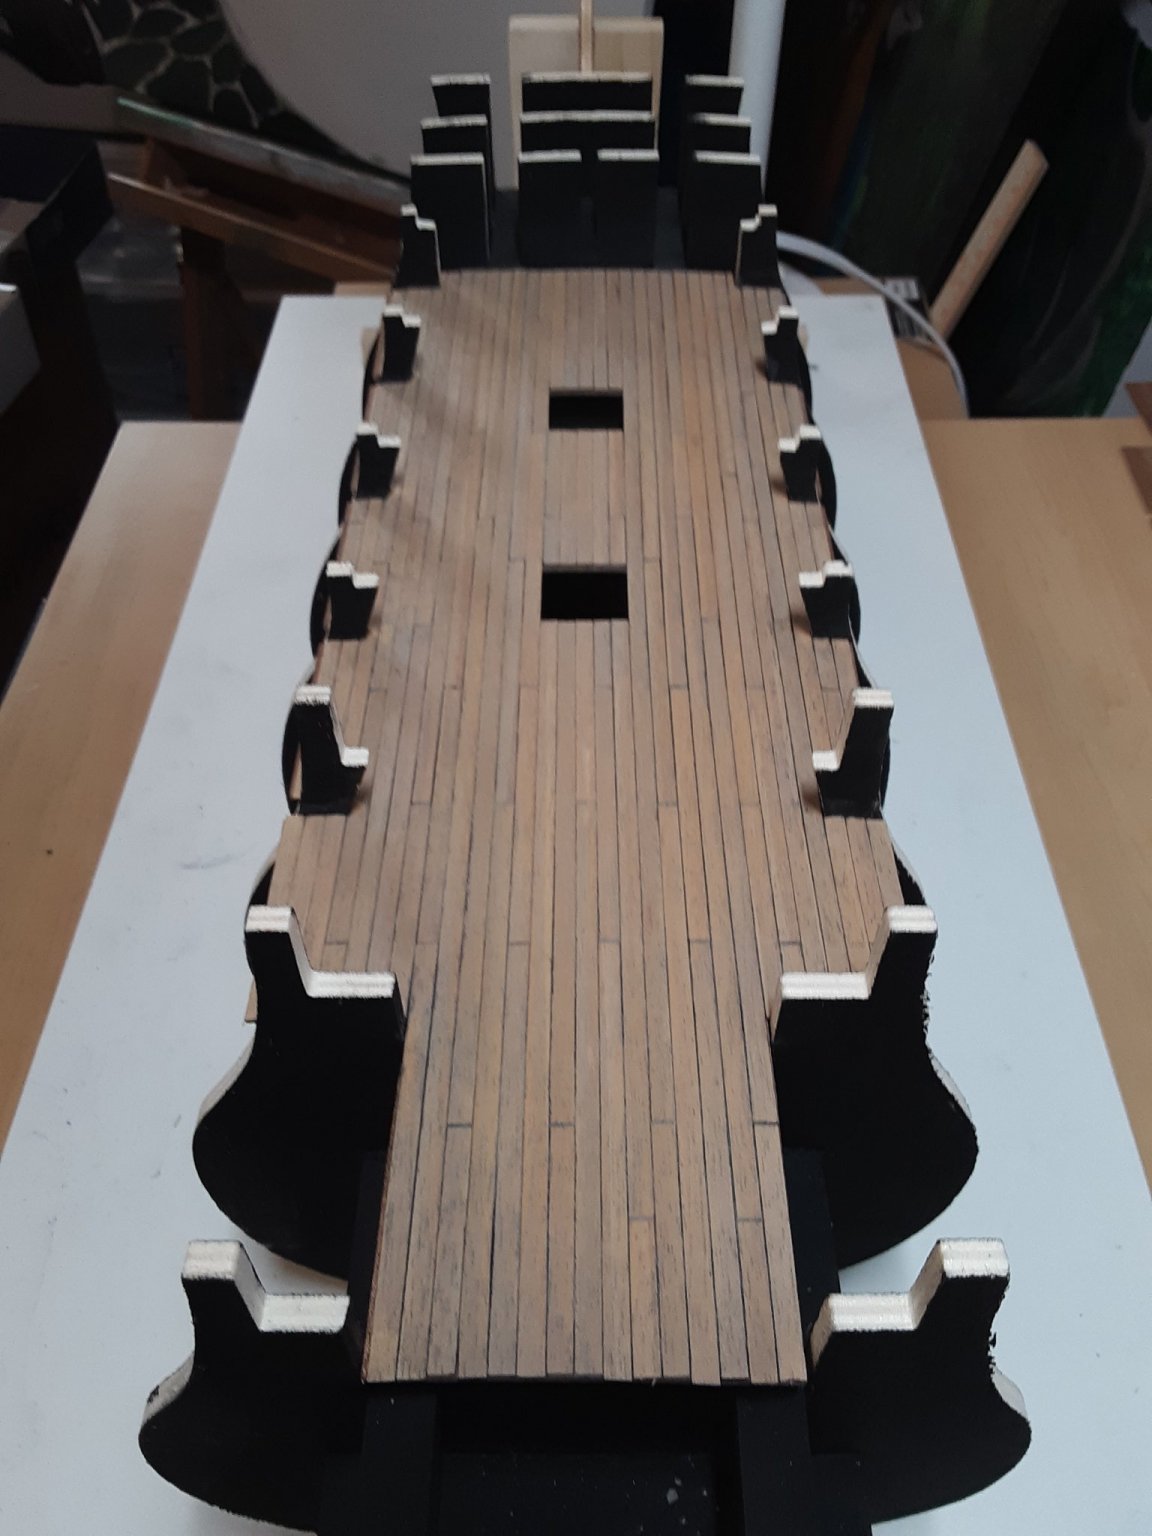
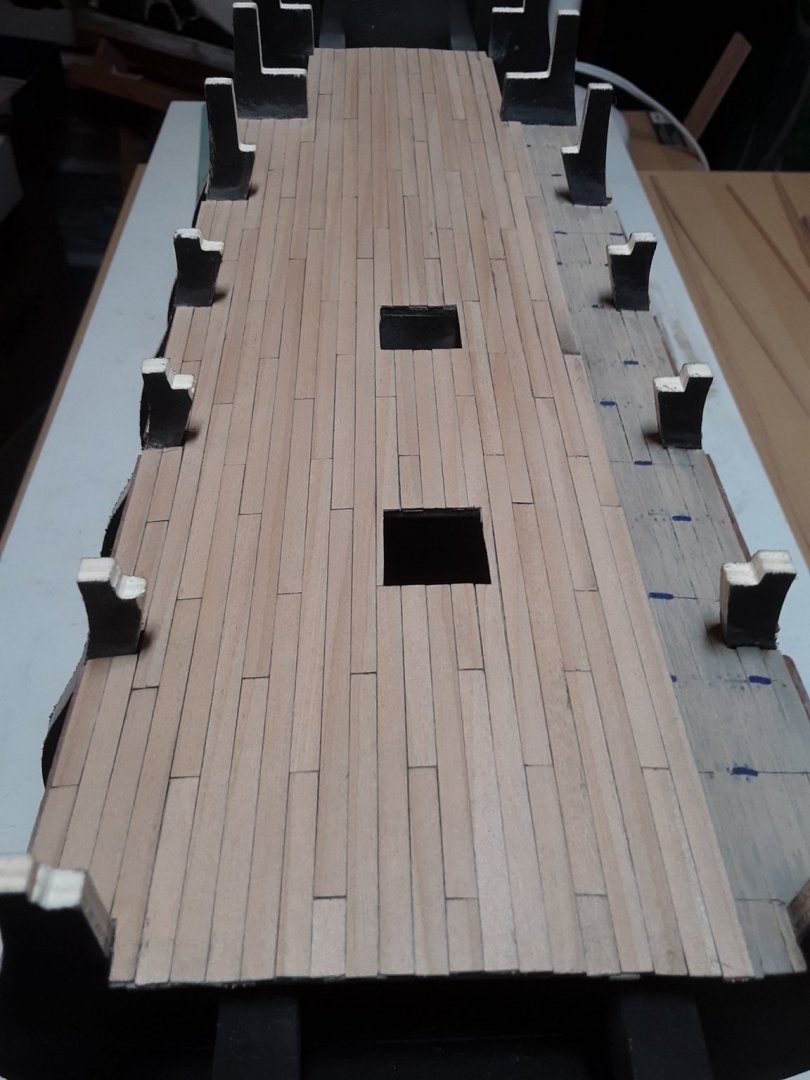
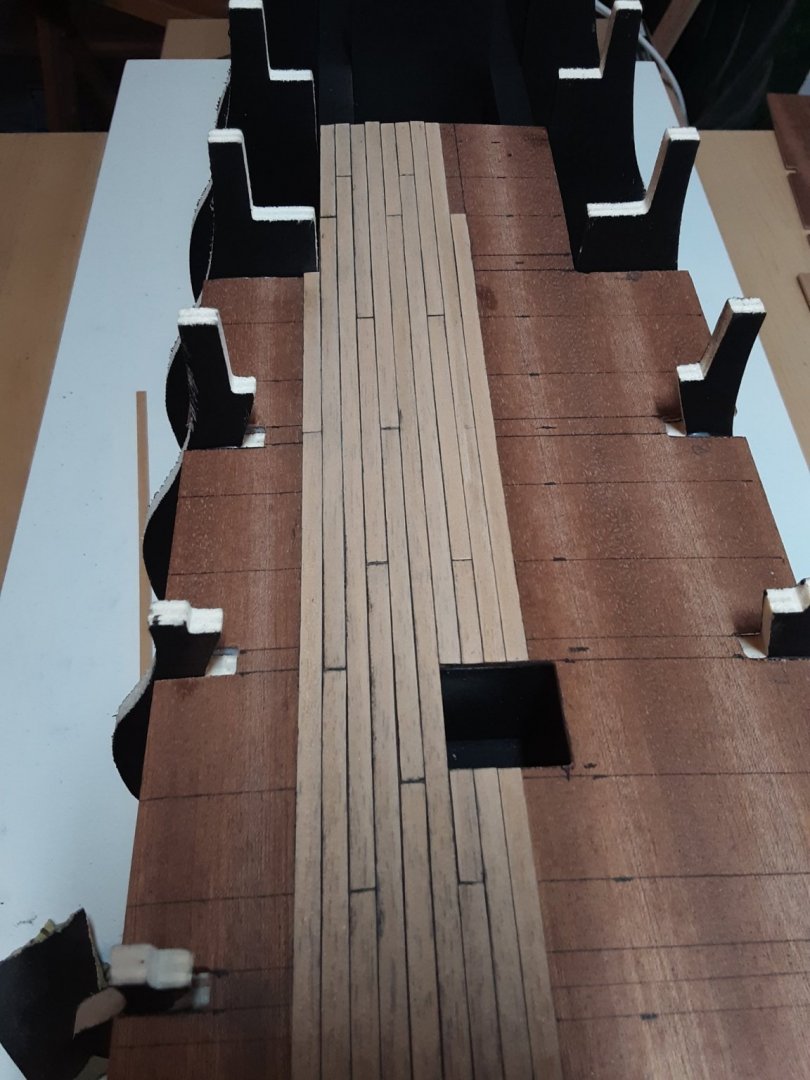
My first deck job. I'm ok with it. Practice makes perfect right?

-
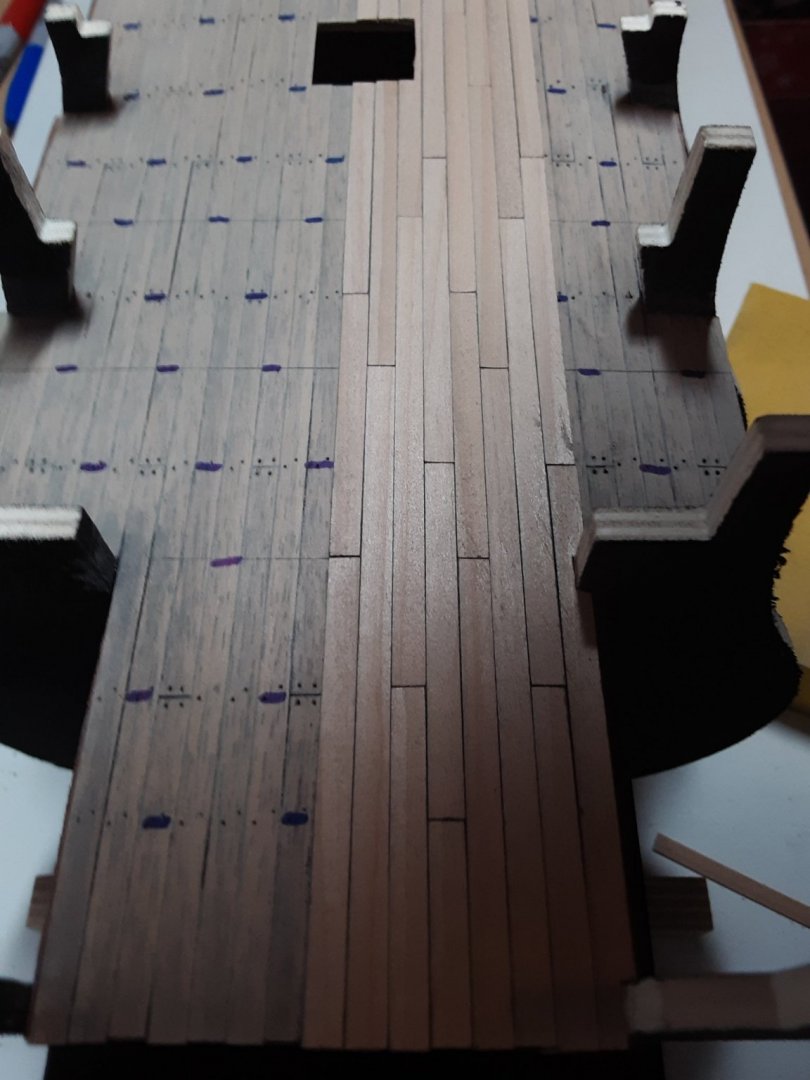
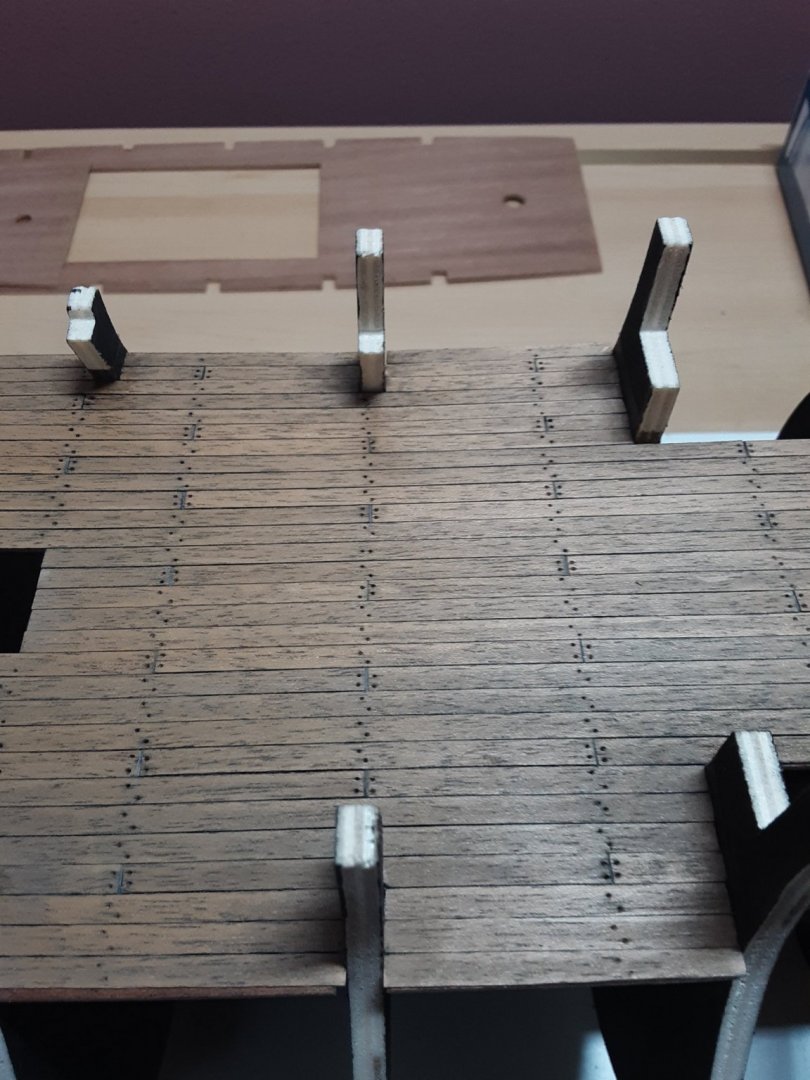
The decking on the starboard side has been lightly sanded. I had to stop, I was going cross eyed. 😳
-
And here's a few more deck boards.

-
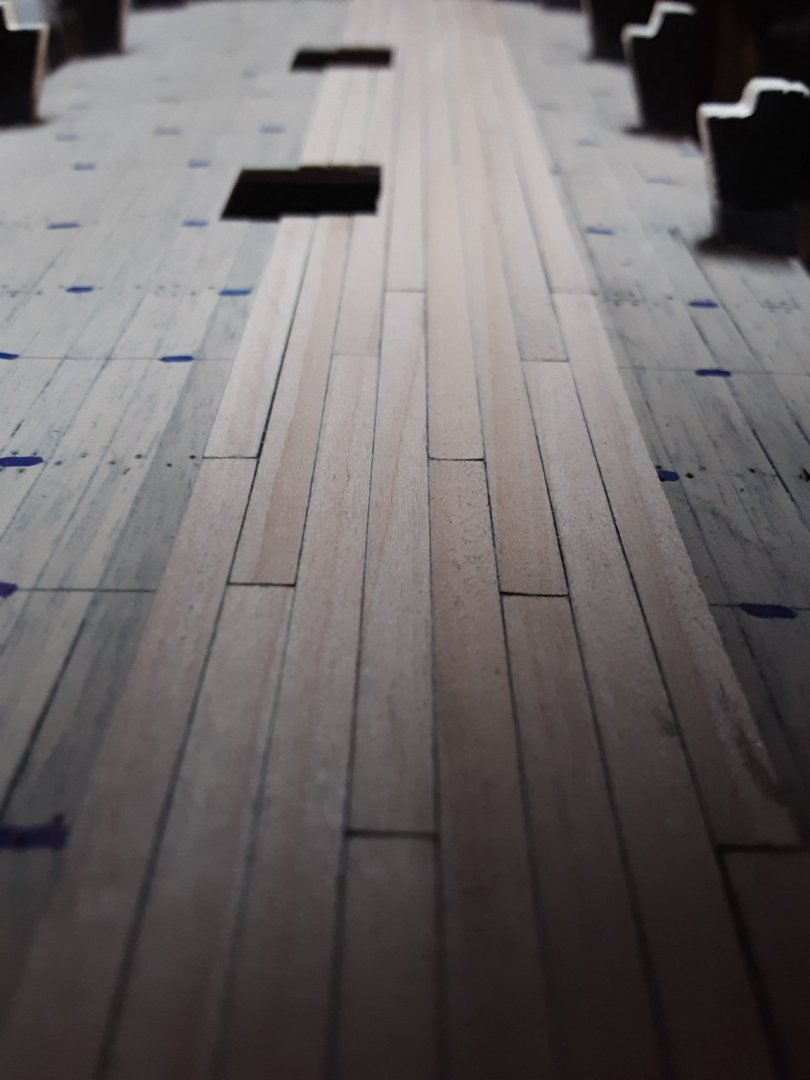
My first decking job. Seeing how I've never done this before, I'm not disappointed with the way it's turning out. I had some trouble figuring out the plank sequence. So this is my practice deck. 😊


-
Hello Eugenio. Thank you so much for your response to this. It looks to be one of many challenges in this kit. I think what you have built is beautiful. Keep up the great work my friend.
-
Now I can resume my build. I'll be putting down some more deck boards. Stay tuned.
-
I'm so excited!! My book came in the mail today. What a gold mine. I don't expect my ship to be an exact replica, but it sure is fun trying. If you're building a Victory, I can't say enough about how great this book is.

-
Great work! I'm way behind where you are. I'm building the same kit. I was wondering about that press wood stuff that's included in the kit. How do you cut those pieces out? Do you leave it attached to the cardboard, or is it removed some how? I appreciate any help you could give. Keep up the great work. Best regards, Robert.
-
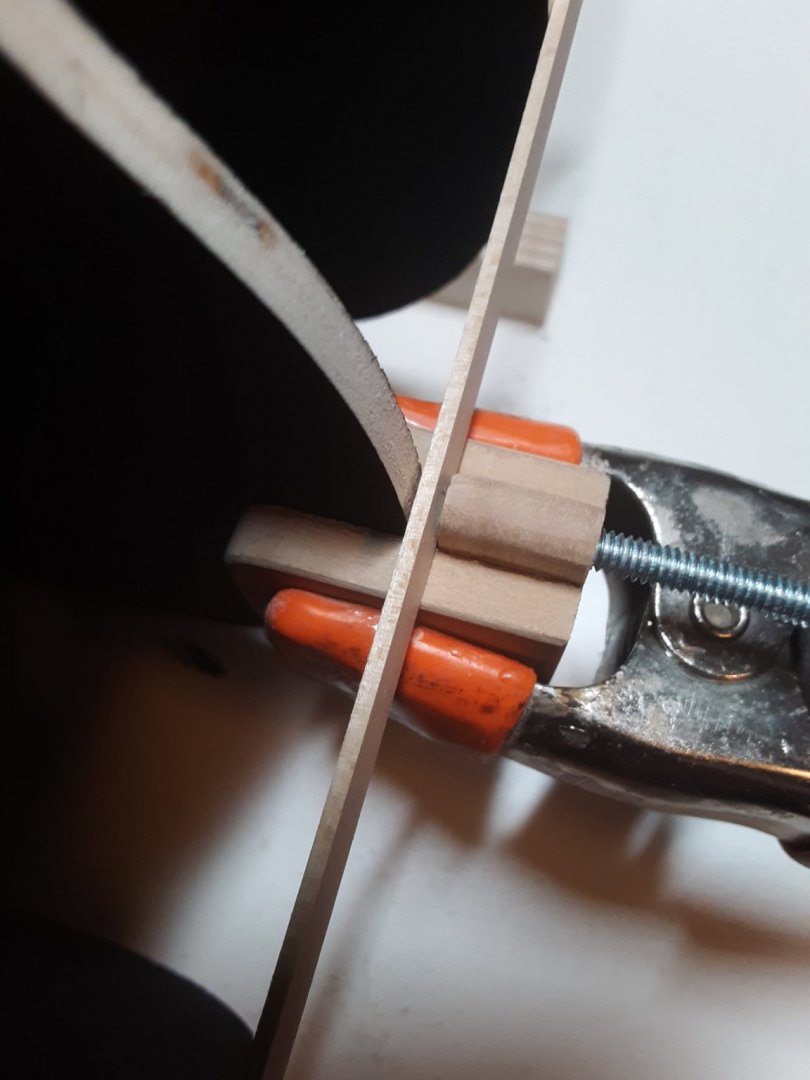
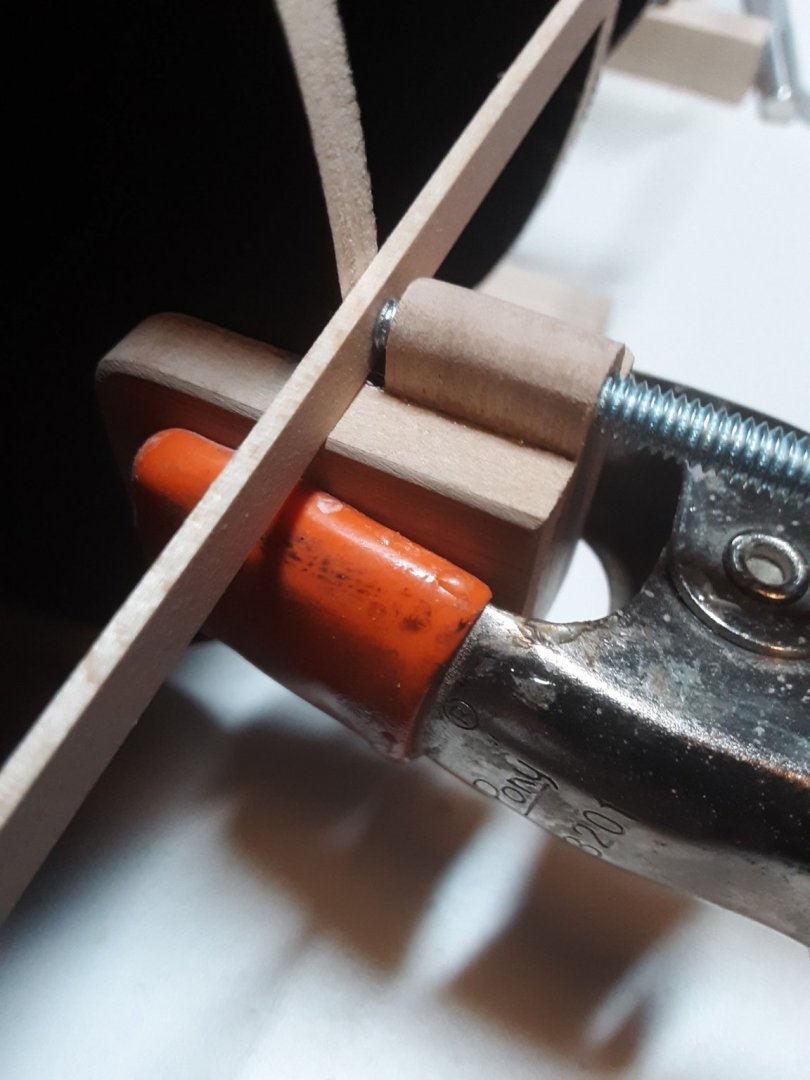
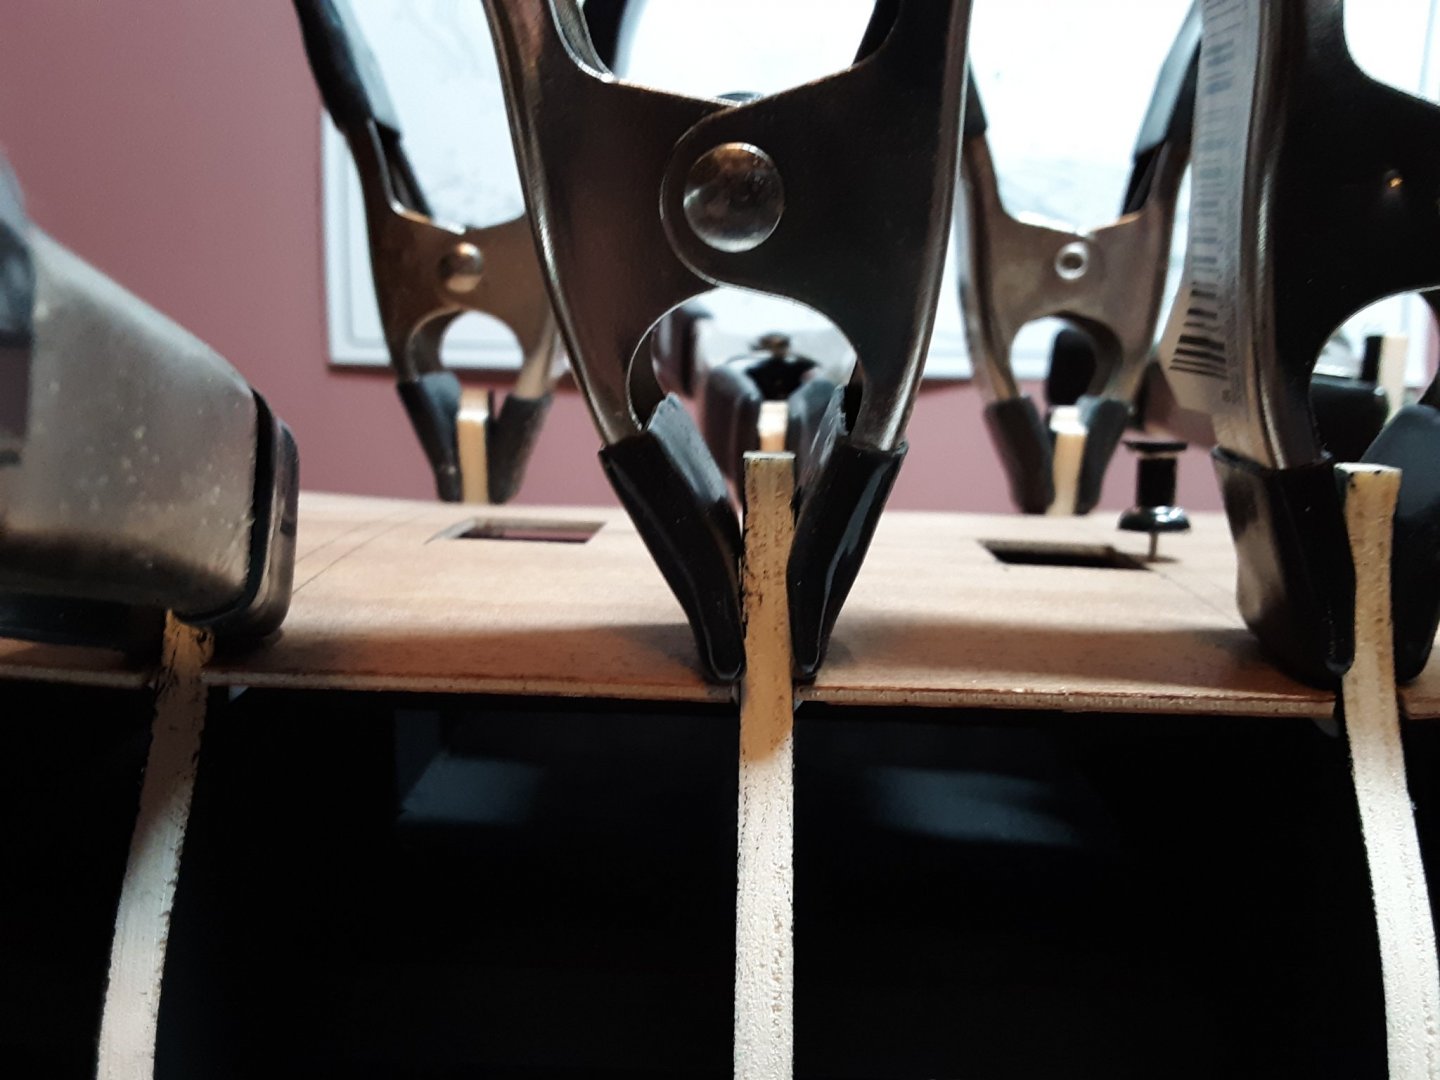
Now I'm going to make about 22 of them. An important note. The screw always applies pressure in the center of the bulkhead. So even at the bow or stern areas where the bulkheads have a steep slope, it will push the plank flat against the angle set. And I'll probably round off the screws and use the felt pads every time.
-
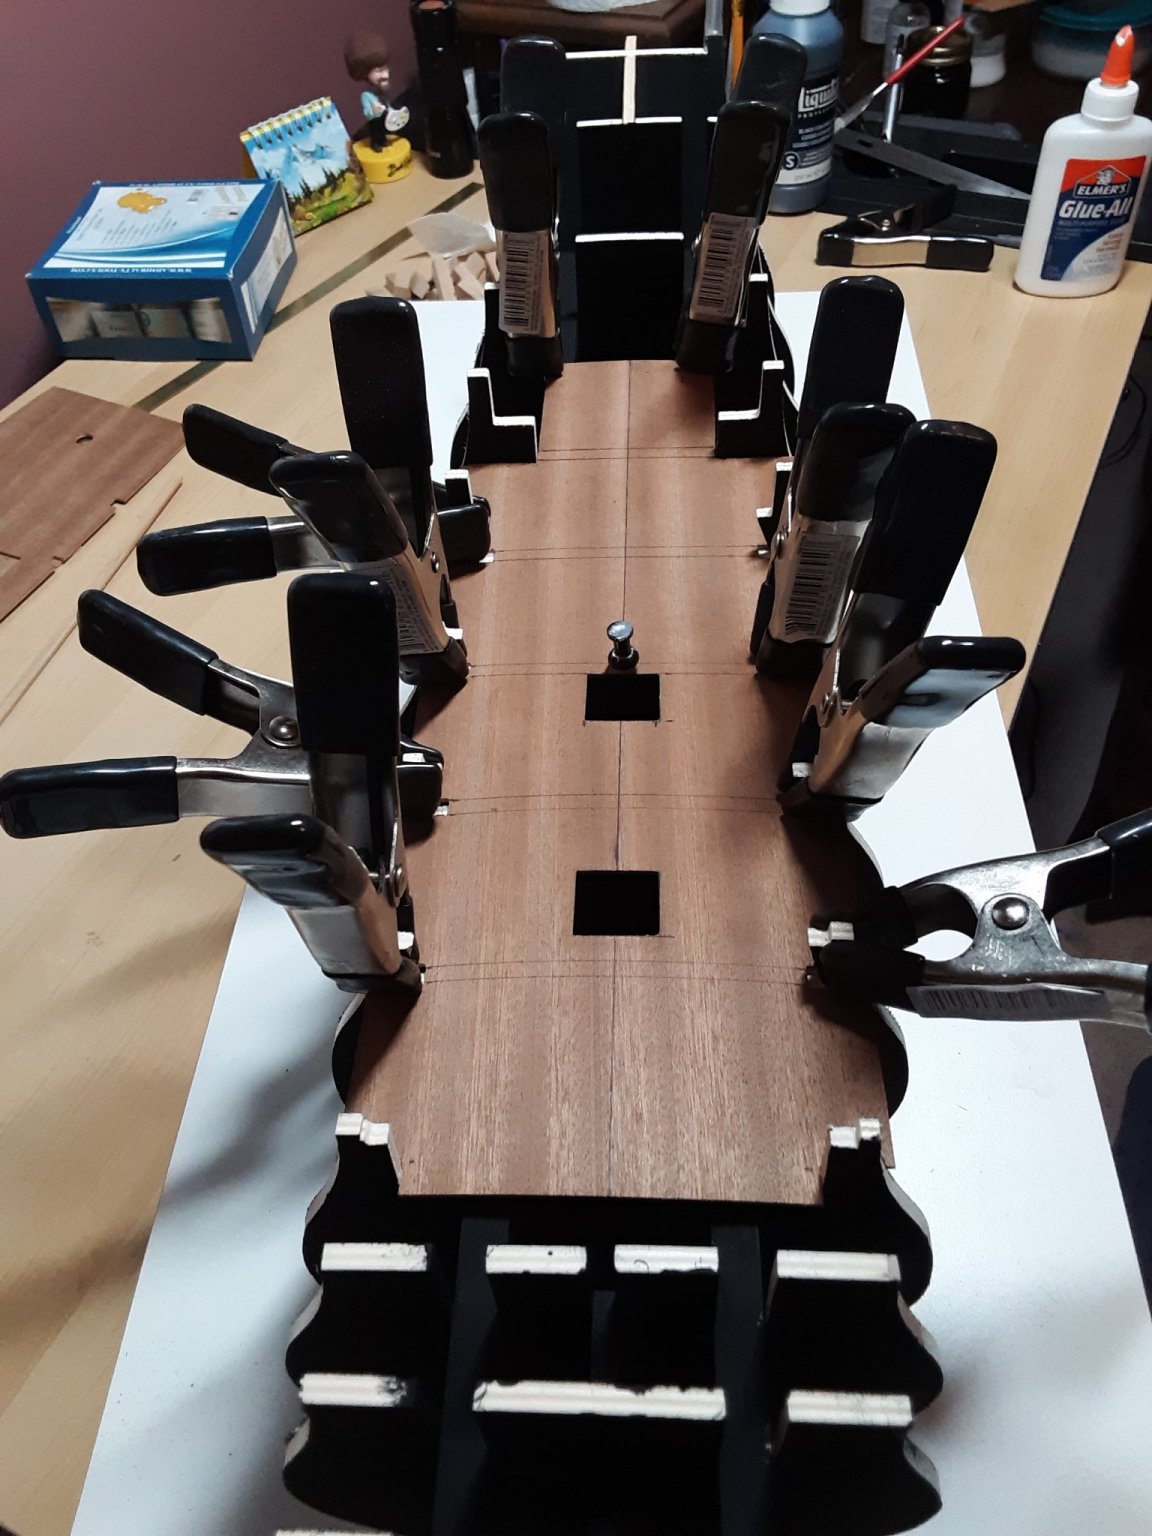
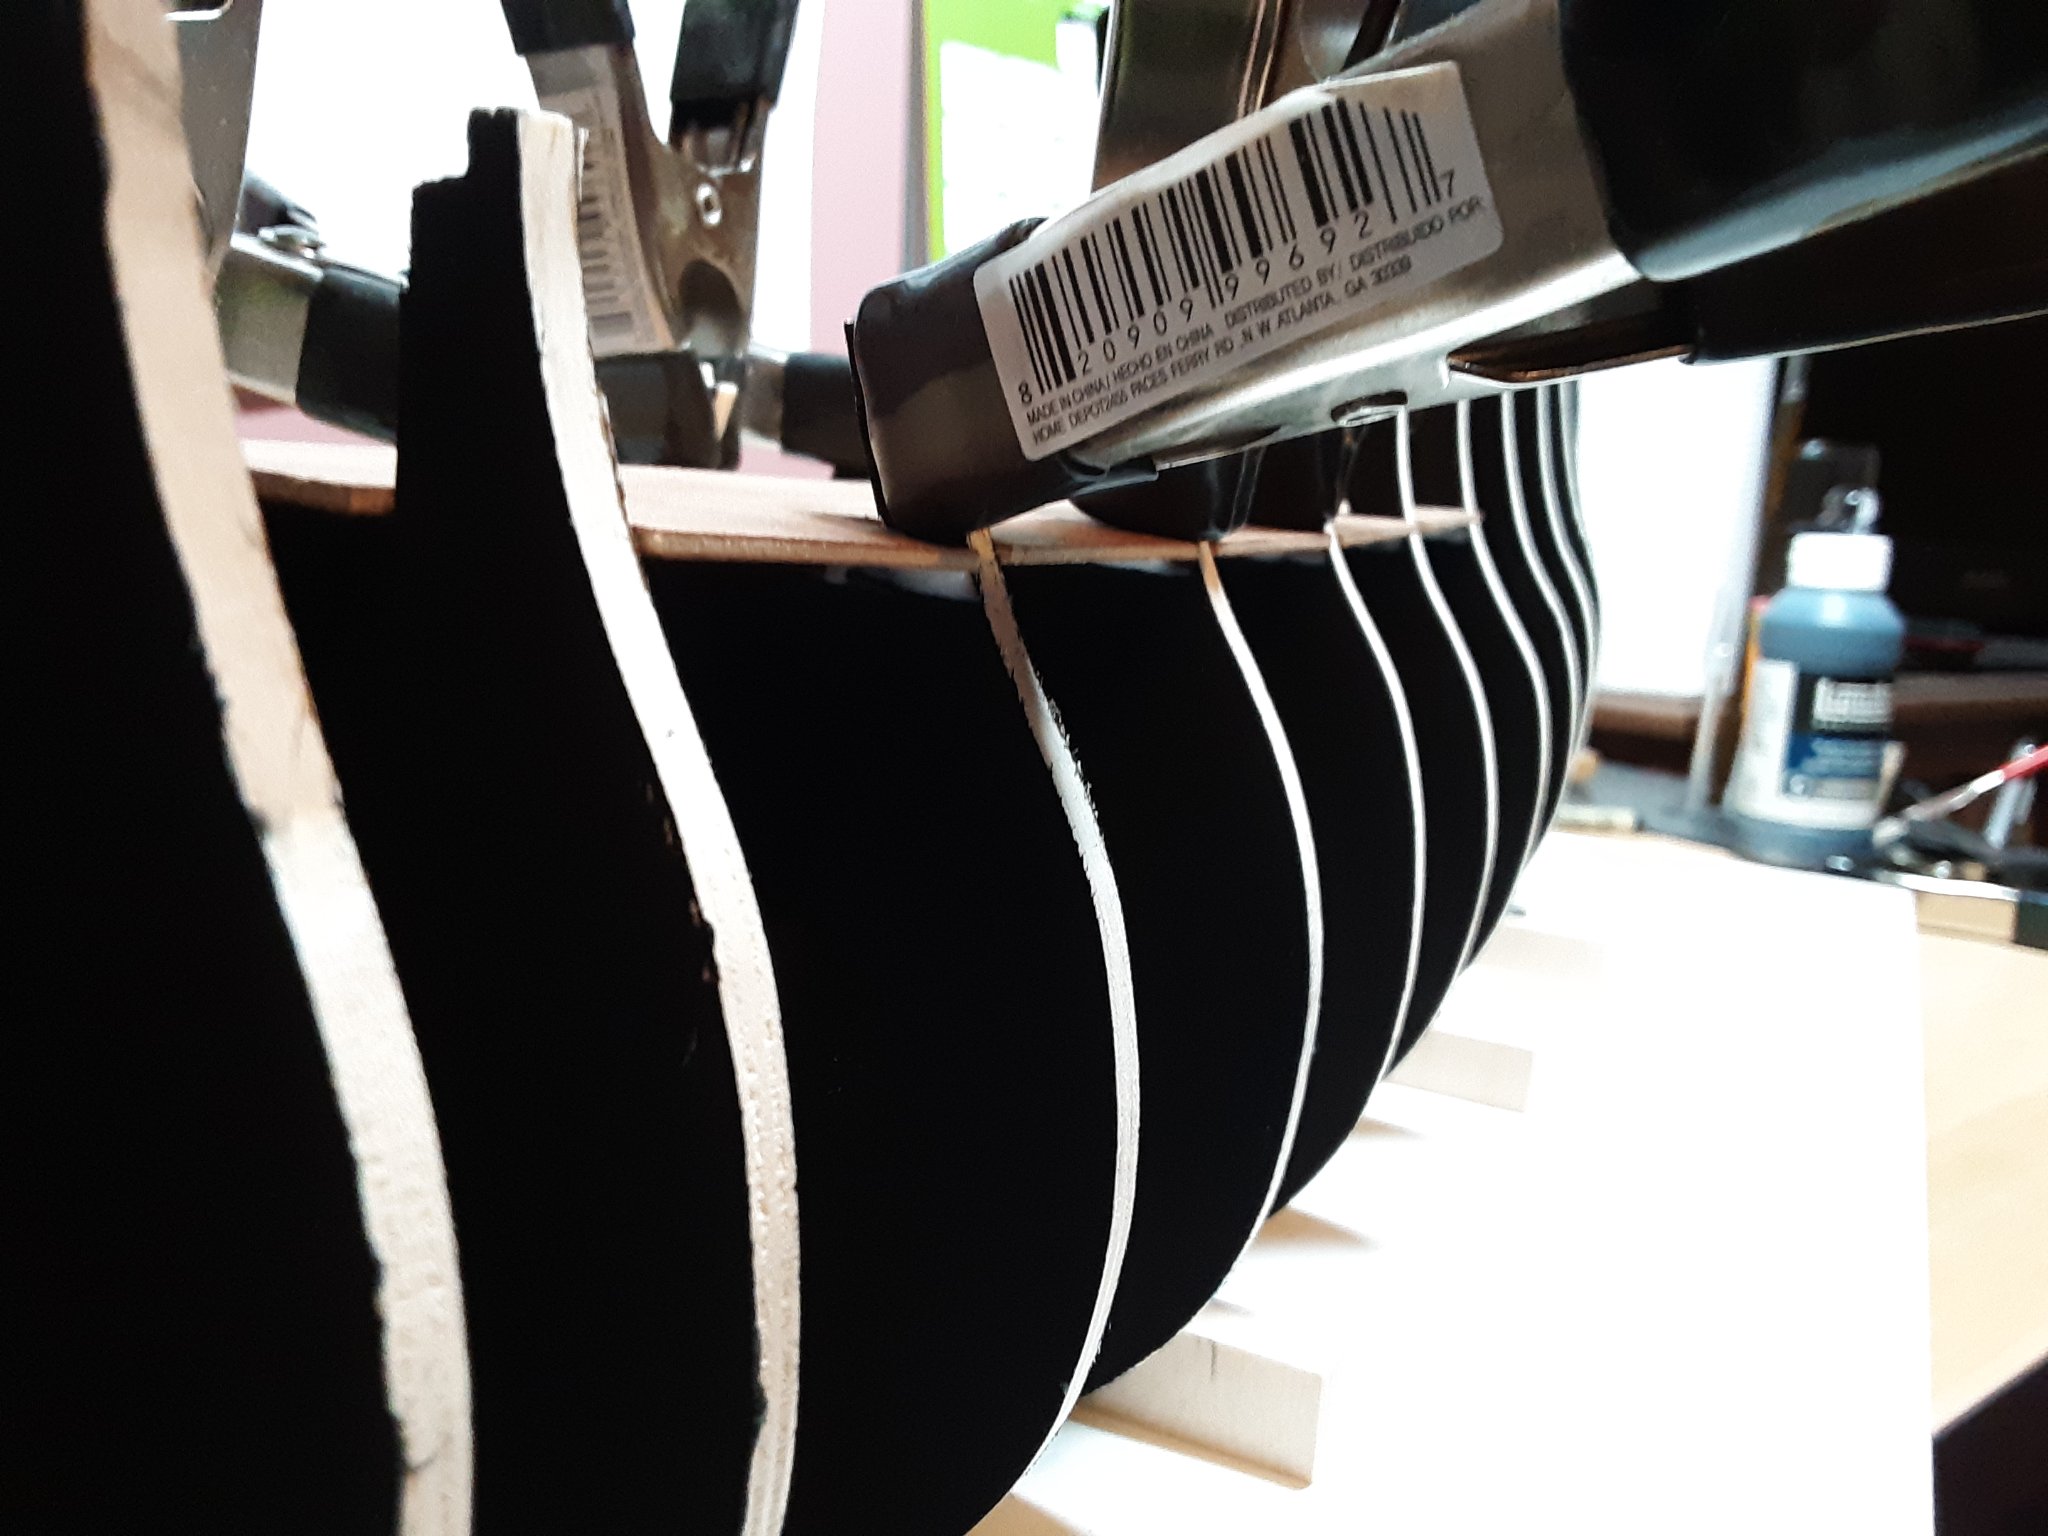
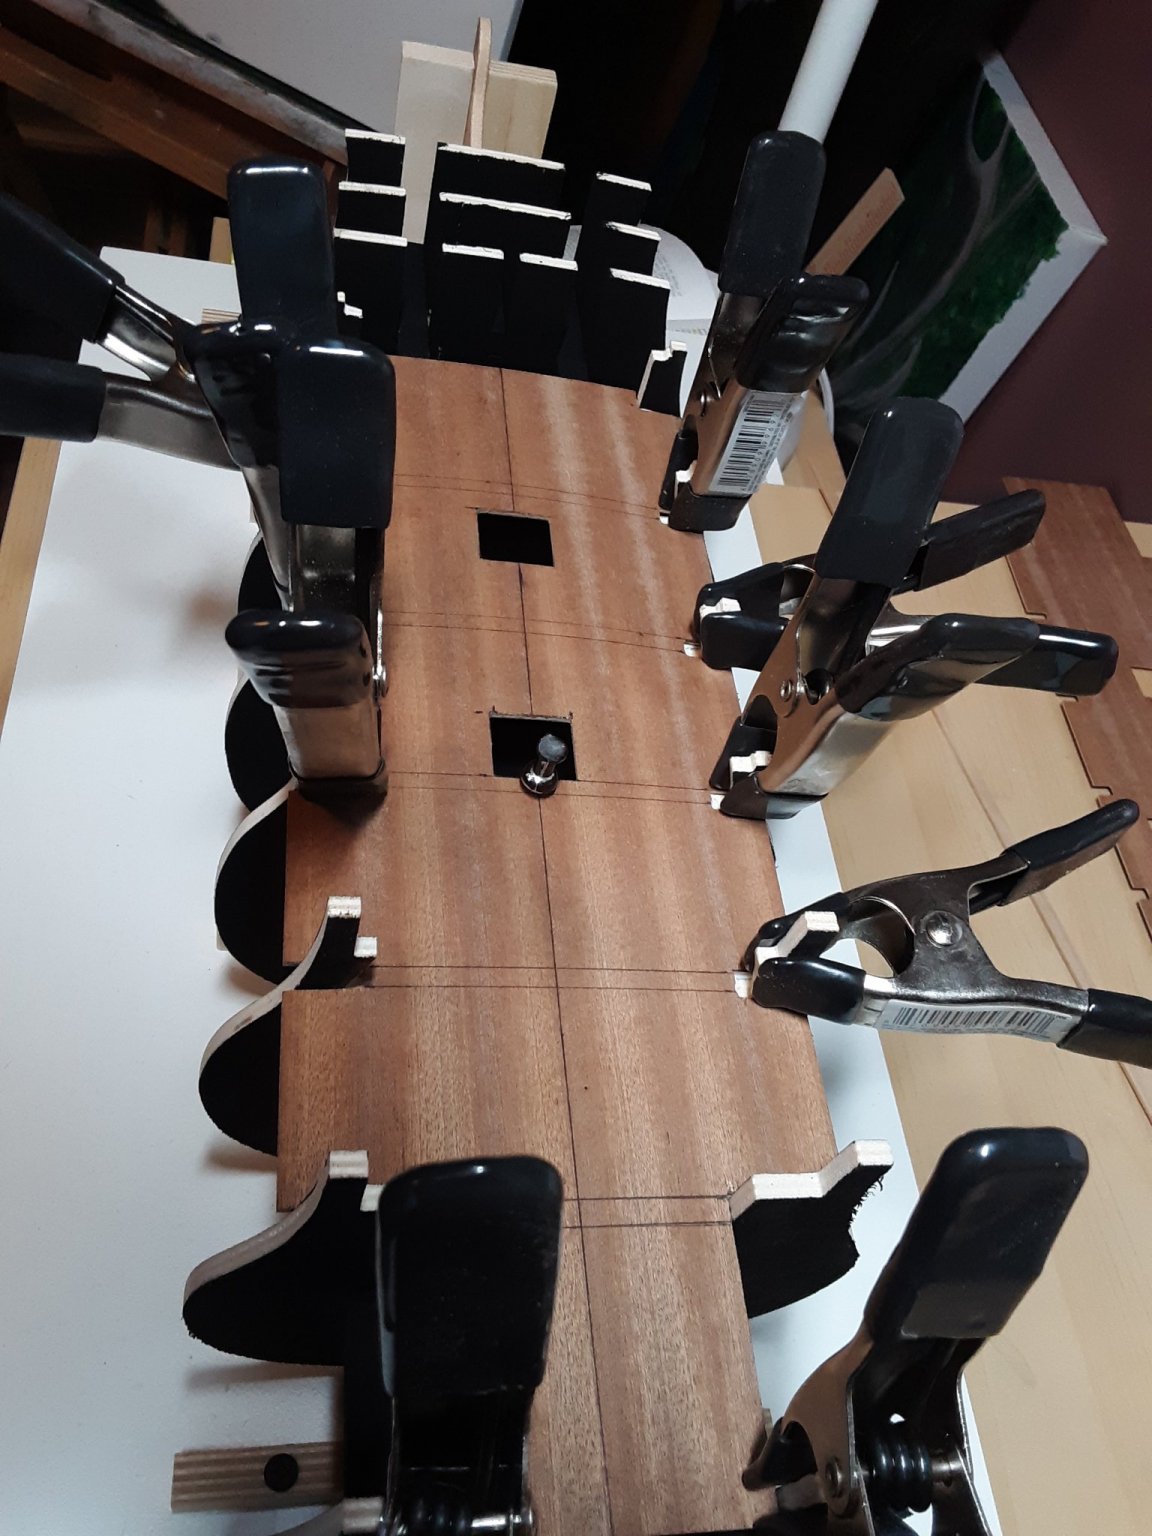
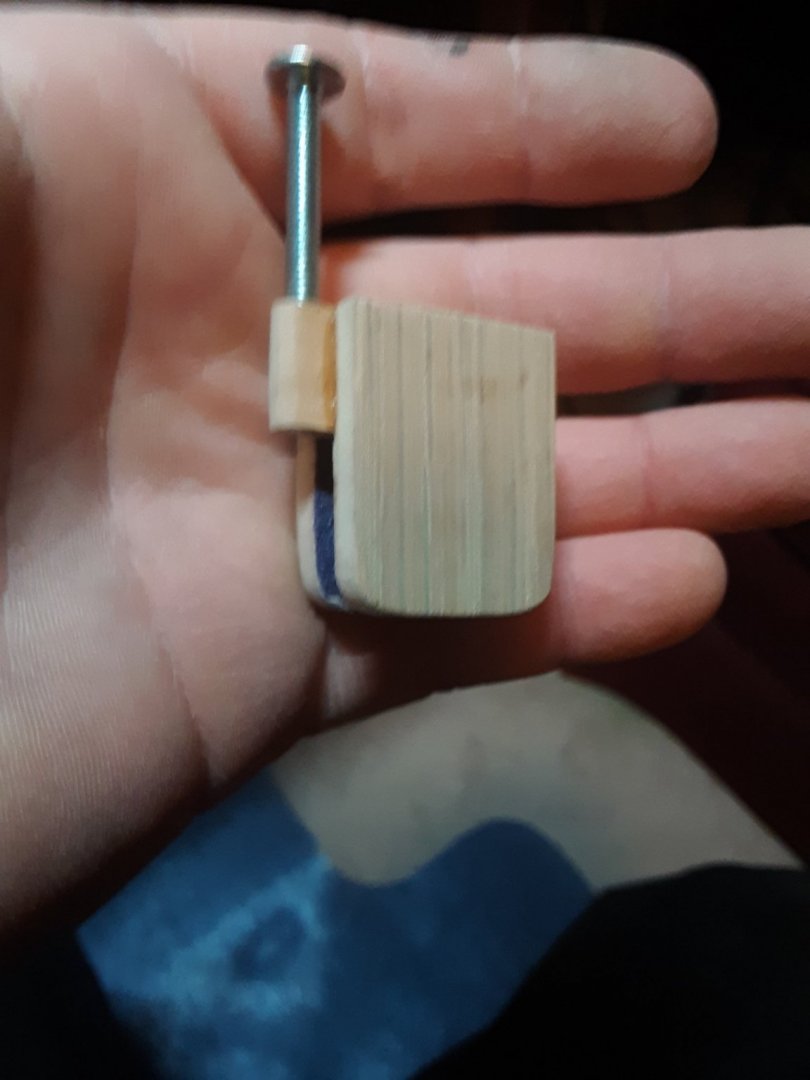
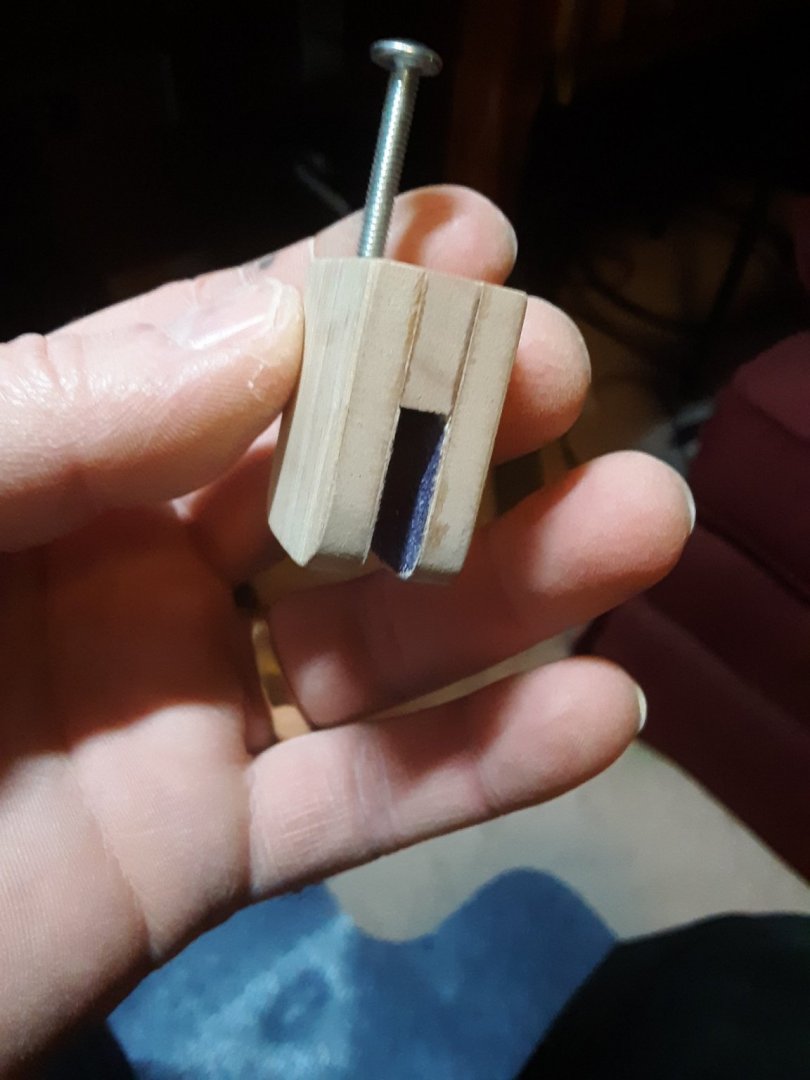
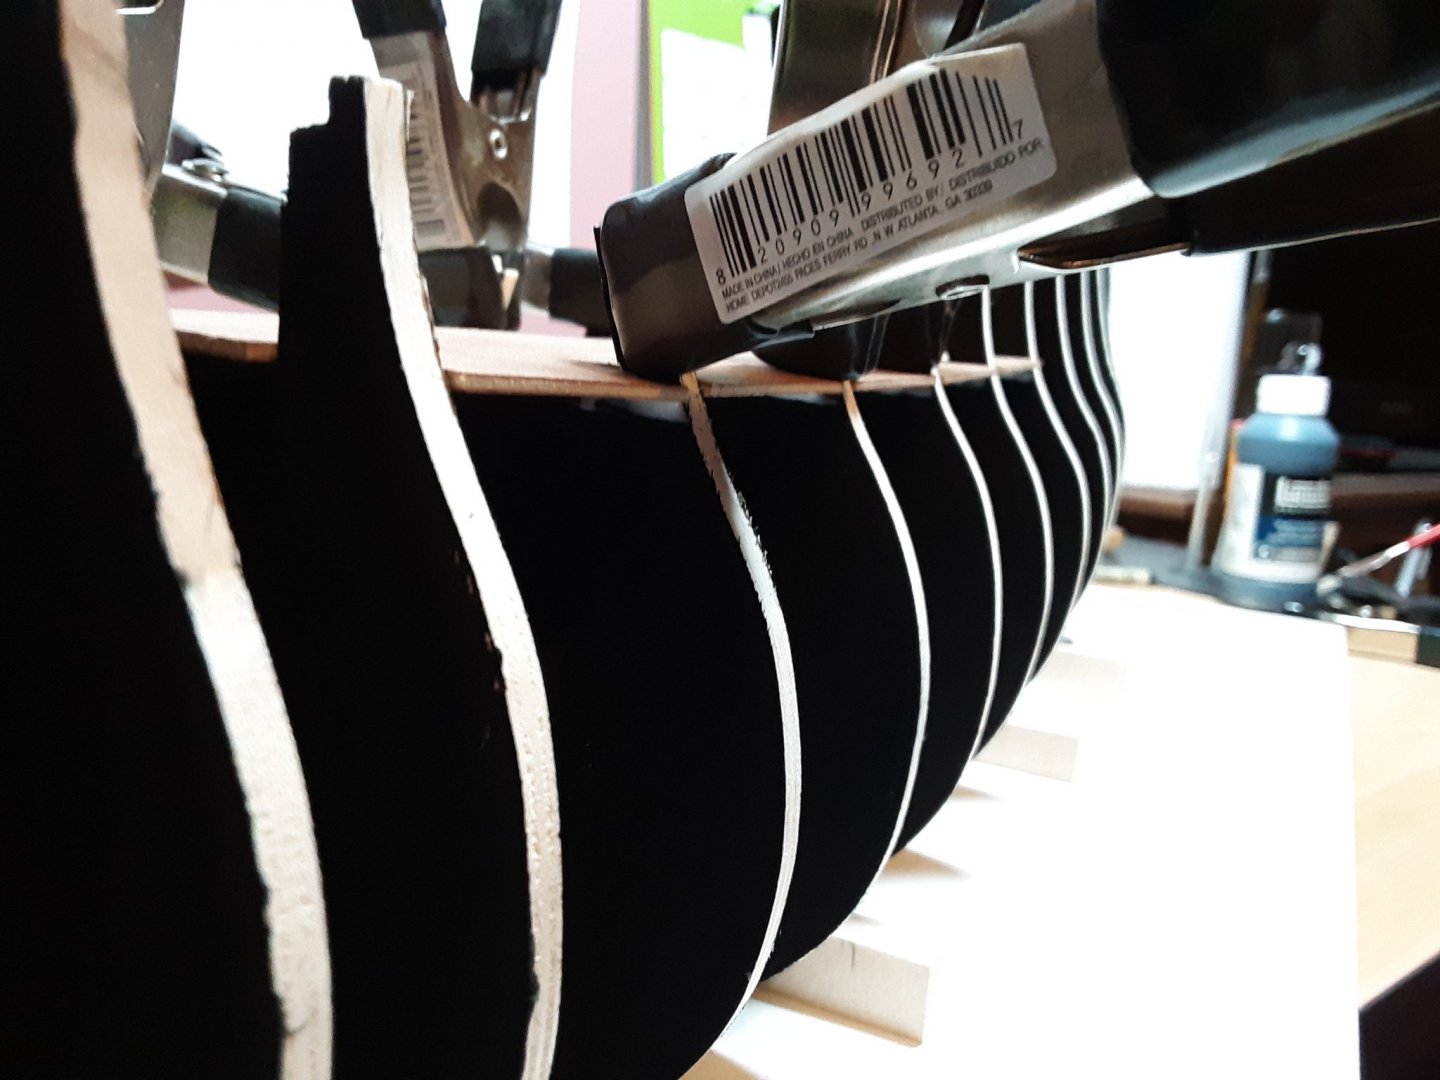
While I'm waiting on a book in the mail, I decided to work on some custom hull planking clamps. Because of the thinness of the bulkheads, I don't want to push a bunch of pins or nails into it. And I don't want to split any of the planks. So I came up with this idea. It's made from 2 pieces of 1/4" plywood that are glued to a piece of Alder. Glued to the inside walls are 80 grit sandpaper, which will help hold it secure when the spring clamp is applied. At the end of the Alder I threaded it to accept a 4/40 size machine screw. So the important measurement here is the width of the Alder. First I glued the sandpaper to the plywood. Then place them on both sides of a bulkhead. Then I carefully measure the gap in between the two and add about a half millimeter. This gives me the thickness of the Alder. CA glued it all together and it simply slides over any bulkhead. Apply a small spring clamp and it's good and snug. Now when I glue one plank to another one, I can slide this clamp right up against the strip I'm trying to glue. Apply the spring clamp and then with a screwdriver I can gently apply enough pressure to hold the strip firmly to the bulkheads. I'll probably insert a small felt pad between the screw and the strip so as not to leave an indentation.

-
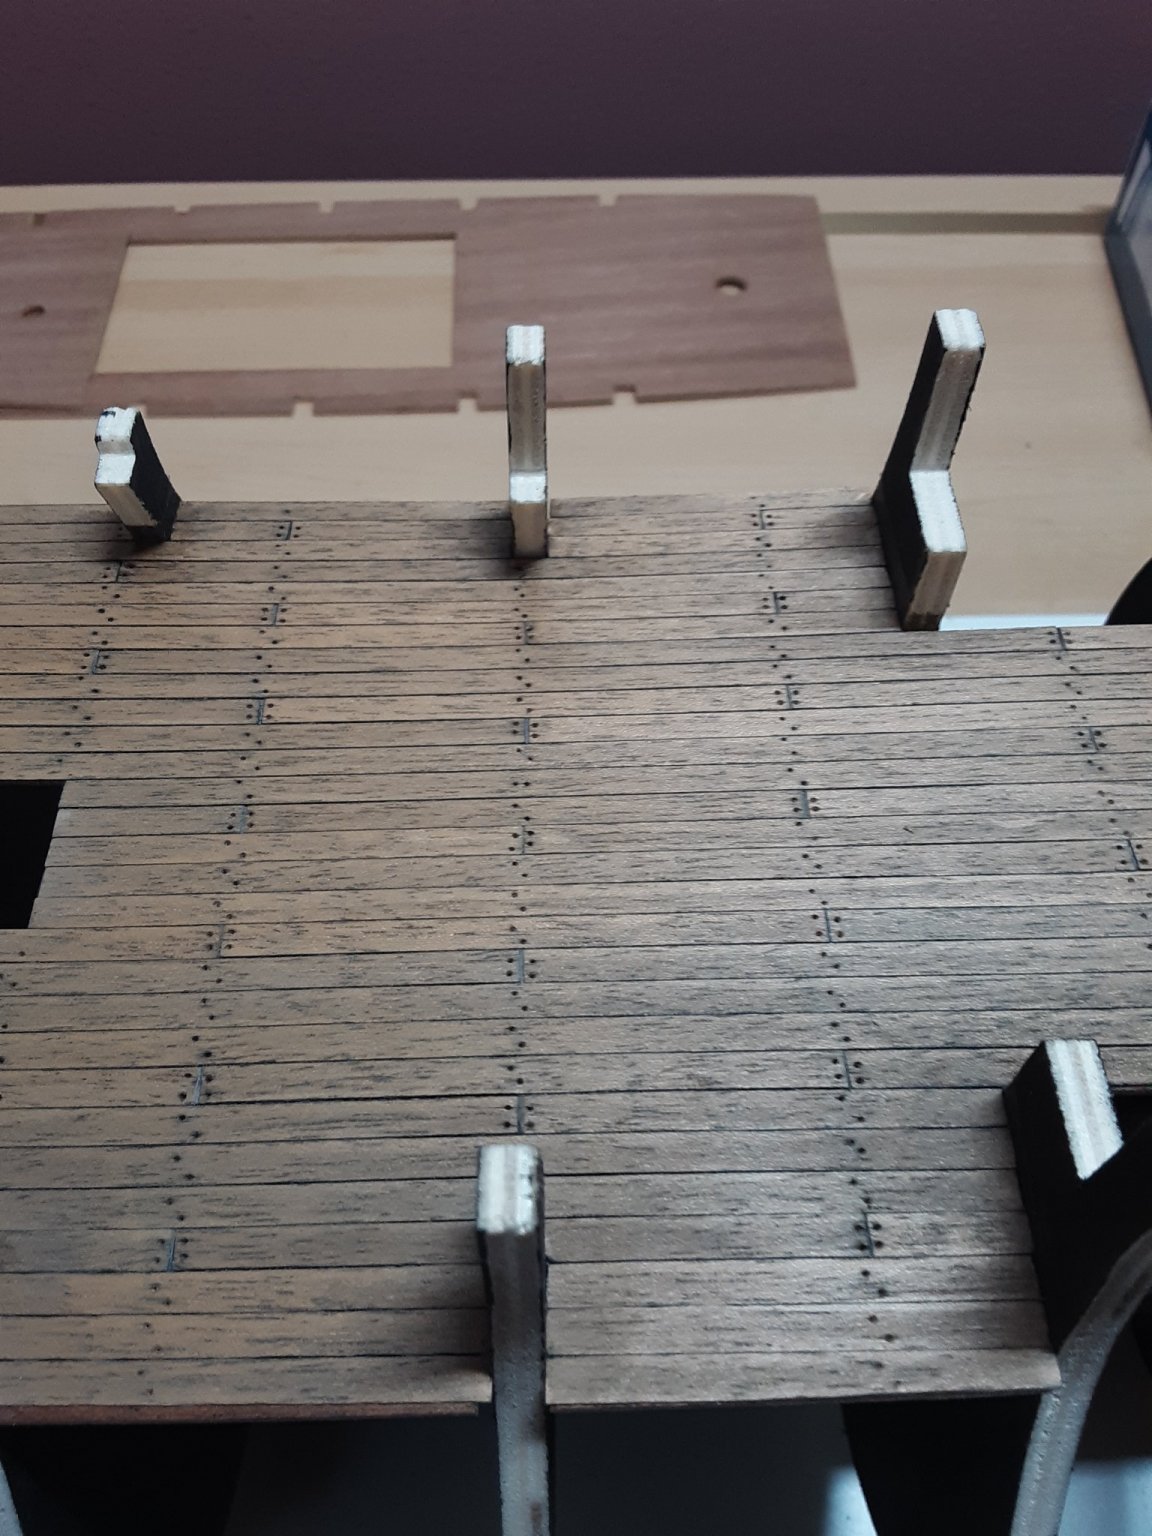
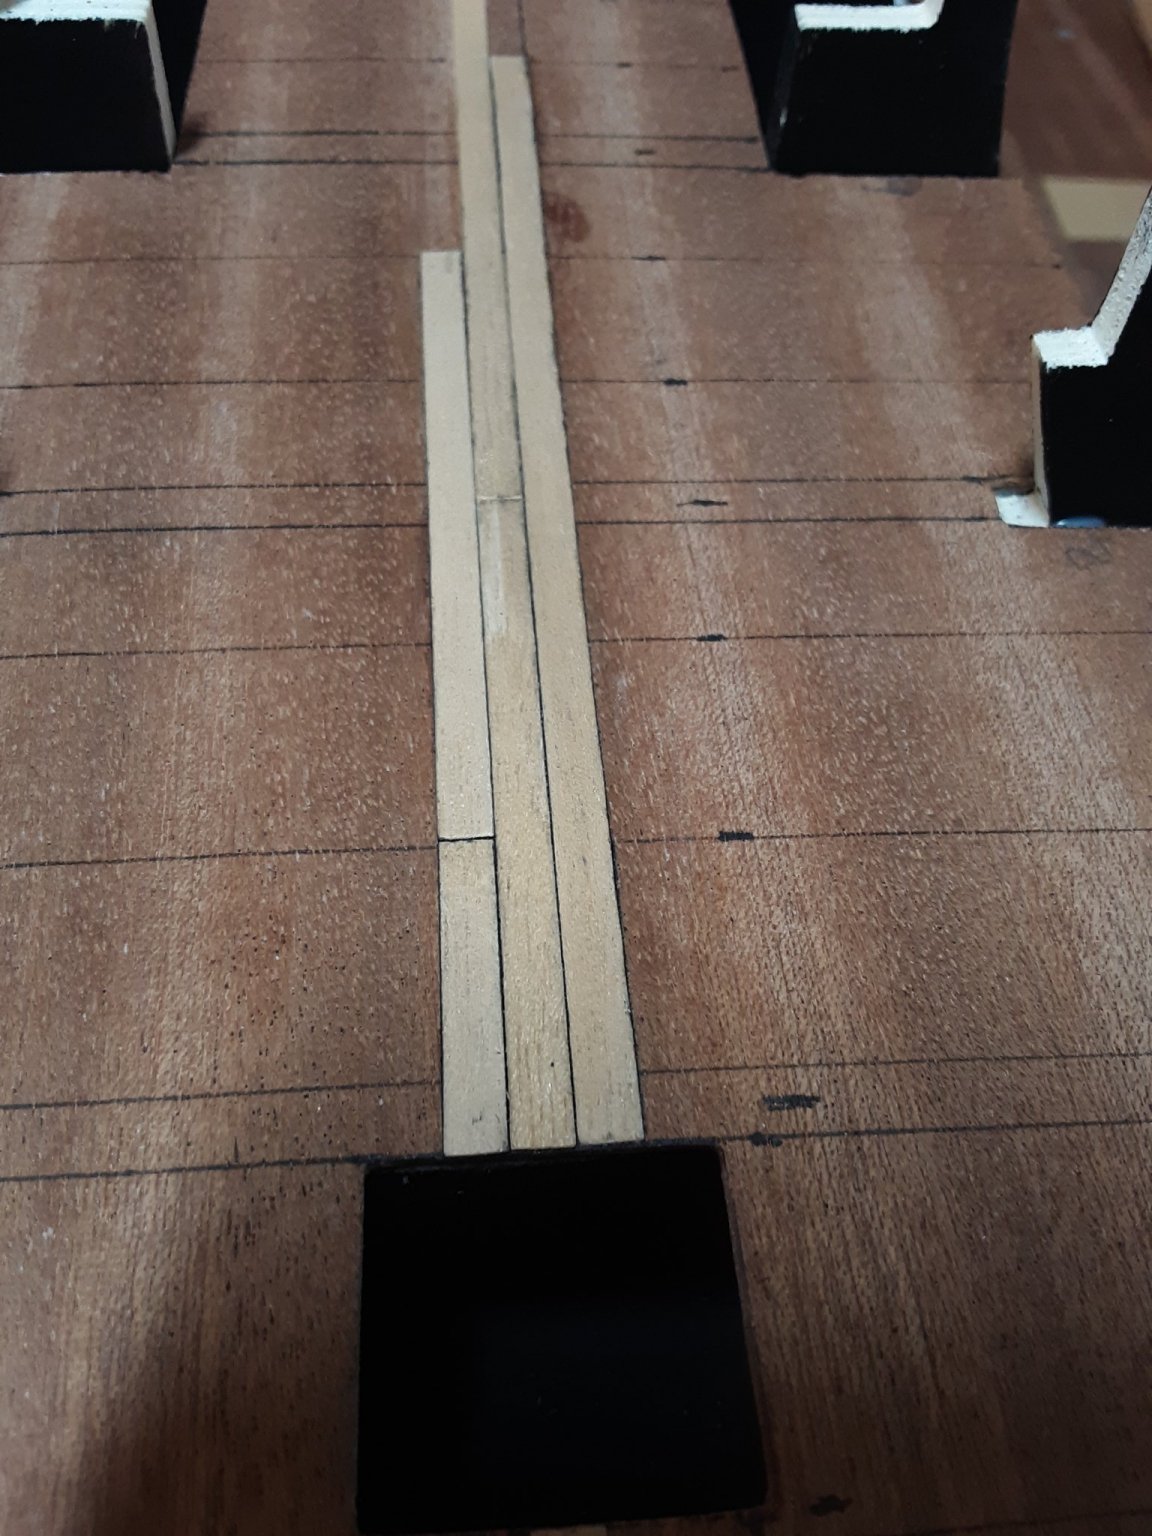
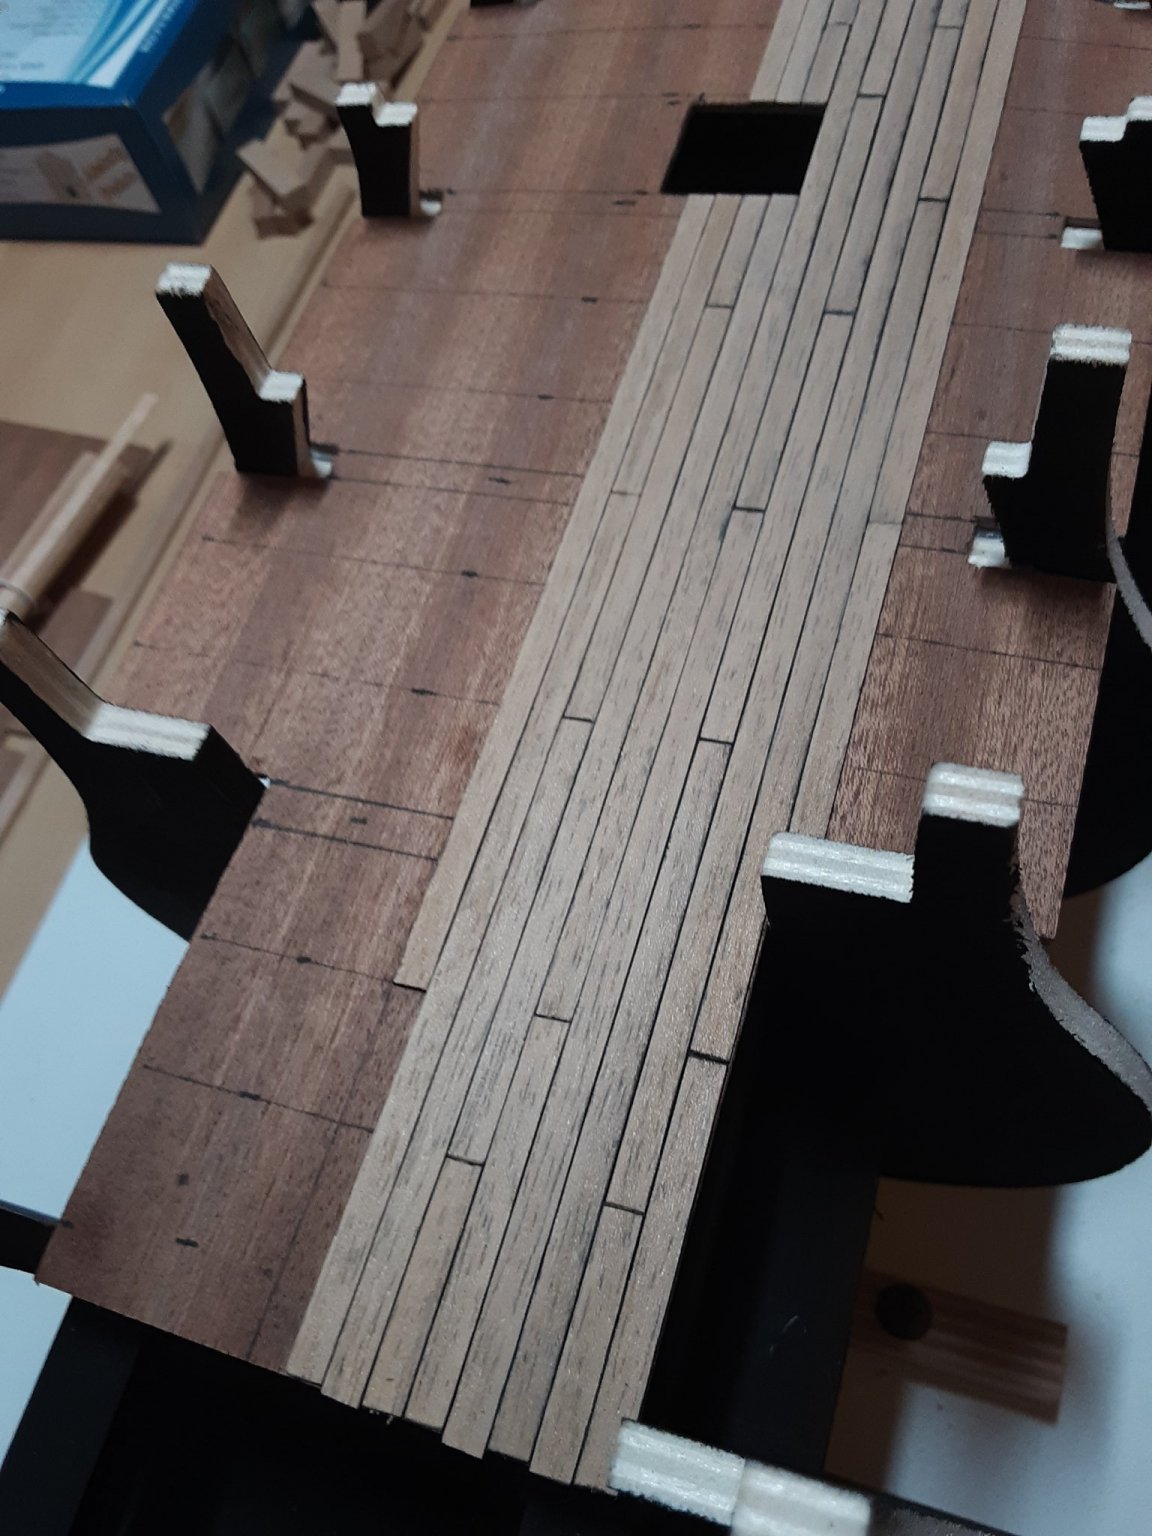
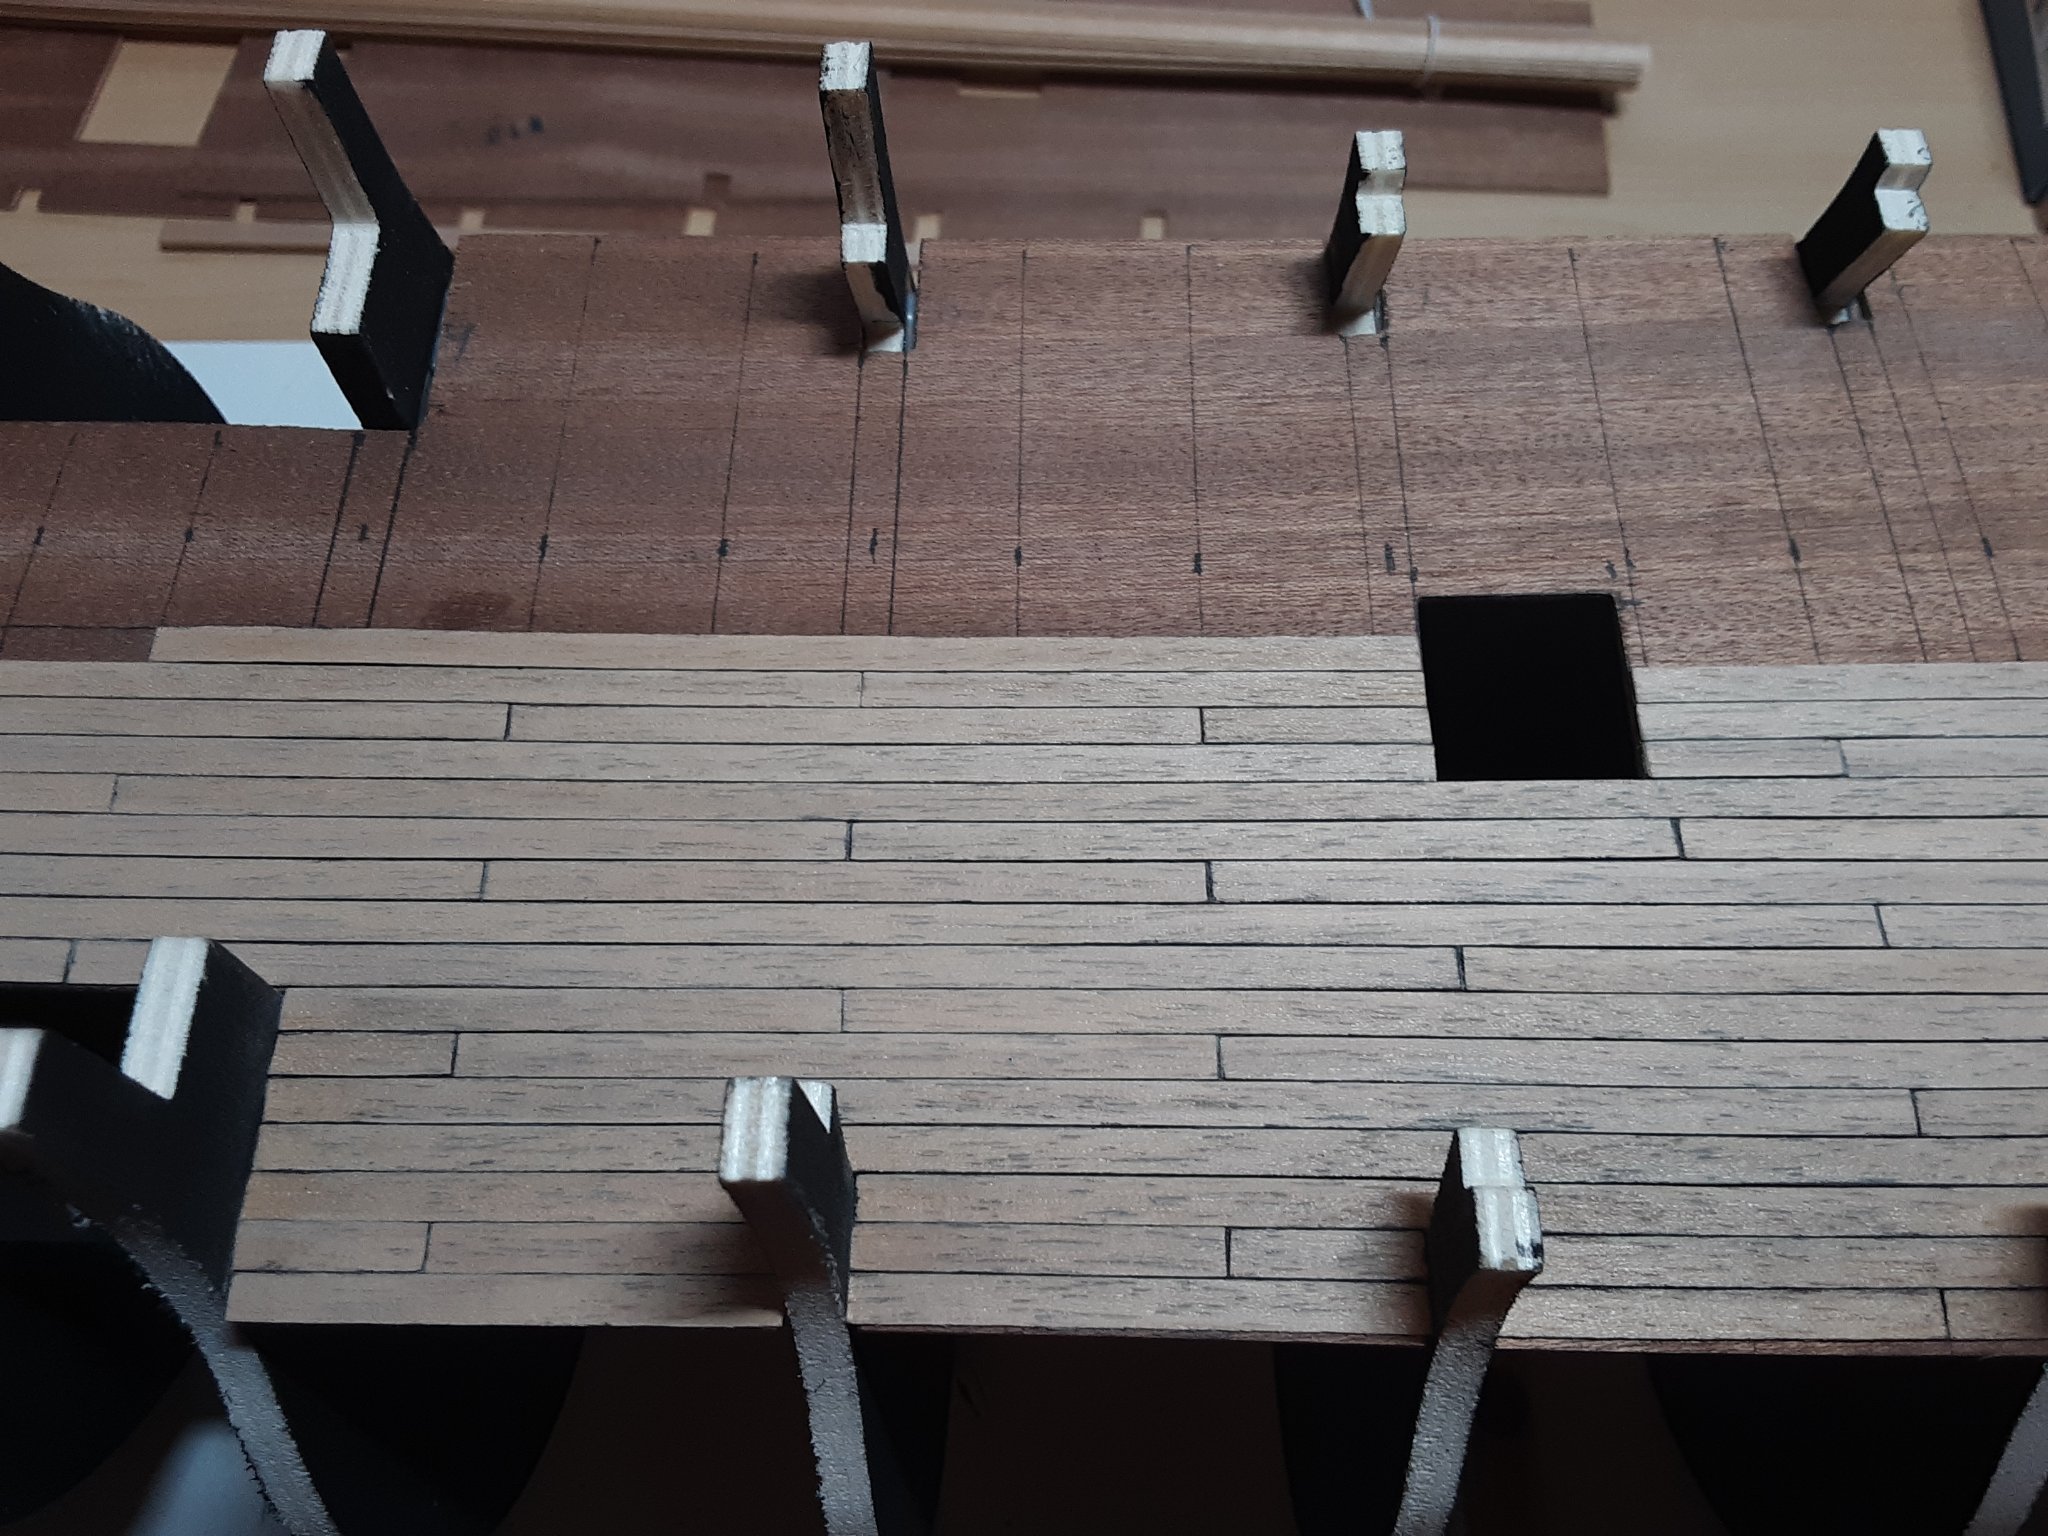
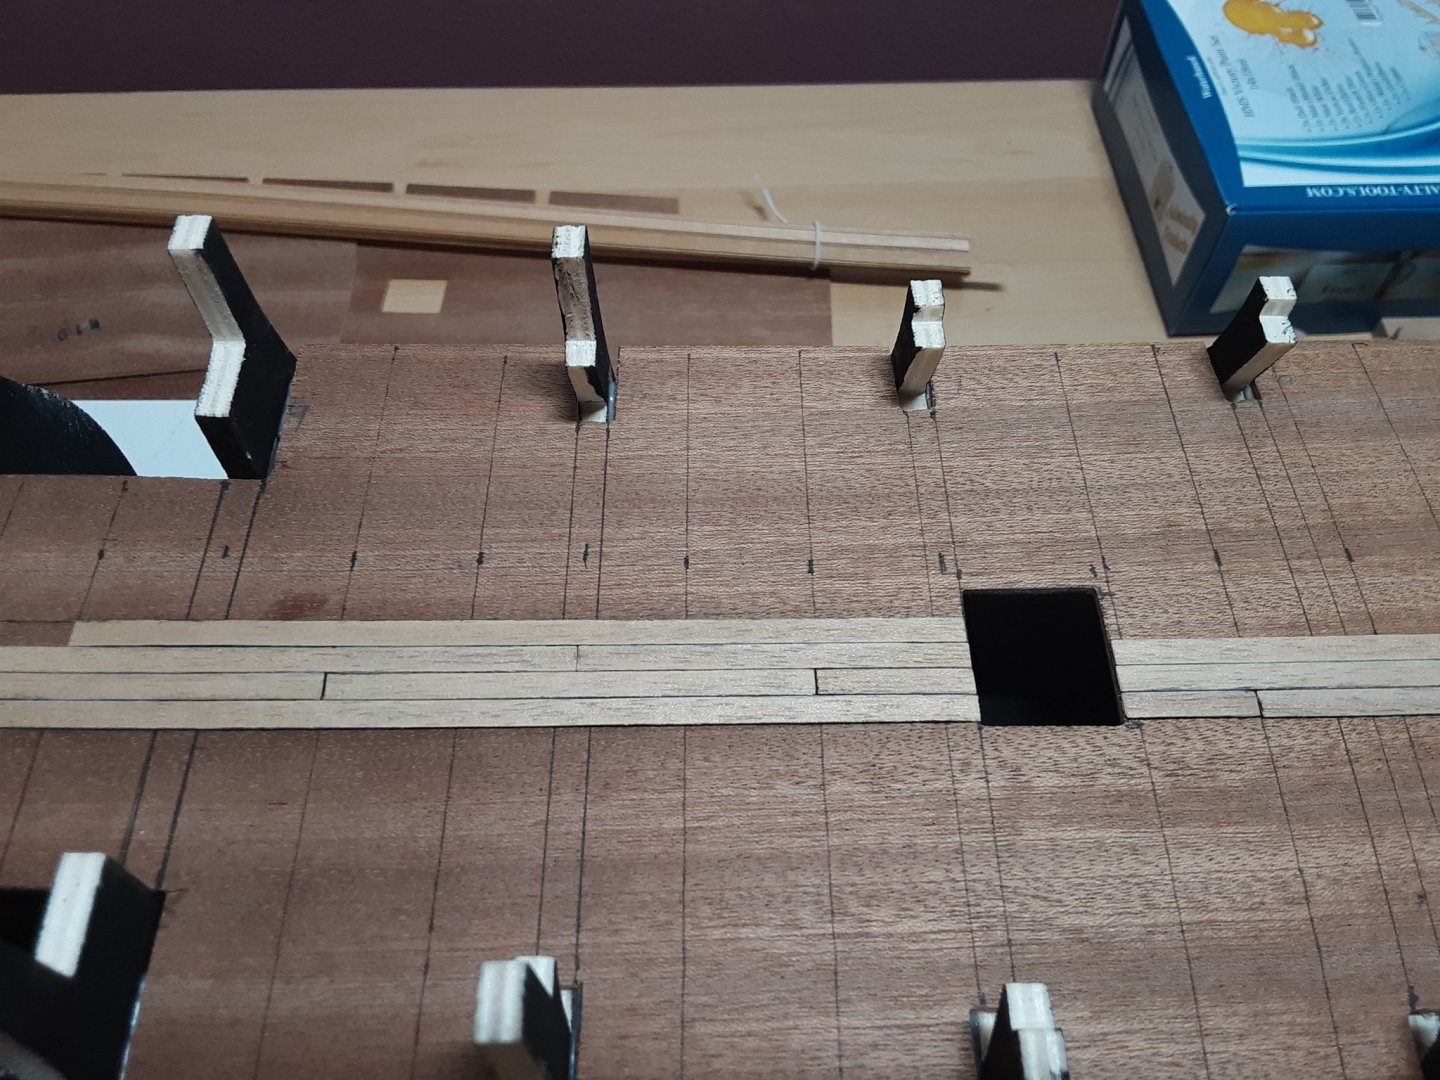
I just ordered "Anatomy of the ship victory" I believe it will prove helpful. I've played around with some finishing techniques for the deck boards. I'm going to lightly sand each plank prior to gluing in place. I'm also going to darken the edges with charcoal to simulate the caulking. Then after all the boards are installed, I'm going to go over the entire deck with a wash coat of antique white stain. This will give the deck a sun bleached look. Then after the antique white stain has dried overnight, I'm going back over all of it again with a walnut wash. This won't darken the deck. What it will do is deposit dark color in every nook and cranny. I tested this on some sample pieces. I really liked what I saw. Soon as I can figure out the deck layout, I'll send pictures. Have a great day. 🙂

-
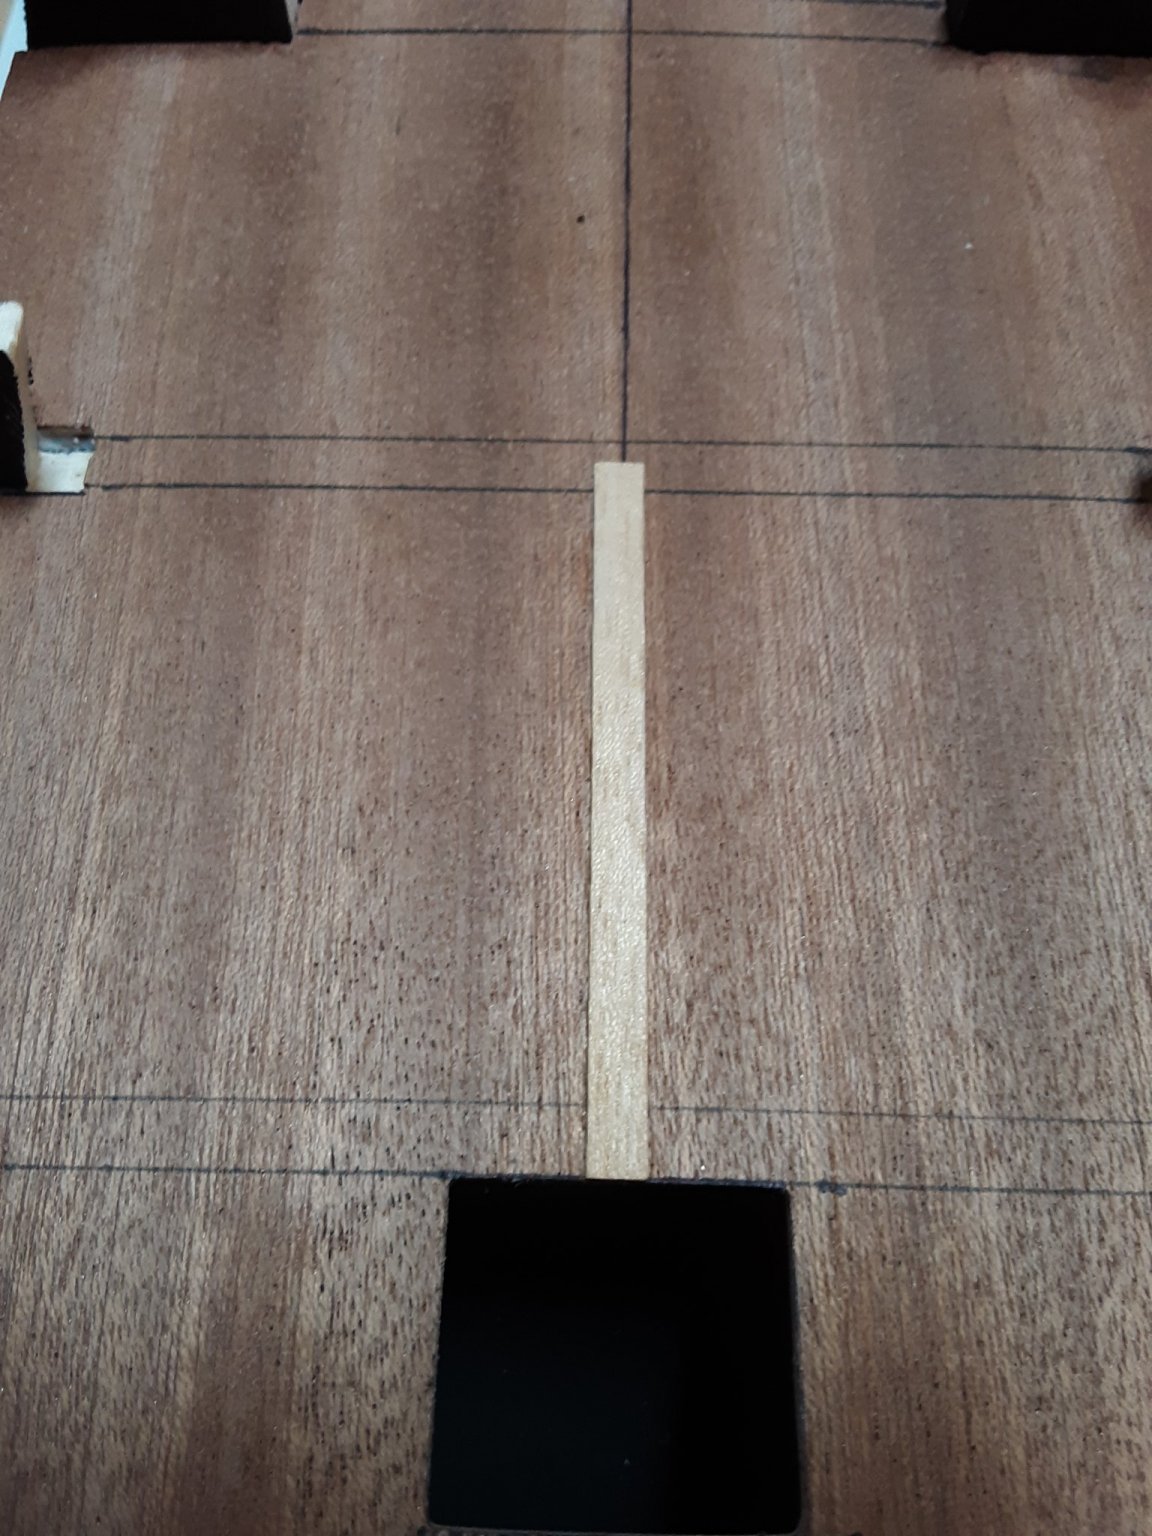
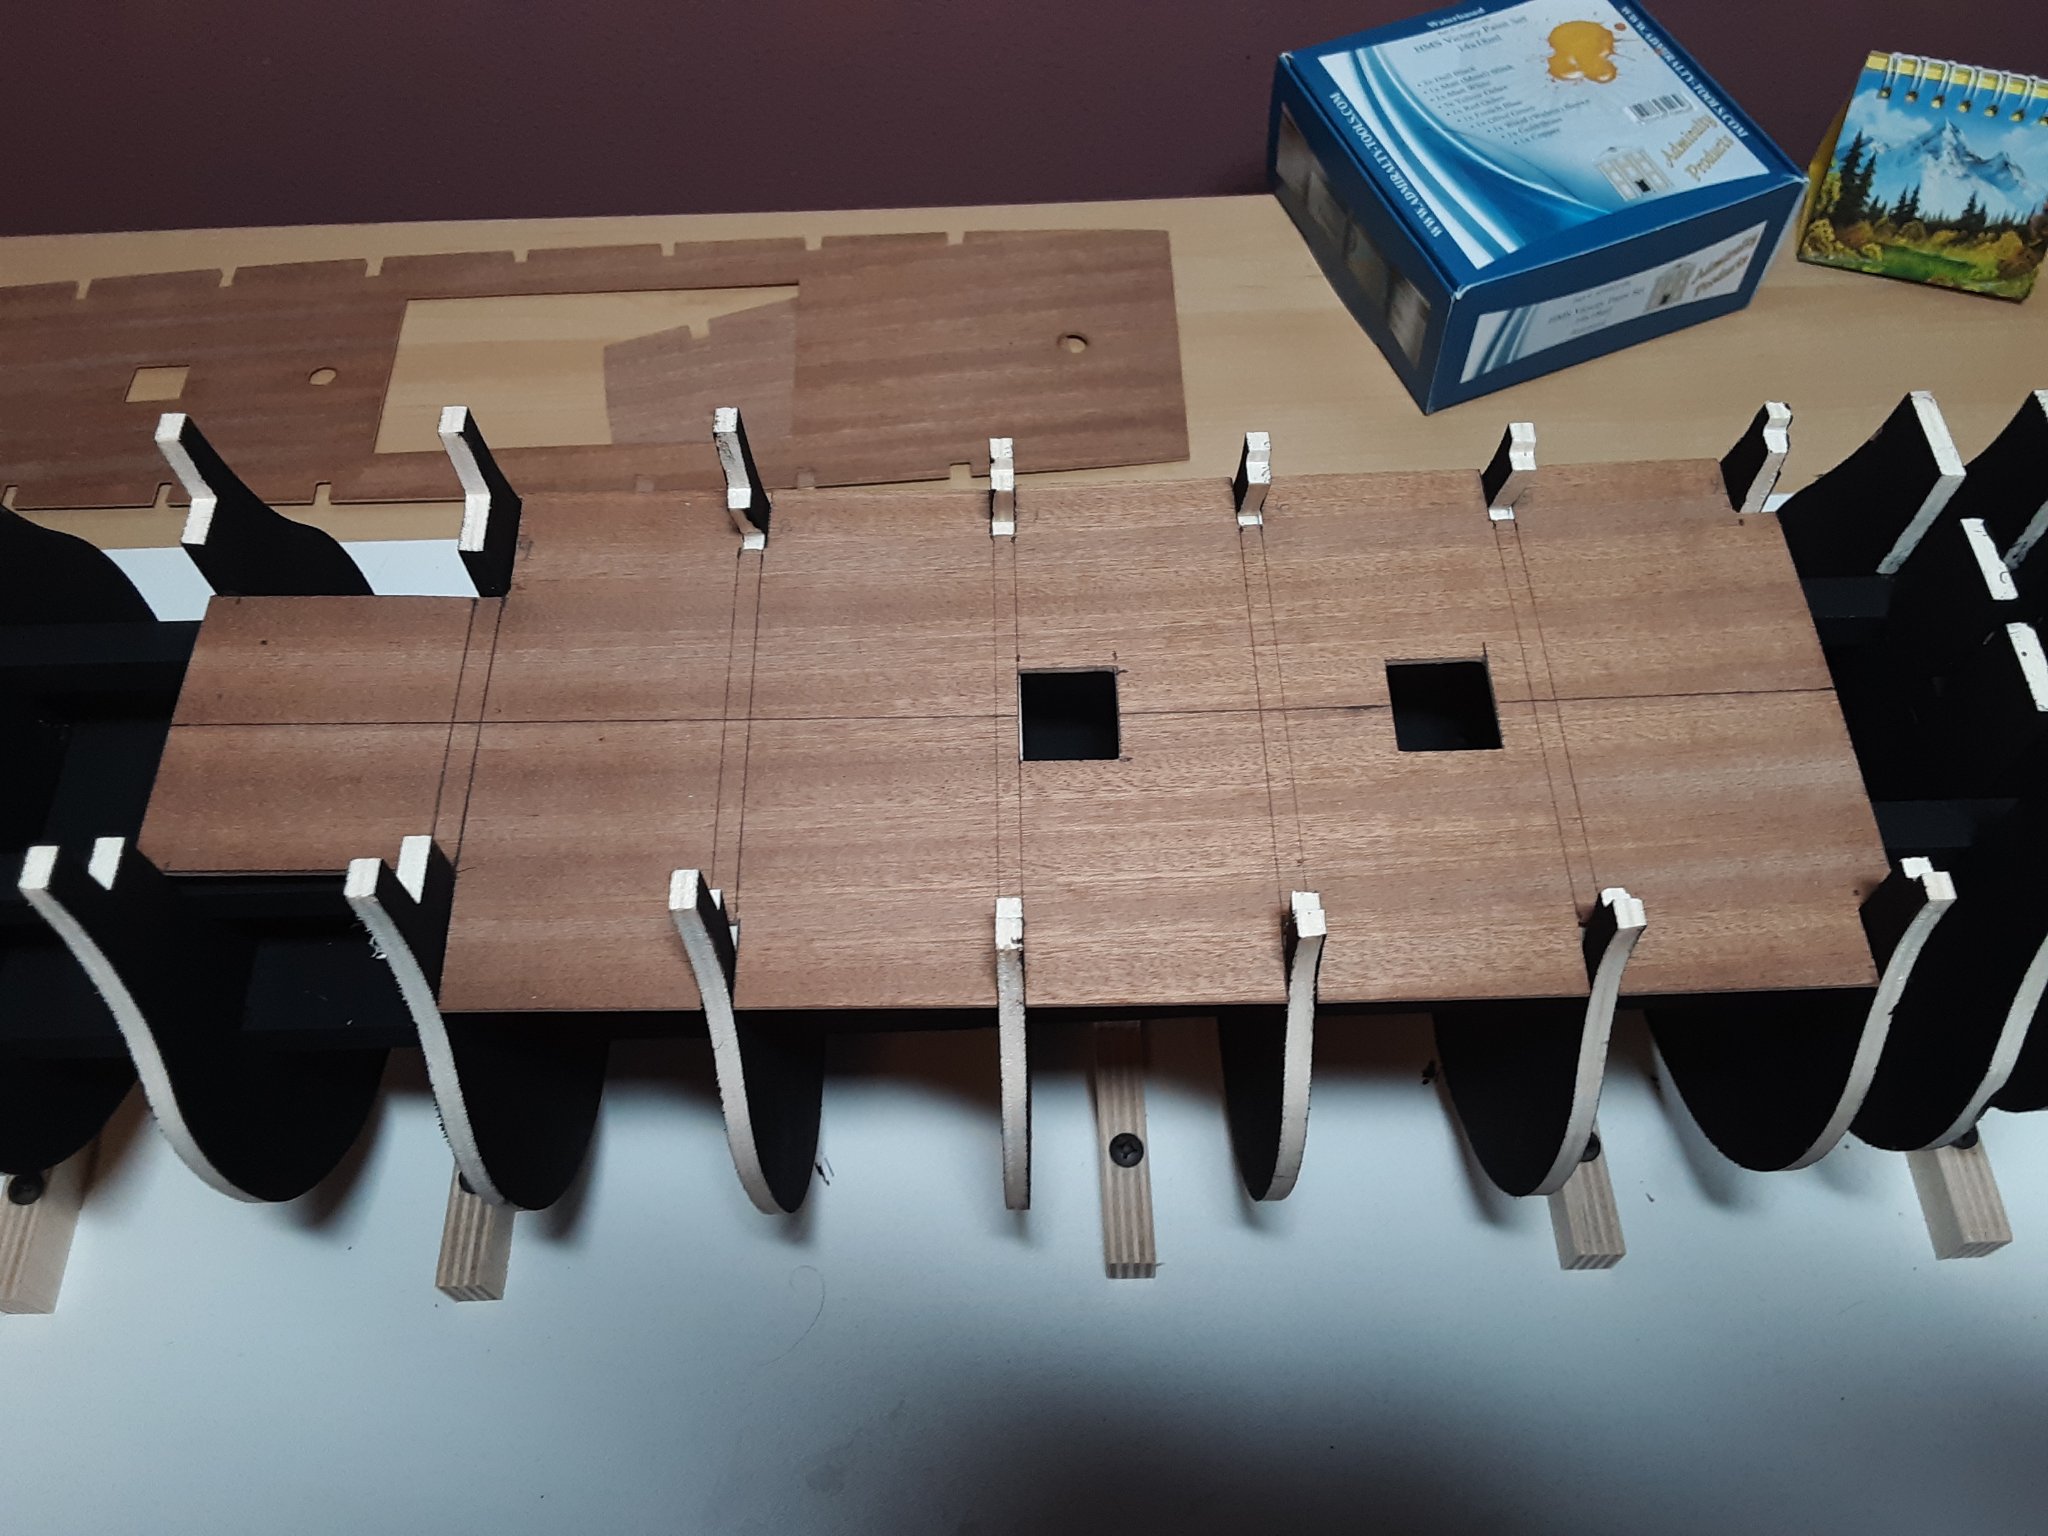
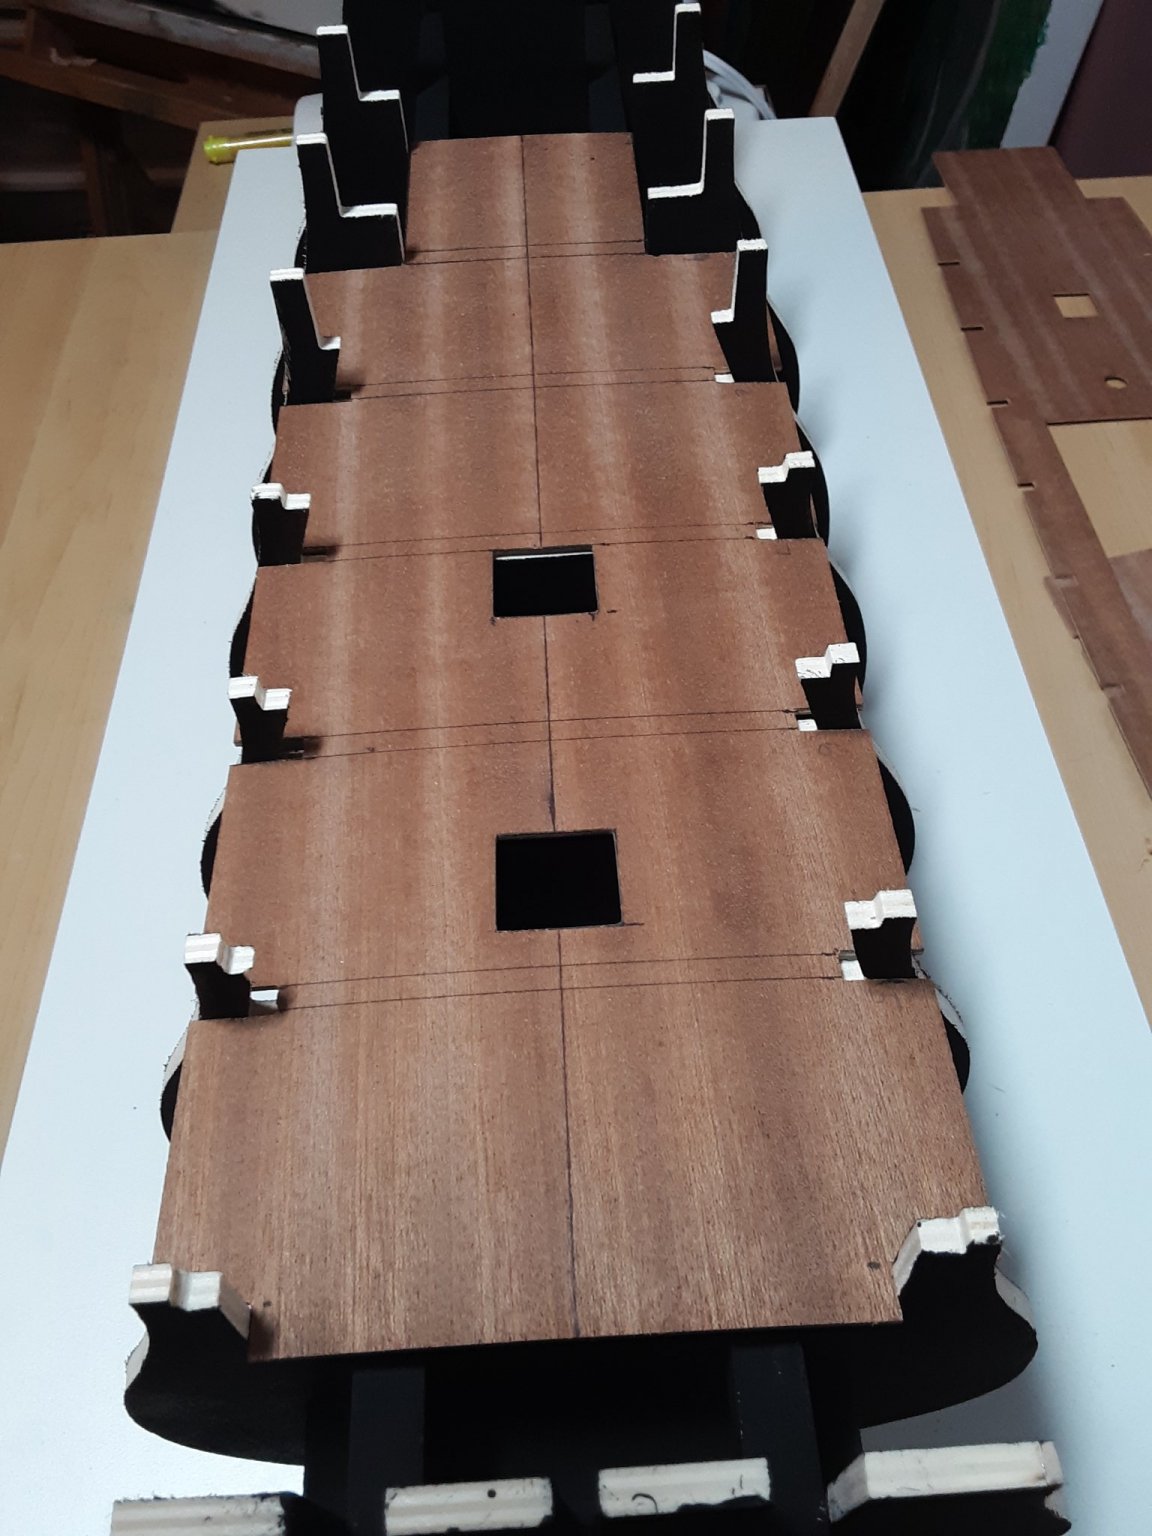
I have 1 deck board in place. I'm trying to find out how many beams ran under this deck. I would like to apply the boards similarly to the way they actually were on the real ship. Any advice is welcome, thanks.
-
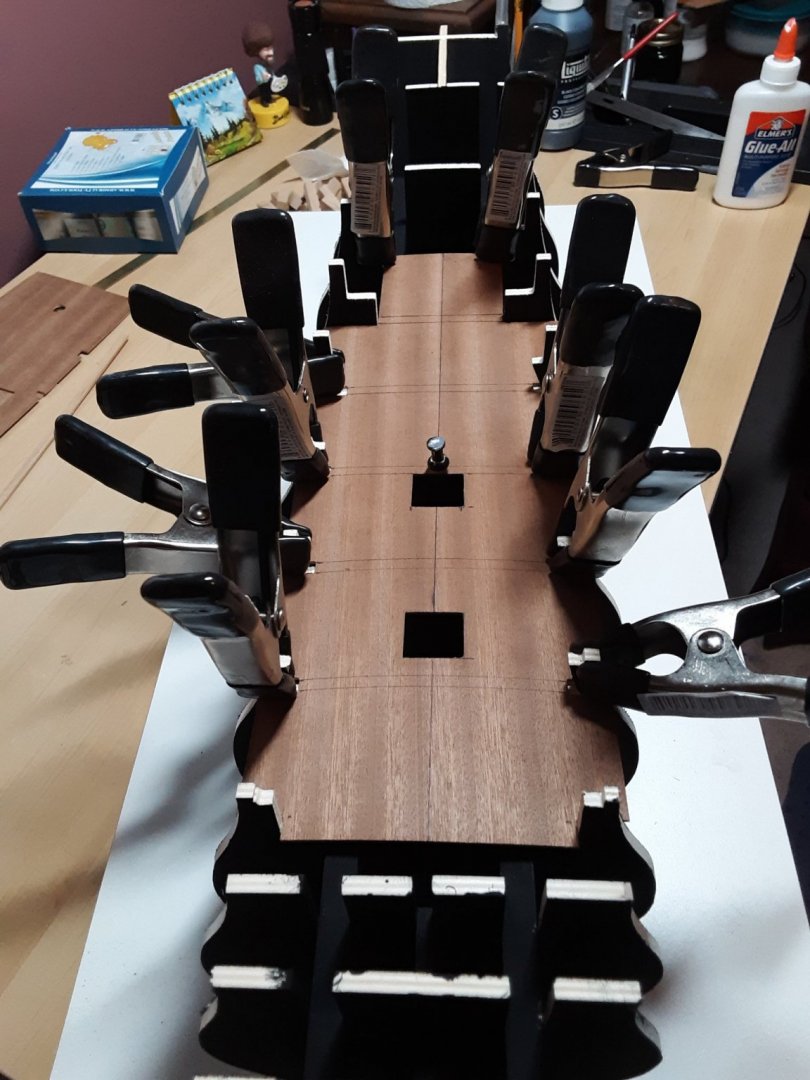
Spent some time gluing in the lower deck. I've been pondering how I'm going to plank this deck. I've seen a lot said about the 4 butt shift layout. I'm trying to figure out just how much realistic detail I want to put into this ship. Being 1:98 scale is a little on the small size. Regardless of how accurate the details, I really just want it to look good. I am planning on painting my model. So I'm leaning more towards a realistic finish. Any ideas or thoughts are always appreciated. Thanks for stopping by. Robert🙂

-
New To Building Ships Help and advice needed
Roberts Orca replied to Richard O's topic in New member Introductions
Hello Richard and welcome. You sound very similar to me. I too have an extensive RC background. Love fine details. I love the look of an old sailing ship with all the cannons and massive rigging. You're obviously not afraid of the work, it's patience that's needed. There are many kits available that a "beginner" could try, but I'm of the stance that you will learn much from taking on something that truly challenges you. This could take years, not months to complete. It's your marathon. Make it what you want it to be. I'm only limited if I refuse to ask questions or take advise from experienced modelers. Having said all that, I'm building my very first wooden ship model from Corel. It's 1:98 scale. I personally prefer a bigger model. This kit is intended for experts. While I will never classify myself as a ship building expert, I do see myself as an expert in effort to learn. There's more to doing one of these than one can wrap their head around. The ONLY thing I have to know how to do is step #1. Then step 2 etc. With all that in mind, I would encourage you to go after what truly gets your heart going. Dream a dream. There are many good people here who will generously give of their experiences. My model was about $350. I'm facing challenges every turn, but I'm starting to understand that THAT is exactly what I'm supposed to go through. If it wasn't for the challenges, where would the true rewards of completion come from? I wish you the best in your journey. Feel free to stop by and say hello in my build log. -
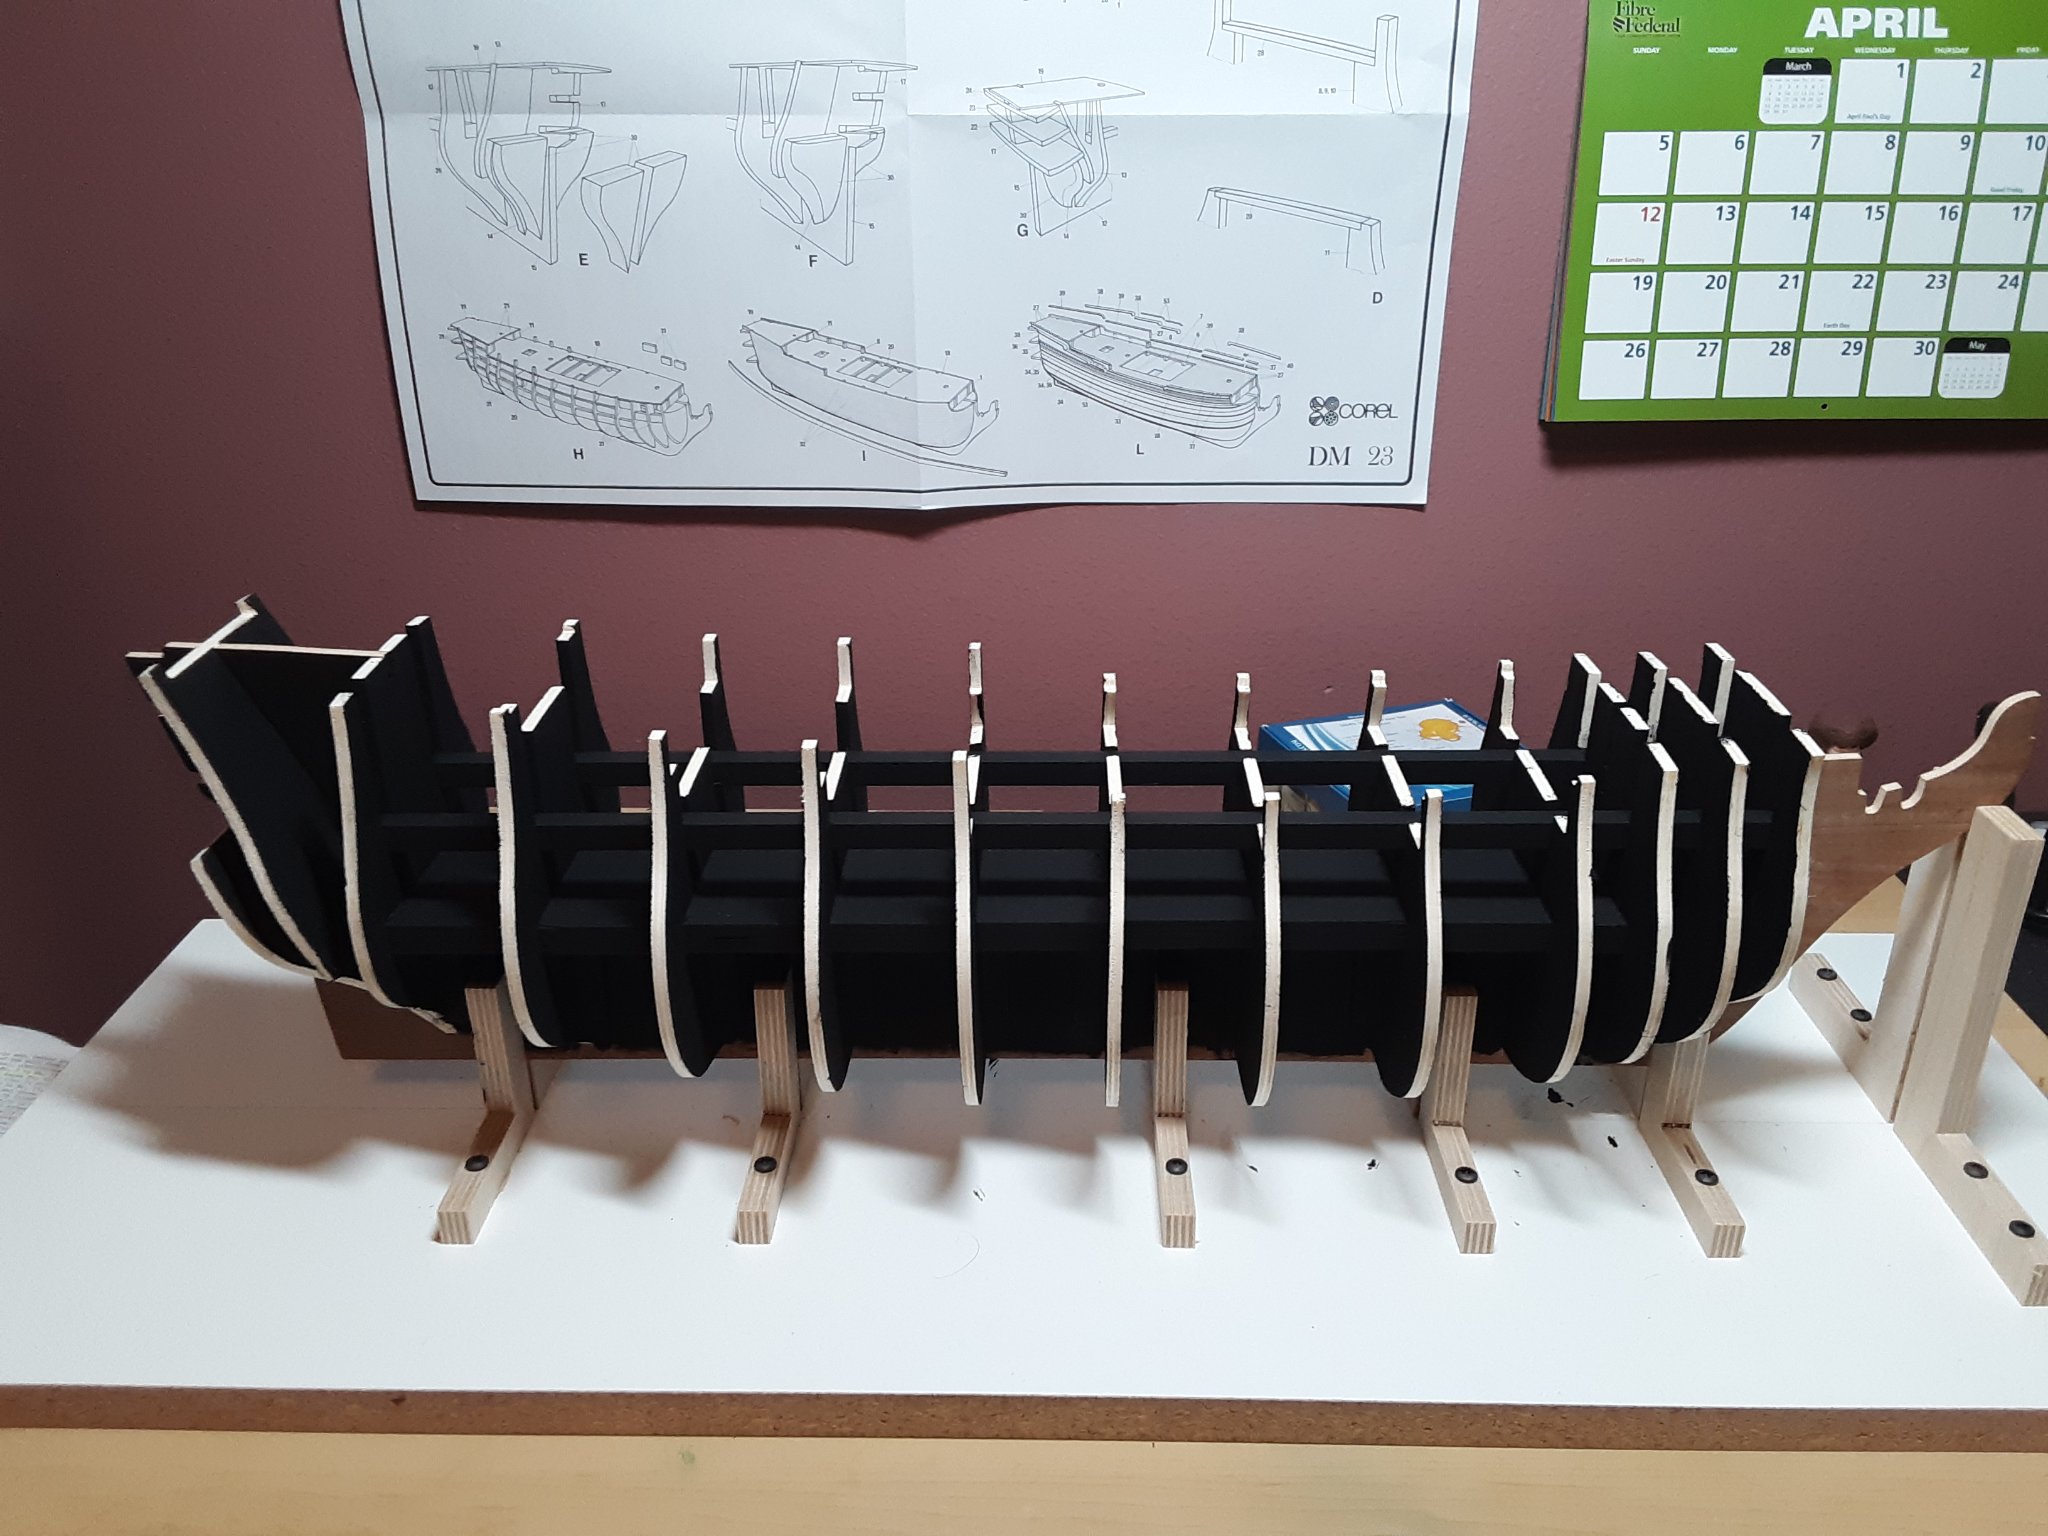
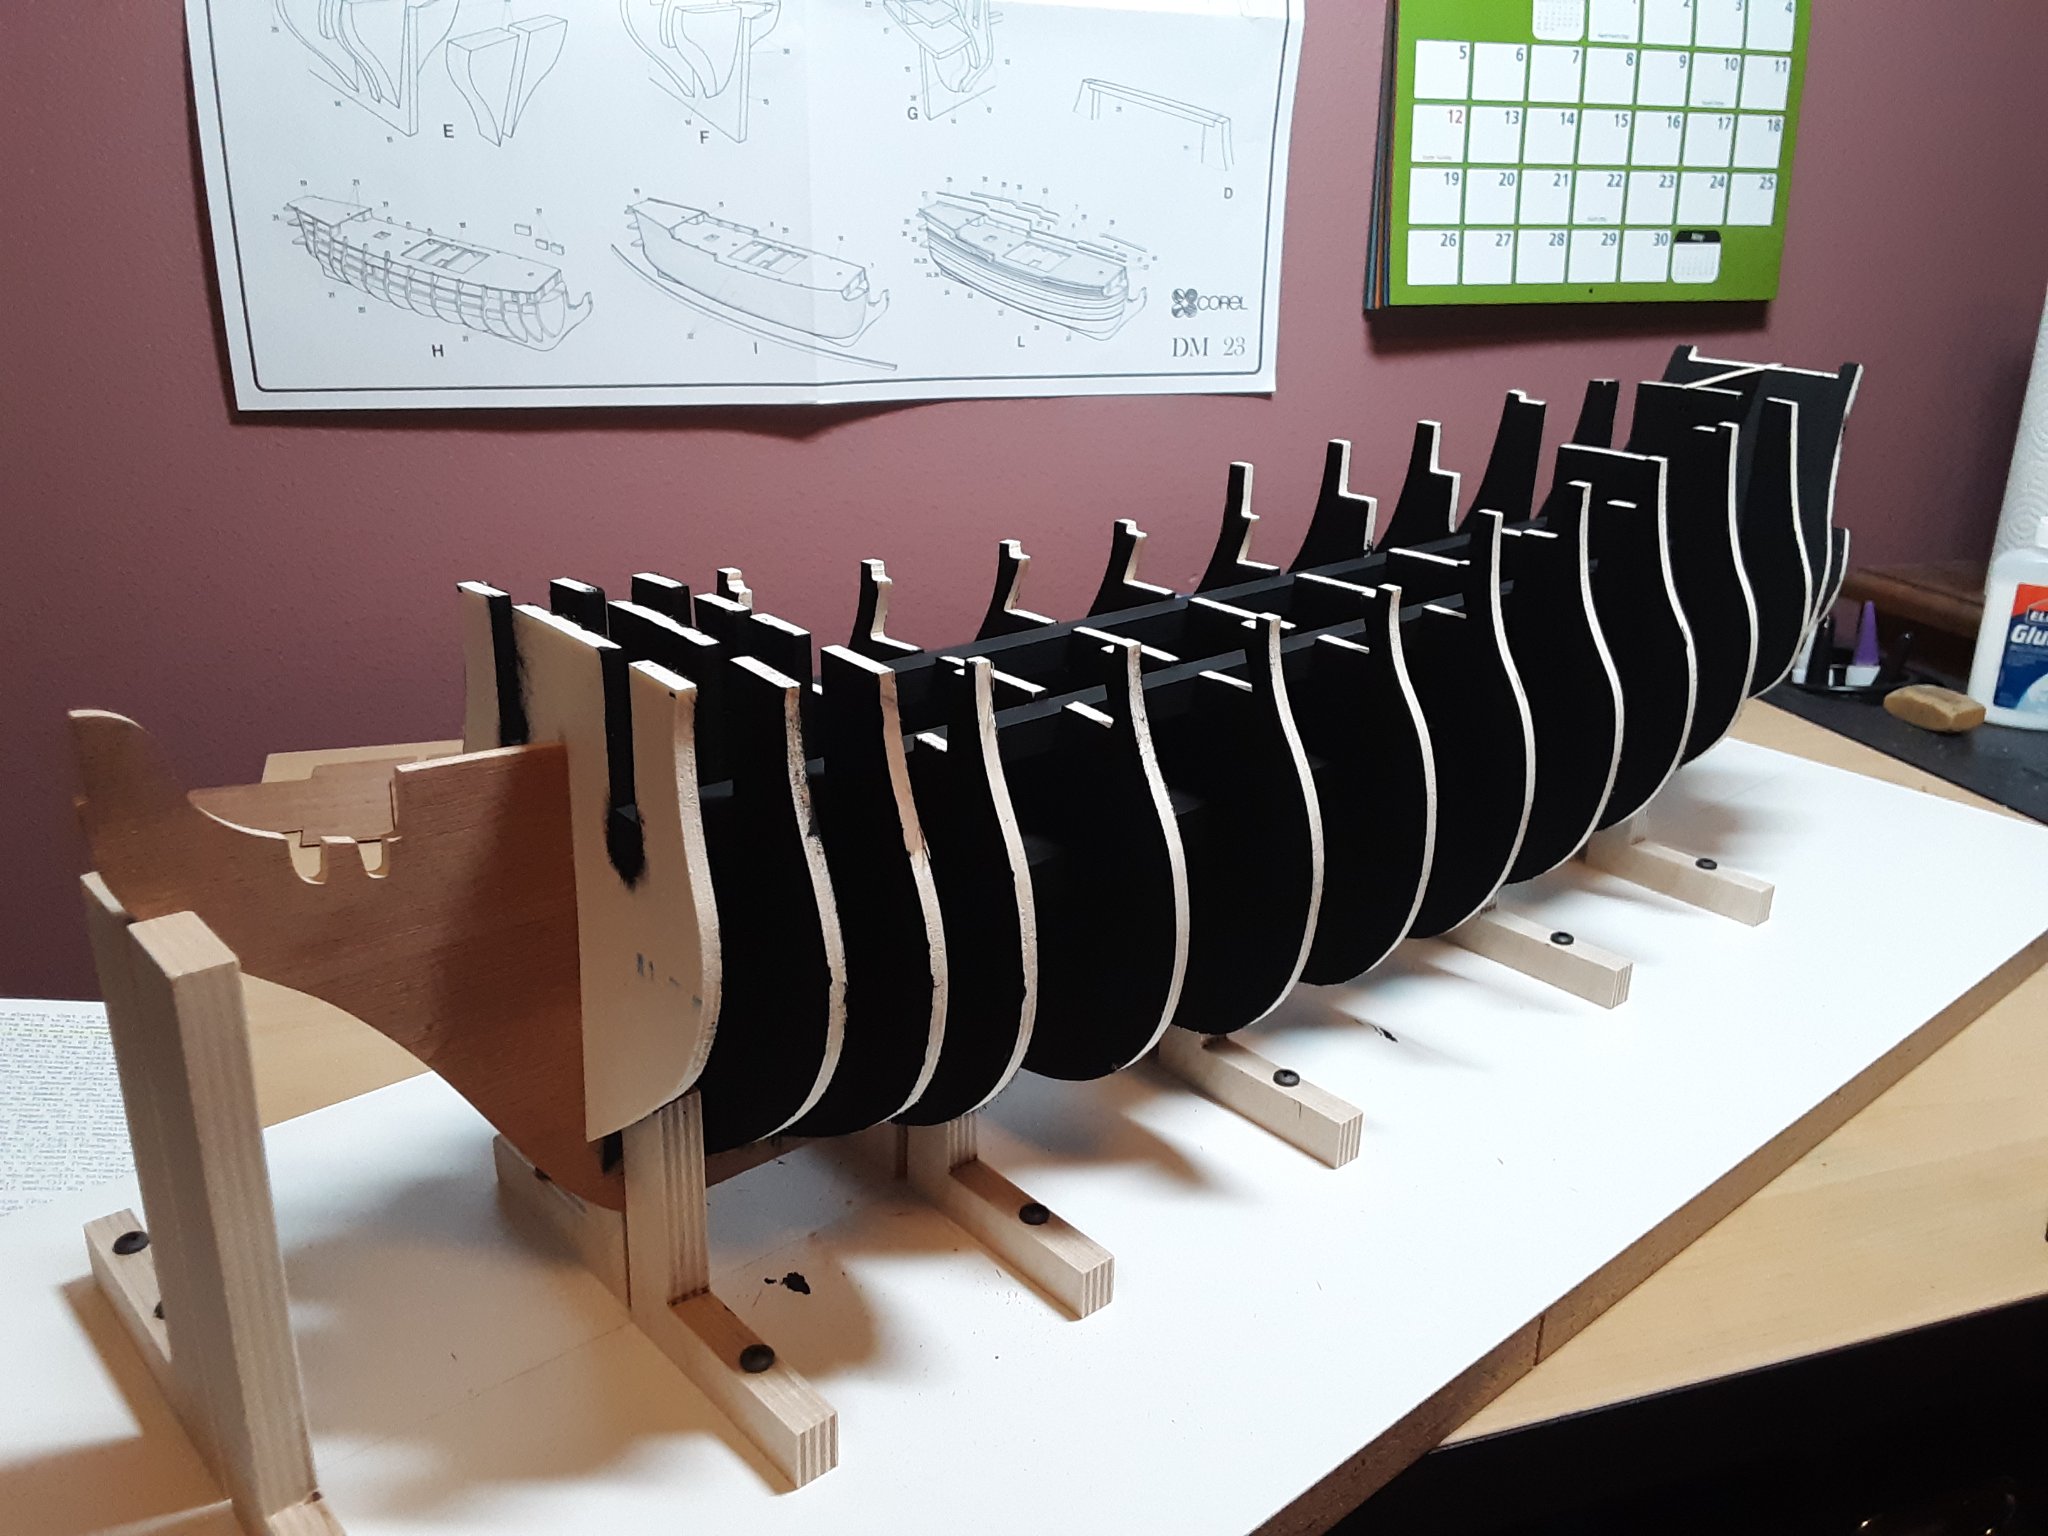
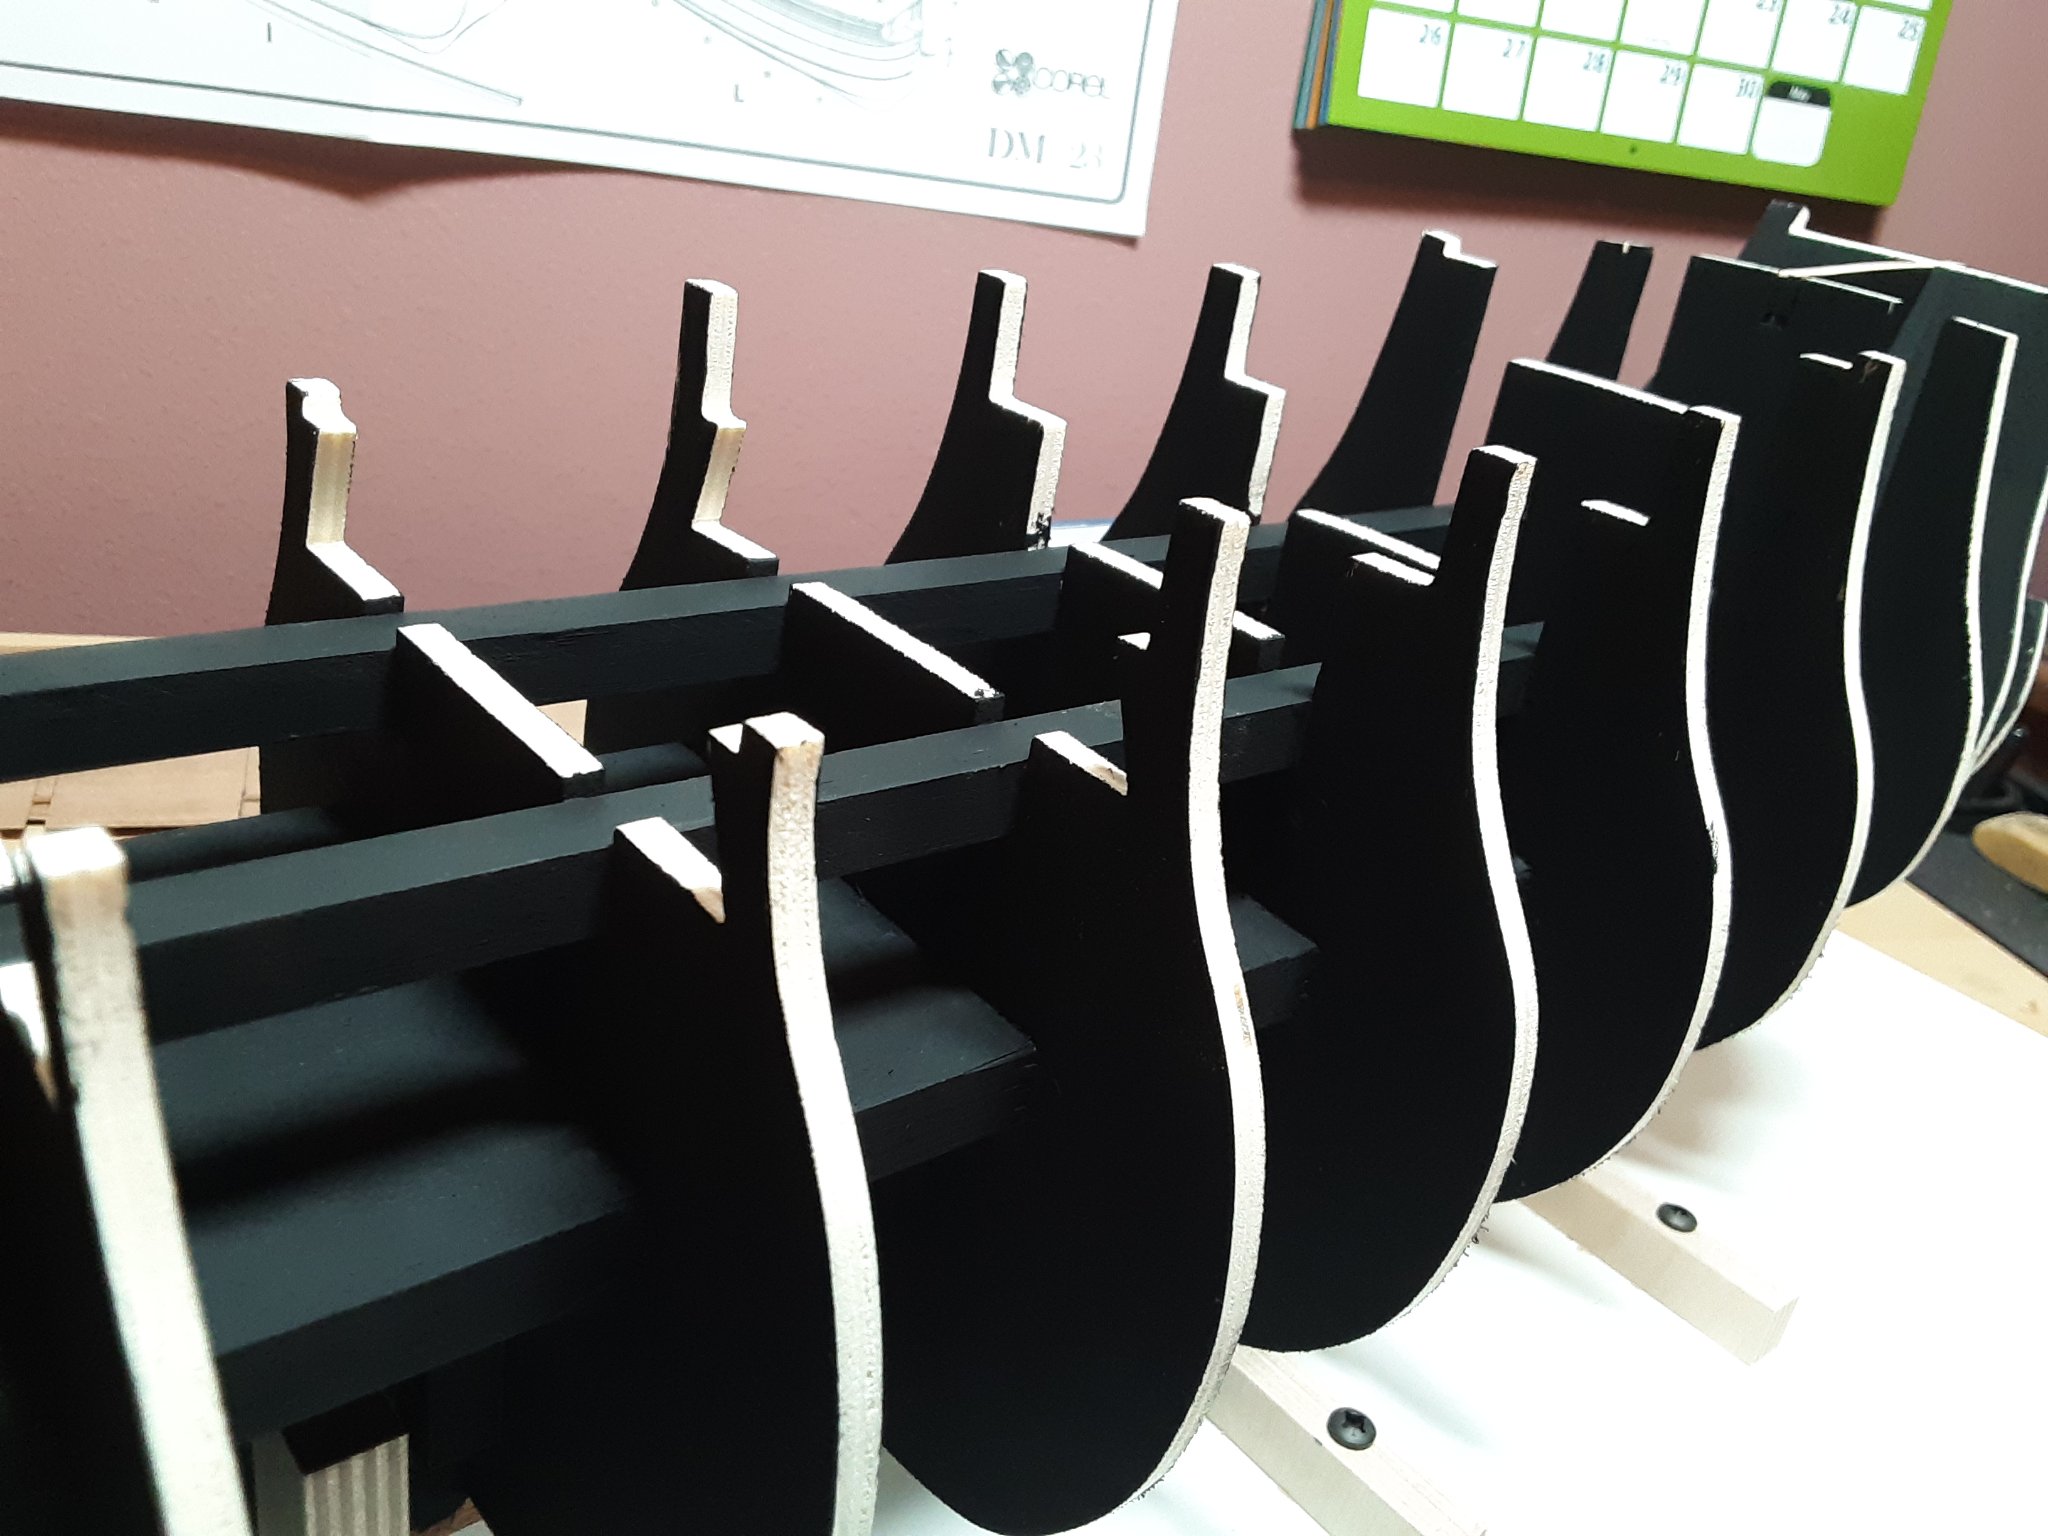
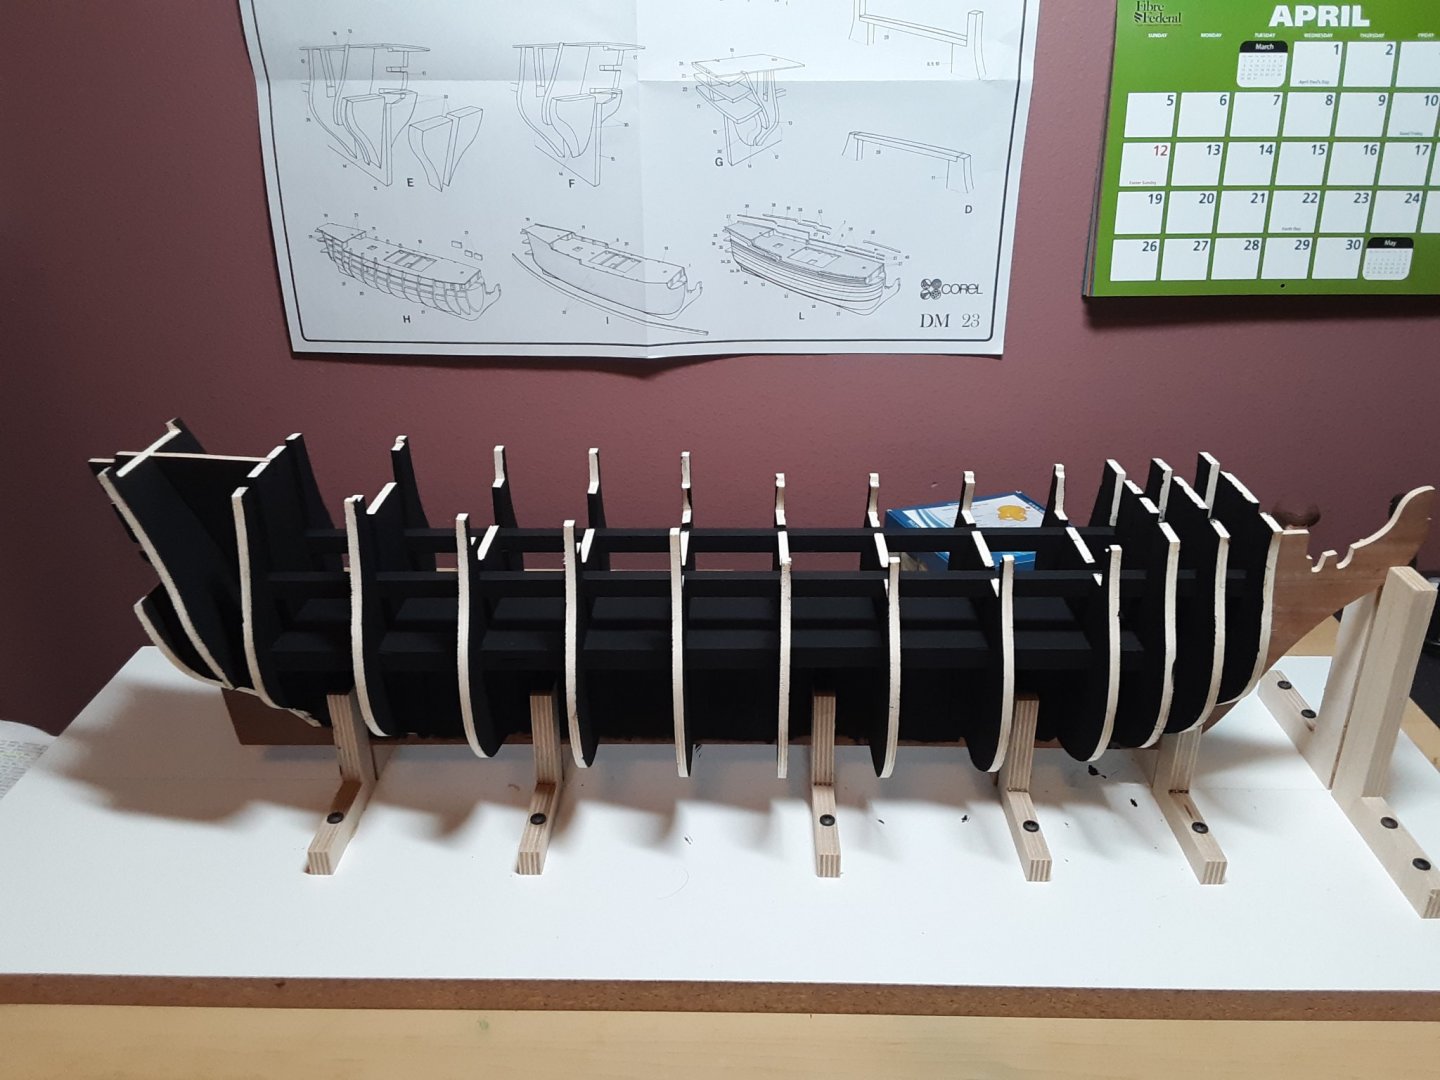
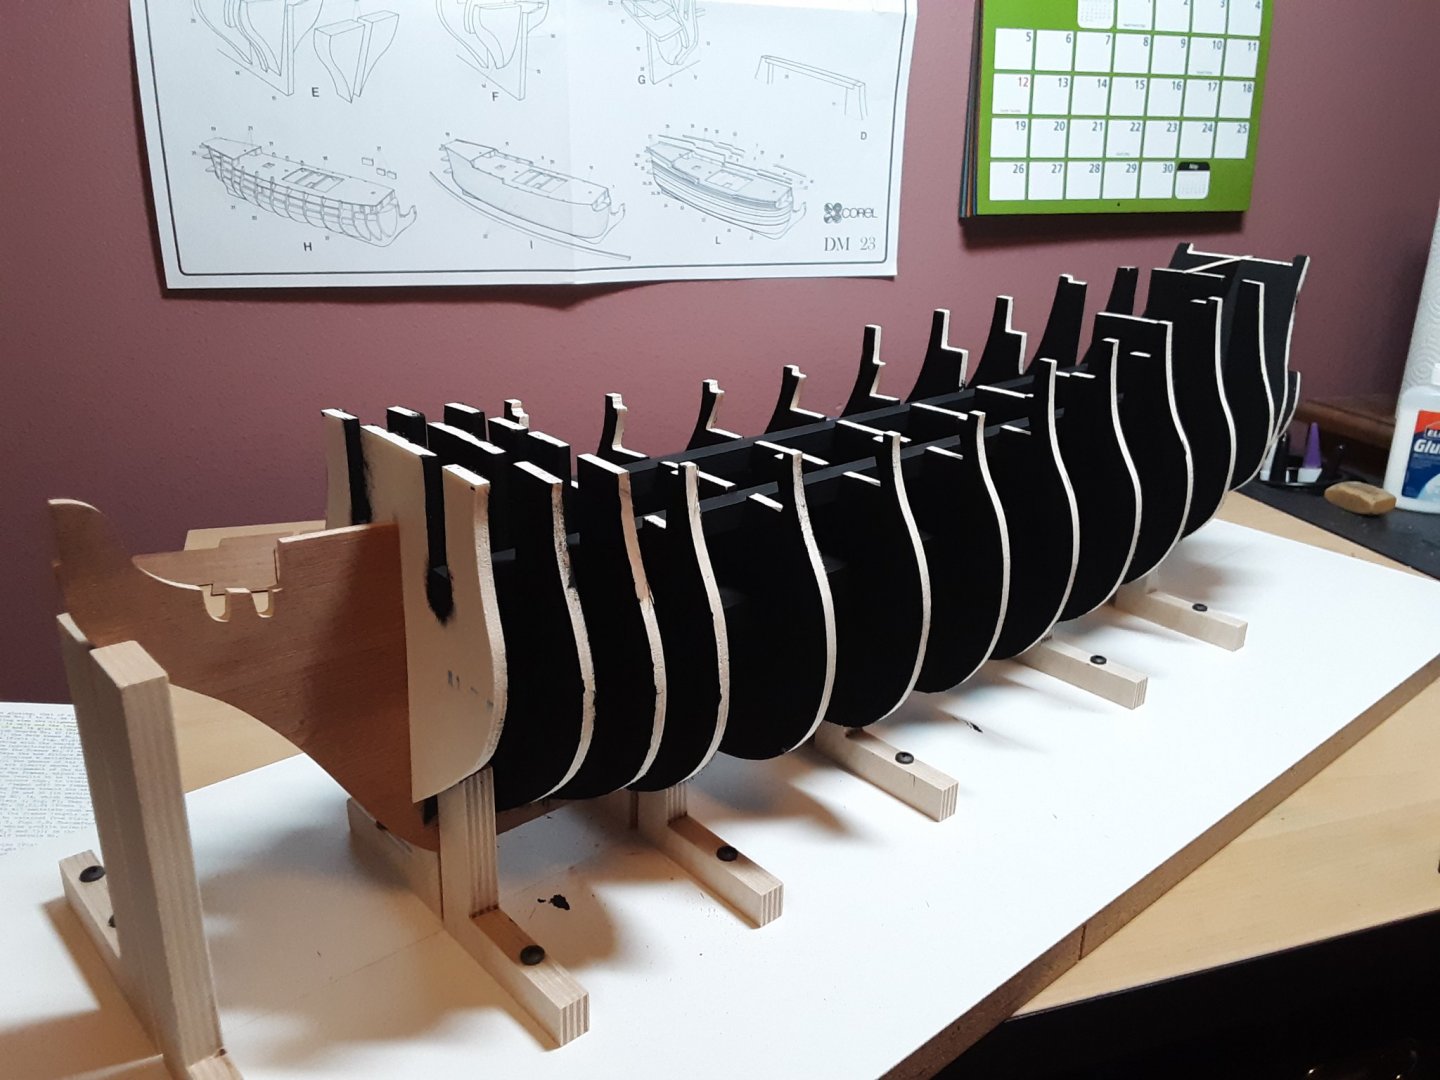
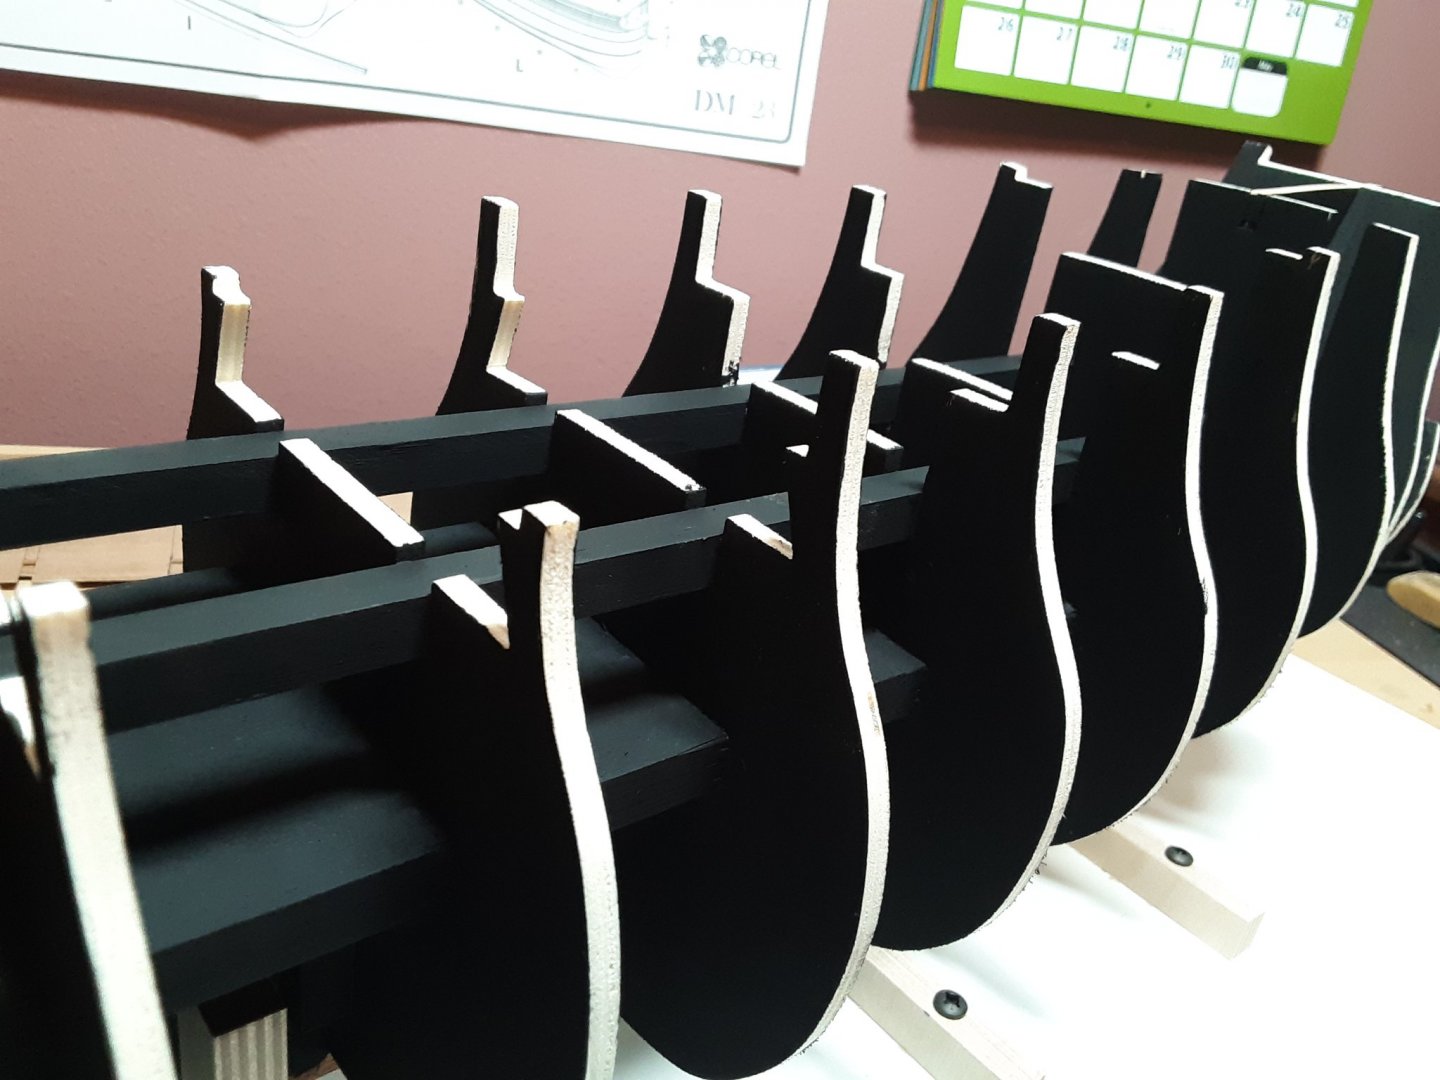
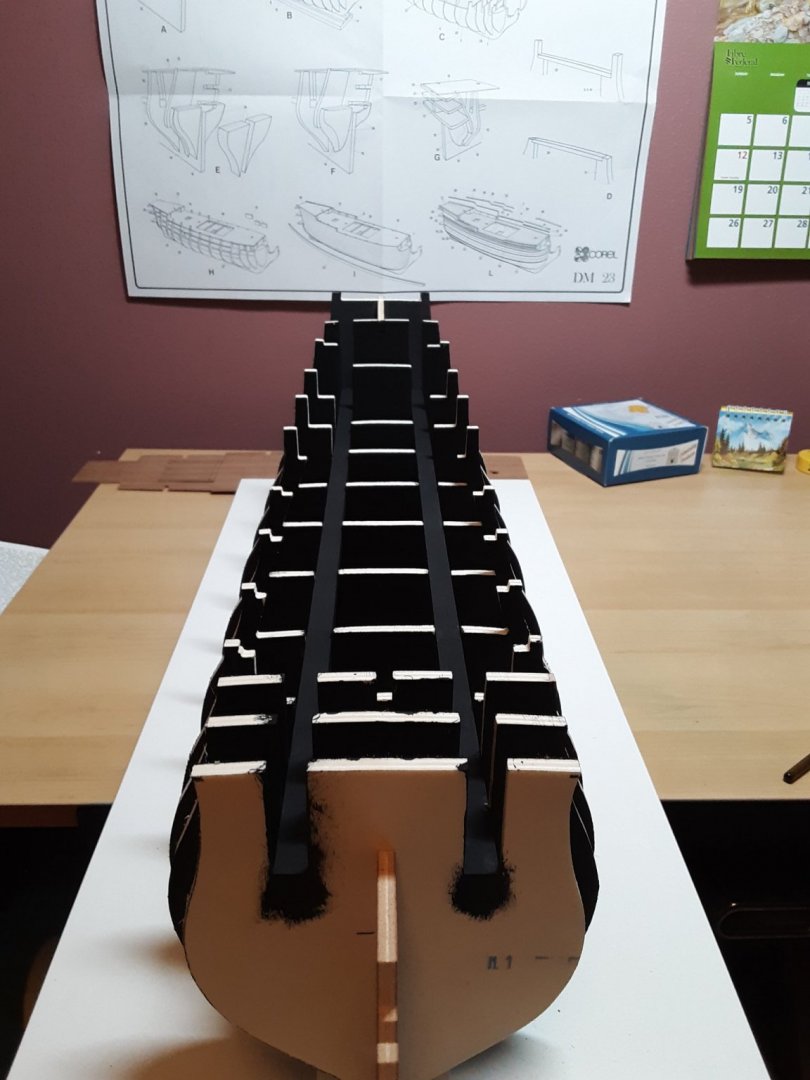
Hello everyone. Spent a little time putting a sealer coat on the framework. Since I'm also a oil painter, I used some black acrylic gesso. Dries flat and it will still allow glue to stick to it. Kinda neat the way it brings out the shape. Next I'll be getting the lower deck in place. The following photos show the lower deck just set in place. I'm still a little nervous about gluing anything until I research about 5 or 6 steps ahead. The instructions from Corel are very slim. I'm enjoying getting sound instruction from fellow builders. If anyone wants to give pointers, advise, I'm all ears. Thanks for stopping by.


-
Hi Rob, welcome. It's nice having new friends.
-
Yes, I understand your points. I believe I'll be following suit by painting my framework before I proceed with the lower deck. Thanks for your input here. Robert 😁
-
Being a woodworker my whole life, I understand the movement of wood due to climate, humidity and temperature changes. But I've never seen this so much in the use of plywood veneers. Solid wood yes, but not plywood. Well I guess it's better to be safe than sorry. There are many types of wood sealers, I was curious why the color black was used.
-
So I've noticed that many modelers have painting the bulkheads and inner structures flat black. Does this help with fairing in the hull? Or is there other reasons for this? Thanks.
-
Thank you Eugenio! Patience, patience, patience. This I'm finding out is a must if I'm going to have success. And it's an enjoyable process. 🙂