JohnN
-
Posts
60 -
Joined
-
Last visited
Content Type
Profiles
Forums
Gallery
Events
Everything posted by JohnN
-
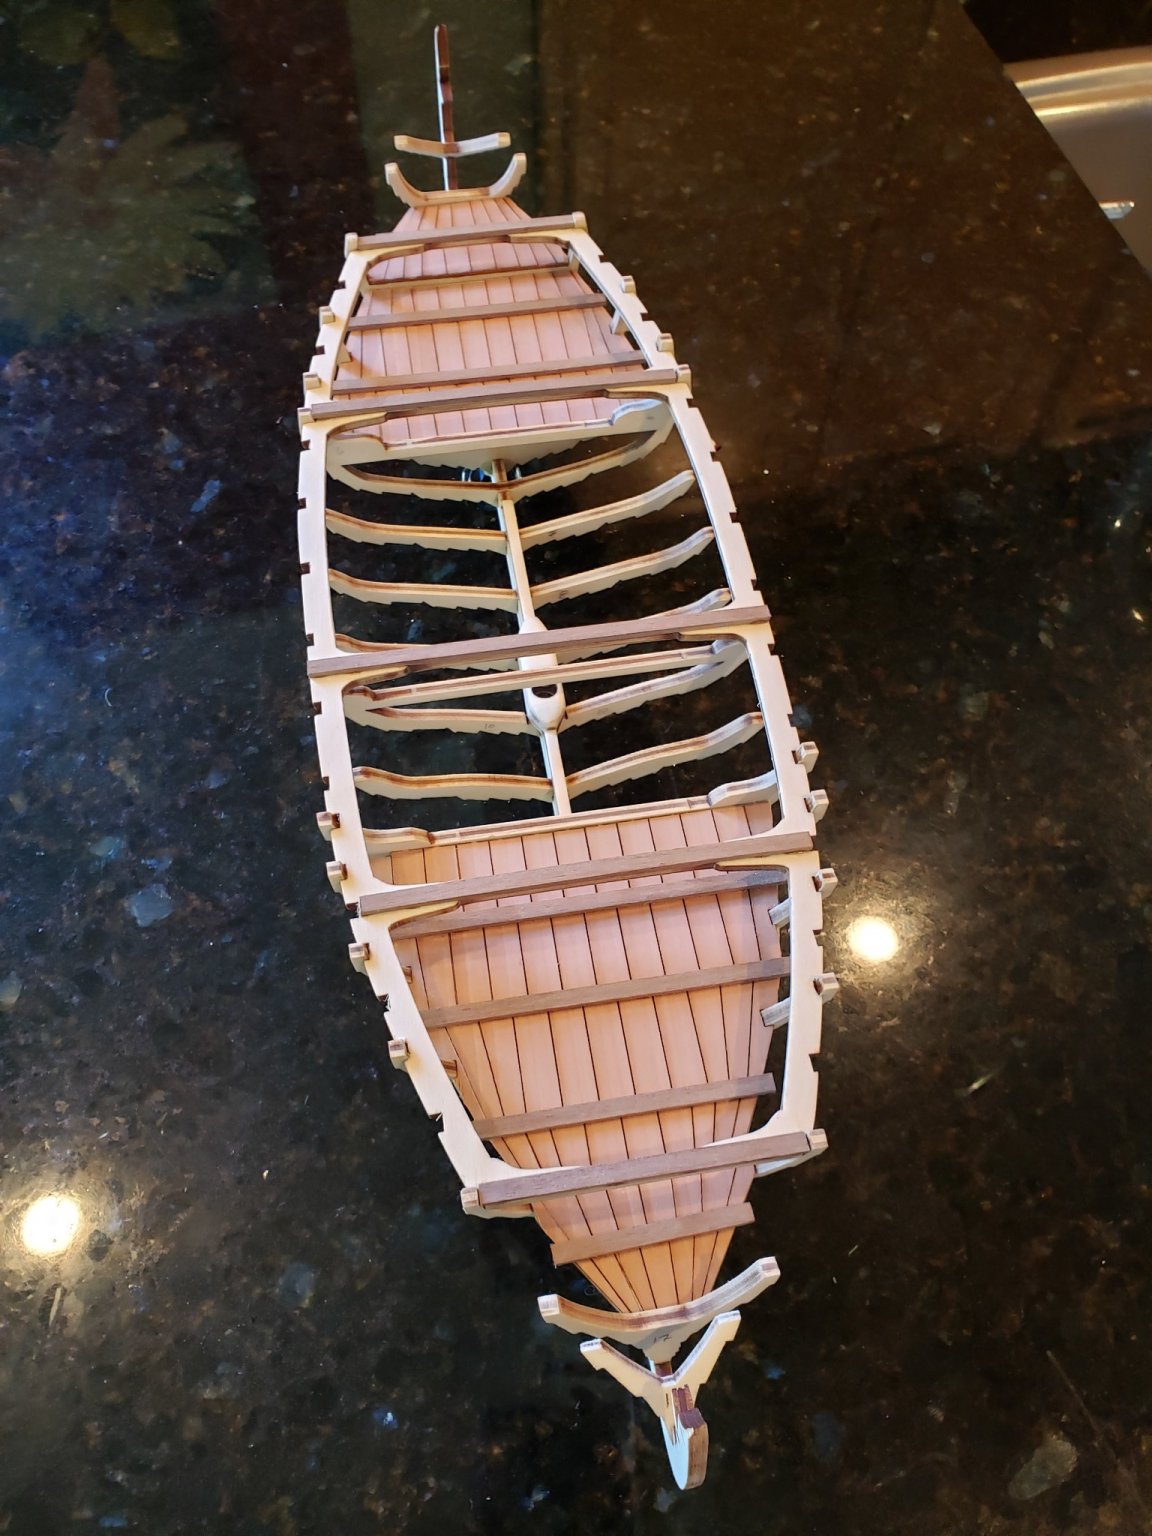
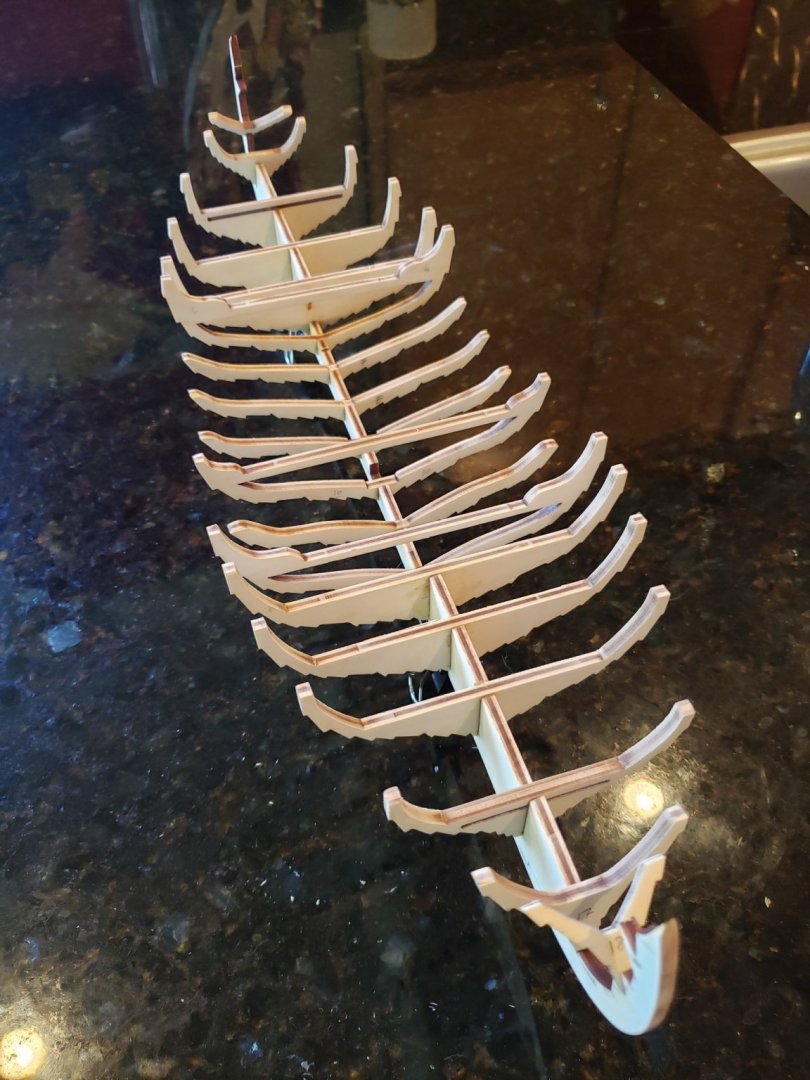
Following a couple hours of working the frame tops and frame cutouts in the inner frame, I wielded the maxi-cure super glue, used the top of frame 10 as a level guide, and attached the inner frame. I spent most of the time working on frames 6 and 12, which were too narrow to allow the inner frame to sit low enough. The image below shows the 5 parts 28 attached to the top of the inner frame. This illustrates the inner frame is sitting on the top of frame 10 as shown in the plans. A few more frame parts to install and the ship will be ready for planking to begin

- 48 replies
-
- 4
-

-
- dusek
- viking knarr
- (and 1 more)
-
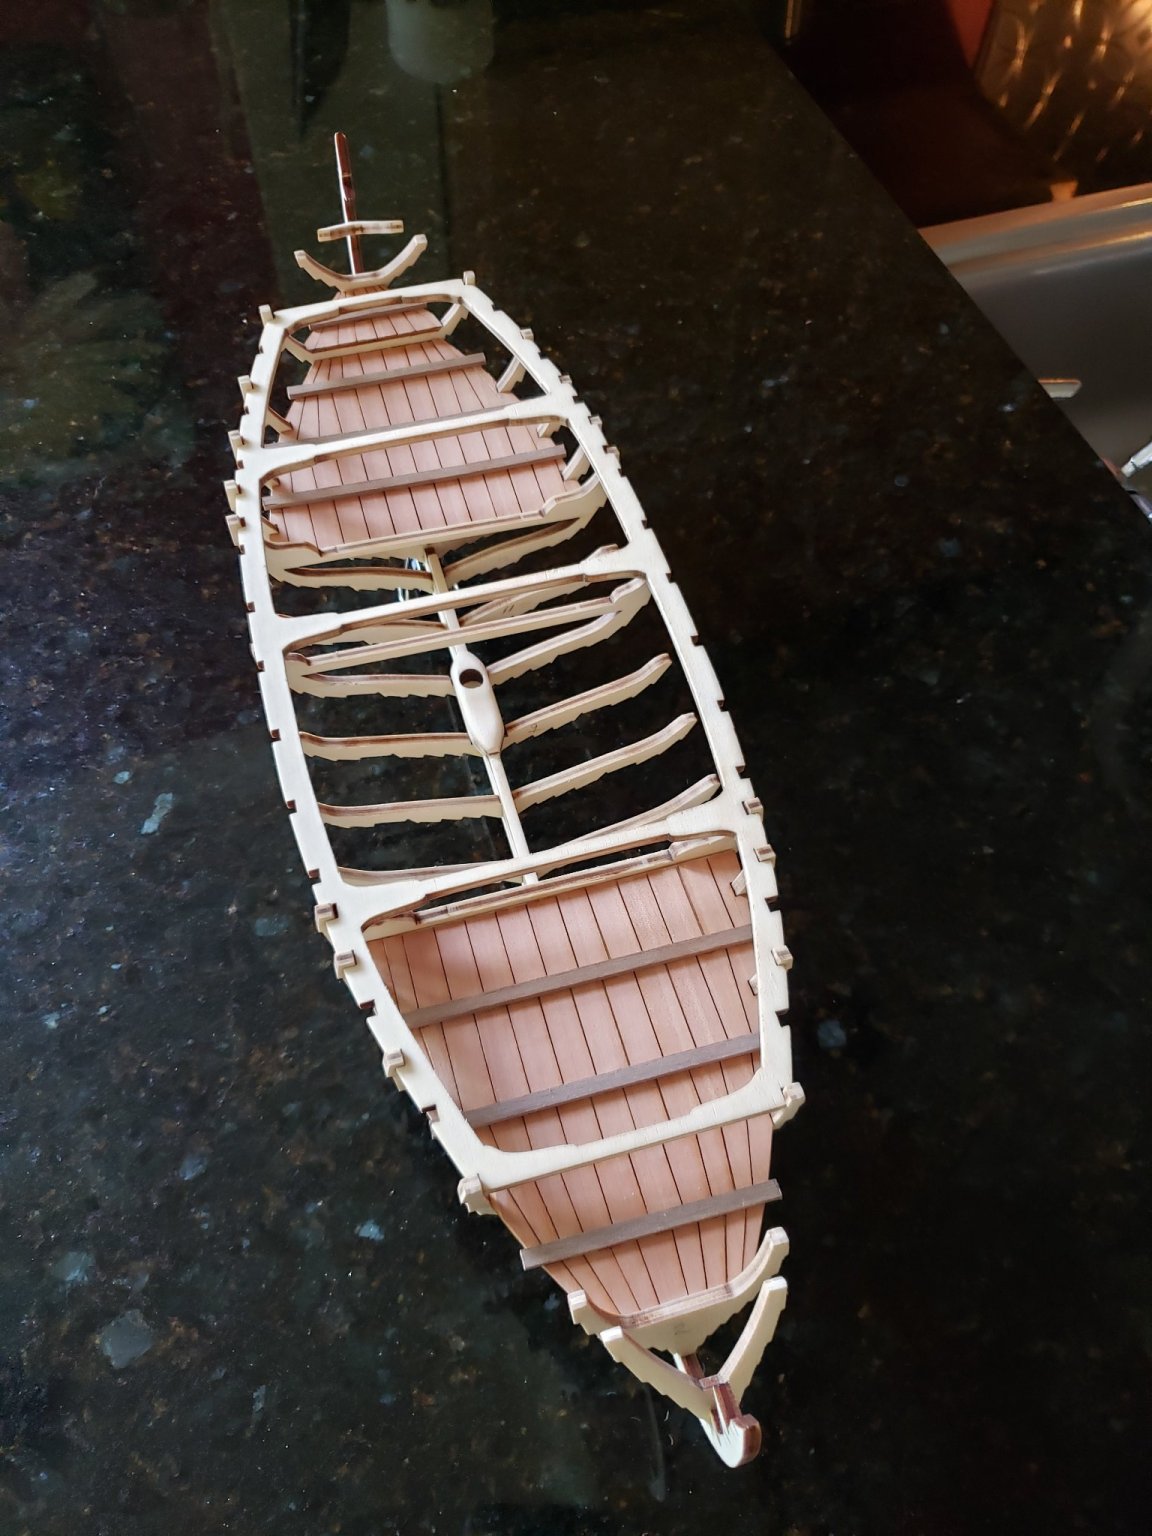
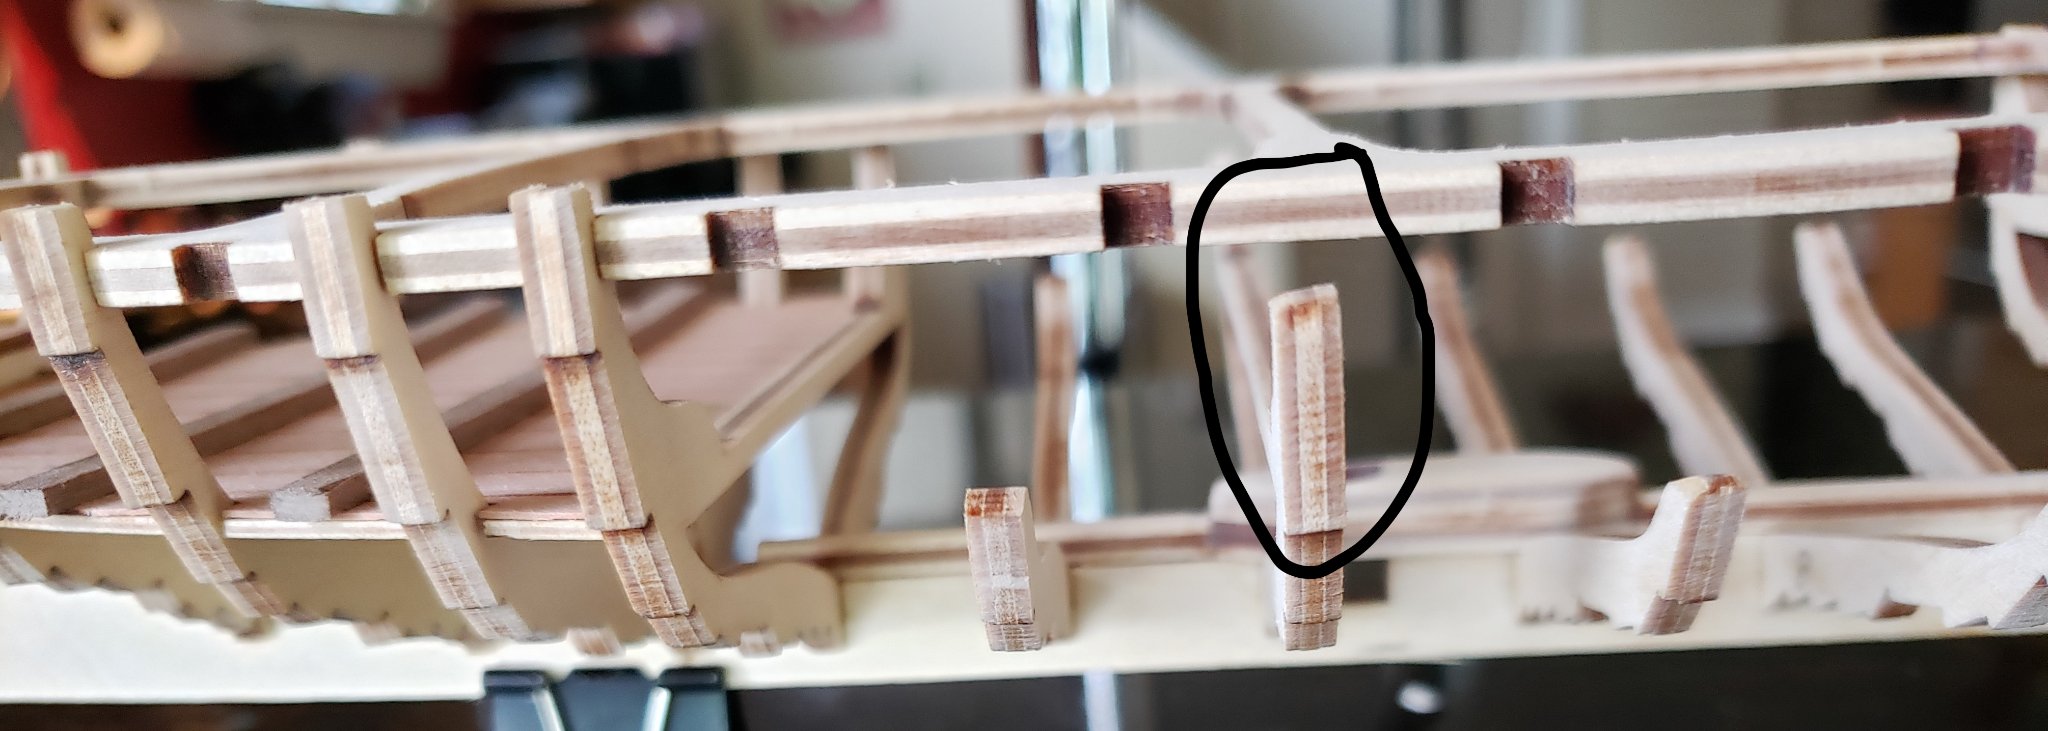
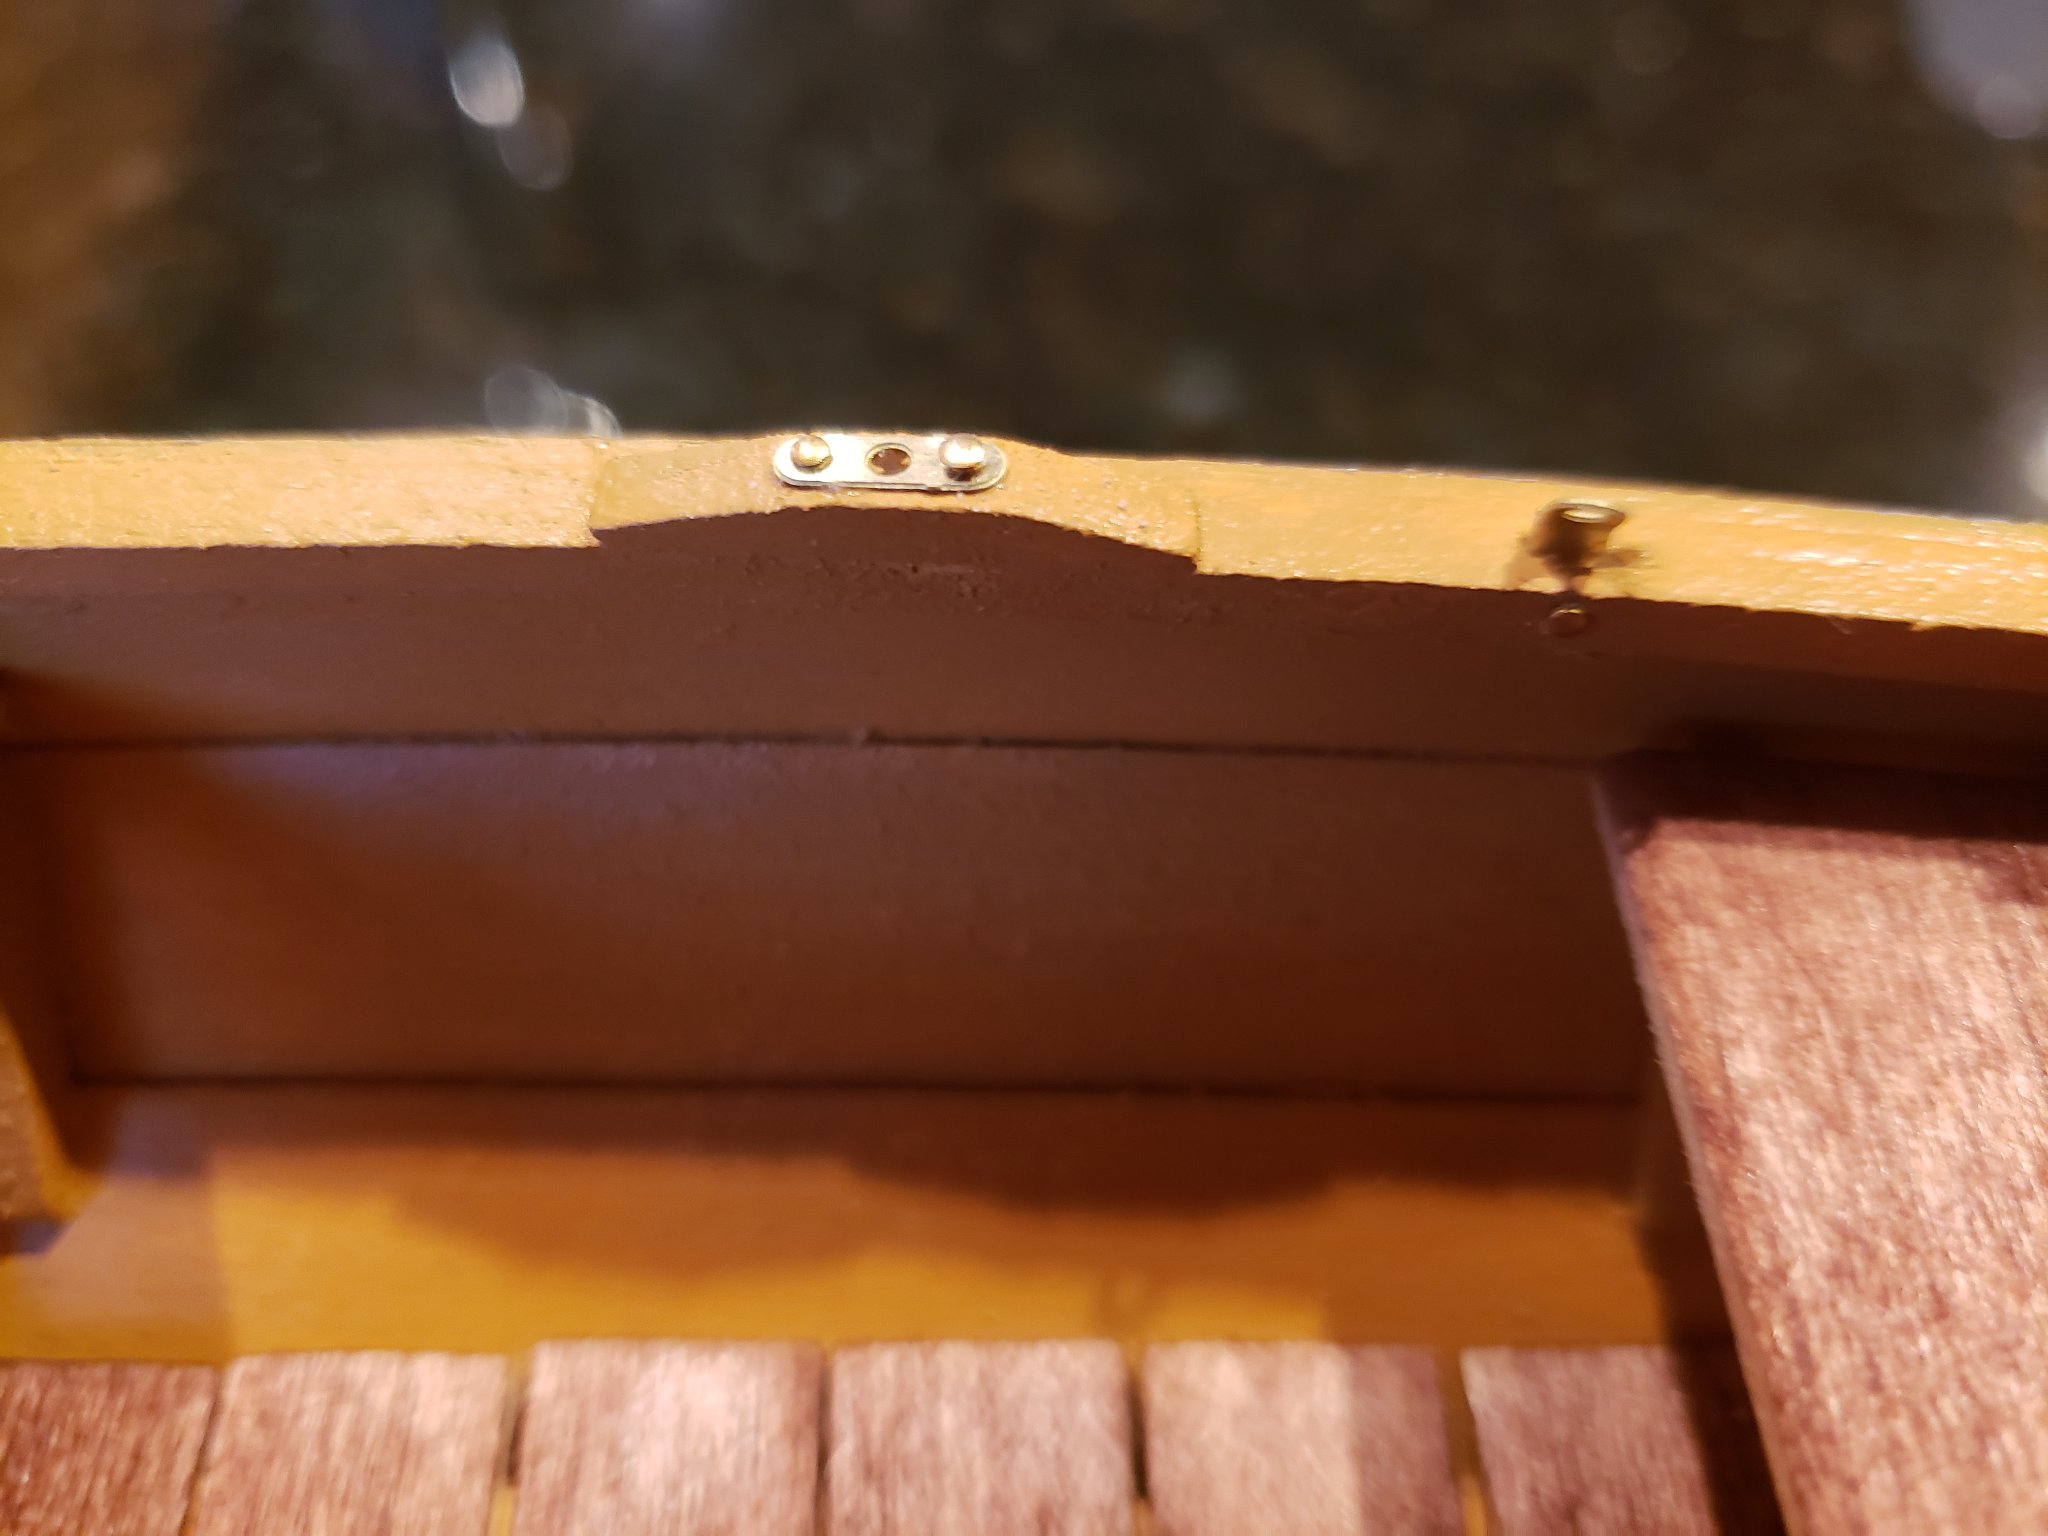
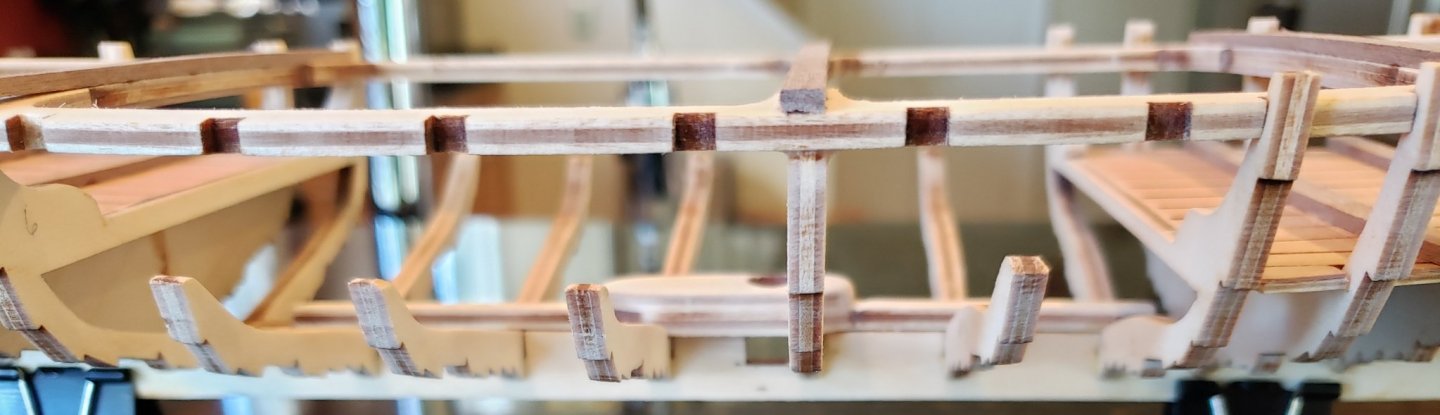
Happy 2021, All. I have installed the sub-deck plywood parts (Steps 1b and 1c) . As stated earlier, some adjustments to the precut slots were necessary. Rather than glue the larger decks to the frames prior to frame attachment to the keel, I installed the frames (as above) and the the decks. No issues I am aware of using this alternate sequence. The mast foot assembly, prep and installation is straightforward. Helpful are locating notches in the keel making placement obvious. The deck planking was a bit troublesome. The provided laser cut planks have thin attachments between separate pieces, and it is not obvious from the instructions if the intent is to separate all parts, then install, or just try to glue down the deck planks as provided. Since three of the four decks lost a lot of pieces during handling, I separated the parts prior to attaching to the plywood sub decks. This worked, but was rather tedious. For the largest, which stayed in one piece, I separated one set of edge planks, glued the rest to the sub-deck, then adjusted the size of the edge pieces to finish coverage. Adding the transverse strips (Step IIIb) is also straightforward; I cut the strips a bit oversized and will trim as either the remaining frame pieces are glued to the transverse strips, or as I am planking. The inner frame is the next piece to attach, and can be seen dry-fitted above. However, this inner frame (part 27) is flat, and the other frame tops are not at the same level WRT to each other. I carefully measured and squared them while attaching to the keel, so am confident they are level. In fact, there is a substantial gap between the inner frame and the top of frame 10 (below) . The cross section provided in the plans shows the inner frame directly in contact with the top of frame 10. It seems a consistent amount of frame should protrude above the inner frame as well, so this suggests the inner frame has a bend, and is lowest at the top of frame 10. I will be fussing with the frame top cutouts in the inner frame to get a better dry fit, while I re-examine construction looking for other assembly blunders that might explain the present situation.


- 48 replies
-
- 2
-
-
- dusek
- viking knarr
- (and 1 more)
-
Have added all frames. I decided to do this from 3 to 16 the the ends. The instructions have the under deck frames added first, then the remainder. I felt the instruction ordered would be problematic for my square tools, hence the ordering change. I see no obvious problems with my ordering. I had a little mis-start, as I began frame installation with the keel reverse ordered WRT the instructions. It was not until I test fit one of the decks that I realized I had erred. I then enjoyed a disassembly and clean up day. Kit manufacturers, how about adding frame numbers at the keel, as well as part numbers on hidden areas of parts for un-attentive builders such as myself ? Seems no real added manufacturing cost, and a large potential time saving for novice builders. I have fitted two of the first layer decks, and am working on the other two. The larger need some fiddling/sanding to get proper fit at the frame cutouts.
- 48 replies
-
- 5
-
-
- dusek
- viking knarr
- (and 1 more)
-
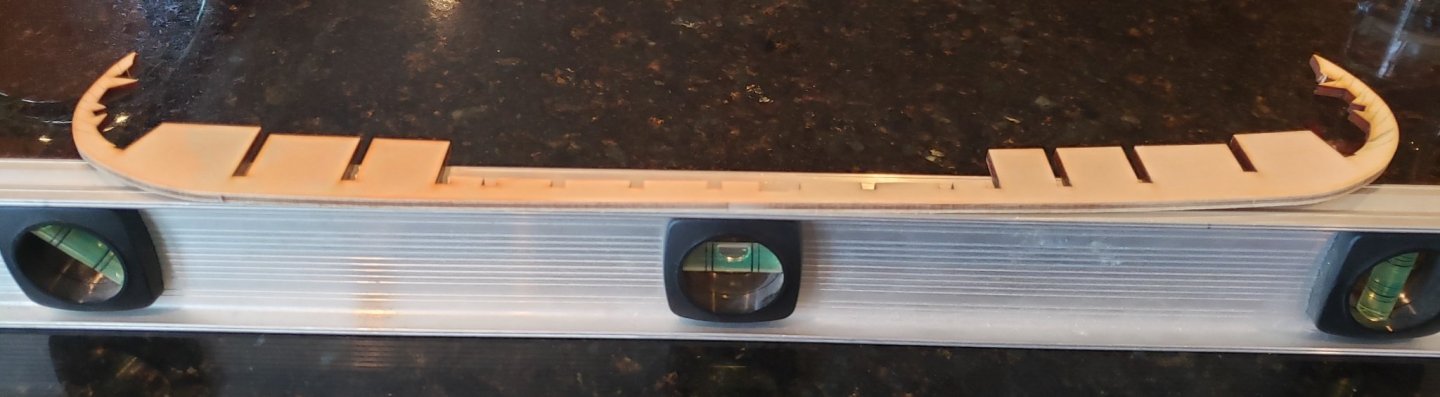
Tools have finally arrived. The keel looks quite close to perfectly flat based on the level. There is perhaps 1 to 2 mm of divergence, which I am not going to be concerned about. Pondering fabricating a build board such as illustrated on other threads. Need to recheck planking locations on the keel before proceeding with frames.
- 48 replies
-
- 3
-
-
- dusek
- viking knarr
- (and 1 more)
-
I continue to await the arrival of some tools as, being rather new to this, I need to add to my box. Thanks, USPS. In the meanwhile, I am cleaning up the keel and frames. I have just started reading @Cathead's build log for the longship. Seems an adventure awaits. 😬
- 48 replies
-
- 1
-
-
- dusek
- viking knarr
- (and 1 more)
-
lucky you @kurtvd19
-
Well, this is interesting .... https://modelexpo-online.com/muscongus-bay-lobster-smack.html
- 43 replies
-
- 1
-
-
- Norwegian Sailing Pram
- Model Shipways
- (and 1 more)
-
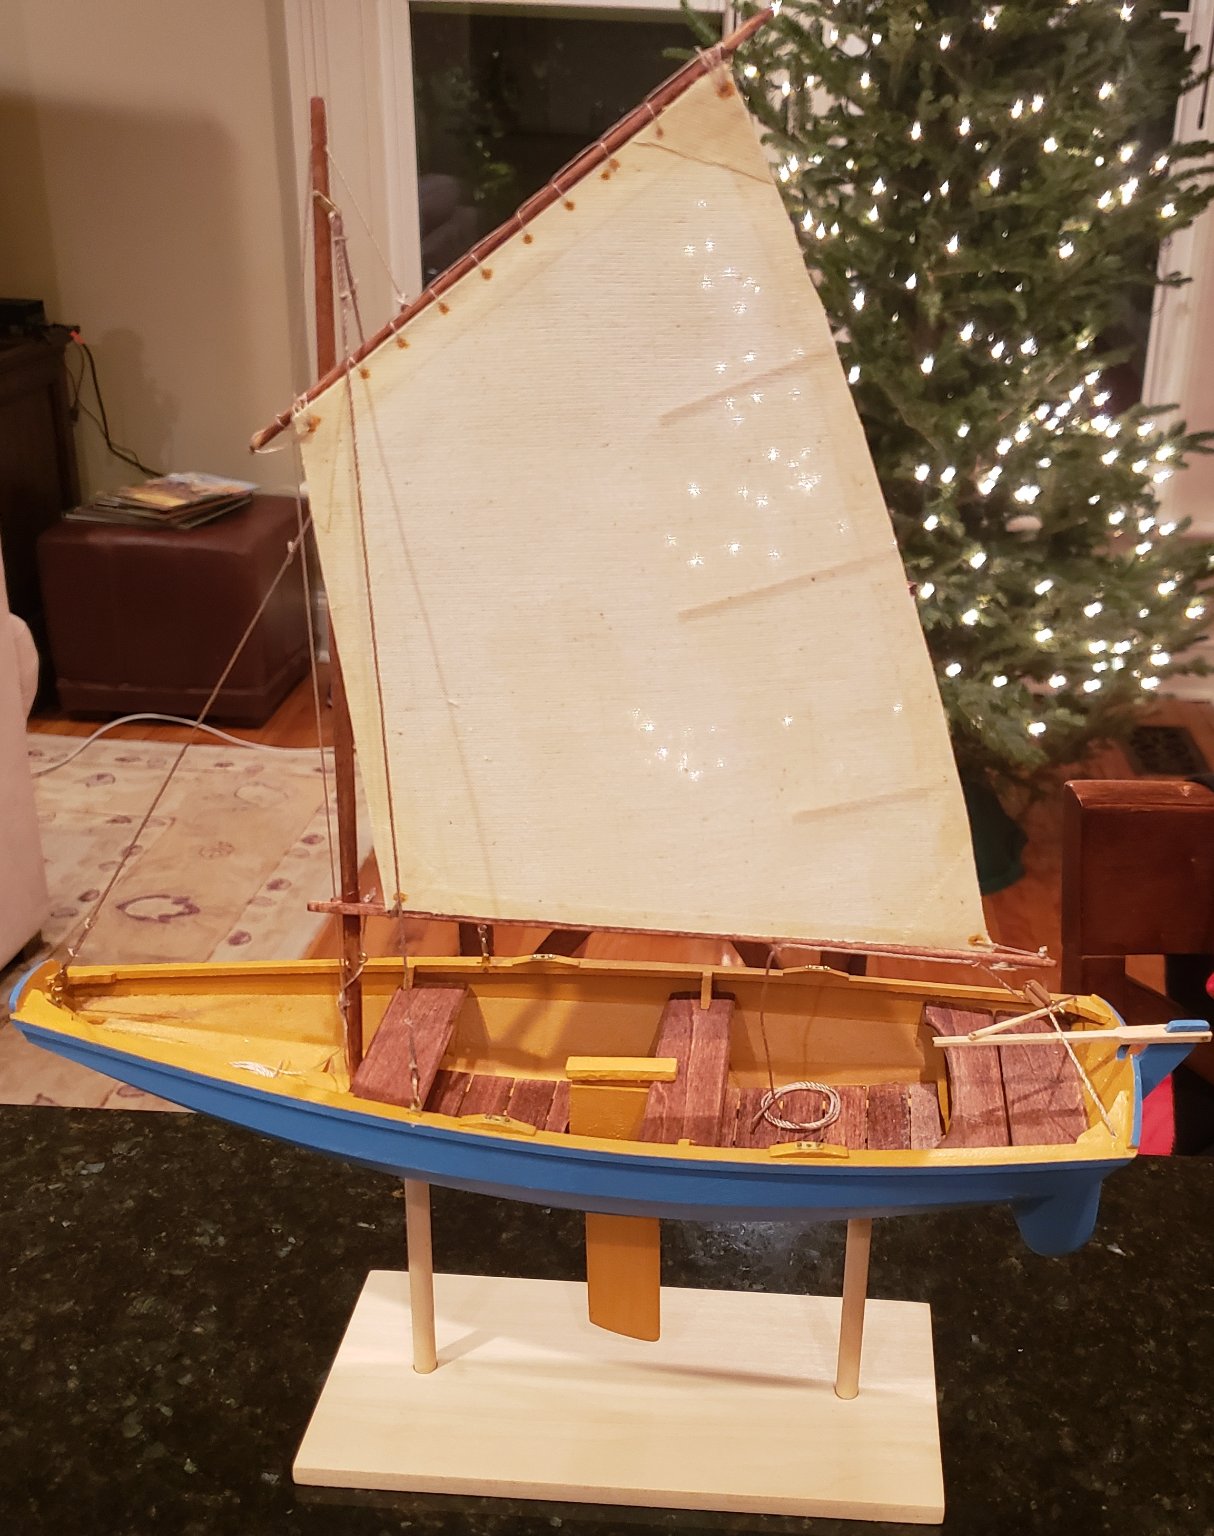
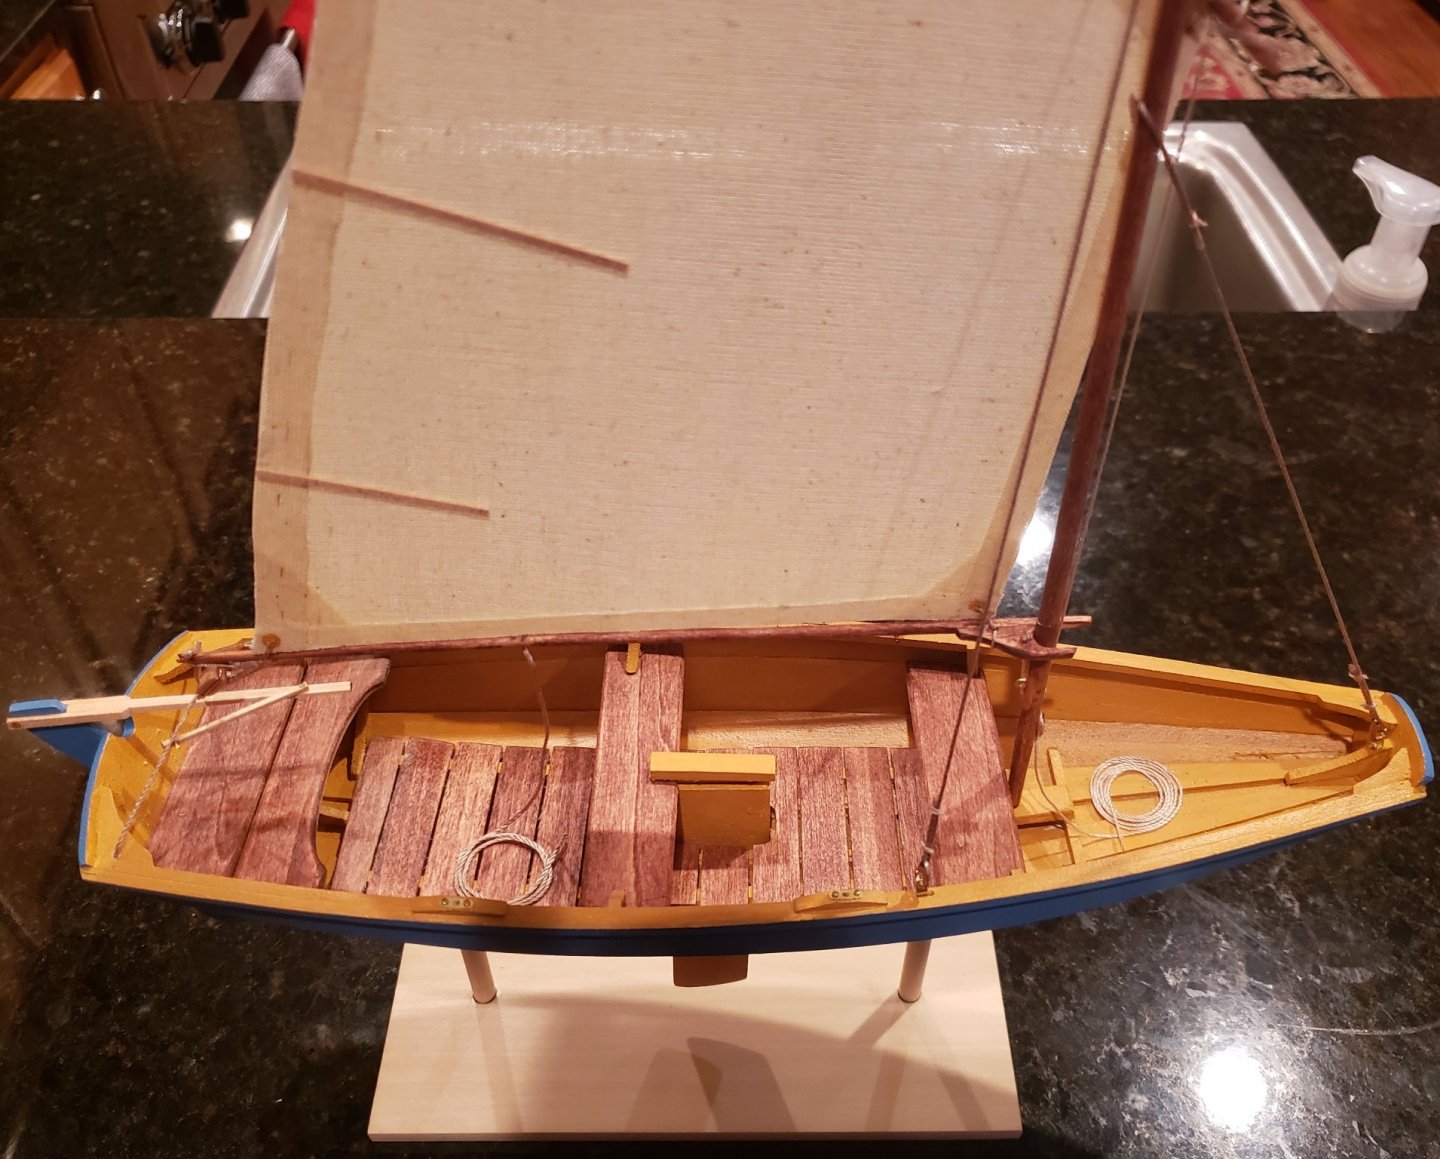
The Pram is completed. Thanks to @SkiBee for his build log, which clarified some points as I was building. As a second kit, there is a reasonable increase in build complexity from the Dory. Especially nice is the need for some rigging, and at a level I did not find daunting. The scale choice is also appreciated, as it meant not having to deal with very small parts, and allowed concentration on technique. The instructions do need an update to correct errors, and MS needs to be more careful with the Bill of Materials. It is frustrating to discover missing or shorted parts. While I realize the need to have beta testes of products, I do think it is reasonable to let customers know they are getting early versions, and to make provisions for quick interaction with the manufacturer. This site did save me considerable annoyance. The build has increased my familiarity with wooden ship model building, and the Dory, Pram build sequence is well designed. If the kit is improved based on feedback, I can recommend it.


- 43 replies
-
- 9
-
-
- Norwegian Sailing Pram
- Model Shipways
- (and 1 more)
-
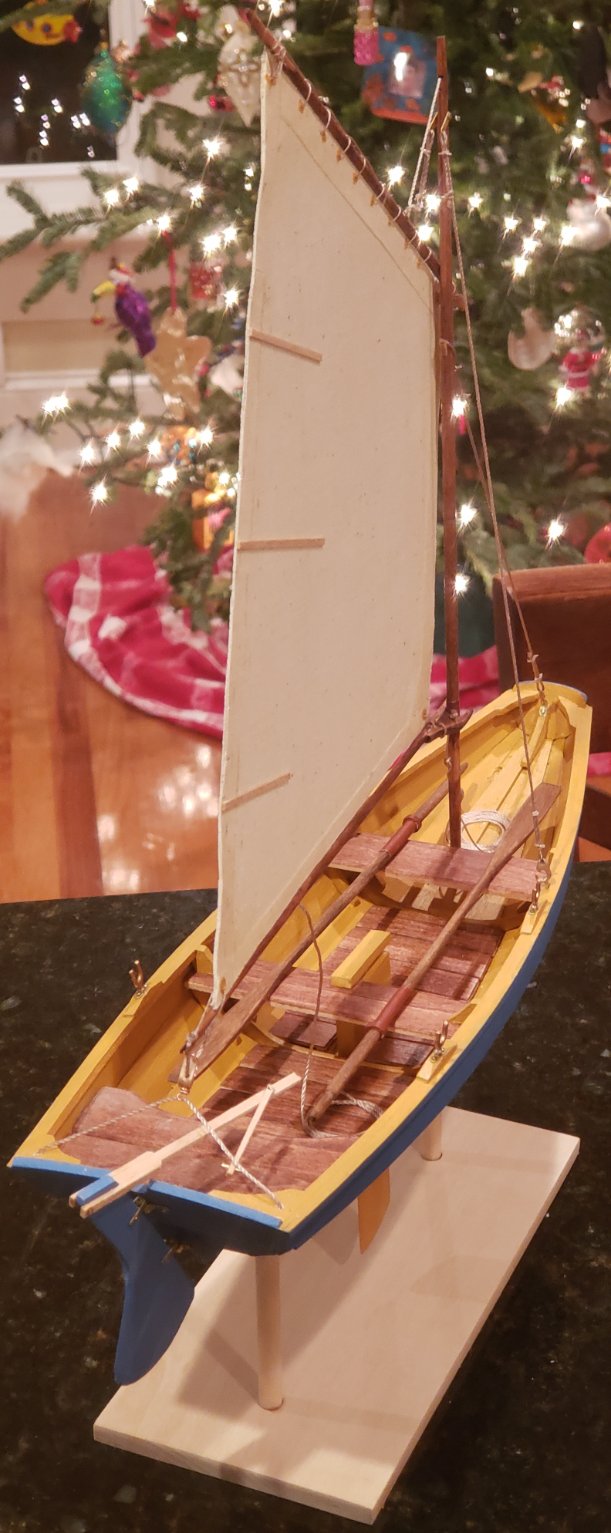
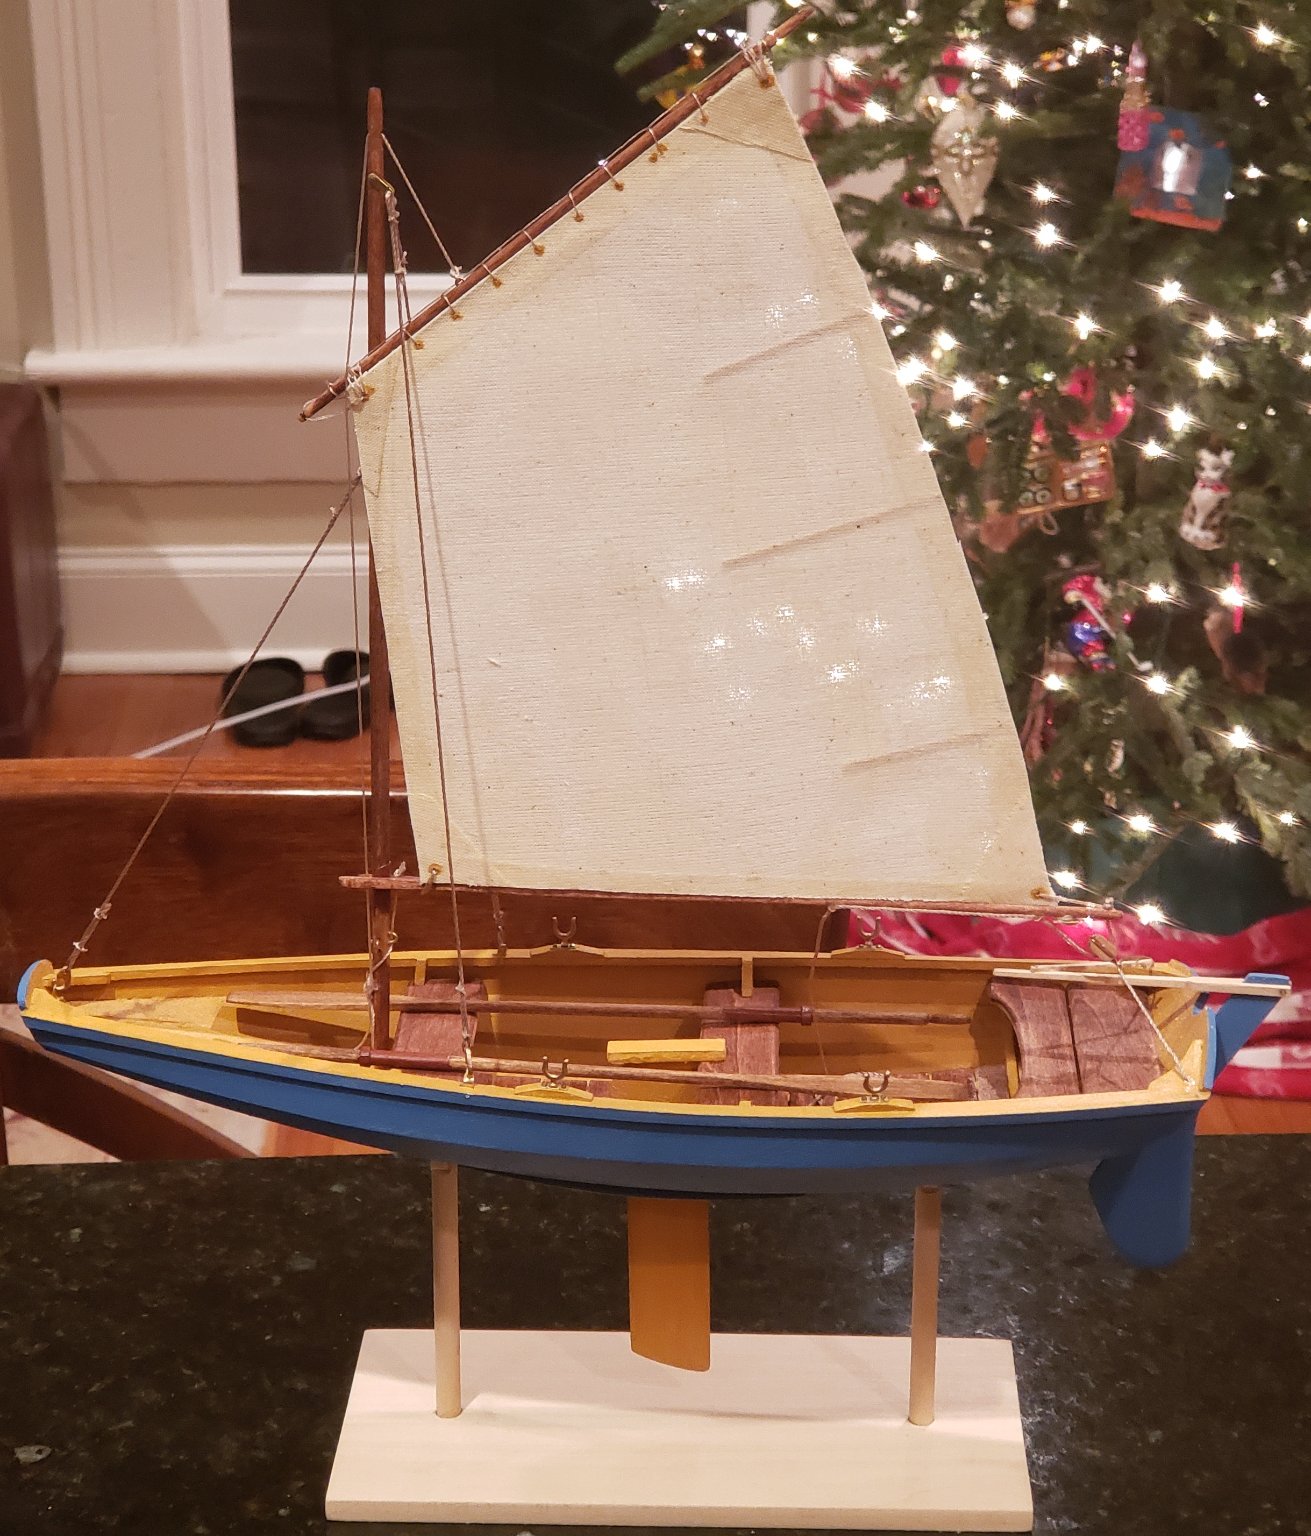
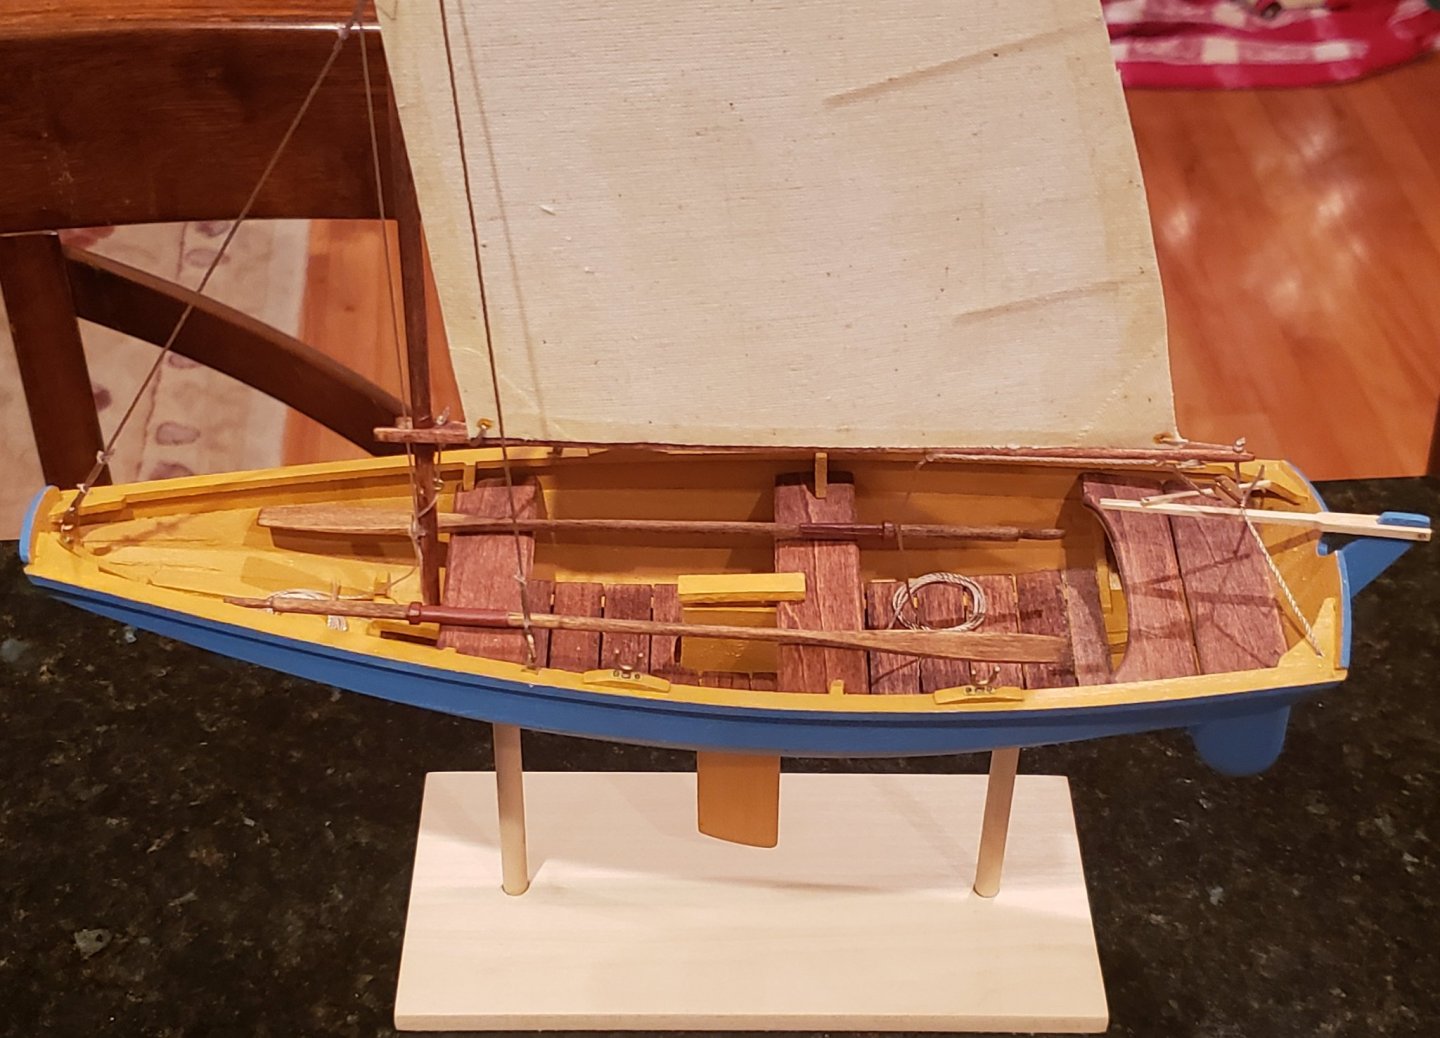
The sail has been raised and rigged. All that remains are the oars and oarlocks.

- 43 replies
-
- 5
-
-
- Norwegian Sailing Pram
- Model Shipways
- (and 1 more)
-
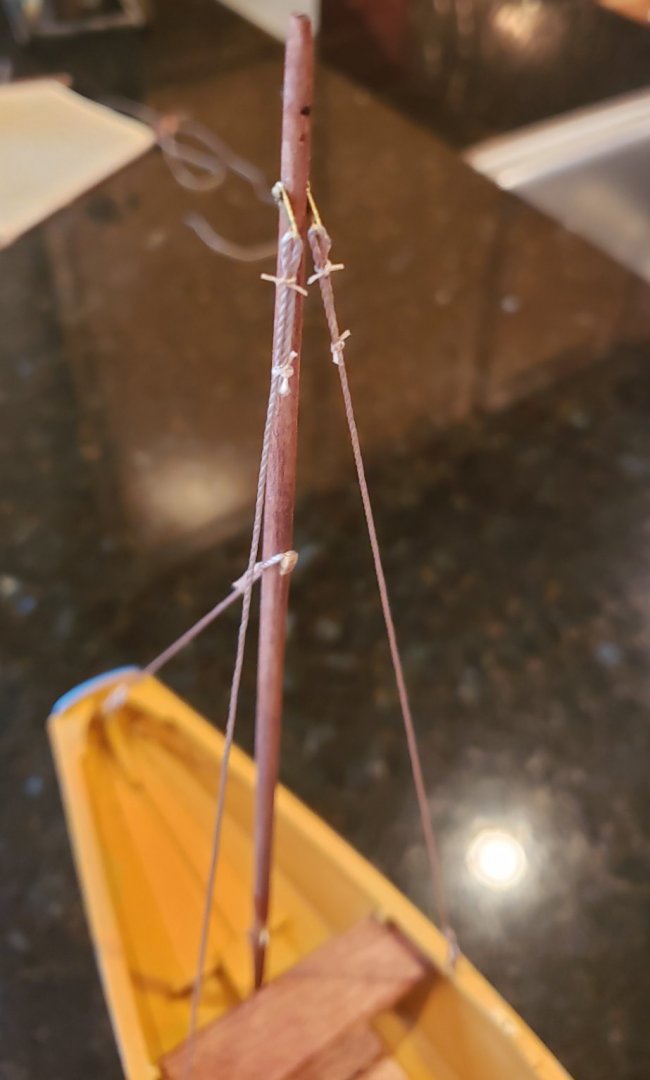
The mast is installed and rigged. When installing the backstay straps at the top of the mast, I found using a full length brass nail, super gluing the strap to the nail, then trimming the nail shaft was much easier than trying to push a very short nail through the strap hole. Fortunately, I now have plenty of spare nails for experimentation. I was hoping to leave gluing the backstay straps to the mast until the stays themselves were installed, but the holes I drilled were too loose, and I was forced to approximate strap position and glue. Otherwise, the rigging was straightforward. The depth of field on the camera was quite a chore to get mostly correct.


- 43 replies
-
- 1
-
-
- Norwegian Sailing Pram
- Model Shipways
- (and 1 more)
-
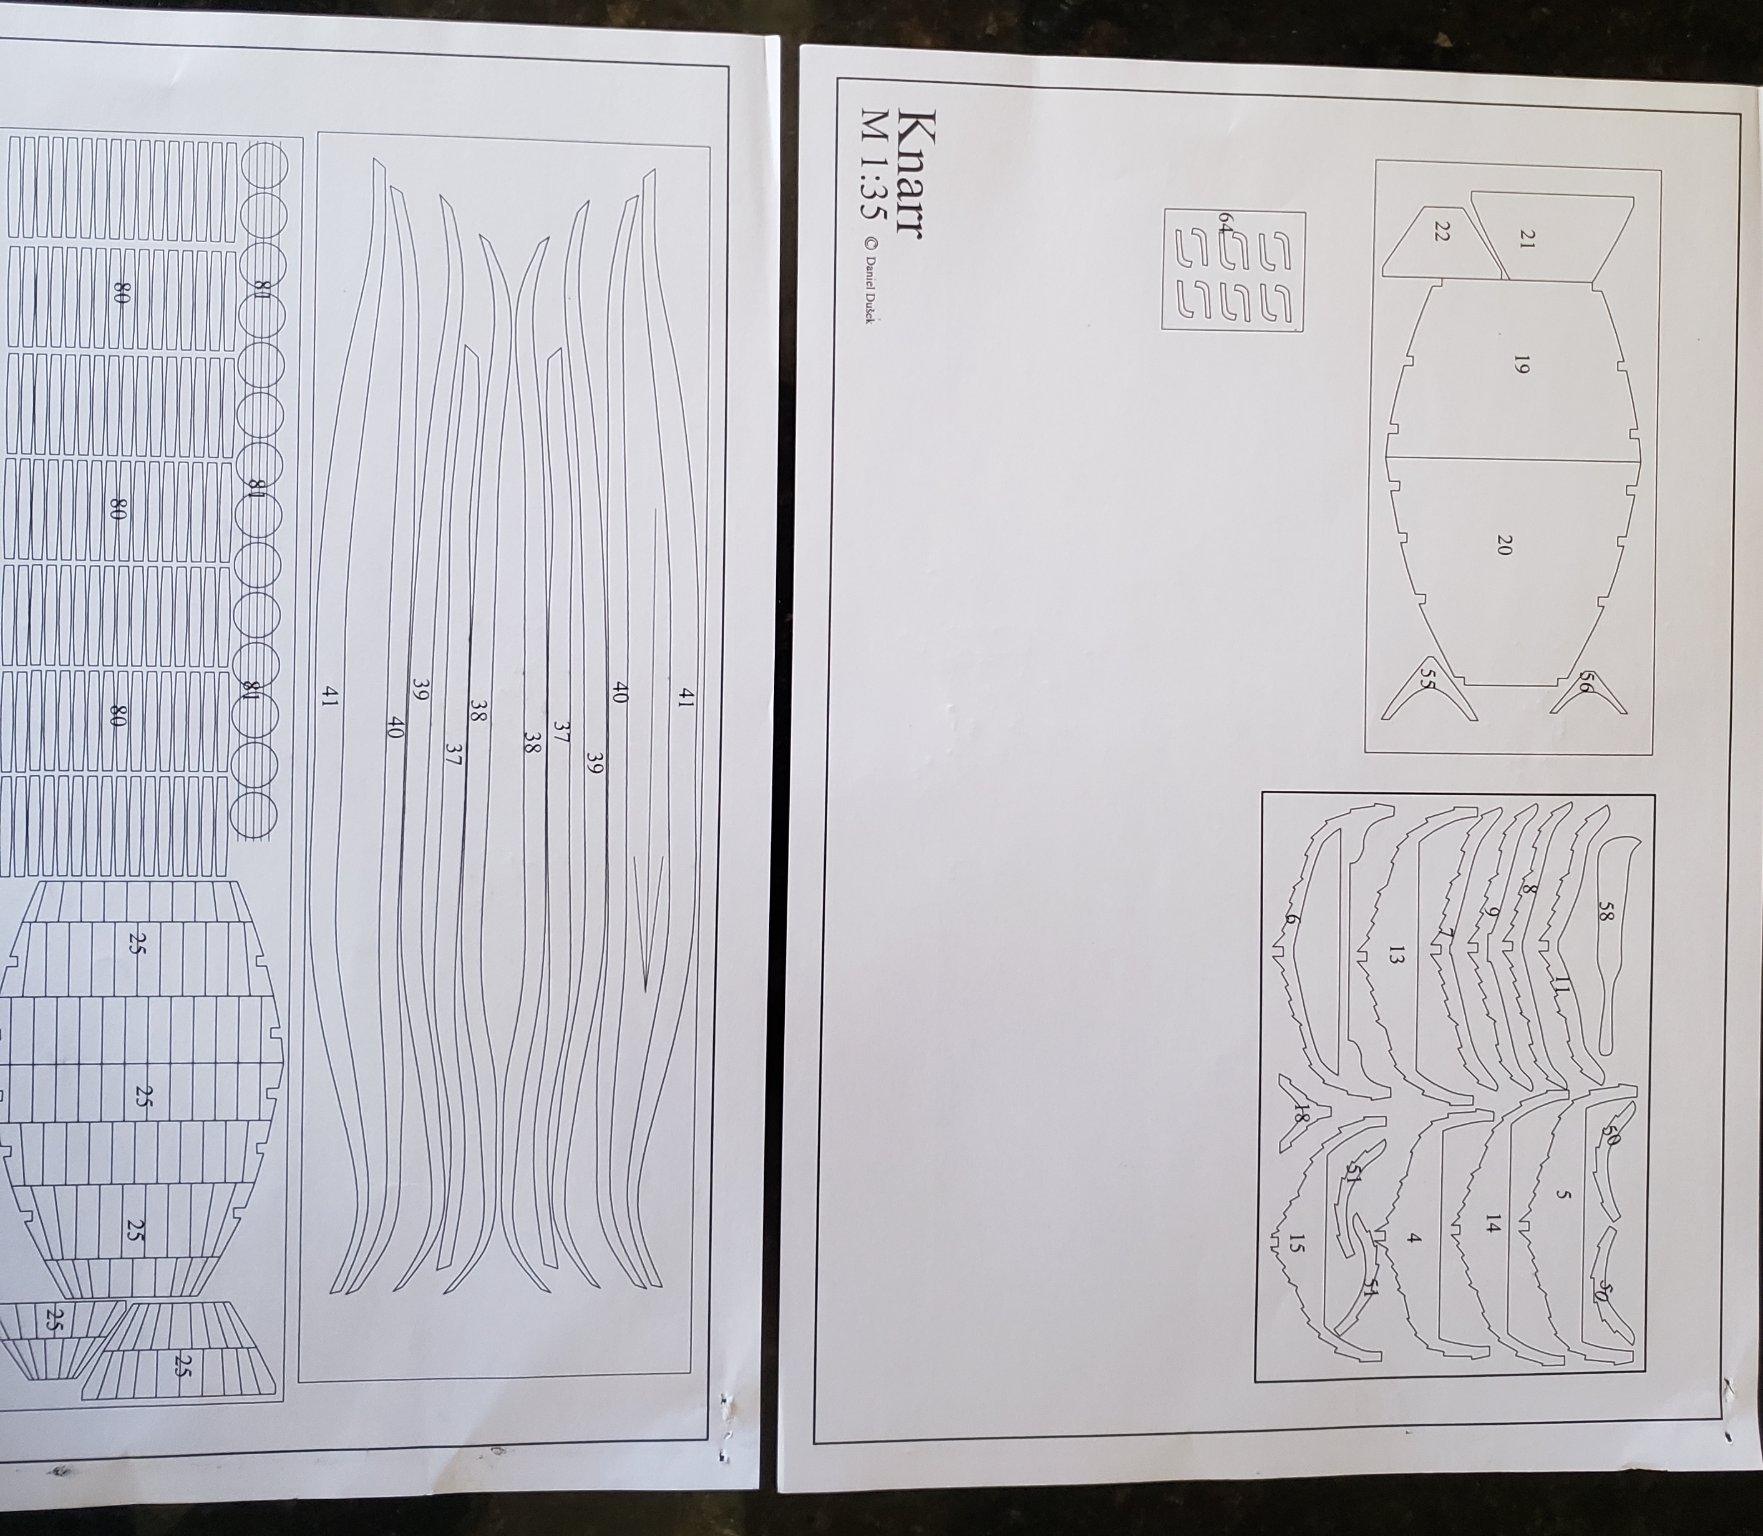
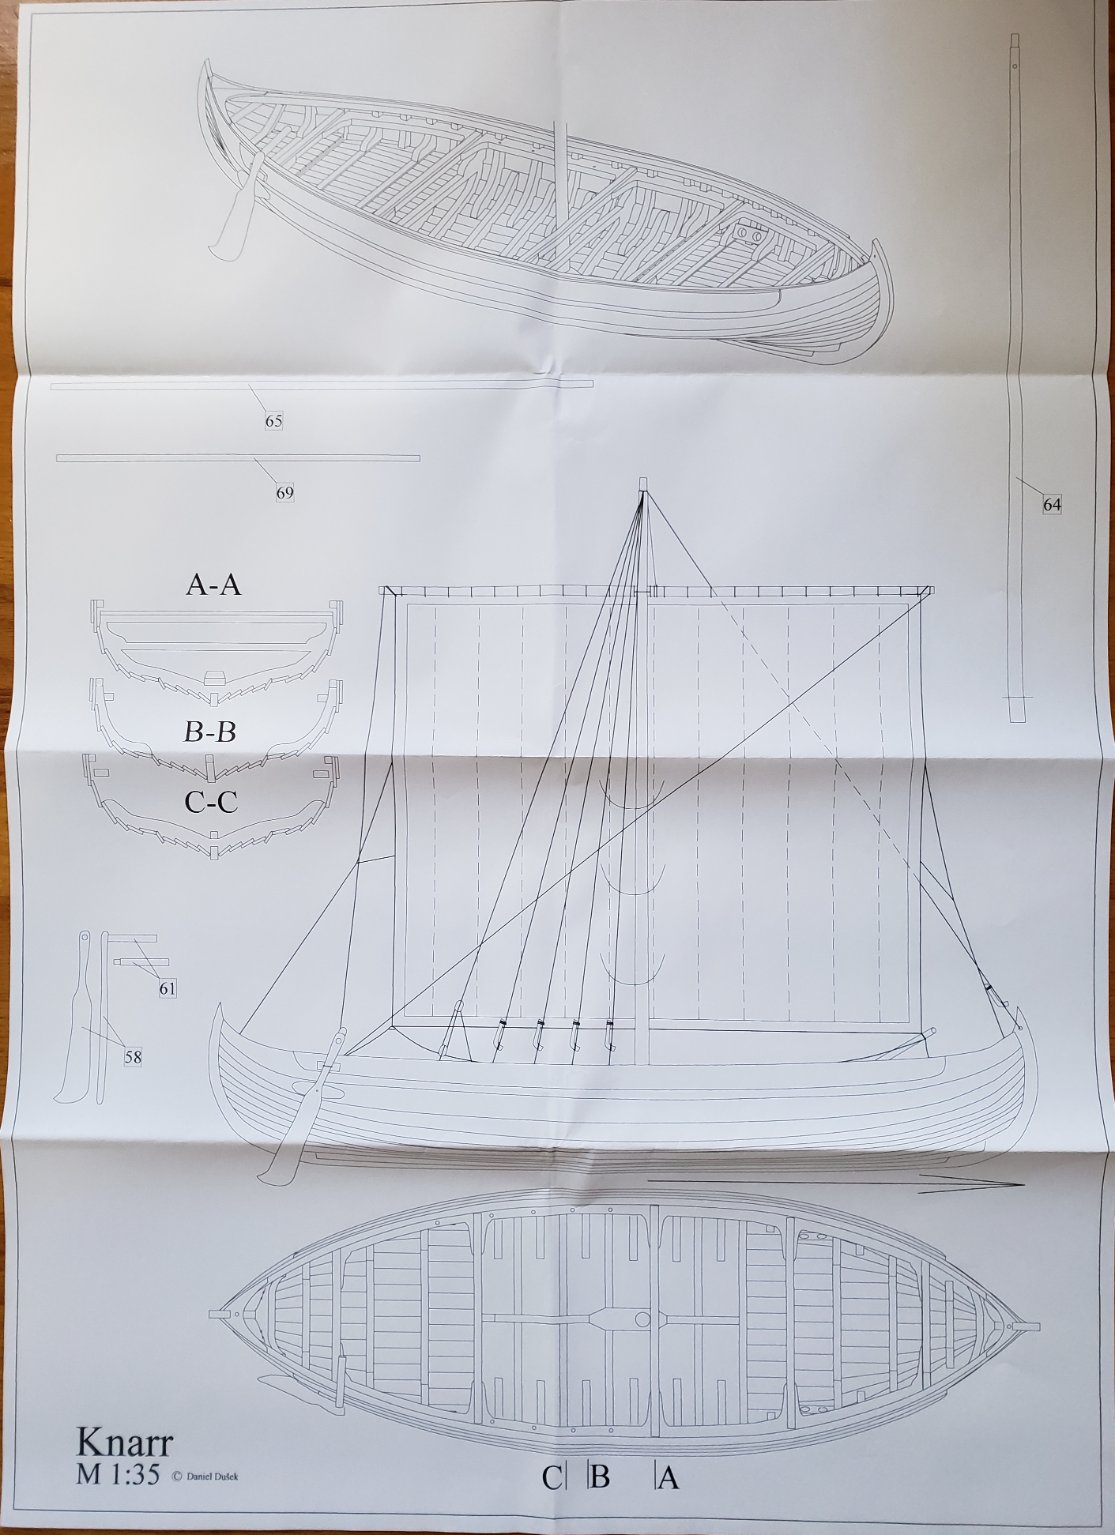
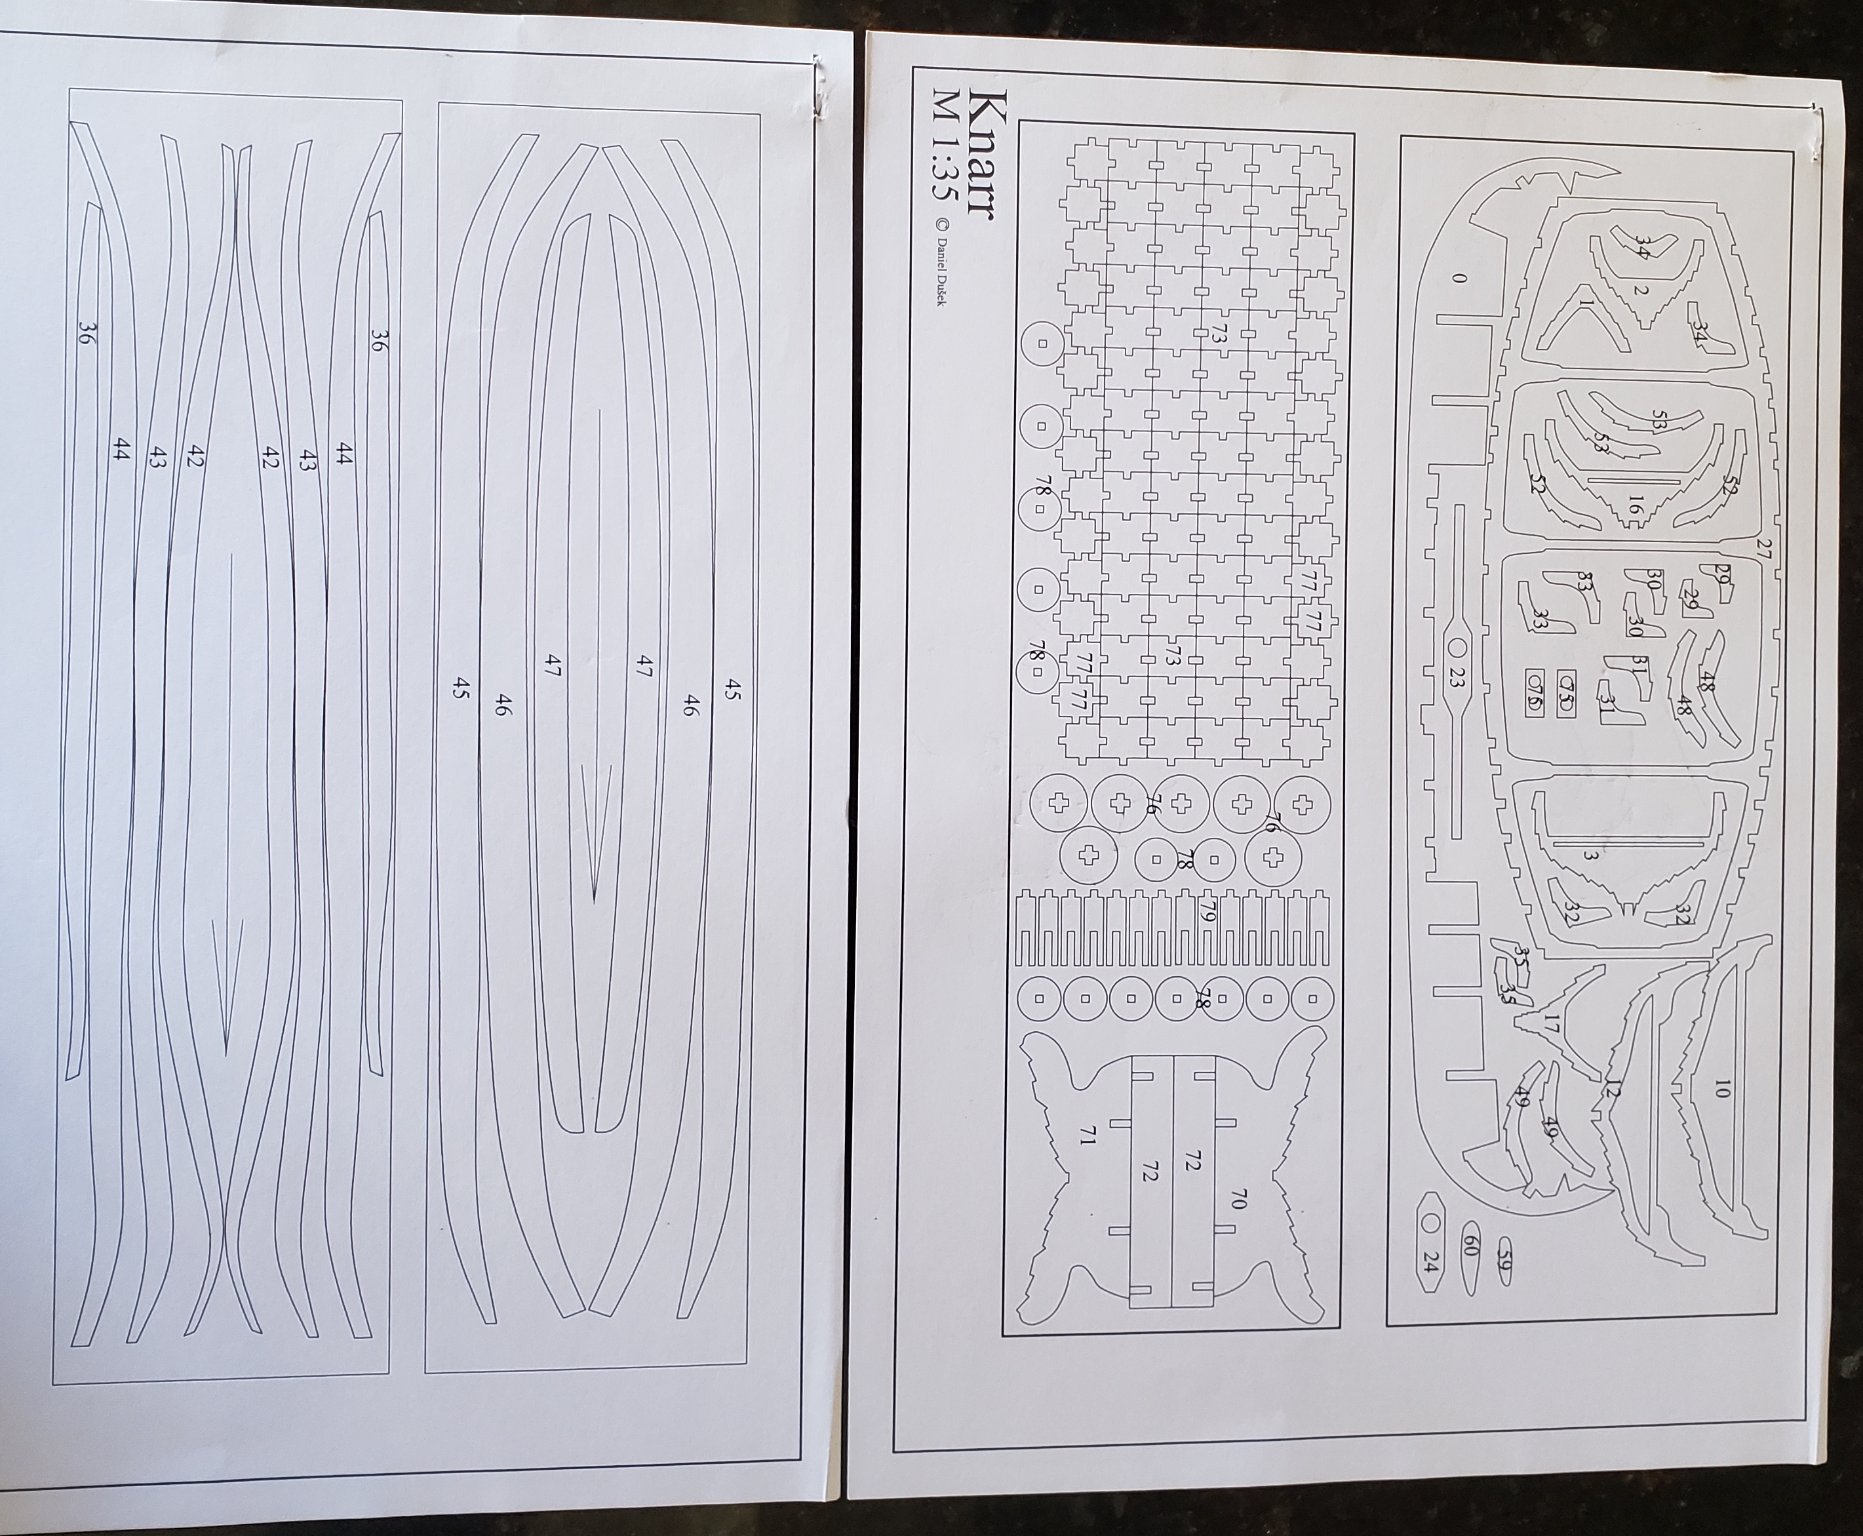
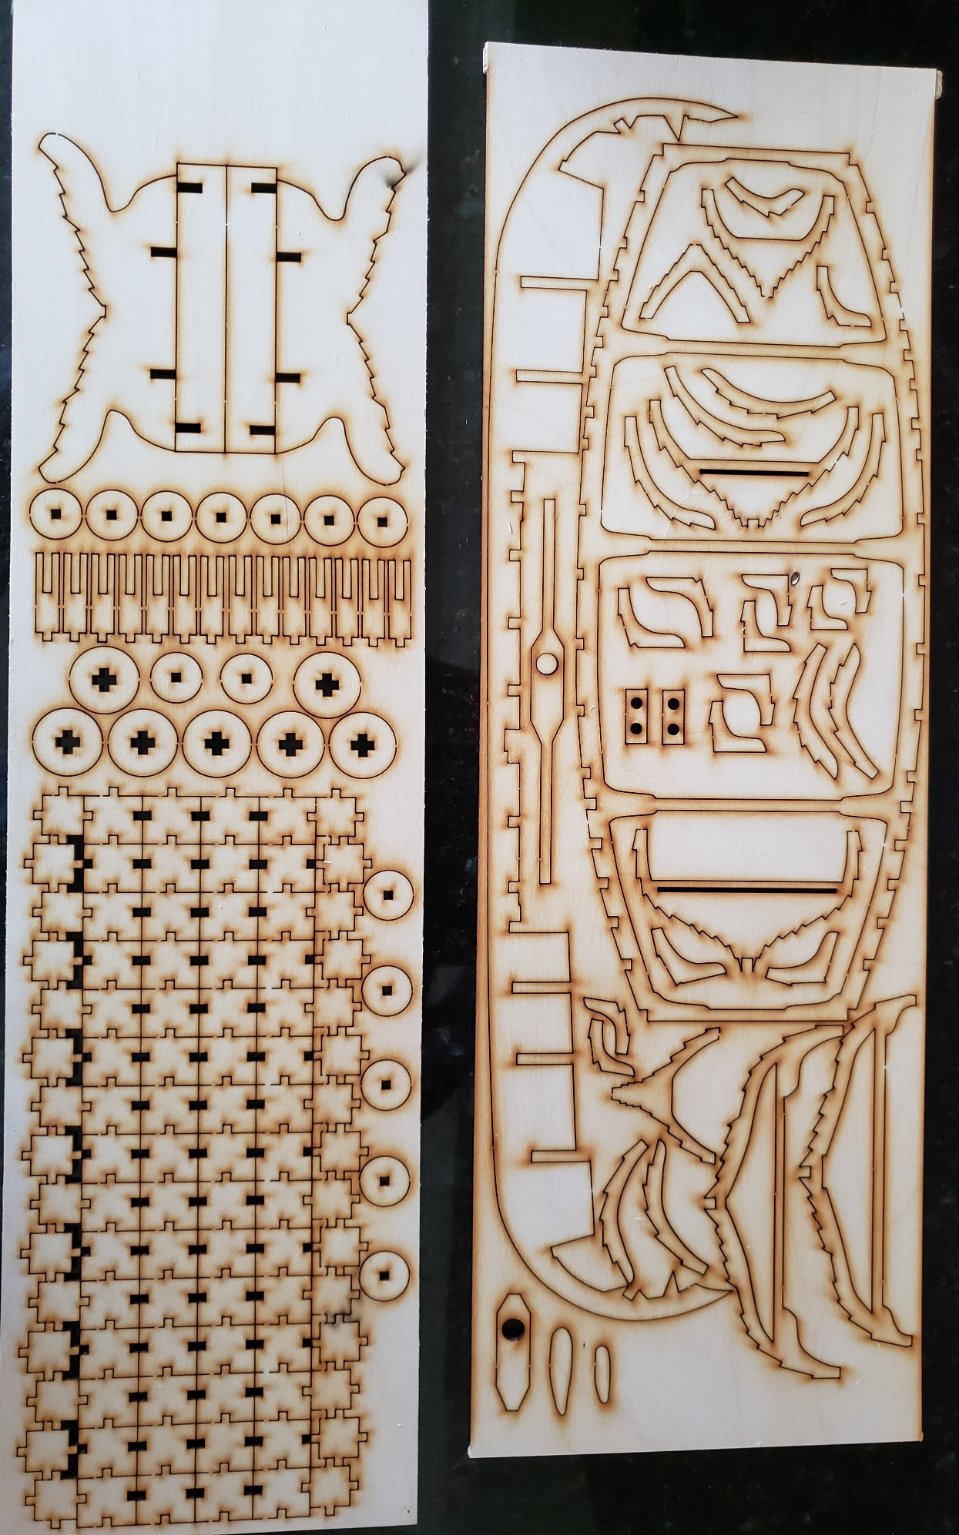
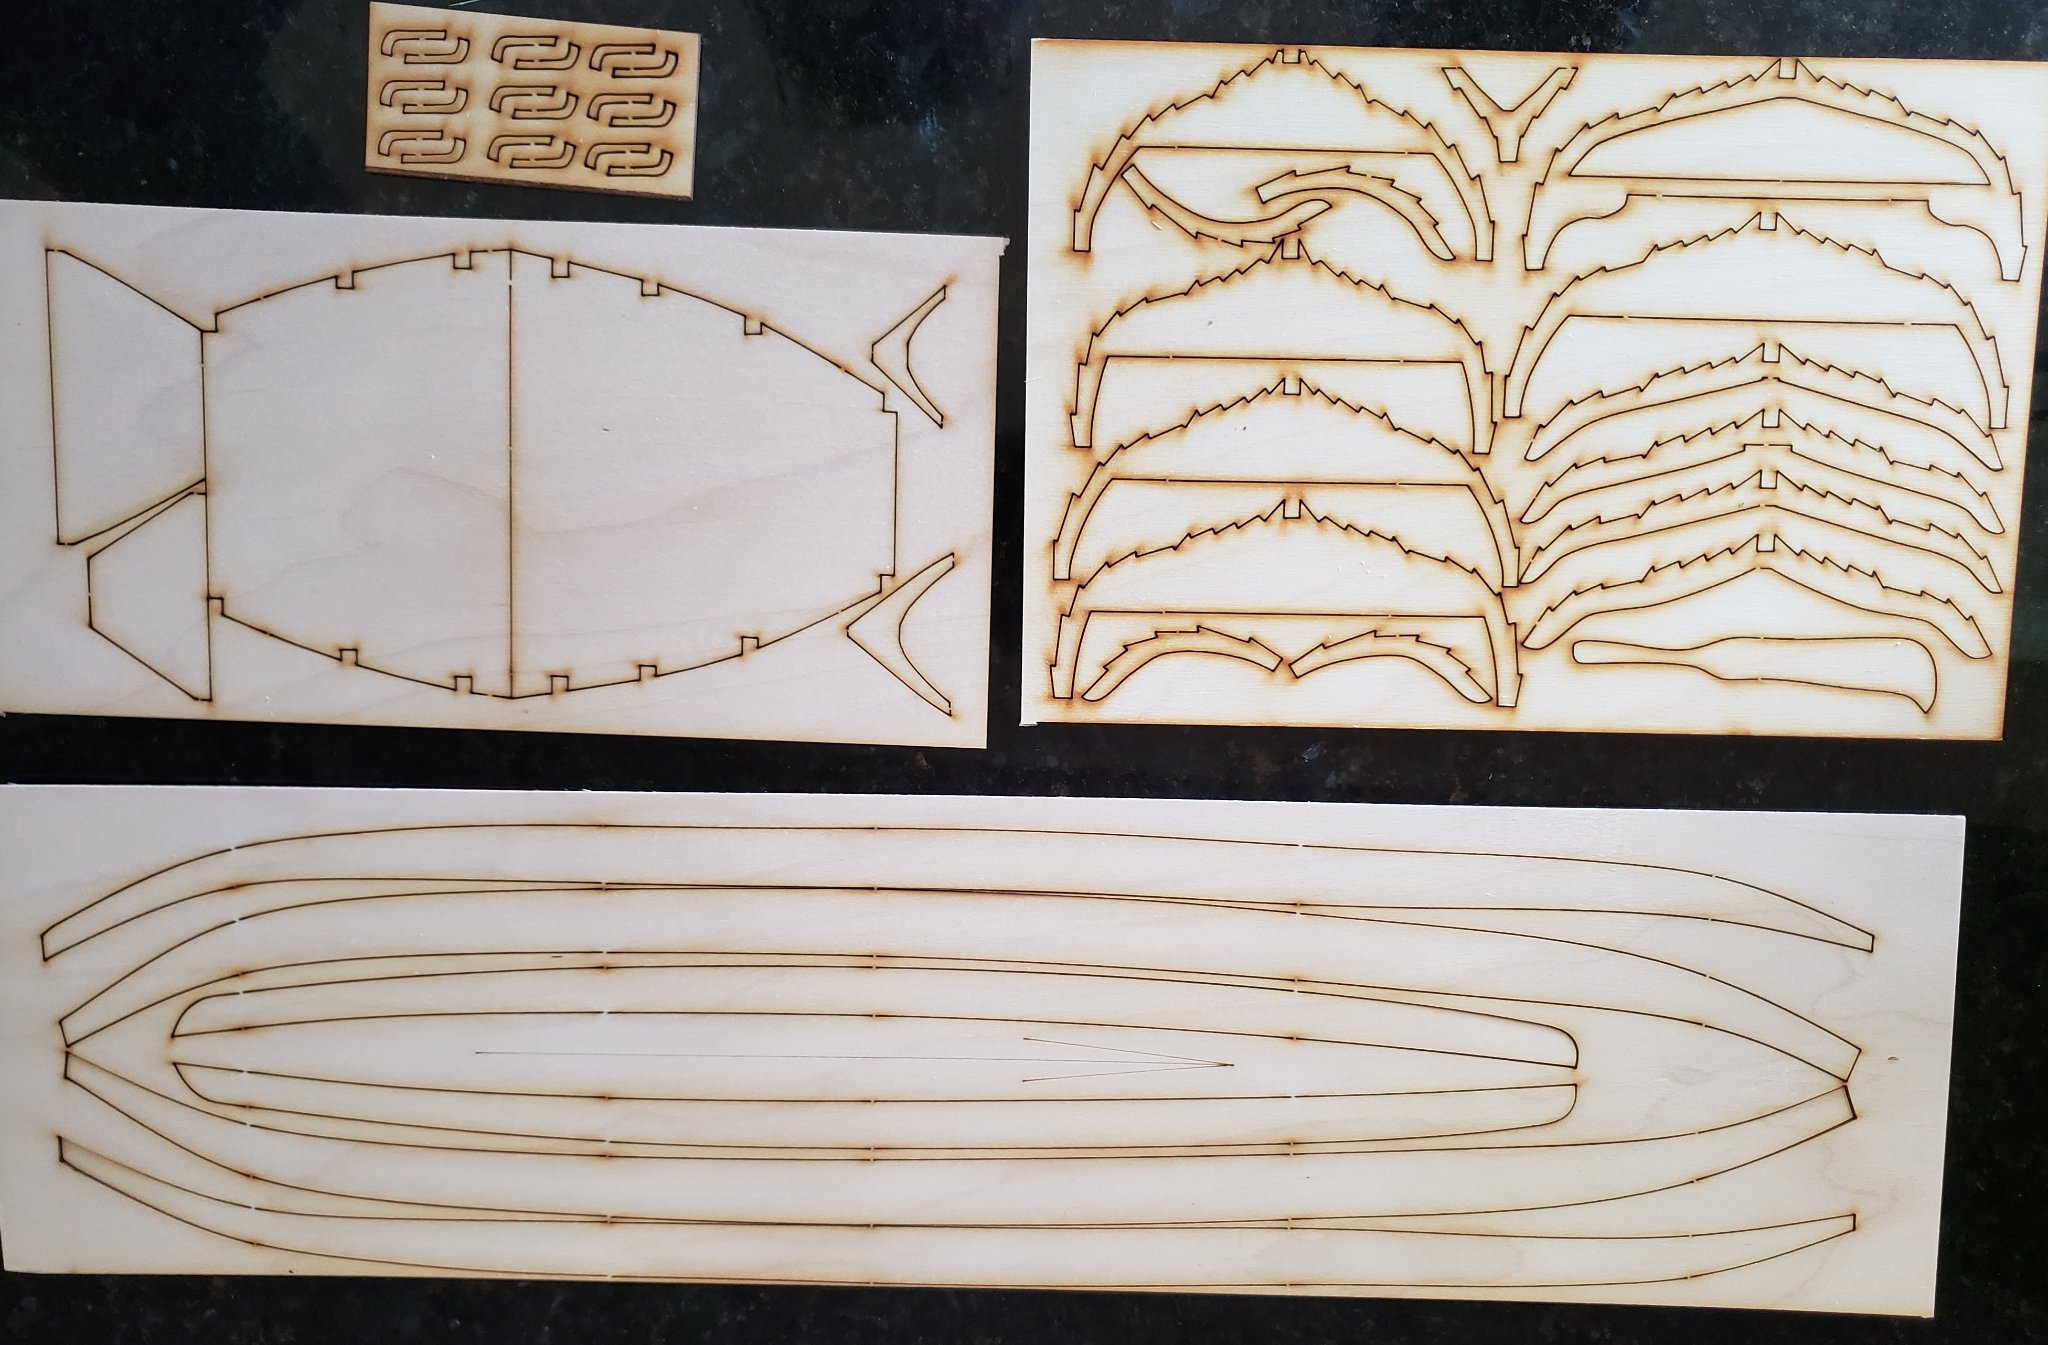
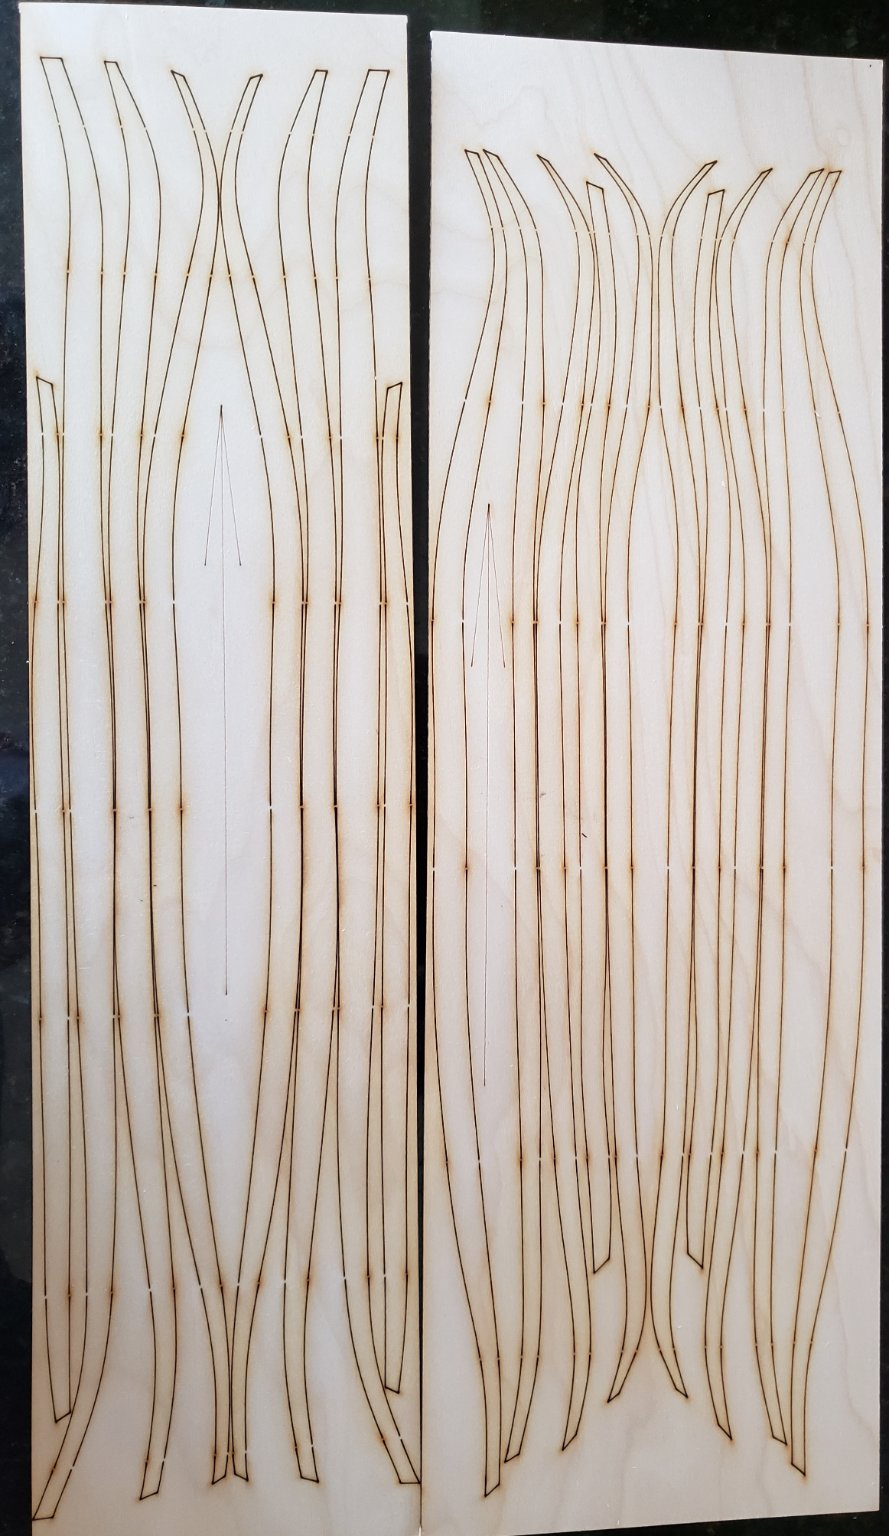
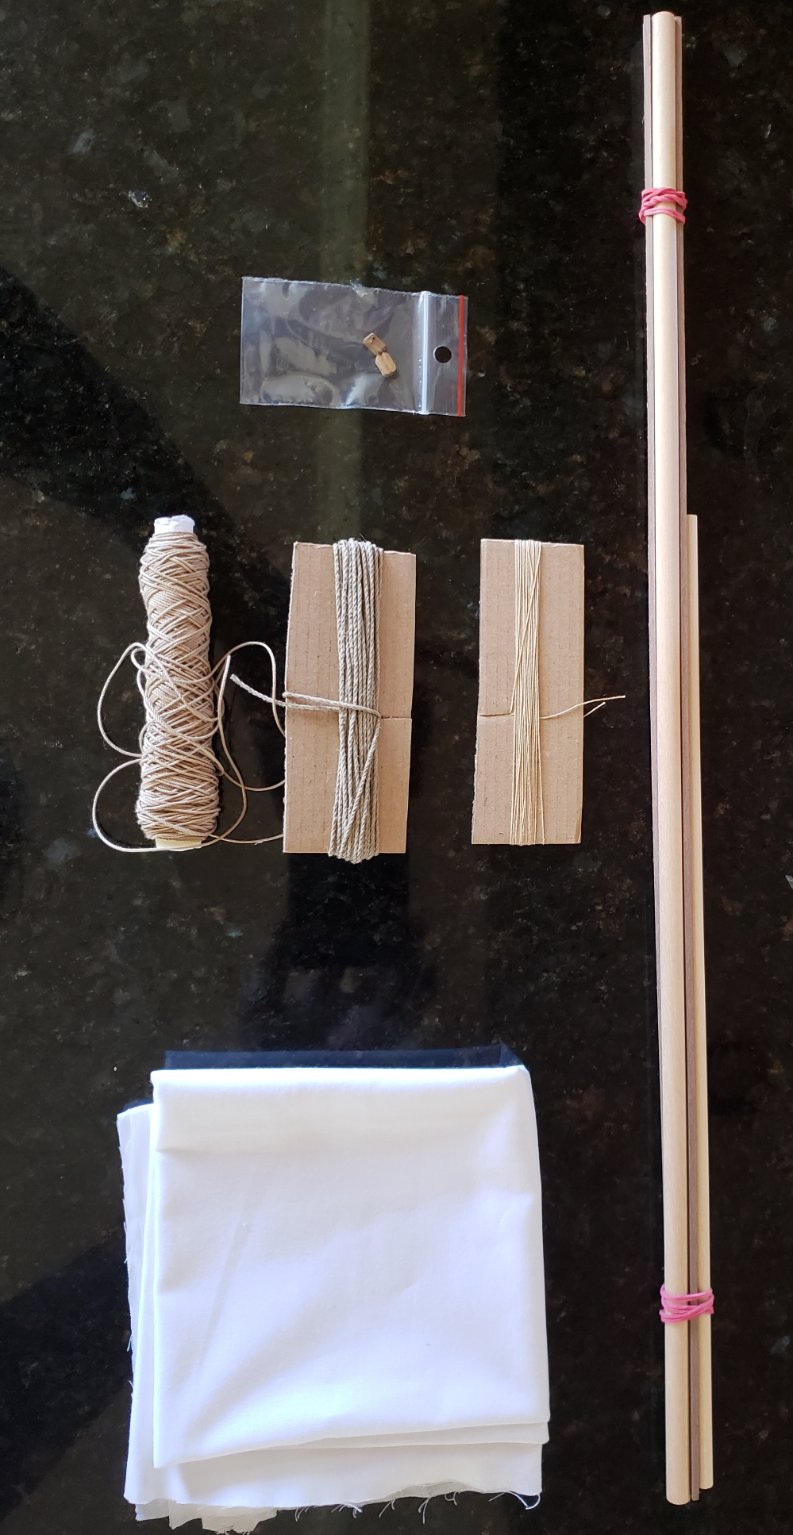
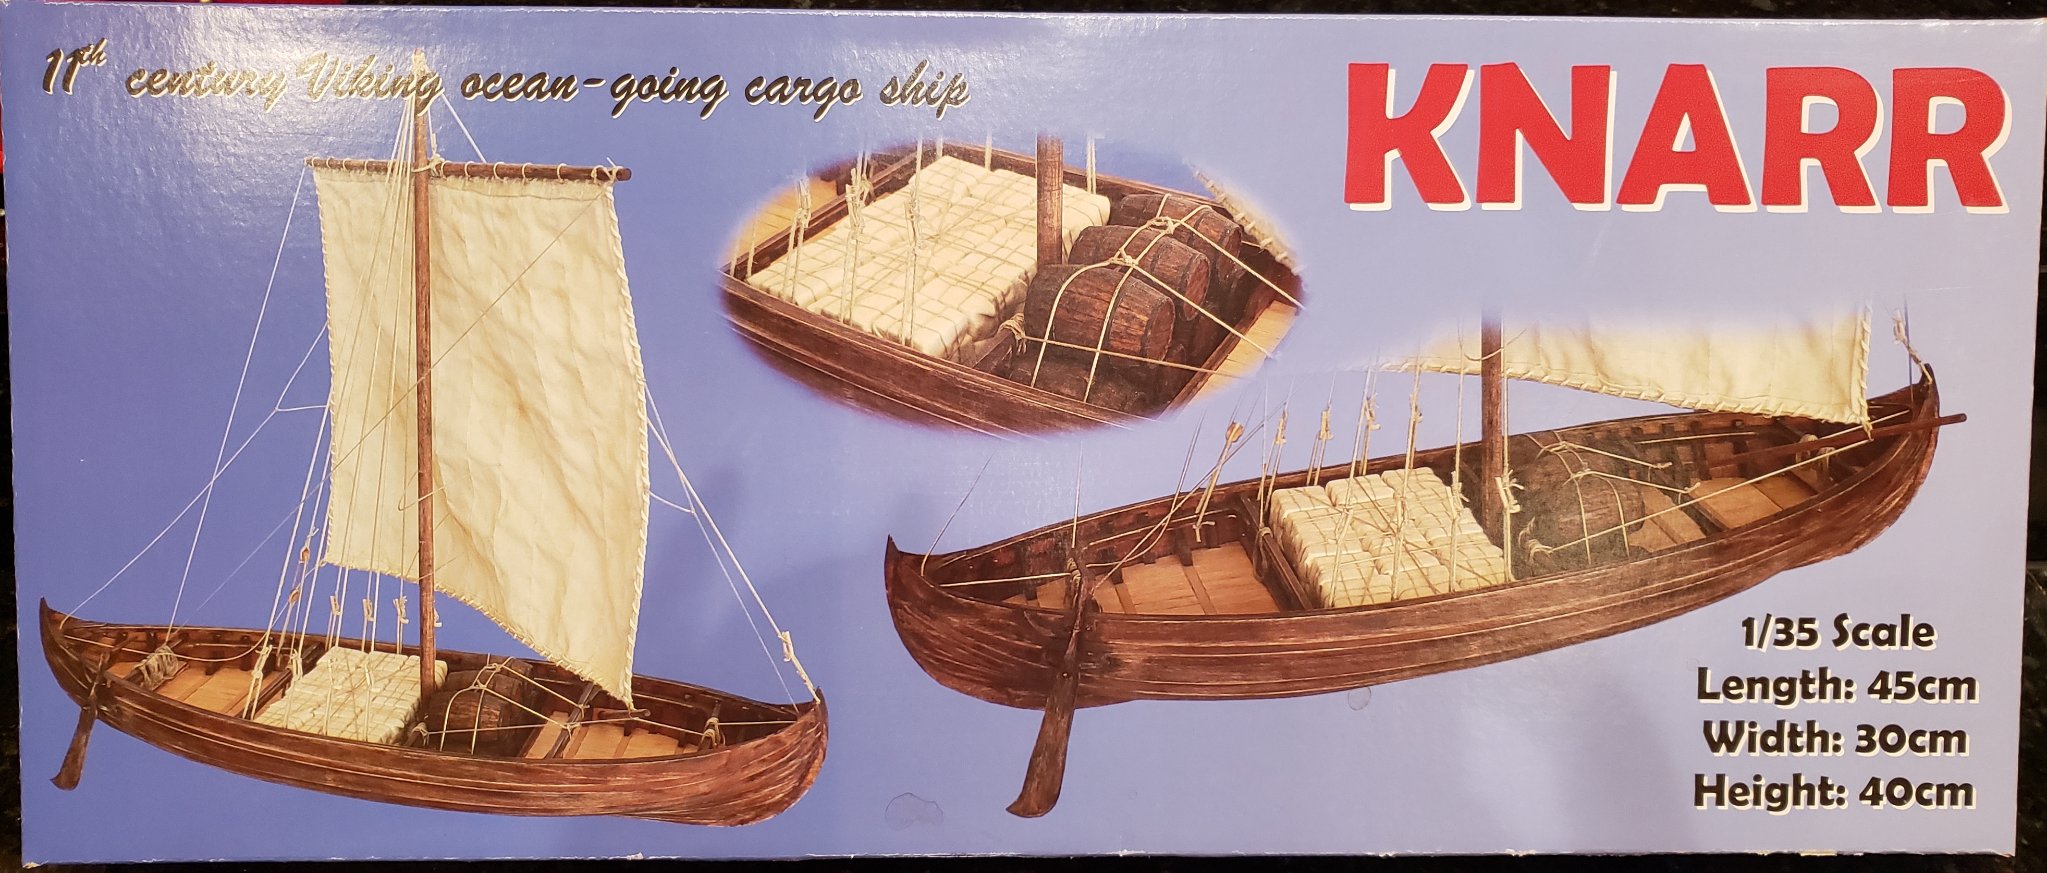
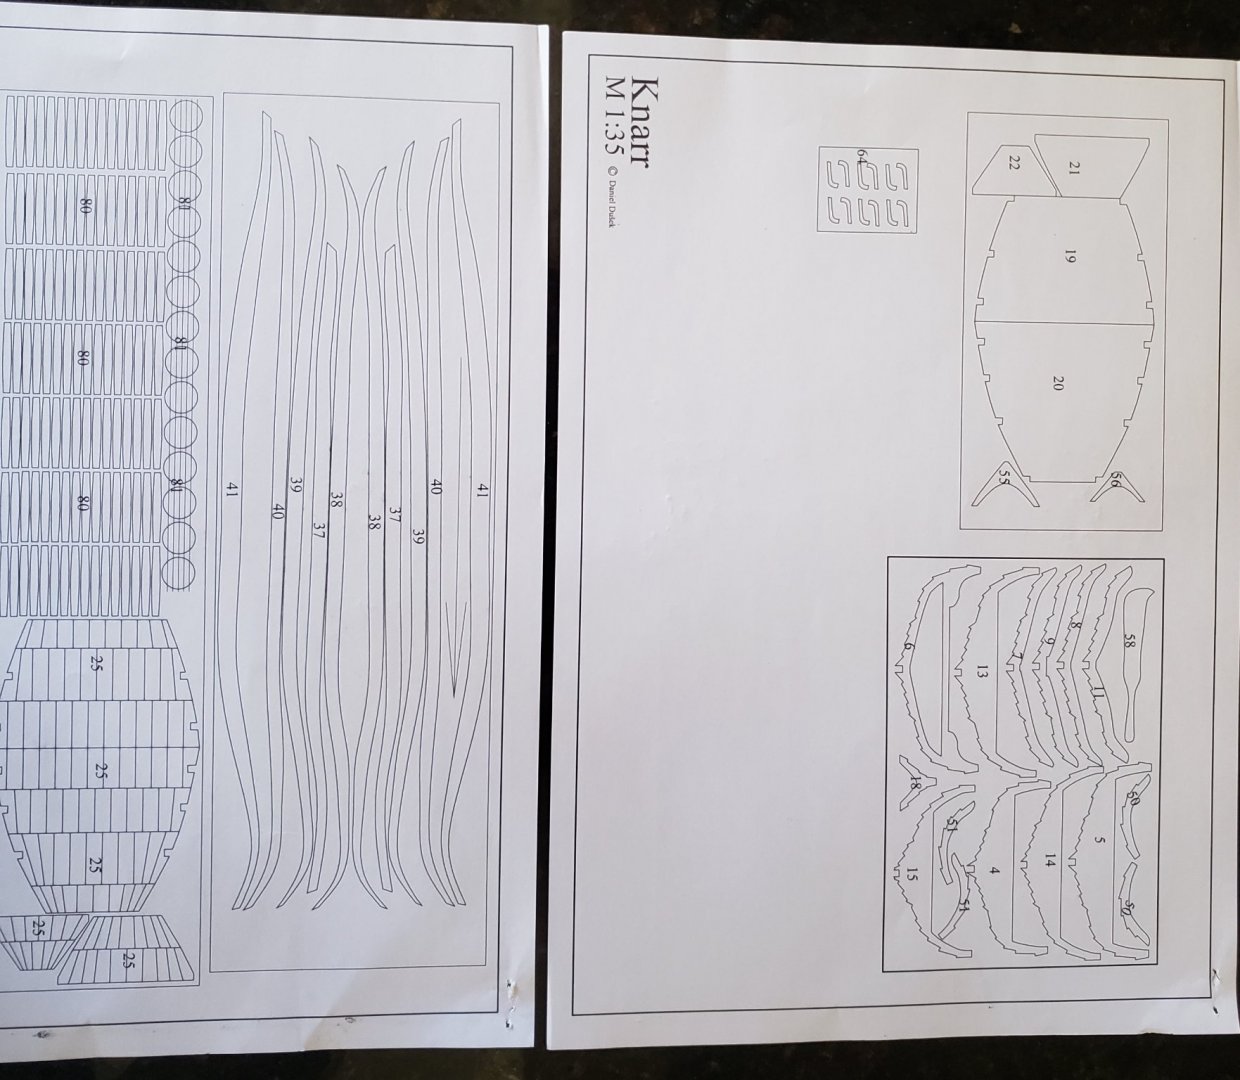
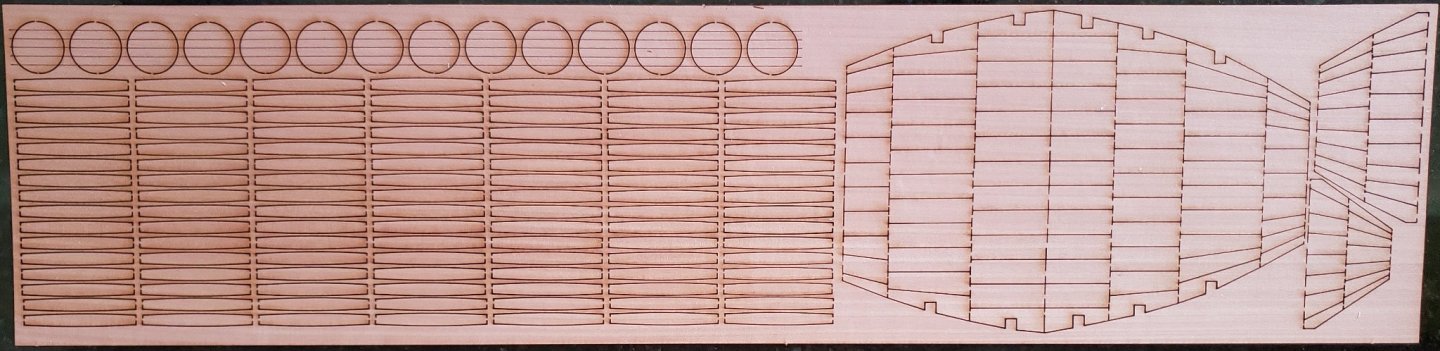
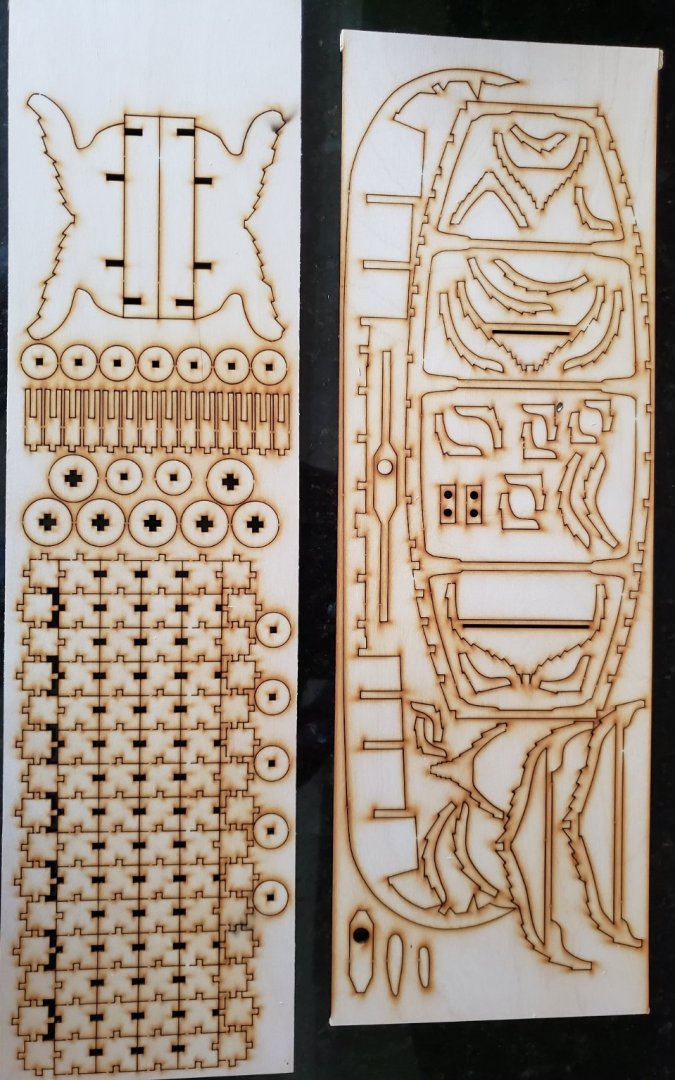
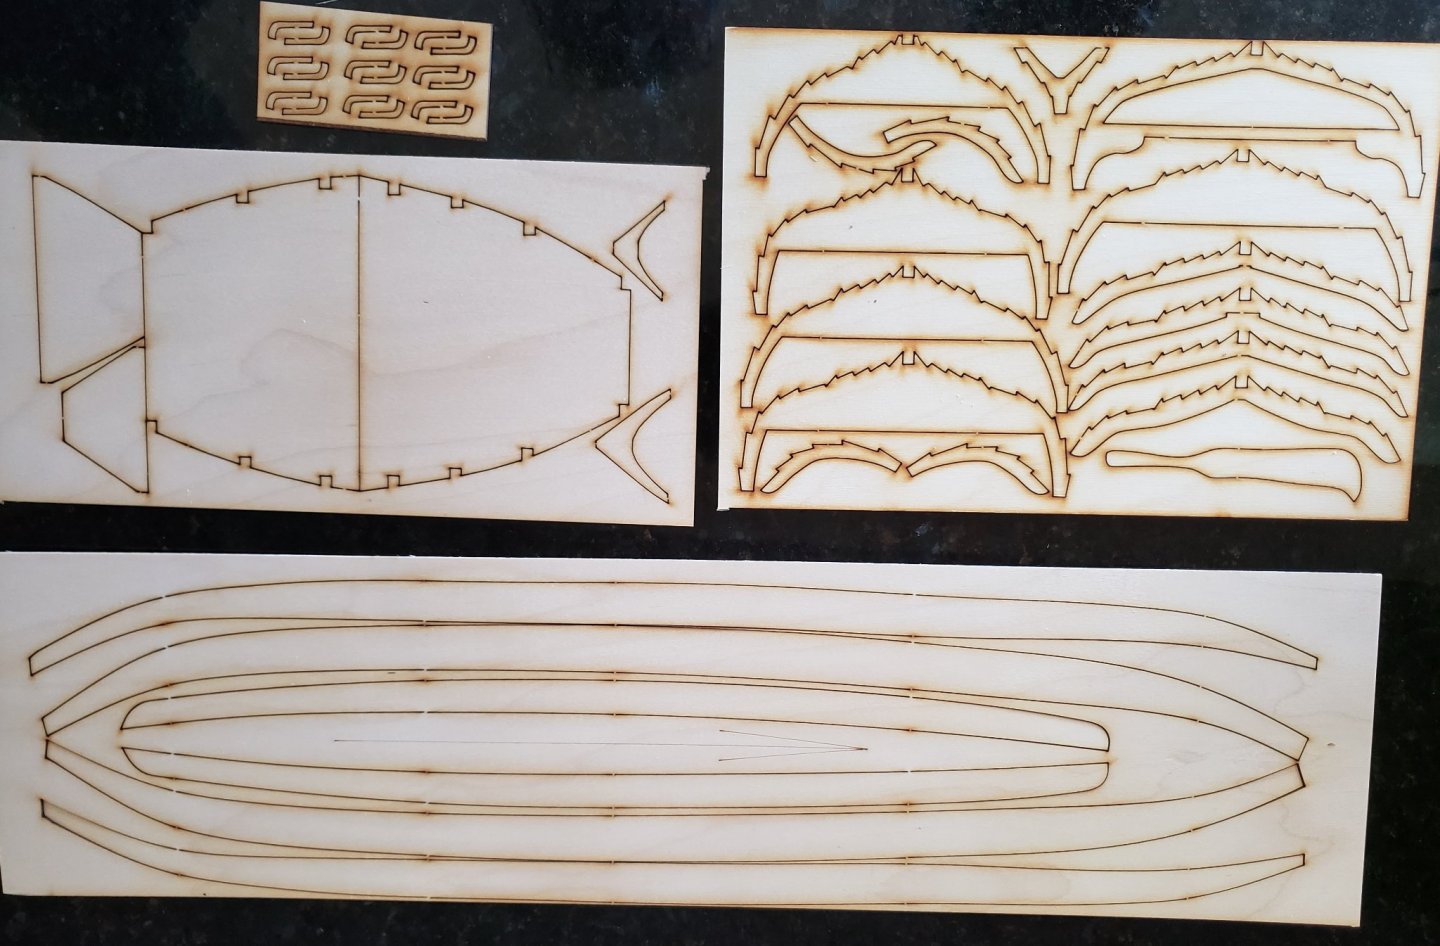
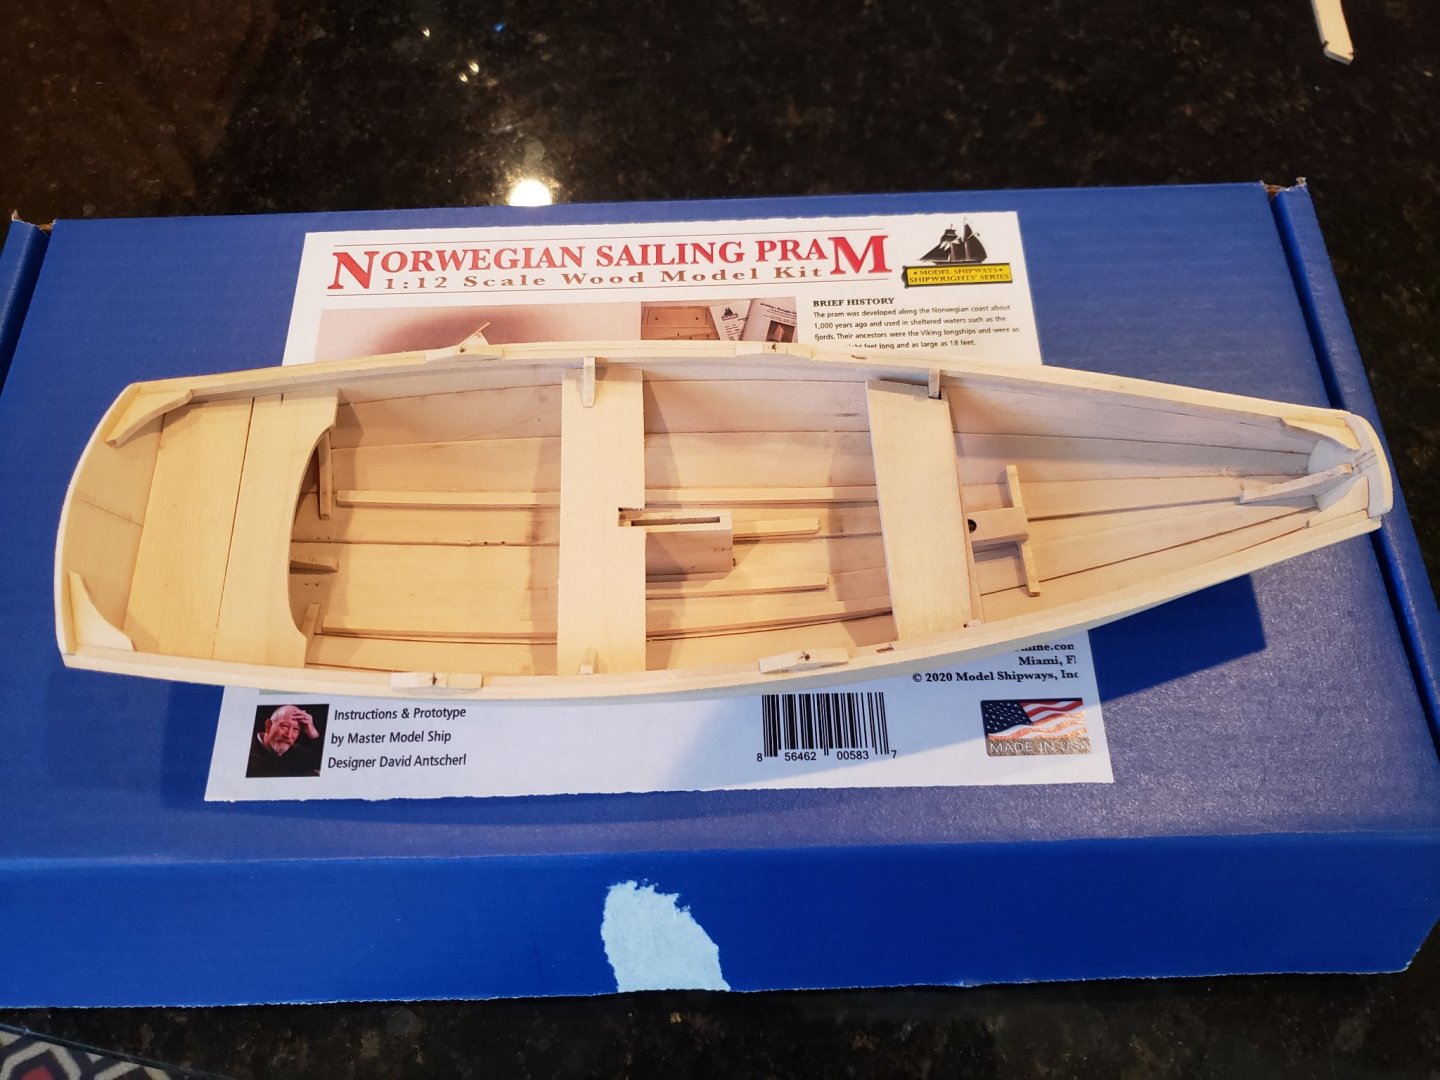
I am embarking on a build of this kit. I found a log for the 1:72nd scale version, but seemingly none exist for this scale. Here are the kit parts


- 48 replies
-
- 6
-
-
- dusek
- viking knarr
- (and 1 more)
-
While awaiting the arrival of additional brass nails from Amazon, I installed the traveler, using a block purchased from MS (1/4 in walnut). Also prepped are the mast stays and fittings installed on the mast. Pondering the next build as well, suggestions are welcomed.
-
Looking good @SkiBee. This kit definitely more complex than the Pram.
-
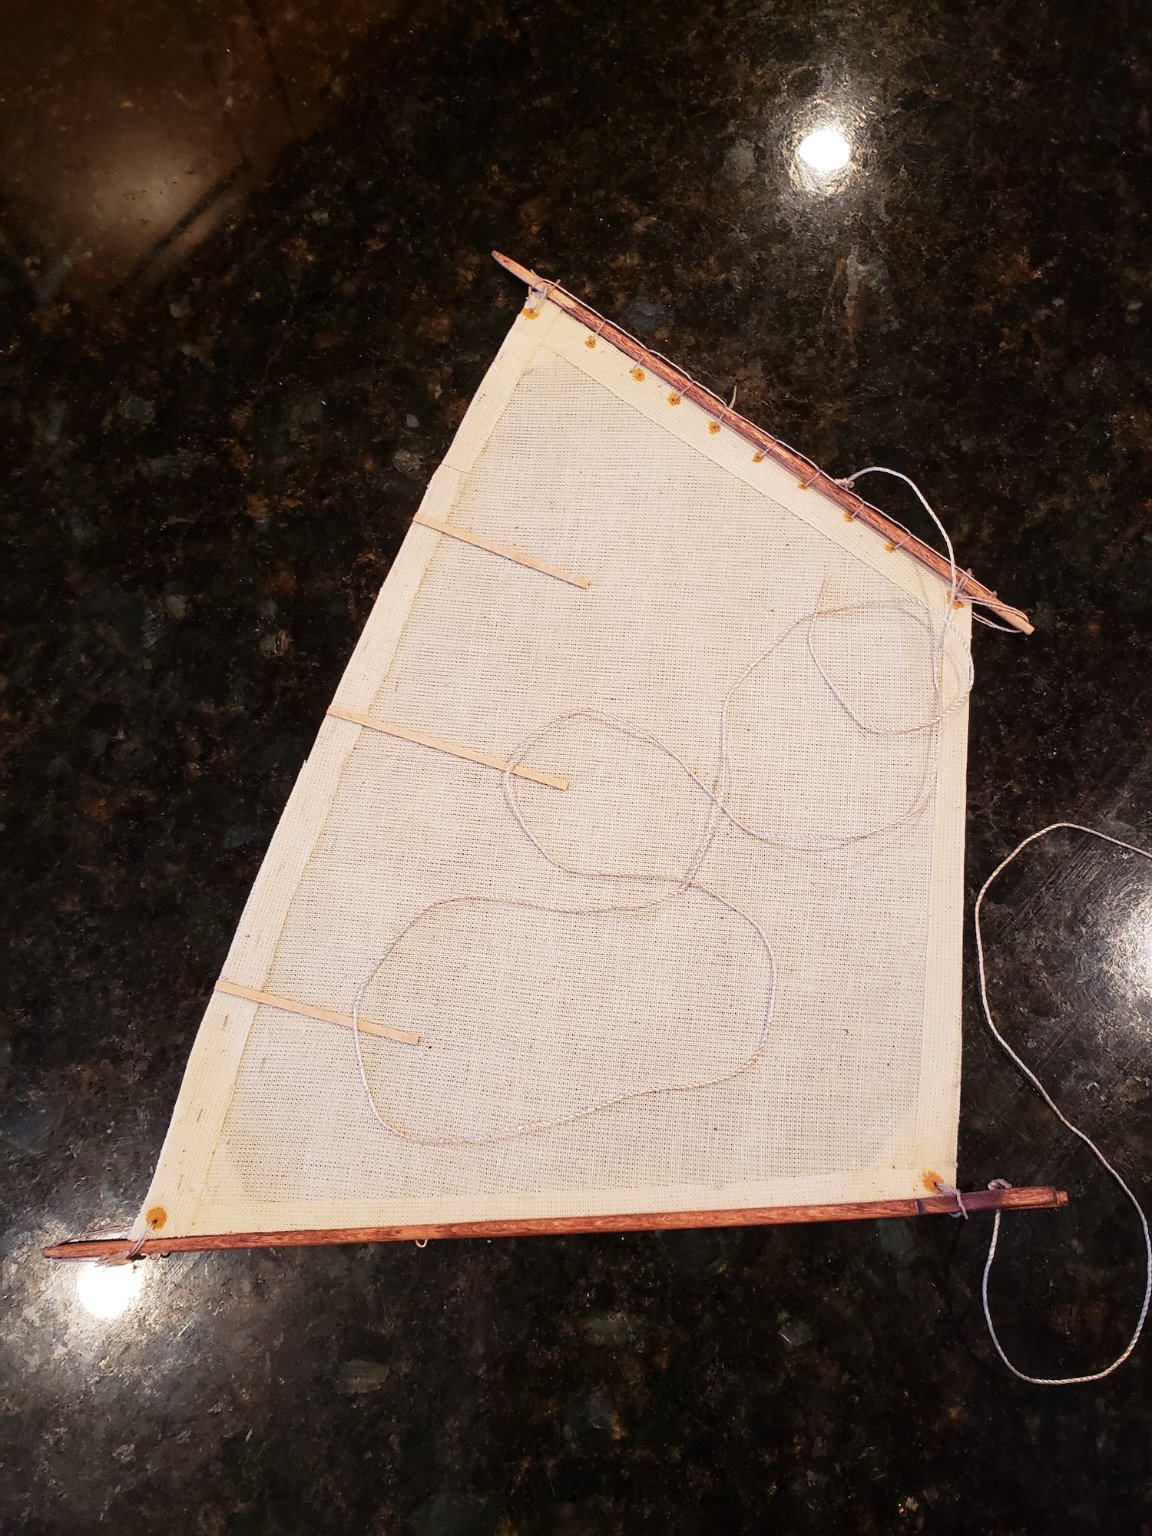
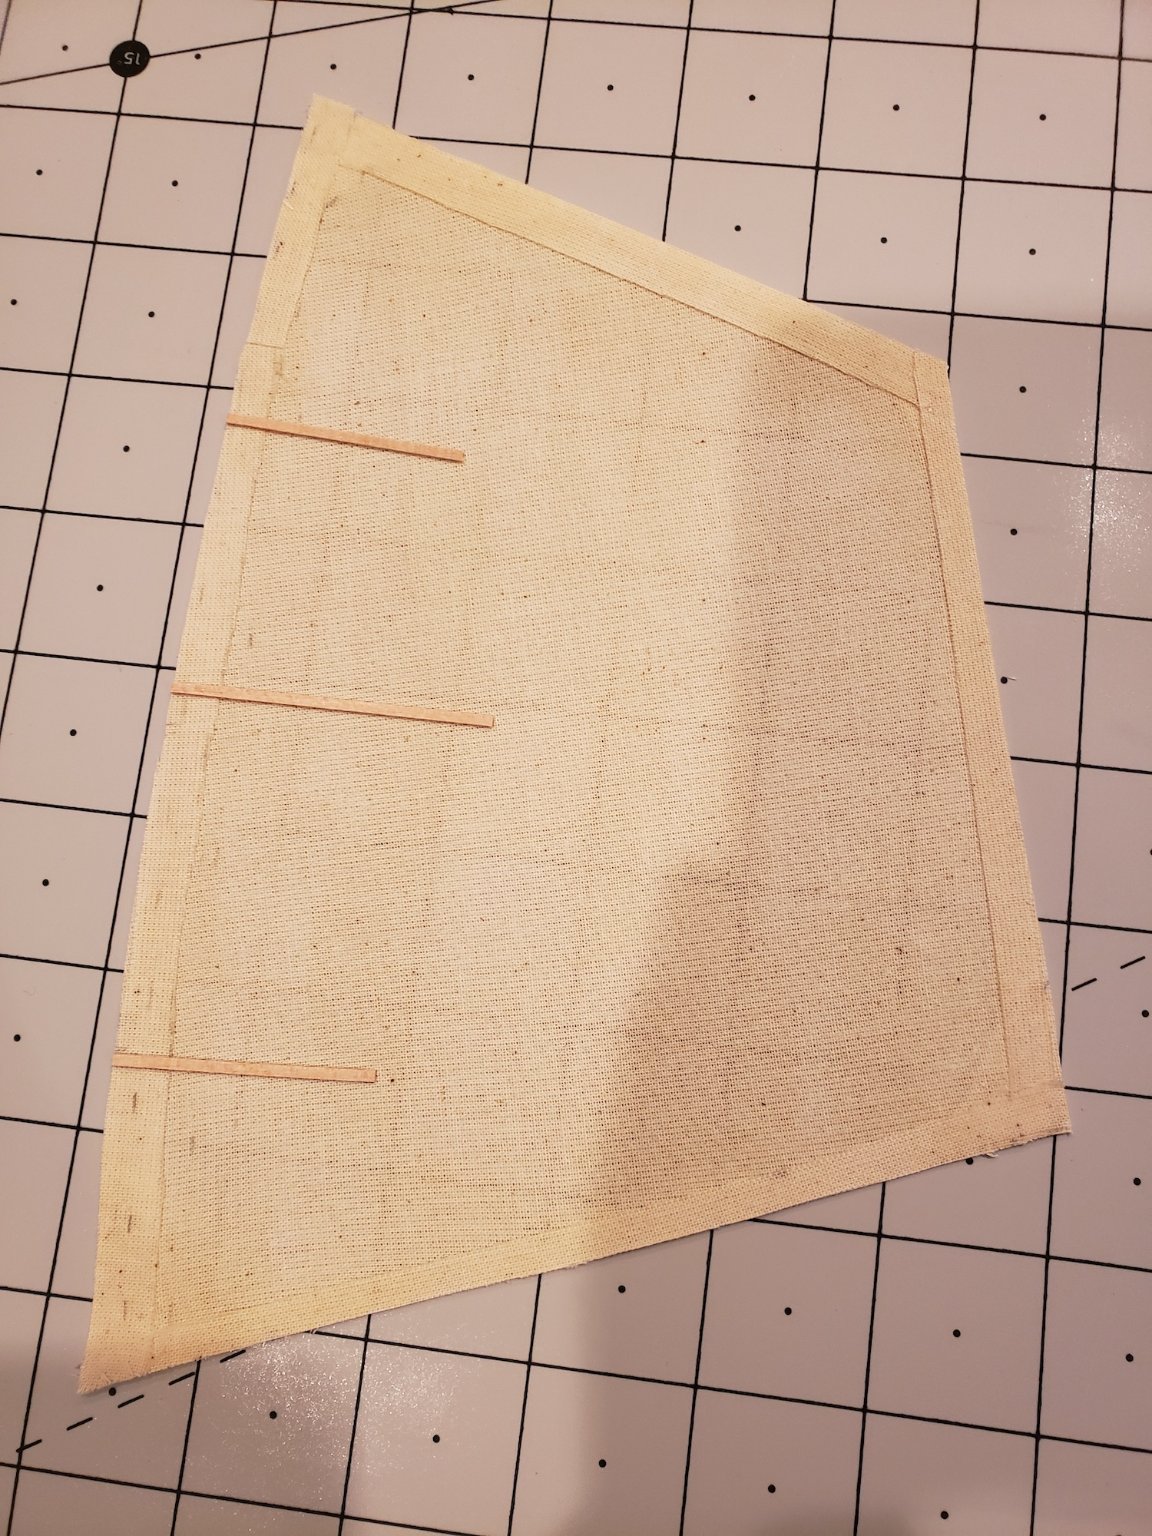
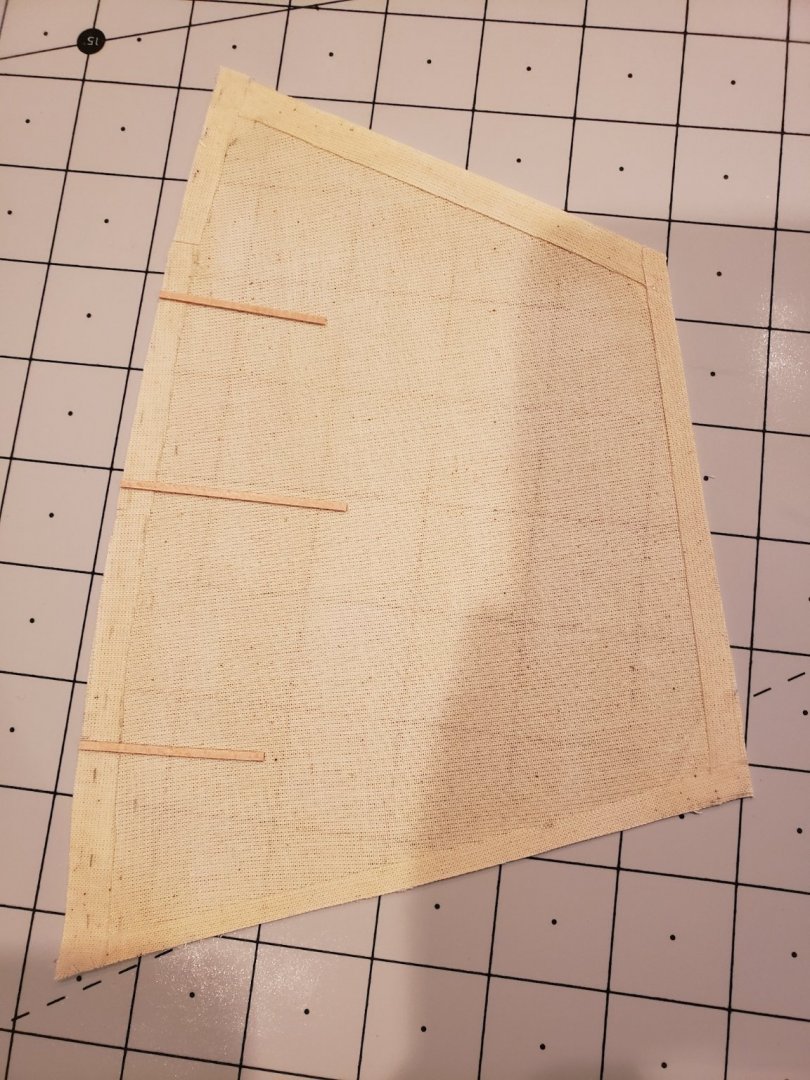
Sail construction today, waiting for complete drying to make holes and begin lashing. Somehow, I lost the leech strip I had fabricated and had to make do with remnants. The kit did not include much spare sail material. The yellowish tinge is a result of the glue wash.
- 43 replies
-
- 4
-
-
- Norwegian Sailing Pram
- Model Shipways
- (and 1 more)
-
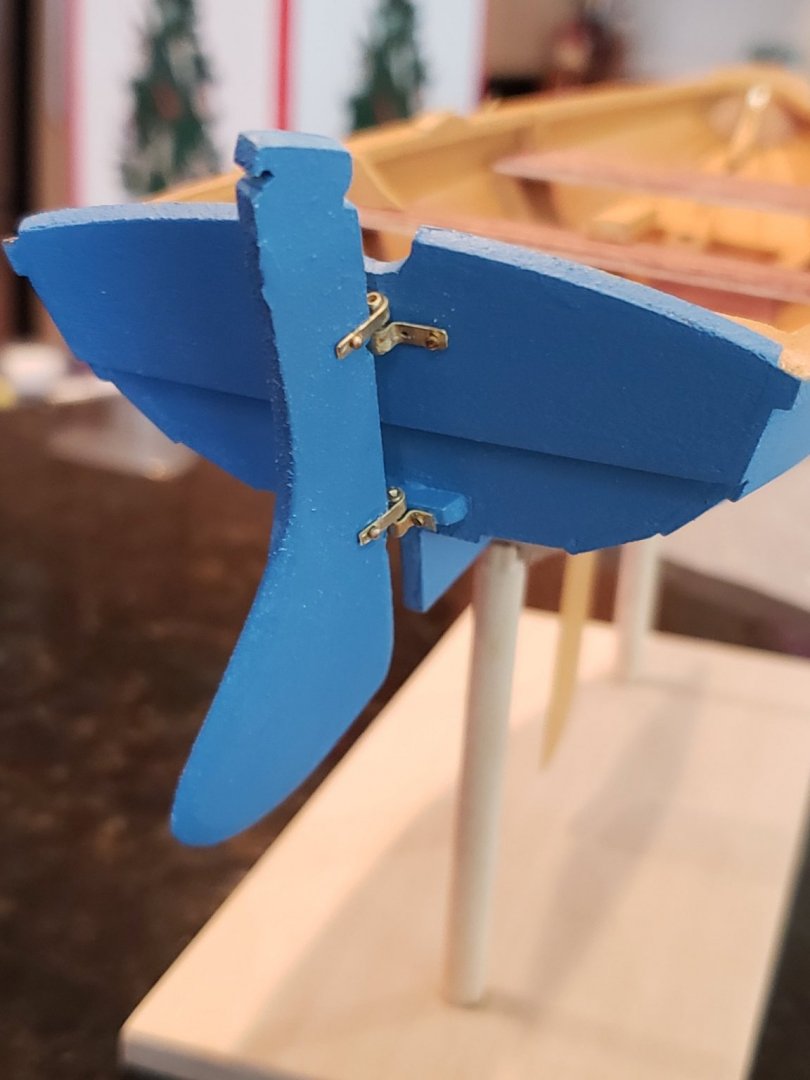
Thanks @Matt D. @SkiBee, did you paint the stay clips and oarlocks brass or gold ? Based on your comments, I fabricated new, and longer, pintle straps using the PE frame, which look and worked better than the kit supplied parts, IMHO. Rudder is hung; it needs a bit of touch-up, but not today. The kit supplied 18 brass nails (WP0993) ,but the kit requires 22 🙄. 8 for oarlock pads, 2 for back stays, 4 for rudder pintles, 6 for rudder gudgeons, 2 for mast top backstays. (The parts list says 16 are needed). I left off the two inboards on the top gudgeon, and I think I will just ignore the holes. It's not worth the effort for 2 of these tiny parts. However, the mast is another matter, so I guess it's back to MS customer support.
- 43 replies
-
- 2
-
-
- Norwegian Sailing Pram
- Model Shipways
- (and 1 more)
-
Added Stay Plates and Oarlock Pads The Everton FC resemblance is purely coincidental. 😀


- 43 replies
-
- 4
-
-
- Norwegian Sailing Pram
- Model Shipways
- (and 1 more)
-
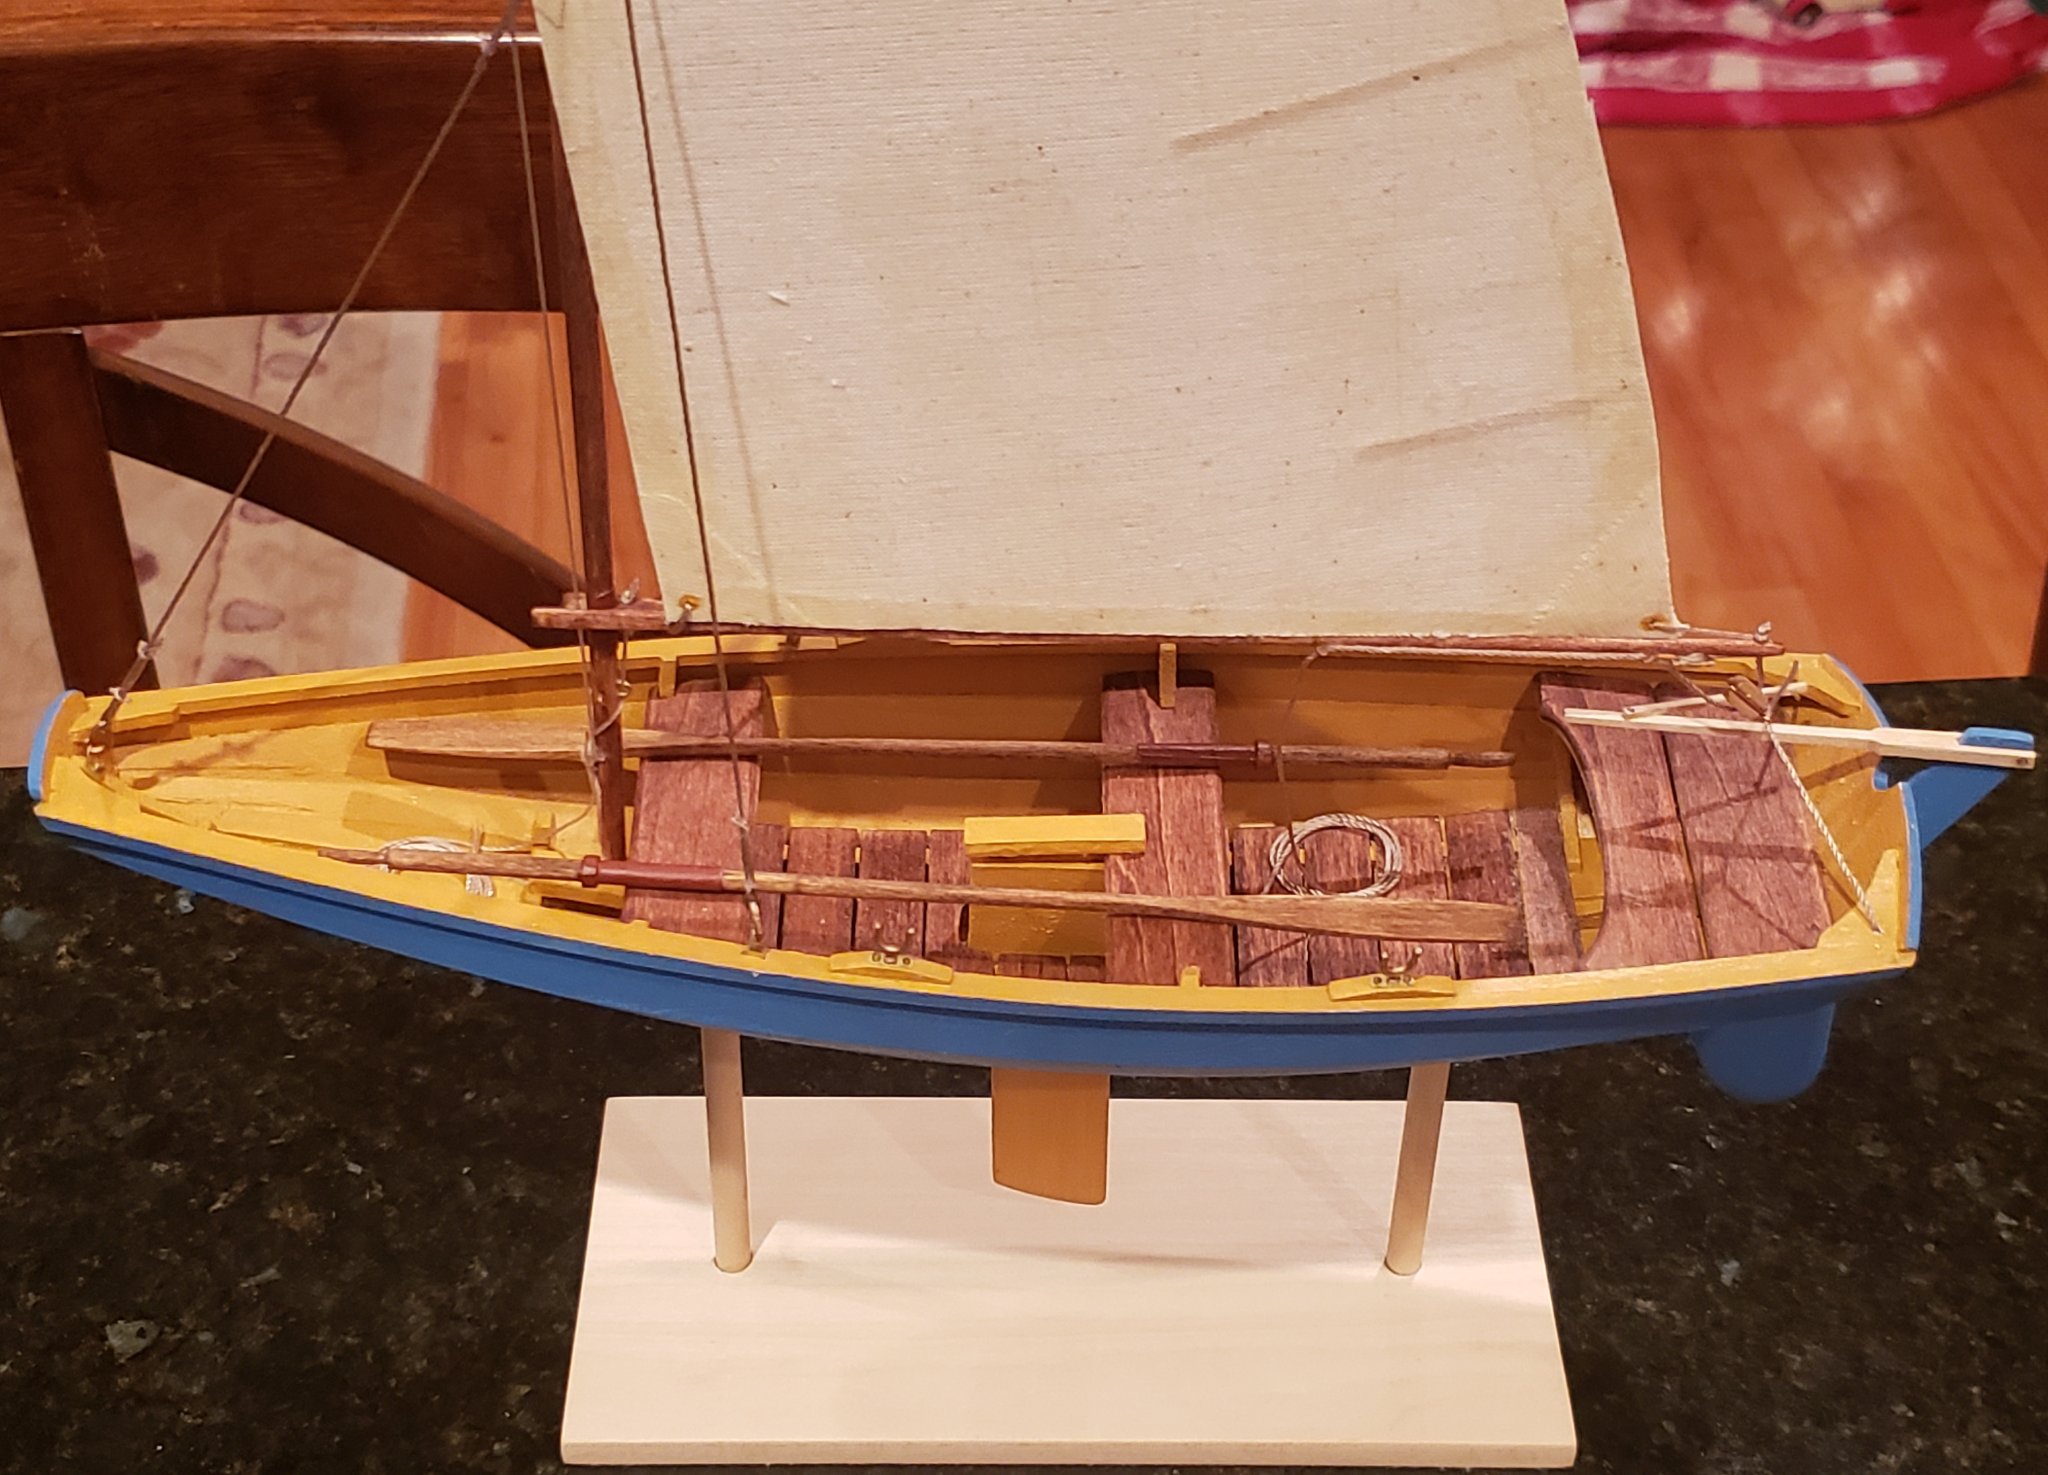
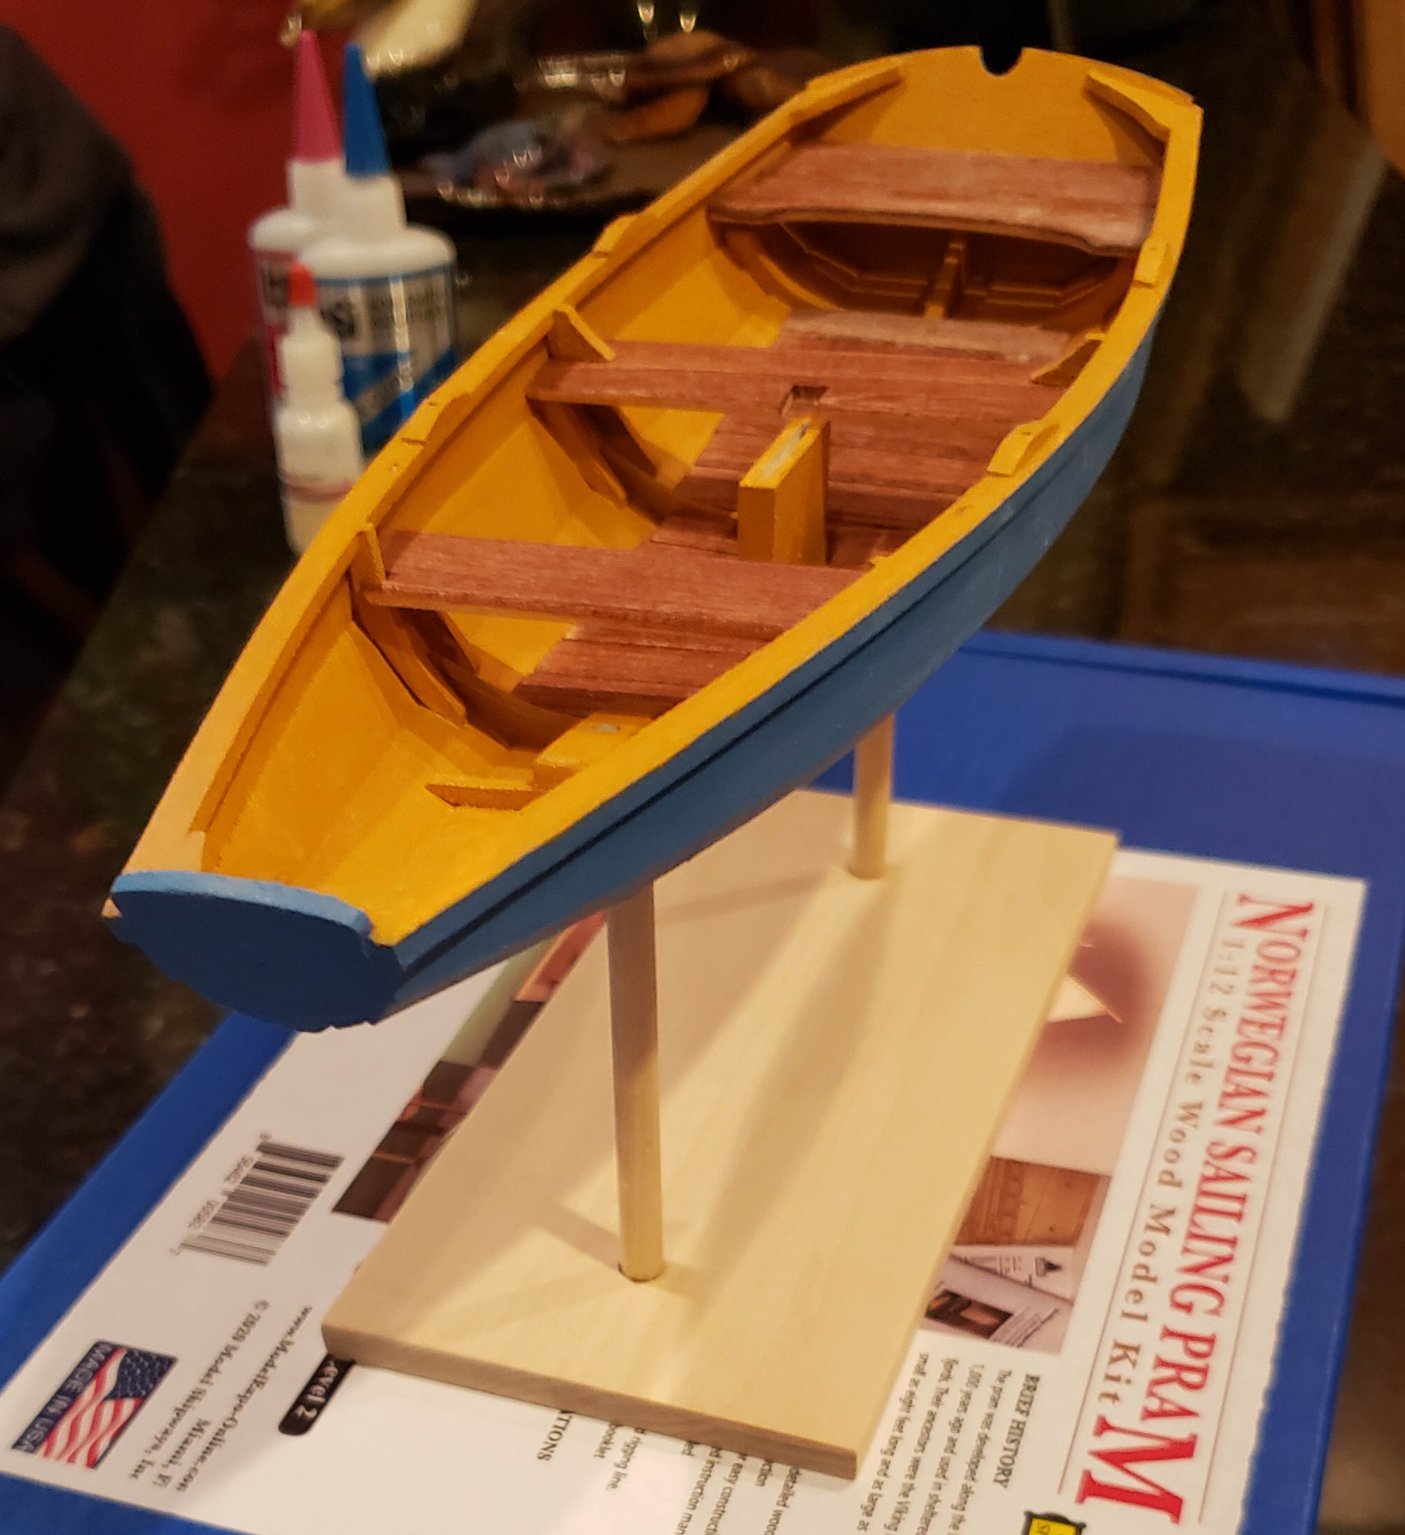
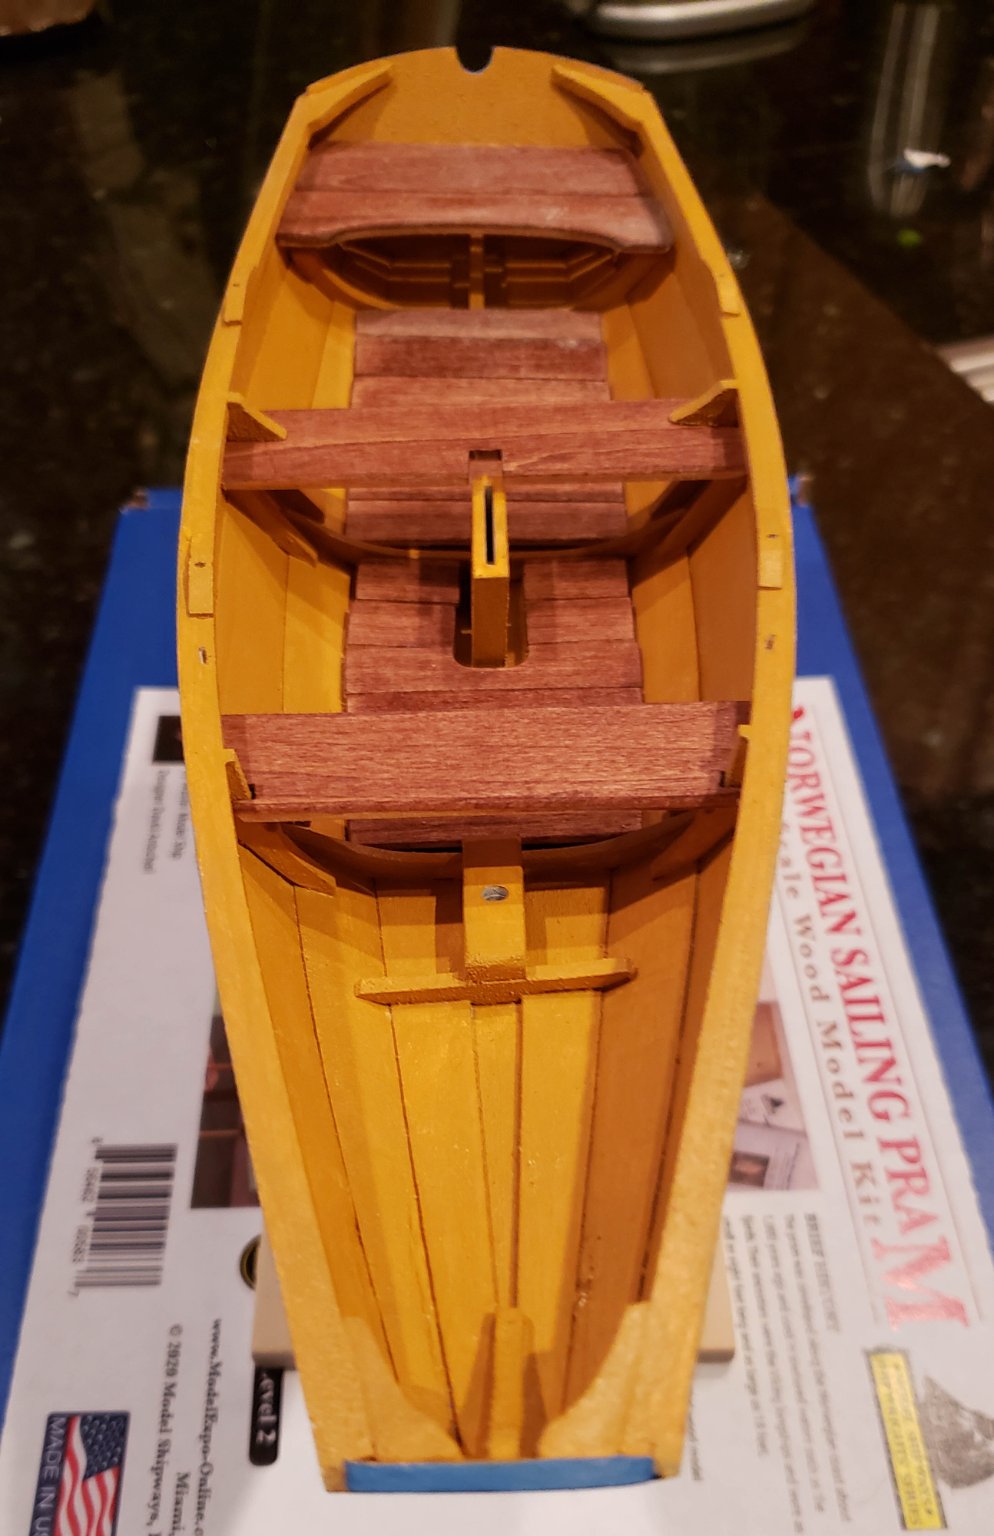
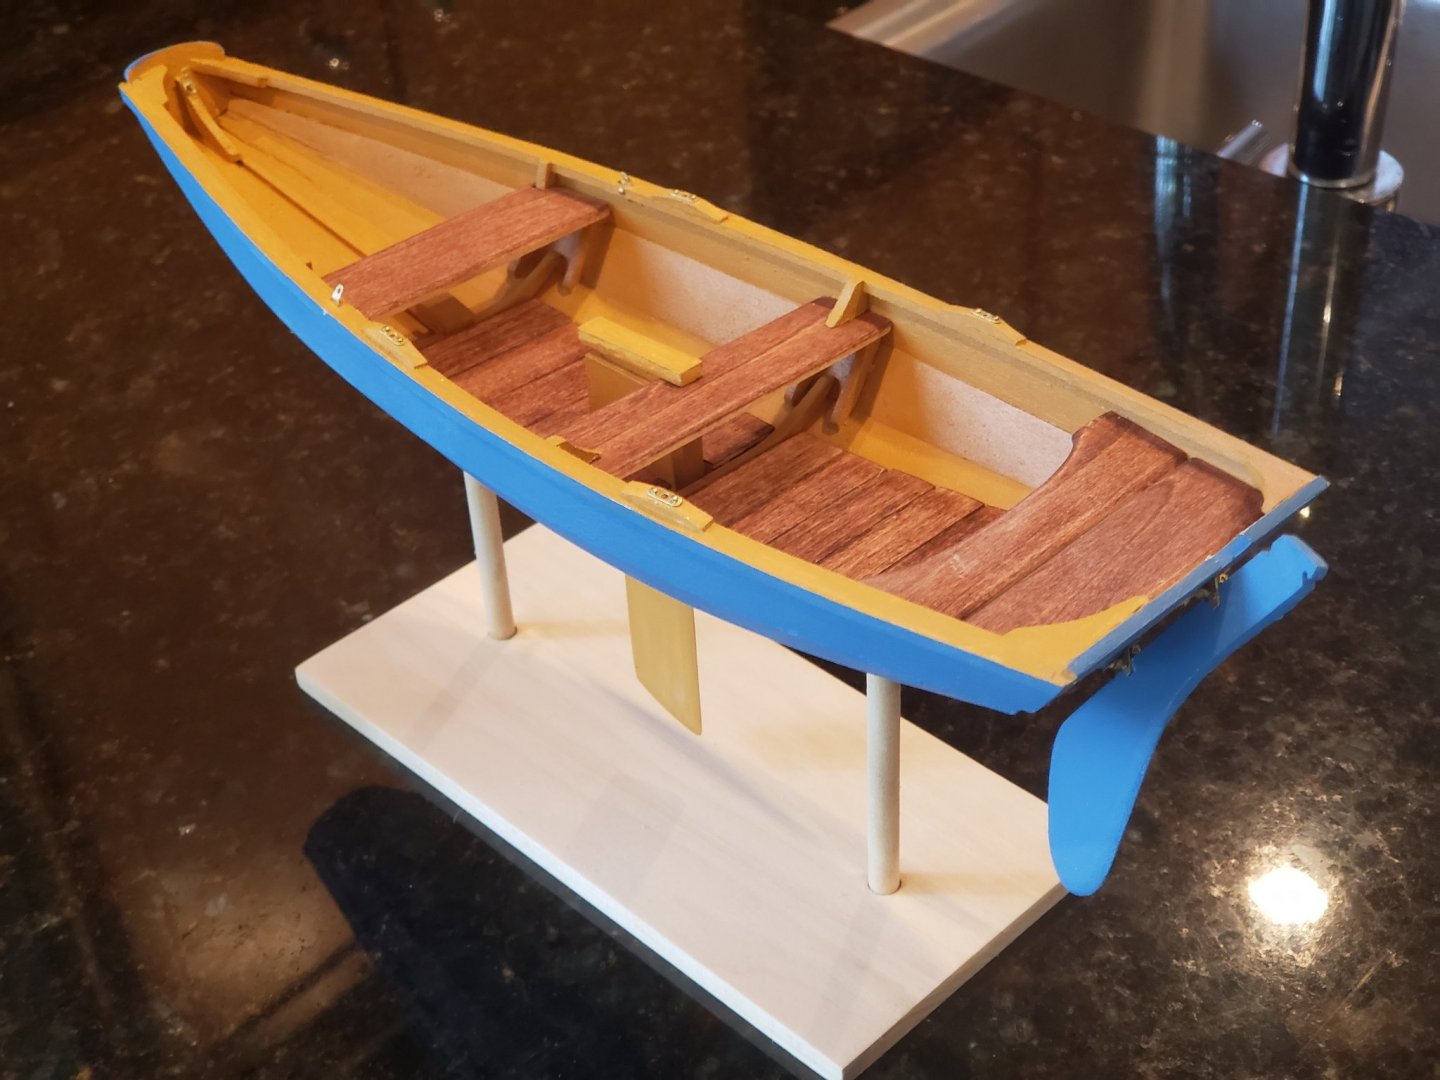
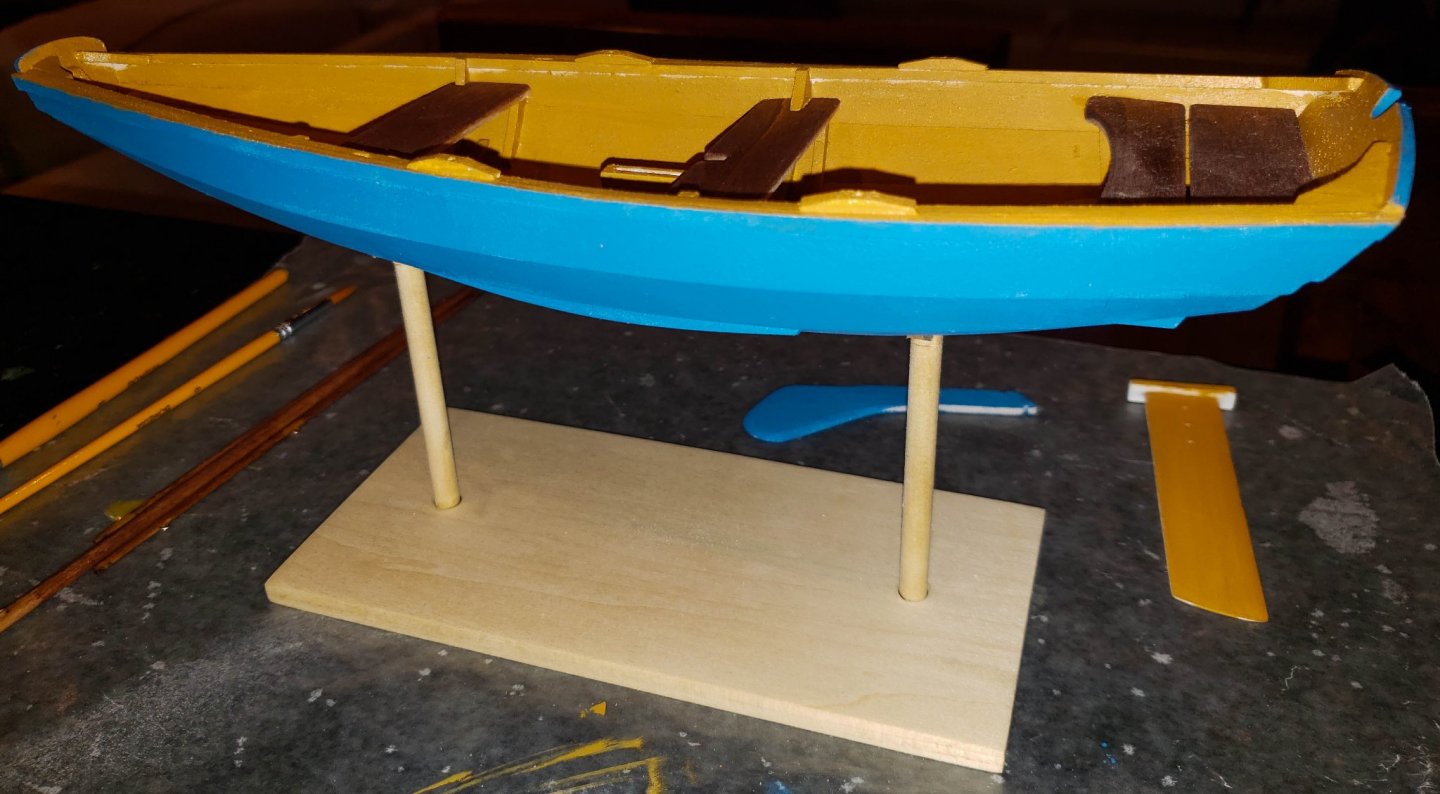
The Pram is painted, floorboards and thwarts installed. I have finished the boom and gaff, the main mast is shaped, and needs its fittings installed. The Pram interior is Hull Yellow Ochre (MS4829) and the exterior Blue Trim (MS4811). The floorboards and thwarts are stained red oak and have a coat of satin polyurethane applied. I did add some material to the inboard floor cleats as the floorboards flanking the dagger board case were not level. The last photo used a flash as I needed front fill, but it is rather harsh light. It also shows that the interior needs a bit of touch up work. 🤣 Happy Thanksgiving, all !!!


- 43 replies
-
- 2
-
-
- Norwegian Sailing Pram
- Model Shipways
- (and 1 more)
-
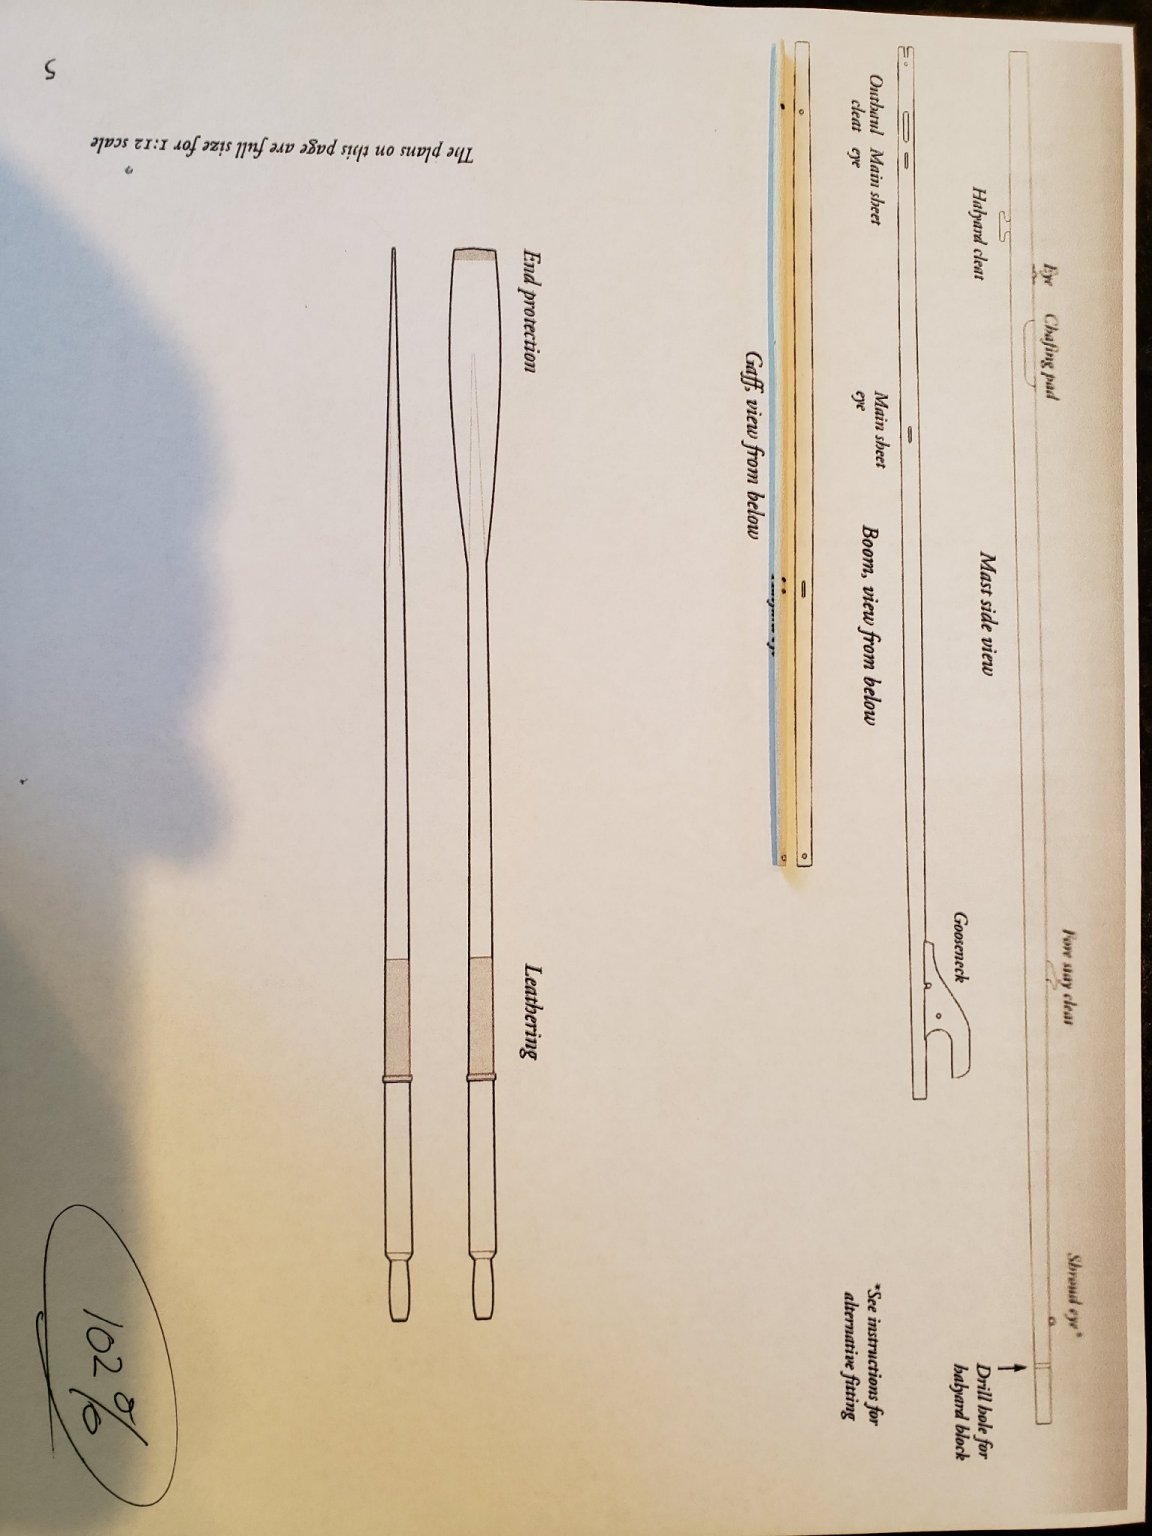
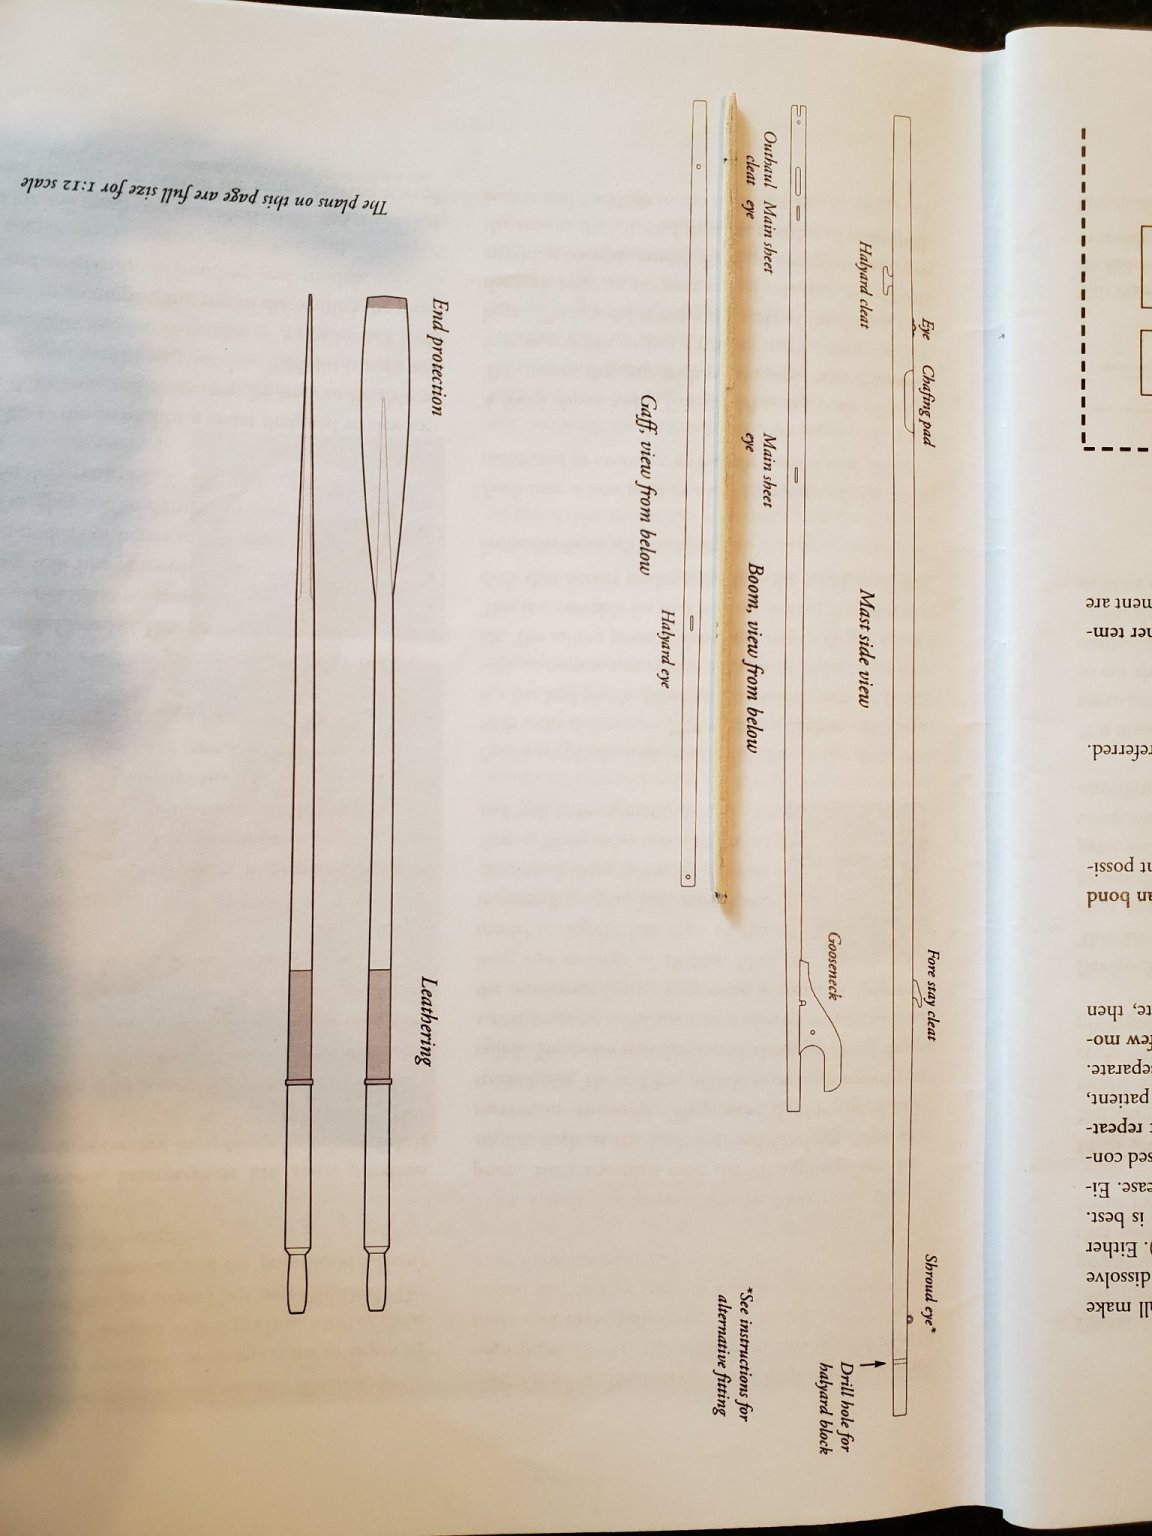
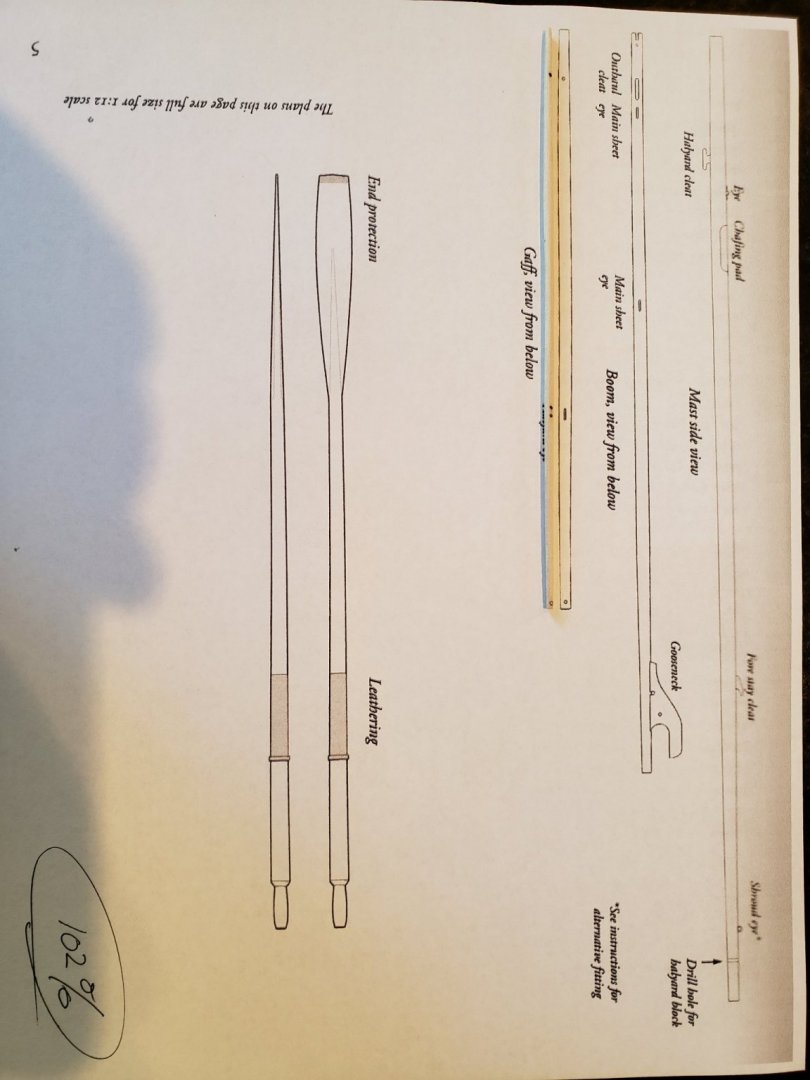
Post scan and reprint of plan page above, at 102%. Note the gaff is on the plans for calibration. The gaff is exactly registered to the plans, the camera has distorted the photo slightly. 🙄 It would seem prudent to print scales on such instruction pages to allow verification/calibration. This in light of @kurtvd19's comment below. For a relative novice, these sorts of errors are a potential minefield.
- 43 replies
-
- 2
-
-
- Norwegian Sailing Pram
- Model Shipways
- (and 1 more)
-
Work began on the gaff and boom. I notice the printed material in the instruction booklet WRT these items appear to NOT be to scale. I am attempting to print at the correct size and will report the adjustment required. This is puzzling as I used the measuring strips on the previous page of the instructions for frame and thwart supports installation, and these seem to be properly placed.

- 43 replies
-
- 1
-
-
- Norwegian Sailing Pram
- Model Shipways
- (and 1 more)
-
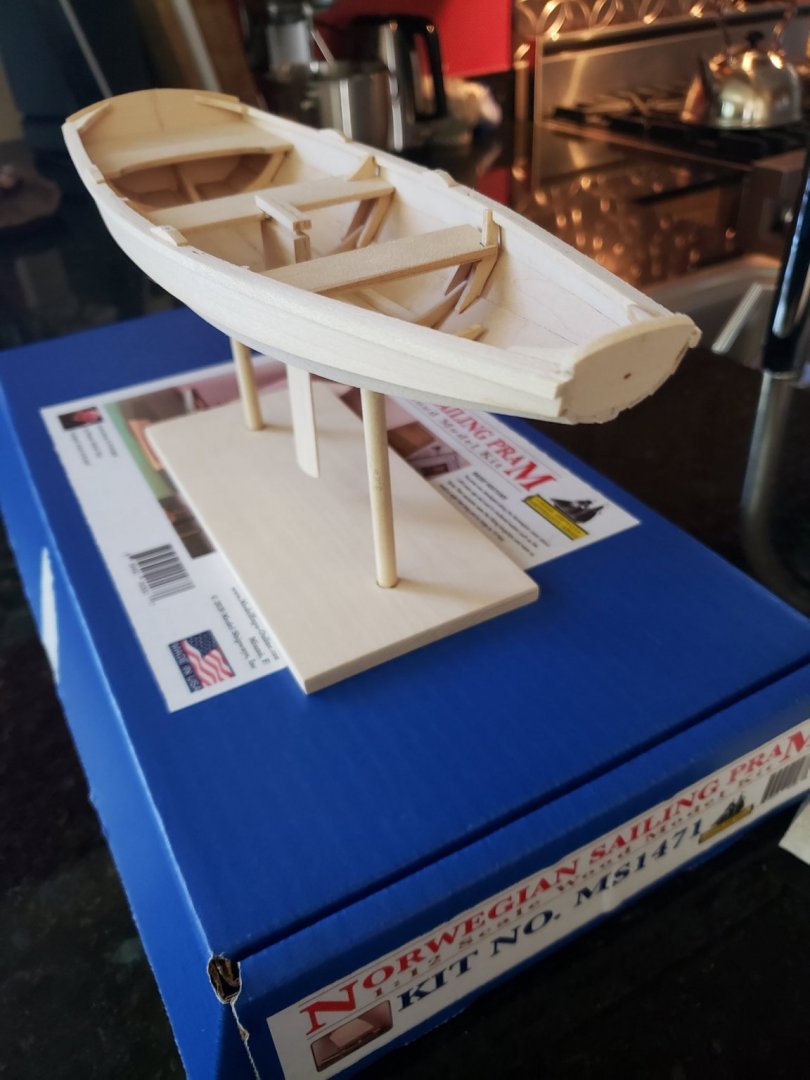
I decided to build the kit supplied display stand.
- 43 replies
-
- 2
-
-
- Norwegian Sailing Pram
- Model Shipways
- (and 1 more)
-
Thanks @Ryland Craze. I created a gallery of the Dory
- 43 replies
-
- 2
-
-
- Norwegian Sailing Pram
- Model Shipways
- (and 1 more)
-
Thanks very much @SkiBee. Full disclosure; I built the MS Dory kit twice before moving on to this Pram. There are two photos of the second build on the MS web site if anyone is interested. (https://modelexpo-online.com/Model-Shipways-Lowell-Grand-Banks-Dory-Model-Wooden-Model-Ship-Kit-124-Scale_p_3957.html) The second Dory was much better than my first effort. I have woodworking experience, which as helped, I think. However, planking is definitely a new skill. These kits are very much different from plastic or resin kits, in my experience. I also wanted to mention my maximum Pram hull width was an actual 1/8 inch narrower than the max mentioned in the instructions. This concerned me, but it seemed to be about the correct width, as the bottom frames required little modification when installing.
- 43 replies
-
- 1
-
-
- Norwegian Sailing Pram
- Model Shipways
- (and 1 more)
-
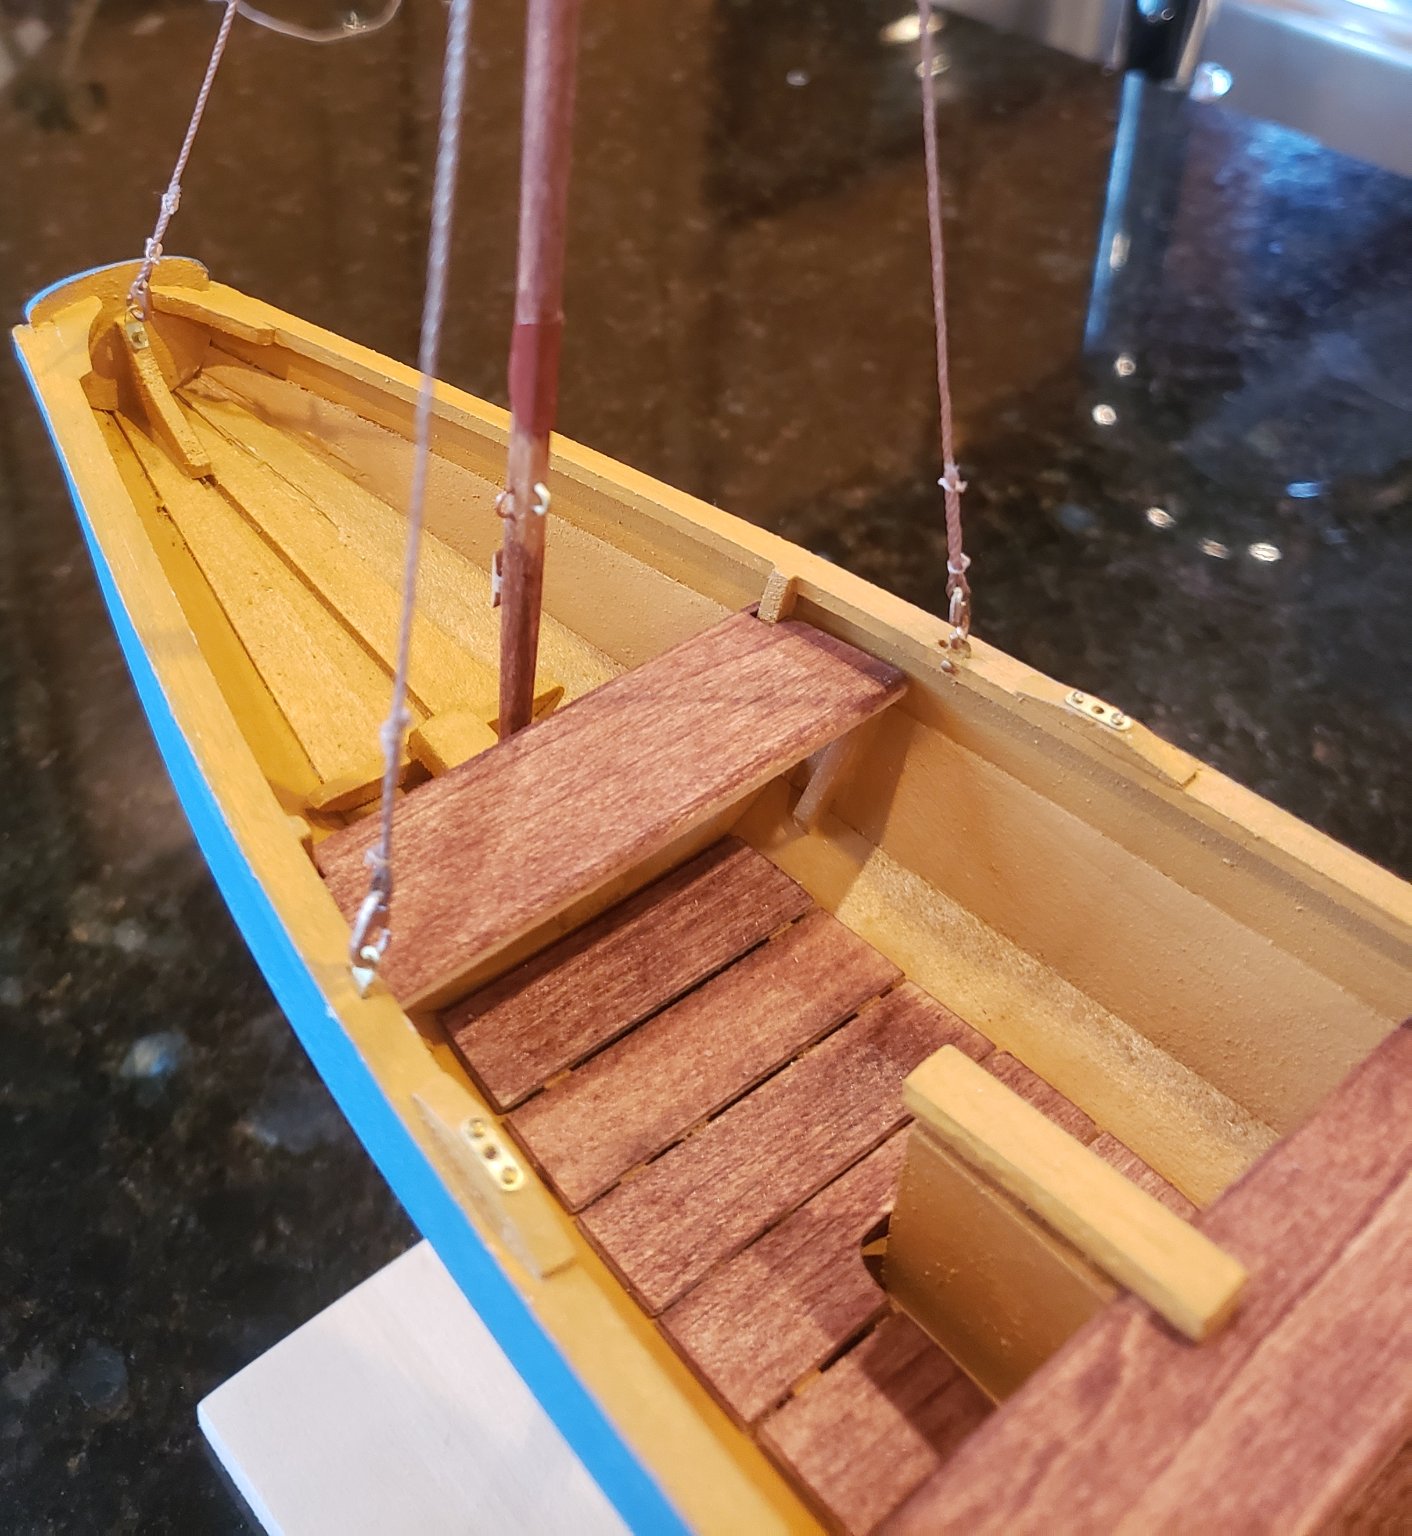
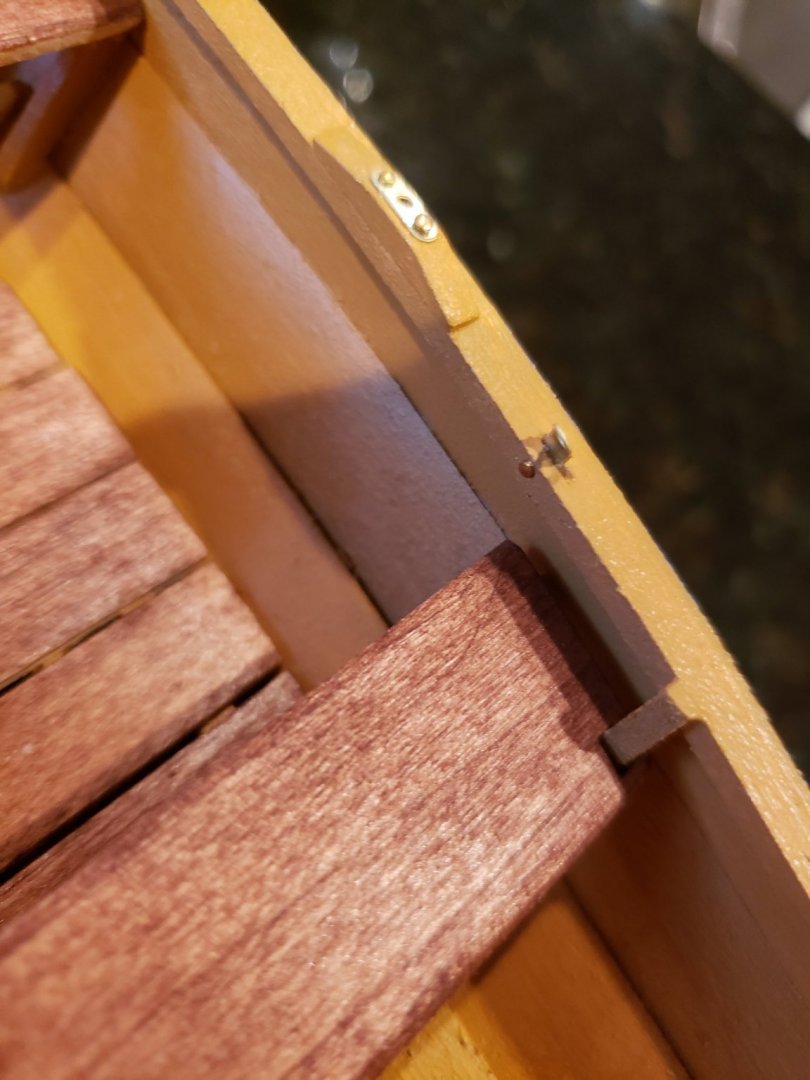
The hull is finished, except for the stern transom notch, and paint prep. I installed the rub rails before the rowlock pads, rather than after as in the instructions. I wanted to sand the rub rail, sheer, inwale tops prior to cutting the chain plate slots and gluing the rowlock pads. I am not precise enough to have perfectly aligned tops otherwise. The seat and thwart frame installation was confusing, in that the instruction photos do not show detailed top height for most. They are about right, it seems, but a bit more installation detail would have been helpful. The mast step is not as described in the instructions, both parts in the kit have holes, so I added a solid piece as a third layer just under the mast hole. The thwarts are test fitted, and will be removed prior to priming. I like to use light grey spray primer prior to color coats, and will do this to the entire hull one I have cleaned up a few dents/gaps. I did not have the colors I wanted for the hull, so must wait for their arrival.
- 43 replies
-
- 5
-
-
- Norwegian Sailing Pram
- Model Shipways
- (and 1 more)