Supplies of the Ship Modeler's Handbook are running out. Get your copy NOW before they are gone! Click on photo to order.
×


JohnN
-
Posts
60 -
Joined
-
Last visited
Content Type
Profiles
Forums
Gallery
Events
Everything posted by JohnN
-
I apologize for missing all your questions, I need to learn how to properly receive notifications. 🙁
-
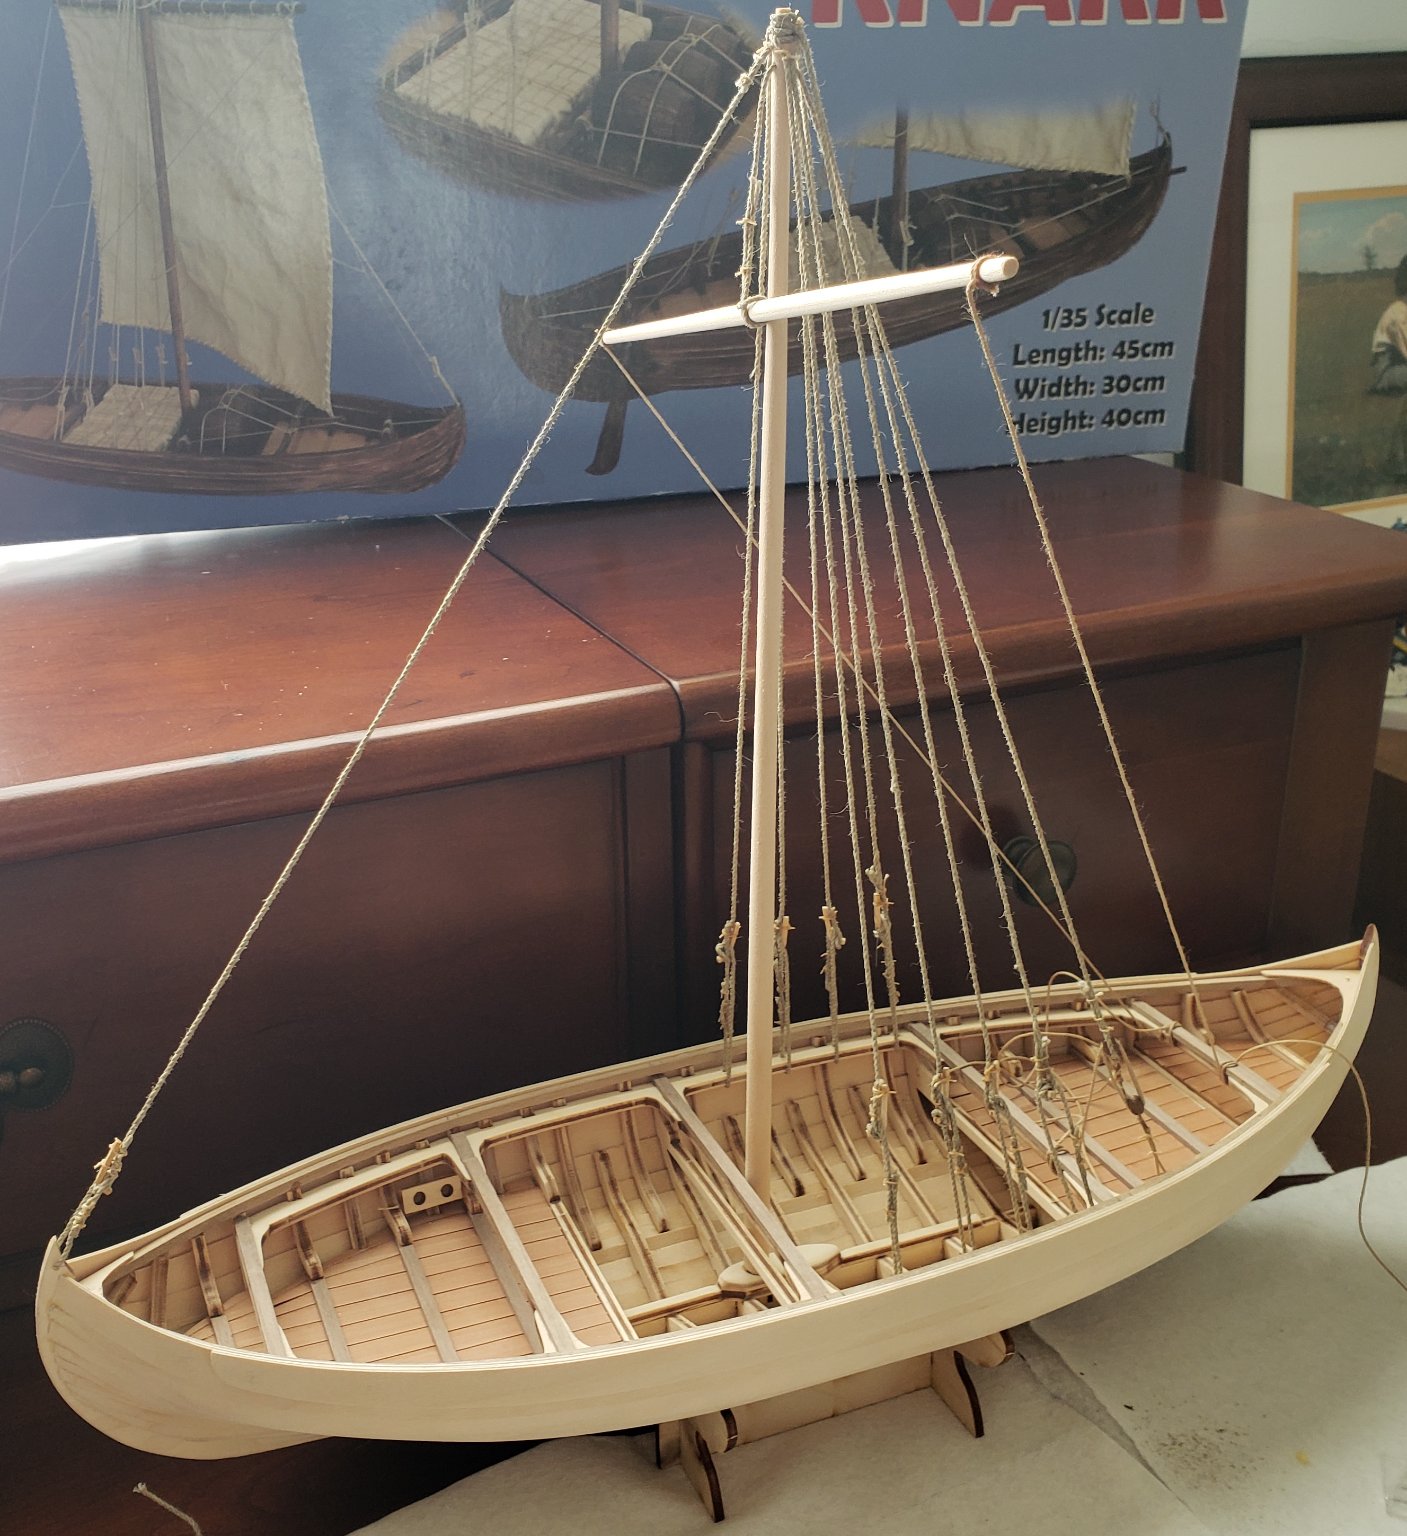
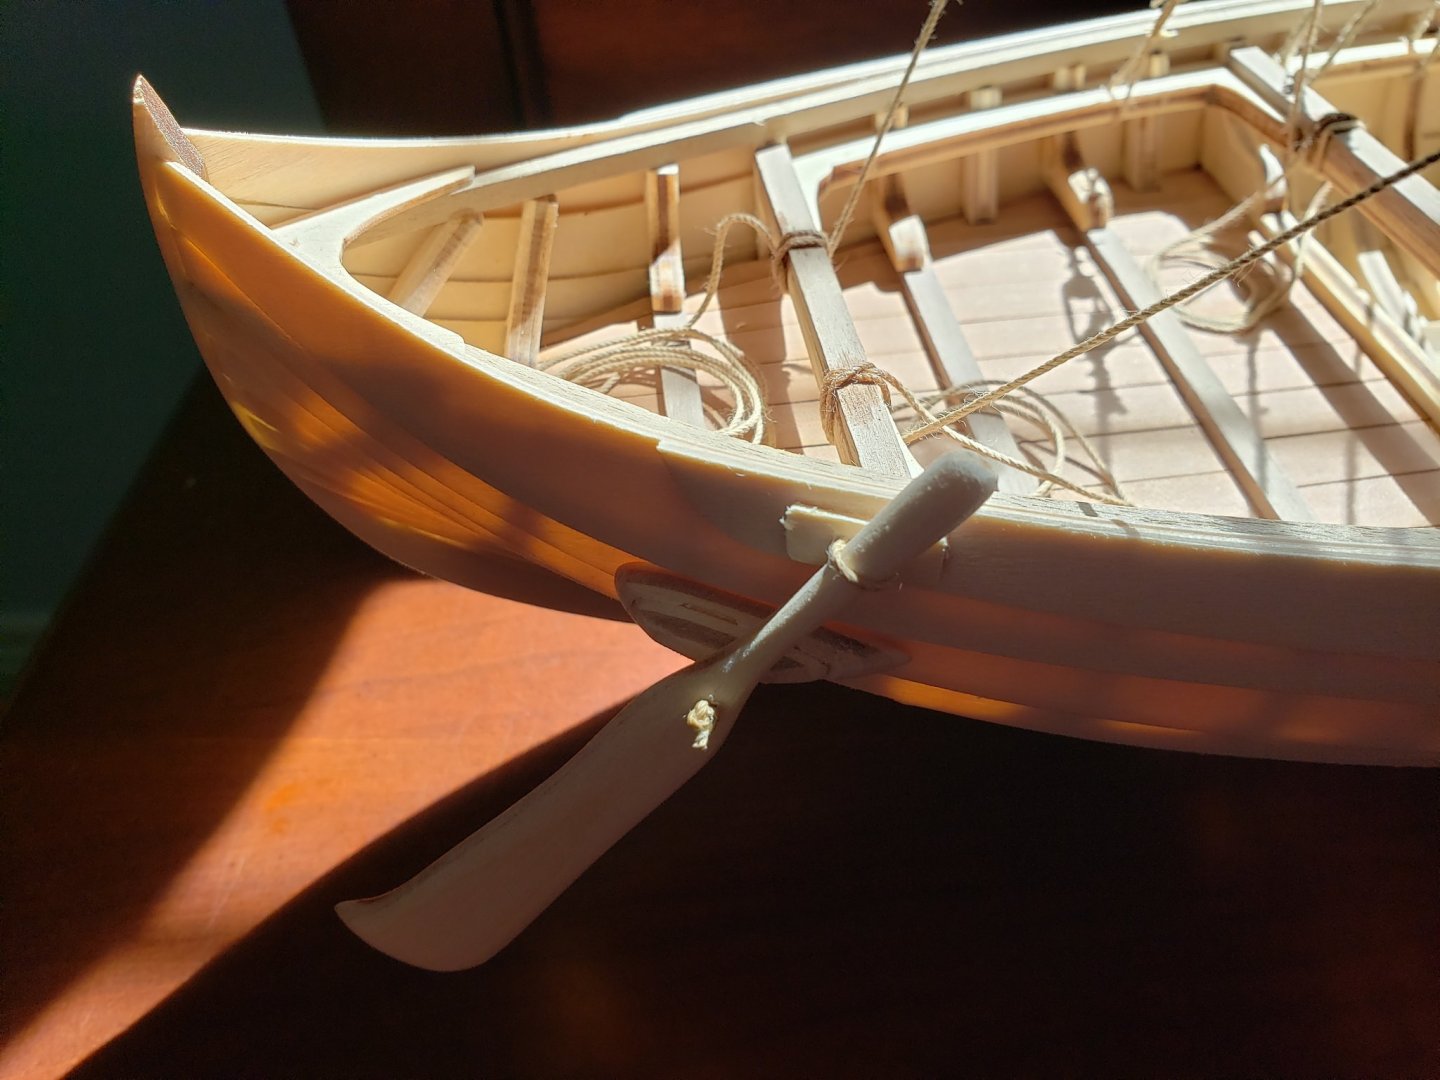
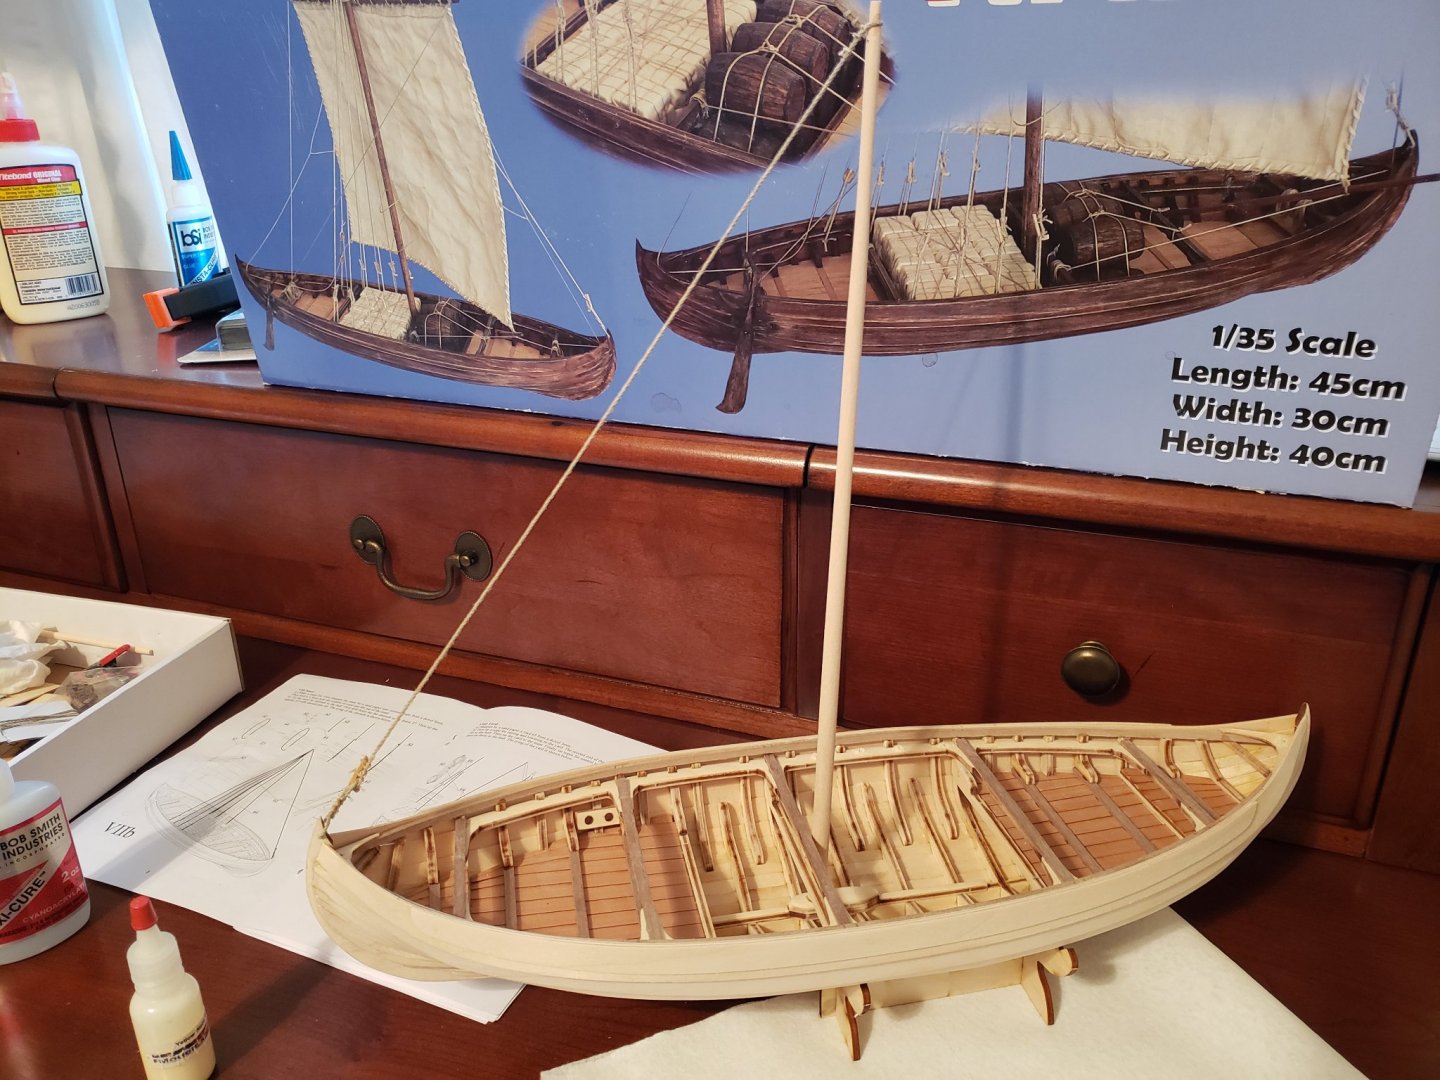
Installed the rudder, finally, and I declare this model finished. See last photos at end of post. Summary: Overall, a satisfying project. Reasonable price for an entertaining build, a good value. For me, the choice of the 1/35th scale was correct, given my skill level and preference for larger scales. Positives: Reasonable increase in build complexity from MS Pram Good quality materials Supplied planking material installed without excessive fuss Rigging worked better than anticipated A presentable, attractive result, IMHO Improvements: Instructions are minimal, and for my skill level, lacked detail. Lots of time spent pondering build steps given above Plywood material had lots of tarry residue, sanding was laborious Largest rigging size was insufficient to complete work Mast rigging seemed to lack realism. Perhaps a trade-off for reduction of complexity. Blocks replaced with aftermarket parts. Fit of some frames required a lot of adjustments Some frames likely installed reversed, discovered when fairing for planking.
- 48 replies
-
- 6
-

-
- dusek
- viking knarr
- (and 1 more)
-
Very nice result @GGibson. Congrats !! I will be watching your smack build log with interest.
- 26 replies
-
- 1
-
-
- Model Shipways
- Norwegian sailing pram
- (and 2 more)
-
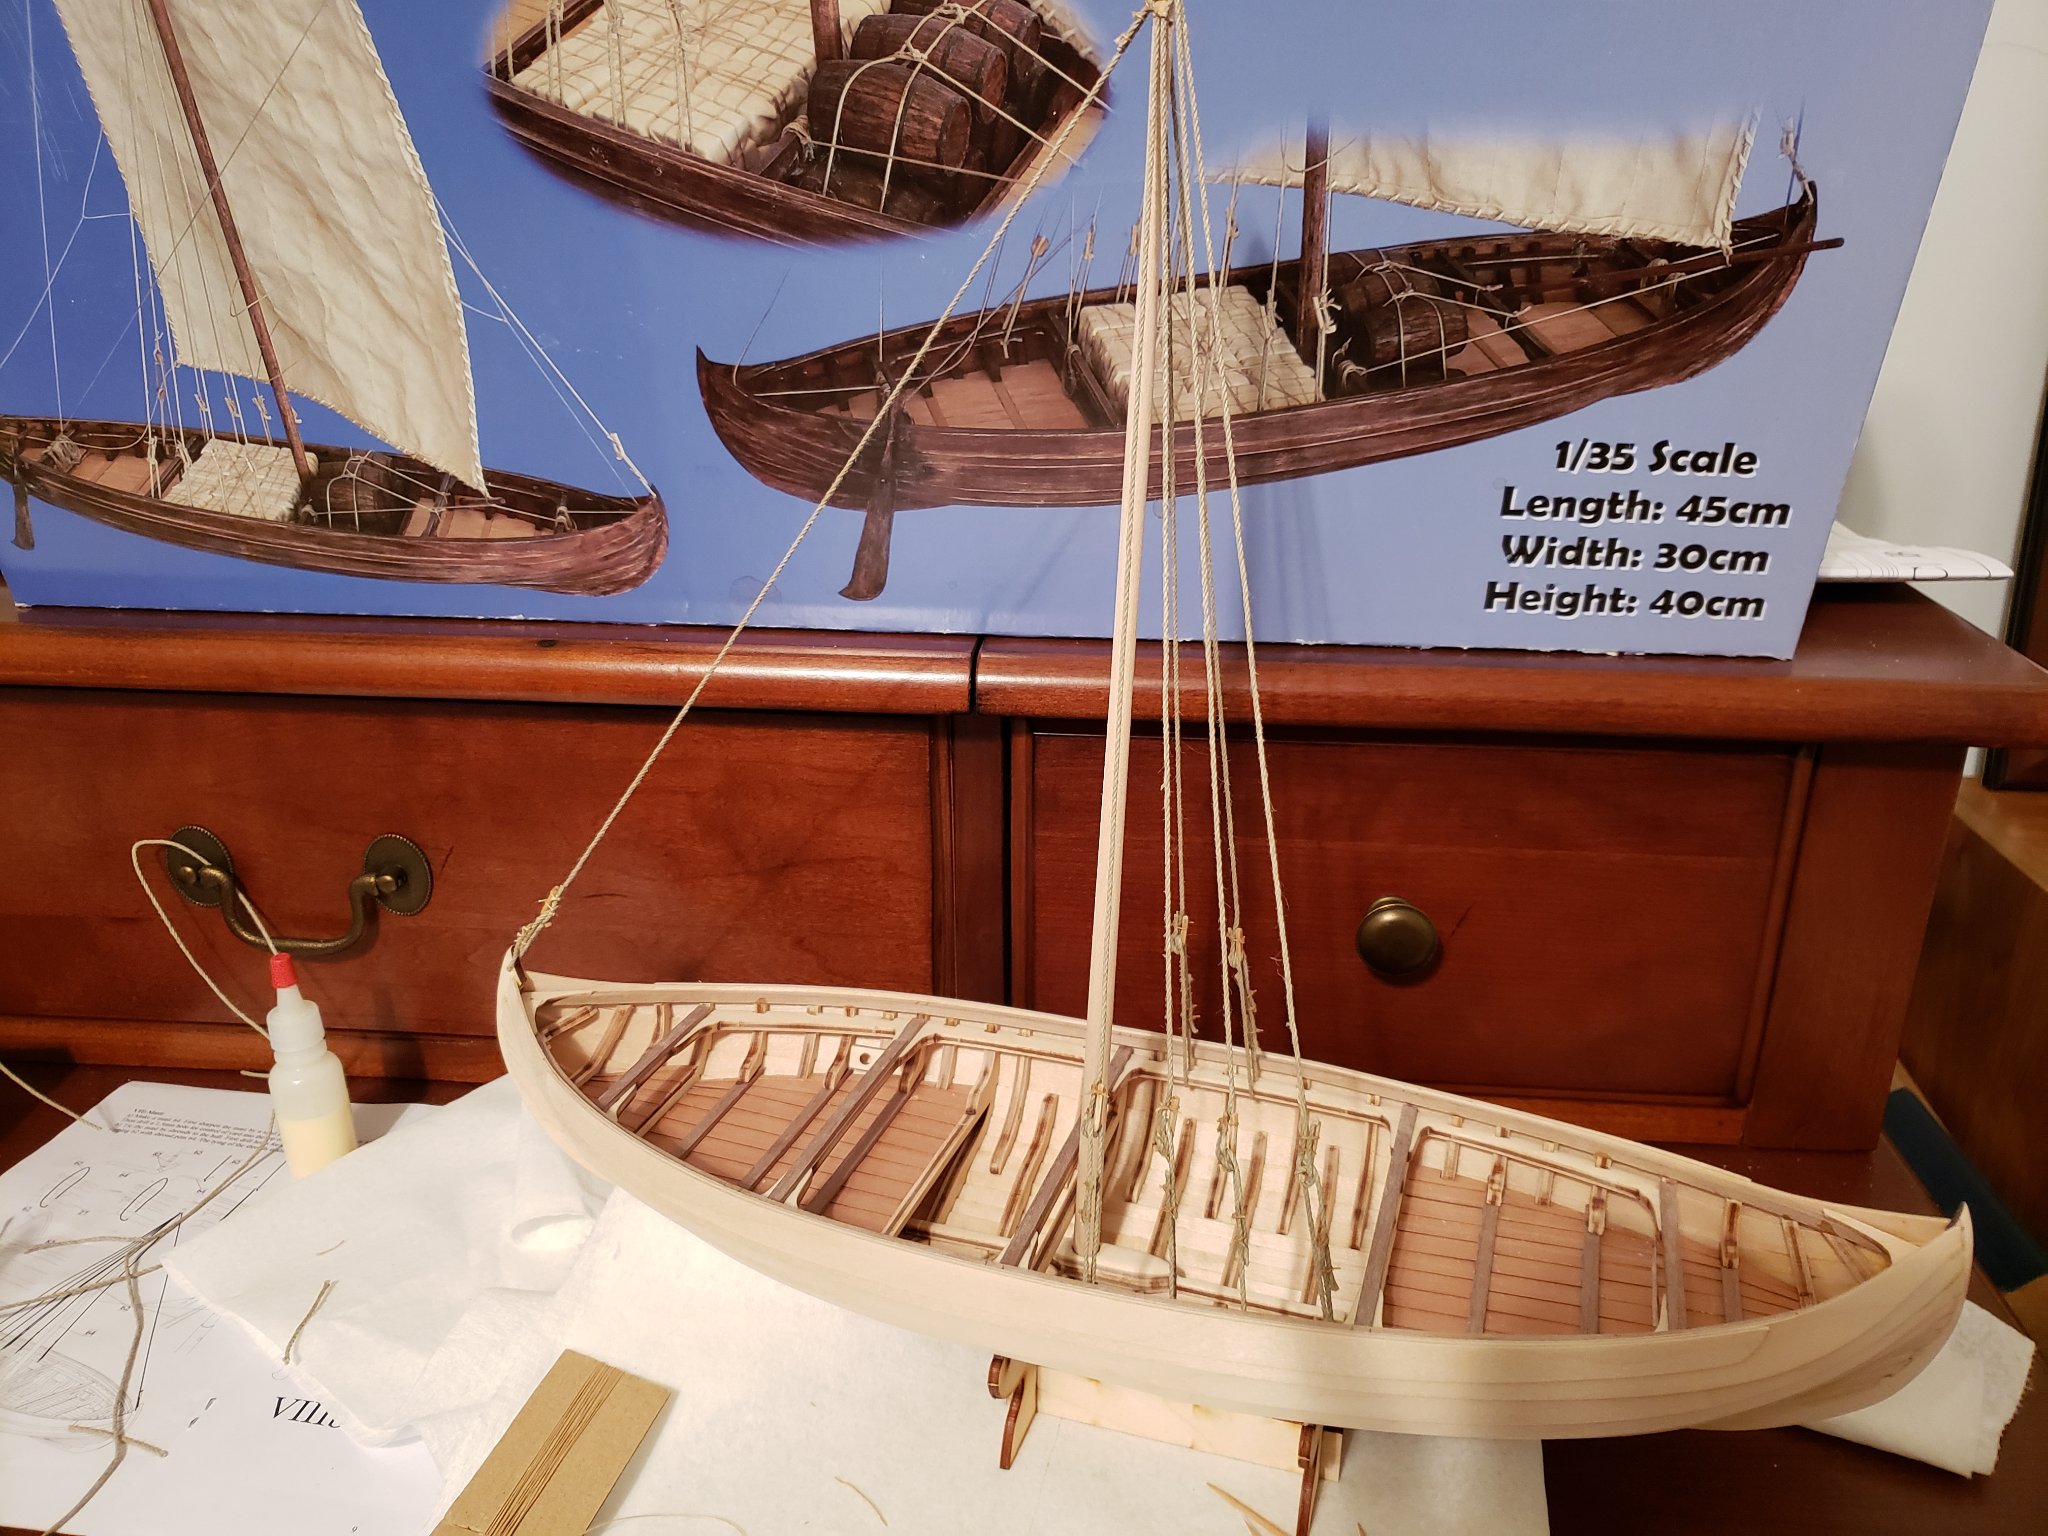
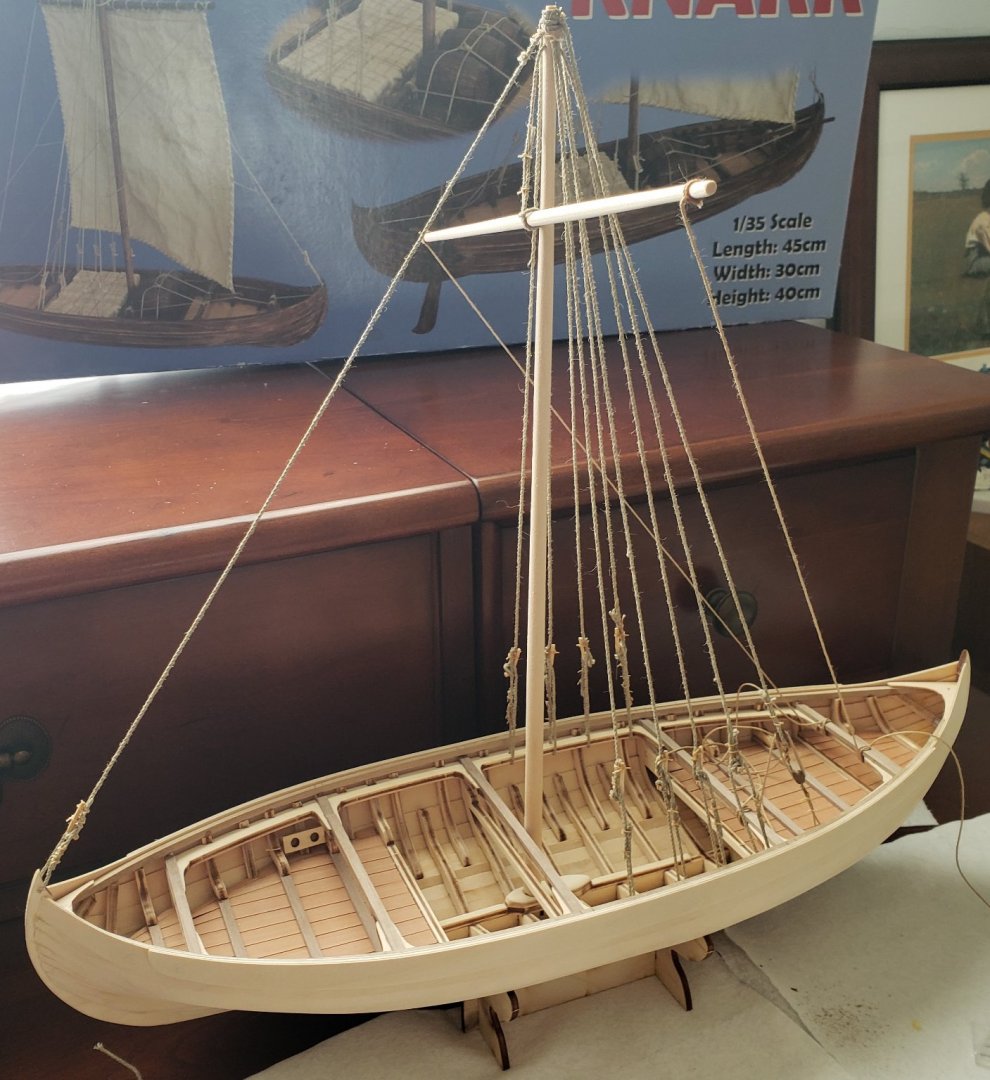
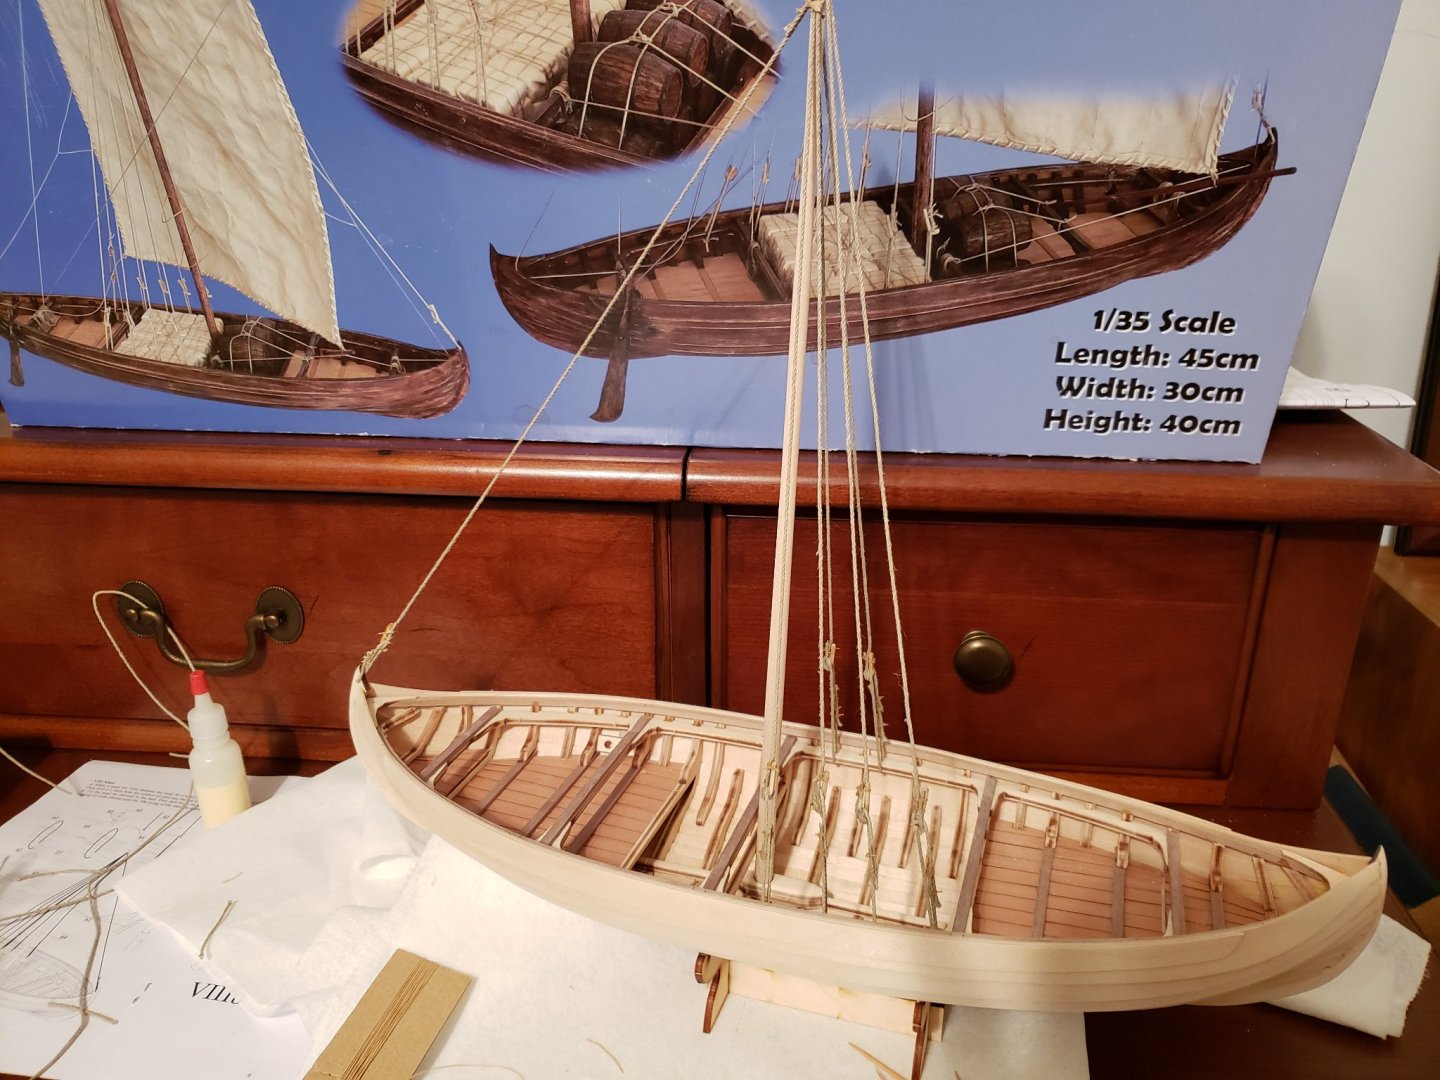
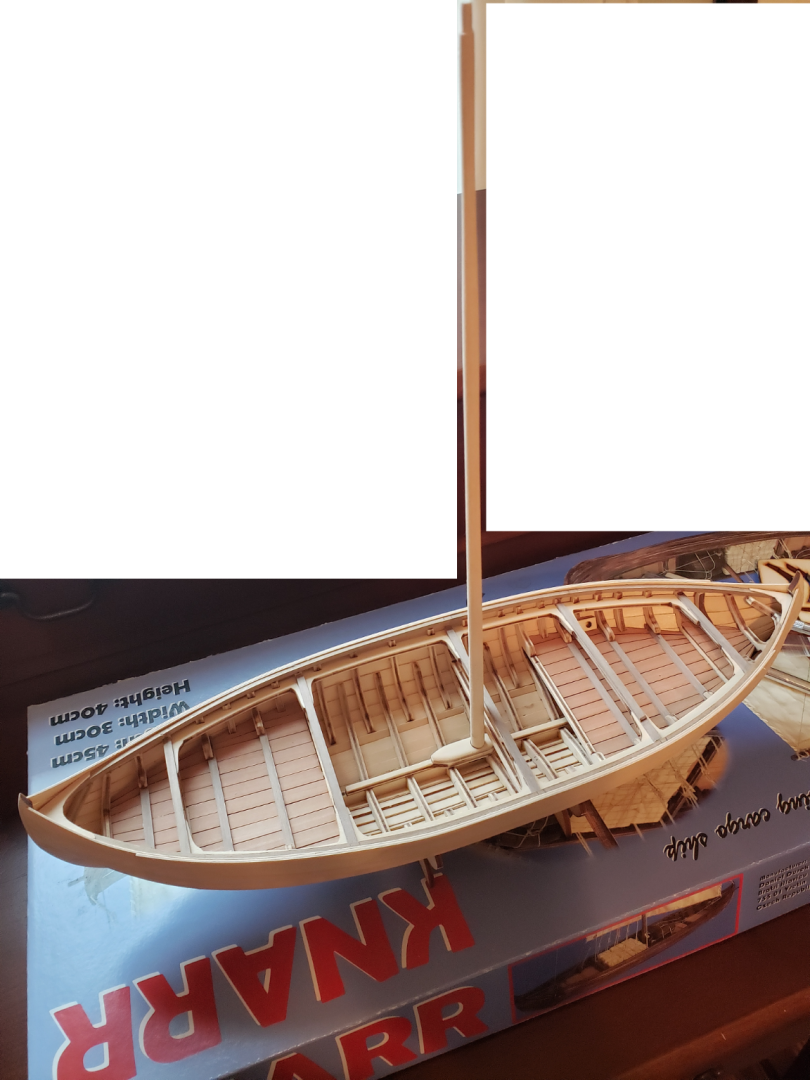
Yard installed as well as associated rigging. A couple hours of tidying and I think I will call this project finished. I might experiment with the sail, but, even if I do, I will not install on the model. Will summarize in a post or two. Thinking about the next project. Perhaps MS's Lobster Smack, but, the build log here and an unconvincing reply from MS customer support regarding addressing some of the major documented issues have me considering other kits. All suggestions are most welcome.

- 48 replies
-
- 4
-

-
-
- dusek
- viking knarr
- (and 1 more)
-
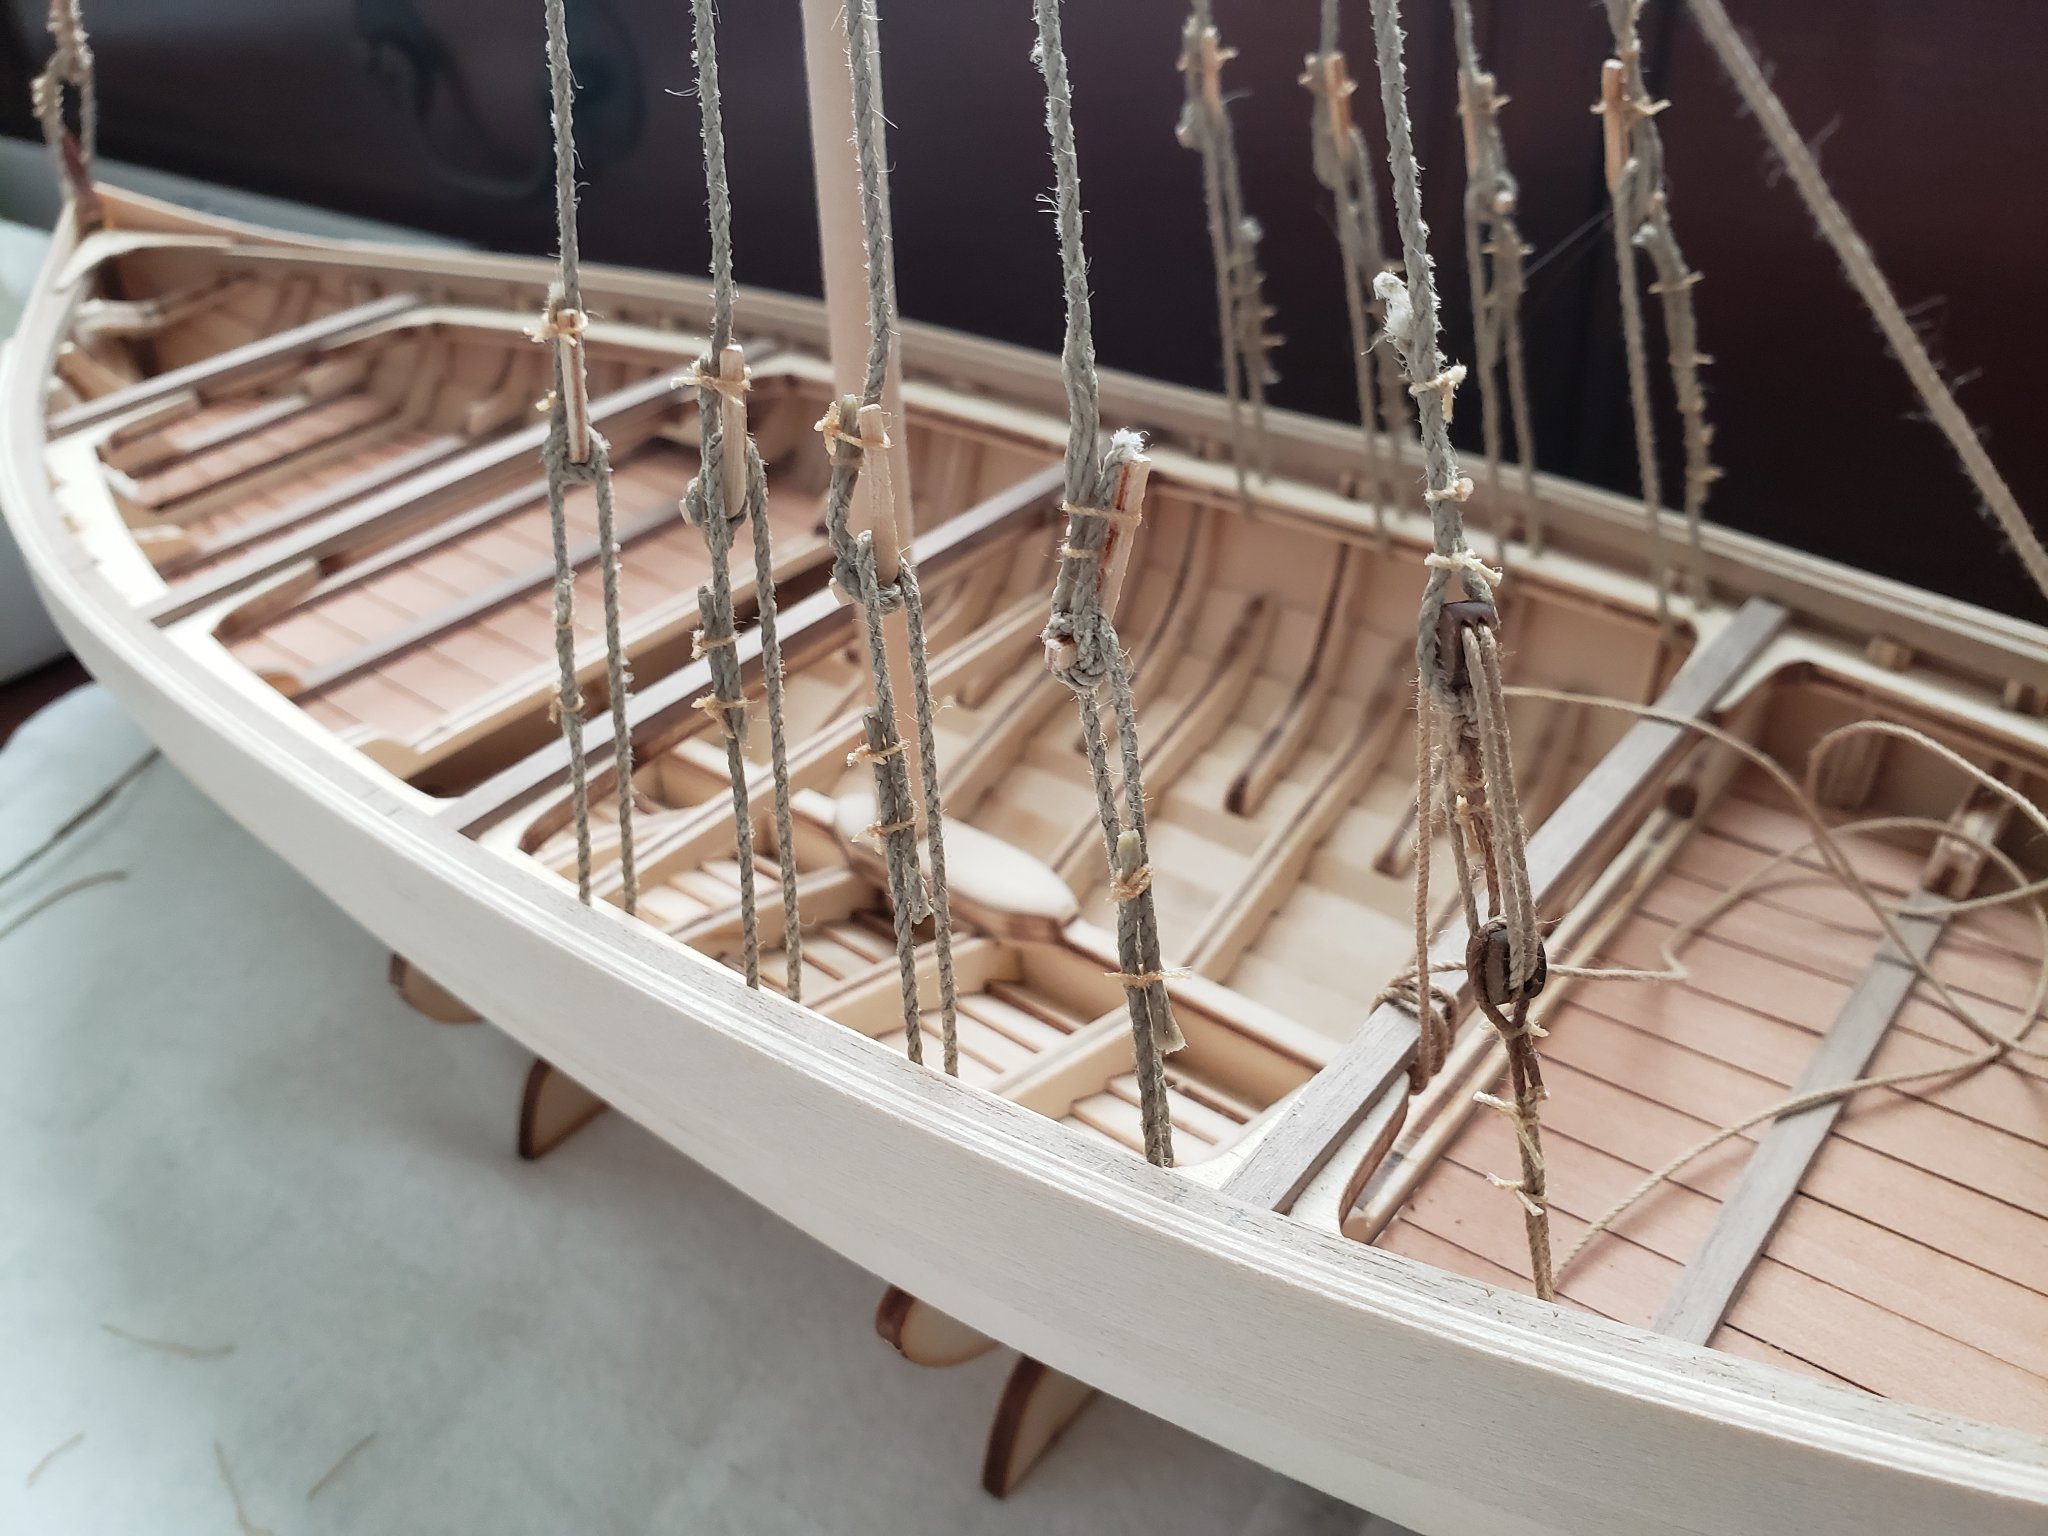
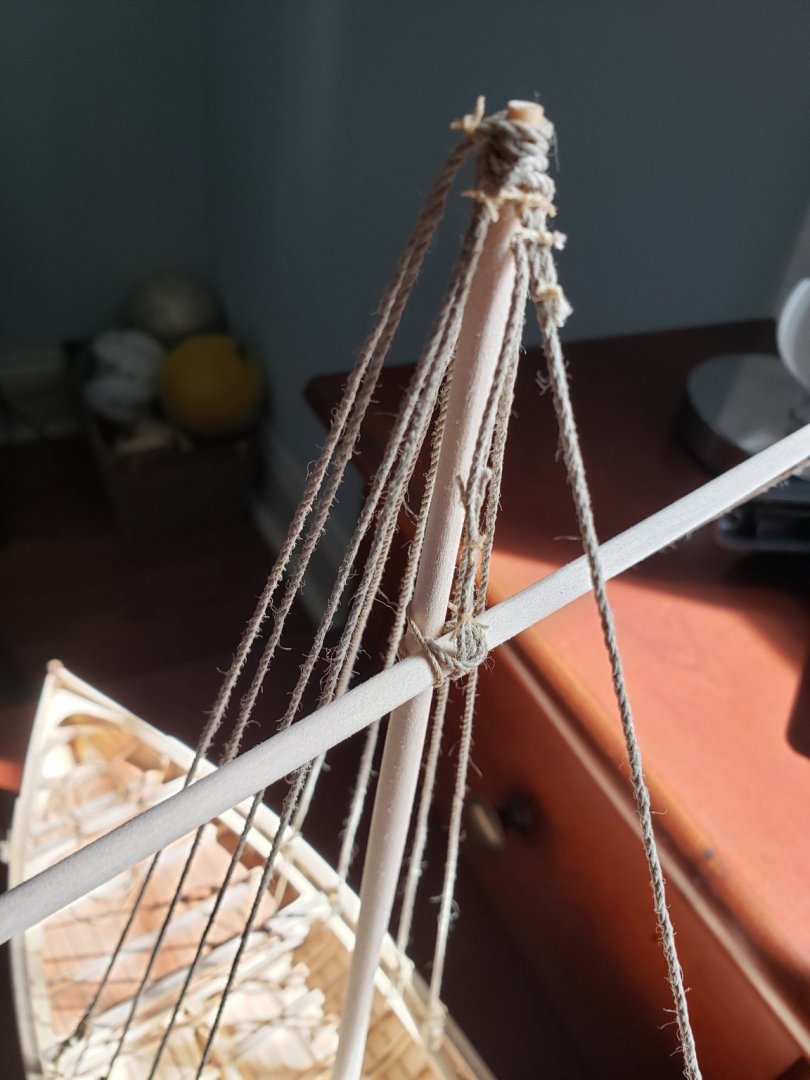
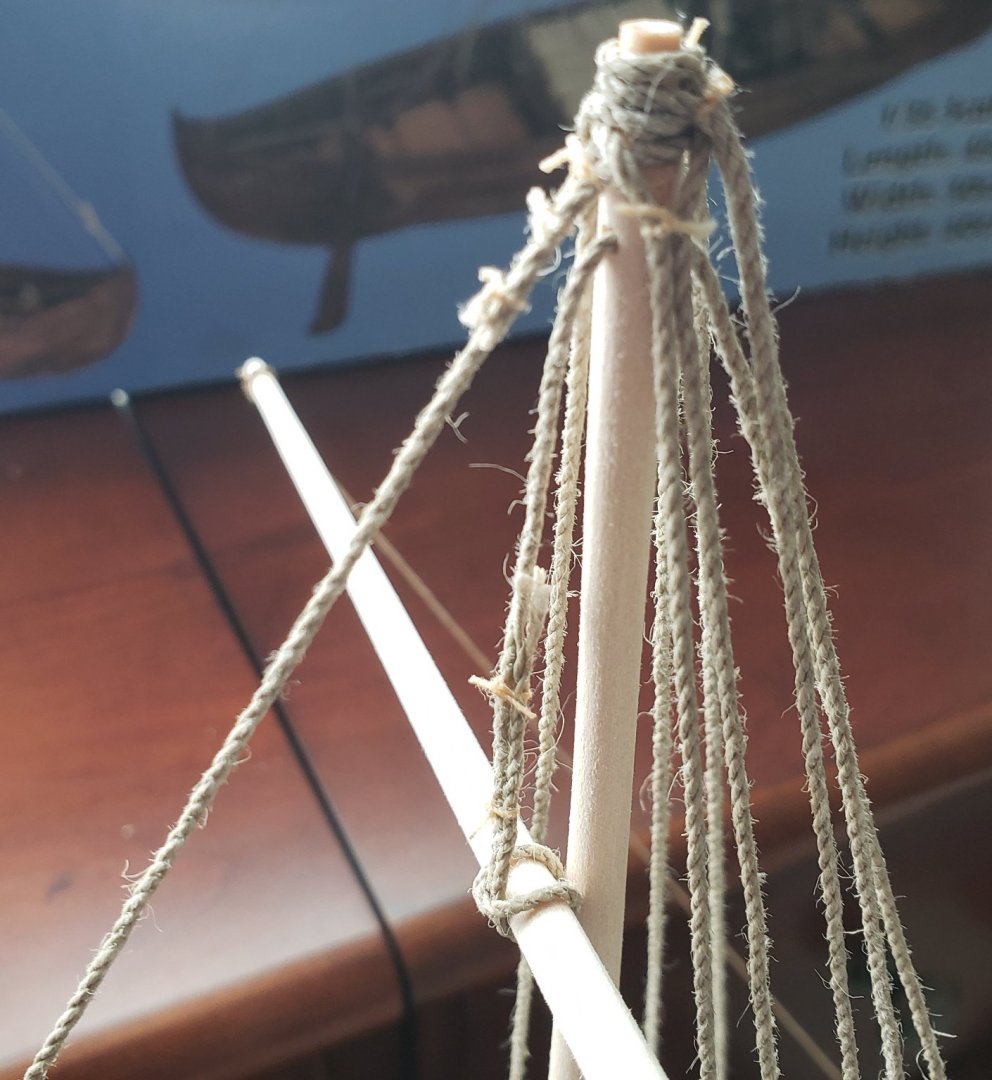
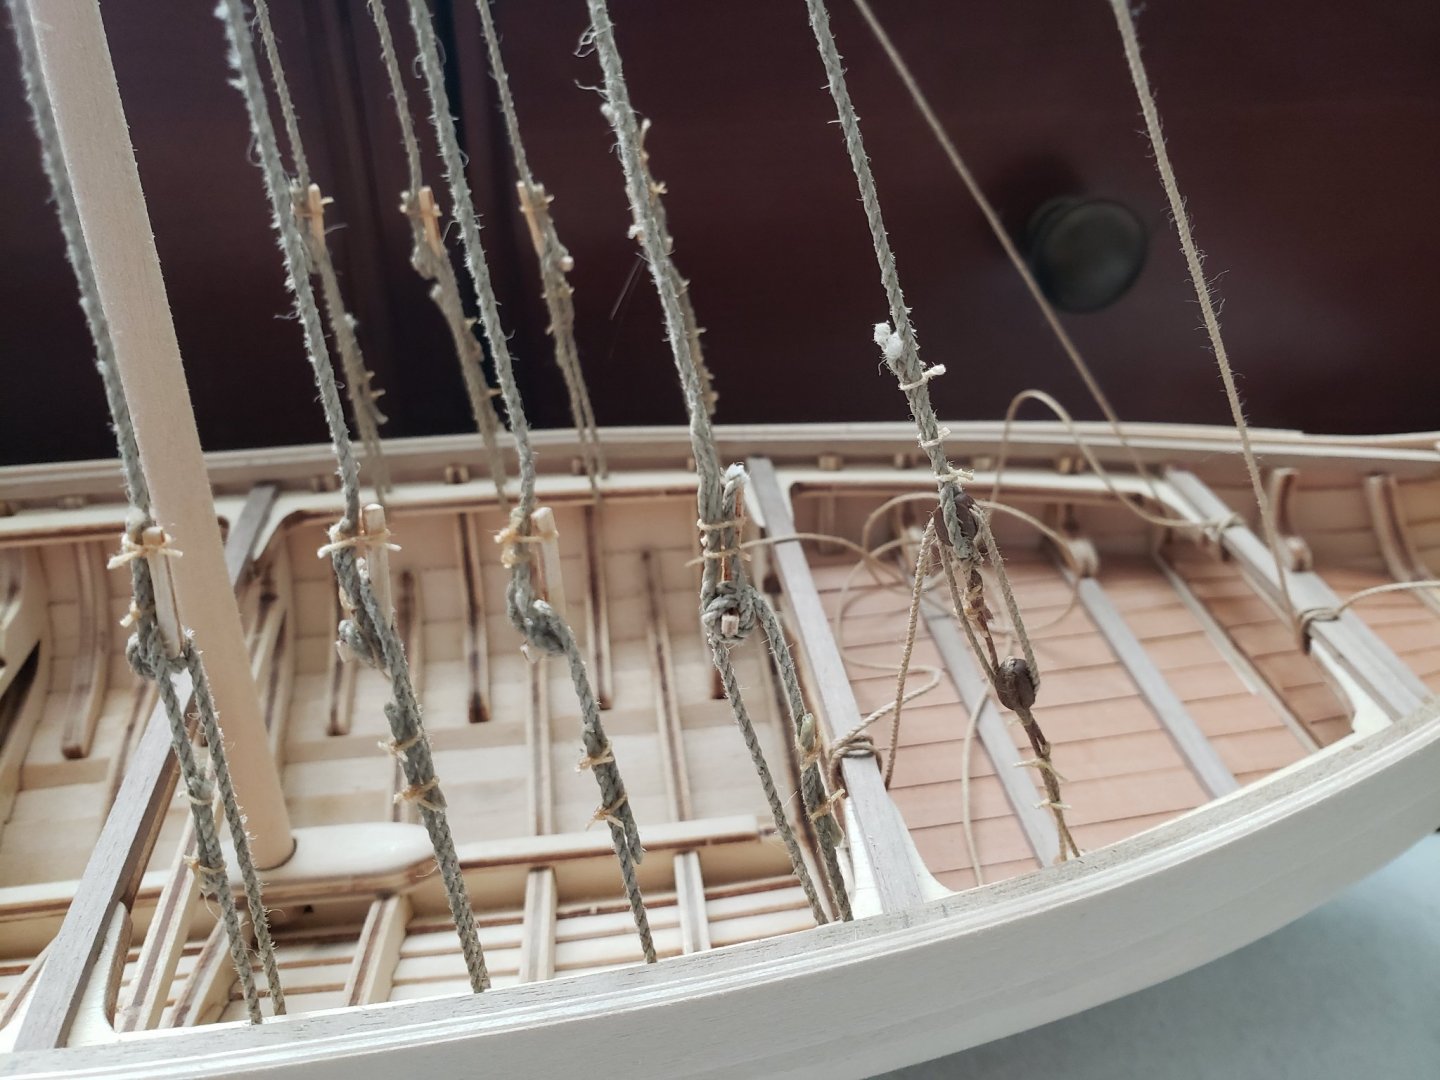
Finished first step of rigging. It would have been quite helpful if the instructions included approximate lengths for the various components, as well as more text describing a suggested process. I neglected to account for the stacking at the top of the main mast when cutting rough lengths, which added to the overall fun of this step. A couple of the stays appear slightly wonky in the photos, but did not appear so to my eye. I presumed the forestay was first, based on the instruction illustrations, then noticed @Daryl's build log (1:72 Viking Knarr) where he ran the forestay last. 🙀 Debating whether to use the sail. As I ponder, on to the yard.
- 48 replies
-
- 3
-
-
- dusek
- viking knarr
- (and 1 more)
-
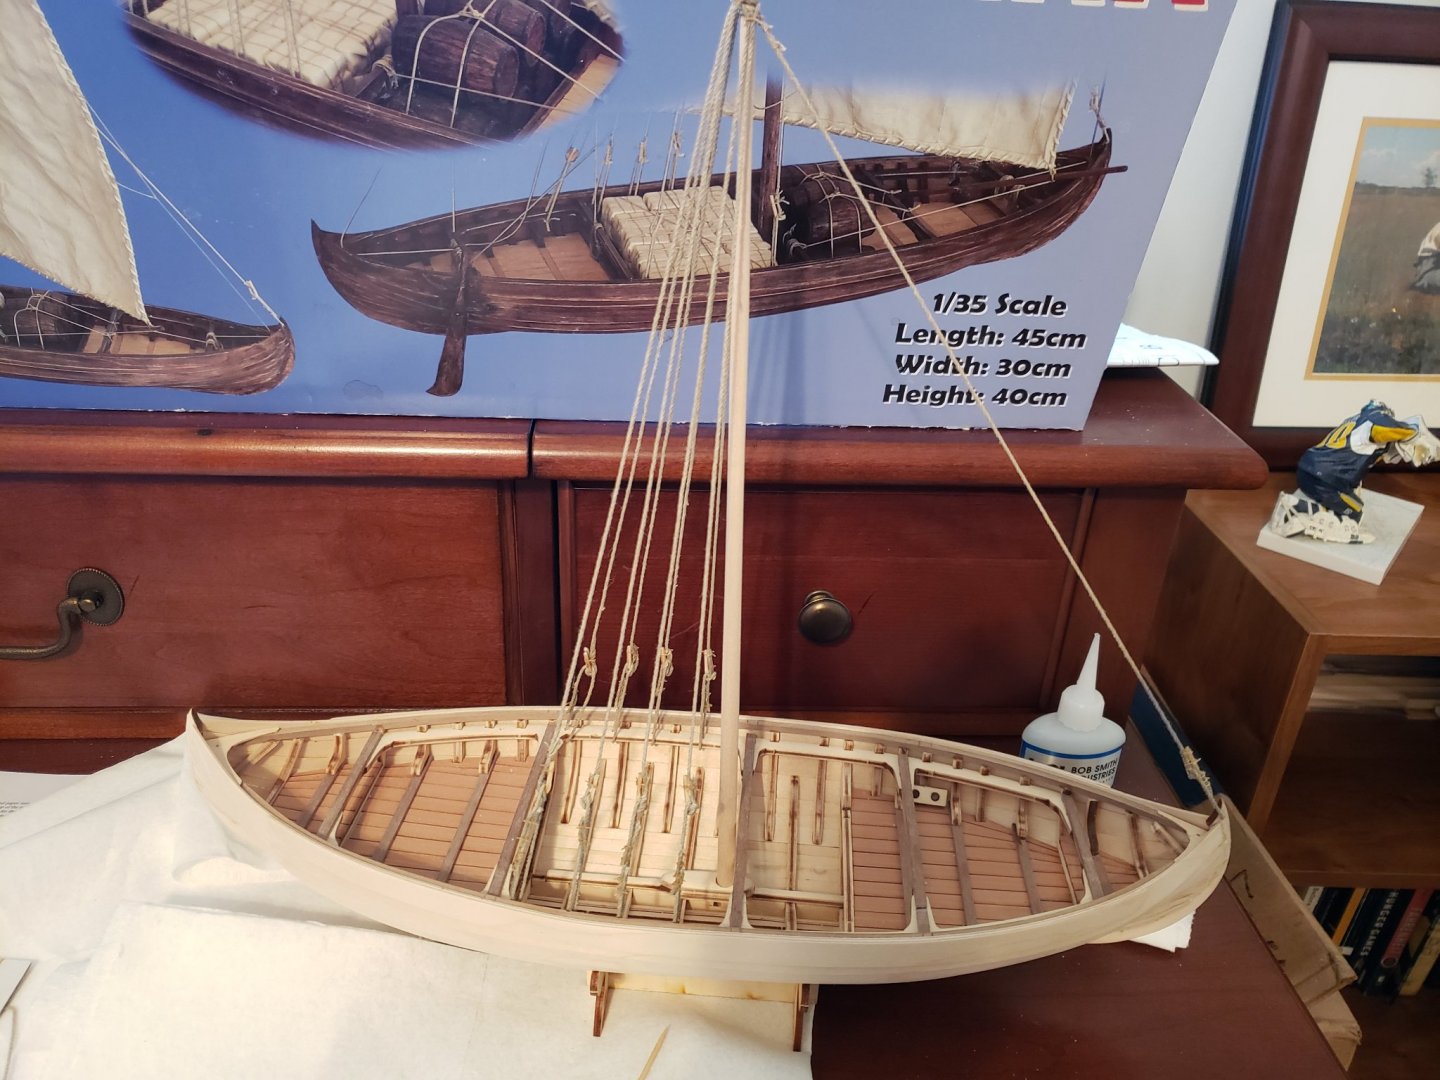
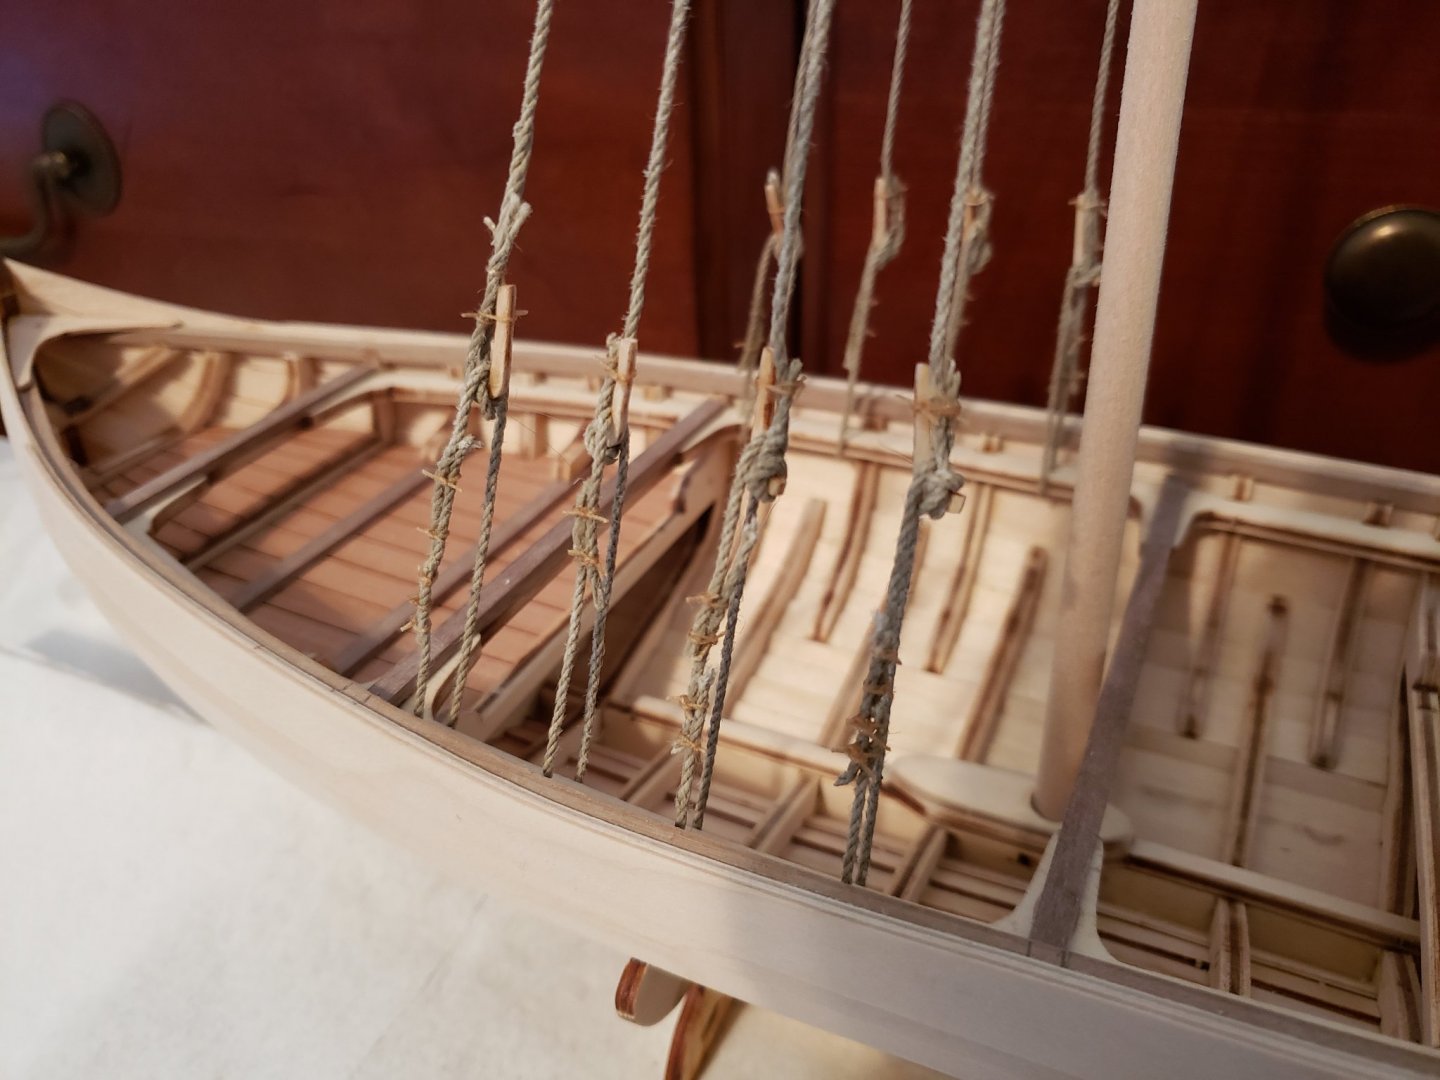
Bit more progress, most of shrouds (backstays ?) installed. One pair yet to complete
- 48 replies
-
- 5
-
-
- dusek
- viking knarr
- (and 1 more)
-
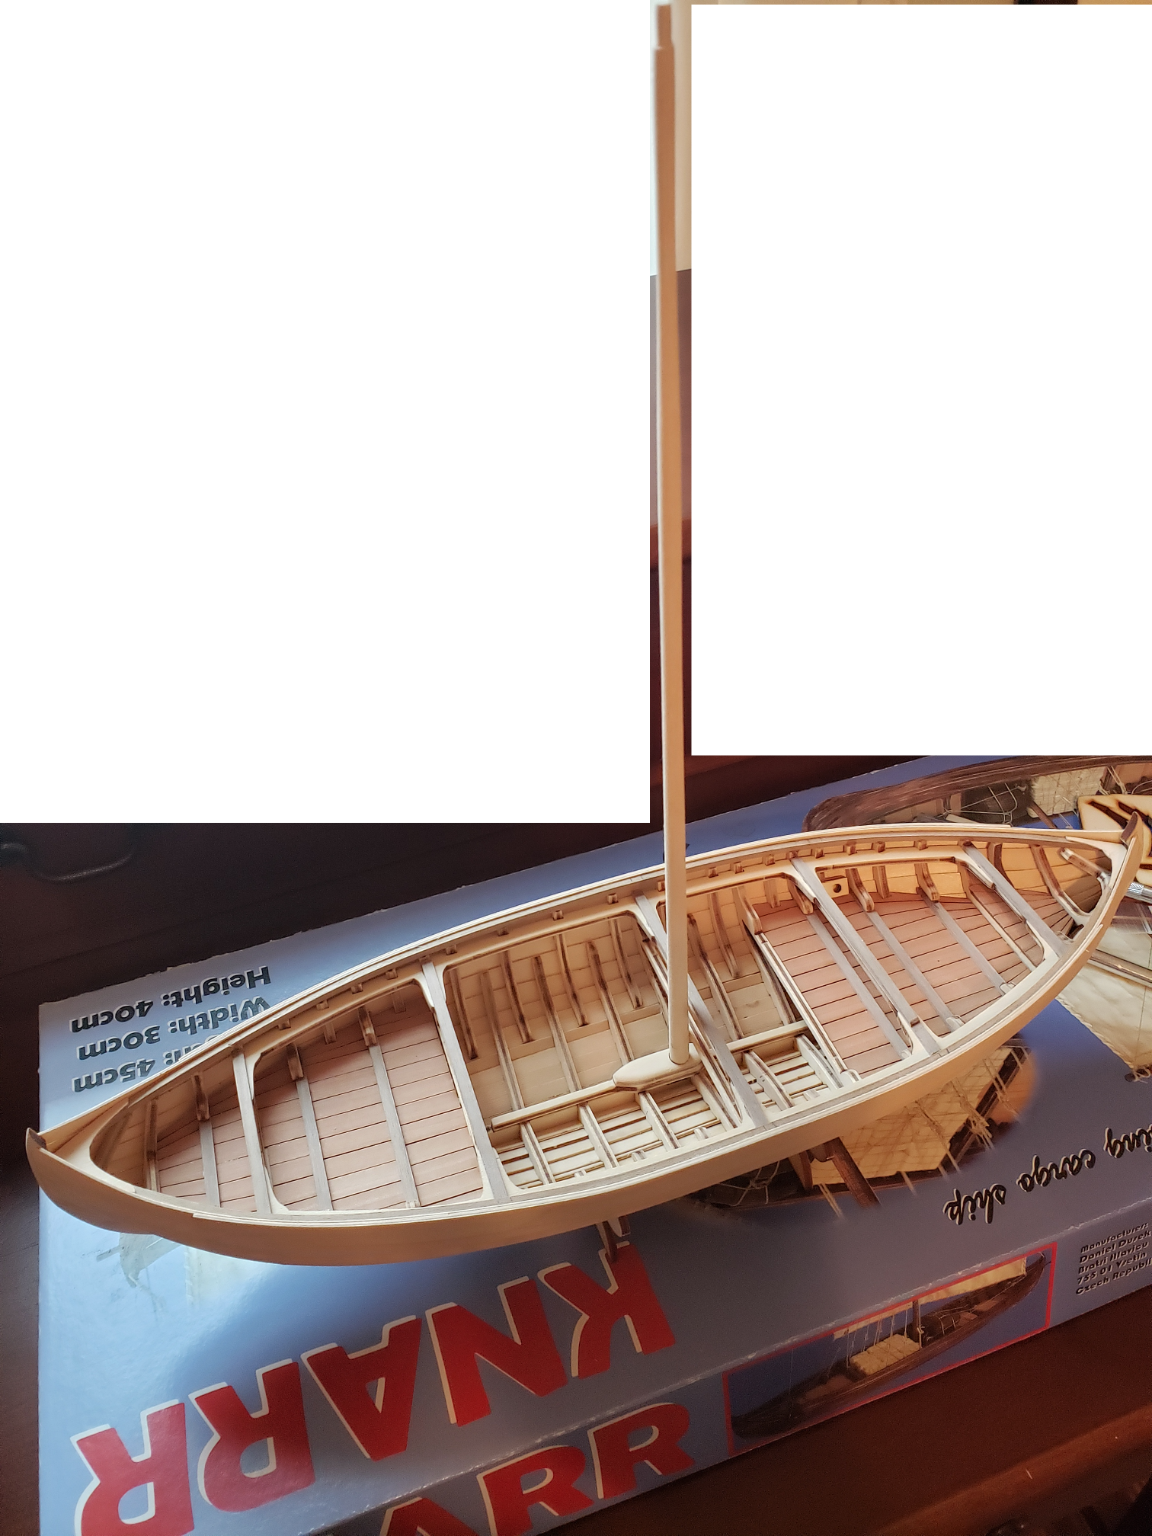
Main mast is permanently installed and rigging has started. Photos Real Soon Now ... (edit, delivered) 🤣 The mast required a slight bit of diameter reduction at the base as well as slight flattening towards the bow, as one of the frames impinged on the mast mount. Easily remedied, but I did not notice when dry fitting. The mast was near perfectly positioned once these adjustments were applied. The fore stay is completed.

- 48 replies
-
- 5
-
-
- dusek
- viking knarr
- (and 1 more)
-
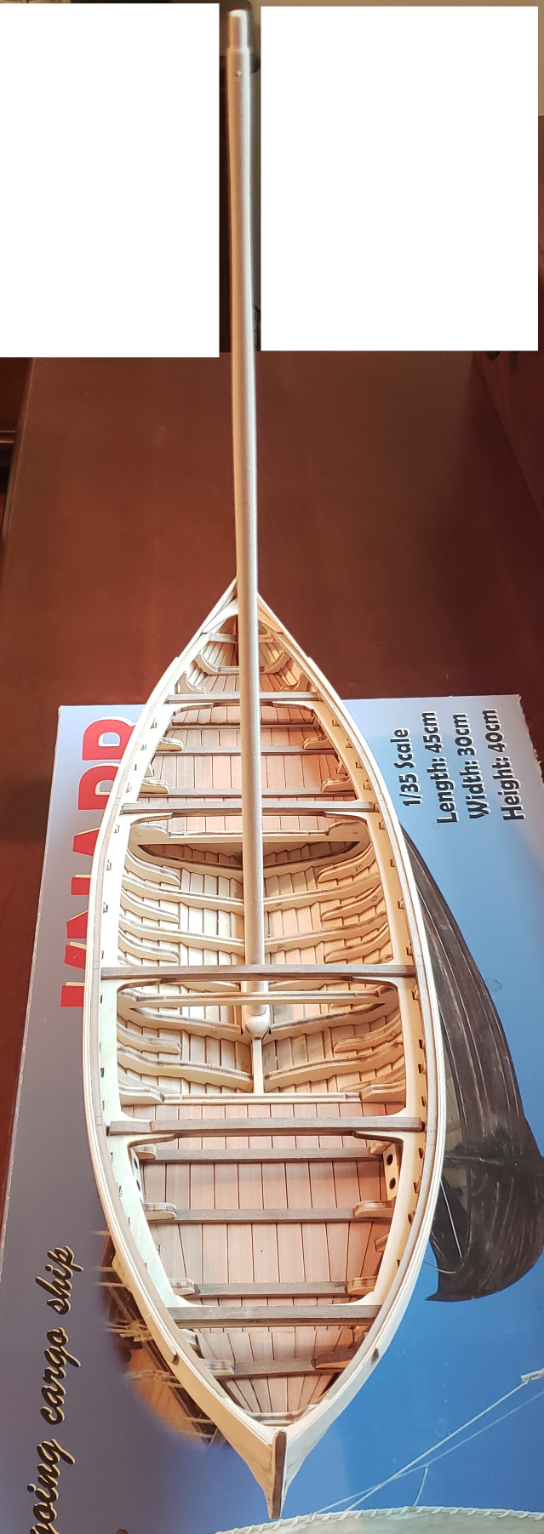
Photos of main mast finished and test fitted. Lots of life in progress presently, which has slowed progress.

- 48 replies
-
- 4
-
-
- dusek
- viking knarr
- (and 1 more)
-
Have most of main mast shaping completed, the step at the top and final sanding remain.
- 48 replies
-
- 1
-
-
- dusek
- viking knarr
- (and 1 more)
-
I have decent progress on the rudder and rudder mount, although the mount is quite tedious and not particularly well designed. I have installed the four frame tops (parts 29 and 35). I feel this was the proper order, as they add nothing to the hull shape, and might have been problematic as no reference is readily available for good installation earlier in construction. I have also made a start on the main mast, which requires quite a bit of material to be removed, and will thus take some time to shape.
- 48 replies
-
- 1
-
-
- dusek
- viking knarr
- (and 1 more)
-
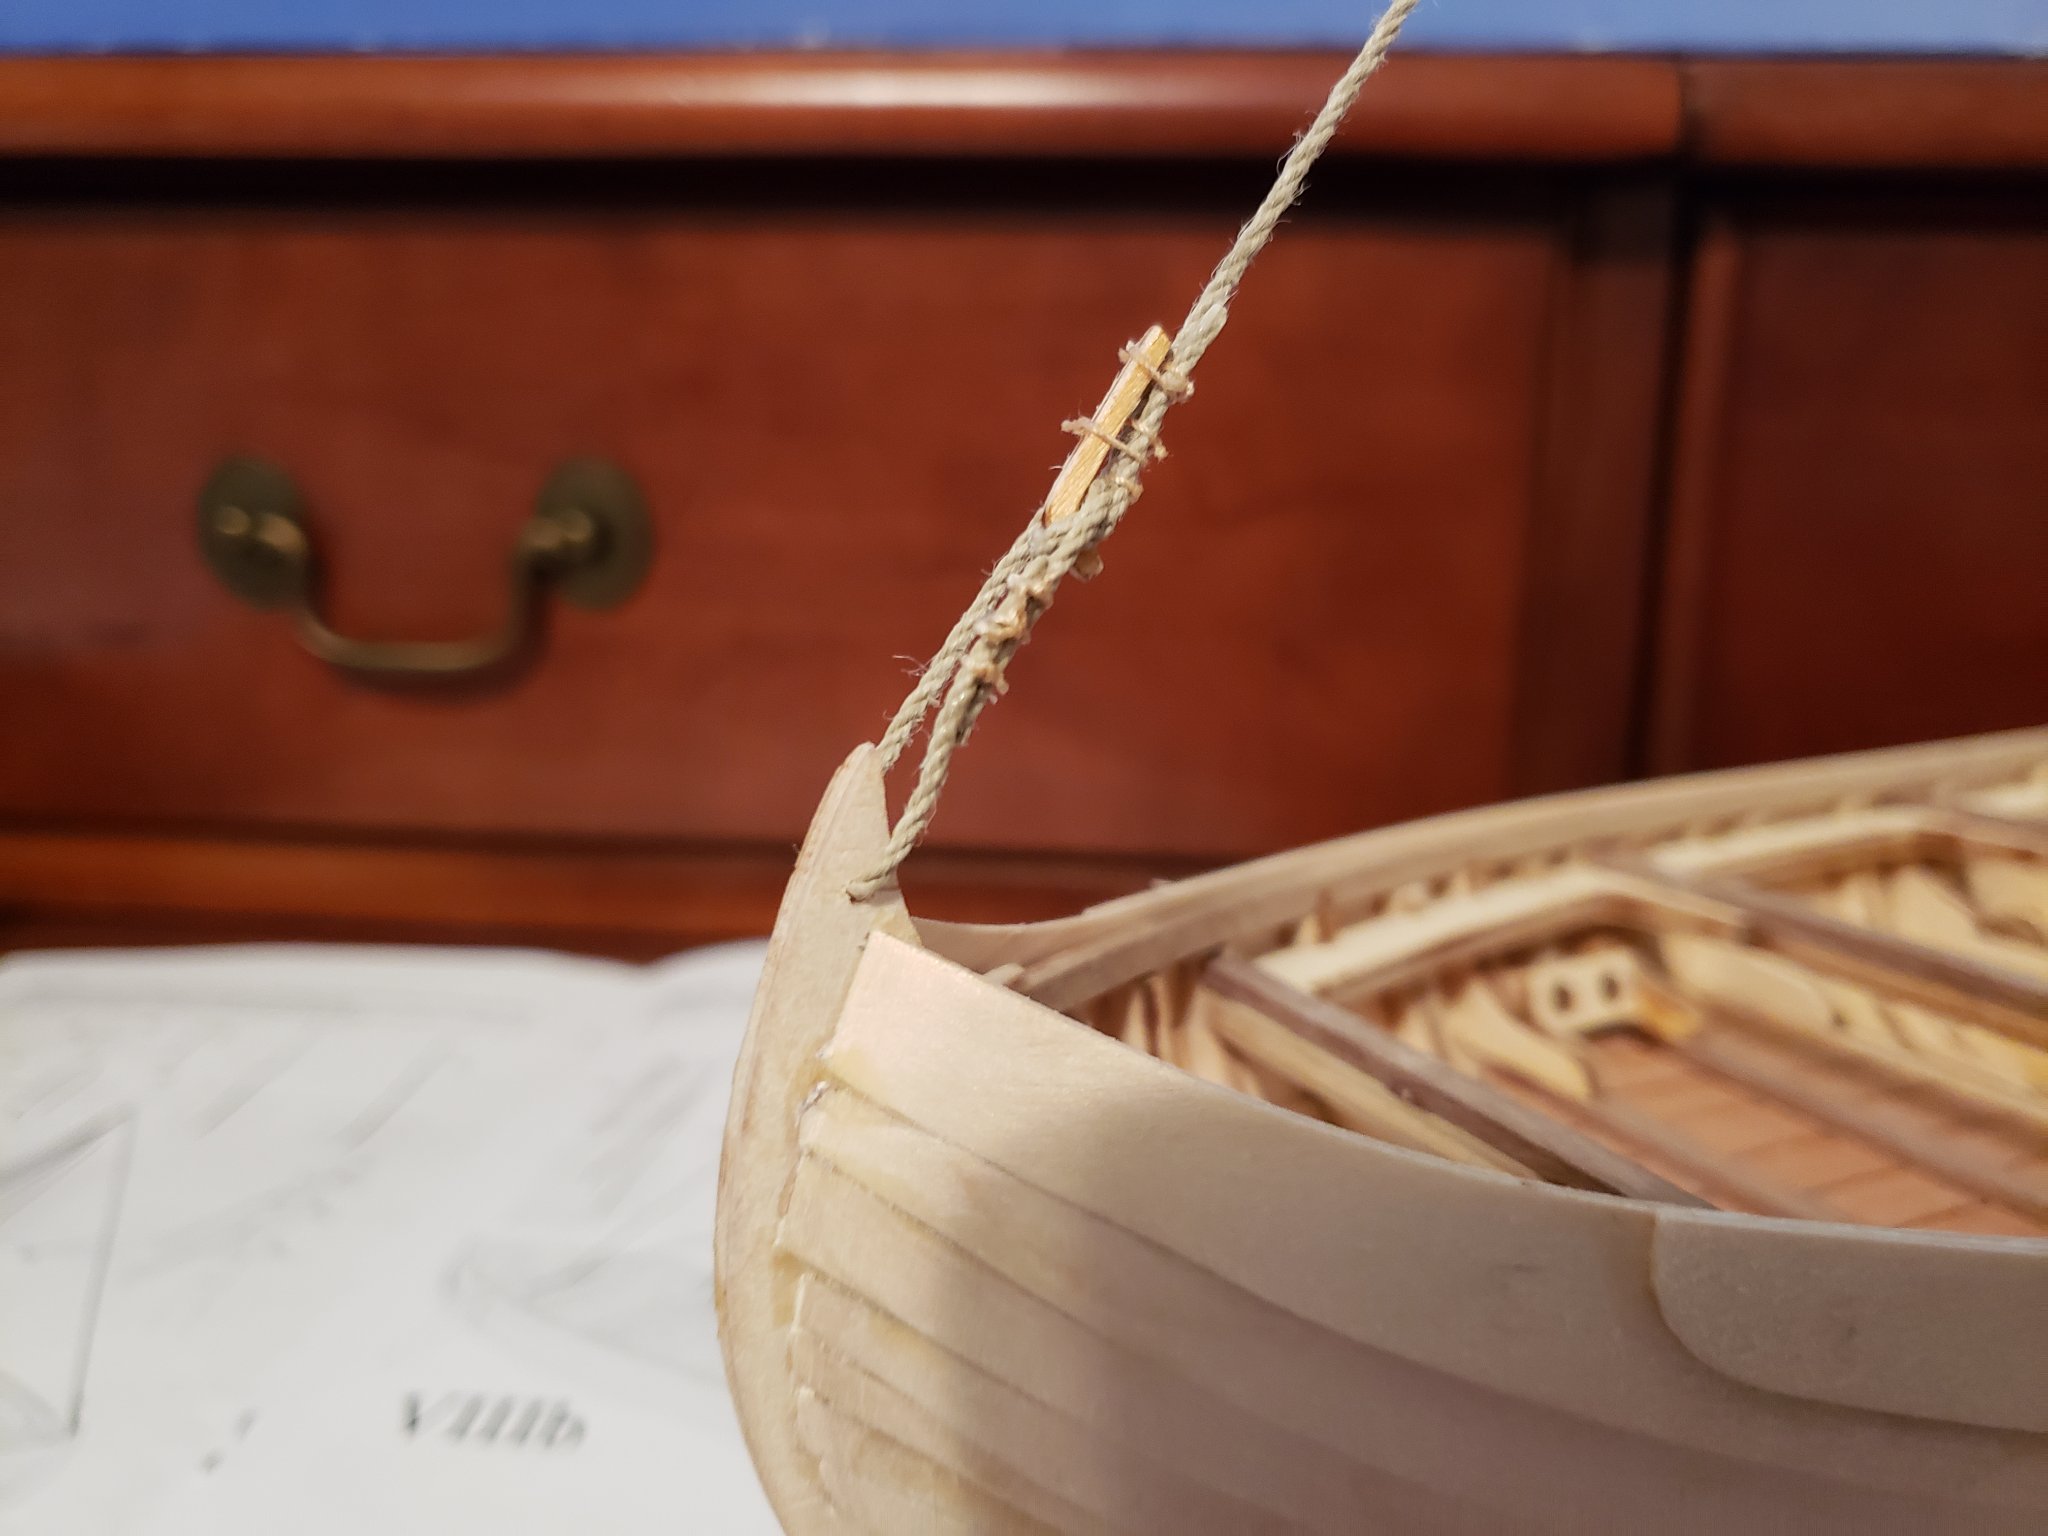
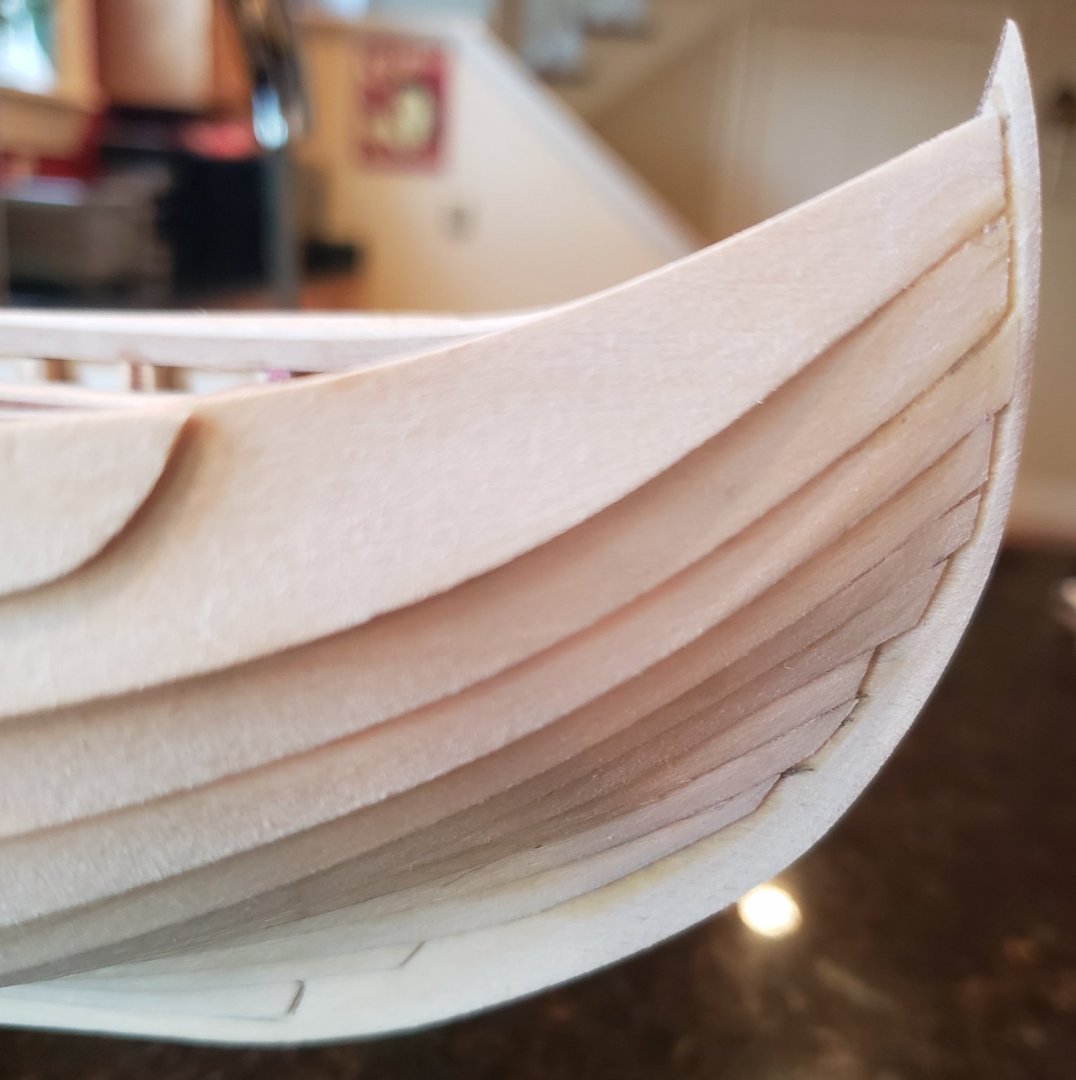
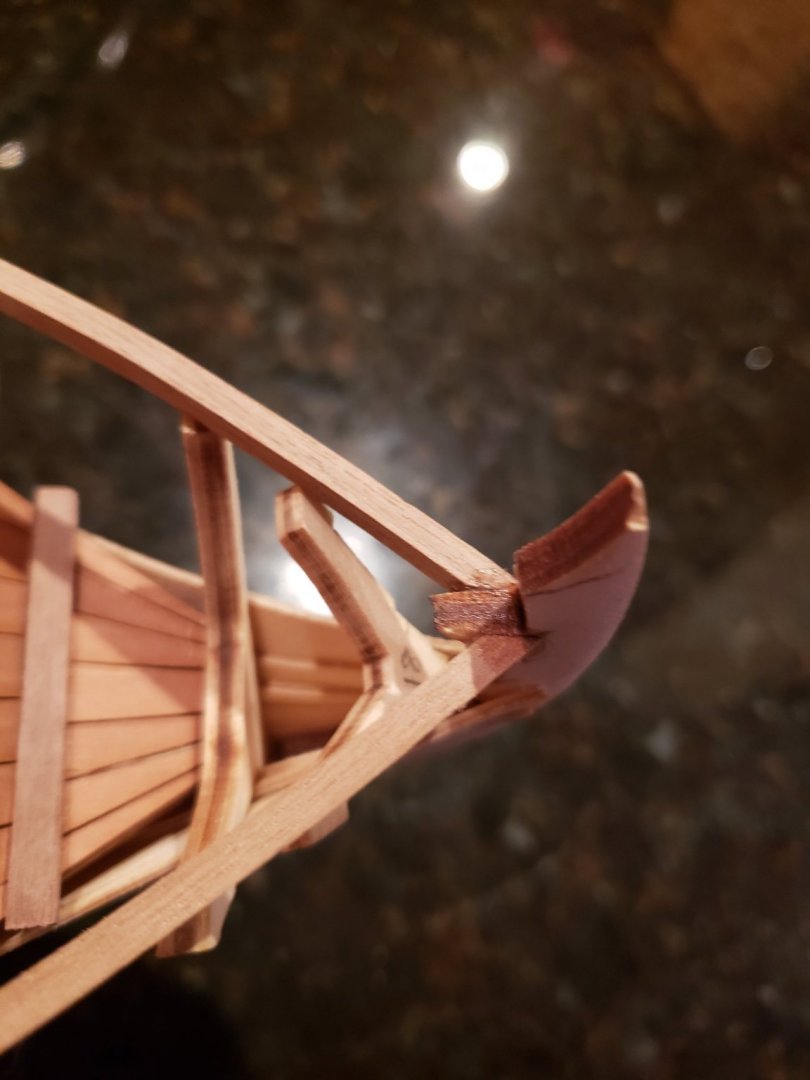
Cleanup of the bow and stern is (mostly) completed. I may spend a bit more time working these areas. I did use some filler to close gaps I am also working on the rudder and rudder mounts, more on those in a separate post. Bow Stern
- 48 replies
-
- 4
-
-
- dusek
- viking knarr
- (and 1 more)
-
All planks have been attached. Still to do is final sanding and clean-up of plank attachments at bow and stern. The process was smoother than anticipated. However, placement of planks is a fussy process, and it is difficult to determine proper bow to stern placement. I do have some mis-alignment, and hopefully this will not be very obvious once I have finished clean-up. During planking, especially the final two planks, some of the frames required removal of quite a bit of material, which, in retrospect, was the correct approach. The final two frames, both at bow and stern, do not align well with the overlying planks. The frame profiles need adjustments that are not parallel with the provided notches. I am unsure if I installed the frames incorrectly, or if the root cause of this mis-alignment is due to some other issue. It seemed the frames may have had a bias bow to stern that I missed during assembly. About half way though the planking, it seemed several frames may have been installed backwards. There is no obvious problem at this stage, but I am left wondering. For the cap rail, my assembly approach seems correct, or at least useable, as it resulted in a lot of bonding surface for the last two planks. The instruction illustrations seemed to indicate a gap between these parts and the keel, which I think would have resulted in quite a mess if followed. The hull is quite solid and stable, and I was able to handle it without issue as I was working the last planks. The last planks are slightly proud of the cap rail; I have not decided whether it is worth the effort to level them amidship as shown in the plans. I knew this as i assembled, but it is requiring more effort than anticipated to remove the excess material. There is a small bit of mis-alignment at the bow; it seems the keel is off perhaps 2mm port to starboard.


- 48 replies
-
- 5
-
-
- dusek
- viking knarr
- (and 1 more)
-
Interesting. My current project required removing substantial material from some of the frames during planking. I'll be updating the build log soon. Seems as though you have (or had) a similar situation.
- 62 replies
-
- 2
-
-
- muscongus bay lobster smack
- Finished
- (and 1 more)
-
My opinion is the frame 10 and transom alignment is not similar to the instruction photos, as you say, @SkiBee How does the transom bottom align with the frame bottoms ? Perhaps dry fitting the stern post pieces as shown in step 10 will provide more information regarding transom alignment.
- 62 replies
-
- 1
-
-
- muscongus bay lobster smack
- Finished
- (and 1 more)
-
Cap rail installation went smoothly, and is finished. I decided to attach them to the keel at bow and stern, as shown below. I think a bit of sanding will be required to properly attach parts 55 and 56, that will need to wait till tomorrow. Bow Stern

- 48 replies
-
- 3
-
-
-
- dusek
- viking knarr
- (and 1 more)
-
Cap rails clamped for initial fitting. Going to finish cap rail installation, including parts 54, 55, and 56, prior to adding plank 44 as working area restricted with latter installed.
- 48 replies
-
- 2
-
-
- dusek
- viking knarr
- (and 1 more)
-
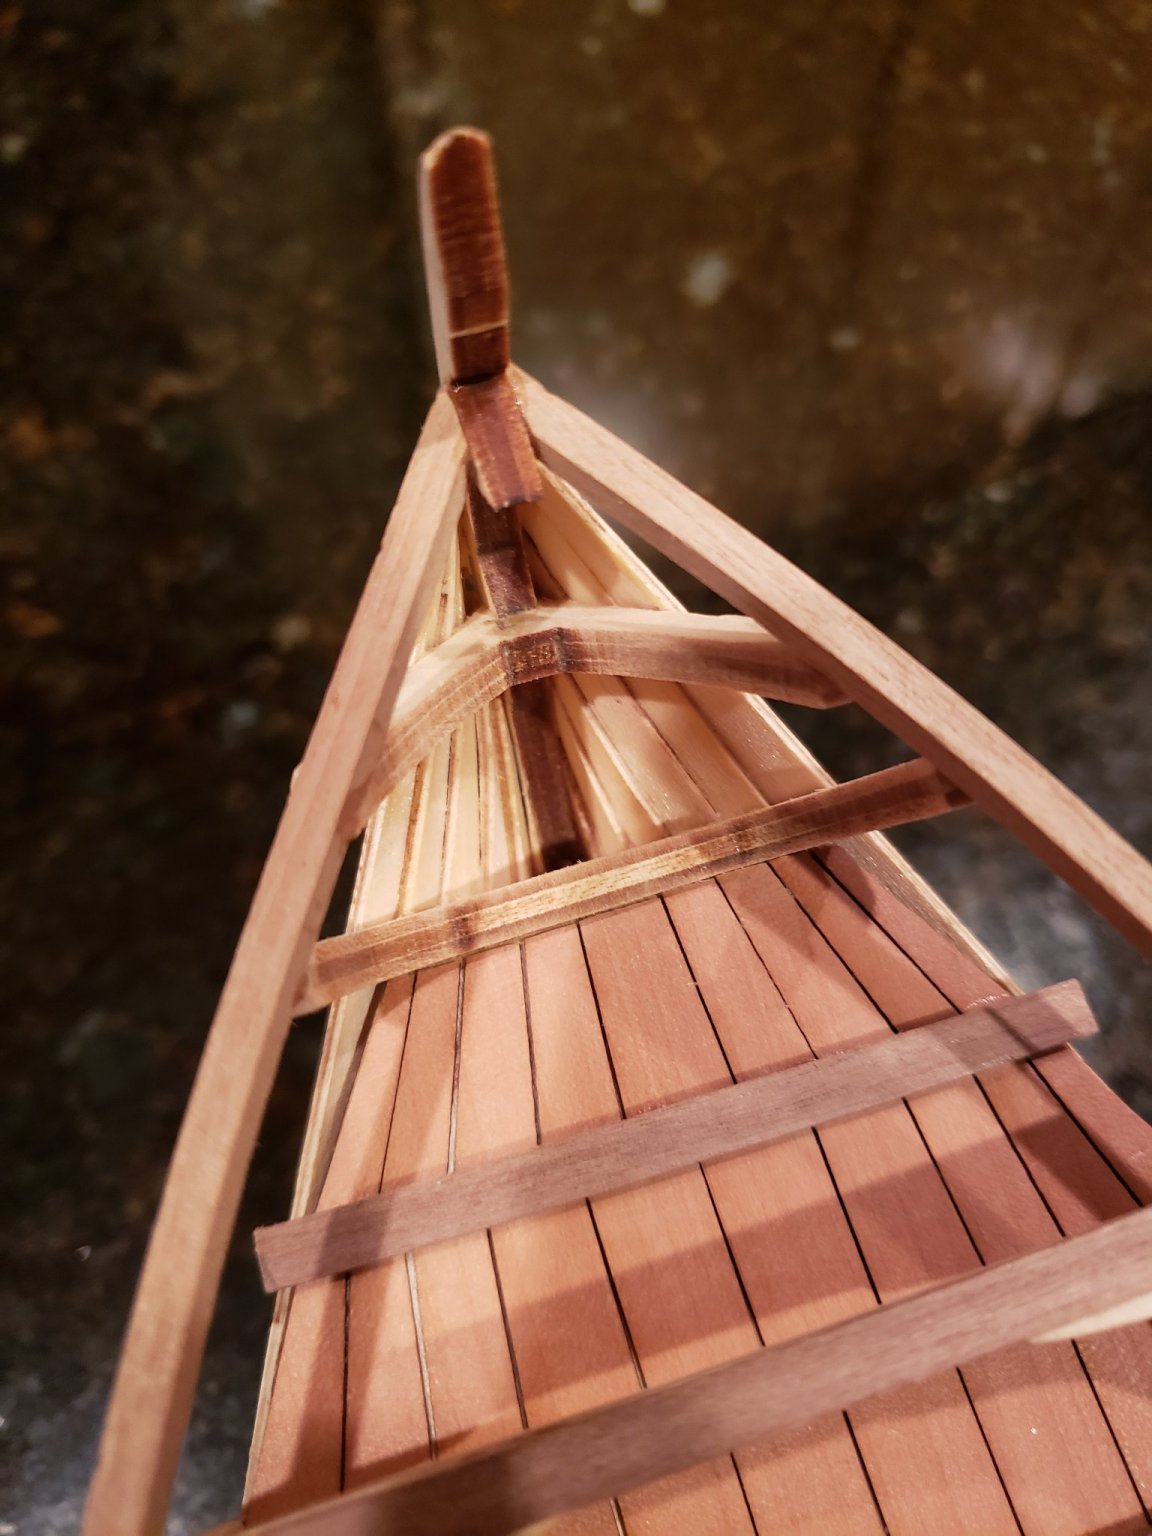
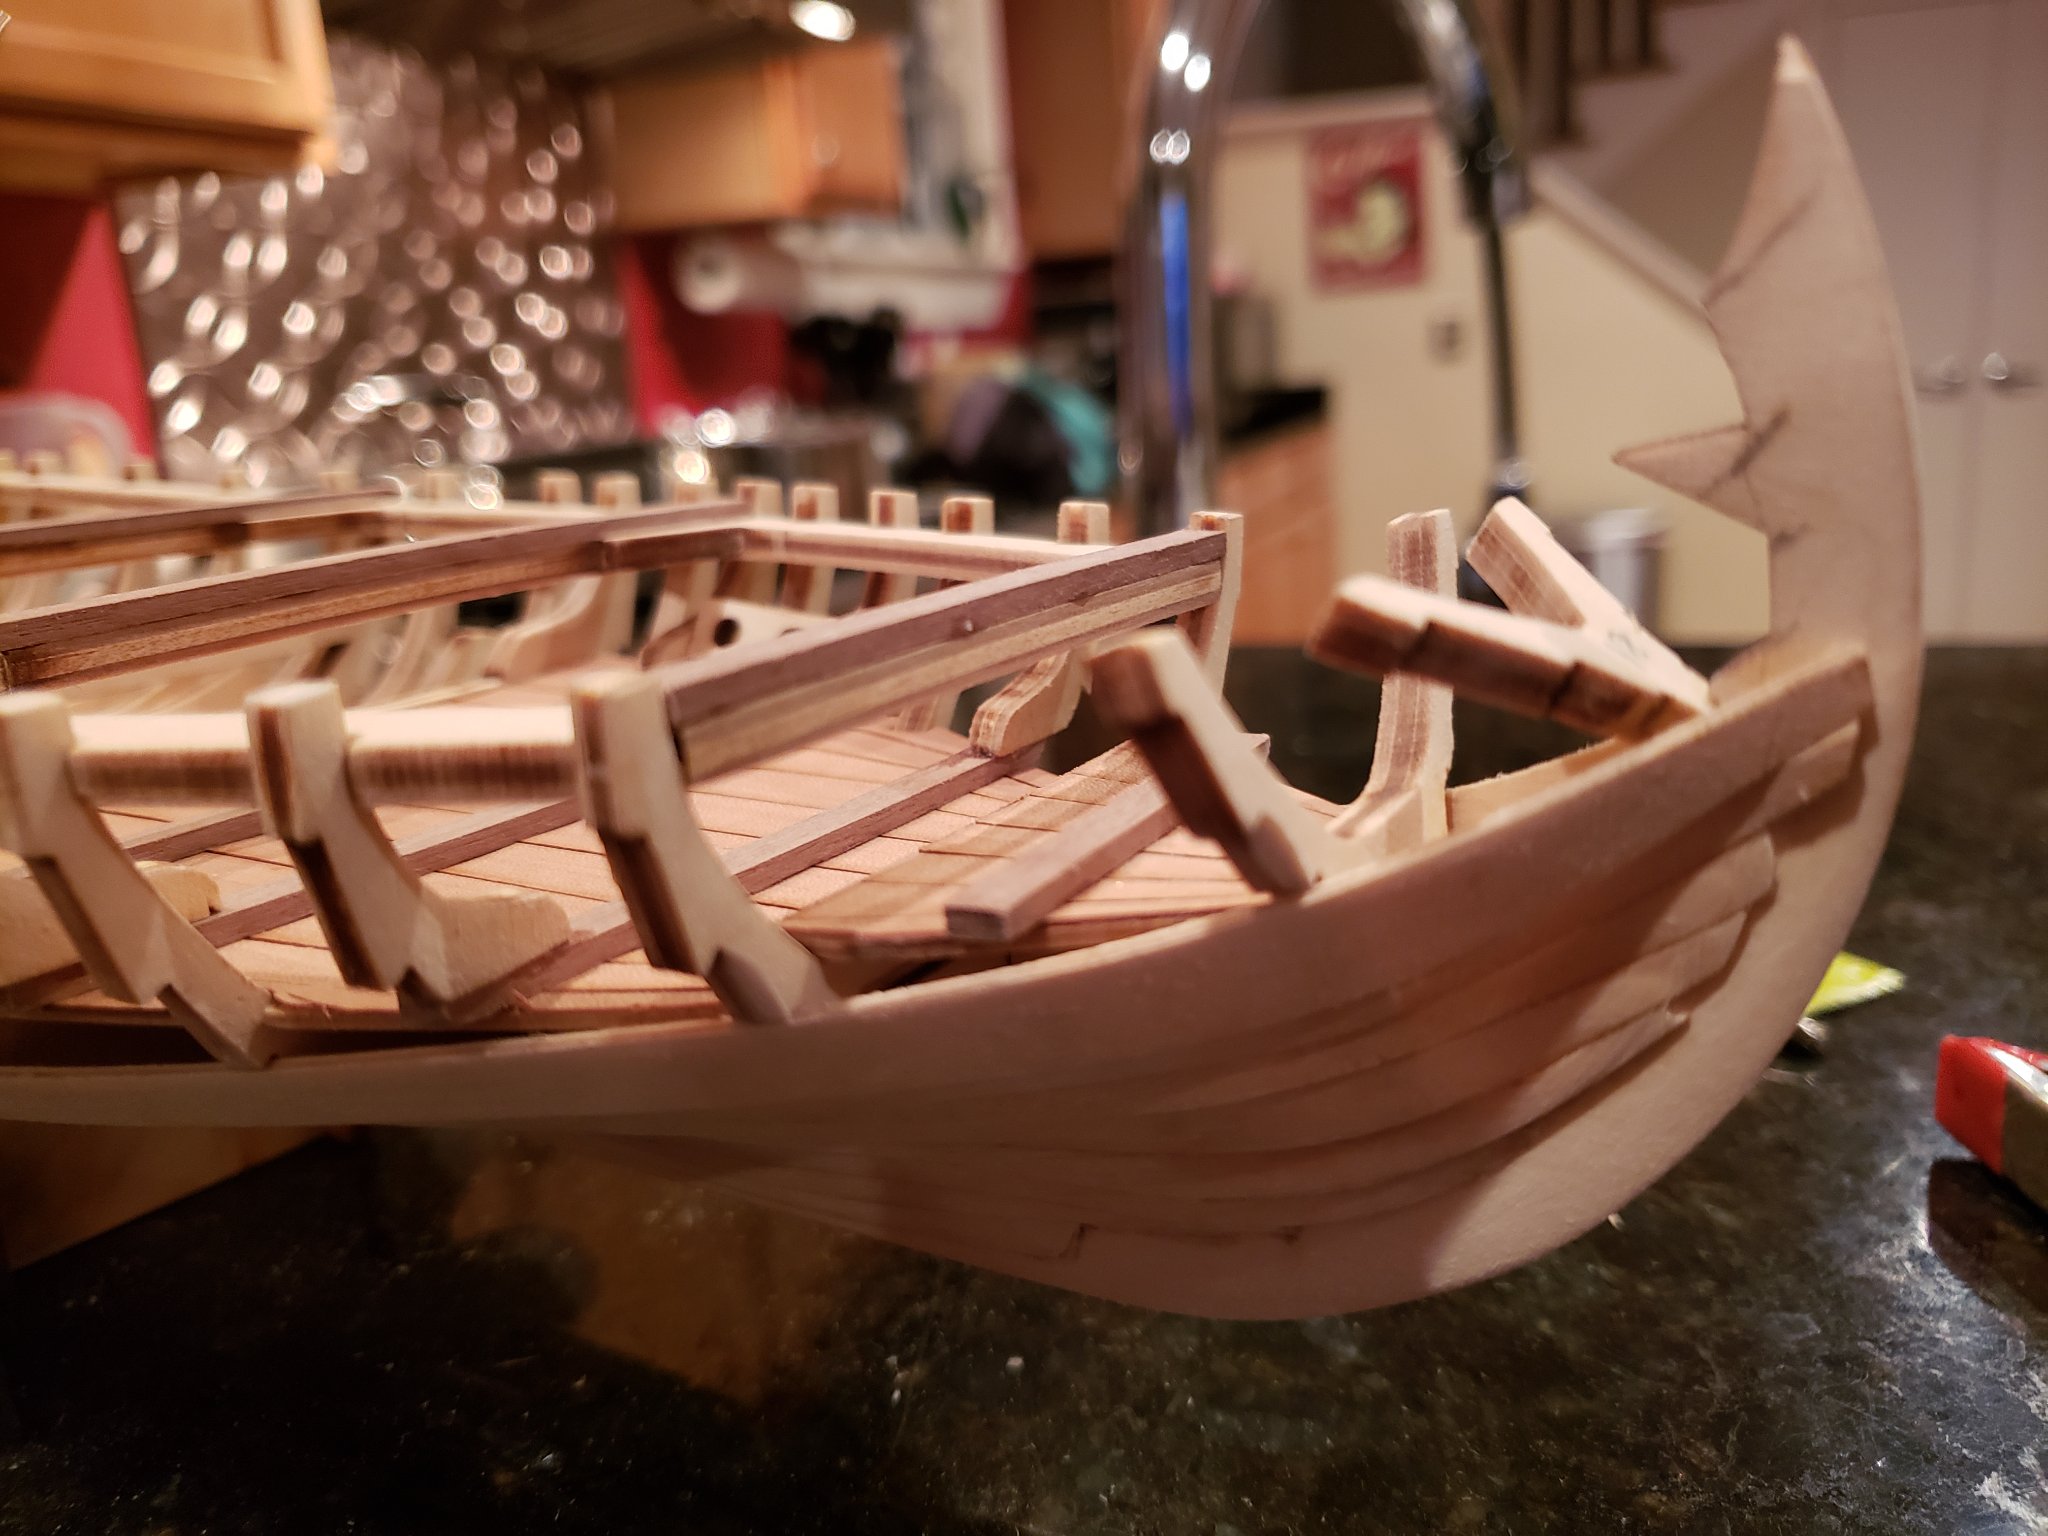
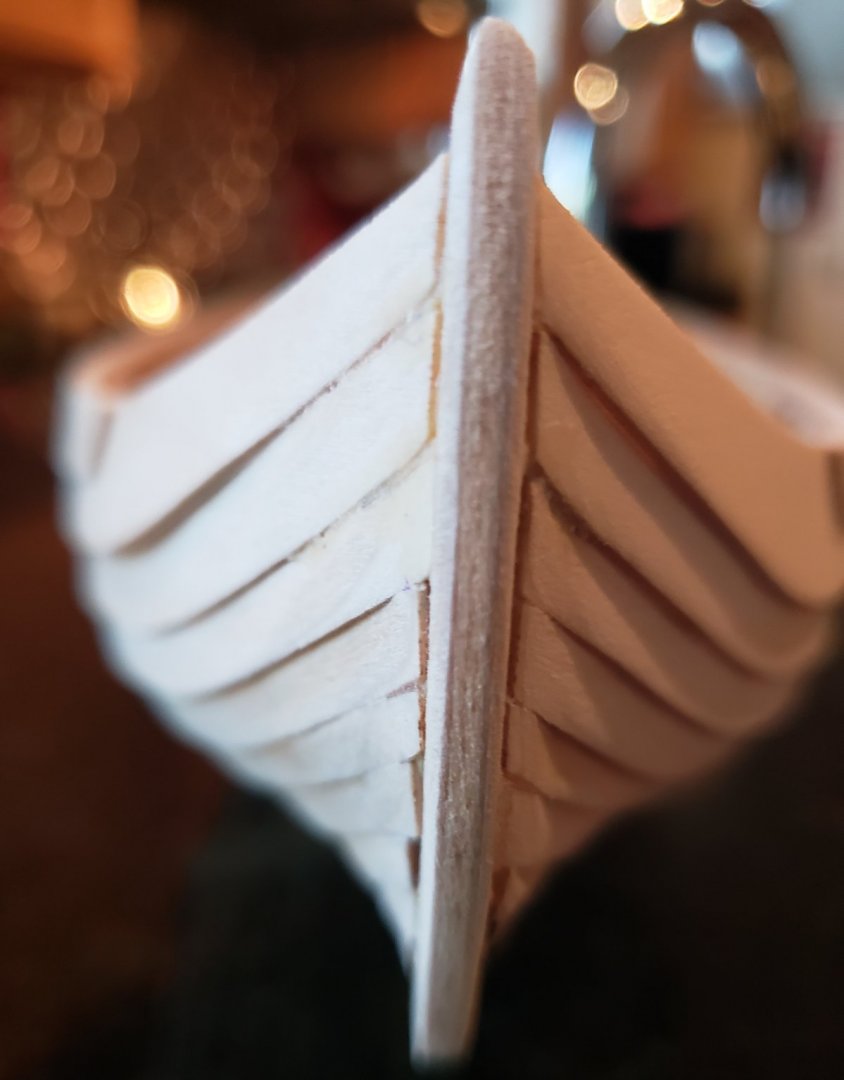
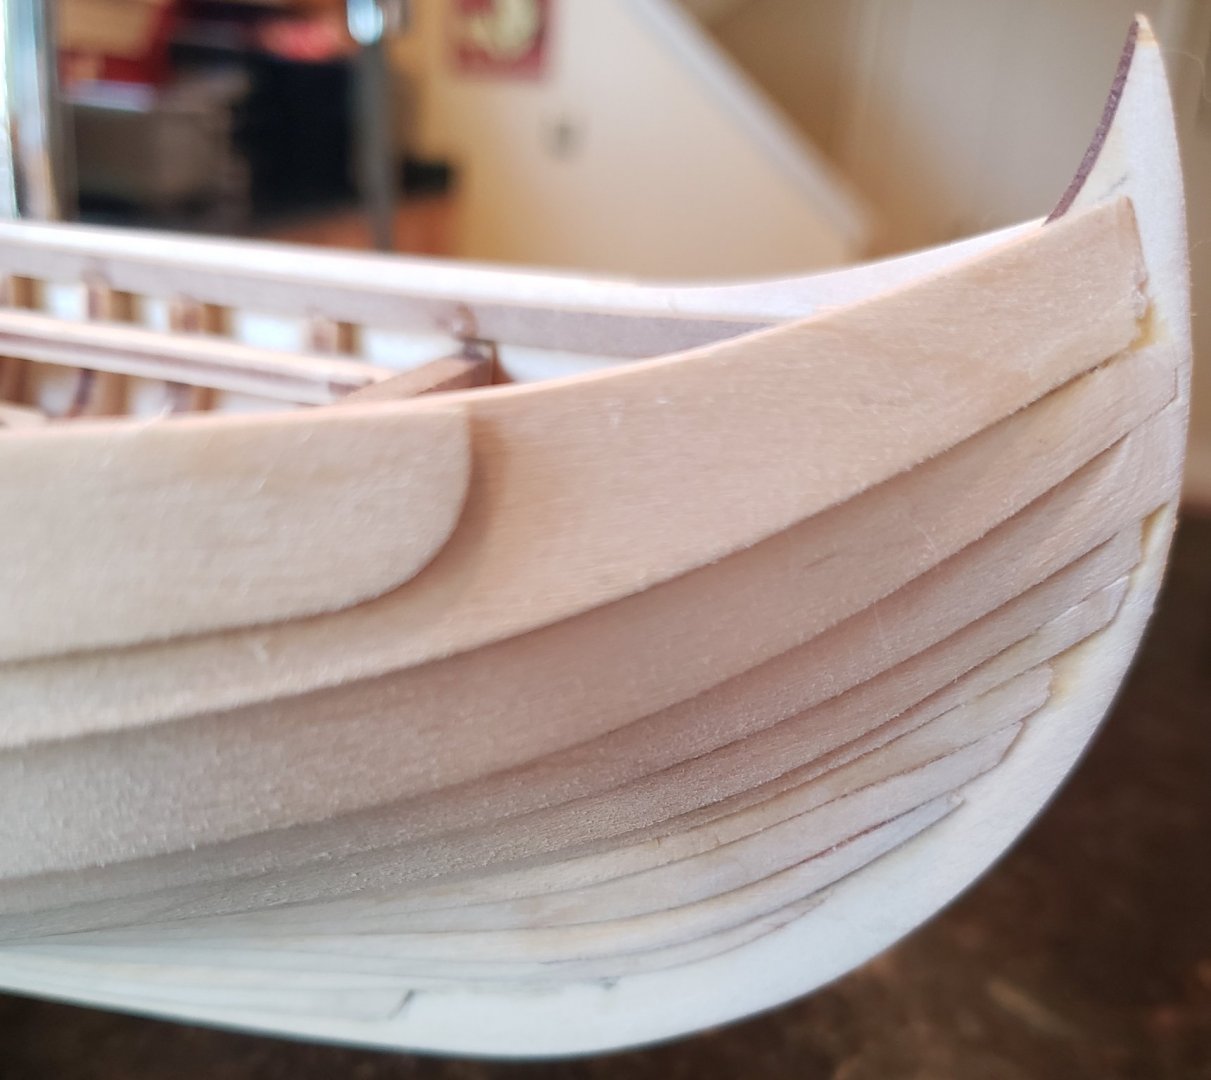
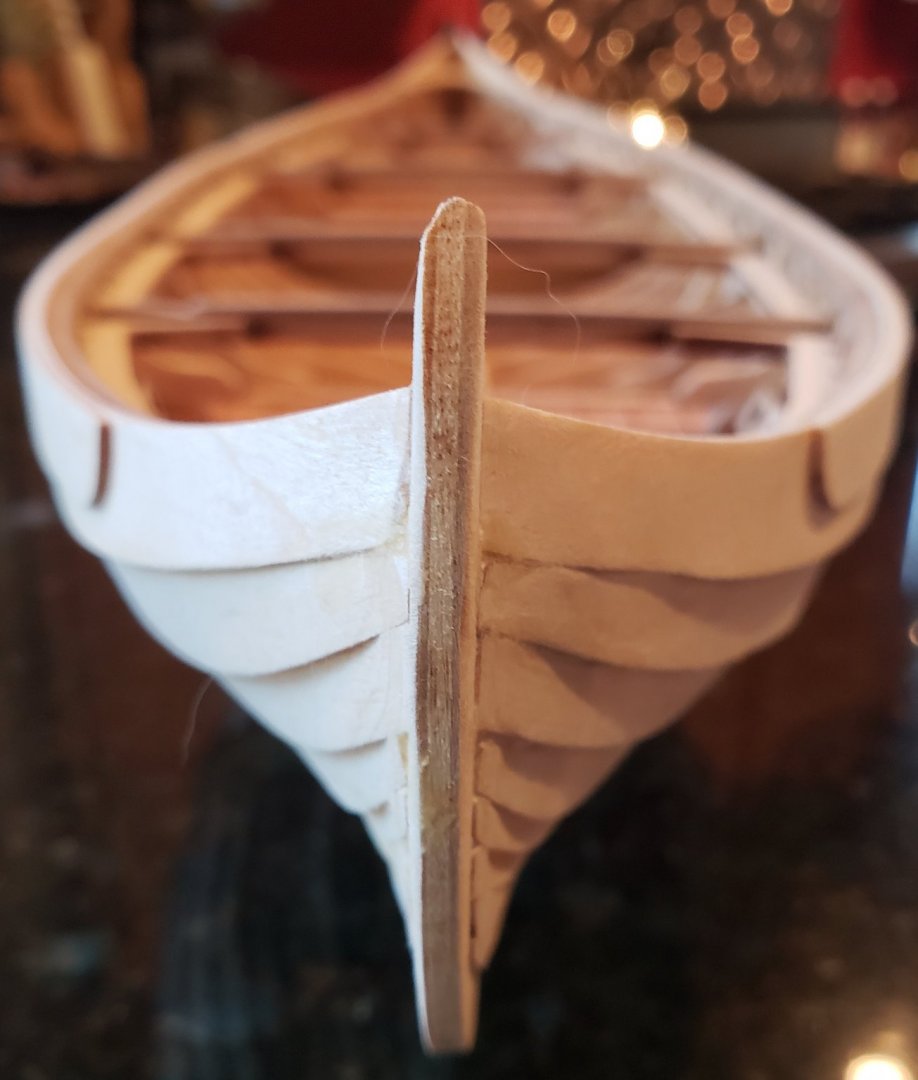
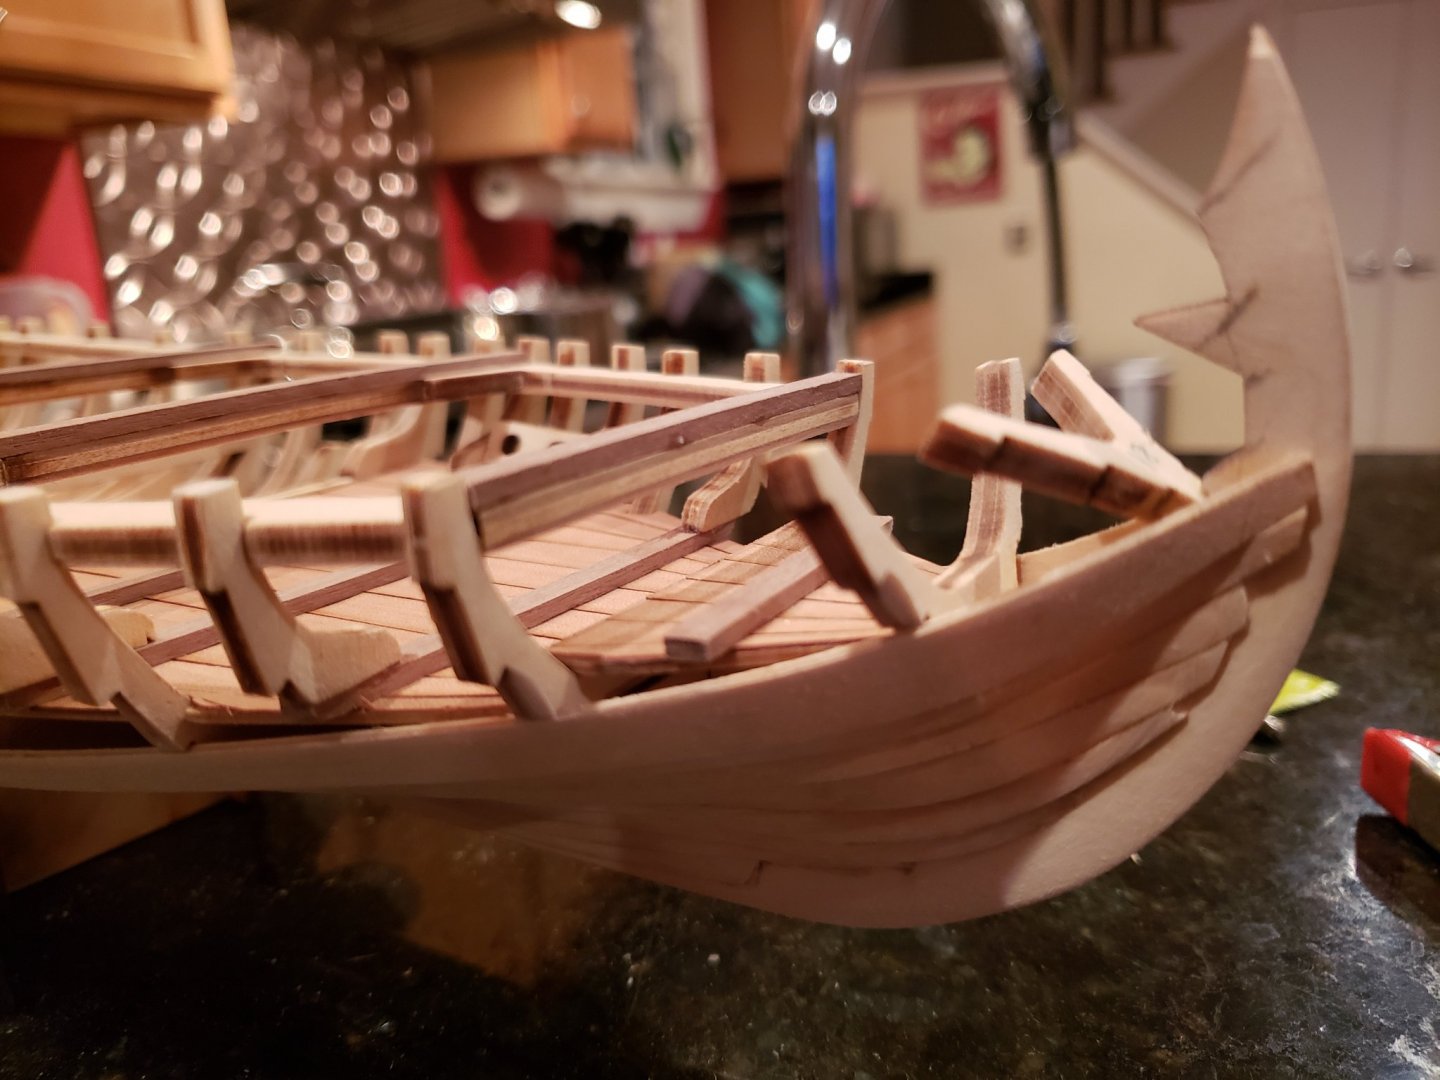
Two more planks are installed, and the full set of shorter frames. The frame tops have been leveled, and I am working on bending the cap rails (parts 54) to fit. It is unclear from the instructions how the cap rails join to the bow and stern. I am assuming they will need to be beveled to fit/join the keel at bow and stern, and the cap pieces 55 and 56 fit over them and attach to the keel at the triangular features visible in the detail photos below. I may attach planks 44 prior to cap rail installation if a dry fit shows no interference. Note this is out of the sequence in the instructions, which has the cap rails attached before planks 42 thru 44. Bow facing viewer Stern facing viewer Interior Bow detail Stern detail


- 48 replies
-
- 5
-
-
- dusek
- viking knarr
- (and 1 more)
-
@bigpetr, Thanks for the additional info, I appreciate your sharing information from a source I cannot access. I had had no success with google searches for clear photos. Also, I did not know this kit is after Skuldelev 1
- 48 replies
-
- 1
-
-
- dusek
- viking knarr
- (and 1 more)
-
🤣 maybe .... Fortunate I have not sanded them (yet)
-
@SkiBee, looks like you had to shim along the spine for all frames, am I interpreting the last photo correctly ?
- 62 replies
-
- 1
-
-
- muscongus bay lobster smack
- Finished
- (and 1 more)
-
@Louie da fly, you are referring to plank 40, as shown below. It is at an odd angle WRT to the surrounding planks. I am considering sanding but would like to see some reference photos before doing any adjustments.
- 48 replies
-
- 2
-
-
- dusek
- viking knarr
- (and 1 more)
-
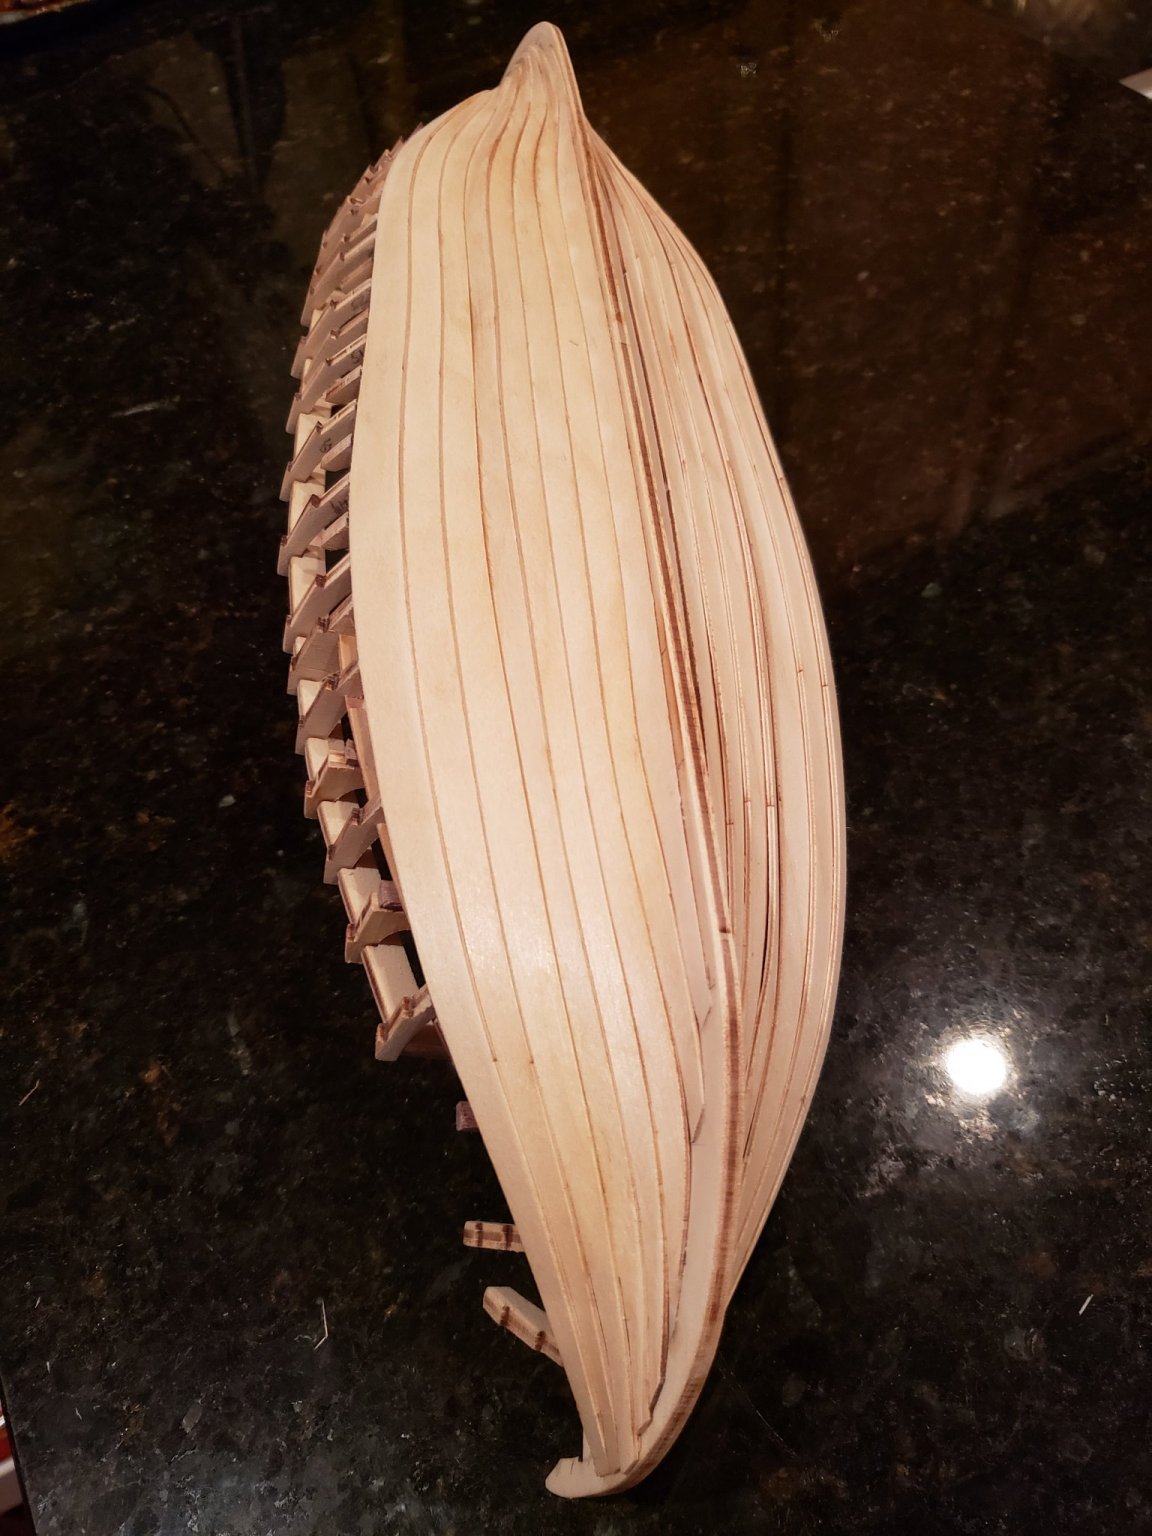
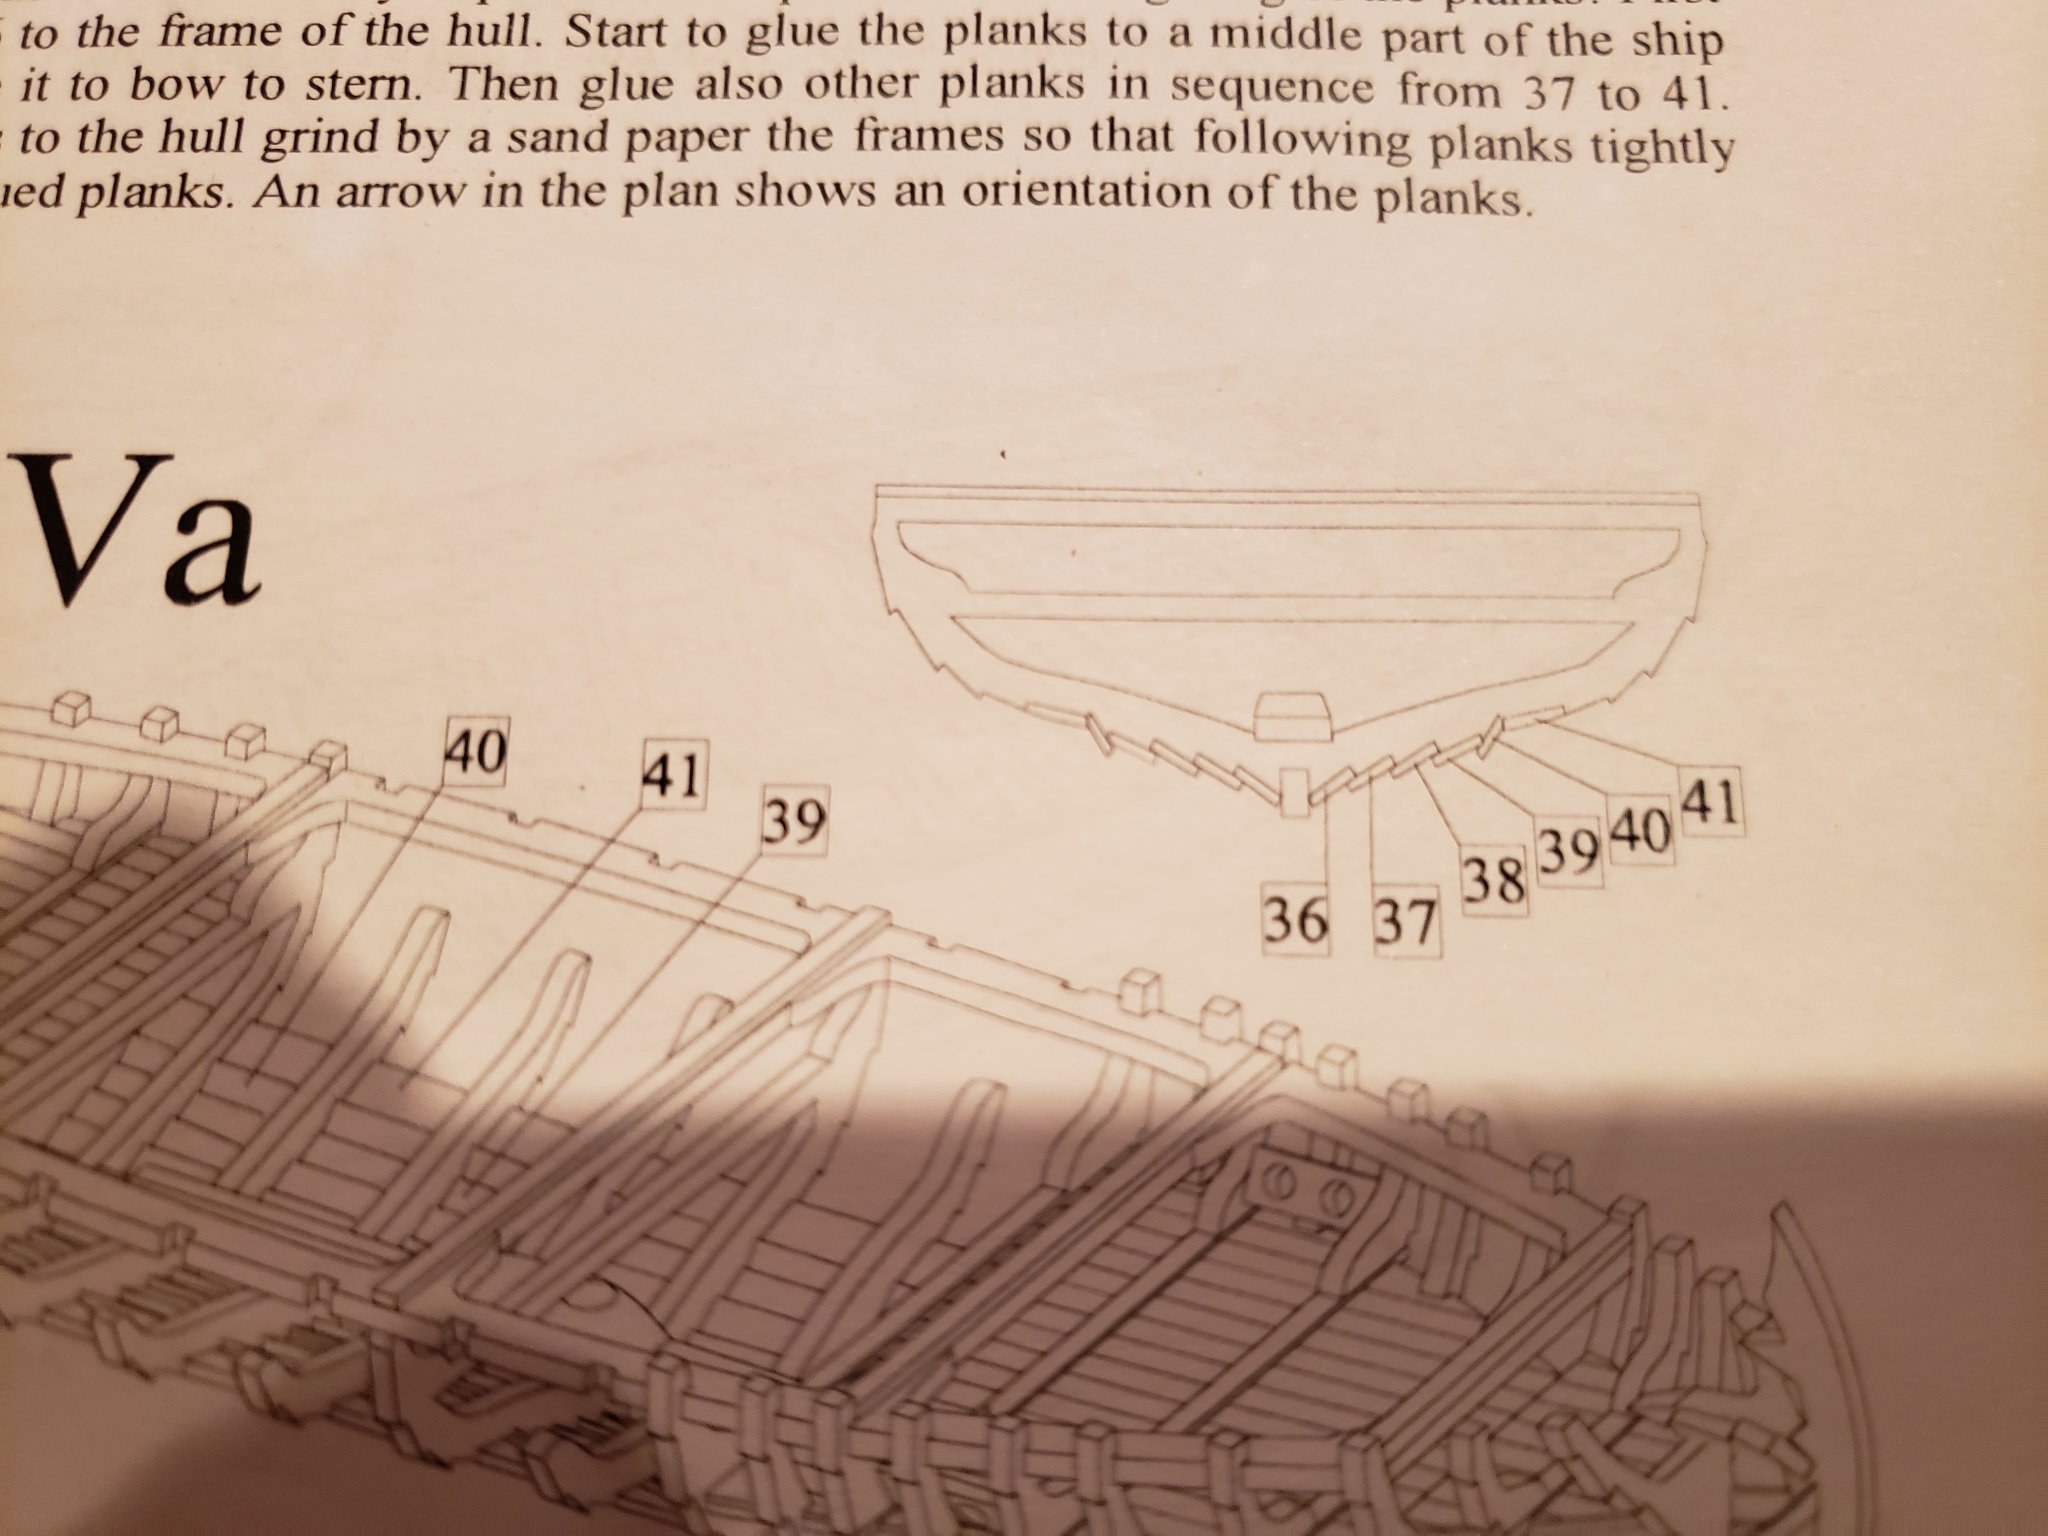
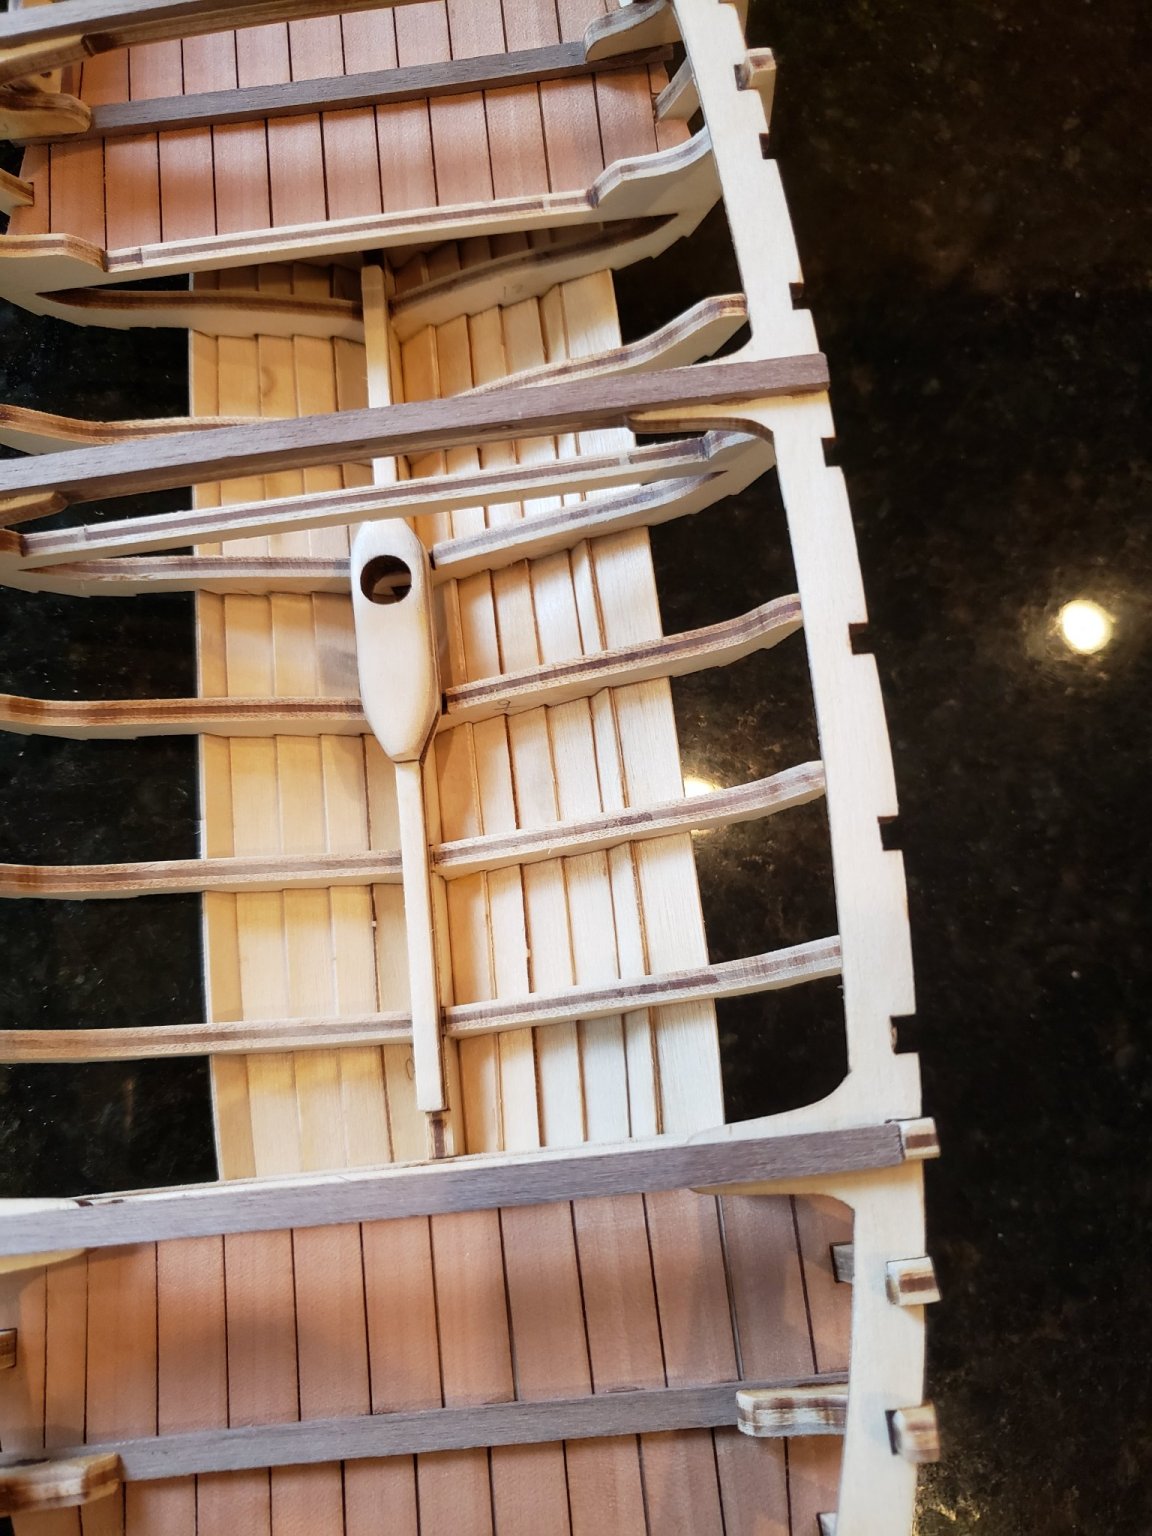
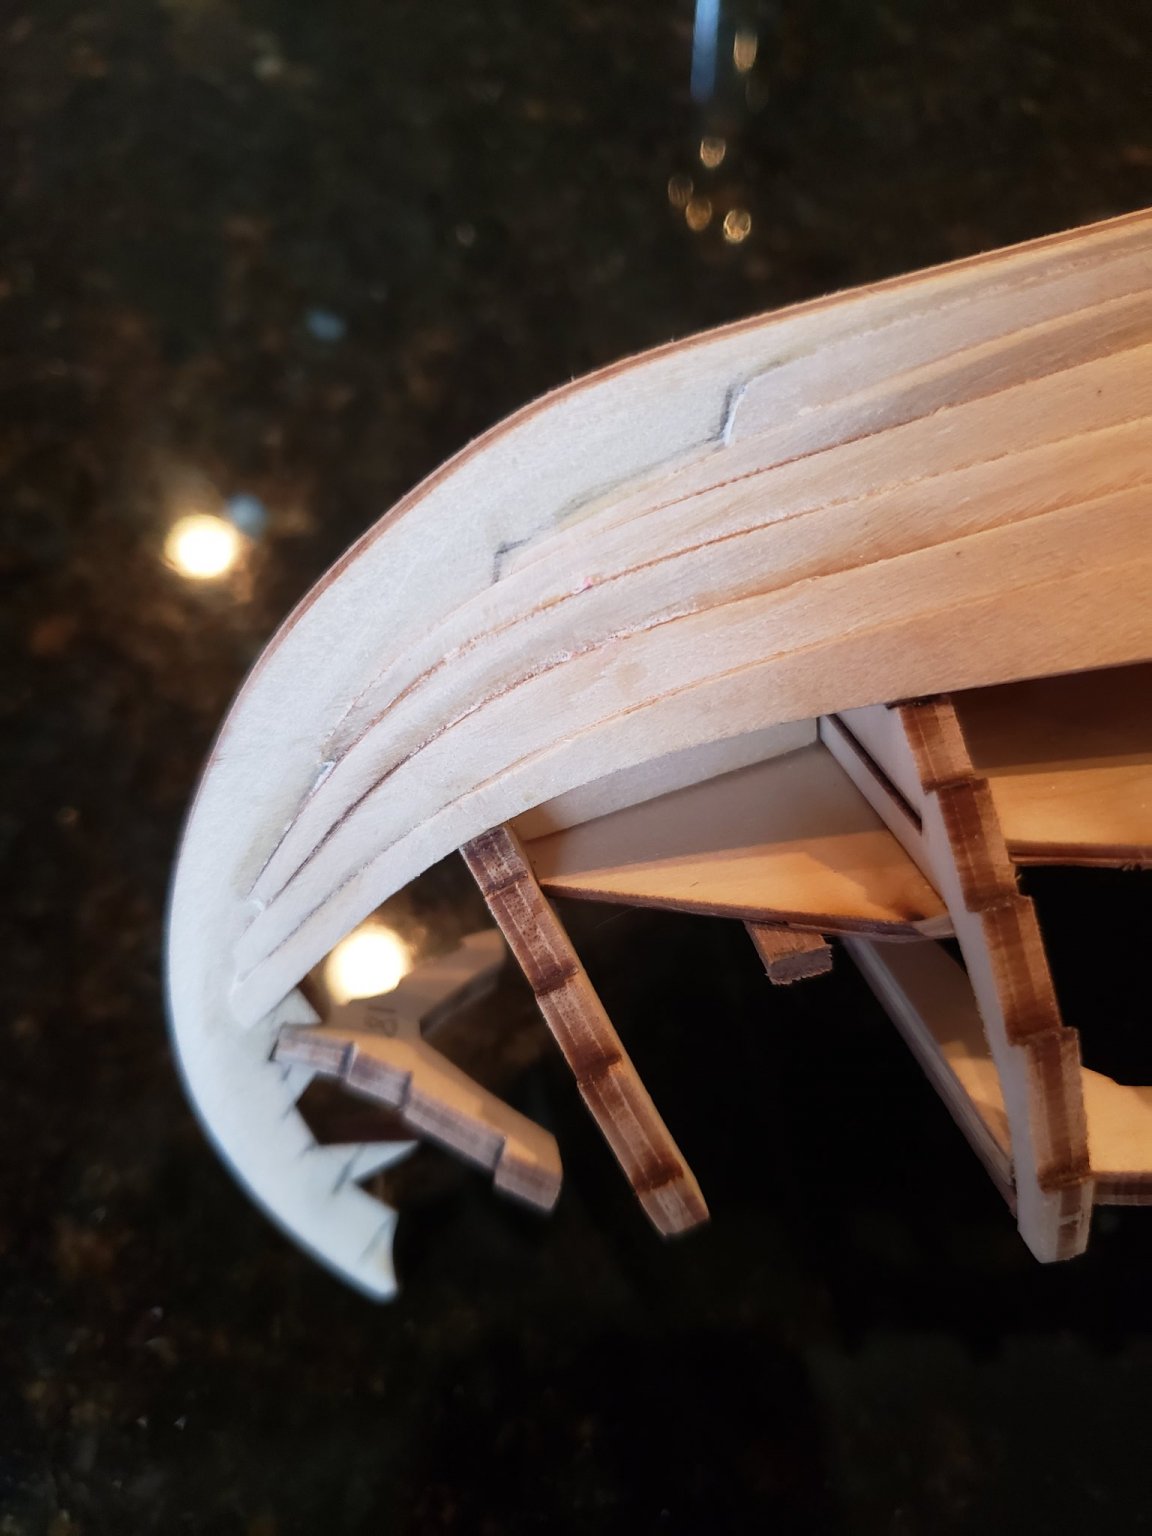
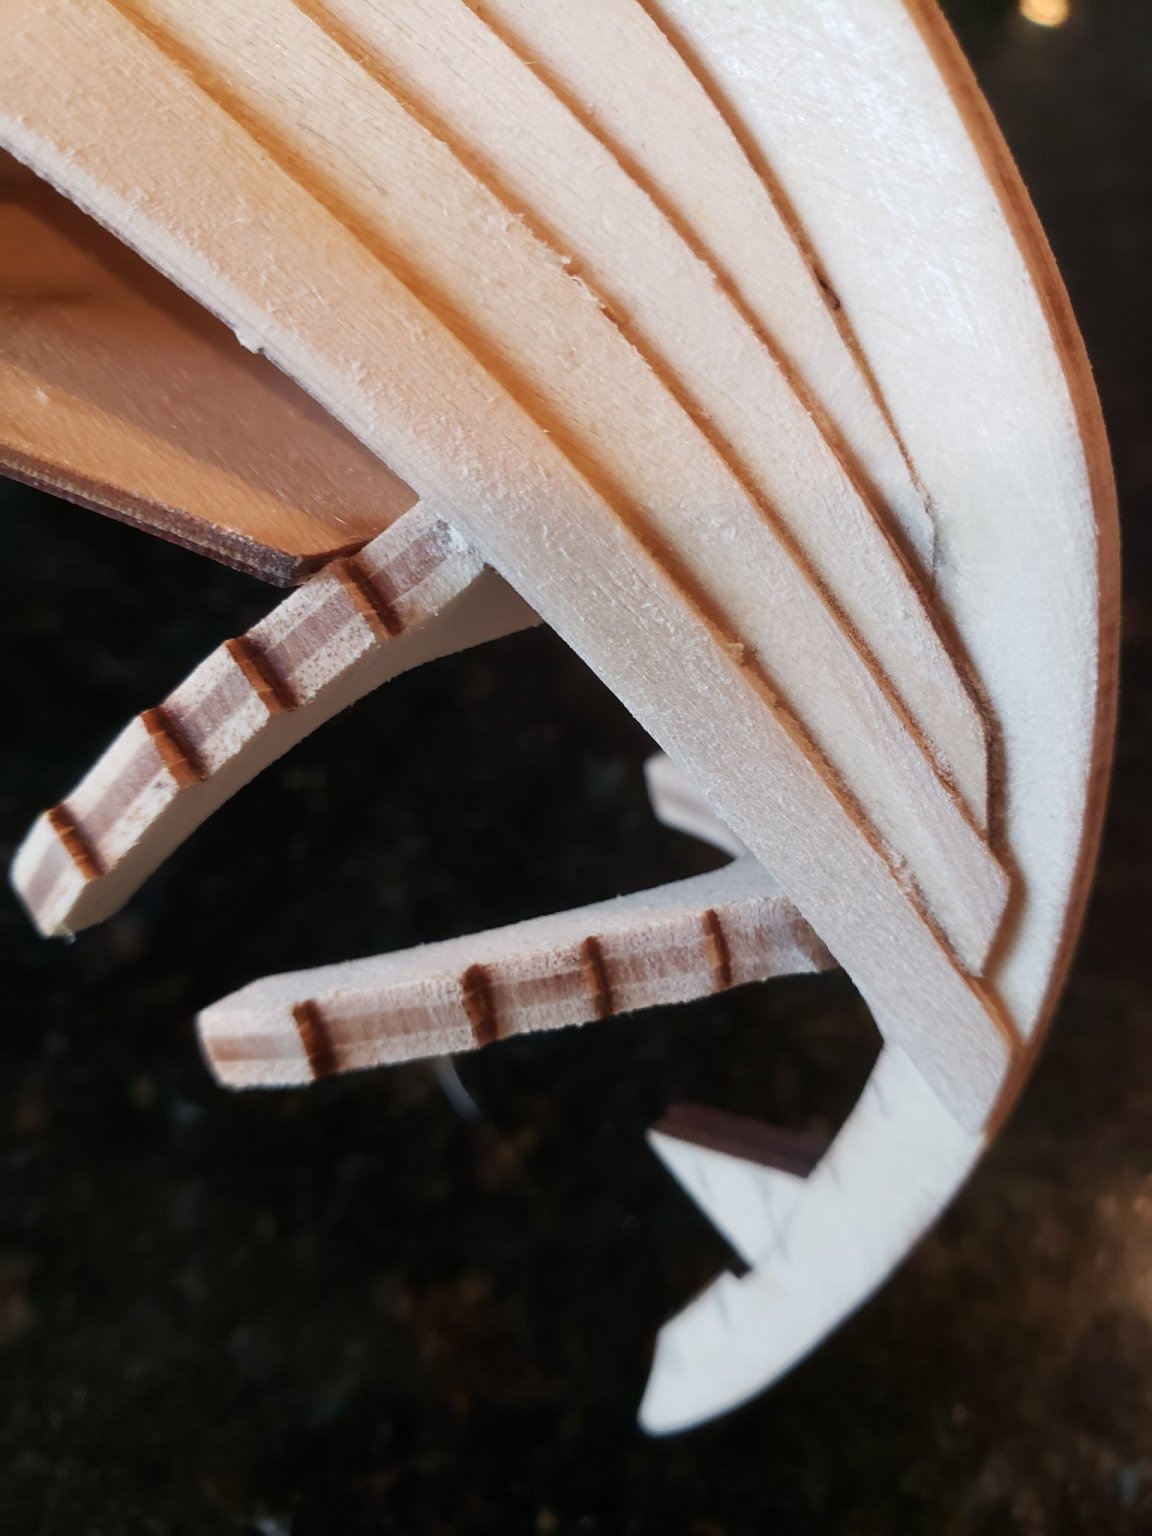
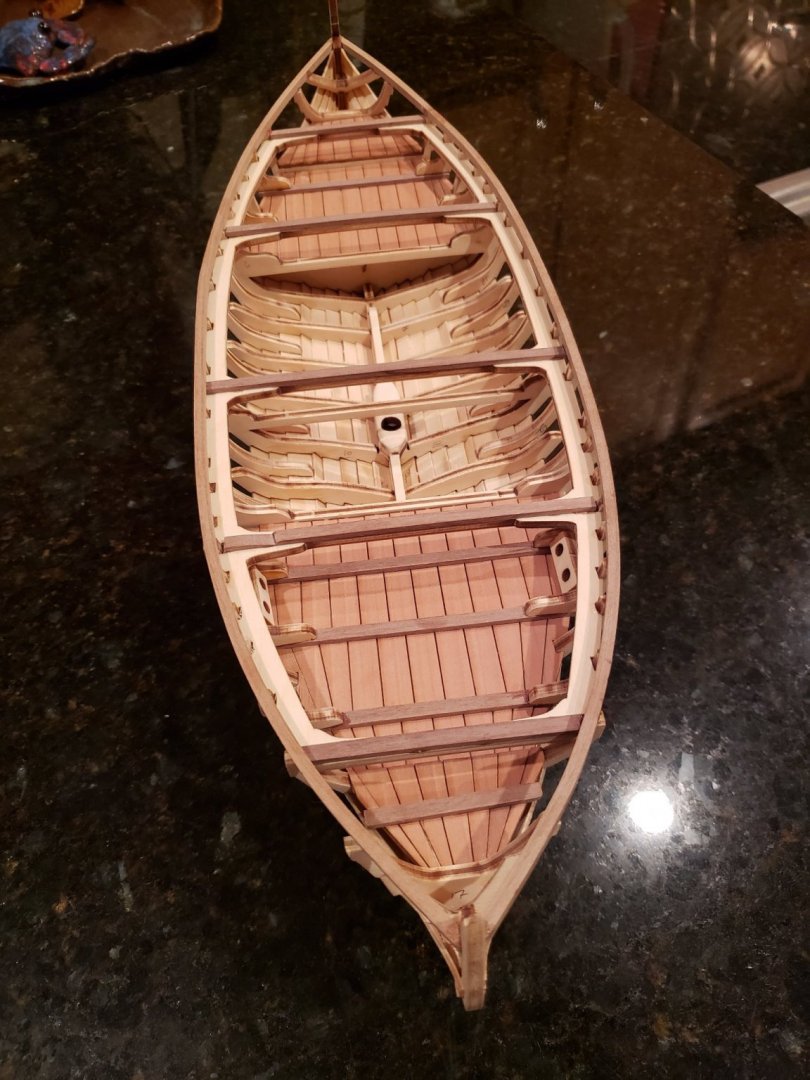
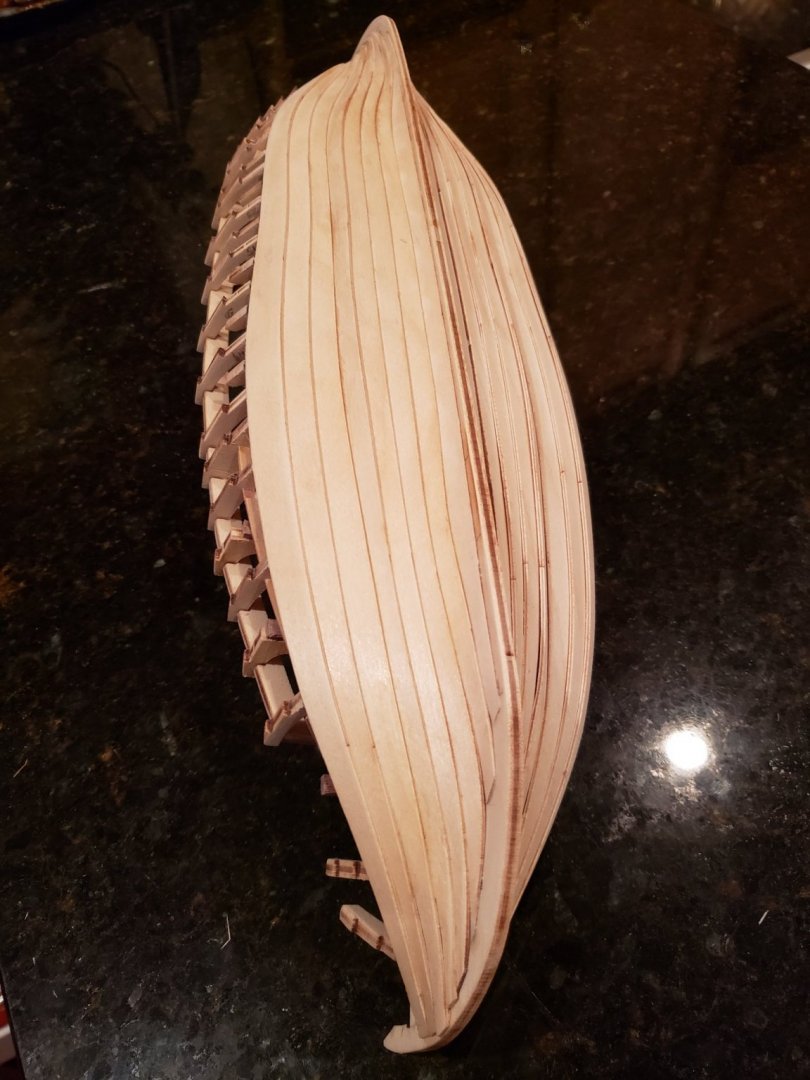
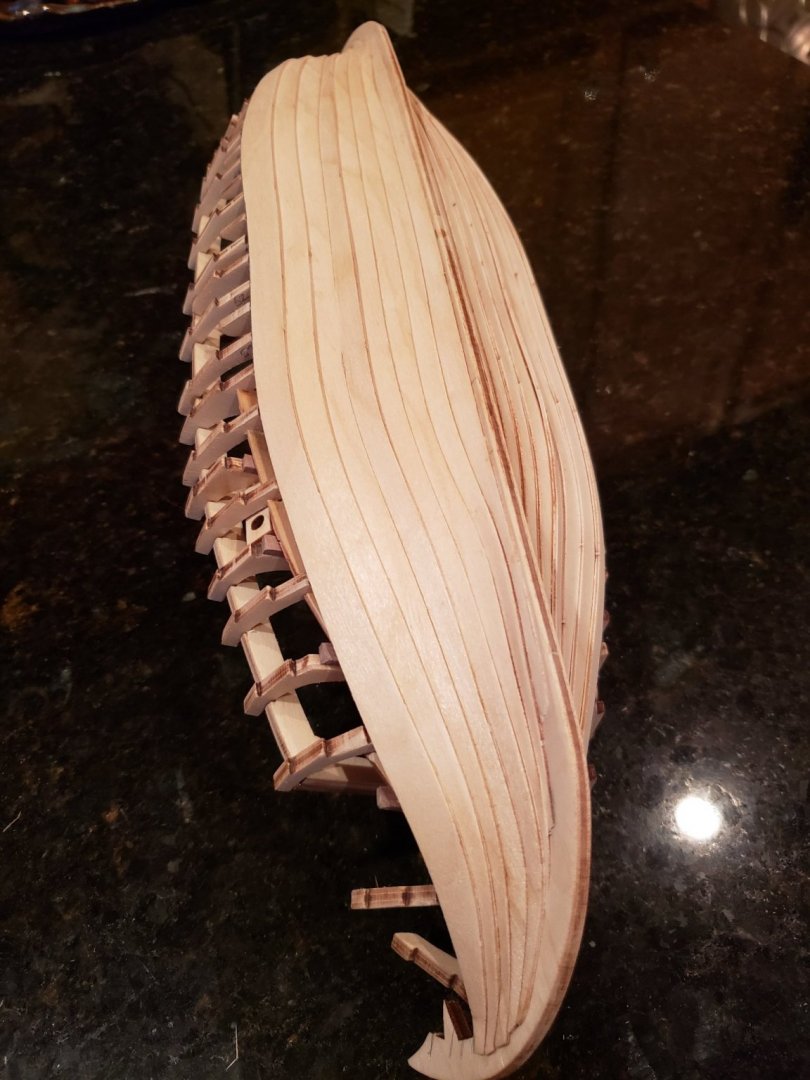
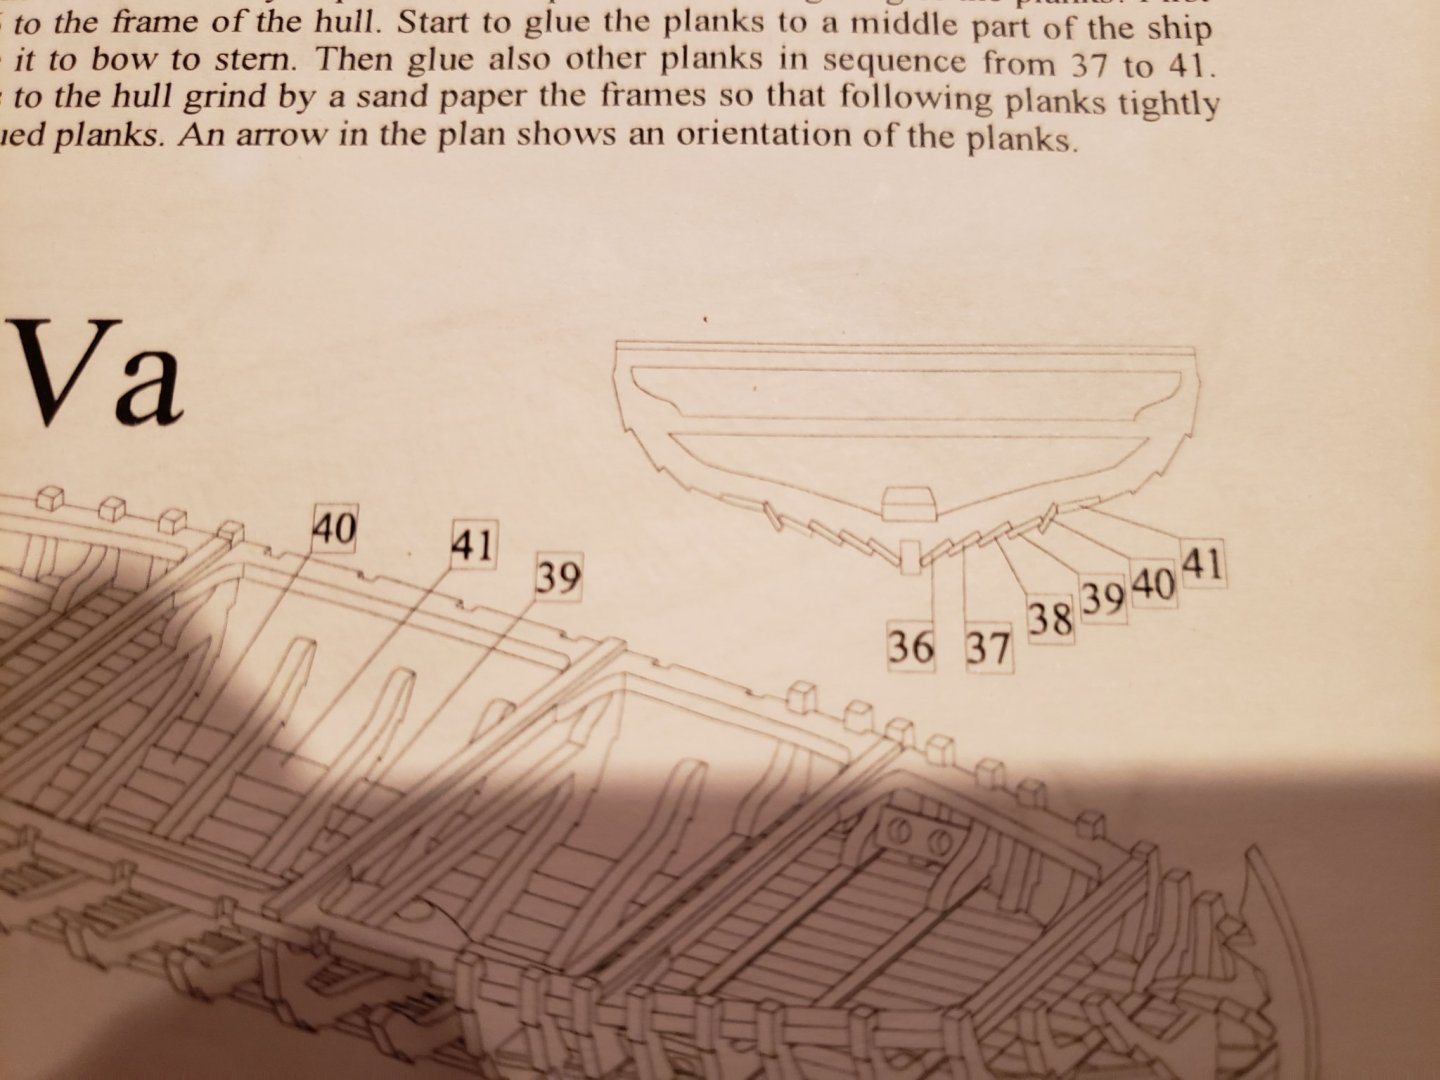
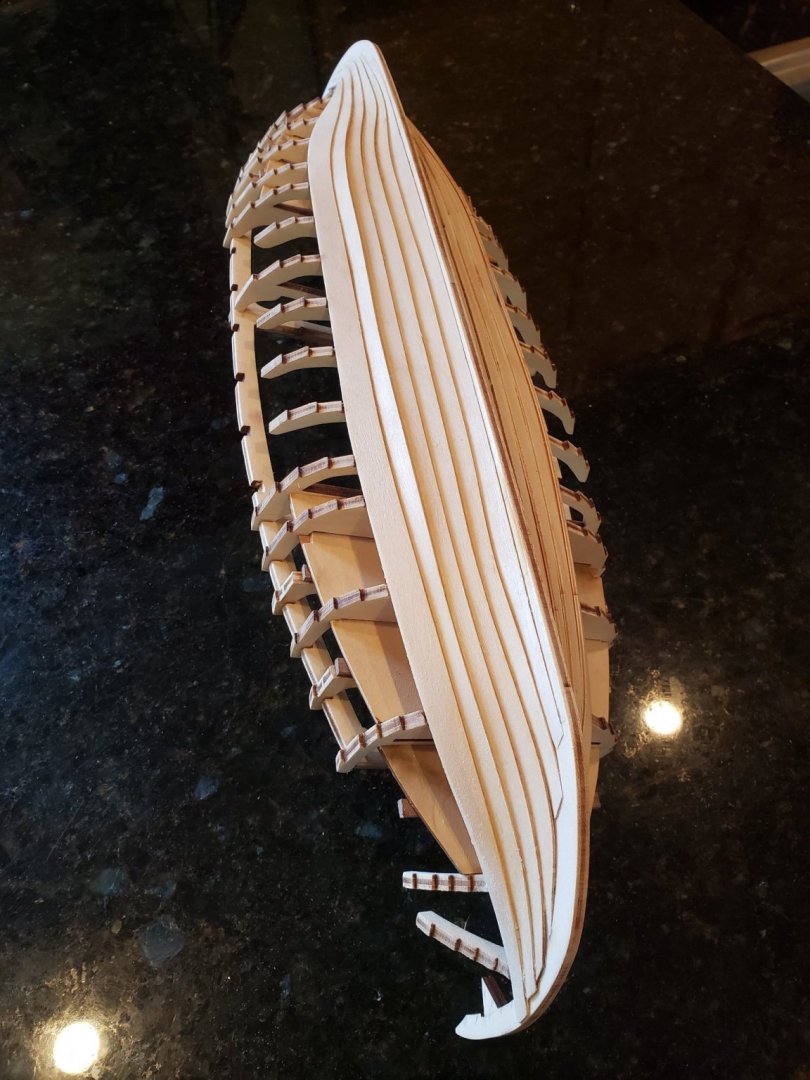
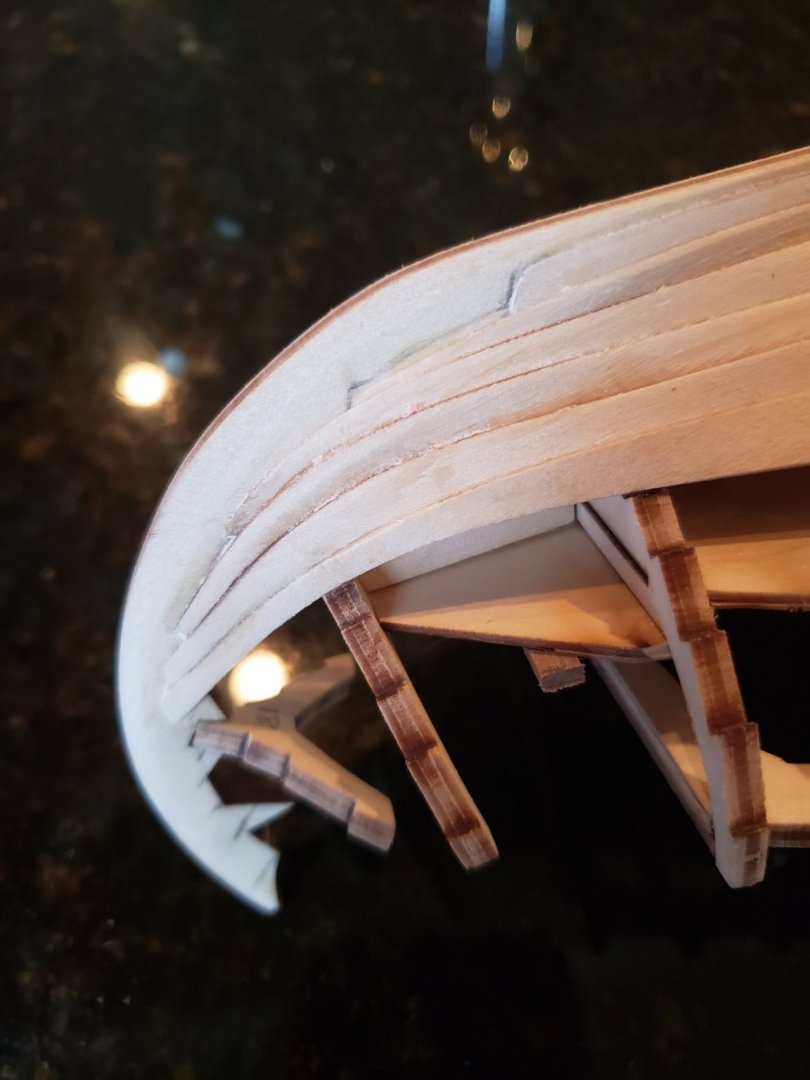
I have completed one side to plank 41; the other is in progress. Plank 41 was a bit of work, as it lies flat to the frames and must be shaped to fit. It came quite a bit oversized, and required some time to get the sizing correct. As I did this before soaking for bending, final attachment needed to wait until it had returned to dry size. The first two photos are overviews, interior and exterior, respectively. Bow facing viewer, below: Stern facing viewer, below: I have not yet decided how to complete treatment of the bow and stern planking, in process as seen below. The first photo is the bow and stern Overall, the fit of the planks has been good, and achieving the alignments illustrated not overly difficult. The lengths of the planks have not been altered. Most of the frames required some adjustment via sanding prior to installing the following planks. The hull feels quite sturdy. This completes step Va of the instructions.


- 48 replies
-
- 4
-
-
- dusek
- viking knarr
- (and 1 more)
-
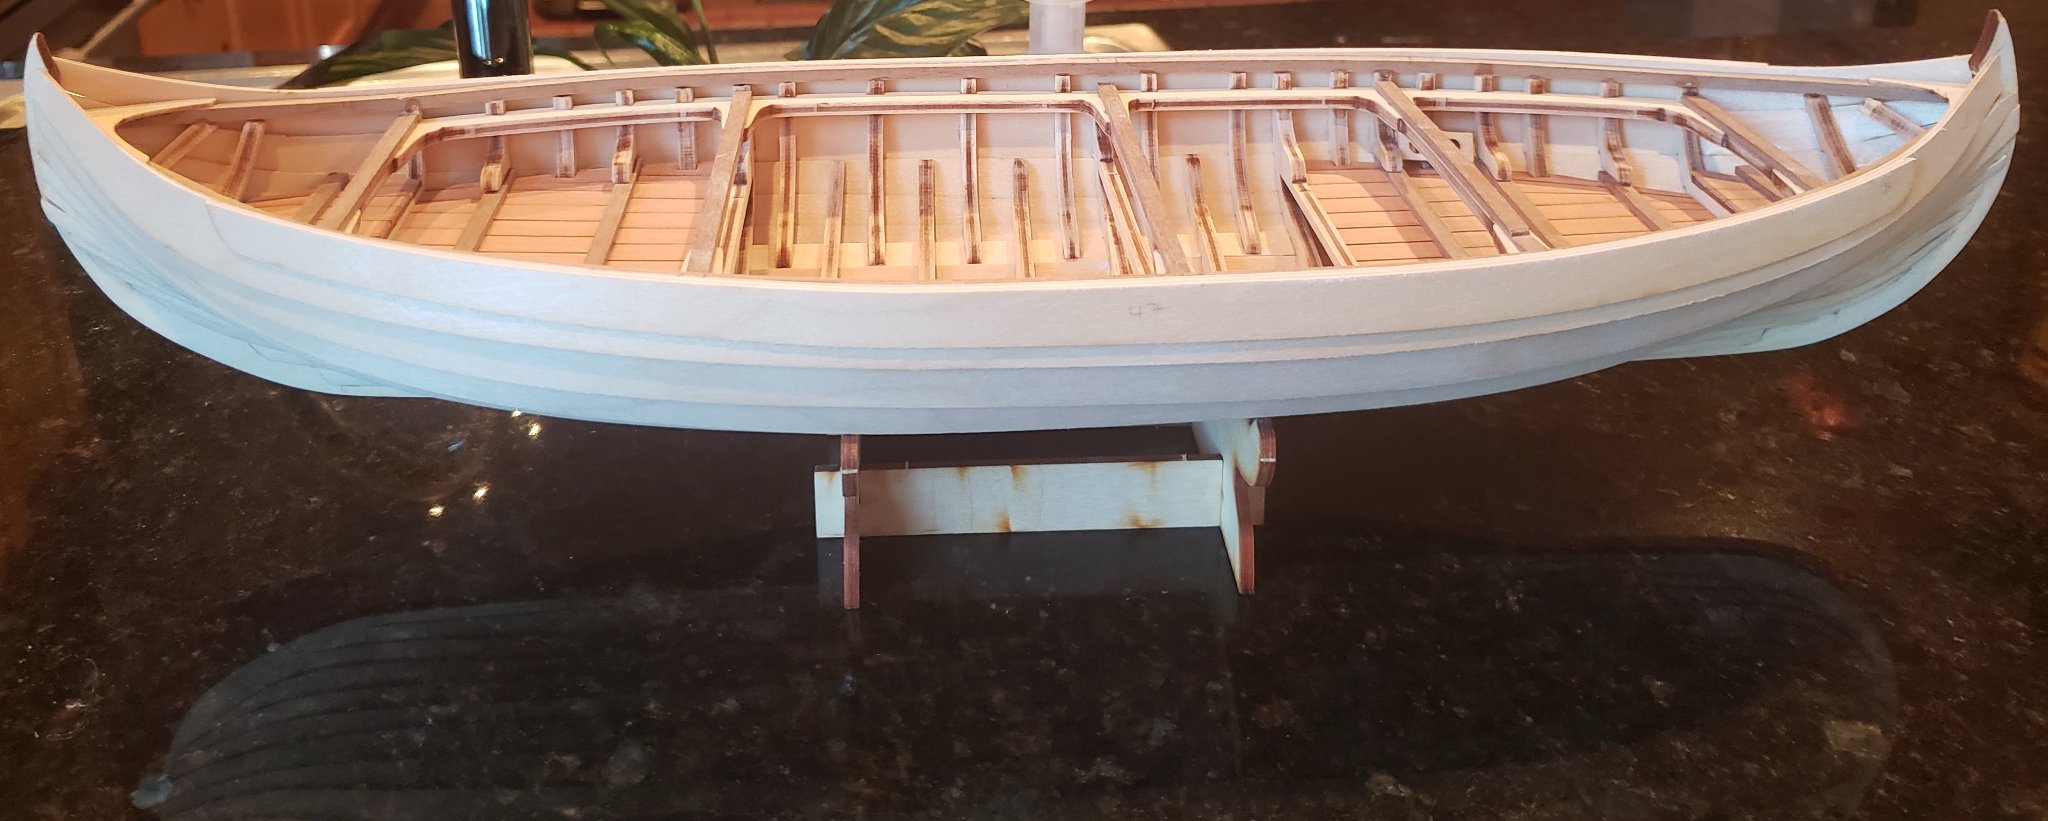
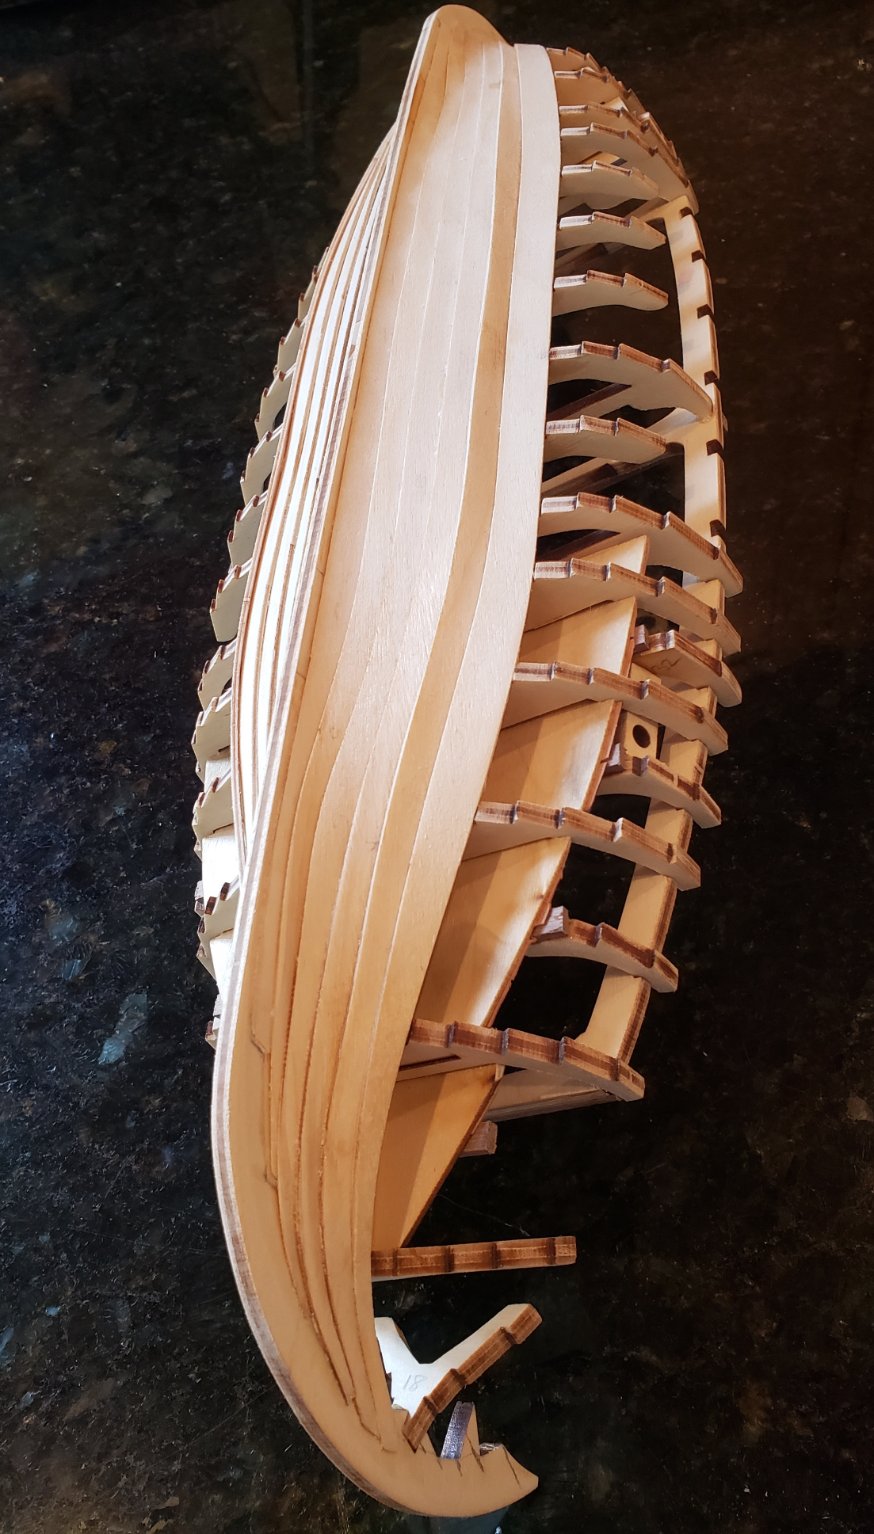
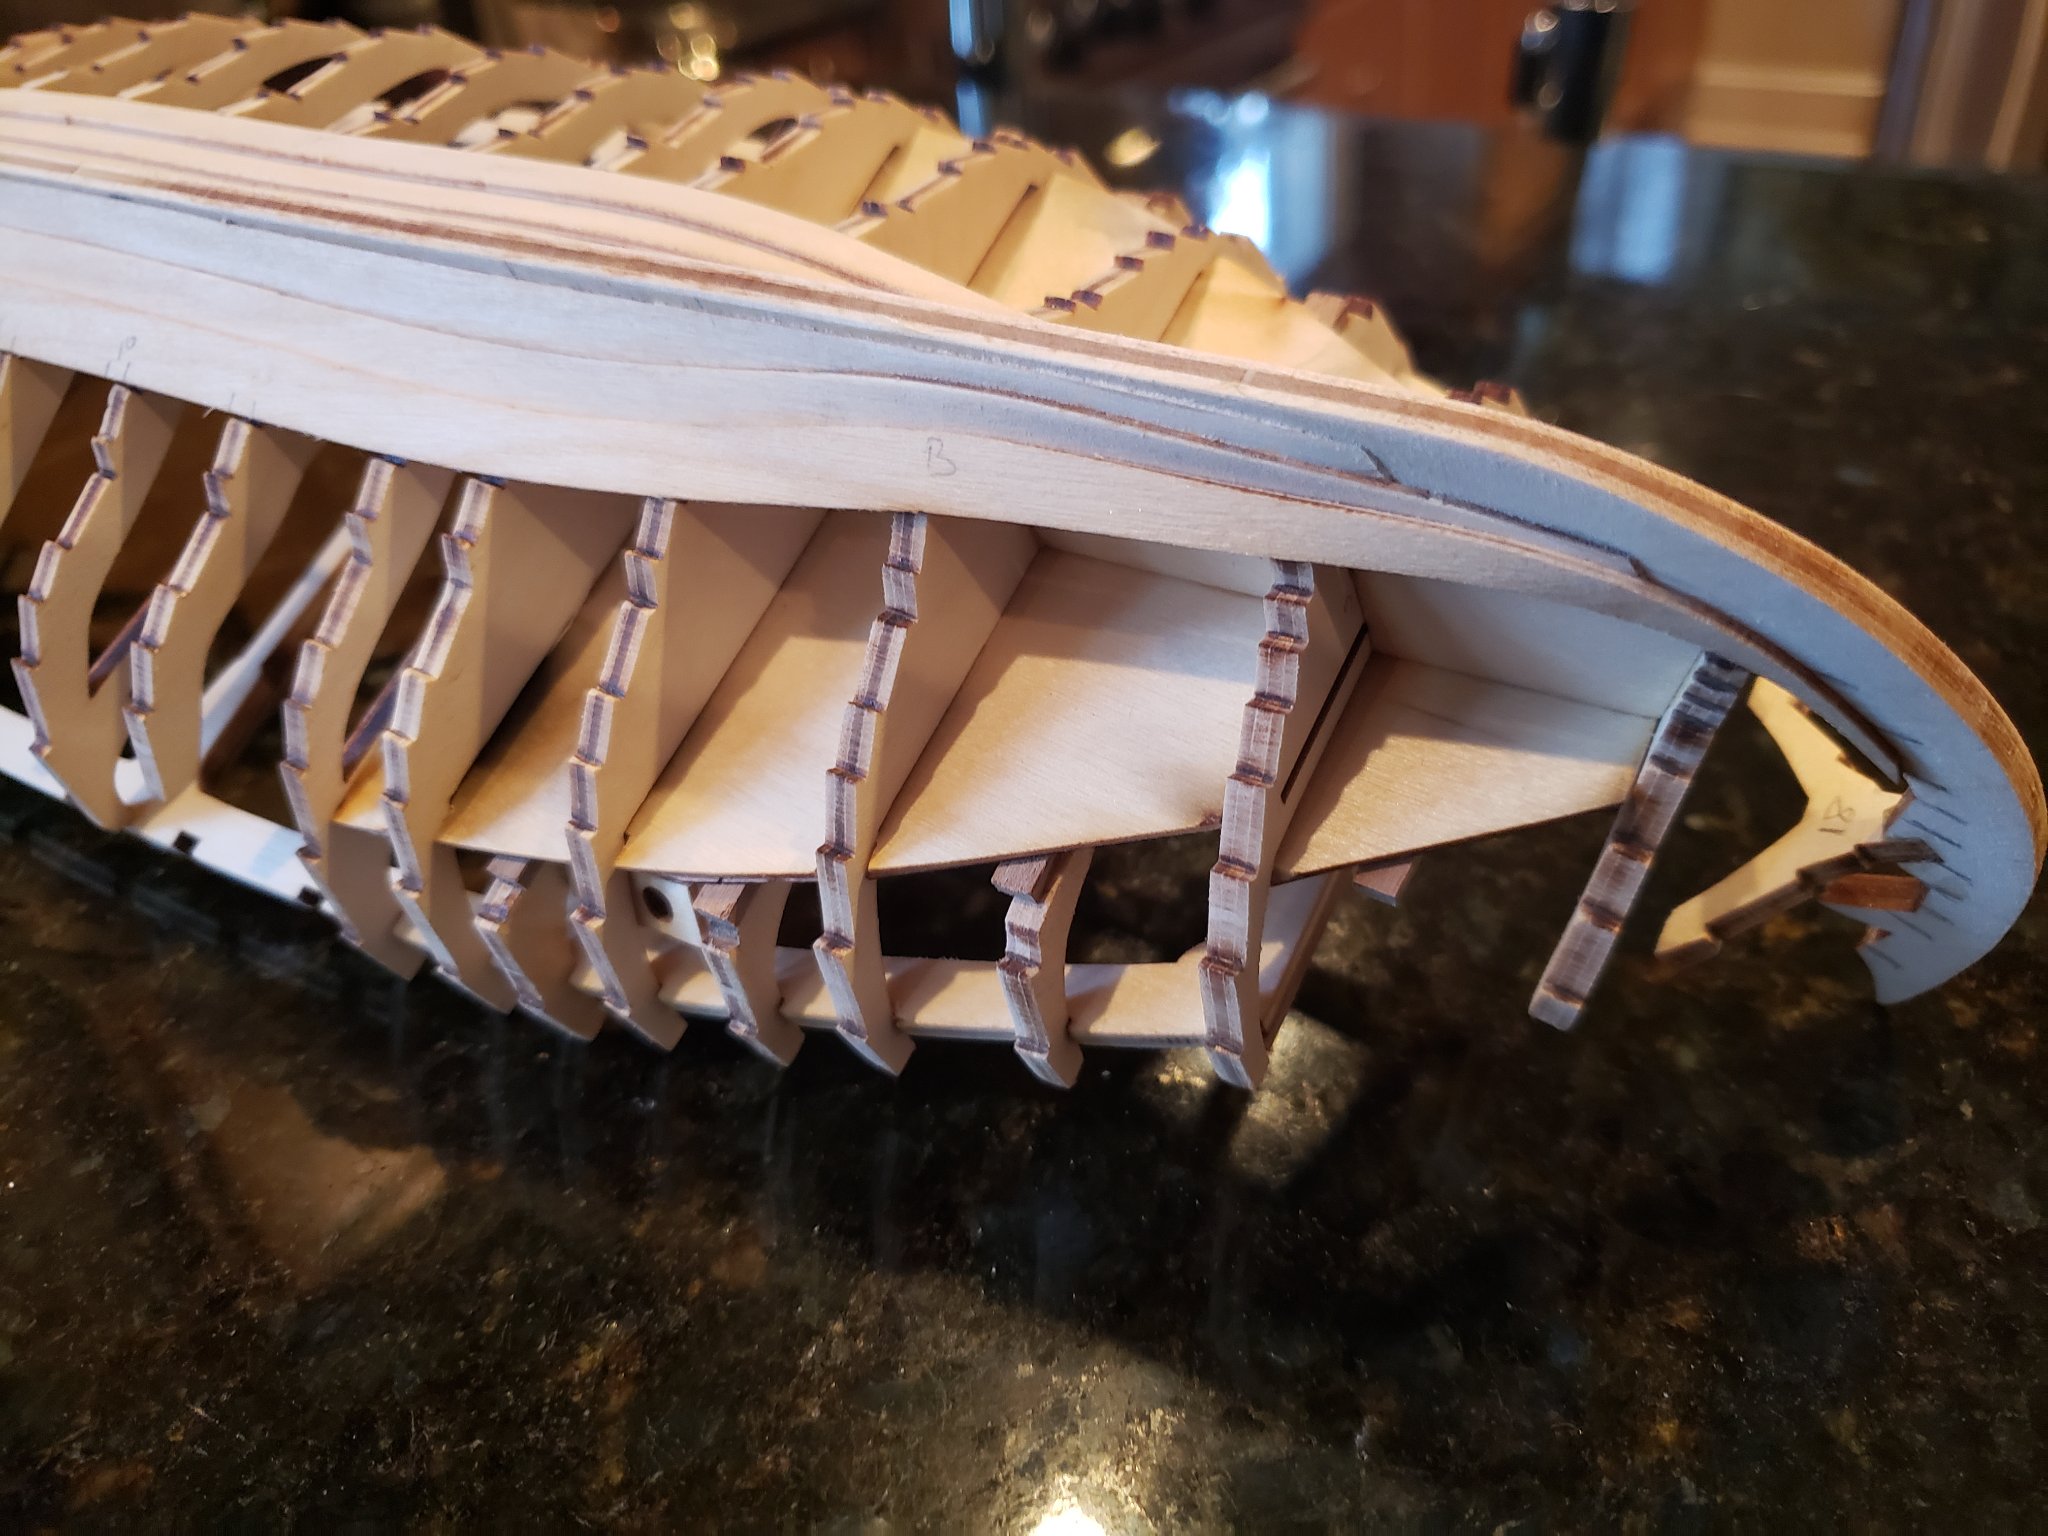
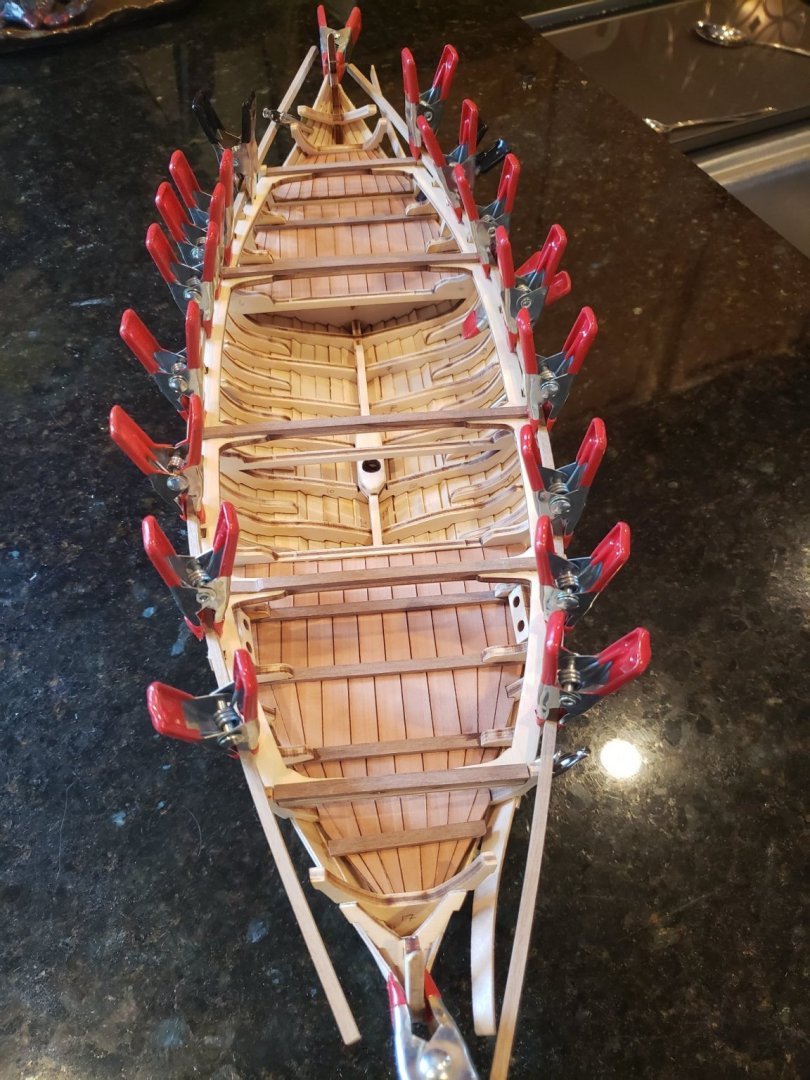
Planking has begun. I have shaped and installed the first three on each hull side, parts 36 thru 38. The process has been, so far, smooth. I did bevel the keel edge of parts 36, and have thinned the ends of all planks, which you can hopefully see in the photos. Most time consuming was assuring the frame surface for the next plank was level with the surface of the just installed plank, as quite a few needed some material removed.


- 48 replies
-
- 3
-
-
- dusek
- viking knarr
- (and 1 more)
-
@SkiBee, you might add some thin material at the locations of frames 3 and 5 to thicken the spine sufficiently to yield a snug fit. The Step 8 photo certainly seems to indicate a snug fit of these pieces to the spine even though they are partially obscured. I cannot verify as I have not yet purchased this kit. An alternative method for frame 4 and reinforcing piece B is to reduce the width of B, assuming the remaining material sufficiently strong. Looking forward to watching you progress.
- 62 replies
-
- 3
-
-
- muscongus bay lobster smack
- Finished
- (and 1 more)
-
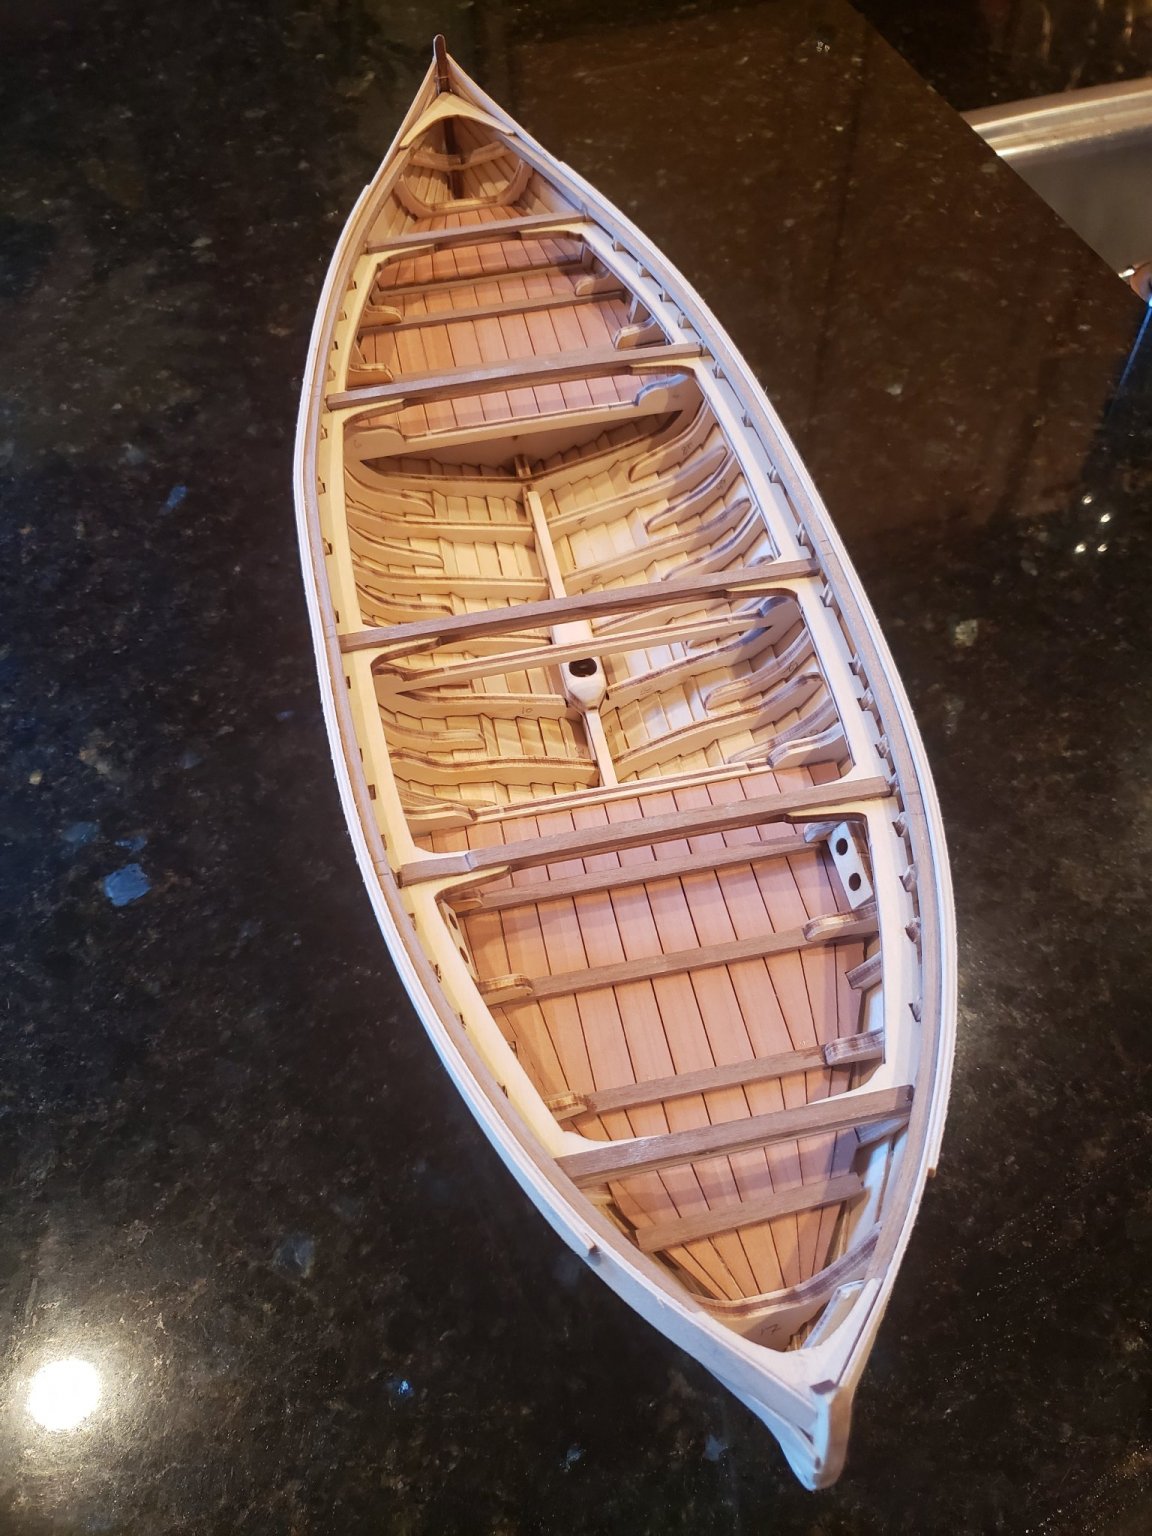
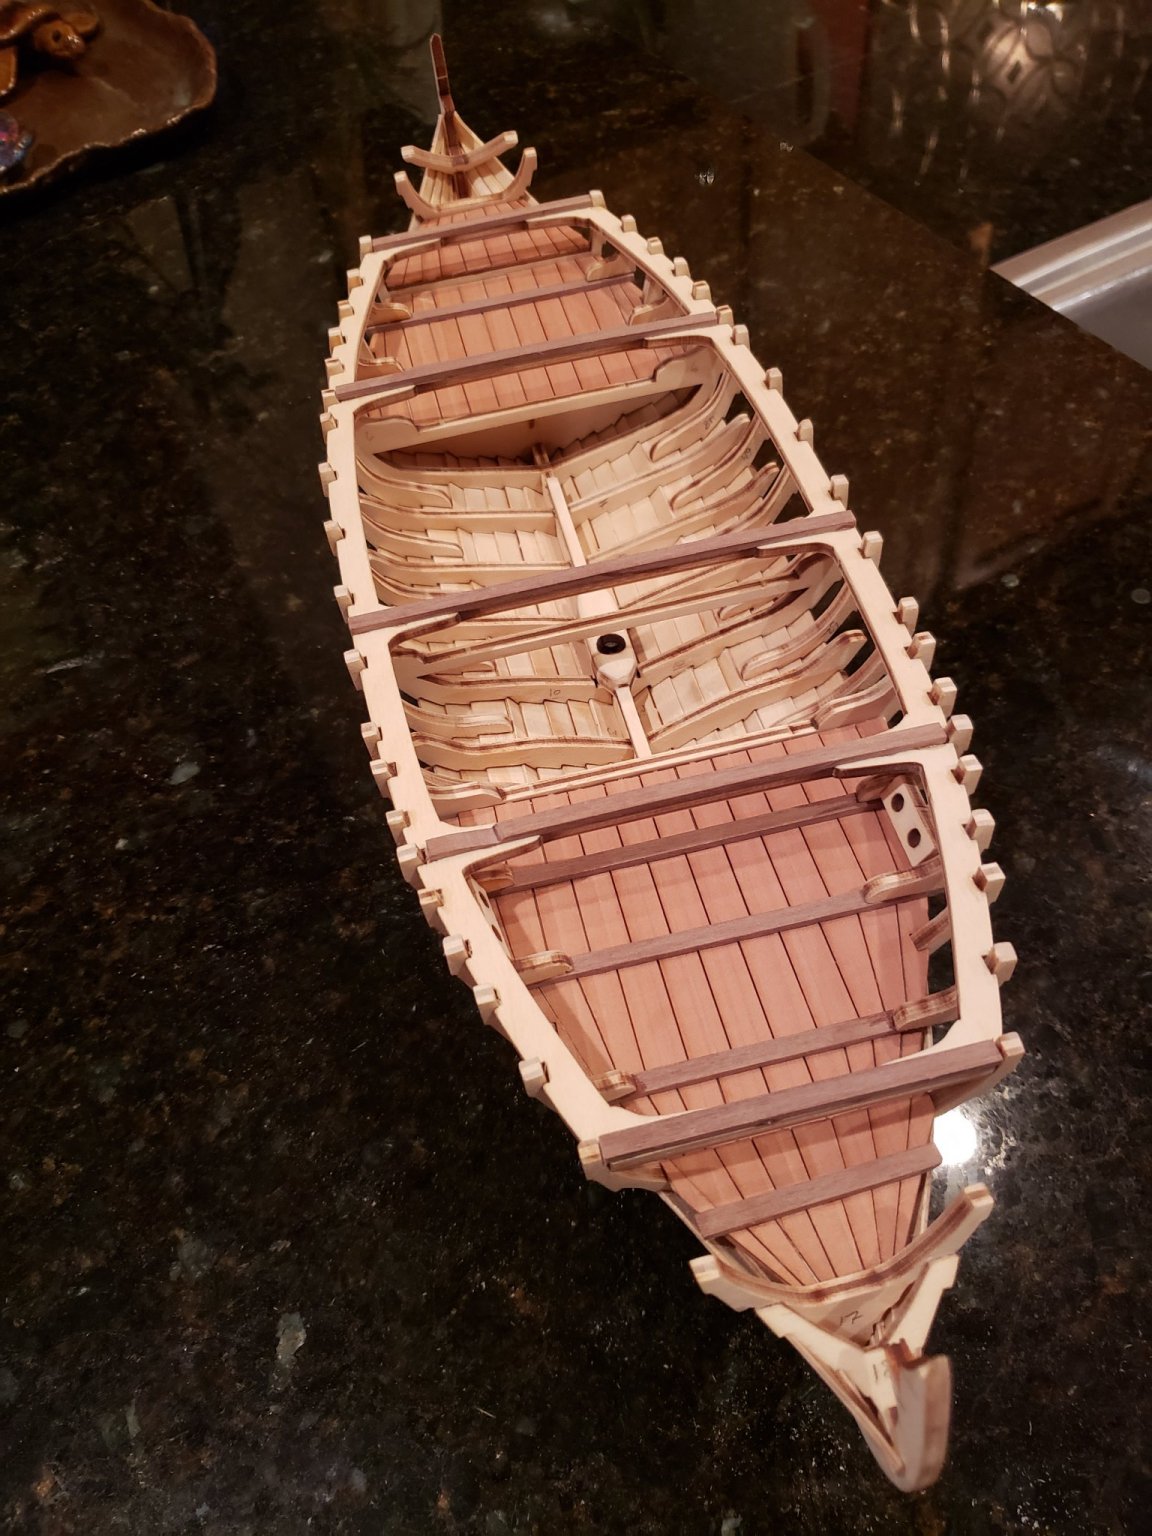
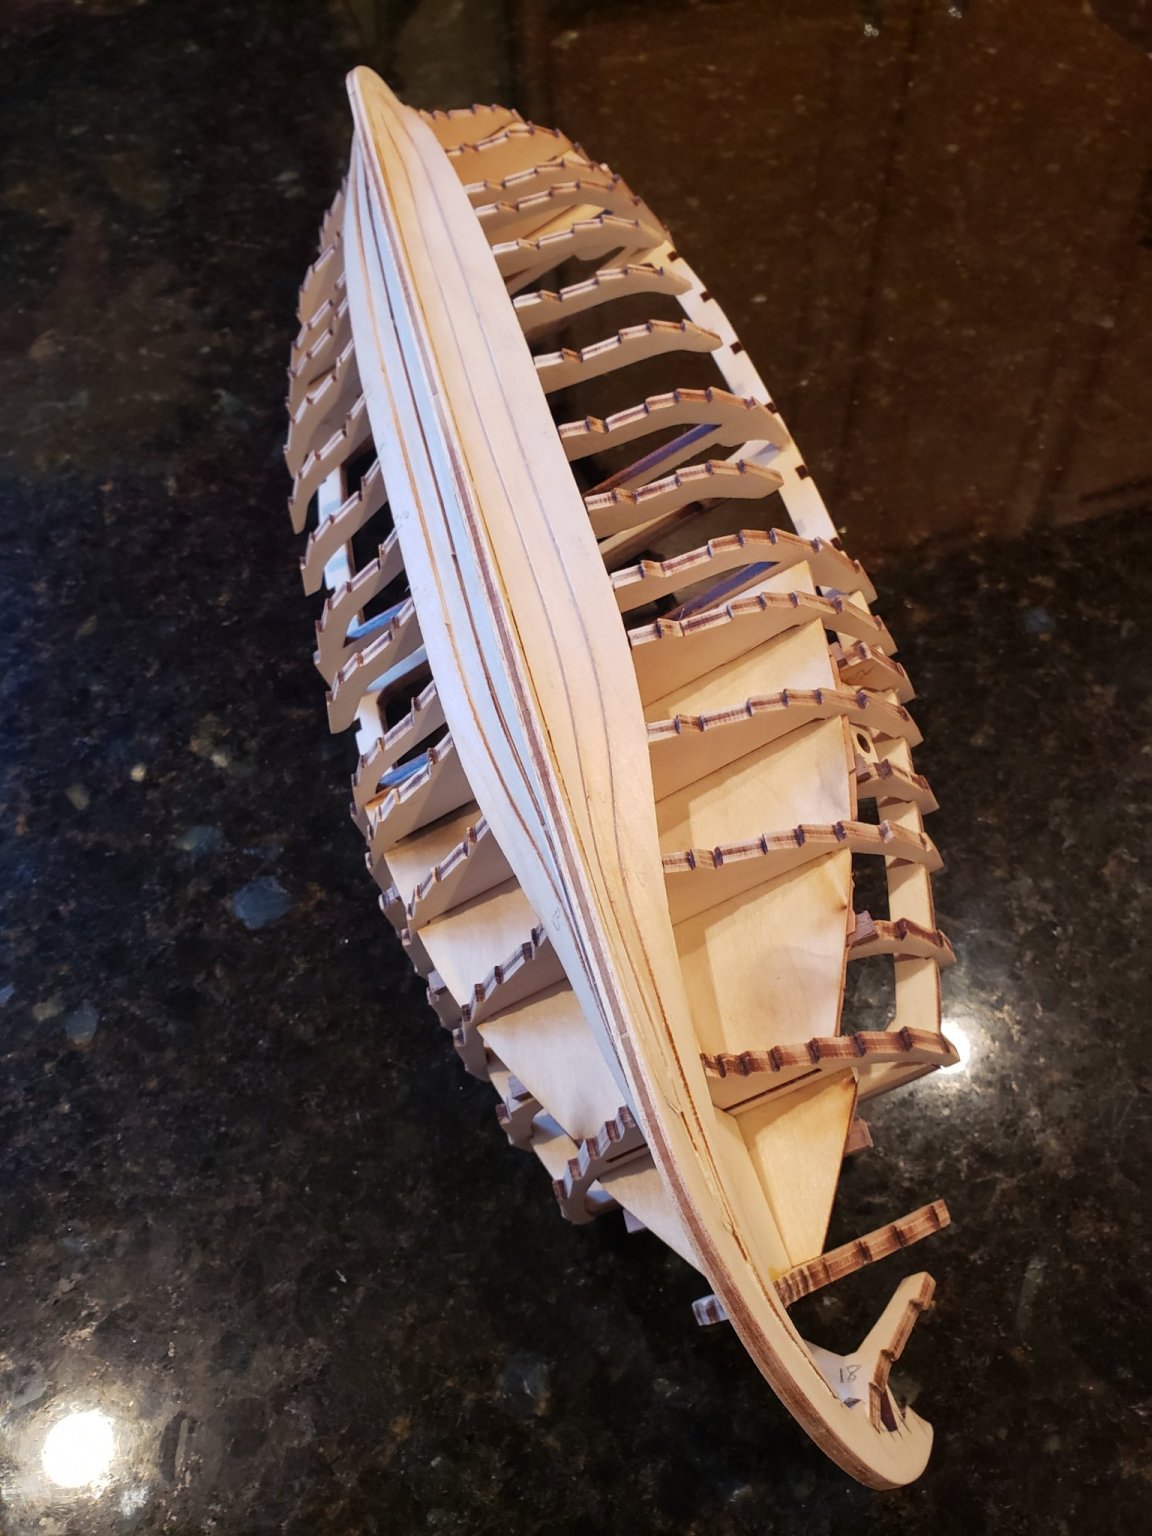
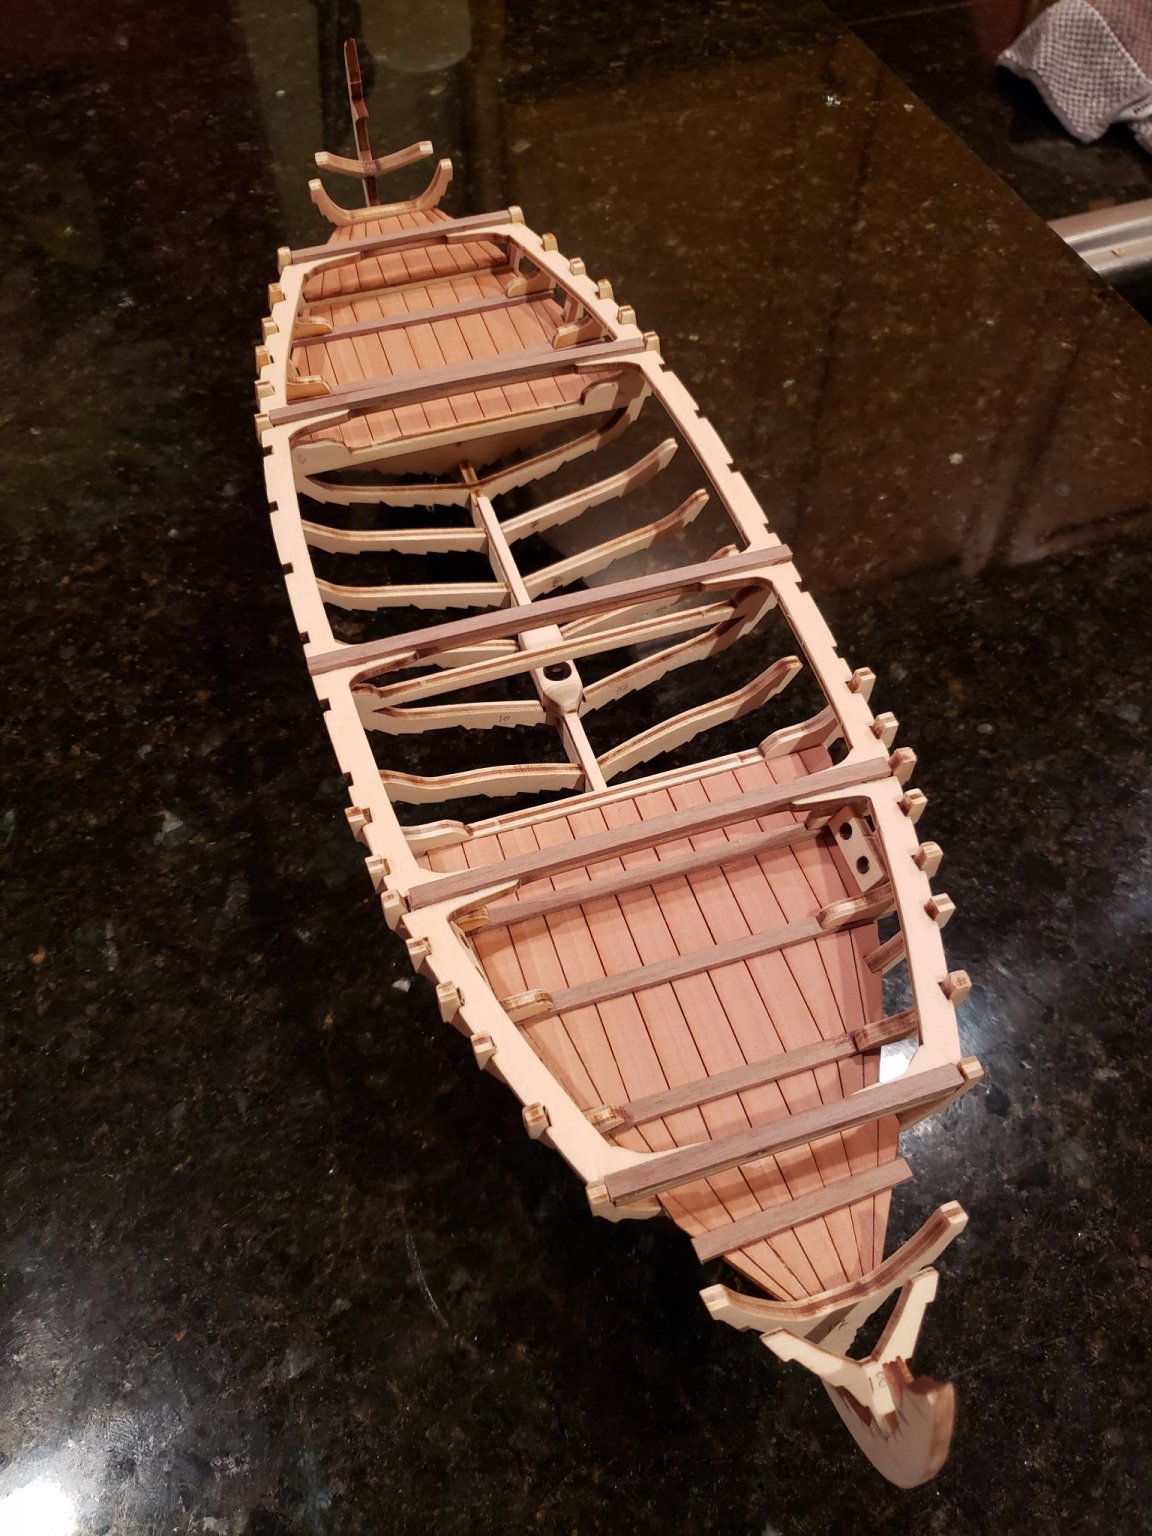
All parts called for prior to planking, except frames 29 and 35, are installed. I will install the remaining frames after I verify their placement during planking, as they do not have the inner frame to help position them laterally. The inner frame (part 27) was the most time consuming to align and install.

- 48 replies
-
- 3
-
-
- dusek
- viking knarr
- (and 1 more)