SkiBee
-
Posts
227 -
Joined
-
Last visited
4 Followers


Recent Profile Visitors
2,508 profile views


-
 SkiBee reacted to a post in a topic:
Speedwell Battle Station Kit 1752 by CiscoH - Syren Ship Model Company - 3/8" or 1:32
SkiBee reacted to a post in a topic:
Speedwell Battle Station Kit 1752 by CiscoH - Syren Ship Model Company - 3/8" or 1:32
-
Freddy Hutson reacted to a post in a topic:
Norwegian Sailing Pram by SkiBee - FINISHED - Model Shipways - Scale 1:12
-
Smokietoon reacted to a post in a topic:
New to ship modelling? But what do you build first?
-
ccoyle reacted to a post in a topic:
Armed Virginia Sloop (AVS) by SkiBee - Model Shipways - 1:48
-
CiscoH reacted to a post in a topic:
Armed Virginia Sloop (AVS) by SkiBee - Model Shipways - 1:48
-
yvesvidal reacted to a post in a topic:
Armed Virginia Sloop (AVS) by SkiBee - Model Shipways - 1:48
-
yvesvidal reacted to a post in a topic:
Armed Virginia Sloop (AVS) by SkiBee - Model Shipways - 1:48
-
yvesvidal reacted to a post in a topic:
Armed Virginia Sloop (AVS) by SkiBee - Model Shipways - 1:48
-
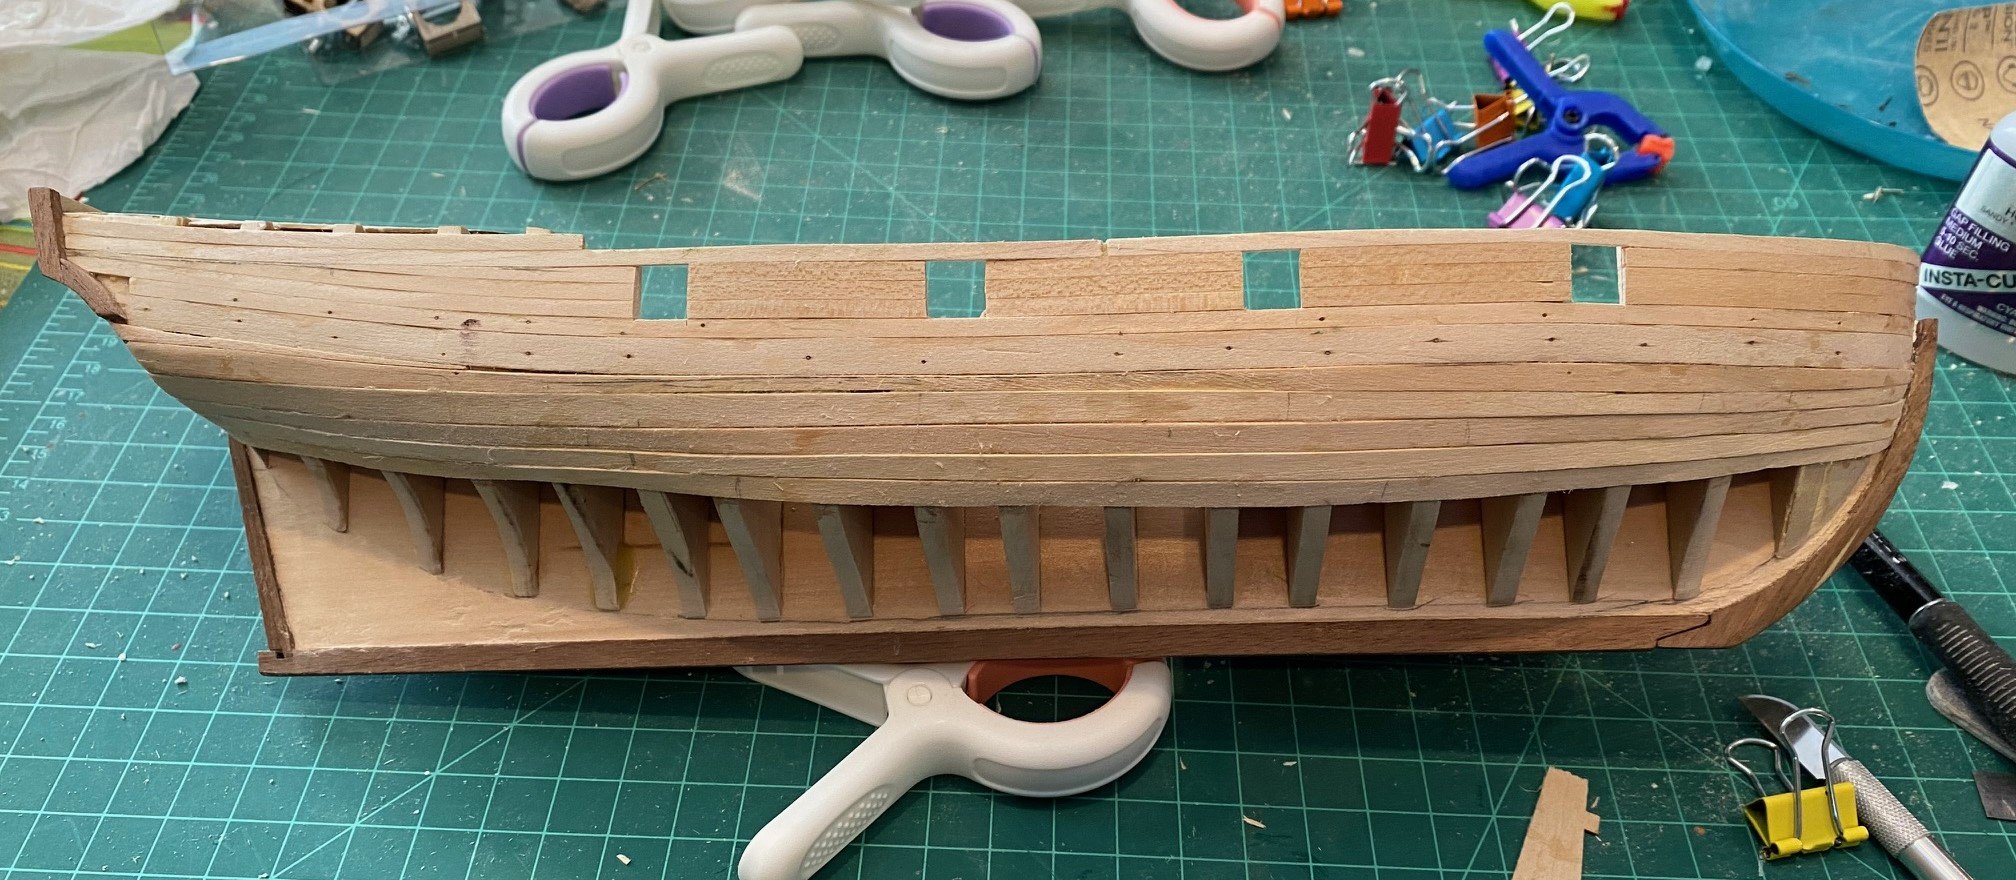
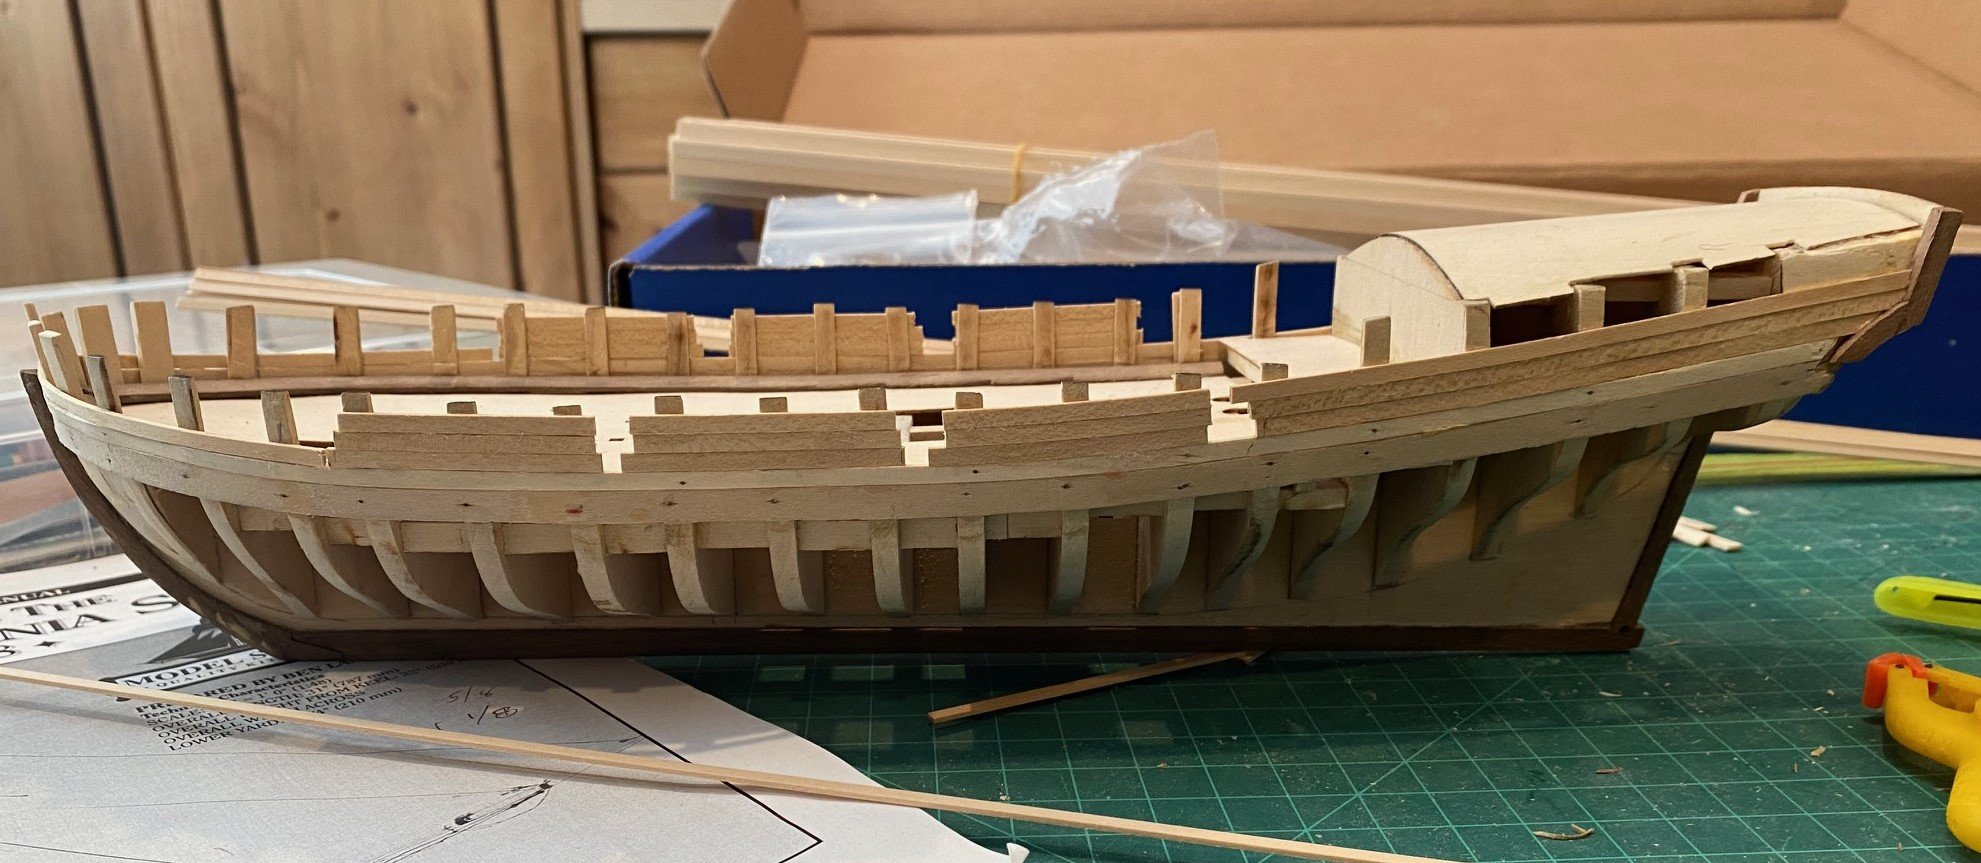
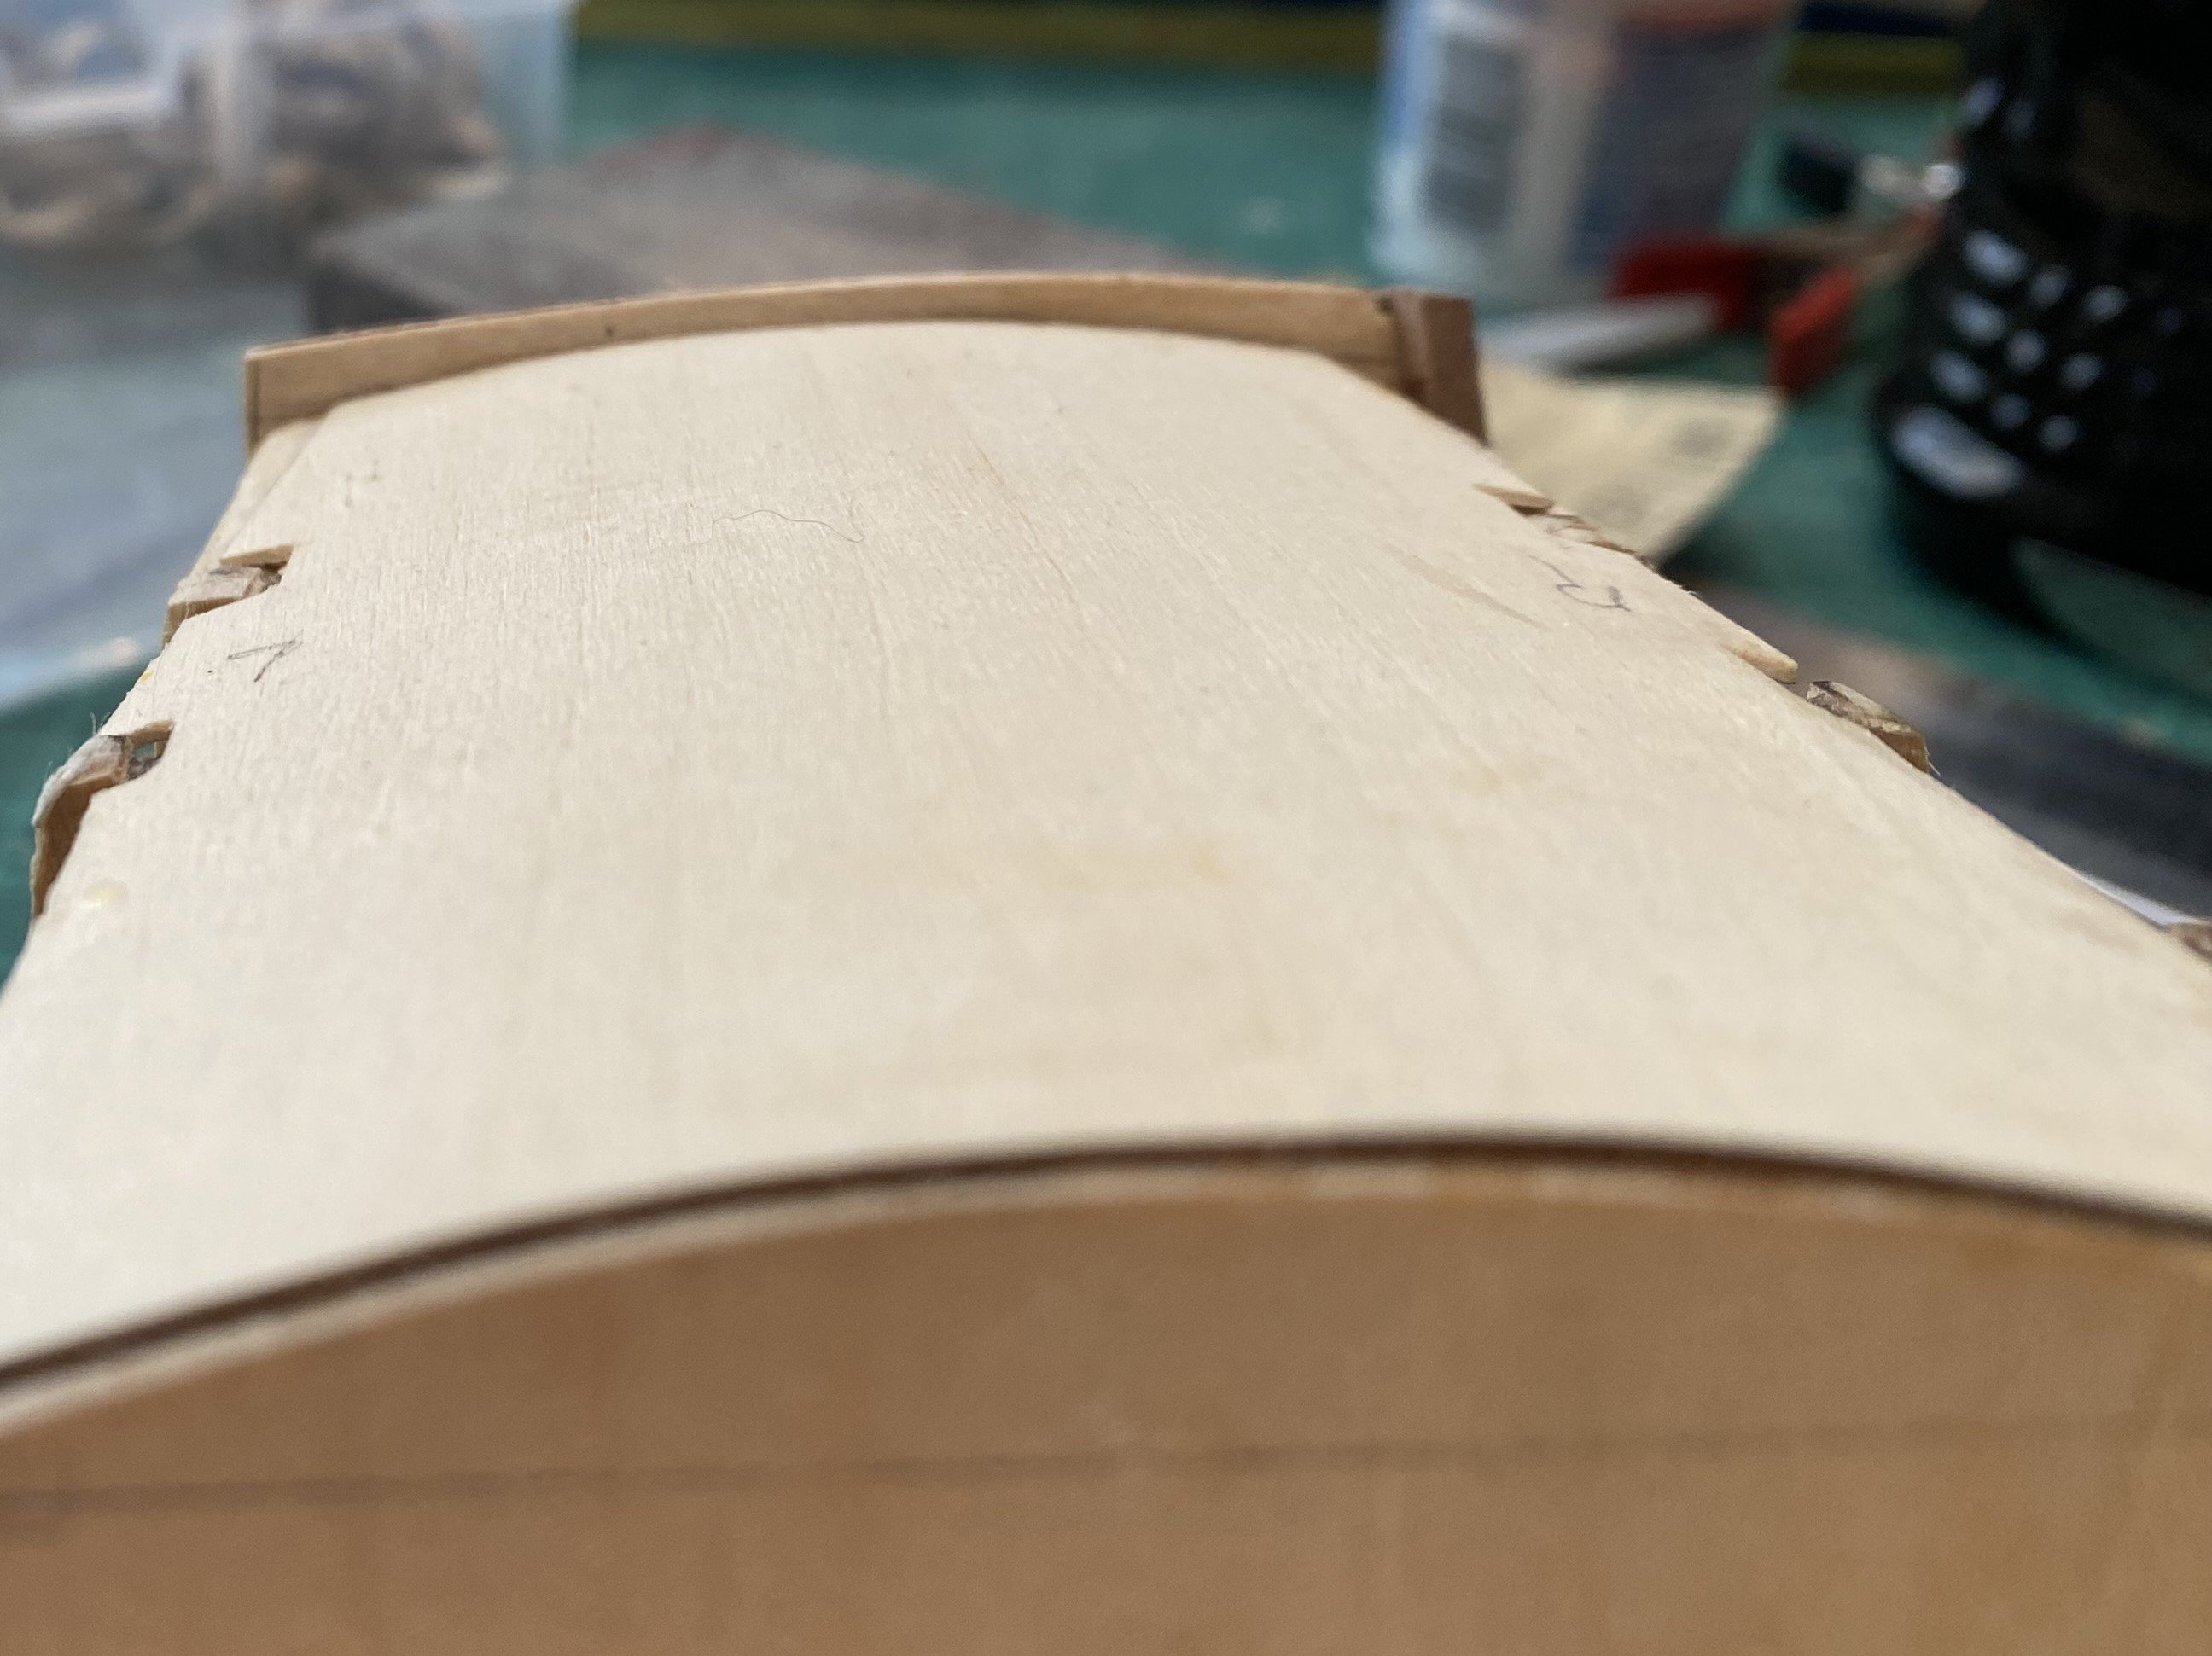
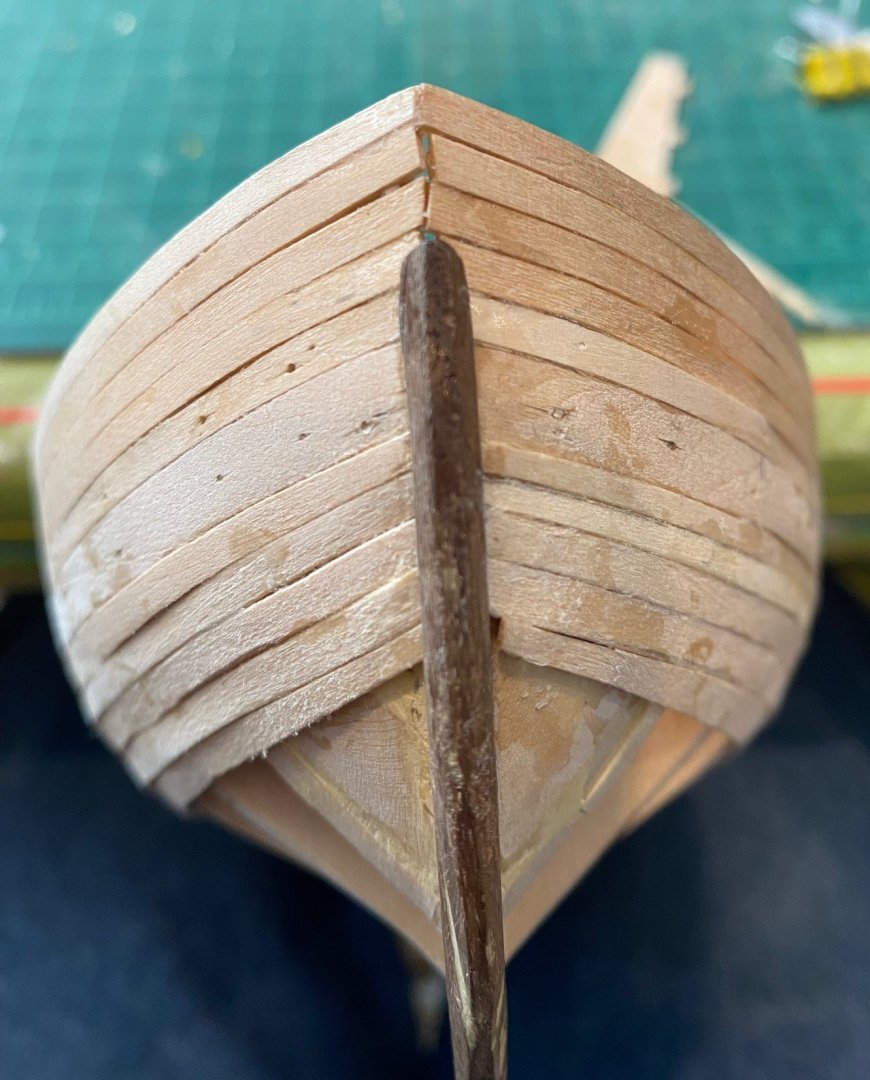
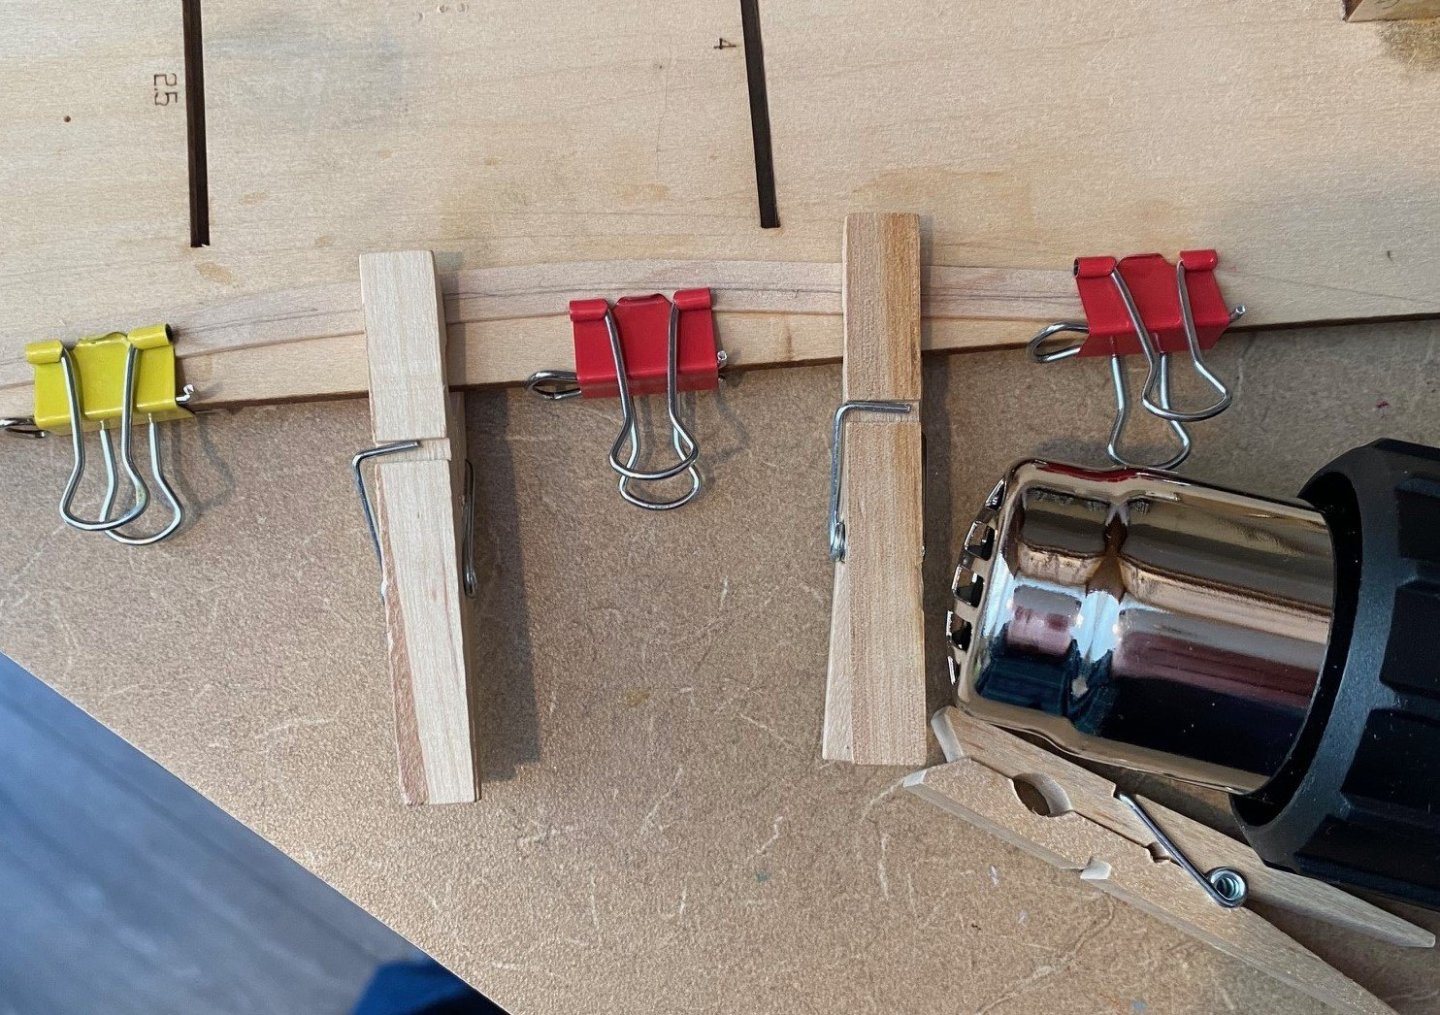
 Completed the install of the 4 planks at the bottom of the hull. The double bends in the planks, both fwd and aft were a little difficult but soaking them for a couple of hours helped. The other challenging thing was getting the right amount of taper and where a mid-ship to start the taper. You can see that when I was done, the port and starboard sides were not symmetrical. I can make up the difference as I finish planking.

-
Ronald-V reacted to a post in a topic:
Armed Virginia Sloop (AVS) by SkiBee - Model Shipways - 1:48
-
SkiBee reacted to a post in a topic:
Armed Virginia Sloop (AVS) by SkiBee - Model Shipways - 1:48
-
I finished the first five roles of planks under the wale plank. Some gaps, weird bends and cracks at the counter bend, nothing that filler and sanding won’t take care of. I’m ok with the product, more importantly I learned a lot. Also, redid the port finish arch piece to make it a little longer to better match the starboard one. I wasn’t paying attention to the how well the plank was adhering to the curve of the counter filler, did not pay attention to the two bends of the plank at the bend: the bend up to the transom but also a twist curve at the bend. Once I noticed it, I glued it down better at the curve.


-
Ryland Craze reacted to a post in a topic:
Armed Virginia Sloop (AVS) by SkiBee - Model Shipways - 1:48
-
CiscoH reacted to a post in a topic:
Armed Virginia Sloop (AVS) by SkiBee - Model Shipways - 1:48
-
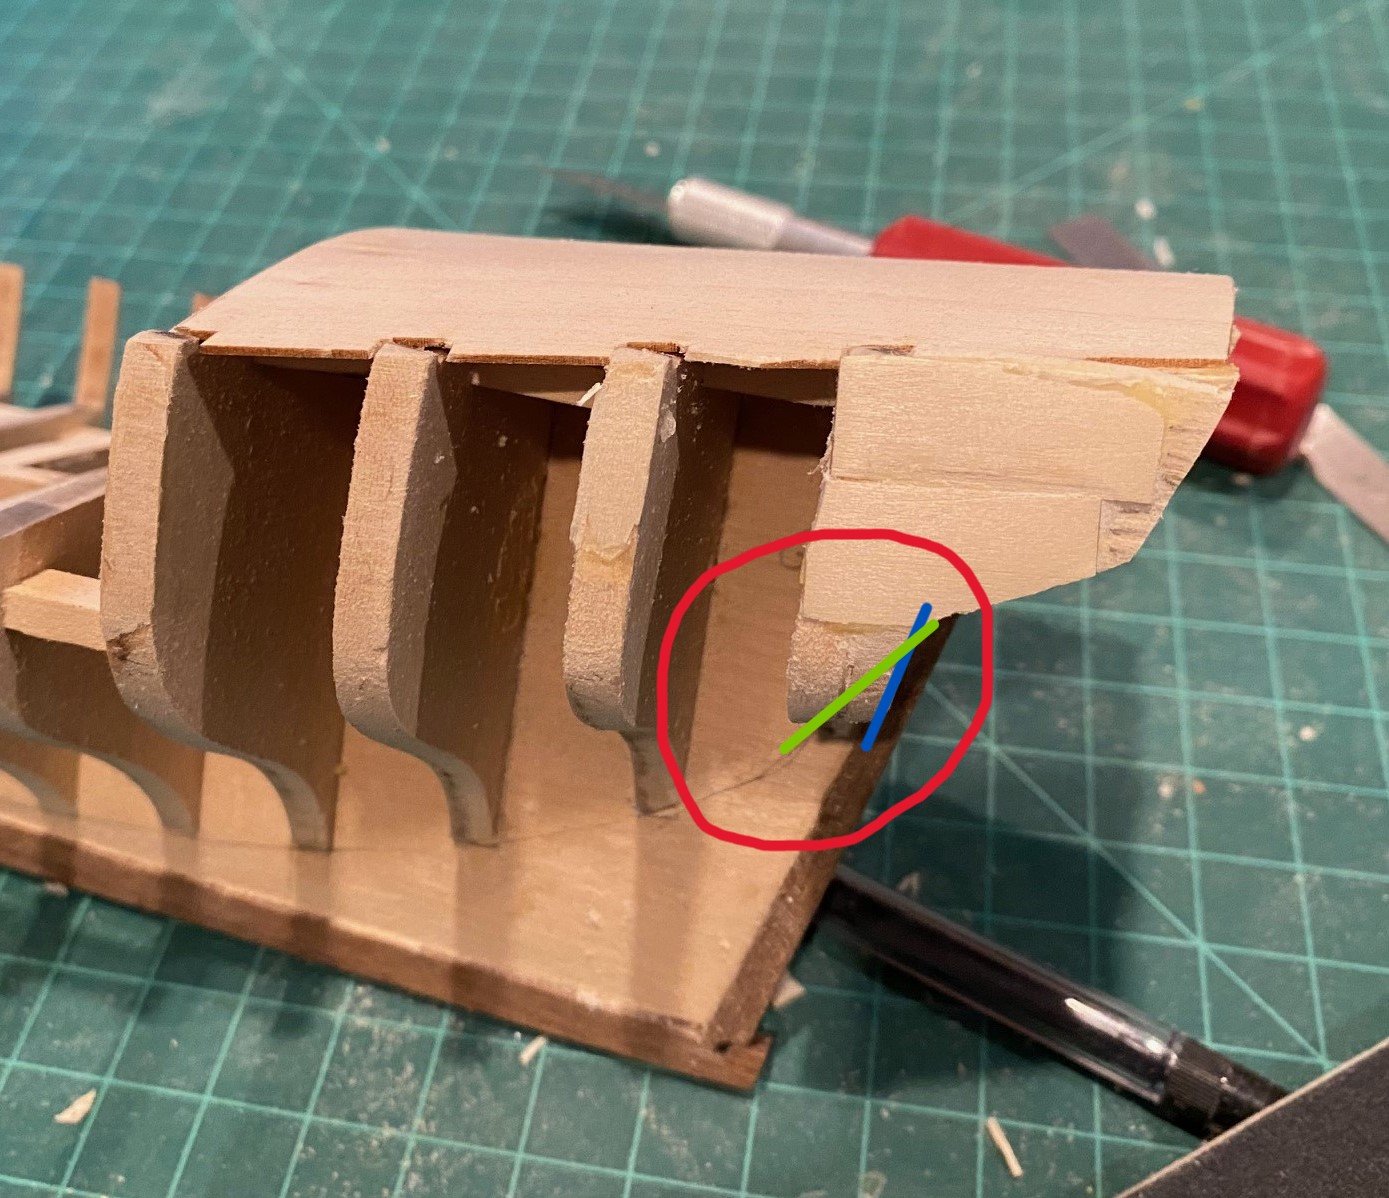
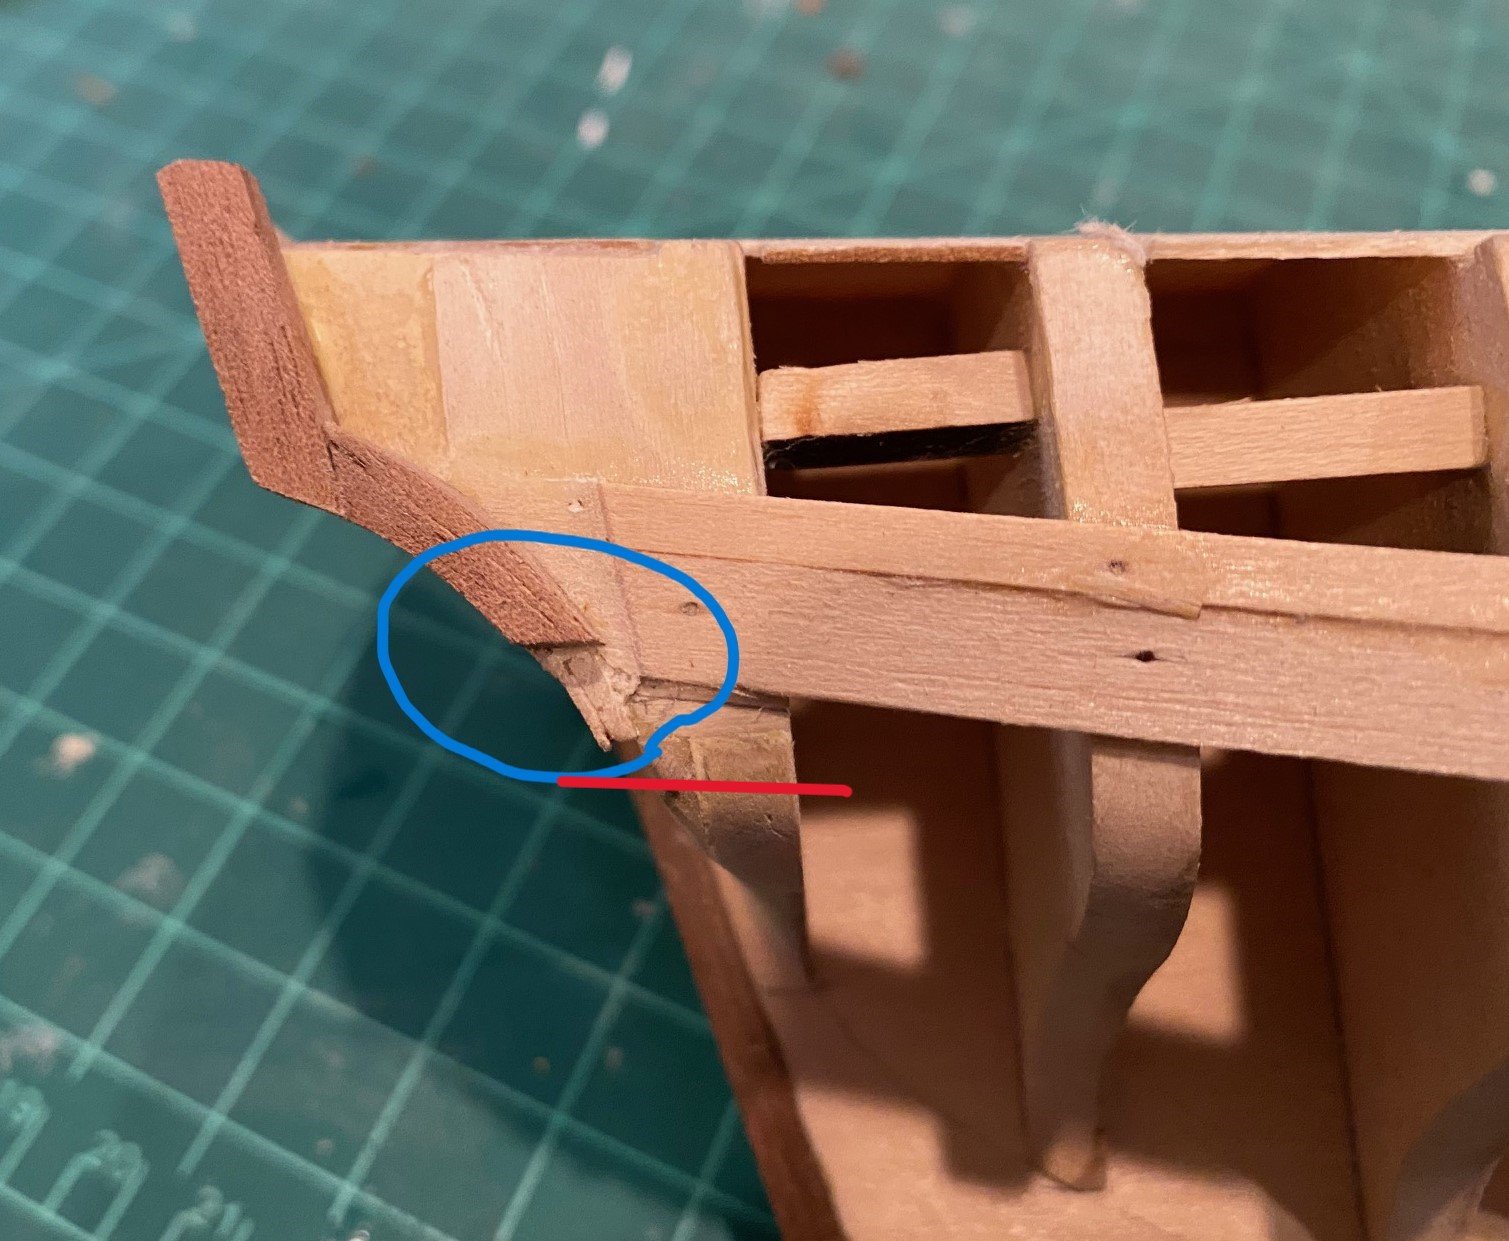
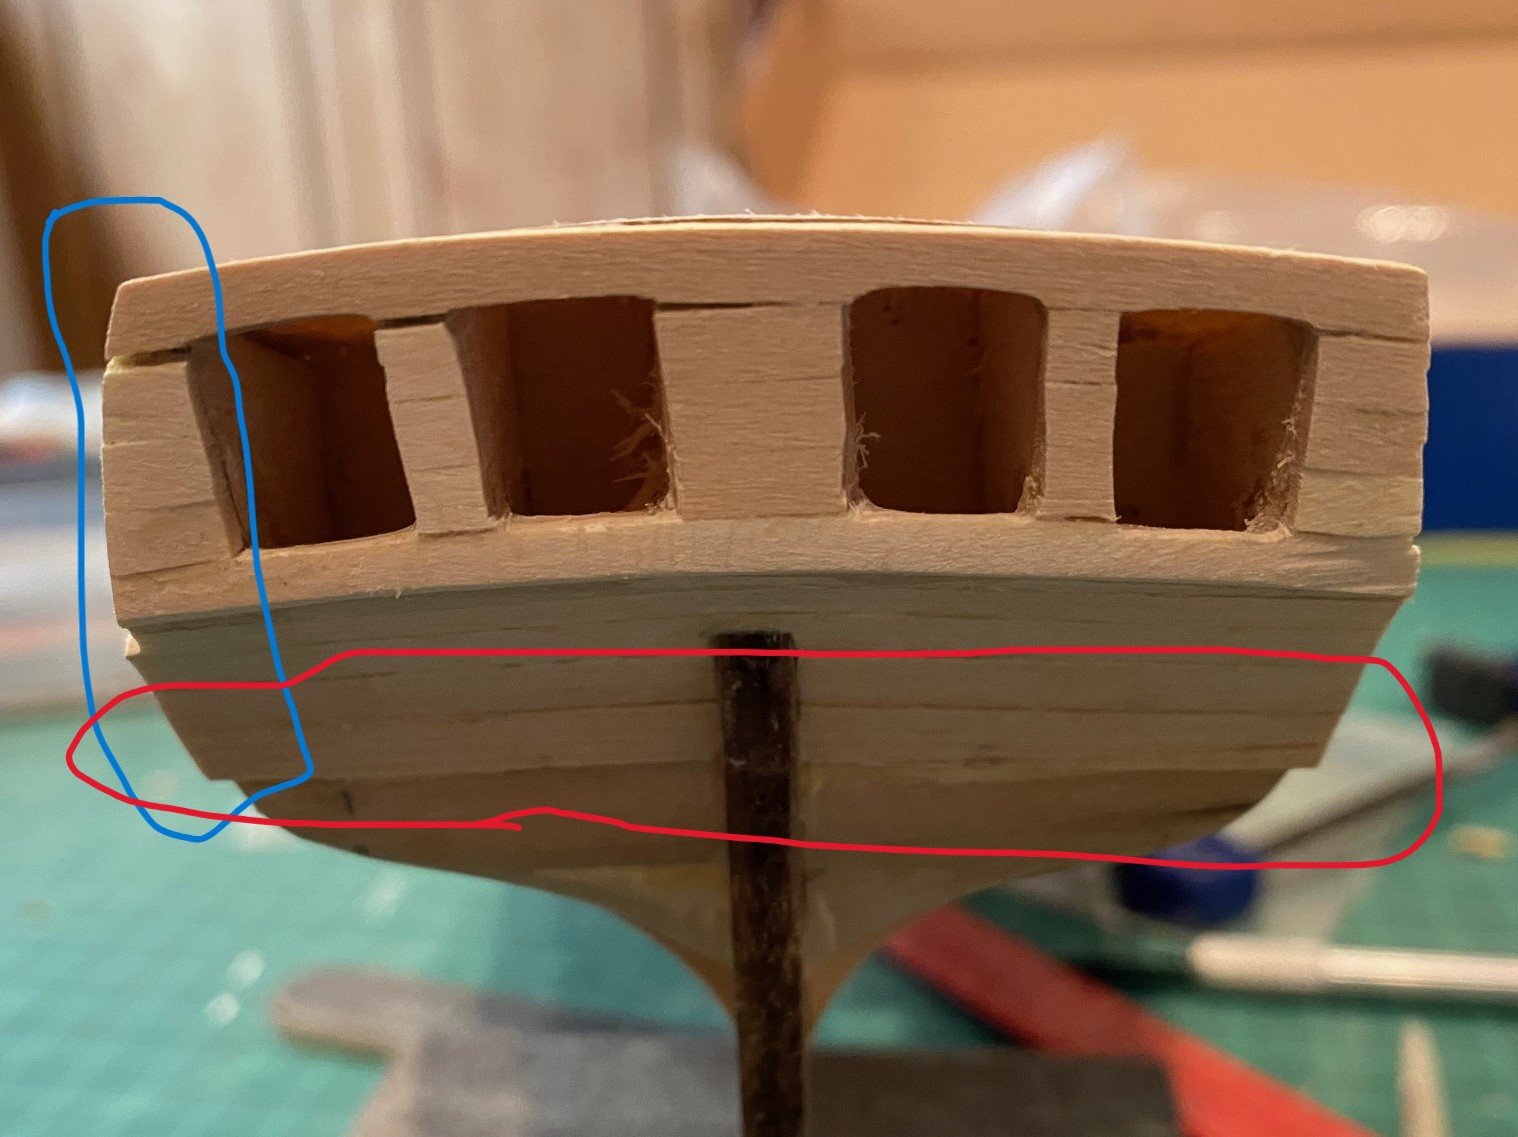
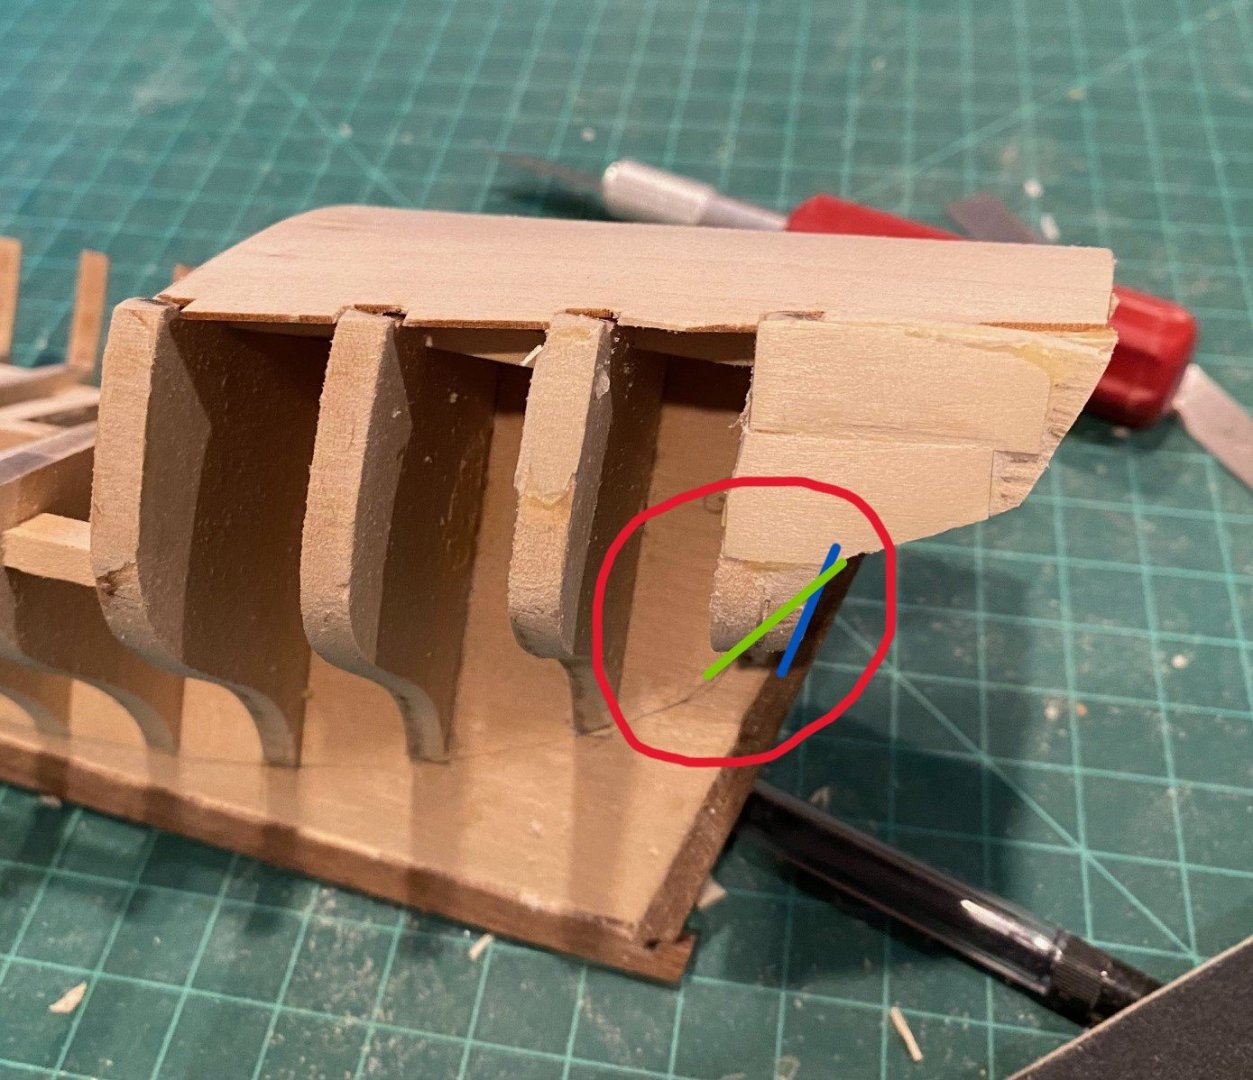
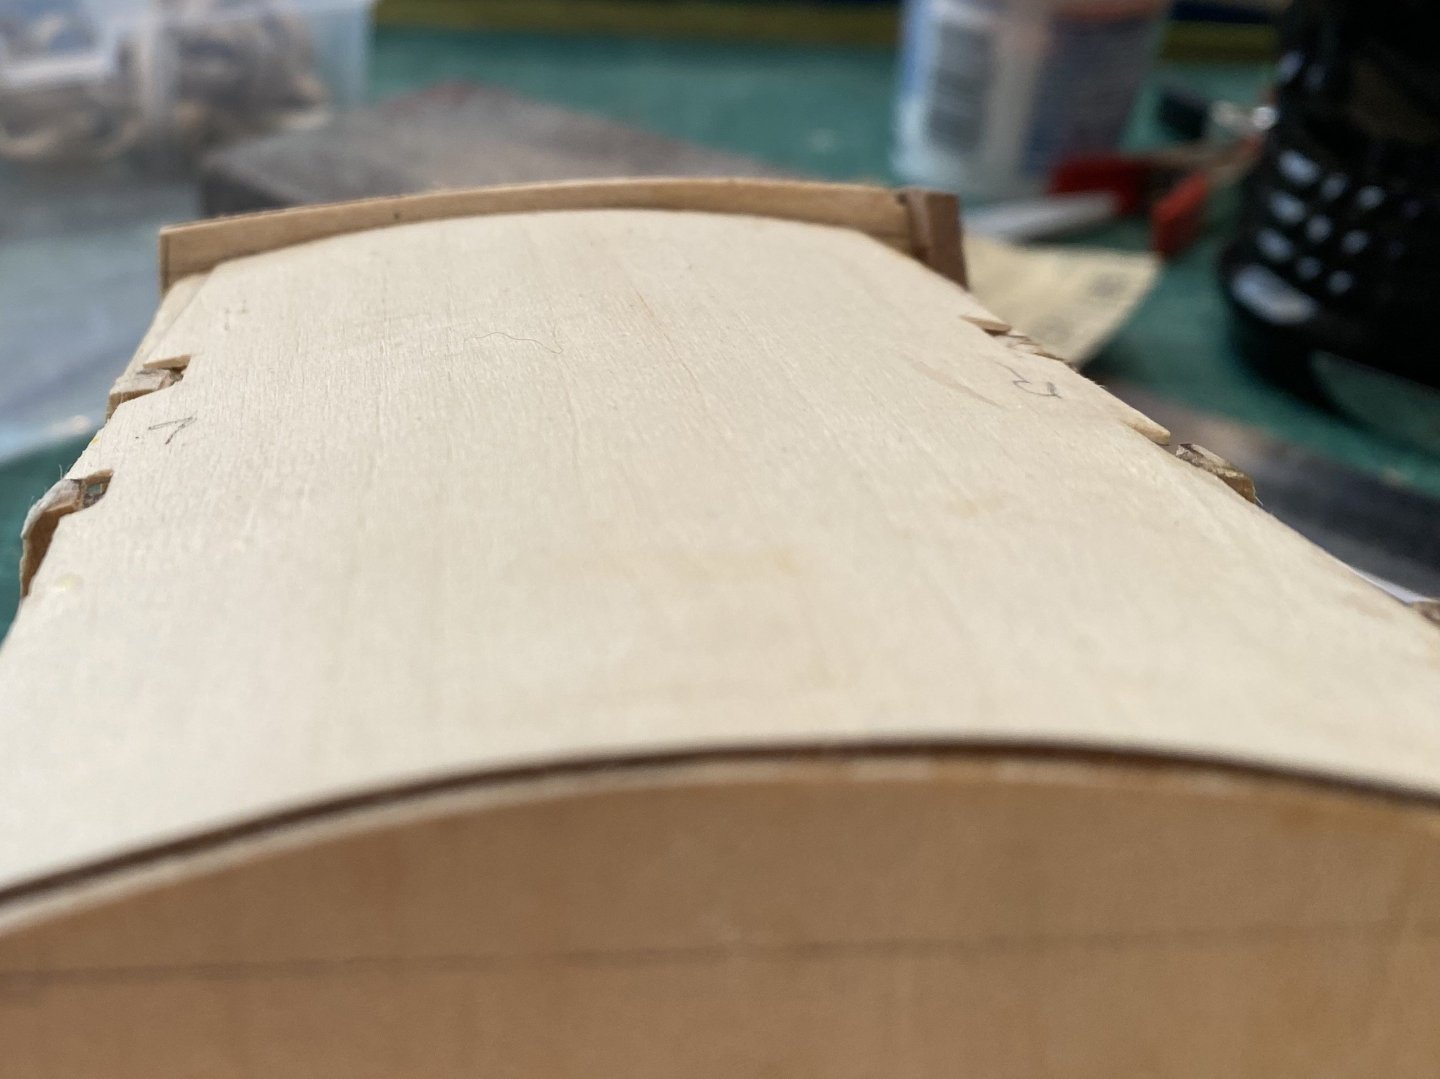
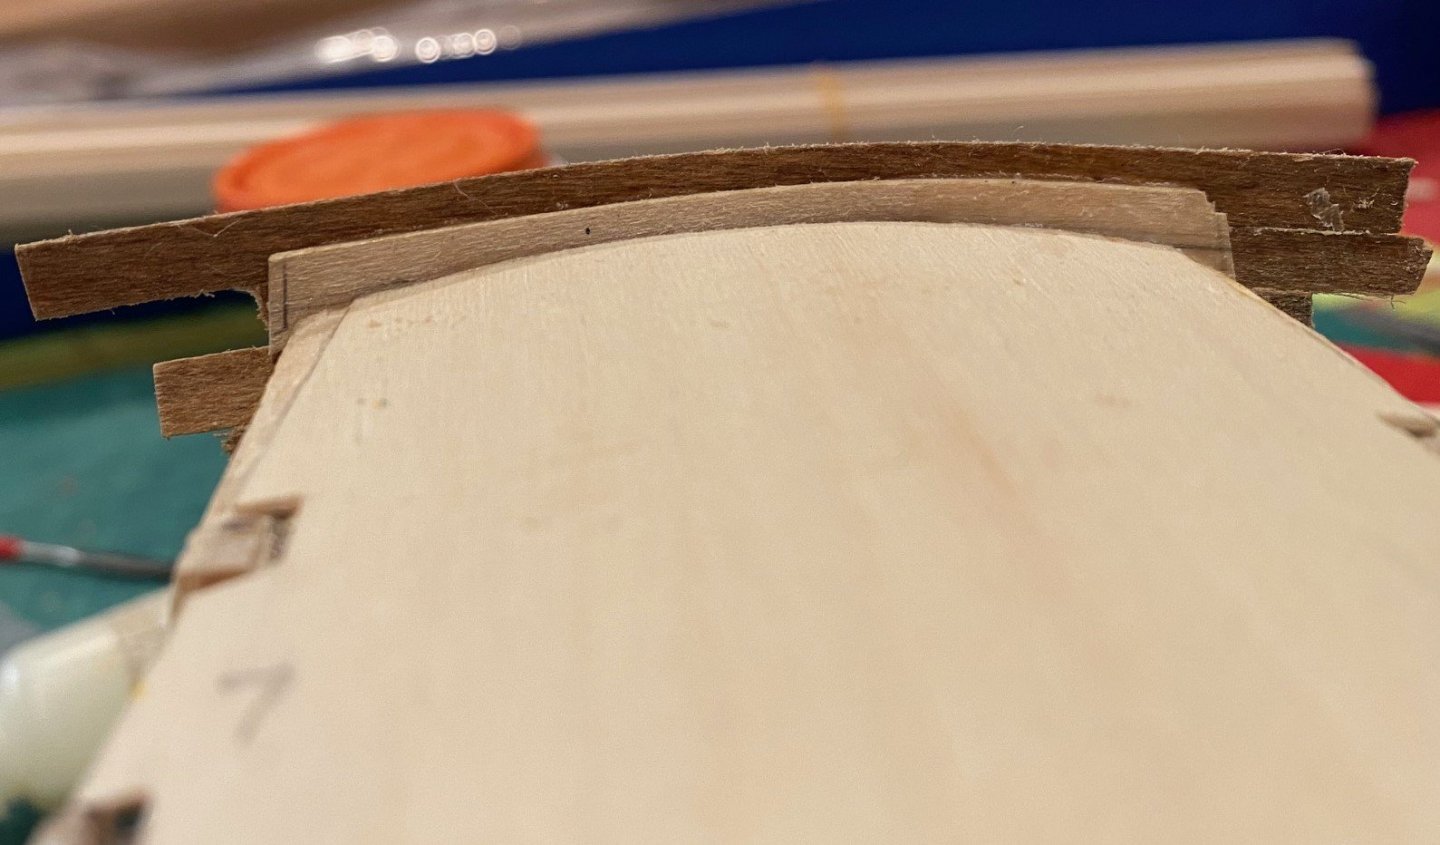
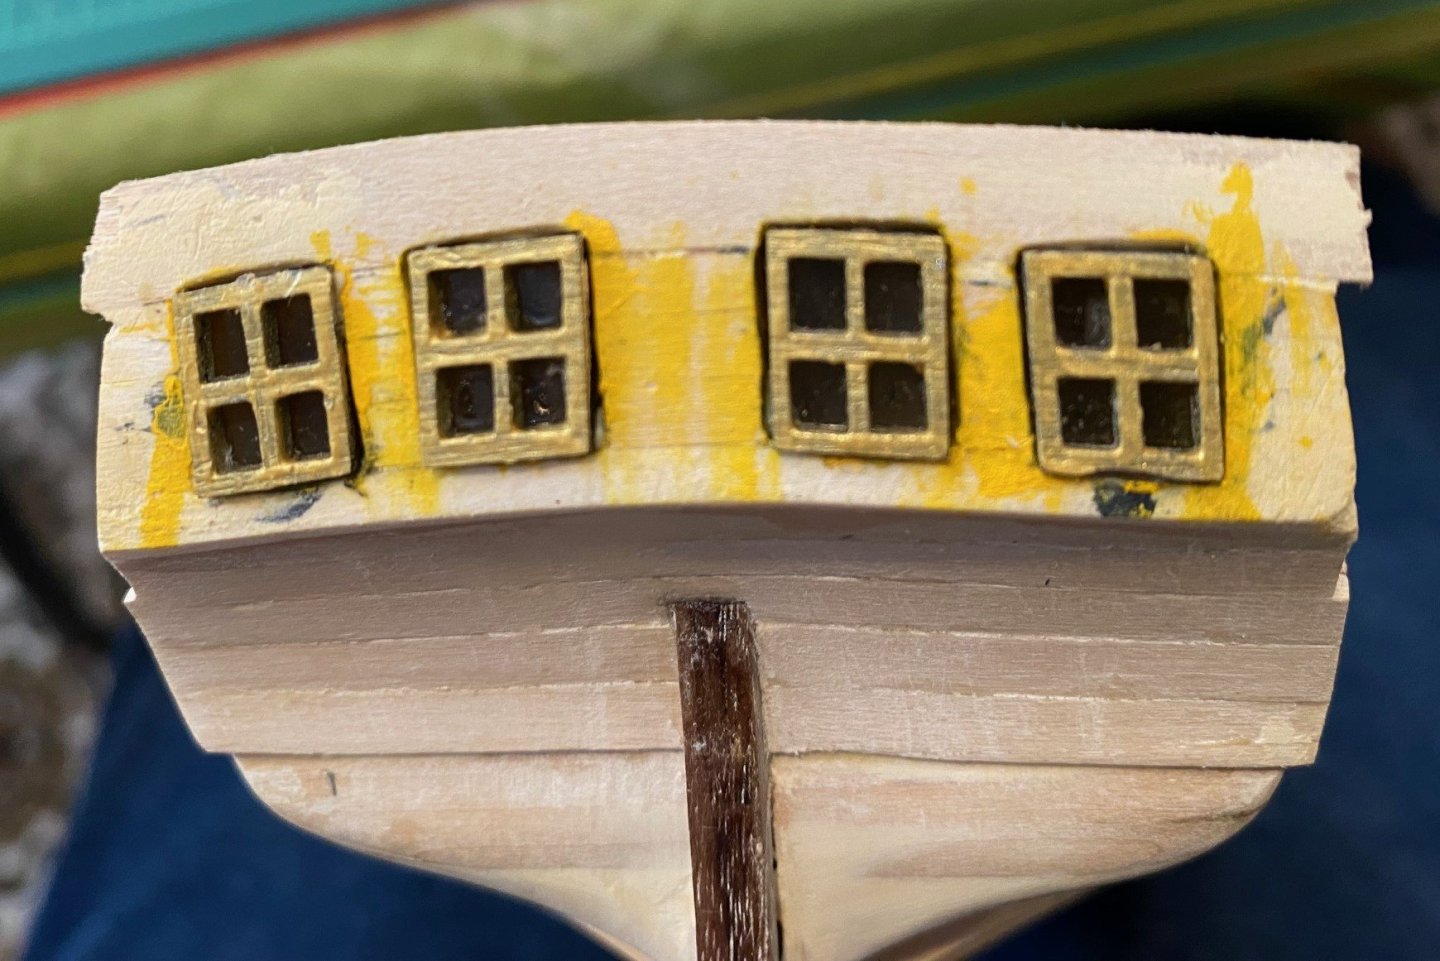
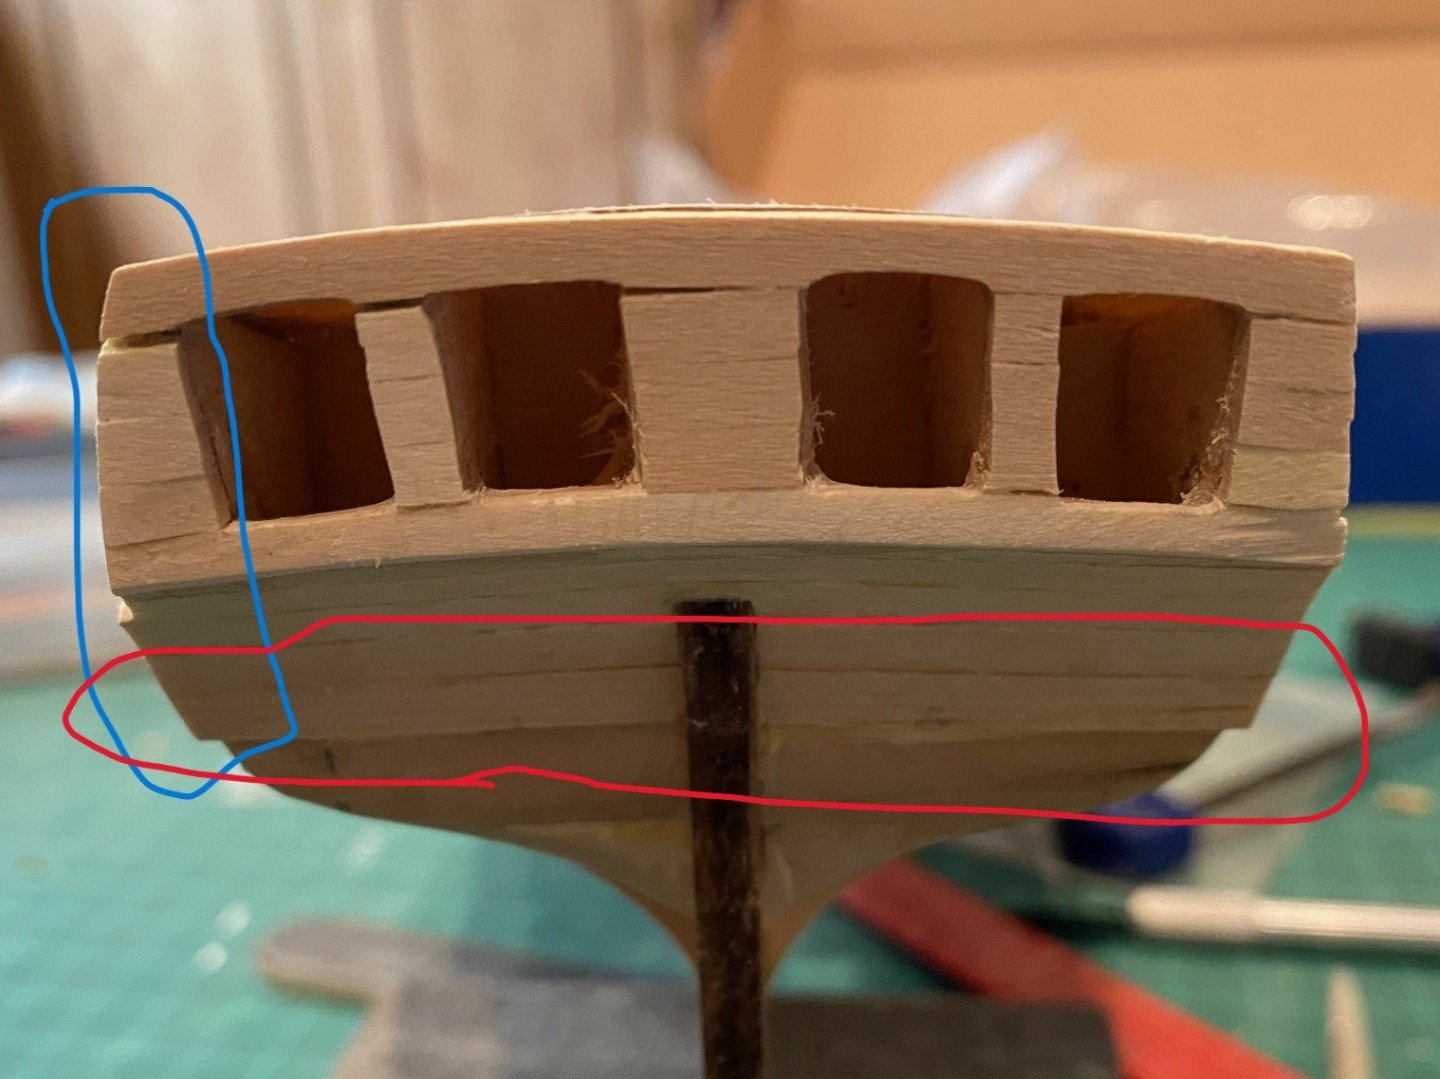
NOTE: I would consider sanding a little more taper in the counter piece, (green line vs the red line) to allow less bend in the planks that bend up the counter. If I would have read the practicum and CiscoH’s post on the aft end bend of the planks, I would have known about sanding the counter filler more to lessen the sharpness of the bend. Also, one of the comments that @mikiek made to CiscoH's post was to lessen the sharpness of the bend. Not only would this reduce the cracking at the bend but make the center side of the plank easier to glue down to the filler.


-
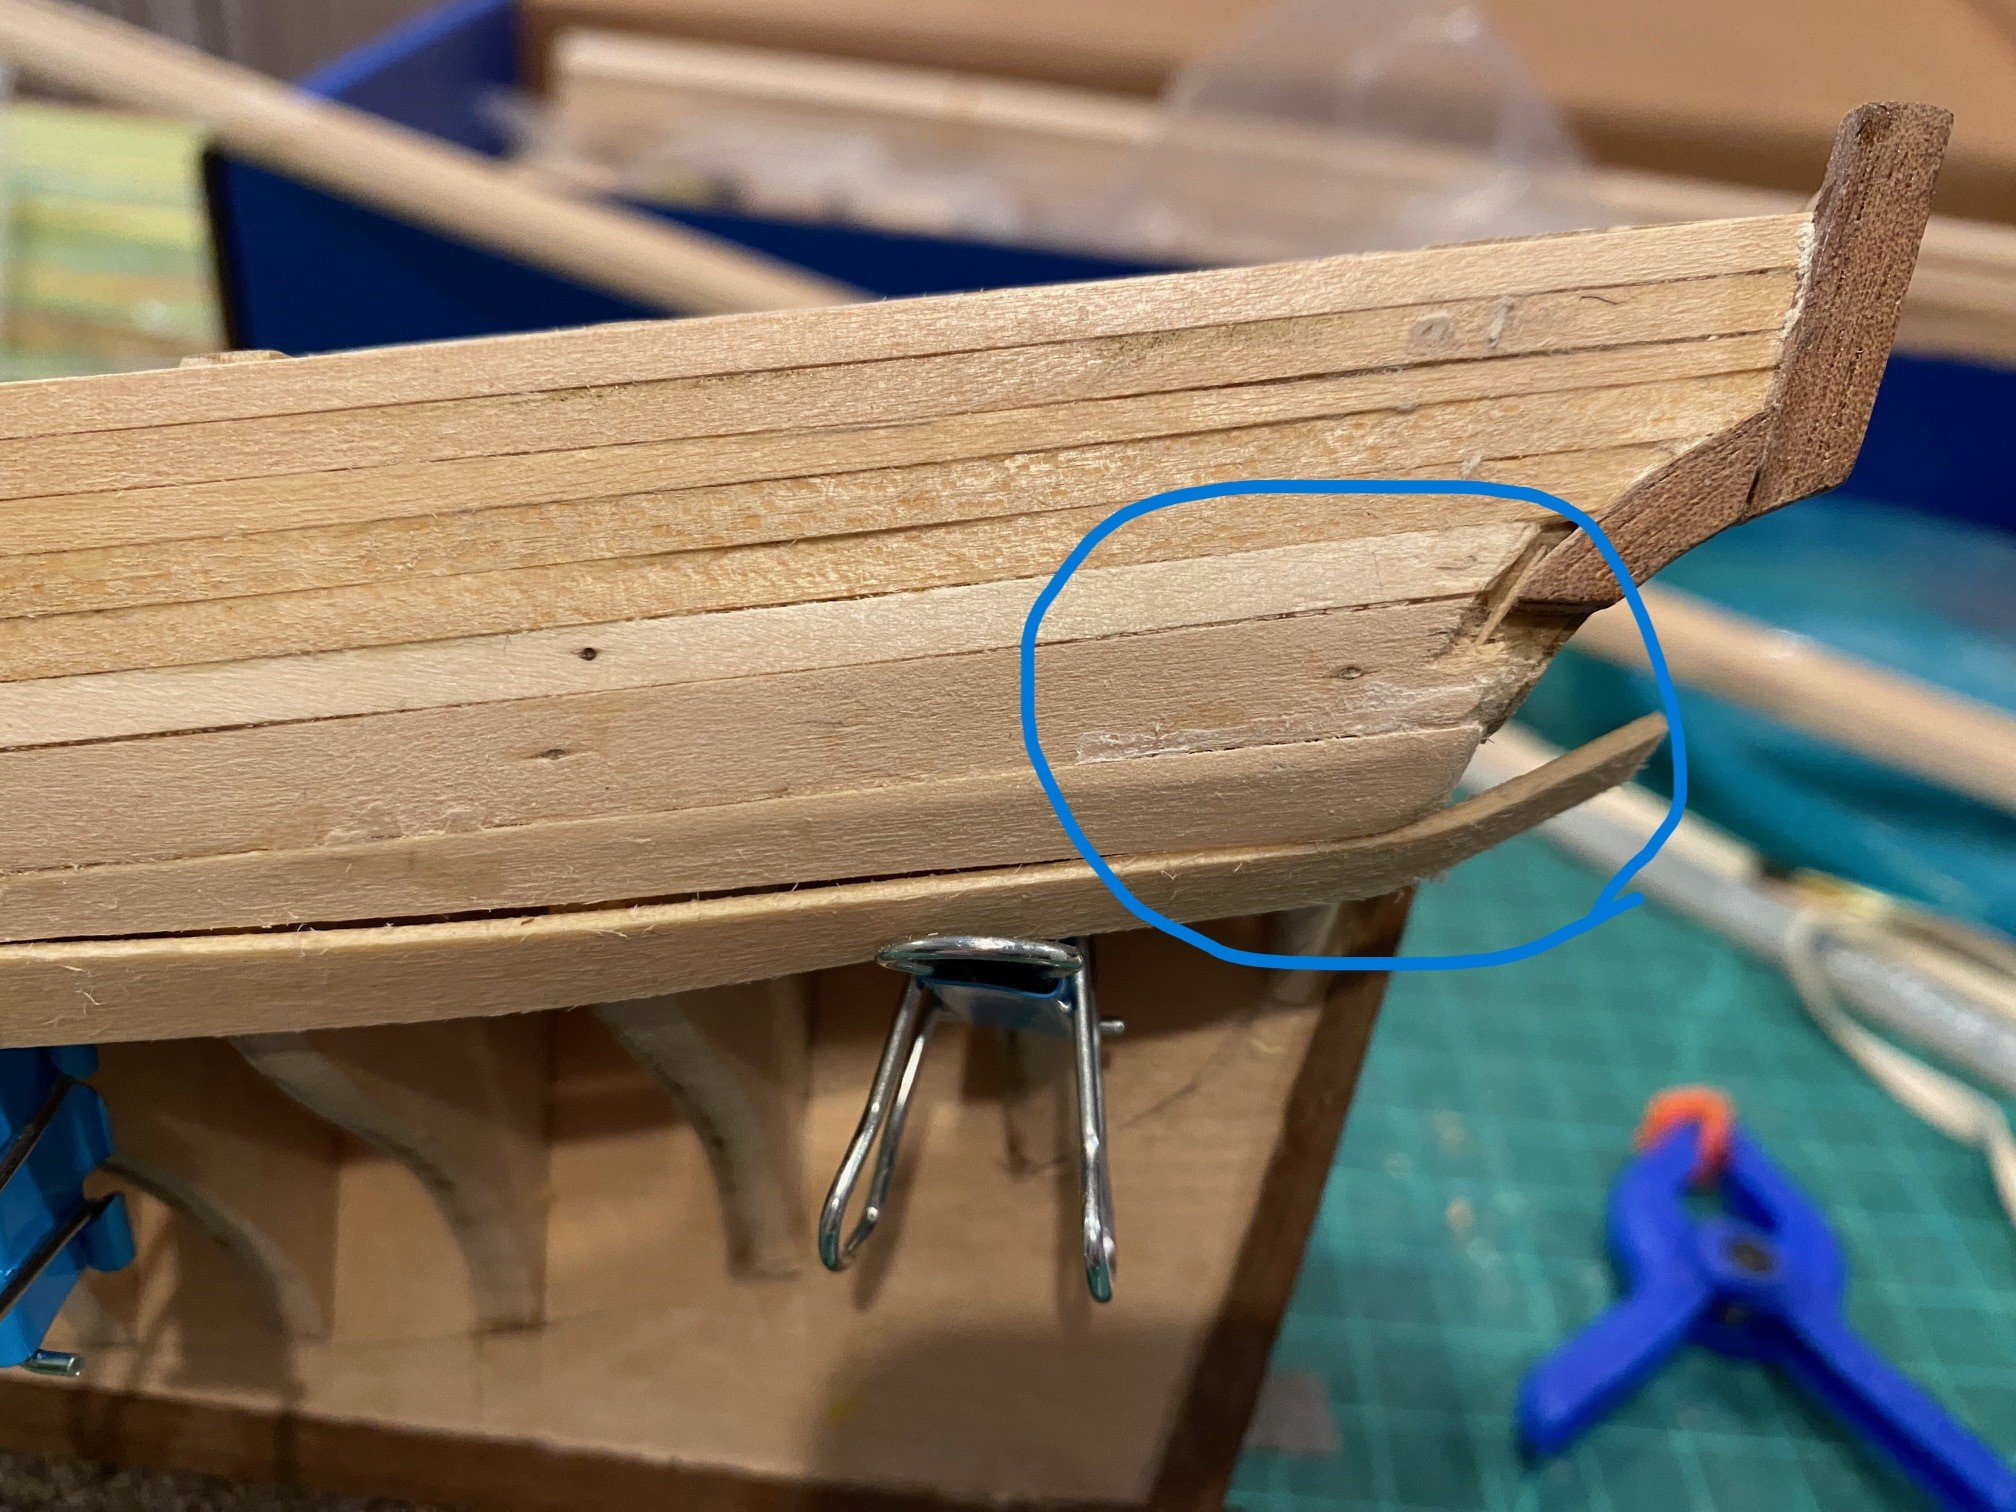
The adjustments I made to the top aft planks worked fairly well, I did not glue the top plank on since I was worried that I would break them due to my handling of the boat while I did other work. I know I will have to do some last-minute adjustments to the top plank when I glue it on to get an even height between the port and starboard side. Now starting on the first ¼ in plank below the wale plank and my first try at spilling a plank. Started on the port side. I followed the Luck Street practicum on spilling the plank. It went ok for the first one, but was never confident as I was doing it, when finished it fit fairly good without too much upward force to butt up to the wale plank. Bending the aft end of the plank up and around the counter was a challenge for two reasons. First, I did not get it soaked enough, and it did crack a little at the bend, putty will fix that. The second challenge was as I bent it around, I found that the I had to trim the plank a little to compensate for the wale plank not matching the top of the counter filler plank as I pointed out a few comments ago. The starboard wale is even higher from the joint. So, I had the plank match the end of the transom planks which left a gap between the wale and the plank, which I just filled in with a filler wedge


-
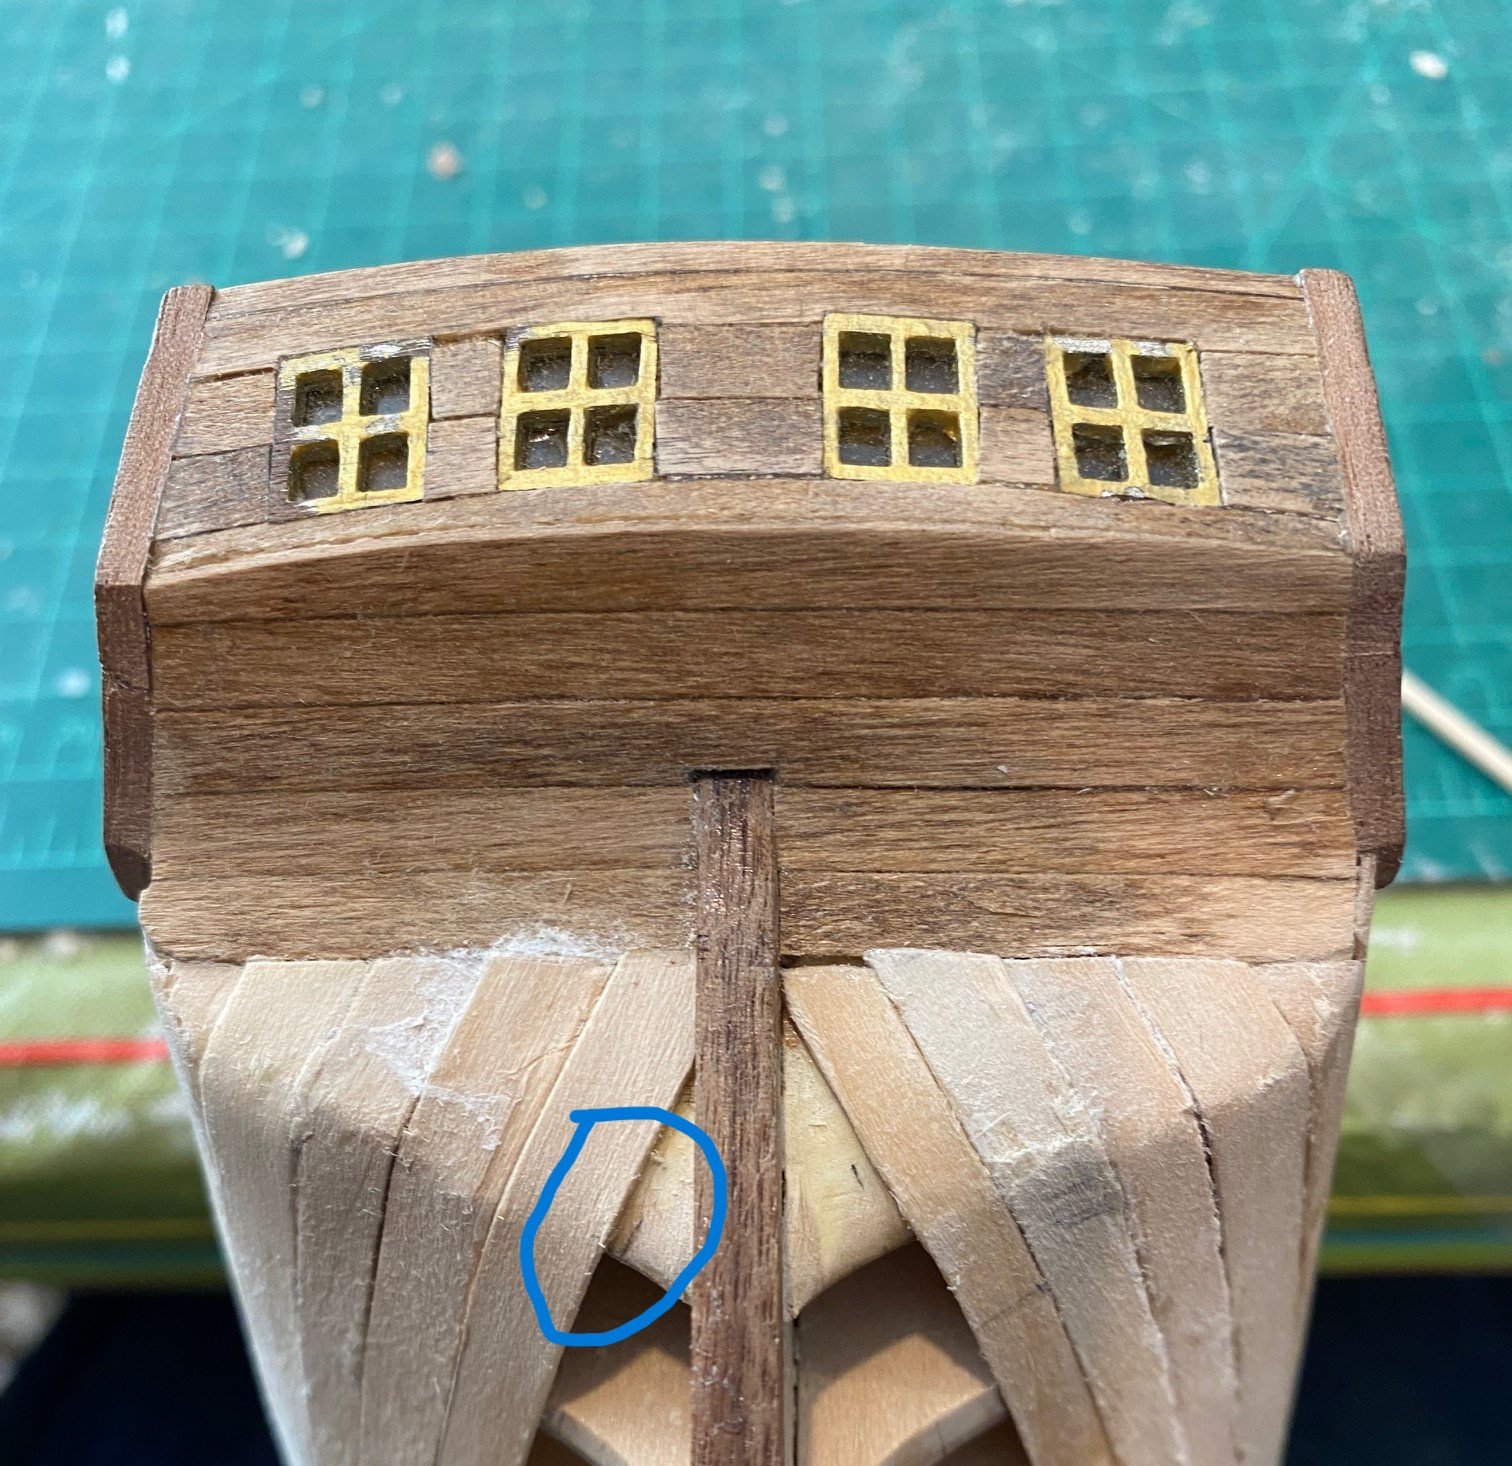
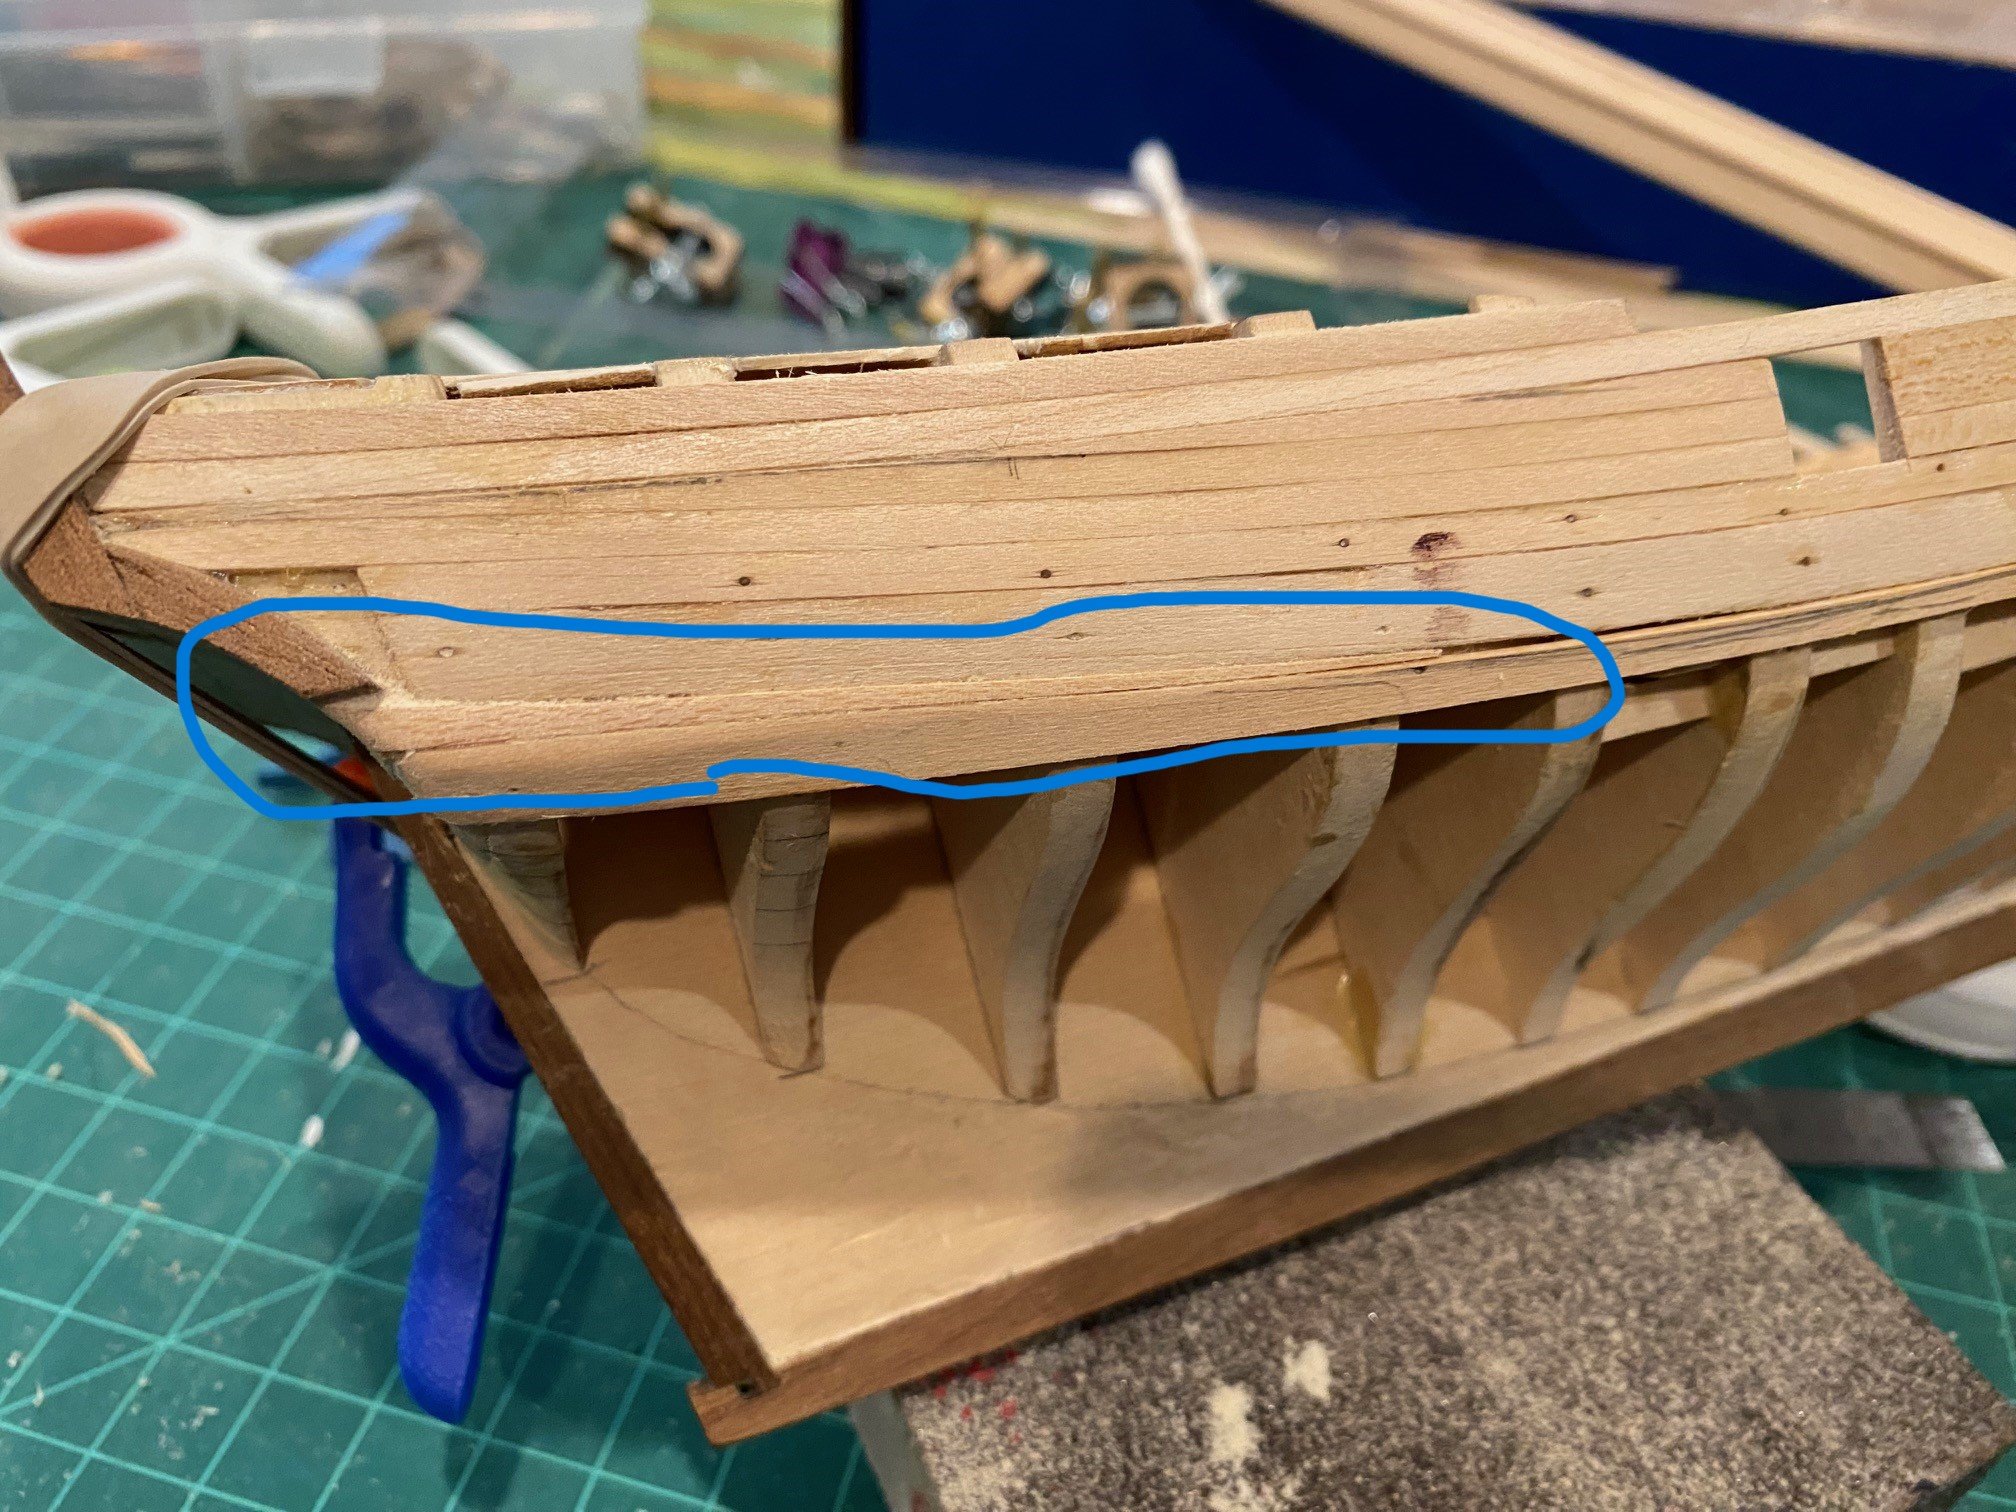
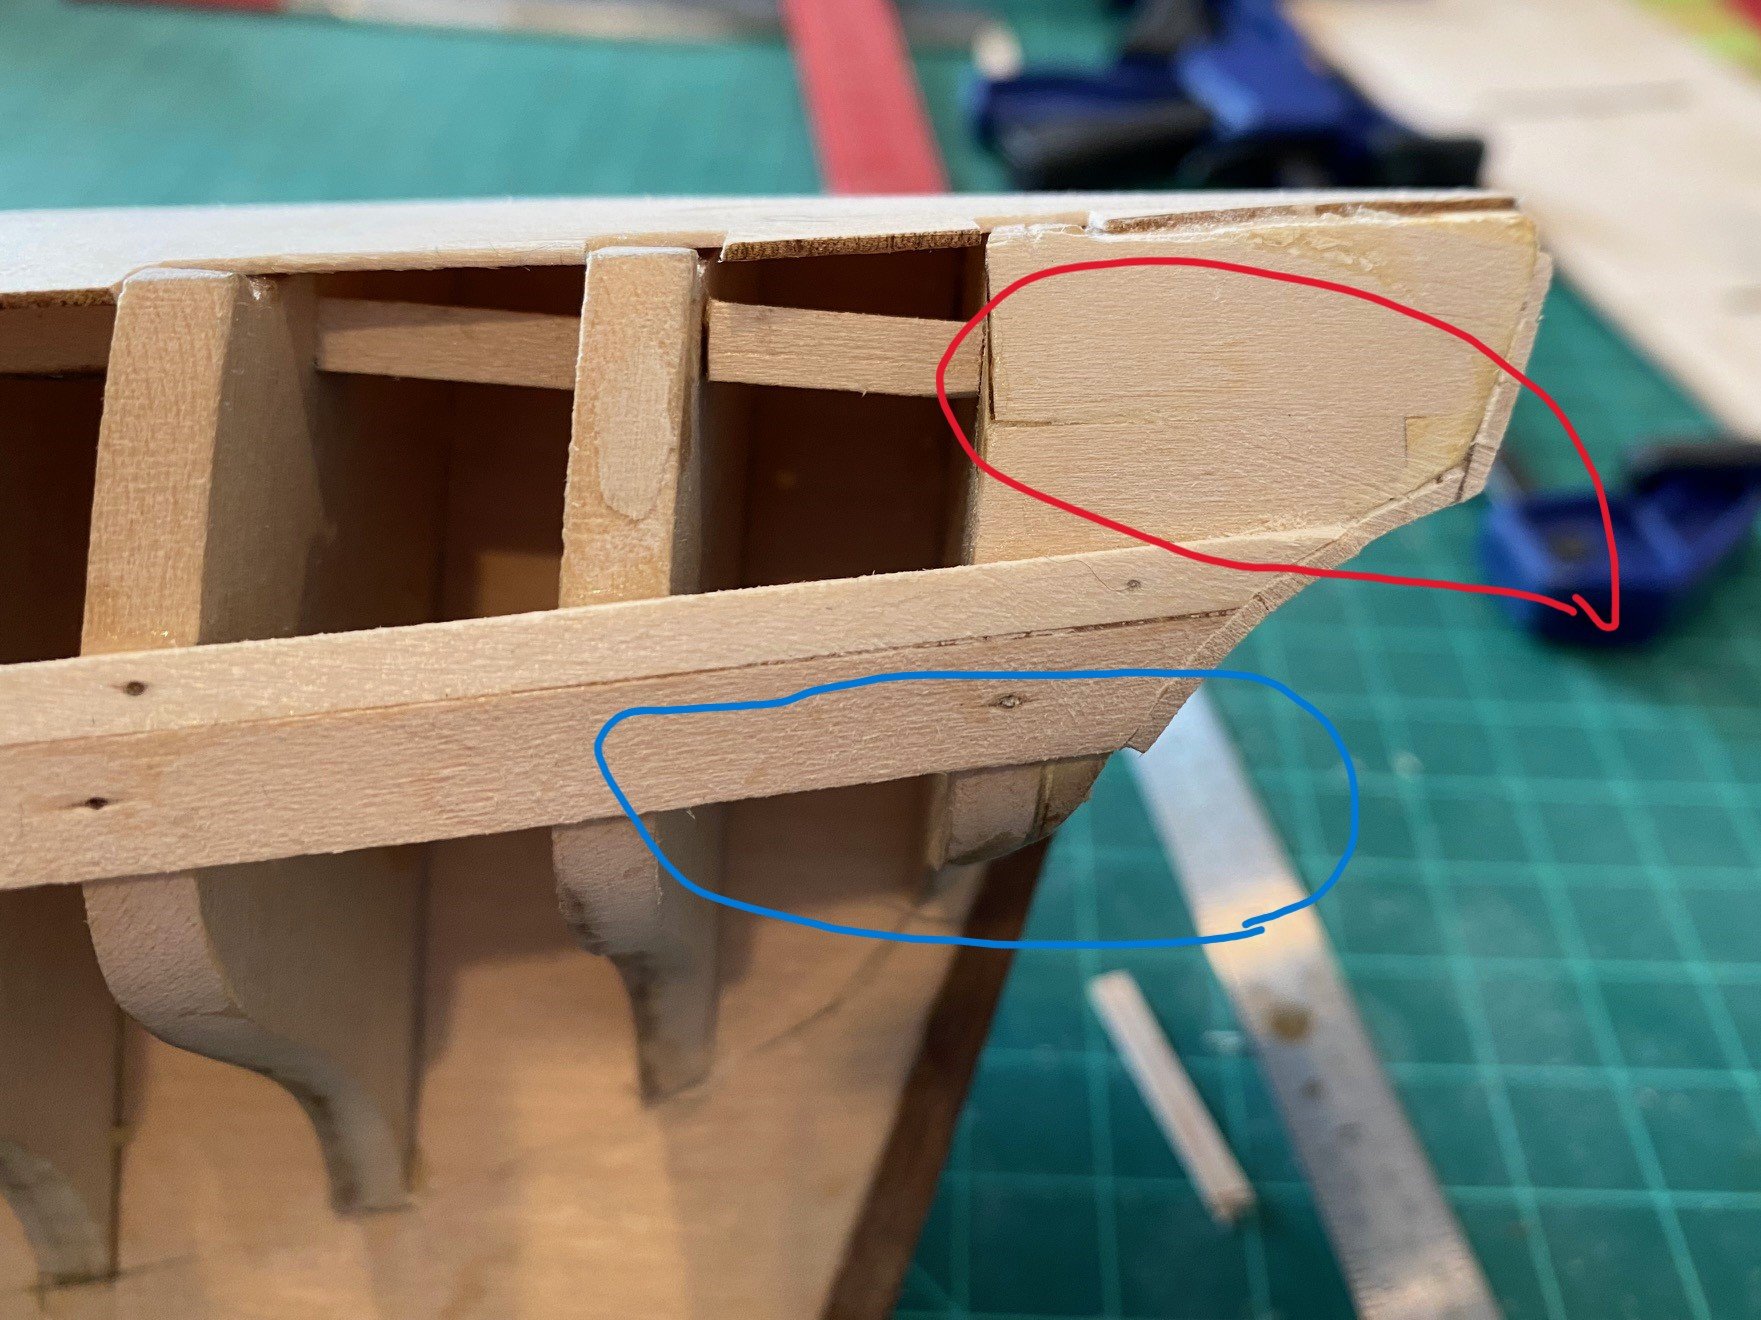
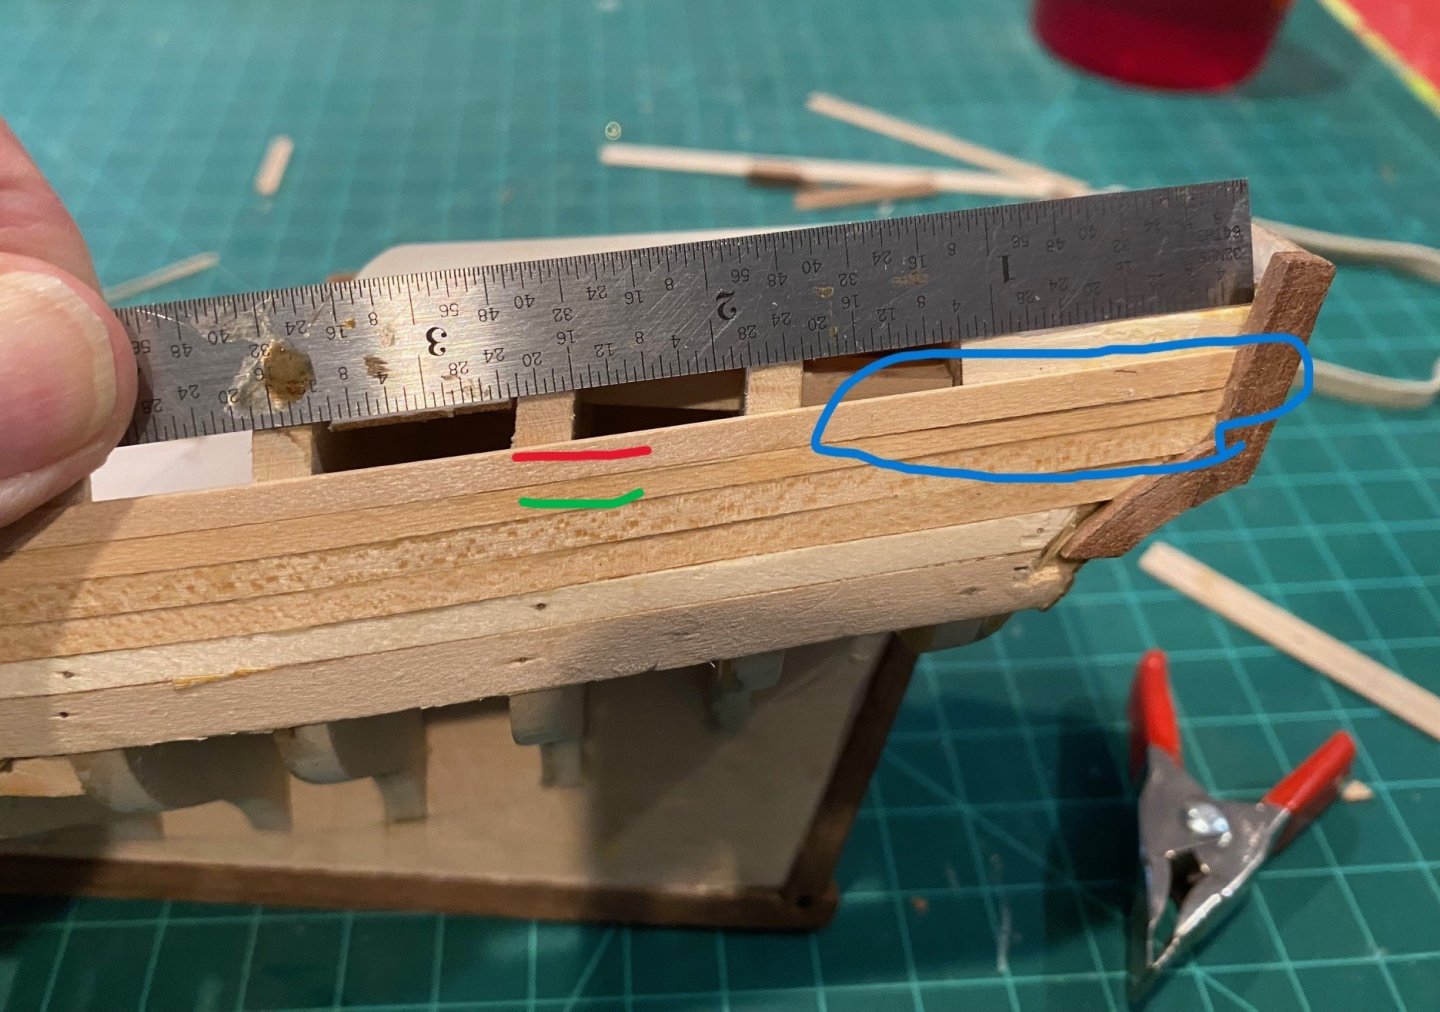
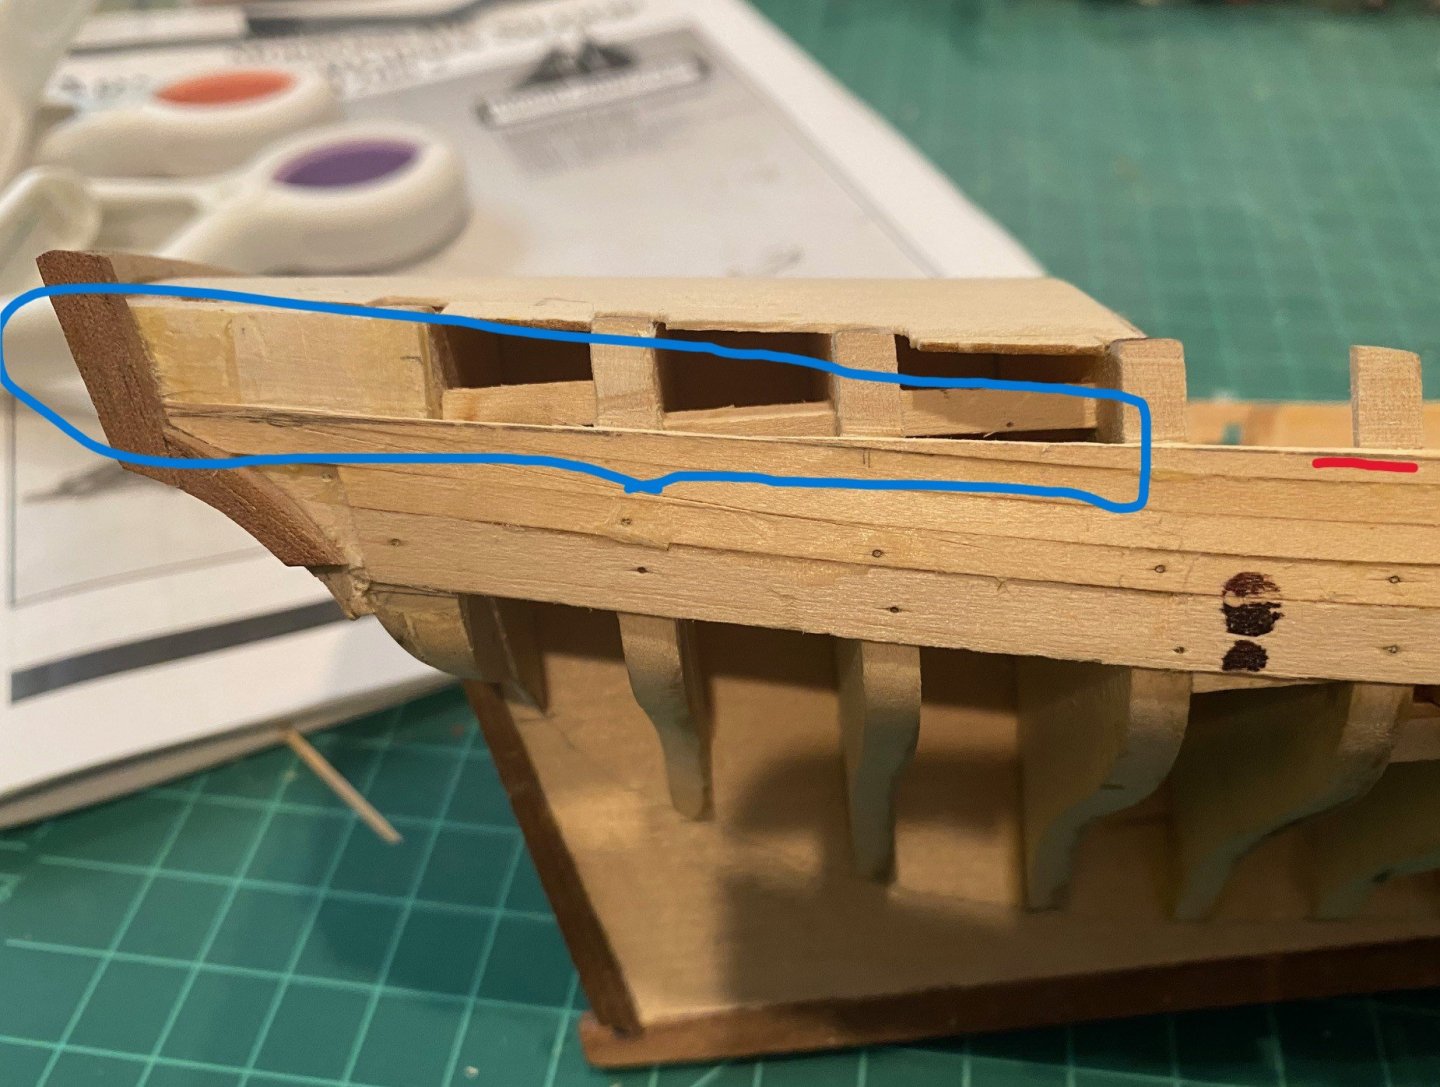
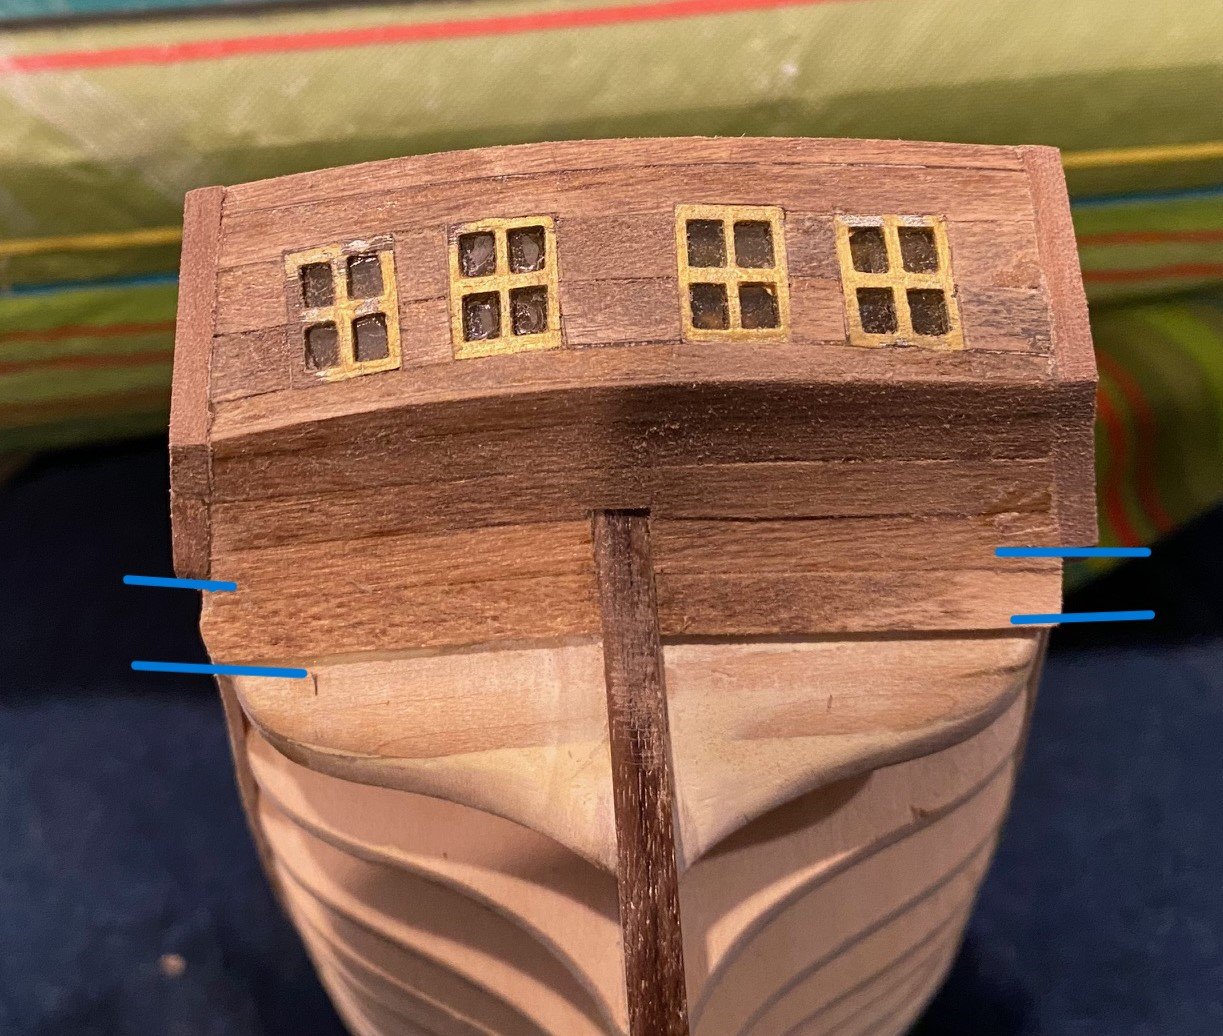
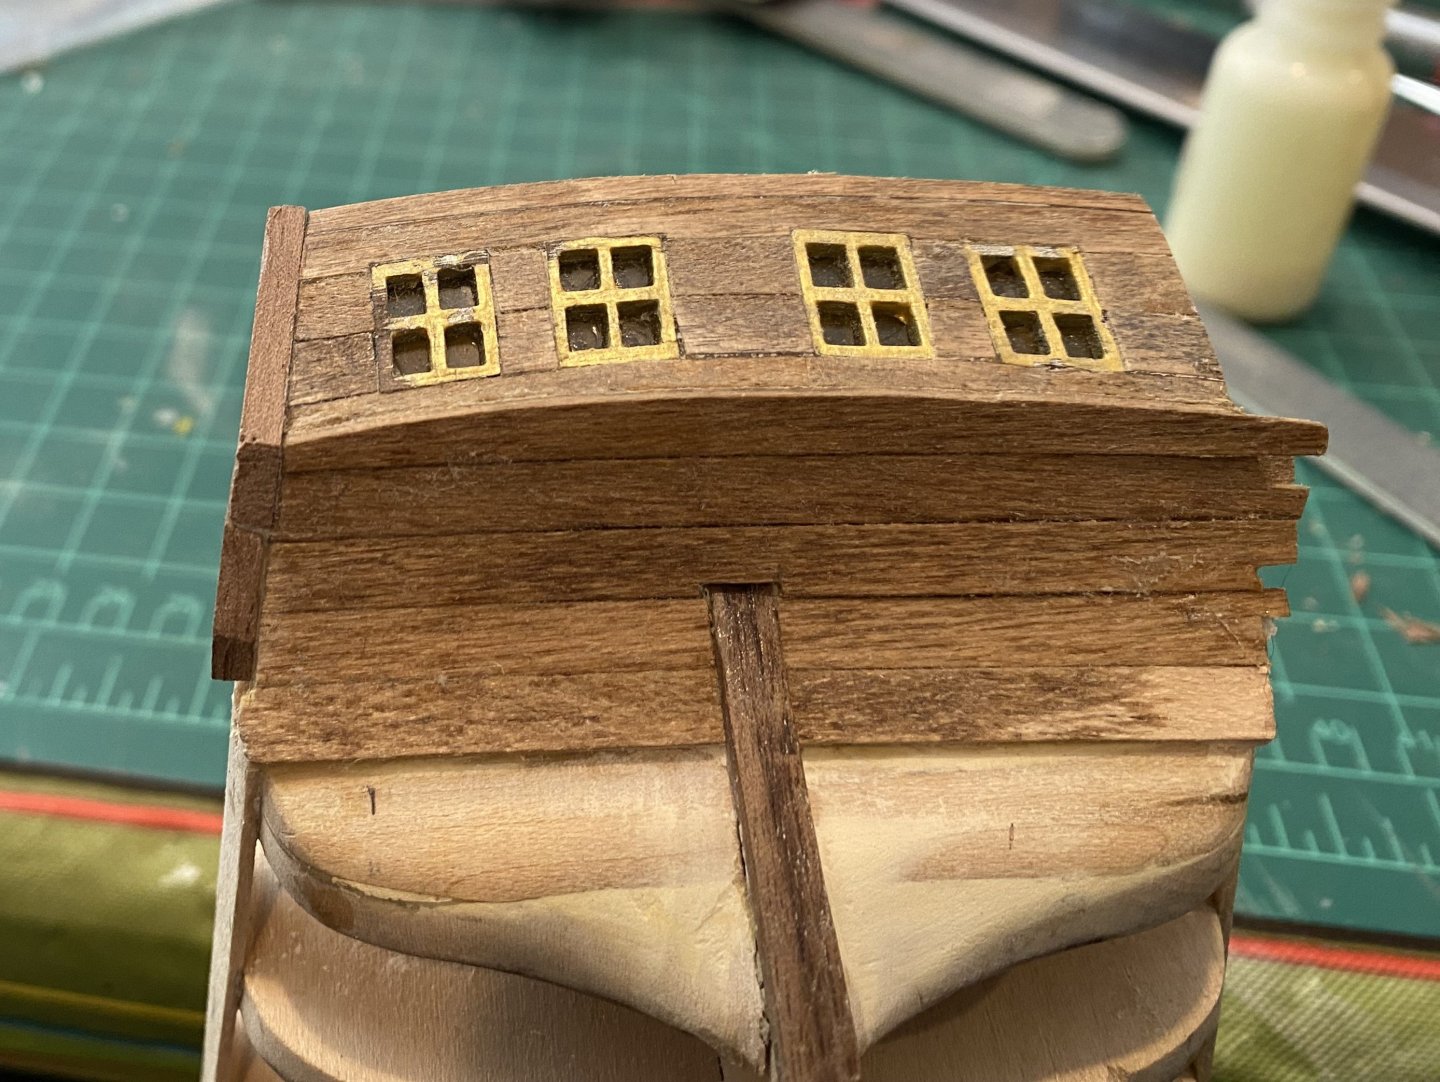
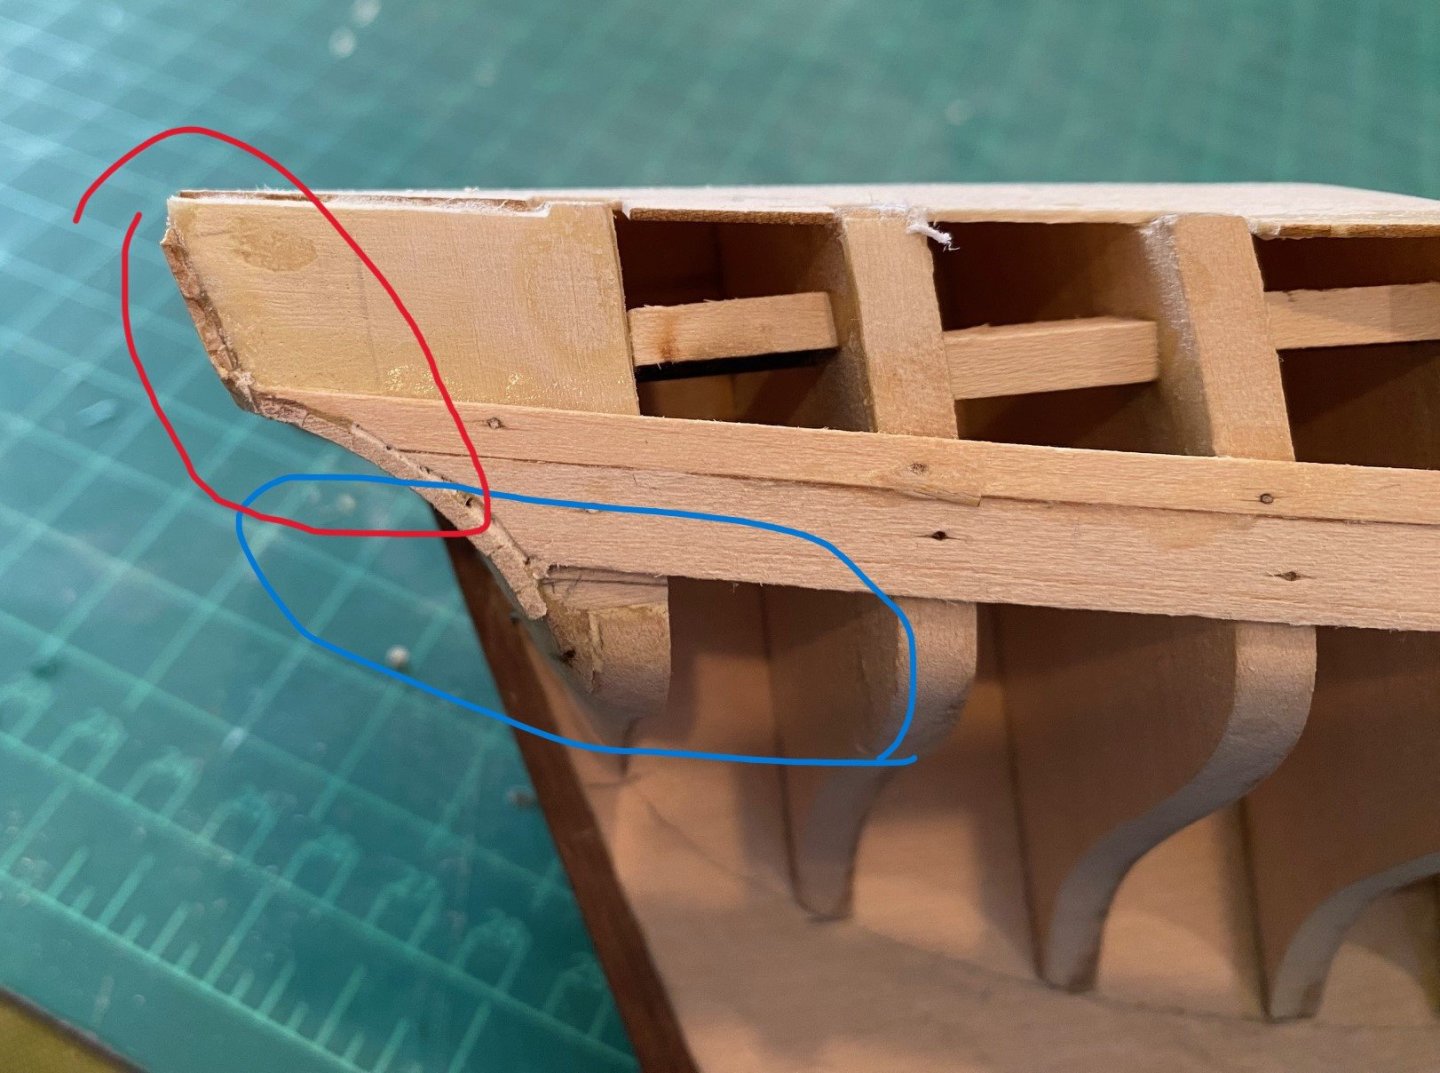
On the port side, I did not have to remove a lot from a plank so that the plank was parallel to the aft deck, see circled area of next picture. The plank marked green is the top of the 3-gun port planks and the red is the stem to stern plank that did not require any adjustment. The starboard side required more of an adjustment to get the top planks parallel to the aft deck as can be seen by the blue circled planks on the next picture. I had to remove all of the aft part of the top gun port plank, marked with the red line, and a significant amount from the middle gun port plank. I glad I read CiscoH’s build log or I would have missed this, saved by CiscoH again.
-
Question about Swift pilot boat stem piece
SkiBee replied to Pastor Wes's topic in Wood ship model kits
Please send picture of what you are talking about. -
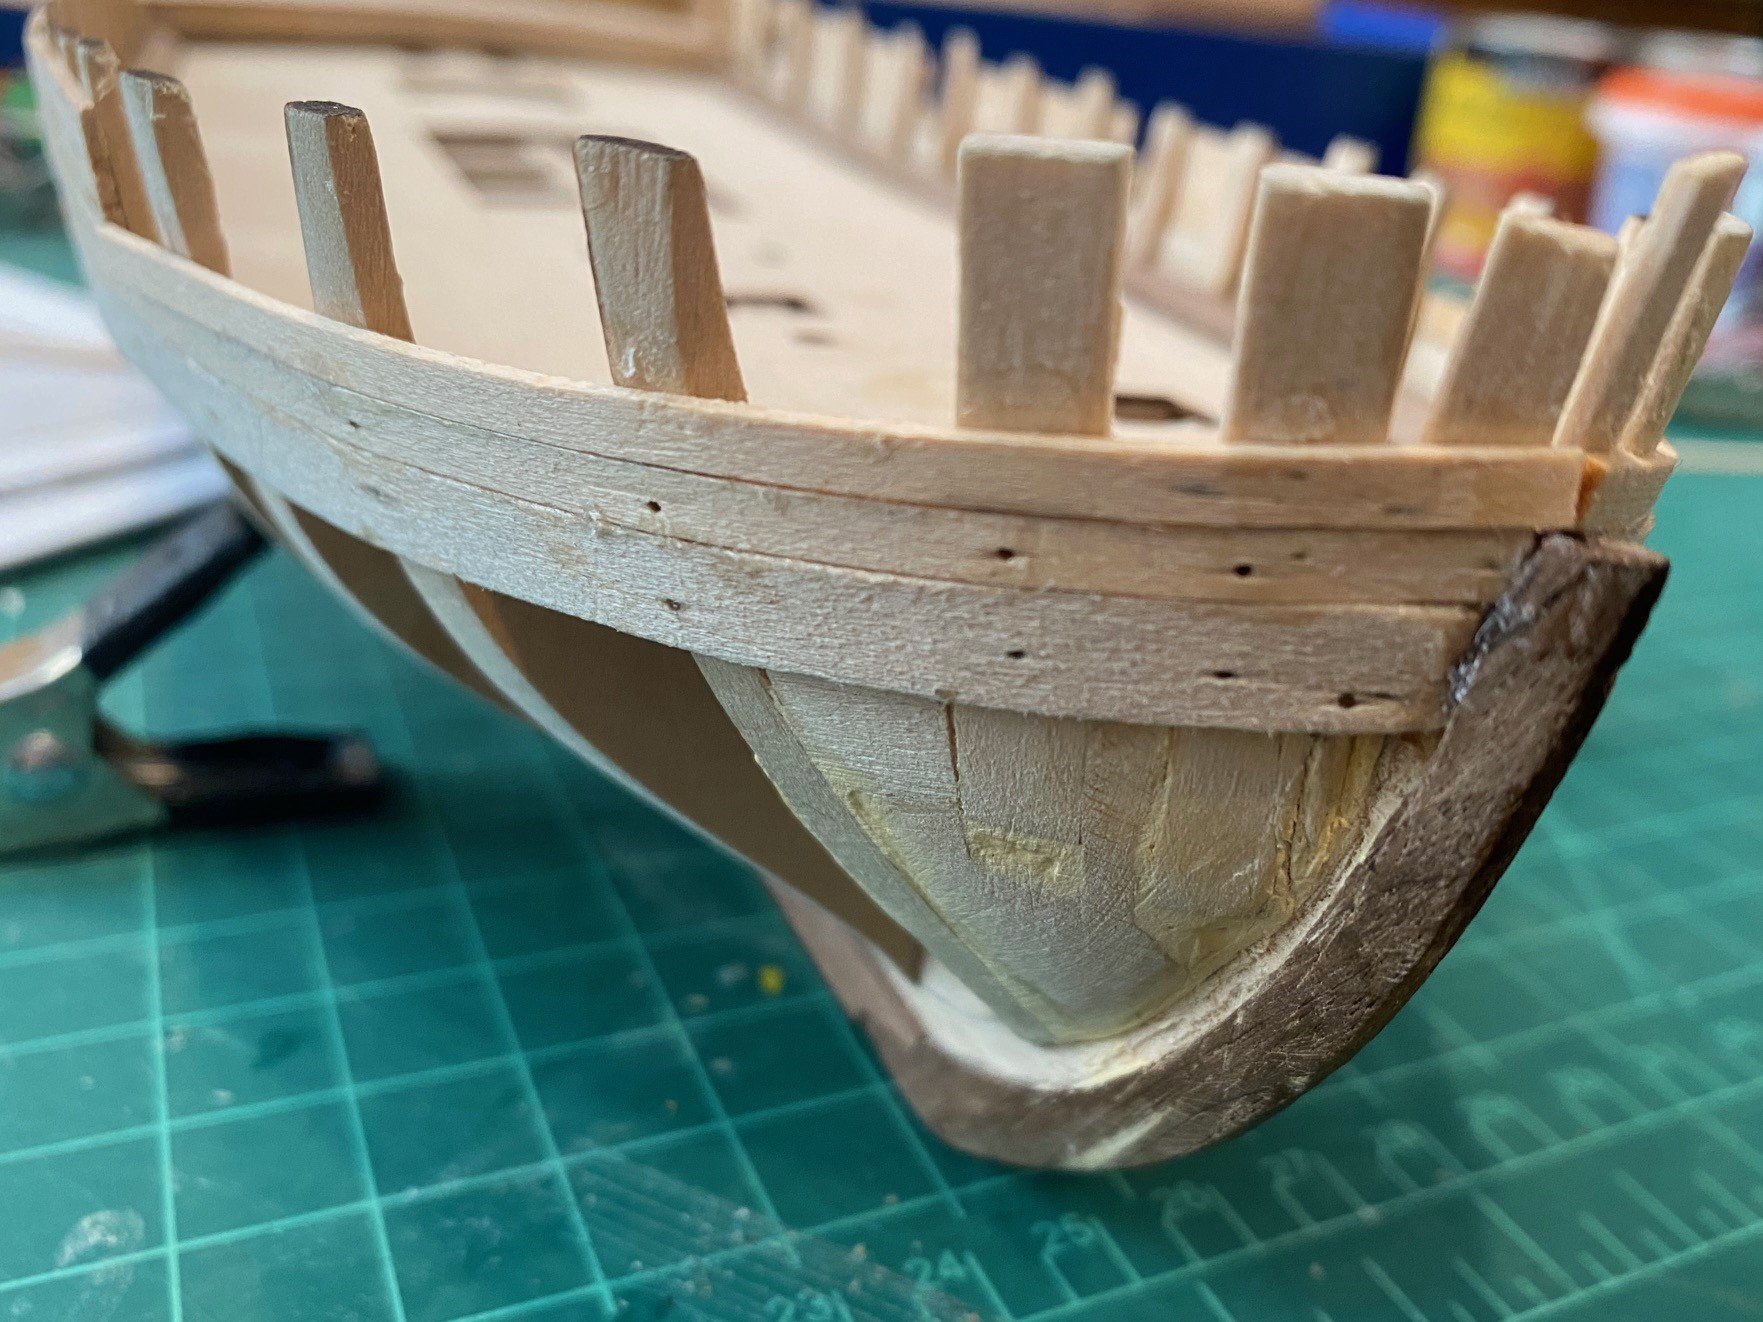
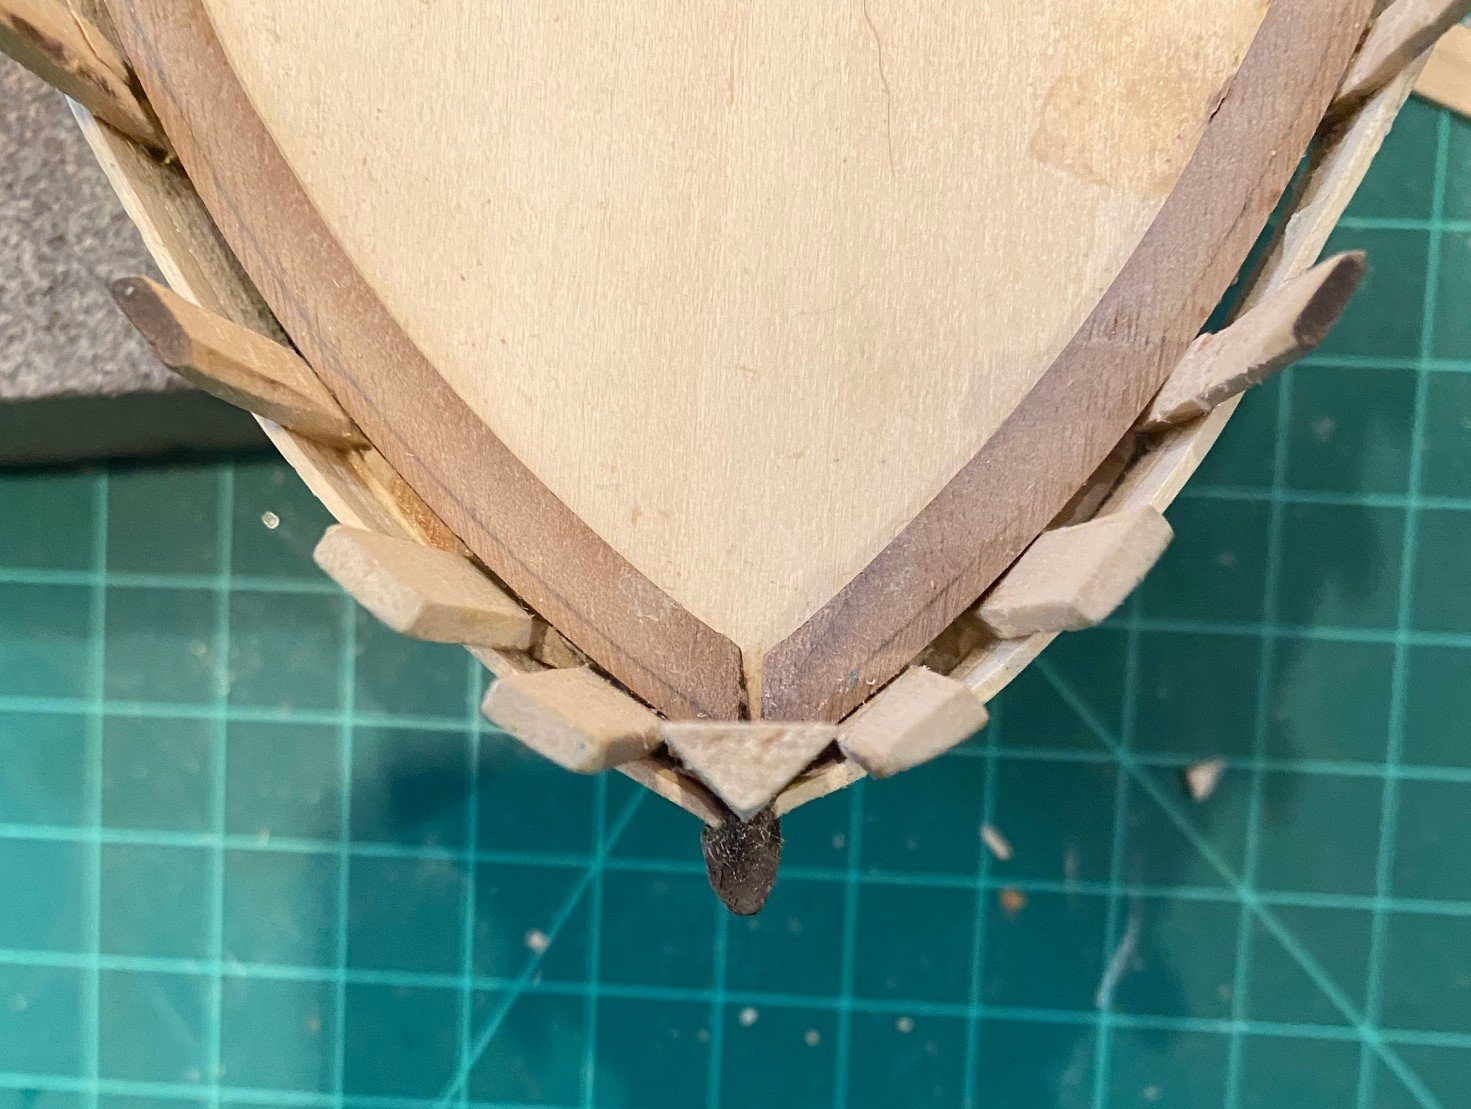
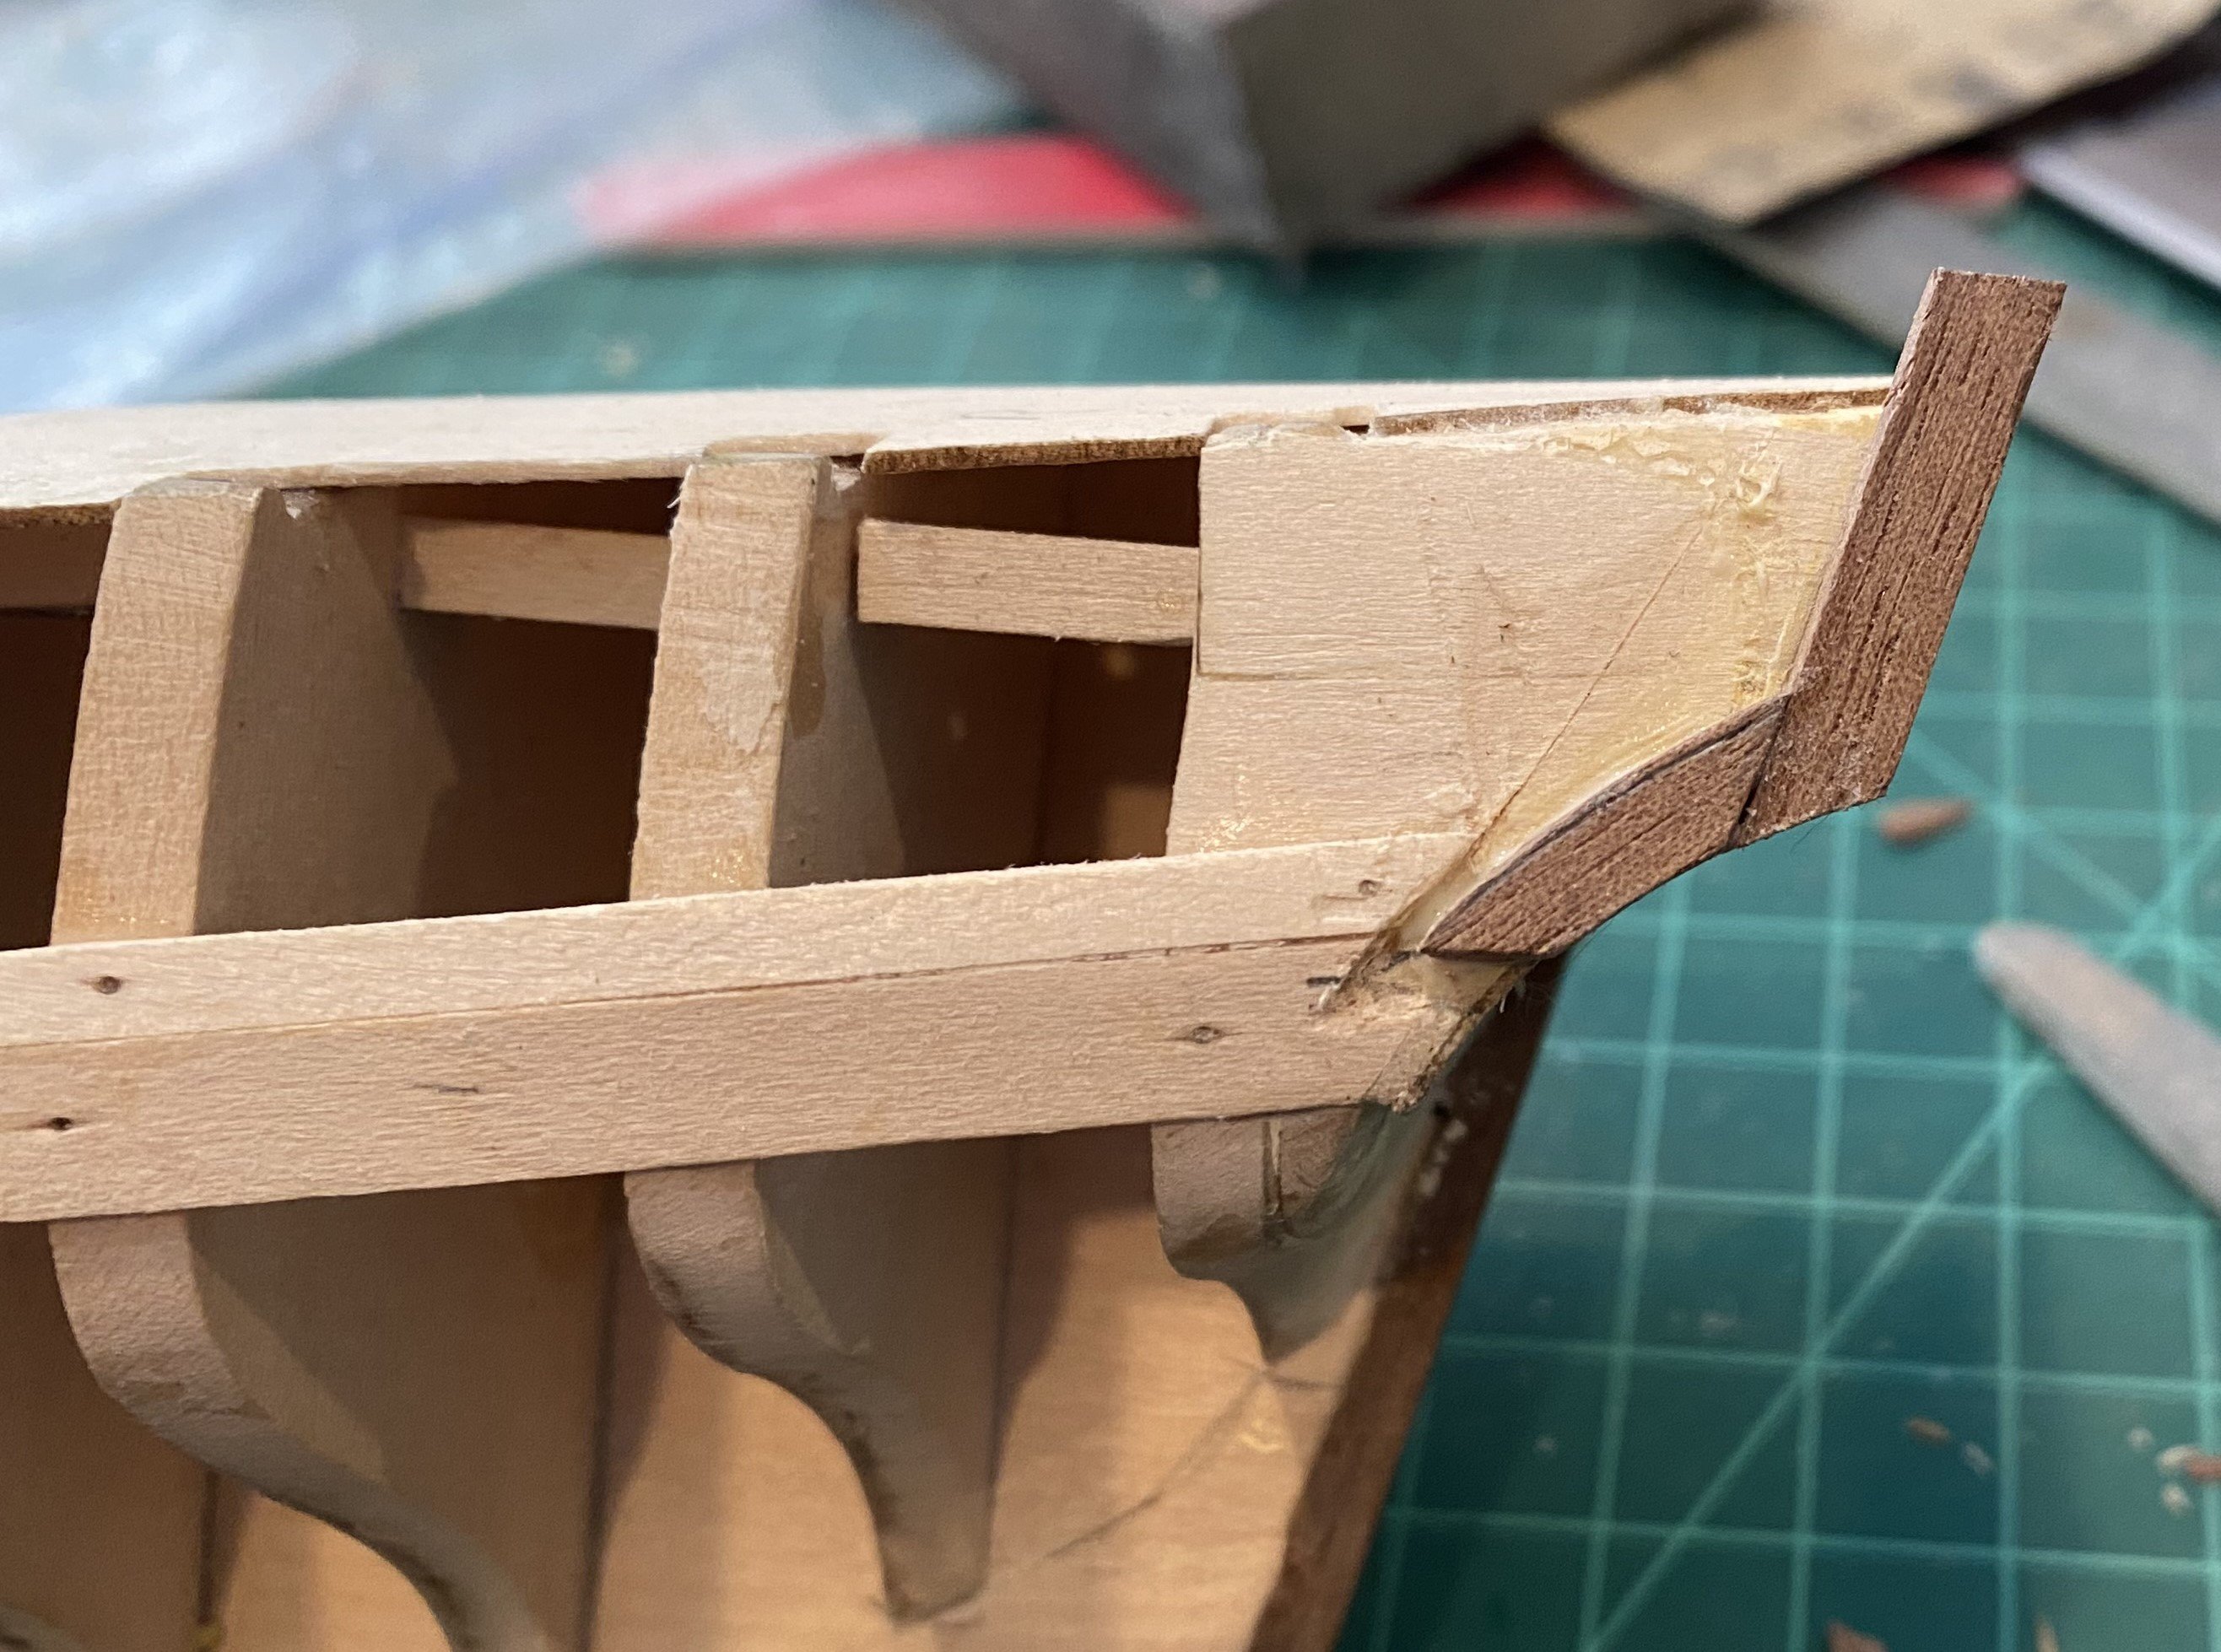
I did use just two pieces of left over basswood strips to provide a glue surface for the bow planks. It worked well for the first plank on each side, but I need to work on removing any gaps between planks on the curved pieces. Finished adding the 3 aft planks that provide the aft gun port side. I can see what CiscoH was talking about getting the aft planks parallel to the edge of the aft compartment overhead. CiscoH appreciate the heads up.

-
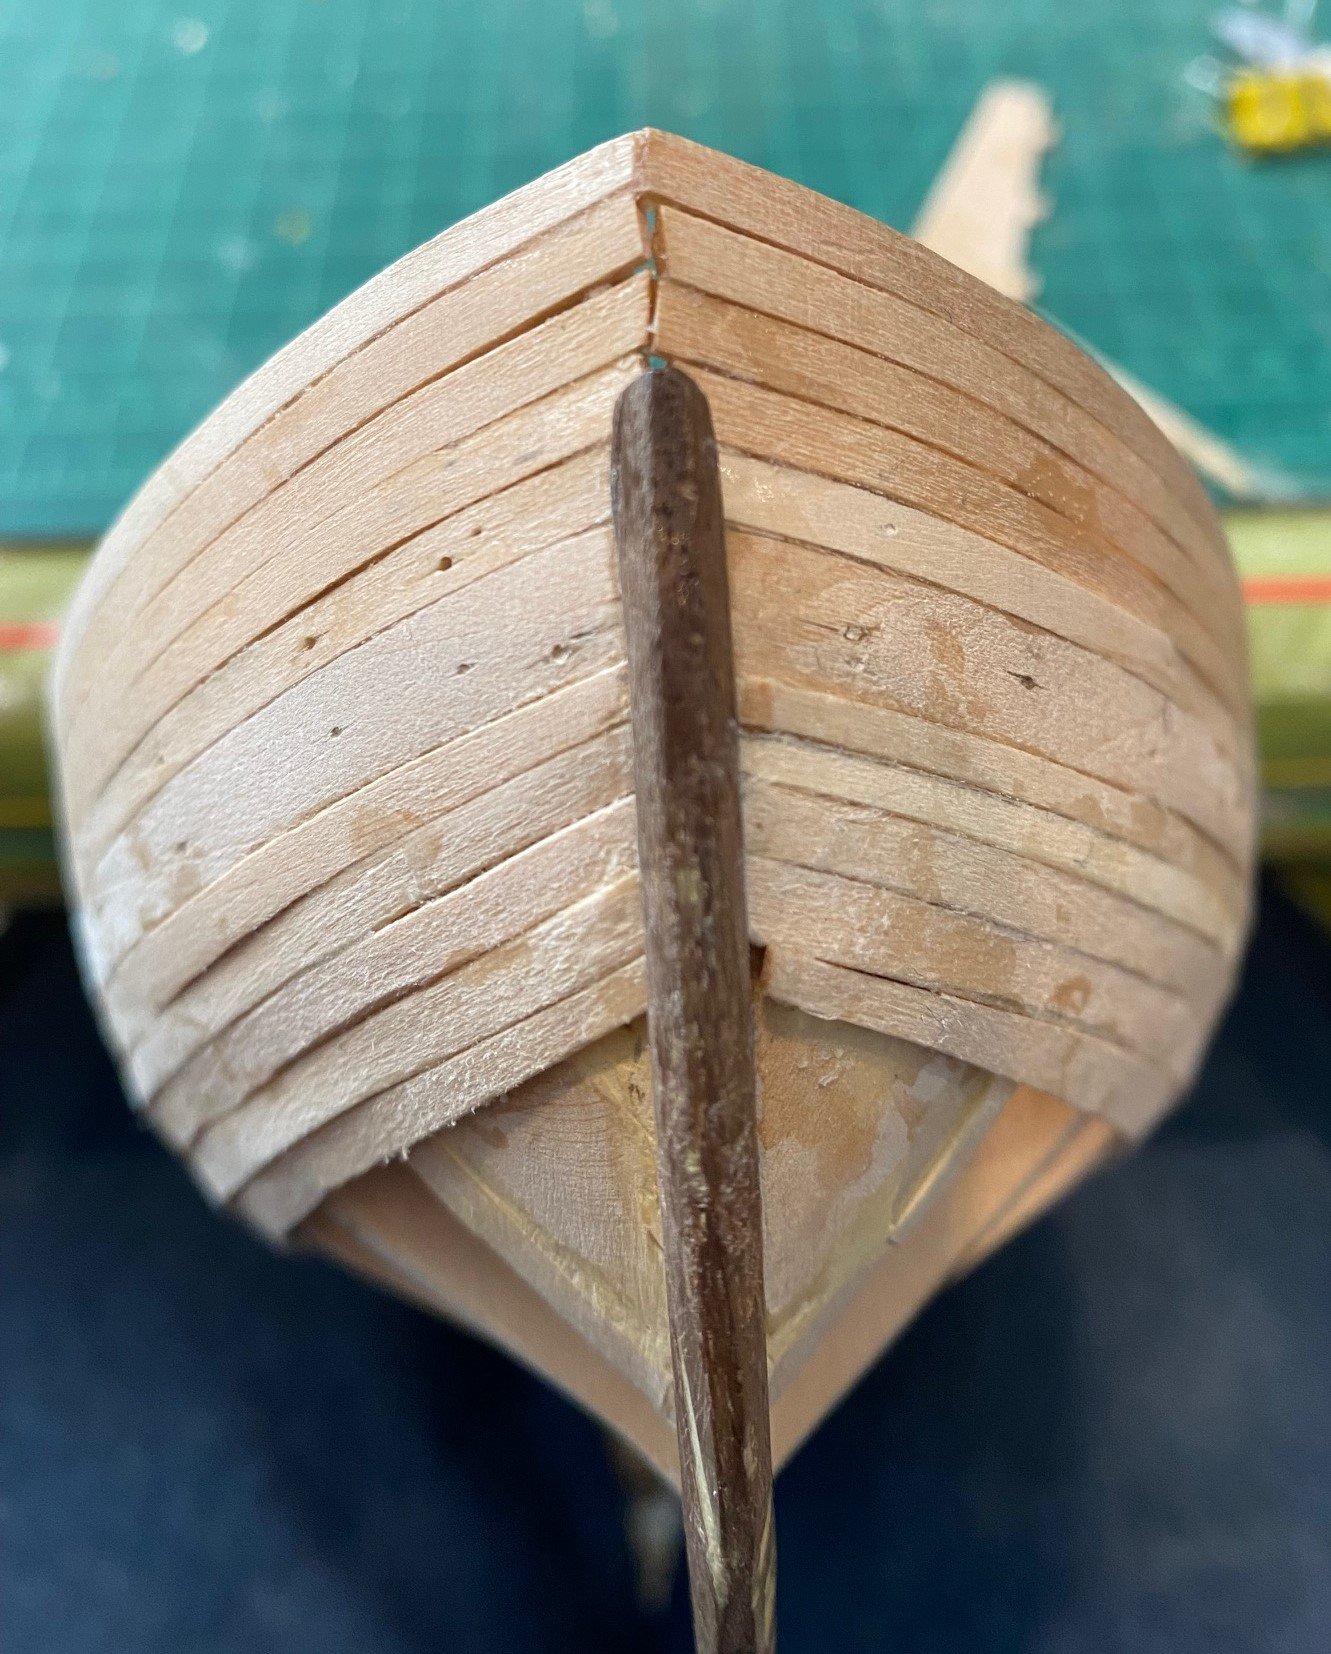
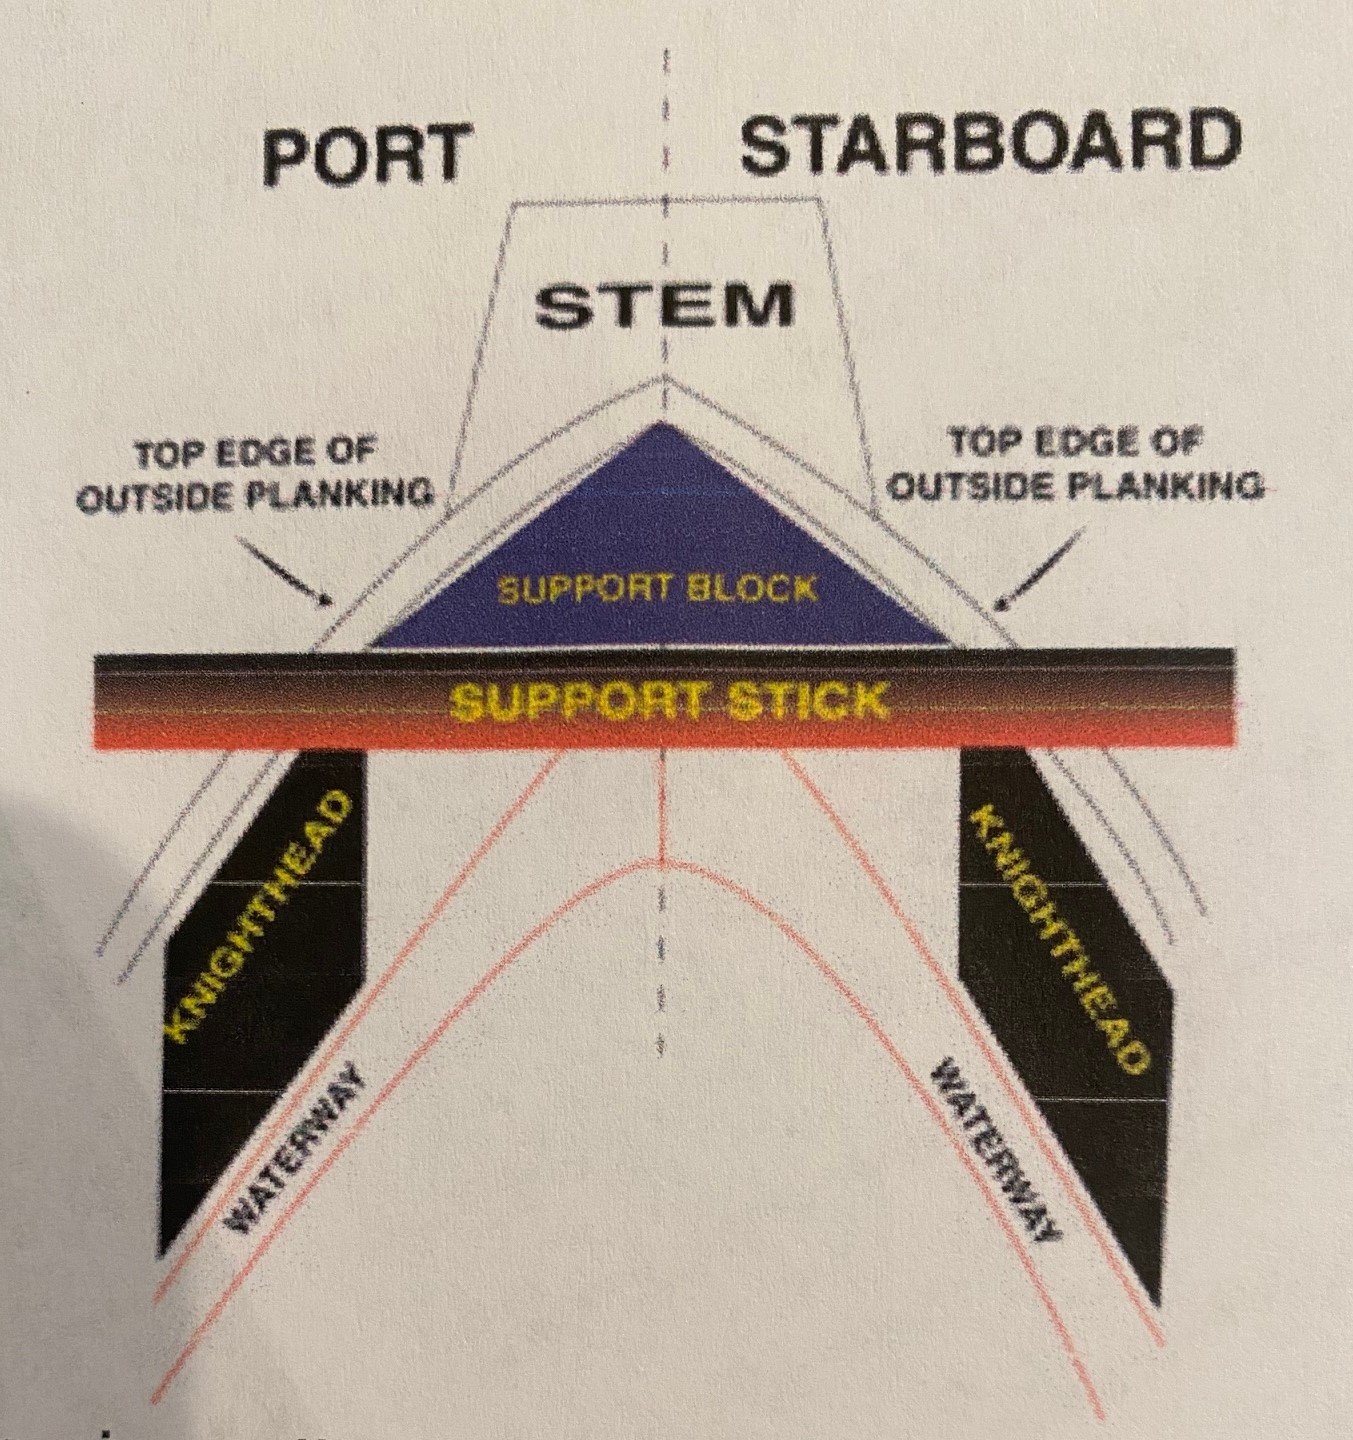
In the Lauck Street practicum by Rober Hunt, it recommends putting a piece of wood in the bow of the boat to have something to glue the planks too at the stem. He recommends taking a piece of ¼ in square basswood and splitting it in half to form a triangle, which I did, pic below. However, my piece really did not give a surface for the plank to glue to, unless I made one with more of 60-degree angle than 45 cut. So, I tried just sticking two pieces of left over basswood between the subdeck and the existing planks at the bow. I think this provides more of a surface for the upper planks to adhere to. Your thoughts and recommendation are requested.


-
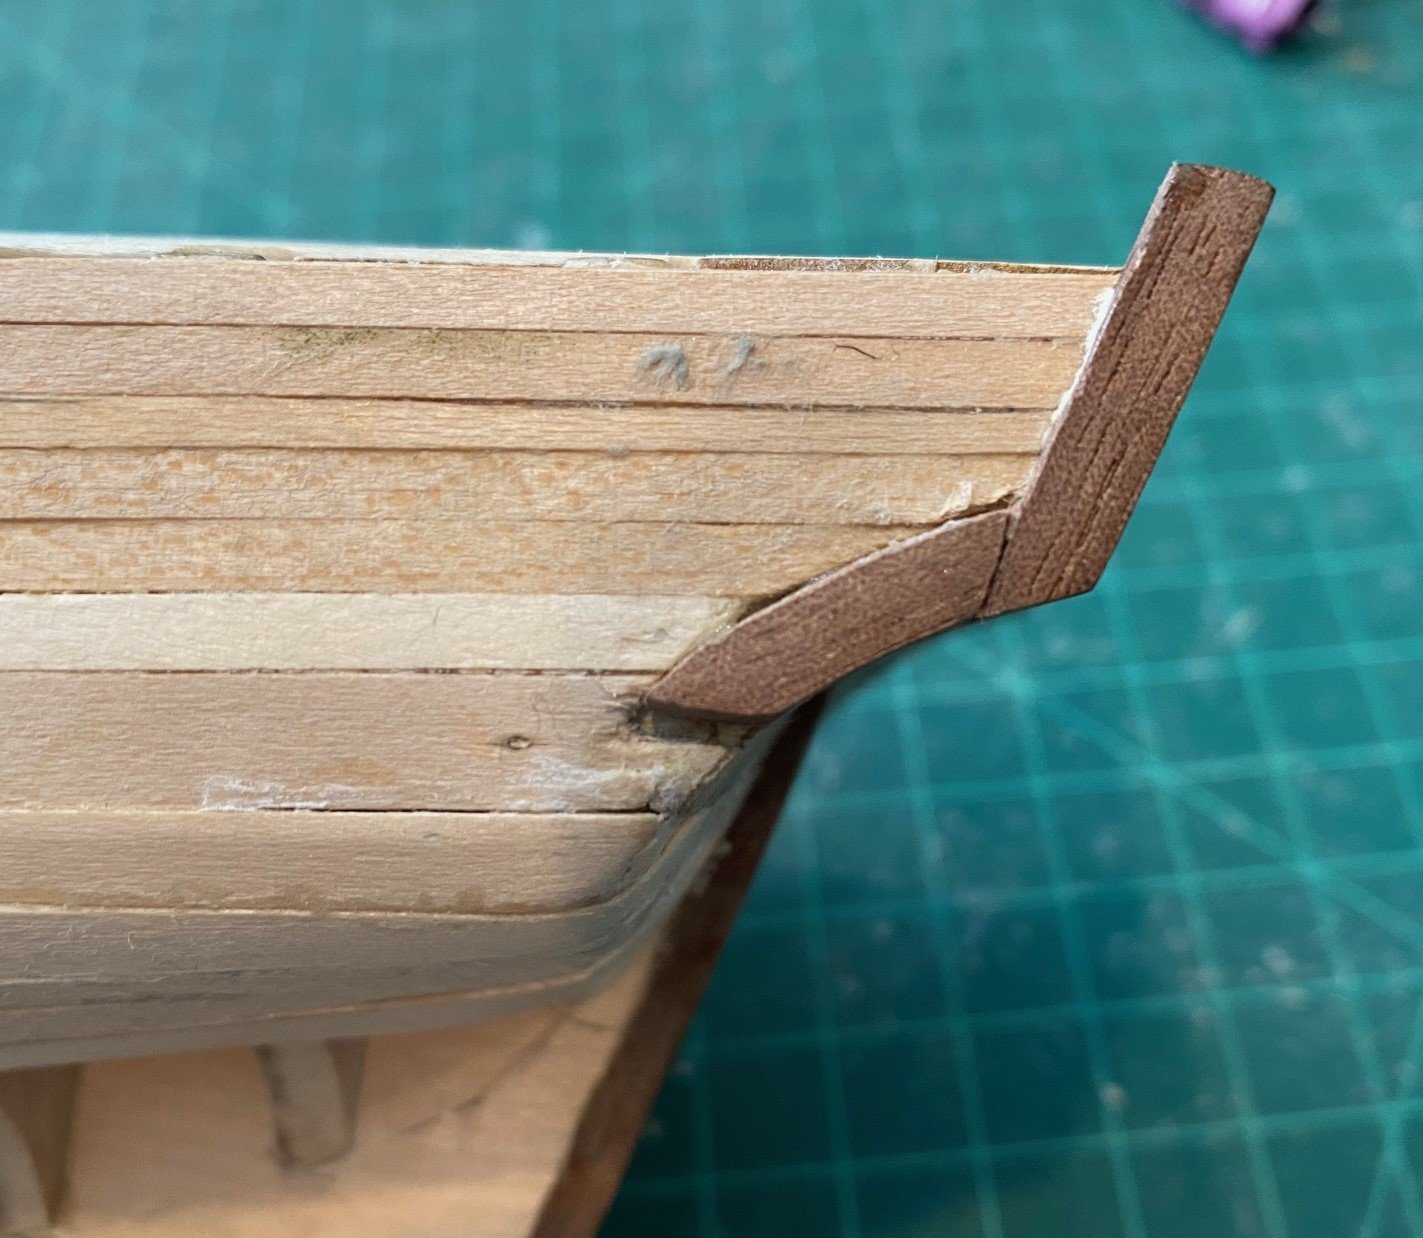
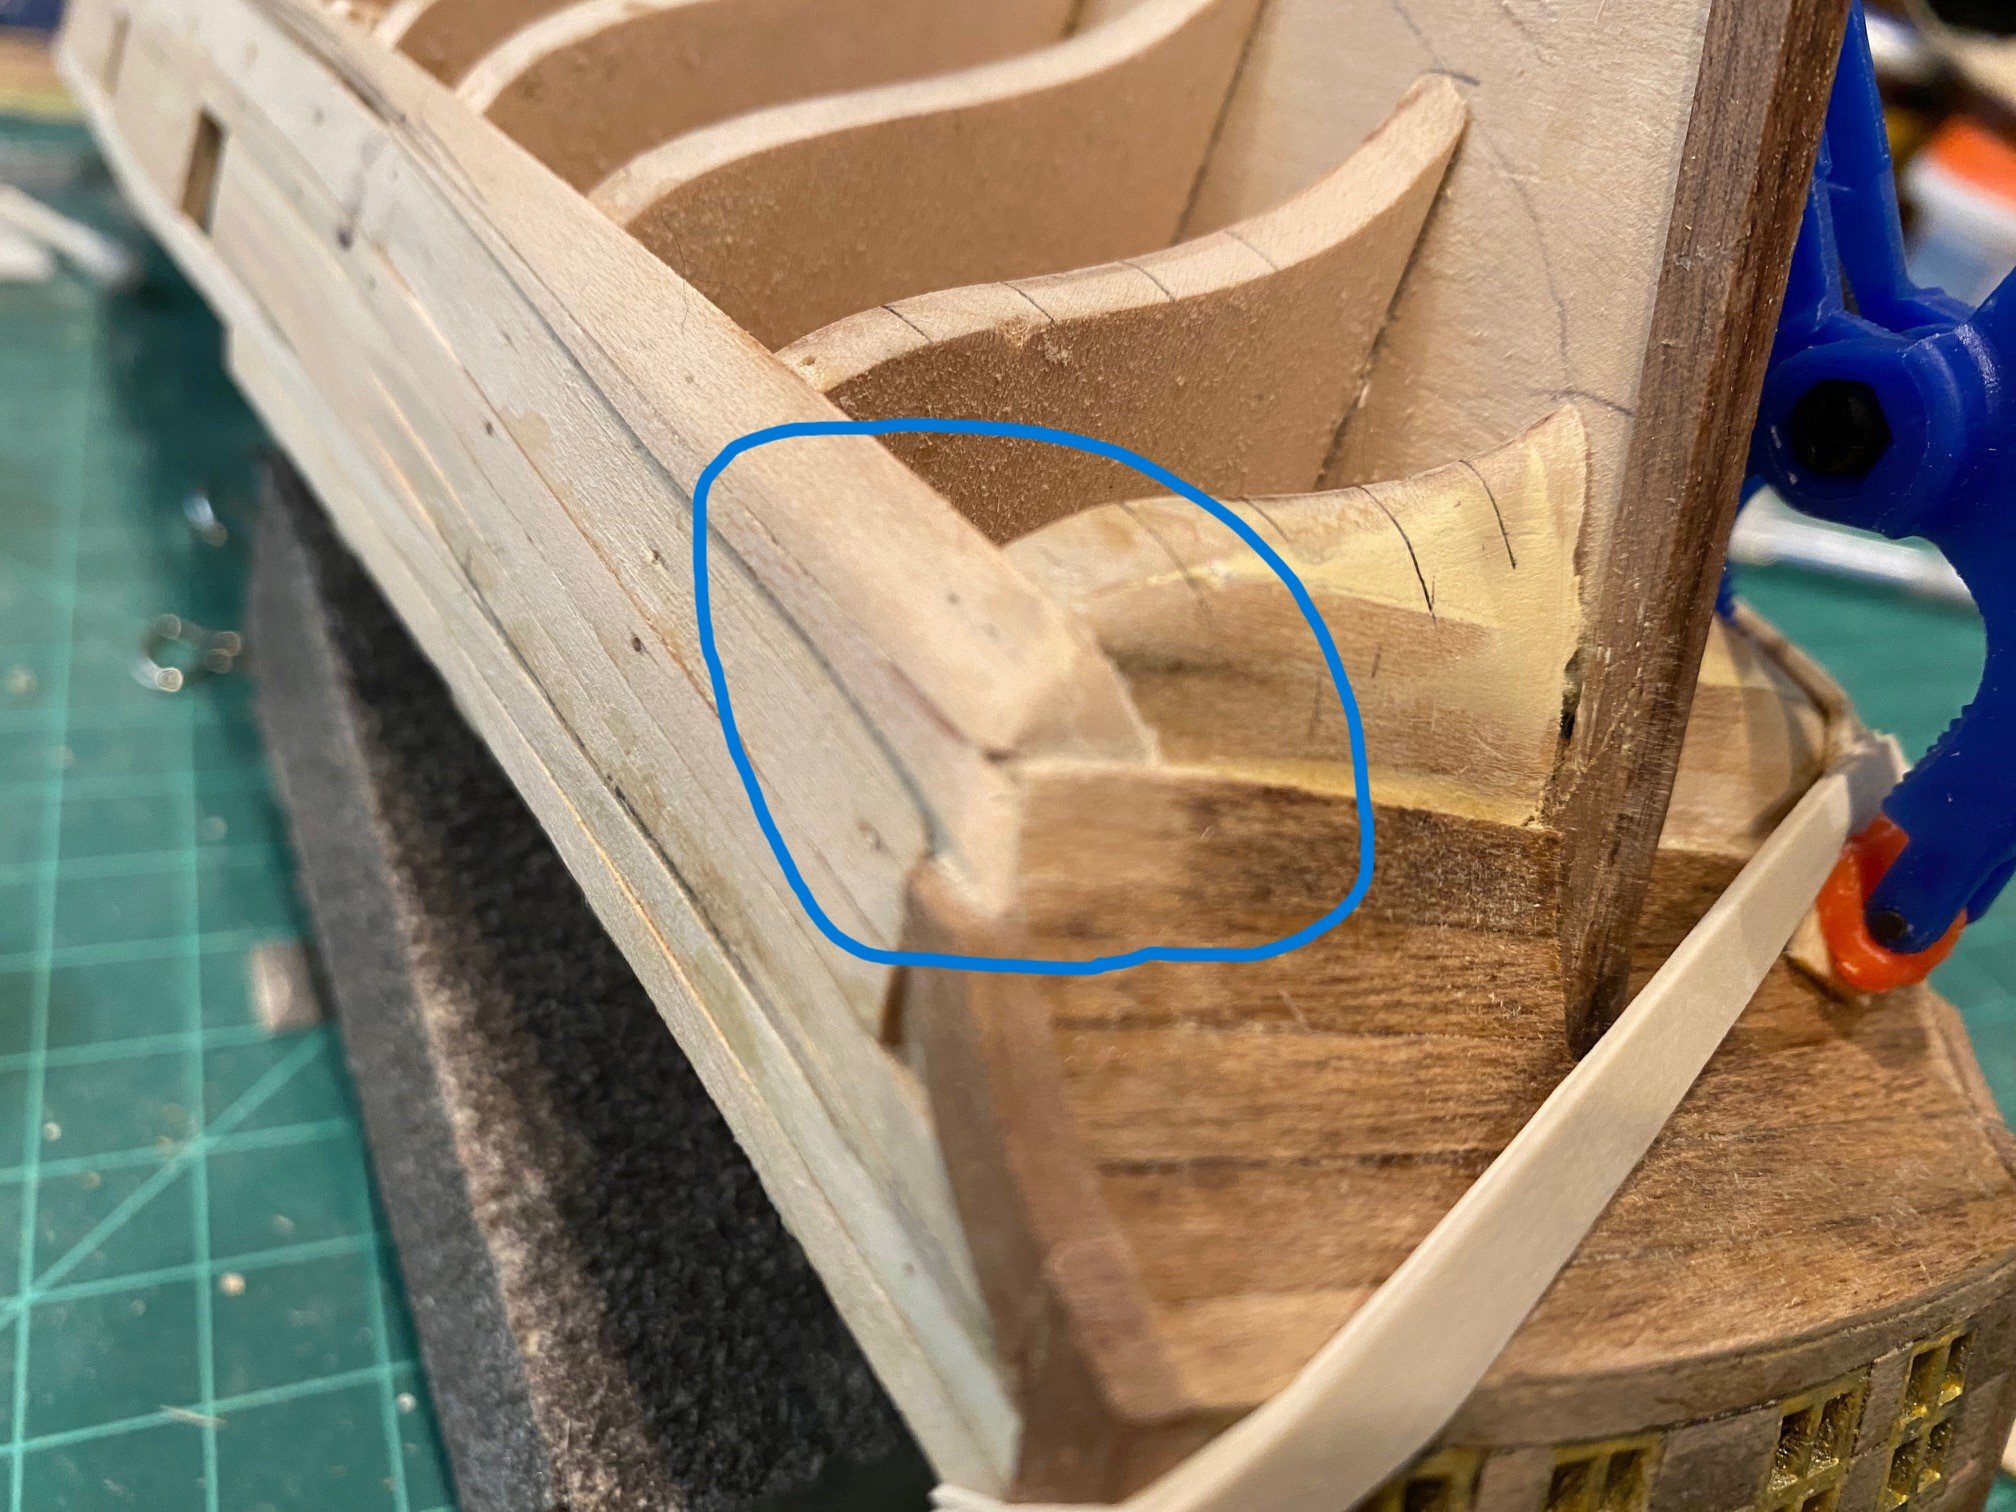
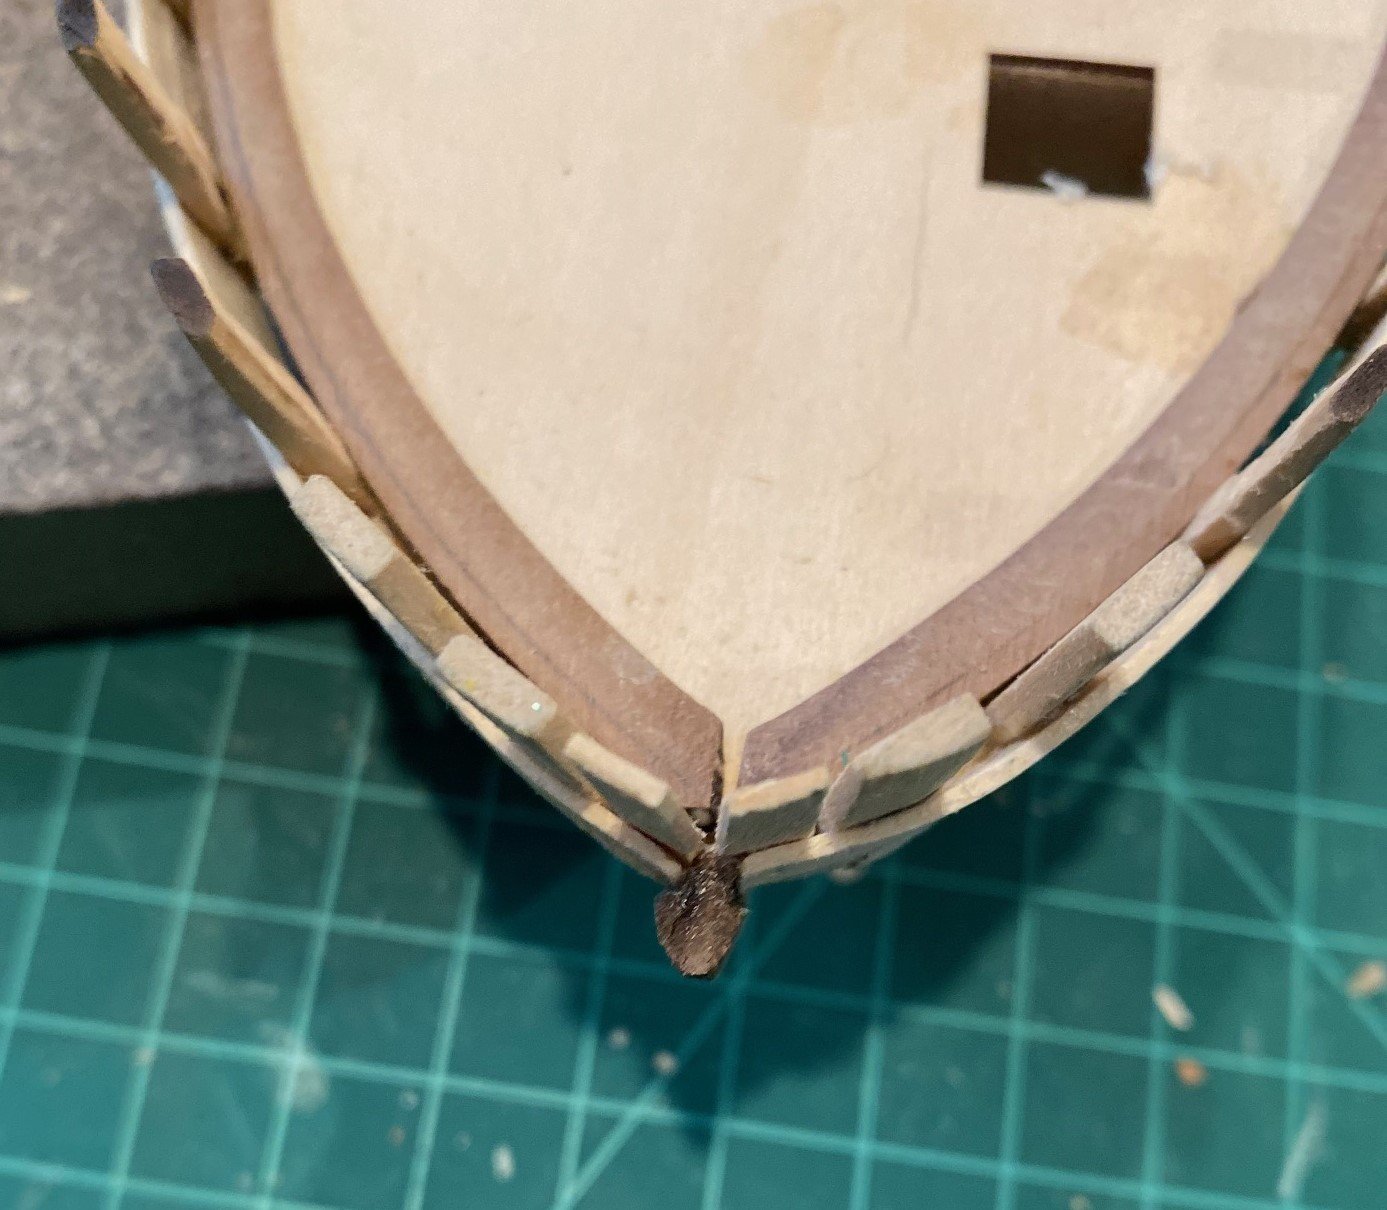
Installed the starboard fashion pieces. I measured the termination of the counter fashion piece from the port side and the drawings, looked at numerous pictures of the starboard counter piece to determine the end of the curved piece. I finally decided to measure from the top of the aft sub-deck to the bottom of the port curved fashion piece and marked it on the starboard side. I did my best to see how that lined up with the top of where the wale would be. Getting the right angle between the two fashion pieces was a challenge, I tried sanding to get the final angle, but I just kept rounding the end. So, I kept using my miter saw and used it to trim the end until they matched, had to start a second curved section since I kept sawing to much off. It turned out that I made the starboard piece longer than the port side curved fashion piece, see the two pictures below. I thought about removing one to make a piece that watched the other side, but I didn’t know which one was correct. So, I decided to wait until I add the hull planks above the wale and one or two below the wale and to determine which one was right. It's hard to see the difference in the pictures, but in real time it's obvious.


-
CiscoH Thanks, you have been very helpful during this build
-
I trimmed the top off of the top most walnut plank to match the basswood plank that extended up above the aft deck surface. I looked through a lot of build logs and it seemed like the right height. Started building the port side Fashion Pices, it was a little tricky to do the bottom curved piece at the counter. Experimented with angles and such, ended up following the Luck Street instructions. The starboard fashion pieces will be more of a challenge since my wale plank is to height (look at pictures a few frames back), but I’ll figure it out.

-
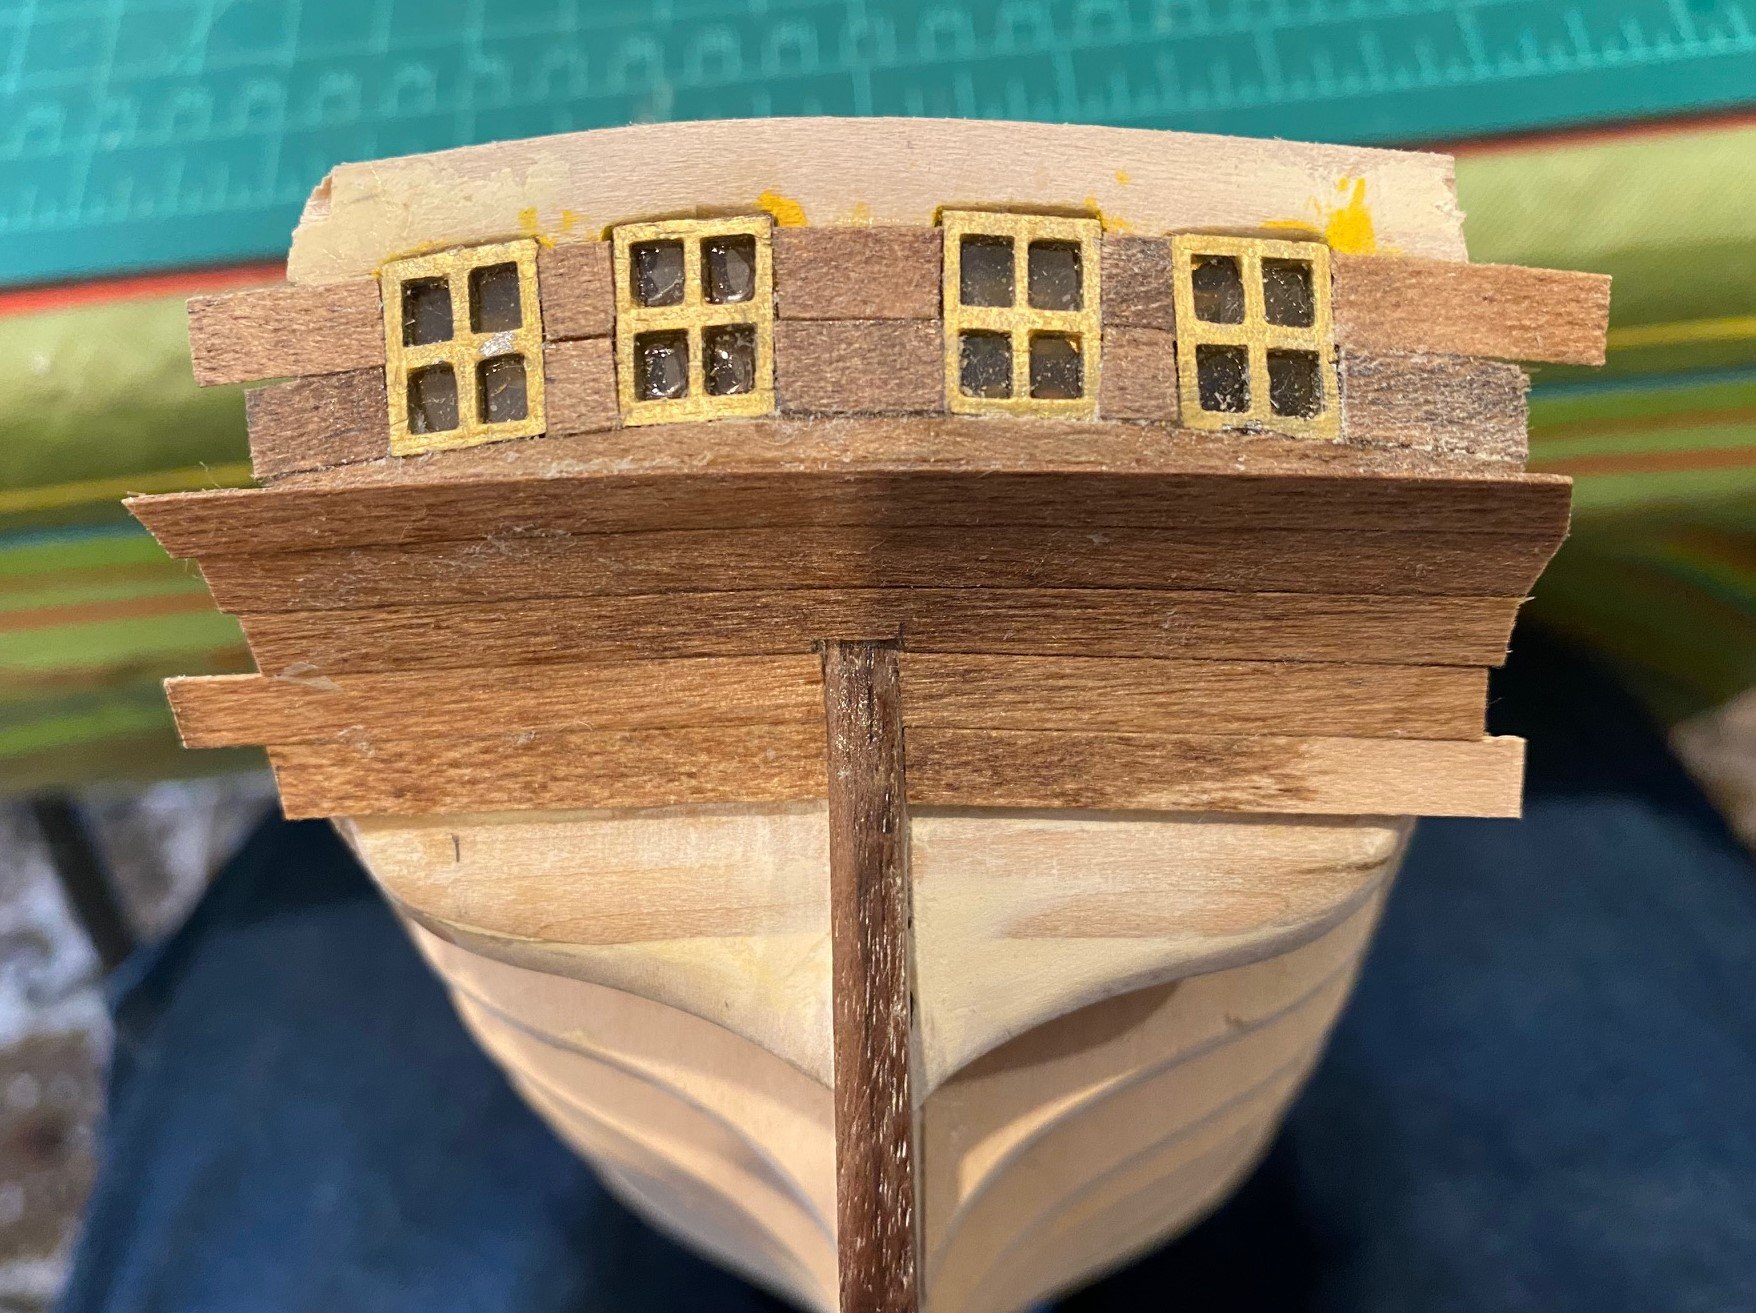
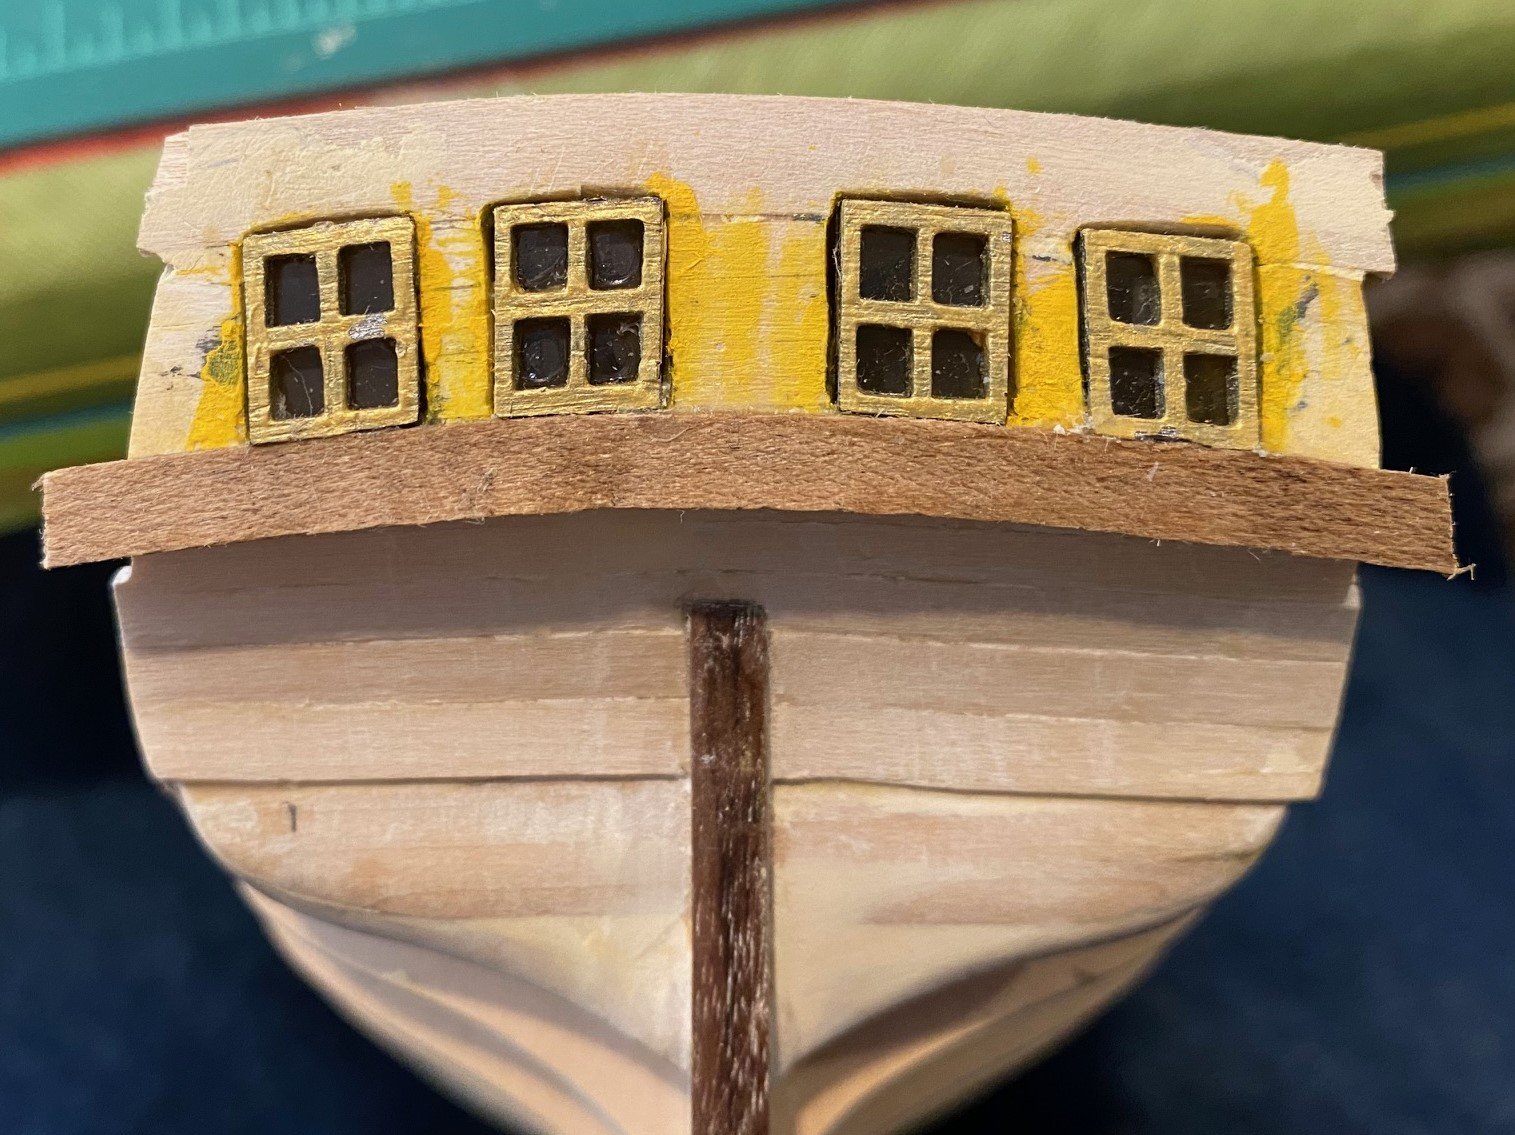
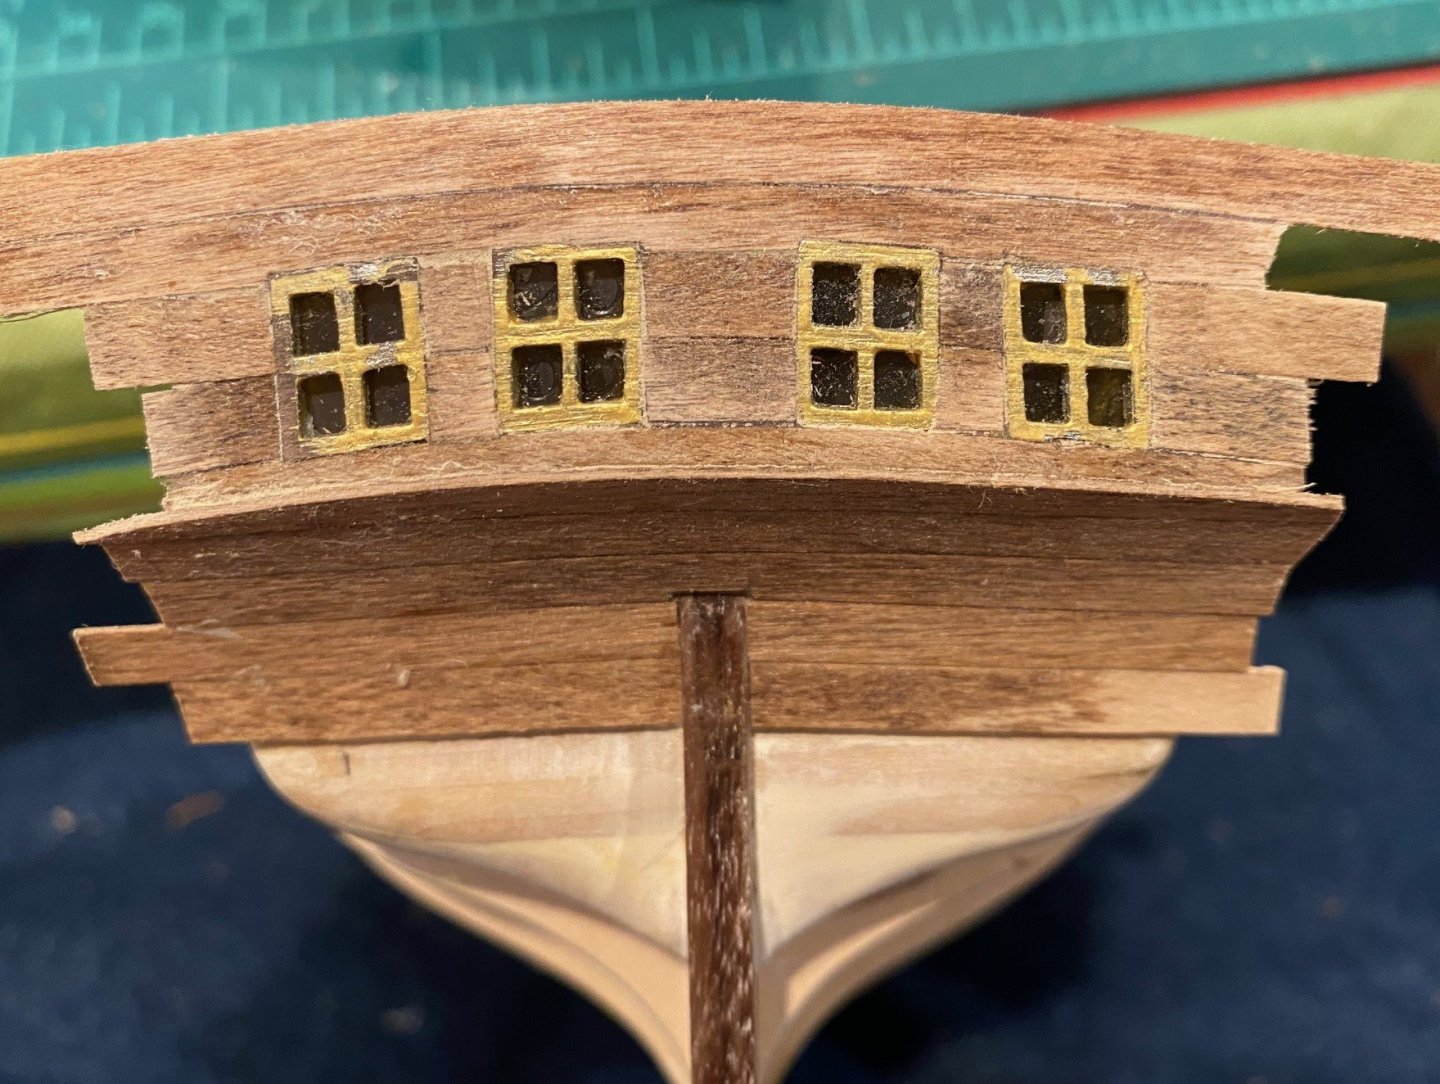
Glue the remaining transom walnut planks until the top of the windows. Next, I glued the walnut planks on the counter, ended just little past the first layer of planks, will leave it like it is until I start the lower hull planks that bend up to the counter planks, and then figure out what to do, trim or leave them as is. Had to give a little thought to the walnut planks above the window, where I wanted the top of the last plank to be in reference to the aft sub-deck. I looked at pictures in both instructions, drawings and other build logs. I chose to put two planks above the windows and then decided how far back to cut the topmost plank. The first plank I carefully cut out a little notch out for the windows by laying the plank on top of the last plank and windows to determine width and depth. Took a little at a time then trial fit and then a little more sanding and cutting, I ended up sanding some of the width of the plank off due to a few mistakes cutting the notches rather than start a new plank. Actually, I think that will be better since I’m sure the topmost plank will end up being shaved down as I but the top piece on. Sanded the transom planks down a little using medium fine sandpaper to clean up the edges. I might have to fill in some small gaps between the planks with walnut colored wood filler. Next, I will clean up the gold on the windows, not sure if I’ll put on some Polly-Ur now or later. {NOTE: The Key is to TAKE YOUR TIME getting the windows in the right place and then planking, trial and error is ok. I'm good with the results but should still have taken a little more time to prevent gaps around the windows and between the planks.}

-
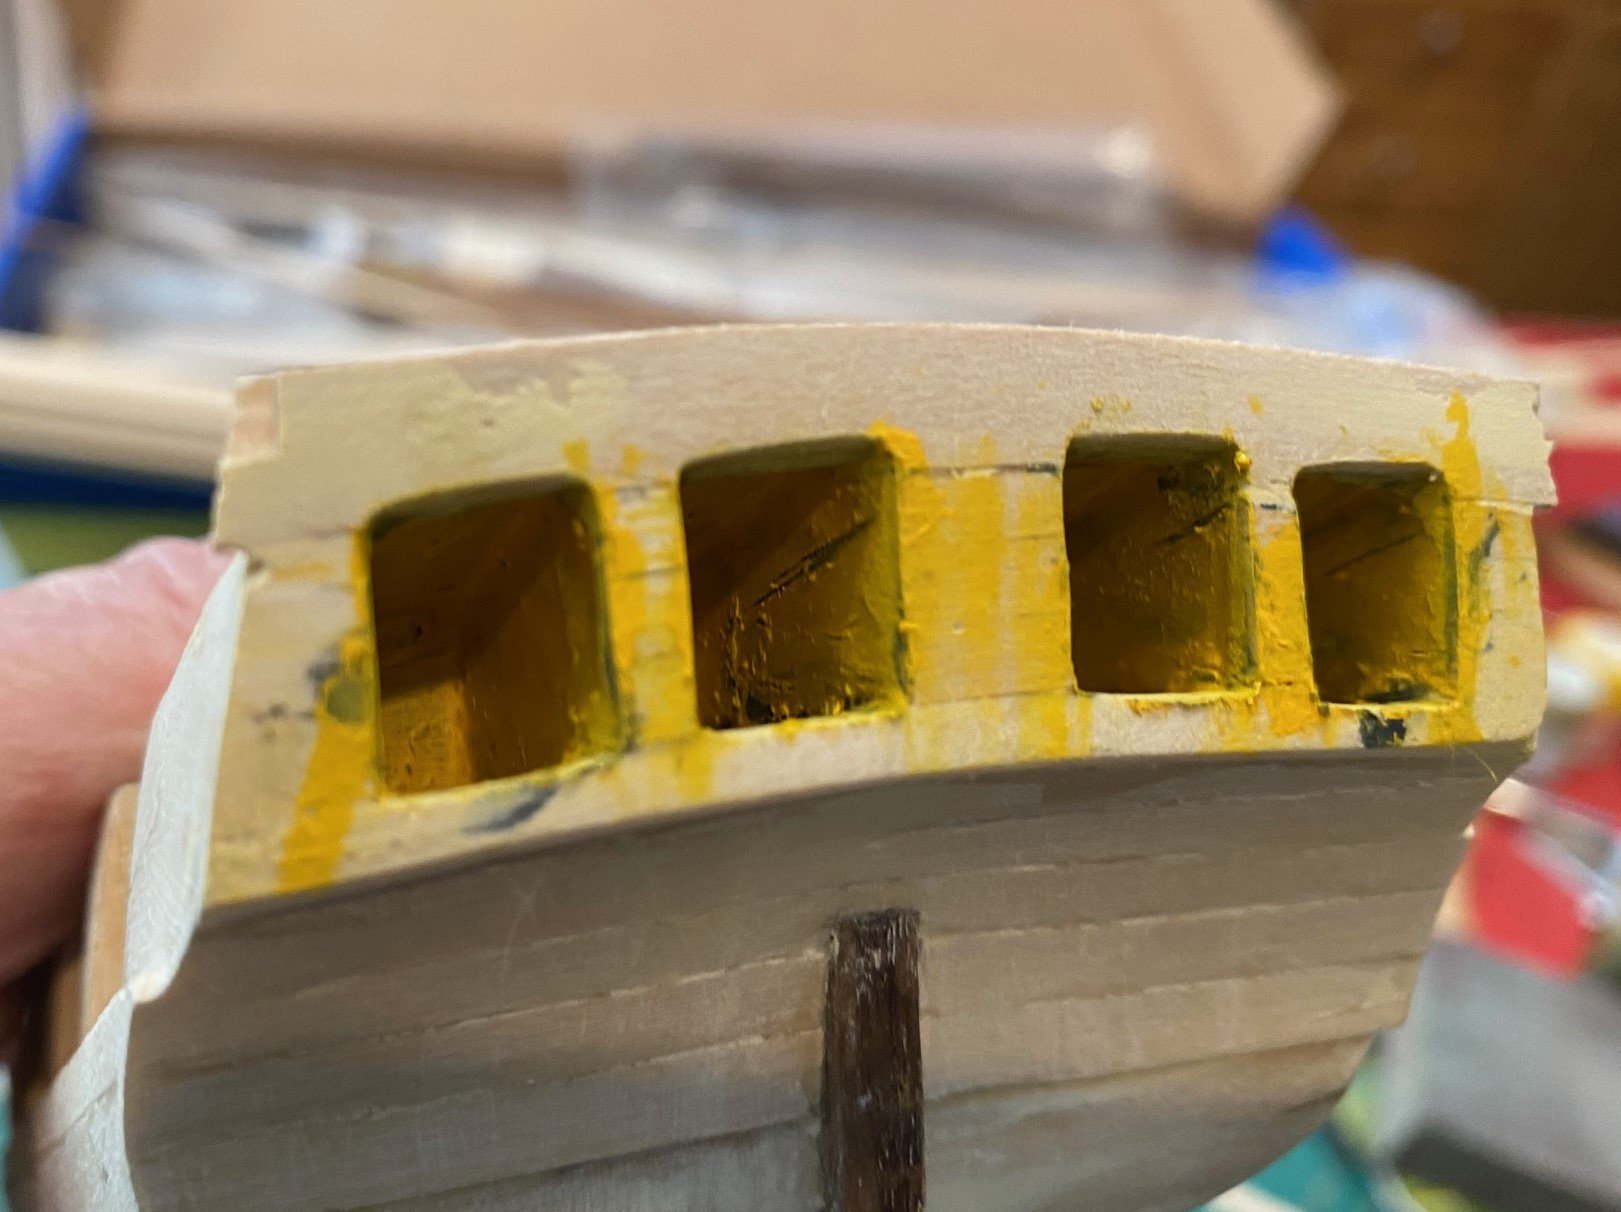
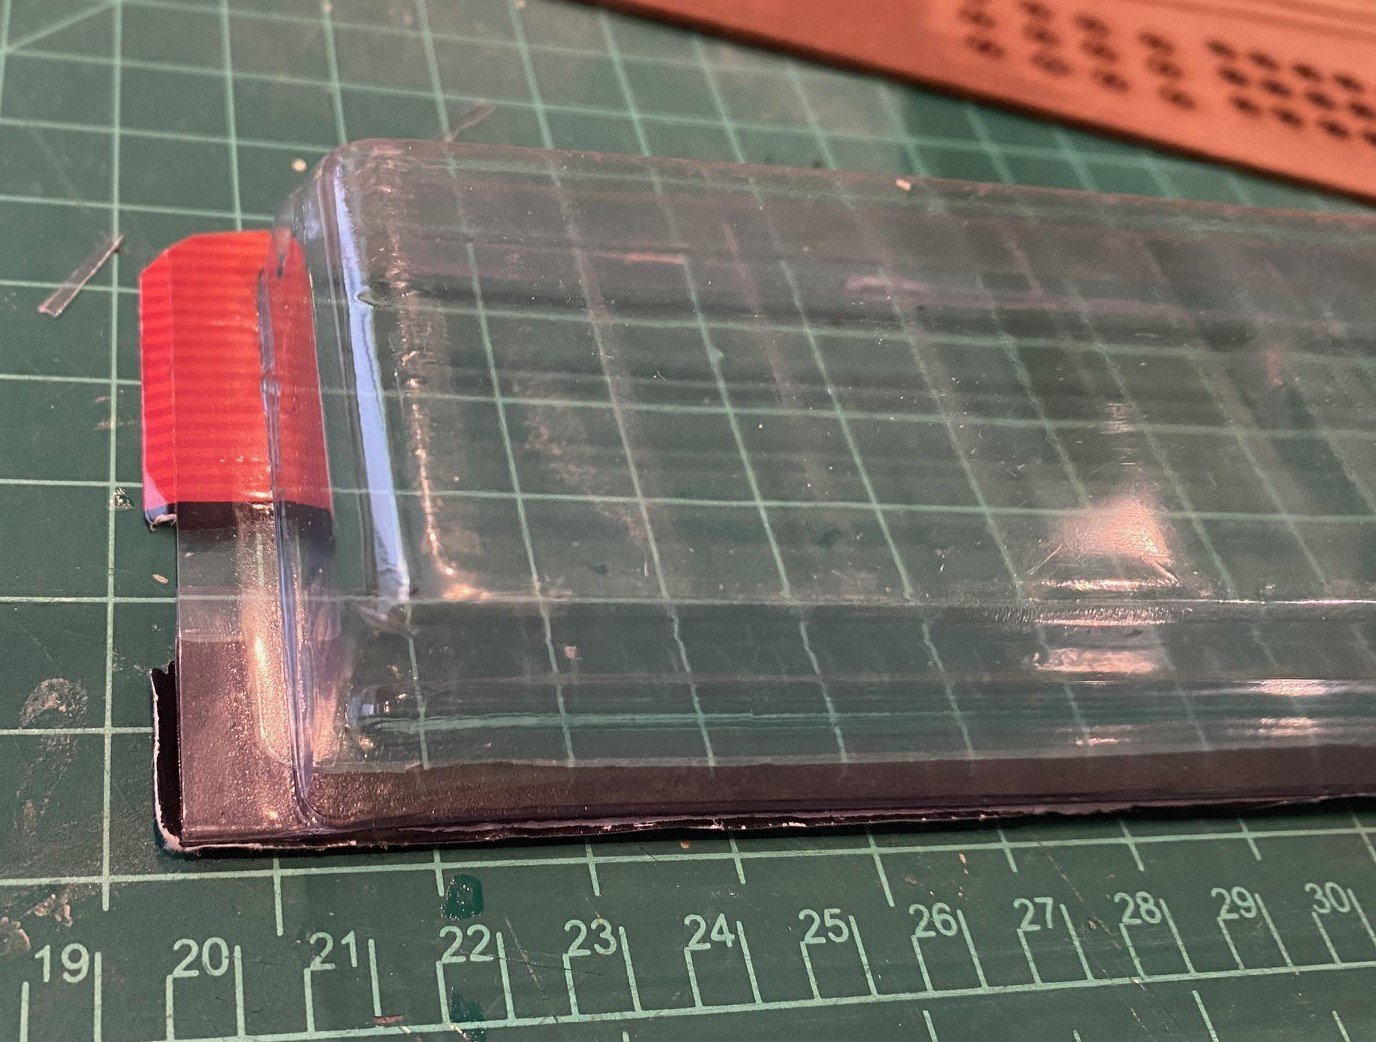
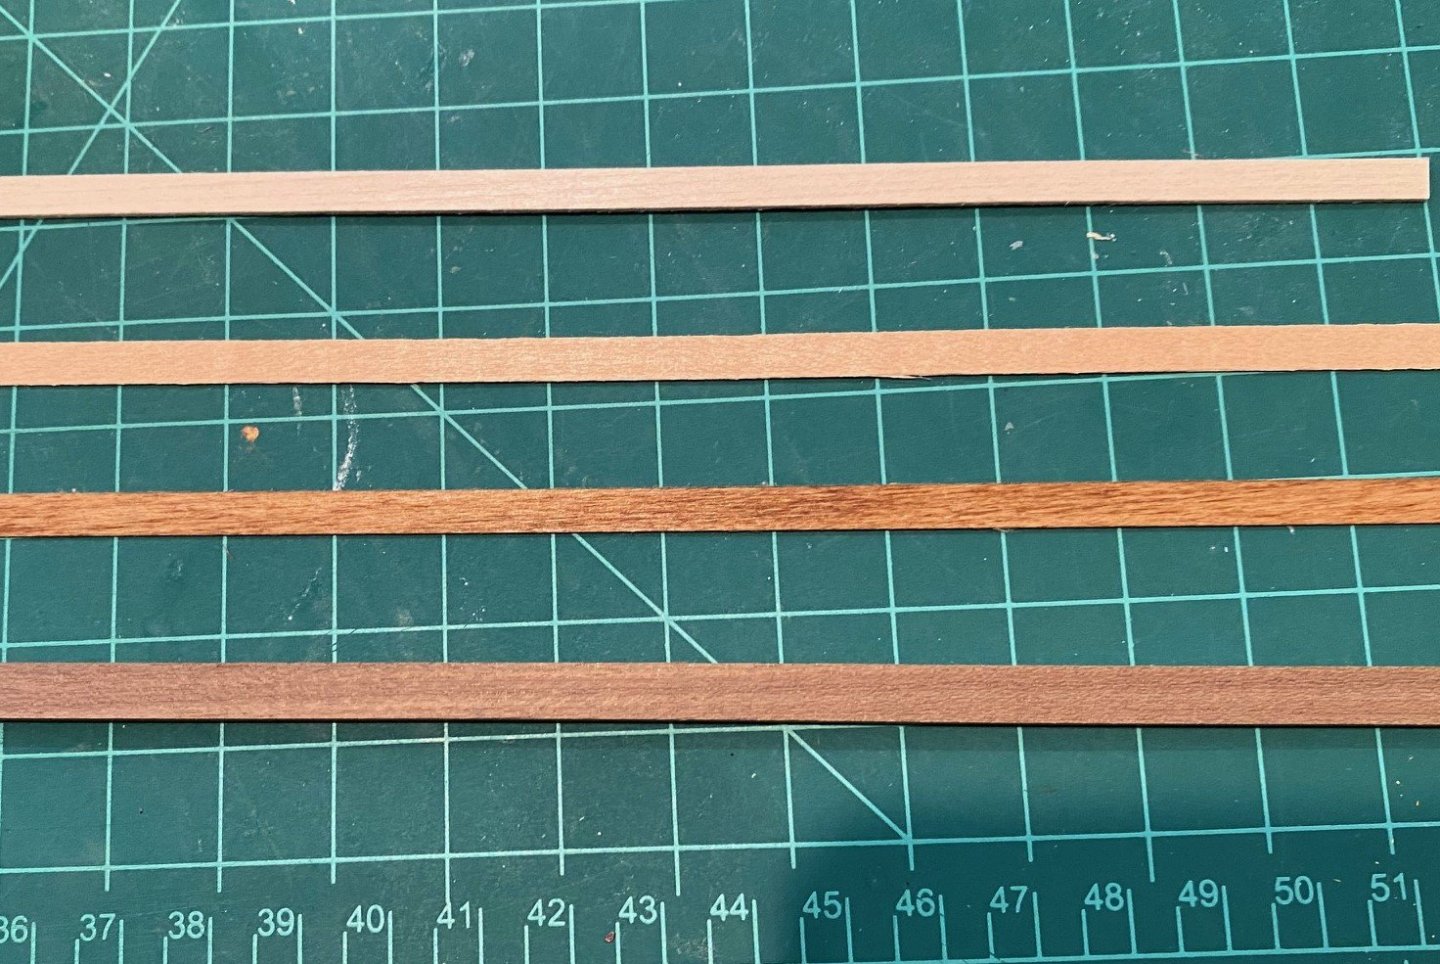
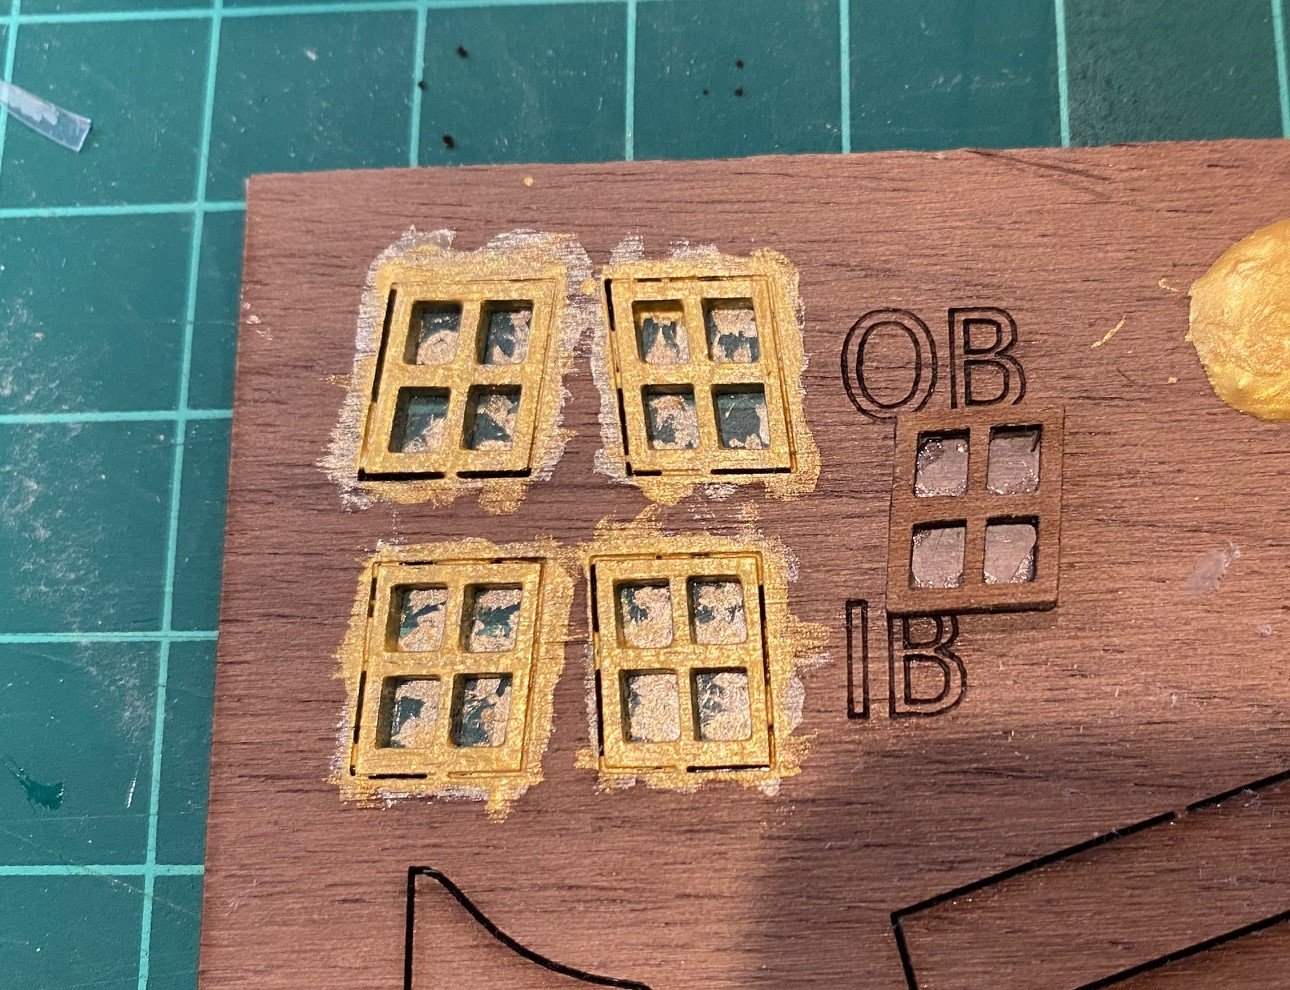
Bending the first walnut plank to fit under the windows on the transom. At first, I couldn’t find the walnut planks, I had put them with the basswood since they were so light. I started to test what stain that I had would bring it closer to the walnut wood color in the kit. The walnut stain made them to dark and hid the wood grain. In the below picture, the top plank is basswood, the second is the walnut plank I’m referring to, the third plank is the walnut plank stained with light Oak, the fourth plank is a thicker kit supplied walnut. At this time, I’m going to stain the hull walnut planks with the light oak stain to bring out a darker color and the grain. Started to work on aft transom windows, I painted the frames gold and then glue a piece of plastic that was the top cover of some tools. Painted the back of the window frame with a light coat of CA glue and clamped the plastic to the frame. Looks like glass. Painted the inside of the window housing black per the instructions, but when I trail fitted the window in the transom, the glass just looked like it had been painted black, there wasn’t any indication of depth behind the window. So, I painted the inside a window yellow to simulate the yellowish color of candlelight. Glued the windows in using wood glue then started gluing the first plank on the transom. Started in the middle using CA glue. The biggest problem was keeping the window to be even with the thickness of the plank. After a little trial and rework, I think I got it. {NOTE: After glueing in the windows and walnut planks, I'm not sure it matters what color you paint the inside of the windows, even leaving them not painted. Looking through my windows, I still can't see anything.}


-
SkiBee reacted to a post in a topic:
Armed Virginia Sloop (AVS) by SkiBee - Model Shipways - 1:48
-
Started gluing the planks on the counter, when I went to glue the bottom plank on it looked like that there was not a straight horizontal line across the bottom. So I trimmed off a bit from the midline to the starboard side. When I glued it on, it did not look right so I glued on the piece I trimmed. You can see it from the pictures below. I whittled and sanded the edges of the transom planks to the to the counter of the transom filler pieces. Two things I noticed as I was looking at the next step, the fashion piece. I should not have sanded the plank edges to the contour of the side of the hull but I should have created a straight cut so that it would match the fashion pieces. The second thing I noticed was that the top transom plank did not extend above the aft deck as the design called for. So, I removed the top plank and will glue in a wider piece that extends beyond the sides of the hull. As noted earlier, the aft ends of the hull planks were not even in reference to the counter filler pieces. At that time, I figured that I could cover that up when I glued the walnut planks on. But it does create a bit of a problem glueing on the finishing pieces. You can see that the Port side comes down to the junction of the two counter filler blooks. Where the starboard side does not, I curved the planks up more than they should have been. I thought about using acetone to soften the CA glue I glued the rear portion of the starboard planks on with acetone, remove and then reglue in the right place, but the more I looked at the drawings and instructions, I still think I can correct it when I glue the walnut planks on. The only thing that I can see that I need to be careful with is to make sure that the bottom of the gun port is even with the top of the walnut Black Strate.


-
SkiBee reacted to a post in a topic:
Staining basswood and wood filler
-
If you have a problem with blotchy stain on basswood, try a stain conditioner (usually called a 'Pre-Stain Conditioner). I've used it a lot on pine wood working projects and it works great on any type of modeling wood. It evens out the stain absorption of the wood. Try it on a piece of scrap wood and see if it works for you.