HOLIDAY DONATION DRIVE - SUPPORT MSW - DO YOUR PART TO KEEP THIS GREAT FORUM GOING! (89 donations so far out of 49,000 members - C'mon guys!)
×


Cmm4000
-
Posts
60 -
Joined
-
Last visited
-
 ZhangRenWing reacted to a post in a topic:
Montanes 1794 by Cmm4000 - OcCre - 1:70
ZhangRenWing reacted to a post in a topic:
Montanes 1794 by Cmm4000 - OcCre - 1:70
-
ZhangRenWing reacted to a post in a topic:
Montanes 1794 by Cmm4000 - OcCre - 1:70
-
Cmm4000 reacted to a post in a topic:
J H Crawford by LJP (Lawrence Paplham) - Scale 1:64 - an 1894 to 1898 Wisconsin sternwheeler
-
SiriusVoyager reacted to a post in a topic:
Montanes 1794 by Cmm4000 - OcCre - 1:70
-
Canute reacted to a post in a topic:
Proxxon DB250 3 Jaw Chuck
-
mtaylor reacted to a post in a topic:
Proxxon DB250 3 Jaw Chuck
-
mtaylor reacted to a post in a topic:
Proxxon DB250 3 Jaw Chuck
-
vossiewulf reacted to a post in a topic:
Montanes 1794 by Cmm4000 - OcCre - 1:70
-
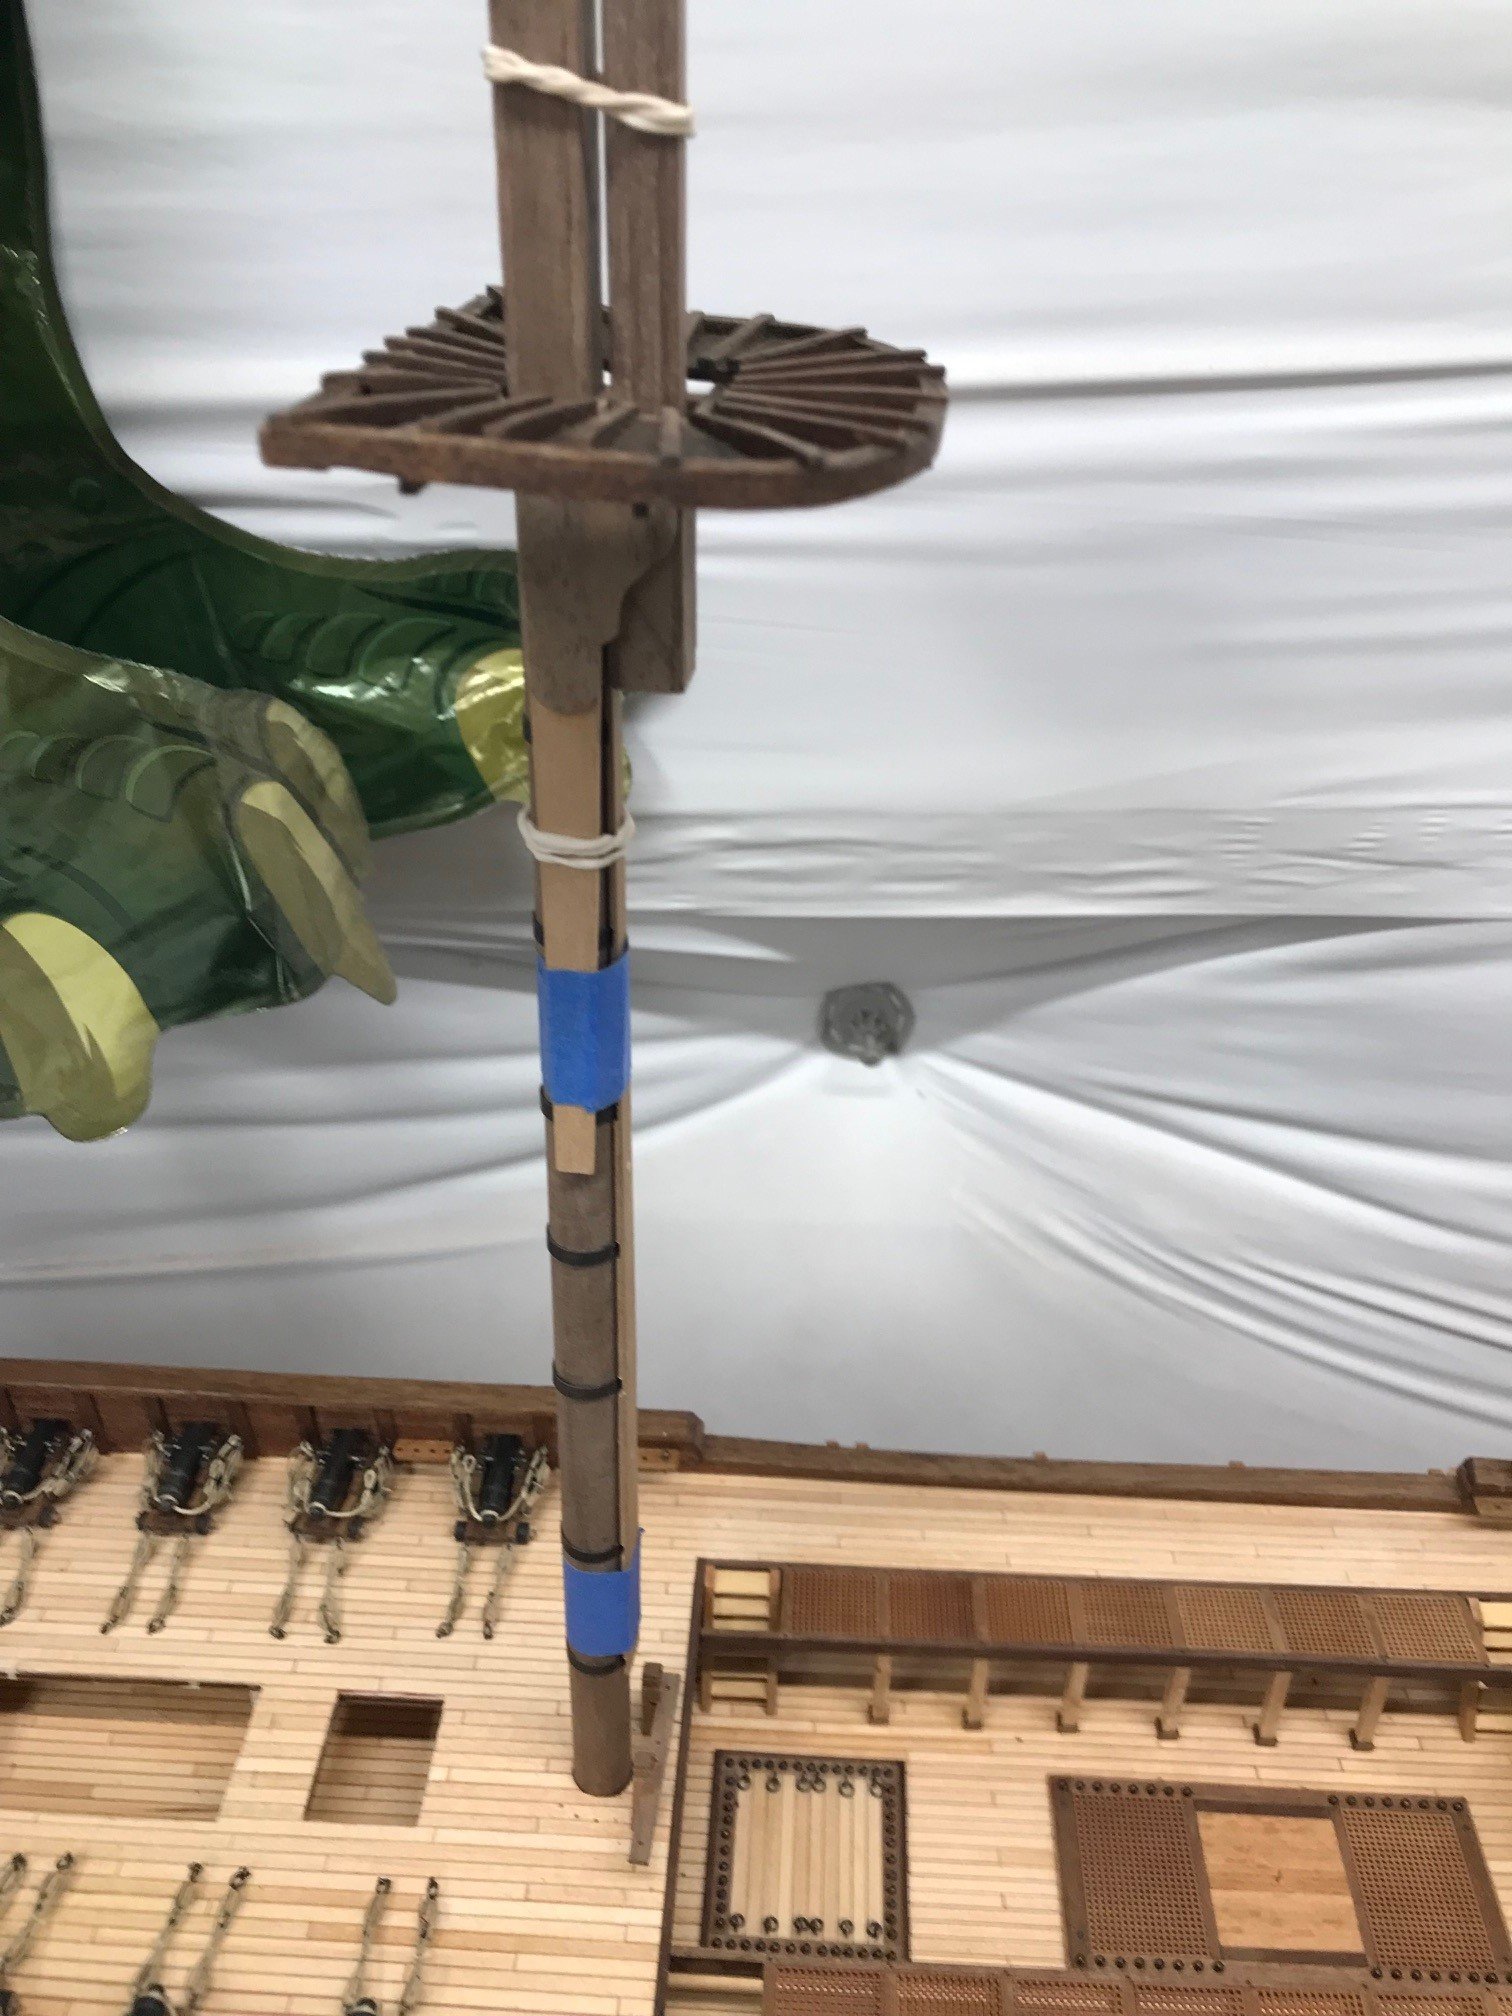
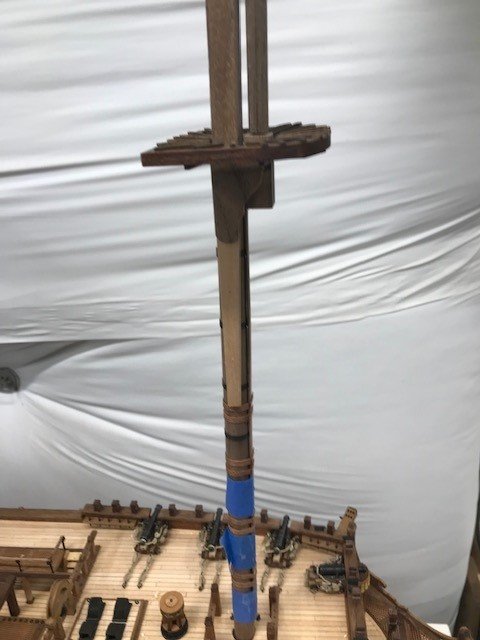
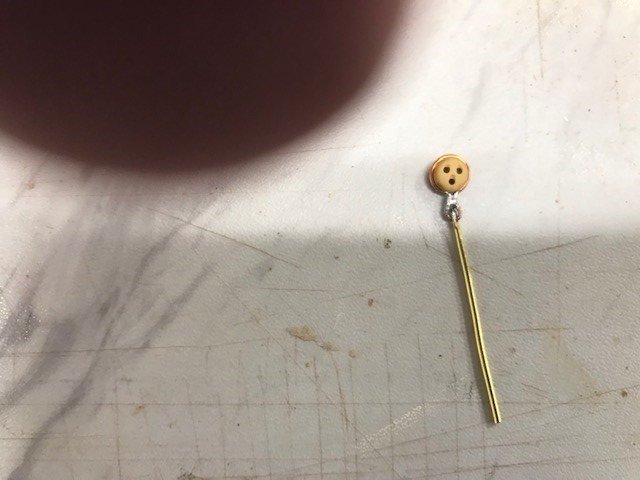
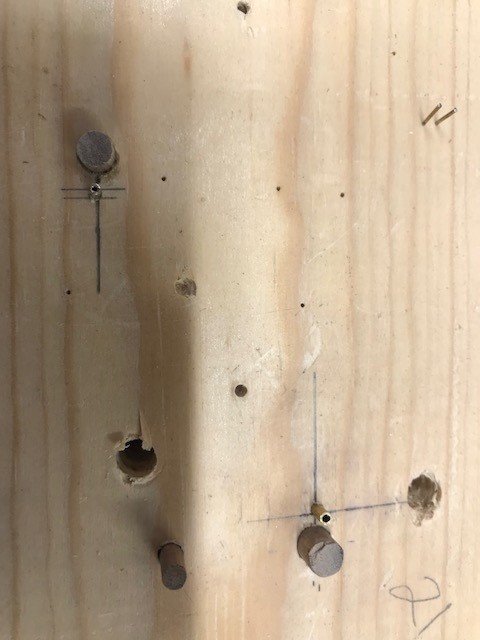
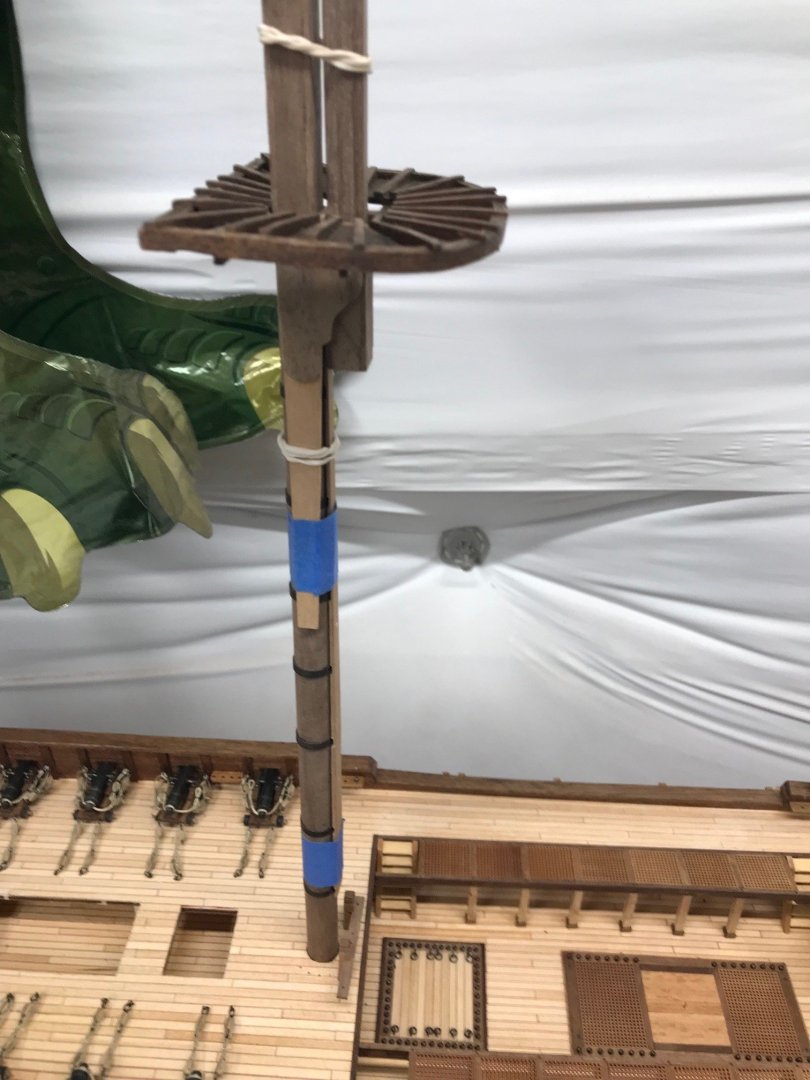
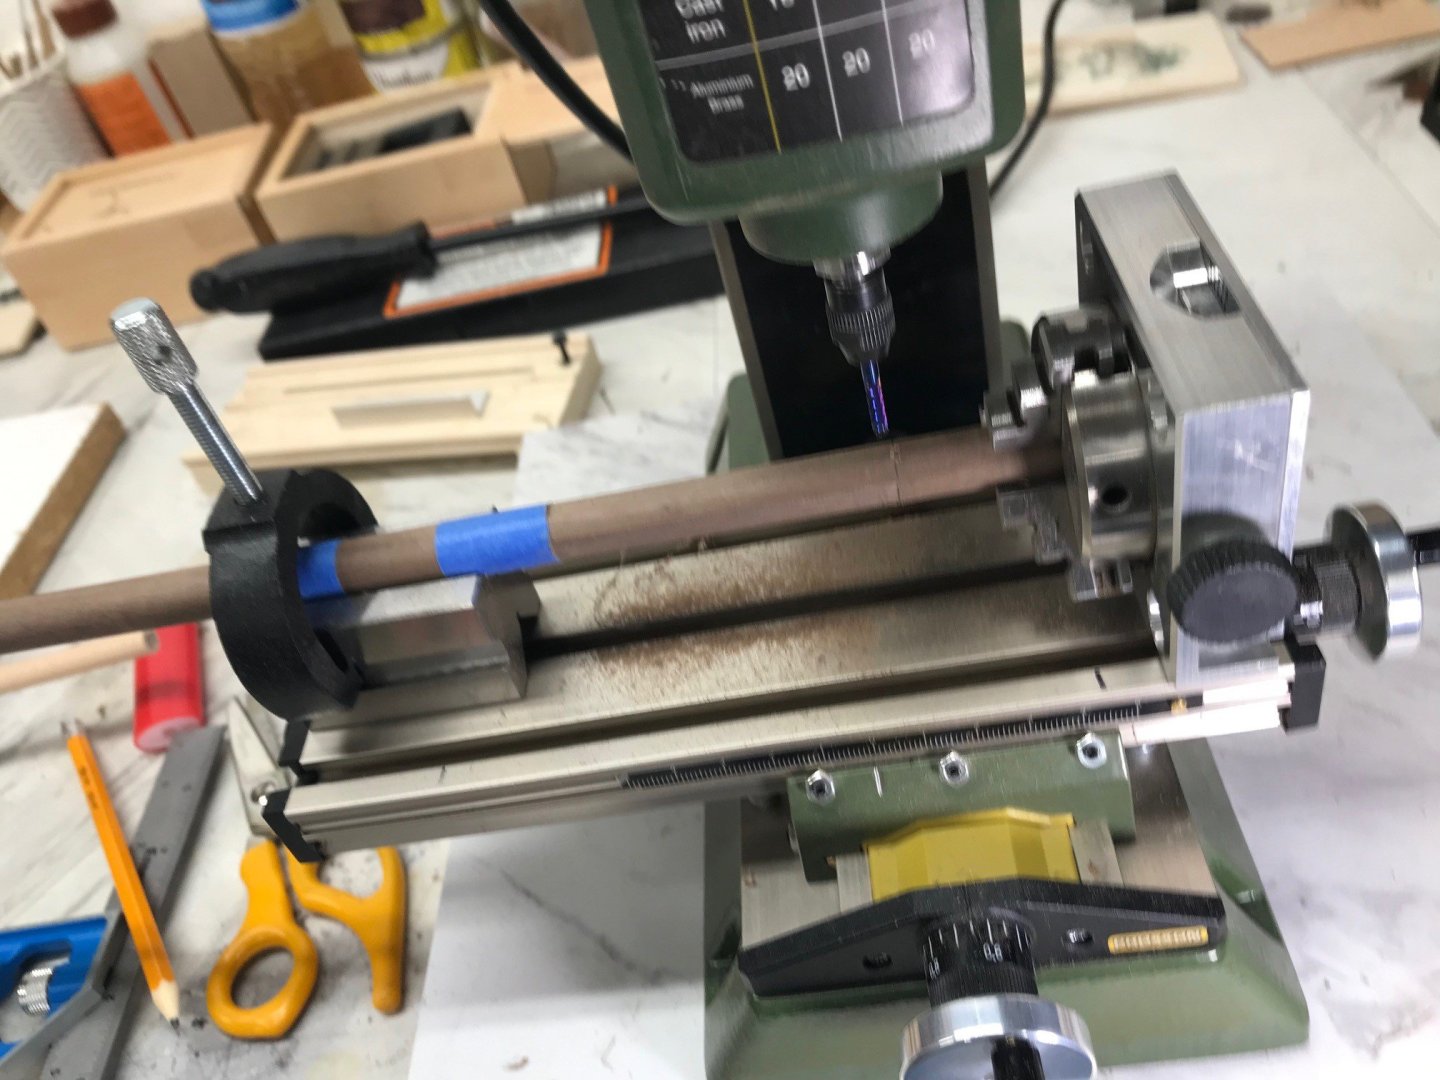
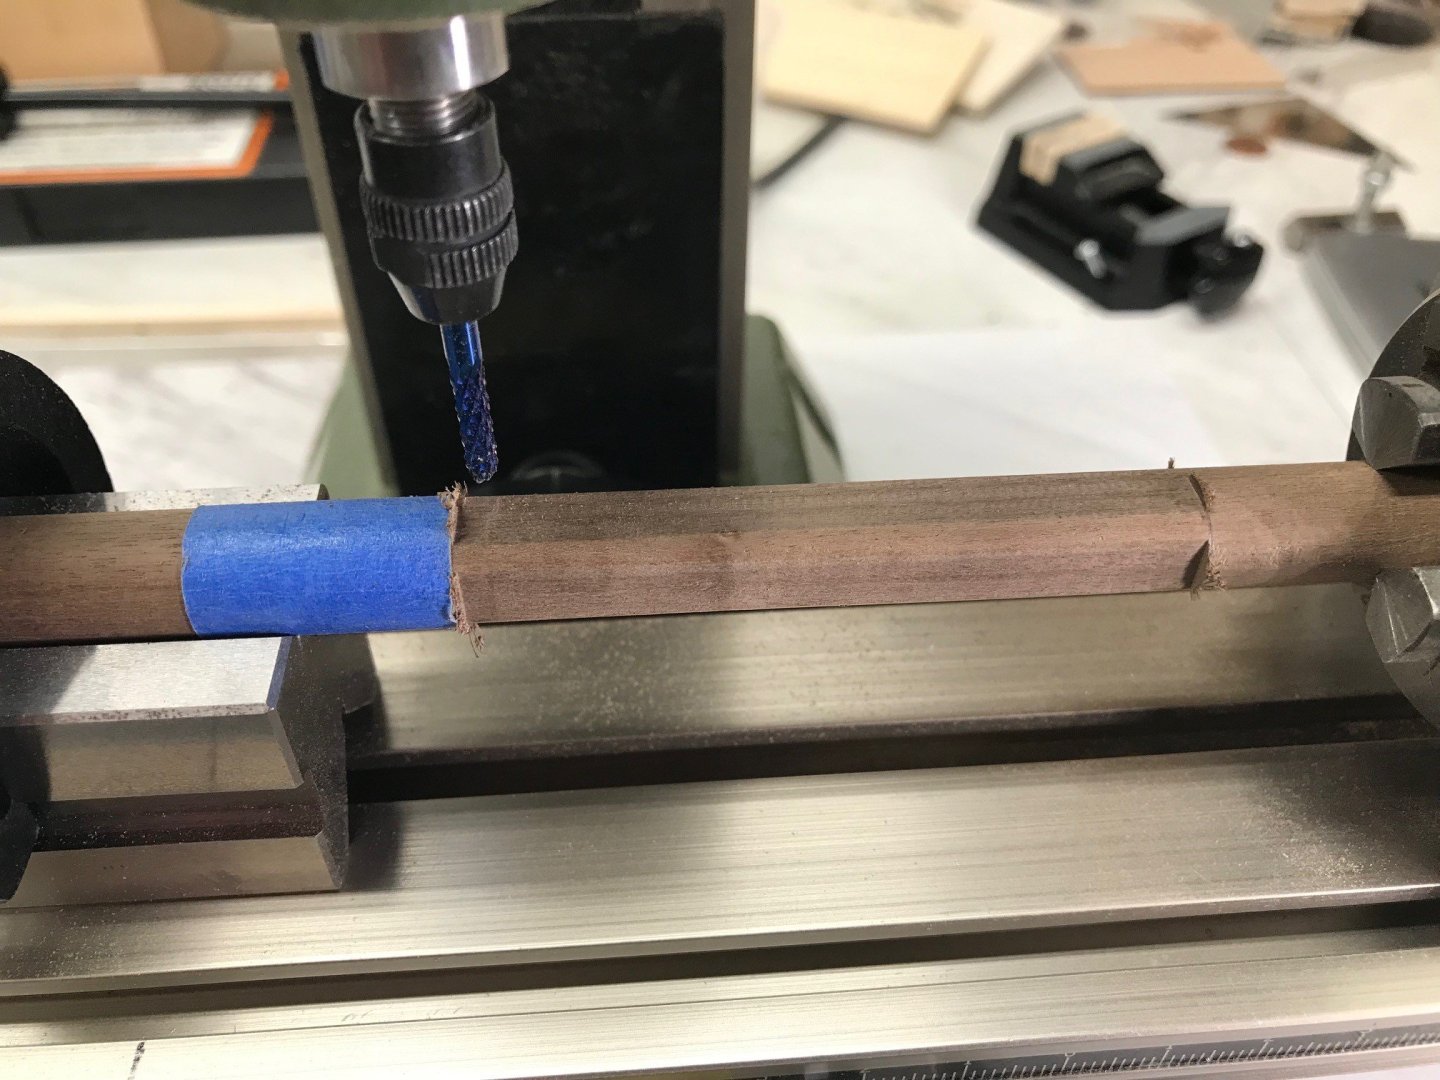
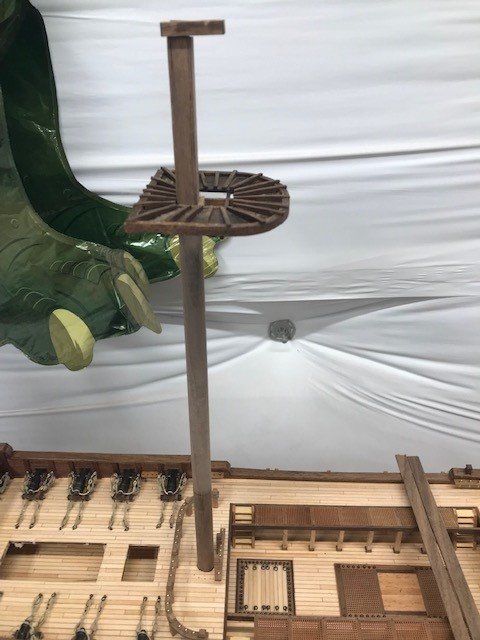
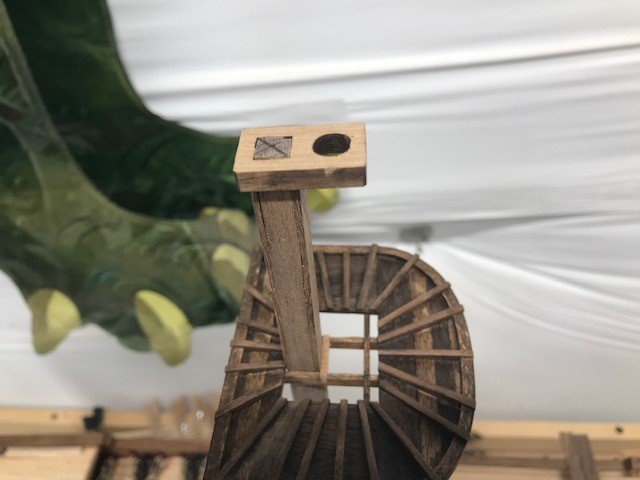
 Been a while since my last post, work continues with the masts and deck details. Prototype deadeye and jig made. Still working details for the jig I'll post more photos when I start the mass production process and the prehistoric poop deck.
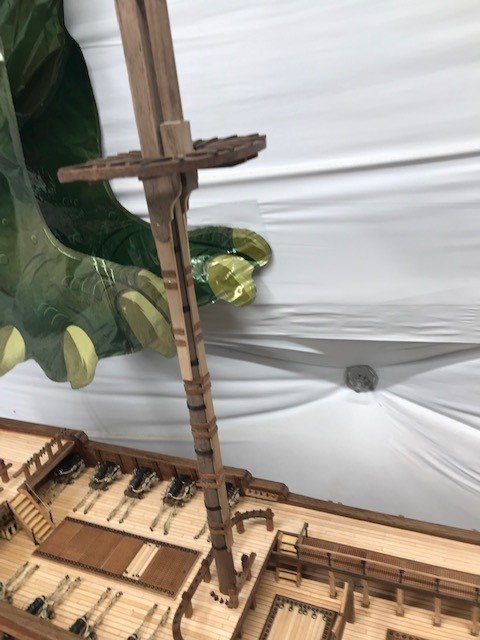
-
Yes, I was going under the assumption he was working on round stock.
-
Hi Julian, Looking at your first picture it looks like jaws are in backwards the taller part of the jaw should be towards the center of the chuck see the picture that GGibson posted above. The jaws are taller towards the center of the chuck. Curt
-
Ronald-V reacted to a post in a topic:
Montanes 1794 by Cmm4000 - OcCre - 1:70
-
More work on the masts.


-
RossR reacted to a post in a topic:
Montanes 1794 by Cmm4000 - OcCre - 1:70
-
Ronald-V reacted to a post in a topic:
Montanes 1794 by Cmm4000 - OcCre - 1:70
-
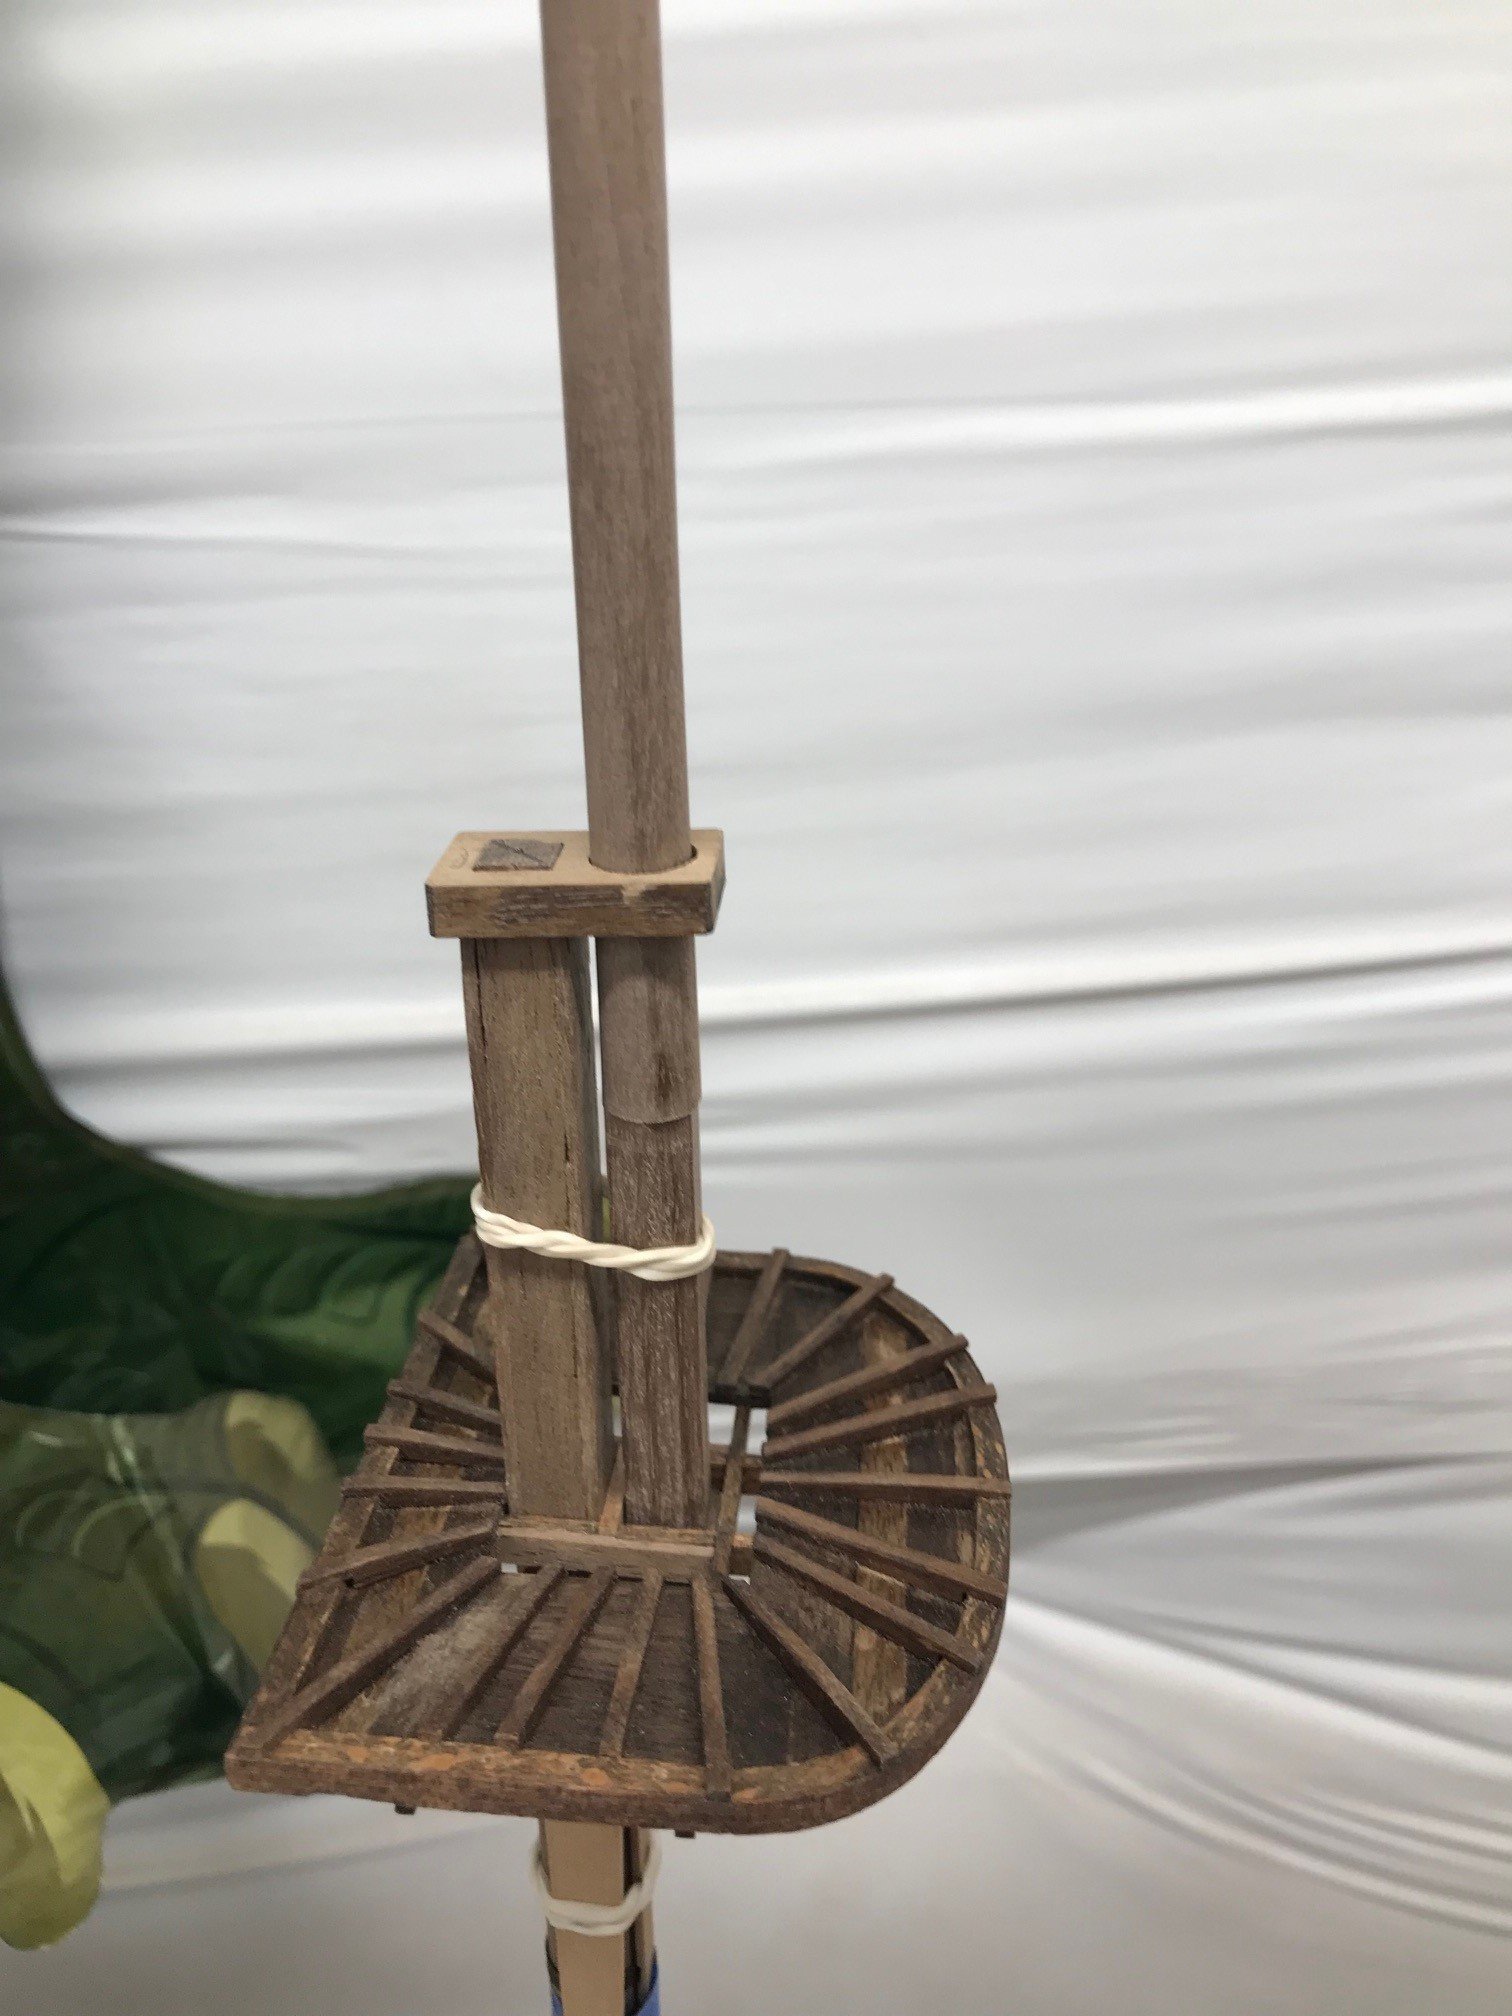
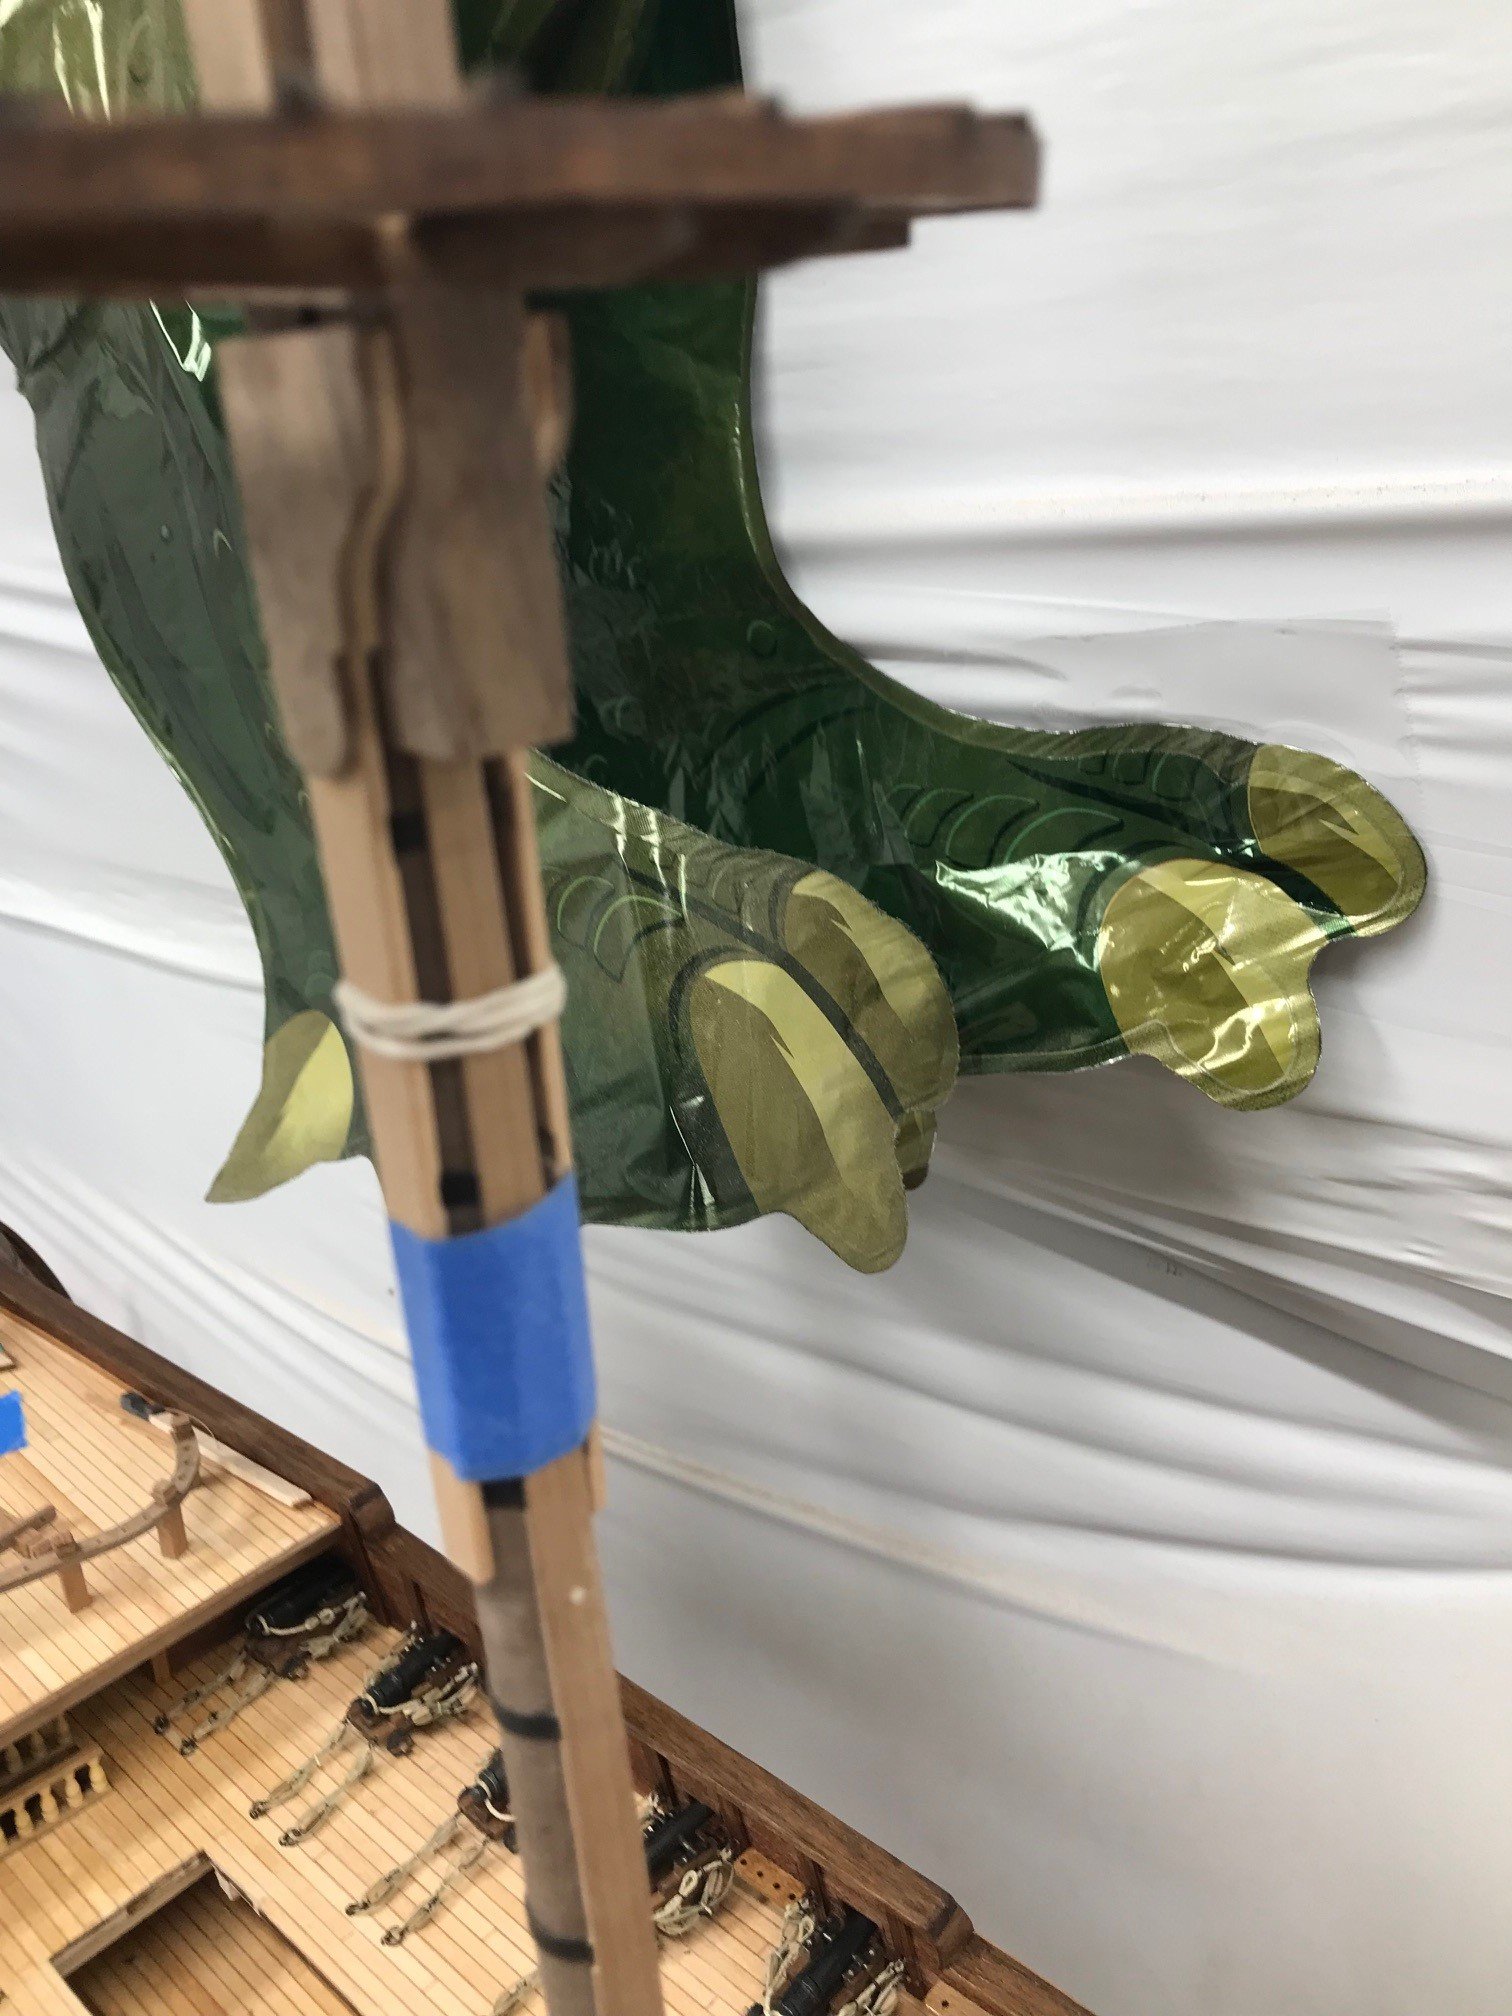
Work finally begins on the masts!
-
Sorry first mast.
-
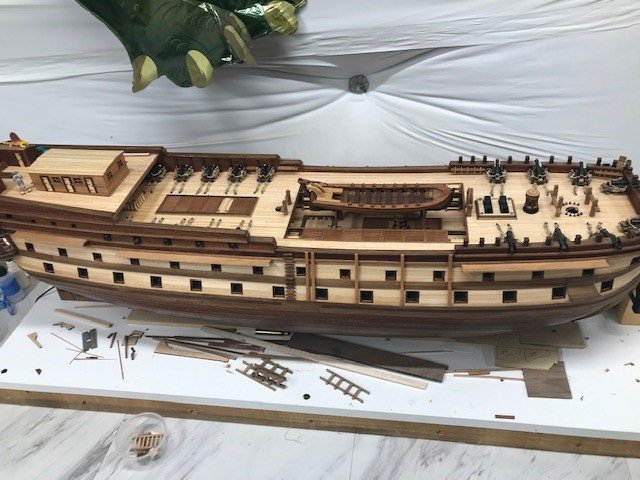
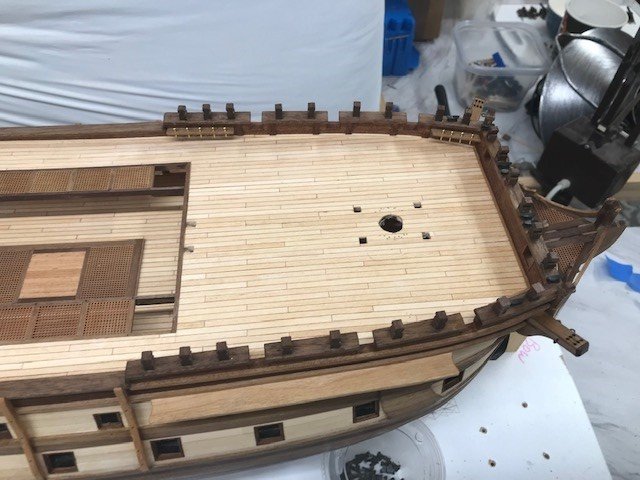
Last gun installed! Dry fitting some of the deck parts. Finally started the firs mast too.
-
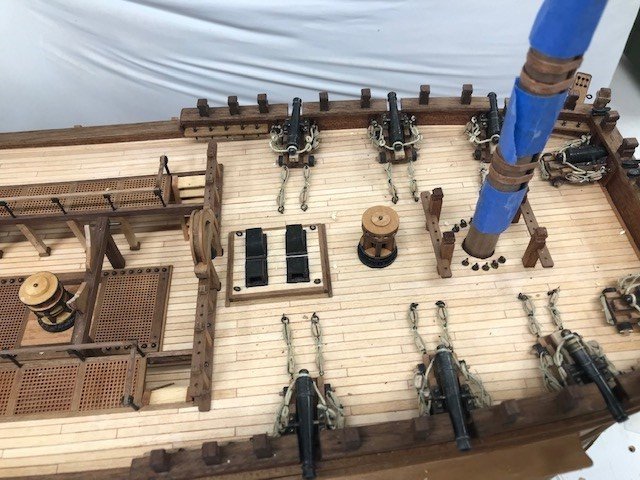
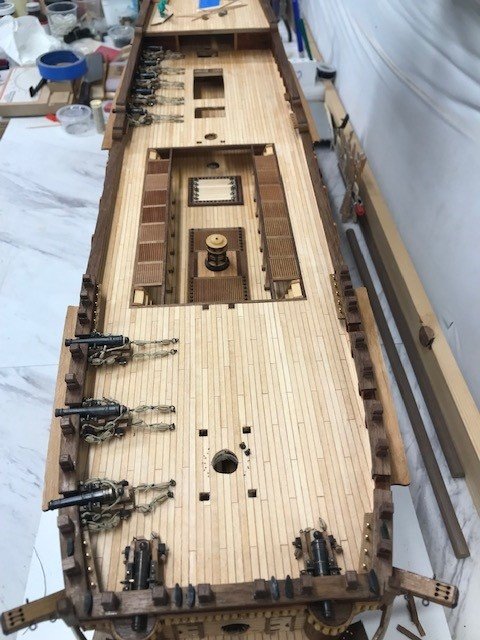
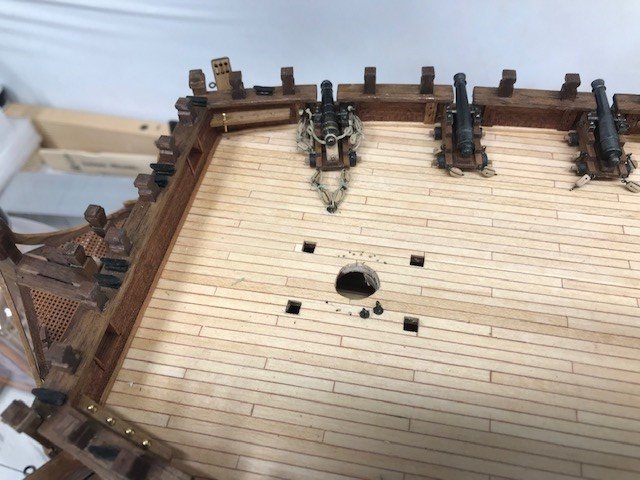
Starboard battery finally completed only 10 left yea!
-
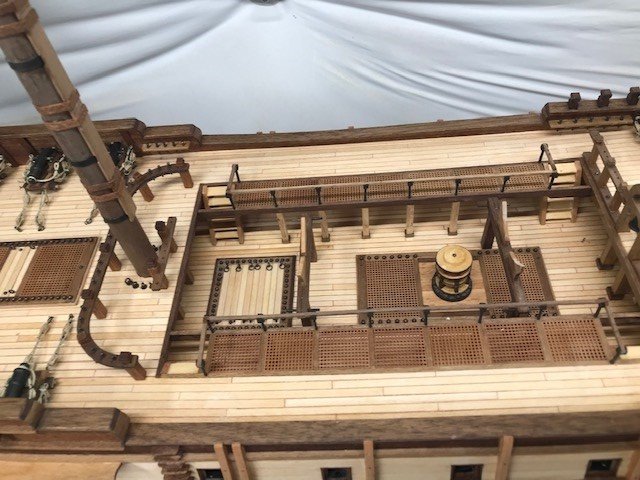
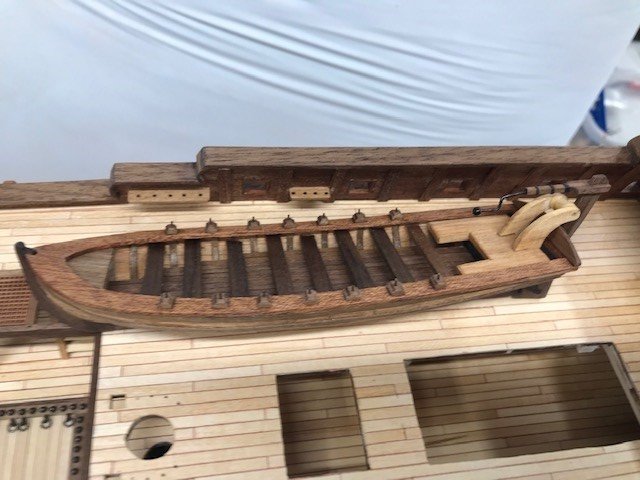
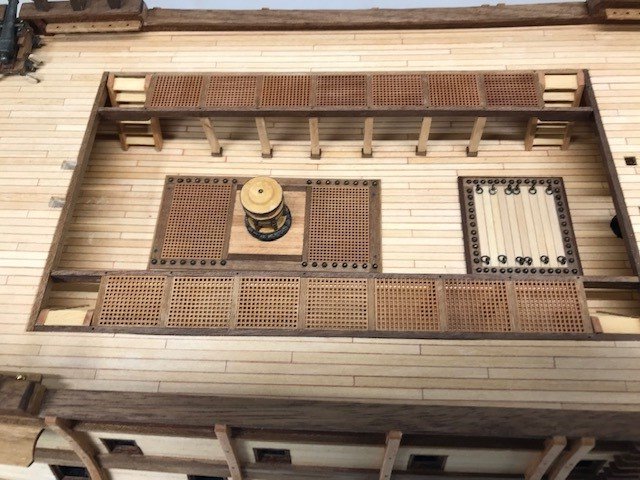
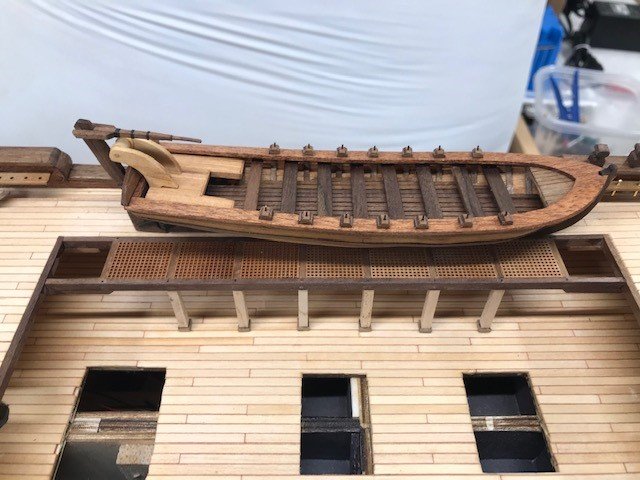
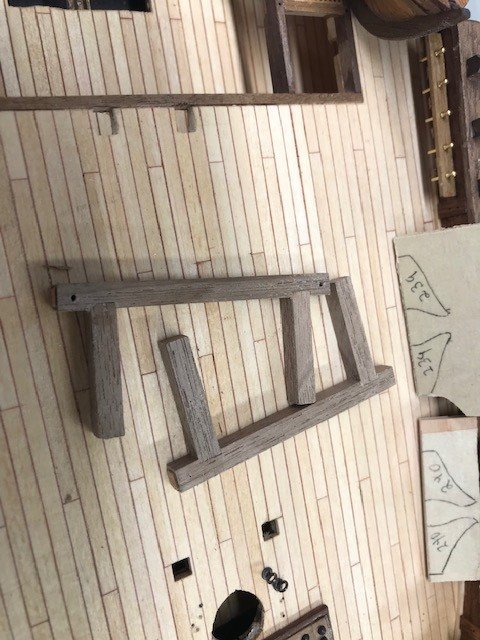
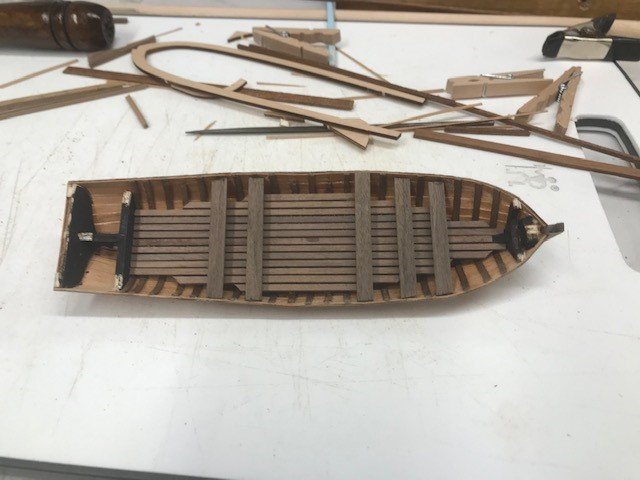
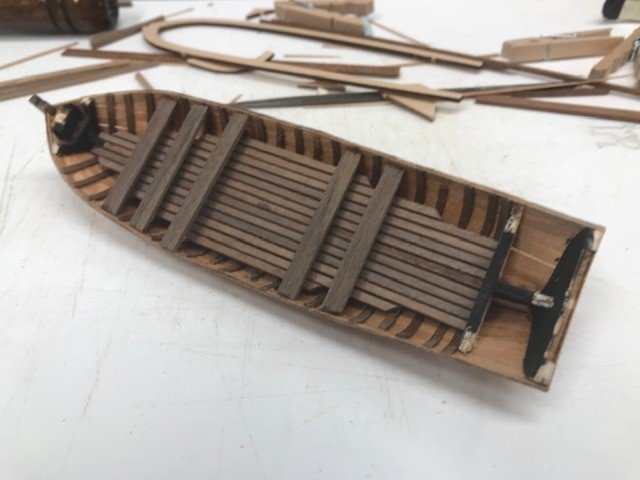
Added some more detail to the ship's boat. Waist details installed. Had to remake the supports for the ship's boat since I did not account for the width of the grating. The first gun and rigging is installed only 15 more to go. Kicking around the idea of mounting the port side guns in the stowed position.
-
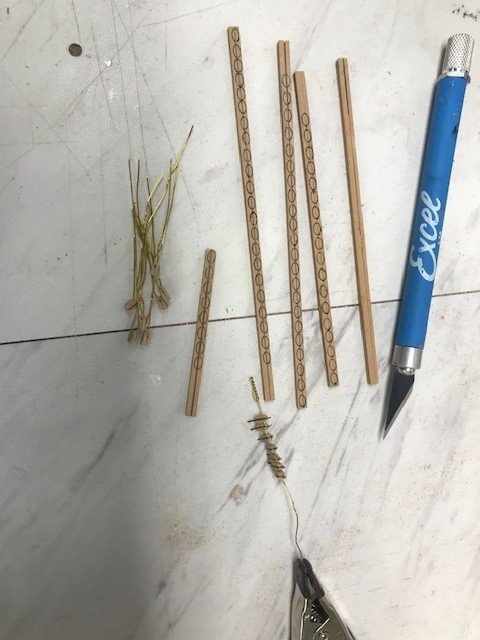
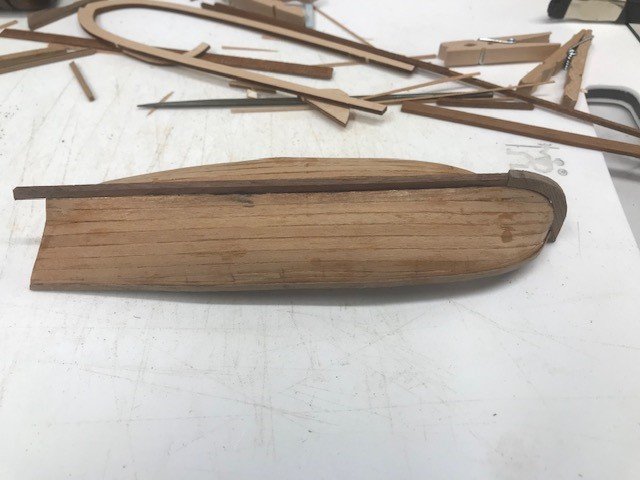
Finished the first ship's boat, still have to make the fine detail parts but the major construction is done. For the boat I used maple, cherry, walnut, and mahogany to replace the kit supplied ply. The first six supports for the walkway are in place. The supports to mount the boat are walnut and I still have to cut the uprights from cherry. Block making continues, these are the blocks to complete the gun tackle.
-
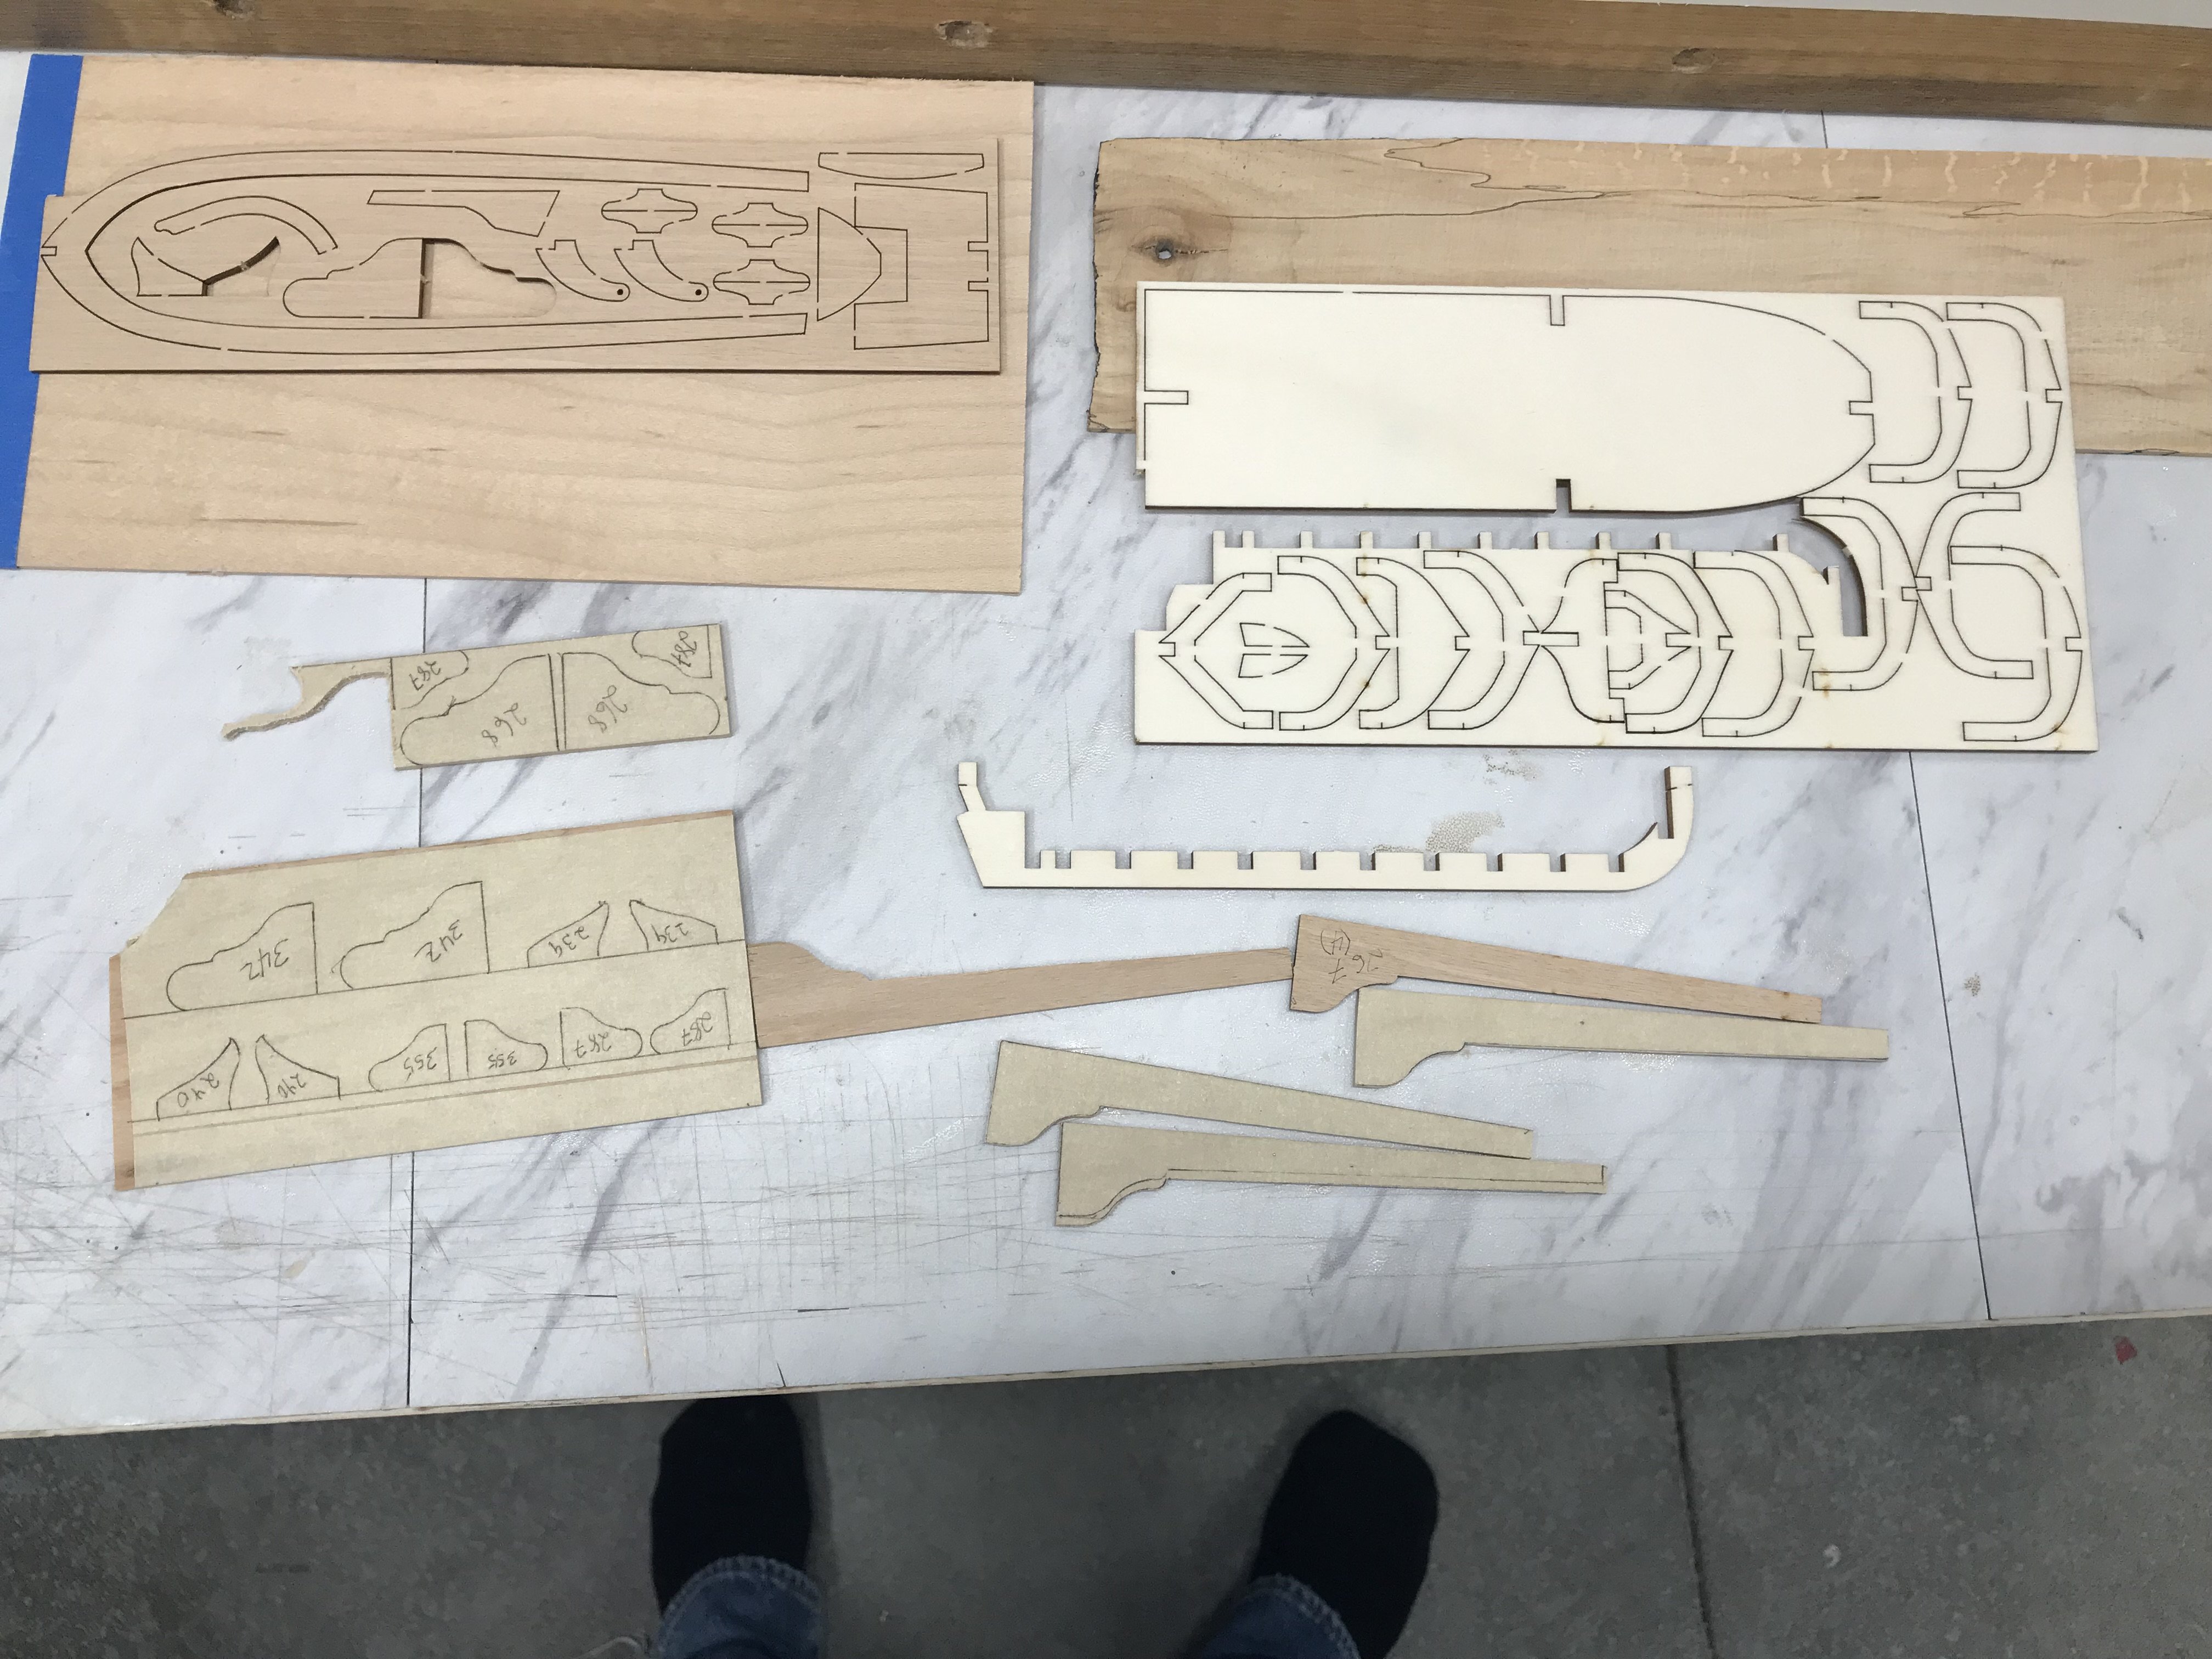
The ships boat from the kit is nicely laser cut but all ply. Made great templates to cut all the parts though! The planking is cherry, and I cut the plywood frames away and replaced them with walnut strips. The decking, keel, stem and rudder are all walnut. Still have quite a few parts to fabricate.
-
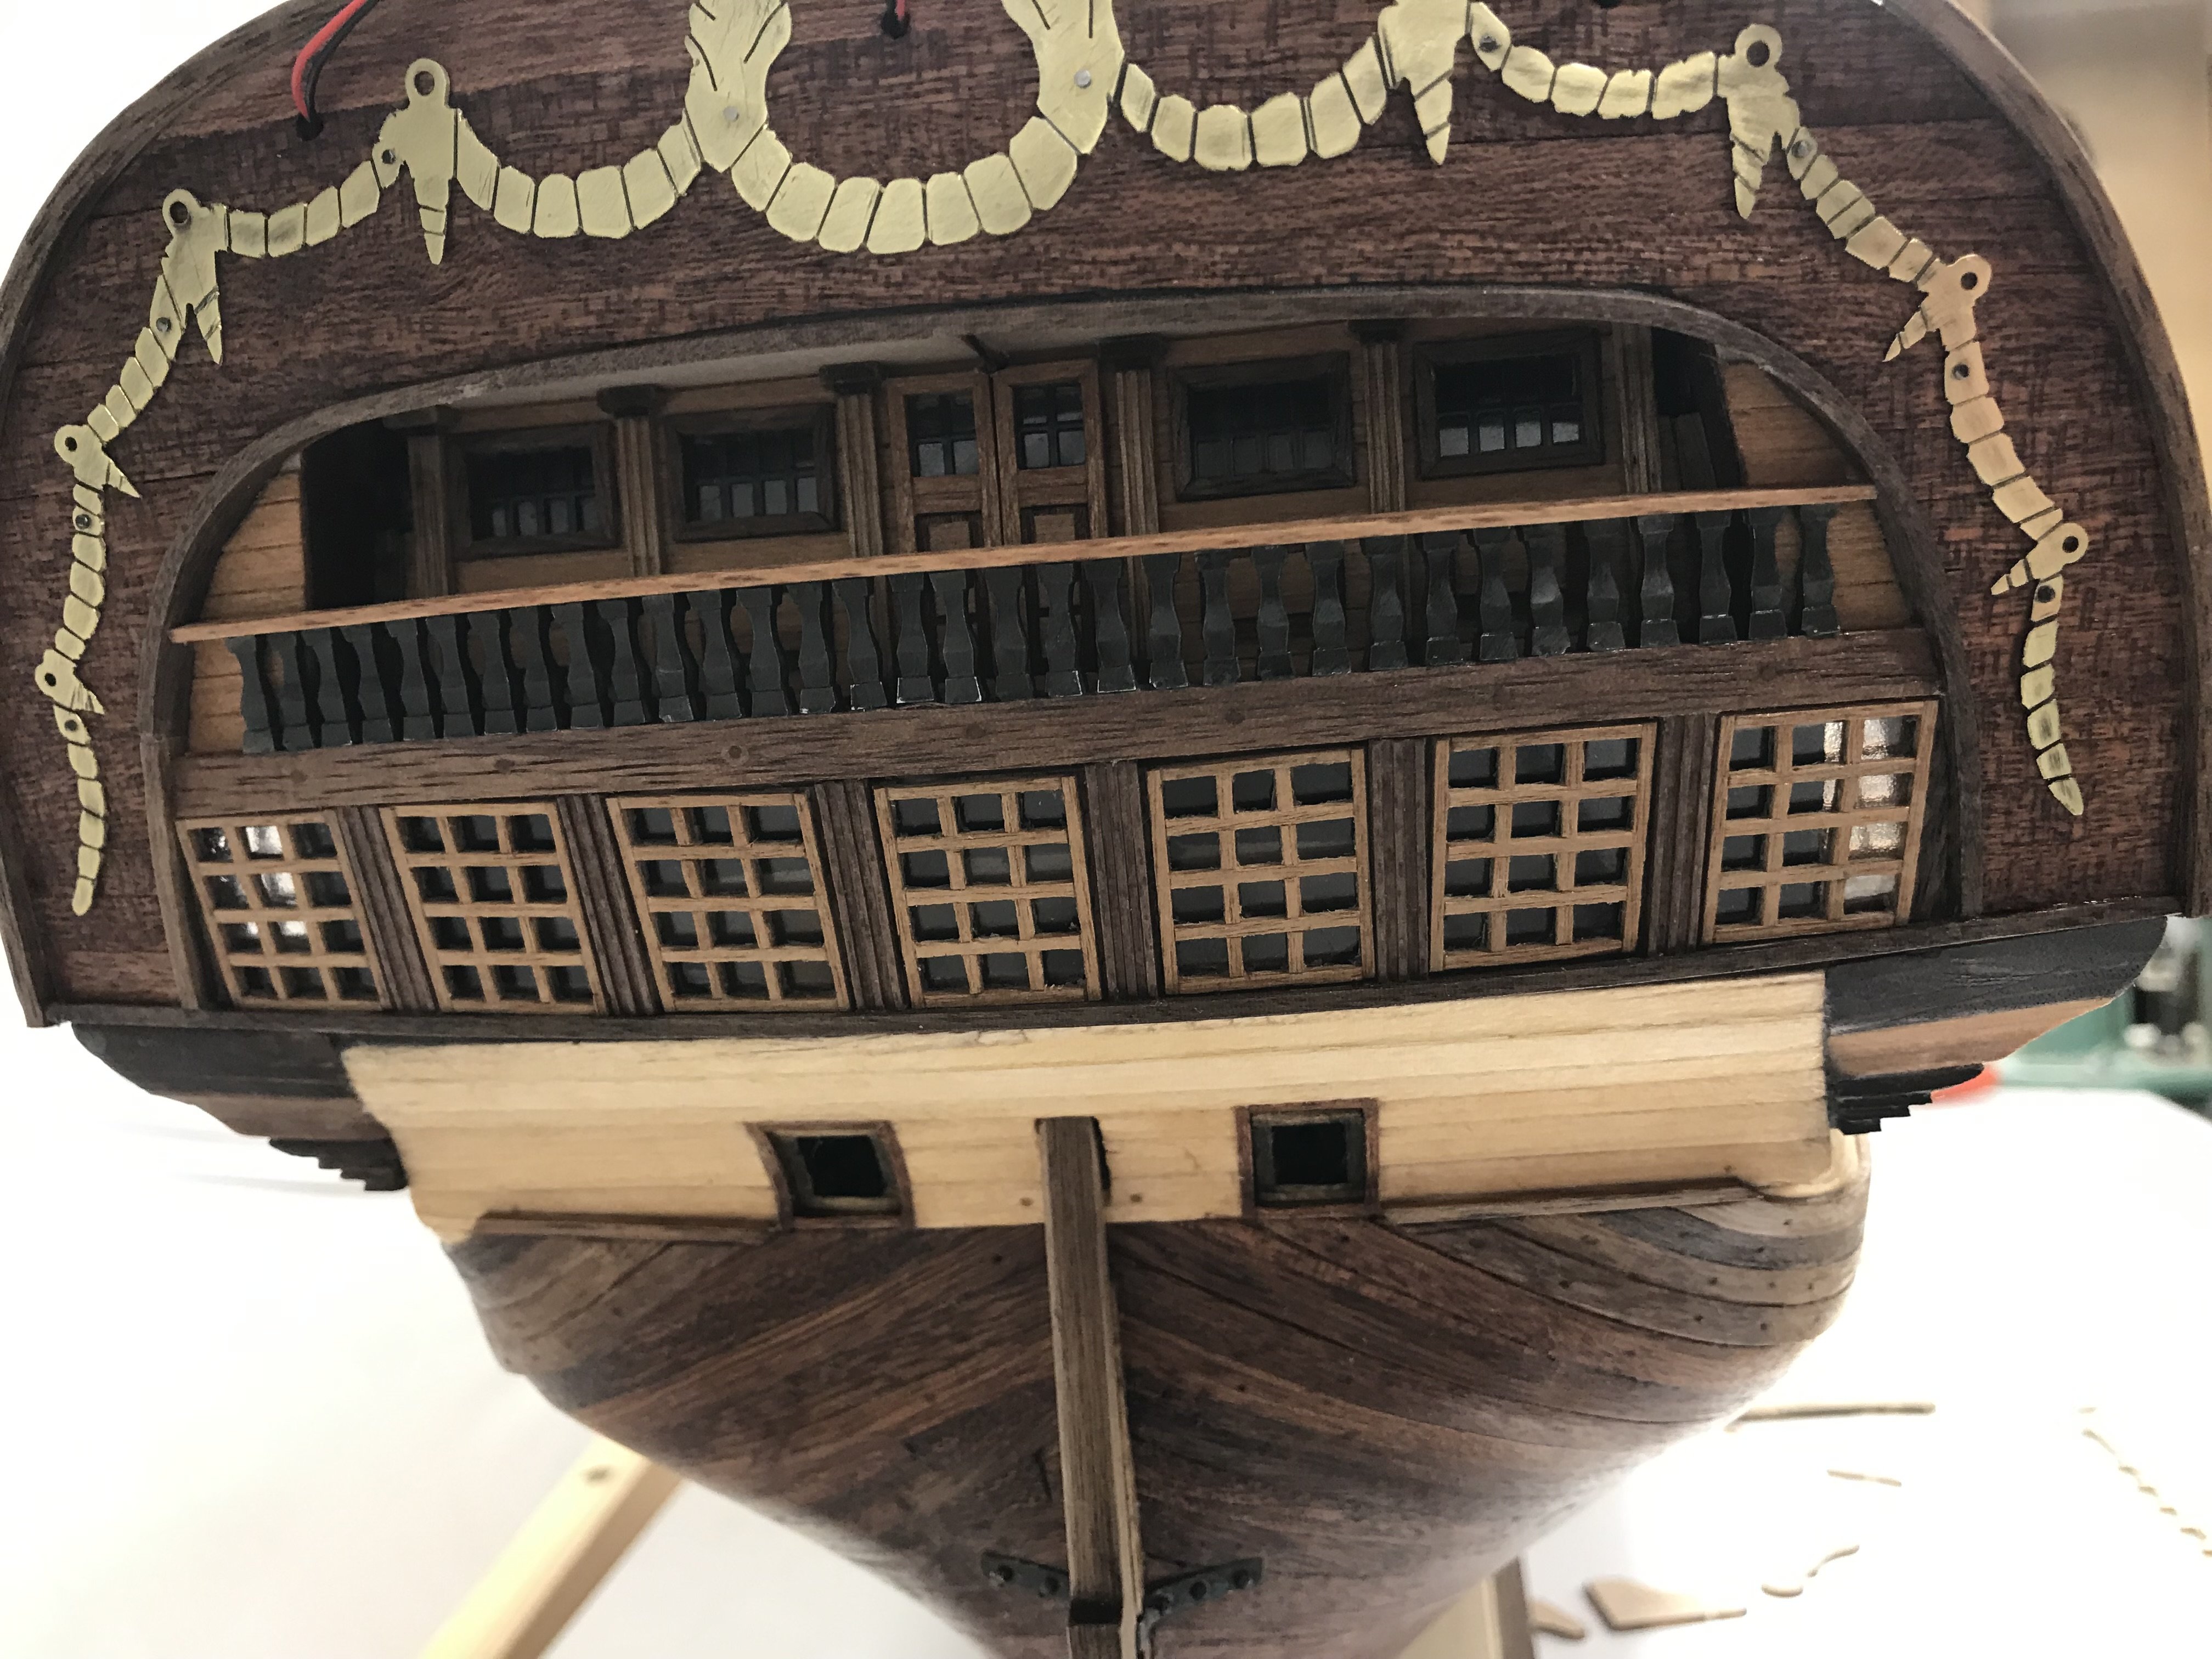
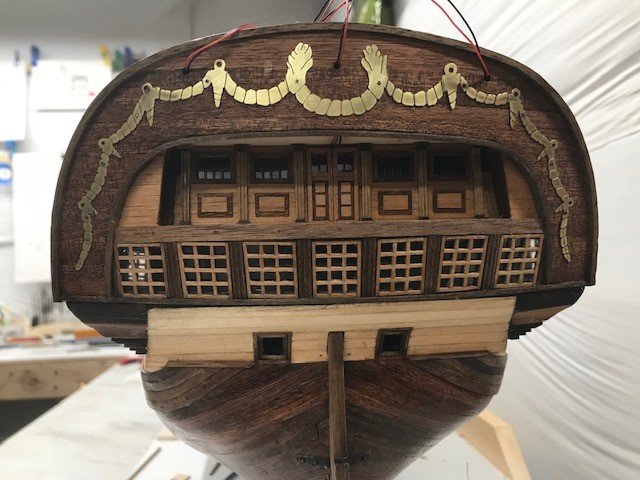
Completed the stern railing and work begins on the masts and ship’s boat.


-
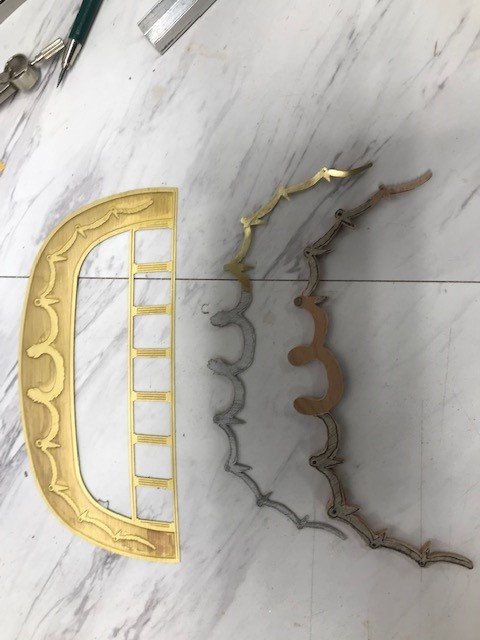
Oh, here is a shot of the inspiration. The PE part is from the kit. I messed with both wood and brass decided on brass in the end.
-
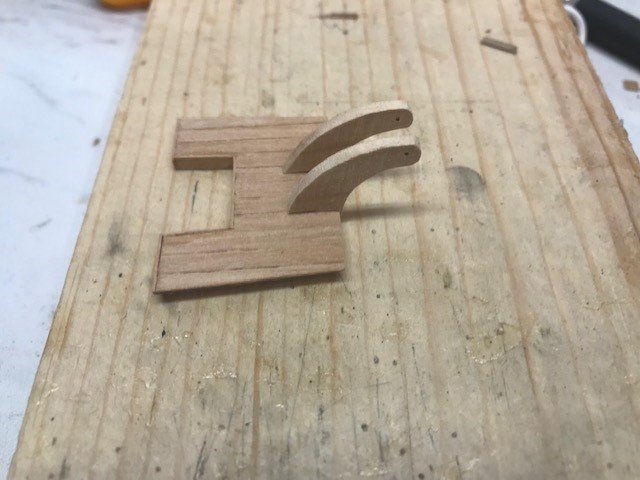
Completed the bow davits and oiled all the wood. Attached the stern decoration (I haven't buffed the pins to match the decoration yet but they will blend better when I do). Next start the railing.
-
Oh I forgot to mention the kit supplied parts for the lanterns soldered and blackened quite nicely happy with the results!