Joseph F.
-
Posts
78 -
Joined
-
Last visited
Content Type
Profiles
Forums
Gallery
Events
Everything posted by Joseph F.
-
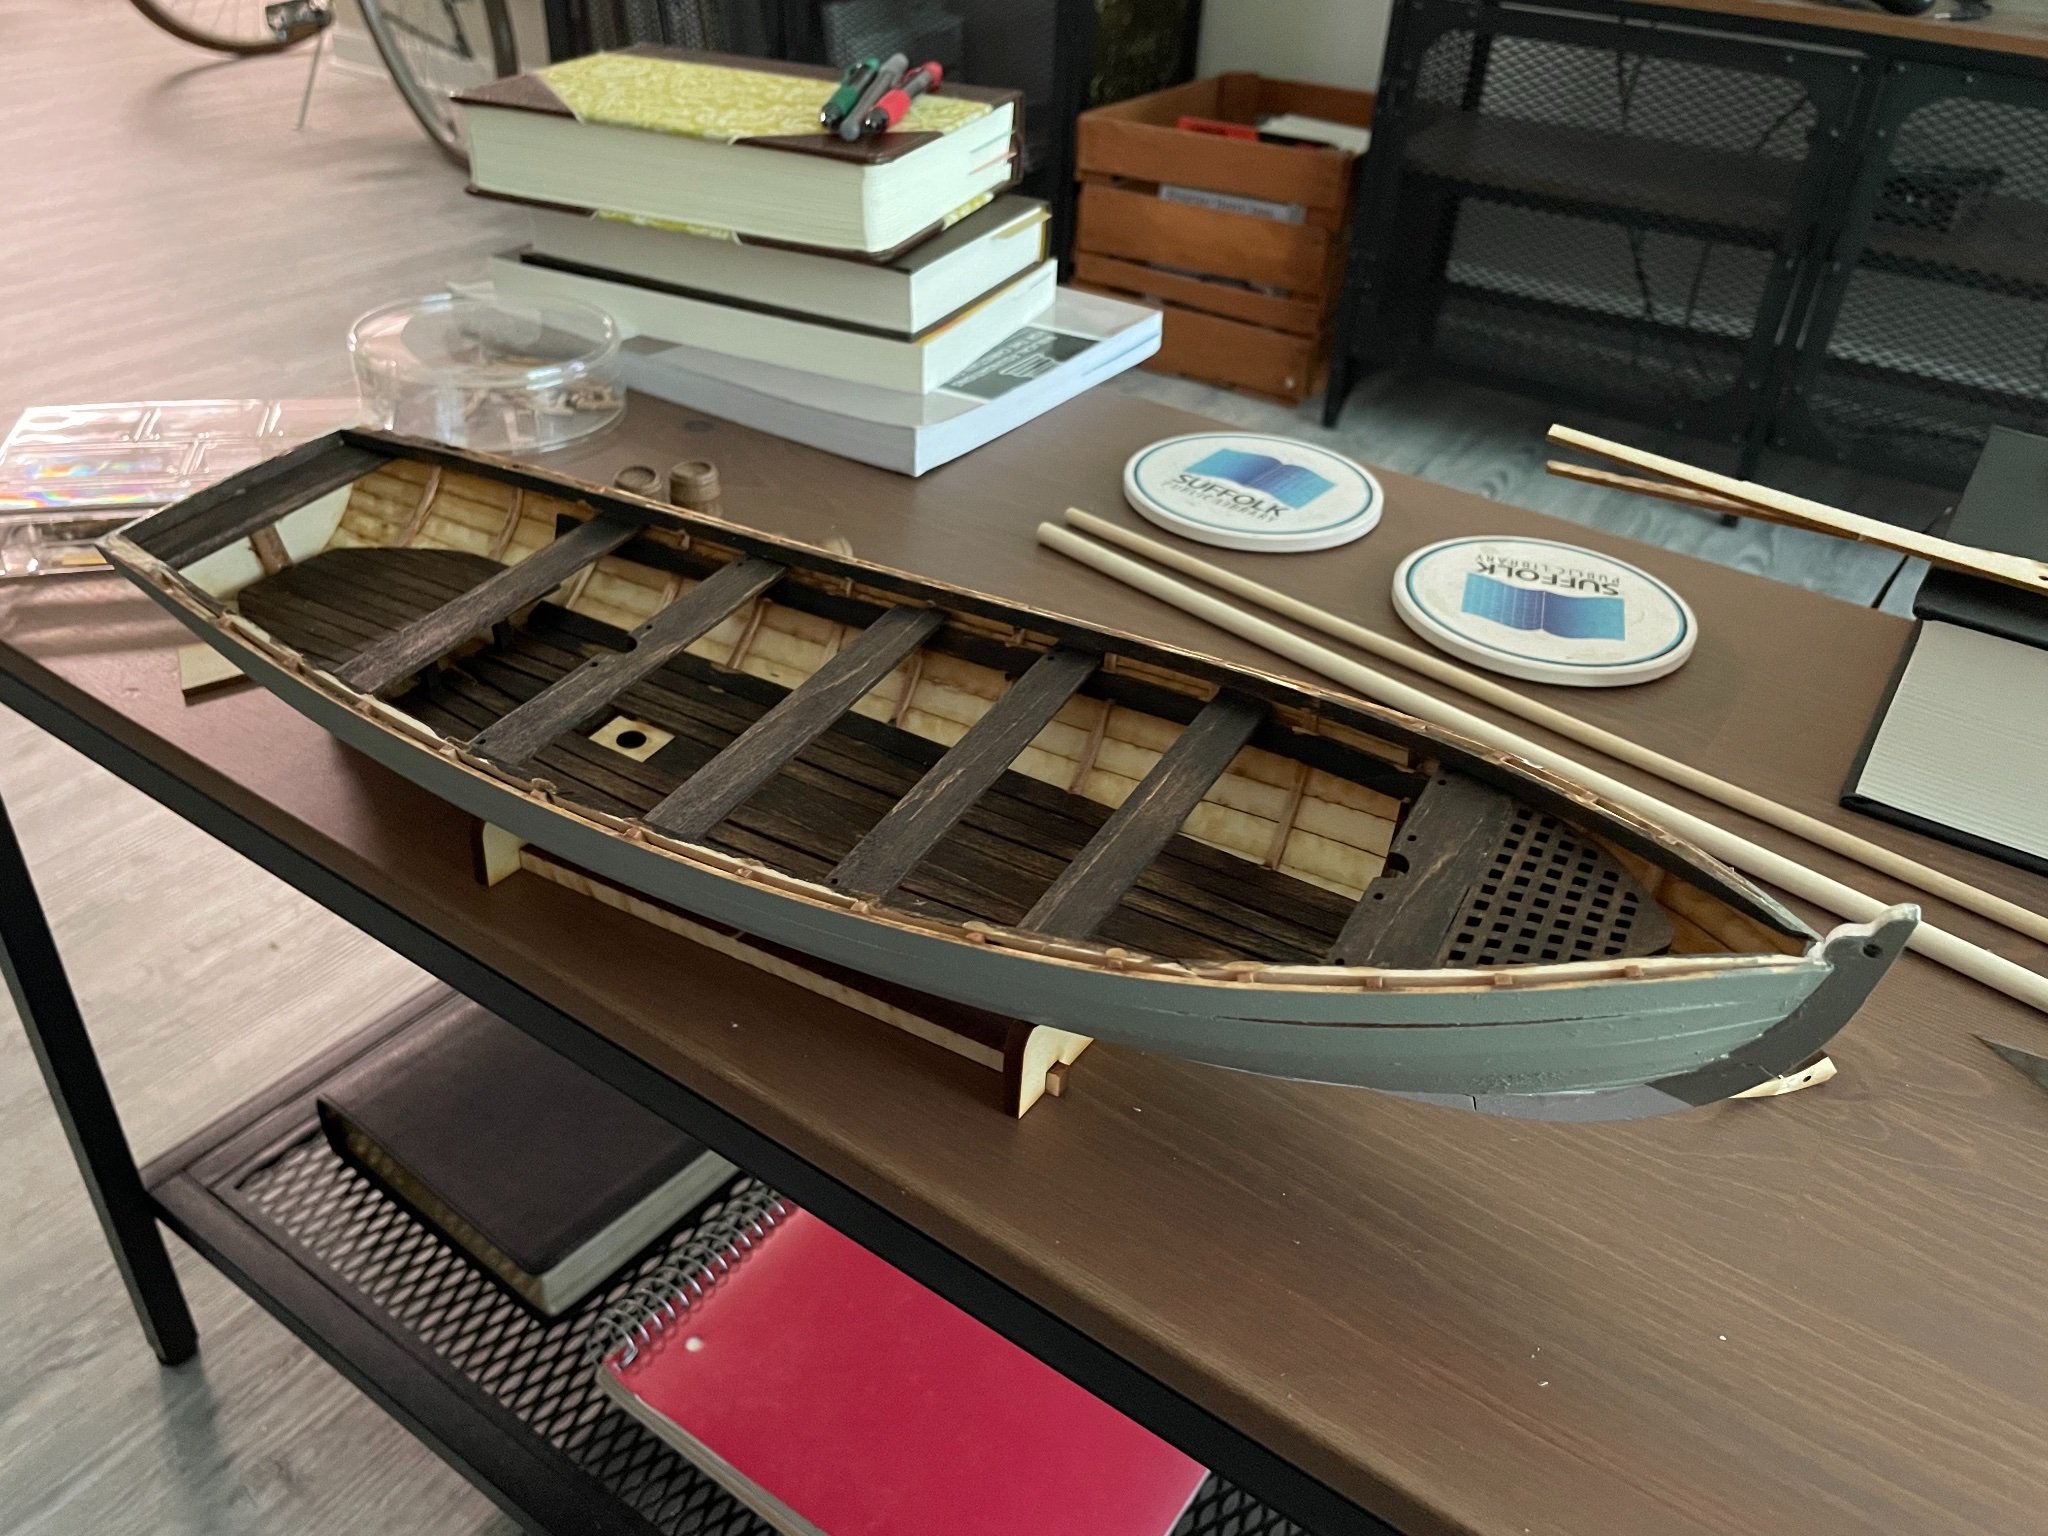
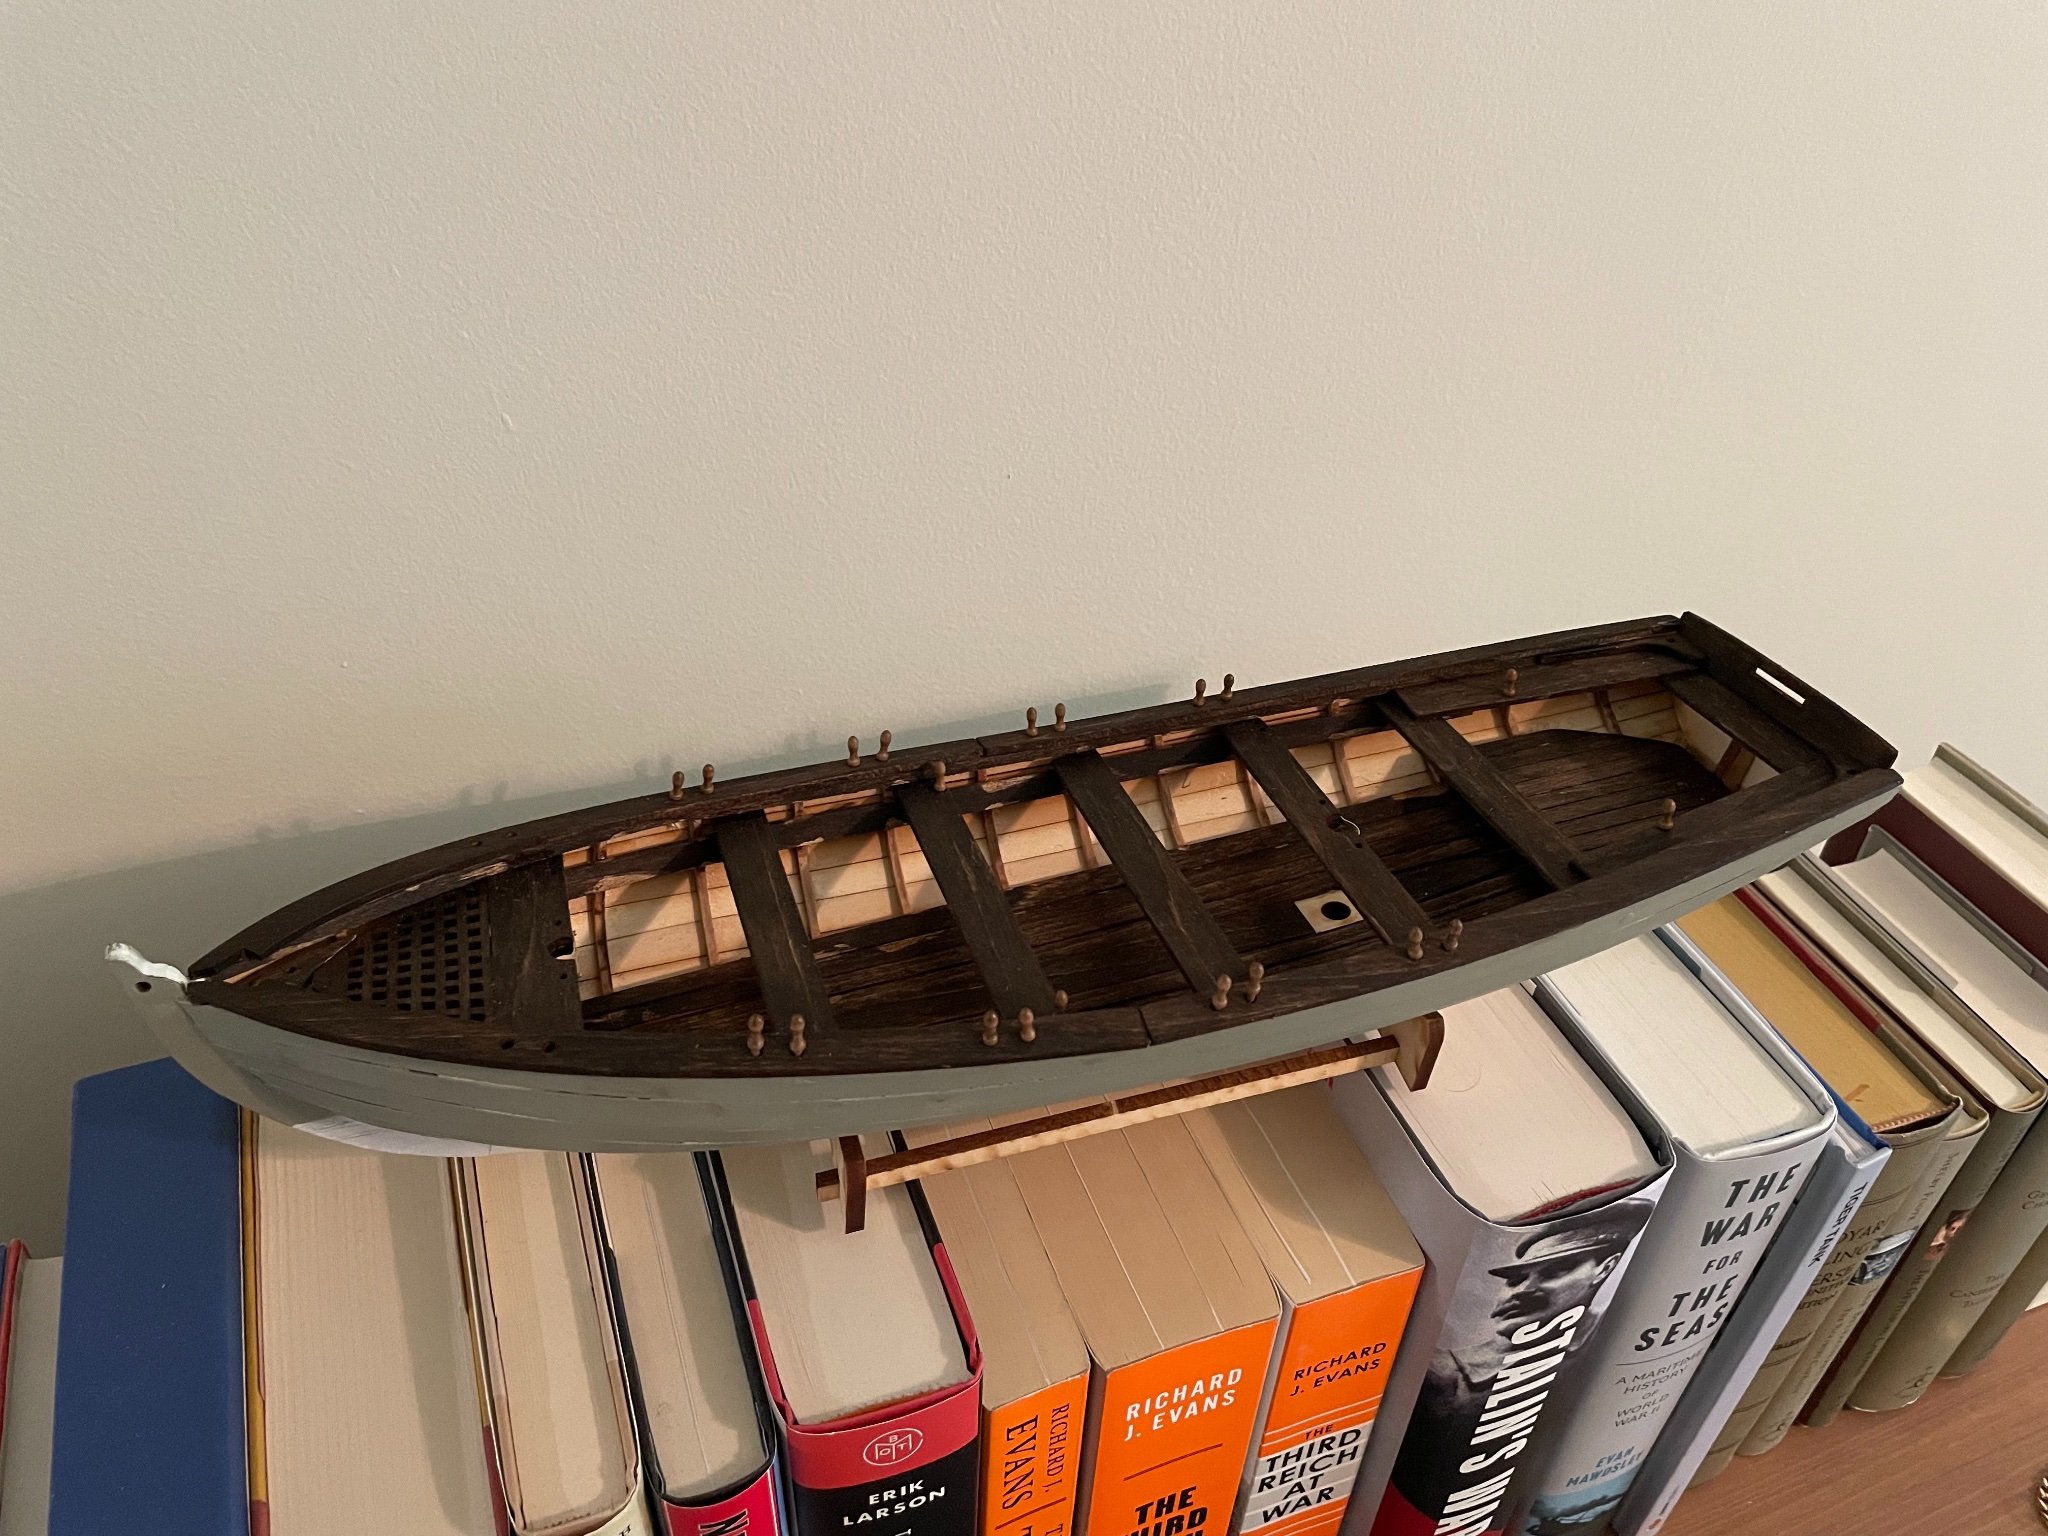
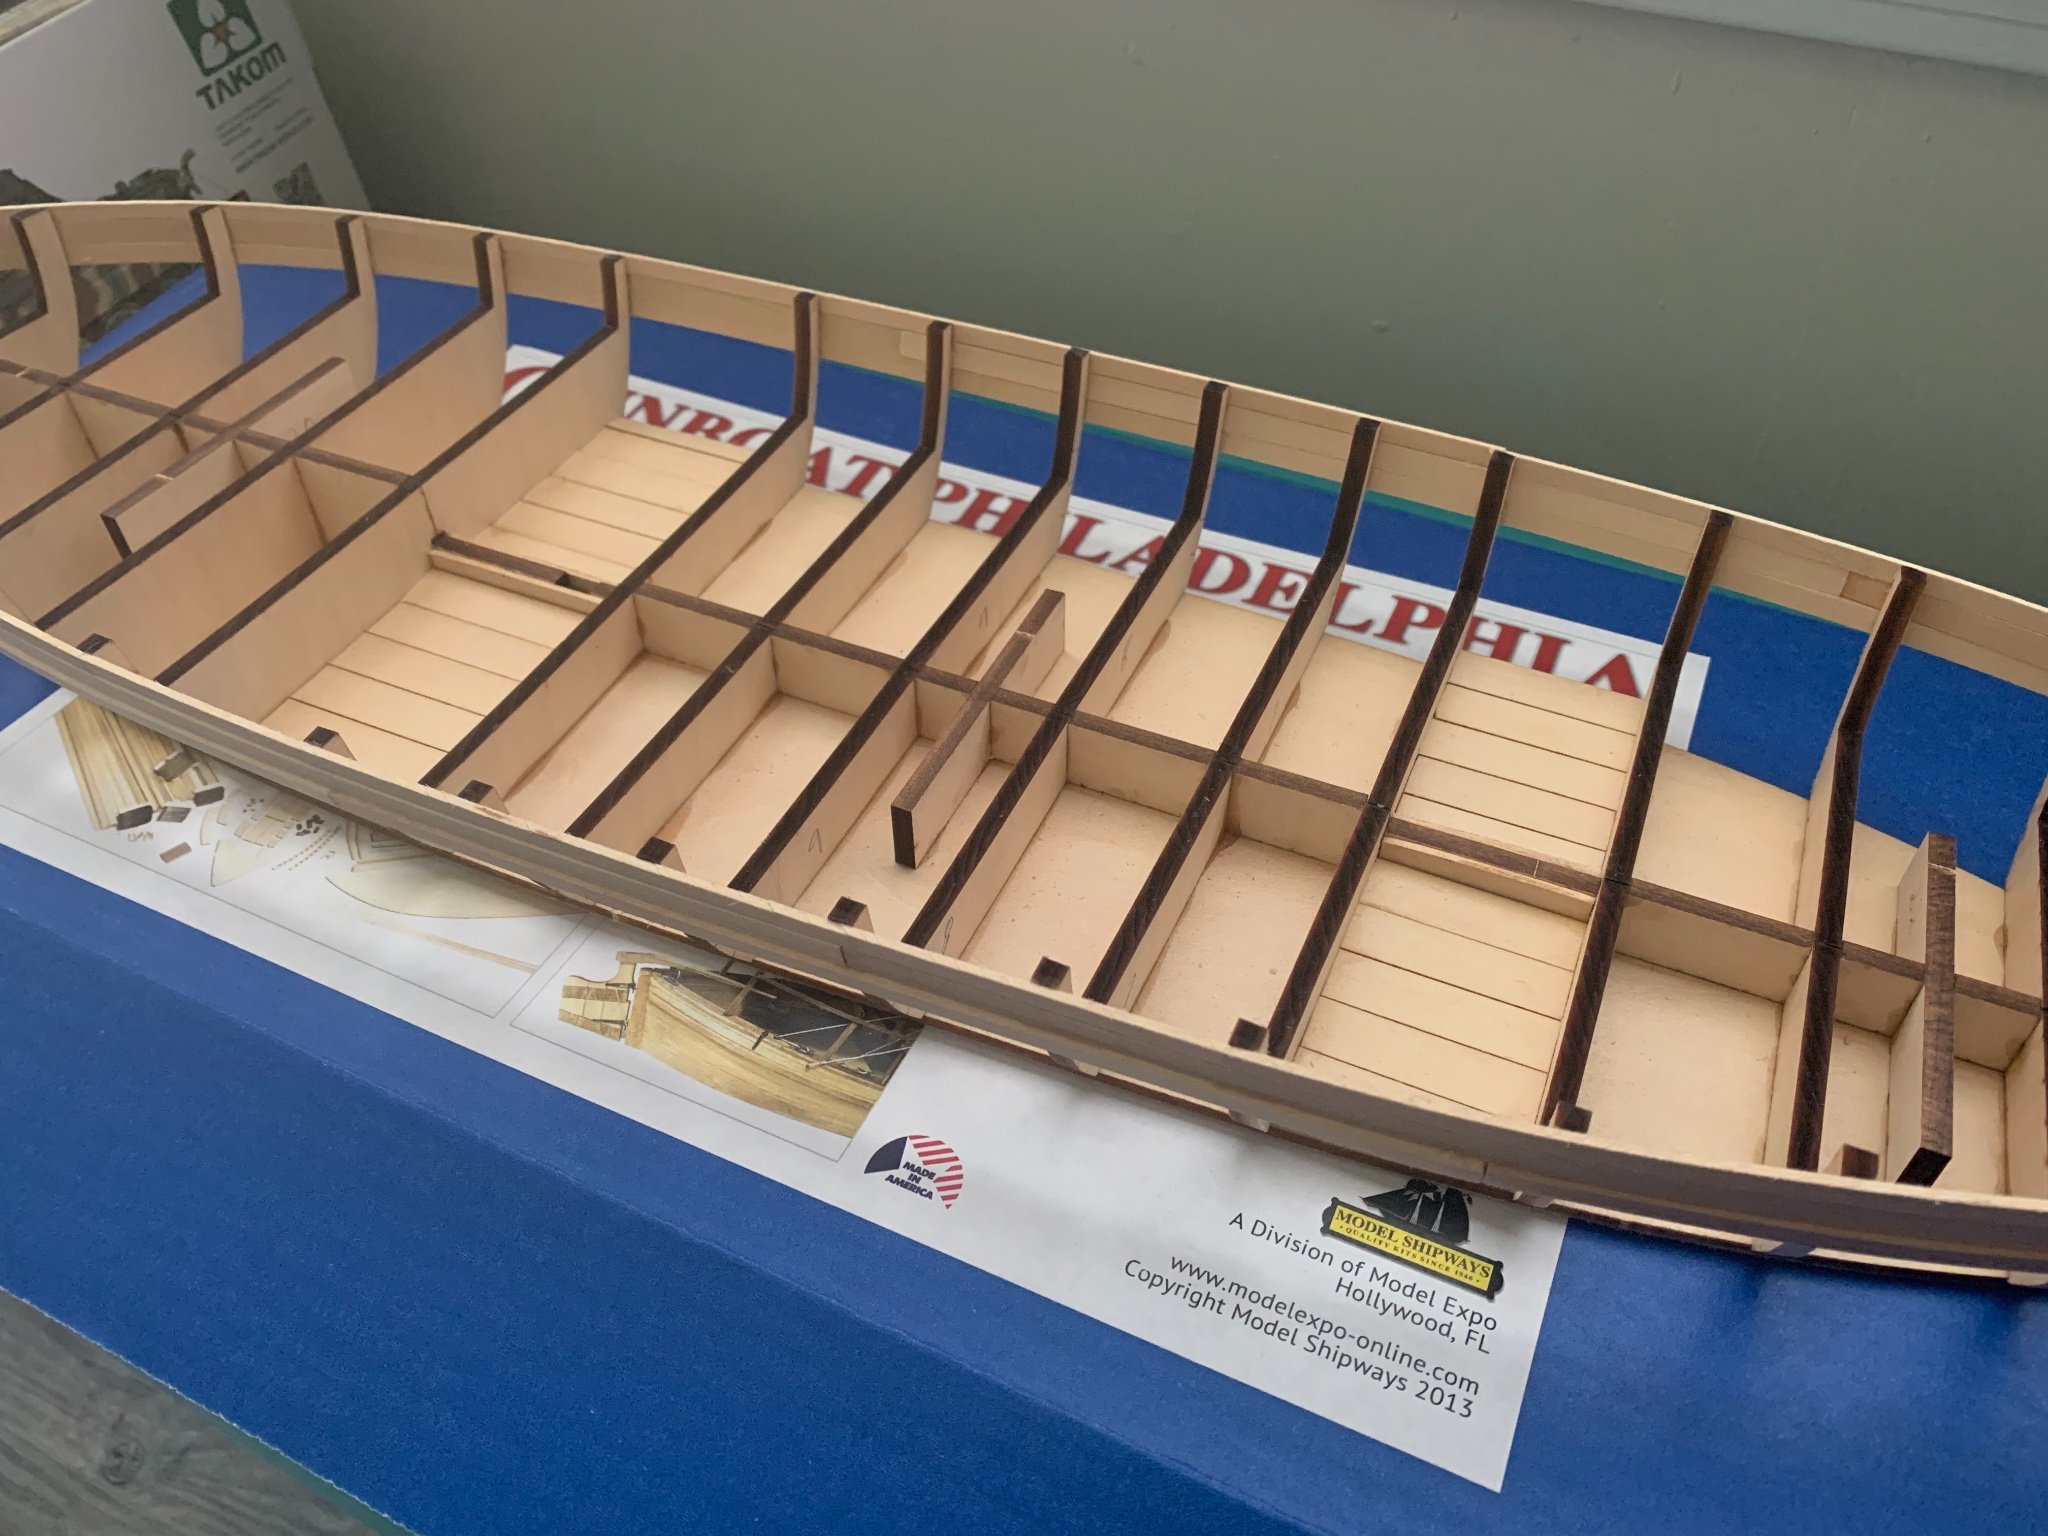
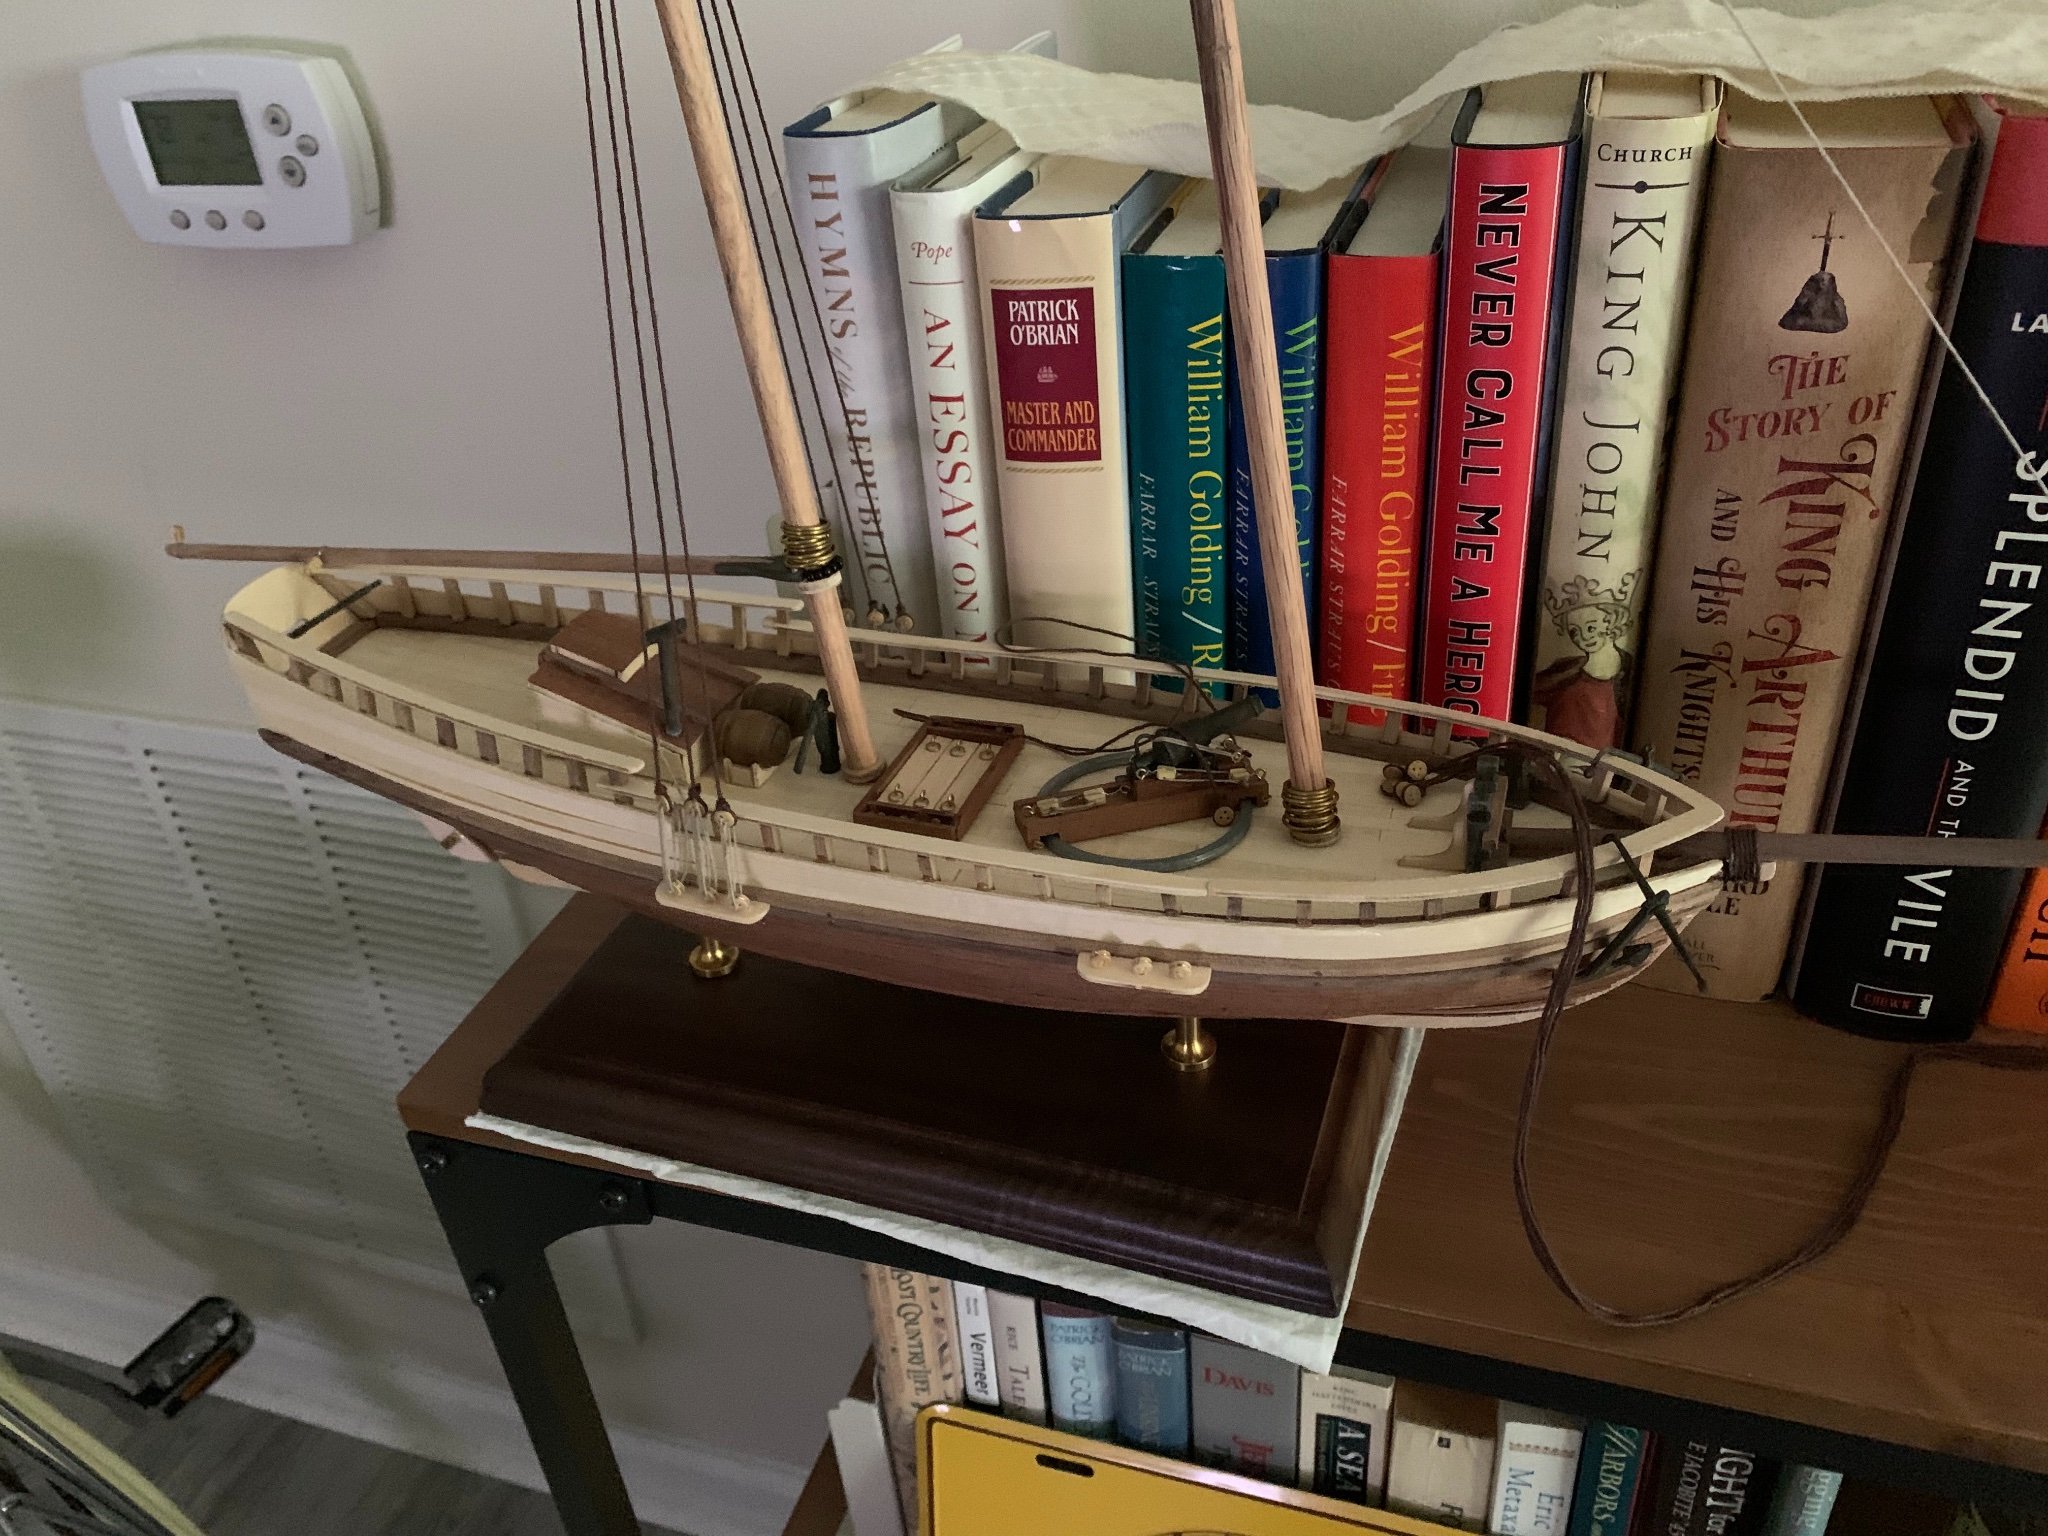
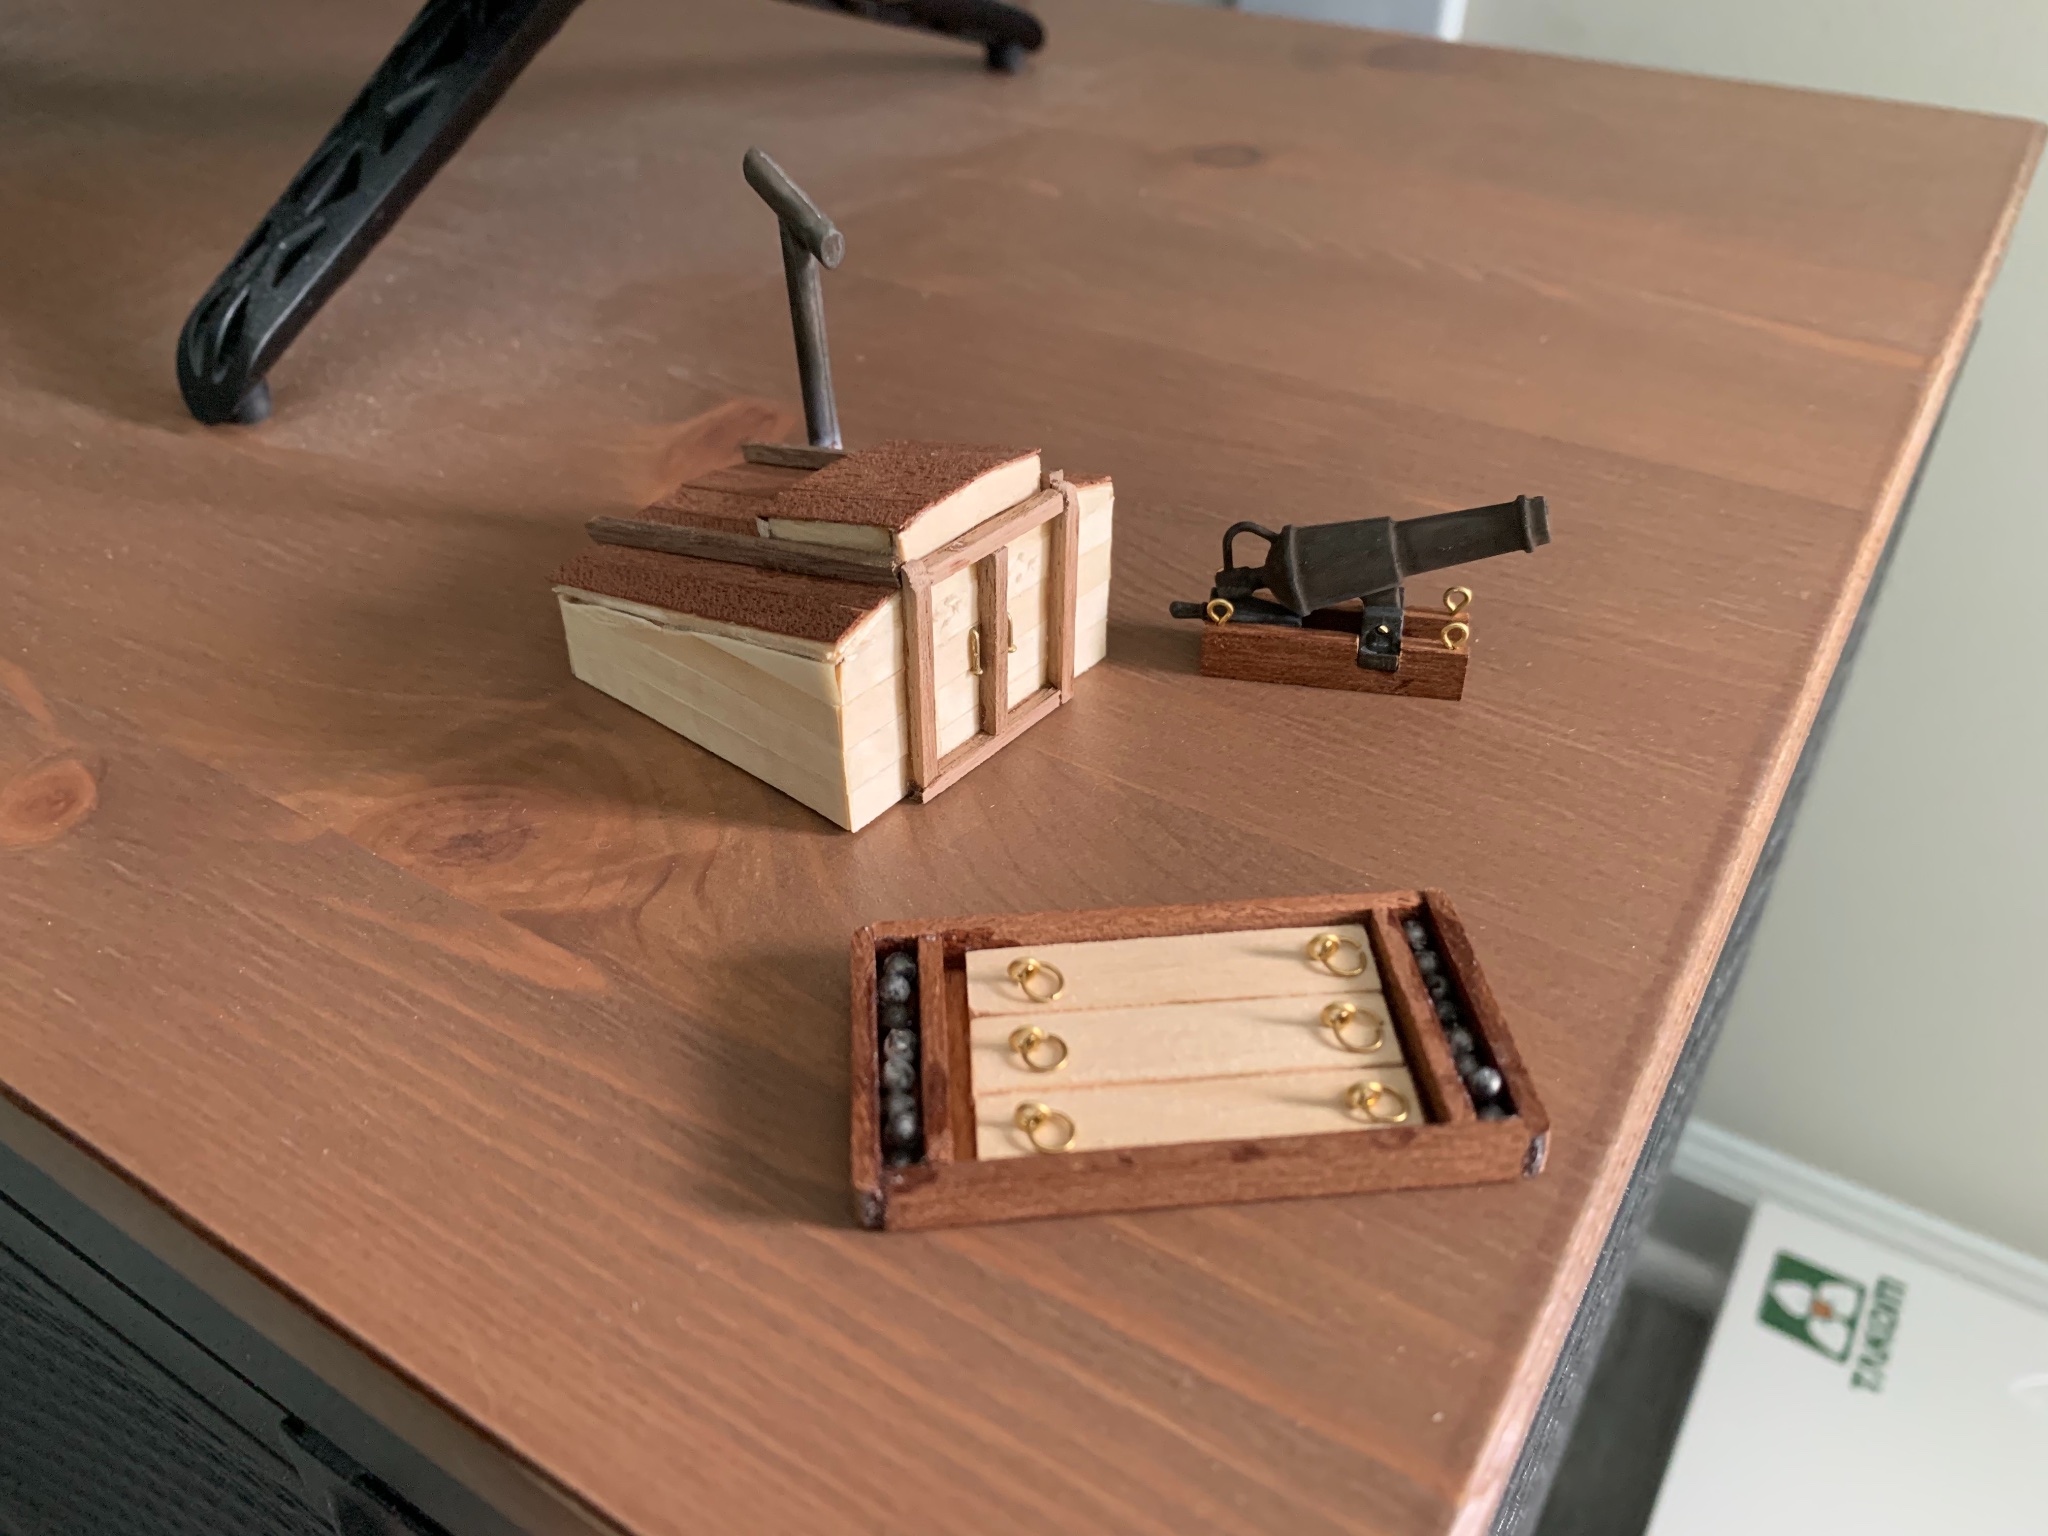
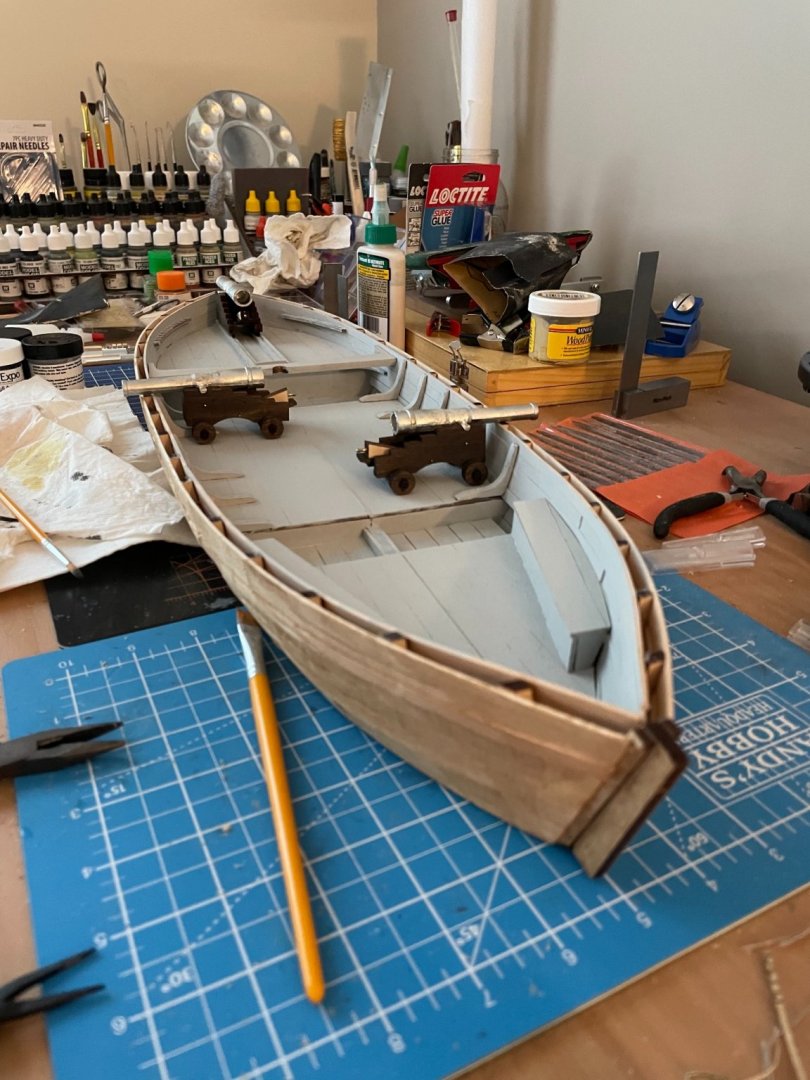
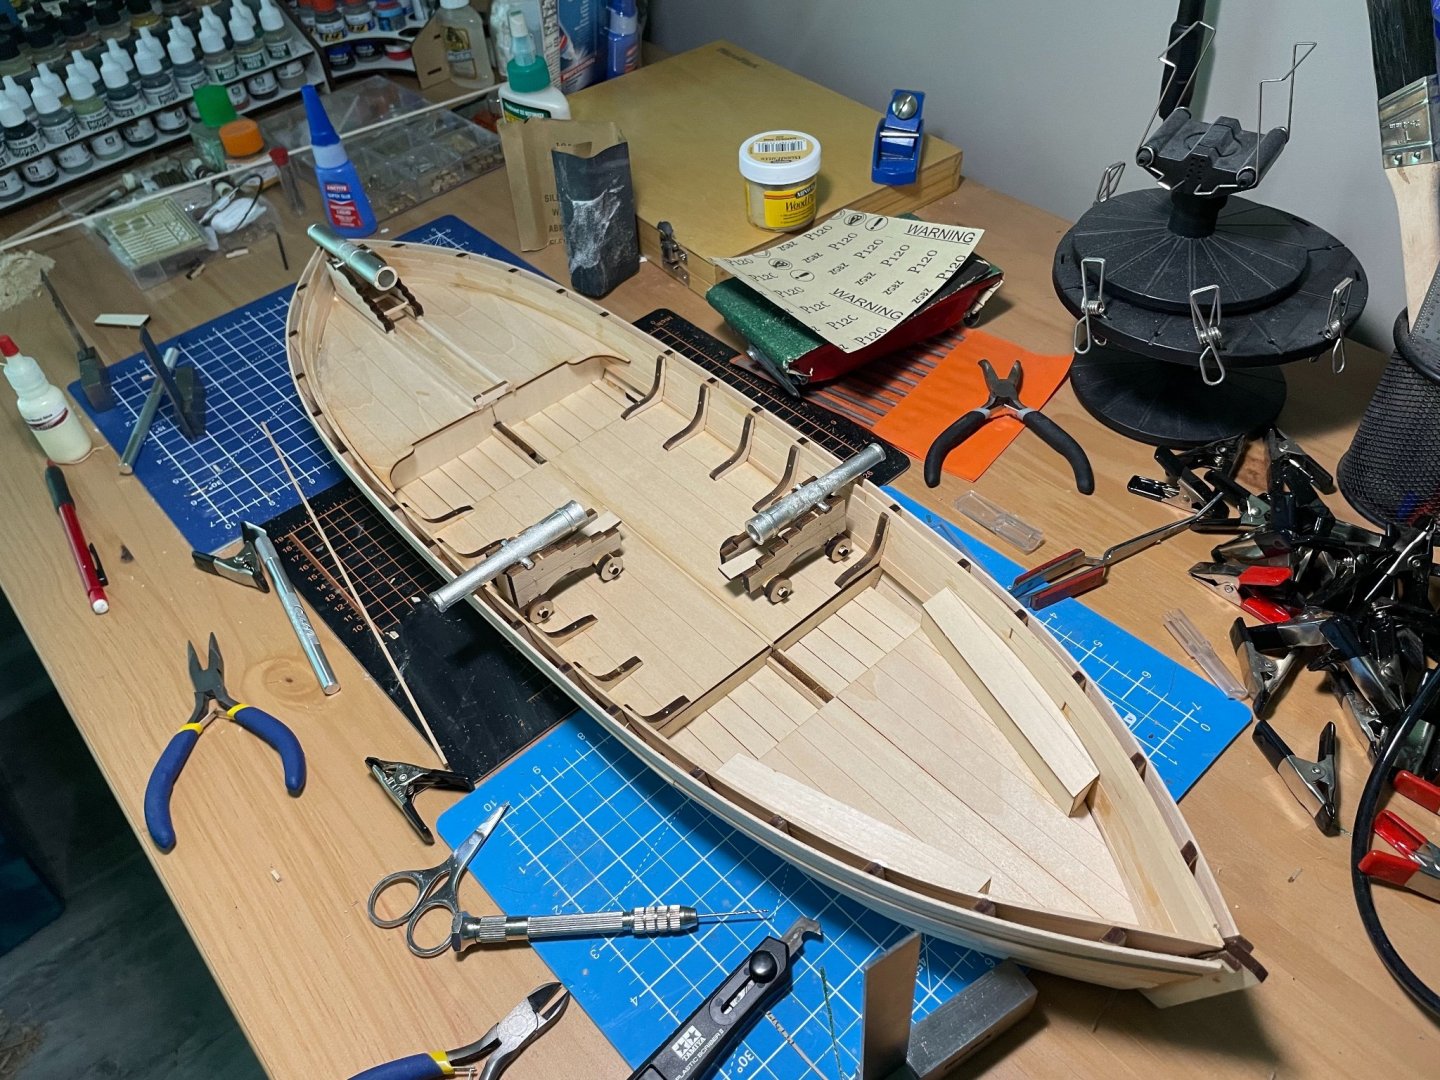
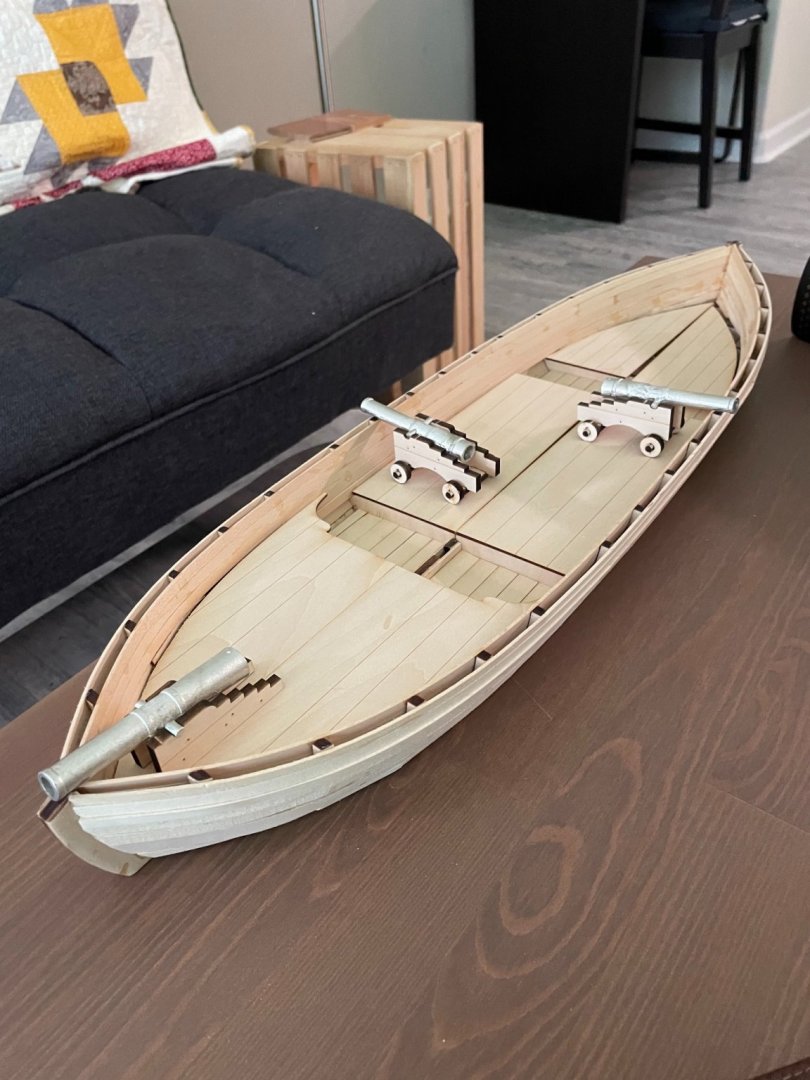
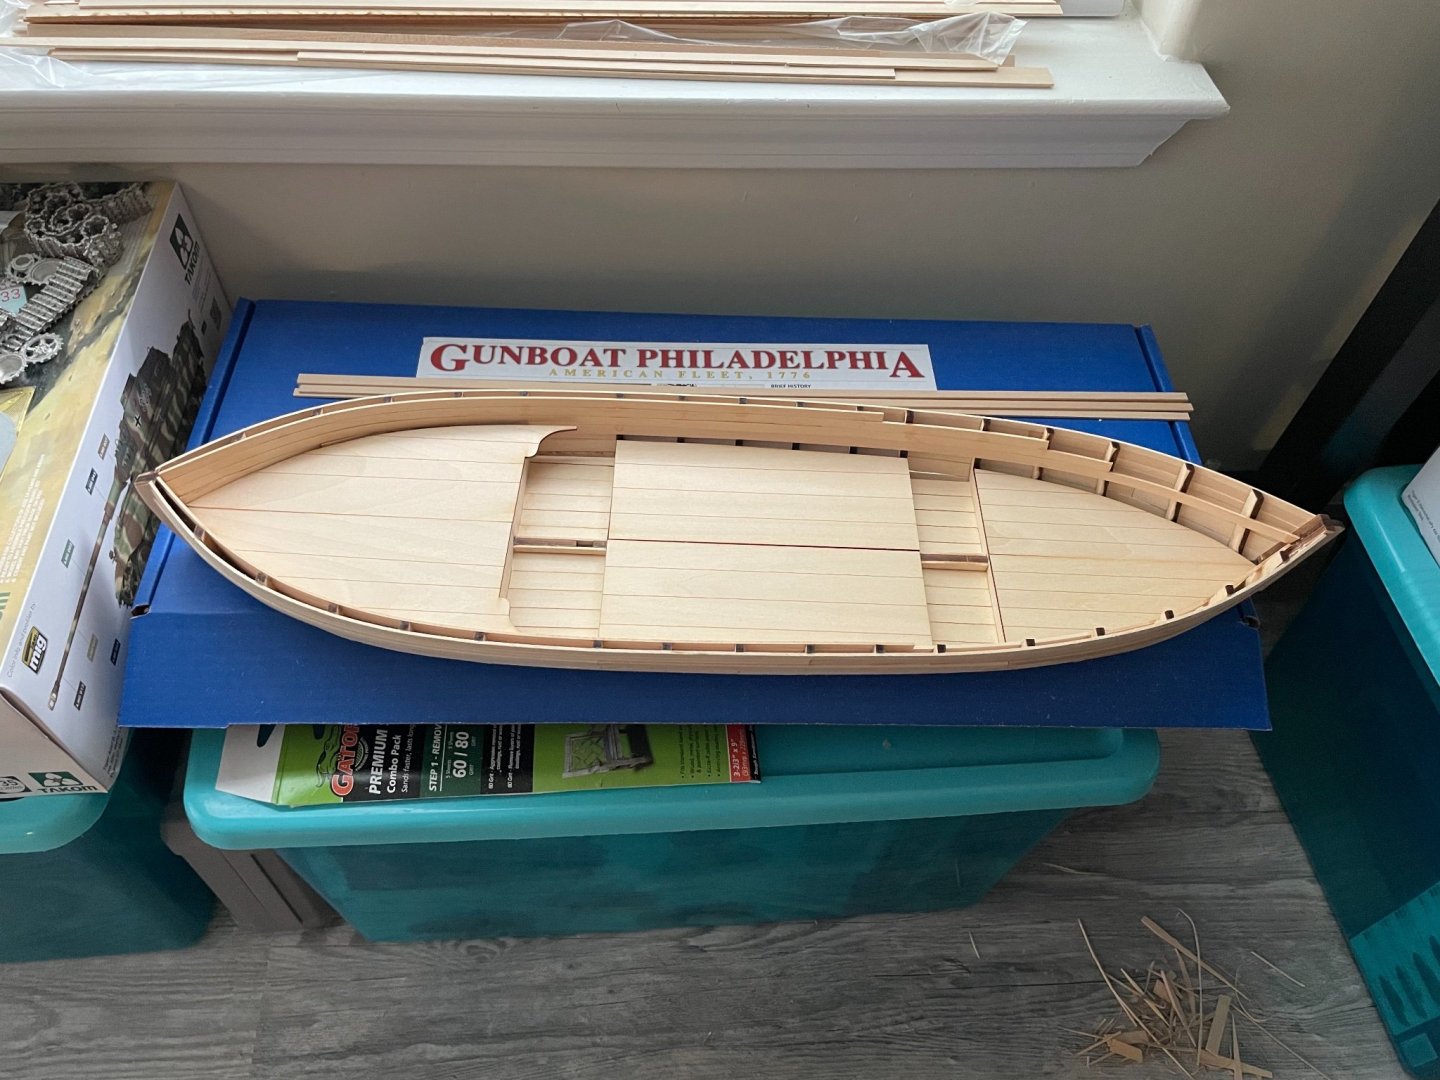
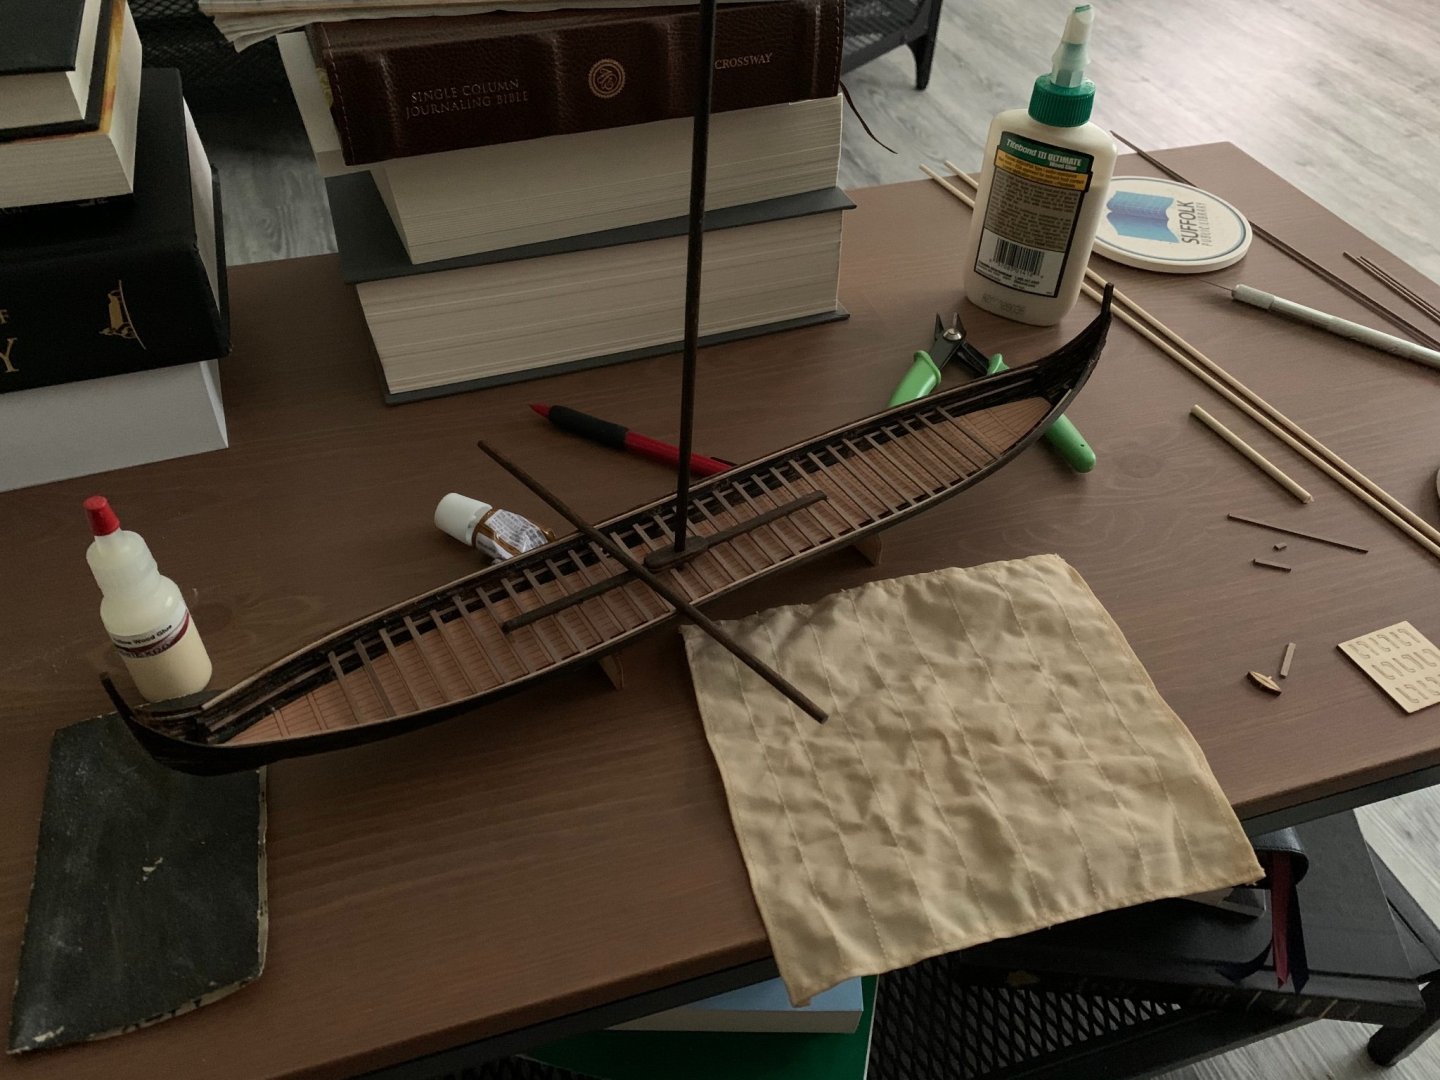
Finally glued the decking pieces down, had to use wood shims in the forward and middle sections. The gaps in the aft decking will be covered by the storage lockers. Using my handy new nail pusher to fix the knees. The port side storage chest. Finally was able to use my Tamiya scribing tool to simulate the hinge. The unpainted boat with decking, chests, knees, and gun carriages. After adding the shot garlands and dry fitting the mast partner, I painted the interior of the boat in the light grey that comes with the kit. I have only seen one other builder use a grey stain on the interior, but I thought it would provide a good contrast with the honey exterior and the espresso bean gun carriages. Going to paint the gun quoins bright red. NEED HELP: How do you paint Britannia metal? Acrylic won’t stick to it. Have considered getting a blackening solution, what would other builders recommend?
- 32 replies
-
- 2
-

-
- Model Shipways
- Philadelphia
- (and 1 more)
-
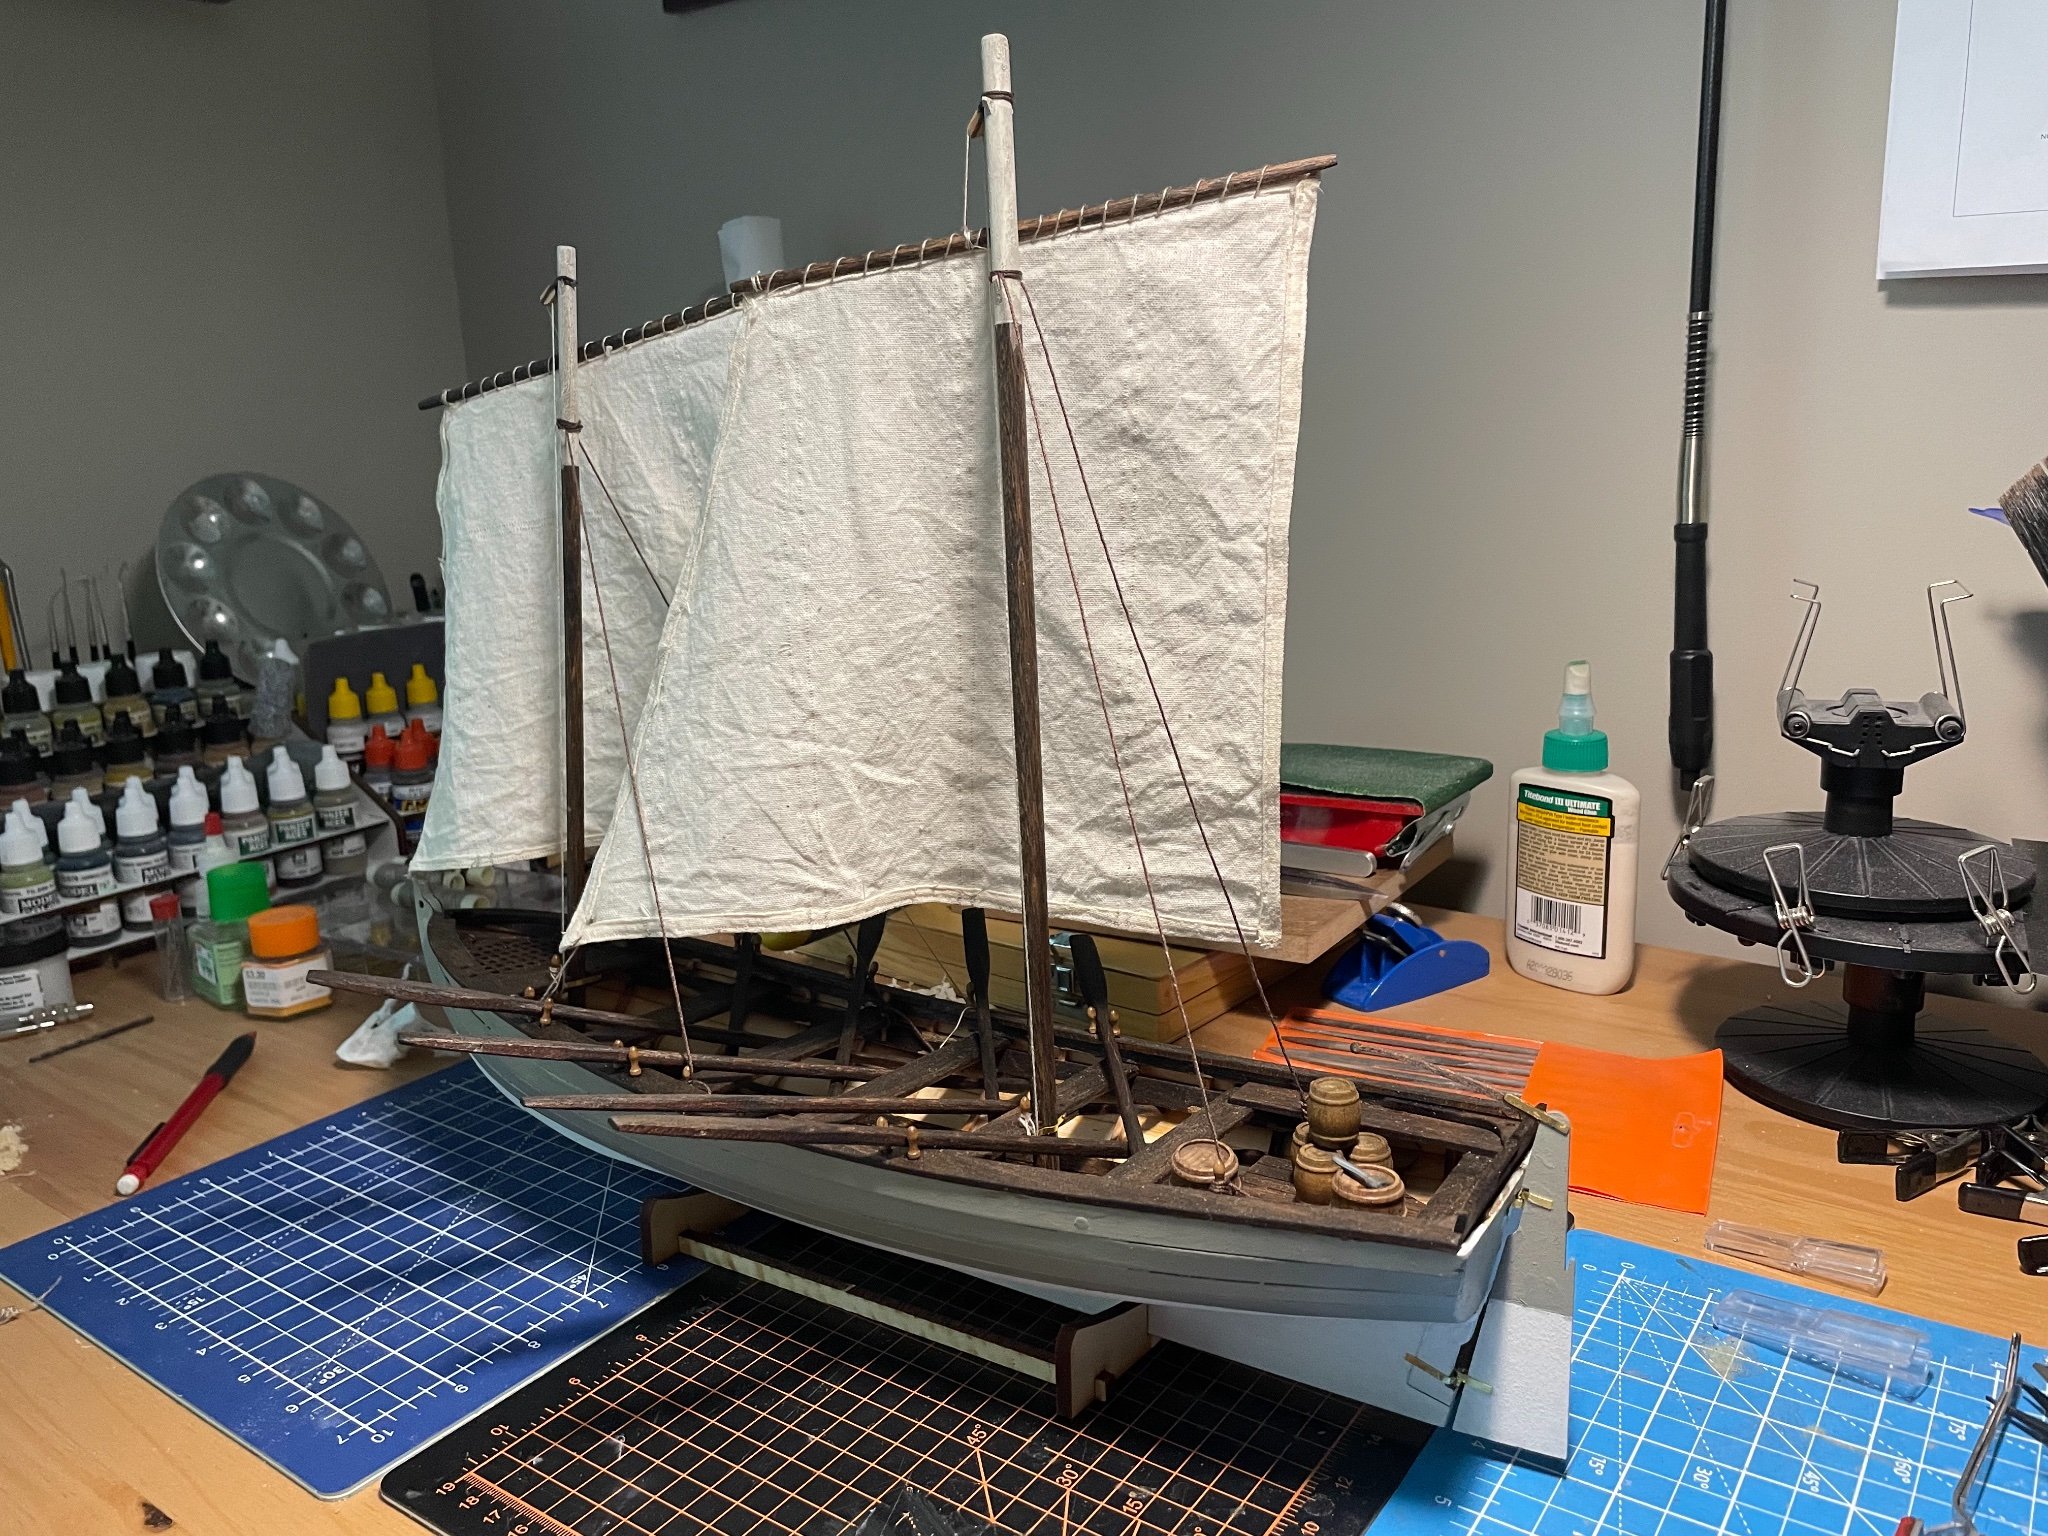
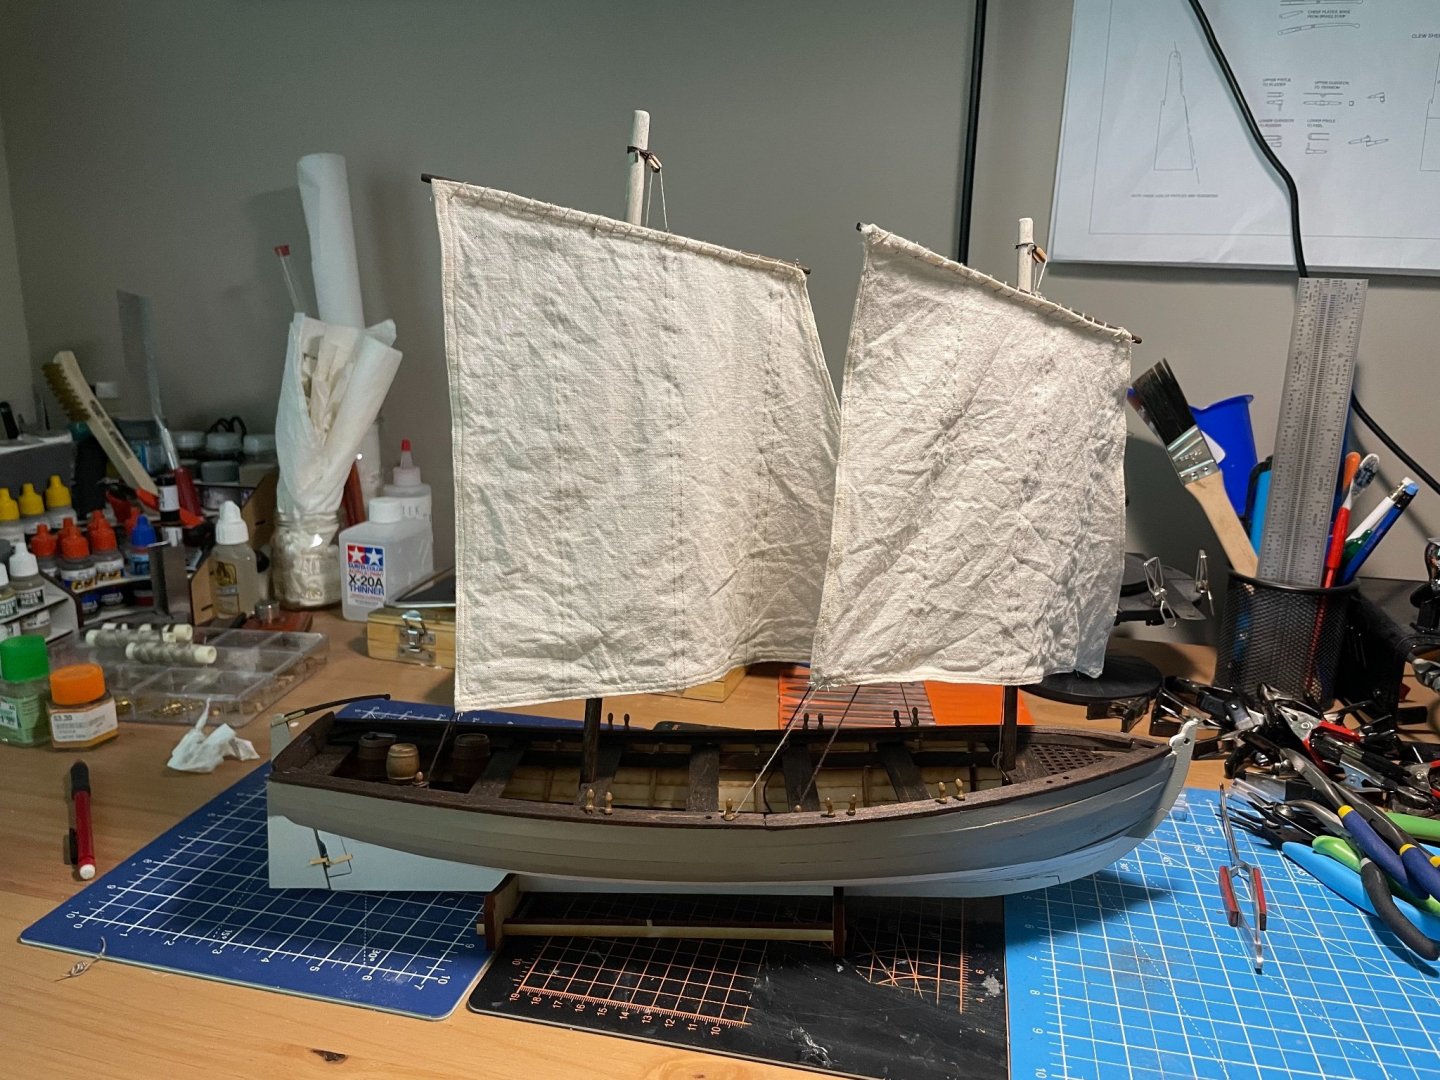
I got my sails back yesterday, so I was able to finish this project today. I cut corners off a small piece of wood to make the cleats in the mast, stained them, then masked and painted the tops. Also masked and painted the rudder, and attached it to the transom. Weaved the sails onto the yards and rigged them to the masts. Used extra belaying pins as oar locks, and this model is complete!

- 5 replies
-
- 4
-
-
- Model Shipways
- Bounty Launch
- (and 1 more)
-
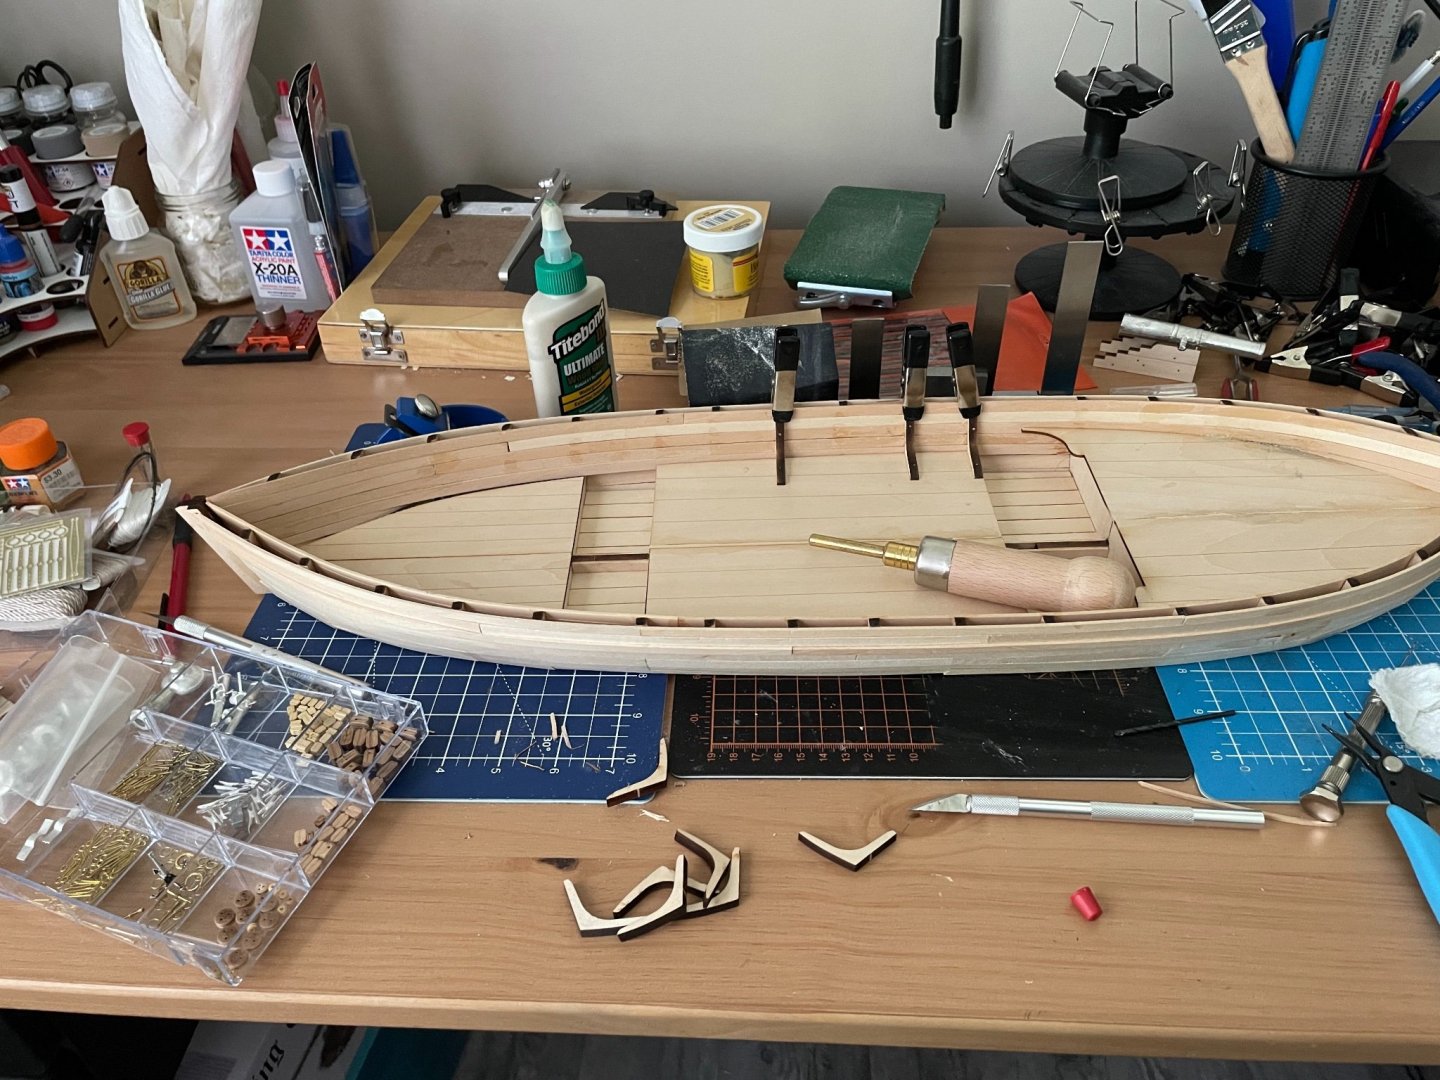
Still working on getting the deck pieces to fit, have done a little work on the cannon and gun carriages.
- 32 replies
-
- 3
-
-
- Model Shipways
- Philadelphia
- (and 1 more)
-
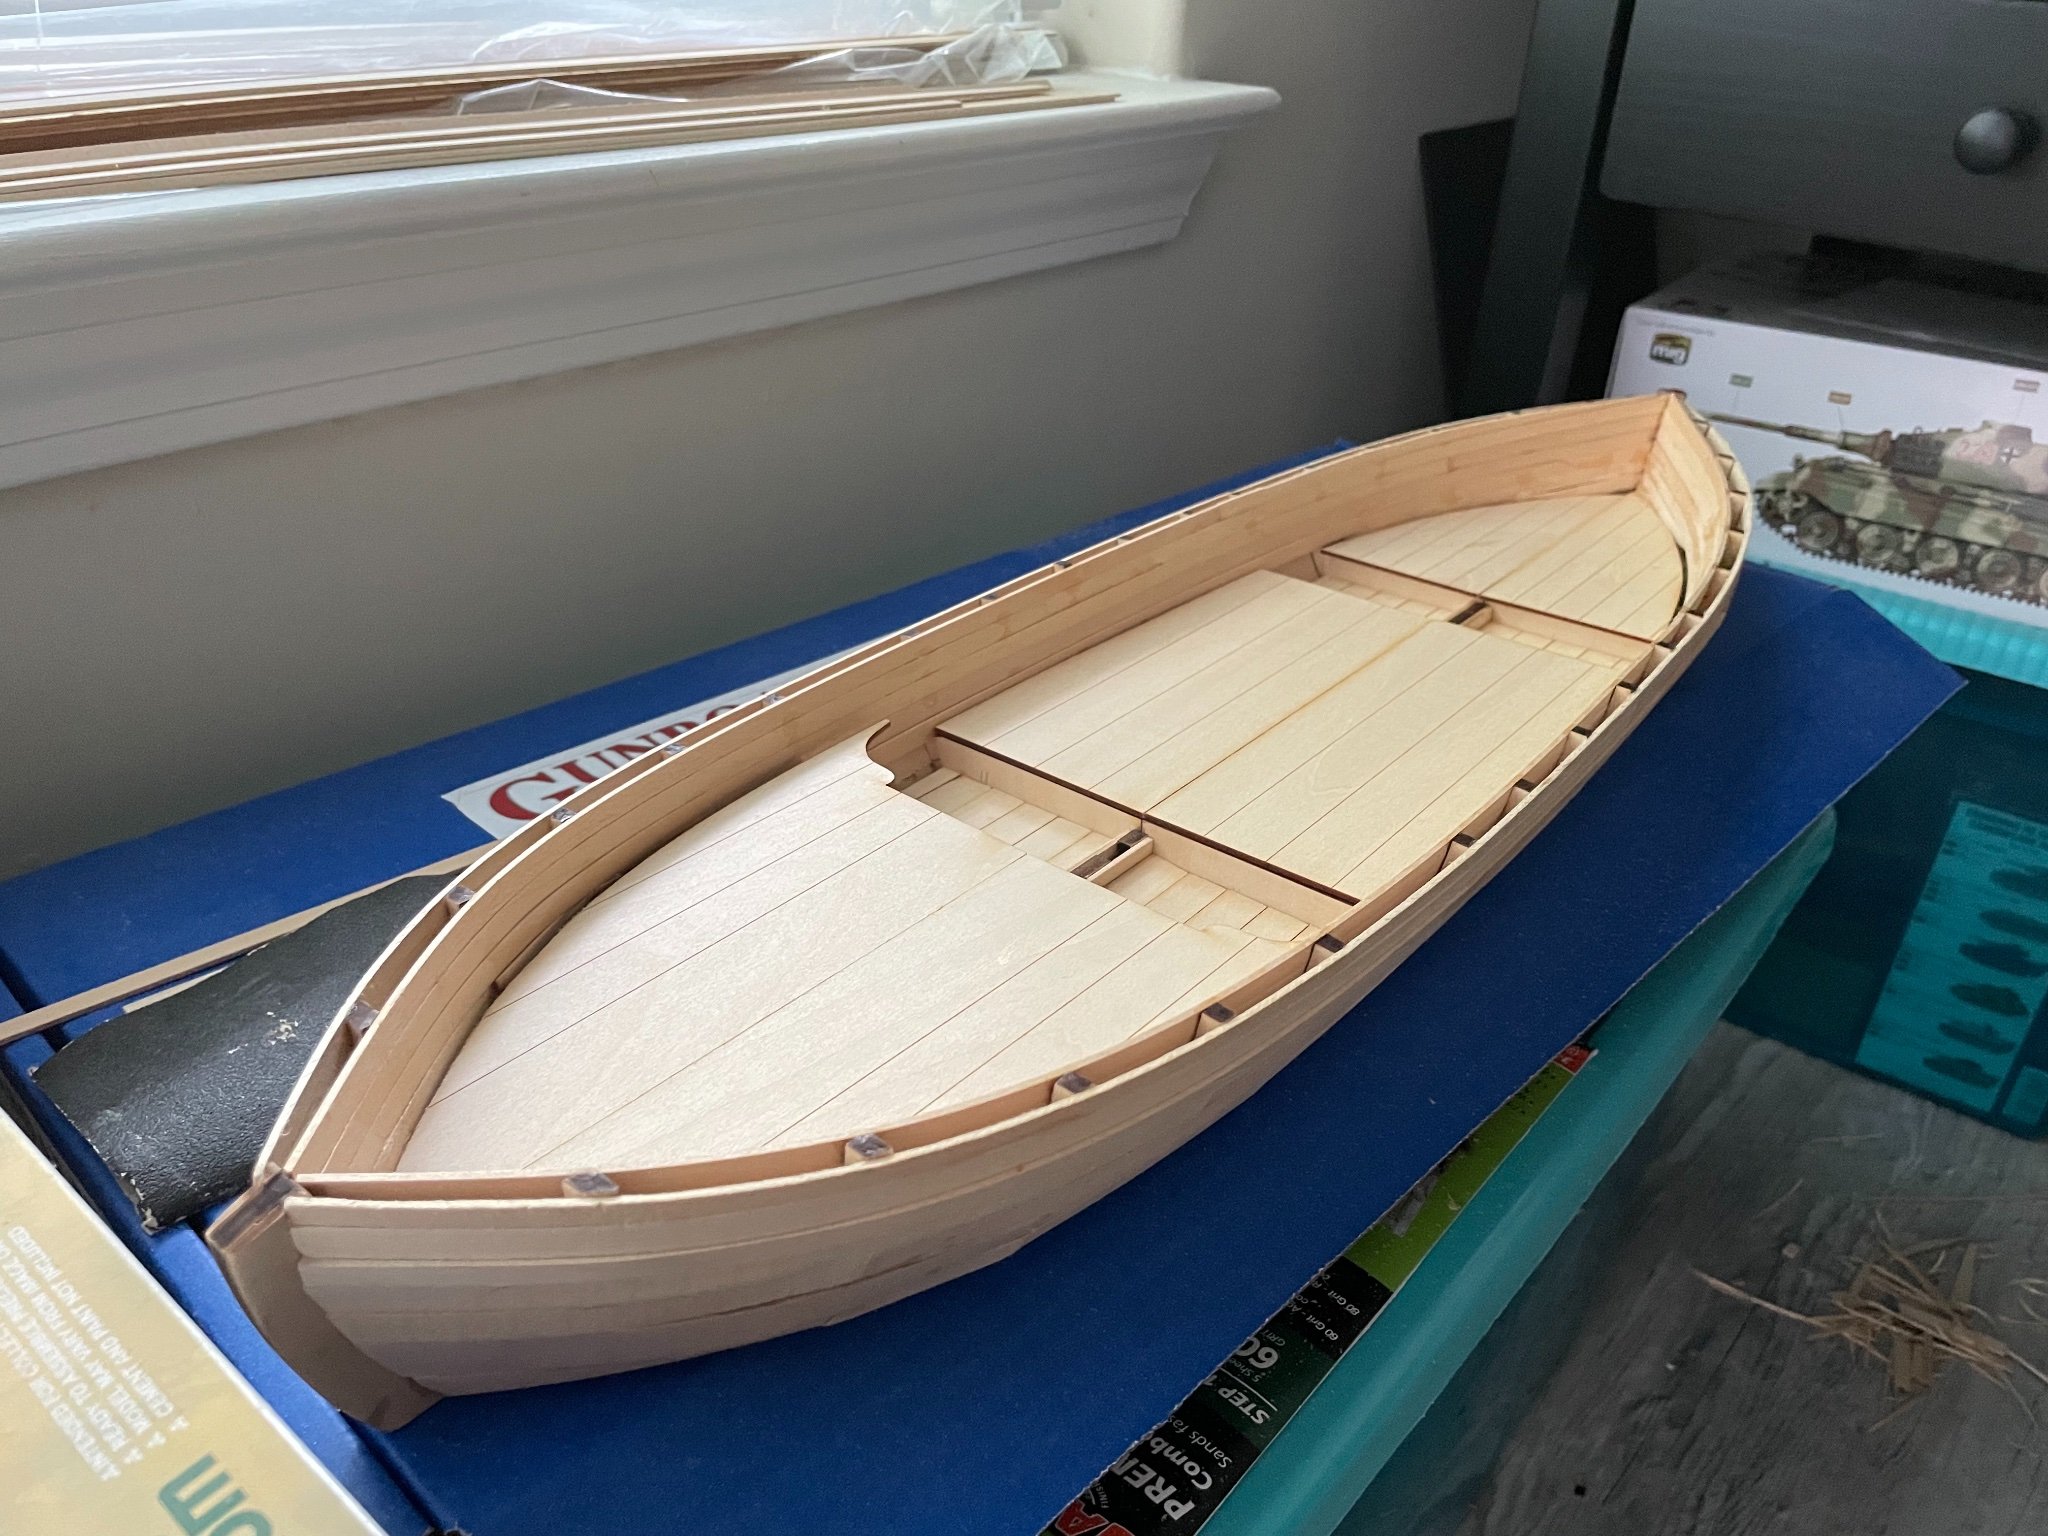
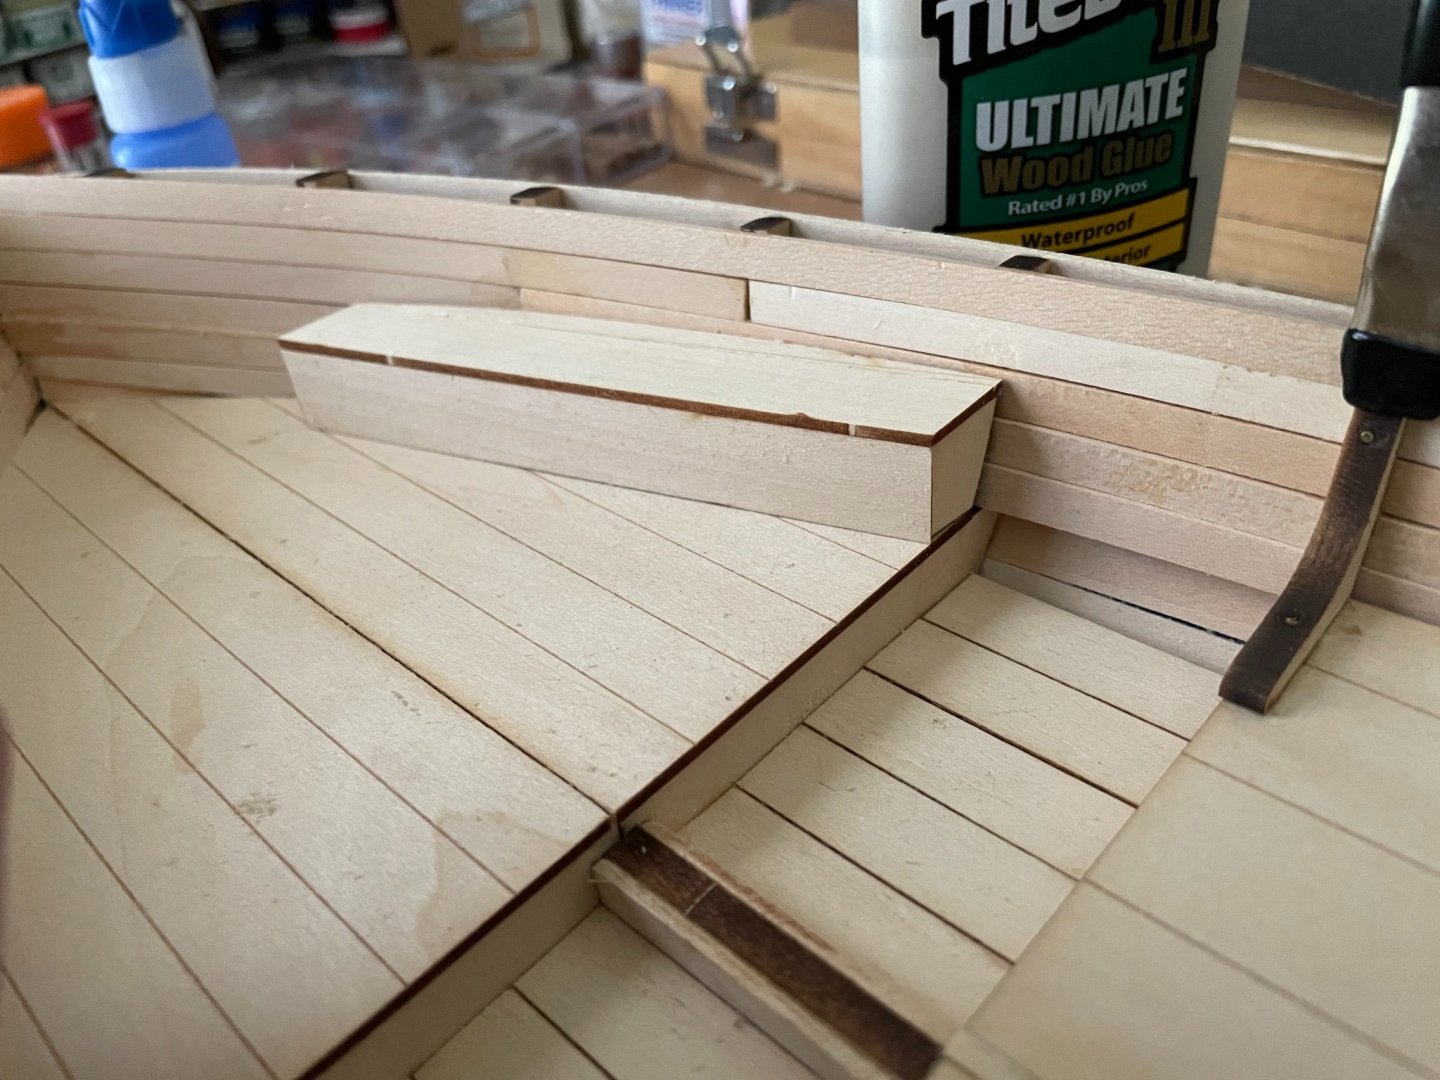
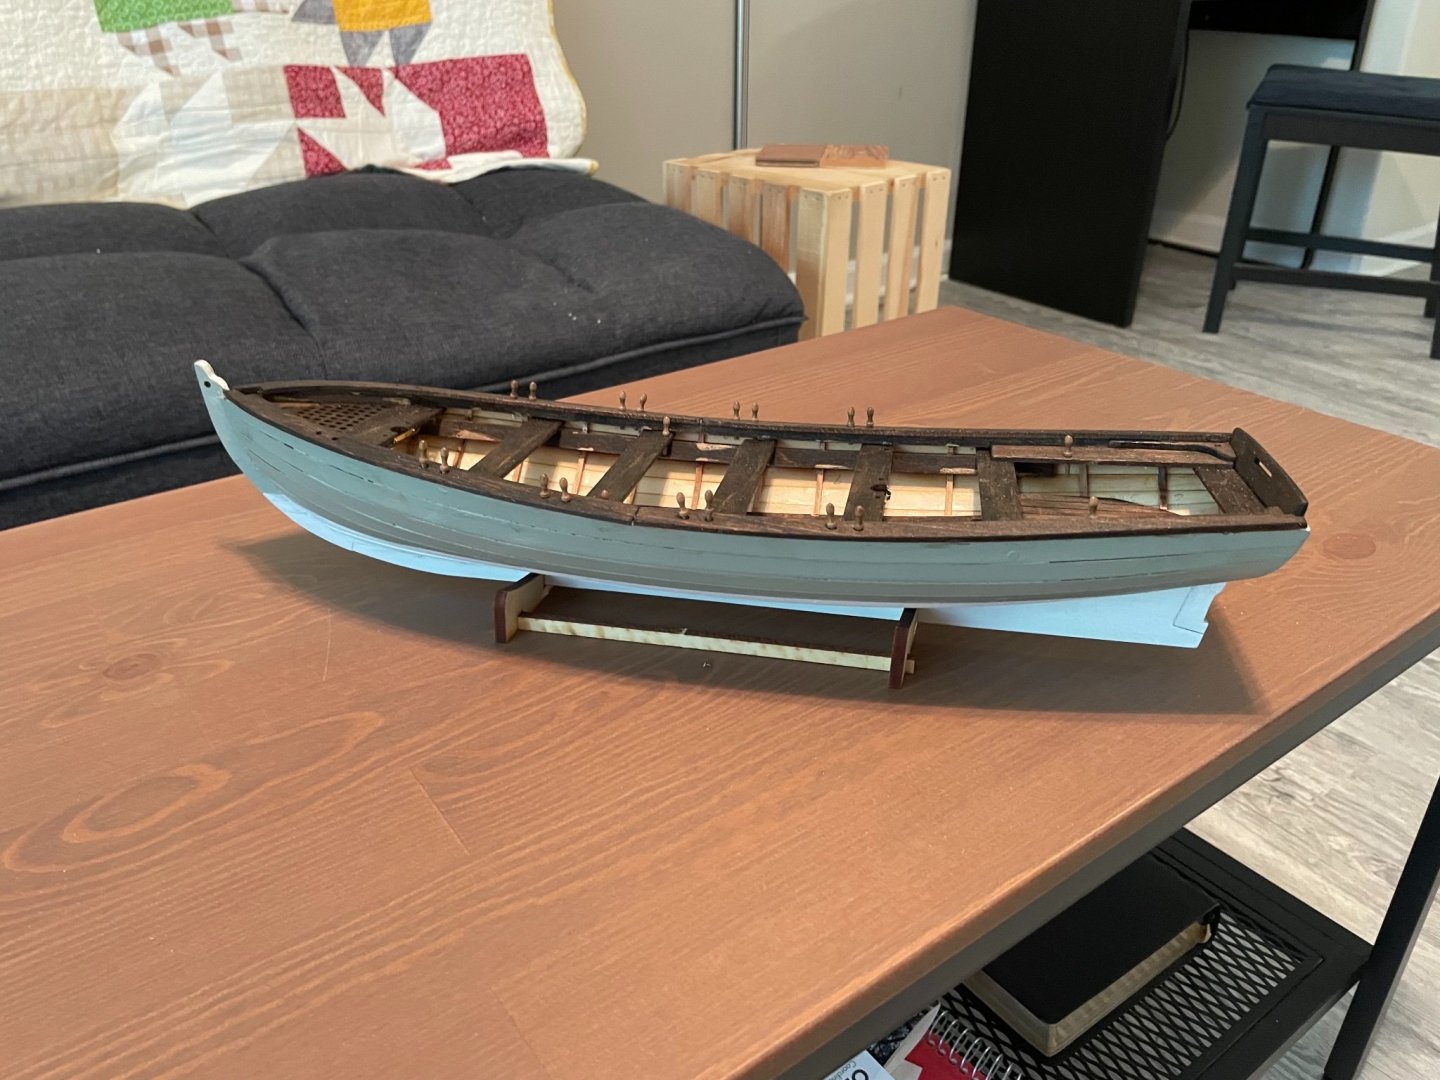
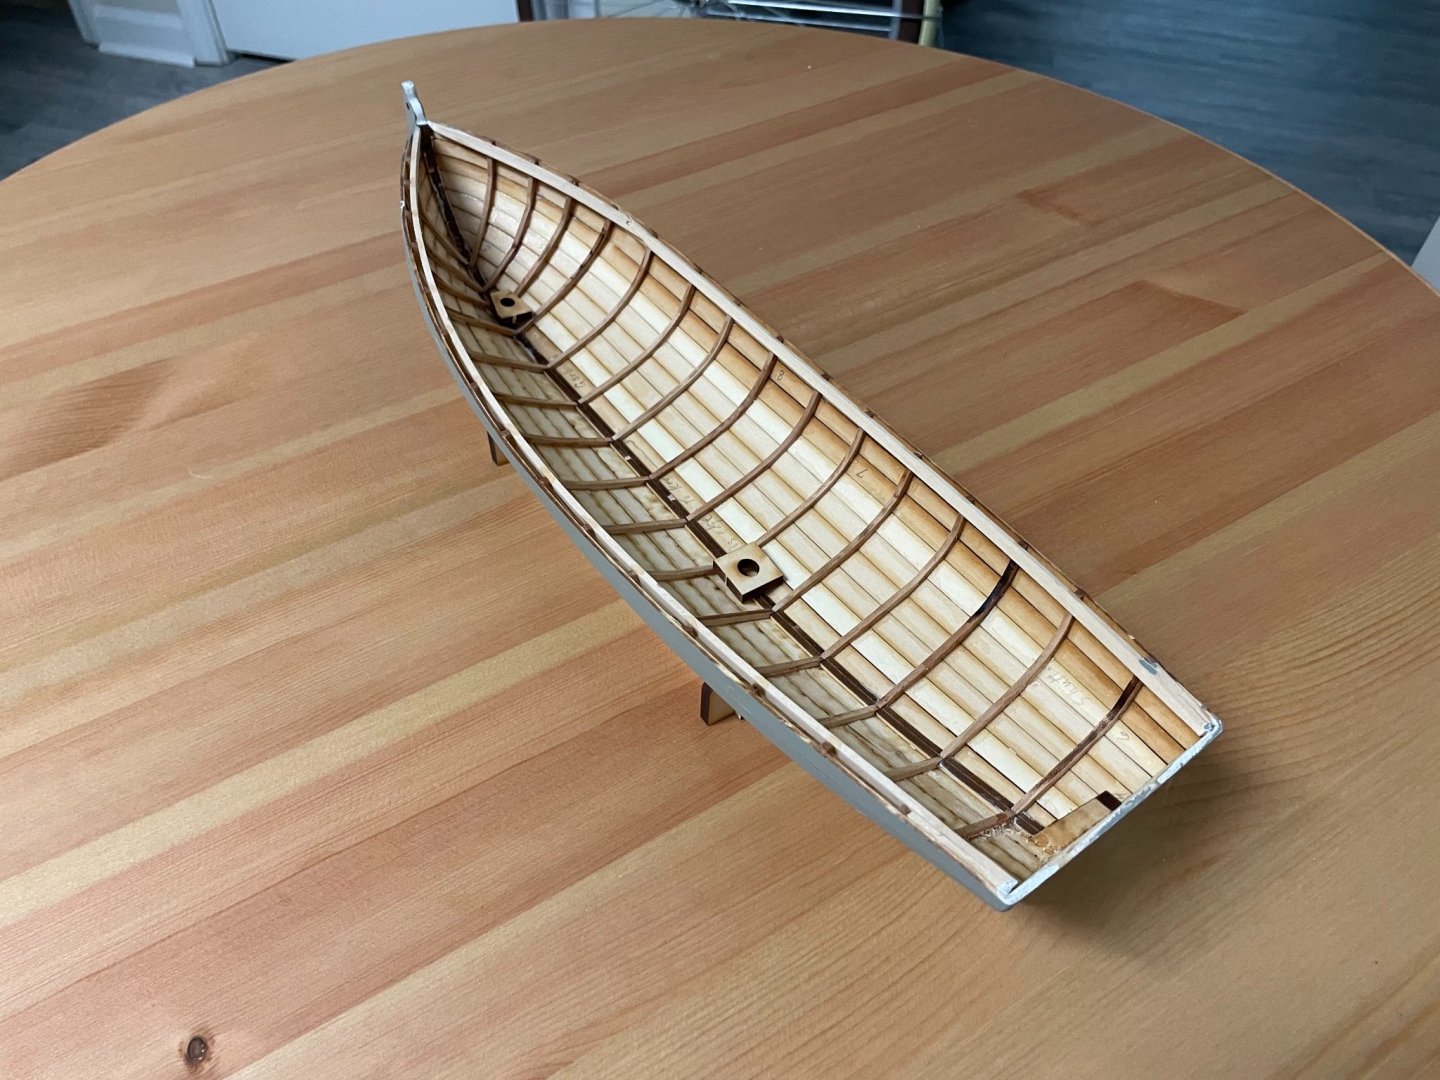
Here I’ve been at work on the floor boards, which were a bit tricky since the bottom of the boat is less flat than it’s supposed to be. When the floorboards were installed, I began to dry fit the seats. After building a section of quarterdeck planking in the rear, I decided to stain the floor boards and seats and gunwales in the same color that I used on the Dusek Viking Longboat, a dark espresso color. I left the interior frames and planks unstained because they are coated in superglue and wouldn’t stain evenly. To make the gunwales fit evenly, I had to cut them in half and glue the halves separately. The dark color helps mask this and other mistakes… I still have to paint and hang the rudder, sand the oars, cut and rig the masts, and I am pleased with the project so far. I have a friend making the sails, and after I rig those this project will be done.


- 5 replies
-
- 3
-
-
- Model Shipways
- Bounty Launch
- (and 1 more)
-
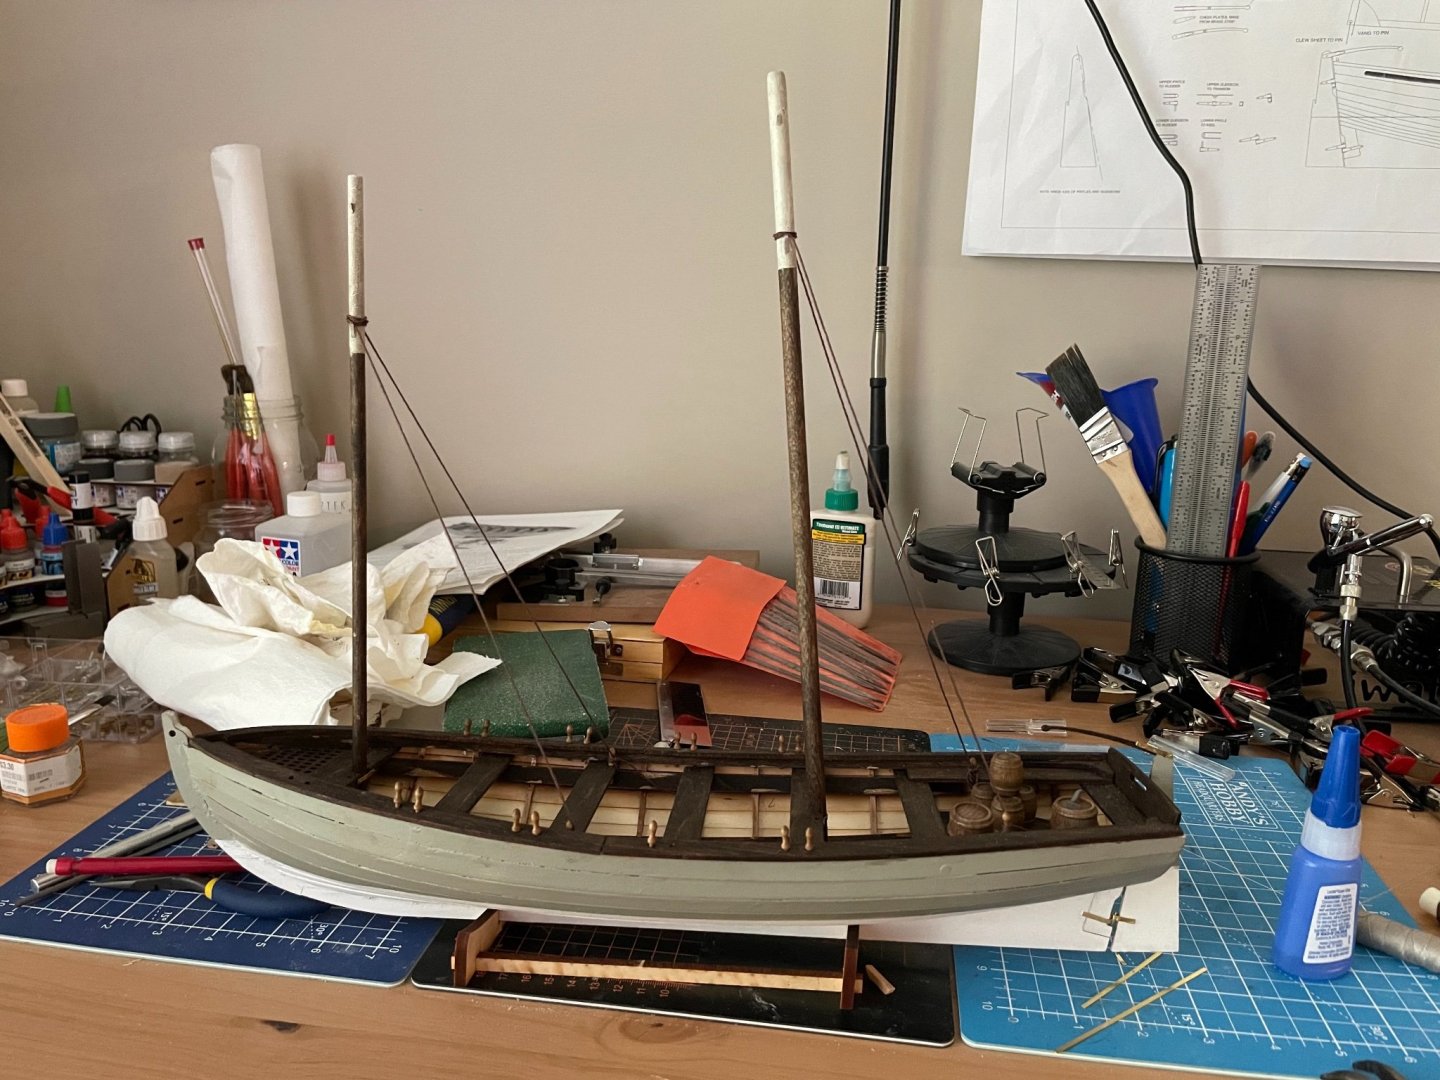
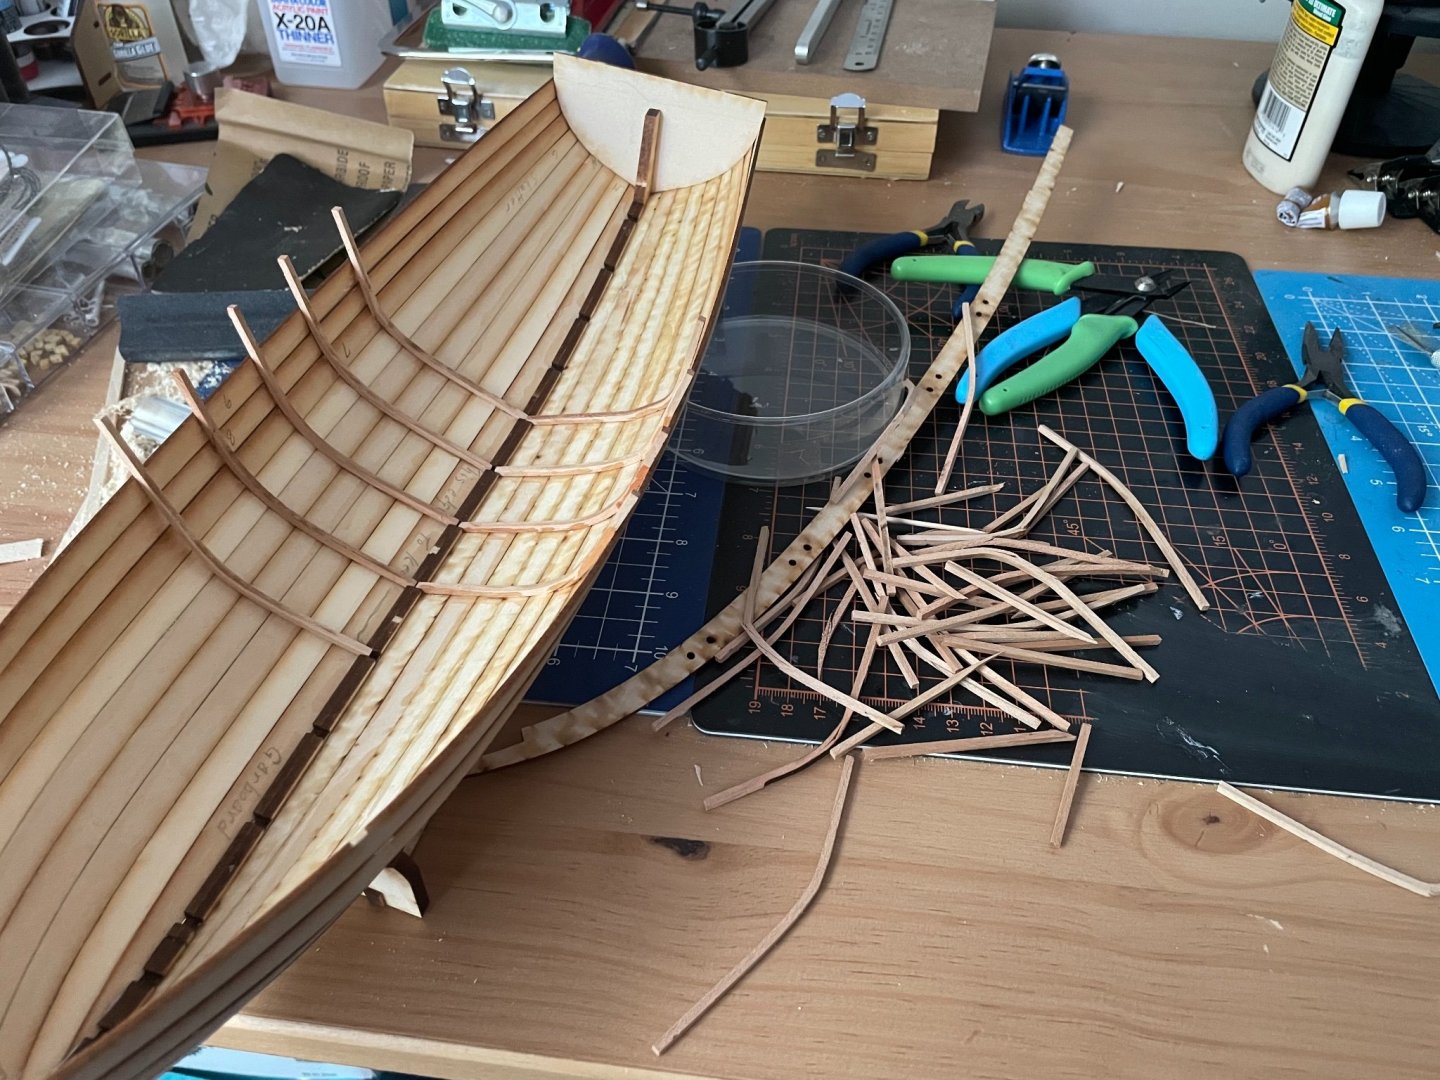
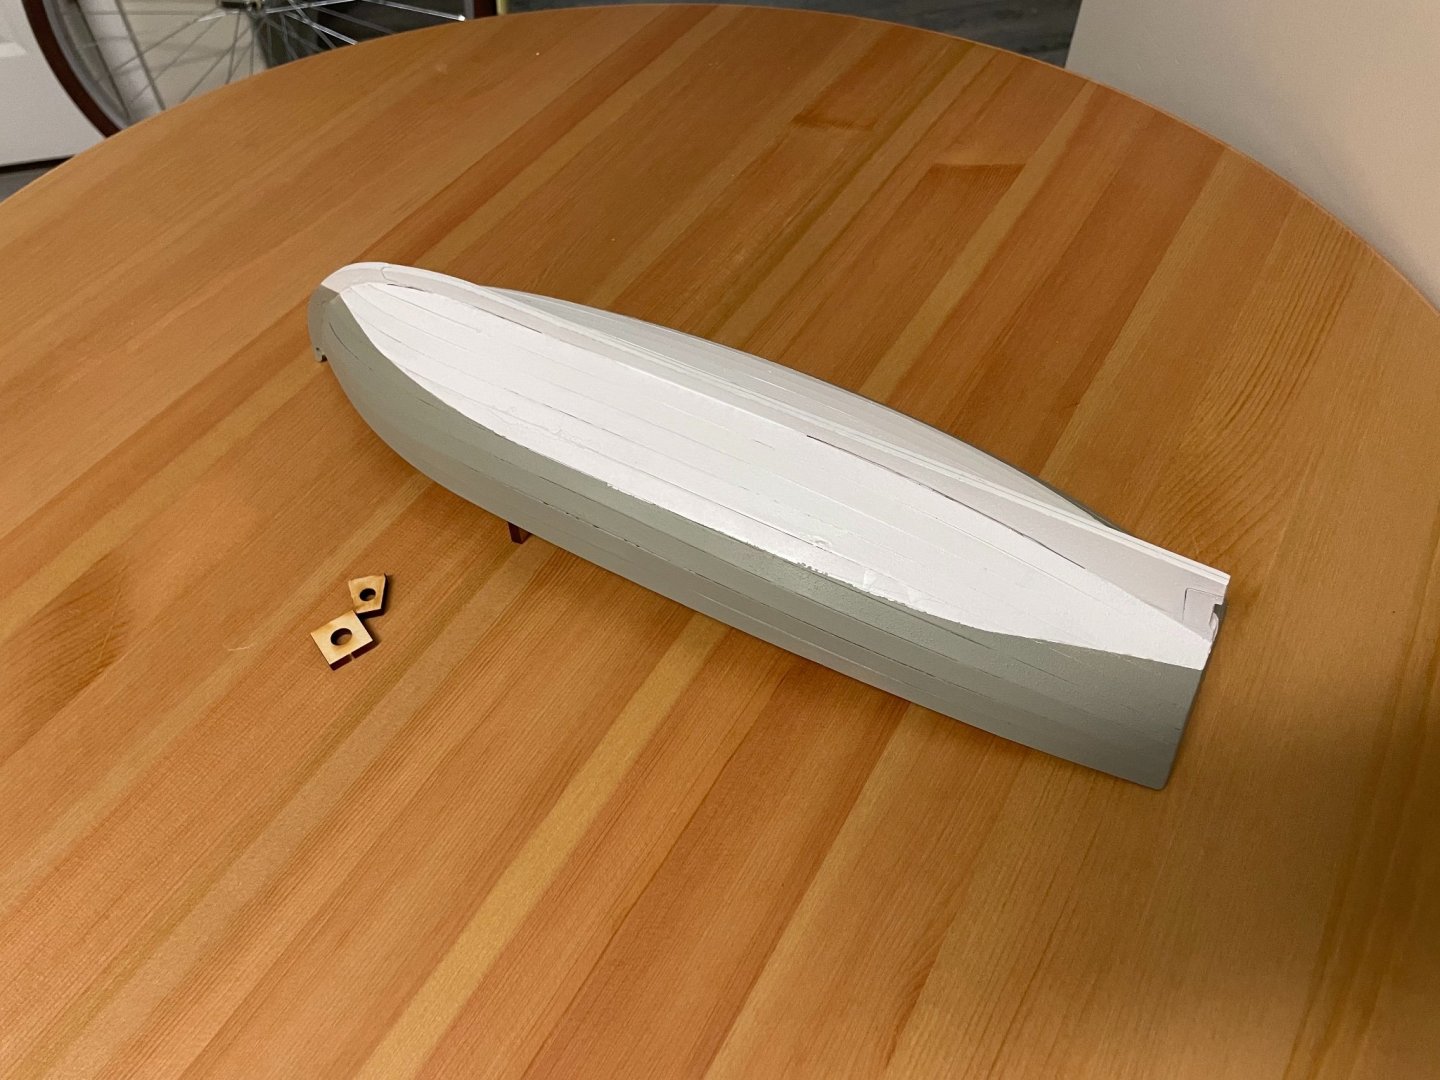
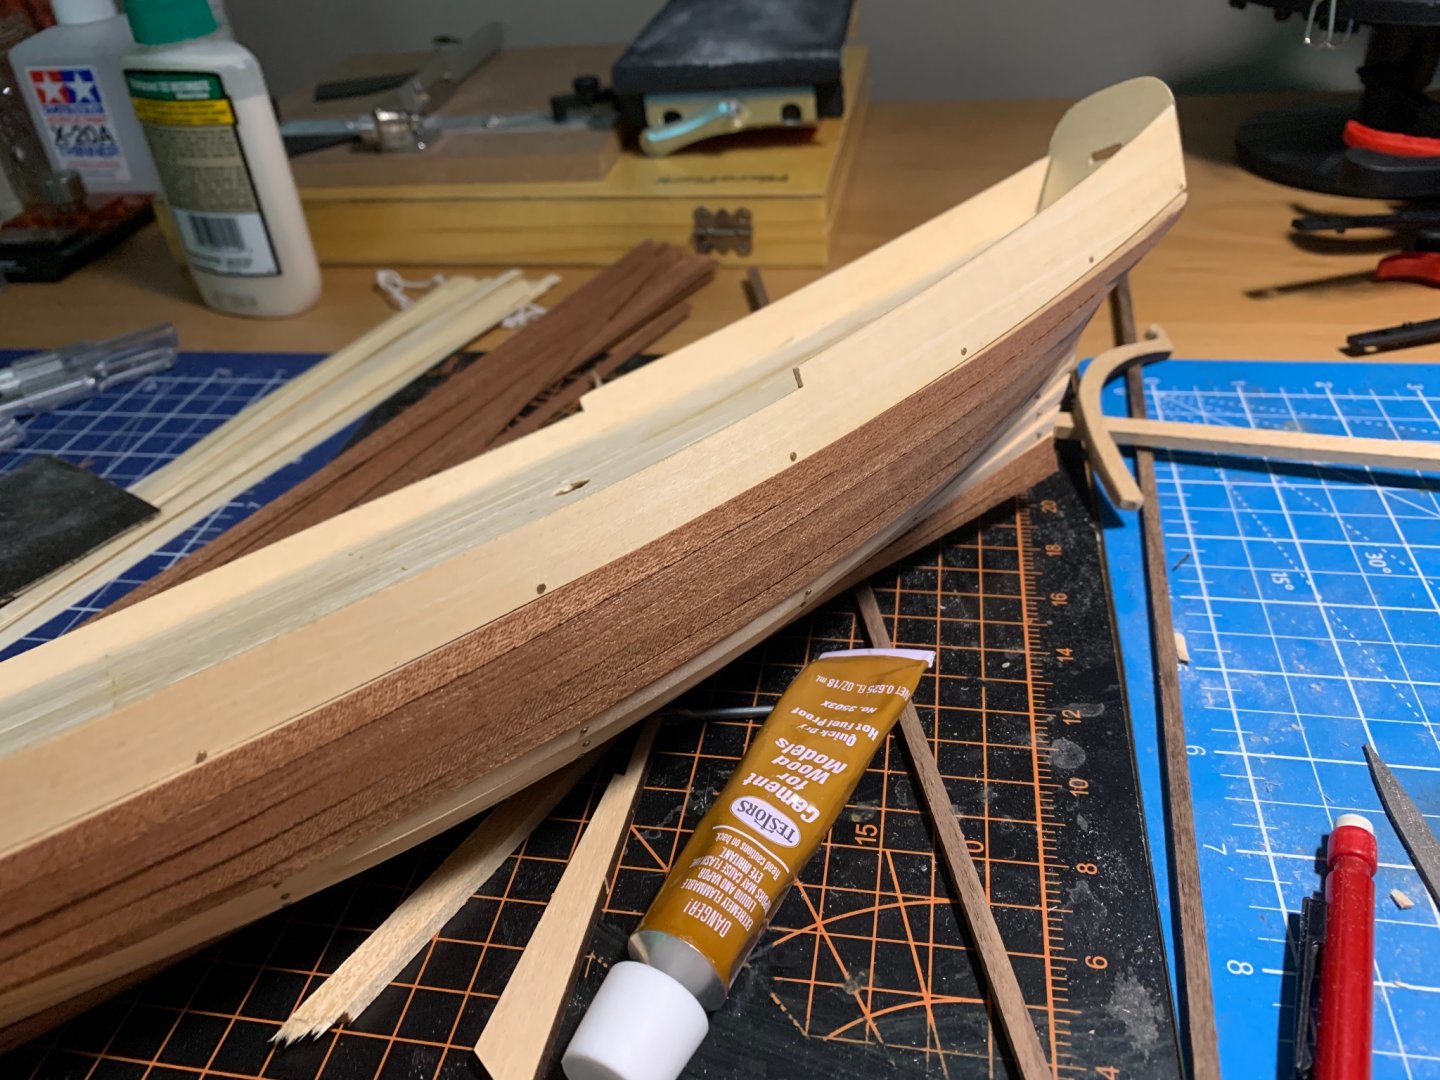
Bending the frames is what caused me to abandon this project not long after starting back in May, but I decided to add about half the frames at a much less severe angle than the instructions called for. I think the frames look great, as long as you don’t look too close… Also had to cut down the transom to be flush with the sheer plank. I installed the sheer clamps, then gave the hull two coats of polyurethane. Yesterday I did some masking and spraying of the hull, white below the waterline and grey up to the gunwales. Still need to do some touch up, and I may add a yellow or a green stripe along the sheer plank. This is all the progress I’ve made in a weekend, and I am very pleased with how nice this project is turning out. However, I am starting to run into problems, having not used the building frame, but I will get past them.
- 5 replies
-
- 2
-
-
- Model Shipways
- Bounty Launch
- (and 1 more)
-
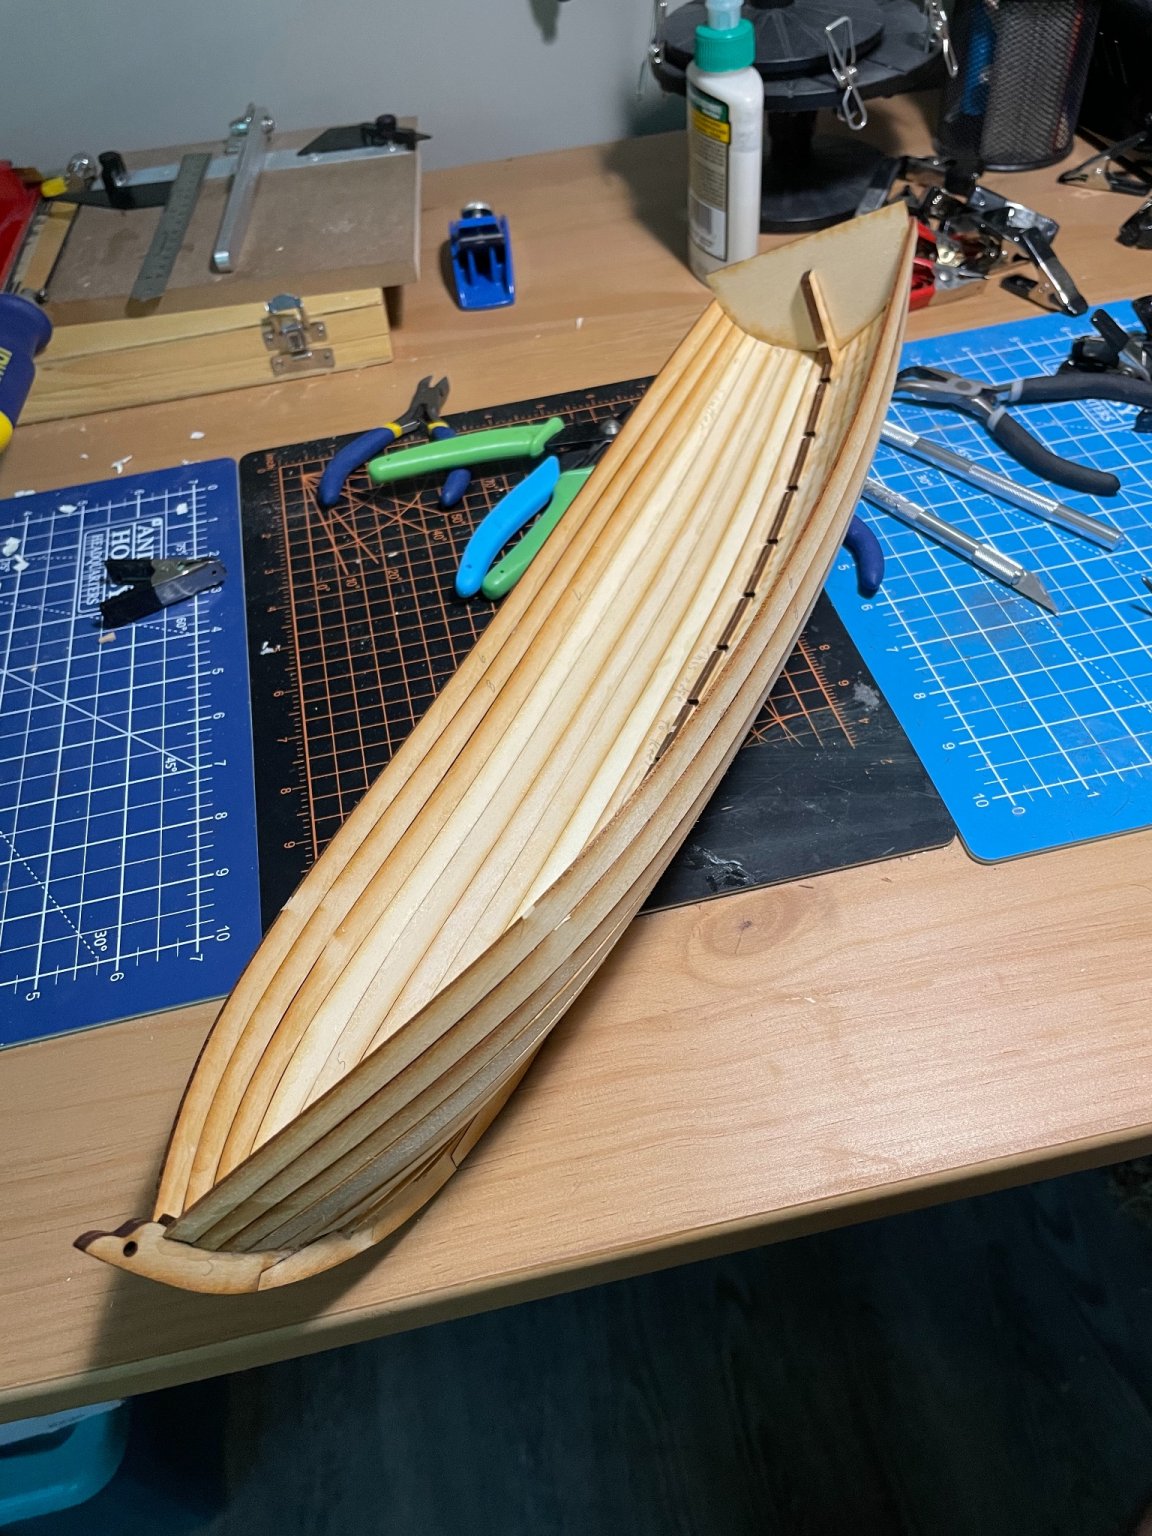
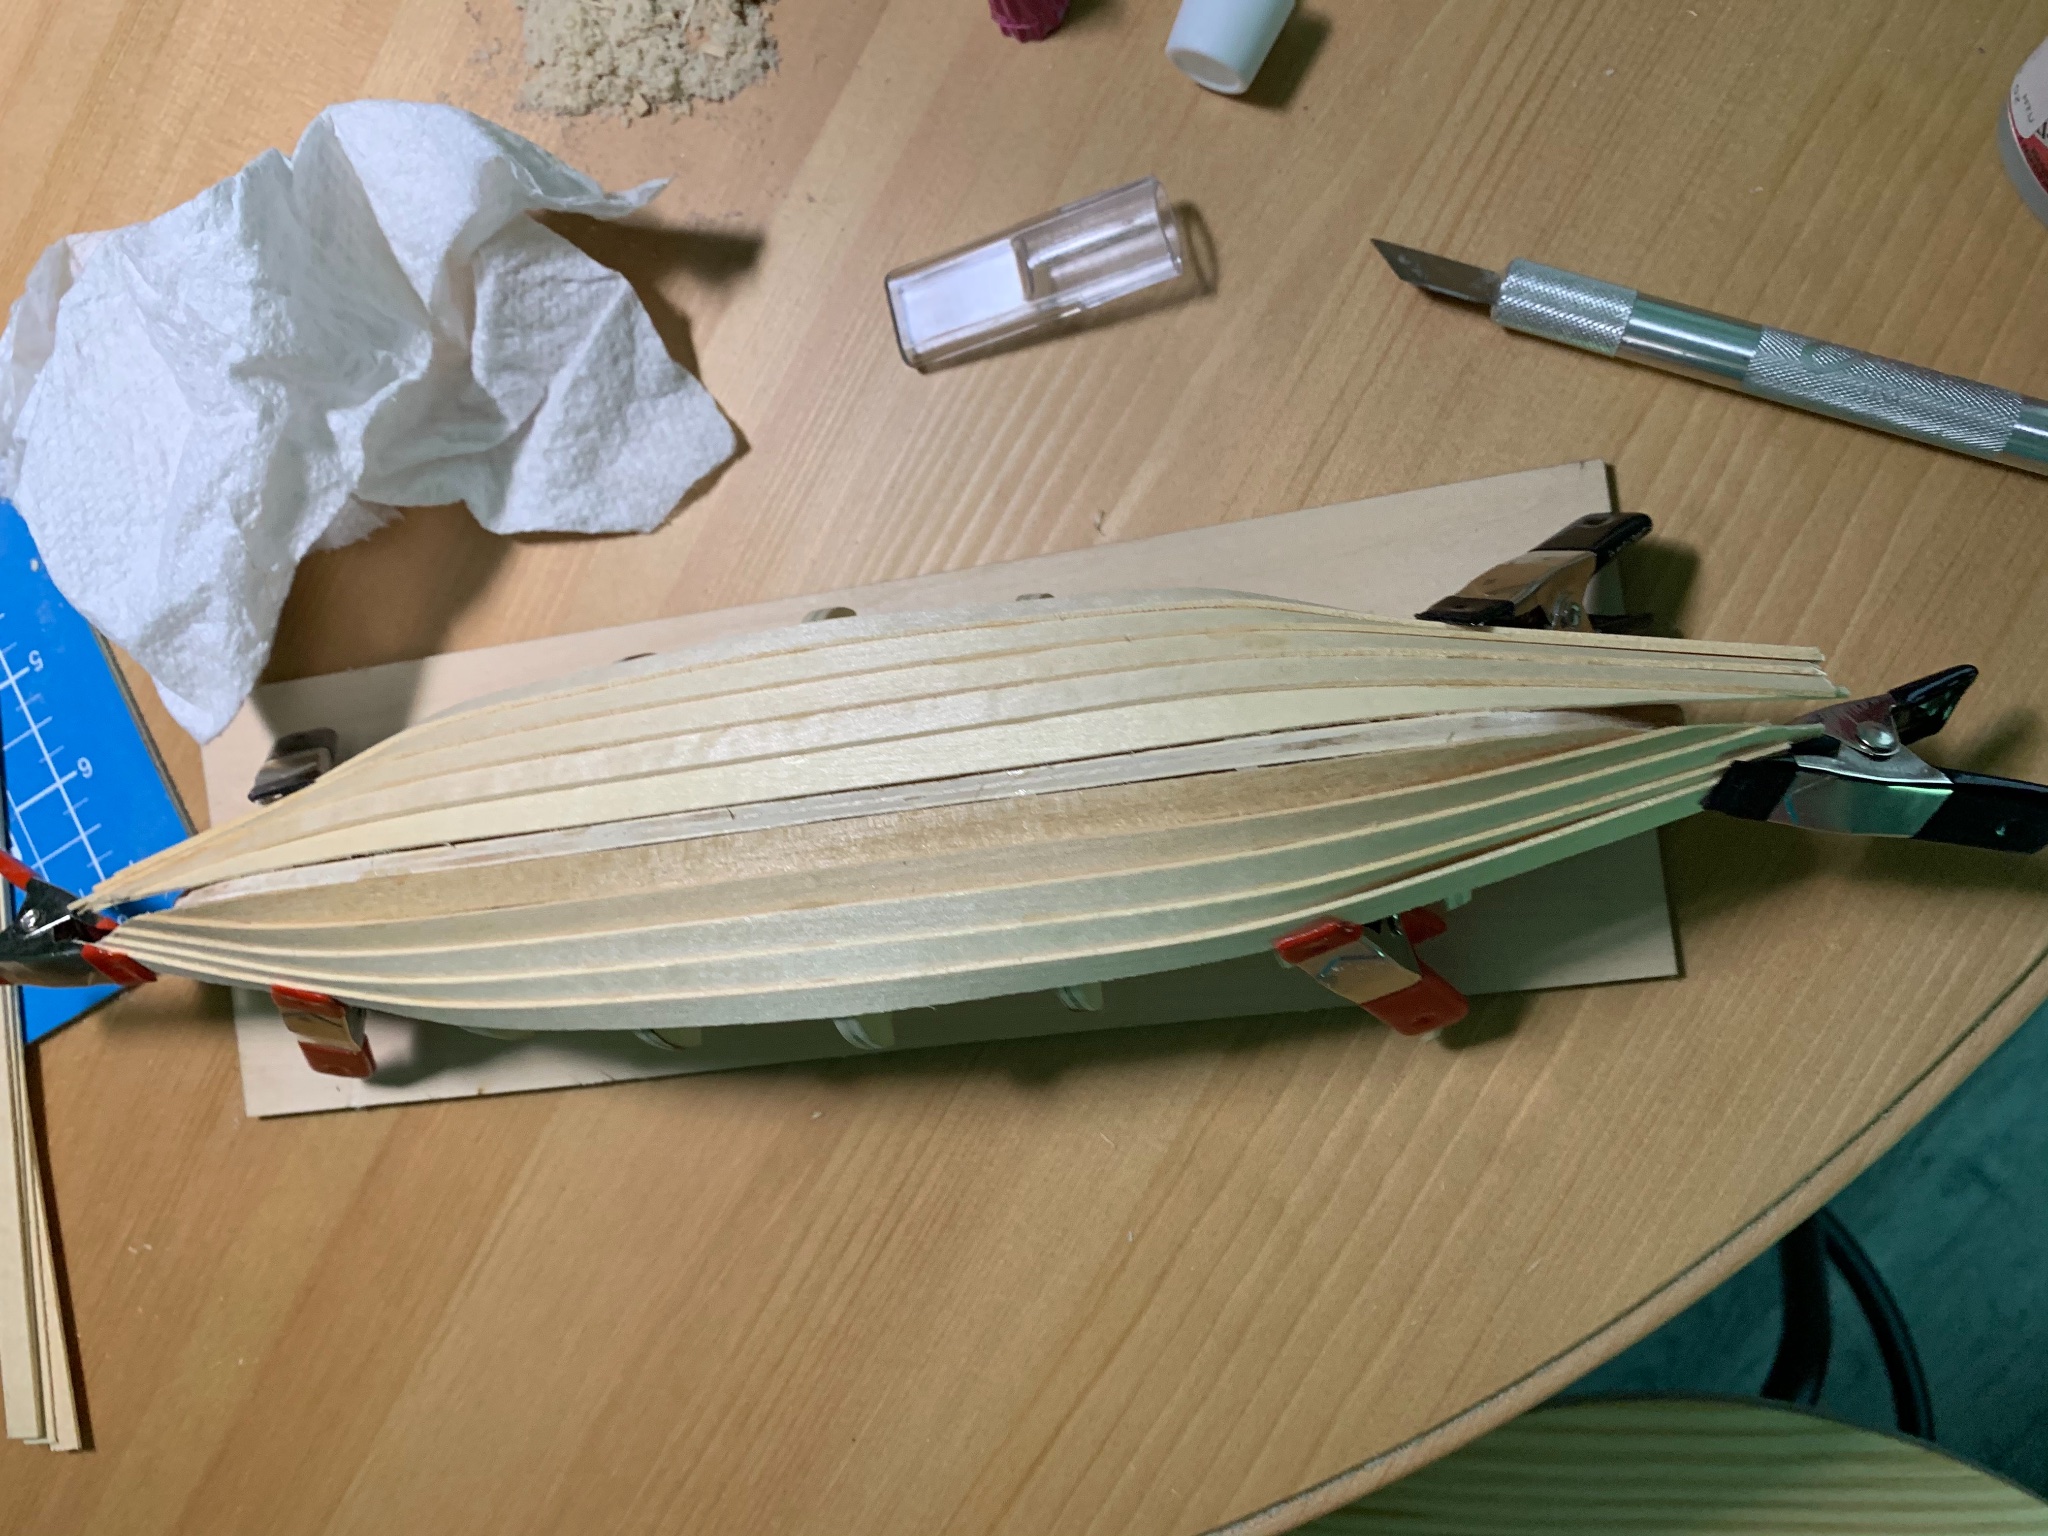
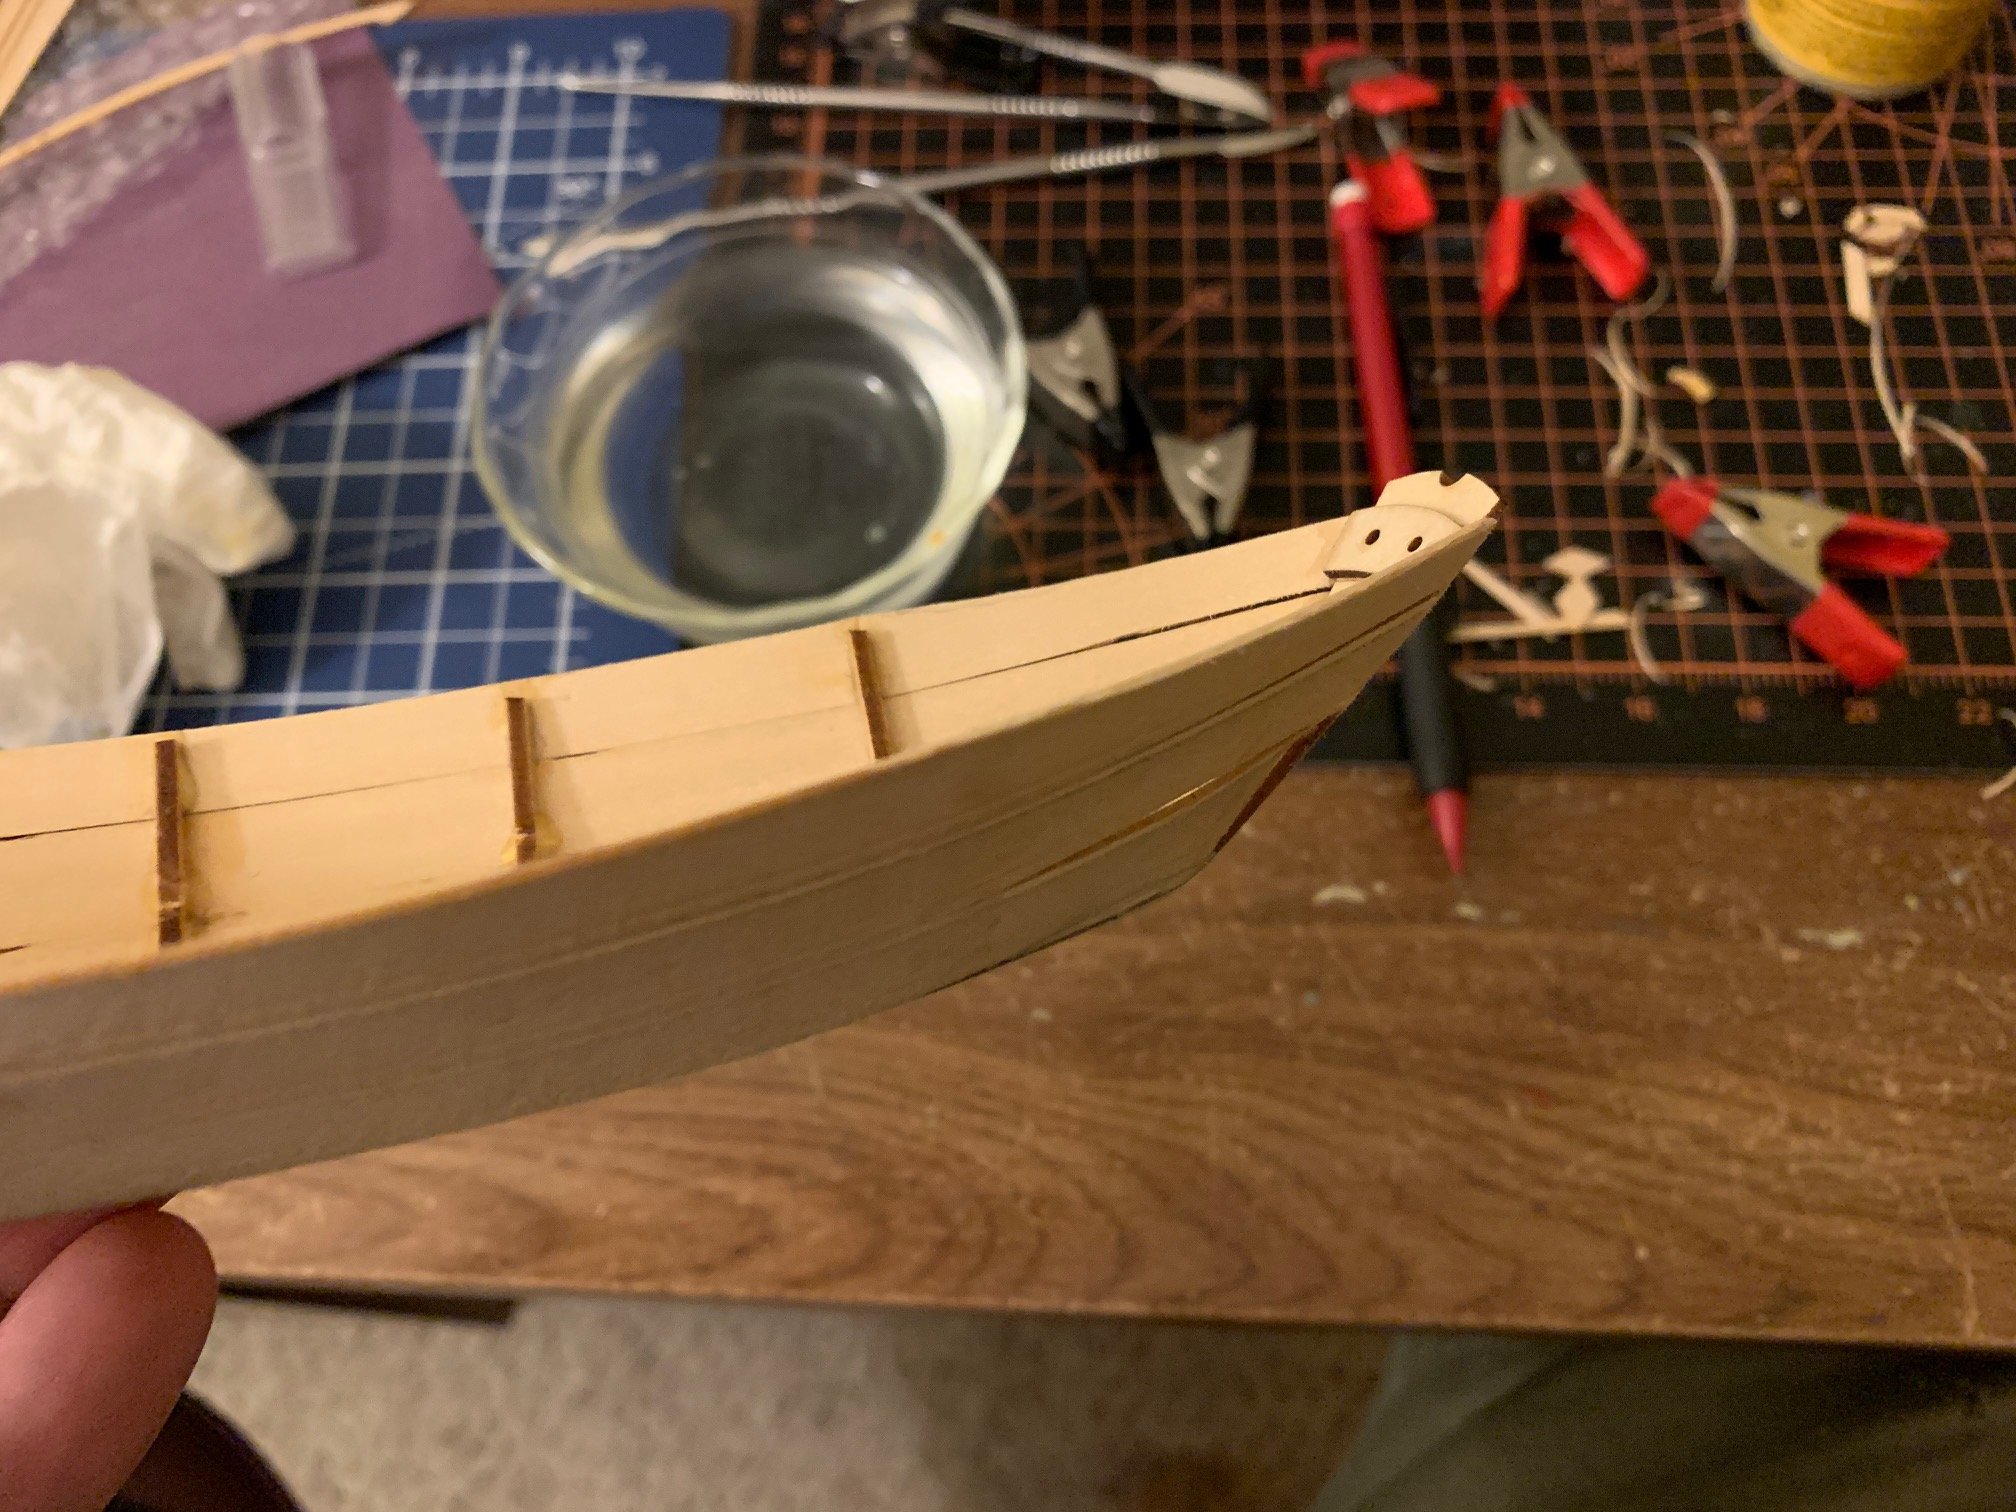
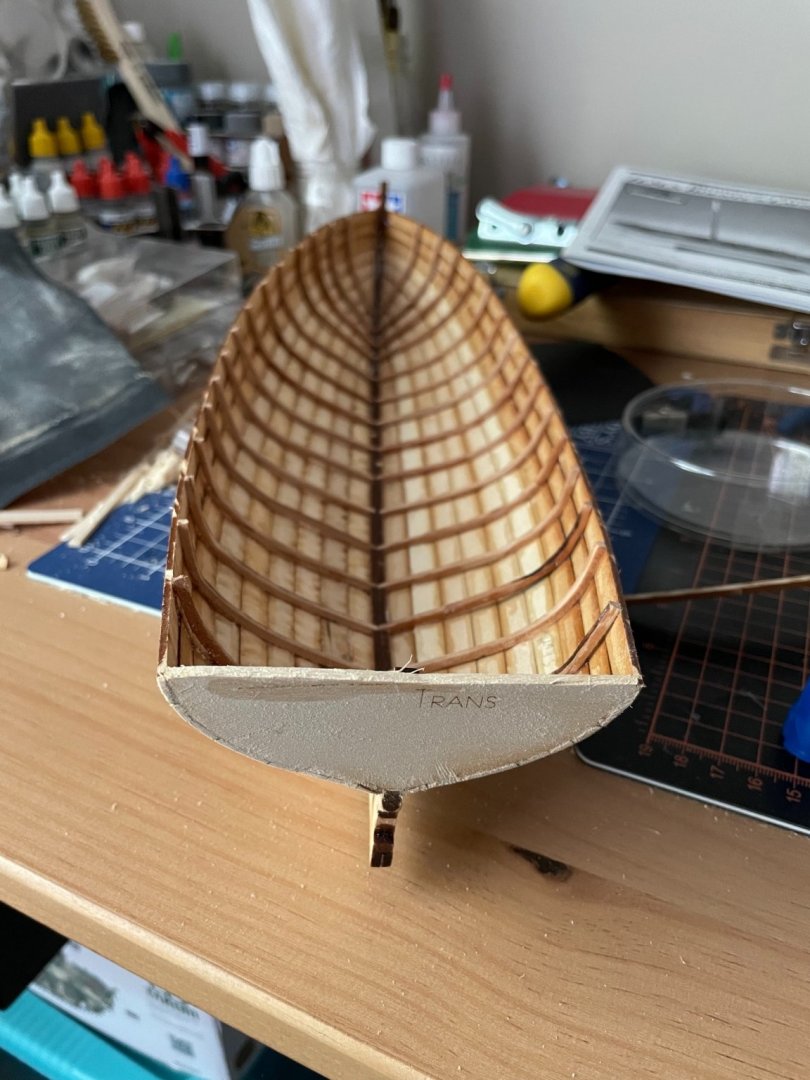
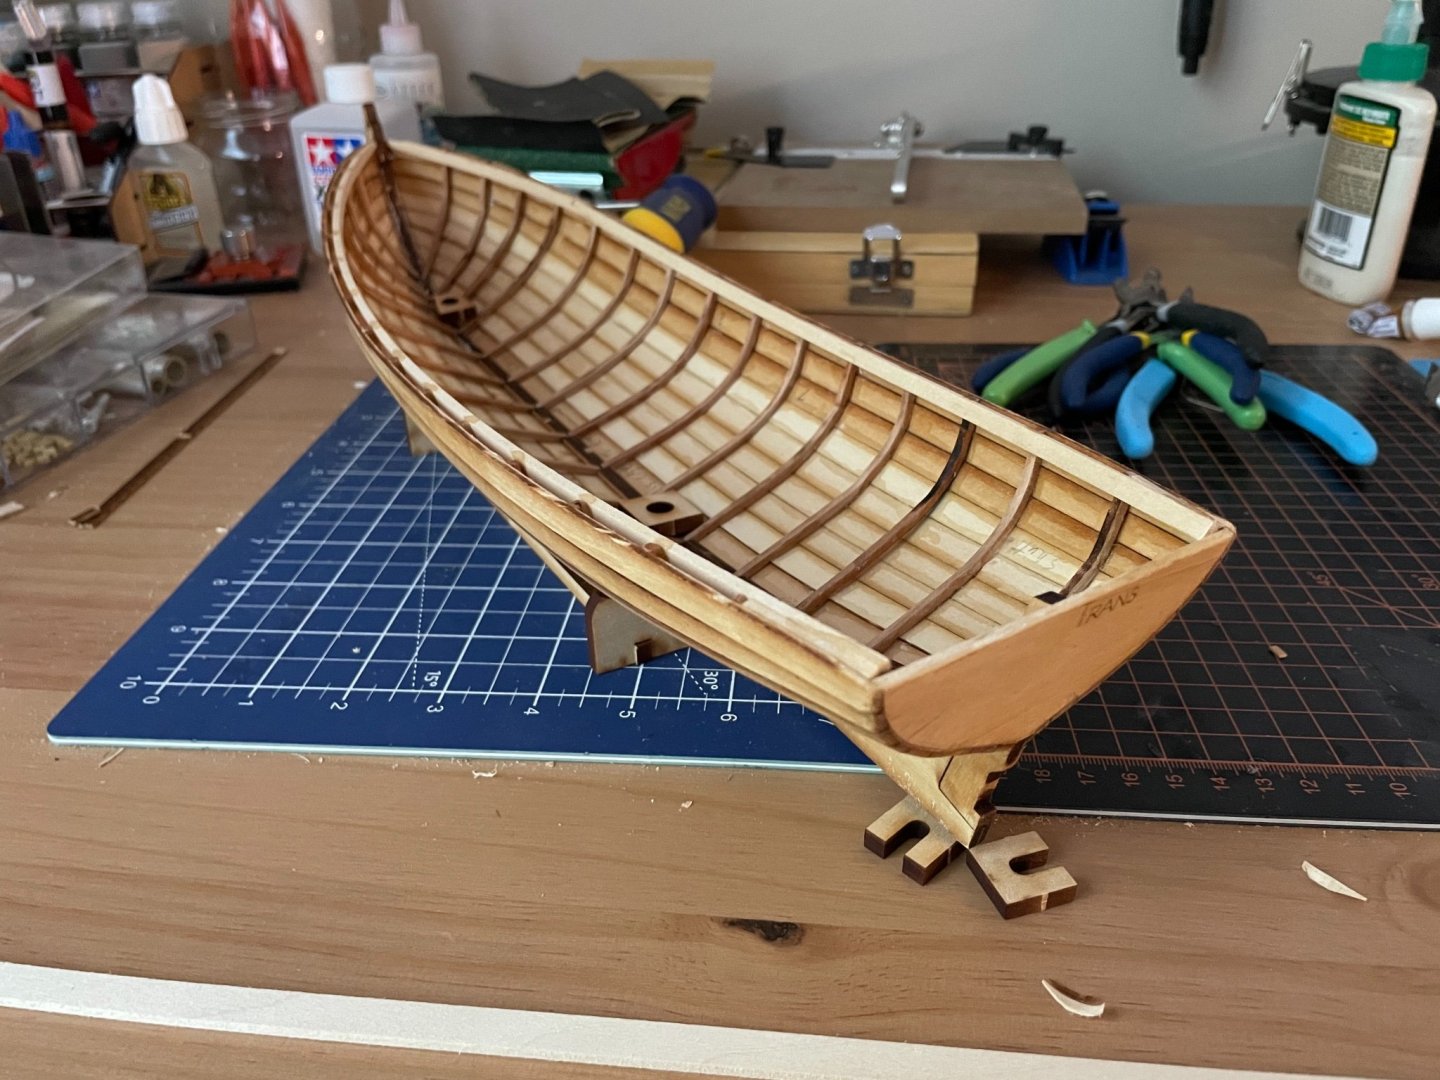
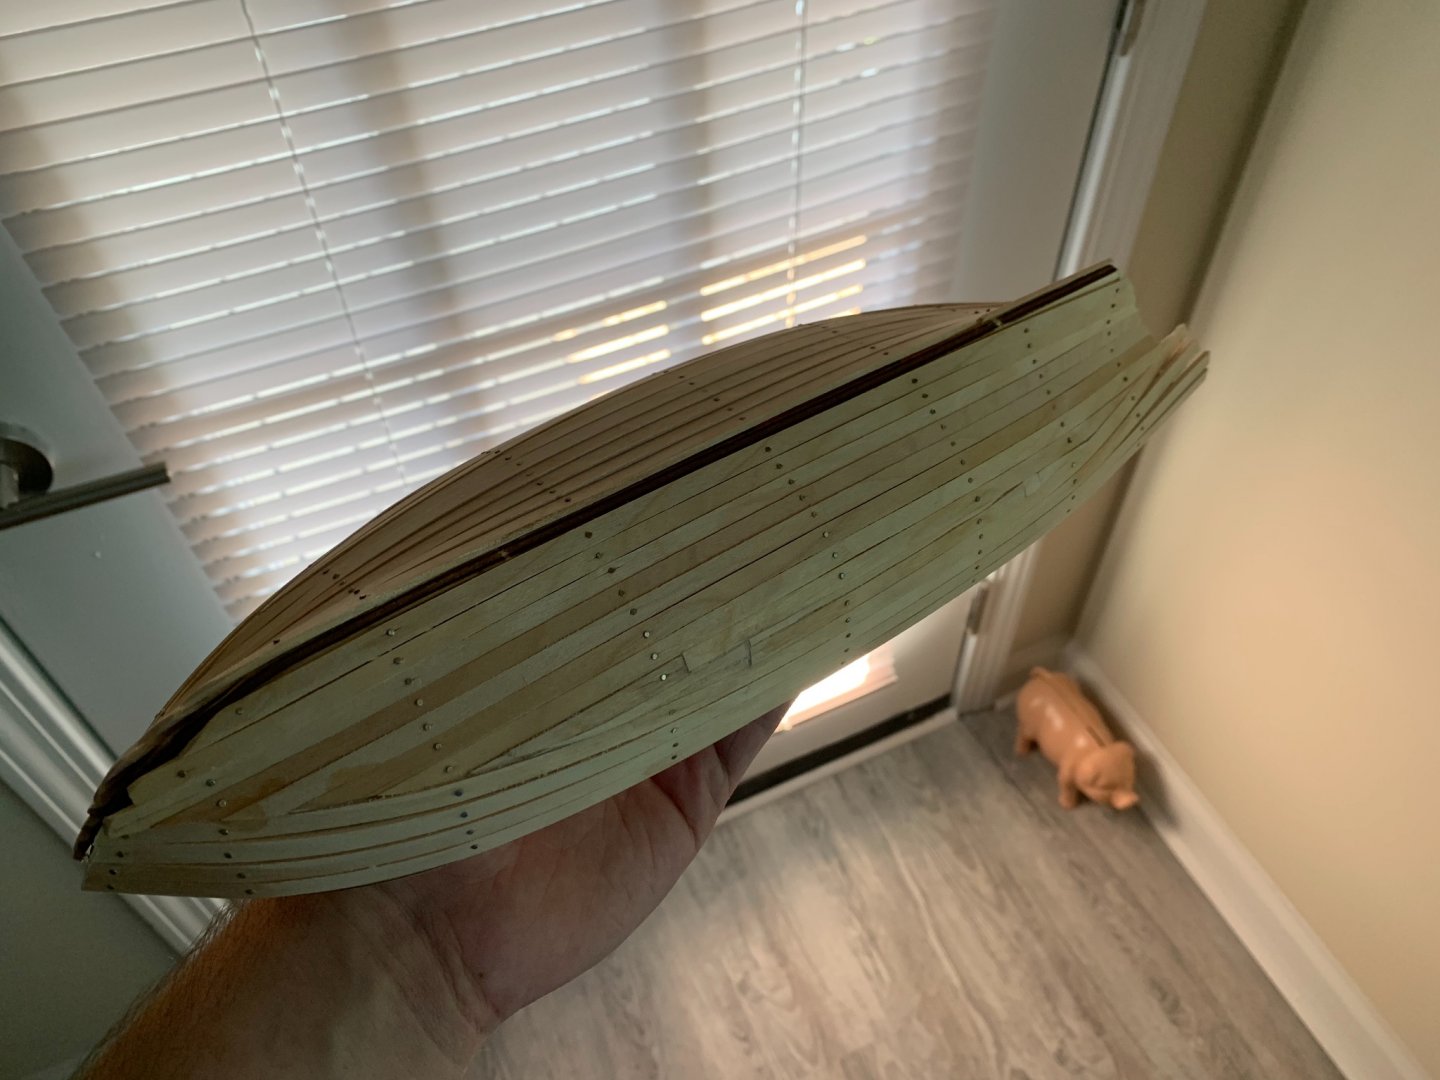
Three thousand, six hundred and eighteen nautical miles. This is the distance Captain William Bligh was able to carry 19 men across the ocean in an open launch, only losing one man. It is for this reason I think the Launch is much more an interesting subject than the Bounty herself. This is a well known kit from Model Shipways, which I bought second hand on eBay. I started it back in May by assembling the keel and cutting the rabbet. It seemed like it would be an easy and quick project, until I began bending the ribs onto the frame. So I decided to lay the project aside till I had more experience and more patience. I picked up the project again yesterday, and assembled the building board as directed in the instructions. However, I just found it easier to begin planking the boat without regard for the frame at all, and the planks naturally found their shape. I ended up only using nine rows of planks, leaving off the sheer plank, because I had placed the garboard plank too far forward. May end up having to cut down the transom a bit. Here is the fully planked boat. It won’t be a fully accurate model of the Bounty launch when I’m finished, but I am happy with what I have so far.


- 5 replies
-
- 4
-
-
- Model Shipways
- Bounty Launch
- (and 1 more)
-
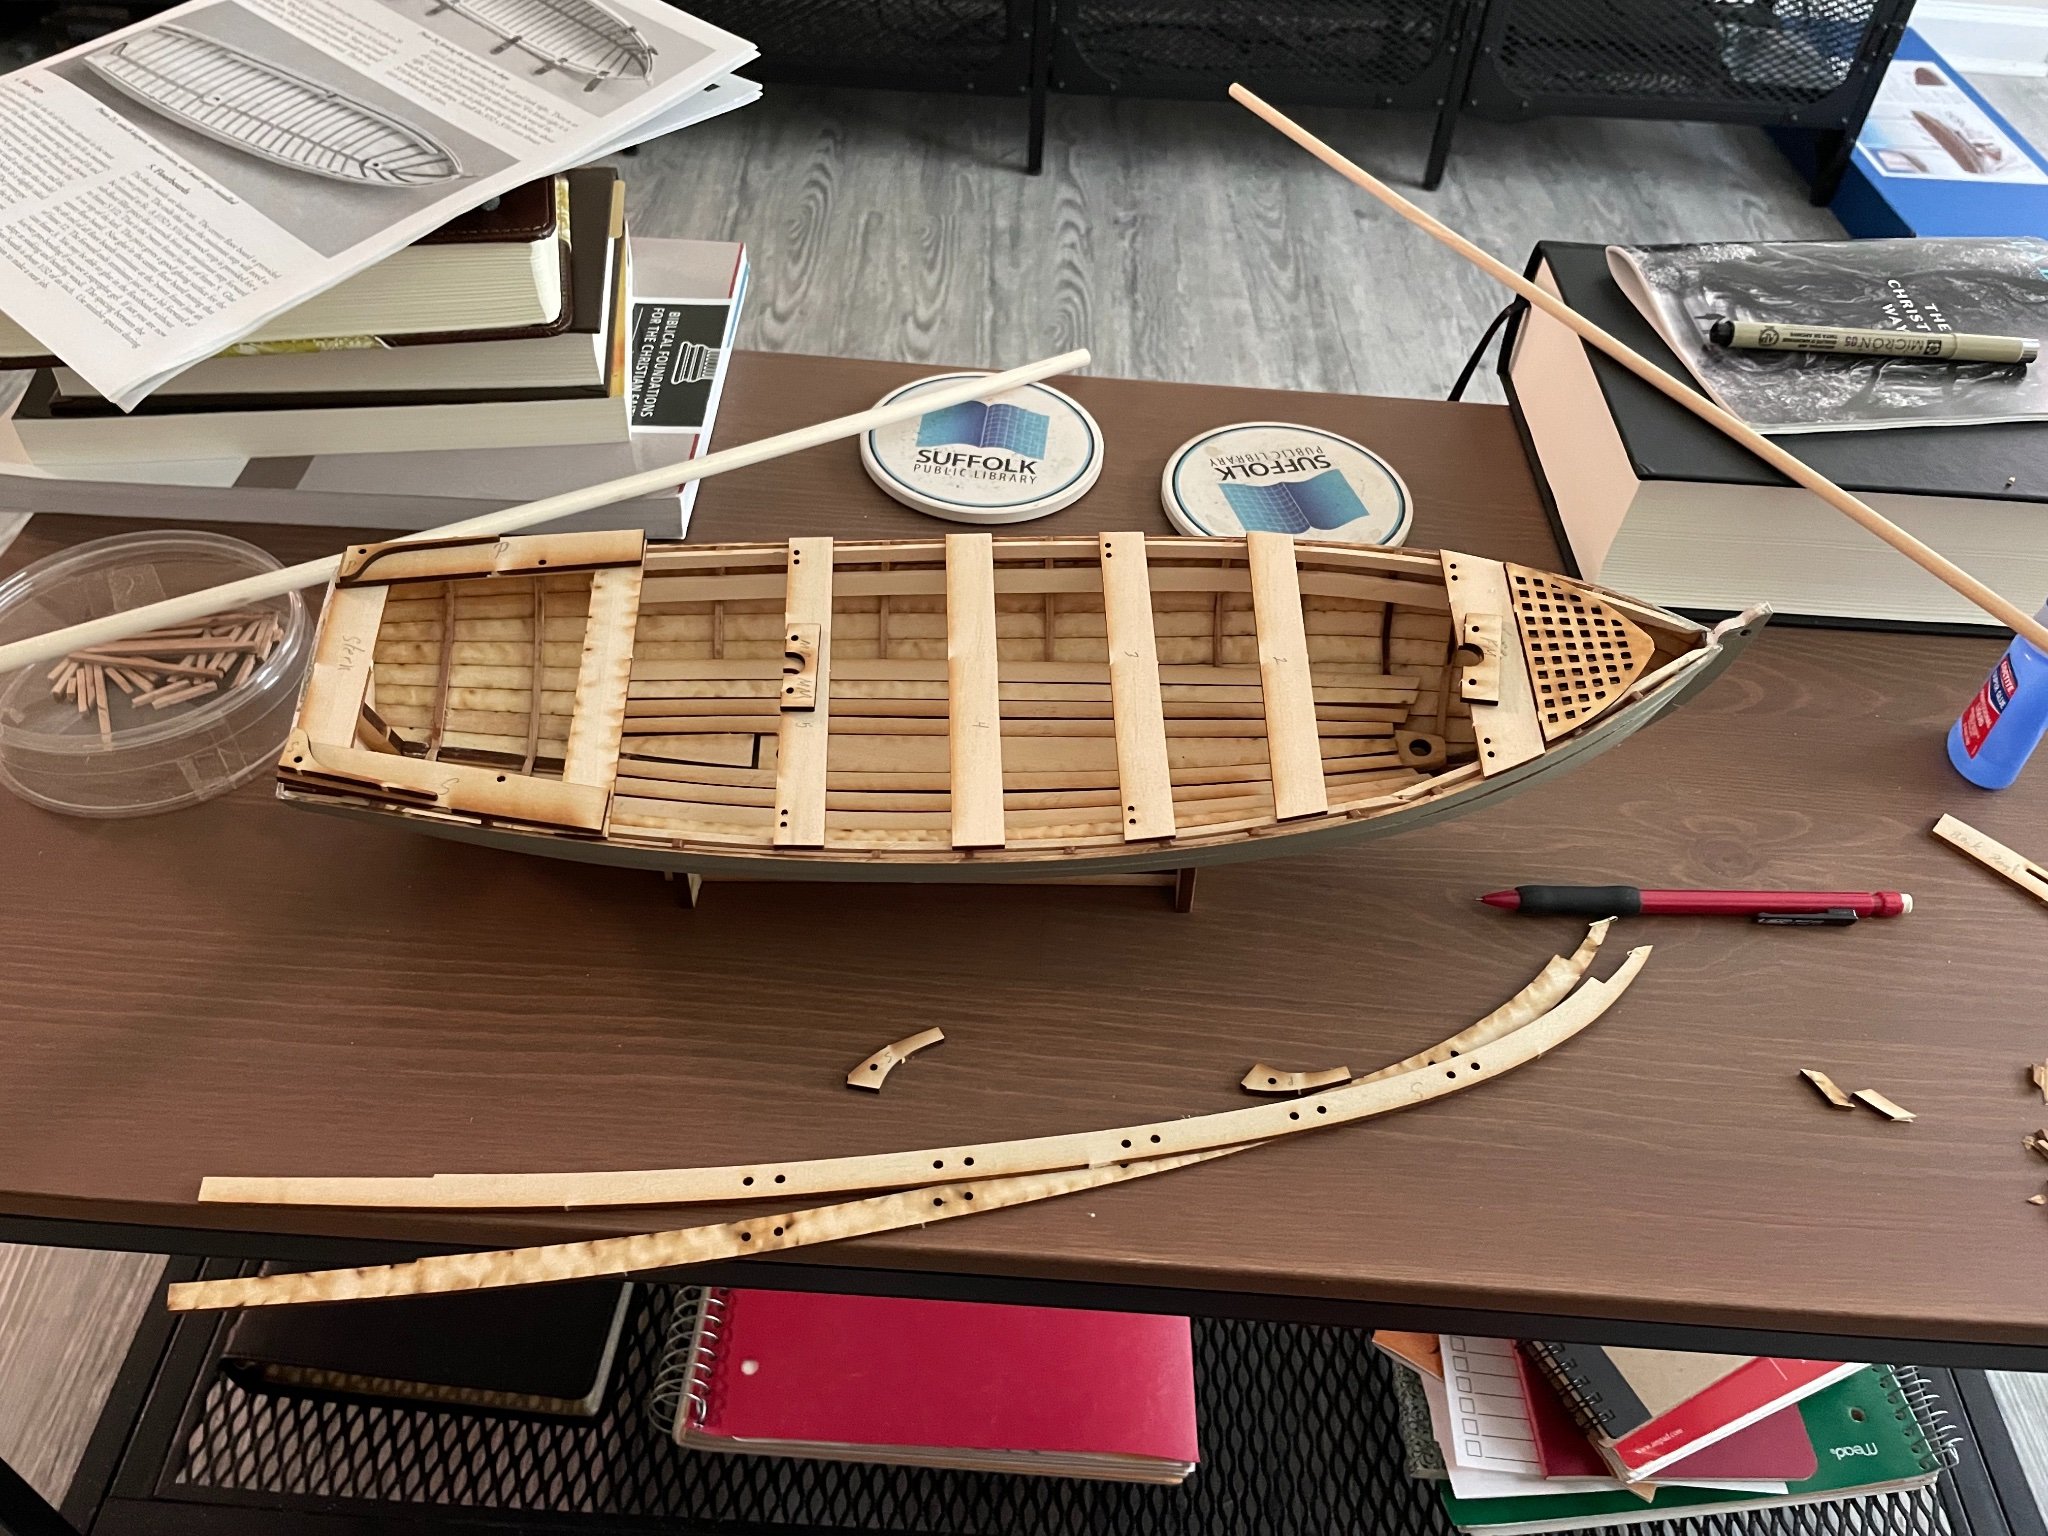
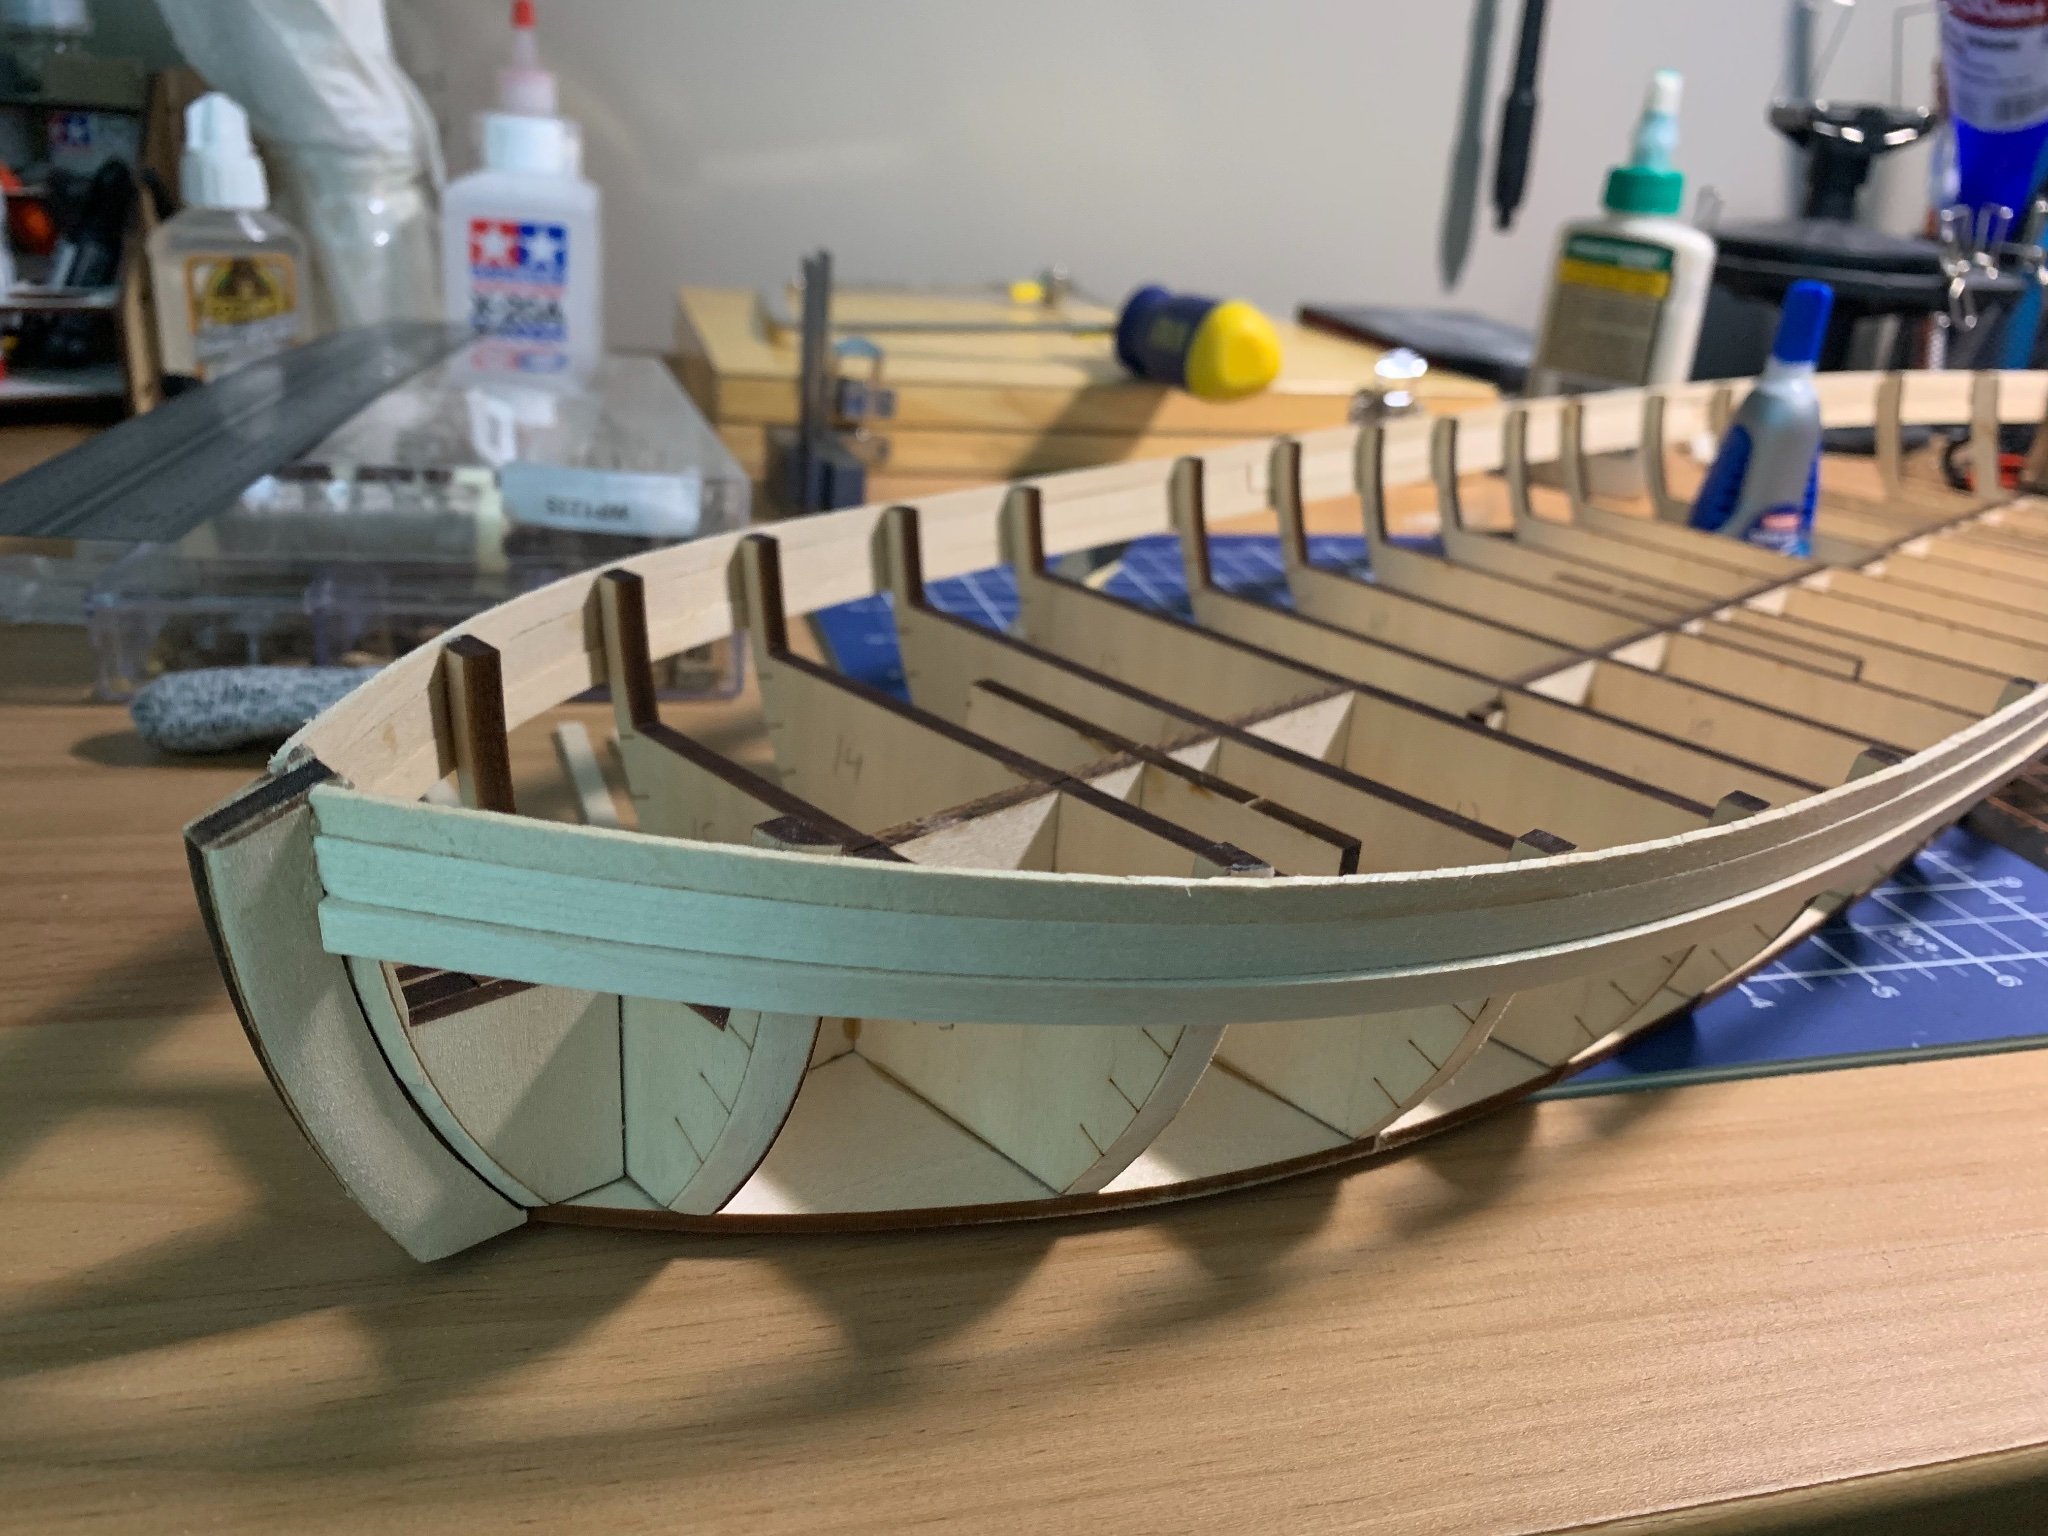
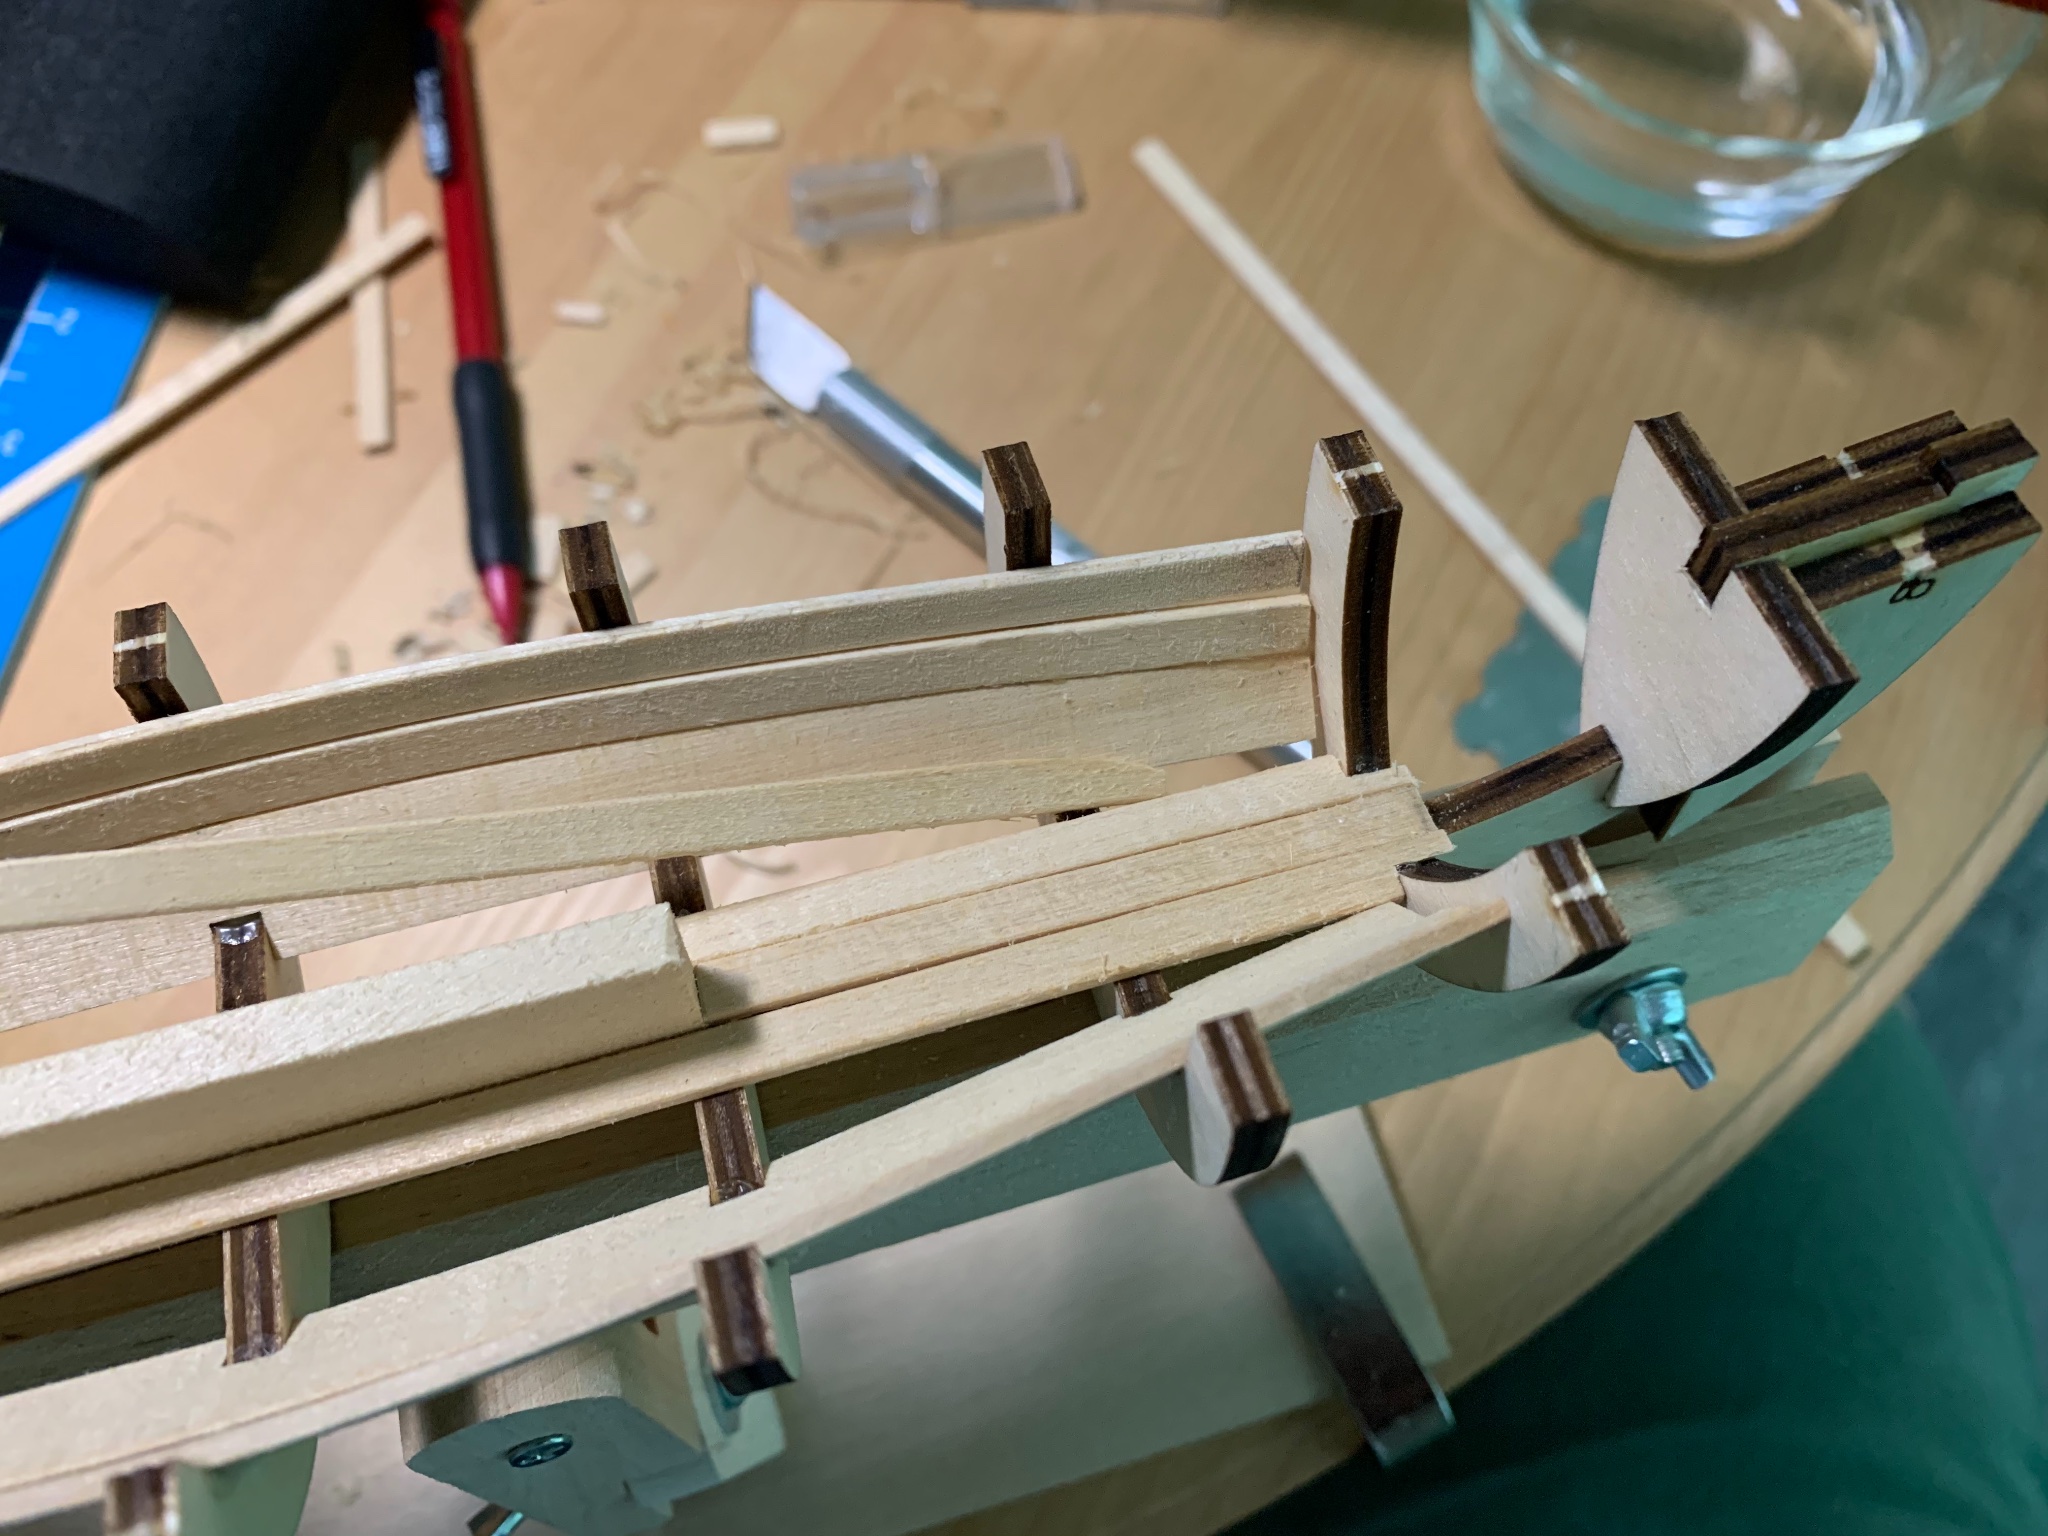
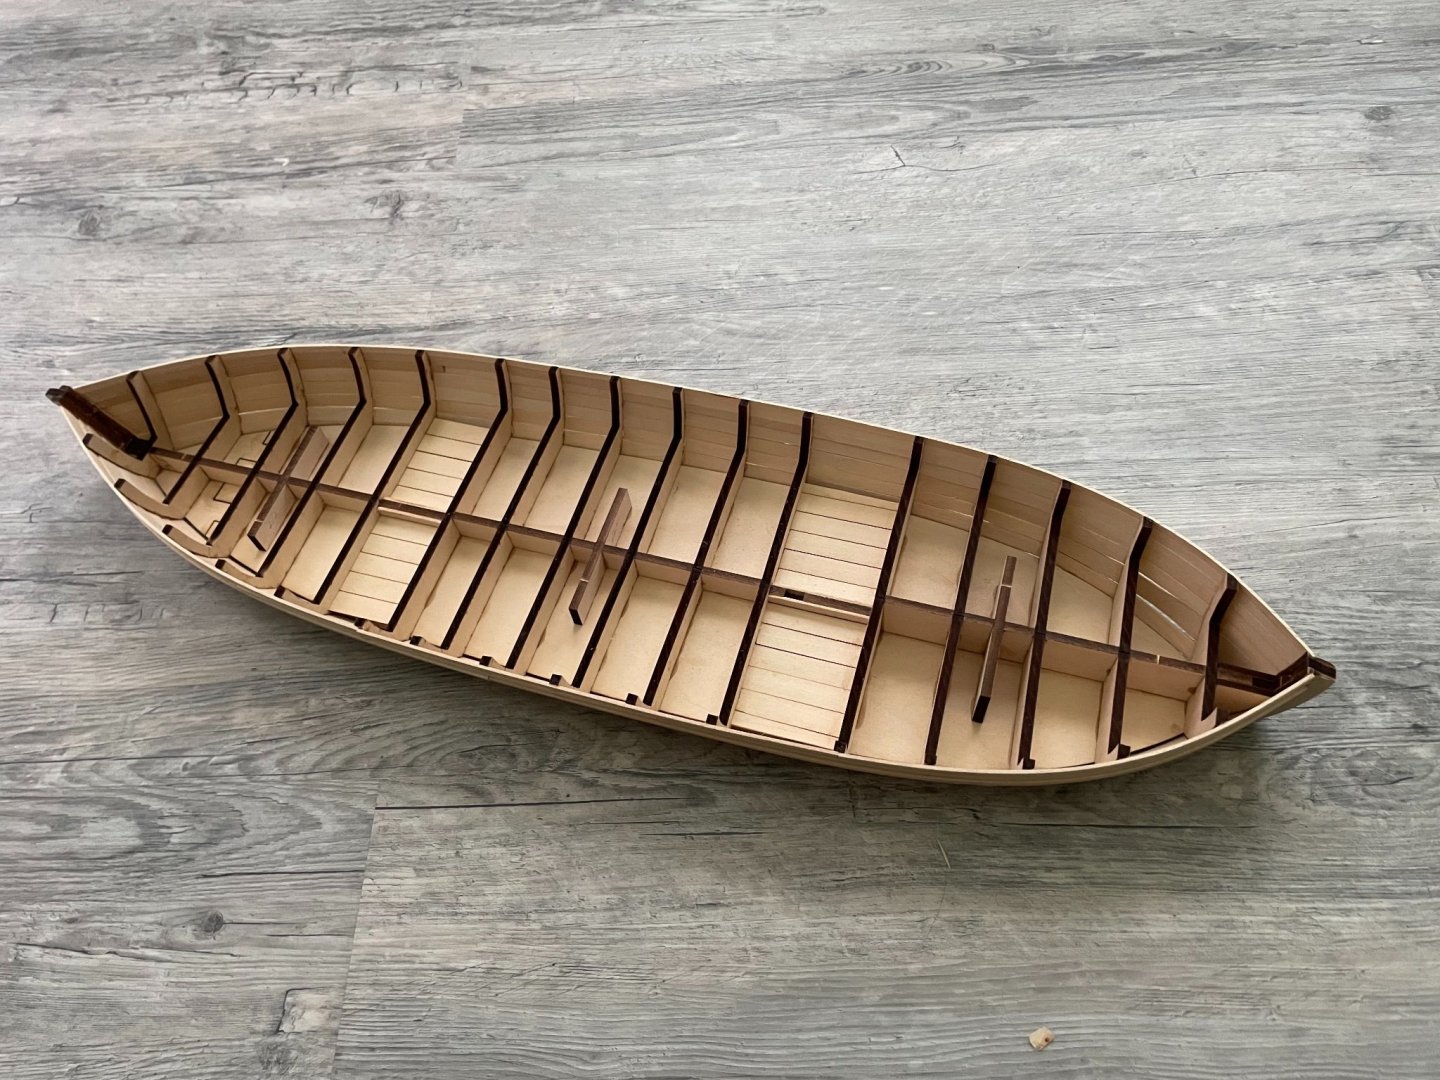
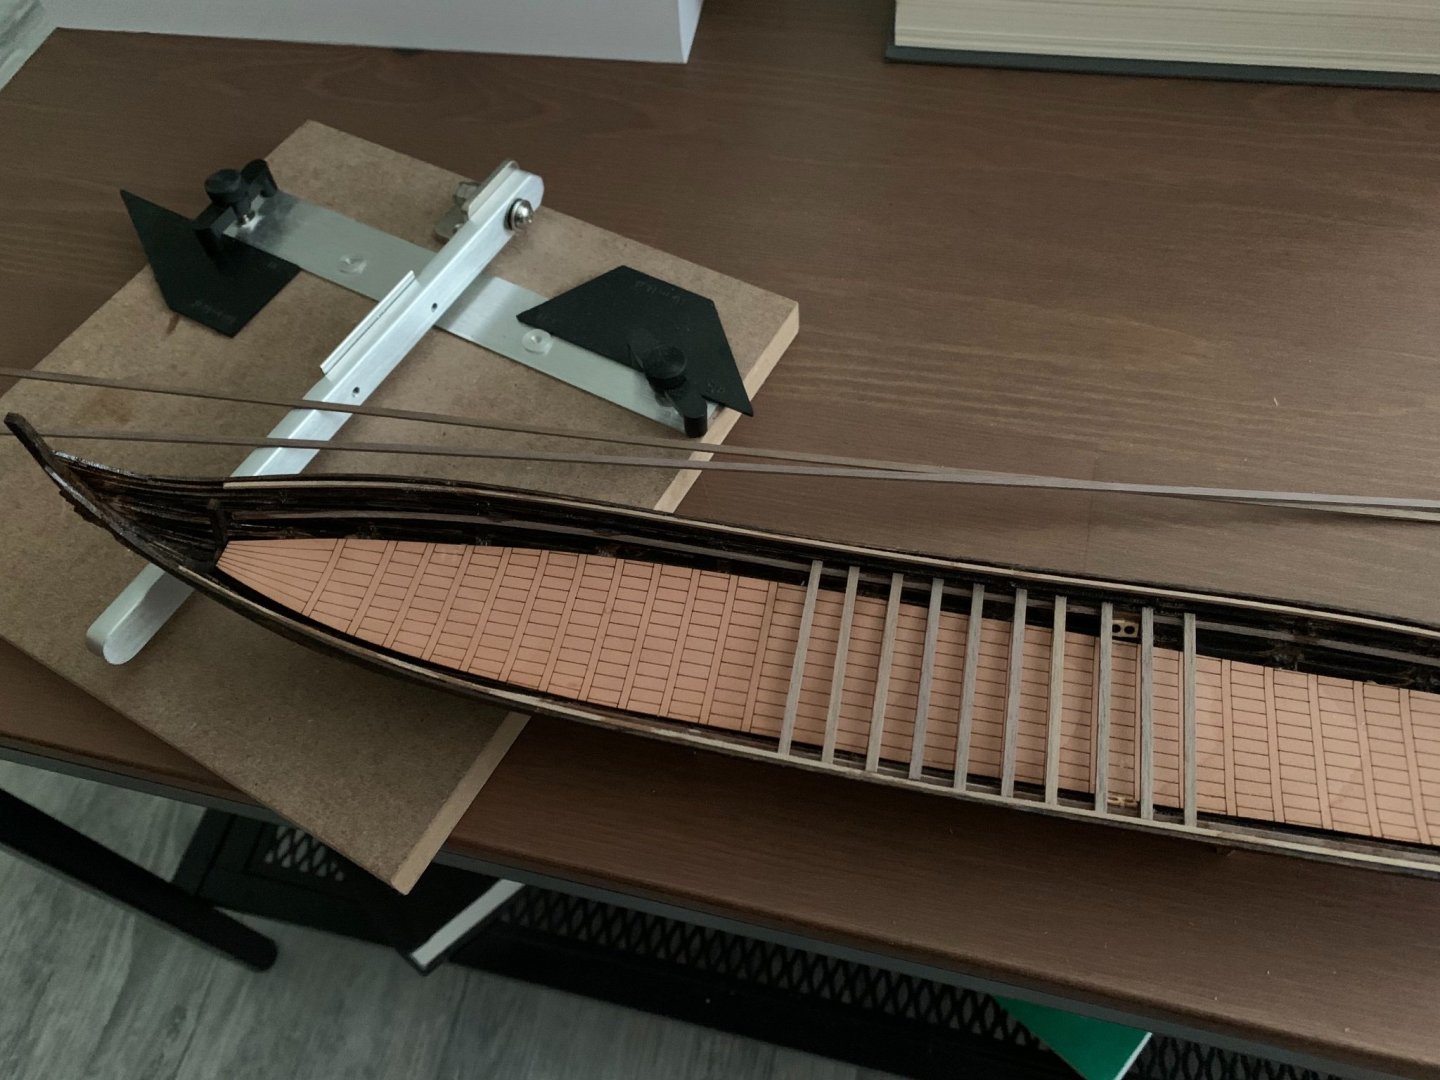
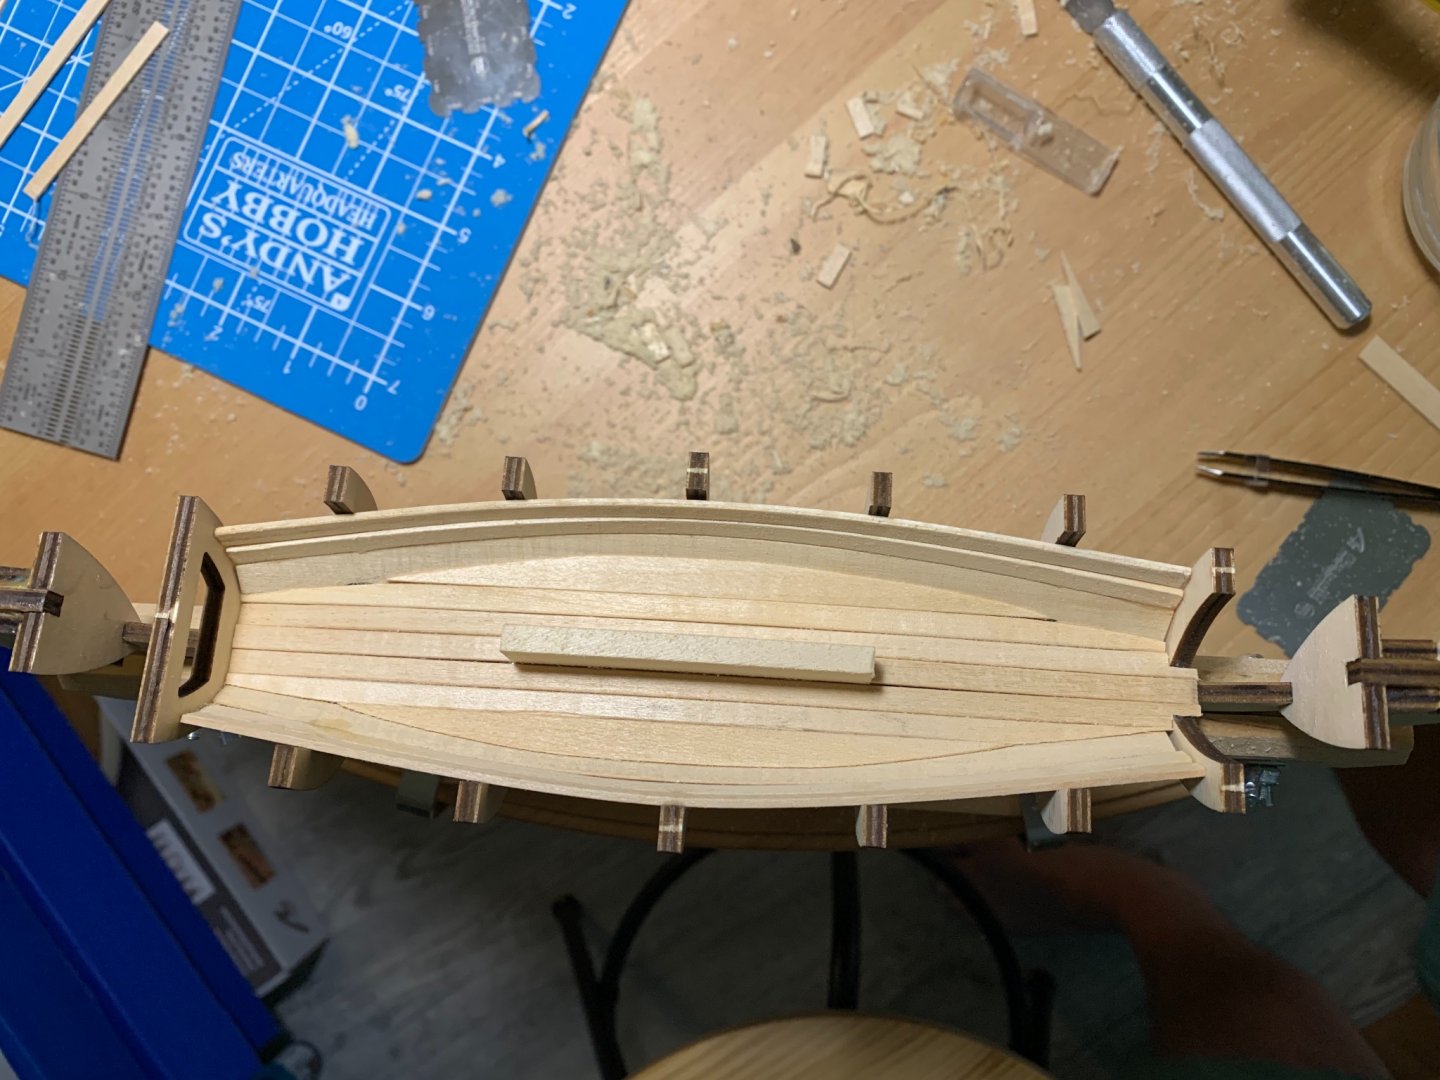
Exterior planking using the “spiling” method was difficult, and there are many gaps. But I plan on filling and sanding them. Interior planking went very smoothly. Another angle of the interior planking. Finished the interior planking. Deck pieces are not glued down yet, since they don’t fit perfectly, but working on that.

- 32 replies
-
- 5
-
-
- Model Shipways
- Philadelphia
- (and 1 more)
-
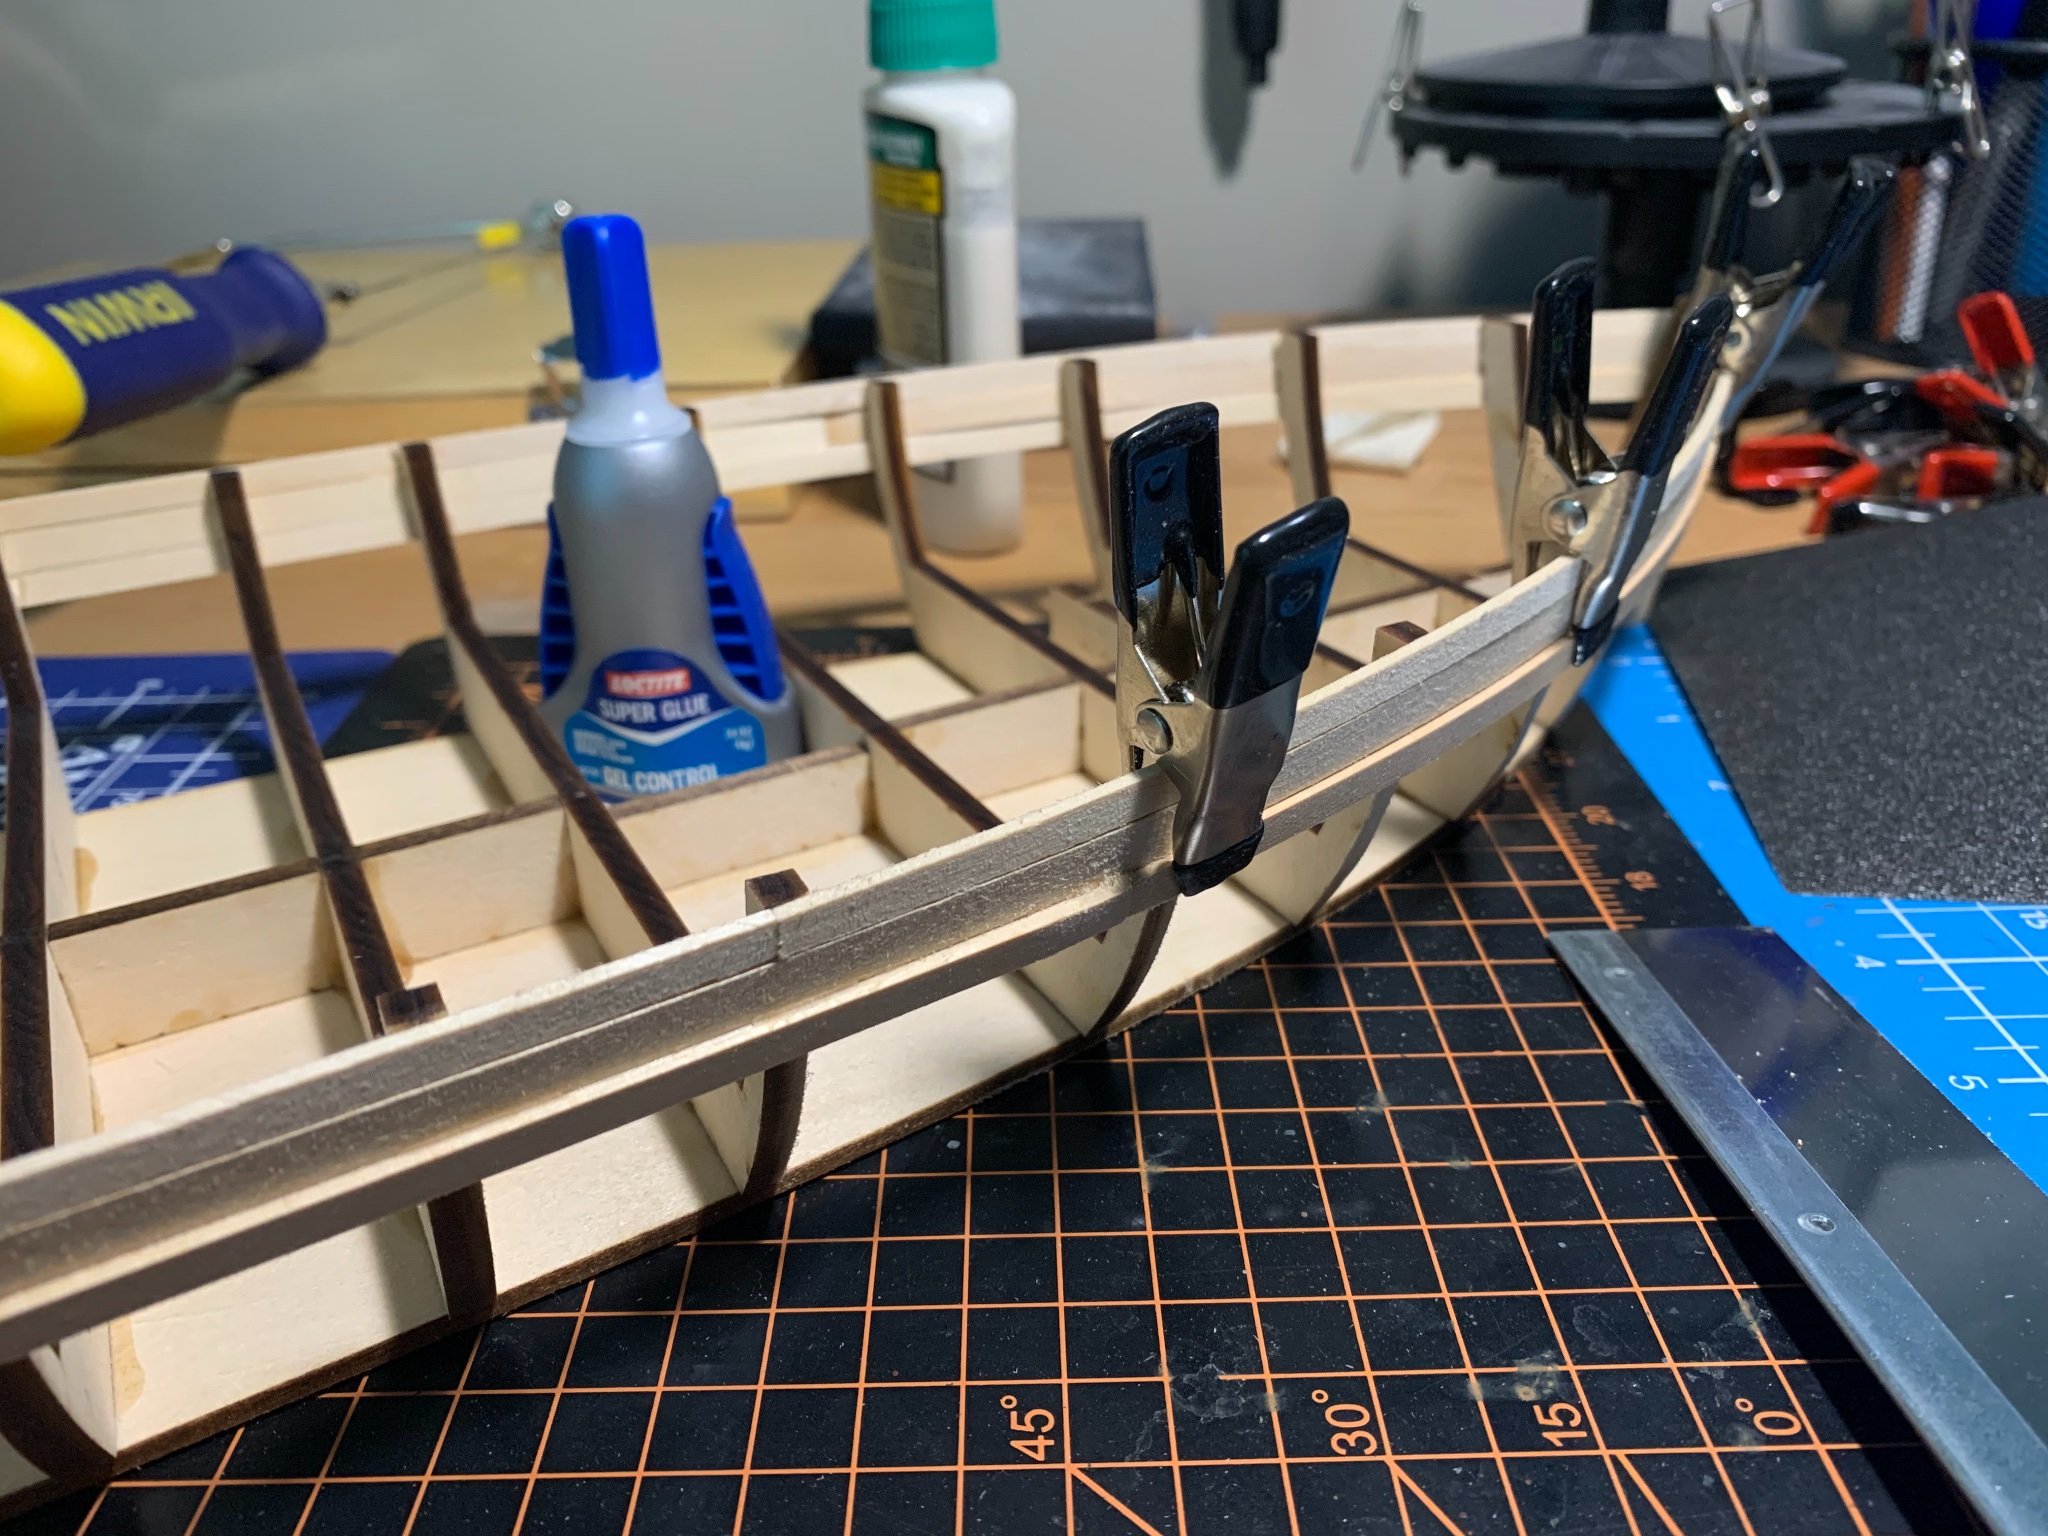
Have glued the first three rows of exterior planking. https://3d.si.edu/explorer/gunboat-philadelphia I am consulting this 3D model from the Smithsonian as I go along, which shows the present state of the real vessel. Adding planking at the lowest parts of the deck is the latest thing I have done.


- 32 replies
-
- 7
-
-
- Model Shipways
- Philadelphia
- (and 1 more)
-
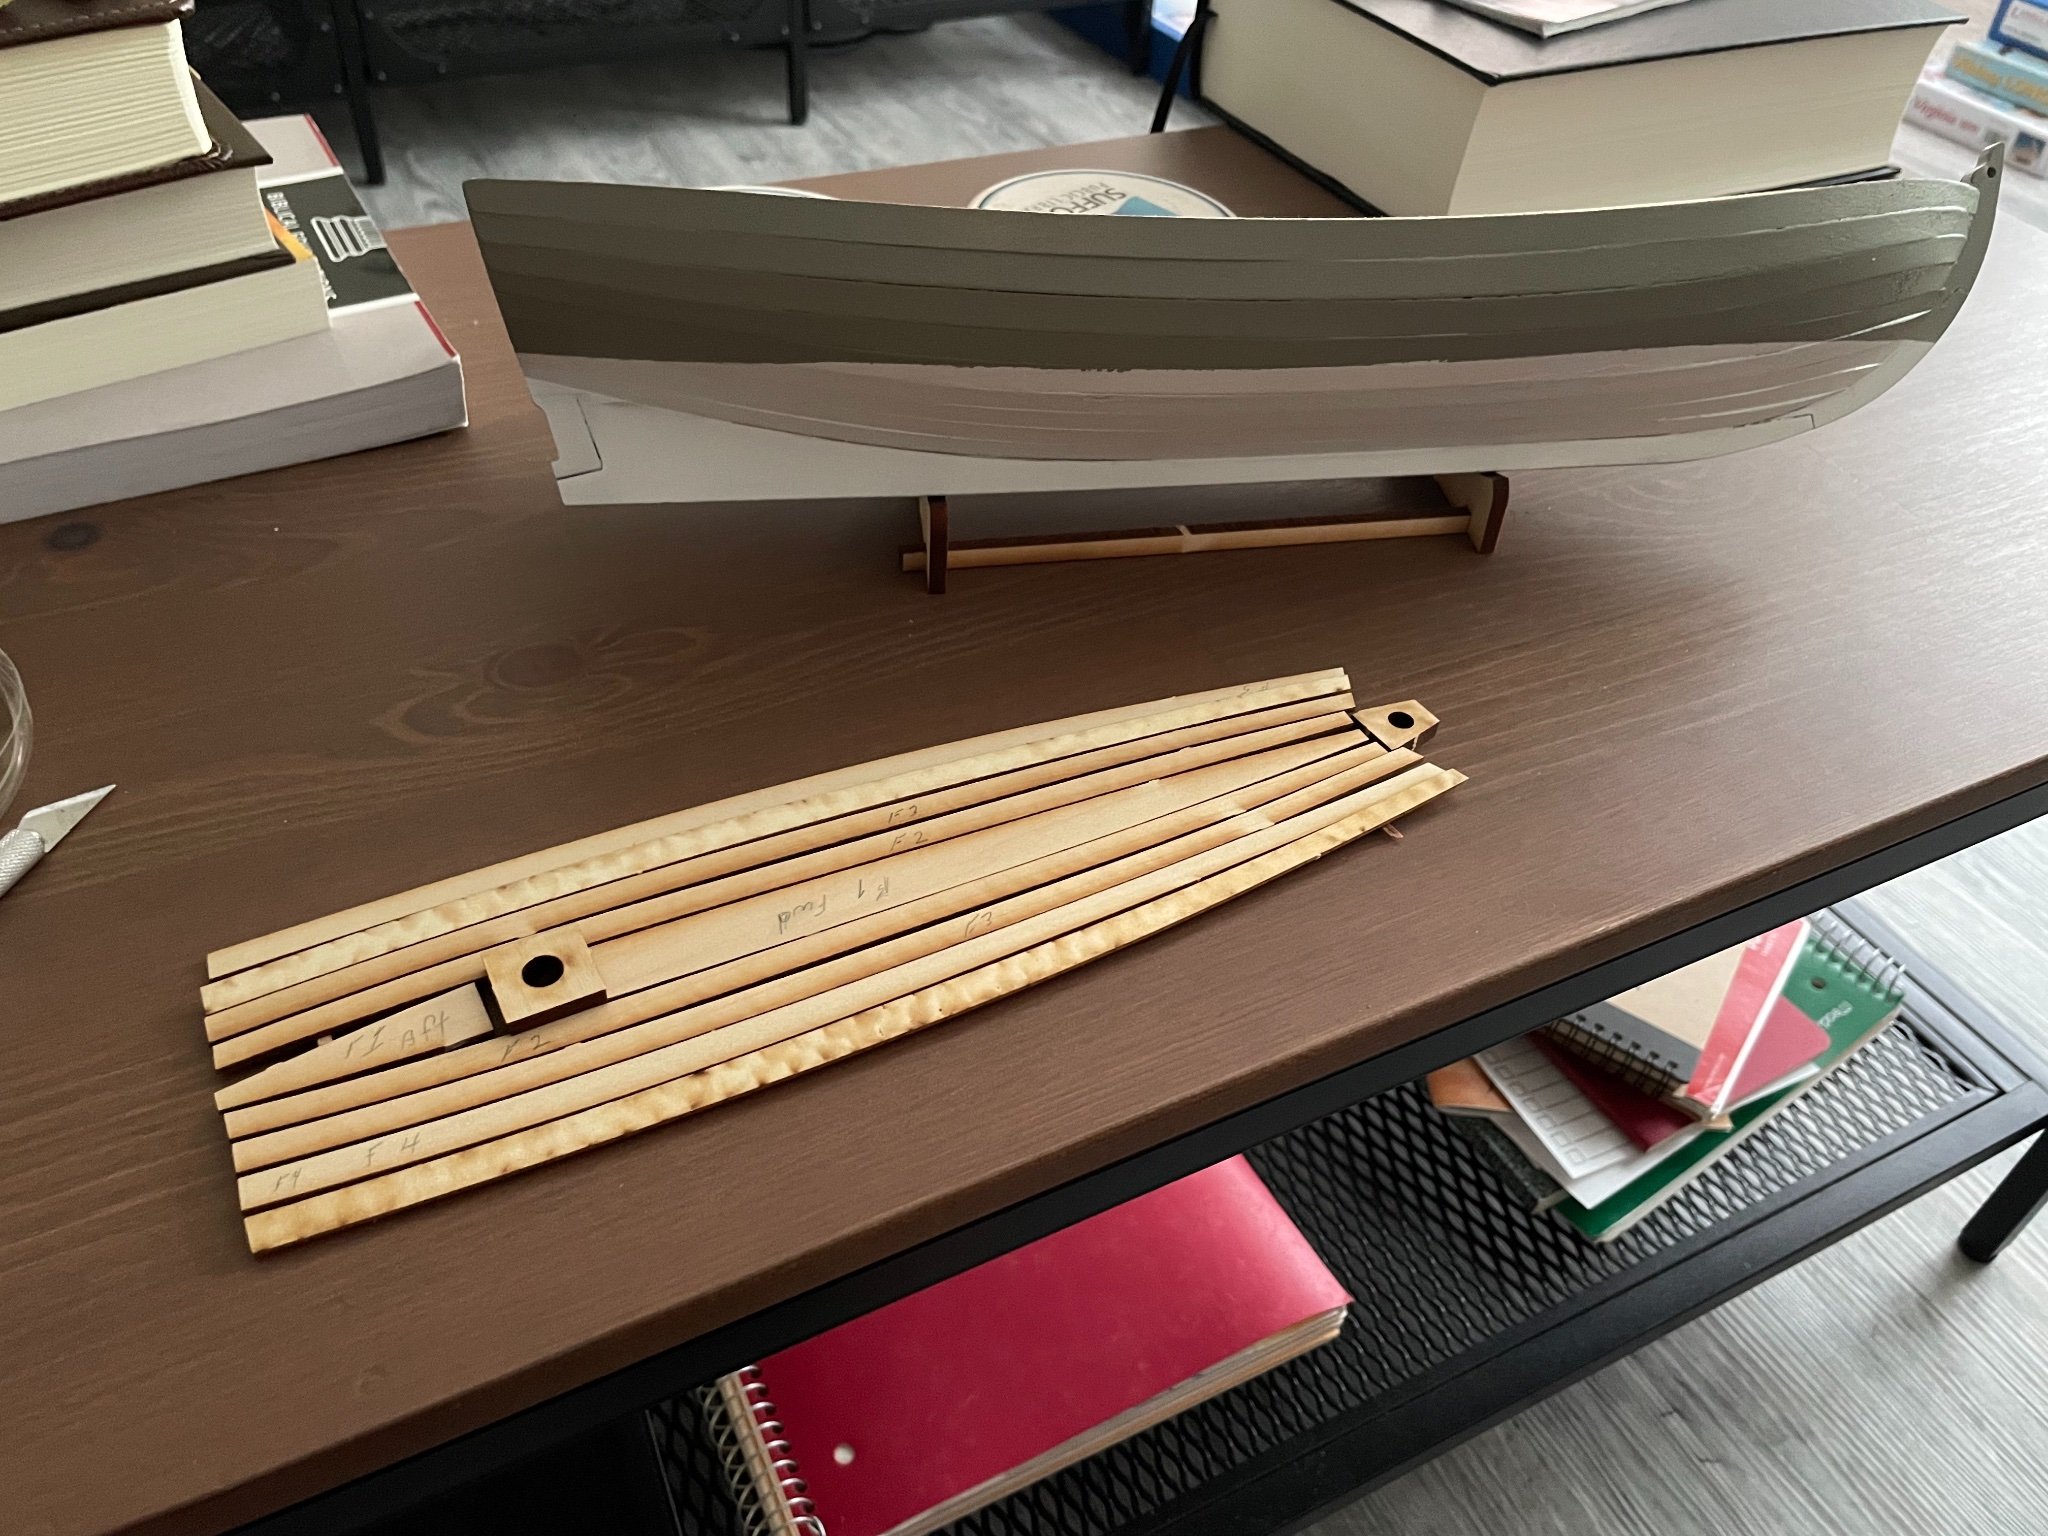
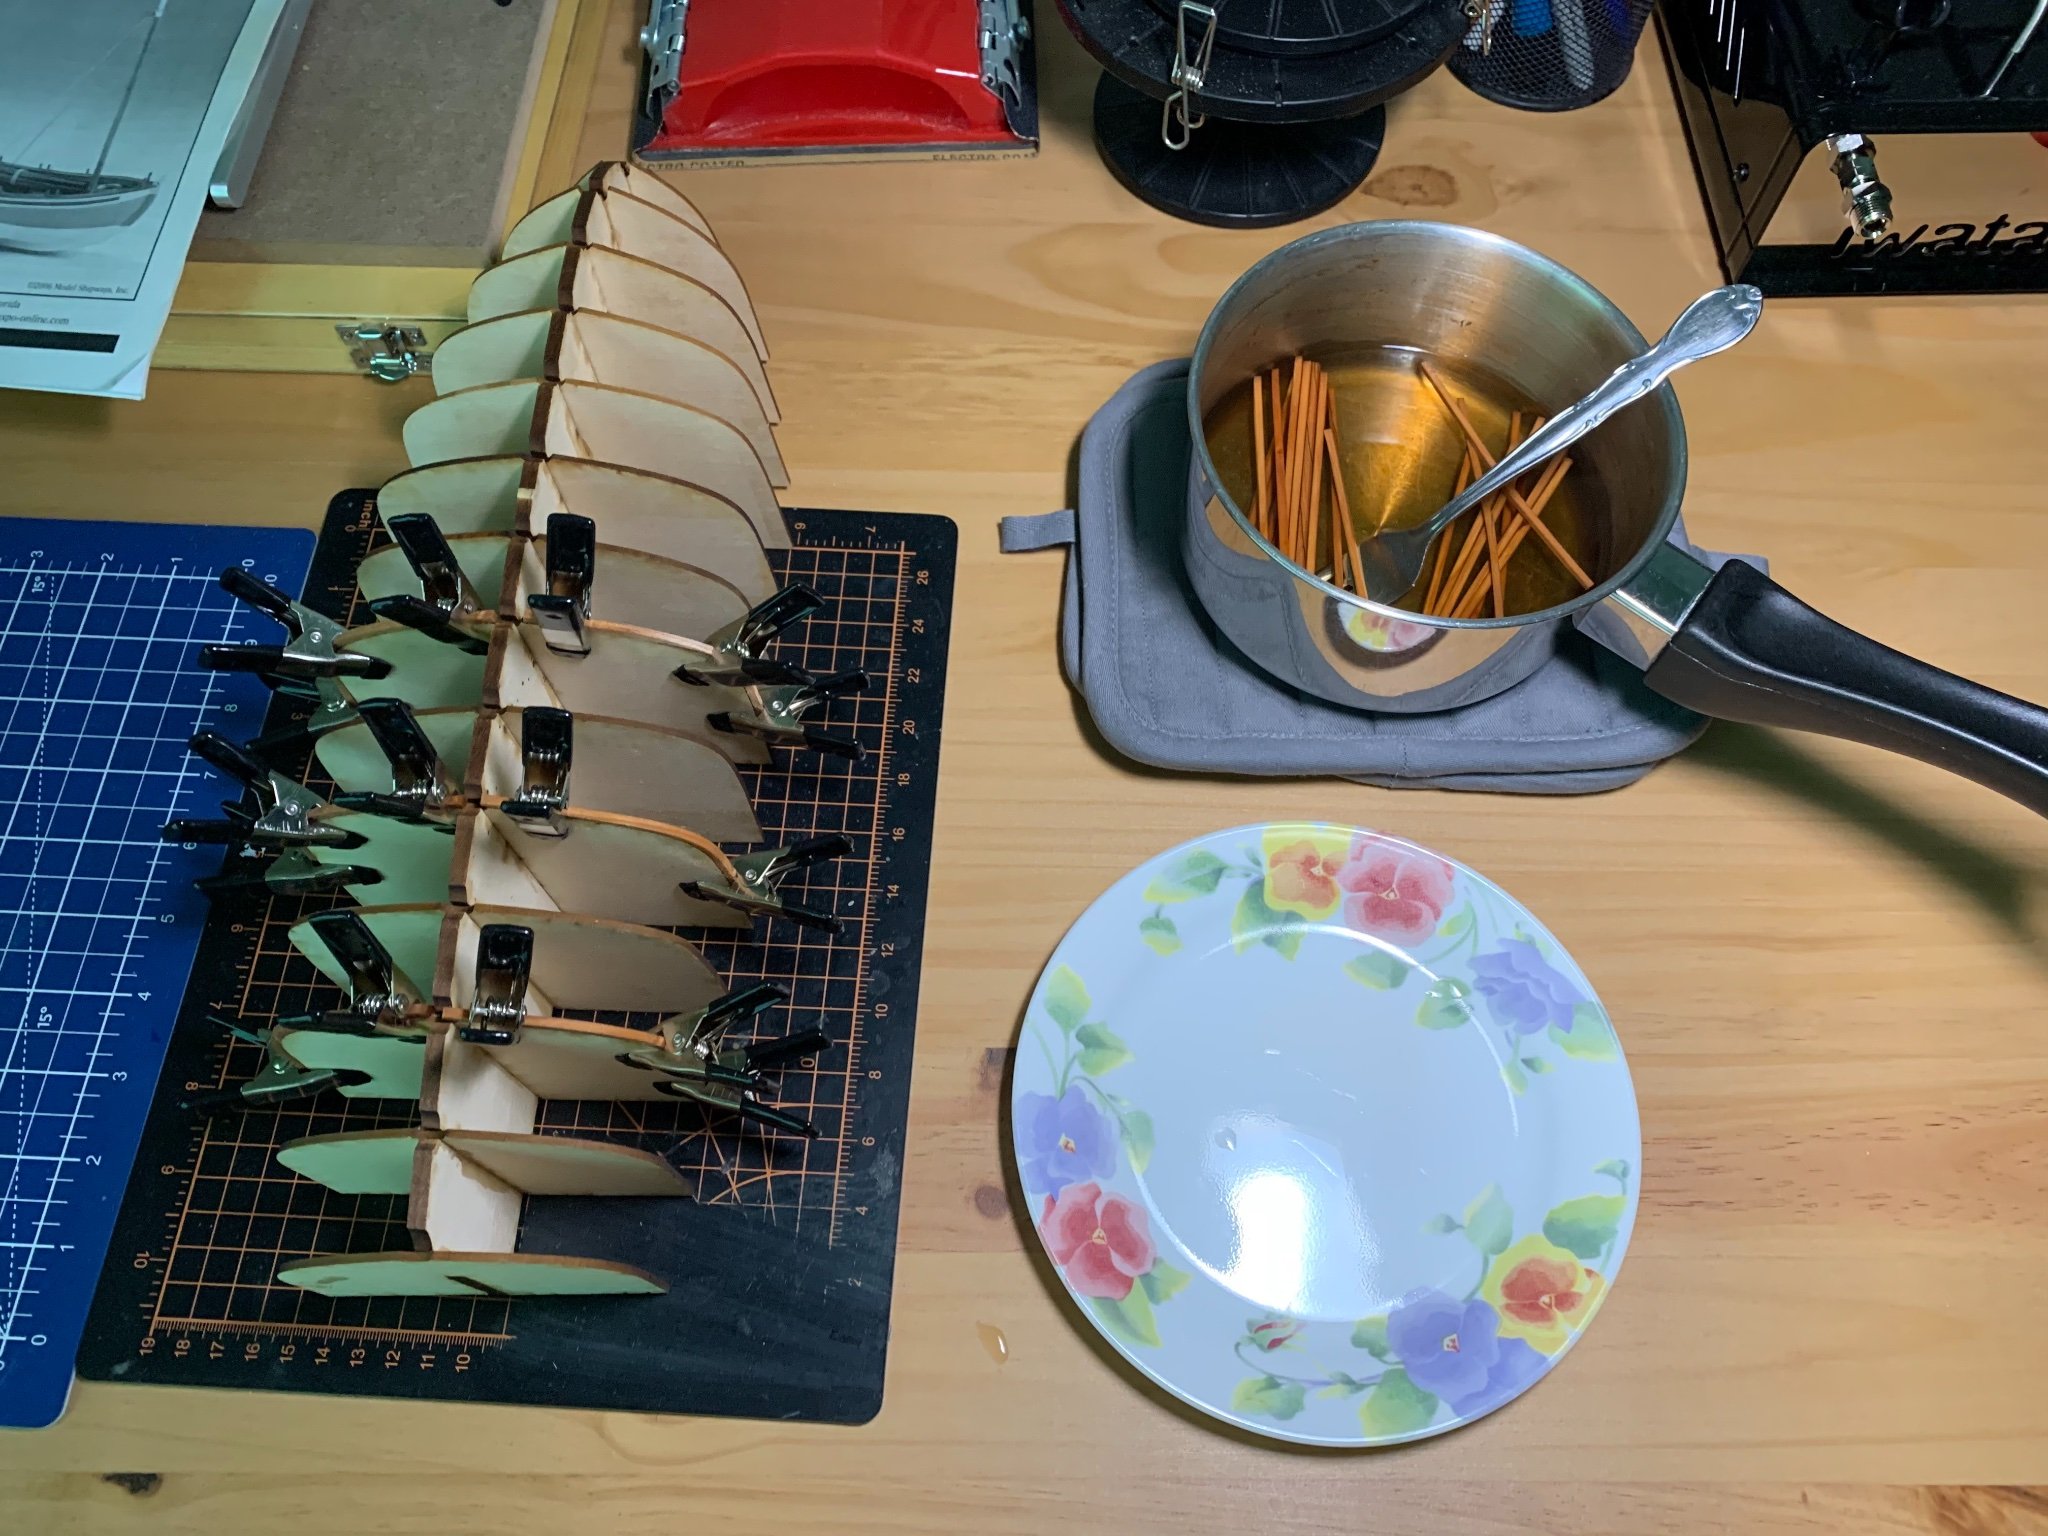
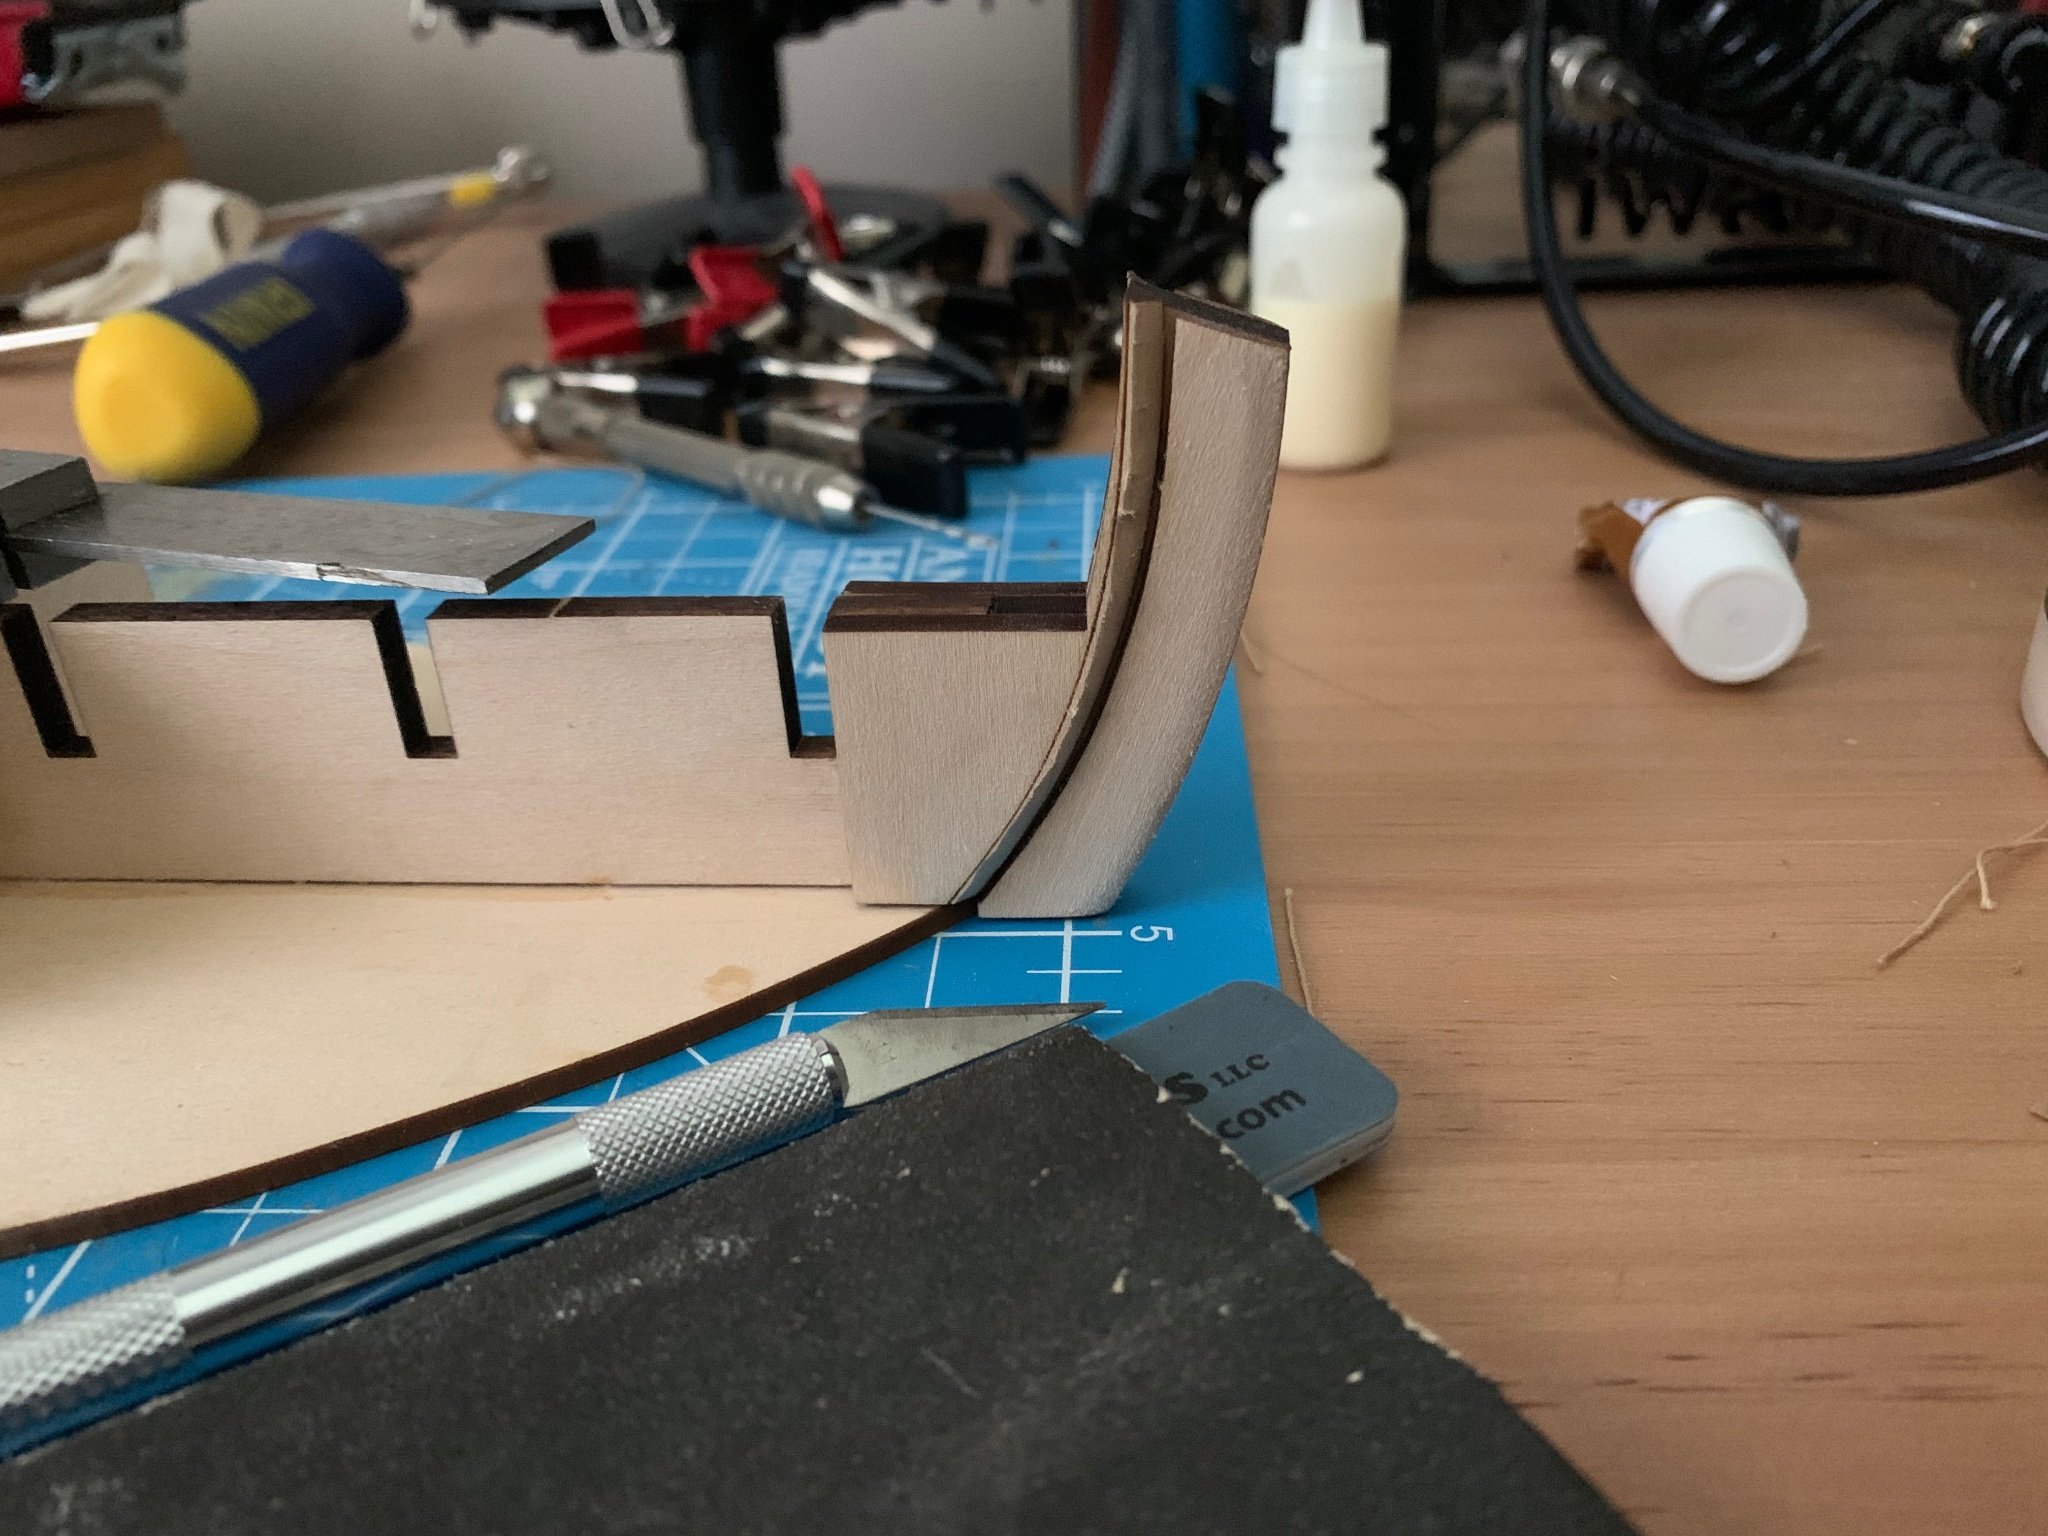
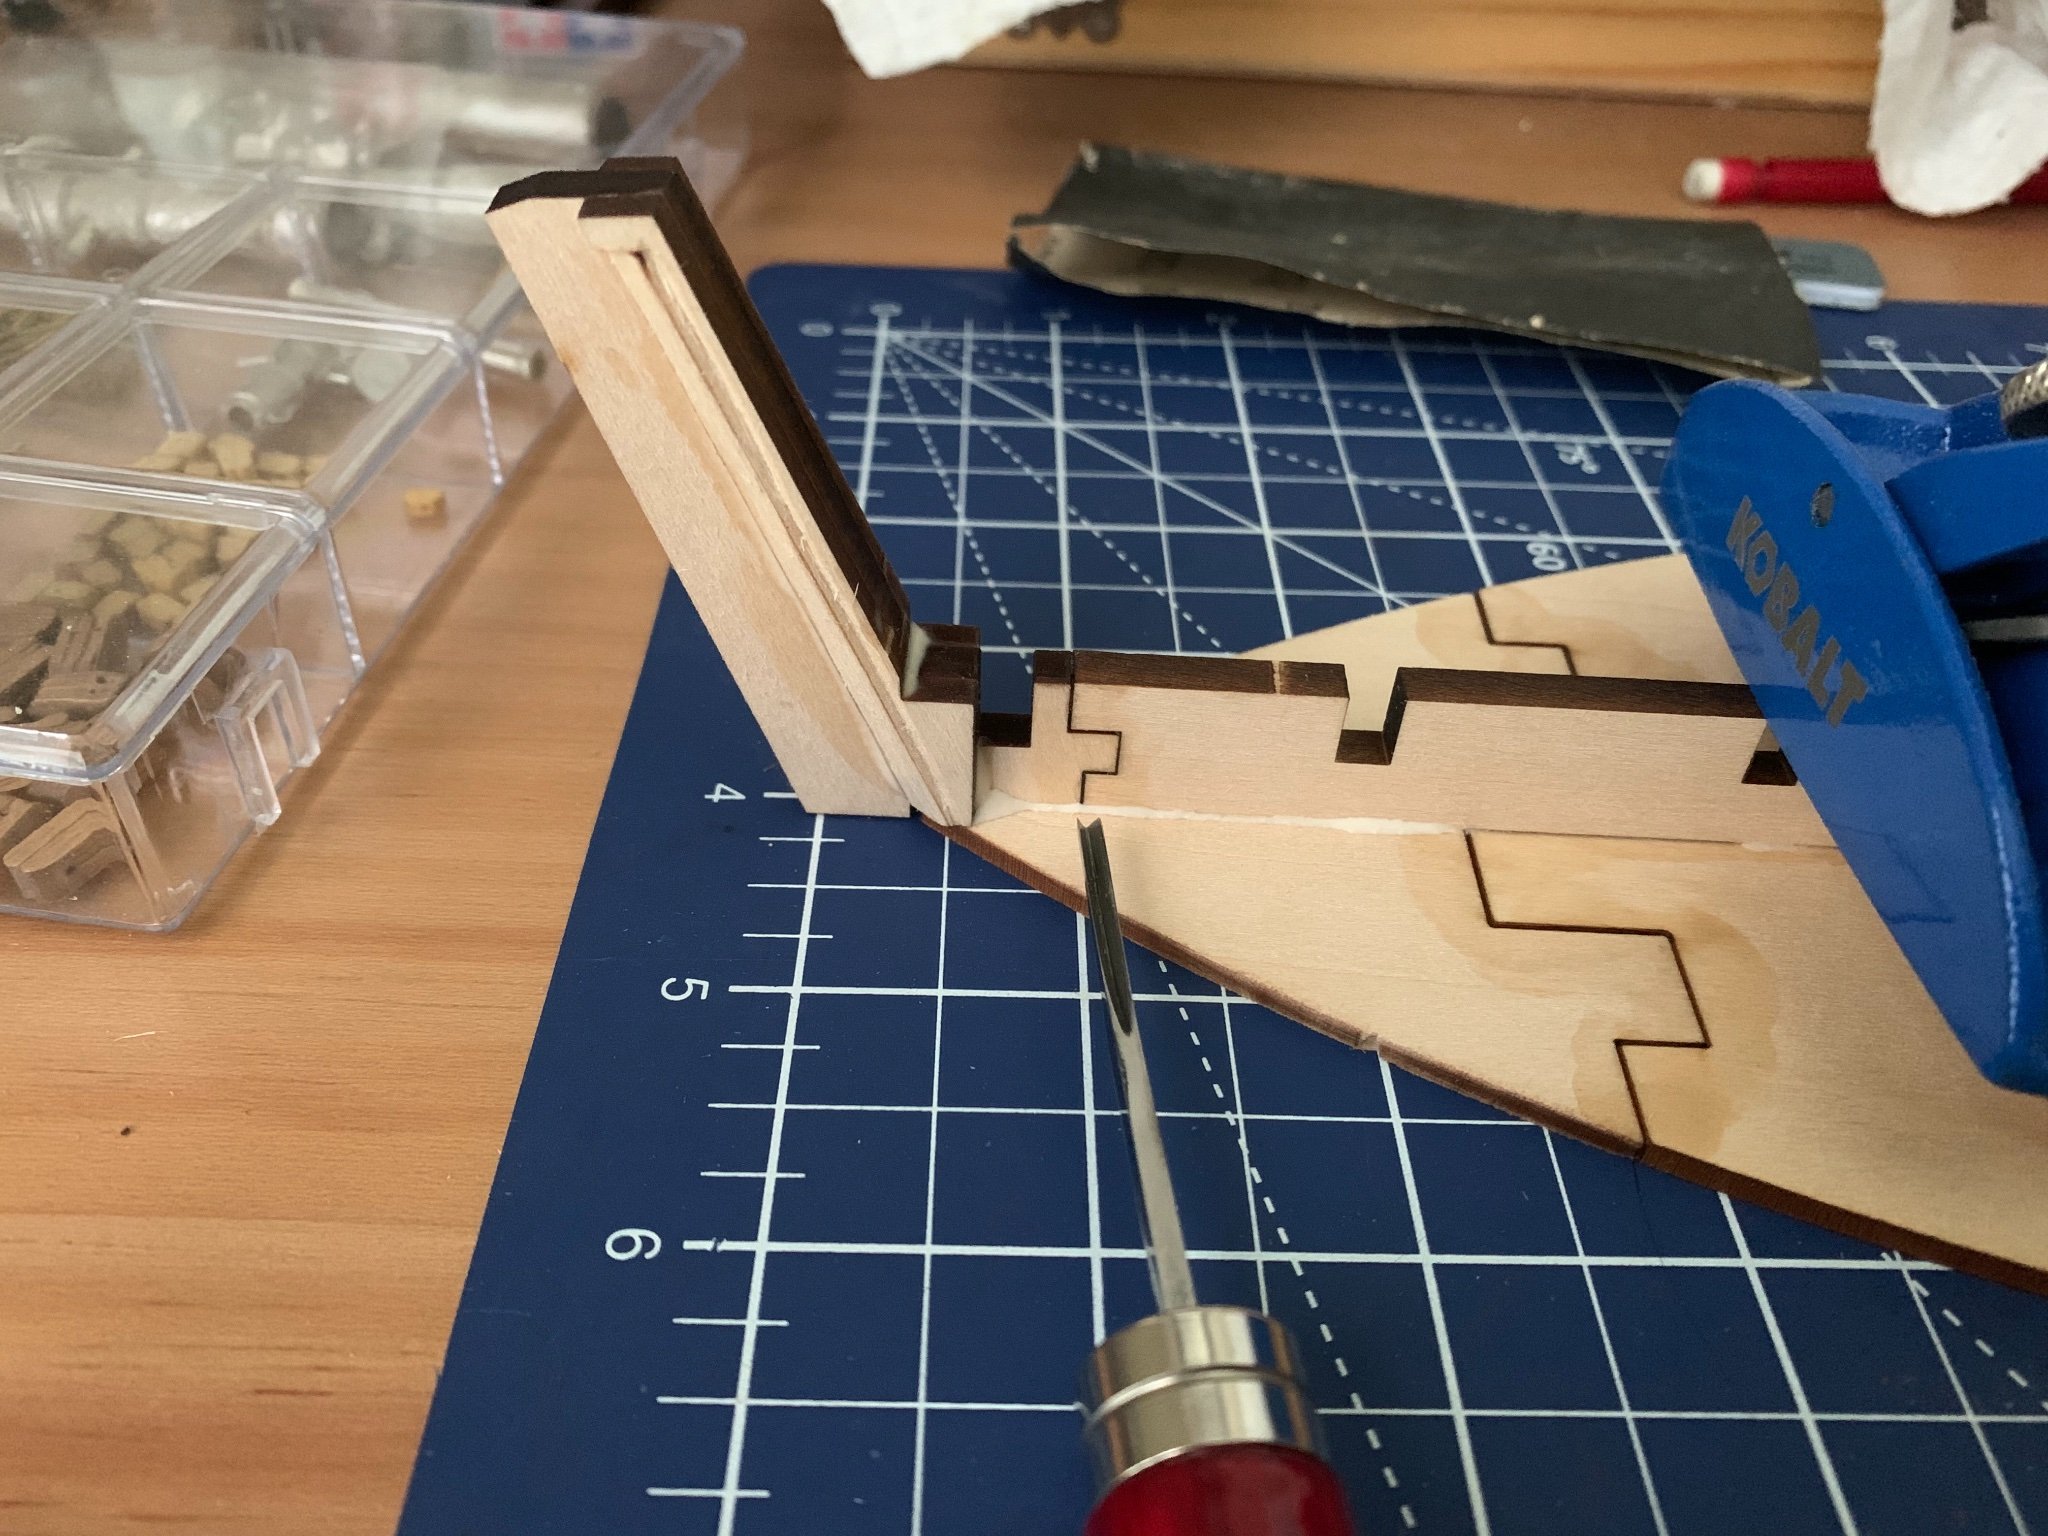
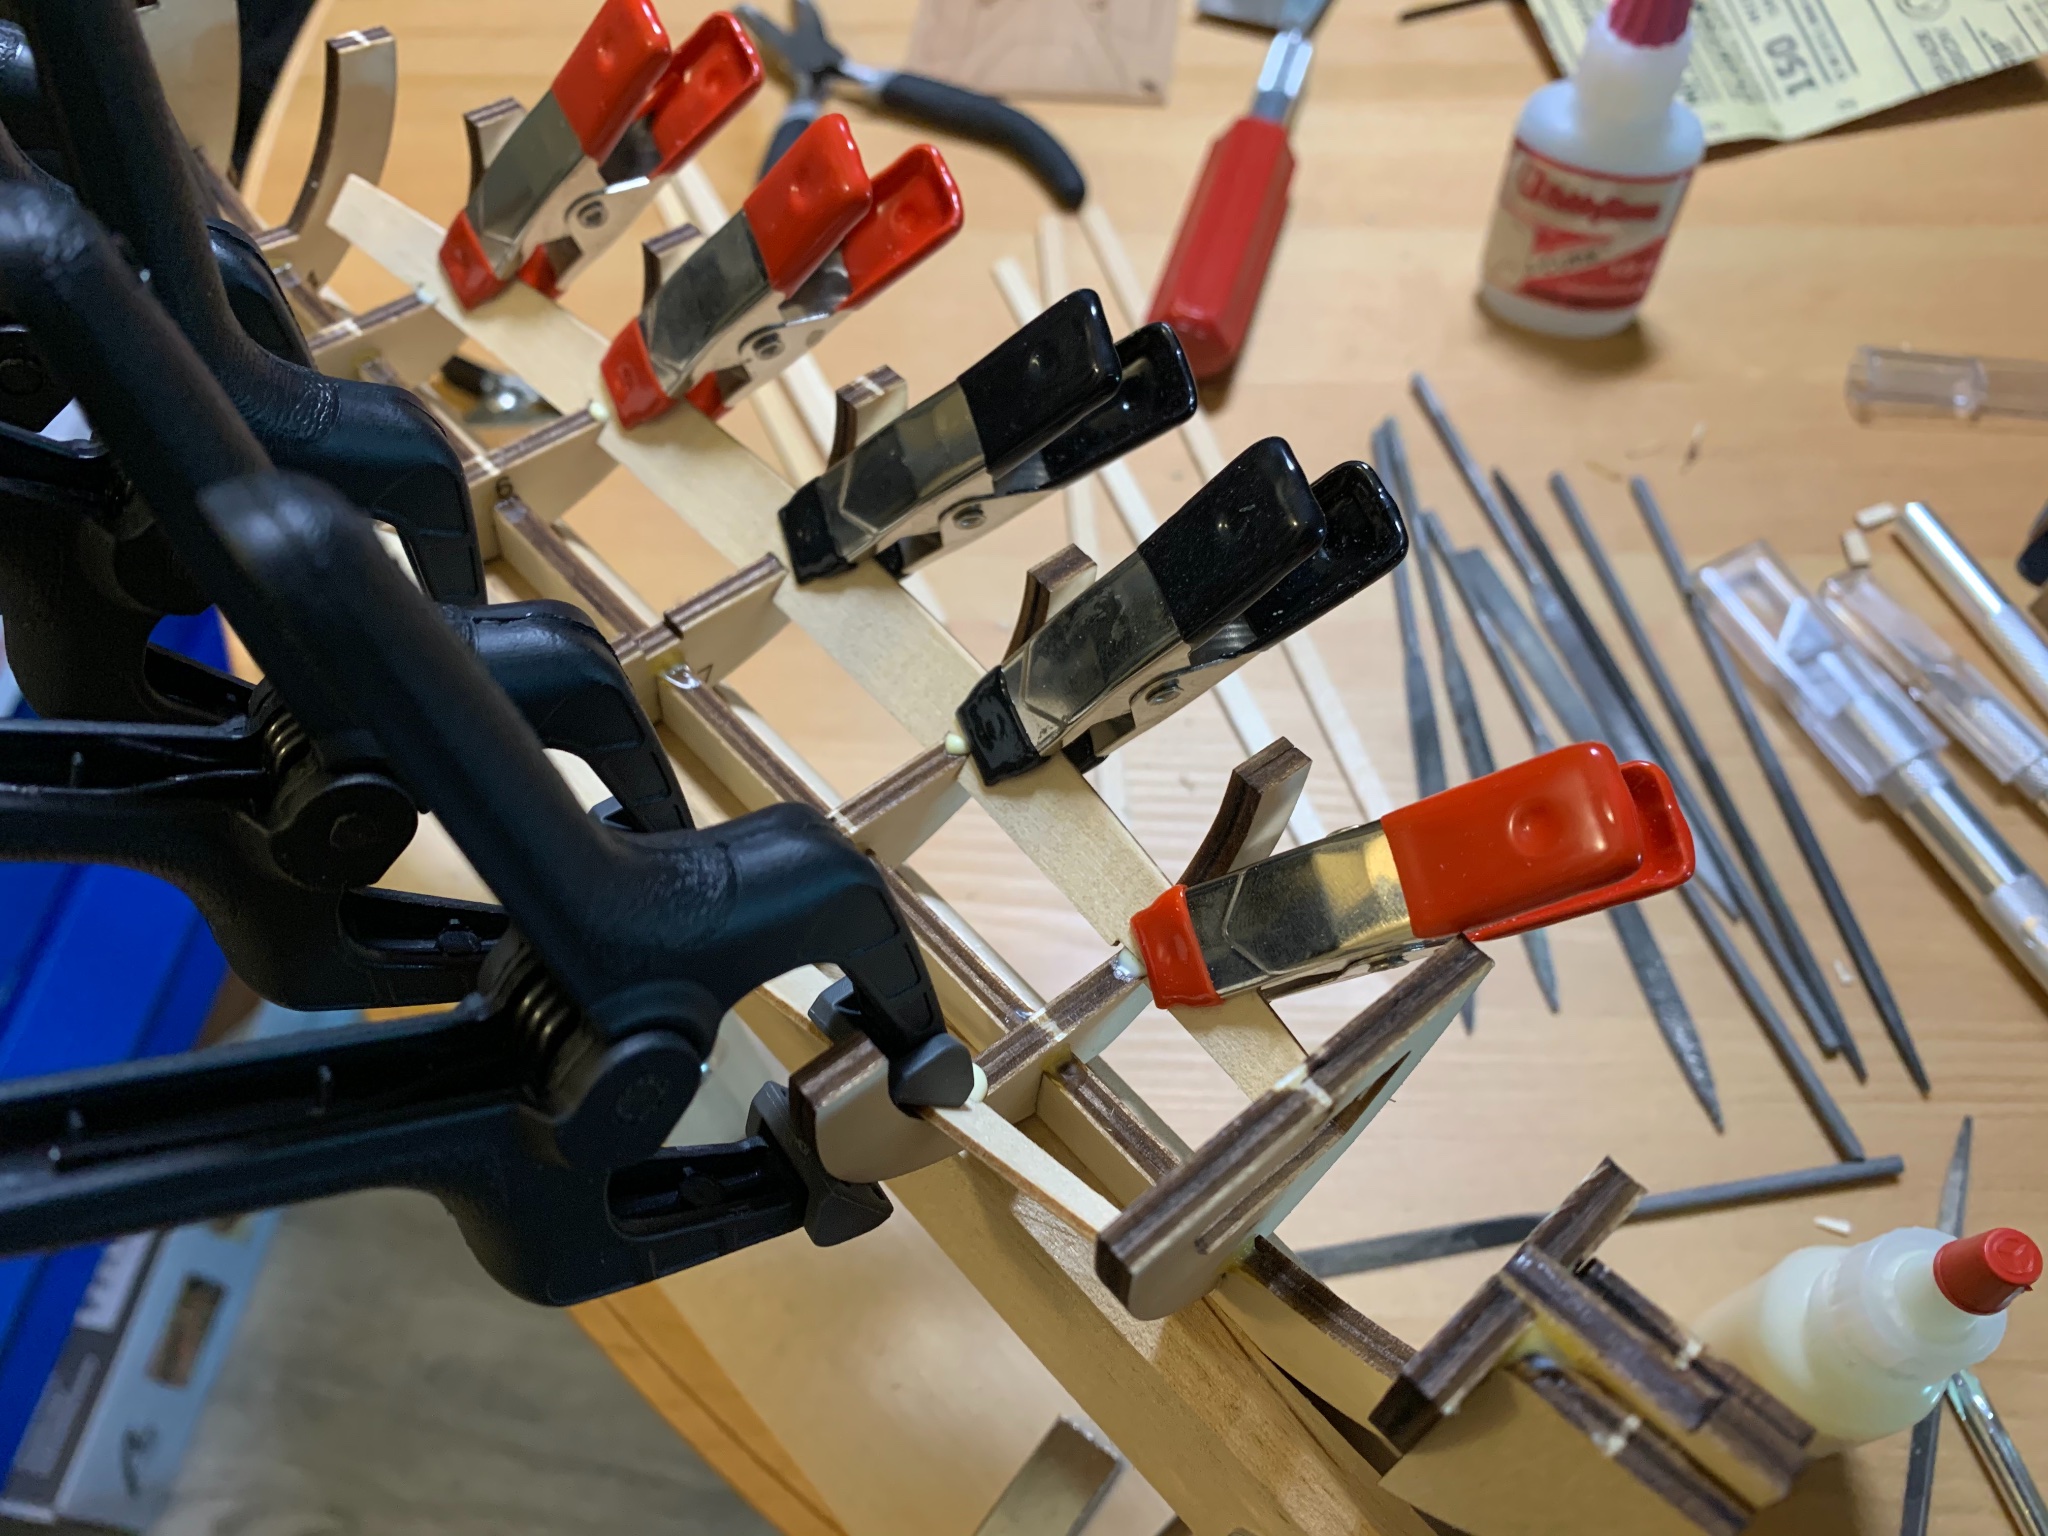
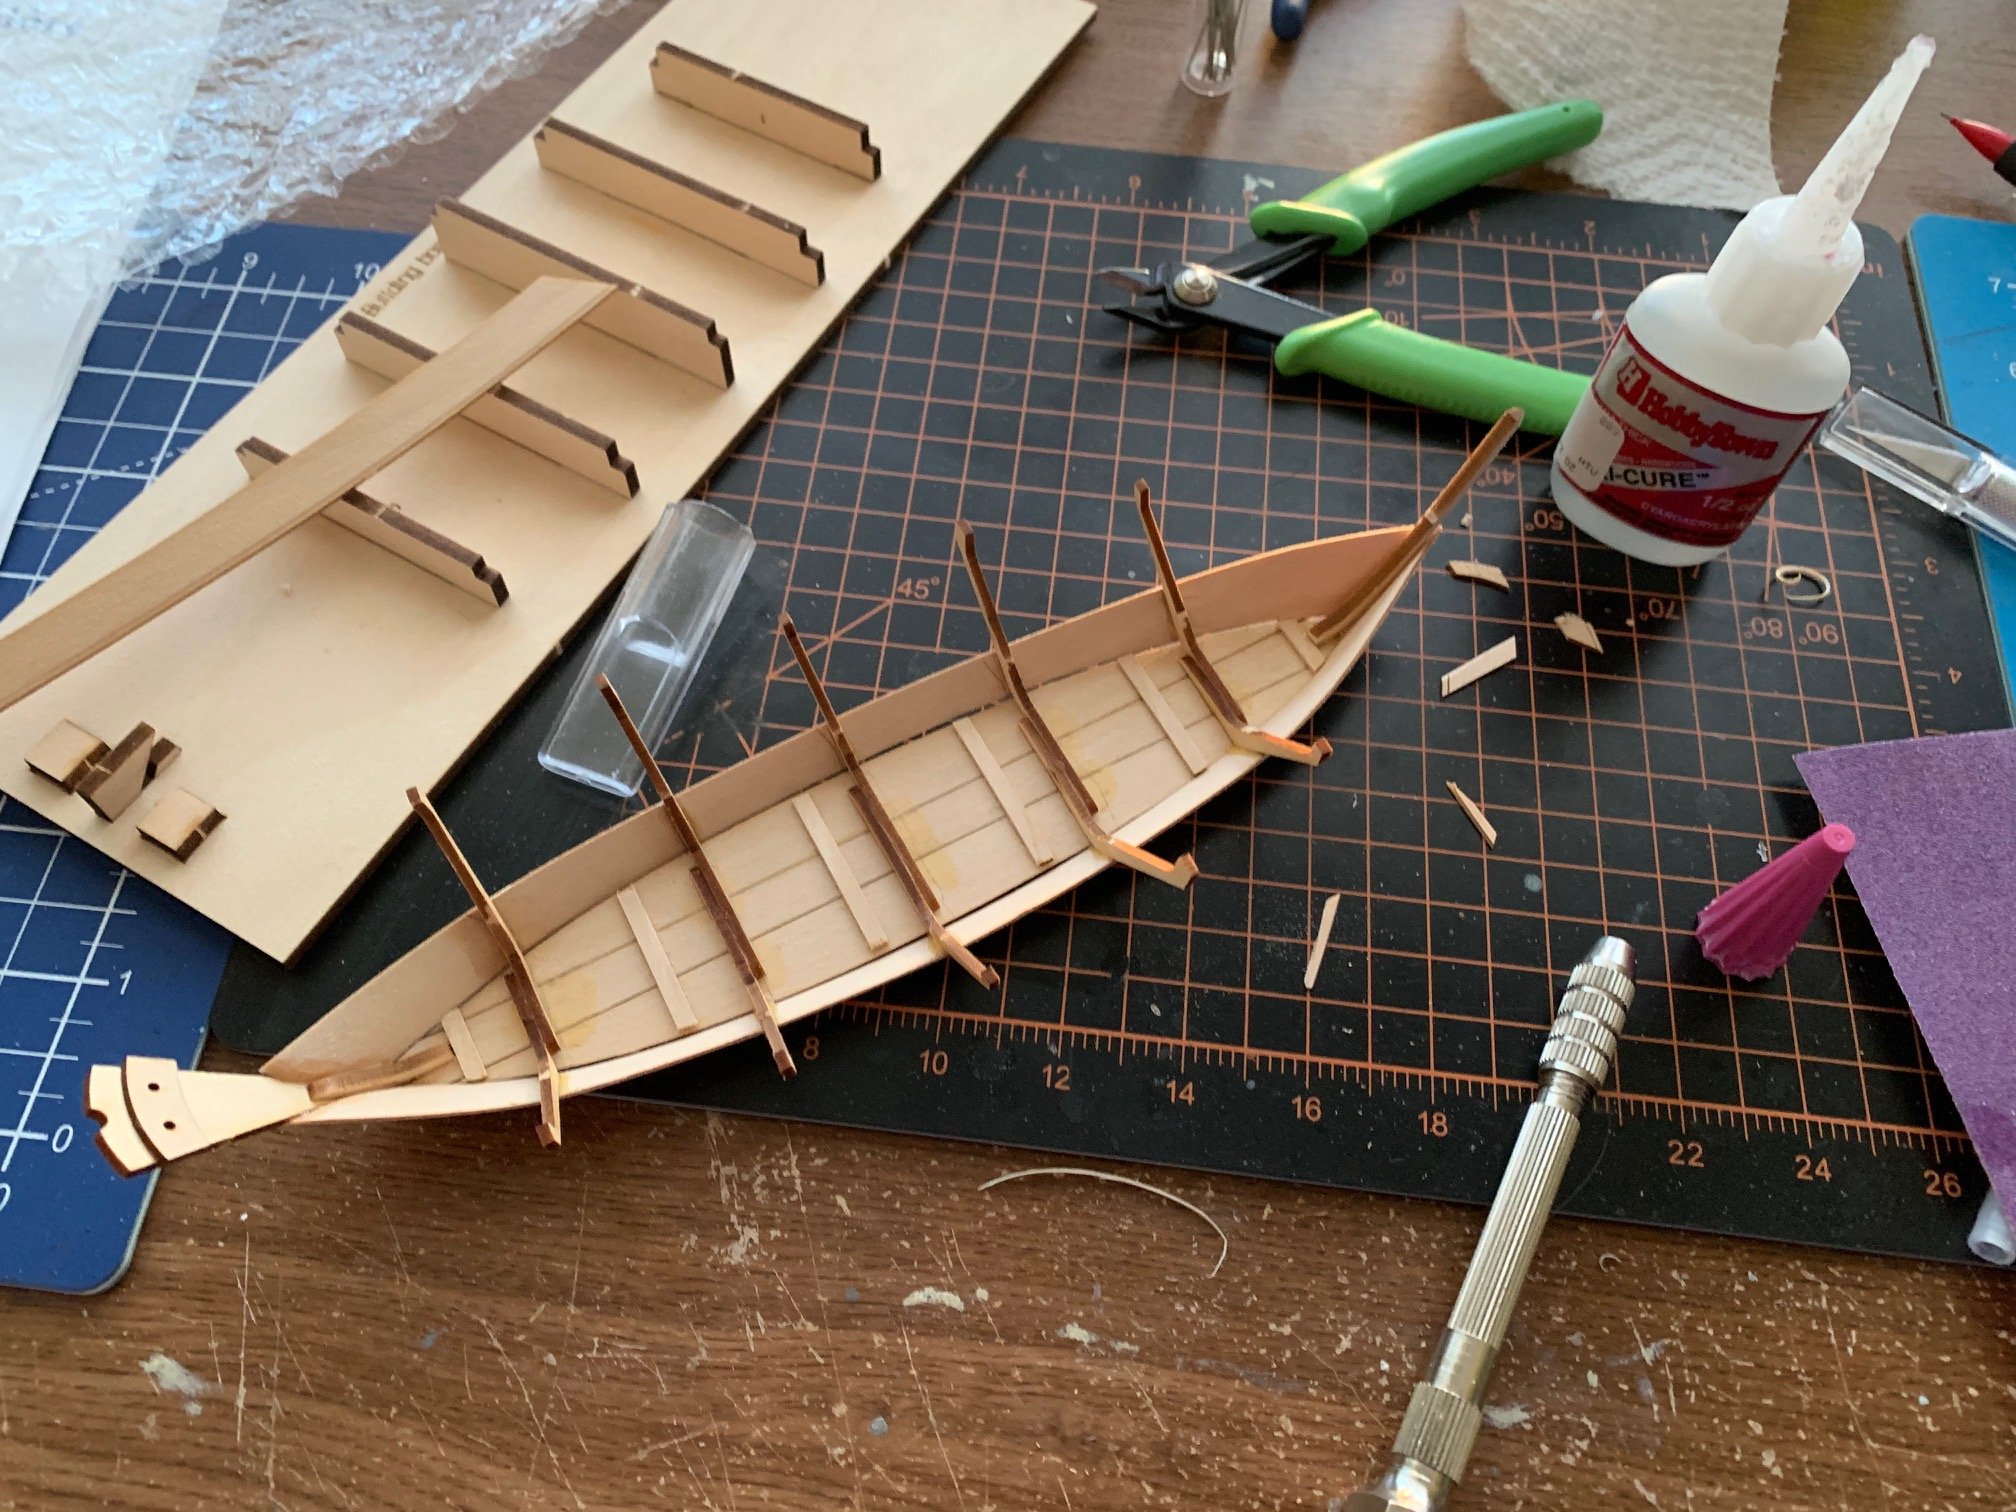
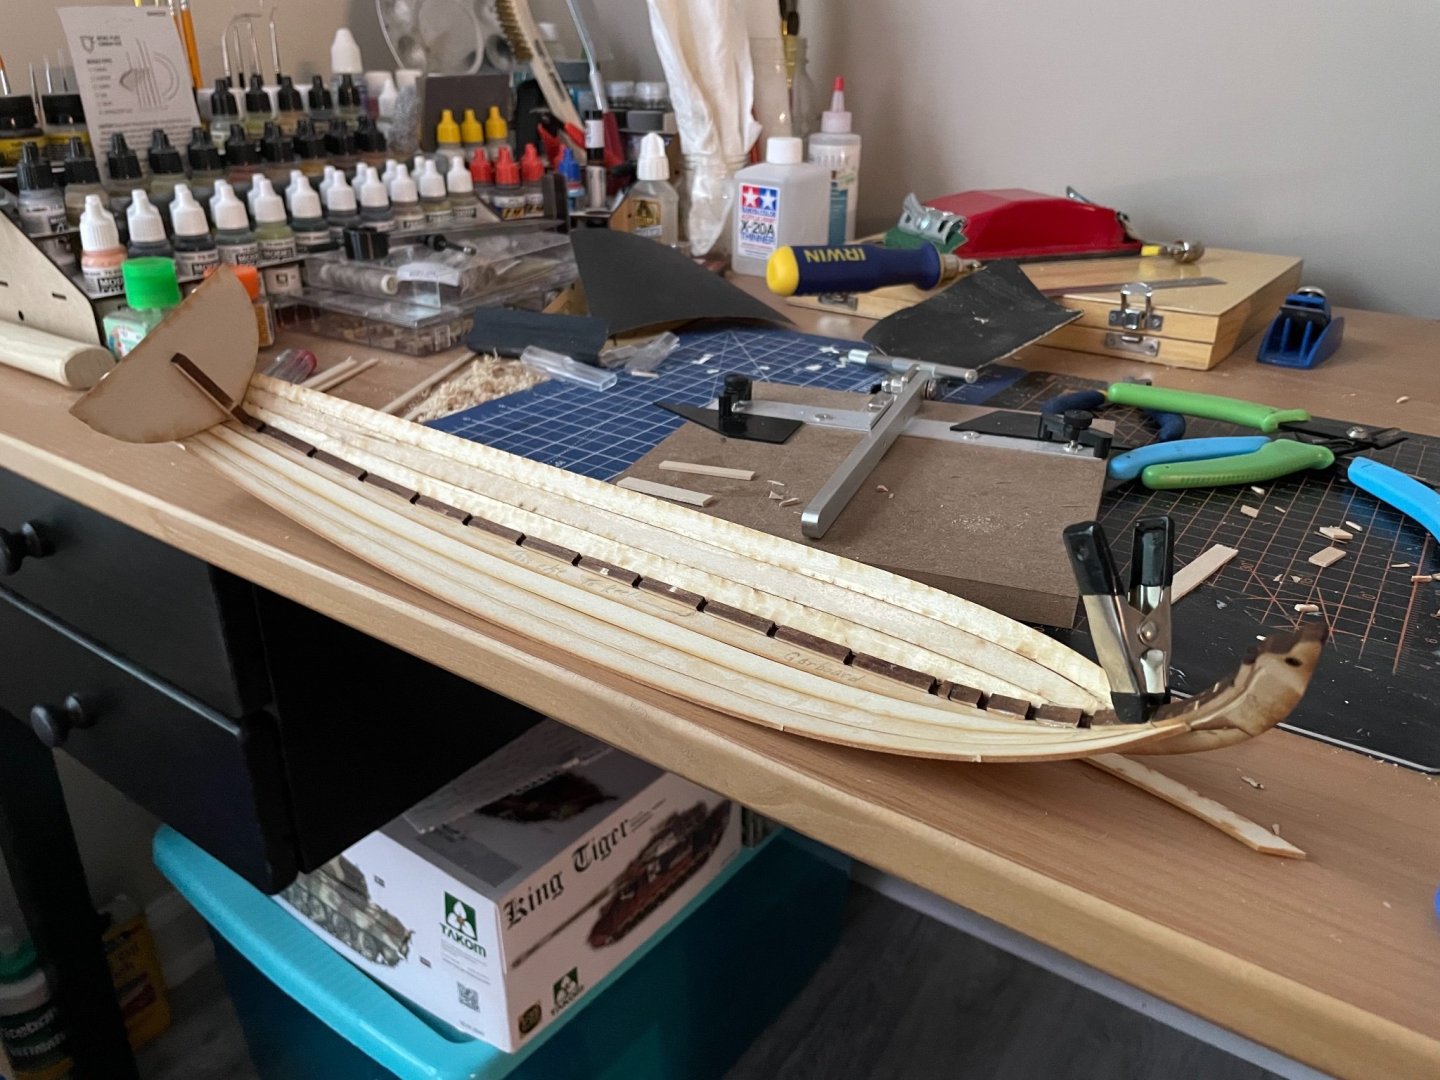
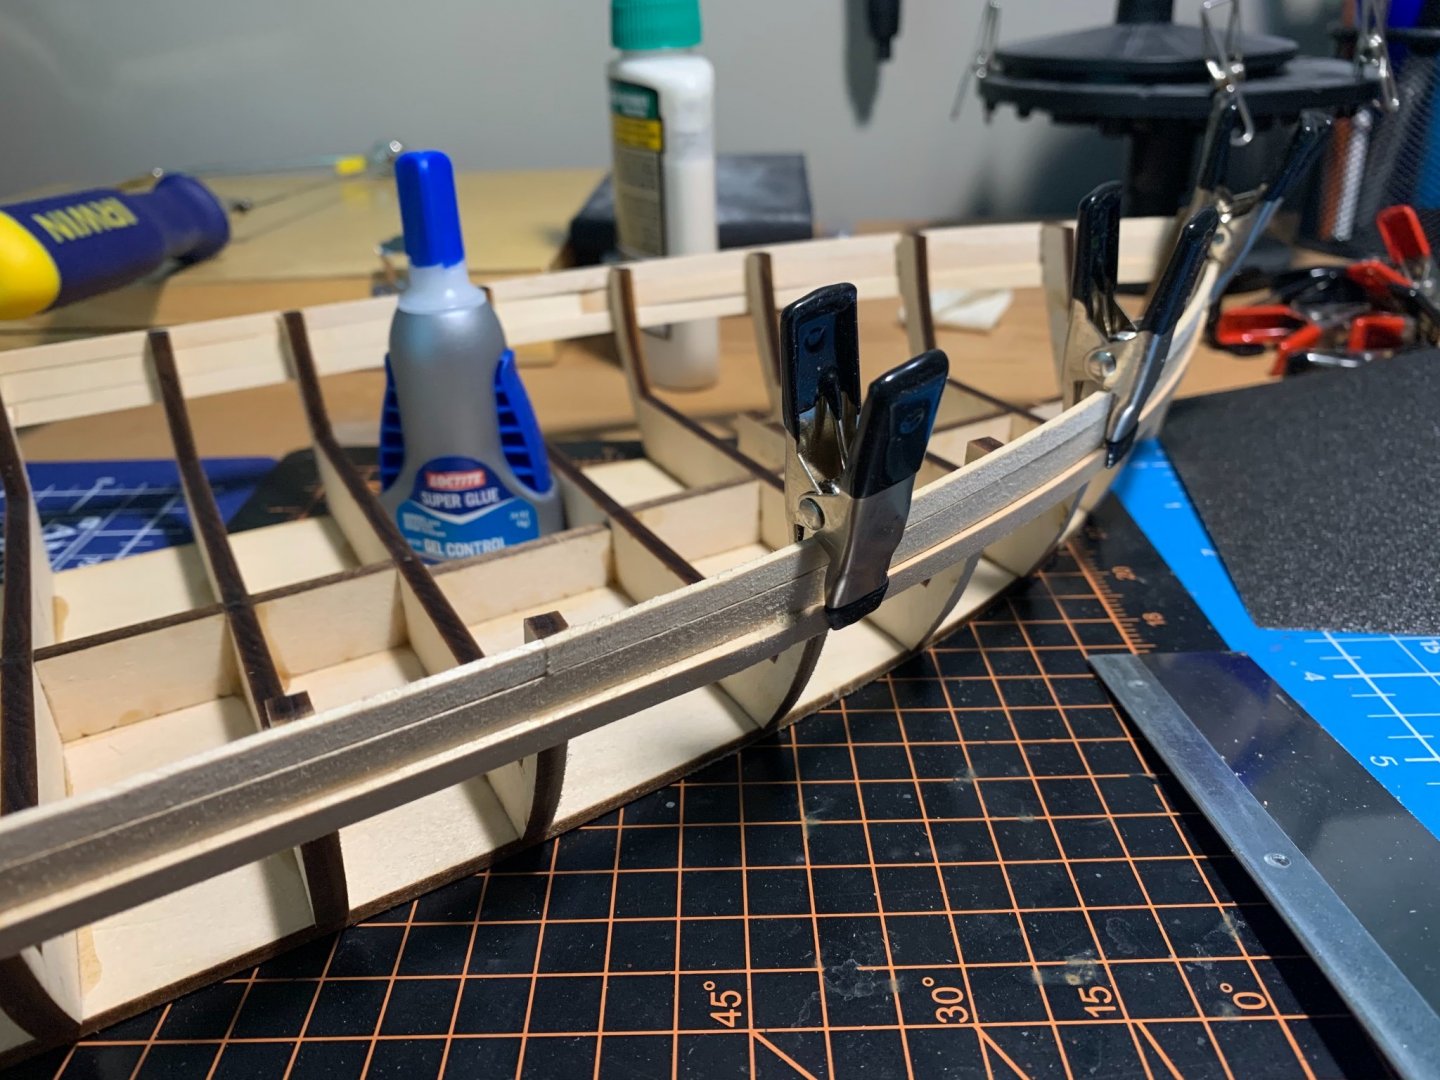
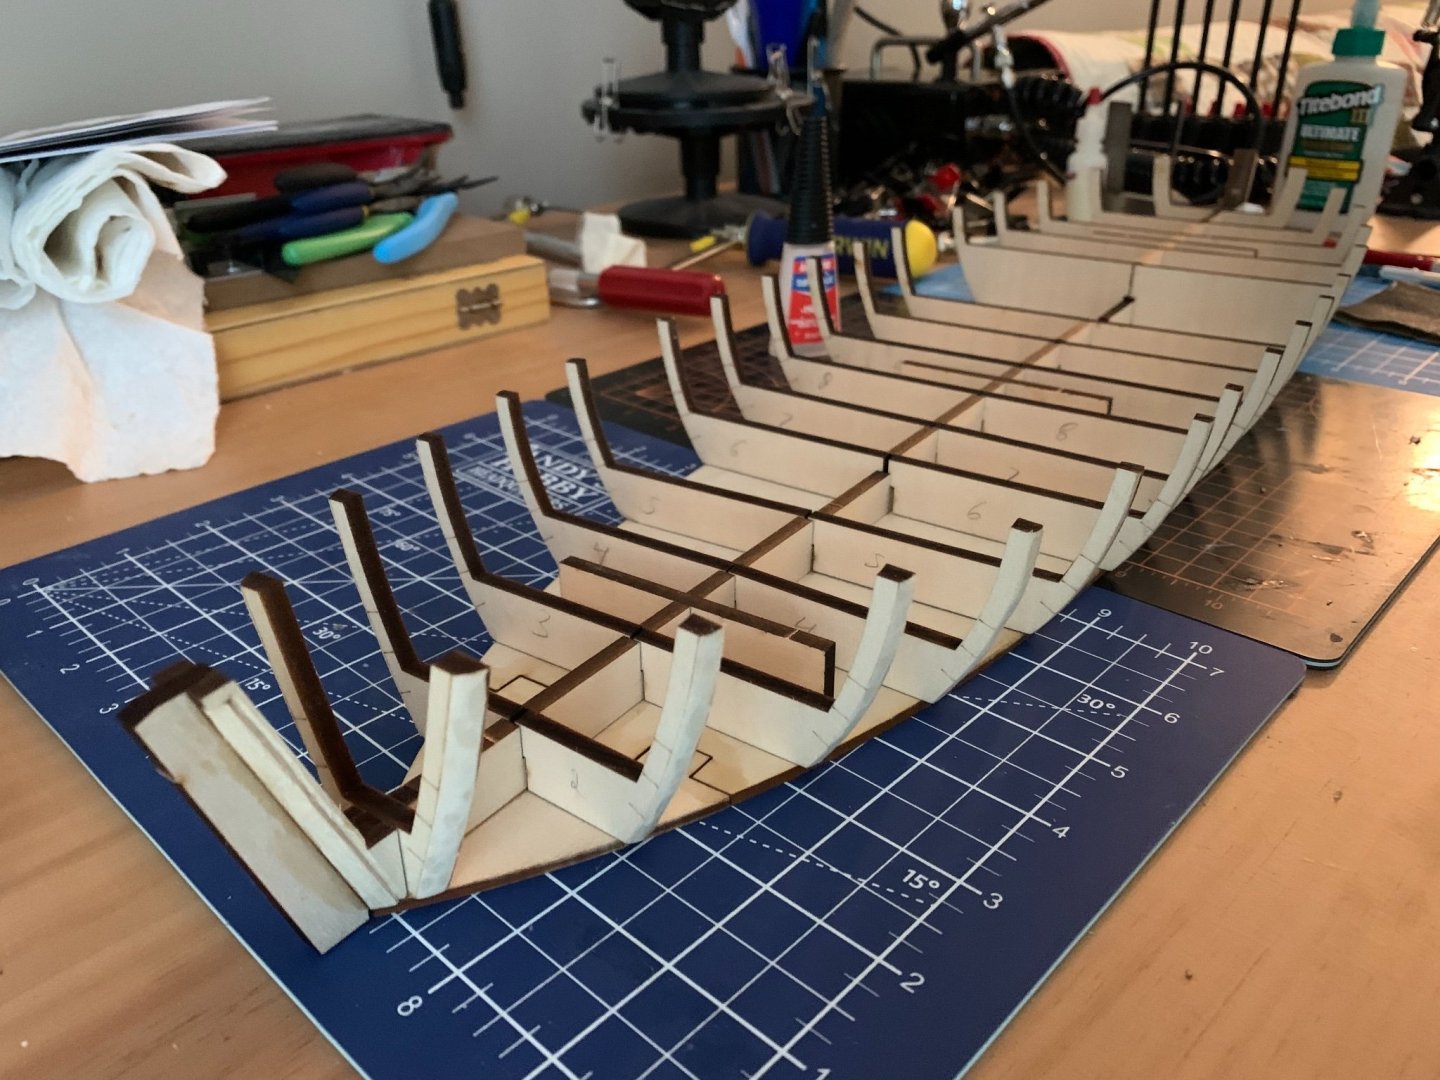
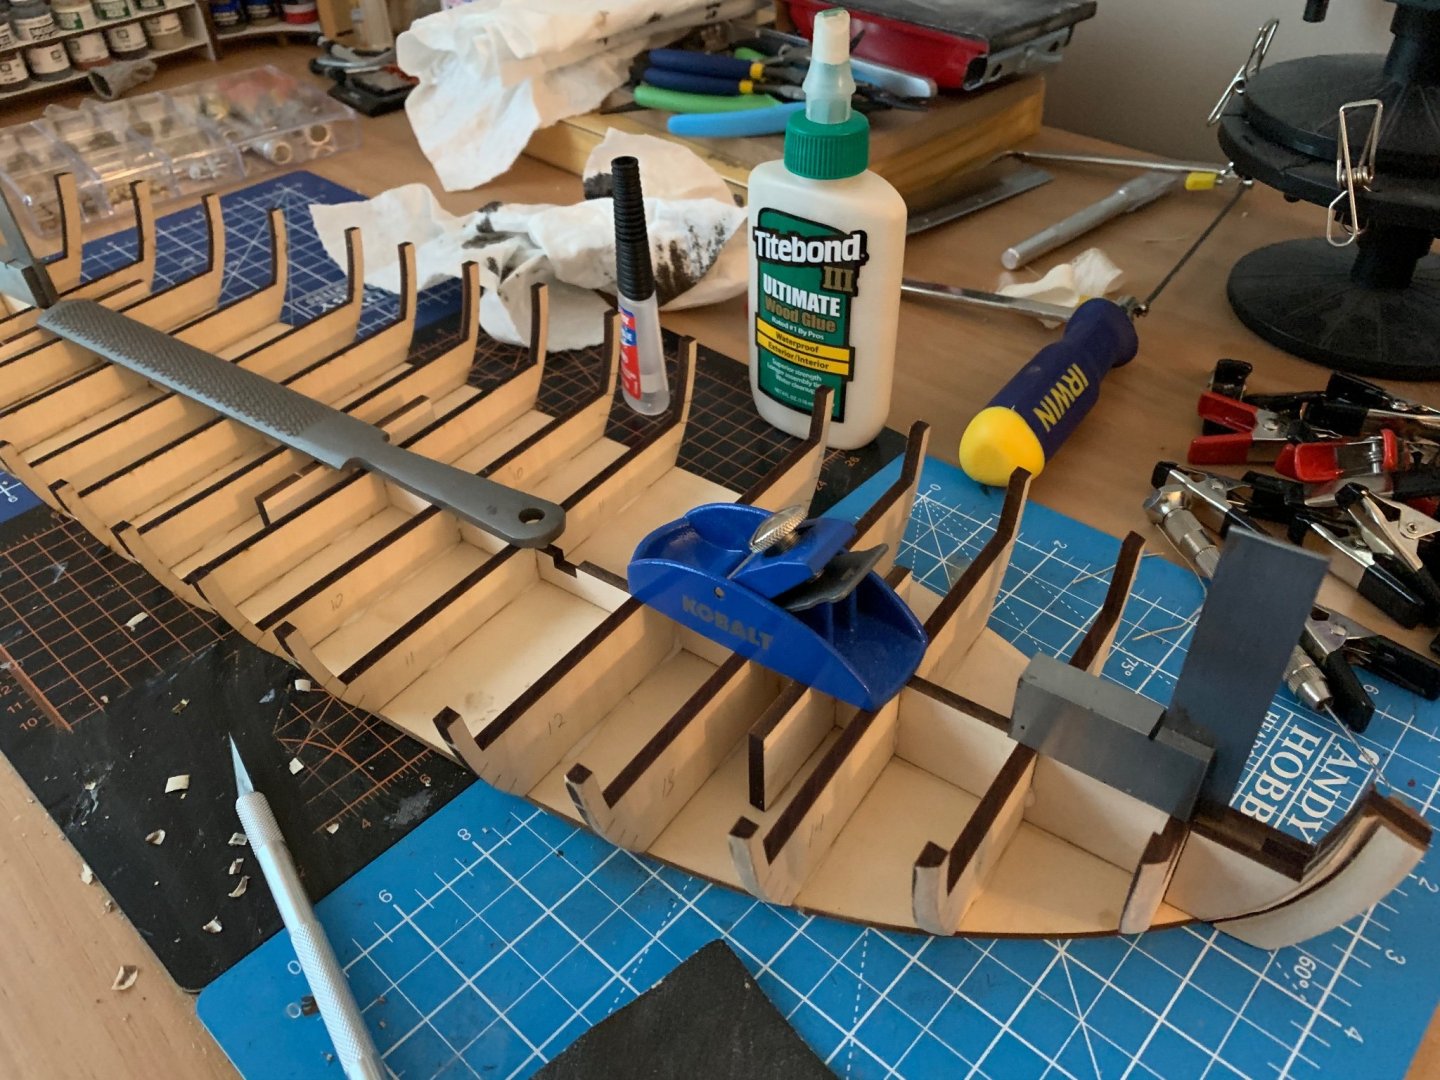
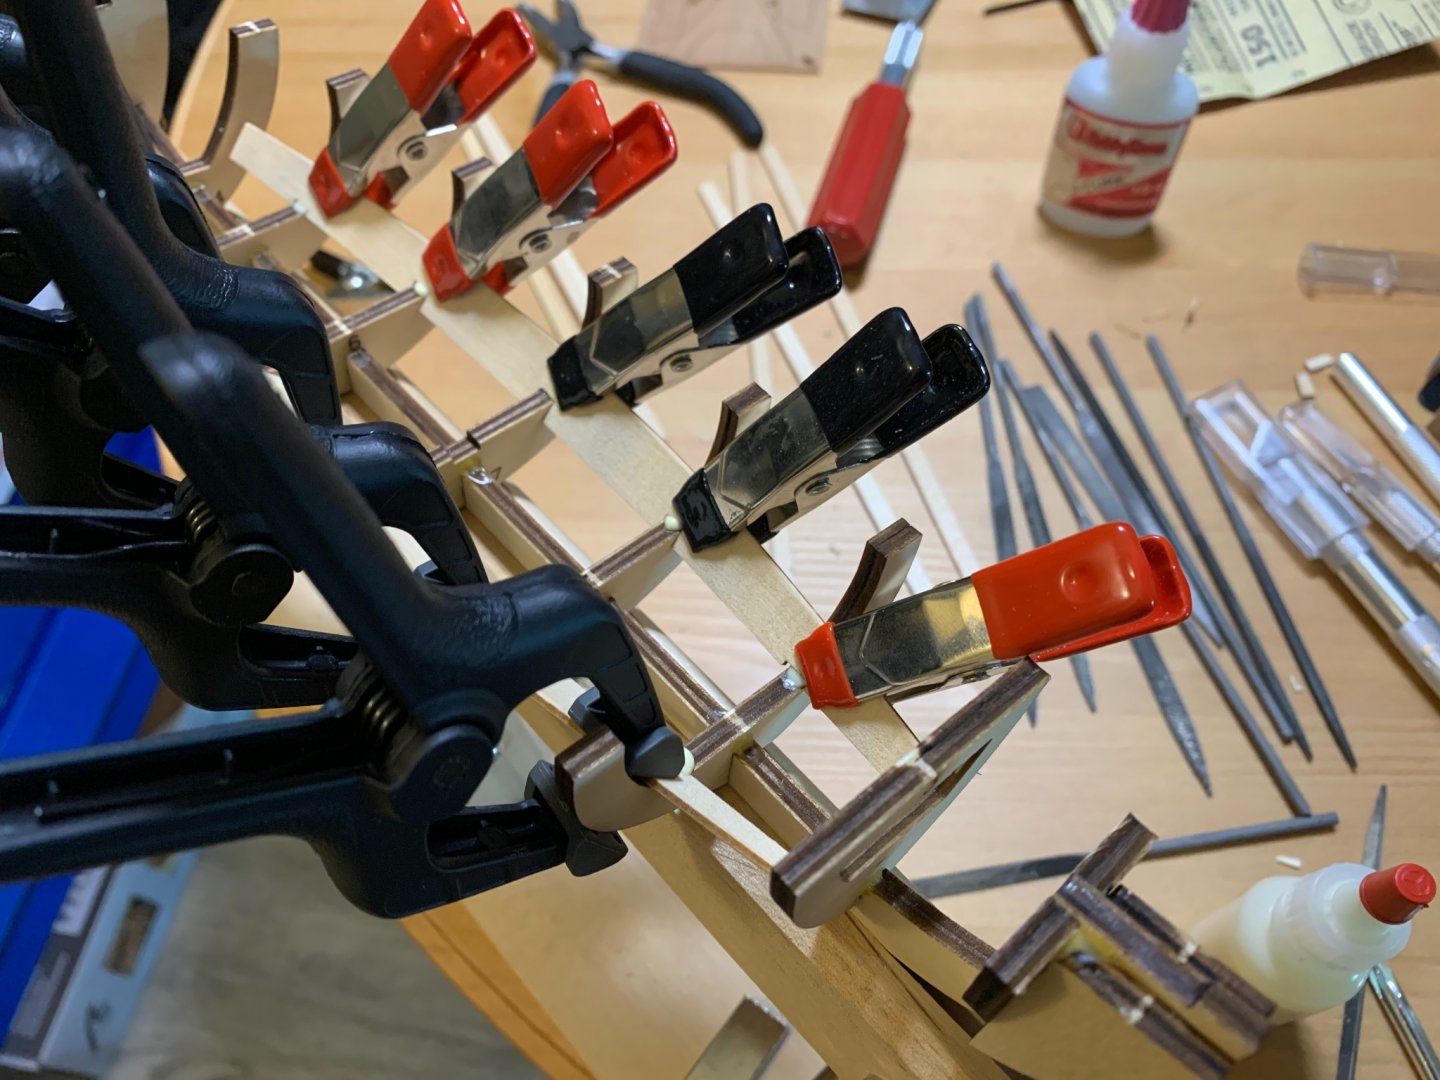
Have been working on assembling the frame. Lots of sanding and cutting here but it has come together really well and quickly. Working on the Stem and Transom, most of it is sandpaper work but an sharp angled carver is necessary for cutting the rabbet. A laser cut line in the frames show you exactly how much needs to be shaved off, while the frames in the middle just need a little sanding. Using every heavy flat object I have to get the frames glued evenly. I’m going to let that sit for a couple hours, and then it’ll be time to start planking!


- 32 replies
-
- 4
-
-
- Model Shipways
- Philadelphia
- (and 1 more)
-
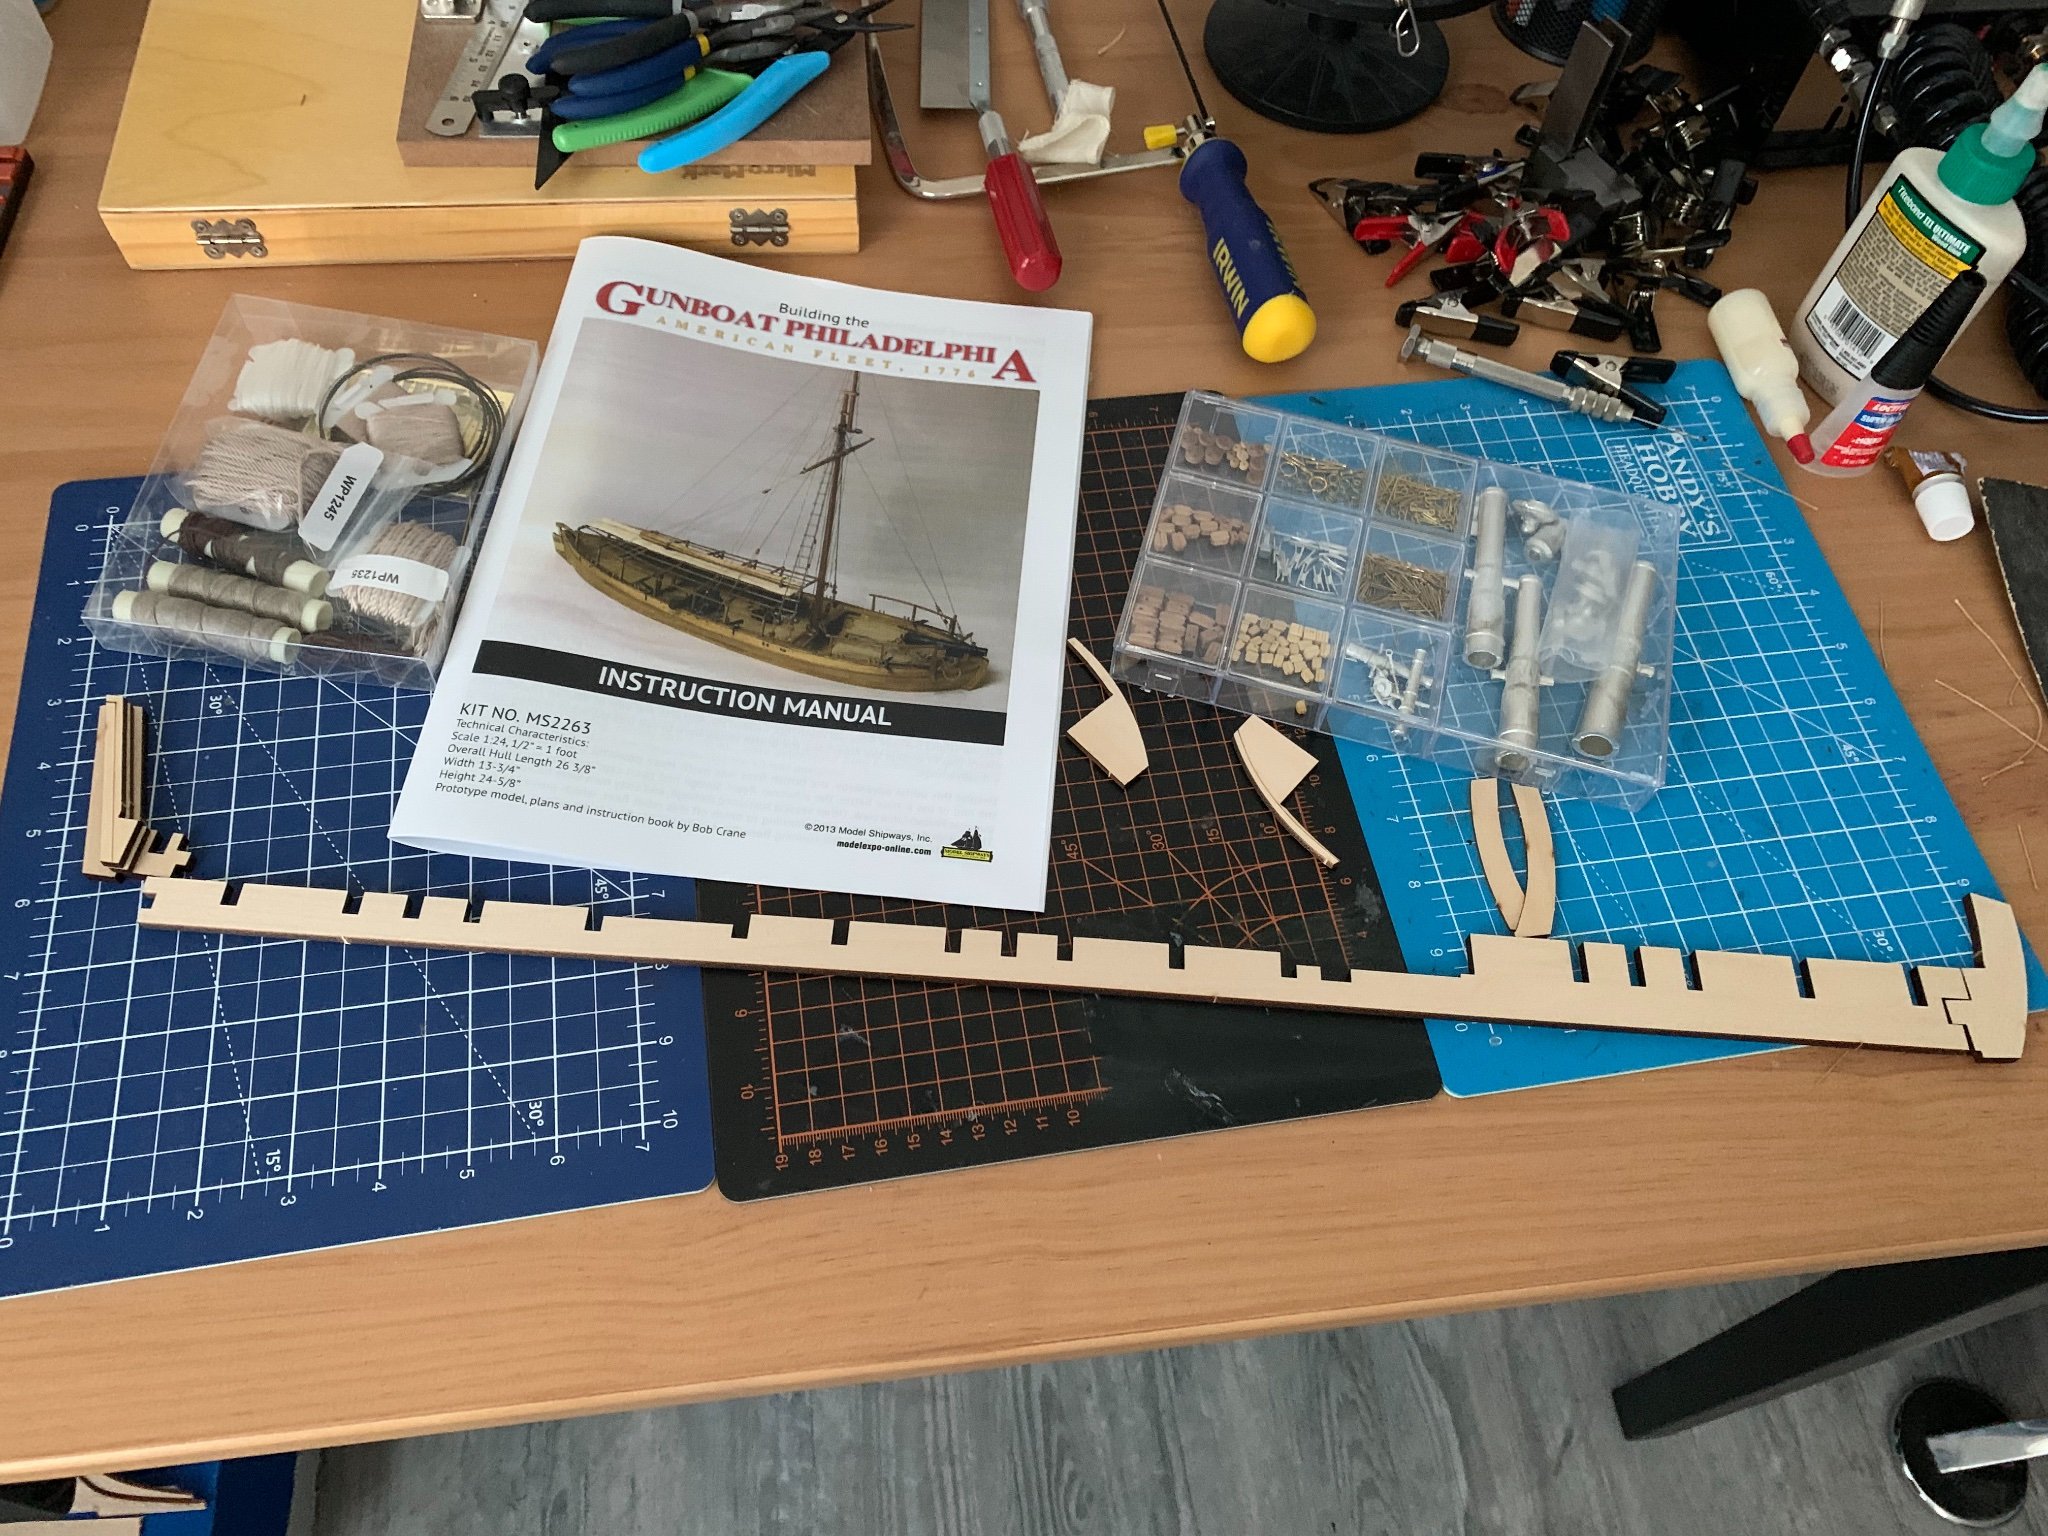
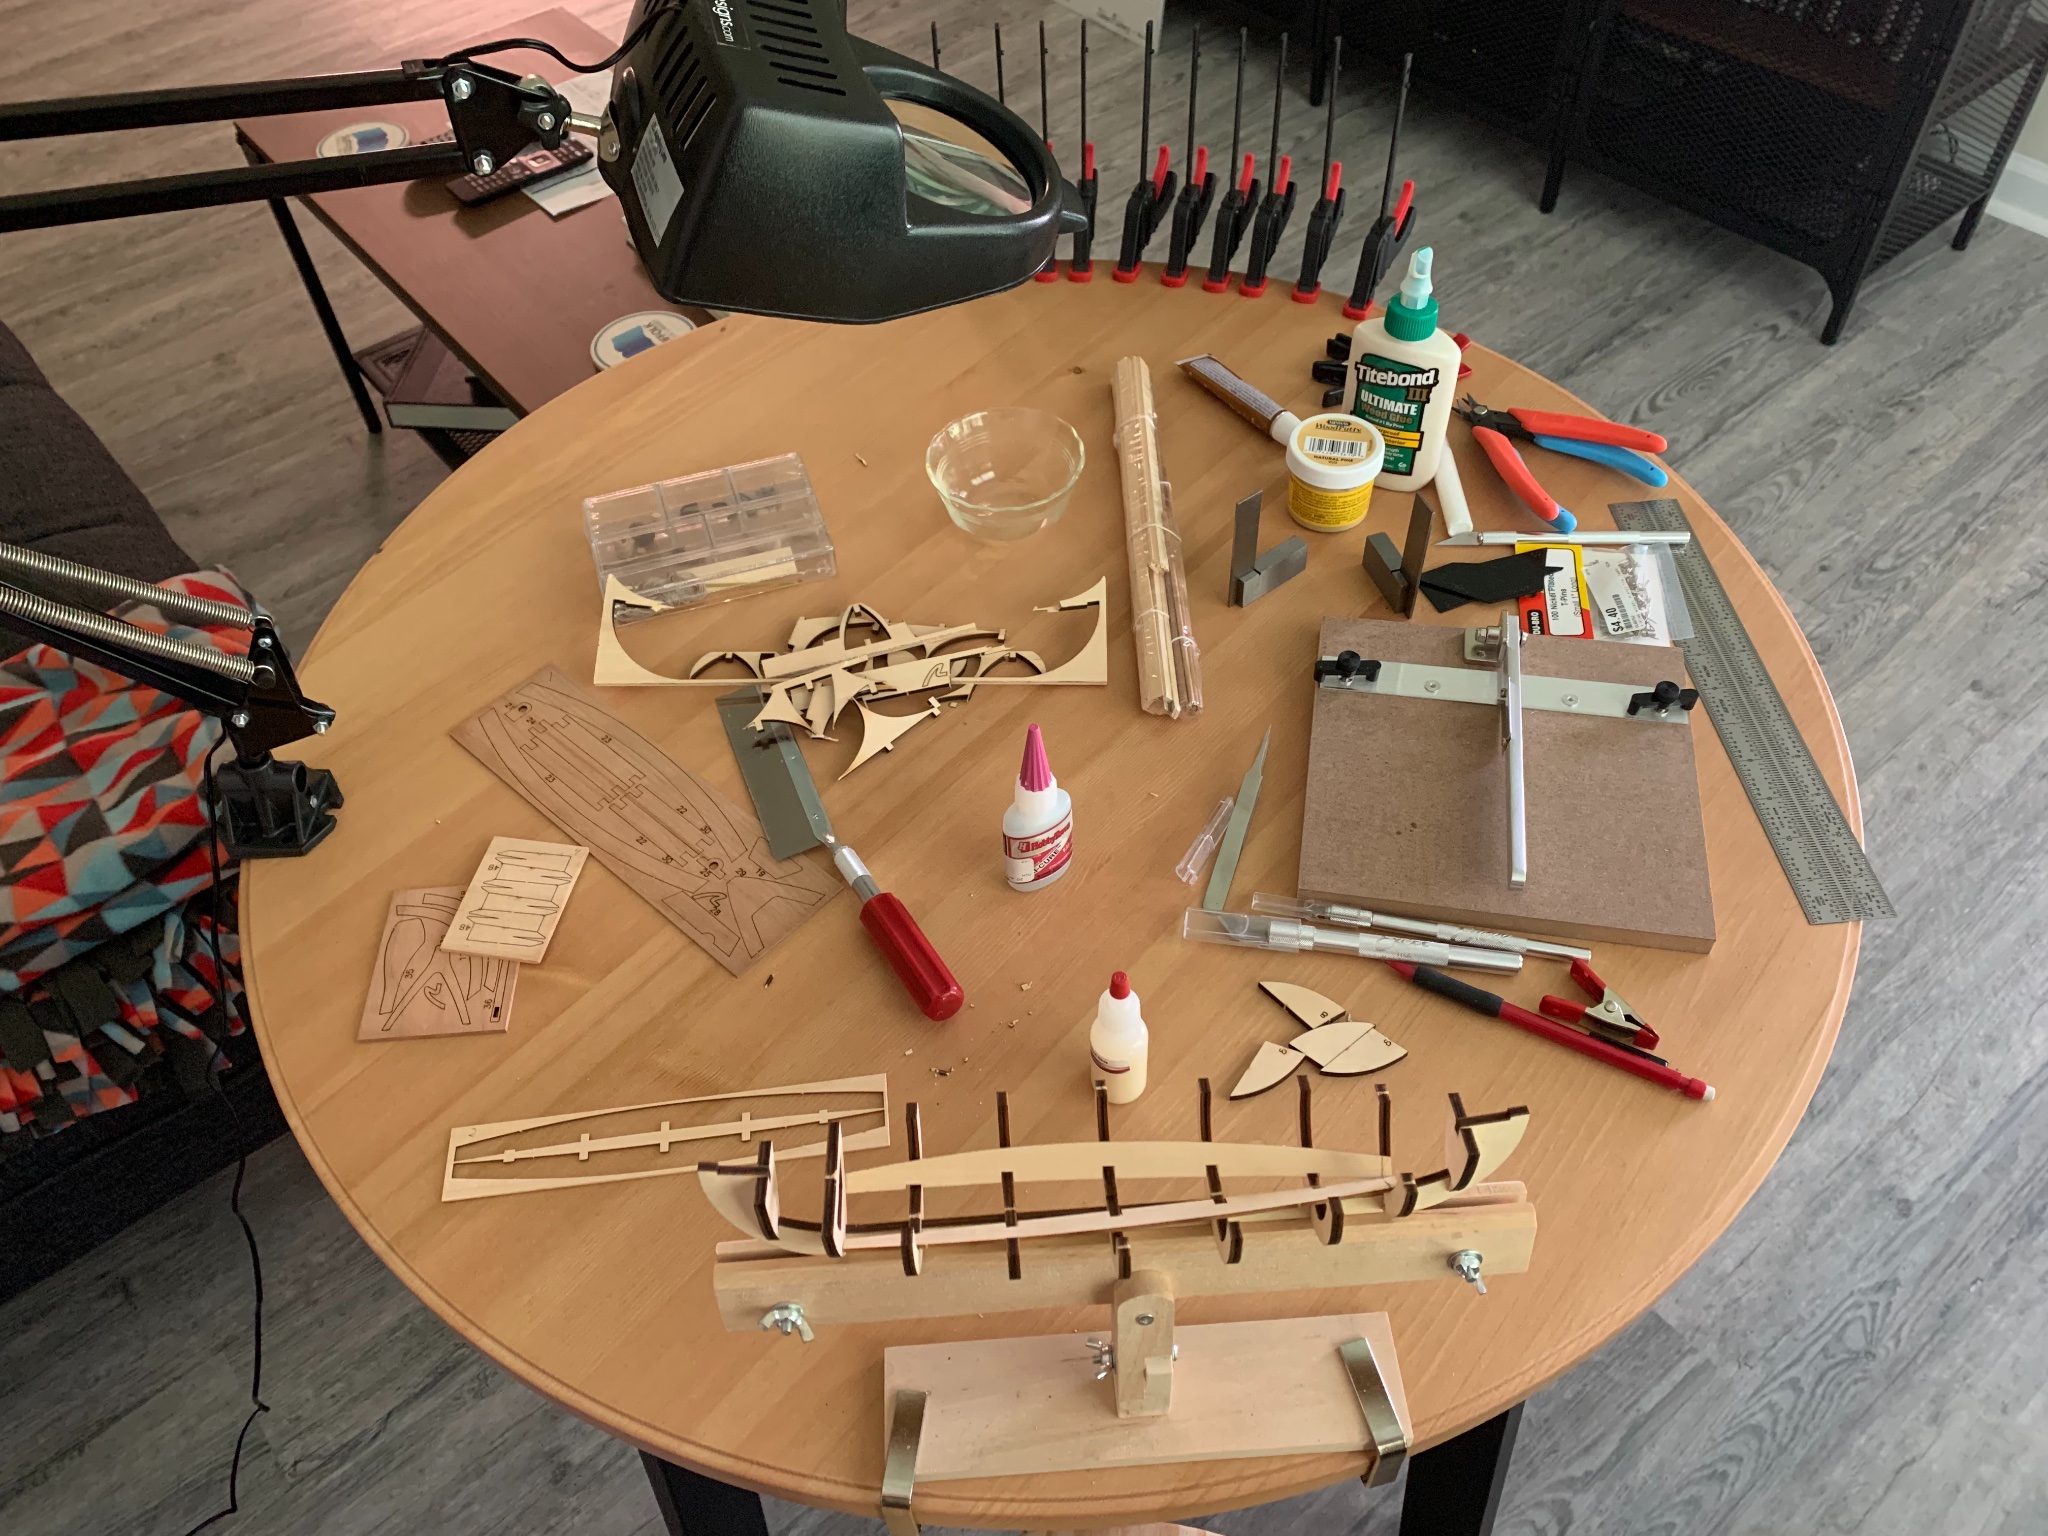
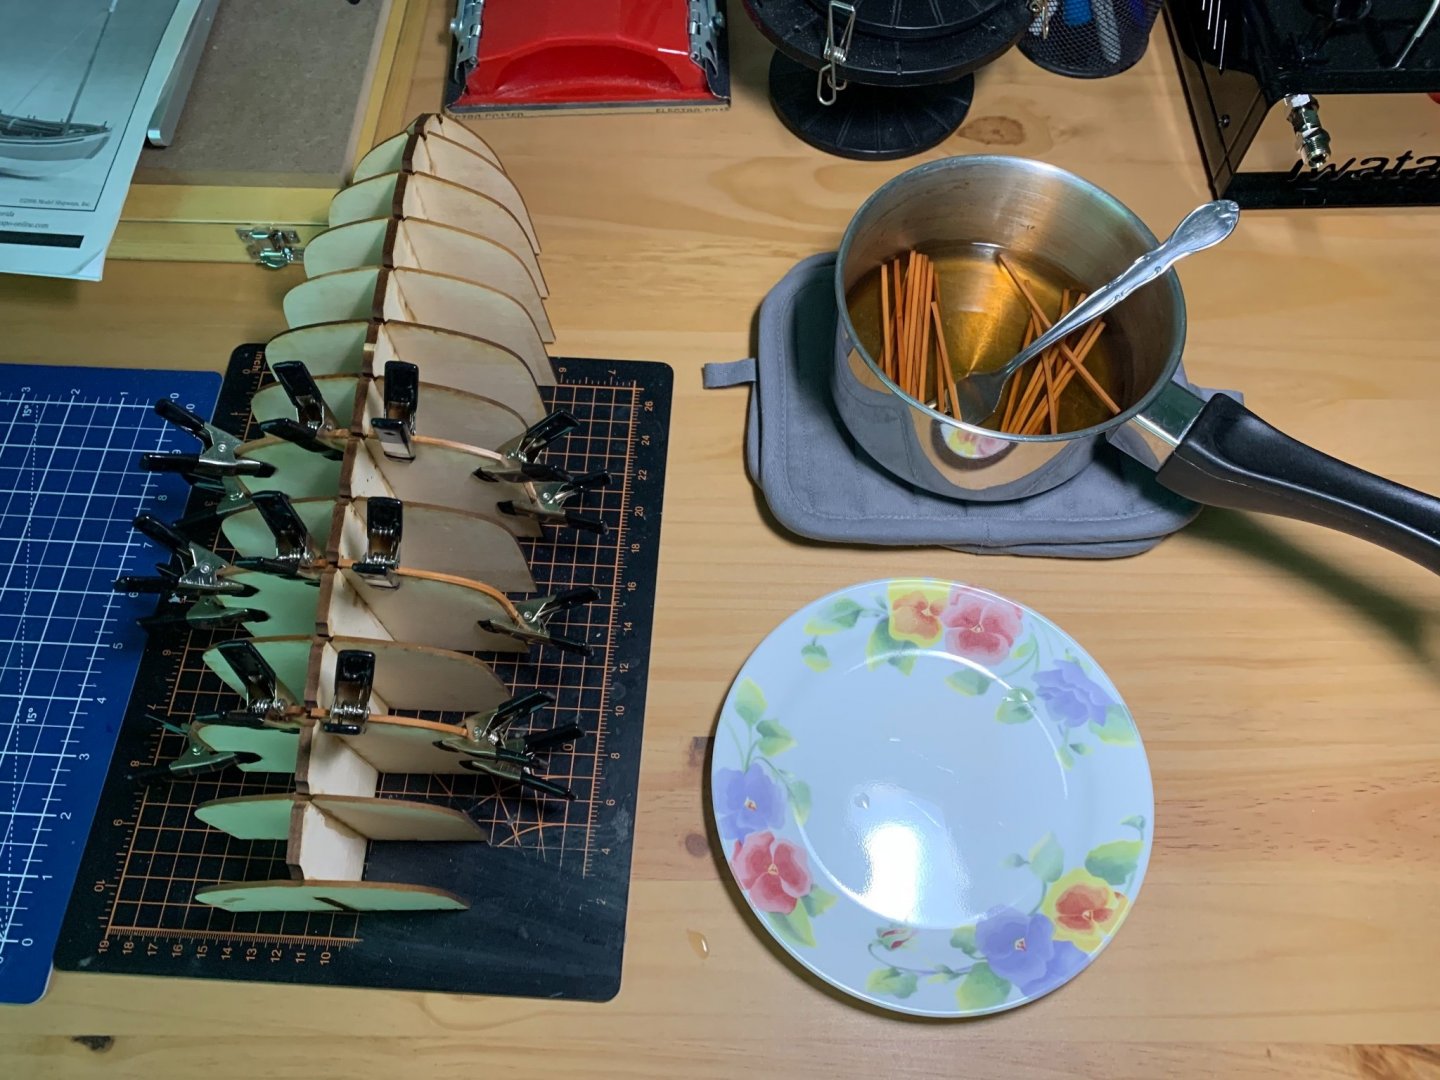
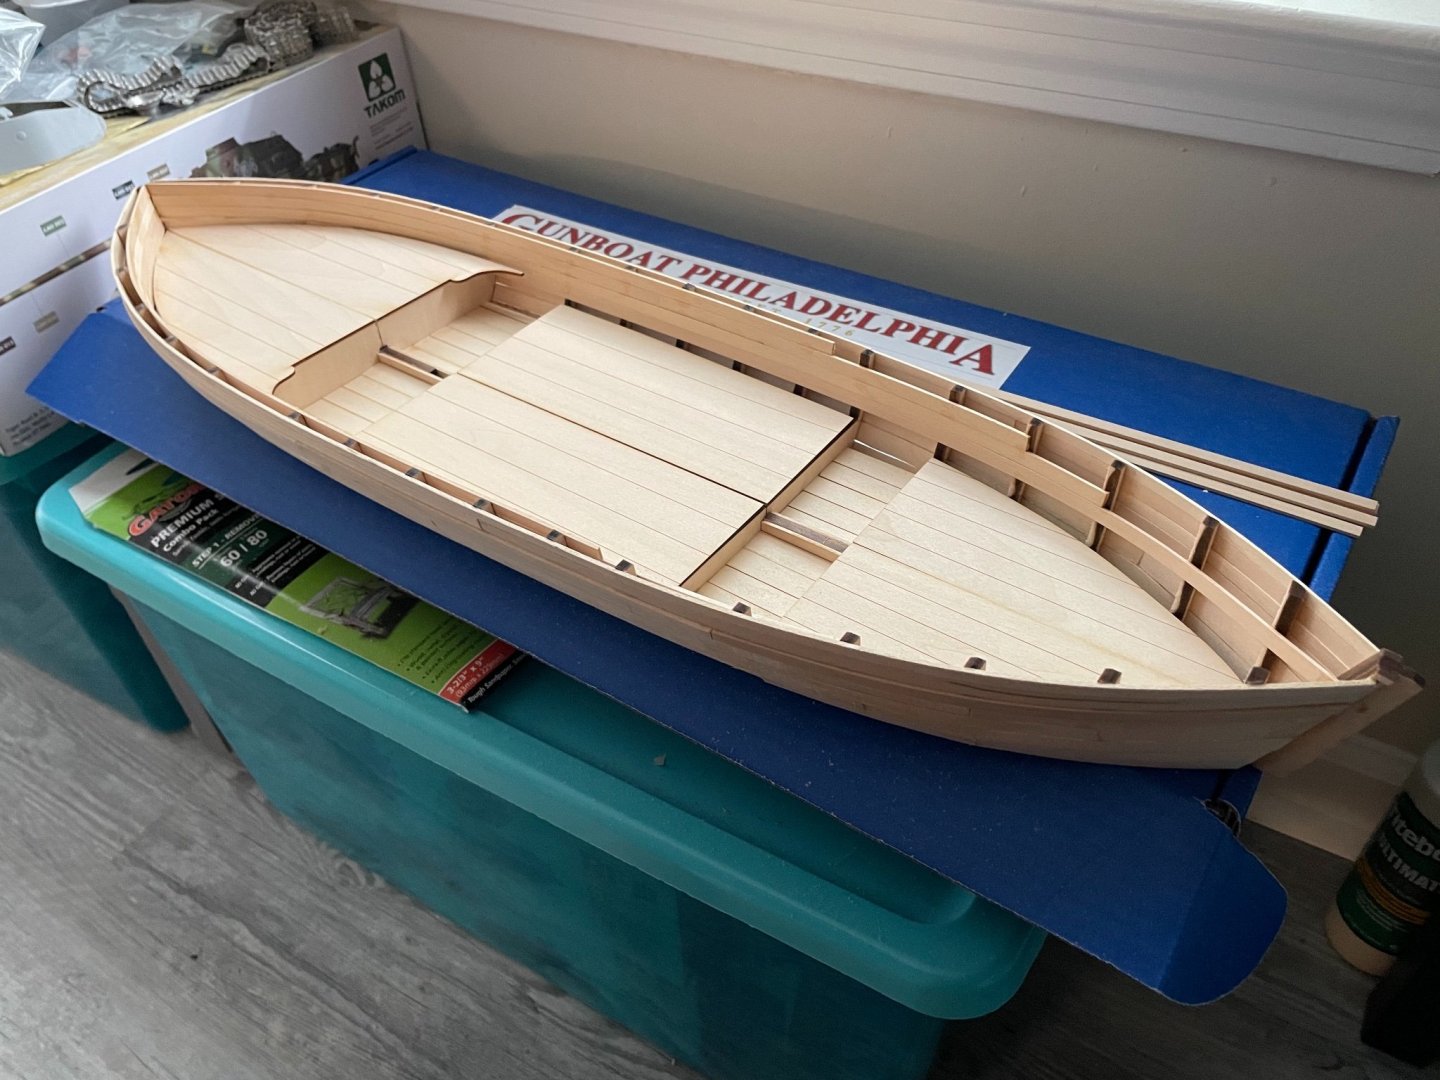
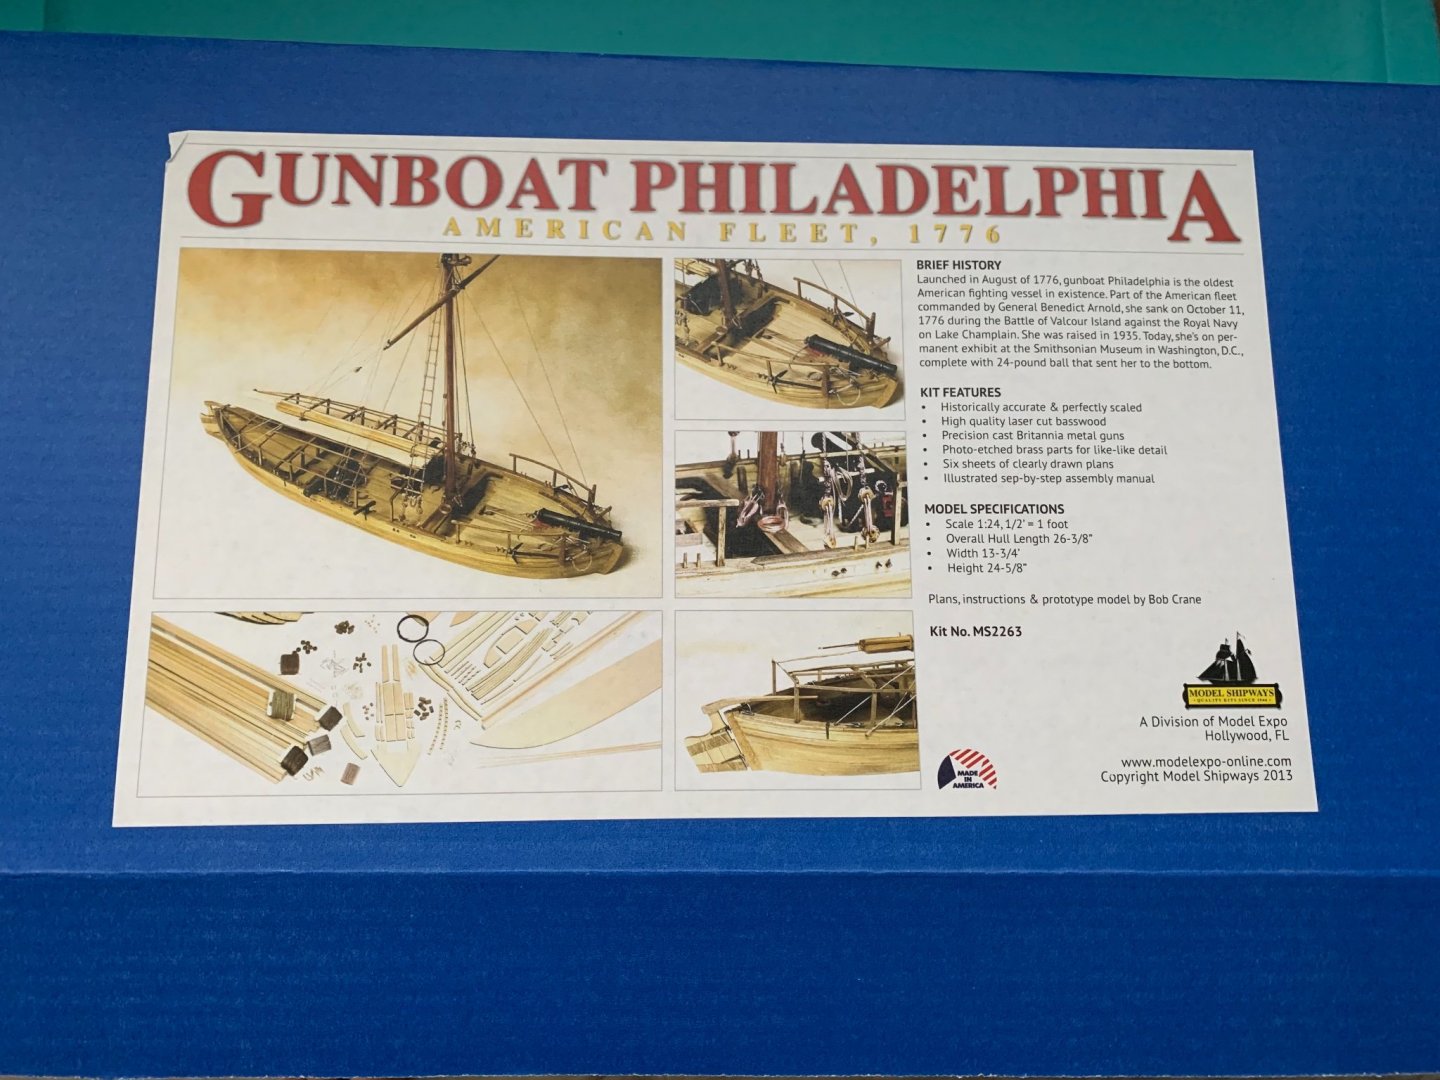
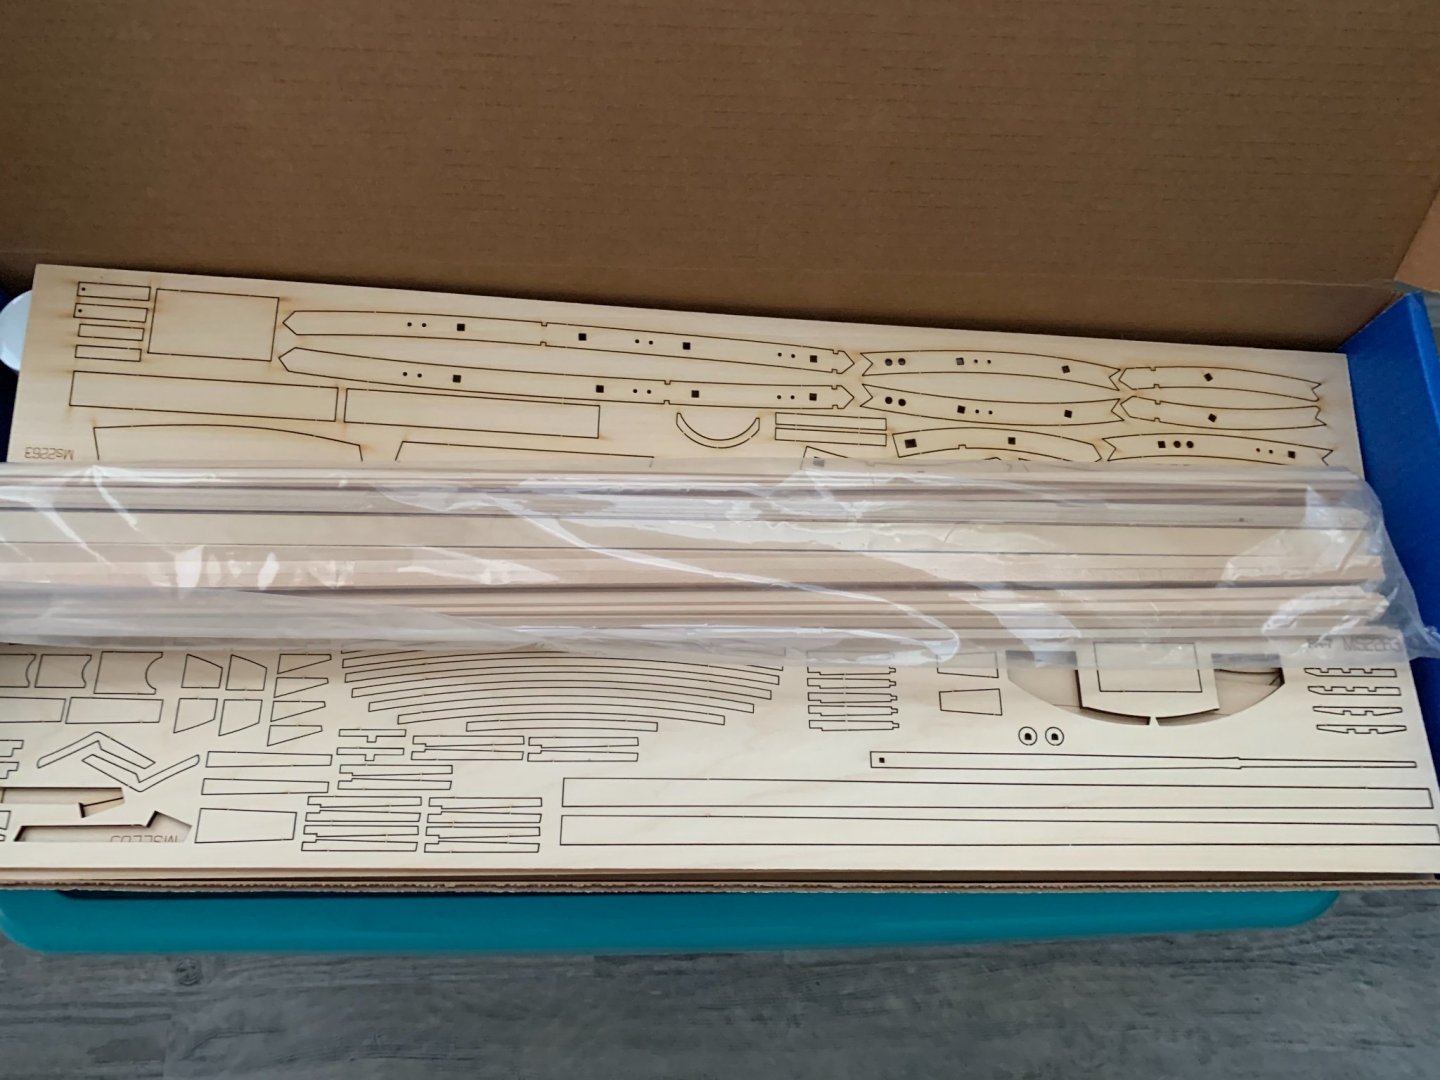
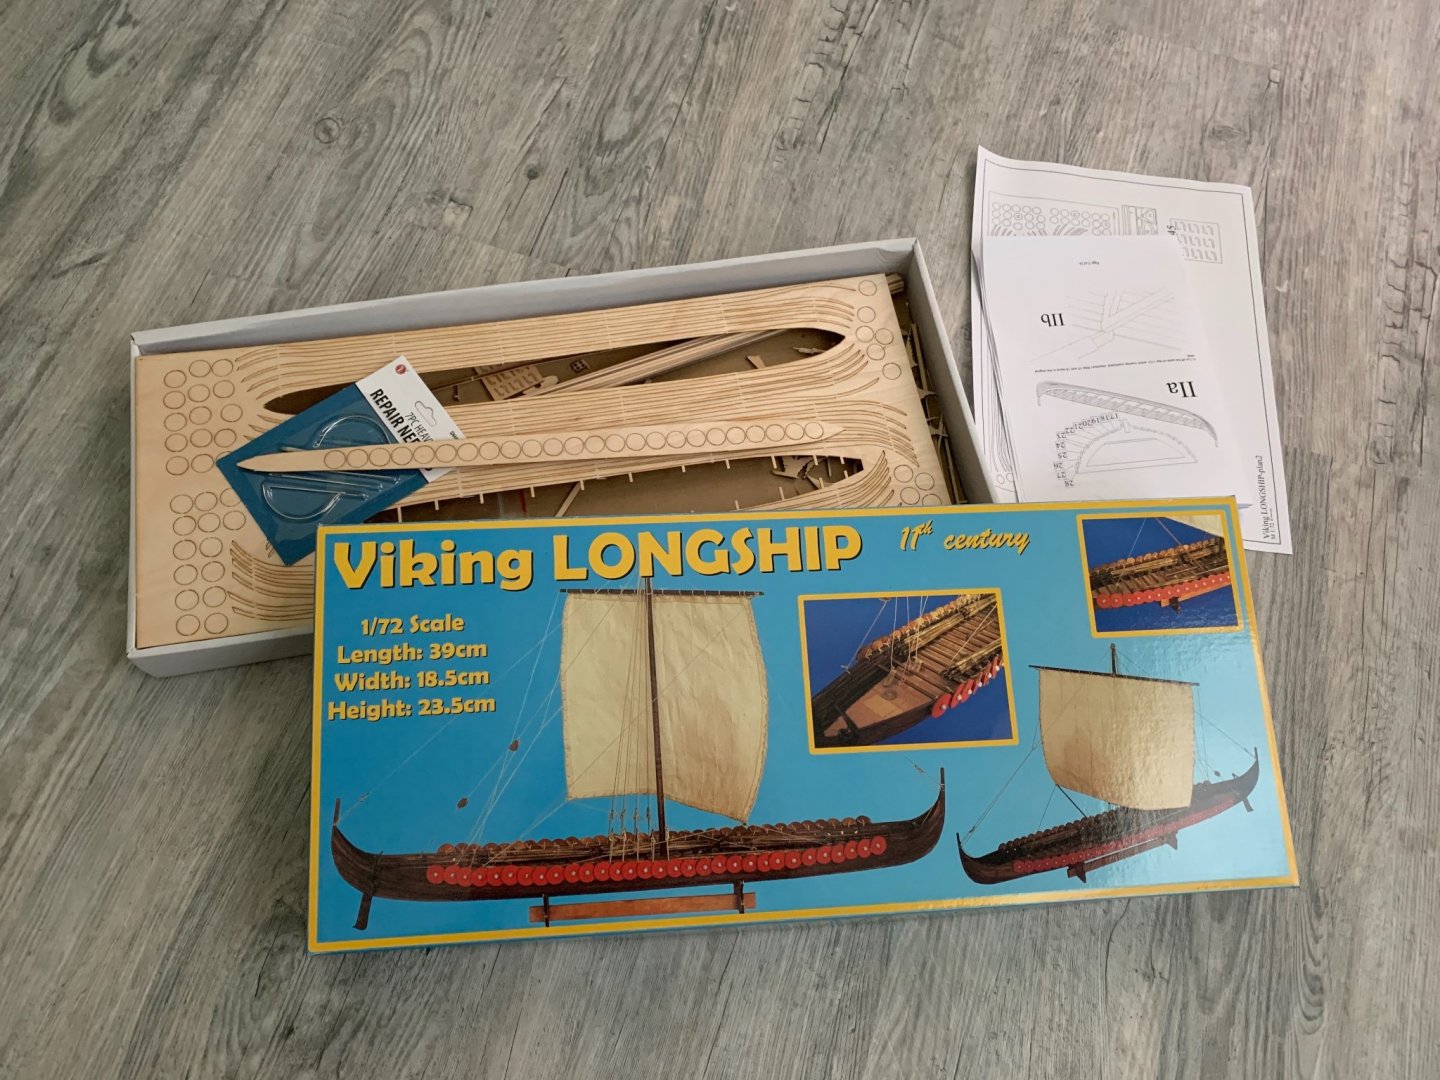
I got this kit a couple months ago, intrigued because it seemed an obscure subject. (I didn’t realize how many had built this kit before, and that the real vessel still exists in the Smithsonian.) Reading the short and unfortunate history of the gunboat, I have become very excited to start this project. The kit is in 1/24 scale, or 1/2” = 1’. The completed vessel should be a little over 2 feet long, and I’m glad to be working at a large scale again, since my last two projects have been much smaller. The kit comes with 7 or 8 sheets of plans which are a great compliment to the instruction manual, 11 sheets of laser cut wooden parts, as well as a decent sized bag of planks and dowels. I have sorted all the rigging blocks and hardware in a container and will soon start working on the keel.

- 32 replies
-
- 7
-
-
- Model Shipways
- Philadelphia
- (and 1 more)
-
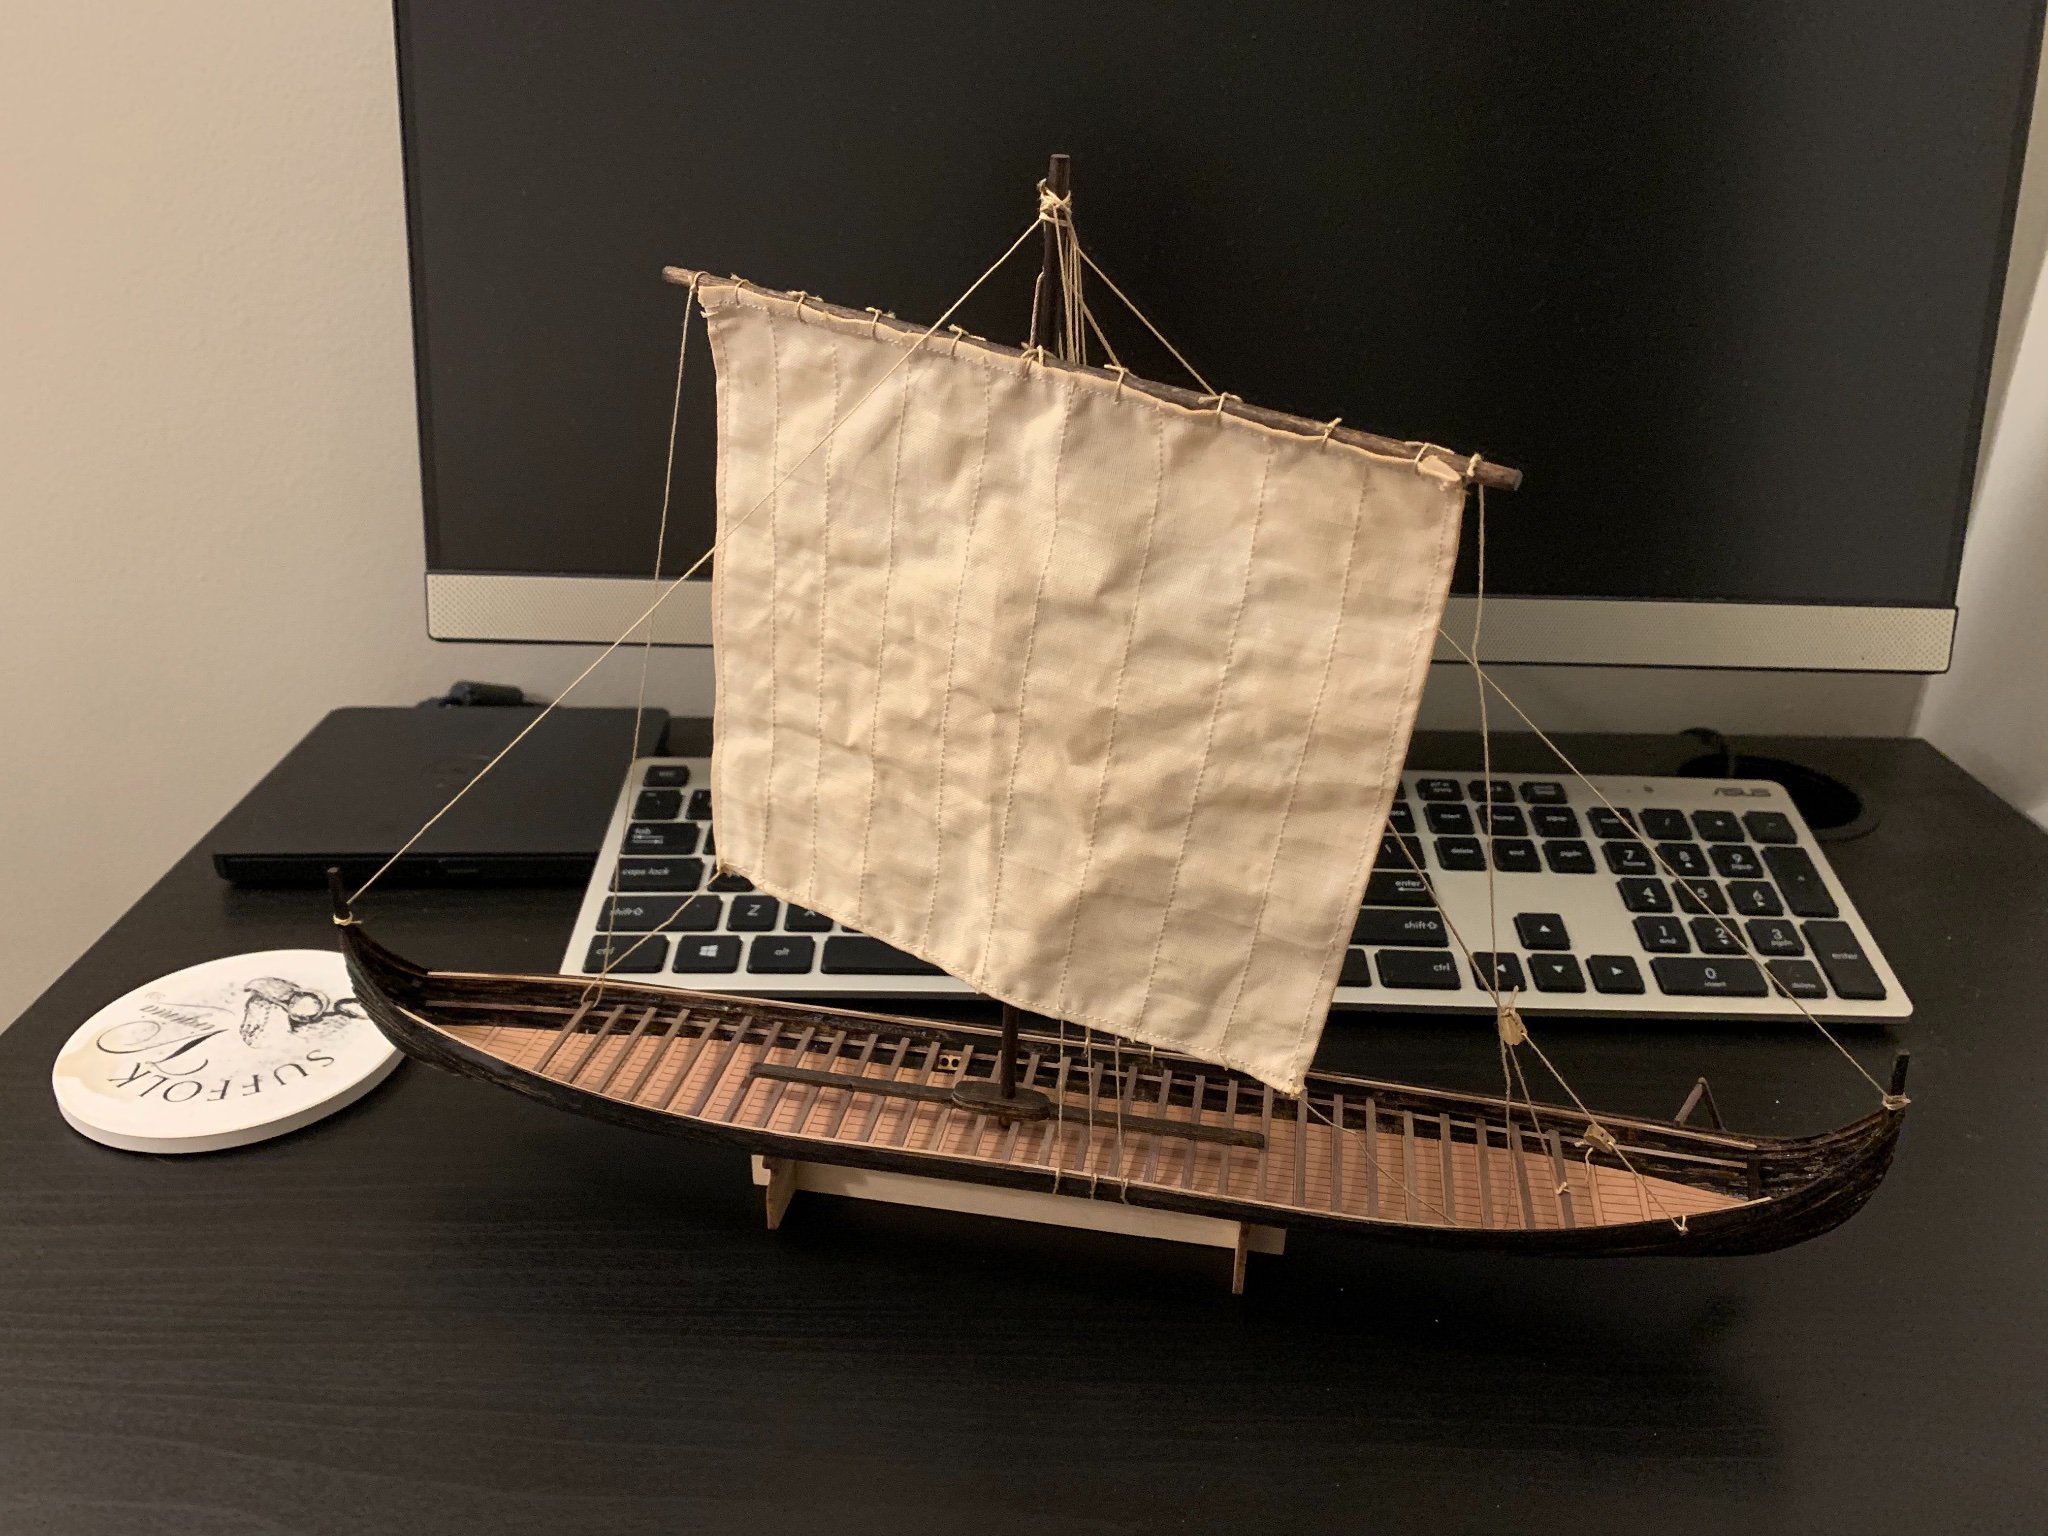
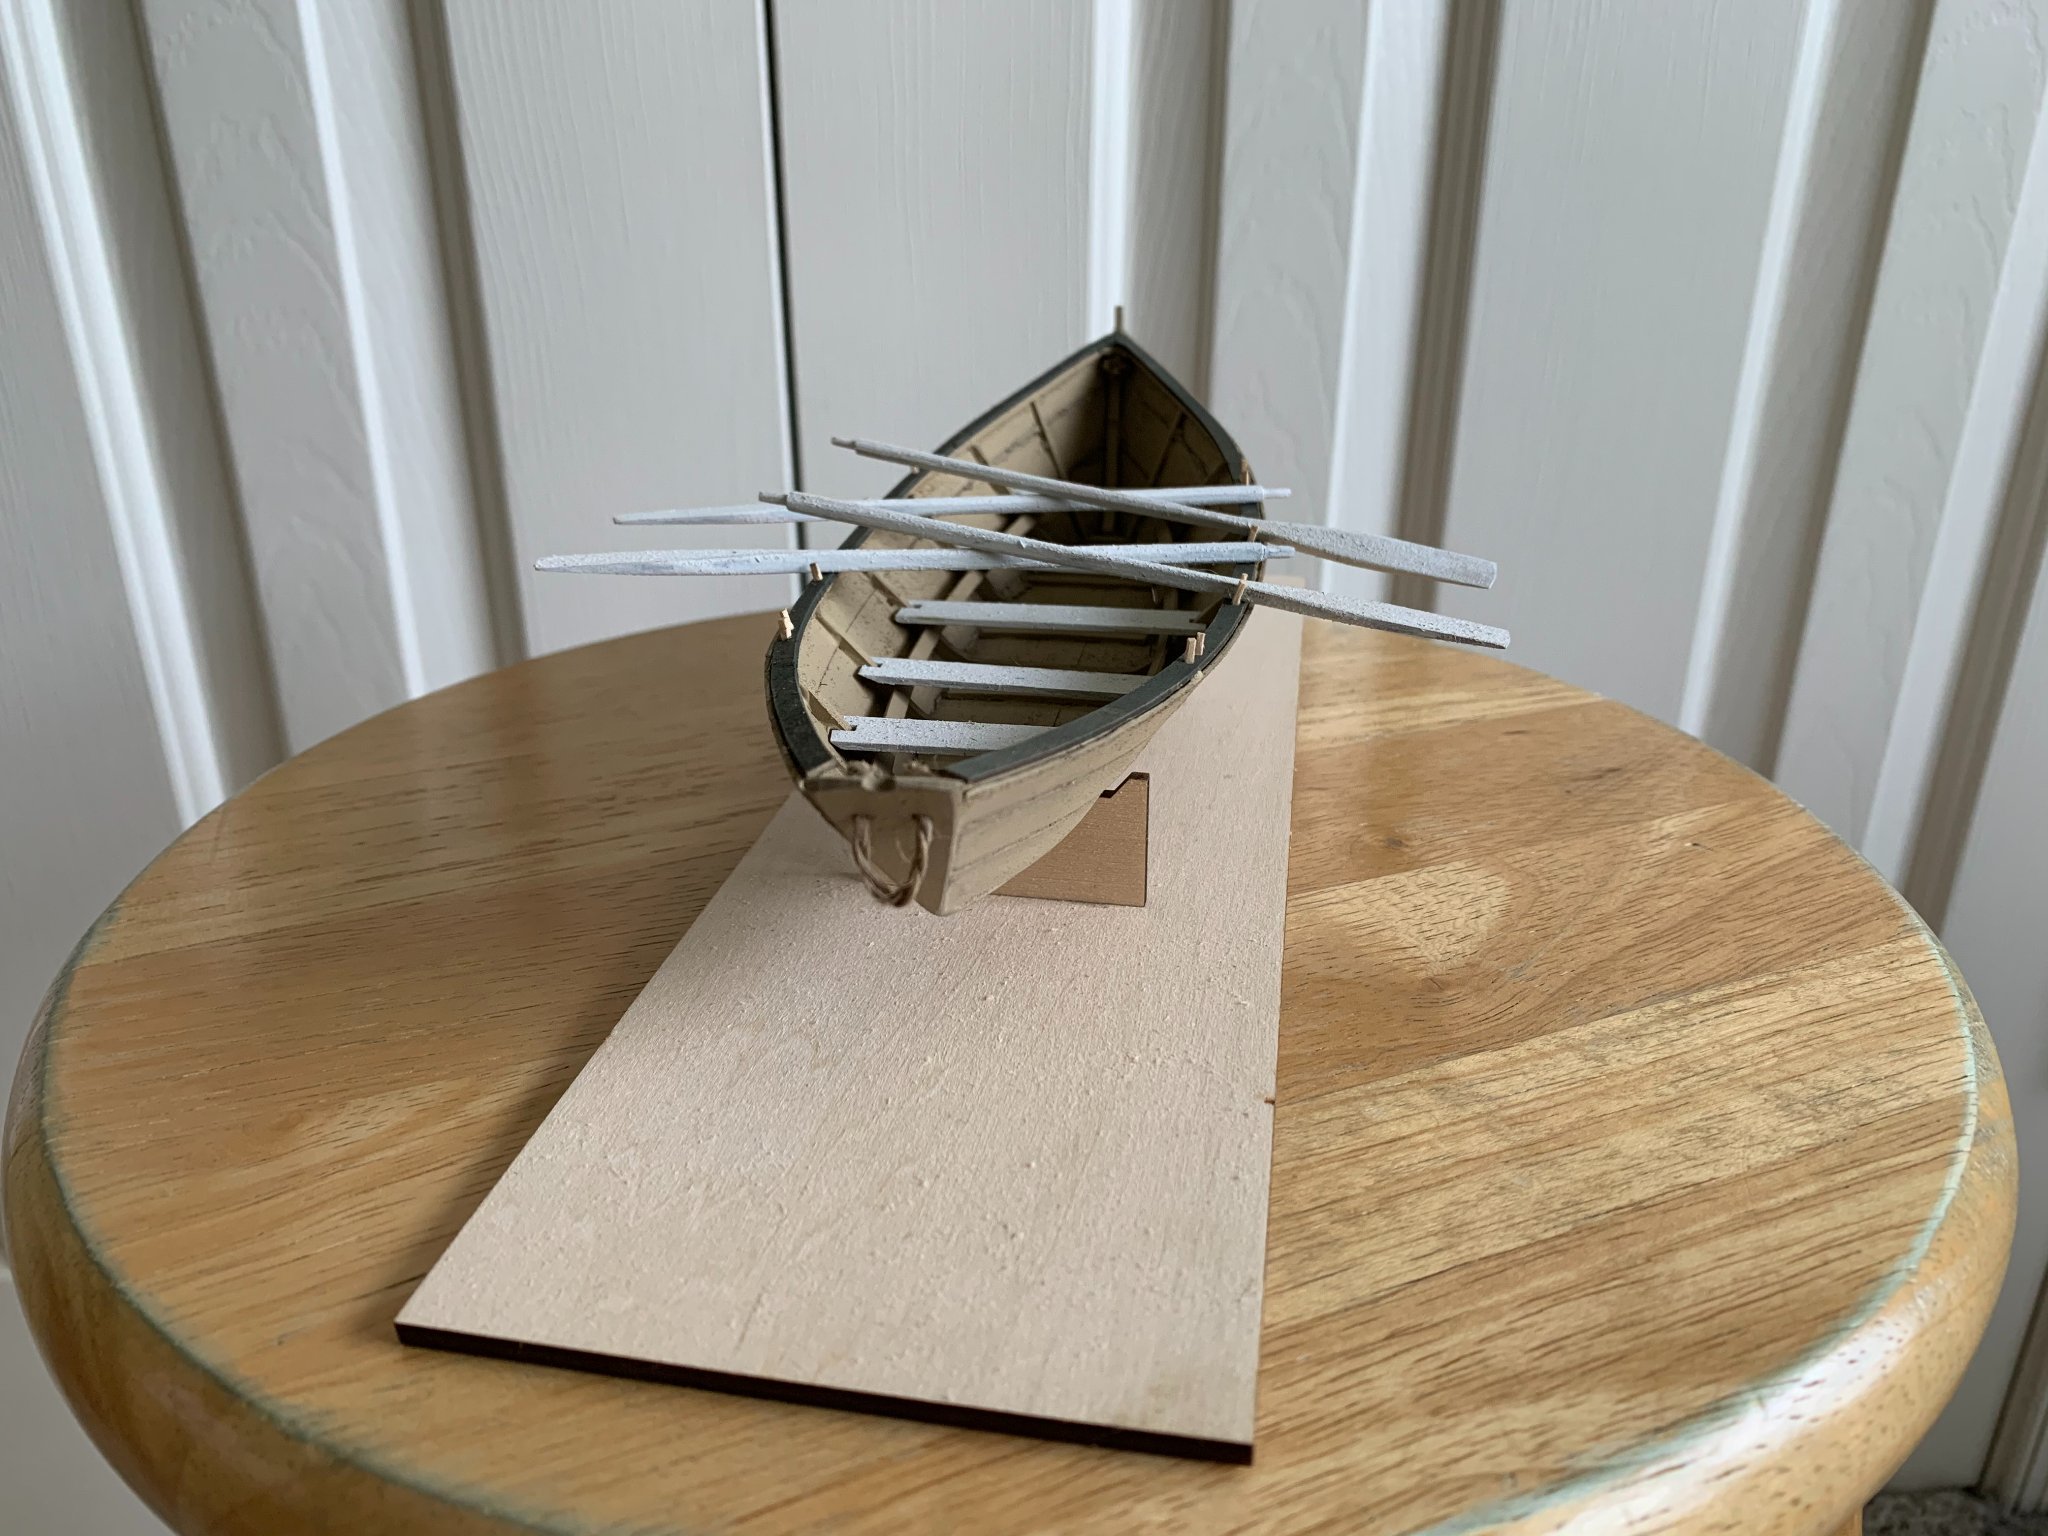
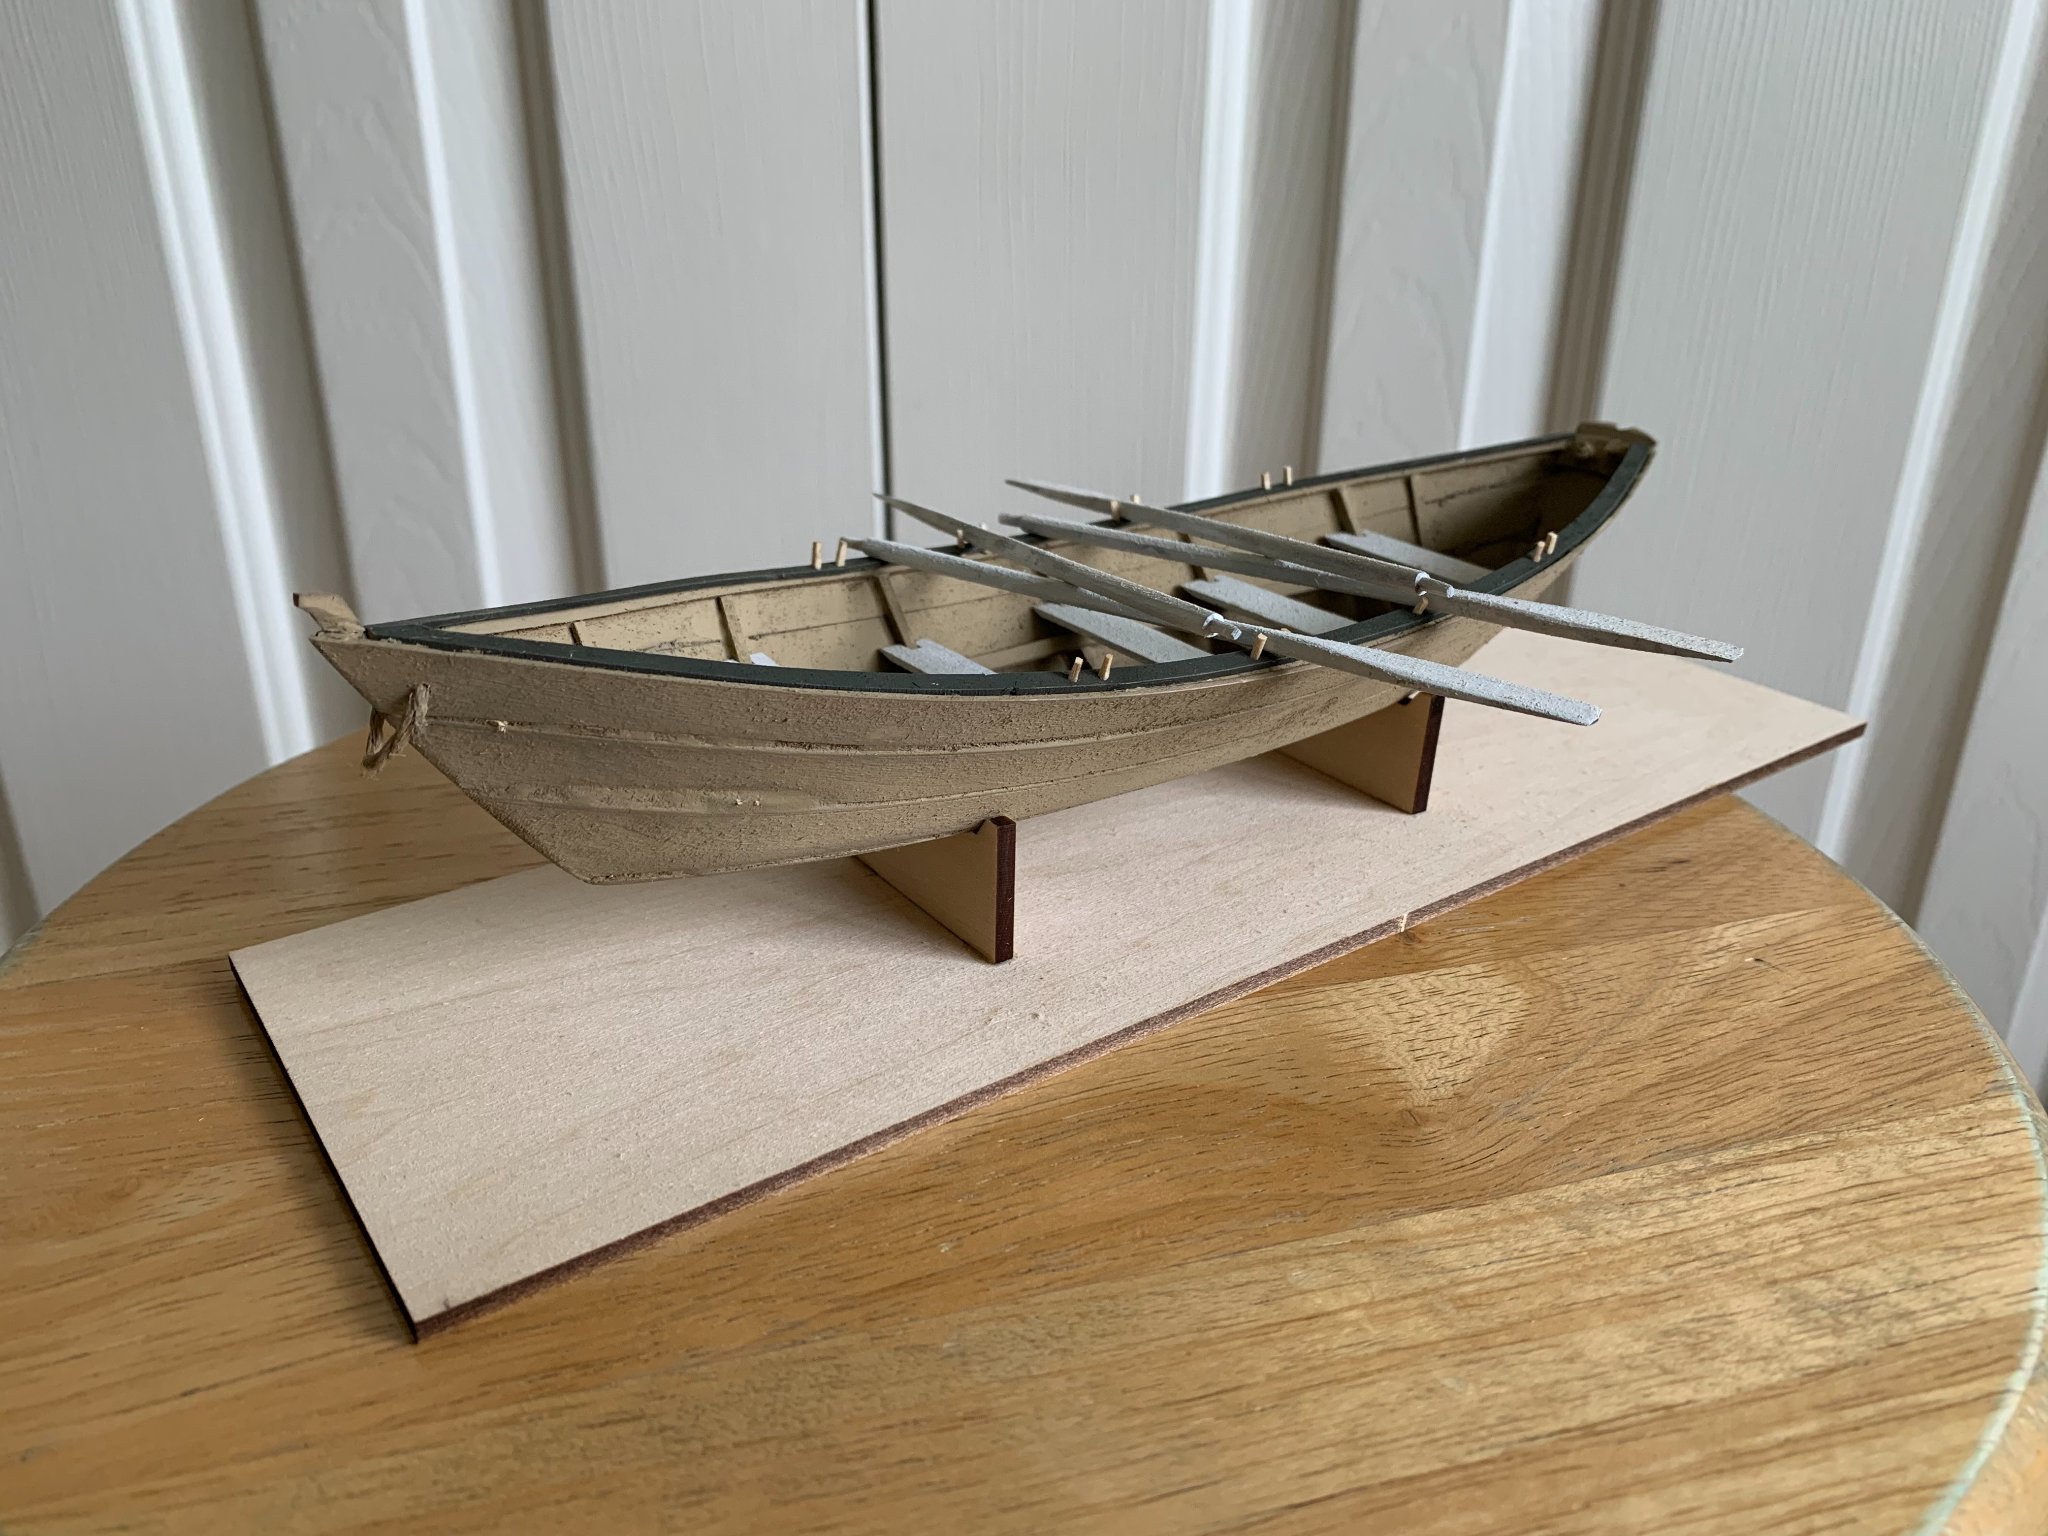
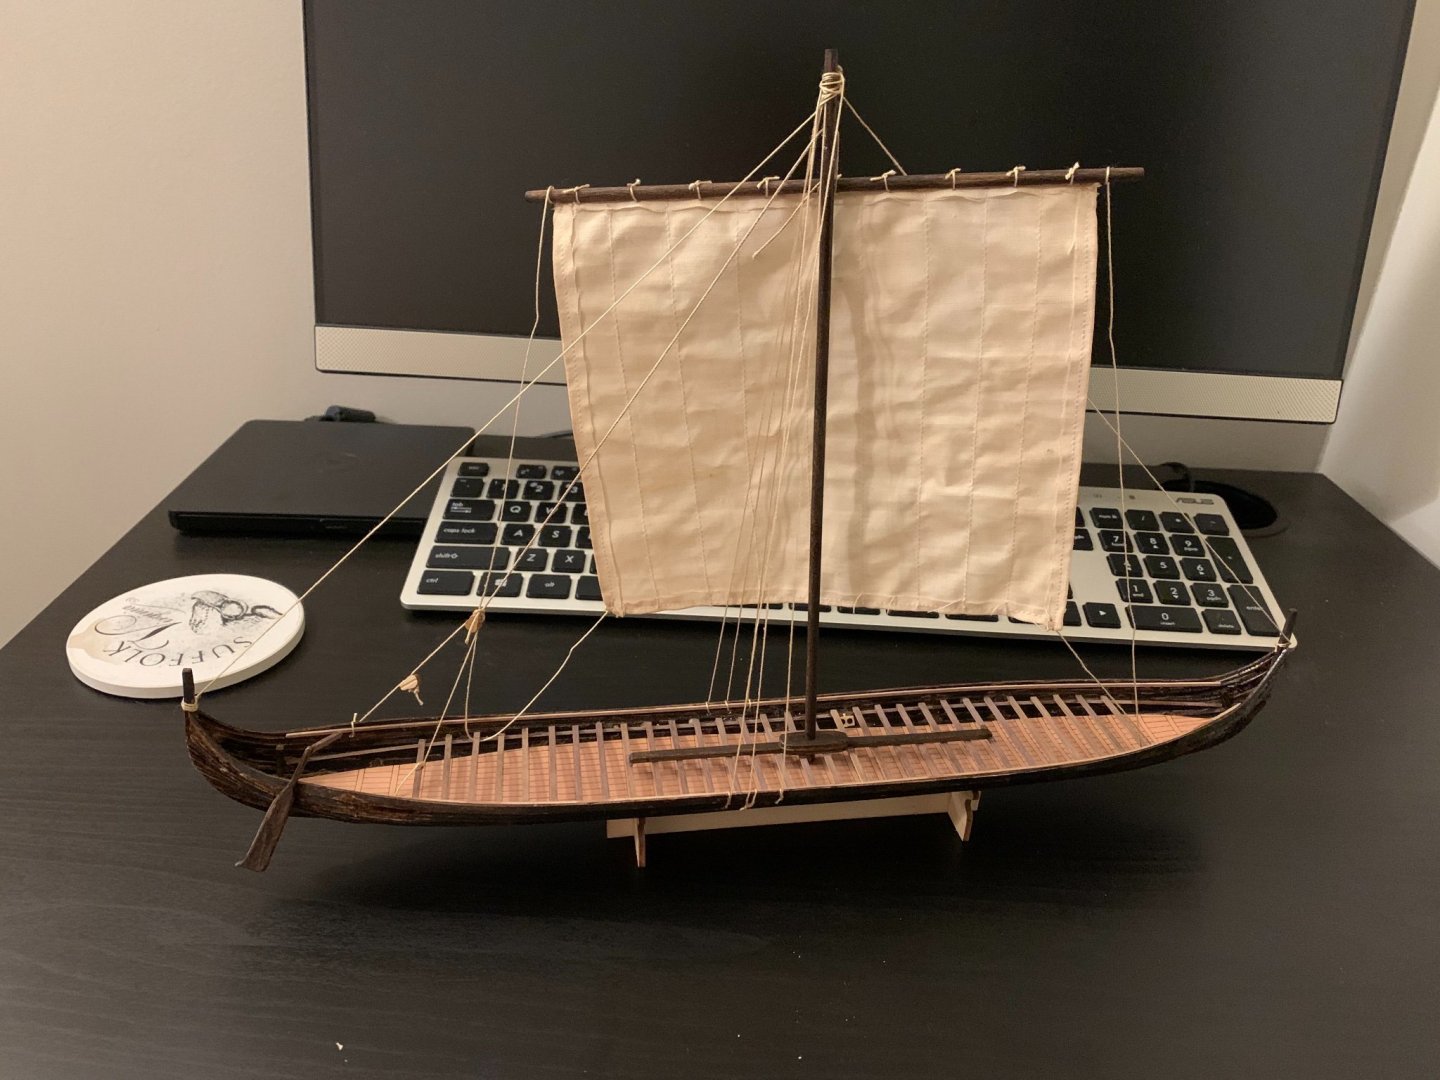
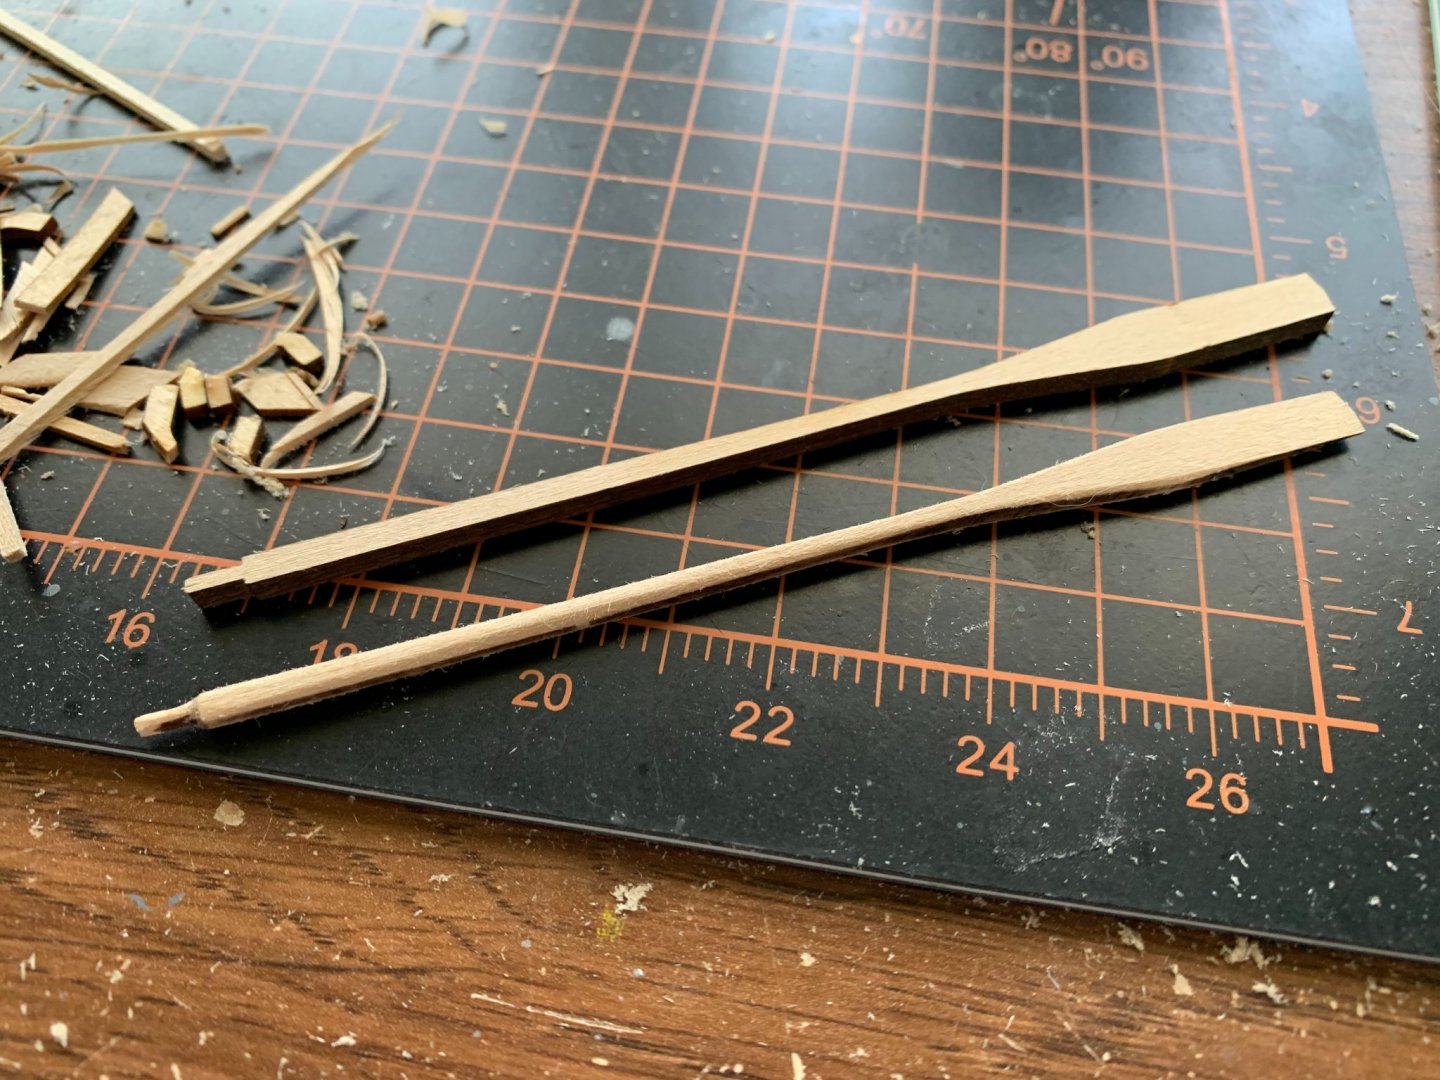
I finally got around to finishing this project today. This kit should only take someone about a week or two, working steadily. Adding seating planks. So far, the Chop-It from Micromark has been an essential tool for me, it’s incredibly helpful for making uniform lengths of planking. Mast attached. I first steeped the sail in a cup of tea, which gave a very natural sail-cloth color, but I decided to steep it again in a cup of coffee which gave a darker and more handsome color. The finished boat! I didn’t bother to make oars, or to attach the shields that come with the kit. This project was a commission for a friend, and I hope he’ll be pleased when he sees it. It was an easy kit with good quality materials. Thanks for the tips and encouragement I’ve received from people!

- 6 replies
-
- 5
-
-
- Dusek
- Viking Longship
- (and 1 more)
-
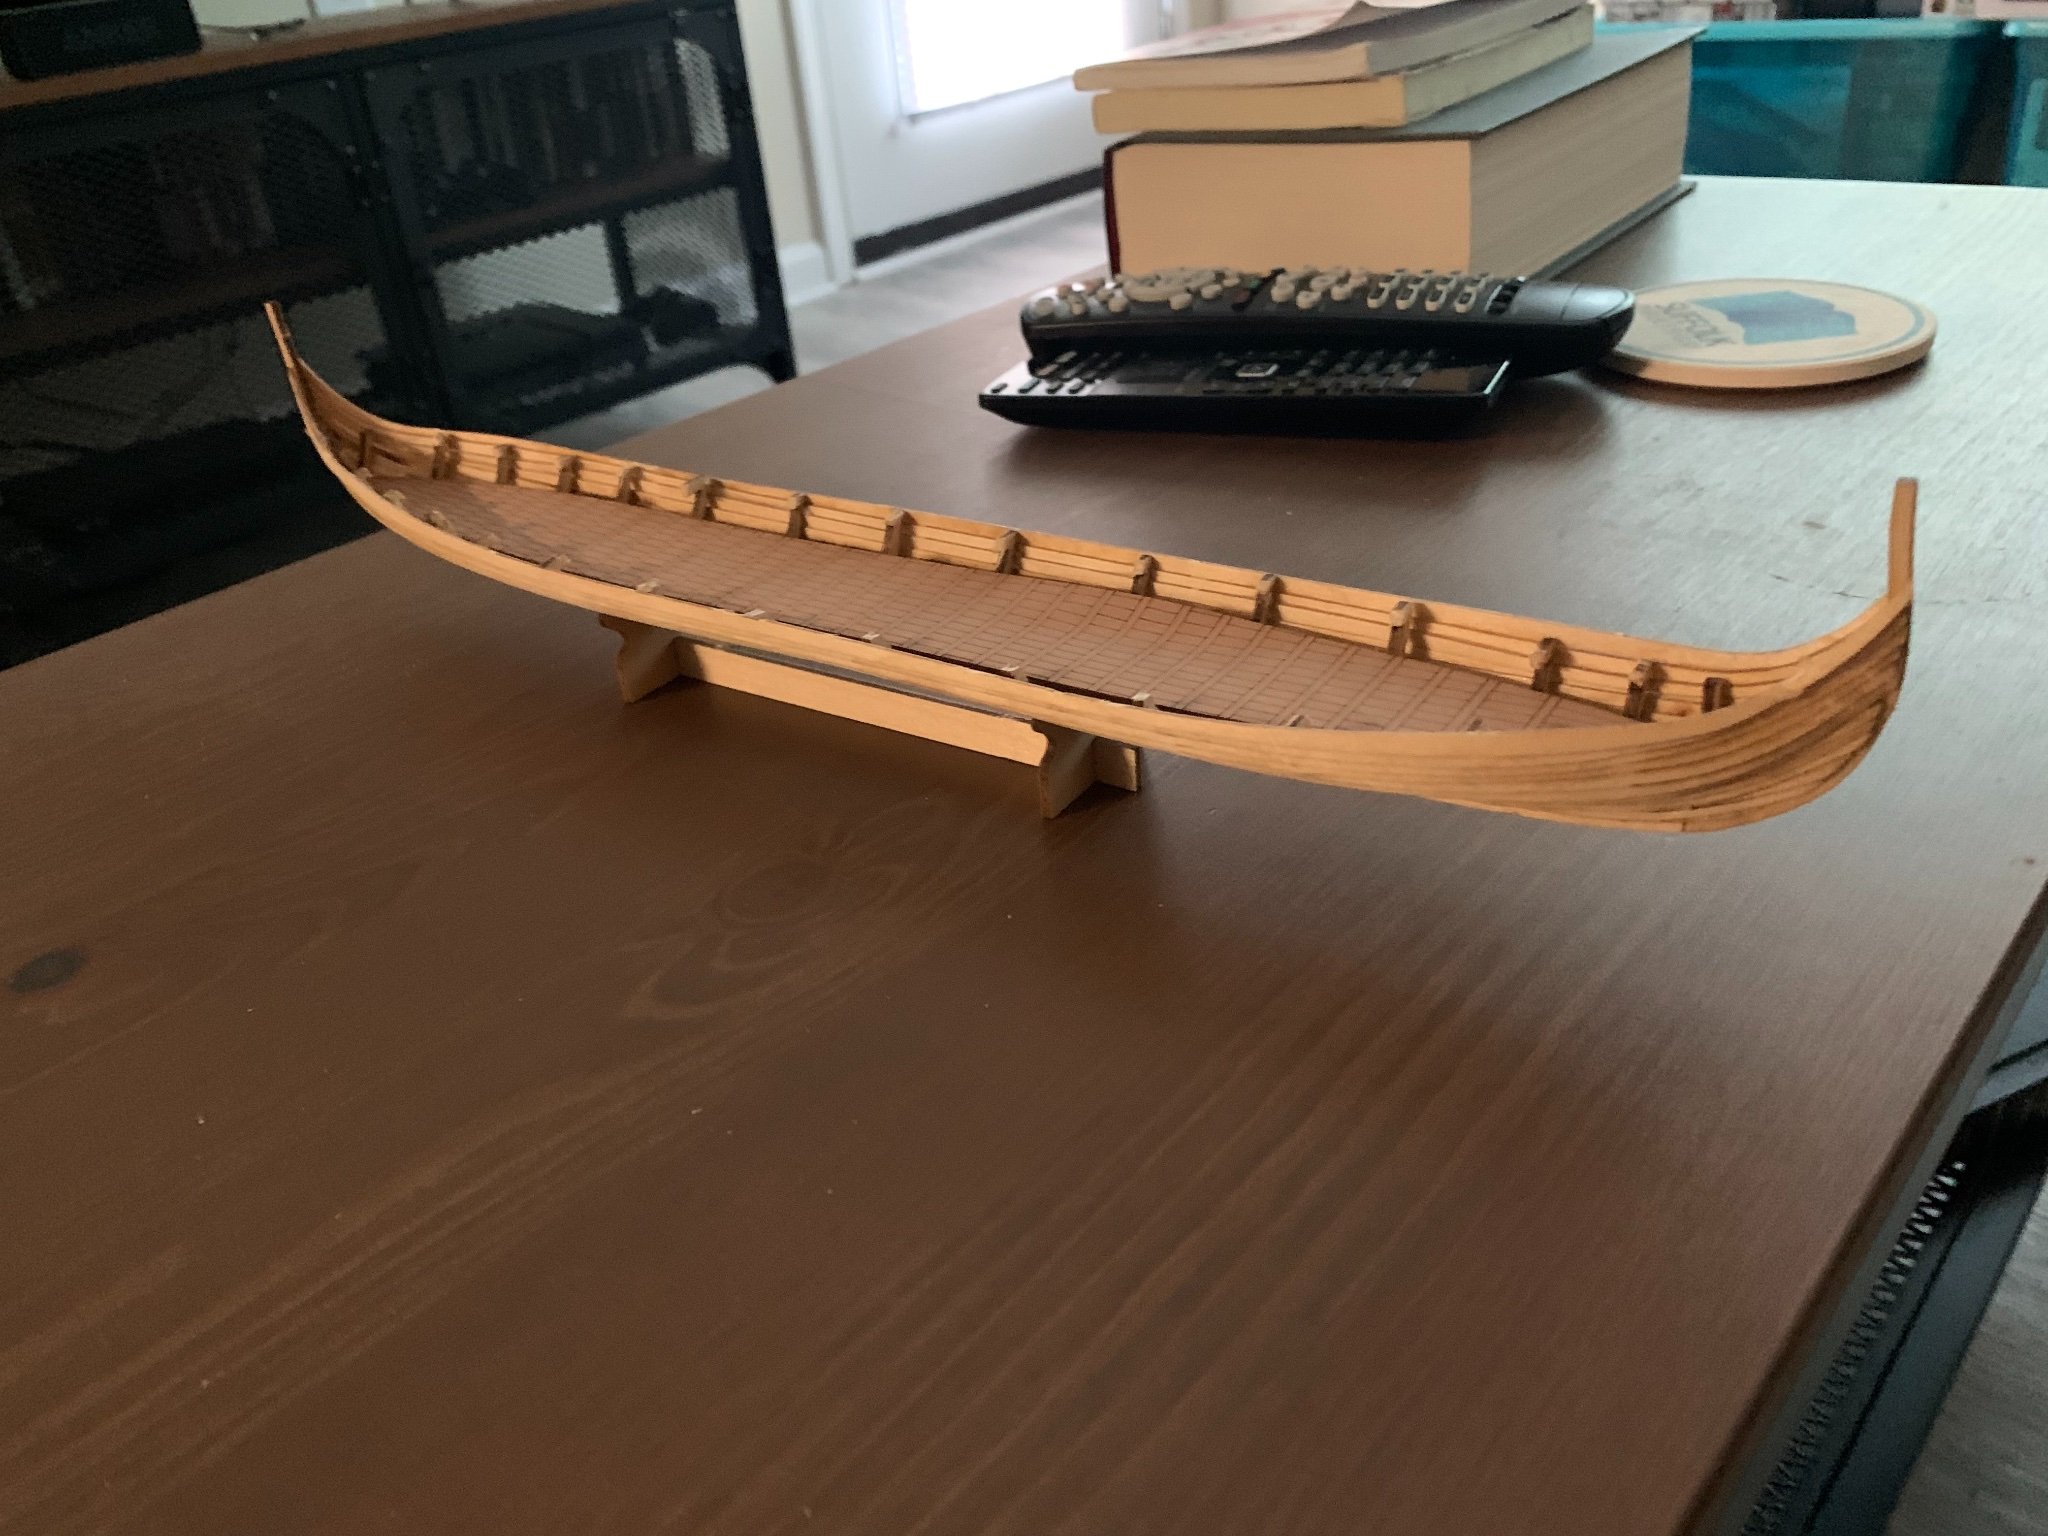
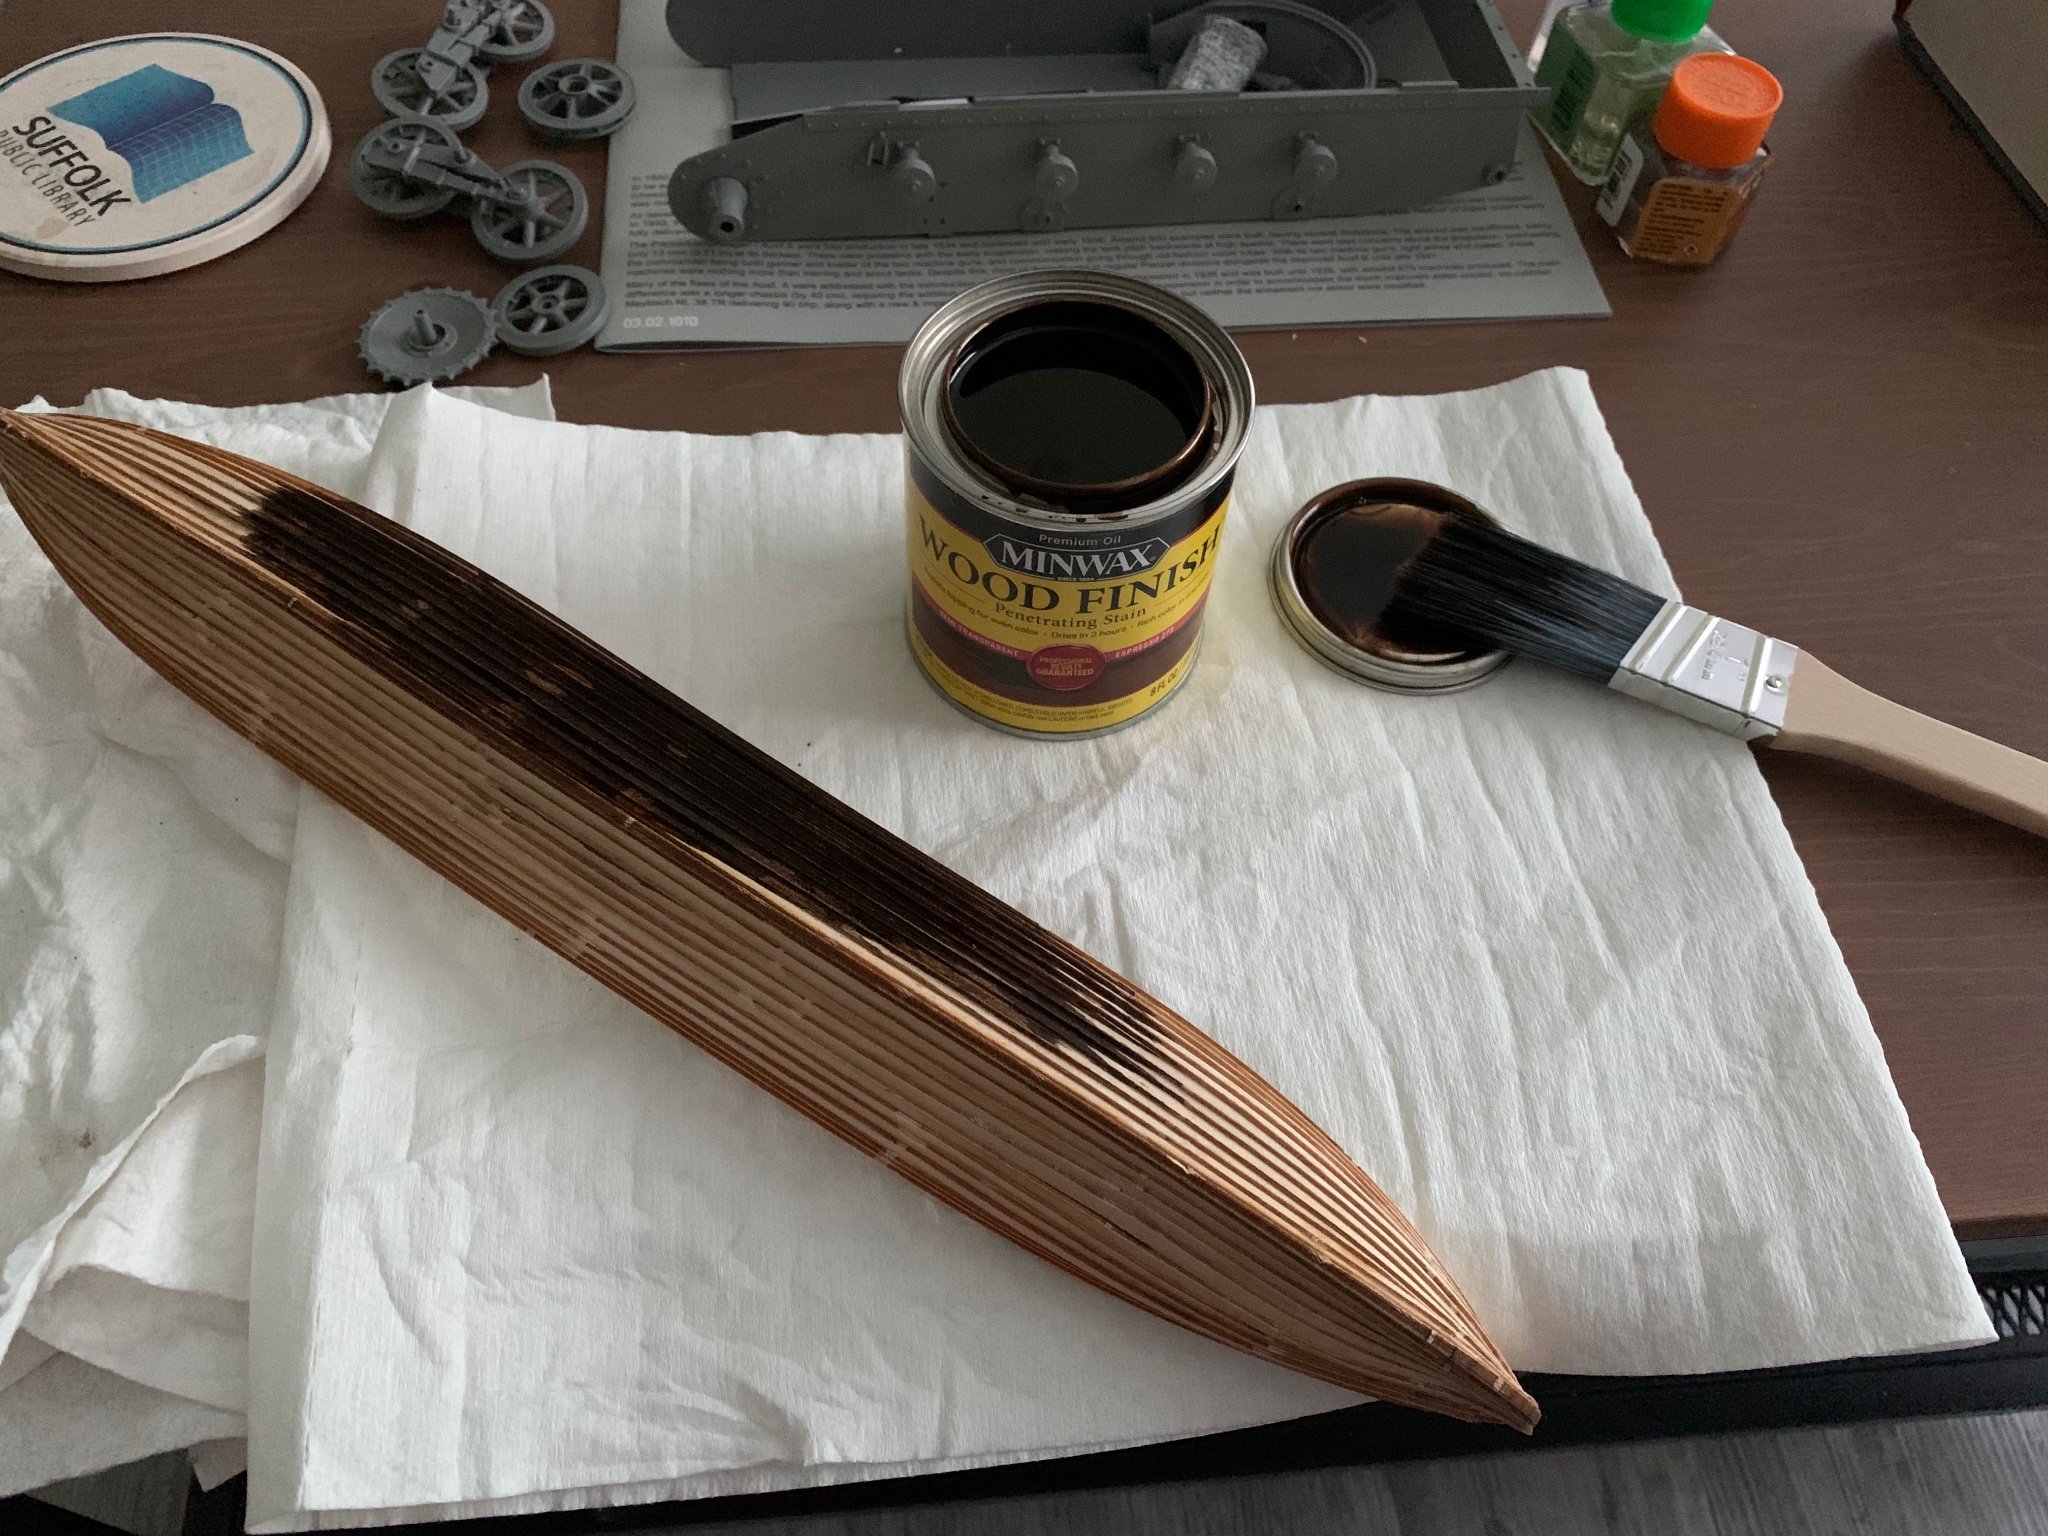
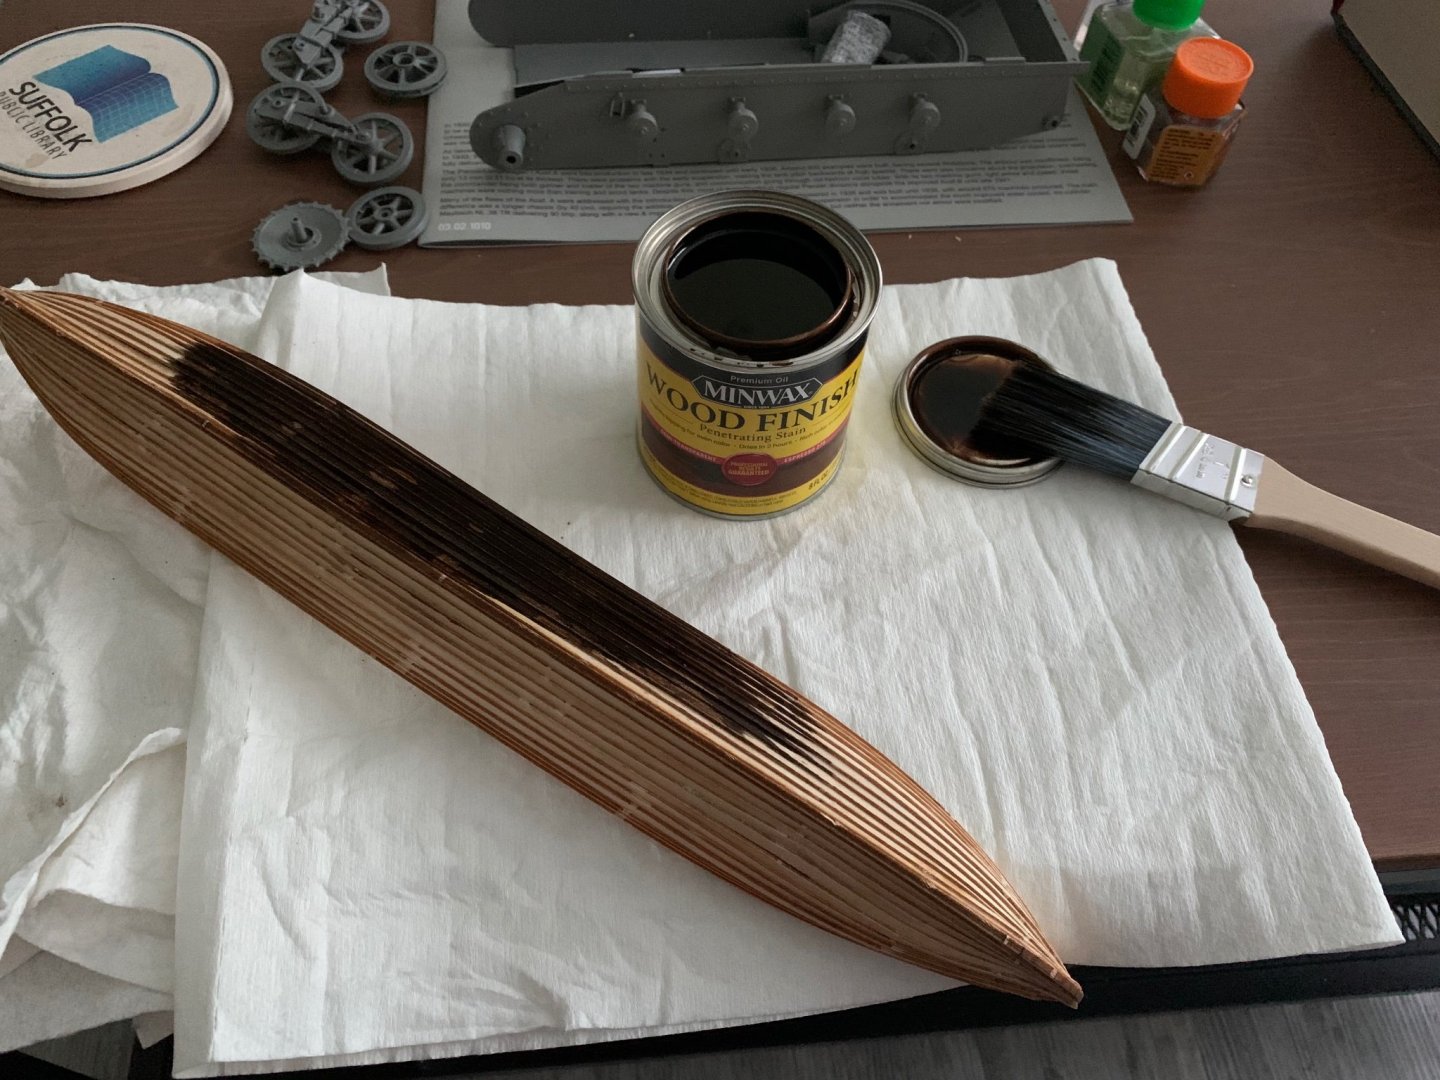
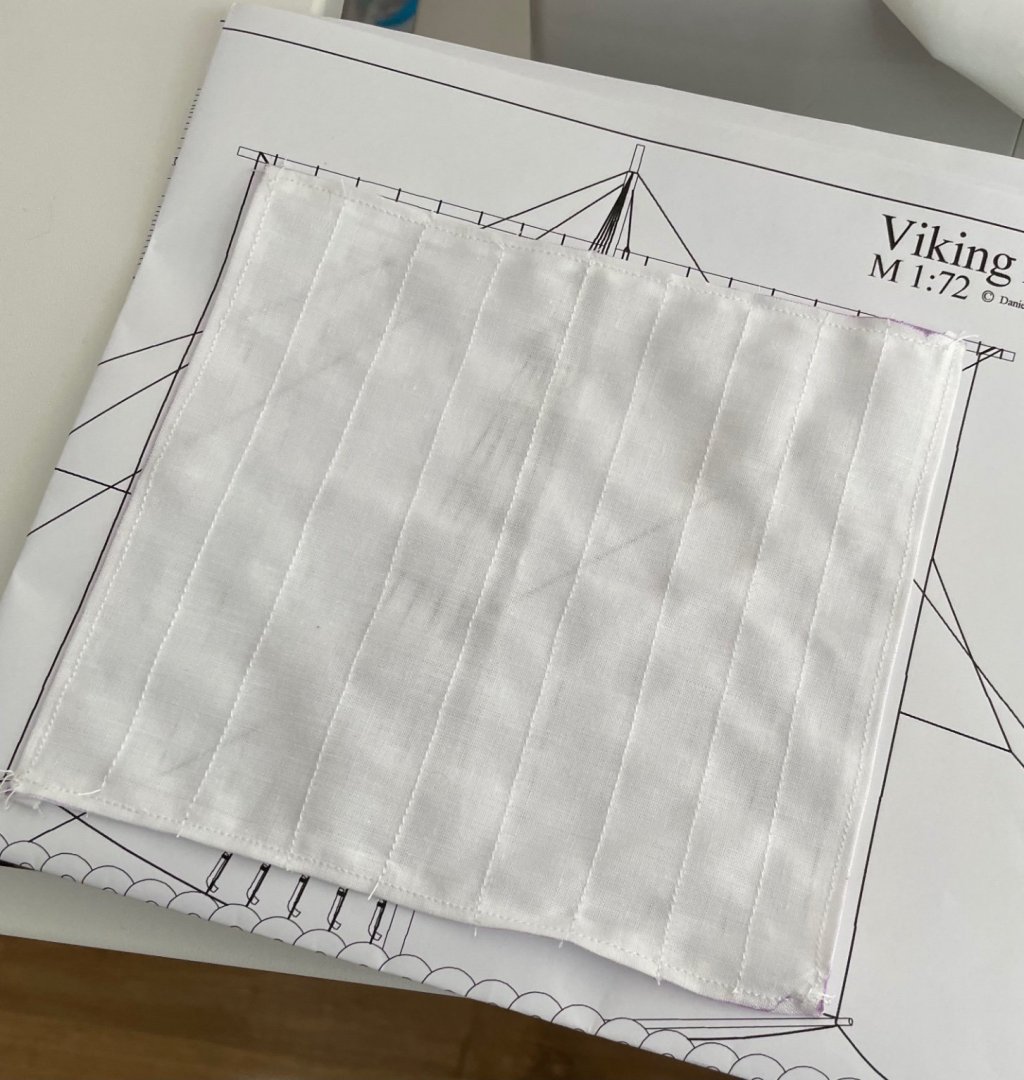
The fully planked boat! Managed to fit all the planks in a 6-hour session one afternoon. After this I tore out the frames down to the floor (except the small ones on either end). I cleaned up the planking in some areas with cutting and sanding, then applied one coat of Miniwax Espresso stain. It didn’t apply very well to areas with superglue on them, but I’m planning to sand it down and apply another coat where necessary. My mother made me a sail from the cloth provided in the kit, she’s the greatest and she did an excellent job. Planning on staining the sail in a cup of tea to make it look weathered.

- 6 replies
-
- 7
-
-
- Dusek
- Viking Longship
- (and 1 more)
-
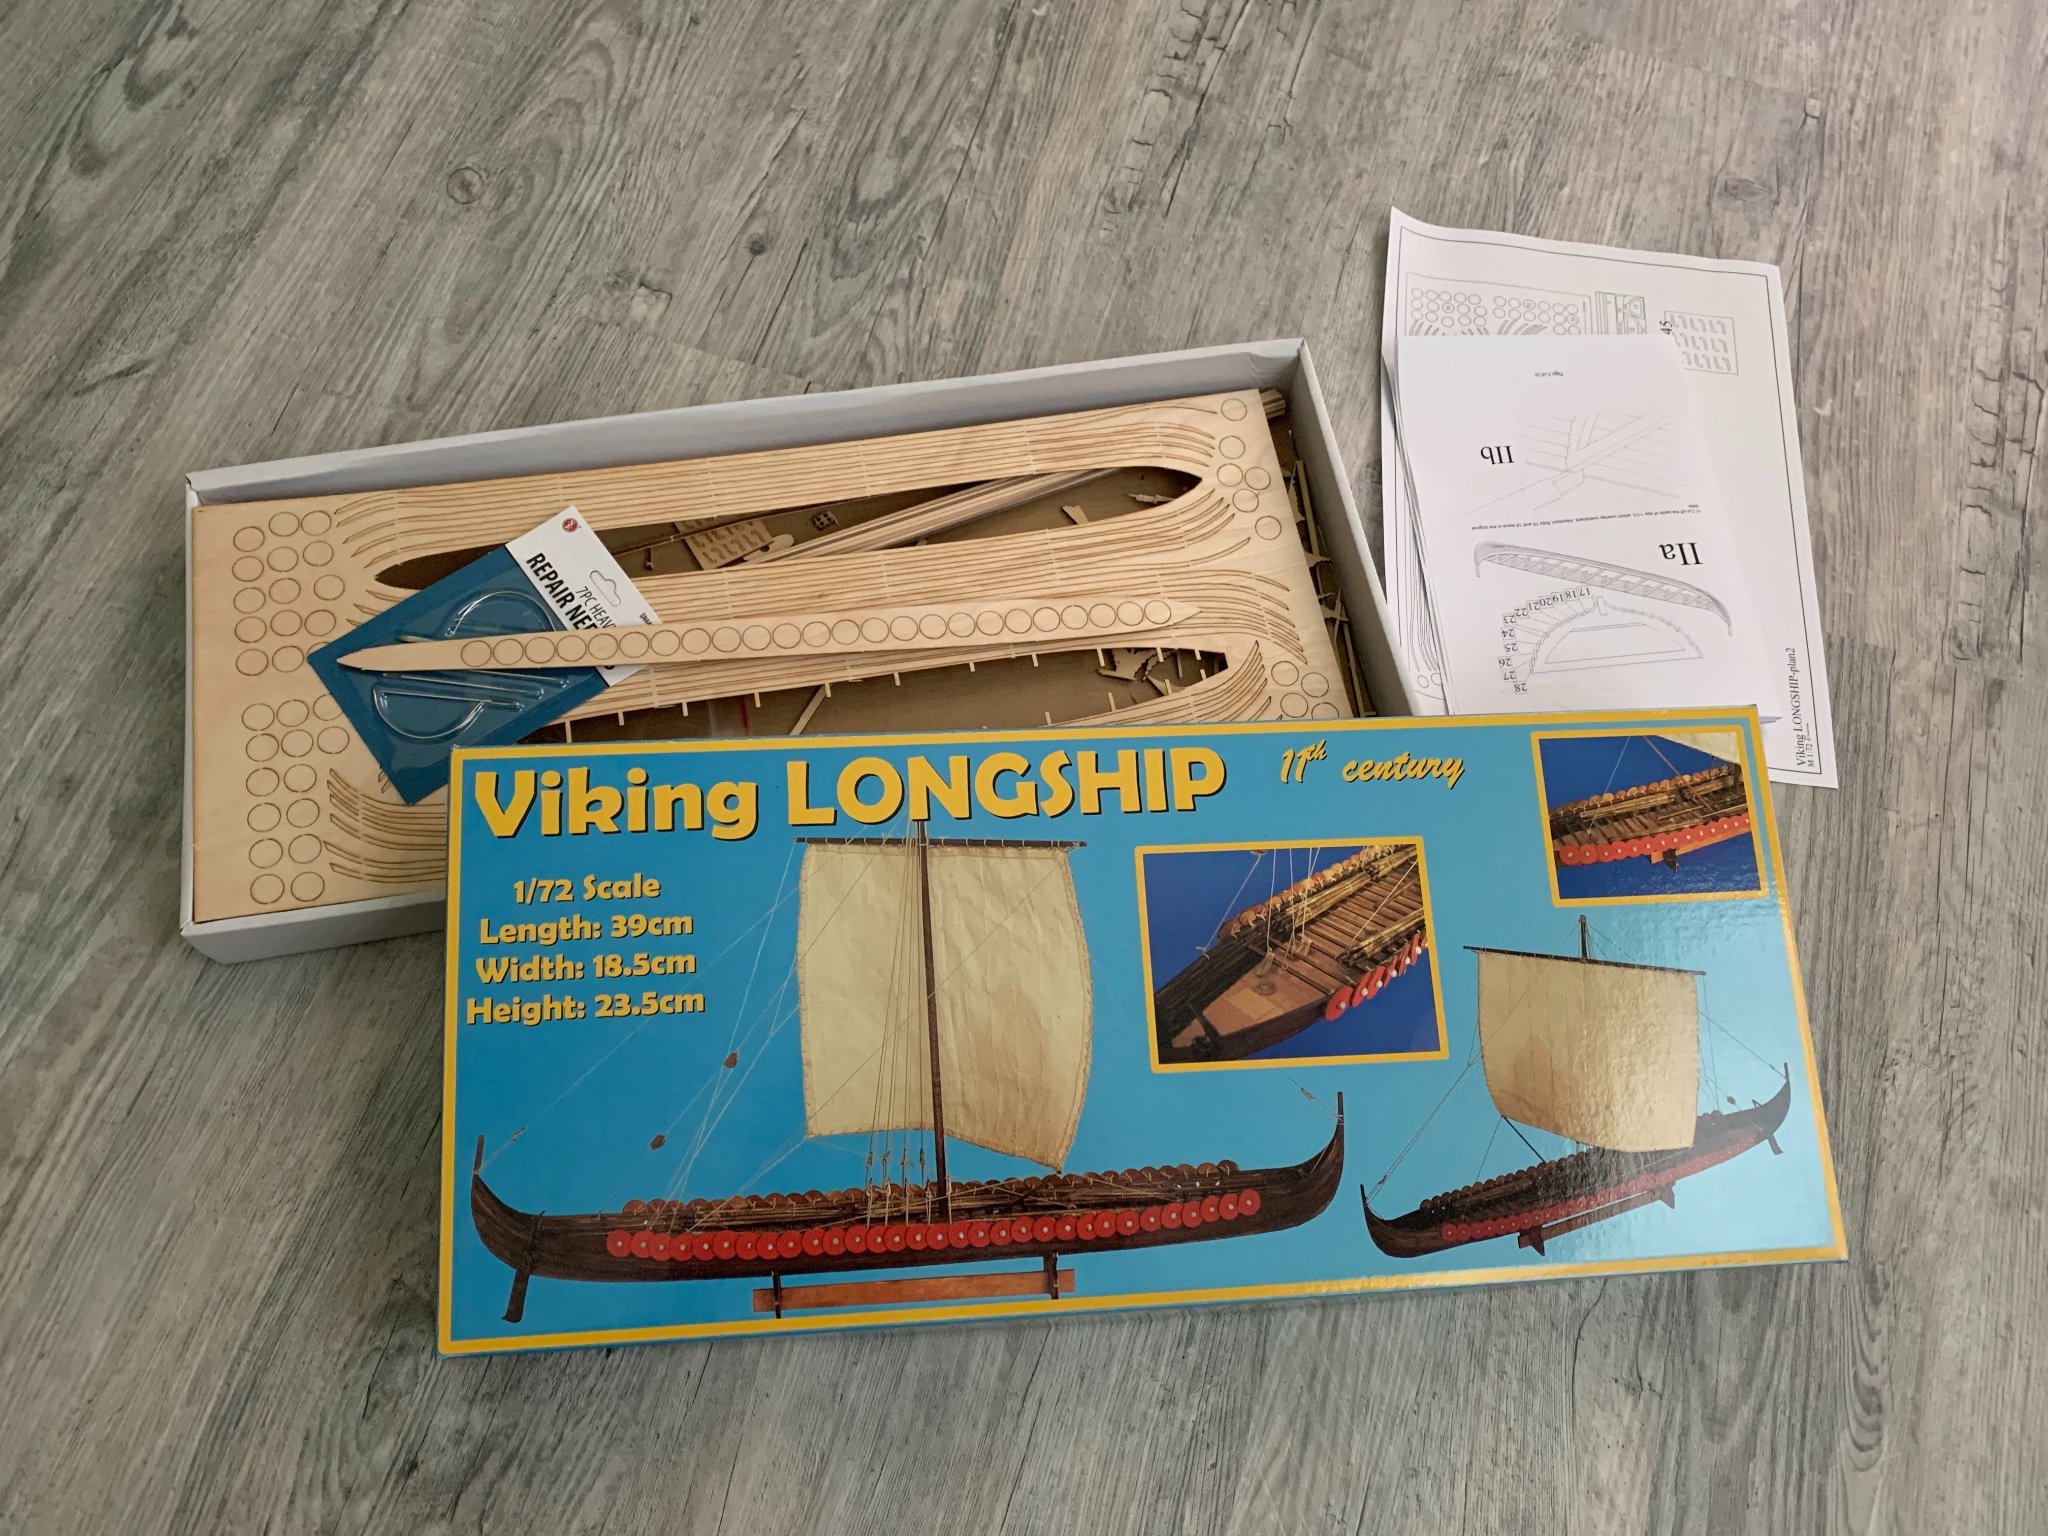
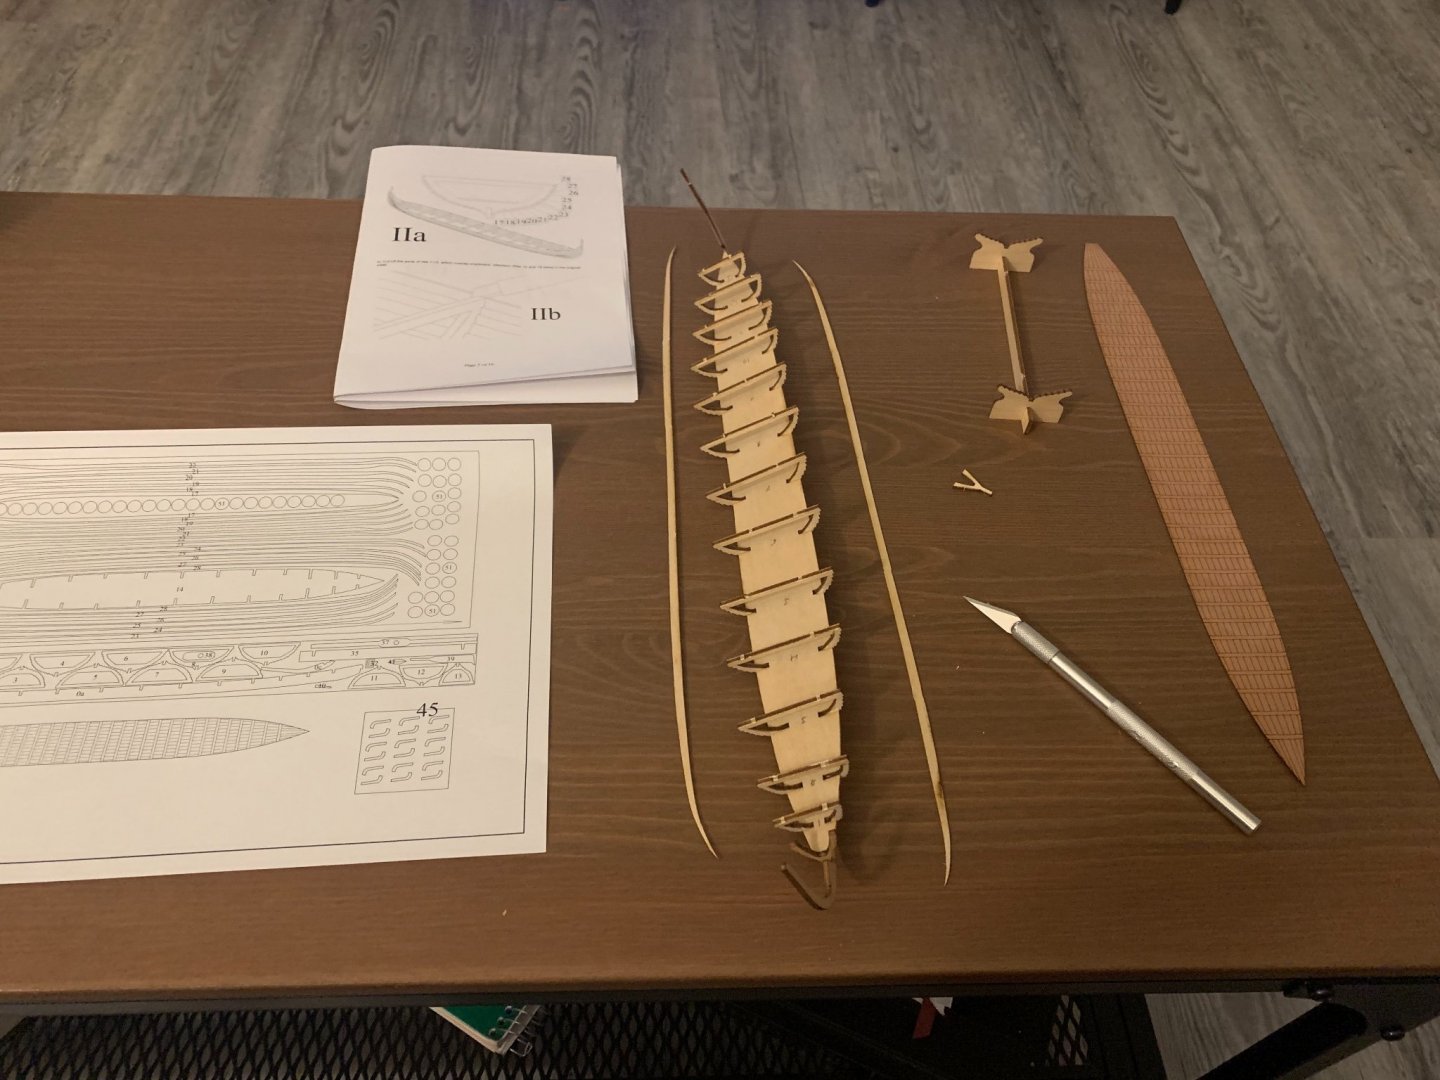
Got this kit on a Model Expo sale recently, just as a fun side project to give to a friend who wants a Viking ship on his desk. Frame was a bit tricky to get straight, but the planking should be easy since it’s all laser cut. Now that I’ve finished the Virginia Schooner, I hope this will be a quick project.
- 6 replies
-
- 3
-
-
- Dusek
- Viking Longship
- (and 1 more)
-
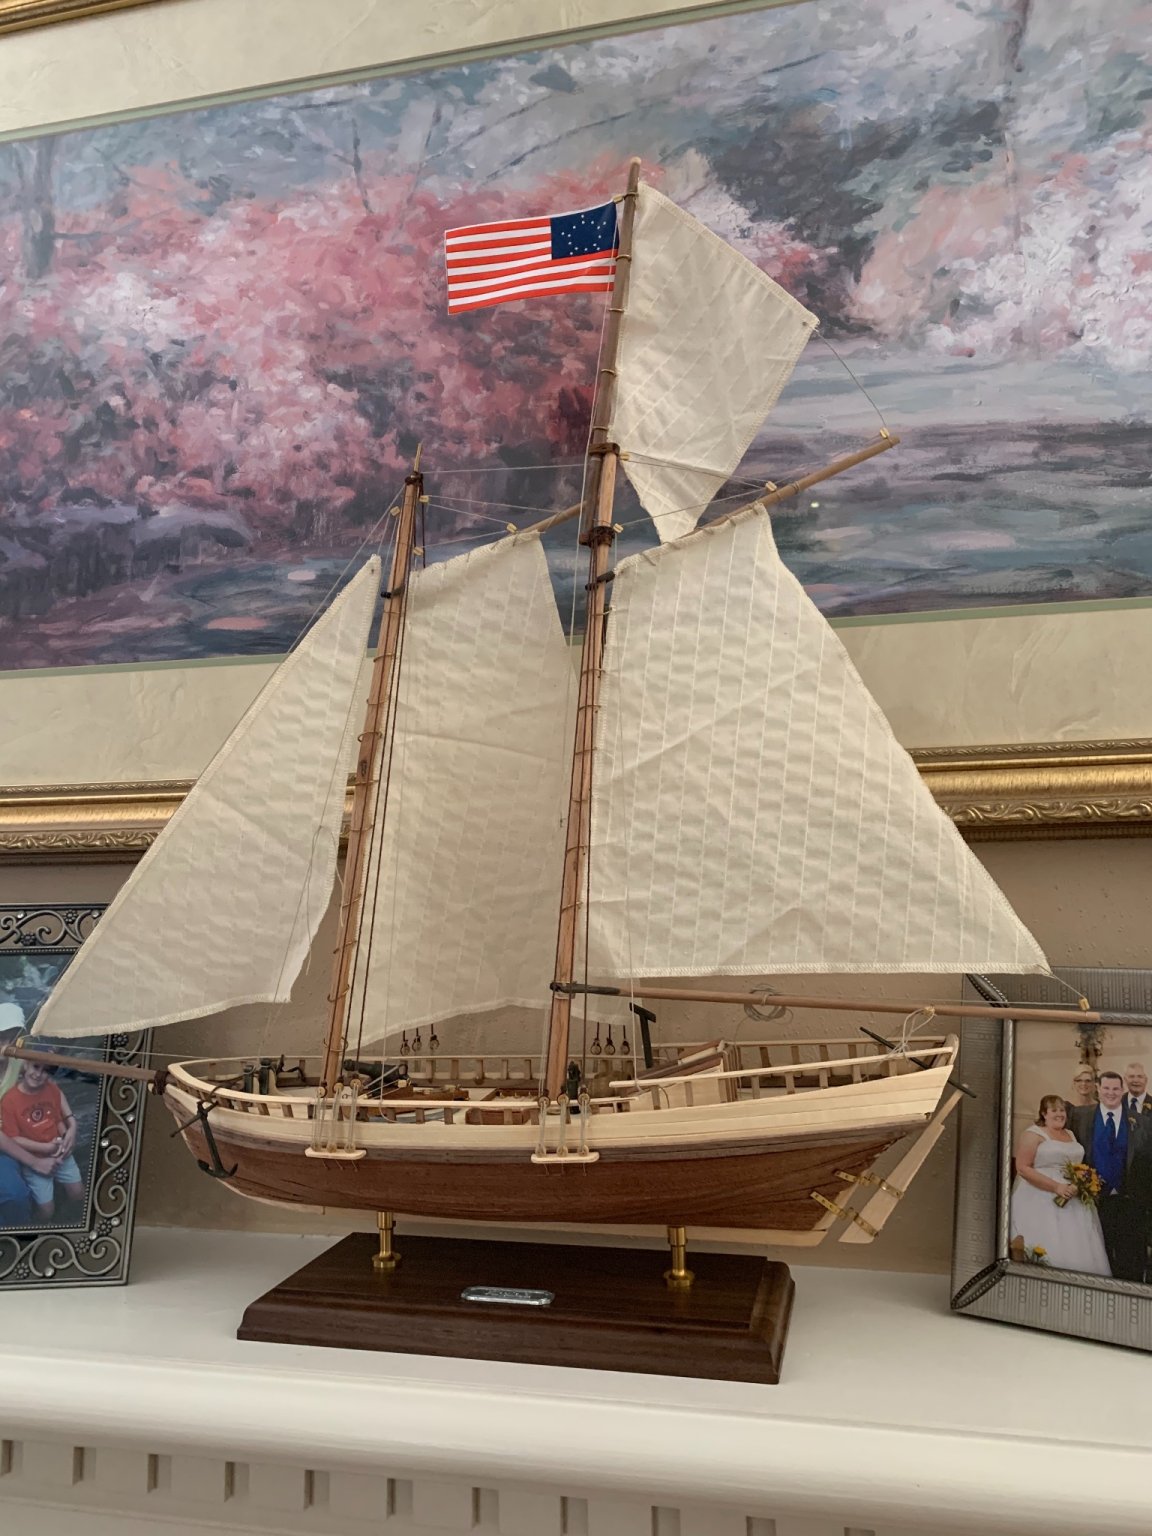
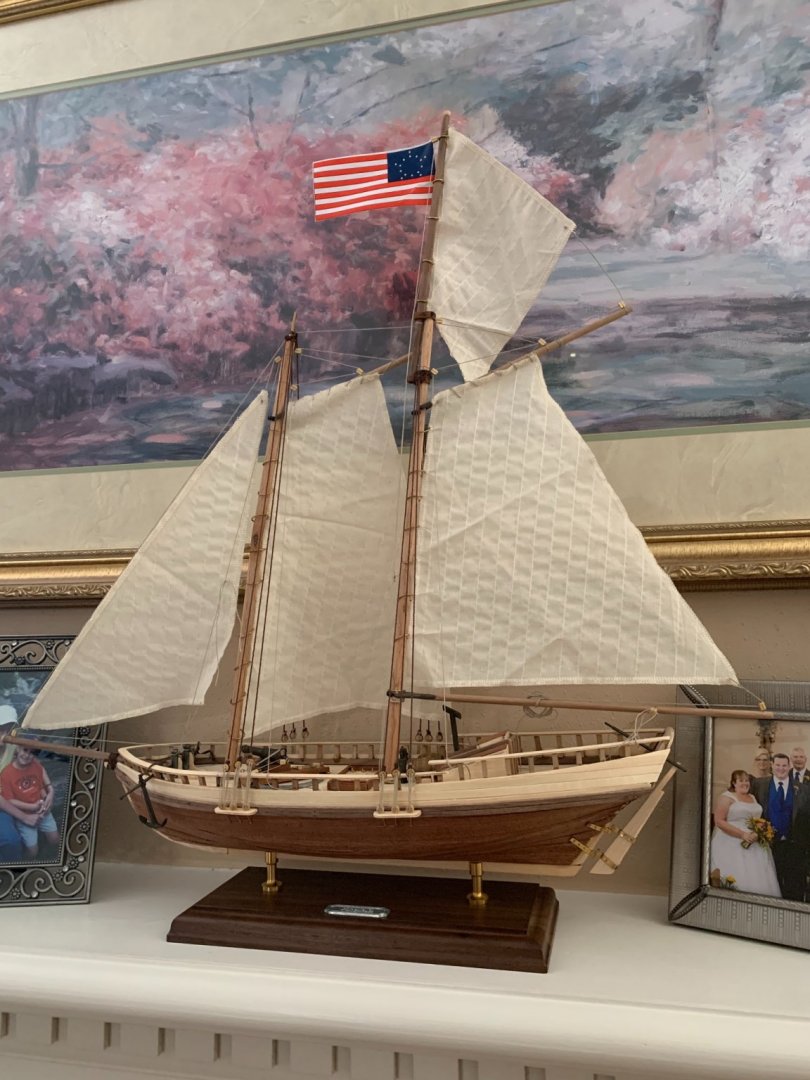
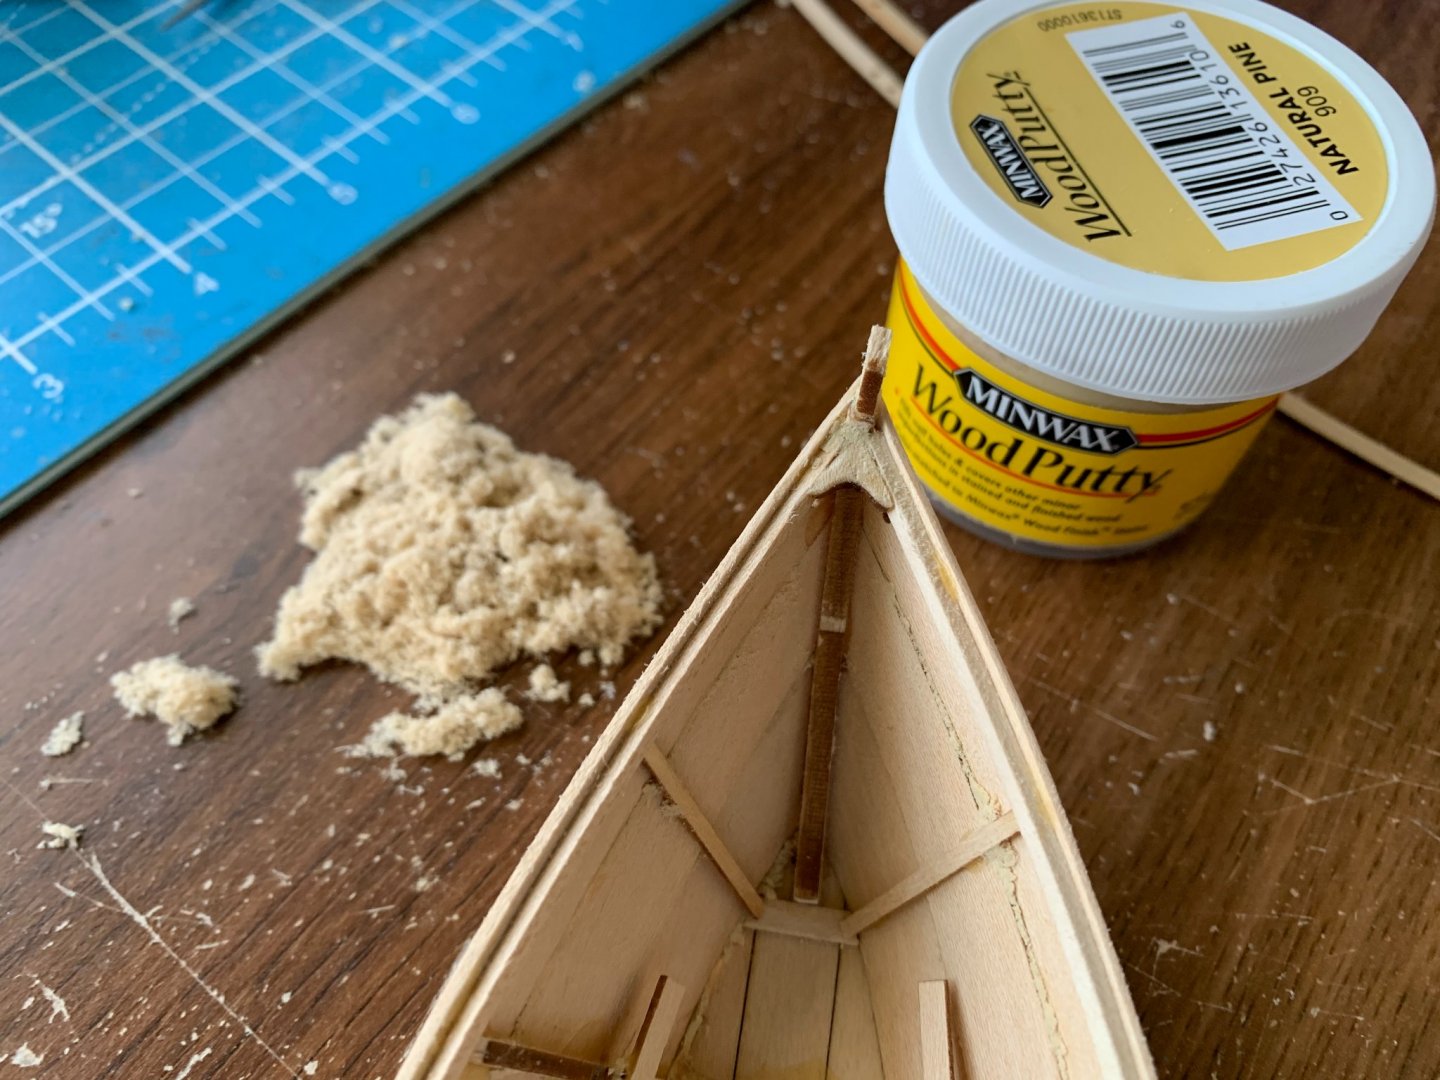
I got distracted a bit during the month of June. Missed my June 20th deadline I set for myself, but I did finish the boat on July 3rd, and was able to present it to my Dad as an Independence Day gift, also my parents’ anniversary is not far off. Fixing the bottom deadeyes. Rigged my first deadeye, which was not difficult to do, you just have to manage the height of it. Also got a base and some pedestals for the neat plaque they give you in the kit. I simplified the rigging a great deal, both for time constraints, and because I figured it was meant more for display. The kit’s sails did not come with the correct sizes, and I had my mother alter an extra jib sail to look more like the gaff sail that should have come with the kit. Rigging is inaccurate and not functional, but I was trying to make it look clean and presentable. Also a noticeable cant in the foremast, the thing split in half on me and I had to fill it with wood glue and sawdust. The finished product on my parents’ mantle. They’re happy with it, and although I can see many mistakes, it gives me confidence to continue on to bigger projects. Ship is complete now, I would appreciate any feedback!


- 6 replies
-
- 5
-
-
- artesania latina
- virginia
- (and 1 more)
-
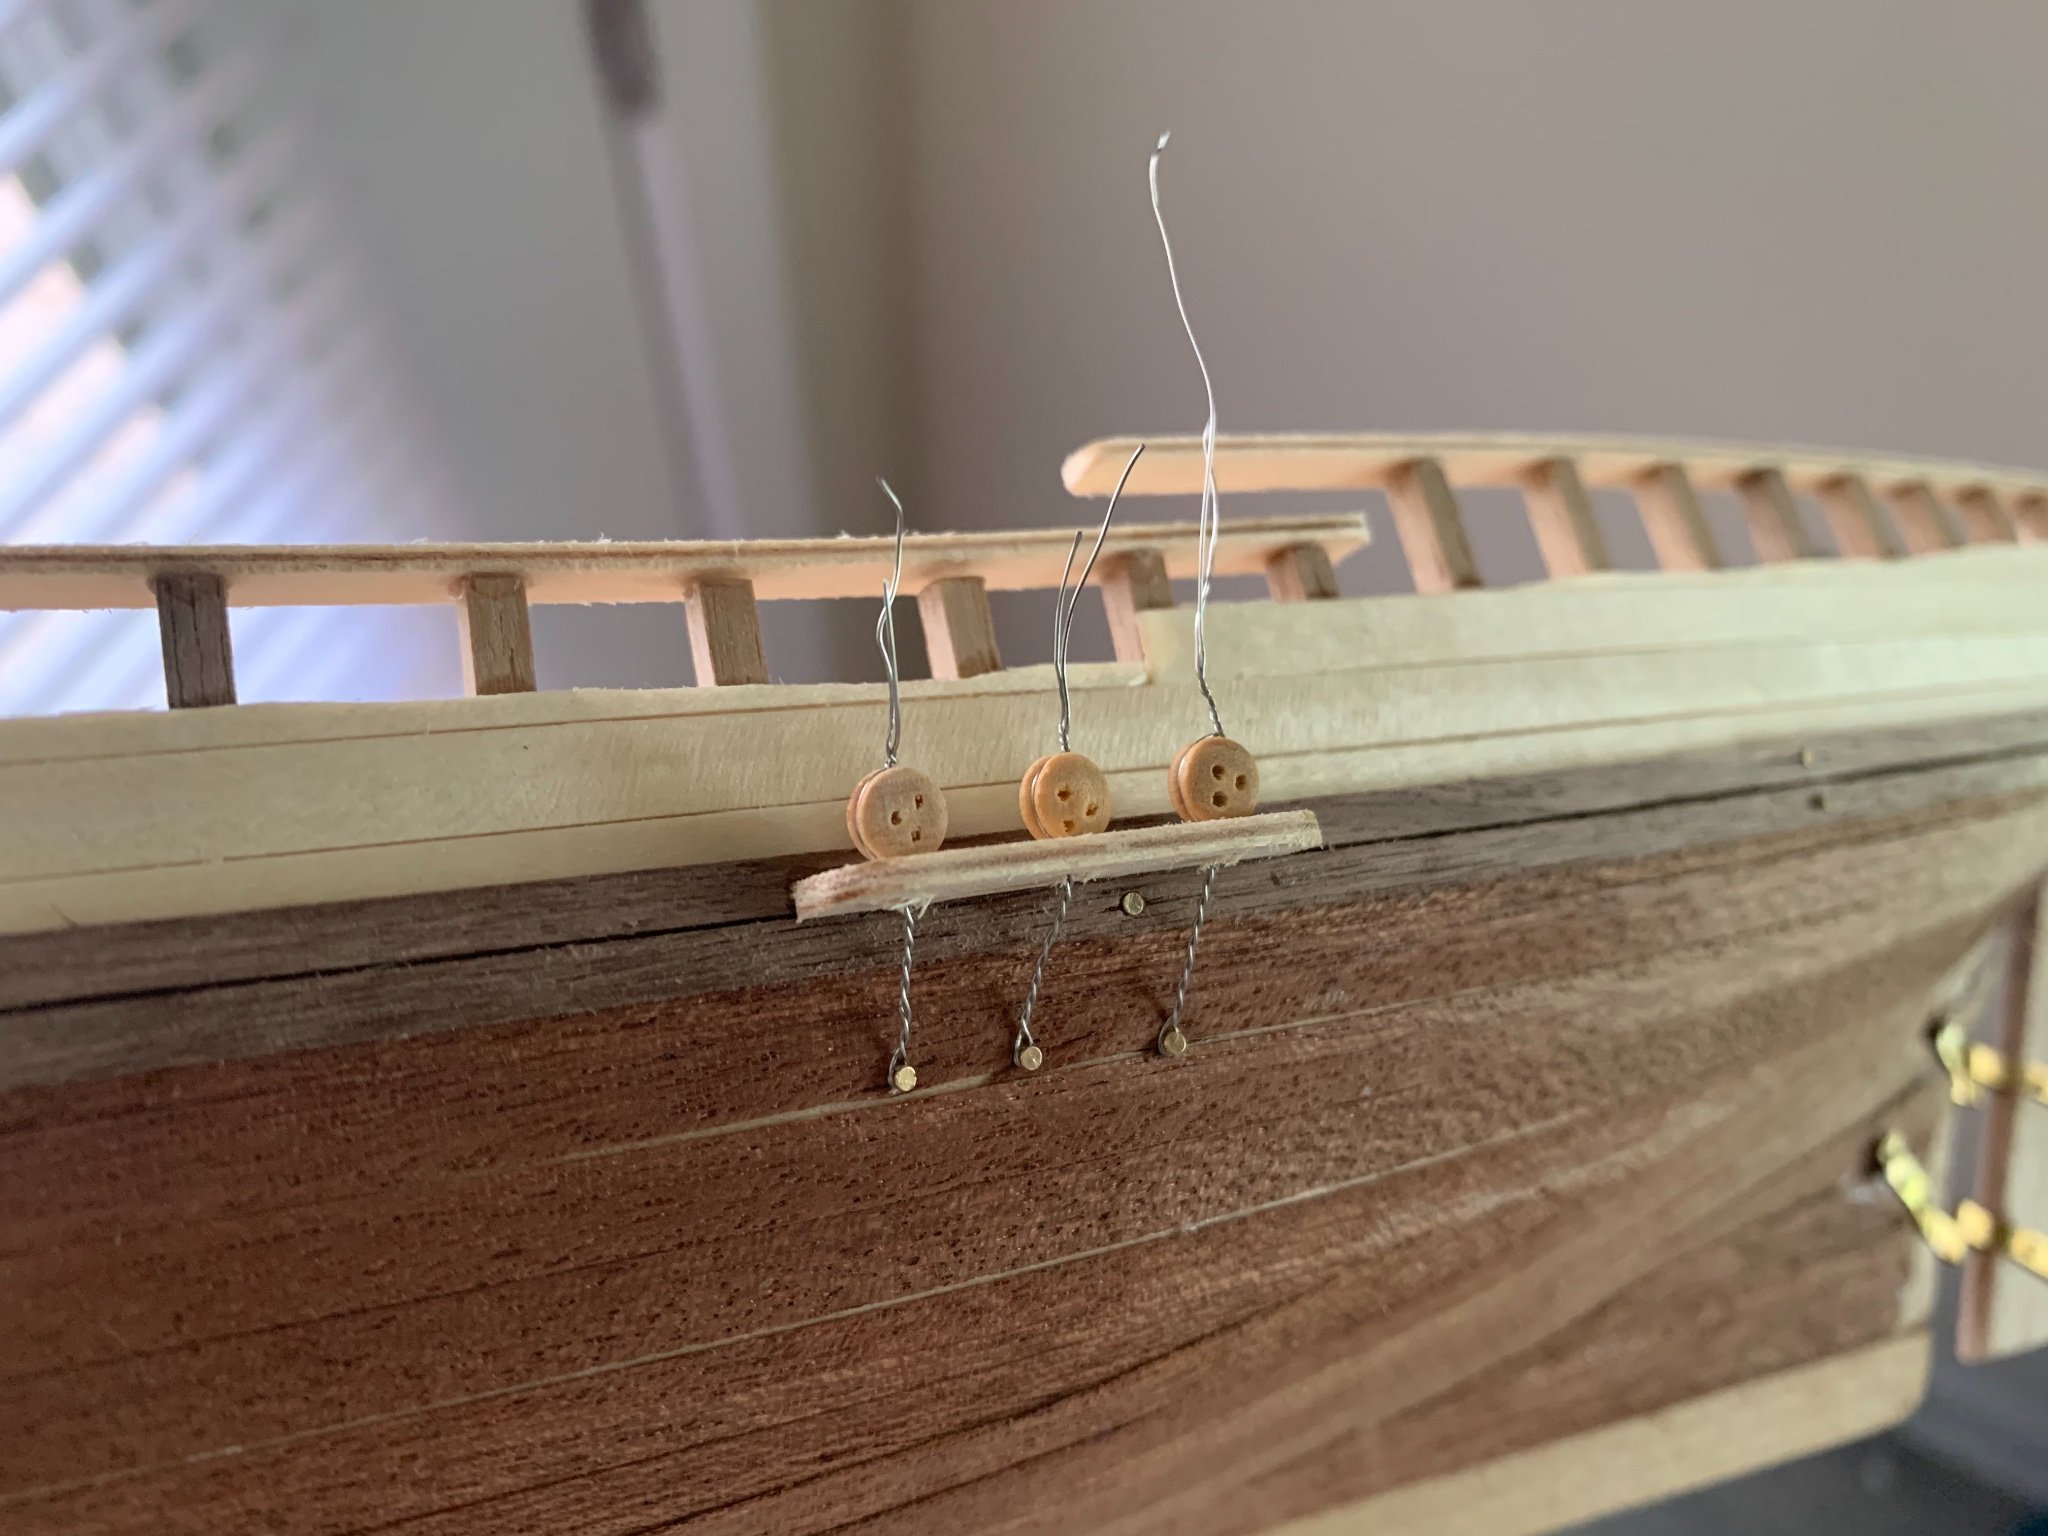
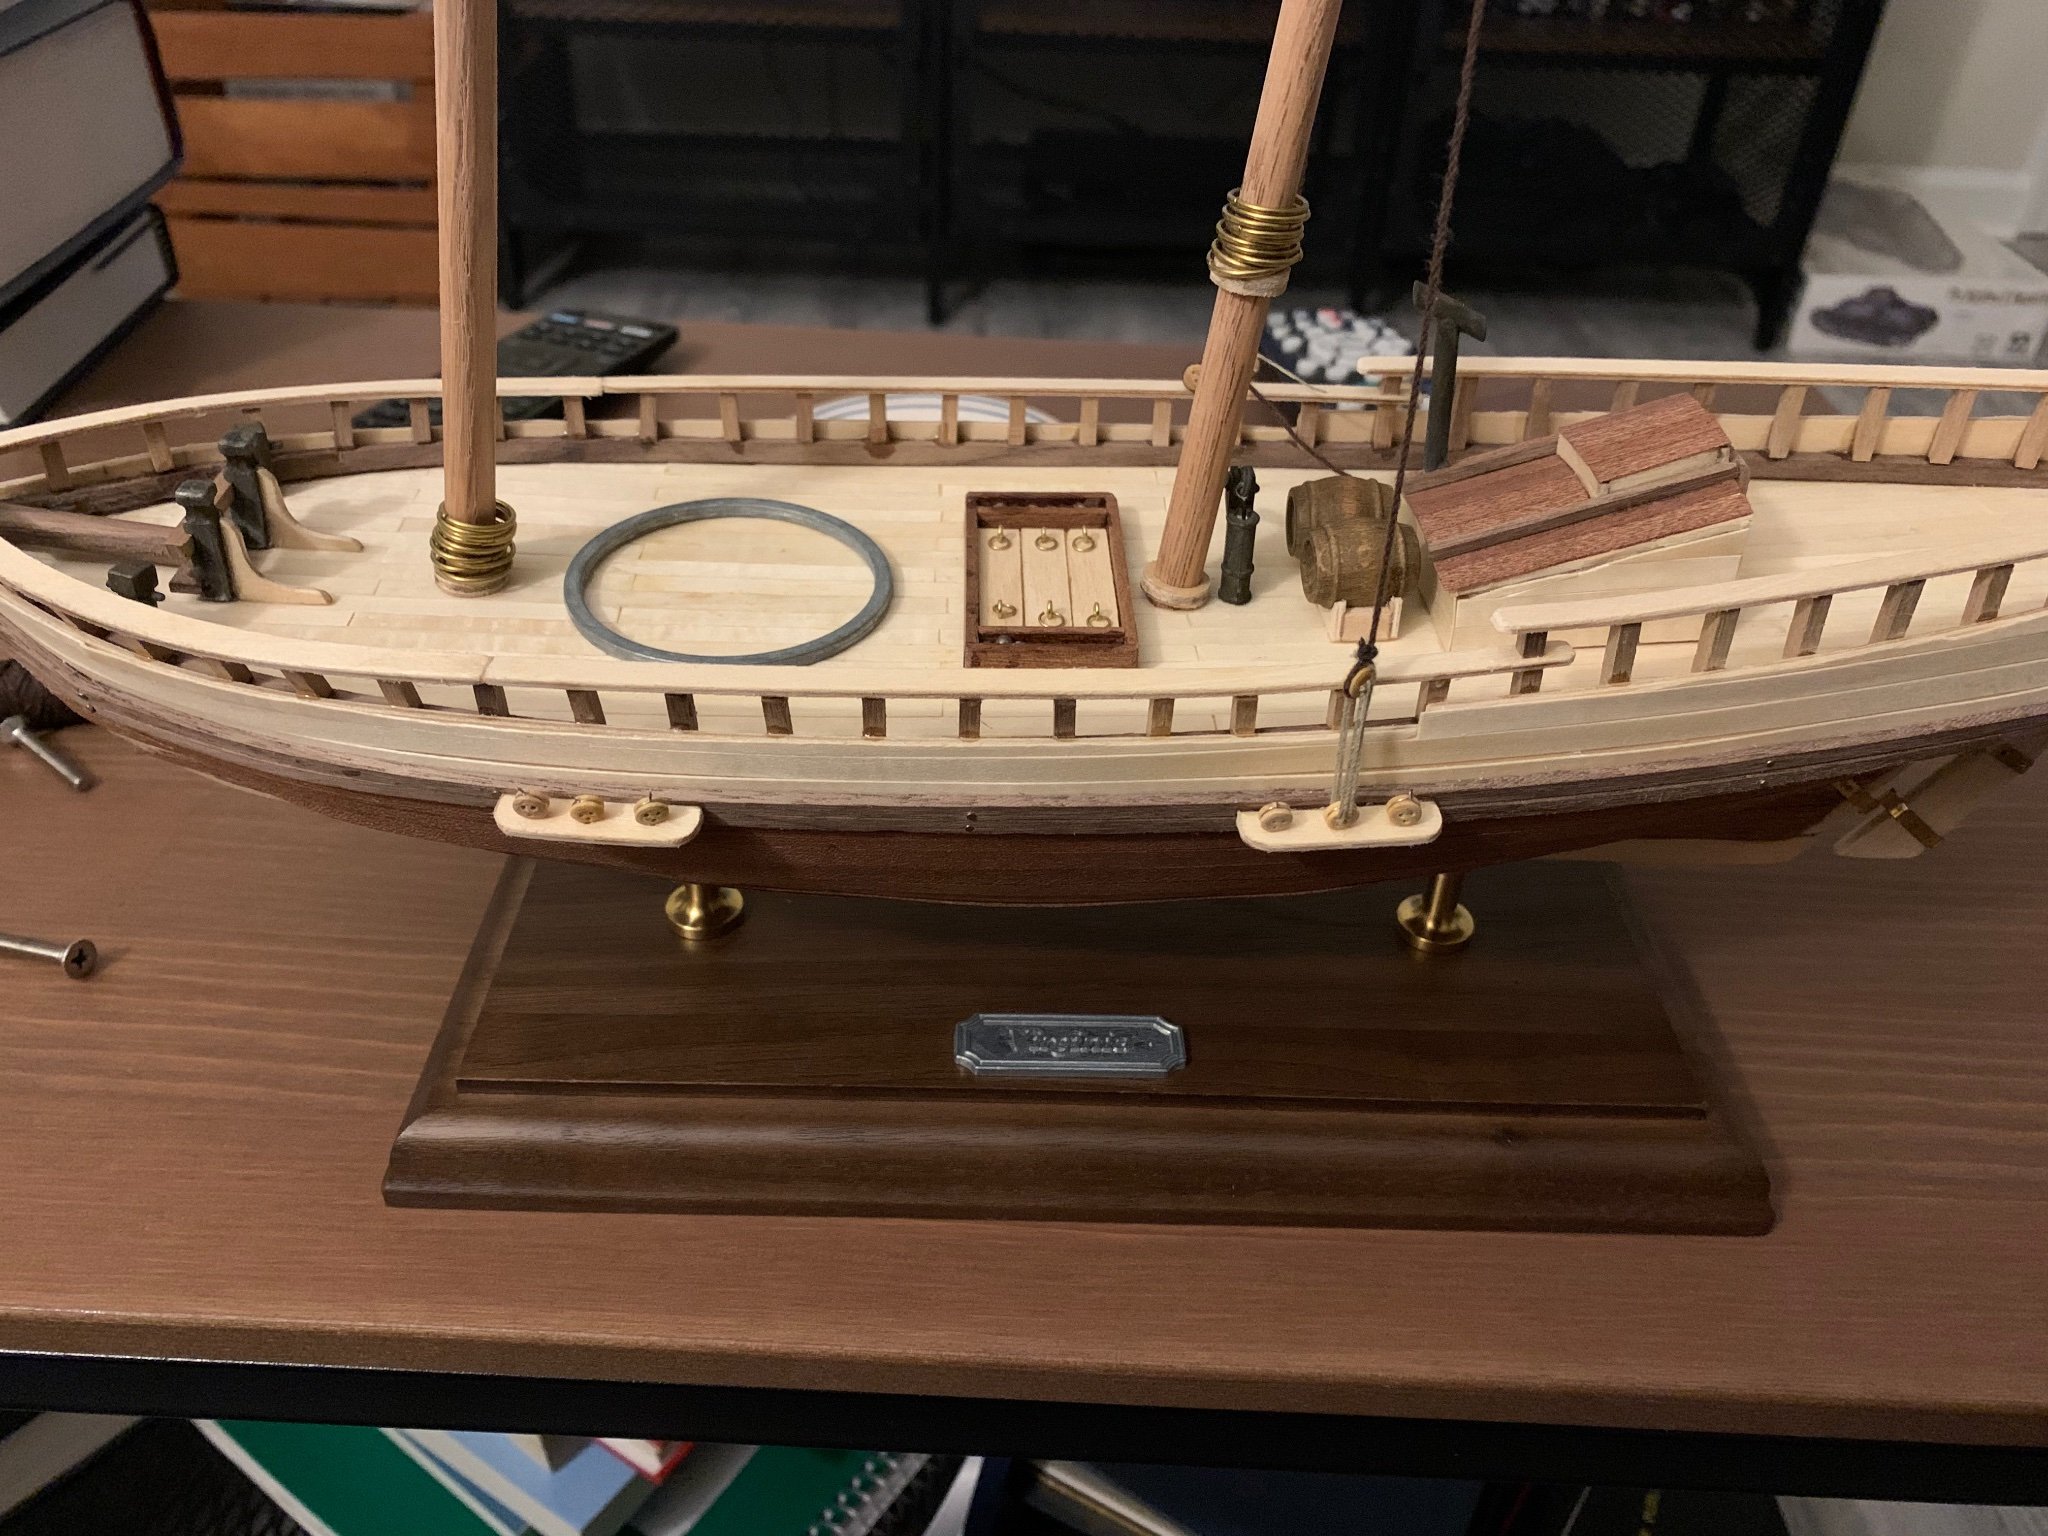
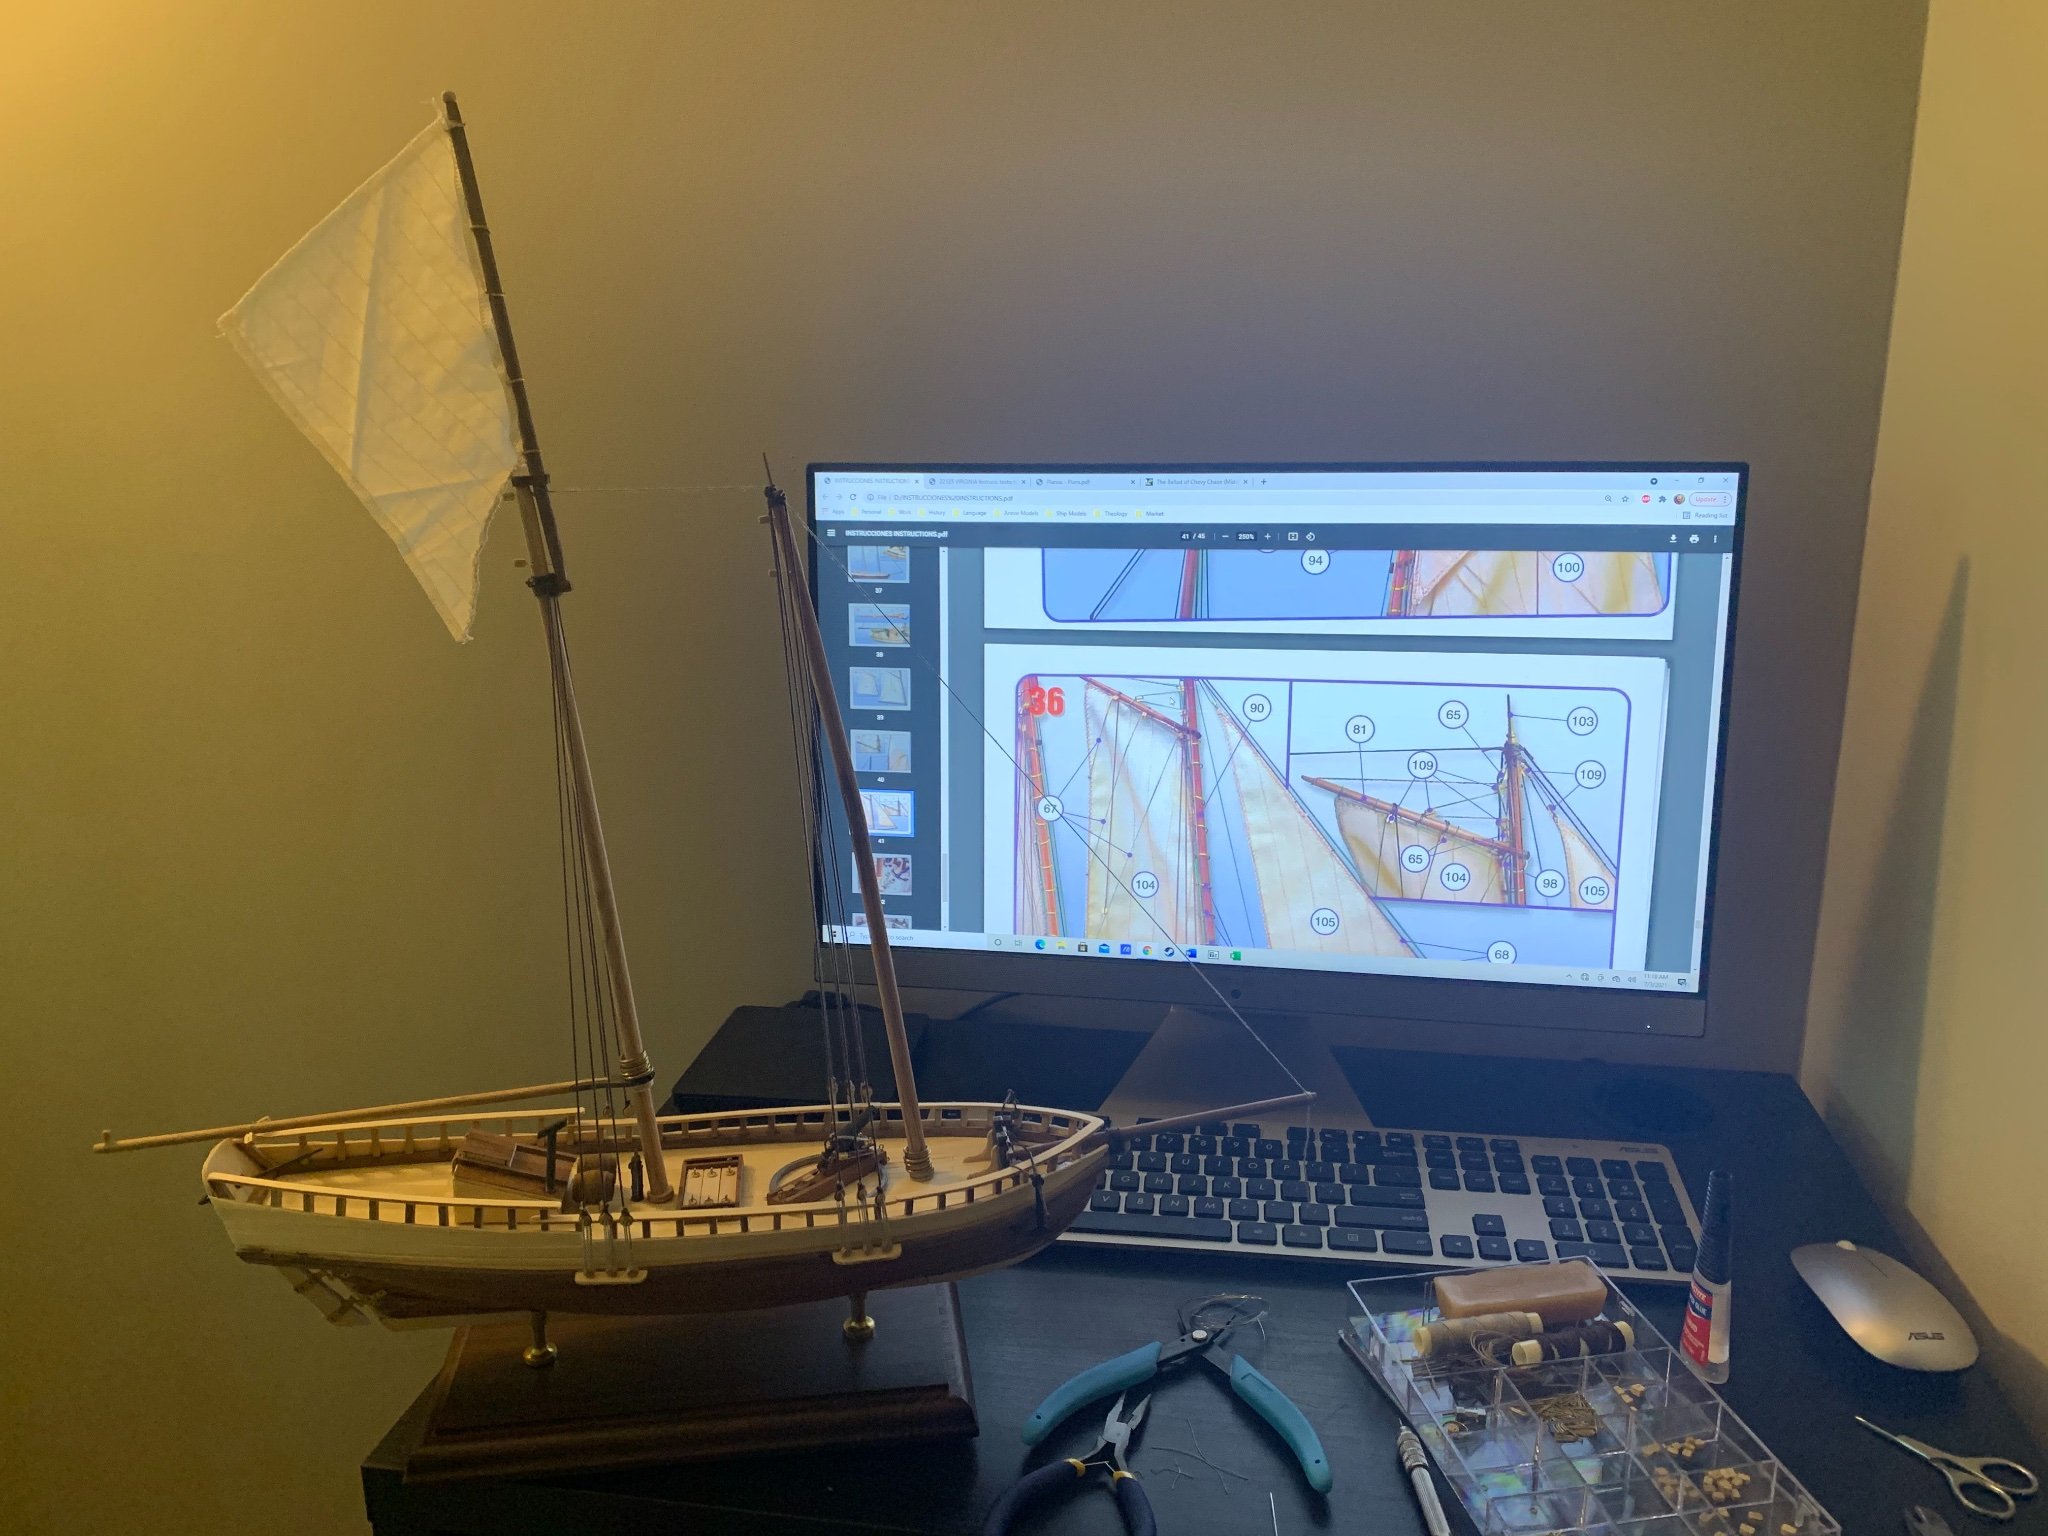
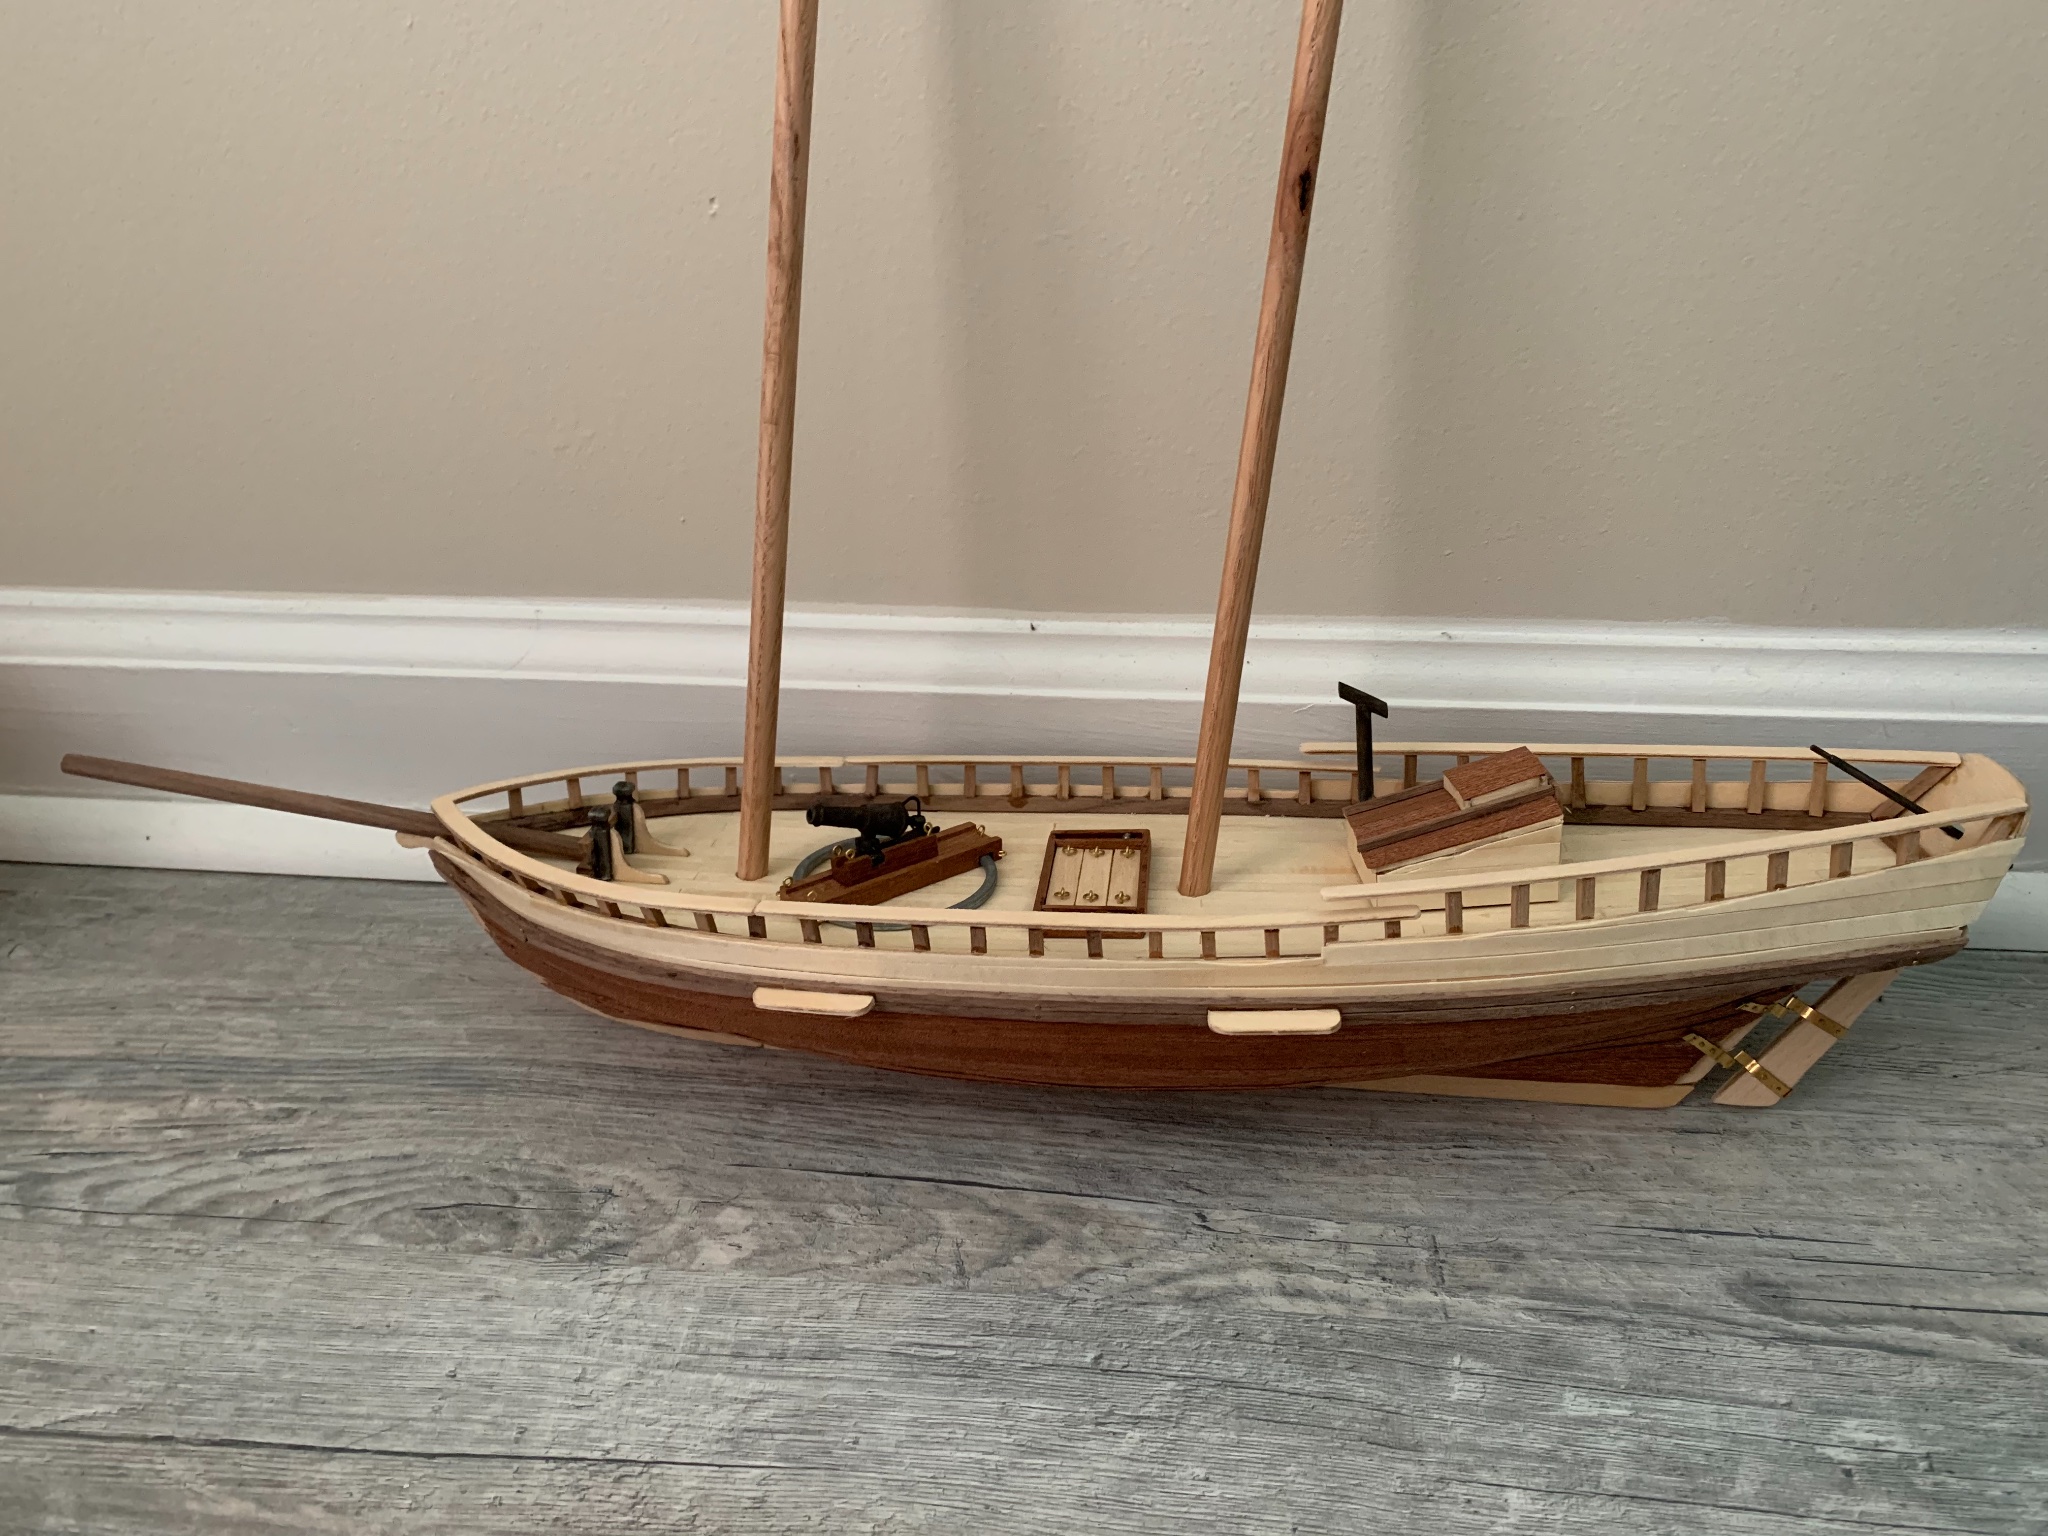
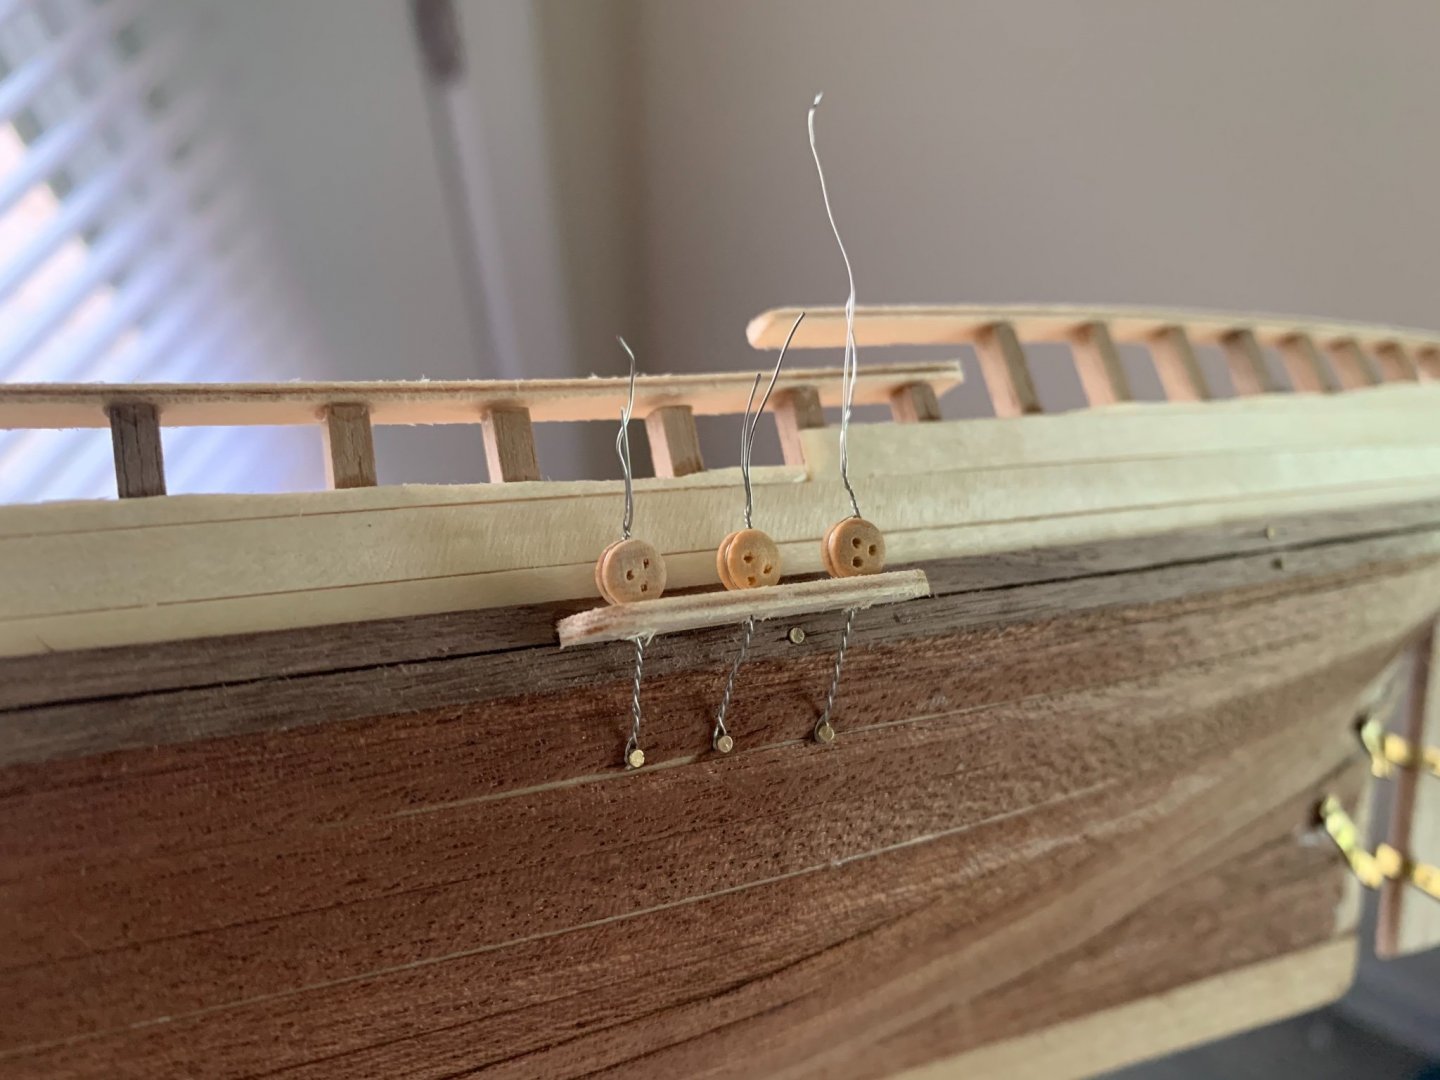
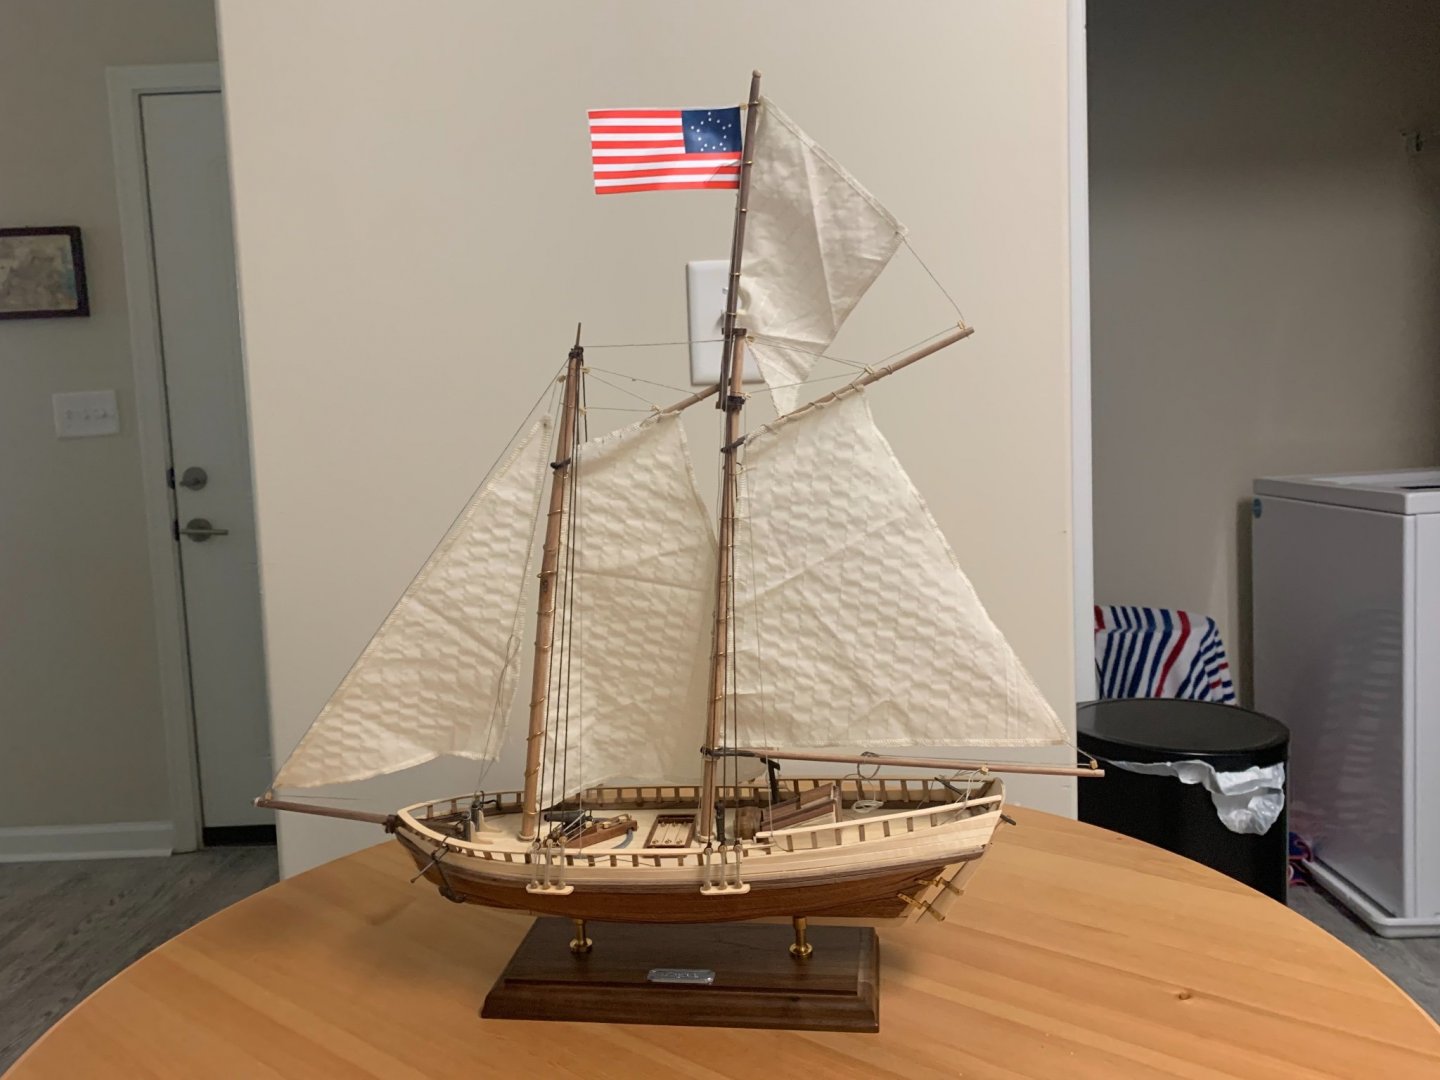
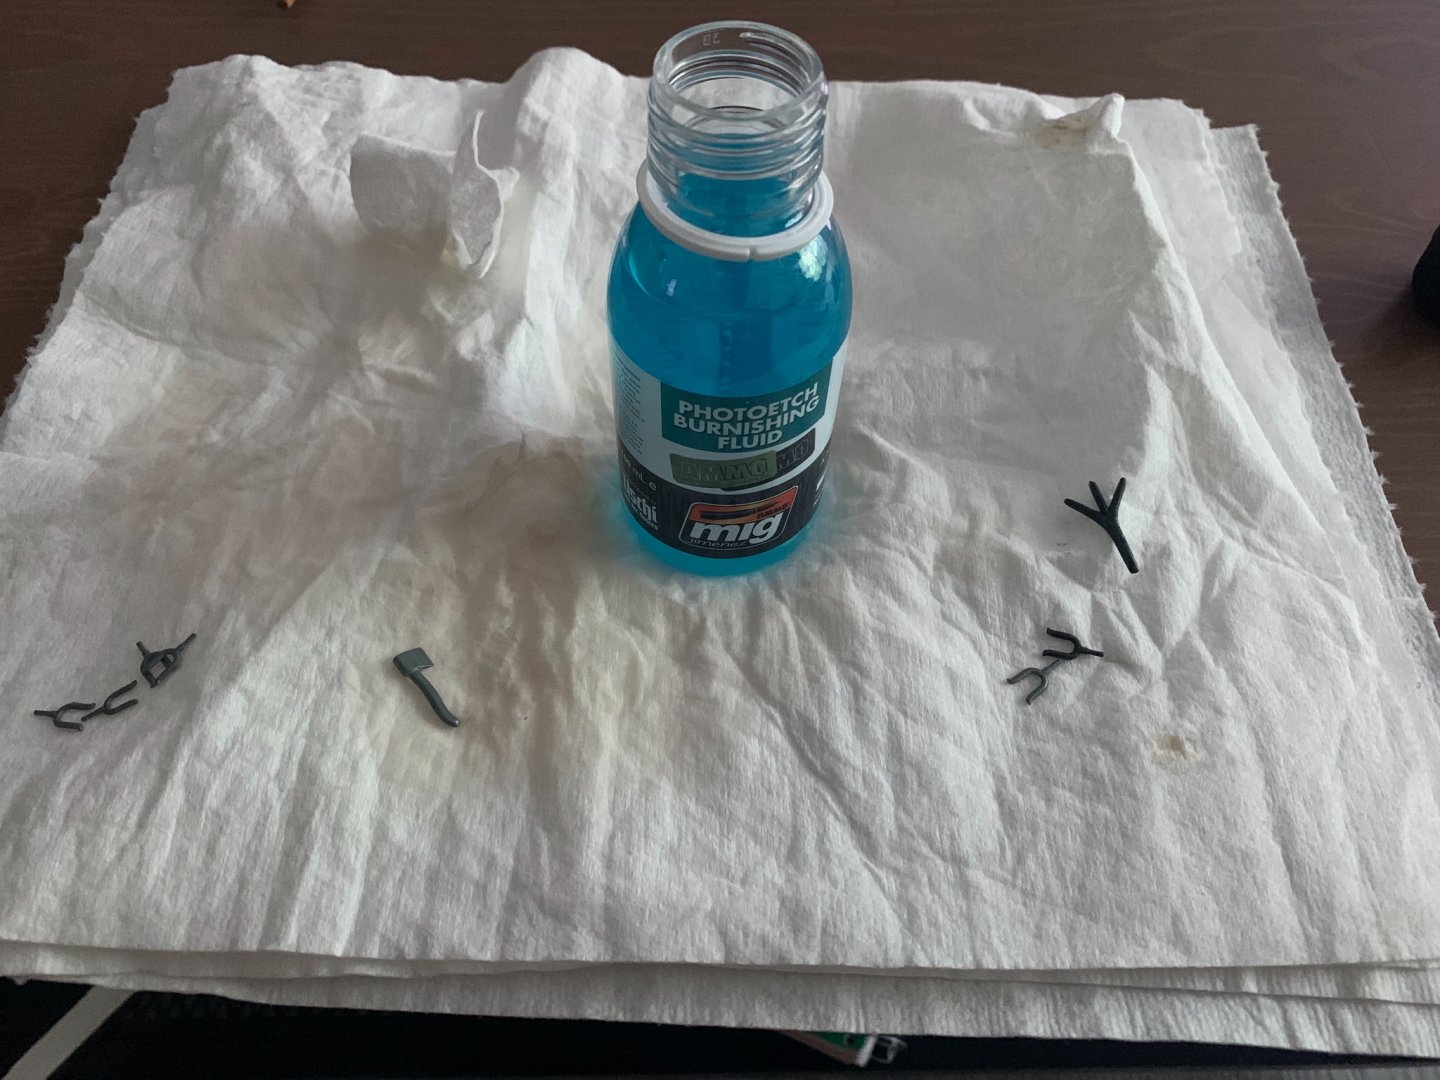
@Nirvana Thanks for the compliment! I tried to make the nail heads as flush as possible, but I didn’t file them down. My veneer planks went down pretty well, but it might have been better to do that. I have done a lot of little things on the schooner this week, but I didn’t take a lot of pictures. Attaching the posts for the railings was the most time consuming thing. I used Ammo by Mig Burnishing Fluid again to blacken the metal parts of the kit, and it really gives a great iron-like finish, much better than paint. I would highly recommend this product. I believe I got it from scalehobbyist.com It was a lot of fun to build the deck furniture. There is a lot of rigging to be done for the carronade, which I will need to do before starting on the ship’s rigging. So I did discover my kit was missing one of the 8mm applewood masts, and instead of having mismatched masts, I decided to use a 5/16ths Oak Dowel for both of them. I hope with staining, it will not look too different from the bowsprit and boom. Here is the ship as it stands, railings, rudder, and rubbing strakes installed, along with the deck furniture. I hope to shape the masts and start the standing rigging this week, and to have the whole ship done by June 20th so it can be a Father’s Day gift.


- 6 replies
-
- 1
-
-
- artesania latina
- virginia
- (and 1 more)
-
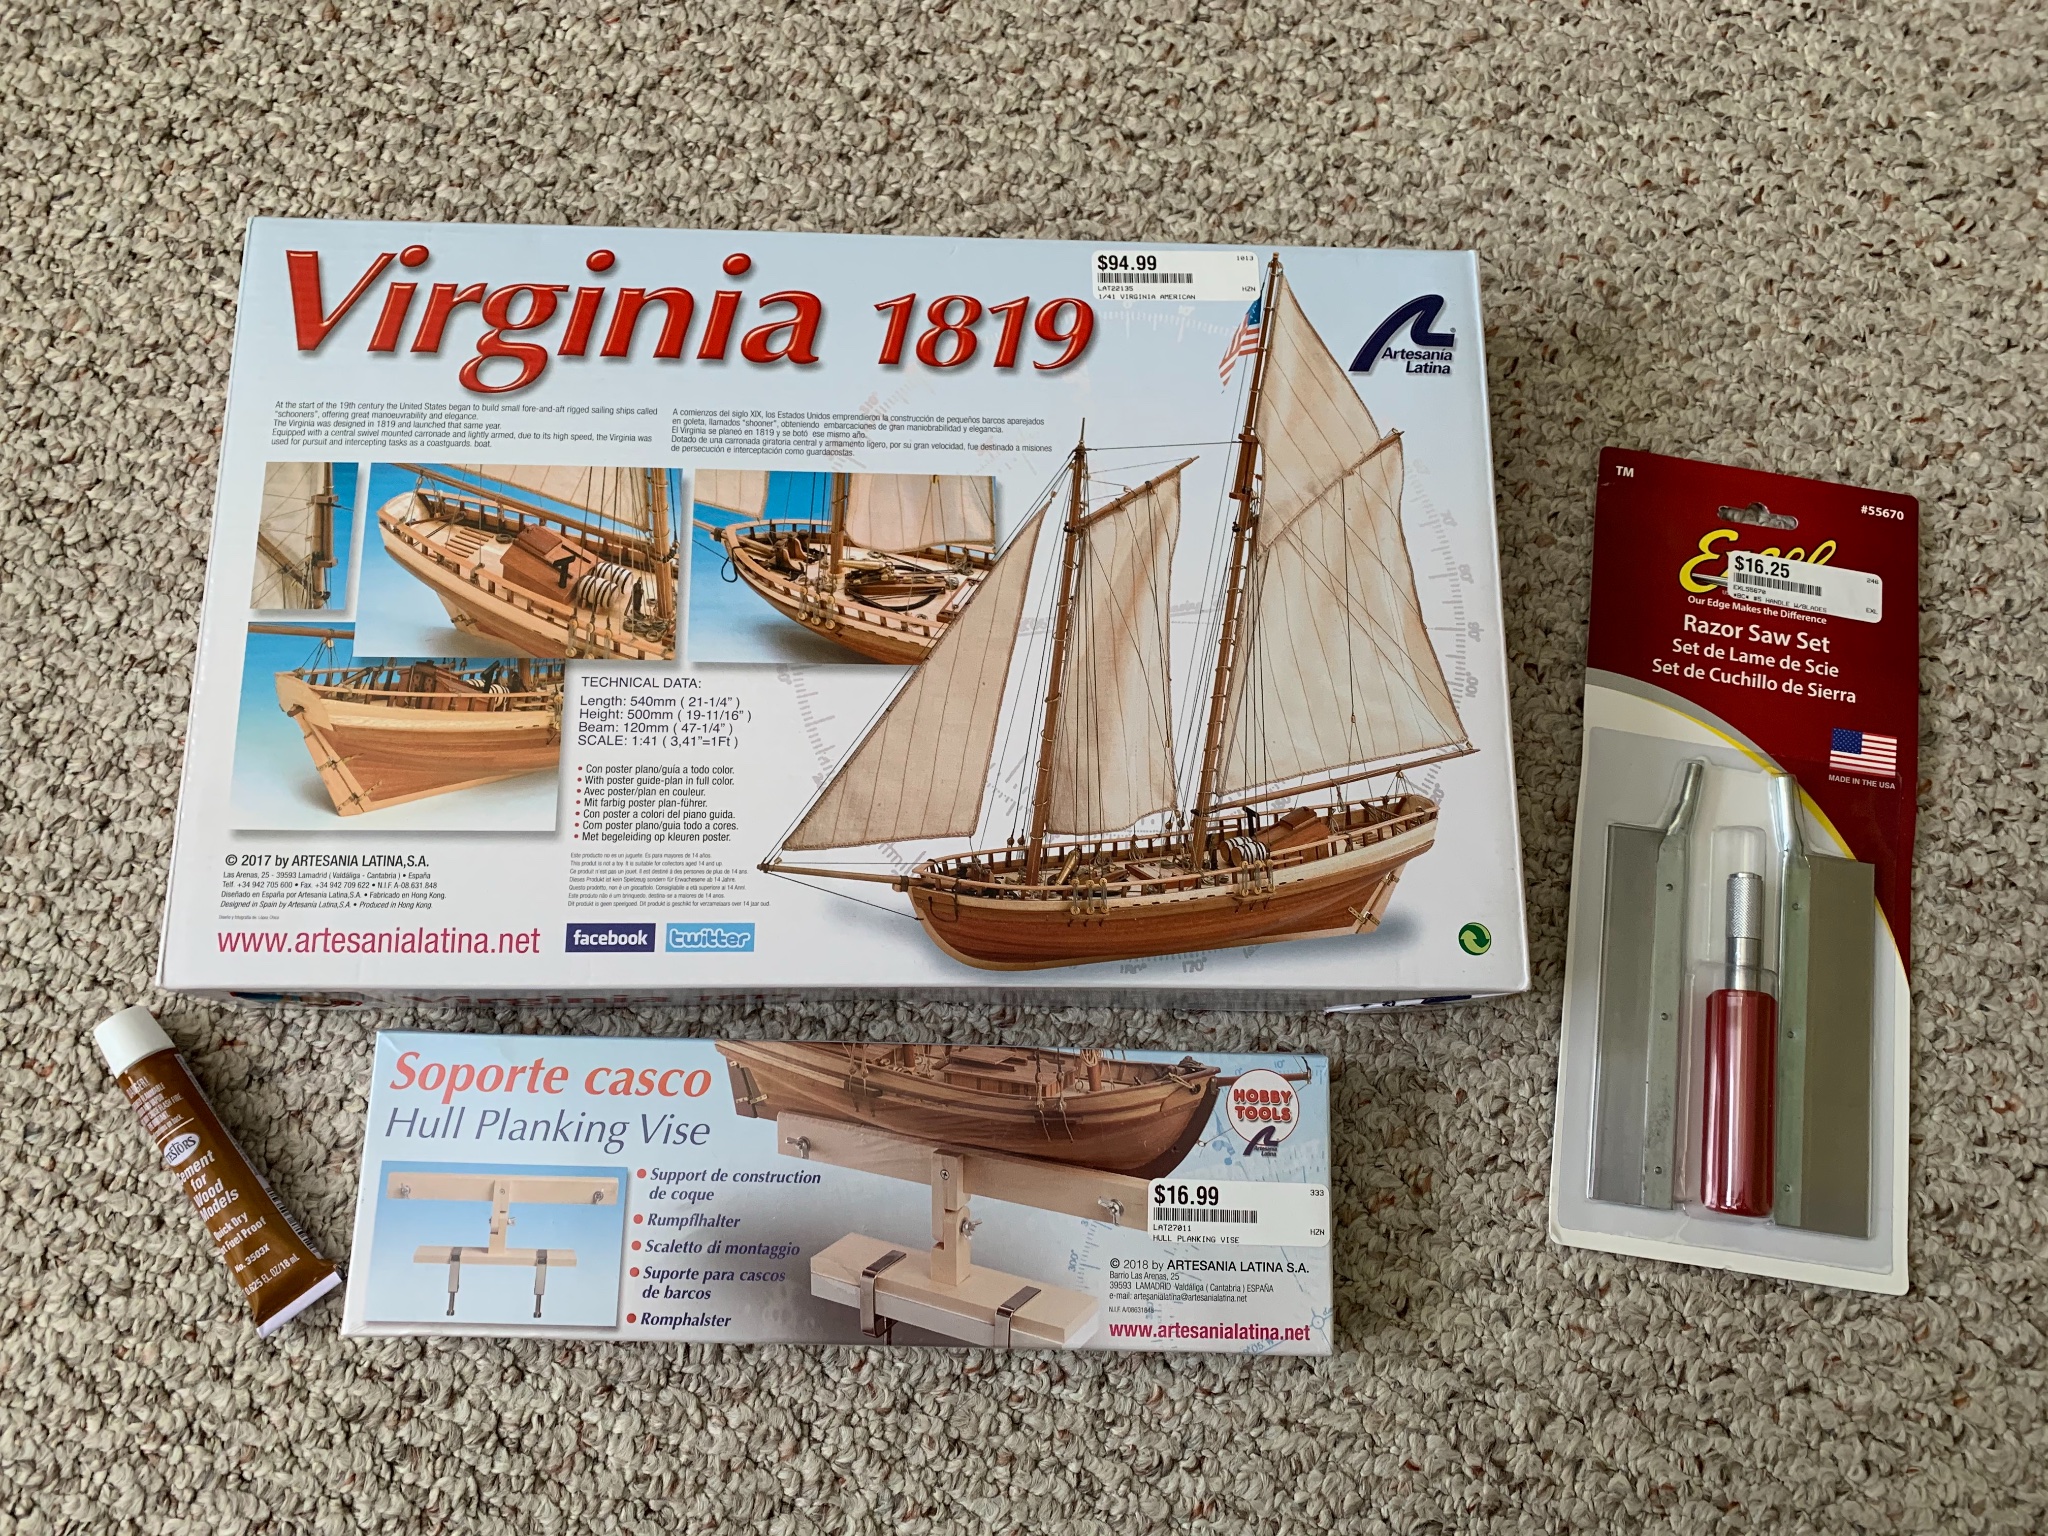
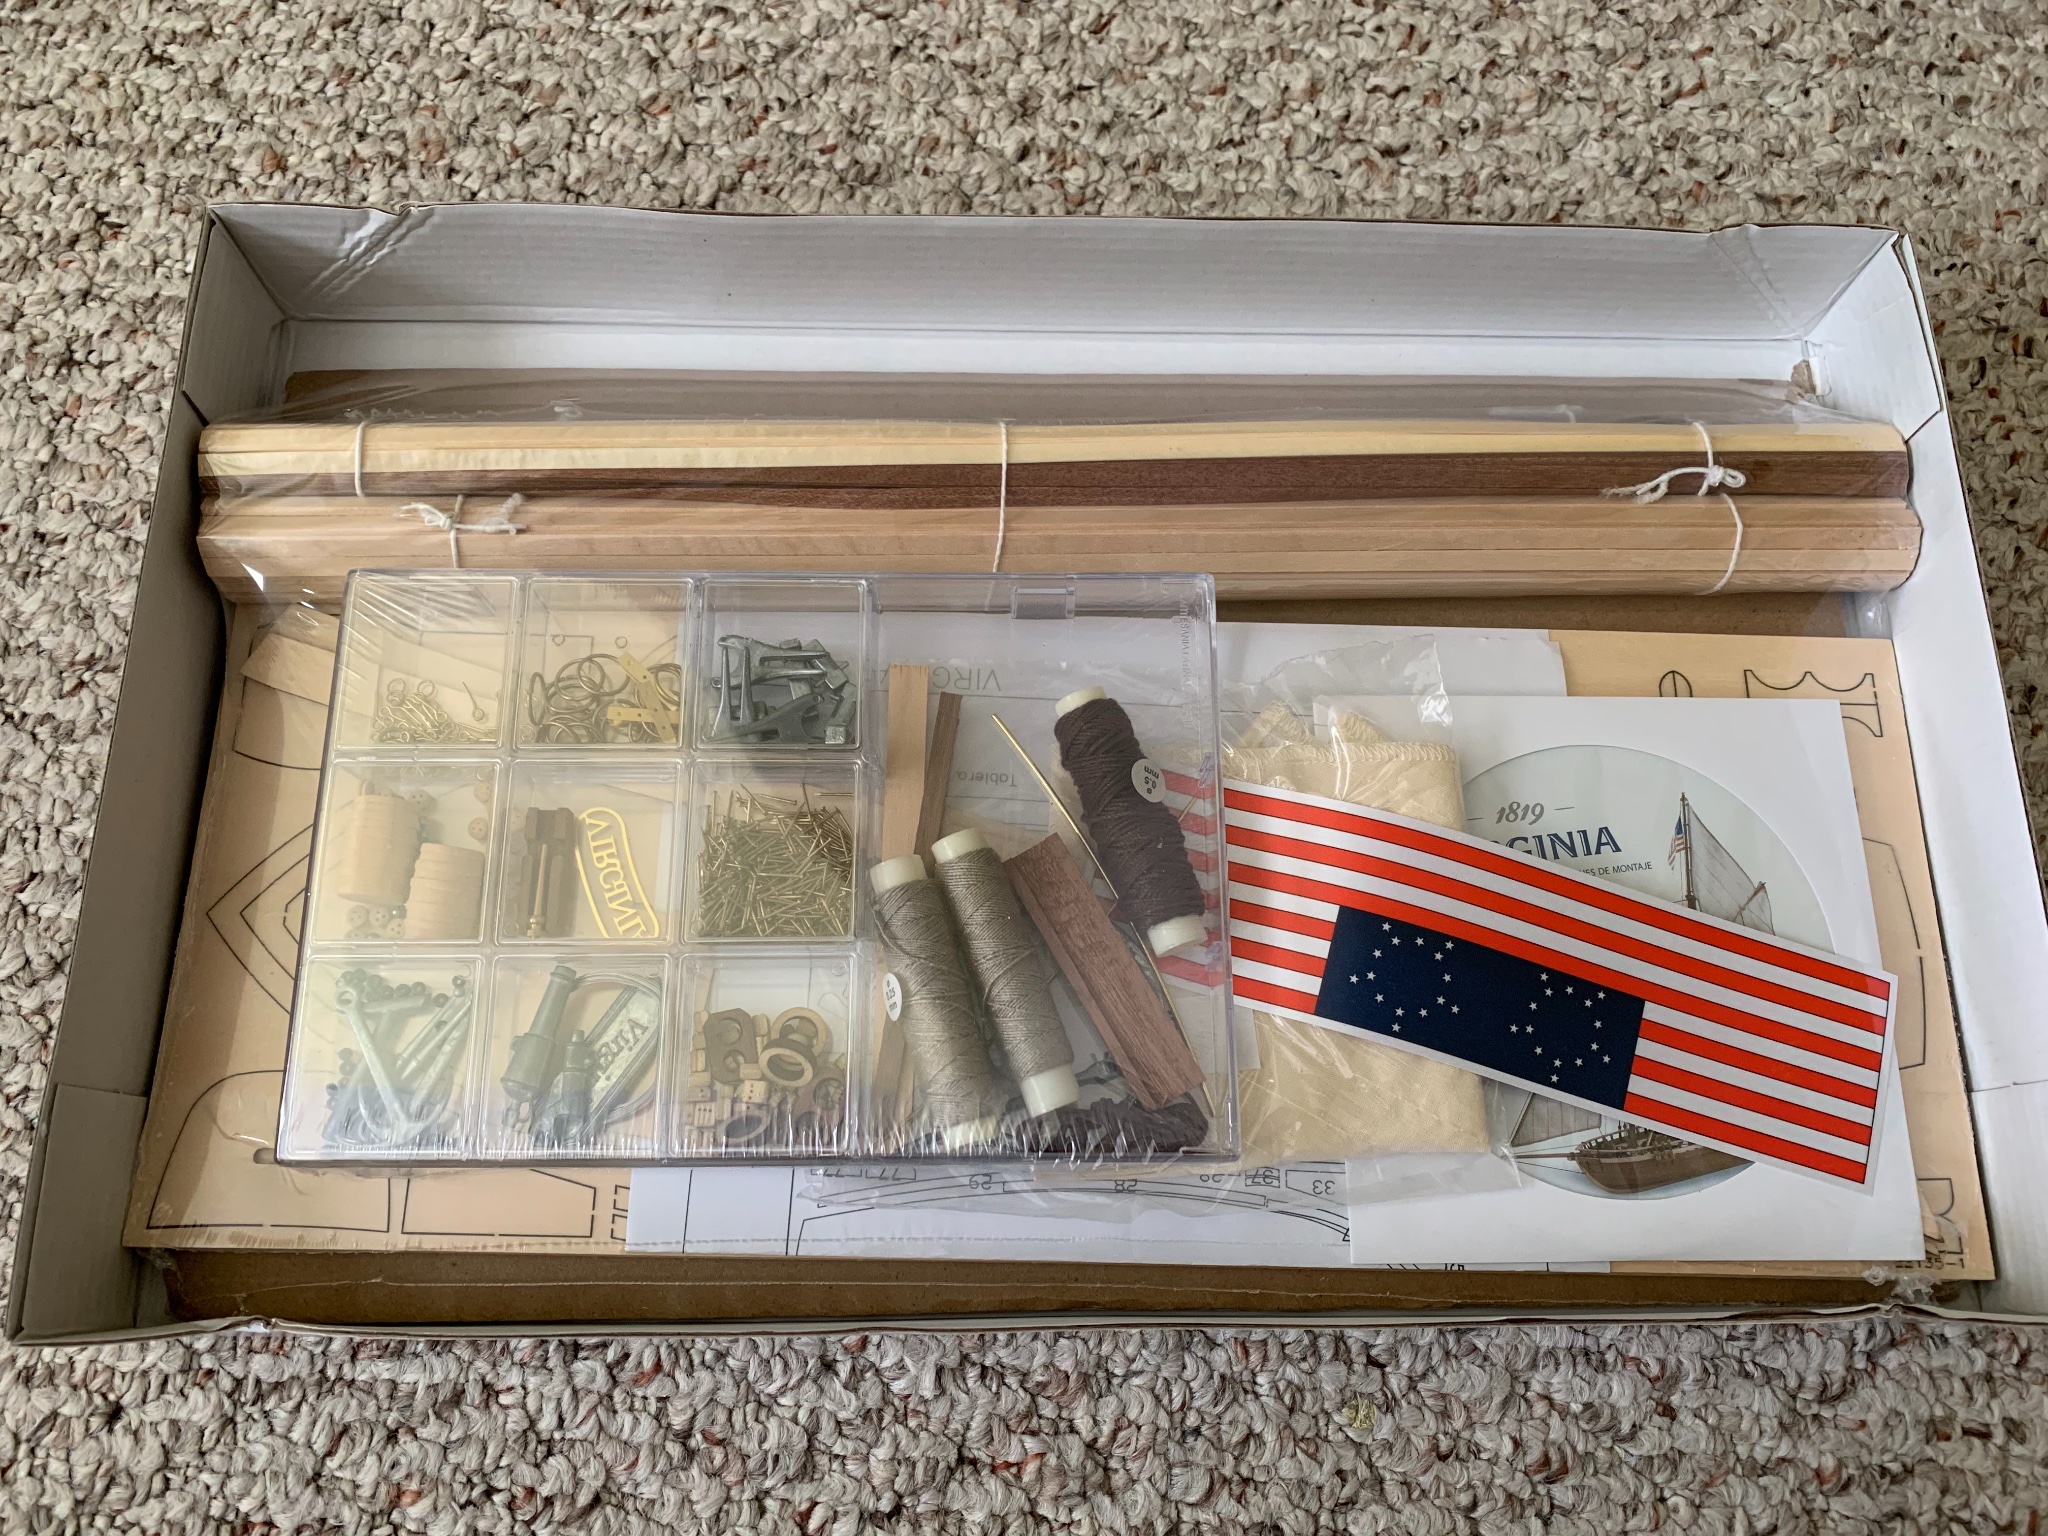
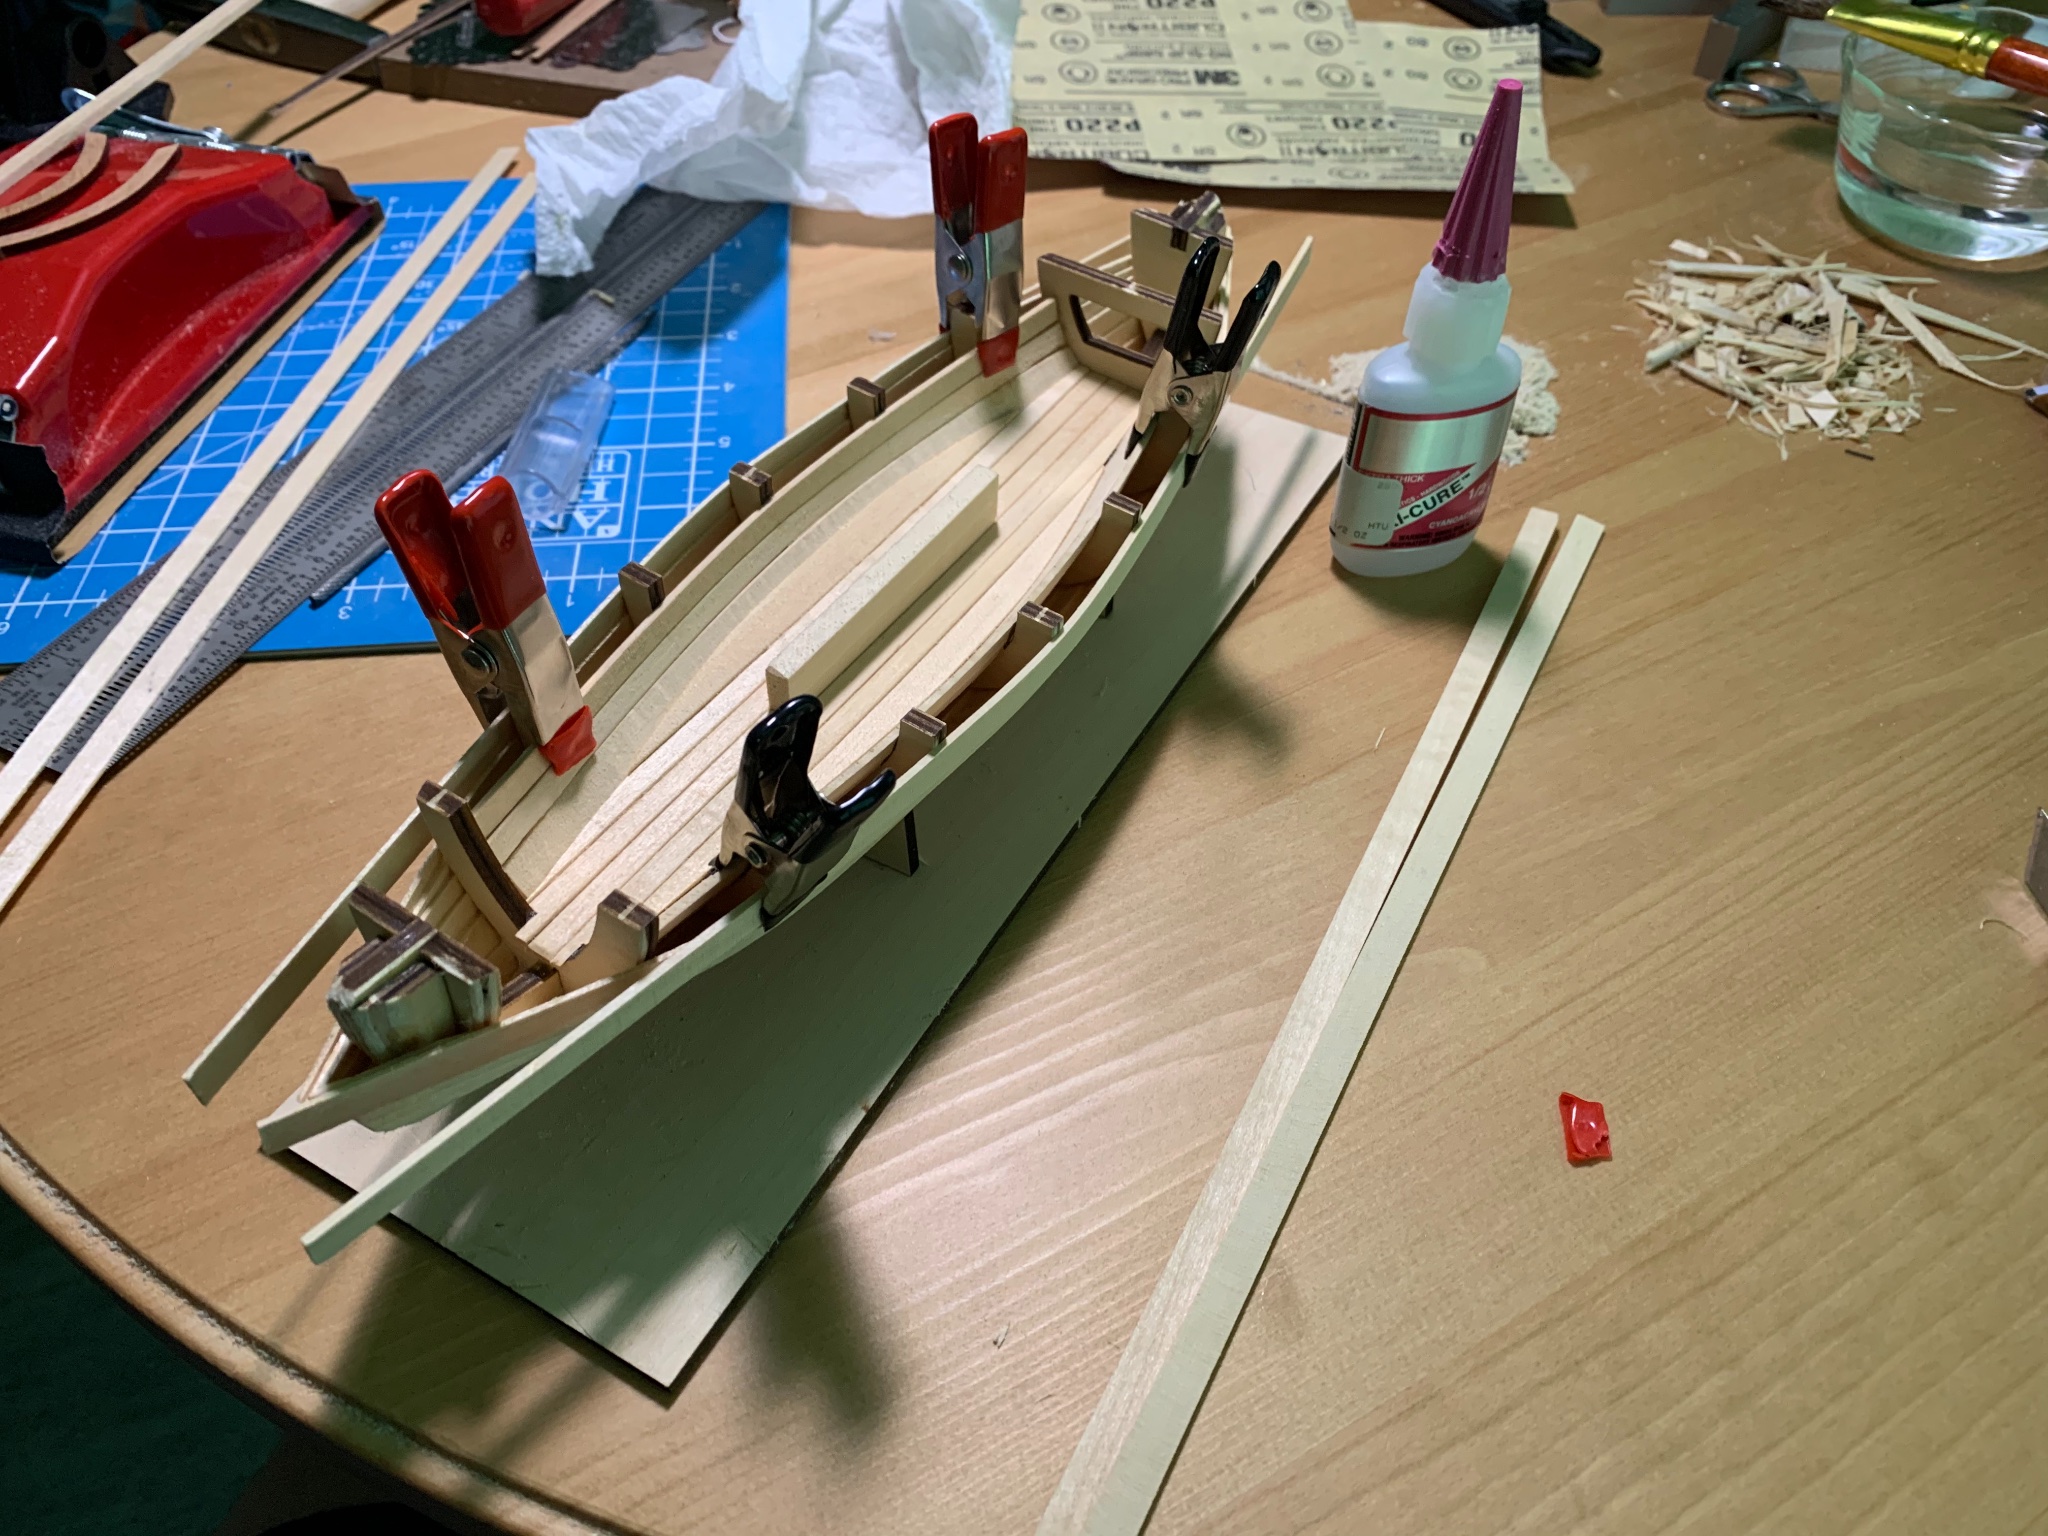
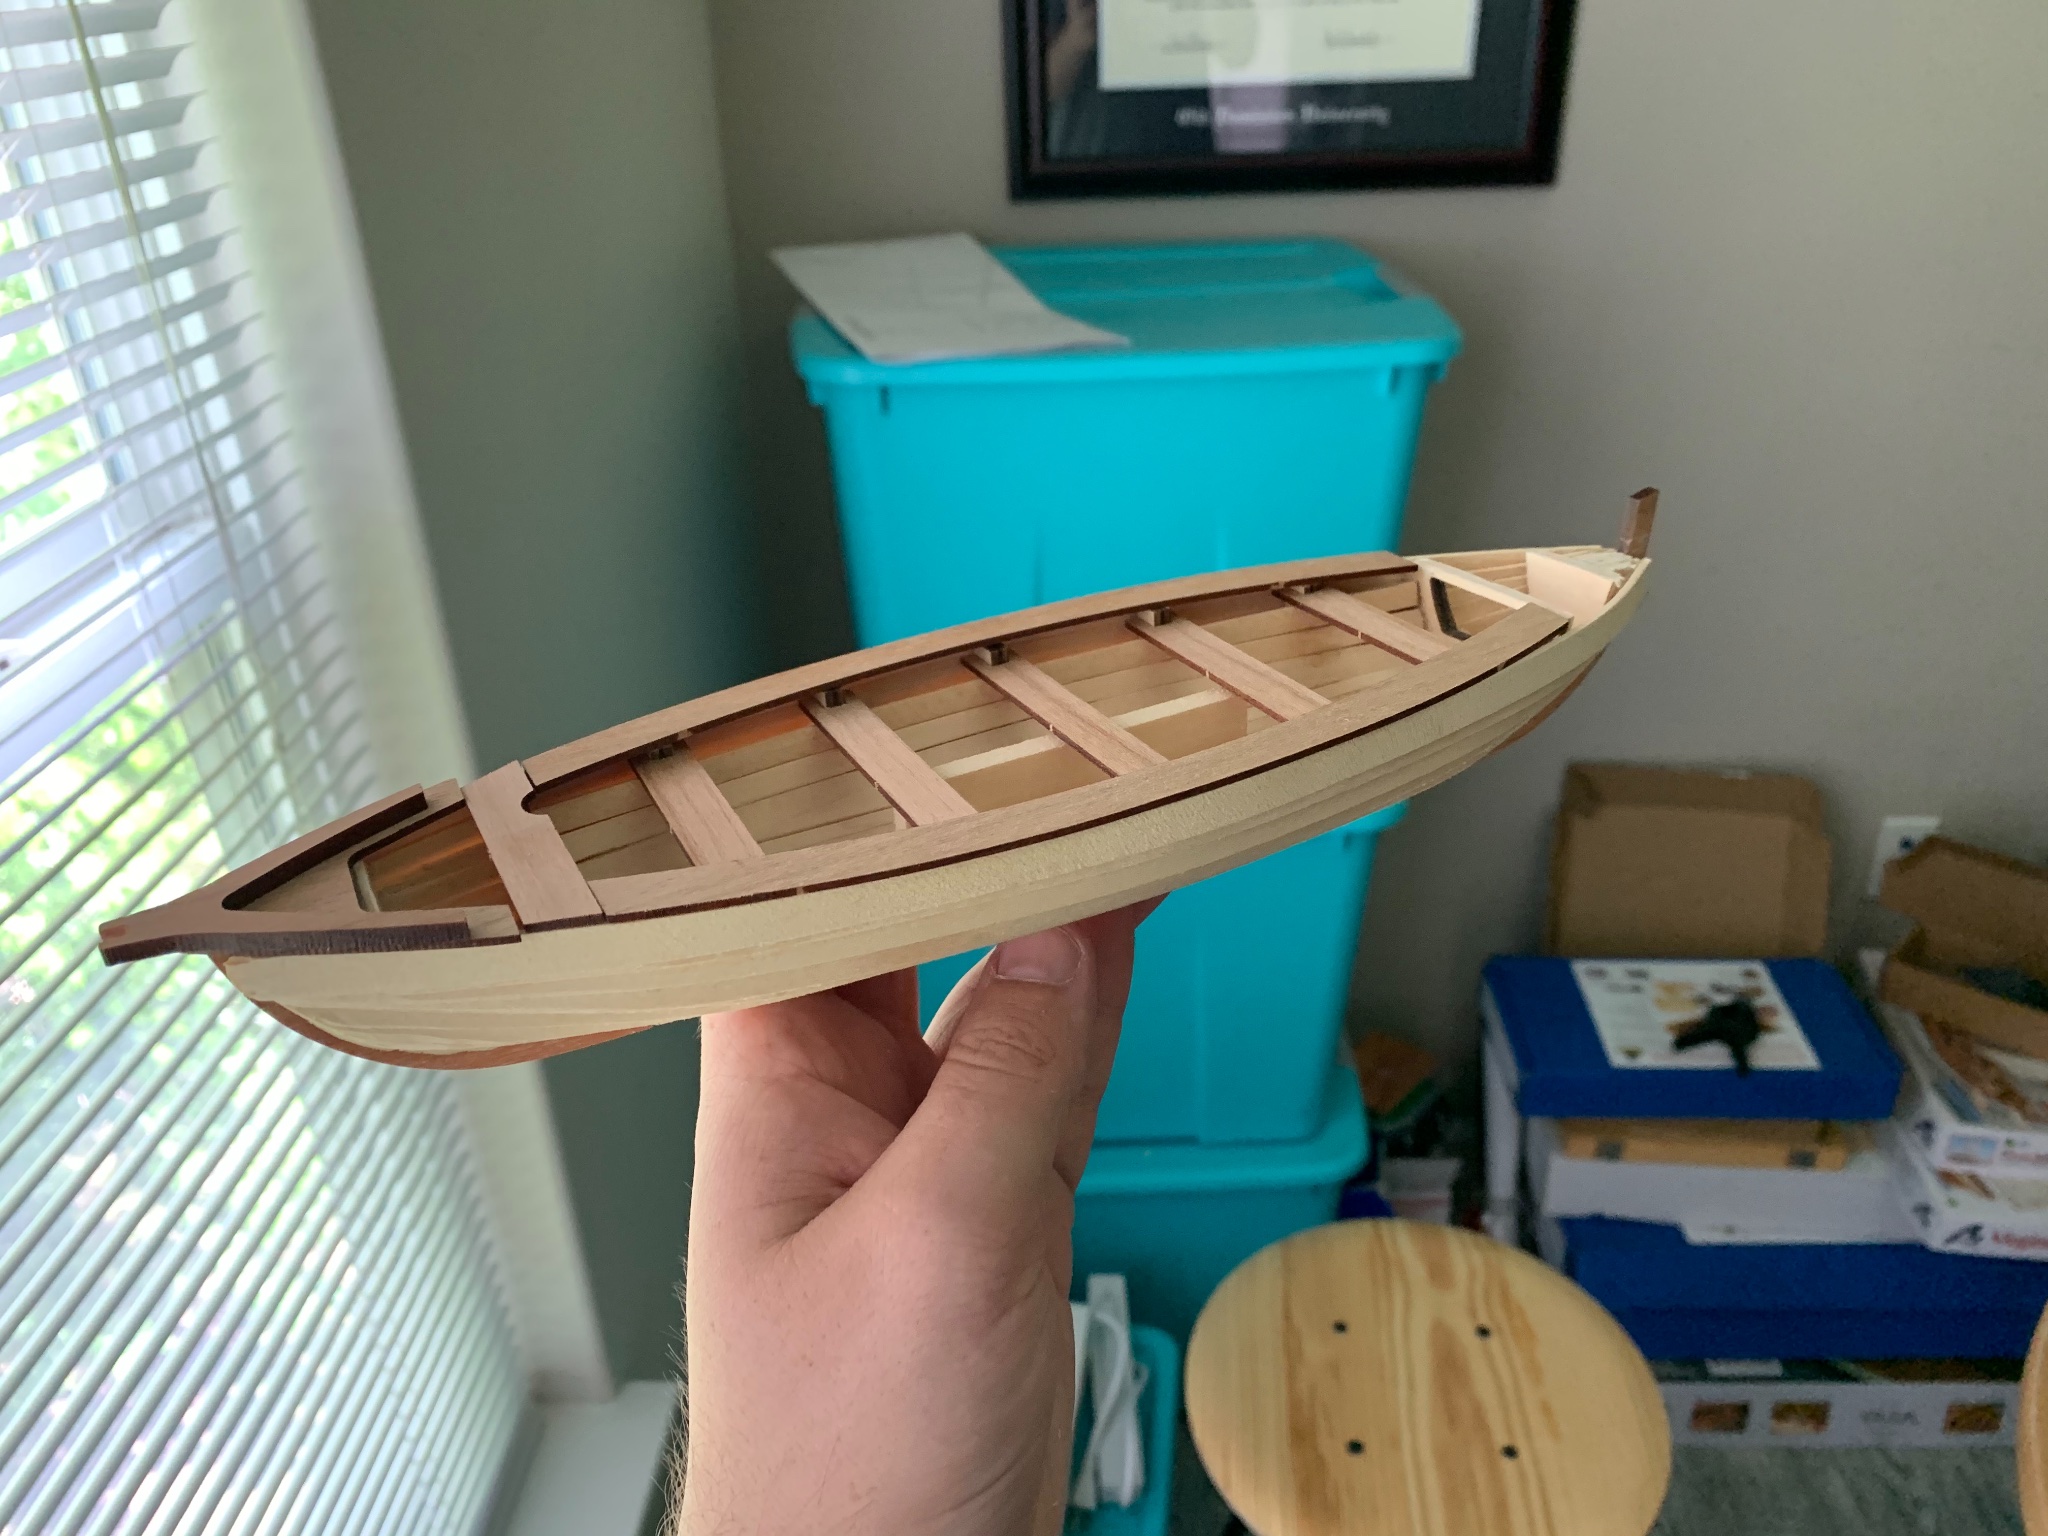
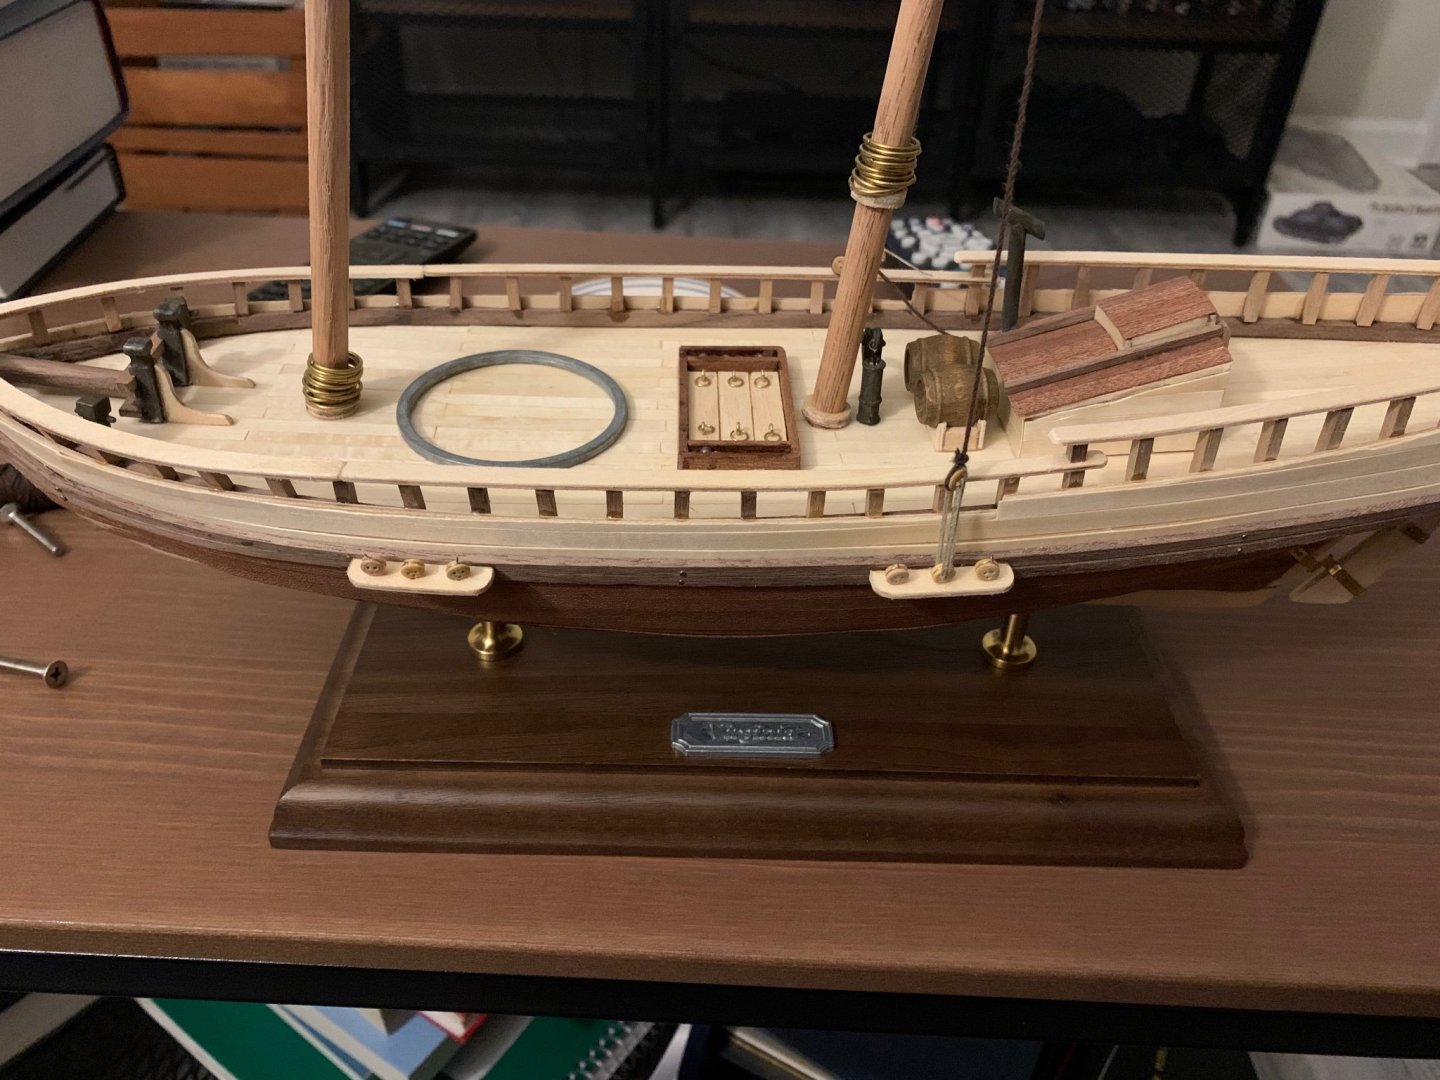
I bought this kit a few months ago from HobbyTown, not knowing a thing about this hobby, and got a few tools I thought I would need. I’ve used them all so far, and gathered many more tools. Two boat kits later, I feel experienced enough to tackle this ship. The instructions on CD are mainly visual, but it’s gotten me through so far. I may be missing a couple timbers, but thankfully it seems all the hardware is here. I had intended to build the Bounty Launch from Model Shipways next, but I ran into trouble early into that kit. By comparison, this kit has been very easy. I find working with nails much easier than trying to glue all those planks. As before, I’ve had a little trouble tidying up the stern and the bow, but I am gratified to learn that I am improving. The fully planked hull. On one side of the hull I used perfectly sanded and beveled planks to join up the center. But on this side I just used scraps of wood, dust, and glue to fill it in, then sanded it down to shape. This is where I am at present, with the gunwales and transom installed. I have begun veneering the hull, and hope to hang the rudder sometime this weekend. I am about a week into this project, I think it will take me another week to build the railing and deck furniture, and another week to do rigging and sails. It’s coming together much faster than I anticipated! Let me know your thoughts.


- 6 replies
-
- 1
-
-
- artesania latina
- virginia
- (and 1 more)
-
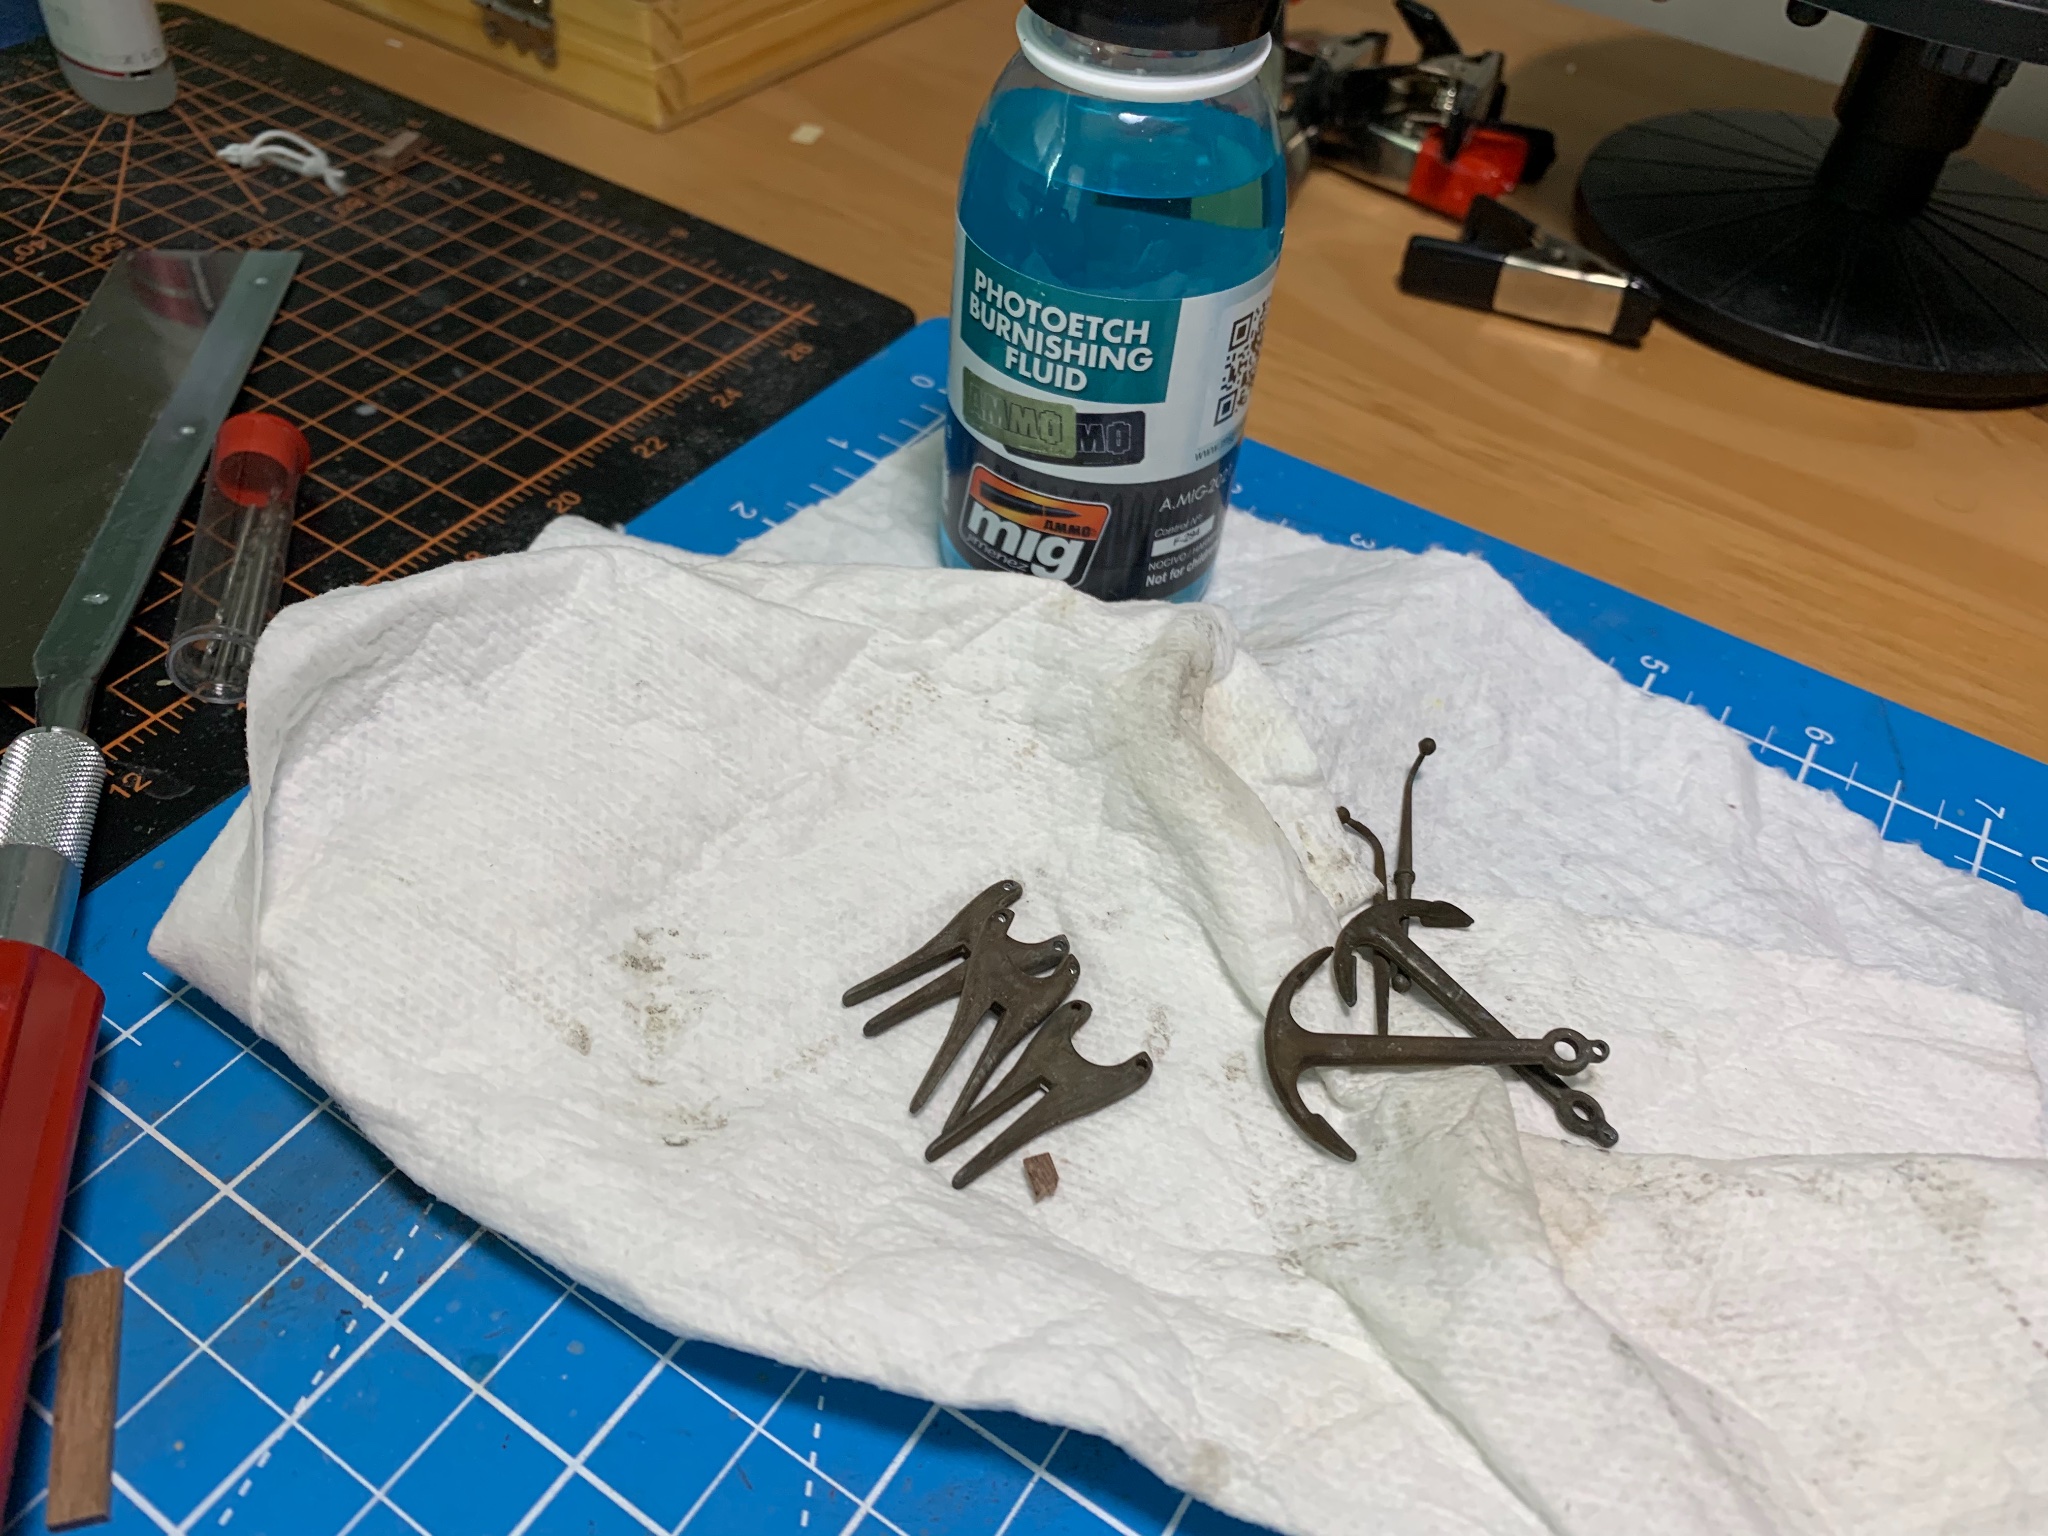
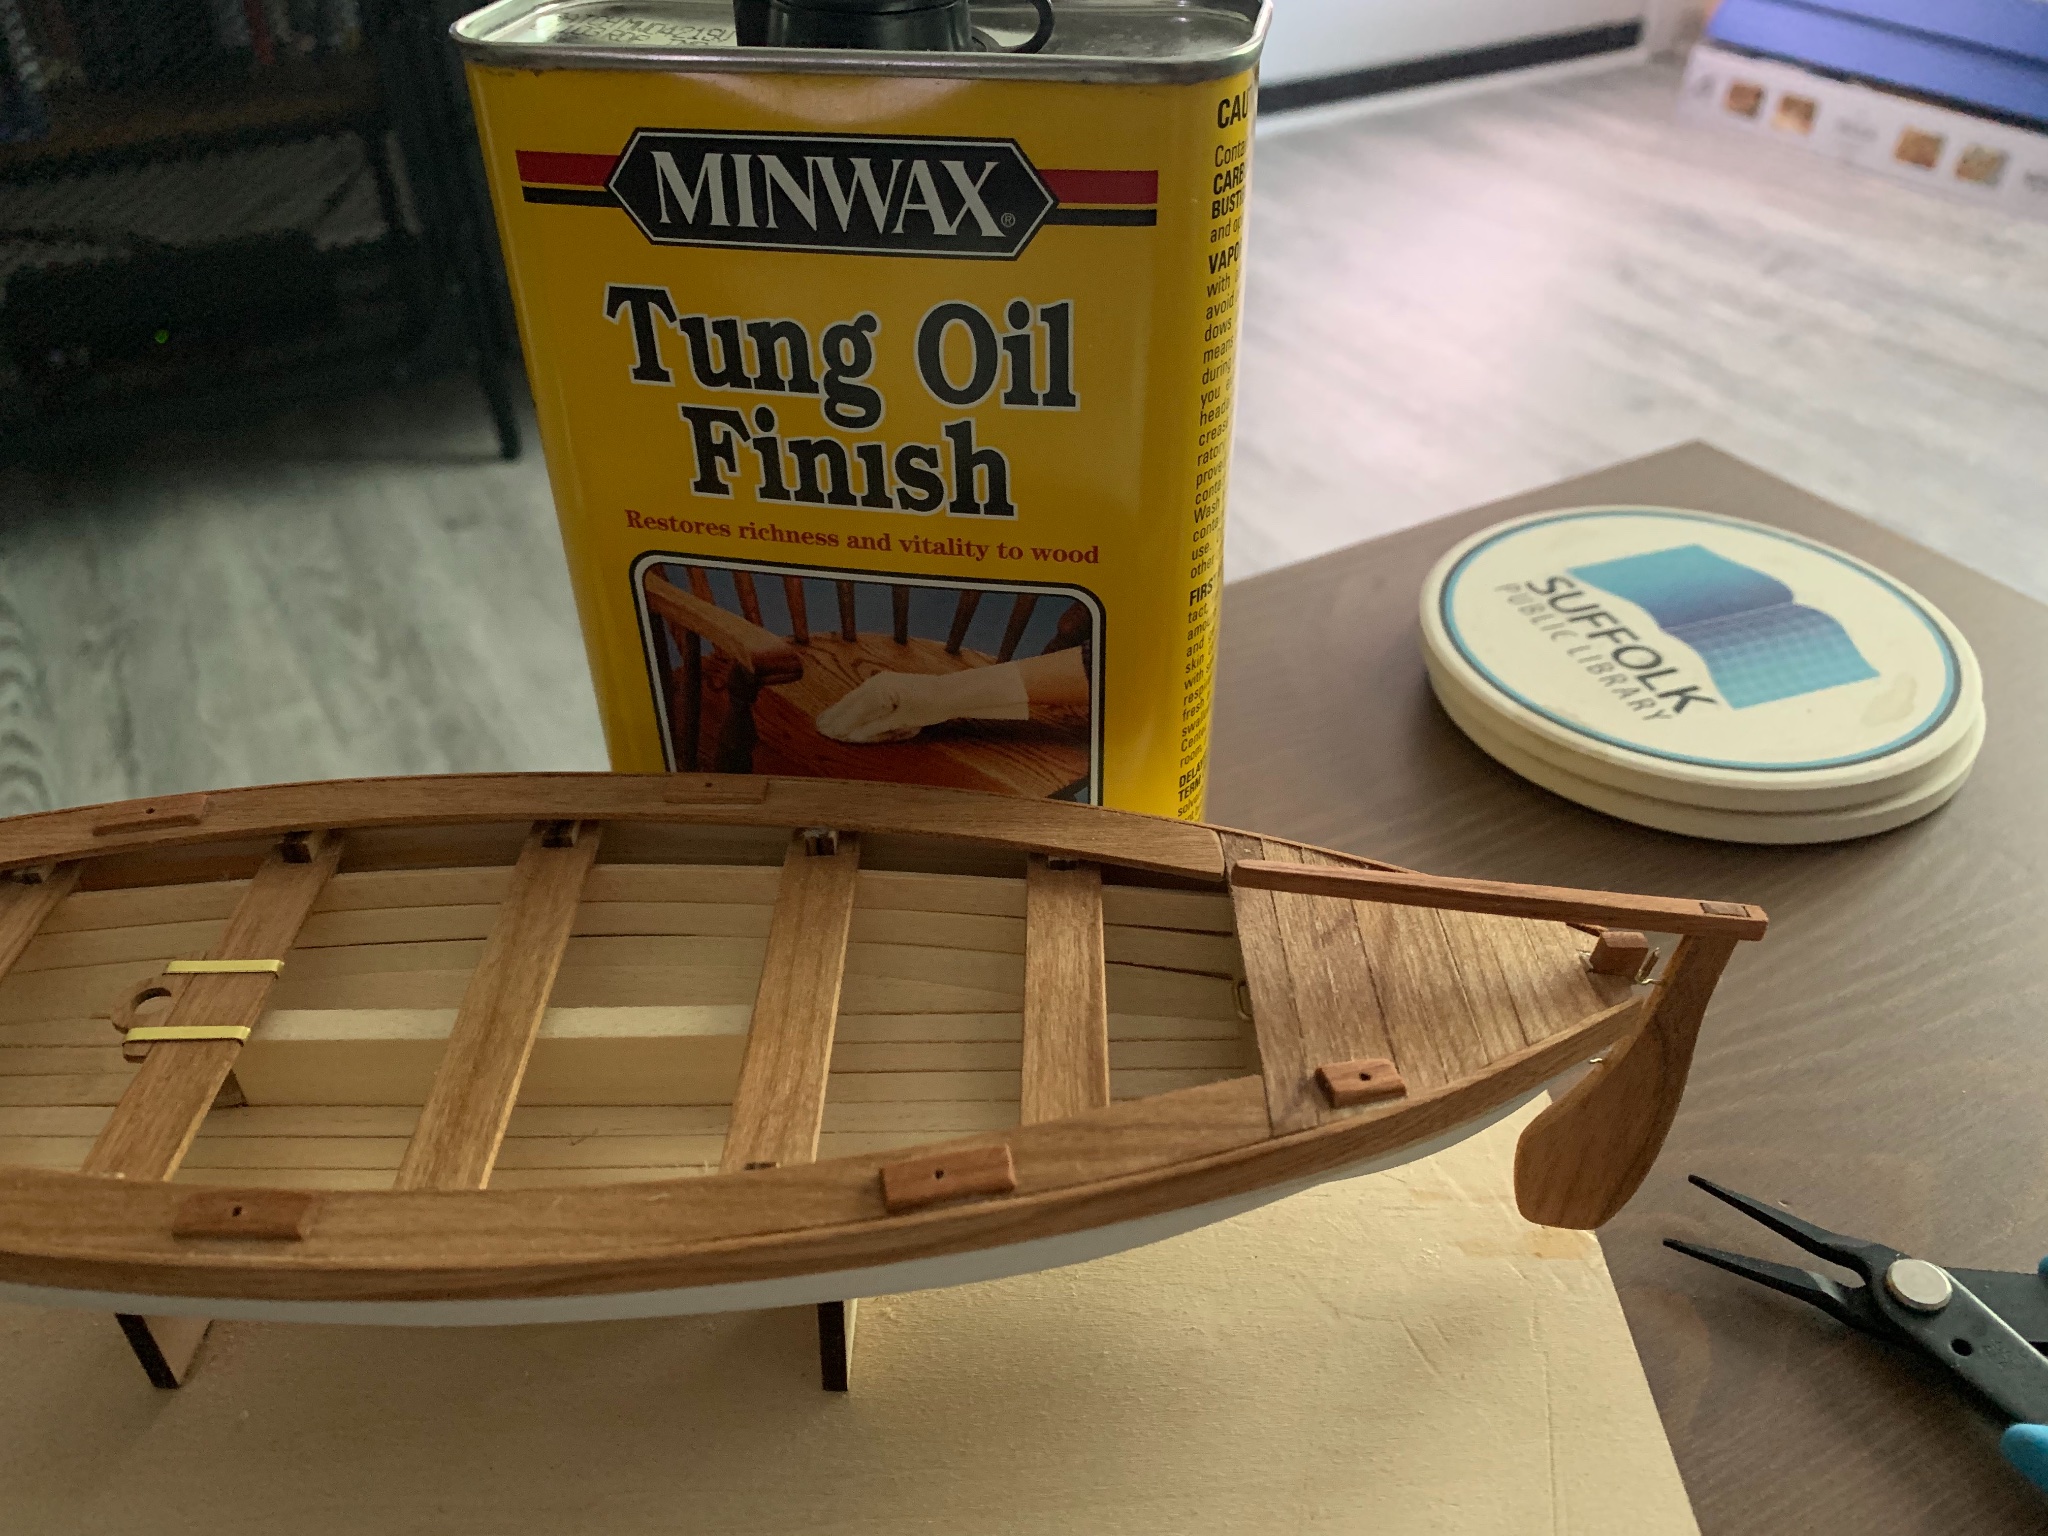
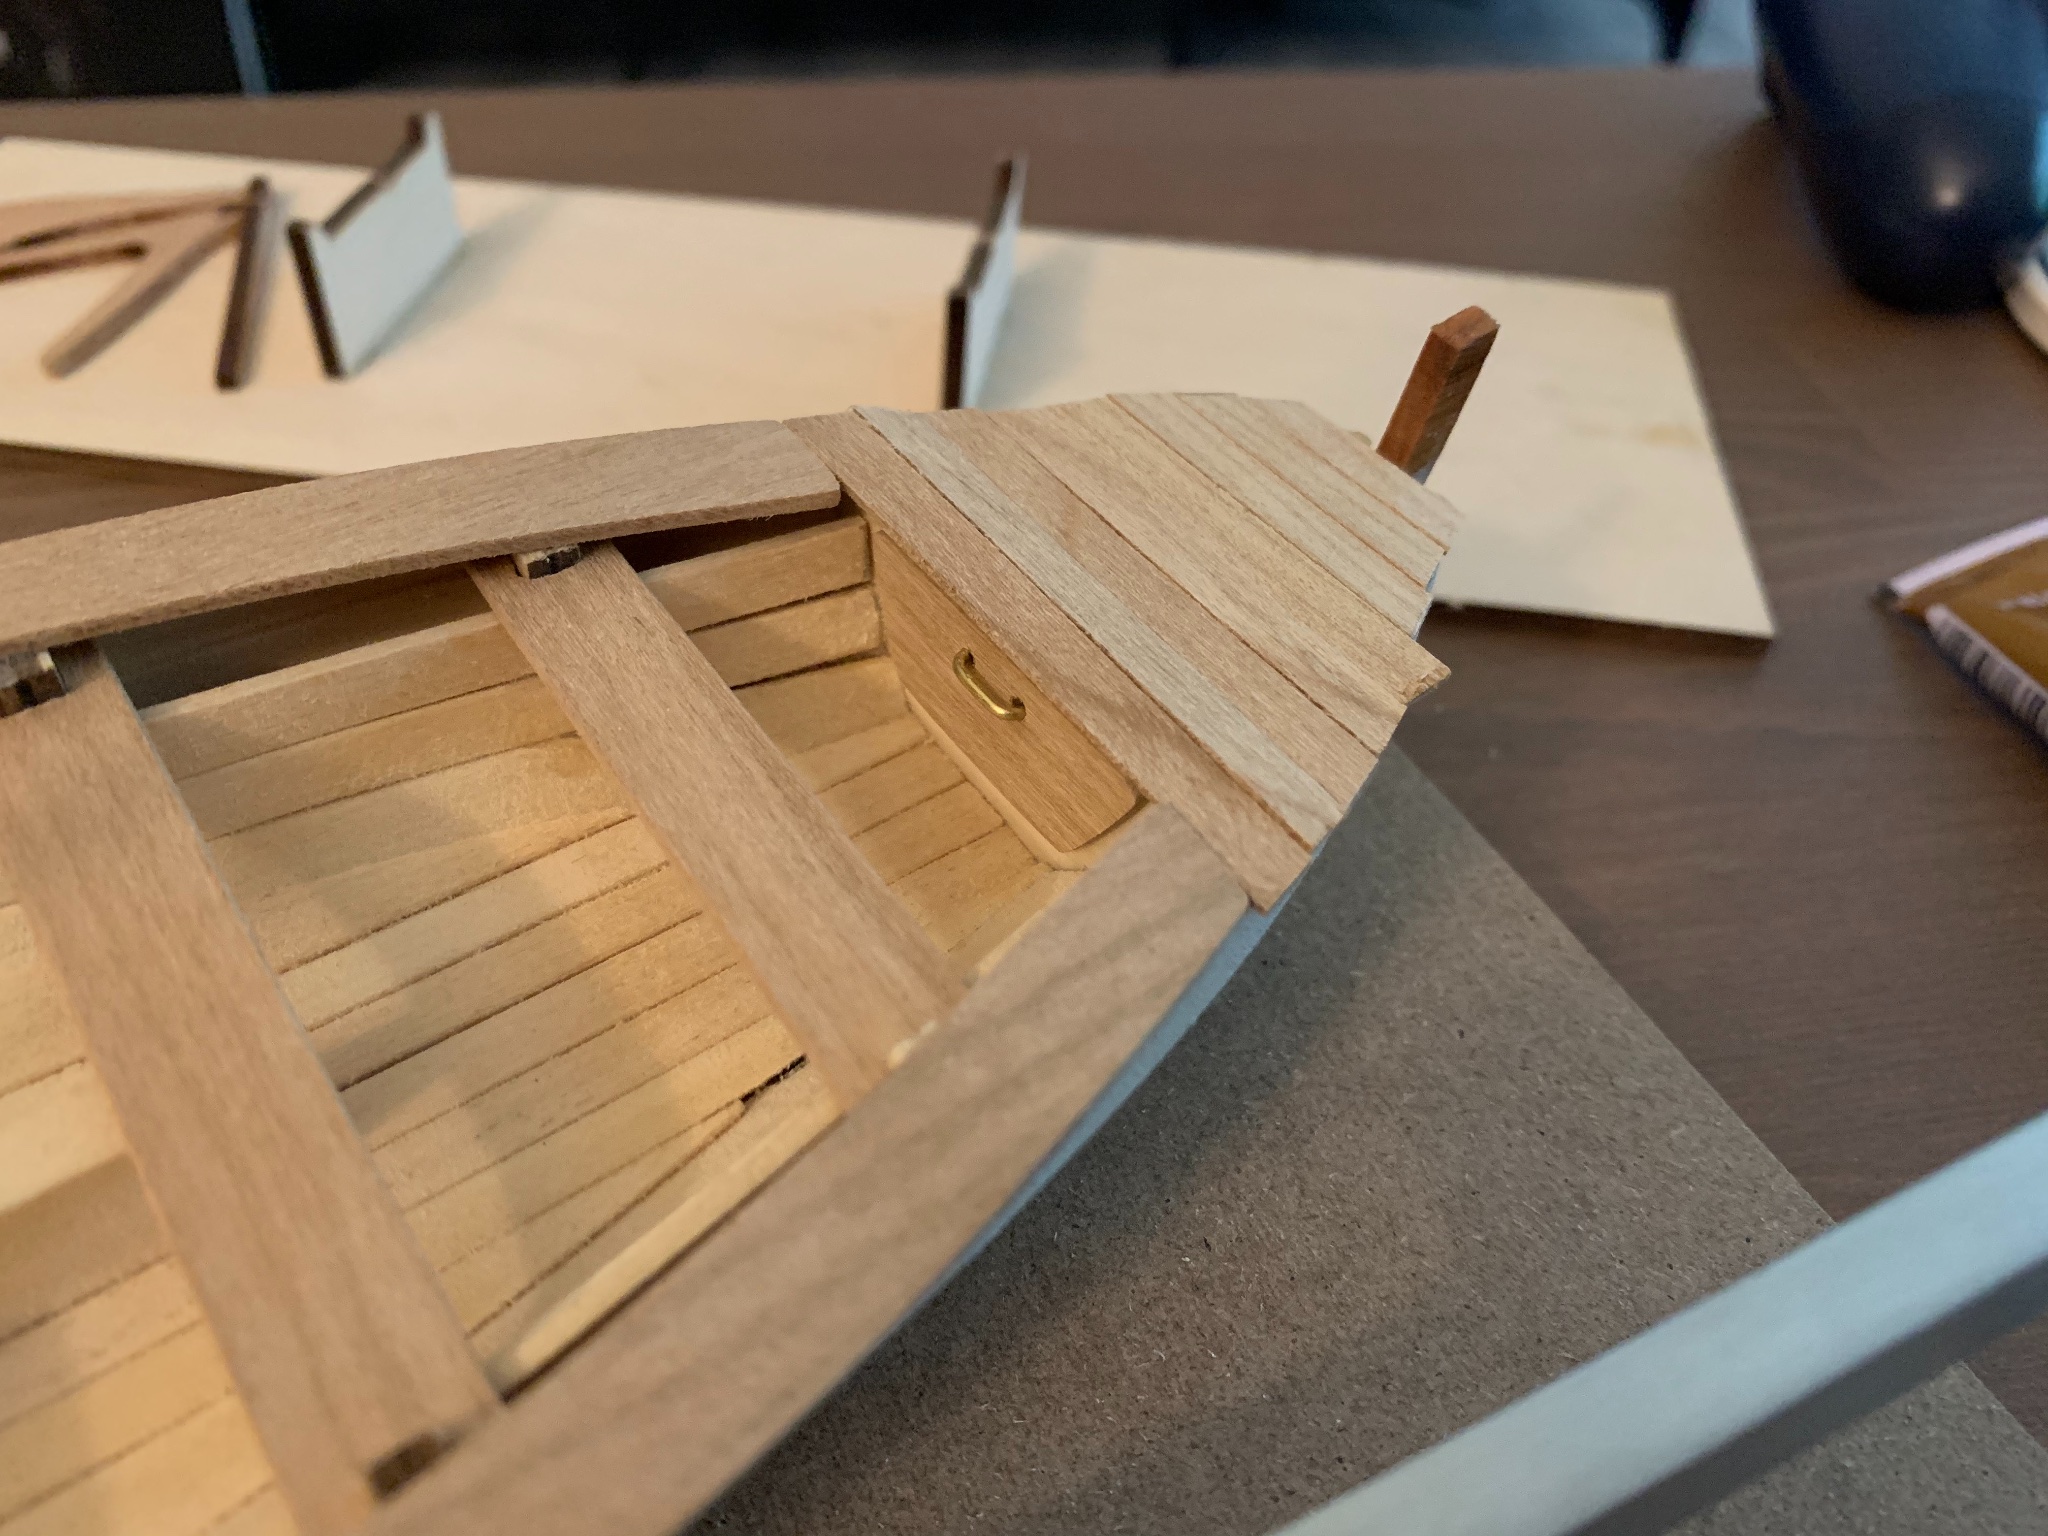
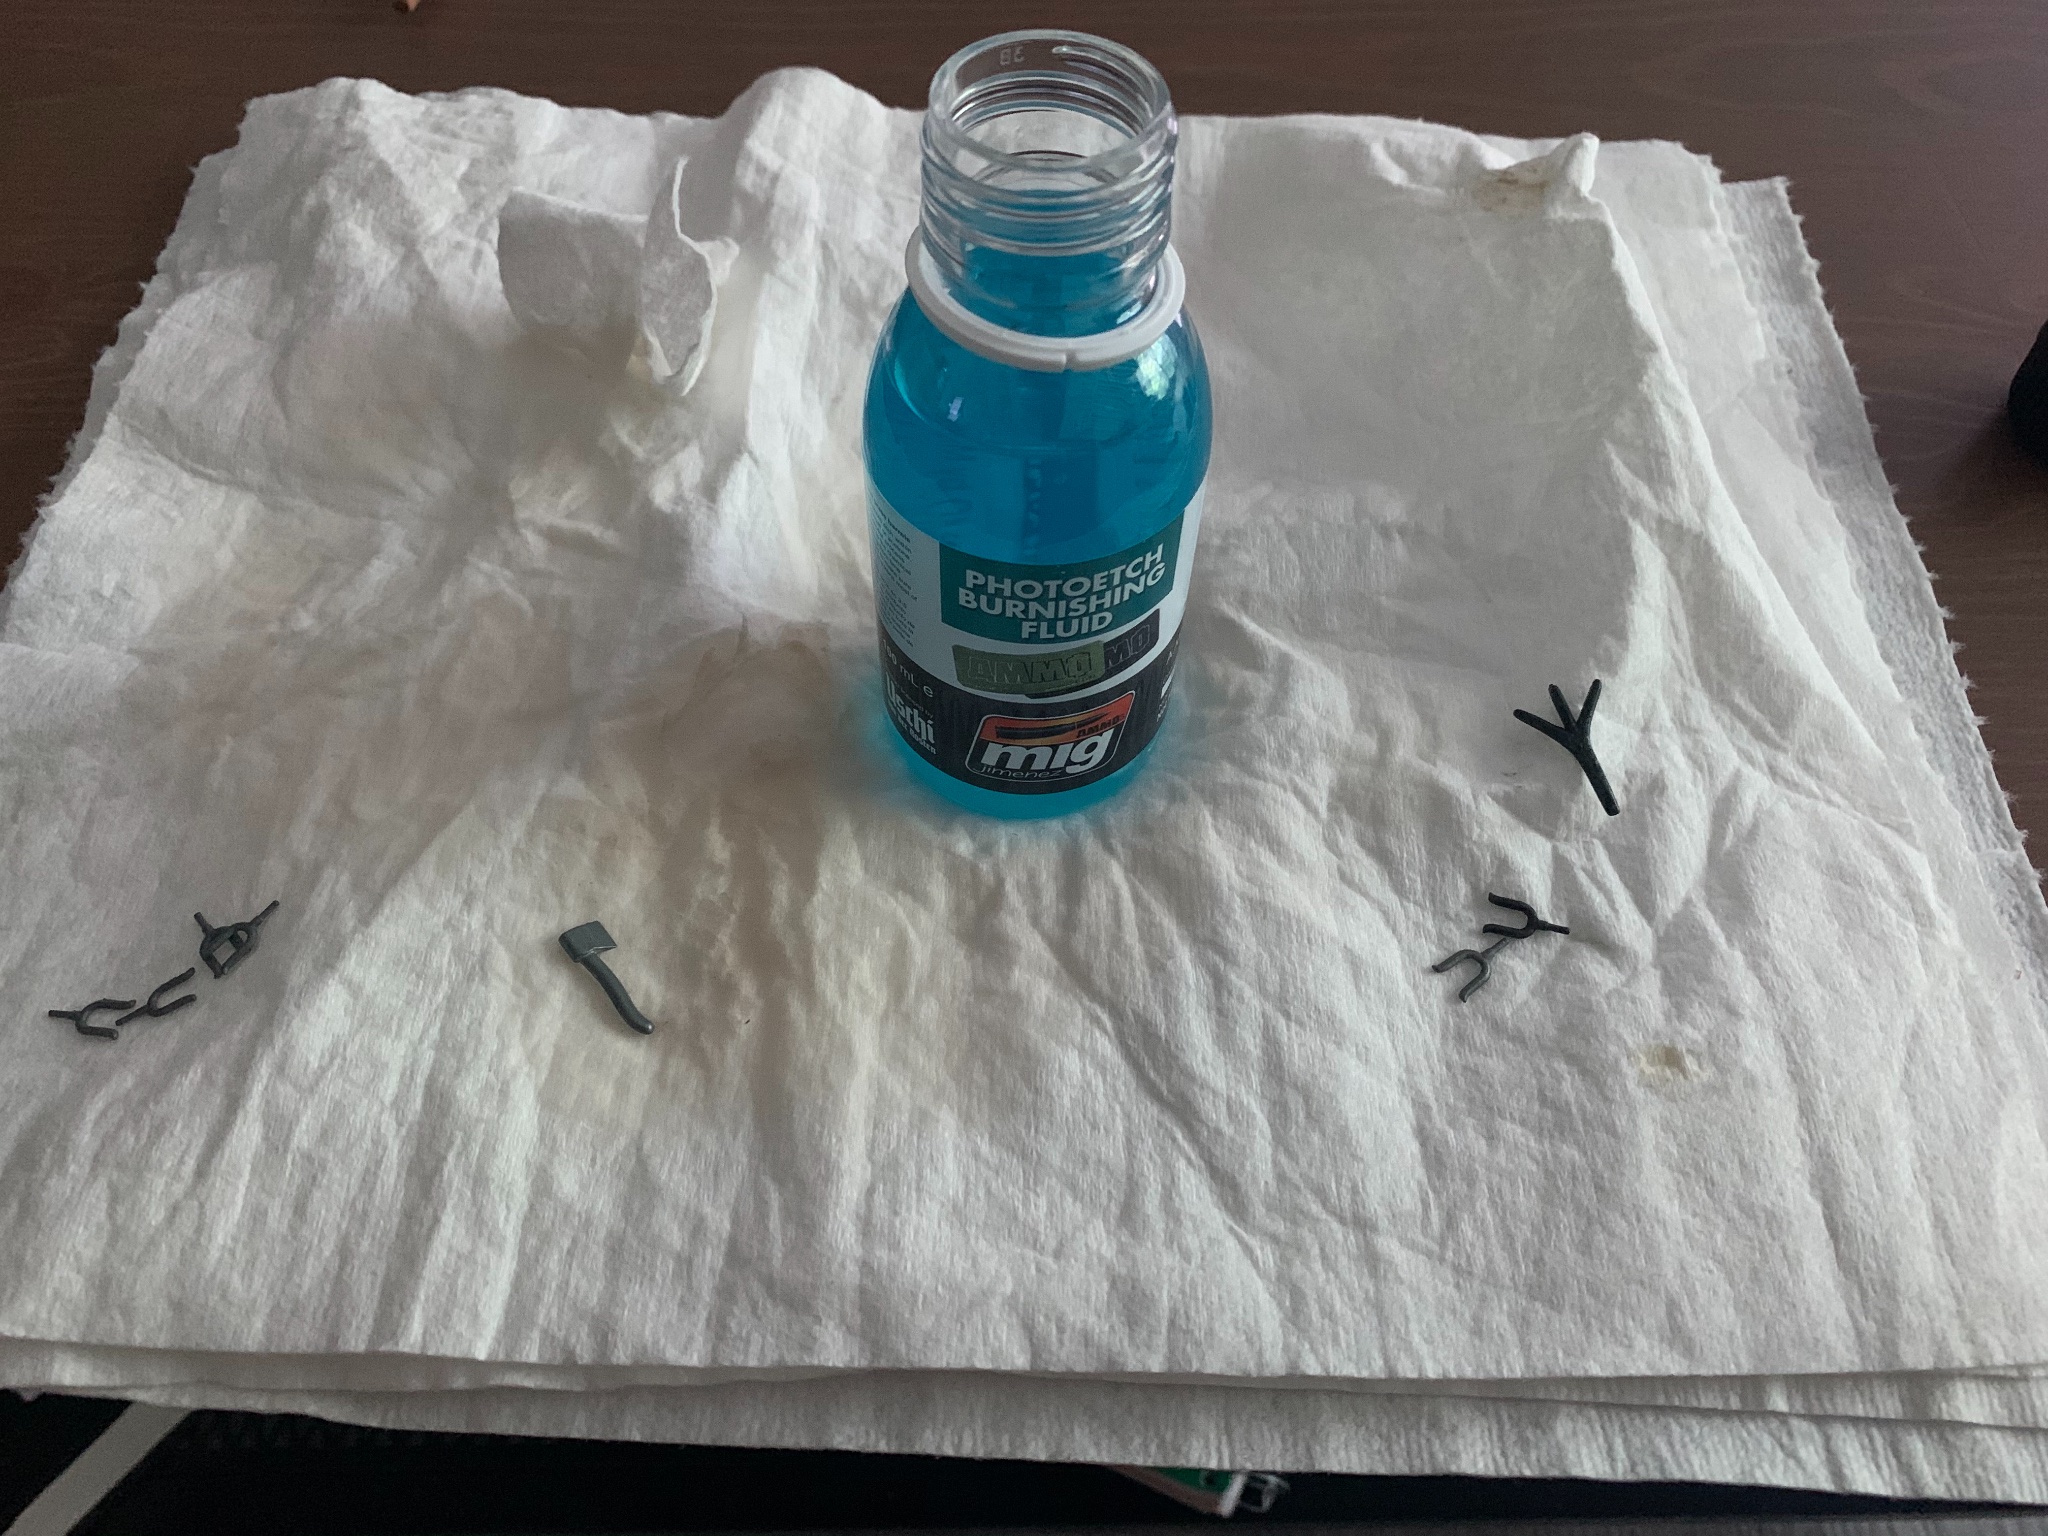
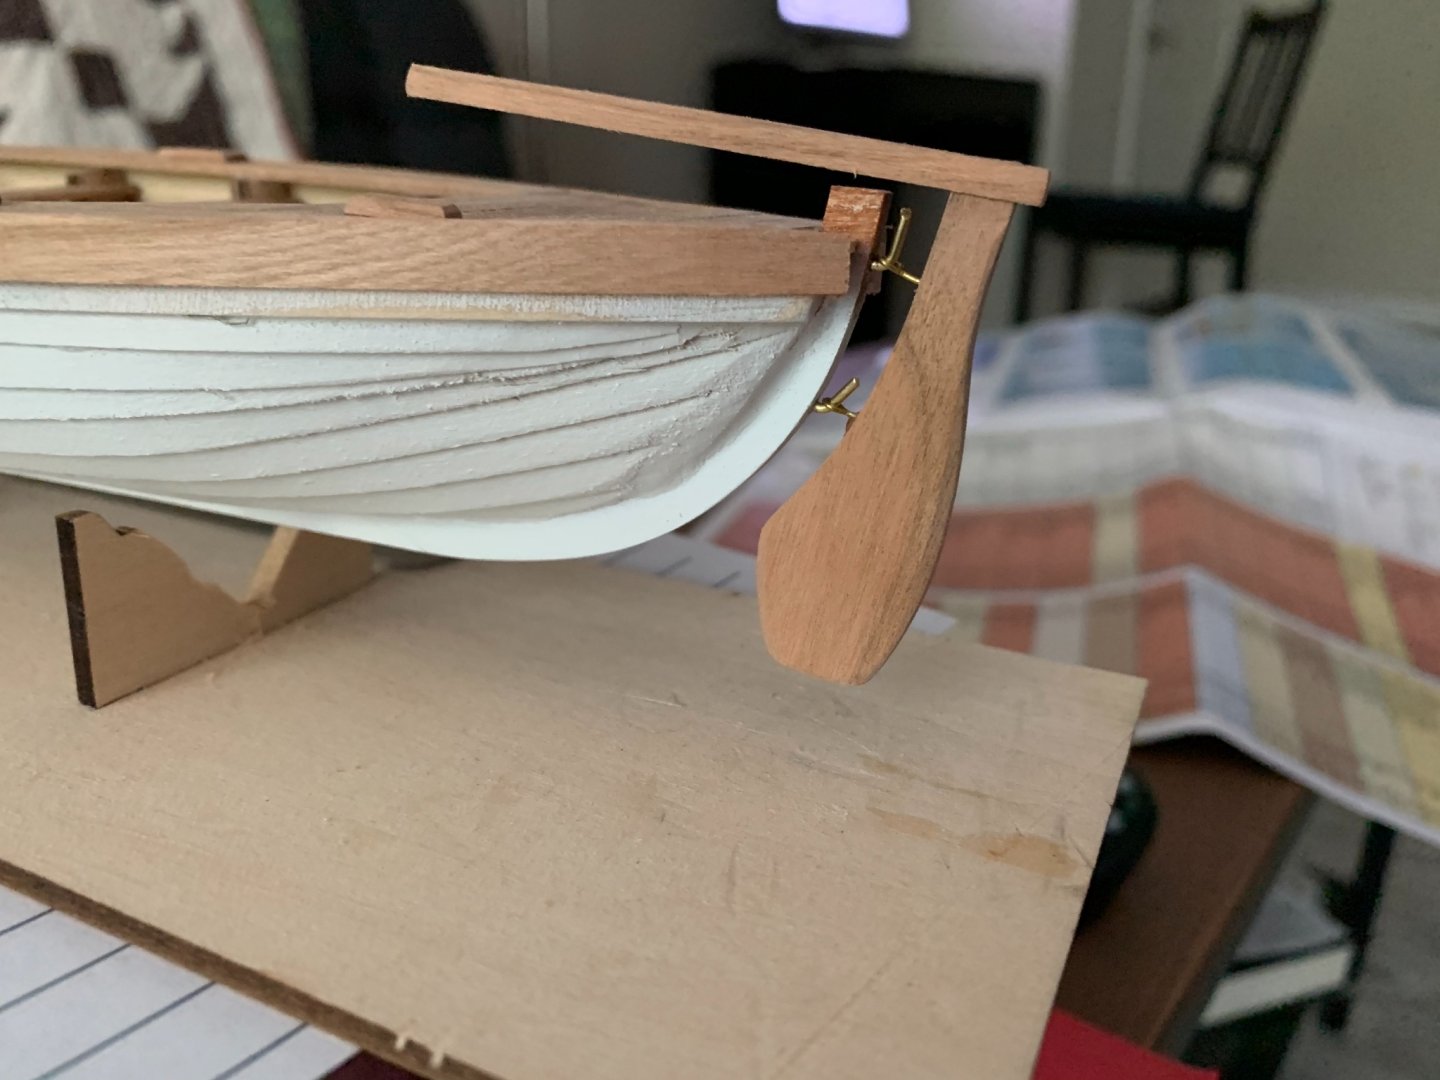
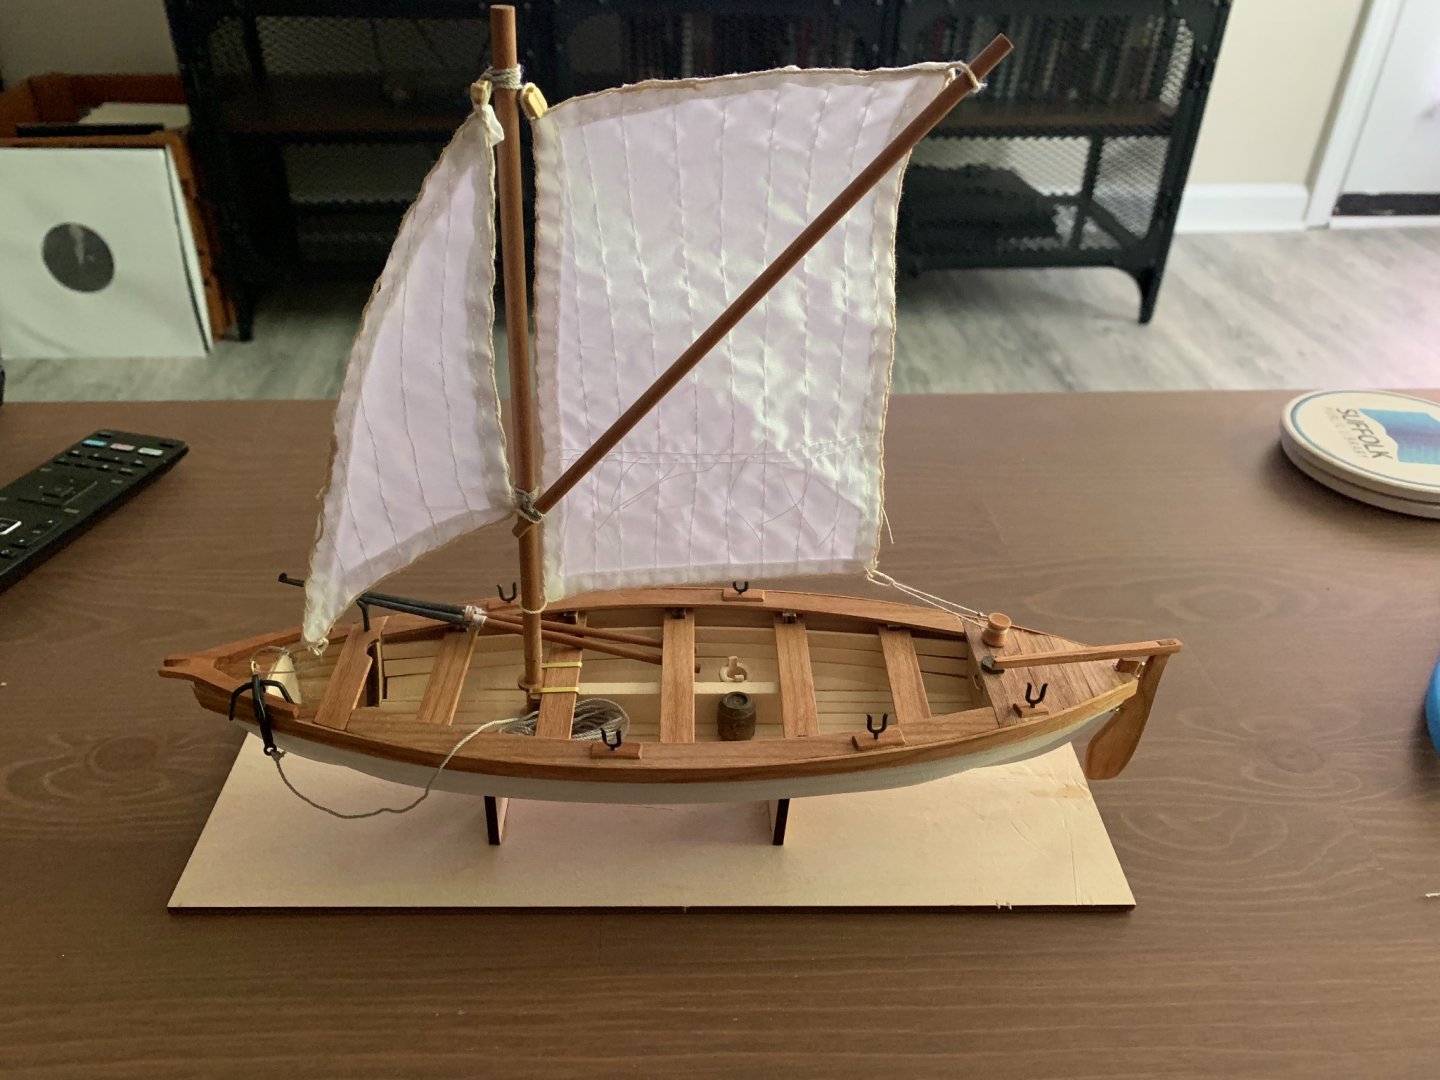
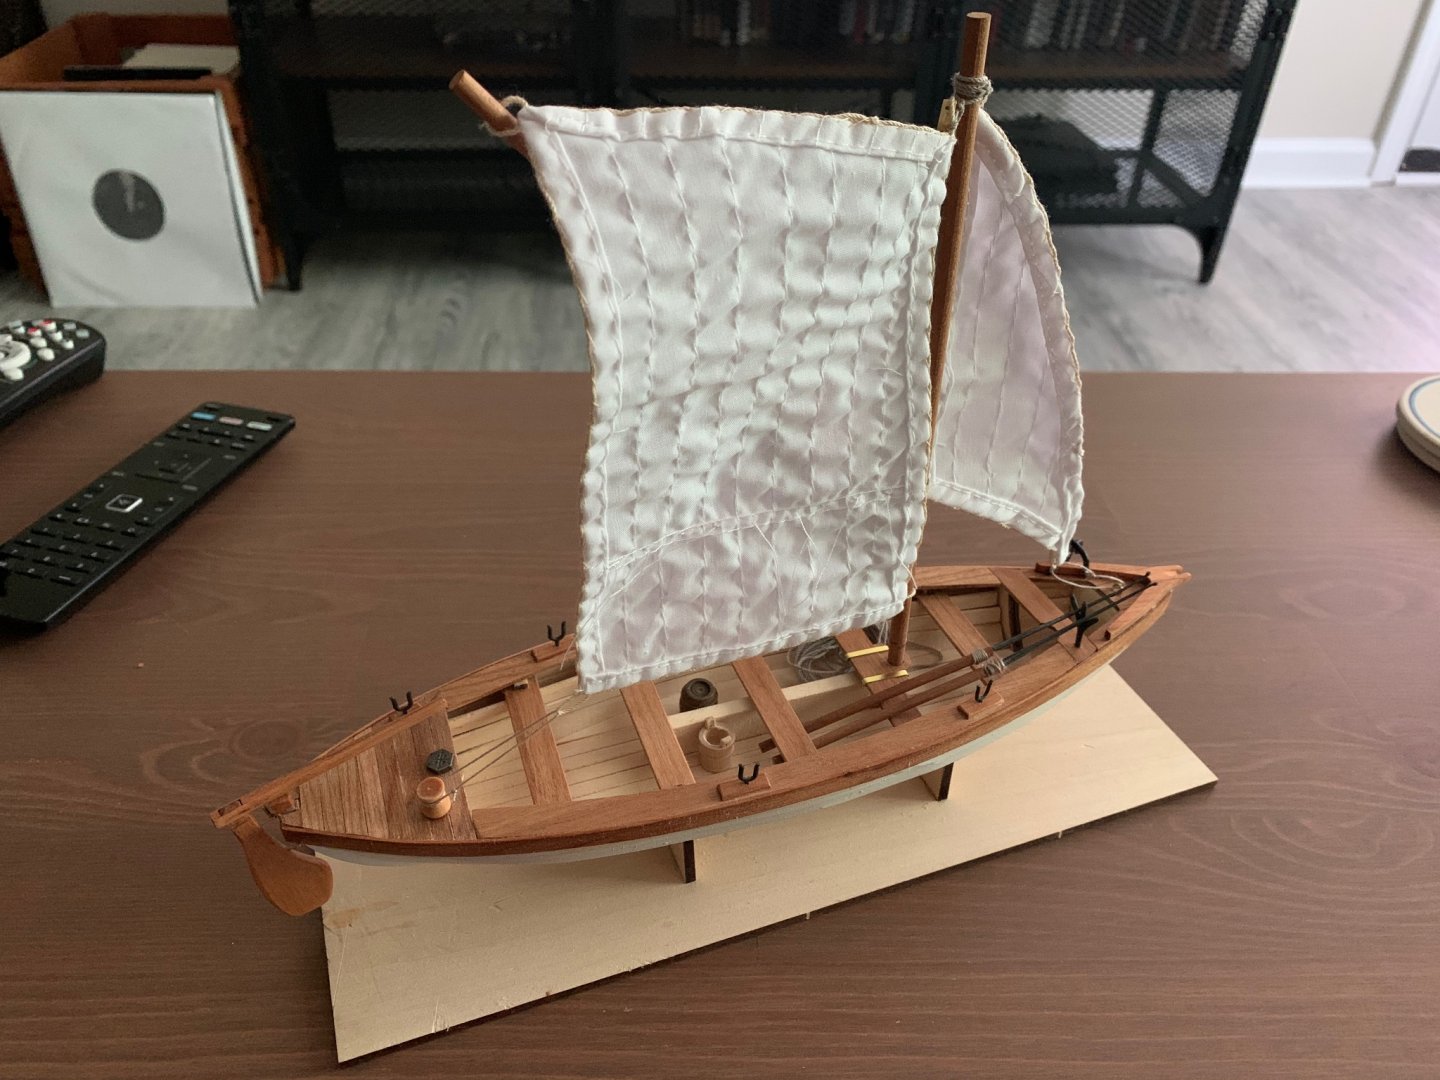
Before I glued the gunwales, I gave the hull two or three coats of Rustoleum white paint, which went on pretty well over the polyurethane, but I should have done some more sanding beforehand. After that, the rest of the boat came together fairly easy. I glued the gunwales to the frame and planked the stern section, and also sanded and bent a brass handle for the stern hatch. This picture shows the tiller after it was hung, and also a closeup of the hull after painting. Rigging the sails was very easy and fun, I tried to use the loops at the corners of the pre-sewn sails to fit around the masts and blocks. I left the loops at the bottom right and bottom left untied for the next step. I read some comments on this site that Tung Oil was a good finish, and I was very pleased with how easy it was to use, and how much of a good effect it gives. Doesn’t look like varnish at all, just makes the wood look richer. I will certainly be using this stuff in my future projects. I applied it only to the gunwales, the tiller, and the seats. The oar locks and harpoon crotch came in this greyish metal, which I dipped in some Burnishing Fluid from Ammo by Mig, which you can find on scale model modeling websites. It gave a more natural and cleaner finish than black paint. The finished product! The gunwales were stained, oar locks blackened, harpoons made, and sails tied down. That round piece at the stern is for the Harpoon line, not for tying down the sails, but it was convenient, and my kit did not supply any other loops. The whole build took me two weeks. Once I got past the difficulty of planking, this kit became very fun and easy. And despite my many mistakes, I think it looks good, and it gives me confidence to start my next build, the Bounty Launch from Model Shipways.


- 4 replies
-
- 3
-
-
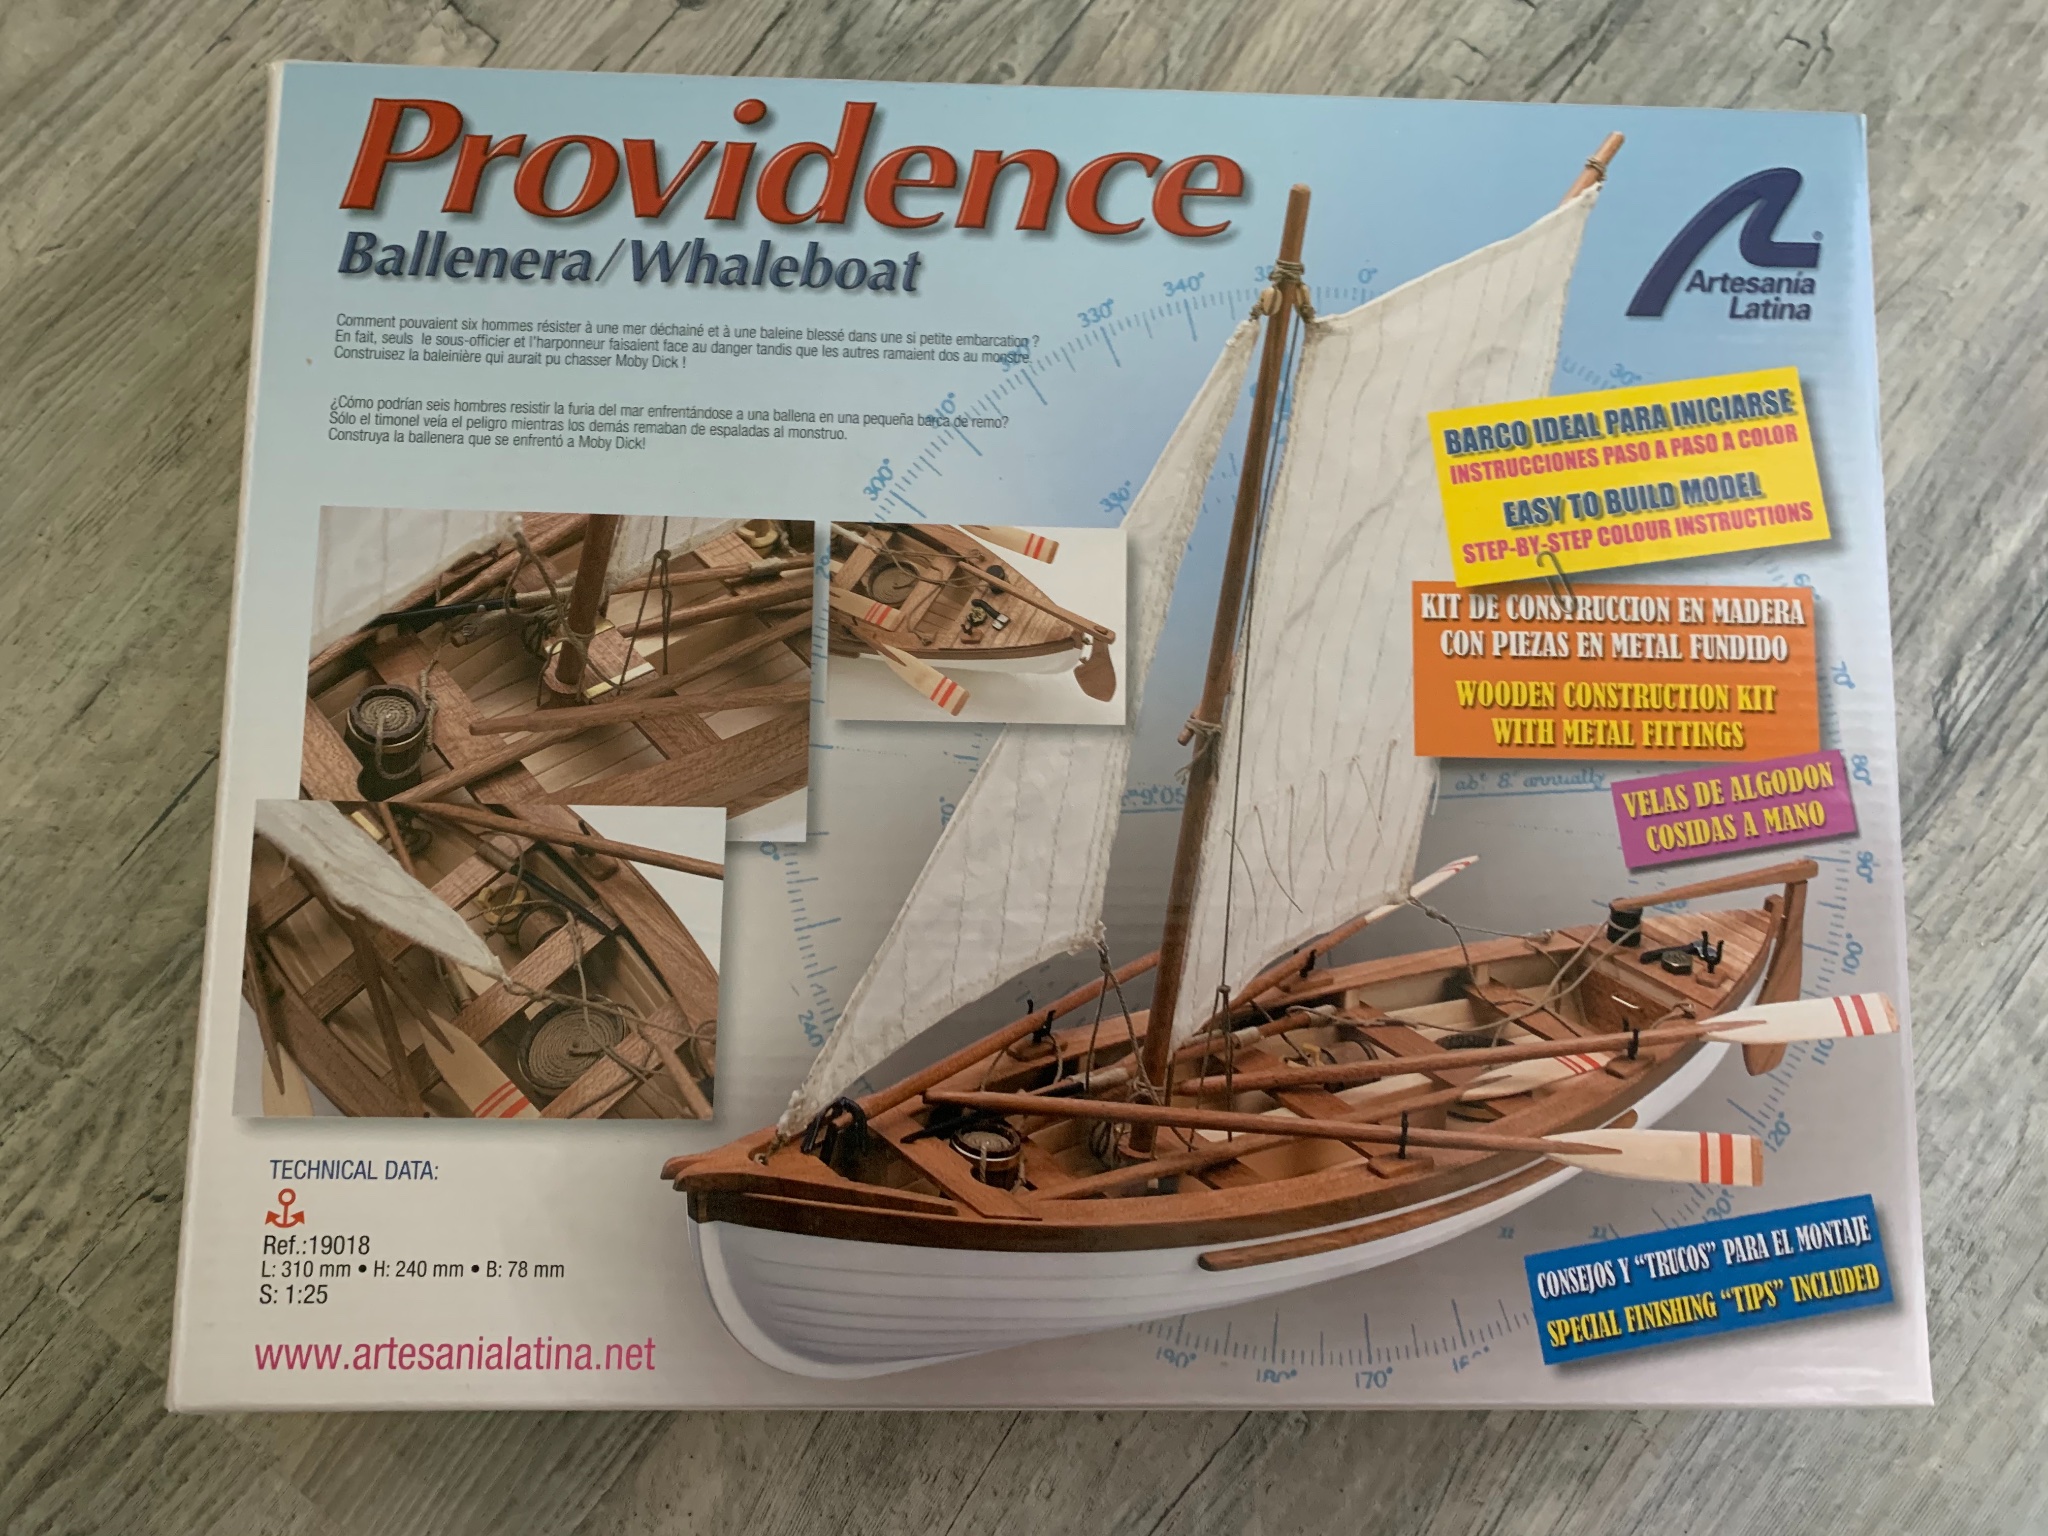
- Providence
- Artesania Latina
- (and 2 more)
-
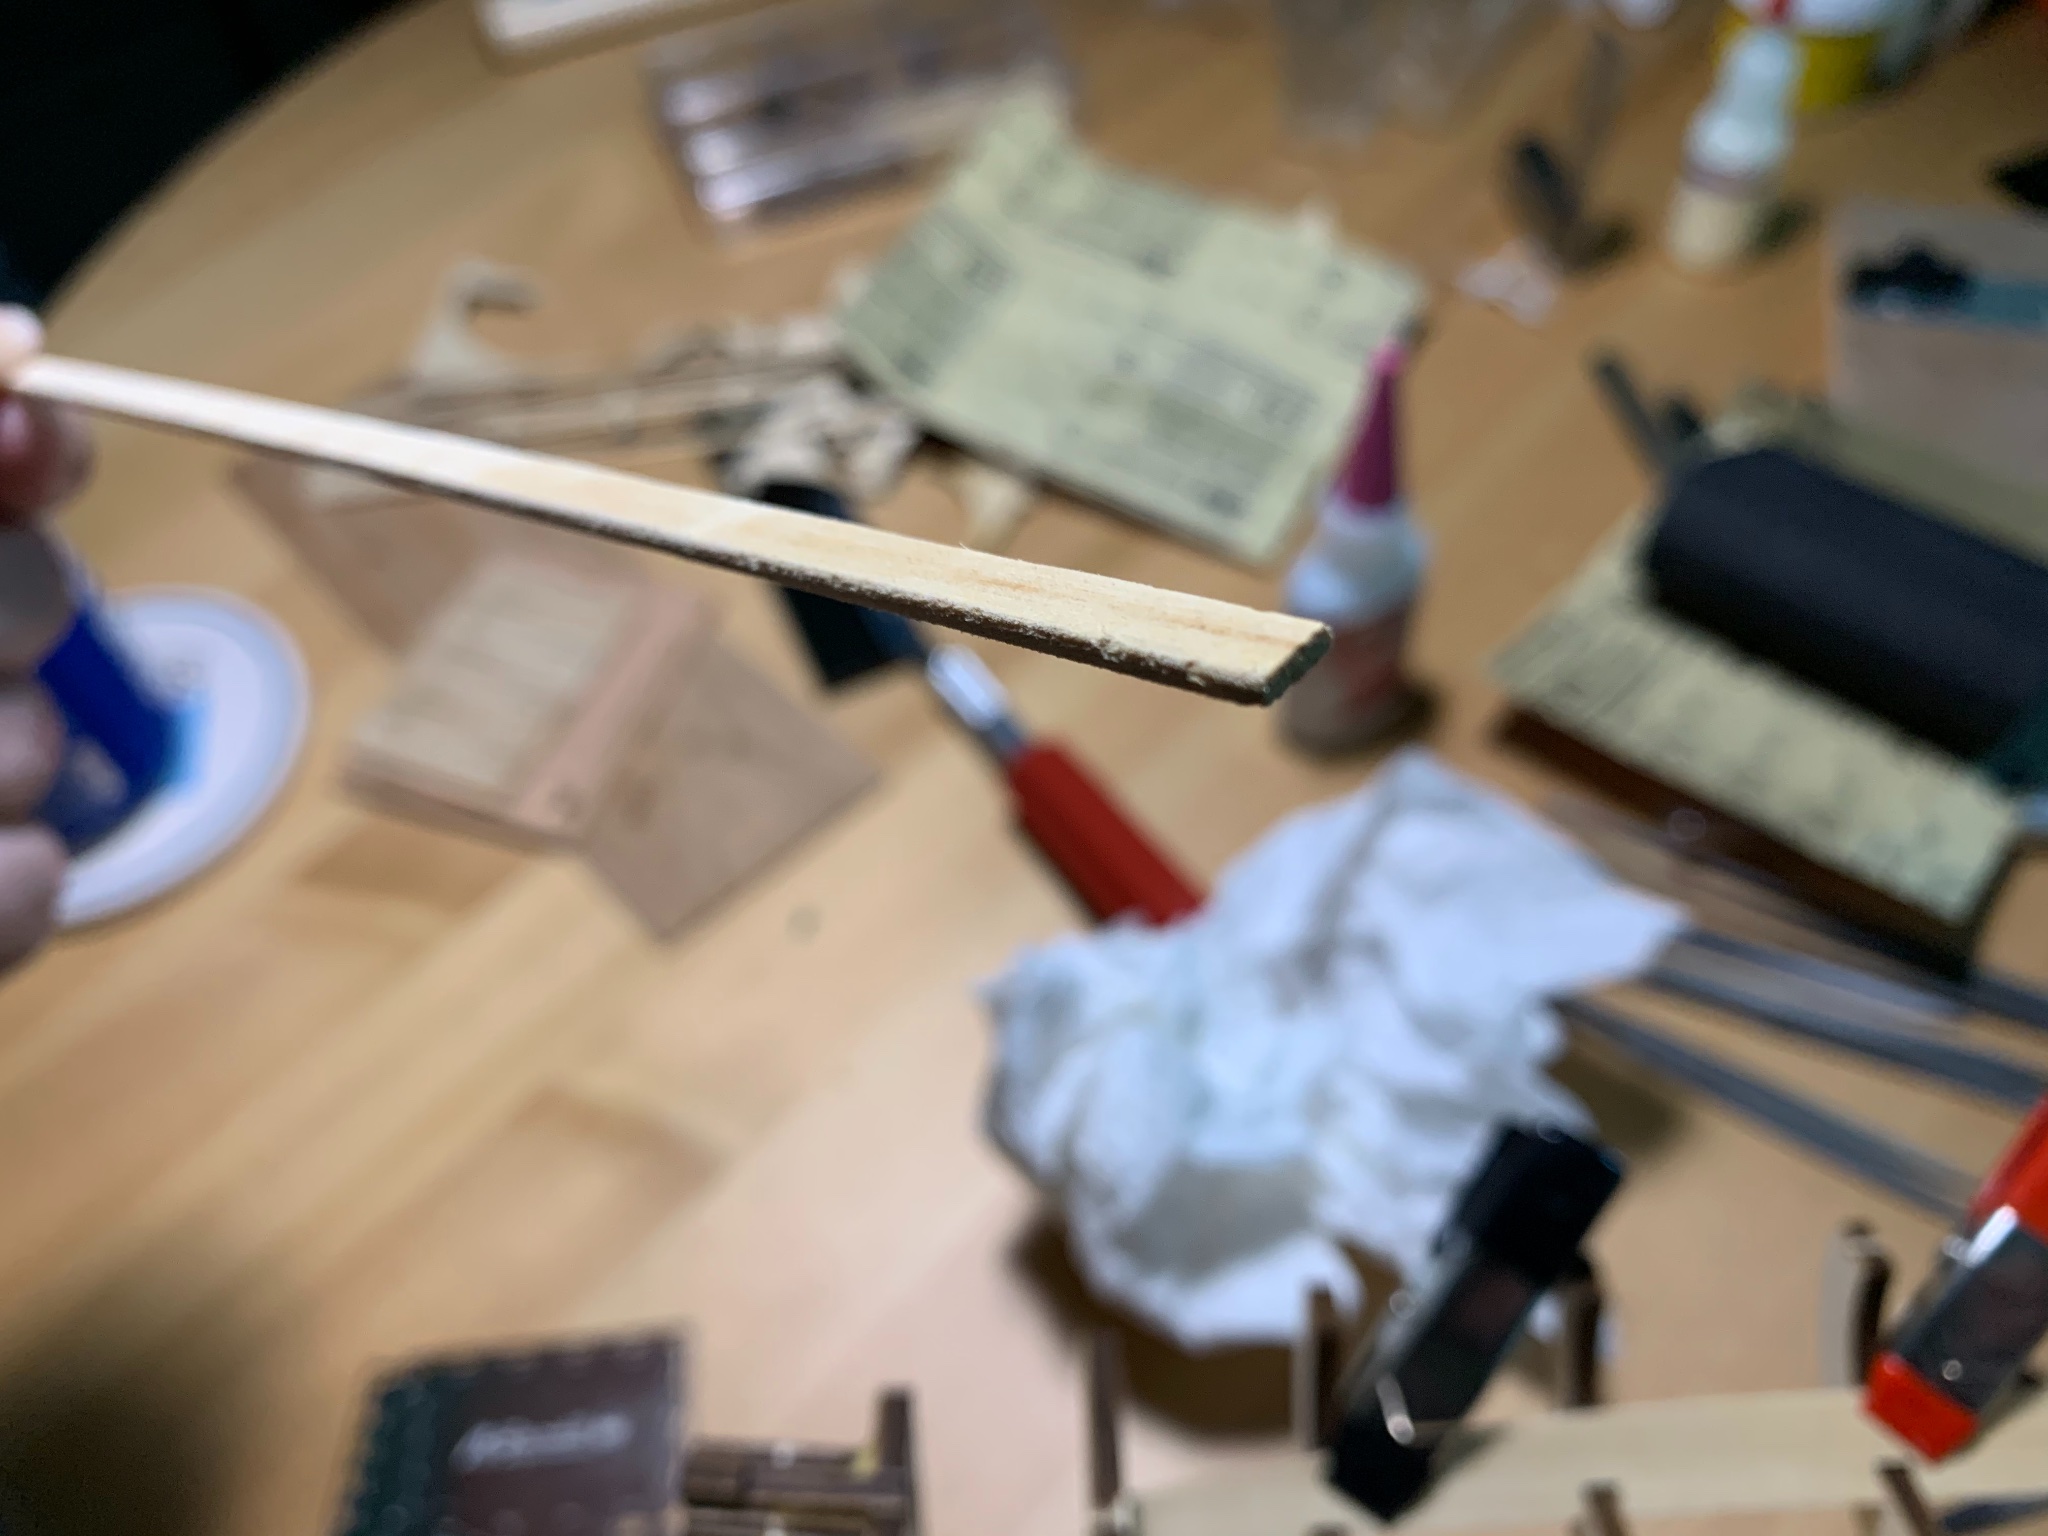
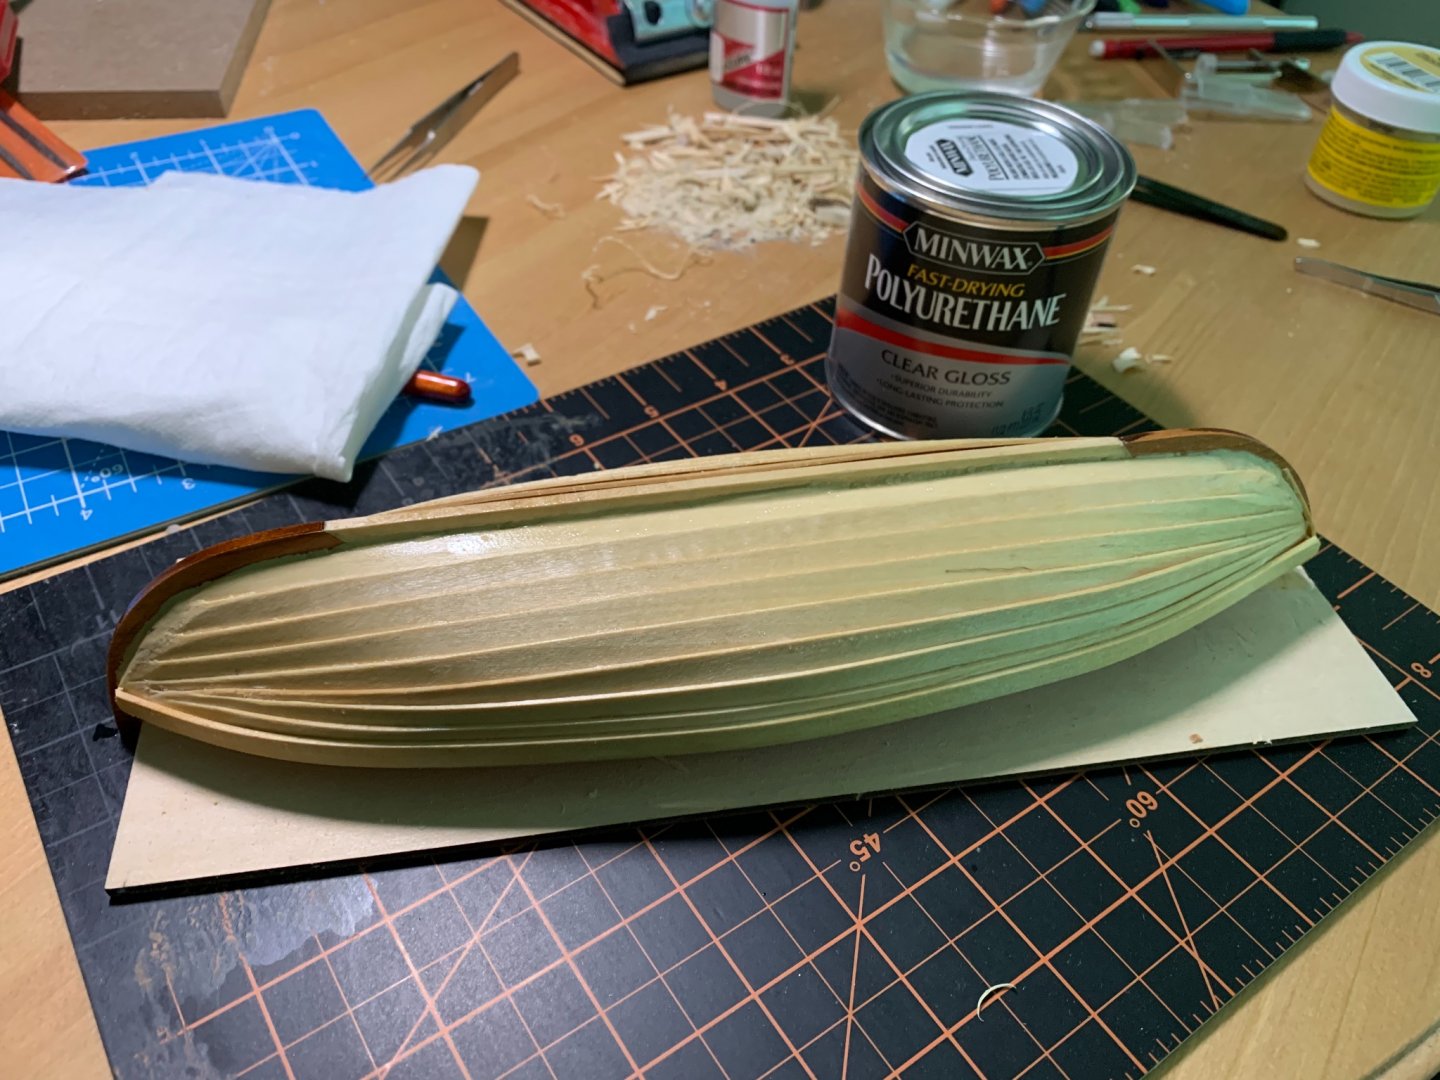
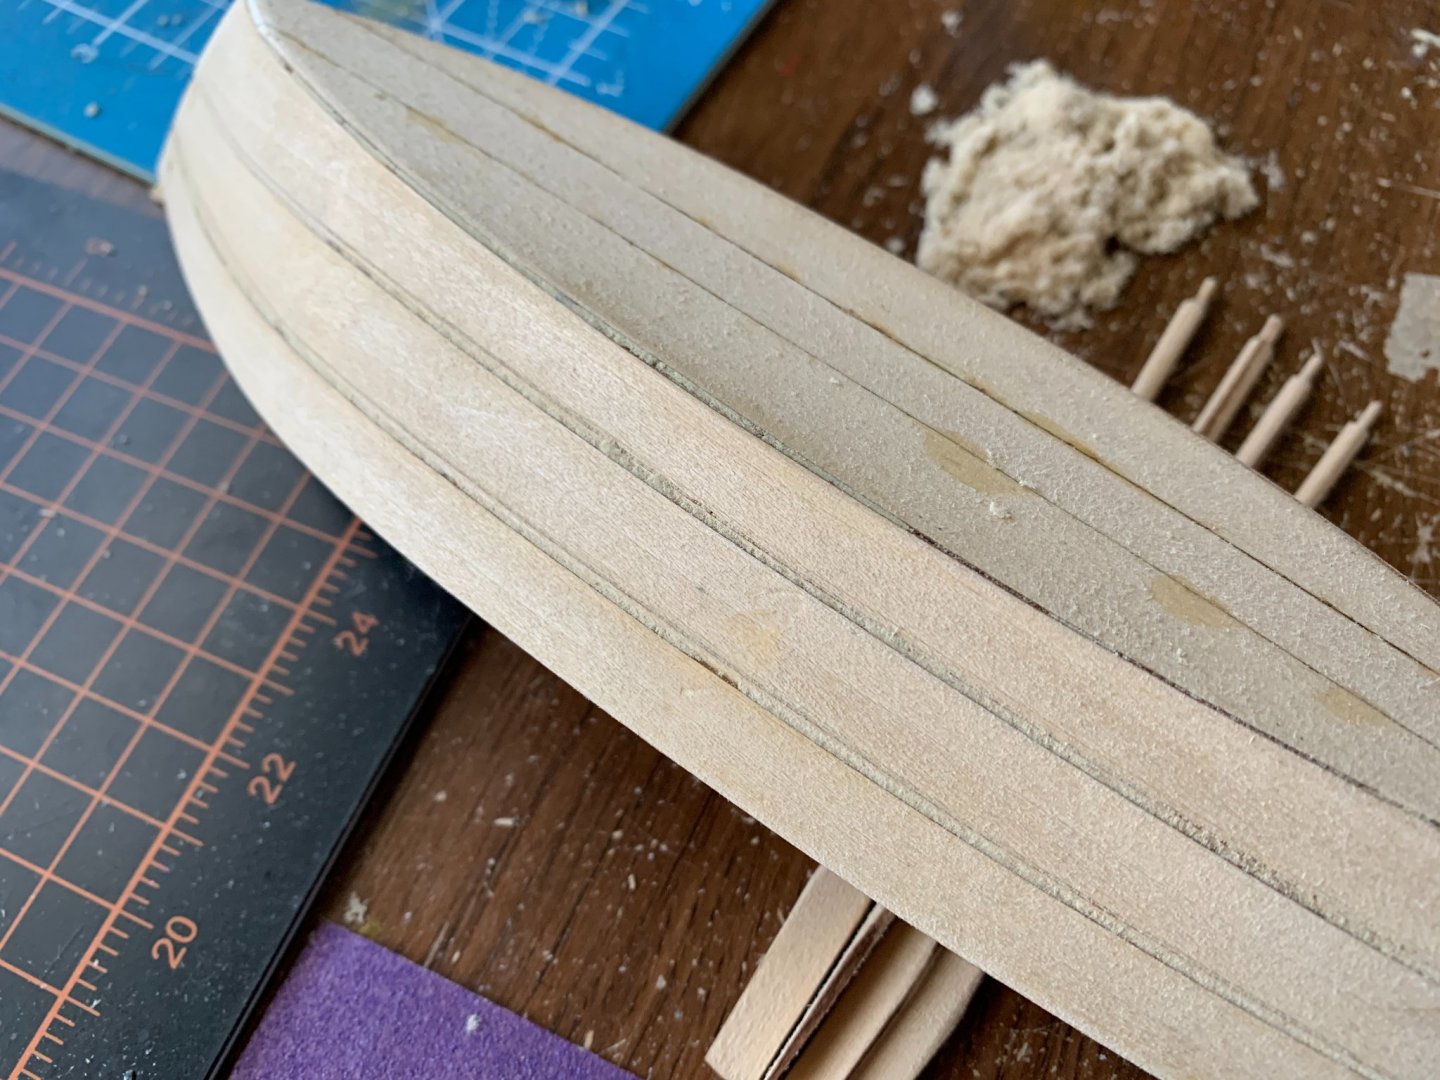
Started exterior planking, found the clinker hull style to be very easy to do once I got started. Most difficult part was joining the ends of the planks to the bow and stern, and I’ll be the first to admit I didn’t do a very good job, but wood putty covers a multitude of errors. Tried Testor’s Wood Glue in the brown tube for some things, it’s good for exterior decoration, but don’t expect it to bear any weight or pressure. Had to resort to super glue on the planking. Super glue has the amazing property of binding to your fingers instantly, but taking several minutes to set to the material you’re using it on. Both ends of the boat are very ugly, but after sanding, wood putty, and a coat of white paint, hopefully it won’t look too bad. In preparation for painting, I coated the hull in some Miniwax Polyurethane, which I will let set for a day, then apply another coat. I’ve got to chapter 25 of Moby Dick! Before I applied the sealer, I dry fitted the gunwales and seats, which give me hope that this will shape into a fine looking boat.


- 4 replies
-
- 2
-
-
- Providence
- Artesania Latina
- (and 2 more)
-
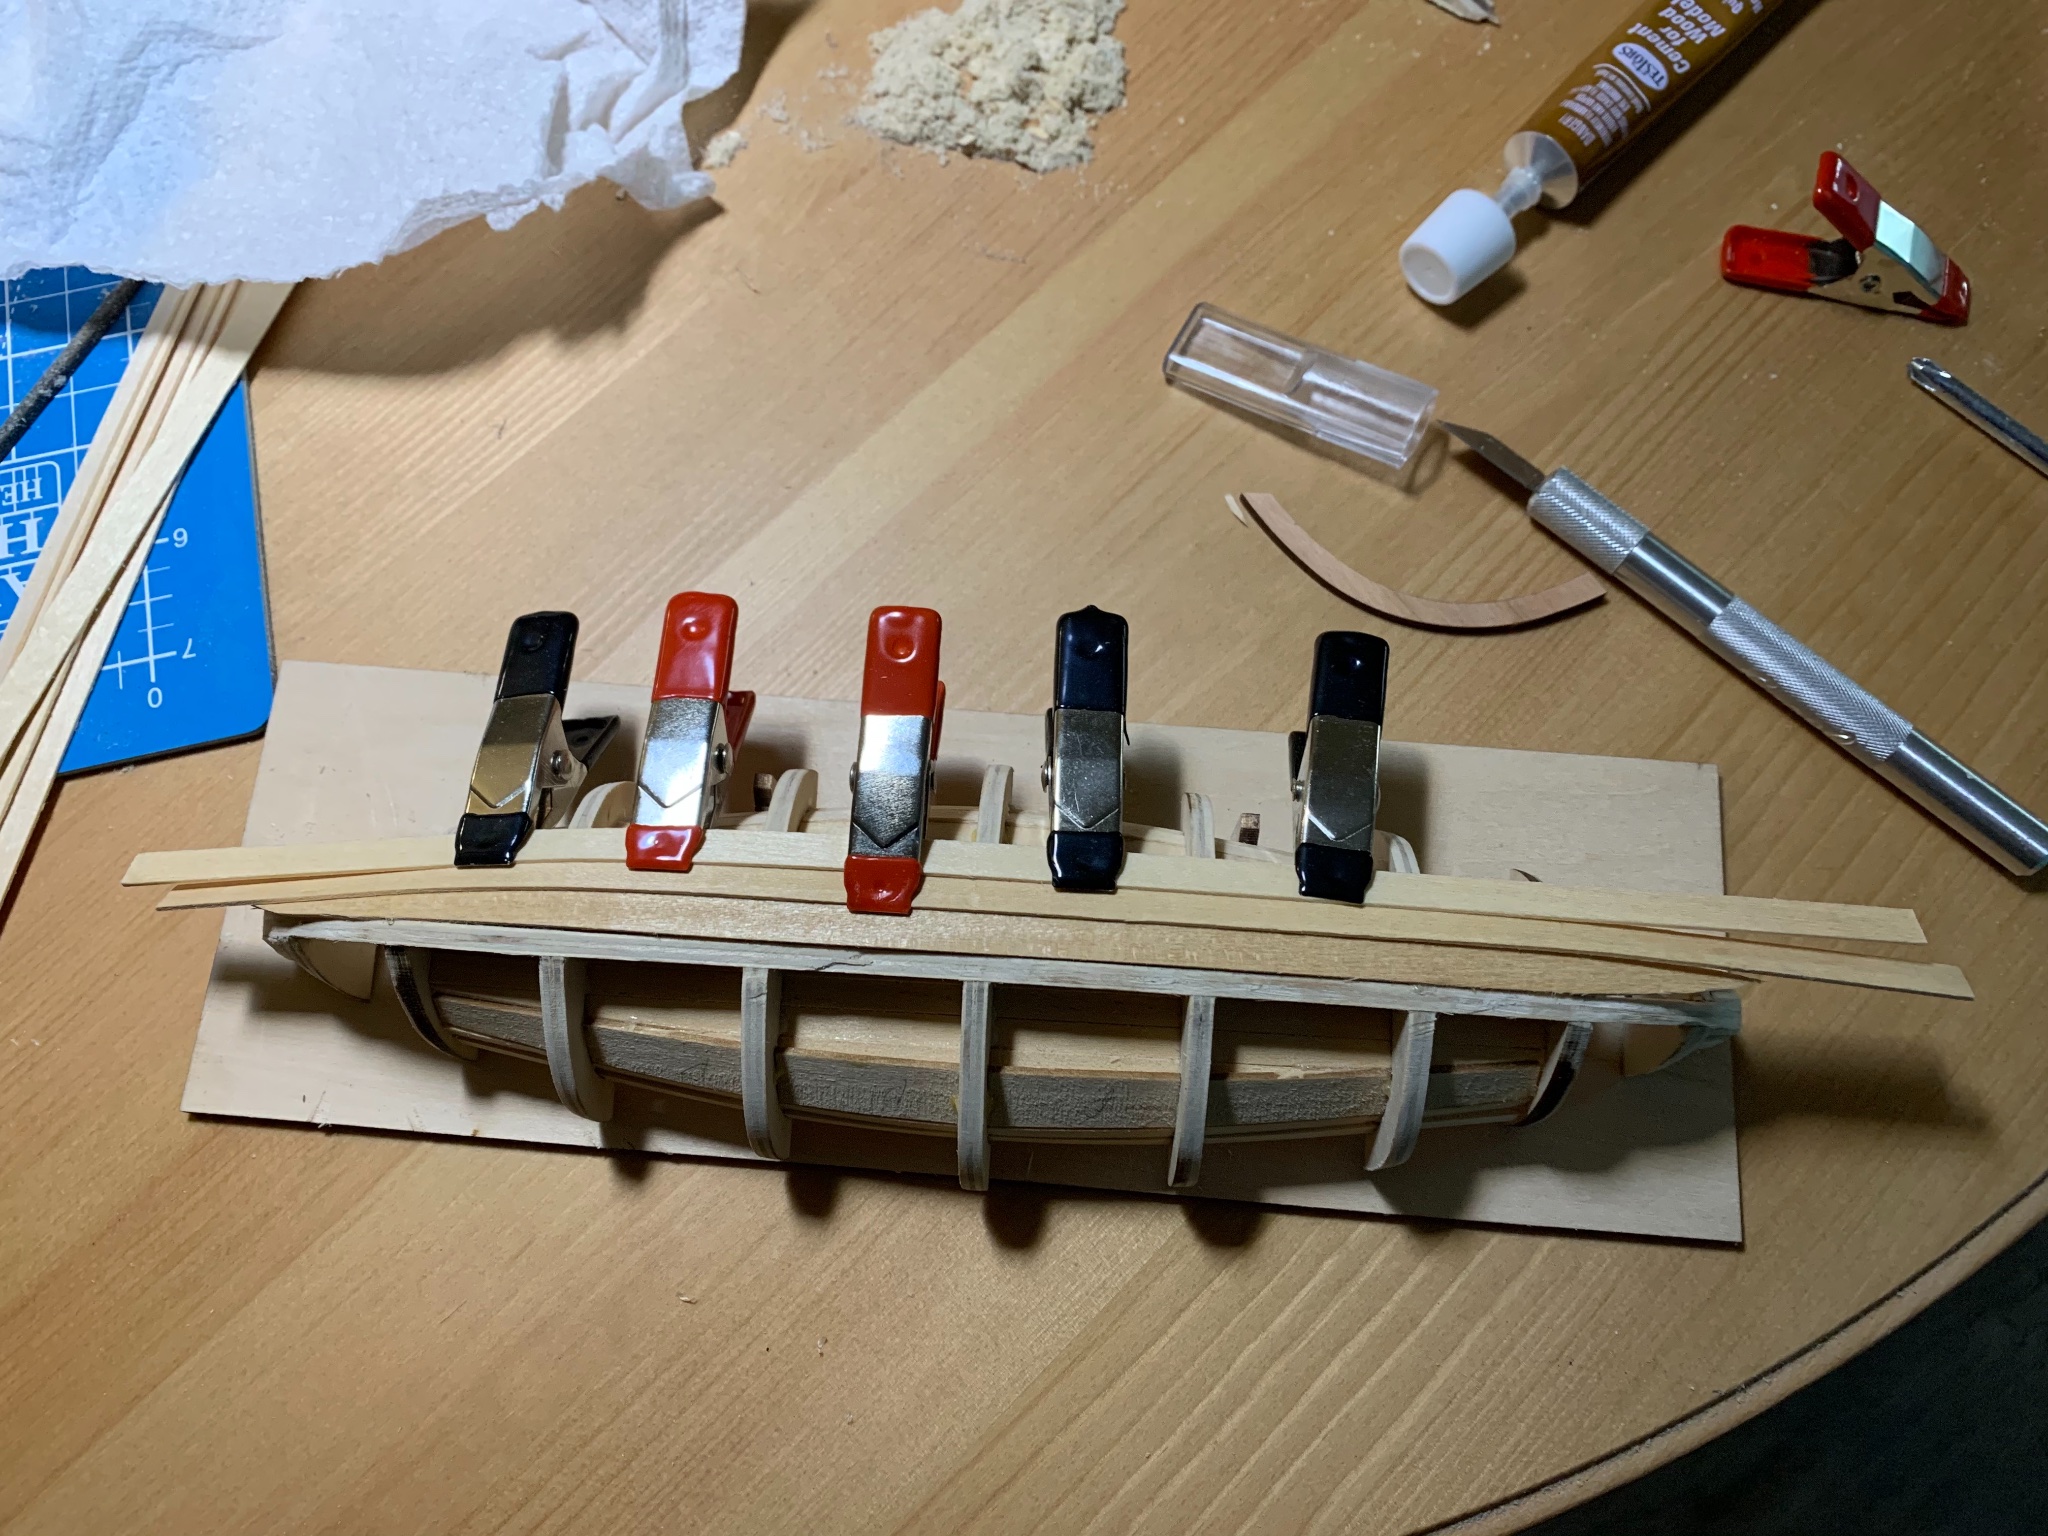
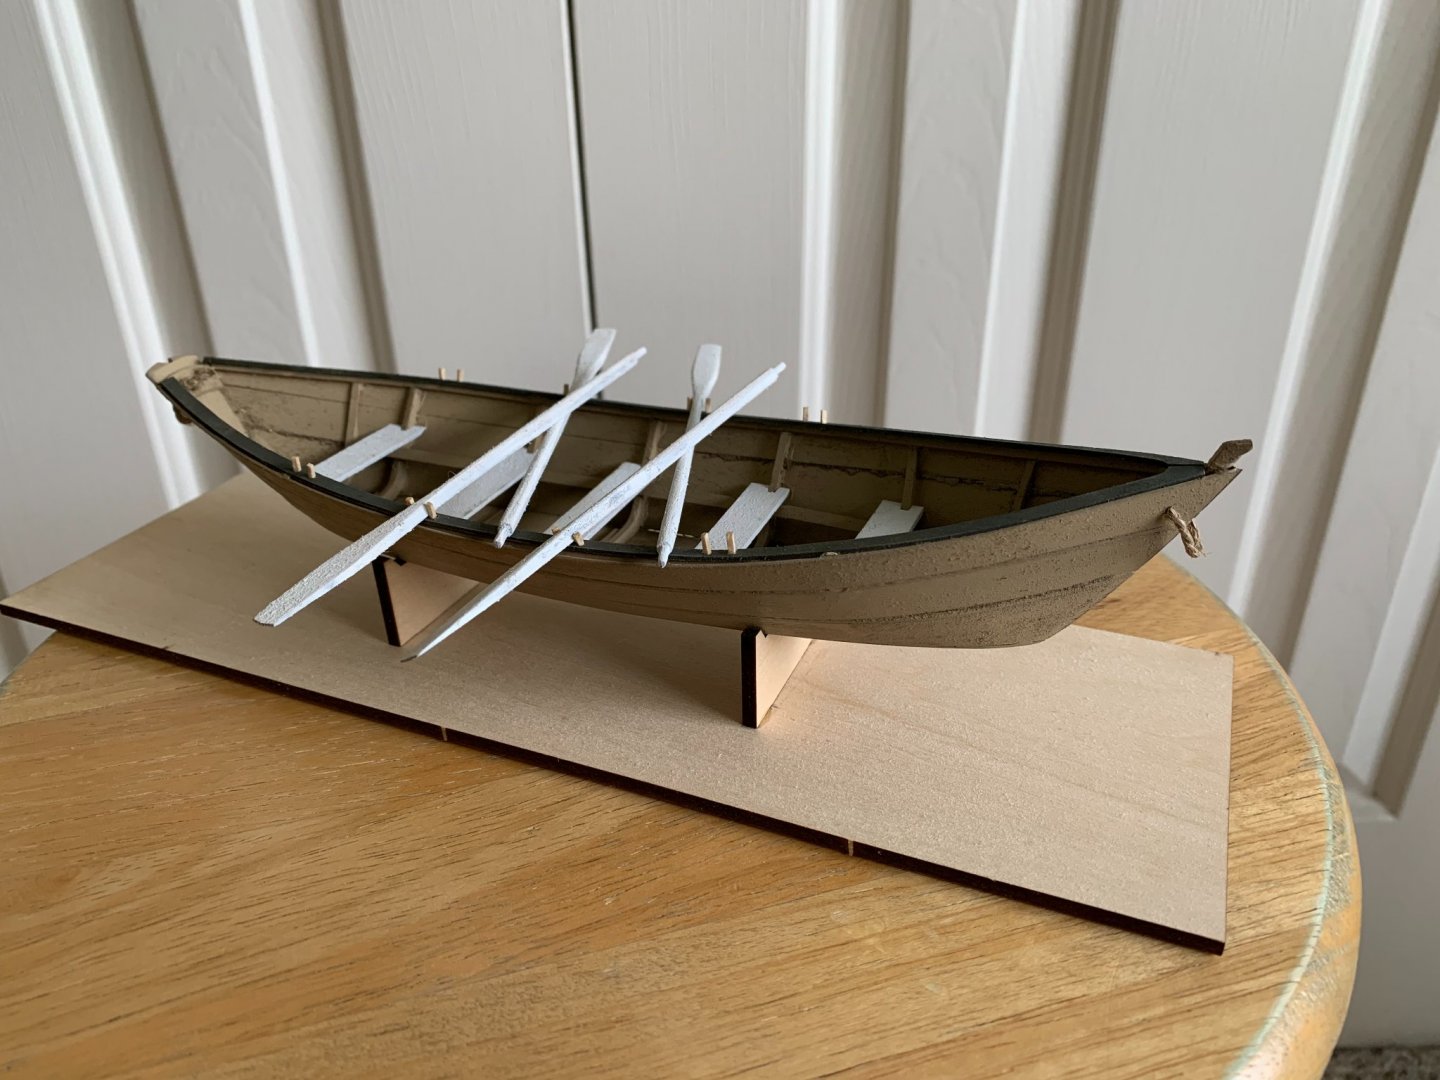
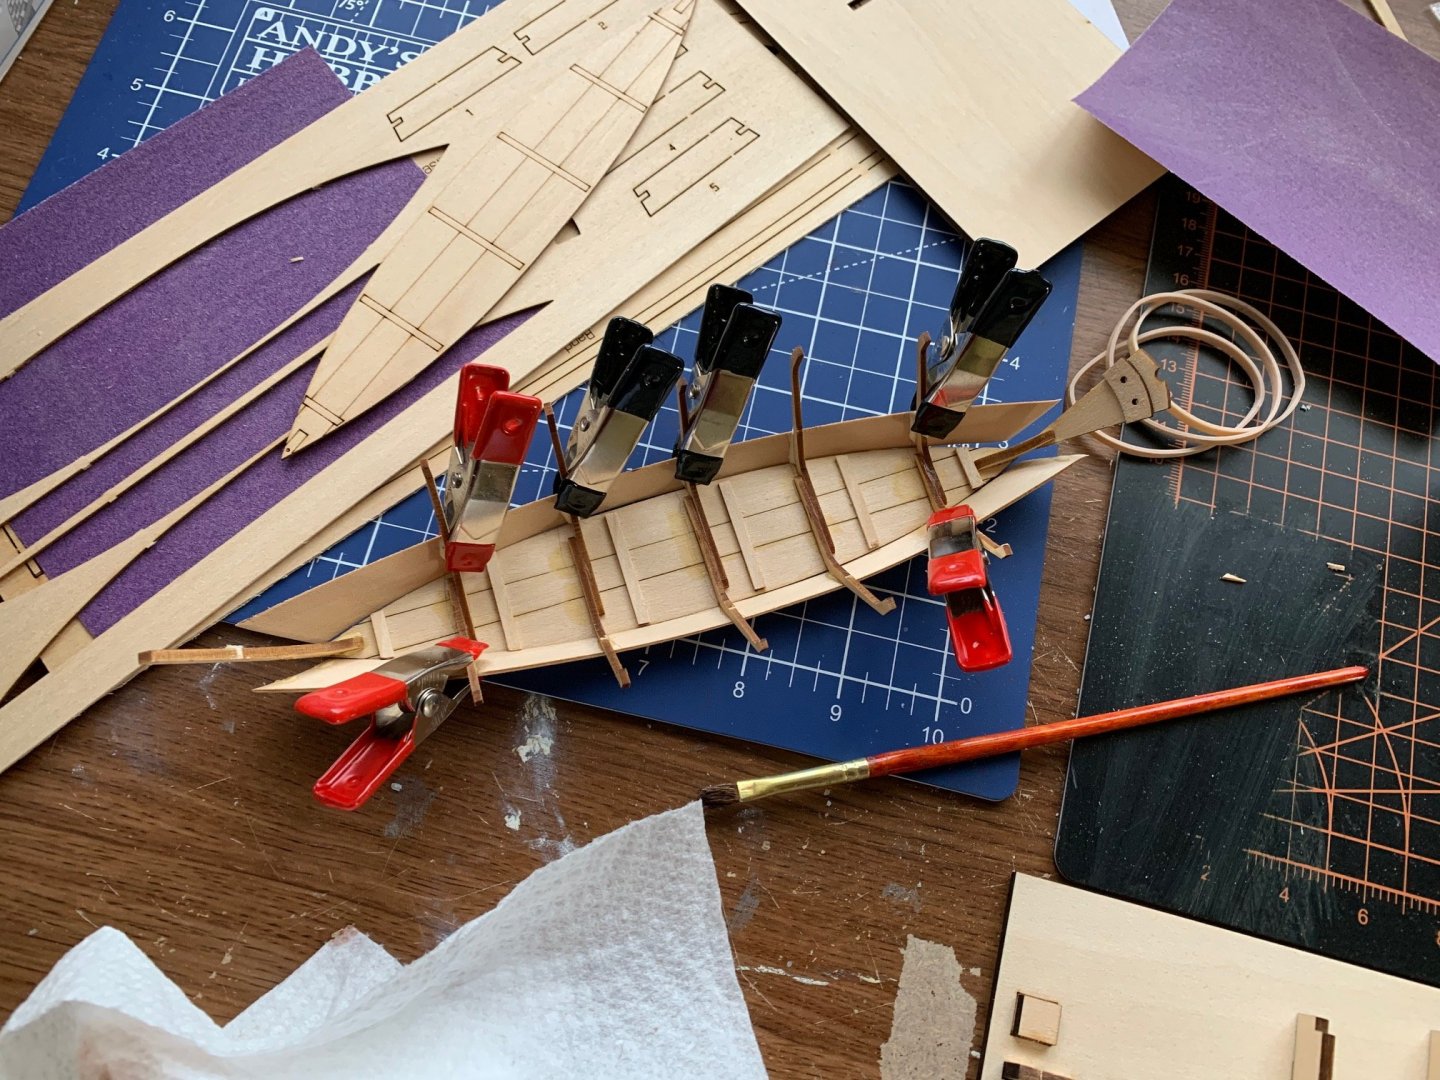
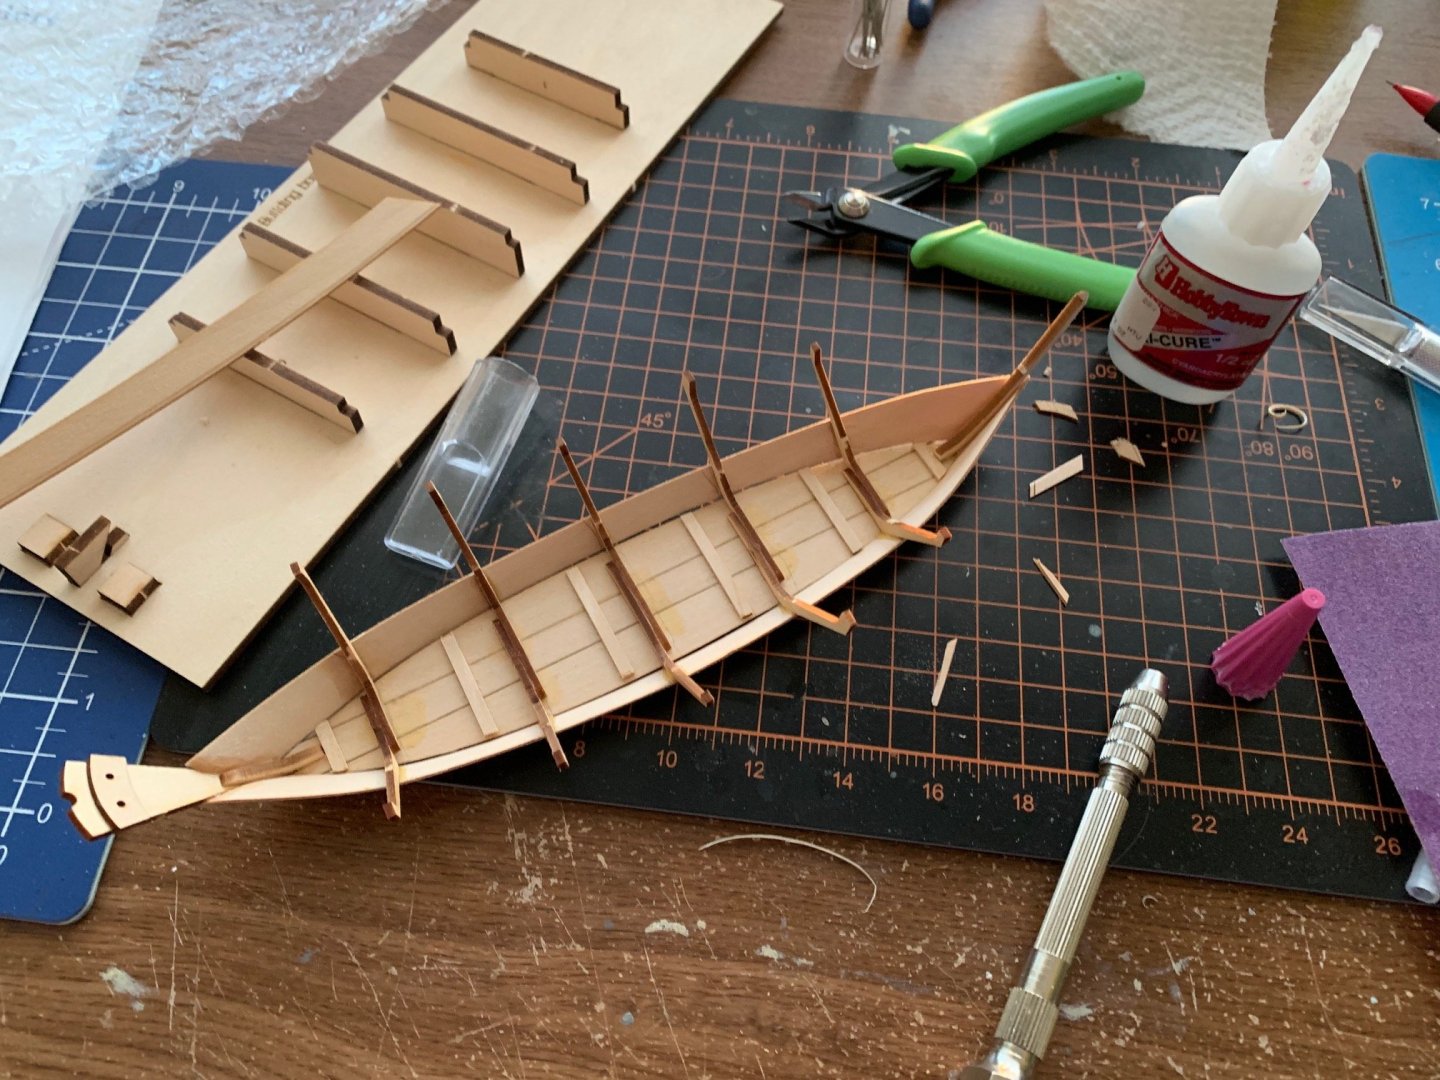
Started my second boat kit this weekend, Providence Whaleboat by Artesania Latina, one of their beginner’s kits. I’ve consulted the other build logs and am trying to avoid the issues they found with this kit, and it’s coming together very well so far. Frames fitted neatly, though the plywood was very brittle. Using a lot more tools on this kit than I did on my first, getting a much better result. The instructions just call this the “interior side piece.” Made double sure that it would fit cleanly, since I saw other builders having trouble with this piece. There is a lot of room for error. I got to use my Micro Shapers from Artesania Latina on the interior planking, to make it round on the edges. Needs cleaning up afterwards, but it’s a neat tool. The interior side planking isn’t perfect, once again I forgot to sand the frames, but it’s better than my last boat. The floor planking was very easy with enough sanding and cutting. Sanded one of the “Cockpit floor side battens” and used it as a form to make the second one. Took a great deal of sanding and fitting, but the floor planking finished very neatly. I’m very proud of this work so far. Now begins the laborious task of sanding down the frames to receive the exterior planks! I’m listening to an audiobook of Moby Dick while I work. Call me Ishmael!


-
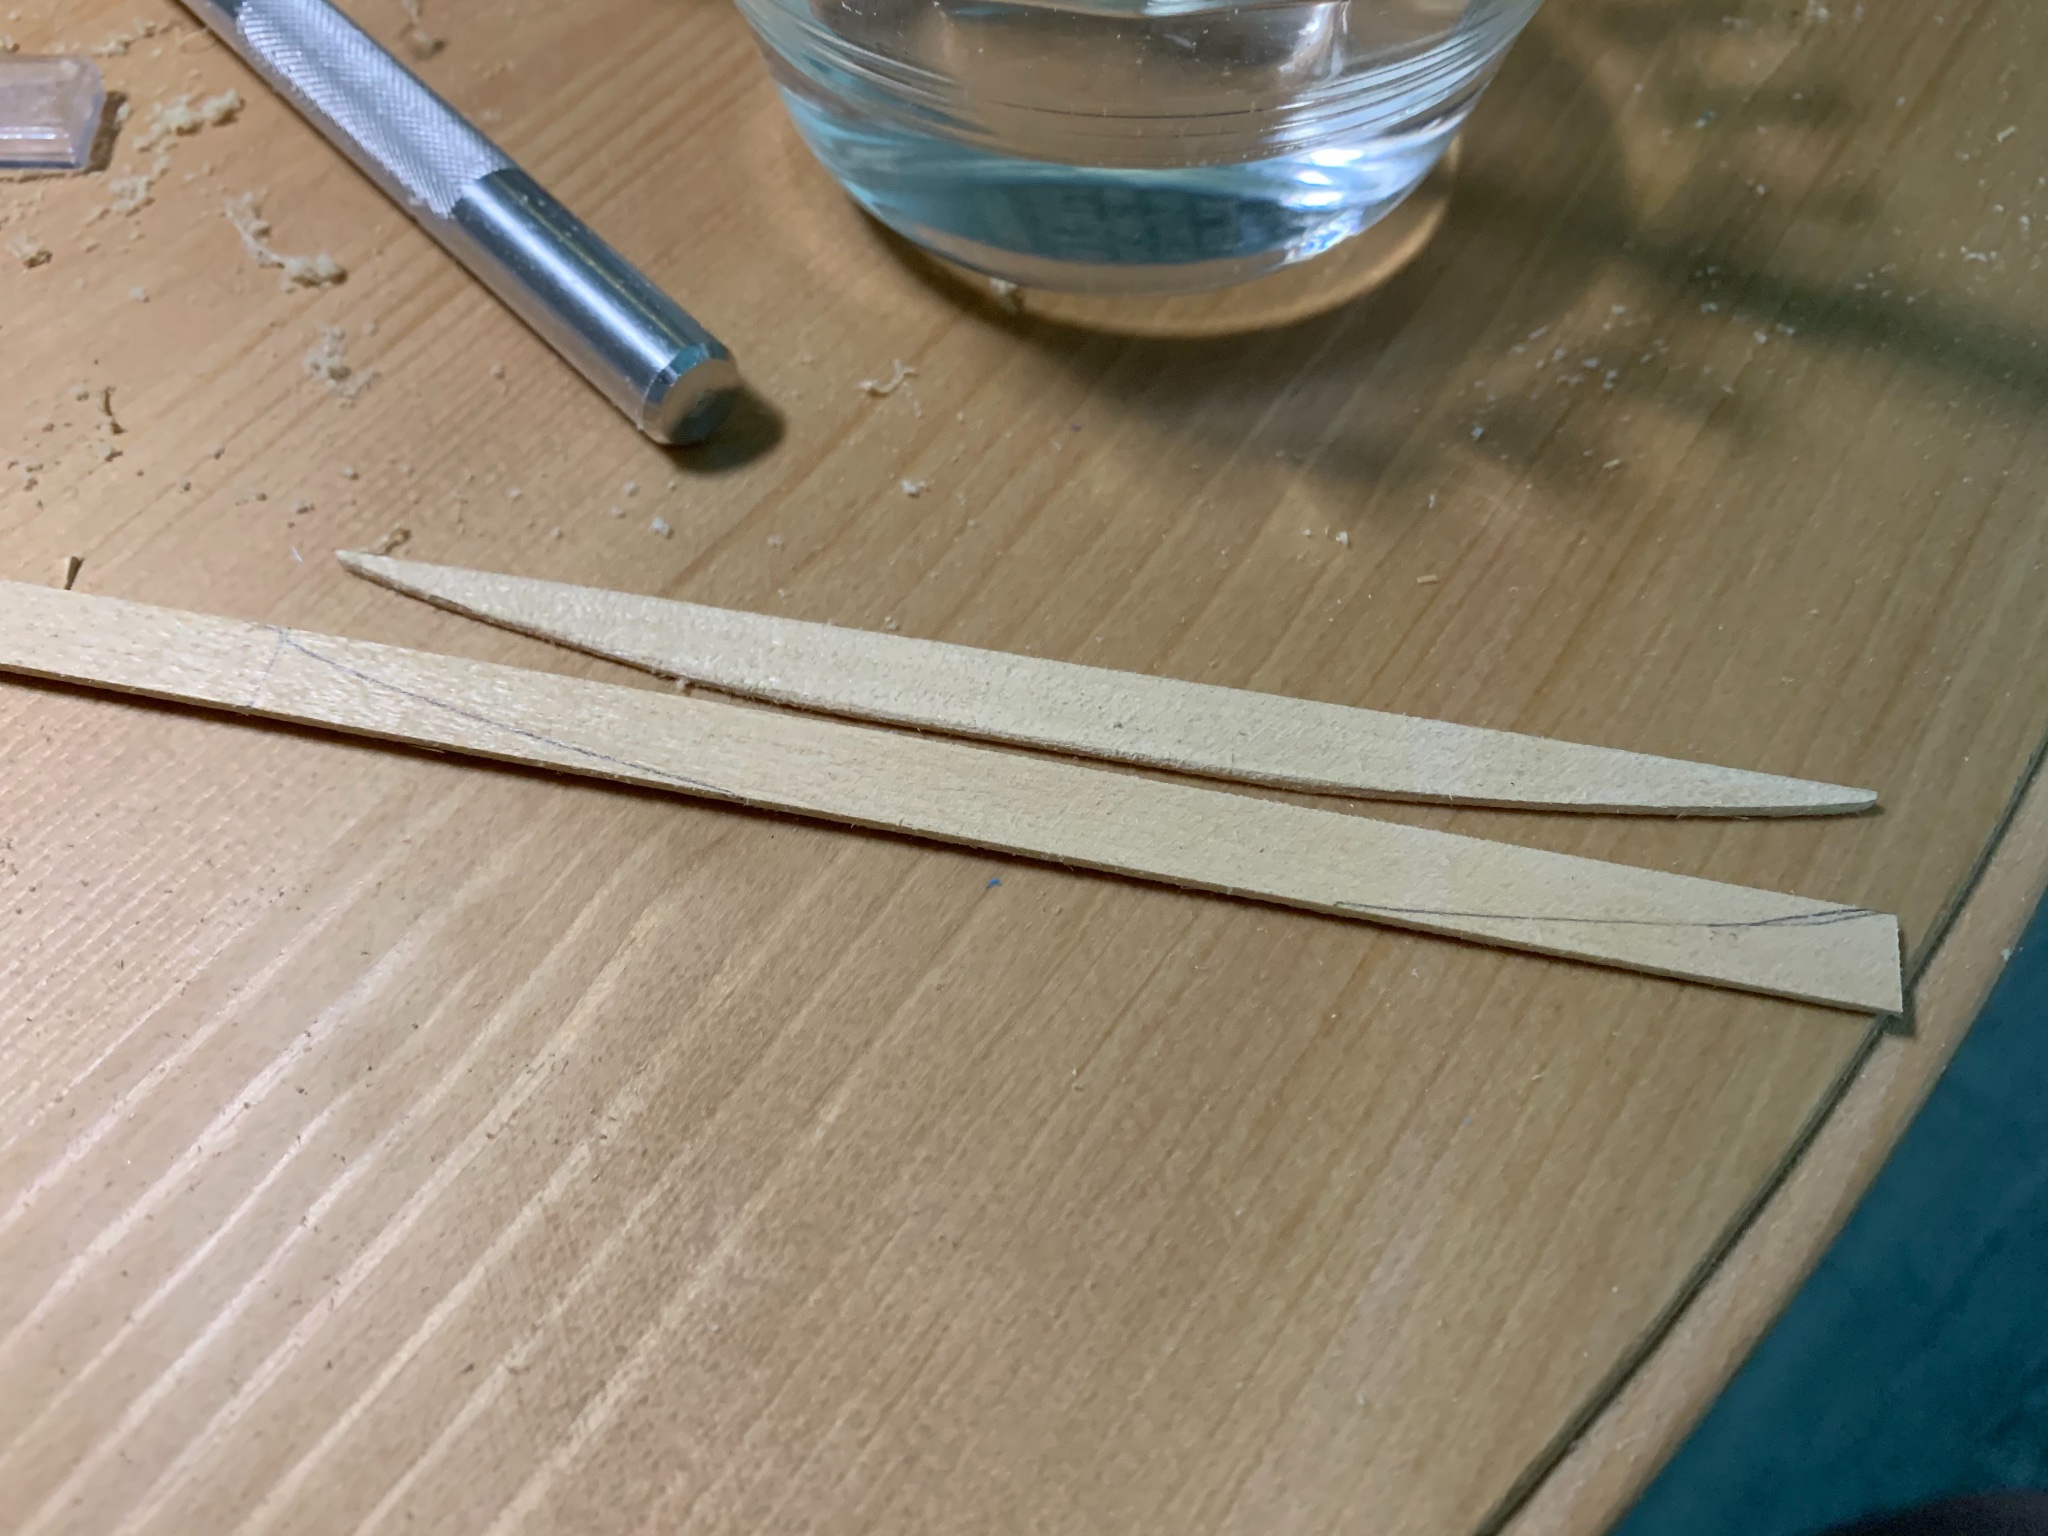
Wood dust and putty helped me fill gaps between planks. Had no issue attaching the gunwale frames and the breast hook. An oar as it comes from the laser-cut board, vs one that has been sanded. I painted the boat with some spray paint I had in the garage, tan for the boat, dark green for the gunwales, and white for the seats and oars. I found the rope that came with the kit to be a bit too big and glossy, so I used some twine rubbed in beeswax for the beckets. This has been a great kit for an absolute beginner like me. I wanted to get all my mistakes out on this, and I'm happy with the final result. Going to take a few weeks before starting my next kit, and take more time on it. Building Artesania Latina's Providence Whaleboat, which will give me another shot at a clinker hull, and will also allow me to play with sails and rigging a little. I appreciate everyone's comments and replies!


- 11 replies
-
- 8
-
-
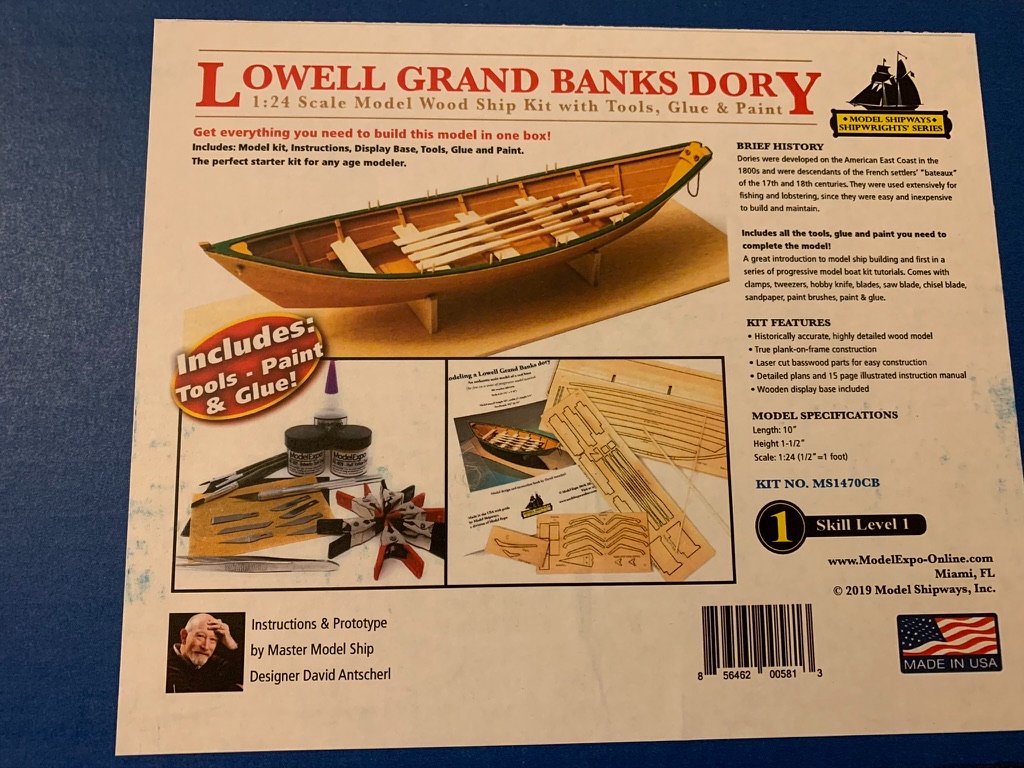
- Lowell Grand Banks Dory
- Model Shipways
- (and 2 more)
-
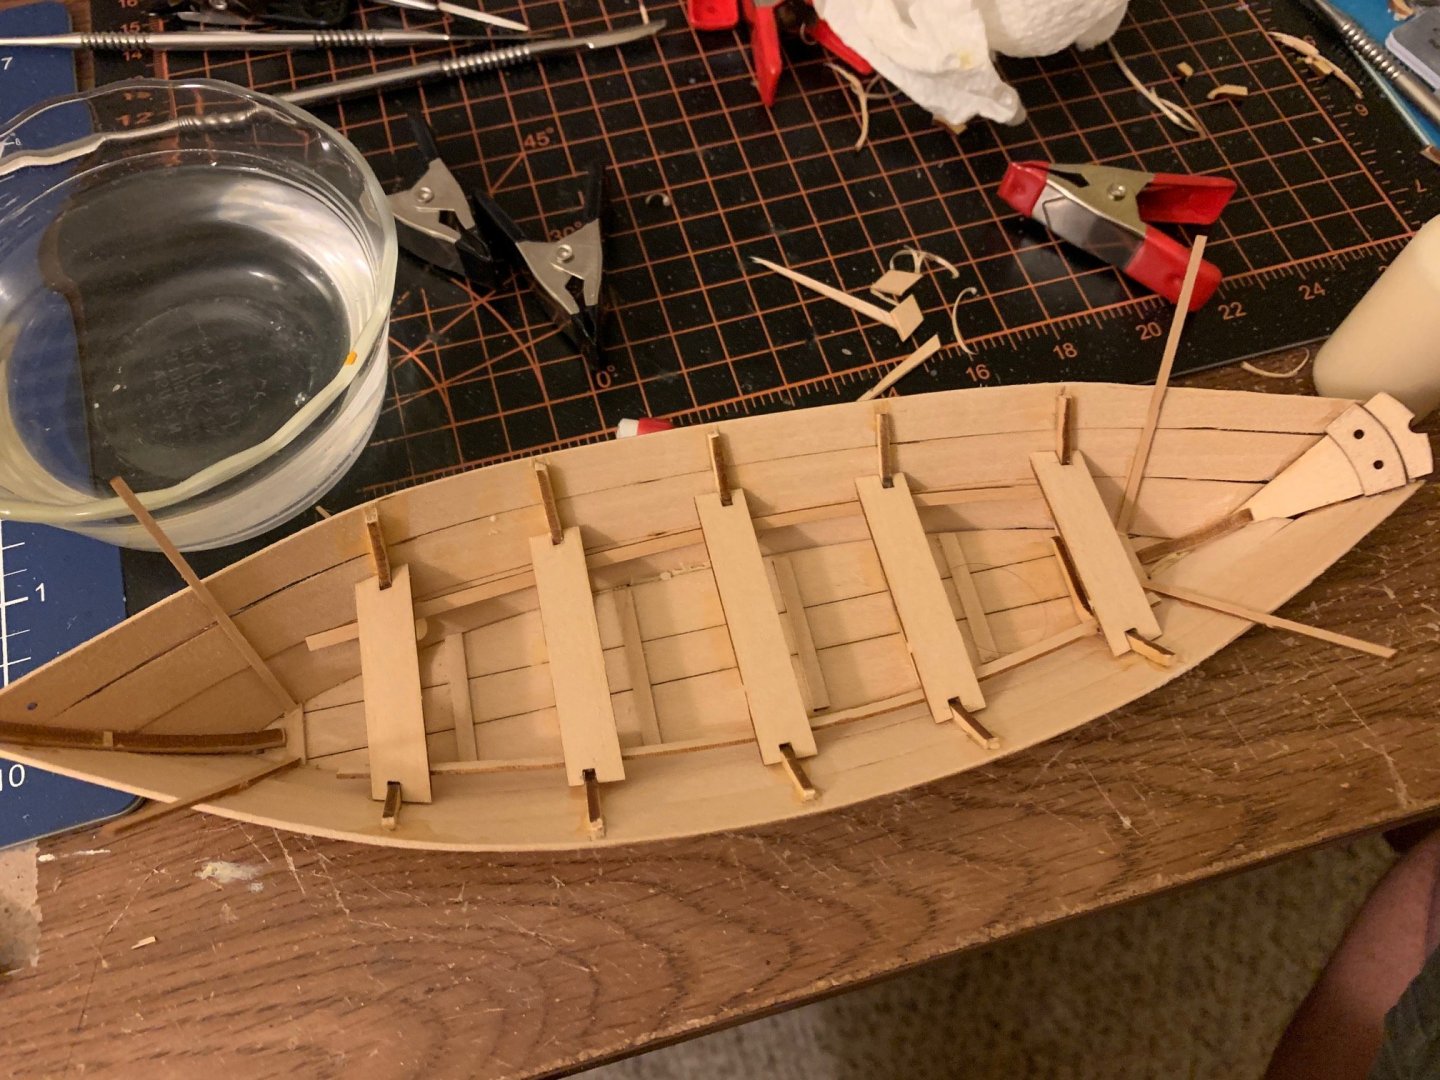
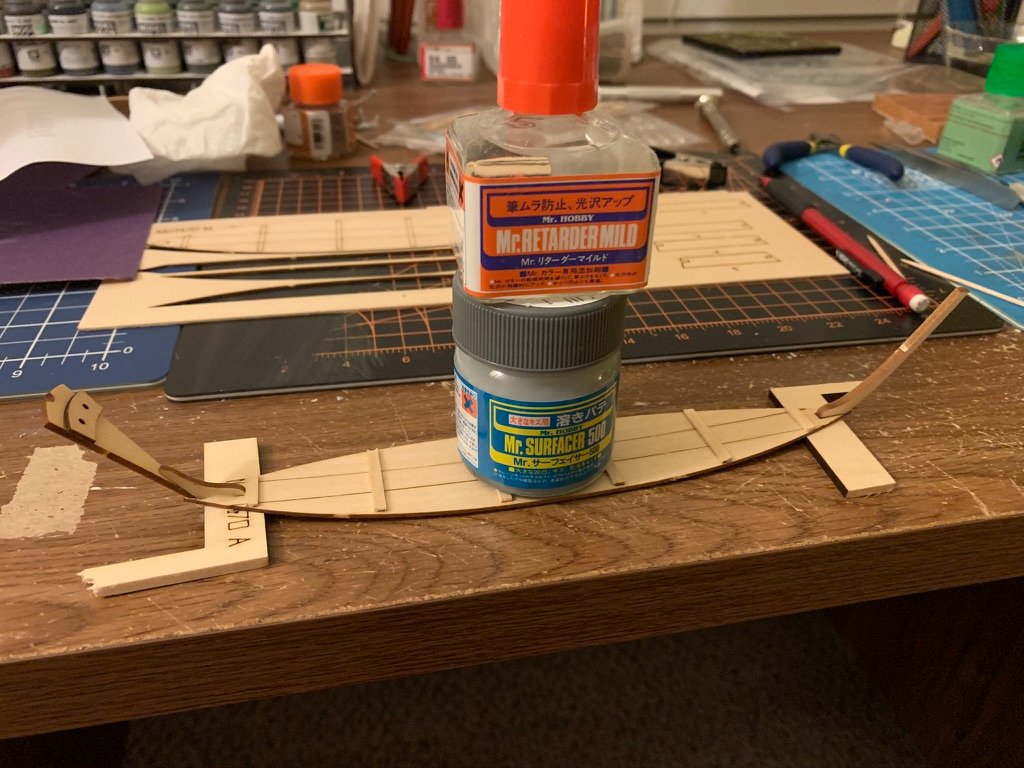
Thanks for the comments everyone. It's taken me a week to get back to it because of other projects, and because I needed some time to think about some problems I ran across. 1. I glued the stem and transom too far inward. 2. I forgot to sand the frames down before planking. 3. I arranged the planks flush, and not in a overlapping "clinker" style. None of these are major issues, but I do have gaps between the planks now, which I might try to fix with wood putty. Had no issue gluing the garboard planks to the frames, but I couldn't get them to hold to the stem and transom with wood glue. I finally resorted to super glue. There was some extra length at the transom end, which I chopped off. When all the planks were fitted, I realized not having them in a clinker style meant that they were riding too high, so I sanded and shaved the bow and stern down to better fit the gunwales. I added a bit of wood to the stem so it would stick out. The boat in its present state, with risers and seats added, and stern cleats glued. Next I will be fitting the gunwales and sanding the oars, after which this boat will be ready for paint! It surely doesn't look exactly like the picture on the box, and there's large gaps between the planks, but I'm having a good time, and I know the next time I try planking it will look better.

- 11 replies
-
- 2
-
-
- Lowell Grand Banks Dory
- Model Shipways
- (and 2 more)
-
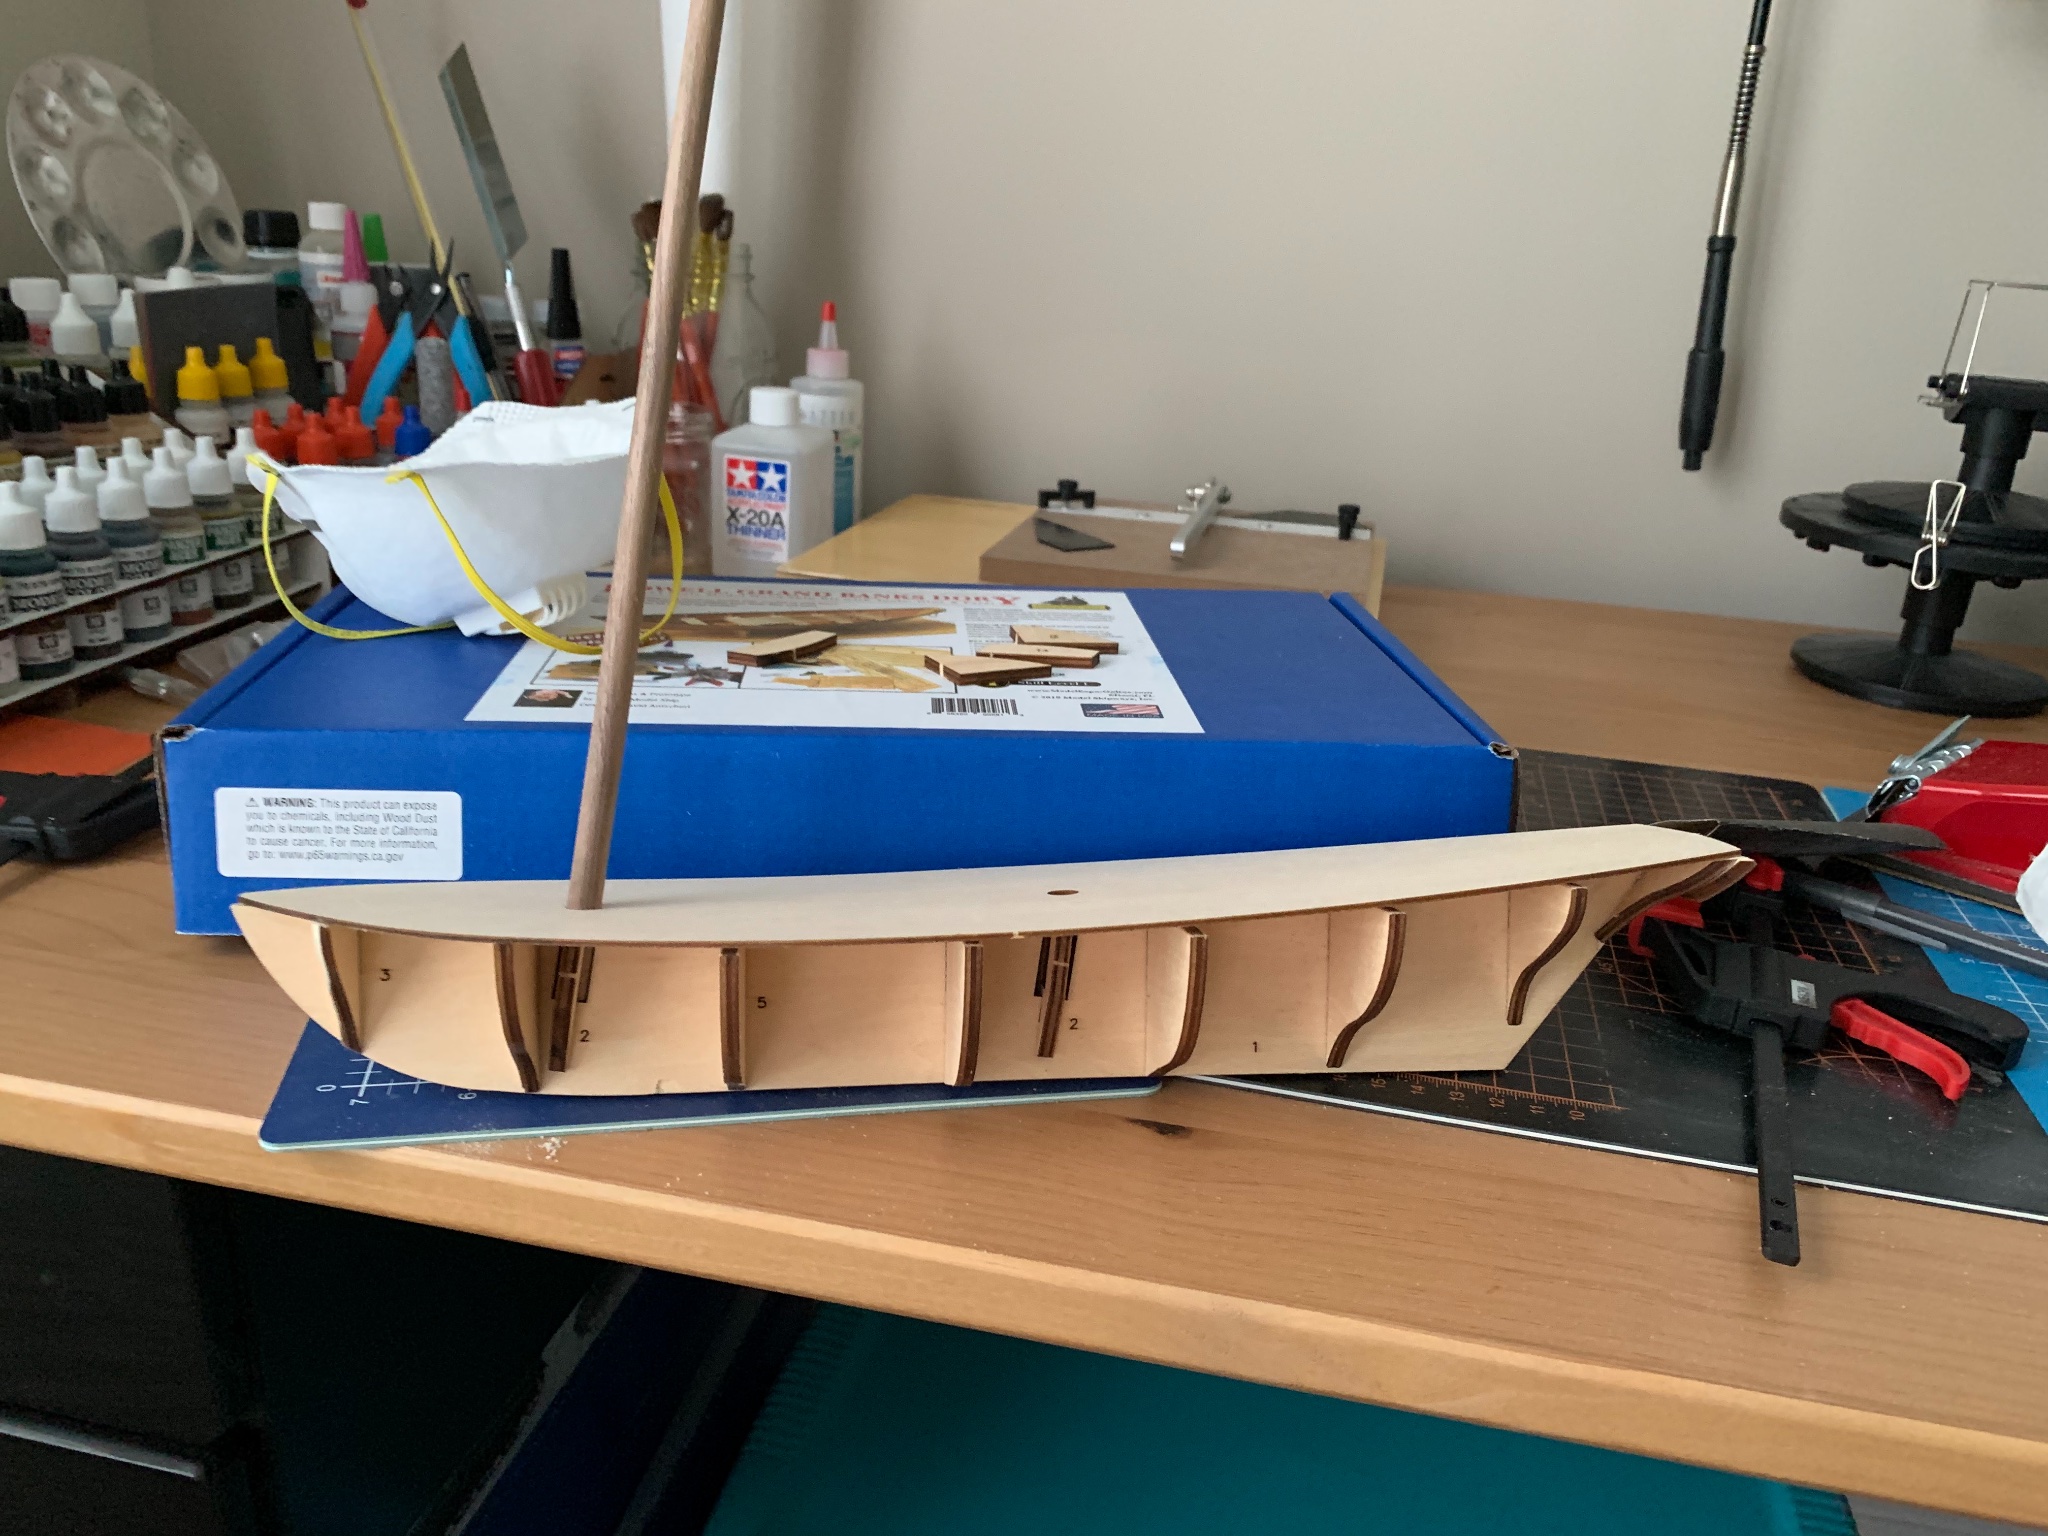
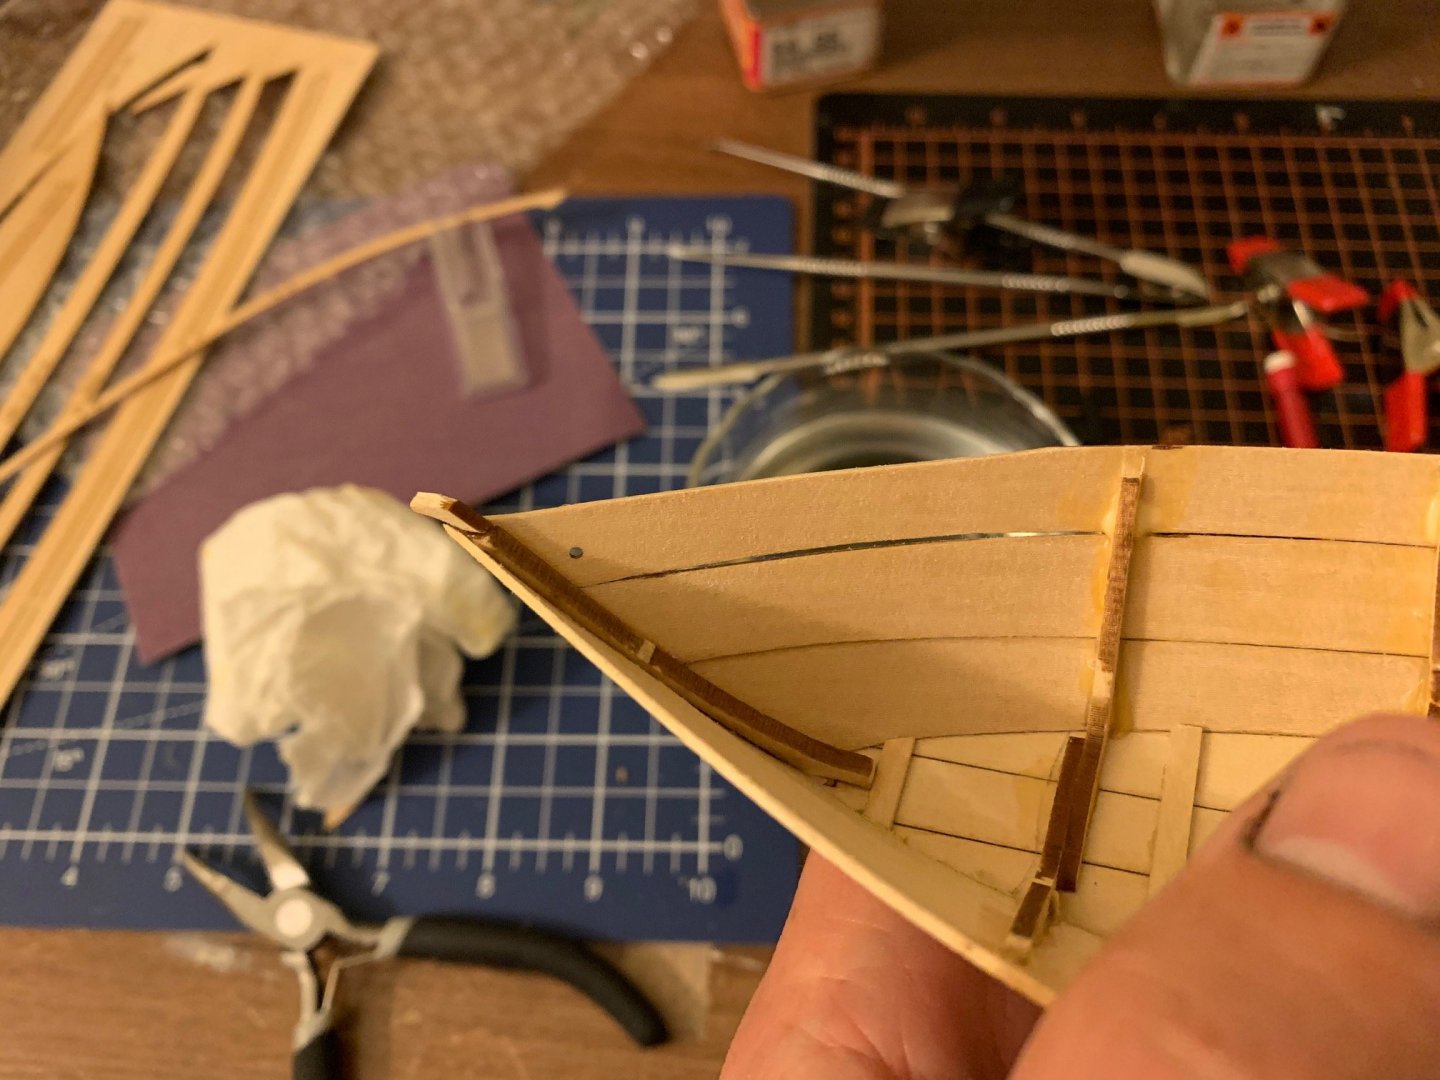
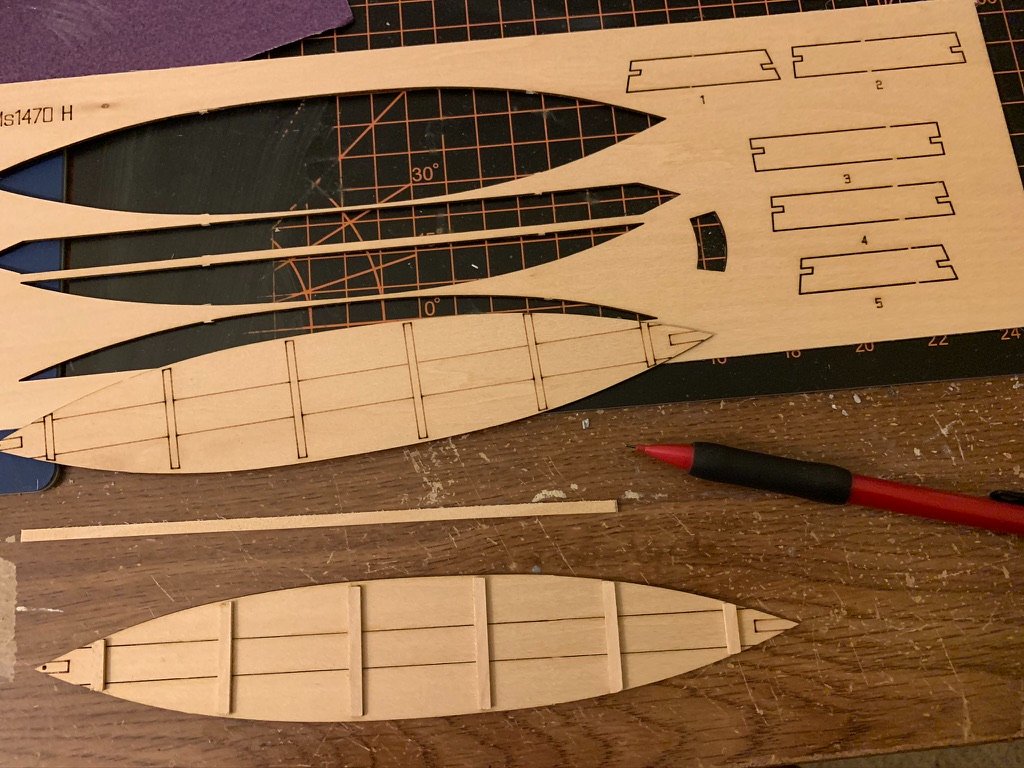
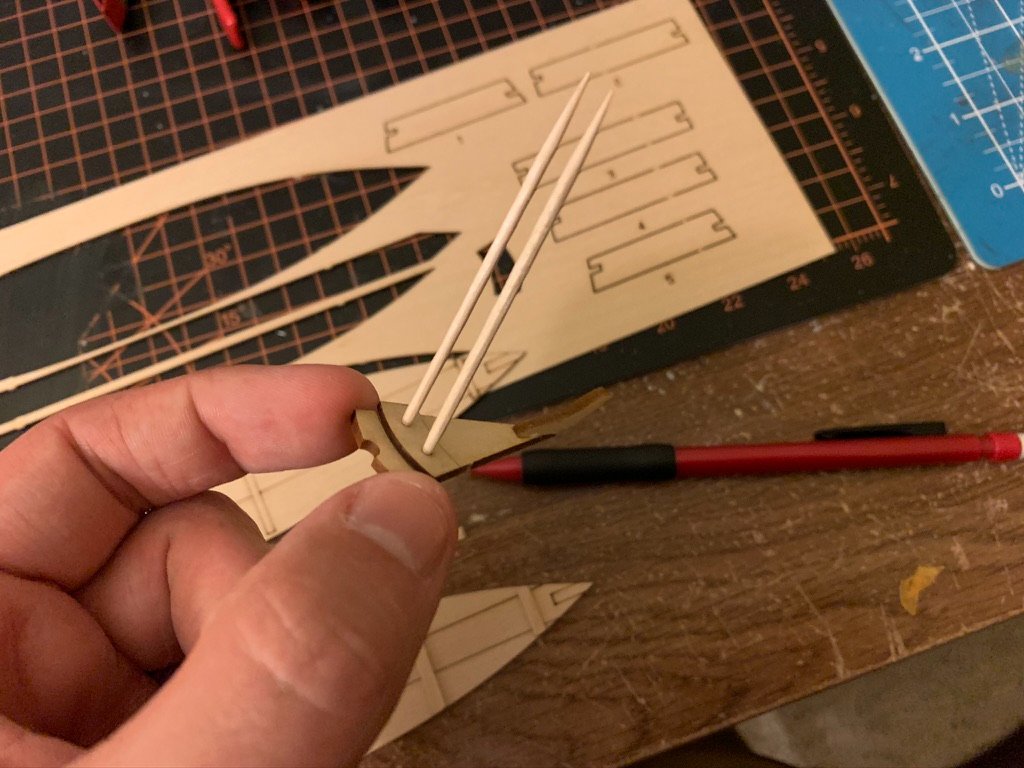
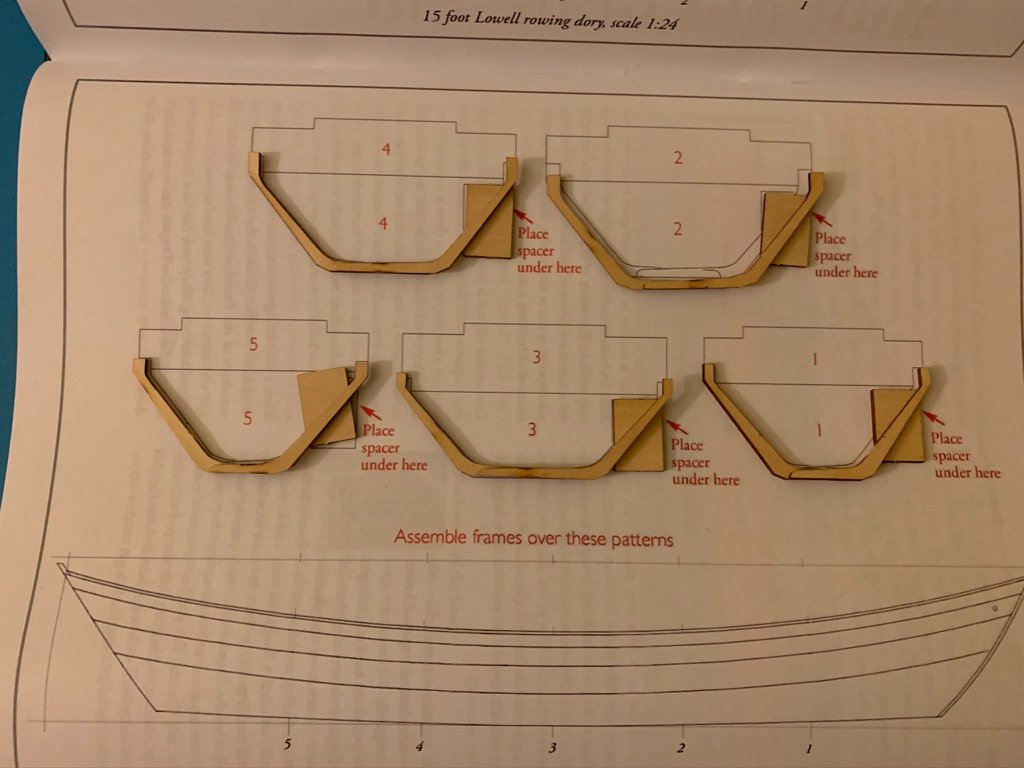
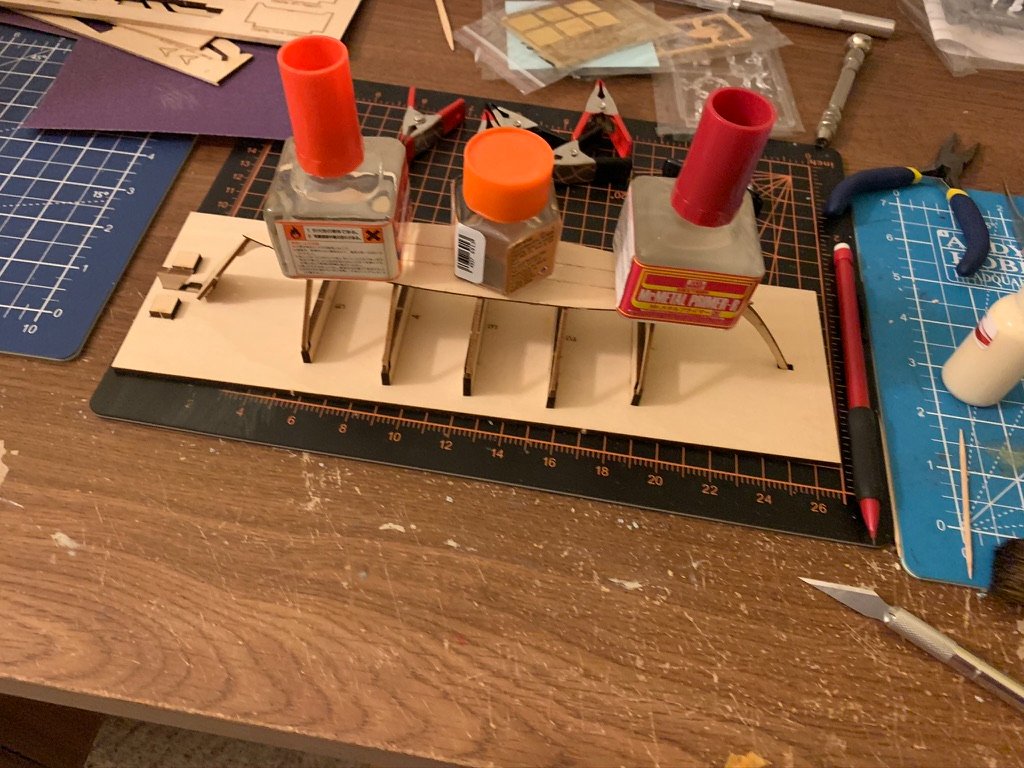
I know this is not the first build of this kit on this forum, but I decided to post my log of it for my own reference if nothing else. Very excited to start, I've only ever built plastic models, so this will be a learning experience. The kit I got comes with some basic tools, allowing you to build it out of the box. I already had most of the tools, but I won't say no to extra tweezers, clamps, paint, and glue. You can make the bottom from a single piece or three planks. I chose the latter, though I did use the single piece to mark off lengths for the bottom cleats. Used toothpicks to align the holes between the stern cleat and the transom. With the Transom and Stem glued on, I wetted the bottom, set the ends on 1/8" pieces, and placed some glass jars in the middle to get that 2° bend in the bottom. I deviated from the instructions when assembling the frames, but think I got a good result. Glued the frames to the bottom, then placed the whole thing on the building board. Going to let that sit for the night. So far the kit has built itself. Sanding and planking tomorrow!
- 11 replies
-
- 5
-
-
- Lowell Grand Banks Dory
- Model Shipways
- (and 2 more)
-
Thanks to all repliers, Mark especially. To answer questions about other tools I have, I have several hobby knives, several pliers and tweezers, lots of clamps, and a rotary tool. I hope to have something to show in a couple weeks! @Chuck Seiler We've been here since 1607
-
I'm from East Virginia, a lover of the water and a long-time reader of nautical fiction. I'm primarily an armor modeler, but I am going into wooden ships. I have ordered several kits which I plan to finish in this order to familiarize myself with the craft: Model Shipways 1/24 Grand Banks Dory Artesania Latina 1/24 Providence Whaleboat Artesania Latina 1/24 Jolly Boat from HMS Bounty Artesania Latina 1/85 Sultan Arab Dhow Artesania Latina 1/41 1819 Virginia Schooner Model Shipways 1/64 1803 Brig Syren I am also getting the following tools: Razor Saw Keel Vise Microshapers A and B from Artesania Latina Marking and Measuring Set (rulers, compass, squares) 3" Squares x2 5oz Upholsterer's Hammer Rigging tools and long-neck scissors I already have hobby knives, files, sandpaper, various wood and CA glues, various paints, etc, all the basic modeling tools and supplies. I'm really looking forward to getting started, everyone here seems very knowledgeable and supportive. My questions for more experienced modelers would be: Is this a good plan to start the hobby? Am I missing any necessary/helpful tools? What is some basic advice you can give me?