Admiral Beez
-
Posts
190 -
Joined
-
Last visited
About Admiral Beez

-
 JacquesCousteau reacted to a post in a topic:
HMS Spartiate by Admiral Beez - FINISHED - Heller - 1/150 - PLASTIC - kit-bashing the Heller Le Superbe
JacquesCousteau reacted to a post in a topic:
HMS Spartiate by Admiral Beez - FINISHED - Heller - 1/150 - PLASTIC - kit-bashing the Heller Le Superbe
-
JacquesCousteau reacted to a post in a topic:
HMS Spartiate by Admiral Beez - FINISHED - Heller - 1/150 - PLASTIC - kit-bashing the Heller Le Superbe
-
_SalD_ reacted to a post in a topic:
HMS Spartiate by Admiral Beez - FINISHED - Heller - 1/150 - PLASTIC - kit-bashing the Heller Le Superbe
-
_SalD_ reacted to a post in a topic:
HMS Spartiate by Admiral Beez - FINISHED - Heller - 1/150 - PLASTIC - kit-bashing the Heller Le Superbe
-
AJohnson reacted to a post in a topic:
HMS Spartiate by Admiral Beez - FINISHED - Heller - 1/150 - PLASTIC - kit-bashing the Heller Le Superbe
-
AJohnson reacted to a post in a topic:
HMS Spartiate by Admiral Beez - FINISHED - Heller - 1/150 - PLASTIC - kit-bashing the Heller Le Superbe
-
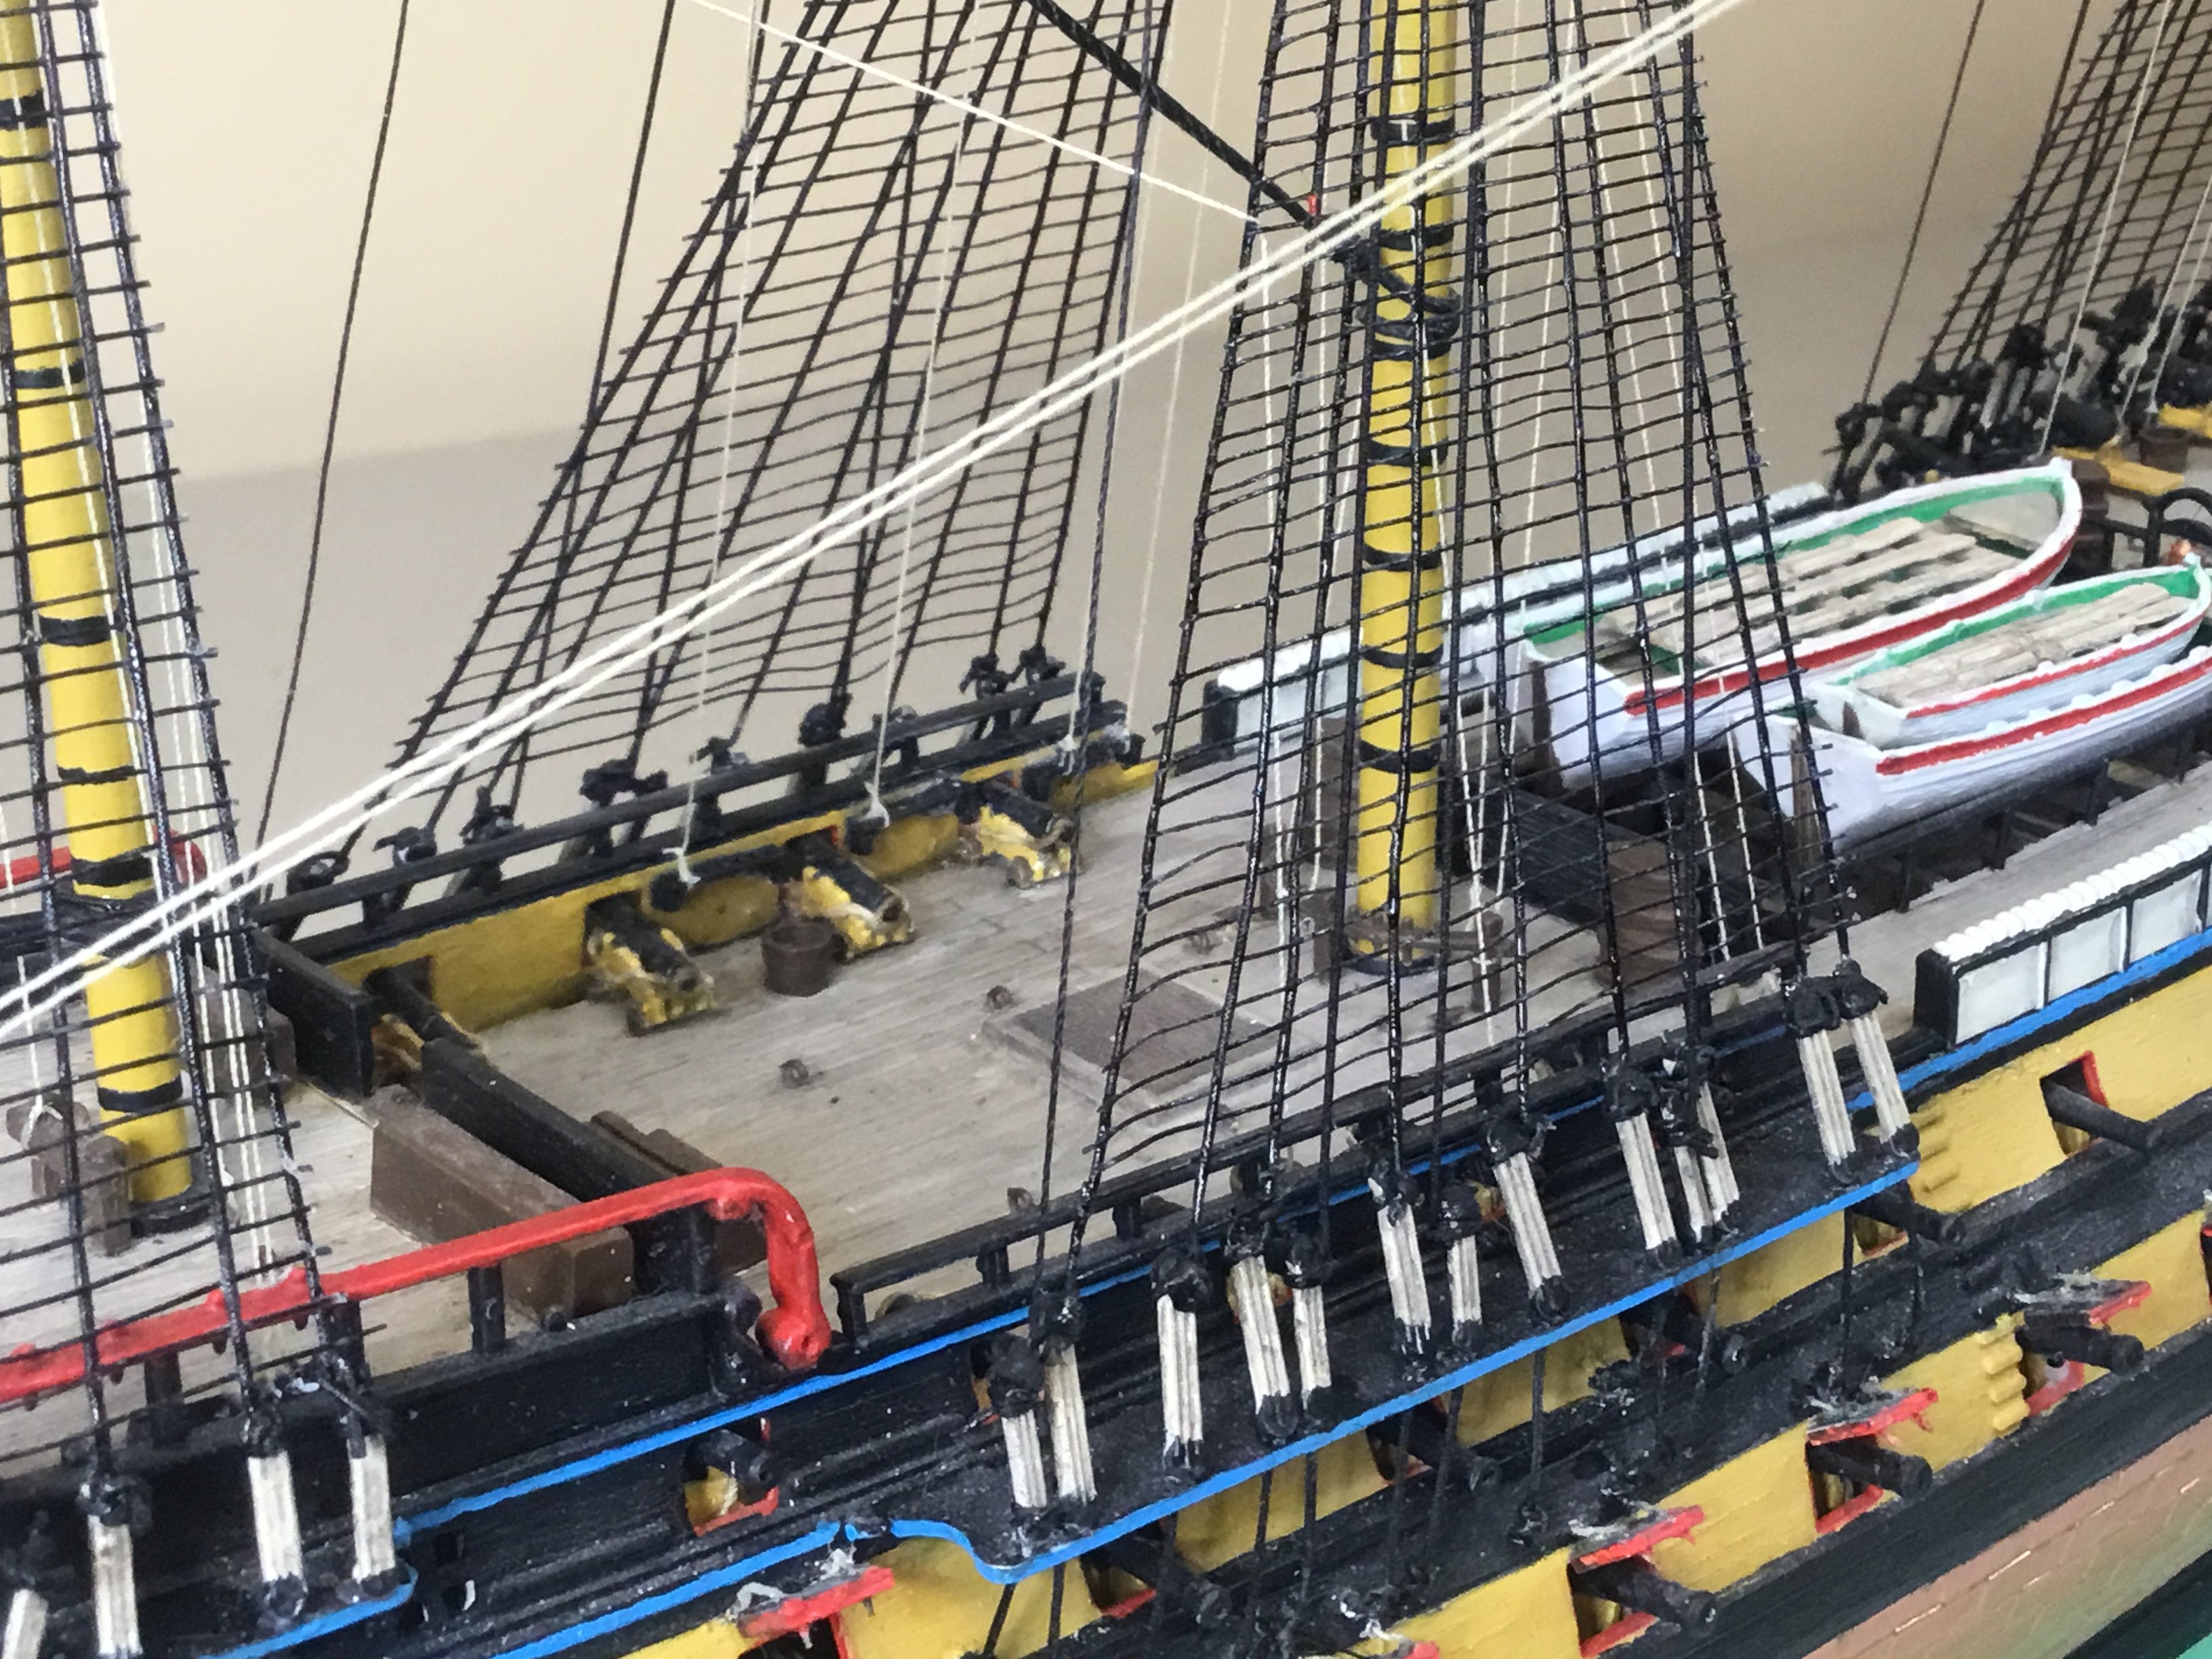
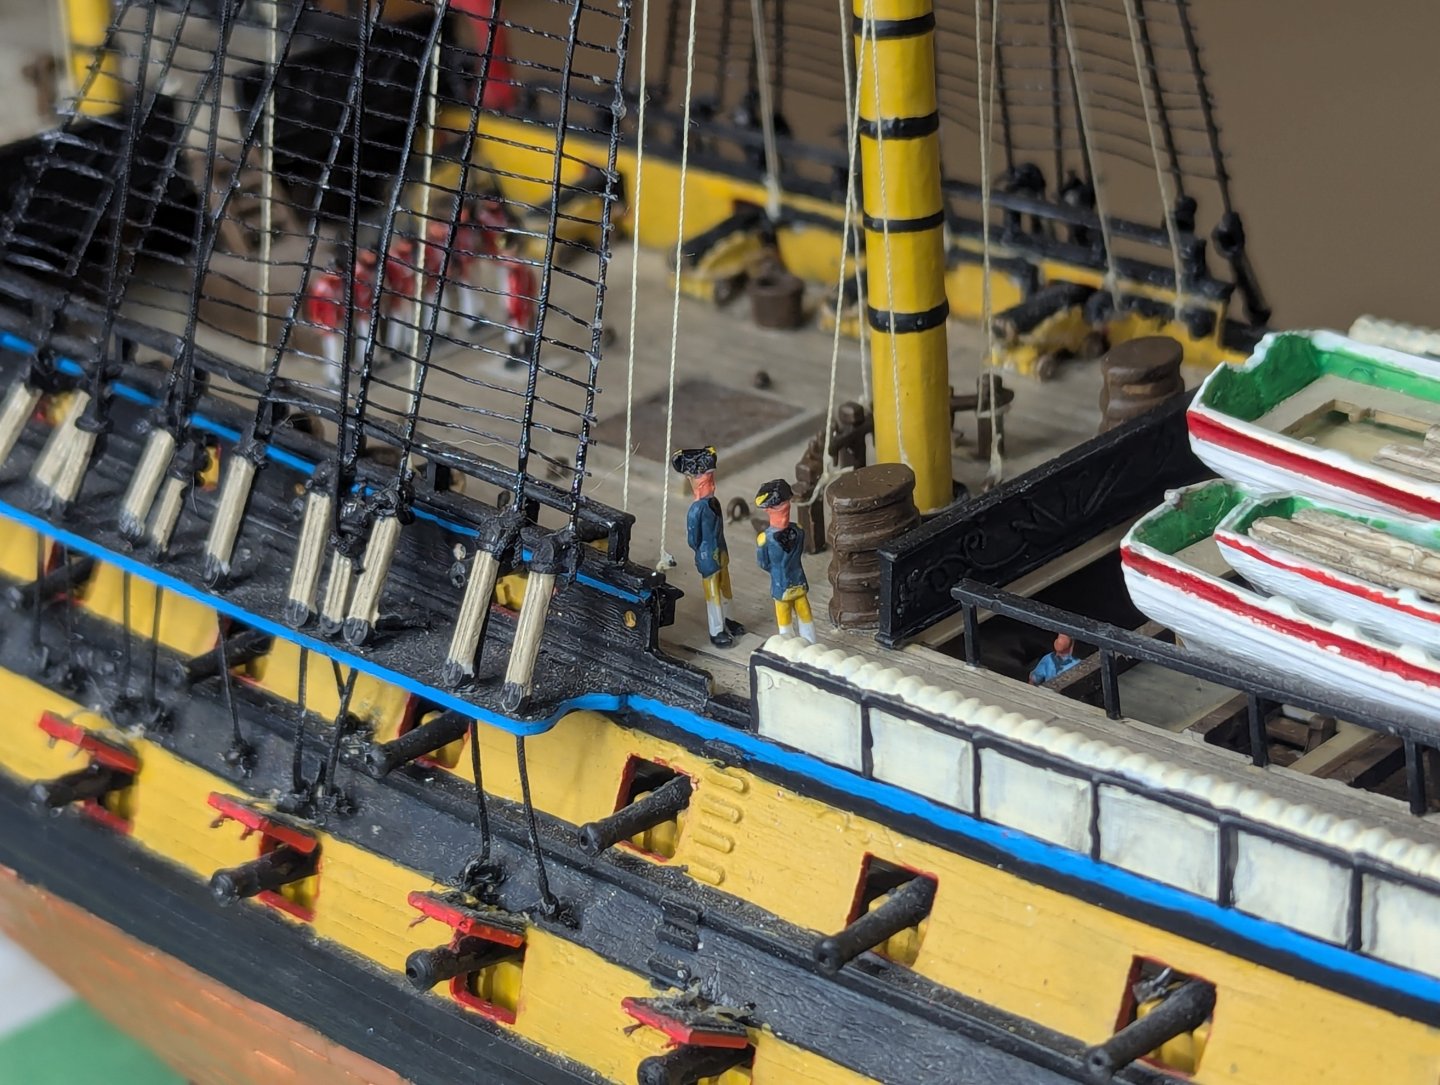
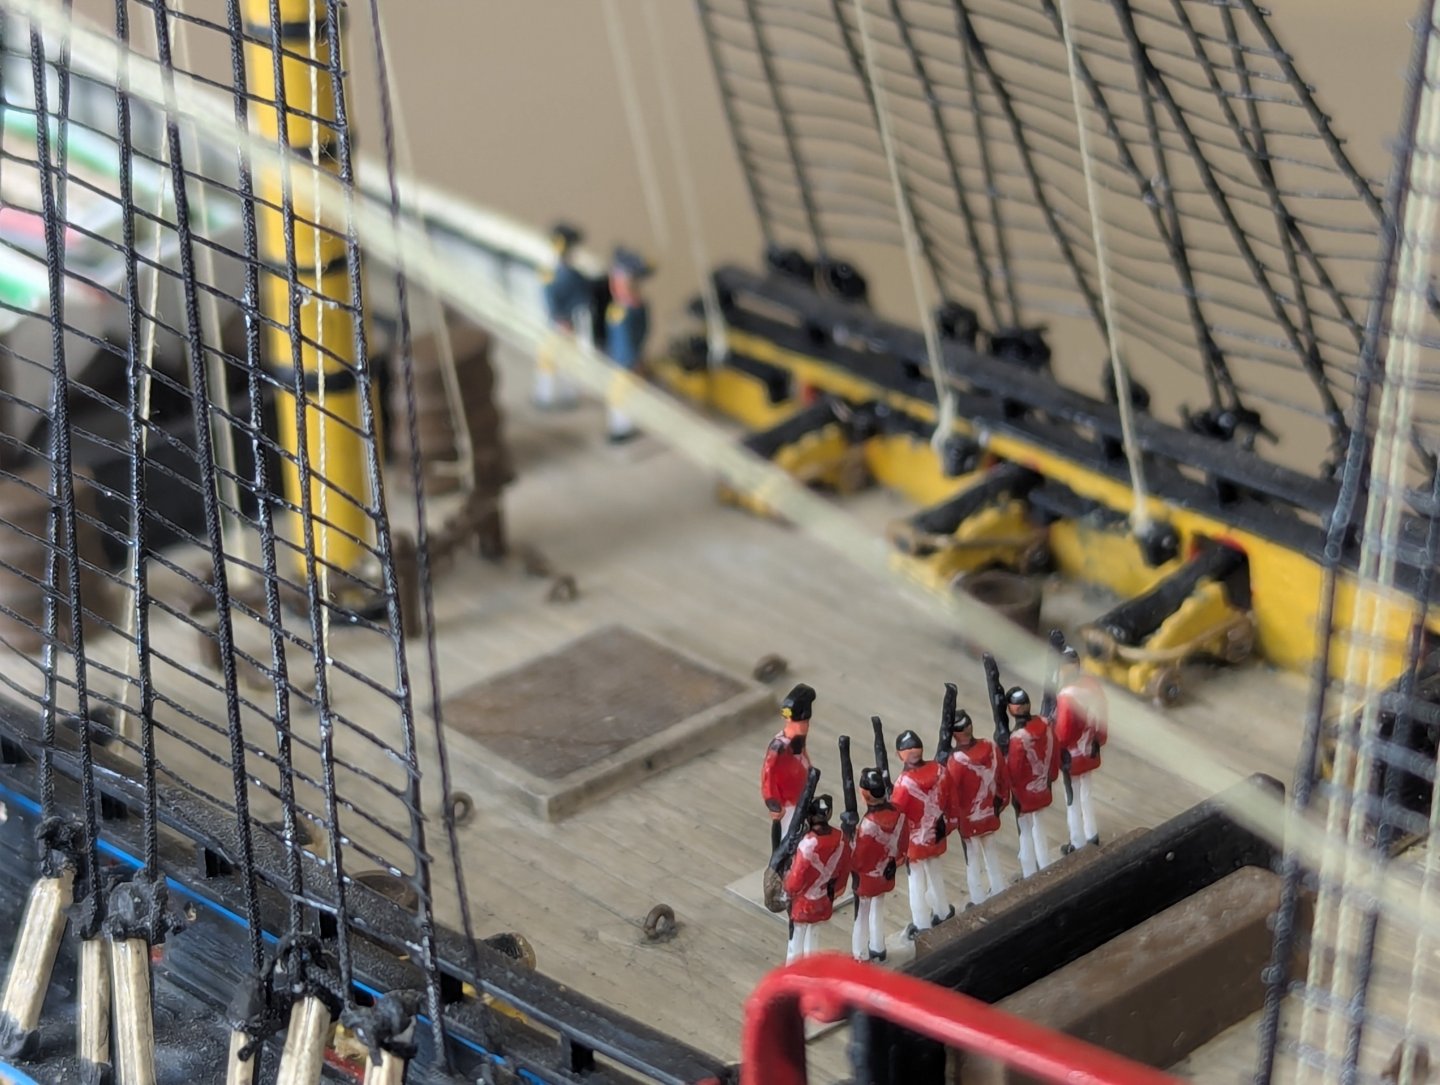
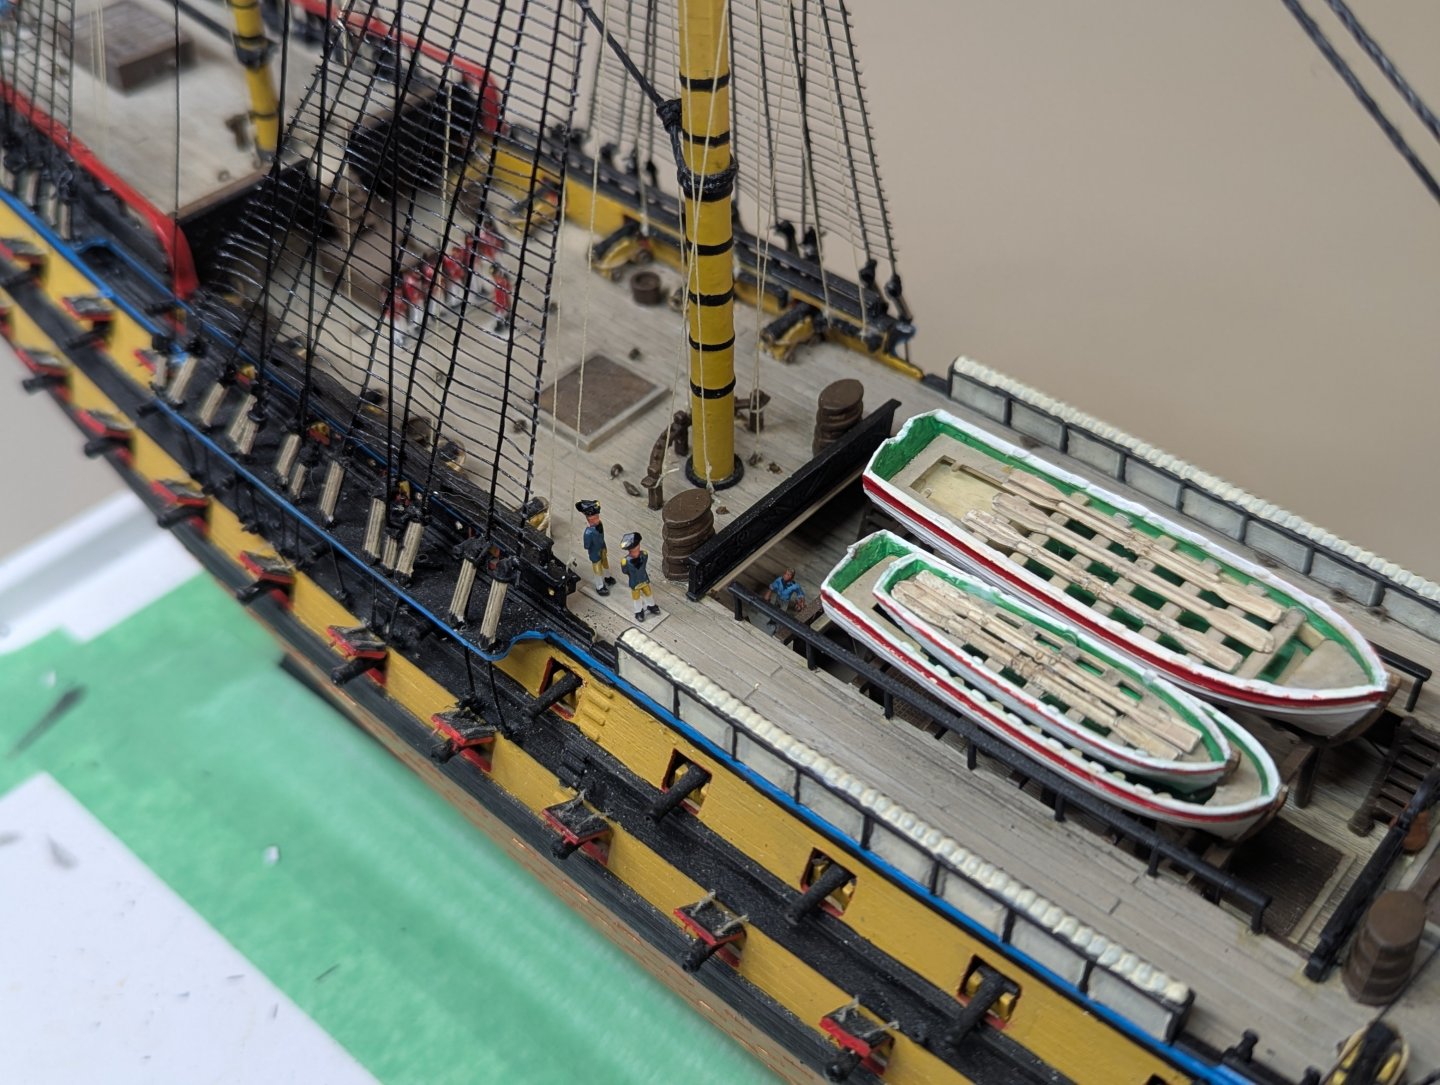
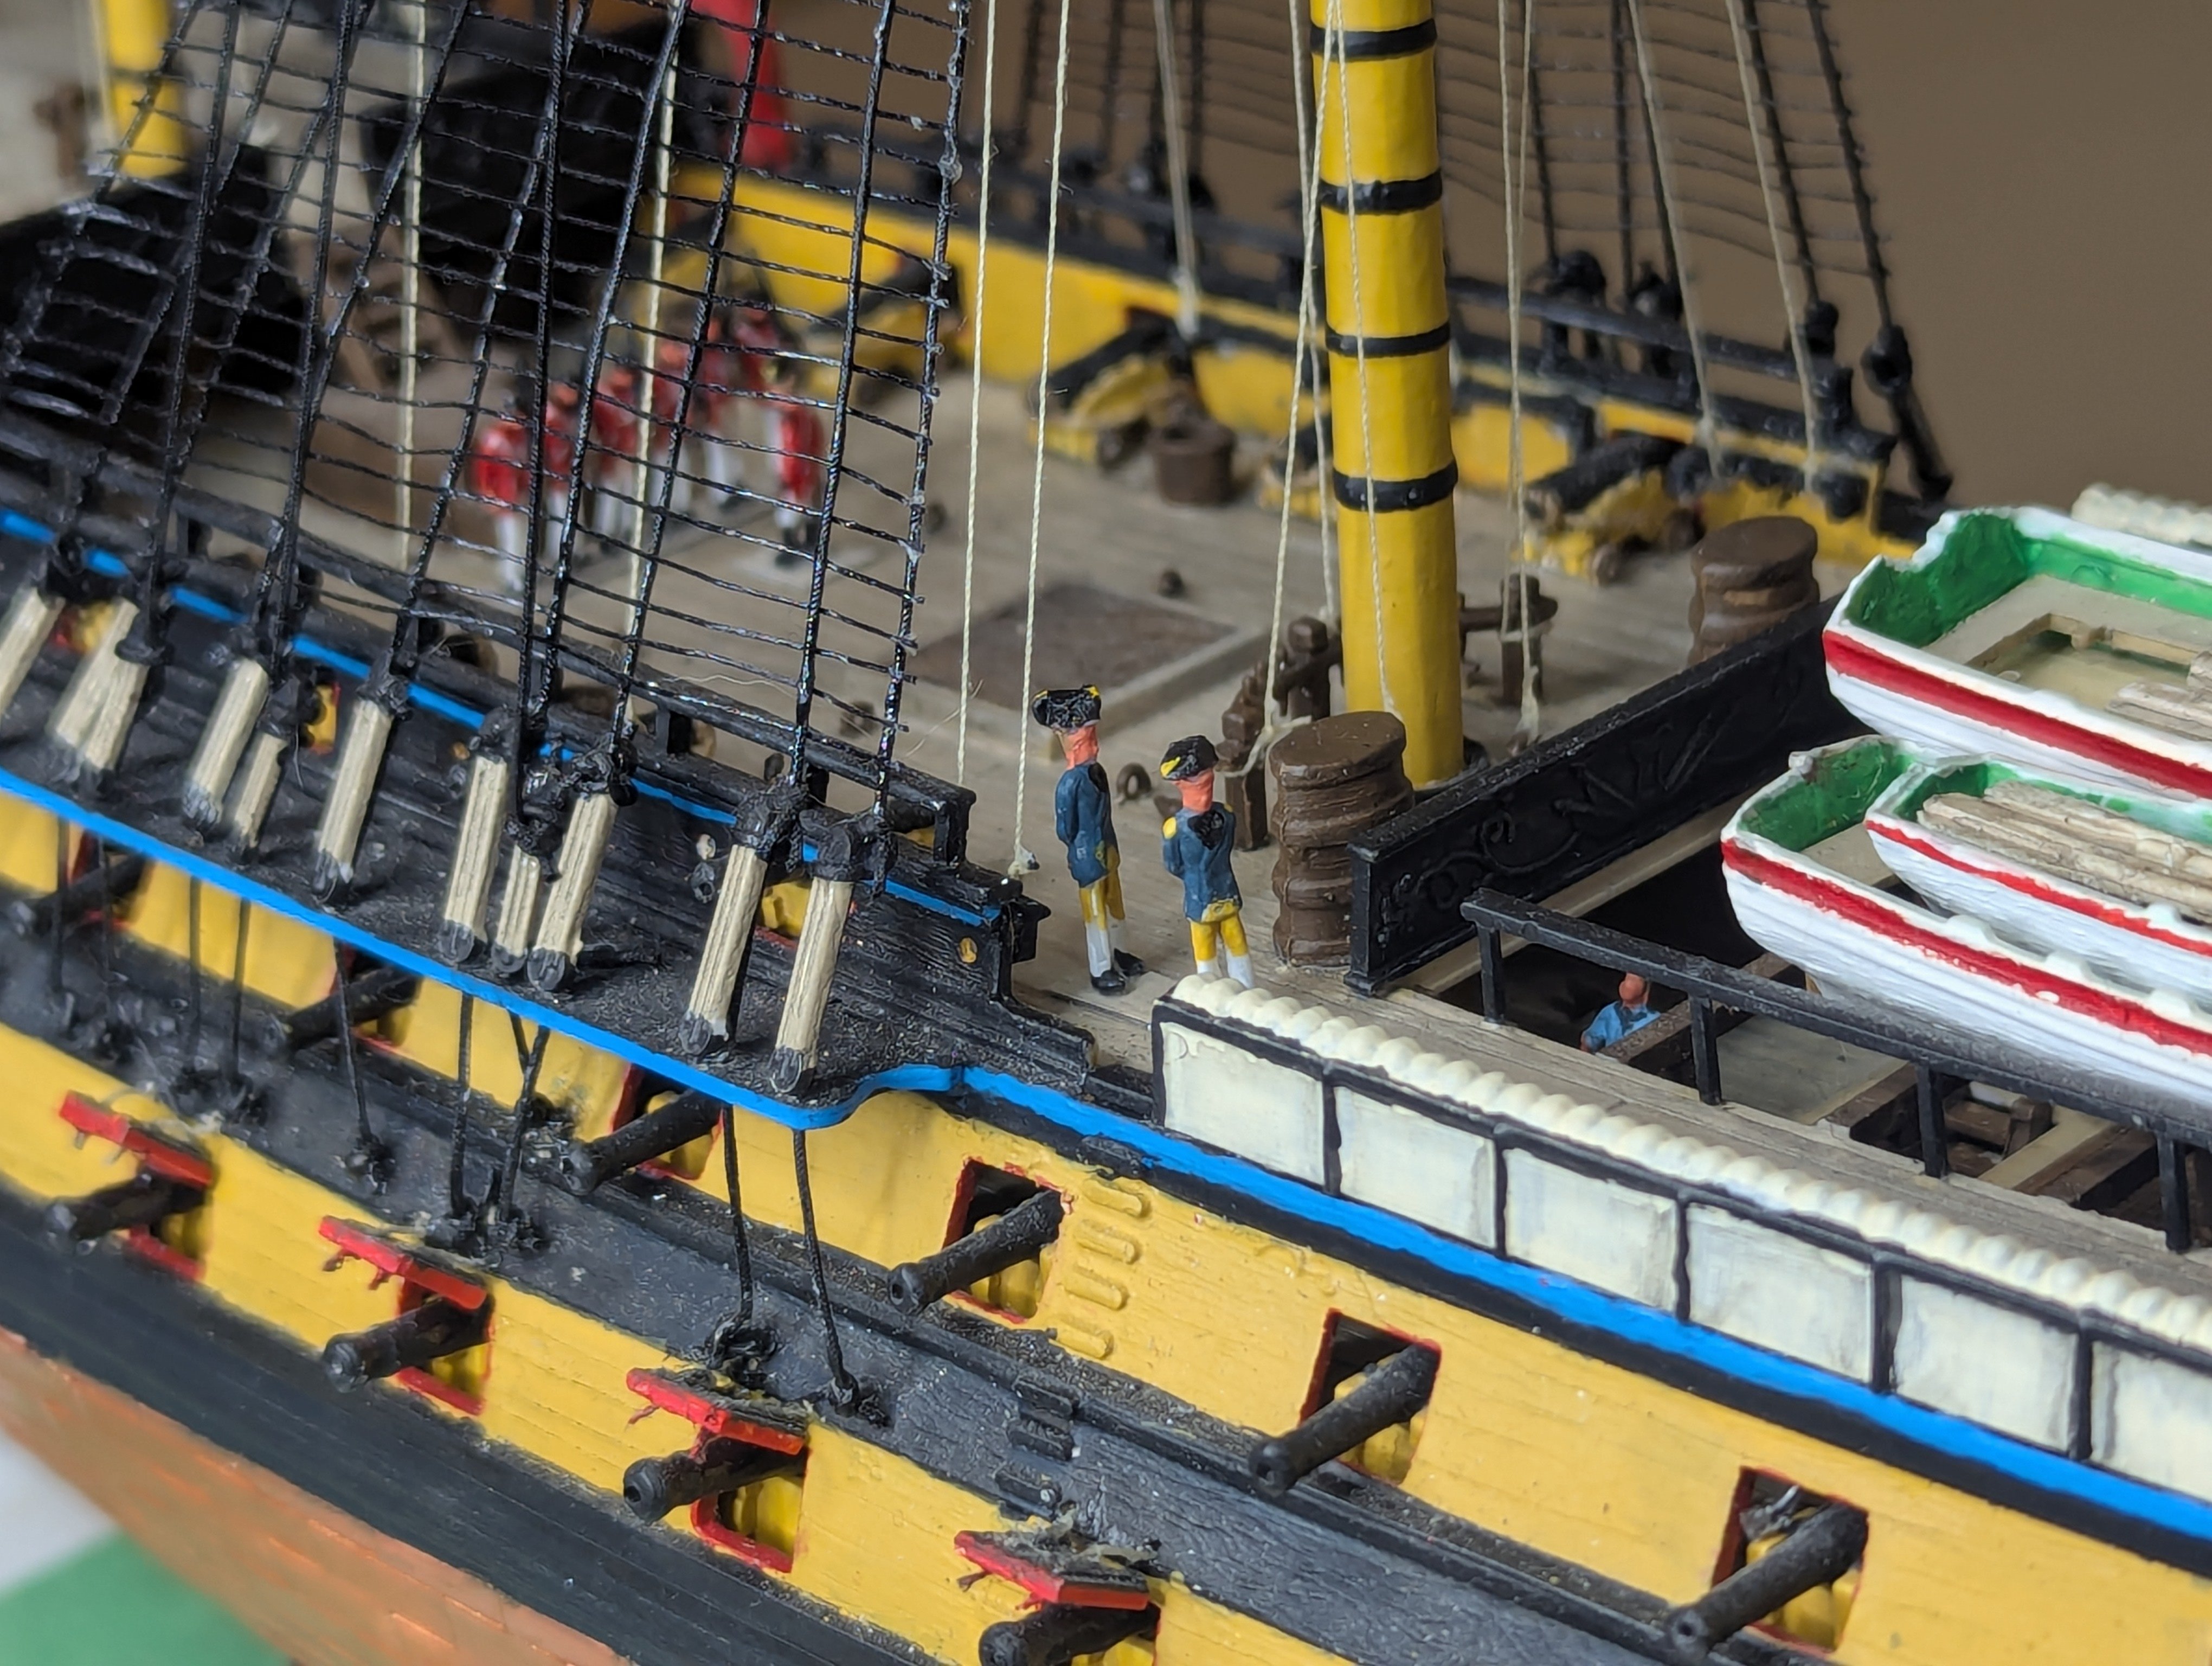
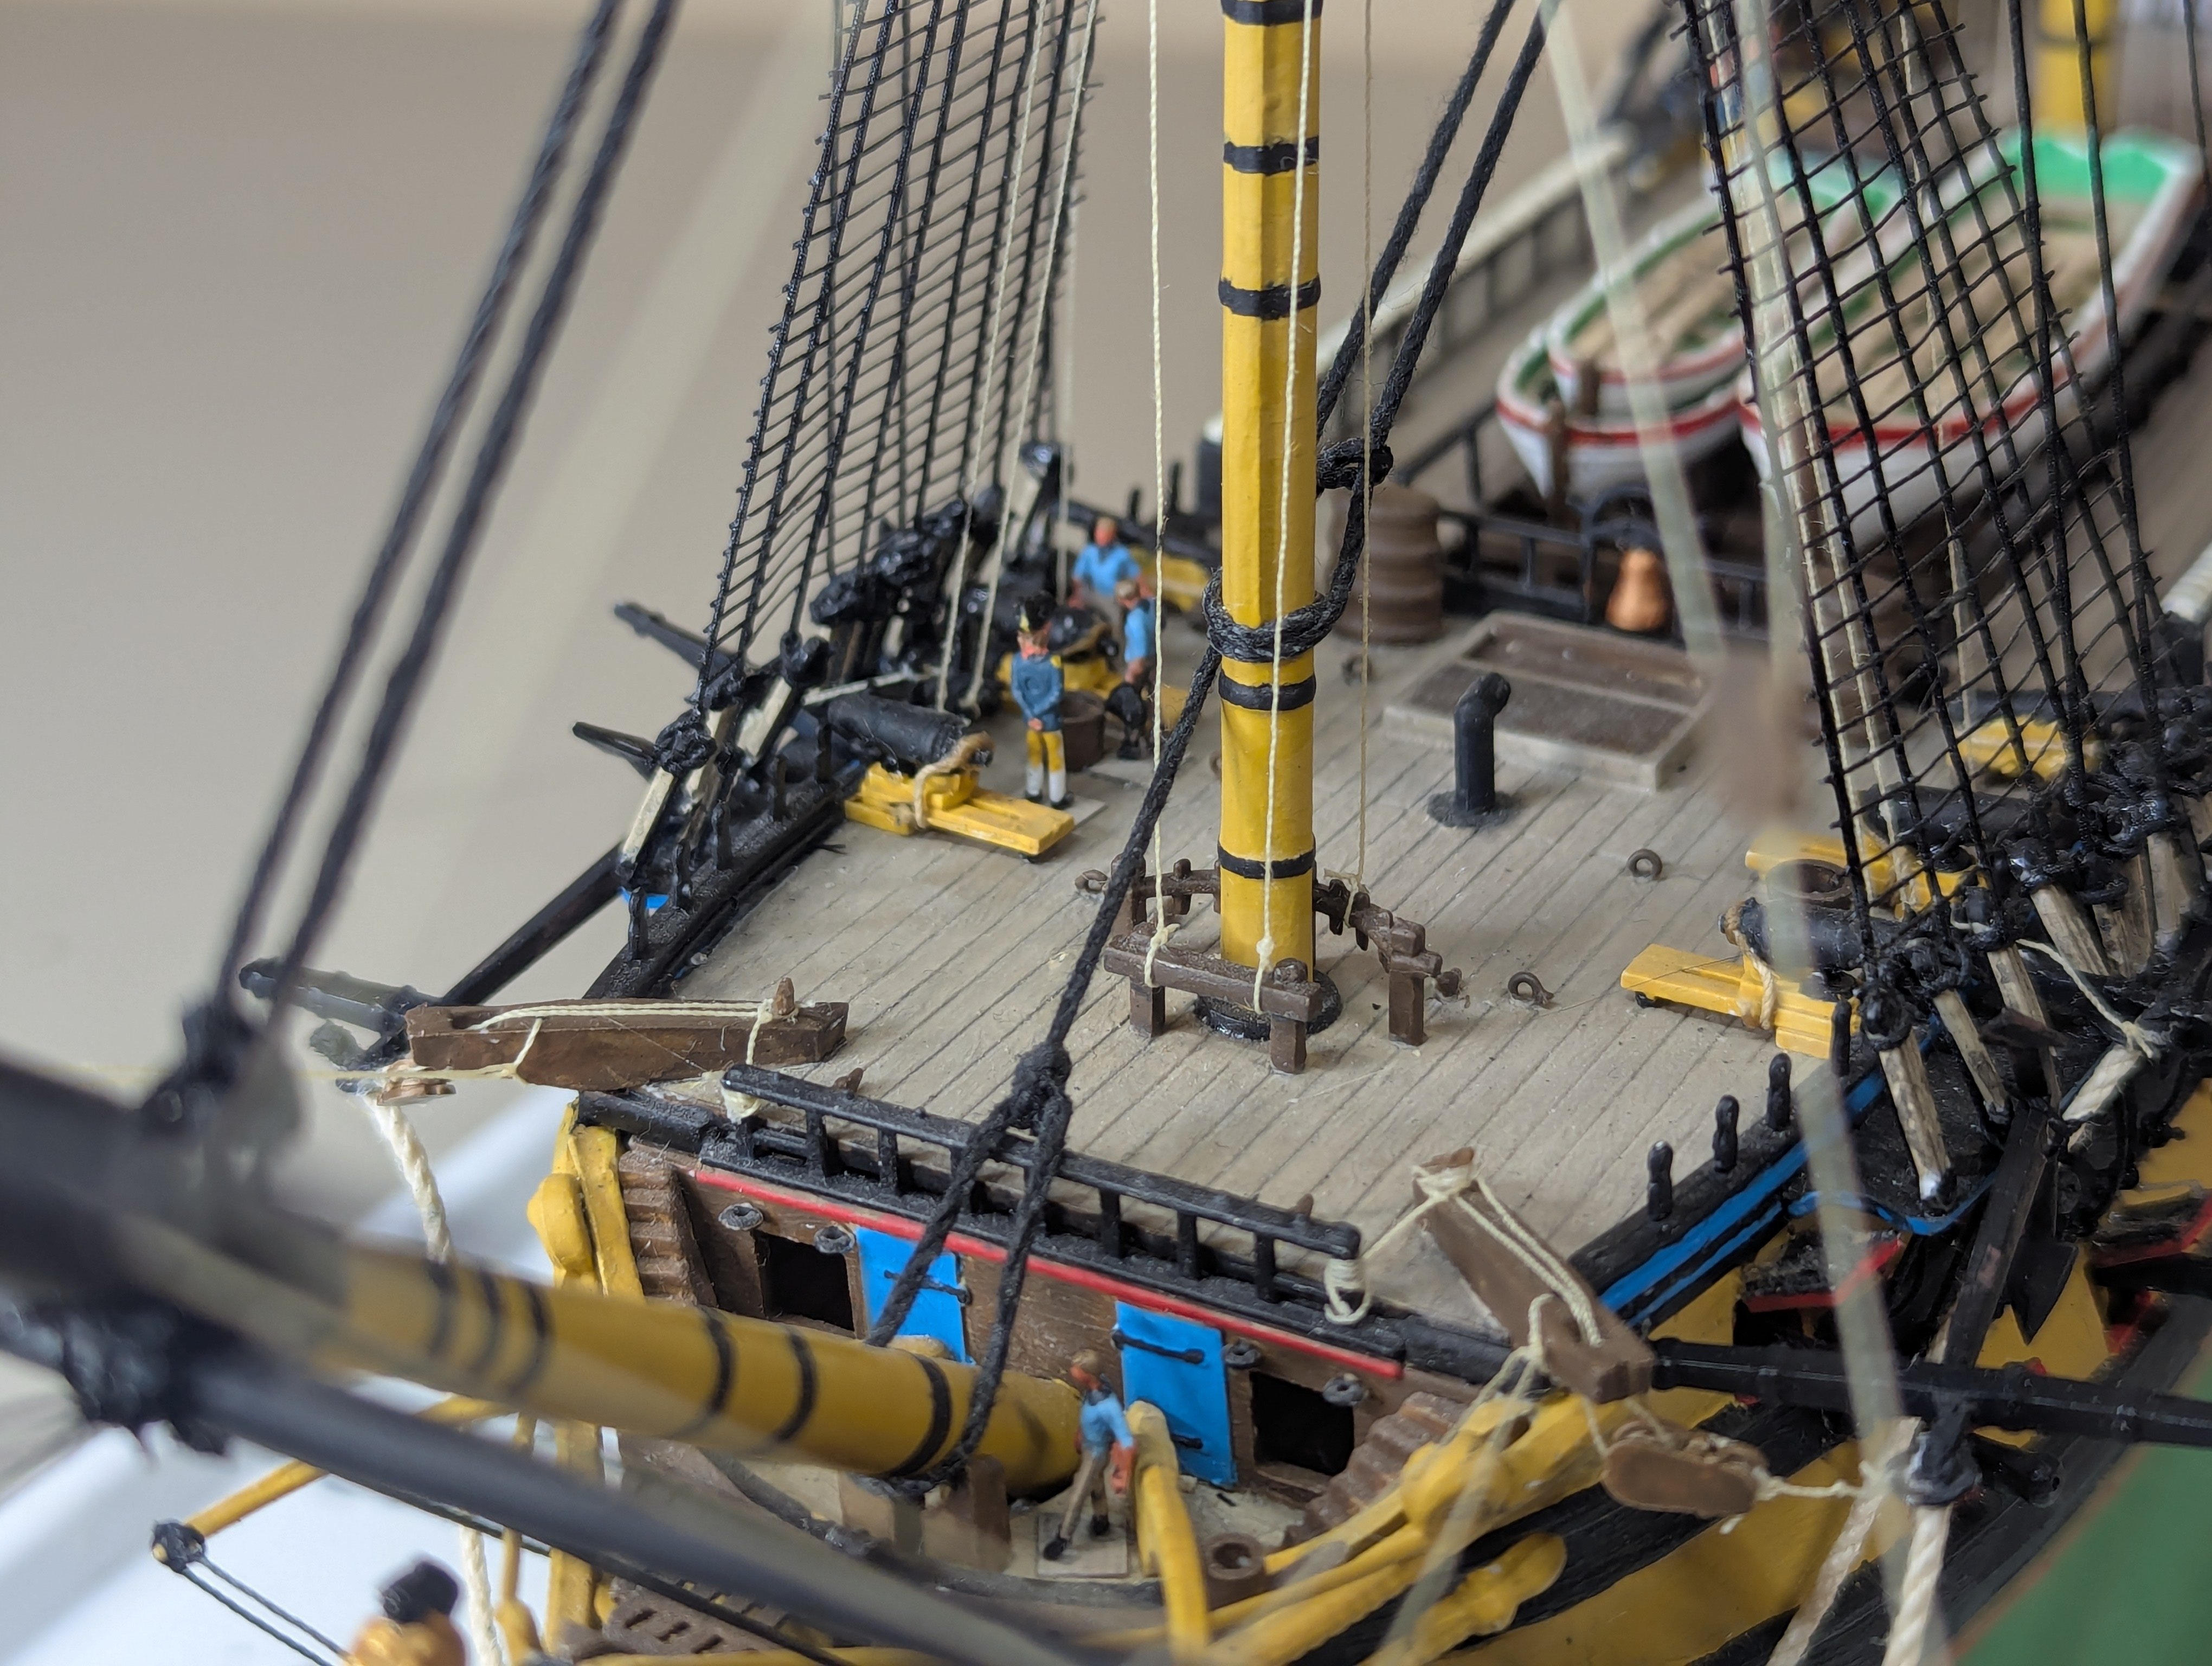
 We have our crew. Captain (athwartship hat, twin epaulettes), three lieutenants (fore-aft hat, single epaulette), a file of marines with their officer, nine seamen and two female visitors. I put them onto colour-matching bases (clear plastic, primed and painted) so I can easily stand them up. I’ve used a very dilluted kid’s glue to place them, so I can move them around later if I wish. I have to wonder if the ship’s boats below are not to scale. The largest looks like a yacht. I'm lefthanded, and so are my Marines. Their Brown Bess muskets are actually the walking stick and arm cut off the same figure as their officer.
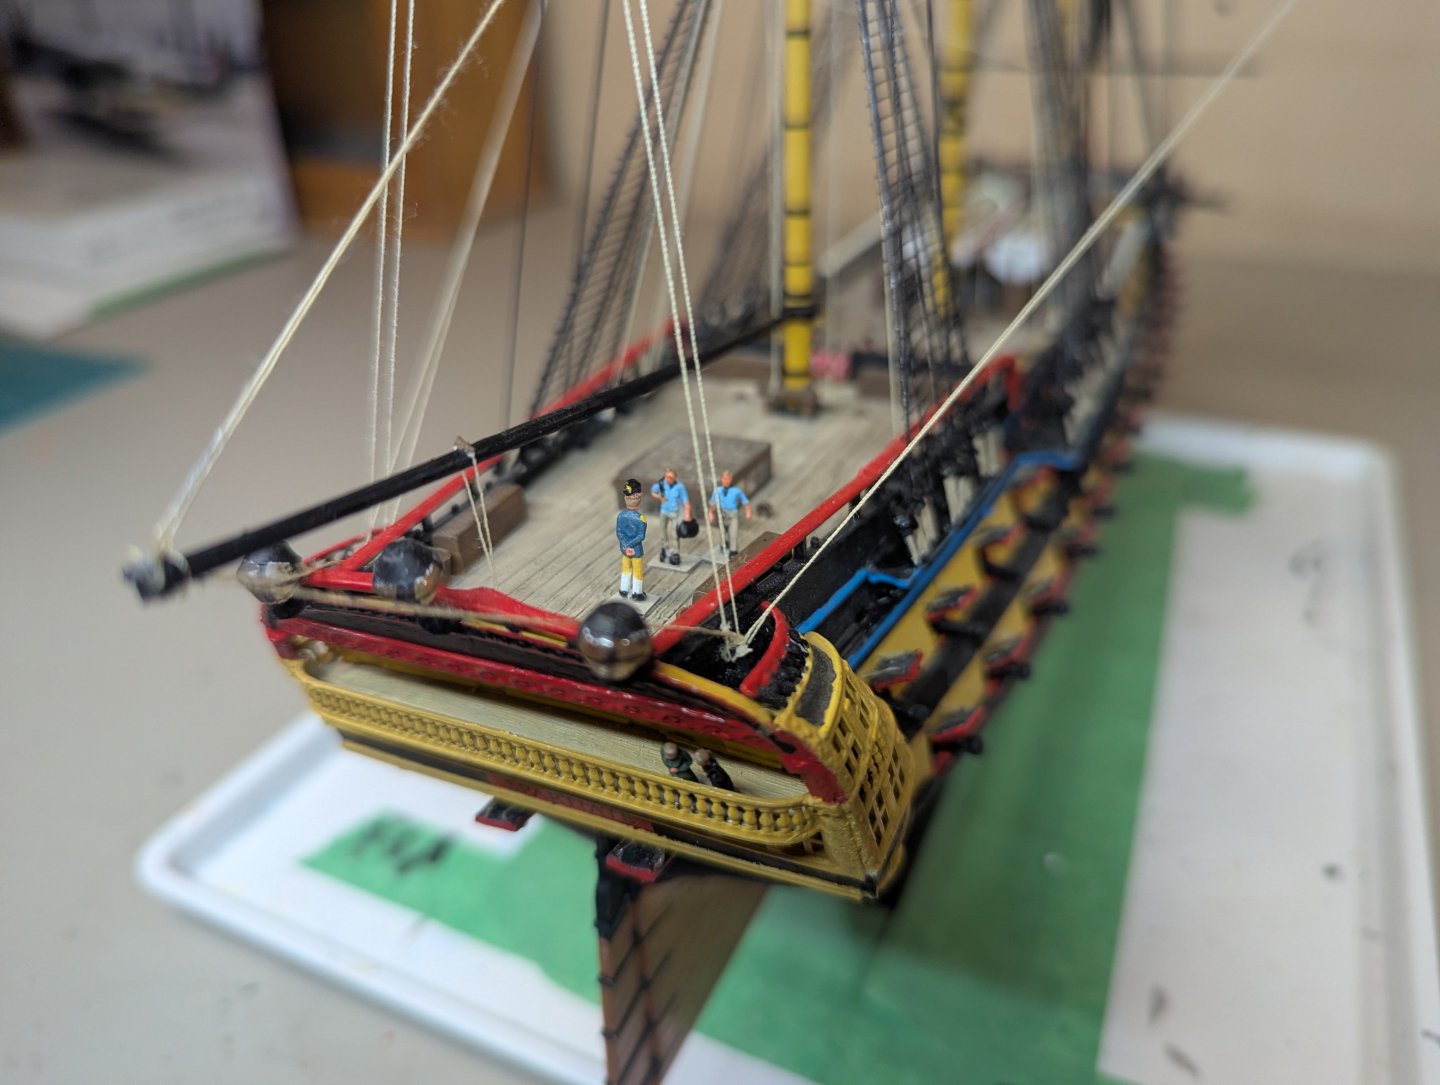

.thumb.jpg.4f2b82076969ee5a92c8dddd6a00d360.jpg)
.thumb.jpg.5b91b4045769abc960234133282ccdba.jpg)
-
robdurant reacted to a post in a topic:
HMS Spartiate by Admiral Beez - FINISHED - Heller - 1/150 - PLASTIC - kit-bashing the Heller Le Superbe
-
Clark reacted to a post in a topic:
HMS Spartiate by Admiral Beez - FINISHED - Heller - 1/150 - PLASTIC - kit-bashing the Heller Le Superbe
-
 Admiral Beez reacted to a post in a topic:
HMS Spartiate by Admiral Beez - FINISHED - Heller - 1/150 - PLASTIC - kit-bashing the Heller Le Superbe
Admiral Beez reacted to a post in a topic:
HMS Spartiate by Admiral Beez - FINISHED - Heller - 1/150 - PLASTIC - kit-bashing the Heller Le Superbe
-
Admiral Beez reacted to a post in a topic:
HMS Spartiate by Admiral Beez - FINISHED - Heller - 1/150 - PLASTIC - kit-bashing the Heller Le Superbe
-
Admiral Beez reacted to a post in a topic:
HMS Spartiate by Admiral Beez - FINISHED - Heller - 1/150 - PLASTIC - kit-bashing the Heller Le Superbe
-
Admiral Beez reacted to a post in a topic:
HMS Spartiate by Admiral Beez - FINISHED - Heller - 1/150 - PLASTIC - kit-bashing the Heller Le Superbe
-
Admiral Beez reacted to a post in a topic:
HMS Spartiate by Admiral Beez - FINISHED - Heller - 1/150 - PLASTIC - kit-bashing the Heller Le Superbe
-
Admiral Beez reacted to a post in a topic:
HMS Spartiate by Admiral Beez - FINISHED - Heller - 1/150 - PLASTIC - kit-bashing the Heller Le Superbe
-
Admiral Beez reacted to a post in a topic:
HMS Spartiate by Admiral Beez - FINISHED - Heller - 1/150 - PLASTIC - kit-bashing the Heller Le Superbe
-
Admiral Beez reacted to a post in a topic:
HMS Spartiate by Admiral Beez - FINISHED - Heller - 1/150 - PLASTIC - kit-bashing the Heller Le Superbe
-
Admiral Beez reacted to a post in a topic:
HMS Spartiate by Admiral Beez - FINISHED - Heller - 1/150 - PLASTIC - kit-bashing the Heller Le Superbe
-
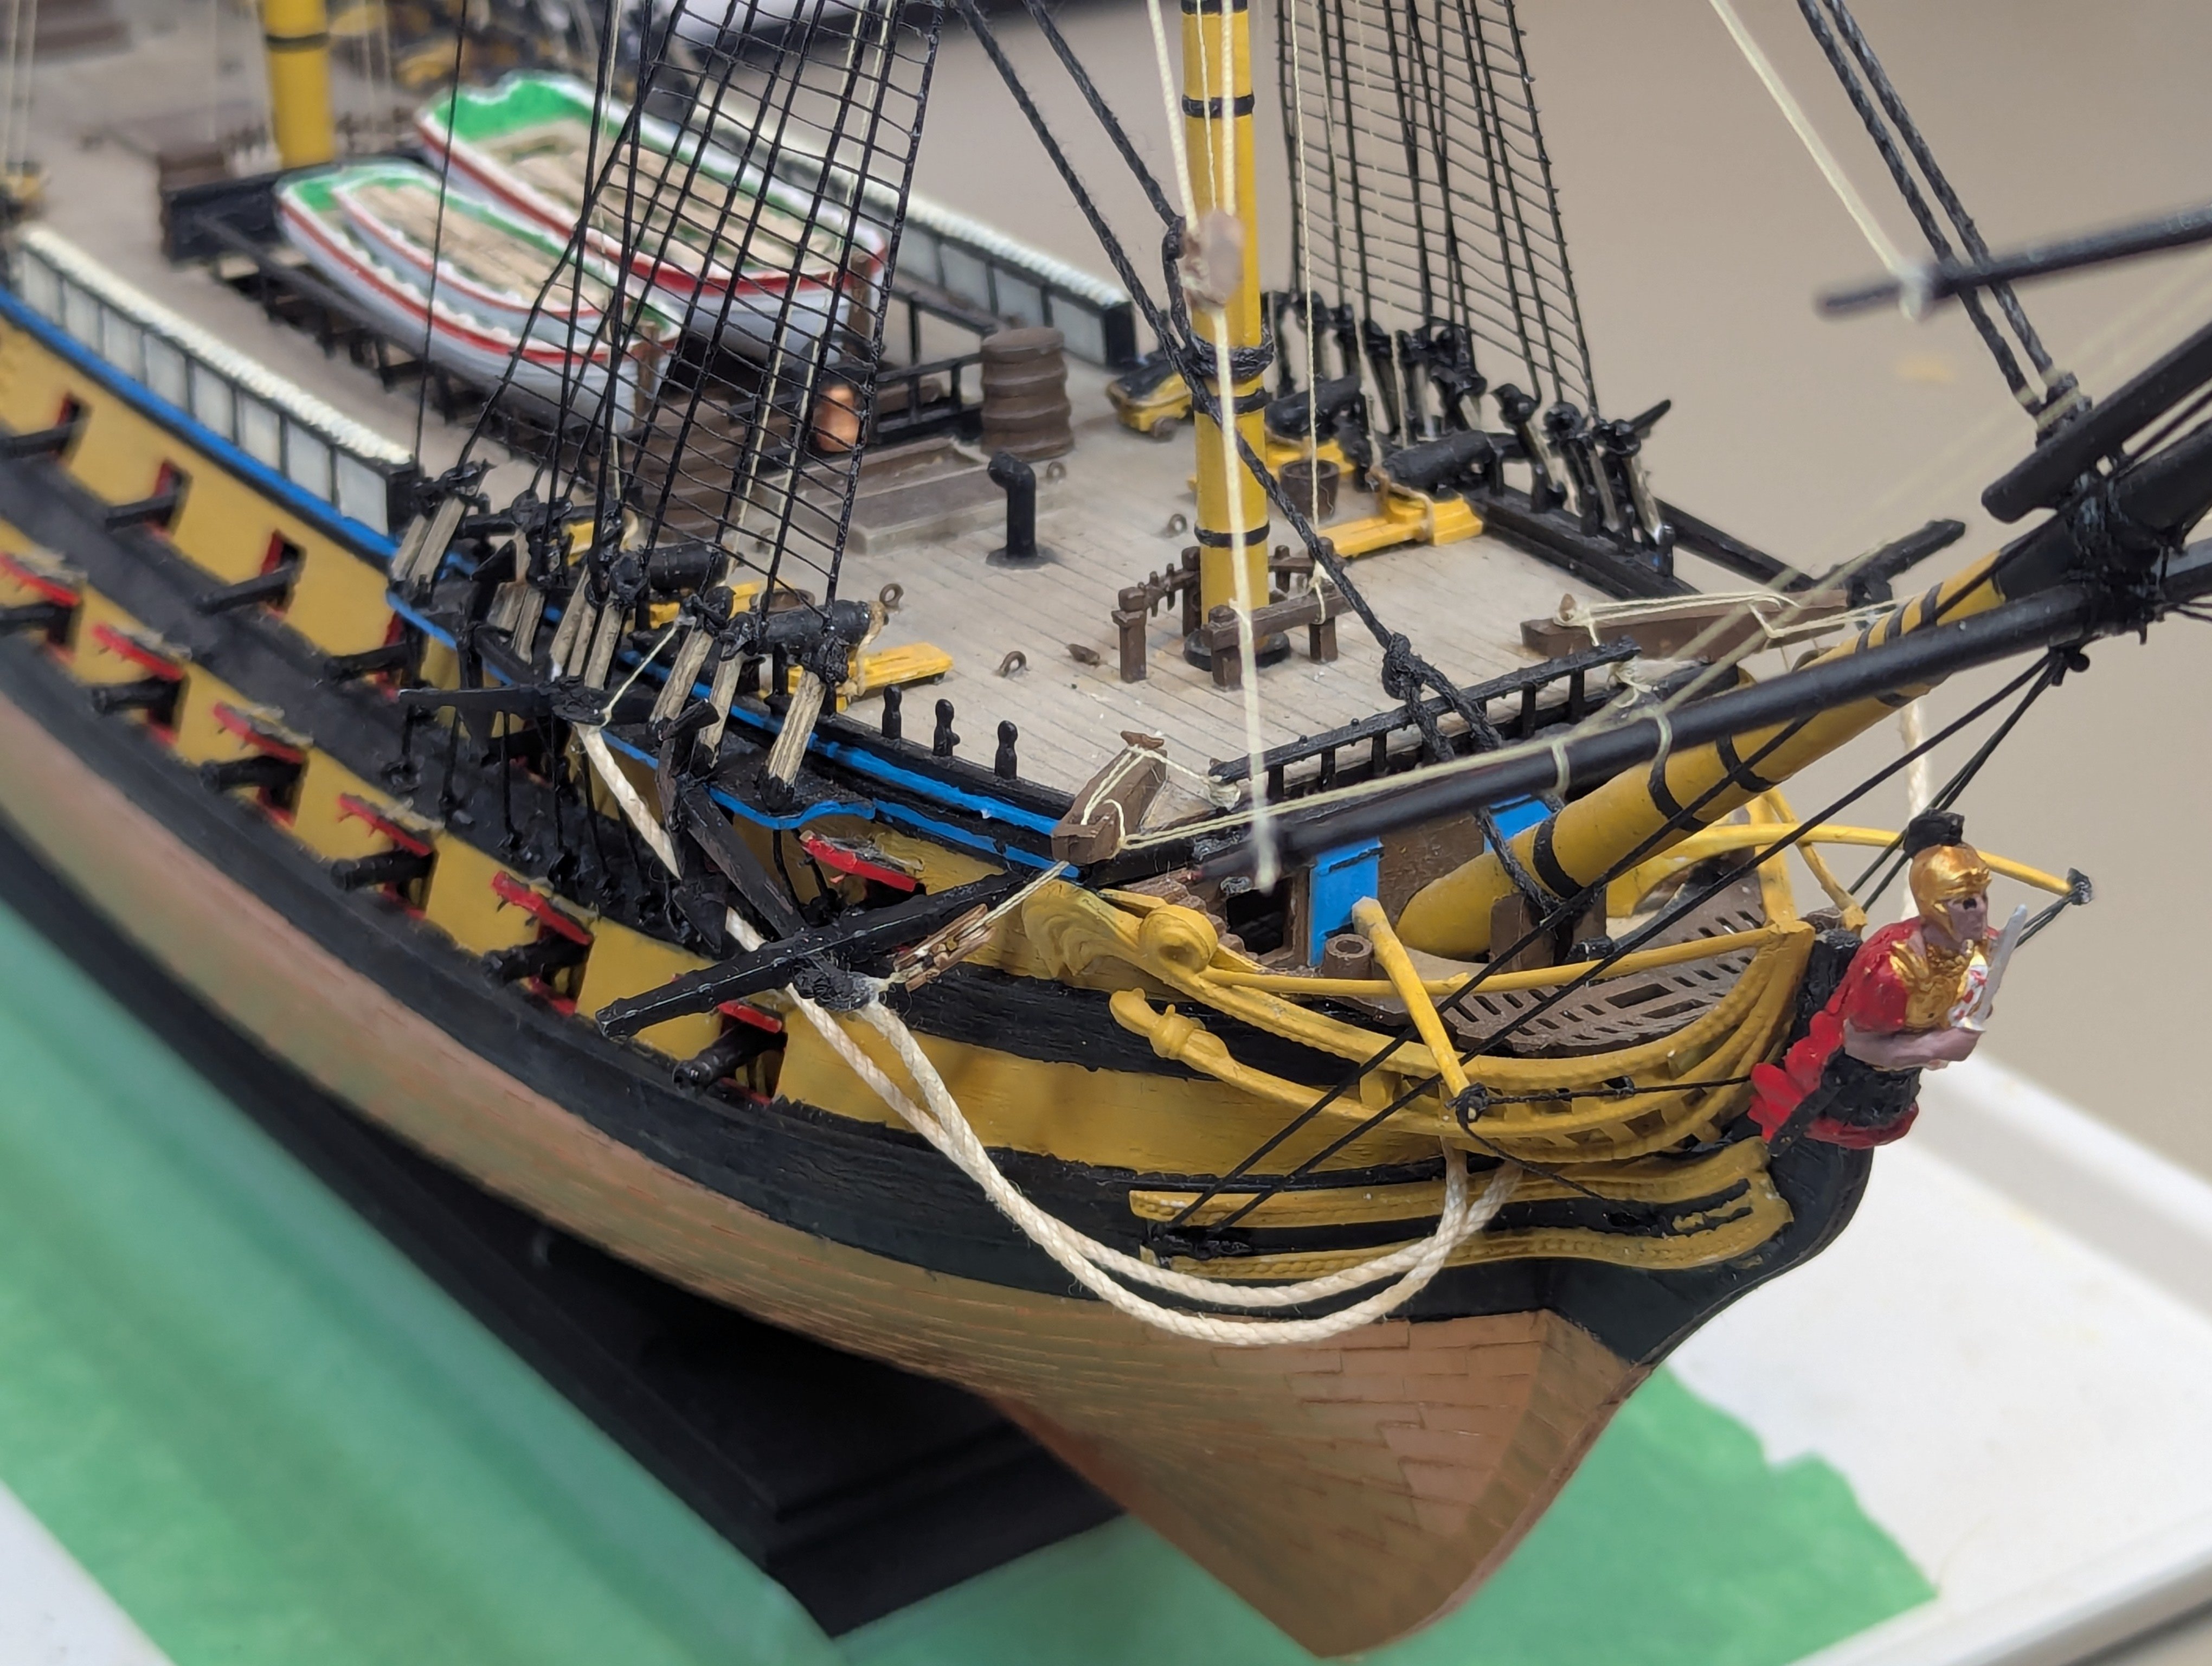
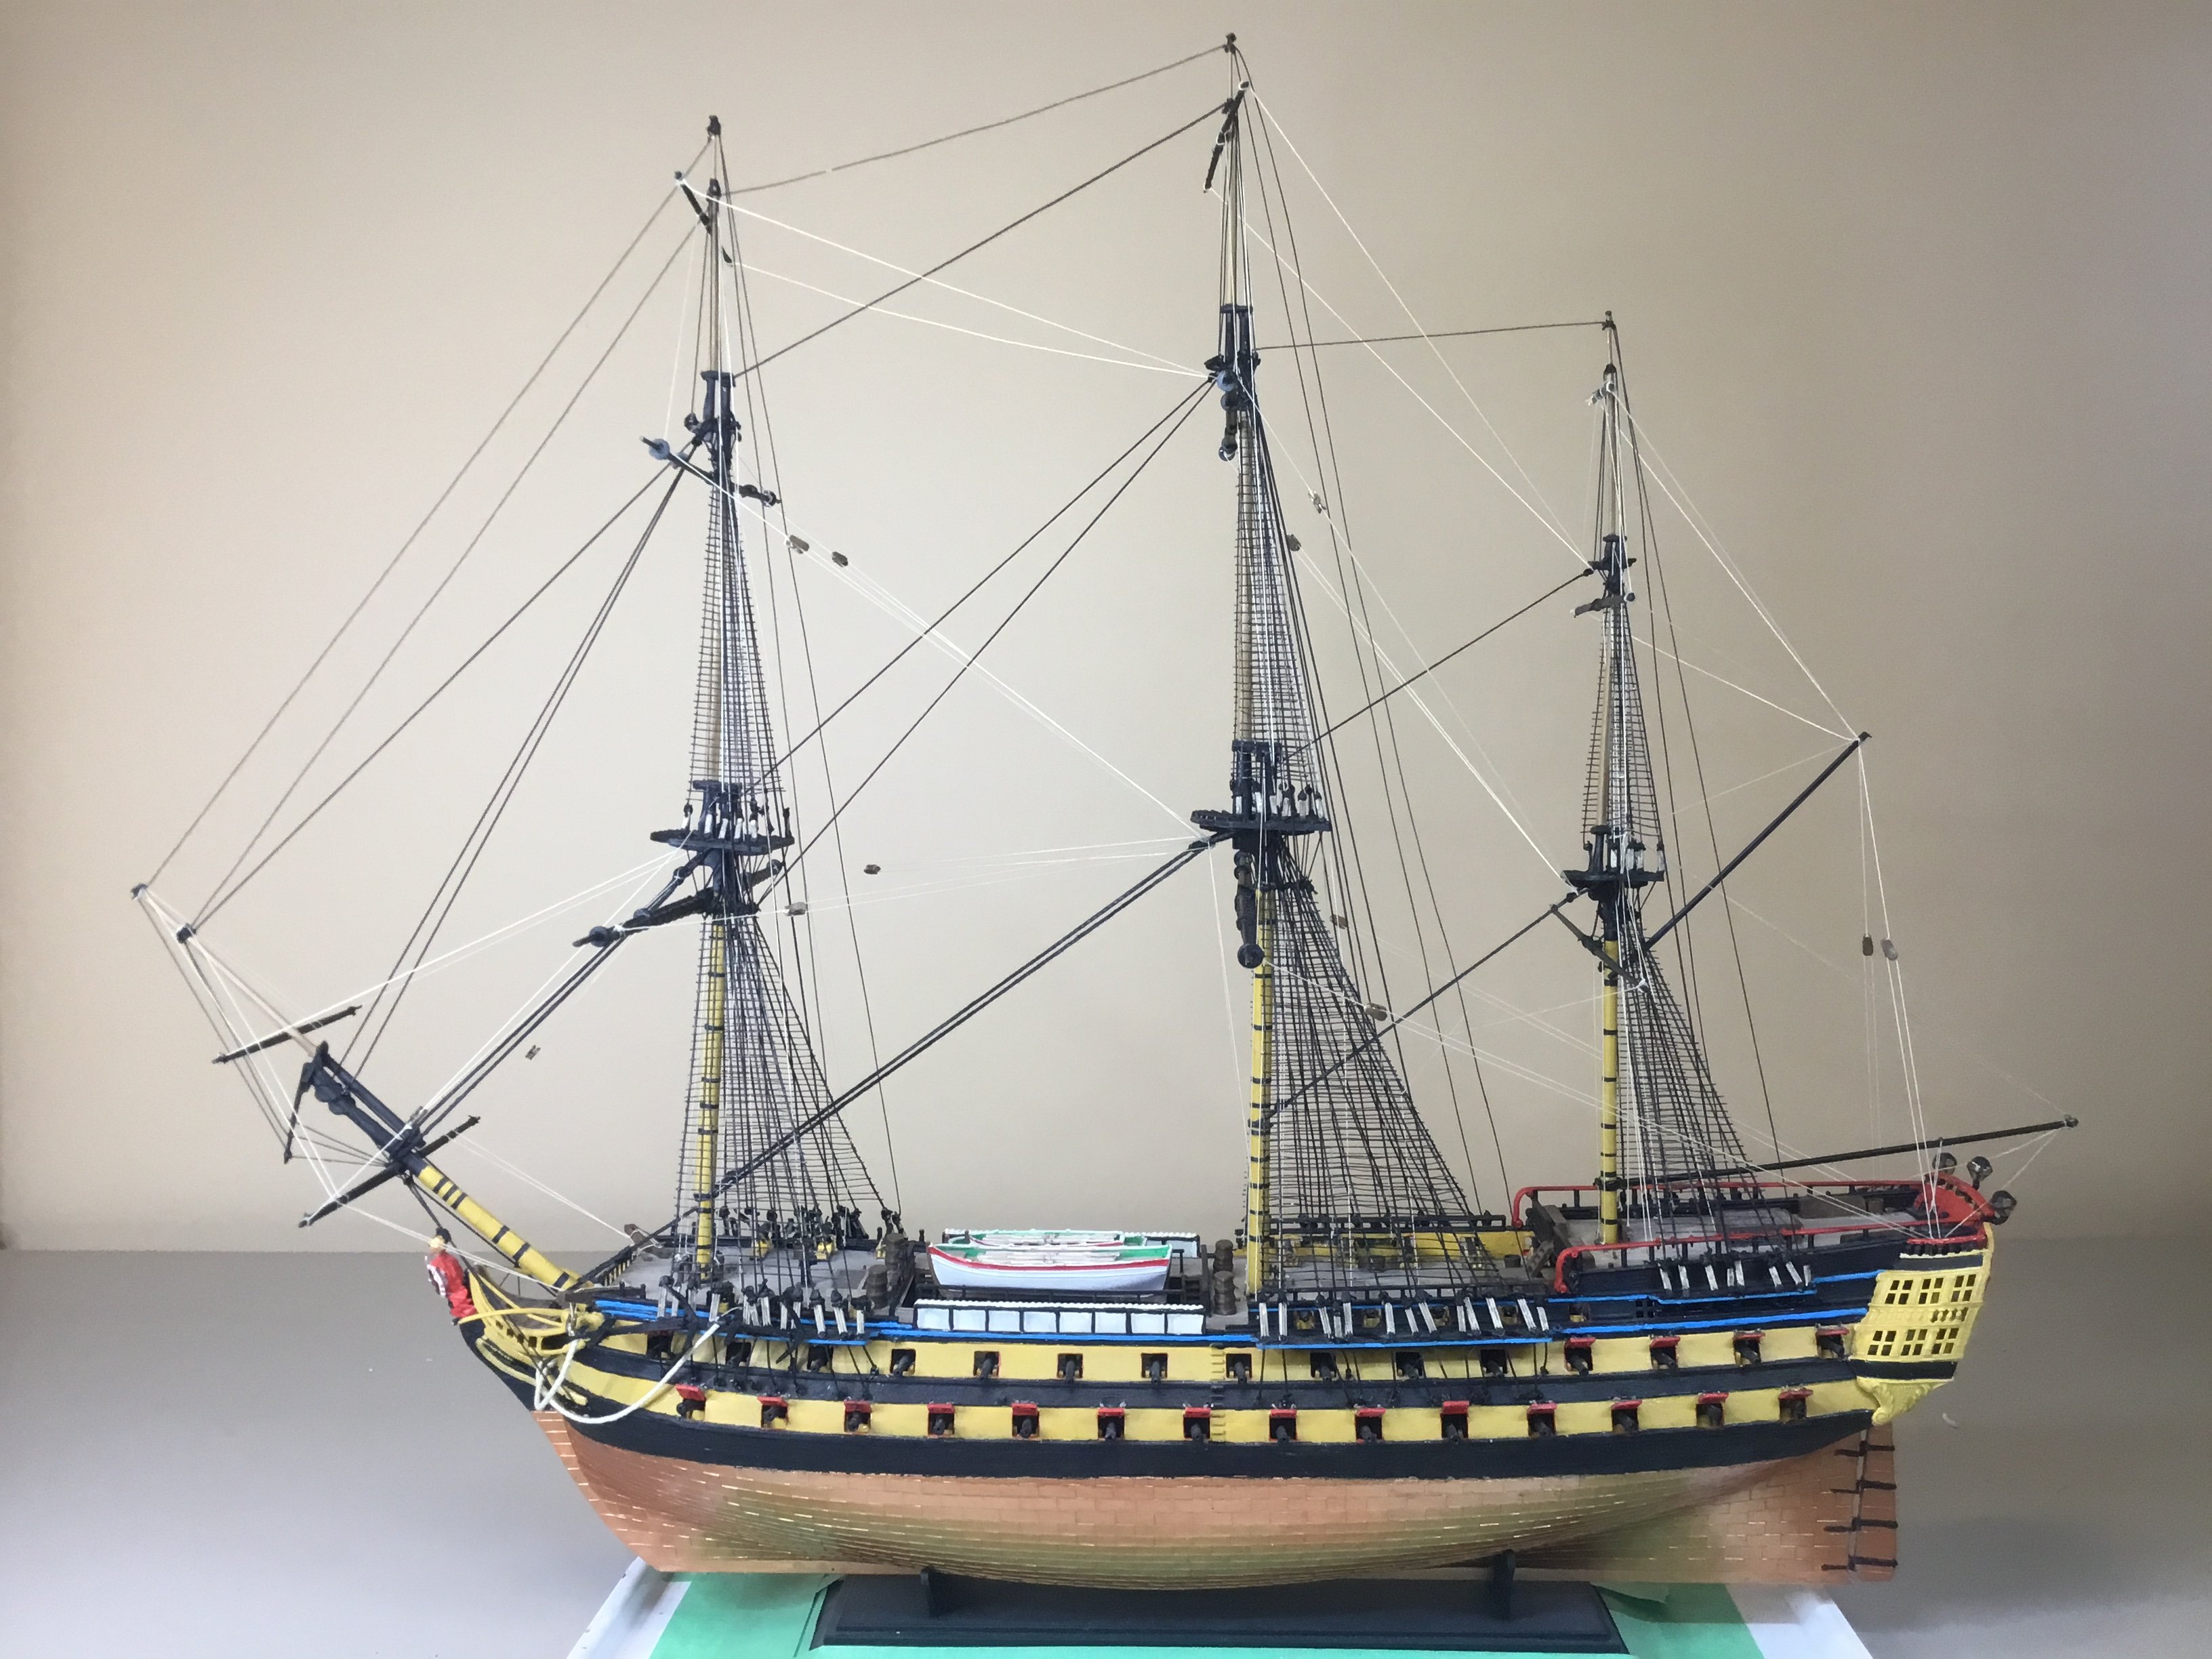
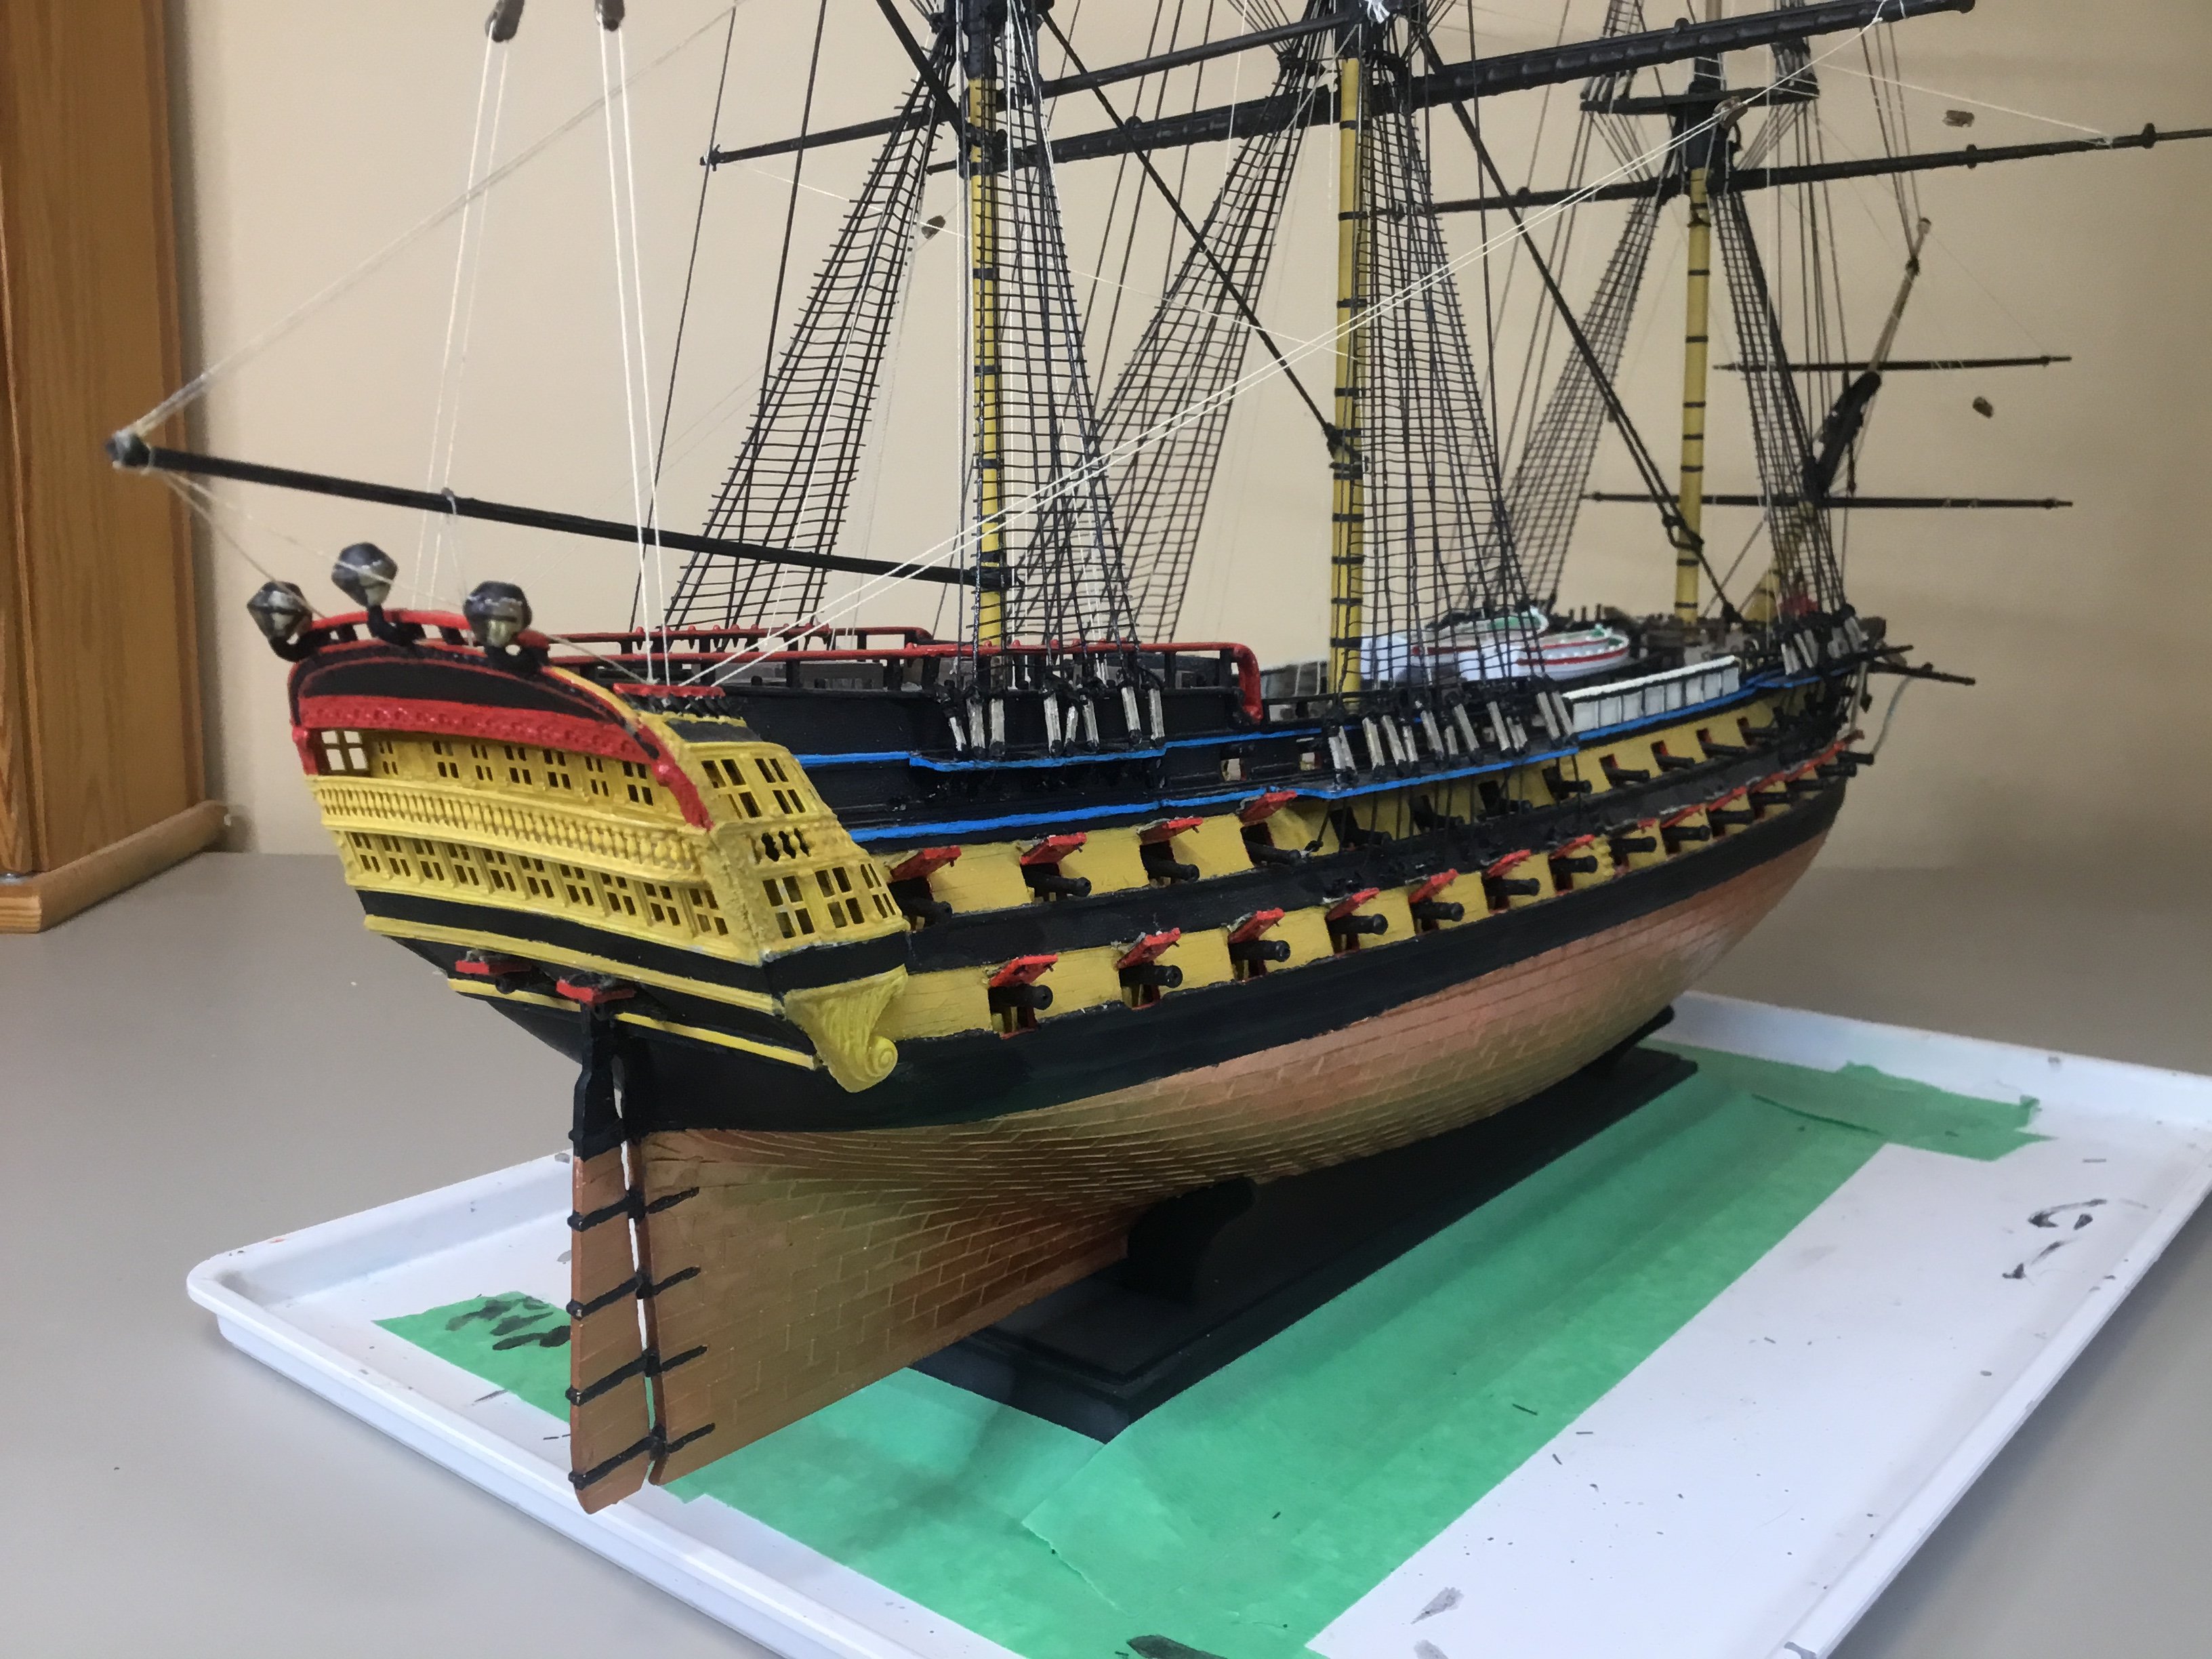
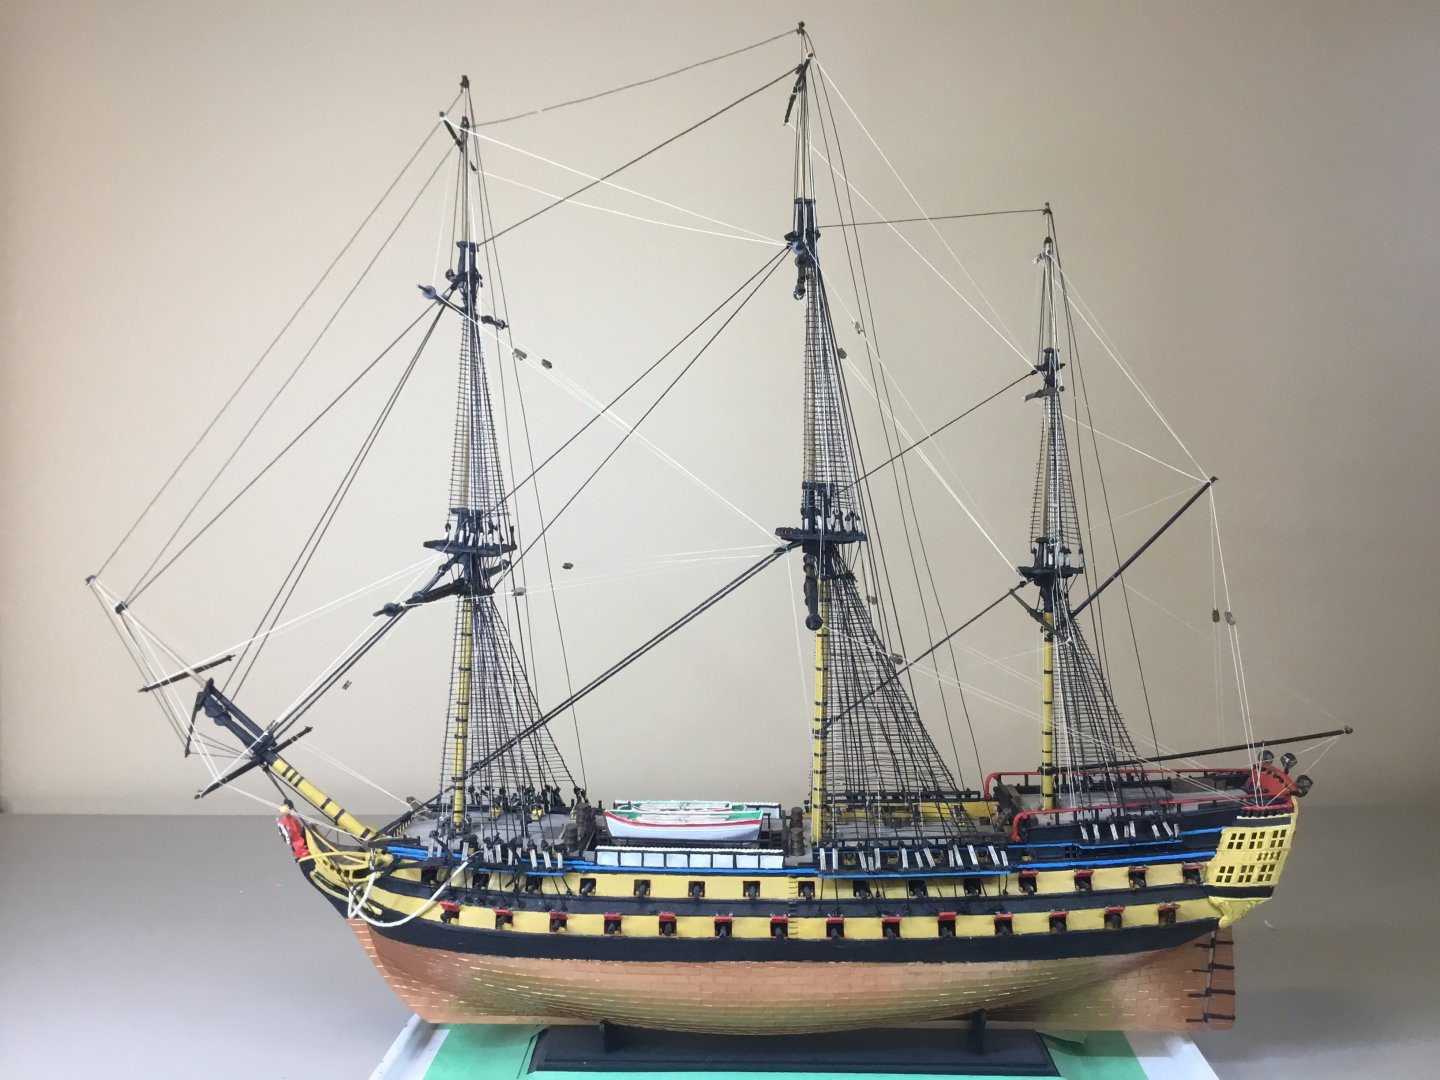
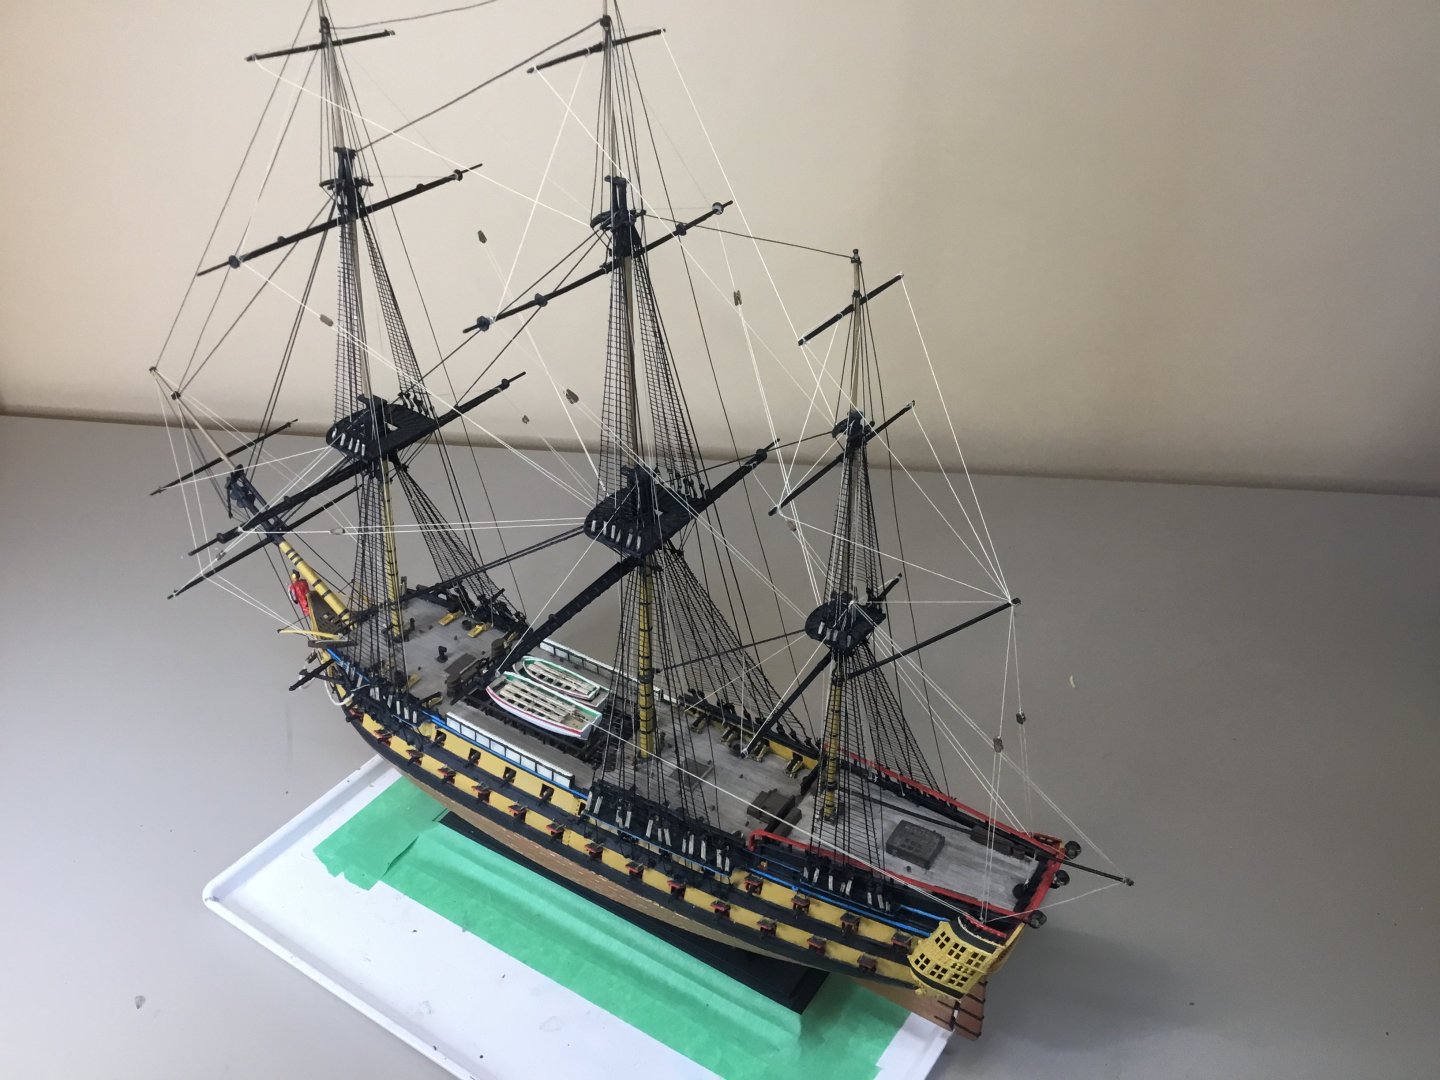
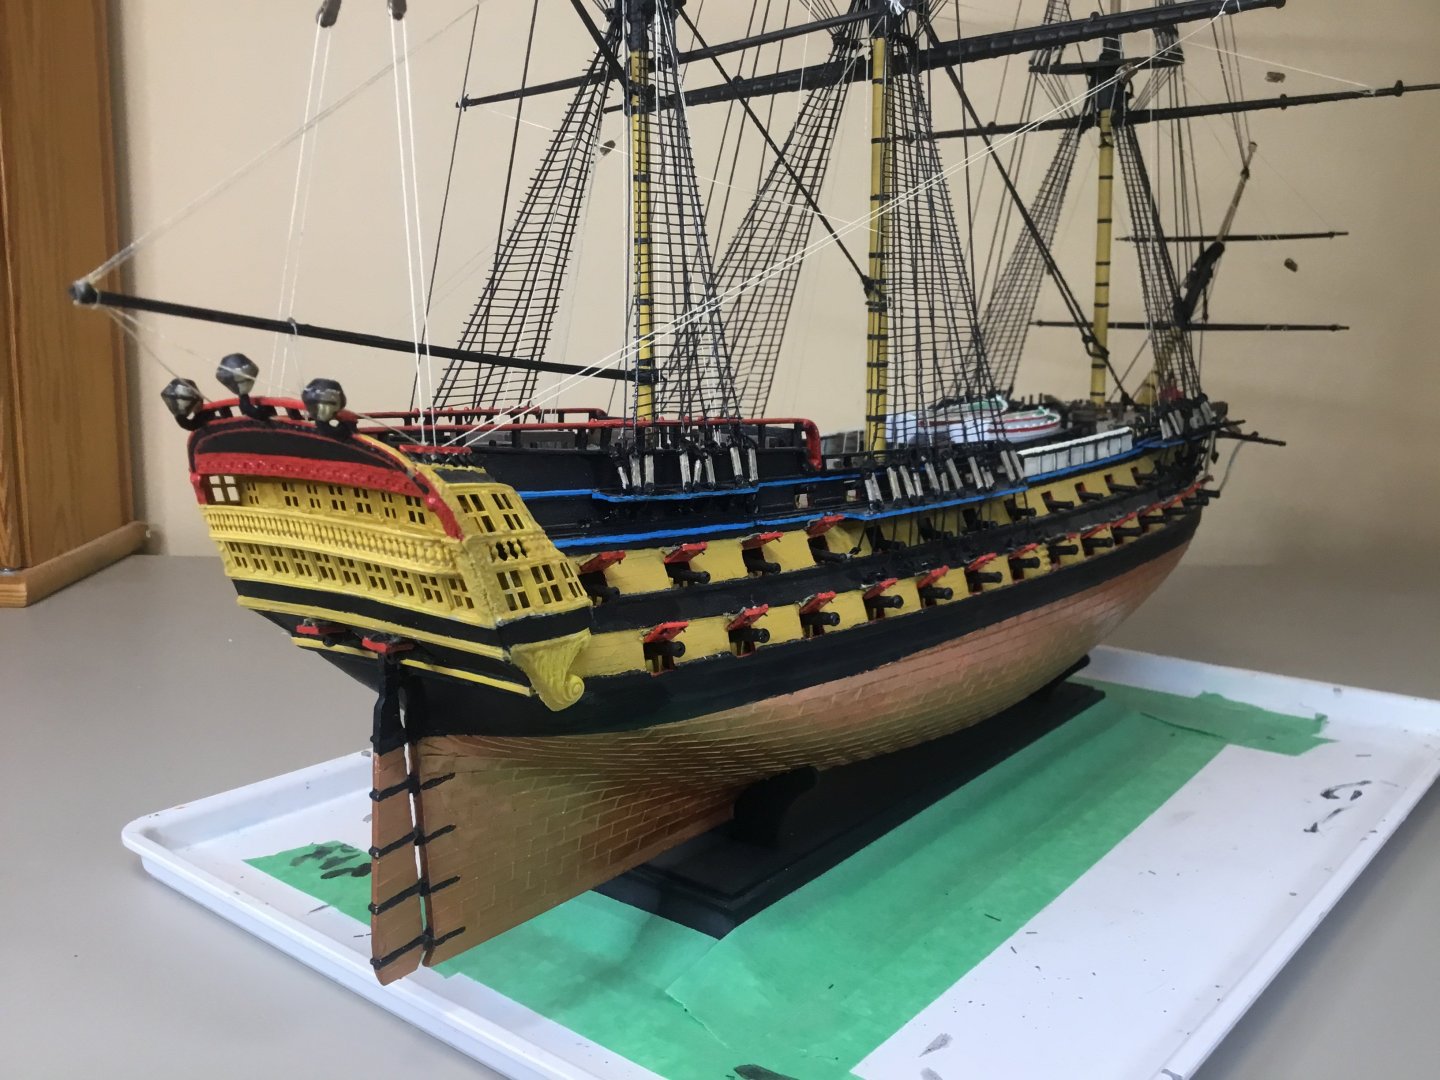
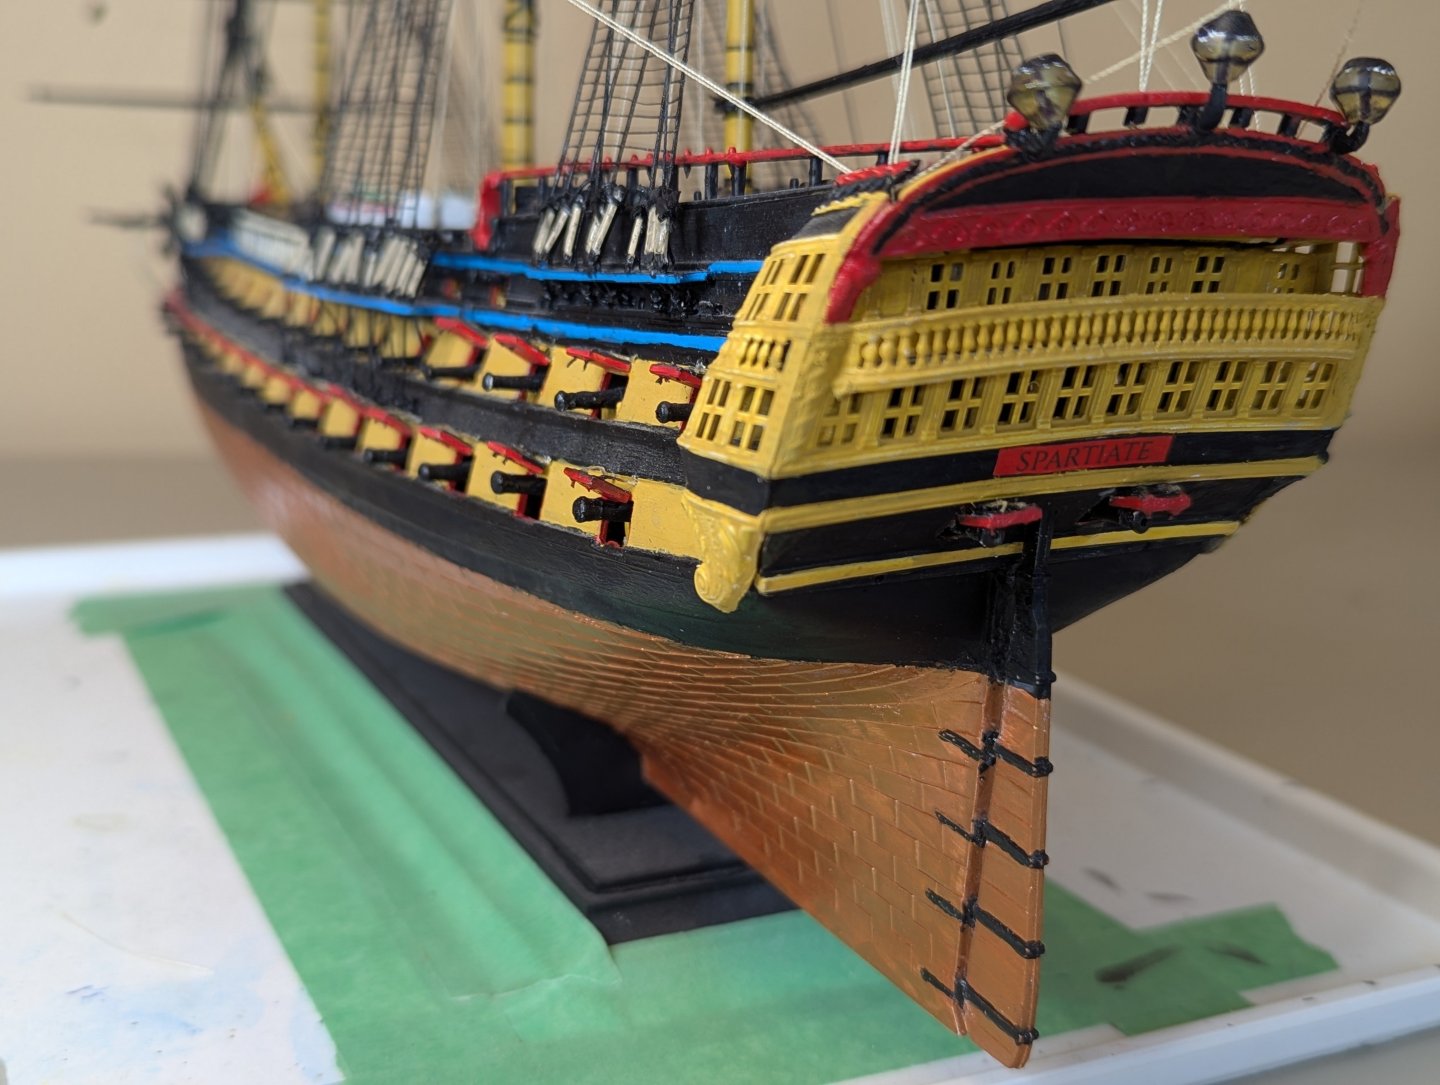
And that’s a wrap. With the installation of the four anchors, HMS Spartiate (74 guns), launched in 1797 at Toulon, captured in 1798 by Nelson at the Nile, and later flagship of the Royal Navy’s South America station until 1842, is now complete. She joined Nelson’s column at Trafalgar, where, alongside HMS Minotaur, she captured the Spanish Neptuno (80 guns). With battle scars still visible, Spartiate’s flag from the battle was sold for £384,000 at auction in London on Trafalgar Day, 21 October 2009. The final touch, with her nameboard in place. Cardstock painted in the same red acrylic as the ship, then run through the laser printer on Google Docs using Cinzel (Medium) font, which was ChatGPT's recommended font for Napoleonic era Royal Navy nameboards. I have some 1:150 scale people (railway N-Scale) that I may add later, but the ship project is done. Thank you @Blue Ensign, @TomRigg, @PqLear, @greenskin, @Beef Wellington, @robdurant and everyone for your advice and encouragement over these more than four years. See you on the next build, the kitbashing of Harugo's 1:350 scale IJN Mikasa into HMS Formidable. I'm looking forward to builds that do not have rigging beyond signal hoists and wireless lines.


-
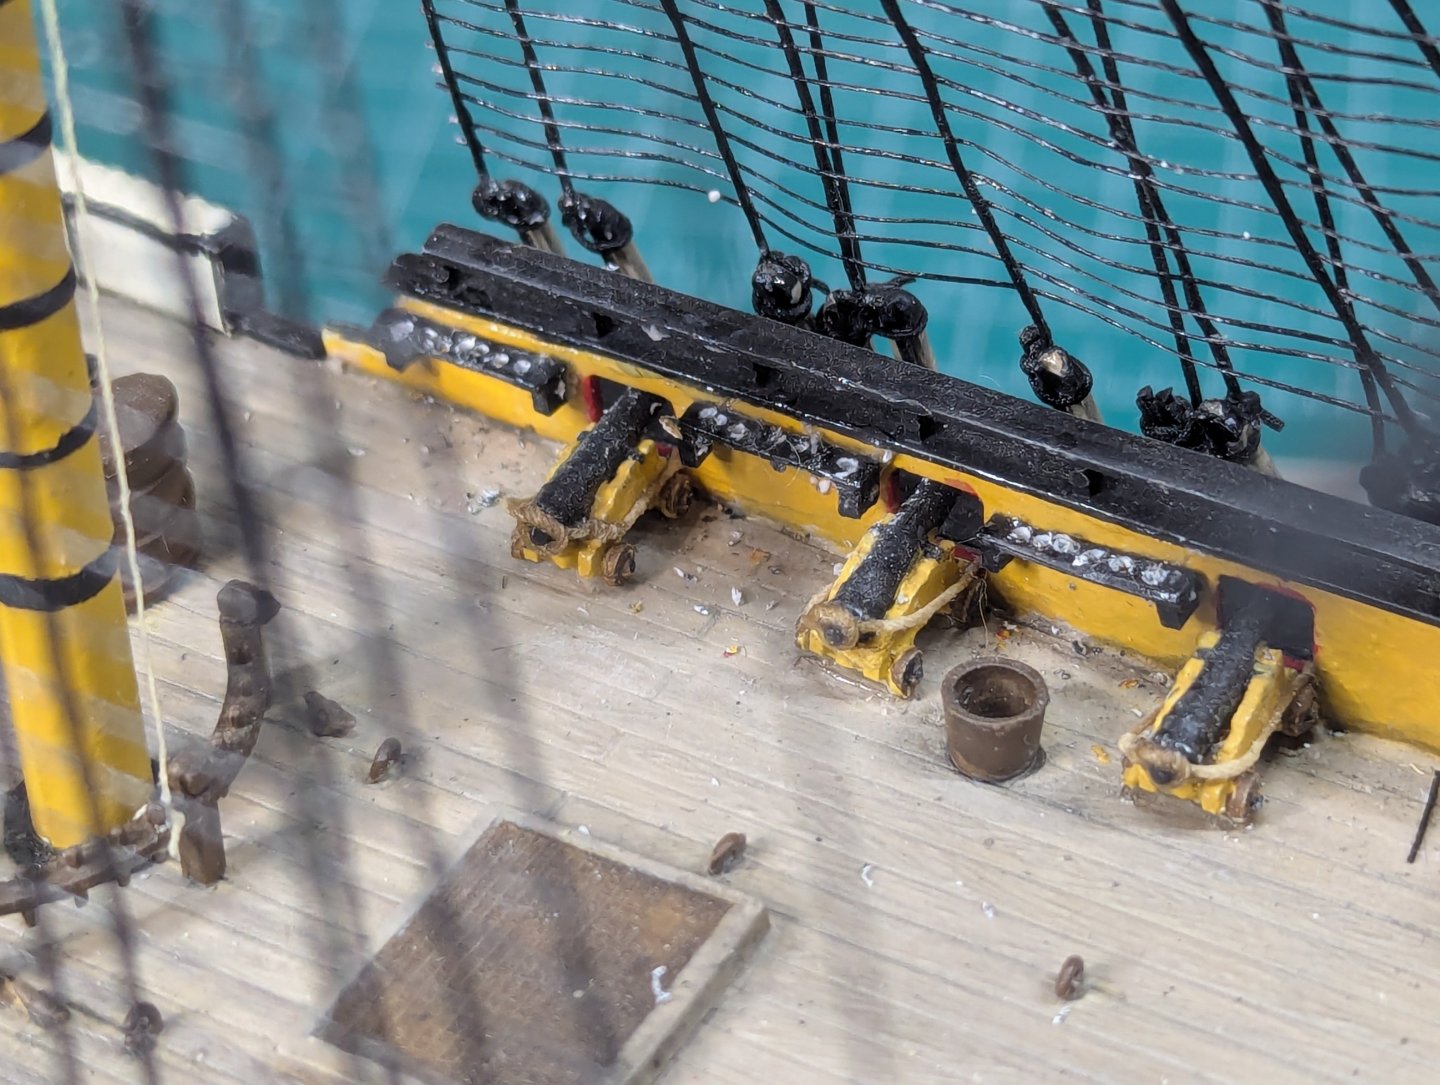
Merry Christmas all. I’m now installing the blocks for the running rigging. Moving along nicely. The blocks that come with the kit are oversized, but they’re easy to work with.
-
Nail polish remover (acetone) will quickly remove CA from your tools and anything else. My tweezers sometimes get clogged with CA, so I keep a glass jar of my daughter's nail polish remover with stainless steel balls in the bottom to raise the level. I then leave my CA encrusted tools in the jar for perhaps ten minutes and they come out looking brand new.
-
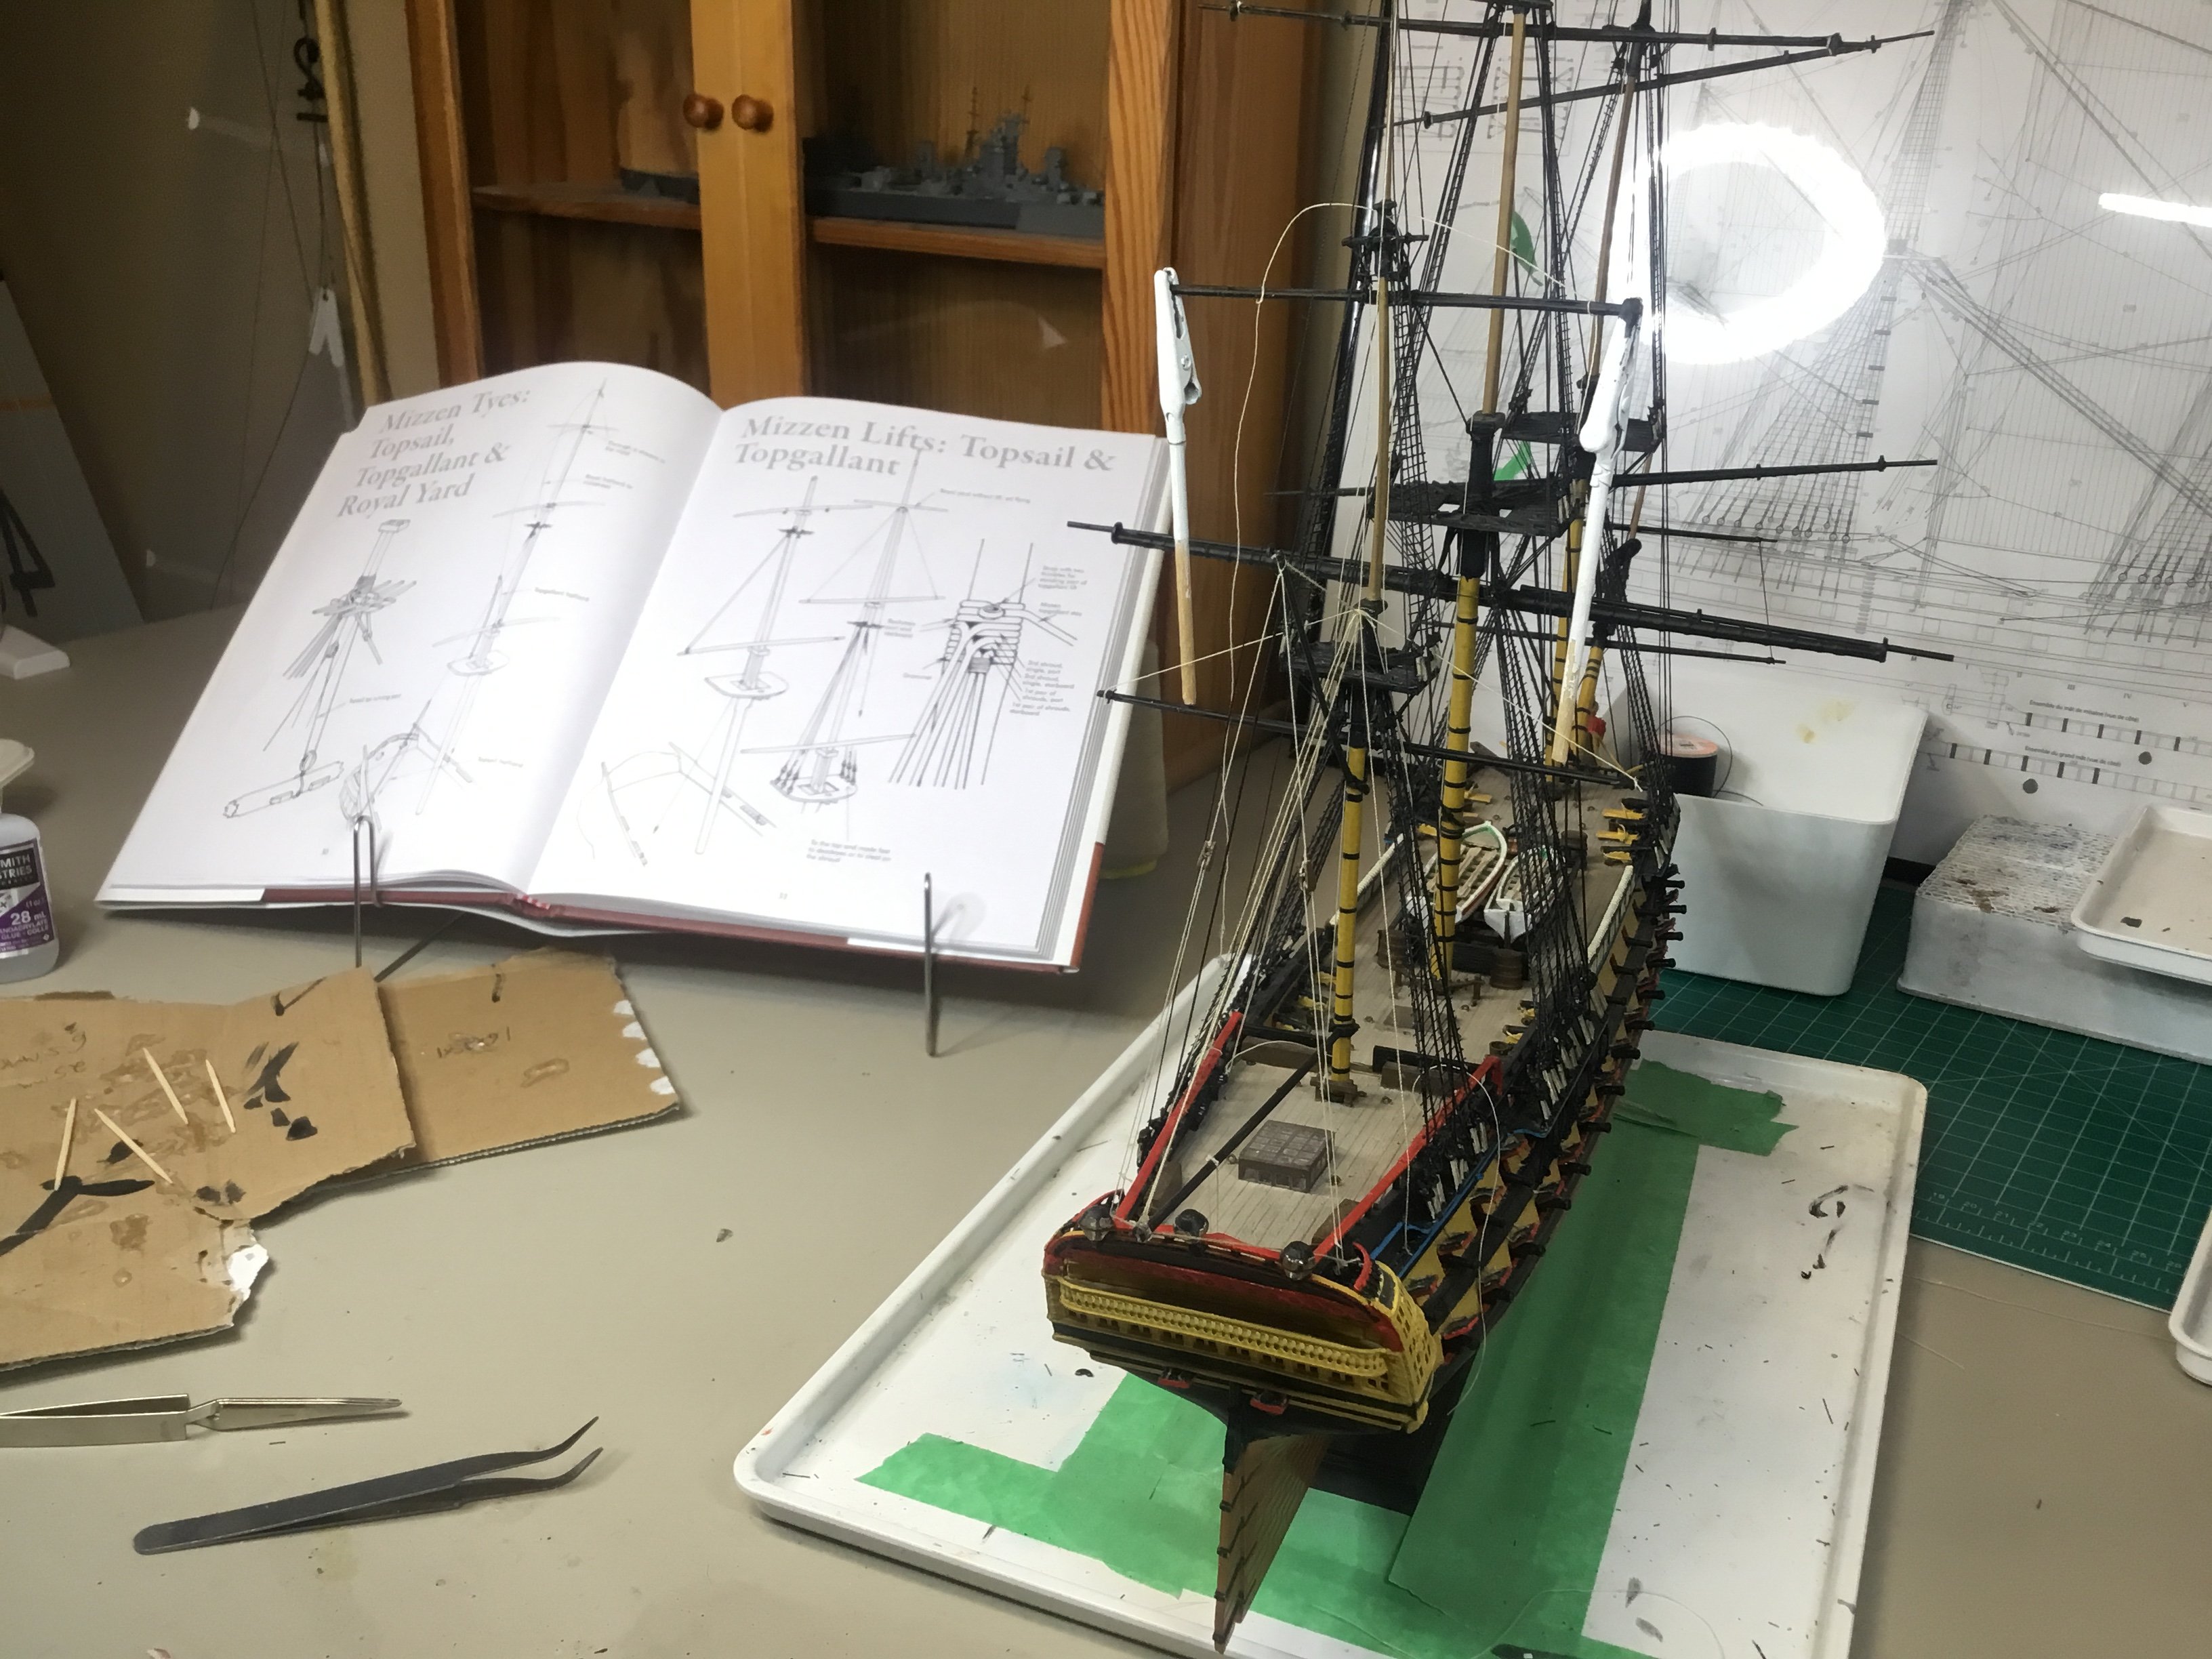
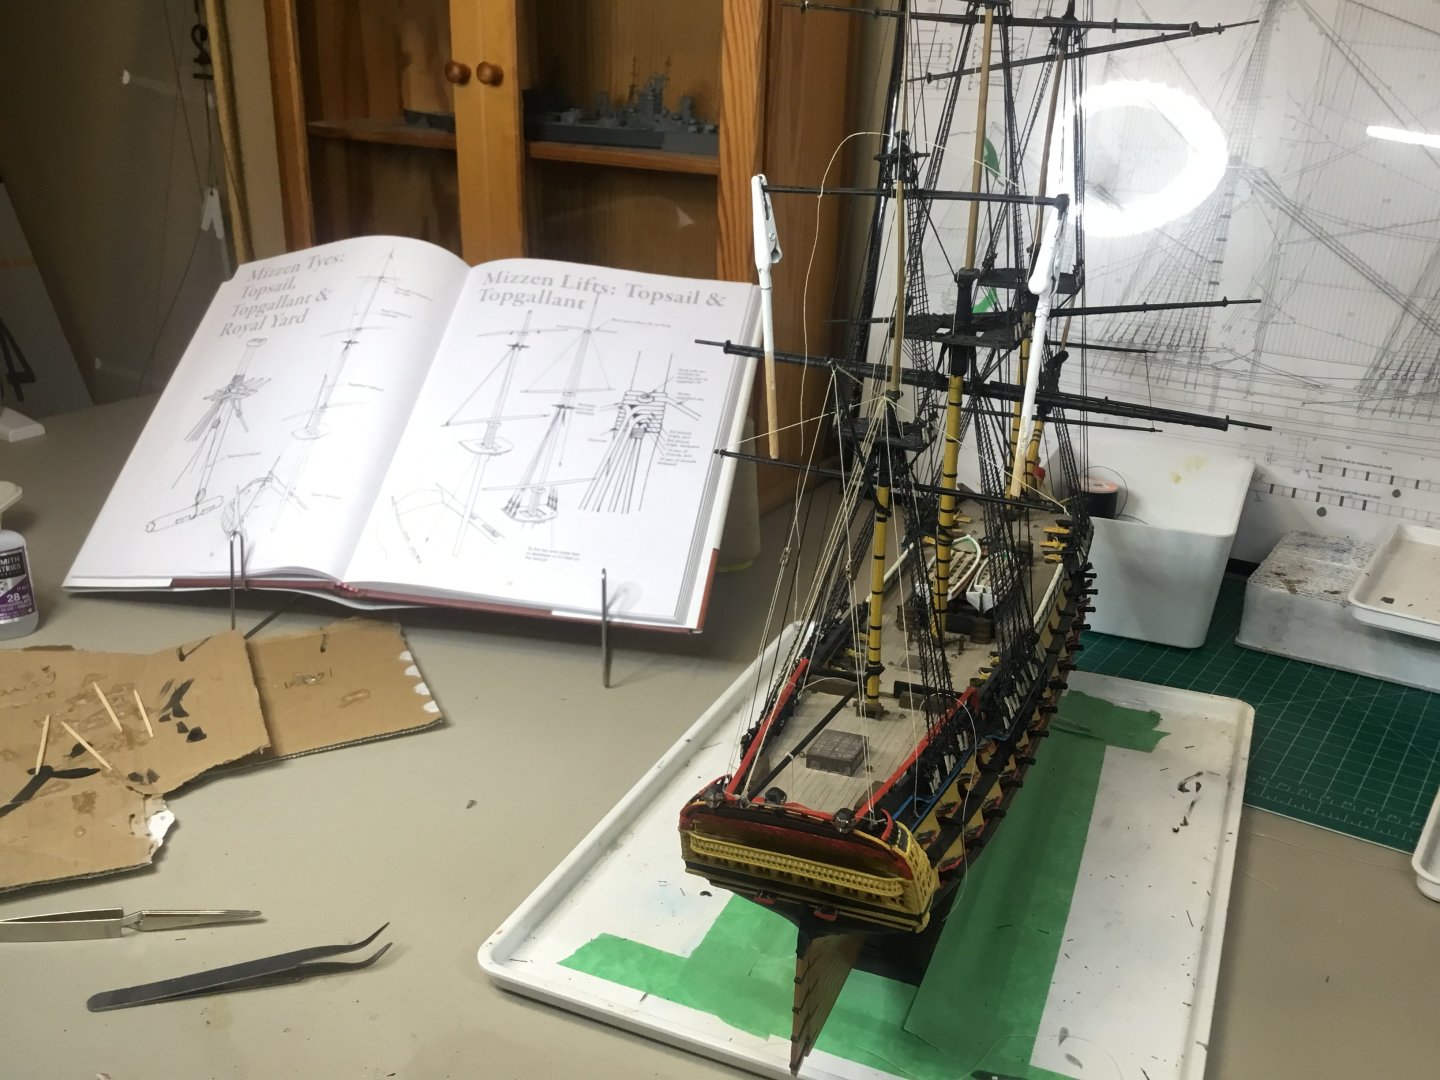
The book on rigging has been a godsend for this project. I may not be to Royal Navy spec, but my rigging will be as close to the book as possible. My custom pin rails seem to be working out nicely. The kit only provides about ten sets of blocks, so I am using them sparingly across the build.

-
I'm pleased with how it turned out. I bought a micro pin vise drill to ream out the holes, necessary as some of the CA glue blocked them. We'll now start installing the running rigging, running it through the holes in the pin rails below - but not knotting it permanently until I am sure there are no crossed lines. When we're done I'll mock up belaying pins.

-
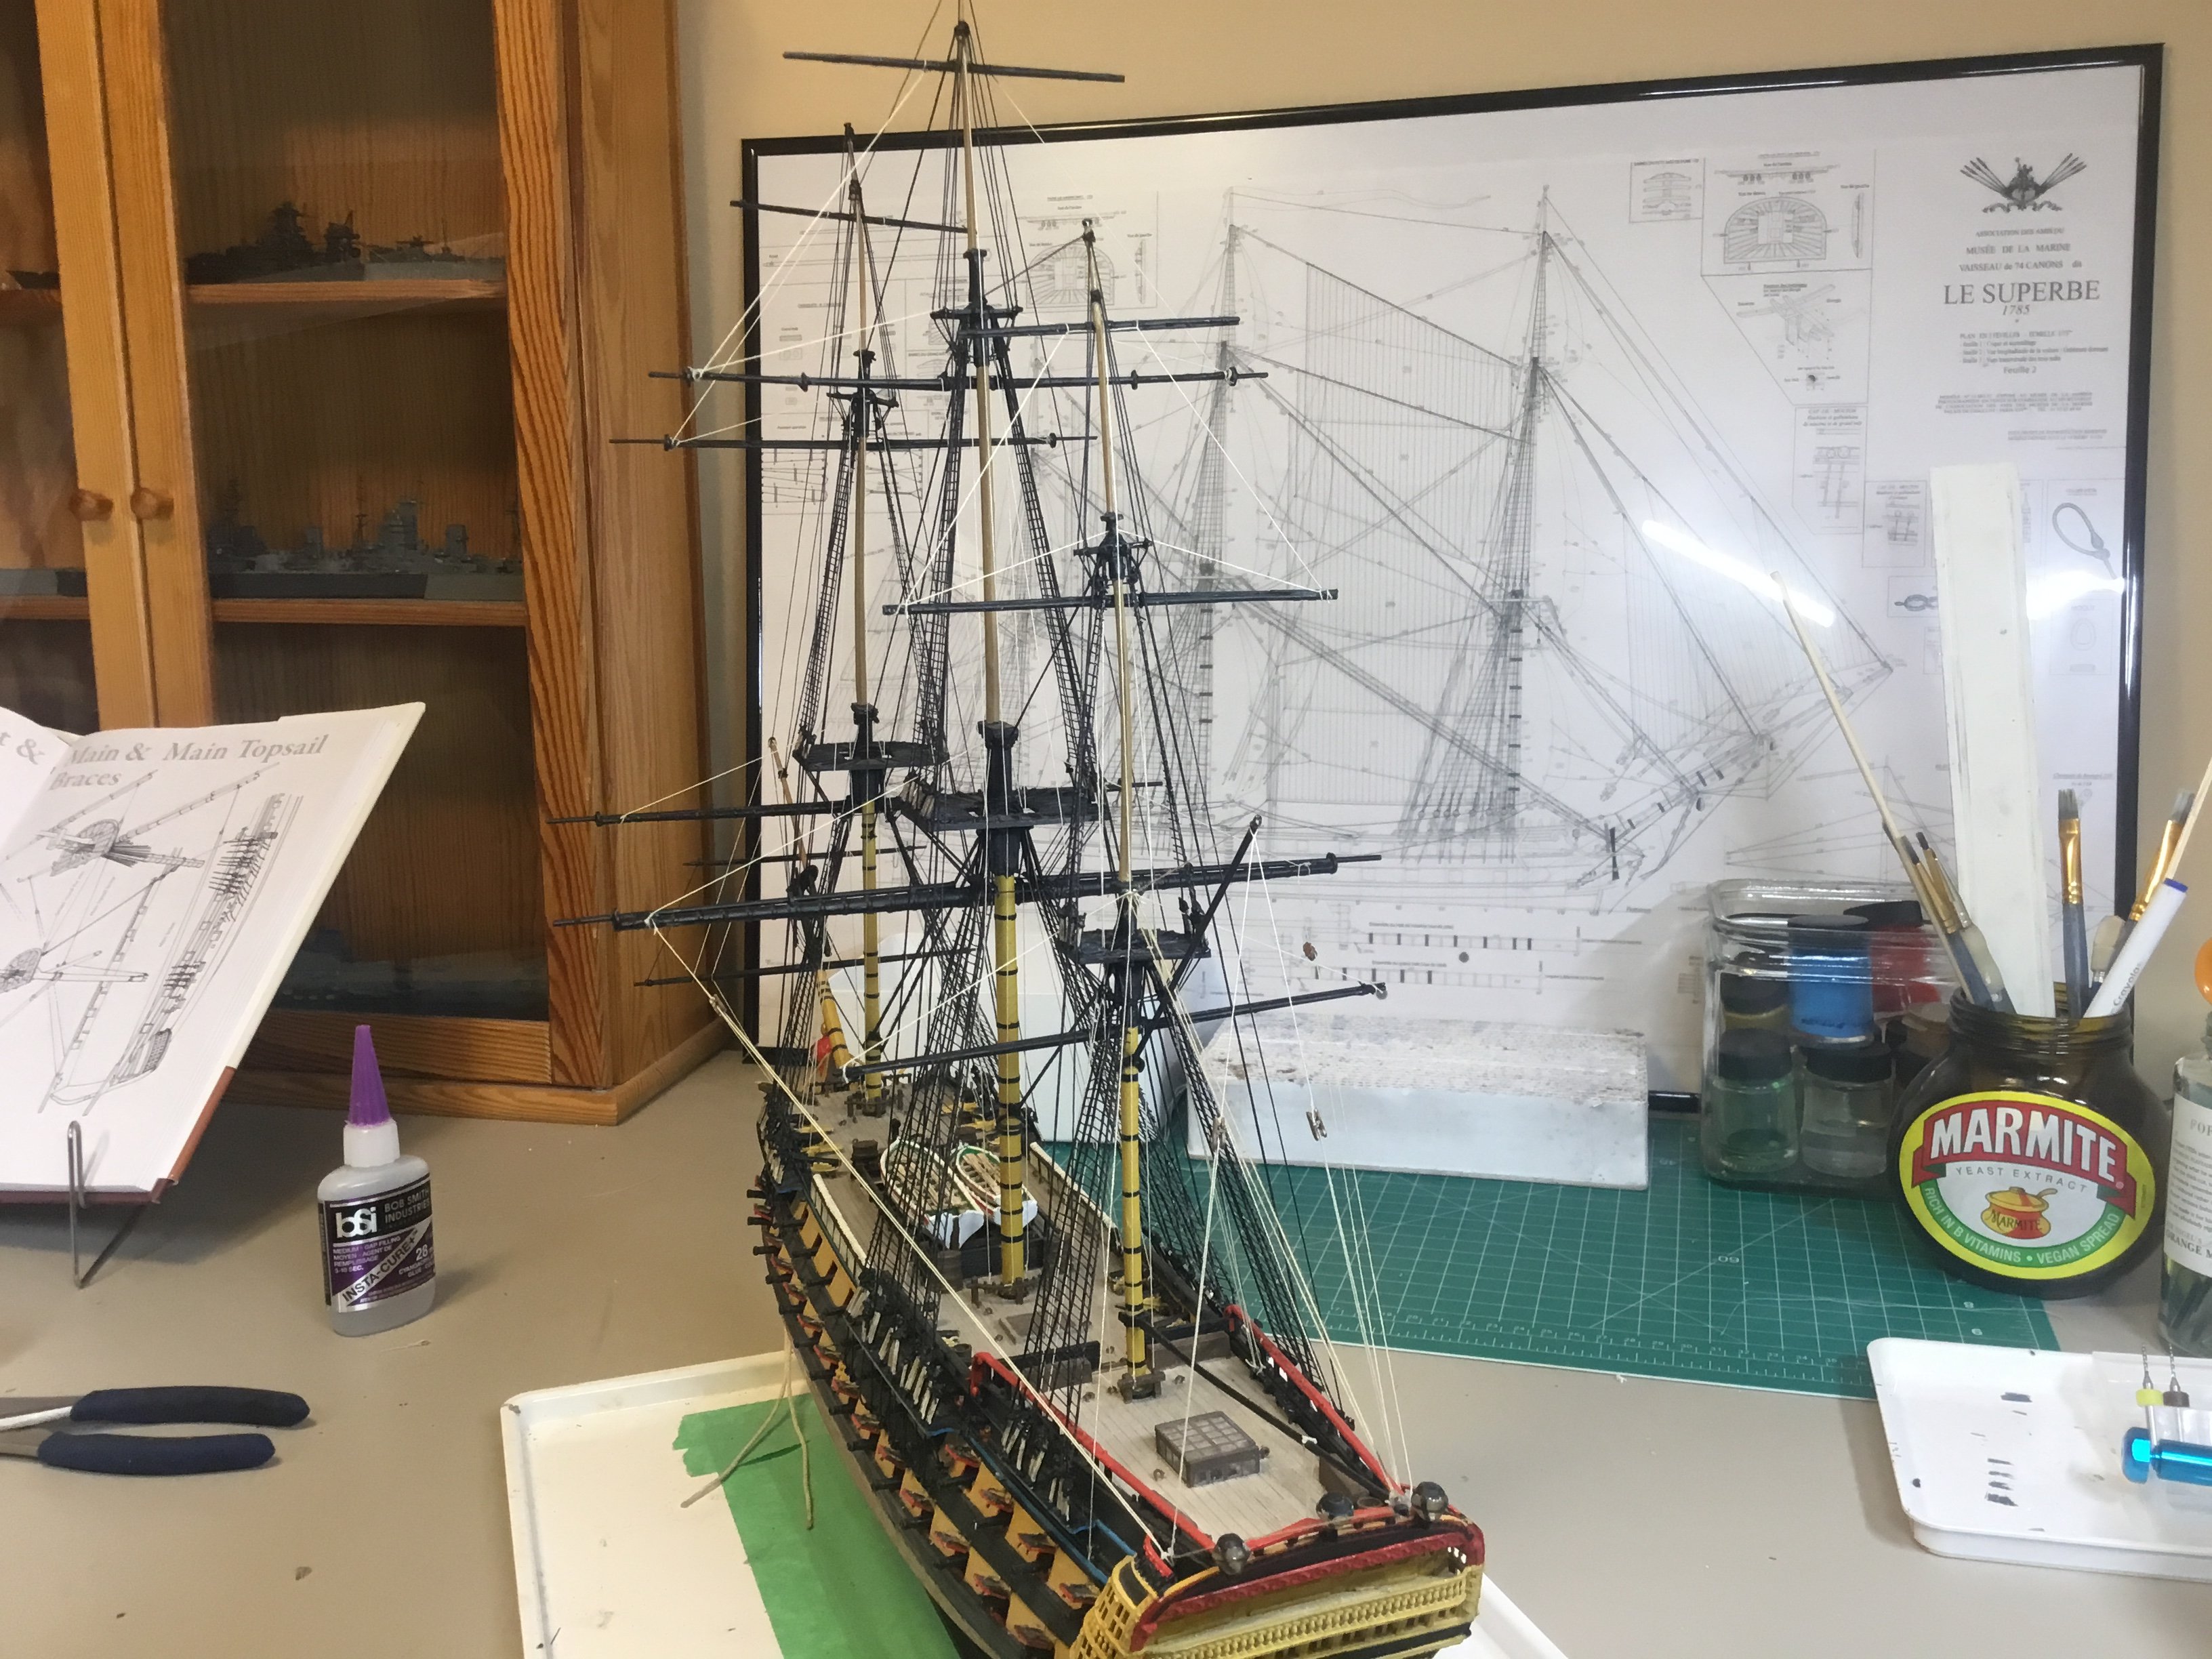
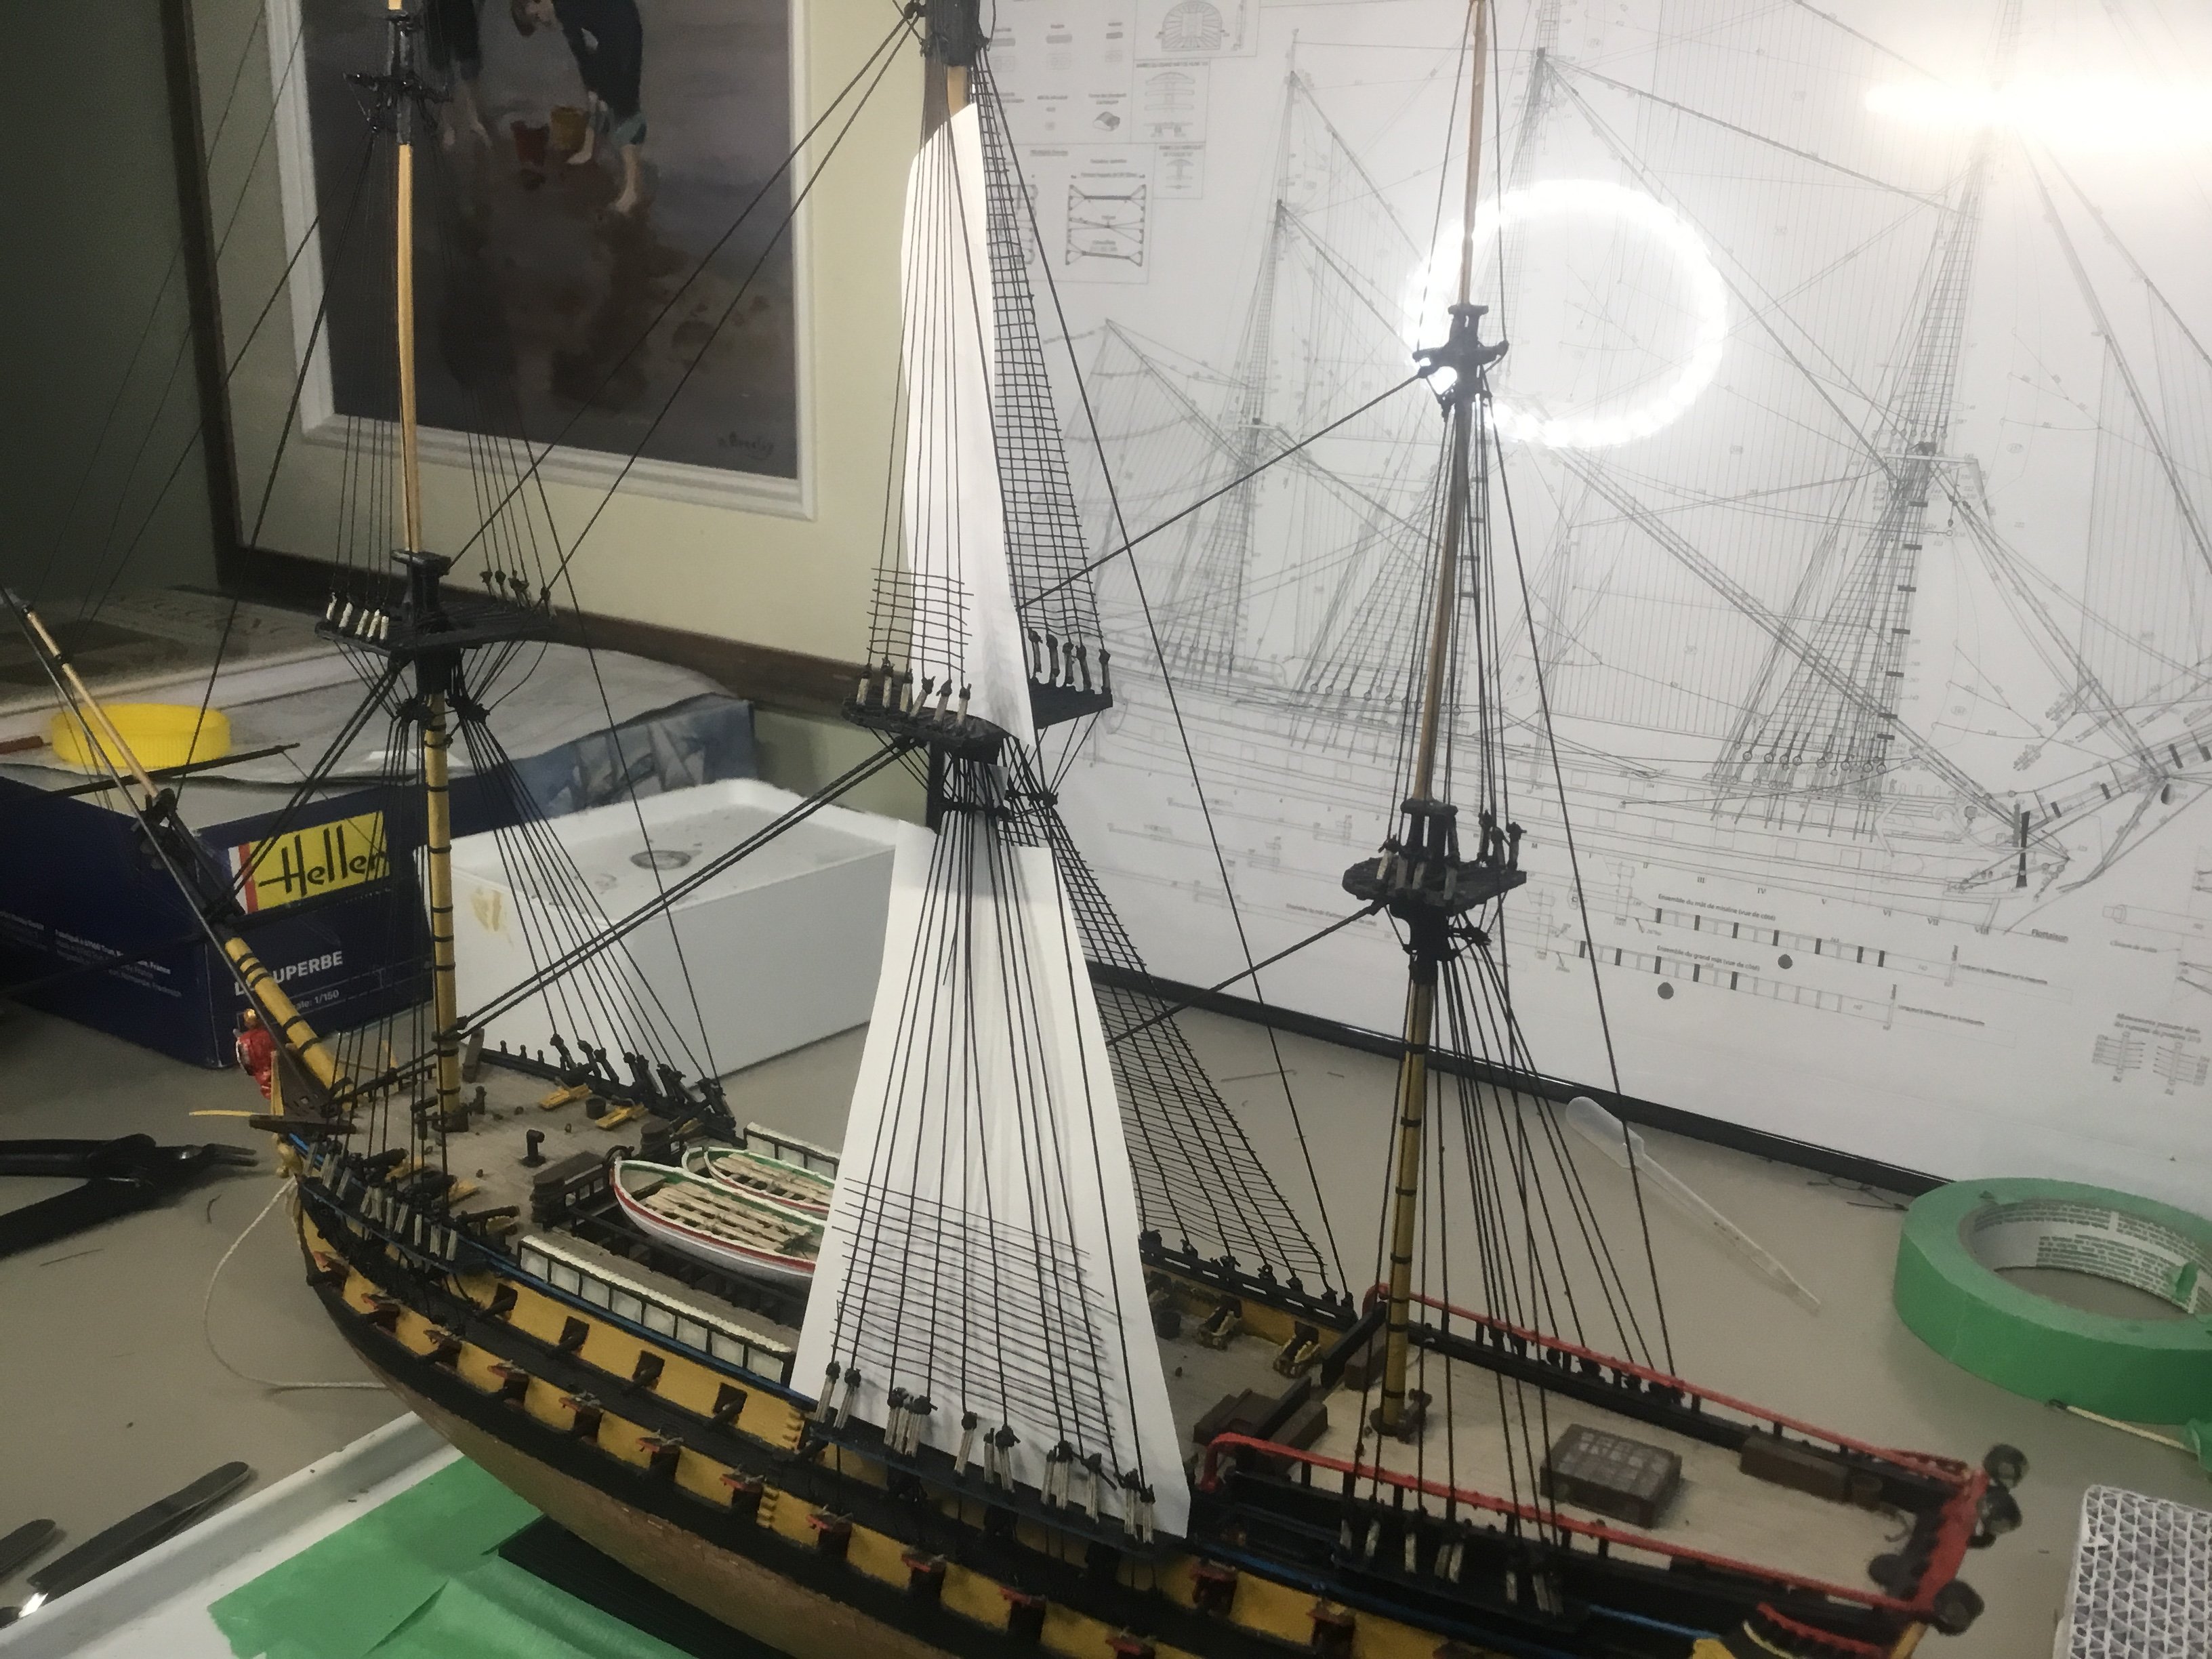
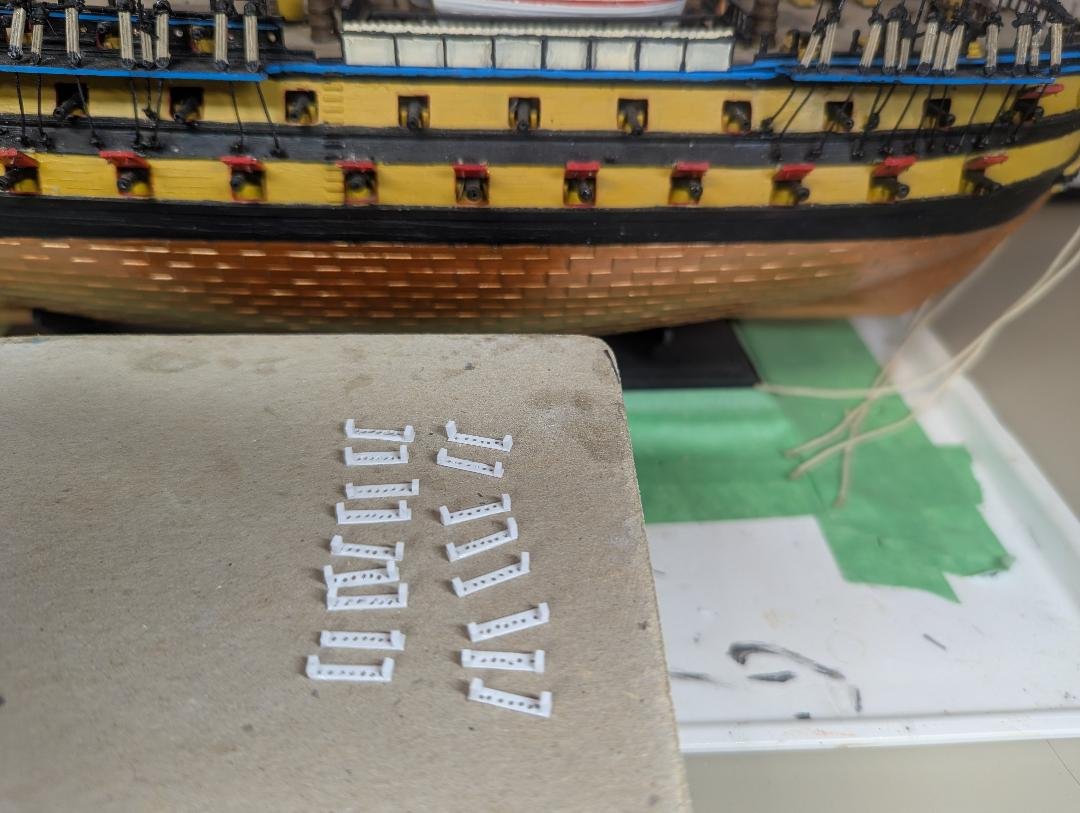
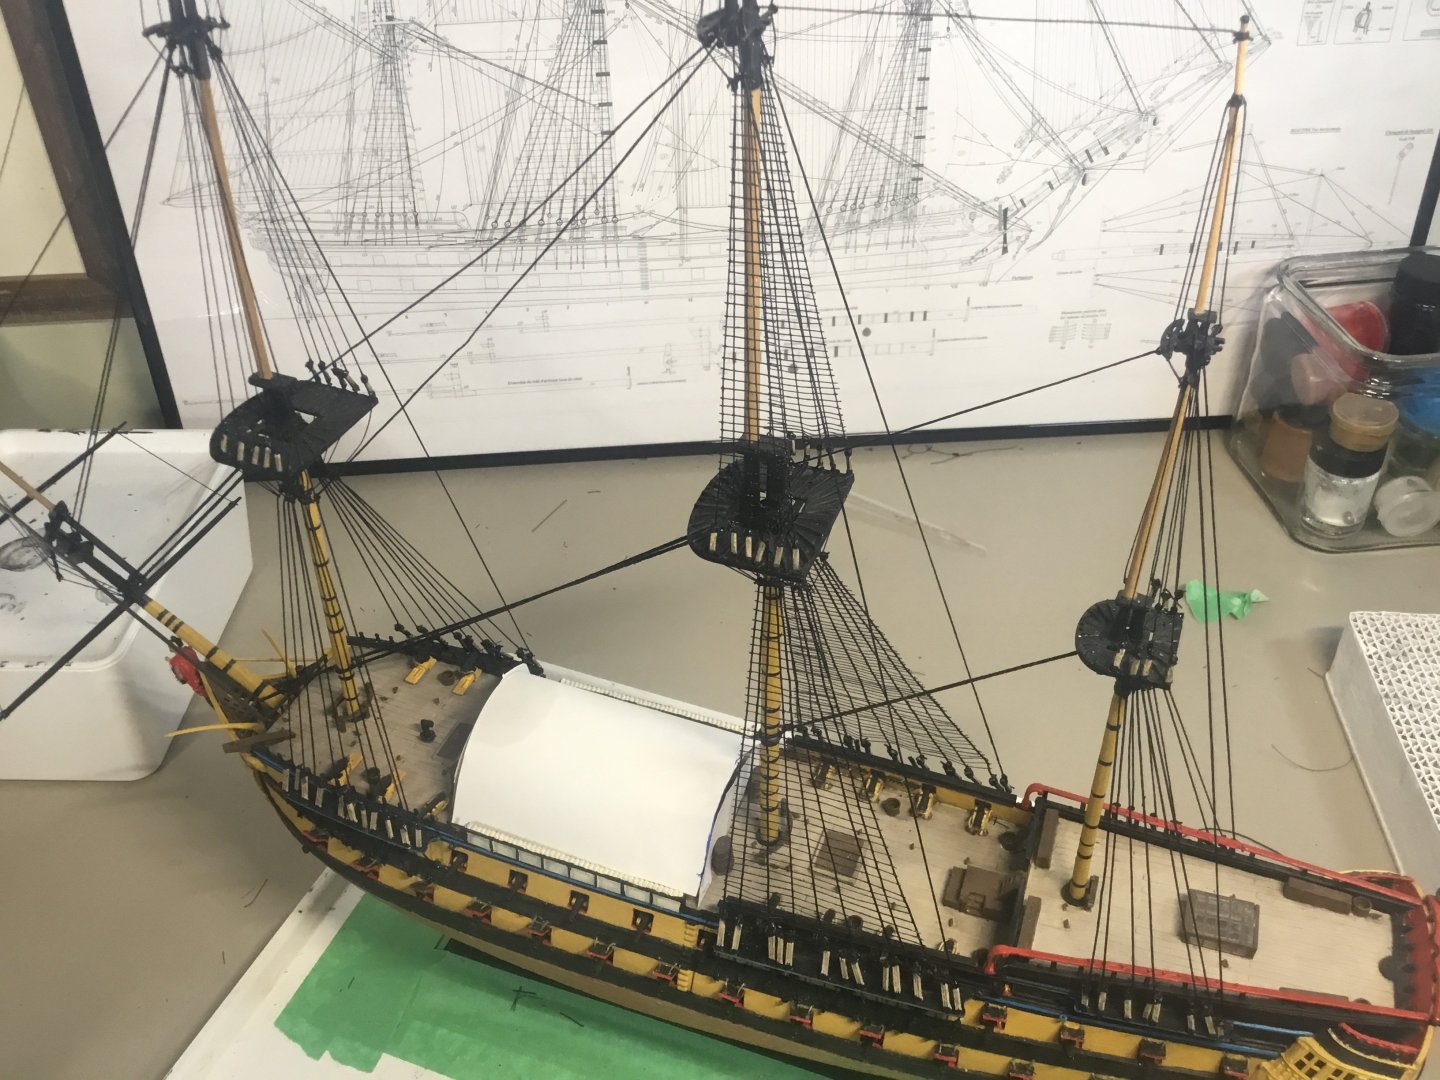
I bought a sheet of v-groove styrene today at my local hobby shop. Here’s where we are so far.
-
That's a good idea. Did you affix a vertical support underneath to keep them level and help adhere them to the hull sides? I like how you've replaced the central stairway to the poop with the traditional British separate stairways. I'd already painted and assembled mine by the time I'd realized that was needed. So, in my mind my ship's recently captured and not yet fully converted to RN spec.
-
I've gone as far as I wanted on masts and booms. I'm stuck at the moment as the running rigging can't get around the belaying pins as provided, so I must pull them off and redesign it.
-
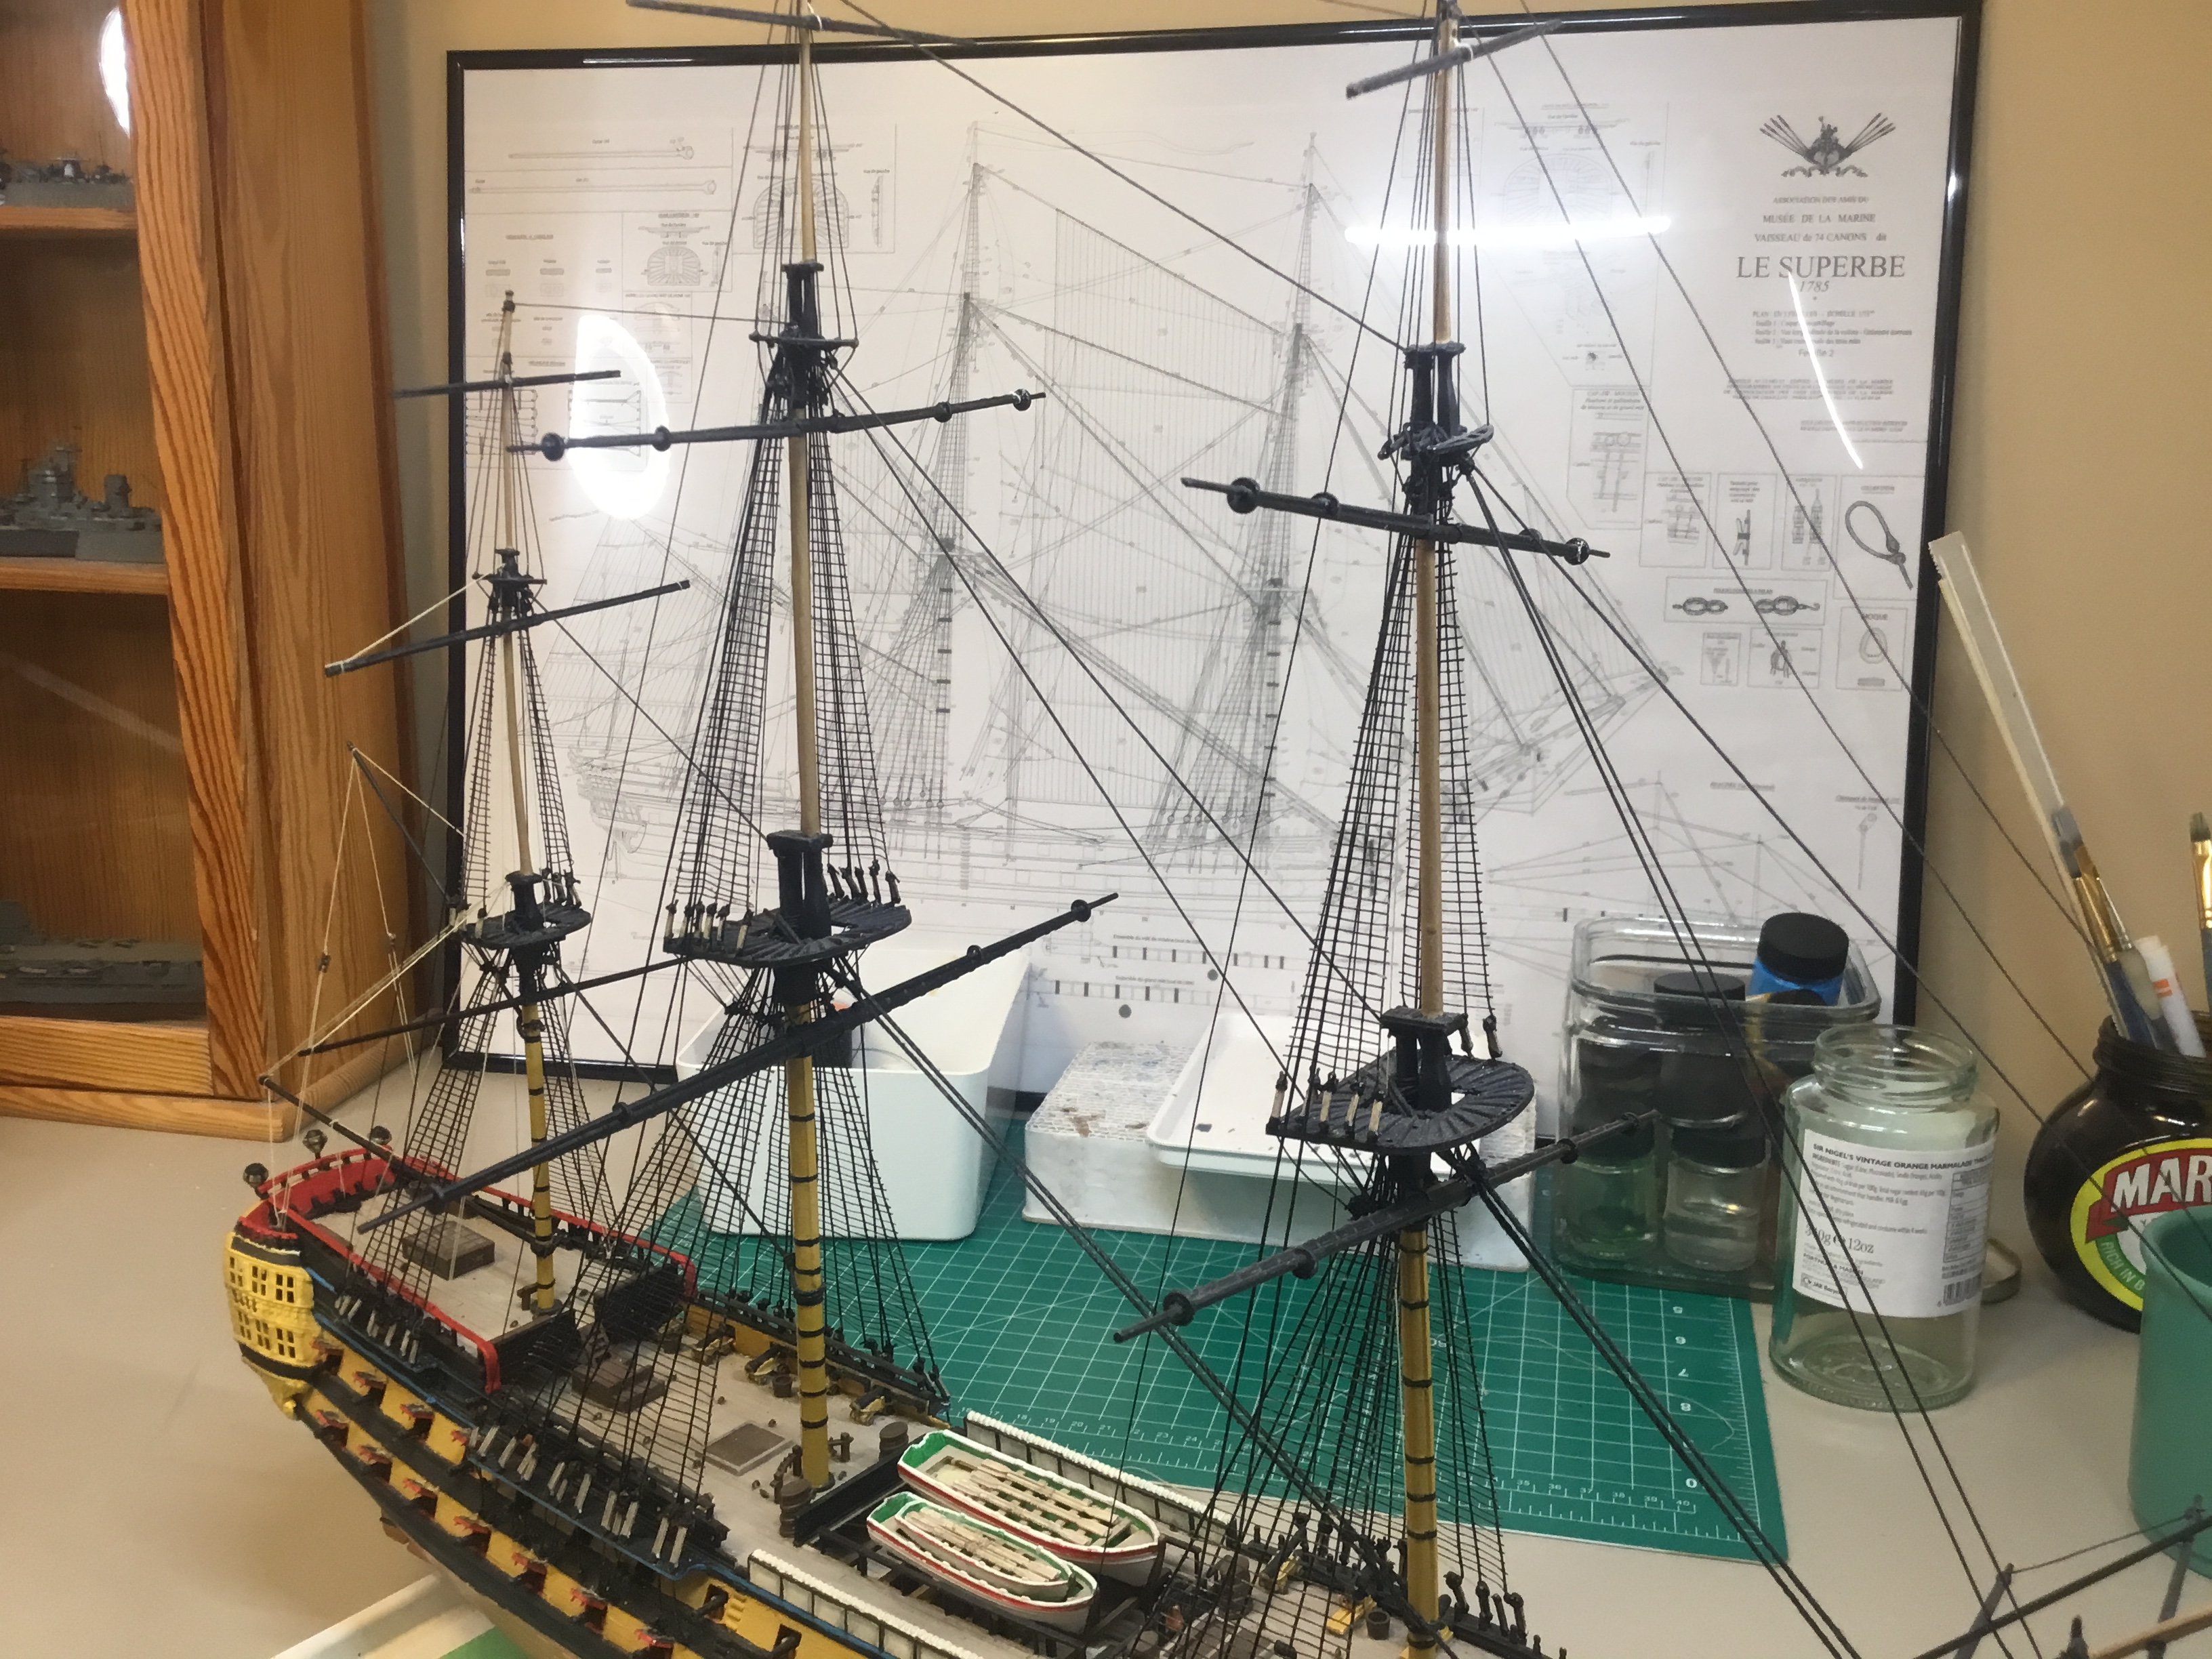
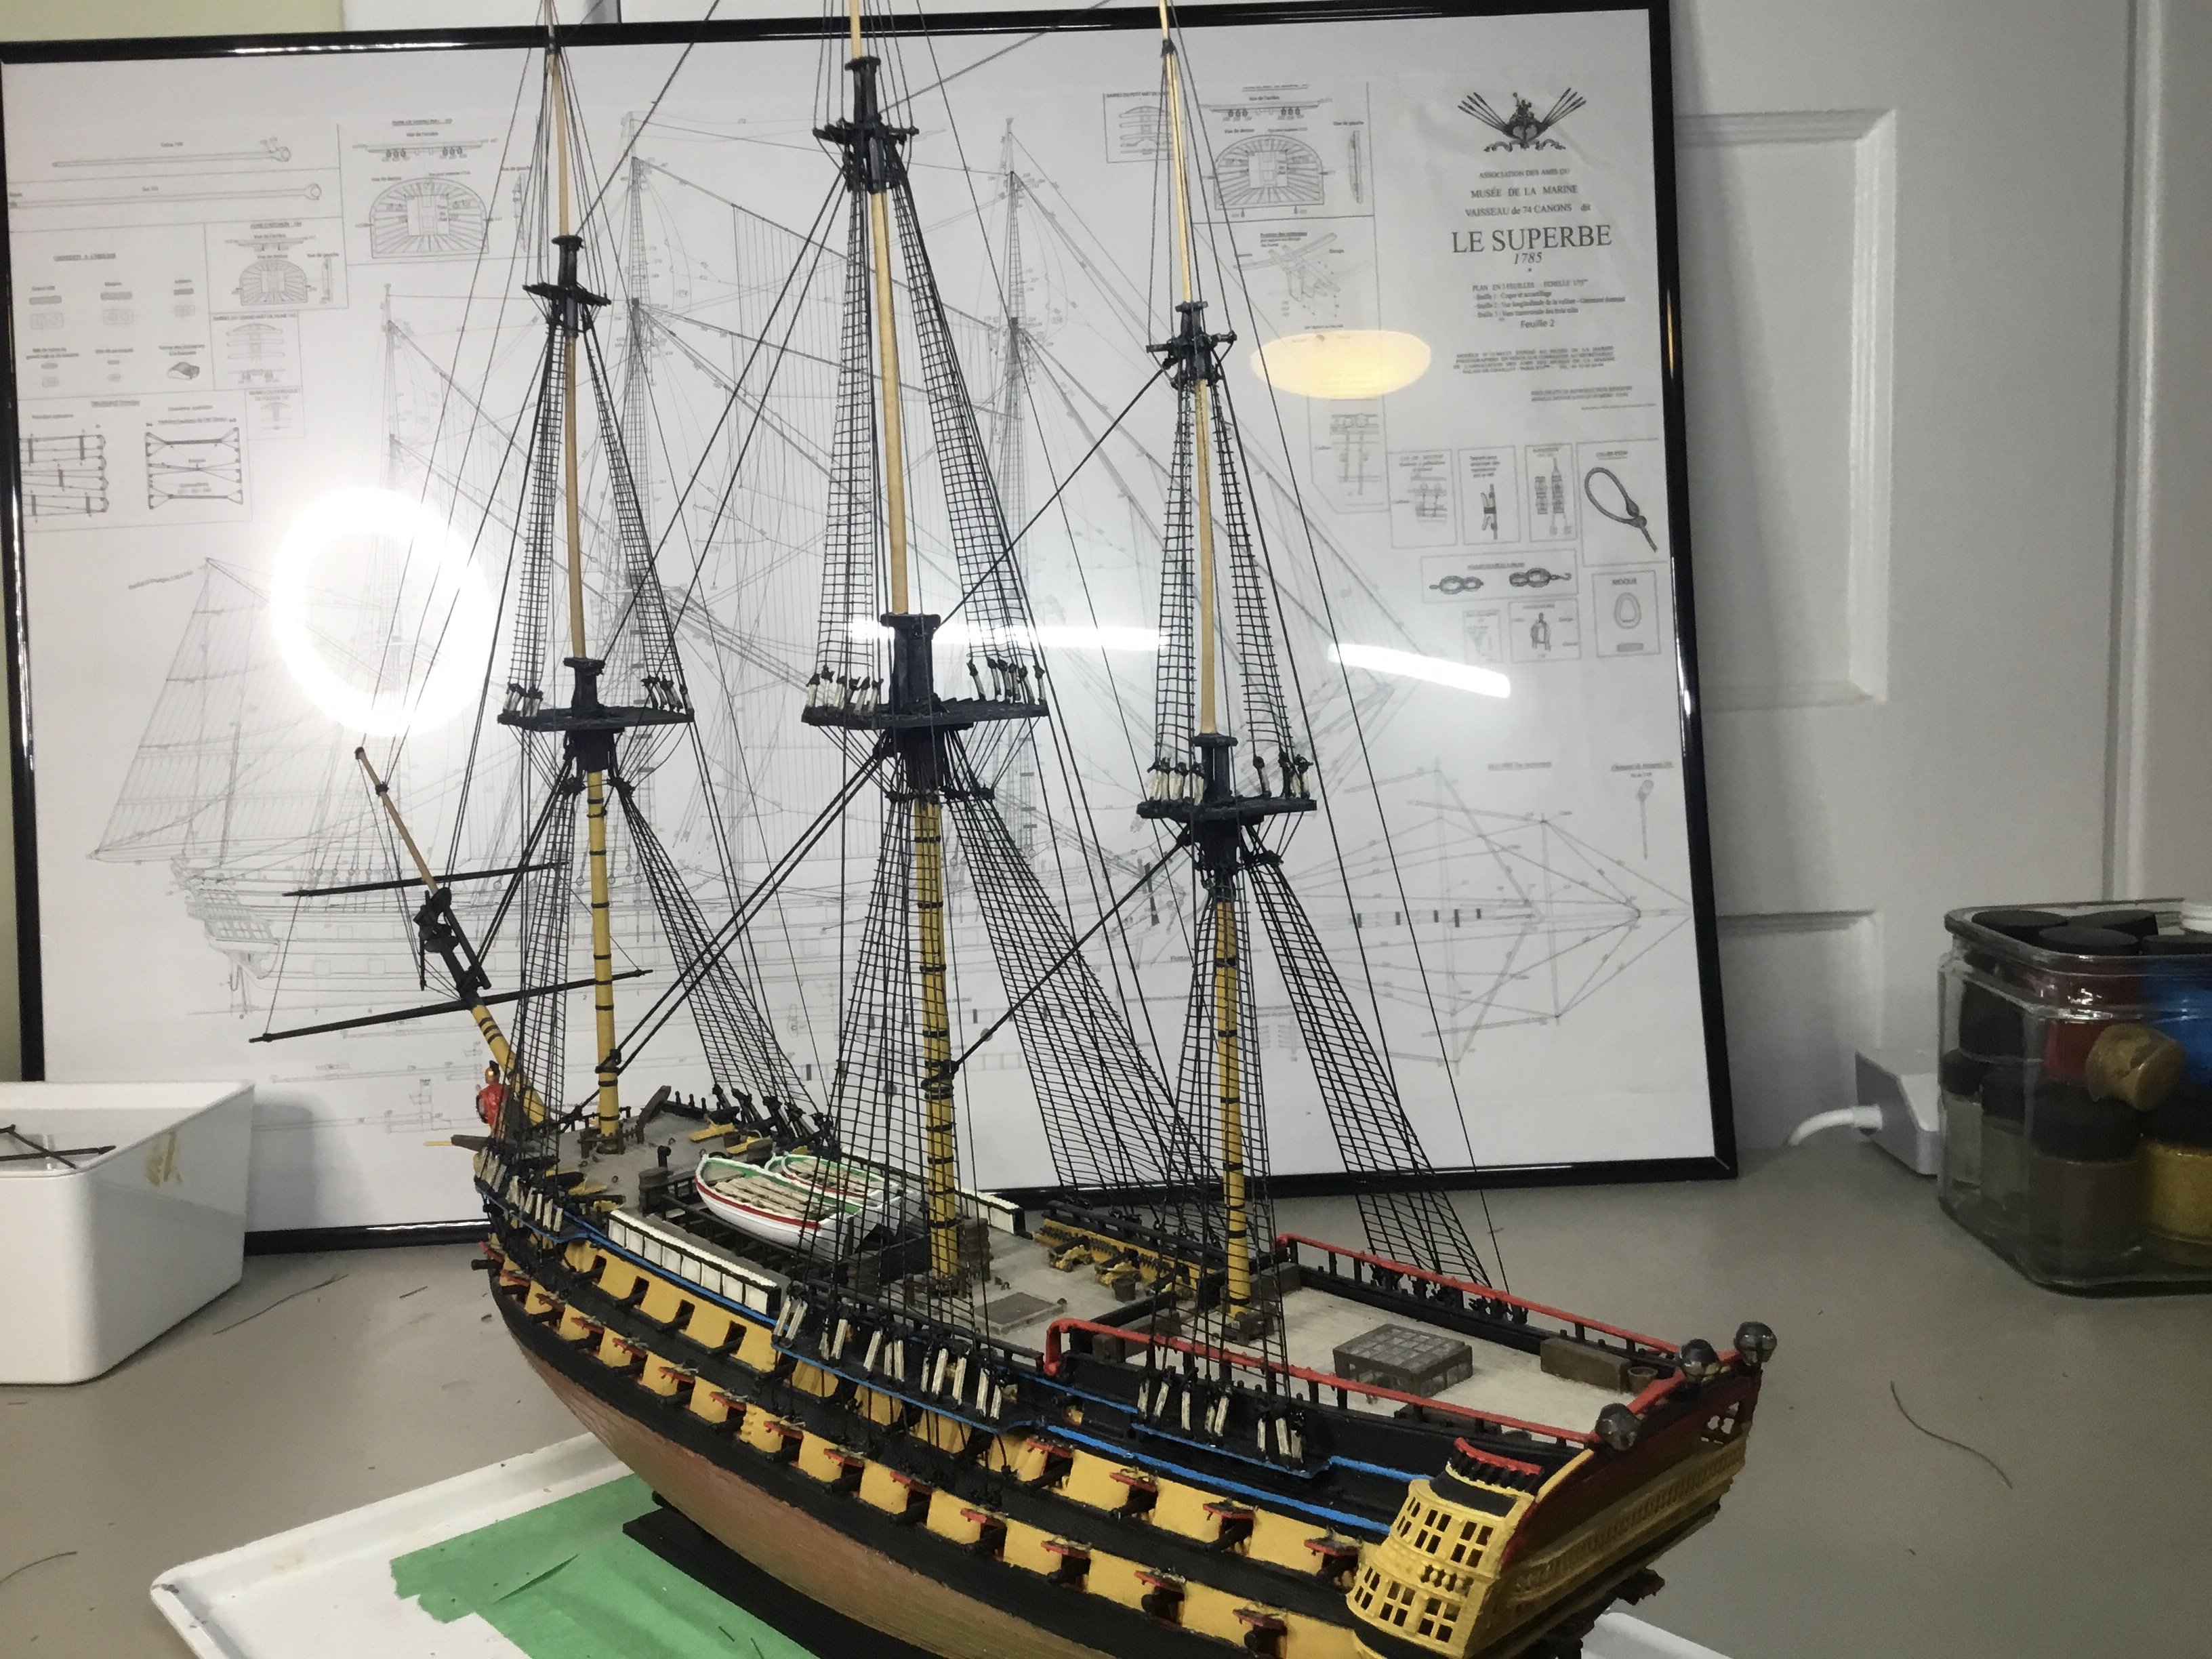
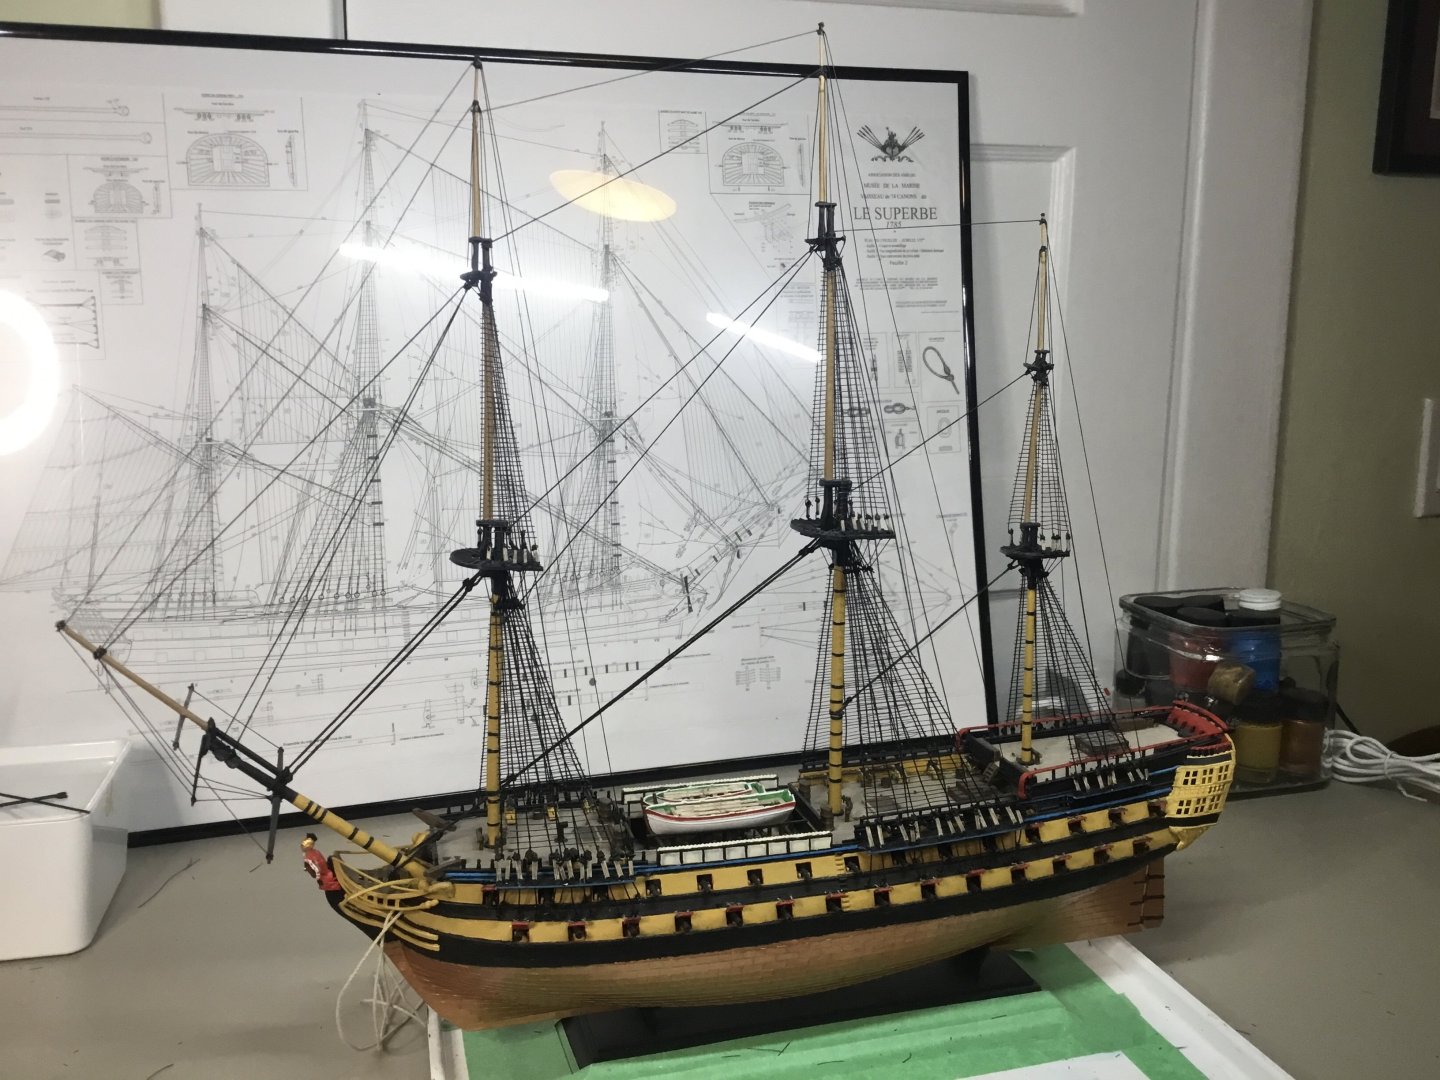
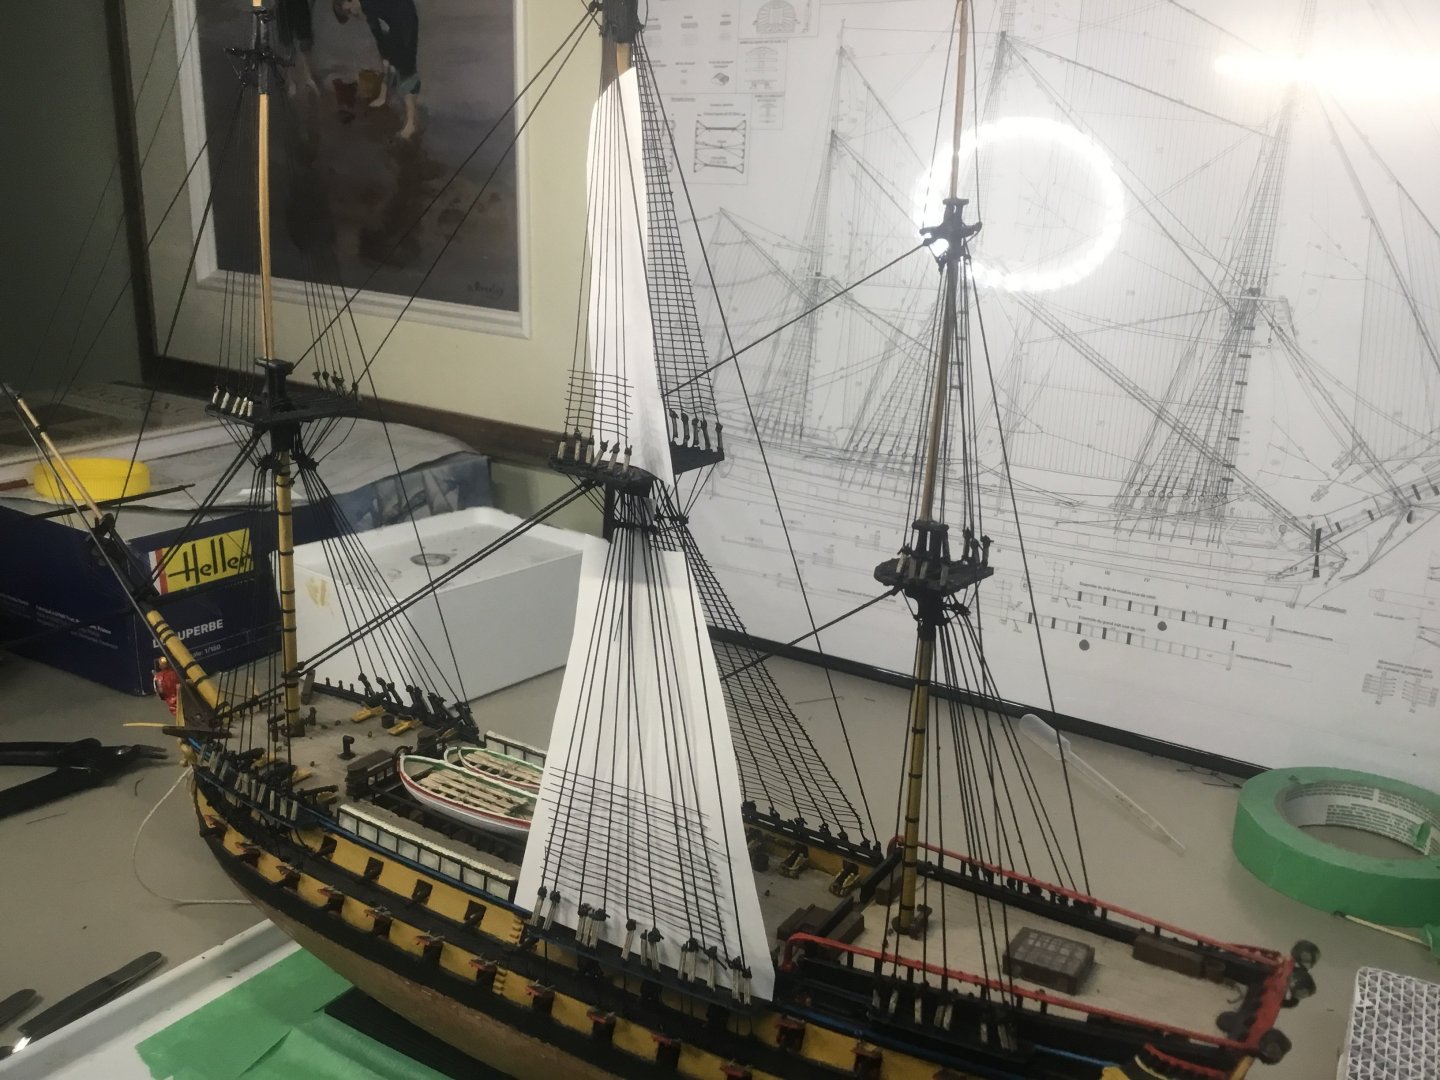
Standing rigging and ratlines now complete, less bowsprit shrouds (WIP). I should get through the yards, sails and running rigging fast enough. I think this will be the last (and my first) rigged model I build for a while.


-
Landlubber Mike's technique for furled sails
Admiral Beez replied to Landlubber Mike's topic in Masting, rigging and sails
Thank you for sharing this. I shall give it a go. -
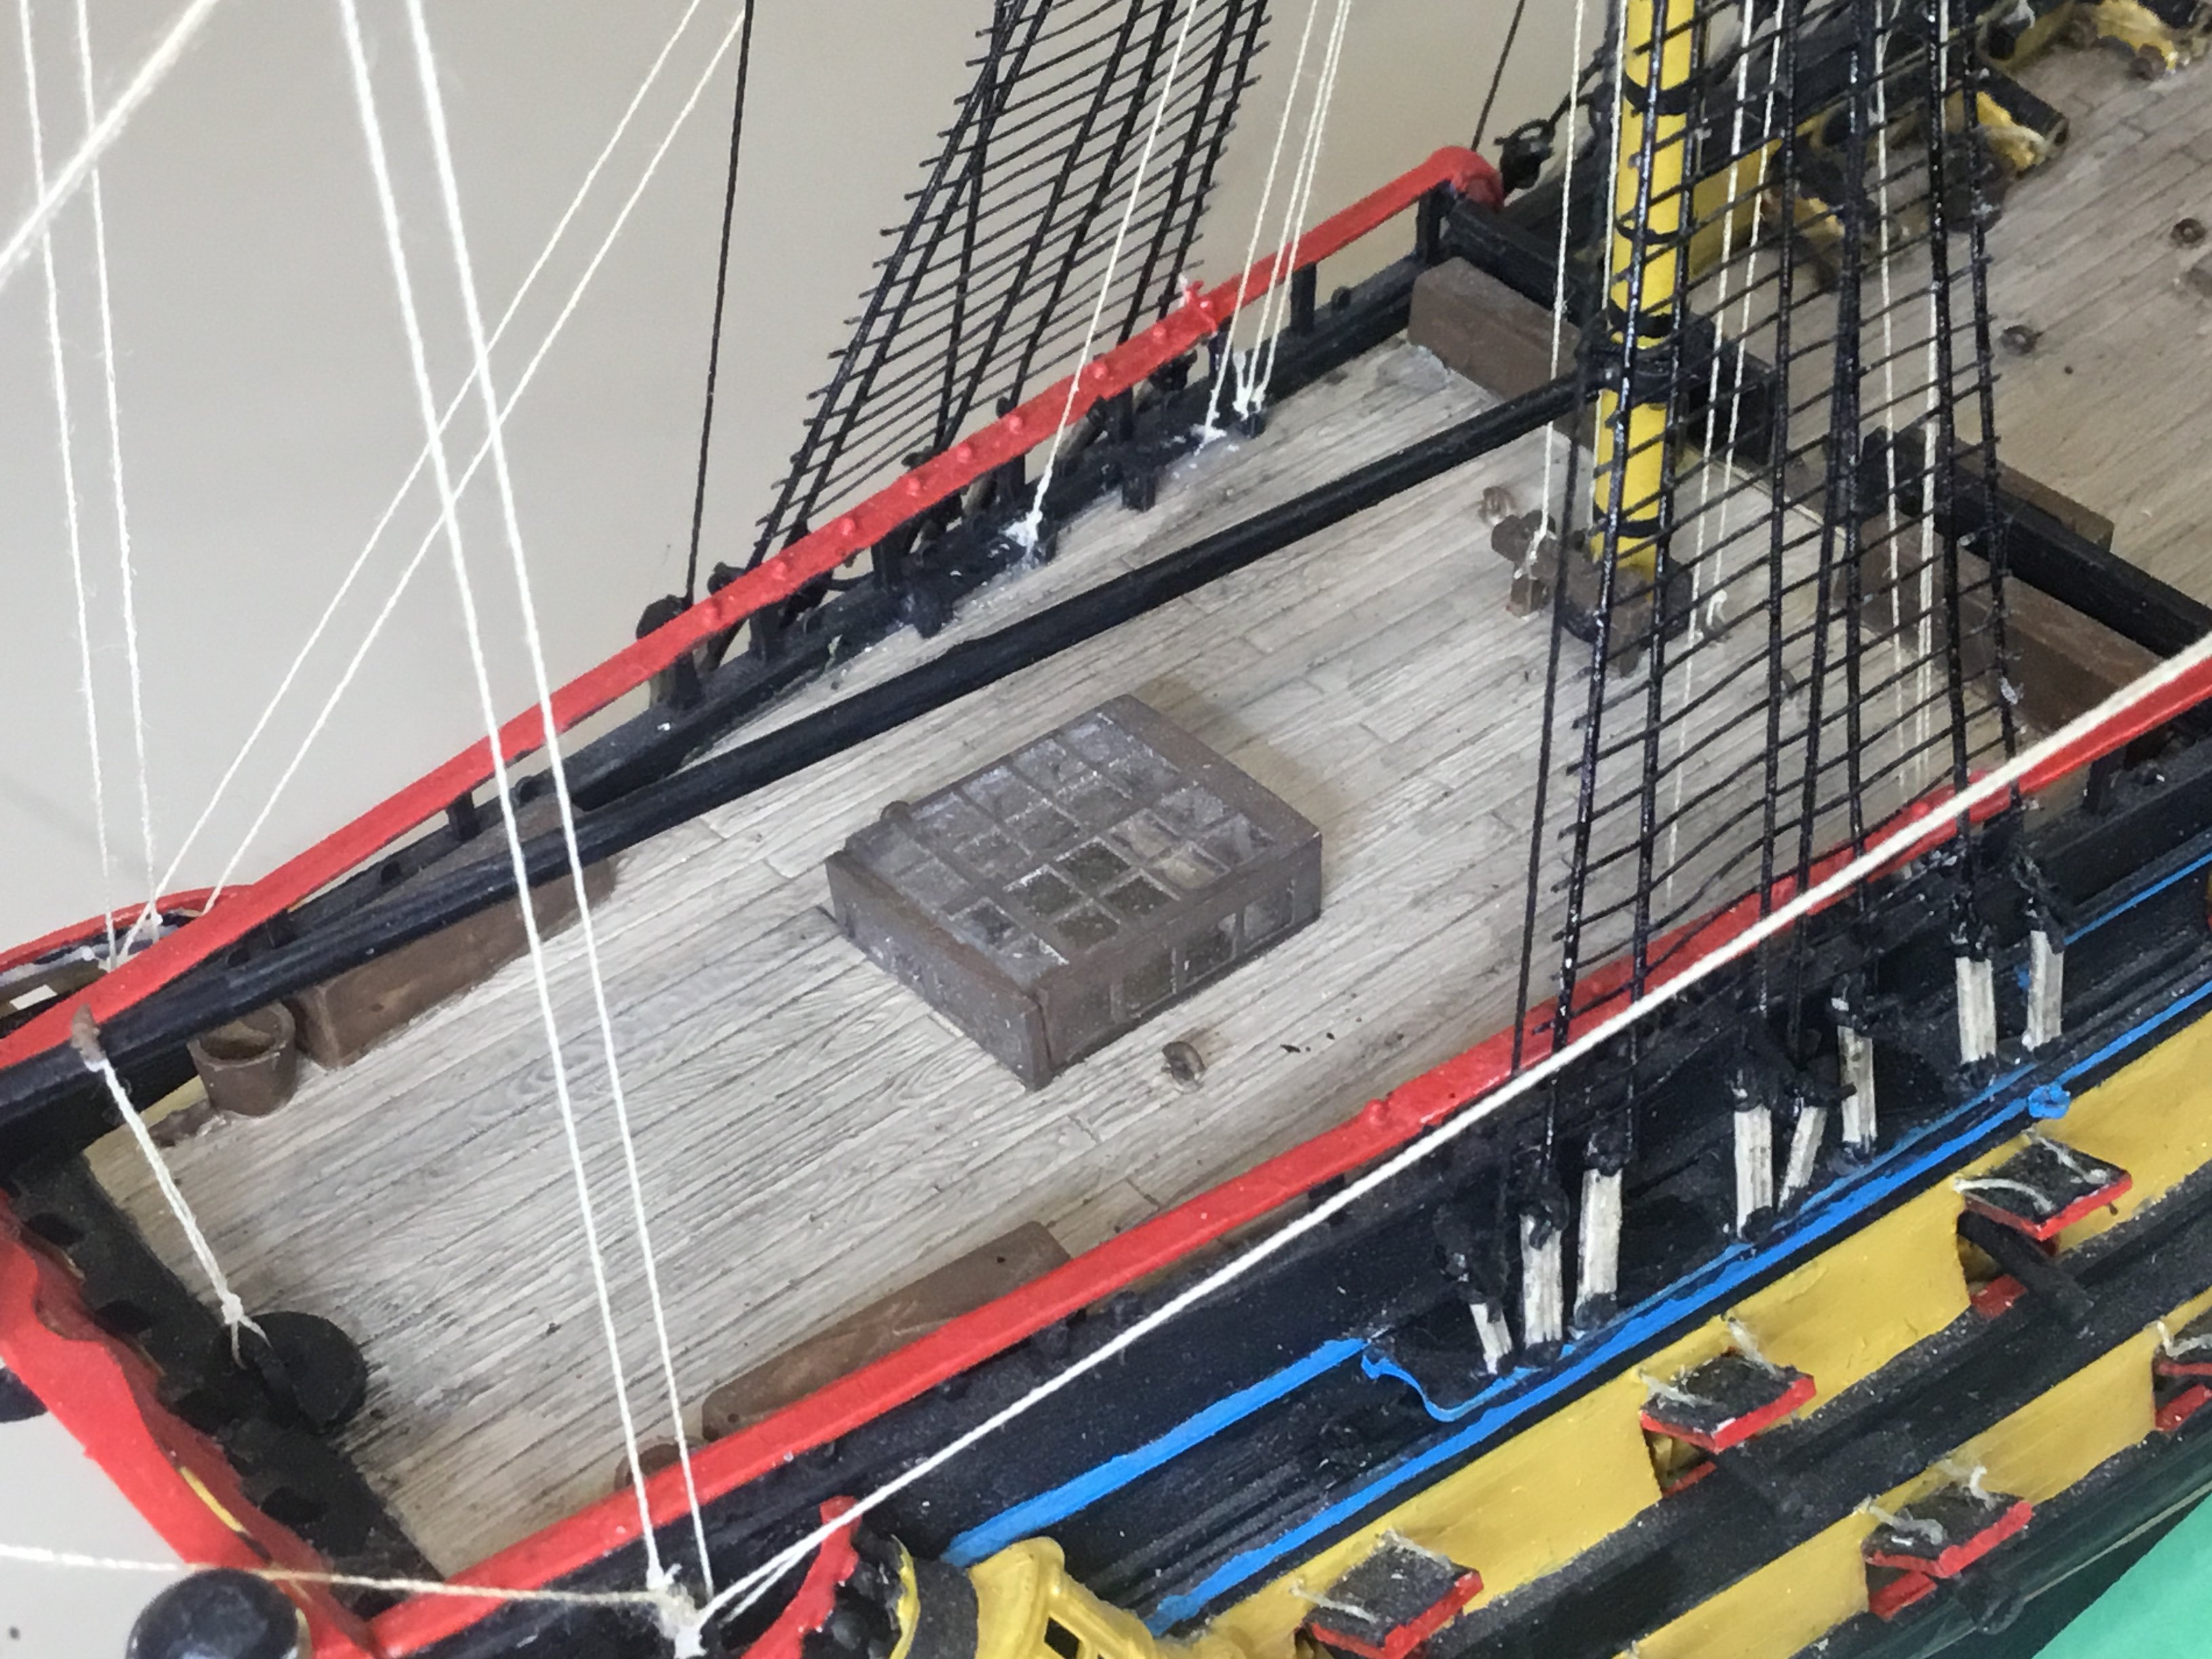
Some progress. Just eight more sets of rat lines to make. The white paper structure is to prevent ratline trimmings from falling into the waist.


-
Here's what I'm doing for my ratlines. I've taken the original Heller shroud tool, cut out the middle piece and then wrapped around this 0.25mm horizontal lines (the 0.4 mm vertical lines are already on the line). Then I coated all these lines with clear craft glue diluted with water. Then using a wide paint brush I covered the lines with the glue/water mixture and left it to dry overnight. In the morning I repeated this treatment, leaving it again overnight. On the next day the lines were now stiff with glue. I then cut these off and basketweaved them around the vertical shrouds, followed by each intersection get a dab of clear craft glue with an old paint brush. So far I am happy with the look and am pleased to have finally found a method that works for me, helping me to overcome the procrastination that's delayed this project for a year or more.
-
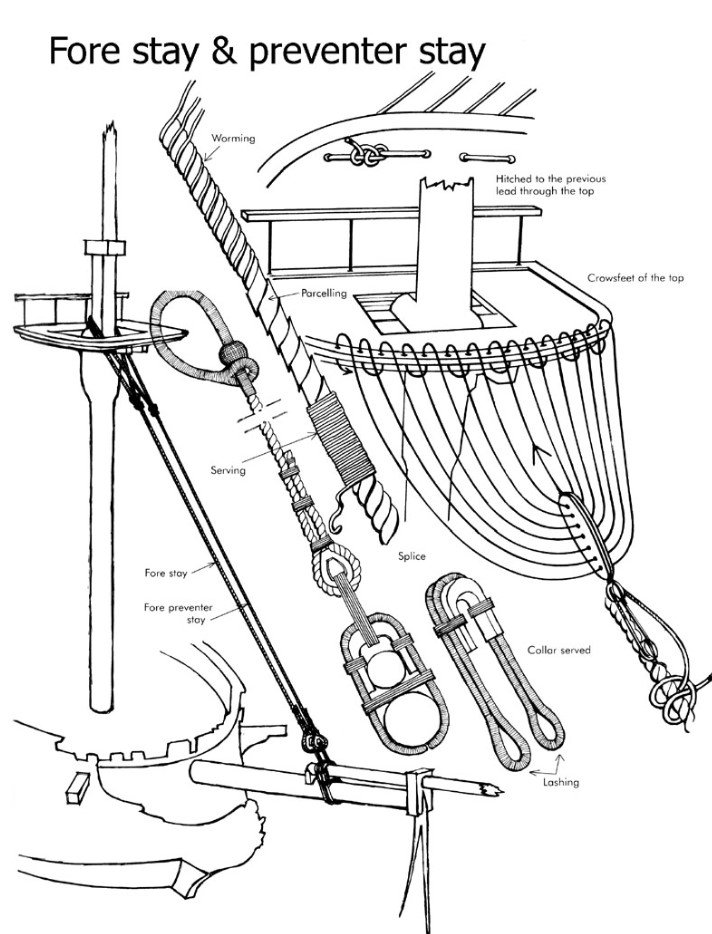
Main and Fore Preventor Stay
Admiral Beez replied to Admiral Beez's topic in Masting, rigging and sails
Thanks. I don’t see the crows feet on most Napoleonic era models. Did HMS Victory ever have them? -
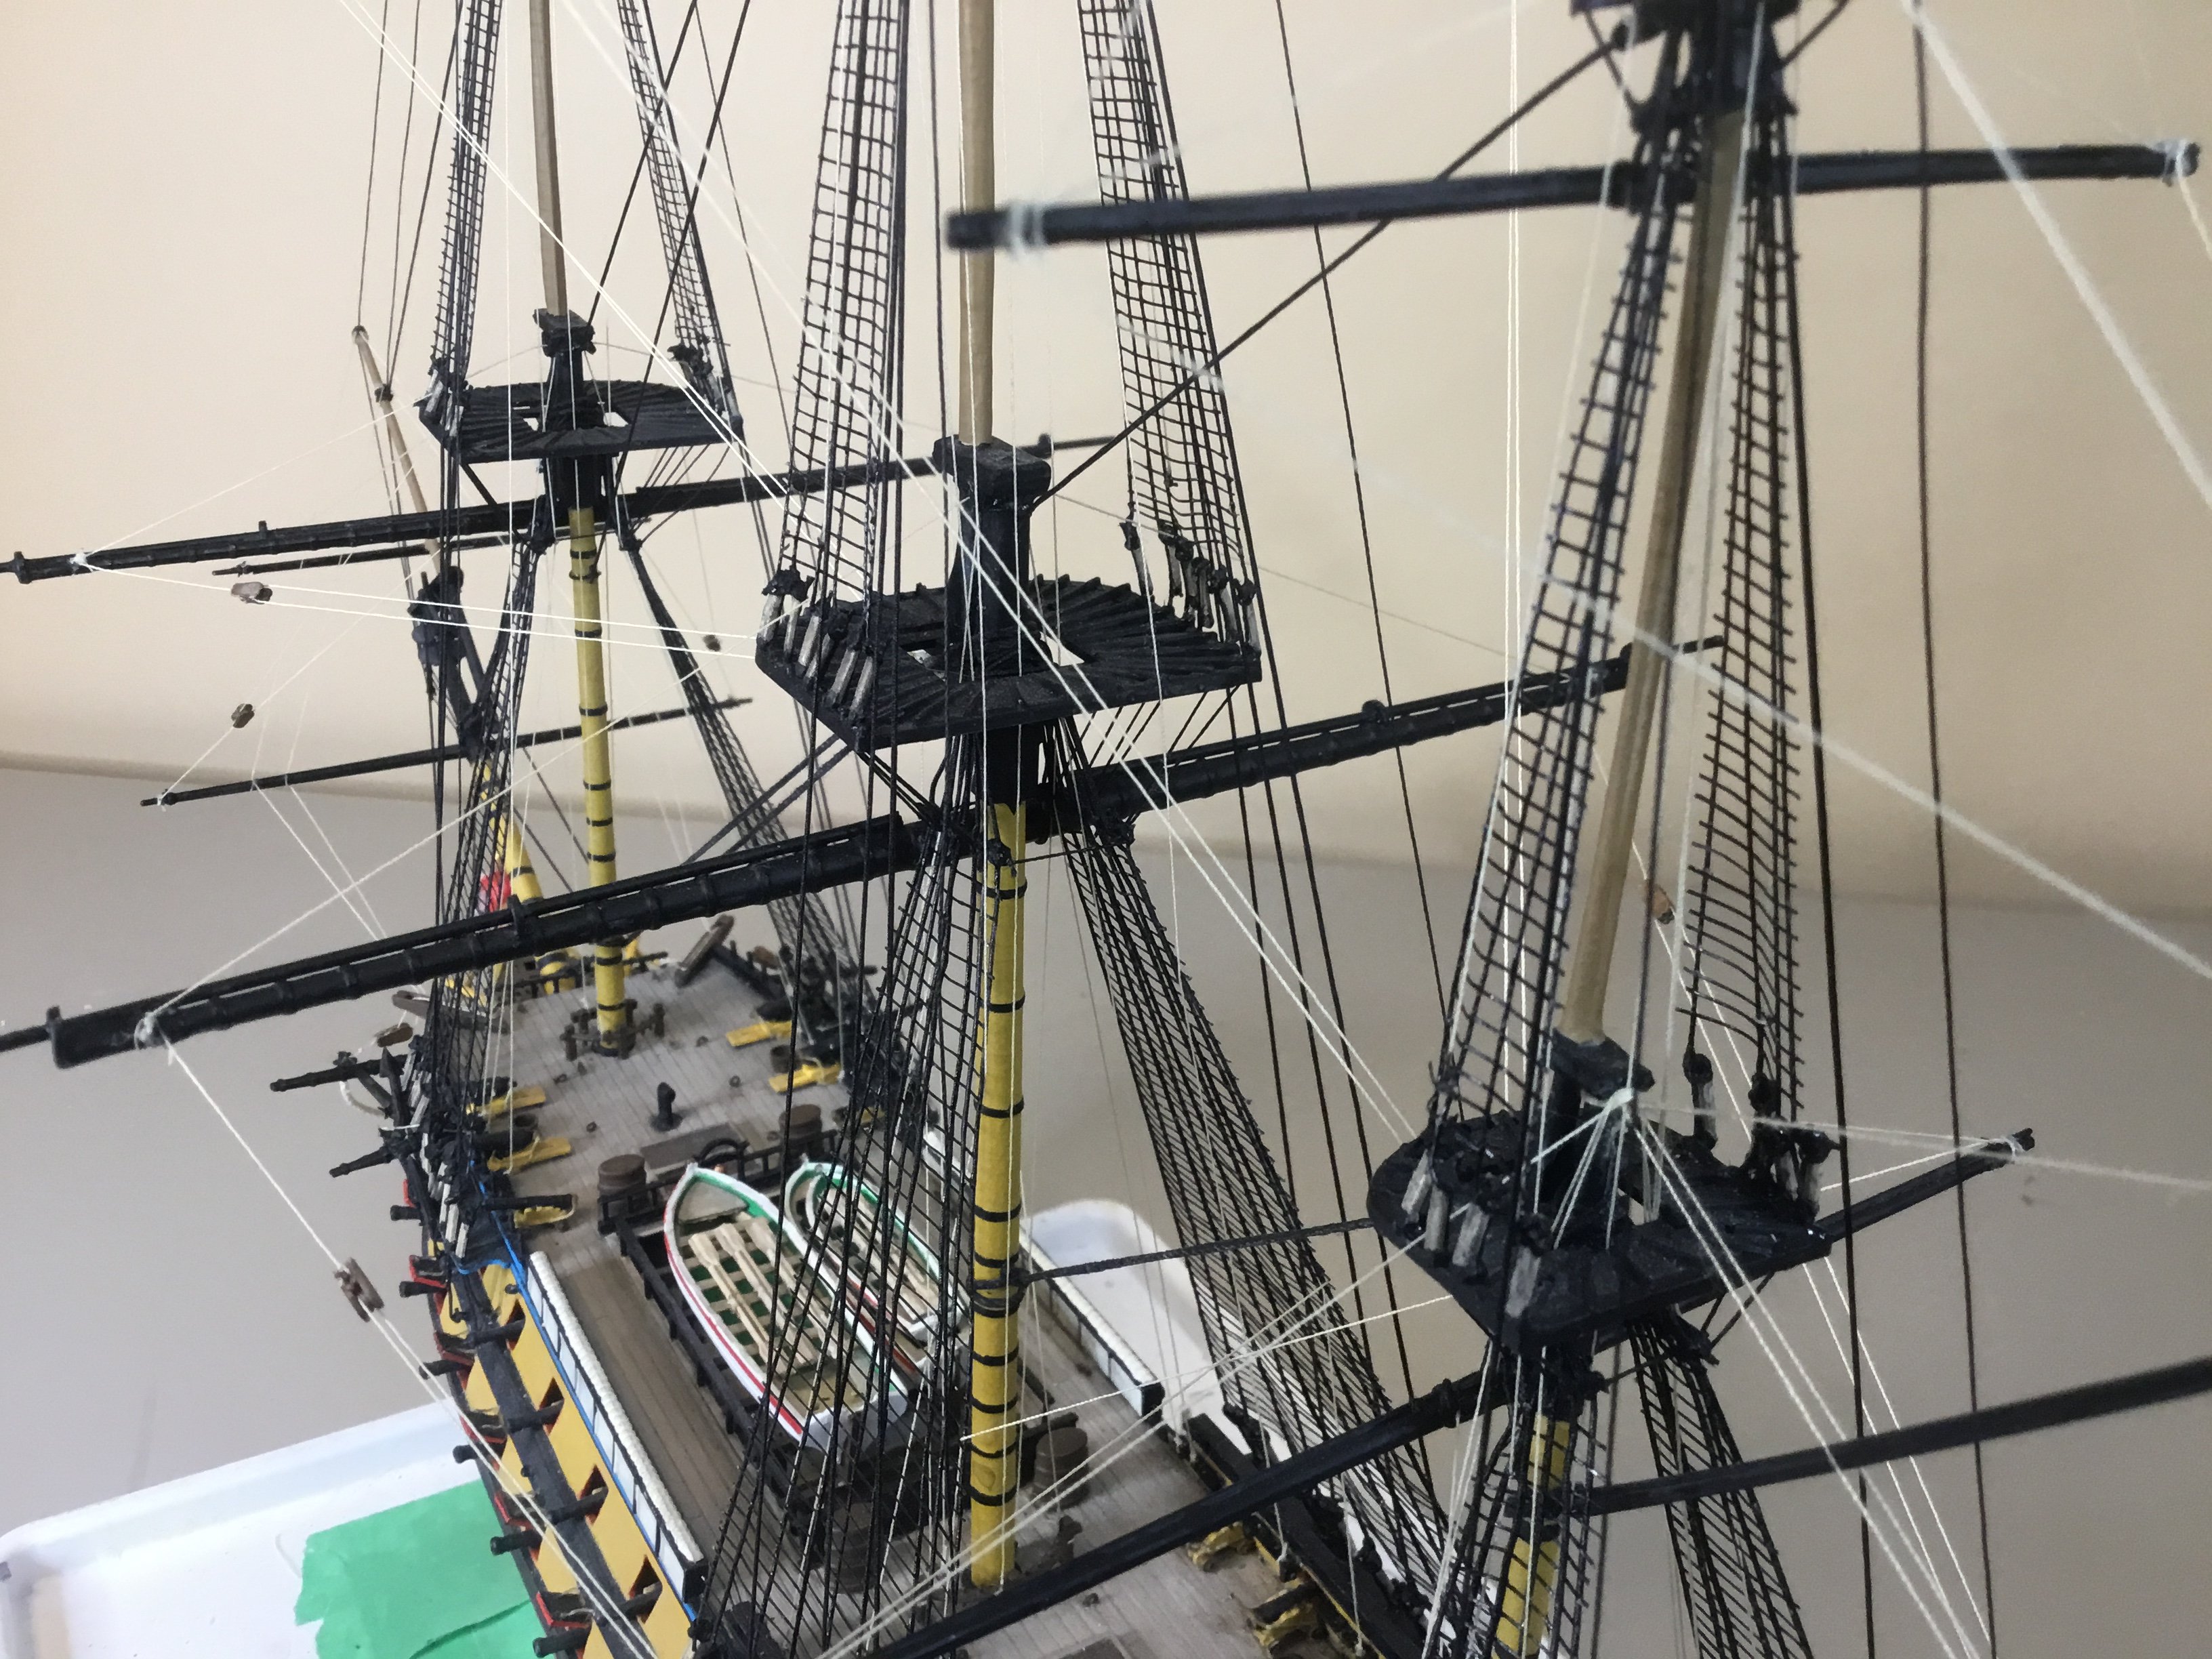
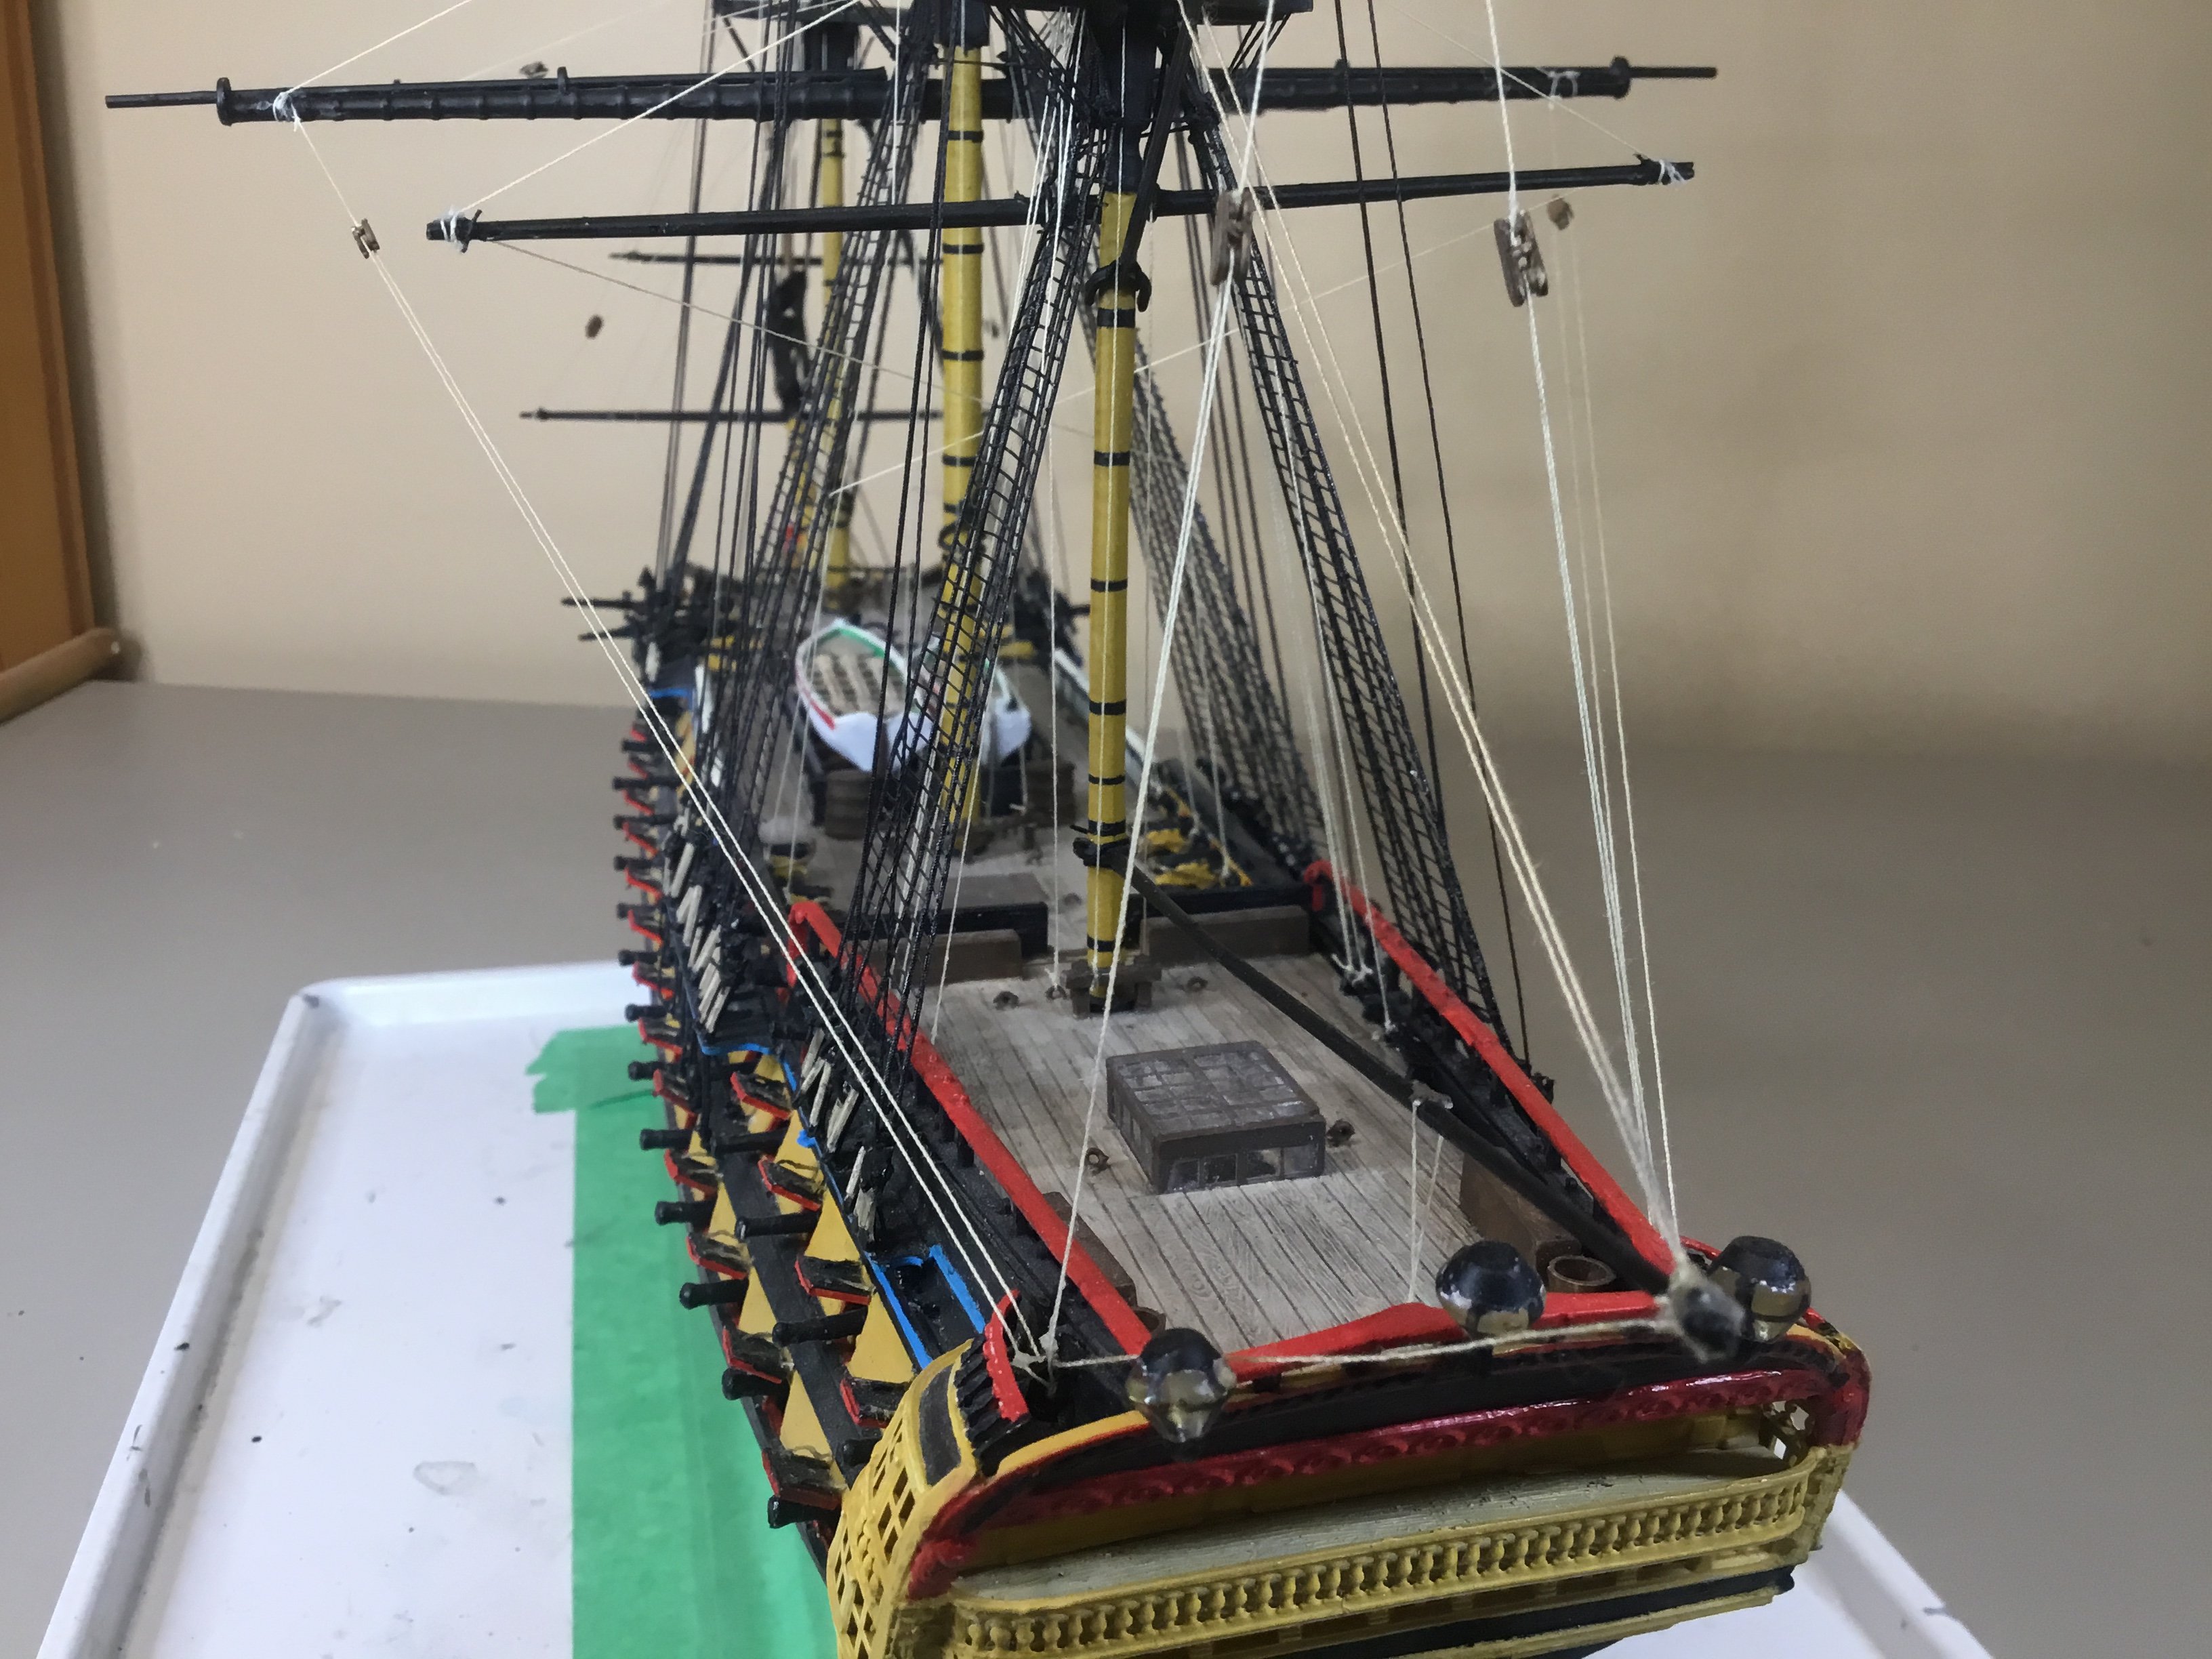
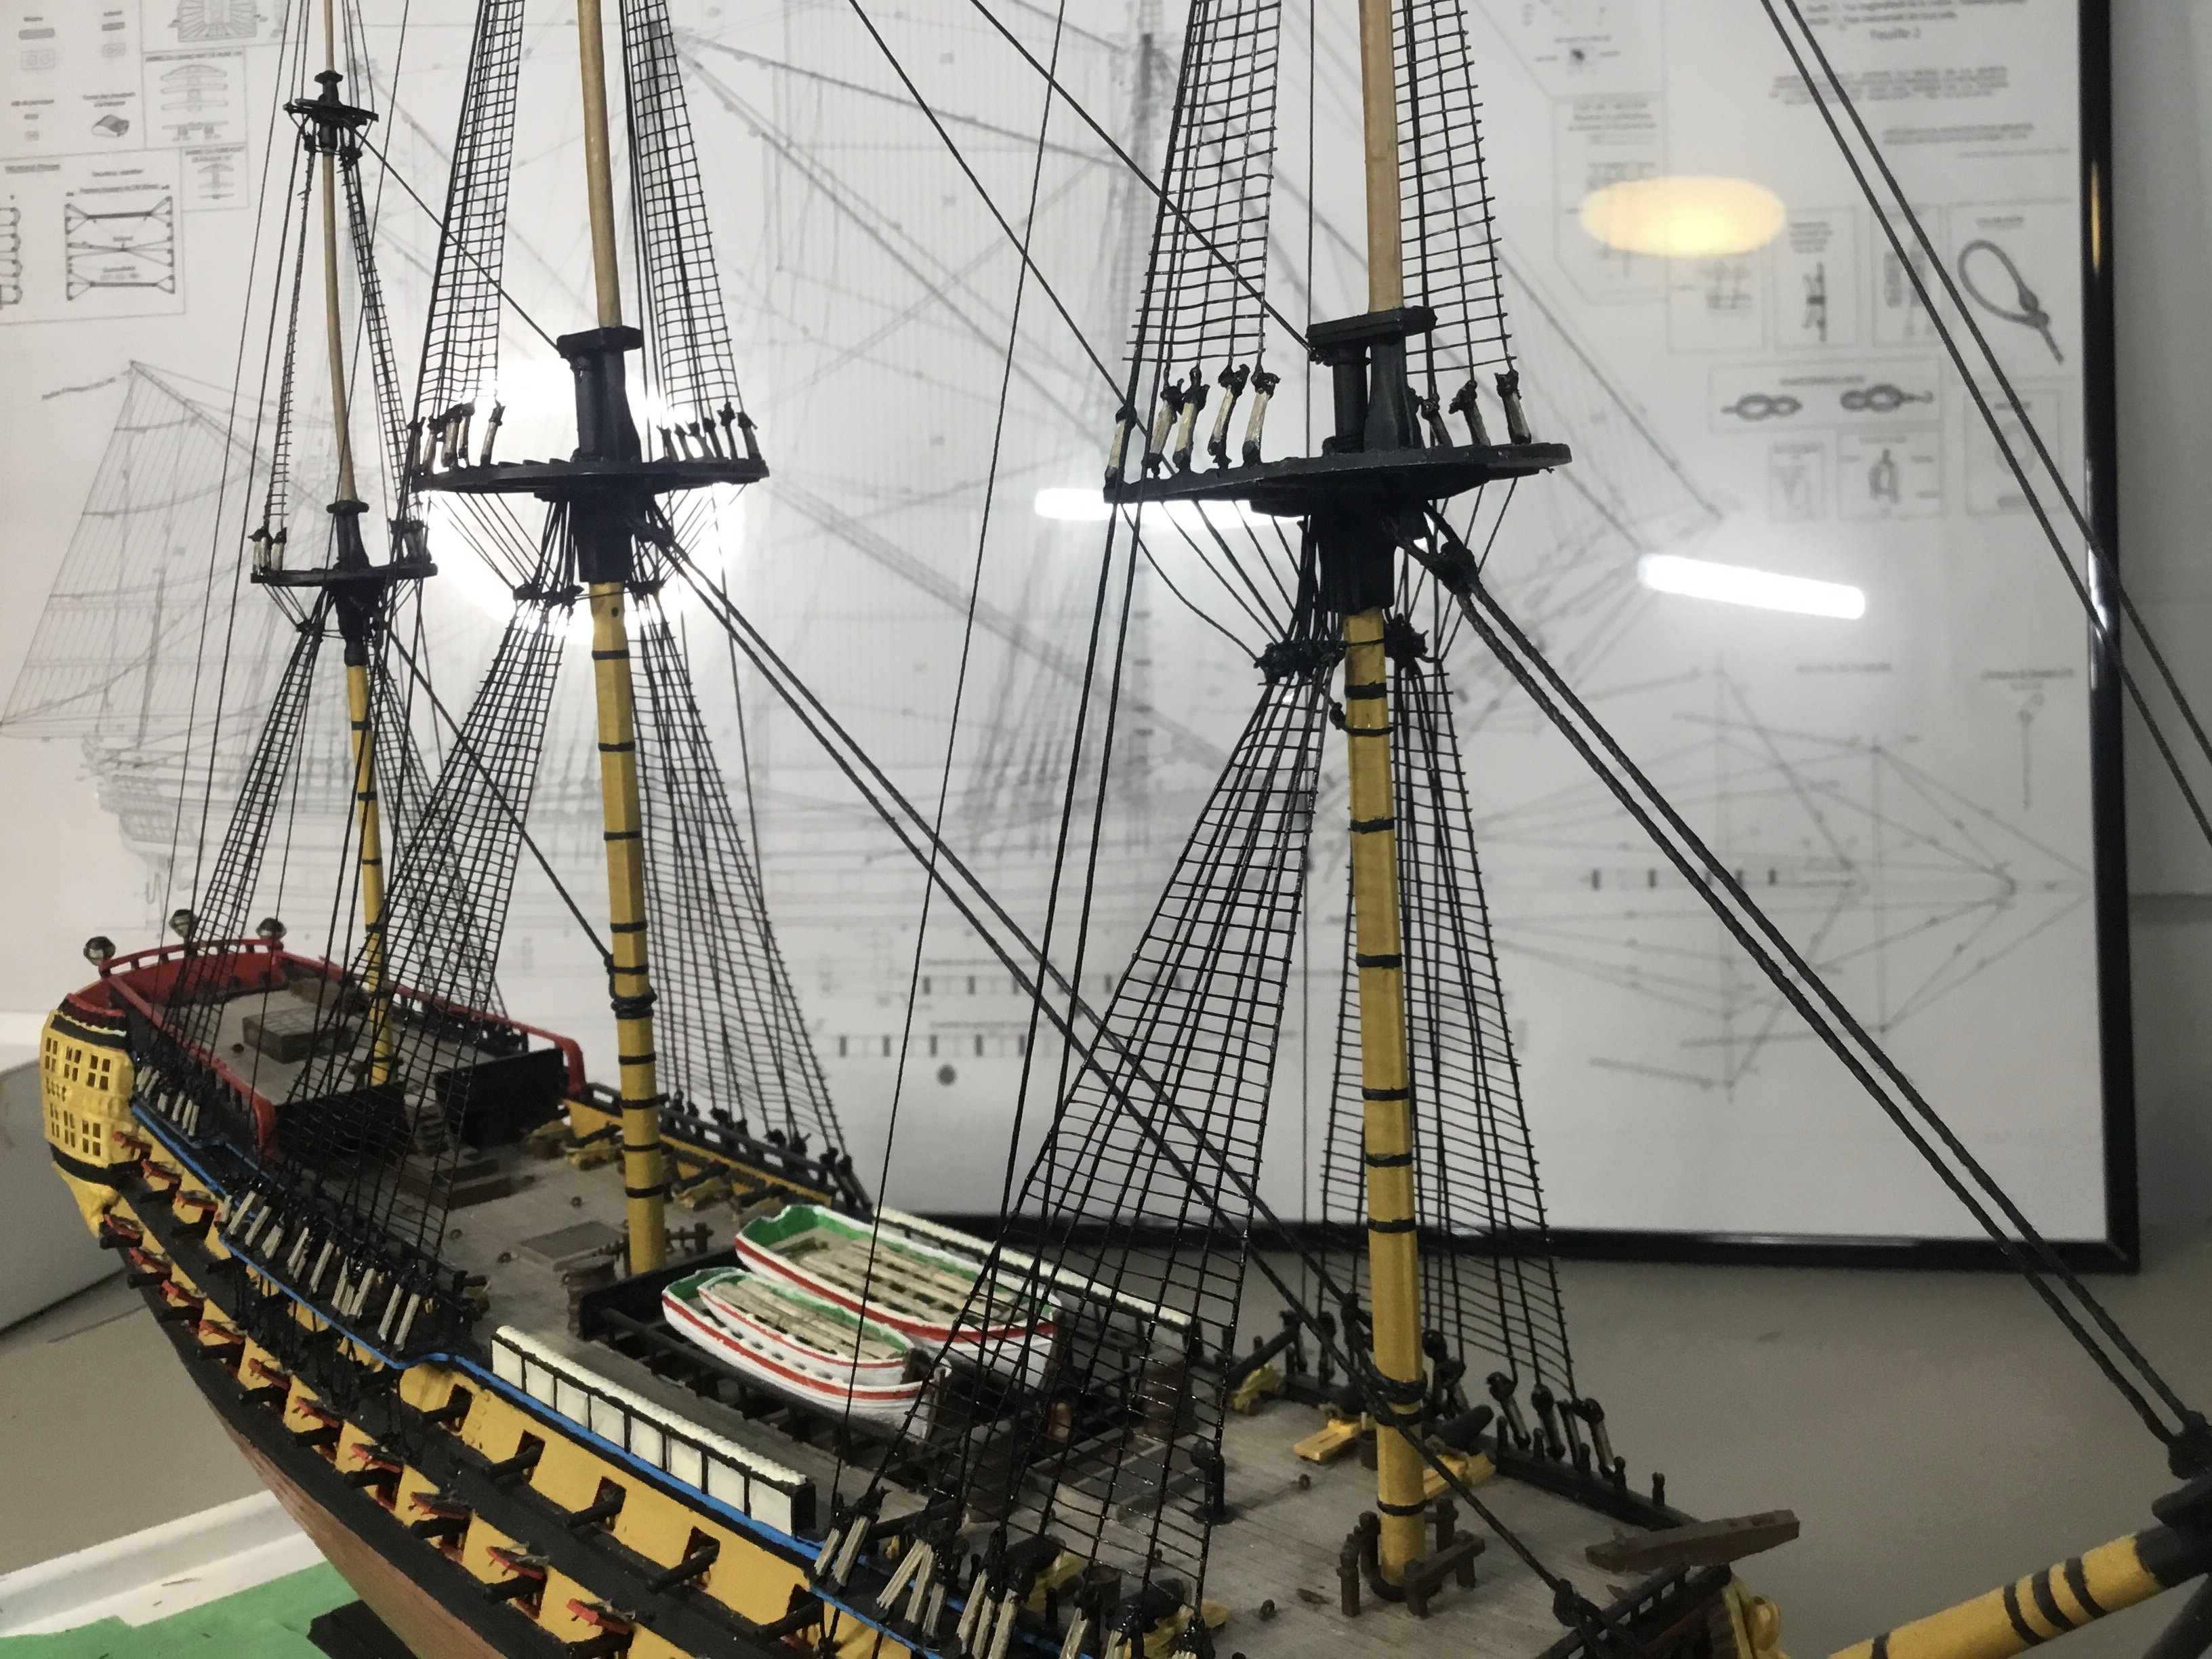
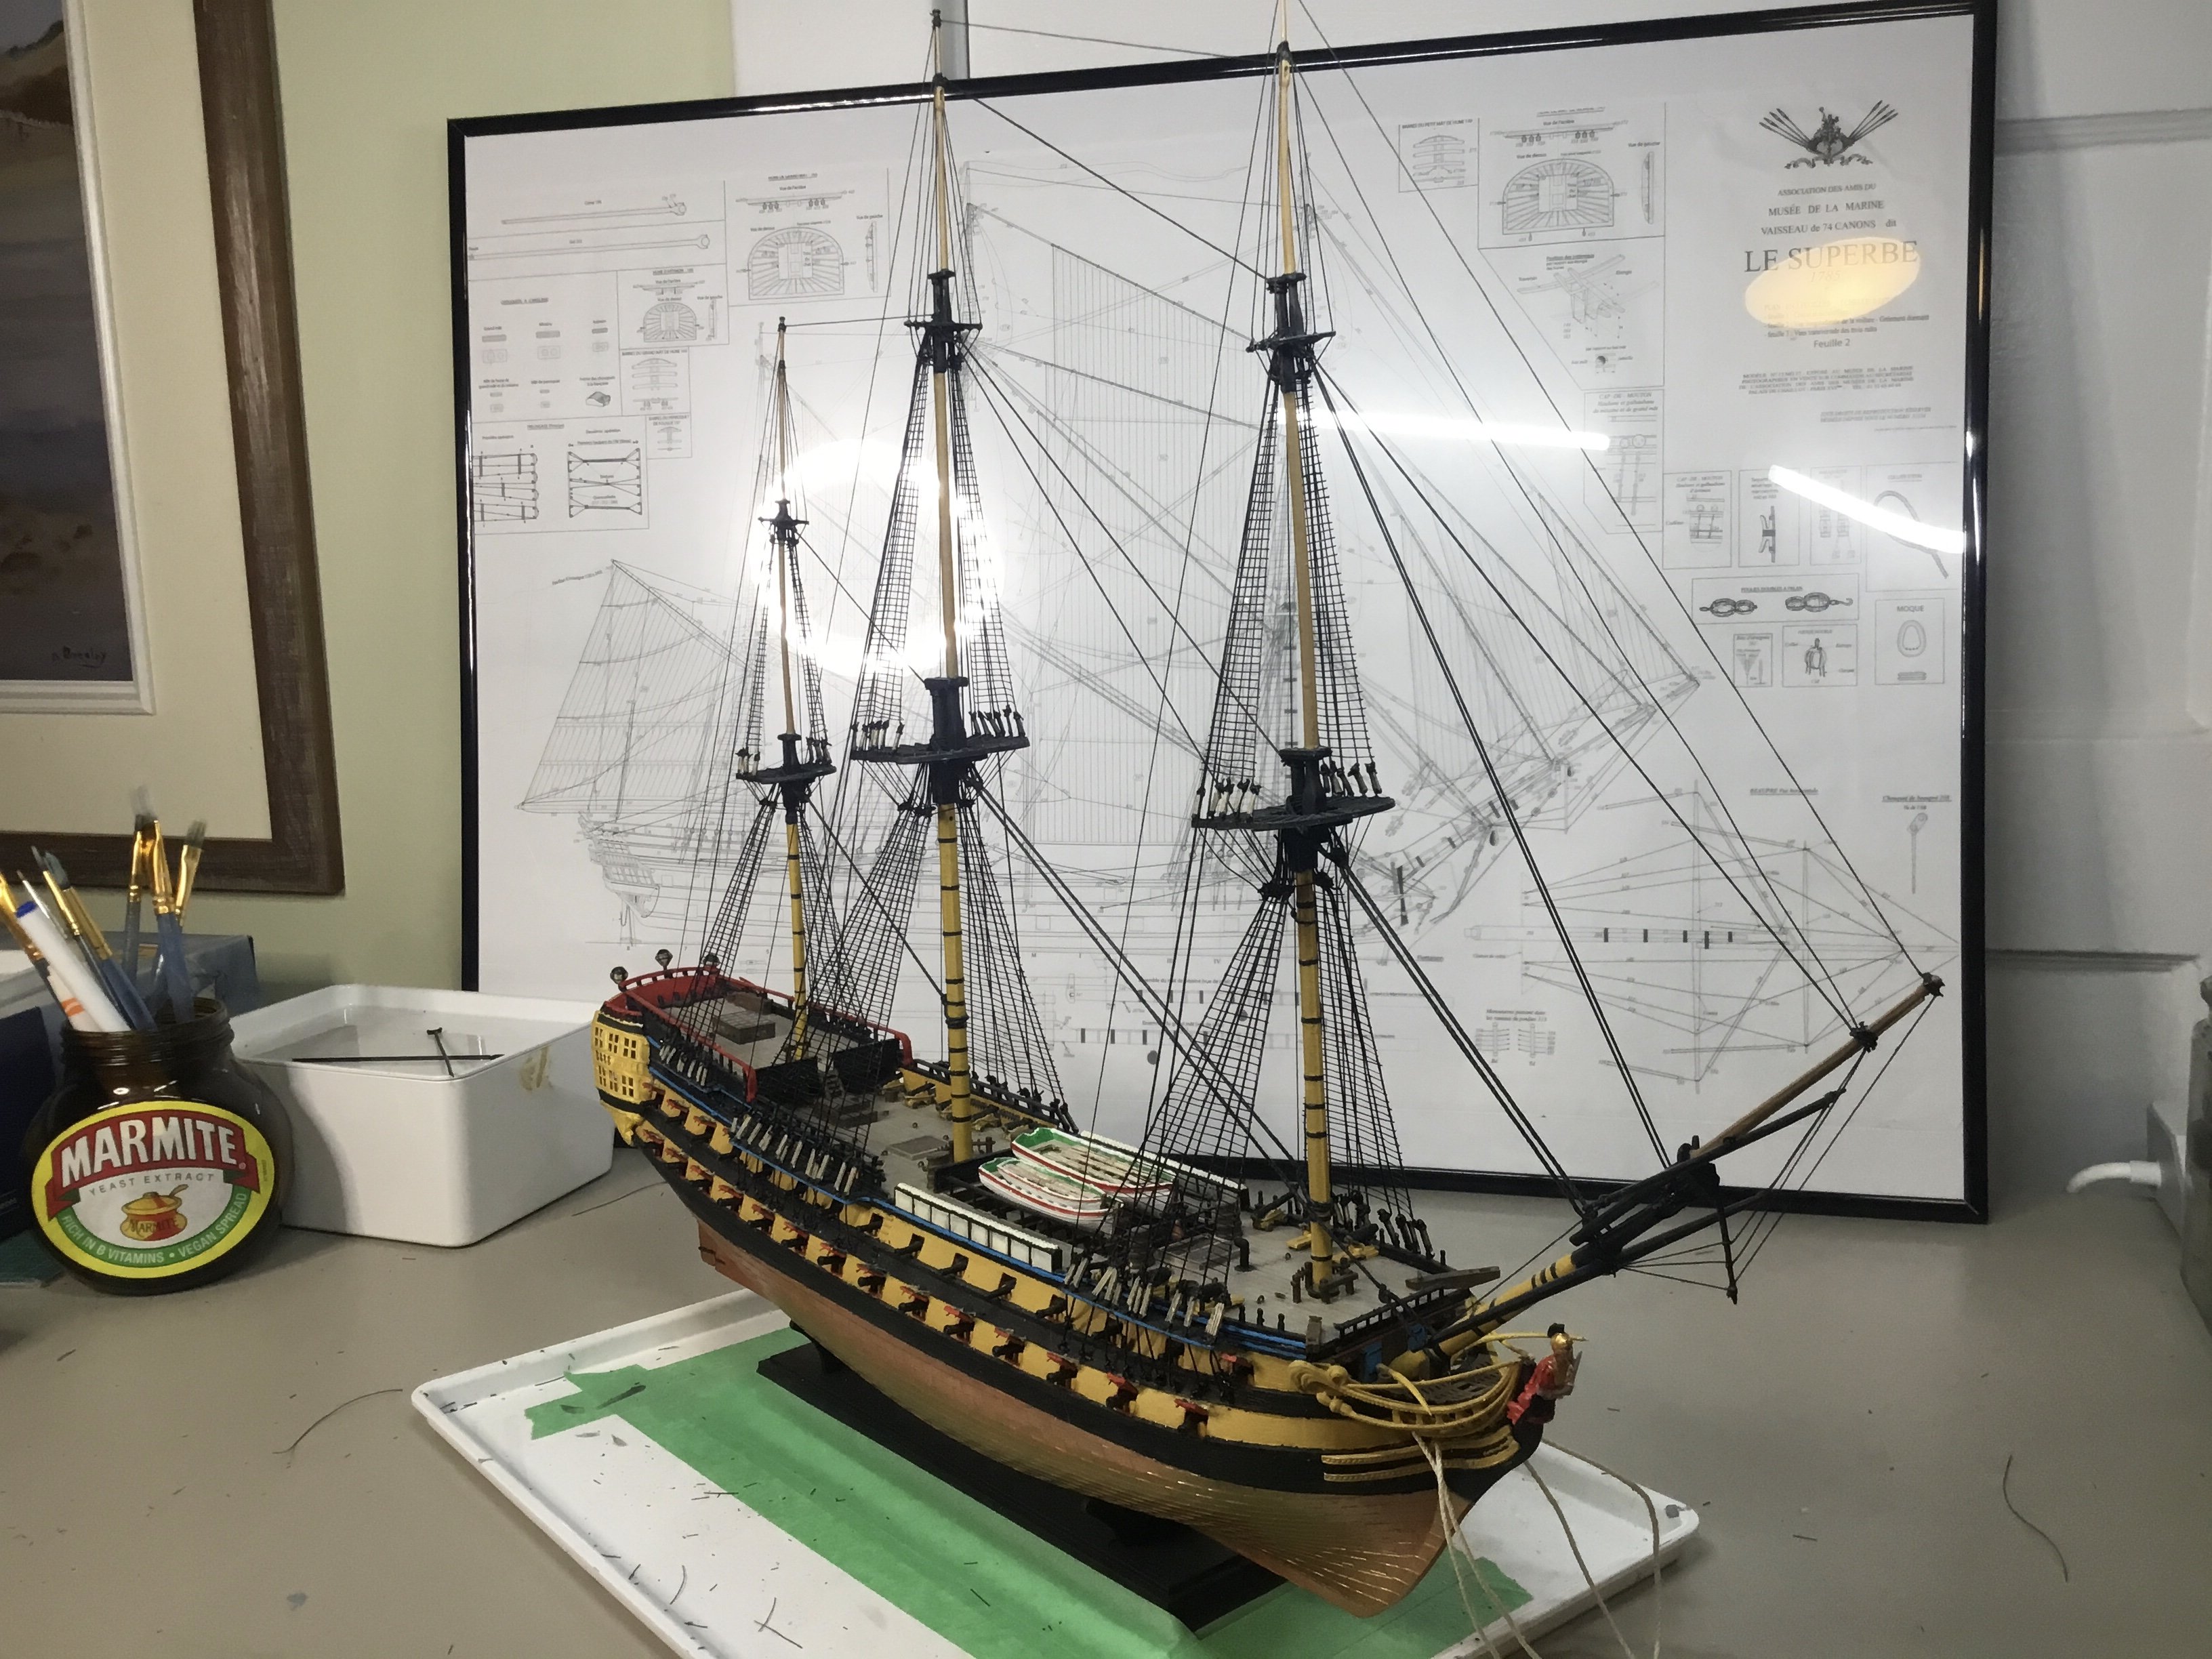
Newbie question here. On my model build (see here) of Heller's 1/150 Le Superbe (but built to a British fashion), the front of the main and foremast top platforms have a line of small holes. The image below says lines from these holes should connect with the fore and main preventor stays, but I do not see this feature on other models. Maybe it was a French feature I can ignore in my captured HMS vessel?


.jpg.74f1334237e6beeaf34b40505e4ad9b7.jpg)
.jpg.06e98e61f9cc715b6f648429db826842.jpg)