HOLIDAY DONATION DRIVE - SUPPORT MSW - DO YOUR PART TO KEEP THIS GREAT FORUM GOING! (Only 20 donations so far - C'mon guys!)
×


Admiral Beez
-
Posts
184 -
Joined
-
Last visited
Content Type
Profiles
Forums
Gallery
Events
Everything posted by Admiral Beez
-
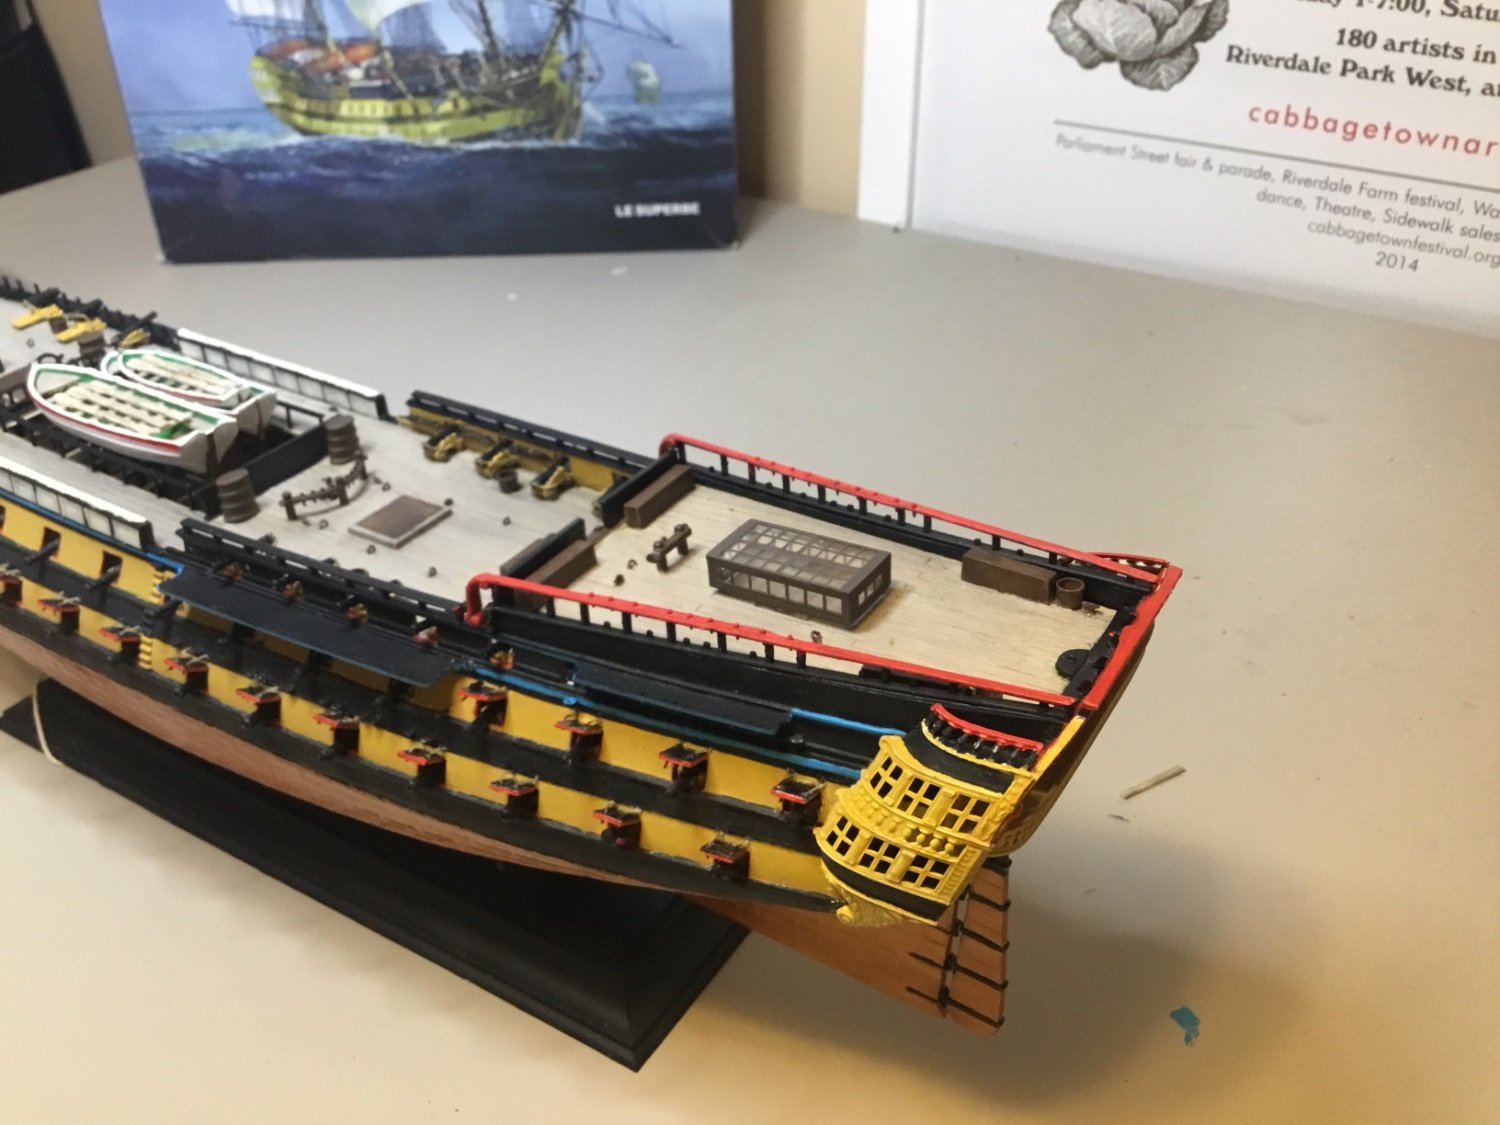
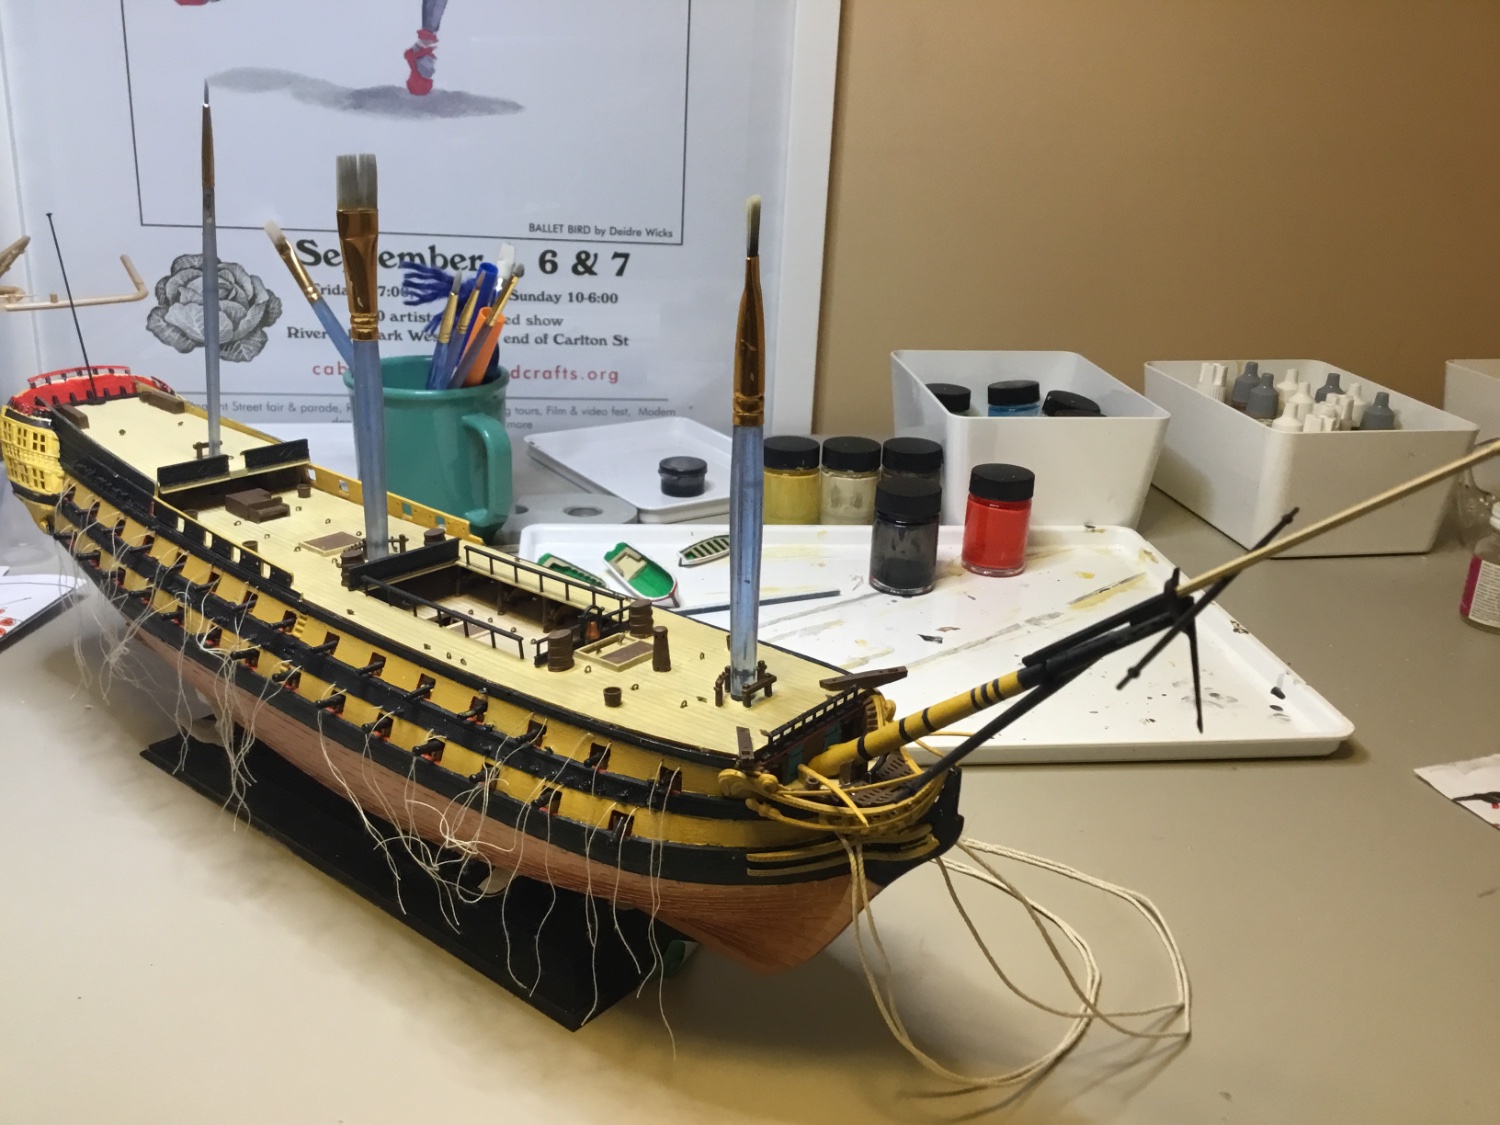
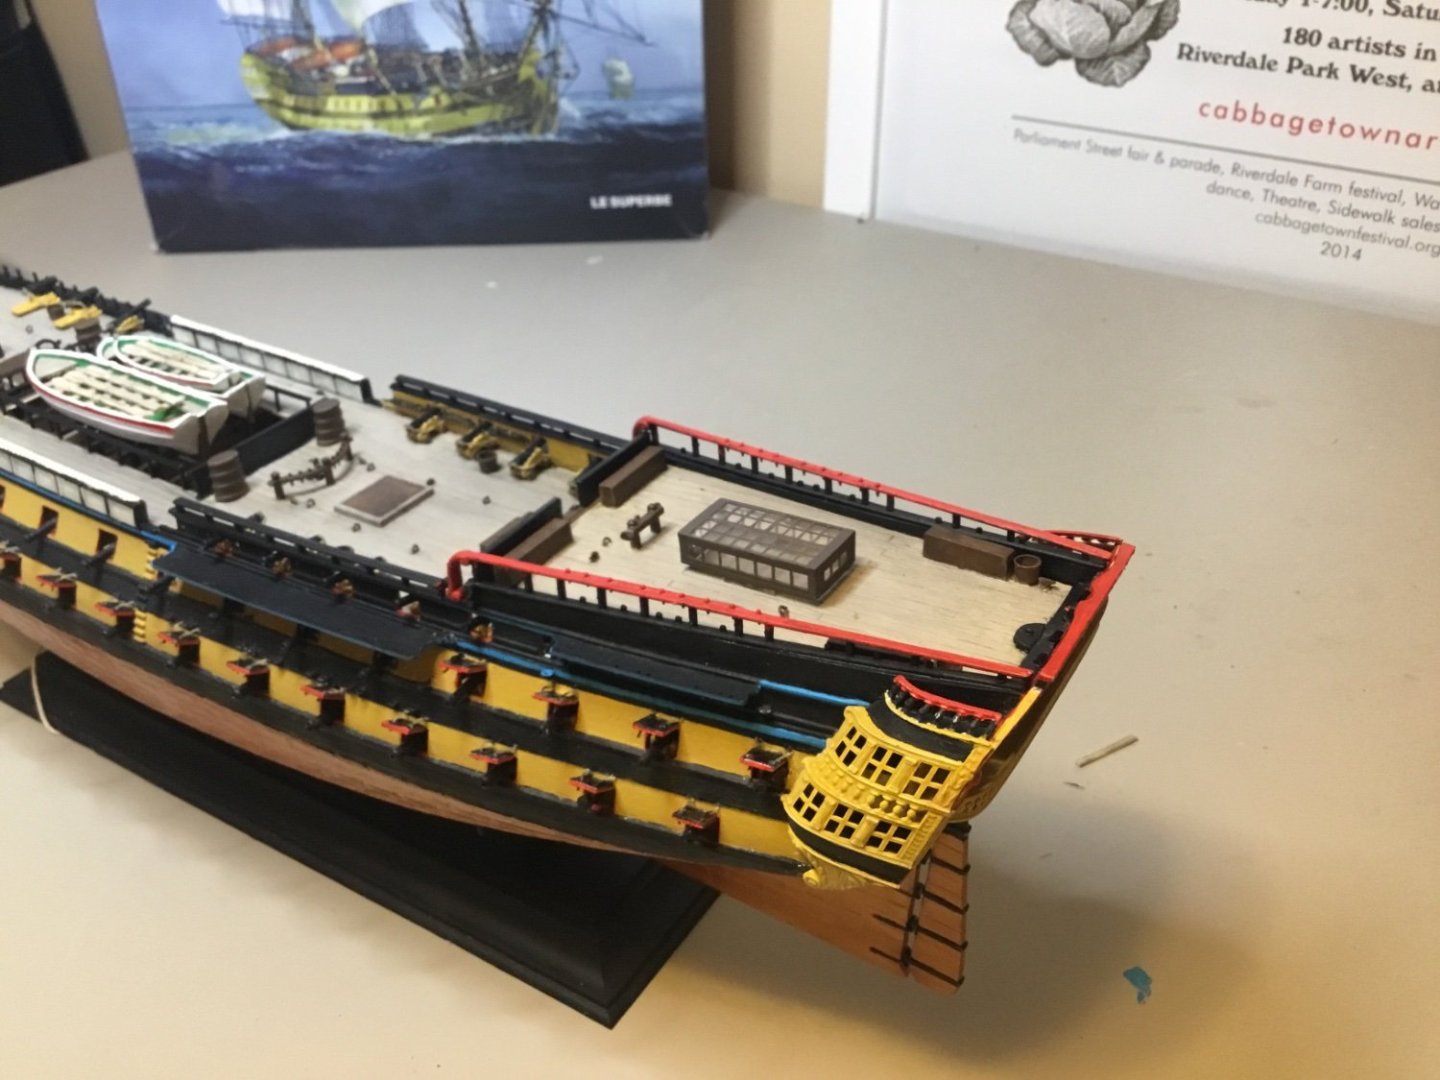
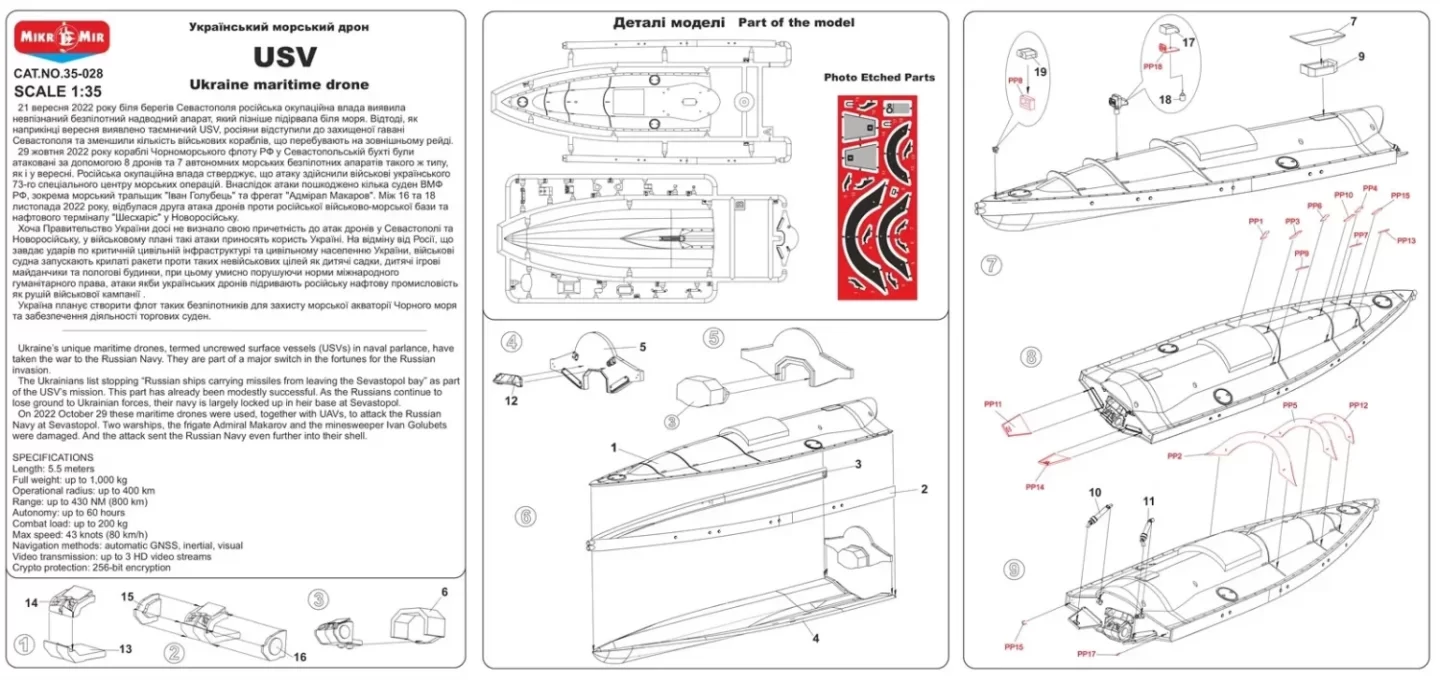
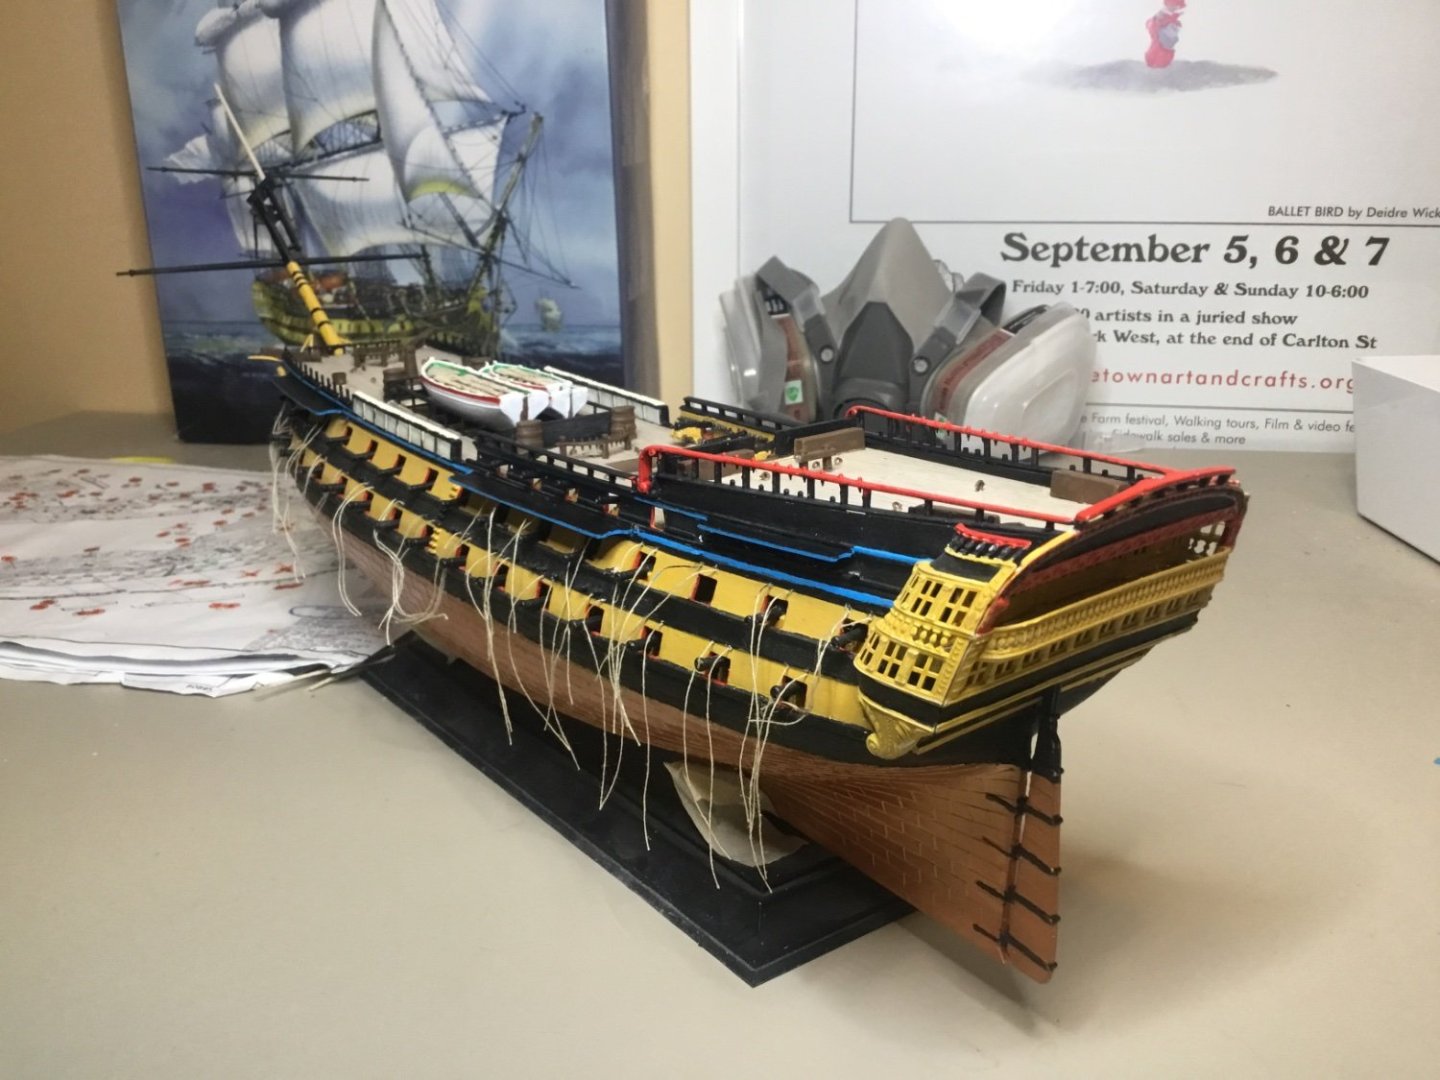
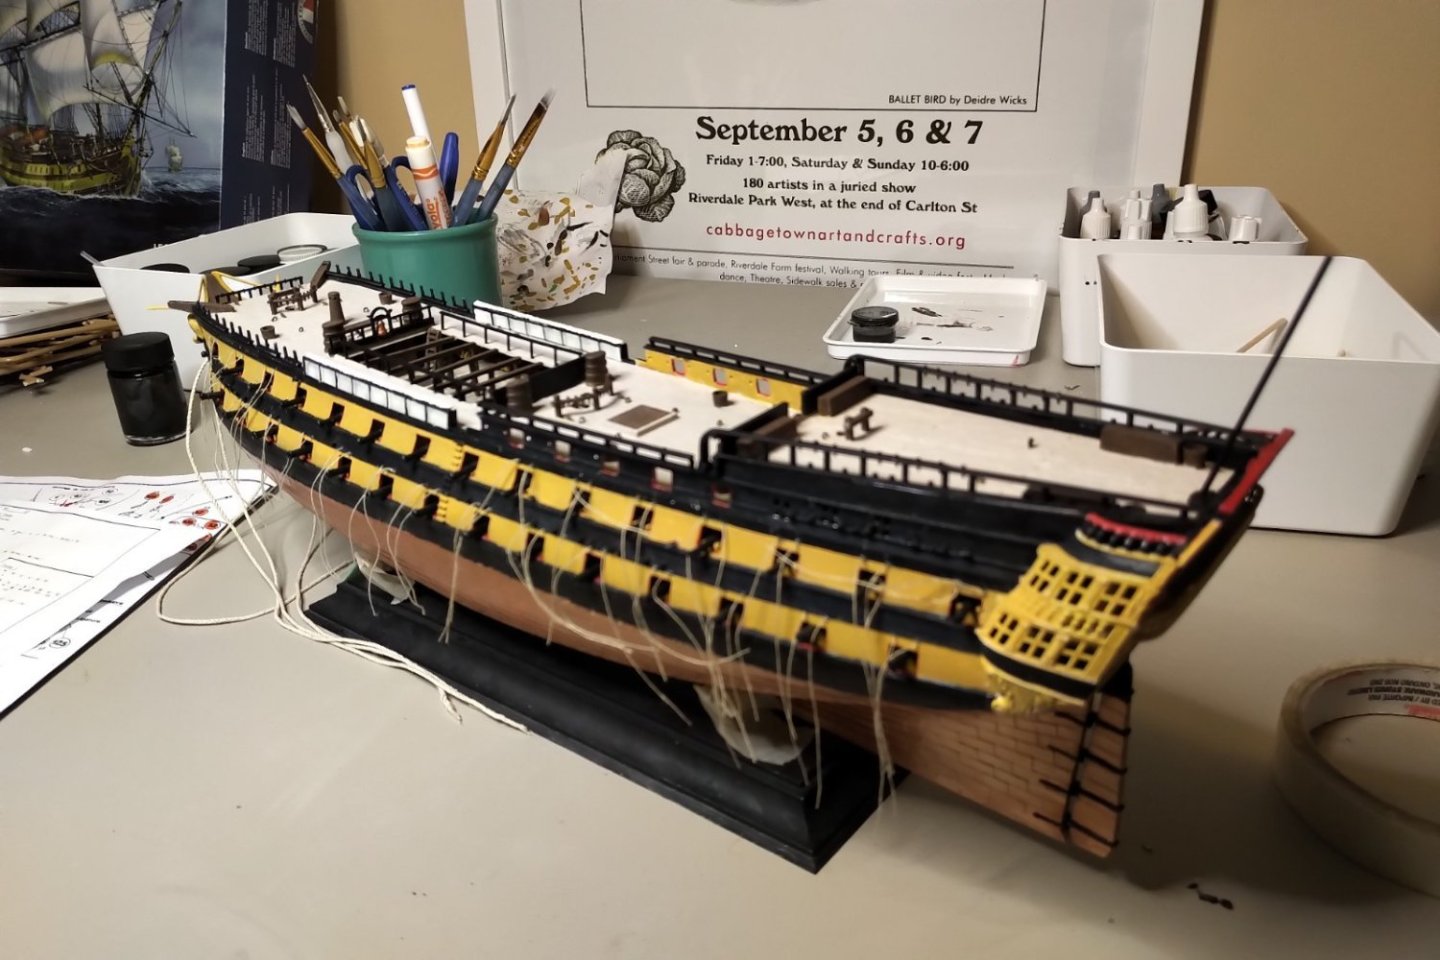
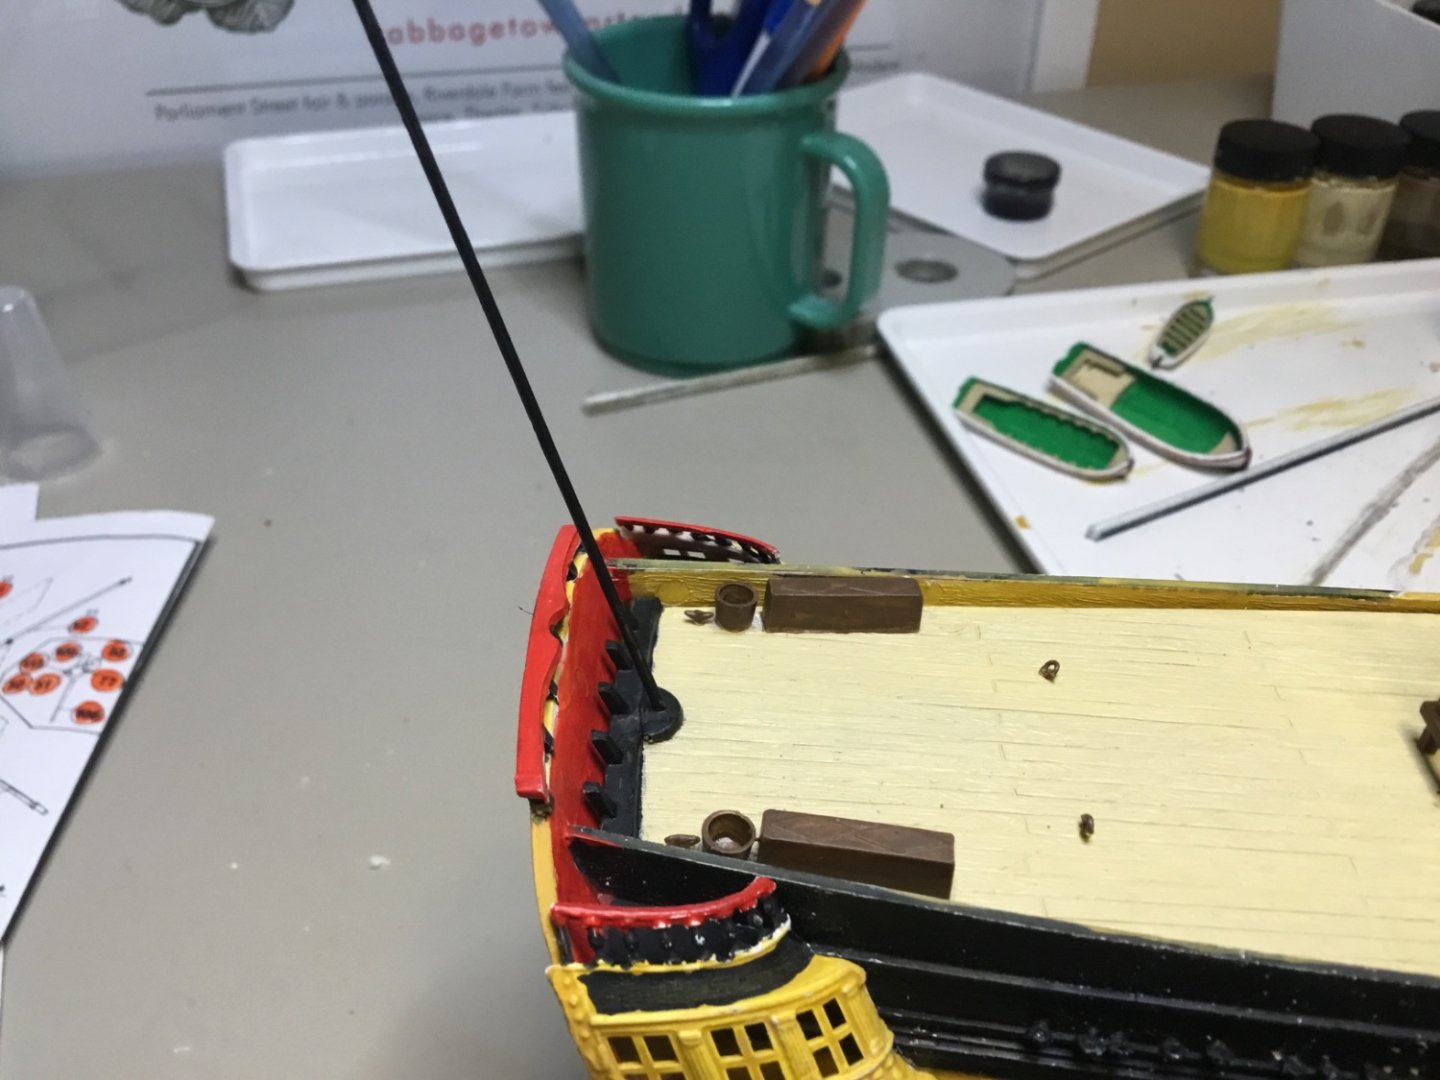
 Larboard side gun port lids installed. As you can see I’ve added port lids to the upper gun deck, one furthest forward plus aft where the officers’ cabins would have started. The custom-cast carronades turned out well, and I’m pleased with the ropes on the cannons. I’m still not sure what to do with the chimney, as the jeer capstan might be too tall and wide to simulate the chimney - I may just cut it off and create a square base and make a new chimney from a piece of elbow-shaped sprue. Here’s some options for the missing poop skylight. I’ll likely trim down the glass one to half size.


-
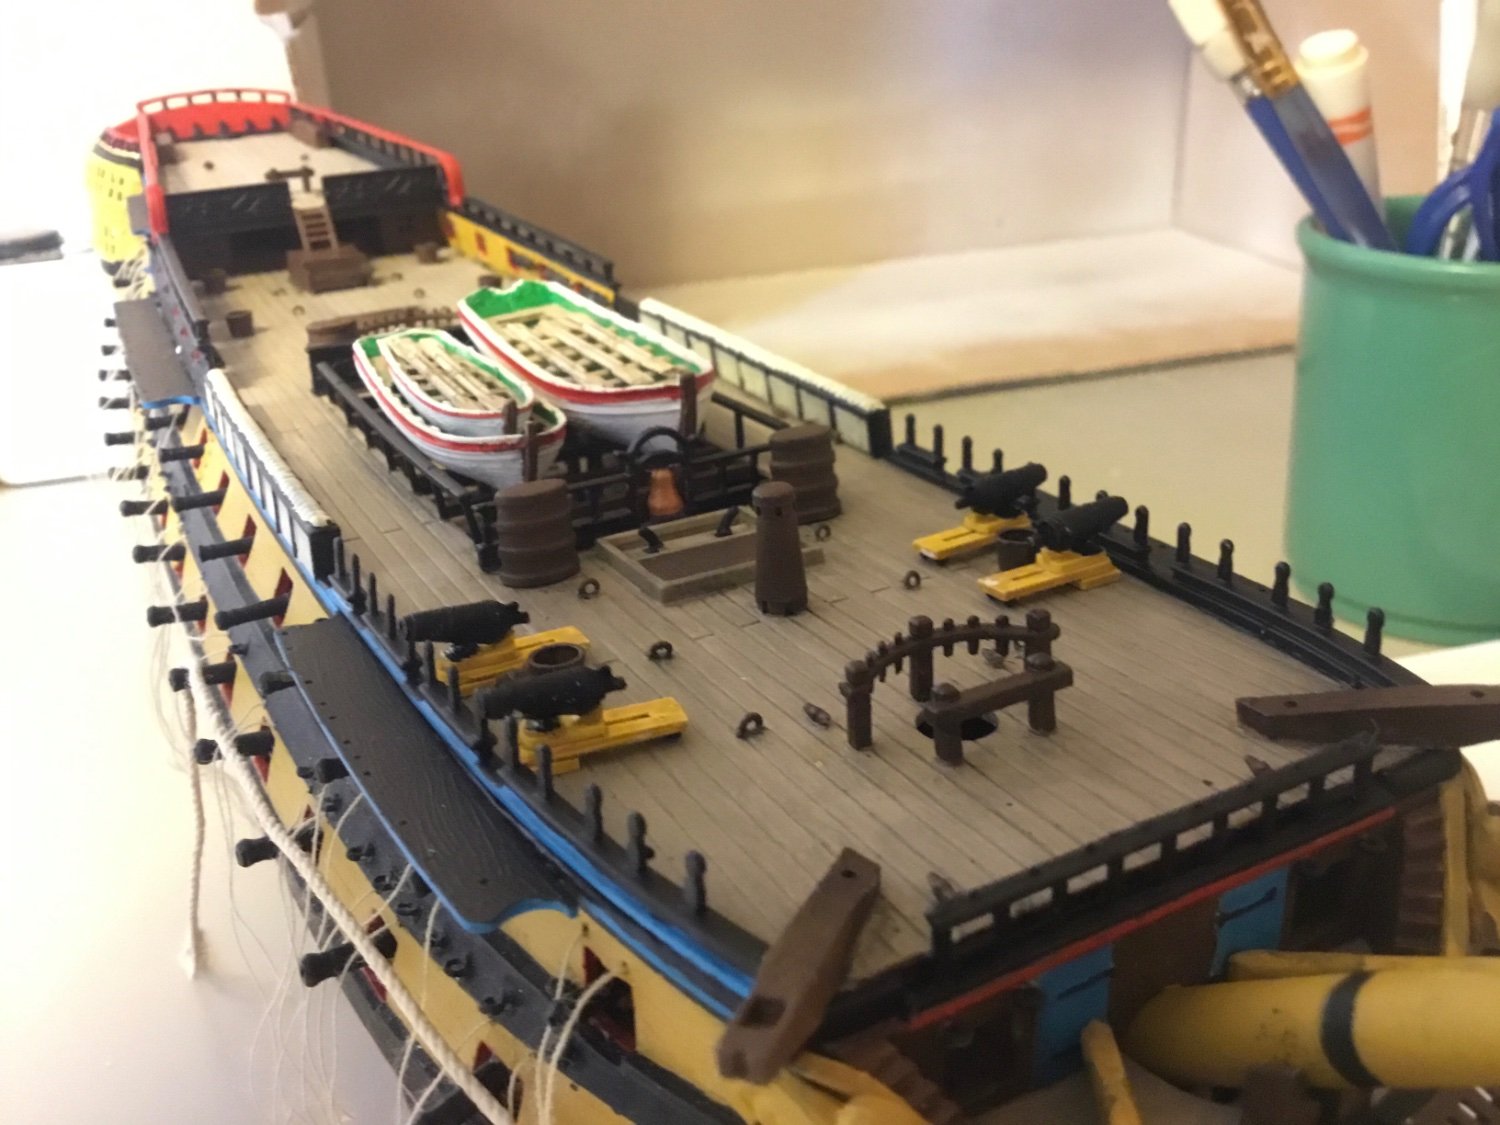
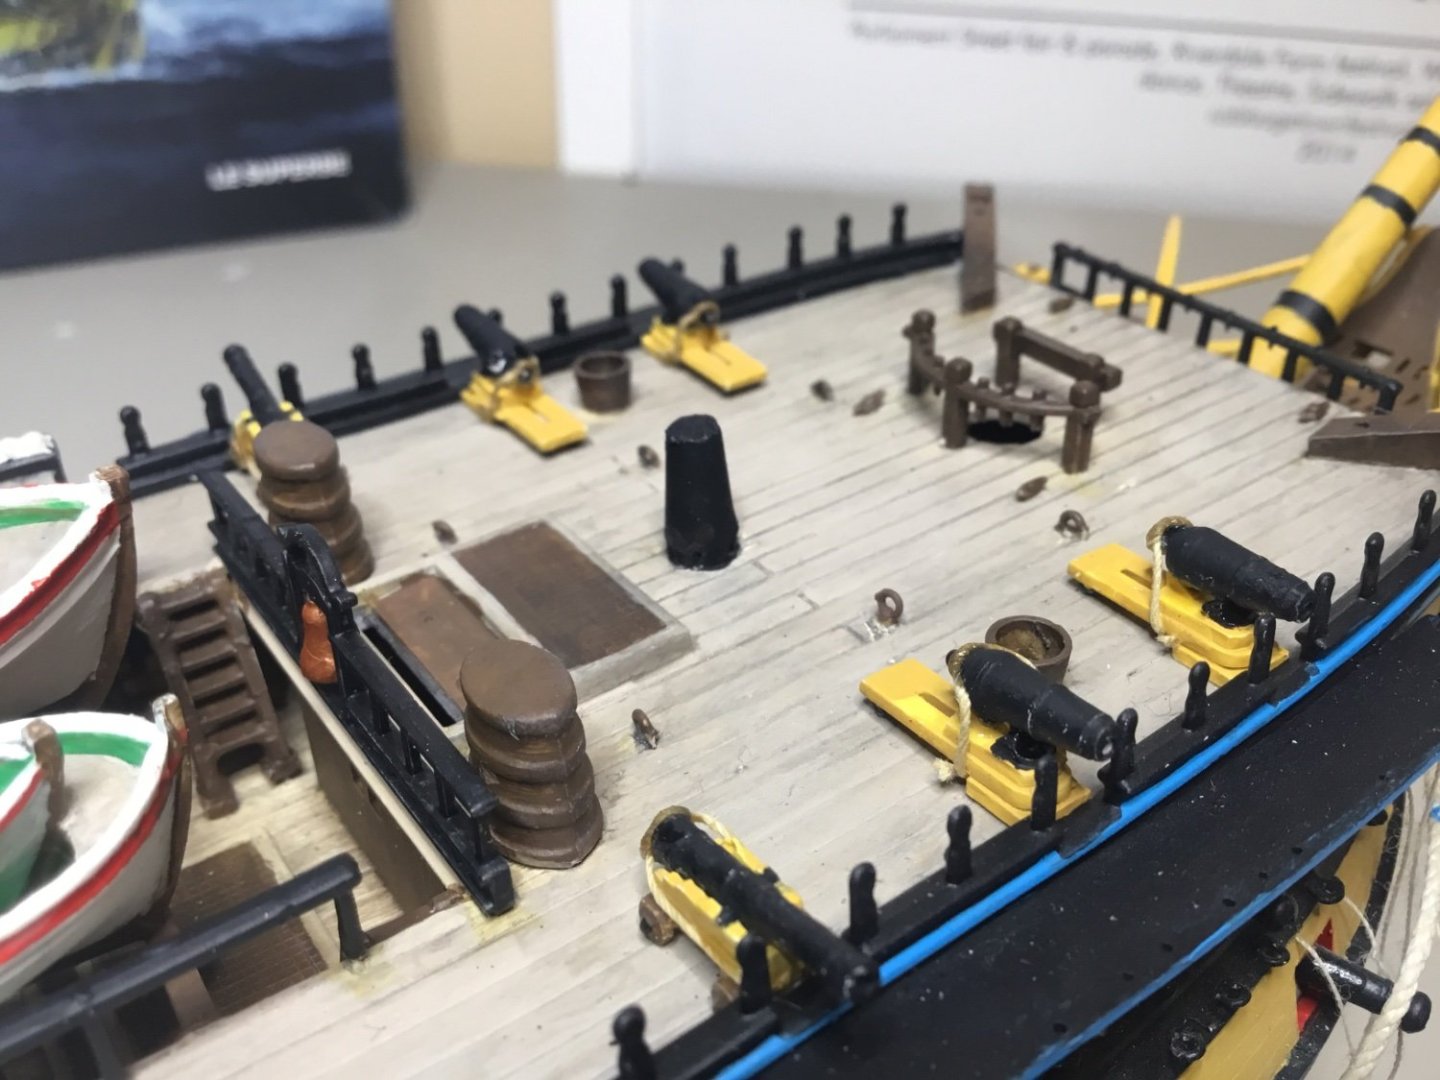
Bench is now an arms locker. Armrests removed and cavity beneath bench filled in with styrene. Jeer capstan now a chimney, awaiting its exhaust turnout. Forecastle and quarterdeck guns and carronades roped and knotted, waiting to dry then aboard they go. First gun port lid threaded and glued into place. I’ll knot the rope when they’re all firmly in place.


-
My thoughts too - the sprue has come in handy. I used a column of sprue to support the quarterdeck above the gundeck, for example. I’m sure I can make a convincing chimney. The Bellona book (keeping in mind she’s British-built rather than a British conversion of a French prize) has been a lot of help, though in hindsight I didn’t catch as many differences between the kit and the RN ship as I would like. I’m using the book now along with pics from Victory for rigging the guns and carronades. I remind myself that this is my “learning” ship, having not built anything since my 20s, 30 years ago.
-
I’m too far along to remove the bench and platform behind it, but I will cover up the cavity in front of the bench so that it becomes an arms chest. Once I have the jeer capstan converted to a chimney (thanks for that advice) along with the custom carronades, boat skid beams and RN-like paint scheme in place I’ll be satisfied that I’ve made her somewhat British. I’m still perplexed by the bowsprit extension being off centre. Im tempted to cut it off and rotate it to centre. Im going to remove the yards anyway and install them when I do the rigging. Thoughts? And why is the ship’s wheel so far under the poop - there’s no way the helmsmen could see the sails or have any situational awareness.
-
I'm going to change jeer capstan into a chimney. If I cut the top off the capstan and fabricate an aft pointed type it might look chimney like - I'll try out this cone calculator, https://www.cmrp.com/cone-calculator. Just like the chimney on HMS Victory below. I can remove the little stove pipes and will then fabricate a grating hatch cover like the one afore the chimneys below. Do you think I should remove the bench before the poop stairs? I can't imagine any British officer or seaman lounging about while on the quarterdeck!
-
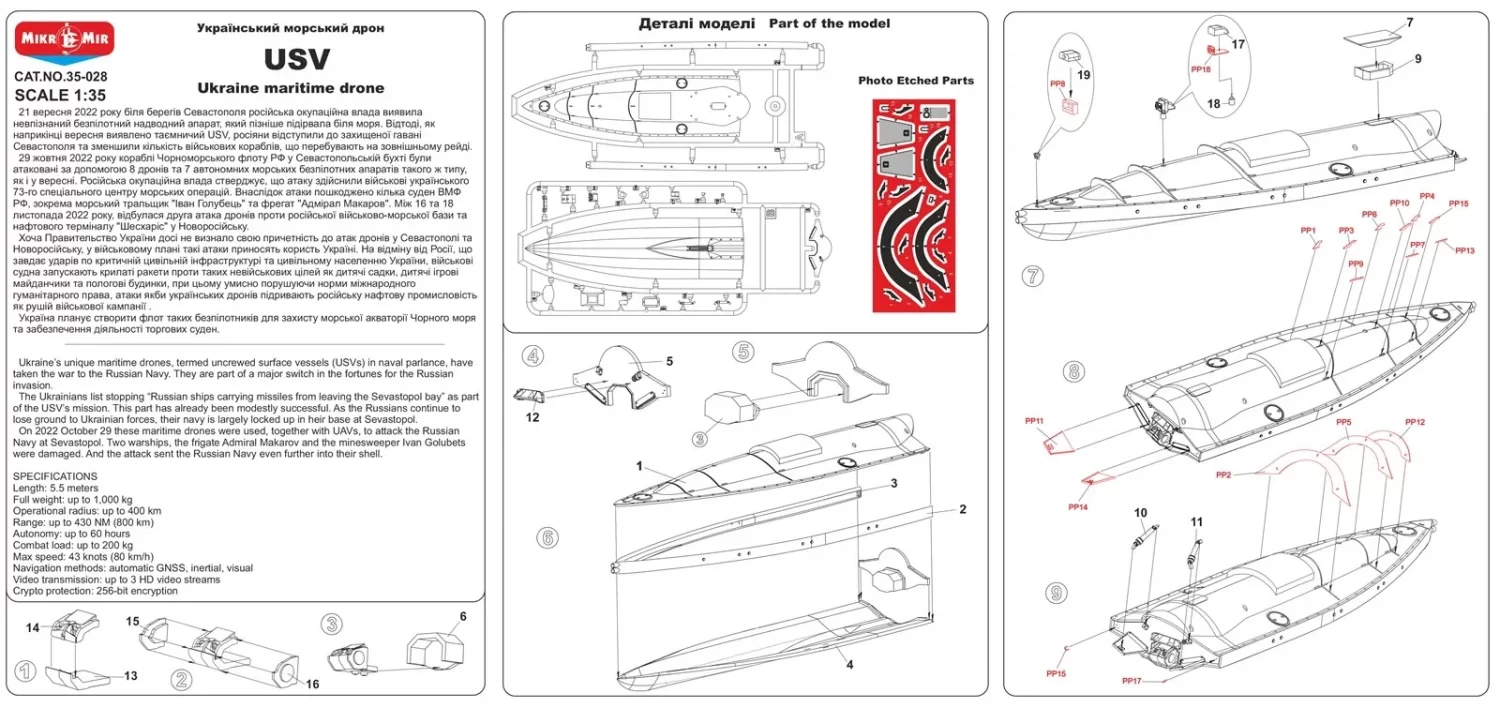
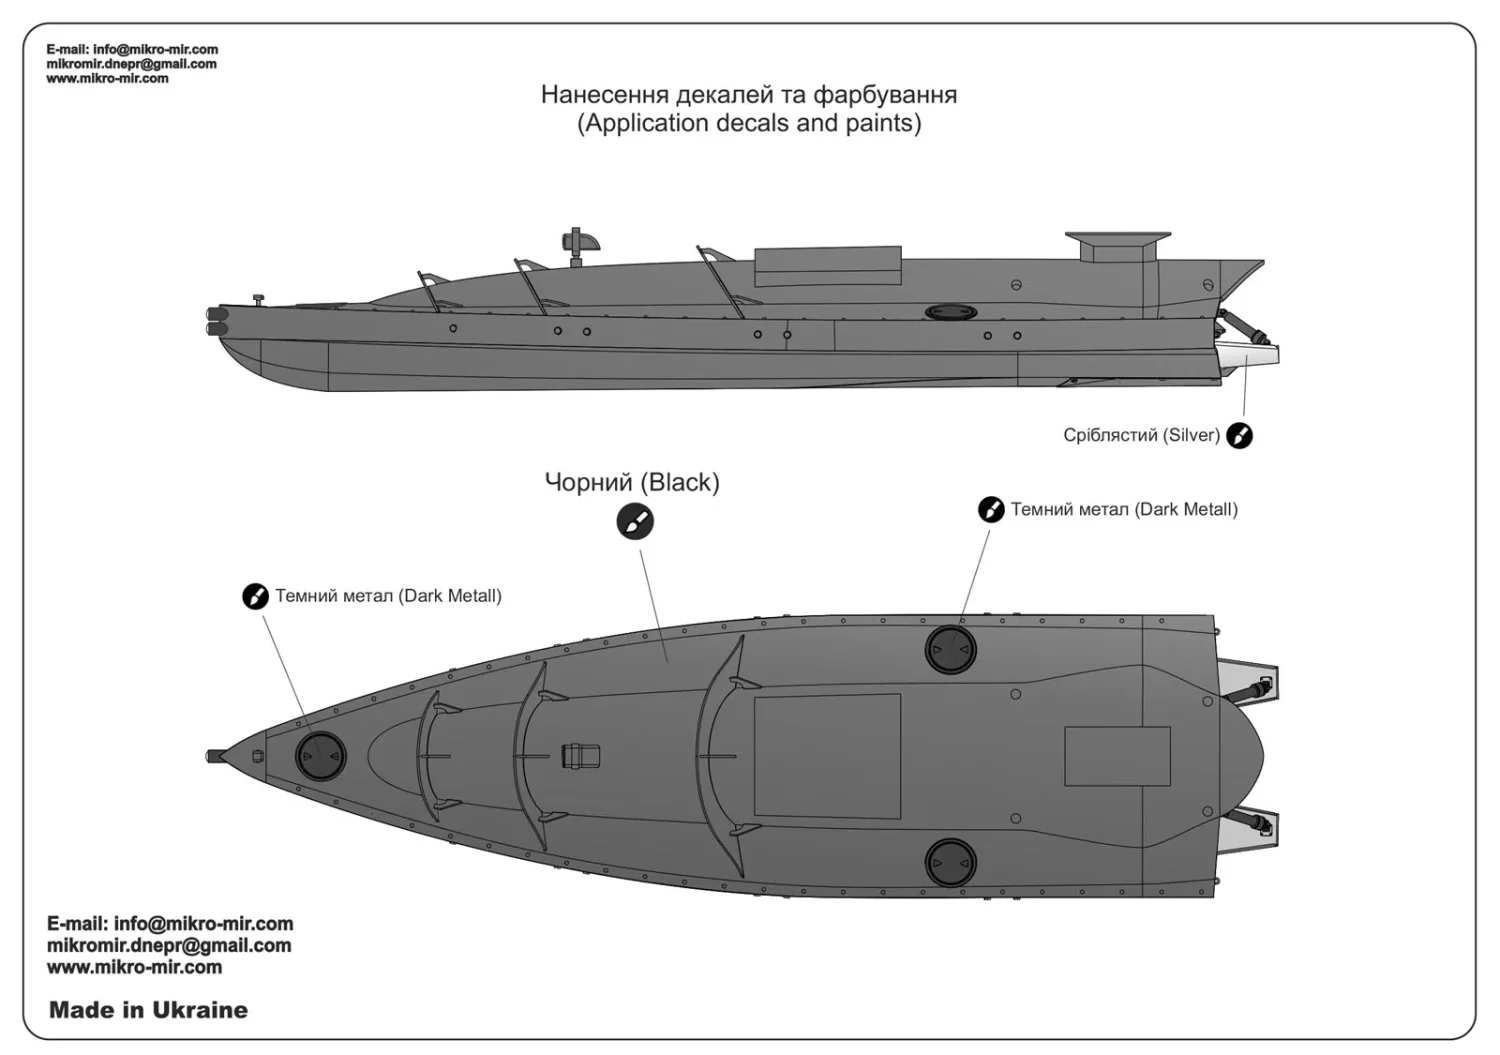
Here’s an interesting kit. Who would have thought we’d see model kits of naval strike drones?


- 1 reply
-
- 10
-

-

-
Hmmm… if I were to cut off the jeer capstan what would go in that space? I see what looks like the stove chimney here. This model at my local museum has a jeer capstan. Most of the ship here are British. Perhaps a captured French ship would keep it upon transfer to British service?


-
I wish I’d known it was mostly a French feature when I began my build of a British 74. Originally captured from the French, so perhaps they’d leave it in place.
-
One item on the original shipyard plans that’s missing on the Heller kit is the skylight on the poop deck. I’m going to try to mock something up there. It’s a strange omission on the kit. The kit comes with some extra 12 pounder barrels, and some carriages, but not the carriage side panels. I suppose that’s just from efficiencies on the sprues. I was thinking about making a pair of 12 pounder carronades for the poop deck, cutting the barrels short and removing the wheels from the carriages.
-
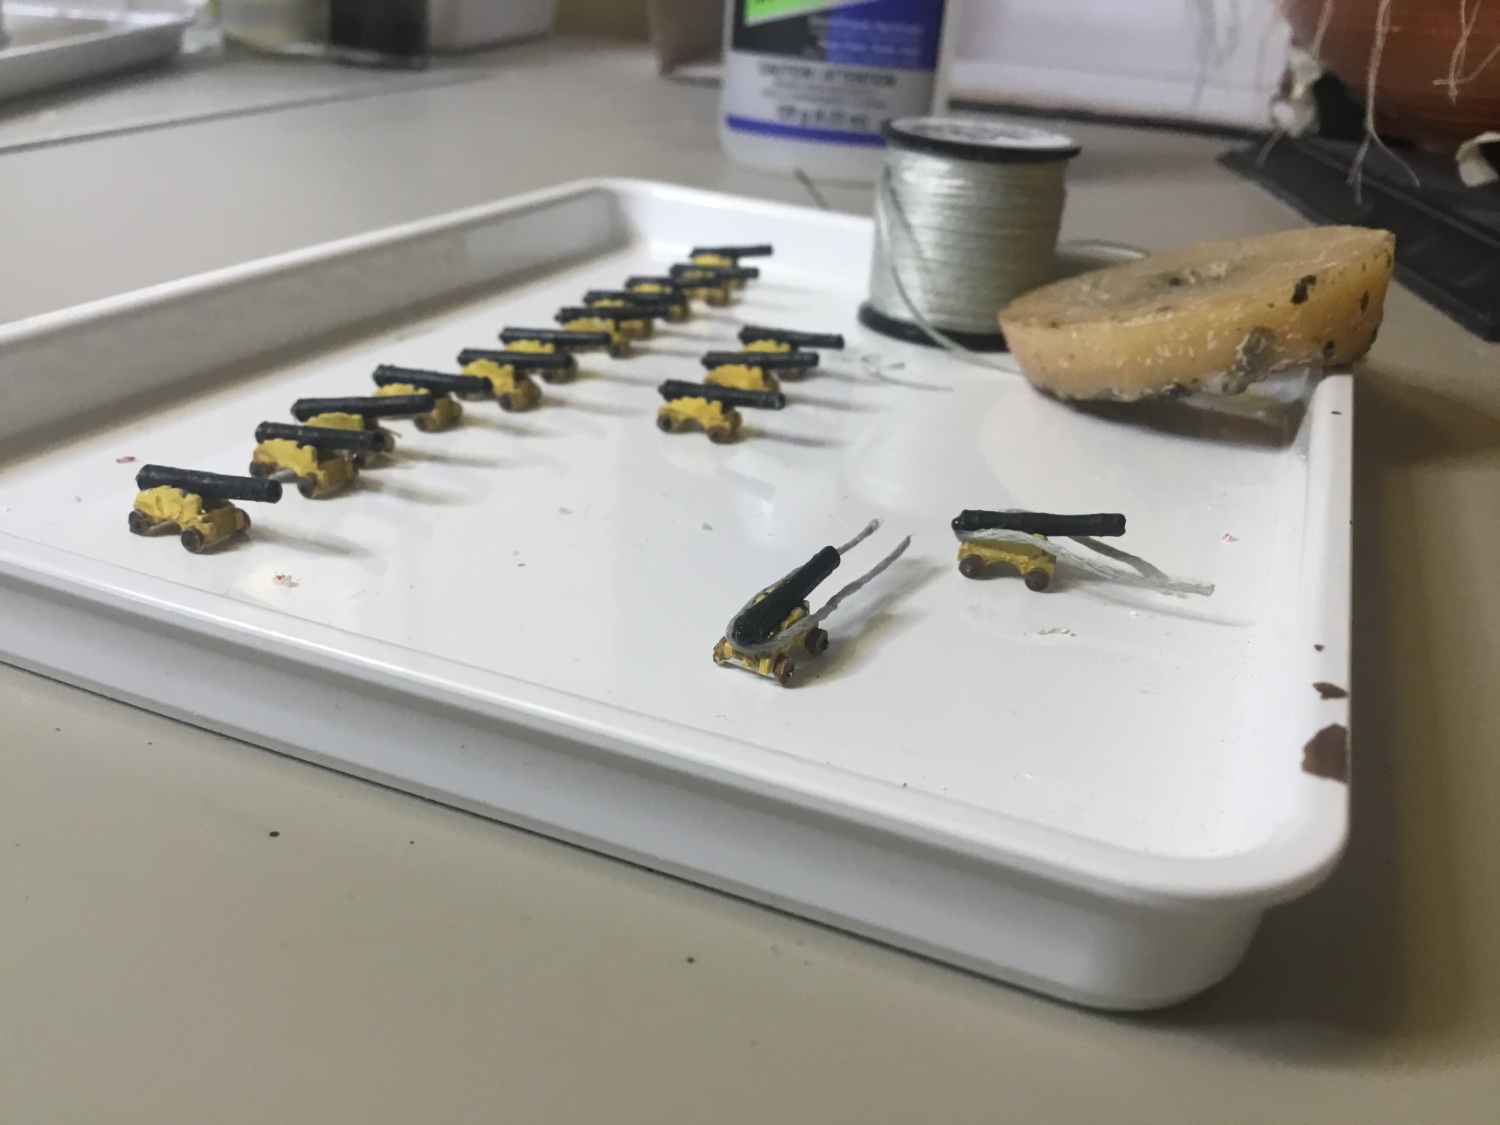
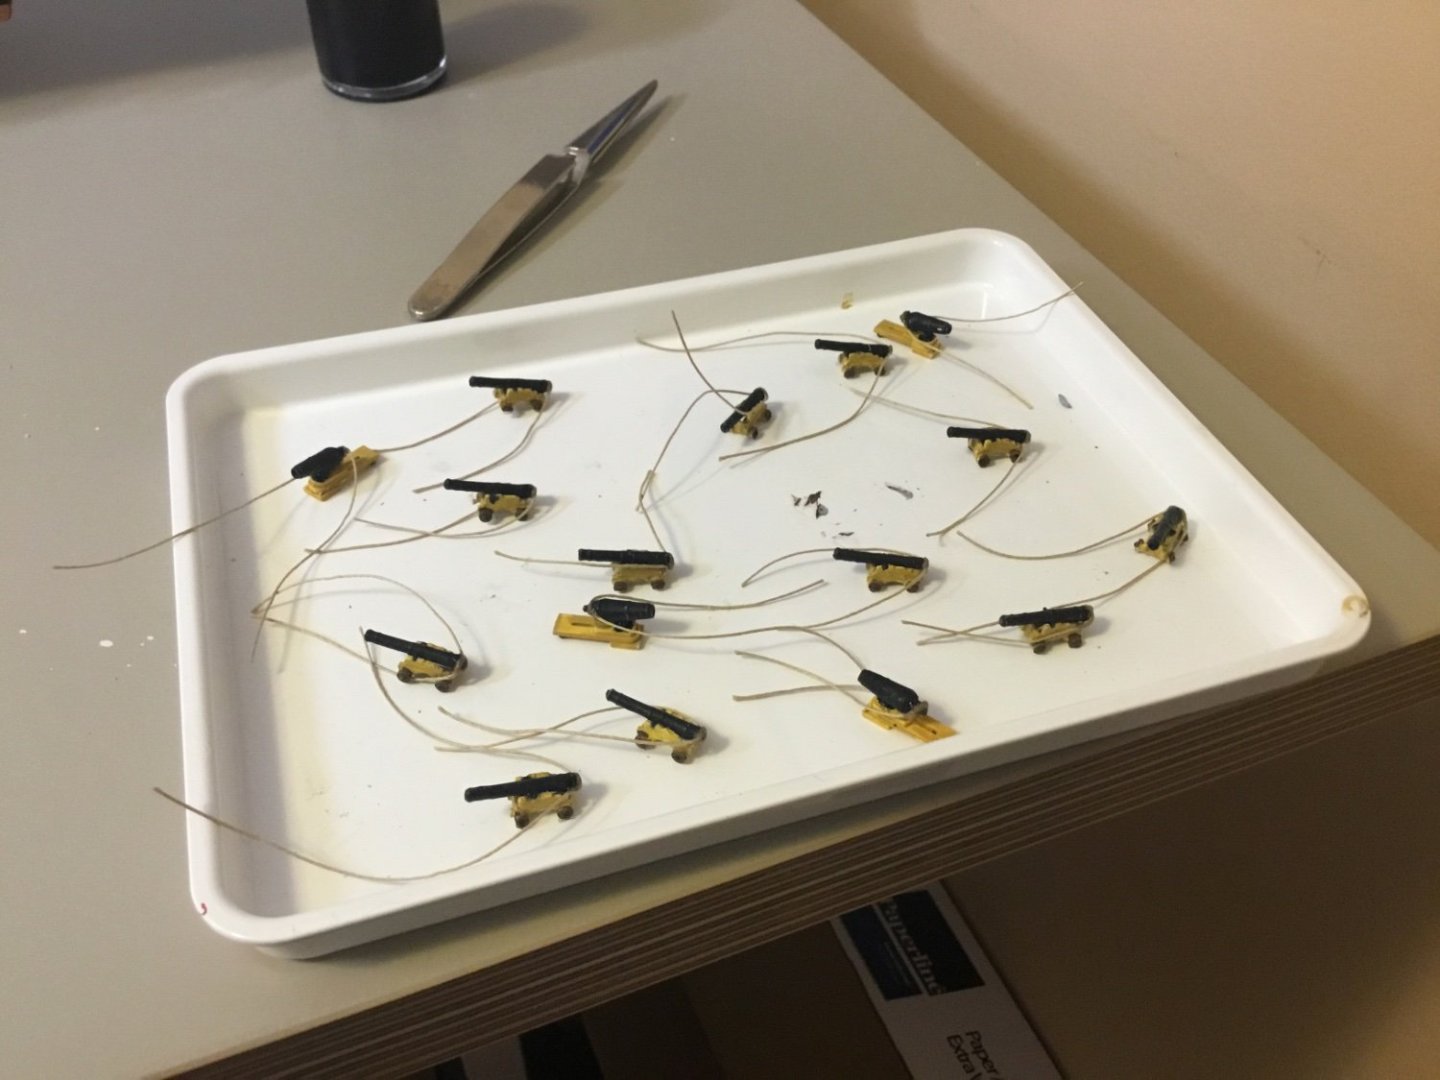
Thanks. I realized after I posted that pic that I had one of the carriages or slides for the carronades backwards. The furthest one is run out but I’ve got the gun pointing the wrong way. My friend who resin cast the guns made two sets of slides, one run out and the other run in. I’ll be putting all four run out, to match the long guns. HMS Victory only had one carronade per side on the forecastle, and none on the poopdeck, but I’m going for four total up front, and none on the poop. I’d need to find something smaller than a 64 pounder for the poopdeck. Presumably part of efficiency in sprue tooling and/or production, the kit does come with an few extra 12 pounder barrels and carriage bases, but not sides, I could mock up something for the poop deck.

-
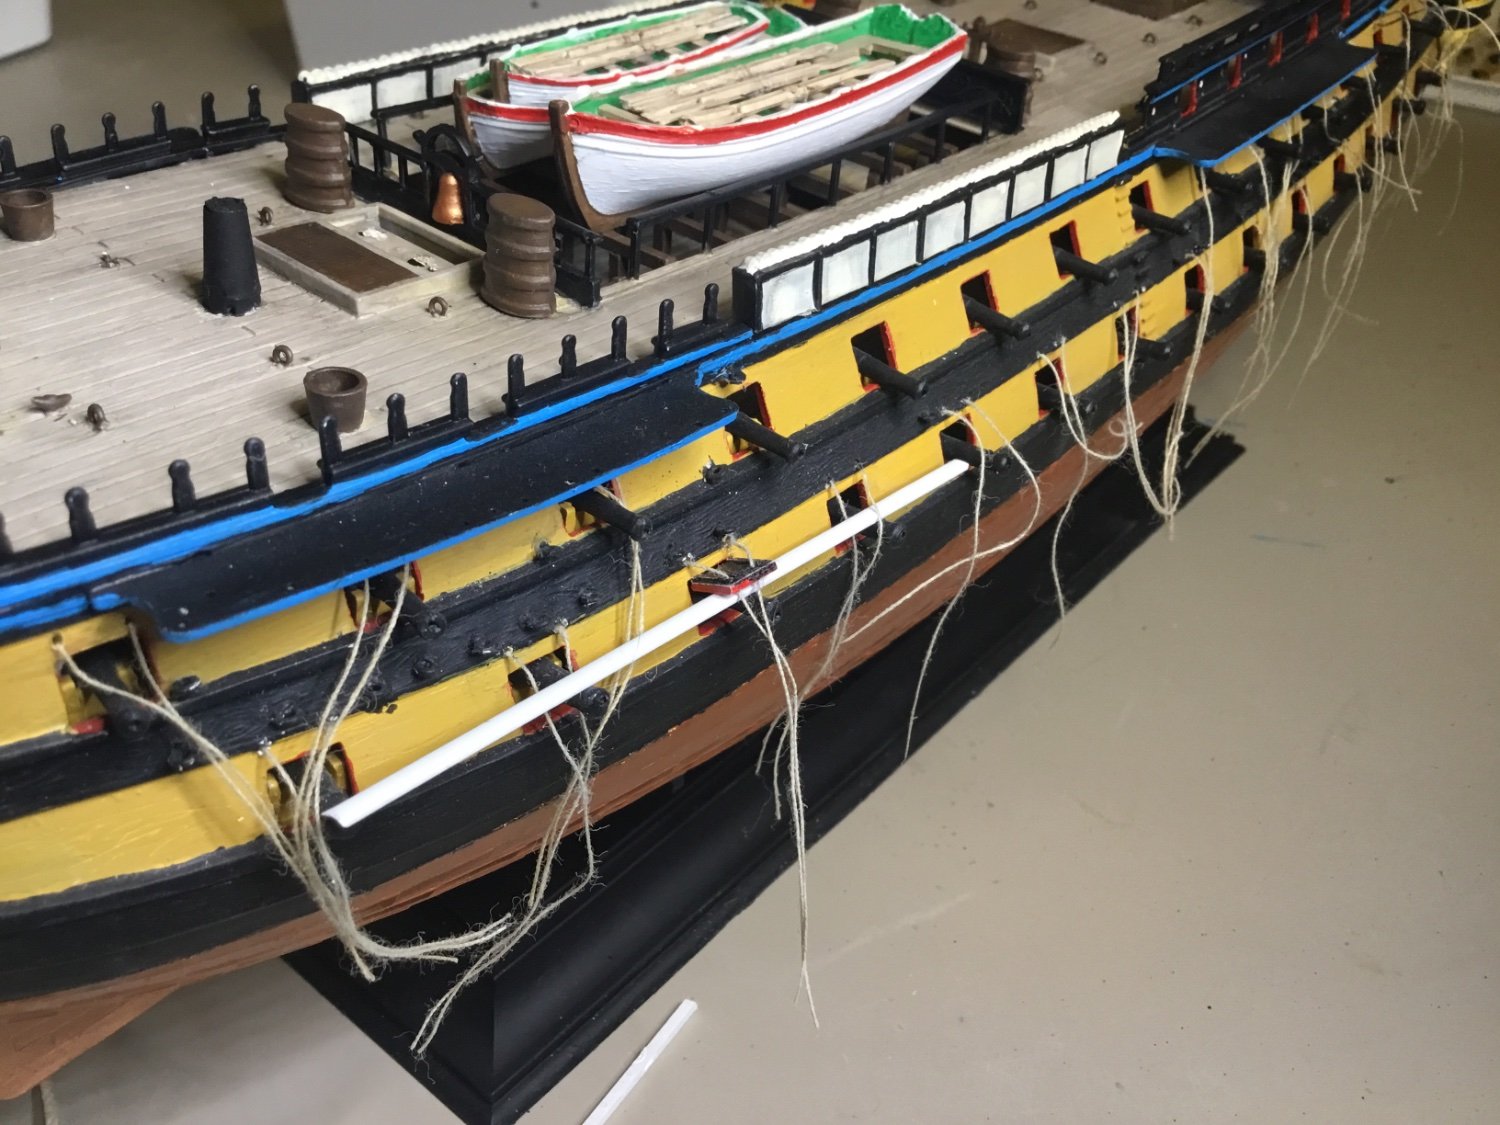
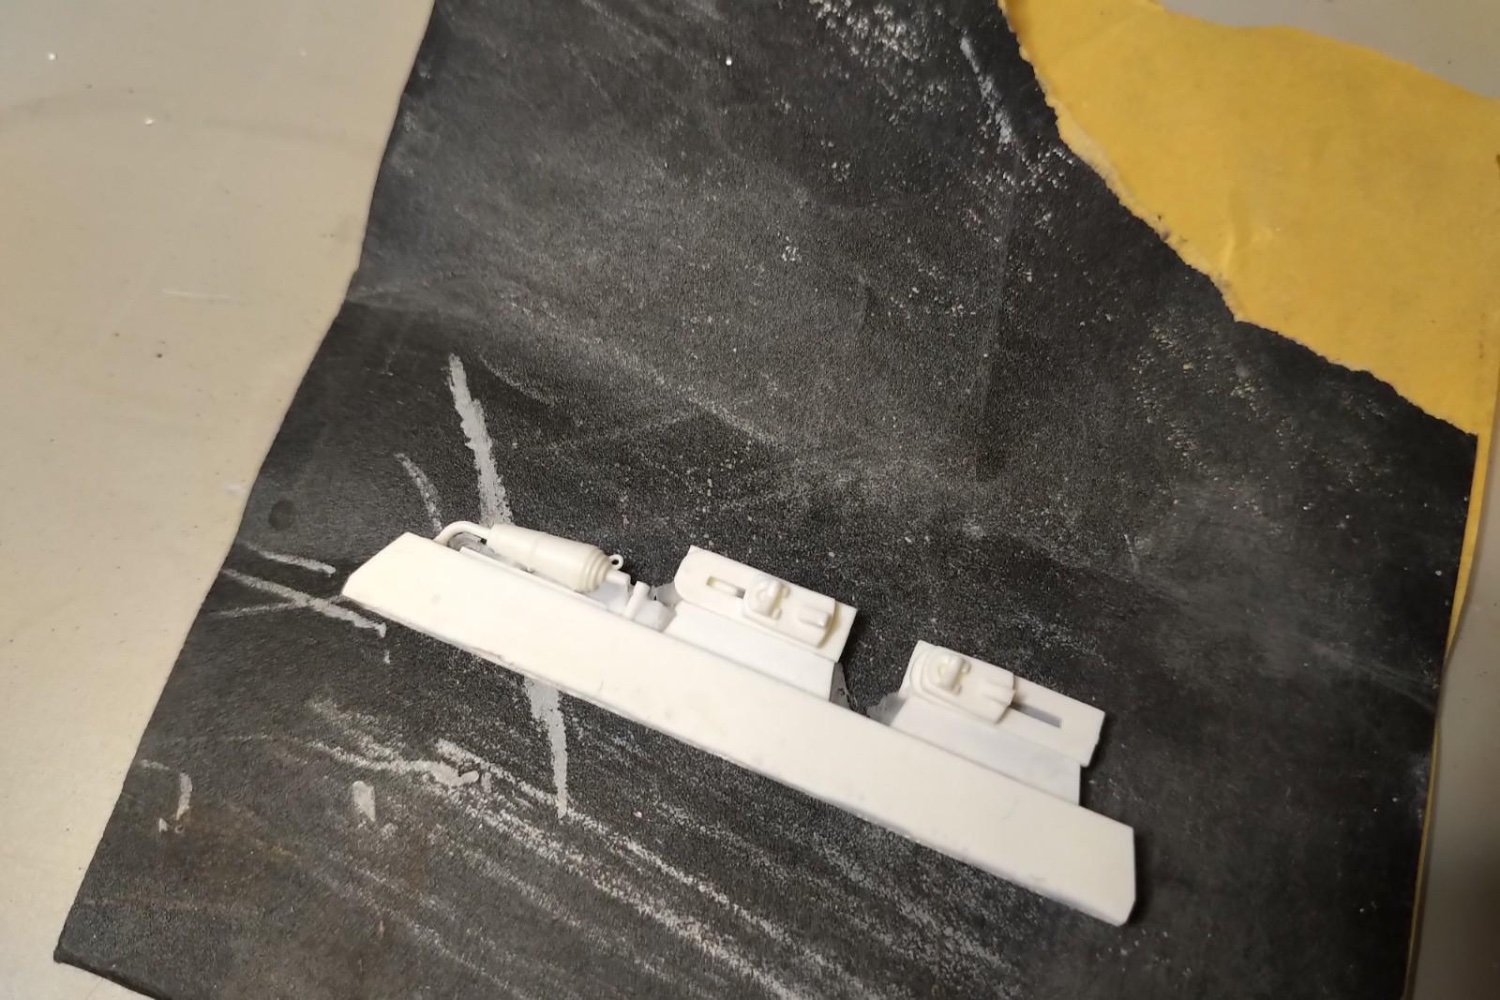
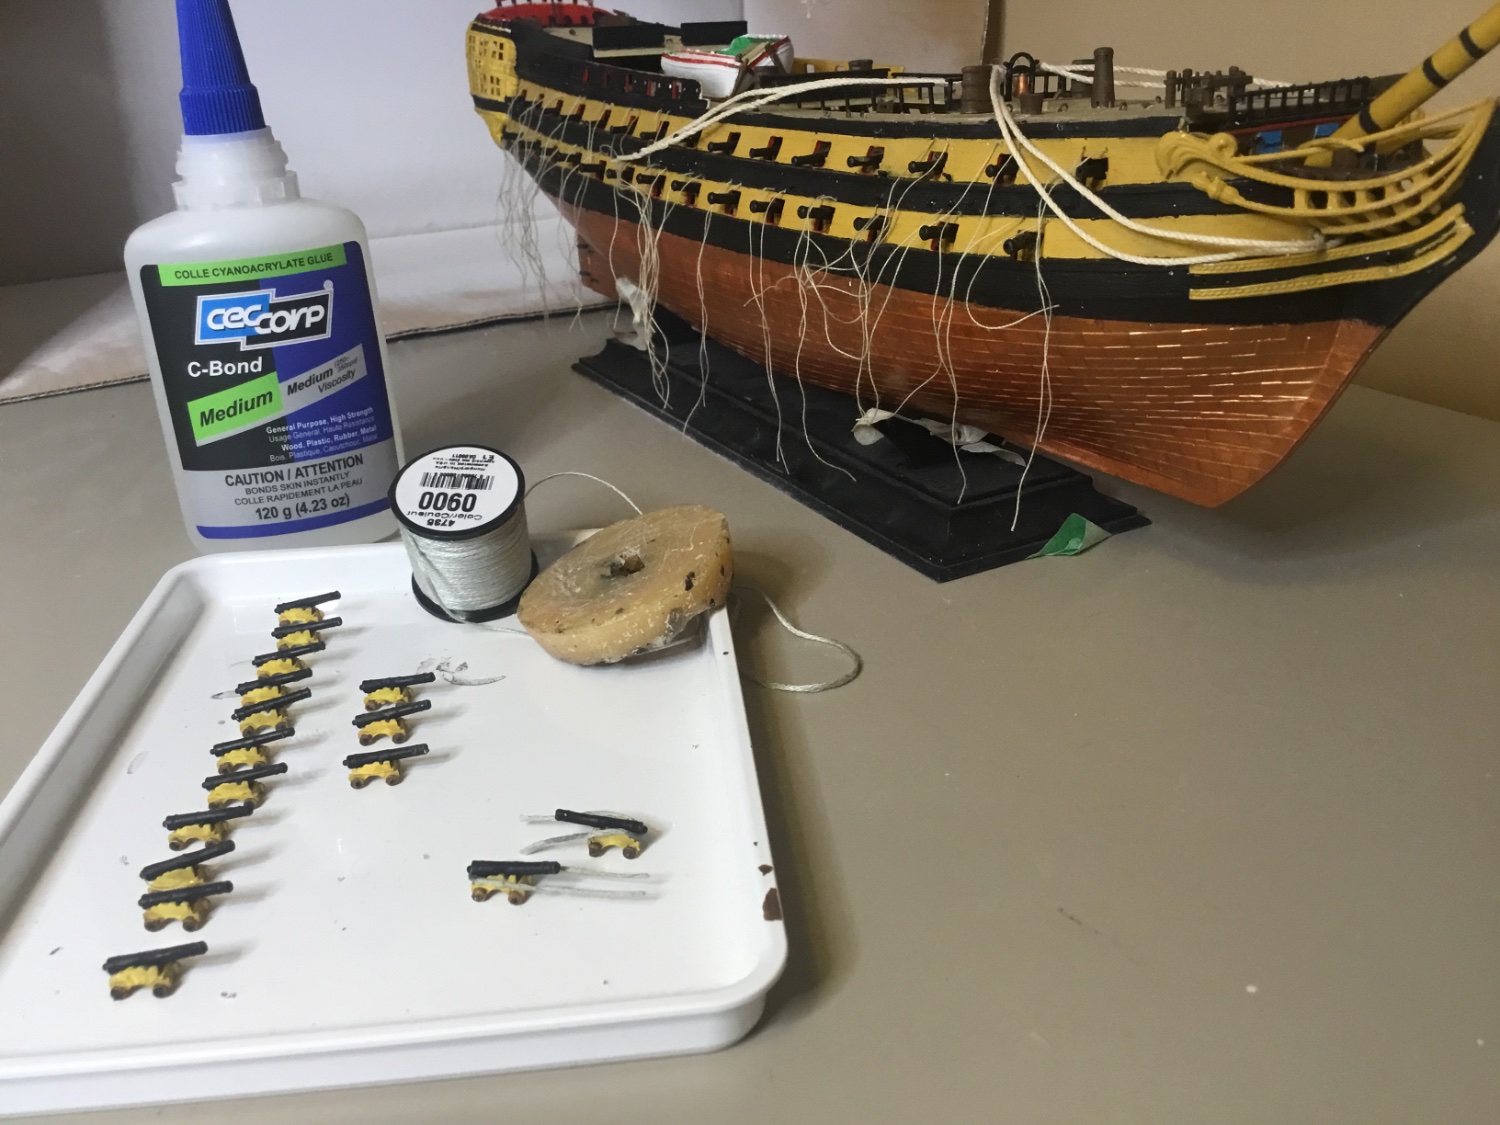
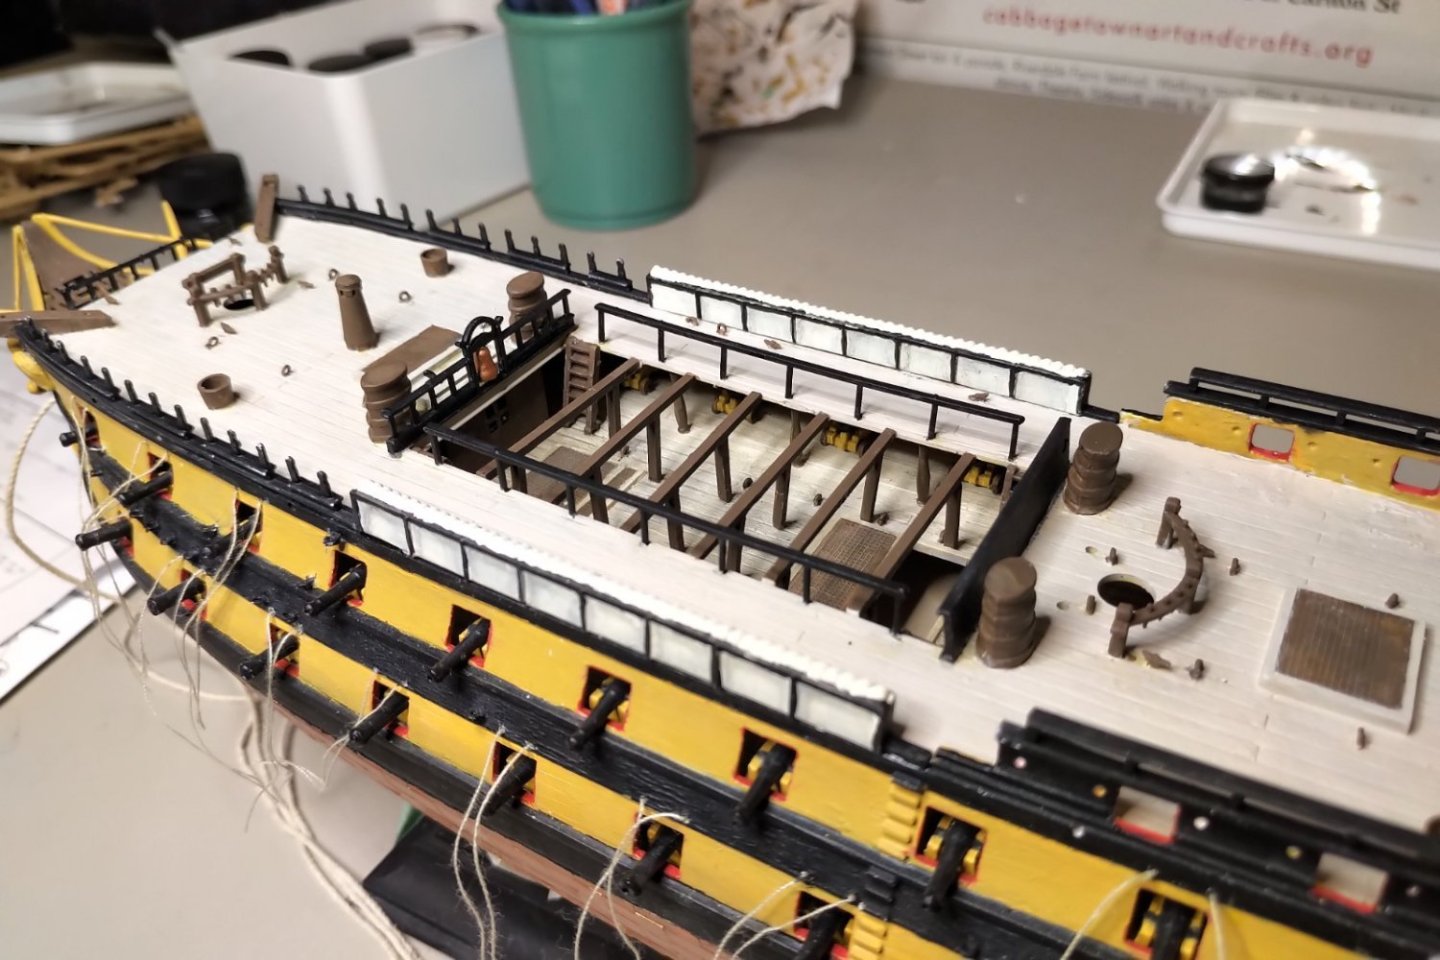
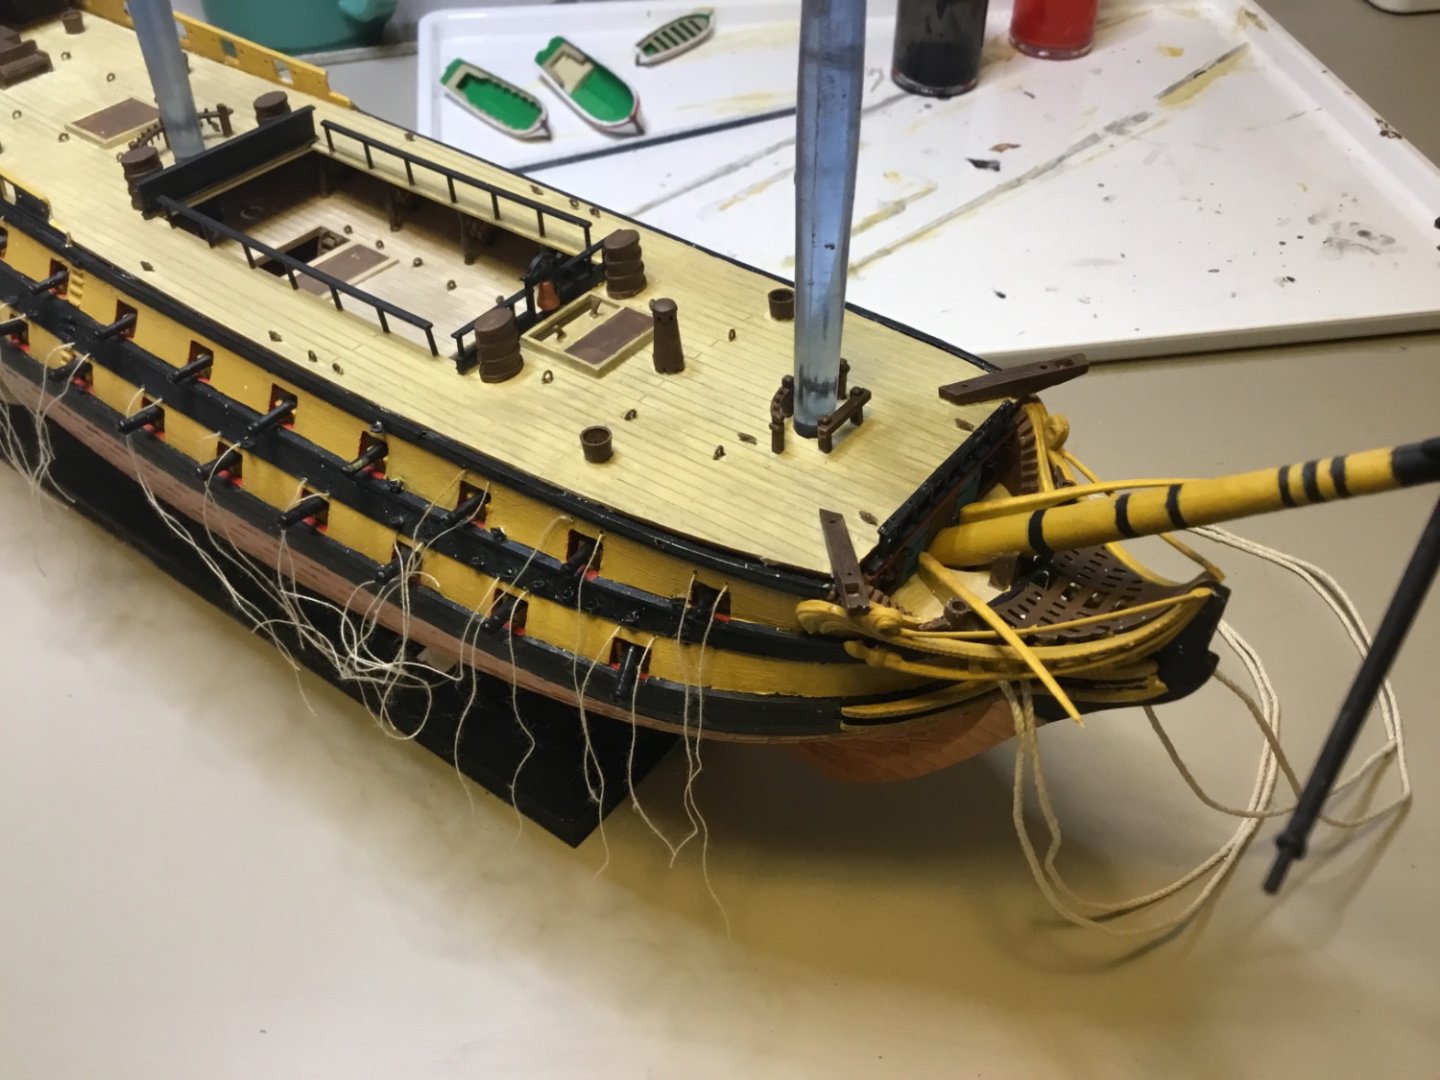
Gunport lids drilled and painted. I broke three micro bits on my Dremel, but they’re very cheap on Amazon. Check out the custom resin cast carronades my friend made for me.


-
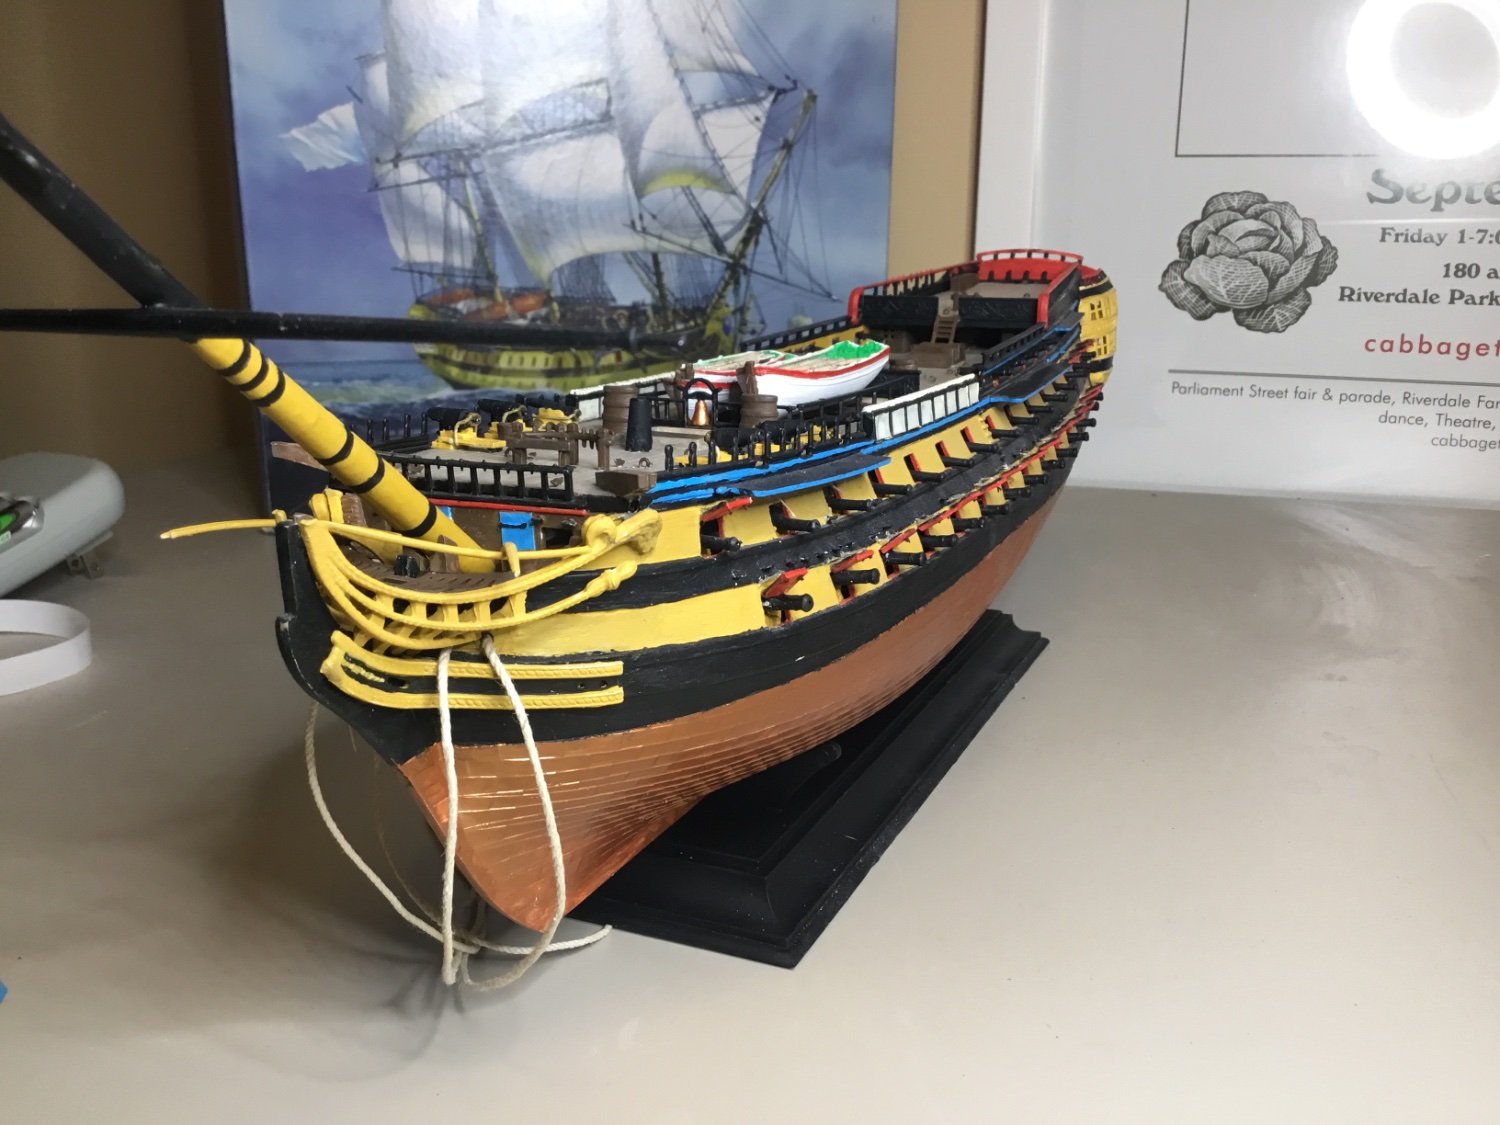
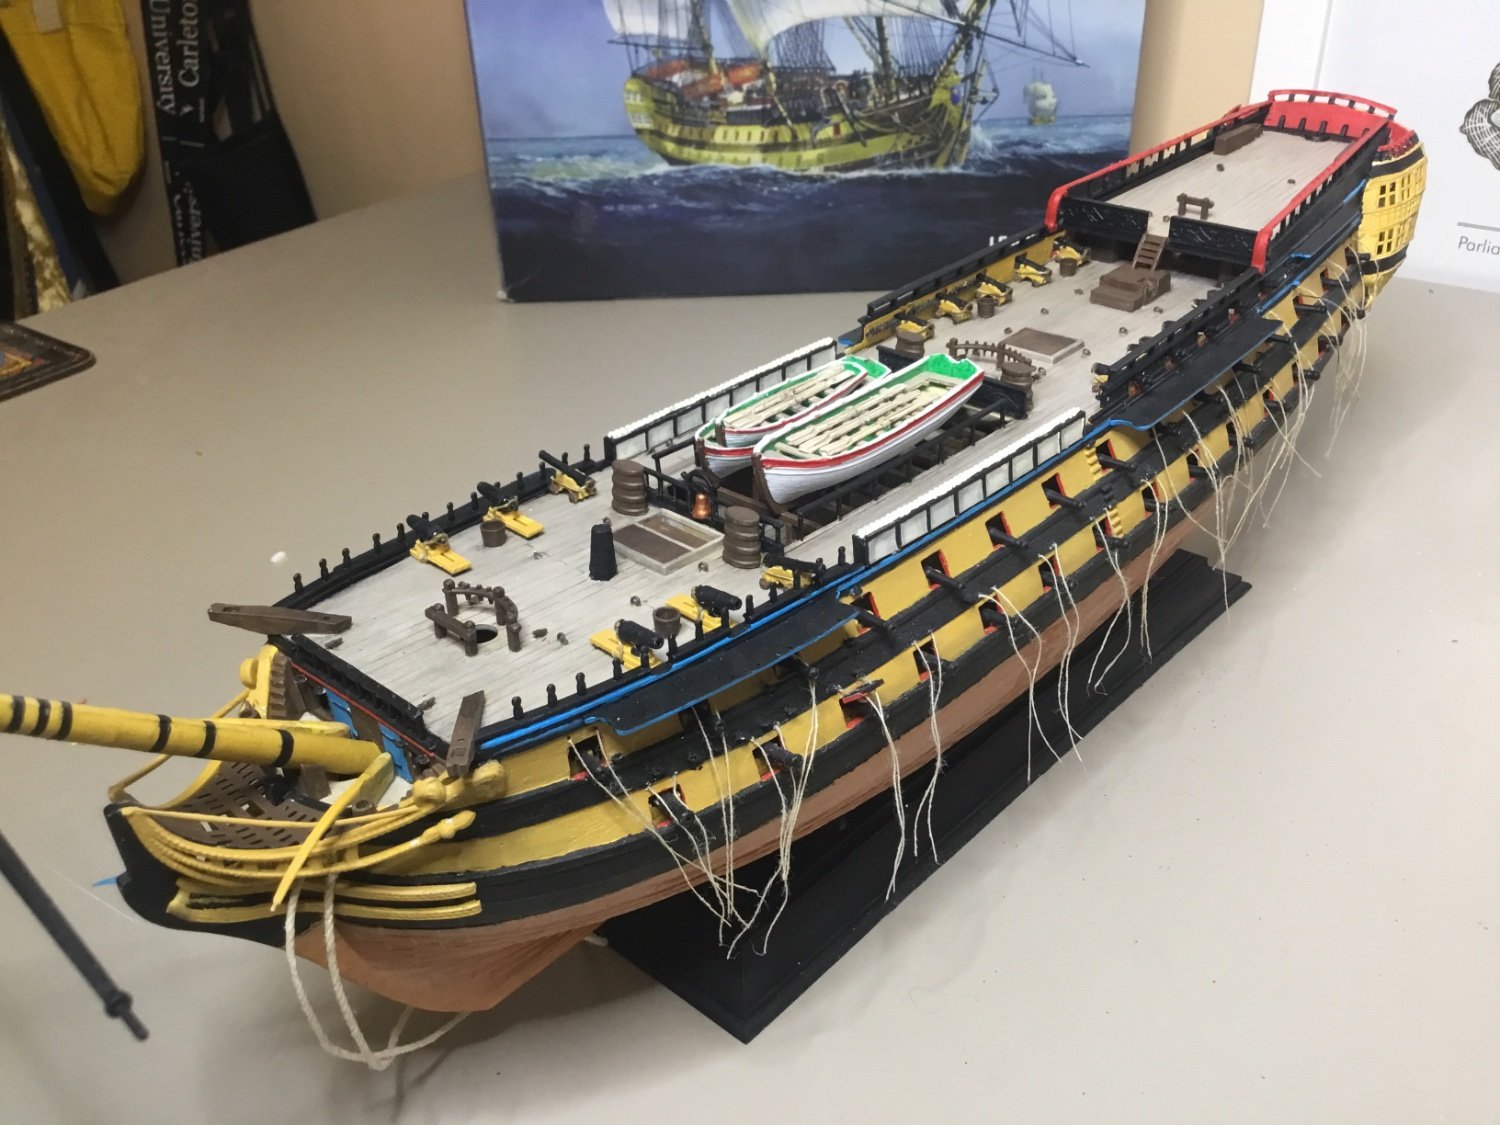
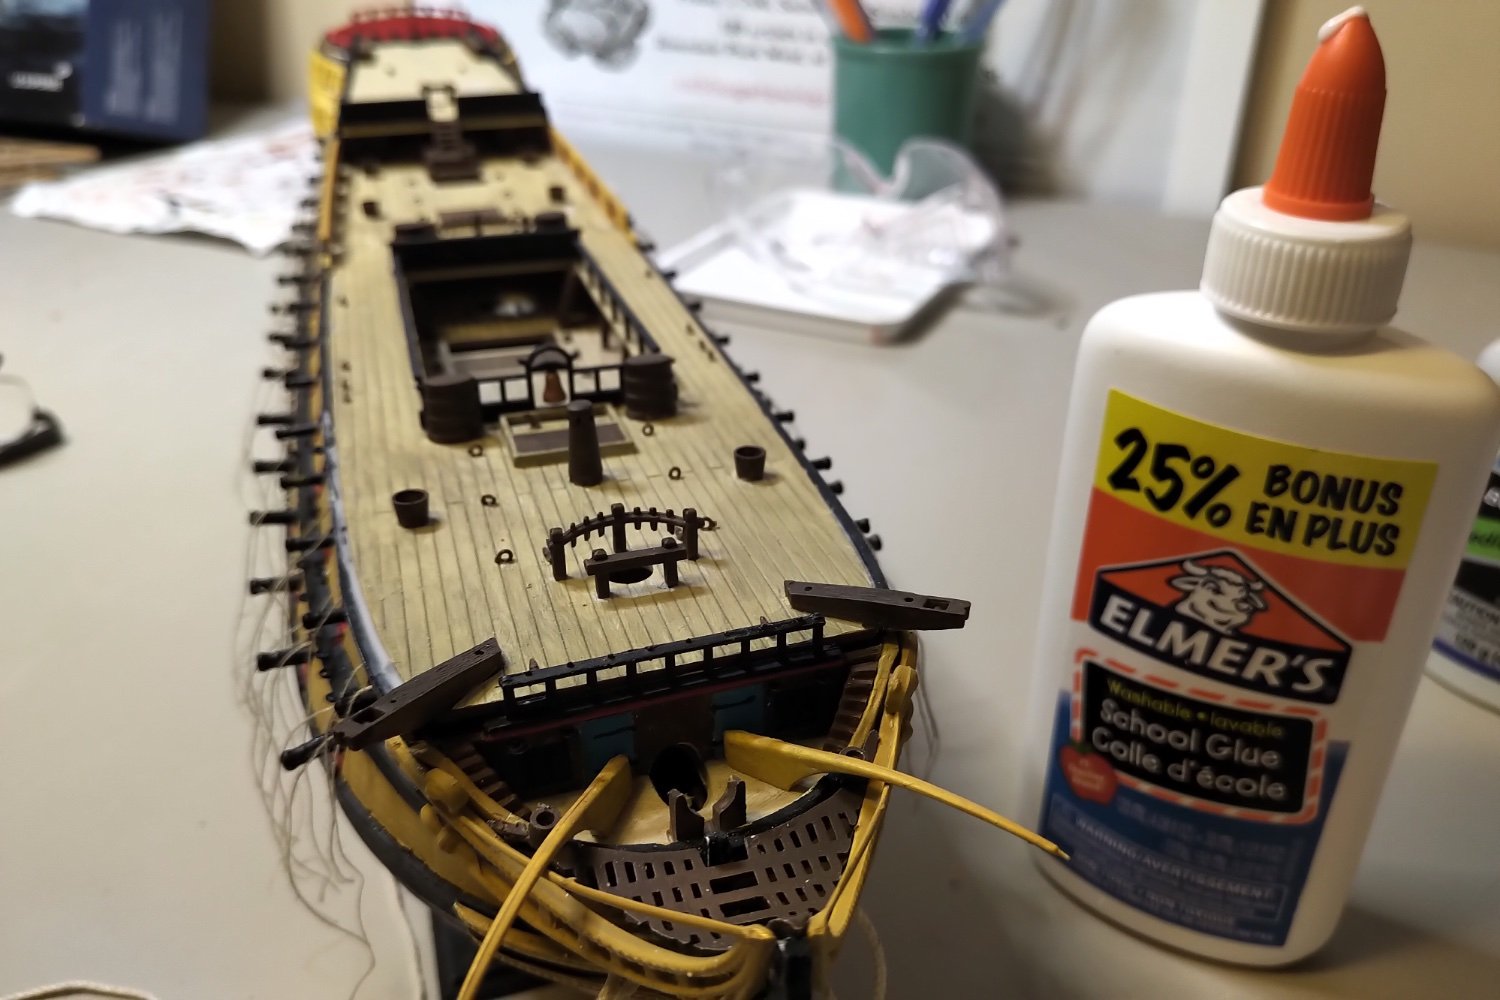
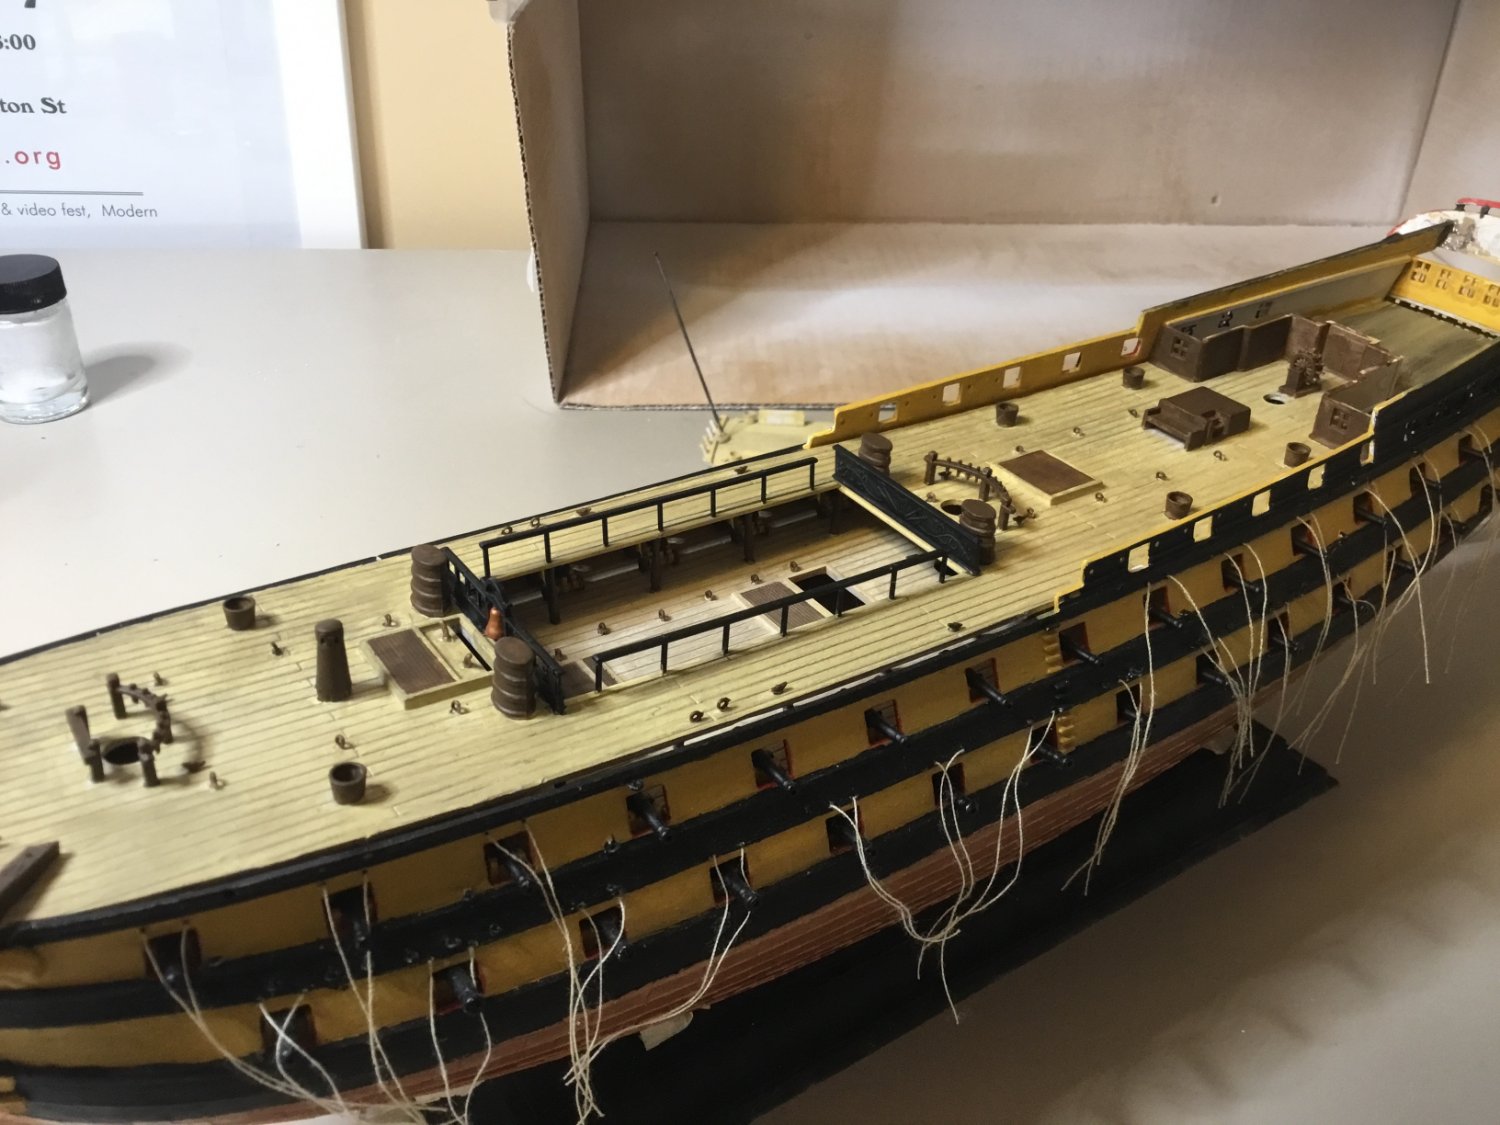
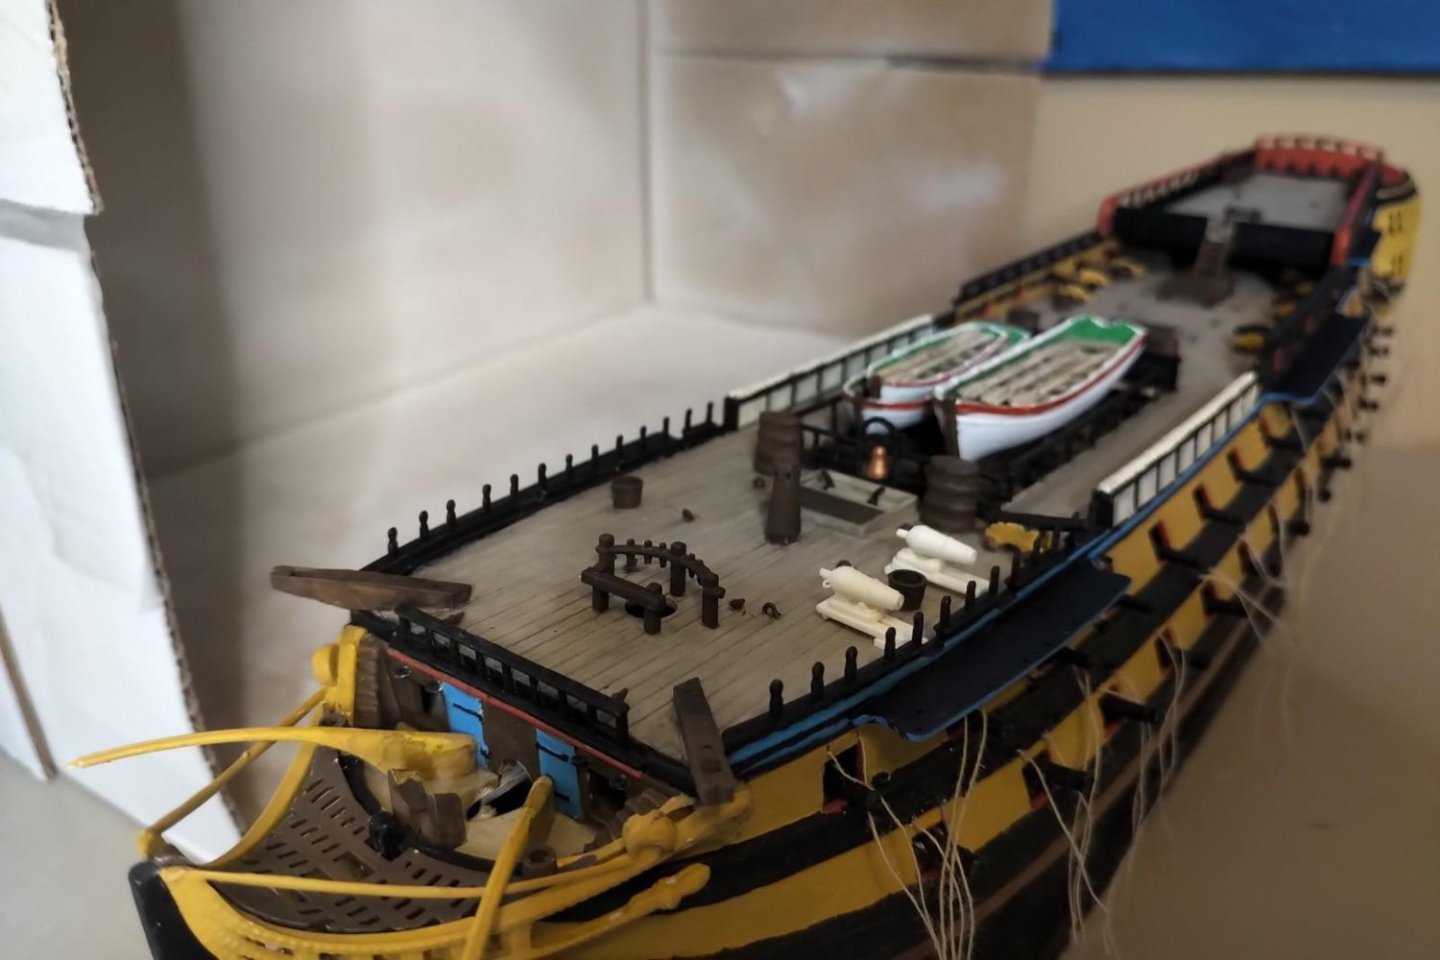
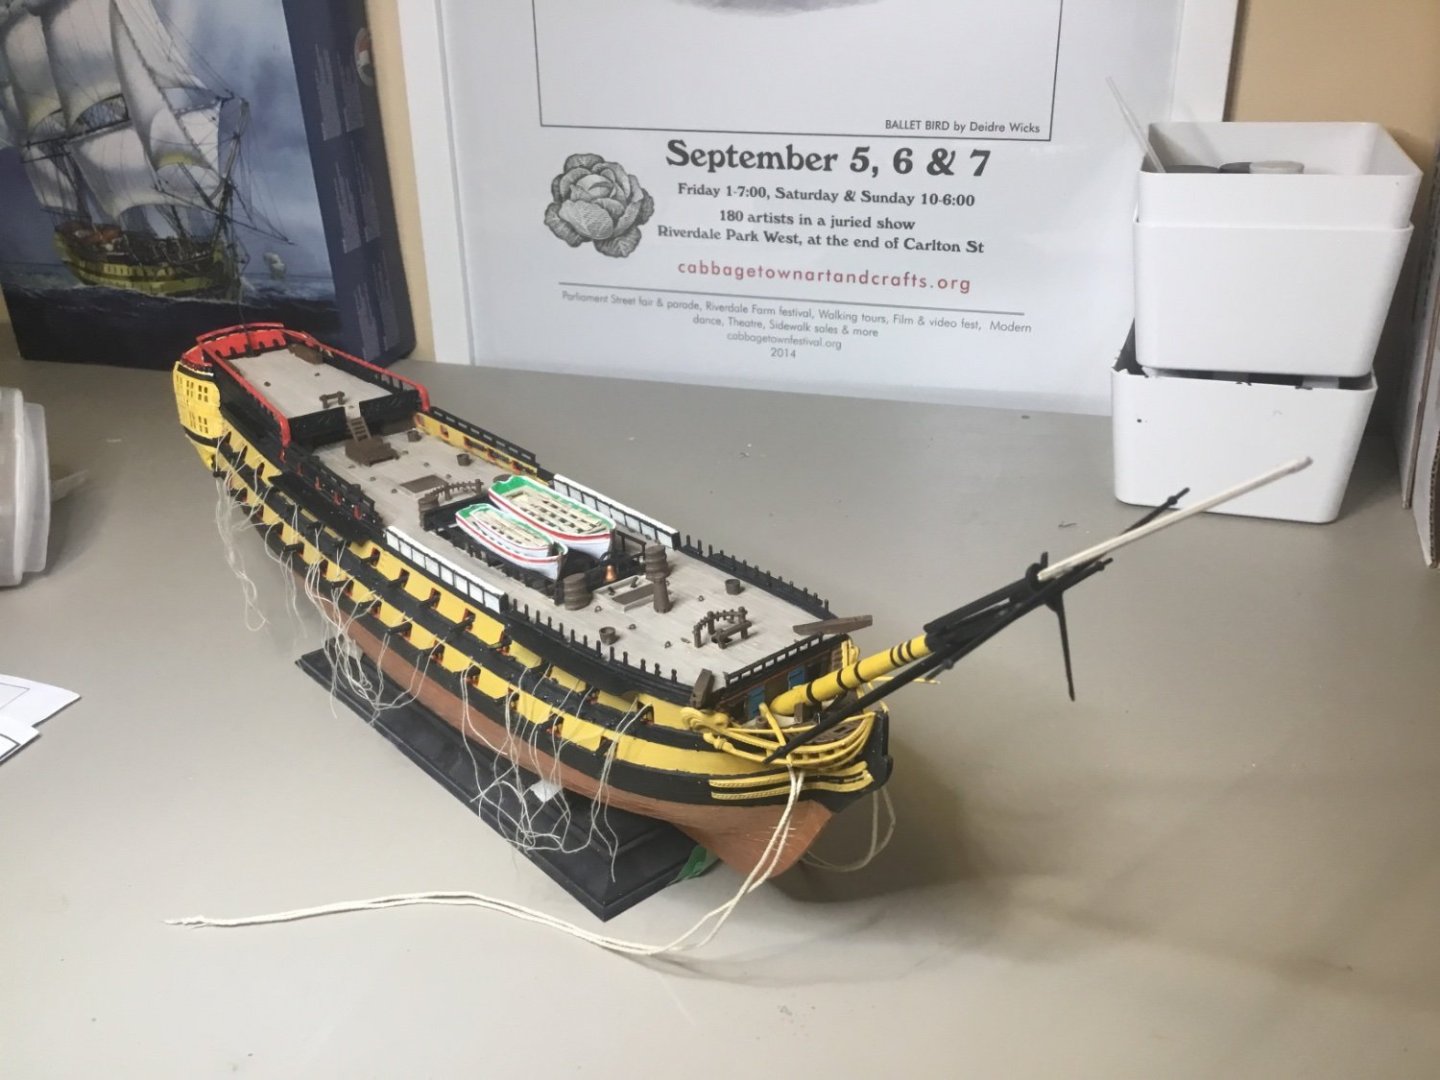
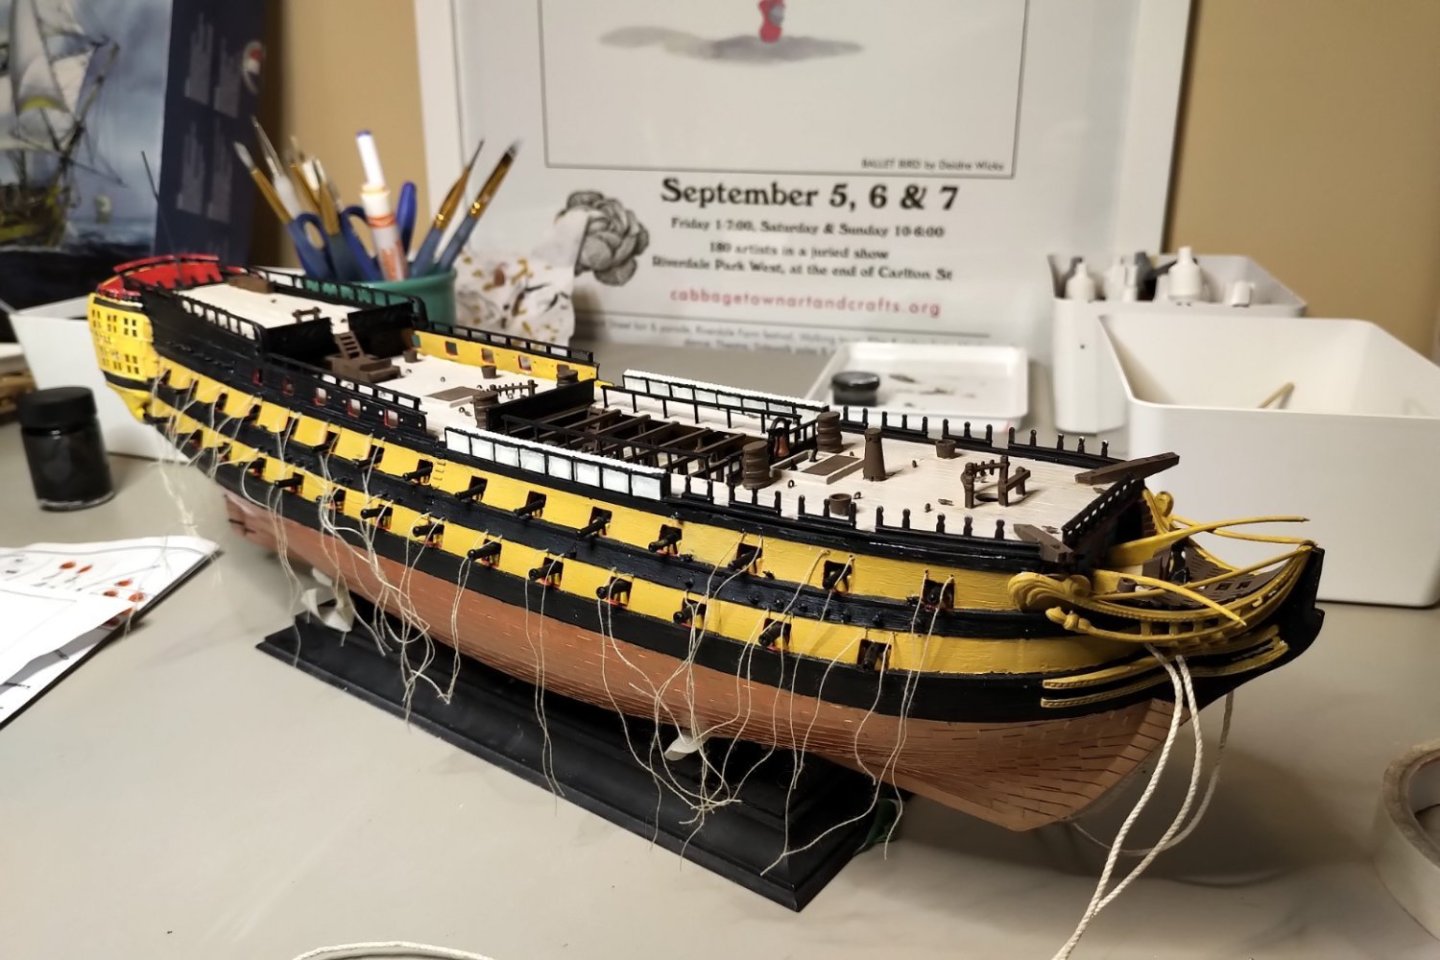
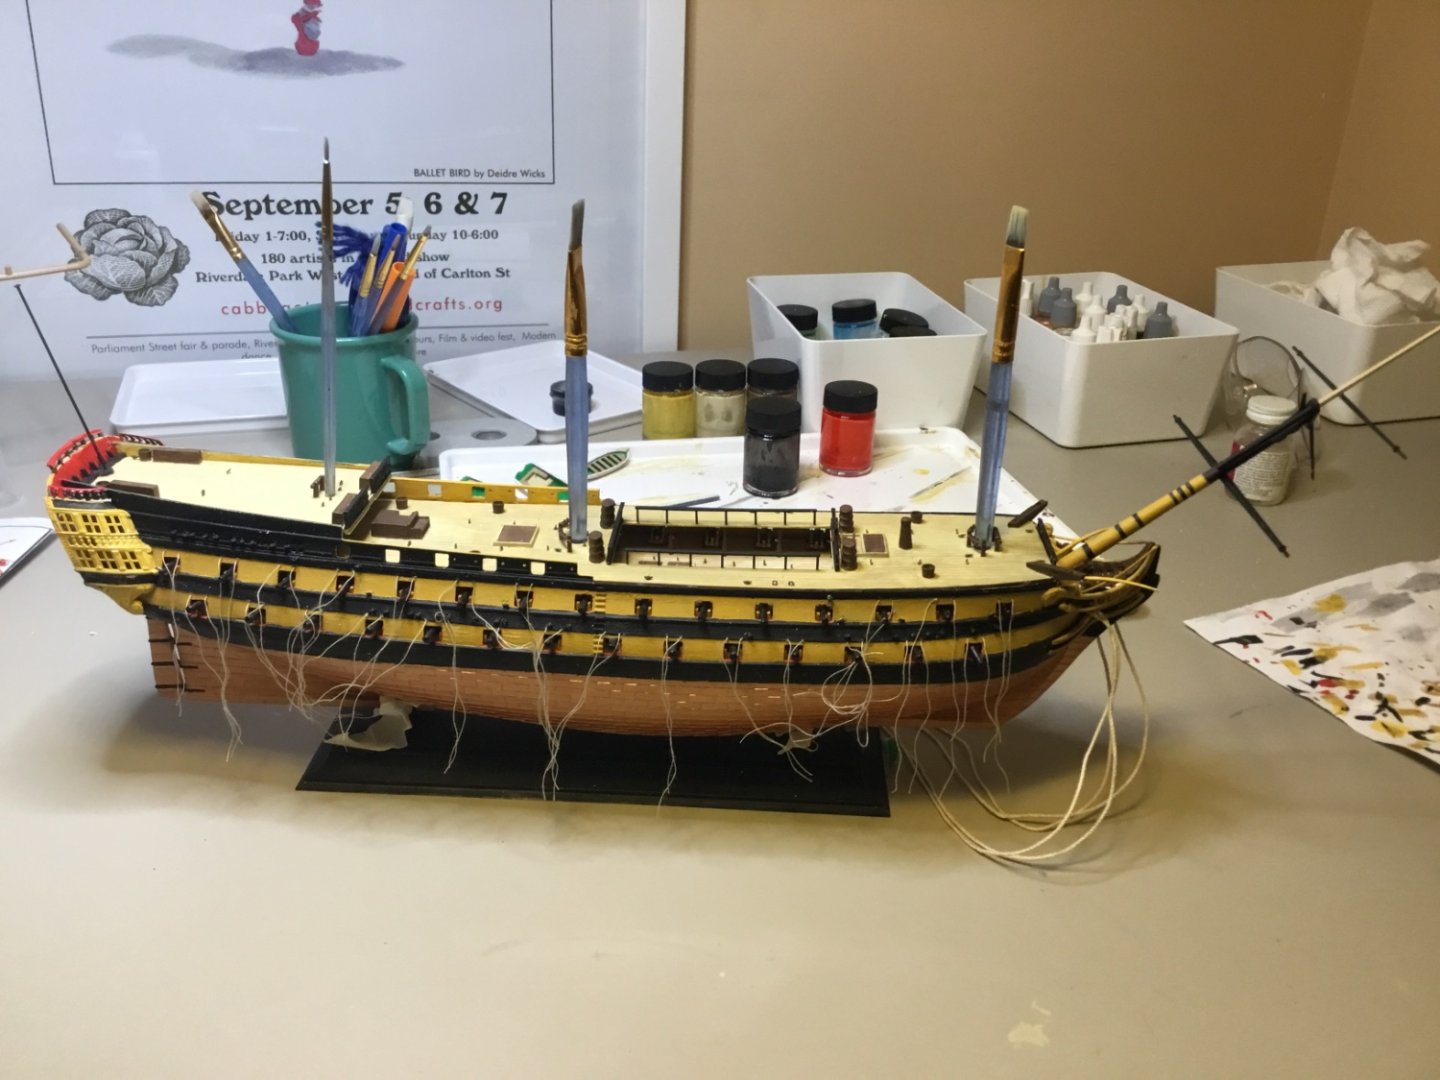
My fine line painting still needs improvement, but I’m finally happy with my blue trim. We’re starting to look more and more like the professional model of HMS Vanguard that is my guide, see first post. Advice I would give myself? Don’t worry what the lower decks look like, you can’t see them. So when you’re attaching those cannons, generously cement them onto the deck before you paint the guns and the deck. I’ve had the ship fall on its side and a cannon break loose due to a failure of CA glue between the pre-painted gun and painted deck, and had shake it out and then shave down the trunnions so I could insert the gun and carriage through the gun port. I call this my “learning ship” for a reason.
-
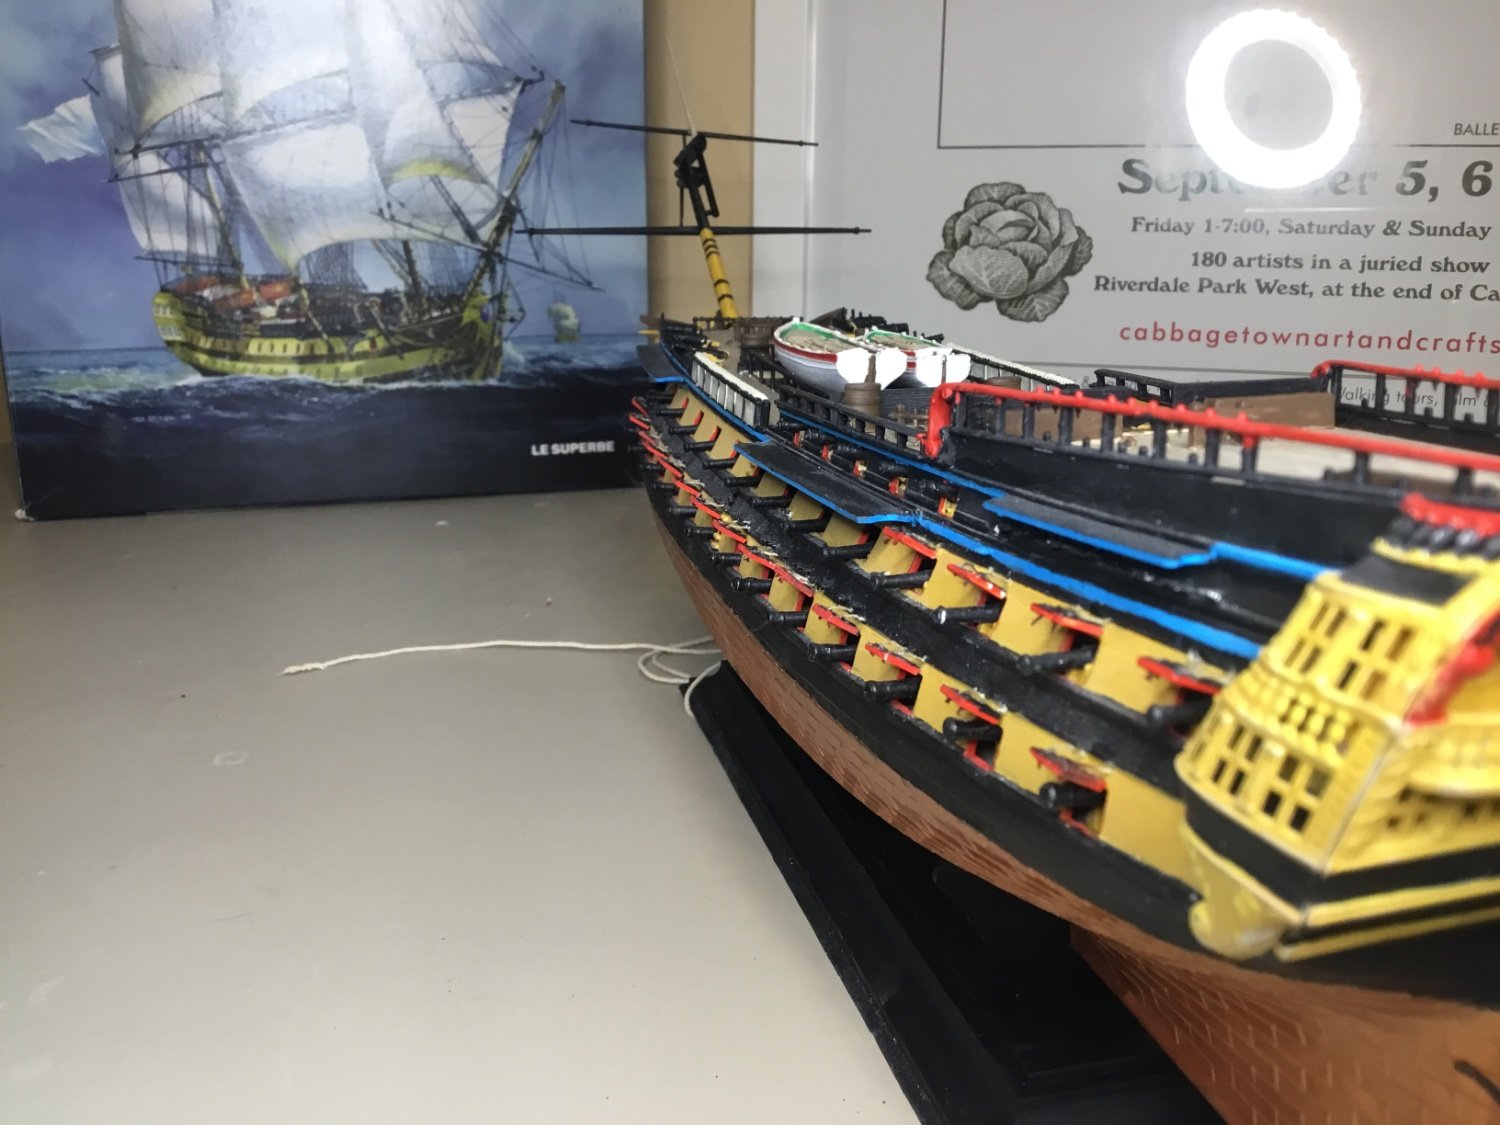
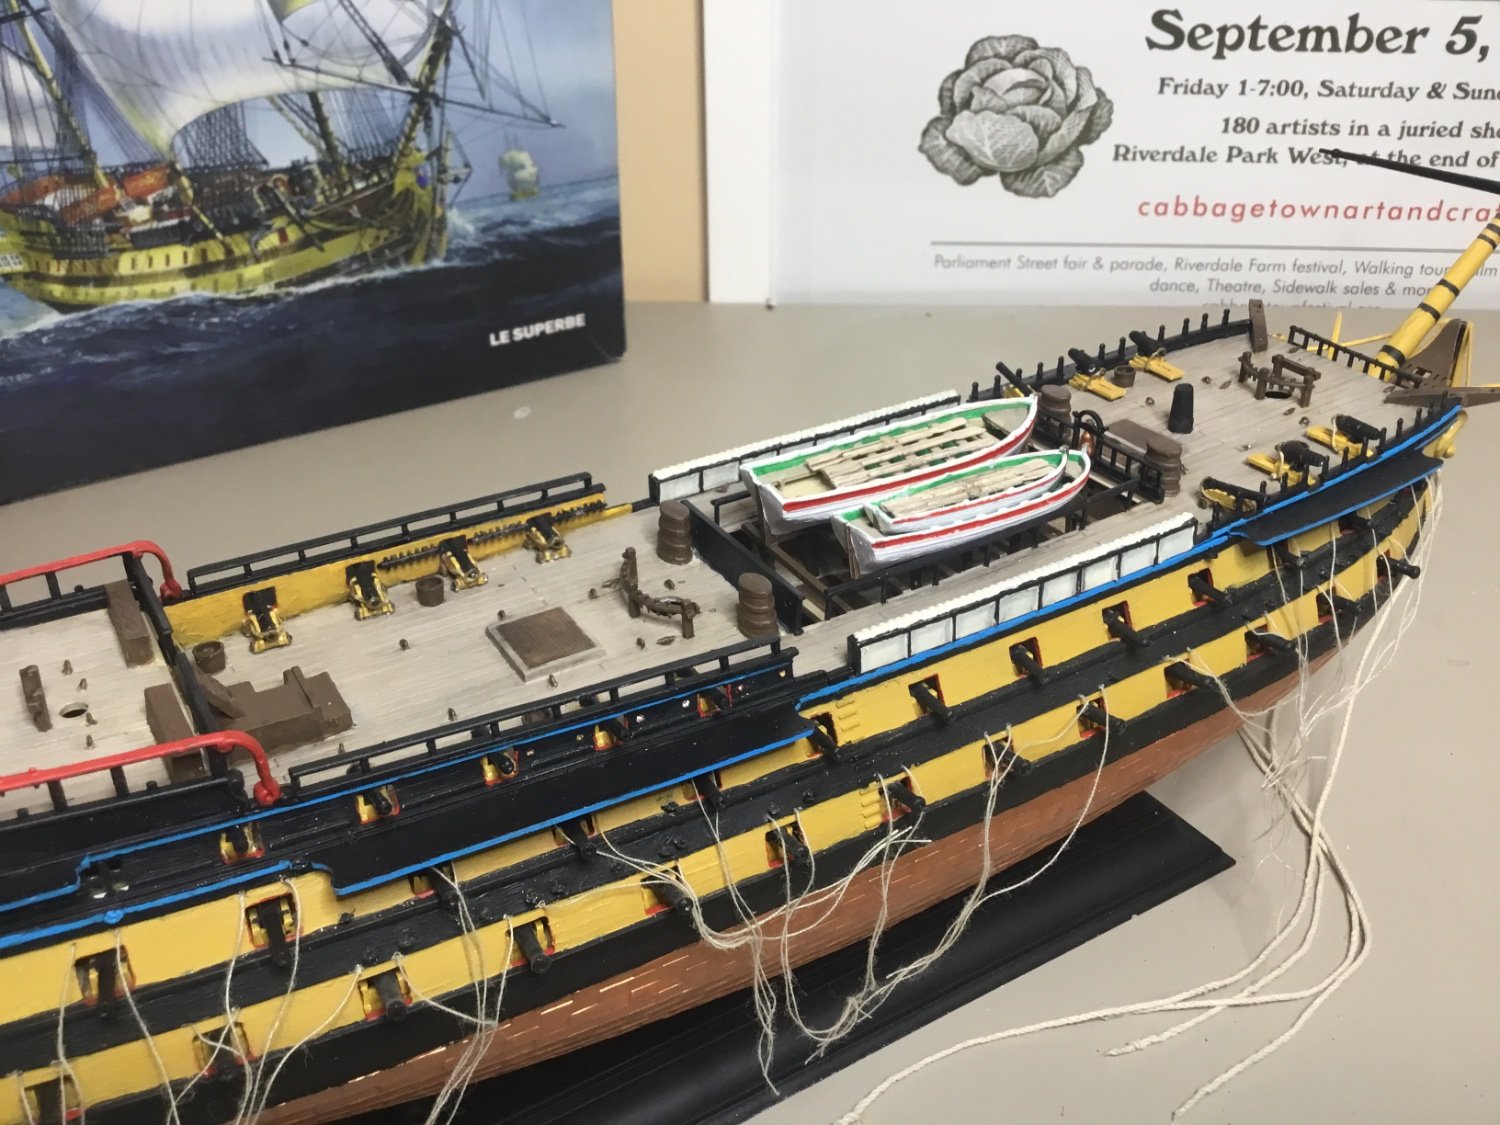
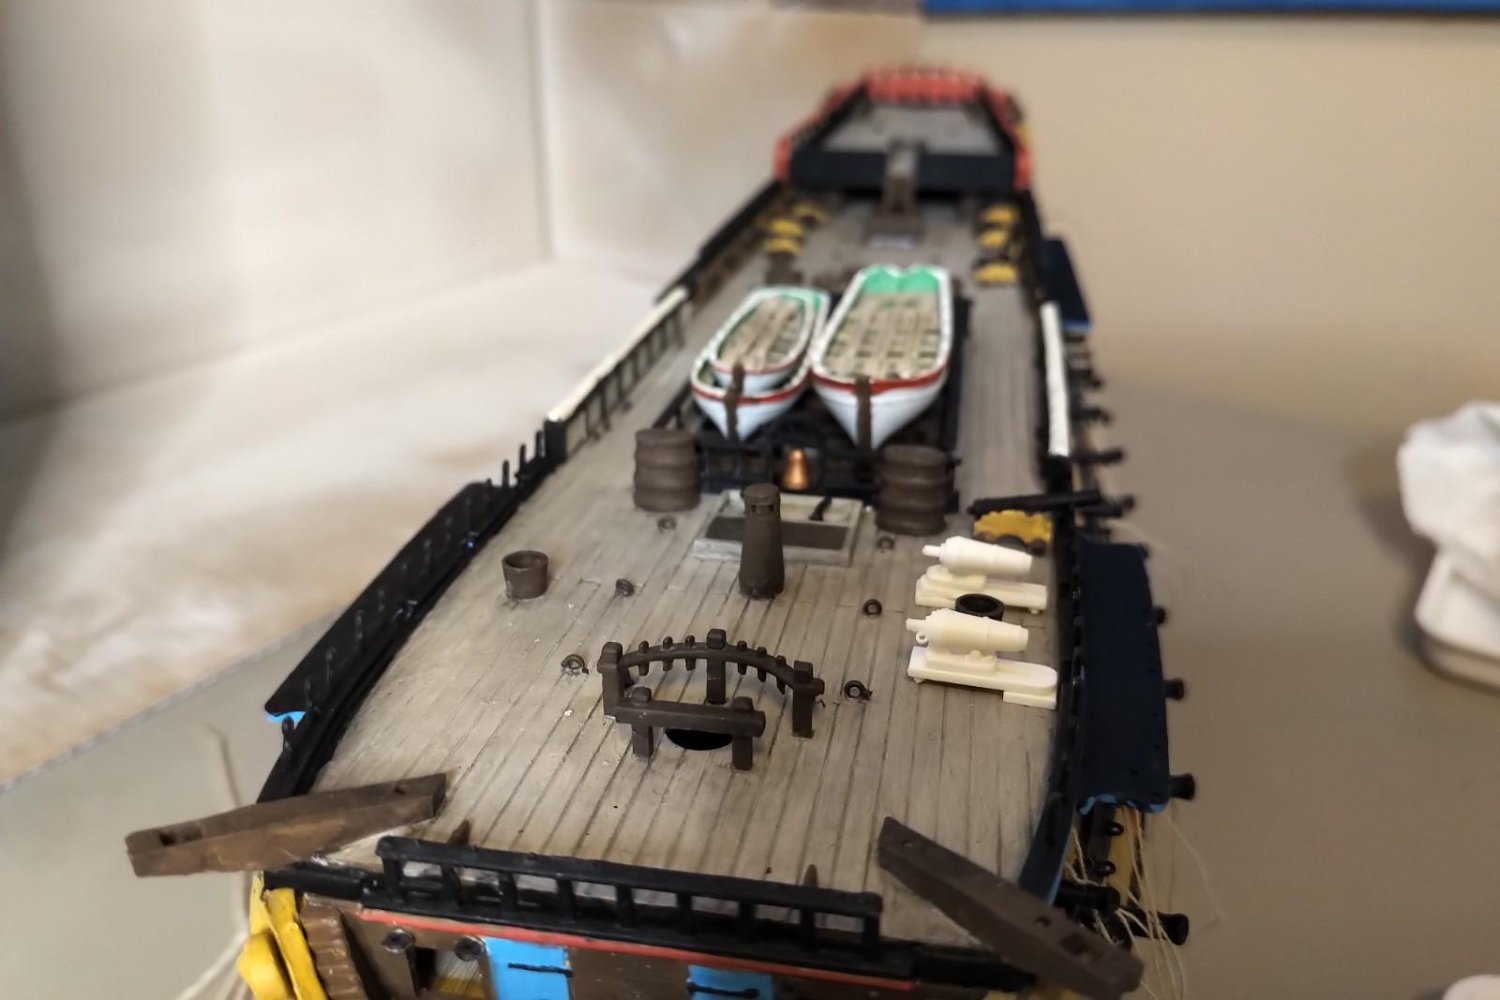
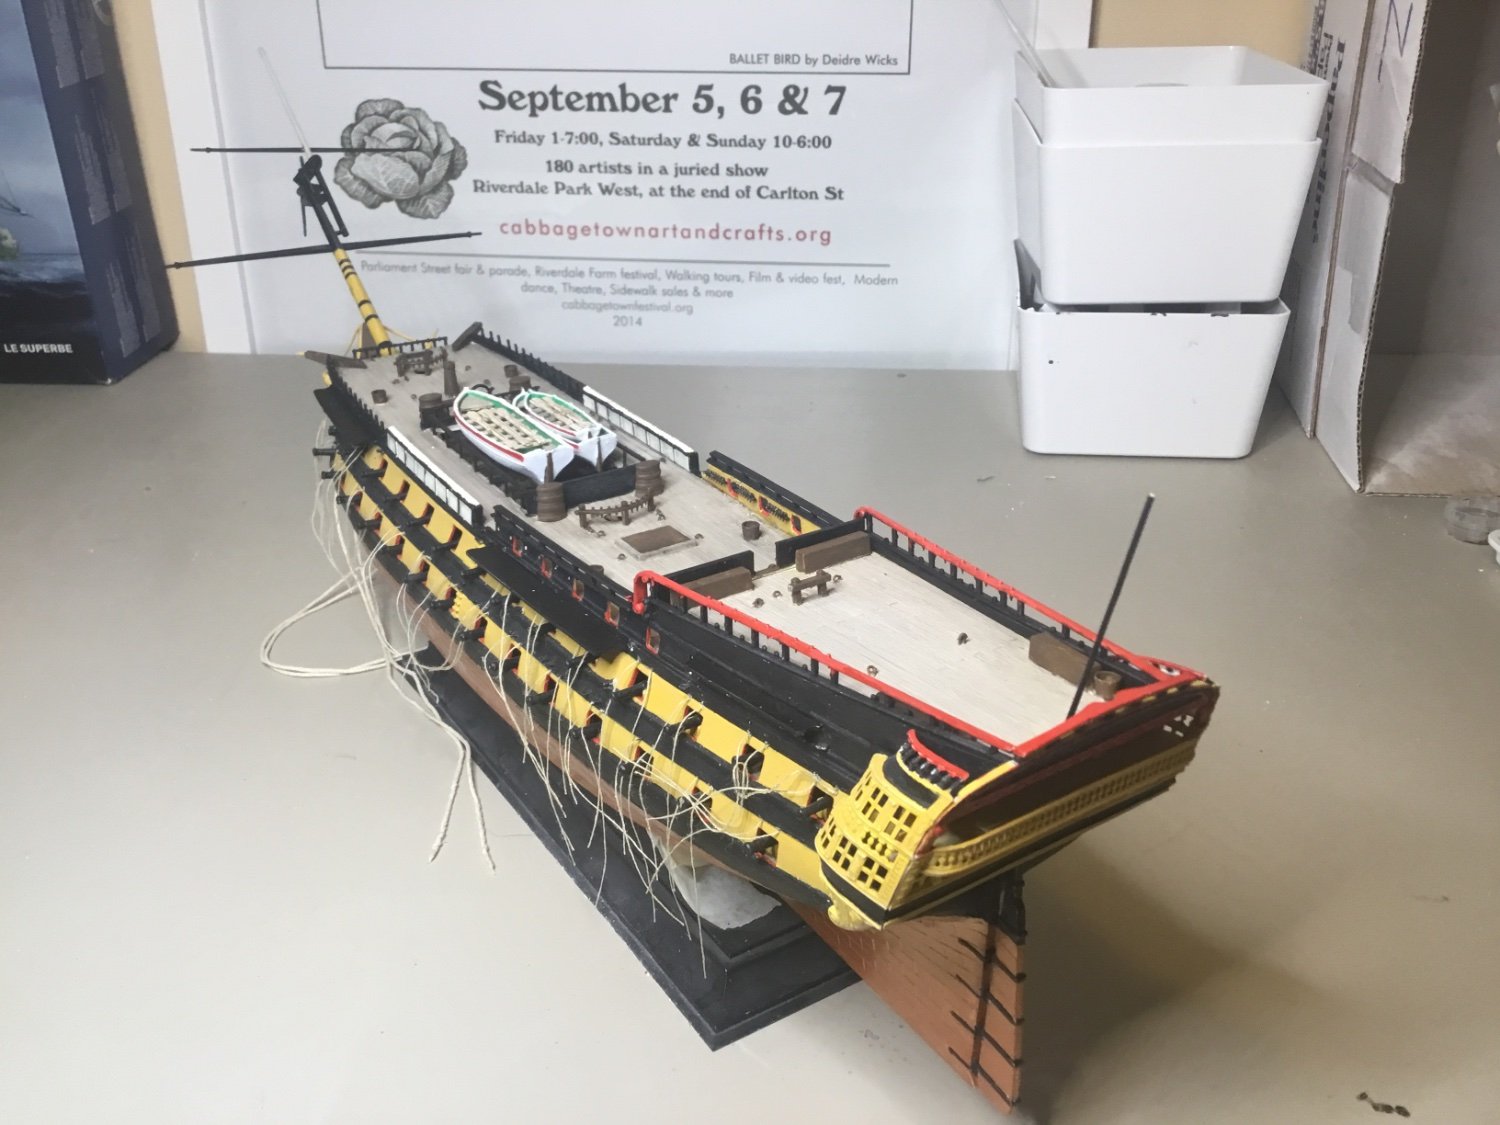
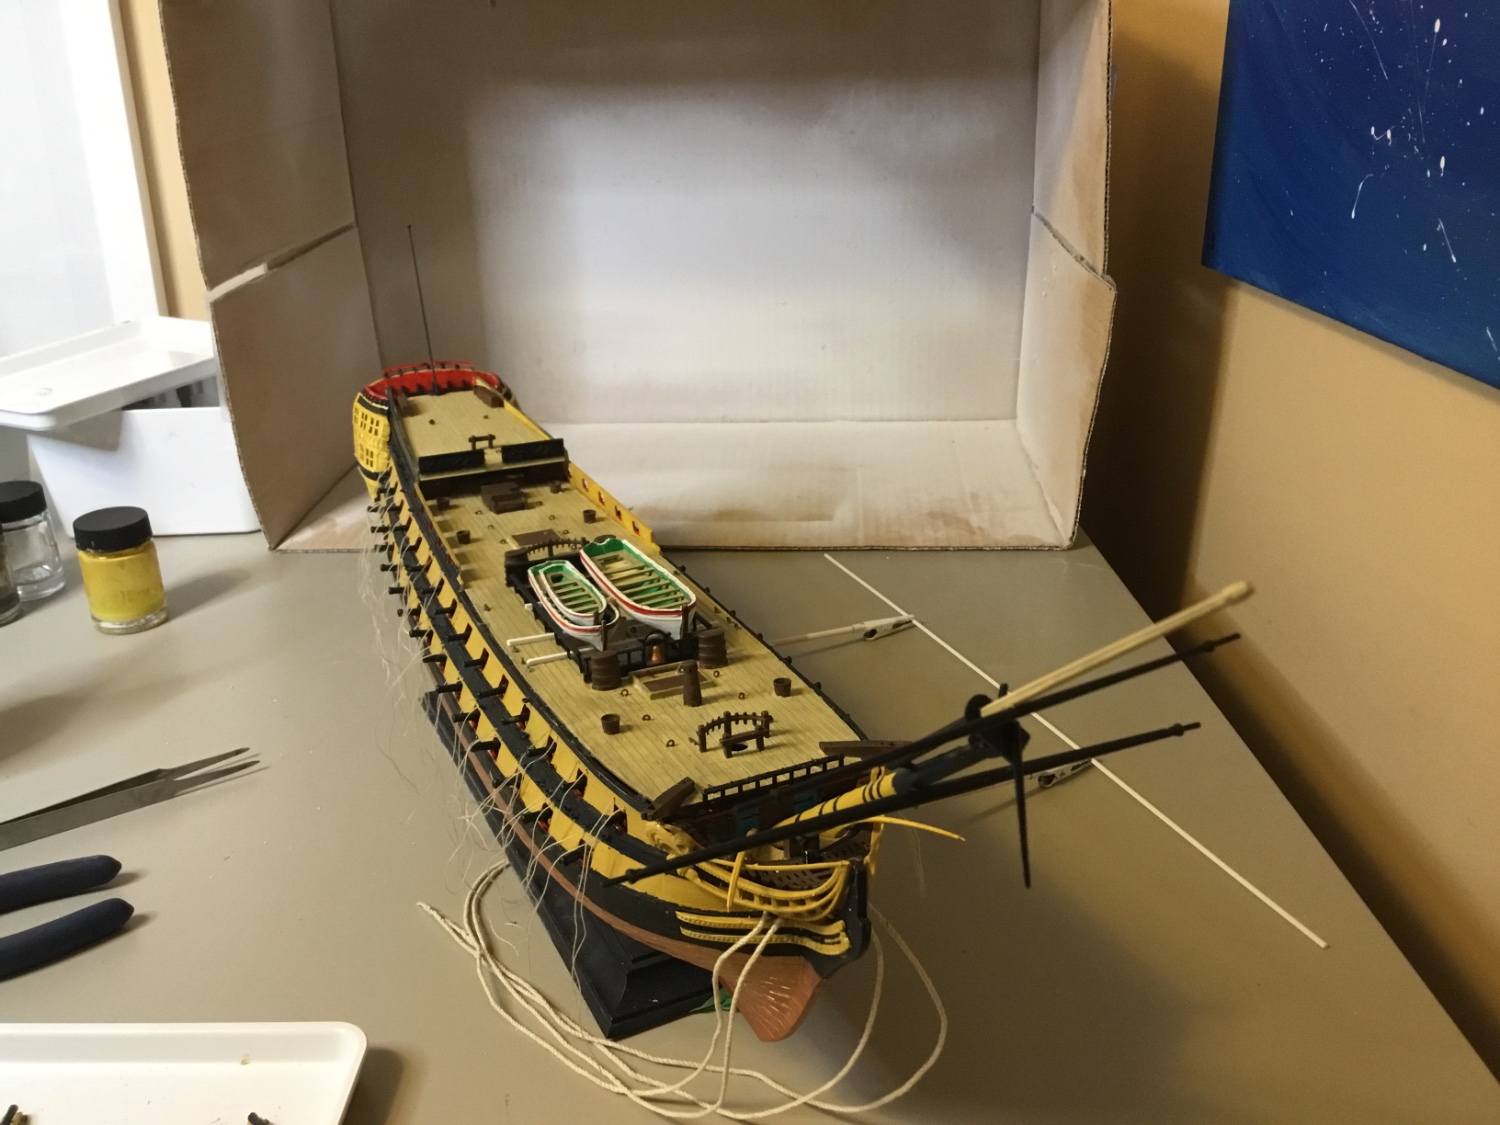
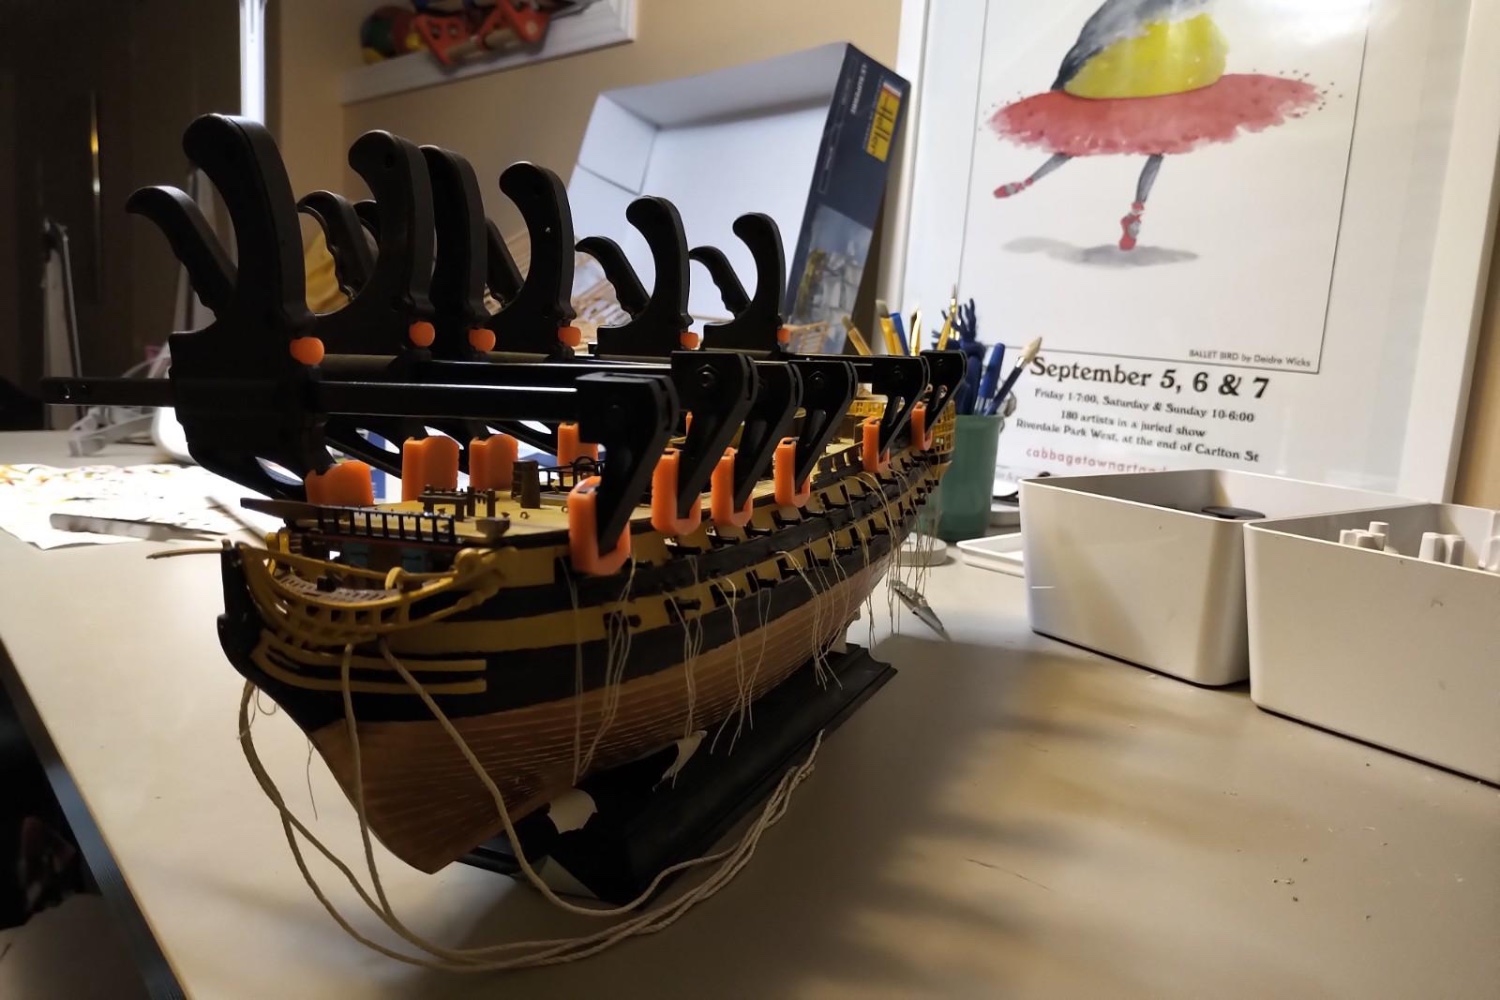
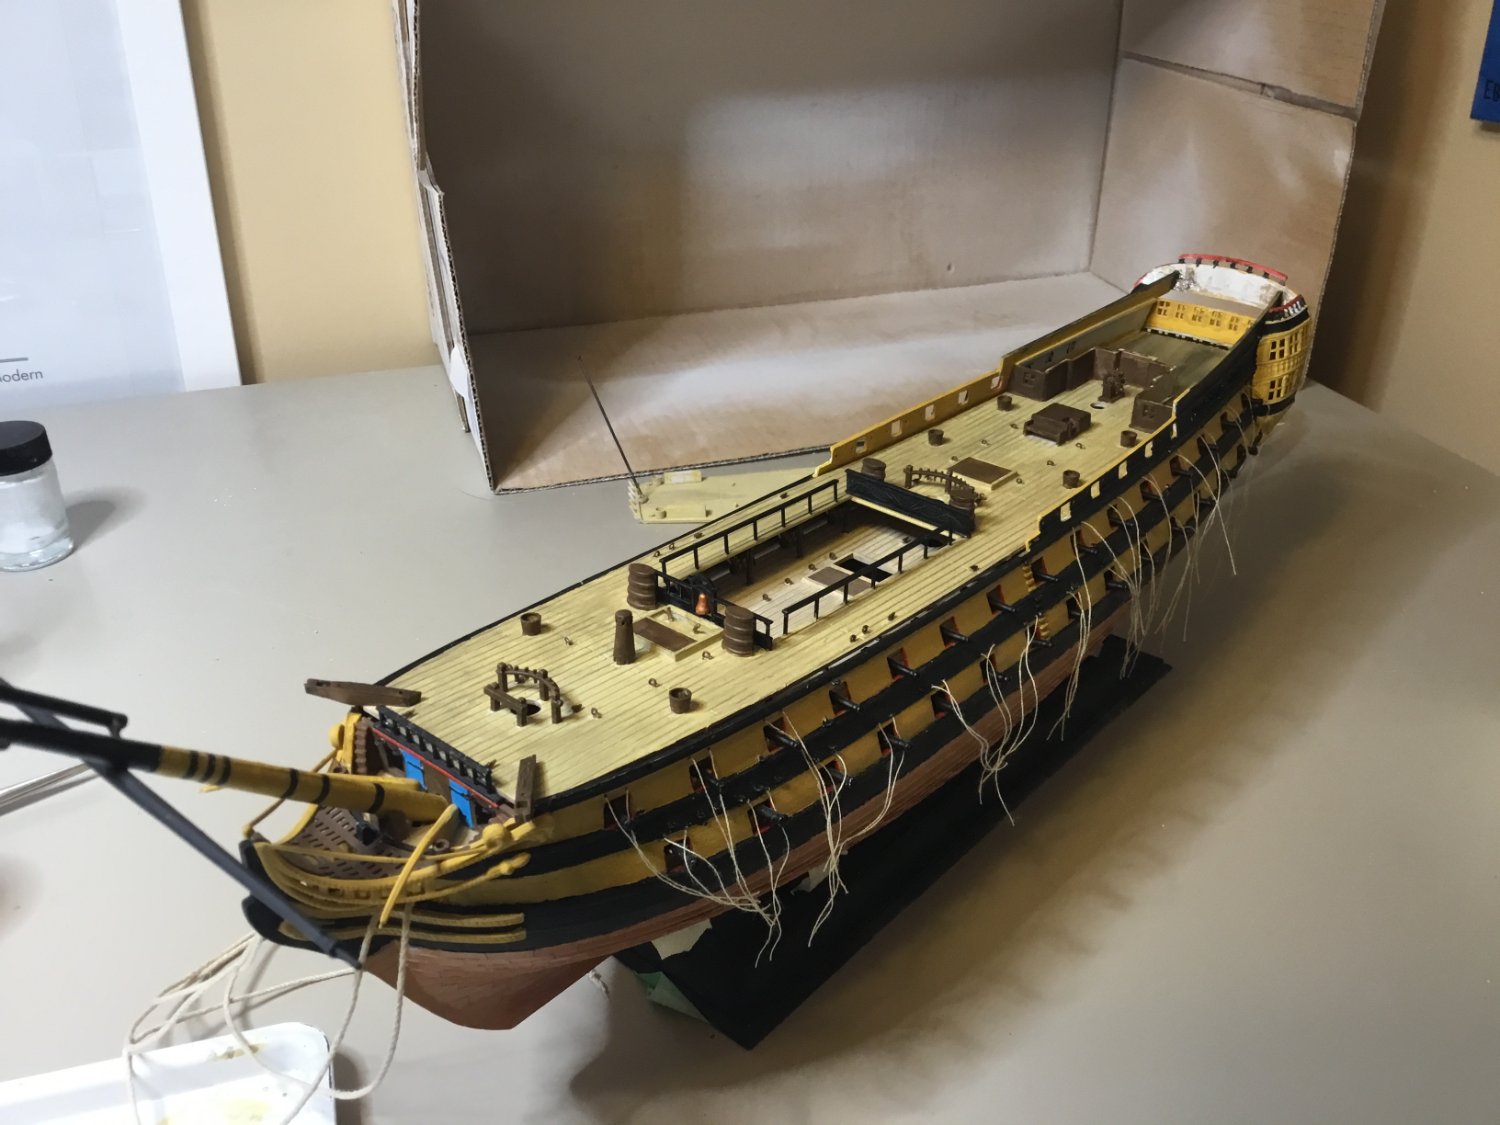
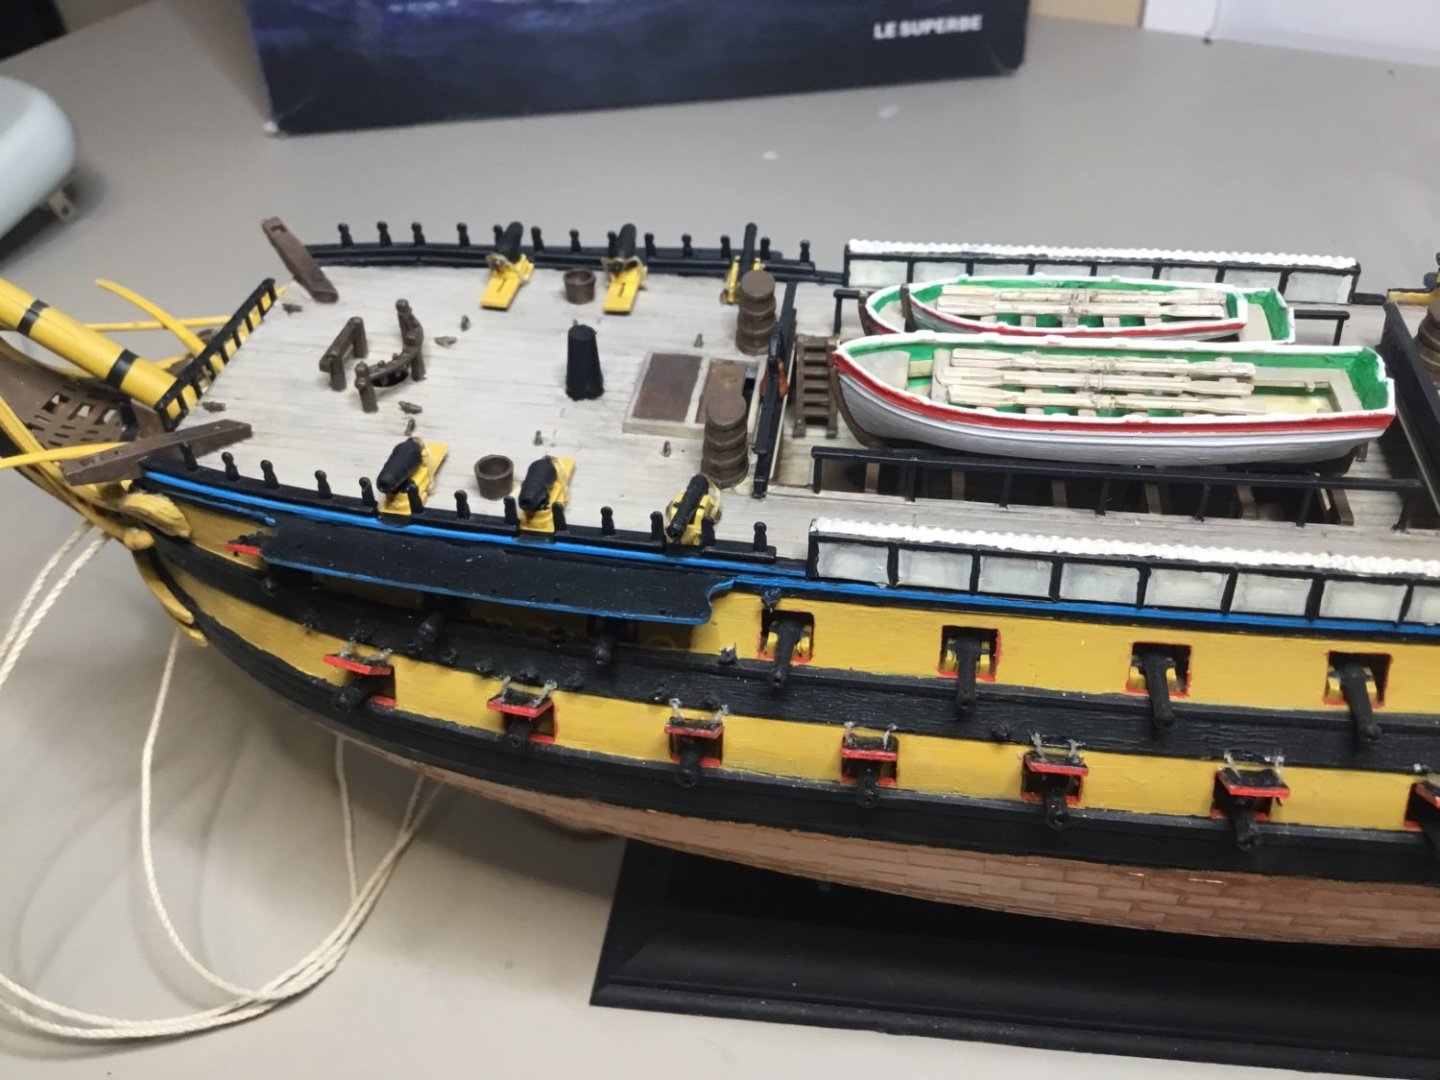
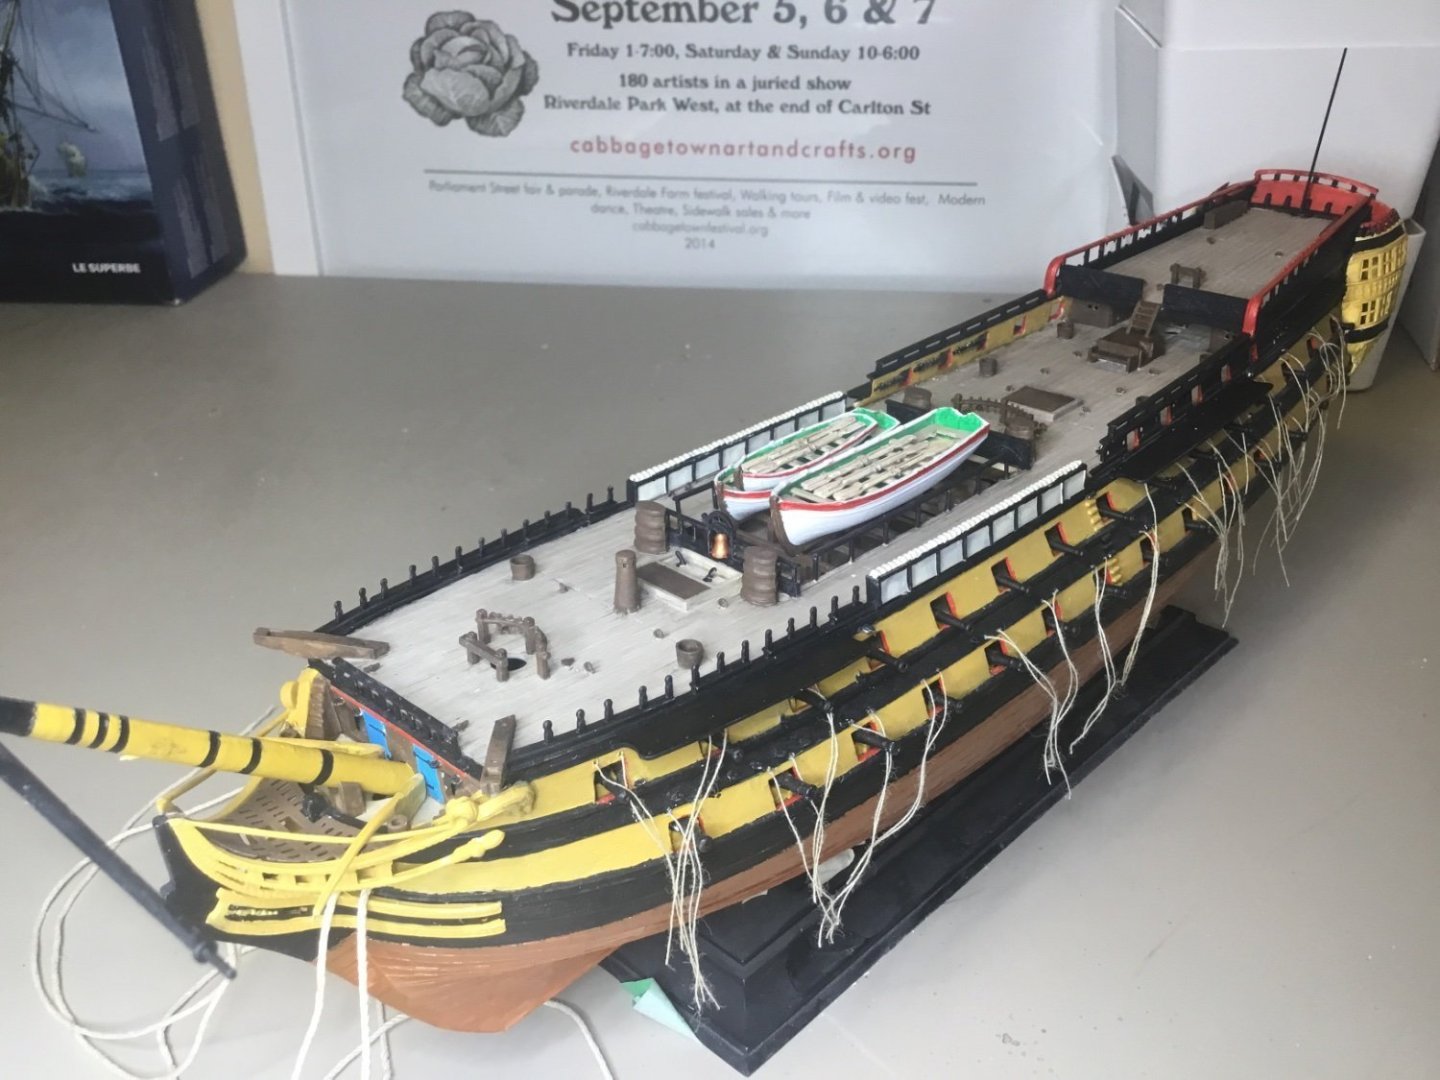
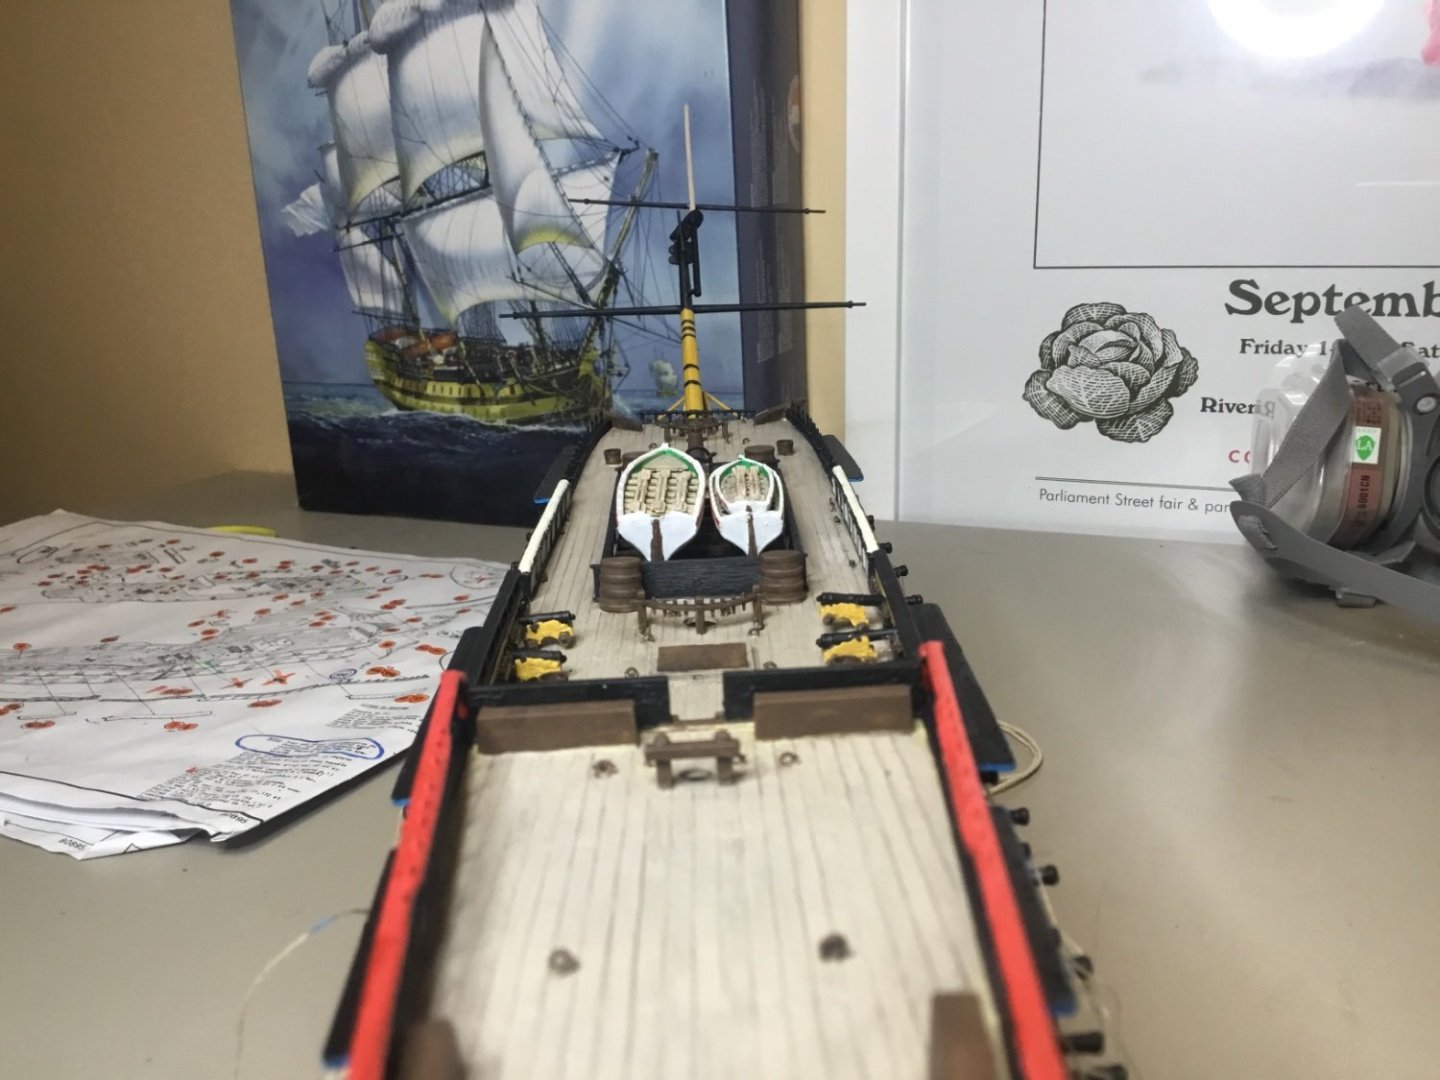
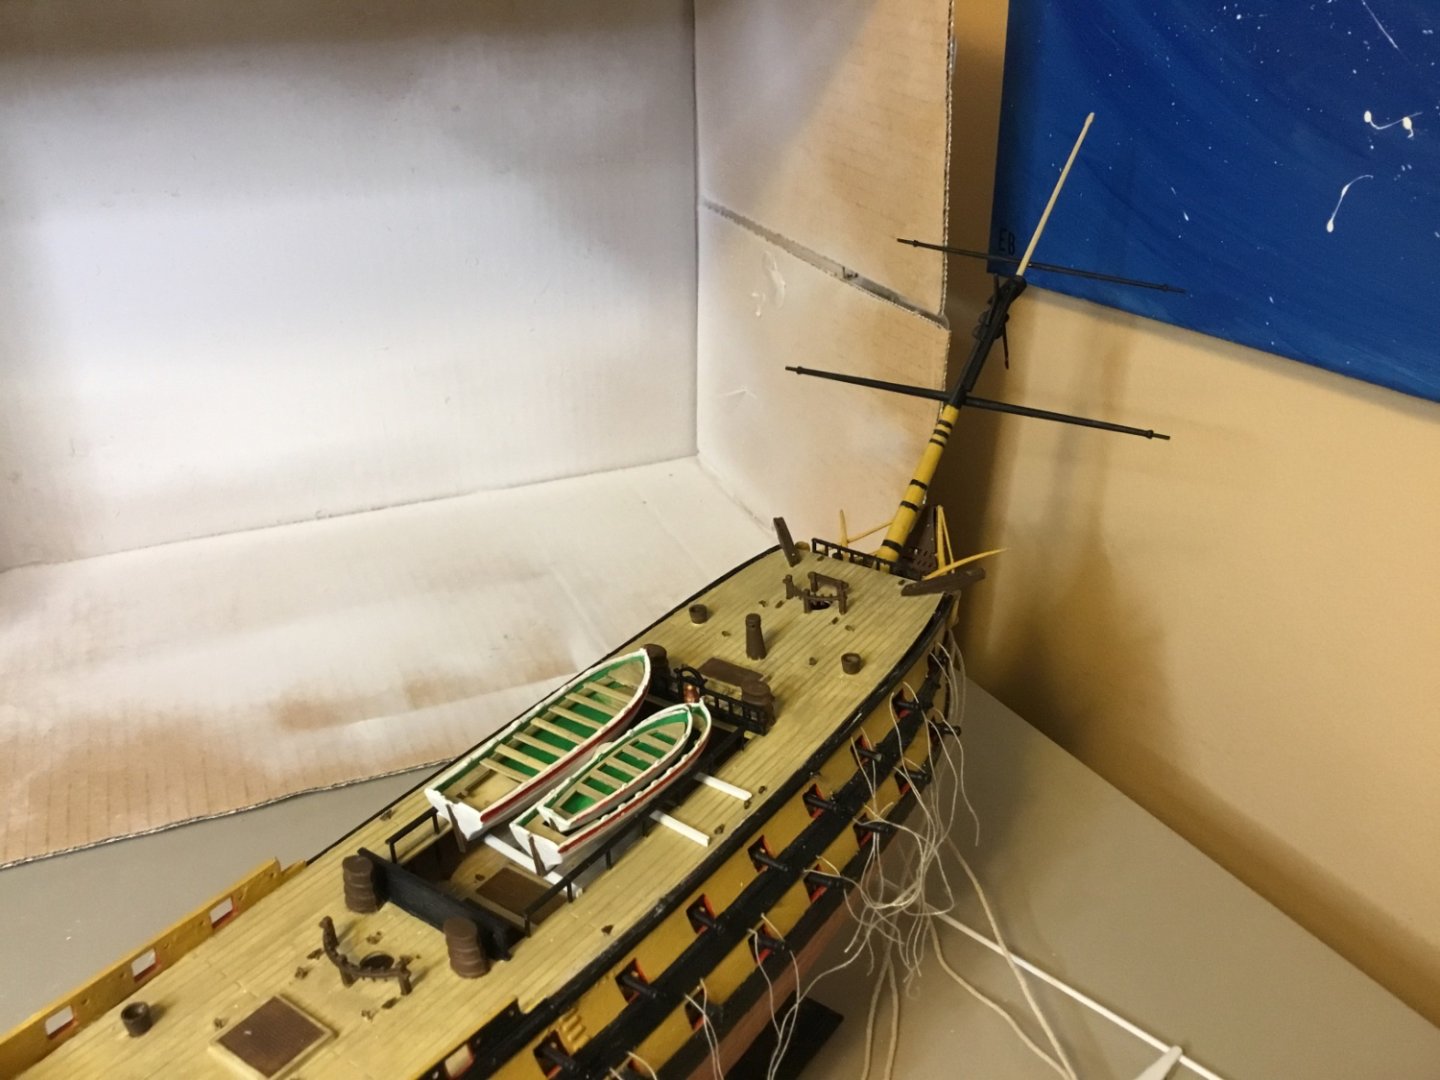
Boats and custom-made 3D printed oars installed, deck repainted and “weathered”, exterior sail platforms attached. Last step is to rope up and install the quarterdeck cannons and forecastle cannonades. And then we’re off to the masts. Gun port lids will be last, due to risk of knocking them off in handling the ship.


-
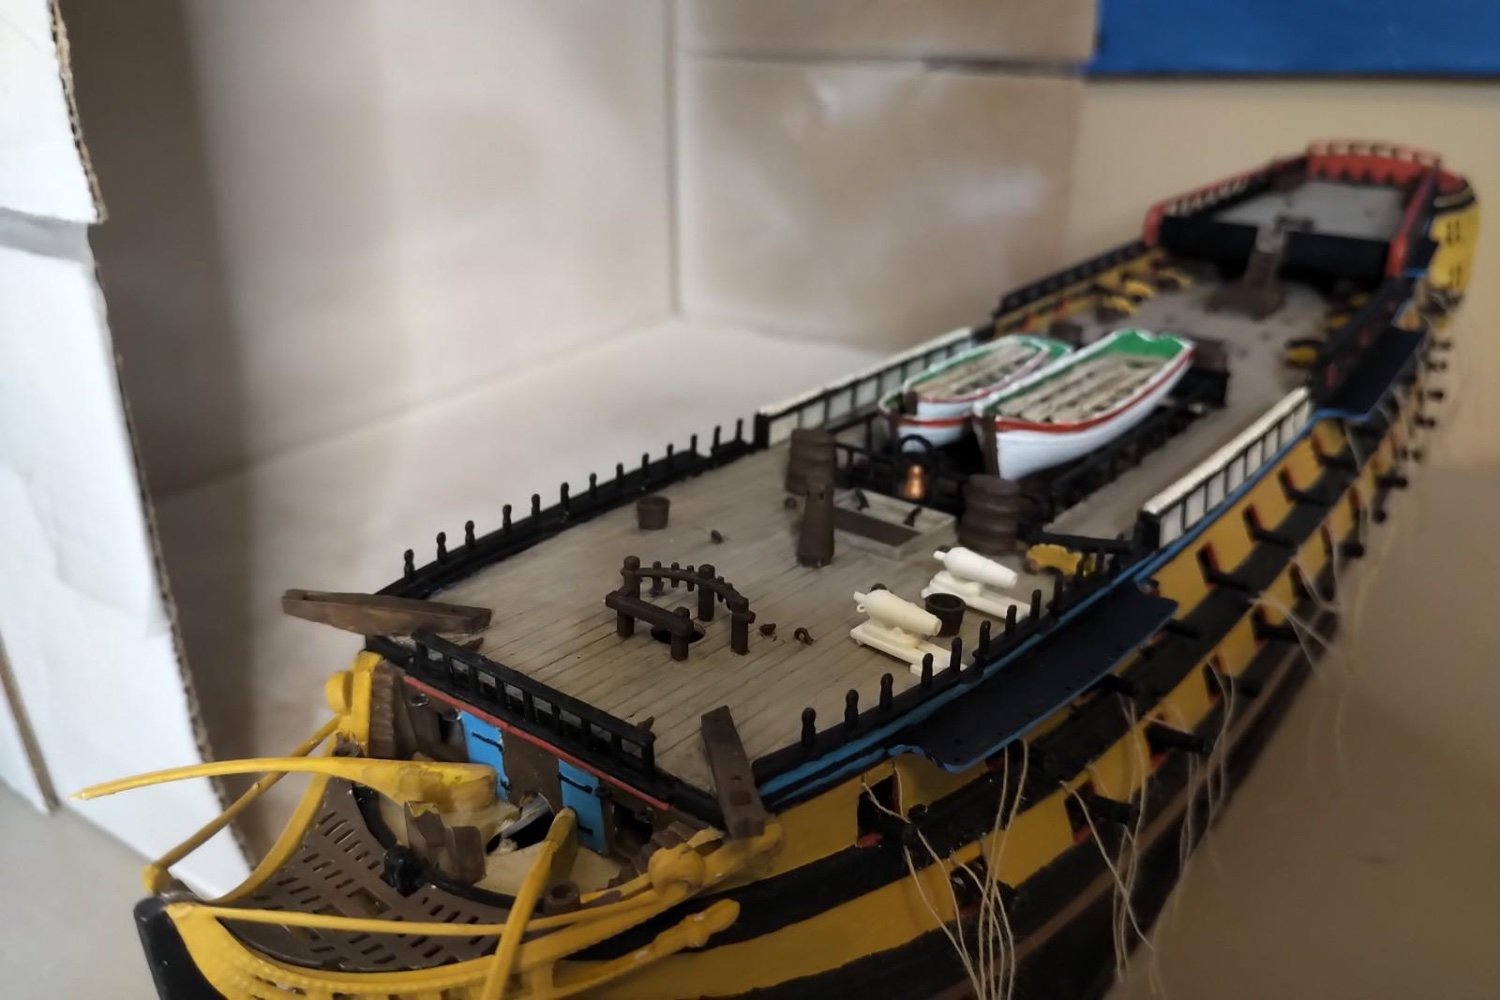
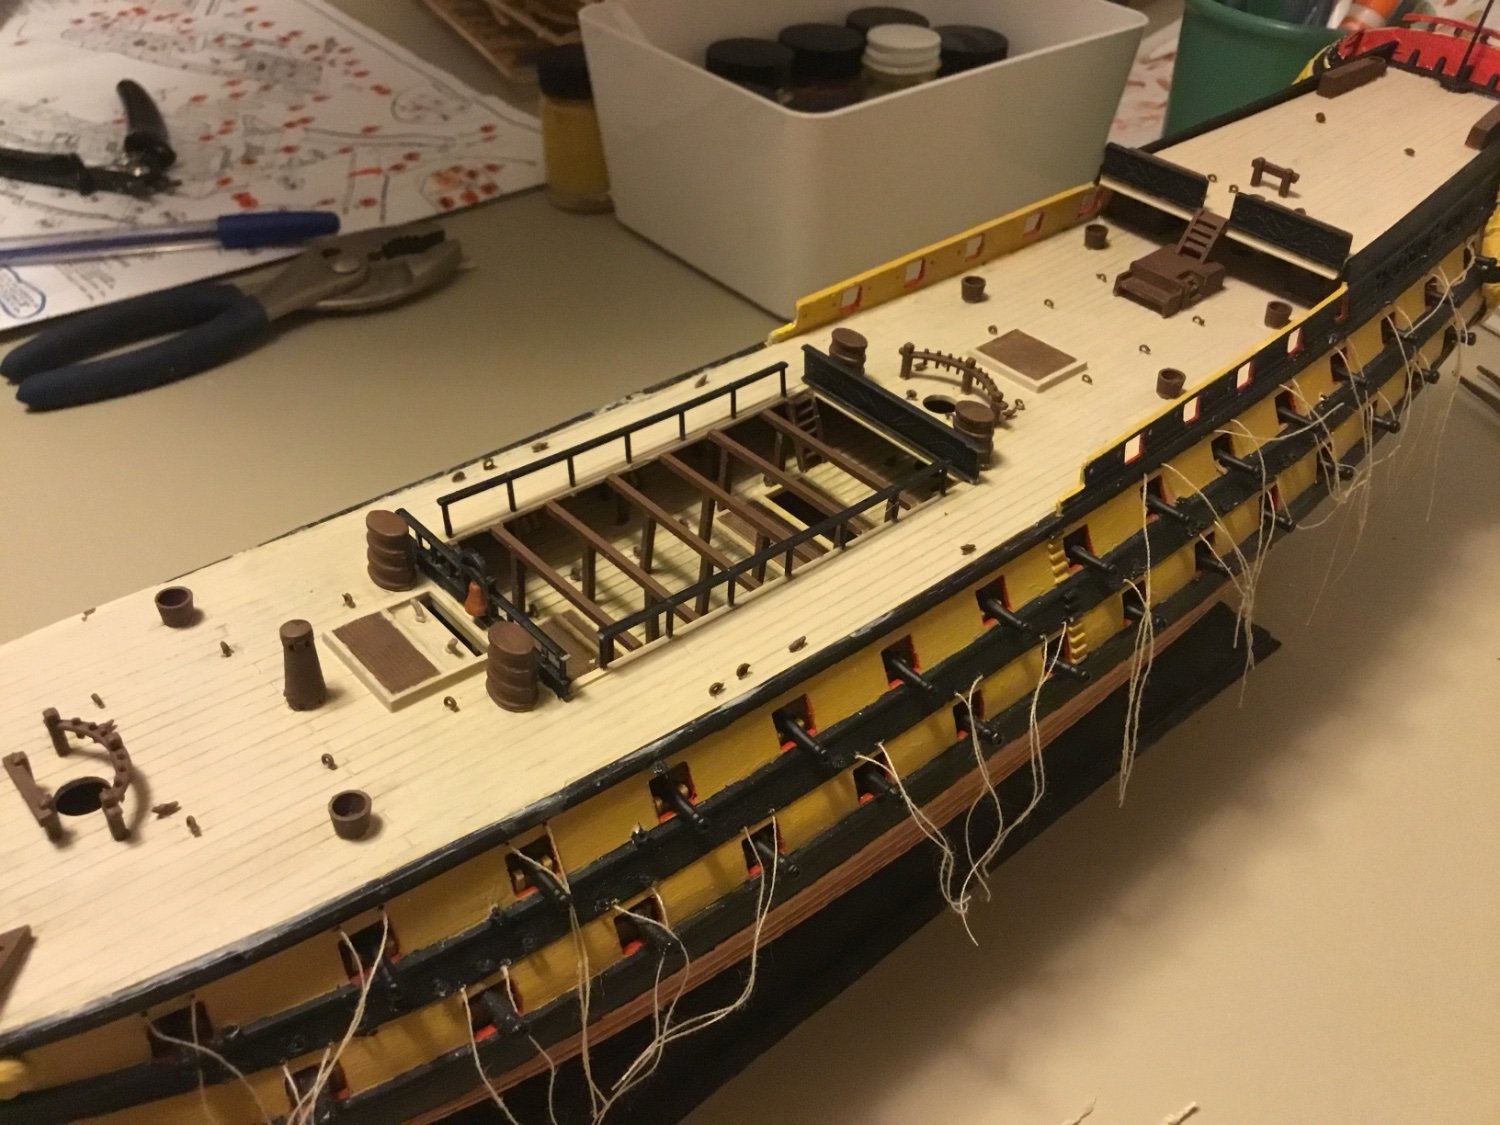
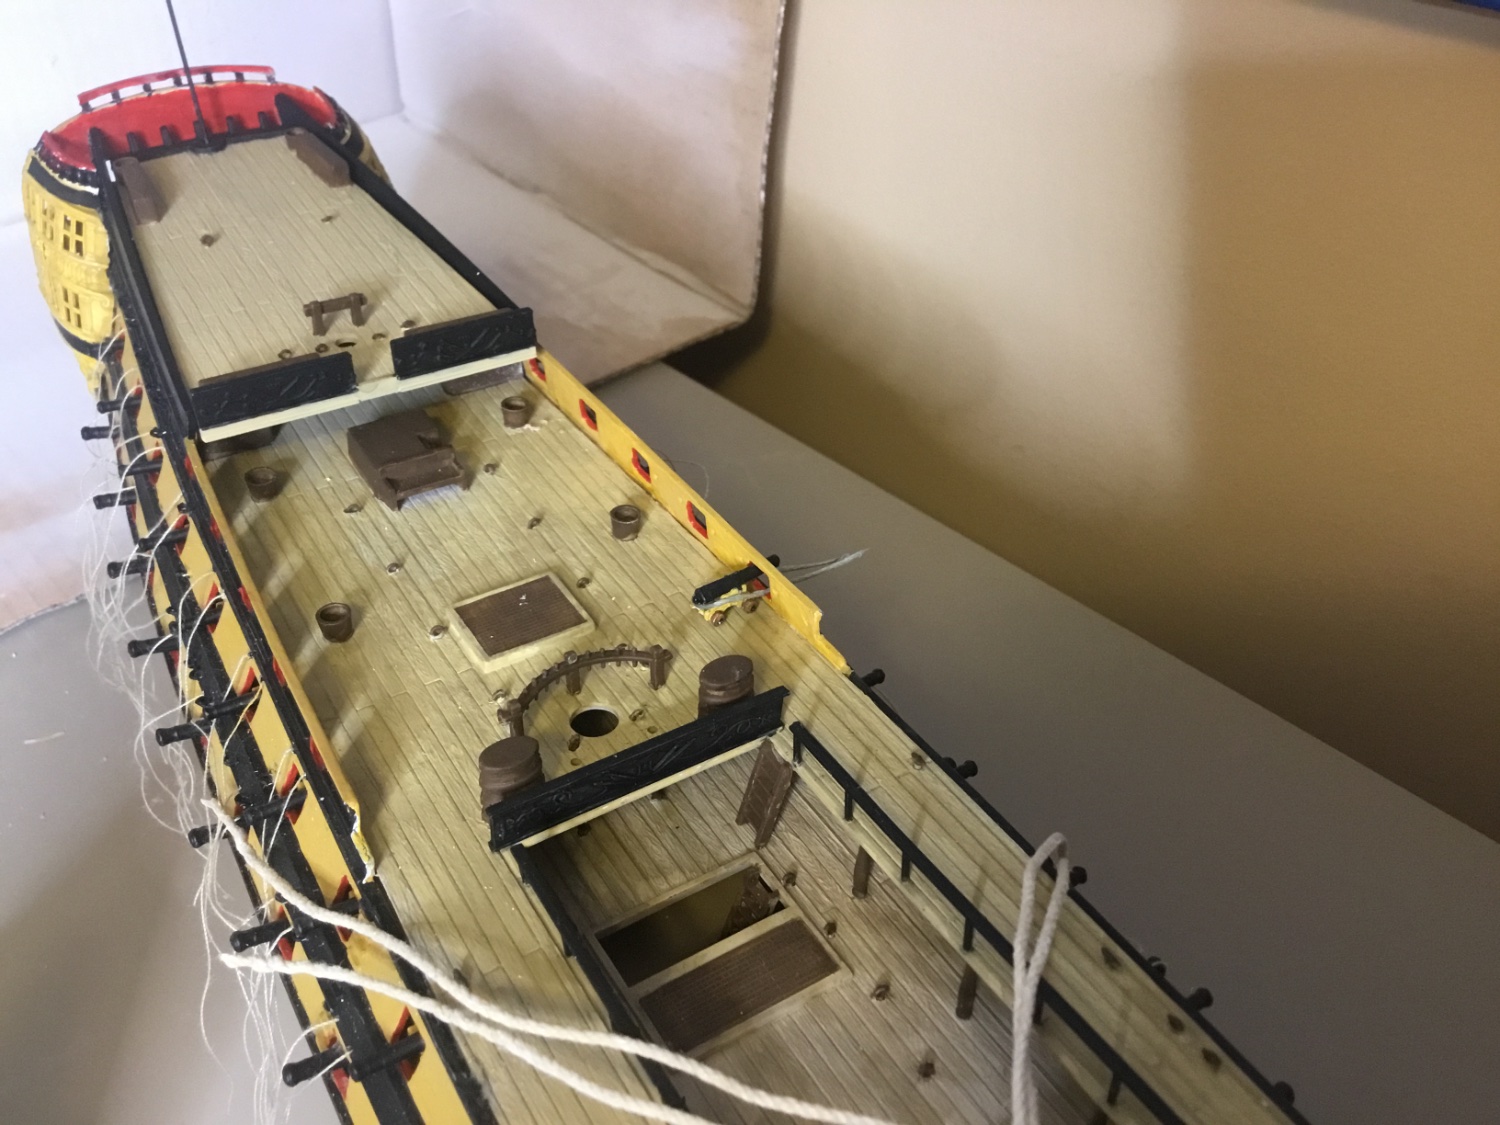
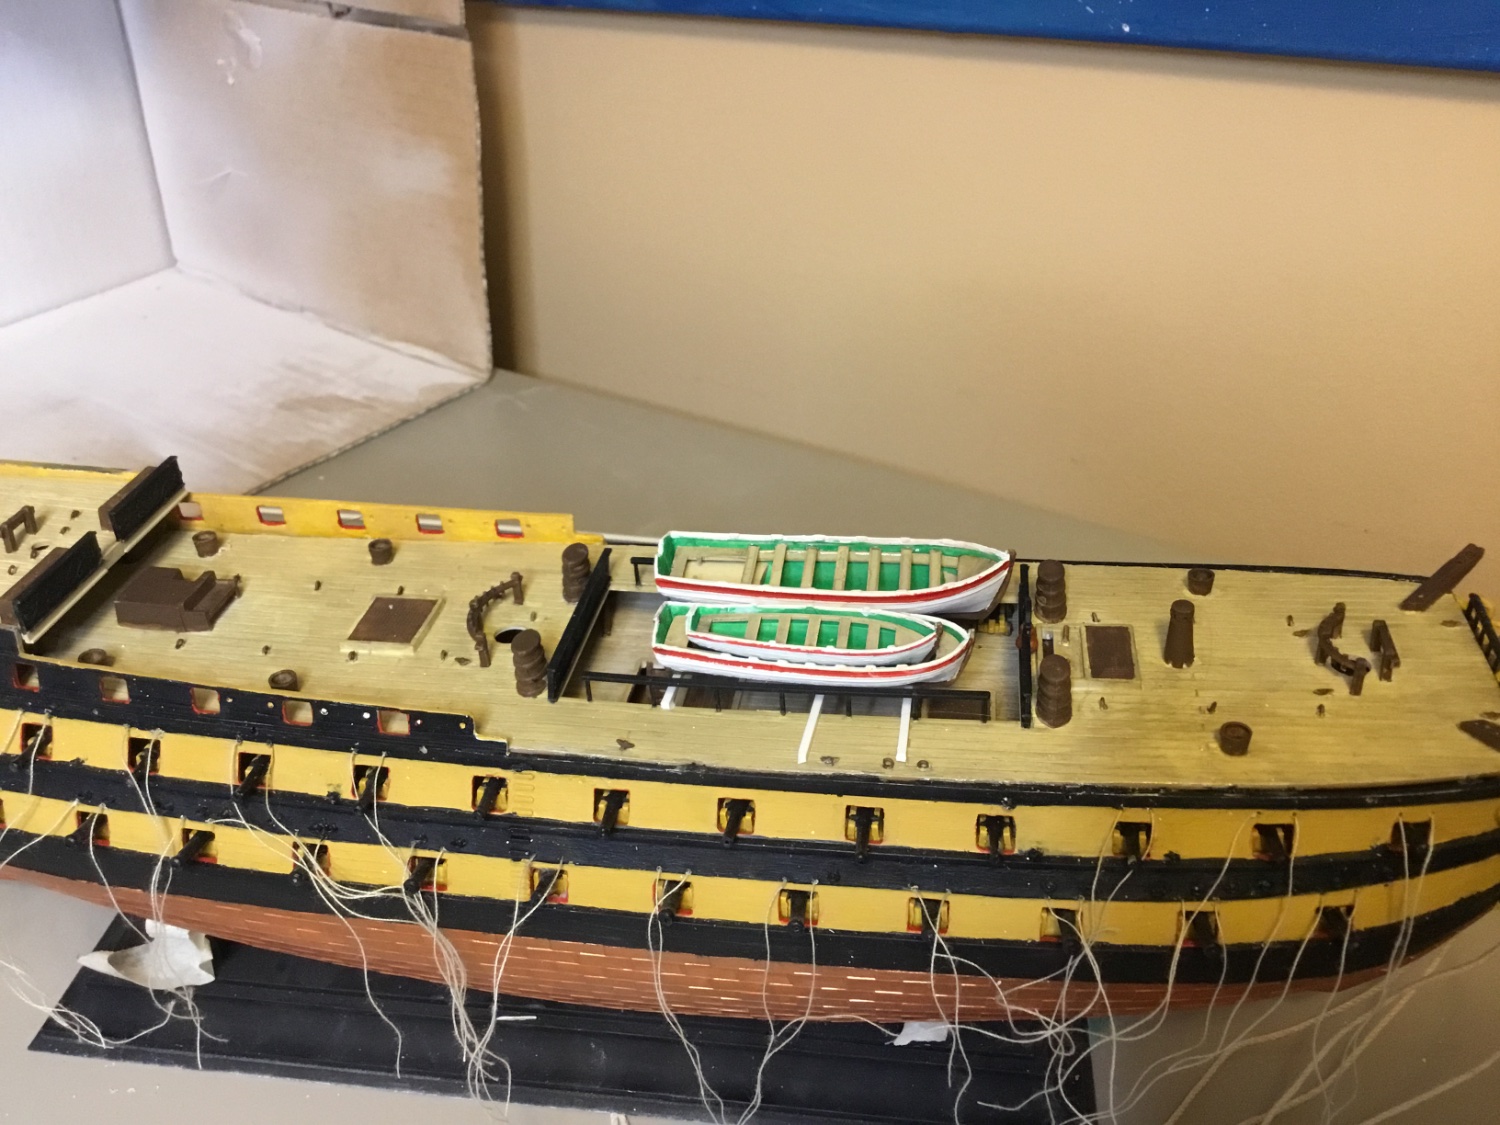
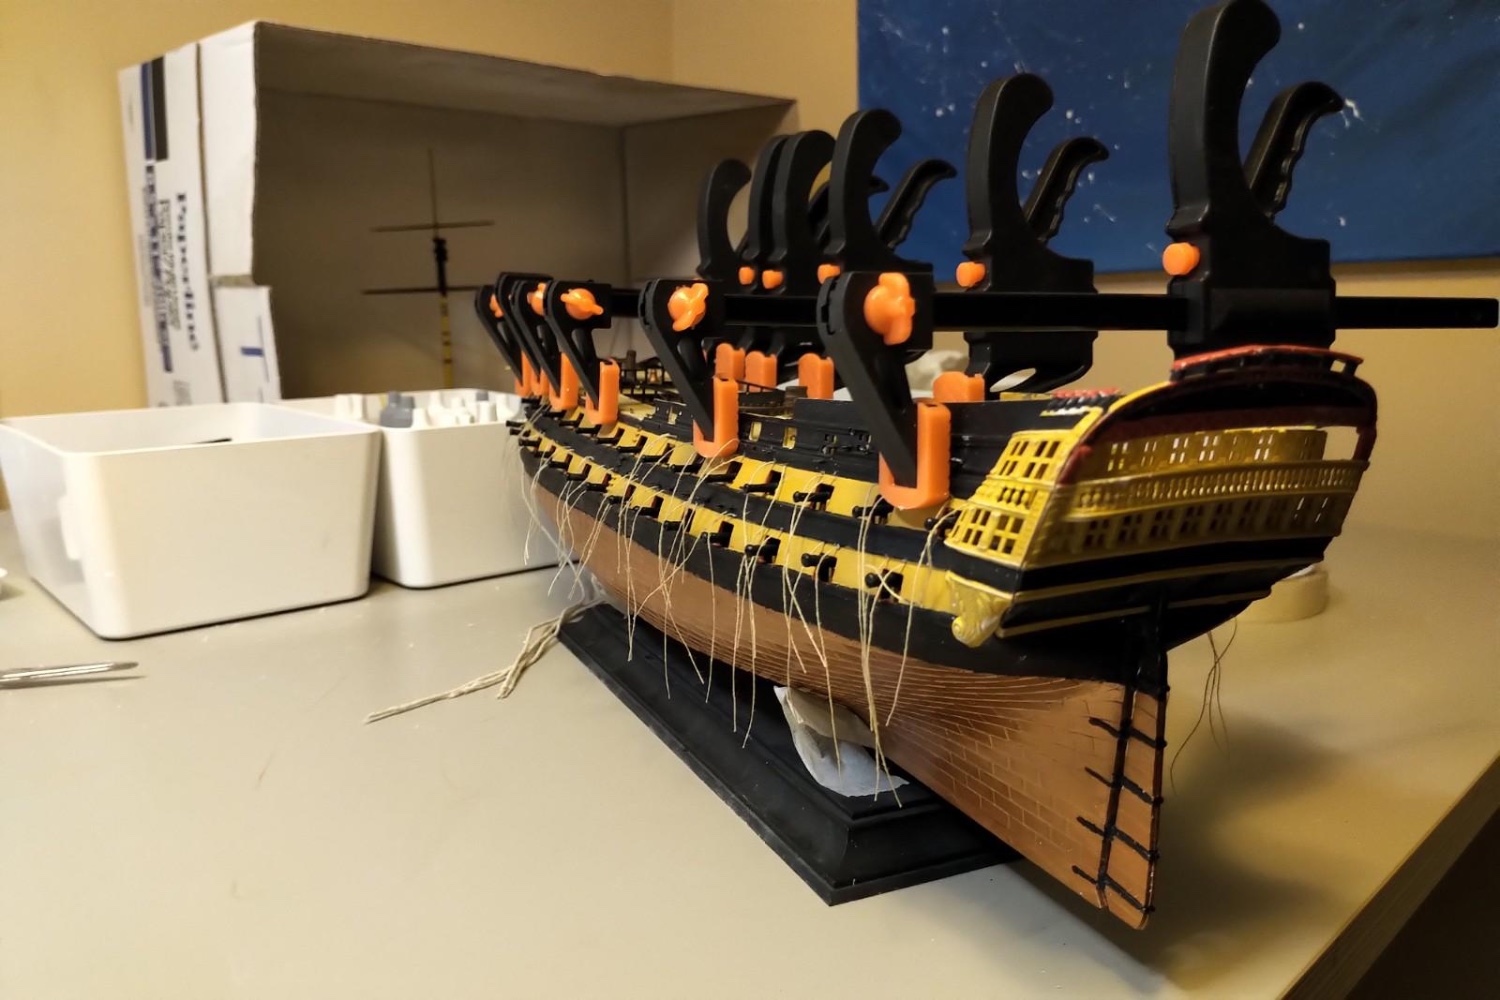
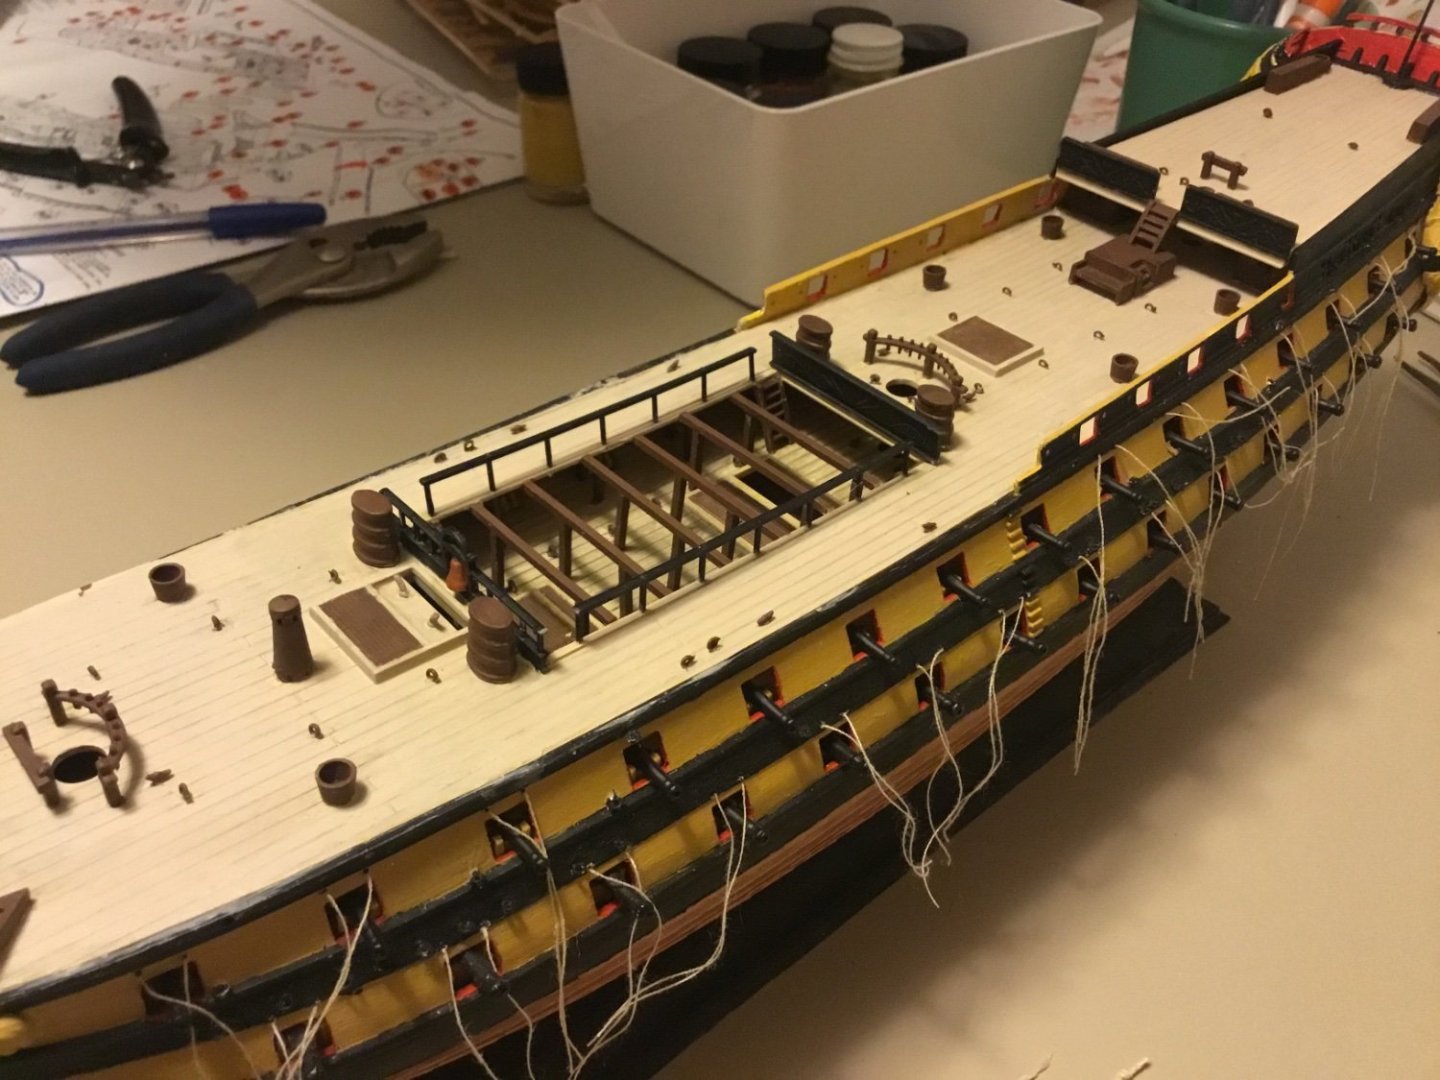
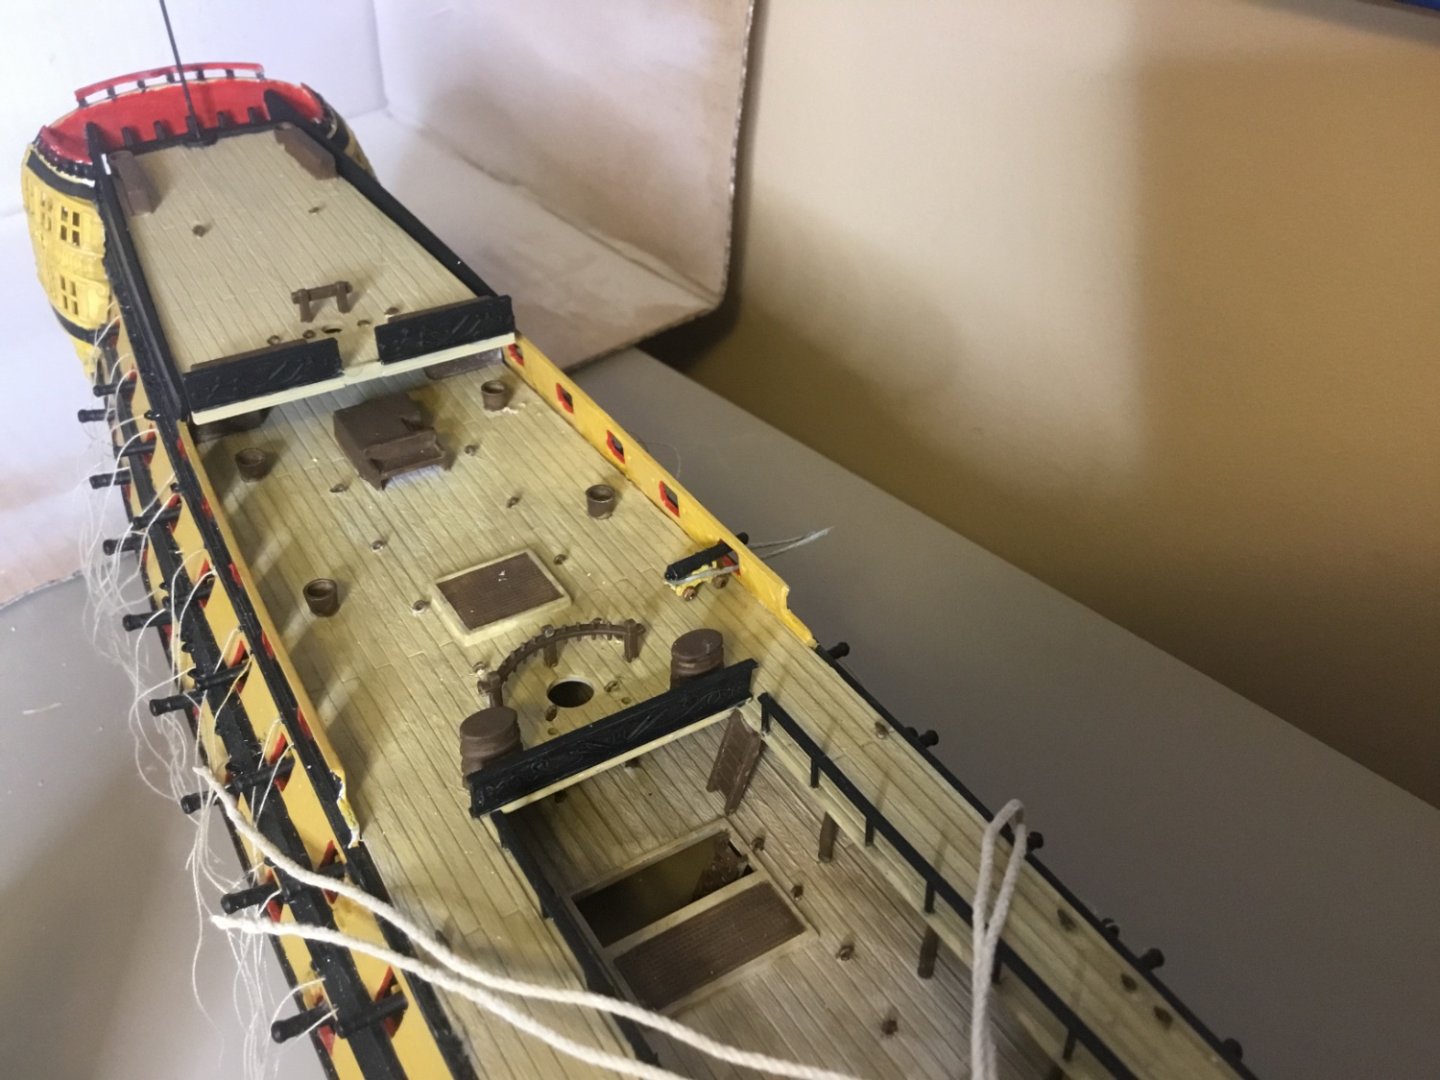
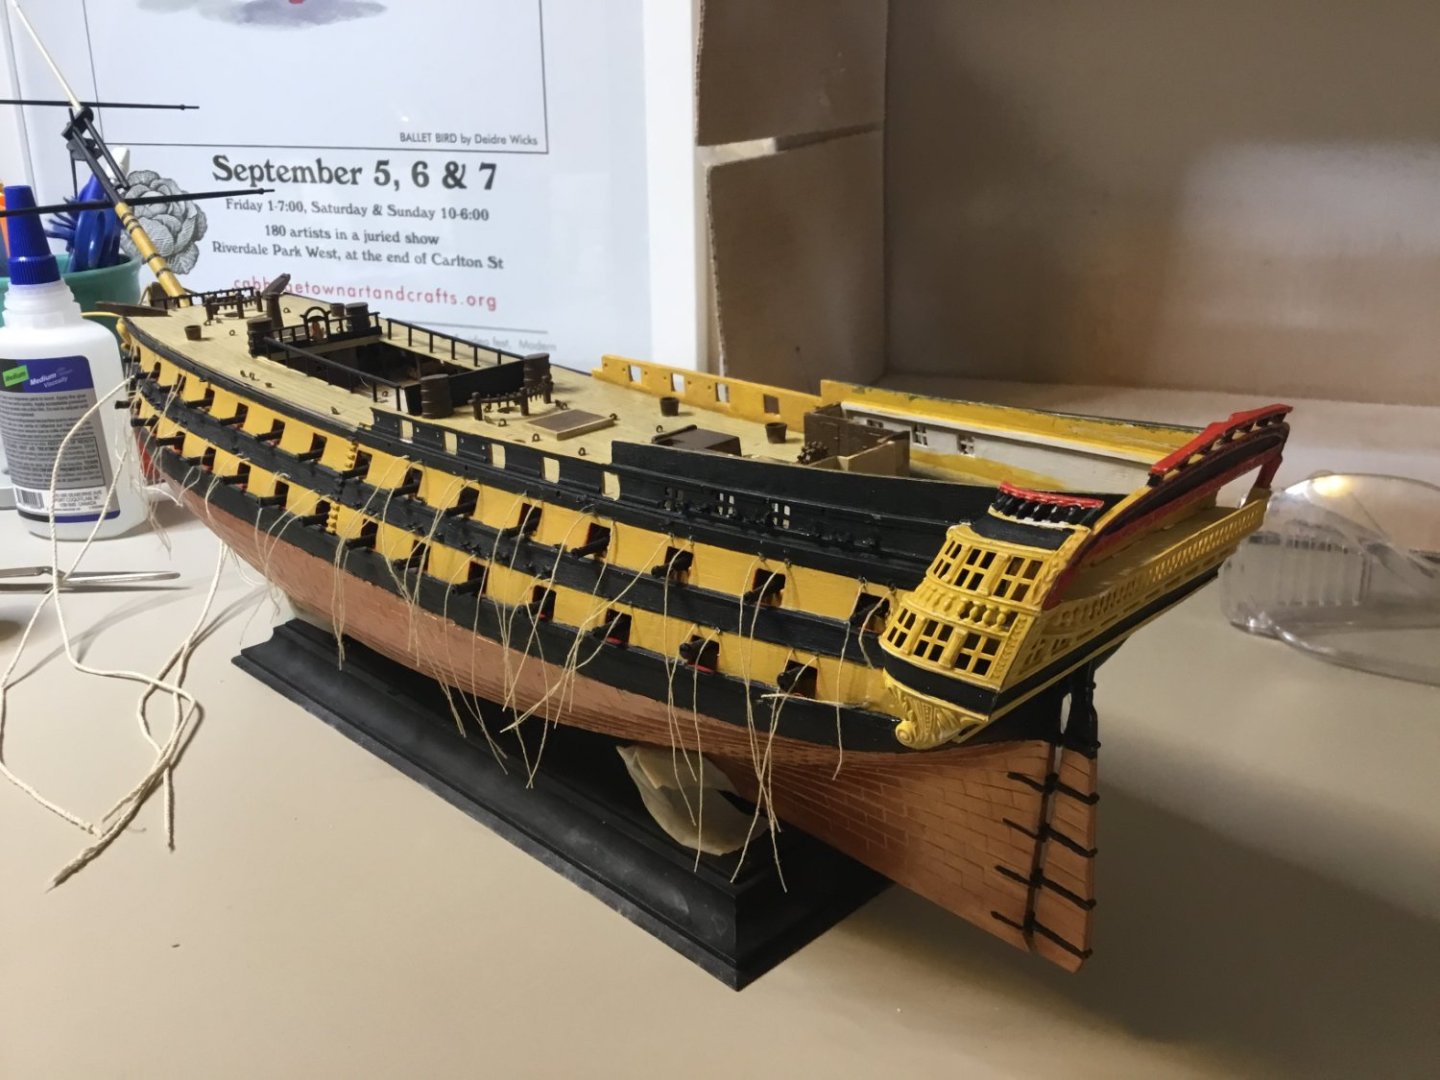
Side railings and hammock stowage railings now attached. You wouldn't know I had to use white glue to fill the gap in the deck to hull mating. Deck is now painted the correct tan, ready for clear coating and black wash. I'm especially pleased with my custom skid beams for the boats.

-
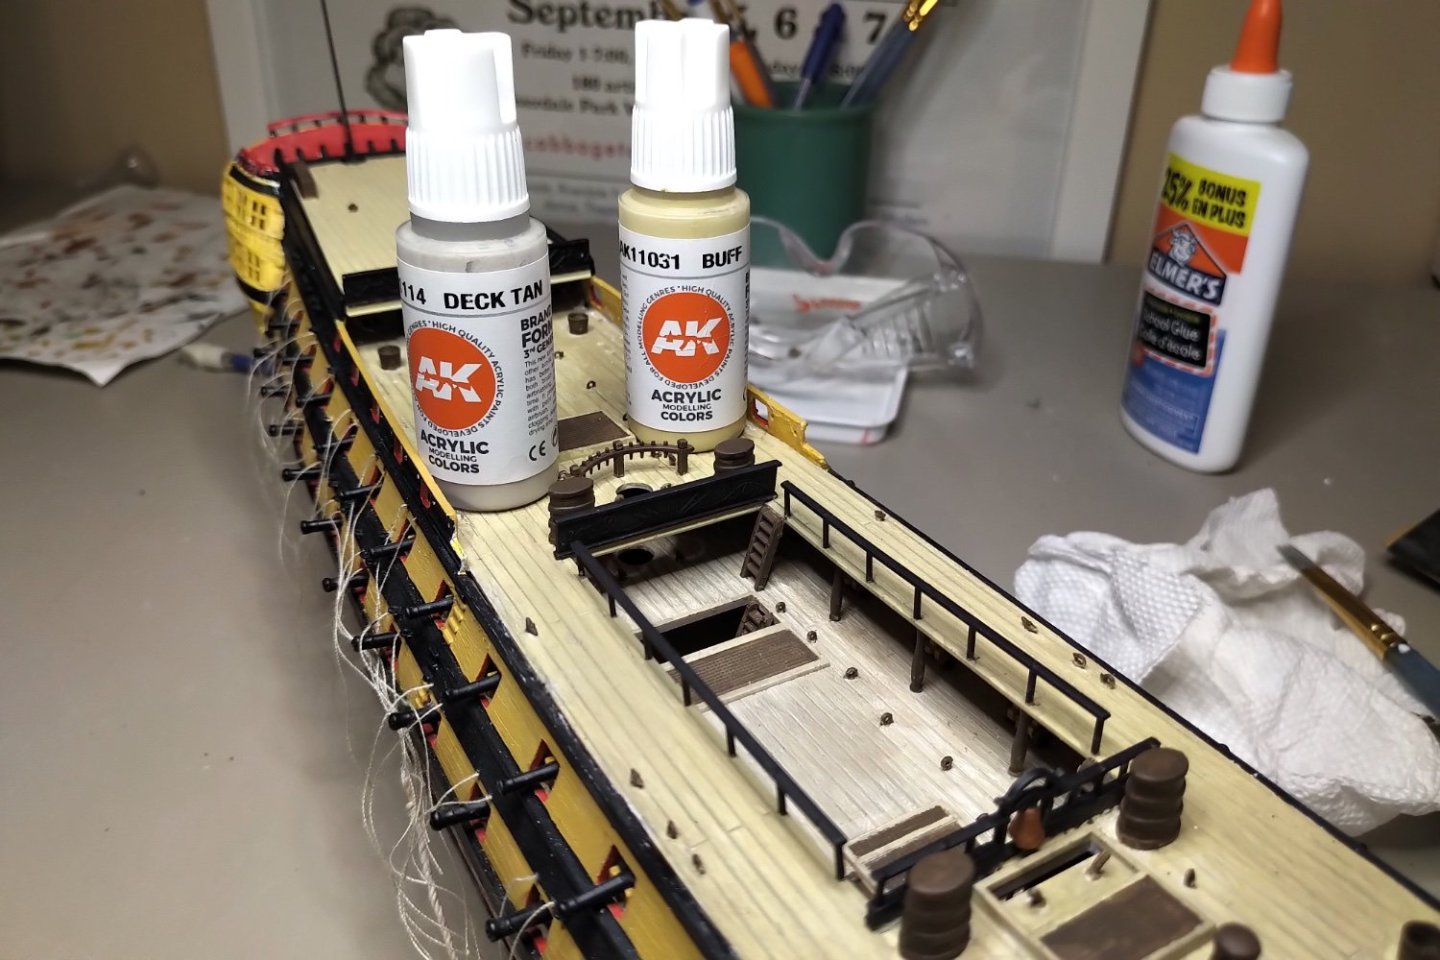
Deck repainted the correct tan colour. Custom skid beams installed to hold the boats. I’m now touching up the paint before applying clear coat so I can add the diluted black wash to the deck. Some good advice I received on using kid’s white glue as filler, add some talcum powder to thicken it, and add a couple of drops of the colour you’re going to paint over the glue. Lastly, make sure you clear coat to seal the glue, as it will dry and crack over the years otherwise.
-
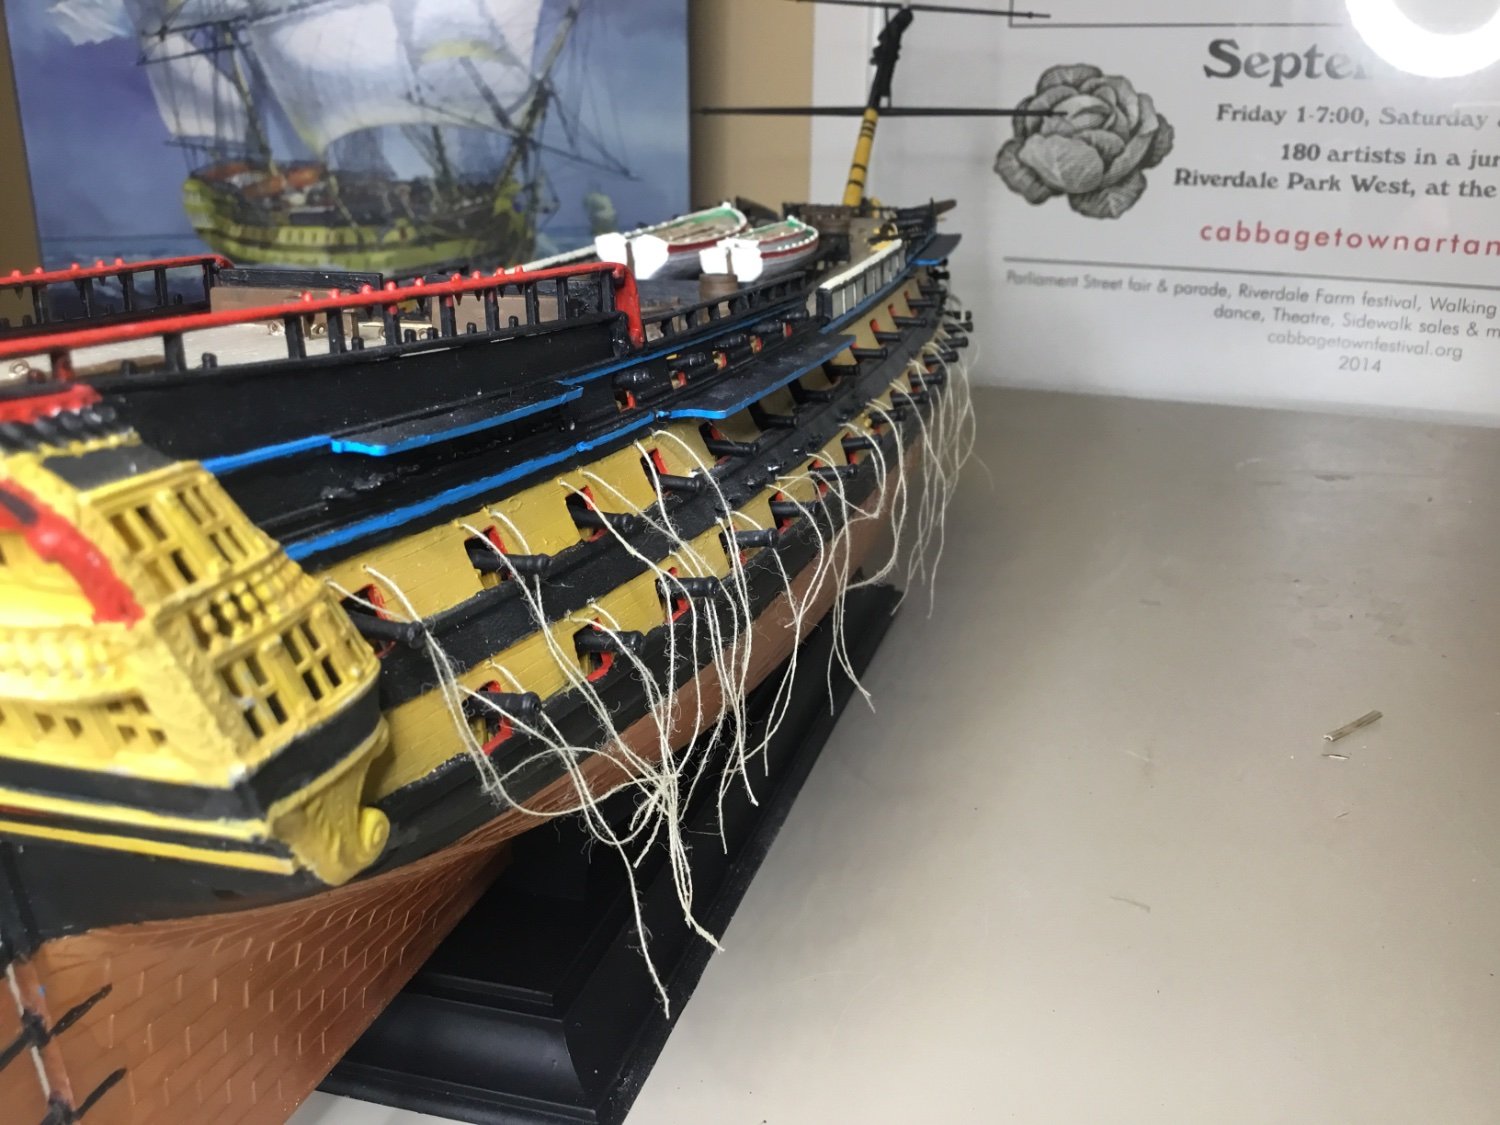
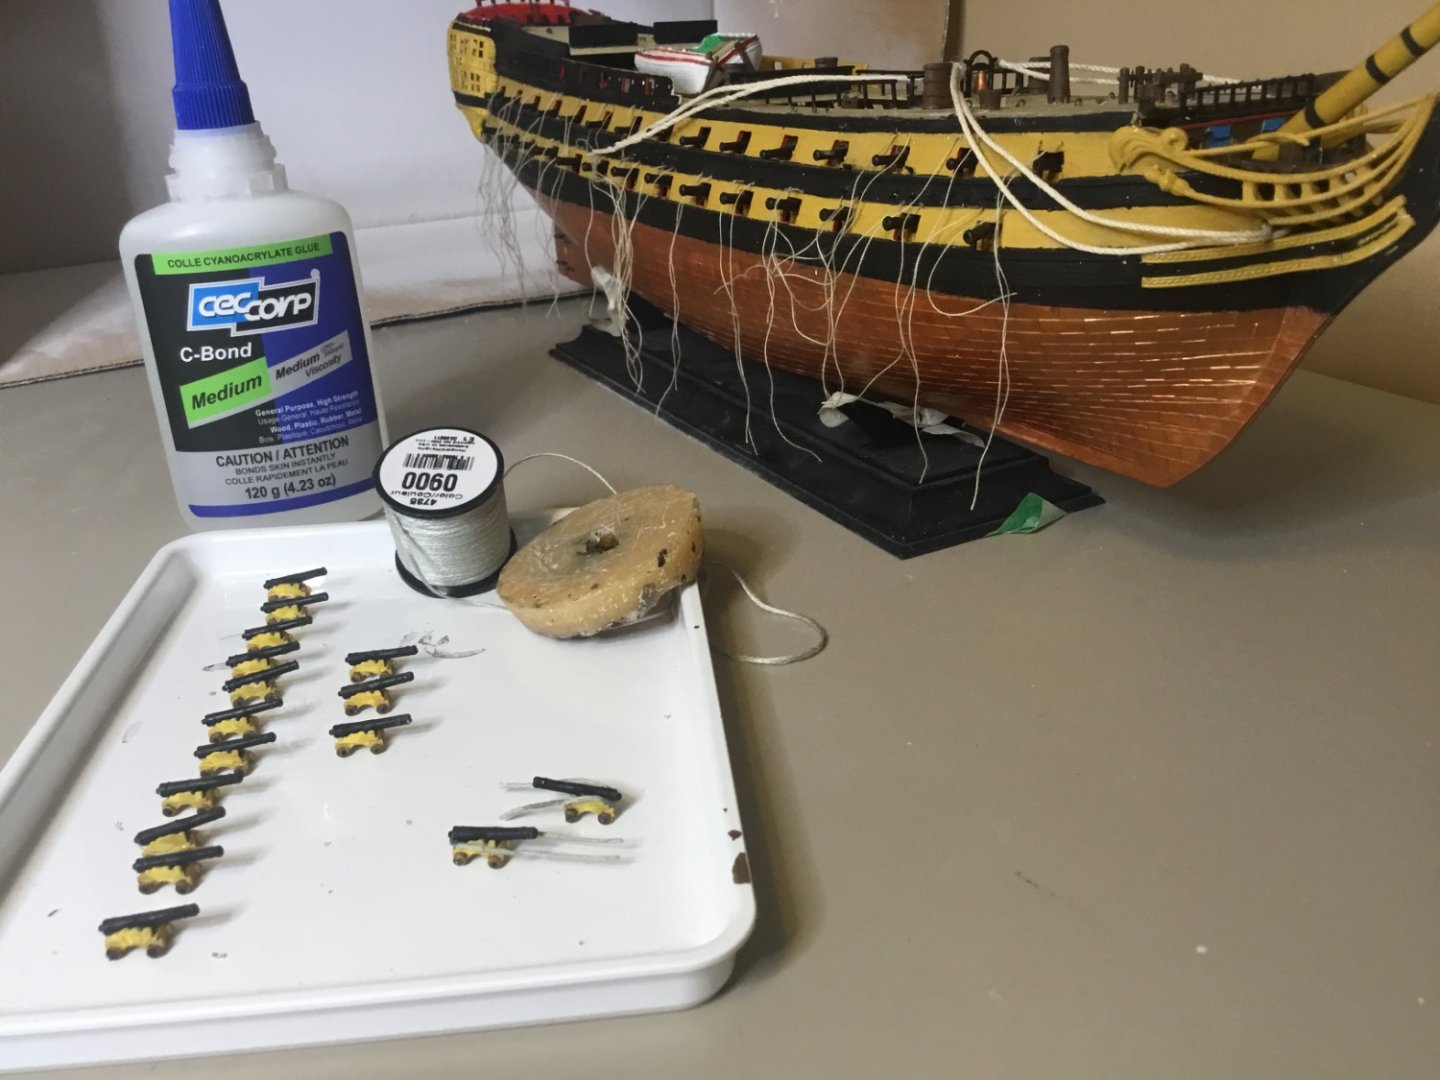
We’ve caused problems, and solved those and others. I found out why my deck colours didn’t match - obviously I used the wrong paint! When I bought the kit I also bought buff colour paint intending to mix with yellow to paint the hull sides. But then I bought Yellow Ocre for the sides, putting the Buff paint away for future projects. But then it came time to paint the upper decks and I grabbed the Buff instead of the Deck Tan I’d used on the lower deck. But it all ends well, since my cannon ropes frayed (see cannon below), requiring me to rip out the cannons. Thankfully the kit has an extra sprue of cannons, and besides I’m replacing the forecastle 12 pounders with vacuum formed 32 pdr cannonades a friend in my model club made for me - so the destruction of a few cannons in the removal process isn’t so bad. And, since the deck is now scratched up from canon removal I can repaint with the proper Deck Tan paint, clear coat and add my diluted black wash to match the lower deck. My friend above from the Toronto model boat club (I highly recommend joining such clubs) also made me oars for the boats, and gave me better string for the cannons. See below, note the oar in the boat. I’ve also made the skid beams from 2.5 mm square styrene strips, to hold the boats. And a reason for joining clubs is advice when all seems lost. The starboard (larboard) forecastle deck edge would not meet up with the hull side, no matter my clamps. The club recommended I used children’s white craft glue to fill the gap. And it worked perfectly, see below. I took the opportunity to glue over gaps in the stern gallery and quarterdeck to hull sides. Once the glue dries I’ll paint all with the Deck Tan and then restring the cannons and get back to it.

-
Fabricating and installing breech rope from thread pulled through beeswax and affixed to the pommel on each quarterdeck 12 pounder cannon with instant glue. Rope will be cut to meet inner hull side when cannon is permanently installed.


-
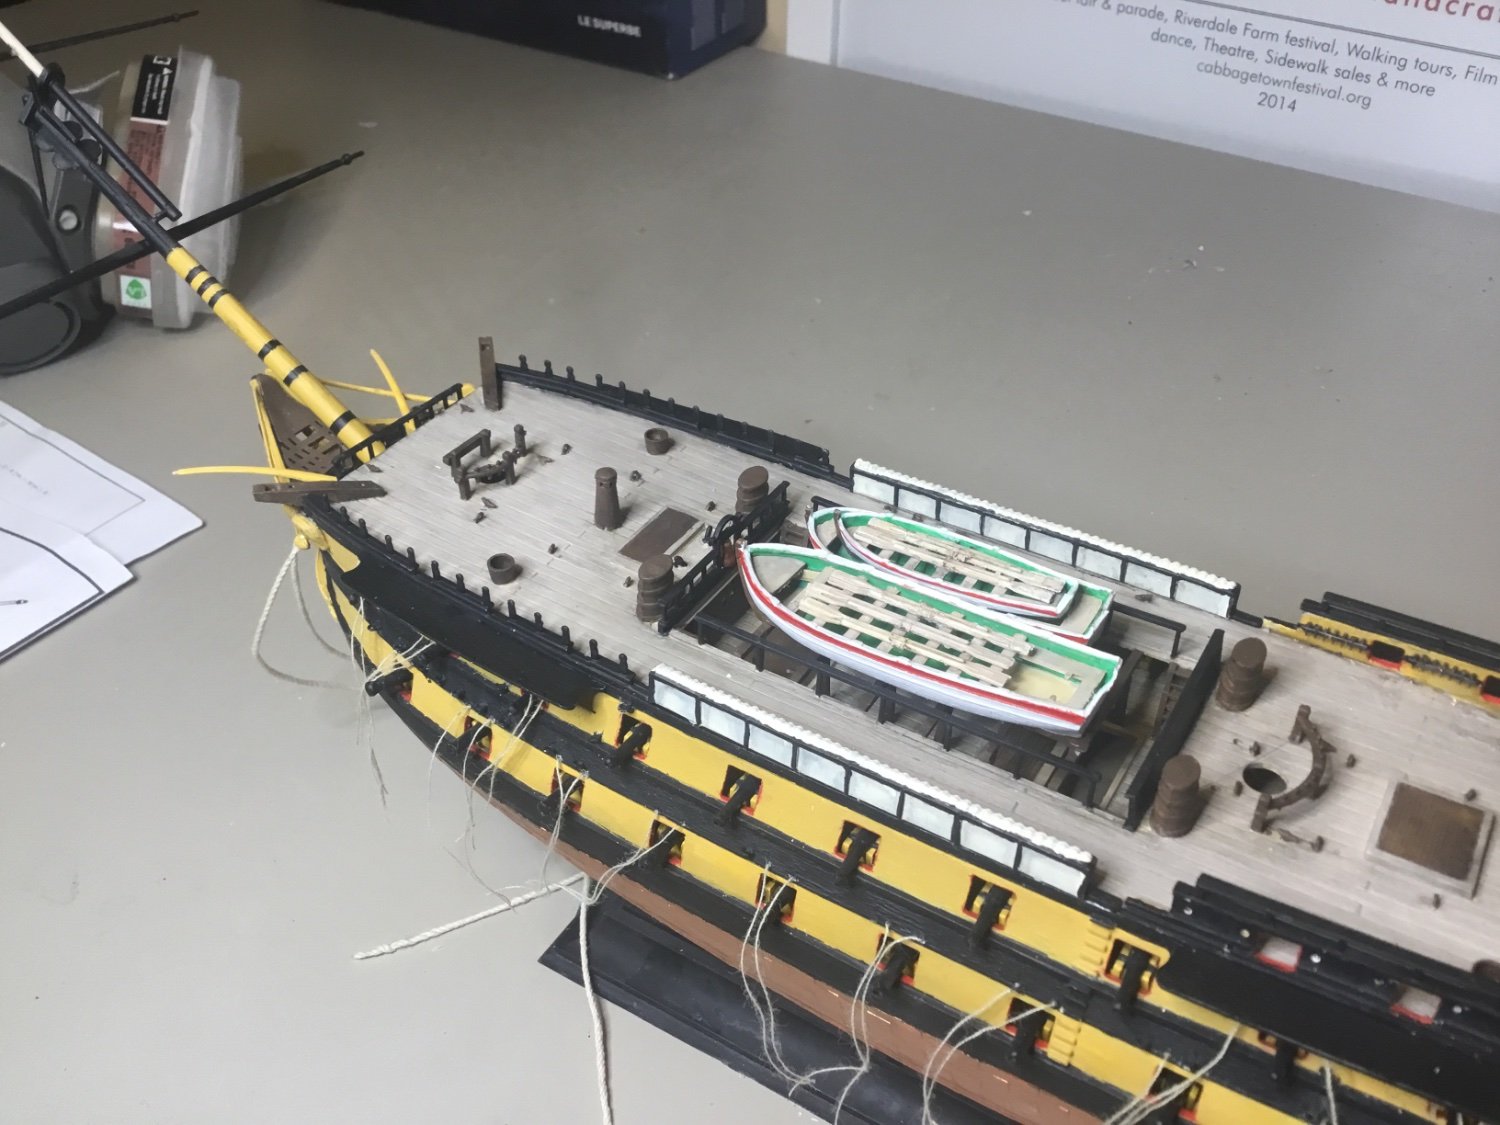
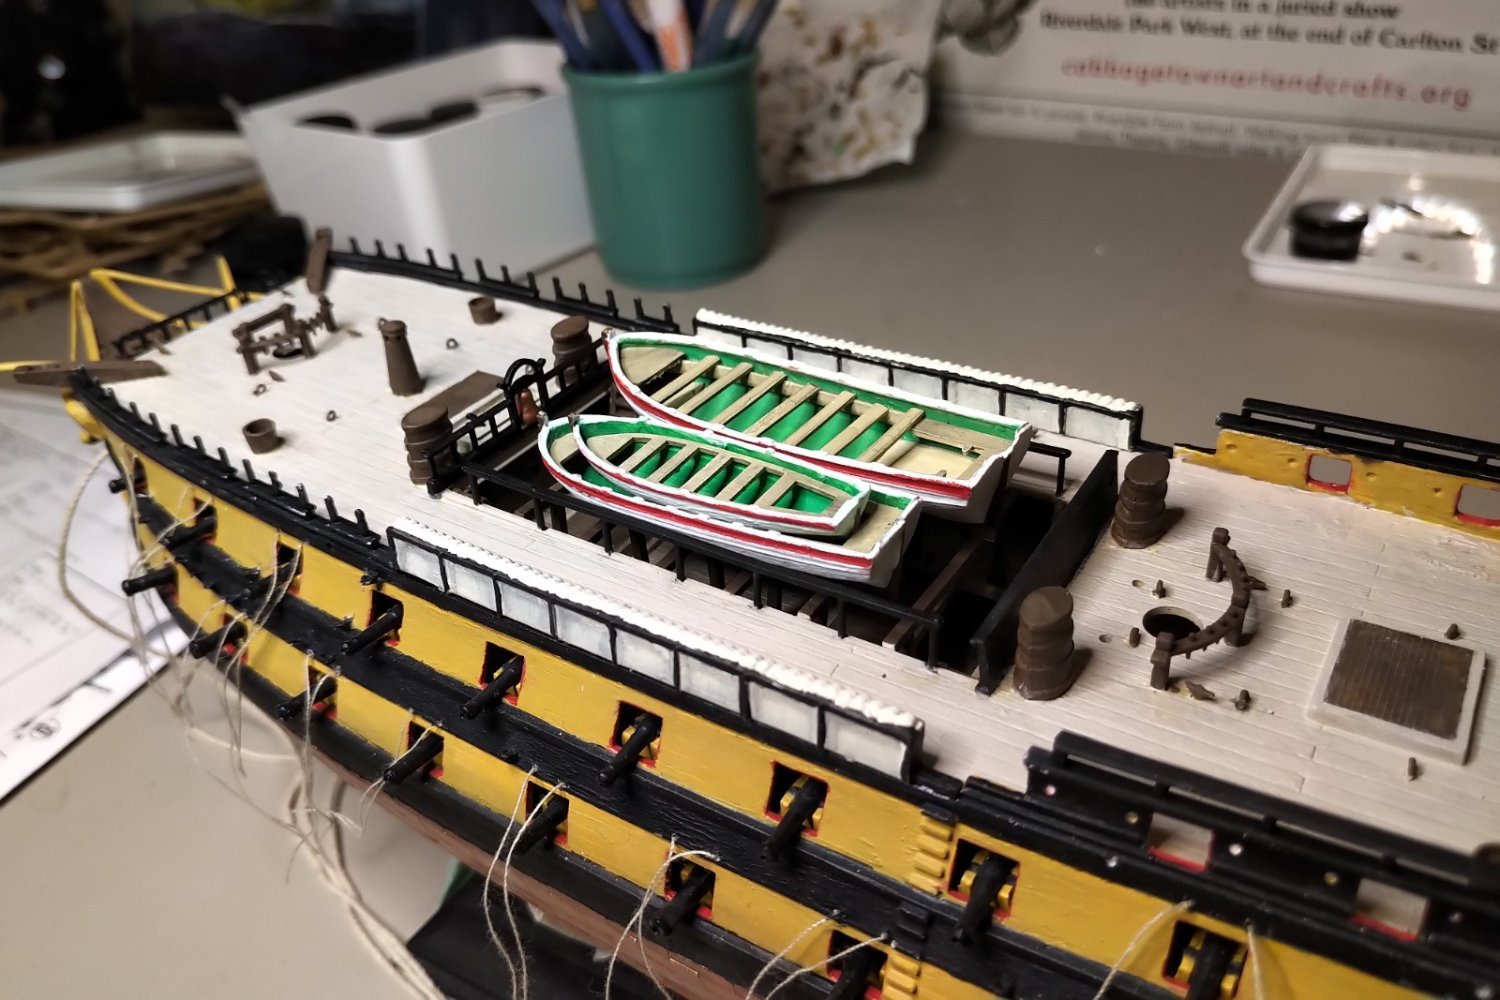
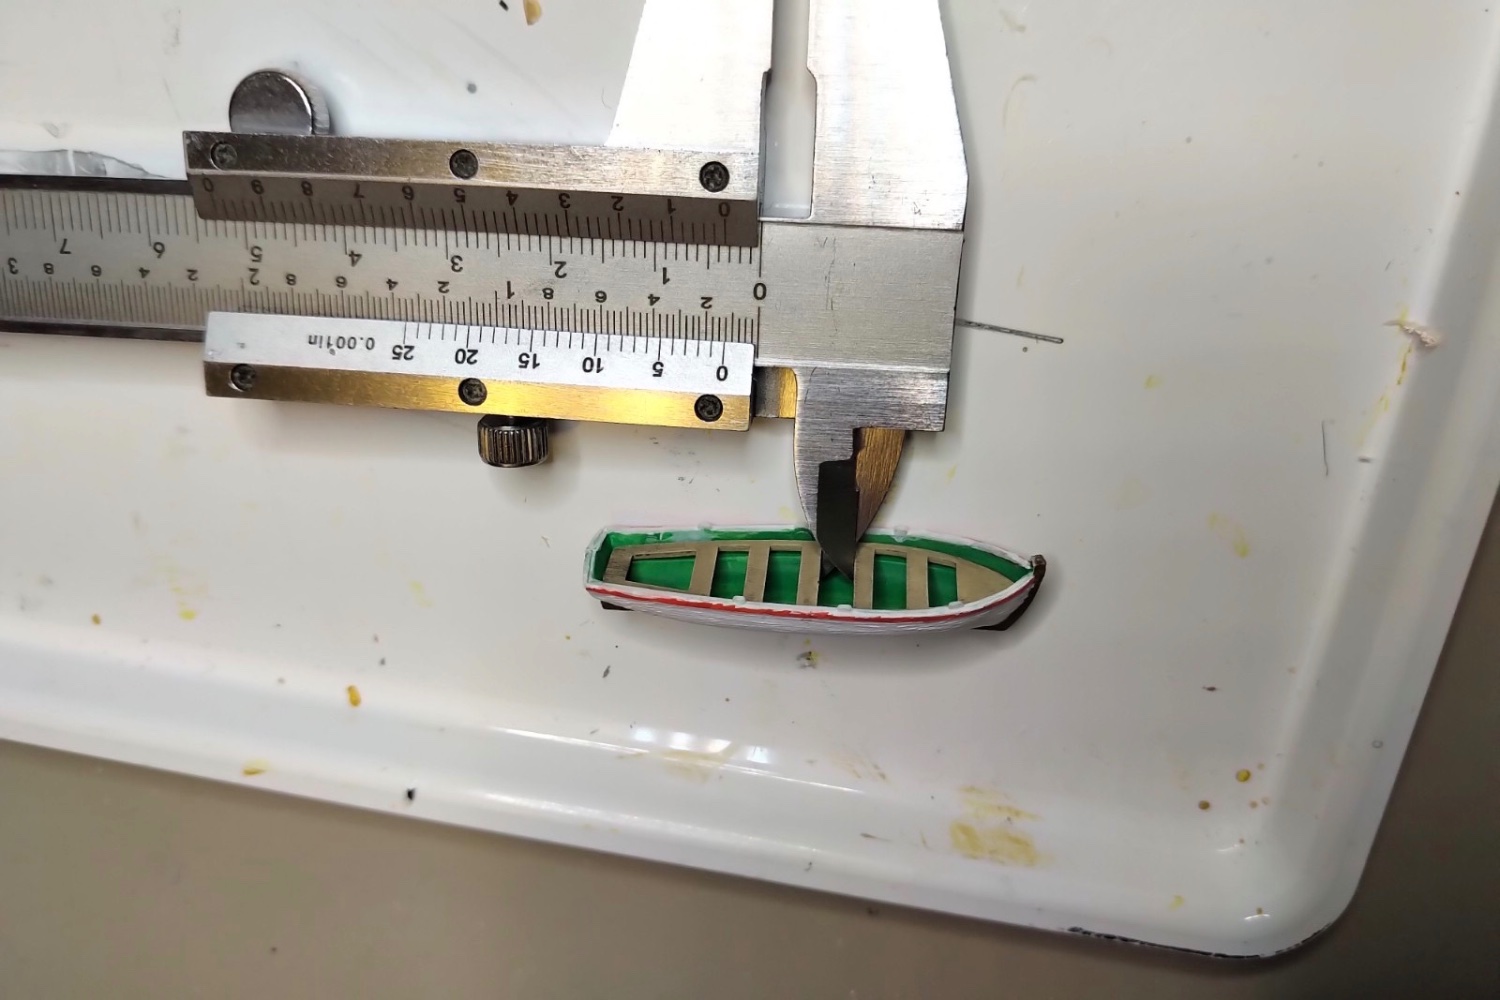
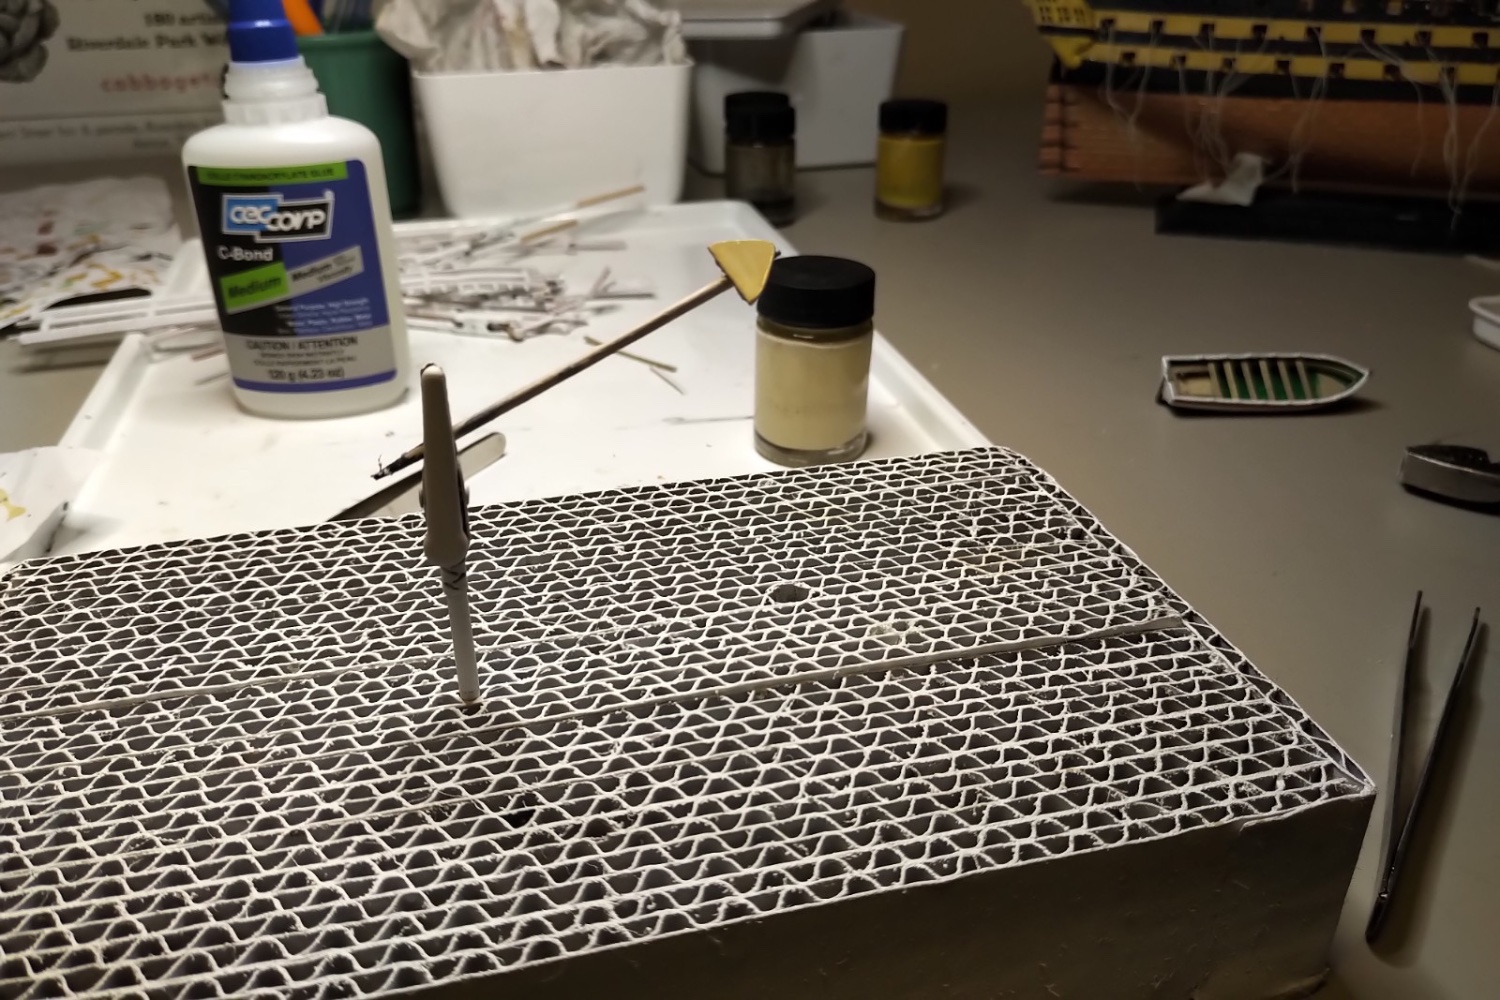
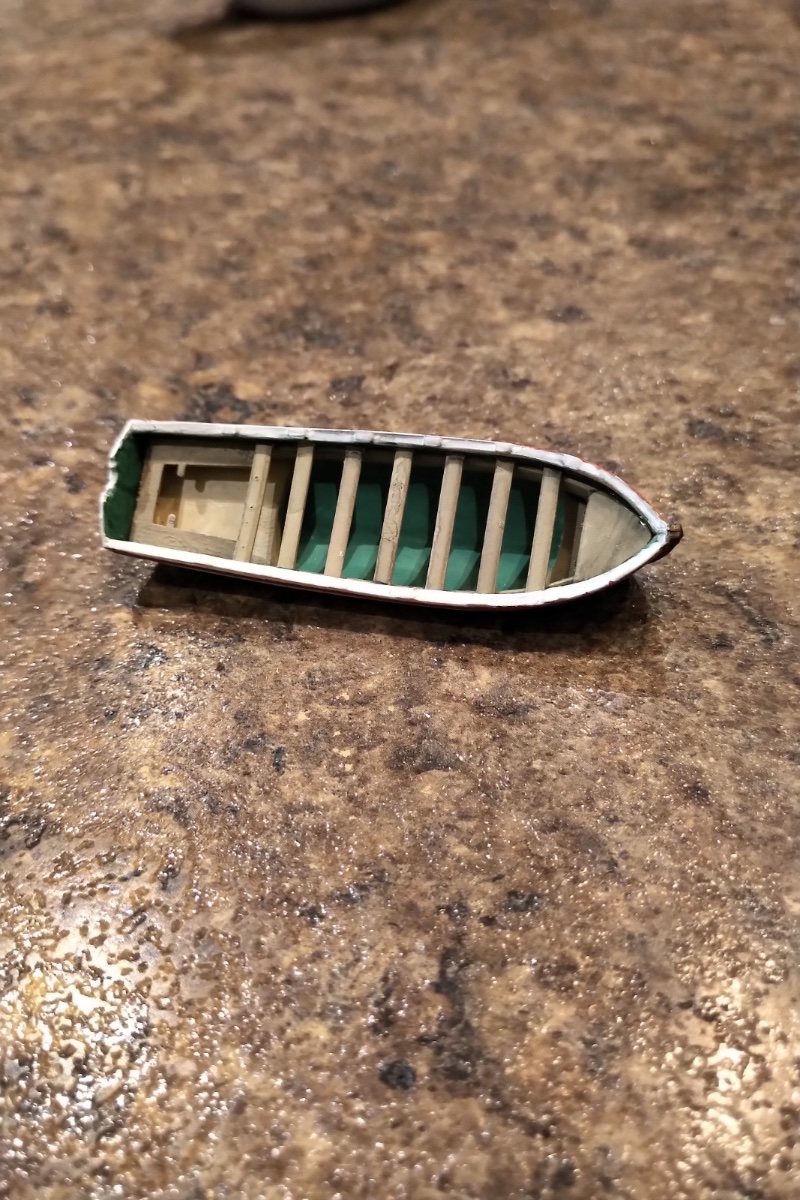
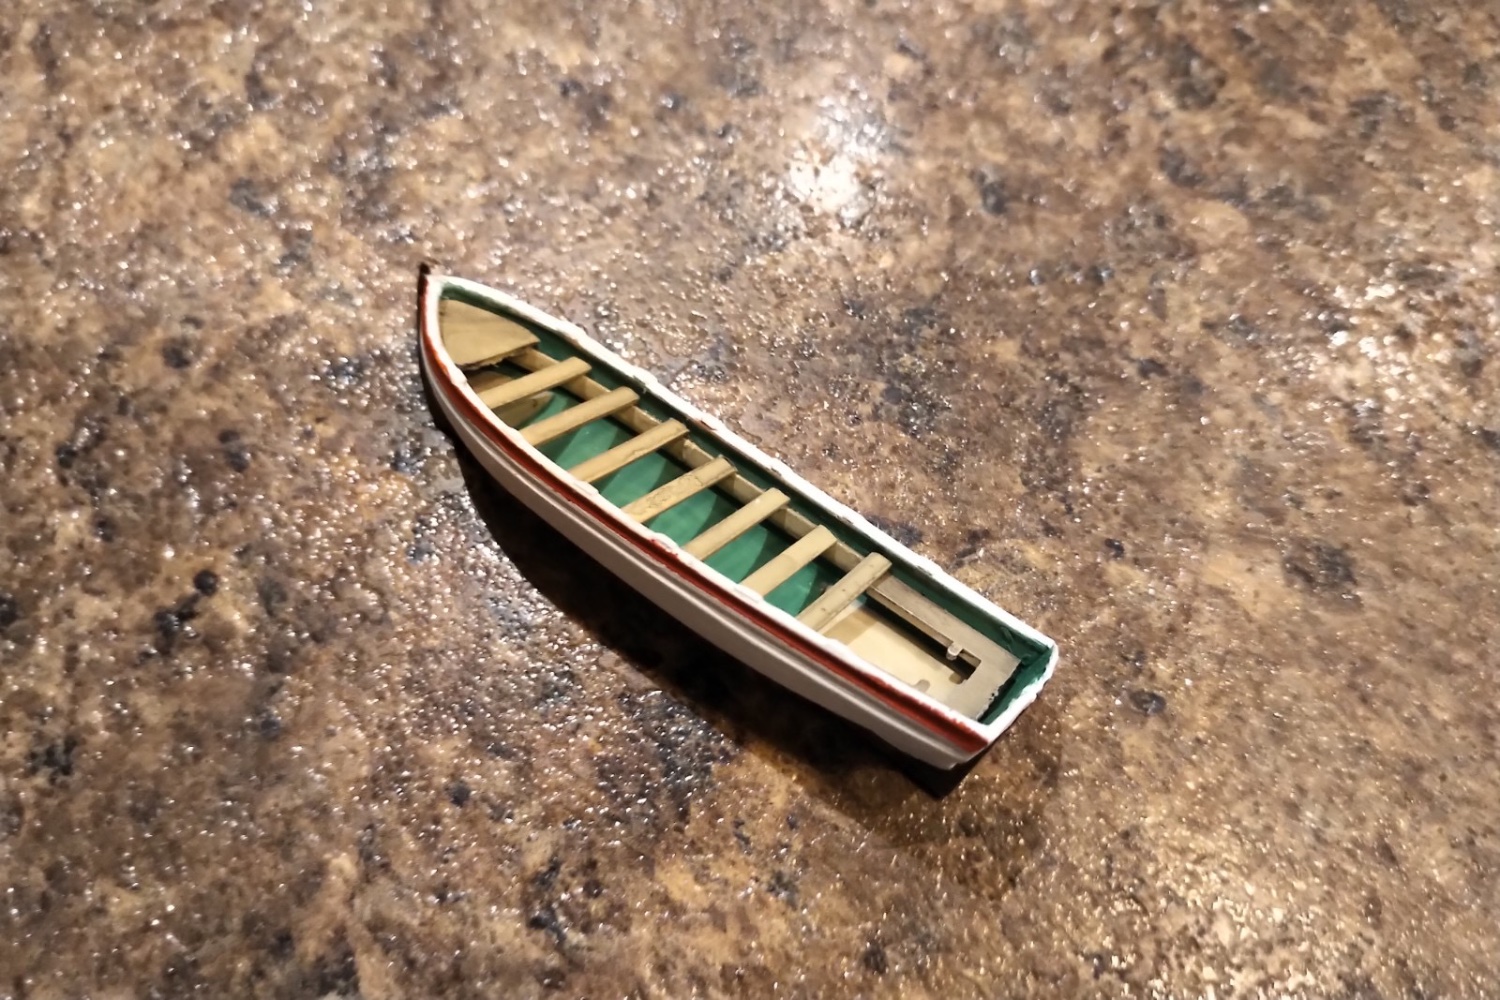
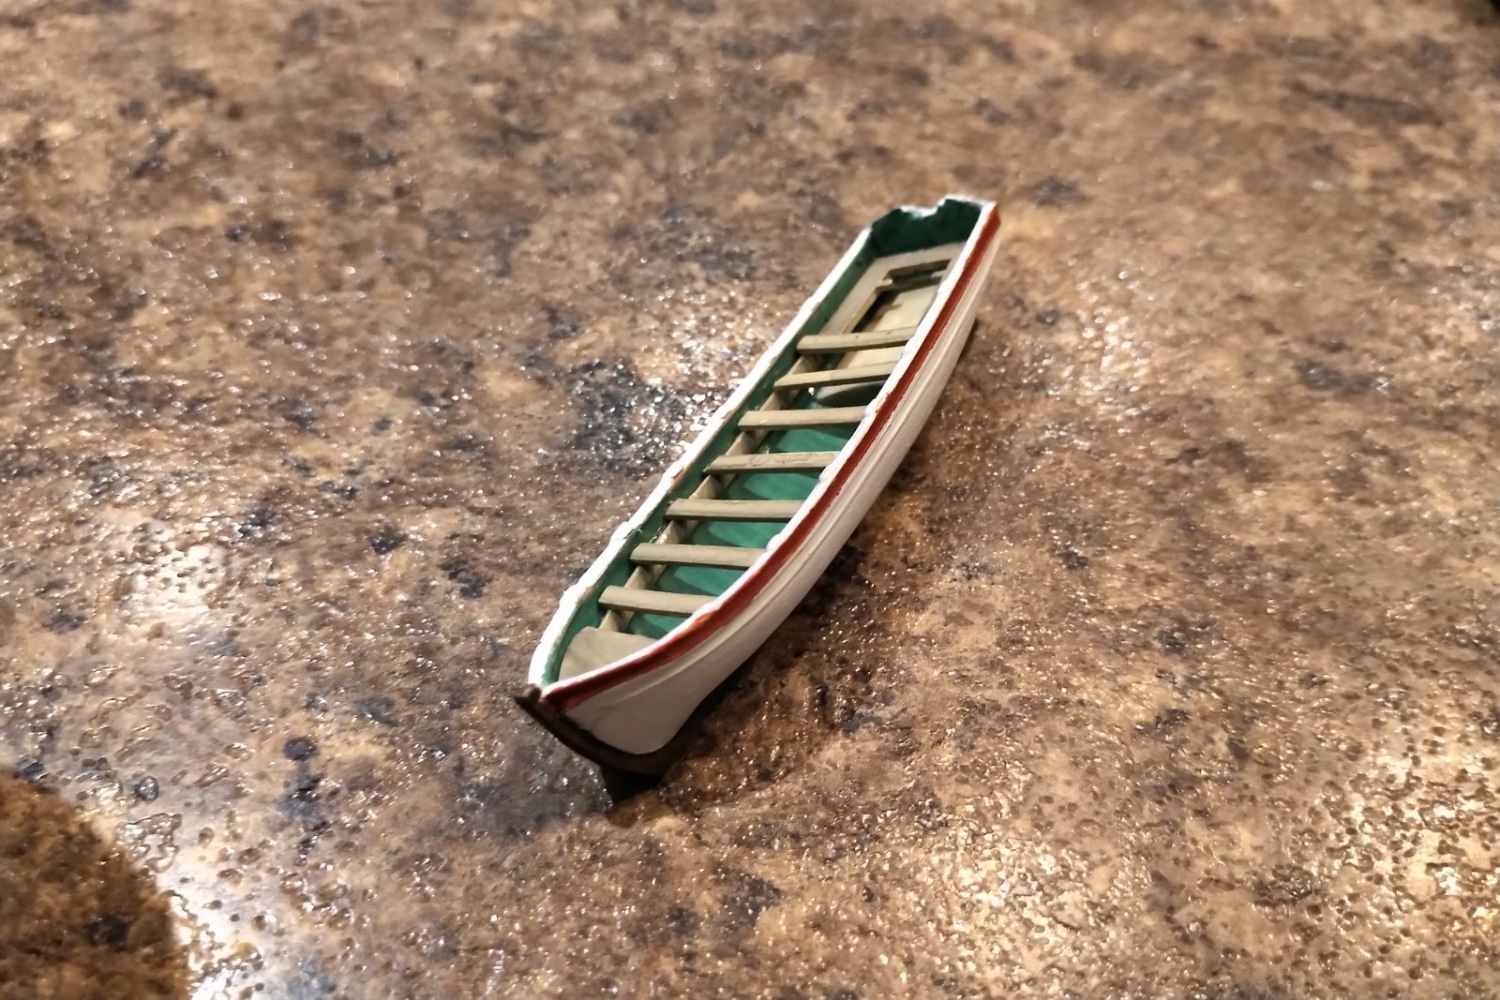
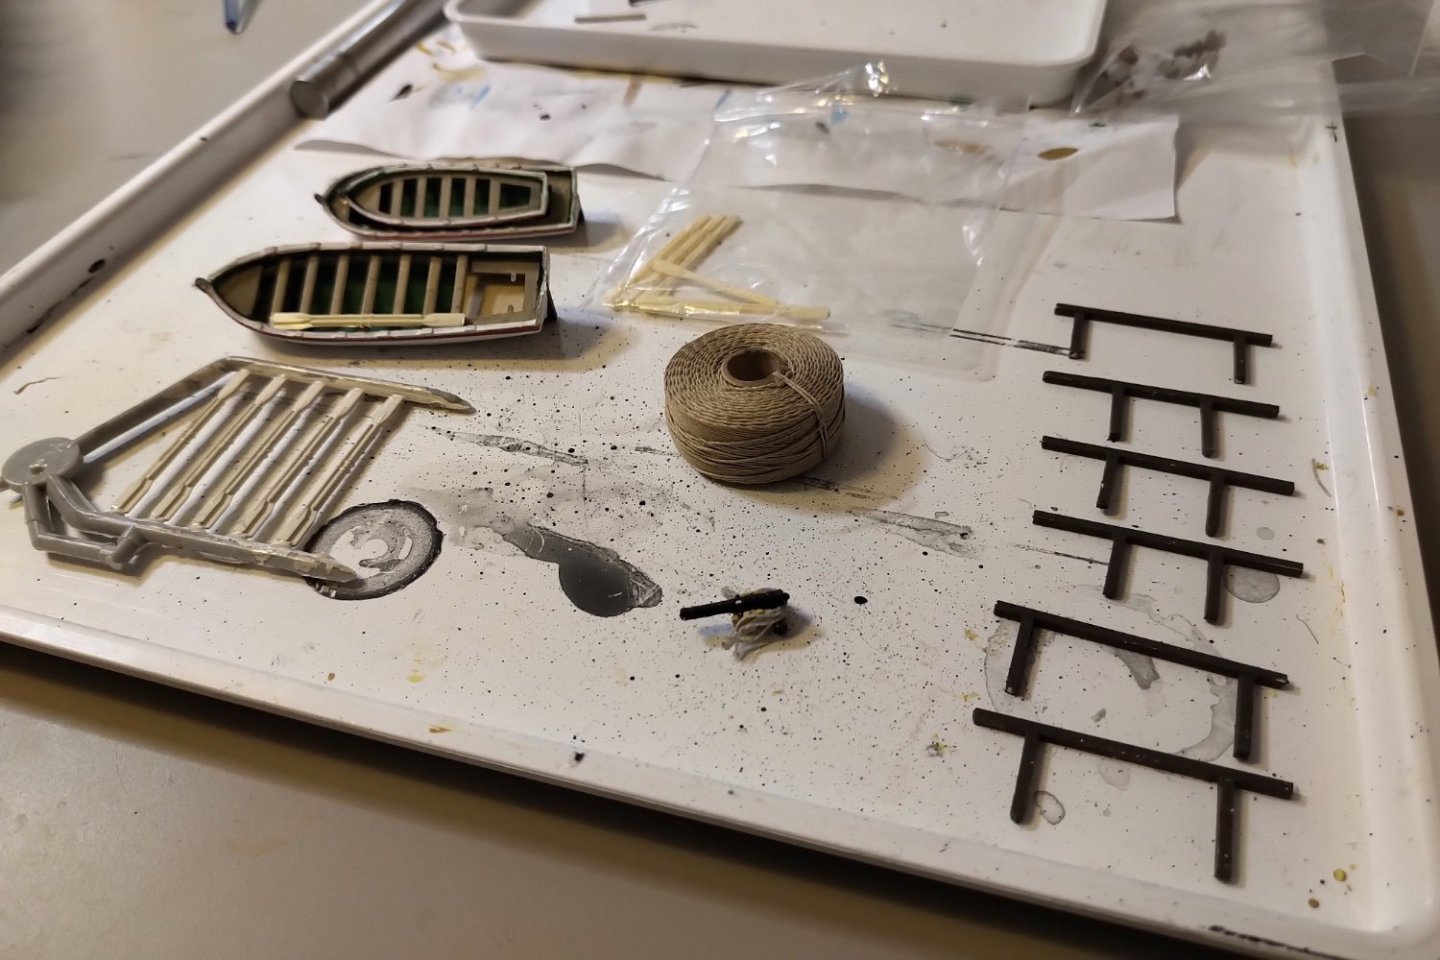
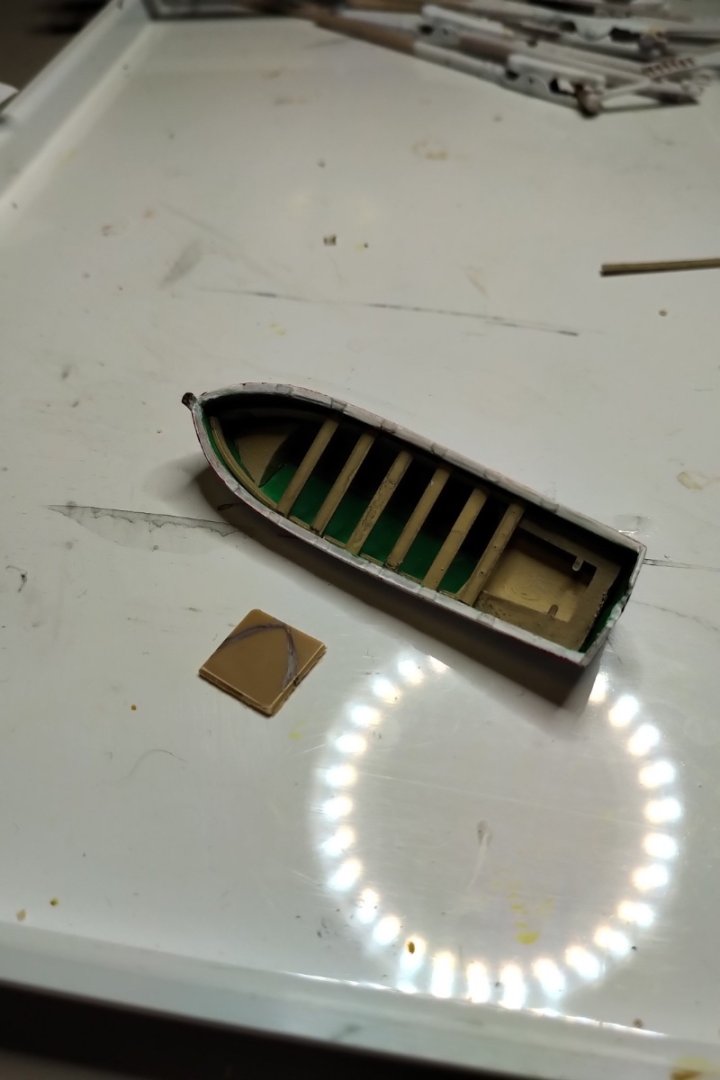
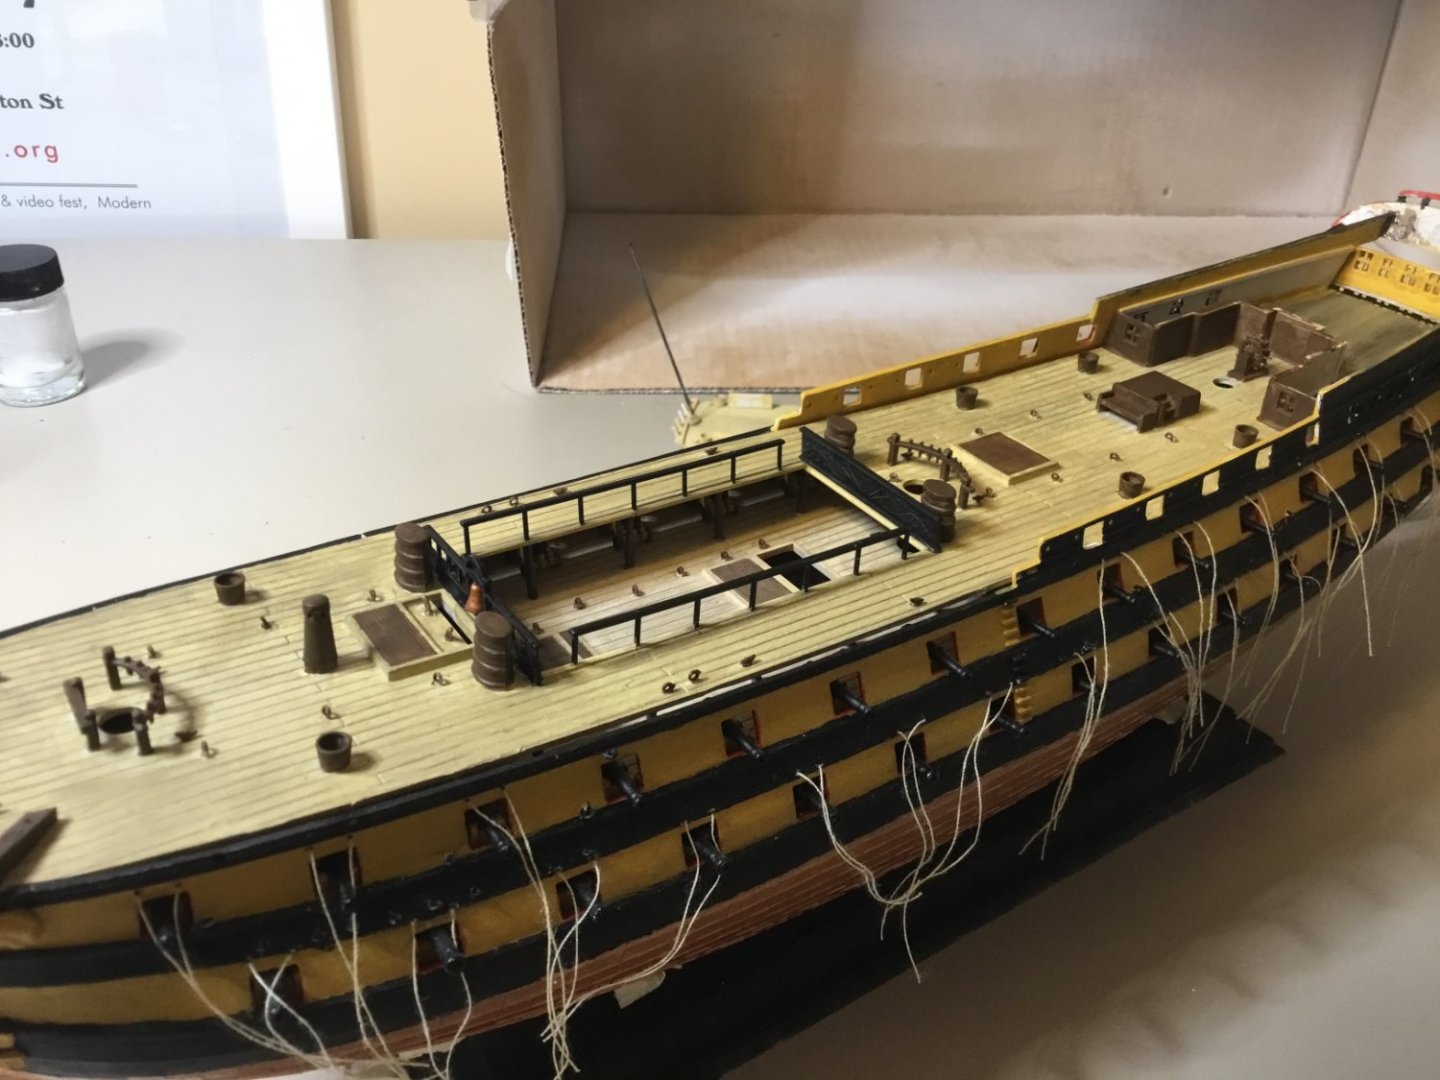
I’ve custom made thwarts for the larger boat. I used 2.5 mm styrene c-channel strips for the thwarts (seats) and fabricated the bow piece from a number plate off the sprew. I used the spacing on the small boats seats to space my custom ones. Then I prime coated, wood-tone painted, clear coated and then distressed each piece with a diluted black wash. Next step is the create the spars across the waist that the boats sit upon. Unlike the French who spent their days in port prettying ship, the British were at sea in all weathers on blockade, so the boats had to be easily on hand. I’ve got 3mm square profile styrene strips primed and ready for painting to create the cross beams and columns.


-
I’m not entirely happy with the fit on this kit, or at least my build attempt. There’s a gap where the forecastle deck meets the starboard hull side, despite my clamping. And another gap above the side stern gallery windows and the side gallery ceiling. I’ll hide the first with some filler and the railings that come next, and the latter I’ll mock up some cuttings from the sprue. I have a lot of touch up painting to do, as you can see - I rough paint prior to assembly, but with these acrylic paints I find they smudge and come off until you do the final clear coat sealing. I have to remind myself that this is my training boat, having no built any model kits in over twenty years. I’m learning a lot.

-
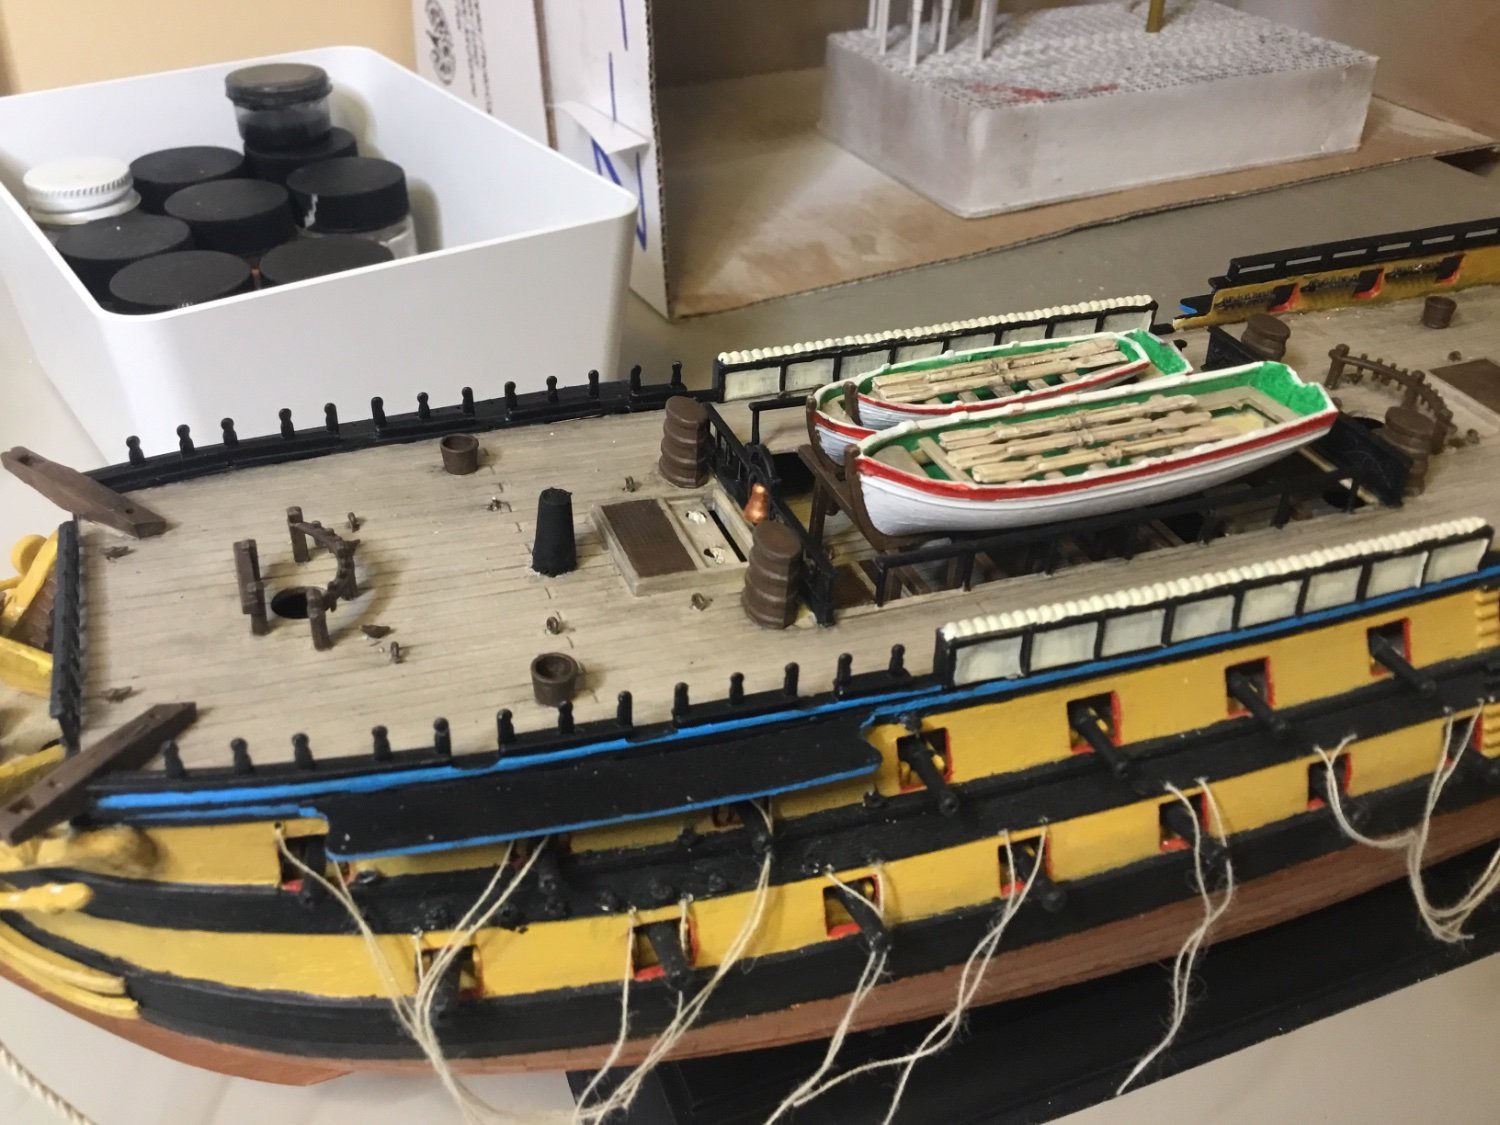
I've clear coated the quarterdeck, waist and forecastle and now added the black wash. I looks a little too green compared to the main deck seen through the waist, not sure why, but there's no going back, so I will add a little more wash to the main deck to match. Well, since the paint is clearcoat sealed I could try to rinse away some of the wash. I'm not sure our ship's Captain would allow his decks to look so, but perhaps we've just returned from a long mission in the North Atlantic where the hollystoning was postponed. I need to get some more clamps to glue this new deck to the hull sides. My trick for gluing is to scrape off the primer so that the plastic cement can adhere, plus I put super glue on a few spots to help it stay in place. My painting skills or patience still need work, but we're making progress.

-
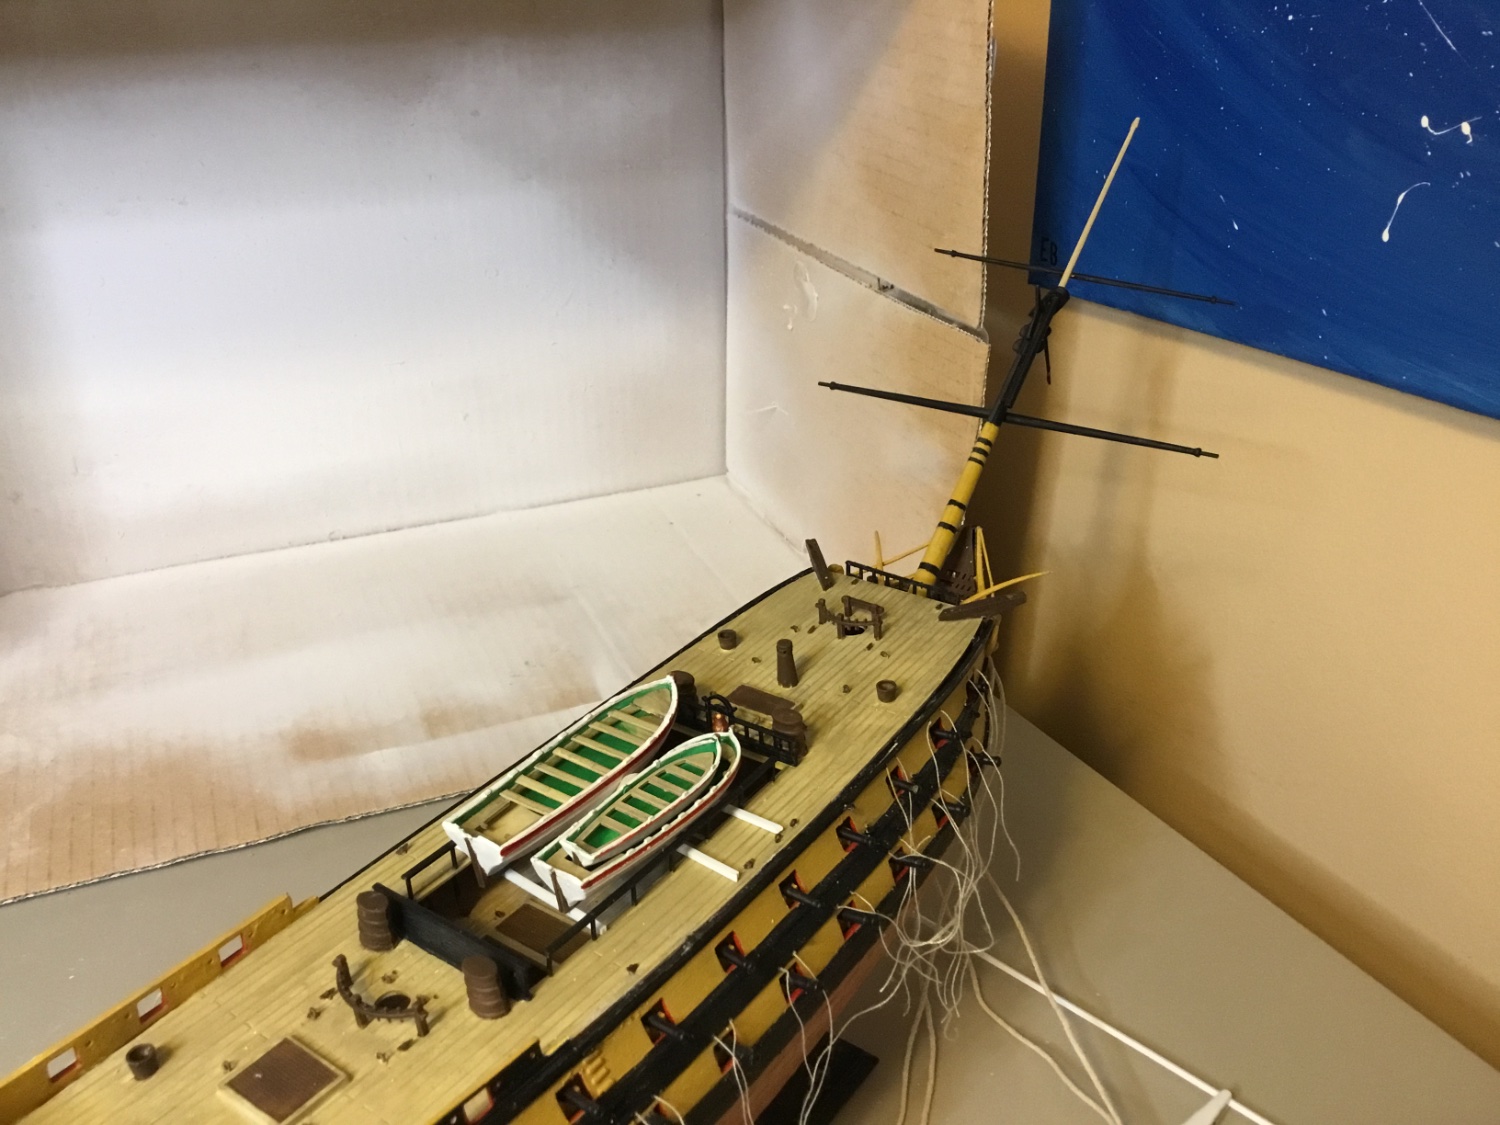
Did you get the bowsprit sorted? Mine’s complete, so maybe I can help?
- 23 replies
-
- 1
-
-
- le superbe
- heller
- (and 1 more)
-
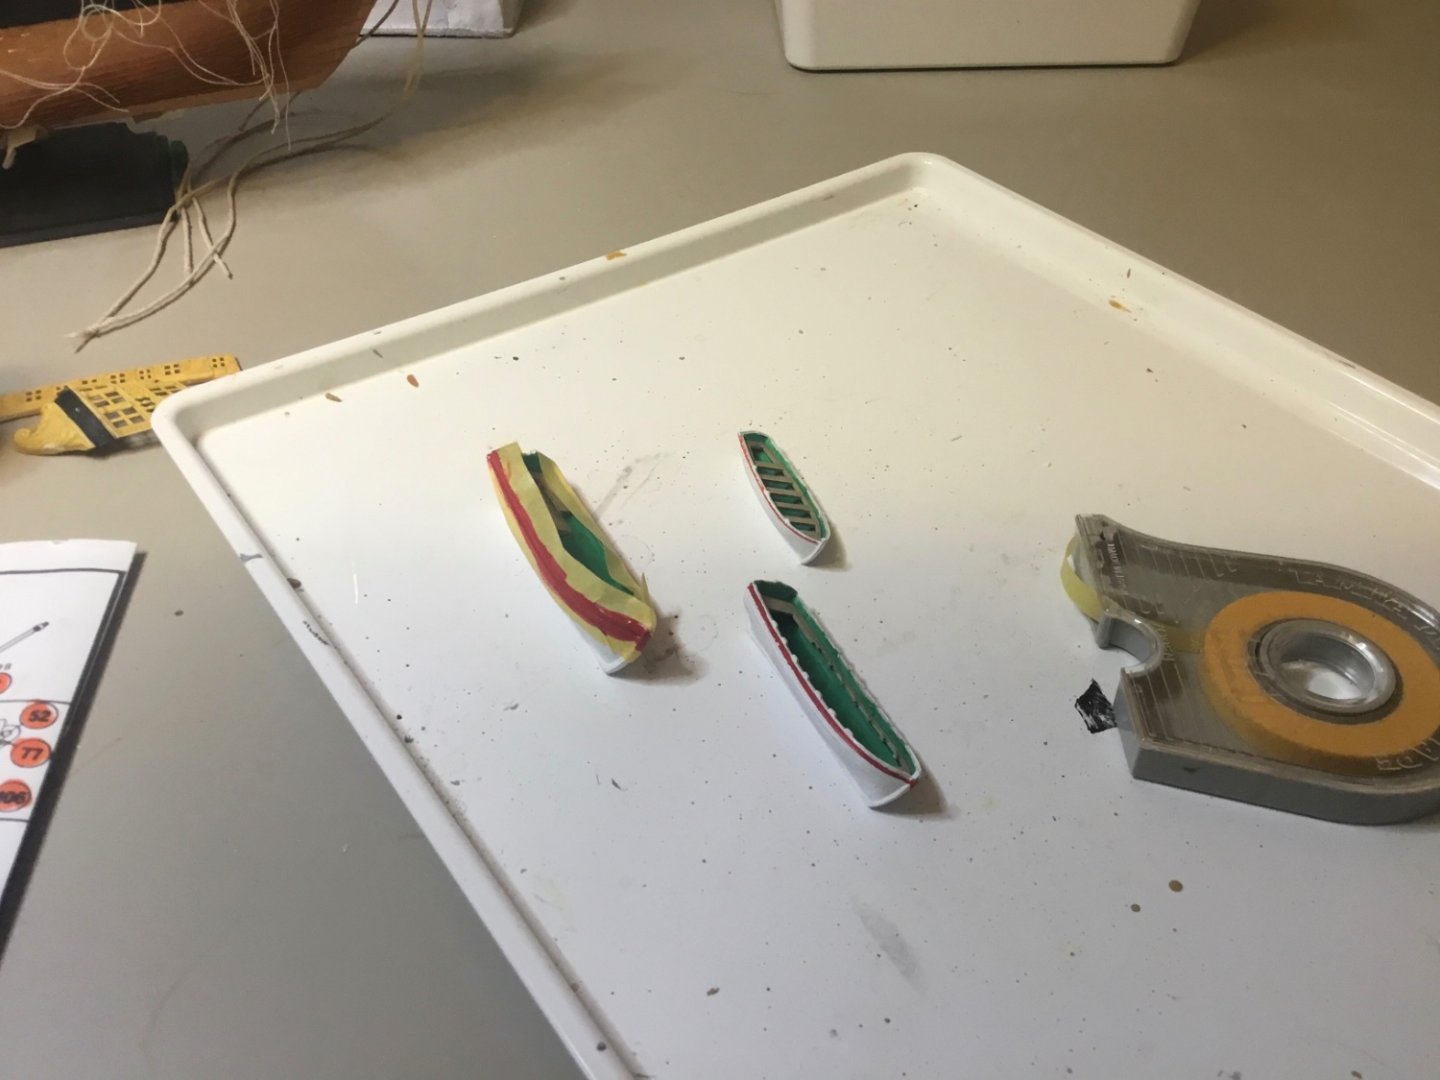
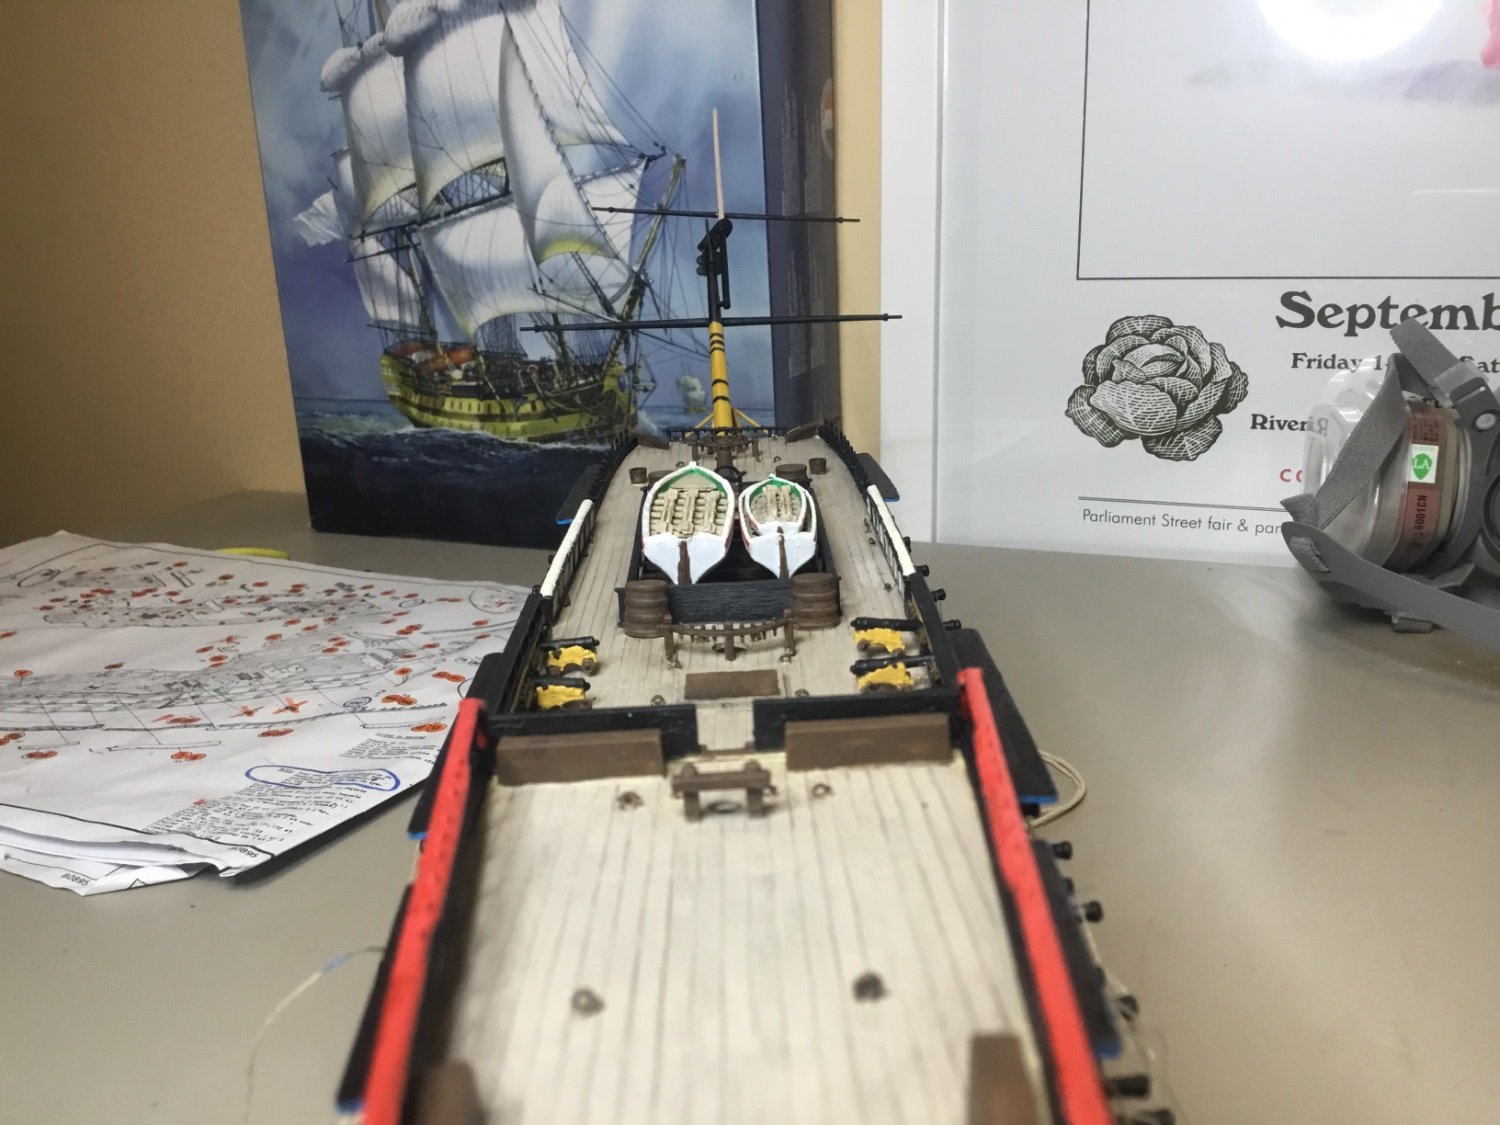
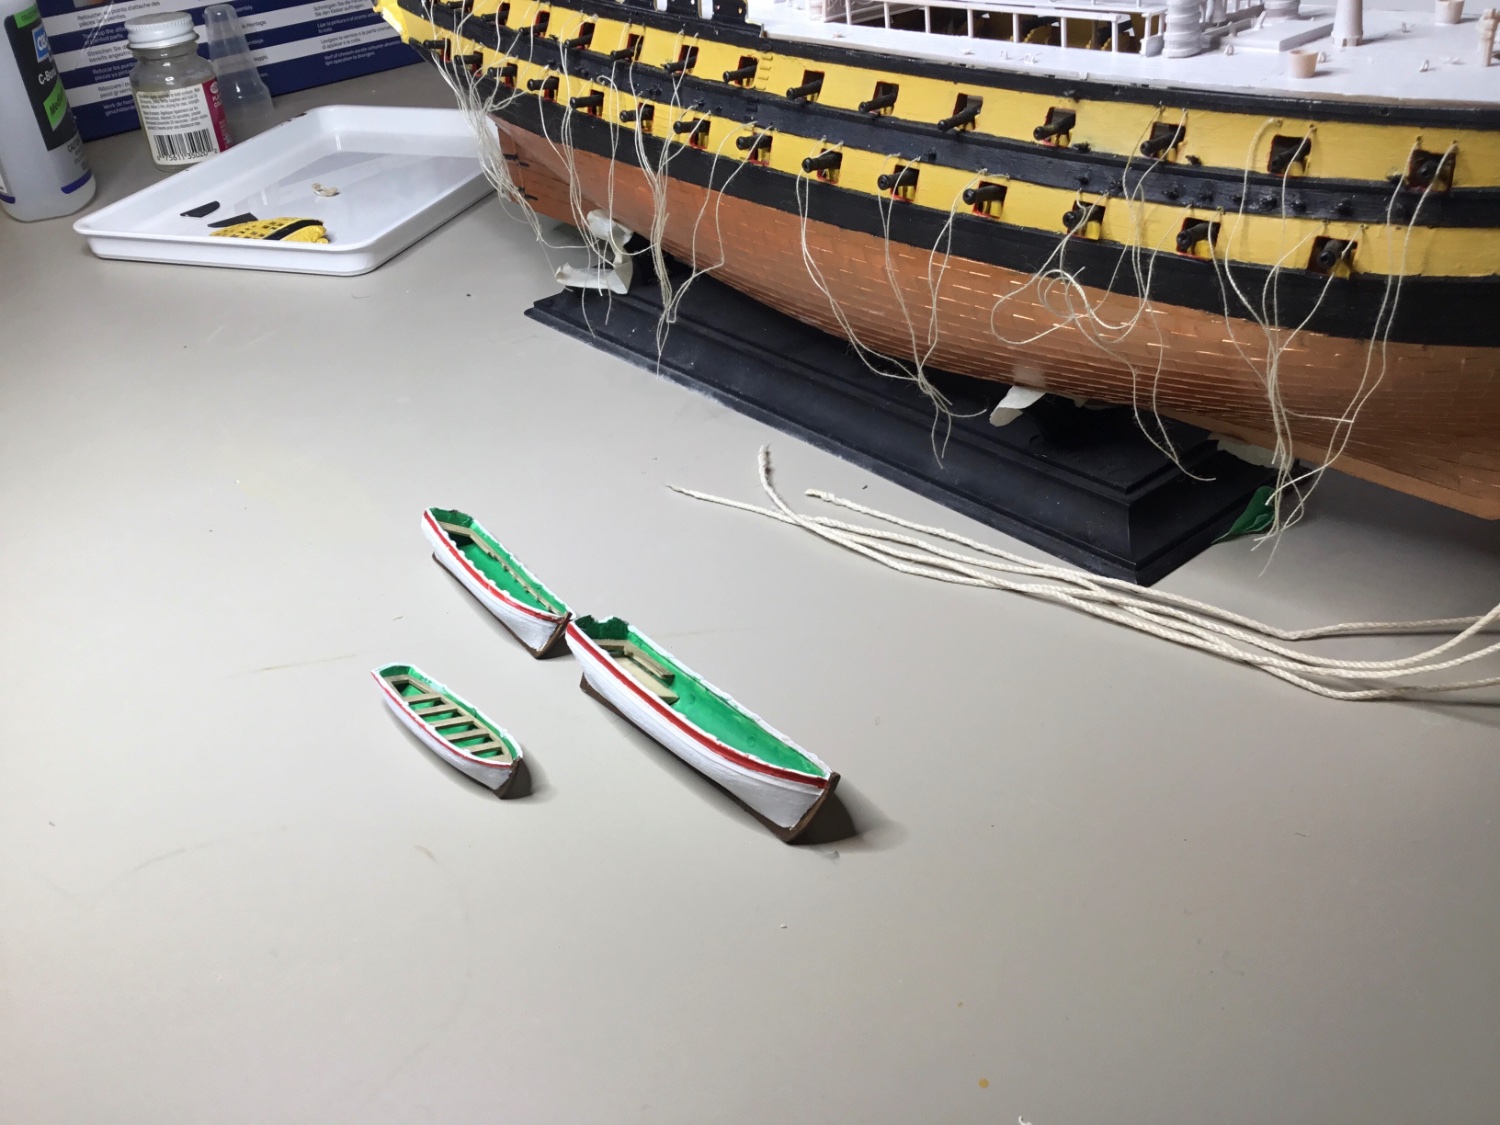
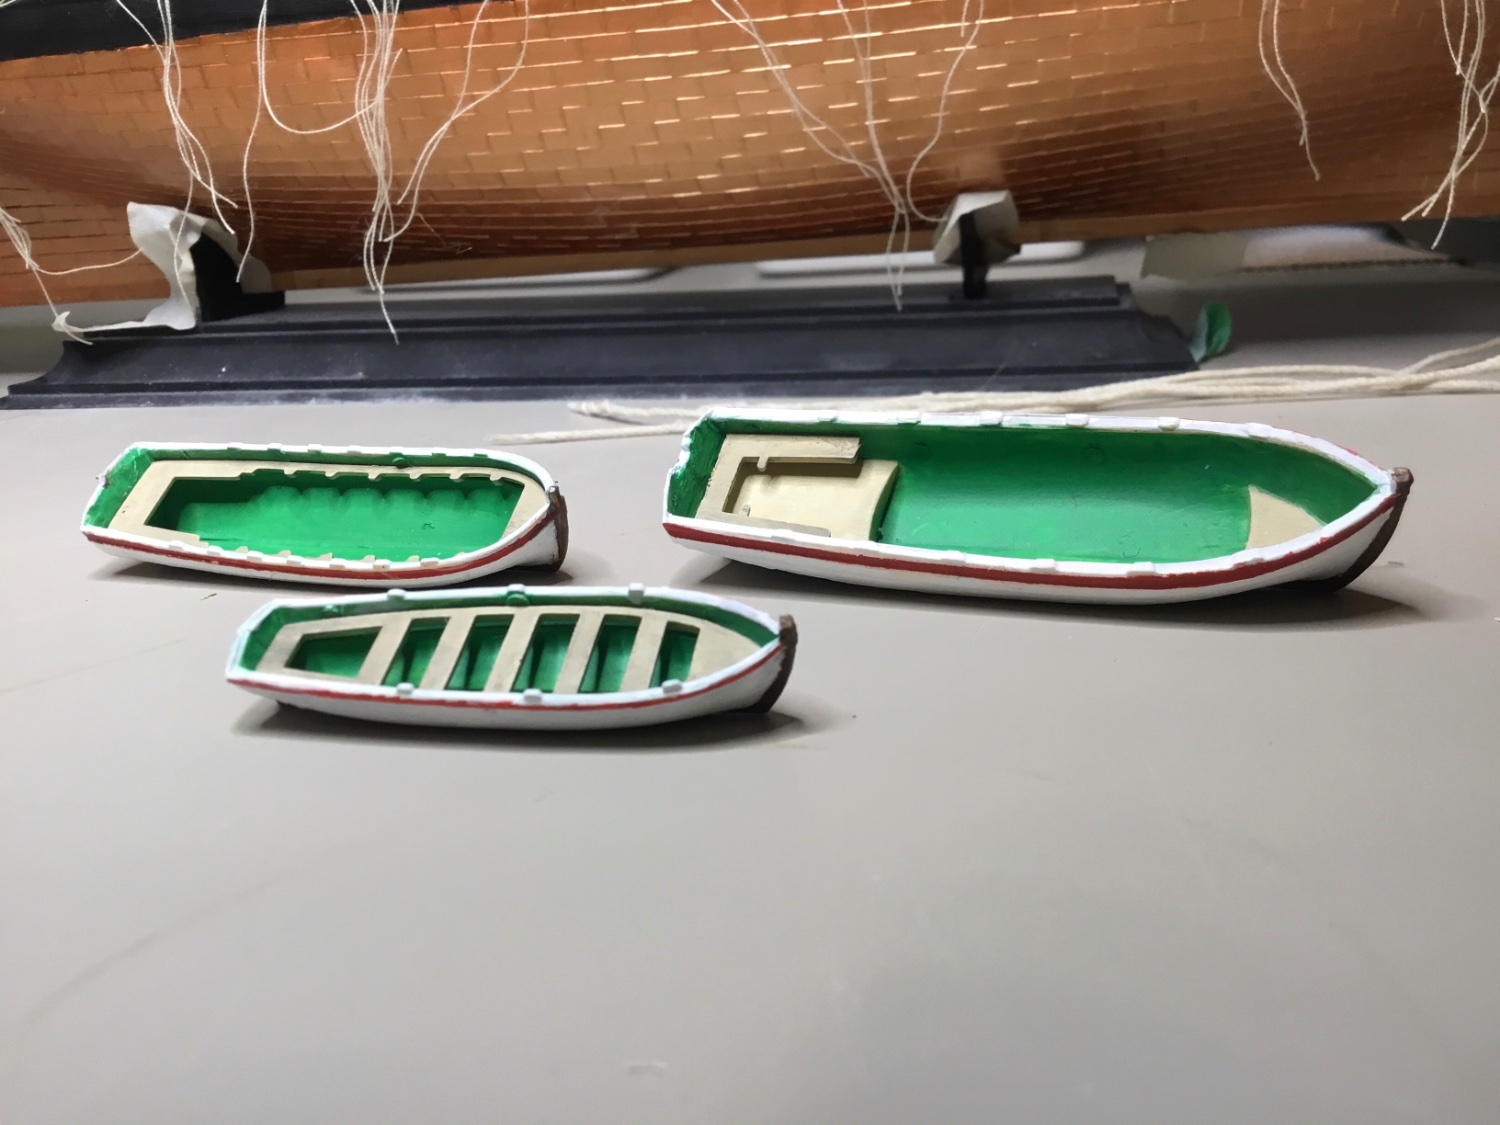
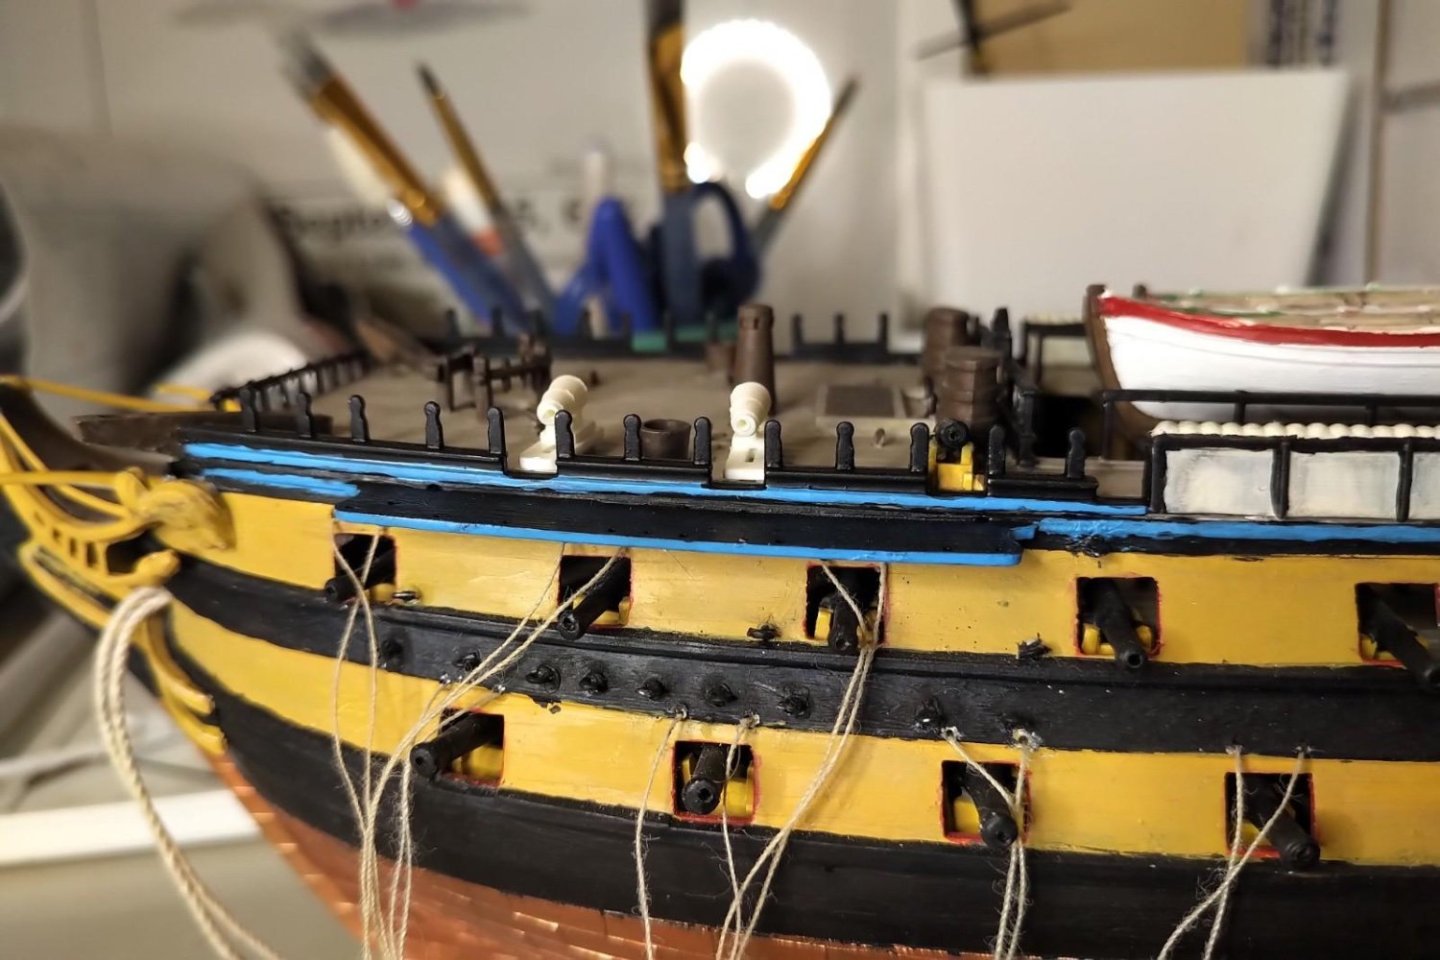
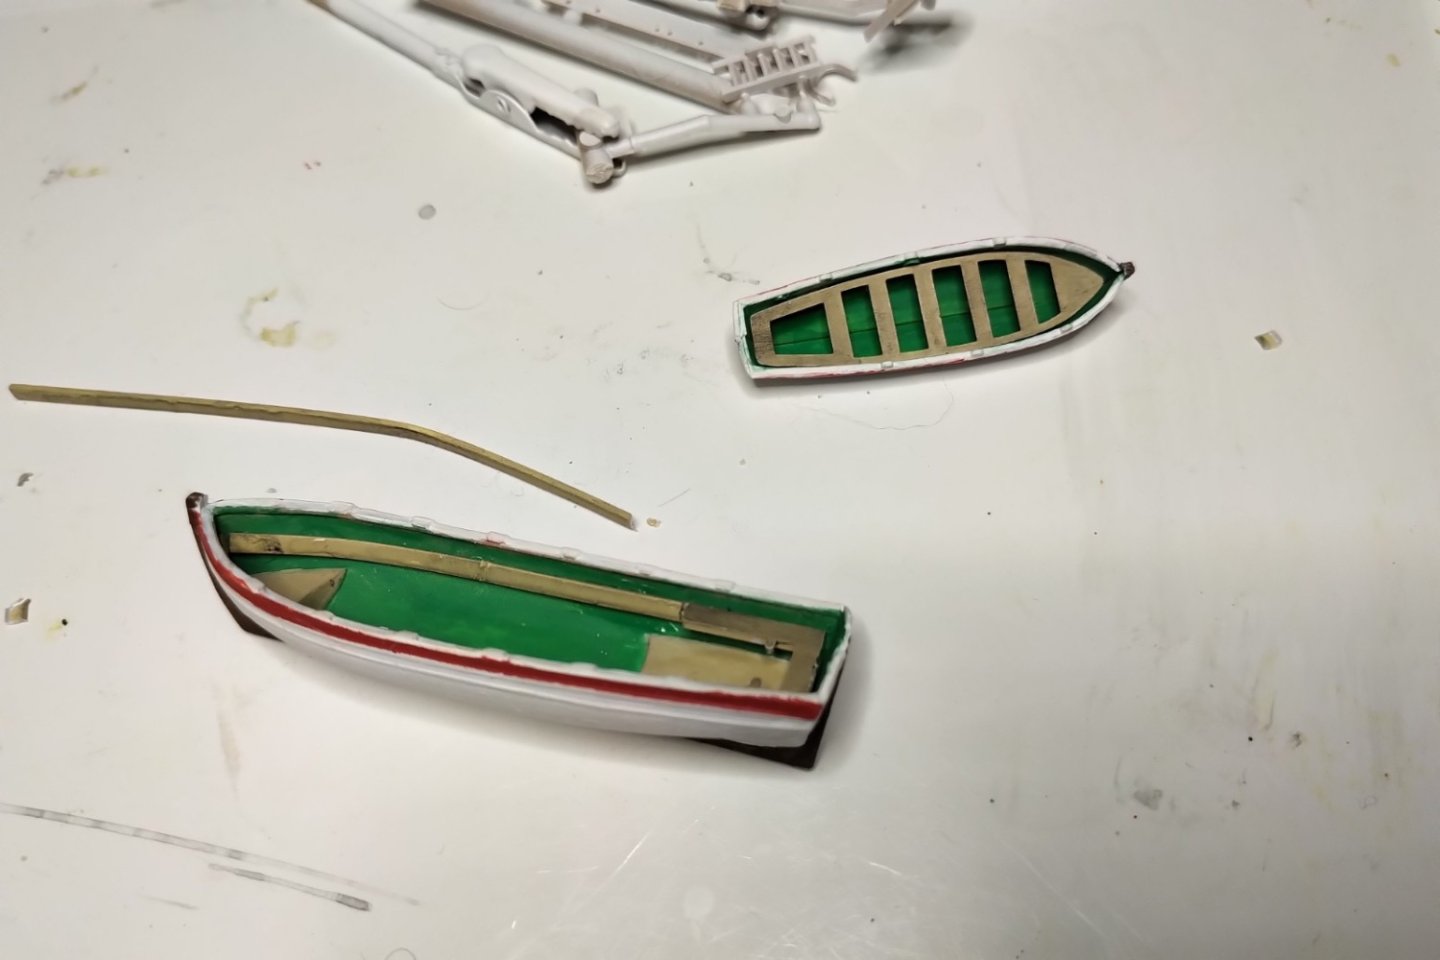
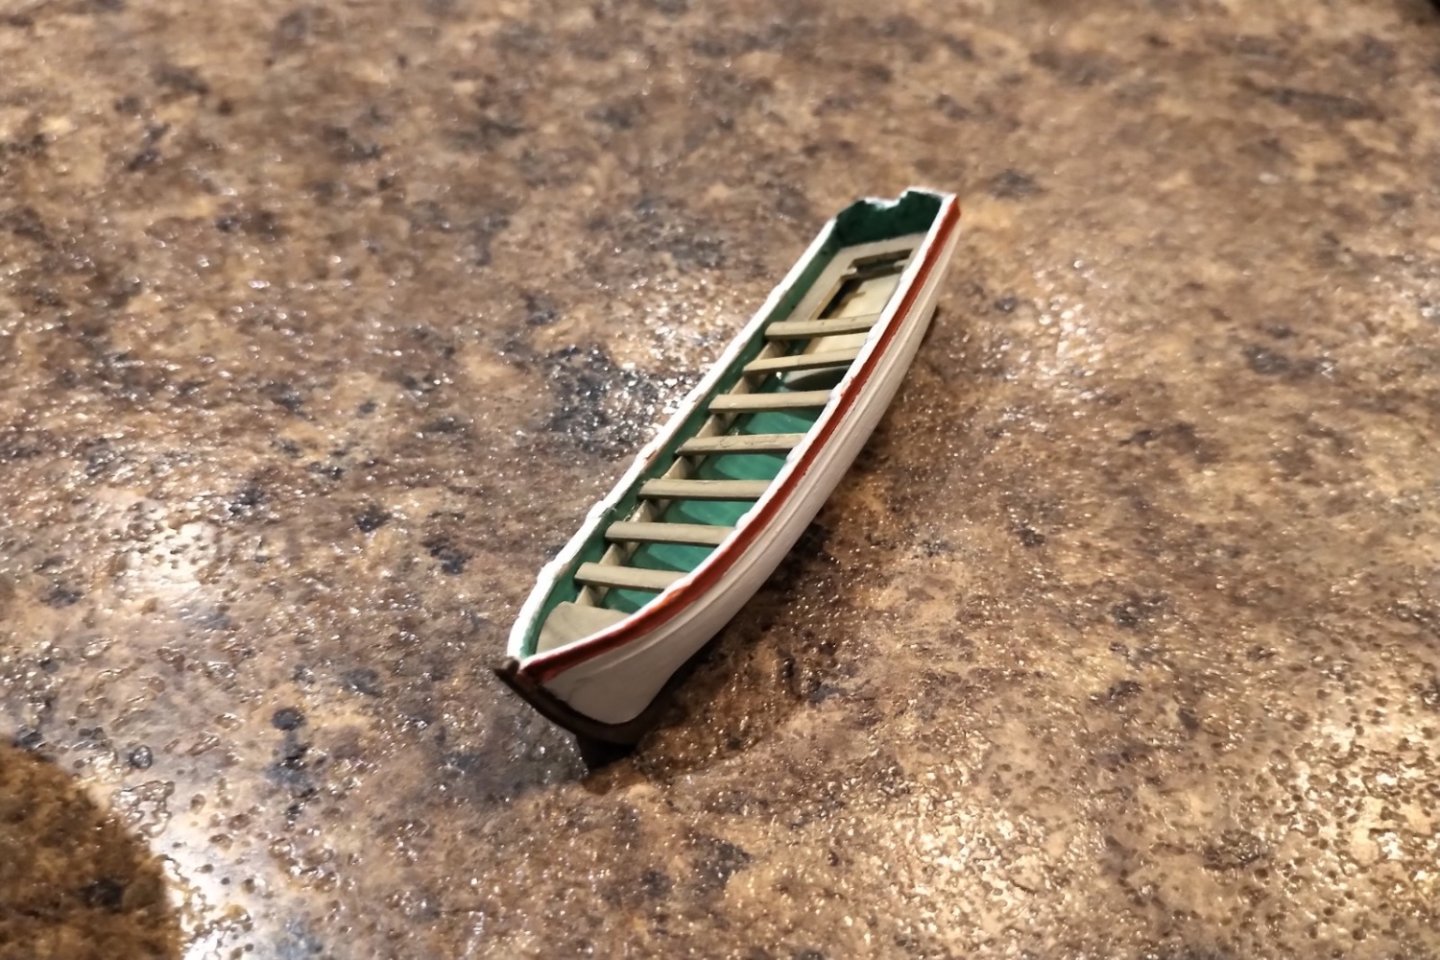
I had some taping overflow, but I’m happy with the boats now. I’ve just finished clear coating them. The Heller kit has all three boats stacked, but I want to put them two across on spars on the waist. To make that look right I may need to create some seats or cross bars on the otherwise empty boats.
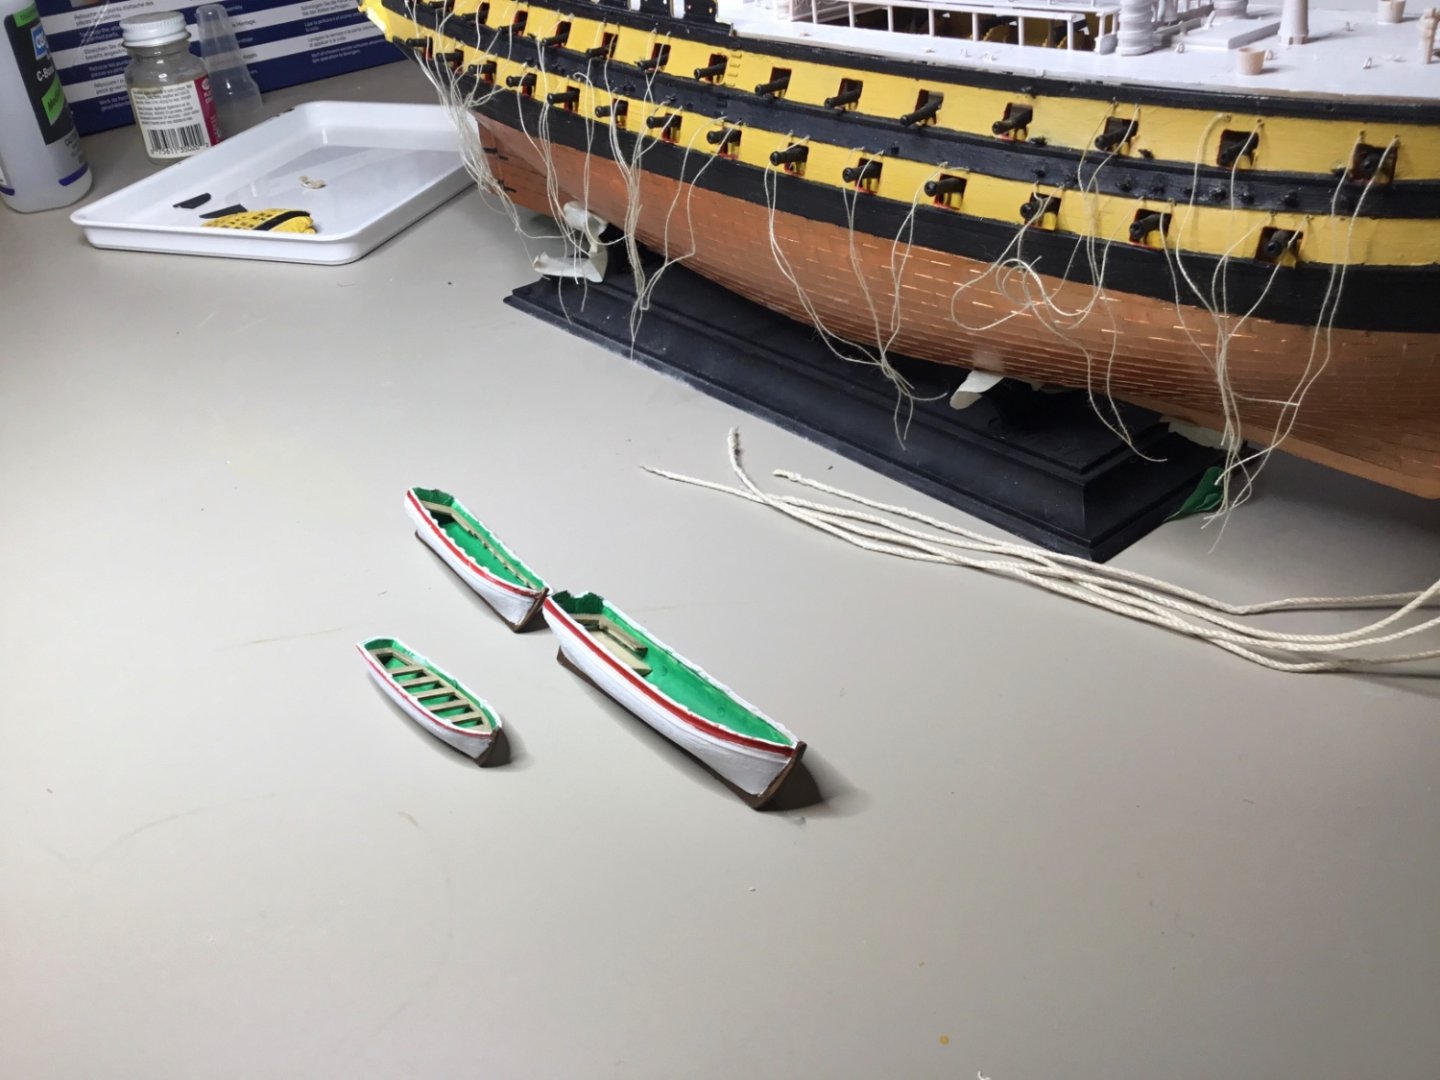
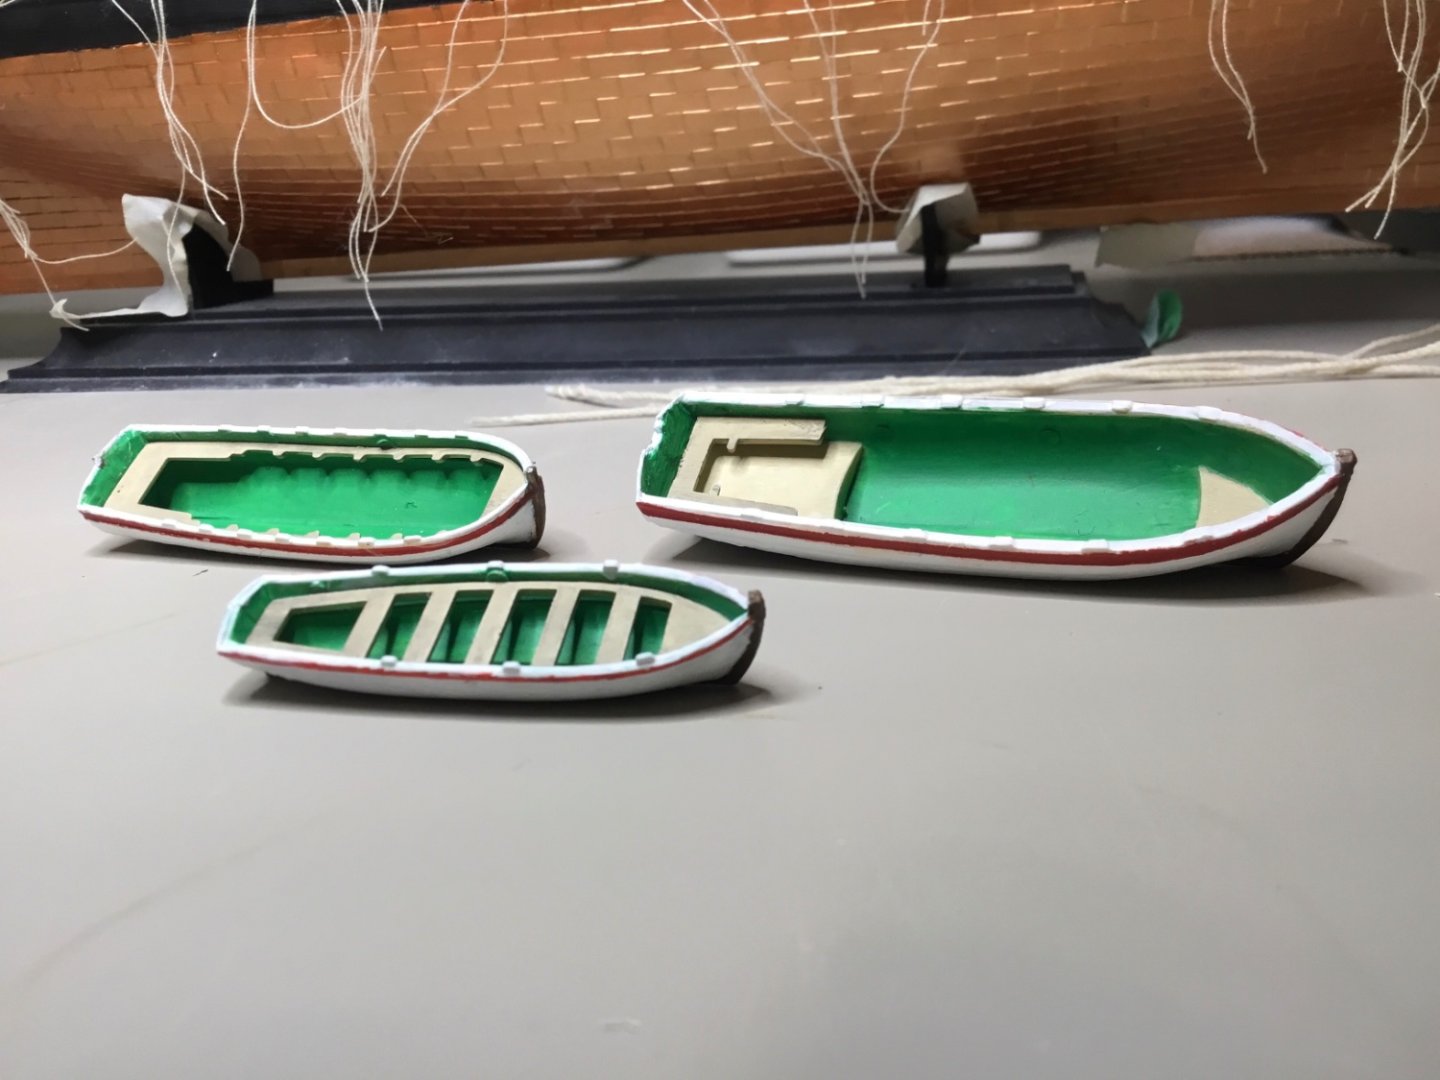
-
Taping and painting the boats. The kit instructs that they be stacked, but I’m thinking of mounting them on spars across the waste. If so, I’ll need to make up some seats. I’m using this model as a guide, https://www.modelships.de/Vanguard/dEL4A0625.jpg