HOLIDAY DONATION DRIVE - SUPPORT MSW - DO YOUR PART TO KEEP THIS GREAT FORUM GOING! (Only 20 donations so far - C'mon guys!)
×


Admiral Beez
-
Posts
184 -
Joined
-
Last visited
Content Type
Profiles
Forums
Gallery
Events
Everything posted by Admiral Beez
-
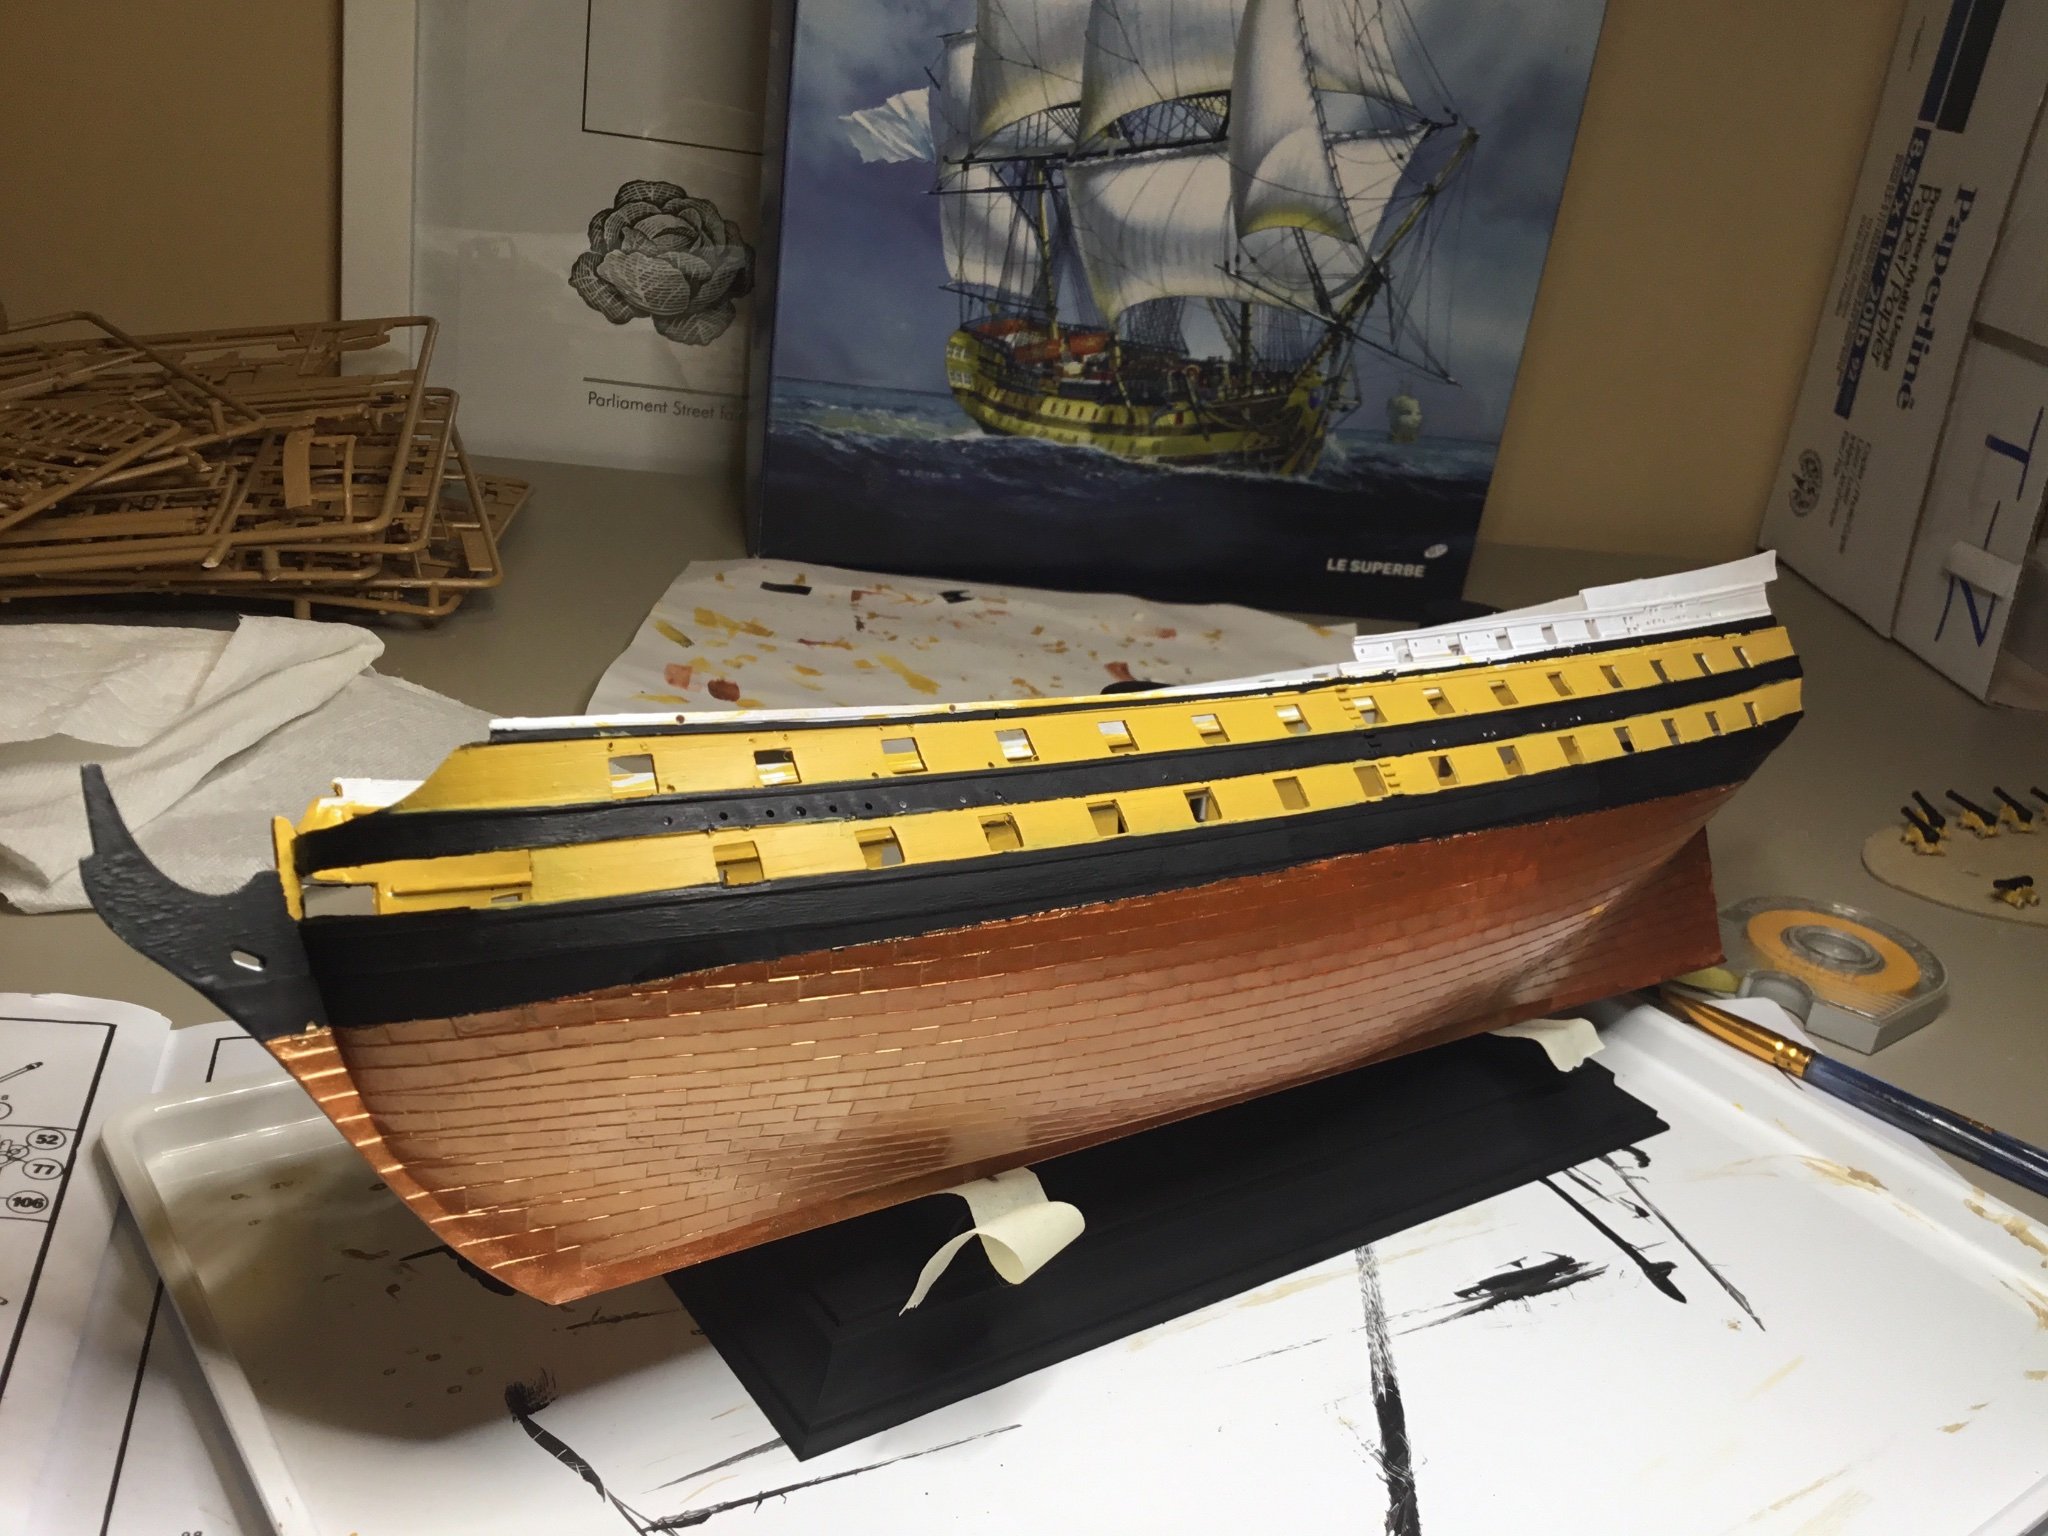
 I’ve drilled out one side and installed ropes for the gun port lids. I’ve omitted ropes (and lids) on the upper deck gun ports between the quarter deck and forecastle, as this matches what I see in models and paintings, but I may decided to put lids across all.
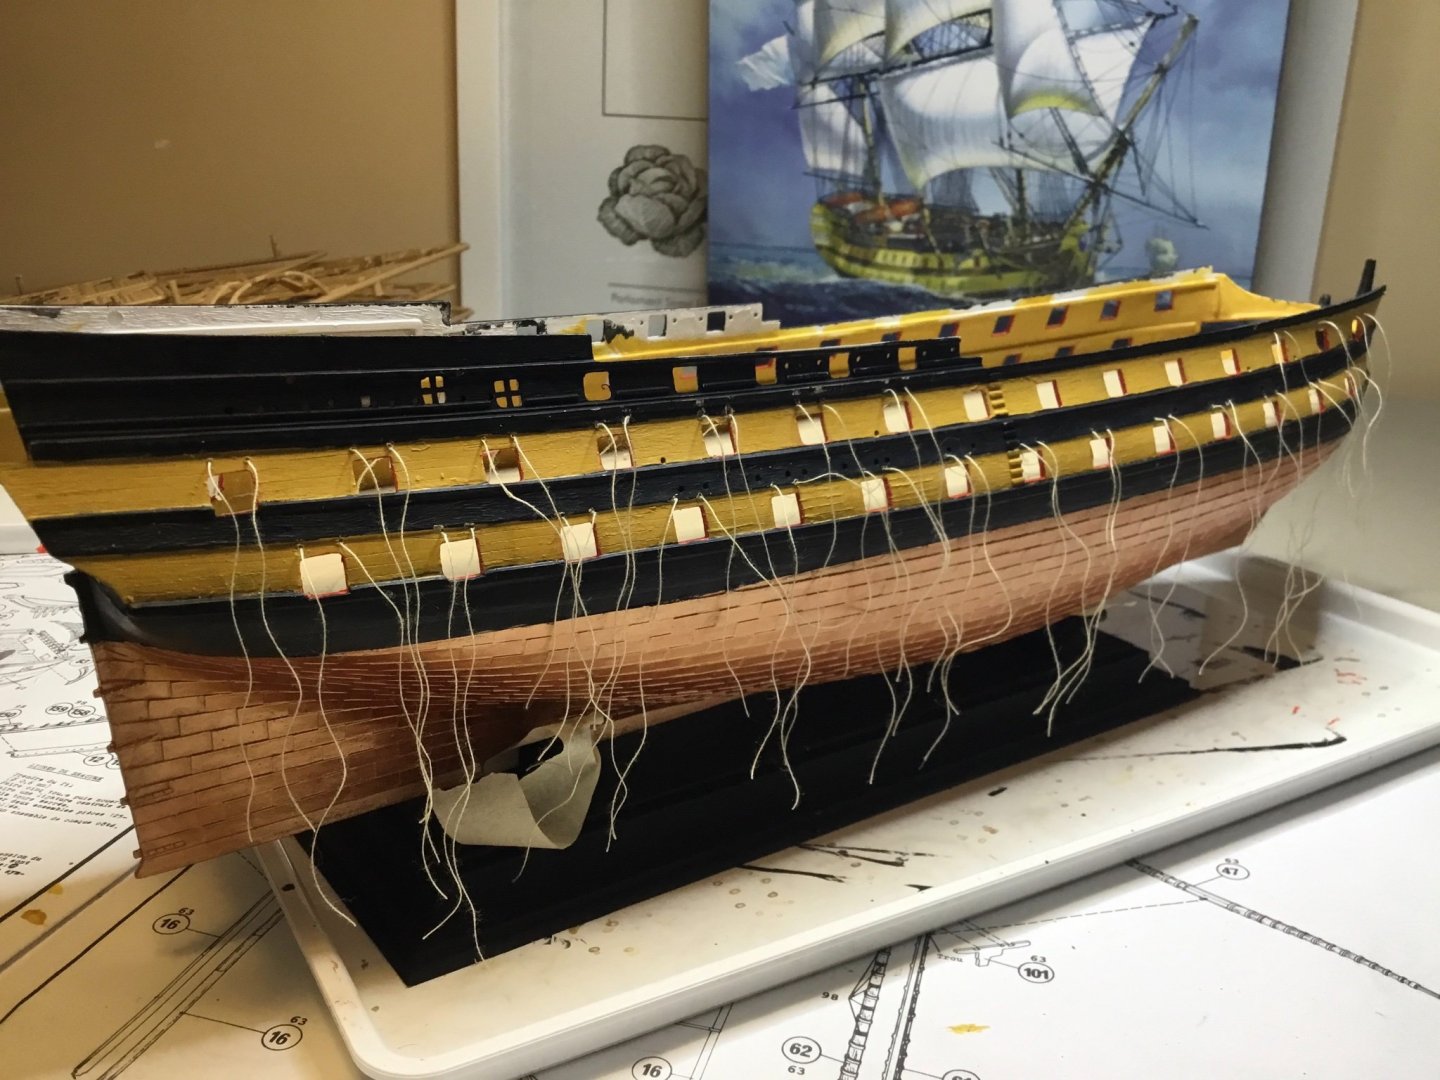
-
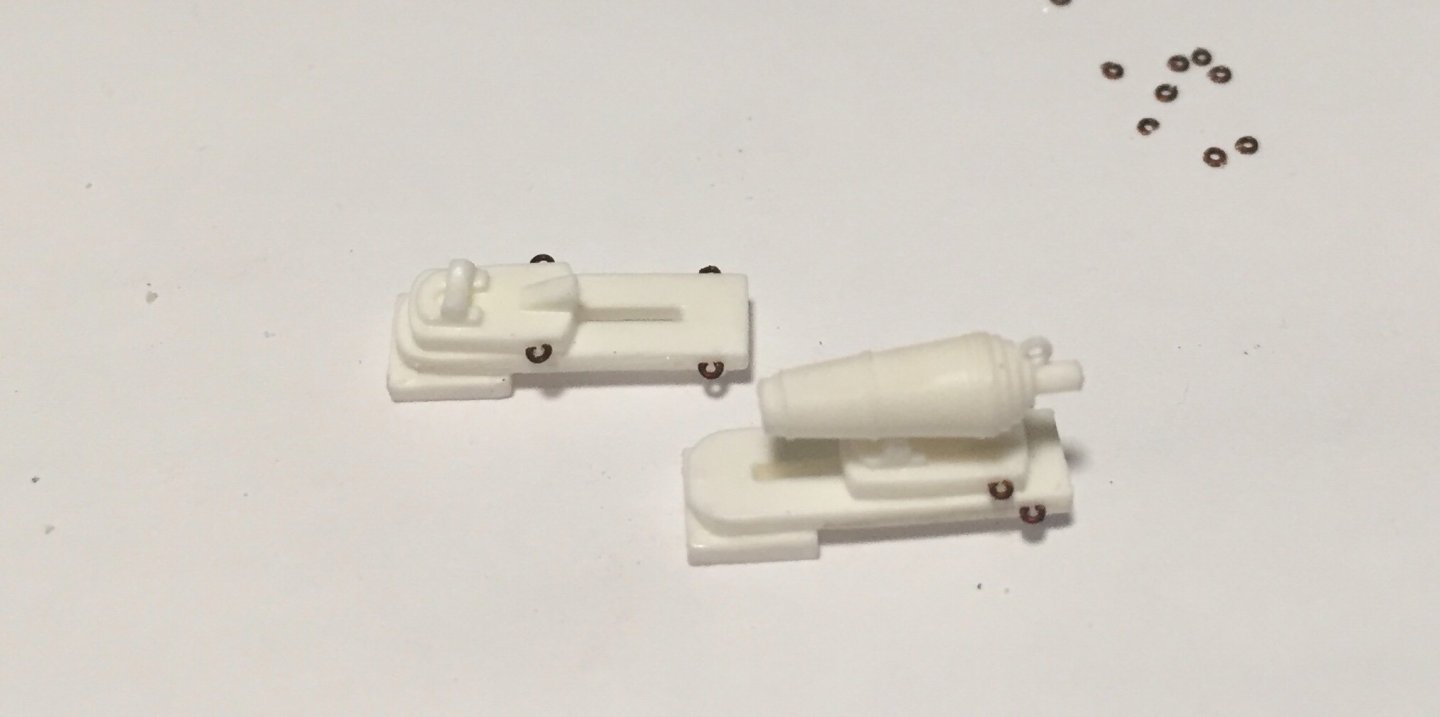
Hull sides now completely painted. I realize I’ll need to cut out some ports on the poop deck for the carronades, but that’s a future worry. Edit, carronades aren’t on the poop, only the forecastle, so no port cuts needed. I’ll just swap out a few of the 12 pounders. Here’s the carronade my friend made for me on his vacuum former.

-
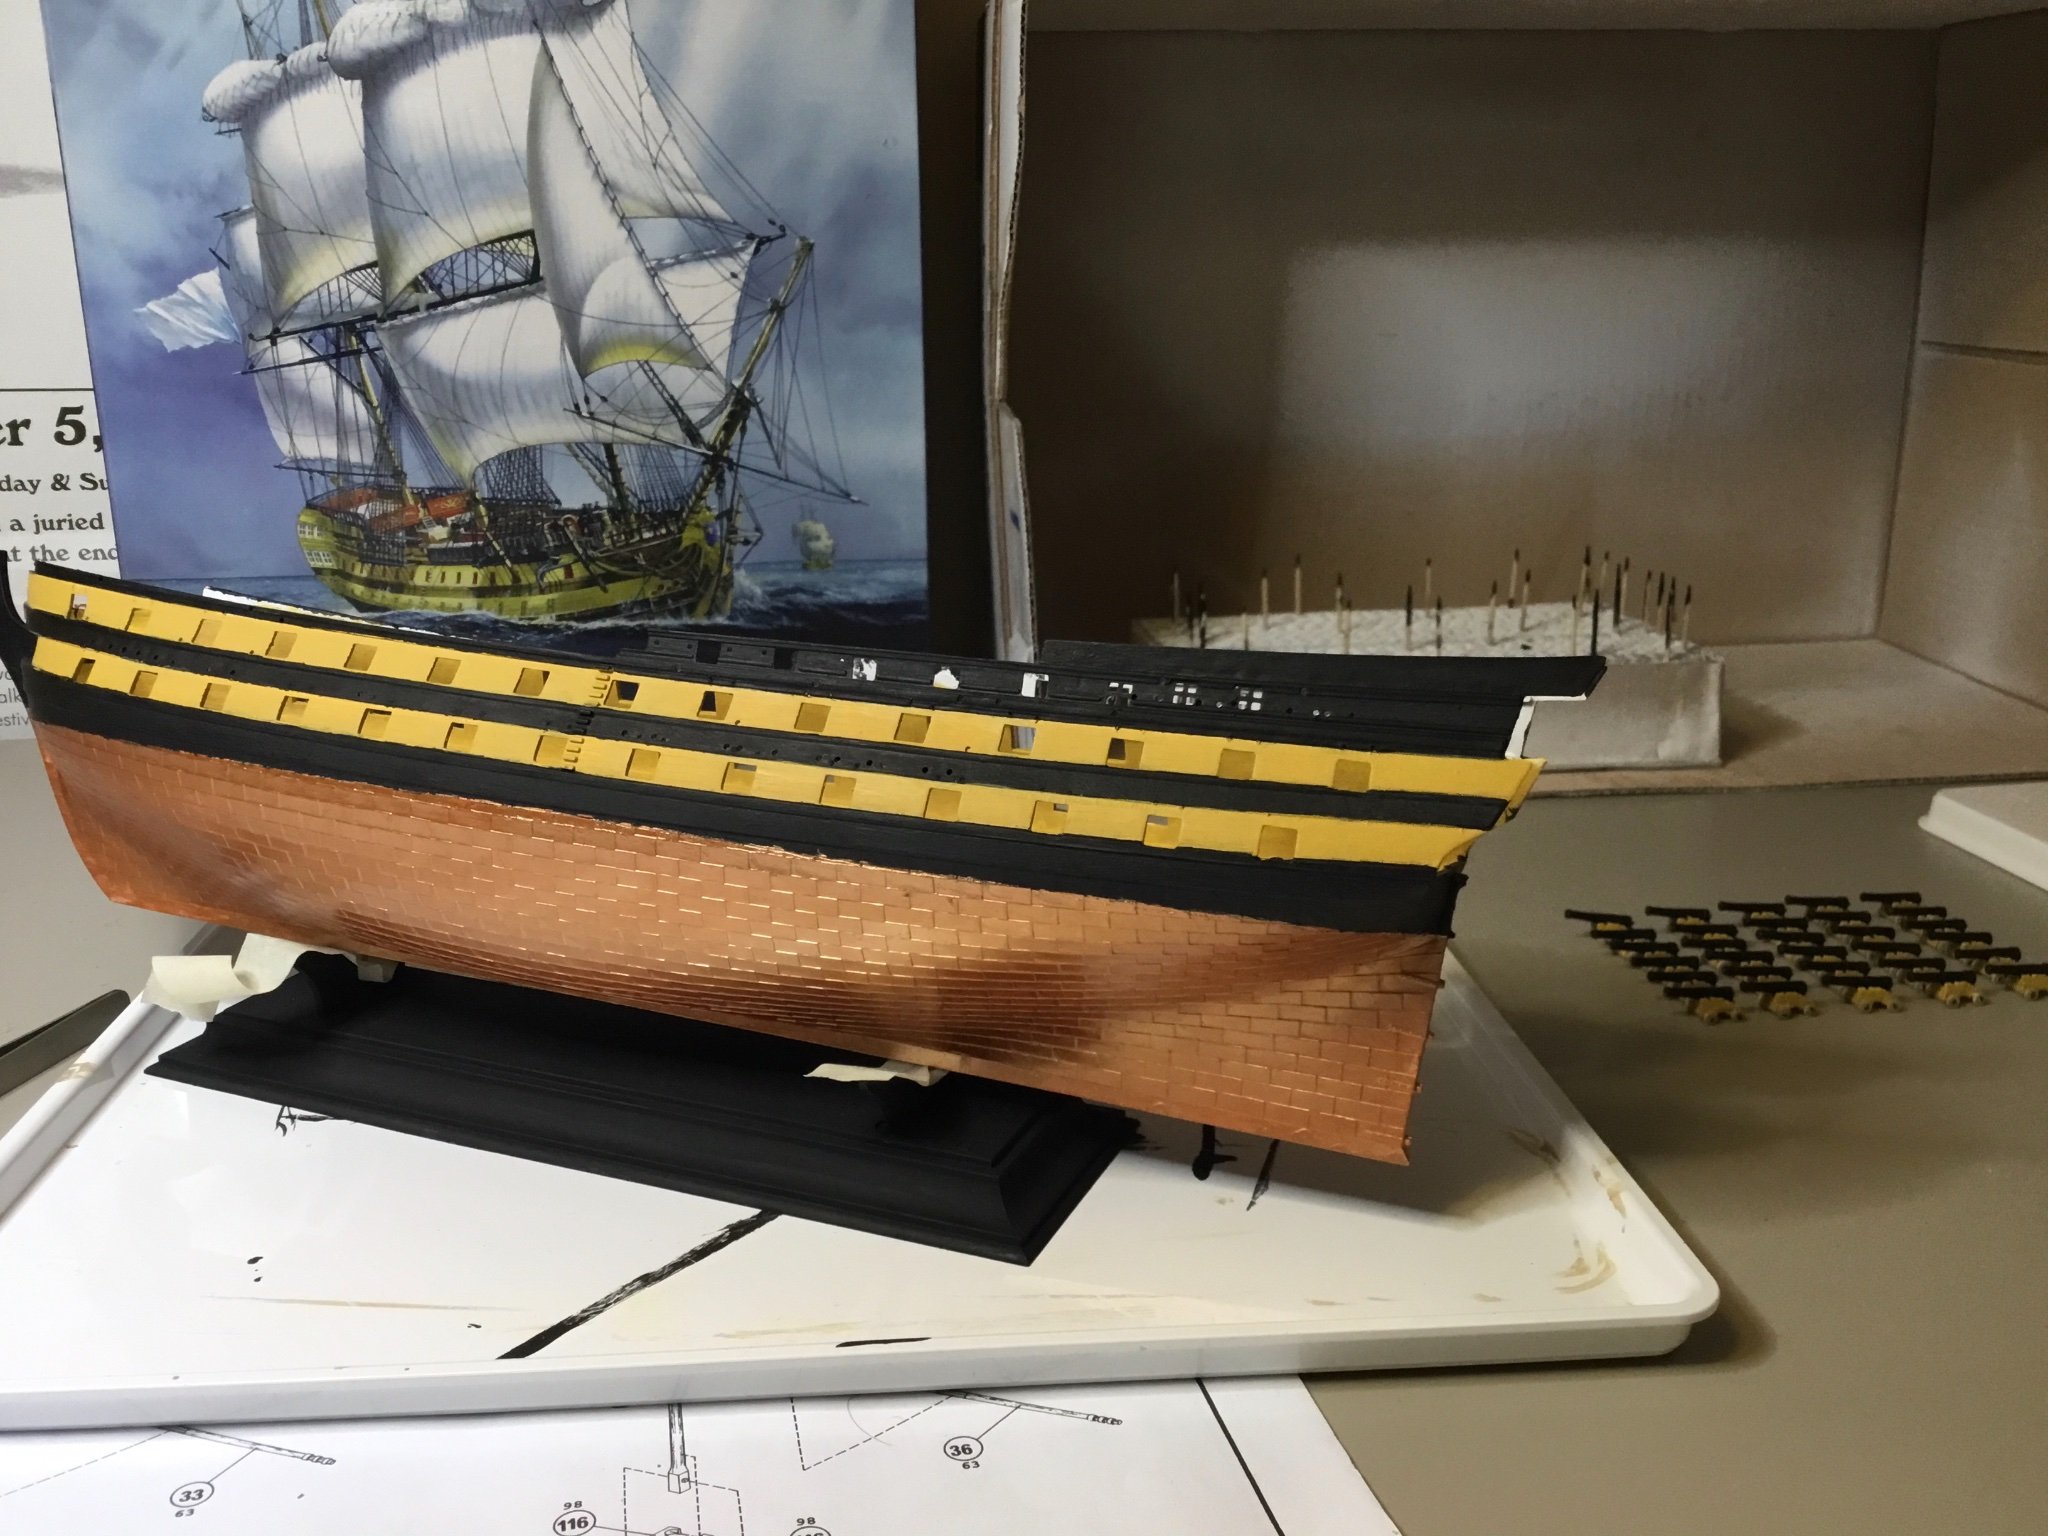
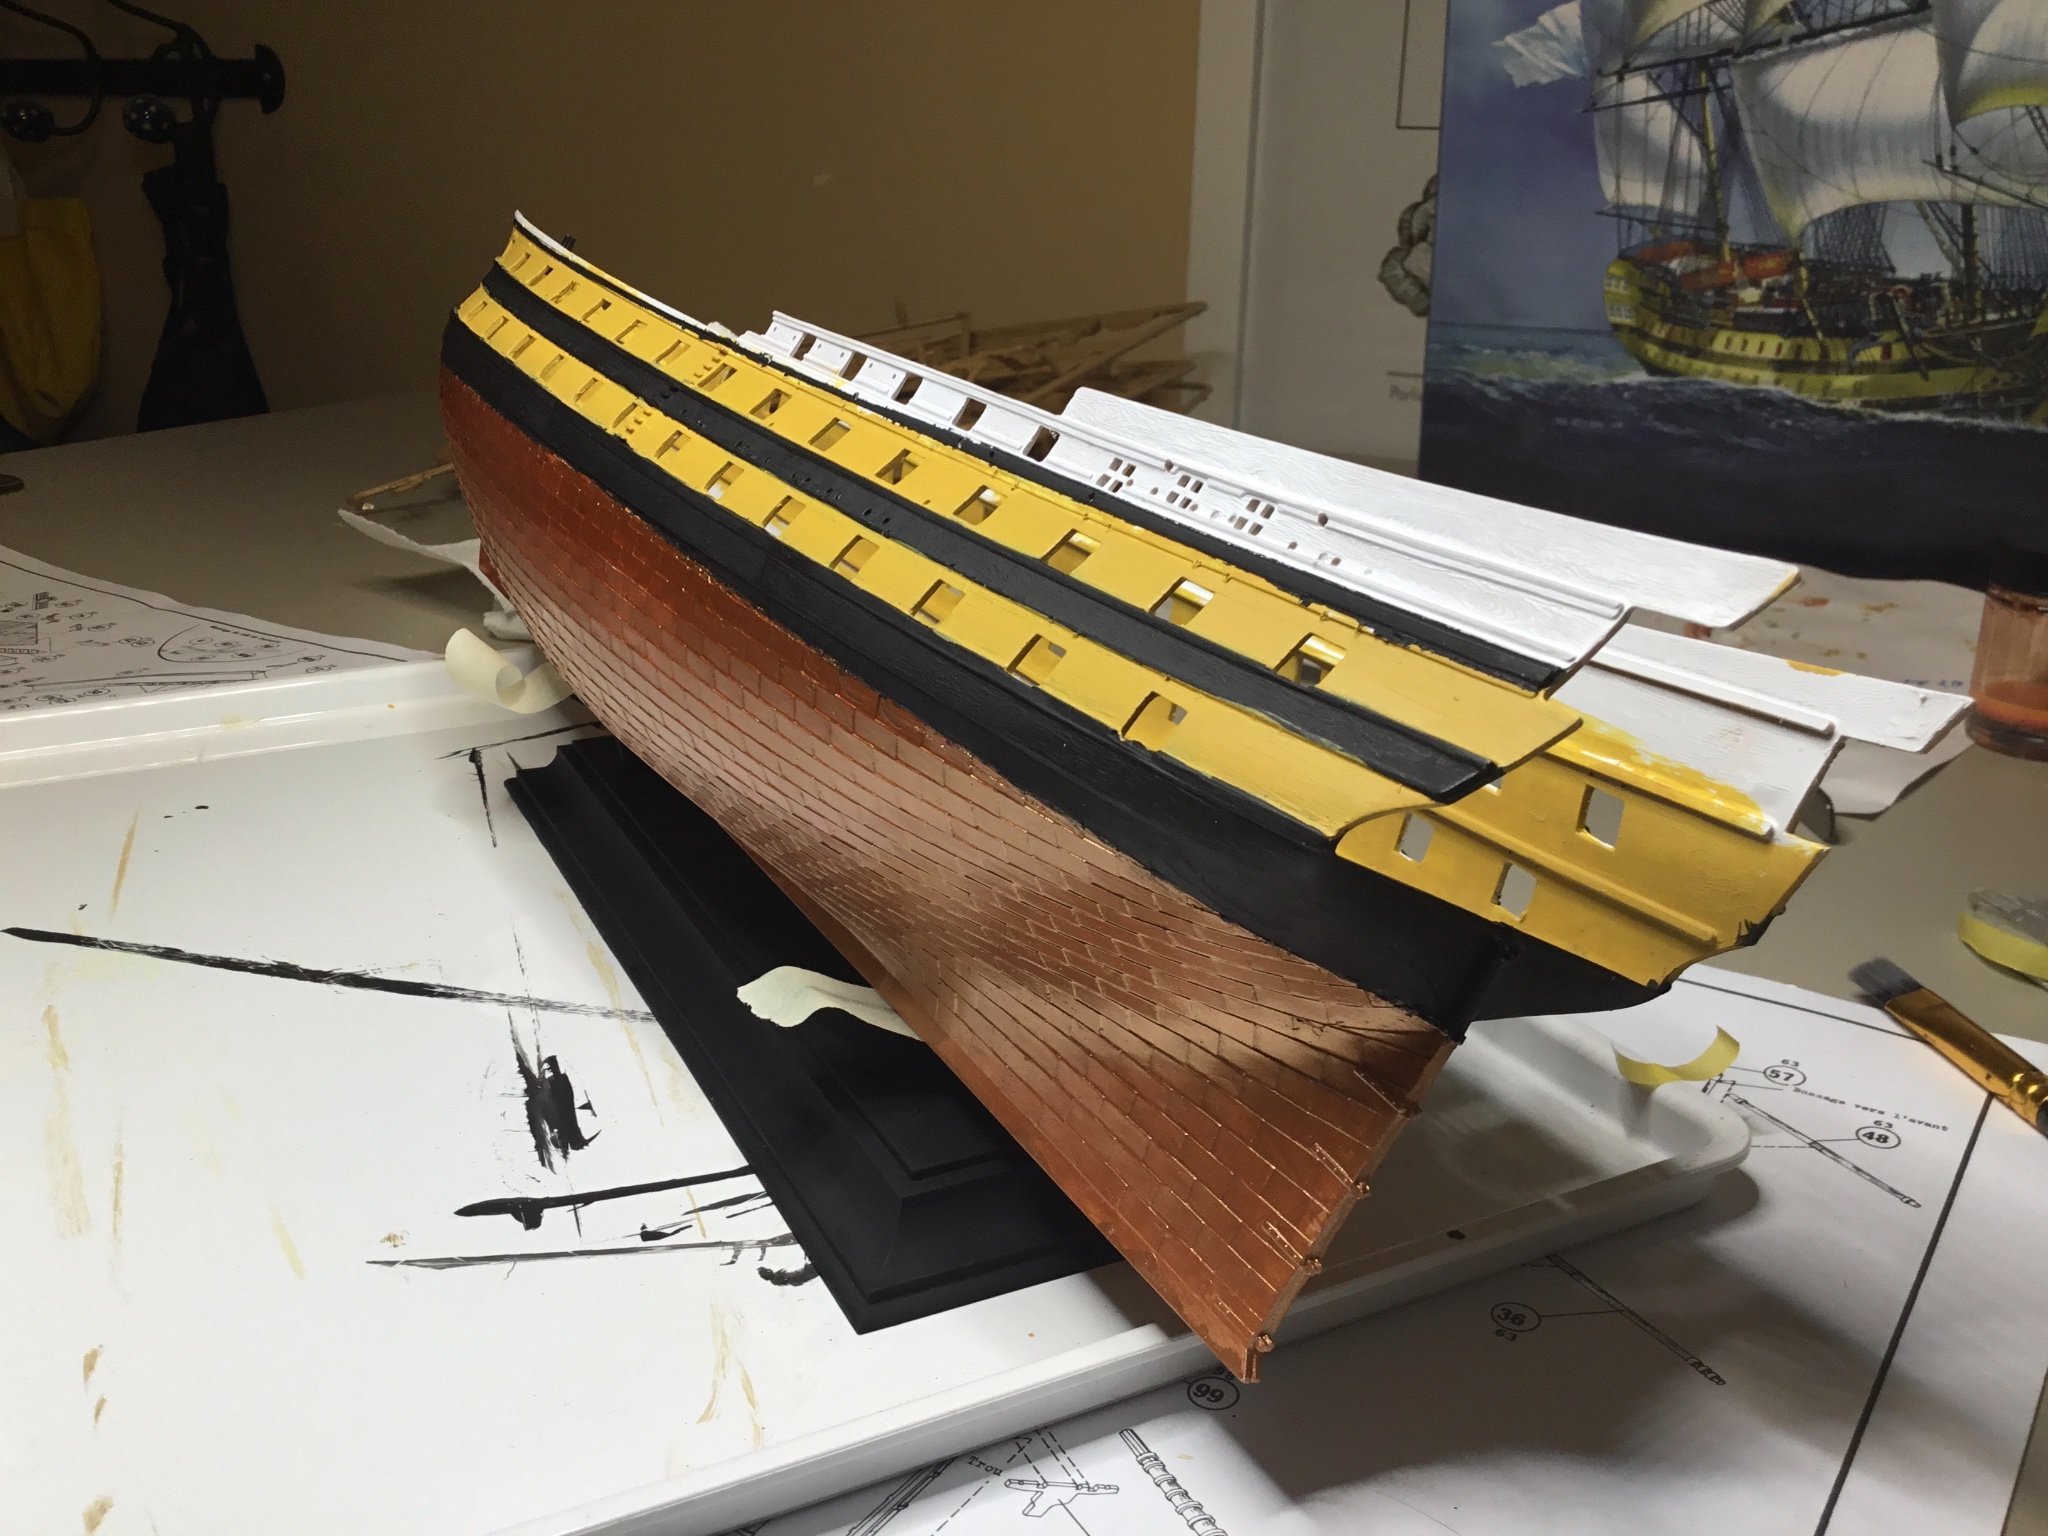
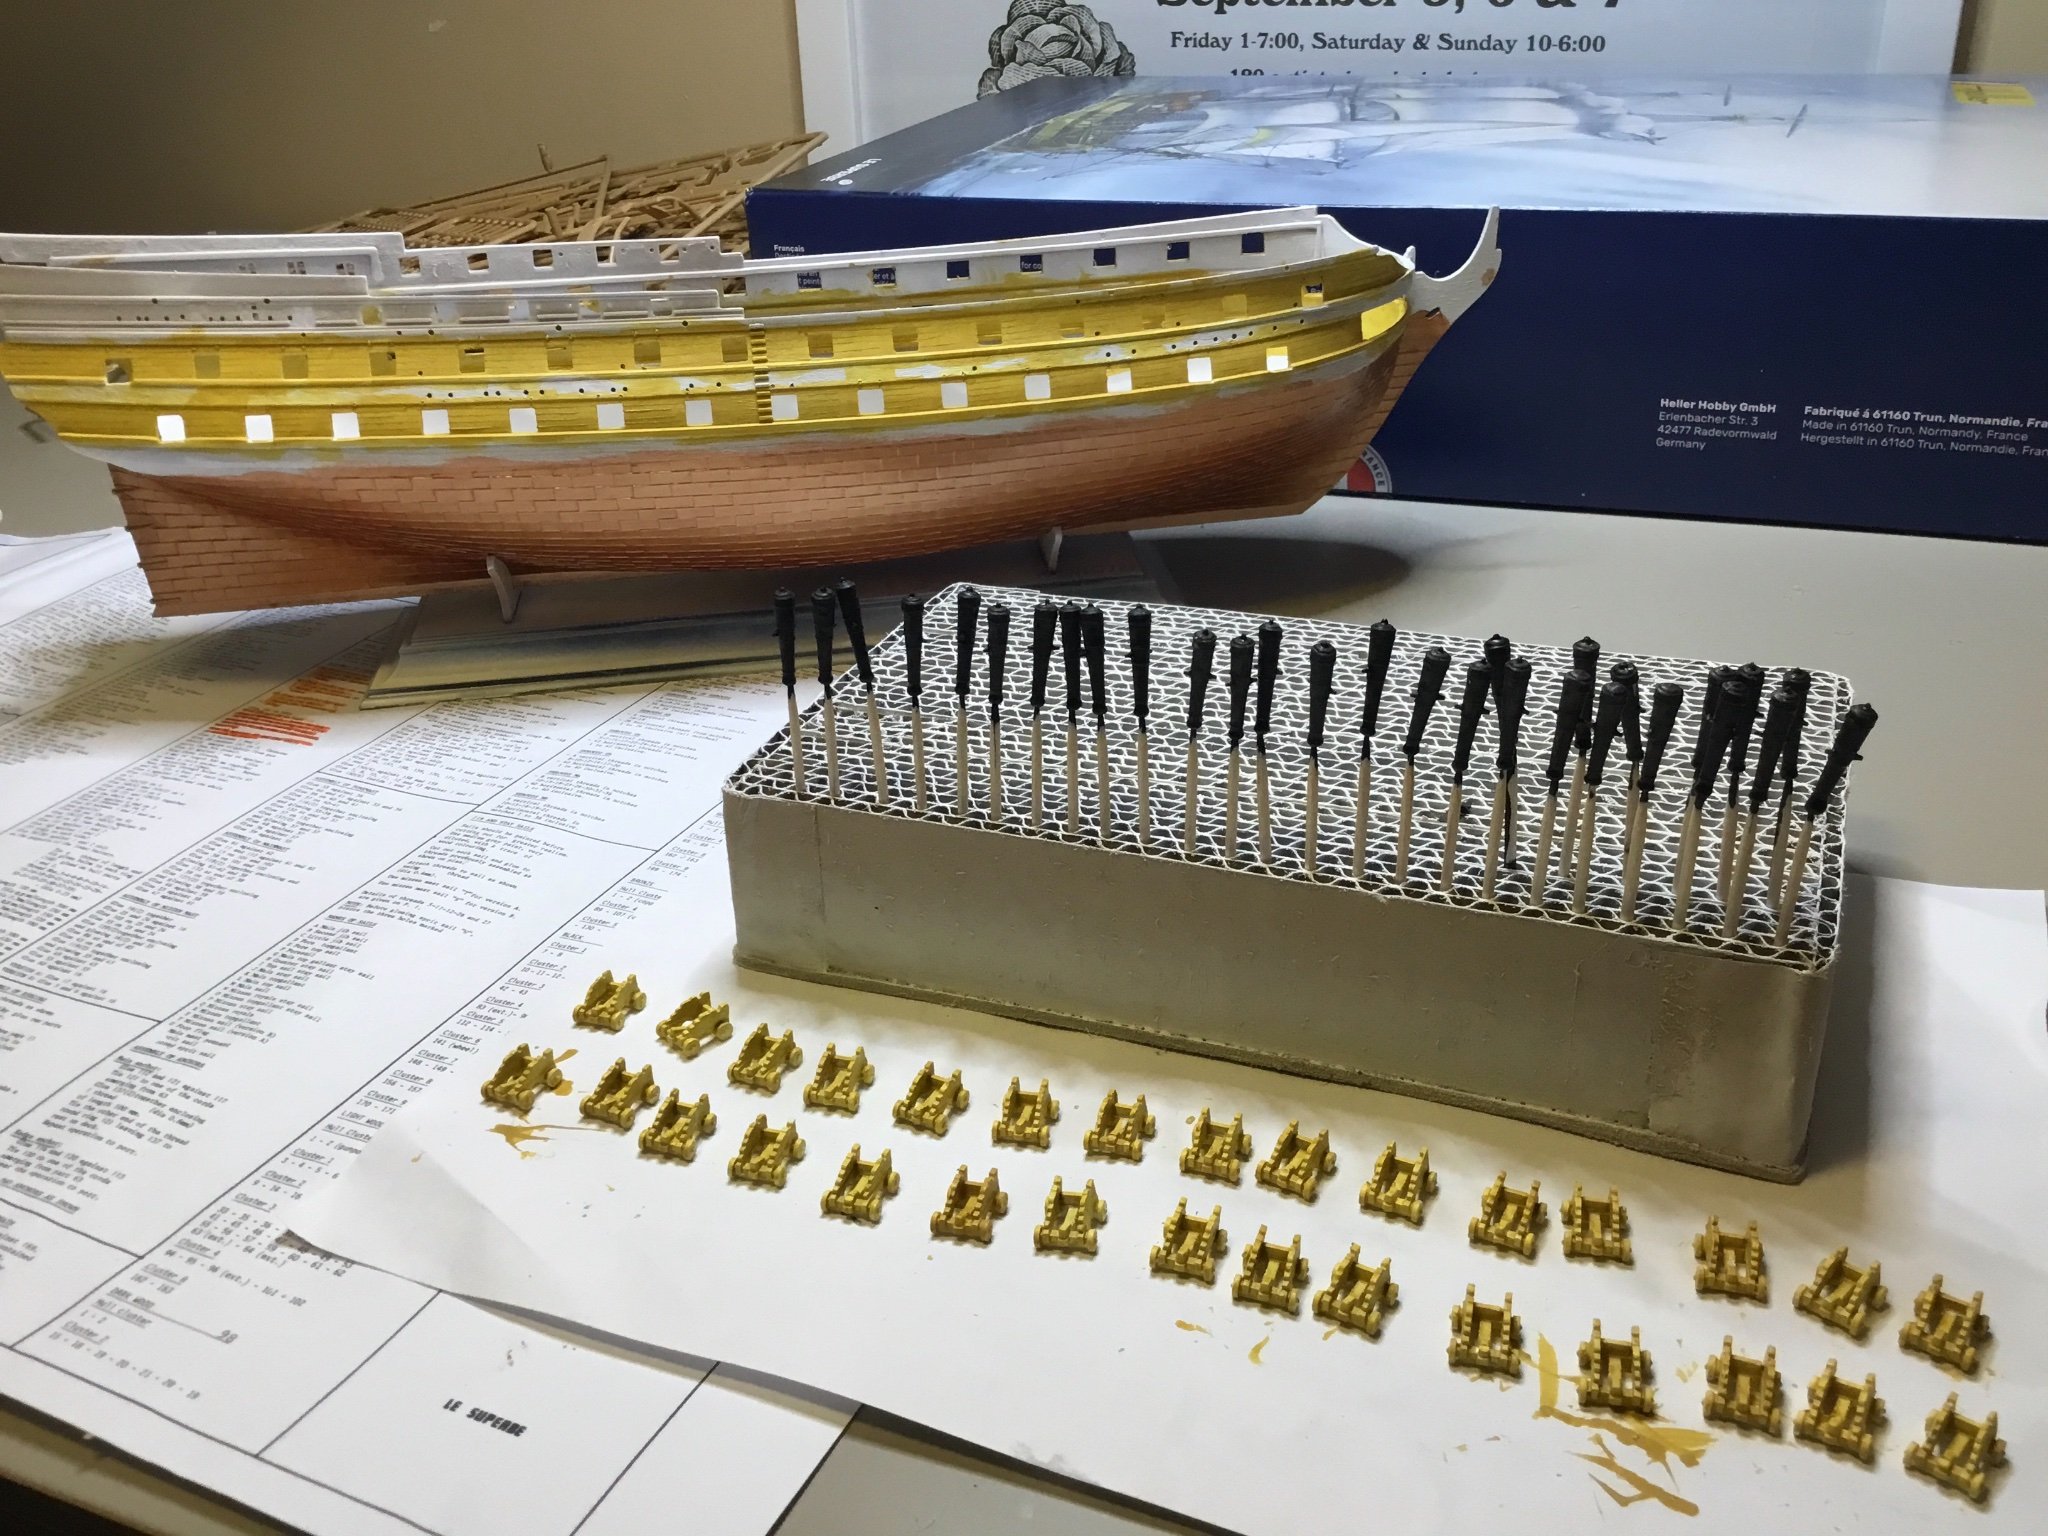
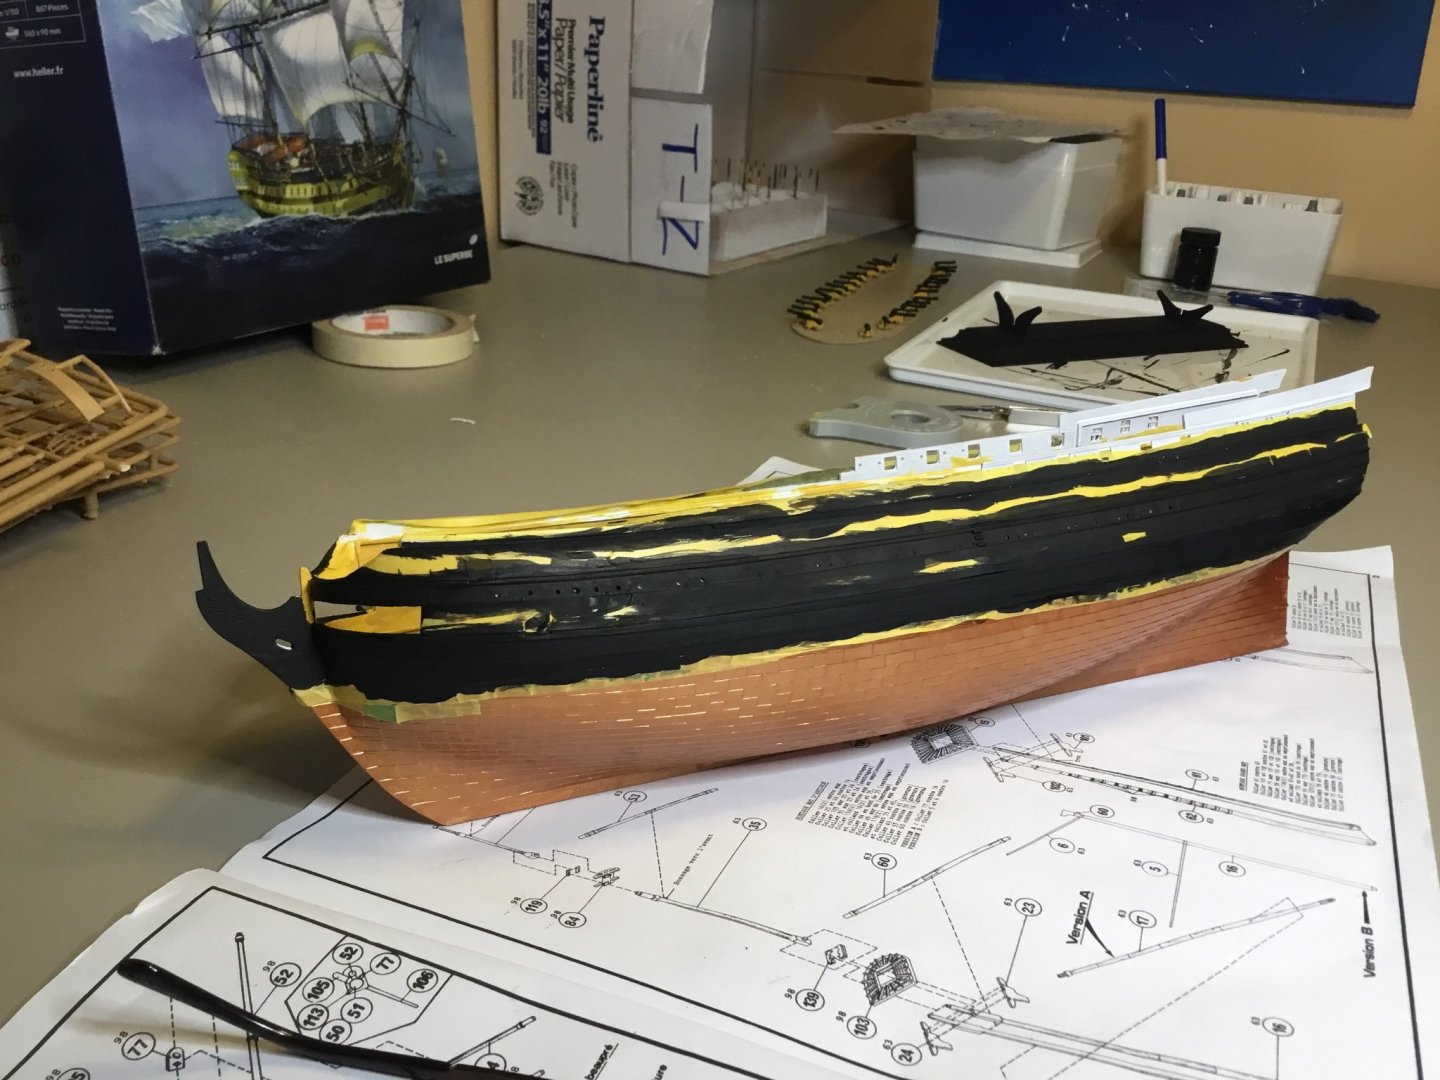
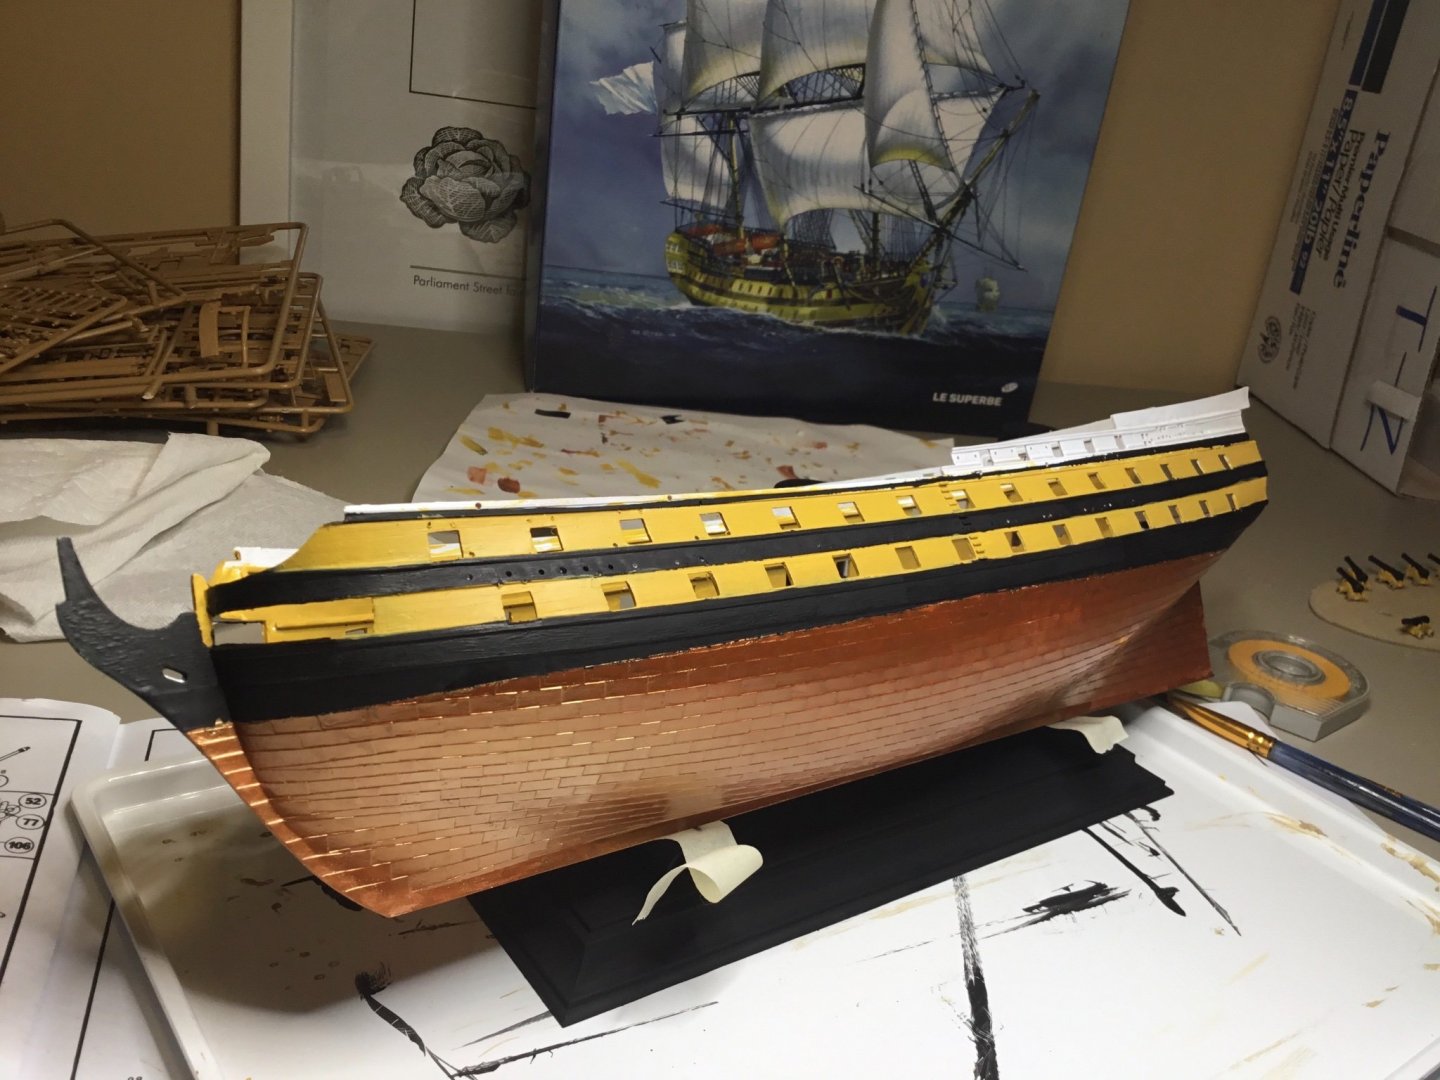
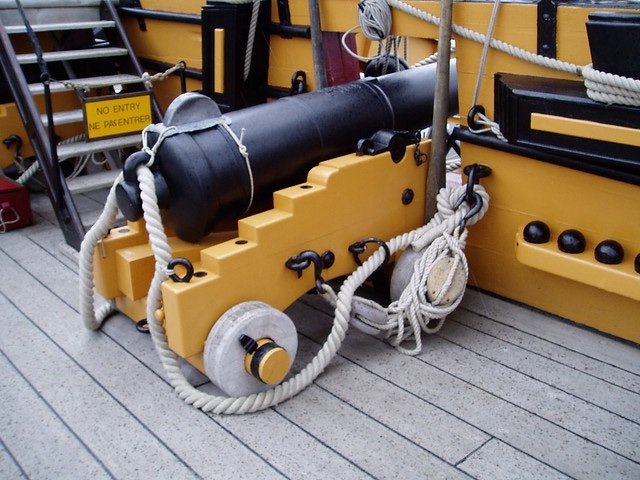
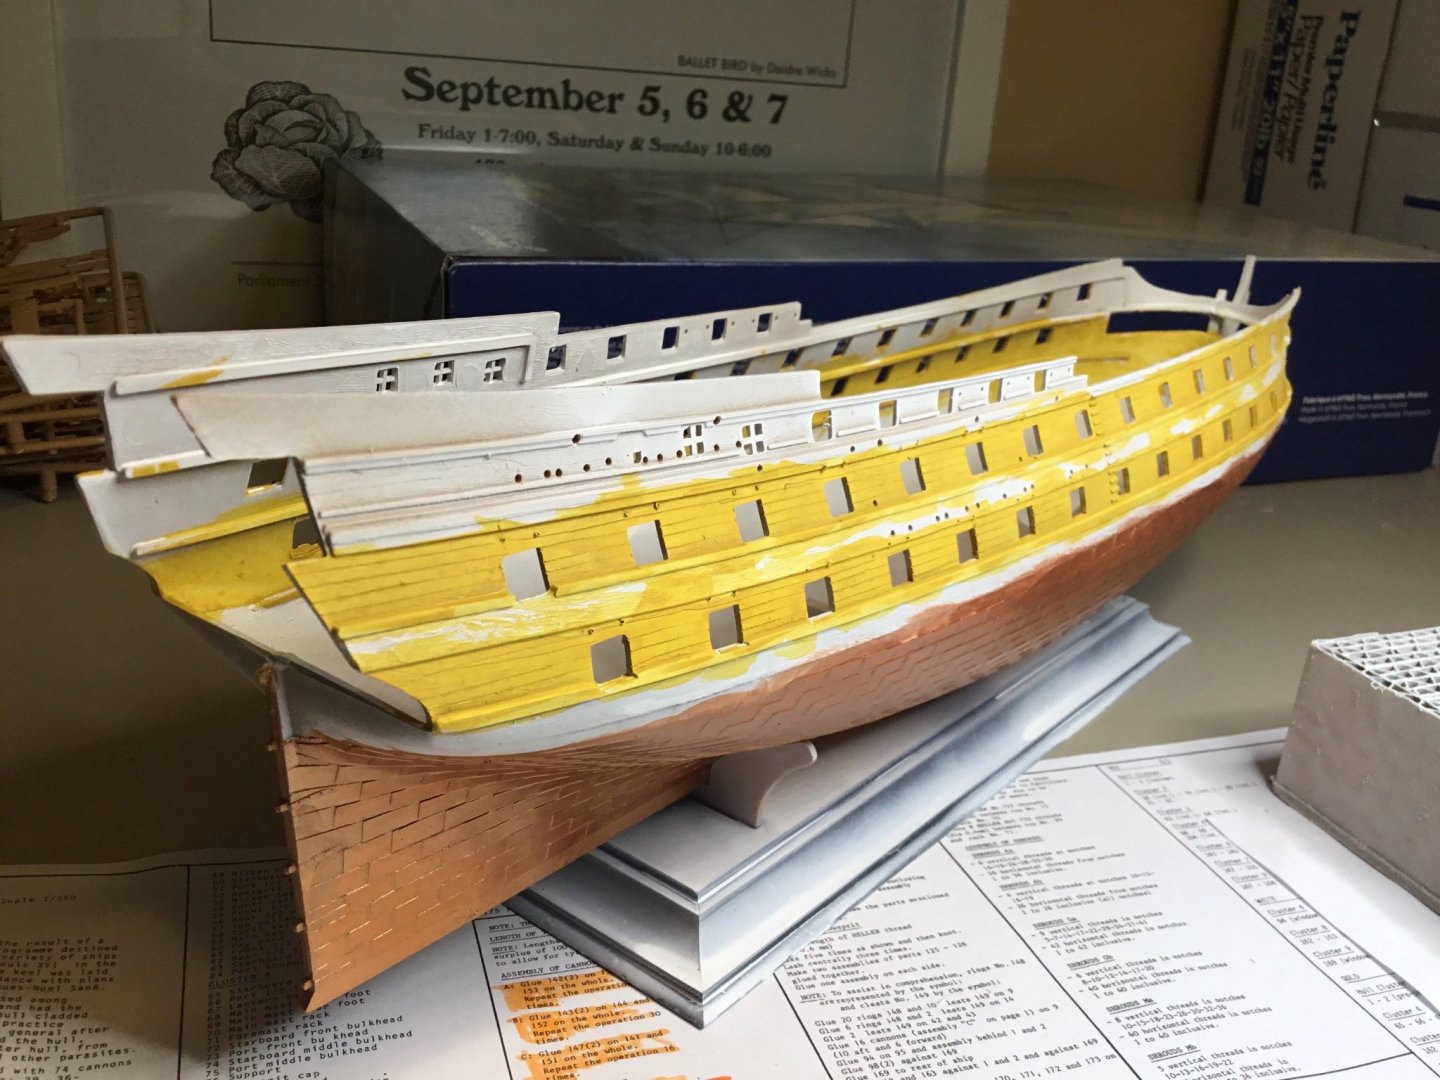
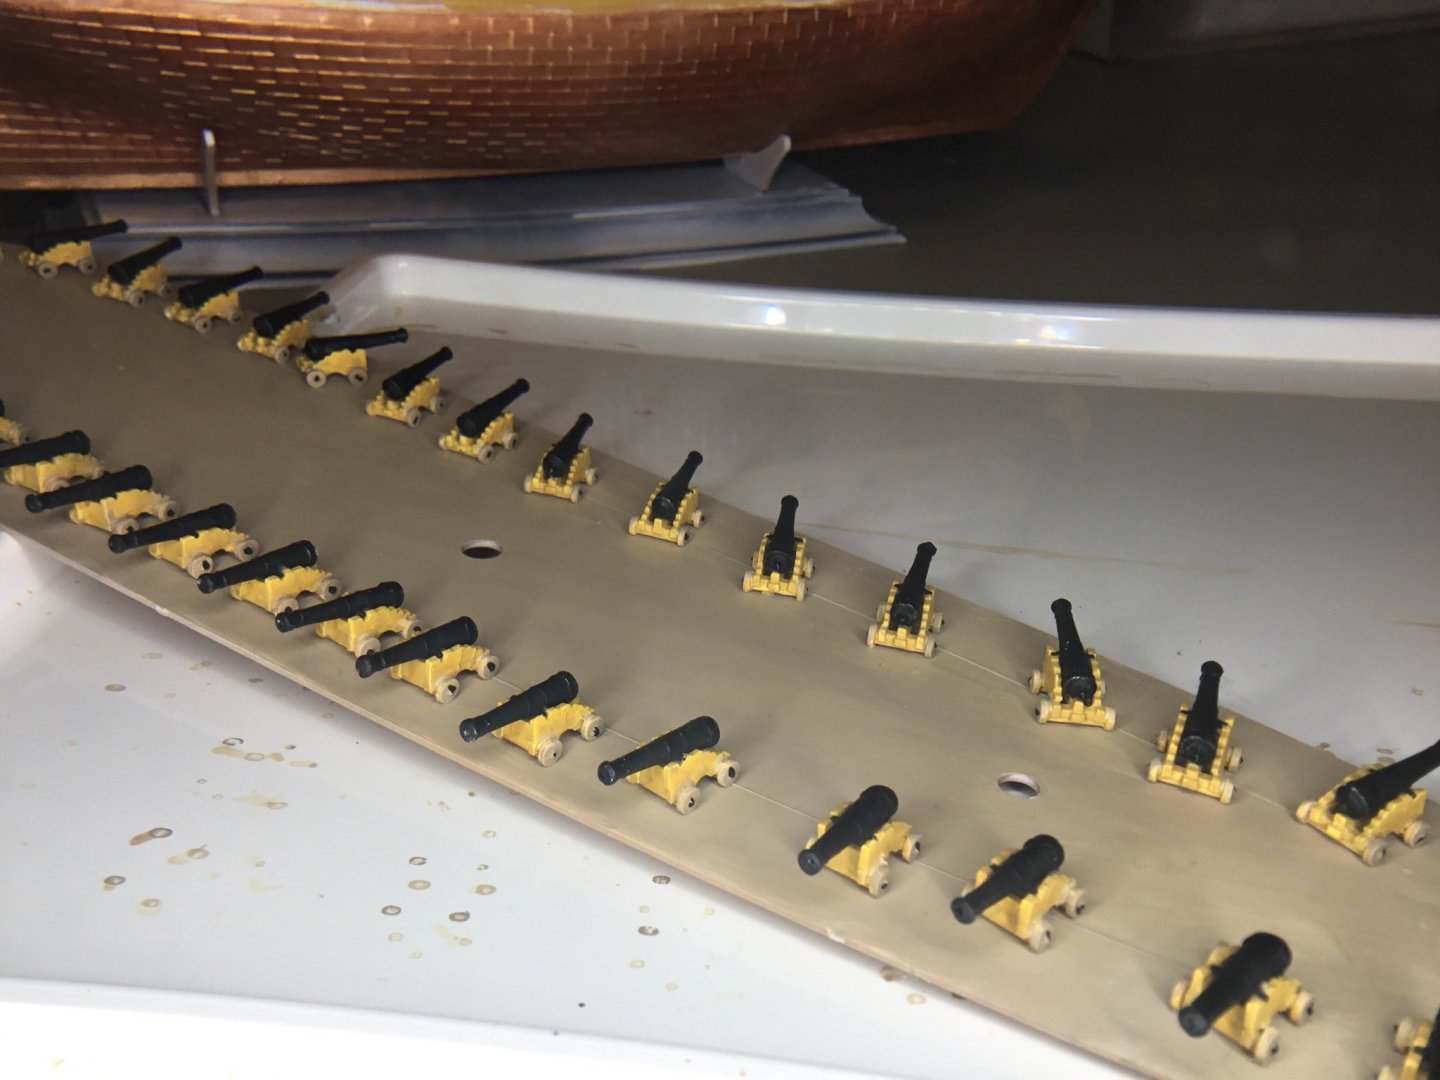
Either my abilities with the Tamiya tape are wanting or my black paint was mixed too thin but I suffered some black incursion into my ochre stripes and copper. But it’s okay, fixed it with some free hand ochre and copper, and now it looks like a true wooden, weather worn ship. The lower gun deck cannons turned out nicely. I think the ochre carriages are a little too close in colour to the unpainted wheels (same colour as the deck), but we’ll see, maybe I’ll paint the wheels of the upper deck and quarter deck guns (they’re unpainted on HMS Victory). Next steps is to use a thin brush to touch up the black edges above and below the ochre stripes, finish painting and install the lower gun deck, install ropes through the drilled holes for the gun port lids. I left the upper hull unpainted as I was planning to paint some thin blue decorative trim lines (like here on HMS Vanguard, https://www.modelships.de/Vanguard/Photos-HMS-Vanguard_detail-views.htm), but I’ve decided to paint it black right to the upper edge and decorate it later.

-
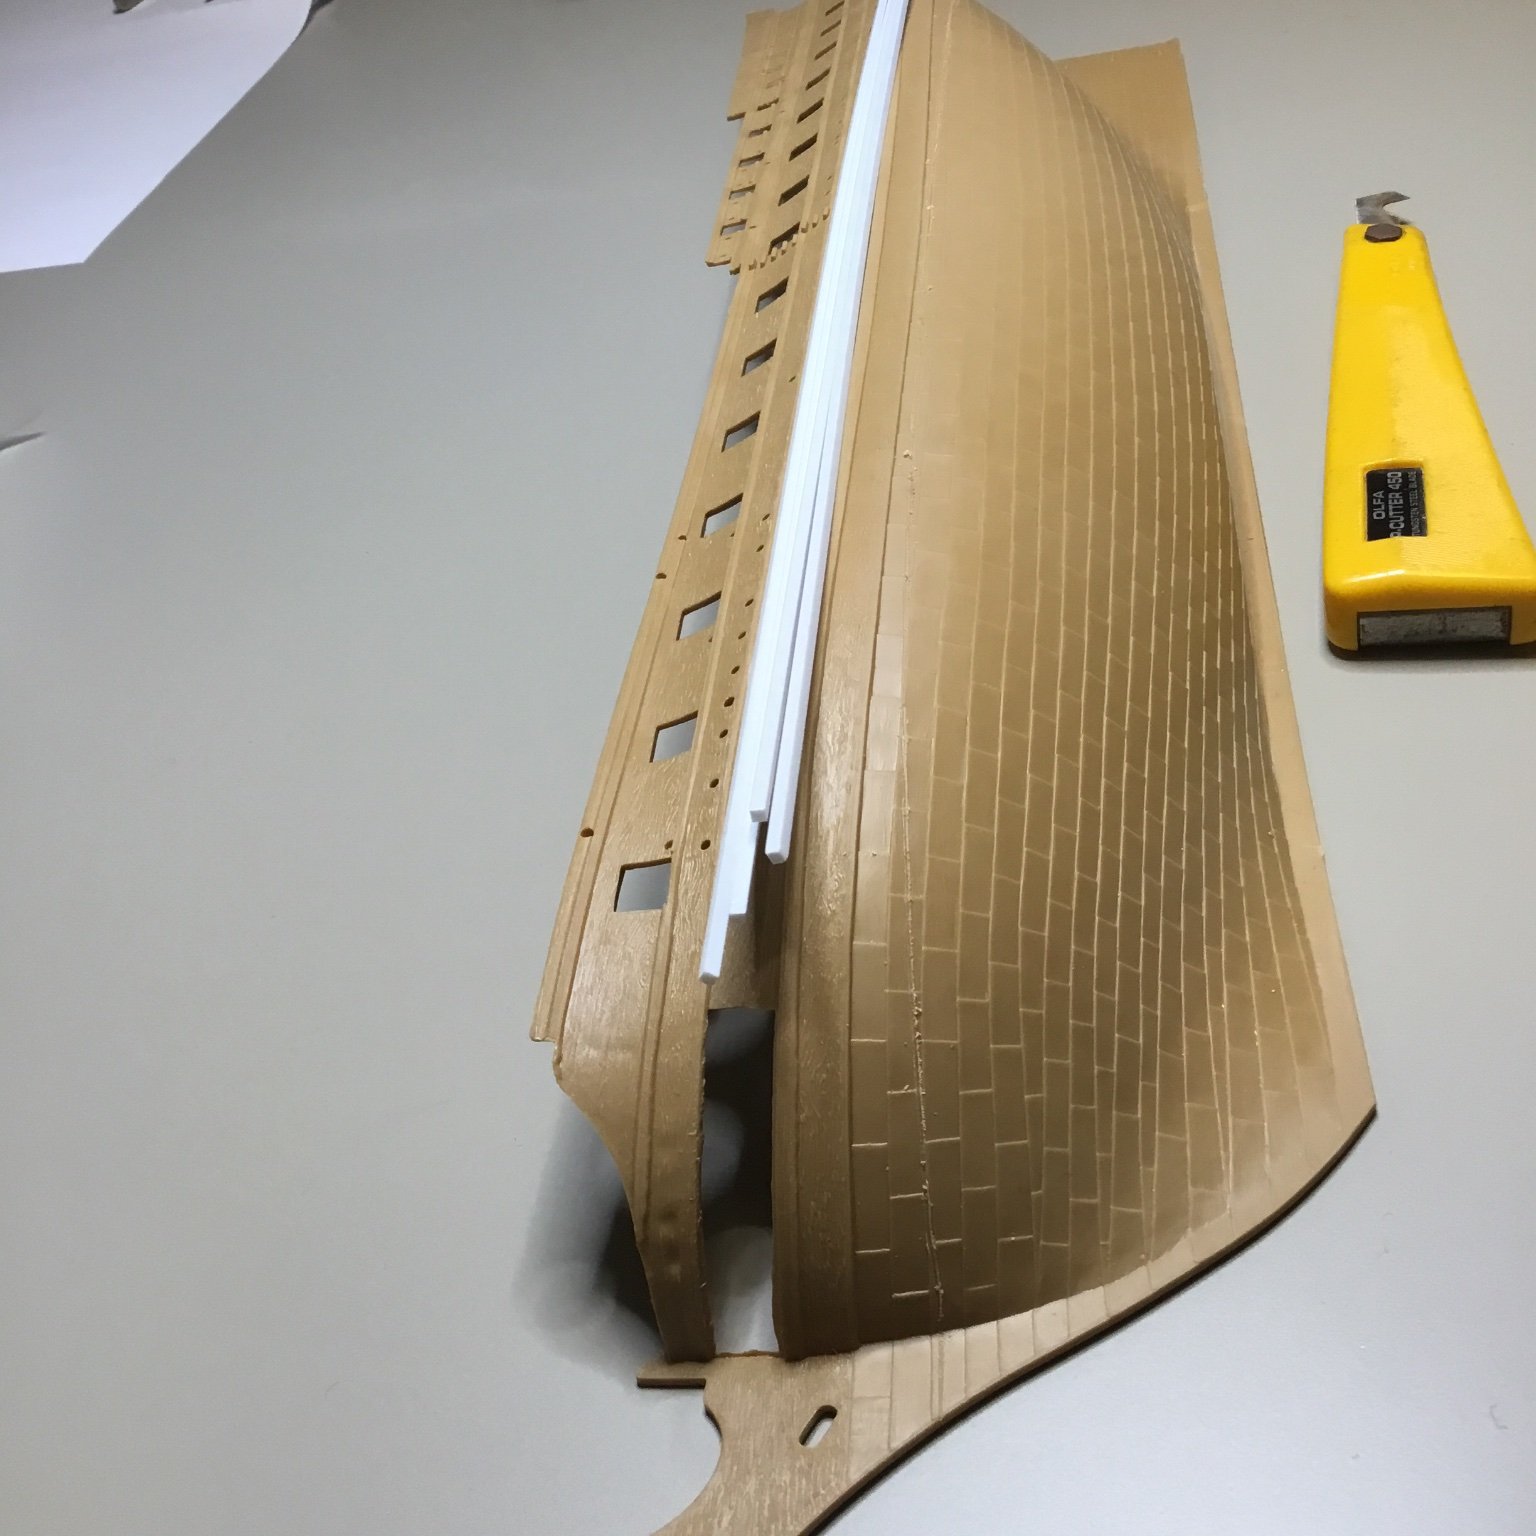
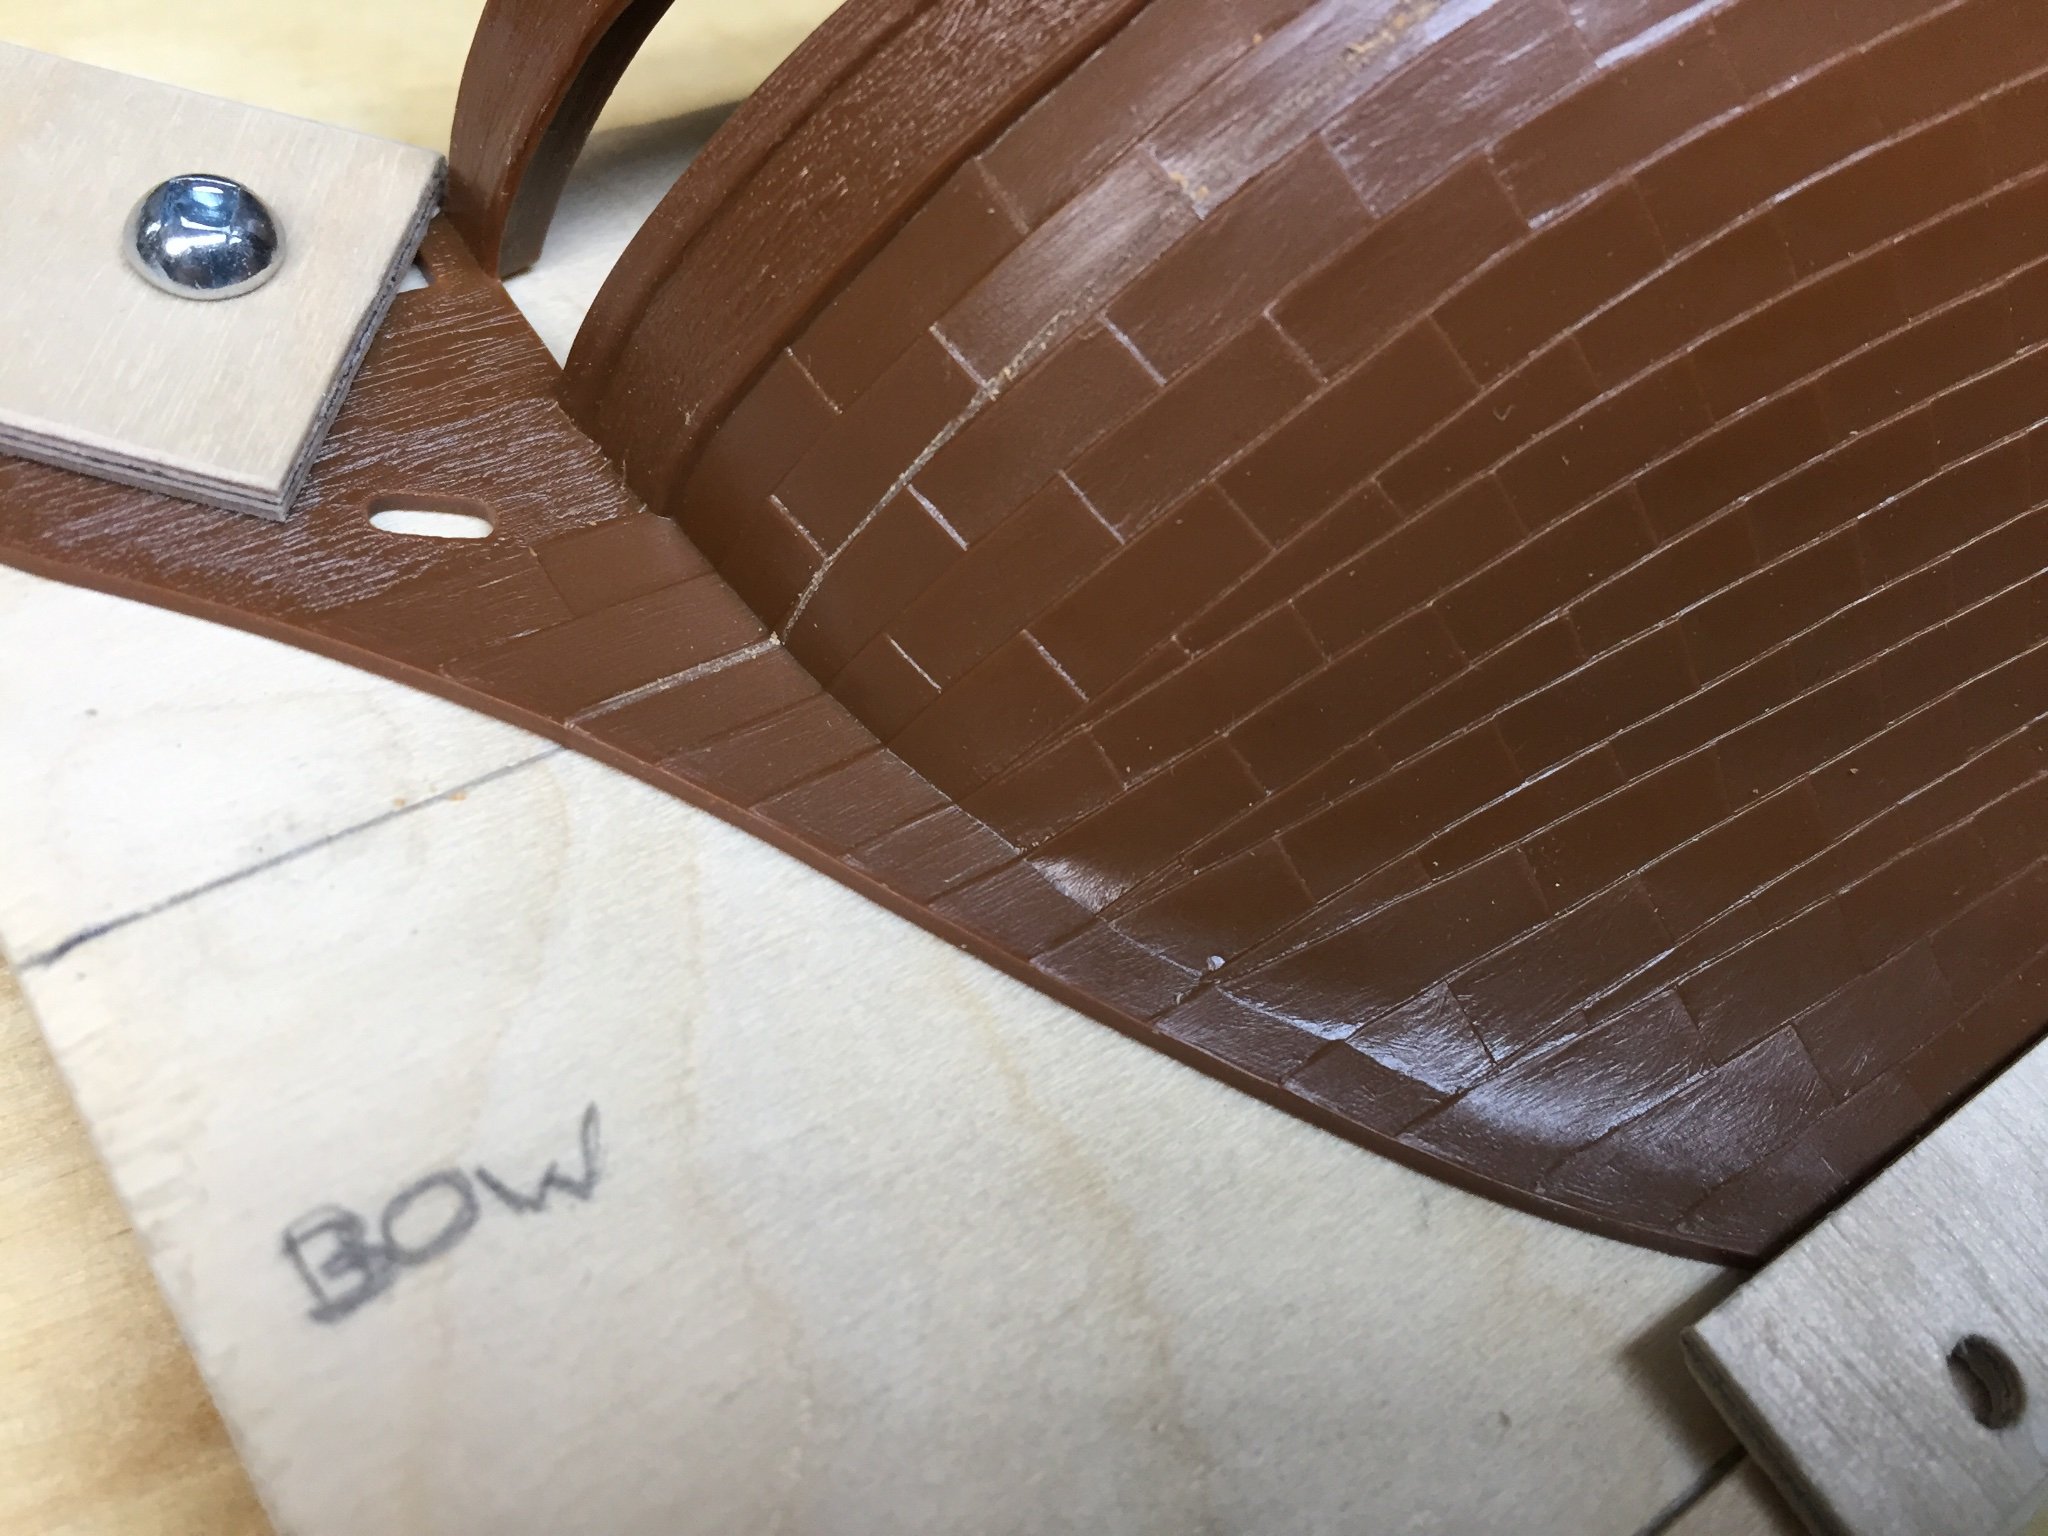
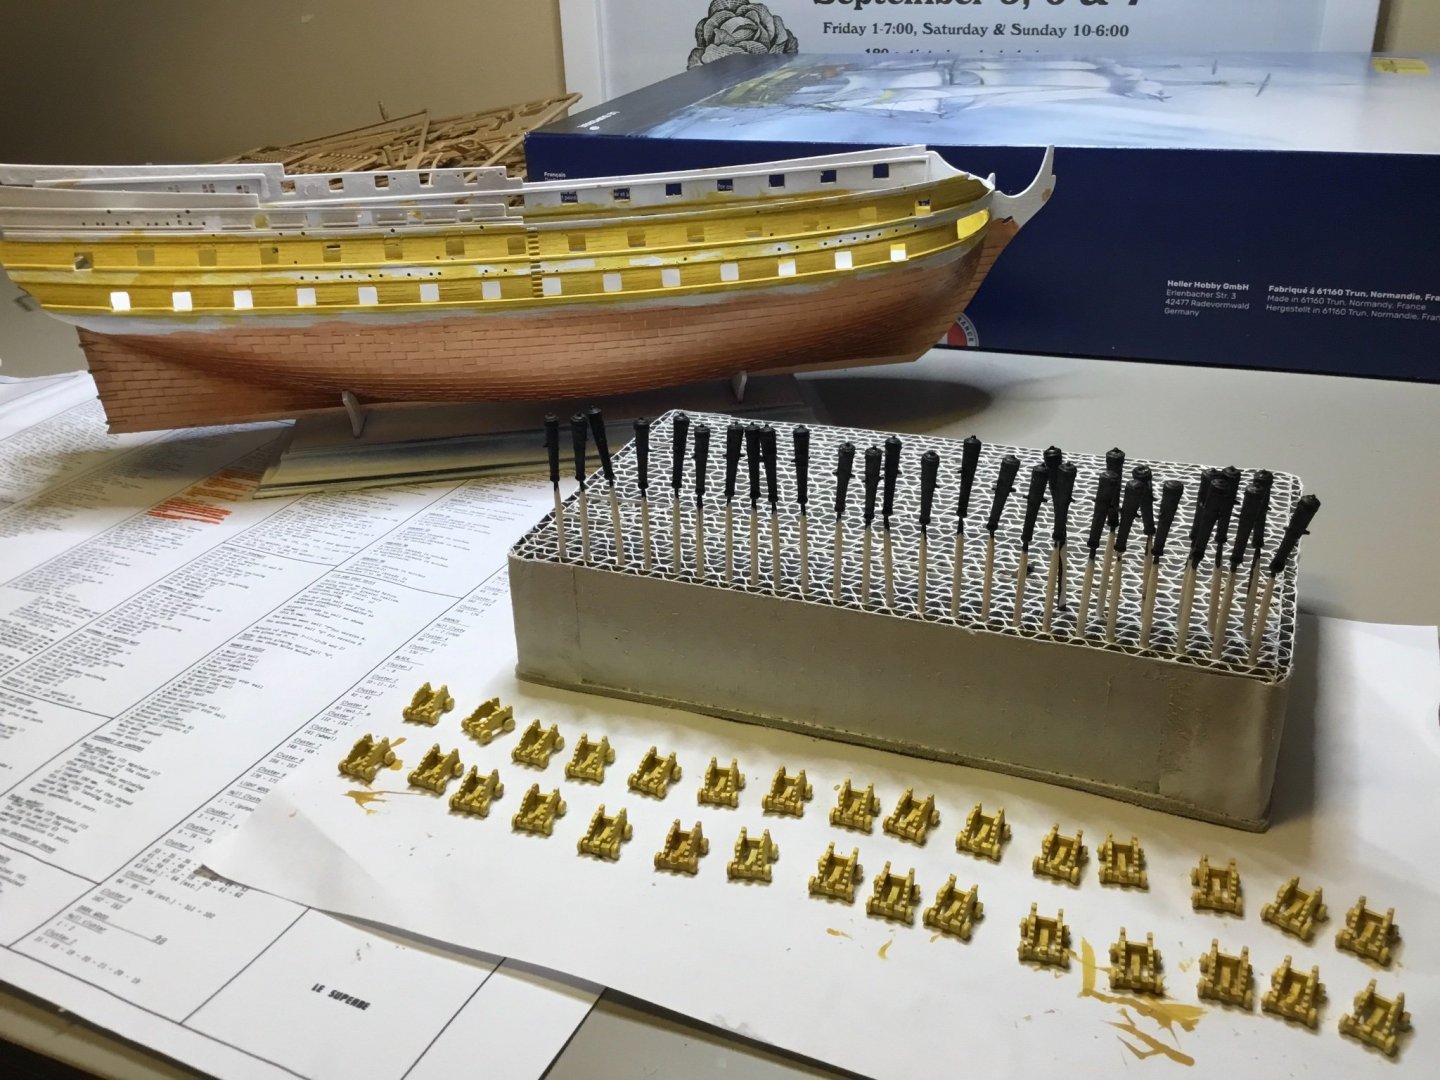
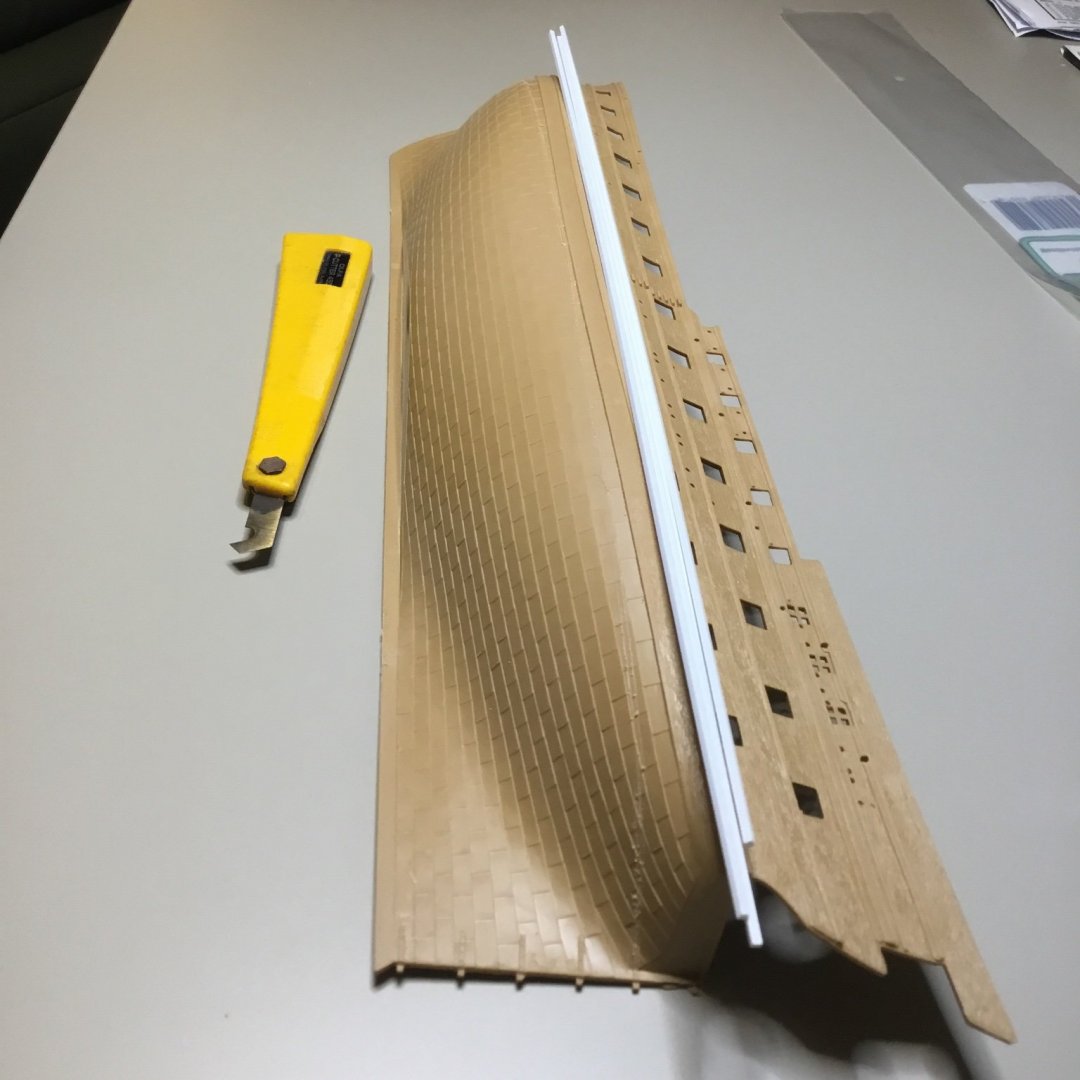
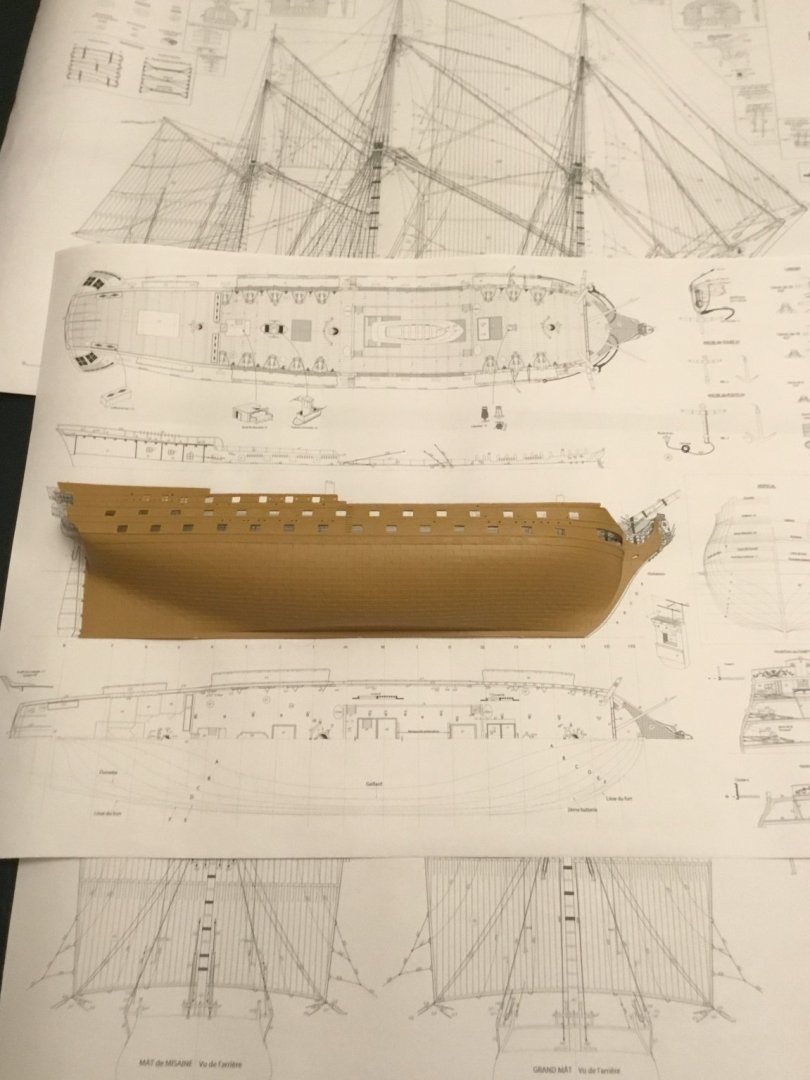
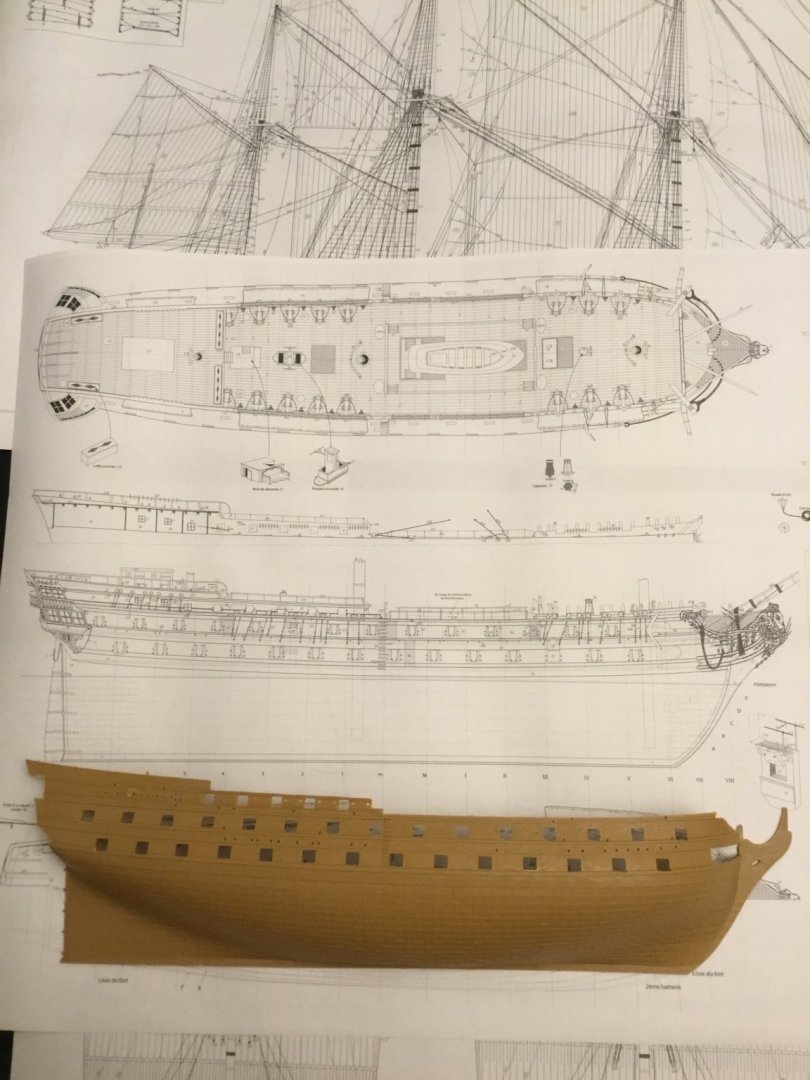
Plank lines scribed between gun ports. Copper above waterline now scraped away. Hull below waterline now coppered. I’m learning not to over dilute the paints as it takes many coats otherwise. Yellow ochre is more yellow than the Nelson orange I was expecting, but that’s fine, we’re not changing it now, and it will look sharp once I add black. Yellow ochre side strakes now painted, plus the hull sides of the interior of the lower and middle gun decks, like done on HMS Victory where the interior walls and carriages match the external strakes, like here https://c8.alamy.com/comp/F80MNG/lower-gun-deck-of-hms-victory-at-the-portsmouth-historic-dockyard-F80MNG.jpg The upper gun deck interiors will be black, maybe red, I’ll decide. The 32 pdr cannons are on toothpicks for painting. I’ll have to sharpen them for the small guns. The next step is the complete the lower gun deck. Unlike the upper decks, Heller omitted the plank lines. I may scribe these with a metal ruler, but I think this deck may not be visible.
-
Hi B.E., I've now primed my cannons and carriages and am beginning to plan out their painting and assembly. How did you attach the tackle ropes to the side of the hull? I think you have small eyelets glued to the hull insides, what are those? Did you fabricate the tackle ropes for all cannons or just those that are visible? As for the ropes for the gun lids, what rope do you recommend? I have drilled out the hull for for the ropes that close the ports lids using a 0.6 mm bit. I want to tie knots so I assume fishing line is out. Plus I want that yellow, running rigging colour. This is new technique for me so any advice is welcome, thanks.
-
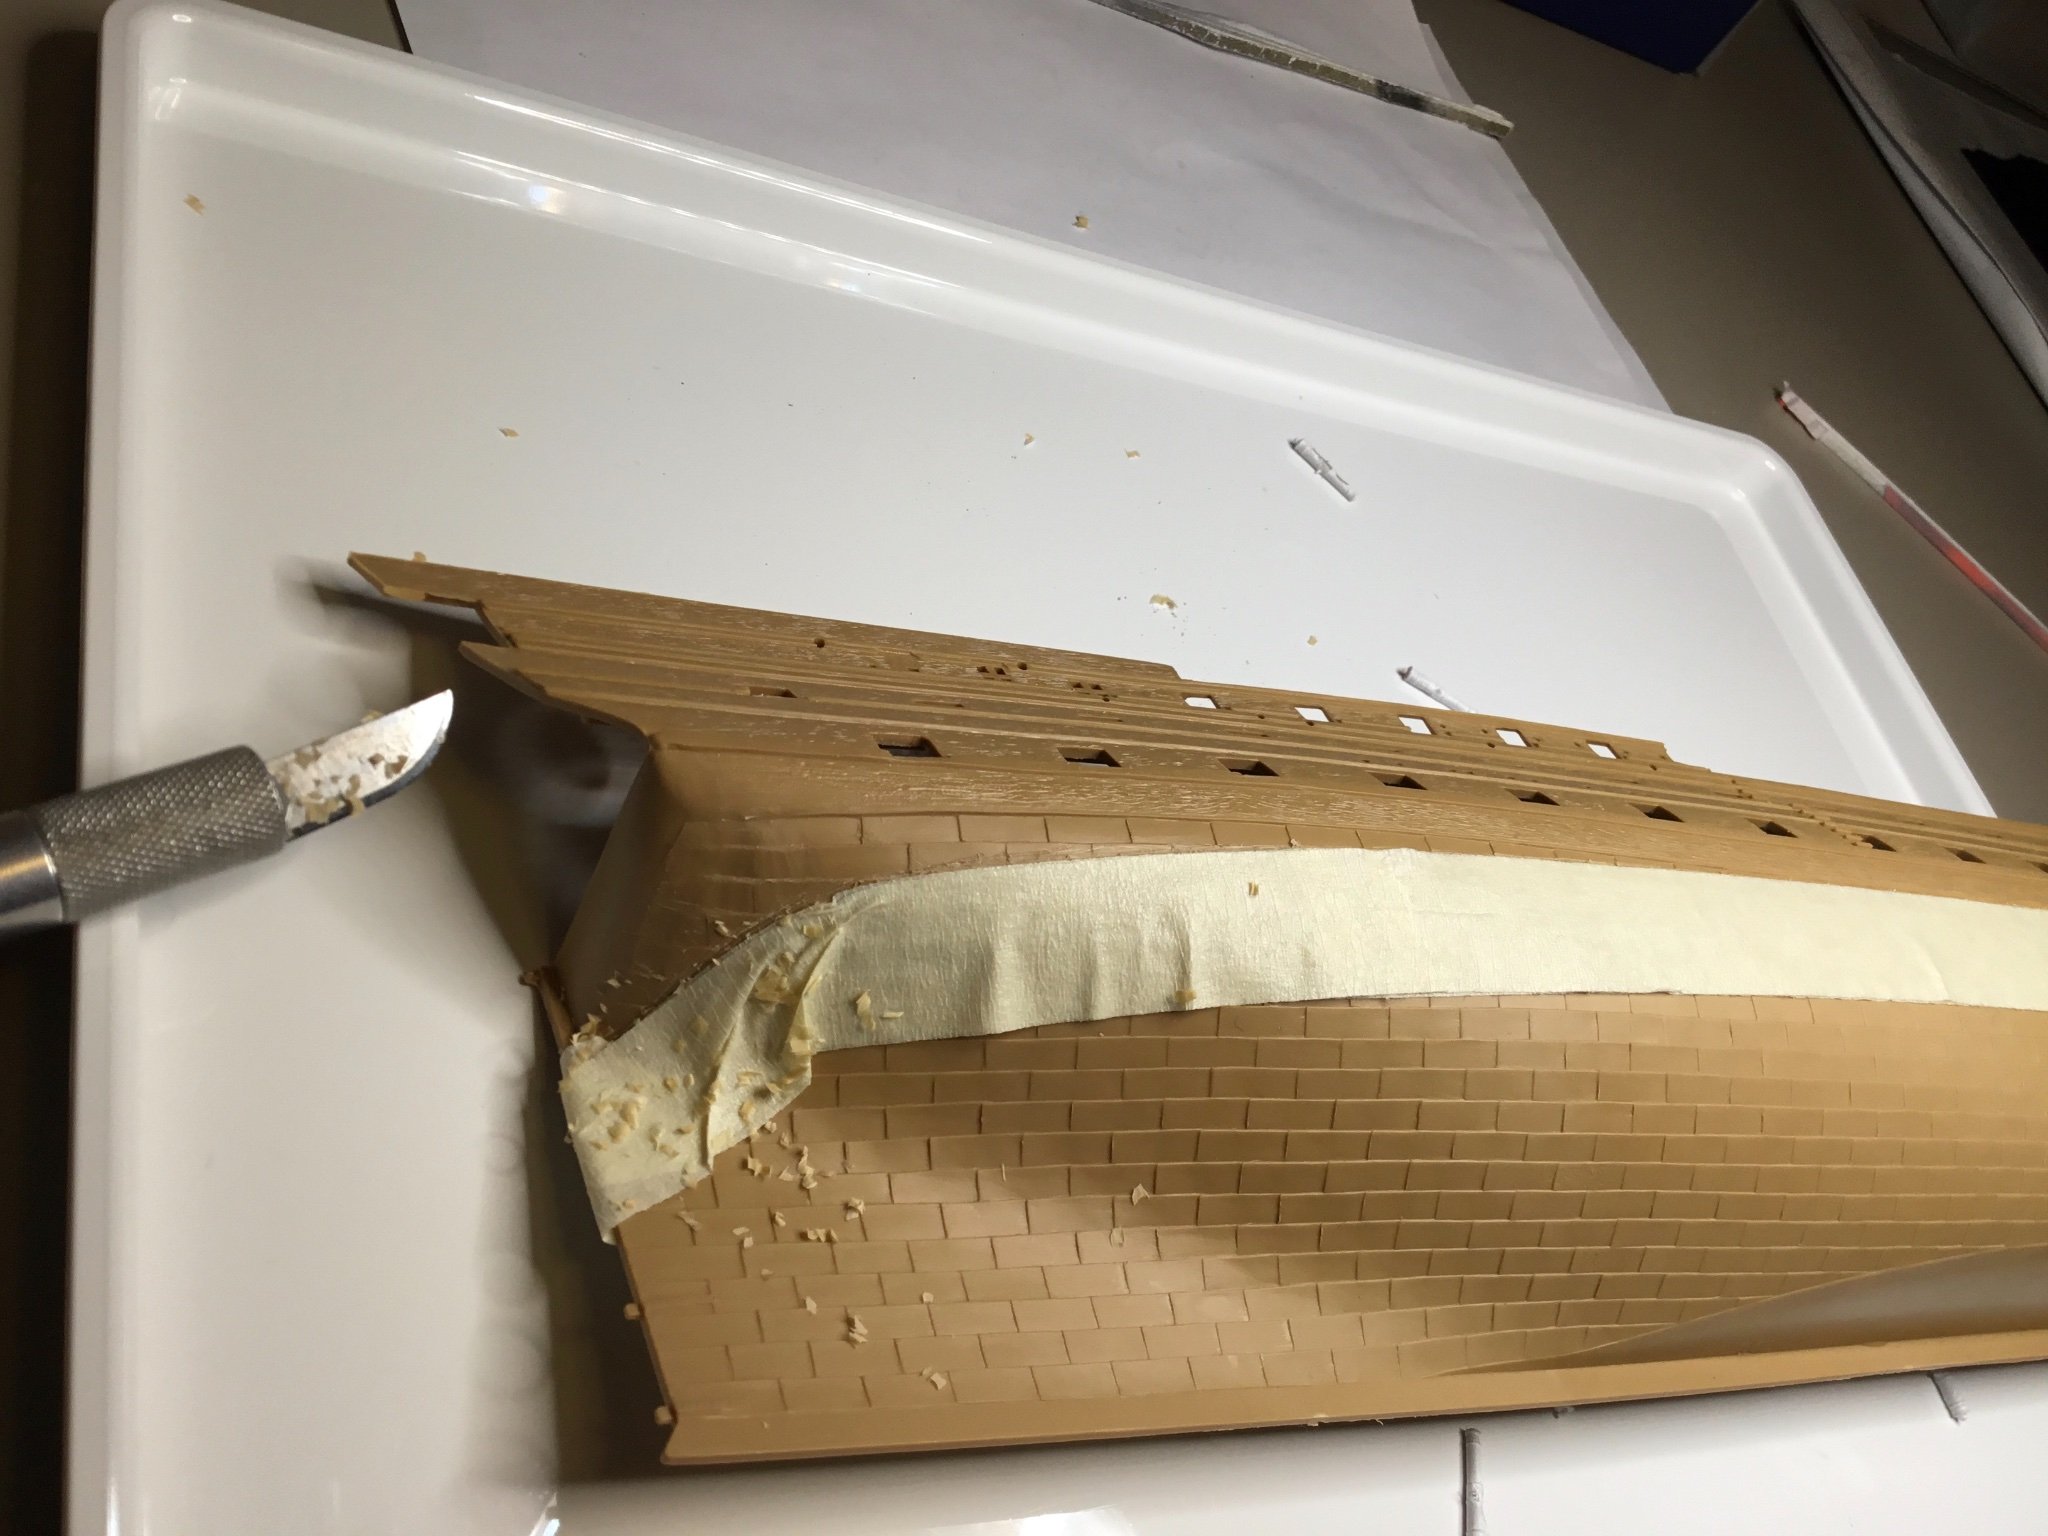
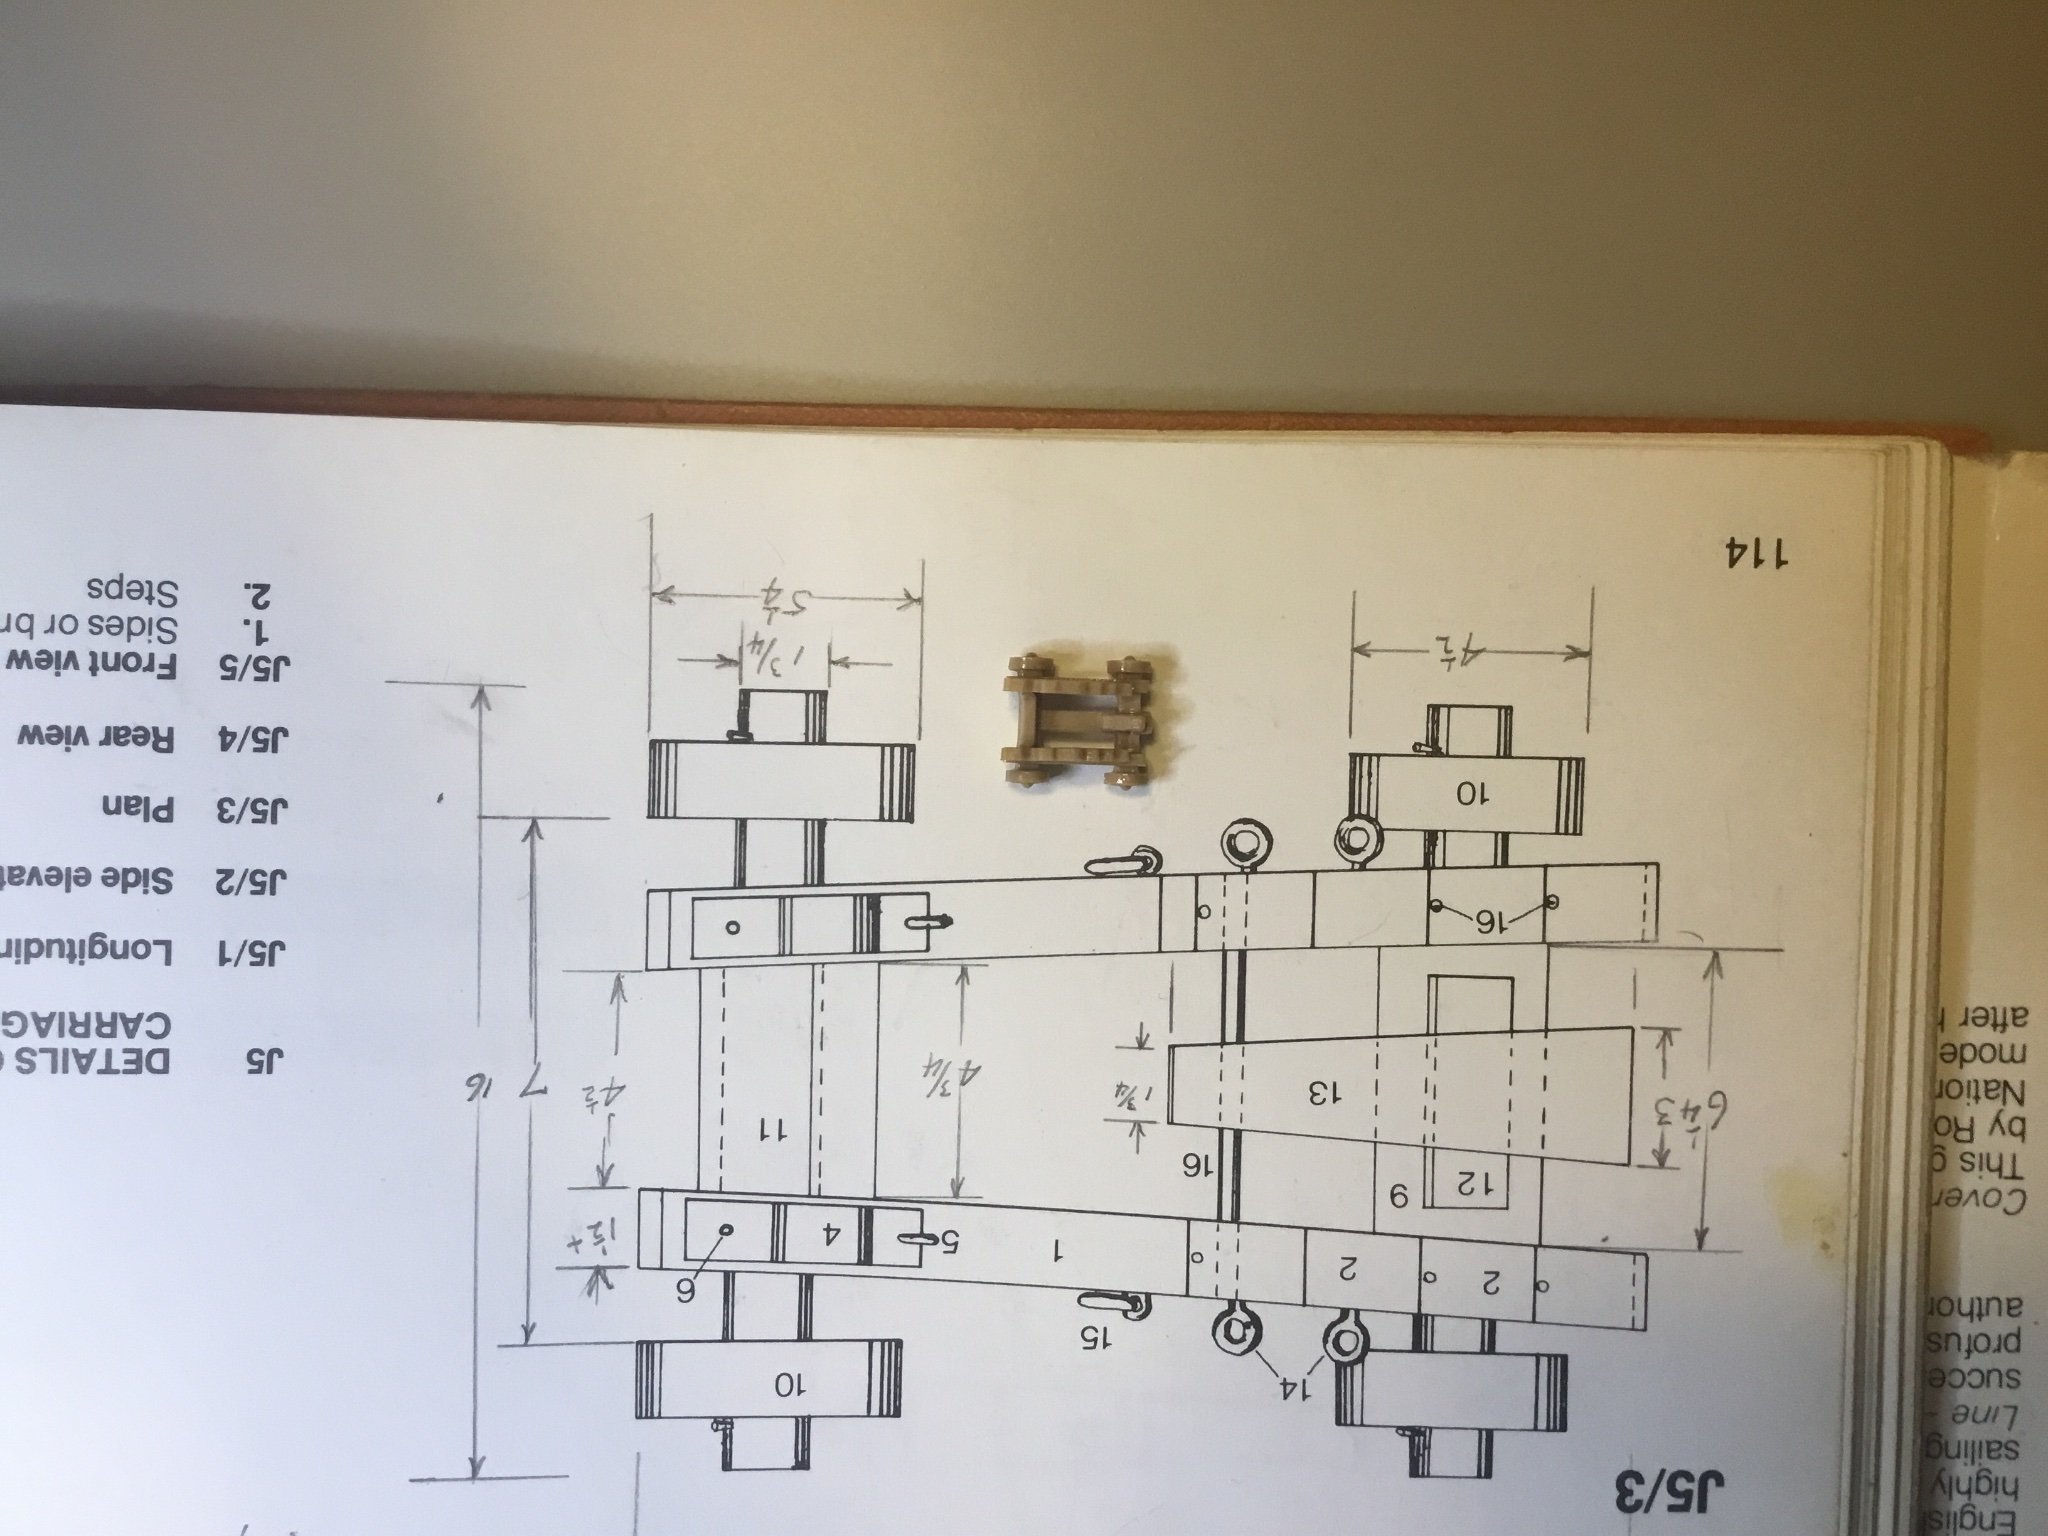
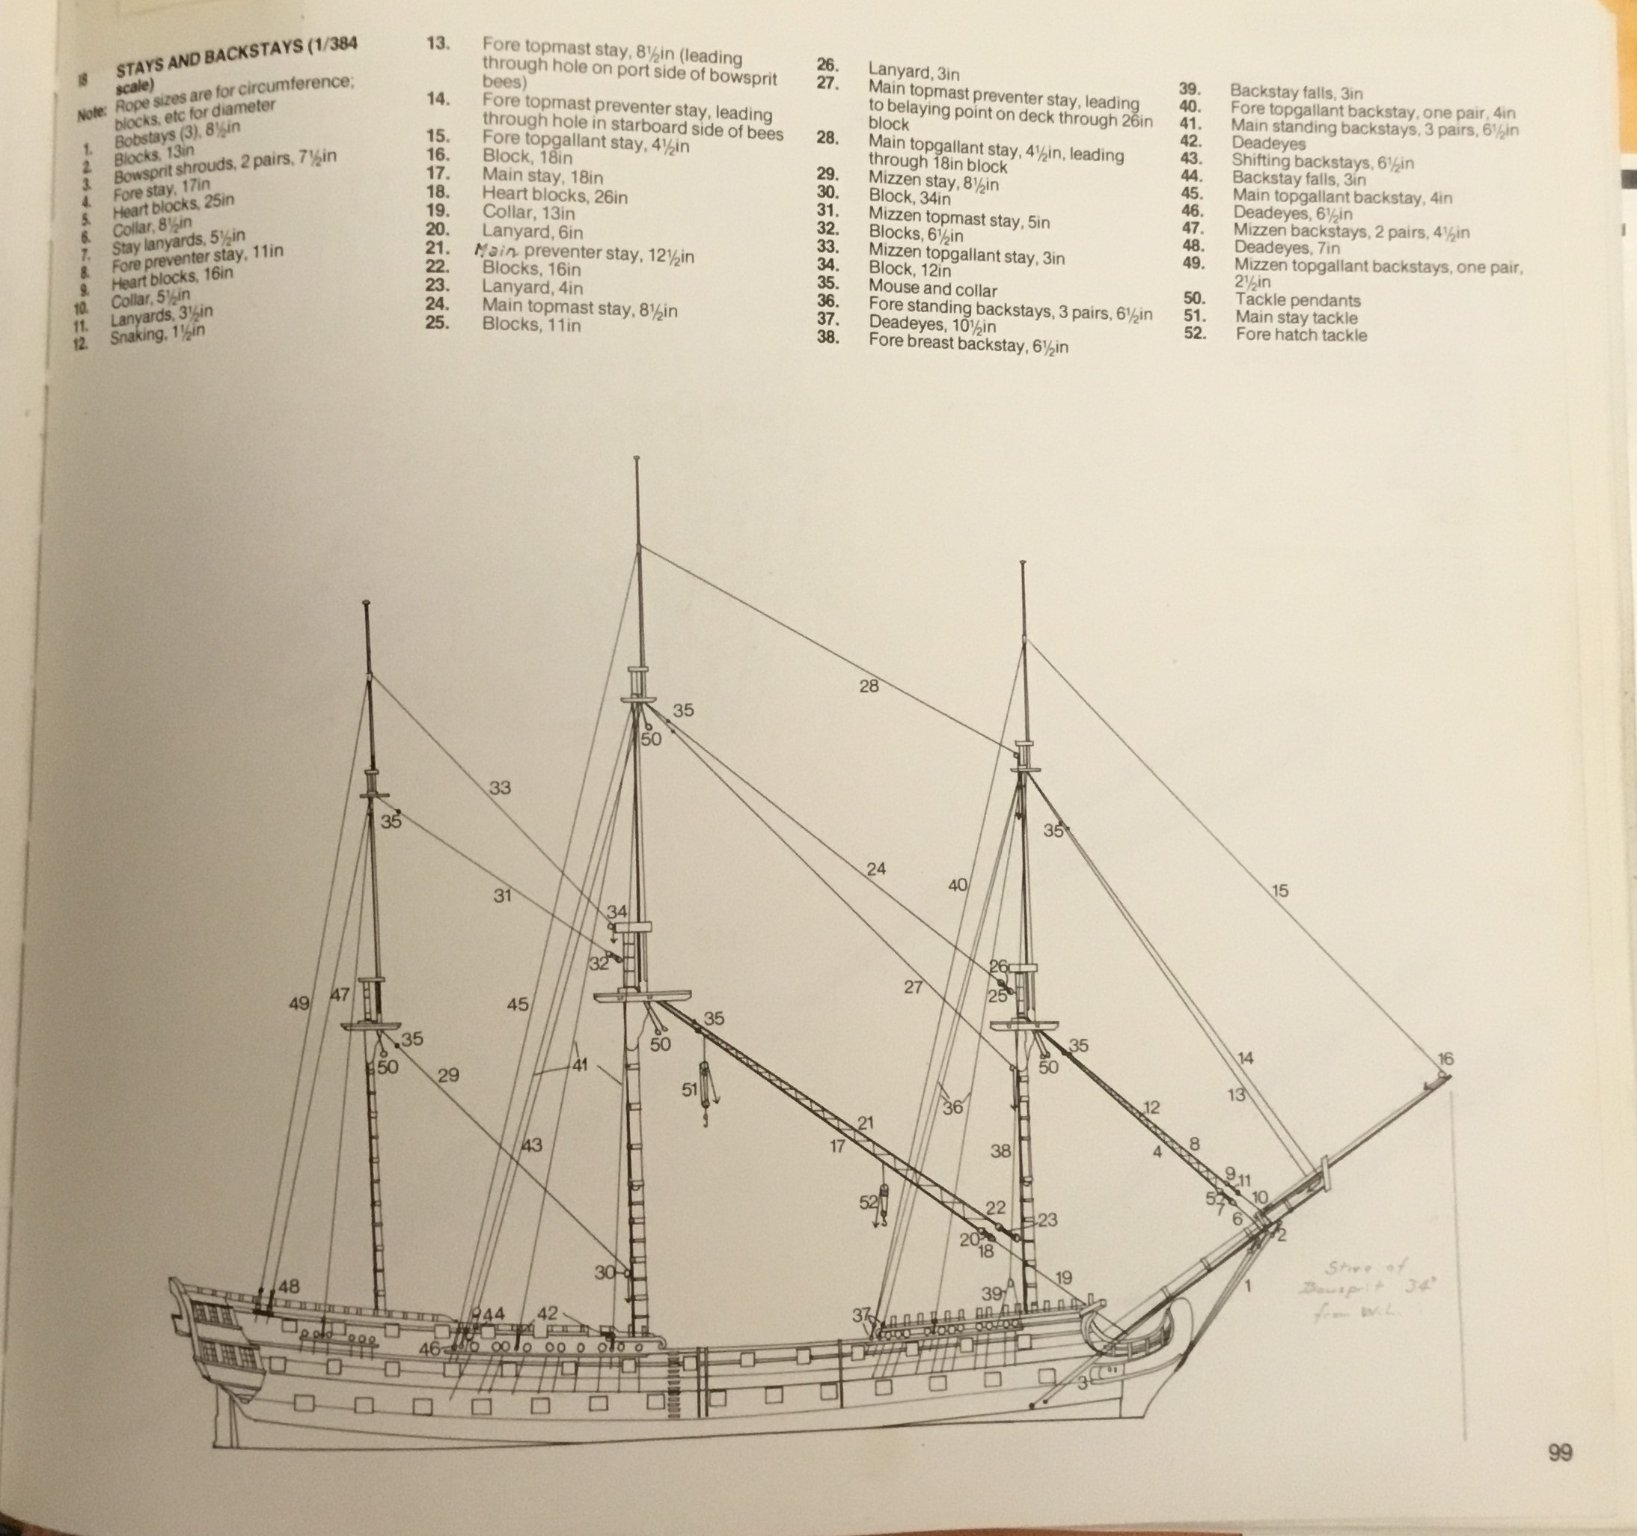
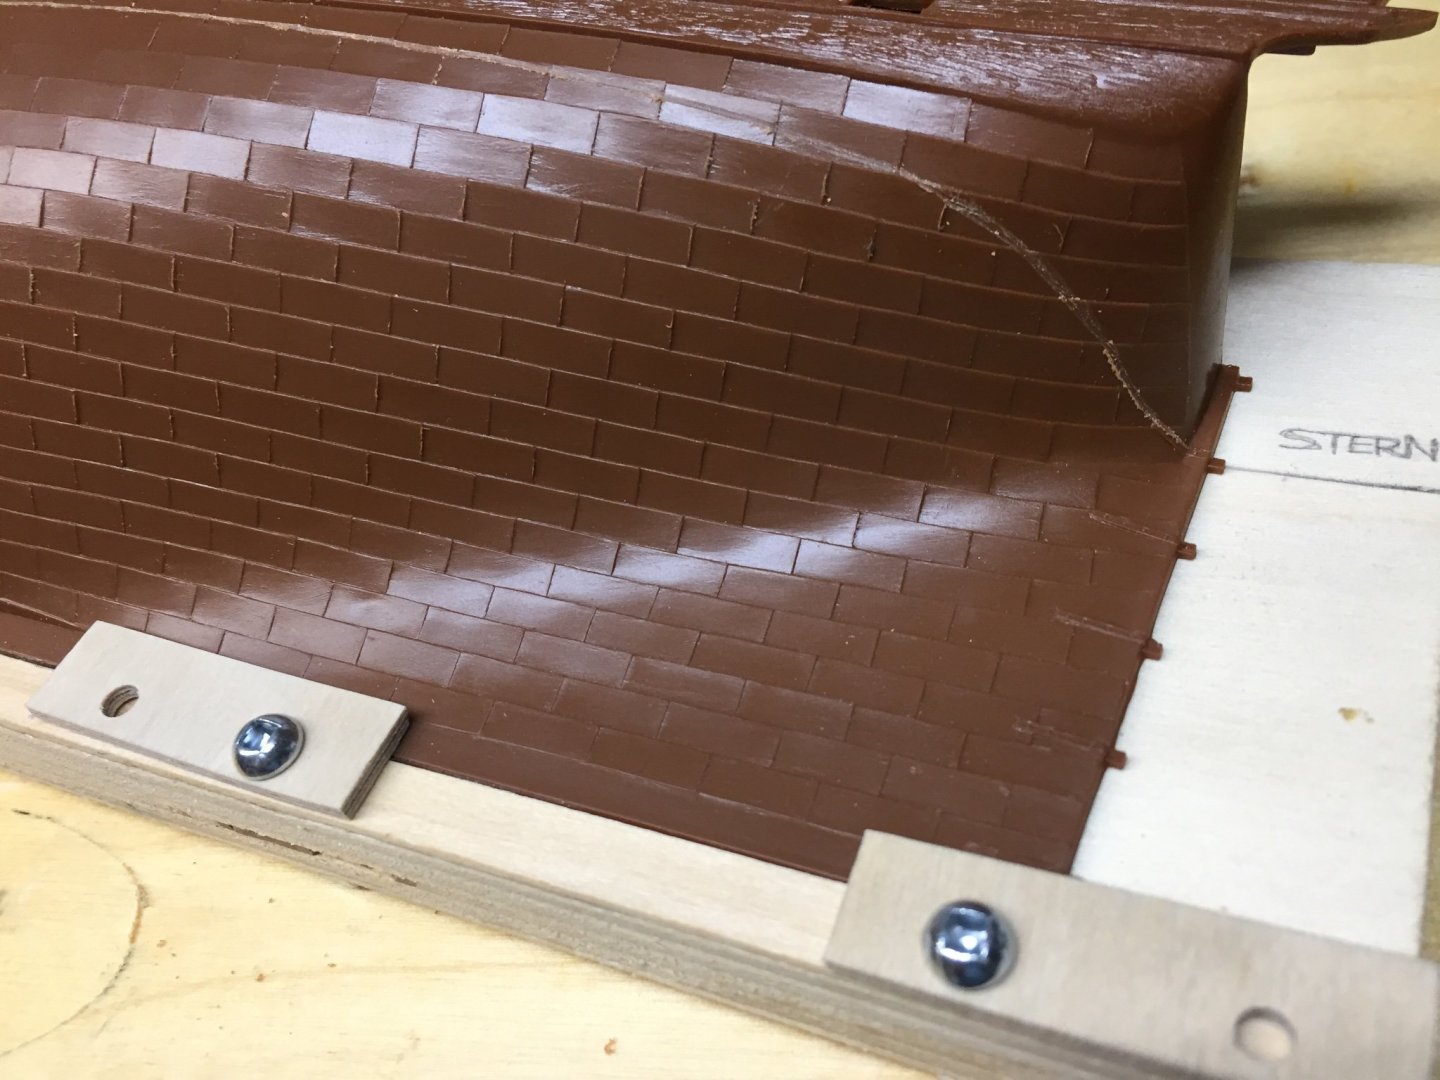
Now scraping the excess copper above the waterline down with a curved blade. Once done I’ll be sanding the hull between the gun ports so that I can scribe the plank lines, as we want to see them under the ochre paint. I’ll also be drilling the holes for the gun port lid ropes, this includes drilling through the wales (the reinforcing fore/aft planks), as shown in this book of plans for HMS Bellona. I also noticed after priming that my 18 pounders need more sanding of the raised circles on the upper sides of the barrels. The 24 and 32 pounders look fine. That’s the upside of priming as it reveals imperfections that you’ll want to fix before final paint.

-
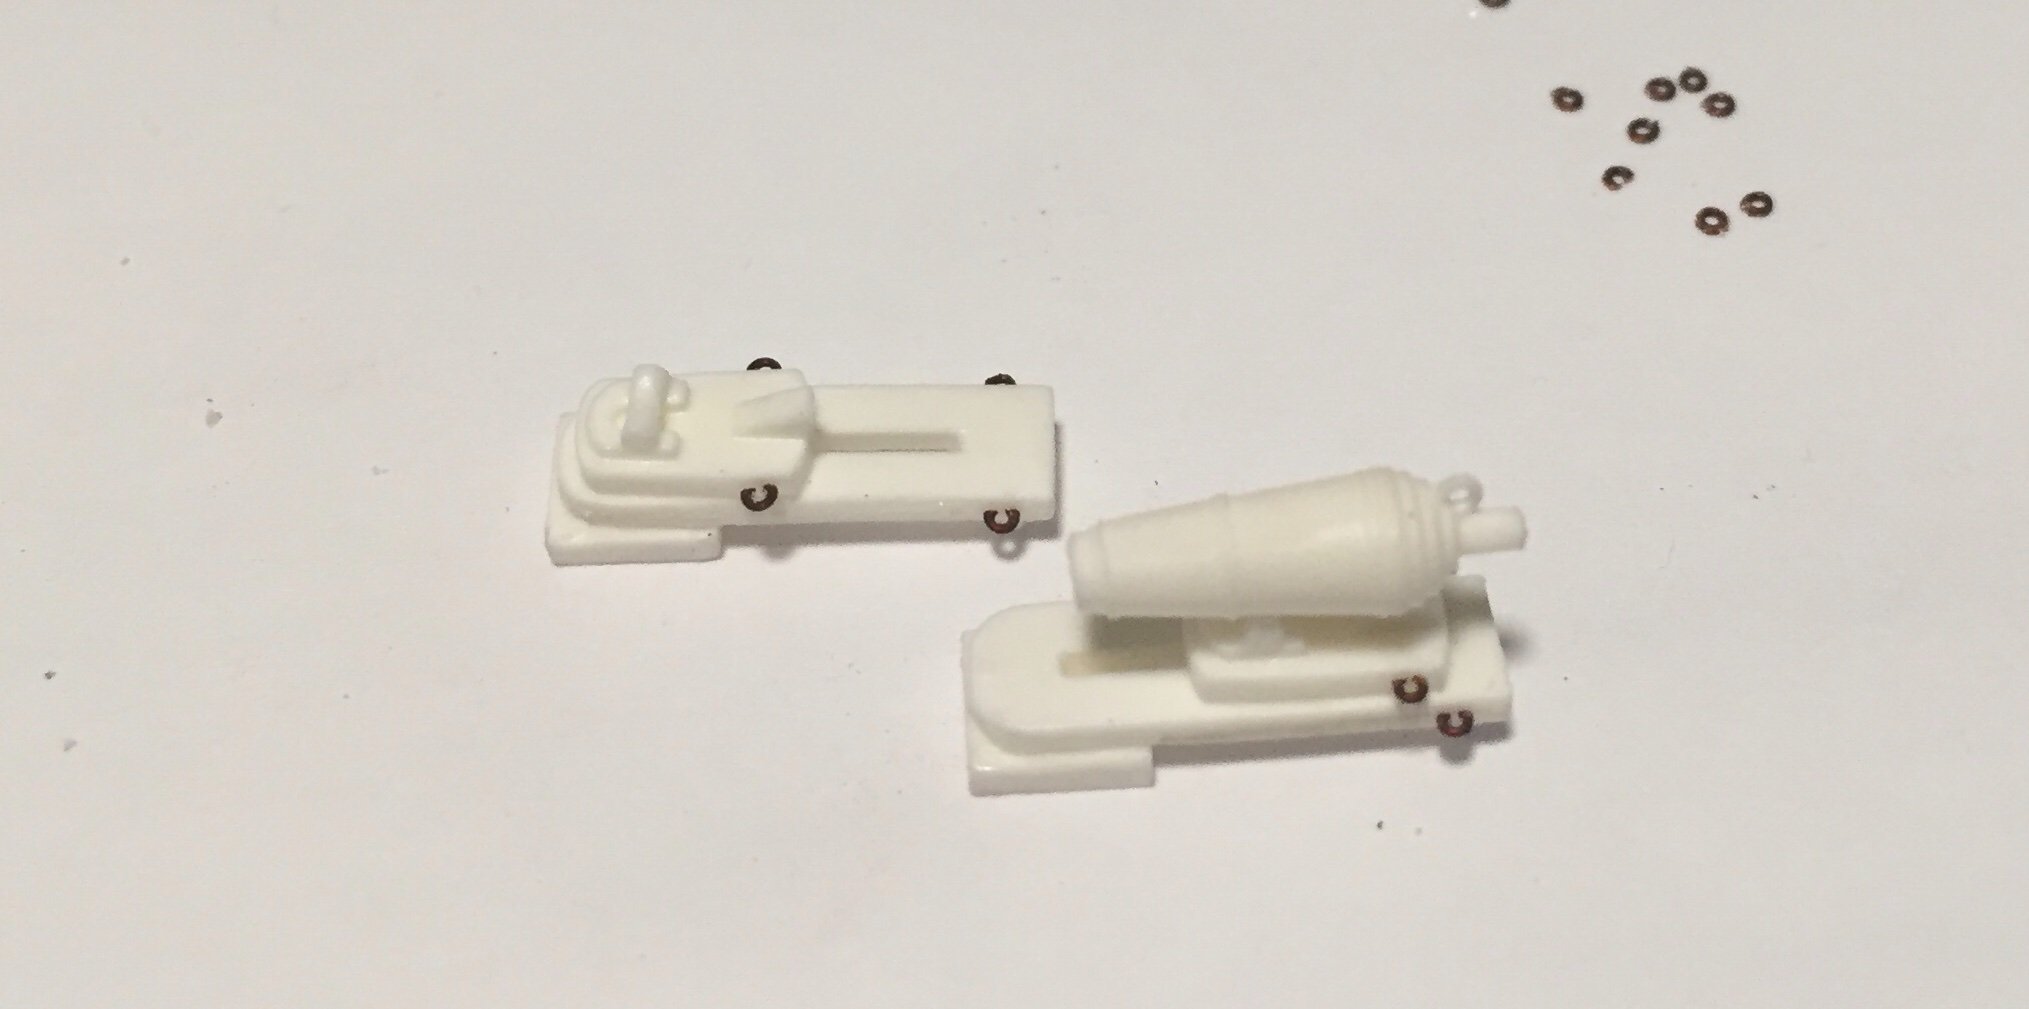
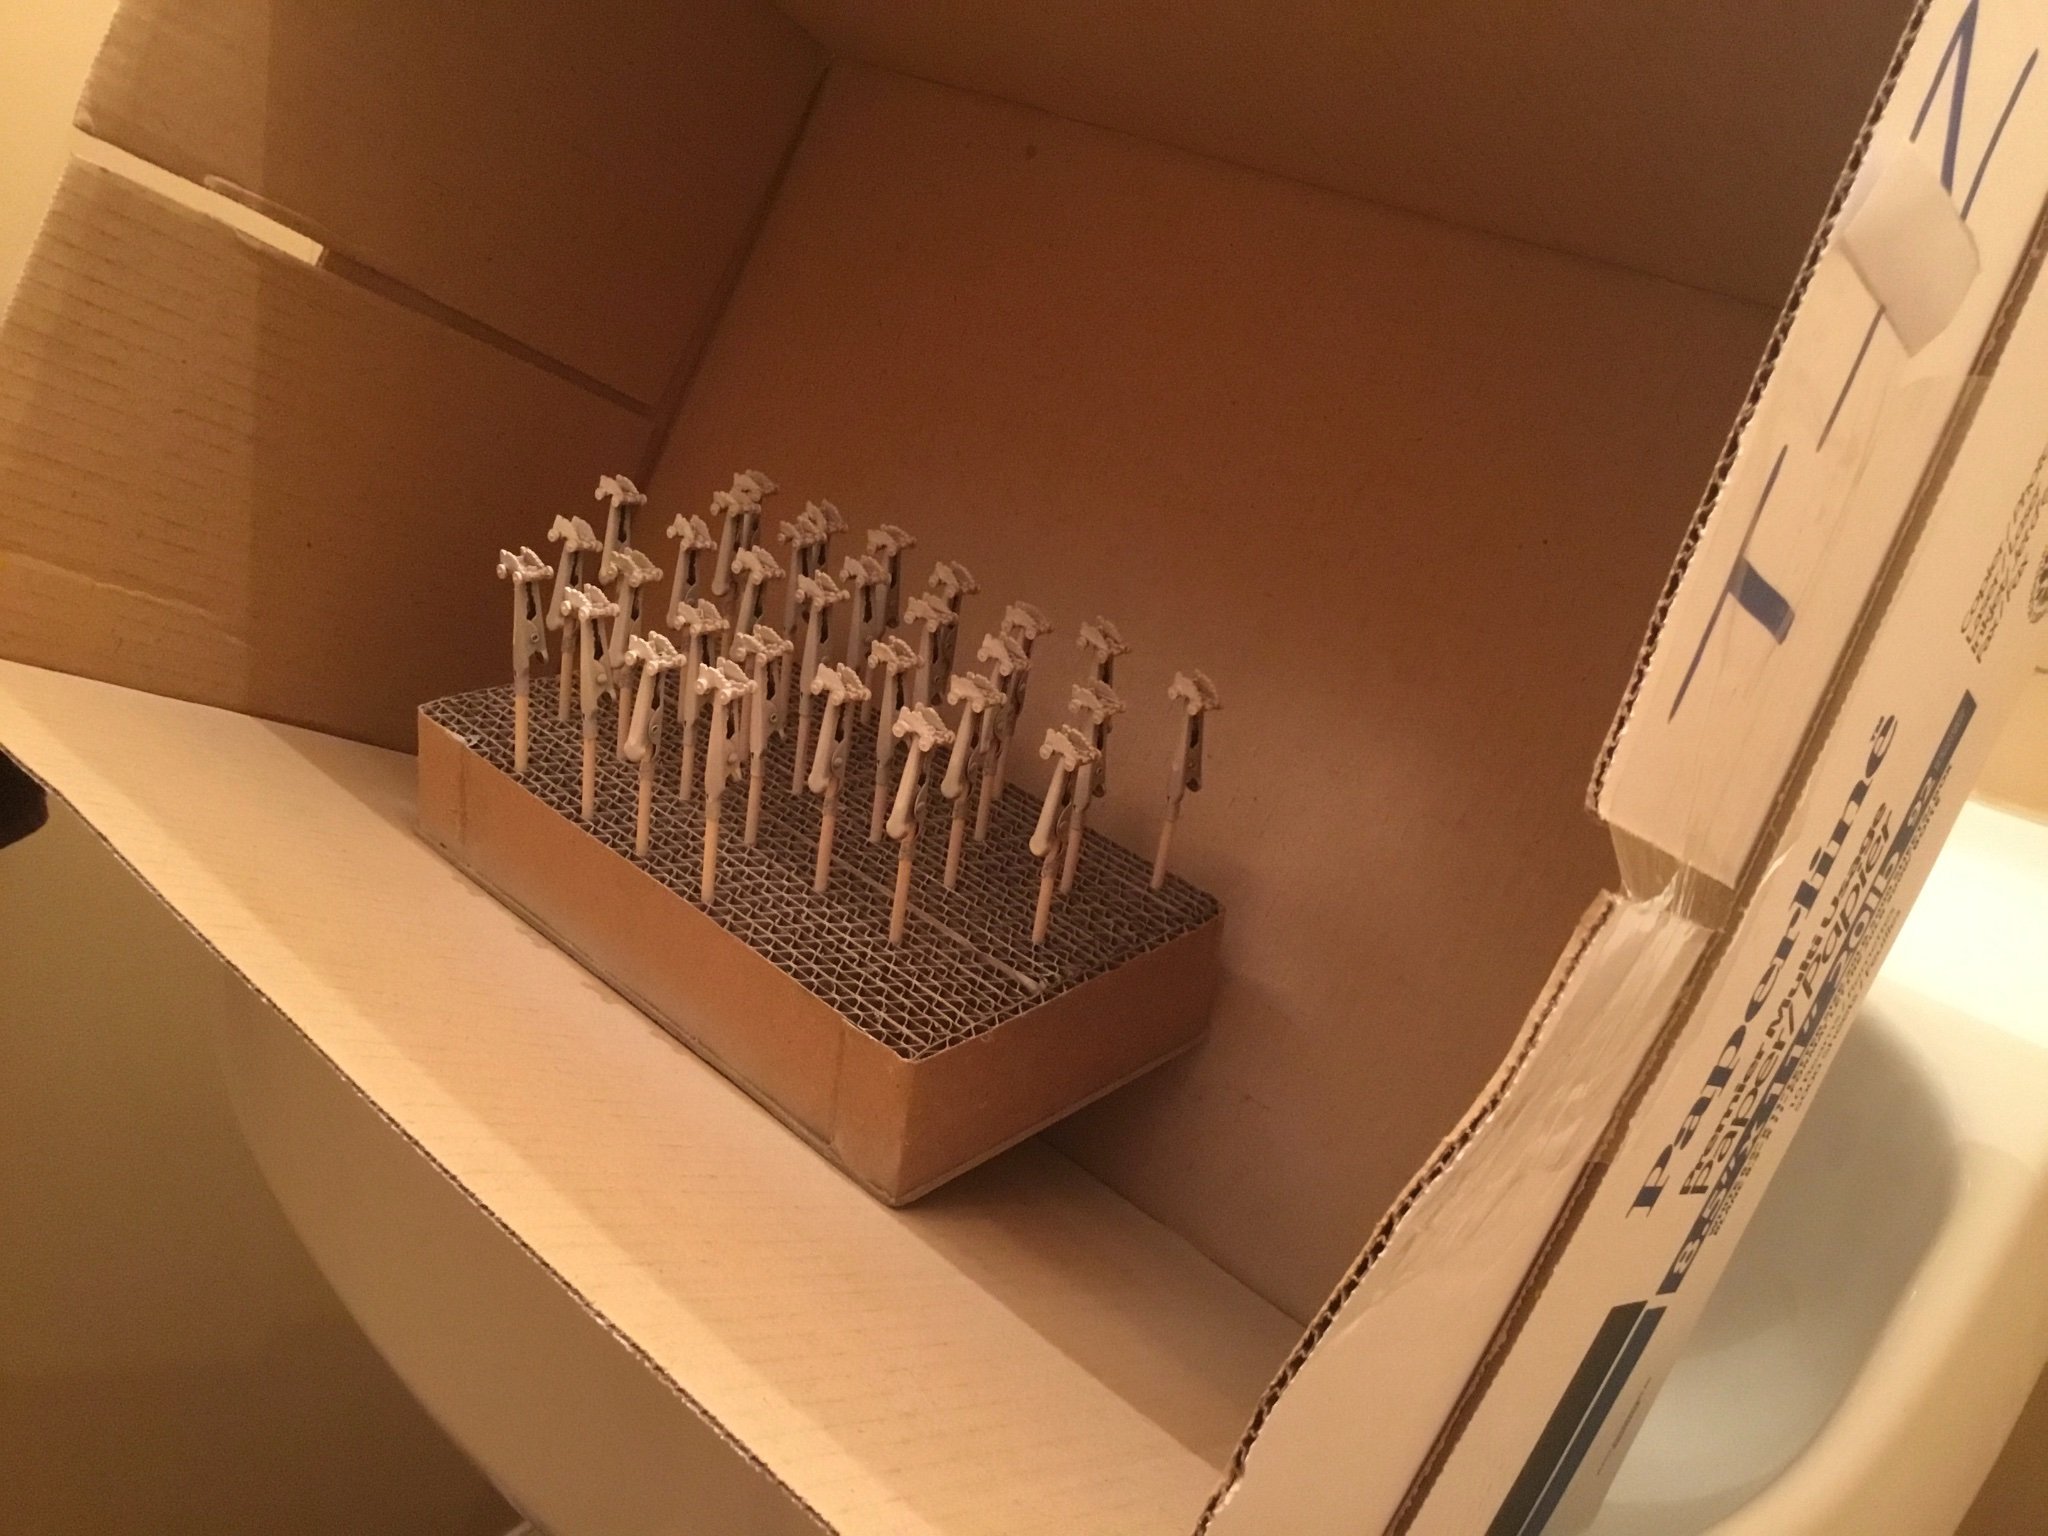
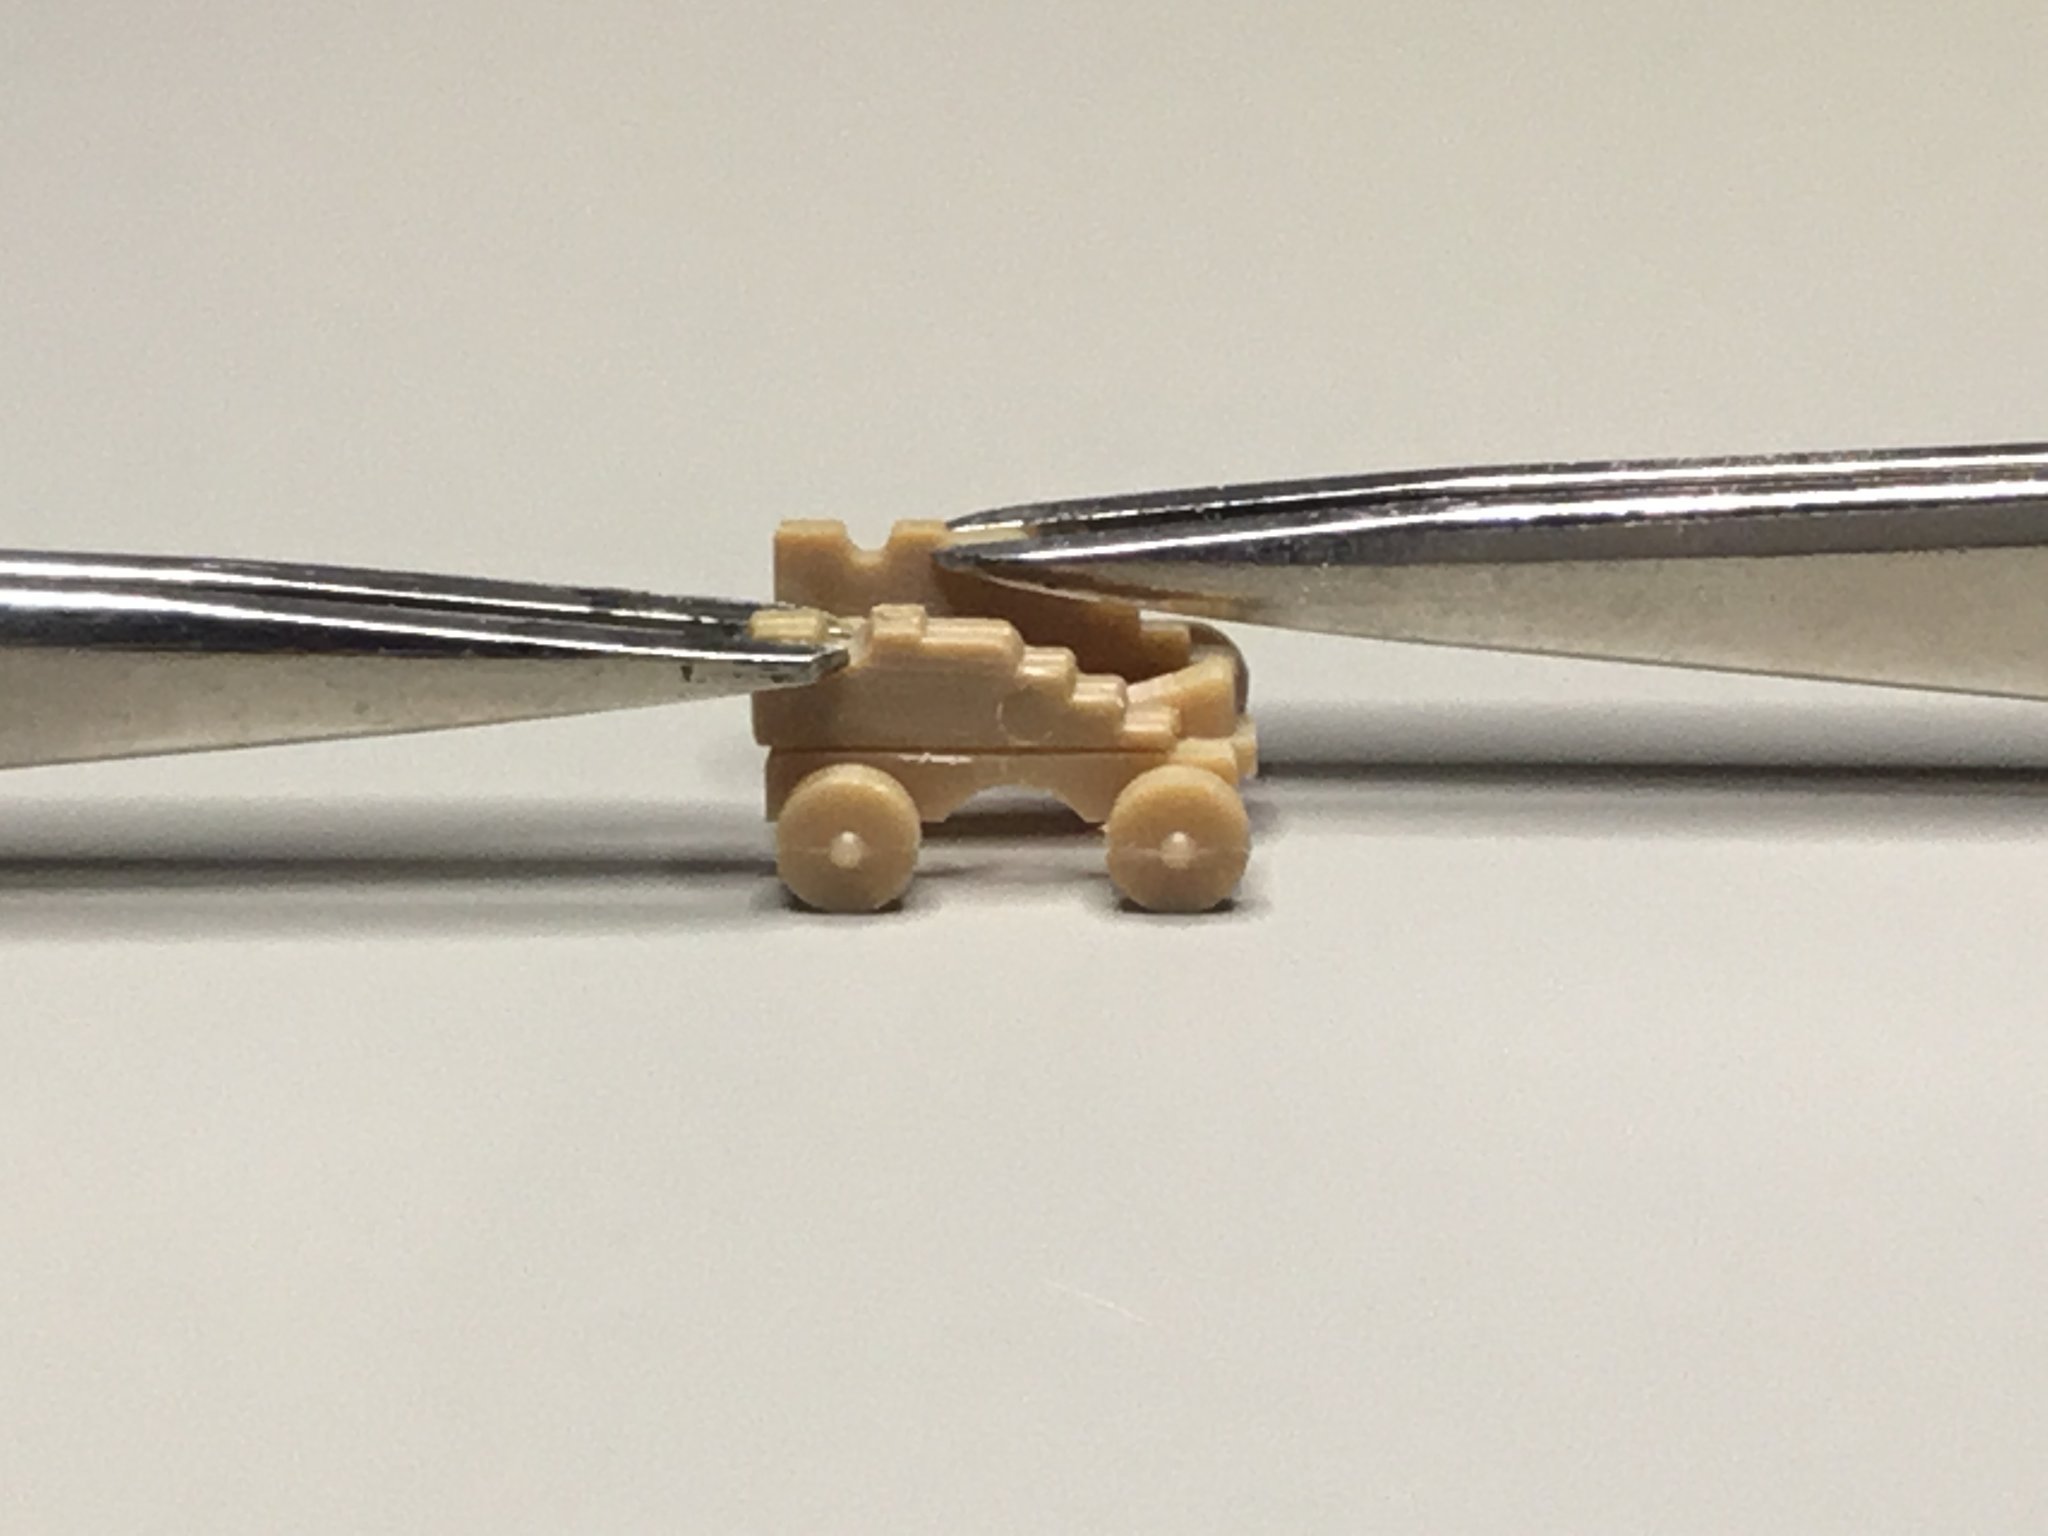
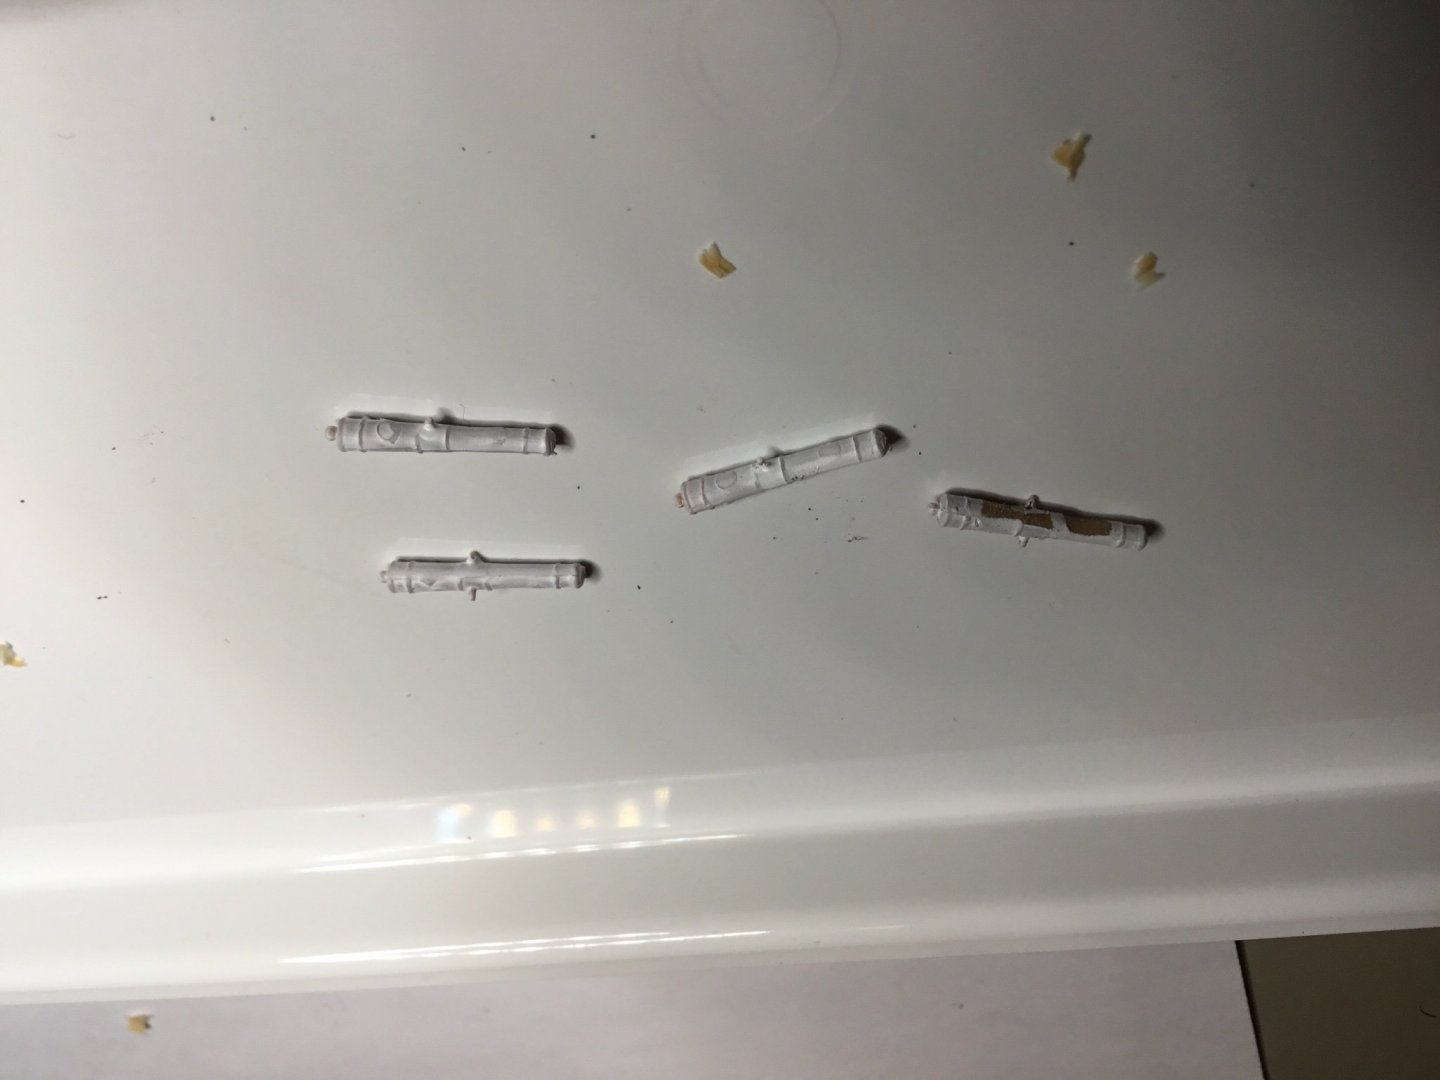
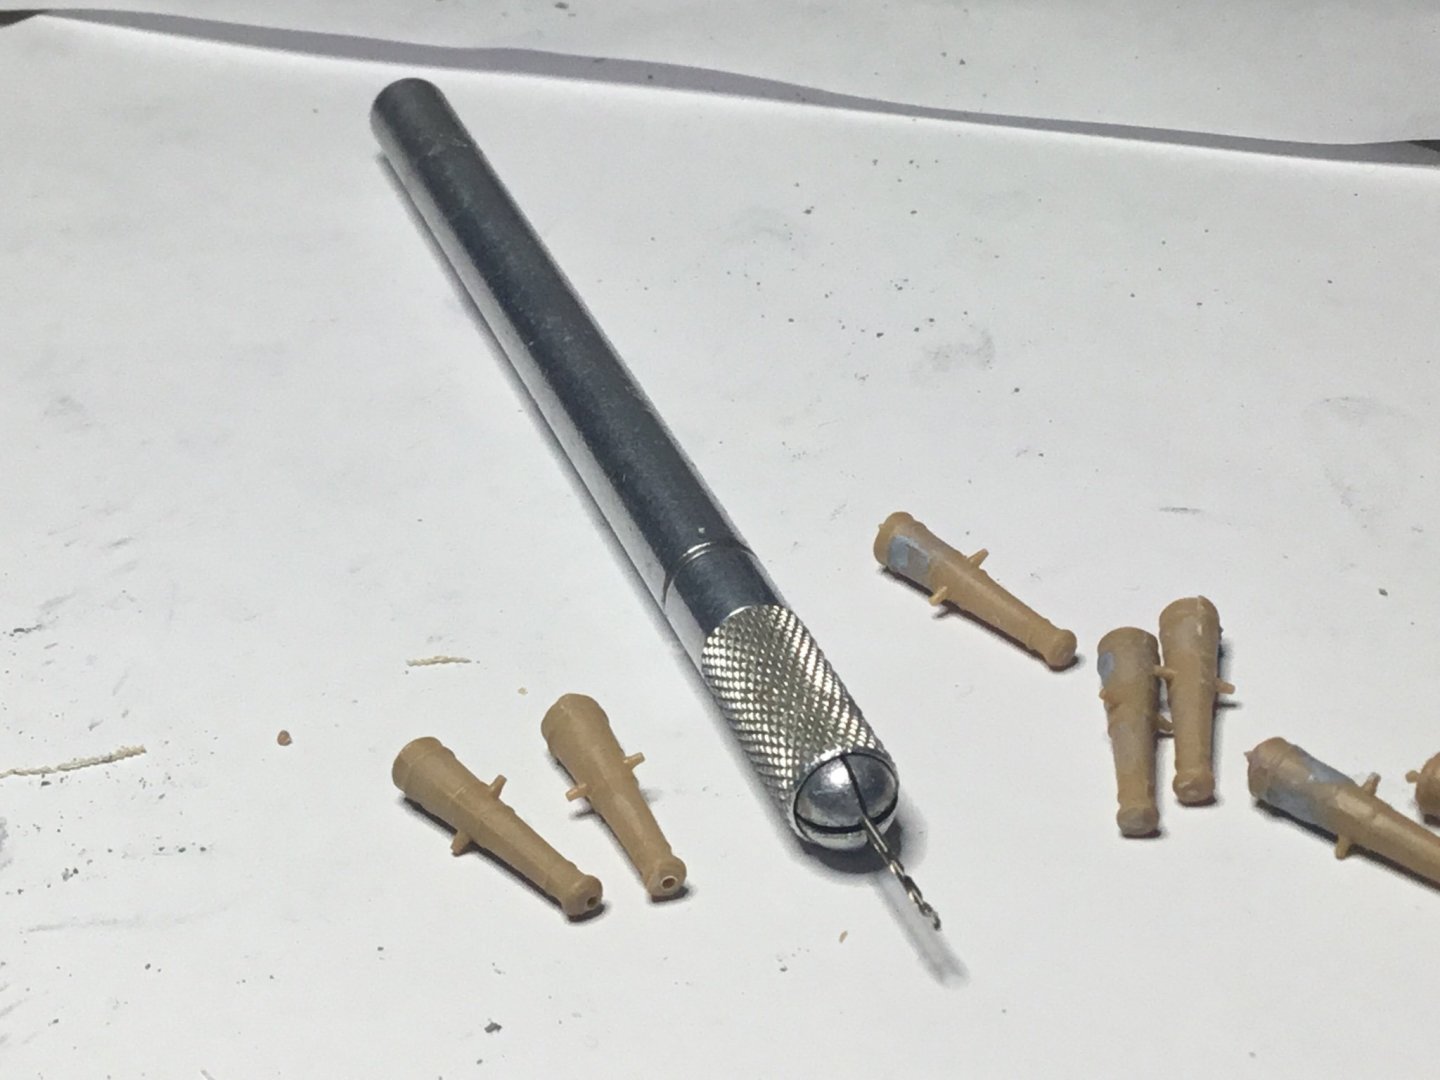
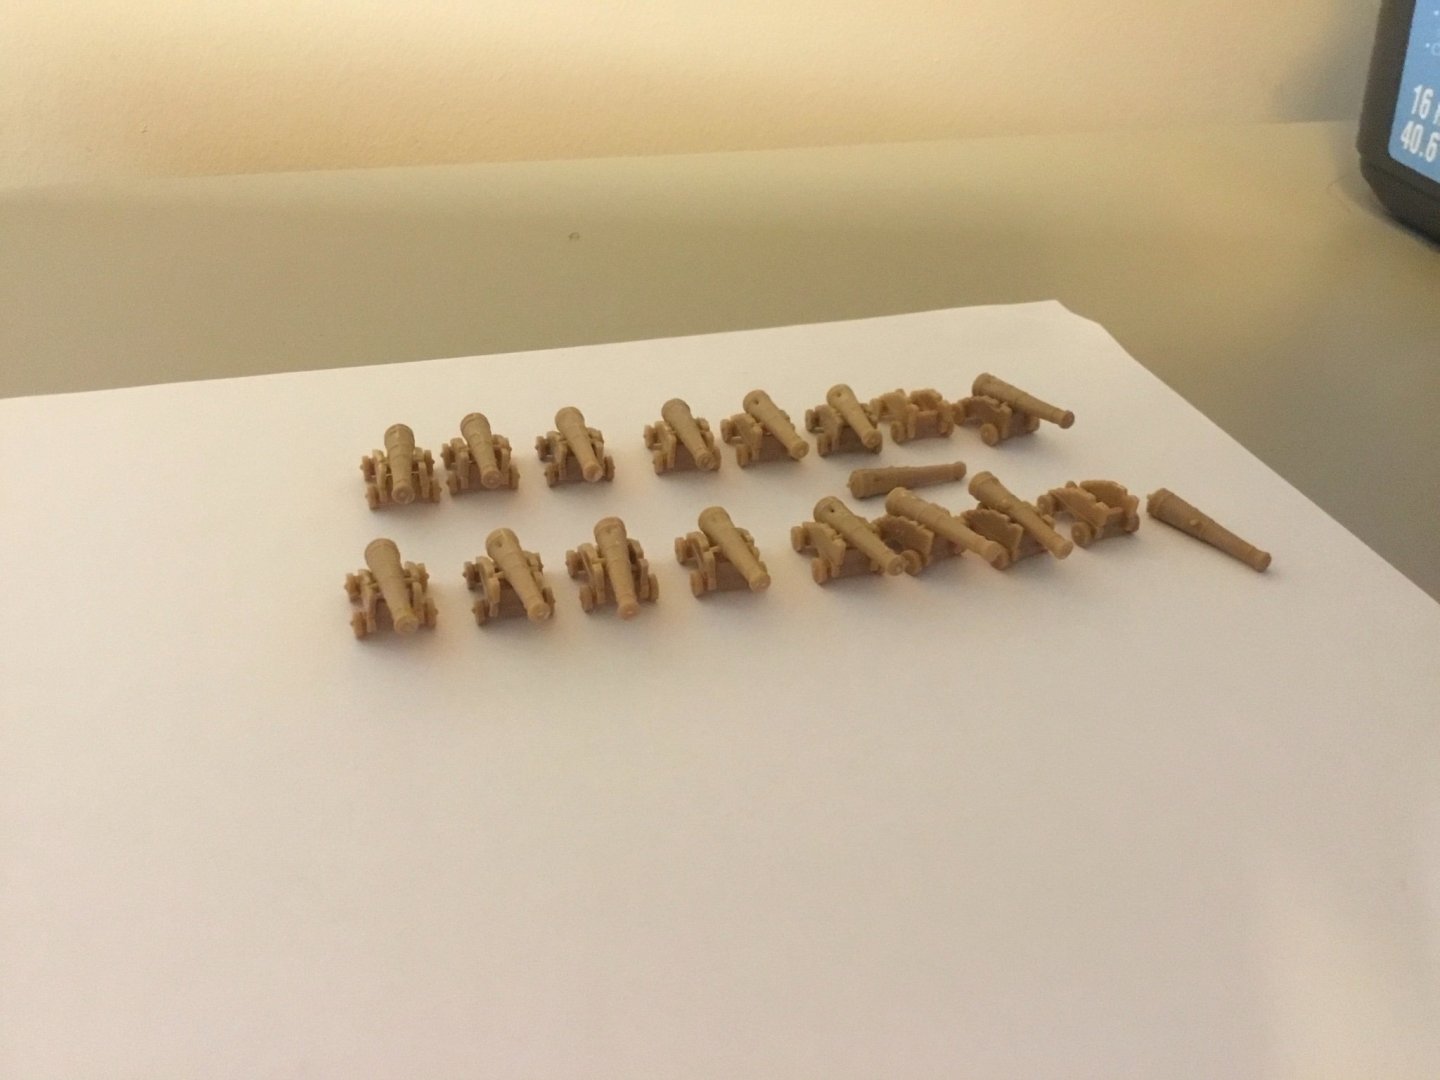
Thirty 32 pdr cannons puttied and sanded, now drilling out muzzles. Carriages sanded and now primed (thanks to bathroom fan ventilation). Once I have these all done I’ll do the same for the 24 pdr and 18 pdr cannons. A friend (building the same kit) is also vacuum forming me some cannonades, since the French didn’t use them.

-
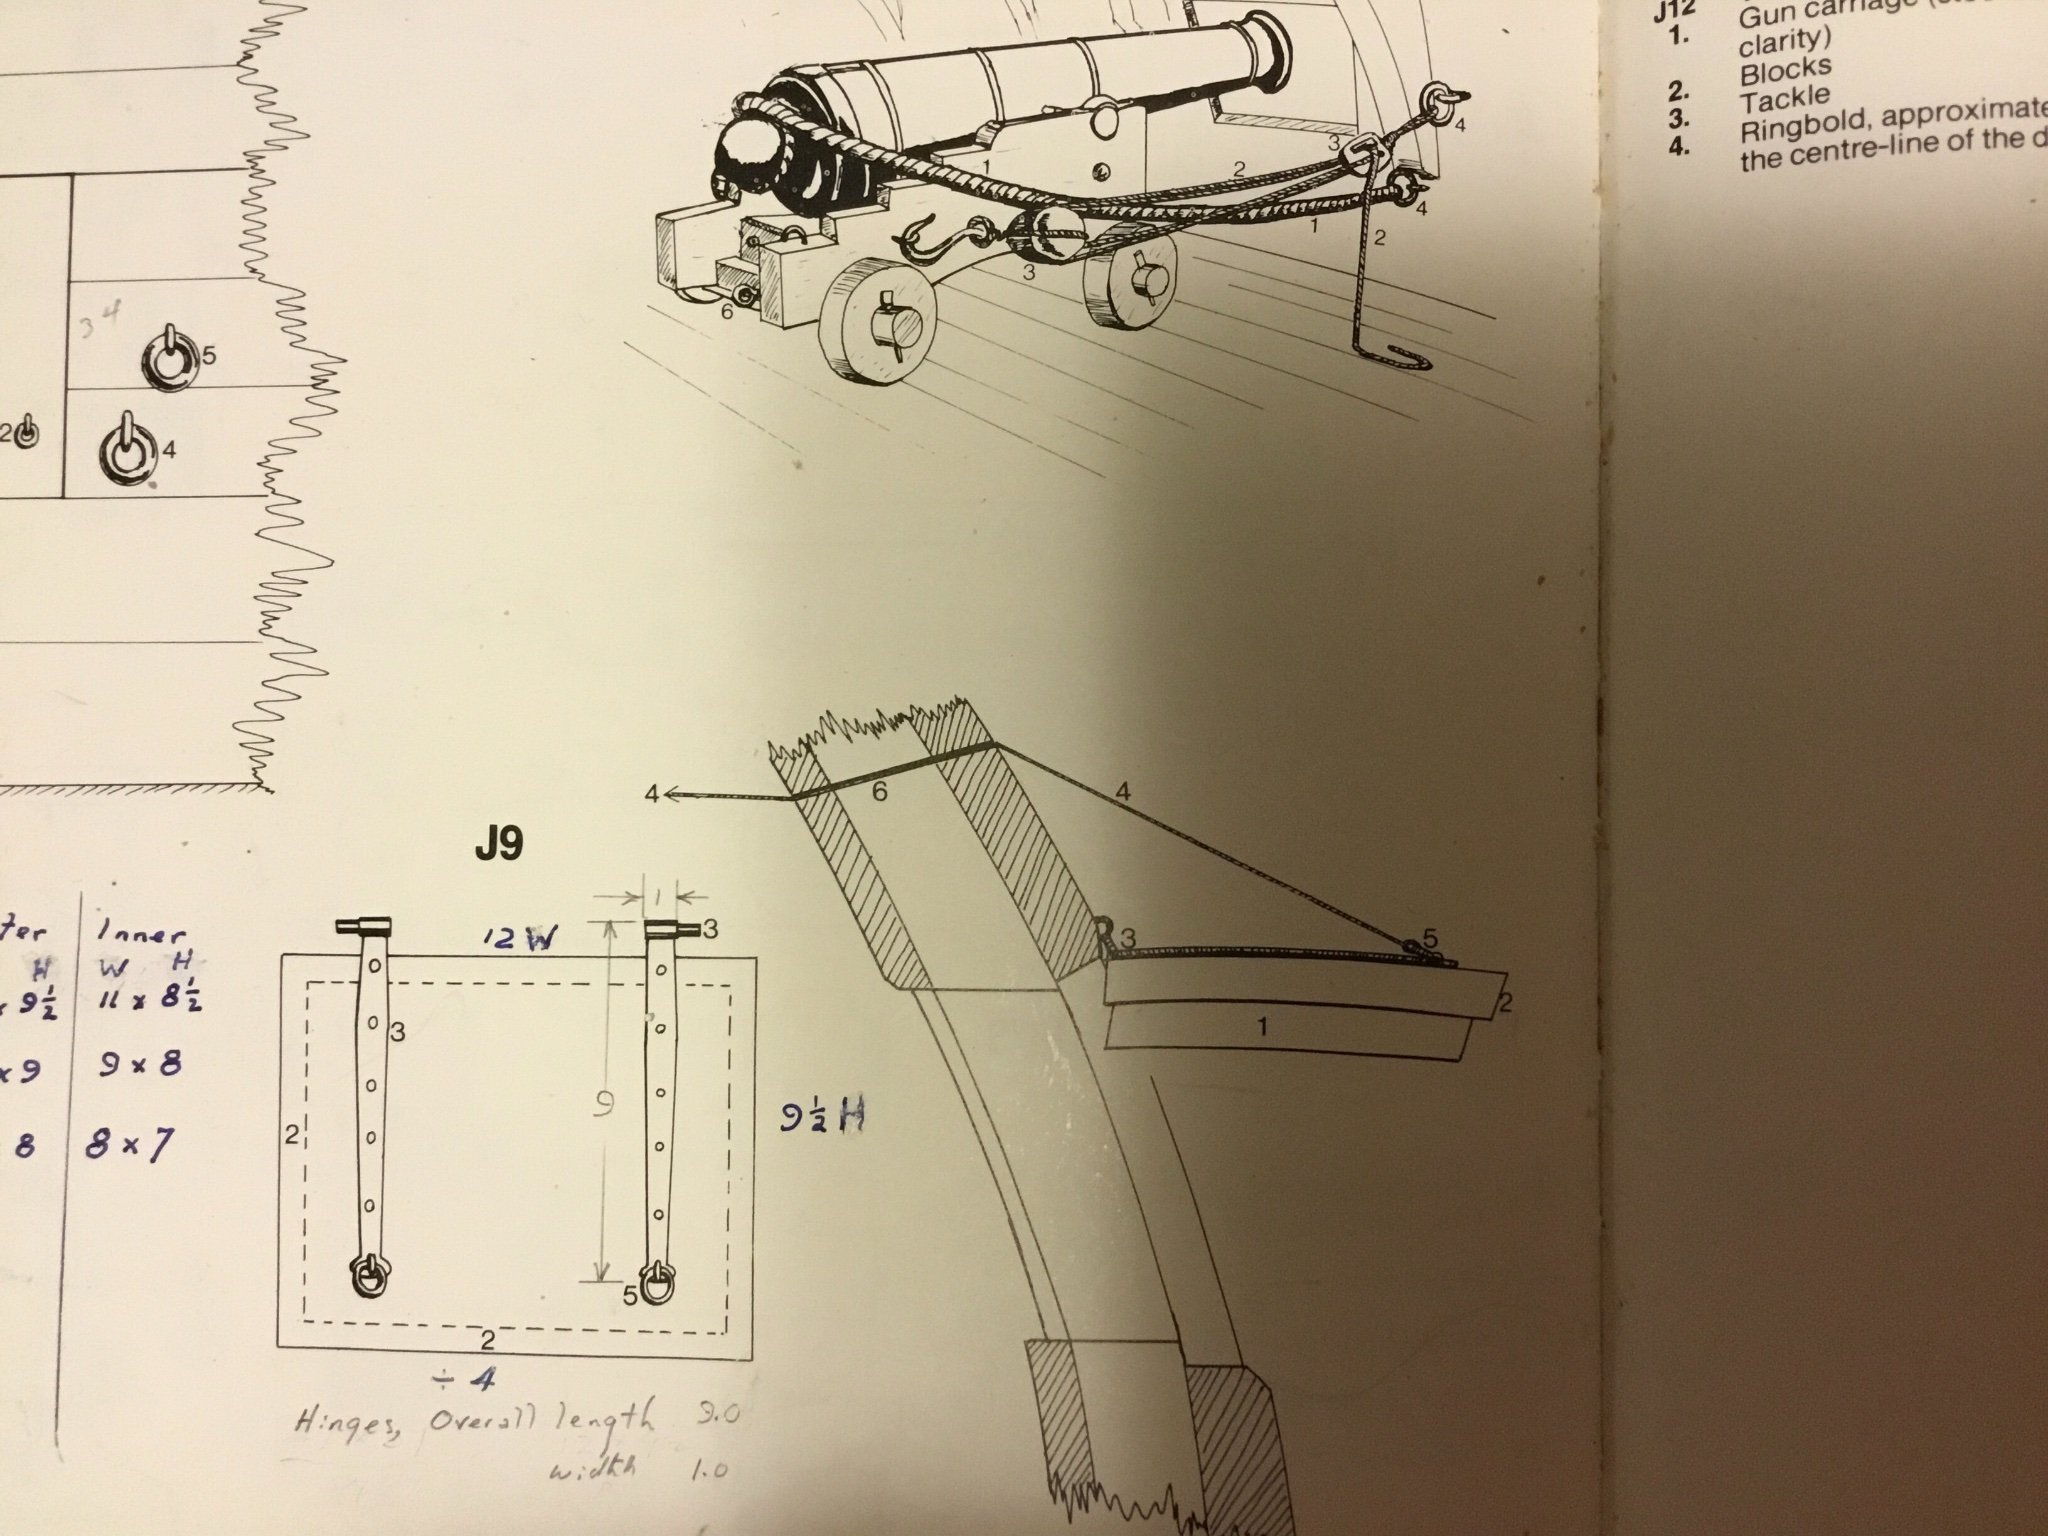
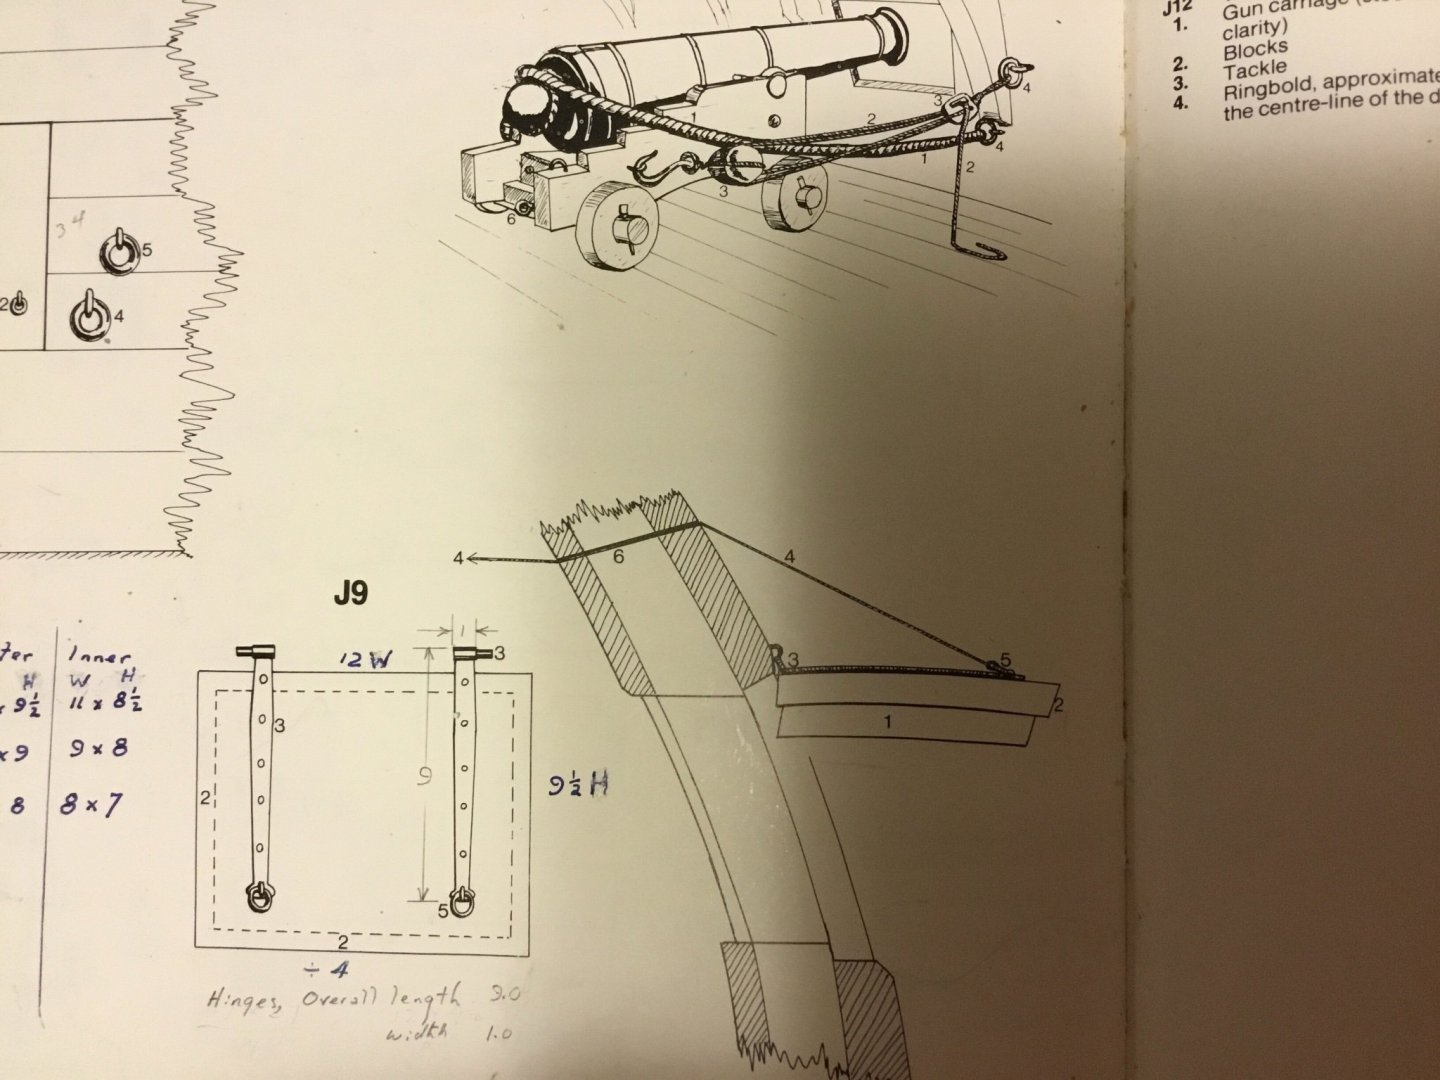
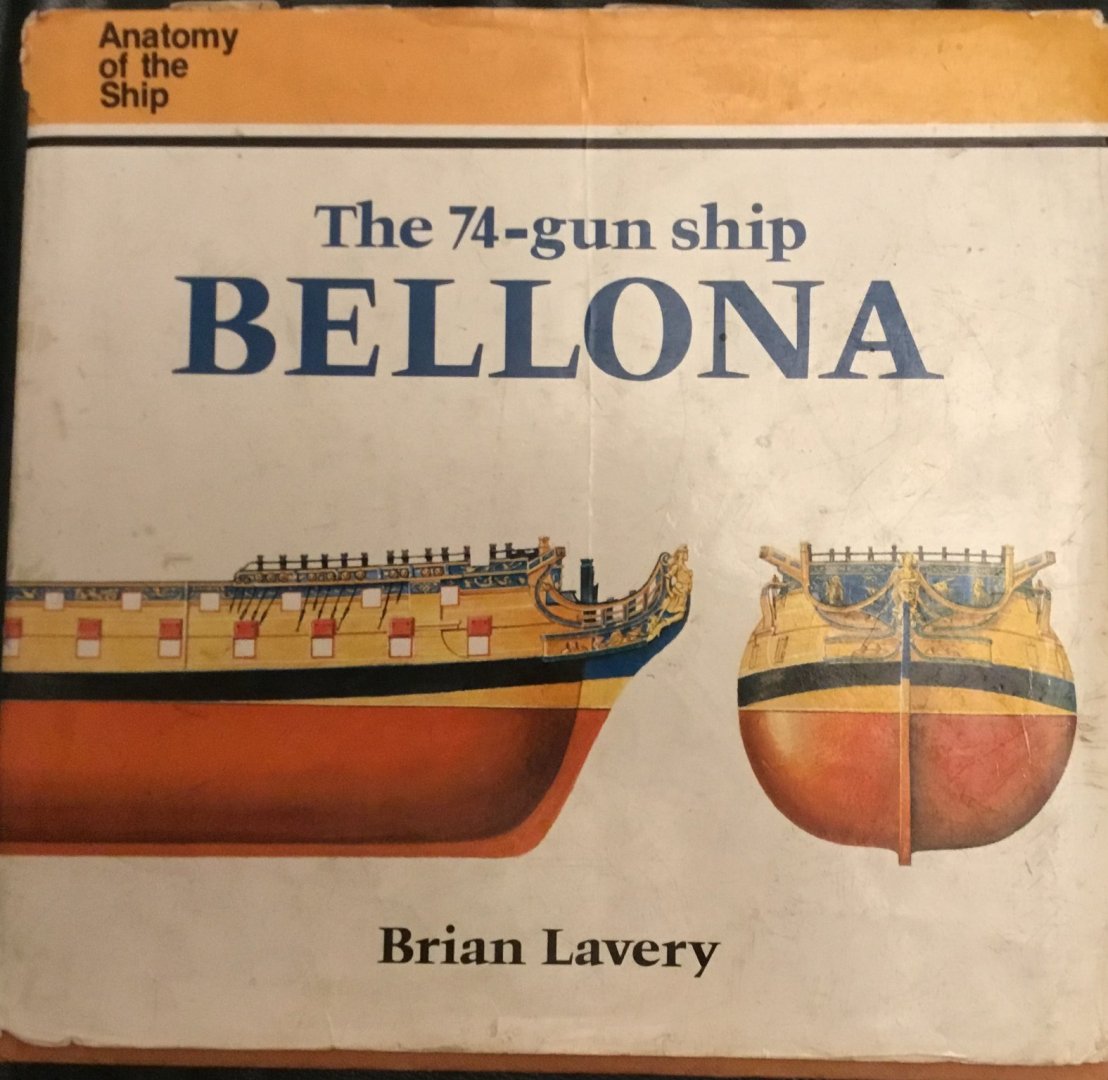
@Ian_Grant I like the wooden dummy. I’ve just finished the first step on the 32 pounder cannons. I noticed that the cannon pins were too narrow to sit well onto the carriage side panels. So I looked at my HMS Belona book, and it’s clear Heller dropped the ball on the design of their gun carriages, as the vertical panels are supposed to be closer together at the front of the gun. But no matter, we’ll do our best with what we have.

-
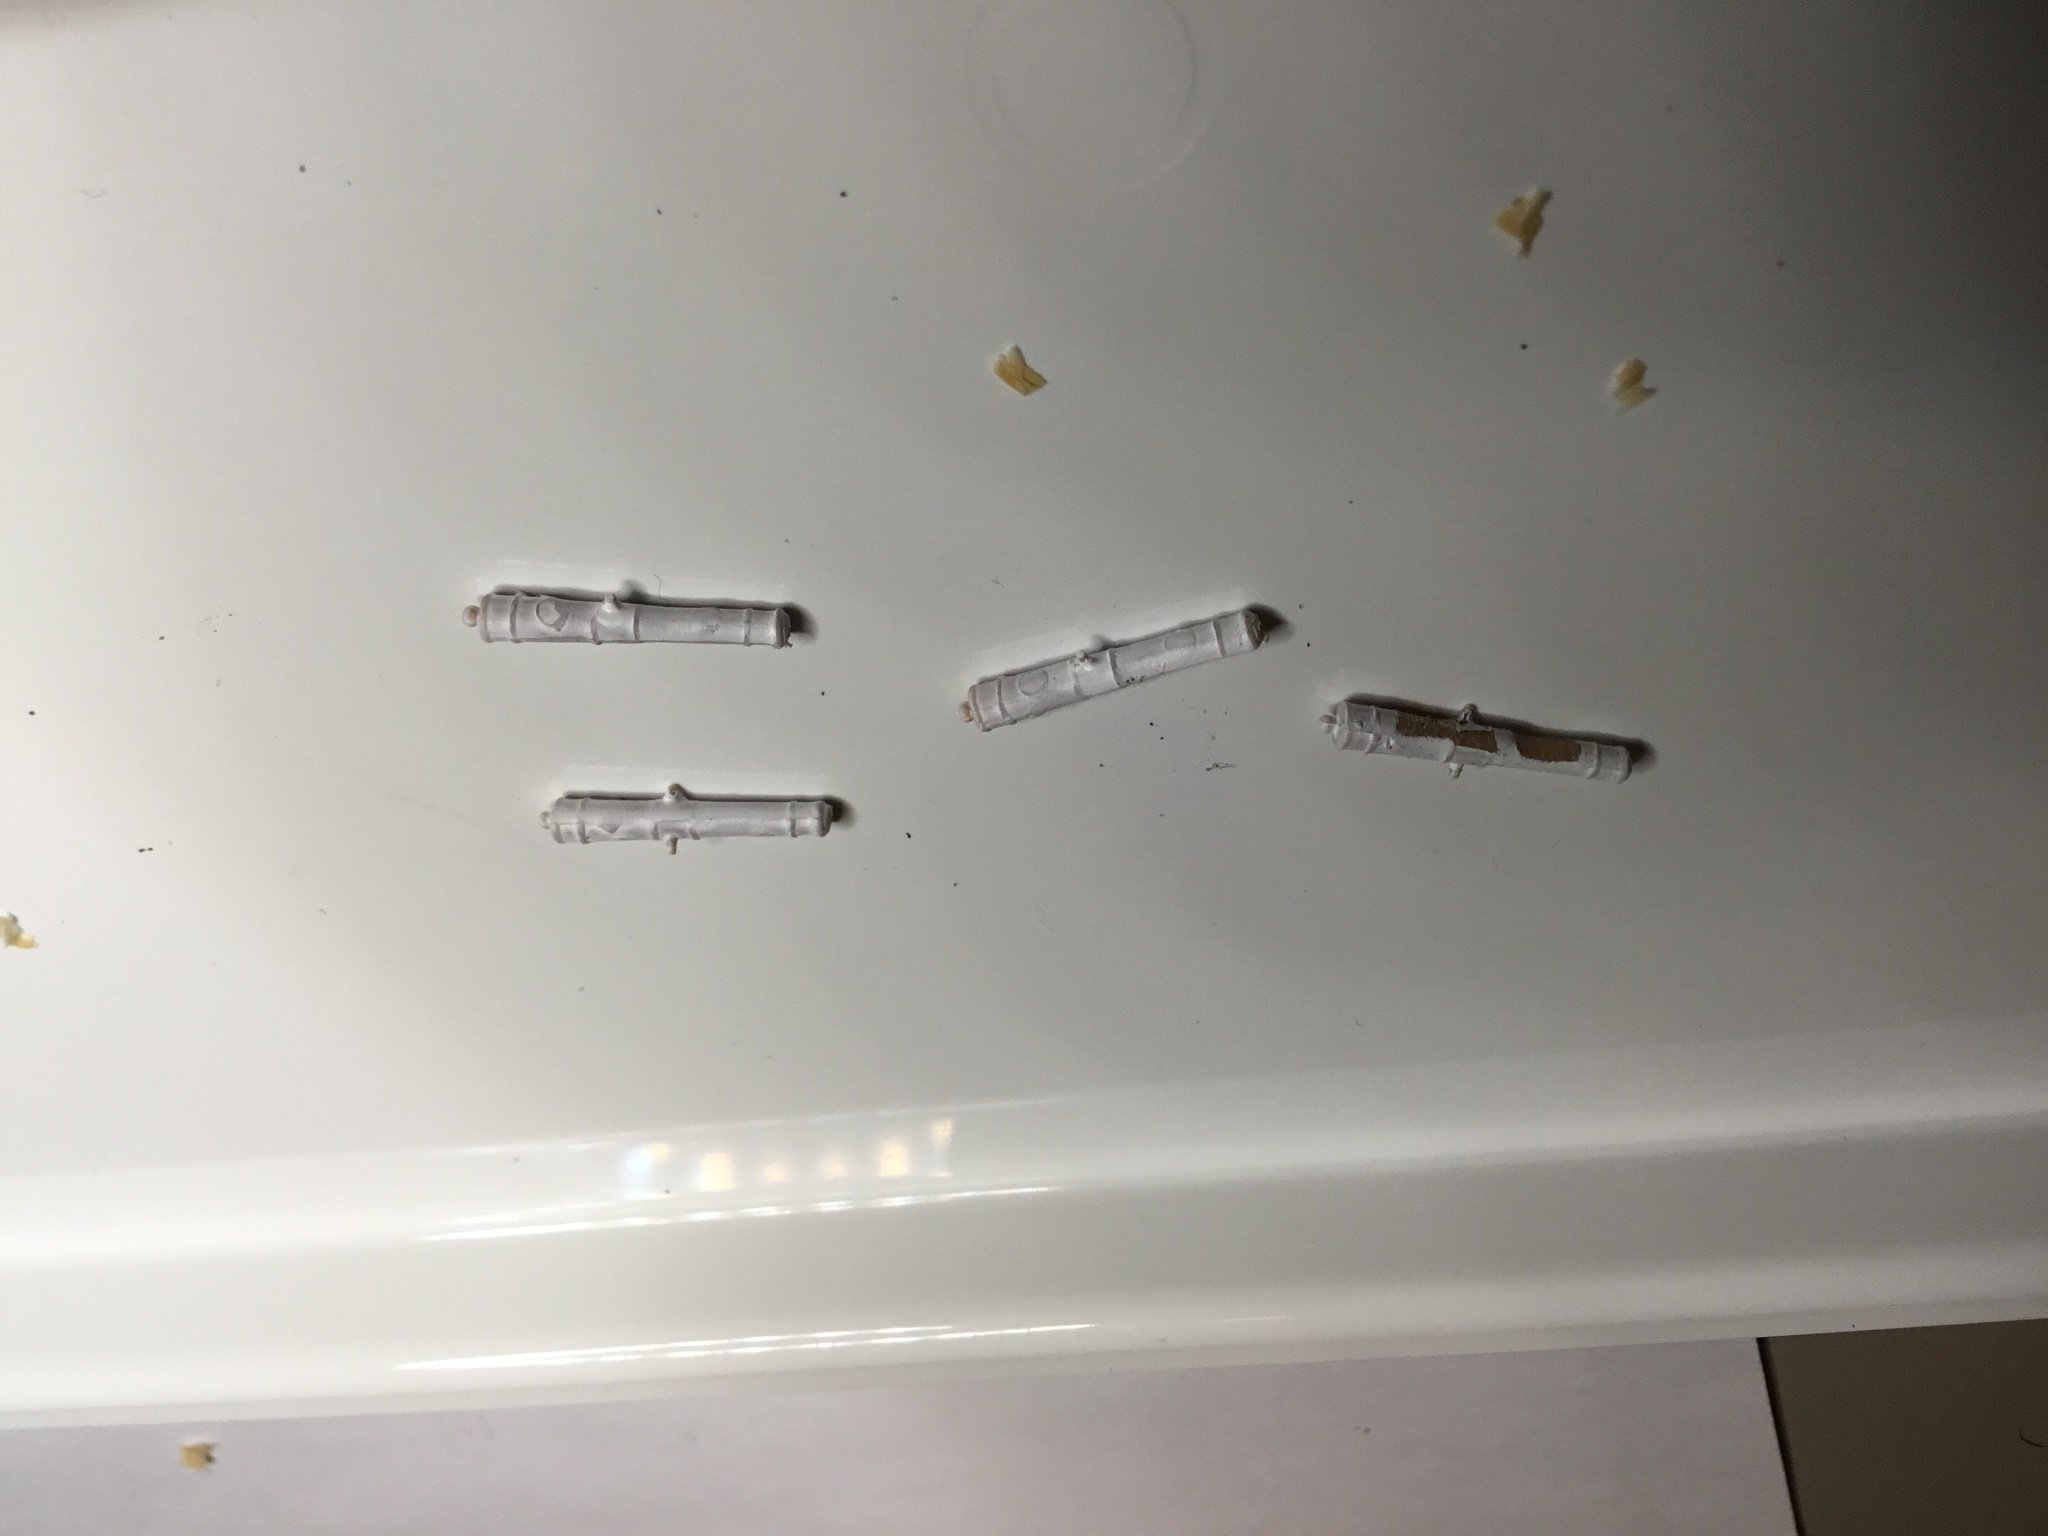
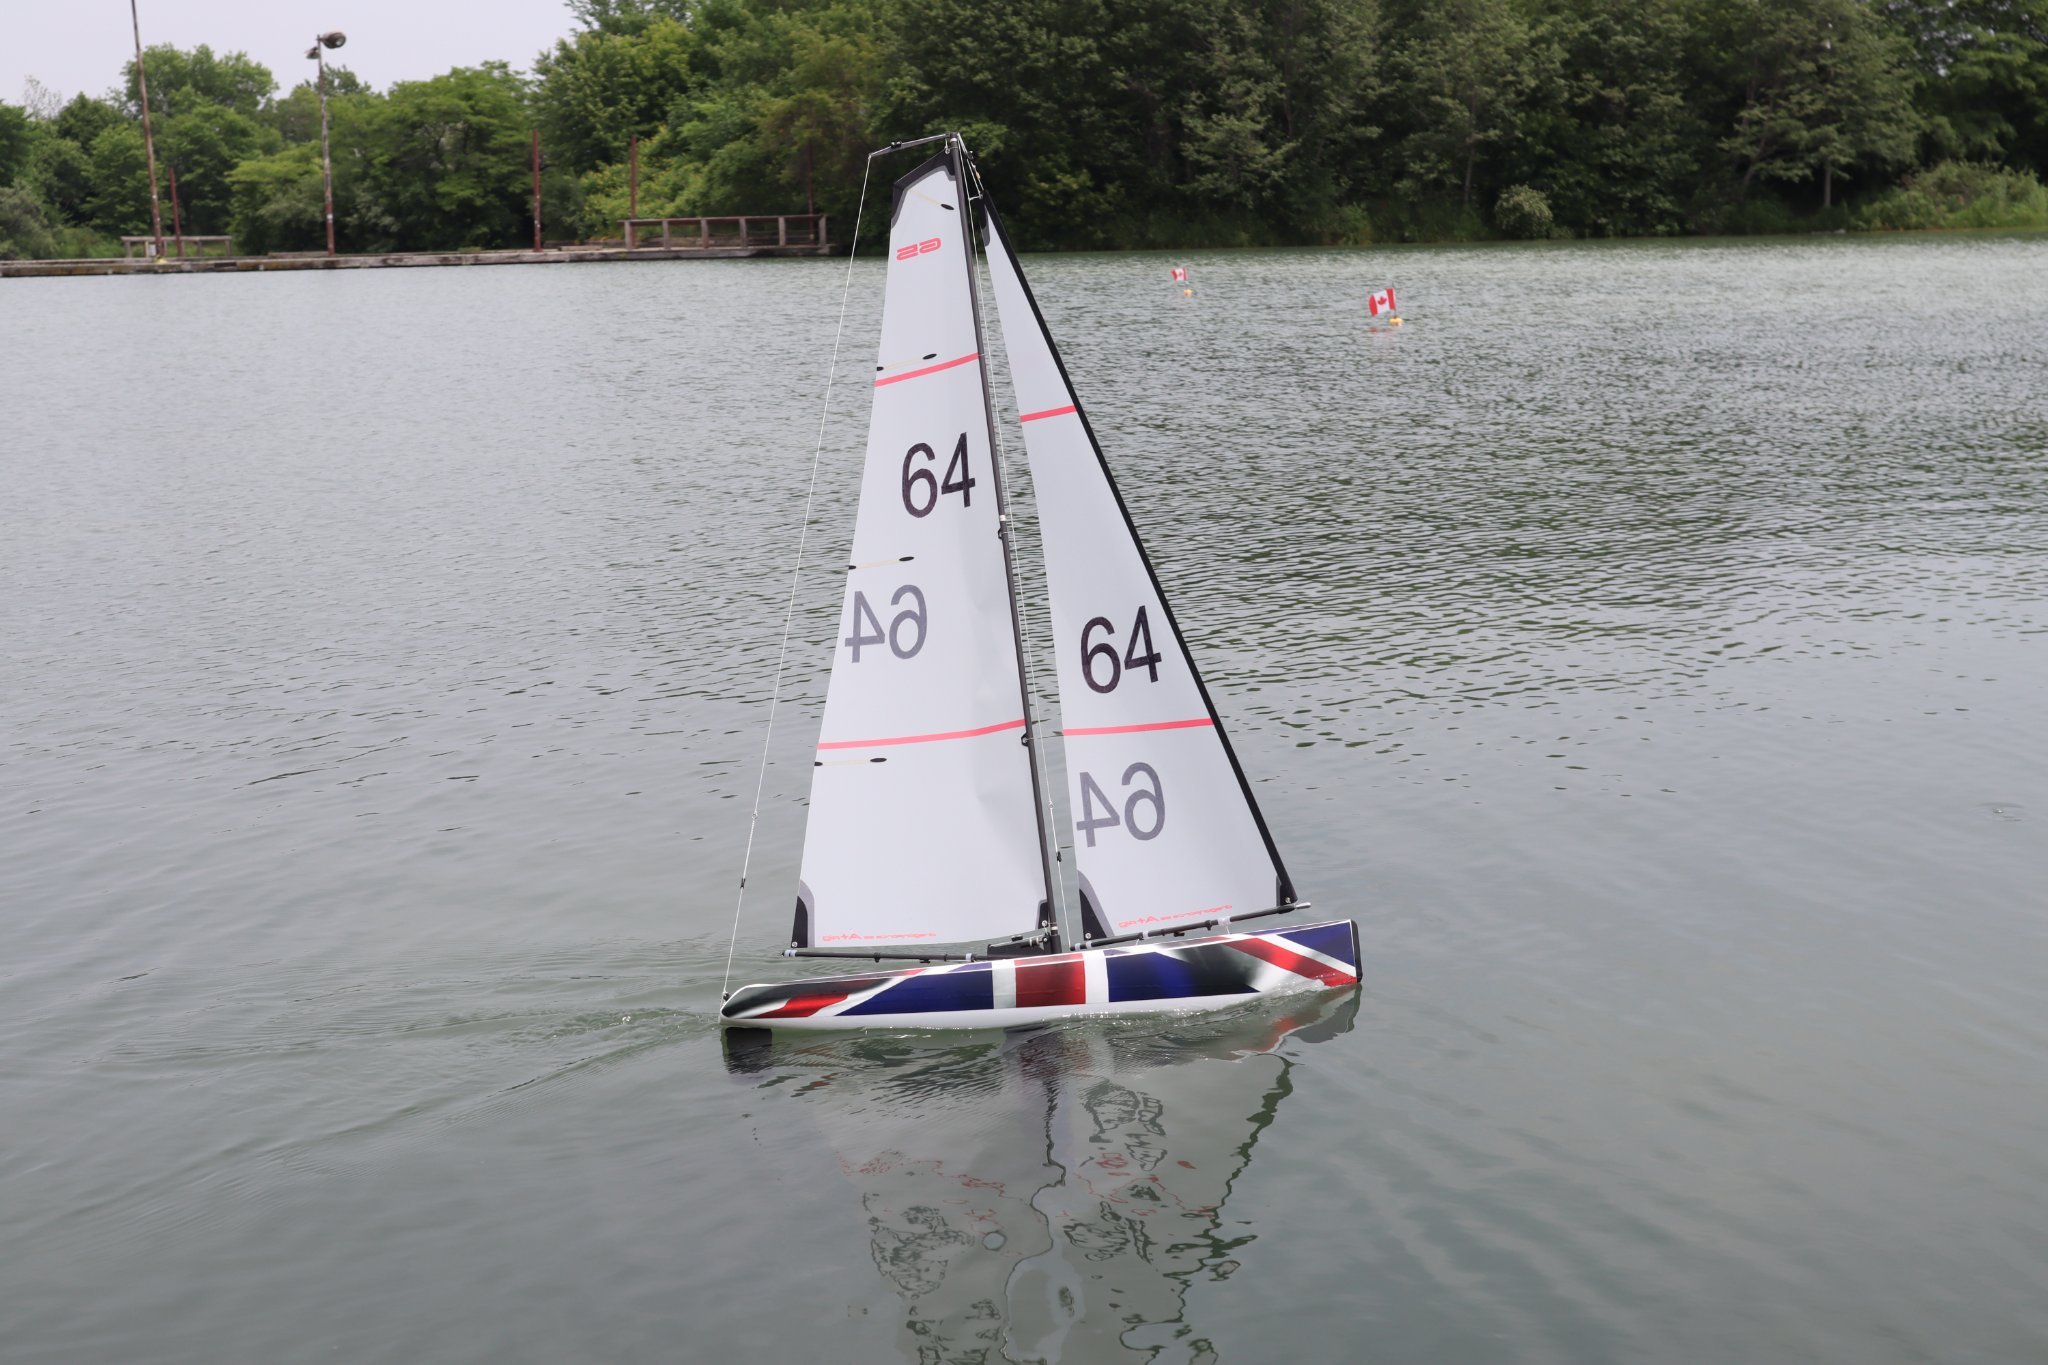
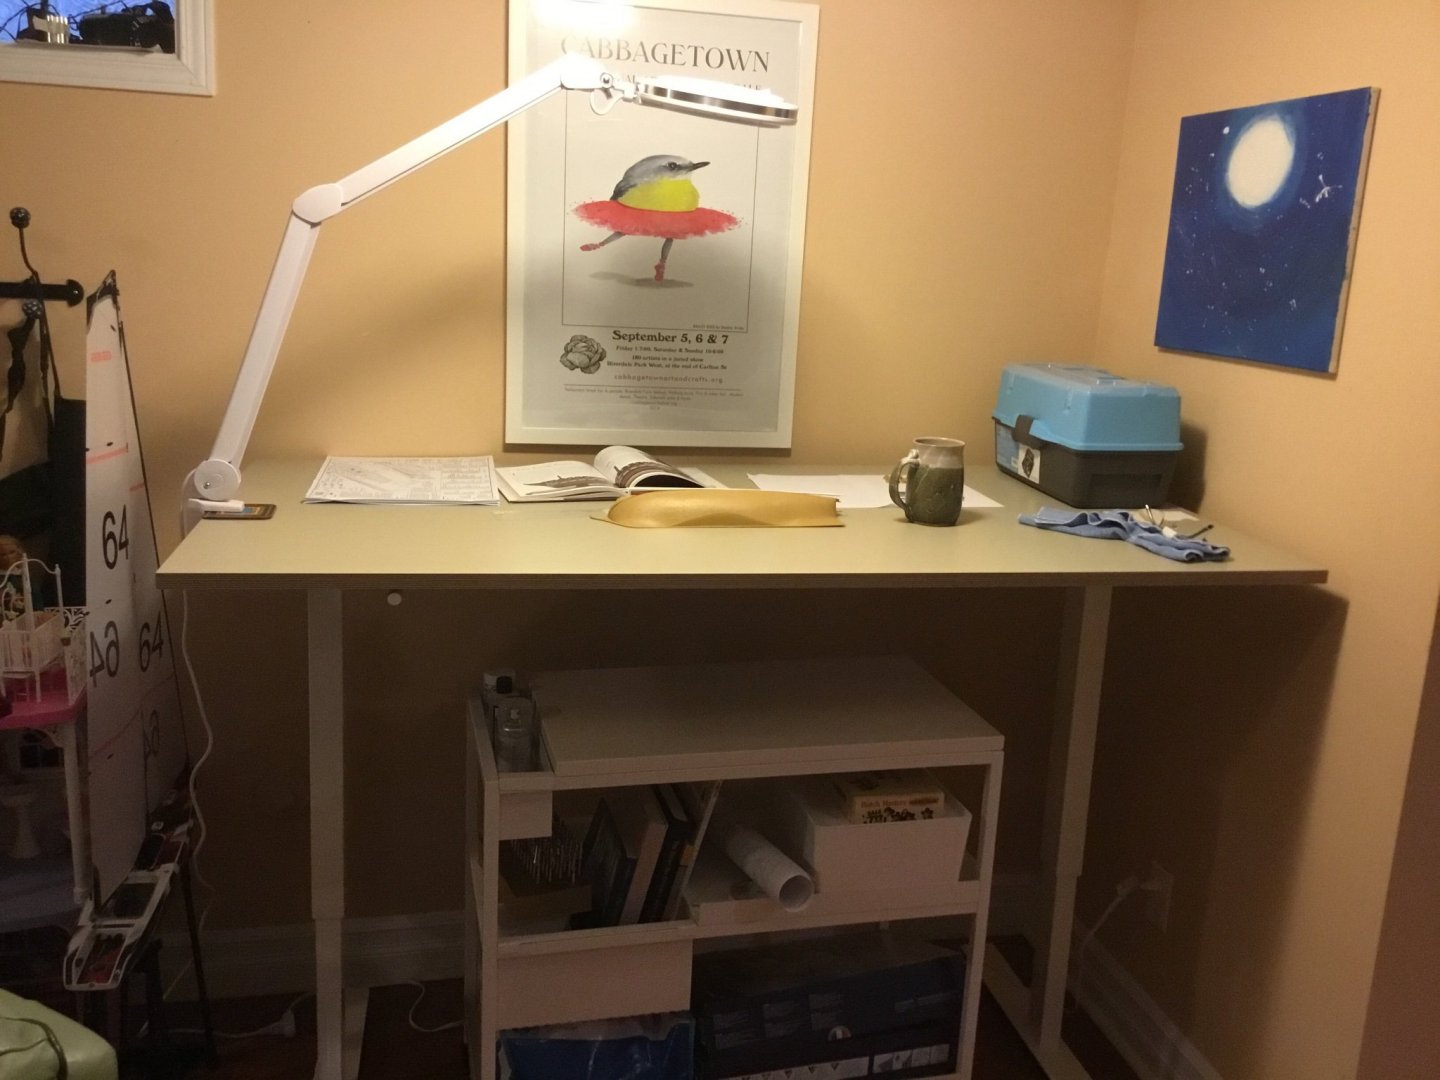
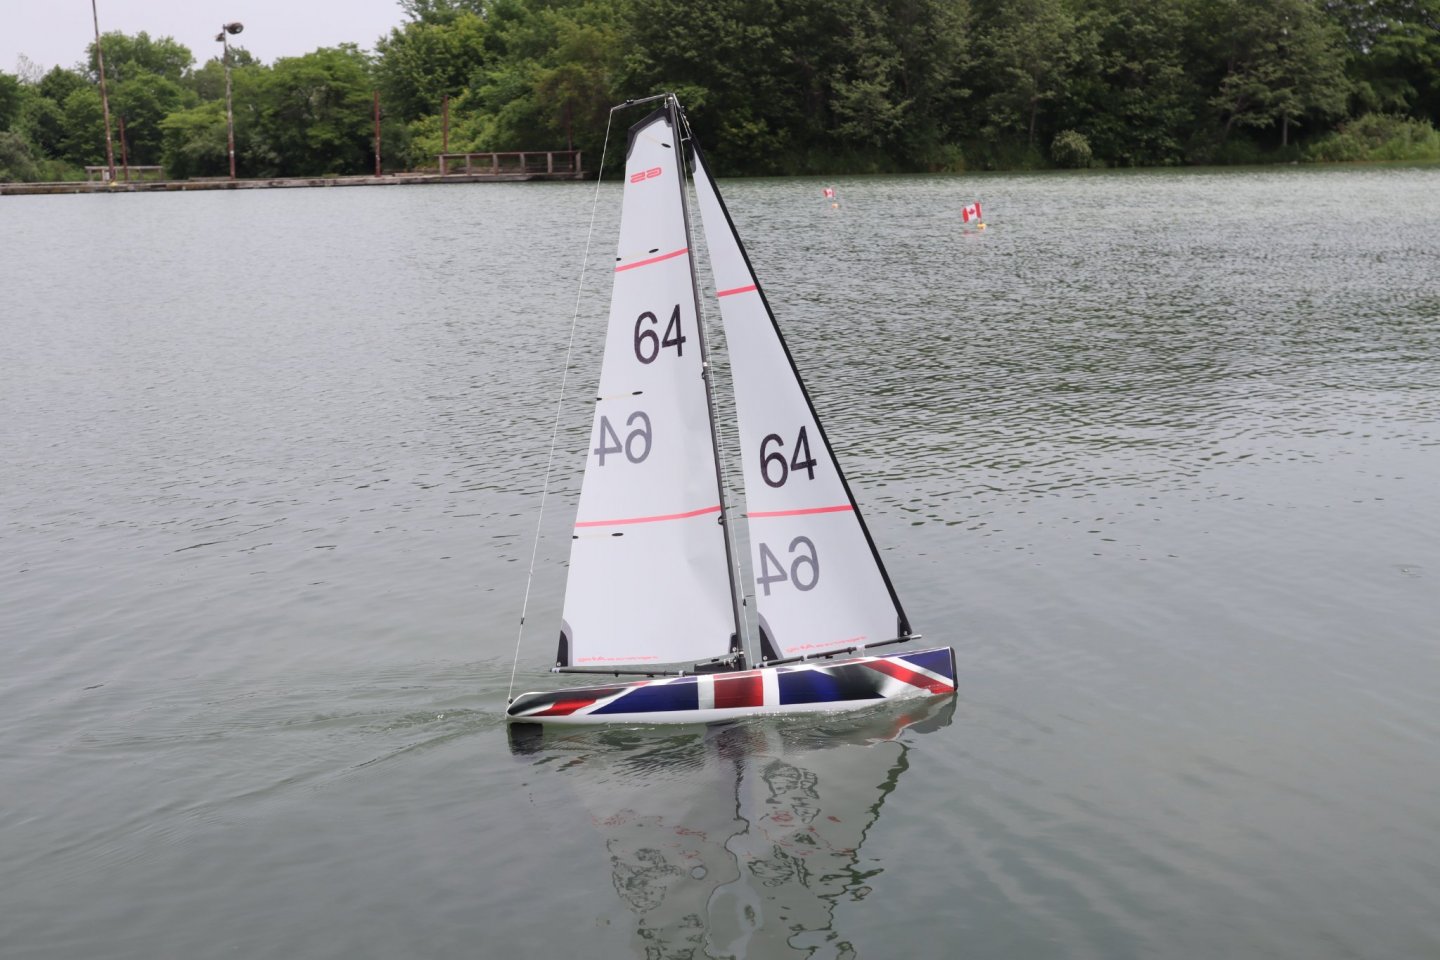
@Ian_Grant Thanks. What’s really helped me getting started was joining the local boat building club, https://metromarine.org/static-division/. These old timers have been a godsend on this project, for example helping me to scribe the waterline for copper removal and providing the styrene strips and loaner hooked scriber for marking the planks, see below. First twenty 32 pdr carriages now together, cannon just placed for fun, will glue the cannons on separately after the carriages are filled, sanded, primed and painted. The club also loaned me tiny drill bits to drill out the gun barrels (I may leave a few with their red tompions in). The injection moulded cannons are terribly finished, with holes above the breaches (visible below) that need to be filled and sanded before priming. Heller was smart to have the 32 pdr cannons as the first step in the instructions, as you can practice on these and make your mistakes because only the barrel is visible. Here’s my work station. The standing desk from IKEA is a great help as you can adjust the height to suit how your back feels and if you’re sitting or standing, and it’s hand crank so no motor to break down. And the magnifier lamp is a must have for my 50 year old eyes. You can see my DragonForce DF65 r/c sailboat to the left, which was my introduction to the model boat club, and their racing division and the national association https://crya.ca/df65/. Of course the ponds will be frozen soon, so that’s one reason I returned to model kits, to stay active in the club and to keep my renewed interest in boat models.

-
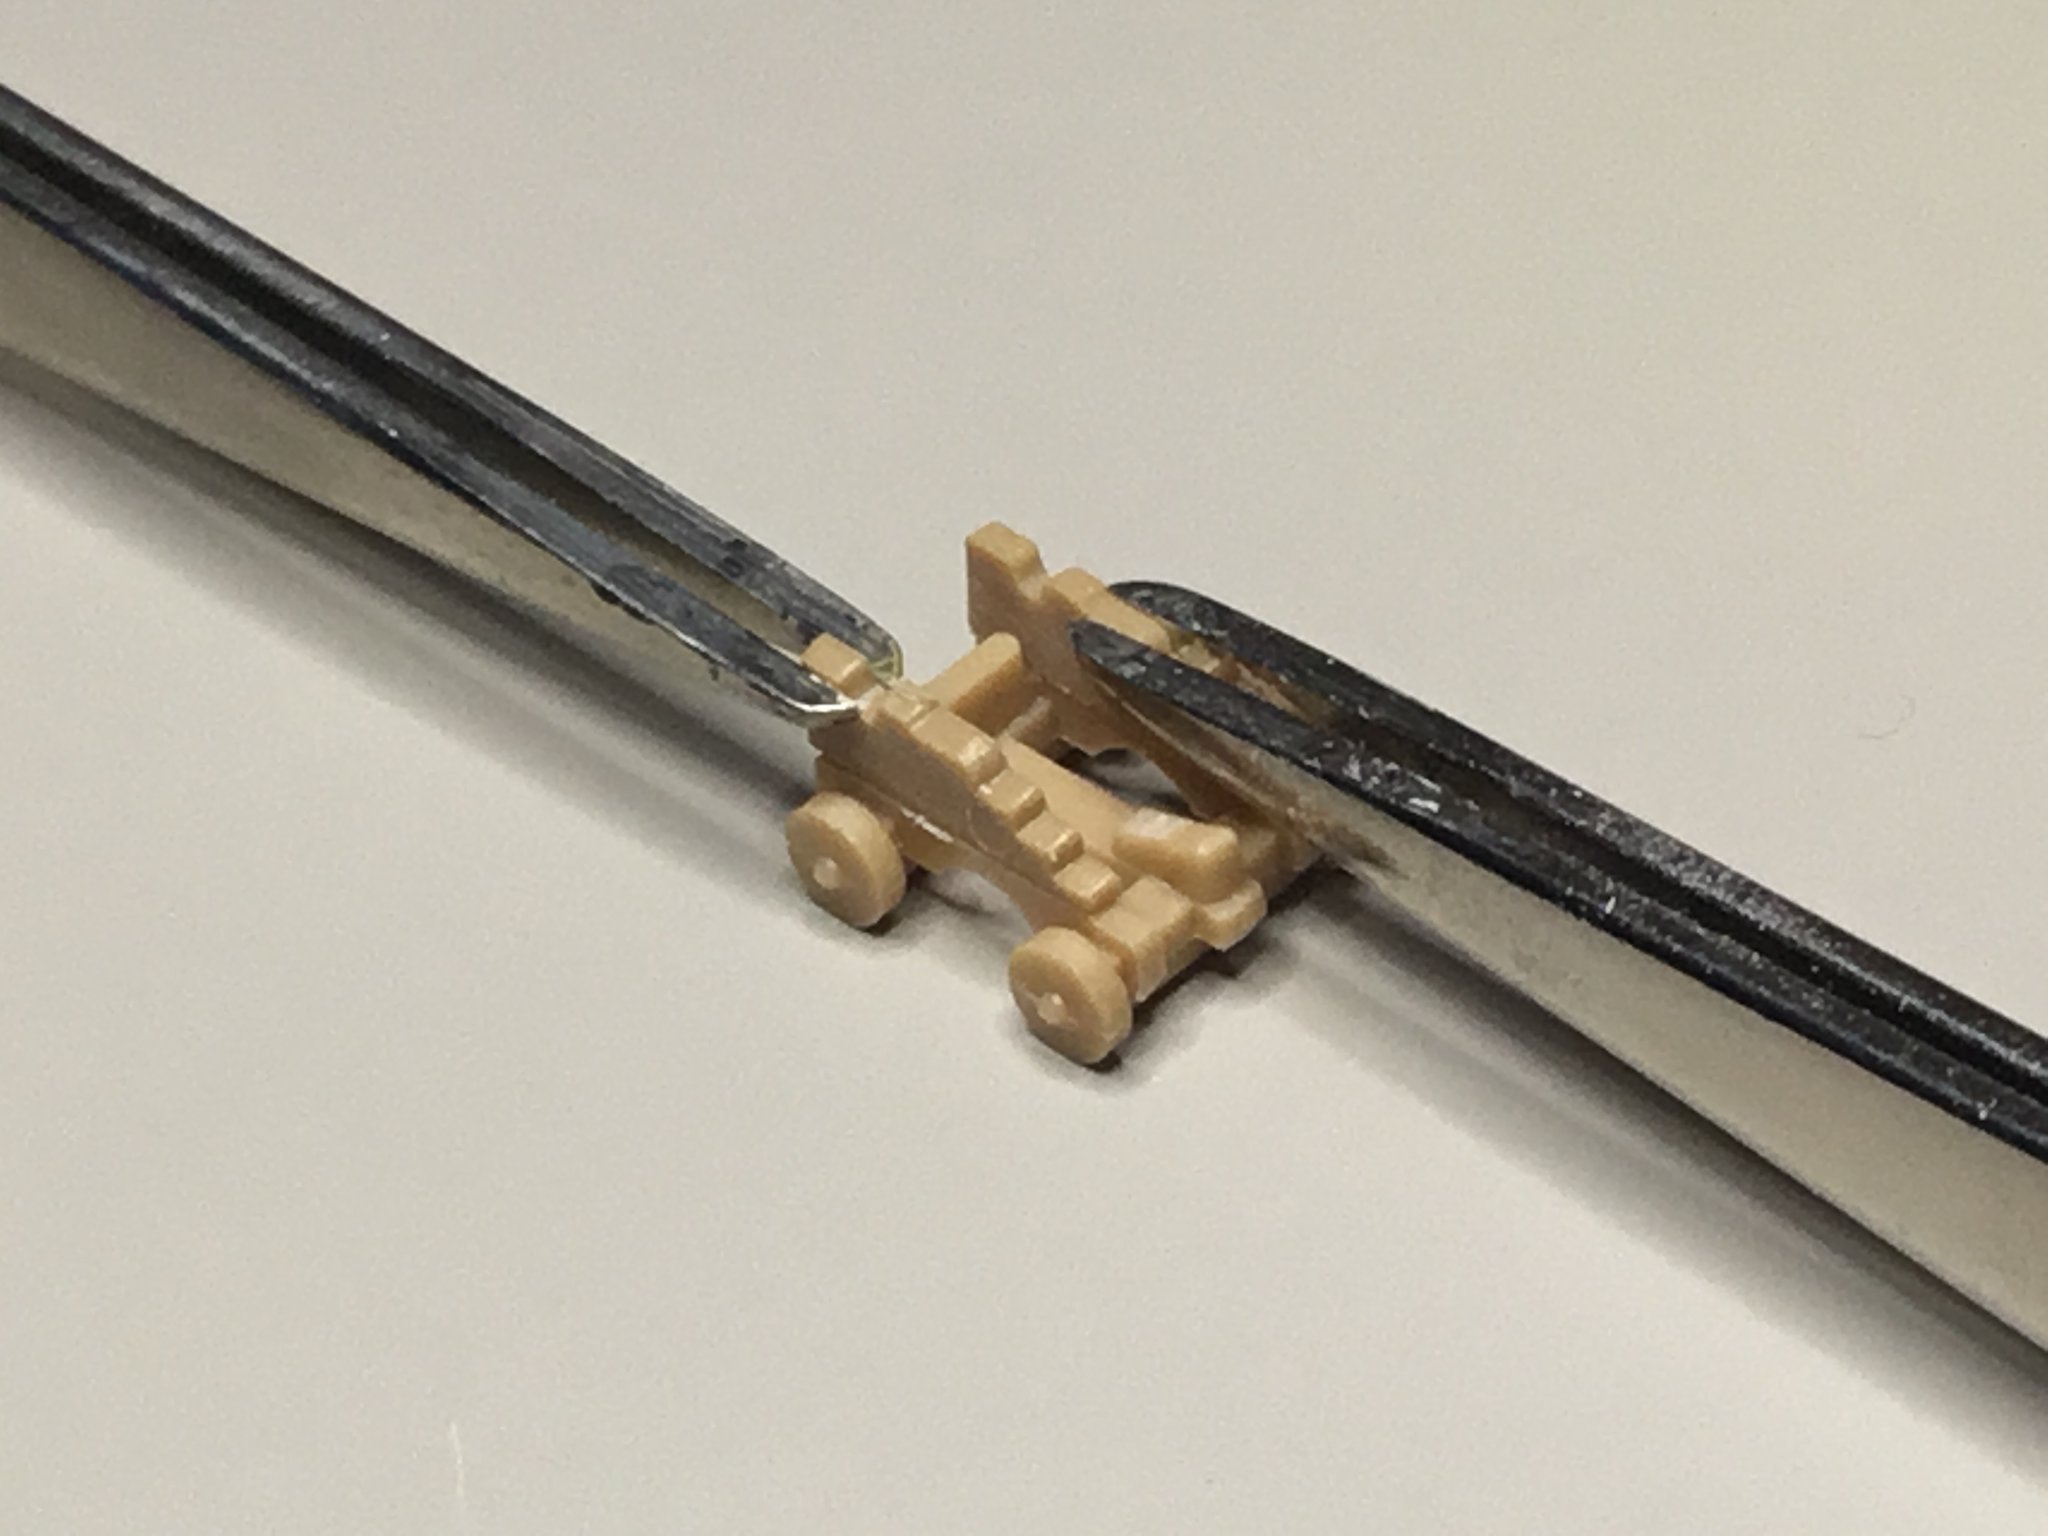
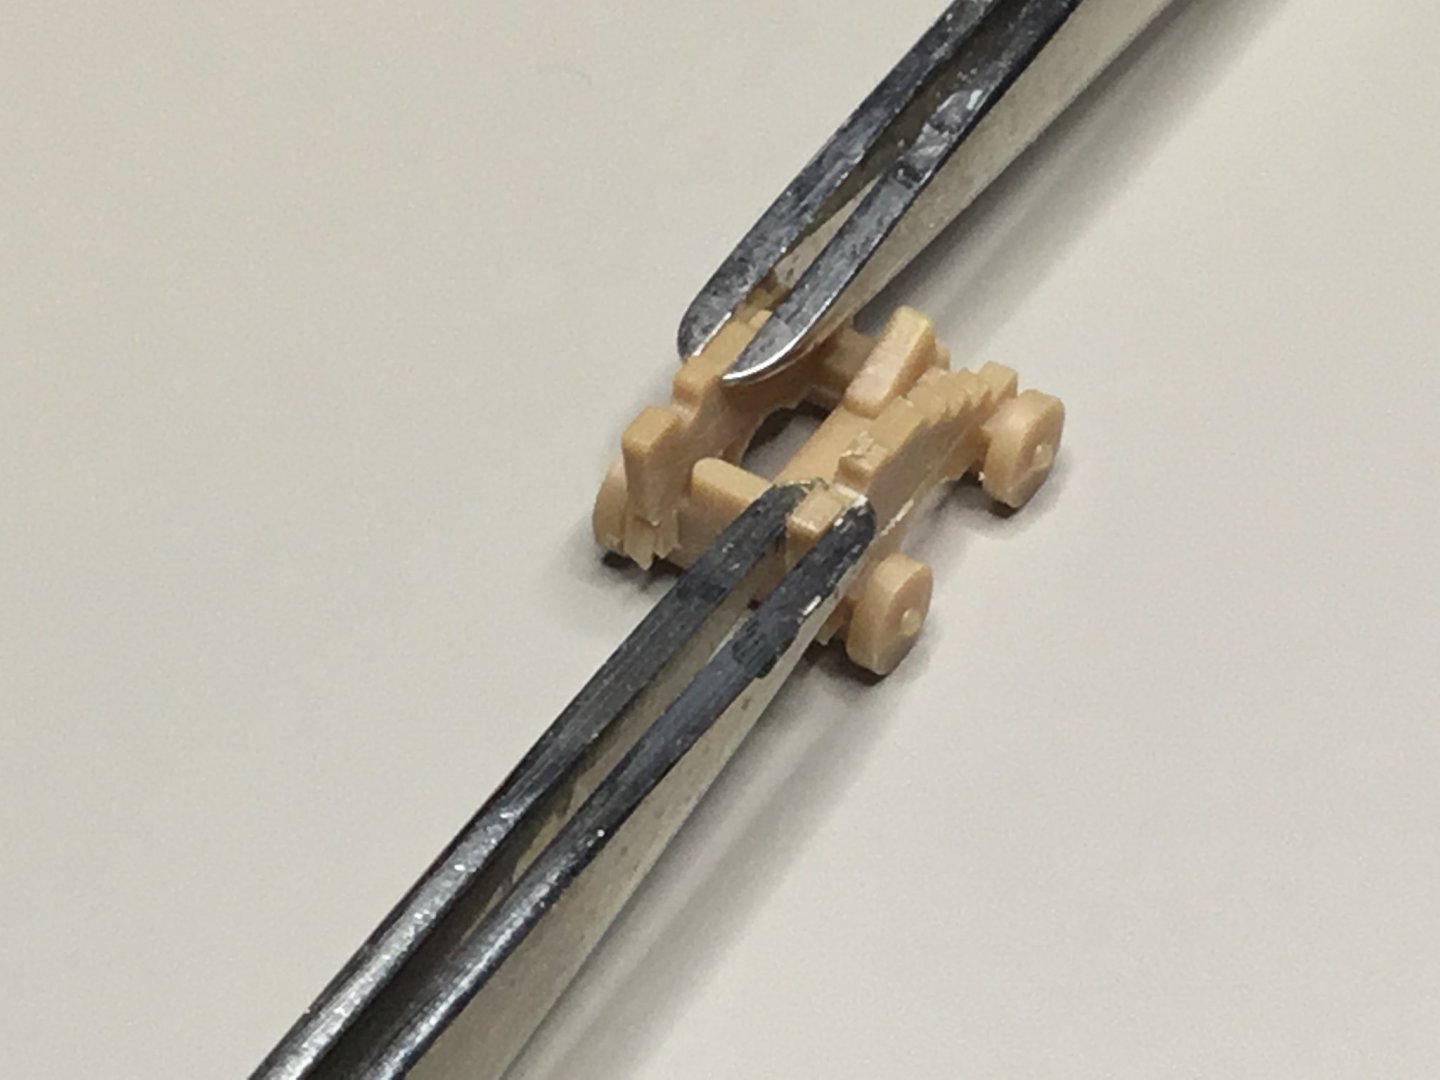
I’ve figured out a means to align the vertical panels on the carriages for gluing using reverse grip tweezers. There will be putty filling and sanding to do before we prime.


-
A friend who’s an expert builder rigged up this jig so we could score the exact waterline, showing the copper we need to sand away. We’re also scribing plank lines between the wales.


-
Thanks B.E. That’s interesting as I’d have thought the French would at least want upper gun-deck port lids below the poop deck to provide some weather protection forward of the stern cabins and gallery.
-
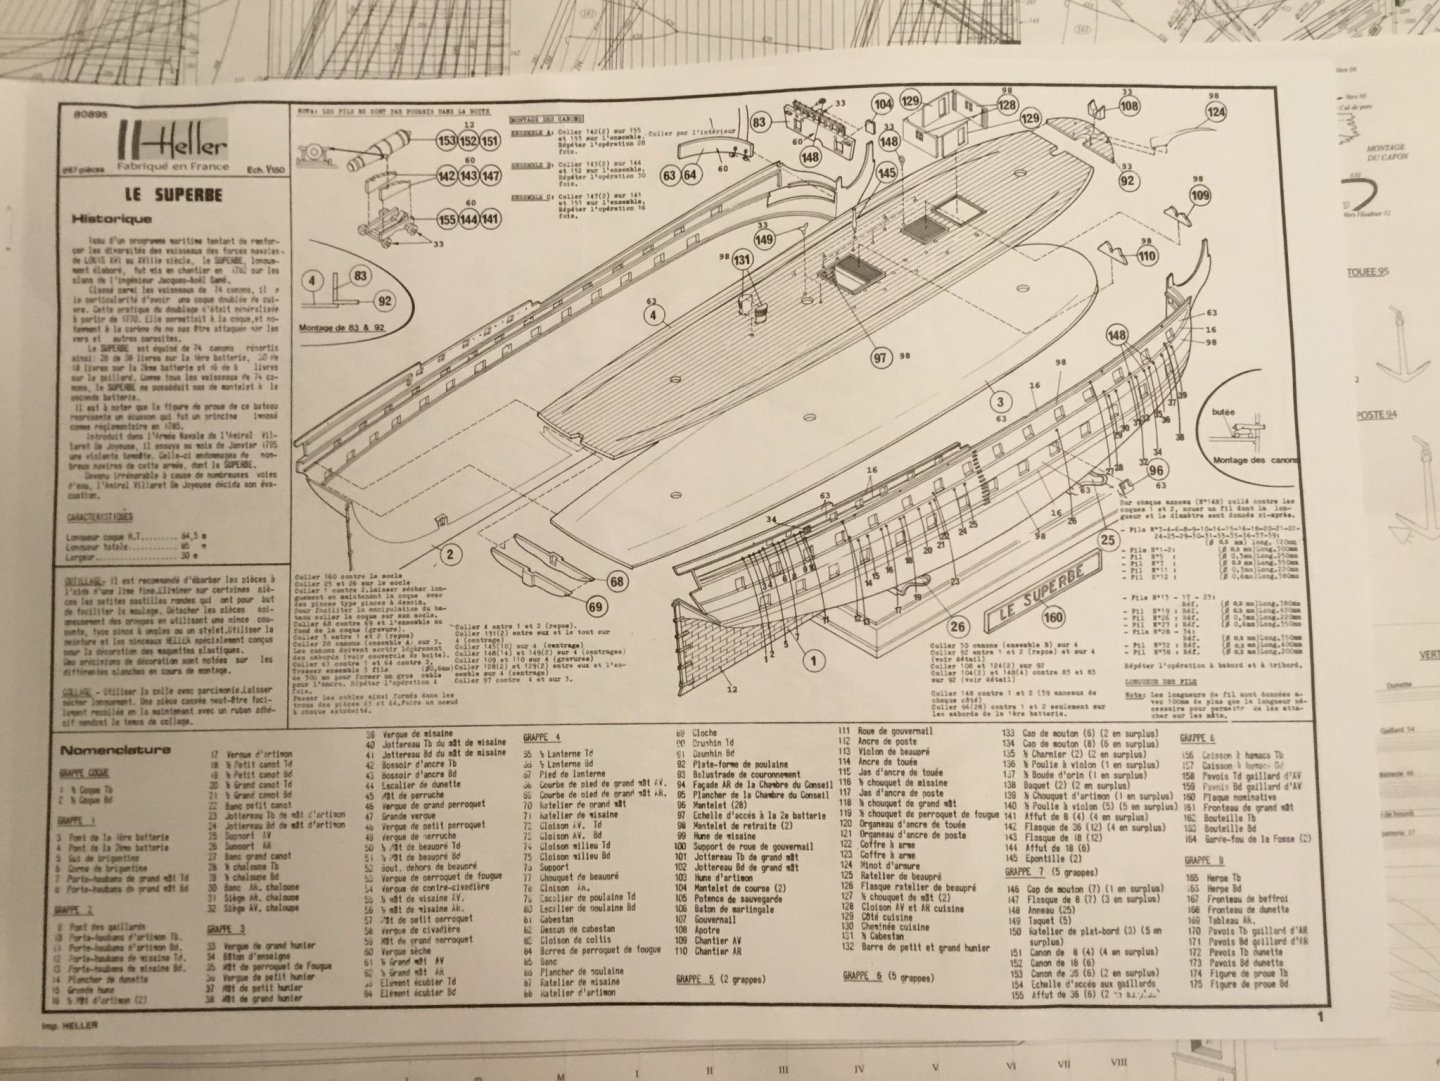
Hi BE. I notice the Le Superbe kit omits gun port lids on the upper deck. This seems a big error on Heller’s part since I believe Le Superbe (and all ships of the line) had gun door lids on their full length gun decks, as shown on the plans. Did you consider mocking some up? I’m pondering such a move.

-
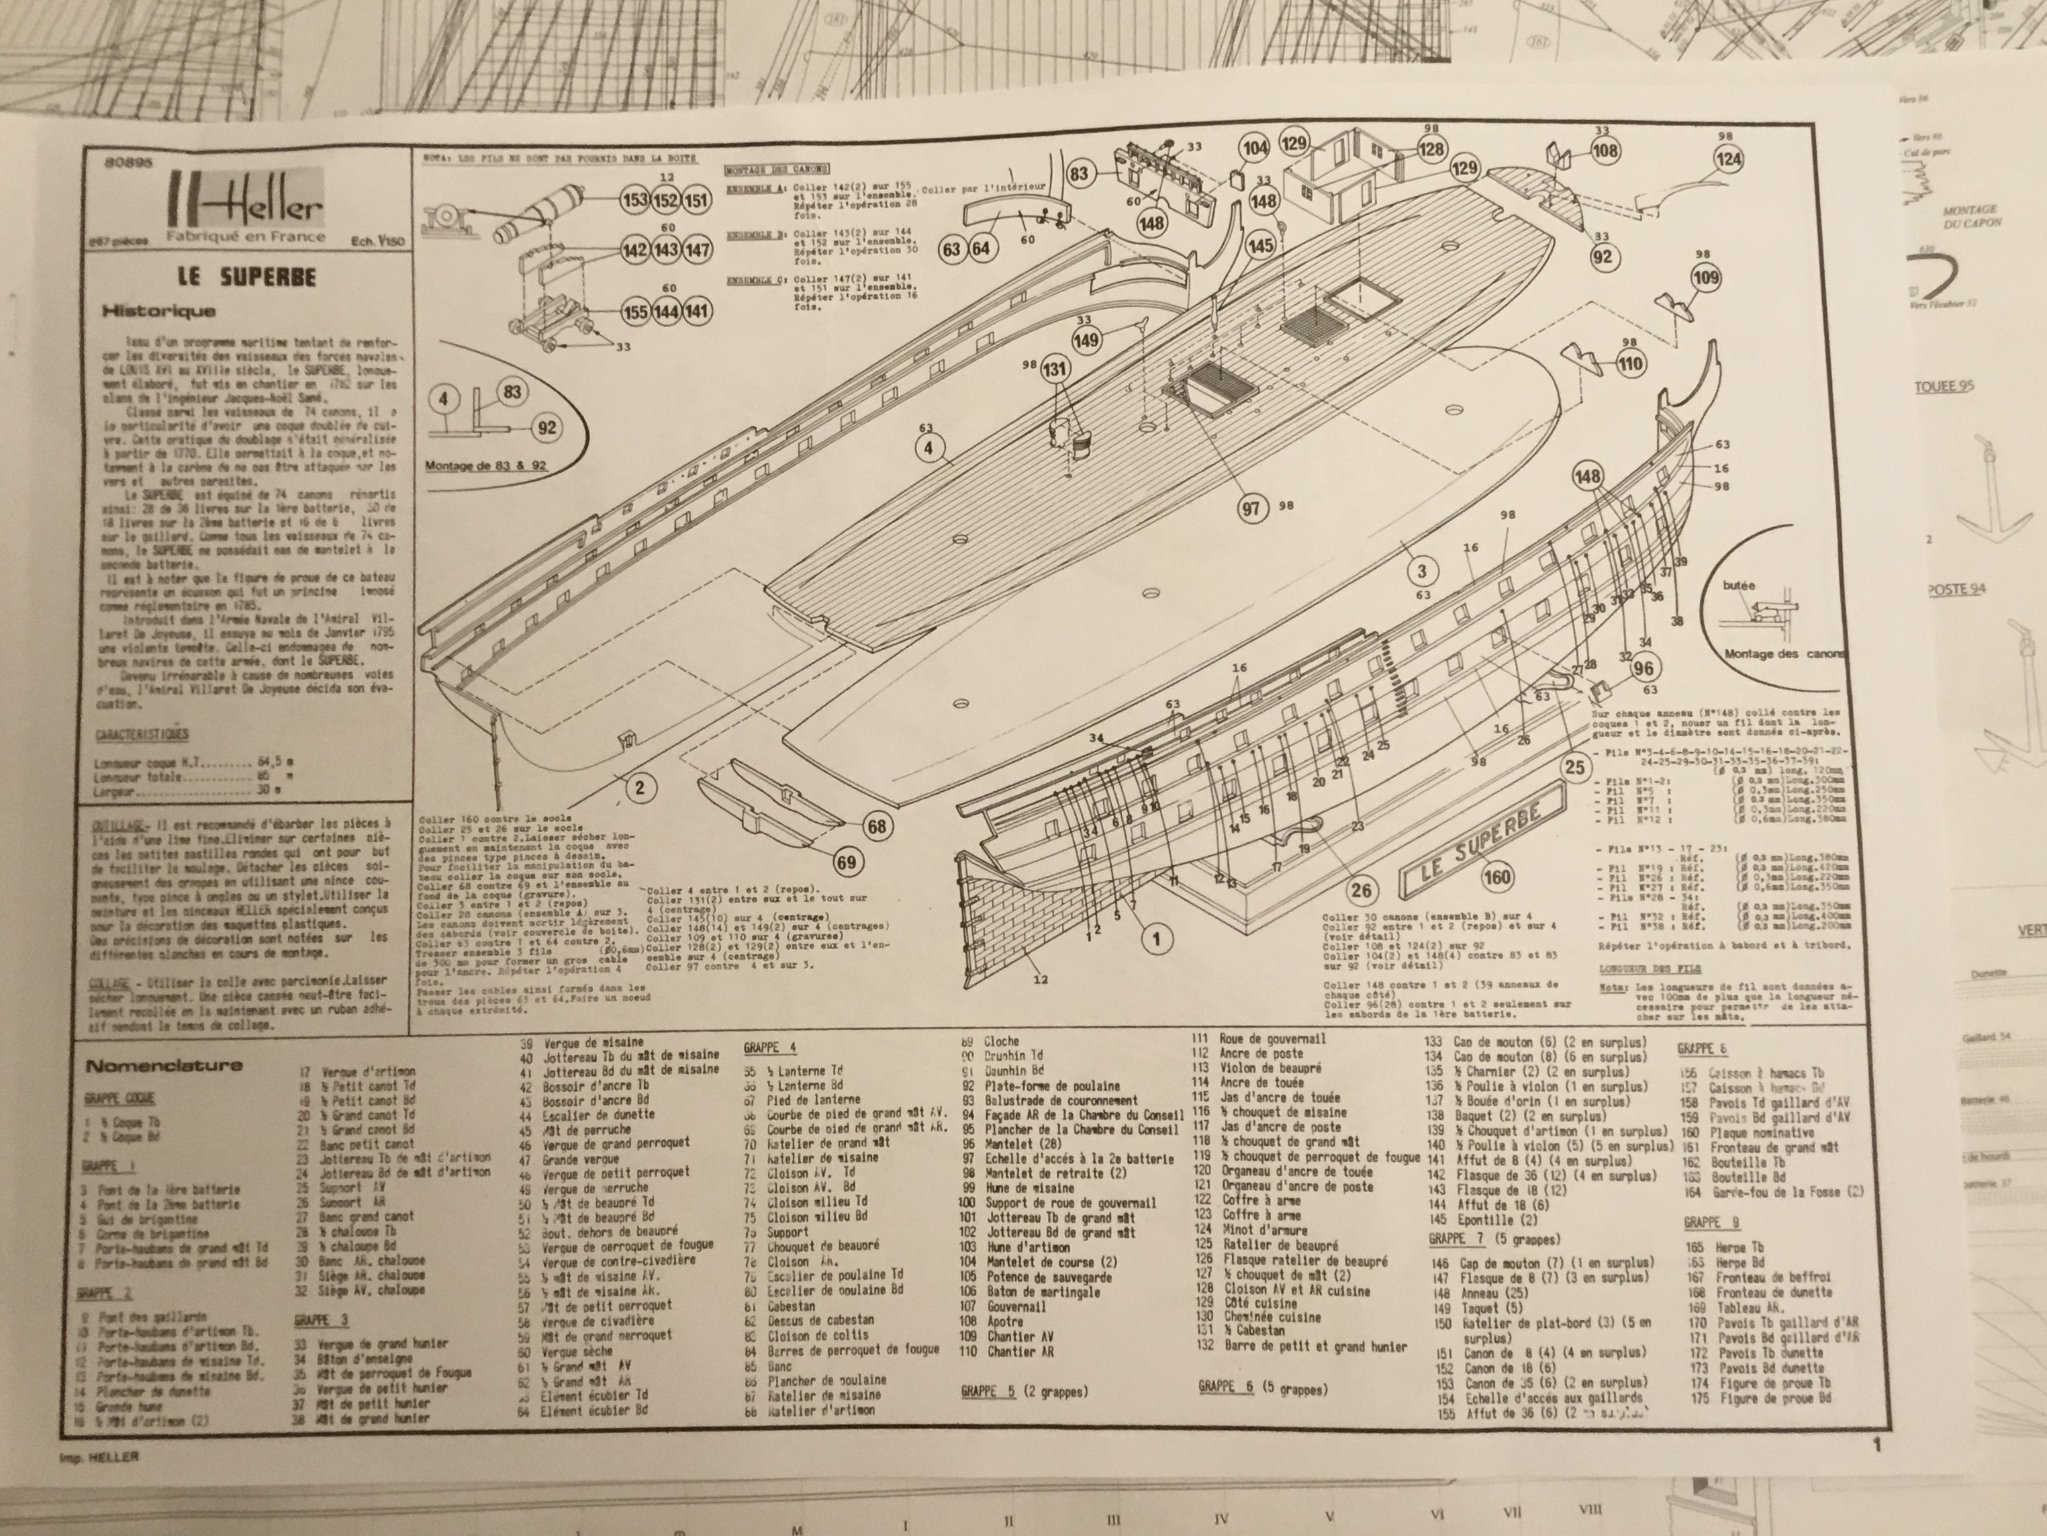
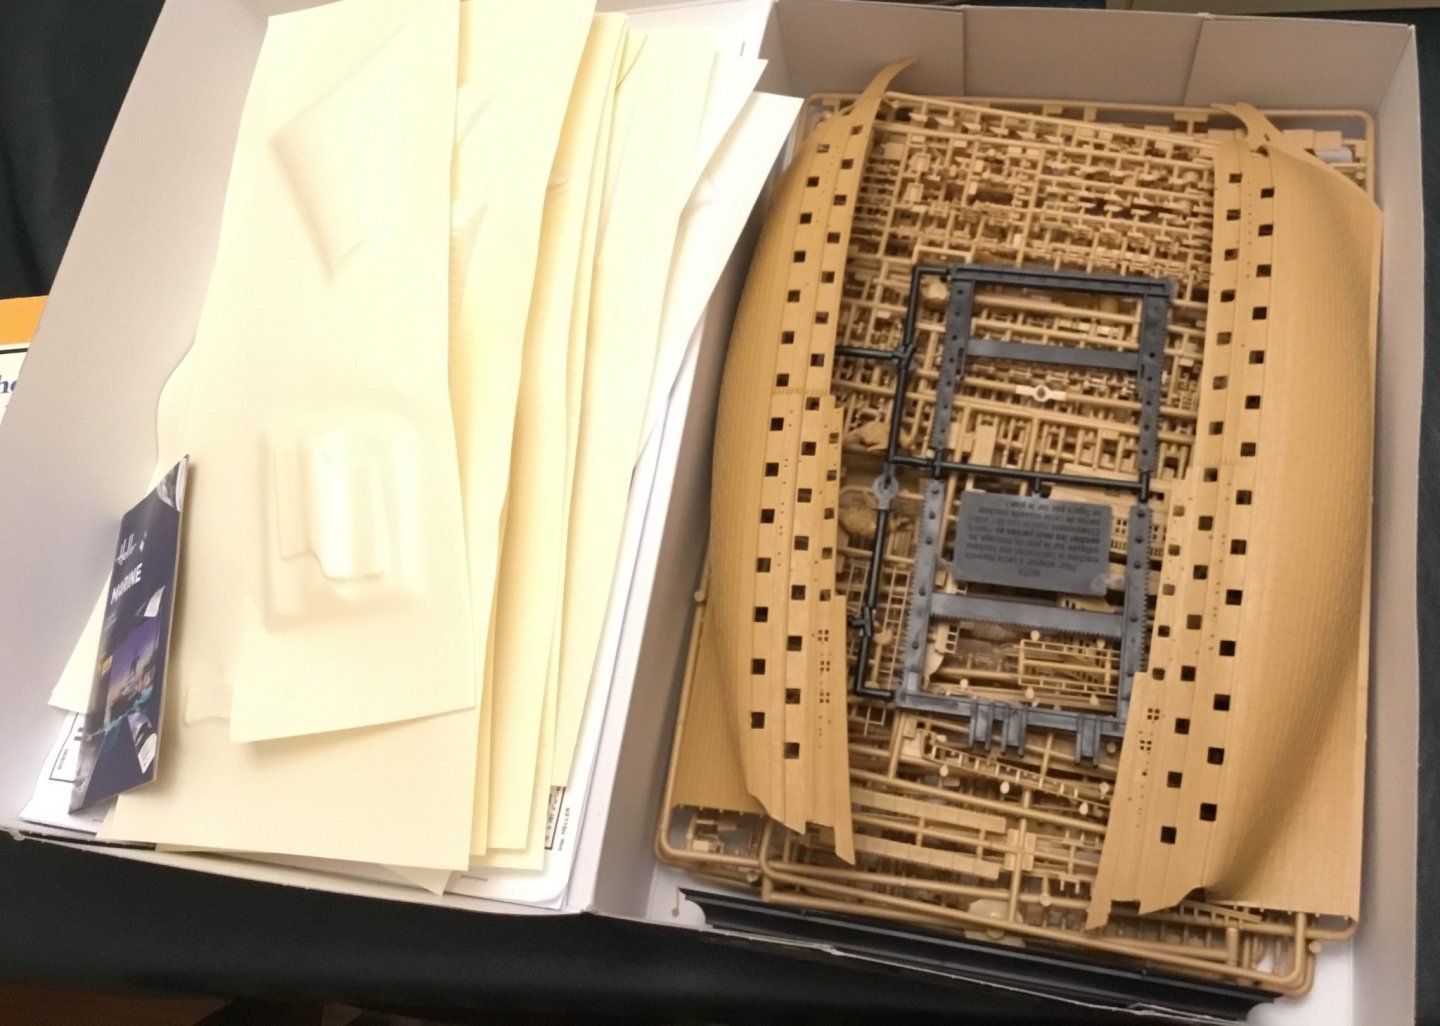
I’m starting my first kit in years, Heller’s 1/150 Le Superbe. I’m using AK and Vallejo acrylics and Tamiya’s spray-on white primer. The first step are the cannons. The cannons and trucks first need sanding to remove flashing, which I can do on the trees. But would it be best to cut the parts off the tree and glue and assemble the cannons before priming and painting? It would be easier to prime and paint the cannons before they’re glued to the carriages, but I’d have to scrape some off to glue them. If I’m going to prime and paint them before assembly I might as well prime and paint when the cannons and carriages are on the tree, since otherwise much of my spray-on primer will be wasted. Thoughts?
-
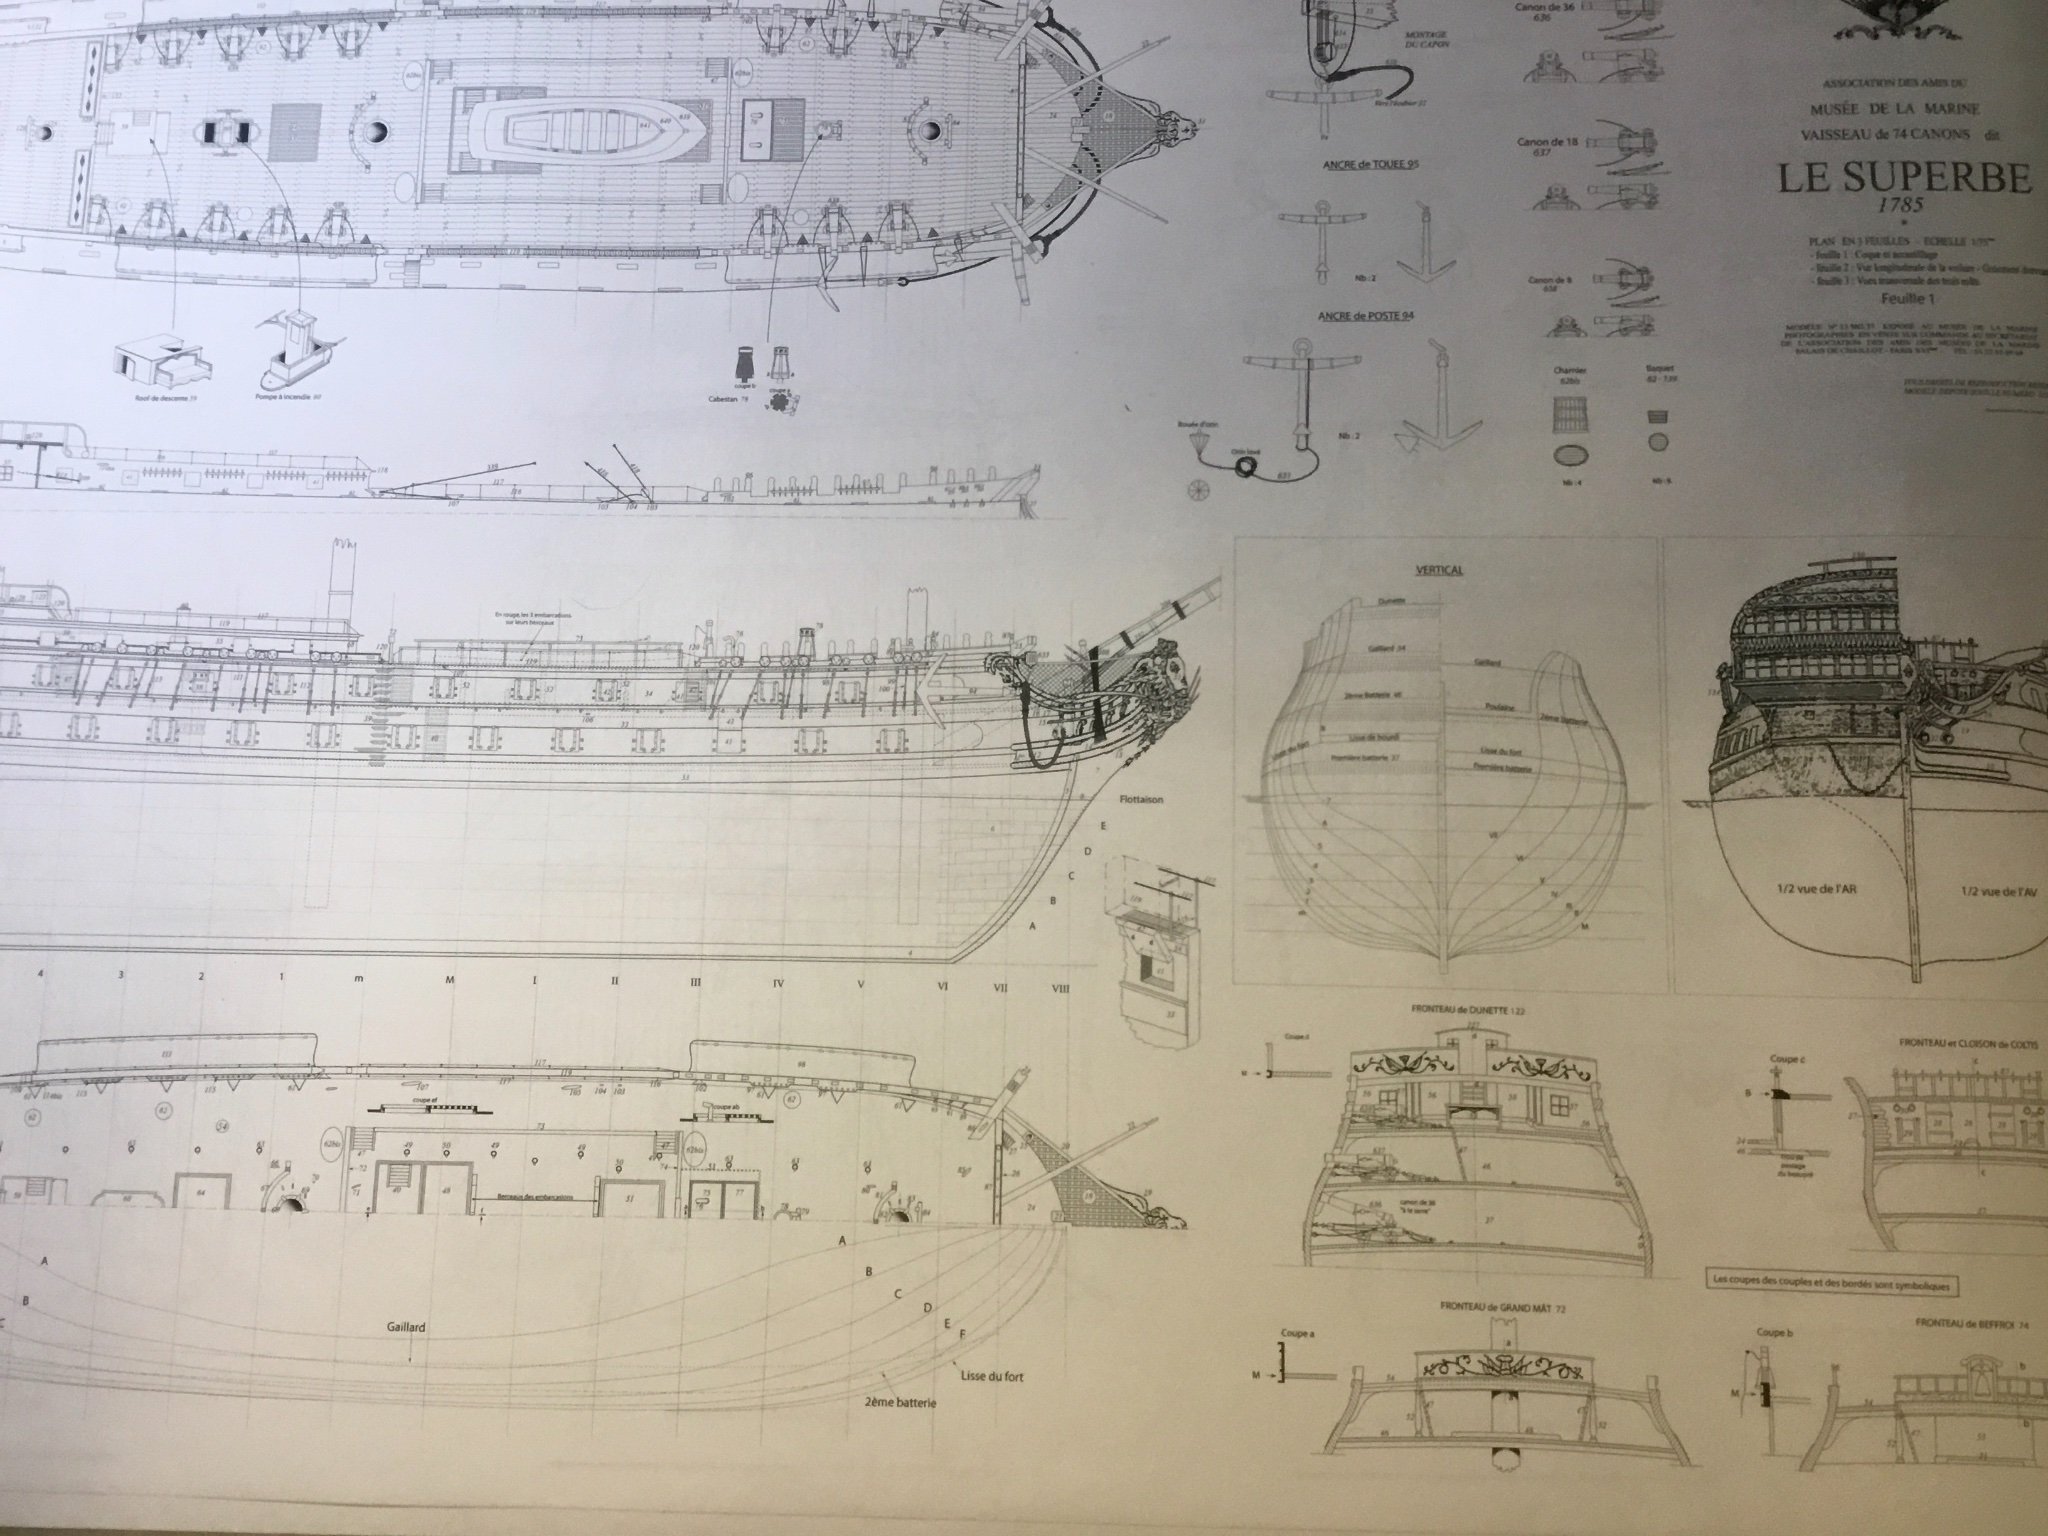
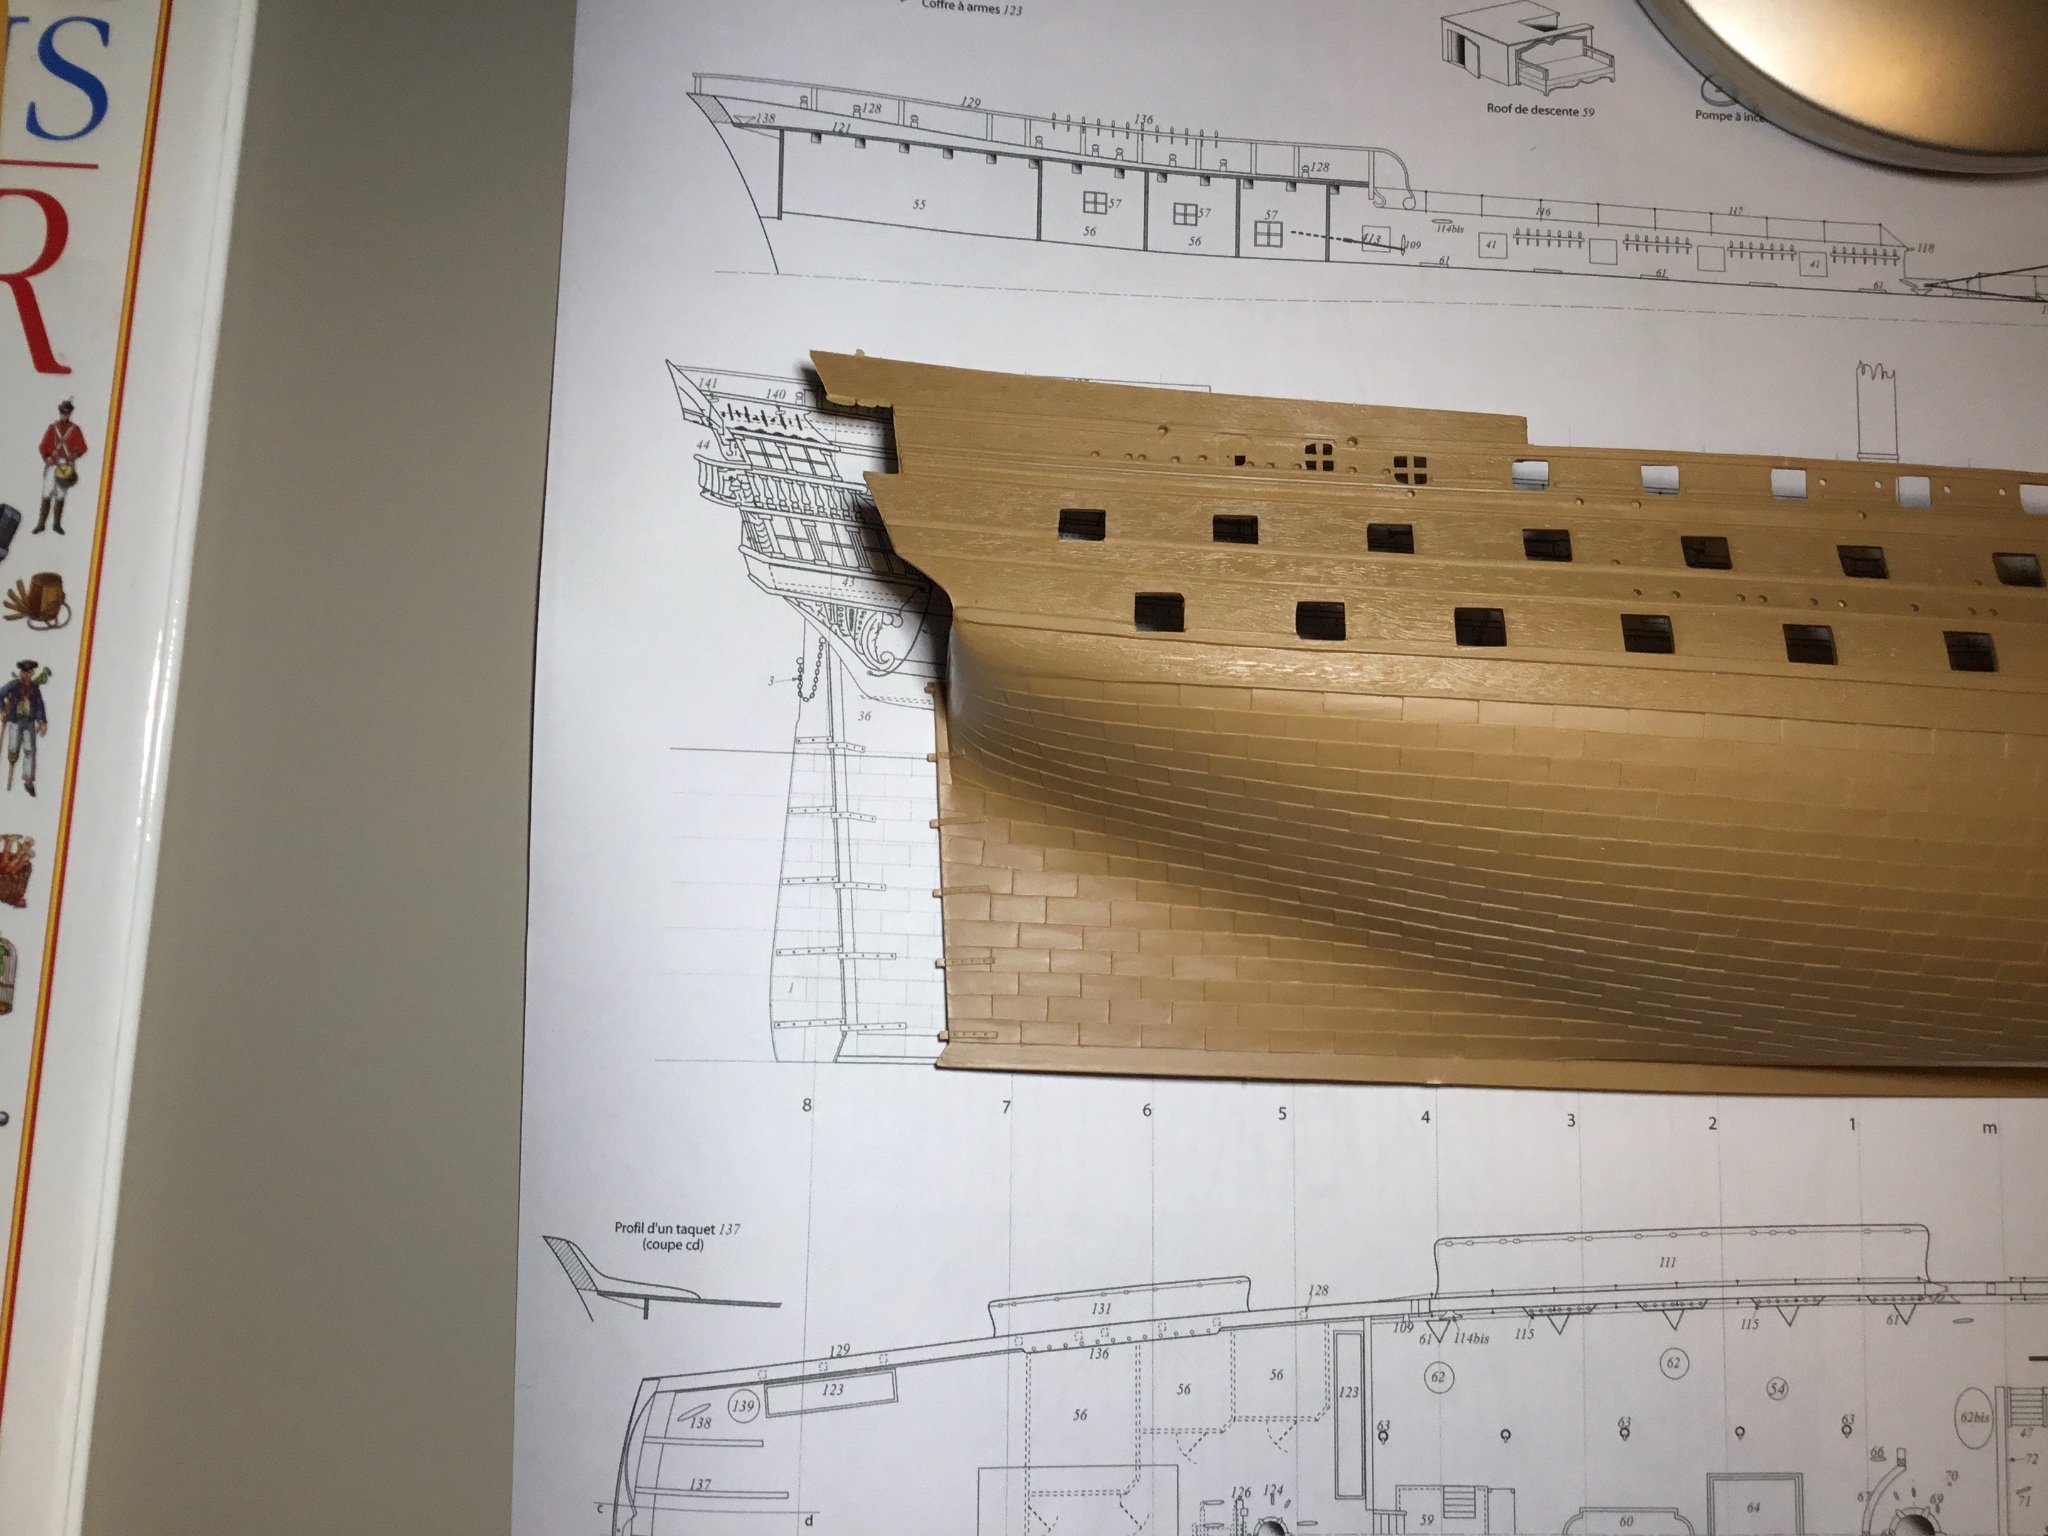
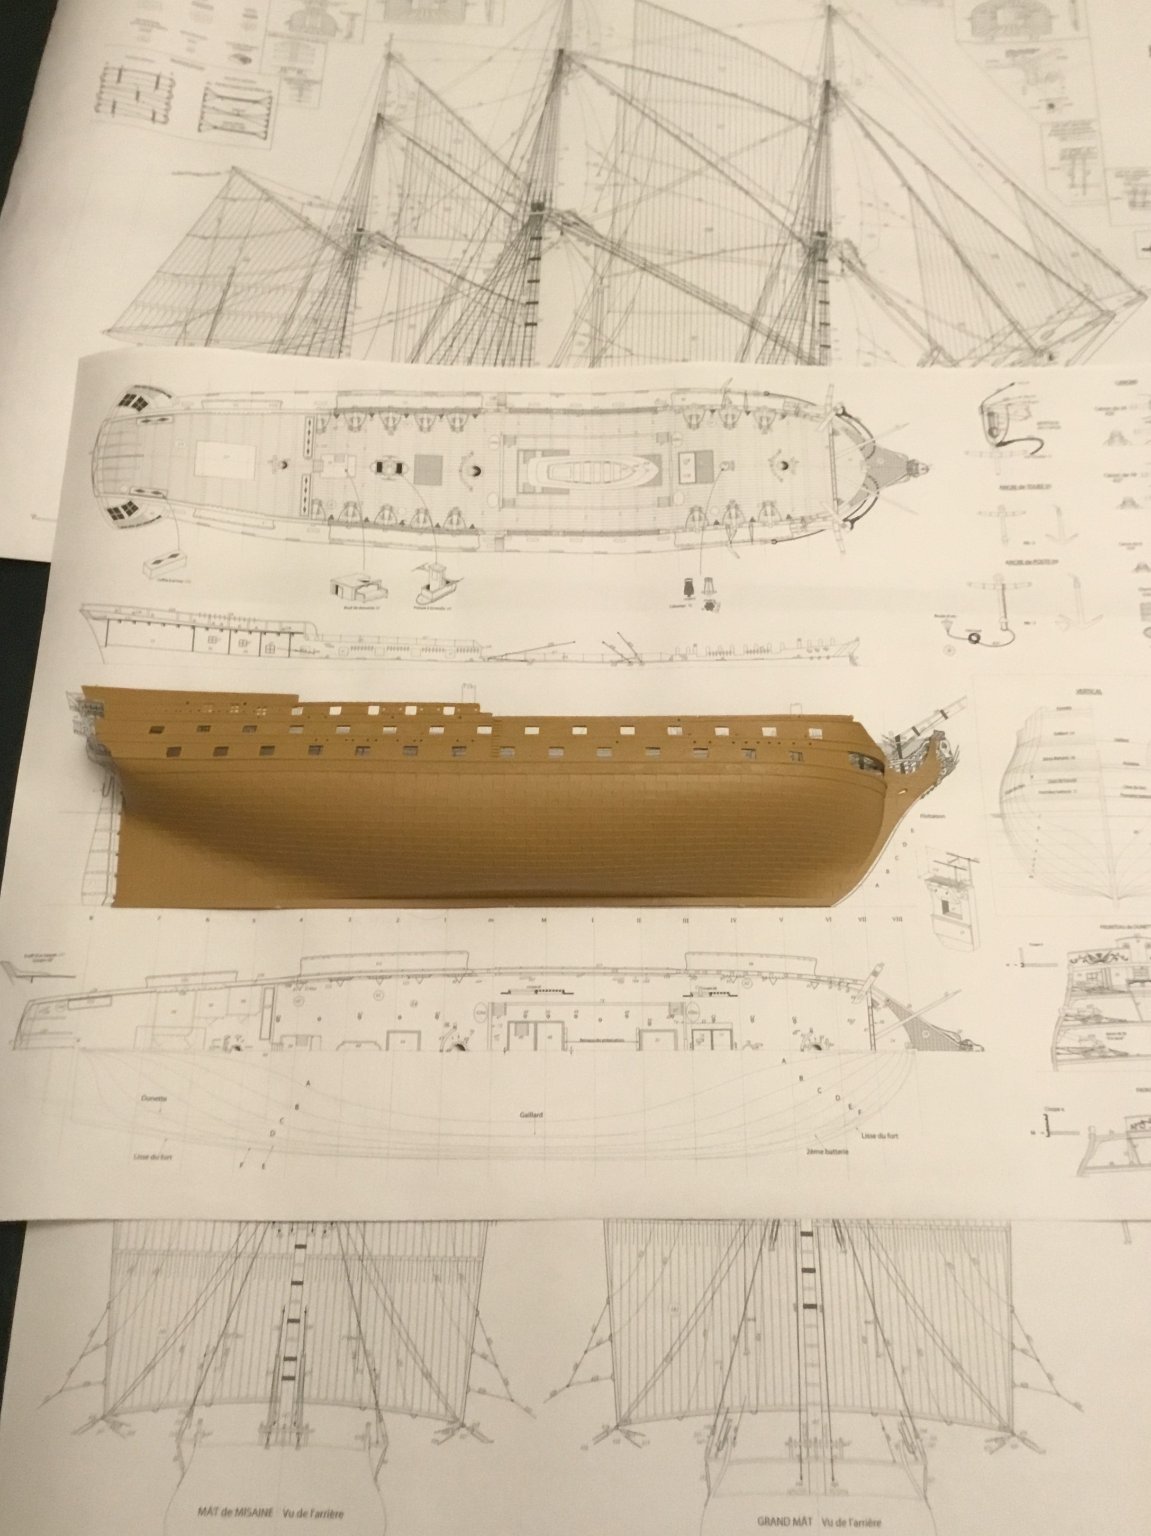
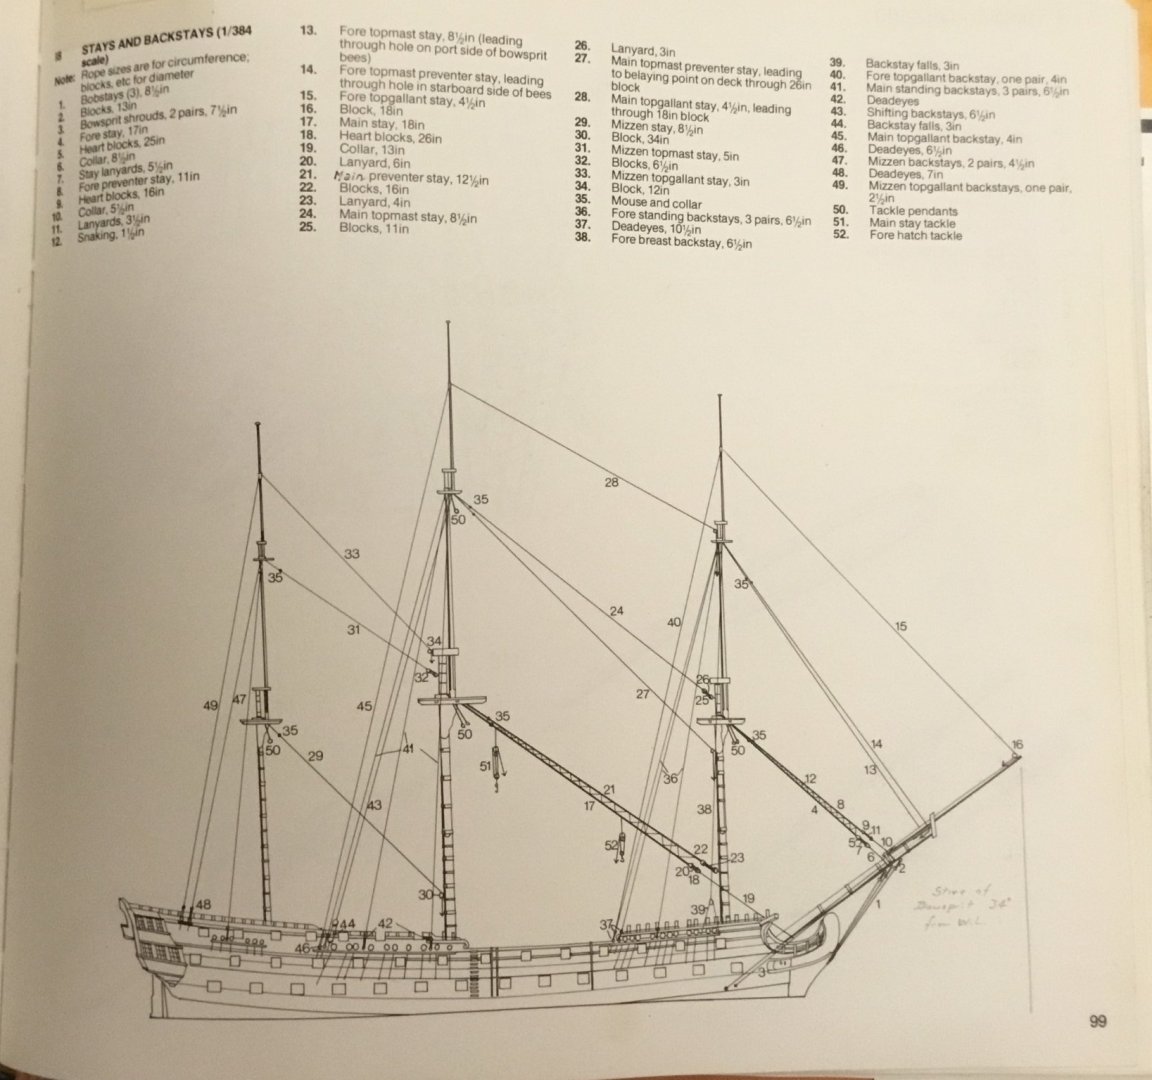
Check out these pics against the plans. Clearly I need to sand down two rows of copper below the lower wale. If I just paint these rows black it’ll be too noticeable. In addition to this I sand down the hull between each gun port and with strips of styrene as a guide I’ll scribe four or five planks from fore to aft. What the heck was Heller thinking when they made the tooling for this kit? Presumably they had access to the same plans from the Musse De La Marine that I’m using here.

-
Hi Lucas. I’m about to begin this kit. Did you progress further on yours? I really enjoyed your log.
-
This was recommended to me by an expert builder https://www.modelshade.com/paint-conversion-chart/ Mods, if it’s already covered elsewhere please move or delete my post, thank you.
-
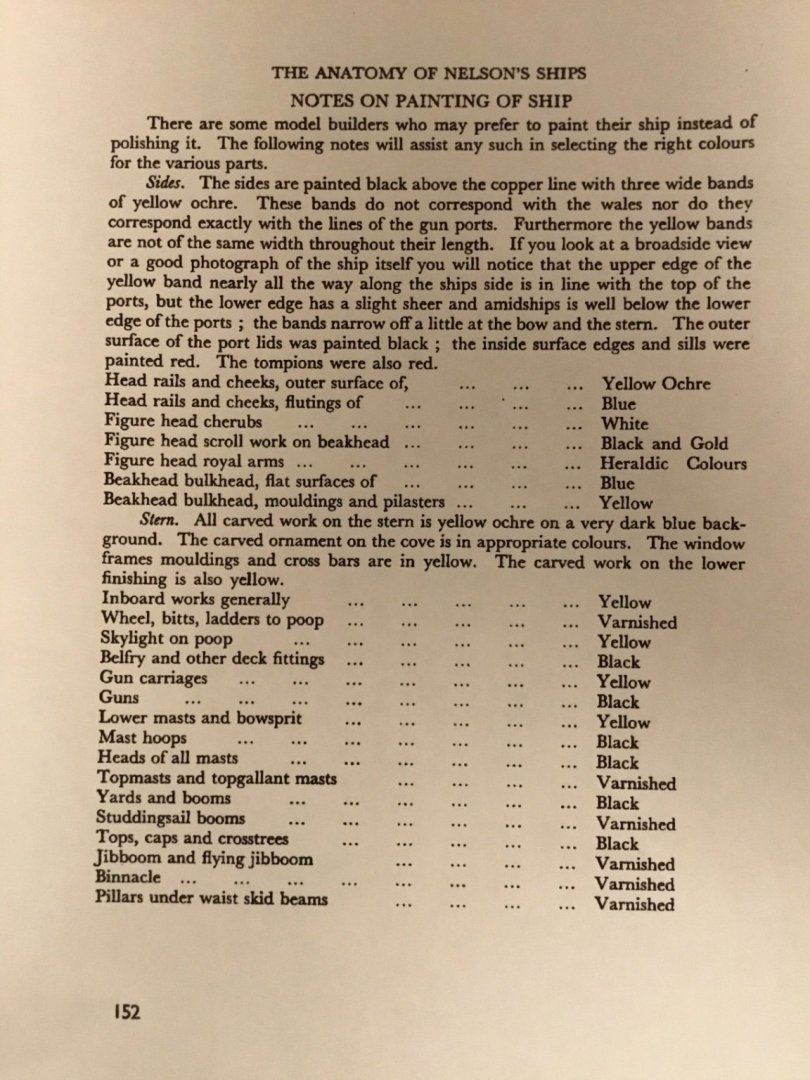
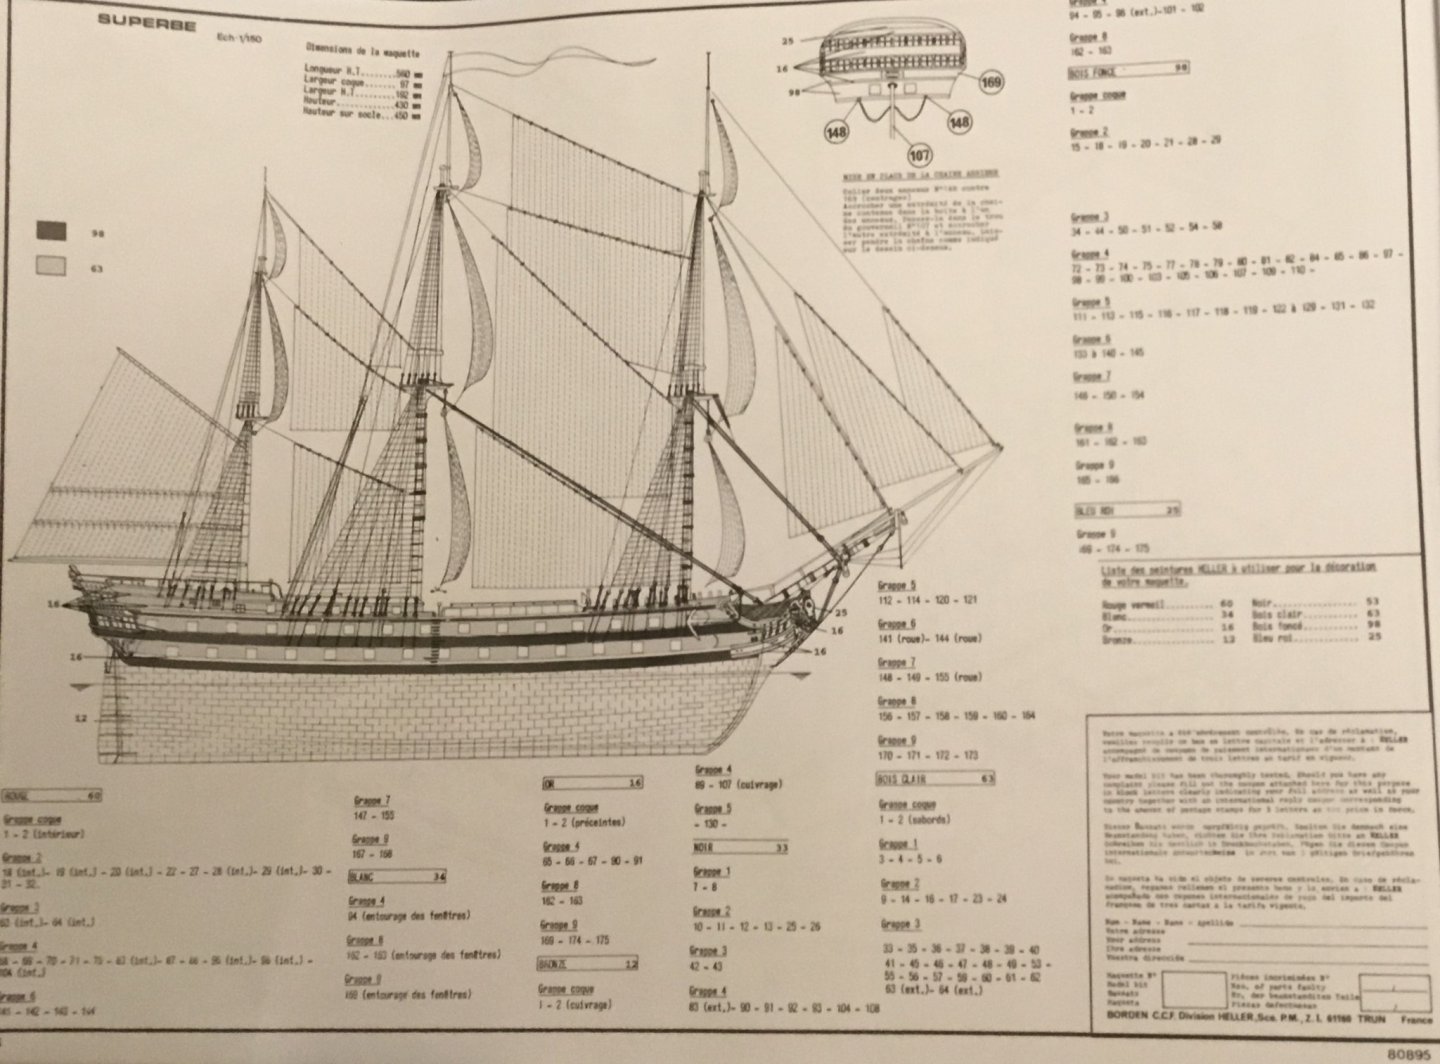
Painting guide from The Anatomy of Nelson’s Ships. I’ll be using this, plus the model of HMS Vanguard linked above as my guides as I make my paint list.
-
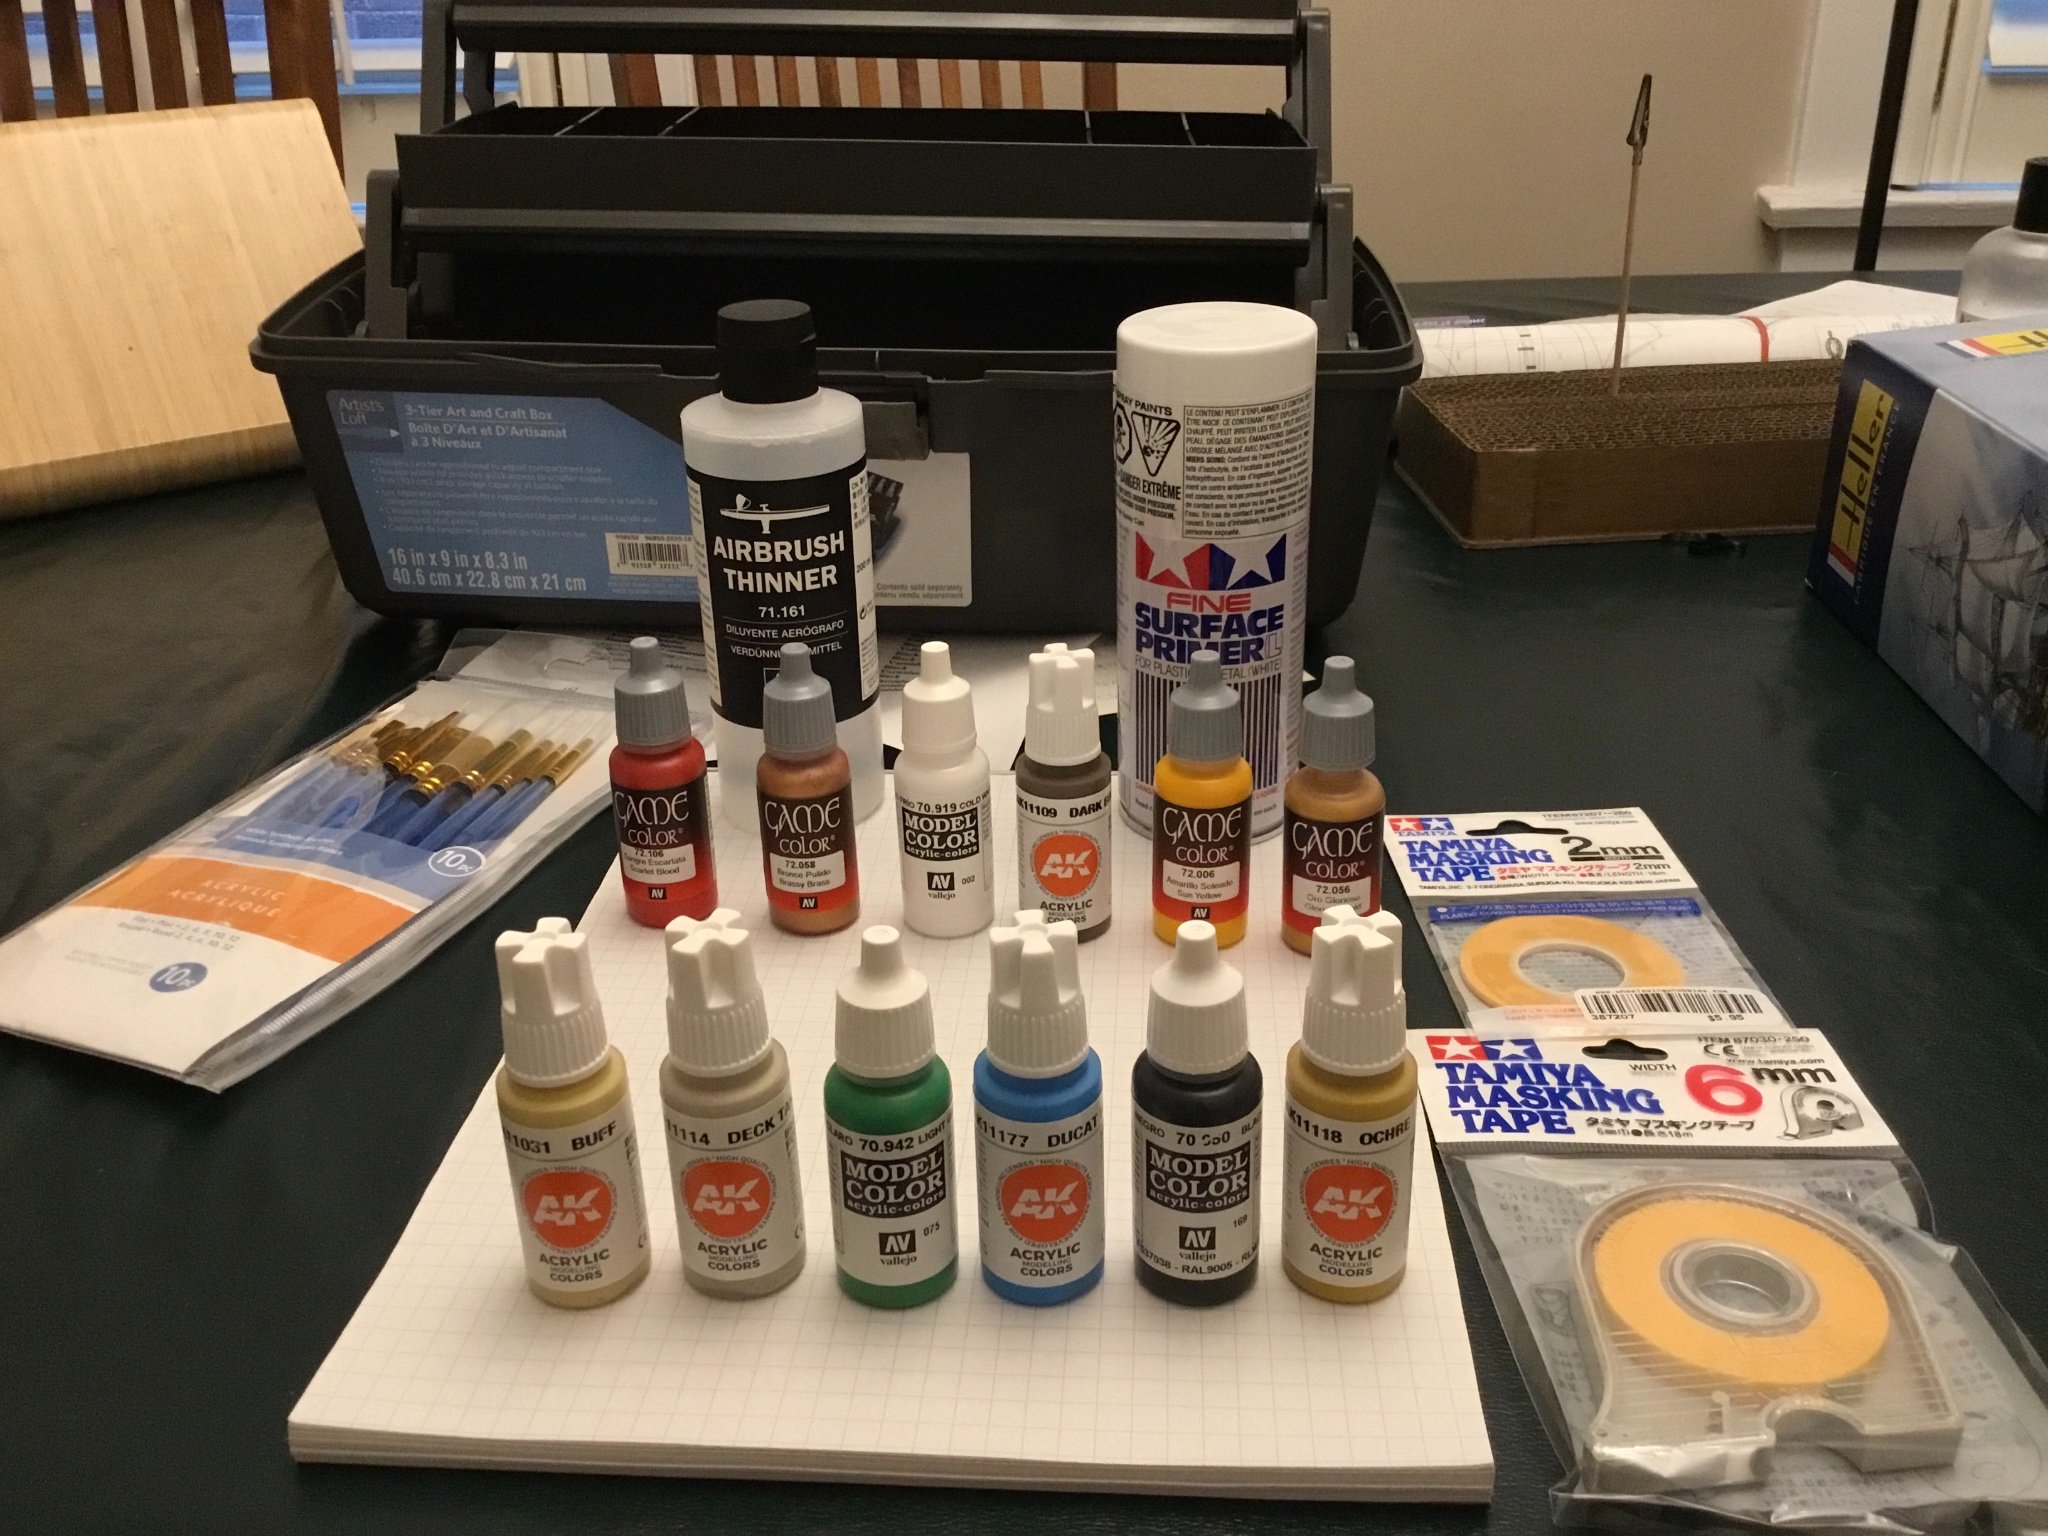
I'll also be referring to other builds of Heller's 1/150 Le Superbe here on Model Ship World, including: https://modelshipworld.com/topic/7347-le-superbe-by-algeciras1801-heller-plastic-1150-converted-to-hms-belleisle/ https://modelshipworld.com/topic/5836-le-superbe-by-lukasvdb-plastic-heller-1150-first-ship-of-the-line-ever-built/ https://modelshipworld.com/topic/152-le-superbe-by-blue-ensign-finished-heller-plastic-built-as-le-praetorian-after-boudriot/ And that's as far as I've got to date. Today we head to the hobby shop for Tamiya's spray primer and Vallejo acrylics. Except for the primer this will be a brush only project. A very experienced builder friend has provided paint swatches from his own RN ship-of-the-line builds and Vallejo codes, plus guidance on thinners, washes, brushes, fillers, internal mast reinforcement (a necessity with Heller kits), etc. etc. (it's a long list) plus several plastic parts from his old kits to practice and swatch test painting with; so I have a good starting point after my 18 years off.
-
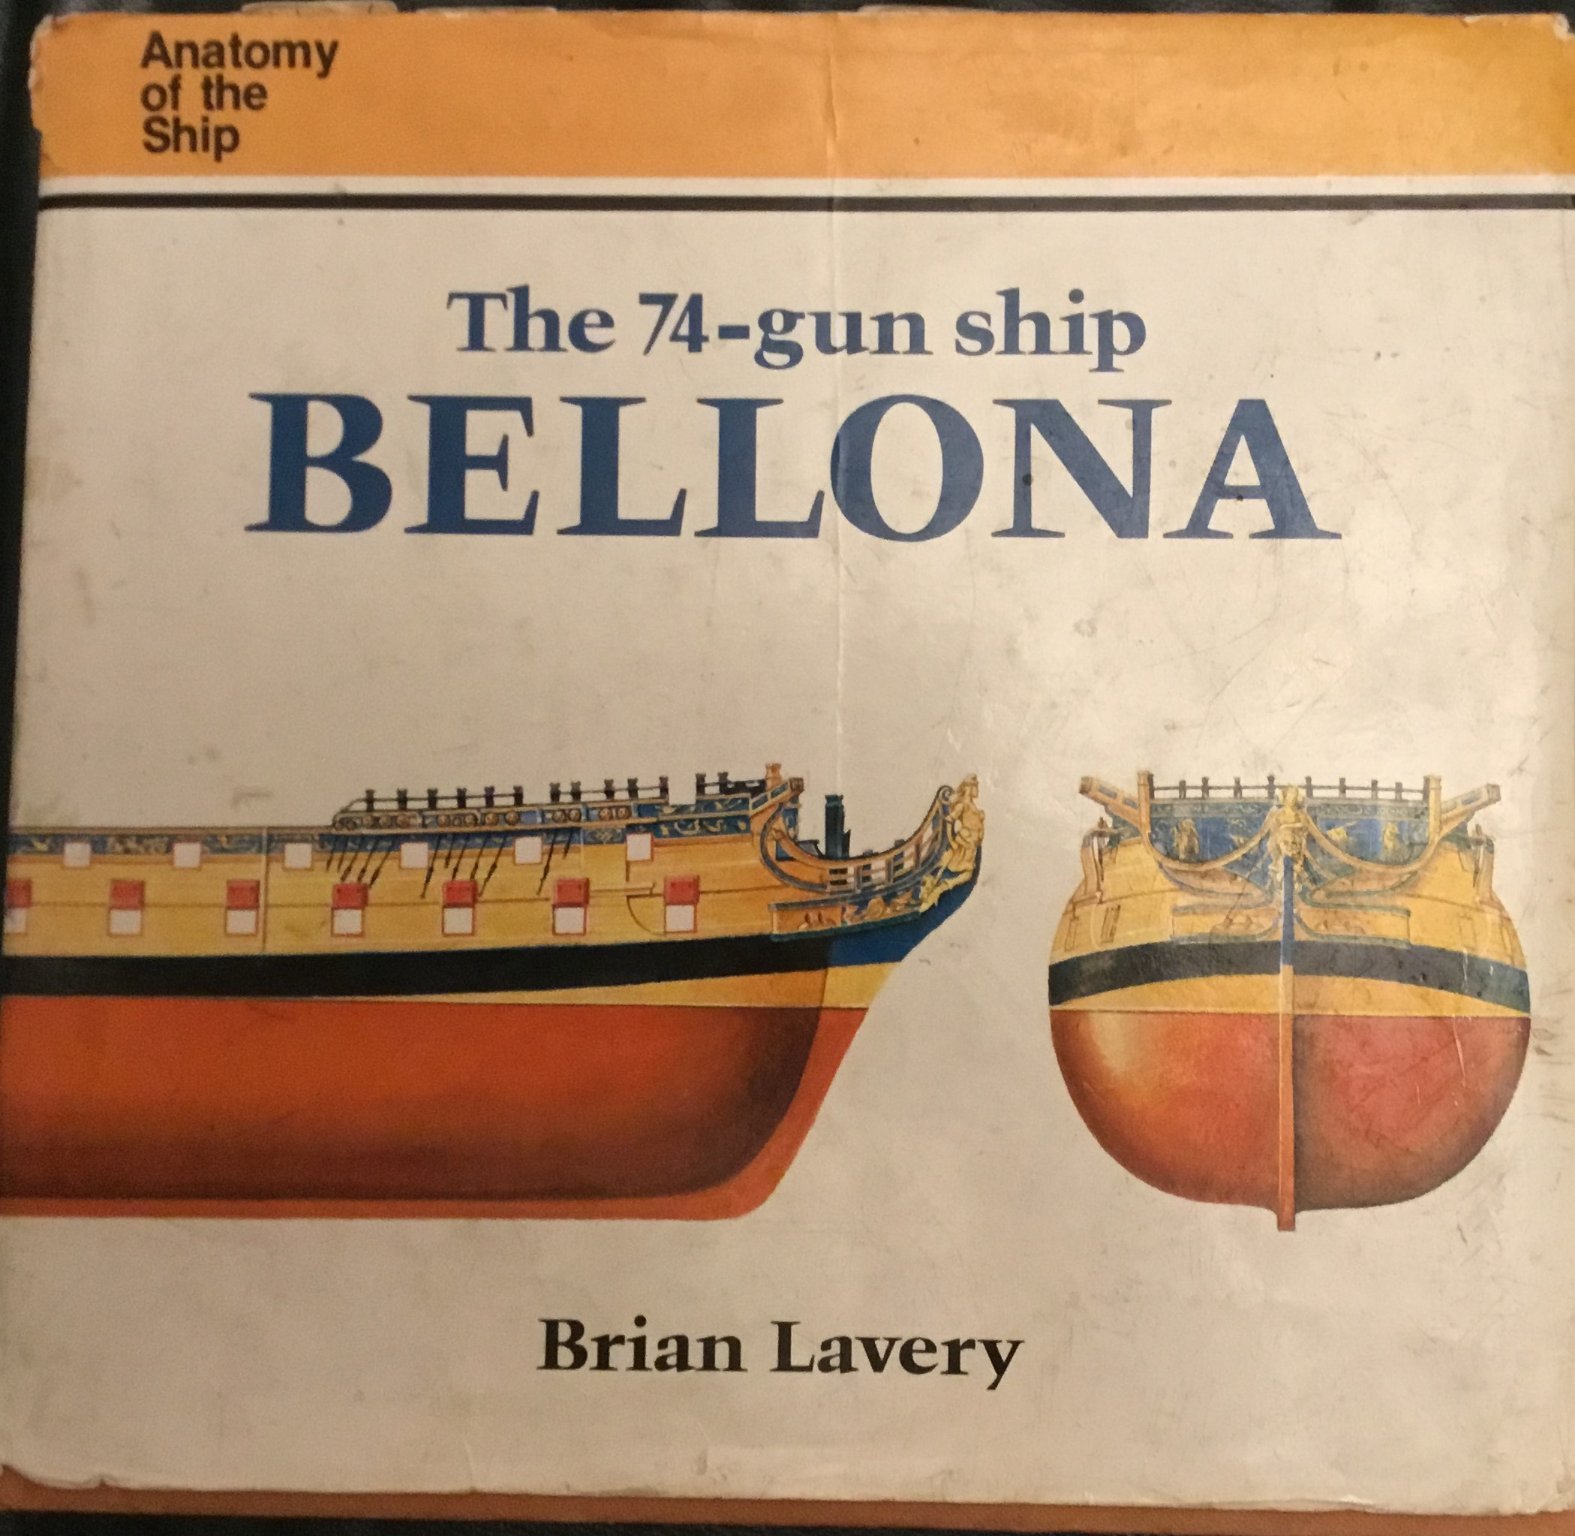
Other resources include a loaner book on HMS Bellona, mostly to assist with rigging and ships boats. I may try to mock up some cannonades as shown in the book.
-
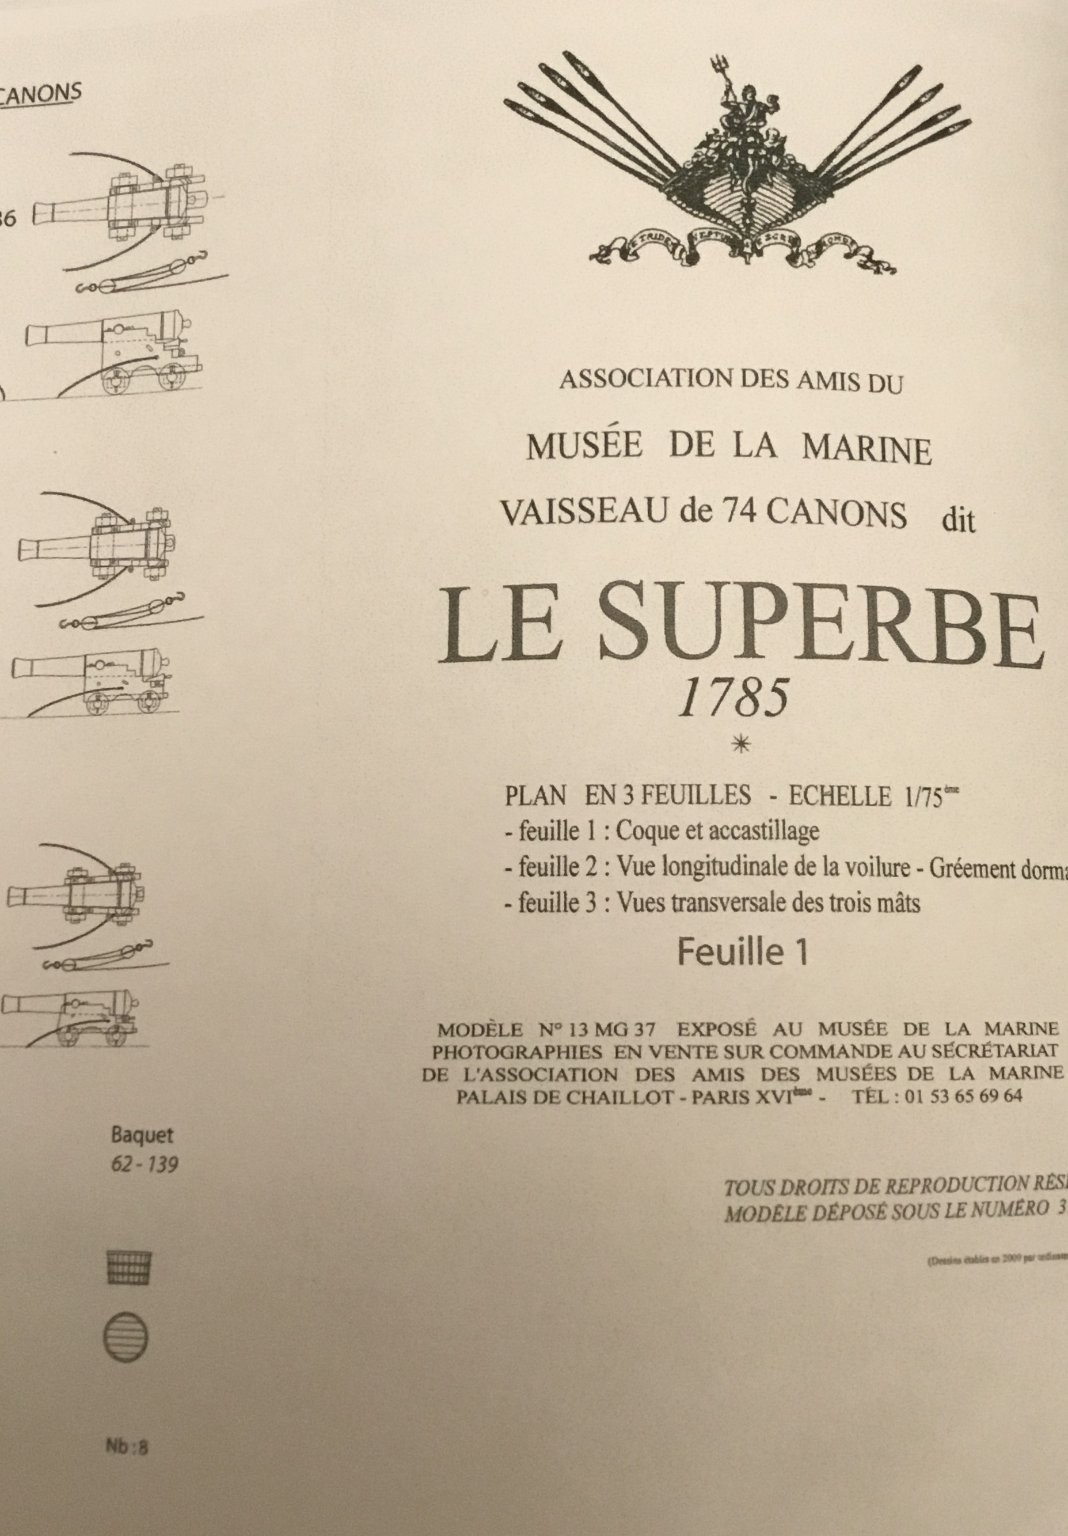
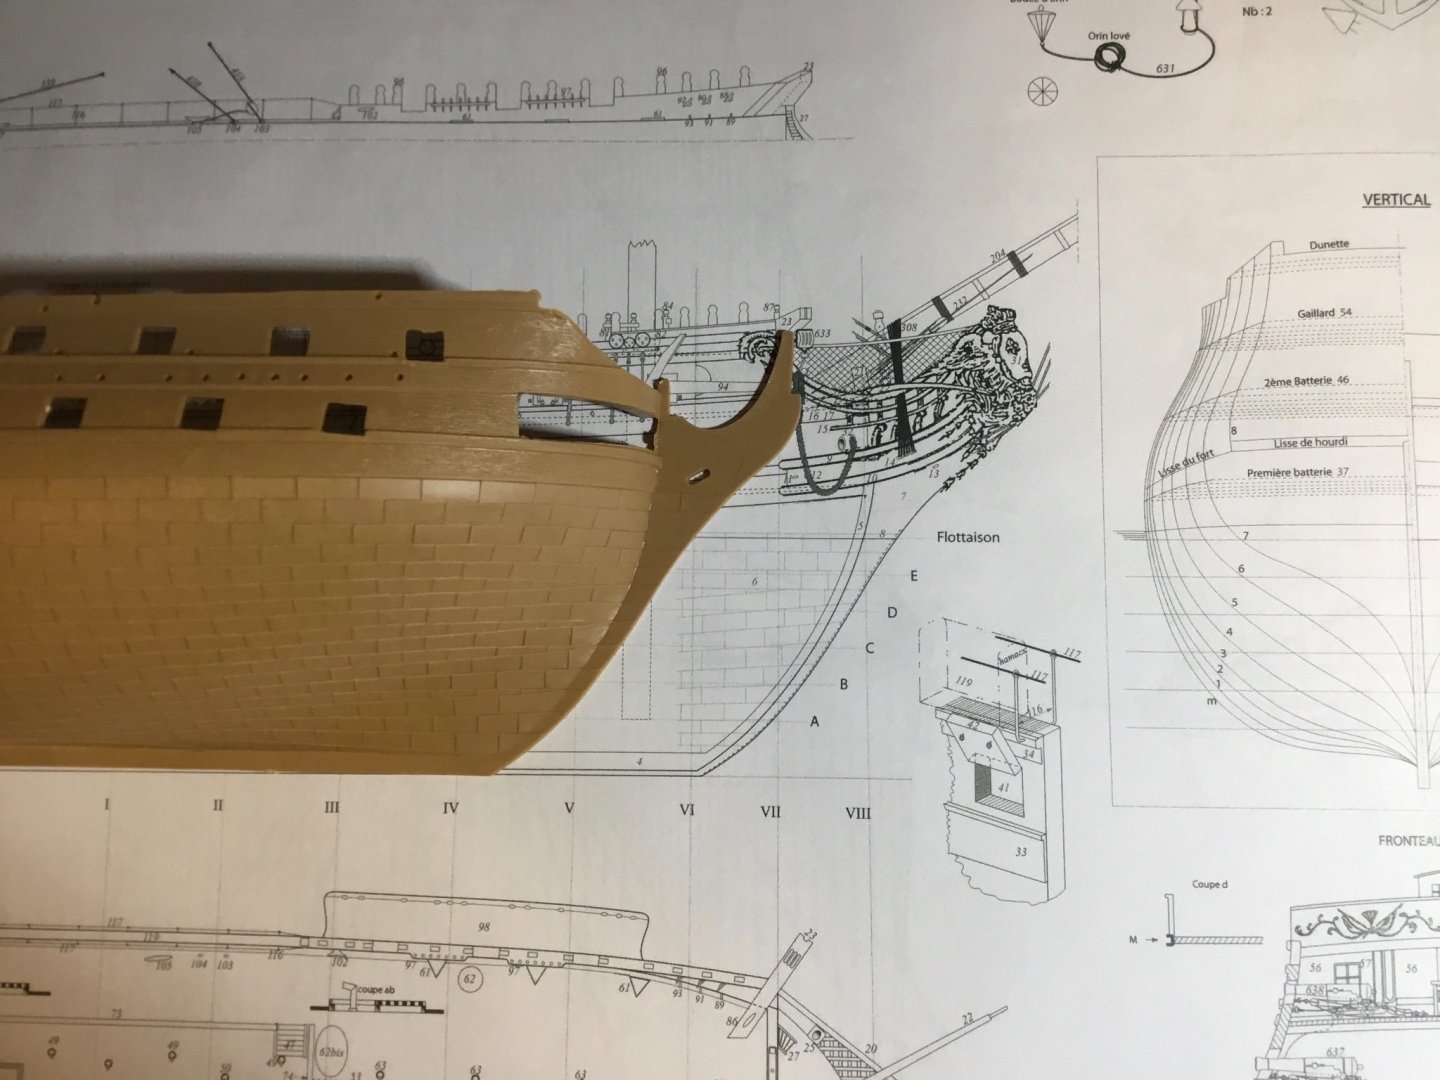
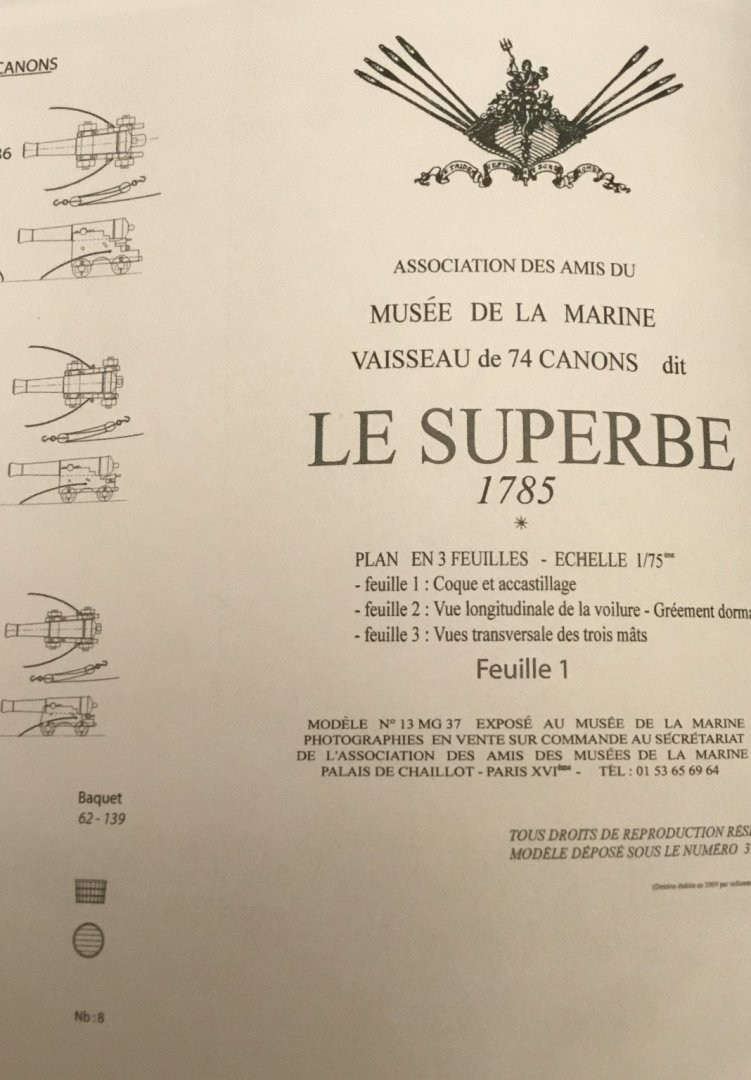
Resource materials I will be using include the British plans for HMS Spartiate plus the French marine museum's plans for Superbe, printed to the exact 1/150 scale as my model, see below. Notice how the plans show that the copper comes up too far on the model kit. A more experienced builder than me may try to sand down the excess rows of copper but but this is not something I'm going to try on my first build in years.
-
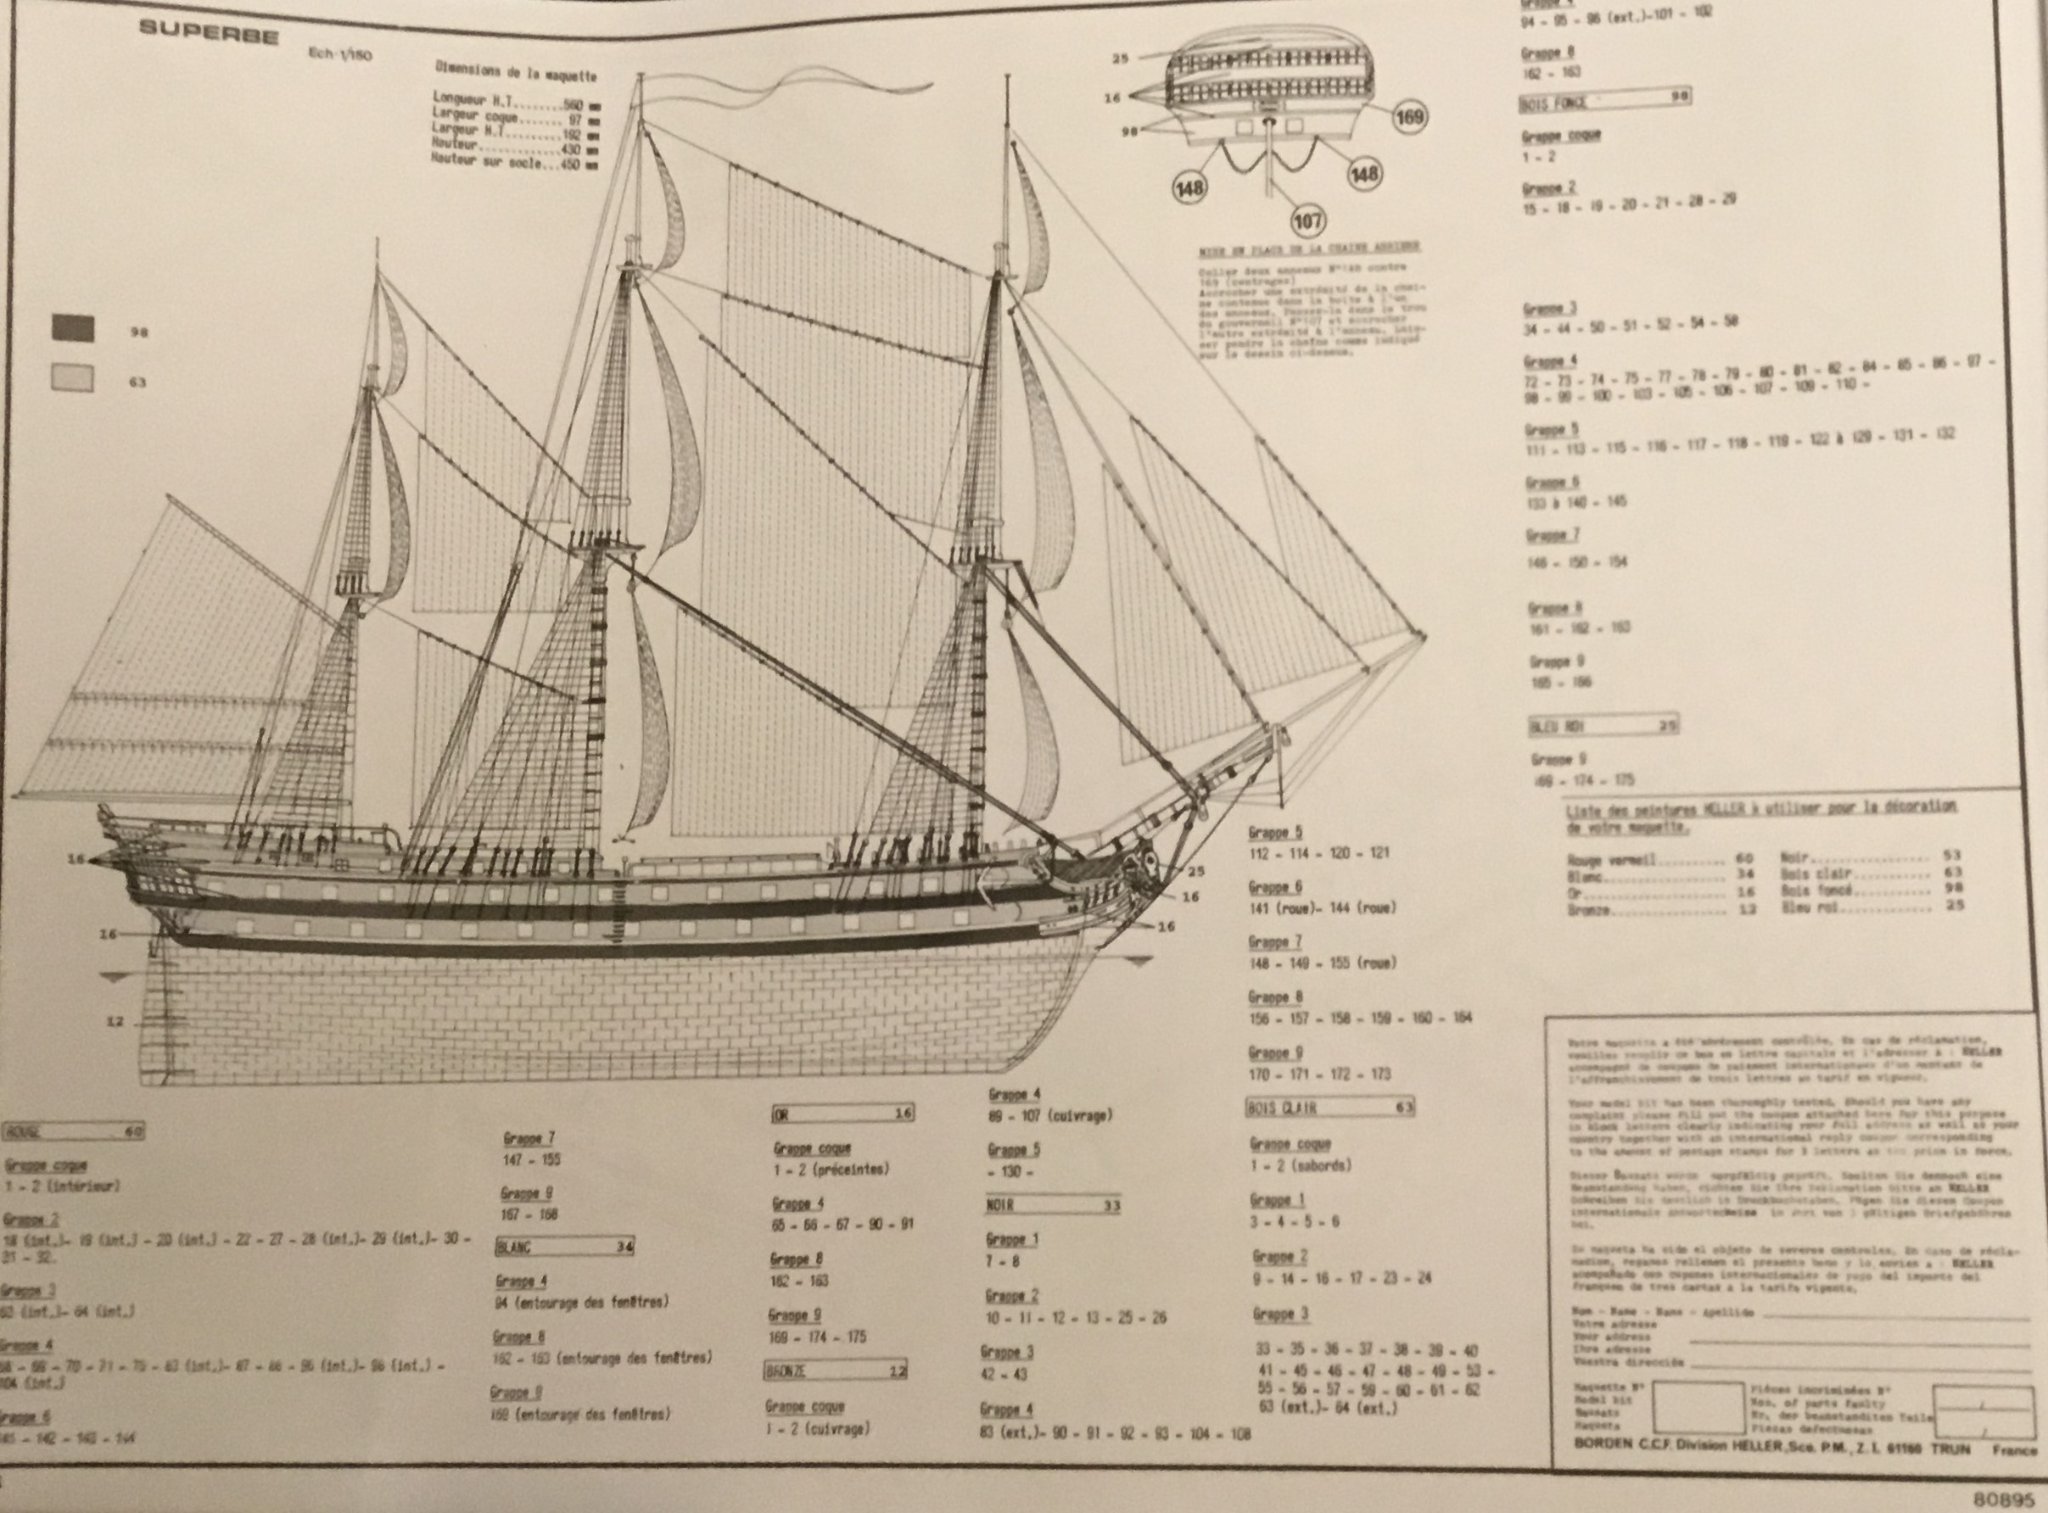
After an 18 year paternity leave I am returning to model ships with Heller's 1/150 scale Le Superbe. I am a British-born Canuck who spent many days in the 1980s at the https://www.historicdockyard.co.uk/ waiting for the ferry to my grandparents on the Isle of Wight, and am a fan of all things RN/RCN. I will be completing the kit as HMS Spartiate as I imagine she may have looked at Trafalgar. For colours I plan to use this excellent model of HMS Vanguard, as I like the blue side railings, red on the stern, and the yellow ochre sides (rather than the orange used until recently on HMS Victory). The instructions are in French, but they have an English list at the back. Still, as a good Canadian I have a smattering of French language buried away from my university days that may prove useful. I've chosen HMS Spartiate as my goal as she was one of the approx. twenty French Téméraire-class captured by the British, but one of only two that served with Nelson at Trafalgar. She then went on to serve as British flagship to the South Atlantic squadron well into the 1830s. A good, long history of service, unlike the actual Le Superbe.

-
Painting the 1/180 scale HMS Victory
Admiral Beez replied to ronald305's topic in Plastic model kits
True. I’ve today sent an email to Vallejo asking if they can provide paint codes for Airfix’s Victory, http://www.hobbylinc.com/airfix-hms-victory-1765-plastic-model-sailing-ship-kit-1:180-scale-09252 -
Thanks. I’ve decided to hand brush the entire model, after. Tamiya spray prime. Can anyone steer me to a branded paint code guide for RN ships, like HMS Victory or Surprise?